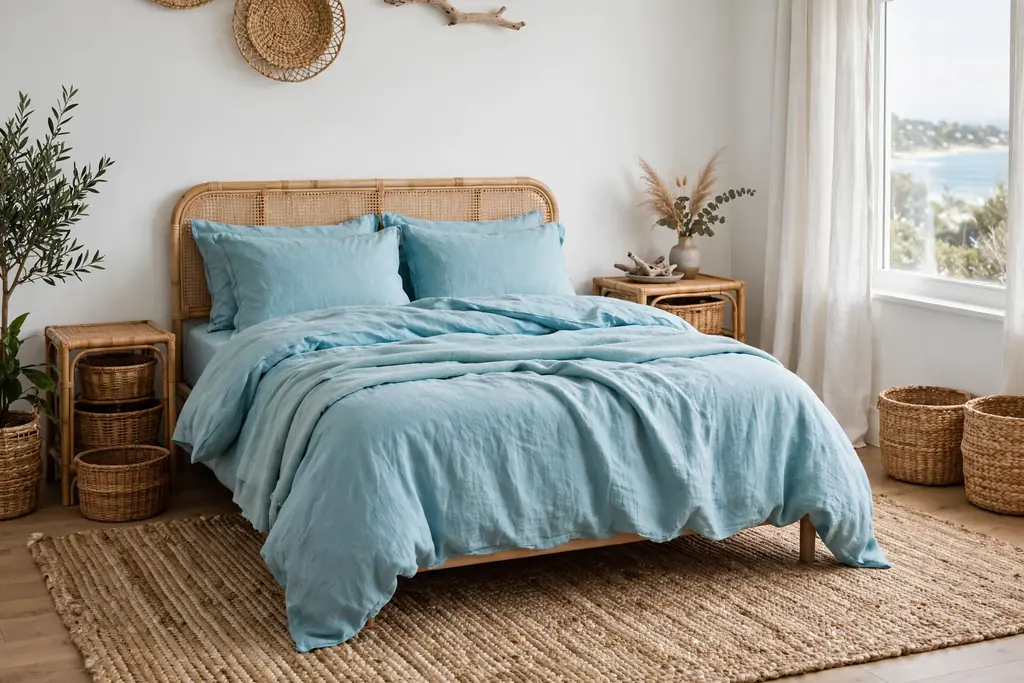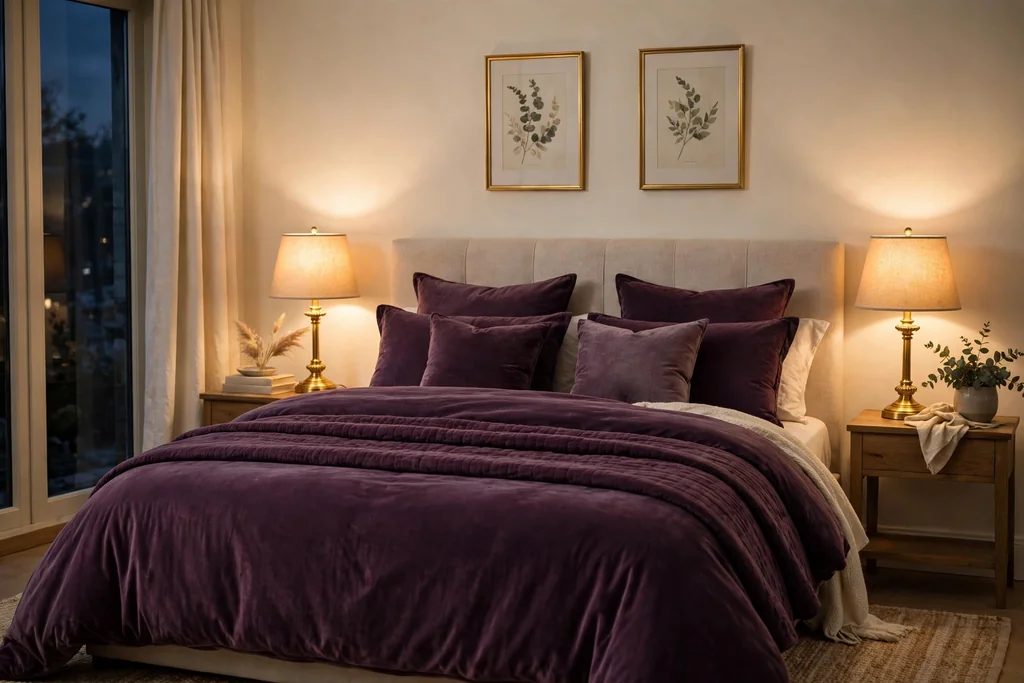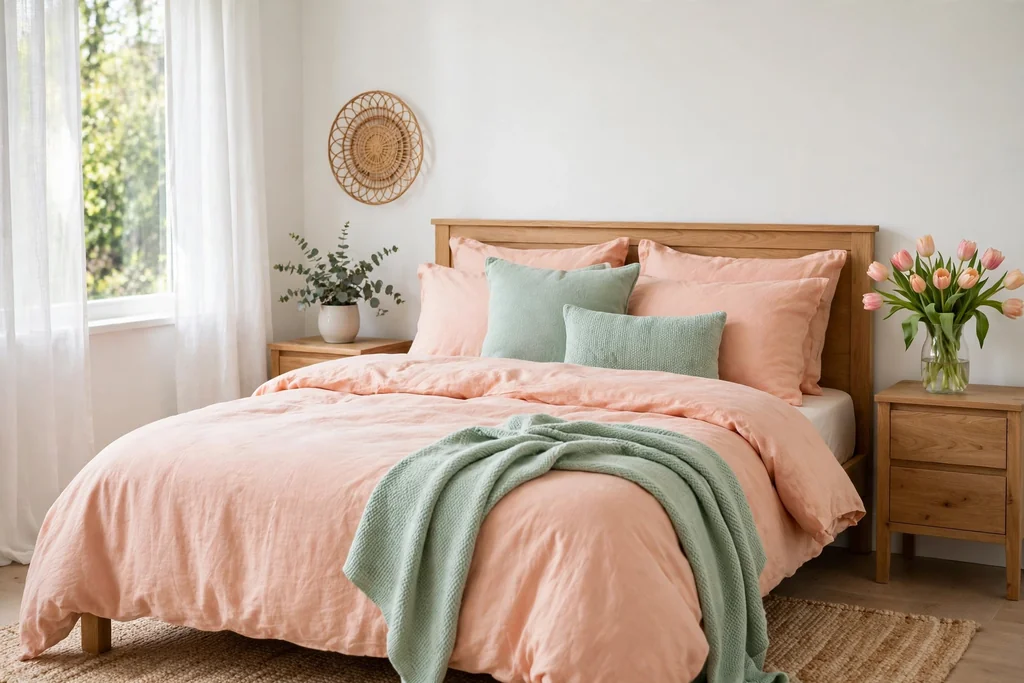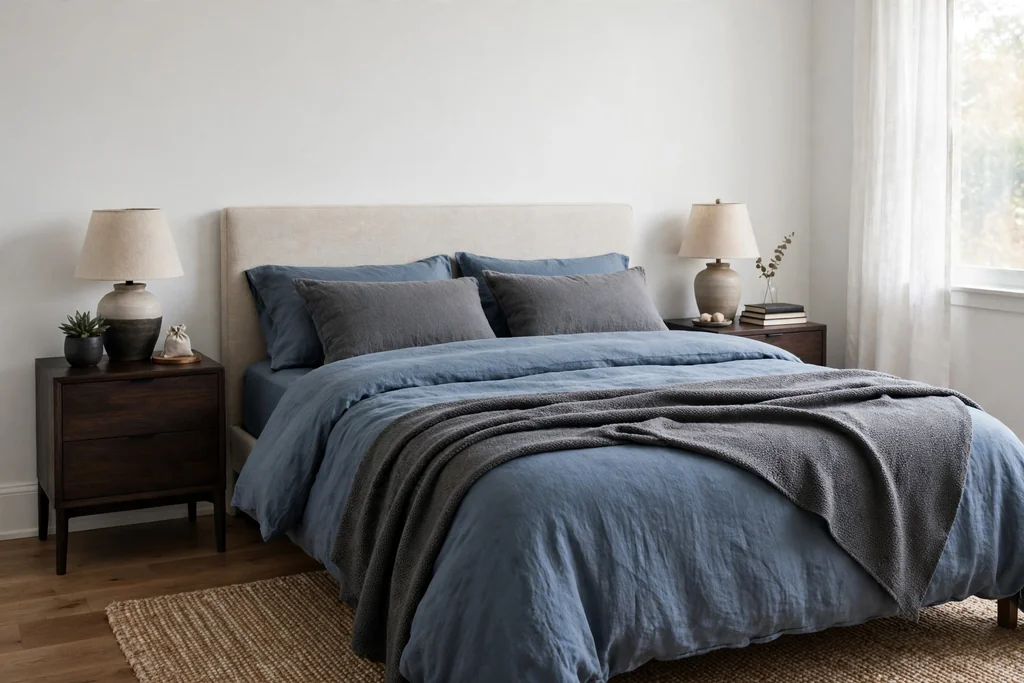
Author: Clara Bennett

  • 31 Ways to Decorate Your Fireplace Mantle for Spring

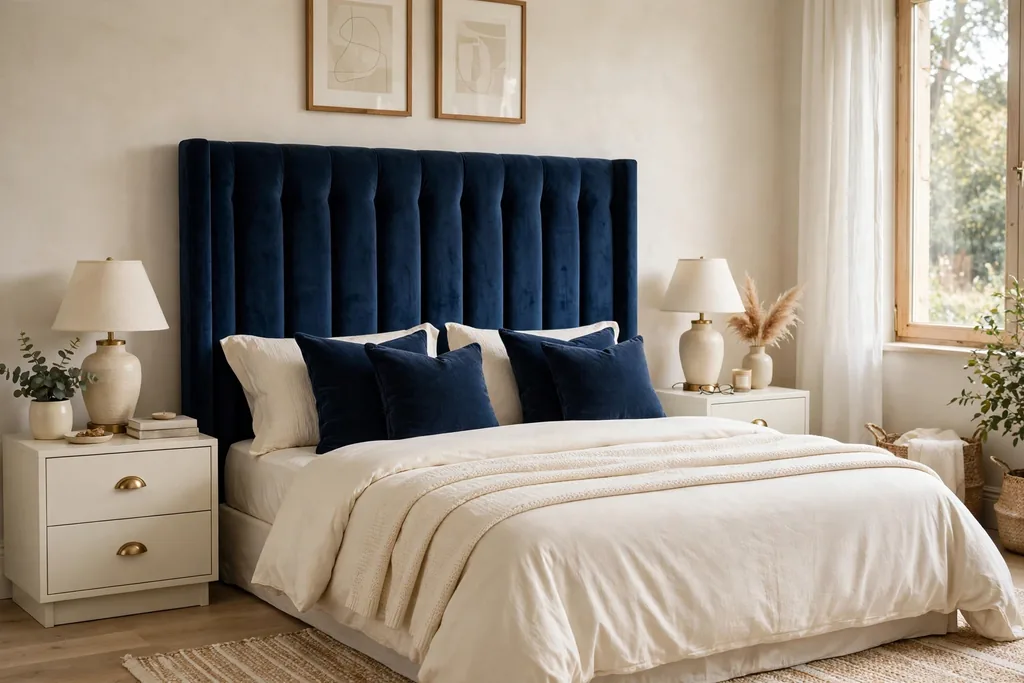
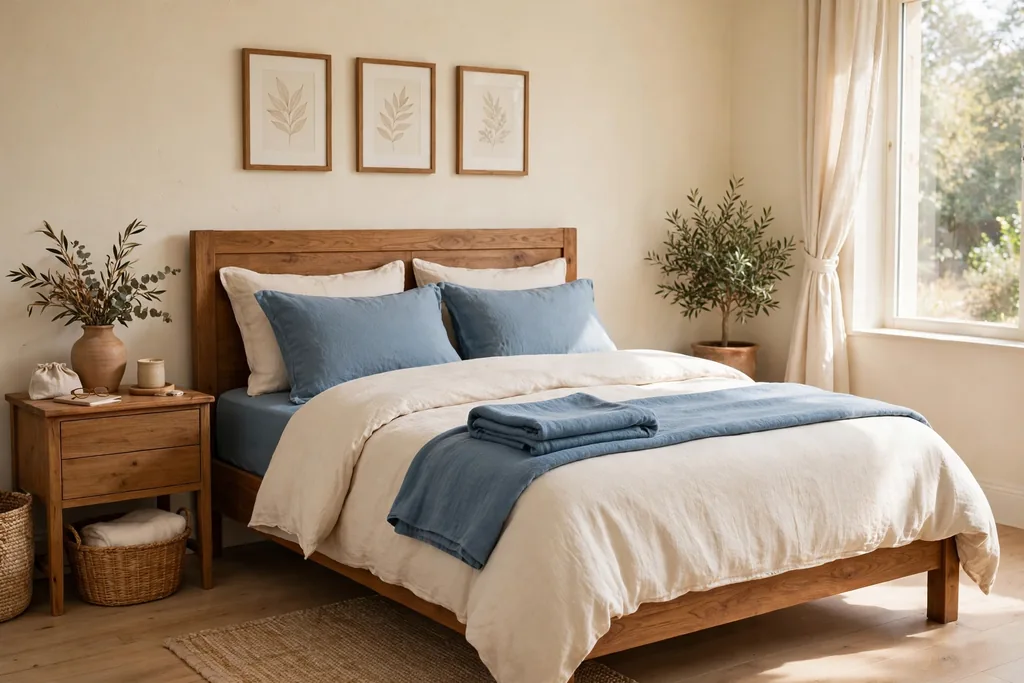
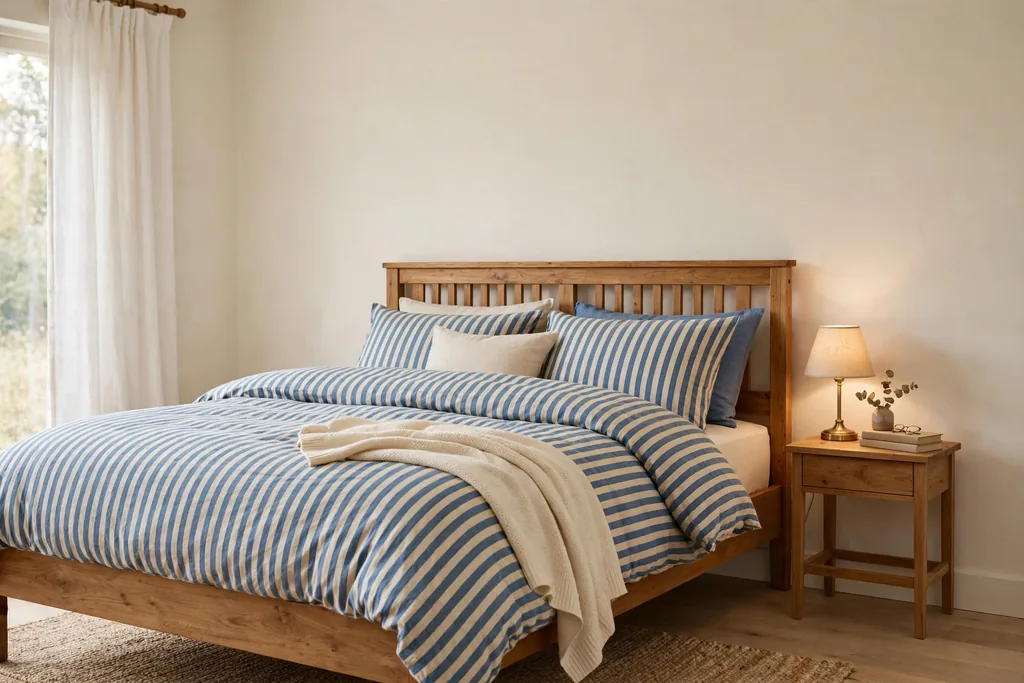
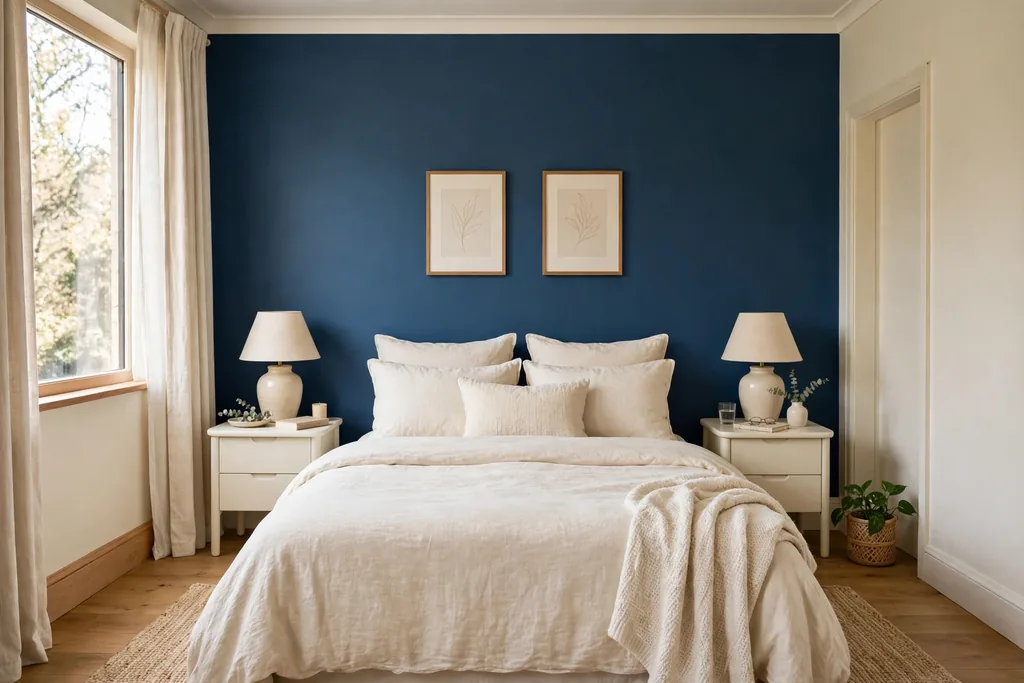
    31 Ways to Decorate Your Fireplace Mantle for Spring

    Spring is the right time to lighten the mantle. Heavy winter garlands come down, and in their place go fresh flowers, soft green leaves, pale candles, and a few small seasonal touches. The goal is a shelf that feels open and alive, not crowded. These 31 ways to decorate your fireplace mantle for spring cover garlands, wreaths, flower arrangements, candles, art, and small vignettes, so you can pick one main idea or combine two or three. Start with the largest piece, such as a mirror, a wreath, or a tall branch arrangement, then add smaller items around it. For fireplace styling in another room, these kitchen fireplace ideas show how a mantel can anchor a working space without crowding it.

    Key Takeaways

    • Start with one anchor, such as a mirror, a wreath, or a tall vase, then build smaller pieces around it.
    • Keep the palette light: soft greens, white, cream, and one or two pastel accents repeated through the display.
    • Mix heights on purpose, with tall branches or candlesticks at the ends and lower bowls and plants in the middle.
    • Leave empty space between groups so each piece reads clearly and dusting stays simple.
    • Use fresh flowers and potted plants where you can, and keep dried or faux pieces for spots near heat.
    • Swap only a few pieces when the season moves on, rather than clearing the whole mantle each time.

    1. Fresh Eucalyptus Garland Draped Along the Shelf
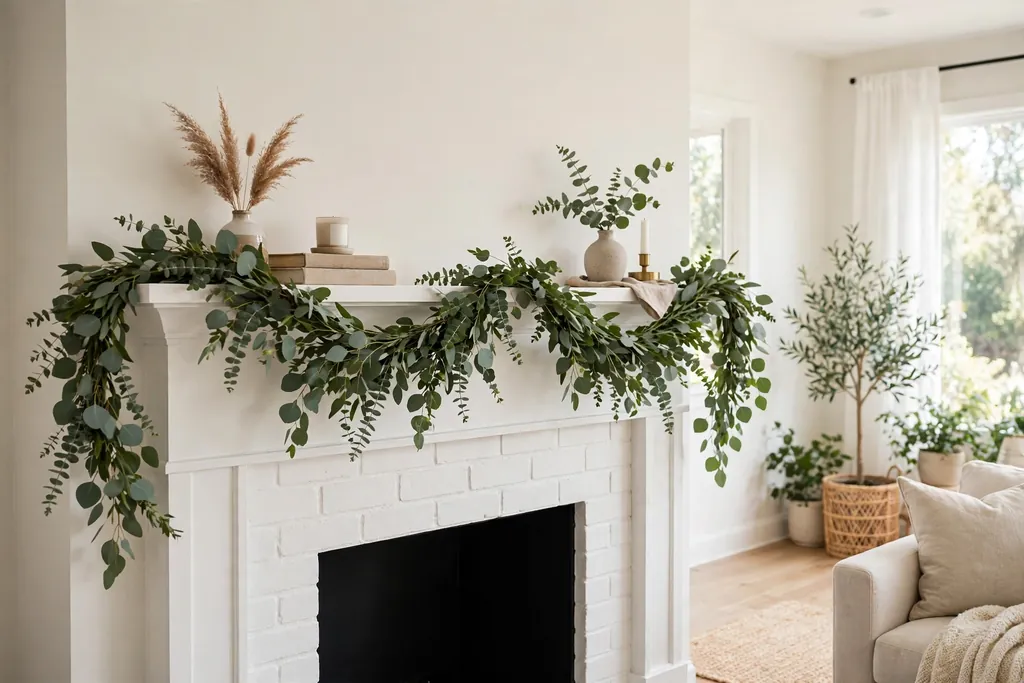
    Fresh eucalyptus garland draped along a white fireplace mantle shelf.

    Lay a fresh eucalyptus garland along the mantle shelf, letting the ends trail a little over each side. Eucalyptus gives a soft green line that suits almost any spring display, and its scent is gentle rather than strong. Choose stems with full, round leaves, and lay them in one loose layer instead of piling several garlands on top of each other.

    Fix the garland with small clear clips or a strip of museum putty so it does not slide off the shelf. Tuck a few small white flowers into the garland if the green alone feels plain, and mist the leaves lightly every few days. Replace the garland when the leaves start to dry and curl, or switch to a faux version for a mantel near a working fire.

    2. Tulips in Clear Glass Vases
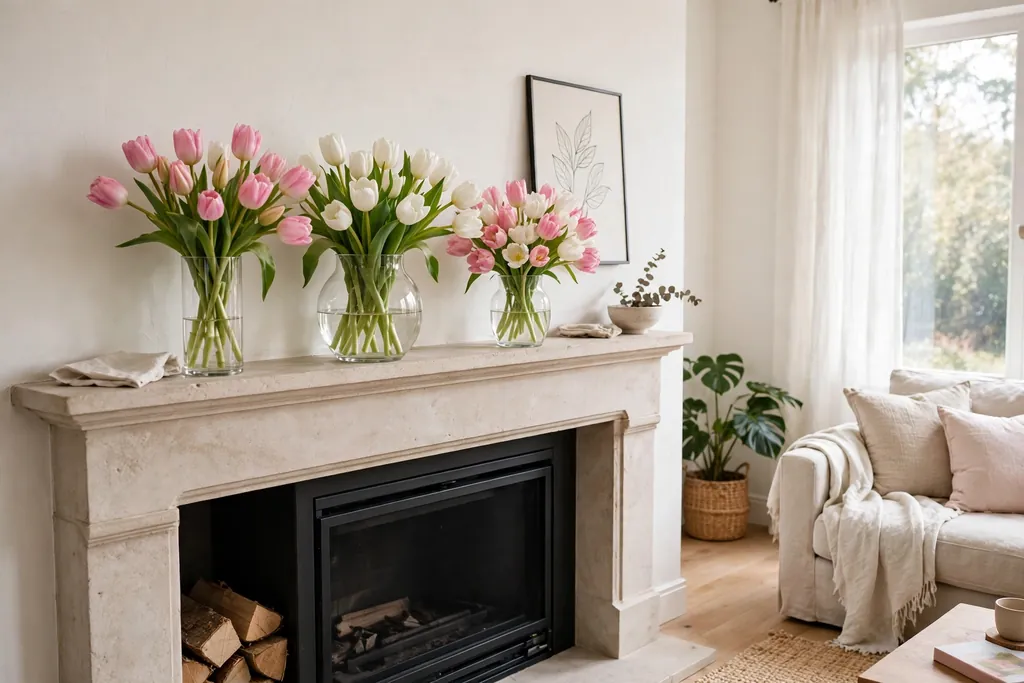
    Pink and white tulips in clear glass vases on a fireplace mantle.

    Group tulips in clear glass vases for a spring mantle that looks fresh the day you arrange it. Tulips keep growing after they are cut, so stems will bend and open in different directions, which gives the display a natural, relaxed shape. Use vases of different heights, and keep the flower heads above the rim so the color shows from across the room.

    Trim the stems at an angle and change the water every two days to keep the tulips standing longer. Pink, white, and soft yellow tulips all work, but pick one main color and use the others as small accents. If a stem droops too far, move it to a shorter vase or trim it for a bud vase elsewhere in the room.

    3. Potted Hyacinths in a Row
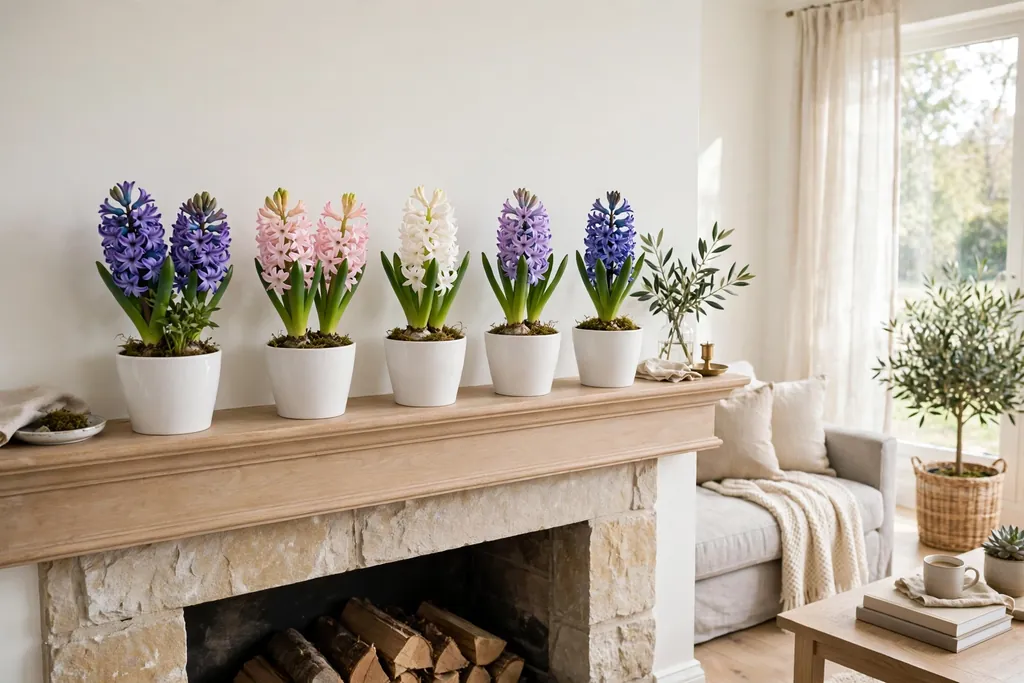
    Potted hyacinths in white ceramic pots lined up on a fireplace mantle.

    Line up potted hyacinths along the mantle for color and scent in equal measure. Hyacinths bloom in pink, purple, white, and blue, and their dense flower spikes read clearly even from the doorway. Keep the pots small and matching, in white ceramic or plain terracotta, so the flowers carry the color.

    Water the bulbs sparingly and keep the soil just damp, since wet soil on a mantle can stain the shelf. Slip each nursery pot inside a decorative pot with no drainage hole, and add a saucer or a felt pad under each one. When the blooms fade, move the pots to a sunny windowsill and plant the bulbs outside in autumn.

    4. Cherry Blossom Branches in a Tall Vase
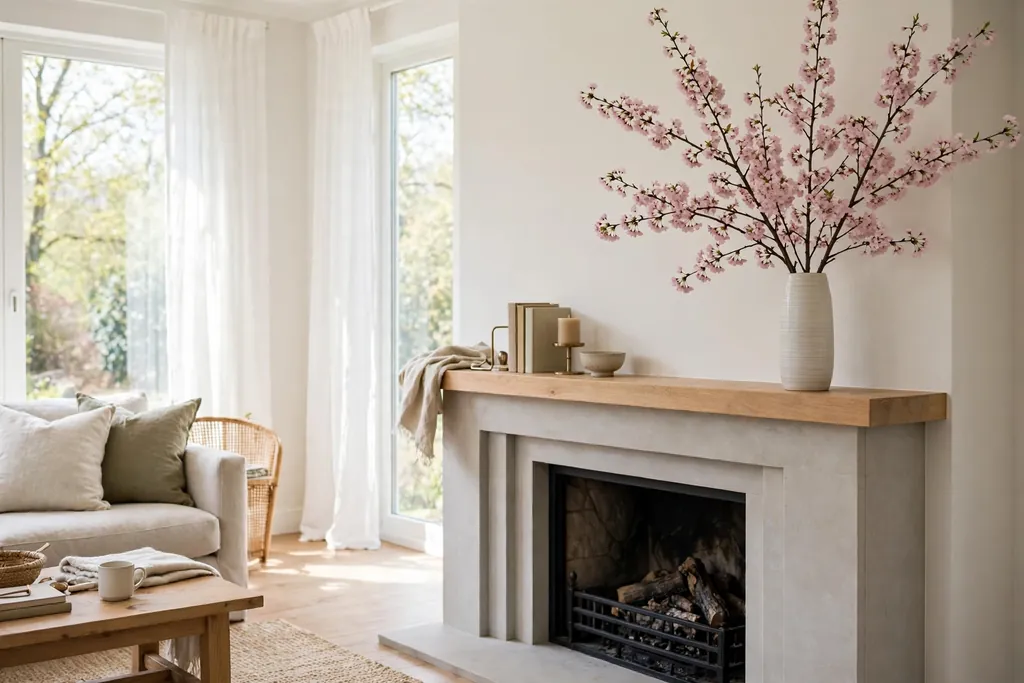
    Cherry blossom branches in a tall vase at one end of a fireplace mantle.

    Place cherry blossom branches in a tall, heavy vase for instant height at one end of the mantle. The pale pink blossoms open slowly indoors, so the display changes a little each day. A tall vase also balances a wide mantle, giving the eye a vertical line among lower candles and bowls.

    Choose branches with a mix of buds and open blooms, and trim the ends before placing them in water. Keep the vase near the center of the shelf depth so a tall arrangement cannot tip forward, and avoid placing it directly above a lit fire. If fresh branches are hard to find, a good faux branch in the same soft pink gives a similar outline without dropping petals.

    5. Forsythia Stems for Early Yellow
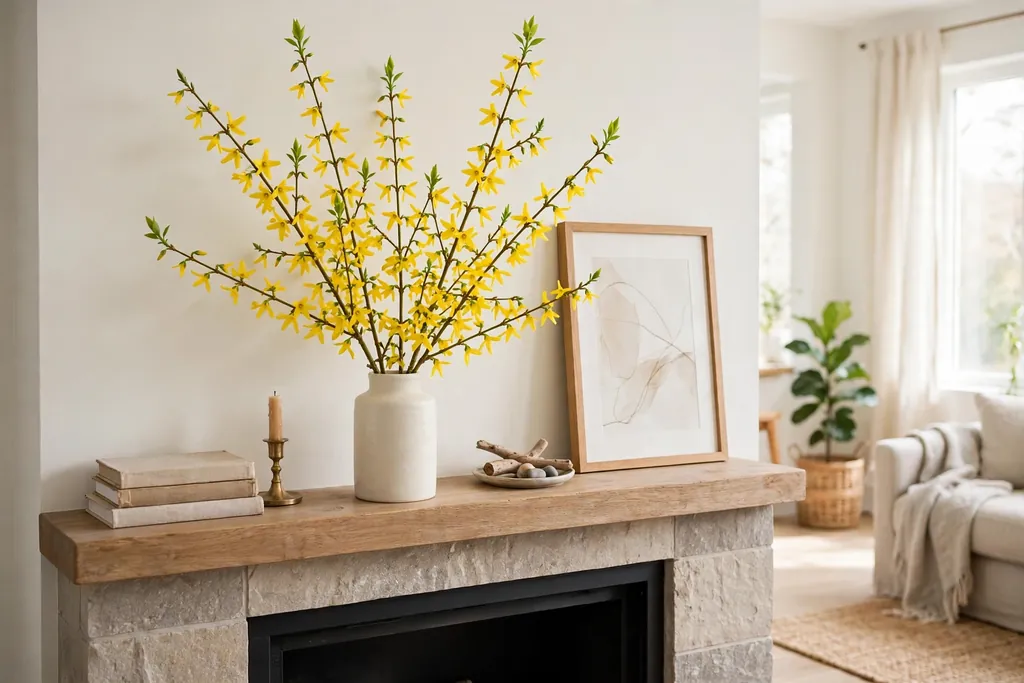
    Yellow forsythia stems in a simple vase on a fireplace mantle.

    Use forsythia stems when you want a clear sign of early spring. The bright yellow flowers open along bare stems, so the arrangement looks light and airy rather than dense. Forsythia suits a mantle that already has a lot of green, since the yellow gives one strong color note.

    Cut stems from your own shrub in late winter and bring them inside to force the blooms, or buy cut stems from a florist. Place them in a simple glass or ceramic vase with water, and keep them away from direct heat so the flowers last longer. Pair forsythia with white candles or a pale bowl, and let the yellow be the only bold color in the group.

    6. Spring Wreath Hung Above the Mantle
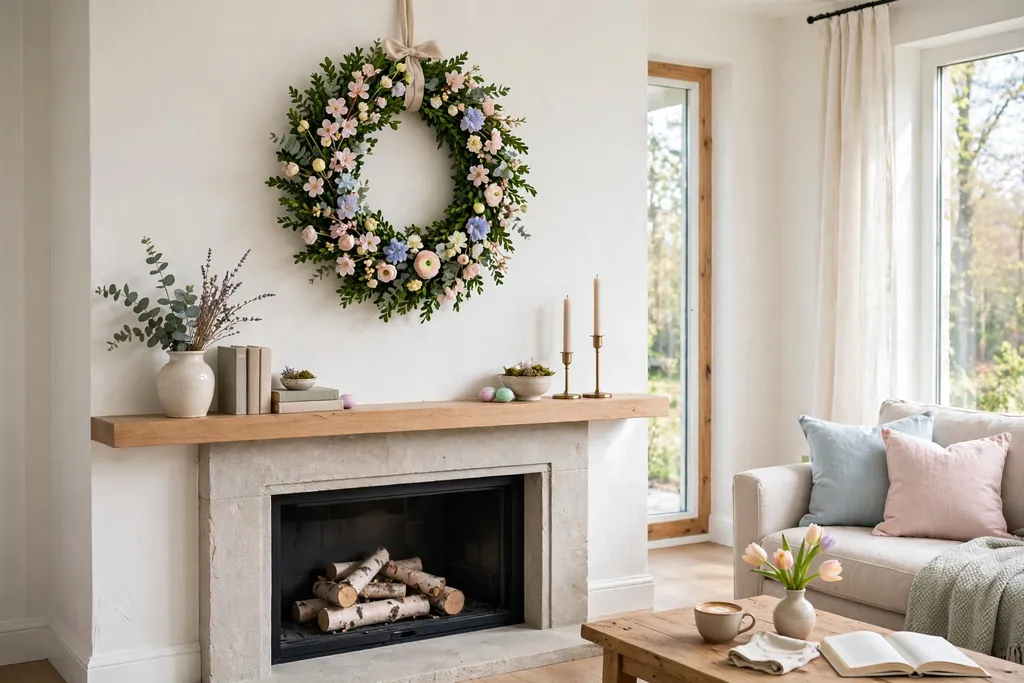
    Spring wreath of boxwood and pastel flowers hung above a fireplace mantle.

    Hang a spring wreath above the mantle to fill the wall space without adding another object to the shelf. A wreath made of boxwood, mixed greenery, and a few small pastel flowers suits the season and works with most room colors. Hang it centered over the firebox, with the bottom of the wreath a few inches above the shelf.

    Use a sturdy hook or a nail rated for the wreath weight, and check that the wreath hangs level before you step back. A wreath also works well over a mirror, layered in front of the glass for extra depth. Keep the wreath clear of the fire opening, and choose a faux wreath if the fireplace is used often.

    7. Round Mirror Framed by a Leafy Wreath
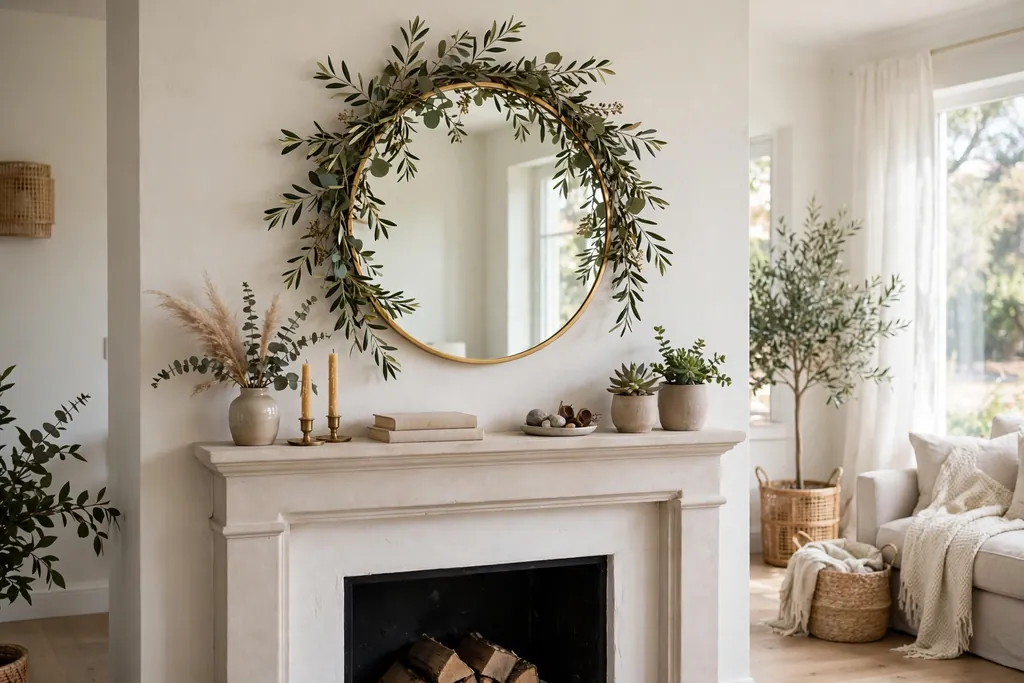
    Round mirror with a small leafy wreath layered over it above a fireplace mantle.

    Layer a small leafy wreath over a round mirror for a mantle centerpiece with both reflection and greenery. The mirror bounces light into the room, which helps a spring display feel bright, while the wreath softens the hard round edge. This pairing suits a narrow mantle where a wide art print would feel too large.

    Hang the mirror first, then hang the wreath from the same hook or a small separate hook so it sits slightly forward of the glass. Keep the wreath slim, since a thick wreath can cover too much of the mirror. Wipe the glass with a soft cloth after hanging, and step back to check that the wreath does not hide the reflection you want.

    8. Pastel Taper Candles in Brass Holders
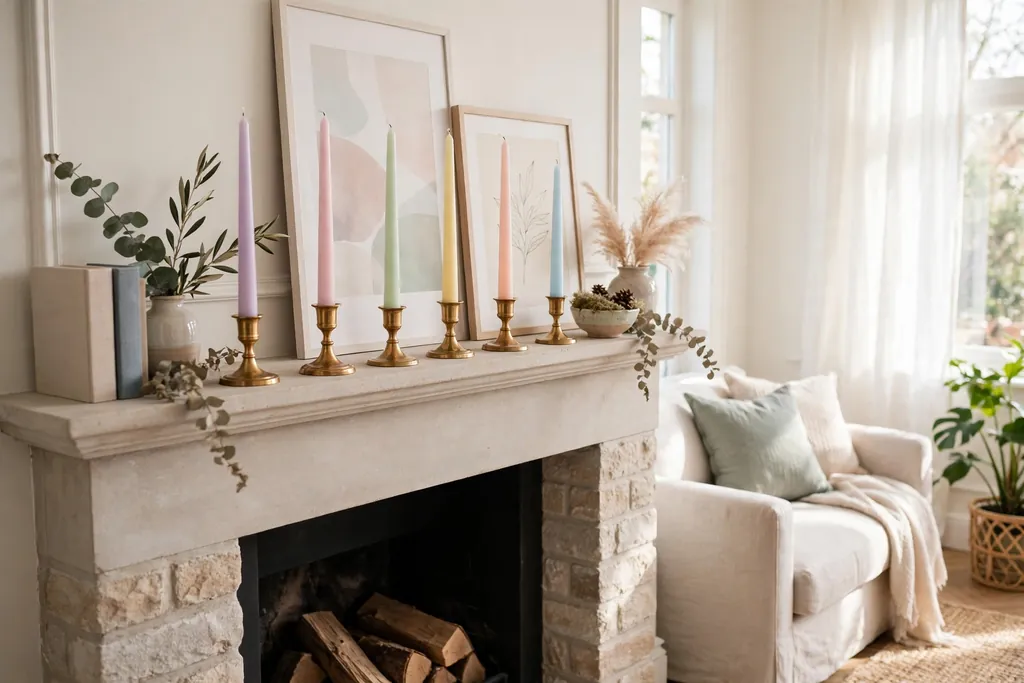
    Pastel taper candles in brass holders along a fireplace mantle.

    Set pastel taper candles in brass holders along the mantle for soft color and a warm evening glow. Pale pink, butter yellow, and soft green tapers read as spring without looking like party decorations, and brass holders add a warm metal note that suits wood mantles. Vary the holder heights so the candles step up and down along the shelf.

    Place candles well clear of garlands, paper, and fabric, and never leave them burning in an empty room. Battery tapers give the same look where real flames are not practical, such as a mantle near curtains. Store spare tapers flat in a cool place so they do not bend before use.

    9. White Pillar Candles on a Wood Tray
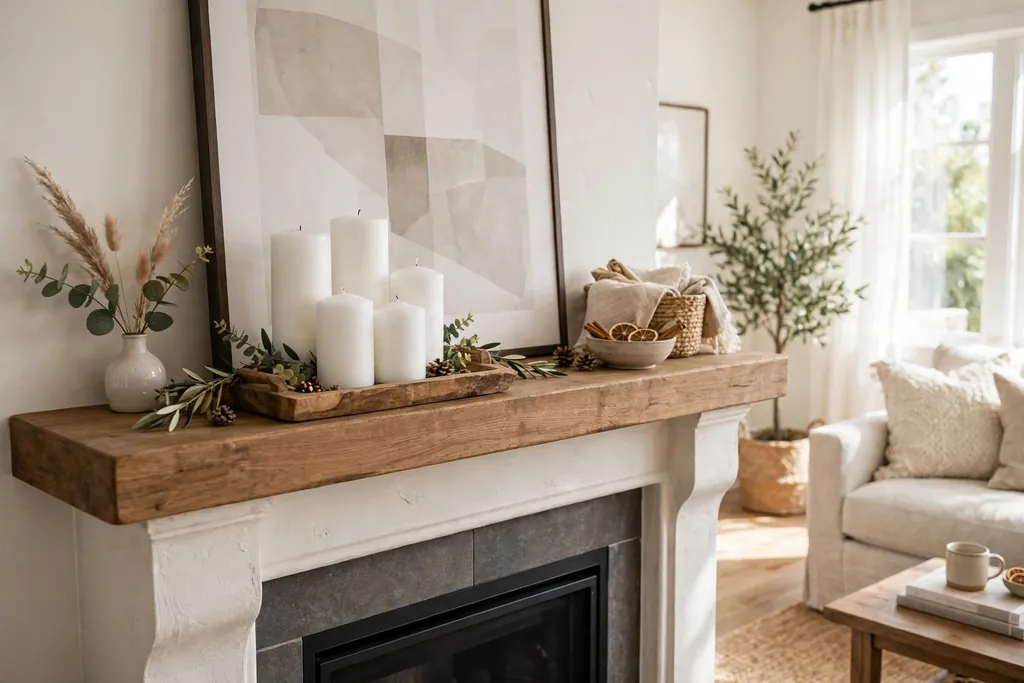
    White pillar candles grouped on a wood tray on a fireplace mantle.

    Group white pillar candles on a wood tray for a calm base that works under almost any spring arrangement. The tray gathers the candles into one unit, protects the shelf from wax, and makes it easy to lift the whole group when you dust. Choose pillars in two or three heights, and keep the tallest at the back.

    Add a few small green sprigs around the base of the candles for a spring note, but keep all greenery clear of the wicks. If you use real candles, trim the wicks and let each candle burn long enough for the top to melt evenly, which avoids tunneling. Battery pillars are a safer pick for a mantle that sits above a working fire.

    10. Ceramic Birds as a Quiet Focal Point
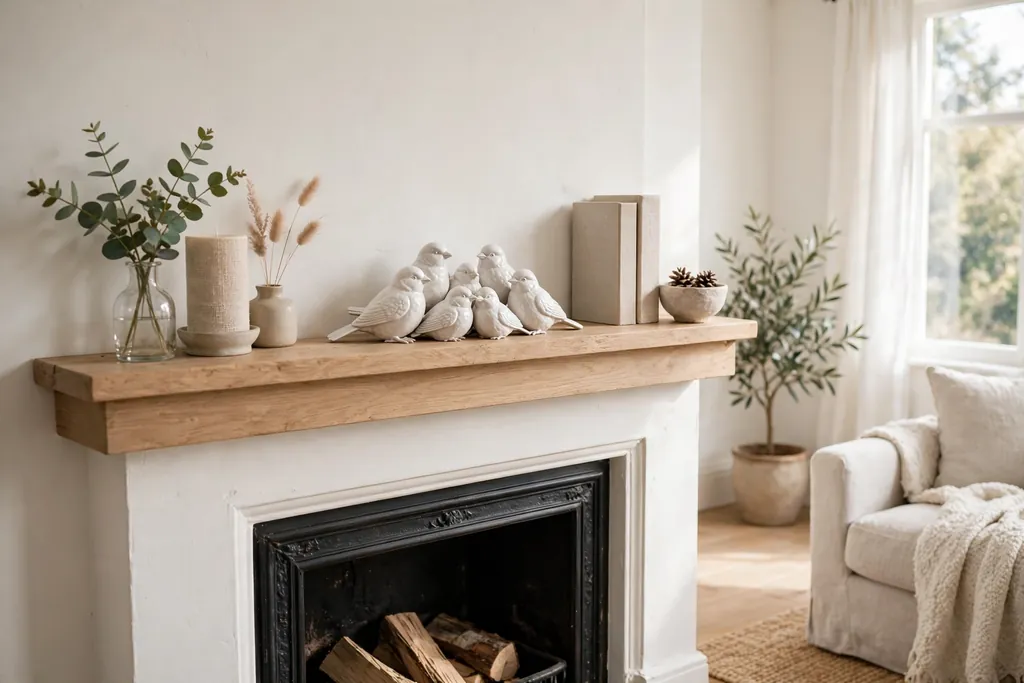
    Small ceramic birds grouped on a fireplace mantle.

    Place two or three ceramic birds on the mantle for a gentle spring theme that does not shout. White or pale pastel birds suit most rooms, and a small group reads as a deliberate collection rather than a single random ornament. Set them at slightly different heights, using a small stack of books or a low stand under one bird.

    Keep the birds near the center or at one end, not spread across the whole shelf, so they hold together as a group. Dust ceramic birds with a soft dry cloth, and keep them away from the shelf edge where they could be knocked off. If you collect birds in other rooms, repeat the same color on the mantle so the house feels linked.

    11. Botanical Prints in Matching Frames
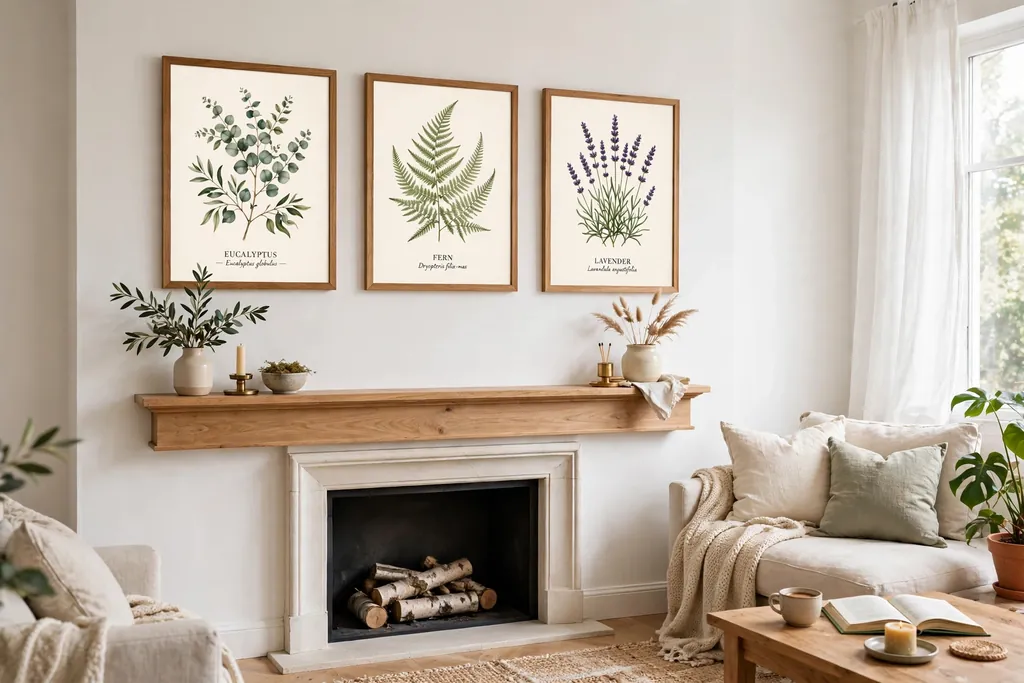
    Botanical prints in matching frames hung above a fireplace mantle.

    Hang botanical prints in matching frames above the mantle for a spring wall display that lasts past the season. Prints of leaves, ferns, and garden flowers in soft greens and muted colors suit a pale wall, and matching frames keep a group of three or four prints calm. Hang the group centered over the firebox, with the middle of the group at eye level when standing.

    Start with three prints in a row for a wide mantle, or a grid of four for a taller wall. Leave equal gaps between frames, and use a paper template on the wall to mark hook positions before you drill. Swap one print for a seasonal piece in spring, and keep the rest year round for a display that changes slowly.

    12. Pressed Flowers in Glass Frames
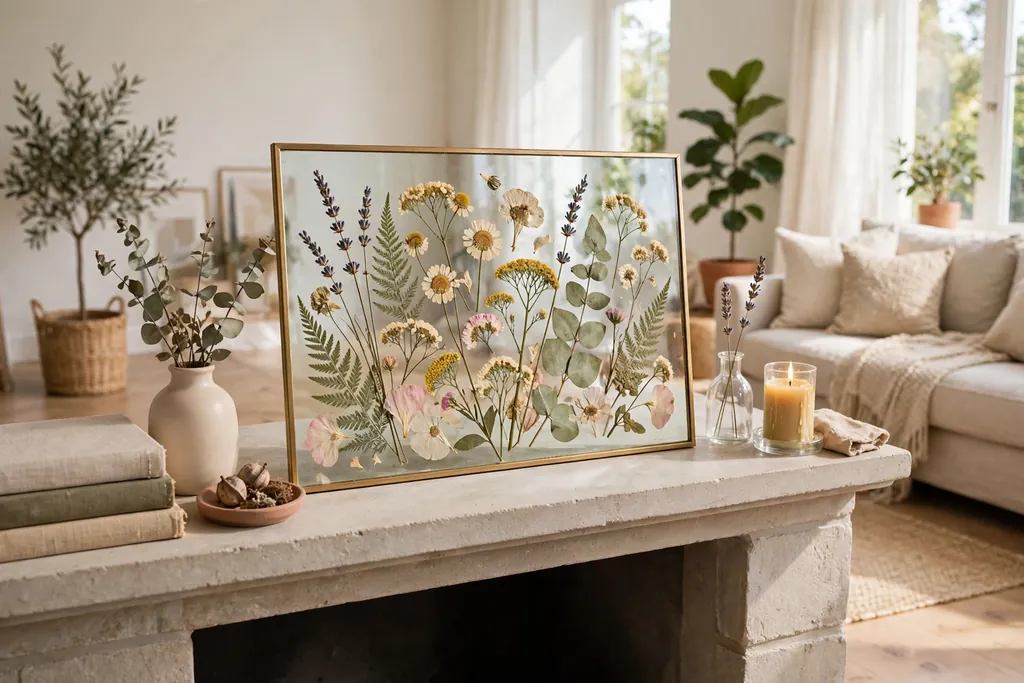
    Pressed flowers framed between glass sheets on a fireplace mantle.

    Frame pressed flowers between two sheets of glass for a light, detailed spring accent. The glass lets light through the petals, so the colors look soft rather than flat, and the thin frame suits a mantle that already holds heavier vases or candle holders. Pressed pansies, ferns, and small wildflowers press well and keep their shape.

    Buy ready pressed pieces or press your own flowers between sheets of paper under a heavy book for two to three weeks. Handle the finished frames by the edges, and hang them where they get indirect light, since strong sun fades pressed petals. Two small glass frames flanking a mirror or a wreath give symmetry without weight.

    13. Daffodils in a Low Ceramic Bowl
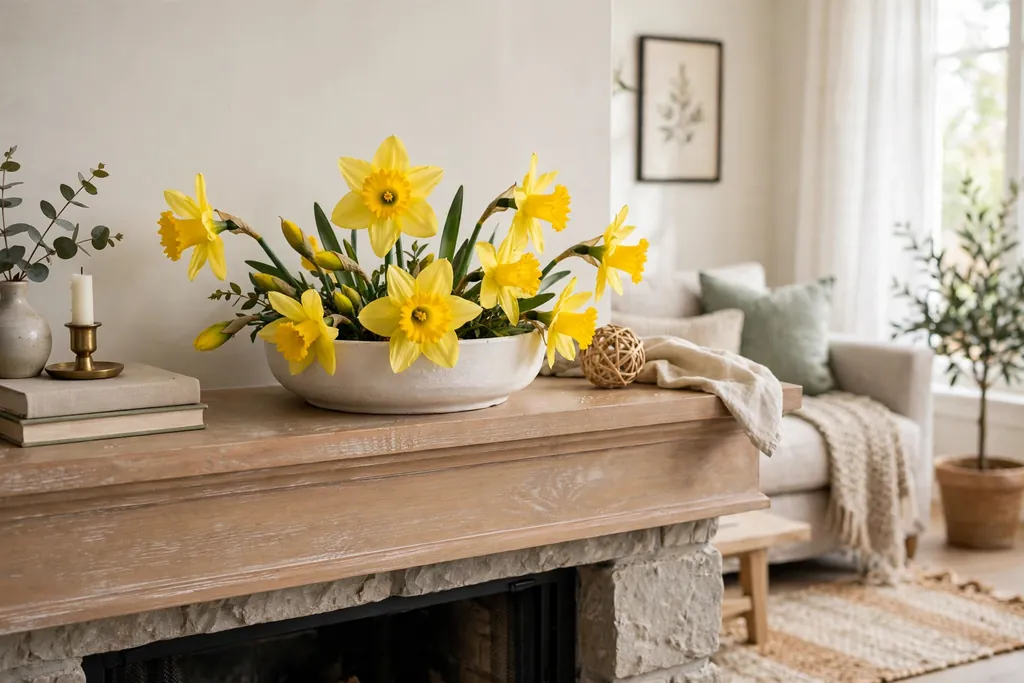
    Yellow daffodils arranged in a low white ceramic bowl on a fireplace mantle.

    Arrange daffodils in a low ceramic bowl for a spring centerpiece that sits below eye level and leaves the wall art visible. Daffodils have a clear, cheerful yellow that needs little help, so a simple white or cream bowl lets the flowers lead. Cut the stems to slightly different lengths so the blooms sit at varied heights.

    Use a small flower frog or a ball of chicken wire inside the bowl to hold the stems in place, and top up the water daily since shallow bowls dry out fast. Daffodil sap can harm other cut flowers in the same water, so keep daffodils on their own for the first day, or arrange them alone in the bowl. Place the bowl in the center of the mantle for a classic look.

    14. Moss Covered Pots with Small Ferns
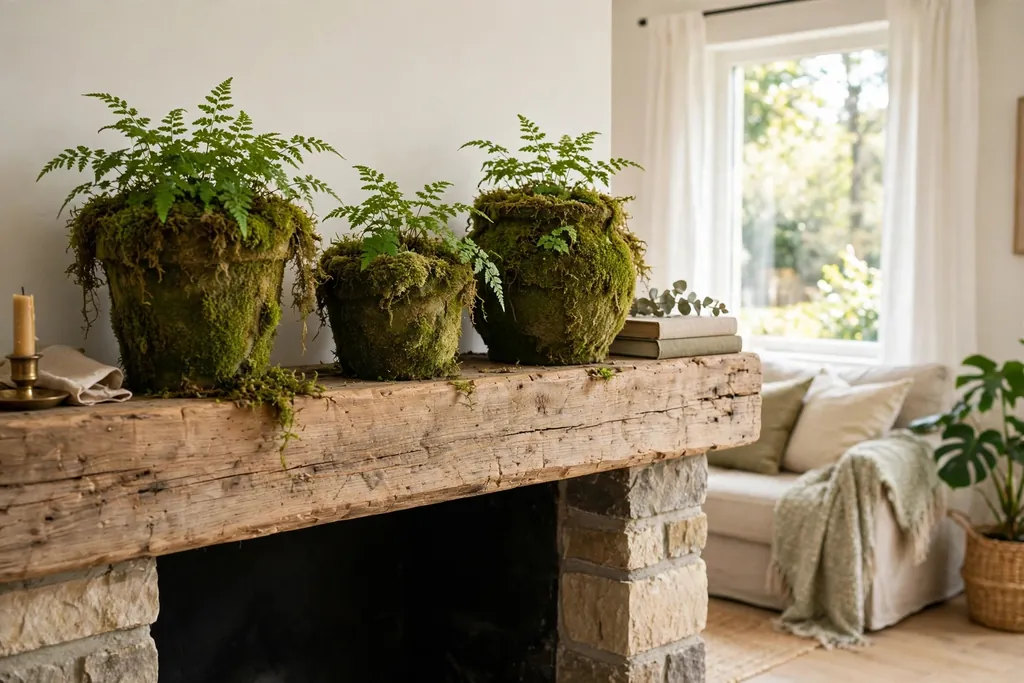
    Moss covered pots with small ferns on a fireplace mantle.

    Set moss covered pots of small ferns on the mantle for a woodland spring feel. The moss gives texture that smooth ceramic pots lack, and ferns add soft, feathery leaves that contrast with the straight lines of the shelf. Choose ferns that stay small, such as button fern or maidenhair fern, so they do not outgrow the display.

    Keep the soil lightly damp and mist the ferns every few days, since indoor air dries them out. Put a waterproof saucer under each pot to protect the shelf, and rotate the pots weekly so the ferns grow evenly. If a fern browns at the tips, move it to a spot with less direct sun and trim the damaged fronds.

    15. Terracotta Pots of Fresh Herbs
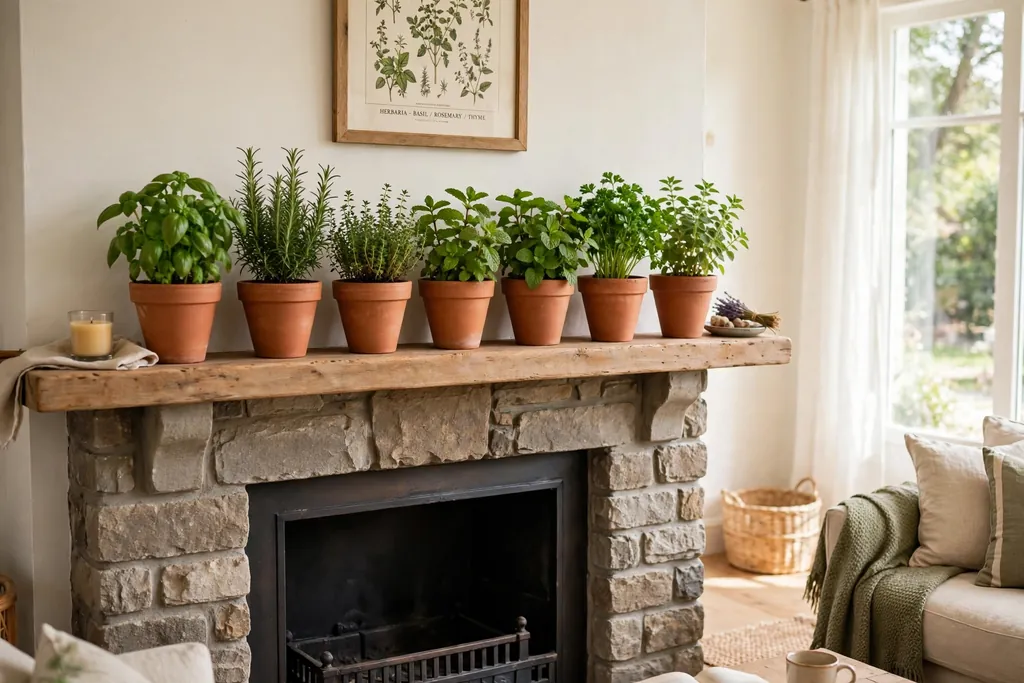
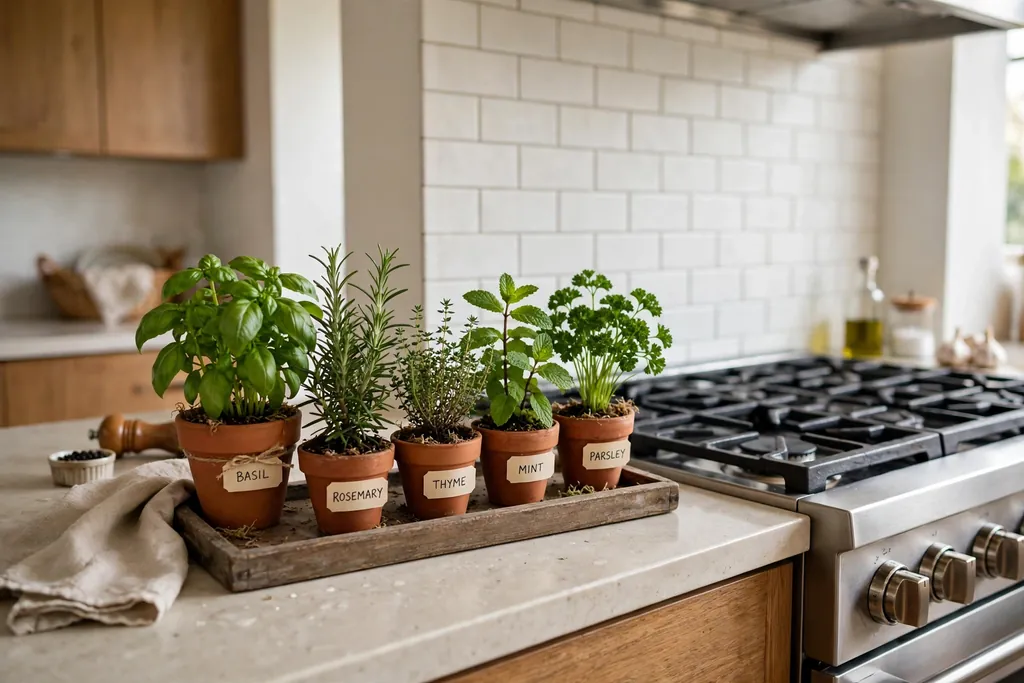
    Terracotta pots of fresh herbs lined up on a fireplace mantle.

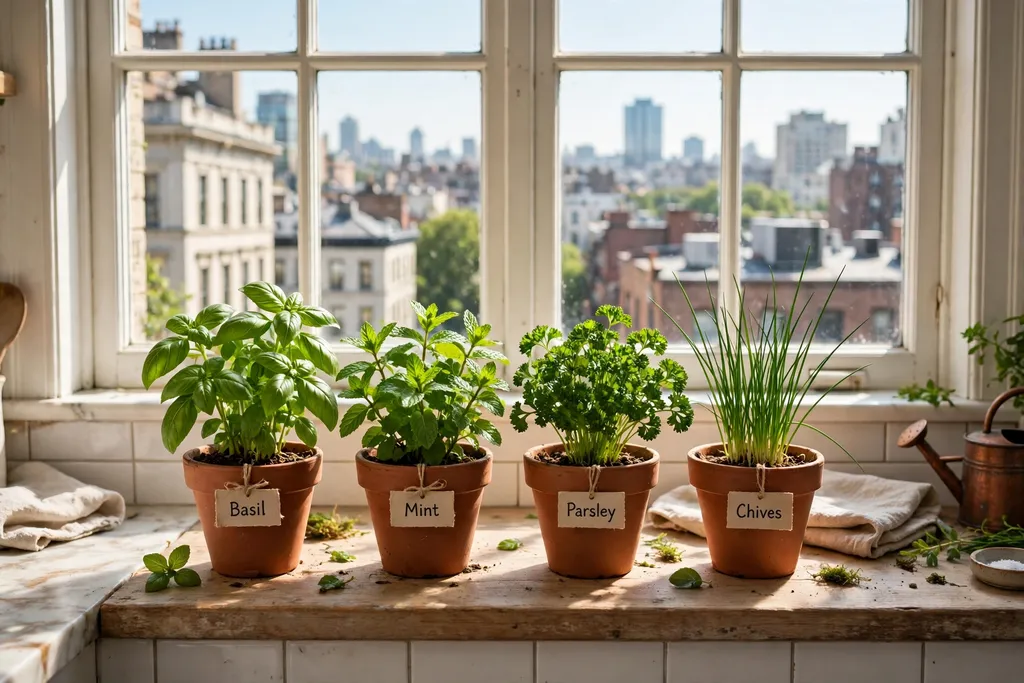
    Line up terracotta pots of fresh herbs on the mantle for a spring display you can also cook with. Basil, mint, chives, and parsley all grow well in small pots, and their green leaves suit a kitchen facing living room. The warm orange brown of terracotta also pairs well with pale spring flowers nearby.

    Give herbs as much daylight as the room allows, and water only when the top of the soil feels dry. Snip leaves regularly, which keeps the plants bushy rather than leggy, and replace any plant that grows too tall for the shelf. Label the pots with small wood markers if guests will pick leaves, and keep mint in its own pot since it spreads fast.

    16. Wood Bead Garland in Soft White
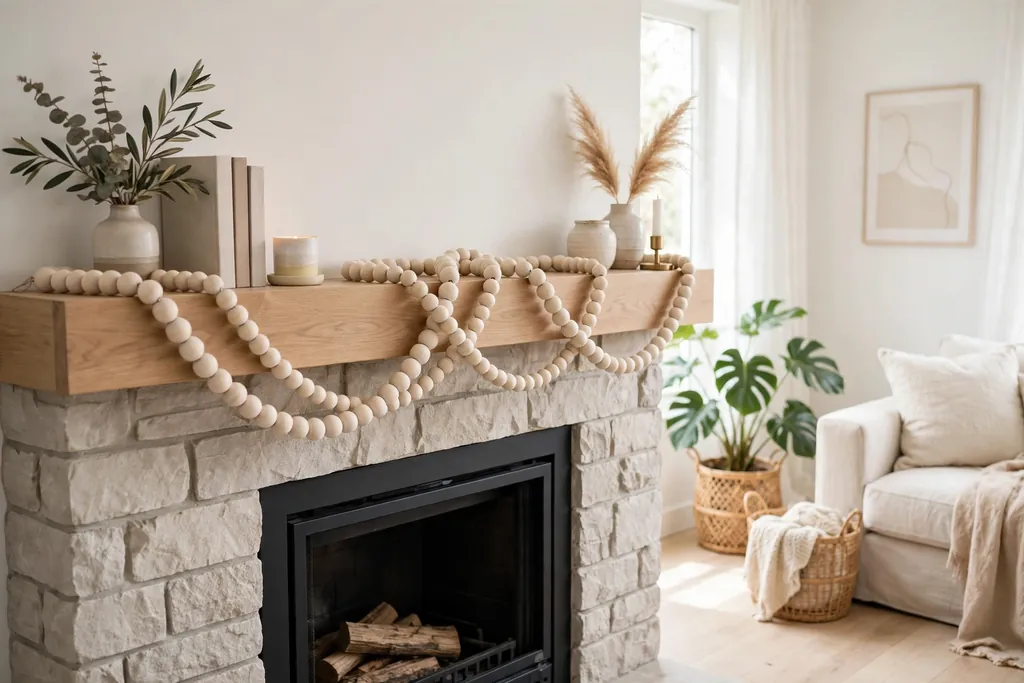
    Soft white wood bead garland draped along a fireplace mantle shelf.

    Drape a wood bead garland in soft white along the mantle for a simple, neutral layer that ties other pieces together. Bead garlands add texture without color, so they work under a wreath, around candle holders, or along the front edge of the shelf. A garland with a tassel at each end looks finished without extra decoration.

    Lay the garland in a loose curve rather than a straight line, and let it dip slightly between candle groups. Wipe wood beads with a dry cloth to keep dust out of the grooves, and store the garland flat so the cord does not tangle. Swap the white beads for natural wood in autumn, and keep the same draping habit year round.

    17. Graduated Ceramic Vases in Pastel Glazes
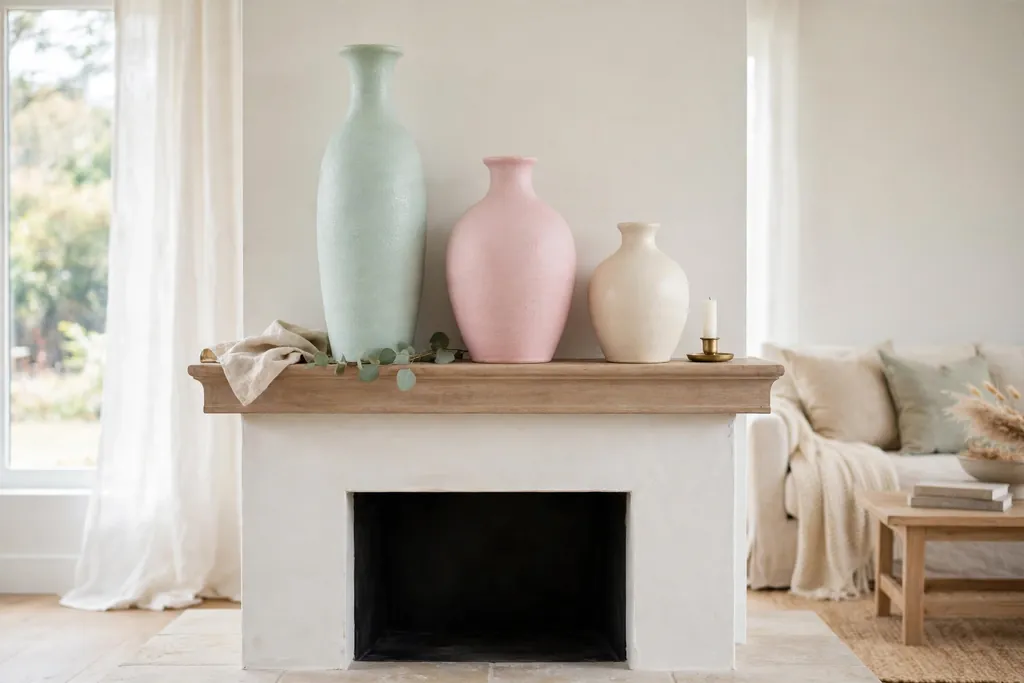
    Ceramic vases in graduated heights and pastel glazes on a fireplace mantle.

    Arrange ceramic vases in graduated heights and pastel glazes along one side of the mantle. A tall vase, a medium vase, and a short vase in pink, mint, and cream give a stepped outline that draws the eye along the shelf. Leave some vases empty and put a single stem in others, so the group does not look like a flower shop display.

    Choose glazes in the same soft tone family, rather than mixing bright colors, so the group stays calm. Place the tallest vase at the outer end and step down toward the center, or mirror the step on both ends for symmetry. Wash the vases before use, since pastel glazes show water marks more than dark ones.

    18. Glass Cloche Over a Mini Spring Scene
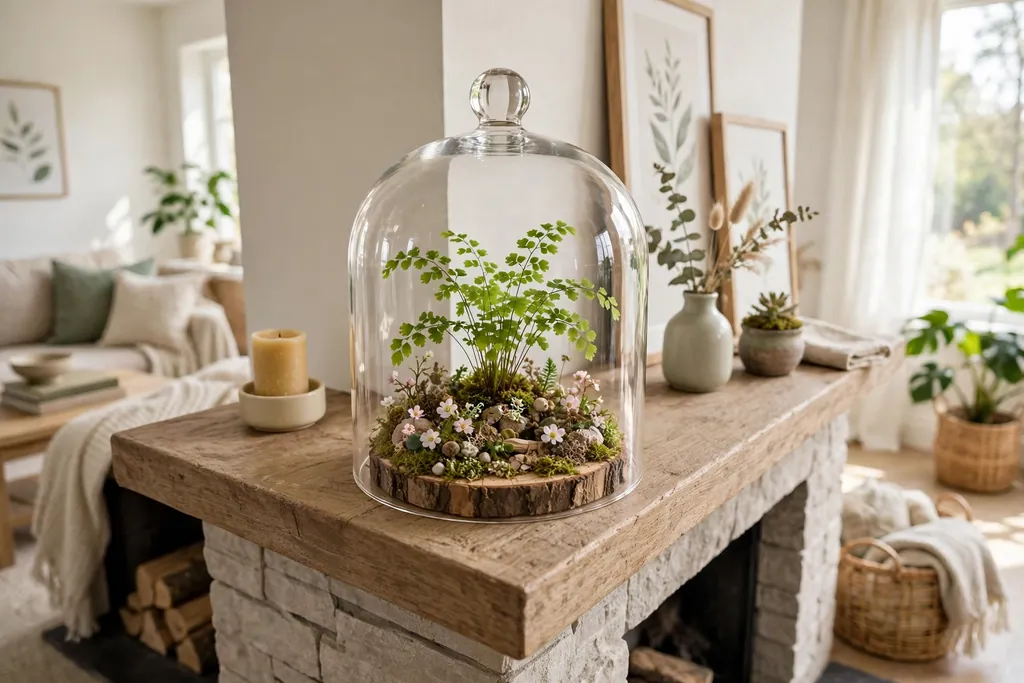
    Glass cloche over a mini spring scene with a small plant on a fireplace mantle.

    Place a glass cloche over a mini spring scene for a display that invites a closer look. Under the dome, set a small potted plant, a tiny ceramic bird, or a few moss covered stones on a wood slice. The glass protects the scene from dust and keeps small pieces together as one unit.

    Choose a cloche tall enough that the plant inside has room to grow, and lift the dome every few days to let air in. Keep the cloche away from the shelf edge, since glass domes are easy to knock, and clean the inside with a soft cloth when condensation appears. One cloche is enough on most mantles, since two can look like a shop window.

    19. Vintage Books Topped with a Small Plant

    Vintage books stacked on a fireplace mantle topped with a small potted plant.

    Stack two or three vintage books on the mantle and top them with a small potted plant. The books add height for a plant that would otherwise sit too low, and their worn covers bring a collected feel to a spring shelf. Choose books in muted cloth covers, and stack the largest at the bottom.

    Turn the spines toward the wall if the titles clash with the room, or show them if they suit the scheme. Put a small felt pad under the plant pot to protect the top book, and avoid watering the plant while it sits on the books. This trick also works for a small candle holder or a ceramic bird that needs a lift.

    20. Pastel Easter Eggs in a Footed Bowl
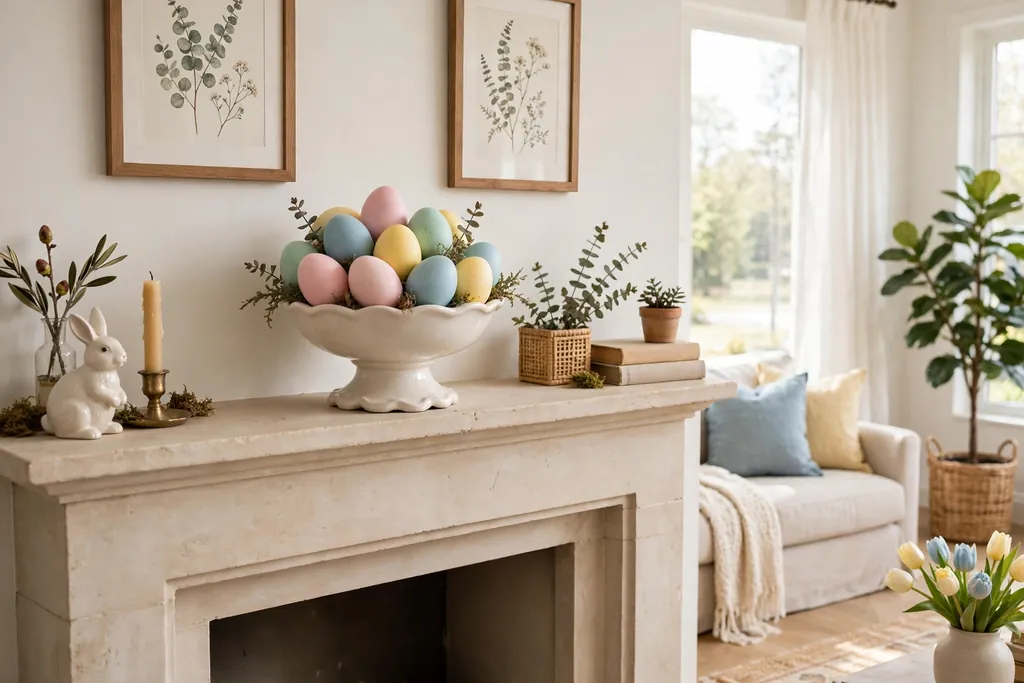
    Pastel Easter eggs in a footed bowl on a fireplace mantle.

    Fill a footed bowl with pastel Easter eggs for a short seasonal accent that is easy to put away after the holiday. Painted wood or ceramic eggs last longer than real blown eggs, and soft pink, blue, yellow, and mint eggs suit a spring palette. The footed bowl raises the display so it reads above lower candles and garlands.

    Mix the eggs loosely rather than stacking them in neat rows, and tuck a little moss or shredded paper between them for texture. Keep the bowl in the center or at one end of the mantle, and pack the eggs away after Easter so the spring display does not feel dated. Swap the eggs for small lemons later in the season if you like the bowl shape.

    21. Bird Nest Vignette with Speckled Eggs
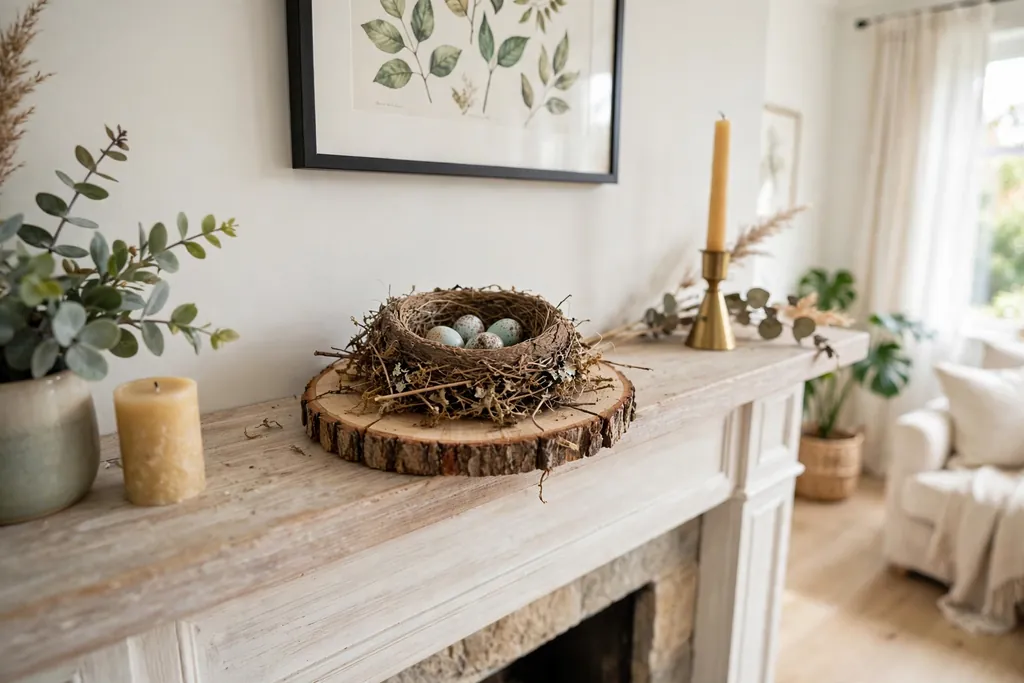
    Small bird nest vignette with speckled eggs on a fireplace mantle.

    Build a small bird nest vignette with a faux nest and speckled eggs for a natural spring focal point. Set the nest on a wood slice or a small cake stand, add two or three speckled eggs, and place a few sprigs of greenery beside it. The vignette works best as one small group, not spread across the shelf.

    Keep the nest low and stable, and use faux eggs rather than real ones so the display lasts the whole season. Place the vignette at one end of the mantle, balanced by a candle group or a vase at the other end. Pack the nest away when spring ends, since it reads as a seasonal piece rather than a year round decoration.

    22. Lemon Bowl for a Citrus Note
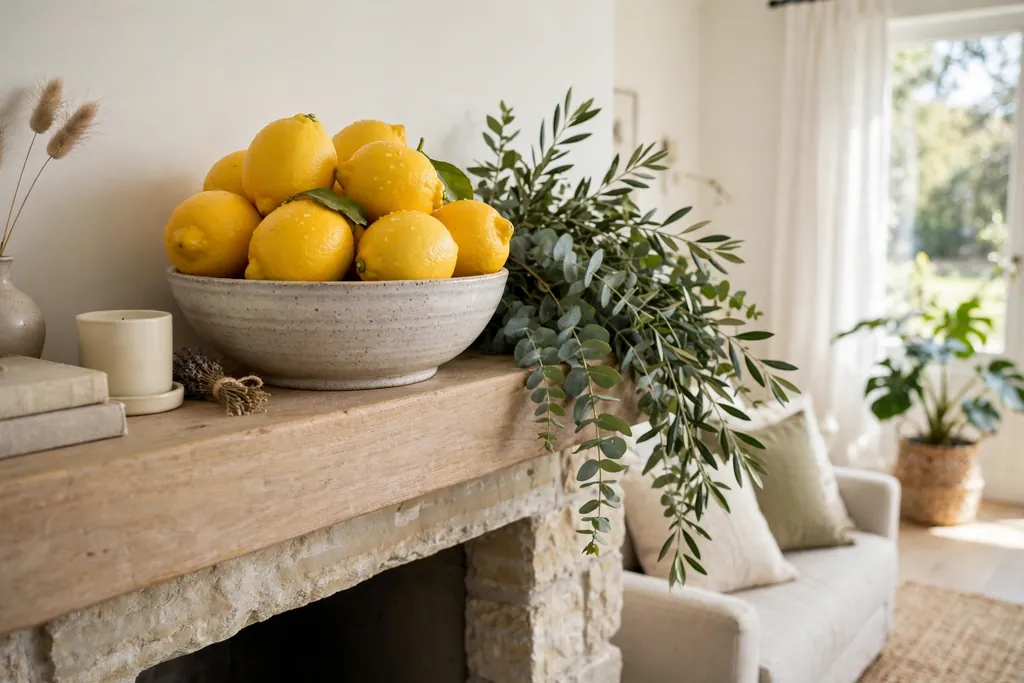
    Bowl of fresh lemons on a fireplace mantle beside greenery.

    Set a bowl of fresh lemons on the mantle for a bright citrus note that suits late spring. The yellow echoes daffodils and forsythia elsewhere in the room, and the round fruit adds a different shape among vases and candles. A white or wood bowl keeps the focus on the lemons themselves.

    Choose lemons of similar size, wash and dry them before display, and replace any that soften. Use the lemons in cooking before they age, and top the bowl up so it always looks full. This idea pairs well with greenery and white candles, and it suits a mantle in a room that already has a citrus theme in the kitchen.

    23. Watercolor Landscape Leaning on the Wall
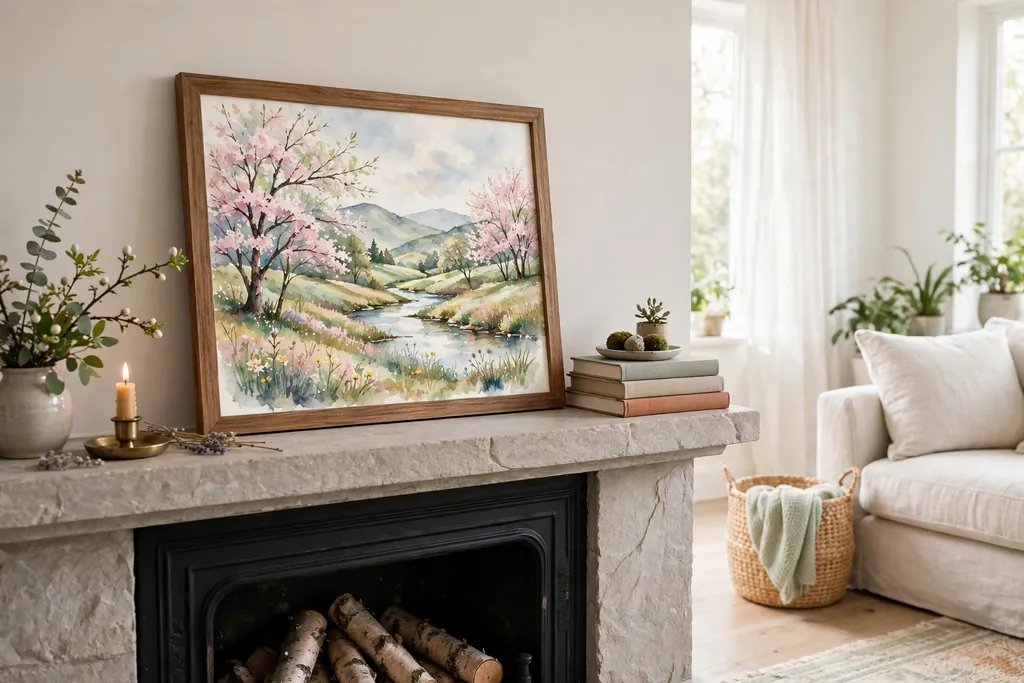
    Watercolor spring landscape leaning against the wall on a fireplace mantle.

    Lean a watercolor landscape against the wall on the mantle for art that needs no hooks. A soft spring landscape, with pale green fields and a light sky, adds color at the back of the shelf while smaller pieces sit in front of it. Leaning art also lets you swap pieces easily when the season changes.

    Use a frame with a wide mat so the painting reads from across the room, and secure the top edge with a small adhesive pad so the frame cannot slide forward. Keep the painting clear of candle flames and out of direct sun, which fades watercolor. Pair a landscape with a small plant at its base to link the art to the shelf display.

    24. Potted Lavender in a Woven Basket
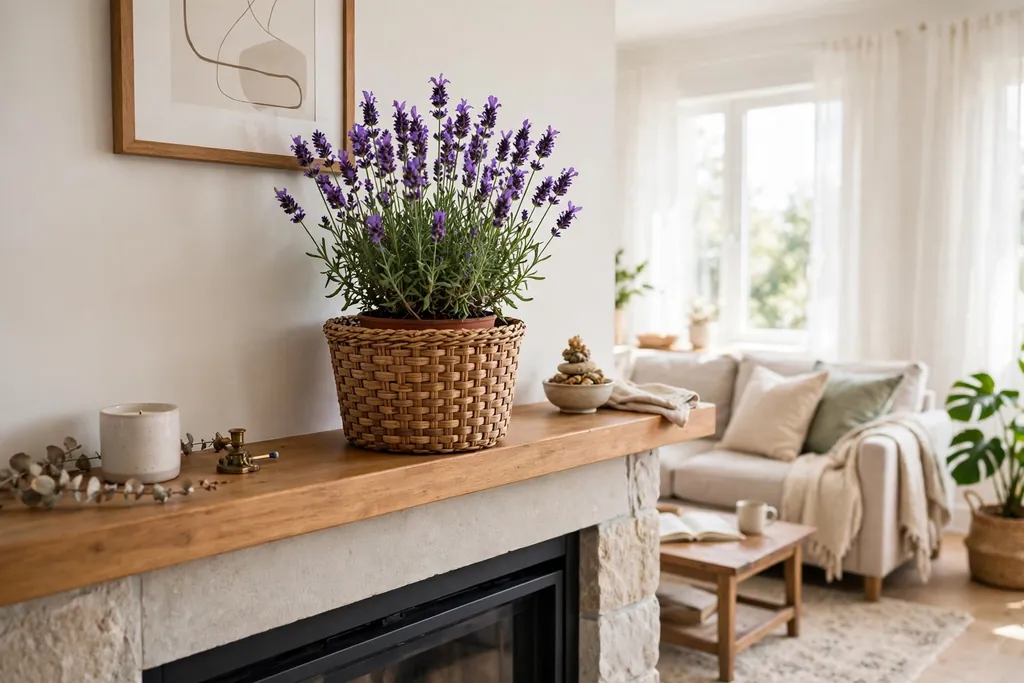
    Potted lavender in a woven basket on a fireplace mantle.

    Place potted lavender in a woven basket on the mantle for scent, soft purple color, and natural texture in one piece. Lavender suits a sunny mantle, and the woven basket softens the straight lines of the shelf. Choose a basket that fits the pot snugly, with a plastic liner inside to catch water.

    Give lavender as much light as you can, and water only when the soil is dry, since lavender dislikes wet roots. Trim the flower stems after they bloom to keep the plant compact, and move the pot outside for summer if it grows too large for the shelf. The scent is gentle indoors, and it pairs well with white candles nearby.

    25. Pussy Willow Stems in a Stoneware Jug
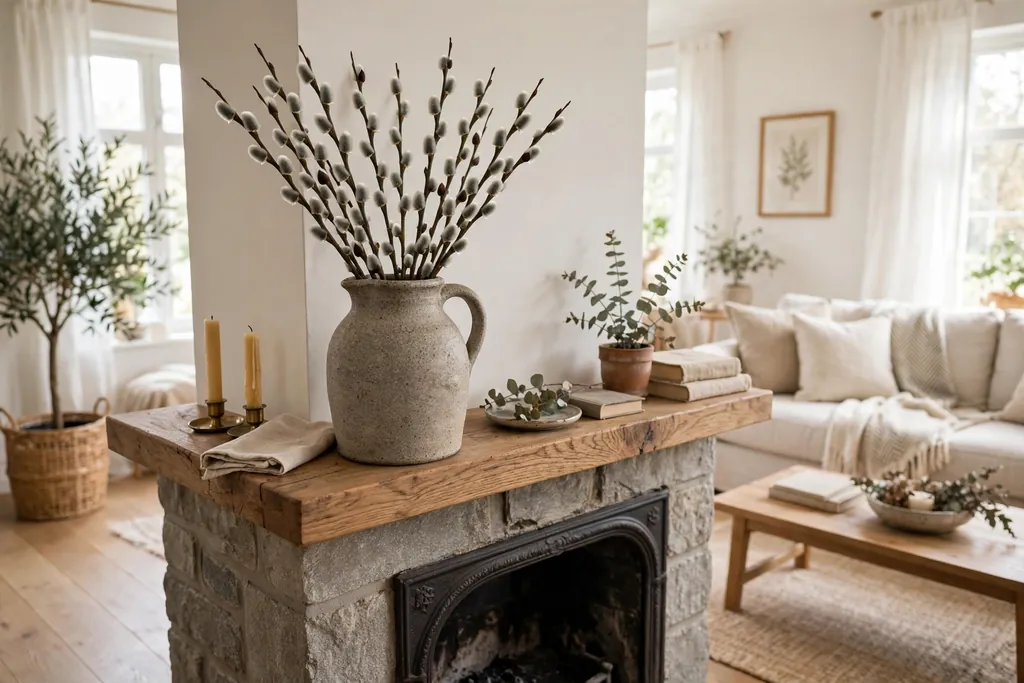
    Pussy willow stems in a stoneware jug on a fireplace mantle.

    Stand pussy willow stems in a stoneware jug for a soft, neutral arrangement that lasts for weeks. The grey, fuzzy buds catch light nicely, and the bare stems keep the display airy. A stoneware jug in cream or soft grey suits the muted tones of the willow and anchors the arrangement on the shelf.

    Trim the stems to varied lengths, and place the tallest at the back of the jug. Pussy willow needs no water once cut, which makes it a good pick for a mantle above a working fire, where fresh flowers dry out fast. Dust the buds gently with a soft brush, and replace stems that shed heavily.

    26. Small Topiary Balls in Clay Pots
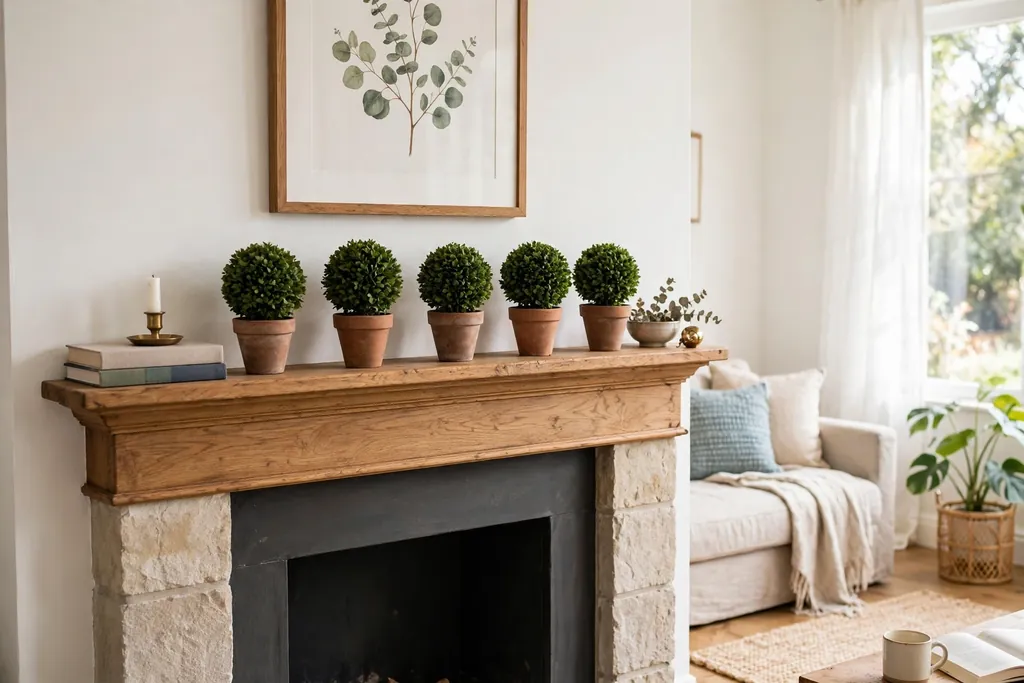
    Small topiary balls in clay pots on a fireplace mantle.

    Set small topiary balls in clay pots on the mantle for neat green shapes that hold their form all season. Boxwood or faux boxwood balls suit a classic spring look, and the round shape contrasts with tall candles and branch arrangements. Use two matching pots for symmetry, or one larger ball as a single accent.

    Keep real boxwood lightly watered and out of strong sun, or choose faux balls for a mantle near heat. Trim real topiary with small scissors to keep the round shape, and wipe faux balls with a damp cloth to remove dust. Place topiary at the ends of the shelf to frame the display, or flanking a mirror for a balanced pair.

    27. Fairy Lights Woven Through Greenery

    Fairy lights woven through a greenery garland on a fireplace mantle in the evening.

    Weave battery fairy lights through a greenery garland for a soft evening glow on the mantle. The tiny lights make spring leaves and flowers visible after dark, and they suit a mantle that serves as the room focal point in the evening. Choose warm white lights, and hide the battery box behind a vase or a stack of books.

    Use a timer so the lights switch off on their own, and keep the wire clear of candle flames and the fire opening. Replace batteries before the wire starts to dim unevenly, and unwind the lights carefully at the end of the season so the wire does not kink. This idea works best with a full garland, since sparse greenery shows the wire too clearly.

    28. Mini Tiered Stand with Spring Pieces
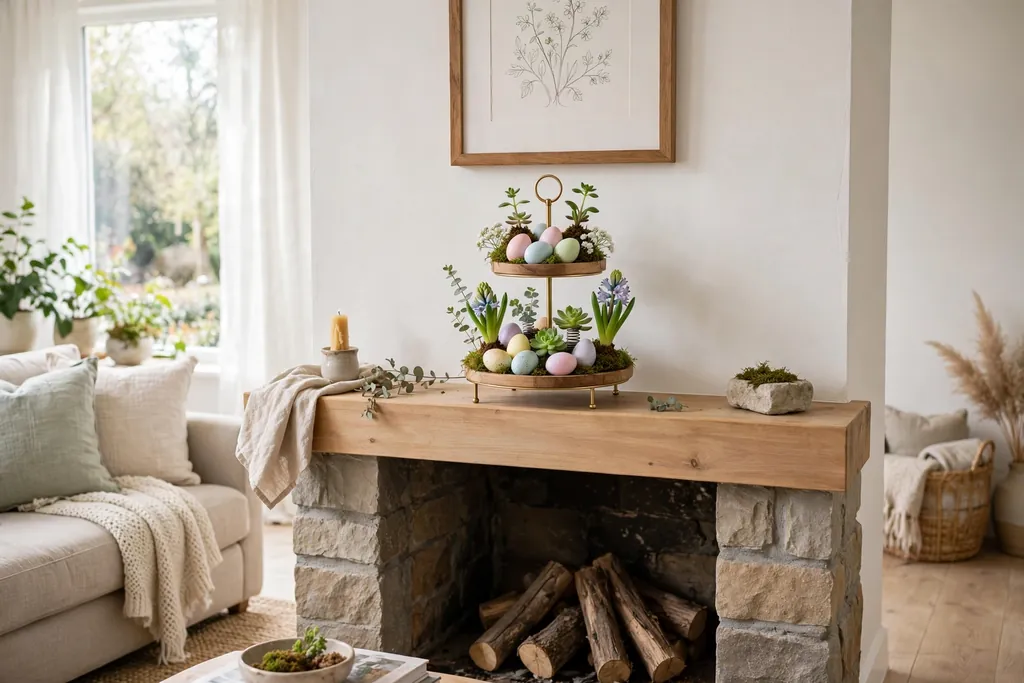
    Mini tiered stand with small spring plants and pastel eggs on a fireplace mantle.

    Use a mini tiered stand on the mantle to hold several small spring pieces in a small footprint. A two tier stand can hold mini potted plants, a tiny ceramic bird, and a few pastel eggs, stacked vertically instead of spread along the shelf. This suits a narrow mantle where a long row of objects would feel crowded.

    Keep the heaviest piece on the bottom tier so the stand stays stable, and leave one small gap on each tier so the stand does not look stuffed. A white or pale wood stand suits spring best, since a dark stand can dominate the small items. Move the stand as one unit when you dust, rather than lifting each piece separately.

    29. Linen Bunting in Spring Pastels
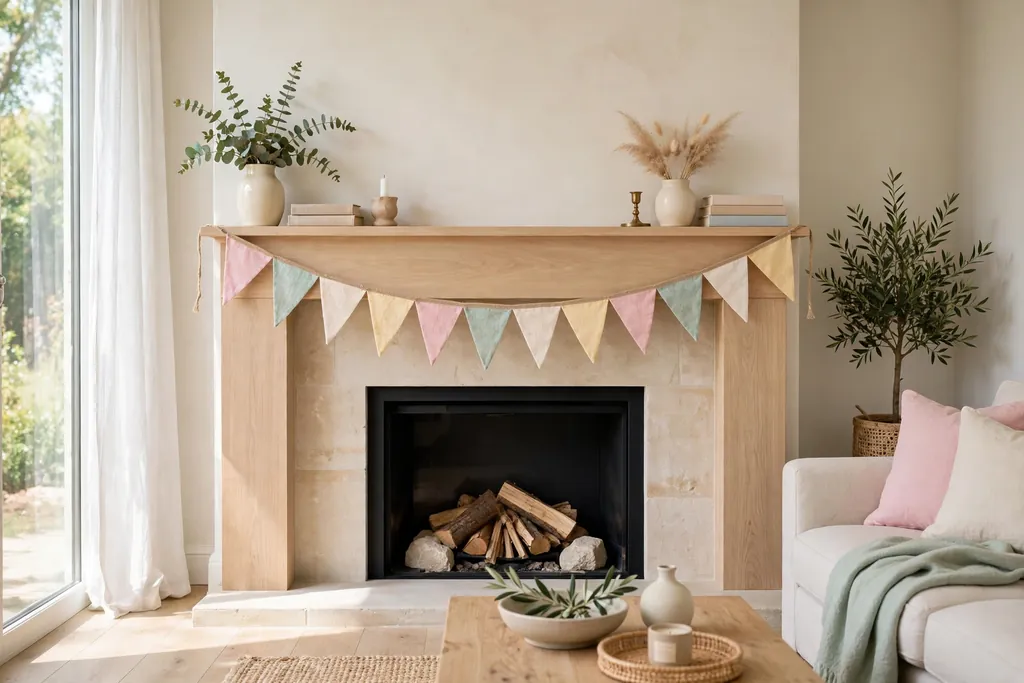
    Linen bunting in spring pastels hung across a fireplace mantle.

    Hang a linen bunting in spring pastels across the front of the mantle for a light, handmade touch. Small triangles in pink, mint, cream, and soft yellow add color without weight, and linen keeps the look calm rather than festive in a party sense. Hang the bunting from the shelf edge or from small hooks at each end.

    Keep the bunting short enough that it does not droop onto the fire opening, and iron the triangles before hanging so they lie flat. This idea suits a family room or a mantle decorated for a spring gathering, and it comes down easily when the season ends. Pair bunting with plain white candles so the shelf does not carry two strong patterns at once.

    30. Single Stem Bud Vases in a Row
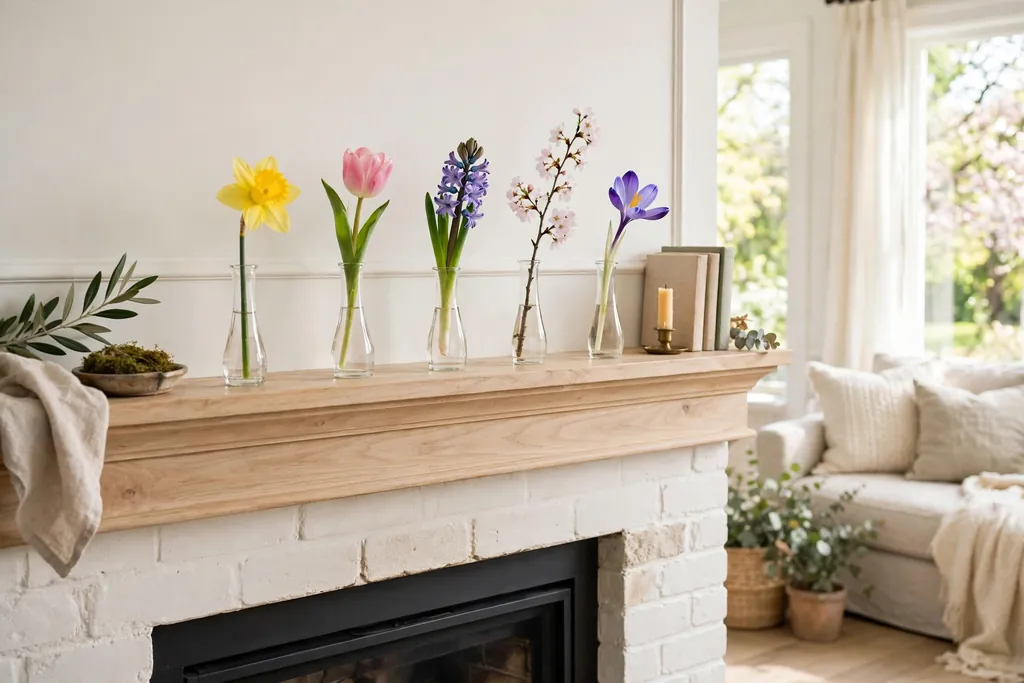
    Single stem bud vases lined up in a row on a fireplace mantle.

    Line up single stem bud vases in a row for a simple flower display that uses very few blooms. Each small vase holds one stem, such as a tulip, a ranunculus, or a sprig of blossom, so a small bunch of flowers stretches across the whole mantle. Matching bud vases look tidy, while mixed vintage vases look collected.

    Keep the water topped up, since bud vases hold very little, and change it every two days. Trim each stem to suit its vase height, and keep the tallest stem near the center for a gentle peak. This is a good way to use leftover stems from a larger bouquet, and it suits a mantle where a big arrangement would block a mirror or art.

    31. Mixed Garden Bouquet as the Centerpiece
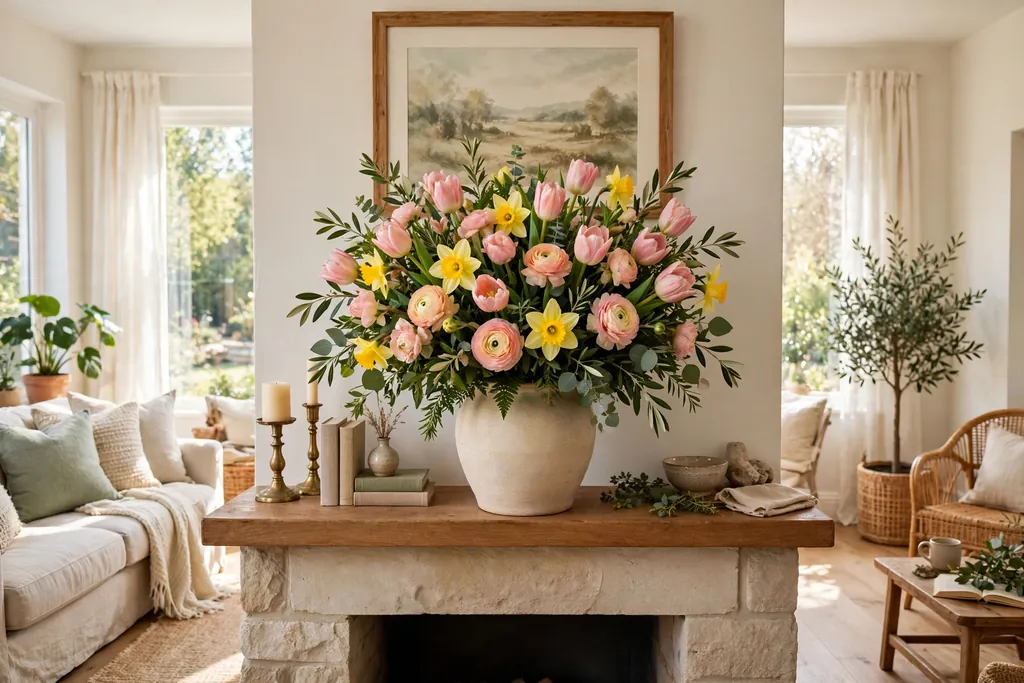
    Mixed garden bouquet of tulips, daffodils, and greenery in a large vase on a fireplace mantle.

    Finish with a mixed garden bouquet as the mantle centerpiece, gathering tulips, daffodils, ranunculus, and fresh greenery in one large vase. A mixed bouquet pulls together the colors and flowers used elsewhere on the shelf, so the whole display feels planned rather than random. Choose a vase wide enough to hold the stems loosely, and let the bouquet spill a little over the rim.

    Strip leaves below the waterline, trim the stems at an angle, and change the water every two days to keep the bouquet fresh. Place the bouquet in the center of the mantle, with lower candles and bowls on each side, and step back to check the balance from the doorway. Replace the shortest lived flowers as they fade, so the bouquet lasts into a second week.

    Conclusion

    A spring mantle works best when it feels light, fresh, and a little unfinished, with room for flowers to open and new pieces to join. Pick one anchor, repeat one or two soft colors, and leave gaps between groups so the shelf stays easy to dust and easy to change. Fresh flowers and potted plants do most of the work, while candles, mirrors, and small seasonal pieces add warmth after dark and on cloudy days. Start with the idea that fits your room and your routine, then add a second one next weekend rather than buying everything at once. For the floor around the fire, these living room rug ideas help the seating zone match the lighter spring look, and the pale, calm approach in these Swedish living room ideas pairs well with a pastel mantle display.

    FAQs

    How do I decorate my fireplace mantle for spring on a small budget?

    Start with what you already own, such as white candles, plain vases, and a mirror, then add one fresh element, like a bunch of tulips or a few forsythia stems. A single garland of greenery, a bowl of lemons, or a row of bud vases costs little and changes the whole shelf. Add more pieces over several weekends instead of buying a full display at once.

    What flowers last longest on a spring mantle?

    Potted bulbs, such as hyacinths and small daffodils, last longest because their roots stay in soil. Among cut flowers, tulips, ranunculus, and daffodils usually last a week or more with fresh water and trimmed stems. Keep all flowers away from direct heat above a working fire, and change the water every two days.

    How do I keep a spring mantle from looking cluttered?

    Choose one anchor, such as a mirror or a wreath, then limit the shelf to three or four groups of objects with clear gaps between them. Repeat one or two colors, mix heights on purpose, and step back to check the display from the doorway. If a piece does not add color, height, or texture, move it to another room.

    Is it safe to put greenery and candles on a mantle above a working fireplace?

    Keep all greenery, fabric, paper, and dried flowers well clear of the fire opening and away from candle flames, and follow the clearance rules for your fireplace and any candle maker guidance. Battery candles and faux greenery are safer picks directly above a fire that is used often. Never leave real candles burning in an empty room.

    When should I switch my mantle from winter to spring decor?

    Late winter is a good time to start, when forsythia and pussy willow stems can be forced indoors and early bulbs appear in shops. Swap heavy garlands and dark candles first, then add fresh flowers as they become available. Most spring displays look best from March through May, with small swaps, such as lemons for Easter eggs, keeping them fresh.

    How do I decorate a mantle if I do not have a working fireplace?

    Treat the firebox as a display space too, with a group of pillar candles, a stack of books, or a basket of greenery inside it. The mantle shelf follows the same rules: one anchor, mixed heights, and gaps between groups. Without heat to worry about, you can use fresh flowers, fabric bunting, and paper accents freely.
  • 12 Serene Kitchen with Sage Green Cabinets for a Cozy Seasonal Update

    12 Serene Kitchen with Sage Green Cabinets for a Cozy Seasonal Update

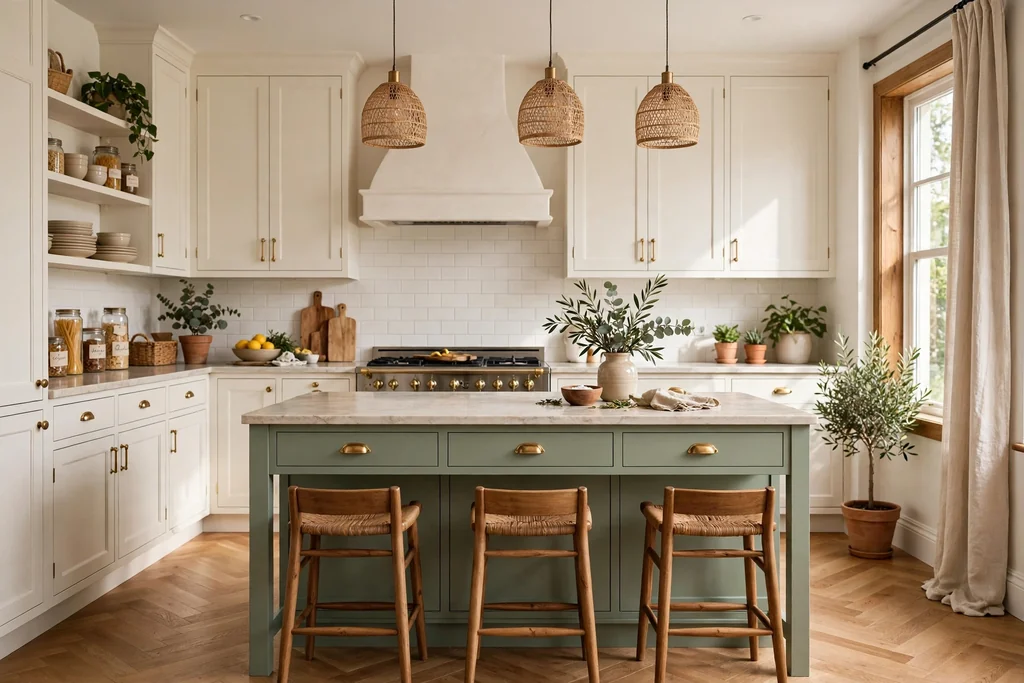
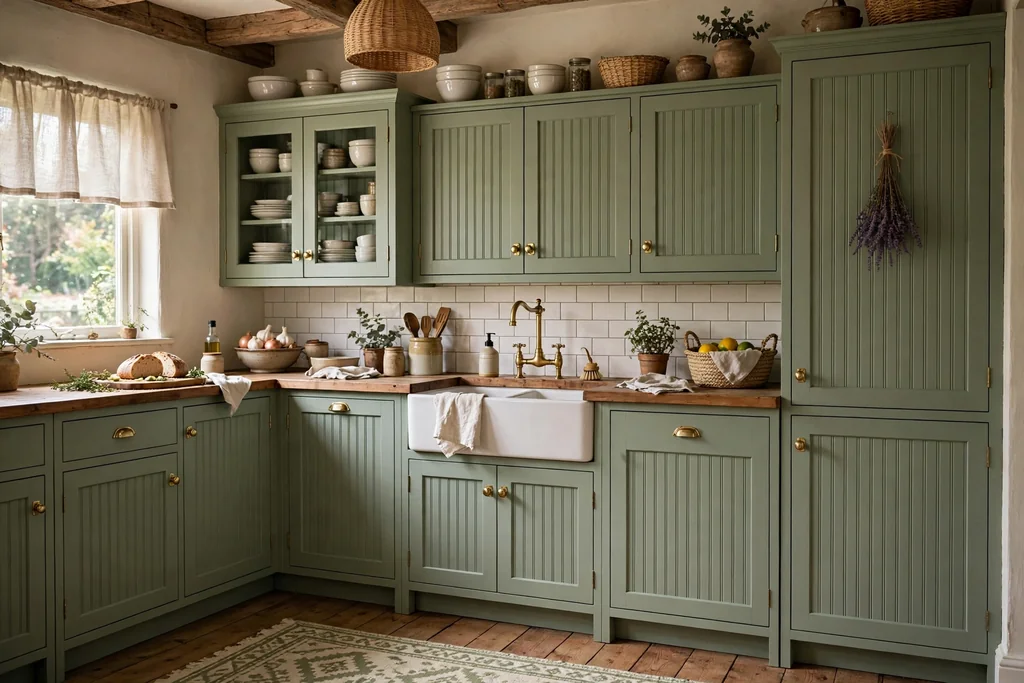
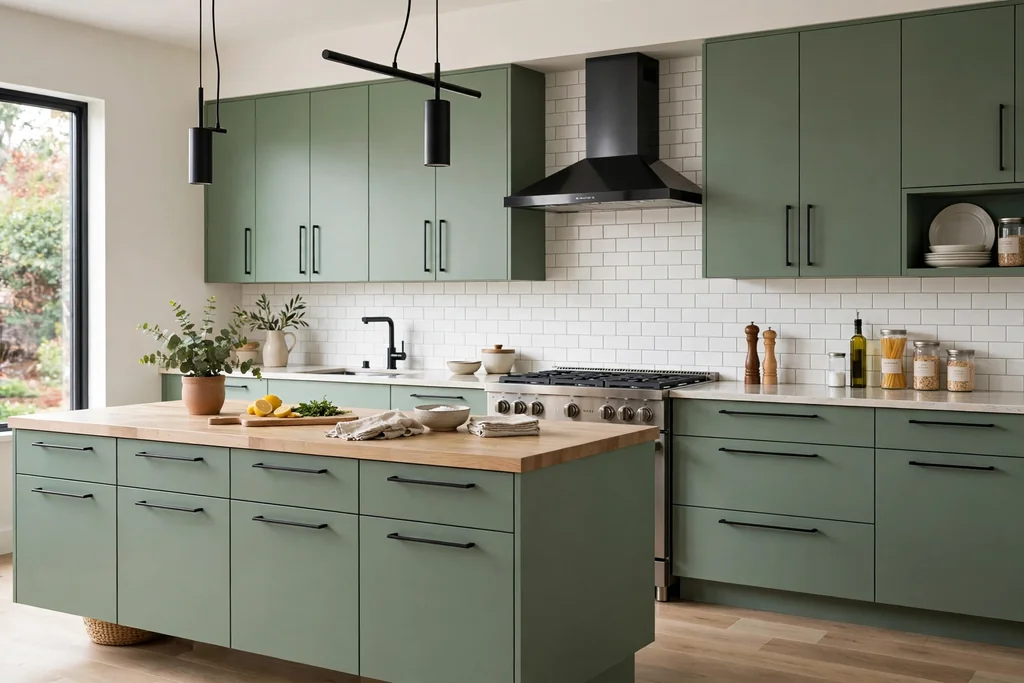
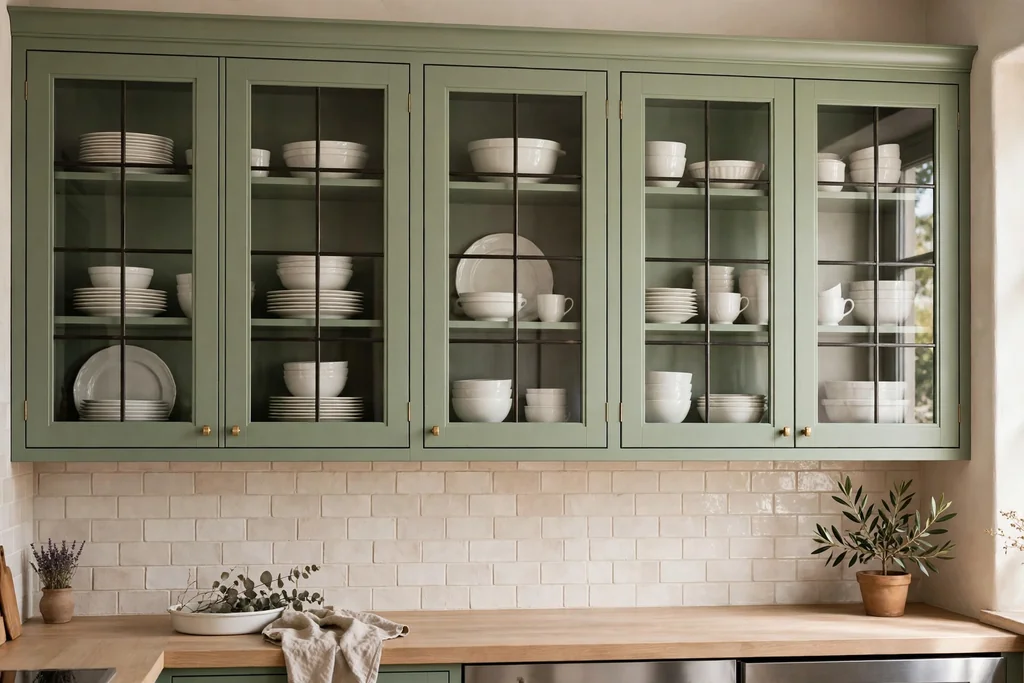
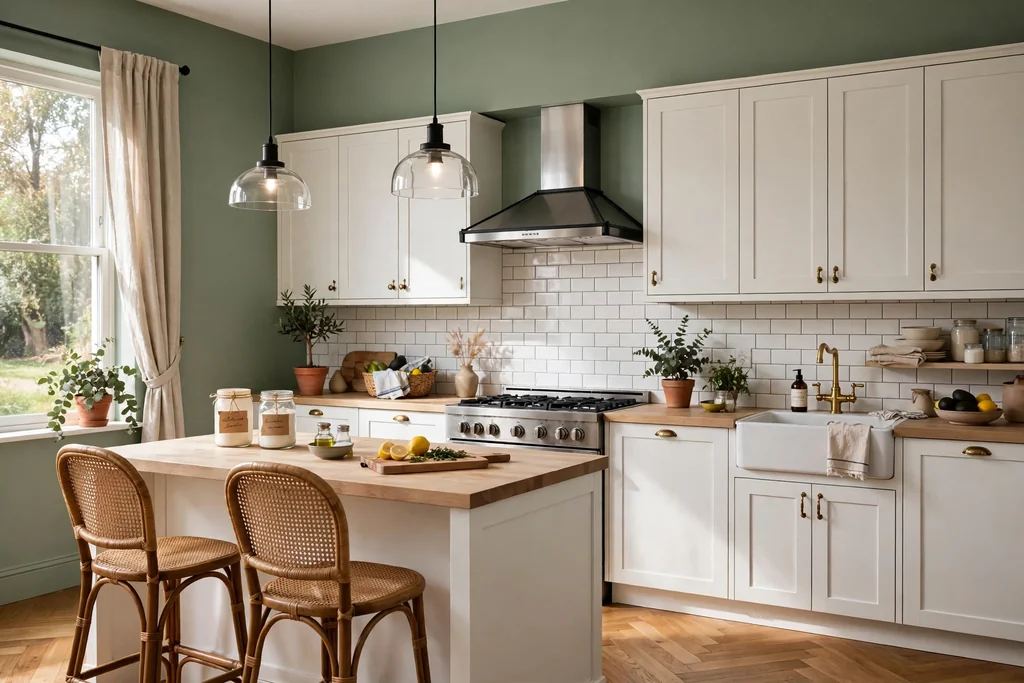
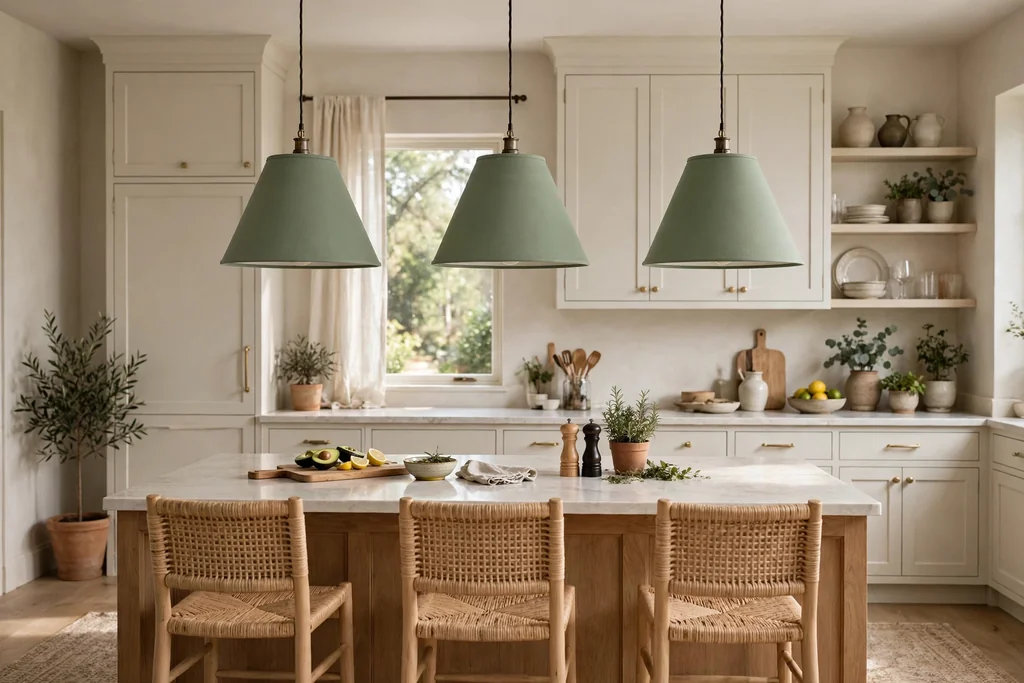
    Sage green cabinets give a kitchen color without noise. The tone sits between green and grey, so it pairs with warm wood, cream, brass, and black, and it stays calm in both bright daylight and warm evening light. These 12 ideas cover full cabinet runs, two-tone layouts, islands, pantry walls, and small kitchens, plus the seasonal swaps that keep the same cabinets feeling fresh in autumn and winter. Start with the cabinet layout that suits how you cook, then add one warm material and one metal finish. For seasonal styling that keeps counters clear for cooking, these fall kitchen decor ideas use the same restrained approach.

    Key Takeaways

    • Start with one sage tone across the main cabinets, and repeat it once or twice in small items so the room reads as planned.
    • Pair sage with warm white, cream, light oak, and one metal finish, brass or matte black, rather than mixing several metals.
    • Test paint samples in morning and evening light, since sage shifts a lot between cool daylight and warm lamplight.
    • Keep seasonal changes to textiles, towels, and one counter cluster, so the cabinets stay the calm base all year.
    • In a small kitchen, run sage cabinets to the ceiling and keep counters and backsplash light to protect the sense of space.
    • Match the idea to how you cook: open shelves suit everyday dishes, glass uppers suit display, and a pantry wall suits bulk storage.

    1. Classic Shaker Cabinets with Brass Pulls

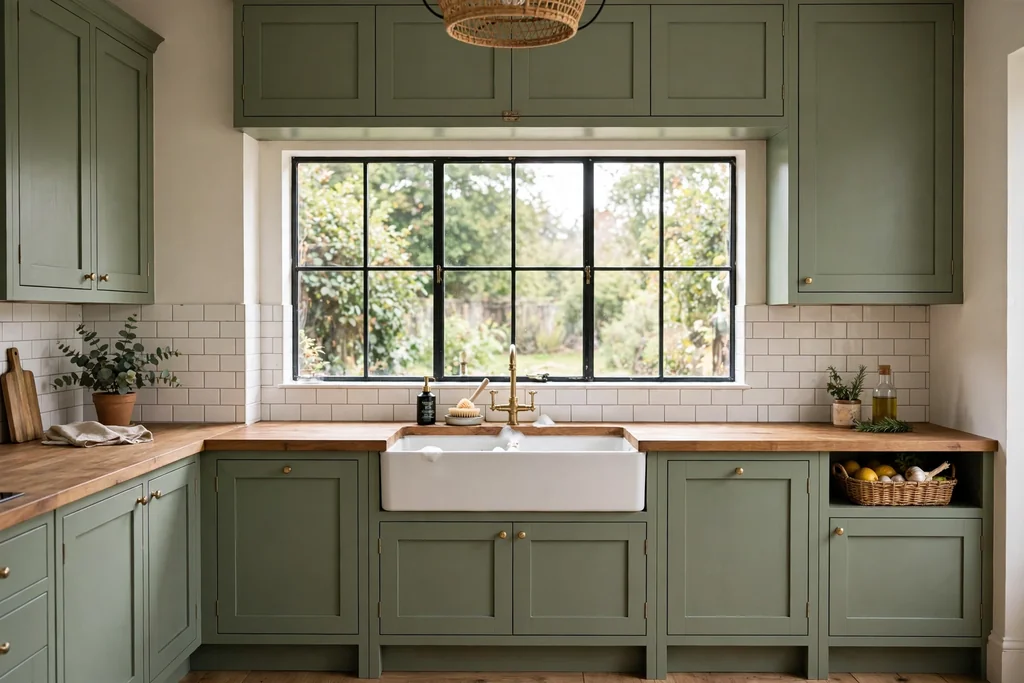
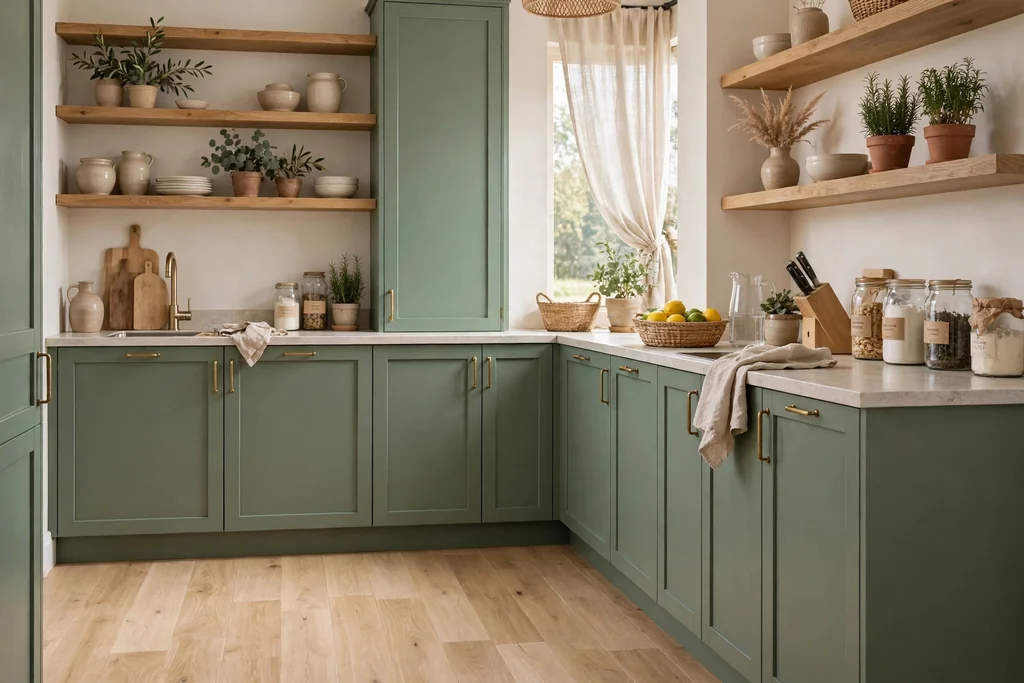
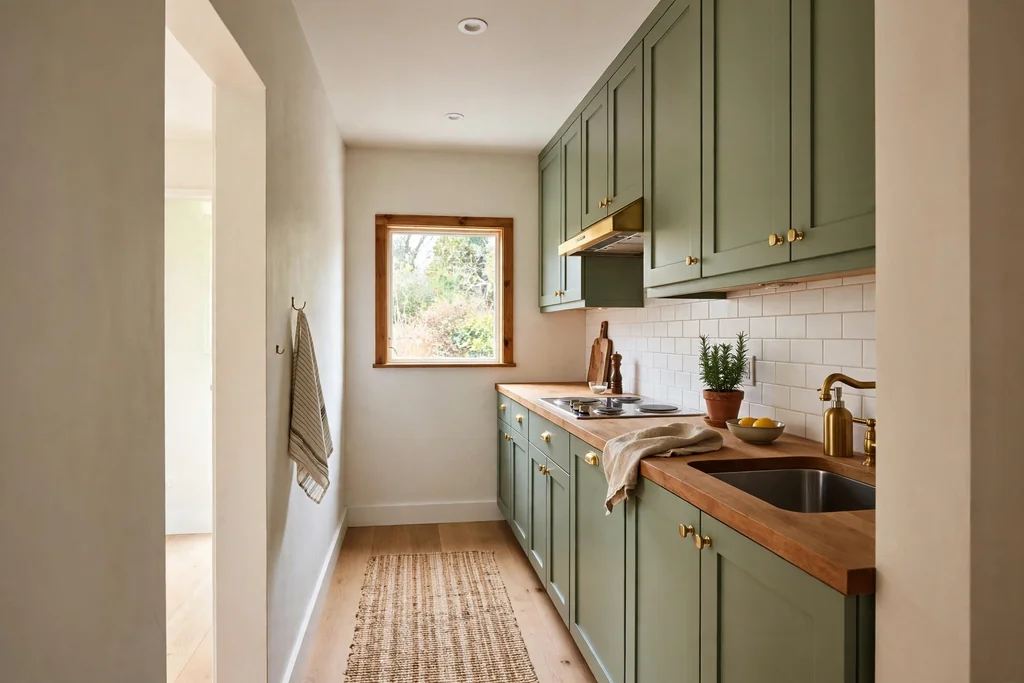
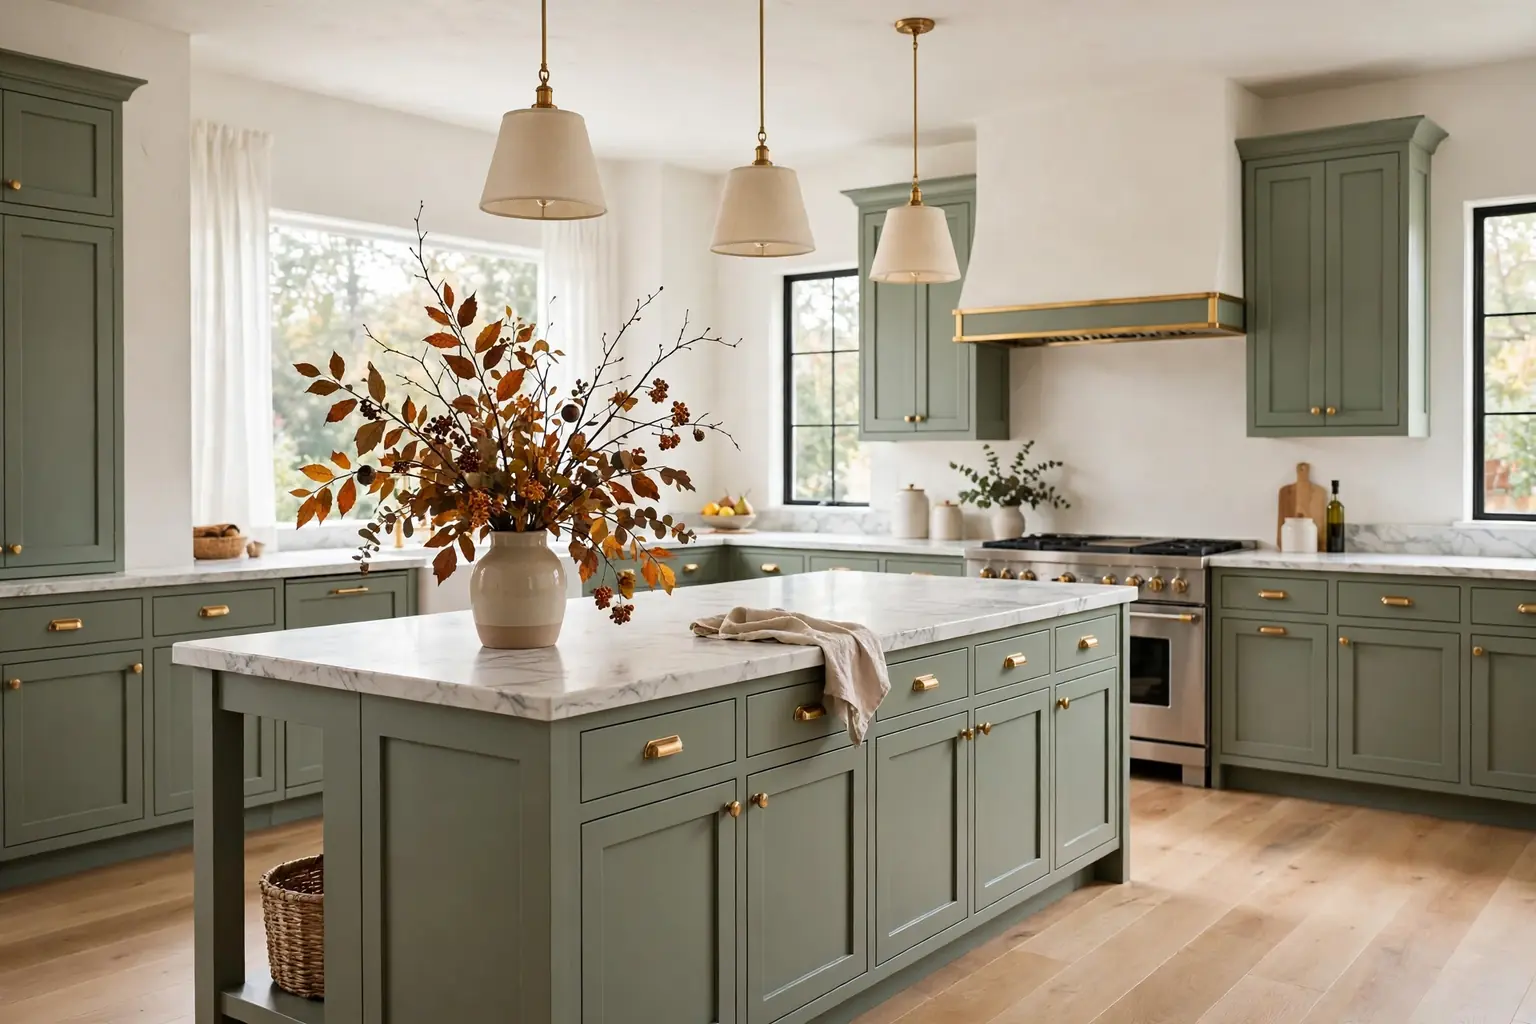
    Kitchen with sage green shaker cabinets, brass knobs and pulls, cream walls, and ceramic dishes on the counter.

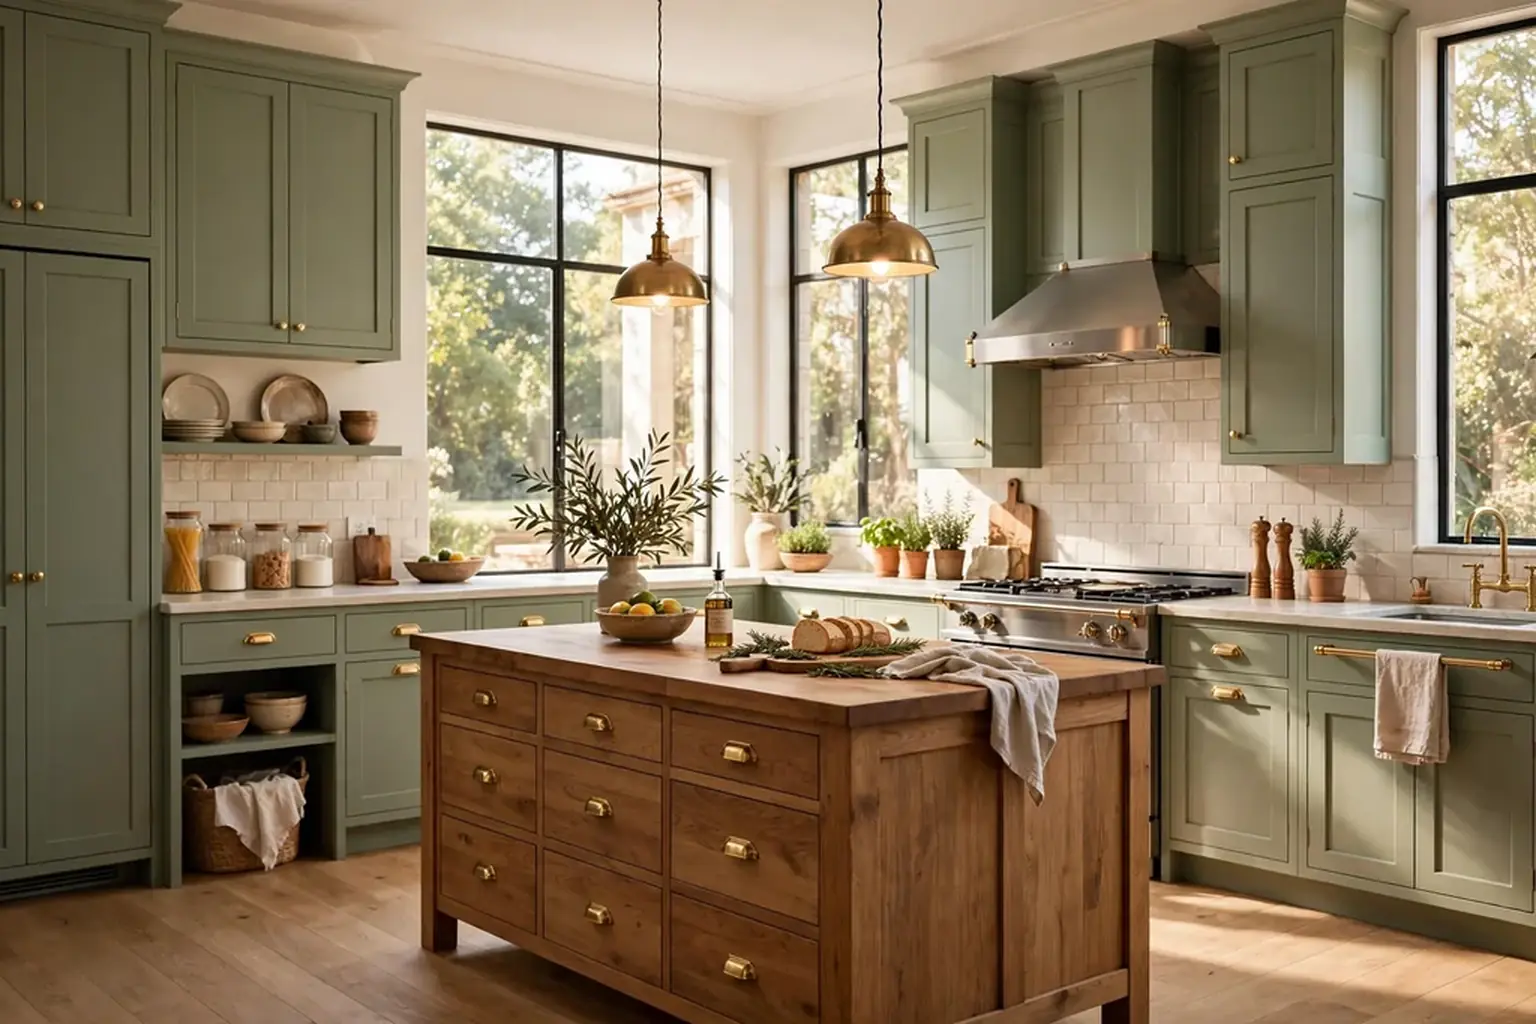
    Run sage green shaker cabinets along the main wall, with simple brass knobs and pulls, for a kitchen that feels settled from day one. Shaker doors give just enough detail to catch light, while the muted sage keeps the run from feeling heavy. Brass warms the green in a way chrome cannot, and it links to a faucet, a kettle, or a light fitting if you repeat the finish once more.

    Keep the walls warm white and the counter a pale stone or light wood, so the sage has room to breathe. Choose solid brass style pulls in one size for drawers and one for doors, and check the screw length against your door thickness before ordering. If brass feels too yellow beside your sage sample, pick a brushed or aged brass rather than a bright polished one.

    2. Two-Tone Layout with Sage Lowers and Warm White Uppers

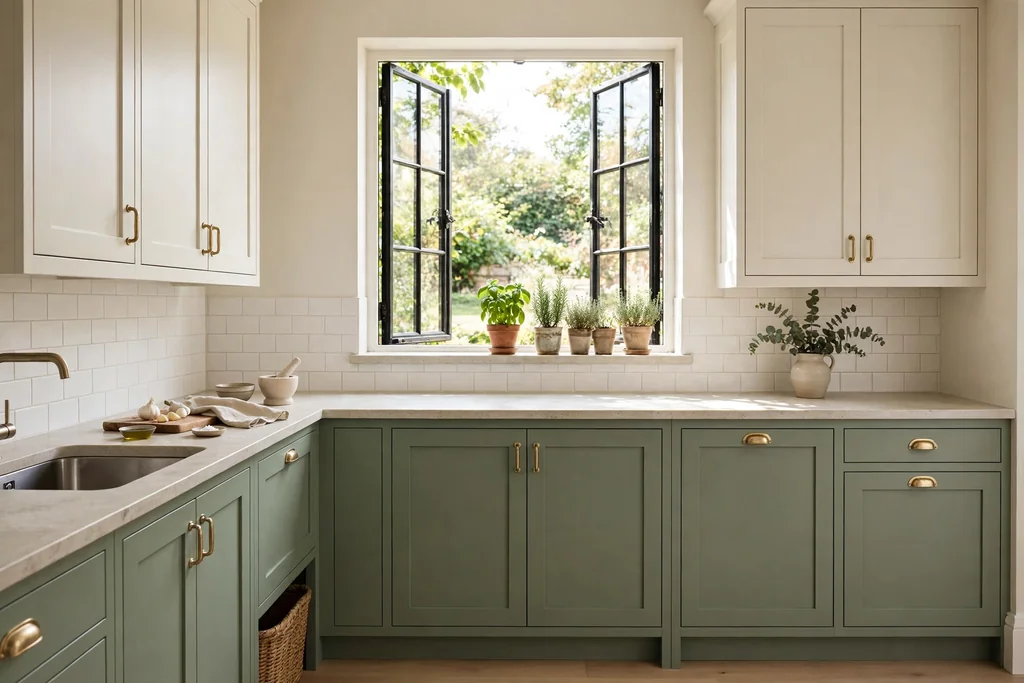
    Kitchen with sage green lower cabinets and warm white upper cabinets, a light stone counter, and herbs on the windowsill.

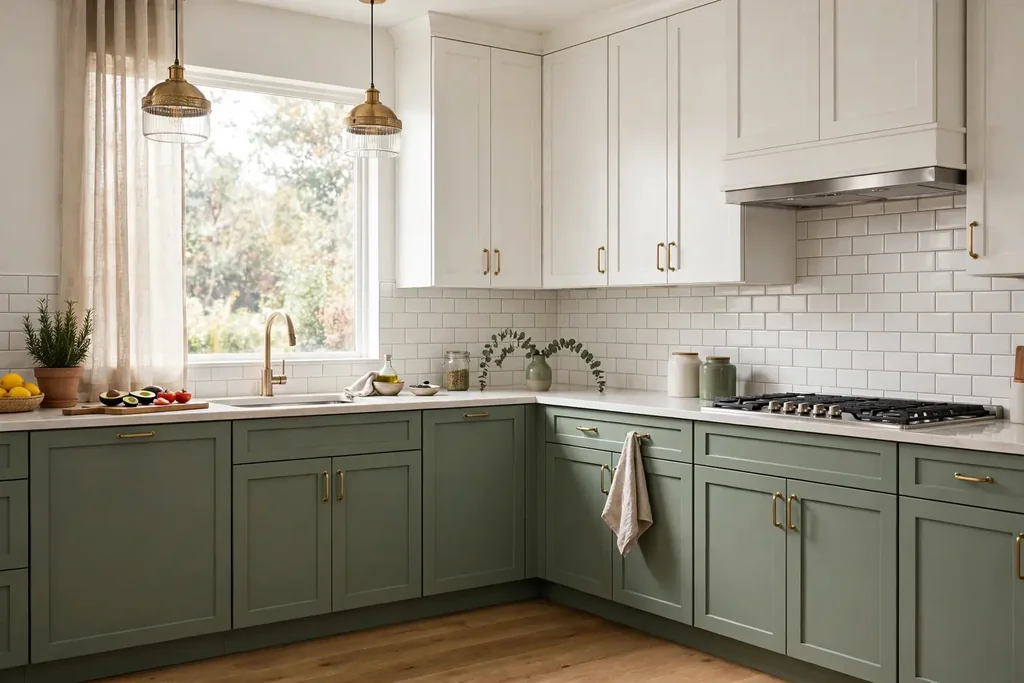
    Paint the lower cabinets sage and keep the uppers warm white to lighten a kitchen that feels top heavy. The darker tone grounds the room at counter height, where you see it most while cooking, while the pale uppers keep the wall feeling open. This split also suits a kitchen with low ceilings, since the eye reads the upper wall as part of the room, not as more cabinetry.

    Repeat the sage once above counter height, in a stool cushion, a towel, or a small plant pot, so the lower cabinets do not feel cut off. Keep the counter light and the backsplash simple, so the two tones stay the main story. If your uppers are already white, this is a lower cost change, since only the base cabinets and island need paint.

    3. Sage Island with a Butcher Block Top

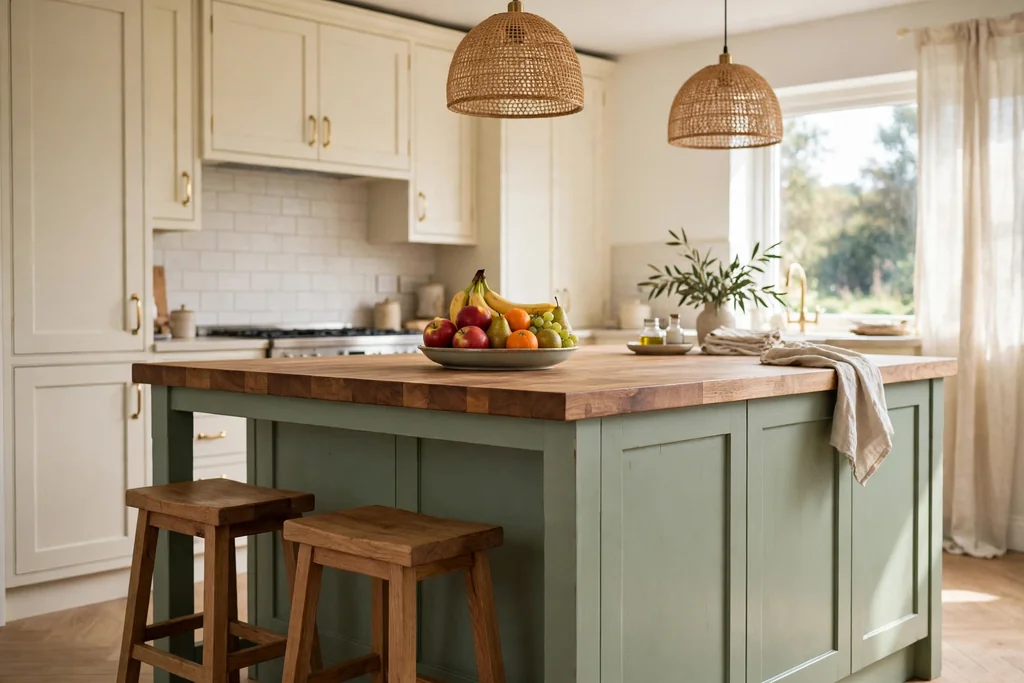
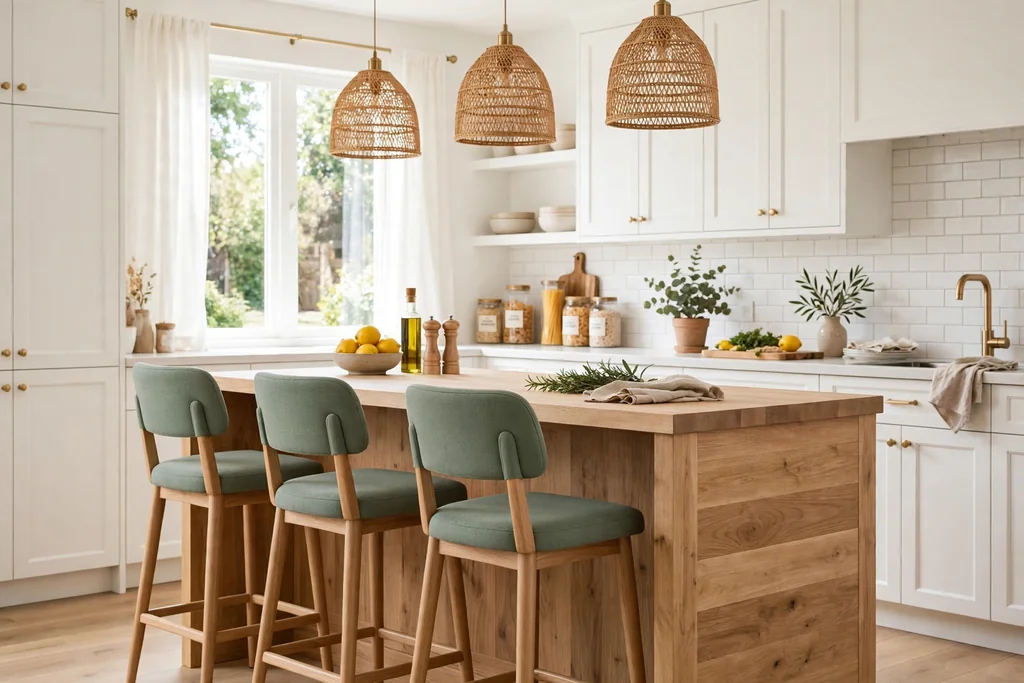
    Kitchen island painted sage green with a butcher block wood top, wooden stools, and a bowl of fruit.

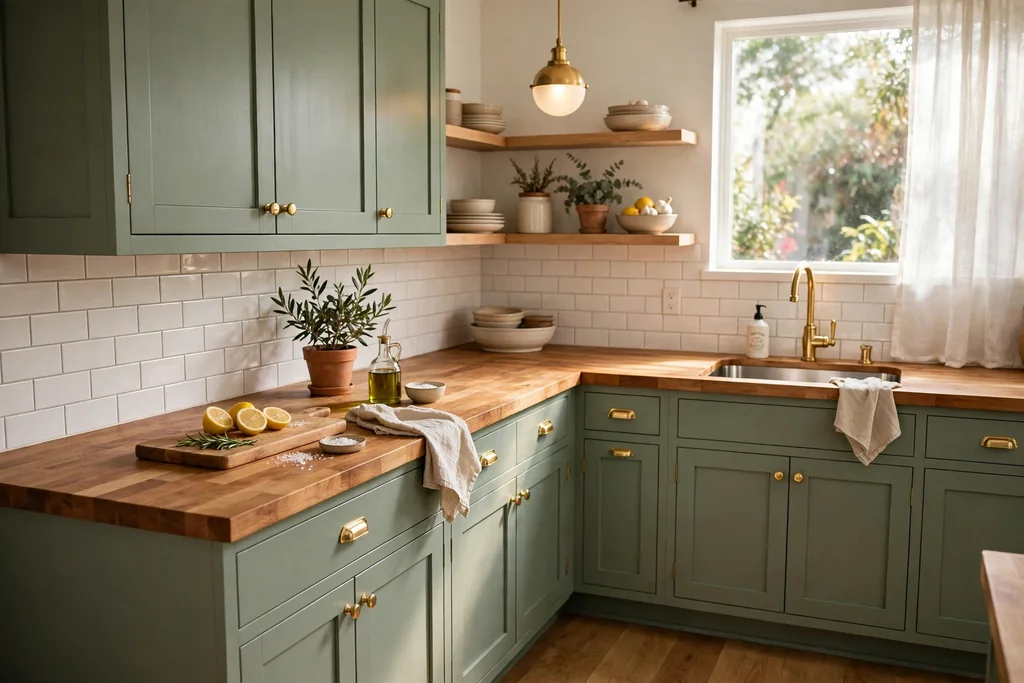
    Make the island the sage piece and keep the perimeter cabinets warm white or light wood, so the room gains a clear focal point without a full repaint. A thick butcher block top warms the green, gives a forgiving surface for chopping and serving, and suits stools in wood or woven seats. The island also becomes the natural spot for a fruit bowl, a board, and a vase, which keeps the main counters clearer.

    Size the island for the room: leave enough walkway on each side to open the dishwasher and pass with a hot pan. Seal the wood top as the maker advises, and oil it on a regular cycle if it is used for food prep. Keep the island sage in the same tone as any other sage item in the room, so it reads as part of the kitchen, not as a separate piece.

    4. Sage Cabinets with Marble-Look Counters and a Gold Faucet

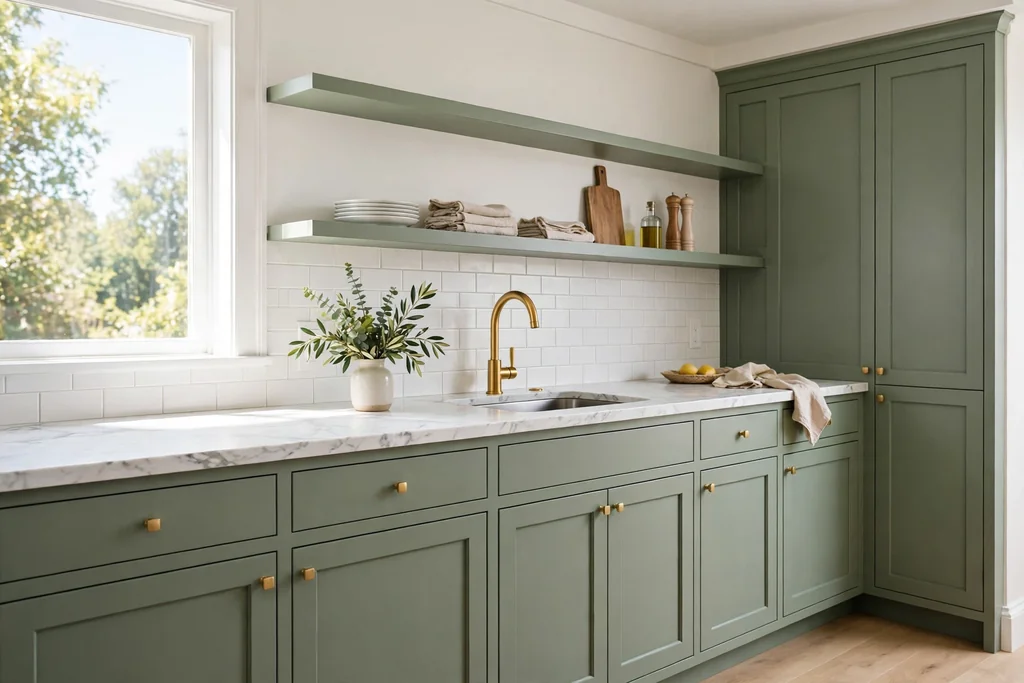
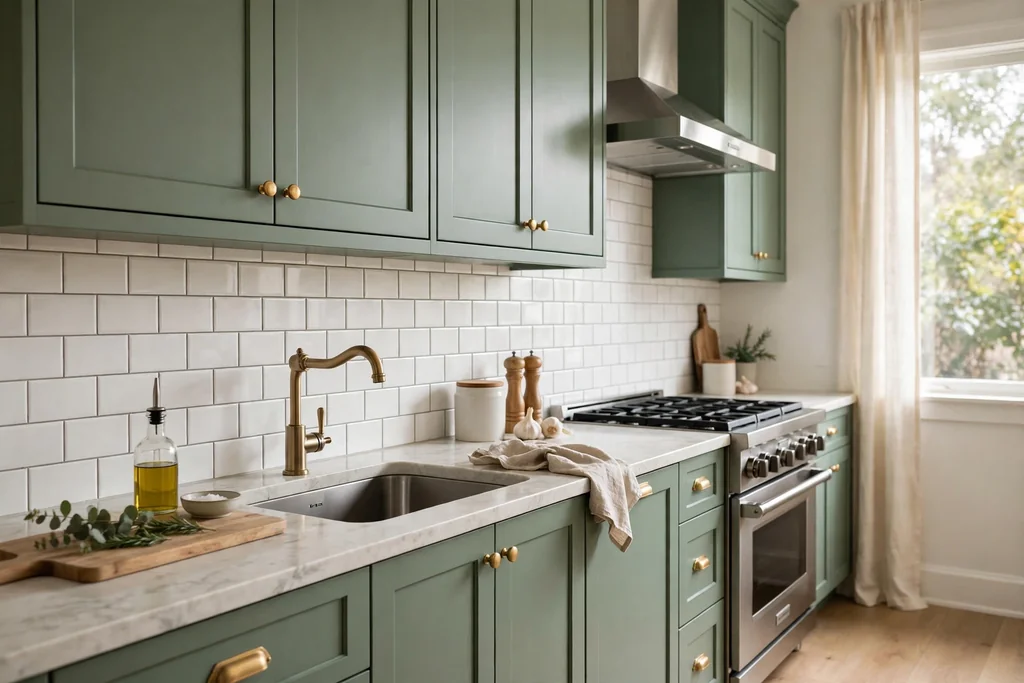
    Sage green kitchen cabinets with white marble-look counters, a gold faucet, and a small vase of greenery.

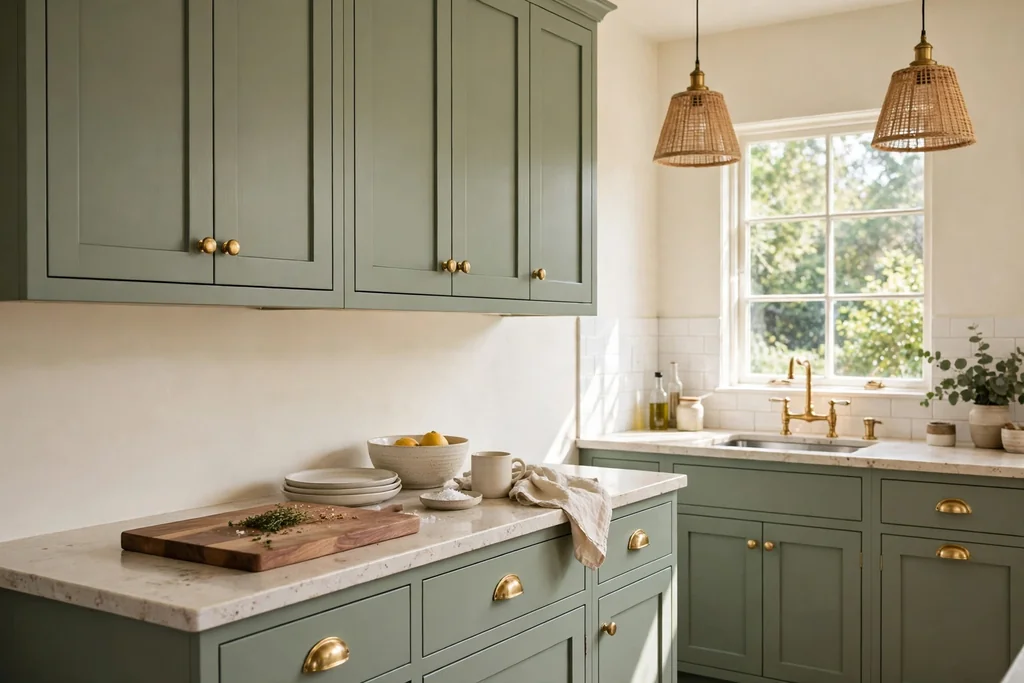
    Pair sage cabinets with white marble-look counters and a gold faucet for a calm, slightly dressy kitchen that still works hard. The pale counter lifts the green, the soft veining adds movement without a pattern, and the gold faucet picks up the warmth in wood and brass handles. This pairing suits kitchens with good daylight, where the pale surfaces can reflect light back into the room.

    Keep the backsplash plain, in cream or white tile, so the counter veining stays the main detail. Wipe stone-look surfaces after cooking, and choose a faucet finish that matches the cabinet hardware, since two gold tones side by side can clash. A small vase of greenery on the counter is enough decor here, since the materials already carry the room.

    5. Glass-Front Sage Uppers for Seasonal Display

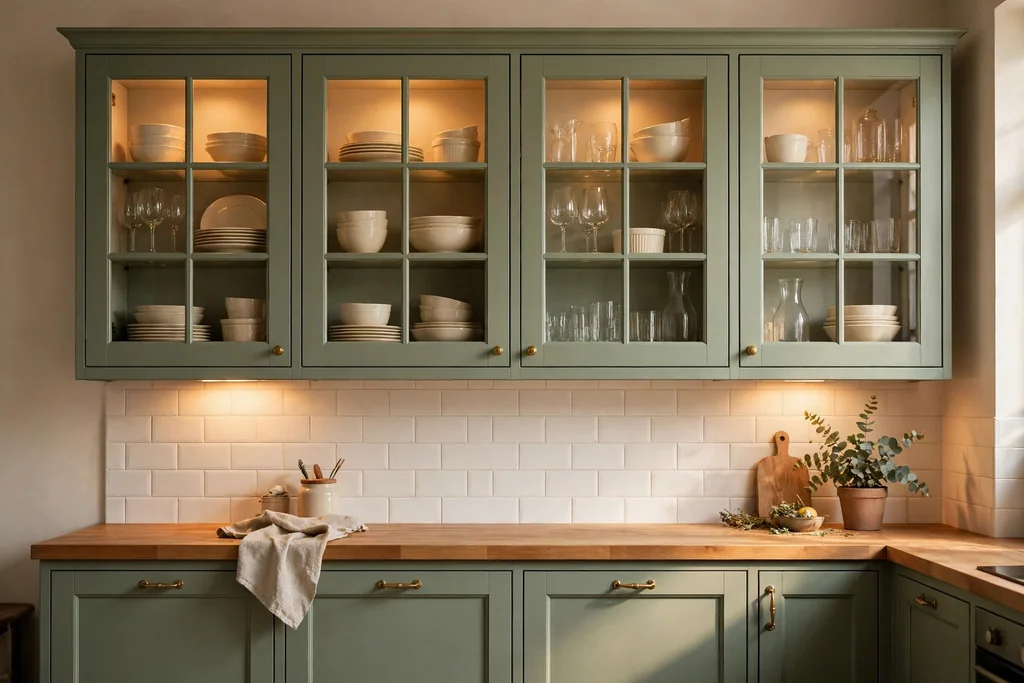
    Sage green glass-front upper kitchen cabinets showing cream dishes and glassware above sage lower cabinets.

    Fit glass-front doors on the sage upper cabinets to show cream dishes, glassware, and a few seasonal pieces, while keeping the lowers closed for everyday storage. Glass uppers suit a kitchen where you own dishes worth seeing, and they make a small room feel less boxed in, since the eye travels past the door front. Change only the top shelf display by season, with a pumpkin in autumn or a sprig of greenery in winter, and leave the rest as everyday ware.

    Keep the inside of the cabinets tidy, since glass shows everything, and group items by color and size rather than filling every shelf. Use the same sage inside the cabinet or a warm white, and check that the glass is easy to clean after cooking steam. If glass feels too exposed, use reeded glass, which softens the view while still letting light through.

    6. Sage Pantry Wall for Closed, Calm Storage

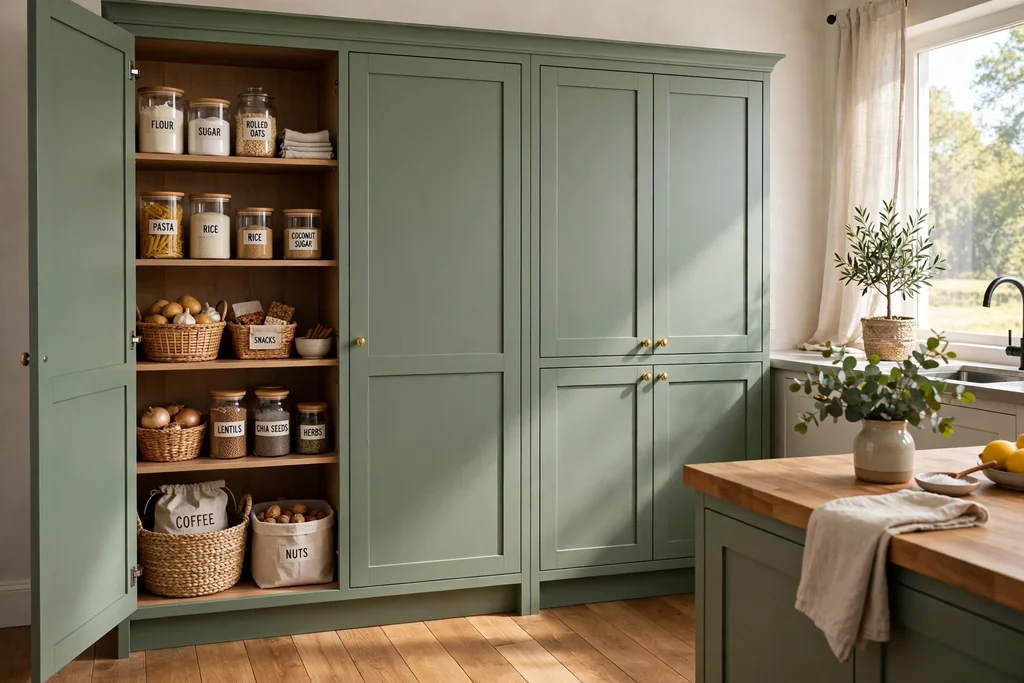
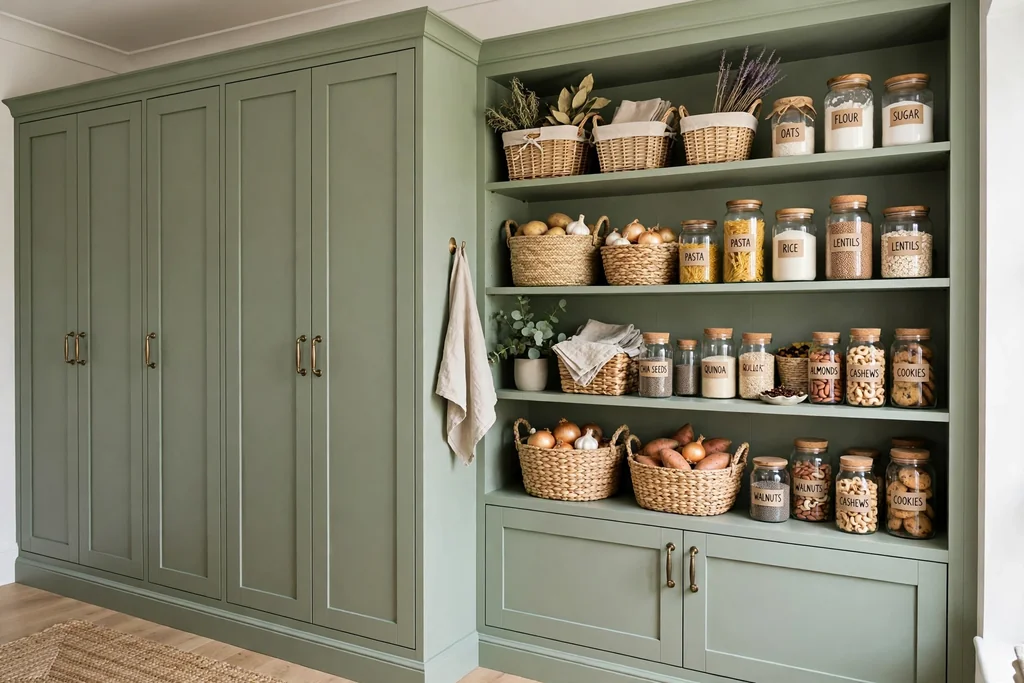
    Tall sage green pantry cabinets in a kitchen, one door open showing organized jars and baskets.

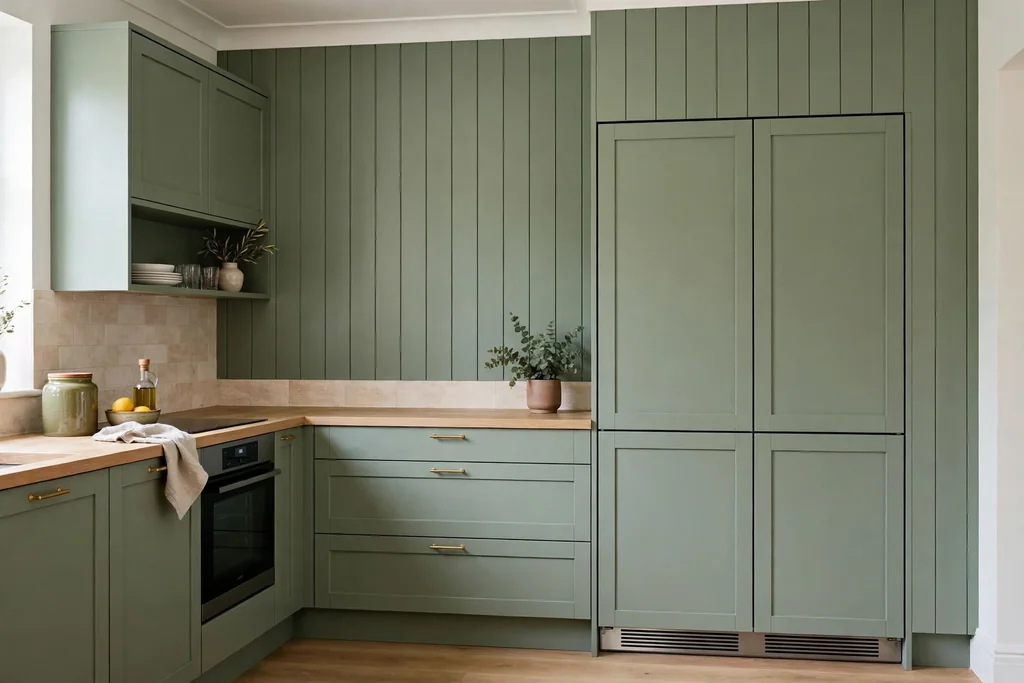
    Build a full height sage pantry wall on one side of the kitchen to hide food, appliances, and cleaning gear behind closed doors. A pantry wall suits a kitchen with no separate pantry, and it keeps the main run calm, since tall doors read as wall paneling rather than as storage. Inside, plan before you fit the doors: tall space for brooms at one end, drawers in the middle, and shelves sized for the jars and boxes you actually buy.

    Leave one section with a counter level shelf or a pull-out worktop if the wall allows it, so small appliances have a home that does not crowd the main counter. Keep door handles simple and matched, and check door swings against the fridge and the main walkway. Label the inside of one door with a short list of staples if that helps the household keep the pantry stocked.

    7. Sage Cabinets Beside Light Oak Open Shelves

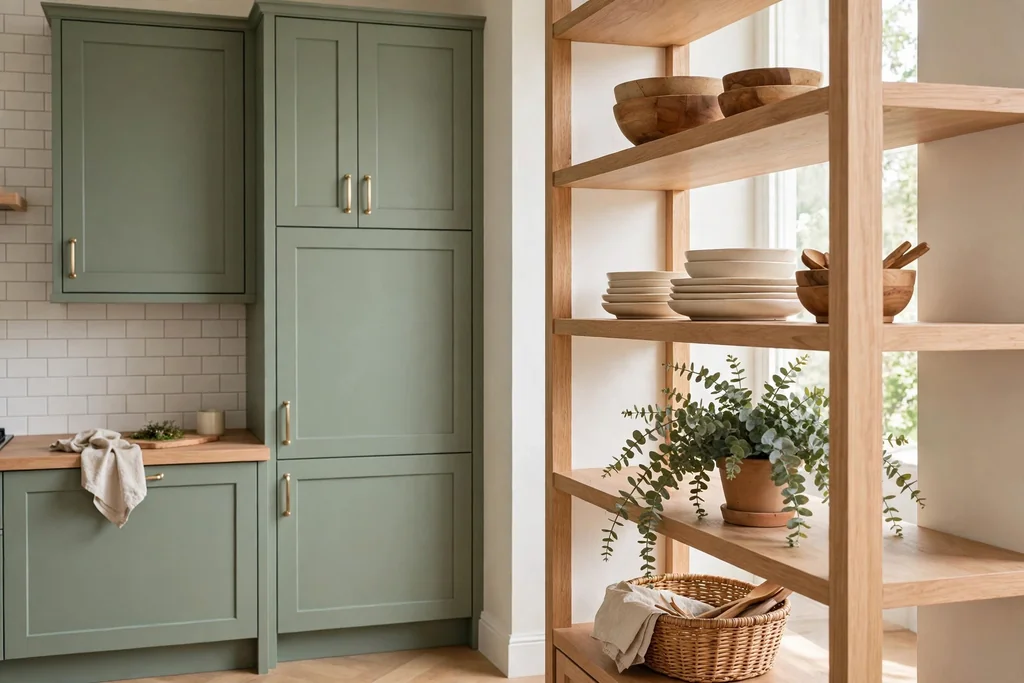
    Sage green kitchen cabinets beside light oak open shelves holding wooden bowls, cream plates, and a plant.

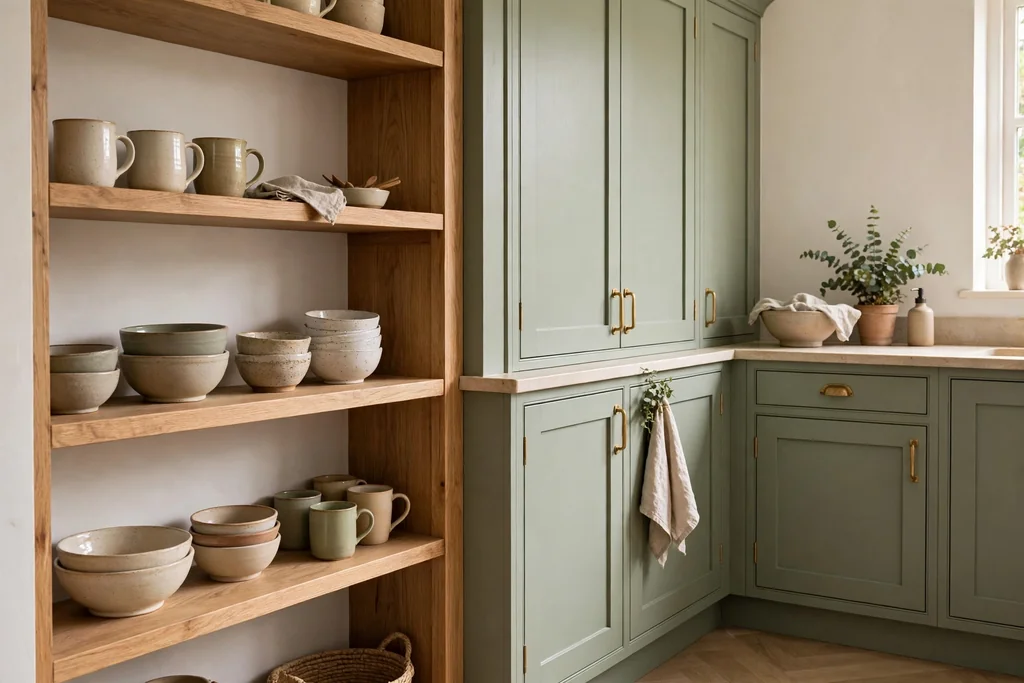
    Place light oak open shelves beside sage cabinets to warm the green and give everyday dishes a home within reach. Oak adds grain and warmth that painted doors cannot, and open shelves suit plates, bowls, and mugs you use daily, since you can grab them without opening a door. Keep the shelf run short, one or two shelves, so it reads as an accent rather than as a replacement for closed storage.

    Style each shelf with one material repeated, such as wood boards, cream dishes, and one plant, and leave gaps between groups so the shelf reads calm. Dust open shelves more often than closed cabinets, especially near the stove, and put the heaviest items at the ends or on the lower shelf. If open shelves feel too exposed for your whole kitchen, use them on one wall only and keep sage closed cabinets everywhere else.

    8. Sage Cabinets with a Patterned Cream and Green Backsplash

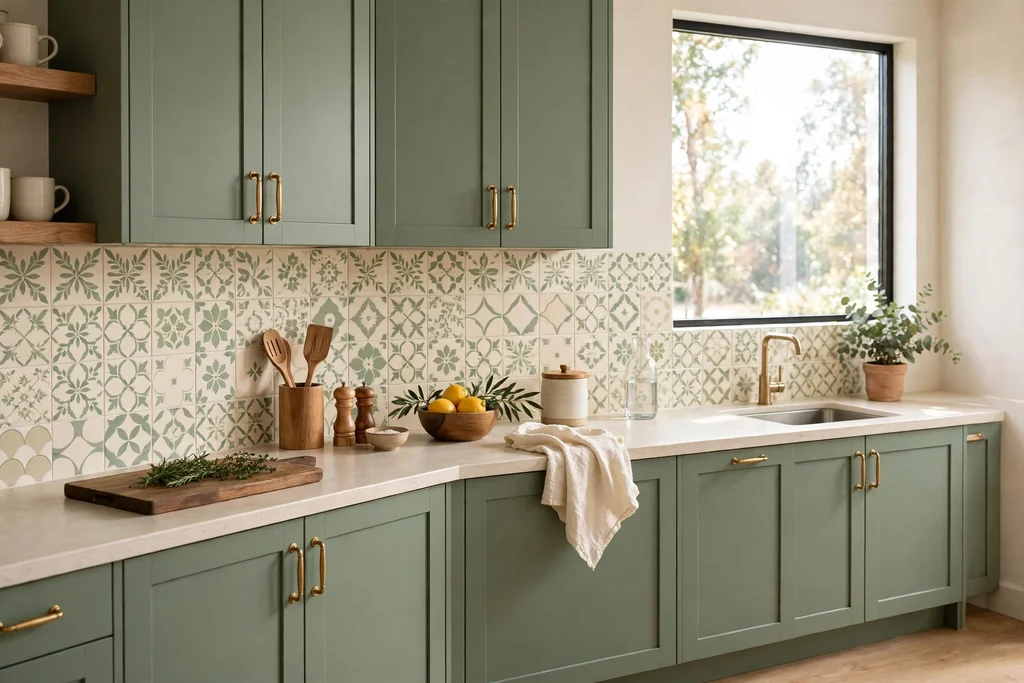
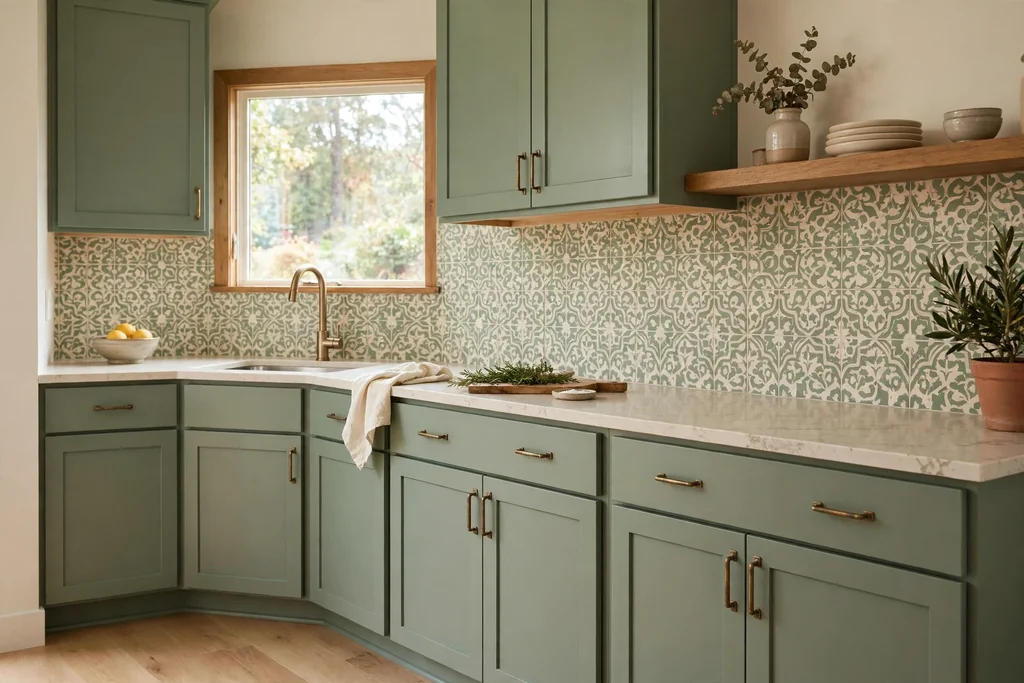
    Sage green kitchen cabinets with a cream and soft green patterned tile backsplash and wooden counter accessories.

    Set sage cabinets against a patterned tile backsplash in cream and soft green for a kitchen with pattern in one controlled place. The tile adds movement at eye level, where you stand to cook, while the cabinets stay quiet below it. Choose a pattern with plenty of cream in it, so the green in the tile echoes the cabinets without competing with them.

    Keep the counter plain and the upper cabinets simple, since the backsplash is doing the decorative work. Order extra tiles for cuts and future repairs, since batches and patterns can vary, and seal grout as the tile maker advises. If a full patterned wall feels like a lot, run the pattern only behind the stove as a panel, and use plain cream tile on the rest of the run.

    9. Full Room Palette with Sage, Cream Walls, and Warm Wood Floors

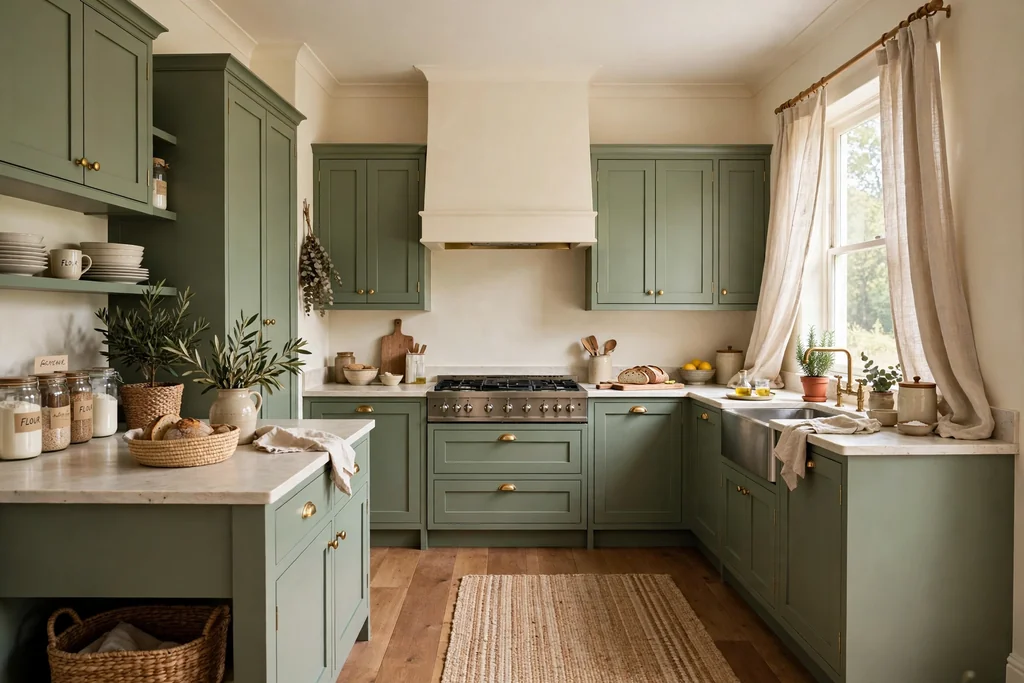
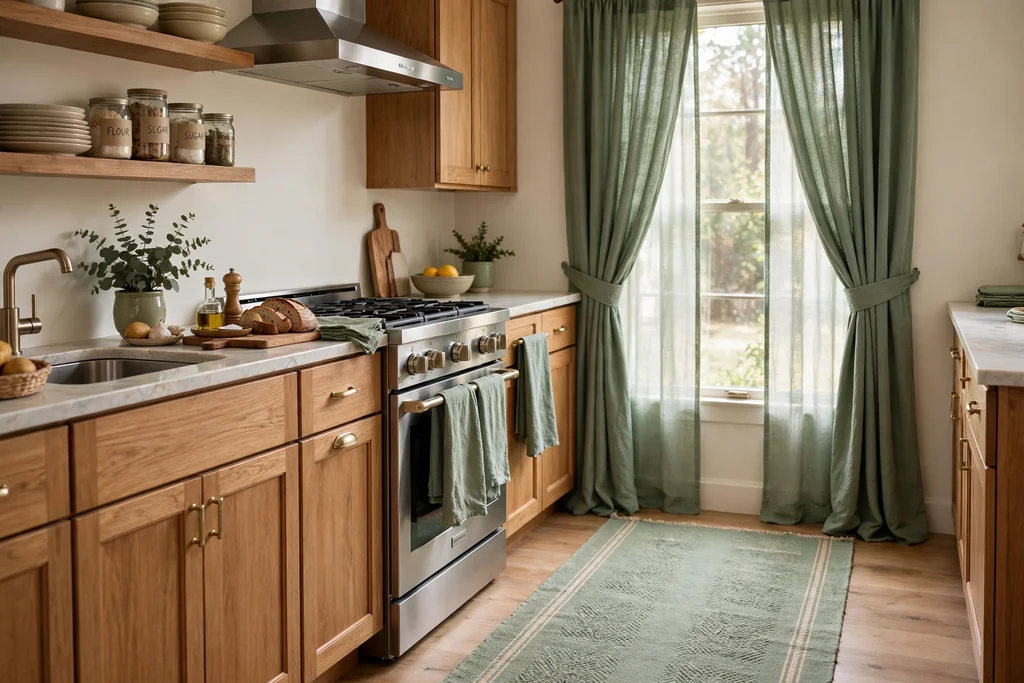
    Full kitchen with sage green cabinets, cream walls, a warm wood floor, a woven rug, and linen curtains at a window.

    Build the whole room around sage cabinets, cream walls, and warm wood floors, so the kitchen feels calm from every angle. This palette suits open plan rooms, since the same tones can carry into the dining area without a hard break. Cream walls keep the room bright, wood floors add warmth underfoot, and the sage cabinets supply the color, so no single surface has to work too hard.

    Repeat each tone at least twice: sage in the cabinets and a towel or stool cushion, cream in the walls and dishes, wood in the floor and a board or shelves. The same calm sage approach works beyond the kitchen, and these sage green bedroom ideas show how the color behaves with cream and wood in a restful room. Keep window treatments light, in linen or cotton, so daylight still fills the room.

    10. Seasonal Swaps on the Same Sage Cabinets

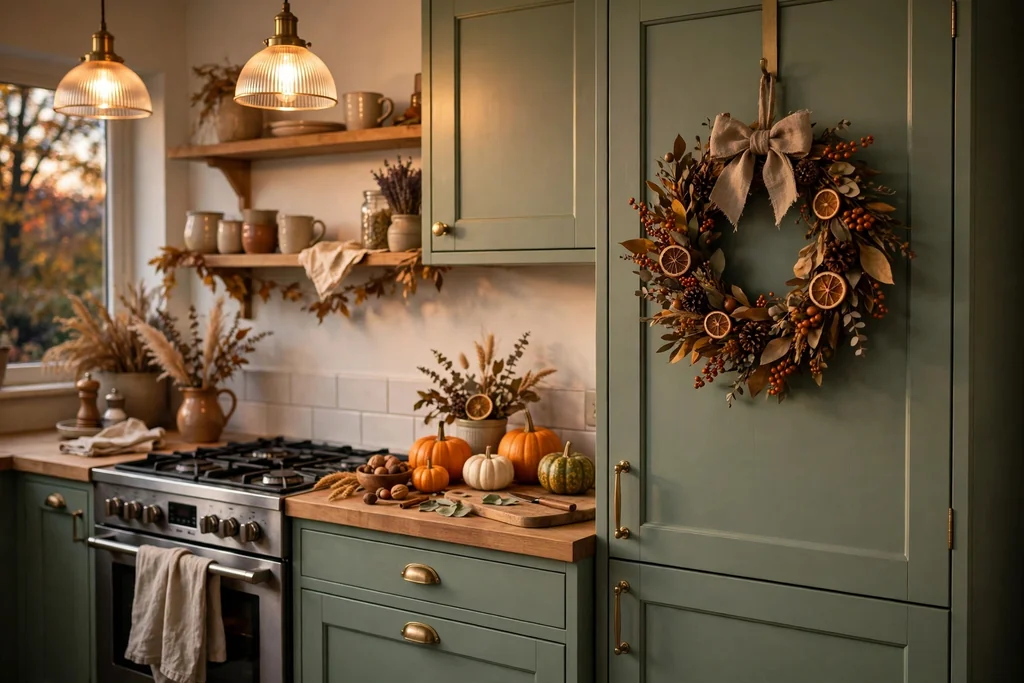
    Sage green kitchen styled for autumn, with small pumpkins on the counter, a linen towel on the oven handle, and a wreath on a cabinet door.

    Keep the cabinets as they are and change the season with towels, a wreath on a cabinet end panel, and one counter cluster, so the kitchen feels current without any paint. In autumn, add a linen towel in rust or cream, a small pumpkin or two on a tray, and a wreath on a door that does not block a handle. In winter, swap to a plain green wreath, a cream runner on the table, and warm light in the evening.

    Keep every seasonal item off the main prep runs, and choose one spot per surface at most, so cooking stays easy. Store the seasonal set together in one box, washed and folded, so the next swap is a short job. Keep dried stems and wreaths well away from the stove and any open flame, and use flameless candles near counters.

    11. Sage Cabinets Run to the Ceiling in a Small Kitchen

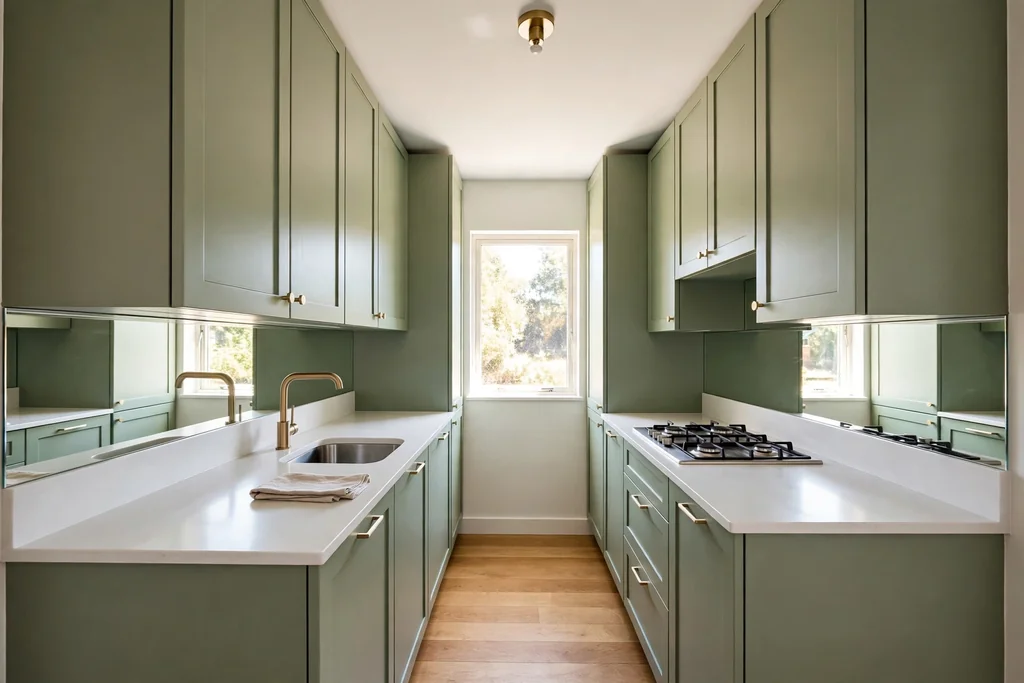
    Small galley kitchen with sage green cabinets up to the ceiling, white counters, and a bright, uncluttered layout.

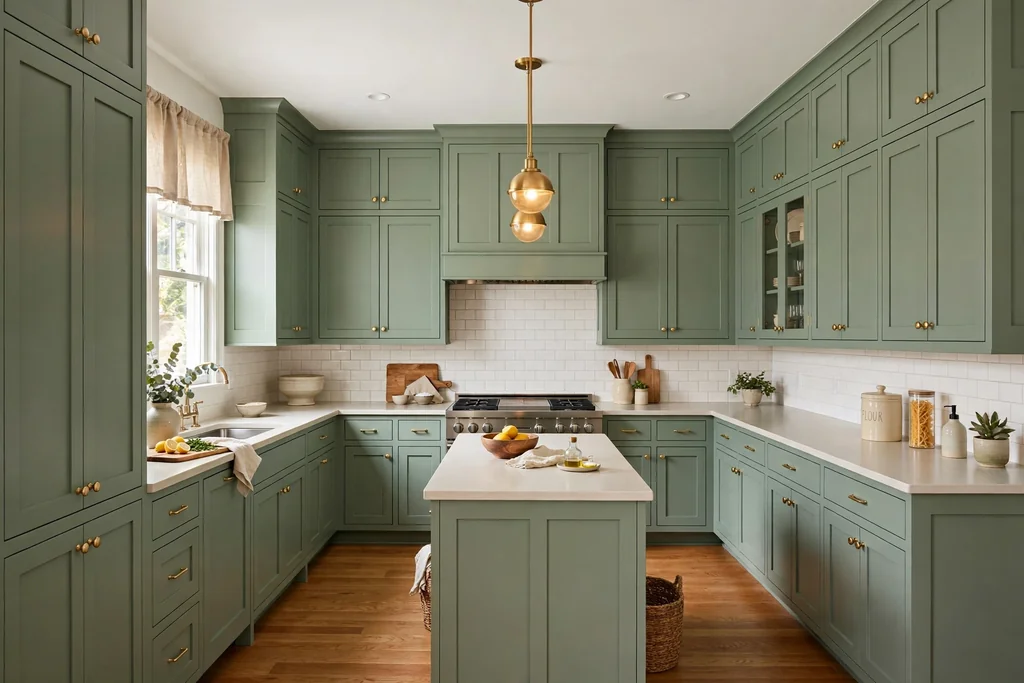
    In a small kitchen, run sage cabinets up to the ceiling and keep the counter, backsplash, and floor light, so storage grows without the room feeling closed in. Tall cabinets use the wall space that often goes unused, and they give rarely used items a proper home above daily reach. A pale sage, close to grey green, works better here than a deep green, since a strong color over a full wall can feel heavy in a tight room.

    Keep the top cabinets for light, rarely used items, and add a sturdy step stool stored nearby. Leave the glass mostly clear at the window, and use the sill for one plant or a small tray, since daylight is the best tool for making a small kitchen feel larger. For window treatments that protect light in a small room, these kitchen window decor ideas cover cafe curtains, film, and sill styling.

    12. Sage Cabinets with Matte Black Hardware and Warm Evening Light

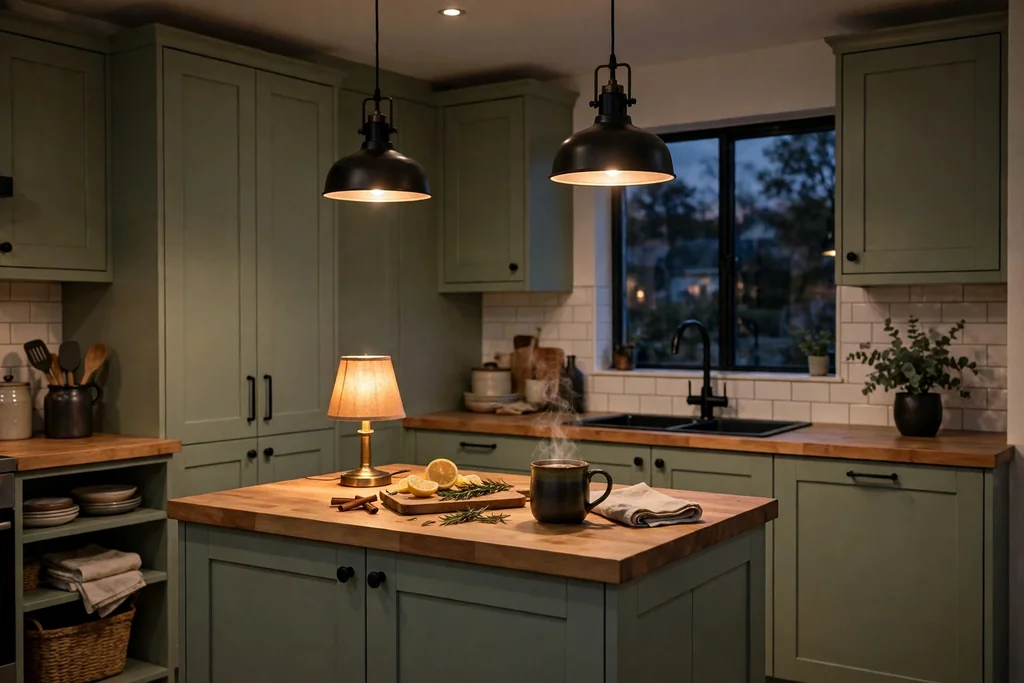
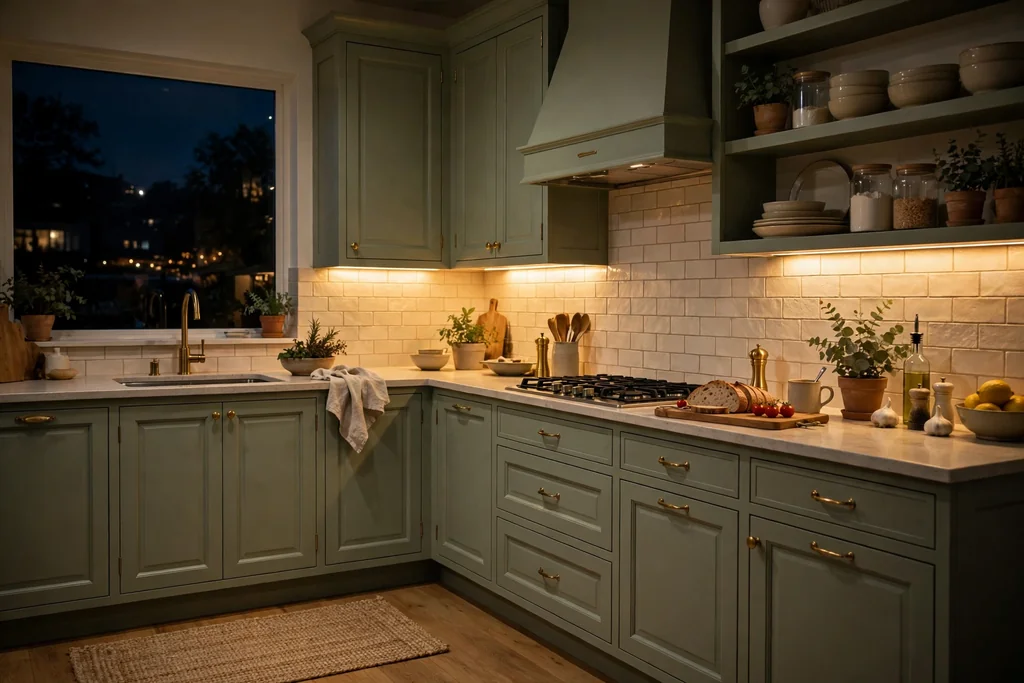
    Sage green kitchen in the evening with matte black hardware, black pendant lights, warm lamps, and a mug on the counter.

    Finish sage cabinets with matte black pulls, black pendant lights, and warm white bulbs for a kitchen that feels cozy after dark. Black gives the soft green a clear edge, and it suits kitchens with black appliances, a black faucet, or dark window frames, since the finish then repeats across the room. In the evening, warm light softens the contrast, so the black reads as a quiet frame rather than as a harsh line.

    Repeat the black once or twice only, in hardware and one light fitting, and keep the rest of the room warm, with wood, cream, and linen. Choose warm white bulbs that suit your fittings, and add a small counter lamp or under cabinet light if the main light leaves corners dark. In winter, this is the easiest seasonal change of all: no new decor, just warmer light and a mug on the counter.

    Conclusion

    A serene sage kitchen starts with the cabinets and stays calm because the rest of the room repeats the same few tones. Choose the layout that fits how you cook, whether that is a full shaker run, a two-tone split, a sage island, or a pantry wall, then add one warm material and one metal finish. Keep seasonal changes small, in towels, one tray, and one wreath, so the cabinets stay the steady base through autumn and winter. Test your sage sample in your own light, keep counters clear for cooking, and let the green do its quiet work.

    Save this list on Pinterest for your next kitchen refresh, and start with one idea: the cabinet layout first, then the hardware, then the seasonal swap.

    FAQs

    What colors pair best with sage green kitchen cabinets?

    Warm white, cream, light oak, and pale stone pair best, since they keep the room bright and let the sage stay the main color. Brass or gold adds warmth, while matte black adds a clear edge; pick one metal finish and repeat it, rather than mixing several. Avoid a second strong wall color, since sage needs quiet neighbors to read as calm.

    Should I paint all my kitchen cabinets sage, or only some?

    It depends on the room size and light. A full sage run suits a bright kitchen with pale counters and walls, while a two-tone layout, sage lowers and warm white uppers, suits a smaller or darker kitchen. A sage island alone is a good first step if you want to test the color before committing to a full repaint.

    Does sage green work in a small kitchen?

    Yes, if you keep the tone pale and the surrounding surfaces light. Run cabinets to the ceiling for storage, keep the counter and backsplash in cream or white, and leave the window mostly clear for daylight. Avoid a deep sage over a full wall in a tight room, since a strong green can feel heavy when it covers every surface.

    How do I update sage cabinets for autumn without repainting?

    Change textiles and one counter cluster only: a linen towel in rust or cream, a small pumpkin or two on a tray, and a wreath on a cabinet end panel. Keep seasonal items off the prep runs beside the stove and sink, and store the set together so the next swap is quick. Warm white bulbs in the evening finish the seasonal feel with no new decor.

    What hardware finish suits sage green cabinets?

    Brass suits a warm, traditional kitchen, since it warms the green and links to wood and cream. Matte black suits a kitchen with black appliances or dark window frames, since it gives the soft green a clear edge. Choose one finish for pulls, knobs, and the faucet if possible, and pick brushed or aged brass if bright brass feels too yellow beside your sage sample.

    How do I keep sage cabinets looking clean?

    Wipe painted doors with a soft, damp cloth and a mild cleaner, and dry them after, since sage shows grease film and marks sooner than white. Keep the area near the stove wiped often, and touch up chips promptly with the same paint, stored and labeled. Avoid harsh scrub pads, which can dull a matte or eggshell finish over time.


  • 27 Ways to Design a Serene Lavender Bedroom

    27 Ways to Design a Serene Lavender Bedroom

    Lavender brings a soft, restful color to a bedroom without the weight of a deep purple. Used in pale tones, it pairs well with white, grey, cream, and light wood, and it works on walls, bedding, curtains, and small accents alike. These 27 ways to design a serene lavender bedroom cover paint, furniture, textiles, light, storage, and scent, so you can start with one layer or plan a fuller room. Begin with the change you notice first when you walk in, then add one more layer at a time. For a muted green scheme that pairs well with lavender, see these sage green bedroom ideas.

    Key Takeaways

    • Pick one main lavender tone and repeat it in two or three places, so the room reads as planned rather than scattered.
    • Keep the base pale: white, cream, soft grey, and light wood let lavender stay restful instead of loud.
    • Test paint and fabric samples in morning and evening light, since lavender shifts between cool and warm tones through the day.
    • Mix textures, such as linen, cotton, velvet, wool, and wood, so a soft palette still has depth.
    • Change bedding, curtains, and cushions first for a quick refresh with no paint, and save walls and furniture for a weekend project.
    • Keep nightstands, dresser tops, and floors mostly clear, so the color can do its quiet work without visual clutter.

    1. Soft Lavender Walls with White Trim

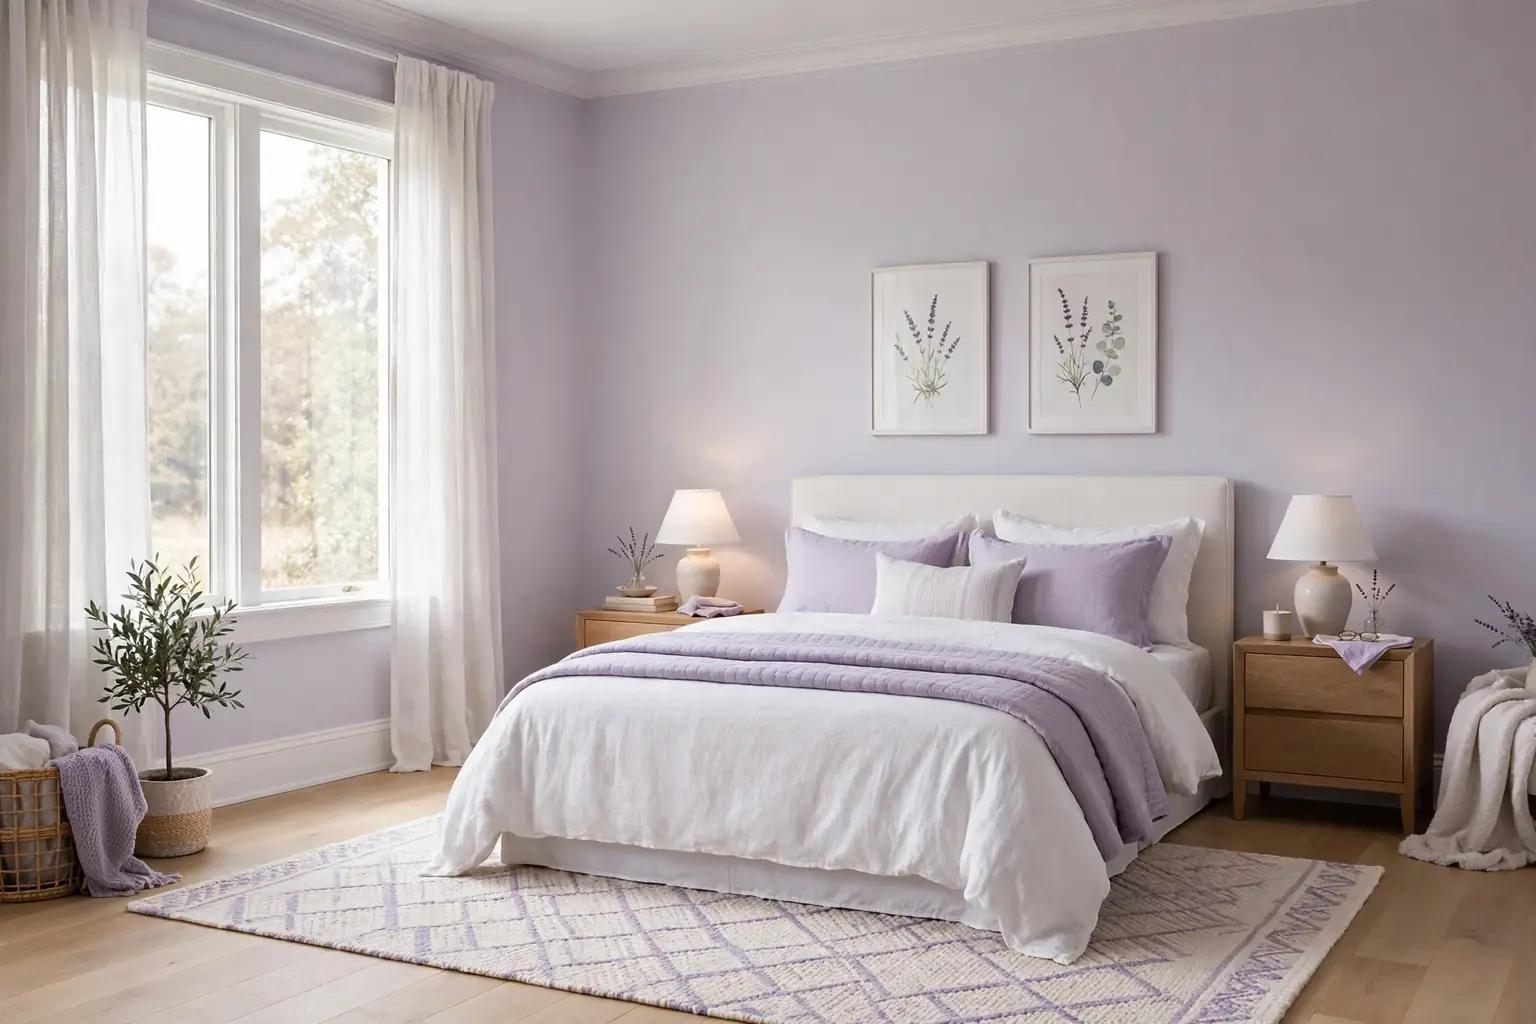
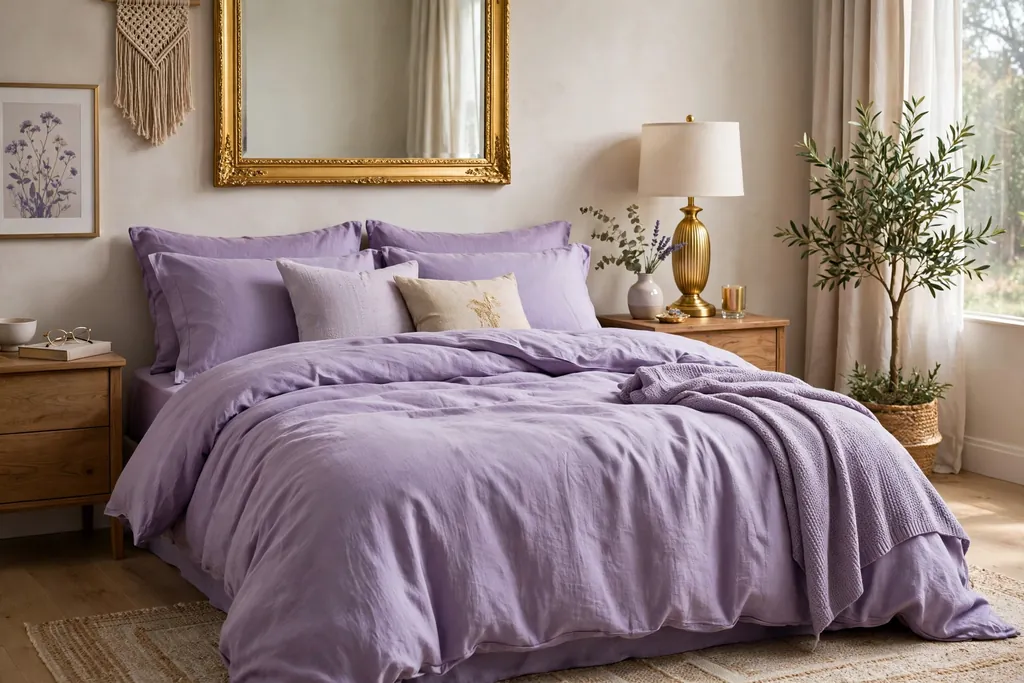
    Bedroom with soft lavender walls and white trim.

    Soft lavender walls with white trim give a bedroom a gentle wash of color from every angle. A pale lavender, close to grey, keeps the room bright in daylight and calm in lamplight, while white trim marks the edges cleanly. This suits a main bedroom with good daylight, where you want color on the walls but still want the room to feel open and restful.

    Test a large swatch on the wall behind the bed and on a wall facing the window, since the same paint can look quite different in each spot. Keep the ceiling white and the bedding mostly cream or white, so the lavender has room to breathe. Choose a matte or eggshell finish, so the walls do not shine under lamplight.

    2. Lavender and White Layered Bedding

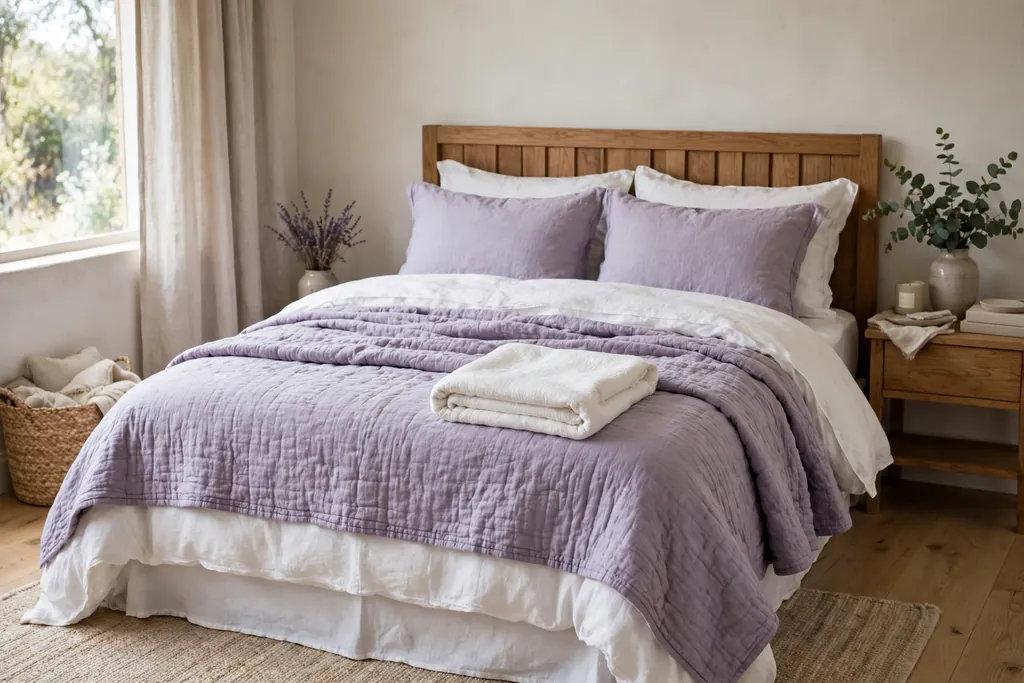
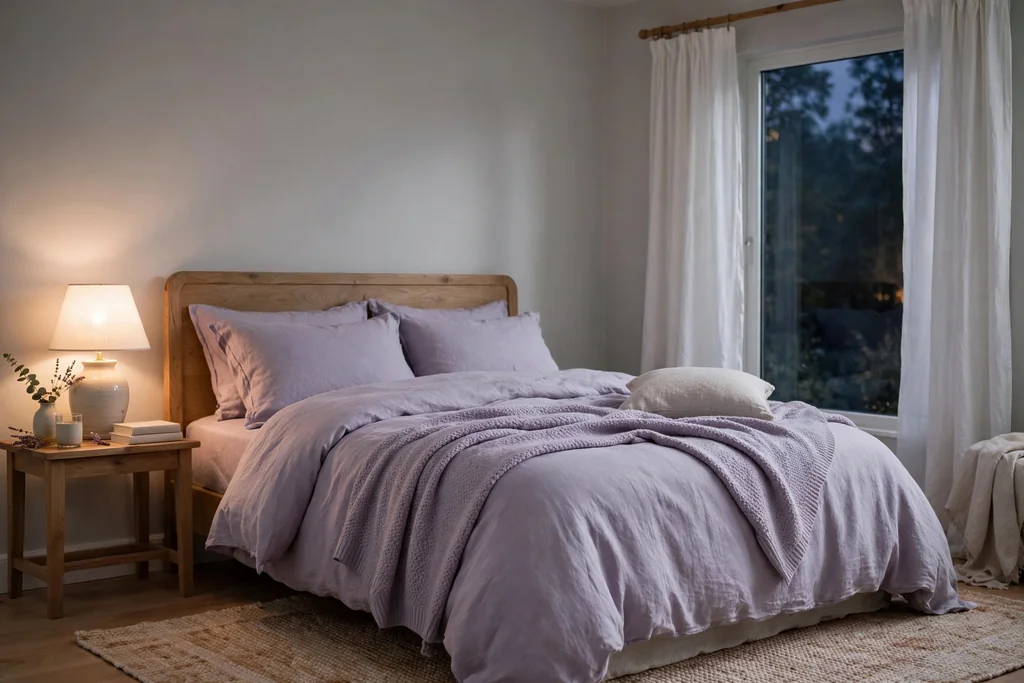
    Bed with layered lavender and white bedding.

    Lavender and white layered bedding is the fastest lavender change, because the bed takes up the most visual space in the room. Start with white or cream sheets, add a lavender duvet or quilt, and fold a white throw across the foot. The two tones give the bed depth without a pattern, and the layers let you adjust warmth through the night.

    Keep the palest shade closest to your face and the lavender toward the foot, which gives the bed a natural sense of order. Add cushions in linen and cotton, not all in the same fabric, so the bed feels soft to the touch as well as to the eye. Wash the throw and cushion covers on a regular cycle, since pale lavender shows marks sooner than darker colors.

    3. A Lavender Upholstered Headboard

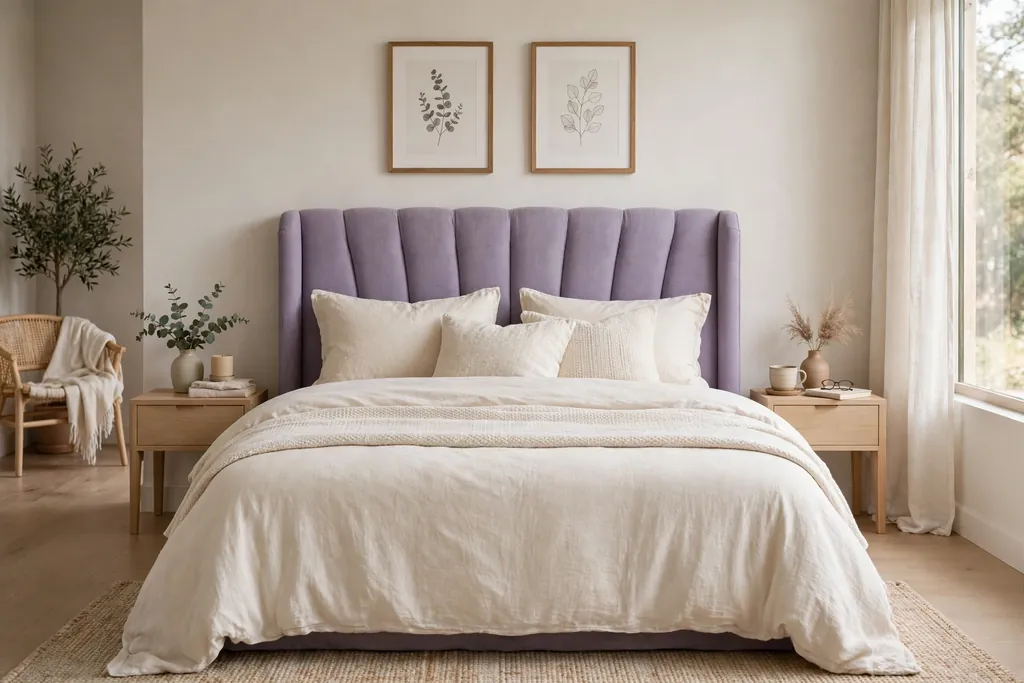
    Bed with a lavender upholstered headboard.

    A lavender upholstered headboard gives the bed a soft focal point that makes the room feel dressed even when the walls stay plain. The padded shape adds comfort for reading in bed, and the fabric catches light in a way flat paint does not. Pair it with cream bedding and one or two cushions in a deeper lavender, and keep the wall behind it plain so the texture stands out.

    This suits a bedroom where the bed sits against a long blank wall. Measure the headboard width against the bed and the wall, since a headboard that is too narrow looks lost and one that is too wide crowds the nightstands. Vacuum the fabric gently with an upholstery tool, since soft fabric can trap dust over time.

    4. Pale Lavender Curtains with Sheer Panels

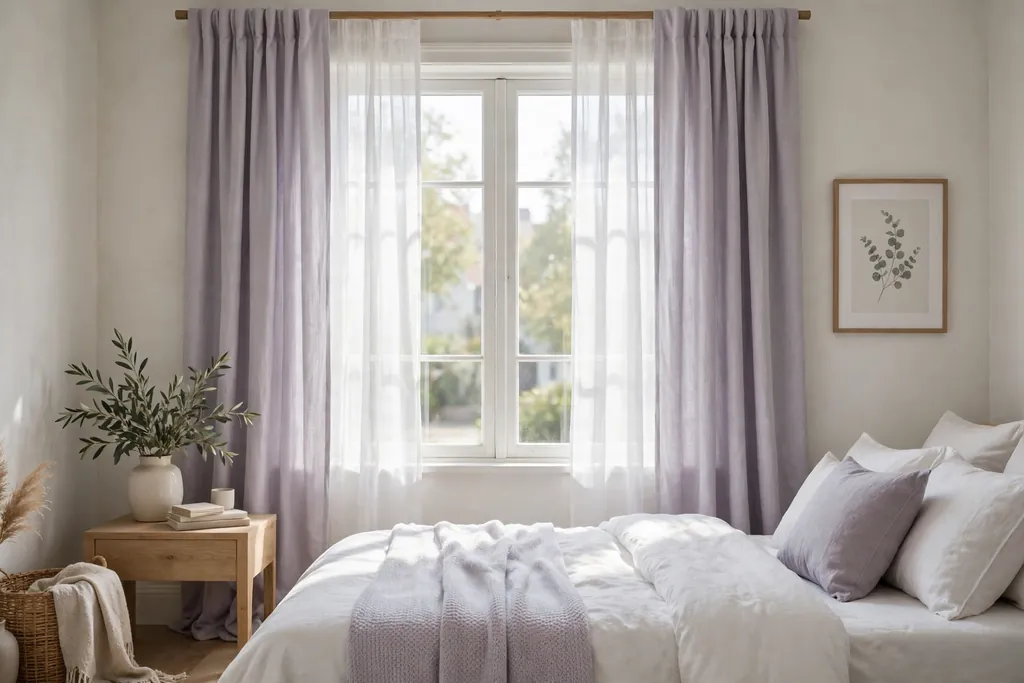
    Bedroom window with pale lavender curtains and sheer panels.

    Pale lavender curtains with sheer panels soften daylight and add a fabric layer that hard surfaces lack. The sheer layer filters light gently during the day, while the lavender panels can close at night for privacy and a deeper color. This suits a bedroom window that needs both soft morning light and a calm evening look.

    Hang the rod close to the ceiling and wide enough that the panels clear the window frame when open, so daylight still fills the room. Choose a lavender a shade deeper than the walls so the curtains read as a deliberate layer. For more window ideas that soften a bedroom, see these bedroom curtain ideas.

    5. A Lavender Accent Wall Behind the Bed

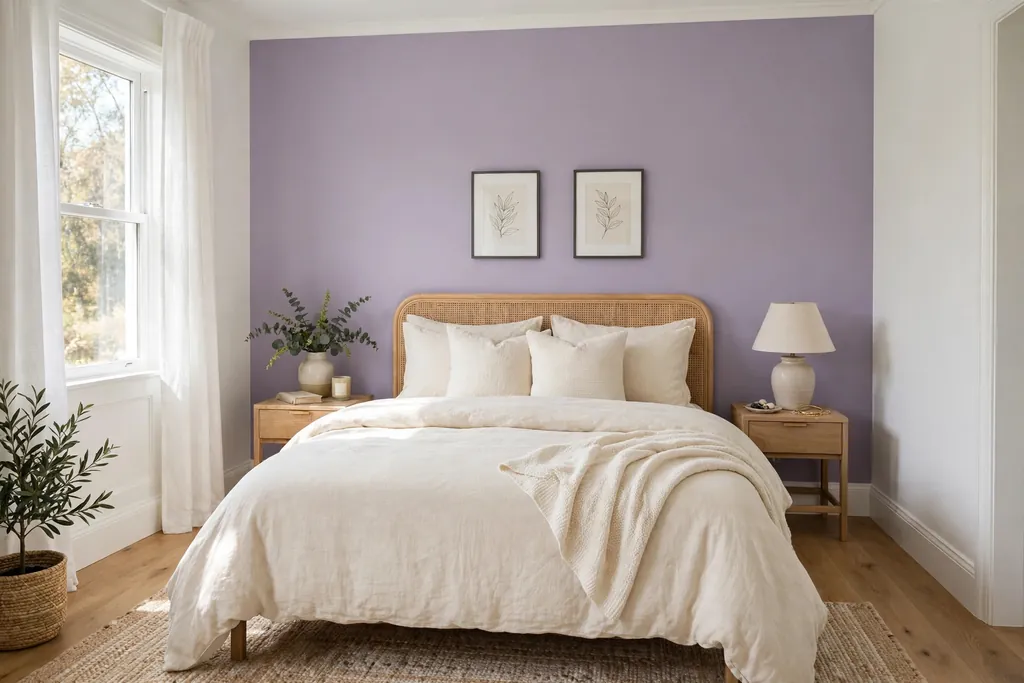
    Bedroom with a lavender accent wall behind the bed.

    Paint the wall behind the headboard in a soft lavender, and keep the other walls white or warm cream, so the bed has a clear focal point without the whole room going purple. The accent wall frames the bed the way a large piece of art would, and it suits a room where you want color but not a full repaint. A muted, grey toned lavender works better here than a bright purple, since the wall sits behind you for much of the day and should stay restful.

    Keep the bedding mostly cream or white, with one lavender cushion or throw to link the bed to the wall. Choose a matte or eggshell finish so the wall does not shine under lamplight, and paint the trim in the same white as the other walls for a clean edge. If the room is small, keep the ceiling white, so the accent wall adds depth without lowering the room.

    6. White Furniture with Lavender Bedding Accents

    Bedroom with white furniture and lavender bedding accents.

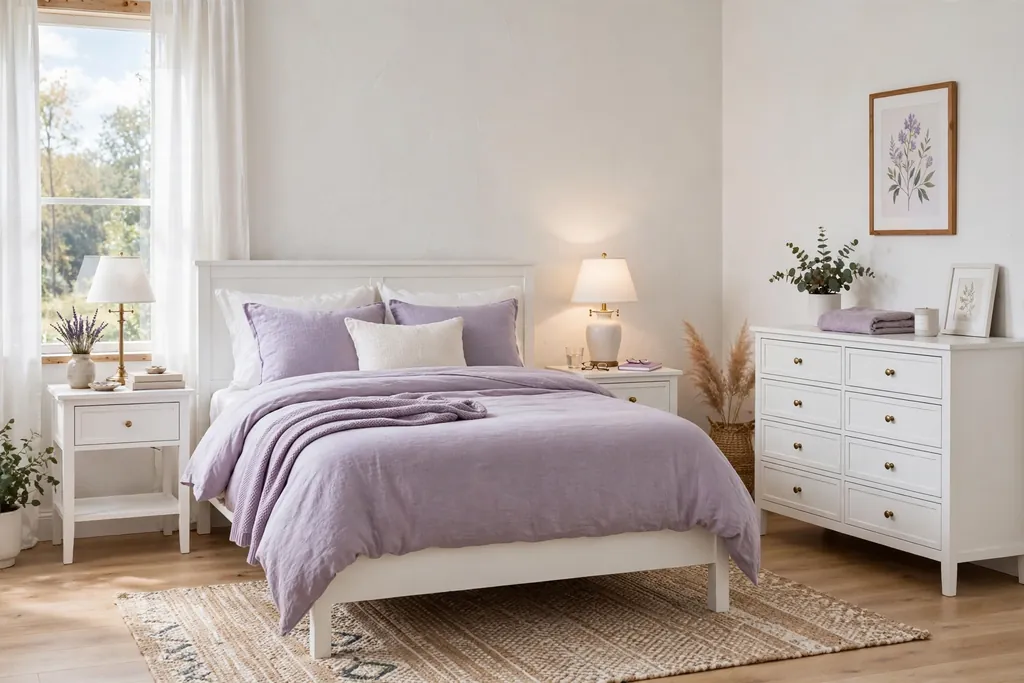
    White furniture with lavender bedding accents keeps a bedroom bright while still giving it a clear color story. A white bed frame, dresser, and nightstands act as a quiet base, and lavender bedding, cushions, and a throw supply the color. This suits a rented room or a room you refresh often, since the furniture stays the same while the textiles change.

    Keep one white tone across the main pieces, so the group reads as planned rather than mixed. Repeat the lavender in at least two places on the bed, such as the duvet and one cushion, so the color does not look like an afterthought. Dust white furniture weekly, since pale surfaces show marks fast.

    7. A Lavender Throw and Cushions on a Neutral Bed

    Neutral bed with a lavender throw and cushions.

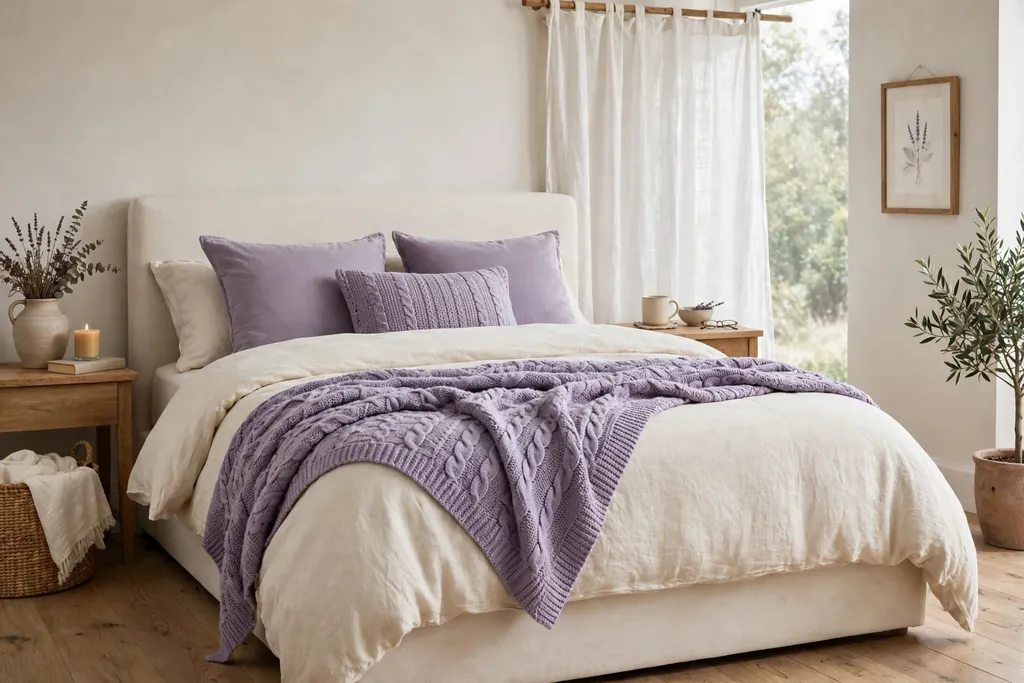
    A lavender throw and cushions on a neutral bed give you lavender in its smallest, easiest dose. The bed stays in white, cream, or soft grey, and the lavender pieces add color at the foot and among the pillows. This suits a bedroom where you are unsure about lavender, since a throw and two cushions are easy to swap out.

    Fold the throw across the lower third of the bed, or drape it over one corner, and keep the rest of the bed plain so the color stands out. Choose cushions in two textures, such as linen and velvet, in close lavender tones, so the group feels layered rather than flat. Store a spare throw nearby, so a fresh look is a quick swap rather than a chore.

    8. A Lavender Reading Chair in the Corner

    Bedroom corner with a lavender reading chair and side table.

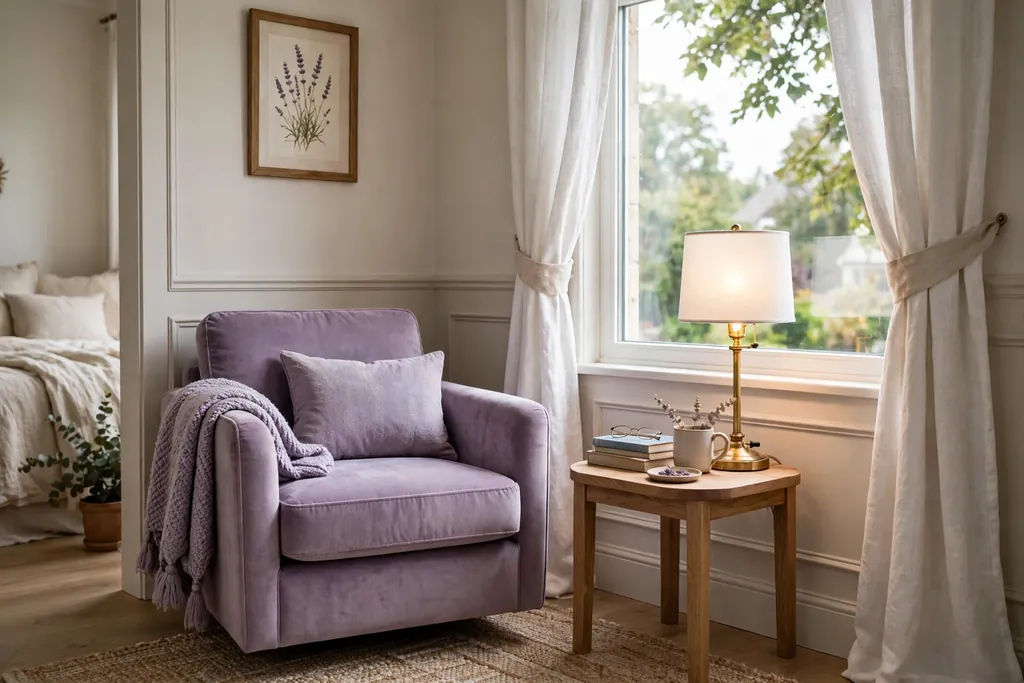
    Place a lavender upholstered chair in a corner with a small side table and a reading lamp, so the bedroom gains a second use that is still quiet. The chair gives you a place to read or dress that is not the bed, and the lavender color marks the corner as its own place. A cushion in cream and a throw over the chair arm keep it inviting.

    This suits a bedroom with a window corner that currently holds nothing but a laundry basket. Choose a chair deep enough to sit in for an hour, not a stiff accent chair that looks good but stays empty. Keep a basket beside the chair for current books, so the corner stays tidy.

    9. Lavender Botanical Prints in White Frames

    Bedroom wall with lavender botanical prints in white frames.

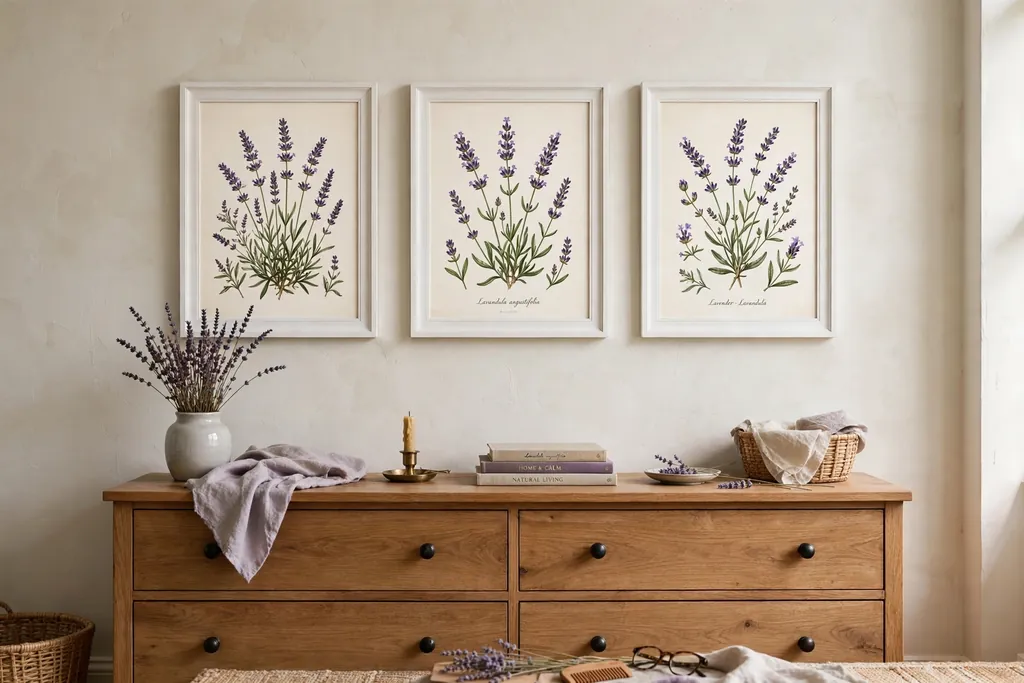
    Lavender botanical prints in white frames add a quiet focal point to pale bedroom walls without adding strong color. Prints of lavender stems, leaves, or simple flower shapes suit the theme directly, and the white frames link the wall to pale furniture. This suits a plain bed wall or a wall above a dresser that needs interest without wallpaper.

    Choose three to five prints in similar sizes, and hang them in matching frames at eye level on one wall. Leave breathing room between frames, and center the group on the bed or dresser rather than scattering prints around the room. Use fixings suited to the wall and the weight, and avoid hanging heavy frames directly above pillows.

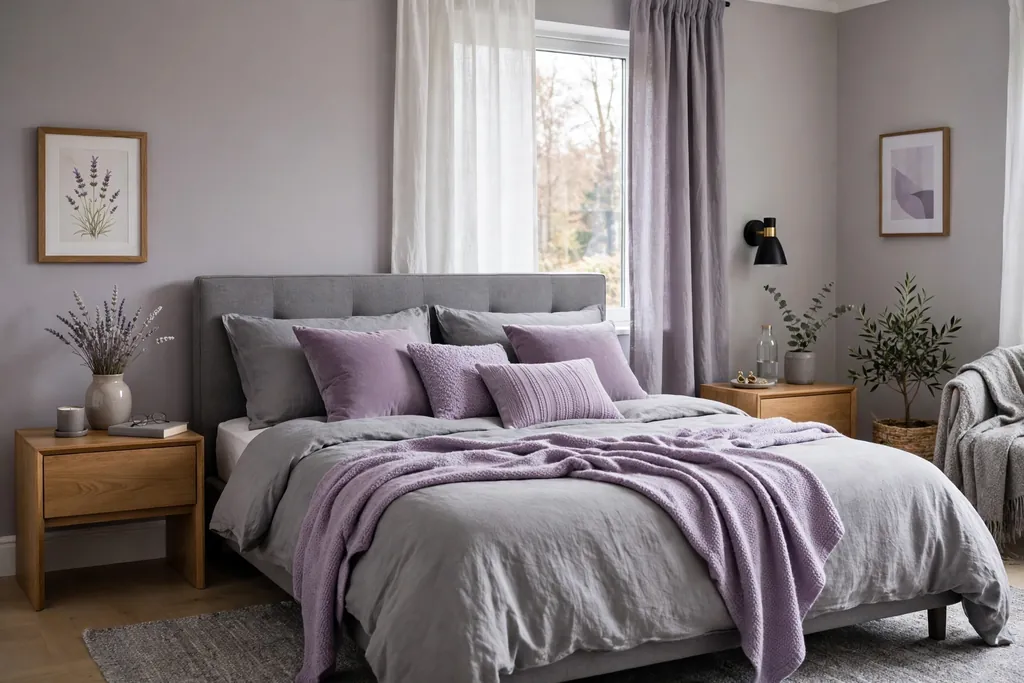
    10. A Lavender and Grey Palette for a Calm Base

    Bedroom with a lavender and grey palette.

    A lavender and grey palette keeps a bedroom calm by pairing a soft purple with a cool neutral. Grey walls, bedding, or a rug ground the lavender, so the purple reads as gentle rather than sweet. This suits a bedroom shared by two people with different tastes, since grey keeps the scheme grown up and easy to live with.

    Use grey for the larger surfaces, such as the rug or the bedding base, and lavender for the smaller layers, such as cushions, a throw, and art. Keep the grey soft and warm toned rather than cold charcoal, so the room does not turn chilly. Add light wood in one or two pieces to warm the pairing.

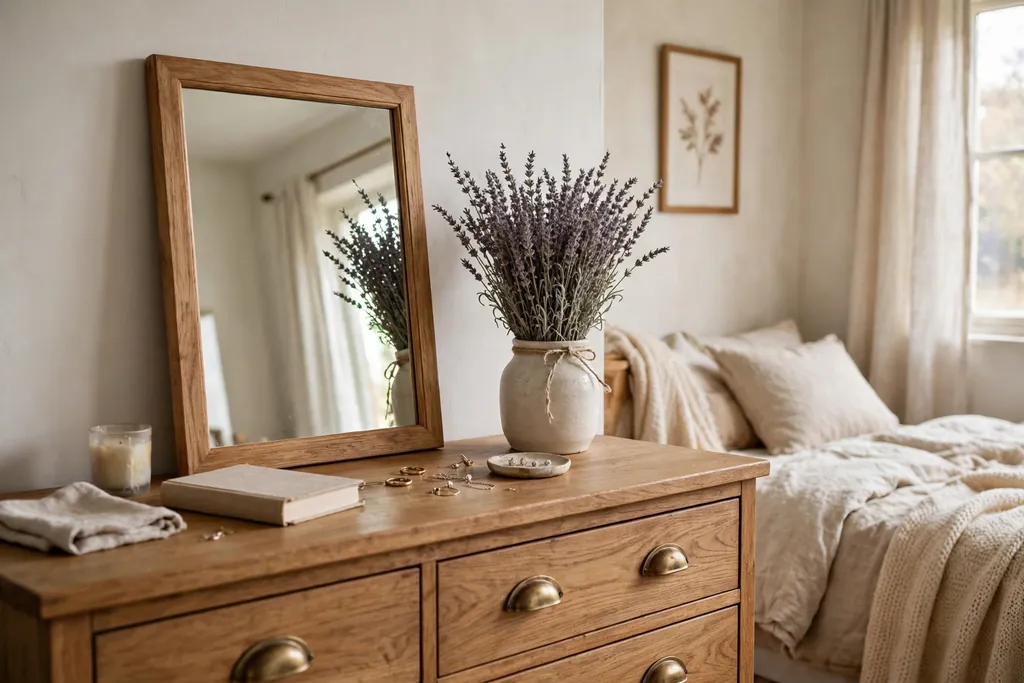
    11. Dried Lavender Bundles in a Vase on the Dresser

    Dresser top with a vase of dried lavender bundles.

    Dried lavender bundles in a vase on the dresser add color, texture, and a light scent with no watering and no upkeep. The slim stems and small buds suit a small dresser top, where a large bouquet would crowd the mirror or lamp. This suits a bedroom that needs one natural detail, and it works in any season.

    Stand two or three small bundles in a plain ceramic or glass vase, and keep the rest of the dresser top to two groups at most: light and one tray. Shake the bundles outside now and then to clear dust, and replace them when the buds start to shed. Keep dried stems away from open flames, since dried plant material catches fire easily.

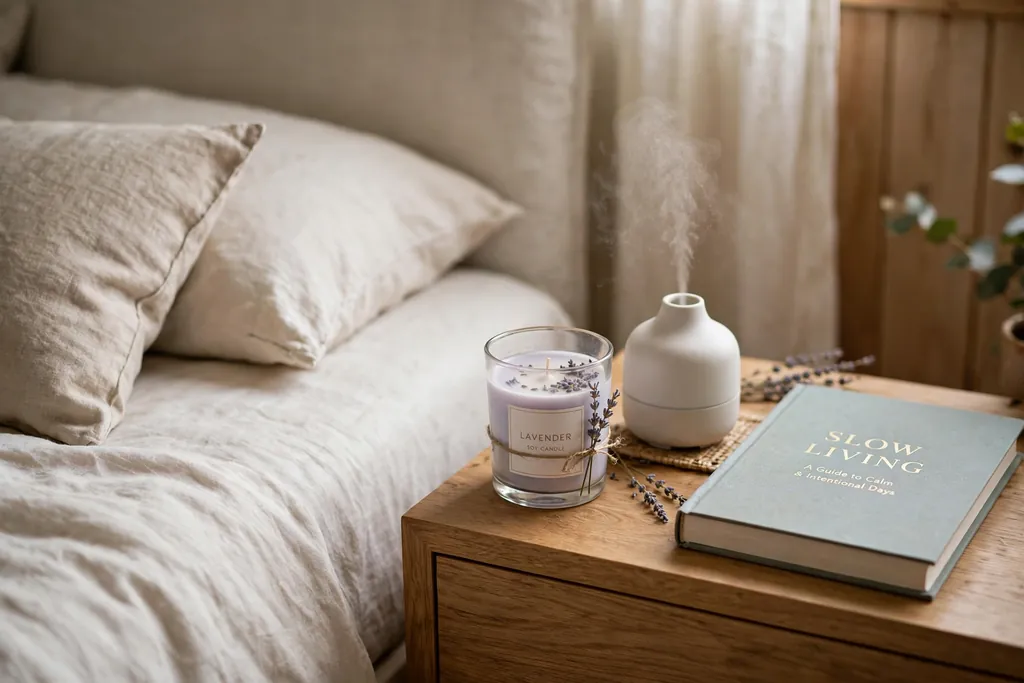
    12. A Lavender Candle and Diffuser on the Bedside

    Bedside table with a lavender candle and diffuser.

    A lavender candle or diffuser on the bedside adds scent to the evening routine, which suits a bedroom meant for winding down. The scent layer works with the visual lavender in bedding or art, so the room feels planned through more than one sense. This suits a bedside that already stays mostly clear, since scent needs only one small item.

    Keep the candle or diffuser on the side away from bedding, and follow the maker guidance on use and refill. Choose one scent item rather than three, so the room smells light rather than heavy. Put the item on a small tray with a book, and move everything else elsewhere, so the bedside stays calm at night.

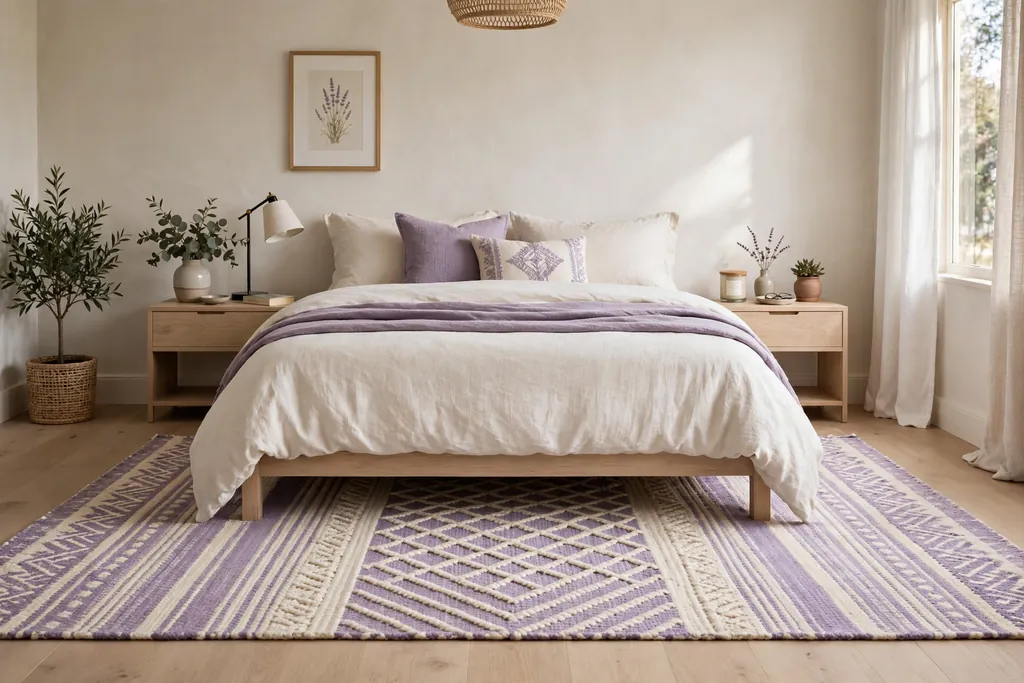
    13. A Lavender Rug on Light Wood Floors

    Bedroom with a lavender and cream rug on light wood floors.

    Lay a large rug in lavender and cream under the bed to ground the room and warm up a hard floor. The rug adds a block of color at ground level, which balances lavender walls or lavender bedding above, and it gives bare feet a soft place to land in the morning. Choose a low pile you can vacuum easily, and let the rug extend well beyond each side of the bed.

    This suits a bedroom with wood or laminate floors, and it works well when the rug pattern is quiet, such as a border or a simple stripe, rather than a busy print. Use a rug pad on smooth floors to stop slipping, and keep the rug pile low near the door swing. A washable rug is worth choosing if the room gets pet traffic or muddy shoes.

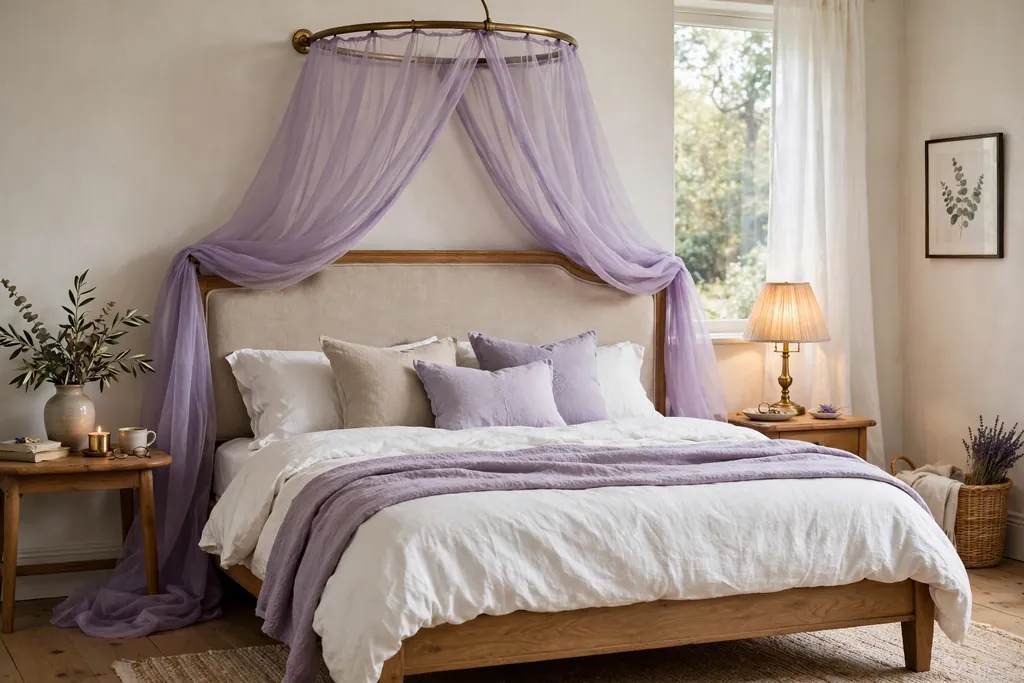
    14. A Lavender Bed Canopy or Draped Bed Crown

    Bed with a sheer lavender canopy draped above it.

    A lavender bed canopy or draped bed crown gives the bed a soft, enclosed feel without a heavy four poster frame. Sheer lavender fabric hung from a crown or a ceiling mount falls gently around the head of the bed, so the sleeping area feels separate from the rest of the room. This suits a bedroom with a plain bed that needs one romantic detail.

    Hang the fabric so it clears the pillows and does not pull when you sit up, and keep the panels light enough to move with air from the window. Wash the fabric often, since sheer panels near a bed collect dust and lint. If a full canopy feels too much, a single draped panel behind the headboard gives a similar effect with less fabric.

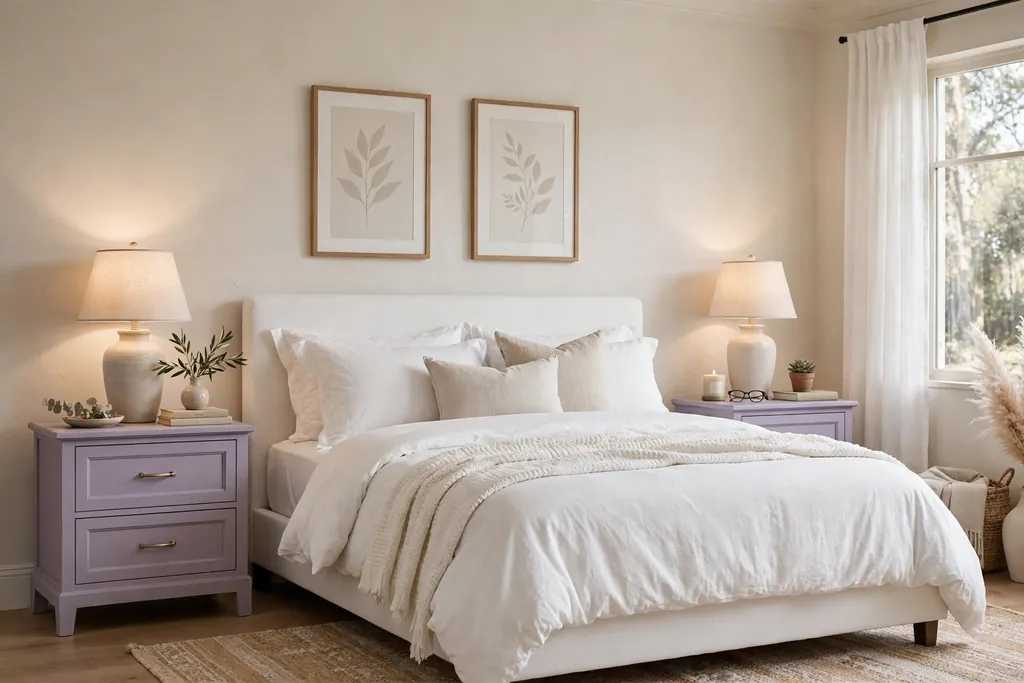
    15. Lavender Painted Nightstands Beside a White Bed

    White bed flanked by lavender painted nightstands.

    Paint a pair of nightstands in lavender and keep the bed white, so the color sits at bed height where you see it last at night. This is a lower risk change than painting a wall or a wardrobe, since two small pieces are easy to repaint later. The lavender nightstands link to a lavender cushion or throw on the bed, and the white bed keeps the room bright.

    Repeat one handle finish across both nightstands, such as brass or matte black, to tie them together. Keep the tops mostly clear, with a lamp, a book, and a glass of water, so the painted color stays visible. If the two nightstands do not match, paint them the same lavender and they will read as a pair.

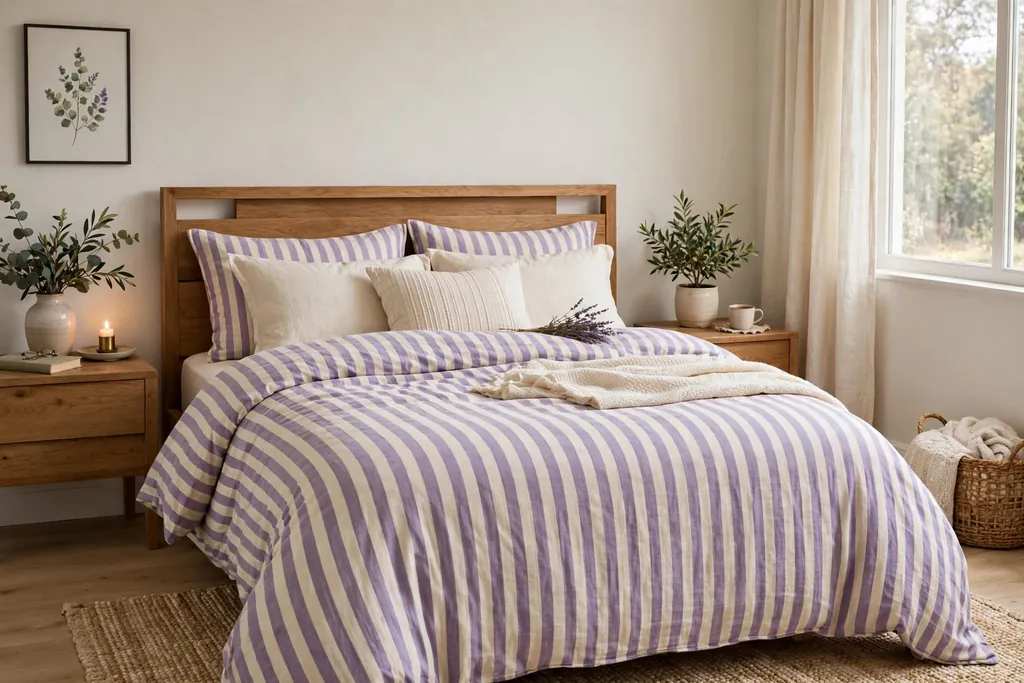
    16. Lavender and Cream Striped Bedding

    Bed with lavender and cream striped bedding.

    Lavender and cream striped bedding adds pattern to a plain bedroom without a bold print. The stripes give the bed direction and rhythm, and the cream keeps the lavender soft. This suits a bedroom with white walls and solid furniture, where the bed needs one clear pattern to anchor the room.

    Keep curtains and the rug mostly plain when the bedding is striped, and repeat one lavender tone in a single cushion. A busy stripe on both bedding and curtains can make a small room feel crowded. For a calmer result, choose stripes in two close tones, such as cream and pale lavender, rather than high contrast stripes.

    17. Lavender Botanical Wallpaper on One Wall

    Bedroom with a lavender botanical wallpaper feature wall.

    Hang a lavender botanical wallpaper on the bed wall for pattern that paint alone cannot give. A lavender stem or leaf print in lavender, cream, and a touch of soft green adds a garden note to the room, and it suits a bedroom where the furniture is plain and the bedding is solid. Keep the other walls in a plain cream or pale lavender pulled from the paper, so the pattern has room to breathe.

    Use the wallpaper on one wall only, and keep curtains and bedding mostly solid, so the room does not gain two competing patterns at once. Order an extra roll for matching and future repairs, since batches can vary. If you rent, look for a peel and stick paper that your lease allows, and test a sample in your light before you commit to the full wall.

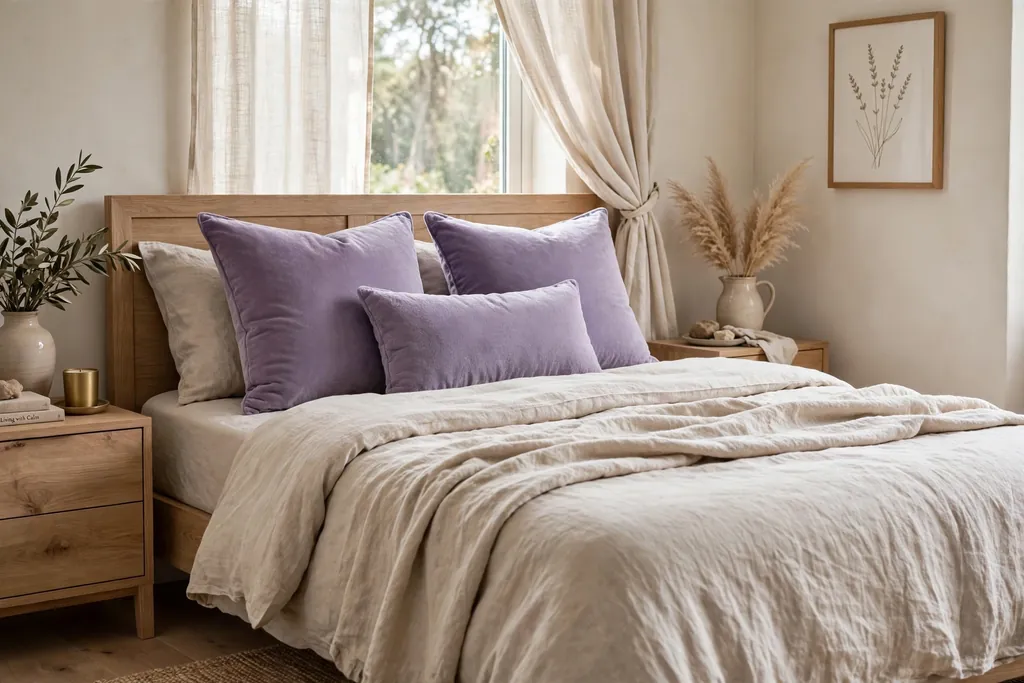
    18. Lavender Velvet Cushions for Soft Texture

    Bed with lavender velvet cushions on linen bedding.

    Lavender velvet cushions add a rich texture that flat cotton cannot give, and they suit a bedroom that feels a little plain in the evening. Velvet catches lamplight in a way that makes the bed look dressed, even when the rest of the room is simple. Pair velvet cushions with linen bedding, so the bed mixes a smooth and a soft pile fabric.

    Keep cushions to three or four, in two close lavender tones, so making the bed stays quick. Vacuum velvet gently with an upholstery tool, since the pile can trap dust over time, and keep cushions clear of direct sun if the color matters to you. If velvet feels too warm for summer, swap it for linen in the same tones and bring the velvet back in cooler months.

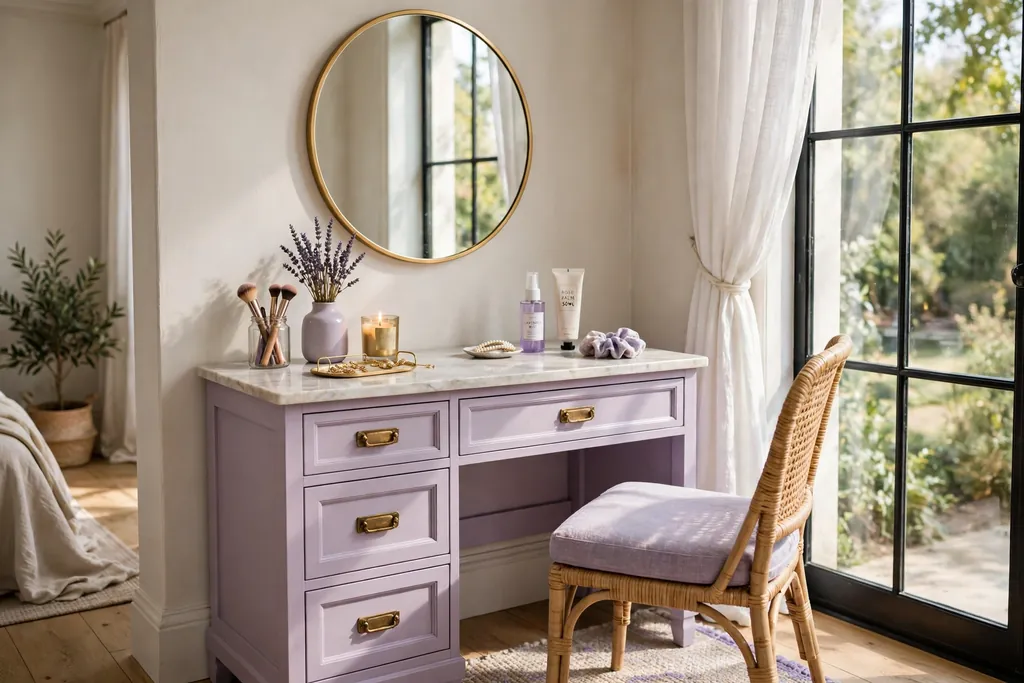
    19. A Lavender Dressing Table and Vanity Corner

    Bedroom vanity corner with a lavender dressing table.

    A lavender dressing table and vanity corner gives a bedroom a tidy place for morning routines, separate from the bed. A small table in lavender paint or with lavender accessories, a mirror, and a chair turns an empty wall into a useful spot. This suits a bedroom with a wall near a window, where daylight helps for getting ready.

    Keep the table top to three groups at most: a mirror, a tray for daily items, and one small vase. Use the drawers or a small basket for items you use less often, so the top stays clear. Match the chair cushion to the bedding in one lavender tone, so the corner links to the rest of the room.

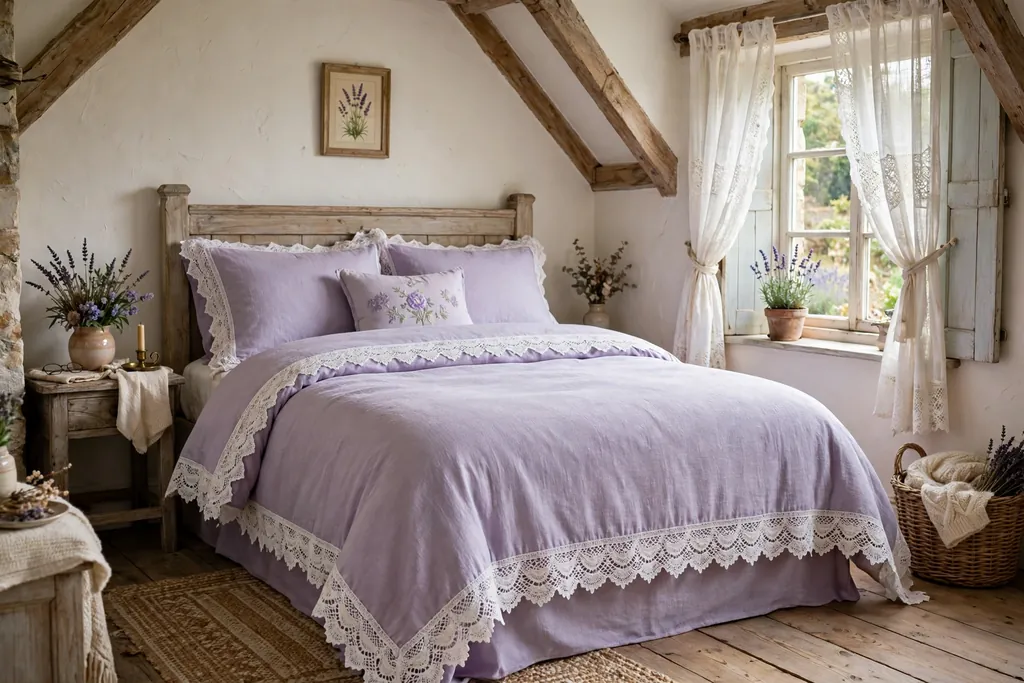
    20. Lavender Bedding with White Lace Trim for a Cottage Feel

    Bed with lavender bedding with white lace trim.

    Lavender bedding with white lace trim gives a bedroom a gentle cottage feel, with soft color and a delicate edge. The lace adds detail to plain lavender pillowcases and a duvet cover without a strong pattern, and it suits a room with wood furniture and simple curtains. This suits a guest room or a country style bedroom where a relaxed look matters more than a crisp one.

    Keep the lace to the pillow edges and the top edge of the duvet, so the trim reads as a detail rather than a theme. Pair the bedding with white curtains and one solid lavender cushion, and avoid adding a second lace pattern nearby. Wash the bedding on a gentle cycle, since lace trims wear faster than plain hems.

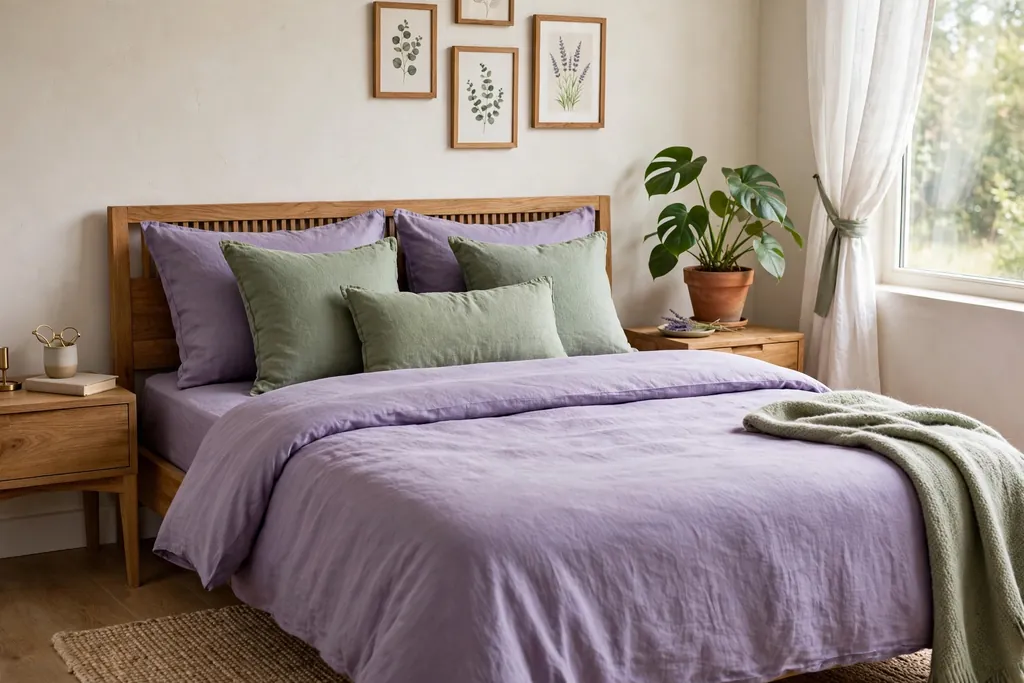
    21. Lavender Paired with Sage Green Botanical Touches

    Bedroom with lavender bedding and sage green accents.

    Lavender paired with sage green gives a bedroom a garden palette that feels natural rather than staged. Sage cushions, a throw, or a plant beside lavender bedding link the purple to leaves and stems, so the room reads like a garden in soft tones. This suits a bedroom with plants, wood furniture, or a view of a garden.

    Use lavender as the main color and sage as the smaller accent, so the two do not compete. Keep the sage muted and grey toned, and repeat it in two places, such as a cushion and a plant pot. Avoid a third strong color nearby, since lavender and sage already give the room plenty of character.

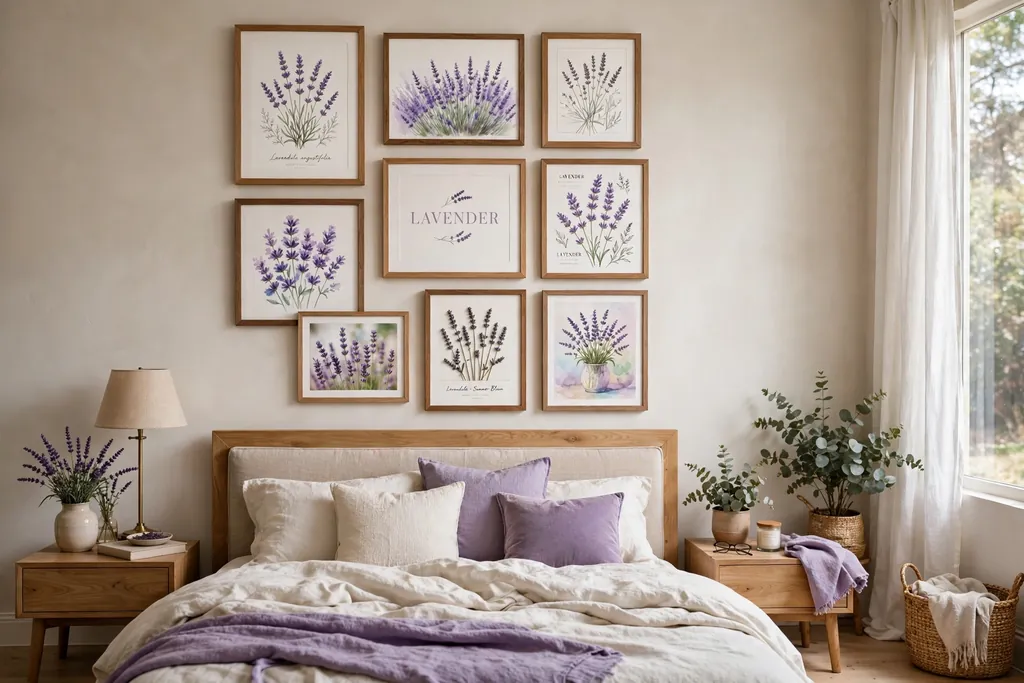
    22. A Lavender Gallery Wall Above the Bed

    Bedroom with a gallery wall of lavender prints above a bed.

    Hang a gallery of framed prints in lavender tones above the bed for wall interest that needs no paint. Choose prints in lavender, cream, and soft grey, with simple white or light wood frames, and hang them in a loose grid or a single row. Mix lavender stem studies, abstract washes, and line drawings, but keep the palette tight so the wall feels calm.

    This suits a bedroom with a large blank wall that needs interest but not a feature color. Lay the frames on the floor first and plan the spacing, leaving equal gaps between frames, then hang the middle frame at eye level. Use picture hanging strips if you rent, and keep the largest frame in the center so the arrangement feels balanced.

    23. Lavender Storage Baskets and Boxes

    Bedroom shelves with lavender storage baskets.

    Lavender storage baskets and boxes turn open storage into calm storage in a lavender bedroom. Use baskets or fabric boxes in lavender and cream, in one material and two sizes at most, for throws, scarves, and spare bedding, and place them beside the bed, under a bench, or on a shelf. Matching containers make a group of items read as one planned set rather than clutter.

    Label the front of each box if more than one person uses the room, and keep baskets light enough to lift with one hand. Line a basket with fabric if it holds small items that slip through the weave. For more closed storage planning, see these bedroom storage ideas.

    24. Lavender Lampshades for Soft Evening Light

    Bedroom in the evening with lavender lampshades glowing.

    Lavender lampshades give a bedroom soft evening light in a color that matches the rest of the room. The shade tints the glow gently, so bedside lamps feel warm and calm rather than stark, and the shade itself adds color even when the lamp is off. This suits a bedroom where the walls stay white and the color lives in textiles and small pieces.

    Choose shades in a pale lavender, since a deep shade can dim the light too much for reading. Match the two bedside shades, so the bed looks balanced from the door, and keep the lamp bases in one finish, such as white ceramic or light wood. Check that the shade clears the bulb as the maker advises, since fabric shades need space from heat.

    25. A Lavender Window Seat with Soft Cushions

    Bedroom window seat with lavender cushions.

    A lavender window seat with soft cushions gives a bedroom a reading spot and a color block in one built piece. Use the seat for spare bedding and books beneath the cushion, and keep the cushion in a washable lavender cover, since window seats collect sun and dust. Choose a seat depth that lets you sit with your back against the wall comfortably.

    Keep the window area clear of heavy items, so you can open the window and clean the glass. A small shelf or a wall hook beside the seat holds a book and a cup, so the seat top stays free for sitting. If a built seat is not possible, a low bench under the window with lavender cushions gives most of the same benefit.

    26. Lavender and Gold Accents for Gentle Warmth

    Bedroom with lavender bedding and gold accents.

    Lavender and gold accents add gentle warmth to a cool purple palette, so the room does not feel cold in the evening. Gold appears in small doses, such as a mirror frame, drawer handles, a lamp base, or a picture frame, while lavender stays on the larger surfaces. This suits a bedroom with white walls and lavender bedding, where one warm metal thread pulls the room together.

    Match the gold to one finish across the small pieces, such as brushed brass, rather than mixing bright and aged gold. Keep the gold to a few small items, since too much metal can make a calm room feel busy. If gold feels too yellow beside your lavender, pick a brushed or aged finish rather than a bright polished one.

    27. Potted Lavender by the Bedroom Window

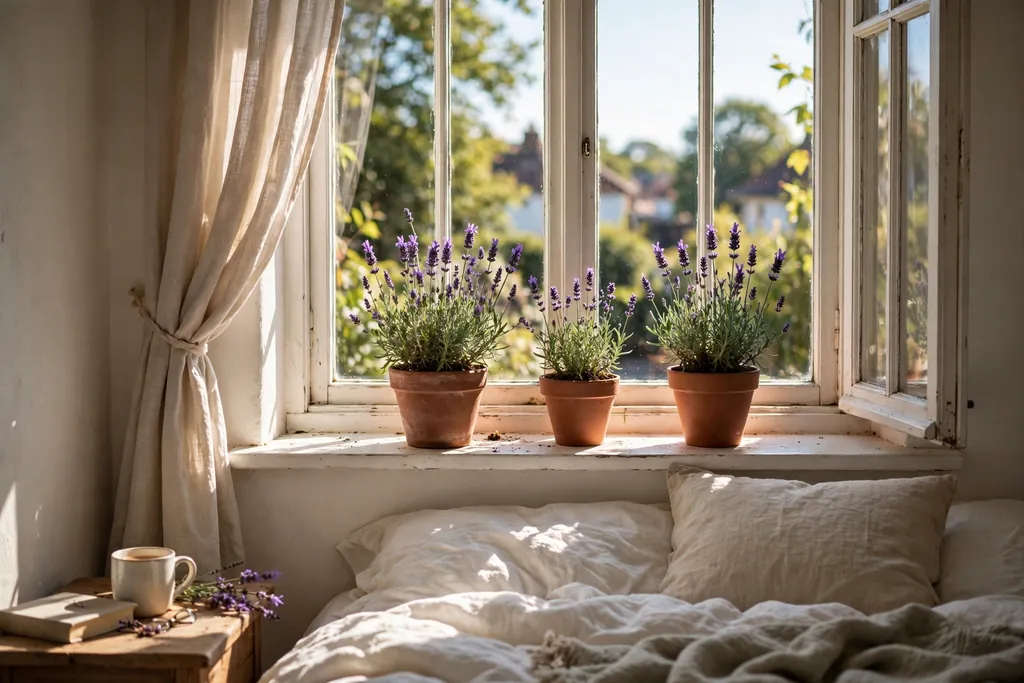
    Bedroom window with potted lavender plants on the sill.

    Potted lavender by the bedroom window adds living color and scent that matches the room theme exactly. A pot or two of lavender on the sill or on a small stand beside the window gives you green leaves and purple buds in season, and it suits a sunny window where the plant gets direct light for part of the day. This suits a bedroom where you want nature in the room without a large plant taking floor space.

    Water only as the plant needs it, and check that the pot drains, so water does not mark the sill or floor. Turn the pot now and then, so growth stays even toward the light. Keep plants out of reach if pets chew leaves, and check that a plant suits your home before you bring it in.

    Conclusion

    A serene lavender bedroom comes from restraint: one main lavender tone, a pale base, soft textures, and clear surfaces. Start with bedding, curtains, or cushions if you want a quick change, then move to walls, furniture, or a reading corner when you have a weekend to spare. Add scent and plants last, since those small layers work best once the larger surfaces are settled. For a calmer room built on the same quiet principles, see these zen bedroom ideas. Save the ideas that fit your room, test samples in your own light, and build the lavender bedroom one calm layer at a time.

    FAQs

    1. What shade of lavender works best in a bedroom?

    A pale lavender close to grey or lilac works best for most bedrooms, since it stays bright in daylight and calm in lamplight. Test a large swatch on two walls, one facing the window and one facing away, since the same paint can look quite different in each spot. Avoid bright or deep purples on all four walls, since strong color can feel heavy by evening.

    2. Does lavender go with grey, white, and wood?

    Yes. White and cream keep lavender bright, soft grey grounds it, and light wood warms the pairing. Use grey for larger surfaces and lavender for smaller layers, or keep the walls white and let lavender live in bedding and curtains. Add one wood tone across the bed frame and nightstands, so the room reads as settled.

    3. How do I add lavender without painting a wall?

    Change bedding, curtains, cushions, and a rug first, since textiles carry color with no tools and no lasting change. Add lavender art, a throw, storage baskets, or dried lavender on the dresser for smaller doses. If you want a wall effect without paint, try peel and stick wallpaper on one wall, if your lease allows it.

    4. Will lavender make a small bedroom feel smaller?

    A pale lavender on all walls, with a white ceiling and white trim, usually keeps a small room feeling open. A single lavender accent wall behind the bed can add depth without closing the room in. Keep furniture pale, mirrors clear of clutter, and bedding mostly light, so the color adds interest rather than weight.

    5. What colors pair well with lavender in a bedroom?

    White, cream, soft grey, sage green, and light wood pair well with lavender, and small touches of brushed gold add warmth. Keep the palette to lavender plus two neutrals, so the room stays calm. Avoid adding a second strong color, such as bright pink or deep red, since it can fight the lavender rather than support it.

    6. How do I keep a lavender bedroom calm instead of busy?

    Repeat one lavender tone in two or three places, keep patterns to one surface at a time, and leave nightstands and dresser tops mostly clear. Mix textures, such as linen, velvet, and wood, rather than adding more colors or prints. If the room starts to feel busy, remove one patterned item and one small decor piece, then live with the simpler version for a week.


  • 22 Amazing Bedroom Color Combos to Give Your Room a New Mood

    22 Amazing Bedroom Color Combos to Give Your Room a New Mood

    Color is the fastest way to change how a bedroom feels, and you do not need to repaint the whole room to feel the difference. A new bedding set, a painted accent wall, a different curtain color, or two cushions in a fresh pairing can shift a room from flat to calm, or from cold to warm. These 22 amazing bedroom color combos cover light and dark rooms, small and large spaces, and quiet and bold moods. Each combo tells you where the colors should go and how much of each to use. Start with the combo that fixes what bothers you most. For a calm green pairing to compare, see these sage green bedroom ideas.

    Key Takeaways

    • Pick two main colors and one small accent at most, so the room reads as planned rather than busy.
    • Put the lighter color on the largest surfaces, such as walls and bedding, and save the deeper color for smaller areas.
    • Repeat each color at least twice, in bedding and curtains, or in cushions and art, so the pairing looks linked.
    • Test paint and fabric samples in morning and evening light before you commit, since colors shift a lot during the day.
    • Change bedding, cushions, and curtains first for a no-paint refresh, and save walls and furniture for a weekend project.
    • Keep the ceiling white or very pale, so even a bold wall color does not make the room feel low or closed in.

    1. Sage Green and Cream on a Painted Accent Wall

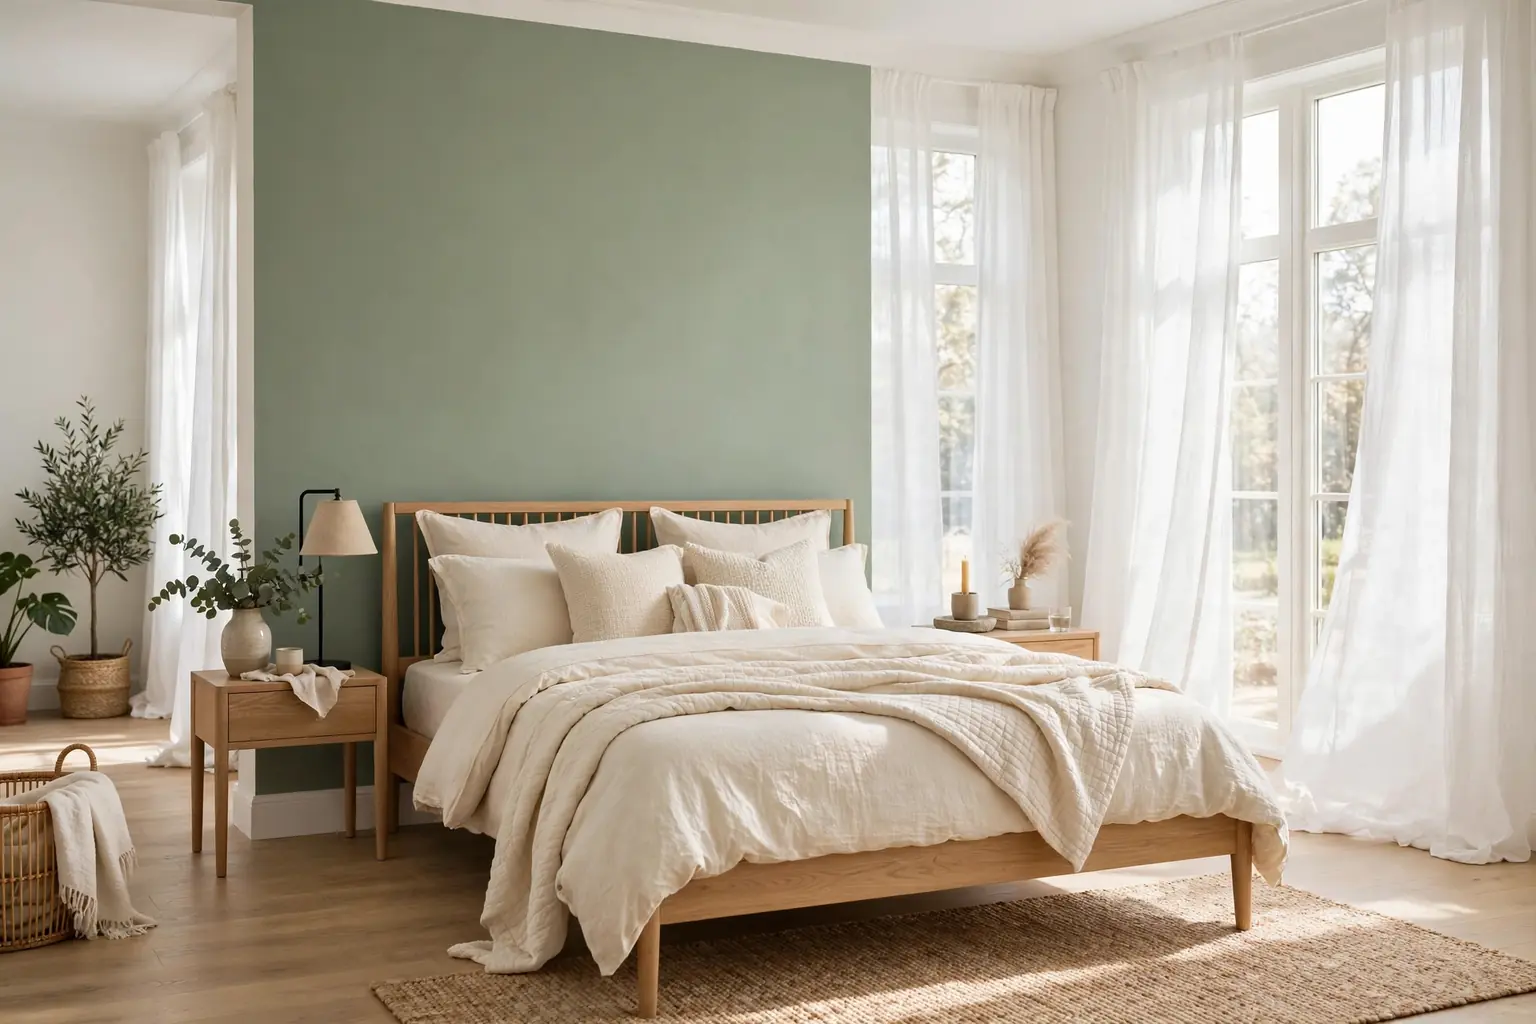
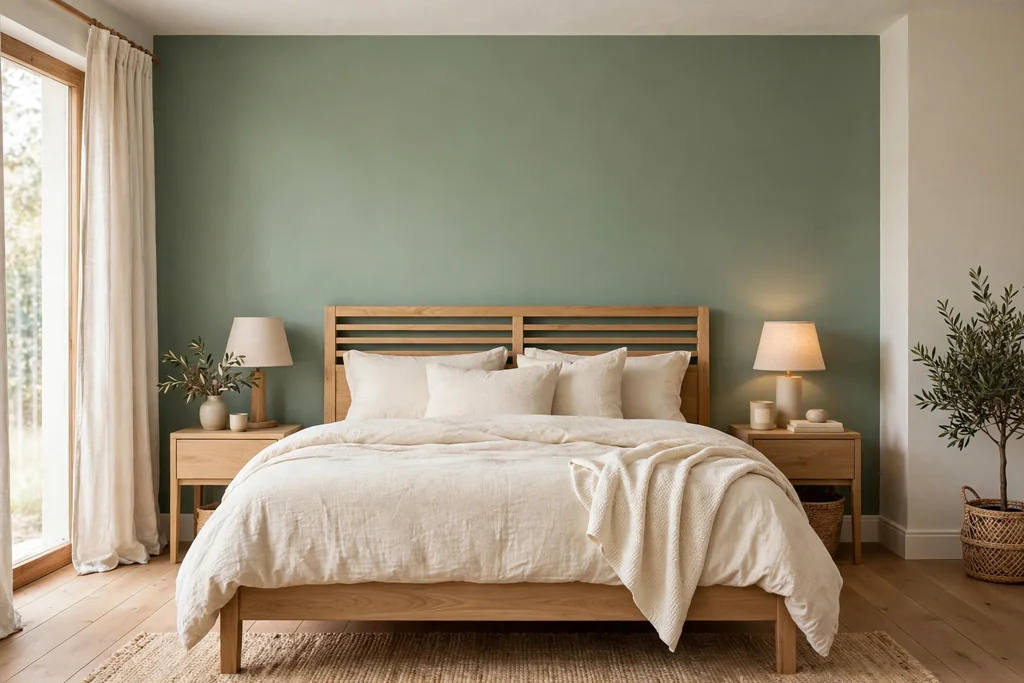
    Bedroom with a sage green accent wall behind a light oak bed with cream bedding.

    Sage green and cream give a bedroom a calm, nature led mood without making the room feel dark. Paint the wall behind the bed in a soft, grey toned sage, and keep the other walls warm cream, so the bed has a clear focal point and the room stays bright. Cream bedding with one sage cushion links the bed to the wall, and light wood furniture keeps the pairing soft rather than cold.

    Keep the sage muted rather than bright, since a strong green behind the bed can feel restless at night. Use a matte or eggshell finish so the wall does not shine under lamplight, and paint the trim in the same cream as the other walls for a clean edge. If the room is small, paint only the bed wall and keep the ceiling white, so the accent adds depth without lowering the room.

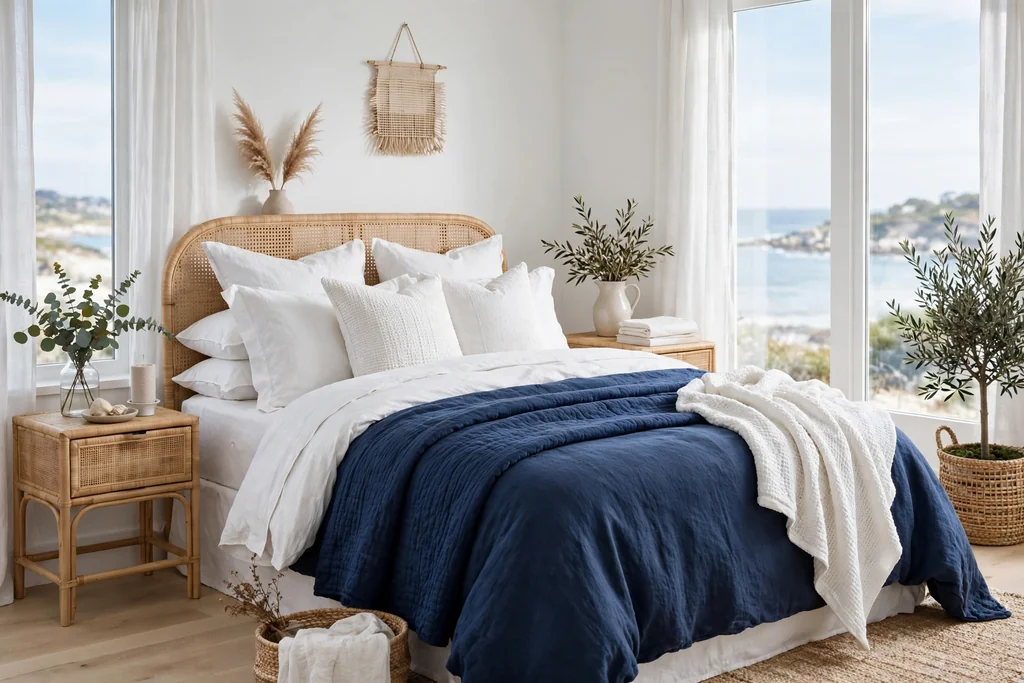
    2. Navy Blue and White for a Crisp Coastal Bed

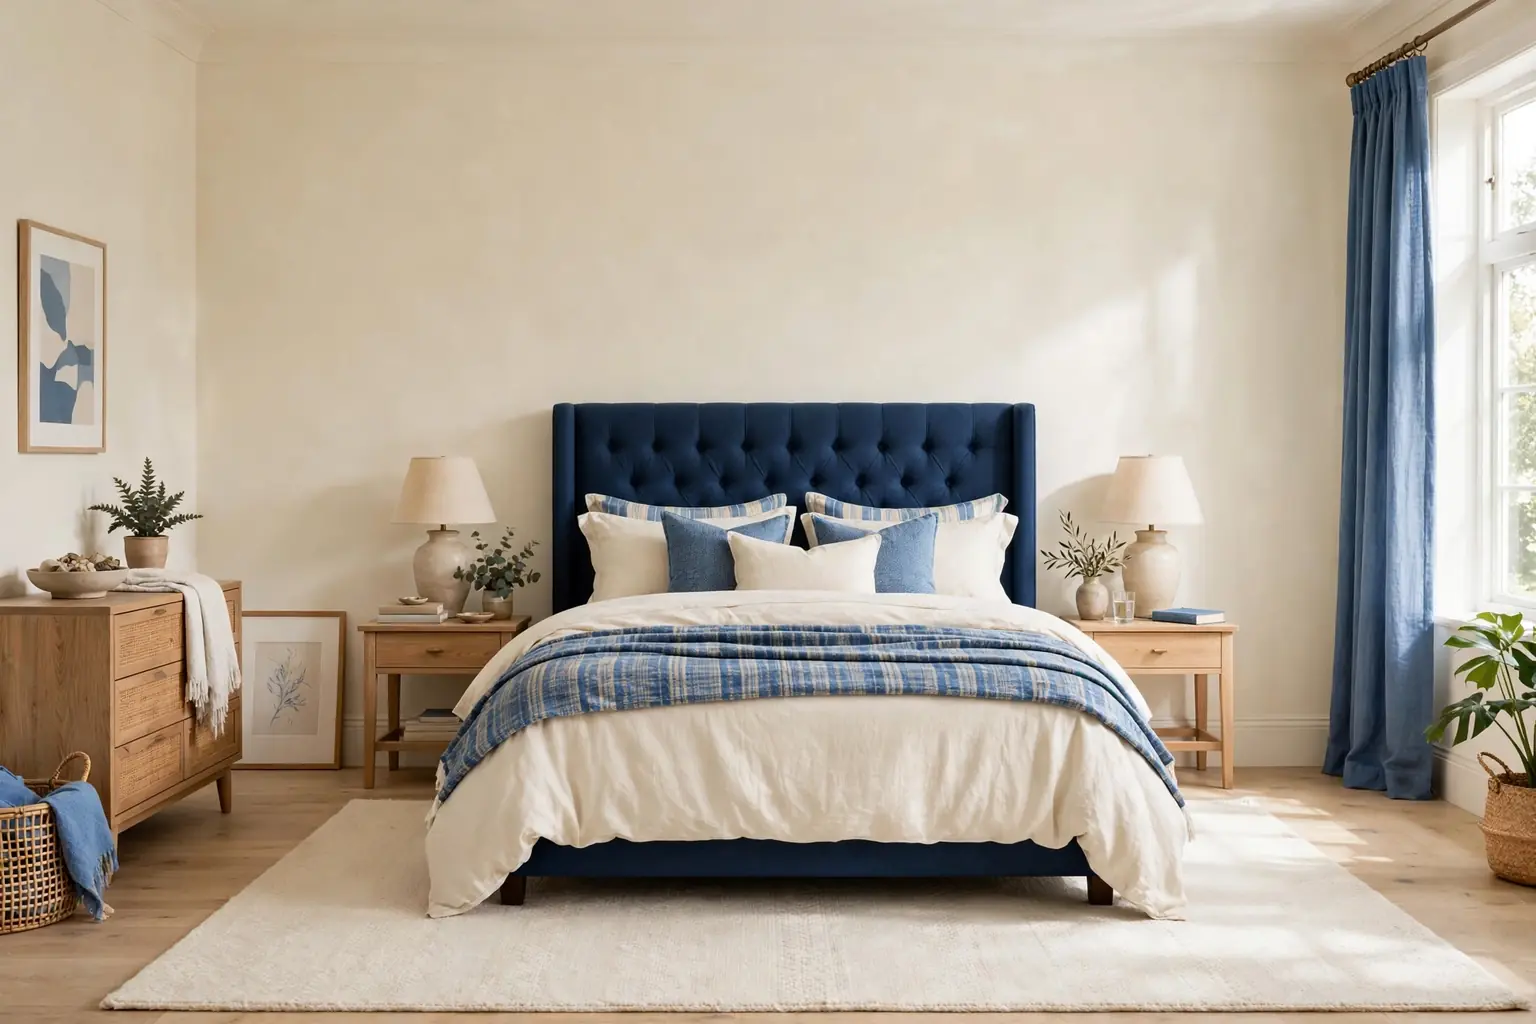
    Coastal bedroom with navy blue bedding and white walls.

    Navy blue and white make a bedroom feel crisp, clean, and easy to wake up in. White walls and white sheets form the base, while navy appears in a duvet cover, a throw folded across the foot of the bed, and one or two cushions. The contrast is clear but not loud, and it suits a room with good daylight, where the white can bounce light around.

    Keep navy to bedding and small accents rather than all four walls, since a full navy room can feel dark by evening. A striped navy and white cushion, or a navy throw on a chair, repeats the color a second time without adding another pattern. Wash navy bedding apart from white pieces at first, so the dark dye does not dull the white layers.

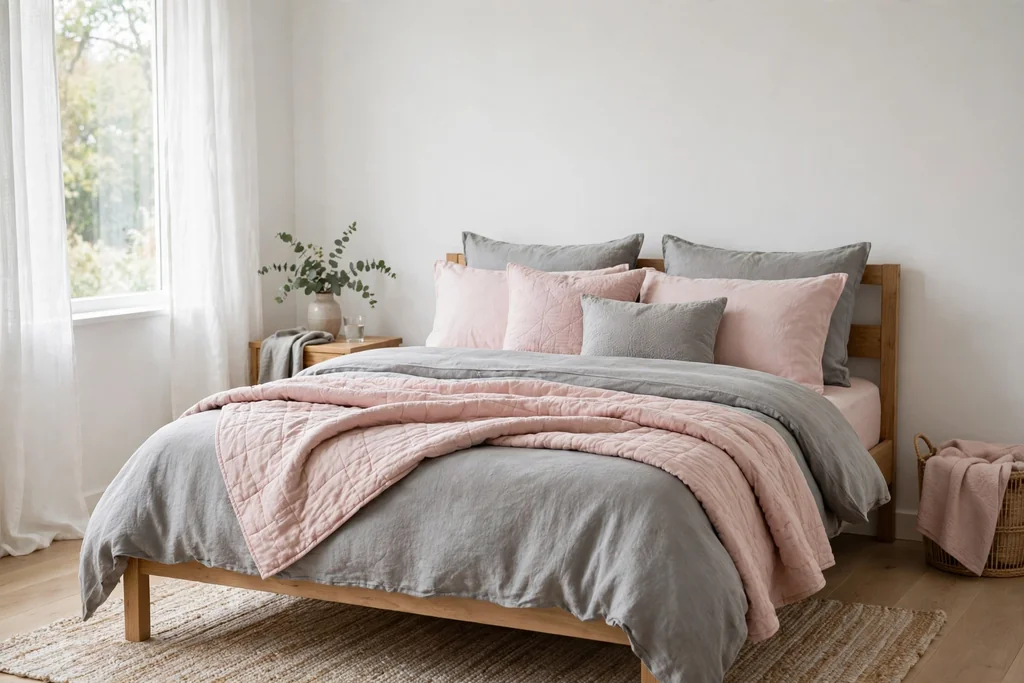
    3. Blush Pink and Soft Grey in Layered Bedding

    Bed with layered blush pink and soft grey bedding.

    Blush pink and soft grey give a bedroom a gentle, restful mood that suits a main bedroom or a guest room. Build the bed in layers: grey sheets and a grey duvet, with a blush throw folded across the lower half and one blush cushion at the front. The pink adds warmth, the grey keeps it from feeling sweet, and the pairing works with white walls and light wood.

    Keep the blush pale and dusty rather than bright, and limit pink to the bed so the rest of the room stays calm. A grey bedside lamp base or a grey rug border repeats the grey away from the bed, so the colors feel spread through the room. If pink starts to feel strong, swap the blush cushion for a grey one and let the throw carry the pink alone.

    4. Charcoal Grey and Mustard in a Reading Corner

    Bedroom reading corner with a charcoal armchair and mustard cushions.

    Charcoal grey and mustard make a strong, warm pairing that works best in a small, defined area rather than across a whole room. Set a charcoal armchair in a corner with mustard cushions and a mustard throw, plus a small side table and a reading lamp. The dark chair grounds the corner, the mustard adds a warm glow, and the rest of the bedroom can stay pale and plain.

    Repeat the mustard once more, in a framed print or a small cushion on the bed, so the corner does not look cut off from the room. Keep the charcoal to the chair and one other item at most, such as a storage basket, since too much dark furniture can make a small room feel heavy. This pairing suits a bedroom with a window corner that currently holds nothing but a laundry basket.

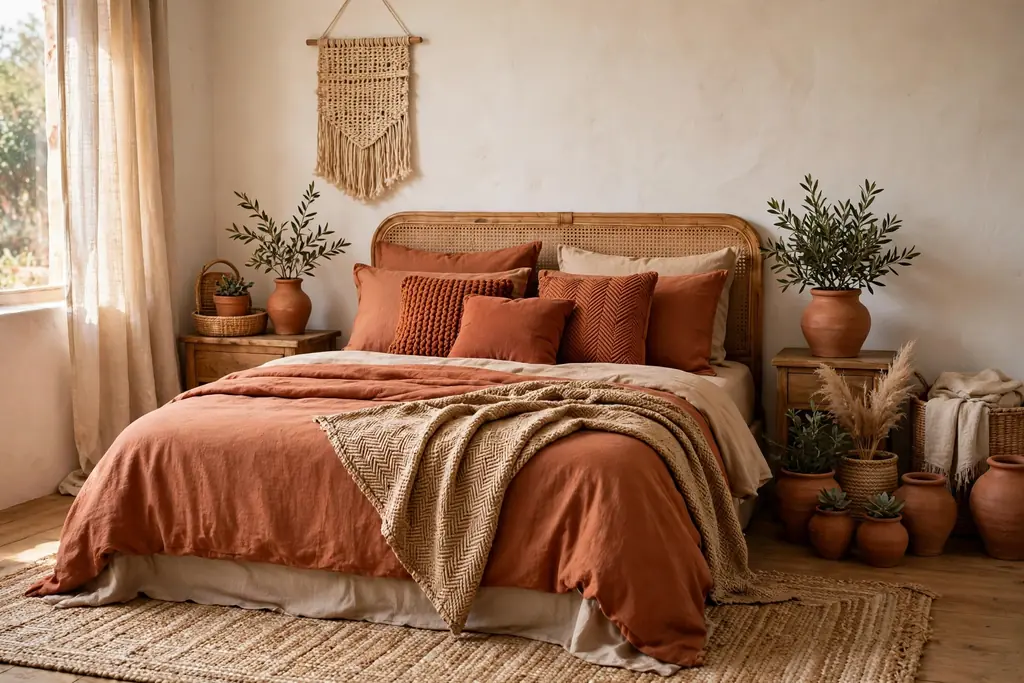
    5. Terracotta and Warm White with Clay Textures

    Warm bedroom with terracotta bedding and warm white walls.

    Terracotta and warm white bring an earthy, sunlit mood to a bedroom, and they suit rooms with wood floors and woven textures. Warm white walls form the base, while terracotta appears in bedding, cushions, and clay pots on a dresser or windowsill. The pairing feels warm without being dark, and it links well to rattan, jute, and light wood.

    Use terracotta in layers of texture rather than one flat block of color: a terracotta throw, a woven cushion, and a clay pot give the color depth. Keep the white warm, not blue white, so the two tones sit well together in evening light. If the room gets little sun, keep terracotta to bedding and pots, and let the warm white walls carry the light.

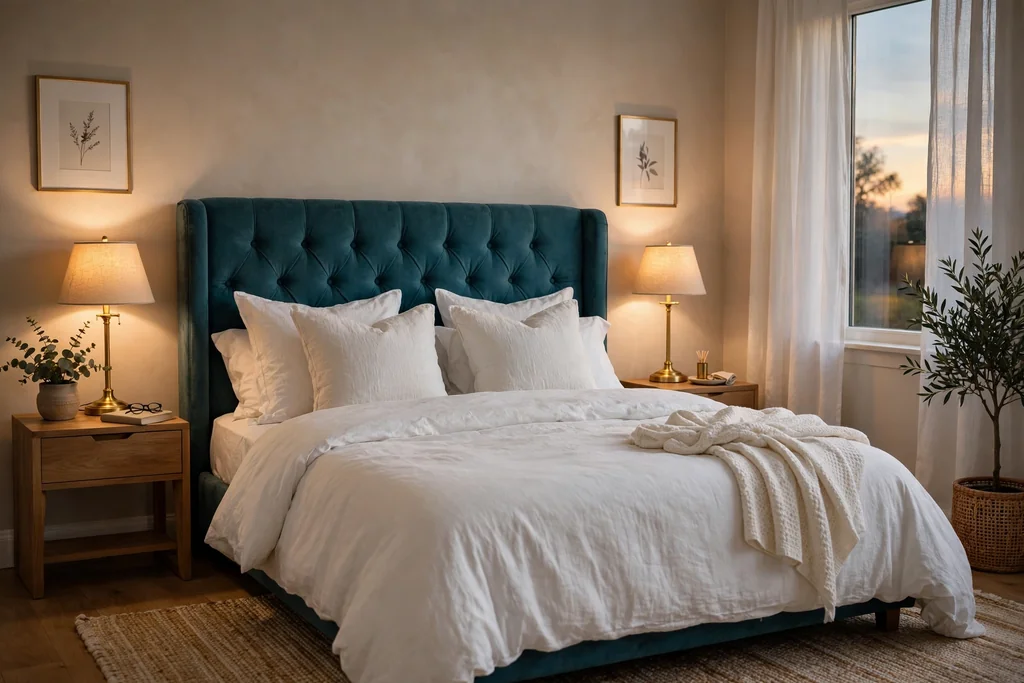
    6. Teal and Gold on an Upholstered Headboard

    Bedroom with a teal upholstered headboard and gold lamps.

    Teal and gold give a bedroom a rich, evening mood that still feels restful. Choose a teal upholstered headboard as the focal point, keep the bedding white or cream, and add gold in small doses: lamp bases, a picture frame, or drawer handles. The teal supplies the color, the gold adds warmth, and the pale bedding keeps the room from feeling dark.

    Keep gold to two or three small pieces with the same finish, either brushed or polished, so it reads as one thread rather than a mix of metals. A teal cushion on the bed repeats the headboard color at a smaller scale, and a plain wall behind the headboard lets the color and texture stand out. Vacuum the headboard gently now and then, since velvet and woven fabrics hold dust.

    7. Lavender and Pale Grey for a Calm Evening Room

    Calm bedroom with lavender bedding and pale grey walls.

    Lavender and pale grey make a bedroom feel quiet at night, which suits a room used mainly for rest. Pale grey walls form a soft base, lavender appears in bedding and one cushion, and white sheets keep the bed bright. The pairing is gentle rather than bold, and it works well with silver or brushed nickel fittings and plain curtains.

    Keep lavender pale and dusty, since a bright purple can feel busy under lamplight. Use warm bulbs in bedside lamps, because cool light can make lavender look grey and flat. If you want a little more interest, add a lavender stem in a vase on the dresser, and keep the rest of the surfaces plain so the color stays calm.

    8. Forest Green and Brass in a Traditional Bedroom

    Traditional bedroom with forest green walls and brass lamps.

    Forest green and brass give a bedroom a settled, traditional feel that suits dark wood furniture and paneled walls. Paint one wall in deep forest green, or use green bedding against cream walls, and add brass in lamp bases, a mirror frame, or drawer pulls. The green adds depth, the brass adds a warm glow, and cream bedding keeps the room from feeling closed in. For a calmer take on the same layered approach, see these elegant bedroom ideas.

    Repeat the brass in at least two places, so one brass lamp alone does not look random. Keep the green to one wall or to bedding, not both, unless the room is large with good daylight. Wipe brass with a soft cloth to keep the finish even, and check care guidance for lacquered pieces before using any cleaner.

    9. Sky Blue and Sand for a Light Morning Room

    Light bedroom with sky blue bedding and a sandy rug.

    Sky blue and sand make a bedroom feel light and fresh in the morning, and they suit a room with a window that gets early sun. White or very pale walls form the base, sky blue appears in bedding and curtains, and sand appears in a rug, a woven basket, or a wooden bed frame. The pairing reads as airy, and it suits a small room, since neither color is dark or heavy. For more window treatments in this palette, see these bedroom curtain ideas.

    Hang sky blue curtains high and wide, so the panels stack clear of the glass when open and daylight still fills the room. Keep the sand tone warm and natural, such as light oak or jute, rather than a yellow beige that fights the blue. If the room faces north and gets cool light, warm up the sand with a wooden frame or a woven throw, so the blue does not feel cold.

    10. Burgundy and Cream with Velvet Cushions

    Bed with burgundy velvet cushions and cream bedding.

    Burgundy and cream give a bedroom a warm, rich mood that suits colder months and rooms with plain furniture. Cream bedding forms the base, burgundy appears in two or three velvet cushions and a throw folded across the foot of the bed, and the walls stay cream or soft white. Velvet adds depth without pattern, and a small number of cushions keeps the bed easy to make.

    Put zip covers on the cushions, so you can wash them and swap colors by season. Keep sleeping pillows clear at night, and store decorative cushions in a basket or on a bench while you sleep, so the bed stays practical. If burgundy feels strong, use it in cushions only and keep the throw cream, so the deep color reads as one accent.

    11. Olive Green and Beige in a Nature Led Room

    Bedroom with olive green bedding

    Olive green and beige make a bedroom feel grounded and calm, and they suit rooms with plants, wood, and woven textures. Beige walls form a warm base, olive appears in bedding, a throw, or a painted dresser, and light wood furniture links the two tones. Potted plants on a windowsill or dresser repeat the green in a living form, so the palette feels natural rather than staged.

    Keep the olive muted and grey toned, since a bright green can feel harsh next to beige. Use linen and cotton for bedding, and add one woven basket for throws or spare bedding, so texture does the work that pattern would do. If the room is dark, keep olive to bedding and plants, and let beige walls and a pale rug carry the light.

    12. Coral and White for a Bright Guest Room

    Bright guest bedroom with coral cushions and white bedding.

    Coral and white make a guest bedroom feel bright and welcoming without a full repaint. White walls and white bedding form the base, coral appears in cushions, a throw, and a small vase of flowers on the dresser, and the room stays fresh in daylight. The pairing suits a small guest room, since the white keeps it open and the coral gives it a clear identity.

    Keep coral to soft, warm tones rather than bright orange, and limit it to the bed and one dresser detail, so the room does not feel loud. A coral cushion on a white chair, or a coral print in a plain frame, repeats the color a second time. When guests leave, the coral pieces are easy to swap for another accent, so the room can change mood with little effort.

    13. Black and White with One Wood Tone

    Bedroom with black and white bedding and light wood furniture.

    Black and white give a bedroom a clear, graphic look, and one wood tone keeps it from feeling hard or cold. White walls and white bedding form the base, black appears in picture frames, a lamp base, and one cushion, and light oak in the bed frame and nightstands adds warmth. The pairing suits a room with plain furniture, where strong contrast can carry the design.

    Keep black to small, repeated details rather than large blocks, such as a black headboard wall or black bedding, which can dominate a small room. Match the wood tone across the bed, tables, and shelves, so the pieces read as one planned group. Leave breathing room on walls and surfaces, since a graphic palette needs empty space to look calm.

    14. Dusty Rose and Sage in a Soft Vintage Room

    Vintage bedroom with dusty rose bedding and sage cushions.

    Dusty rose and sage give a bedroom a soft, vintage mood that suits older furniture and floral details. Cream walls form the base, dusty rose appears in bedding and a cushion, sage appears in a throw or a painted nightstand, and light wood keeps the room warm. The two muted tones sit well together because neither is bright, and the pairing works with lace, linen, and simple floral prints.

    Keep both colors dusty and muted, and use one as the main color and the other as the accent, rather than splitting them evenly. A rose duvet with a sage throw, or sage bedding with rose cushions, reads more calmly than equal blocks of both. If you add a floral print, pick one that shares a rose or sage tone with the bedding, so the pattern links to the room.

    15. Chocolate Brown and Cream for a Warm Winter Bed

    Warm bedroom with chocolate brown bedding and a cream throw.

    Chocolate brown and cream make a bedroom feel warm and sheltered, which suits winter and rooms with wood floors. Cream walls and cream sheets form the base, chocolate appears in a duvet cover or a knit throw, and warm lamplight deepens the brown in the evening. The pairing feels cozy without pattern, and it suits a room where the bed is the clear focus.

    Layer the brown in textures: a knit throw, a woven cushion, and a wood bed frame give the color depth without a second strong tone. Keep the cream warm, not stark white, so the two tones sit well together under warm bulbs. If the room is small, keep chocolate to bedding and one cushion, and let cream walls and a pale rug keep the space open.

    16. Aqua and White with Woven Textures

    Coastal bedroom with aqua bedding and woven textures.

    Aqua and white give a bedroom a breezy, coastal mood that suits summer and rooms with rattan or jute. White walls and white bedding form the base, aqua appears in a duvet cover, cushions, or curtains, and woven textures in a jute rug, rattan baskets, and a woven pendant add warmth. The pairing feels light, and it suits a room with good daylight, where the white can reflect light.

    Keep aqua pale and watery rather than bright turquoise, so the room stays restful at night. A jute rug under the lower half of the bed grounds the palette, and a woven basket for throws repeats the natural texture. If the room gets cool light, add one warm wood piece, such as a bedside table, so the aqua does not feel cold.

    17. Plum and Gold for an Evening Glow Room

    Bedroom in the evening with plum bedding and gold lamps.

    Plum and gold give a bedroom a rich evening mood that suits a room used for reading and rest after dark. Cream walls form the base, plum appears in bedding and cushions, and gold appears in lamp bases, a mirror frame, or a small tray on the dresser. Warm bulbs make the gold glow and deepen the plum, so the room feels settled in the evening.

    Keep plum to bedding and cushions, not all four walls, unless the room is large with strong daylight. Match the gold finish across the pieces you choose, and keep the rest of the room plain, so the pairing reads as one planned accent. Store extra plum cushions in a basket at night, so the bed stays easy to get into.

    18. Peach and Mint in a Fresh Spring Bedroom

    Spring bedroom with peach bedding and mint cushions.

    Peach and mint give a bedroom a fresh, spring mood that suits a room with white furniture and good daylight. White walls form the base, peach appears in bedding and a cushion, mint appears in a throw, a painted stool, or a vase, and the two pastel tones keep the room light. The pairing suits a guest room or a small bedroom, since neither color is dark or heavy.

    Keep both tones pale and soft, and use one as the main color on the bed and the other in small accents, so the room does not feel like two competing pastels. A peach duvet with a mint throw, or mint bedding with peach cushions, reads more calmly than equal blocks. Add one bunch of fresh stems in a plain vase, and keep the rest of the surfaces clear.

    19. Slate Blue and Charcoal for a Quiet Room

    Quiet bedroom with slate blue bedding and a charcoal throw.

    Slate blue and charcoal give a bedroom a quiet, settled mood that suits a room where rest comes first. White or pale grey walls form the base, slate blue appears in bedding, charcoal appears in a throw and cushions, and dark wood nightstands add warmth. The pairing is muted rather than bold, and it works well with plain curtains and a low pile rug.

    Keep charcoal to soft furnishings rather than walls or large furniture, since a dark block can make a small room feel heavy. A slate blue duvet with a charcoal throw gives the bed depth, and a charcoal cushion repeats the dark tone at a smaller scale. Use warm bulbs in the evening, so the blue does not turn cold under cool light.

    20. Butter Yellow and White for a Sunny Small Room

    Sunny small bedroom with butter yellow bedding and white walls.

    Butter yellow and white give a small bedroom a sunny mood without a strong, bright yellow that can feel harsh. White walls form the base, butter yellow appears in bedding, cushions, and one curtain panel or throw, and light wood furniture keeps the room warm. The pairing suits a room with little daylight, since the pale yellow adds warmth that the white alone cannot give.

    Keep the yellow buttery and pale, close to cream, rather than a school bus yellow, and limit it to the bed and one accent, so the room stays calm. White curtains hung high and wide help the window look larger, and a pale rug under the bed softens the floor. If yellow starts to feel strong, swap one cushion for white and let the bedding carry the color alone.

    21. Rust and Denim Blue in a Relaxed Rustic Room

    Rustic bedroom with rust bedding and denim blue cushions.

    Rust and denim blue give a bedroom a relaxed, rustic mood that suits wood furniture, plaid or plain linen, and woven rugs. Cream or warm white walls form the base, rust appears in bedding and a throw, denim blue appears in cushions and a chair cover or curtains, and a wood bed frame links the two tones. The pairing feels lived in rather than formal, and it suits a room with natural light and simple furniture.

    Keep rust warm and earthy, and denim blue muted rather than bright, so the two tones sit well together. A rust throw on a denim covered chair, or denim cushions on a rust bed, repeats each color a second time. Avoid adding a third strong color nearby, since rust and denim already give the room plenty of warmth and contrast.

    22. Emerald and Blush for a Bold but Soft Finish

    Bedroom with an emerald headboard and blush bedding.

    Emerald and blush give a bedroom a bold finish that still feels soft, and they suit a room that needs one clear statement. Cream walls form the base, emerald appears in a velvet headboard or a painted dresser, blush appears in bedding and cushions, and the pairing balances a deep jewel tone with a pale, warm pink. The contrast is clear, but the blush keeps the emerald from feeling dark.

    Keep emerald to one large piece, such as the headboard or the dresser, and let blush carry the bed, so neither color fights the other. A blush throw on an emerald chair, or an emerald cushion on a blush bed, repeats each tone at a smaller scale. If the room is small, keep emerald to the headboard only, and let cream walls and pale bedding keep the space open.

    Conclusion

    A bedroom color combo works when each color has a clear job and a clear place. Put the lightest color on the largest surfaces, use the deeper color in smaller doses, and repeat each color at least twice, so the room looks planned rather than patched together. Test samples in your own light, change bedding and cushions first for a quick refresh, and save walls and furniture for a weekend project. Pick one combo from this list, try it on the bed first, and live with it for a week before you add the next layer. For ideas on keeping swapped bedding and spare cushions tidy, see these bedroom storage ideas. The right pairing will make the room feel new, even when nothing else changes.

    FAQs

    How many colors should a bedroom palette have?

    Two main colors and one small accent at most work best for most bedrooms. A larger palette can look busy, since bedding, curtains, rugs, and art each add their own tones. Start with a light base color for walls and bedding, add a deeper second color in cushions or a throw, and keep a third color to small details such as a frame or a vase. If the room starts to feel crowded, remove one accent color and let texture, such as linen, wool, and wood, add interest instead.

    How do I test a color combo before I paint?

    Paint large swatches on two walls, one facing the window and one facing away, and live with them for a few days in morning and evening light. Hold fabric samples for bedding and curtains next to the swatches, since paint alone does not show how the full room will look. If you are not ready to paint, try the combo in bedding and cushions first, which is easy to swap, and paint only after the bedding pairing feels right in your light.

    Can I mix warm and cool colors in a bedroom?

    Yes, as long as one side leads and the other stays in small doses. A warm cream wall with a cool slate blue bed, or a cool grey wall with a warm terracotta throw, can work well, since the contrast adds interest. Keep the tones muted rather than bright, repeat each color at least twice, and use warm bulbs in the evening, so cool tones do not feel cold. If the mix starts to feel unsettled, remove the smallest accent and let the two main colors carry the room.

    What is the easiest no-paint way to try a new color combo?

    Change the bed first, since it is the largest surface in the room. Swap the duvet cover, add a throw in the new accent color, and change two cushions to match. Curtains are the next easiest change, since one pair in the new color can shift the whole wall. Keep walls, furniture, and rugs as they are, and live with the bedding change for a week before you decide whether to paint or buy larger pieces.

    How do I keep a bold color combo calm?

    Use the bold color in one place only, such as a headboard, one wall, or bedding, and keep the rest of the room pale and plain. Limit patterns to one item, keep surfaces mostly clear, and use warm, layered light in the evening rather than one bright ceiling light. A bold color with pale walls, plain curtains, and a low pile rug reads as a clear accent, while the same color on every surface can make a room feel loud and hard to rest in.

    When should I change bedroom accent colors?

    Change accents when the season changes, when the room starts to feel tired, or when a new bedding set or curtain pair makes the old accents clash. Small swaps, such as cushions, throws, and a vase, are enough for most refreshes, and they cost less than repainting. Store out of season bedding and cushions in a labeled basket or drawer, so the next swap is quick and the spare pieces stay clean.


  • 22 Amazing Chic Book Shelf Ideas to Make Your Next Refresh Easier

    22 Amazing Chic Book Shelf Ideas to Make Your Next Refresh Easier

    A book shelf can set the tone for a whole living room. When the shape is clean, the color is calm, and the books have room to breathe, the shelf looks planned rather than crowded. When it is packed edge to edge, even good books can look like clutter. These 22 chic book shelf ideas cover built-ins, arches, glass doors, floating shelves, soft color, lighting, and styling, so you can pick one that fits your wall, your books, and your budget. Measure the wall first, note sockets and skirting boards, and start with the books you reach for most. These living room rug ideas show how to size a rug to the seating group, so the shelf wall and the seating work as one room.

    Key Takeaways

    • Measure the wall, including skirting boards, sockets, and door swings, before you buy or build a bookshelf.
    • Anchor tall, heavy, or freestanding shelves to the wall, and put heavy books low so the unit stays stable.
    • Pick one clear look per shelf wall: one frame color, one accent metal, and one or two display materials, repeated with restraint.
    • Leave breathing room on every shelf, with gaps between book groups and one partly empty shelf for new titles.
    • Add warm light at shelf level, since a dark shelf will stay unused even with good books on it.
    • Style with a mix of upright books, horizontal stacks, ceramics, and one plant per shelf run, and keep walkways clear.

    1. White Built-In with Brass Trim

    White built-in bookshelf with slim brass trim in a living room, filled with books and small ceramics.

    Build or paint a white built-in bookshelf and add slim brass trim, handles, or picture lights for a quiet, polished finish. White keeps a large shelf wall calm, while brass gives it a warm detail that stops it from looking plain. Paint the unit the same white as the trim for a fitted look, or use a soft warm white if the walls are cool.

    Put heavy hardbacks low, everyday paperbacks at eye level, and lighter items such as small vases up high. Keep brass to one or two details per unit, such as slim edge trim and matching handles, so it reads as a detail rather than a theme. This idea suits a living room with pale walls and wood floors, where a full wall of books needs to feel light.

    2. Arched Bookshelf Niche

    Arched bookshelf niche in a living room wall, with books and a small vase on its shelves.

    Use an arched bookshelf, or add an arched frame around a straight bookcase, to soften a room full of square furniture. The curve draws the eye up and gives the shelf a furniture feel, even when the shelves themselves are simple. An arch suits a tall, narrow wall, a hallway end, or a wall beside a fireplace.

    Keep the books inside the arch simple, with upright rows and one horizontal stack per shelf, so the curve stays the main detail. Paint the arch the same color as the shelf for a calm look, or paint the wall inside the arch one shade deeper for contrast. Measure the arch height against the ceiling before you buy, since a tall arch needs clear space above it.

    3. Black Lacquer Bookcase with Gold Details

    Black lacquer bookcase with gold handles and trim in a living room, books and pale ceramics on its shelves.

    Choose a black lacquer bookcase with gold handles, slim gold trim, or a gold picture light for a bold, evening-ready shelf wall. Black makes book spines and pale ceramics stand out, and gold keeps the dark finish from feeling flat. This pairing suits a living room used in the evening, where lamplight warms both finishes.

    Keep the walls around it pale, so the dark unit reads as a feature rather than a shadow. Put the heaviest books on the lowest shelves, and use bookends that match the gold or the black in the room. Dust black lacquer often, since dust shows clearly on it, and wipe it with a soft cloth as the maker advises.

    4. Glass-Door Display Bookcase

    Bookcase with glass doors in a living room, displaying books and ceramics behind clear glass.

    Choose a bookcase with glass doors when you want to show a collection but keep dust, pets, and small hands off the books. Clear glass keeps the spines visible, while reeded glass softens the view of a busy collection. This is the best choice for a shelf near a busy doorway, where open shelves would collect dust fast.

    Keep the doors closed when the room is dusty, and wipe the glass inside and out when you clean the room. Inside, sort books by author or by subject, and leave a little space on each shelf so you can remove a book without pulling the whole row forward. A glass-door case also suits signed books, photo books, and sets you want to keep together.

    5. Floating Oak Shelves with Ceramics

    Floating oak shelves on a living room wall, holding upright books and plain ceramics.

    Fix floating oak shelves on one wall and style them with upright books and a few plain ceramics for a light, open shelf wall. Floating shelves keep the floor clear, which helps a small living room feel open, and oak adds warmth to pale walls. Two or three shelves are usually enough, since more can make the wall look crowded.

    Fix floating shelves into studs or use fixings rated for the weight, since a shelf of hardbacks is heavier than a shelf of ornaments. Keep a bookend or a small rail at each open end so books do not slide off. Reserve floating shelves for favorites and for books with covers you enjoy seeing, since they hold fewer books than a full bookcase.

    6. Sage Green Painted Bookcase

    Sage green painted bookcase in a living room, with books, a plant, and a brass lamp beside it.

    Paint a bookcase sage green for a soft, calm color that suits wood, linen, and brass without shouting. Sage works well in a room that already has plants, since the shelf color and the leaves sit easily together. It also suits a pale room that needs one gentle color note, rather than a bold accent wall.

    Pair sage with cream walls, pale wood, and one warm metal, such as brass, for handles or a lamp. Keep the styling simple, with books grouped by height and one ceramic or plant per shelf. For a calm, pale base around the shelf, these Swedish living room ideas show how light walls, soft layers, and a chair placed where the light is best can warm a whole room.

    7. Slim Black Metal Frame Bookshelf

    Slim black metal frame bookshelf with wood shelves in a living room, holding books and a small plant.

    Use a slim black metal frame bookshelf when you want an open, airy unit that still holds a large collection. The thin frame keeps both walls visible, so the shelf feels lighter than a closed bookcase, which suits a small or dark living room. Black metal also pairs well with wood shelves, glass, and leather.

    Place it against a plain wall, where the frame lines stay clear, and keep heavy books on the lowest shelves for stability. Anchor the top to the wall, even if the unit feels steady, since a tall open frame can tip if pulled. Leave one shelf partly empty, so the frame reads as furniture rather than as packed storage.

    8. Bookshelf with a Reading Bench Below

    Living room bookshelf with a low cushioned reading bench below it, a floor lamp beside the bench.

    Set a low bench or a window seat below a bookshelf, with a cushion on the seat and the current book within reach, to make a reading spot that gets used daily. The bench gives the shelf wall a purpose beyond storage, and the shelf above keeps the next books close at hand. Angle a floor lamp behind one shoulder of the seat, so evening reading is easy.

    Add a small basket beside the bench for the book you are reading now, and keep a throw on the seat for cooler evenings. Keep the bench depth shallow enough that you can reach the shelves without standing on the seat. This idea suits a wall with a window nearby, where daylight does most of the work by day.

    9. Rounded Edge Bookcase

    Bookcase with rounded corners and soft edges in a living room, holding books and a small woven basket.

    Choose a bookcase with rounded corners and soft edges for a gentle, modern look that suits a family room. Rounded edges soften the straight lines of a shelf wall, and they are kinder in a room where people walk past the shelf often. A rounded unit also pairs well with a round coffee table and curved armchairs.

    Style it with books grouped by height and one soft item per shelf, such as a small vase or a woven basket, so the curves stay visible. Avoid sharp, angular ornaments on a rounded shelf, since they fight the shape. Wipe the curved edges often, since dust gathers on a curve just as it does on a flat shelf.

    10. Pale Ladder Shelf with Linen Baskets

    Pale wood ladder shelf leaning against a living room wall, with books and linen baskets on its shelves.

    Lean a pale wood ladder shelf against a wall for a light, renter friendly option that needs little fixing beyond a small anchor. The shelves get deeper toward the bottom, so place large books low and smaller books and plants higher up. Linen baskets on the lower shelves hide chargers, notebooks, and small clutter.

    Check that the feet sit flat on the floor and that the top rests evenly against the wall, and anchor the top if children use the room. Keep heavy items off the top two rungs, and leave one shelf for a plant that trails a little, so the ladder reads as lived in. This idea suits a first home or a rented room, where a built-in is not practical.

    11. Bookshelf Backed with Patterned Wallpaper

    Open bookshelf lined with patterned wallpaper at the back, holding books and one plain ceramic per shelf.

    Line the back of an open bookshelf with patterned wallpaper to give plain shelves a finished, collected look. Wallpaper behind books adds color and pattern without painting the whole wall, and it can be changed later with less work than a full repaint. Choose a small, calm pattern, since a large, busy print will fight the book spines.

    Measure each back panel before you cut, and use a paste suited to the shelf material, with edges pressed flat so pages do not catch. Keep the shelf styling simple, with books upright and one plain ceramic per shelf, so the wallpaper stays visible in the gaps. This idea suits a plain white or pale wood bookcase that needs one quiet detail.

    12. Low Credenza Bookshelf under Art

    Low wide credenza used as a bookshelf in a living room, with framed art hung on the wall above it.

    Use a low, wide credenza as a bookshelf, with books laid flat or upright on its top and inside its open sections, and art hung above it. A low unit keeps the wall above free for art, which suits a room where the shelf wall is also a gallery wall. The credenza top also gives a place for a lamp, a vase, and the book you are reading now.

    Keep the books on the credenza to one or two neat groups, so the top still looks like a surface rather than a pile. Hang the art with its center at eye level when seated, and leave a gap between the credenza top and the lowest frame, so you can lift books out without knocking a frame. This idea suits a long, low wall under a window or beside a sofa.

    13. Two-Tone Bookcase with Painted Frame and Wood Shelves

    Two-tone bookcase with a painted frame and natural wood shelves in a living room, holding books and ceramics.

    Combine a painted frame with natural wood shelves for a bookcase that feels both finished and warm. The painted frame gives the unit a clean edge, while the wood shelves add grain and warmth that paint alone cannot. This mix suits a room with both painted trim and wood furniture, since it links the two.

    Paint the frame in the room trim color for a fitted look, or use a soft neutral such as warm grey if the trim is white. Keep the wood shelves matte rather than glossy, so they read as natural rather than new. Group books by height on the wood shelves, and use plain ceramics that suit both the paint and the wood.

    14. Bookshelf with a Small Desk Nook

    Bookshelf wall with a small desk nook below the shelves in a living room, a chair tucked under the desk.

    Fit a small desk into a bookshelf wall, with books on the shelves above and a chair that tucks under the desk, so the wall works for reading and for writing. Books on the shelves above stay close to the desk, which suits reference books and notebooks you check often. Keep the desk depth shallow enough that you can reach the shelves without standing up and leaning across the work surface.

    Add a task lamp, a cable tidy, and one drawer or basket for pens and paper, so the desk stays clear for work. Keep the chair light enough to pull out without hitting the shelves. This idea suits a living room wall that must also serve as a home office, since it gives work a defined place without taking a whole wall.

    15. Tall Narrow Bookshelf for a Tight Wall

    Tall narrow bookshelf fitted on a slim living room wall beside a door, holding books and a small clock.

    Use a tall, narrow bookshelf on a wall that is too slim for a wide bookcase, such as a wall beside a door, a fireplace, or a window. A narrow unit holds a surprising number of books when the shelves are adjustable, especially if you mix upright rows with one horizontal stack per shelf. Measure the width from both sides, including skirting boards and door frames, before you buy.

    Use the top shelf for a light plant or a small clock, and keep the middle shelves for books you use weekly. A narrow shelf also works well in a pair, one on each side of a door or a fireplace, where two slim units frame the feature. Choose adjustable shelves if your collection mixes tall art books and small paperbacks.

    16. Muted Color-Blocked Book Display

    Bookshelf with books arranged in muted color blocks of cream, sage, dusty blue, and warm grey.

    Arrange books by spine color in soft, muted blocks, such as cream, sage, dusty blue, and warm grey, for a shelf that works as calm display as well as storage. Muted color blocking suits a chic room better than bright blocks, since the colors stay close to the room palette. Work shelf by shelf, and keep one neutral block for books that do not fit any color group.

    Accept that color order is not subject order, so keep a small group of daily reference books together at eye level regardless of color. Step back and check the blocks from the sofa, since a block that looks even up close can look patchy from across the room. Re-sort only when you add a batch of new books, not after every single purchase, or the system becomes a chore.

    17. Bookshelf with Warm Shelf Lighting

    Living room bookshelf lit with warm shelf lights in the evening, books glowing softly.

    Add warm light to a bookshelf with slim shelf lights, a small picture light, or a lamp placed to wash across the spines. Light matters on a shelf wall because shelves are often in the darker part of a room, and a dark shelf will stay unused even when the books are good. Warm white light suits a living room better than cool white, which can make wood and paper look harsh.

    Place lights under each shelf or along the top, and hide cables behind the unit or in a cable channel. Battery lights suit a rented home, while wired lights suit a built-in shelf planned in advance. Test the light level at dusk, and add one brighter reading light beside the chair if the shelf light alone is not enough to read by.

    18. Vintage French Style Gilt Bookcase

    Vintage French style bookcase with a painted frame and slim gilt trim in a living room, holding books.

    Choose a vintage French style bookcase, with a painted frame, carved details, and slim gilt trim, for a room with classic furniture and soft colors. The carved frame gives the shelf a furniture feel, while the gilt detail keeps it from looking plain. This style suits leather-bound books, pale ceramics, and a linen armchair nearby.

    Keep the walls around it pale, so the carved frame stays the detail, and avoid crowding the shelves, since a carved unit already carries a lot of visual detail. Put the heaviest books on the lowest shelves, and use bookends that match the gilt or the painted frame. Check secondhand shops for a frame with good joints, since an old frame often suits this look better than a new copy.

    19. Bookshelf as an Open Plan Divider

    Freestanding double-sided bookshelf used as a room divider in a living room, books visible from both sides.

    Place a freestanding double-sided bookshelf at an angle to a wall to divide a living area from a dining or work zone. Books visible from both sides make the divider feel like furniture, not a barrier, and the unit gives both zones their own storage. Choose a unit open on both sides when you want light to pass through, and with a solid back on one side only if you need to hide one zone.

    Anchor the divider to the floor or to a wall bracket where possible, since a freestanding unit can tip if a child climbs it. Keep heavy books low on both sides, and leave the top shelf for light items. This idea suits an open plan room where the shelf marks the edge of the living zone, and it works best when the divider is no taller than eye level from the seating side.

    20. Bookshelf with Closed Cabinets Below

    Bookshelf with closed cabinets below and open shelves above in a living room, books and a vase on the open shelves.

    Combine open shelves above with closed cabinets below, so the wall holds books you want to see and clutter you want to hide. Cabinets below suit board games, chargers, photo albums, and oversized books that do not stand well on open shelves. Keep the cabinet doors plain and matched to the shelf color, so the unit reads as one piece.

    Put the books you reach for most on the open shelves at eye level, and use the cabinets for items you need weekly rather than daily. For spacing and grouping lessons that carry over from other rooms, the corner shelf advice in these kitchen bookshelf ideas shows how to measure a tight space and keep books within easy reach. Label the inside of a cabinet door if the household shares the storage, so games and albums go back to the right place.

    21. Bookshelf with a Drinks Cabinet Section

    Bookshelf section used as a drinks cabinet in a living room, with glasses, bottles, and a serving tray.

    Give one section of a bookshelf a second job as a drinks cabinet, with glasses on one shelf, bottles on a lower shelf, and a small tray for serving. A drinks section suits a living room shelf used for hosting, since guests can help themselves without a separate bar cart. Keep the drinks section to one bay of the unit, so the wall still reads as a bookshelf first.

    Store bottles low and upright, keep glasses away from the shelf edge, and wipe the shelf after use, since spills damage paper fast. Use a small tray to gather bottles and glasses, so the section stays tidy between gatherings. Keep this section out of reach of small children, and keep it clear of candles and open flames.

    22. Bookshelf Gallery Wall with Art Above

    Bookshelf in a living room with framed art prints hung on the wall above the shelves.

    Hang framed art, prints, or photos on the wall above a bookshelf, so the wall reads as a small gallery as well as a library. Art above the shelves draws the eye up and stops the shelf wall from feeling like storage alone. Keep the frames consistent in color or material, and hang the center of the group at eye level when seated, so it suits the chair below.

    Start with three or four pieces and add over time, rather than filling the wall in one go. Use art with pale backgrounds and soft colors if the shelves are already colorful, or bold prints if the books are mostly neutral. Leave a gap between the top shelf and the lowest frame, so you can lift books out without knocking a frame.

    Conclusion

    A chic book shelf starts with the wall itself, not the shopping list. Measure the wall, decide what the shelf must do, and pick one idea from this list that fits that job. Anchor tall units, put heavy books low, leave breathing room, and add warm light so the shelf gets used after dark. Start with the books you reach for most, style one shelf at a time, and let the shelf grow as your collection grows. A shelf that holds books you love, a chair you sit in, and a lamp you switch on each evening will feel lived in because it is lived in.

    Save this list on Pinterest before your next living room refresh, and start with the wall closest to your favorite seat.

    FAQs

    How do I make a bookshelf look chic rather than cluttered?

    Leave gaps on every shelf, group books by height, and limit non-book items to about one per shelf. Pick one frame color and one accent metal, and repeat them with restraint, rather than adding a new color on each shelf. A shelf that is packed edge to edge looks like storage, while a shelf with gaps, one plant, and one ceramic looks like a room you live in.

    What color bookshelf looks most chic in a living room?

    White, sage green, and black are the safest chic choices, since each gives a clear base for books and ceramics. White suits a pale room, sage suits a room with plants and wood, and black suits a room used in the evening, where lamplight warms the finish. Test a painted sample in daylight and lamplight before you paint a full unit, since color shifts a lot between the two.

    How do I light a bookshelf without wiring?

    Use battery shelf lights under each shelf, a battery picture light above the top shelf, or a floor lamp placed to wash light across the spines. Battery lights suit a rented home, while wired lights suit a built-in shelf planned in advance. Test the light at dusk, keep cables or battery packs behind the unit, and add a reading lamp beside the chair if shelf light alone is not enough to read by.

    How many books should I put on each shelf?

    Leave about a tenth of each shelf empty, so you can slide books out and add new titles without restacking the whole row. Group books by height, use bookends at open ends, and mix upright rows with one horizontal stack per shelf for a relaxed look. A partly empty shelf is not wasted space: it is the space that lets you use the shelf without a restack each time.

    Can a chic bookshelf work in a small living room?

    Yes, if you choose a light option and keep the floor clear. Floating shelves, a ladder shelf, or a low credenza suit a small room better than a floor-to-ceiling built-in, which can crowd the wall. Use pale colors, leave gaps on the shelves, and keep the seating small enough that the walking route past the shelf stays clear. A small shelf that holds the books you read now is more useful than a large one that blocks the room.

    How do I anchor a tall bookshelf safely?

    Fix tall or freestanding shelves to the wall with brackets or straps rated for the unit weight, using fixings suited to your wall type. Put heavy books low, keep the unit level, and check the fixings after the first few weeks of use. Anchor even low units in a home with children, since a child may climb or pull on a shelf. If you rent, ask about approved fixings before you drill.


  • 32 Sage Green Themed Kitchen Ideas for a More Polished Space

    32 Sage Green Themed Kitchen Ideas for a More Polished Space

    Sage green gives a kitchen color without noise. It is muted enough to live with every day, yet clear enough to set the tone for cabinets, walls, tile, and wood. These 32 sage green themed kitchen ideas cover full cabinet runs, two tone layouts, islands, backsplashes, hardware, seating, and lighting, so you can plan a whole room or change one layer at a time. Start with the largest surface you see first, usually the cabinets, then repeat the sage once or twice in smaller spots so the room reads as planned. If you want to compare sage with other cabinet colors first, these colors for your kitchen cabinets set out undertones and pairings to check beside your floor and counters.

    Key Takeaways

    • Start with one main sage surface, such as the cabinets, the island, or one wall, and repeat the tone once or twice in smaller items.
    • Pair sage with warm white, cream, light oak, pale stone, and one metal finish so the room stays soft and settled.
    • Test paint and tile samples in morning and evening light, since sage shifts between cool daylight and warm lamplight.
    • Mix textures, such as painted wood, linen, woven baskets, and stone, so a muted palette still has depth.
    • Keep work surfaces clear and storage closed where possible, since a tidy sage kitchen reads as more polished than a decorated but crowded one.
    • Choose washable finishes near the stove and sink, and keep one darker accent, such as black hardware or a wood stool, in a few small places for shape.

    1. Classic Sage Shaker Cabinets All Over

    Kitchen with sage green Shaker cabinets on every wall and a pale counter.

    Use sage Shaker cabinets on every wall for the most reliable version of this look. The recessed panel adds just enough detail to avoid a flat wall of color, while the muted green keeps the room calm. This suits almost any home, and it gives you a steady base for wood floors, a pale counter, and brass or black taps.

    Keep the walls warm white or cream, and repeat one warm material, such as light oak stools or a wood board, in two spots. Choose a satin or semi gloss finish near the stove, since flat paint shows splashes and is harder to wipe. The result is a kitchen with clear color that still feels easy to cook in every day.

    2. Two Tone Sage Lowers and White Uppers

    Kitchen with sage green lower cabinets and white upper cabinets.

    Paint the lower cabinets sage and keep the uppers white for a lighter take on a full sage kitchen. The sage grounds the room at floor level, where scuffs and marks are most common, while the white uppers keep the wall bright and open. This split suits smaller kitchens and rooms with low ceilings.

    Repeat the sage once more, in stools, a runner, or a vase, so the lower color looks planned rather than random. Keep the counter pale and the backsplash simple, so the two cabinet colors stay the clear feature. If you later want more sage, repainting only the uppers is a smaller job than starting over.

    3. Sage Island with Warm White Cabinets

    Warm white kitchen with a sage green island and wood stools.

    Keep the main cabinets warm white and paint only the island sage for a clear focal point with low risk. The island becomes the color anchor of the room, and the rest of the kitchen stays calm, which makes the change easier to live with and easier to repaint later. A sage island also hides scuffs better than a white base at kick height.

    Repeat the island color once more, in a stool cushion, a runner, or a plant pot, so it links to the room. Choose a hard wearing paint for the island base, since it takes kicks, bags, and stool legs. For budget ways to make a single change like this count, these kitchen ideas on a budget show how paint, hardware, and lighting do most of the work.

    4. Sage Beadboard Cabinets for a Cottage Kitchen

    Cottage kitchen with sage green beadboard cabinets and a farmhouse sink.

    Choose beadboard door fronts in sage for a cottage kitchen, with narrow vertical grooves that add texture without a new color. Beadboard suits a farmhouse or coastal home, and it pairs well with a farmhouse sink, wood counters, and woven baskets. The texture stops sage from looking flat, even in a kitchen with little pattern elsewhere.

    Keep counters and the backsplash plain, so the beadboard can carry the detail. Wipe the grooves with a damp cloth, since crumbs and dust settle in the lines. If full beadboard doors feel like too much, use them on the island or on one pantry wall, and keep the rest of the cabinets in plain Shaker style.

    5. Flat Front Sage Cabinets for a Modern Kitchen

    Modern kitchen with flat front sage green cabinets and long simple pulls.

    Use flat front sage cabinets for a modern kitchen, with no panel detail and long, simple pulls. The flat doors let the color itself do the work, and they suit handleless runs, integrated appliances, and pale stone counters. This is a good choice when you want sage to feel current rather than cottage style.

    Keep the rest of the room quiet, with a plain backsplash and one wood tone, so the flat fronts read as calm rather than bare. Wipe fingerprints near handles often, since flat doors show marks more than framed doors do. Add warmth with wood stools or open wood shelves, so the modern lines still feel lived in.

    6. Glass Front Sage Uppers for Display

    Sage green upper cabinets with glass fronts displaying white dishes.

    Swap a few sage upper doors for glass fronts, and display white dishes, clear glasses, and a few wood boards behind them. Glass breaks up a long run of sage doors, adds depth, and makes everyday pieces easy to find. It suits a kitchen with one straight run, where two or three glass doors are enough to change the whole wall.

    Keep the display simple, with one stack per shelf and space between groups, so the cabinets read as tidy. Put daily dishes at easy reach and rarely used pieces higher up. If glass feels too exposed, use reeded or frosted glass on one cabinet for a softer version of the same idea.

    7. Floor to Ceiling Sage Pantry Wall

    Floor to ceiling sage green pantry cabinets with baskets and jars.

    Dedicate one wall to tall sage pantry cabinets, floor to ceiling, for dry goods, small appliances, and cleaning gear in one place. A pantry wall keeps the rest of the kitchen free of tall units, so the cooking wall can stay low and open. It also makes meal planning easier, since everything is visible at a glance.

    Fit the pantry with adjustable shelves, a few baskets for loose items, and labels on each shelf zone. Keep heavy items at waist height and light items up high. Put the pantry near the fridge or the main prep counter, so ingredients travel a short distance to the cooker.

    8. Sage Cabinets with Butcher Block Counters

    Sage green cabinets with warm butcher block wood counters.

    Pair sage cabinets with butcher block counters for warmth that stone alone cannot give. Wood softens the green, suits farmhouse, Scandinavian, and transitional rooms, and works with white, cream, and beige walls alike. A wood counter also makes the island or prep run feel like furniture rather than a fitted block.

    Seal the wood as advised for kitchen use, and wipe spills promptly so water does not sit on the surface. Use the butcher block for prep and keep hot pans on trivets, since heat marks wood. Sand and reseal a worn section rather than replacing the whole top, which keeps this a long lasting choice.

    9. Sage Cabinets with Pale Stone Counters

    Sage green cabinets with a pale stone counter and brass tap.

    Pair sage cabinets with a pale stone or stone look counter for a quiet, classic backdrop. The pale surface lifts the green, keeps the work zone bright, and pairs well with brass taps, wood stools, and cream tile. This suits a kitchen where you want the cabinets to carry the color and the counter to stay calm.

    Keep the backsplash plain, so the counter pattern stays clear. Seal grout and stone as advised, and wipe splashes promptly near the sink and cooker. If a full stone slab is out of reach, large stone look tiles give a similar effect with more grout lines to clean.

    10. Brass Hardware on Sage Cabinets

    Sage green cabinets with brass knobs and cup pulls.

    Warm sage cabinets with brass knobs, cup pulls, and a matching tap for a soft golden thread through the room. Brass warms sage in a way that chrome cannot, and it suits wood floors, cream walls, and both Shaker and beadboard doors. This is one of the easiest updates, since hardware swaps need no painting and no building work.

    Keep all the brass in the same finish, so knobs, pulls, and the tap read as one set. Save the old hardware in a labelled bag if you rent or may want to swap back. Wipe brass with a soft cloth to keep the finish even, and repeat brass once more in a light fitting or a frame so it does not look isolated.

    11. Matte Black Hardware on Sage Cabinets

    Sage green cabinets with matte black handles and a black tap.

    Use matte black handles, hinges, and a black tap against sage cabinets for a sharper, modern farmhouse edge. Black outlines each door, adds contrast without a new color, and pairs well with dark counters, wood stools, and a black framed window. This suits a kitchen that needs definition, such as a large sage room that feels washed out.

    Repeat black once or twice more, in a light fitting, a stool frame, or a rug border, so the hardware does not look isolated. Keep the rest of the room pale, so black stays an accent rather than a theme. Matte black shows fingerprints less than polished black, which helps on doors used many times a day.

    12. White Subway Tile Backsplash with Sage Cabinets

    Sage green cabinets with a white subway tile backsplash.

    Use a white subway tile backsplash behind sage cabinets for a clean, classic wall that lets the green stay the feature. The white tile brightens the work zone, reflects light back into the room, and pairs with almost any counter. A simple brick pattern keeps the wall calm, while a stacked pattern gives a slightly more modern feel.

    Seal grout in the splash zone behind the sink and cooker, and wipe splashes promptly. Keep the counter plain, so the tile pattern stays clear. If white tile feels too plain, use a handmade look tile with slight variation in tone, which adds interest without a new color.

    13. Patterned Tile Backsplash with Sage Cabinets

    Sage green cabinets with a patterned tile backsplash in sage and cream.

    Pair sage cabinets with a patterned tile backsplash for a wall with clear character, using a pattern in sage, cream, and one accent such as terracotta or navy. The pattern gives the kitchen a focal point behind the cooker or sink, and it suits a room where the cabinets are plain and the counters are simple. Keep the pattern to one wall run, not every wall, so it reads as a feature.

    Choose a tile size that fits the wall without awkward cuts at the edges, and test a few tiles beside the sage cabinets in daylight. Keep other patterns quiet, such as a plain runner and solid towels, so the backsplash does not compete with a second strong print. Seal the tile as advised for the splash zone.

    14. Sage Walls with White Cabinets

    Kitchen with sage green walls and white cabinets.

    Paint the walls sage and keep the cabinets white for the reverse of a sage cabinet kitchen. This suits a kitchen where the cabinets are already white and in good shape, since paint alone changes the room. The sage walls give warmth and color at eye level, while the white cabinets keep storage bright.

    Choose a sage a shade deeper than you first like for the sample, since wall color often reads paler once it covers a full wall. Keep the ceiling and trim white, and repeat the sage once in towels or a runner so the wall color links to the room. This is also a good test: live with sage walls for a season, then decide whether to use it on cabinets later.

    15. Sage Window Frame with Cafe Curtains

    Kitchen window with a sage green frame and linen cafe curtains.

    Paint the kitchen window frame sage and hang linen cafe curtains on the lower half for privacy at counter height with daylight above. The sage frame turns a plain window into a feature, and the cafe curtains soften the glass without blocking the top light. This suits a window over the sink, where full curtains would crowd the counter.

    Hang the panels on a slim tension rod inside the frame if you rent, and keep the hem just above the sill so fabric does not sit in water. Choose washable fabric, since kitchen curtains pick up grease film over time. For more window treatments that suit a working kitchen, see these kitchen window decor ideas.

    16. Open Wood Shelves Beside Sage Cabinets

    Open light oak shelves beside sage green cabinets with mugs and bowls.

    Replace one short run of sage uppers with open wood shelves, and keep the rest of the cabinets closed. The shelves give you a spot for daily mugs, bowls, and plants, while the closed cabinets hide the less pretty storage. This mix is practical in a small kitchen, where a full wall of uppers can feel heavy.

    Keep shelf items to pieces you use weekly, and dust them often, since open storage collects cooking film. Put the shelves near the sink or cooker, where daily dishes are most useful. Use light oak shelves for warmth against sage, and leave breathing room between groups so the shelves read as calm, not crowded.

    17. Sage Range Hood Cover as a Focal Point

    Kitchen cooking wall with a sage green range hood cover.

    Build or paint the range hood cover sage so the cooking wall has a clear focal point above the cooker. A sage hood cover links to sage cabinets or a sage island, and it suits a kitchen with a plain backsplash, where the hood can carry the detail. Keep the shape simple, such as a straight or gently tapered cover, so it reads as part of the cabinetry.

    Choose a washable paint finish, since the hood sits in steam and cooking film. Keep the backsplash behind the cooker plain, so the hood shape stays clear. If a full hood cover is too large a job, painting only the hood trim in sage gives a smaller version of the same idea.

    18. Sage Bench Seat in a Breakfast Nook

    Breakfast nook with a sage green bench seat and cream cushions.

    Build a sage bench seat into a breakfast nook, with storage drawers below and cream cushions above, for seating that also hides table linens and board games. The bench uses a corner well, seats more people than chairs alone, and gives the nook a clear color anchor. This suits a kitchen with a window corner that currently holds only a small table.

    Keep the table wood or white, so the sage bench stays the feature, and add one sage cushion pattern repeated in a runner or a vase. Choose a wipeable cushion fabric near the table, since breakfast seating takes daily spills. Leave a gap at one end of the bench so people can slide in without moving the table.

    19. Sage Bar Stools at a Wood Island

    Wood island with sage green bar stools in a bright kitchen.

    Pair a wood island with sage bar stools for color at seat height, where you see it every time you sit down. Sage stools suit a kitchen where the cabinets are white or wood, since the stools add color without repainting a single door. Choose stools with a footrest and a seat height that fits the island, and test one stool before buying a full set.

    Repeat the sage once more, in a runner or a plant pot, so the stools look planned. Wipe stool legs often, since they take kicks and floor dust. If the stools have fabric seats, choose a washable cover or a wipeable seat, since kitchen seating takes spills.

    20. Sage Farmhouse Sink Wall

    Sage green cabinets around a farmhouse sink under a kitchen window.

    Build the sink wall around a deep farmhouse sink, with sage cabinets on either side and the sink front on show. The sink becomes a focal point, the deep bowl suits large pots and baking trays, and the sage cabinets keep the wall calm. This suits a kitchen with a window over the sink, where daylight makes the sage and the sink front glow.

    Choose a tap finish that matches your cabinet hardware, and keep the counter around the sink plain for wiping. A farmhouse sink needs a cabinet made to fit it, so check sizes before ordering. Clean the sink with a soft cloth and mild cleaner, and keep a wood board or a drying rack nearby for daily use.

    21. Sage Coffee Station in a Cabinet Nook

    Sage green cabinet nook set up as a coffee station with mugs and jars.

    Turn one sage cabinet run into a coffee station, with an appliance garage or a niche for the machine, mugs on hooks or a shelf, and jars for beans and sugar. Keeping coffee gear in one spot frees the main counter for cooking, and it gives mornings a clear routine. This suits a kitchen with a short run of cabinets near the dining table or a window.

    Keep the station near a power point, and leave a heat safe surface for the machine. Store mugs you use daily at hand height, and keep spare filters and beans in a closed drawer below. Wipe the station each morning, since coffee splashes show quickly on sage doors, just as they do on white.

    22. Hanging Herb Planters on a Sage Wall

    Sage green wall with hanging herb planters in terracotta pots.

    Hang small herb planters on a sage wall, in matching terracotta or white pots, so the wall gains living color and cooking herbs stay within reach. The green of the herbs sits naturally against sage paint, and the planters suit a wall near the cooker or prep counter. Use a rail or individual hooks fixed into studs, with pots light enough to lift for watering.

    Choose herbs based on the light your wall actually gets, and keep a tray or saucer under each pot to protect the wall. Water at the sink and let pots drain before hanging them back, since drips mark paint. If the wall gets little light, use one trailing plant in a hanging pot instead of a full herb row.

    23. Sage Dining Table and Chairs in an Eat In Kitchen

    Eat in kitchen with a sage green dining table base and chairs.

    Paint a dining table base or a set of chairs sage in an eat in kitchen, and keep the table top wood for warmth. The sage seating marks the dining zone clearly inside an open kitchen, and it suits a room where the cabinets are white or wood, since the table adds color without a repaint. This is a good weekend project, since chairs are easy to repaint later.

    Keep the table top wood or white, and add cream seat cushions so the sage does not feel heavy. Repeat the sage once more, in a runner or a vase on the table, so the dining zone links to the kitchen. Choose a hard wearing paint for chair legs, since they take daily kicks.

    24. Sage Cabinets with Light Oak Floors and Accents

    Sage green cabinets with light oak floors and oak shelves.

    Pair sage cabinets with light oak floors, open oak shelves, and oak stool seats for warmth that painted cabinets alone cannot give. The oak grain softens the green, suits farmhouse, Scandinavian, and transitional rooms, and works with white, cream, and beige walls alike. A simple oak tone across the main pieces keeps the room settled rather than busy.

    Match the oak tone to your floor if you can: pale oak with pale sage, warmer oak with a deeper sage. Keep the finish matte or satin rather than high gloss, which can look harsh next to soft linen and cotton. The same warm pairing shapes these sage green bedroom ideas, where light oak and sage sit together in a calm room.

    25. Cream and Sage Checkerboard Floor

    Kitchen with a cream and sage checkerboard floor and plain cabinets.

    Lay a cream and sage checkerboard floor for a kitchen floor with clear pattern and a vintage note. The checkerboard suits a cottage or farmhouse kitchen, and it pairs well with plain sage or white cabinets, since the floor carries the pattern. Keep the checks a modest size in a small kitchen, so the floor does not crowd the room.

    Choose a floor material that suits a kitchen, such as tile or a wipeable vinyl, and seal grout if you use tile. Keep walls and counters plain, so the floor stays the feature. A washable runner over the main walkway softens the pattern underfoot and protects the floor in the busiest spot.

    26. Sage Pendant Shades over the Island

    Sage green pendant shades hanging over a kitchen island.

    Hang pendant shades painted sage over the island for color at eye level, where you notice light most. Two or three simple dome or drum shades, spaced evenly over the island, read as a plan, and the sage links to cabinets or stools below. This suits a kitchen where the cabinets are white or wood, since the pendants add color without paint on a large surface.

    Hang them high enough to clear heads and steam, and keep the lowest point well above the counter. Match the pendant metal, such as brass or black, to the tap or handles. Use warm white bulbs so the light feels soft in the evening and the sage reads as warm, not grey.

    27. Sage Panels on an Integrated Fridge Wall

    Kitchen wall with sage green panels on an integrated fridge.

    Fit sage panels on an integrated fridge so the appliance wall reads as cabinetry rather than a block of steel. The panels link the fridge to sage cabinets beside it, and they suit a kitchen where the fridge sits in a full run of tall units. Keep the panel style the same as the cabinets, with matching handles, so the fridge disappears into the wall.

    Check the panel sizes and hinge clearances before ordering, since integrated panels must fit the appliance maker guidance. Keep the panels wipeable, since the fridge doors are used many times a day. If full panels are too large a job, a sage panel on a tall pantry beside the fridge gives a similar linked look.

    28. Sage Plate Rack on an Open Wall

    Sage green plate rack on a kitchen wall holding white plates.

    Fit a sage plate rack on an open wall, with slots for plates and a small shelf for bowls, for storage that also acts as decor. The rack suits a kitchen with a blank wall near the dining table, and it keeps daily plates within reach without a full cabinet run. Paint the rack the same sage as the cabinets, so it reads as part of the room.

    Keep the plates in one color family, such as white or cream, so the rack reads as tidy. Fix the rack into studs or with fixings rated for the load, since plates are heavy. Leave space below the rack for a small shelf or a rail, so the wall works for bowls and cups as well as plates.

    29. Sage Memo Board for Menus and Notes

    Sage green memo board beside a kitchen prep counter with notes.

    Hang a sage memo board near the prep counter or the fridge for menus, shopping lists, and notes, framed in wood or painted to match the cabinets. The board keeps paper off the fridge and the counter, and it gives the kitchen a working hub that still looks planned. This suits a family kitchen where lists and school notes otherwise pile up.

    Keep the board a modest size, and clear it weekly so it stays useful rather than crowded. Use pins or clips that suit the board surface, and keep one small pot for pens beside it. If you rent, hang the board from a picture rail or adhesive fixings rated for its weight, so it comes down with no heavy repair.

    30. Sage Textiles: Runner, Towels, and Curtains

    Kitchen with a sage green runner, towels, and window curtains.

    Use sage textiles for a no paint refresh: a washable runner by the sink, towels on the oven rail, and curtains or a valance at the window. Textiles change the room in an afternoon, and they suit renters and anyone testing sage before painting cabinets. Choose one sage tone across the pieces, with cream or white mixed in, so the group reads as a set.

    Keep the runner low pile and washable, since the sink area takes water and food spills. Wash towels and curtains on a regular cycle, since pale sage shows dust and marks sooner than darker colors. If the textiles alone feel too soft, add one hard sage item, such as a stool or a vase, to anchor the color.

    31. One Wall Sage Galley for a Small Kitchen

    Small galley kitchen with one wall of sage green cabinets.

    Paint one wall of sage cabinets in a small galley kitchen, with the opposite wall kept white or open, so the room gains color without feeling closed in. The sage run holds the cooker, sink, and main storage, while the white wall keeps light bouncing back into the narrow room. This suits a galley where a full sage kitchen would feel heavy.

    Keep the counter pale, the backsplash simple, and the floor light, so the narrow room stays bright. Use deep drawers for pots and a tall pantry at one end, since galley storage must work hard. For more small kitchen planning, these white kitchen cabinet ideas show how white uppers and open elements keep a tight room feeling open.

    32. Warm Under Cabinet Light in a Sage Kitchen at Night

    Sage green kitchen at night with warm under cabinet lighting.

    Add warm under cabinet lighting to a sage kitchen so the green reads as soft, not grey, after dark. Light removes shadows from sage doors, makes prep safer, and lets the kitchen glow in the evening instead of looking flat. This is a small change with a large effect on how lived in the room feels.

    Use warm white bulbs, not cool daylight bulbs, so sage paint reads as warm. Put prep lighting on a separate switch from ceiling lights, so you can light only the work zone in the evening. Wipe the light covers often, since kitchen grease dulls the light over time, and check that strips sit clear of the cooker and steam.

    Conclusion

    A polished sage kitchen rarely needs a full remodel in one go. Start with the largest surface, test the sage in your own light, pair it with warm white, light oak, and one metal finish, and repeat the tone once or twice in smaller spots. Add one storage fix and one lighting fix, since a tidy, well lit kitchen reads as more polished than a decorated but cluttered one. Save this list on Pinterest before your next kitchen refresh, and try one idea first: a wall, an island, or a set of stools this week, and a backsplash or hardware change when you are ready for the next step.

    FAQs

    What sage green shade works best in a kitchen?

    Choose a muted, grey green rather than a bright green, since a muted sage stays calm across a full run of cabinets and in both daylight and evening light. Test a large sample beside your floor, counter, and appliances, and check it in the morning and at night. Some sage paints lean blue and others lean yellow, and that undertone shows clearly beside wood floors and stone counters.

    Does sage green work in a small or dark kitchen?

    Yes, if you keep the sage to one run, an island, or the lower cabinets, and keep the uppers, walls, and counters pale. Light sage with white uppers and a pale backsplash keeps a small kitchen bright, while a full run of deep sage can feel heavy in a dark room. Add warm under cabinet light and a light floor to keep the room feeling open.

    What colors go with sage green kitchen cabinets?

    Warm white, cream, light oak, pale stone, and soft beige all sit well with sage. Brass adds warmth, matte black adds definition, and wood counters or oak shelves keep the room from feeling flat. Keep one metal finish through the room, and limit strong accent colors to one or two small items, such as a runner or a vase, so sage stays the clear feature.

    What backsplash suits sage green cabinets?

    A white subway tile backsplash is the safest pairing, since it brightens the work zone and lets sage stay the feature. A handmade look white tile adds texture without a new color, while a patterned tile in sage, cream, and one accent gives the wall more character. Keep the counter plain when you choose a patterned tile, so the two patterns do not compete.

    Is sage green hard to keep clean in a kitchen?

    Sage hides light marks better than white, but it still shows cooking splashes near the stove and sink. Choose a satin or semi gloss washable finish for cabinets, wipe doors near the cooker each week, and keep textiles washable. A matte finish looks soft but marks more easily, so save flat paint for walls away from the splash zone.

    Can I add sage green to a kitchen without repainting cabinets?

    Yes. Start with sage stools, a runner, towels, curtains, a memo board, or pendant shades, and repeat the tone in two or three spots so it reads as a plan. Painting one island, one pantry wall, or a window frame is a larger step that still leaves the main cabinets untouched. Test textiles first if you are unsure of the shade, then move to paint when the tone feels right in your light.


  • 13 Blue and Cream Bedroom Ideas That Balance Style and Comfort

    13 Blue and Cream Bedroom Ideas That Balance Style and Comfort

    Blue and cream is a pairing that rarely goes wrong in a bedroom. Blue brings a cool, restful note, while cream keeps the room warm and soft, so the result feels calm without feeling cold or flat. The balance comes from deciding where each color leads: a navy headboard or a blue wall can anchor the room, while cream bedding, curtains, and lampshades soften the edges around it. These 13 blue and cream bedroom ideas cover headboards, bedding, walls, furniture, curtains, rugs, art, and lighting, so you can start with one change or plan a full room refresh. Test paint and fabric samples in daylight and lamplight before you commit, since both blue and cream shift a lot with light.

    Key Takeaways

    • Let one color lead per surface: a blue anchor, such as a headboard or one wall, with cream around it keeps the room balanced.
    • Mix at least two blues, such as navy and dusty blue, so the scheme has depth instead of one flat shade.
    • Keep large surfaces cream, including bedding and walls, when the room is small or short on daylight.
    • Repeat blue three times in a room, such as bedding, art, and a rug, so the color looks planned.
    • Warm the scheme with wood, rattan, and warm white lamps, since blue and cream alone can feel cool.
    • Start with bedding or curtains for a quick refresh, and save walls and large furniture for a bigger project.

    1. Navy Velvet Headboard with Cream Bedding

    Bedroom with a navy velvet headboard

    Start with a navy velvet headboard if you want a clear blue anchor without repainting the room. The deep blue gives the bed wall a strong center, while cream bedding keeps the bed itself light and inviting. A channel or buttoned design adds texture, so the headboard reads as soft furniture rather than a flat panel. This suits a main bedroom where the bed sits against a long blank wall and needs a focal point.

    Keep the bedside tables cream or pale wood so the headboard stands out cleanly, and add navy cushions to link the headboard to the bedding. Measure the headboard width against the bed and the wall, since a headboard that is too narrow looks lost and one that is too wide crowds the bedside tables. Vacuum velvet gently with an upholstery tool, since the pile can trap dust over time.

    2. Cream Walls with Dusty Blue Bedding Layers

    Bedroom with cream walls and a bed layered with dusty blue and cream bedding.

    Paint the walls warm cream and layer dusty blue bedding on top for a soft, restful scheme that works in almost any bedroom. Cream walls bounce light around the room, while blue sheets, a blue throw, and blue cushions add color exactly where you look first: the bed. This suits a small room or a room with one window, since the pale walls keep the space feeling open.

    Start with cream or ivory sheets, add a cream duvet, then fold a dusty blue throw across the foot of the bed and finish with two blue cushions. Keep the palest shade closest to your face and the blue at the foot, which gives the bed a natural sense of depth. Wash the throw and cushion covers on a regular cycle, since pale cream shows marks sooner than darker colors.

    3. Blue and Cream Striped Bedding

    Bed with blue and cream striped bedding and a cream throw.

    Choose blue and cream striped bedding for a classic pattern that adds interest without a second print elsewhere in the room. Stripes read as crisp and orderly, which suits a bedroom that needs structure, and the cream in the stripe keeps the pattern light. A wooden bed frame and plain cream walls let the bedding do the talking, so the room stays calm rather than busy.

    Keep the rest of the bedding plain, with one cream throw folded at the foot, and repeat the blue once more in a small item, such as a cushion or a vase. If the stripe feels strong, pick a narrower stripe or a softer dusty blue, which reads more gently in a small room. This is a renter friendly change, since bedding needs no tools and can move to another room later.

    4. Deep Blue Accent Wall Behind the Bed

    Bedroom with a deep blue accent wall behind a bed with cream bedding.

    Paint one deep blue accent wall behind the bed for a bold backdrop that makes cream bedding glow. The dark wall gives the room depth, while cream bedside tables, cream lamps, and cream bedding stop the blue from feeling heavy. This suits a bedroom with good daylight, since light keeps the blue lively rather than gloomy.

    Keep the other walls cream and hang two simple framed prints on the blue wall so the bed zone feels finished. Test a large painted sample on the wall and look at it in morning and evening light before painting the whole wall, since deep blues shift a lot with light. If you rent and cannot paint, a large blue tapestry or a set of blue framed prints can give a similar anchor without paint.

    5. Cream Upholstered Bed with Blue Patterned Cushions

    Cream upholstered bed with blue patterned cushions and a blue knit throw.

    Pick a cream upholstered bed and dress it with blue patterned cushions for a soft base you can recolor with the seasons. The cream frame and cream bedding act as a quiet background, while patterned cushions in blue add personality in a small, changeable dose. A blue knit throw folded at the foot links the cushions to the rest of the bed.

    Mix two cushion patterns that share one blue, such as a geometric print and a small floral, and keep the rest of the room plain so the patterns have room to breathe. This suits a reader who likes to refresh a room often, since cushions and a throw cost less and take less effort than new furniture. Fluff and rotate the cushions regularly so the filling stays even.

    6. Dusty Blue Curtains Layered Over Cream Sheers

    Bedroom window with dusty blue curtains layered over cream sheer panels.

    Hang dusty blue linen curtains over cream sheer panels for a window that works in both daytime and nighttime. Open the blue panels in the morning for soft light through the sheer, then close them at night for privacy and a darker room for sleep. This pair suits a bedroom on a busy street, where daytime privacy and nighttime darkness both matter.

    Use a double rod so each layer moves on its own, and hang the rod high and wide so the window looks larger and the panels clear the glass when open. Keep the sheer in cream and choose the blue panel in a tone from your bedding, so the layers look linked when closed. For more curtain fabrics, lengths, and hanging tips, see these bedroom curtain ideas. Wash sheer panels often, since pale cream shows dust more than a heavier fabric.

    7. Painted Navy Dresser with Brass Handles

    Navy painted dresser with brass handles under a round mirror.

    Paint a wooden dresser navy and add brass handles for a furniture piece that anchors a cream room. The dark blue gives the dresser presence, while brass handles add warmth that keeps the navy from feeling cold. A round mirror above it and a small vase on top finish the corner without adding more furniture.

    Keep the wall behind the dresser cream so the navy stands out cleanly, and leave the top mostly clear, with a book, a small tray, and one vase. Sand and prime the dresser before painting, and use a paint made for furniture so the finish holds up to daily drawer use. If brass feels too warm, brushed gold handles give a similar effect with a softer shine.

    8. Blue and Cream Patterned Rug Under the Bed

    Bedroom with a blue and cream patterned rug under a bed with cream bedding.

    Lay a large blue and cream patterned rug under the bed to ground the room and pull the whole scheme together. The pattern links the bed to the floor, while cream bedding above it keeps the room light, and the rug gives bare feet a soft landing first thing in the morning. This suits a bedroom with wood or laminate floors, where a rug adds warmth and cuts echo.

    Choose a rug large enough to extend beyond each side of the bed, and use a rug pad underneath so the layers do not slip. Keep the rug pile low near the door swing, and vacuum with a brush head on a regular cycle. If the pattern is bold, keep the bedding mostly plain so the rug can be the one patterned piece in the room.

    9. Coastal Blue Walls with Rattan and Cream Linen

    Coastal bedroom with pale blue walls

    Pair pale blue walls with a rattan headboard and cream linen bedding for a coastal take on the blue and cream scheme. The pale blue reads as fresh in daylight, rattan adds woven warmth, and cream linen keeps the bed soft and relaxed. Woven baskets beside the bed hold throws and books without adding closed furniture.

    Keep the palette tight: pale blue walls, cream bedding, and rattan in two or three spots, so the room stays calm. Dust woven pieces with a dry cloth or a soft brush, and keep rattan out of damp corners, since it can warp. For a wider coastal palette, including sand tones and sea blues, see these coastal bedroom ideas. A sea view is not needed: the palette and textures do the coastal work on their own.

    10. Blue and Cream Gallery Wall Above the Bed

    Bedroom with a gallery wall of blue and cream prints above a bed.

    Hang a gallery wall of blue and cream prints above the bed for personality without painting a wall or buying new furniture. Choose prints in navy, dusty blue, cream, and soft grey, with simple wood frames, and hang them in a loose grid so the wall feels calm rather than crowded. Mix abstract shapes, botanical prints, and simple line drawings, but keep the palette tight.

    Lay the frames on the floor first and plan the spacing, leaving equal gaps between frames, then hang the middle frame at eye level. Use picture hanging strips if you rent, and keep the largest frame near the center so the arrangement feels balanced. Swap one print with the seasons if you want a small change without redecorating the whole room.

    11. Navy Nightstands with Cream Lamps

    Bedroom with navy nightstands and cream lamps beside a bed.

    Choose navy nightstands with cream lampshades for a bedside pair that adds color at a small scale. The navy tables frame the bed, while cream lamps give warm, even light for reading, which a single ceiling light rarely does. Brass or wood handles on the drawers add a warm note that links the tables to the rest of the room.

    Keep the nightstand tops clear apart from a lamp, a book, and a glass of water, so the tables stay useful rather than turning into piles. Choose warm white bulbs, and put the switches where you can reach them without getting up. If one side of the bed has less space, a single navy table with a wall light above it keeps the look balanced.

    12. Blue Patterned Wallpaper Above Cream Wainscoting

    Bedroom with blue patterned wallpaper above cream wainscoting.

    Fit blue patterned wallpaper above cream wainscoting on the bed wall for a classic look with clear structure. The wallpaper adds pattern at eye level, while the cream panels below it keep the lower wall calm and easy to clean. A wooden bed frame and cream bedding let the wall be the feature, so the rest of the room can stay plain.

    Keep the wallpaper to one wall, and let the other walls stay cream, so the pattern does not crowd the room. Order a sample first and look at it in daylight and lamplight, since blue prints shift a lot with light. If you rent, a paste the wall paper that strips cleanly, or a set of framed wallpaper panels, gives a similar effect without a full wall commitment.

    13. Soft Blue Ceiling with Warm Cream Walls

    Bedroom with a soft pale blue ceiling and warm cream walls.

    Paint the ceiling a soft pale blue and keep the walls warm cream for a gentle surprise overhead that does not dominate the room. The blue ceiling reads as sky on a bright day, while cream walls keep the room grounded and warm. A white pendant light hangs cleanly against the blue, and cream bedding below ties the scheme together.

    Keep the blue pale rather than mid tone, since a ceiling color looks darker once it covers a large area, and test a large sample overhead before committing. Paint the cornice or trim in the same blue or in cream, and keep the choice consistent around the room so the edge reads as planned. This suits a bedroom with white or cream trim, where the ceiling can be the one unexpected color.

    Conclusion

    A blue and cream bedroom works best when blue has a clear job and cream softens everything around it. Start with the layer you notice most, usually the bed or one wall, then add the second color in two or three smaller spots, such as cushions, curtains, or a rug. Keep the palette tight, let daylight in, and warm the room with wood, rattan, and warm lamps, so the scheme feels calm and lived in rather than cold. For a softer, warm neutral base to pair with blue accents, see these beige bedroom ideas.

    Save this list on Pinterest before you start, and work through it one idea at a time: bedding first for a quick refresh, then curtains and rugs, then walls and furniture when you have a weekend to spare.

    FAQs

    What is the best blue to pair with cream in a bedroom?

    Navy works best as an anchor, such as a headboard or one wall, while dusty blue and pale blue work best in larger doses, such as bedding, curtains, or a ceiling. Use navy in one or two spots and dusty blue in soft layers, so the room has depth without feeling dark. Test samples in daylight and lamplight, since blue shifts a lot with light.

    Can blue and cream work in a small bedroom?

    Yes, if cream leads and blue stays in smaller doses. Keep walls and bedding cream, and add blue through cushions, a throw, art, or one nightstand. A pale blue ceiling or pale blue curtains also work in a small room, since they add color without shrinking the walls. Avoid a dark blue on all four walls in a small room.

    How do I keep a blue and cream bedroom from feeling cold?

    Warm the scheme with wood, rattan, and warm white lamps. A wooden bed frame, a woven rug, and lamps with cream shades add warmth that blue alone cannot give. Keep at least one warm material in the room, and choose warm white bulbs for the evening, so the room feels restful at night.

    Should the bedding or the walls carry the blue?

    Bedding is the easier first step, since it covers the largest surface and can change with the seasons. Walls suit a reader who wants a lasting anchor, such as one deep blue accent wall behind the bed. If you are unsure, start with bedding, live with it for a few weeks, and paint a wall only if the room still needs a stronger blue note.

    What metal finish suits blue and cream bedrooms?

    Brass and warm gold suit the scheme best, since they warm up cool blue and sit well against cream. Use one finish in three places, such as drawer handles, a lamp base, and a mirror frame, and keep other metals out of the room where you can. Brushed nickel also works if you prefer a cooler finish, but mix it with wood so the room does not feel cold.

    How much pattern should a blue and cream bedroom have?

    One patterned piece is enough in most rooms, such as striped bedding, a patterned rug, or a gallery wall. Keep the rest of the room mostly solid, so the pattern has room to stand out. If you mix two patterns, make sure they share one blue, and keep one pattern large scale and the other small scale, so they do not compete.


  • 28 Black and Beige Living Room Ideas That Feel Right

    28 Black and Beige Living Room Ideas That Feel Right

    Black and beige is a pairing that looks simple and can go wrong fast. Too much black makes a room feel heavy and closed in, while too much beige can feel flat and unfinished. The rooms that get it right use beige for the large, light surfaces and black in clear, repeated doses: a sofa, a frame set, a table, a lamp. These 28 black and beige living room ideas show how to set that balance in rooms of different sizes and styles, from a bold black sofa wall to quiet details such as black piping on a beige sofa. Start with the biggest piece first, then repeat the darker tone two or three times around the room so it reads as a plan.

    Key Takeaways

    • Let beige carry the large surfaces: walls, the biggest rug, and often the largest sofa, so black can act as contrast instead of closing the room in.
    • Repeat black at least three times, such as a sofa, a table, and frames, so one dark piece does not look like a mistake.
    • Use texture to soften the contrast: linen, boucle, wool, leather, wood grain, and woven baskets all count as contrast here.
    • Keep lighting warm and layered, since black absorbs light and beige reflects it, and the two need different handling.
    • Test paint and fabric samples in daylight and evening light before committing, since black and beige both shift a lot between the two.
    • In a small room, keep black slim and low, and let beige cover more wall and floor area.

    1. Anchor the Room With a Black Sofa on Beige Walls

    Black sofa against warm beige walls with beige cushions and a wood coffee table.

    Put a black sofa against warm beige walls for the clearest version of this pairing. The beige keeps the room light, while the black sofa gives it a firm center that does not need much else to look finished. Keep the wall beige warm rather than grey beige, so the sofa reads as rich instead of stark, and leave beige visible above and beside the sofa with a light rug edge or a beige throw.

    Add two or three beige cushions in different textures, such as linen and knit, so the sofa does not look like a solid block. A wood or black coffee table in front repeats the dark tone at a lower level. For more help with a dark sofa shape and shade, these grey couch living room ideas cover how a dark sofa behaves in rooms of different sizes and light levels.

    2. Reverse It With a Beige Sofa and Black Accent Chairs

    Beige sofa with two black accent chairs and a small black side table.

    Reverse the usual balance when you want a lighter room that still feels grounded. A beige sofa keeps the largest piece light, while two black accent chairs pull the eye across the room and stop the beige from floating. Choose chairs with a different shape from the sofa, such as slim legs against a soft sofa frame, so the pairing reads as a deliberate contrast.

    Place a small black side table between the chairs to repeat the chair tone and give each chair a surface. This arrangement suits rooms with good daylight, since beige upholstery shows marks more easily in bright light, so washable covers are a practical choice if the sofa gets daily use.

    3. Paint One Black Feature Wall Behind the Sofa

    Black feature wall behind a beige sofa with a cream framed print.

    Paint one wall black behind the sofa and keep the other walls beige to give the room depth without darkening the whole space. A matte or eggshell black finish reads softer than a high gloss finish, and it makes beige cushions and light art stand out against it. Hang a beige or cream framed print on the black wall so the seating zone has a clear focal point.

    This idea suits a room with a long, unbroken sofa wall. In a room with many doors or windows on that wall, a black feature wall can look broken up and lose its effect, so test the tone on a large board first and check it in daylight and evening light.

    4. Frame the View With Black Window Frames and Beige Walls

    Living room with black window frames, beige walls, and light curtains.

    Black window frames give a beige room a sharp outline and make the view outside feel like a framed picture. This works best when the frames are repeated elsewhere, such as in picture frames or a black lamp, so the windows do not stand alone. Keep the walls a warm beige and the window treatments light, so the dark frames read as detail rather than heaviness.

    If replacing frames is not an option, painting existing frames black gives a similar outline for less work, but check the paint suits the frame material and can handle sun and condensation. Clean the frames regularly, since dust shows more clearly on black than on white.

    5. Set the Balance With a Striped Black and Beige Rug

    Striped black and beige rug under a beige sofa and coffee table.

    A striped rug in black and beige sets the room balance at floor level in one move. Wide stripes in soft black and warm beige feel calm, while narrow stripes in stronger contrast feel livelier. Run the stripes across the room to make it feel wider, or toward the window to draw the eye outward.

    Size the rug so the front legs of the sofa and chairs rest on it, and keep the rest of the seating fairly plain so the rug leads the pattern story. A flatweave rug suits a busy room, since it is easy to clean and chairs slide across it without catching.

    6. Ground a Beige Sofa With a Black Coffee Table

    Black coffee table in front of a beige sofa with a tray and a book.

    When the sofa, walls, and rug are all beige, a black coffee table is enough dark tone to ground the room without repainting anything. Choose a table with a simple shape and a matte finish, so it reads as a solid anchor rather than a shiny object. Keep the top mostly clear, with one tray, a book stack, or a small plant, so the table shape stays visible.

    A lower, wider table suits a long sofa, while a round table suits a tight seating group where corners would catch shins. Wipe the top after use, since dust and rings show more readily on black than on wood.

    7. Build a Black Media Console With Beige Decor on Top

    Black media console under a television styled with a beige vase and light books.

    A television wall can look like a blank screen and dark boxes, but a black media console grounds it and beige decor softens it. Choose a console in black wood or matte black that is wider than the television, so the screen does not overhang the furniture, and keep cables hidden inside or behind the console.

    Style the top with light objects, such as a beige vase, a stack of light books, or a small plant, and leave space around the television vents following the maker guidance. If the room is used for conversation as well as viewing, place the console and seating so chairs can turn toward each other without moving heavy furniture.

    8. Hang a Gallery Wall in Black Frames on a Beige Wall

    Gallery wall in black frames on a beige wall above a sofa.

    Black frames on a beige wall give a gallery wall structure without adding color that competes with the art. Use frames in one black tone, vary the frame sizes while keeping the spacing even, and plan the layout on the floor first, starting with the largest piece in the center, then building outward.

    Mix art, photographs, and one textile piece, such as a woven hanging, for texture. Keep the bottom of the gallery above sofa back height if it hangs over seating, so nobody brushes against the frames when sitting down. Mark hanging points with tape before making holes.

    9. Pair a Black Fireplace Surround With a Beige Mantel Display

    Black fireplace surround styled with beige candles and a beige vase on the mantel.

    A fireplace is a natural focal point, and a black surround with beige styling on the mantel keeps it warm rather than gloomy. If the surround is black stone, tile, or painted wood, keep the mantel objects light: beige candles, a beige vase, light framed art, or a beige clock. Leave breathing space between objects so the mantel does not look crowded.

    Keep anything that can burn well clear of the fire opening, following the fireplace maker instructions. A mirror or light art above the mantel reflects light back into the room, which matters most when the surround itself absorbs light.

    10. Paint an Interior Door Black in a Beige Room

    Black interior door with beige walls and cream trim in a living room.

    Paint an interior door black to add a strong vertical line of contrast without changing any furniture. A black door suits a beige hallway opening into the living room, or a living room door that would otherwise disappear into beige walls. Keep the trim beige or cream, so the door reads as a deliberate feature rather than a dark hole.

    Use a durable paint suited to doors, since doors get touched daily, and check the finish in evening light before painting every door in the house. One or two black doors are enough; painting all of them can make a small home feel chopped up.

    11. Mix Black and Beige Patterns in Cushions and Throws

    Sofa with mixed black and beige patterned cushions and a folded throw.

    Pattern is where black and beige can play without changing any furniture. Combine one large scale pattern, such as wide stripes or a bold check, with one small scale pattern, such as a dot or a fine stripe, and keep the rest plain so the eye has somewhere to rest. Use the same two tones in every pattern, so a black and beige stripe sits happily beside a beige cushion with a black border.

    Swap cushion covers with the seasons if you like a change: heavier wool or knit textures for cold months, lighter linen for warm months. Keep the total number of patterned cushions to three or four on a standard sofa, since more than that can make the seating look busy.

    12. Choose a Beige Sectional With a Black Ottoman

    Beige sectional with a black ottoman holding a tray.

    A beige sectional gives a large family room a light base, while a black ottoman keeps it from feeling washed out. Pick cushions in two tones, such as beige and a darker taupe, plus one patterned cushion that combines black and beige, so the dark tone is repeated across the sectional rather than sitting in one spot.

    A black leather or wood ottoman can serve as a coffee table with a tray on top, and as extra seating when guests visit. Measure the full sectional, including the chaise or return, before ordering, and leave a clear walking route around at least one end so the large piece does not block the room.

    13. Style Black Shelves With Beige Ceramics and Books

    Black shelves styled with beige ceramics, light books, and open gaps.

    Black shelves, whether built in or freestanding, look their best when the objects on them include plenty of beige. Place beige ceramics, light books with beige spines, and a beige vase among darker wood and leather bound books, and leave open gaps so each shelf reads as a display rather than storage.

    Start with the largest pieces, vary the shapes, and leave visible gaps. Anchor tall shelving to the wall following the maker instructions, keep heavy items low, and put everyday items at hand height so the shelves stay useful as well as decorative.

    14. Create a Reading Nook With a Black Chair and a Beige Lamp

    Black armchair reading nook with a beige shaded floor lamp and side table.

    A reading nook needs a comfortable chair, light aimed at the page, and a surface for a drink, and black and beige suits all three. Choose a black armchair with a supportive back and seat depth that fits the main reader, add a beige shaded floor lamp behind the chair shoulder, and place a small side table within reach.

    A beige throw over the chair arm links the lamp shade to the seating, and a basket beside the chair holds the current book and an extra throw. Angle the chair slightly toward the room so the nook feels part of the living space, and test the lamp position in the evening, since a shade that looks beige in daylight can glow warm or dull depending on the bulb.

    15. Layer Warm Light at Three Levels

    Evening black and beige living room lit by a ceiling light, table lamp, and small shelf lamp.

    Black absorbs light, so a black and beige room needs more than one ceiling light to feel warm after dark. Use three levels: ambient light from a ceiling fixture or tall floor lamp, task light from a table lamp beside the seating, and a low glow from a small lamp on a shelf or side table. Choose warm white bulbs for all three, so the beige tones glow rather than turning grey, and use dimmers where possible to shift from bright daytime to calm evening light.

    Place the brightest light where you read or work, and keep the overall level soft in the evening. Check for glare on the television and on any glass fronted frames before fixing lamp positions.

    16. Pair Black Side Tables With Beige Lamp Shades

    Black side tables beside a beige sofa with beige lamp shades.

    Black side tables beside a beige sofa give every seat a dark anchor at a useful height, while beige lamp shades on top soften the contrast and spread warm light. Choose tables just tall enough to reach easily from the sofa, and shades in white or beige so the light stays soft rather than harsh.

    Keep each table to one lamp and one small item, such as a book or a small plant, so it stays useful rather than becoming another display shelf. A table with a lower shelf can hold a book or a basket underneath, which keeps the top clear.

    17. Add Beige Boucle Chairs Beside a Black Side Table

    Beige boucle chairs with a small black side table between them.

    Beige boucle chairs add soft, nubby texture that stops a black and beige room from feeling hard or flat. Place a pair facing the sofa or angled toward the fireplace, with a small black side table between them, so the chairs form a conversation pair rather than two spare seats.

    Boucle shows marks more easily than smooth fabric, so washable covers or a fabric protector suited to the material are worth considering in a room used daily. Keep the chairs clear of direct sun where possible, since pale boucle can fade unevenly over time.

    18. Keep Throws in a Black Woven Basket

    Black woven basket holding folded beige and black throws beside a sofa.

    A black woven basket by the sofa solves two problems at once: it stores throws where they are actually used, and it adds black texture at floor level. Roll or fold throws in beige, cream, and one black throw neatly so the basket looks inviting rather than stuffed, and keep only the throws that are used regularly in it, storing spares elsewhere.

    Choose a basket with a sturdy base and handles, and a size that fits beside the sofa without blocking a walking route. Shake out throws regularly so dust does not settle into the weave. For a warmer take on the same neutral idea, these brown and cream living room ideas show how texture carries a two tone room.

    19. Try a Geometric Black and Beige Accent Wall

    Geometric black and beige accent wall behind a plain sofa.

    A geometric accent wall in black and beige adds pattern at wall scale without needing a busy rug or patterned sofa. Paint large blocks, arches, or a simple grid in matte black on a beige base, and keep the rest of the room plain so the wall leads. This suits a room with one clear, mostly empty wall, such as the wall behind a television or a side wall with no doors.

    Plan the shapes with tape on the wall first, and step back to check the scale from the sofa before painting. If the pattern feels too strong, painting only the lower half of the wall in the geometric design, with plain beige above, softens it.

    20. Hang Black Pendant Lights Over the Seating Zone

    Black pendant lights hanging over a coffee table in a beige living room.

    Black pendant lights over a coffee table or a side seating zone repeat the dark tone at ceiling height, which balances a black sofa or black frames at floor level. Choose simple shapes, such as a dome or a cone, in matte black, and hang them high enough to see under but low enough to pool light where people sit.

    Use warm white bulbs and a dimmer, so the pendants can shift from bright task light to soft evening glow. Keep cords tidy and the pendants clear of walkways, and check that the light does not glare into eyes when seated.

    21. Lay a Beige Rug With a Black Border

    Beige rug with a black border under a sofa and coffee table.

    A beige rug with a black border frames the seating group like a picture frame, and it suits a room where the coffee table and sofa already carry detail, since the center of the rug stays quiet under the table. The border adds interest at the edges, where it is most visible, and it ties black furniture to a beige floor plan.

    Choose a border color that is a true black rather than a faded grey, so it reads clearly against the beige center, and keep the border width in proportion to the rug size, so a small rug does not end up all border and no center. For more help with size and placement, see these living room rug ideas.

    22. Contrast a Beige Sofa With a Black Leather Chair

    Black leather chair angled beside a beige fabric sofa with a side table.

    A black leather chair beside a beige fabric sofa adds contrast in texture, and that contrast is what stops the room from feeling flat. Place the chair at an angle to the sofa, with a small side table between them, so the two seats form a conversation corner rather than a matched set.

    Leather needs simple care: wipe spills promptly, keep it out of direct sun where possible, and condition it as the maker advises. If the chair is new and the sofa is old, a beige throw over the chair arm can soften the contrast until the leather settles in.

    23. Use Beige Cabinetry With Black Hardware

    Beige built in cabinetry with matte black handles in a living room.

    Beige built in cabinetry or a beige sideboard with black hardware gives a living room storage that fits the palette without a separate dark furniture piece. Black handles, knobs, and hinges repeat the dark tone in small, even doses across a large beige surface, which keeps the unit from looking plain.

    Choose hardware in one black finish, such as matte black, rather than mixing black with chrome or brass on the same unit. Check the handle size against the door or drawer size, since small handles on large doors look lost, and large handles on small drawers feel heavy.

    24. Place a Black Arch Floor Lamp Behind the Seating

    Black arch floor lamp curving over a beige seating group.

    A black arch floor lamp behind the sofa brings light over the seating group without a ceiling fixture, and its curved shape softens a room full of straight lines. Place the base behind the sofa or beside it, with the arc reaching over the coffee table or a reading seat, and keep a clear path behind the base so nobody trips over it.

    Choose a heavy base that cannot tip easily, and a shade that directs light down onto the seating rather than into eyes. A dimmer lets the lamp work as both reading light and evening glow, which suits a room used through the day.

    25. Hang One Large Black and Beige Abstract Canvas

    Large black and beige abstract canvas hanging over a sofa.

    One large abstract canvas in black and beige gives a plain wall a focal point without the busy feel of a full gallery wall. Choose a piece with both tones in clear balance, such as broad beige washes with black marks, and hang it centered over the sofa with its outer edges inside the sofa width.

    Keep the rest of that wall plain, so the canvas leads, and repeat one tone from the canvas in a cushion or throw so the art feels linked to the room. Hang the center of the canvas at eye level when seated, and use fixings rated for the canvas weight.

    26. Choose a Tailored Beige Sofa With Black Piping

    Tailored beige sofa with black piping on cushions and arms.

    A tailored beige sofa with black piping adds contrast at seam level, which is a quiet way to carry the palette without a second dark furniture piece. The piping outlines the cushions and arms, so the sofa shape reads clearly against beige walls, and it suits a formal or tailored room better than a loose slipcovered sofa.

    Keep the rest of the seating plain, since the piping already supplies the detail, and repeat the black in one other place, such as a side table or frames, so the piping does not stand alone. Check that the piping is well sewn and even, since uneven piping shows clearly on a pale sofa.

    27. Build a Window Seat With a Beige Base and Black Cushions

    Window seat with a beige base and black seat cushions.

    A window seat with a beige base and black cushions turns an often empty window wall into a useful seat that fits the palette. Build or place a low bench under the window, cover the base in beige, and add black seat cushions with beige throw cushions on top, so the seat is comfortable and the contrast is clear.

    Add storage inside the bench for throws, games, or books, and keep the window seat clear of heavy curtains that would block the light. This idea suits a bay window or a wide window wall, and it gives a small living room an extra seat without another armchair.

    28. Keep a Small Room Open With Slim Black Furniture and Beige Walls

    Small living room with slim black furniture, beige walls, and a beige rug.

    In a small living room, black can still work if the furniture stays slim and low. Choose a black sofa with slim arms, a narrow black coffee table, and open legged chairs, and keep the walls, rug, and curtains beige, so the room keeps its light. Slim legs let floor show beneath furniture, which makes the room feel larger than closed bases would.

    Keep black to three or four slim pieces and let beige cover the rest, and use a mirror or light art on one wall to bounce daylight around the room. Avoid a large black sectional or a tall black bookcase in a small room, since a single bulky dark piece can close the space in.

    Conclusion

    A good black and beige living room starts with the balance, not the shopping list. Let beige carry the large, light surfaces, repeat black in three or four clear places, and add texture and warm light so the contrast feels soft rather than stark. Pick one idea from this list, such as a black sofa on beige walls or a beige rug with a black border, set it where you will actually sit, and add the next dark detail only after that first pairing feels right.

    Save this list on Pinterest before your next room refresh, and work through it one area at a time: seating first, then walls and floors, then the small details that make the room yours.

    FAQs

    How much black should a beige living room have?

    Use black for roughly one third of the visible contrast, not half the room. A good starting point is three or four black pieces, such as a sofa, a table, frames, and a lamp, with beige on the walls, the largest rug, and most of the upholstery. If the room starts to feel heavy, swap one black piece for beige, or add a beige throw and lighter art, rather than repainting a wall.

    What beige paint goes best with black furniture?

    A warm beige with a slight yellow or pink undertone suits black furniture best, since it keeps the room feeling warm rather than grey. Test two or three warm beige samples on the wall and check them in morning light and evening lamplight before painting the whole room, since beige shifts a lot between the two. Keep the ceiling and trim in a matching warm white so the room reads as one calm space.

    Can a black sofa work in a small living room?

    Yes, if the sofa stays slim and low and the rest of the room stays beige. Choose slim arms, open legs, and a low back, keep the walls and rug beige, and add a mirror or light art to bounce daylight around the room. Avoid pairing a black sofa with a black rug and black curtains in a small room, since that much dark tone at every level can close the space in.

    How do I stop a black and beige room from looking flat?

    Add texture, not more color. Mix linen, boucle, wool, leather, wood grain, and woven baskets, and vary the finishes between matte black and soft beige fabric. Layer lighting at three levels, and add one pattern, such as stripes or a geometric rug, so the eye has somewhere to rest. A room with five textures in two tones feels richer than a room with two textures in five colors.

    What rug works best with a black and beige living room?

    A rug that repeats both tones works best, such as a beige rug with a black border, a black and beige stripe, or a geometric pattern in the two tones. Size the rug so the front legs of the sofa and chairs rest on it, and keep the rug pattern simpler if the cushions are patterned, or the cushions simpler if the rug is busy. A flatweave rug suits a busy room, while thick wool suits a quiet seating corner.

    Is black and beige too cold for a family living room?

    Not if the beige stays warm and the lighting stays warm. Choose a warm beige for walls and large upholstery, add wood tones in a coffee table or side table, use warm white bulbs at more than one height, and keep soft throws within reach of every seat. With those layers in place, black reads as a grounding contrast rather than a cold statement, and the room stays easy to live in daily.


  • 22 Urban Gardening Solutions for Small City Spaces

    22 Urban Gardening Solutions for Small City Spaces

    City living does not have to mean giving up on growing things. A railing, a windowsill, a sunny wall, or a shared courtyard can all hold a garden, as long as each spot is matched to plants that suit its light, wind, and watering needs. These 22 urban gardening solutions cover balconies, rooftops, indoor shelves, and shared plots, with options for renters, for food growers, and for people who only have an hour a week. Start with the sunniest spot you already have, add one container at a time, and let the garden grow around how you actually live.

    Key Takeaways

    • Match plants to the spot: sun lovers need six or more hours of direct sun, while herbs and leafy greens cope with less.
    • Use light containers with drainage holes, and raise pots on feet so water can leave freely and does not stain the surface below.
    • Water containers more often than ground beds, since pots dry out fast in sun and wind, and mulch the surface to hold moisture.
    • Grow up, not out, on a balcony: rails, walls, shelves, and hanging baskets add growing room without taking floor space.
    • Keep heavy items near walls and load bearing edges, and check building rules before fixing anything to a railing, wall, or roof.
    • Start with crops you eat weekly, such as herbs, salad leaves, and tomatoes, so the garden earns its space from the first season.

    1. Balcony Rail Planters

    Balcony railing planters with colorful flowers and trailing herbs on a small city apartment balcony.

    Hang planters over the balcony rail to grow flowers and trailing herbs without using any floor space. Rail planters suit renters, since most types hook on and lift off, and they put plants right where sun and air reach them. Choose planters with drainage holes and a drip tray or liner so water does not fall on neighbors below.

    Plant trailing herbs such as thyme and oregano at the front, with upright flowers or compact vegetables behind them. Check the rail width before buying, and secure each planter so wind cannot lift it. Water rail planters often in hot weather, since their shallow soil dries fast, and feed lightly through the season as the label advises.

    2. Vertical Pallet Wall Garden

    Vertical pallet wall garden mounted on a city balcony wall

    Fix a wooden pallet to a sheltered balcony wall and plant each slat row for a garden that takes almost no floor space. A pallet wall suits salad leaves, strawberries, and herbs, all of which grow well in shallow soil. Line the back and sides with landscape fabric, fill each row with potting mix, and plant through the gaps.

    Water from the top so moisture reaches every row, and check the lowest row most, since water can collect there. Fix the pallet firmly to the wall, and keep the total weight in mind if the wall is a partition rather than a structural wall. In winter, move tender plants to a sheltered spot and let the pallet dry between waterings.

    3. Windowsill Herb Garden

    Sunny kitchen windowsill herb garden with small pots of basil

    Grow herbs in small pots on a sunny windowsill for fresh leaves a few steps from cooking. Basil, mint, parsley, chives, and thyme all grow well indoors with bright light, and a windowsill garden needs no outdoor space at all. Use pots with drainage holes and saucers, and rotate pots weekly so plants grow evenly toward the light.

    Keep mint in its own pot, since it spreads fast and can crowd out neighbors. Pick little and often to keep plants bushy, and water when the top inch of soil feels dry. If winter light is weak, move the pots to the brightest window you have, and trim leggy stems back in spring to encourage fresh growth.

    4. Tiered Plant Stand

    Tiered plant stand with stacked pots of vegetables

    Use a tiered plant stand to stack pots in layers, so one square foot of floor holds three or four times the plants. Tiered stands suit balconies and small patios, where floor space is the limit. Put sun lovers on the top tier, shade tolerant plants lower down, and trailing plants on the edges so they can spill over.

    Choose a stand that is stable in wind, and place heavier pots on the lowest tier to keep it steady. Water the top tier first, since drips will reach the tiers below, and check lower pots for overwatering. A folding stand can come inside in winter, which suits renters and people with no storage shed.

    5. Hanging Baskets from Ceiling Hooks

    Hanging baskets with trailing flowers and strawberries suspended above a small city balcony.

    Hang baskets from sturdy ceiling hooks to grow flowers, strawberries, and trailing herbs above head height. Hanging baskets use air space that otherwise goes unused, and they bring color to eye level on a plain balcony. Use light baskets with liners that hold moisture, and hang them where you can reach them with a watering can.

    Water hanging baskets daily in hot weather, since they dry out faster than ground level pots. Choose trailing plants such as lobelia, trailing rosemary, or strawberries for the edges, and upright plants for the center. Check the hook rating and the ceiling fixing before hanging a watered basket, since wet soil is much heavier than dry soil.

    6. Self Watering Containers

    Self watering container garden with a water reservoir tub planted with tomatoes and salad leaves on a city balcony.

    Grow tomatoes, peppers, and salad leaves in self watering containers that hold a water reservoir below the soil. A reservoir keeps moisture steady, which suits busy growers and hot balconies where pots dry out between waterings. Fill the reservoir as the maker advises, and top up when the gauge or filler pipe shows it is low.

    Use a light potting mix, not heavy garden soil, so water can wick up evenly. Mulch the surface to slow evaporation, and feed as the crop type requires, since reservoir watering can wash nutrients down over time. In rainy spells, check that the reservoir is not overflowing, and empty it before frost if the container could crack.

    7. Narrow Ledge Shelf Along the Wall

    Narrow wooden shelf ledge along a balcony wall holding small pots of herbs and flowers.

    Fix a narrow shelf along a balcony wall to hold small pots in a line, turning a dead strip of wall into a growing ledge. A ledge shelf suits shallow pots of herbs, succulents, and small flowers, and it keeps pots off the floor where space is tight. Choose a shelf depth that fits your pots with room to spare, and fix brackets firmly into the wall.

    Keep heavier pots near the brackets, and leave a gap at one end for a watering can. A second shelf above the first doubles the growing room, as long as lower plants still get light. If the balcony is rented, a freestanding narrow shelf unit gives a similar result without drilling.

    8. Indoor Grow Light Shelf

    Indoor grow light shelf garden in a city apartment

    Set up a shelf with grow lights to raise seedlings, herbs, and leafy greens indoors all year. A grow light shelf suits flats with little natural light, and it lets you start seeds weeks before outdoor planting. Place lights close above the plants, raise them as plants grow, and run them on a timer for steady daily light.

    Start with herbs and salad leaves, which need less light than fruiting crops. Keep the shelf near a water source, and use trays under pots to catch drips. Check plants daily for dry soil, since indoor air can dry pots fast, and give seedlings a gentle fan breeze now and then to keep stems sturdy.

    9. Community Garden Plot Share

    Community garden plot in a city with neat raised beds and gardeners tending vegetables

    Join a community garden and take a shared or single plot if your home has no outdoor space at all. Community plots give room for vegetables, fruit, and flowers, plus shared tools, water, and advice from nearby growers. Ask about plot size, fees, rules, and waiting lists before joining, since popular gardens fill fast.

    Grow crops you eat often, and visit at least once a week in the growing season for watering and picking. Share the work fairly if the plot is shared, and label your rows so everyone knows what is planted where. A community plot also suits crops that need more room, such as squash and beans, which rarely fit a balcony pot.

    10. Rooftop Container Garden

    Rooftop container garden with lightweight pots of tomatoes

    Grow in lightweight containers on a roof terrace, where sun is often stronger and more even than at street level. Rooftop containers suit vegetables, herbs, and flowers, but wind, weight, and drainage need care. Use light pots, a free draining mix, and plants that cope with wind, and keep heavy items near load bearing walls where possible.

    Check building rules and weight limits before placing any container on a roof, and never block drains, access routes, or fire escapes. For roof planting, shade, and seating ideas that pair with containers, see these rooftop garden ideas. Water roof pots often, since sun and wind dry them fast, and add a wind screen on the windward side if plants keep getting battered.

    11. Microgreen Trays Indoors

    Indoor microgreen trays on a kitchen counter near a window

    Grow microgreens in shallow trays on a kitchen counter for fast harvests in very little space. Radish, pea shoots, broccoli, and mustard microgreens are ready in one to three weeks, and they need only a sunny windowsill or a small grow light. Sow seed evenly on damp growing mix, cover until sprouts appear, then give light and water daily.

    Harvest with clean scissors just above the soil line, and wash greens gently before eating. Start a new tray each week for a steady supply, and compost the used mix or reuse it for non edible plants. Microgreens suit small kitchens well, since a tray takes less room than a single large pot.

    12. Fabric Pocket Planter Wall

    Fabric pocket planter wall hanging on a small balcony

    Hang a fabric pocket planter on a wall or fence and plant each pocket with herbs, strawberries, or small flowers. Pocket planters suit narrow balconies and rented walls, since they hang from hooks and leave the floor free. Fill each pocket with potting mix, plant one or two plants per pocket, and water slowly from the top.

    Check that the wall can hold the weight of wet pockets, and use a drip tray or a waterproof backing if the wall must stay dry. Smaller pockets dry out fast, so water often in summer and group thirsty plants together. In winter, empty tender plants from the pockets and store the planter dry to keep the fabric in good shape.

    13. Rolling Planter Cart

    Rolling planter cart with wheels holding pots of herbs and vegetables on a sunny city balcony.

    Put pots on a rolling cart with wheels so you can chase the sun across a balcony or move plants under cover before a storm. A rolling cart suits balconies where sun moves during the day, and it makes watering and cleaning easier, since the whole group moves at once. Choose a cart with locking wheels, and lock them once the cart is in place.

    Group plants with similar water needs on one cart, so watering stays simple. Keep the cart balanced, with heavier pots low, and check that wheels roll over thresholds without tipping. In winter, roll tender plants indoors or to a sheltered corner, and bring the cart back out when frost risk passes.

    14. Dwarf Fruit Tree in a Pot

    Dwarf fruit tree in a large pot on a city balcony with small lemons growing.

    Grow a dwarf fruit tree, such as a lemon, fig, or apple on dwarf rootstock, in a large pot on a balcony or patio. Dwarf trees stay small enough for containers, and they give fruit, flowers, and structure in one plant. Choose a pot at least as wide as the tree label advises, with drainage holes, and use a free draining mix.

    Water deeply but less often than small pots, and feed in the growing season as the tree type requires. Prune lightly each year to keep the shape compact, and move the pot to a sheltered spot in hard frost if the variety needs it. Check the mature size on the label before buying, since even dwarf trees need room to grow.

    15. Balcony Worm Bin

    Small balcony worm compost bin beside pots of healthy green plants on a city balcony.

    Keep a small worm bin on a balcony to turn kitchen scraps into rich compost for your pots. A worm bin suits city homes with no garden compost heap, and it gives a steady supply of worm castings that feed container plants. Feed the worms vegetable scraps, torn paper, and eggshells, and avoid meat, dairy, and oily food.

    Keep the bin in shade, since worms dislike heat, and keep the contents damp like a wrung out sponge. Harvest castings a few times a year, and mix a small amount into potting mix rather than using it straight. If the bin smells, add dry paper and cut back on feeding until the balance returns.

    16. Climbing Trellis Screen

    Trellis screen with climbing beans and morning glory flowers giving privacy on a small city balcony.

    Train climbing beans, peas, or morning glory up a trellis screen to grow food and flowers vertically while adding privacy. A trellis screen suits a balcony edge where neighbors can see in, and it shades a sunny seating spot in summer. Fix the trellis firmly, since a planted screen catches wind, and tie stems loosely as they grow.

    Plant annual climbers each spring for a fresh screen, or use a perennial climber where winters allow it. Water the base well, since climbers in pots dry out fast, and feed through the season for steady growth. Keep the trellis clear of drains and access routes, and prune back growth that blocks light to lower plants.

    17. Window Box with Herbs and Flowers

    Window box outside a city apartment window planted with herbs and colorful flowers.

    Fix a window box outside a window to grow herbs and flowers in a spot that needs no floor space at all. Window boxes suit kitchens and bedrooms, where herbs are close to hand and flowers can be seen from inside. Use a box with drainage holes, secure brackets rated for the full wet weight, and check building rules before fixing anything outside.

    Mix herbs such as parsley and chives with trailing flowers for color and use in one box. Water window boxes often, since they are shallow and exposed, and deadhead flowers to keep them blooming. In winter, swap tender plants for hardy herbs or evergreen foliage so the box still looks cared for.

    18. Countertop Hydroponic Garden

    Small countertop hydroponic garden unit growing lettuce and basil in a bright city apartment kitchen.

    Grow lettuce, basil, and strawberries in a small countertop hydroponic unit that feeds plants with nutrient water instead of soil. A hydroponic unit suits flats with no outdoor space, since it needs only a counter, power, and water. Follow the unit instructions for nutrient strength, water level, and light hours, and change the water as advised.

    Start with leafy crops, which grow fast and forgive small mistakes. Keep the unit clean between crops, since algae can build up in standing water, and check roots for rot if growth slows. A hydroponic unit also suits winter growing, when outdoor pots slow down and fresh leaves are harder to come by.

    19. Repurposed Crate Garden

    Repurposed wooden crates turned into planters with vegetables and flowers on a small city balcony.

    Turn sturdy wooden crates into planters for vegetables and flowers, lining each crate and drilling drainage holes before filling it. Crate gardens suit small budgets and small balconies, since crates stack, move, and fit awkward corners. Line the inside with landscape fabric to hold soil while letting water drain.

    Raise crates on feet or bricks so air flows beneath them and the wood dries between waterings. Plant shallow rooted crops such as salad leaves, radishes, and herbs in single crates, and stack crates in steps for taller plants. Replace or repair crates when the wood softens, since a rotten crate can spill soil onto the balcony.

    20. Shared Courtyard Raised Bed

    Shared courtyard raised bed garden between city apartment buildings with vegetables

    Share a raised bed in a building courtyard with neighbors, so everyone gets growing room without owning a garden. A shared bed suits herbs, salads, and flowers that many people use, and it spreads the work of watering and weeding across the group. Agree who plants what, who waters on which days, and how the harvest is shared before planting.

    Build the bed with good drainage and a path beside it wide enough to work from. Keep one section for each household if sharing gets complicated, and label crops so no one picks the wrong plant. A courtyard bed also gives a reason to meet neighbors, which often keeps the bed watered even when one household is away.

    21. Pollinator Pot Cluster

    Cluster of pots with pollinator flowers

    Group pots of pollinator friendly flowers, such as lavender, coneflowers, and single open blooms, into a cluster on a balcony or doorstep. Pollinators visit city balconies when flowers are grouped in drifts, not scattered as singles, so plant three or five of each type together. Choose plants that flower in different months, so food is available from spring to autumn.

    Avoid spraying open blooms, and leave some seed heads standing in autumn for birds. Place the cluster where bees can reach it without crossing a busy seating area, and keep a shallow dish of water with pebbles nearby in hot weather. A pollinator cluster also adds color and scent near seating, which makes a small outdoor space feel alive in summer.

    22. Cold Frame Mini Greenhouse

    Small cold frame mini greenhouse with a clear lid protecting young plants on a city balcony.

    Place a small cold frame with a clear lid on a balcony to protect young plants and stretch the growing season. A cold frame warms soil in spring, shelters seedlings from wind, and keeps salads growing later into autumn. Open the lid on warm days for air, and close it at night or before frost to hold warmth inside.

    Start seeds in the cold frame a few weeks earlier than outdoors, and harden plants off by opening the lid longer each day before moving them out. Water sparingly, since a closed lid holds moisture, and check for overheating on sunny days. A folding cold frame can pack away in summer, which suits balconies with no storage room.

    Conclusion

    A small city space can hold a real garden when each spot is used for what it suits best. Rails and walls carry herbs and flowers, shelves and carts add room without new floor space, and shared plots and courtyards give room for bigger crops. Start with one container in your sunniest spot, learn how fast it dries out, and add the next idea only when the first one is thriving. For level and structure ideas that pair with stepped containers and small outdoor areas, see these tiered garden ideas. Save the solutions that fit your light, your lease, and your routine, and let the garden grow one pot at a time.

    FAQs

    What is the easiest urban gardening solution for a beginner?

    A windowsill herb garden is the easiest place to start. It needs only a sunny window, small pots with drainage, and herbs such as basil, mint, and parsley that you use often. Water when the top inch of soil feels dry, pick little and often, and move the pots to the brightest window in winter.

    Can I grow vegetables on a small balcony?

    Yes, if you choose compact crops and match them to your sun. Salad leaves, herbs, radishes, dwarf tomatoes, and climbing beans all grow well in pots. Use containers at least as deep as the crop label advises, water often in hot weather, and feed through the season, since pot soil runs out of nutrients faster than garden soil.

    How do I water container plants when I am away?

    Self watering containers, a reservoir system, or a simple drip setup help most, since pots dry out fast in sun and wind. Move pots into shade before you leave, mulch the surface, and ask a neighbor to check thirsty plants in a heatwave. Grouping pots together also slows drying, since the group shades its own soil.

    What grows well in shade on a city balcony?

    Leafy greens such as lettuce, spinach, and chard cope with partial shade, as do herbs such as mint, parsley, and chives. Ferns, hostas in pots, and shade tolerant flowers such as impatiens and begonias also do well out of direct sun. Avoid fruiting crops in deep shade, since they need strong sun to ripen.

    Do I need permission to garden on a balcony or roof?

    Often, yes, so check first. Building rules may cover weight limits, fixing things to rails and walls, water drainage onto neighbors, and roof access. Ask the building manager or landlord before drilling, hanging heavy planters, or placing containers on a roof, and keep drains, fire escapes, and access routes clear at all times.

    How do I keep a small urban garden low cost?

    Start with what you already have: reuse crates and tubs with drainage holes added, swap cuttings and seeds with neighbors, and grow from seed rather than buying large plants. A community plot or shared courtyard bed spreads costs further, and compost from a small worm bin feeds pots without buying bags of feed every season.


  • 23 Front Yard Flower Bed Ideas for a Fresh Take on Your Home

    23 Front Yard Flower Bed Ideas for a Fresh Take on Your Home

    The front yard is the first part of your home most visitors see, and a flower bed is the quickest way to give it a clear, cared for look. A good bed frames the door, softens hard edges, and gives you planting to enjoy from the window as well as from the street. These 23 ideas cover layered borders, island beds, shade and sun planting, pollinator beds, and low care options for a small plot, a wide lawn, or a sloped yard. Note sun, rain, and upkeep time first, then build one bed well before adding another. For tall, sunny color that also feeds bees, these sunflower garden ideas show how height can anchor a front bed.

    Key Takeaways

    • Map sun, shade, drainage, and foot traffic before you dig, since those four facts decide which plants will last.
    • Layer heights on purpose: tall plants at the back, mid height plants in the middle, and low edging plants at the front.
    • Repeat one or two colors or plants along a bed so the planting reads as a plan, not a collection of singles.
    • Mix evergreen structure with seasonal flowers so the bed looks cared for in winter as well as in summer.
    • Edge the bed clearly and mulch it, since a clean edge and covered soil cut weeds and watering work.
    • Start with one bed near the door or path, where you will see it daily, and add more beds only once that one works.

    1. Layer a Border by Height Along the House

    Layered flower border along the front of a house with tall flowers at the back and low plants at the front.

    Build a border along the front of the house with tall plants at the back, mid height plants in the middle, and low plants at the front. This classic layering means every plant stays visible from the street, and it keeps the bed looking full even when one group is between flowers. Put shrubs or tall perennials such as hollyhocks or delphiniums against the wall, roses or salvias in the middle, and geraniums or catmint at the front edge.

    Leave a narrow gap between the back row and the wall so air can move and you can reach plants for trimming. Water at the base, mulch the whole bed, and step back to the street after planting to check that no tall plant blocks a window. Repeat the same mid height plant in three or four spots along the border to tie the length together.

    2. Shape a Curved Island Bed in the Lawn

    Curved island flower bed in the middle of a front lawn with a small tree in the center.

    Cut a curved island bed into the middle of a front lawn to break up a flat expanse of grass and give flowers a focal point of their own. A curved shape looks softer than a rectangle and is easier to mow around, since the mower follows one smooth line. Mark the shape with a hose or rope first, then cut the turf and edge the bed with stone, brick, or a simple spade cut edge.

    Plant one small tree or tall shrub as the center, then ring it with mid height flowers and a low edge of ground cover. Keep the bed wide enough to reach the middle from either side without stepping on plants. An island bed suits wide front yards best, and it works well where a straight border would feel too formal for the house.

    3. Frame the Front Door With Matching Beds

    Matching flower beds on each side of a front door with shrubs and colorful flowers.

    Place a matching bed on each side of the front door to give the entry a balanced, welcoming frame. Symmetry suits formal and traditional houses, and it helps visitors know at once where to walk. Plant the same shrubs and the same edging flowers in both beds, and keep heights similar so neither side looks heavier than the other.

    Add one pot or small tree in each bed for height, and keep the path between the beds clear and wide enough for two people to pass. For a door color that sits well beside flower color, see these blue front door colors, which cover deep navy through pale sky shades. Trim both beds at the same time so they stay matched through the season.

    4. Edge a Formal Bed With Low Boxwood

    Formal front flower bed edged with low boxwood and filled with roses and lavender.

    Edge a front bed with a low row of boxwood or another small evergreen to give it a crisp outline all year. The evergreen edge acts like a frame for seasonal flowers inside it, so the bed never looks empty in winter. Plant the boxwood in a single straight or gently curved line, spaced so the plants will join into one hedge within a couple of seasons.

    Fill the inside with roses, lavender, or seasonal annuals, and keep the center planting lower than the house windows. Clip the boxwood once or twice a year to hold its shape, and feed it in spring. This bed suits brick and stone houses and small front yards, where a tidy edge matters more than a large planting area.

    5. Plant a Loose Cottage Mix Bed

    Loose cottage flower bed with roses, foxgloves, lavender, and geraniums in front of a house.

    Fill a front bed with a loose mix of roses, lavender, foxgloves, hardy geraniums, and catmint for a cottage look that feels relaxed rather than arranged. Cottage beds work by layering many flowers at different heights and letting them overlap, so the bed looks full from early summer into autumn. Plant in groups of three or five, and let self seeding plants such as foxgloves find their own spots over time.

    Keep a clear path edge so the looseness reads as a choice, and cut back spent stems to keep new flowers coming. This bed suits older houses, picket fences, and front yards where a formal edge would feel stiff. Stake tall foxgloves and hollyhocks early, since they lean once the flower spikes open.

    6. Build a Pollinator Bed for Bees and Butterflies

    Pollinator flower bed with coneflowers, lavender, and salvia and bees visiting the blooms.

    Plant a front bed with coneflowers, lavender, salvia, catmint, and single flowered dahlias to give bees and butterflies food from spring to autumn. Pollinator beds work best in full sun, with flowers grouped in drifts so insects can find them easily, and with no bare soil showing once plants fill in. Leave some seed heads standing in autumn for birds, and avoid spraying the bed when insects are active.

    Add a shallow dish of water with pebbles for drinking, set where it will not tip. Keep the bed free of double flowered types that offer little nectar, and check plant labels for bloom times so the bed never has a gap with nothing in flower. A pollinator bed near the path also lets you watch visitors to the garden from the window.

    7. Plant a Shade Bed Under a Front Tree

    Shade flower bed under a front yard tree with hostas, ferns, and astilbe.

    Use the ground under a front tree for a shade bed of hostas, ferns, astilbe, and spring bulbs, instead of struggling to grow lawn or sun lovers there. Shade beds need plants that cope with dry soil and root competition, so improve the soil with compost at planting and mulch well to hold moisture. Plant in drifts under the canopy, and keep plants clear of the trunk so air can move around the bark.

    Water new plants well in their first season, since tree roots take much of the available water. Add snowdrops or crocus for early spring color before the tree leafs out, then let hostas and ferns carry summer. This bed suits north facing fronts and yards shaded by a large street tree.

    8. Try a Sun Loving Gravel Bed for Dry Spots

    Sun loving gravel flower bed with lavender, sedums, and ornamental grasses in front of a house.

    Make a gravel bed for hot, dry front yards with lavender, sedums, ornamental grasses, and Mediterranean herbs that like sharp drainage and full sun. Gravel beds need little watering once plants settle, and the stone surface keeps weeds down and shows off plant shapes. Dig in grit or coarse sand if your soil holds water, then plant through a weed barrier and top with a layer of gravel.

    Choose plants that stay compact so they do not flop over the path, and leave gaps between them so each plant has room to spread. Gravel beds suit south facing fronts, new houses with poor soil, and owners who want color without daily watering. Rake the gravel once a season to keep it level and clear of leaves.

    9. Plan a Seasonal Rotation Bed

    Front flower bed with spring tulips and daffodils in bloom beside the path.

    Design one front bed to change with the seasons, starting with tulips and daffodils in spring, then summer annuals, then chrysanthemums and ornamental kale in autumn. A rotation bed keeps the front of the house looking fresh all year, since something is always at its peak. Plant bulbs in autumn in the spaces between perennials, and lift or replace annuals as each season ends.

    Keep a simple note of what was planted where, so you do not dig up bulbs by mistake. This bed suits a small front yard where one bed must do all the work, and it works well beside the door, where you will notice each change. Save money by using perennials for the backbone and annuals only for seasonal color.

    10. Dress Up the Mailbox With a Small Bed

    Small flower bed around a mailbox post with low daylilies and creeping phlox.

    Plant a small bed around the mailbox post to give a plain entrance a clear focal point at the street. Use low plants such as dwarf daylilies, creeping phlox, or small ornamental grasses, so blooms never block the mailbox door, the house number, or the view of the street. Keep plants clear of the path the mail carrier uses, and trim any stems that lean over the pavement.

    Add one or two pots beside the post if the ground is paved or the soil is poor, and choose plants that cope with roadside dust and winter salt if your street is treated. A mailbox bed is a small job that makes the whole front yard look more cared for, and it is a good first bed for a new gardener. Check plant labels for your zone before buying, using a reference such as the RHS plant pages for growing advice.

    11. Wrap a Bed Around a House Corner

    Flower bed wrapping around the corner of a house with a shrub at the corner and lower flowers along both sides.

    Wrap a flower bed around the corner of the house to soften a sharp angle and link the front garden to the side garden. Corner beds work best with one taller plant at the corner itself, such as a small shrub or a climbing rose on a trellis, then lower plants stepping down along both sides. This layout stops the corner from looking bare and gives you a longer bed without taking much lawn.

    Keep the corner plant clear of gutters and windows, and leave access to taps and meters hidden behind the planting. Repeat one flower color along both arms of the bed so the two sides read as one design. Corner beds suit houses where the front door sits to one side, since they pull the eye around the house.

    12. Raise a Stone Bed Along the Porch

    Low raised stone flower bed along a front porch with trailing plants over the stone edge.

    Build a low raised stone bed along the front of a porch to lift flowers to eye level and give the porch a planted base. Raised beds warm up early, drain well, and keep planting contained, which suits a narrow front yard. Build the wall no higher than knee height for easy reach, fill it with a mix of garden soil and compost, and plant the front edge with trailing plants that spill softly over the stone.

    Choose stone that matches the house, such as brick for a brick house or fieldstone for a stone house, so the bed looks like part of the building. Water raised beds more often than ground beds, since they dry out faster. Keep the bed clear of the porch steps so the entry stays safe and wide.

    13. Group Pots as a Bed on Porch Steps

    Group of flower pots in different sizes on porch steps beside a front door.

    Group pots of different sizes on porch steps and beside the door to make a flower bed where there is no ground to dig. Pots suit rented homes, paved fronts, and houses where the soil near the house is poor. Use one tall plant, one mid height plant, and one trailing plant in each large pot, and group pots in threes or fives for a fuller look than a single pot alone.

    Water pots often in hot weather, since they dry out faster than beds, and feed container plants through the season. Move pots to follow the sun or to frame the door for a special occasion, and bring tender plants under cover before frost. This idea also works as a trial bed: grow a plant in a pot for a season before committing it to a ground bed.

    14. Build a Rock Garden Bed for a Sunny Bank

    Rock garden bed on a sunny bank with alpine plants, sedums, and stones.

    Turn a sunny bank or a sloped corner into a rock garden bed with alpine plants, small sedums, creeping thyme, and dwarf shrubs tucked between stones. Rock beds suit spots where soil is thin and drainage is sharp, and the stones hold heat and shelter small plants. Bury at least a third of each large stone so it looks settled, fill behind the stones with gritty soil, and plant in the pockets between rocks.

    Keep planting low and open so the stones stay visible, and top dress with gravel to keep plant crowns dry. A rock bed near the path gives a close up view of small flowers that would be lost in a big border. Avoid rich compost that holds water around alpine roots, since wet crowns rot in winter.

    15. Plant a White Flower Bed for Evening Glow

    White flower bed with white roses, foxgloves, and cosmos glowing in evening light.

    Plant a front bed in white flowers such as white roses, white foxgloves, white cosmos, and white hydrangeas for a bed that glows in evening light. White beds suit front yards used in the evening, since pale flowers stay visible after sunset, and they look calm beside any house color. Mix white flowers with green foliage only, and avoid adding a second strong color, so the bed stays restful.

    Add scented white flowers such as jasmine or white stocks near the path, where you will pass them at dusk. White beds need regular deadheading, since spent white blooms show more than colored ones. This bed also photographs well from the street, since white reads clearly even in shade.

    16. Use Bold Color Blocks in Drifts

    Front flower bed planted in bold blocks of red and yellow flowers.

    Plant large drifts of one color at a time, such as a block of red tulips followed by a block of yellow daylilies, for a front bed that reads clearly from the street. Color blocks work because the eye sees a mass of color before it sees single plants, so even a small bed can make a strong impression. Plant each color in a group of at least nine plants, and keep the blocks large enough to see from the road.

    Repeat one color in a second spot, such as a pot by the door, to link the bed to the house. For pink led schemes, these pink flower garden ideas show how drifts of one color make the color read clearly. Avoid mixing too many colors in one bed, since that can look busy from a distance.

    17. Edge a Bed With Edible Flowers and Herbs

    Front flower bed edged with herbs and edible flowers such as nasturtiums and chives.

    Edge a front flower bed with edible flowers and herbs such as nasturtiums, chives, rosemary, and thyme, so the bed is useful as well as pretty. Herb edges suit beds near the kitchen door or the path to the house, where you can pick leaves on the way inside. Plant herbs at the front edge where you can reach them, and keep taller flowers behind so they do not shade the herbs for most of the day.

    Check that any flower you plan to eat is grown without spray and is known to be safe to eat, since not all garden flowers are edible. Trim herbs often to keep them compact, and replace any that get leggy with fresh plants in the same spots. This bed gives a front garden a kitchen garden feel without a separate vegetable plot.

    18. Make a Rain Garden Bed for a Wet Corner

    Rain garden bed in a wet front yard corner with iris, astilbe, and ferns.

    Turn a wet corner or the spot where a downspout empties into a rain garden bed of moisture loving plants such as astilbe, iris, ferns, and Joe Pye weed. Rain beds slow water, let it soak in, and stop puddles from forming on paths and lawns. Dig a shallow basin, direct the downspout into it through a short channel or pipe, and plant the wettest center with plants that cope with standing water for a day or two.

    Plant the drier edges with plants that like moist but not wet soil, and mulch the basin to hold moisture between rains. Check local rules before redirecting a downspout, and keep the bed away from house foundations. A rain bed turns a problem corner into one of the lushest parts of the front yard.

    19. Terrace a Sloped Front Yard Bed

    Terraced flower beds on a sloped front yard with low stone walls and layered planting.

    Terrace a sloped front yard into two or three level beds with low stone or timber walls, so each level stays flat and easy to plant. Terraced beds stop soil from washing downhill, make watering fairer, and give each level its own planting job, such as shrubs on the top level and flowers on the lower ones. Build from the bottom up, keep each wall low, and leave a path or step between levels for access.

    For stepped layouts and wall types that suit different slopes, see these tiered garden ideas. Plant the top level with taller plants that catch the light, and the lowest level with low edging plants seen from the street. Keep walls below knee height unless a professional builds them, and check local height and drainage rules first.

    20. Sow a Wildflower Strip Along the Front

    Wildflower strip along the front edge of a yard with mixed summer blooms.

    Sow a wildflower strip along the front edge of the yard, beside a fence or a path, for a loose, natural bed that needs little care once it settles. Choose a seed mix suited to your region, clear weeds first, and sow thinly on bare, raked soil in spring or autumn as the packet directs. Mark the strip edges with a mown edge or a simple stone line so it reads as a choice, not neglect.

    Let the strip stand into autumn so plants can self seed and birds can use the seed heads, then cut it down once the season ends. The first year can look patchy while perennials establish, so set expectations and mix fast annuals in for first year color. Wildflower strips suit wide front yards and houses with a relaxed style.

    21. Plant a Fragrant Bed Beside the Path

    Fragrant flower bed beside a front path with lavender, roses, and sweet peas.

    Plant a fragrant bed beside the front path with lavender, roses, jasmine, sweet peas, and stocks, so visitors smell the garden before they reach the door. Fragrant beds work best in a sunny, sheltered spot, with scented plants at the path edge where you brush past them. Plant lavender and rosemary where hands can touch them, and train jasmine or sweet peas up a small trellis beside the gate.

    Water fragrant plants at the base rather than over the leaves, since wet leaves can lose scent and invite disease. Keep the path clear by trimming plants that lean across it, and deadhead roses and sweet peas often to keep new scented blooms coming. This bed makes a short walk to the door feel like part of the garden, not just a route through it.

    22. Keep a Low Care Perennial Bed

    Low care perennial flower bed with daylilies, catmint, and ornamental grasses.

    Build a front bed from tough perennials such as daylilies, hostas for shade, sedums for sun, ornamental grasses, and catmint, for color that returns each year with little work. Low care beds suit busy owners and rental homes, since perennials need no yearly replanting and most need only one tidy up a year. Plant in groups, mulch well, and space plants by their mature size, not by how they look in the pot.

    Cut the whole bed down once a year in late winter or early spring, and divide crowded clumps every few years to keep them flowering well. Avoid plants that need staking, frequent deadheading, or winter protection, since those add work each season. A low care bed still looks cared for if its edge stays clean and its mulch is topped up each spring.

    23. Design a Four Season Bed With Evergreen Structure

    Four season front flower bed with evergreen shrubs and seasonal flowers in front of a house.

    Design a front bed around evergreen shrubs such as boxwood, yew, or dwarf conifers, then add seasonal flowers around them for color through the year. Evergreen structure stops the bed from looking empty in winter, while bulbs in spring, roses in summer, and asters in autumn give it changing color. Plant evergreens first, spaced for their mature size, and fill the gaps with seasonal plants that can be changed without disturbing the shrubs.

    Add one winter interest plant, such as a shrub with colored stems or early flowers, so the bed earns its place in the coldest months. Feed and mulch in spring, prune evergreens lightly to hold their shape, and step back each season to check that the bed still reads well from the street. This bed is the best choice if you want one front bed that works all year with no bare season.

    Conclusion

    A front yard flower bed does not need every idea on this list. Pick one bed that fits your sun, soil, and time, such as a layered border by the house, a pollinator bed by the path, or a low care perennial bed for a busy household. Build its edge well, mulch it, and plant in groups rather than singles, so the bed looks deliberate from the street from the first season. Add evergreen structure for winter, spread flowering across spring, summer, and autumn, and keep the path and door clear so the garden welcomes visitors instead of blocking them.

    Save this list on Pinterest before your next nursery trip, and work through it one bed at a time: structure first, then the plants that suit your light and soil, then the seasonal color that keeps the front of your home looking fresh.

    FAQs

    What is the easiest front yard flower bed for a beginner?

    Start with a low care perennial bed in full sun, using daylilies, catmint, sedums, and ornamental grasses. These plants return each year, need little watering once settled, and need only one tidy up a year. Plant in groups of three or five, mulch well, and keep the edge clean. Once that bed works, add a second bed, such as a mailbox bed or a pot group by the door, rather than digging the whole front yard at once.

    How wide should a front yard flower bed be?

    A bed along the house should be at least three to four feet deep, so you can layer tall plants at the back, mid height plants in the middle, and low plants at the front. Narrower beds force plants into a single row, which looks thin and leaves little room for layering. For an island bed, make it wide enough to reach the middle from either side without stepping on plants, usually six to eight feet across for a medium bed.

    Which flowers grow best in a front yard bed in full sun?

    In full sun, try coneflowers, lavender, salvias, daylilies, zinnias, and ornamental grasses, all of which flower well with at least six hours of direct sun. Check the plant label for your growing zone and mature size, and group sun lovers together rather than mixing them with shade plants. Water new plants well in their first season, mulch to hold moisture, and deadhead where the label advises it to keep new blooms coming.

    How do I keep a front yard flower bed low care?

    Choose tough perennials, mulch the whole bed to cut weeds and hold moisture, and edge the bed clearly so grass does not creep in. Avoid plants that need staking, frequent deadheading, or winter protection, and space plants by their mature size so they do not crowd each other. One yearly tidy up, a spring mulch top up, and watering only in dry spells is enough for most low care beds once plants settle.

    Should front yard flower beds match the house style?

    Yes, in a broad sense. Formal houses suit edged beds, boxwood, and matching beds by the door, while cottages suit loose mixes and curved shapes. A modern house suits simple drifts of one or two colors and clean stone or metal edging. Matching the bed to the house does not mean copying the house color, only choosing a bed shape and plant style that sits comfortably beside it, so the garden and the house read as one place.

    How do I stop weeds taking over a front flower bed?

    Mulch the bed with two to three inches of bark or compost, edge it clearly, and plant densely so little bare soil shows once plants fill in. Pull weeds when they are small, before they seed, and avoid digging the whole bed over each year, since that brings new weed seeds to the surface. Ground cover plants at the front edge, such as creeping thyme or hardy geraniums, also shade the soil and leave less room for weeds to start.


  • 33 Herb Garden Ideas to Give Your Space a New Look

    33 Herb Garden Ideas to Give Your Space a New Look

    Fresh herbs change how a kitchen feels. A pot of basil by the sink, a row of chives by the back door, or a sunny bed full of rosemary means flavor is within reach, and the garden itself smells good on a warm day. These 33 herb garden ideas cover pots, raised beds, walls, balconies, and full garden beds, so there is an option for a small flat, a rented patio, or a large yard. Start with the herbs you cook with most, give them sun and drainage, and add one idea at a time. For stepped layouts that suit a slope or a small yard, these tiered garden ideas show how to give each level a clear job.

    Key Takeaways

    • Start with the herbs you cook with weekly, and add less used herbs only after the first group is thriving.
    • Most culinary herbs need sun and free draining soil, while mint, parsley, chives, and lemon balm cope better with shade and moisture.
    • Grow mint in its own pot, since it spreads fast and can take over a shared bed or planter.
    • Pick little and often to keep plants bushy, and water pots more often than beds, since containers dry out fast.
    • Label herbs while they are young, since many look alike before they flower or develop their scent.
    • Keep the herb garden close to the kitchen door or the cooking area, so picking becomes part of cooking, not a separate trip.

    1. Kitchen Windowsill Pot Row

    Small herb pots in a row on a bright kitchen windowsill above a sink.

    Line up small pots of basil, parsley, and chives along a bright kitchen windowsill for herbs you can snip while you cook. A windowsill row suits a flat or a house with no outdoor space, and it keeps the most used herbs in sight, which means they get picked and watered. Use pots with drainage holes and a saucer under each one, and turn the pots every few days so growth stays even.

    Water when the top of the soil feels dry, and feed lightly through the growing season as the pot label directs. Replace annual herbs such as basil each year, and move tender pots away from cold glass on frosty nights. Keep a small pair of scissors nearby so picking is quick and clean, and pinch out the growing tips of basil often to stop it running to seed too soon.

    2. Terracotta Pot Cluster by the Back Door

    Terracotta pots of herbs grouped by a back door in sunlight.

    Group terracotta pots in different sizes by the back door for a herb garden you pass every day. Terracotta suits herbs because it breathes and dries out between waterings, which Mediterranean herbs in particular like. A cluster also looks planned, even with only four or five pots, if you repeat one pot style and vary the heights.

    Put tall rosemary at the back, mid height sage and thyme in the middle, and trailing thyme or oregano at the front of the group. Raise pots on feet in wet weather so water drains freely, and move tender pots to a sheltered spot in winter. Sweep fallen leaves from the pots, and check the soil with a finger before watering, since a terracotta pot in sun can dry out in a day.

    3. Raised Bed Herb Patch

    Low wooden raised bed planted with neat rows of culinary herbs.

    Build or buy one low raised bed for herbs and keep it close to the kitchen door. A raised bed warms up early, drains well, and keeps herbs at a comfortable picking height, which matters if bending is hard. Keep the bed no wider than you can reach across from one side, so you never have to step on the soil to pick.

    Fill the bed with a mix of garden soil and compost, and plant in groups by water need: rosemary, thyme, and sage in the driest corner, parsley and chives where soil stays a little damper. Mulch the surface with gravel for dry loving herbs or with compost for leafy herbs, and edge the bed with a flat stone where you can stand to pick. Rotate annual herbs to a new spot in the bed each year.

    4. Stone Herb Spiral

    Stone herb spiral rising to a center planted with rosemary and thyme.

    Build a stone spiral that rises from ground level to a raised center for herbs with different soil and water needs in one small footprint. The top of the spiral stays dry and sunny, which suits rosemary, thyme, and sage, while the lower, shadier base suits parsley, chives, and mint in its own pot sunk into the soil. A spiral also gives a garden a clear focal point without taking up a whole bed.

    Lay the spiral with stones or bricks, fill it with free draining soil, and leave a narrow path or flat stones around it for picking. Plant the tallest herbs at the center so they do not shade the lower levels, and water the top more often, since raised soil dries fast. A spiral near a path works well, since you can reach every level without stepping into the bed.

    5. Vertical Pallet Herb Wall

    Wooden pallet fixed to a wall planted with herbs in its slats.

    Fix a wooden pallet upright against a sunny wall or fence and plant herbs in its slats for a herb garden that uses almost no floor space. A pallet wall suits a small patio, a balcony wall, or a narrow side passage, and it brings herbs to eye level, which makes picking easy. Line the back and base of each slat row with landscape fabric, fill with potting mix, and plant small herbs such as thyme, chives, parsley, and trailing oregano.

    Water slowly from the top so moisture reaches each row, and check the lower rows, which can stay wetter than the top. Fix the pallet firmly to the wall or to posts, since a planted pallet is heavy when wet. Replace the fabric and mix every year or two, and keep the pallet clear of damp ground by standing it on feet or a low plinth.

    6. Hanging Herb Baskets

    Hanging baskets of trailing herbs under a porch beam.

    Hang baskets of herbs from a porch beam, a pergola, or sturdy wall brackets to use air space above a patio or path. Hanging baskets suit trailing herbs such as thyme, oregano, and trailing rosemary, mixed with upright parsley or chives in the center. They also keep herbs away from slugs, which can be a help in a damp garden.

    Line baskets with coir or moss, fill with potting mix, and water often, since baskets dry out faster than any other container. Hang baskets where you can reach them for watering and picking without a ladder, and take them down in strong wind. Feed lightly through the season, and refresh the mix each spring so plants do not run out of food mid summer.

    7. Ladder Shelf Herb Display

    Wooden ladder shelf holding herb pots against a sunny wall.

    Lean an old wooden ladder or a tiered shelf unit against a sunny wall and set herb pots on each rung or shelf. A ladder display suits a patio corner or a balcony, and it gives each pot its own light and air, which helps herbs stay compact. It also makes a small collection look like a display, not a row of spare pots.

    Put sun loving herbs on the top shelves and shade tolerant herbs lower down, where taller plants cast a little shade. Fix the ladder or shelf so it cannot tip, and use pots that fit the shelf depth so they do not overhang the edge. Water each pot on its own, since top pots dry faster, and move the whole unit to follow the sun if one side turns shady.

    8. Window Box Herb Garden

    Window box under a kitchen window planted with parsley, chives, and thyme.

    Fix a window box under a kitchen window and plant it with the herbs you reach for most, such as parsley, chives, basil, and thyme. A window box puts herbs at hand height for picking from inside or outside, and it suits a house with no garden bed at all. Choose a box with drainage holes and a firm bracket rated for the weight of wet soil.

    Plant low, compact herbs so they do not block light from the window, and trim them often to keep the box tidy. Water window boxes often in hot weather, since shallow soil dries fast, and feed lightly through the season. In winter, move tender herbs indoors and replace the box planting with hardy parsley, chives, and thyme.

    9. Balcony Railing Planters

    Herb planters clipped to a sunny balcony railing.

    Clip planters to a balcony railing for a herb garden that fits a flat with no ground space. Railing planters suit compact herbs such as basil, parsley, chives, thyme, and mint in its own planter, and they leave the balcony floor clear for a chair and a table. Fix each planter firmly, and check the railing weight limit before loading a long run of planters.

    Use a light potting mix, since a heavy soil mix adds weight and holds too much water on a balcony. Water often, since railing planters are exposed to wind and sun, and bring tender herbs inside before frost. Keep a drip tray or a liner in place so watering does not drip onto neighbors below, and trim herbs often to stop them shading each other.

    10. Indoor Herb Shelf With Grow Lights

    Indoor shelf of herb pots under small grow lights in a kitchen.

    Set up a shelf unit with a simple grow light over each shelf for herbs through winter or in a kitchen with little natural light. A lit shelf suits basil, parsley, chives, and mint, and it keeps fresh leaves available when outdoor herbs slow down. Place the shelf near a power point, keep the lights on a timer as the light maker directs, and leave space above each pot for growth.

    Water pots when the top of the soil feels dry, and turn pots often so plants grow straight toward the light. Keep the shelf away from radiators, which dry pots fast, and wipe the light fittings free of dust so light reaches the plants. Start with two or three herbs on one shelf, and add more only when the first group is growing well.

    11. Wall Rail With Hanging Pots and Jars

    Metal wall rail with hanging herb pots and jars in a kitchen.

    Fix a metal rail to a kitchen or patio wall and hang small pots and jars from hooks along it for herbs at arm height. A wall rail suits a narrow kitchen wall, a pantry door, or a sheltered patio wall, and it keeps herbs visible, which helps you remember to pick and water them. Use small pots for parsley, chives, and thyme, and keep mint in a separate jar or pot so it cannot spread.

    Hang pots with a gap between them so air moves and leaves dry after watering, and use hooks that hold the full weight of a watered pot. Water each pot on its own, since small pots dry at different rates, and label each pot while plants are young. Bring tender herbs inside in cold weather, and refresh the potting mix each spring.

    12. Round Herb Wheel Bed

    Round herb bed with spoke paths and a different herb in each wedge.

    Mark out a round bed with paths like wheel spokes and plant a different herb in each wedge for a herb garden that is easy to pick from and easy to explain to visitors. A wheel bed suits a sunny lawn corner or a front garden, and the paths mean you can reach every wedge without stepping on soil. Edge each wedge with low stones, bricks, or a narrow box hedge if you want a formal look.

    Plant tall herbs such as rosemary and sage near the center, where they act as a focal point, and low herbs such as thyme and chives at the outer edge. Keep the center clear enough to stand on while picking, or place a flat stone there as a standing spot. Water the wedges by need, not by routine, since dry loving herbs and leafy herbs sit side by side in this layout.

    13. Kitchen Counter Herb Station

    Tray of small herb pots on a kitchen counter near a stove.

    Set a tray of small herb pots on a kitchen counter near the stove for the herbs you use daily, such as basil, parsley, and chives. A counter station suits cooks who want herbs within arm’s reach, and it works even in a home with no garden at all. Use a tray with a lip to catch water, pots with drainage holes, and a small pair of scissors kept with the tray.

    Keep the station in the brightest spot on the counter, and move pots to a windowsill for a few hours if the counter is dark. Water little and often, since small counter pots dry fast near a warm stove, and replace annual herbs when they get leggy. Keep only three or four pots on the counter, and grow spares on a windowsill or outside so the station stays tidy.

    14. Wooden Crate Herb Garden

    Wooden crate planted with herbs on a patio doorstep.

    Plant herbs in a wooden crate lined with landscape fabric for a movable herb garden that suits a patio, a doorstep, or a rented home. A crate gives herbs a deep enough root run for parsley, chives, sage, and thyme, and it can be carried to a sunnier spot or taken with you when you move. Line the crate, add drainage holes in the base, and fill with potting mix.

    Plant one tall herb at the back of the crate, mid height herbs in the middle, and a trailing herb at the front edge. Water crates often in hot weather, since wood sides dry out, and stand the crate on feet so the base does not sit in water. Replace the lining and mix every year or two, and check the wood for rot each spring.

    15. Galvanized Trough Herb Garden

    Long galvanized trough planted with a row of culinary herbs.

    Use a galvanized metal trough as a long, narrow herb bed for a patio, a balcony, or beside a kitchen door. A trough suits a row of herbs in cooking order, such as basil, parsley, chives, thyme, and oregano, and its height makes picking easy without bending. Drill drainage holes in the base if the trough has none, and raise it on feet or bricks so water drains freely.
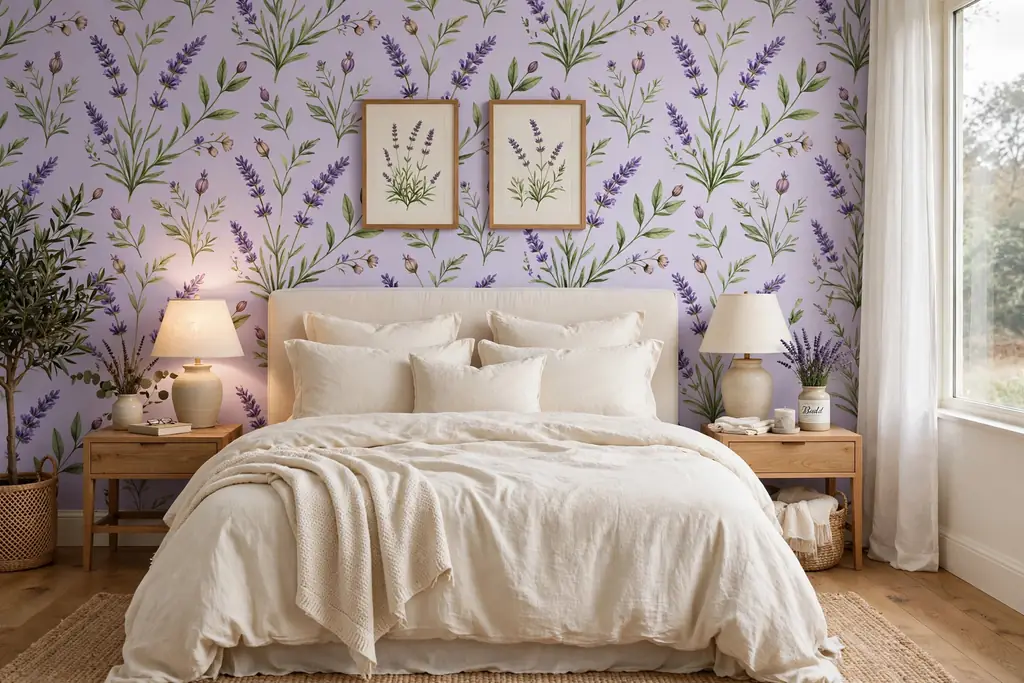
    Fill the trough with a free draining mix, and plant dry loving herbs at one end and leafy herbs at the other, so watering can suit each group. Metal heats up in sun, so water trough herbs more often in hot weather and mulch the surface to hold moisture. In winter, move a small trough to a sheltered spot, and protect tender herbs with fleece on frosty nights.

    16. Herb Edging Along a Garden Path

    Low herbs edging a garden path with thyme and chives.

    Plant low herbs such as thyme, chives, and parsley along the edge of a garden path so every walk past brushes scent into the air. A herb edge suits a path to the kitchen door, a vegetable garden, or a seating area, and it turns a plain edge into a useful planting. Keep the herbs low and trimmed back from the path so walkers do not trip or crush the plants.

    Plant in a single row or a double row beside the path, and leave gaps at path junctions so you can step off the path without trampling herbs. Water path herbs well in their first season, and trim them after flowering to keep the edge tidy. Replace any herb that grows woody or bare in the center, and fill gaps with fresh plants in spring.

    17. Flowering Herb Border for Pollinators

    Flowering herb border with bees visiting chive and thyme flowers.

    Let some herbs flower in a dedicated border for bees and other pollinating insects, using chives, thyme, oregano, sage, lavender, and borage. A flowering herb border suits a sunny garden edge, and it gives you both cooking leaves and flowers for the table, if you pick only part of each plant. Leave a patch of each herb unpicked so it can flower, and cut other plants back for fresh leaves.

    Plant in drifts rather than single plants, so pollinators can find the flowers easily, and avoid spraying the border, since sprays harm the insects you want to attract. For tall flower color beside herbs, these sunflower garden ideas show how height and color can sit beside lower planting without crowding it. Cut back spent flower stems in autumn, and leave a few seed heads standing for birds.

    18. Tea Herb Patch

    Tea herb patch with mint, chamomile, and lemon balm near a seat.

    Plant a small patch for tea herbs, such as mint, chamomile, lemon balm, lemon verbena, and fennel, for fresh leaves to brew through summer. A tea patch suits a sunny, sheltered corner near a seat, so you can pick and brew in one short trip. Grow mint and lemon balm in their own pots sunk into the bed, since both spread fast and can crowd slower herbs.

    Pick leaves in the morning, when scent is strongest, and use fresh leaves or dry a small batch for winter. Keep the patch well watered in hot weather, since tea herbs such as mint and lemon balm like moisture, and trim plants often to keep them bushy. Label each herb clearly, since tea herbs look alike when young, and check that any herb you brew is a variety meant for food use.

    19. Mediterranean Herb Bed

    Sunny gravel bed with rosemary, thyme, sage, and lavender.

    Plant a dry, sunny bed with rosemary, thyme, sage, oregano, and lavender for the herbs that suit hot, free draining soil. A Mediterranean bed suits a south facing border, a gravel garden, or a sunny slope, and it needs less water than a leafy herb bed once plants are established. Use gravel mulch to hold heat, keep crowns dry, and cut down on weeds.

    Space plants by their mature size, not by how they look in the pot, since rosemary and sage grow wide. Water new plants well in their first season, then water only in long dry spells, and prune after flowering to keep plants compact. Protect tender rosemary in cold areas with fleece or by growing it in a pot that moves under cover in winter.

    20. Asian Cooking Herb Bed

    Raised bed with Thai basil, coriander, lemongrass, and mint.

    Grow Thai basil, coriander, mint, lemongrass, and shiso in one bed for the herbs used most in Asian cooking. An Asian herb bed suits a warm, sunny spot with rich, moist soil, and it works well in a raised bed where soil warms early. Grow mint in its own pot, and give lemongrass the sunniest corner, since it needs heat to grow well.
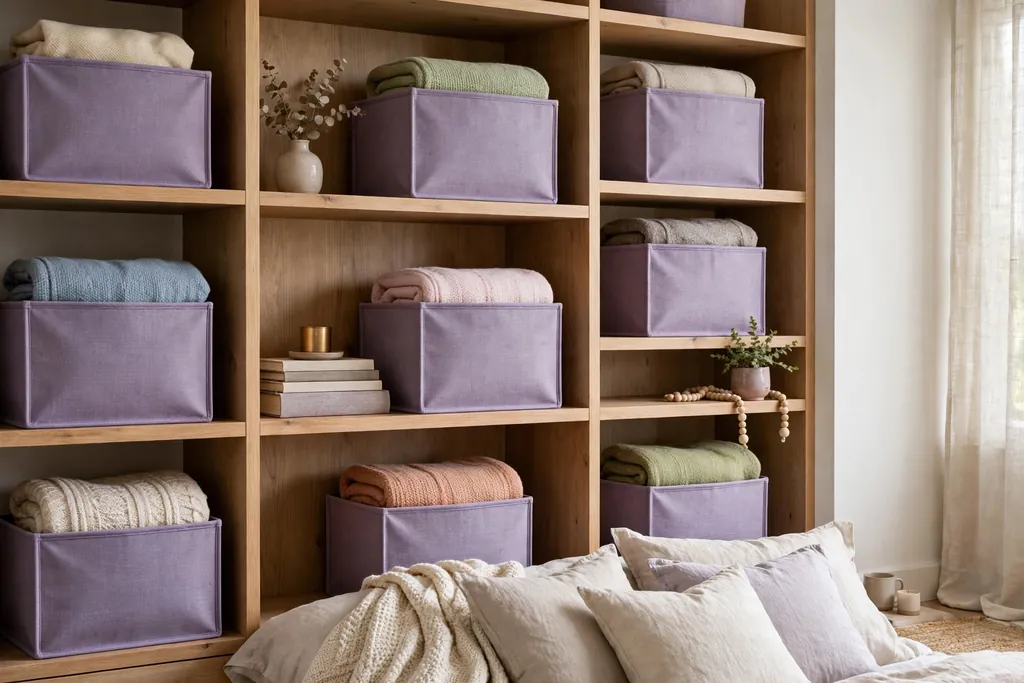
    Water this bed more often than a Mediterranean bed, since coriander and shiso wilt fast in dry soil, and sow coriander in small batches every few weeks for a steady supply. Pick Thai basil often to stop it flowering too soon, and move lemongrass indoors before frost in cold areas. Keep the bed close to the kitchen, since these herbs are often picked at the last minute before cooking.
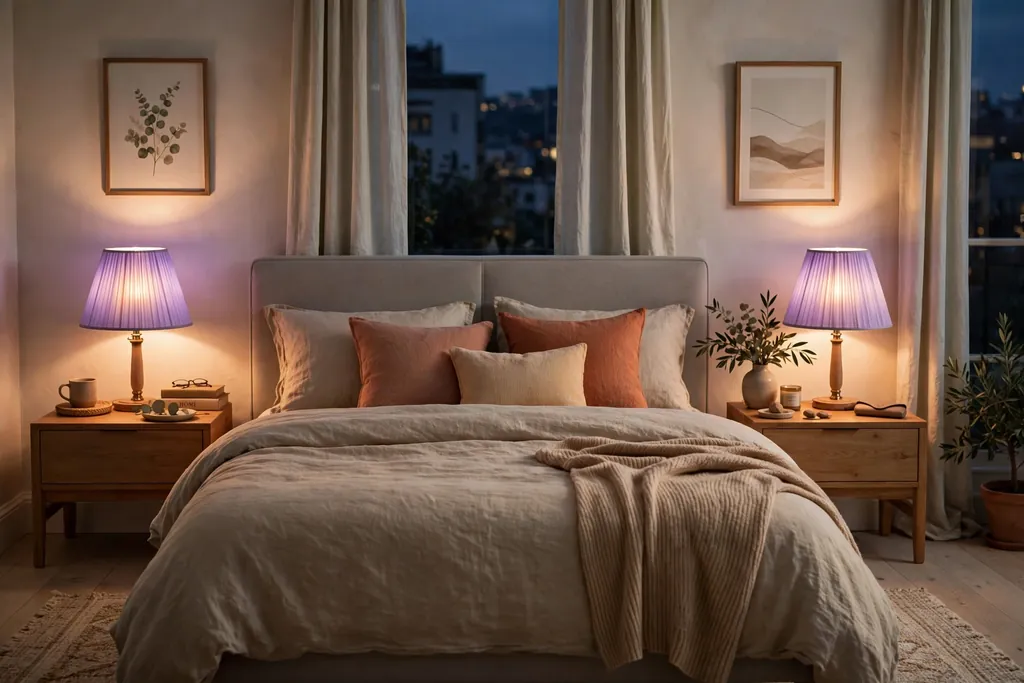
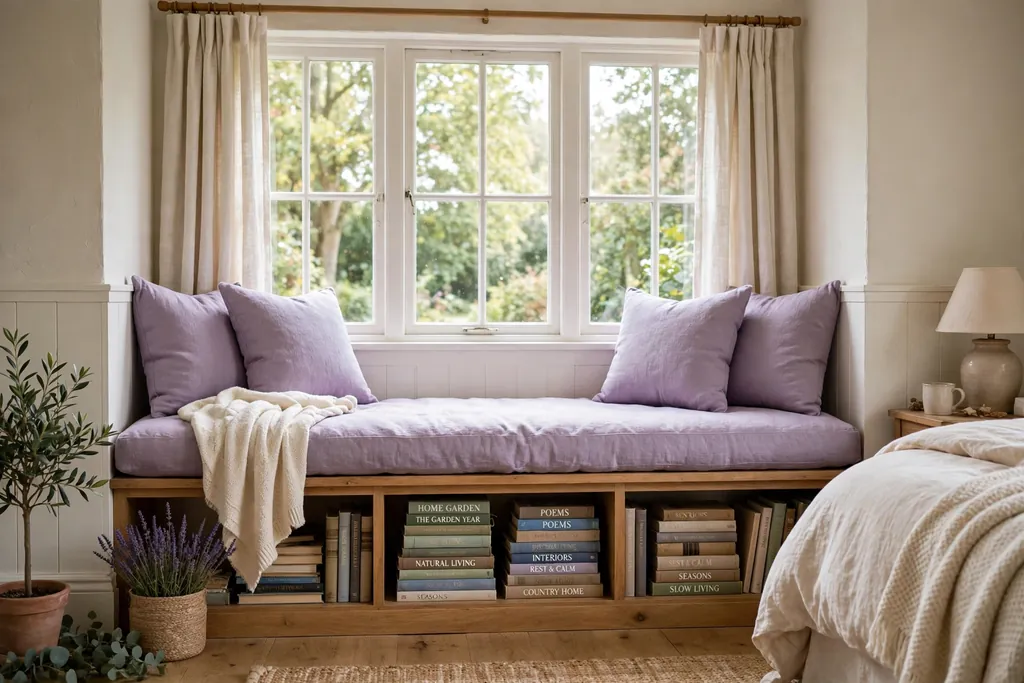
    21. Salsa Herb Patch

    Small sunny patch with coriander, oregano, and chives for salsa.

    Plant coriander, oregano, and chives in a small patch for salsa and fresh sauces, with a pot of mint nearby for drinks. A salsa patch suits a sunny bed near the vegetable garden or a large pot by the kitchen door, and it keeps the herbs you chop fresh together in one place. Sow coriander in batches through the season, since it runs to seed fast in hot weather.

    Pick coriander leaves little and often, and cut chives with scissors to keep them coming back. Water the patch well in hot weather, since soft herbs wilt fast, and mulch the surface to hold moisture. Grow the patch close to tomatoes or peppers if you grow them, so salsa ingredients are picked in one trip, and replace annual coriander each year.

    22. Salad Leaf and Soft Herb Bed

    Bed mixing soft herbs and salad leaves in neat rows.

    Mix soft herbs such as parsley, chives, dill, sorrel, and tarragon with salad leaves in one bed for picking a bowlful in minutes. A salad herb bed suits a spot with morning sun and afternoon shade, since soft herbs and leaves wilt in fierce midday heat. Sow salad leaves in rows between herb plants, and pick leaves from the outside of each plant so the center keeps growing.

    Water this bed often, since leafy plants need steady moisture, and feed lightly through the season. Cut dill and parsley back hard if they get tall and leggy, and let one dill plant flower for seeds and for pollinators. Keep the bed close to the kitchen, and pick in the morning for the crispest leaves.

    23. Herb Drying and Storing Corner

    Bunches of herbs hanging upside down to dry on a rack.

    Set aside a dry, airy corner for drying herbs, with a rack, hooks, or a drying frame near the herb garden or in a shed. A drying corner turns a summer glut into winter flavor, and it suits gardeners who grow more than they can use fresh. Tie small bunches of thyme, oregano, sage, and rosemary, hang them upside down out of direct sun, and label each bunch while you can still tell them apart.

    Dry herbs until leaves crumble easily, then strip leaves into labeled jars and store them away from light and heat. Keep the drying area clean and dry, and check bunches for damp, since damp herbs spoil fast. Use dried herbs within a year for the best flavor, and keep a note of which varieties dried best so you can plant more of them next year.

    24. Shade Tolerant Herb Corner

    Shady garden corner planted with parsley, mint, and chives.

    Plant parsley, mint, chives, lemon balm, and sweet woodruff in a shady corner where sun loving herbs would fail. A shade herb corner suits a north facing bed, a spot under a tree with dappled light, or a side passage that gets only morning sun. These herbs like moisture, so this corner often needs less watering than a sunny bed, but it still needs drainage so roots do not sit in water.

    Grow mint and lemon balm in pots sunk into the bed to stop them spreading, and mulch with compost to hold moisture and feed the soil. Pick shade herbs often to keep them bushy, and cut back any plant that gets leggy in low light. Check for slugs in damp shade, and lift pots onto feet or gravel if slugs become a problem.

    25. Sunny Gravel Herb Bank

    Sunny gravel bank planted with rosemary, thyme, and lavender.

    Plant rosemary, thyme, sage, and lavender on a sunny gravel bank or a sloped bed for herbs that want sharp drainage and heat. A gravel bank suits a front garden slope, a dry border, or a spot where soil stays thin and stony, and it needs less watering than a flat bed once plants are established. Use gravel mulch to reflect heat, keep crowns dry, and cut down on weeds.

    Plant into pockets of free draining soil mix, not into bare gravel, and water new plants well until roots establish. Prune after flowering to keep plants compact and to stop woody growth taking over the bank. Keep the bank clear of fallen leaves in autumn, since damp leaves rot herb crowns, and replace any plant that outgrows its pocket with a smaller variety.

    26. Wheelbarrow Herb Garden

    Old wheelbarrow planted with herbs on a sunny patio.

    Plant herbs in an old wheelbarrow for a movable herb garden that can follow the sun or move under cover in a storm. A wheelbarrow suits a small patio, a rented garden, or a gardener who wants herbs at a comfortable height without building a bed. Drill drainage holes in the base, fill with potting mix, and plant a mix of tall rosemary at the back, mid height sage and thyme in the middle, and trailing thyme at the front.

    Move the wheelbarrow to the sunniest spot in spring and to shelter before frost, and lock the wheel or chock it so it cannot roll. Water wheelbarrow herbs often, since the shallow soil dries fast, and refresh the mix each spring. Keep the handles clear so the barrow can still be moved, and check the tray for rust each year.

    27. Herbs Grown in Water on a Sill

    Glass jars of herb cuttings rooting in water on a windowsill.

    Root cuttings of mint, basil, and oregano in jars of water on a bright windowsill for herbs with no soil at all. A water herb setup suits a small kitchen, a classroom, or a gardener who wants to see roots grow, and it gives fresh leaves while cuttings establish. Use clean jars, change the water every few days, and keep jars out of direct midday sun, which heats the water and grows algae.

    Take cuttings just below a leaf joint, strip the lower leaves, and stand the stems in water until roots are an inch or two long. Move rooted cuttings into pots for long term growing, since water alone runs out of food, and keep a few jars going for a steady supply of cuttings. Label each jar, since mint and oregano cuttings look alike in water.

    28. Formal Herb Knot Garden

    Formal herb knot garden with low hedging and gravel paths.

    Lay out a formal knot garden with low box or lavender hedging in interwoven shapes, and fill each section with a different herb. A knot garden suits a front garden, a courtyard, or a garden with a formal style, and it looks good in winter, when the hedging keeps its shape. Keep the design simple, with two or three interwoven shapes, so trimming stays manageable.

    Plant thyme, sage, chives, and parsley inside the hedging shapes, and keep the hedging trimmed twice a year to hold the pattern. Edge the knot with gravel paths so you can reach each section for picking and trimming without stepping on plants. Water new hedging well in its first season, and replace any hedge plant that dies so the pattern stays clear.

    29. Stacked Tower Planter for a Small Patio

    Stacked tower planter with herbs growing from pockets on each level.

    Use a stacked tower planter with pockets on each level for herbs on a small patio or balcony. A tower planter suits a gardener with only a square foot of floor space, and it holds more plants than a single pot by using height. Plant trailing thyme and oregano in the lower pockets, mid height parsley and chives in the middle, and basil or rosemary at the top.

    Water from the top slowly so moisture reaches each level, and turn the tower every few days so all sides get sun. Check the lower pockets, which can stay wetter than the top, and feed lightly through the season. Bring tender herbs inside before frost, and refresh the mix in each pocket each spring.

    30. Fence Pocket Herb Wall

    Fabric pocket planters on a sunny fence filled with herbs.

    Hang fabric or felt pocket planters on a sunny fence for a herb wall that needs no floor space at all. A fence pocket wall suits a small garden, a balcony fence, or a narrow side passage, and it brings herbs to eye level for easy picking. Fill each pocket with potting mix, plant one herb per pocket, and water slowly so each pocket soaks evenly.
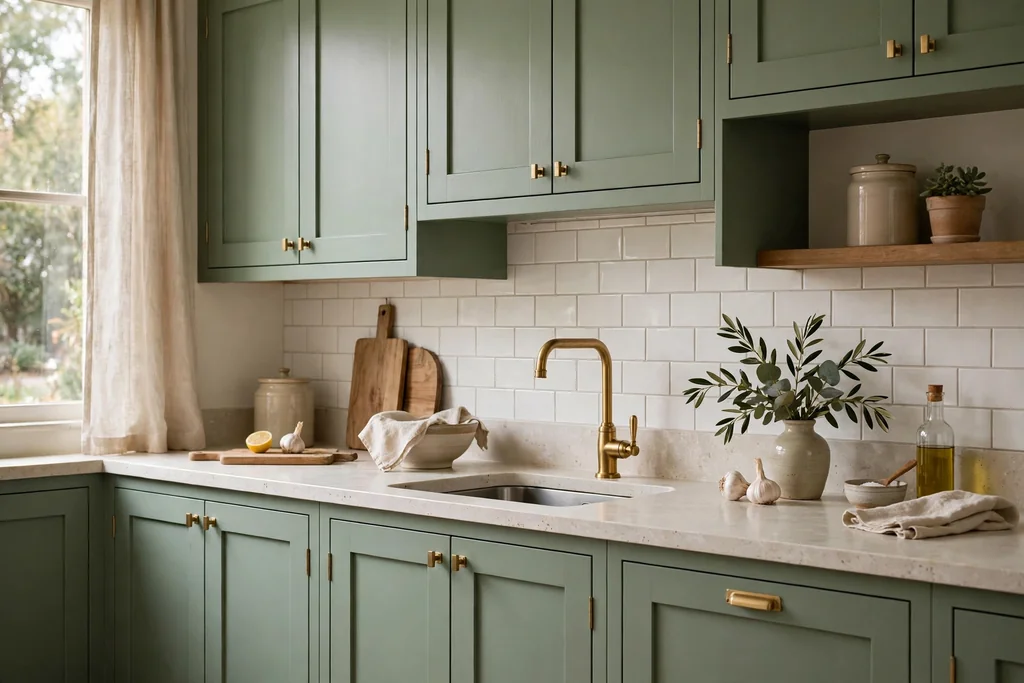
    Plant compact herbs such as thyme, chives, parsley, and trailing oregano, and keep mint in a pocket on its own so it cannot spread to neighbors. Water pocket walls often, since shallow pockets dry fast in sun and wind, and check the fence fixings, since a planted wall is heavy when wet. Replace the mix each year, and bring tender herbs inside before frost.

    31. Herb Bed Outside the Kitchen Window

    Narrow herb bed outside a kitchen window with a stone standing spot.

    Plant a narrow herb bed outside the kitchen window so you can see the herbs from inside and pick them in a few steps. A window bed suits a house with a small garden strip beside a wall, and it keeps herbs in the sunniest spot near the house, where walls reflect heat. Plant parsley, chives, thyme, and sage in the bed, and keep taller rosemary at the end, where it will not block the window.

    Leave a flat stone or a narrow path beside the bed for standing while you pick, and keep the bed clear of the house wall so air moves and damp does not build up. If the window looks onto a patio, a seat close by lets you pick and rest in one trip, and these garden bench ideas show how to choose a spot first and match the seat to it. Water the bed well in hot weather, since soil near a wall dries fast.

    32. Cold Frame Herb Garden for Cold Months

    Cold frame with herbs growing inside on a sunny winter day.
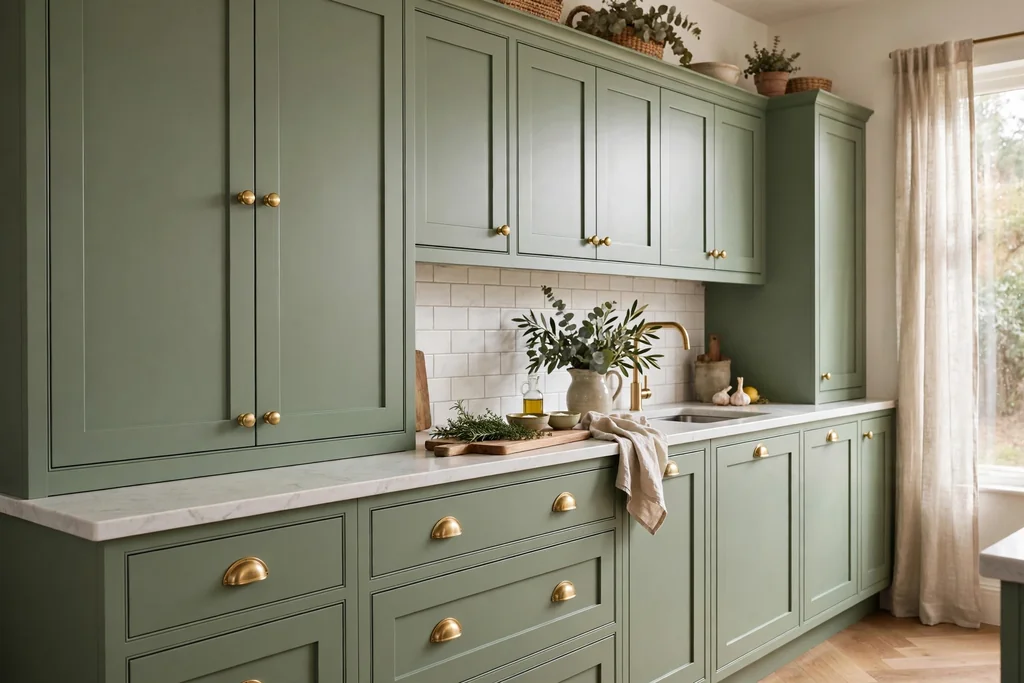
    Use a cold frame to grow parsley, chives, thyme, and winter savory through cold months and to start tender herbs early in spring. A cold frame suits a gardener who wants fresh herbs past the first frost, and it protects plants from wind and heavy rain without heating. Place the frame in a sunny, sheltered spot, and open the lid on mild days so plants do not overheat.
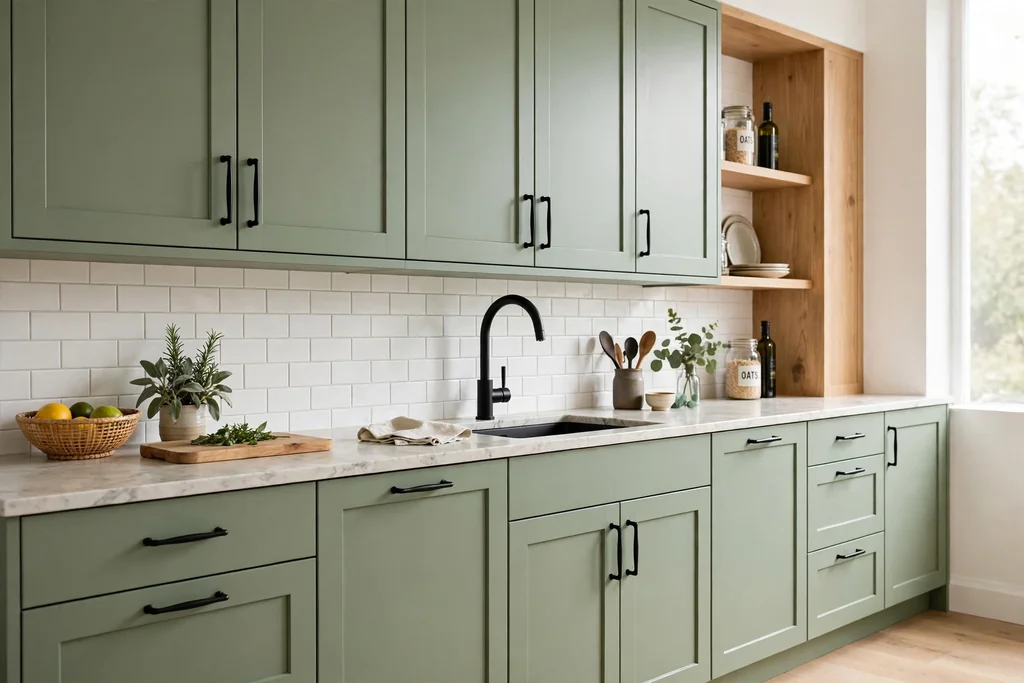
    Water cold frame herbs sparingly in winter, since cold soil stays wet longer, and close the lid before frost at night. Start basil and other tender herbs in the frame in spring, once frost risk has passed, and harden them off by opening the lid for longer each day before moving them outside. Keep the glass clean so light reaches the plants, and check for slugs in damp weather.

    33. Herb and Flower Companion Bed

    Garden bed mixing herbs with marigolds, nasturtiums, and calendula.

    Mix herbs with flowers such as marigolds, nasturtiums, calendula, and sweet alyssum in one bed for color, scent, and pollinators alongside cooking leaves. A companion bed suits a cottage garden, a vegetable garden edge, or a front garden where a plain herb bed would look bare. Plant herbs in groups, and fill gaps with flowers, so the bed looks full from spring to autumn.

    Pick herbs often to keep them bushy, and deadhead flowers to keep blooms coming. Leave some flowers to set seed for next year, and let a few herbs flower for bees, as in the pollinator border earlier in this list. Water the bed evenly, since flowers and herbs share the same soil, and replace annual flowers each spring with fresh plants.

    Conclusion

    A good herb garden starts with the herbs you actually cook with, not with the largest bed you can build. Pick one idea from this list that fits your space, whether that is a windowsill row, a pot cluster by the door, or a raised bed near the kitchen, and get those first herbs growing well. Once picking becomes part of cooking, you can add a wall, a spiral, or a second bed with confidence, knowing what each herb needs. Keep the garden close, water pots often, pick little and often, and let a few herbs flower for bees. Save this list on Pinterest before your next garden trip, and work through it one area at a time.

    FAQs

    Which herbs are easiest for a beginner herb garden?

    Start with mint in its own pot, chives, parsley, thyme, and rosemary, since these cope with a range of conditions and forgive a missed watering better than tender basil. Give them sun, drainage, and regular picking, and add basil, coriander, and dill once the first group is thriving. Keep the garden small at first, with three to five herbs, so watering and picking stay easy.

    How much sun do most culinary herbs need?

    Most culinary herbs need at least six hours of sun a day, and Mediterranean herbs such as rosemary, thyme, sage, and lavender do best in full sun with free draining soil. Parsley, mint, chives, and lemon balm cope with part shade, and they suit a north facing bed or a spot with morning sun only. If a spot gets less than four hours of sun, grow herbs indoors under a grow light or choose shade tolerant herbs only.

    Why is mint always grown in its own pot?

    Mint spreads by underground stems and can take over a bed, a planter, or a path edge in one season, crowding out slower herbs. Growing mint in its own pot, or in a pot sunk into a bed with the rim above soil level, keeps its roots contained while still giving you plenty of leaves. Check pot grown mint each year, since it can escape through drainage holes if the pot sits on open soil.

    How often should potted herbs be watered?

    Water potted herbs when the top inch of soil feels dry, which can mean daily in hot, windy weather and only every few days in cool, cloudy weather. Water slowly until water runs from the drainage holes, then empty the saucer so pots do not sit in water. Pots dry faster than beds, and hanging baskets and pocket planters dry fastest of all, so check small containers first on hot days.

    Can herbs grow indoors all year?

    Yes, with enough light. A bright south facing windowsill suits chives, parsley, and mint, while basil and other tender herbs do better with a grow light in winter, when daylight is short. Keep indoor herbs away from radiators, water when the top of the soil feels dry, and turn pots often so growth stays even. Replace annual herbs each year, since indoor plants tire faster than outdoor plants.

    What is the best soil for herbs in pots?

    Use a free draining potting mix, not heavy garden soil, which compacts in pots and holds too much water around herb roots. For Mediterranean herbs, mix in extra grit or perlite for sharper drainage, and for leafy herbs such as parsley and mint, use a mix with more compost to hold moisture. Refresh potting mix each spring, since old mix loses structure and food, and feed lightly through the growing season as the mix label directs.


  • 14 Japanese Apartment Design Ideas to Inspire Your Next Room Refresh

    14 Japanese Apartment Design Ideas to Inspire Your Next Room Refresh

    A Japanese apartment feels calm because every piece has a clear job and the floor stays open. Low furniture, natural wood, soft paper light and one well placed plant can make a small room feel larger, quieter and easier to keep tidy. These 14 Japanese apartment design ideas adapt those habits for rented rooms and small homes, without a remodel. You will find tatami zones, shoji screens, genkan entries, hidden storage and flexible rooms that change from day to night. Start with one idea, such as clearing the floor or adding a low table, and let the rest follow at your own pace.

    Key Takeaways

    • Keep the floor open first, then add furniture. Empty floor space is part of the design, not wasted space.
    • Choose low, light furniture in natural wood so sight lines stay clear across a small room.
    • Give every item a closed home, so surfaces stay clear and tidying takes minutes.
    • Use soft, layered light from paper lamps and low lamps instead of one harsh ceiling light.
    • Add nature in small doses: one plant, one branch, or a view framed by a clear window.
    • Let one room do two jobs with sliding screens, a foldaway table, or a futon that stores away by day.

    1. Tatami Zone for Floor Living

    Tatami mat zone in a small apartment with floor cushions and a small tray.

    Lay a tatami mat, or a woven rush rug that echoes tatami, in one clear corner to mark a floor living zone. This spot becomes the place for tea, reading, or sitting with friends, and it changes how the whole room feels because the floor itself becomes seating. Keep the zone free of tall furniture so the low line of sight stays open.

    Add floor cushions, called zabuton, and a small tray for cups, and remove shoes before stepping onto the mat, as you would on real tatami. A woven mat is easier to clean and move than fixed flooring, which suits renters. If the room is carpeted, a firm mat on top still gives a clear edge and a sense of place.

    2. Shoji Screens for Soft Light

    Shoji screen beside a bright window spreading soft light through a small apartment.

    Use a shoji screen, or a freestanding screen with translucent paper panels, beside a window or across a doorway to soften daylight. Shoji screens spread light evenly through a room and give privacy without blocking the sun, which matters in a small apartment where a solid curtain can darken the whole space.

    Place the screen where it catches morning or afternoon light, and keep the path behind it clear so it can slide or fold easily. A lightweight freestanding screen needs no wall fixing, so it suits rented homes. Choose a simple wooden frame and plain paper, and avoid patterned screens that compete with the calm palette of the room.

    3. Low Platform Bed in a Sleeping Nook

    Low platform bed in a quiet apartment sleeping nook with plain bedding and a plant.

    Set a low platform bed, or a futon on a low wooden base, in the quietest corner of the room to create a sleeping nook that feels grounded. A low bed keeps the ceiling height visible and makes a small bedroom feel taller, while the simple frame leaves room for a plant or a small shelf beside it.

    Keep bedding in warm white, soft grey, or pale beige, and fold a throw at the foot of the bed instead of piling cushions. If space is very tight, a futon that rolls away by day frees the same floor for living space, which is the flexible approach used in many Japanese homes. The zoning advice in these studio apartment decorating ideas helps a sleeping nook share a room with living and work zones.

    4. Low Wooden Table with Floor Cushions

    Low wooden table with floor cushions in a small Japanese apartment living area.

    Place a low wooden table, called a chabudai in a traditional setting, at the centre of the tatami zone for meals, work, and conversation. Sitting on floor cushions around a low table keeps the room open, and the table itself becomes a gathering point that does not block views across the apartment.

    Choose a table with a plain wood top and simple legs, sized so everyone can reach the centre without stretching. Store the cushions in a basket or on a low shelf when the table is not in use, so the zone stays clear. A foldaway low table gives the same effect in a room that also needs floor space for exercise or guests.

    5. Genkan Entry with a Step and Shoe Storage

    Genkan style apartment entry with a shoe tray, low bench, and a slim shoe cabinet.

    Create a genkan style entry by marking a clear shoe zone just inside the door, with a low step, a tray, or a different rug from the main floor. This small change keeps outdoor dirt out of the living area and gives every arrival a clear first step: shoes off, shoes stored, then step into the home.

    Use a slim shoe cabinet, a low bench with baskets beneath, or wall hooks for a bag and a coat, keeping the entry to one tidy group. A tray catches wet shoes, and a small dish holds keys. Keep the entry clear of parcels and extra coats, since a calm entry sets the tone for the rest of the apartment.

    6. Hidden Storage Behind Flat Doors

    Apartment closet with flat plain doors blending into a pale wall, closed and tidy.

    Hide storage behind flat, handle free doors or simple curtain panels so clothes, cleaning items, and spare bedding stay out of sight. Japanese apartments often use large closets, called oshiire, with plain doors that blend into the wall, and the same idea works with a freestanding wardrobe or a closet fitted with plain fronts.

    Sort each closet by use, with daily items at hand height and seasonal items up high, and label boxes inside so nothing needs a long search. The basket and bin grouping in these bedroom storage ideas works well inside a plain closet too. Leave one shelf partly empty, so new items have a place instead of landing on a chair.

    7. Washi Paper Lighting for a Soft Glow

    Small apartment in the evening lit by a washi paper lamp with a soft warm glow.

    Light the room with washi paper lamps, paper lanterns, or a lamp with a plain fabric shade that spreads a soft glow. Paper light feels warm and even, and it suits evening meals, reading, and quiet time far better than a single bright ceiling light in a small room.

    Layer the light at two or three heights: a floor lamp or paper lantern at seating height, a small table lamp beside the bed, and daylight through a shoji screen by day. Use warm bulbs and a dimmer where you can, and keep lamp shades plain so the light, not the lamp, is the focus. Paper shades need care near heat, so check the bulb guidance for your lamp.

    8. Natural Wood and Bamboo Accents

    Japanese apartment detail with natural wood tray, bamboo mat, and ceramic bowls.

    Bring in natural wood and bamboo through a bench, a tray, a shelf, or chopstick rests and small bowls, rather than through large new furniture. Wood grain, bamboo, and woven fibres add warmth and texture to a room that might otherwise feel plain, and they age with small marks that suit a lived in home.

    Keep the wood tones close together, such as light oak, pale bamboo, and warm walnut in small doses, so the room reads as one calm palette. A wooden tray on the low table, a bamboo mat in the entry, and a wood frame on the wall are enough. Avoid glossy or heavily patterned finishes, which can make a small room feel busy.

    9. One Focal Plant and a Framed View

    Single potted plant on a low stand in a calm Japanese apartment beside a clear window.

    Choose one focal plant, such as a small pine, a bamboo stem in a ceramic vase, or a bonsai on a low stand, and place it where you see it from your main seat. One plant, given a clear spot and a plain pot, draws the eye and brings nature indoors without filling every surface with greenery.

    Frame the view too: keep one window clear of clutter, or hang one simple print of a mountain, a river, or a branch on an otherwise plain wall. Match the plant to the light it will actually get, use a saucer under the pot, and start with one plant before adding more. A single strong plant beats a crowded shelf of plants that are hard to care for.

    10. Warm Neutral Palette with Linen and Cotton

    Japanese apartment living room in warm neutrals with linen cushions and a cotton throw.

    Use a warm neutral palette of soft white, warm beige, pale grey, and muted clay on walls, bedding, and large furniture, then add texture with linen, cotton, and wool. Texture, rather than strong colour, gives a Japanese apartment its warmth: a linen cushion, a cotton throw, a wool rug, and a woven basket each feel different to touch.

    Keep strong colour to one or two small accents, such as a dark ceramic vase or a deep green plant pot, and repeat that accent in one other spot so the room feels linked. If you rent and cannot paint, a large rug, curtains in a warm neutral, and bedding in the same palette give the same calm base with no fixed change.

    11. Sliding Fusuma Panels for a Flexible Room

    Sliding panels partly open between a sleeping nook and a living area in a small apartment.

    Use sliding panels, a ceiling track curtain, or a freestanding screen to divide one room into two zones that can open again in seconds. Fusuma panels are opaque sliding doors in a traditional home, and a modern version lets a sleeping nook close at night and open into the living area by day.

    Keep the divider light and simple, with plain panels that slide easily on a track, and leave a clear walking route around one end so the division never feels like a wall. A curtain on a ceiling track gives a softer, renter friendly version of the same idea. The divider guidance in these cozy apartment living room ideas shows how an open divider can mark a boundary without blocking light.

    12. Compact Kitchen with Clear Counters

    Compact Japanese apartment kitchen with clear counters and a small tray of daily items.

    Keep kitchen counters clear by storing appliances in one cabinet, using a tray for daily items, and giving every tool a fixed spot. Japanese apartment kitchens are often compact, so they work because only daily items stay out: a kettle, a cutting board, and a small tray for oils or tea.

    Use vertical storage inside cabinets, such as shelf risers and hooks on the inside of doors, and a rolling cart that parks beside the counter when extra prep space is needed. Wipe counters after cooking and return items to their cabinet the same evening, so the kitchen stays ready for the next meal. A clear counter also makes a small kitchen feel larger and calmer.

    13. Engawa Style Window Seat and Balcony Link

    Low window seat bench with a cushion beside a bright apartment window.

    Turn the strip beside the window into an engawa style seat, with a low bench, a cushion, and a clear view outside, so the room feels linked to the balcony or the street. This narrow seat works for morning tea, reading, or putting on shoes, and it gives a small apartment a breathing space at its edge.

    Keep the seat cushion in a washable cover, add a small shelf or hook nearby for a book and a cup, and keep the window glass clear so daylight reaches deep into the room. If you have a balcony, carry a mat and a small table outside in good weather, then bring them back in, so the outdoor space extends the room without a permanent setup.

    14. Tokonoma Alcove with One Rotating Display

    Small alcove display with a single vase and branch on a plain shelf in a Japanese apartment.

    Set aside one small alcove, shelf, or wall niche as a tokonoma style display, with one object at a time: a vase with a single branch, a small ceramic bowl, or one framed print. Rotating the display with the seasons, or when you find a new piece, keeps the room feeling fresh without buying new furniture.

    Keep the alcove plain, with a clear background and no other objects competing for attention, and place it where you pass it daily, such as beside the entry or at the end of a hallway. Change the display only when the season changes or the branch fades, so the single object gets time to be noticed. This quiet focal point sums up the whole approach: less on show, more noticed.

    Conclusion

    A Japanese apartment design is not about buying a full set of new furniture. It is about an open floor, low furniture, natural materials, soft light, and storage that keeps surfaces clear. Start with the floor and the entry, add a low table and a paper lamp, and finish with one plant and one display that you truly notice. Work through this list one idea at a time, live with each change for a week, and keep only the ideas that make daily life easier. For small rooms, the zoning and storage ideas in these studio apartment decorating ideas and bedroom storage ideas pair well with the Japanese habits above.

    Keep this list handy for your next room refresh, and save it to your apartment decorating board on Pinterest so you can find the tatami zone, shoji screen, and genkan ideas when you are ready for the next change.

    FAQs

    How can I make a small apartment feel Japanese without a remodel?

    Start with the floor, the light, and the storage. Clear one floor zone, add a low table and floor cushions, swap a harsh ceiling light for a paper lamp and a low lamp, and hide clutter behind plain doors or baskets. A warm neutral palette, one plant, and natural wood accents complete the look with no drilling or painting, and each change can be reversed when you move.

    What is a tatami room, and can I use tatami in a rented apartment?

    A tatami room is a room floored with woven rush mats, used for sitting, eating, and sleeping on the floor. In a rented apartment, a woven rush rug or a set of tatami style mats laid over the existing floor gives a similar zone without fixing anything down. Remove shoes before stepping on the mat, keep it dry, and vacuum it gently, and move it easily when you need the floor for other uses.

    What is the difference between shoji and fusuma screens?

    Shoji screens are translucent, with paper over a wooden lattice, so they soften light and give privacy while still letting daylight through. Fusuma panels are opaque sliding panels, used as doors or room dividers that close a space fully. In a small apartment, a shoji style screen suits a window or a light divider, while a fusuma style panel or a ceiling track curtain suits a sleeping nook that needs full privacy at night.

    How do I keep a Japanese style apartment tidy every day?

    Give every item a closed home and follow a short daily reset: shoes in the genkan cabinet, dishes back in the kitchen cabinet, cushions in their basket, and the low table cleared after meals. Keep only daily items visible, and do a ten minute reset each evening so clutter never builds up. A room with few visible items is easier to tidy than a room with open shelves full of small objects.

    What colours and materials suit a Japanese apartment?

    Warm neutrals suit the base: soft white, warm beige, pale grey, and muted clay, with natural wood, bamboo, linen, cotton, wool, paper, and ceramic for texture. Keep strong colour to one or two small accents, such as a dark vase or a green plant pot, and repeat it once elsewhere in the room. Plain finishes and visible wood grain matter more than pattern, so choose simple fabrics and matte surfaces.

    Can a Japanese apartment design work with a sofa and a television?

    Yes, if you keep the low, open feel. Choose a low sofa with slim legs, a low media bench instead of a tall unit, and a plain wall behind the television with one small display beside it. Keep cables hidden, keep the floor in front of the sofa clear, and use a paper lamp for evening viewing instead of a bright ceiling light. The room can still feel calm when the largest pieces sit low and surfaces stay clear.