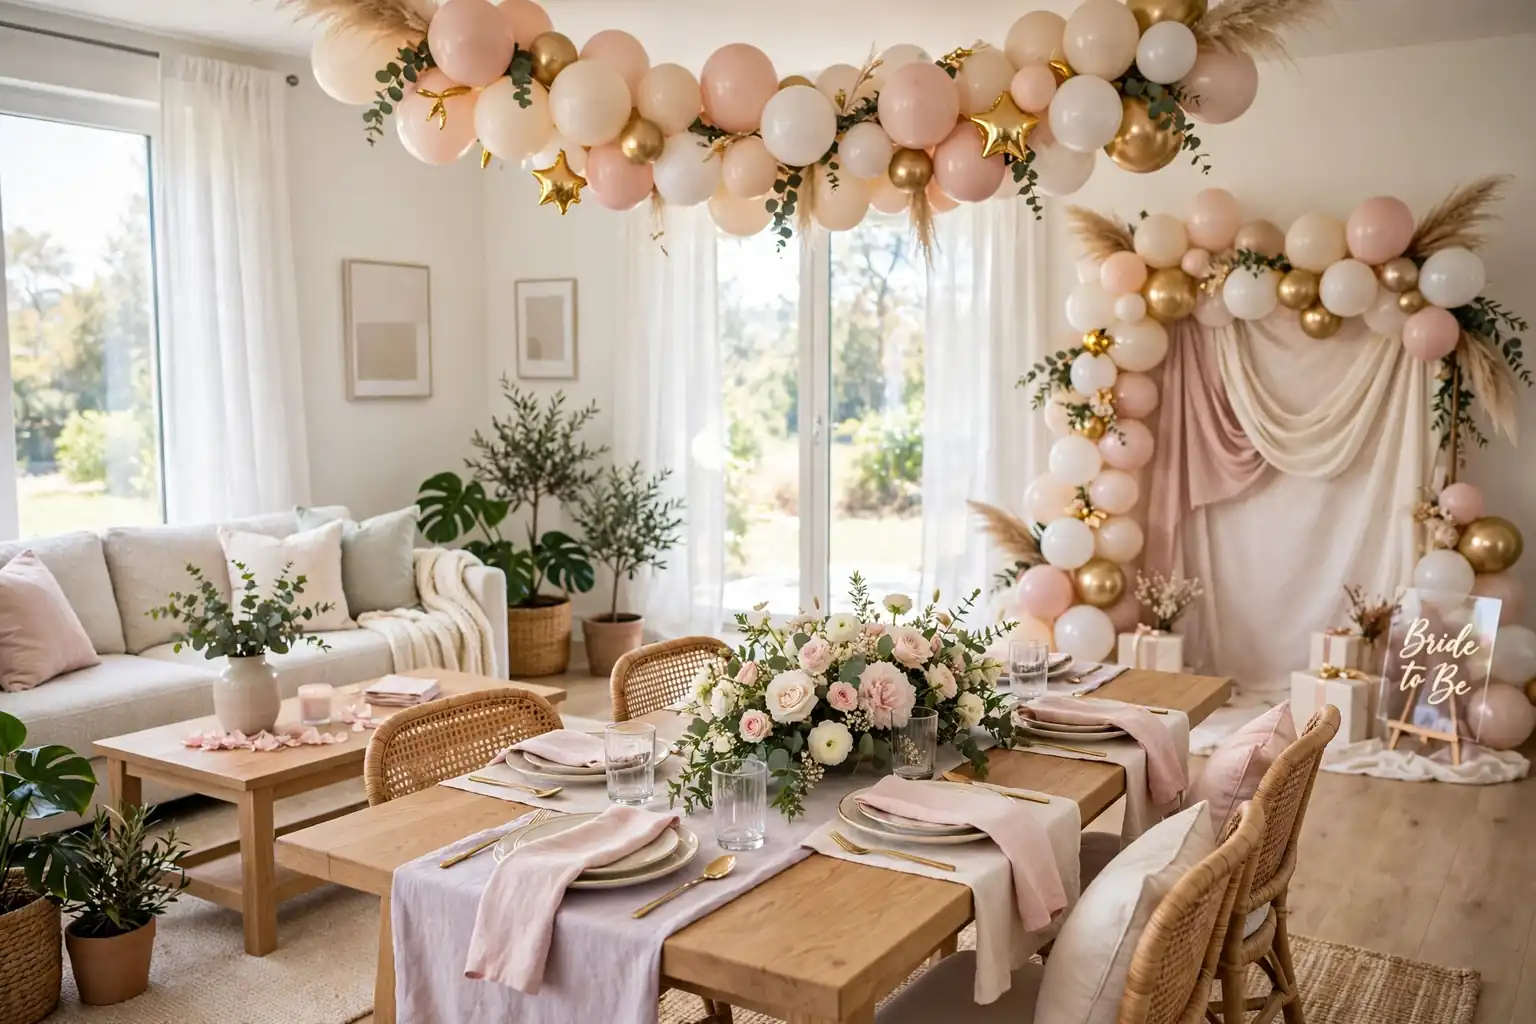
Category: Living Room

Comfortable seating, thoughtful layouts, and finishing touches for a living room that feels like home.

  • 23 Bridal Shower Decorating Ideas for a Welcoming Home Event

    23 Bridal Shower Decorating Ideas for a Welcoming Home Event

    Bridal shower decorating ideas for a home event start with a clear entry, one focal table, and soft color repeated across the room. Use balloons or flowers at the door, a low centerpiece on the main table, a photo spot, and a drink station. The 23 ideas below cover entry, tables, walls, and favors for a welcoming gathering.

    Start with the base you already own: a plain cloth or runner, everyday plates, and cloth napkins in a soft neutral. Then add one bridal shower layer at a time, such as a balloon garland, a flower centerpiece, or a welcome sign. Keep centerpieces low enough to see across, leave room for food and gifts, and choose pieces you can lift off in one move when the room needs to clear. Pick one palette, such as blush and cream with one metal accent, and repeat it at the entry, the table, and the photo spot, so the whole home reads as one event.

    Key Takeaways

    • Pick one palette of two soft colors plus white and one metal accent, and repeat it at the entry, the table, and the photo spot.
    • Keep centerpieces low and narrow, so guests can see each other and serving dishes still fit.
    • Give the event one clear focal point, such as a dessert table or a photo backdrop, and keep the rest of the decor simple.
    • Use textiles first: a cloth, runner, napkins, and chair ties carry most of the color and wash easily.
    • Plan the flow: entry, seating, food, gifts, and favors each need their own clear spot, so guests are never crowded into one corner.
    • Choose candlelight with care: keep flames clear of balloons, paper, and fabric, and use battery candles near paper decor or with children present.

    1. Balloon Garland Arch at the Entry
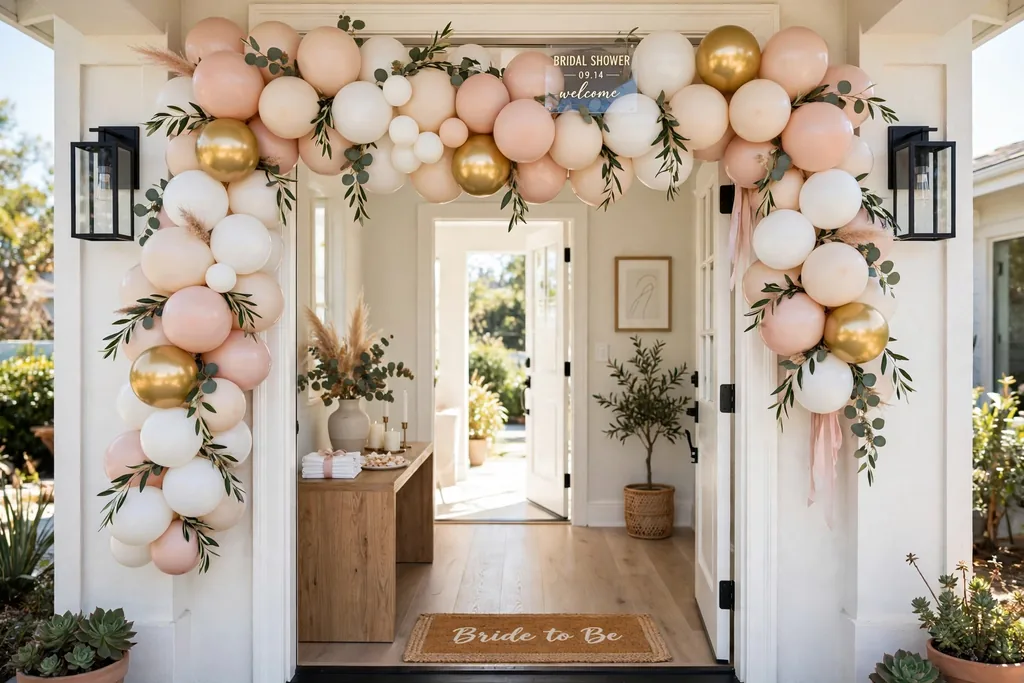
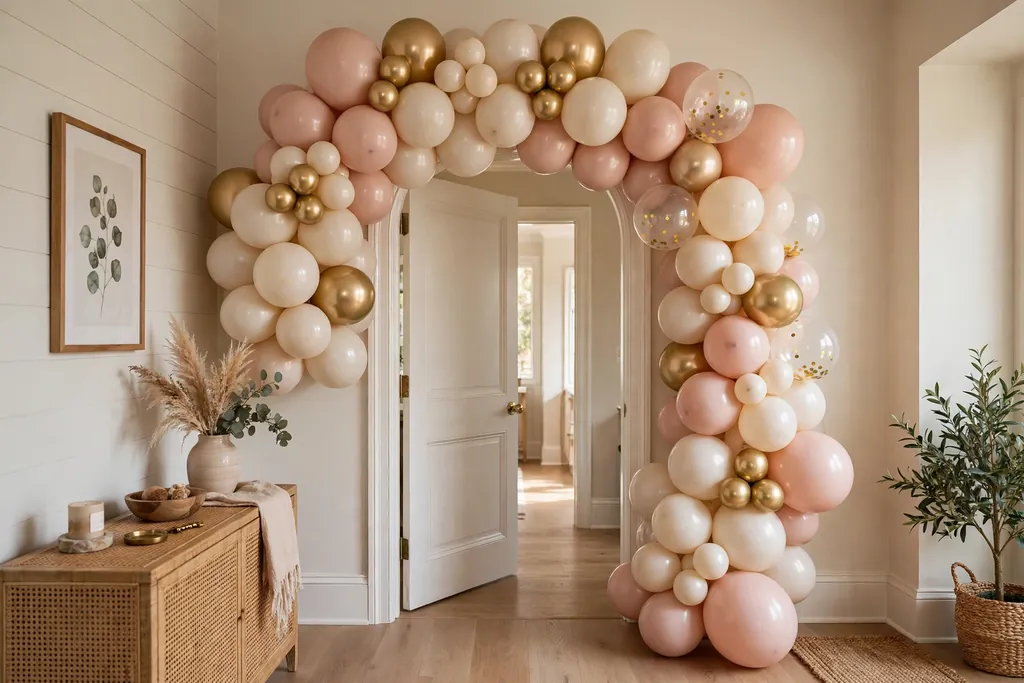
    Balloon garland arch in blush, cream, and white with gold accents across a home entry doorway.

    Hang a balloon garland in the shower palette across the front door frame or the entry wall, so guests know at once they have arrived at a celebration. Mix two balloon sizes in blush, cream, and white, with a few gold balloons for accent, and shape the garland into an arch or a loose swag that follows the door frame. Anchor it well at both ends, so it does not slip while guests come and go.

    Keep the garland clear of the door swing and the walkway, and leave headroom above the path, so tall guests can pass without ducking. If the entry is narrow, use a half arch on one side of the door instead of a full arch, which gives the same welcome note with less bulk. Save a few spare balloons and a small pump for quick fixes before guests arrive.

    2. Fresh Flower Centerpieces in Mixed Vases
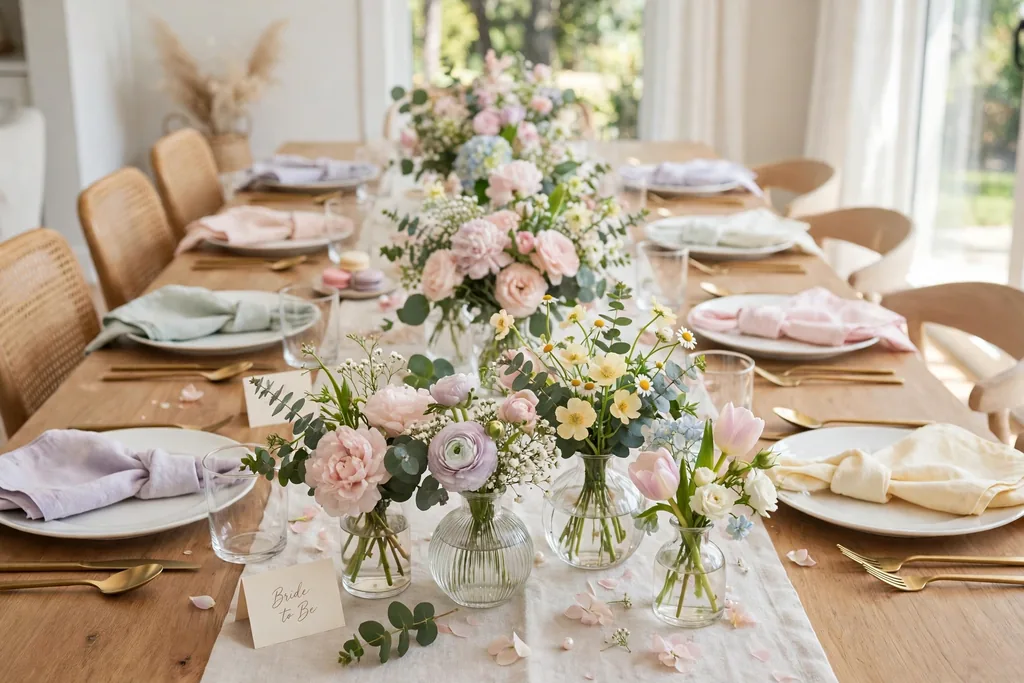
    Low fresh flower arrangements in mixed glass vases down the center of a bridal shower table.

    Set low flower arrangements down the center of the main table using vases you already own in mixed shapes, such as bud vases, short jars, and one wider vase. Use one flower type in each vase, or the same mix in every vase, in the shower palette, with short green stems between blooms. The mixed heights look collected rather than formal, and each vase can move to a sideboard after the meal.

    Trim stems so blooms sit just above the vase rim, and keep the total height low enough to see across. Change the water the morning of the event, and remove any stem that wilts, since one cloudy vase can spoil the group. For a long table, space three or five vases evenly, and leave room between them for serving dishes and glasses.

    3. Dessert Table with a Tiered Display
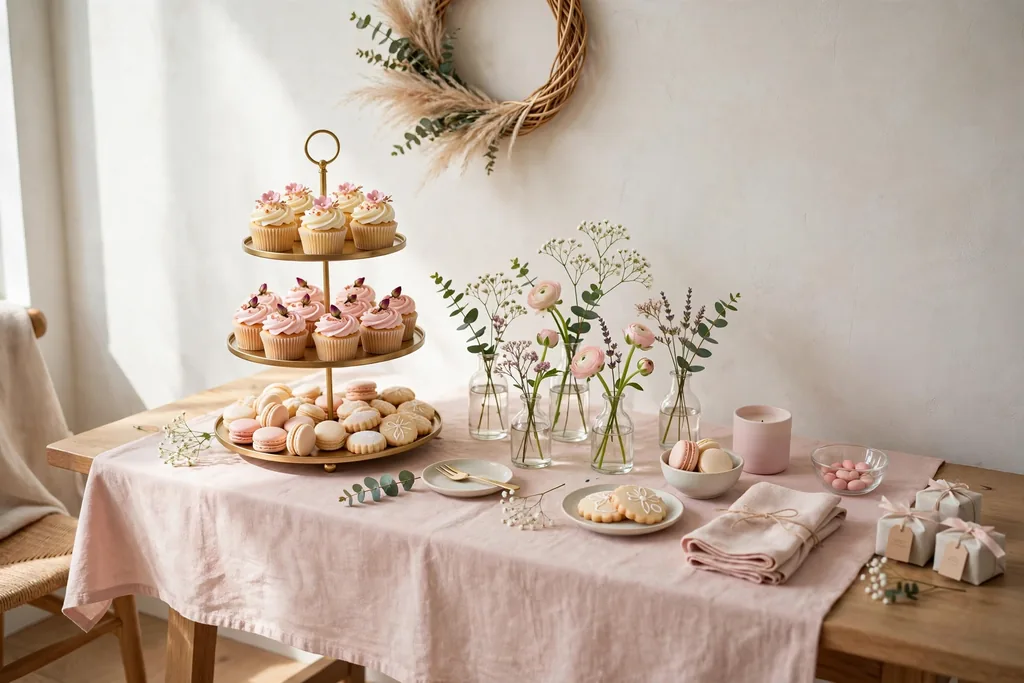
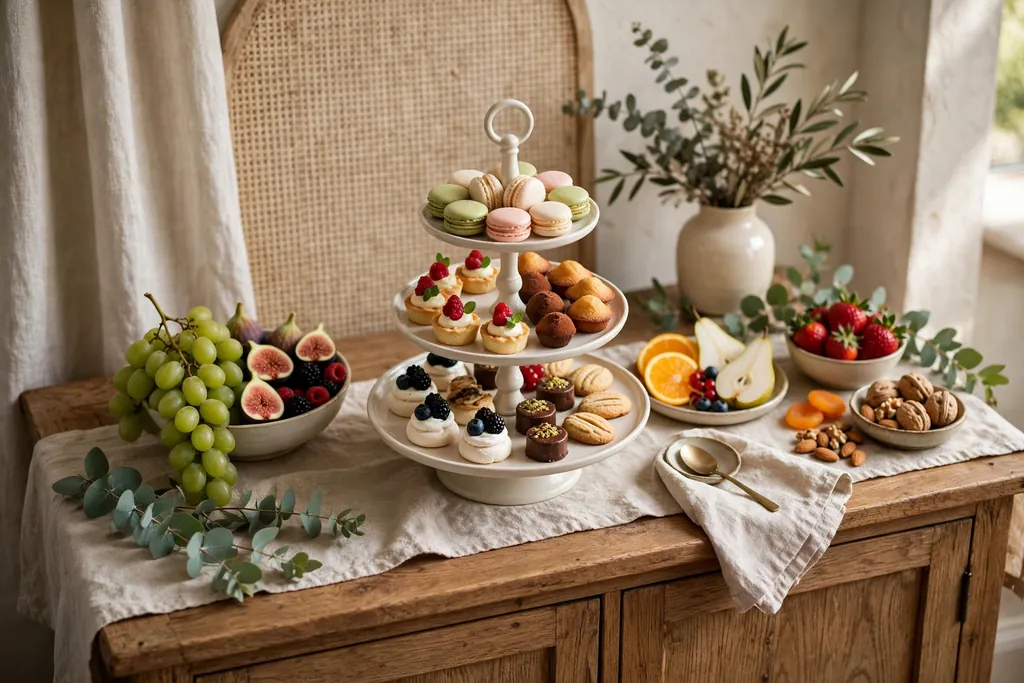
    Dessert table with a tiered stand of cupcakes and treats, a plain blush cloth, and small flower stems.

    Set a dessert table against a wall with a tiered stand at the center, holding small treats such as cupcakes, cookies, and fruit, so the table works as both food and decor. Add a plain cloth in the shower palette, a few small flower stems in bud vases, and one cake plate at a different height, so the table has shape without crowding. Keep the table near the main seating, so guests can help themselves without crossing the whole room.

    Put heavier items on the bottom tier of the stand and lighter treats on top, and keep the table clear of the main walkway. Cover treats until serving time, and set small plates and napkins at one end, so guests do not need to hunt for them. If the table will hold food only, set the flower decor on a separate tray beside it, so crumbs and petals do not mix.

    4. Welcome Sign at the Door
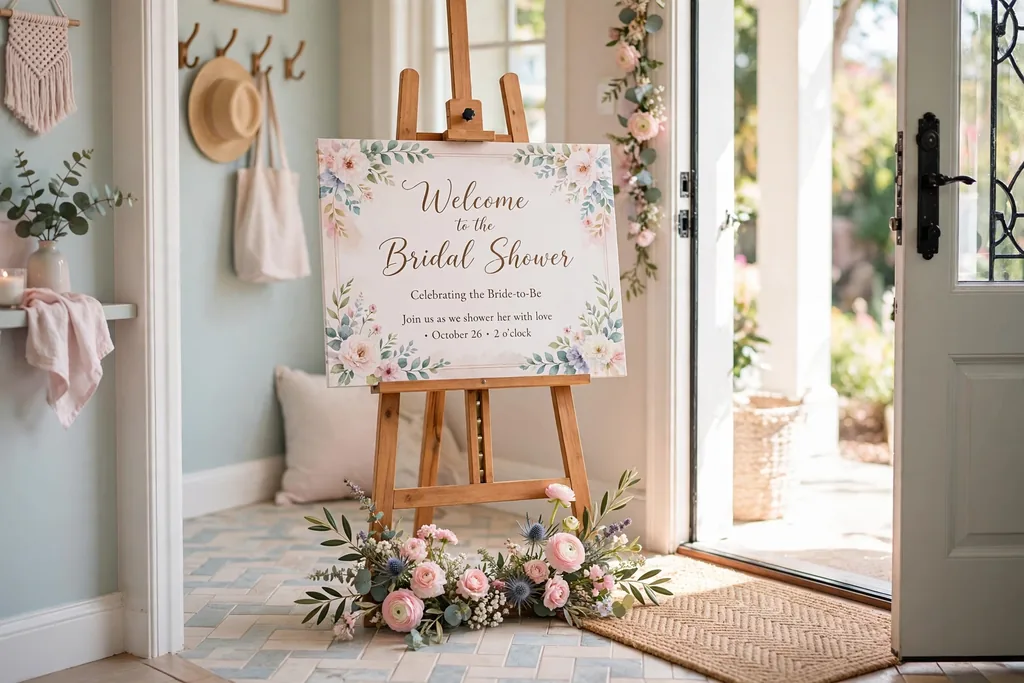
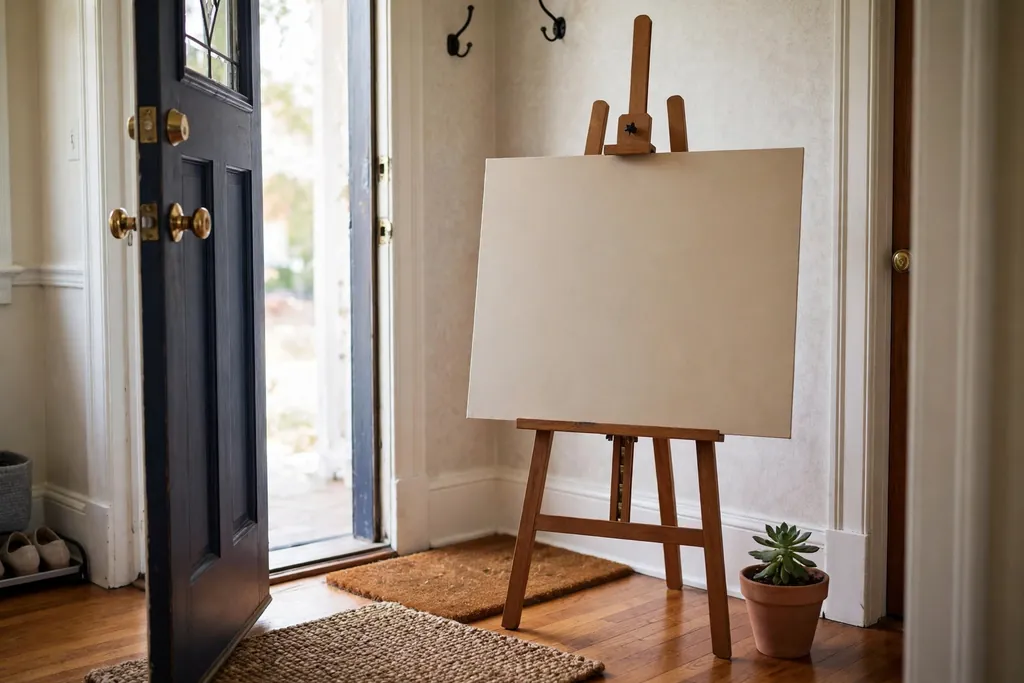
    Welcome sign on an easel just inside a home door with small flowers at its base.

    Place a welcome sign on an easel just inside the door, with a short greeting for the bridal shower and the guest of honor noted by first name only if the host prefers it. A chalkboard, a printed sign in a simple frame, or a hand lettered board all work, as long as the lettering is large and easy to read from a few steps away. Add two small flower stems or a balloon bunch at the base, so the sign reads as part of the decor.

    Keep the sign clear of the door swing and the coat area, and check it in daylight and in evening light before guests arrive, since chalk and pale print can fade in bright sun. If the entry is tight, hang the sign on the wall beside the door instead of using an easel, which saves floor space and still greets every guest.

    5. Pastel Linen Table Setting for Brunch
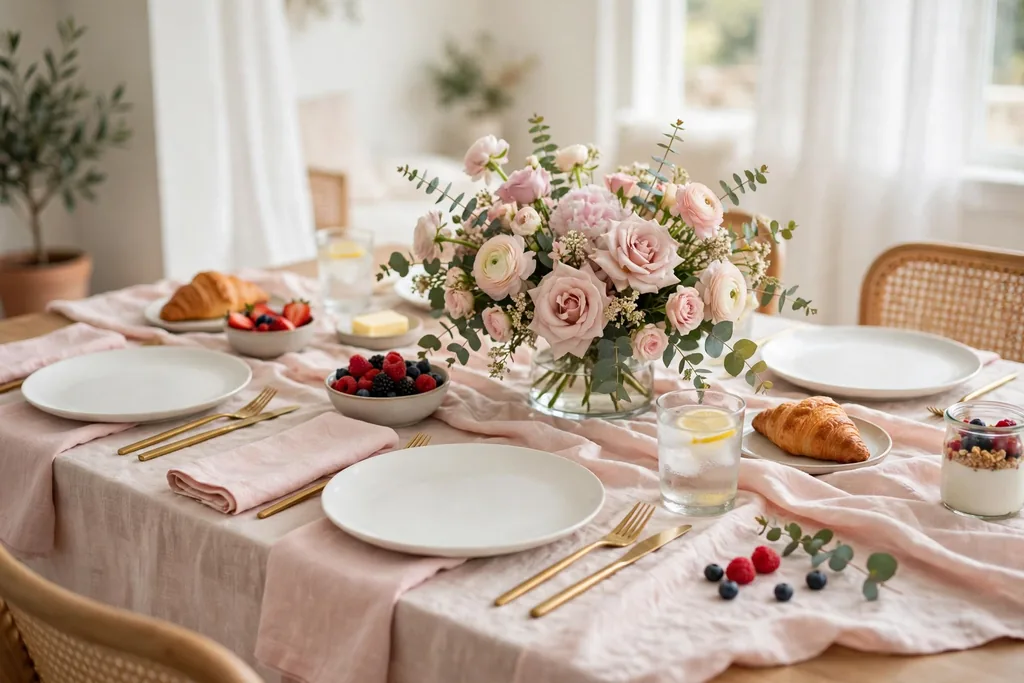
    Brunch table with a pastel linen cloth, white plates, matching napkins, and a low flower vase.

    Lay a pastel linen cloth in blush, mint, or pale blue over the brunch table, then set plain white plates at each place, so the cloth carries the color and the plates stay calm. Add cloth napkins in a matching pastel, clear glasses, and one small flower stem at each place or a low vase at the center. This simple pairing suits a morning shower, since it looks fresh in daylight and needs no patterned dishes.

    Iron or steam the cloth before the event, since creases show more on pastel linen than on a patterned cloth. If the cloth is light in color, use a plain undercloth or table protector beneath it, so a spill does not mark the table during the meal. For a larger group, use the same napkin fold at every place, so the table looks matched from the end of the room.

    6. Fabric Photo Backdrop Wall
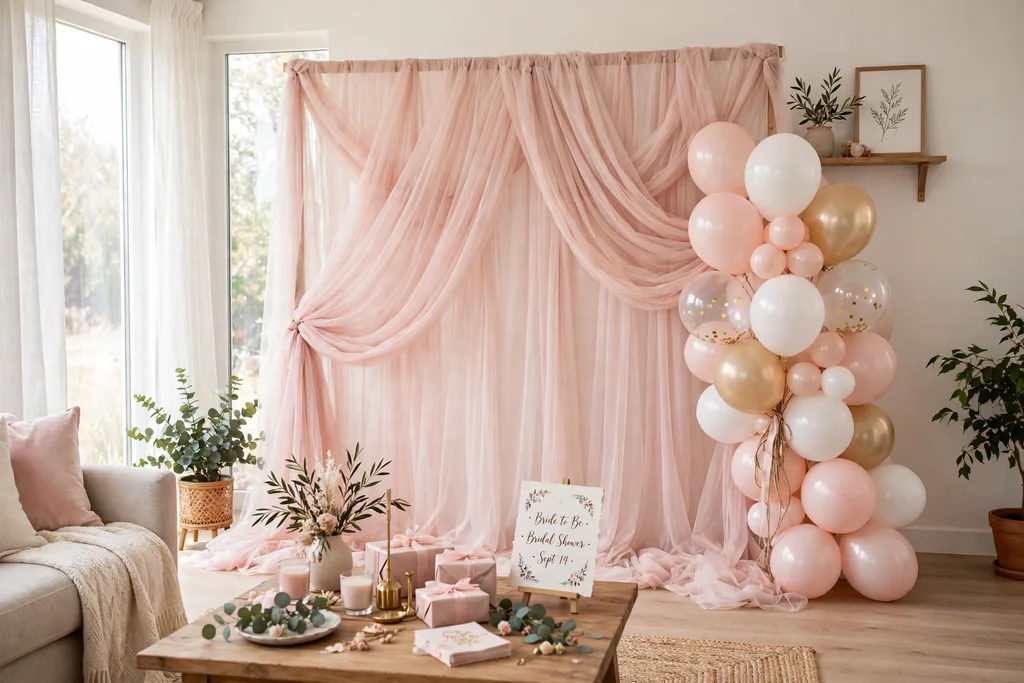
    Fabric photo backdrop wall in soft tulle with a balloon bunch at one side in a living room.

    Hang a length of fabric, such as soft tulle, linen, or crepe, across one blank wall to make a photo backdrop, and add a balloon bunch or paper fans at one side for shape. The backdrop gives photos a clean background, hides a plain wall or a busy shelf, and marks one corner of the room as the photo spot. Choose fabric in the shower palette, and hang it from a rod or removable hooks, so it falls straight and does not pull paint.

    Weight the bottom edge lightly or tape it flat to the floor line, so it does not billow when guests walk past. Keep the backdrop clear of candles and food, and leave floor space in front of it for two or three people to stand together. A small basket of photo props beside the backdrop, such as frames and signs, lets guests pose without hunting for items around the room.

    7. Cozy Lounge Corner with Cushions
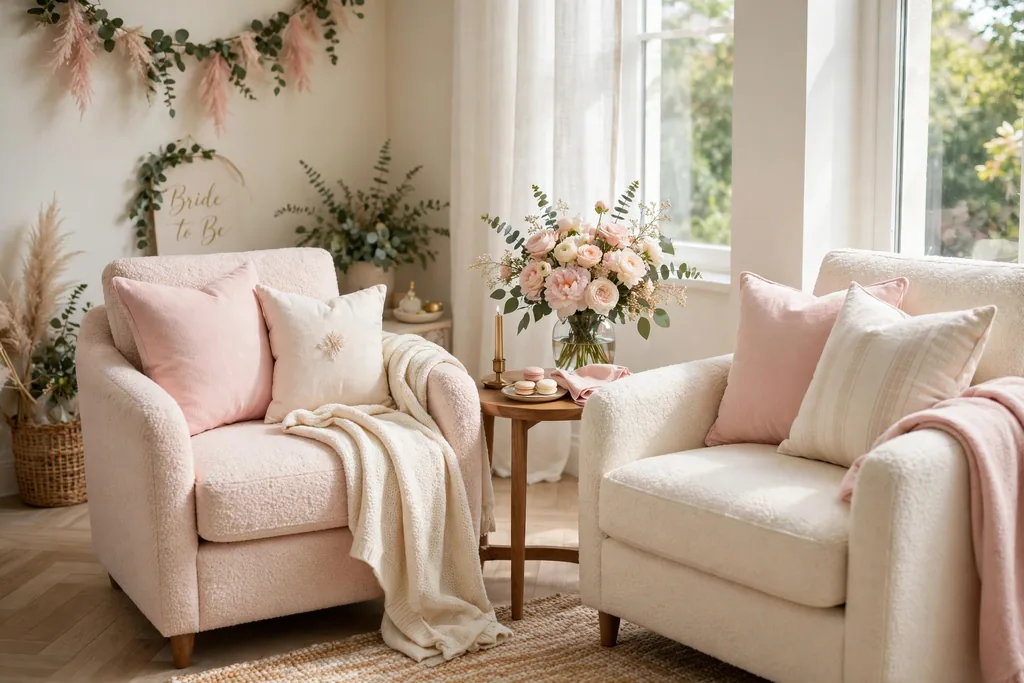
    Cozy lounge corner with armchairs, pastel cushions, a throw, and a small side table with flowers.

    Set a lounge corner with a sofa or two armchairs, extra cushions in the shower palette, and a small side table for drinks, so guests who want to chat have a spot away from the food table. Add a soft throw over one chair arm and a small vase of flowers on the side table, and keep the corner near natural light if the room allows it. This corner also gives the guest of honor a comfortable seat for opening gifts.

    Keep walkways clear around the chairs, and do not block the path to the food or gift tables with the lounge group. Choose cushions with removable covers, since drinks and food travel, and spills happen at gatherings. If floor space is tight, use floor cushions on a rug instead of extra chairs, which seats more guests in the same footprint.

    8. Gift Table with a Card Box
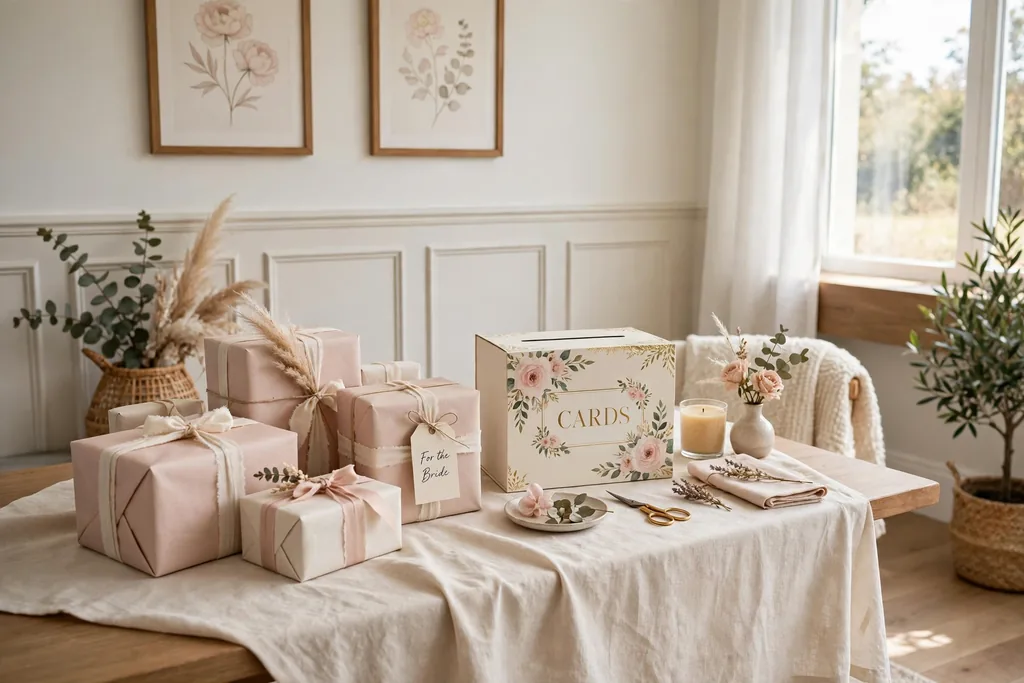
    Gift table with wrapped presents, a decorated card box, and a plain cloth along a living room wall.

    Set a gift table near the entry or along one wall, with a plain cloth, a decorated card box, and a small sign noting where cards go. The card box keeps envelopes safe and tidy, and the separate gift table keeps presents clear of food and seating, so nothing is knocked over during the event. Place larger gifts at the back of the table and smaller ones at the front, so the table looks full without hiding anything.

    Leave space beside the table for guests to set down bags and coats while they place gifts, and keep the table clear of the main walkway. If gifts will be opened during the event, leave an empty chair and a small bin or bag beside the table for wrapping paper, so cleanup stays simple. Check the card box slit before guests arrive, since a narrow slit can tear envelopes.

    9. Drink Station with a Signature Punch
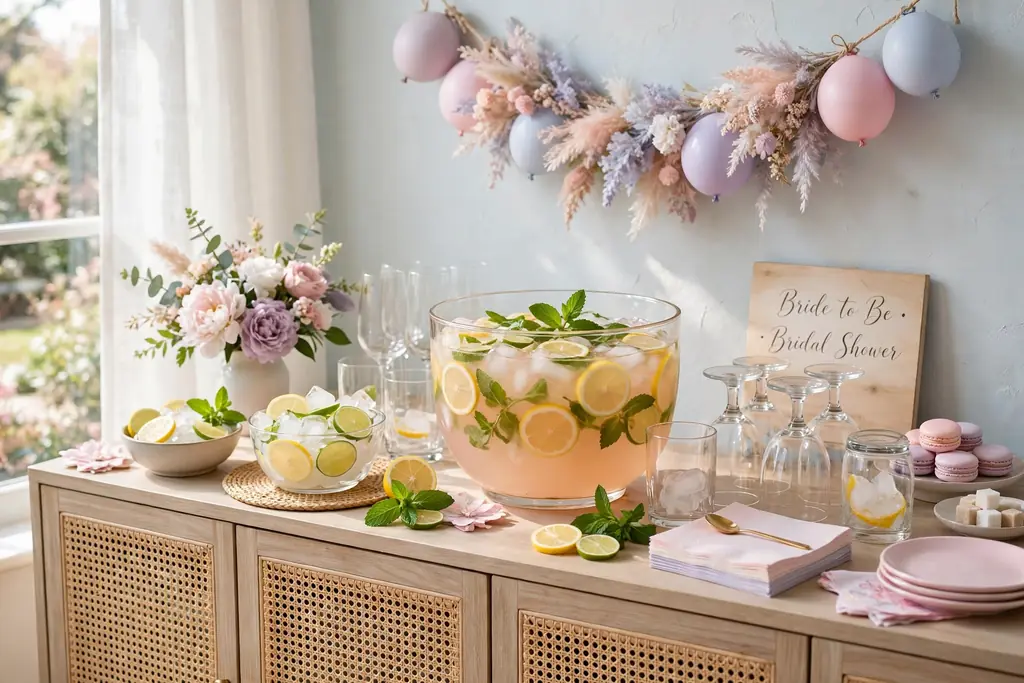
    Drink station sideboard with a punch bowl, glasses, ice, citrus slices, and mint.

    Set a drink station on a sideboard or a small table with a large punch bowl or jug, glasses, ice, and garnish such as citrus slices and mint, so guests can help themselves without crowding the kitchen. Add a small framed card naming the drink, and offer sparkling water and a nonalcoholic option beside it, so every guest has a choice. Keep the station near the main seating but clear of the food path, so refills do not block serving.

    Put heavier items, such as the punch bowl, at the back of the table, and keep a cloth nearby for drips. Refill ice and glasses before guests sit down, and label any drink that contains common allergens in plain words on the card. If children are present, use sturdy glasses on the station and keep the station at the adult end of the table.

    10. Hanging Floral Hoops on the Wall
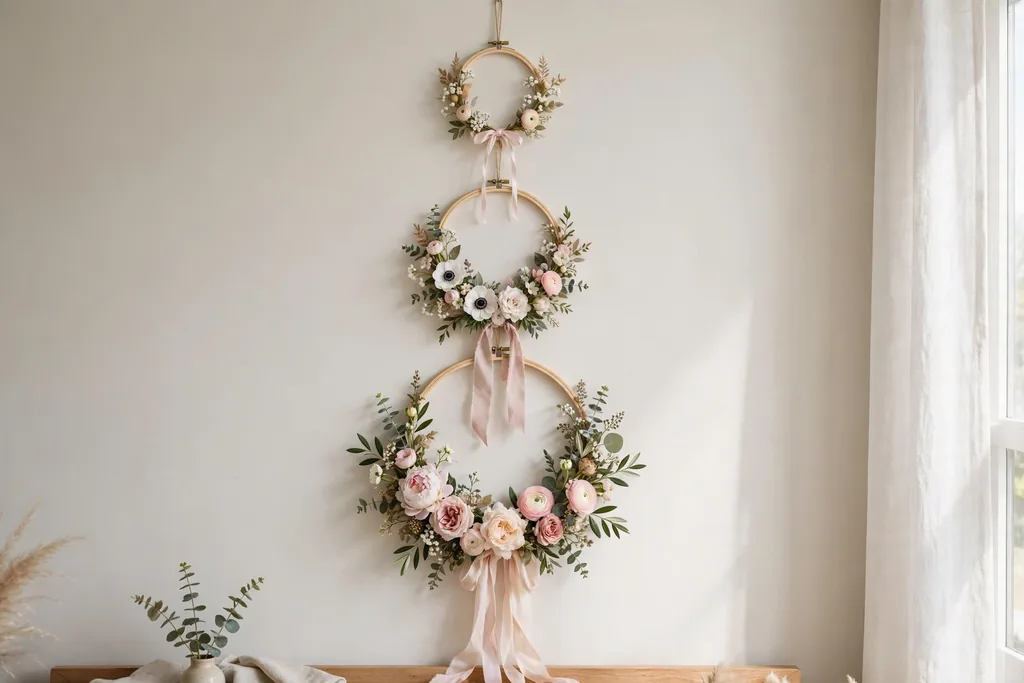
    Three floral hoops of varied sizes with flower stems and ribbon hanging on a living room wall.

    Hang two or three embroidery hoops or metal rings on a blank wall, each dressed with a few faux or fresh flower stems and a short length of ribbon, for wall decor that adds shape without taking floor space. Vary the hoop sizes, with one larger hoop in the middle and smaller ones at the sides, and hang them at eye level, so guests notice them as they enter the room. This idea suits a wall that is too small for a full backdrop.

    Use removable hooks rated for the hoop weight, and check that hoops hang level before guests arrive. Keep fresh stems in small water tubes if the hoops will hang for hours, or use faux stems for a longer event, since fresh blooms can wilt in a warm room. If the wall is already busy with art, hang the hoops on a plainer wall instead, so they stand out.

    11. Greenery Garland Runner on the Main Table
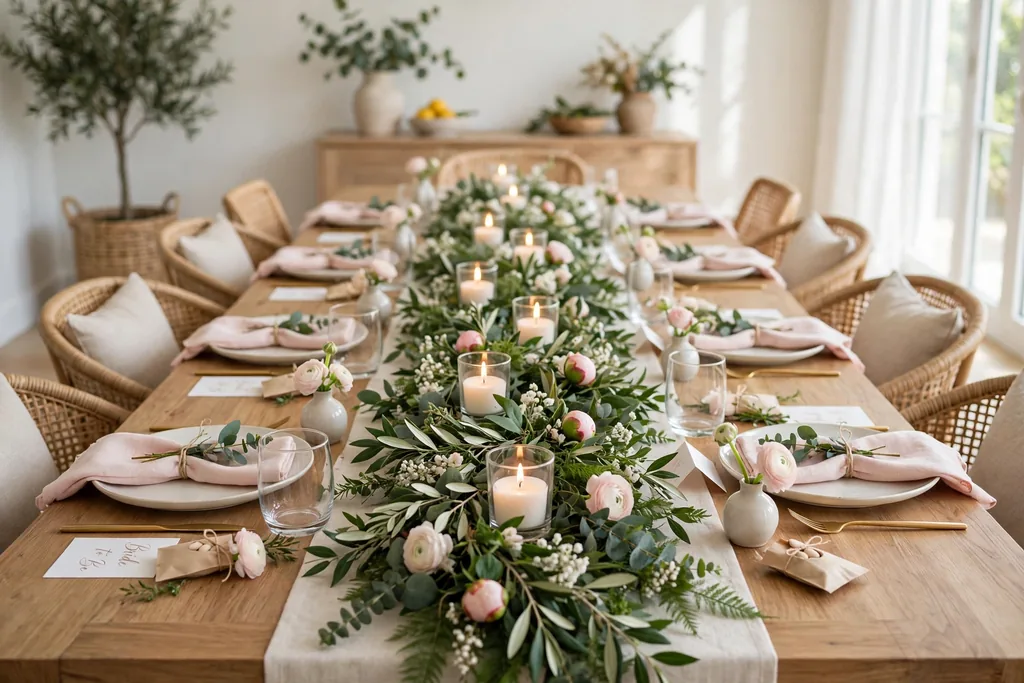
    Greenery garland runner with small blooms and candles in holders down a long dining table.

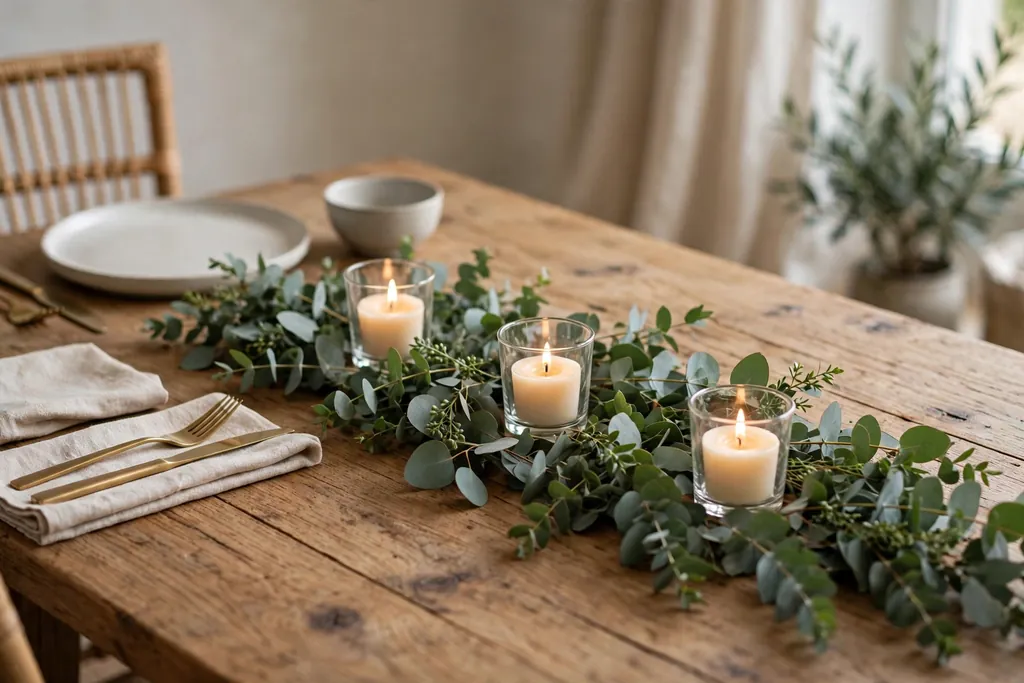
    Lay a greenery garland down the center of the main table, letting it dip slightly at the ends, then tuck in a few small blooms and one candle in a holder at each end to anchor it. The garland carries color along the whole table, which suits a long dining table for a gathering, and it leaves room for plates and glasses on both sides. Use faux greenery if the table will be set hours ahead, since fresh stems can wilt and shed.

    Secure the garland so it does not slide when plates are set down, and trim it to fit the table, leaving room at each end for serving dishes. Keep fresh or faux garlands clear of real flames, and use battery candles along the garland. Shake a fresh garland outside before bringing it in, and dust a faux garland before laying it out, so leaves do not drop onto plates.

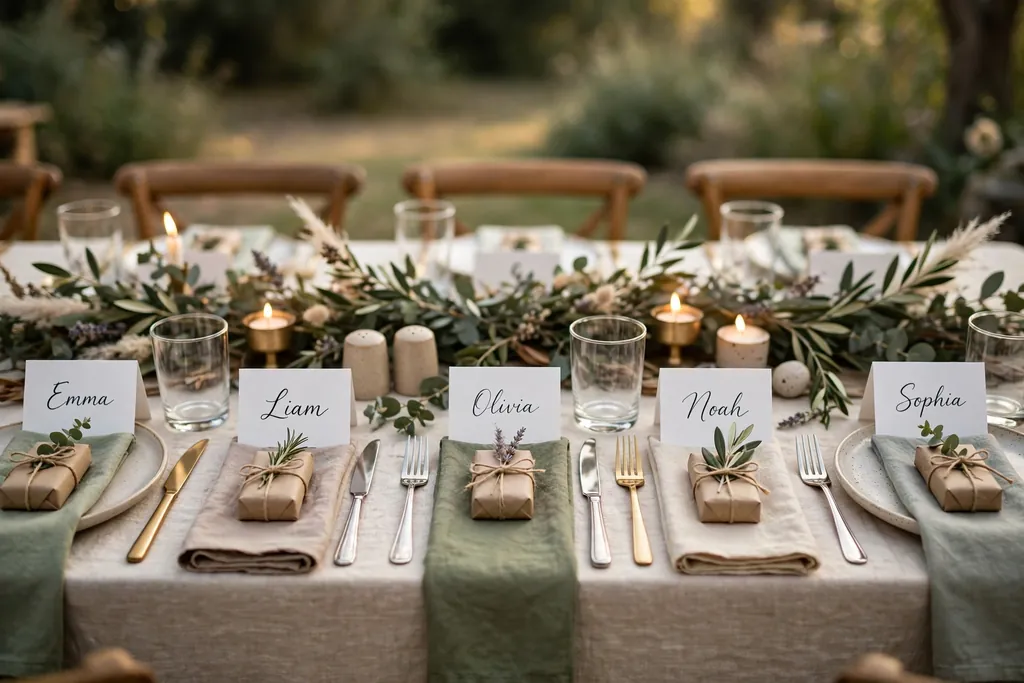
    12. Place Cards with a Small Favor
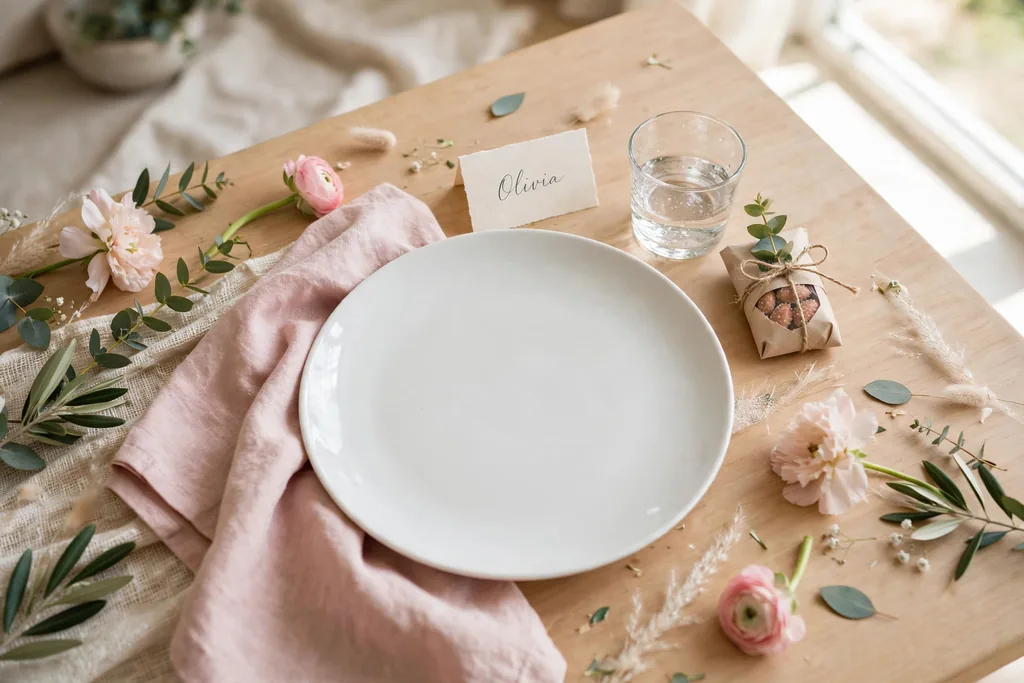
    Table place setting with a handwritten place card and a small favor beside a white plate.

    Set one place card at each seat, with the guest name written in clear, large lettering, and a small favor beside it, such as a mini candle, a small soap, or a packet of seeds. The card marks each seat, so guests settle quickly, and the favor doubles as a thank you guests can take home. Use cards in the shower palette, and keep the favor small enough to sit beside a plate without crowding the glass.

    Write names before the event and check spelling against the guest list, since a misspelled card is noticed at once. If seating is open rather than assigned, use the cards as welcome notes instead, with one short line for each guest, and skip the seat plan. Keep favors clear of food and hot dishes, and set aside a few spare cards and favors for last minute guests.

    13. Cake Stand Display with Fresh Blooms
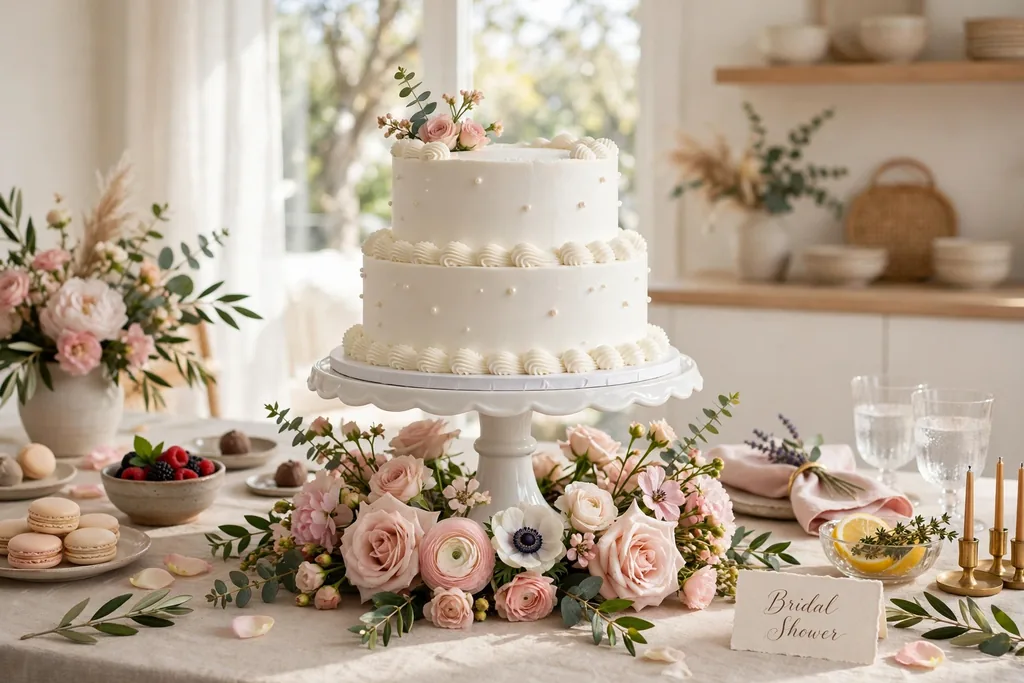
    Cake on a raised stand with fresh blooms around the base on a dessert table.

    Place the cake on a raised stand at the center of the dessert table, with a few fresh blooms or green stems tucked around the base, so the cake becomes the focal point of the room. A stand adds height without blocking views, and the blooms tie the cake to the rest of the table decor. Choose a stand wide enough for the cake plate, with a stable base, and set it where guests can see it from the seating area.

    Keep the cake clear of direct sun and heat, since frosting softens fast in a warm room, and keep blooms clear of the cake surface itself, using stems around the base only. If the cake will be cut during the event, leave a knife, a server, and small plates beside the stand, so serving does not need a hunt through the kitchen. Cover the cake until serving time if the room is dusty or busy.

    14. Paper Pom-Poms and Lanterns Overhead
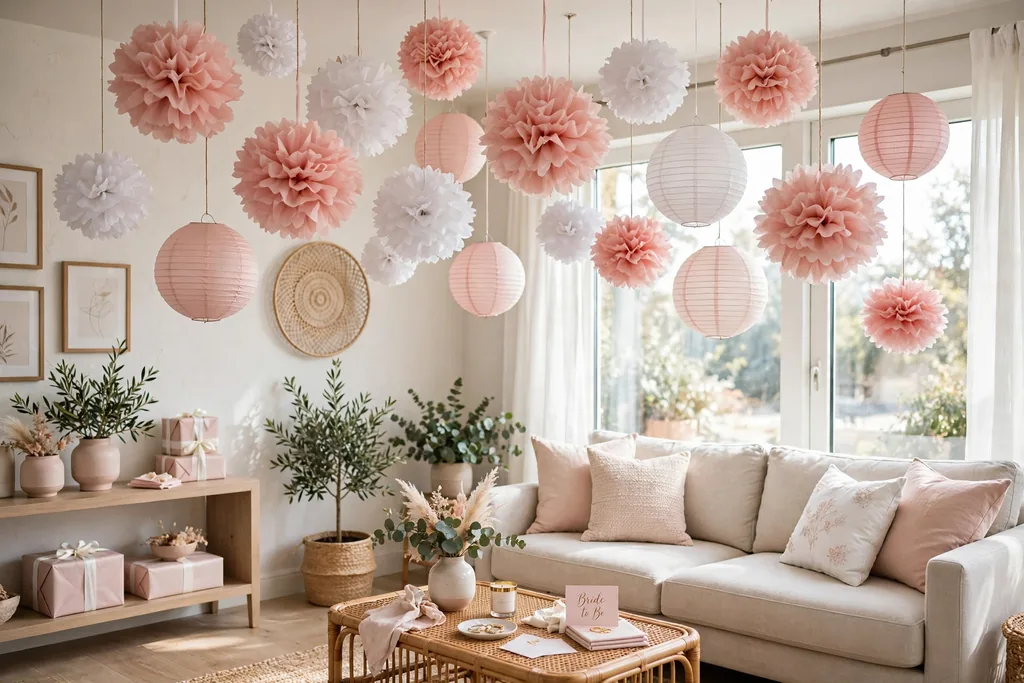
    Paper pom-poms and paper lanterns in blush and white hanging from a living room ceiling.

    Hang paper pom-poms and paper lanterns from the ceiling in the shower palette, at varied heights, so the room gains color overhead without taking table or floor space. This idea suits a living room with a plain ceiling, and it works well above a food table or a lounge corner, where guests look up as they gather. Use lightweight paper pieces, and hang them from removable hooks or tape rated for ceiling use.

    Keep paper pieces clear of light bulbs, candles, and ceiling fans, and hang them high enough that tall guests do not brush them. If the ceiling is low, use fewer pieces and hang them near the walls rather than over the center of the room, so the space still feels open. Take the pieces down after the event and store them flat, since crushed paper lanterns are hard to reuse.

    15. Advice and Wishes Card Station
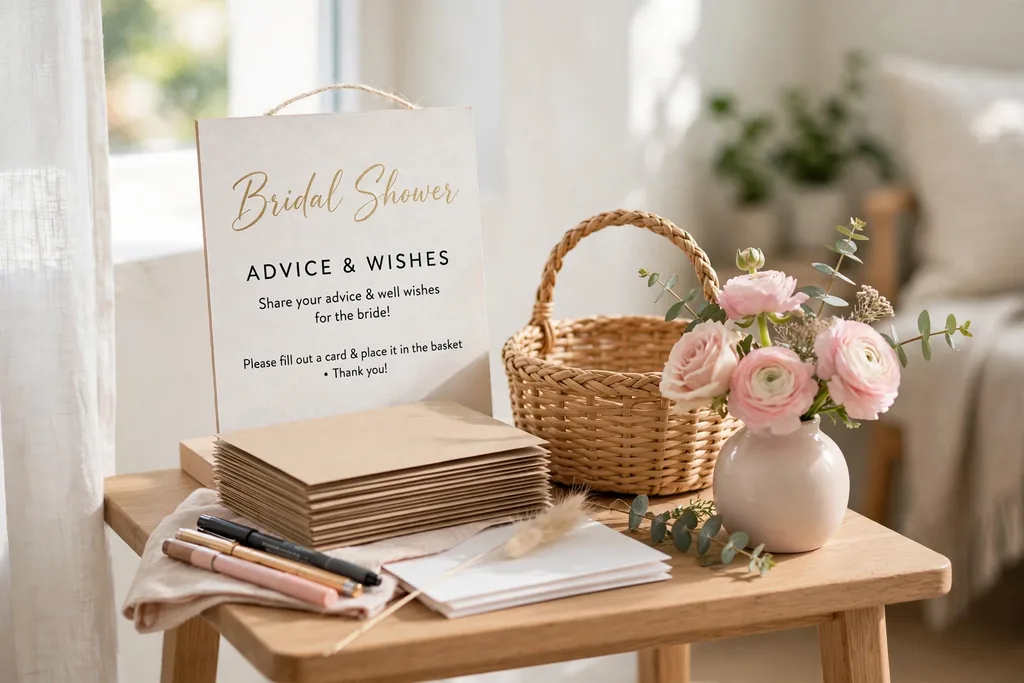
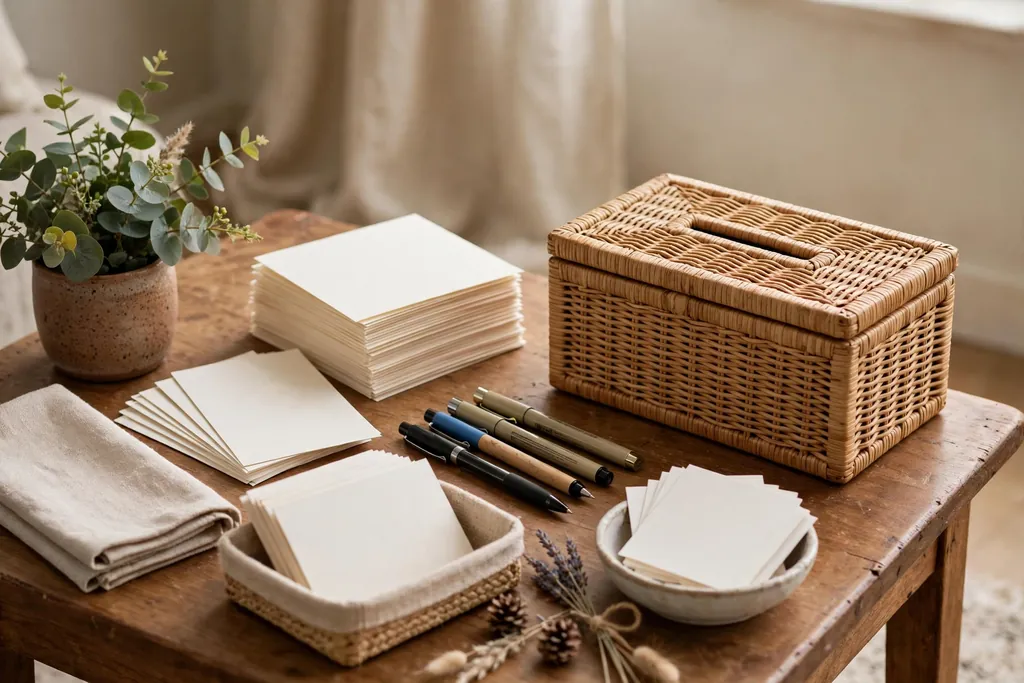
    Advice and wishes card station with blank cards, pens, a basket, and a small vase of flowers.

    Set a small station with blank cards, pens, and a box or basket, inviting guests to write advice or wishes for the guest of honor. Add a short sign explaining the station, a few sample prompts on a card, such as a favorite memory or one wish for the couple, and a small vase of flowers to mark the spot. The cards give guests a quiet activity between courses, and the guest of honor keeps them after the event.

    Place the station on a side table near the seating area, not in the main walkway, and check pens before guests arrive, since dry pens stall the station. Keep the cards small, so guests write a few lines rather than a long letter, and set aside a ribbon or a folder to bundle the finished cards. If children are present, add crayons and larger cards at a lower table, so they can join in.

    16. Decorated Chair for the Guest of Honor
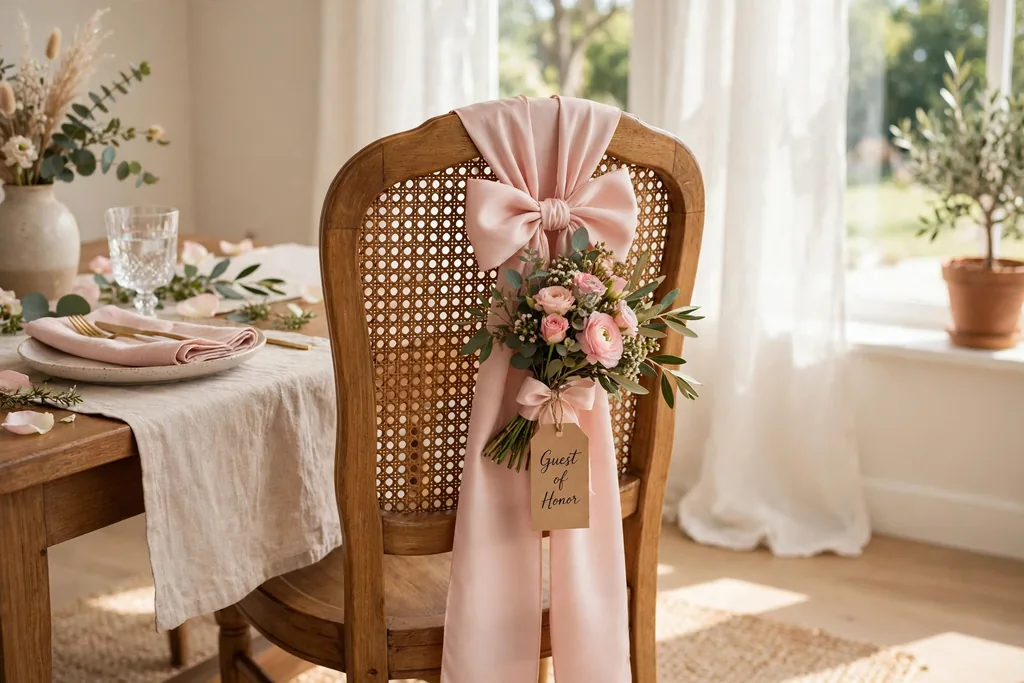
    Dining chair with a blush sash bow and a small flower bunch tied to the chair back.

    Mark the guest of honor chair with a simple sash, a small flower bunch tied to the chair back, or a short banner across the top rail, so her seat stands out without a large throne style setup. This small detail helps photos, since the guest of honor is easy to spot, and it gives her a clear seat at the main table or in the lounge corner. Use ribbon or fabric in the shower palette, tied in a simple bow that will not slip.

    Tie the sash the same way on both sides, and keep ribbon clear of chair legs and walkways, so no one trips. Remove fresh flowers before the chair is used for a meal if petals could drop onto food, or use faux stems for the chair detail. If the chair will move during gift opening, use a sash that stays tied through the move, rather than a loose banner that needs refitting.

    17. String Lights Around Windows and Shelves
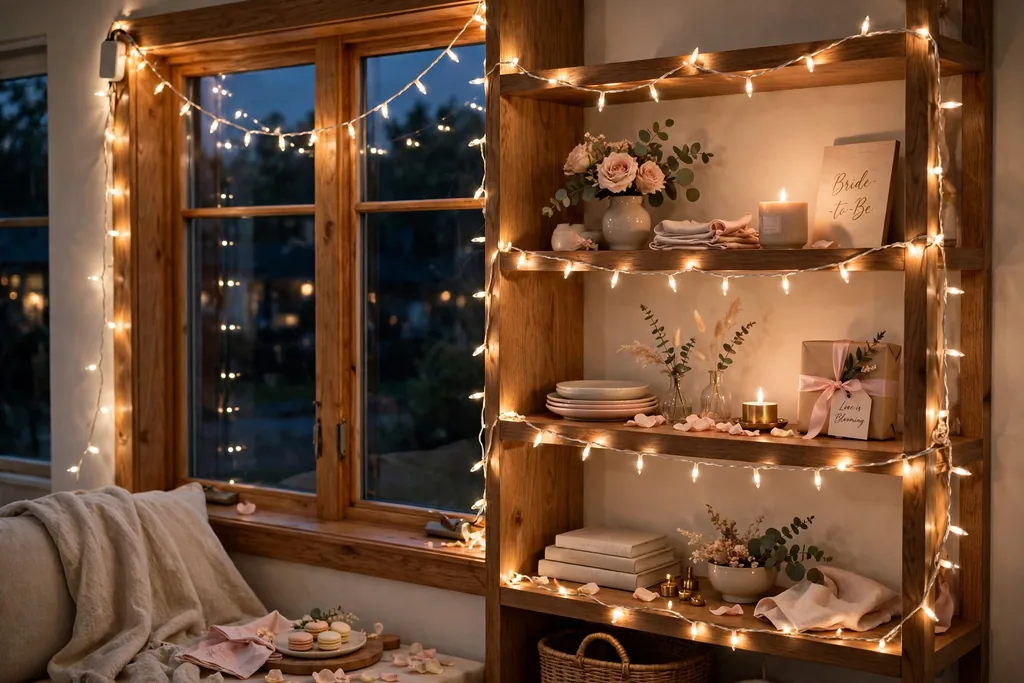
    Battery string lights draped along a window frame and open shelves in a living room in the evening.

    Drape battery string lights along a window frame, a mantel, or open shelves, so the room gains soft light in the evening without new lamps. String lights suit a living room shower, since they add warmth to corners that overhead lights leave flat, and battery lights need no outlet near the display. Choose warm white lights for a calm glow, and keep the wire neat along edges, so it reads as decor rather than clutter.

    Use battery lights near fabric, paper, and balloons, and keep plug in lights clear of curtains and water. Check batteries before the event, and set a timer or switch the lights on just before guests arrive, so they last through the evening. If the room has strong daylight, string lights matter less, so save them for an evening shower or a dim corner.

    18. Blush and Gold Table Palette
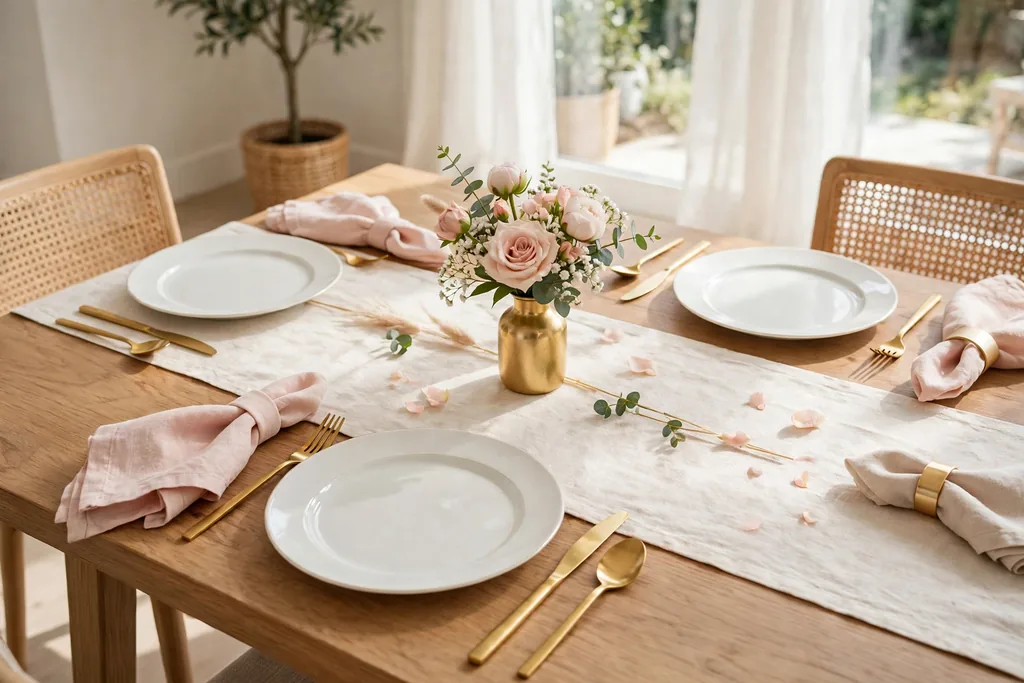
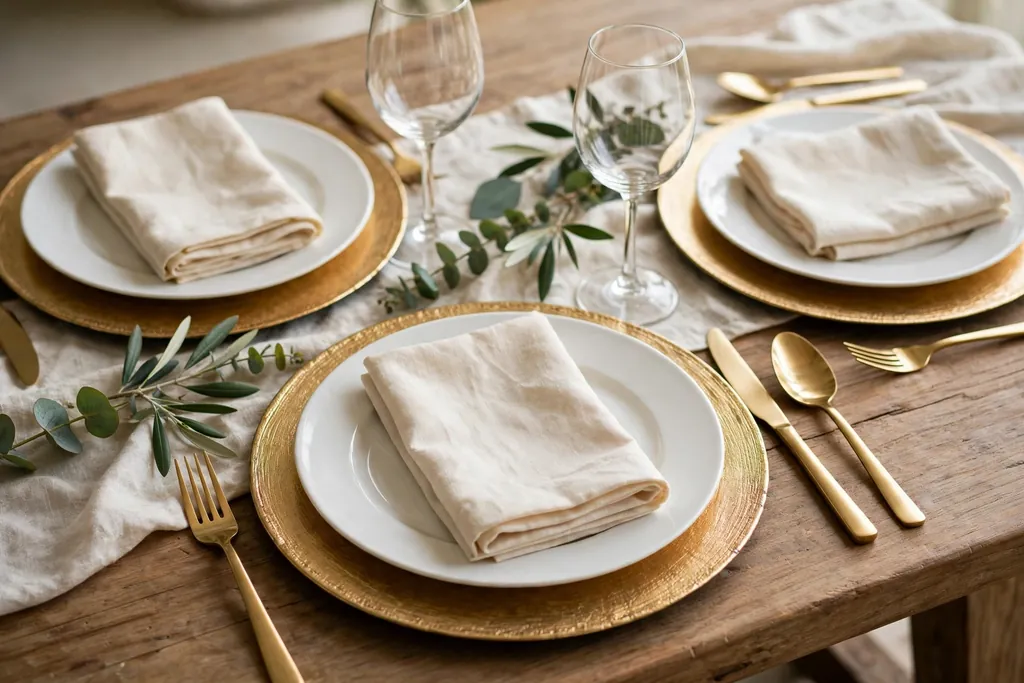
    Dining table with blush napkins, gold cutlery, white plates, and a cream runner.

    Set the main table with blush napkins, gold toned cutlery, white plates, and a cream runner, so the table gains a bridal note from tableware alone, without a large centerpiece. Add one gold accent at the center, such as a small gold vase or gold candle holders, and keep the rest of the table plain, so the blush and gold stay the single accent. This palette suits both a brunch and an afternoon shower.

    Repeat the blush at least twice, such as napkins plus flowers, and repeat the gold at least twice, such as cutlery plus candle holders, so the table looks planned. Polish gold toned cutlery before the event, since marks show more on metal than on plain steel. For a larger group, use the same napkin fold at every place, so the table looks matched from the end of the room.

    19. Patio or Garden Setup for Mild Weather
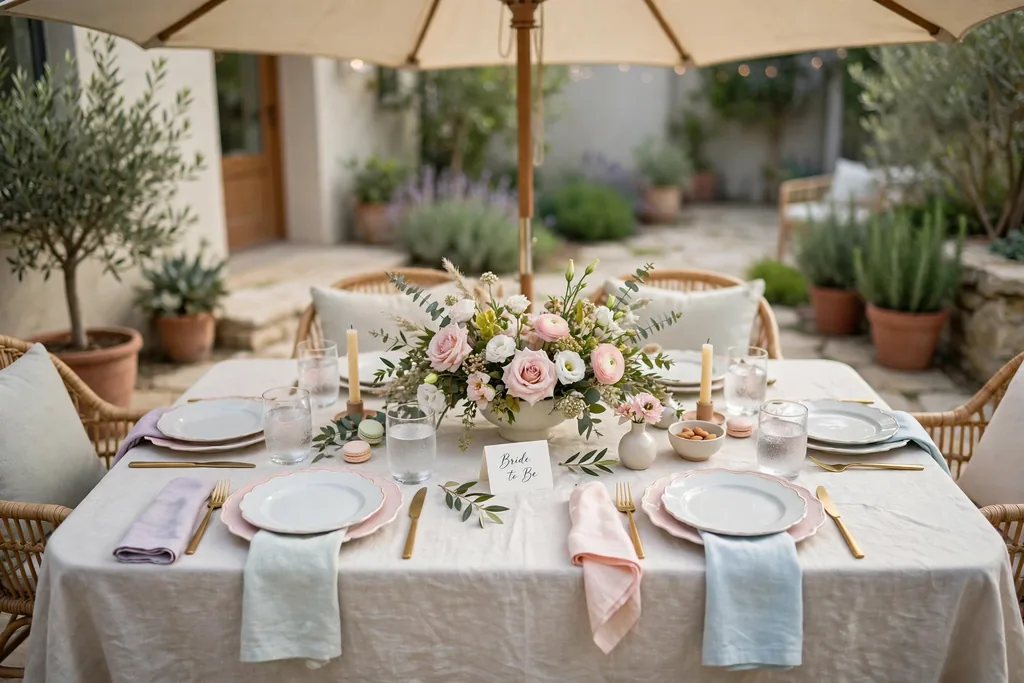
    Patio table set for a bridal shower with a light cloth, low flowers, and a shade umbrella.

    Move the main seating outside for mild weather, with a patio table, a light cloth, and a low flower centerpiece, so the shower gains fresh air and garden light. Add a shade umbrella or a canopy if the sun is strong, and weight the cloth with clips, so a breeze does not lift it onto plates. Keep one indoor room set as a backup, so a change in weather does not stall the event.

    Choose sturdy glasses and heavier vases outdoors, since outdoor tables get knocked more often, and keep paper decor clear of wind and damp. Bring cushions and paper pieces inside if rain starts, and set the gift and card tables under cover from the start, so presents and cards stay dry. For an evening patio shower, add string lights and battery lanterns for steady light after sunset.

    20. Game Table Corner
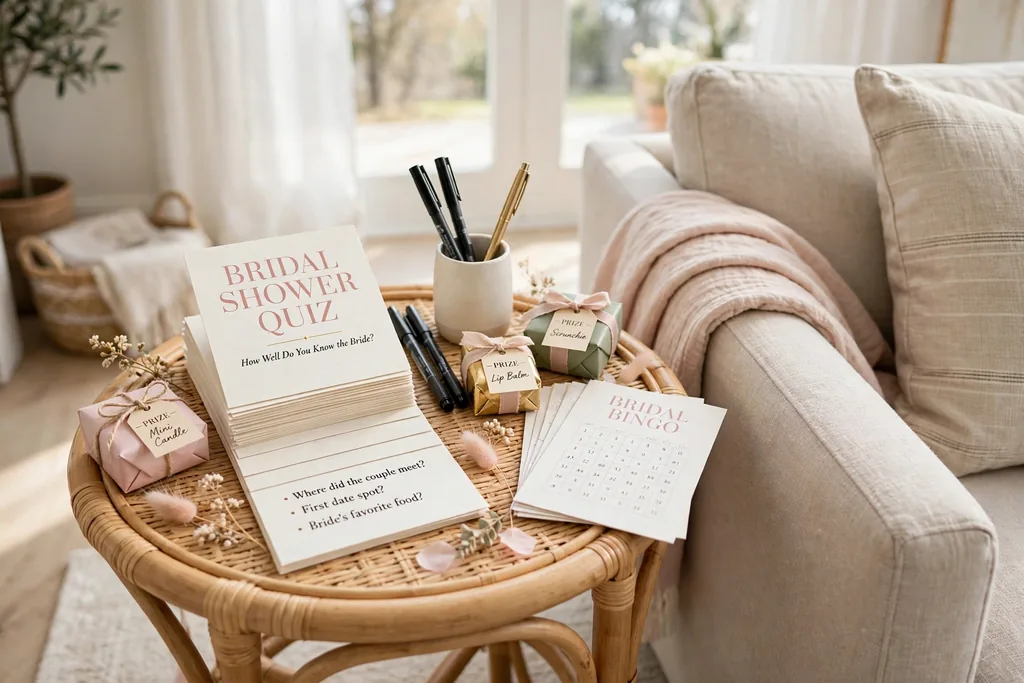
    Small side table with bridal shower game cards, pens, and small prizes near seating.

    Set a small side table with two or three shower games, such as a quiz, a bingo card set, or a ring toss, with pens and a small prize for each game, so guests have an activity between courses. Keep the table near the seating area but clear of food, and add a small sign naming each game in plain words. A game corner suits a longer shower, since it gives guests something to do while gifts are opened or food is served.

    Keep game pieces large enough to handle easily, and set aside spare pens and cards, since pieces go missing at gatherings. If the group is large, run games in short rounds rather than one long game, so no guest waits long for a turn. For guests who prefer to chat, keep the game table optional, so no one feels pressed to join.

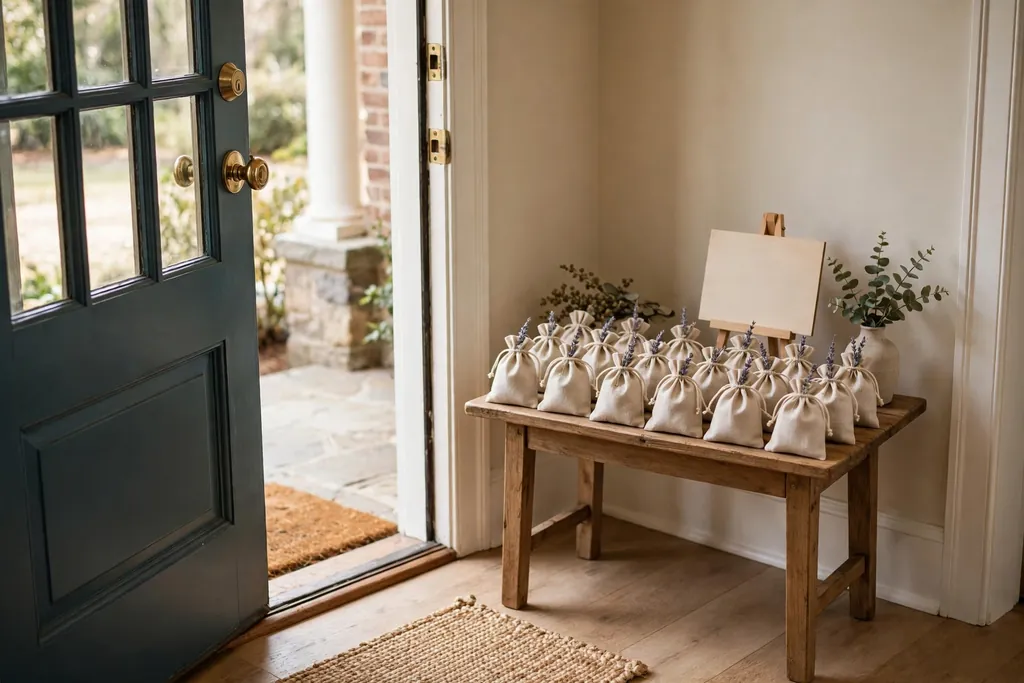
    21. Favor Table with Take-Home Bags
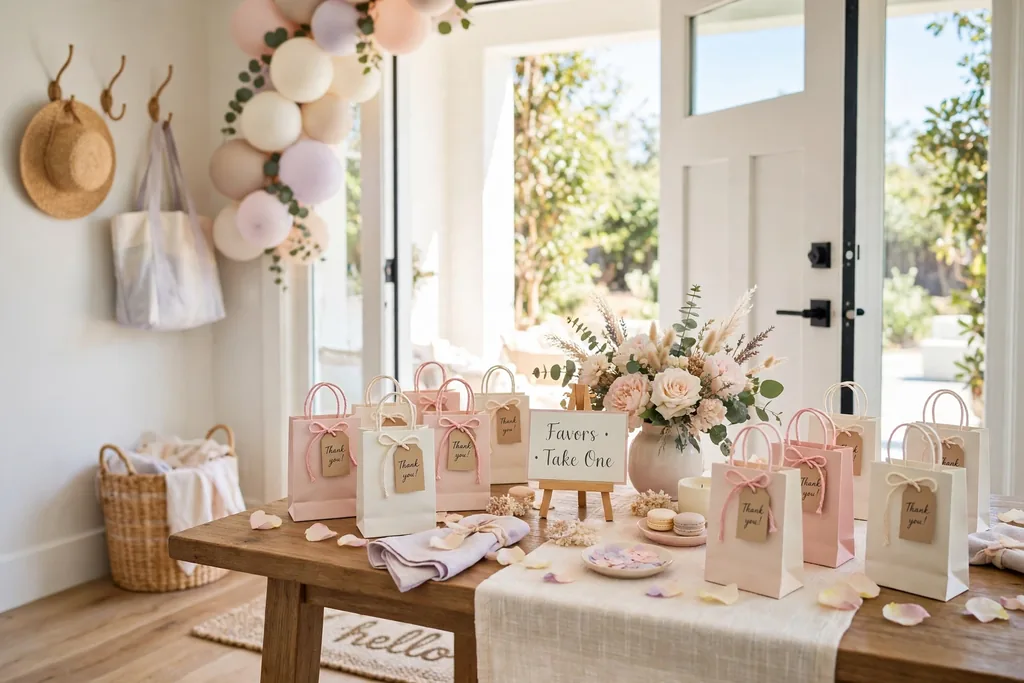
    Favor table near an exit with small gift bags in blush and cream and a short sign.

    Set a favor table near the exit with small bags or boxes in the shower palette, each holding a small gift such as a mini candle, a packet of tea, or a small plant, so guests leave with a thank you. Add a short sign noting that favors are for each guest, and keep the table clear of the gift table, so guests do not mix up gifts coming in with favors going out. Place the table where guests pass it on their way out, not in the center of the room.

    Fill bags before the event and count them against the guest list, with a few spares for extra guests. Keep favors light and small, so guests can carry them easily, and keep any plant favors in small pots with saucers, so soil does not mark bags or hands. If favors include food, label common allergens in plain words on a card at the table.

    22. DIY Flower Bar for Guests
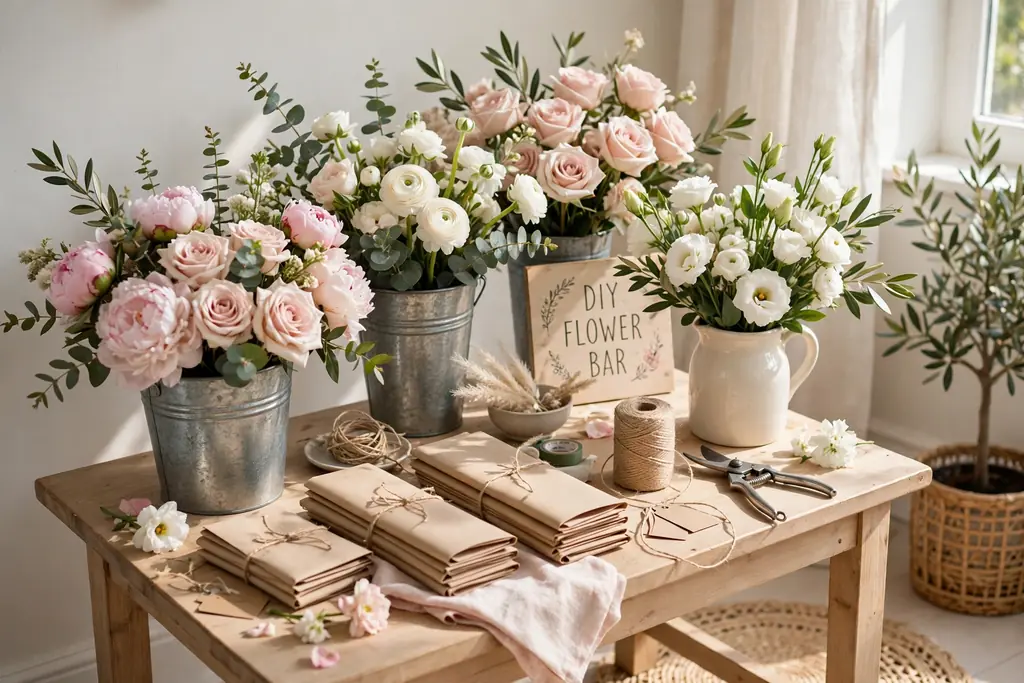
    DIY flower bar with buckets of fresh stems, scissors, twine, and paper wraps on a side table.

    Set a flower bar on a side table with buckets of fresh stems, scissors, twine, and small paper wraps, so each guest can build a small bouquet to take home. Sort stems by type in separate buckets, with a short sign showing three simple bouquet steps, and keep a bin nearby for trimmings. A flower bar doubles as decor while guests use it, and it gives each guest a personal favor shaped by their own taste.

    Keep scissors safe by using blunt tipped craft scissors and keeping sharp tools with the host, and set the bar on a surface that wipes clean, since water and stems drip. Trim stems for guests who ask, and keep buckets topped with water through the event, so stems stay fresh. If the guest list is large, set out two bars or refill buckets in rounds, so no guest waits long.

    23. Memory Table with Photos and Keepsakes
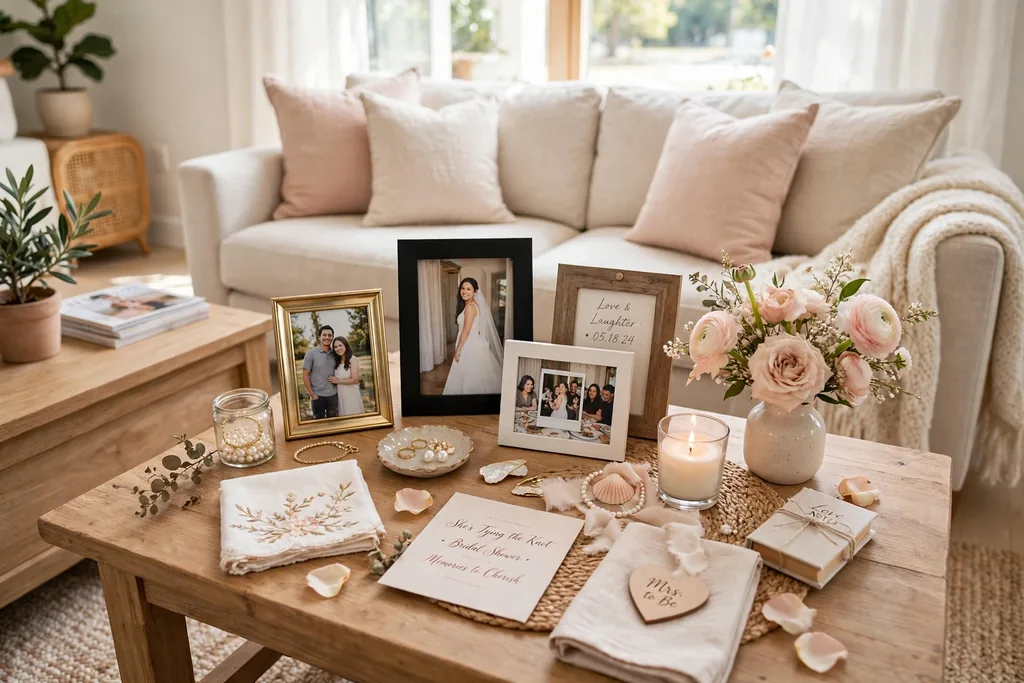
    Memory table with framed photos, keepsakes, and a small vase of flowers near seating.

    Set a memory table with framed photos of the guest of honor, a few keepsakes, and a small vase of flowers, so guests can look back and chat about shared moments. Use photos from different years, with short captions noting the occasion in plain words, and keep the table near the seating area, so guests can browse it between courses. A memory table suits a home shower, since it uses photos the host already owns and needs no new decor.

    Keep frames stable and clear of food and drinks, and use copies of precious photos rather than originals, so nothing irreplaceable is at risk. If the table is small, use three or four frames rather than a crowded group, so each photo shows. Add a small notebook beside the table for guests to note a memory, which the guest of honor can keep with the advice cards.

    Conclusion

    Bridal shower decorating ideas for a home event do not need a large budget or a new set of dishes to work. A clear entry, one low centerpiece, a photo spot, a drink station, and a small favor at each place will carry most showers, and the rest of the list can be added one idea at a time as space and time allow. Start with the palette, set the main table first, then add the entry, the walls, and the favor table in that order.

    For more table ideas in another seasonal palette, see spring tablescapes and fall table decor, and for a romantic table palette to compare, see Valentine table decorations. Keep what you use often, store balloons, fabric, and paper pieces together in one box, and let the room return to a simple, usable base when the shower ends. Save this list on Pinterest for your next celebration, and work through it one idea at a time.

    FAQs

    How do I decorate for a bridal shower at home without a large budget?

    Use what you already own first: a plain cloth, everyday plates, and cloth napkins, then add one low cost layer, such as a balloon garland, paper pom-poms, or a flower bar. Textiles and paper carry most of the color for little cost, and a single palette repeated at the entry, the table, and the photo spot makes the whole room look planned without new dishes or furniture.

    What colors work best for bridal shower decorating ideas?

    Blush, cream, and white with one metal accent, such as gold, work well together, because they suit living rooms, dining tables, and photo backdrops in daylight and evening light. Repeat each color at least twice, such as blush napkins with blush flowers, so the room looks planned. Keep one bright accent to a few pieces, so the palette stays calm enough for a home event.

    How do I set up a bridal shower photo spot at home?

    Hang fabric across one blank wall, add a balloon bunch or paper fans at one side, and leave floor space in front for two or three people to stand together. Keep the backdrop clear of candles and food, weight the bottom edge so it does not billow, and set a small basket of props beside it. Good daylight or a simple lamp aimed at the backdrop, not at guests, gives clear photos.

    How many decorations does a home bridal shower need?

    A home bridal shower needs one clear entry detail, one focal table, one photo spot, and small details at each place, rather than decor in every corner. Start with a balloon garland or welcome sign, a low centerpiece, a backdrop, and place cards or favors, then add a drink station and a game corner only if space allows. Fewer, repeated details look more welcoming than many competing pieces.

    How do I keep bridal shower centerpieces from blocking conversation?

    Keep centerpieces low and narrow, below eye level when guests are seated, and leave the middle of the table partly open. A low flower vase, a greenery garland, or a row of short candles all sit low enough to see across. If a taller piece is needed for a large table, use slim stems in a narrow vase, so guests can see around them.

    How do I plan the flow of a home bridal shower?

    Plan five clear spots: entry, seating, food, gifts, and favors, each with its own table or corner, so guests are never crowded into one place. Put the gift table near the entry, food near the seating, and favors near the exit, with walkways clear between them. Check the flow by walking it yourself before guests arrive, and move any piece that blocks a path or a doorway.
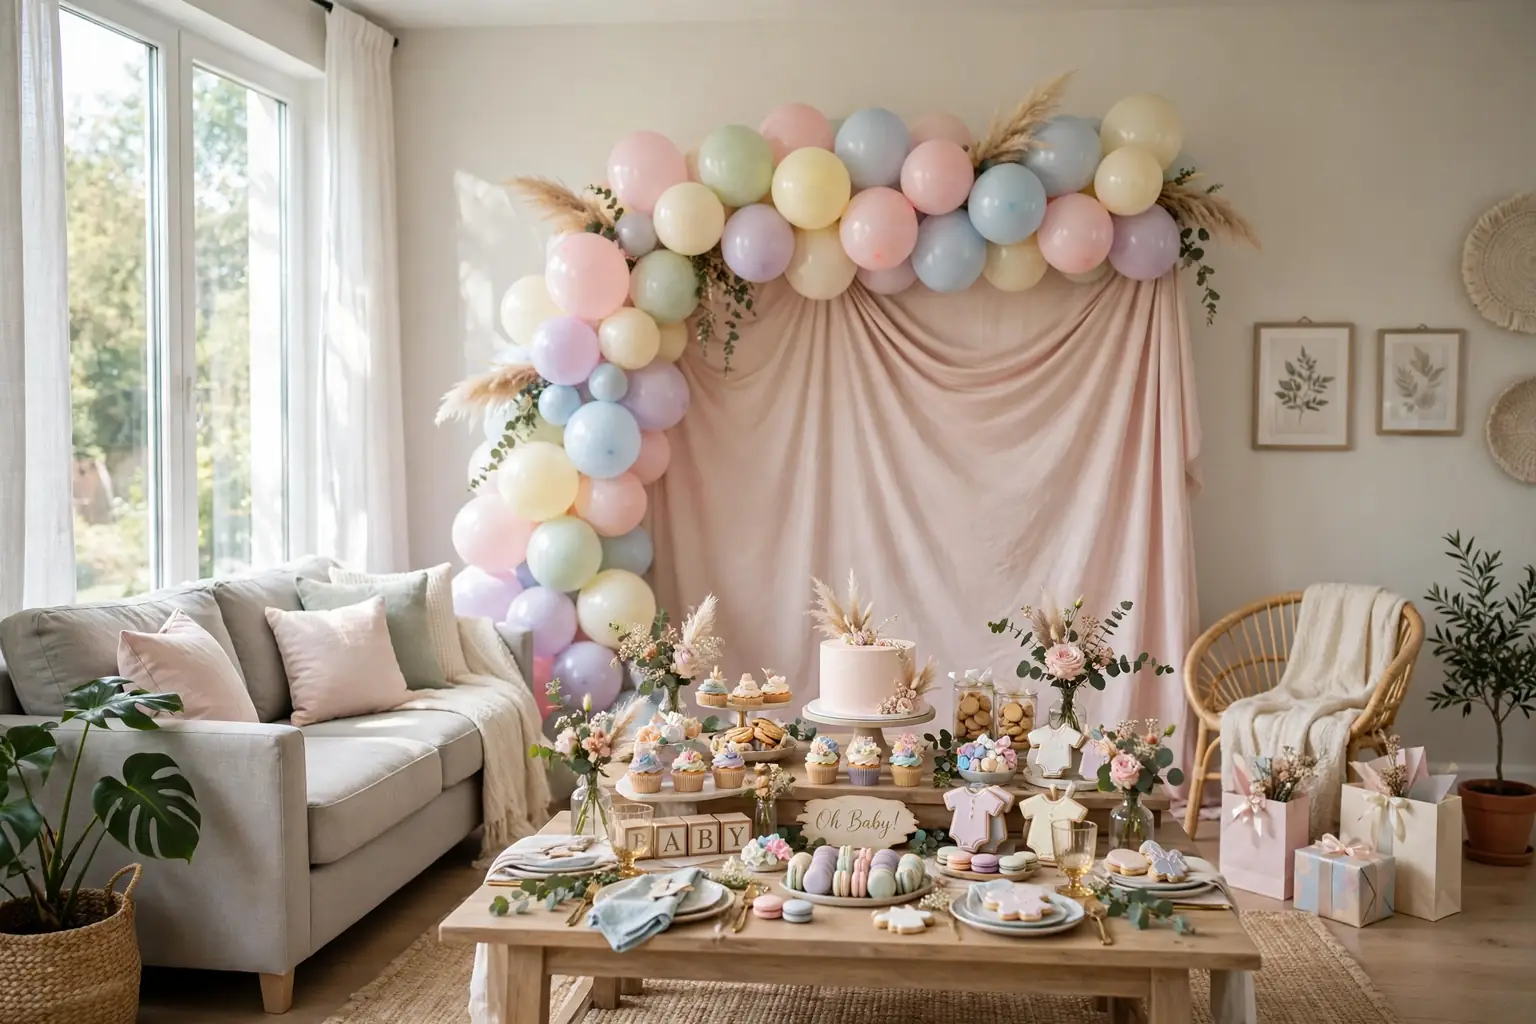
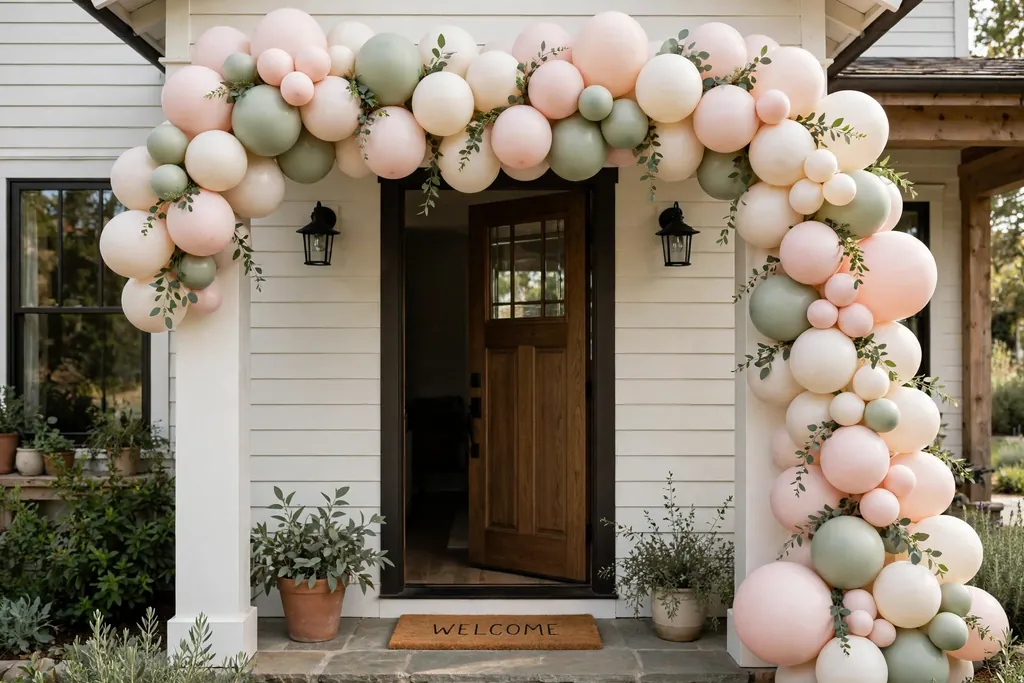
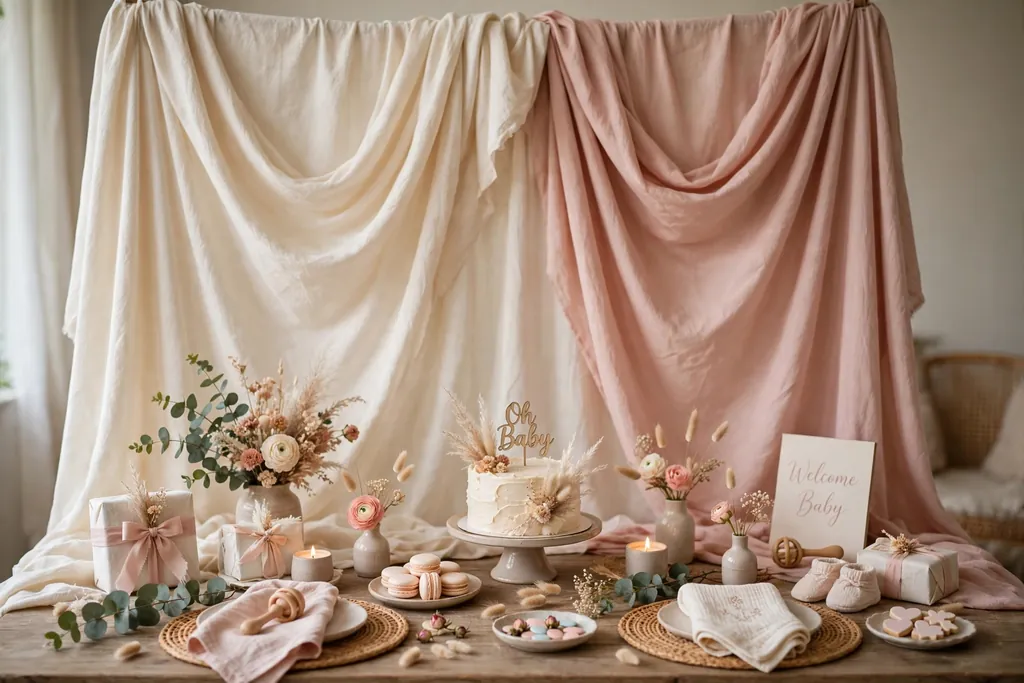
  • 25 Baby Shower Decoration Ideas for a Beautiful Home Celebration

    25 Baby Shower Decoration Ideas for a Beautiful Home Celebration

    Baby shower decoration ideas for a home celebration work best when you pick one soft palette, one clear focal point, and simple pieces guests can enjoy without crowding the room. Start with balloons or a backdrop, add a low table centerpiece, and finish with a dessert table, a gift spot, and small personal touches that welcome the guest of honor.

    The 25 ideas below suit a living room, a dining room, or a combined open plan space, and most of them use pieces you can set up the day before. Pick a palette first, such as blush and cream, sage and white, or soft blue and cream, then repeat it in balloons, table linen, and flowers. The same low centerpiece rule that keeps a spring tablescape easy to talk across applies here, and the soft layers in these cozy room decorating ideas show how warm light and texture can make a party room feel calm rather than busy.

    Key Takeaways

    • Pick one palette of two or three soft colors and repeat each color at least twice, in balloons, linen, and flowers.
    • Give the room one focal point, such as a balloon arch or a backdrop, and keep the rest of the decor simple around it.
    • Keep table centerpieces low and narrow, so guests can see each other and serving dishes still fit.
    • Group decor by zone: entry, main table, dessert table, gift table, and one photo or games corner.
    • Use battery candles near balloons, paper, and fabric, and keep real flames clear of all decor.
    • Choose pieces that lift off in one move after the party, such as a backdrop panel, a tray centerpiece, and boxed favors.

    1. Pastel Balloon Arch at the Entry

    Pastel balloon arch in blush, cream, and sage over a home entry doorway.
    A pastel balloon arch at the entry tells guests they have arrived at a celebration before they see the main room. Build the arch over a doorway or along one wall, using balloons in your palette, such as blush, cream, and soft sage, with a few larger balloons mixed among smaller ones for shape. Anchor both ends with weights or ties to furniture that will not move during the party.

    Keep the arch clear of the walking path and away from ceiling fans, light fixtures, and open flames. If the arch sits near a door that guests use often, leave the center open and wide, so no one brushes balloons on the way in. Deflate and sort balloons after the party, and keep any uninflated balloons out of reach of small children.

    2. Soft Fabric Backdrop Behind the Main Table

    Soft cream and blush fabric backdrop hanging behind a decorated baby shower table.

    A soft fabric backdrop behind the main table gives photos a clean background and marks the guest of honor seat. Hang lengths of muslin, linen, or tulle from a stand or a curtain rod, in cream or a pale palette color, with gentle folds rather than a flat sheet. Layer two tones, such as cream over blush, for depth without pattern.

    Secure the stand so it cannot tip, and keep the fabric clear of candles and food. Weight the base with sandbags or heavy books hidden behind a plant if the stand feels light. After the party, the same fabric can serve as a tablecloth or a curtain panel at home, so it earns a second use.

    3. Baby Block Stacks as Table Markers

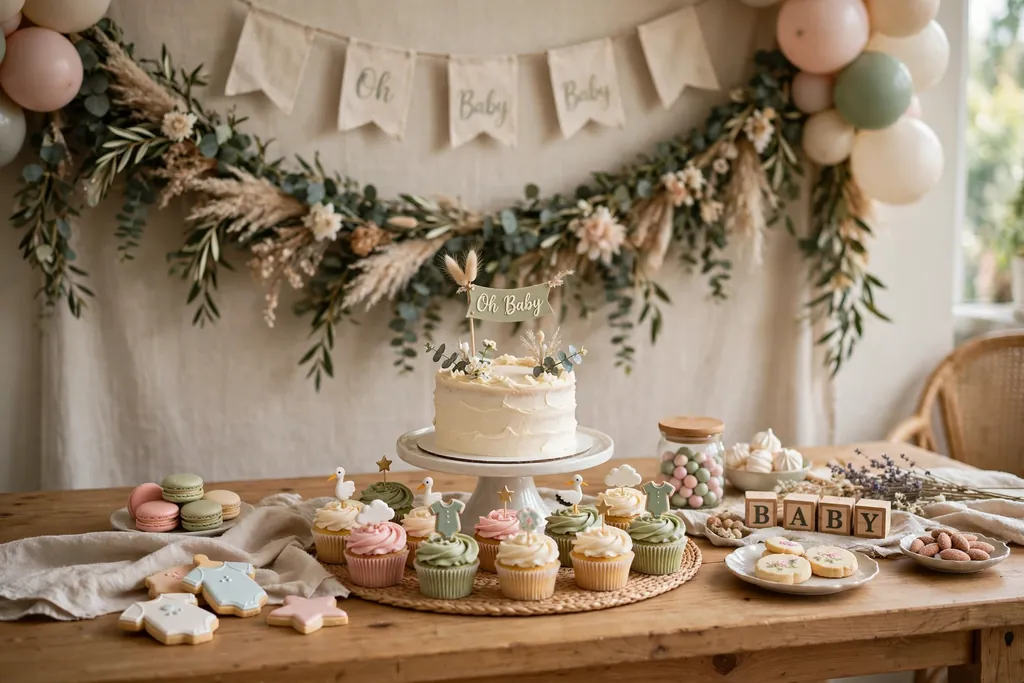
    Wooden baby blocks stacked to spell BABY on a baby shower table with small flowers.

    Wooden or cardboard baby blocks stacked to spell a word, such as BABY, make a playful centerpiece that guests notice at once. Set one stack at the center of each table, or one large stack on the main table, with small flowers or greenery tucked beside the base. Keep the stack low, with three or four blocks high at most, so sightlines stay open.

    Use blocks that sit flat and stable, and keep them clear of drinks, since a spill can mark painted blocks. If small children attend, use large, lightweight blocks that cannot be a choking risk, and set the stack on a tray so it lifts off in one move when food is served.

    4. Diaper Cake Display on the Dessert Table

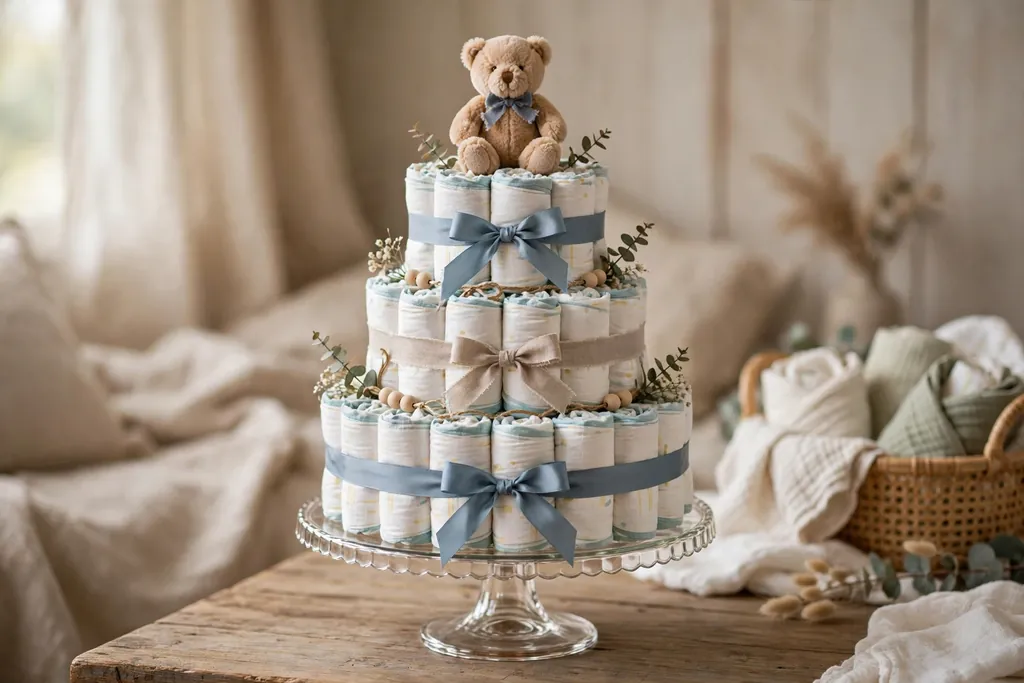
    Tiered diaper cake with ribbon and a small plush topper displayed on a cake stand.

    A diaper cake, made from rolled diapers arranged in tiers and tied with ribbon, works as both decor and a useful gift. Set it on a cake stand at one end of the dessert table, with a small topper, such as a plush toy or a paper flower, and a ribbon in your palette around each tier. Keep it clear of food plates, so guests do not mistake it for cake.

    Build the cake on a firm base board, and wrap the finished tiers lightly if the party is outdoors or in a warm room. After the party, the guest of honor can take the diapers home as they are, so avoid gluing anything to the diapers themselves. Use ribbon and pins only, and check that no small pins stay loose in the diapers.

    5. Low Floral Bowls for the Main Table

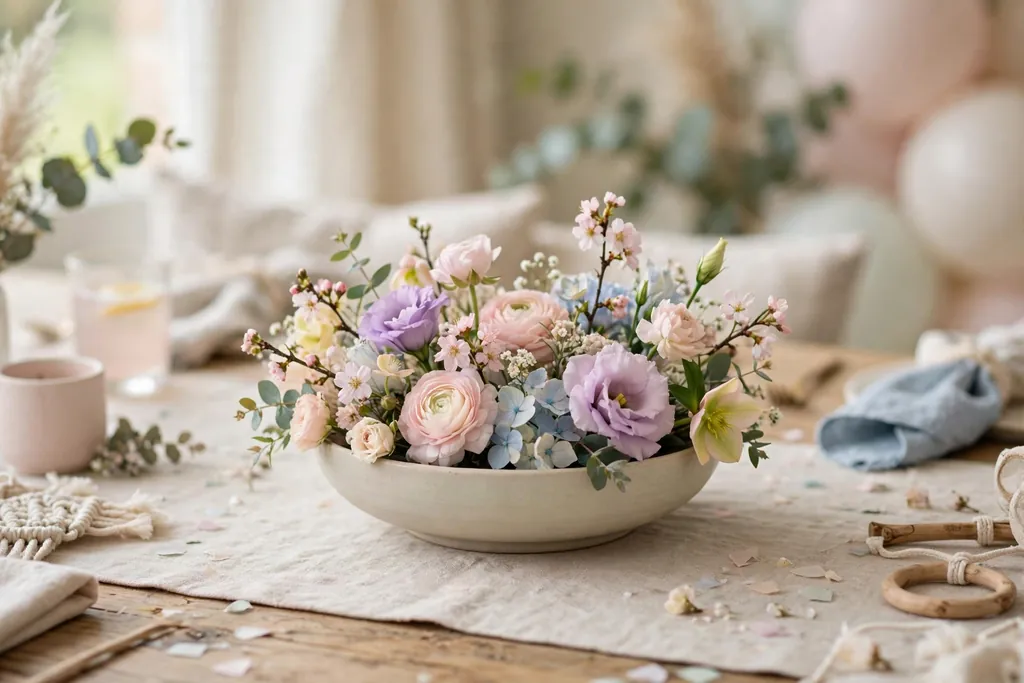
    Low wide bowl of short stemmed pastel flowers as a baby shower table centerpiece.

    Low floral bowls keep the table pretty without blocking conversation. Fill wide, shallow bowls with short stemmed flowers in your palette, such as roses, ranunculus, or carnations, with a few green leaves between blooms, and set one bowl at the center of each table. The low, round shape suits both round and long tables.

    Change the water the morning of the party, and trim stems at an angle so blooms stay fresh through the day. Keep pollen heavy blooms clear of food plates, and set each bowl on a small mat if the table marks easily. If fresh flowers are out of budget, use good quality faux blooms in the same low bowls.

    6. Pastel Table Settings with a Simple Runner

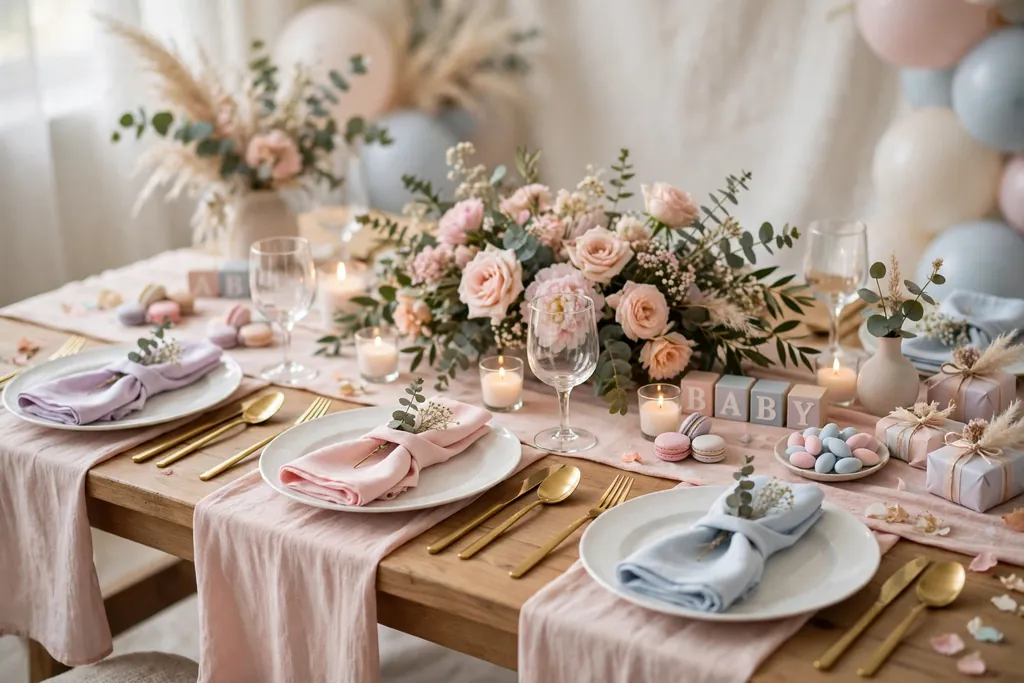
    Pastel baby shower table setting with a blush runner, white plates, and folded napkins.

    Pastel table settings start with a plain runner in blush, sage, or cream, then white plates, clear glasses, and folded napkins in one palette color. The runner carries most of the color, so plates and glasses can stay plain and easy to use. Add one small detail at each place, such as a sprig of greenery on the napkin, to tie places together.

    Iron or steam the runner before the party, since creases show more on pale linen than on patterned cloth. Keep the runner narrow enough that plates sit flat on the table, not on the fabric edge. The same low, calm approach used for valentine table decorations works here, with pastel shades in place of red and pink.

    7. Ribbon Bows on Dining Chairs

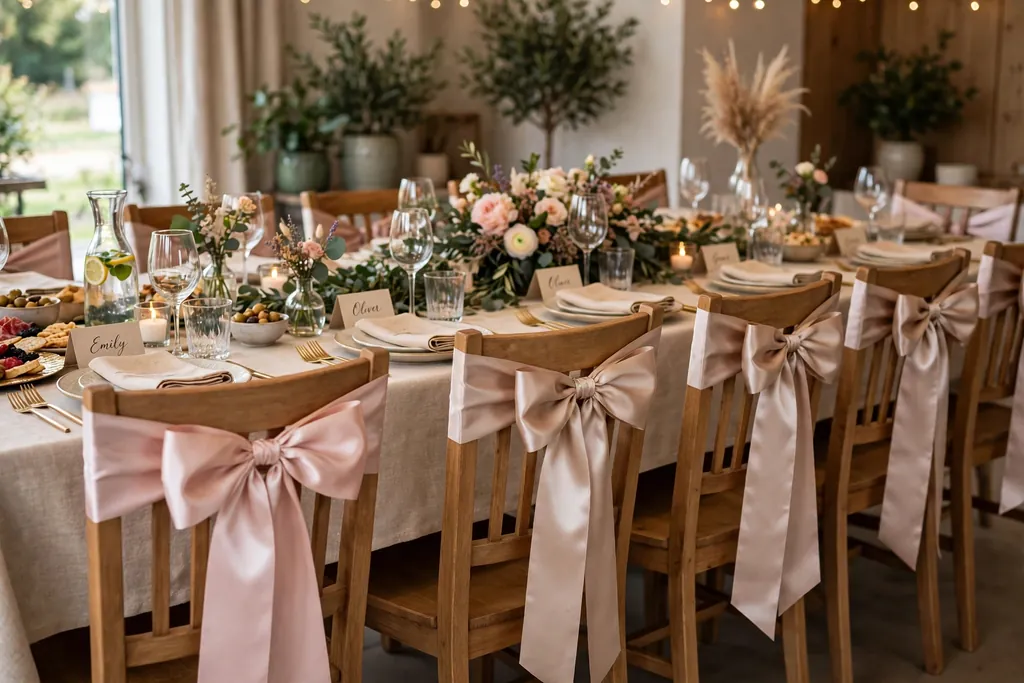
    Dining chairs with wide satin ribbon bows tied on the back rails at a party table.

    Ribbon bows tied to dining chairs add color behind each guest without taking up table space. Tie a wide satin or grosgrain ribbon around the top rail of each chair, finishing in a simple bow, in one palette color or in two alternating colors. The bows suit a table that is already full, since they use no surface at all.

    Cut ribbons to the same length, and tie each bow the same way, so chairs look matched from across the room. Use a simple knot under the bow to keep it from slipping, and keep ribbon ends clear of chair legs and walkways. Remove ribbons before washing chair covers, and store them flat so they do not crease.

    8. Dessert Table with a Tiered Cake Stand

    Dessert table with a tiered cake stand, cupcakes, and a garland backdrop.

    A dessert table with a tiered cake stand gives the party a clear sweet focal point. Set the main cake or cupcakes on a stand at the center of a side table, with smaller plates of cookies or fruit around it, and a backdrop or garland behind the table to frame it. Keep heavier items on the lowest tier, and lighter treats above.

    Leave room at the front of the table for plates and serving tools, and keep the table clear of the main walking path, so guests can queue without blocking seats. Cover treats until serving time, and wipe the stand after use. If the table holds food only, set flower decor beside it rather than among the food tiers.

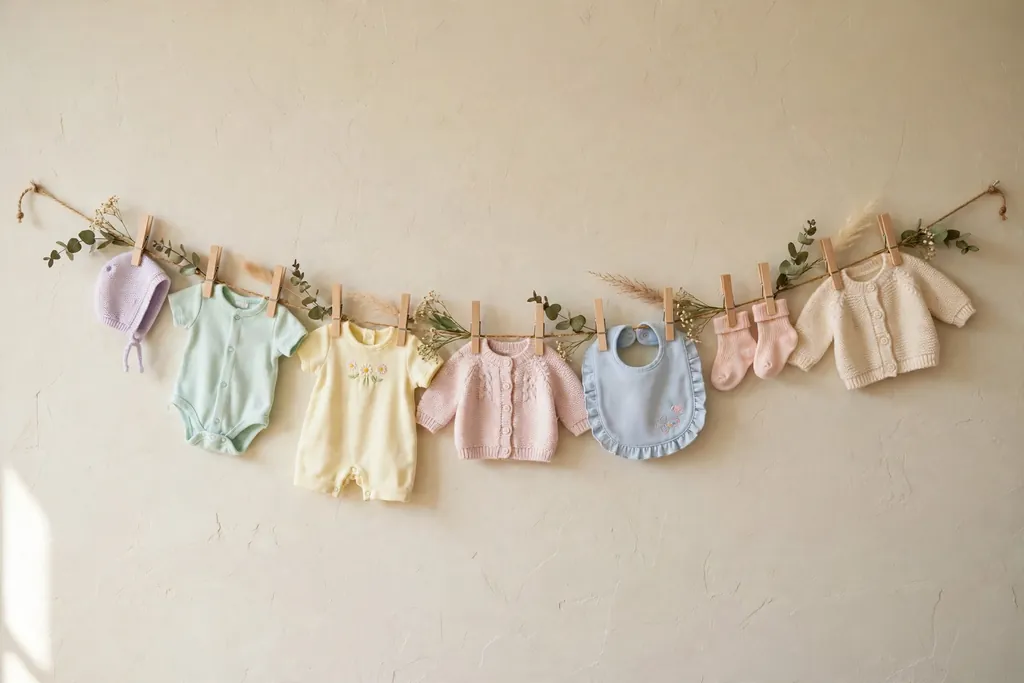
    9. Onesie Clothesline Garland

    Small pastel baby clothes clipped on a twine clothesline garland across a wall.

    A onesie clothesline garland strings small baby clothes on twine across a wall, a mantel, or a window, clipped with small pegs. Use plain or pastel onesies, bibs, and socks in your palette, spaced evenly along the line, with one or two small paper stars or hearts between items. The line reads as decor during the party and as a useful gift after it.

    Hang the line high enough that guests do not brush it with their heads, and secure both ends so it does not sag onto food or candles. Wash new clothes before hanging them, and keep the line clear of heat sources. After the party, fold the clothes into a gift box for the guest of honor.

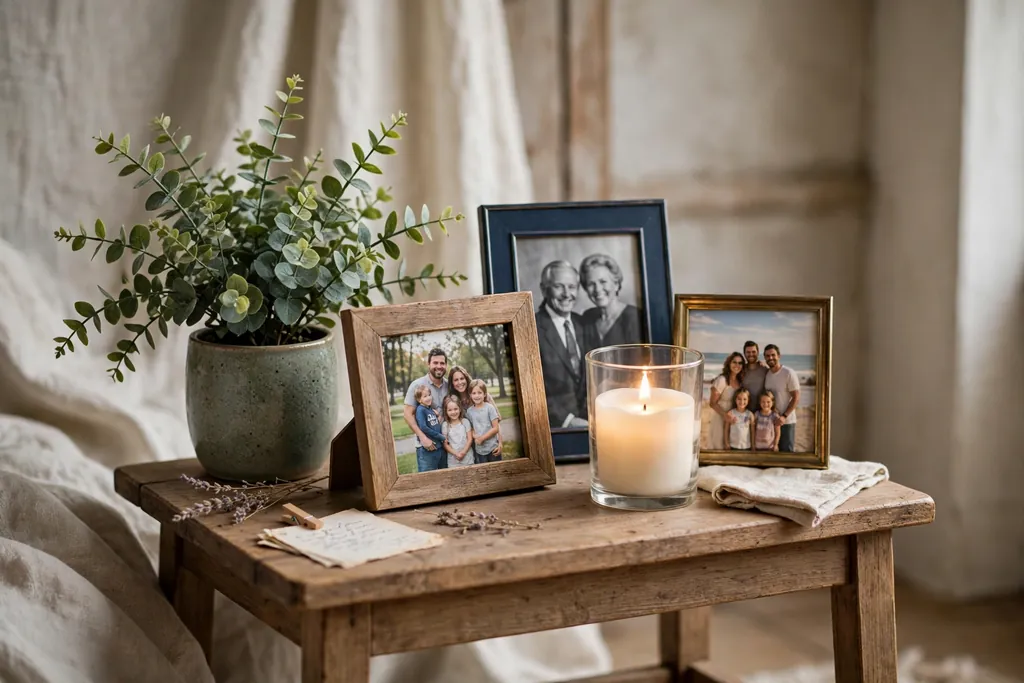
    10. Photo Memory Table

    Small memory table with framed family photos, a plant, and a battery candle.

    A photo memory table gives guests something to look at while they settle in. Set a small table near the entry with framed photos of the parents, a few ultrasound prints if the family wishes to share them, and one or two keepsakes, such as a first pair of shoes. Keep frames at varied heights, with a small plant or candle beside them, so the table looks styled rather than crowded.

    Label nothing that the family would rather keep private, and ask before printing any photo that includes other people. Keep the table clear of drinks, since a spill can damage prints, and set it where guests can step aside to look without blocking the entry. Battery candles suit this table, since paper prints sit close by.

    11. Gift Table with a Basket and a Card Box

    Gift table with a large basket of wrapped gifts and a decorated card box.

    A gift table with a basket and a card box keeps presents tidy and gives guests a clear place to leave them. Set a sturdy table near the entry, with a large basket or crate for wrapped gifts, a decorated box with a slot for cards, and a small sign that names the table. Keep the table against a wall, so gifts do not block a walkway.

    Empty the card box into a safe spot partway through a long party, so it does not overflow. Keep the gift table away from the dessert table, so food and gifts do not mix, and leave a chair beside it for a helper who can watch larger gifts. After the party, the same basket can hold baby supplies at home.

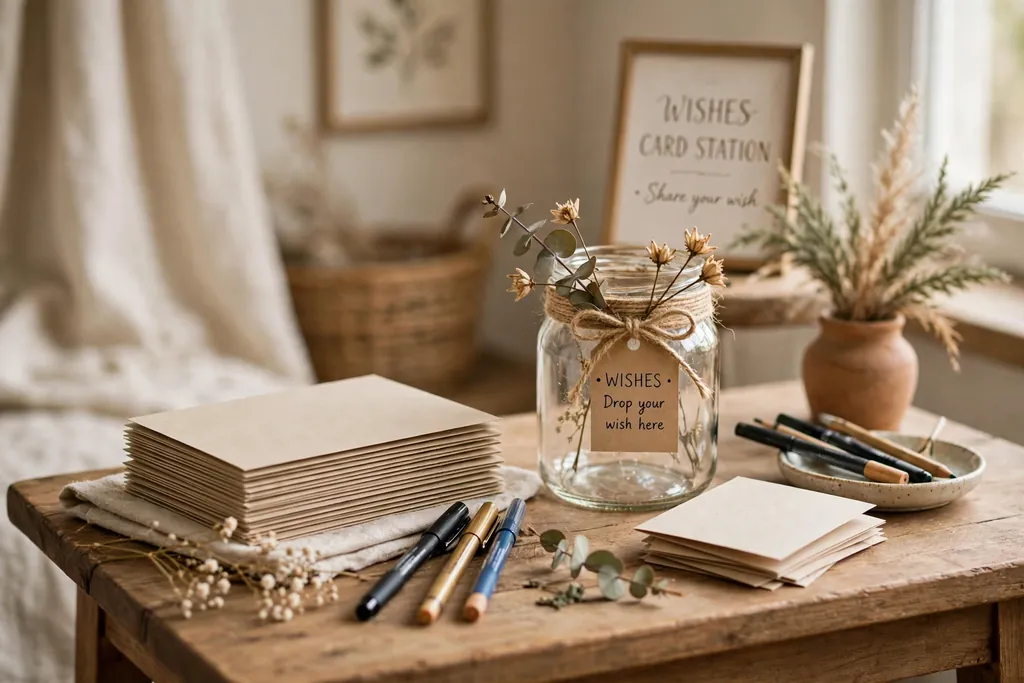
    12. Wishes for Baby Card Station

    Wishes card station with blank cards, pens, and a decorated jar on a side table.

    A wishes card station invites guests to write a short note for the baby, which the family can keep. Set out small blank cards, pens, and a decorated jar or box on a side table, with a short sign that explains the idea in one line. Use cards in your palette, with a simple border or a small star print, so the station matches the room.

    Keep pens that write smoothly and do not bleed through thin card, and test one card before the party. Set the station away from drinks, so cards stay clean, and leave a few spare cards for guests who want to write more than one note. After the party, tie the cards with ribbon and store them with the baby book.

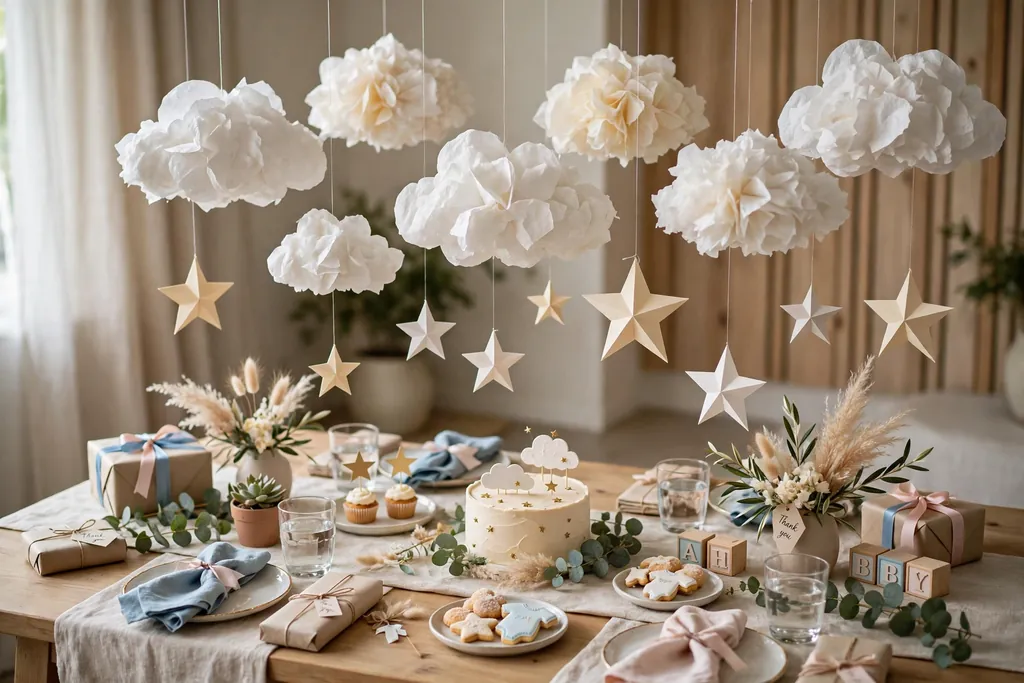
    13. Hanging Clouds and Stars from the Ceiling

    Paper clouds and stars hanging from clear thread above a baby shower table.

    Hanging paper clouds and stars from the ceiling adds a gentle night sky note above the party, without taking up floor or table space. Cut or buy clouds in white and stars in cream and gold, hang them from clear thread at varied heights over the main table or a corner, and keep the group small enough that light still reaches the table. The shapes suit a neutral palette as well as a pastel one.

    Hang shapes clear of ceiling fans, light bulbs, and open flames, and keep the lowest shape above head height. Use light paper, so a falling shape cannot hurt anyone, and secure each thread with a small hook or tape that leaves no mark. Take the shapes down the same day, since paper creases if left hanging in damp air.

    14. Teddy Bear Display in a Reading Corner

    Plush teddy bears arranged in an armchair with a folded baby blanket.

    A teddy bear display in a reading corner gives the room a soft, welcoming focal point for photos. Set one large plush bear in an armchair, with two or three smaller bears beside it, a folded baby blanket over the chair arm, and a small stack of picture books on a side table. Keep the corner clear of walkways, so guests can step in for a photo without blocking seats.

    Use bears that are clean and in good shape, and keep them clear of food and drinks. If the bears are gifts, tag them so they go home with the right family, and keep one bear out of the display if it holds special meaning and should stay clean. After the party, the bears can move to the nursery.

    15. Place Cards and Small Favors at Each Seat

    Place cards with guest names and small wrapped favors set at a party table.

    Place cards and small favors at each seat help guests settle in and give them a keepsake to take home. Set one small card with the guest name at each place, leaning against the glass or laid on the napkin, with a small favor beside it, such as a wrapped cookie, a small candle, or a packet of flower seeds. Keep favors small enough to sit beside a plate without crowding the glass.

    Write names in clear, large lettering, and check the seating list before the party, so no guest finds a missing card. If a guest has a food allergy, choose a non food favor for that place, or label food favors clearly. Guests can take favors home in a small bag set by the door, so nothing is left behind.

    16. Drink Station with Labeled Jars and a Punch Bowl

    Drink station with labeled glass jars, a punch bowl, and glasses on a tray.

    A drink station with labeled jars and a punch bowl keeps guests served without crowding the main table. Set a side table with a large punch bowl or drink dispenser, two or three labeled jars for water, juice, and a sparkling drink, and a tray of glasses beside them. Label each jar in clear handwriting, and note any drink that contains common allergens.

    Keep the station near the main room but clear of the entry, so guests can refill without blocking arrivals. Set glasses on a tray with a lip, so a spill stays contained, and refill jars before they run empty. After the party, wash jars and labels off, and store the dispenser clean and dry.

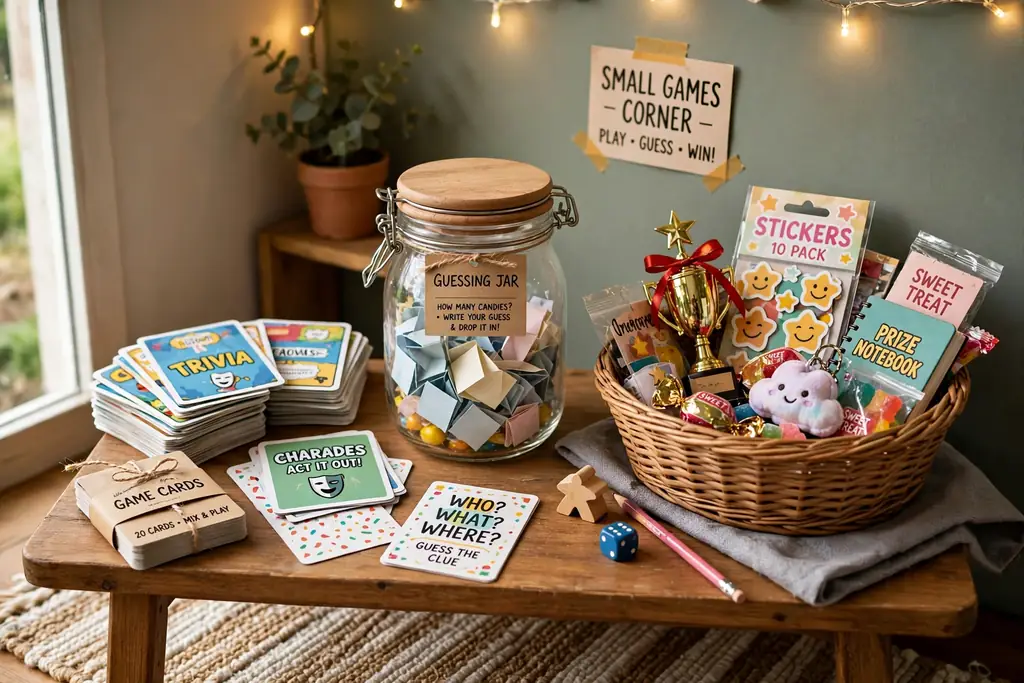
    17. Decorated Games Corner

    Small games corner table with game cards, a guessing jar, and a prize basket.

    A decorated games corner gives guests a place to play without moving the main table decor. Set a small table with game cards, a guessing game jar, and a prize basket, dressed with a runner in your palette, a small balloon bunch, and a framed sign that names the game. Keep the table near seating, so guests can join a game without leaving the party.

    Choose games that need no loud equipment and no mess, such as a baby name quiz or a guess the item jar, and keep game pieces large enough to handle with ease. Set a small bin beside the table for used cards, so the corner stays tidy. After the party, pack game cards flat for reuse at a future gathering.

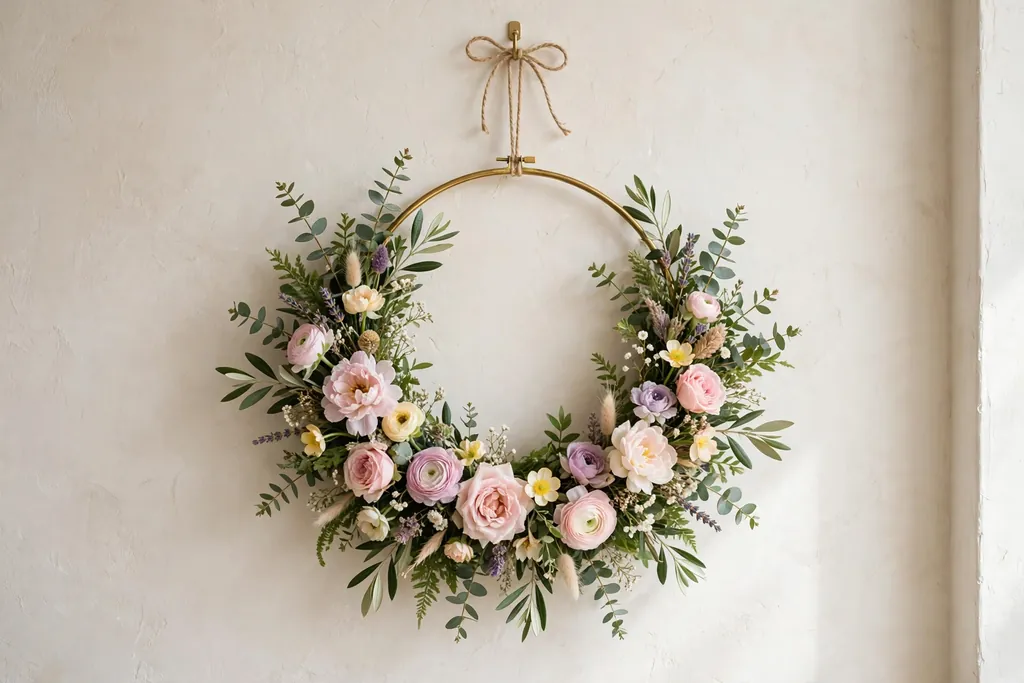
    18. Floral Hoop Wreath on the Wall

    Floral hoop wreath with greenery and pastel flowers hanging on a wall.

    A floral hoop wreath on the wall makes a simple, pretty focal point that suits a small room. Wrap a metal or wood hoop with greenery, add a cluster of flowers in your palette on one side, and hang it at eye level over a console or beside the backdrop. The open center keeps the wall feeling light, unlike a full wreath.

    Hang the hoop from a secure hook rated for its weight, and keep it clear of candles and heat. If fresh flowers wilt fast in a warm room, use faux blooms on the hoop and save fresh flowers for the table. After the party, the hoop can hang in the nursery or over a door at home.

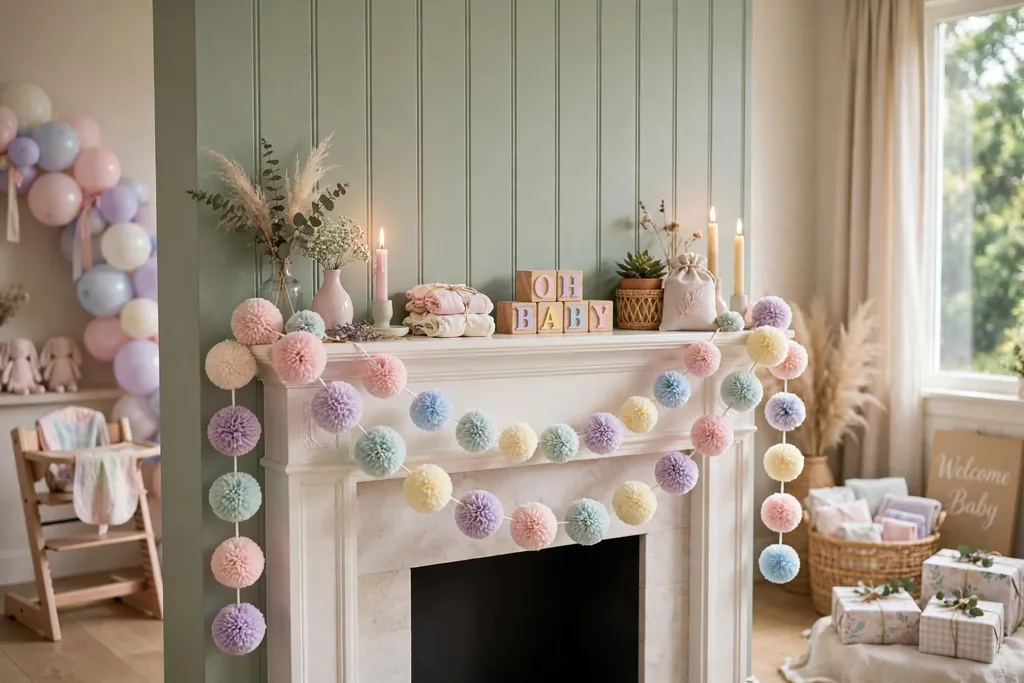
    19. Pastel Pom-Pom Garland Across a Mantel

    Pastel pom-pom garland draped across a mantel in a baby shower room.

    A pastel pom-pom garland across a mantel or window adds soft color at eye level without a large structure. String tissue or wool pom-poms in your palette along twine, spaced evenly, and drape the garland along the mantel edge or across a window frame. Use two sizes of pom-poms for shape, with larger ones at the center and smaller ones at the ends.

    Secure both ends so the garland does not slide when doors open, and keep it clear of candles and heat, since tissue pom-poms catch fire easily. Use wool pom-poms near any flame, or battery candles only near tissue garlands. Fold the garland flat after the party for reuse.

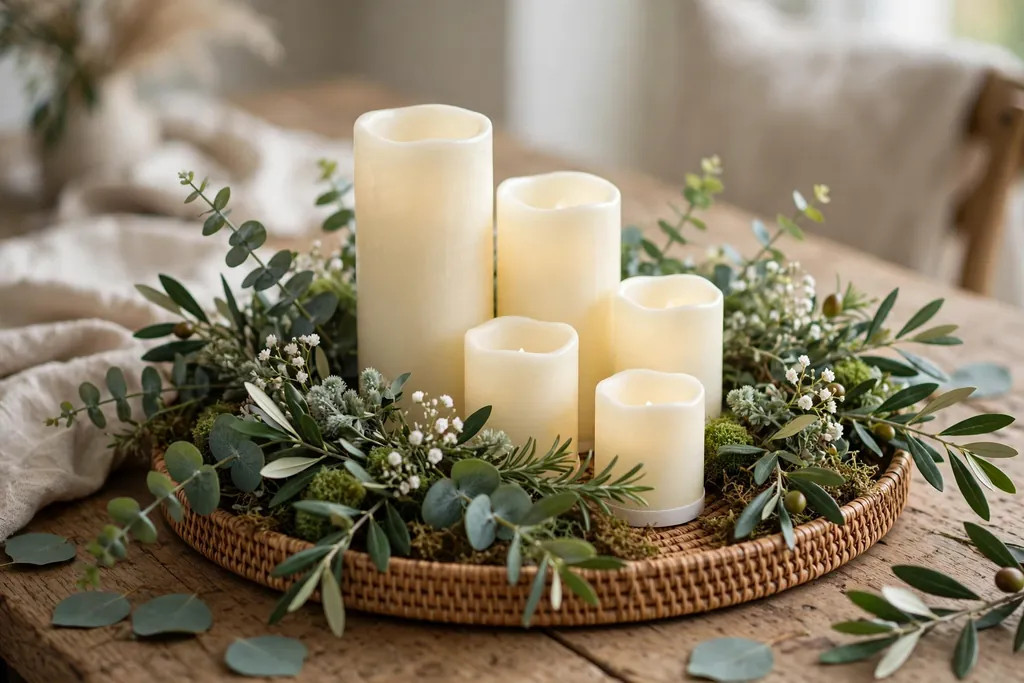
    20. Candle Cluster with Greenery on a Tray

    Battery candle cluster with greenery on a round tray as a table centerpiece.

    A candle cluster with greenery on a tray gives the table warm light in one contained group. Set three or four battery candles of two heights on a round tray, with a few short green leaves or small flowers tucked between holders, and place the tray at the center of a side table or at one end of the main table. The tray keeps the group together, so it lifts off in one move when food is served.

    Use battery candles near balloons, paper, and fabric, and keep real flames clear of all decor if you use them, never leaving them burning unattended. Mix heights, with one taller candle at the back and shorter ones at the front, but keep the total group low enough to see across. Wipe the tray after use, and store candles with batteries removed.

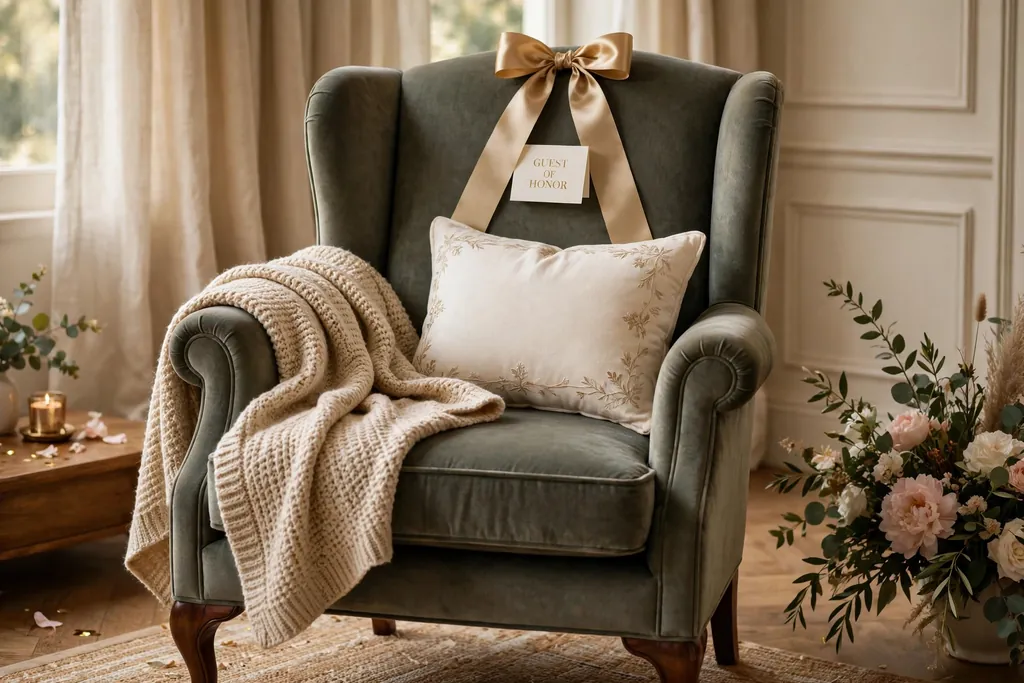
    21. Decorated Chair for the Guest of Honor

    Decorated armchair for a guest of honor with a throw, cushion, and ribbon bow.

    A decorated chair for the guest of honor marks her seat clearly and gives photos a clear focus. Dress one armchair with a soft throw, a cushion in your palette, a ribbon bow on the back, and a small balloon bunch tied to one arm, set where she can see the room and reach a side table for a drink. Keep the chair comfortable first, with decor that does not poke or slip when she sits down.

    Tie balloons loosely, so they can be moved aside if they block her view, and keep the chair clear of the main walking path. Add a footstool if the chair sits low, and keep a glass of water within reach. After the party, remove ribbons and balloons, and leave the throw and cushion for everyday use.

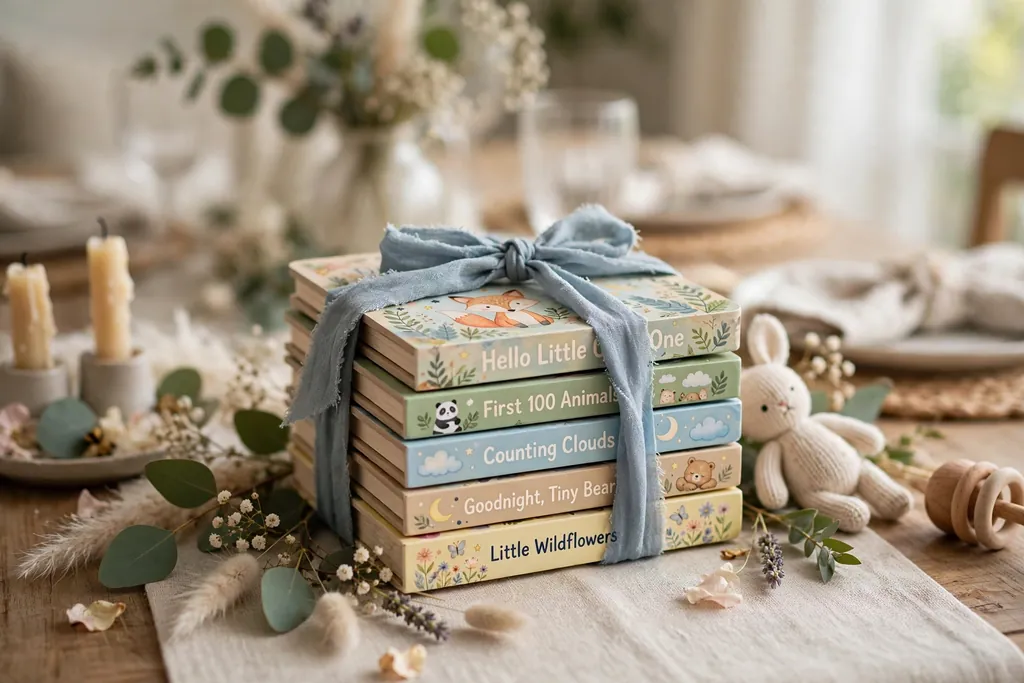
    22. Book Stack Centerpieces

    Stack of small children's books tied with ribbon as a baby shower table centerpiece.

    Book stack centerpieces use small stacks of picture books or classic children’s books as a table focus, tied with ribbon in your palette. Set one stack of three or four books at the center of each table, with a small vase of flowers or a tiny plush toy beside it, and keep the stack low, so guests can see across it. The books suit a shower where guests bring a book in place of a card.

    Choose books with clean covers and no torn pages, and keep them clear of drinks, since a spill can damage paper. If the books are gifts, tag each stack so it goes home with the family, and keep one stack as decor only if the books should stay clean. After the party, the books can move to a nursery shelf.

    23. Sage and White Greenery Tablescape

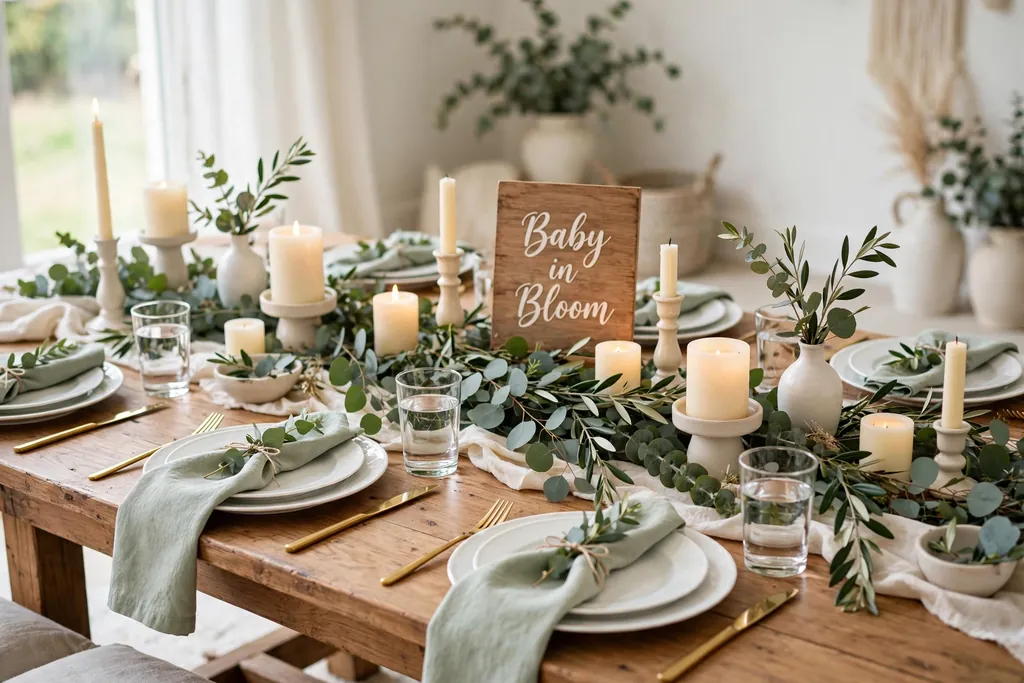
    Sage and white baby shower tablescape with a eucalyptus runner, white plates, and cream candles.

    A sage and white greenery tablescape suits a neutral baby shower, where green leaves carry the color instead of pink or blue. Lay a white cloth, set white plates and clear glasses, then add a eucalyptus or olive leaf runner down the center, with small white blooms and cream candles between leaves. The green and white pairing feels calm and fresh, and it suits any season.

    Keep the runner narrow, so plates sit flat, and trim leaves short, so they do not brush food. Use faux greenery if fresh leaves wilt fast in a warm room, and wipe leaves clean before setting them out. The same green and white restraint used in a spring tablescape works here, with eucalyptus in place of spring flowers.

    24. Ribbon Curtain Across a Doorway

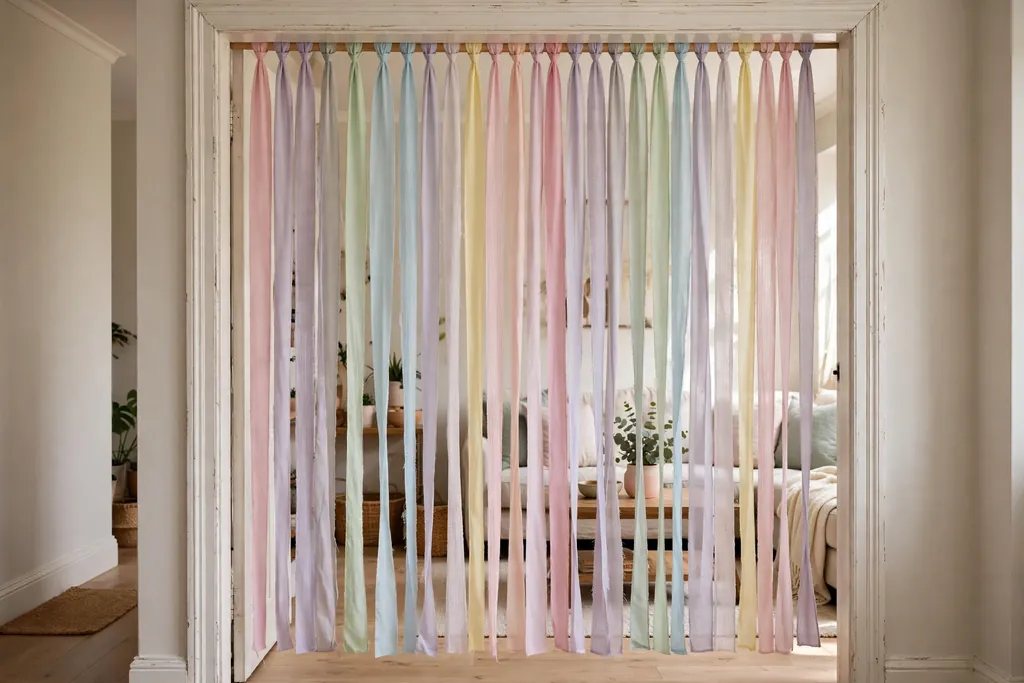
    Ribbon curtain in pastel shades hanging across a home doorway.
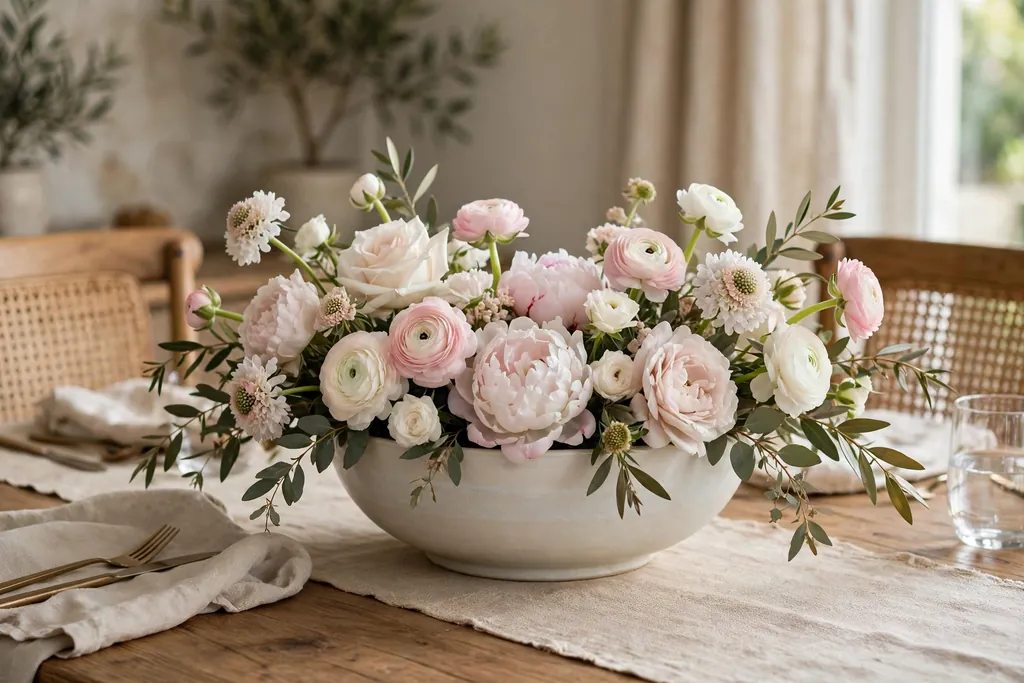
    A ribbon curtain across a doorway marks the party room clearly and adds movement as guests walk through. Hang lengths of ribbon in your palette from a tension rod or a curtain wire, spaced closely enough to read as a curtain, but loosely enough that guests can pass through with ease. Use two or three ribbon widths for texture, with satin and grosgrain mixed.

    Hang the curtain high enough that it does not catch on heads or bags, and keep it clear of candles and heat. Secure the rod so it cannot fall, and test the doorway width before the party, so guests with a pram or a wheelchair can pass with ease. After the party, roll the ribbons for reuse at a future celebration.

    25. Framed Menu and Signage Boards

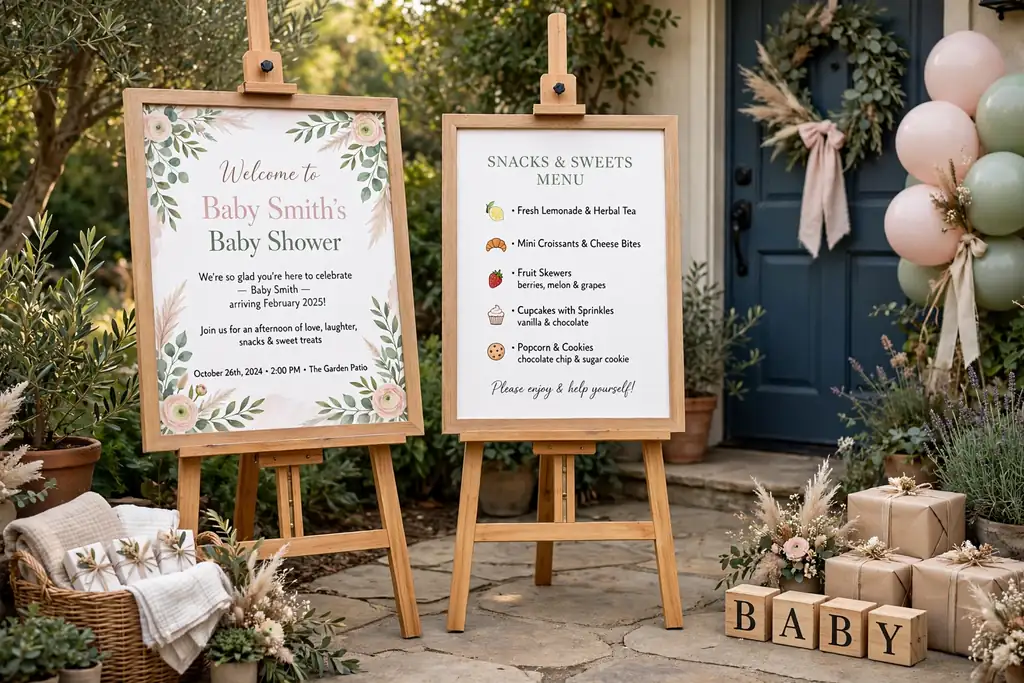
    Framed welcome and menu boards standing on easels at a baby shower entry.

    Framed menu and signage boards give guests clear guidance and add a styled detail to the dessert table and the entry. Set one framed board at the entry with a welcome line, one at the dessert table with a short menu, and one at the games corner with simple instructions, all in the same frame style and handwriting or print. Keep each board short, with large lettering guests can read from a few steps away.
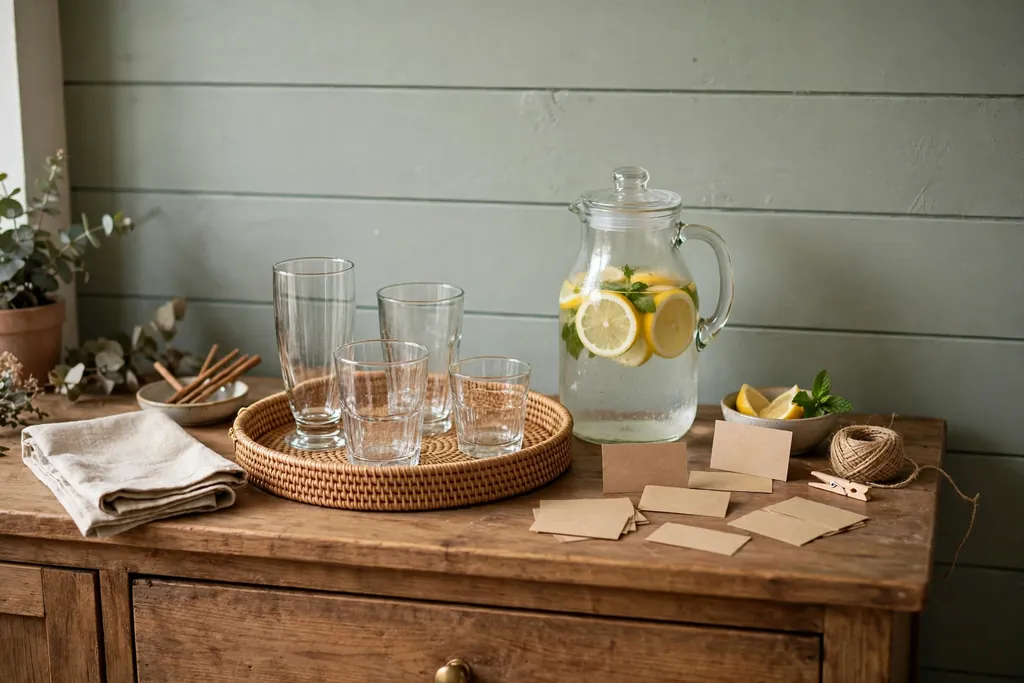
    Use frames that stand stable on a table or an easel, and keep boards clear of food and drinks. Print boards on card stock rather than thin paper, so they stand straight and last through the party. After the party, the family can keep the welcome board as a keepsake, with a photo of the party beside it.

    Conclusion

    A beautiful home baby shower does not need a large budget or a full room redesign. Pick one soft palette, one focal point, and low, simple table decor, then group the rest by zone: entry, main table, dessert table, gift table, and one corner for photos or games. Start with the arch or backdrop and the main table, add the dessert and gift tables next, and finish with small personal touches, such as place cards, wishes cards, and favors, so guests feel welcomed from the door to the last goodbye.

    FAQs

    What is the easiest baby shower decoration idea for a small home?

    The easiest baby shower decoration idea for a small home is a pastel balloon bunch, a fabric backdrop on one wall, and a low floral bowl on the main table. These three pieces mark the celebration clearly, need no large furniture moves, and leave the room usable for seating and serving.

    How do I choose a color palette for baby shower decorations?

    Choose a baby shower color palette by picking two or three soft colors you already like, such as blush and cream, sage and white, or soft blue and cream, and repeating each color at least twice across balloons, linen, and flowers. A neutral palette of sage, white, and cream suits guests who prefer no pink or blue theme.

    How far in advance should I set up baby shower decorations?

    Set up baby shower decorations the day before the party where possible, starting with the backdrop, balloon arch, and table linen, and leaving fresh flowers, food tables, and balloons that lose air for the morning of the party. A day before setup leaves time to fix a sagging garland or a missing ribbon before guests arrive.

    What decorations work best for a baby shower on a small budget?

    Baby shower decorations on a small budget work best when you use paper garlands, a fabric backdrop, ribbon chair bows, and one low floral bowl per table, rather than large hired pieces. These pieces cost little, use materials you can reuse, and still give the room a clear focal point and a finished table.

    How do I decorate a baby shower table without blocking conversation?

    Decorate a baby shower table without blocking conversation by keeping the centerpiece low and narrow, such as a shallow floral bowl, a book stack, or a candle tray, and leaving empty space at each place for plates and glasses. Keep tall pieces, such as balloon arches and backdrops, on walls or at the entry, not in the center of the table.

    Can I reuse baby shower decorations after the party?

    You can reuse many baby shower decorations after the party, such as fabric backdrops, ribbon, frames, baskets, and faux flowers, by packing them flat and clean on the same day. Fresh flowers, balloons, and paper garlands last a shorter time, so keep those for the party itself, and save the sturdy pieces for a future gathering or for nursery decor.

  • 21 Engagement Party Decor Ideas for a Celebration at Home

    21 Engagement Party Decor Ideas for a Celebration at Home

    Engagement party decor for a celebration at home works best with one clear palette, one low table centerpiece, and a few personal touches, such as a photo display, a welcome sign, and a toast station. Start with the rooms guests use, then add balloons, lights, and flowers in that palette, and leave space to eat, talk, and move around.

    Start with the base you already own, such as everyday plates, plain glasses, cloth napkins, and a plain tablecloth or runner, then add one layer at a time. Keep the centerpiece low and narrow, leave room for serving dishes, and repeat one accent, such as gold, blush, or greenery, in at least two rooms. For low centerpiece ideas in a different seasonal palette to compare, see the fall table decor guide, and for a relaxed gathering layout with a drink station and a lounge corner, browse the Friendsgiving decor ideas.

    Key Takeaways

    • Pick one palette, such as blush, cream, and gold, and repeat each color at least twice across the rooms guests will use.
    • Keep the table centerpiece low and narrow, so guests can see across the table and serving dishes still fit.
    • Give decor a hosting job: a welcome sign, place cards, a drink station, and a message station all help guests settle in.
    • Add one personal layer, such as a photo timeline or message cards, so the party feels like a celebration of the couple, not a generic gathering.
    • Use candlelight with care: keep flames clear of fabric, paper, and greenery, and use flameless candles near children or dried material.
    • Leave empty space at each place and a clear path through the room, and test the full setup before guests arrive.

    1. Balloon Arch Over the Entry Doorway

    Balloon arch in blush, cream, and gold framing an entry doorway in a home.

    Frame the entry doorway with a balloon arch in the party palette, such as blush, cream, and gold, so guests know at once that they have arrived at a celebration. Build the arch on a frame or a strip that fits the doorway, with larger balloons at the base and smaller ones filling gaps near the top, and keep the walkway clear underneath.

    Secure the arch to the door frame or to weighted bases on each side, so it cannot slip when the door opens. Keep balloons clear of ceiling fans, light fixtures, and open flames, and check that the arch does not block the door handle or lock. If the doorway is narrow, use a half arch on one side instead, so guests still walk through easily.
    2. Welcome Sign on an Easel by the Door
    Welcome sign on an easel just inside a front door with a small plant beside it.

    Set a welcome sign on an easel just inside the door, with the couple’s names and a short line such as “Welcome to our engagement party.” The sign greets guests before they reach the table, and it marks the start of the party zone in a home where rooms flow into each other.

    Write names in large, clear lettering, and keep the message to one or two lines, so guests can read it at a glance. Place the easel where it does not block the path, and put a small plant or a candle in a holder beside it if the corner looks bare. For a casual party, use a chalkboard or kraft paper sign that can be reused or kept after the night.

    3. Photo Timeline on a String Display

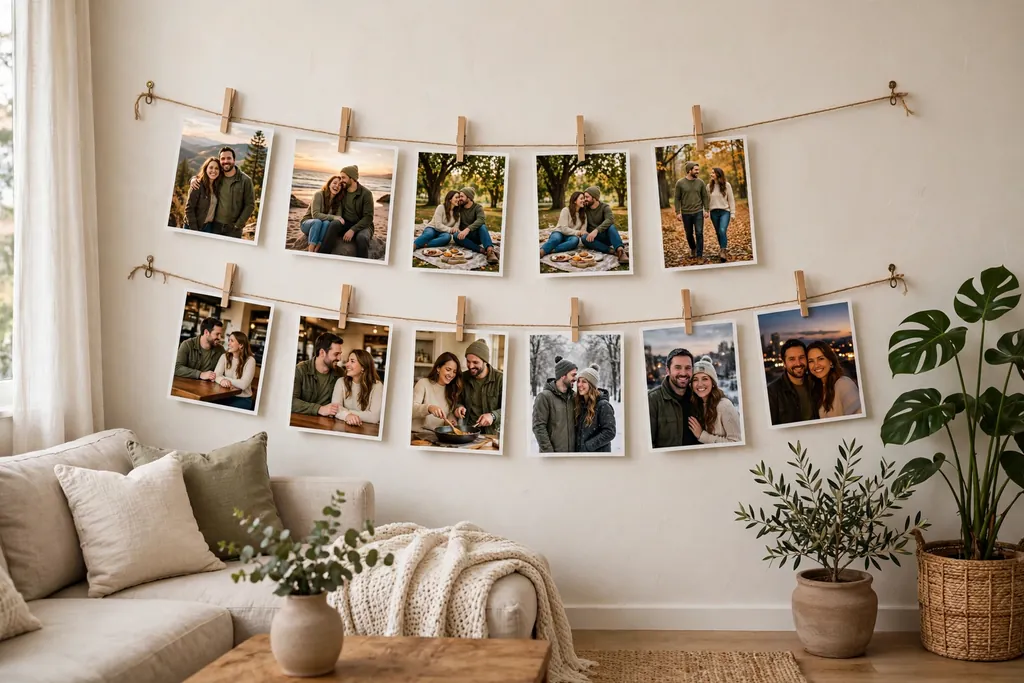
    String photo timeline with printed couple photos clipped along a living room wall.

    Hang a photo timeline along one wall, with printed photos of the couple in order, from early dates to the engagement, clipped to string or twine with small clips. The timeline gives guests something to look at while they arrive, and it starts conversation without any extra hosting work.

    Hang the string at eye level, and mix group photos with small everyday shots, so the display feels personal rather than formal. Leave one empty clip at the end where guests can add a photo from the evening. Take the display down with care after the party, and return borrowed prints to their owners.

    4. Photo Booth Backdrop with a Props Table

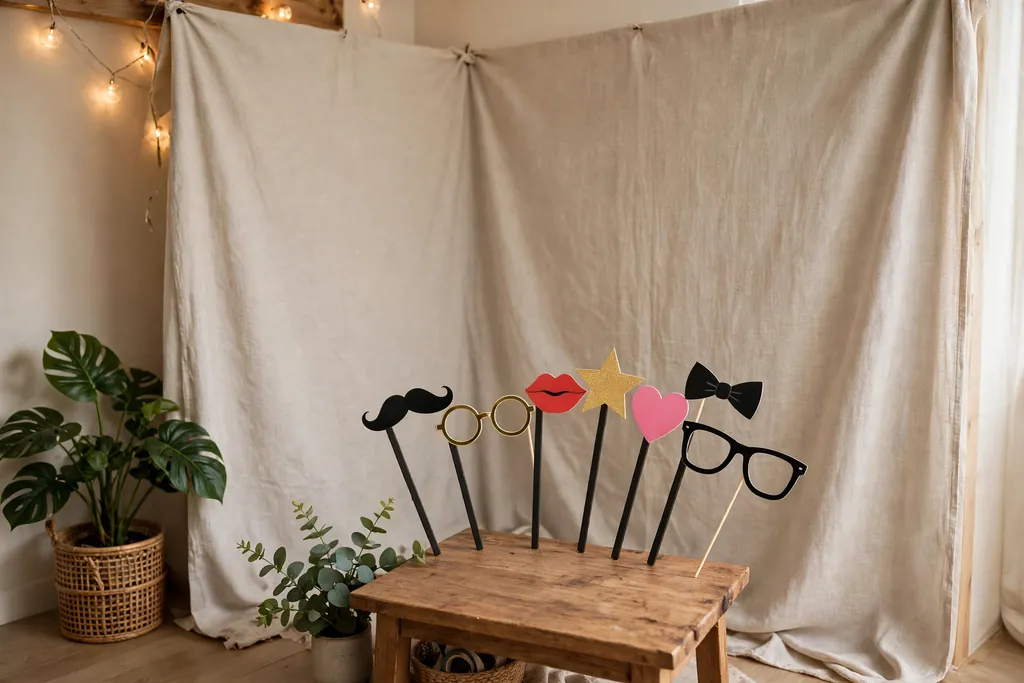
    Photo booth corner with a plain fabric backdrop and a small table of props on sticks.

    Set up a photo booth corner with a simple backdrop, such as a plain curtain, a paper garland, or a fabric panel, and a small table of props, such as signs, hats, and frames on sticks. Guests can take their own photos during the party, and the corner keeps cameras and posing out of the main dining area.

    Place the backdrop against a plain wall with good light, and keep the props table beside it rather than in front of it, so guests can reach props without blocking the shot. Use props that are light and safe, and keep a small basket for props that fall or break. For a small home, use one corner of the living room rather than a full wall.

    5. Low White and Blush Flower Centerpiece

    Low white and blush flower centerpiece in a wide bowl on a dining table.

    Set a low centerpiece of white and blush flowers in a wide bowl or a short vase at the center of the table, so blooms sit just above the rim and the group stays below eye level. The soft colors suit an engagement party, and the low shape leaves sightlines open for conversation across the table.

    Trim stems short and add a few green leaves between blooms, then place the bowl in the center of a round table or slightly off center on a long table, with room for serving dishes at each end. Change the water every day or two if the centerpiece stays out before the party, and keep loose petals off the table with a small tray or mat under the bowl. For more flower centerpiece ideas in a romantic palette, see the Valentine table decorations.

    6. Candle Cluster on a Tray

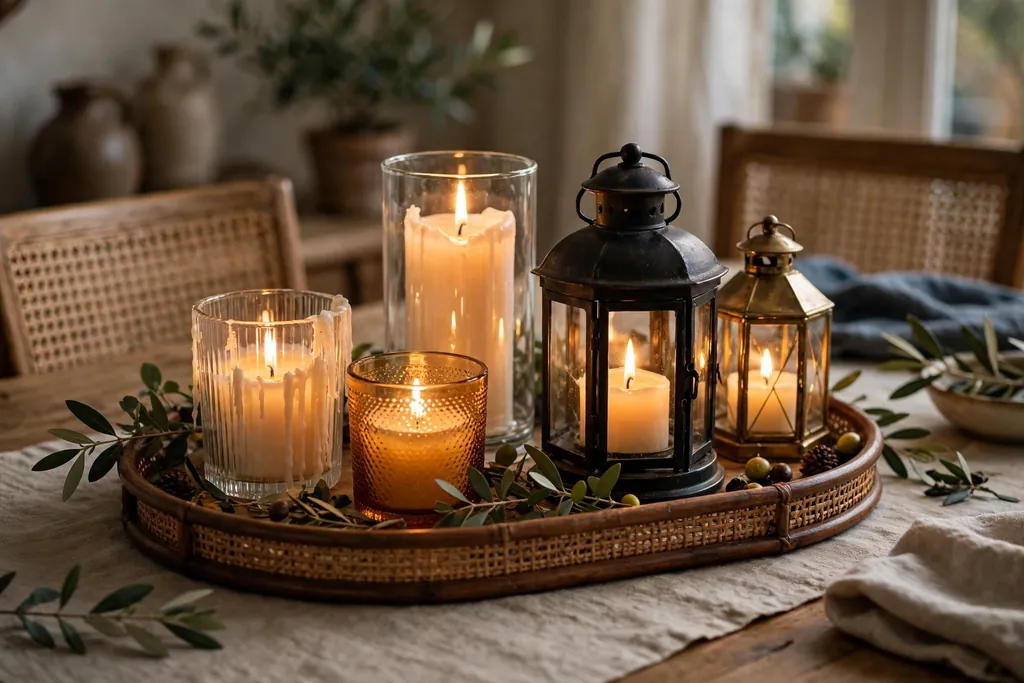
    Candle cluster in varied glass holders and lanterns on a tray on a dining table.

    Group candles of different heights in glass holders, jars, and lanterns on a tray at the center of the table or on a sideboard, and light them as the evening starts. Mixed holders look collected and relaxed, and a tray keeps wax, glass, and light contained in one place, so the group lifts off in one move when serving needs the surface.

    Use flameless candles inside narrow jars and near paper or fabric, and use real candles only in proper holders on a stable surface. Keep the cluster low on the table, so guests can see across it, and never leave real flames burning unattended. Wipe the tray after the party, since wax and dust collect in the rims.

    7. Gold Chargers and Linen Place Settings

    Dining place settings with gold chargers under white plates and cream linen napkins.

    Set gold chargers under everyday plates at each place, with linen napkins in cream or blush and plain glasses, so a normal dinner table gains a celebration layer with no new dinner set. Center one charger at each place, set the plate on top, and keep cutlery in its usual spots, so the table still works for a seated meal.

    Choose chargers with a flat top, so plates sit level and glasses do not wobble. Wipe chargers clean after the meal, and store them flat. Repeat the gold at least once more in the room, such as in candle holders or a picture frame, so the metal reads as a planned palette rather than a single accent.

    8. Dessert Table with a Tiered Stand

    Dessert table with a tiered stand of small bites and fruit on a sideboard.

    Set a dessert table or one end of a sideboard with a two or three tier stand, and fill it with small bites, fruit, and a few fresh blooms or greenery sprigs for color. A tiered stand gives dessert its own spot, so the main table can clear while guests keep grazing, and it adds height without blocking the center of the room.

    Put heavier items on the bottom tier, and keep the stand stable and clear of the main serving path. If the stand will hold food, use it for food only, and set a separate small decor group beside it rather than mixing decor into the food tiers. Cover treats until serving time, and wipe the tiers after use.

    9. Self Serve Drink Station with Labels

    Self serve drink station on a sideboard with a tray, glasses, a jug, and small labels.

    Set a drink station on a sideboard, a cart, or one end of the table, with a tray holding glasses, a jug or dispenser, and small labels for each drink. Guests can help themselves without leaving the gathering area, and labels answer questions about what is in each jug.

    Keep the station on a tray, so drips stay contained and the whole station lifts away after the party. Put sturdy glasses at the front, and keep hot drinks clear of the table edge where guests pass. Wipe the tray during the evening if the station gathers drips, and refill jugs from the kitchen rather than moving the whole station.

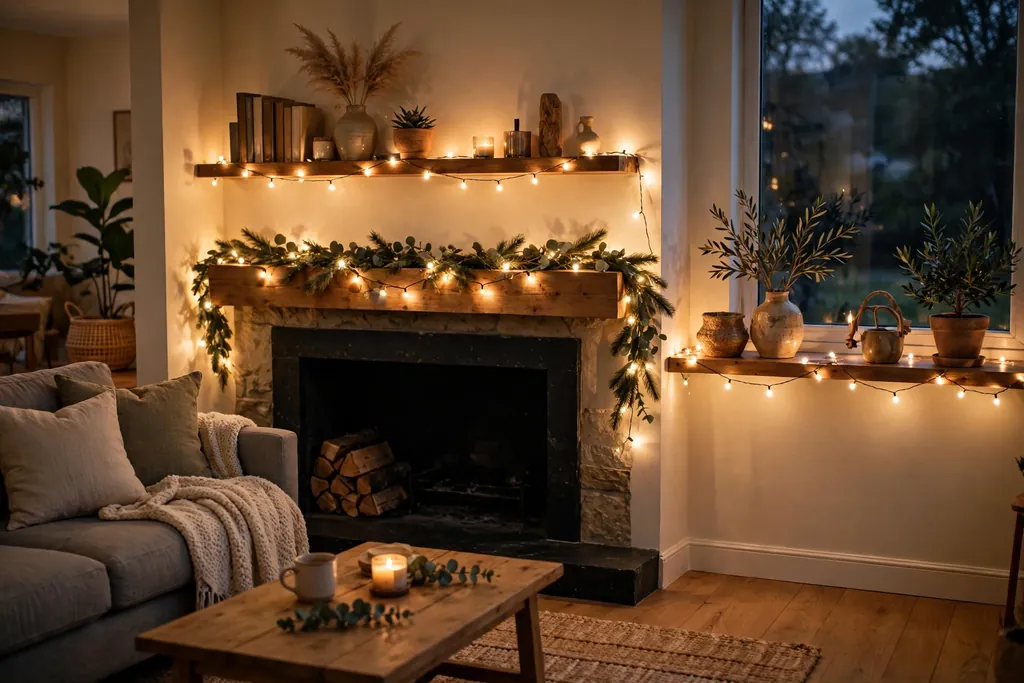
    10. Warm String Lights Across the Living Room

    Living room with warm white string lights along a mantel and a shelf in the evening.

    Hang warm white string lights along a mantel, a doorway, or a shelf in the living room, and add them early, before guests arrive, so the room already feels warm. String lights give a relaxed evening glow that overhead light cannot match, and they suit a party that runs into the night.

    Use battery lights with a timer where plugs are hard to reach, and keep paper or fabric decor clear of real flames and heat sources near the lights. Hang lights loosely, so they do not pull on hooks or frames, and check that cords do not cross a path where guests could trip. Keep one main light on as well, so guests can read labels and move safely.

    11. Paper Tassel Garland Over the Mantel

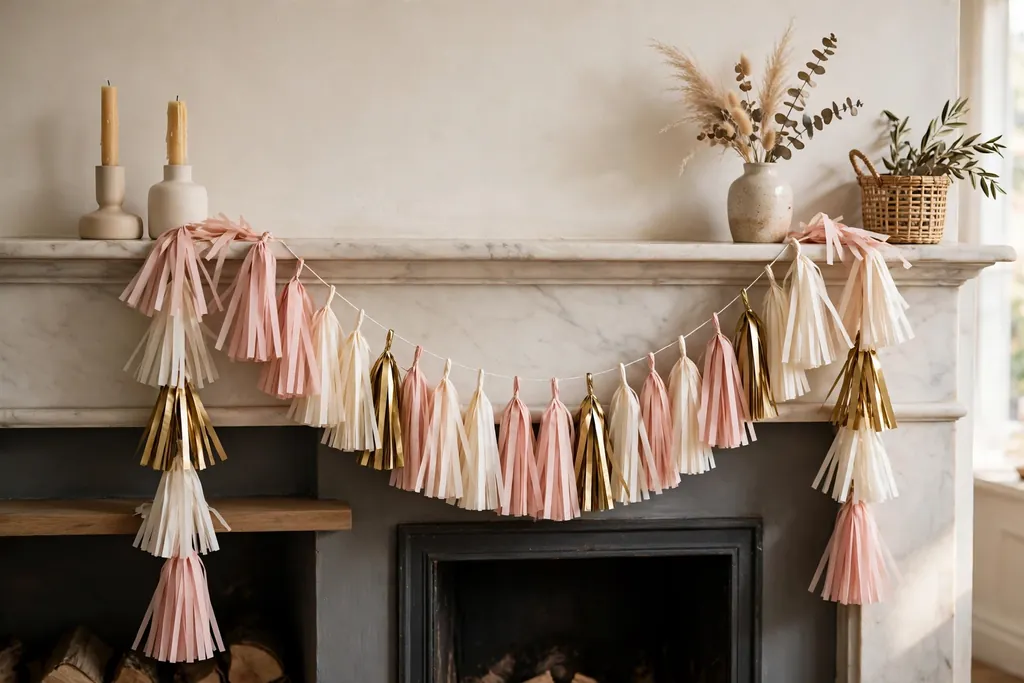
    Paper tassel garland in blush, cream, and gold draped over a mantel.

    Drape a paper tassel garland in blush, cream, and gold over the mantel or along a shelf, letting it dip slightly in the middle and trail a little at each end. A garland marks the main gathering room and carries the party palette above eye level, where it does not crowd the table.

    Secure the garland with small hooks or clear clips so it does not slip, and trim it to fit the space. Keep paper garlands clear of real flames and heat sources, and use flameless candles nearby. Fold the garland flat for storage after the party, so the tassels do not crush.

    12. Fresh Greenery Runner Down the Table

    Dining table with a low eucalyptus runner and short candles in holders.

    Lay a loose greenery runner, such as eucalyptus or olive branches, down the center of the table, then set short candles in holders along it at uneven intervals. The greenery carries color along the whole table without adding height, and it suits a long dining table for a gathering.

    Trim the stems so they stay inside the table edges and do not brush plates or glasses. Secure the runner so it does not slide when plates are set down, and keep real flames clear of dry leaves. Use flameless candles if the runner will sit near curtains or if children will be at the table, and shake fresh stems outdoors before laying them out.

    13. Gold Ring Napkin Rings at Each Place

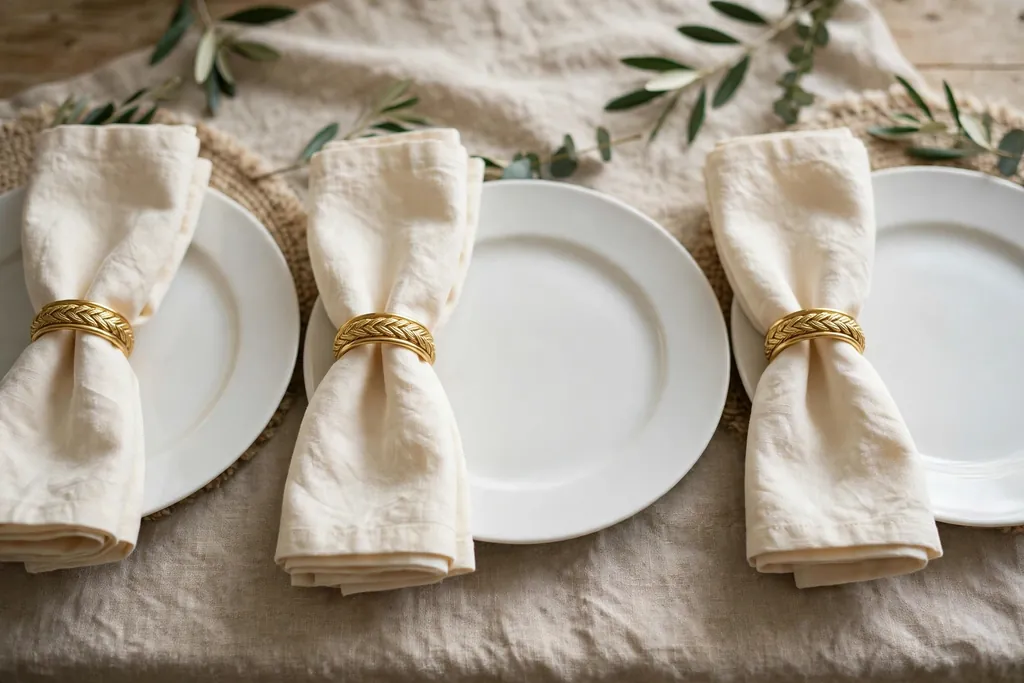
    Folded cream napkins with gold ring napkin rings beside white plates.

    Wrap each folded napkin with a gold ring napkin ring, or tie a simple gold band around the napkin, as a nod to the engagement ring itself. The ring detail sits at every place, so the theme repeats quietly across the table without a large themed centerpiece.

    Fold napkins in a simple rectangle or roll, so the ring sits flat, and use the same ring at every place, so the table looks matched. Keep the ring light enough that it does not pull the napkin off the plate, and remove rings before washing napkins. For a casual table, use a gold ribbon tie instead of a metal ring for the same effect with less cost.

    14. Message Cards Station for the Couple

    Message cards station on a side table with cards, pens, and a box for wishes.

    Set a message station on a side table, with cards, pens, and a short written prompt, such as “Write a wish for the couple,” plus a box or tray to collect the cards. Guests write a short note during the evening, and the couple keeps the cards after the party as a record of the night.

    Keep the cards small enough to write in a minute or two, and write the prompt in large lettering, so guests understand the station at a glance. Put pens that do not smudge in a small cup, and keep the box clear of drinks. Read a few cards aloud only if the couple is comfortable with it, and keep the rest private.

    15. Lounge Corner with Throws and Floor Cushions

    Lounge corner with floor cushions, folded throws in a basket, and a small lamp.

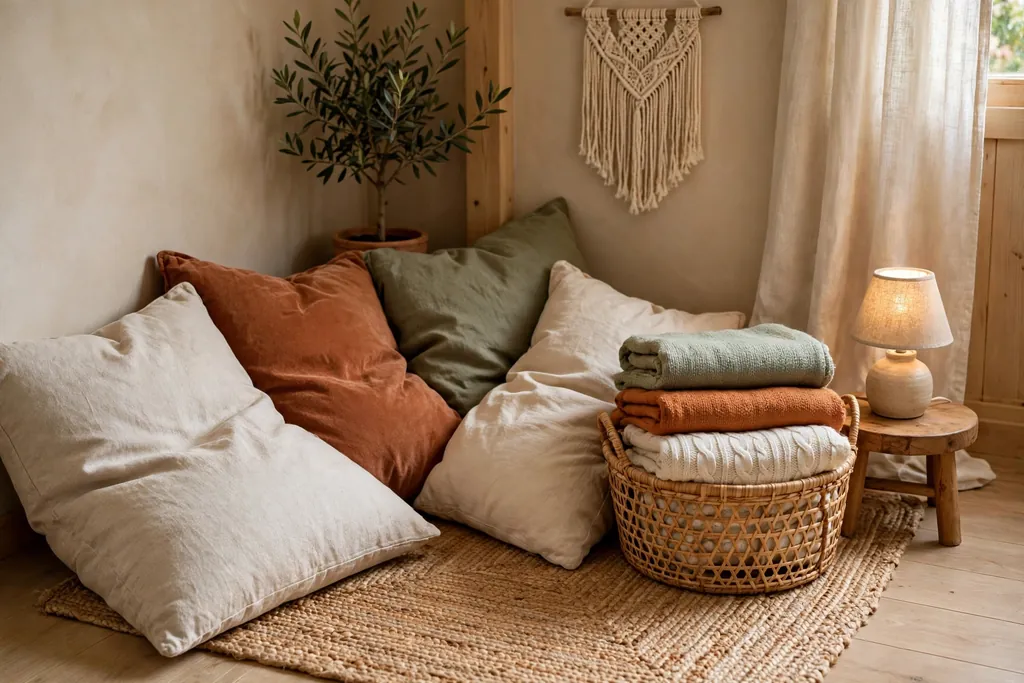
    Set aside a lounge corner away from the table, with a sofa or a few chairs, floor cushions, and folded throws in a basket. An engagement party often runs long after the meal, and a lounge corner gives guests somewhere to sit, talk, and rest without standing in the kitchen.

    Put the basket of throws where guests can reach it, and keep the corner clear of serving traffic. Use washable cushion covers if the group is large, and keep one low side table nearby for drinks. A small lamp or a string of warm lights in this corner keeps the light soft after the main meal ends.

    16. Garden Lanterns and Lights for a Patio Party

    Patio at dusk with lanterns and battery candles along a table and garden steps.

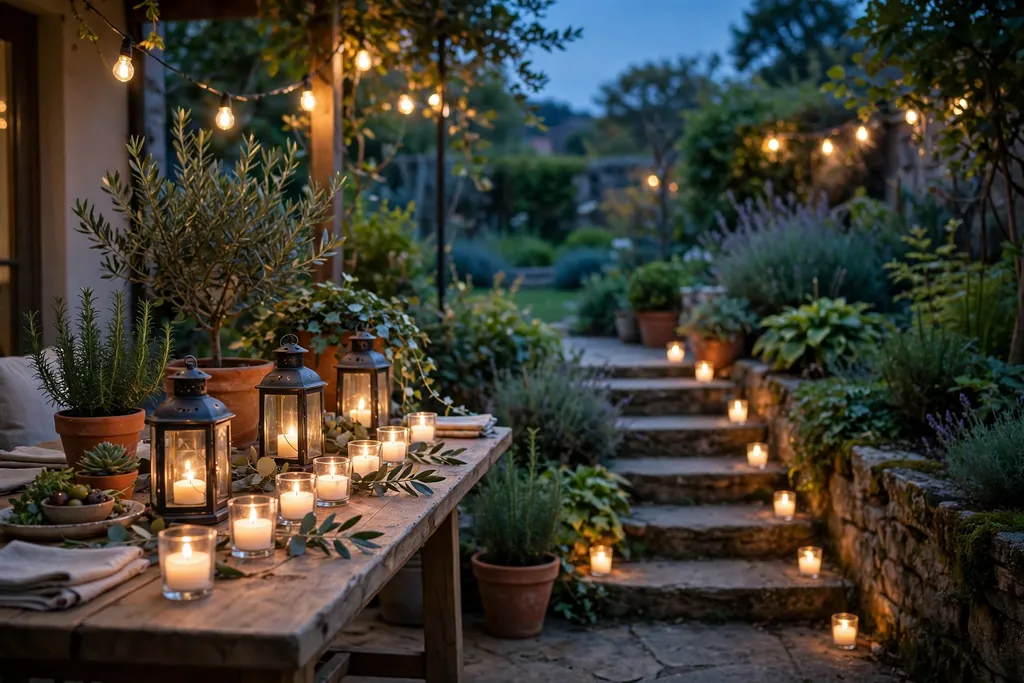
    Set lanterns with battery candles along a patio table, on steps, and beside a garden path, so an outdoor part of the party feels lit and safe after dark. Lanterns give steady, sheltered light, and they lift off the table in one move when serving needs the full surface.

    Place lanterns where they will not block a walkway or an elbow, and use battery candles inside closed or narrow lanterns, since a real flame needs air and a safe holder. Wipe lantern glass before the party, since fingerprints show more on glass than on wood, and bring paper or fabric decor inside if rain is forecast.

    17. Toast Station with Glasses and a Small Sign

    Toast station on a sideboard with glasses ready and a small sign.

    Set a toast station on a sideboard or a tray, with glasses ready, a small sign marking the toast time, and a chilled bottle or jug nearby. The station tells guests where to gather for the toast, and it keeps glasses in one place rather than scattered across rooms before the moment arrives.

    Keep the station near the main gathering room but clear of the buffet flow, so guests can reach it without crossing servers. Use sturdy glasses if children will be near the station, and keep the sign short, such as “Toast at eight.” Clear the station after the toast, so the sideboard can serve dessert or coffee.

    18. Clear Confetti Balloon Bunch on a Sideboard

    Clear confetti balloons in gold and blush anchored in a heavy vase on a sideboard.

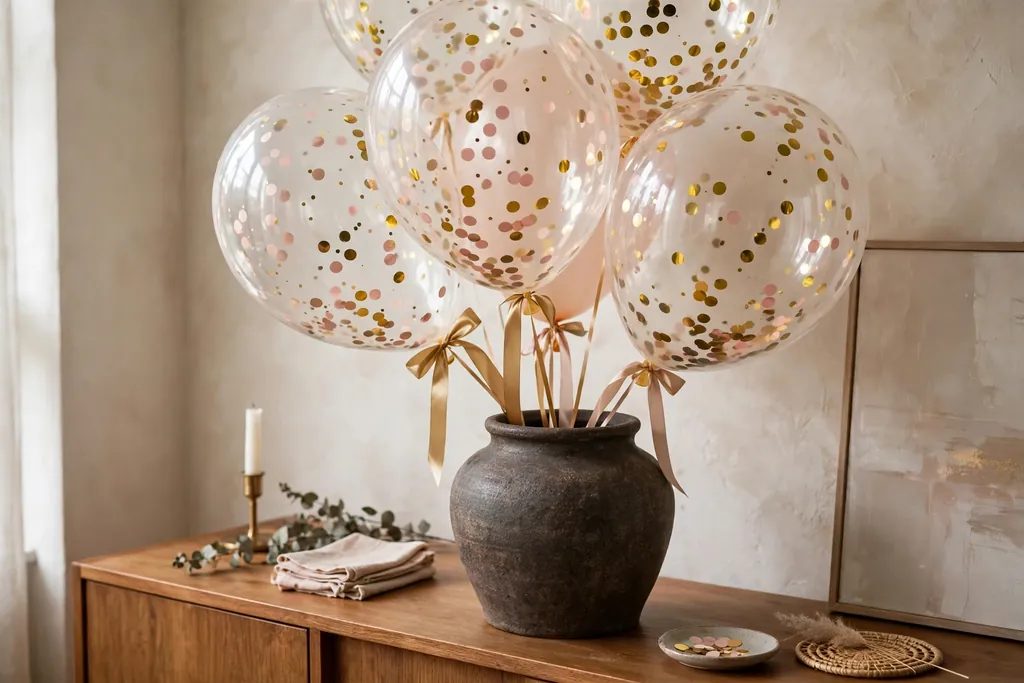
    Tie three to five clear balloons filled with gold and blush confetti to a ribbon bunch, and anchor the ribbons inside a heavy vase or a small weighted box on a sideboard. The balloons rise above the furniture without blocking sightlines at seated eye level, since the anchor sits low and the balloons float well above heads.

    Choose a vase heavy enough that the balloons cannot pull it over, and keep the bunch clear of ceiling fans, light fixtures, and open flames. Trim ribbons to different lengths, so the balloons sit at slightly different heights. For a table with young children, use the bunch on a sideboard instead of the dining table, where it cannot be pulled down during the meal.

    19. Engaged Banner Across a Wall or Mantel

    Engaged banner in gold letters across a living room wall above a mantel.

    Hang a banner reading “Engaged” or “She Said Yes” across a wall, a mantel, or a doorway in the main party room, in letters that match the palette. A banner names the occasion in one glance, and it gives the photo corner and the table a shared focal point.

    Hang the banner at a height where it shows in photos but does not block a doorway or a light fixture, and secure both ends so it does not slip during the evening. Use one banner only in the main room, so the message stays clear, and keep other wall decor simple nearby. Store the banner flat after the party if the couple wants to reuse it.

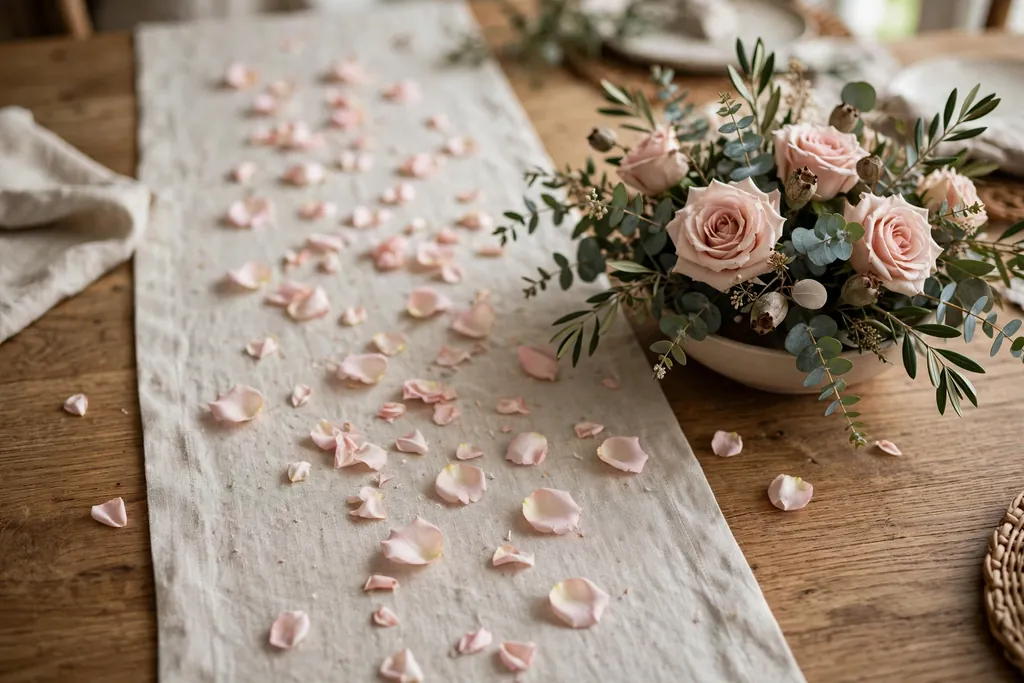
    20. Rose Petal Scatter Along a Runner

    Dining table runner scattered lightly with blush rose petals beside a low centerpiece.

    Scatter fresh or faux rose petals lightly along a plain runner, leaving the ends clear for serving dishes, so the table gains soft color without height. The petal scatter suits a blush and cream palette, and it pairs well with a low flower centerpiece and candlelight.

    Scatter petals sparingly, about a small handful per place setting length, so they do not end up in food or glasses. Use faux petals if the table will be set hours ahead, since fresh petals can wilt and mark light linen. After the meal, gather the runner and shake it outside to collect the petals in one move.

    21. Keepsake Favor Table by the Door

    Small favor table by a front door with identical keepsakes and a thank you sign.

    Set a small favor table by the door, with one small keepsake per guest, such as a candle, a packet of seeds, or a small box of treats, plus a short thank you sign. Guests pick up a favor as they leave, so the party ends with a clear goodbye moment, and the table keeps favors out of the dining area during the meal.

    Keep the favors small and identical, so no guest needs to choose, and place the table where guests pass on the way out but not where it blocks the entry path. Label the favors only if a label is needed, such as an ingredient note, and keep the sign short. Pack any favors left at the end of the night for the couple to keep or send on.

    Conclusion

    An engagement party at home comes together when one palette runs through the rooms, the table stays low and open, and one or two personal touches mark the occasion. Pick the ideas that fit your rooms and your guest list, set them up in full before guests arrive, and leave the rest of the evening for conversation, toasts, and photos. Save this guide to plan your own celebration, and start with the entry, the table, and one photo display, since those three spots shape how the whole party feels.

    FAQs

    How do you decorate for an engagement party at home?

    Start with one palette, such as blush, cream, and gold, then add a welcome sign, a low table centerpiece, string lights, and one photo display. Keep the centerpiece low, leave room for serving dishes, and repeat the palette in at least two rooms, so the whole home feels like one party rather than separate decorated spots.

    What colors work best for engagement party decor?

    Blush, cream, and gold work well for an engagement party at home, since they suit flowers, candlelight, and linen, and they photograph softly in evening light. White and greenery suit a calm, fresh look, while deep green and gold suit an evening party. Pick one main palette, and repeat each color at least twice.

    How many decorations do you need for a small engagement party?

    A small engagement party needs a welcome sign, one table centerpiece, string lights or candles, a photo display, and a drink station, since those five spots cover arrival, dining, light, and conversation. Add a favor table or a message station only if you have room, and skip decor in rooms guests will not use.

    How do you keep an engagement party table low enough to talk across?

    Use a centerpiece that stays below eye level when guests are seated, such as a low flower bowl, a greenery runner, or a candle tray, and keep tall items, such as balloon bunches and banners, on sideboards or walls instead. Test the table by sitting at it before guests arrive, and move anything that blocks a face across the table.

    Can you decorate for an engagement party without buying a full new set?

    Yes, you can decorate with pieces you already own, such as everyday plates, plain glasses, cloth napkins, a plain runner, and candle holders, plus one or two new layers, such as a balloon bunch or a banner. Paper garlands, message cards, and a photo string display cost little, and they carry most of the party theme without new tableware.

    How far ahead should you set up engagement party decor?

    Set up balloons, banners, garlands, and the photo display the day before or the morning of the party, and set the table a few hours ahead, so fresh flowers and petals stay fresh. Light candles and place favors last, just before guests arrive, and keep a small box of spare clips, tape, and candles nearby for quick fixes.


  • 19 Basket Decorating Ideas for Storage and Seasonal Displays

    19 Basket Decorating Ideas for Storage and Seasonal Displays

    Decorating a basket starts with a basket that fits the spot, one clear decoration such as a liner, ribbon, paint, or wrap, and contents that stay tidy. Match the basket size to what it will hold, keep the decoration simple enough to clean or swap, and let one seasonal fill carry the look.

    Start with the basket you already own, and check it first: a sturdy base, handles that hold weight, and a weave that will not snag fabric or scratch a table. Add one decoration at a time, then fill the basket and step back to check the size, color, and height in the room. For a table version of a seasonal basket, see the fall table decor guide, and for the same grouping rule applied to closed storage, browse the craft storage cabinet guide.

    Key Takeaways

    • Pick the basket for the job first: size, handle strength, and base shape matter more than the decoration.
    • Add one clear decoration, such as a liner, ribbon, paint, or wrap, and keep the rest plain.
    • Keep storage baskets easy to clean: use removable liners and washable fills where the basket will be handled often.
    • Swap only the fill for a new season, so one decorated basket can serve all year.
    • Keep display baskets low and stable, and keep flames, water, and heavy items clear of dried fills.
    • Label storage baskets in plain words, so everyone in the house puts things back in the right place.

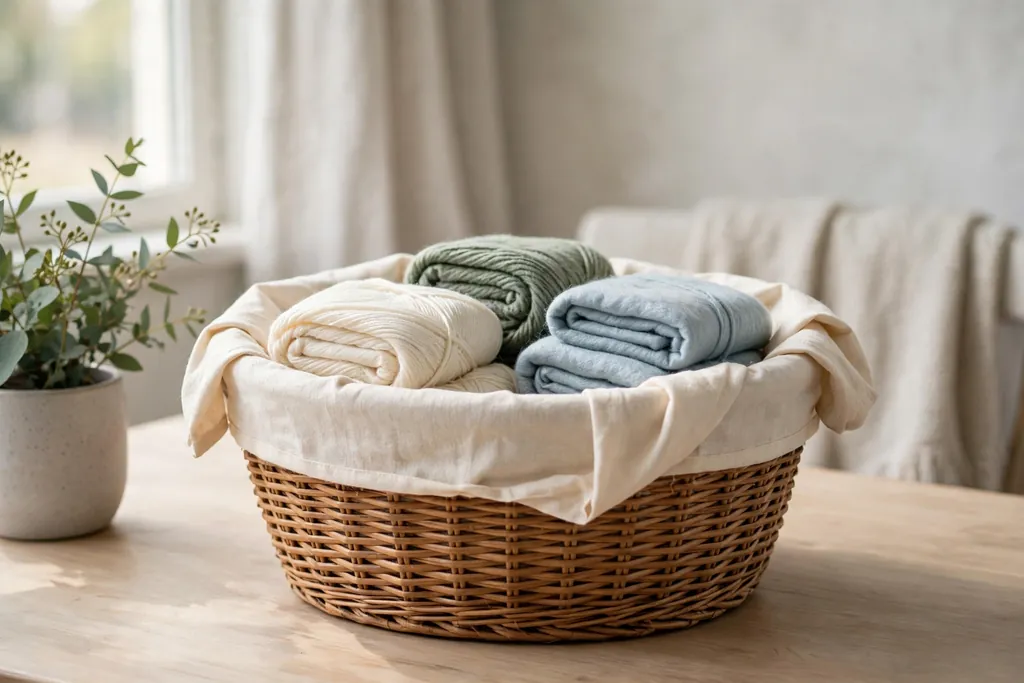
    1. Fabric Liner Basket

    Woven basket with a cream fabric liner folded over the rim, holding folded yarn.

    Line a plain woven basket with a fabric liner, cut to fit the inside, with the top edge folded over the rim and stitched or pinned in place. The liner hides a worn interior, protects soft contents such as yarn or baby clothes, and gives a plain basket a finished look with no paint or glue. Choose a washable cotton fabric in a solid color or a simple stripe that suits the room.

    Measure the basket before cutting, and leave extra fabric at the top for the fold, since a liner that pulls tight will slip inside when the basket is lifted. Wash the fabric first if it may shrink, and make a second liner in a different color, so you can swap the look while one liner is in the wash. For a basket that holds heavier items, stitch the liner to a stiff base board cut to the basket floor.

    2. Ribbon Wrapped Handle Basket

    Woven basket with wide rust ribbon wrapped around its handles and a small bow.

    Wrap wide ribbon around each basket handle, winding it evenly from one end to the other, and finish with a simple bow at the base of each handle. The ribbon adds color and a soft grip, suits a gift basket or a basket carried to a gathering, and comes off easily when the season changes. Choose grosgrain ribbon for a grip that stays put, and a color that matches the basket fill.

    Wind the ribbon with a slight overlap, so no bare handle shows through, and secure the ends with a small stitch or a dot of craft glue on the underside. Keep the bow small and flat, so it does not catch on a door frame or a table edge. For a basket that will be carried often, wrap the handles again over the first layer after a few weeks, since ribbon can loosen with use.

    3. Painted Two Tone Basket

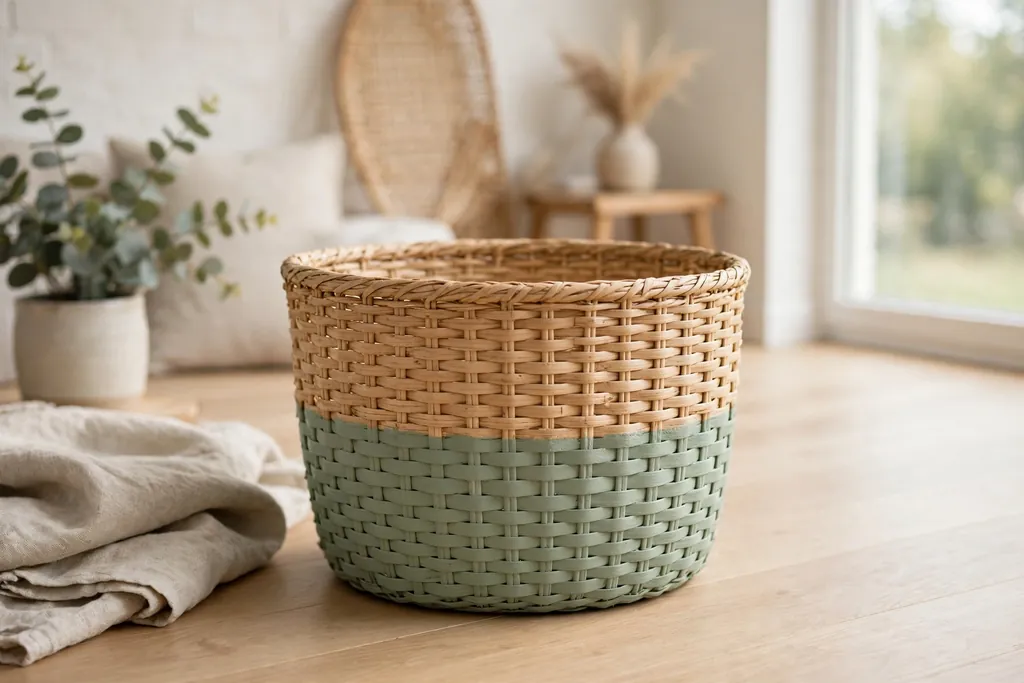
    Woven basket with a painted sage green lower half and a natural upper half on a wood floor.

    Paint the lower half of a woven basket in one solid color and leave the upper half natural, with a clean line where the two meet. The painted base grounds the basket, hides scuffs near the floor, and gives a plain basket a clear, modern look that suits a living room or bedroom. Use paint made for the basket material, and test it on the base first.

    Tape the line before painting, and paint in thin coats, so the weave still shows through and the basket stays flexible. Let each coat dry fully before adding the next, and seal the painted area if the basket will sit on a floor that gets mopped. For a softer look, paint only the rim band or one wide stripe near the base, and keep the rest of the basket natural.

    4. Stenciled Pattern Basket

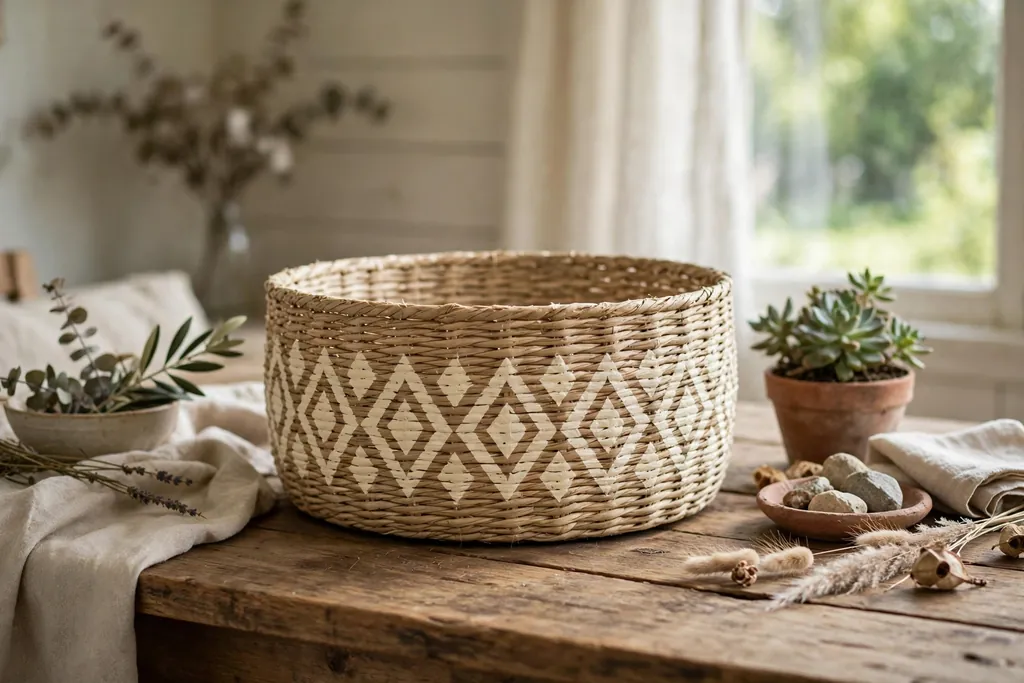
    Plain basket with a stenciled diamond pattern around the outside in cream paint.

    Stencil a simple repeated pattern, such as dots, diamonds, or small leaves, around the outside of a plain basket, using a stencil and a small brush. The pattern gives a plain basket a custom look, suits a basket that will sit in plain sight, and lets you match a room color with one paint shade. Keep the pattern small and evenly spaced, so it reads as a border rather than a busy print.

    Hold the stencil flat against the weave and dab the paint lightly, since a loaded brush will bleed under the stencil edge. Practice on the back of the basket first, and wipe the stencil clean between repeats, so later repeats stay sharp. For a basket used by children, use a large, simple shape, such as stars, and keep the pattern to one band near the rim.

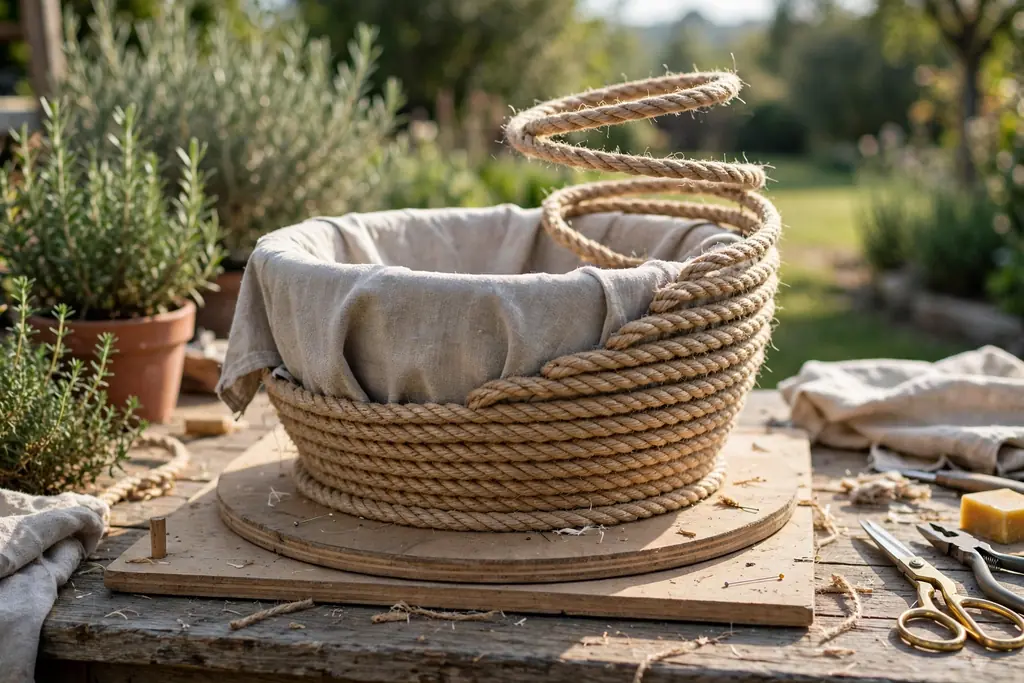
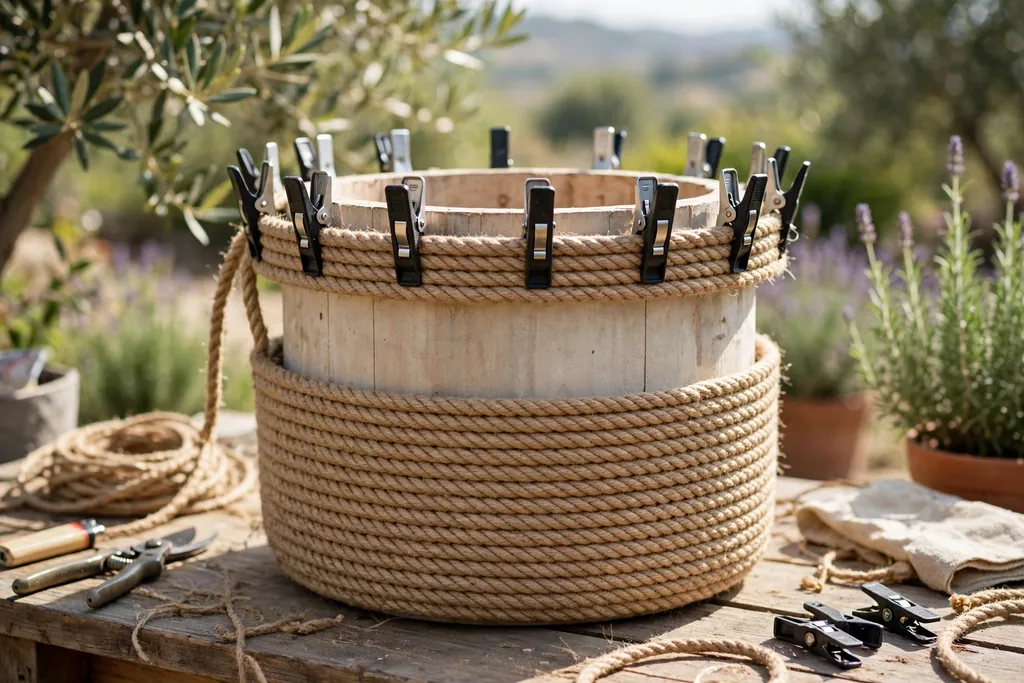
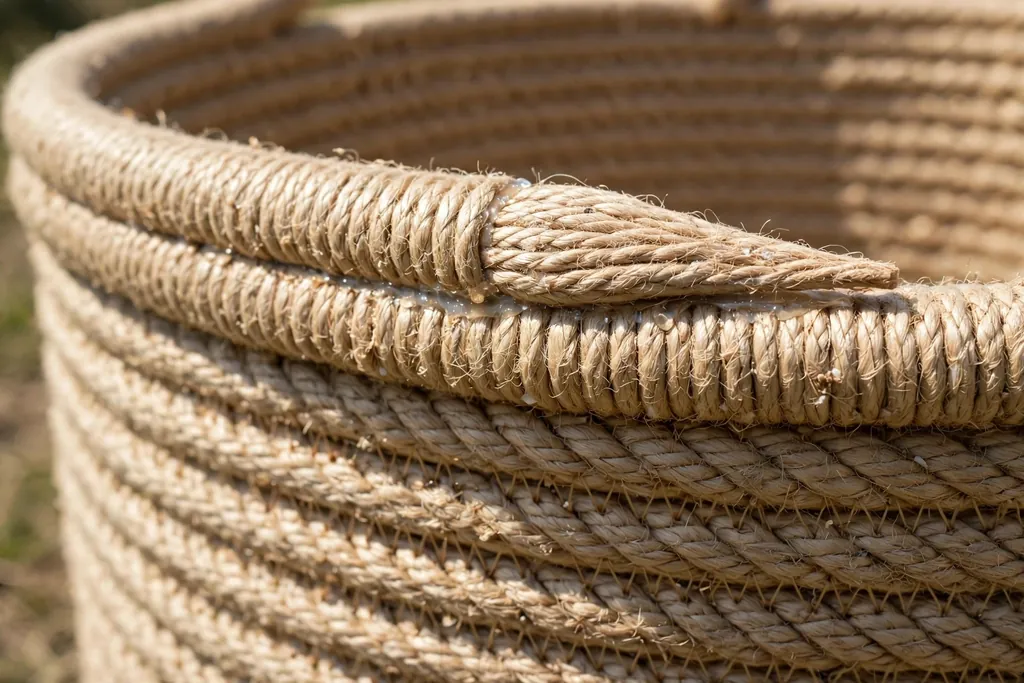
    5. Rope Wrapped Basket

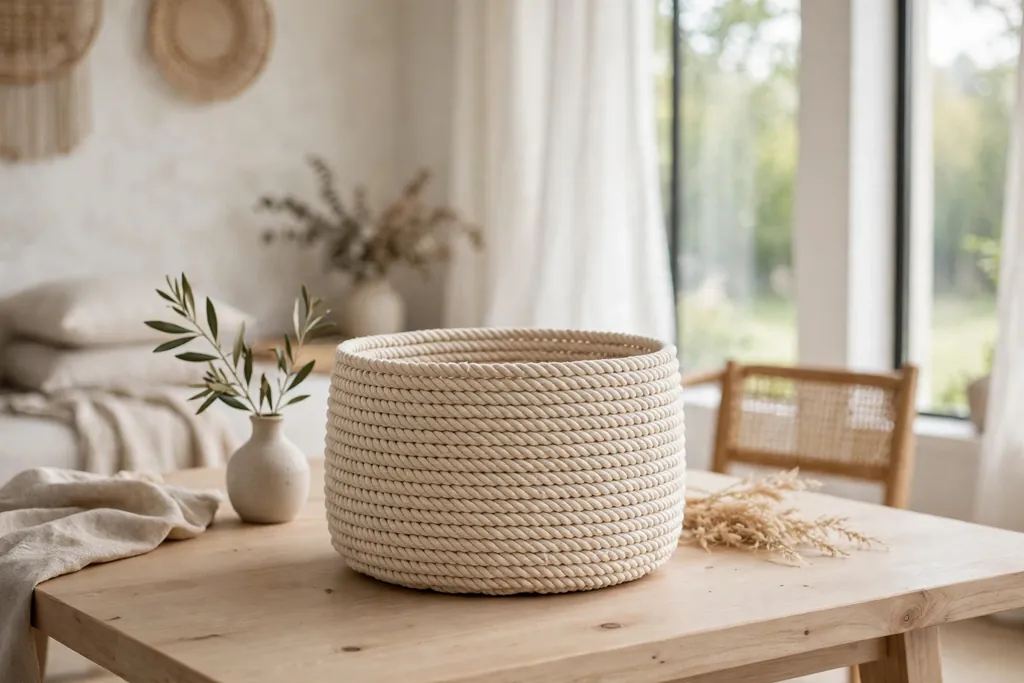
    Basket fully wrapped in natural cotton rope, sitting on a light wood table.

    Wrap thick cotton rope around a plain basket from the base upward, gluing each row snugly against the last, until the whole outside is covered. The rope gives a smooth, coastal look, hides a stained or mismatched basket, and adds grip when the basket is carried. Use rope in a natural color for a calm look, or dyed rope for a stronger color note in the room.

    Start at the base and work upward in even rows, pressing each row tight so no gaps show the old basket beneath. Trim the rope end flush at the rim and tuck it inside, so it does not fray. For a large basket, wrap only the lower two thirds and leave the top weave showing, which saves rope and keeps the basket lighter.

    6. Yarn Wrapped Basket

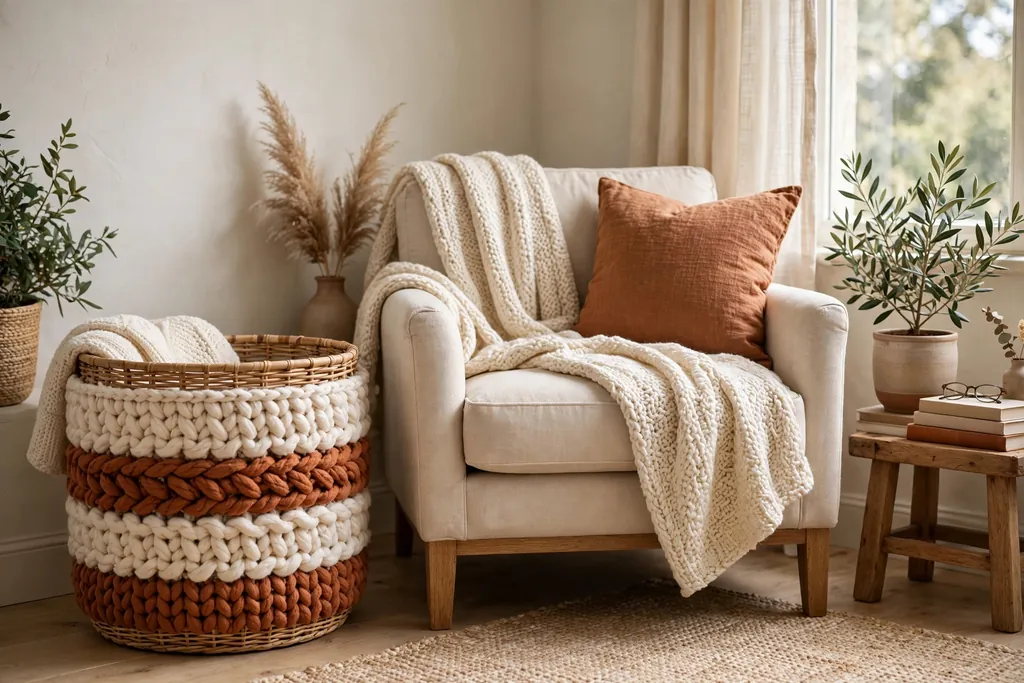
    Basket wrapped in chunky cream and rust yarn bands beside a reading chair.

    Wrap chunky yarn around a basket in horizontal bands, changing color at each band, to give a soft, knitted look that suits a bedroom or a reading corner. The yarn softens a stiff basket, adds warmth beside a chair or bed, and lets you use leftover yarn in colors that already appear in the room. Choose a thick yarn that covers the weave in one or two passes.

    Wind the yarn firmly and keep the tension even, so bands do not sag or bunch. Secure each color change on the inside of the basket, where the knot will not show. For a basket that will hold heavy items, wrap the yarn over a sturdy basket and keep the handles clear, since yarn over a handle can slip when the basket is lifted.

    7. Greenery and Dried Flower Rim Basket

    Woven basket with faux greenery and dried flowers tucked around its rim on a console table.

    Tuck short stems of faux greenery and dried flowers around the rim of a basket, fixing them in place with wire or by weaving them through the top rows. The rim fill turns a plain storage basket into a display piece, suits an entryway or a mantel, and needs no water or upkeep. Use stems in one color family, such as cream, sage, and pale gold, for a calm look.

    Trim stems short, so they sit close to the rim and do not tip the basket or brush a wall. Fix each stem at two points, so it stays put when the basket is moved. For a basket that will also hold items, keep the rim fill to one side only, so the opening stays clear for reaching inside.

    8. Fall Harvest Basket

    Wide shallow basket filled with small pumpkins, gourds, and pinecones on a porch step.

    Fill a wide, shallow basket with small pumpkins, gourds, pinecones, and a few dried leaves, and set it on a porch step, a hearth, or a console table. The harvest fill gives a clear fall display, uses items that store well, and can move from the porch to the table for a gathering. Vary the pumpkin sizes, with one larger pumpkin in the middle and smaller ones at the sides.

    Set the heaviest items at the bottom and the lightest leaves on top, so the basket stays stable. Keep dried leaves clear of real flames, and use battery candles if you add candlelight beside the basket. At the end of the season, keep the basket and swap only the fill, so the same basket can carry a winter or spring display next.

    9. Christmas Basket Display

    Sturdy basket with pinecones, evergreen sprigs, and gold ornaments beside a fireplace.

    Fill a sturdy basket with pinecones, faux evergreen sprigs, and a few plain ornaments in one metal finish, such as gold or silver, and set it beside a door, a fireplace, or a staircase. The basket display gives a holiday note without a tree, suits a small room or an entryway, and packs away in one piece after the season. Keep the tallest sprigs at the back and the ornaments low, so the group stays balanced.

    Use shatterproof ornaments near a doorway or a floor basket, since a basket at floor level can be bumped. If you add fairy lights, use battery lights with a timer, and keep the battery pack where you can reach it without lifting the whole display. For a basket that will also hold gifts, keep the display fill to a shallow top layer, so gifts can sit beneath it.

    10. Spring Flower Basket

    Light basket filled with pink faux tulips and green leaves on a bright windowsill.

    Fill a light basket with faux tulips, daffodils, or cherry blossom stems, plus a few green leaves, and set it on a table, a windowsill, or a porch bench. The flower fill gives a clear spring display, needs no watering, and can be refreshed by swapping one stem color at a time. Choose stems in one main color, such as pink or yellow, with white as a second color.

    Cut stems to two heights, so the group has shape without blocking a window or a conversation across the table. Fix the stems in a block of floral foam inside the basket, so they stay upright when the basket is moved. For a real flower version, set a watertight container inside the basket first, and check the water level daily, since a woven basket will mark if it gets wet.

    11. Summer Beach Basket

    Natural basket with shells, driftwood, and a folded striped towel in a sunroom.

    Fill a natural basket with shells, a small piece of driftwood, and a folded striped towel, and set it in a bathroom, a sunroom, or an entryway. The beach fill gives a summer note, suits a coastal or relaxed room, and can hold real beach items, such as sunscreen and a book, during the season. Keep the shells large enough to handle easily, and rinse gathered shells before bringing them inside.
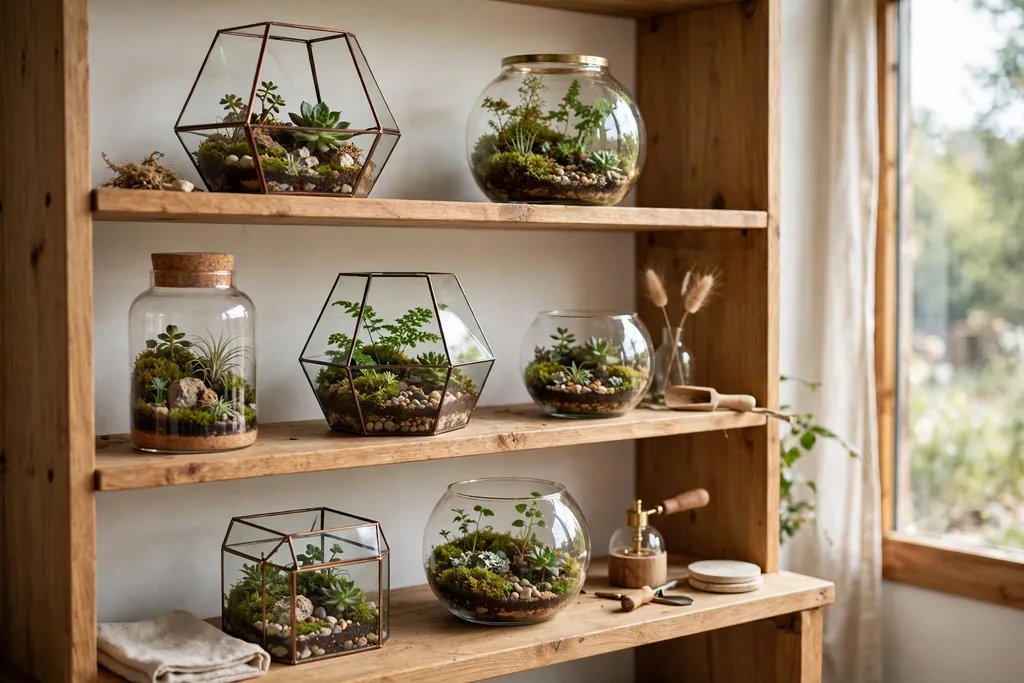
    Set the towel at the back as a backdrop, and group the shells in one small cluster rather than scattering them, so the basket still looks tidy. For a basket used at the beach, skip fragile shells and use the basket for towels and dry clothes only. At the end of summer, wash the basket and store the shells in a small box, so the basket is ready for a fall fill.

    12. Blanket Basket by the Sofa

    Large deep basket beside a sofa holding rolled throws with tops folded over the rim.

    Set a large, deep basket beside the sofa, roll two or three throws inside, and fold the top of each throw over the rim. The blanket basket keeps throws in reach for evenings on the sofa, hides folded blankets in plain sight, and suits a living room better than a pile on a chair. Choose a basket tall enough that the throws stand upright without tipping.

    Roll throws rather than folding them flat, since rolled throws take less room and are easier to pull out one at a time. Wash throws on a regular cycle, since a basket beside a sofa collects dust. For a small living room, use a narrow basket with one throw and a small cushion, so the basket does not crowd the walkway.

    13. Rolled Towel Basket in the Bathroom

    Medium basket on a bathroom stool holding rolled white hand towels standing upright.

    Set a medium basket on a bathroom counter or a stool, roll hand towels and washcloths inside, and stand the rolls upright with the folded ends facing out. The towel basket keeps fresh towels in reach, suits a guest bathroom, and looks tidy with no extra shelving. Choose a basket that fits the counter or stool, and leave room for one spare roll.

    Roll towels tightly, so they stand on their own and do not unroll when one is pulled out. Keep the basket away from direct shower spray, and wash the liner, if you use one, with the towels. For a small bathroom, use a wall basket or a hanging basket with one rolled towel, so the counter stays clear.

    14. Toy and Book Basket for Children

    Low wide basket in a play corner holding upright board books and soft toys with a plain label.

    Set a low, wide basket in a play corner or a bedroom, fill it with board books standing upright and a few soft toys on top, and add a simple label on the front. The low basket lets children reach books and toys on their own and put them back, and it keeps a play area tidy with one container. Choose a basket with no sharp edges and a base that will not tip when a child pulls a book out.

    Keep the basket light, with books at the bottom and soft toys on top, so it stays stable. Sort the contents weekly, and move outgrown books or broken toys, since a full basket soon becomes a mixed bin. For a shared room, use one basket per child, each with a different label color, so sorting stays simple.

    15. Pantry Basket with Labels

    Row of matching baskets on a pantry shelf with plain labels for snacks and baking supplies.

    Line a row of matching baskets on a pantry shelf, one per group, such as snacks, baking supplies, or tea and coffee, and fix a plain label to the front of each basket. The labeled baskets keep pantry shelves tidy, let you pull out one whole group at a time, and suit a kitchen with open shelves. Use baskets that fit the shelf depth, with handles that clear the shelf edge.

    Label each basket in plain words, such as snacks or baking, and keep the label facing out. Put daily items at hand level and backup stock higher or lower, so the most used basket is the easiest to reach. Wipe baskets clean when a spill happens, and check labels each season, since pantry groups change as cooking habits change.

    16. Plant Basket Cover

    Leafy potted plant in a woven basket cover on a wood floor beside a window.

    Set a potted plant, still in its nursery pot, inside a woven basket, so the basket acts as a cover that hides the plastic pot. The basket cover gives a plant a finished look, suits a floor plant or a table plant, and lets you move the plant for watering without a heavy ceramic pot. Choose a basket slightly wider than the pot, so air can move around it.

    Set a saucer or a watertight tray inside the basket first, and lift the plant out to water it, so the basket stays dry. Check the basket base each month for damp marks, and let it dry fully if it gets wet. For a hanging plant, use a basket with a strong handle and a light pot, and hang it from a hook rated for the full weight when watered.
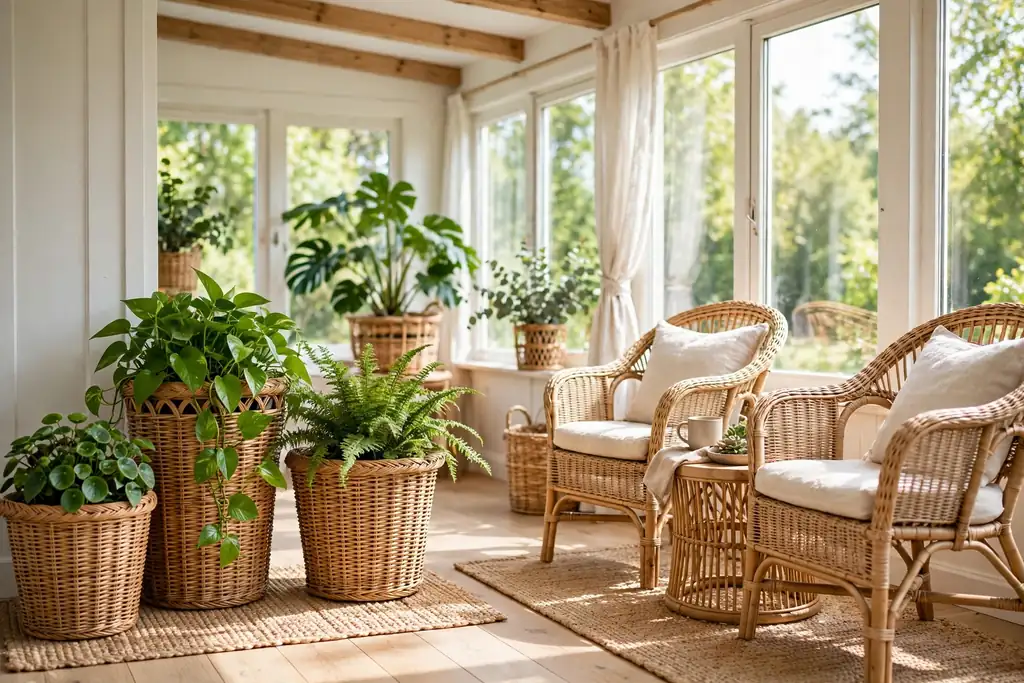
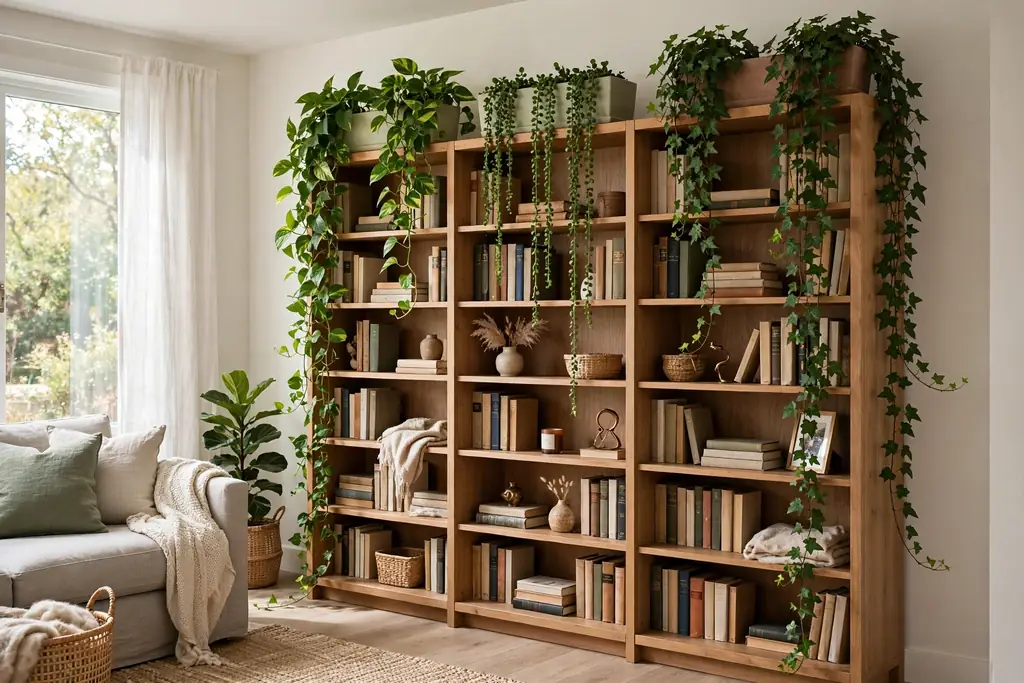
    17. Gift Basket Arrangement

    Gift basket lined with tissue paper holding tea items, a small jar, and greenery sprigs.

    Build a gift basket by lining a basket with tissue paper, setting the tallest gift at the back, and filling gaps with smaller gifts and a few sprigs of greenery or a ribbon curl. The arrangement looks finished as a gift, suits a hostess gift, a birthday, or a housewarming, and lets the basket itself stay as part of the gift. Choose gifts in one theme, such as tea, baking, or bath items, so the basket reads as one gift rather than a mixed box.

    Wrap fragile items first, and set heavy items at the bottom, so nothing crushes a lighter gift. Finish with a clear wrap only if the basket will travel, and tie the wrap with a ribbon at the top. For a gift that will be opened at once, skip the wrap and set a card on top, so the gifts show clearly.

    18. Table Centerpiece Basket

    Low wide basket centerpiece on a dining table with candles in holders and small stem vases.

    Set a low, wide basket in the center of a dining table, and fill it with a short candle group in holders, a few small vases with single stems, or a bowl of fruit. The centerpiece basket keeps the group contained, lifts off in one move when the table needs to clear, and suits both everyday meals and gatherings. Keep the whole group low, so guests can see across the table.

    Use battery candles if the basket holds dried stems or paper, and keep real flames in holders, clear of the basket weave. For a fruit centerpiece, line the basket first, and check the fruit every few days, moving any soft piece to the kitchen. For a small table, use a single small basket with one candle and one stem, rather than a large group.

    19. Wall Hung Basket Display

    Three flat-backed baskets hung on a wall in a triangle, each with one dried stem.

    Hang two or three flat-backed baskets on a wall in a row or a triangle, and leave them empty or fill each one with a single dried stem or a small faux plant. The wall display turns baskets into wall art, suits a hallway, a stairwell, or a dining room wall, and uses wall space that a floor basket cannot. Choose baskets in the same material but different sizes, so the group looks planned.

    Fix each basket with a hook rated for its weight, and test the hang by pressing gently before filling it. Keep the group clear of door swings and high traffic, where a hanging basket could be bumped. For a rented home, use removable hooks and light baskets, so the wall stays undamaged when the display comes down.

    Conclusion

    A decorated basket works best when the basket fits the job, the decoration stays simple, and the fill can change with the season. Start with one idea from this list that fits a basket you already own, such as a liner, a ribbon wrap, or a seasonal fill, and use the basket for a week before adding another layer. Storage baskets stay useful when they are labeled, easy to clean, and sized for the shelf or the spot beside a chair. Display baskets stay fresh when only the fill changes, so one good basket can carry a harvest display in fall, a holiday display in winter, and flowers in spring. Try one basket first, keep what works, and change only one detail at a time until the basket feels like part of the room.

    Frequently Asked Questions

    What is the easiest way to start decorating a basket?

    The easiest way to start decorating a basket is to add a fabric liner, since a liner hides a worn interior, protects soft contents, and can be removed for washing. Measure the basket first, cut the fabric with extra at the top for a fold over the rim, and make a second liner in another color for an easy change.

    How do I keep a decorated basket useful for storage?

    A decorated basket stays useful for storage when the decoration is removable or washable, the basket size matches its contents, and the basket is labeled in plain words. Use a liner for soft items, keep handles clear for carrying, and avoid decorations that shed, snag, or block the opening.

    What should I put in a basket for a seasonal display?

    A seasonal basket should hold one clear fill, such as small pumpkins and pinecones for fall, evergreen sprigs and ornaments for Christmas, or faux tulips for spring. Keep the tallest items at the back, the heaviest items at the bottom, and the whole group low and stable, so the basket can move without tipping.

    Can I use a basket as a plant cover?

    Yes, you can use a basket as a plant cover by setting the potted plant, still in its nursery pot, inside a basket slightly wider than the pot. Set a saucer or a watertight tray inside first, lift the plant out to water it, and check the basket base for damp marks, so the weave stays dry.

    How do I decorate a basket without paint or glue?

    You can decorate a basket without paint or glue by adding a fabric liner, wrapping ribbon around the handles, tucking faux greenery around the rim, or changing the fill for the season. These methods come off easily, leave the basket undamaged, and let one basket serve both storage and display.

    How do I hang baskets on a wall safely?

    Hang baskets on a wall safely by choosing flat-backed, light baskets, fixing each one with a hook rated for its full weight, and testing the hang with a gentle press before adding any fill. Keep the group clear of door swings and high traffic, and use removable hooks in a rented home, so the wall stays undamaged.


  • How to Make a DIY Rope Basket for Stylish Home Storage

    How to Make a DIY Rope Basket for Stylish Home Storage

    To make a DIY rope basket, coil cotton rope in a flat spiral for the base, then coil upward to form the walls, joining each row with glue or stitches as you go. Add handles, trim the end, and let the basket dry before use. The process takes a few hours and needs only rope, glue or thread, and scissors.

    A coiled rope basket is a practical first rope project because the method stays the same from start to finish: each new row sits beside the last one and is fixed in place before you move on. That repetition makes it easy to control the size and shape as you work, and it leaves room to change direction, add a color accent, or stop at any height that suits the spot. This guide walks through the process in order, from planning the size to finishing the rim and handles, so the basket holds its shape and stands up to daily use.

    Key Takeaways

    • Decide the basket size and job first, since the base width and wall height follow from what the basket will hold.
    • Use soft cotton rope that coils easily, and test a short coil before you commit to a full basket.
    • Join each row as you go with glue or stitches, rather than coiling first and fixing later, so rows stay tight and even.
    • Build the walls slowly, checking the shape from the side often, so the basket rises straight instead of leaning or flaring.
    • Finish the rim and handles with care, since the top edge and handles take the most strain in daily use.
    • Let glue dry fully before you load the basket, and spot clean it rather than soaking it.

    Supplies You May Need

    • Cotton rope, soft and flexible, in one main color
    • A smaller amount of rope in a second color, if you want accent rows
    • A hot glue gun and glue sticks, or a large needle and strong thread for stitching rows together
    • Sharp scissors or a craft knife for cutting rope cleanly
    • A bowl, bucket, or pot to use as a mold for shaping the basket
    • Cling film or a plastic bag to cover the mold so glue does not stick to it
    • Clips, clothespins, or binder clips to hold rows in place while glue sets
    • A tape measure or ruler for checking base width and wall height
    • A fabric remnant and a needle and thread, if you plan to add a liner
    • A lighter or matches for sealing cut rope ends, used with care and kept away from the glue gun

    1. Decide the Size, Shape, and Job

    Tape measure and notebook with basket size notes beside a shelf space.

    Start by deciding what the basket will hold, since that choice sets the base width and wall height. A small basket for keys, remotes, or craft tools needs a base of about six to eight inches and low walls, while a basket for blankets or toys needs a base of ten to twelve inches and taller walls. Measure the shelf, table, or floor spot where the basket will sit, and note the largest width and height that fit without blocking a drawer or door.

    Choose a shape that suits the spot and your skill level. A round basket is the simplest first shape, because the coil turns evenly and the walls rise in a steady circle. An oval basket works well on a narrow shelf, but it needs more care to keep both sides even. Write down the target base width and wall height before you buy rope, so you can judge how much rope the project needs and stop coiling at the right point rather than guessing as you go.

    2. Gather Rope and Supplies

    Coils of natural cotton rope and accent rope with scissors and a glue gun on a table.

    Choose soft cotton rope that bends into a tight coil without springing back or cracking. Rope around one quarter to three eighths of an inch thick suits most home baskets: thinner rope gives a finer look but takes more rows, while thicker rope builds height fast and gives a chunkier result. Check the rope by coiling a short length in your hand; it should lie flat against itself without gaps and hold a curve without kinking.

    Set out all supplies before you start, so you do not pause mid coil with glue cooling or rows slipping. You need the rope, glue gun or needle and thread, scissors, clips, and the mold you plan to use, plus a clear work surface large enough to turn the basket as it grows. If you plan accent rows, keep the second color rope beside the main rope and decide now where the accents will fall, such as two rows near the rim or a band partway up the wall.

    3. Choose a Mold and Protect Your Work Surface

    Bowl covered in cling film as a mold for a rope basket on a work table.

    A mold helps a first basket keep a steady shape, especially while the walls rise. Find a bowl, bucket, or pot close to the base width you planned, with sides that slope gently outward or run straight, so the finished basket slides off easily. A mold with a narrow neck or a sharp inward curve will trap the basket, so test the fit by picturing the basket lifting straight up off the mold.

    Cover the mold with cling film or a plastic bag, smoothing it over the outside so glue cannot bond the rope to the mold. Protect your table with an old cloth or cardboard, since hot glue drops and loose fibers land on the surface as you work. Set the mold upside down on the table if you plan to coil the base on its flat bottom, or right side up if you prefer to coil the base flat on the table and use the mold only for shaping the walls.

    4. Start the Coil for the Base

    Hands starting a tight flat spiral coil of cotton rope on a table.

    Begin the base with a tight flat spiral, since a neat center gives the whole basket a steady start. Fold the rope end back on itself for about two inches and glue or stitch the fold in place, so the raw end sits hidden inside the coil rather than sticking out. Then wind the rope around that folded end, pressing each new loop flat against the last one and fixing it with a dot of glue or a few stitches at regular points around the circle.

    Work slowly for the first few rounds, since gaps or overlaps at the center show in the finished base and tilt the rows that follow. Keep the coil flat on the table, pressing it down lightly after each round, and check from above that the spiral stays round. If a gap opens, pull the row back, add a little more glue or an extra stitch, and press the rows together before moving on. A firm, flat start makes every later step easier.

    5. Coil the Base to Full Width

    Flat round coiled rope base measured with a tape measure.

    Keep coiling outward, row by row, until the flat base reaches the width you planned in step 1. Measure across the base after every few rows, since it is easy to coil past the target while focused on keeping rows tight. Fix each row to the last one as you go, with glue dots spaced a few inches apart or stitches at matching intervals, and clip each new row in place for a moment when the glue sets.

    Keep the tension even as you coil: rope pulled too tight curls the base upward at the edges, while rope left too loose leaves gaps between rows. If the base starts to cup, ease the tension on the next rows and press the coil flat; if gaps appear, press the rows together and add an extra fixing point. Stop when the base measures the planned width, and mark that point in your mind, since the next step changes the direction of the coil.

    6. Turn the Coil Up to Form the Walls

    Rope coil turning upward from the base to form the first wall rows on a mold.

    To form the walls, start stacking each new row on top of the last row instead of beside it, so the coil rises instead of spreading. Place the next row on the outer edge of the base, angle it slightly upward, and fix it to the row below with glue or stitches. The first wall row sets the angle for the rest, so take time with it: a row that leans outward makes a flared basket, while a row stacked straight up makes a tall, straight sided basket.

    If you use a mold, slide the base over the mold now, with the base sitting on the mold bottom and the wall rows rising against the mold sides. The mold guides the angle and stops the walls from leaning as they grow. Keep the coil snug against the mold, but not so tight that the finished basket cannot slide off. Check the first two wall rows from the side before you continue, and adjust the angle while the glue is still easy to correct.

    7. Keep Rows Tight and Even as You Build Height

    Half built rope basket with even wall rows and clips holding the latest row.

    Continue coiling upward, row by row, until the walls reach the height you planned. Fix each row to the one below it at regular points, and check the height at several spots around the basket after every few rows, since one side often grows faster than the other when you favor one hand. Turn the basket as you work, so you always fix the row in front of you and can see the shape from the side.

    Watch for two common faults as the walls grow. If rows drift apart, press them together and add extra glue or stitches at the gap before the next row covers it. If the wall starts to lean, ease the coil back toward the mold and hold it with clips until the glue sets. Work in short stretches rather than rushing the full height at once, and pause to compare the basket with your planned height, so you stop at the right row rather than coiling past it.

    8. Add a Color Accent or Wrapped Row

    Rope basket wall with an accent color row partway up the side.

    An accent row adds interest without changing the method, and the simplest place for one is near the rim or as a band partway up the wall. To add an accent, cut the main rope, seal the cut end, and join the accent rope with glue or a few stitches, hiding the join on the inside of the wall where it will not show. Coil the accent rope for one or two rows, fixing it like every other row, then switch back to the main rope the same way.

    Keep accents simple on a first basket: one or two rows in a second color, or a single row wrapped in fabric or twine, reads clearly and does not break the rhythm of the coil. Avoid switching colors every row, since each join is a weak point and a place where the coil can slip. If you use dyed rope, check that the color does not rub off on your hands or on light items the basket will hold, and keep accent rows away from the base, where they wear fastest.

    9. Finish the Top Edge Cleanly

    Tapered rope end tucked and glued flat against the top rim of a rope basket.

    The top edge takes the most handling, so finish it with care. Coil the last row at the planned height, then taper the rope end by cutting it at an angle so it tucks neatly against the row below instead of ending in a blunt step. Glue or stitch the tapered end firmly in place, pressing it flat against the wall and holding it with a clip until the glue sets or the stitches hold.

    Run your finger around the rim to check for loose spots, gaps, or a raised end that could catch on clothes or skin. Add a small extra dot of glue or an extra stitch anywhere the rim feels loose, and trim any stray fibers with scissors for a tidy edge. A clean, firm rim also makes the next step easier, since handles attach best to a rim that holds its shape when pulled.

    10. Make and Attach Rope Handles

    Rope handle loop being stitched to the outside wall of a rope basket below the rim.

    Handles make the basket easy to lift, and simple rope loops suit the coiled style. Cut two equal lengths of rope for the handles, each long enough to arch a few inches above the rim with enough spare at each end to fix to the wall. Seal the cut ends, then shape each length into a loop and hold it against the outside of the basket, opposite sides for balance, with the ends sitting flat against the wall just below the rim.

    Fix each handle end with several stitches through the wall rows, or with a generous amount of glue held by clips until set, and add a second fixing point a row lower for strength. Test each handle by lifting the empty basket, then by lifting it with a light load, and check that the handle ends do not pull away from the wall. If a handle shifts, add more stitches before the basket goes into use, since a handle that fails under load drops the contents.

    11. Trim Loose Ends and Secure the Last Row

    Trimming loose thread ends and stray fibers from a finished rope basket.

    With the rim and handles in place, inspect the whole basket for loose ends, stray fibers, and rows that need an extra fixing. Trim thread ends close to the wall, snip loose rope fibers flush with the coil, and seal any fresh rope cuts with a quick pass of heat, keeping the flame away from glue and thread. Press each row once more, and add glue or stitches anywhere two rows still part when you press them gently.

    Pay close attention to the join points where you changed colors or started the handles, since those spots carry extra strain. A few extra stitches at a join cost little time and stop a row from peeling later. When the basket feels firm all around, with no row lifting and no handle end shifting, the structure is done, and the remaining steps cover removing the mold, adding a liner, and putting the basket to use.

    12. Remove the Mold and Check the Shape

    Finished rope basket sliding off its covered bowl mold.

    Slide the basket gently off the mold, easing it upward and turning it slightly as you lift, rather than forcing it straight off. Remove the cling film or plastic bag, and check the inside of the basket for glue strings or film scraps, trimming or peeling them away. Set the basket on a flat surface and look at it from the side and from above: the base should sit flat without rocking, and the rim should sit level all around.

    If the basket rocks, press the base flat and check whether one wall row sits lower than the rest, then add a small fixing to hold the low side in place. If a wall leans slightly, push it back toward the mold shape and hold it with clips while you add a few extra stitches. Leave the basket empty overnight so glue sets fully and the shape settles, and do not load it until the structure feels firm and dry to the touch.

    13. Add a Fabric Liner

    Fabric liner folded over the rim of a rope basket.

    A liner is optional, but it suits baskets that hold small items, snacks, or toiletries, since it stops small things from slipping through gaps between rows. Measure the inside of the basket, then cut a fabric piece a little larger than the inside, with enough extra at the top to fold over the rim. Sew a simple open topped bag shape, with seams on the outside, and press the seams flat before fitting it.

    Set the liner inside the basket, fold the top edge over the rim, and fix it in place with a few stitches through the rim rows or with small clips that you can remove for washing. Keep the liner loose enough to lift out for cleaning, rather than gluing it to the basket, since a removable liner lasts longer and lets you wash it on its own. If you skip the liner, the basket still works well for larger items such as blankets, toys, and magazines that cannot slip through the coil.

    14. Style, Use, and Care for the Basket

    Finished rope basket with a liner holding rolled towels in a bathroom.

    Place the finished basket where it will earn its keep, such as beside a sofa for blankets, in an entryway for keys and small daily items, in a bathroom for rolled towels, or in a bedroom for craft supplies. Group it with the room rather than hiding it: a rope basket suits natural textures, wood, linen, and plants, and it works best when the items inside match its size, so nothing overflows the rim or strains the handles.

    Care for the basket with simple habits. Spot clean marks with a damp cloth and mild soap, then let the basket air dry fully before you put items back, since trapped damp softens glue and can leave a musty smell. Avoid soaking the basket or putting it in a washing machine, and keep it out of constant damp, such as a spot right beside a shower. Empty it now and then, shake out dust and fibers, and check the rim, handles, and joins, adding a stitch or a dot of glue at the first sign of wear.

    Conclusion

    A DIY rope basket comes down to one repeated action: coil the rope, fix each row to the last, and keep checking the size and shape as you go. Plan the size first, start with a flat, tight base, turn the coil up into even walls, and finish with a firm rim and strong handles. A liner adds a neat finish for small items, and simple care keeps the basket useful for a long time. Start with a small round basket to learn the coil, then adjust the size, height, and accent rows for the next one. For more storage ideas from Dwell Ovell, browse the home page, and see how a craft storage cabinet groups supplies by use, or how to organize a small bedroom with zones and fixed places for daily items.

    FAQs

    How much rope do I need for a DIY rope basket?

    The amount of rope depends on the basket size and rope thickness, so buy more than you expect to use and keep the spare for repairs or a second basket. A small basket with a six to eight inch base needs far less rope than a large blanket basket, and thicker rope builds height with fewer rows. Measure your planned base and wall height first, then check the rope length on the label before you start coiling.

    What kind of rope works best for a rope basket?

    Soft cotton rope works best for a first rope basket, because it coils flat, bends without kinking, and holds glue and stitches well. Rope around one quarter to three eighths of an inch thick suits most home baskets, giving a balance of fine detail and steady height. Avoid stiff synthetic rope for a first basket, since it springs back from the coil and leaves gaps between rows.

    Should I glue or sew the rows of a rope basket?

    Both methods work, and the choice depends on the tools you have and how much strain the basket will take. Hot glue is fast and suits a basket that holds light items, while stitching with strong thread takes longer but holds better under heavier loads and survives more handling. Many makers use glue to hold rows in place while they work, then add stitches at the rim, handles, and joins for strength.

    Why does my rope basket lean or flare as I coil?

    A basket leans when one side grows faster than the other, or when the wall rows drift away from the mold or the planned angle. Turn the basket as you work, check the height at several points around the rim after every few rows, and keep each new row snug against the mold. If a lean appears, ease the coil back into line and hold it with clips until the glue sets, before you add more rows on top of it.

    How do I keep a rope basket clean?

    Spot clean a rope basket with a damp cloth and mild soap, then let it air dry fully before you put items back inside. Avoid soaking the basket or machine washing it, since water softens glue, loosens stitches, and can leave damp trapped between rows. A removable fabric liner helps, because you can lift it out and wash it on its own while the basket stays dry.

    Can I use a DIY rope basket for heavy items?

    A rope basket suits light to medium items such as blankets, toys, magazines, towels, and craft supplies, but it is not the best choice for very heavy items such as books or tools. Heavy loads strain the handles and the rim, and they can pull rows apart over time. For heavier storage, keep loads modest, carry the basket by its base as well as its handles, and check the handle fixings often.

  • 21 Planter Decoration Ideas for Indoor and Outdoor Spaces

    21 Planter Decoration Ideas for Indoor and Outdoor Spaces

    Planter decoration works best when the pot, the plant, and the spot fit together: choose a container that suits the light and scale of the space, match the plant to indoor or outdoor conditions, and group planters by height so the display reads as planned rather than random.

    A planter is more than a holder for soil. Its material, color, and shape set the tone of a corner, a porch, or a table, and its size decides whether a plant looks settled or cramped. The ideas below cover small indoor groups, large outdoor statements, and simple methods for changing a display with the seasons. Start with the spot you see most often, then build out from there.

    Key Takeaways

    • Match the planter to the light, scale, and water needs of the spot before you choose a plant.
    • Group planters in odd numbers and varied heights so a display looks planned from the main viewpoint.
    • Use drainage holes and saucers or trays, especially indoors, to protect floors and furniture.
    • Repeat one material or color across a group to tie separate planters together.
    • Place tall and trailing plants where they have room to grow without blocking paths or light.
    • Change a planter display with the seasons by swapping plants, not by buying new pots each time.

    1. Terracotta Cluster by the Front Door

    Terracotta pots of varied heights clustered beside a front door.

    Group three or five terracotta pots of varied heights beside the front door, with the tallest at the back and the smallest at the front. Terracotta suits an entry because its warm clay color works with brick, wood, and painted doors, and its weight keeps pots steady in wind. Use plants that suit the light at the door, such as hardy shrubs for a sunny step or shade tolerant ferns for a covered porch.

    Keep the cluster clear of the swing of the door and the main walking path. Set pots on a tray or on pot feet outdoors so water drains away from the step, and check soil moisture more often in hot weather, since clay pots dry out faster than plastic or glazed pots. A cluster reads as one welcome display when the pots share the same material, even if the plants differ.

    2. Tall Ceramic Planters in a Living Room Corner

    Tall glazed ceramic planters with upright plants in a living room corner.

    Place two tall ceramic planters in an empty living room corner to give the room height and a clear focal point. Glazed ceramic holds moisture longer than terracotta, which suits indoor plants that prefer steady soil moisture, and its smooth finish suits rooms with polished furniture and soft fabrics. Choose a plant with an upright shape, such as a snake plant or a fiddle leaf fig, so the height of the pot and the plant work together.

    Set the planters where they get the light the plant needs, and keep them clear of heating vents and cold drafts from exterior doors. Use a saucer inside a decorative outer pot, or a pot with a drainage hole set on a waterproof tray, so watering does not mark the floor. Two matching planters look settled, while two different heights add movement to a corner that otherwise sits empty.

    3. Hanging Planters in a Bright Window

    Hanging planters with trailing plants in front of a bright window.

    Hang two or three planters at varied heights in front of a bright window to use vertical space that floor pots cannot reach. Trailing plants such as pothos or string of pearls suit hanging planters, since their stems fall below the pot and soften the window frame. Choose hangers with a secure hook fixed into a stud or a ceiling anchor rated for the weight of a watered pot.

    Hang the lowest planter high enough that no one walks into it, and keep a small watering can nearby, since hanging pots dry out faster in sun and moving air. Rotate each planter a quarter turn every week or two so growth stays even on all sides. A window group works best when the plants share similar light and water needs, so one watering routine suits them all.

    4. Wall Mounted Planters Above a Hallway Console

    Wall mounted planters with small plants above a hallway console table.

    Fix wall mounted planters above a hallway console table to add green at eye level without taking up floor or table space. Shallow wall planters suit small trailing or compact plants, and a row of three keeps the display tidy in a narrow hall. Mount the brackets firmly into studs or use wall anchors rated for the weight of soil, plant, and water.

    Choose plants that cope with the light in the hall, and keep watering simple by using planters with a removable inner pot that you can lift out, water, and drain before putting back. Place a small tray on the console below only if drips are a risk, and wipe the wall behind the planters now and then to catch dust and water marks. This idea suits rented homes too, provided the fixings suit the wall type and the landlord rules allow them.

    5. Tiered Plant Stand in an Empty Corner

    Tiered plant stand with potted plants at different heights in a corner.

    Use a tiered plant stand to turn an empty corner into a layered planter display. A stand with three or four levels holds small and medium pots at different heights, so every plant gets light and air, and the group takes up less floor space than the same pots spread in a row. Place sun loving plants on the top tier and plants that cope with less light lower down.

    Check the stand for stability before you load it, and keep heavier pots low if the stand feels top heavy. Water each pot in place over a tray, or lift pots to a sink and return them once they have drained, to protect the floor. A tiered stand suits a living room, a bedroom corner, or a covered porch, and it makes it easy to move the whole display for cleaning or for a change of season.

    6. Woven Basket Planters in a Bedroom

    Woven basket planters with houseplants beside a bed in a bedroom.

    Set potted plants inside woven baskets to soften a bedroom with natural texture. Baskets suit bedrooms because their woven surface reads as warm and quiet beside bedding and wood furniture, and they hide plain nursery pots without repotting. Use a plastic liner or a saucer inside each basket so watering does not soak the weave.

    Choose low maintenance plants for a bedroom, such as a snake plant or a pothos, and place baskets where they get indirect light rather than harsh midday sun through a south facing window. Keep baskets off damp floors and check the liner after watering, since trapped water can stain the basket or the floor below. One large basket planter beside a dresser and one small basket on a nightstand give a bedroom a matched pair without crowding it.

    7. Concrete Planters for a Patio Seating Area

    Large concrete planters with shrubs beside patio seating.

    Use concrete planters around a patio seating area to add weight, structure, and a clear edge to the space. Concrete suits outdoor seating because it stands up to wind and rain, and its plain gray tone pairs with wood, metal, and woven outdoor furniture. Place a pair of large concrete planters beside a sofa or dining table, with a small tree, a shrub, or a tall grass in each.

    Concrete pots are heavy once filled, so set them in their final spot before you add soil and plants. Use pot feet or a riser under each planter so water drains and the patio surface does not stain. For more patio planter ideas, see Outdoor Patio Decorating Ideas. In winter, move tender plants indoors or protect the planter from repeated freezing and thawing, since trapped water can crack concrete over time.

    8. Wooden Trough Planters Along a Patio Edge

    Wooden trough planters with herbs and flowers along a patio edge.

    Line a patio edge with wooden trough planters to mark a border between seating and garden without building a fence. A long trough holds a row of plants at one height, which reads as a low hedge and softens a hard patio edge. Wood suits patios with decking or wooden furniture, and a trough can hold herbs, flowers, or small shrubs in one shared bed.

    Line the inside of a wooden trough with a waterproof liner that still allows drainage, and drill drainage holes if the trough lacks them, since standing water rots wood and plant roots alike. Water the whole trough evenly, and check the ends, which dry out faster than the middle in sun and wind. Replace the liner or the trough boards when they show rot, and keep the trough clear of walkways so guests do not trip over it.

    9. Raised Planter Bed for a Small Patio Garden

    Raised wooden planter bed with vegetables and herbs on a patio.

    Build or buy a raised planter bed to give a small patio a garden bed that sits at a comfortable working height. A raised bed suits patios because it keeps soil contained, lifts plants off hot paving, and makes watering, weeding, and harvesting easier on knees and back. Fill it with a mix suited to what you plan to grow, such as vegetables, herbs, or cut flowers.

    Place the bed where it gets the sun your chosen plants need, and leave walking room on at least one long side for care and harvesting. Water raised beds more often than ground beds, since their soil warms and dries faster, and top up the soil level each season as it settles. A raised bed with a simple wood frame suits most patios, while a metal bed suits a more modern outdoor space.

    10. Vintage Metal Containers as Porch Planters

    Vintage metal buckets planted with flowers on a porch.

    Turn vintage metal containers, such as old buckets, watering cans, or enamel pots, into porch planters with a story. Metal containers suit a porch because their worn finish pairs with wood steps, rocking chairs, and seasonal door decor, and each piece differs in shape and patina. Use them for annual flowers or herbs that you can replace each season, so the container stays the feature.

    Drill drainage holes in the base of any container that lacks them, and set it on a saucer or a small stand to protect porch boards from rust marks. Check for sharp edges before planting, and line the inside with a pot or a liner if the metal has rust that could stain soil or hands. Keep metal planters out of the hottest afternoon sun if you grow tender plants, since metal heats up fast and dries soil quickly.

    11. Vertical Pocket Planter Wall on a Balcony

    Vertical pocket planter wall with herbs on a balcony wall.

    Hang a pocket planter wall on a balcony railing or wall to grow many plants in a small footprint. Felt or fabric pockets hold one plant each in a vertical grid, which suits balconies where floor space is short but wall space is free. Use herbs, small flowers, or trailing plants, and place sun lovers at the top and shade tolerant plants lower down, where upper pockets cast shade.

    Water a pocket wall slowly from the top, so water reaches each pocket without flooding the lowest row, and check the wall behind it for damp after watering. Feed plants lightly through the growing season, since pocket soil dries out fast and holds few nutrients. Take the wall down or protect tender plants before frost, and fix it firmly so wind cannot pull it from its hooks.

    12. Glass Terrarium Planters on Open Shelving

    Glass terrarium planters with small plants on open shelving.

    Place glass terrarium planters on open shelving to add small planted displays that do not need floor space. A terrarium suits a shelf because its glass walls show the layers of soil, stones, and plants from every side, and its small size fits between books, vases, and framed photos. Use plants that suit the terrarium type: open terrariums for succulents and cacti, closed terrariums for plants that like humidity.

    Keep terrariums out of direct sun, since glass heats up and can scorch leaves, and water sparingly, since a terrarium has no drainage hole and excess water has nowhere to go. Open the lid of a closed terrarium now and then to let fresh air in and to check for mold on the soil surface. One terrarium per shelf keeps the display calm, while a pair of different sizes adds interest without clutter.

    13. Stone Planters Lining Garden Steps

    Stone planters with compact shrubs lining garden steps.

    Set stone planters along garden steps to frame the path and to guide the eye up or down the garden. Stone suits steps because its weight keeps planters steady, and its natural color blends with paving, gravel, and garden walls. Use one planter on each side of the bottom step and one on each side of the top step, or a single planter at each landing, so the path stays clear.

    Choose compact plants that do not spill across the steps, such as small shrubs, lavender, or clipped boxwood, and trim them back so they never narrow the walking width. Use pot feet under stone planters to help drainage and to stop them staining the steps. In winter, check that water does not freeze in the pots and crack the stone, and move tender plants to shelter before hard frost.

    14. Rattan Planters in a Sunroom

    Rattan planters with green plants in a bright sunroom.

    Use rattan planters in a sunroom to add woven texture that suits bright, plant filled rooms. Rattan suits a sunroom because its light, open weave pairs with wicker chairs, light curtains, and wood floors, and it softens the look of plain plastic nursery pots. Place a large rattan planter beside a chair and smaller ones on a side table or a plant stand.

    Keep rattan planters indoors or in a covered sunroom, since rain and long sun exposure can dry and weaken the weave. Use a liner or a saucer inside each planter, and lift the pot out for watering so the rattan stays dry. Choose plants that like bright indirect light for a sunroom, and rotate them now and then so growth stays even toward the windows.

    15. Trailing Planters on Top of a Tall Bookcase

    Trailing plants in planters on top of a tall bookcase.

    Place trailing planters on top of a tall bookcase to use high space that often sits empty. Trailing plants such as pothos, philodendron, or ivy fall down the sides of the bookcase and soften its straight edges, while the pots themselves stay out of the main living area. This idea suits rooms where floor space is tight but wall height is free.

    Water trailing planters with care, since drips fall a long way: lift the pot down to water it, or use a pot with a saucer and water slowly until the soil is damp but not soaked. Check that the bookcase is fixed to the wall if it is tall, and keep the top clear of heavy pots that could tip if the case is bumped. Trim trailing stems now and then to keep them from tangling with books or blocking a light fixture.

    16. Mini Succulent Planters on a Coffee Table Tray

    Mini succulent planters grouped on a tray on a coffee table.

    Group mini succulent planters on a tray on a coffee table to make a low display that guests can see without blocking conversation. Small succulents suit a coffee table because they need little water, stay compact, and come in varied leaf shapes and colors. A tray keeps the group together, protects the table from water marks, and lets you move the whole display for cleaning or for a meal.

    Use pots with drainage holes set on the tray, and water succulents only when the soil feels dry right through, since overwatering is the main cause of failure indoors. Keep the tray near a window or in a bright room, and rotate it weekly so plants do not lean toward the light. Three or five mini planters suit most coffee tables, while more than that can crowd the surface and leave no room for cups or books.

    17. Tabletop Centerpiece Planters for Dining

    Low planter centerpiece with small plants on a dining table.

    Use low planters as a dining table centerpiece to bring green to meals without blocking views across the table. A long low trough, or three small pots in a row, suits a dining table because the display stays below eye level when guests sit down. Use herbs, small flowering plants, or succulents, and keep the arrangement narrow so plates, glasses, and serving dishes still fit.

    Choose plants without strong scent for a dining centerpiece, since heavy fragrance can clash with food, and wipe leaves now and then to keep dust off the table. Move the centerpiece to a sideboard when you need the full table for a large meal, and return it afterward so the table still looks dressed between meals. This idea works indoors at a dining table and outdoors on a patio table, provided the plants suit the light in each spot.

    18. Oversized Planter with an Indoor Tree in the Entry

    Oversized planter with a tall indoor tree in an entry hall.

    Place one oversized planter with an indoor tree in an entry hall to give the space a clear focal point on arrival. A large planter suits an entry because it fills a corner that small pots would leave looking empty, and a tree adds height that draws the eye up and makes the hall feel taller. Choose a tree suited to the light in the hall, such as a fiddle leaf fig for bright light or a dracaena for lower light.

    Set the planter on a wheeled saucer or a plant caddy if you need to move it for cleaning, since a filled oversized pot is heavy. Check the ceiling height and the door swing before you buy, so the tree has room to grow without touching a light fixture or blocking the door. Water slowly and check drainage, since a large pot holds a lot of soil and can stay wet at the bottom long after the surface feels dry.

    19. Seasonal Rotation Planters by the Door

    Planter by a door with seasonal flowers and evergreen branches.

    Keep one or two planters by the door for seasonal rotation, and change only the plants as the seasons change. This method suits entries and porches because the pots stay in place while the display changes: spring bulbs and pansies, summer geraniums or petunias, fall mums and ornamental kale, and winter evergreen branches with pinecones. Rotation keeps a display fresh without buying new pots each season.

    Plan the rotation in advance, and keep a note of what grew well in each pot, so next year you can repeat successes and drop plants that struggled. Clear out spent plants fully before replanting, top up the soil, and check drainage holes for blockages. Store empty pots under cover in winter if they are not in use, and bring tender plants indoors before the first frost in your area.

    20. Hand Painted Patterned Planters as Focal Points

    Hand painted patterned planters with stripes on a porch bench.

    Paint plain planters with a simple pattern, such as stripes, dots, or a band of color around the rim, to make them focal points in their own right. Hand painted planters suit a porch bench, a patio table, or a bright kitchen shelf, where a bold pattern can carry the display even with a simple green plant inside. Keep the pattern to one or two colors so the planter reads as deliberate rather than busy.

    Use paint suited to the planter material and to outdoor use if the planter will sit outside, and seal it if the maker instructions call for a sealant. Paint the outside only, and keep paint away from the drainage hole and the inside soil area, so plant roots stay clear of paint. Let planters dry fully before planting, and touch up chips at the start of each season to keep the pattern looking fresh.

    21. Window Box Planters on a Kitchen Windowsill

    Window box planters with herbs on a kitchen windowsill.

    Set window box planters on a kitchen windowsill to keep herbs and small flowers within reach while you cook. A window box suits a kitchen because its long, narrow shape fits a sill, holds several small plants in one container, and keeps them in the light they need. Grow herbs you use often, such as basil, parsley, and chives, in separate sections or in their own small pots inside the box.

    Check the sill width and weight before you fill the box, and use a tray under it to catch water and protect the sill paint. Water window boxes more often than floor pots, since sill soil warms in sun and dries fast, and snip herbs from the top so plants stay bushy. If the window opens inward, keep the box clear of the opening path, and move tender herbs away from cold drafts in winter.

    Conclusion

    Planter decoration comes down to a few steady choices: a container that suits the material and scale of the room or garden, a plant that suits the light and water of the spot, and a grouping that leaves room to walk, sit, and care for the plants. Start with one spot you use every day, such as a front door, a kitchen sill, or a patio corner, and build a display there before you spread planters through the whole home. With drainage sorted and a simple watering routine in place, a planter display can stay fresh through the seasons with only small changes to plants and placement.

    FAQs

    What is the easiest way to start with planter decoration?

    Start with three pots of varied heights in one material, placed where you see them daily. This small group is easy to water and to adjust, and it shows you how much light and water the spot offers before you add more planters.

    Do planters need drainage holes?

    Yes, most planters need drainage holes so excess water can leave the soil. Without drainage, roots can sit in wet soil and rot, especially indoors. If a decorative pot has no hole, use it as an outer cover and keep the plant in an inner pot with holes that you lift out to water and drain.

    How do I choose a planter size for a plant?

    Choose a pot one size larger than the current root ball, with room for fresh soil around it but not so much empty soil that it stays wet. A pot that is too large holds excess water, while a pot that is too small dries out fast and limits growth. Repot when roots fill the pot and water runs straight through.

    What plants work best in indoor planters?

    Snake plants, pothos, philodendron, and ZZ plants suit many indoor planters because they cope with varied light and need less frequent watering. Match the plant to your room light: bright indirect light suits most houseplants, while low light rooms suit snake plants and ZZ plants better than sun loving succulents.

    How do I keep outdoor planters looking good through the seasons?

    Use the seasonal rotation method in idea 19: keep the pots in place and swap the plants as the seasons change. Top up soil, clear drainage holes, and check for frost damage each season, and move tender plants indoors before hard frost.

    Can I mix planter materials in one display?

    Yes, you can mix materials, provided one element repeats across the group, such as a shared color, a similar shape, or a matched plant type. Without a repeat element, mixed materials can look random, so start with one shared material or color and add a second material in small amounts.

  • How to Choose a Wood Furniture Stain for Your Decor

    How to Choose a Wood Furniture Stain for Your Decor

    To choose a wood furniture stain, match the tone to your room, check whether the wood is warm or cool, test two or three samples on a hidden spot, and pick a stain type that suits the piece and how it will be used. Then prepare the surface, apply thin coats, and seal the result.

    That short answer covers the whole process, and the steps below slow it down so each choice is easy to make. A stain does two jobs at once: it adds color, and it lets the grain show through. That is why the same stain can look different on two pieces, and why a sample test matters more than a color name on a can. Work through the steps in order, test before you commit, and give each coat time to dry. For rooms where warm wood sets the tone, see these farmhouse decor ideas and these living room color schemes.

    Key Takeaways

    • Match the stain tone to the room first, then to the wood, so the finished piece sits well with floors, walls, and other furniture.
    • Warm woods and warm rooms suit warm stain tones, while cool rooms suit cooler, greyer stain tones.
    • Always test two or three samples on a hidden spot or a scrap of the same wood before staining the whole piece.
    • Oil based, water based, and gel stains behave differently, so pick the type that fits the piece and your experience.
    • Prepare the surface well, since stain shows sanding marks, glue spots, and old finish that paint would hide.
    • Apply thin coats, wipe off the excess, and let each coat dry fully before judging the color.
    • Seal stained furniture with a clear topcoat, especially pieces that get daily use such as tables and chairs.
    • Work in a ventilated area, wear protective gear, and check old finishes for lead before sanding.

    Materials and Supplies

    • Wood furniture stain in the tested shade, plus a clear topcoat for sealing
    • Sample stain pots or small cans for testing, in two or three candidate shades
    • A scrap piece of the same wood, or a hidden spot on the piece, for testing
    • Sandpaper in a few grits, such as coarse for stripping and fine for smoothing
    • A tack cloth or a clean, lint free cloth for removing sanding dust
    • Clean cotton rags or a foam brush for applying stain, as directed on the product
    • A natural bristle brush or foam brush for the topcoat, as directed on the product
    • Painter tape, for protecting parts you do not want stained
    • Gloves, eye protection, and a dust mask or respirator, as suited to the task
    • Drop cloths, to protect the floor and nearby surfaces
    • A screwdriver, for removing knobs, hinges, and other hardware before staining
    • A lead test kit, if the piece has an old finish of unknown age

    1. Identify the Wood and Its Current Finish

    Person examining the grain and finish of a bare wood chair in a workshop.

    Start by finding out what wood you have and what is already on it. Look at the grain, the color, and the weight of the piece. Open grained woods such as oak show a strong pattern, while close grained woods such as maple look smoother and take stain more evenly. Pine and other soft woods soak up stain unevenly, which matters when you pick a stain type later.

    Check the current finish next. Run a hand over the surface and look for shine, flaking, or worn patches. A glossy, sealed surface will resist new stain, while bare or worn wood will soak it up fast. If the piece is painted, the paint must come off before stain can work, since stain needs bare wood to show grain. If you are unsure about the wood type, a sample test on a hidden spot will still tell you more than a guess.

    Note any repairs, glue spots, or filler on the surface. Stain colors filler and glue differently from bare wood, and those spots often show up darker or lighter than the rest. Plan to sand or work around them, and keep your expectations realistic for a piece with heavy repairs.

    2. Decide the Look You Want for the Room

    Wood dresser with a medium stain tone beside a bed with neutral bedding.

    Before you pick a shade, decide what job the piece will do in the room. A dining table that anchors a room can carry a deeper tone, while a small side table may look better in a lighter tone that blends in. A bedroom dresser should sit calmly beside bedding and curtains, while a living room console can echo the tone of the floor or the coffee table.

    Look at the largest wood surfaces already in the room, such as floors, beams, or a dining table. Stained furniture does not need to match those tones exactly, and in fact an exact match can look flat. Aim for tones in the same warm or cool family, with one clear step lighter or darker, so the piece relates to the room without disappearing into it. For ideas on keeping wood tones in one family across a room, see these living room color schemes.

    Also think about light. A room with strong daylight will make a stain look lighter and warmer than the same stain in a dim hallway. Check your samples in the room where the piece will live, in both daylight and evening light, before you make a final choice.

    3. Learn the Main Stain Types

    Three cans of wood stain types on a workbench beside a wood board.

    Stains for furniture generally fall into three types, and each suits different pieces. Oil based stains soak in slowly, which gives you more working time to wipe and even out the color. That longer open time helps on larger pieces such as tabletops, but it also means longer drying times and stronger fumes, so ventilation matters more.

    Water based stains dry faster, have lower odor, and clean up with water. They can raise the grain of the wood slightly, which may call for a light sanding between coats. They suit smaller pieces and indoor work where drying time matters, and they work well when you want a lighter, less amber tone.

    Gel stains sit more on the surface than they soak in, which makes them useful on woods that stain unevenly and on pieces where stripping the old finish fully is not practical. They are thicker, so they can be easier to control on vertical surfaces such as chair legs and cabinet doors. Read the directions on the product you buy, since drying times and application methods differ by type.

    4. Choose Warm, Cool, or Neutral Tones

    Wood sample boards in warm, cool, and neutral stain tones on a table.

    Stain tones fall into warm, cool, and neutral families, and the family matters as much as the depth of color. Warm tones carry red, orange, or golden notes, and they suit rooms with warm white walls, brass details, and honey toned floors. Cool tones carry grey, ashen, or slightly blue notes, and they suit rooms with cool greys, silver details, and pale floors.

    Neutral tones sit between the two, with brown notes that read neither strongly warm nor strongly cool. They are a safe choice when a room mixes warm and cool elements, or when you plan to move the piece between rooms later. If you are unsure, hold your sample boards against the floor, the wall, and the largest nearby furniture piece, and pick the family that looks settled beside all three.

    Avoid choosing a tone only because you like it on its own. A warm walnut tone can clash with a cool grey room, and a grey washed tone can look cold beside honey oak floors. The room test in step 5 will catch this before the whole piece is stained.

    5. Pick a Depth: Light, Medium, or Dark

    Wood sample boards in light, medium, and dark stain shades in a row.

    Depth means how dark the stain looks, and it changes the feel of a piece more than most people expect. Light stains keep a room feeling open and show the most grain detail, which suits small rooms and pale decor. They also show wear and marks more readily on pieces that get heavy daily use.

    Medium stains are the most forgiving choice for most furniture. They add clear color and richness, hide minor wear, and still let grain show through. If you are staining your first piece, a medium tone is a sensible place to start, since it is easier to judge and easier to live with than a very dark finish.

    Dark stains give a piece weight and a formal feel, and they can pull together mixed woods by evening out their color differences. They also show dust and scratches more clearly, and they darken a room if used on many large pieces at once. Use dark tones on one anchor piece at a time, and check the sample in the room before committing.

    6. Set Up Safely and Check Old Finishes for Lead

    Ventilated garage workspace with a wood chair on a drop cloth and protective gear on a bench.

    Set up your workspace before you open any stain. Work in a ventilated area, such as a garage with the door open, a covered outdoor space, or a room with windows open and air moving through. Keep the space clear of open flames and heaters, since stain and its rags can be flammable. Lay drop cloths under the piece and keep rags flat or in a safe container as directed on the product, never bunched up in a pile.

    Wear protective gear for the whole job: gloves to keep stain off your skin, eye protection when sanding, and a dust mask or respirator when sanding or working with strong fumes. Change gloves if they tear, and wash your hands after handling stain, even if you wore gloves.

    If the piece has an old finish and you do not know its age, check for lead before sanding. Older painted or varnished finishes can contain lead, and sanding lead paint creates dust that is hazardous to breathe. Use a lead test kit as directed, and if the test is positive, do not sand the piece yourself. Seek advice on safe removal or choose a different piece. This check costs little time and prevents a serious health risk.

    7. Test Samples on a Hidden Spot or Scrap Wood

    Hands brushing stain samples onto the underside of a wood chair seat.

    Testing is the step that saves the most regret. Apply your two or three candidate shades to a hidden spot, such as the back of a leg, the inside of a drawer front, or the underside of the piece. If no hidden spot exists, test on a scrap piece of the same wood, sanded the same way as the furniture.

    Apply each sample the same way you plan to stain the piece, with the same number of coats, and let each sample dry fully. Stain looks much darker when wet, so judge the color only after it dries, and after a clear topcoat sample if you plan to seal it, since topcoat can deepen the tone slightly. Label each sample with the shade name and the number of coats, so you do not mix them up.

    Live with the samples for a day if you can. Check them in daylight and in evening light, beside the floor and the wall, and from across the room. The shade that looks right in all three checks is the one to use, even if it was not your first pick in the shop.

    8. Prepare the Surface: Clean, Sand, and Remove Dust

    Hands sanding a wood tabletop with the grain in a workshop.

    Good preparation decides how even the stain looks. Remove all hardware, including knobs, hinges, and pulls, and set the screws aside in a labeled bag so refitting is simple. Clean the piece with a damp cloth to remove dust and grease, and let it dry fully before sanding.

    Sand with the grain, never across it, starting with a coarser grit to remove the old finish or rough spots, then moving to finer grits to smooth the surface. Cross grain scratches show up clearly under stain, so keep your strokes along the grain and check your work in raking light. Sand edges and corners lightly, since they wear through fast and will take stain darker if over sanded.

    After sanding, remove every trace of dust. Wipe the piece with a tack cloth, then with a clean, slightly damp cloth, and let it dry. Dust left on the surface can block stain and leave pale spots, so this step is worth doing twice on large flat areas such as tabletops.

    9. Use Wood Conditioner on Soft or Porous Woods

    Hands brushing wood conditioner onto a pale pine board in a workshop.

    Some woods soak up stain unevenly, leaving dark blotches beside pale patches. Pine, fir, and other soft woods are the usual cases, as are some close grained woods with uneven density. A pre stain wood conditioner helps even out absorption, so the stain goes on more uniformly.

    Apply conditioner as directed on the product, usually with a brush or cloth, and let it sit for the stated time before staining. Stain soon after the conditioner window opens, since waiting too long can reduce its effect. Conditioner does not change the final color much on its own, but it does change how evenly the stain takes, so judge the color after the stain coat, not after the conditioner.

    If your test samples on scrap wood already look even without conditioner, you may skip it. If the samples look blotchy, conditioner is worth trying on a fresh sample before you stain the whole piece. Test both ways on scrap wood when you have time, since the comparison shows the difference clearly.

    10. Apply the First Coat Evenly and Wipe Off the Excess

    Hands wiping excess stain off a wood tabletop with a cotton rag.

    Stir the stain well before you start, since the color pigments settle at the bottom of the can. Apply a thin, even coat with a clean rag, a foam brush, or a bristle brush, working with the grain and covering one section at a time. Work on flat surfaces first, then legs and edges, so drips on vertical parts can be caught while the stain is still wet.

    Let the stain sit for the time stated on the product, usually a few minutes, then wipe off the excess with a clean rag, again working with the grain. Wiping is what sets the final color: stain left sitting on the surface dries darker and stickier, while wiped stain leaves a thinner, more even tone. Use a fresh section of rag often, so you are wiping off excess rather than moving it around.

    Check the piece in good light after wiping. Look for puddles in corners and carvings, dry patches where the rag took too much off, and lap marks where two sections meet. Fix these now, while the coat is still workable, rather than after it dries.

    11. Let It Dry, Judge the Color, and Add a Second Coat If Needed

    Stained wood tabletop drying in a ventilated workshop beside a sample board.

    Let the first coat dry fully before you judge it or add another coat. Drying times vary by stain type, temperature, and humidity, so follow the directions on the product and allow extra time in cold or damp weather. A coat that feels dry to a light touch may still be soft underneath, and a second coat applied too soon can lift the first.

    Once dry, check the color in the room where the piece will live, in daylight and in evening light. If the tone is right but a little light, a second thin coat will deepen it. Apply the second coat the same way as the first, wipe off the excess, and let it dry fully again. Two thin coats almost always look better than one thick coat, which can hide grain and dry unevenly.

    If the color is too dark after the first coat, do not try to lighten it by sanding patches, since that creates uneven spots. A light overall sanding and a fresh thin coat is a better fix, or accept the darker tone and move to sealing. Note the number of coats you used, so touch ups later match.

    12. Seal With a Clear Topcoat

    Hands brushing a clear topcoat onto a stained wood tabletop in a workshop.

    Stain adds color, but it does not protect the surface on its own. Seal the piece with a clear topcoat, such as polyurethane, in a sheen that suits the room: matte or satin for a soft look, semi gloss for pieces that need wiping often. Apply the topcoat in thin, even coats with a clean brush, working with the grain and avoiding puddles.

    Let each topcoat dry fully, then sand very lightly with fine sandpaper to smooth any dust nibs, wipe off the dust, and apply the next coat. Two or three thin topcoats give better protection than one thick coat, especially on tabletops, chair seats, and other surfaces that get daily use. Follow the drying and recoat times on the product, since they differ by type.

    Check the sheen in the room before the final coat. A topcoat can deepen the stain tone slightly and add shine, so the finished piece may look a little different from the unstained sample. That is normal, and it is another reason to seal your test sample in step 7 before making a final shade choice.

    13. Refit Hardware, Cure, and Place the Piece in the Room

    Person refitting a knob onto a finished stained wood dresser in a bedroom.

    Once the final topcoat is dry, refit the hardware using the labeled screws from step 8. Tighten screws gently, since over tightening can crack a fresh finish around the screw holes. If you replaced knobs or pulls, check that the new hardware suits the stain tone and the room, and that it sits flat against the surface.

    Let the piece cure before heavy use. Drying and curing are different: a finish can feel dry while it is still soft underneath, and placing hot dishes, heavy books, or damp items on it too soon can mark it. Follow the curing time on the topcoat product, and keep the piece in a ventilated spot during that time.

    Place the piece in its room and live with it for a few days before judging the result. Check it beside the floor, the wall, and the nearby furniture, in daylight and in evening light. Small differences from your sample are normal, since grain varies across a single piece. For woven texture that pairs well with warm stained wood, see these rattan decor ideas.

    14. Maintain the Finish and Touch Up Wear

    Hands dusting a finished stained wood side table with a soft cloth in a living room.

    Stained and sealed furniture needs only simple care to last well. Dust with a soft, dry cloth, and wipe spills promptly with a slightly damp cloth, then dry the surface. Avoid harsh cleaners and abrasive pads, which can dull the topcoat and wear through to the stain. Use coasters under hot or wet items on tabletops, and felt pads under objects that sit in one spot for a long time.

    When wear appears, usually on edges, chair arms, and table rims, touch it up early rather than waiting for bare wood to show. Lightly sand only the worn spot with fine sandpaper, wipe off the dust, dab on a small amount of matching stain, let it dry, and seal the spot with a thin topcoat. Feather the edges of the touch up so it blends into the surrounding finish.

    If the whole topcoat looks dull or scratched after years of use, a fresh topcoat over a cleaned and lightly sanded surface can renew the piece without a full strip and restain. That is one of the practical benefits of sealing well in the first place: the stain stays protected, and only the clear coat needs renewing.

    Conclusion

    Choosing a wood furniture stain comes down to a steady order: know the wood and its finish, pick a tone family that suits the room, choose a light, medium, or dark depth, and test samples on a hidden spot before you commit. Set up in a ventilated area with protective gear, check old finishes for lead before sanding, prepare the surface well, apply thin coats, and seal the result with a clear topcoat. With that routine, a stained piece shows its grain, sits well in the room, and stands up to daily use.

    FAQs

    How do I choose a wood furniture stain color?

    Choose a wood furniture stain color by matching the tone family to your room first, then picking a depth that suits the piece. Warm rooms suit warm tones, cool rooms suit cooler tones, and neutral tones suit mixed rooms. Test two or three samples on a hidden spot, check them in daylight and evening light, and pick the shade that looks settled beside your floor and walls.

    Should I use oil based or water based wood stain on furniture?

    Use oil based stain when you want a longer working time on a large piece and can ventilate well, since it dries slowly and has stronger fumes. Use water based stain when you want faster drying, lower odor, and easier cleanup, and when a lighter, less amber tone suits the room. Gel stain suits uneven woods and vertical surfaces, since it sits more on the surface than it soaks in.

    Do I need to test wood stain before staining furniture?

    Yes, test wood stain on a hidden spot or a scrap of the same wood before staining the whole piece. Stain looks darker when wet and varies by wood type, so a sample is the only reliable way to judge the final color. Apply the sample the same way you plan to stain the piece, let it dry fully, and seal a test patch if you plan to seal the furniture.

    How do I stop wood stain from looking blotchy?

    Stop wood stain from looking blotchy by sanding evenly with the grain, removing all dust, and using a pre stain wood conditioner on soft or porous woods such as pine. Apply thin coats, wipe off the excess evenly, and work one section at a time so no area dries before it is wiped. Testing on scrap wood first shows whether conditioner helps for your piece.

    Do I need to seal stained wood furniture?

    Yes, seal stained wood furniture with a clear topcoat, since stain alone does not protect the surface from spills, scratches, and daily wear. Apply two or three thin topcoats, sanding lightly between coats, and let the finish cure before heavy use. Tabletops, chair seats, and other high use surfaces need sealing most, while low use decorative pieces can use fewer coats.

    How do I fix a wood stain that came out too dark?

    Fix a wood stain that came out too dark by first checking whether the sealed finish softens the look once it is fully dry and in the room, since wet stain always looks darker. If it is still too dark, lightly sand the whole surface evenly and apply a fresh thin coat in a lighter shade, or strip and restain for a full correction. Avoid sanding only patches, since that creates uneven spots that show through the next coat.


  • How to Paint Furniture with Milk Paint for a Soft Vintage Finish

    How to Paint Furniture with Milk Paint for a Soft Vintage Finish

    To paint furniture with milk paint, clean and lightly sand the piece, check old paint for lead before sanding, mix the powder with water to a thin cream, brush on two thin coats, let each coat dry, lightly distress edges for a soft vintage look if you like, then seal with wax or oil and let it cure before use.

    That sequence is the whole method in one paragraph, and the steps below walk through it slowly so nothing is left to guess. Milk paint is a powder mixed with water, and it suits wood furniture where a matte, chalky, slightly worn finish looks right. It behaves differently from ready mixed paint: it can chip a little on glossy or sealed surfaces, it dries fast, and it needs a topcoat for daily use. Those traits are part of its appeal for a soft vintage finish, as long as you plan for them. For styling ideas once the piece is finished, see these farmhouse decor ideas and these DIY home decor projects.

    Key Takeaways

    • Pick a solid wood piece in good repair, and check old paint for lead before you sand or strip anything.
    • Work in a ventilated area and wear protective gear, including eye protection, a dust mask, and gloves.
    • Clean the piece well and sand lightly, since milk paint bonds best to a clean, dull surface.
    • Mix milk paint with water to a thin cream, and test it on a hidden spot before you paint the whole piece.
    • Brush on thin coats, let each coat dry fully, and avoid thick coats that dry unevenly.
    • Distress lightly and only on edges and raised details if you want a worn look.
    • Seal with wax or oil for daily use, and let the finish cure before heavy use.
    • Keep the piece out of heavy wear and standing water while the topcoat cures.

    Materials and Supplies

    • A wood furniture piece in good repair, such as a dresser, side table, chair, or nightstand
    • Milk paint powder and clean water for mixing, plus a bonding agent if the surface is glossy or sealed
    • A clean container and a stir stick for mixing, and a strainer if the directions call for one
    • Mild soap, clean water, rags, and a bucket for cleaning
    • Sandpaper in medium and fine grits, and a sanding block
    • Painter’s tape and drop cloths to protect floors and nearby surfaces
    • Natural bristle brushes or foam brushes, plus a smaller brush for details and edges
    • A screwdriver for removing knobs, pulls, and hinges
    • Protective gear: eye protection, a dust mask, and gloves
    • A lead test kit for old paint, if the piece may predate lead paint rules in your area
    • Wax or oil topcoat, a clean lint free cloth, and a soft brush for sealing
    • Wood filler and a putty knife, only if the piece has small dents or holes to repair

    1. Choose the Right Piece for Milk Paint

    Solid wood dresser with simple lines in a bright work area beside a chair.

    Start with a piece that suits a matte, slightly worn finish. Solid wood dressers, side tables, chairs, and nightstands are good first choices, since milk paint bonds well to raw or lightly finished wood and the grain shows through in a pleasing way. A piece with simple lines and a few raised details gives you natural places to distress later, while a piece with heavy carving needs more brush time and care.

    Check the piece for damage before you buy paint. Open every drawer, test every joint, and look for loose legs, cracked rails, and veneer that is peeling or bubbling. Small dents and loose screws are easy to fix, but a wobbly frame or large areas of missing veneer will show through a thin milk paint coat. Choose a piece you can move to a work area with room to walk around it, since painting in place makes it hard to reach the back and the undersides of rails.

    Think about where the finished piece will live. Milk paint with a wax or oil topcoat suits bedrooms, living rooms, and other low moisture rooms well, while a piece that will face daily spills or outdoor weather needs a tougher topcoat plan. If you are unsure, start with a small side table rather than a large dresser, so you can learn how the paint mixes, dries, and seals on a manageable scale.

    2. Check for Lead and Set Up a Safe Work Area

    Person in eye protection, dust mask, and gloves testing old paint on a wooden dresser in a ventilated garage.

    Before you sand, scrape, or strip anything, check old paint for lead if the piece could be old enough to carry lead paint. Use a lead test kit as directed on its packaging, and test several spots, including layers under chipped areas, since older pieces may hold more than one coat. If a test shows lead, or if you are unsure and the piece is very old, stop sanding and get advice from a local lead safety resource before you go further. Do not dry sand lead paint, and keep children and pets away from the work area.

    Set up in a ventilated area, such as a garage with the door open, a covered porch, or a room with windows open and air moving through. Lay drop cloths under the piece and over nearby surfaces, and keep the area clear of clutter so you can move around the piece without tripping. Good light matters as much as air: a bright work light or daylight helps you see missed spots, drips, and thin areas while you paint.

    Wear protective gear for every dusty or messy step. Use eye protection when sanding, a dust mask rated for sanding dust, and gloves when cleaning and painting. Keep a brush, rags, and a bin nearby for waste, and wash your hands after sanding and before eating or drinking. Safety steps take only a few minutes, and they protect the finish too, since dust and dirt in the work area can land in wet paint.

    3. Remove Hardware and Clean the Piece

    Hands removing a drawer knob with a screwdriver beside labeled bags of screws.

    Remove knobs, pulls, hinges, and any other hardware you can take off with a screwdriver, and keep each set of screws in a labeled bag or container. Painting around hardware leaves unpainted edges that show when hardware is changed later, and paint on screw heads makes future removal harder. If a screw is stuck, stop rather than forcing it, and try a better fitting screwdriver before you strip the head.

    Clean the whole piece with mild soap and clean water, using a rag wrung out well so the wood does not soak. Wipe every surface, including drawer fronts, the insides of drawer openings, legs, and rails, since grease, wax, and grime keep paint from bonding. Rinse with a clean damp rag, then let the piece dry fully before you sand. A piece that feels dry on the outside can still hold dampness in joints, so give it time in a ventilated spot.

    While the piece dries, look closely for wax buildup, sticky spots, or glossy patches. A surface that still feels waxy after cleaning may need a second wash, and a very glossy sealed surface is a candidate for a bonding agent in the mixing step. Note any dents, chips, or holes now, so you can fill and sand them in the next step rather than finding them under a coat of paint.

    4. Repair Small Damage and Sand Lightly

    Hands sanding a wooden dresser drawer front lightly with a sanding block.

    Fill small dents, nail holes, and minor chips with wood filler, pressing it in with a putty knife and leaving a slight excess so it can be sanded flat. Let the filler dry as directed on its packaging, then sand it smooth with fine sandpaper. Skip large structural repairs in this guide: a broken joint or a split leg needs proper gluing and clamping first, and paint will not hold a weak frame together.

    Sand the whole piece lightly with medium sandpaper, working with the grain and paying attention to edges, drawer fronts, and any glossy areas. The goal is a dull, even surface with light scratches for the paint to grip, not bare wood everywhere. On raw wood, a light pass is enough. On a previously painted or sealed piece, sand until the shine is gone and the surface feels rough to the touch.

    Wipe away all sanding dust with a dry cloth, then a slightly damp cloth, and let the piece dry again. Dust left on the surface shows as rough spots under thin milk paint, so this wipe matters more than it seems. Check the piece in good light after wiping: any shiny patch you missed is a spot where paint may chip later, and a quick extra sand there now saves a repair later.

    5. Mix the Milk Paint to a Thin Cream

    Hands stirring milk paint powder and water in a container to a thin cream.

    Mix milk paint just before you paint, since it is a powder that you combine with water. Follow the ratio on the packaging for the product you bought, and mix in a clean container with a stir stick, adding the powder to the water a little at a time. Stir well, let it rest for the time the directions state, then stir again. The mixed paint should look like thin cream: smooth, pourable, and free of lumps.

    Strain the paint if the directions call for it, or if you can see lumps after stirring. Lumps show as bumps under a thin coat, and they are hard to brush out once they land on the piece. Mix only as much as you need for one coat at a time, since mixed milk paint does not keep the same way a sealed can of ready mixed paint does. Keep the container covered between brush loads so the surface does not skin over.

    If your surface is glossy, sealed, or nonporous, mix in a bonding agent as directed on its packaging. A bonding agent helps milk paint grip surfaces where it would otherwise chip heavily, and it is a useful option for laminate edges, sealed wood, and previously varnished pieces. Test the bonded mix on a hidden spot first, as described in the next step, so you can see how it dries on your exact surface.

    6. Test the Color and Finish on a Hidden Spot

    Brush testing milk paint on the underside of a wooden furniture rail.

    Before you paint the whole piece, brush your mixed paint onto a hidden area, such as the back of a leg, the underside of a rail, or the inside of a drawer opening. Let it dry fully, then look at it in daylight and in room light. Milk paint often dries lighter than it looks when wet, and the wood tone underneath can shift the color, so a test patch is the only reliable preview.

    Check the test patch for bonding as well as color. Rub it lightly with a dry finger once it is dry: a well bonded coat stays put, while a coat that powders or flakes easily may need a bonding agent, more sanding, or a cleaner surface. If you plan to distress the piece, try a light sand on the test patch too, and see how much of the wood or base color shows through. That test tells you how hard to press in the distressing step.

    Keep the test patch and your notes together. Write down the paint color, the mix ratio you used, whether you added a bonding agent, and how many coats you plan. Milk paint colors can look close on a chart and different on wood, so a short note saves guesswork if you need to mix more paint for a second coat or a touch up.

    7. Brush on the First Thin Coat

    Hands brushing a thin first coat of cream milk paint onto a dresser drawer front.

    Brush on the first coat in thin, even strokes, working with the grain and starting on a large flat surface so you can find a steady rhythm. Load the brush lightly and spread the paint out, rather than laying it on thick. Thin coats dry more evenly, show less brush marking, and bond better than one heavy coat, which is the most common mistake with milk paint.

    Work one section at a time: a drawer front, then a side panel, then the legs, rather than jumping around the piece. Keep a wet edge where you can, and brush back lightly over the section you just painted to even out the coat. On legs and rails, paint all sides before moving on, so you do not miss a face that shows from across the room.

    Let the first coat dry fully before you judge it. A first coat of milk paint often looks patchy, streaky, or thin, and that is normal: the second coat is what builds even color. Do not try to fix patchiness by brushing more paint onto a half dry coat, since that lifts the coat underneath and creates rough patches. Step back, let it dry, and plan the second coat on a clean, dry surface.

    8. Lightly Sand Between Coats

    Hands sanding a dried first coat of milk paint lightly with fine sandpaper.

    Once the first coat is dry, run your hand lightly over it to check for roughness, dust nibs, or raised grain. Sand very lightly with fine sandpaper, using almost no pressure, and work with the grain. This pass is not about removing paint: it smooths the surface so the next coat goes on evenly and bonds well.

    Wipe away all sanding dust with a dry cloth before the next coat. Dust trapped under a second coat shows as a rough, gritty finish that no topcoat will hide. Check edges and corners with extra care, since dust gathers there and brush loads tend to pool there too. If you sanded through to bare wood in a small spot, note it: the next coat will cover it, but a third thin coat may be needed for even color there.

    Take a short break after sanding to let any airborne dust settle. Painting straight into a dusty room puts dust in the wet coat, and a few minutes of waiting keeps the finish smooth. If the work area has a fan, point it away from the piece while the coat is wet, so dust is not blown onto the surface.

    9. Apply the Second Coat for Even Color

    Hands brushing a second thin coat of cream milk paint onto a wooden dresser.

    Apply the second coat the same way as the first: thin, even, and with the grain, one section at a time. Two thin coats give even color on most pieces, and the second coat usually covers the patchiness of the first. Keep the brush load light, and avoid going back over an area that has started to dry, since that can pull up the coat below.

    Check your work from different angles as you go, including from a low angle in good light. Missed spots often hide on the undersides of rails, the inner edges of drawer fronts, and the backs of legs. A second coat is also the right time to even out edges where the first coat pooled, since a light brush pass on a dry edge blends better than a thick touch up later.

    Let the second coat dry fully, then judge the color and coverage in daylight. If a third coat is needed for even color, apply it the same way, with a light sand and dust wipe between coats. Most pieces need two coats, and a third is a normal choice for pale colors over dark wood, rather than a sign that something went wrong.

    10. Fix Drips, Missed Spots, and Rough Areas

    Hands sanding a small paint drip flat with fine sandpaper on a dresser edge.

    Once the final color coat is dry, inspect the whole piece in good light and mark any drips, missed spots, or rough patches. Sand a drip lightly with fine sandpaper until it is level with the surface around it, then wipe away the dust. A drip that is sanded flat and touched up with a thin coat blends far better than a drip left under a topcoat.

    Touch up missed spots with a small brush and a thin coat, feathering the edges of the touch up into the surrounding paint so no hard line shows. Let each touch up dry before you judge it, since wet milk paint looks darker than the dry coat around it. If a touch up still shows after drying, a second thin touch up, feathered the same way, usually settles it.

    Run your hand over the piece one last time to check for roughness. Any gritty area that remains now will still be gritty under wax or oil, so sand it lightly and touch it up while the piece is still unsealed. This inspection step is short, and it is the last easy chance to correct the finish before sealing locks it in.

    11. Distress Edges Lightly for a Soft Vintage Look

    Hands distressing a painted dresser corner lightly with fine sandpaper.

    If you want a soft vintage look, distress lightly and only where wear would happen naturally: edges, corners, raised details, and the rims of drawer fronts. Use fine sandpaper and light, short strokes, and stop often to look at the result. A little distressing goes a long way, and it is easy to add more but hard to undo a heavily sanded patch.

    Work in small areas and step back to check the balance across the piece. Distress the most on edges that would catch hands and use, less on flat panels, and none on areas that would stay protected in normal use. That pattern reads as natural wear, while random heavy sanding across flat panels reads as damage. Keep the distressing even from side to side, so one drawer front does not look far more worn than the next.

    Wipe away all distressing dust before sealing, and look at the piece in daylight once more. If a spot looks too stark, a thin touch of paint over part of it softens the contrast while keeping some wear visible. If you prefer no distressing at all, skip this step: a clean milk paint finish with a good topcoat looks calm and finished on its own, and the guide works just as well without it.

    12. Seal the Finish with Wax or Oil

    Hands applying a thin wax topcoat to a milk painted dresser top with a cloth.

    Seal the piece with wax or oil, following the directions for the topcoat you bought. Milk paint on its own is porous and marks easily, so a topcoat is what makes the finish usable on a dresser, table, or chair. Apply the topcoat in a thin, even layer with a clean cloth or a soft brush, working one section at a time and wiping away excess as you go.

    Let the first topcoat layer dry or set as directed, then check for dull or dry looking patches that may need a second thin layer. Wax gives a soft, low sheen and a smooth hand feel, while oil can deepen the color a little and suit pieces that need a slightly harder wearing surface. Either choice works when applied thinly and evenly, and thick topcoat layers that pool in corners should be wiped back before they set.

    Buff a wax topcoat lightly with a clean cloth once it has set, and keep the piece in a ventilated area while the topcoat dries. Avoid placing objects on the surface, stacking items on it, or cleaning it with strong cleaners until the topcoat has had time to cure. The sealing step is quiet work, and a thin, patient application gives a more even result than a rushed heavy coat.

    13. Reattach Hardware and Cure Before Heavy Use

    Hands reattaching a drawer knob to a finished milk painted dresser.

    Once the topcoat is dry to the touch, reattach the hardware you removed, using the labeled screws you kept. Tighten screws snugly but do not over tighten, since a screw driven hard into a freshly painted drawer front can crack the finish around the hole. If a hole feels loose, a small wood repair before reattaching is better than forcing a screw that will work loose again.

    Let the piece cure before heavy daily use, even if the surface feels dry. Curing time varies with the topcoat, the room temperature, and the humidity, so follow the directions for your topcoat and give it the full time it states. During curing, keep the piece in a ventilated room, avoid placing heavy objects on it, and avoid sliding items across the surface.

    Use the curing time to check drawers, doors, and moving parts. Open and close each drawer to make sure paint has not sealed it shut, and sand any sticking edge lightly if needed. A drawer that sticks after painting usually needs only a light sand on the edge, not a repaint, and catching it now keeps the finish intact.

    14. Style the Piece and Care for the Finish

    Finished milk painted dresser styled simply in a bedroom with books and a vase on top.

    Place the finished piece where it will be used and enjoyed, and style it simply so the soft vintage finish can show. A small stack of books, a plain vase, or a folded cloth on a dresser top suits the finish, while heavy or wet items belong on a tray or a coaster. For a living room, a milk painted side table pairs well with neutral textiles and wood tones, as in the farmhouse decor ideas linked above.

    Care for the finish with gentle cleaning: dust with a dry or slightly damp cloth, and wipe spills promptly rather than letting them sit. Avoid strong cleaners, abrasive pads, and standing water, all of which wear wax and oil topcoats faster. If a waxed surface starts to look dull after months of use, a fresh thin wax layer, applied as directed, usually restores the sheen without repainting.

    Keep a small amount of leftover mixed paint notes, or a small touch up jar if your paint directions allow it, for future nicks. Touch up a nick by cleaning the spot, brushing on a thin coat, letting it dry, and sealing just that spot with the same topcoat. Small, prompt touch ups keep a milk painted piece looking cared for, and they are far easier than a full repaint.

    Conclusion

    Painting furniture with milk paint is a patient, step by step process: choose a sound piece, check for lead and work safely, clean and sand lightly, mix to a thin cream, brush on thin coats, distress only if you want the worn look, and seal well. Each step is simple on its own, and the finish rewards thin coats and full drying time more than speed. Start with a small piece, keep notes on your mix and coats, and let the piece cure before heavy use, and you will have a soft vintage finish that suits everyday rooms.

    FAQs

    Is milk paint good for furniture?

    Yes, milk paint is good for furniture when the piece is wood, the surface is cleaned and sanded, and the finish is sealed with wax or oil. It gives a matte, slightly chalky finish that suits a soft vintage look, but unsealed milk paint marks easily, so the topcoat step matters for daily use.

    Do I need to sand before painting furniture with milk paint?

    Yes, you should sand lightly before painting furniture with milk paint, even on a surface that looks clean. A light sand removes shine and gives the paint something to grip, and it also reveals wax buildup or glossy patches that need extra cleaning or a bonding agent.

    How do I mix milk paint for furniture?

    You mix milk paint by combining the powder with water in the ratio on the packaging, stirring well, letting it rest as directed, and stirring again until it looks like thin cream. Strain it if the directions call for it, mix only what you need for one coat, and test it on a hidden spot before painting the whole piece.

    Can I use milk paint on previously painted furniture?

    Yes, you can use milk paint on previously painted furniture if you clean it well, sand until the shine is gone, and check for lead before sanding old paint. On glossy or sealed surfaces, add a bonding agent as directed, and test on a hidden spot, since milk paint can chip more on sealed surfaces without that help.

    How do I get a vintage distressed look with milk paint?

    You get a vintage distressed look by sanding lightly with fine sandpaper on edges, corners, and raised details after the color coats are dry. Use short, light strokes, stop often to check the balance, and wipe away dust before sealing, since sealing locks in whatever level of wear you created.

    How do I seal milk paint on furniture?

    You seal milk paint by applying a thin, even layer of wax or oil topcoat as directed on its packaging, wiping away excess, and letting it dry and cure fully before heavy use. Wax gives a soft, low sheen, oil can deepen the color a little, and either choice needs a thin application rather than a thick pooled coat.


  • Custom Slipcovers: What to Measure and Consider Before Ordering

    Custom Slipcovers: What to Measure and Consider Before Ordering

    Before ordering custom slipcovers, measure the overall width, depth, and height of each piece, then measure seats, backs, arms, and cushions separately, and note curves, loose parts, and floor clearance. Share those numbers with fabric, fit, and care choices, so the maker can shape a cover that fits your furniture, not a generic size.

    A custom slipcover is only as good as the information sent with the order. A ready made cover is made for a size range, so small differences in arm shape or cushion depth matter less. A custom cover is cut for one piece, so a missed measurement, an unnoted curve, or a cushion counted as one piece when it is really two can change the fit. Work through this guide in order, from deciding what the cover must do to a final recheck, and keep one clear record for each piece of furniture.

    Key Takeaways

    • Measure each piece separately, even when two chairs look alike, since small differences change a custom fit.
    • Record overall width, depth, and height first, then seats, backs, arms, cushions, skirt length, and floor clearance.
    • Photograph and sketch the piece, and note curves, slopes, tufting, loose cushions, reclining parts, and removable legs.
    • Choose fabric for daily use, washing, pets, children, and sunlight, not only for color.
    • Decide fit details before ordering, including snug or relaxed fit, separate cushion covers, zippers, ties, piping, and skirt style.
    • Recheck every number, confirm the order details in writing, and keep a copy of the measurements for future orders or repairs.

    Supplies You May Need

    • A flexible measuring tape for curves and a rigid tape for straight overall dimensions
    • A notebook or printed measurement sheet, with one page per piece of furniture
    • A pencil, a phone camera for clear front, side, back, and detail photos, and a small level or straight edge if the piece has a sloping back
    • Masking tape or small paper labels to mark left and right, front and back, and cushion positions while measuring
    • Fabric swatches, or a note of the room colors, rug, curtains, and wall color, for color checking in daylight and evening light

    1. Decide What the Slipcover Must Do

    Notebook with slipcover job notes beside a family sofa.

    Decide what the slipcover must do before measuring, because the job shapes the fabric and fit choices that follow. A cover meant to protect a sofa from pets and children needs washable fabric and a secure fit that stays in place when someone sits down. A cover meant to change the look of a tired chair can allow a softer drape and a lighter fabric, if daily wear is low. A cover for a room with strong sun needs fabric and color choices that suit that light and use.

    Write down the main job in one sentence, then list the secondary jobs, such as hiding worn upholstery, adding a seasonal color, or making a mismatched set look like a set. Note who uses the piece, how often, and whether it is a main seat or an occasional chair. That list will guide the fabric discussion in step 9 and the fit discussion in step 11, and it will help you spot a choice that looks good in a swatch but fails in daily use.

    2. Identify the Piece and Its Shape

    Armchair with rolled arms and loose cushions in a living room.

    Identify the piece and its shape in plain terms, since a maker cannot cut a good cover from a furniture name alone. Note whether it is a sofa, loveseat, armchair, recliner, chaise, sectional section, dining chair, or ottoman, and whether it has rolled arms, track arms, sloped arms, or no arms at all. Note the back shape too, such as a straight back, a curved back, a camel back, a wing back, or a low back, and whether the back cushions are loose, attached, or part of a single bench cushion.

    Check the base as well. Note whether the piece has a skirt, exposed legs, a plinth base, or a reclining footrest, and whether any part moves, folds, or comes off. Count the seat cushions, back cushions, and any bolster or lumbar cushions separately. A clear shape description, paired with photos from step 3, reduces the chance that a maker assumes a standard shape your piece does not have.

    3. Gather Tools and Set Up One Record Per Piece

    Measuring tapes, notebook, and camera laid out beside a sofa.

    Gather the measuring tools and set up one record per piece before taking a single number. Use a flexible tape for curves, arm rolls, and seat fronts, and a rigid tape for overall width and height, since a flexible tape can sag on a long straight run. Keep a notebook or printed sheet for each piece, with space for overall dimensions, seat and back dimensions, arm dimensions, cushion dimensions, and notes on shape, legs, and moving parts.

    Photograph the piece from the front, each side, and the back, plus close views of the arms, back, cushions, skirt, and legs, before you start measuring. Photos taken with cushions in place, and again with cushions removed if they lift out, show a maker how the frame sits under the cover. Label the photos and the measurement sheet with the same piece name, such as living room sofa or bedroom armchair, so nothing is mixed up when several pieces are ordered together.

    4. Measure Overall Width, Depth, and Height

    Measuring tape stretched across the full width of a sofa.

    Measure the overall width, depth, and height first, since these three numbers frame every other measurement. For width, measure from the outermost point of one arm to the outermost point of the other arm, at the widest point, and note whether that point is at the arm top, the arm front, or the base. For depth, measure from the front edge of the seat, or the front of the arm if it sticks out further, straight back to the rearmost point of the back.

    For height, measure from the floor to the highest point of the back, with the piece standing on its normal floor surface and any casters or glides in place. Measure twice, and write down the unit used, such as inches, on every line of the record. If the piece sits on a rug, note that too, since rug thickness can change the height and the skirt length in step 7. Keep these overall numbers at the top of the record, so they are easy to find when checking the order.

    5. Measure the Seat, Back, and Arms Separately

    Measuring tape on a sofa seat between the arms.

    Measure the seat, back, and arms separately, since overall dimensions alone do not describe how a cover must bend around each part. For the seat, measure the width between the arms, the depth from the front edge to the back cushion or back frame, and the height from the floor to the top of the seat cushion. For the back, measure the width between the arms, the height from the seat surface to the top of the back, and the depth of the back at its thickest point.

    For each arm, measure the height from the floor to the top of the arm, the width across the top of the arm, and the length from the front of the arm to the back of the arm. Note whether the arm front is flat, rolled, or sloped, and whether the arm top is flat or rounded. These separate numbers let a maker shape the cover around the arms and back, rather than draping one flat panel over a piece with very different parts.

    6. Measure Each Cushion on Its Own

    Loose sofa cushions laid out in a row with labels and a tape measure.

    Measure each cushion on its own, since cushions that look alike often differ by a small amount, and a custom cover cut for one cushion may not fit its neighbor. For each seat cushion, measure the width, depth, and thickness at the thickest point, and note whether the front edge is square, rounded, or waterfall style, where the fabric curves over the front. For each back cushion, measure the width, height, and thickness, and note whether the top is square, rounded, or shaped to the back frame.

    Number or label each cushion on the record, such as left seat, center seat, and right seat when viewed from the front, and mark the same labels on the cushions themselves with removable tape if they will be sent or photographed separately. Note whether a cushion is reversible, whether it has a zipper, and whether it is filled in a way that keeps its shape or flattens with use. If the slipcover will have separate cushion covers, these numbers are the ones the maker will cut from, so recheck them in step 14.

    7. Measure Skirt Length, Legs, and Floor Clearance

    Measuring tape from a sofa seat frame down to the floor beside sofa legs.

    Measure skirt length, legs, and floor clearance, since the bottom of a slipcover is where a good fit is most visible. If the cover will have a skirt, measure from the seat frame or the chosen skirt starting point down to the floor, at the front, sides, and back, since floors are not always level and the piece may sit higher at one end. Decide how the skirt should finish: to the floor, just above the floor, or short enough to show the legs, and write that choice down.

    For the legs, measure the height from the floor to the bottom of the frame, the leg shape, and whether the legs unscrew or stay fixed. Note the clearance under the piece and whether the cover must leave room for a reclining footrest, a swivel base, or casters to move. A skirt measured only at the front can hang unevenly at the back, so check all four sides before sending the order.

    8. Note Curves, Slopes, Tufting, and Moving Parts

    Flexible tape following the curve of a sofa back and rolled arm.

    Note curves, slopes, tufting, and moving parts, since these are the details most often missed in a first set of measurements. Use the flexible tape to follow a curved back, a rolled arm, or a sloped seat front, and write down both the straight line distance and the curved distance if they differ. Note any slope in the back, any dip in the seat, and any place where the frame narrows or widens from front to back.

    List every moving or removable part, including reclining backs, pull out footrests, swivel bases, folding arms, removable headrests, and loose bolster cushions, and note whether the cover must move with that part or sit clear of it. Note tufting, buttons, piping, nailhead trim, or a seam that the cover must sit over, since a tight cover over deep tufting will read differently from a loose cover over a smooth frame. Photos of these details, taken in step 3, are worth more than a short note alone.

    9. Choose Fabric for Daily Use, Washing, and Light

    Fabric swatches in different weights and weaves on a sofa seat.

    Choose fabric for daily use, washing, and light, not only for how a swatch looks in your hand. Think about who sits on the piece, how often it is used, whether pets or children use it, and whether food and drink are common nearby. A fabric that can be removed and washed on a routine that suits your home will last longer in daily use than a fabric that needs special handling, however good it looks on day one. Check the care instructions for the finished cover, not only for the fabric in general, since construction and linings can change how it should be washed.

    Consider sunlight and room conditions too. A piece in strong direct sun, near a radiator, or in a damp room will age fabric differently from a piece in a shaded, dry room. Ask the maker what fabric weights and weaves suit your use, and whether a tighter weave, a heavier weight, or a fabric with some stretch will hold its shape better on your piece. Avoid choosing on color alone at this stage: settle the practical fabric family first, then narrow color in step 10.

    10. Choose Color and Pattern and Check Swatches in the Room

    Neutral fabric swatches held against a sofa beside a rug and curtains.

    Choose color and pattern after the practical fabric choice, and check swatches in the room, not only under shop lighting. Hold each swatch against the sofa frame, beside the rug, curtains, and wall color, and view it in daylight and again in evening lamplight. A color that looks calm in a small swatch can read much stronger across a whole sofa, and a pattern that looks small on a swatch can dominate a large seat. For help matching the new cover to the rest of the room, see these living room color schemes.

    Think about scale and repeat. A large pattern suits a large sofa and a plain room, while a small pattern or a plain fabric suits a small chair or a room that already has patterned curtains or a patterned rug. Note the direction of the pattern, if it has one, and whether it must line up across seat and back cushions. If the room changes with the seasons, a neutral cover with seasonal pillows and throws may be more flexible than a strongly seasonal cover color, as shown in these fall living room decor ideas.

    11. Decide Fit Details Before Ordering

    Snug slipcover being smoothed over a sofa arm beside a relaxed chair cover.

    Decide fit details before ordering, since a custom cover can be cut snug, relaxed, or somewhere between, and each choice changes how it looks and sits. A snug fit follows the frame closely and shows the furniture shape, but it needs accurate measurements and may be harder to remove for washing. A relaxed fit drapes more loosely, hides small frame irregularities, and is easier to fit, but it can bag at the seat if the fabric is light. State which fit you want for the body, the arms, and the cushions separately, since one piece may need a snug seat and a relaxed skirt.

    Decide the construction details as well: separate cushion covers or one piece cover, zippers or ties for removal, piping along seams or a plain seam, a skirt or a tailored base, and how the cover should close at the back. Note whether ties, zippers, or elastic should be hidden, and whether the cover must stay in place without slipping when someone sits down. These choices are hard to change after cutting, so write them on the order record, not only in a phone call.

    12. Decide Care, Removal, and Everyday Use

    Slipcover section being removed from a sofa cushion for washing.

    Decide care, removal, and everyday use before ordering, so the finished cover fits your routine as well as your furniture. Ask how the cover comes off, whether it comes off in one piece or in sections, and whether cushion covers come off separately. Note whether the cover can be washed at home, how it should be dried, and whether it should be refitted while slightly damp to smooth wrinkles, following the care instructions given for that cover.

    Plan for daily use too. Note whether the piece is used every day, whether pets sleep on it, and whether the cover will be removed often for washing. If removal will be frequent, a cover with clear closures and separate cushion covers will be easier to live with than a single tight cover. Keep a note of the care routine with the measurement record, so anyone else in the home can follow the same routine and the cover is not washed on a setting that harms it.

    13. Confirm the Order Details in Writing

    Written order sheet with sofa measurements and fabric notes beside a sofa.

    Confirm the order details in writing before the maker starts cutting, since a written record protects both sides if a number is misread. Send the measurement record, the photos, the fabric choice, the color and pattern choice, and the fit and care choices together, and ask the maker to confirm each item back to you. Check that the confirmation lists the correct piece, the correct number of cushions, the correct skirt length, and the correct closures, and query anything that does not match your record.

    Ask what the maker needs if a measurement is unclear, and send a new photo or a remeasured number rather than guessing. Note any questions the maker asks about curves, moving parts, or leg clearance, and answer them with a measurement or a photo, not with a general description. Keep the confirmed order, the measurement record, and the photos together, so a later question about fit can be checked against what was actually ordered.

    14. Recheck, Label, and Send a Complete Order Pack

    Complete order pack with measurement sheet, photos, and fabric swatches on a table.

    Recheck, label, and send a complete order pack as the last step, not as an afterthought. Remeasure the overall width, depth, and height, and at least one cushion, a second time, and have another person check the numbers if one is available, since a second pair of eyes often catches a transposed digit. Check that left and right labels match the view from the front, that cushion labels match the cushions themselves, and that skirt measurements were taken at all four sides.

    Assemble the pack in order: a cover page with the piece name and the main job from step 1, the measurement record, the shape notes from step 8, the fabric, color, and fit choices from steps 9 to 11, the care notes from step 12, and the confirmed order details from step 13, plus the photos. Send the pack as one complete set, keep a copy for yourself, and note the date sent. A complete, rechecked pack is the best way to get a custom slipcover that fits on the first delivery.

    Conclusion

    Custom slipcovers reward careful preparation. Measure each piece separately, from overall dimensions down to cushions, skirt, and floor clearance, and record curves, slopes, tufting, and moving parts that a flat size range would miss. Choose fabric for daily use and washing, check color in the room, decide fit and care details before cutting, and confirm the order in writing. Recheck the numbers and send one complete pack, and the cover you receive is far more likely to fit the furniture you actually own. For more ideas from Dwell Ovell, browse the home page for home decor guides.

    FAQs

    How do I measure for custom slipcovers?

    Measure the overall width, depth, and height first, then measure the seat, back, and arms separately, and measure each cushion on its own. Add skirt length, leg height, and floor clearance, note curves, slopes, tufting, and moving parts, and photograph the piece from the front, sides, and back, so the maker has a complete record for that one piece.

    What measurements does a custom slipcover maker need most?

    A custom slipcover maker needs overall width, depth, and height, seat width and depth, back height and width, arm height, width, and length, and the width, depth, and thickness of each cushion. Skirt length, leg details, floor clearance, and notes on curves, reclining parts, and loose cushions complete the set, since those details shape how the cover is cut.

    Should I measure a sofa with the cushions on or off?

    Measure a sofa both ways when the cushions lift out: with cushions in place for the overall look and seat height, and with cushions removed for the frame width, seat depth, and back shape underneath. Record both sets clearly on the same sheet, and label each cushion, so the maker can tell which numbers describe the frame and which describe the cushion.

    What is the difference between custom slipcovers and ready made slipcovers?

    Custom slipcovers are cut for one specific piece from its own measurements, shape notes, and fit choices, while ready made slipcovers are made for a size range and a general furniture shape. Custom covers usually fit curves, unusual arms, and separate cushions more closely, but they depend on accurate measurements, while ready made covers are easier to return if the size range does not suit the piece.

    How do I choose fabric for custom slipcovers?

    Choose fabric for custom slipcovers by daily use first: how often the piece is used, whether pets or children use it, whether it can be removed and washed on a routine you will follow, and whether it sits in strong sun. Settle the practical fabric family, weight, and weave with the maker, then choose color and pattern by checking swatches in the room in daylight and evening light.

    Can custom slipcovers fit a recliner or a sectional?

    Custom slipcovers can be made for recliners and sectional sections, but they need extra notes on moving parts, since a reclining back, a pull out footrest, or a sectional corner changes how the cover must be cut. Measure each sectional section separately, note which parts move and whether the cover must move with them, and photograph the piece in both its upright and reclined positions when that applies.

  • 17 Floral Slipcover Ideas for a Fresh Cottage Look

    17 Floral Slipcover Ideas for a Fresh Cottage Look

    Floral slipcovers give a sofa or chair a cottage look, because the print carries the pattern while walls, wood, and linen keep the room calm. Choose a print scale that suits the room, match one flower color in pillows or art, and keep the rest of the palette quiet. These 17 ideas cover sofas, chairs, and dining seats.

    A floral slipcover is a practical way to change a room, since the cover can be removed, washed, and swapped while the sofa underneath stays the same. The risk is a room that looks busy, and that usually comes from too many competing patterns or colors at once. Start with one floral piece as the main pattern, then add plain or lightly textured pieces around it, and let wood, woven baskets, and plain curtains do the quiet work. For help keeping the rest of the room calm, see these living room color schemes.

    Key Takeaways

    • Let one floral slipcover be the main pattern in the room, and keep other large pieces plain or lightly textured.
    • Match print scale to the room: small prints suit small rooms and chairs, large prints suit a large sofa in a room with plain walls.
    • Repeat one flower color in a pillow, a throw, or a piece of art, so the floral looks planned rather than random.
    • Mix floral with only one other pattern at a time, such as gingham or a stripe, and keep the shared colors the same.
    • Check the fit, skirt length, and care label before buying, since a floral that cannot be washed easily will be hard to live with.
    • Swap pillows, throws, and small accents by season, so the same floral base can look light in spring and warm in fall.

    1. Classic Rose Print Sofa Slipcover

    Sofa with a classic rose print slipcover in soft pink and cream with plain cream pillows.

    A classic rose print on a sofa is the most direct route to a cottage look, especially in soft pink, cream, and sage on a light base. Roses read as familiar and soft, and they suit wood furniture, linen curtains, and a plain rug far better than a bold modern print. Keep the walls plain and the coffee table wood or woven, so the roses stay the focus.

    Style the rose sofa with plain pillows in cream and one sage or dusty pink tone taken from the print. Avoid a second large floral nearby, such as floral curtains in a different rose, since two rose prints at different scales can clash. If the room already has floral art, keep the art small and in the same pink family, or move it to another wall.

    2. Small Scale Wildflower Print for a Small Room

    Small loveseat with a small scale wildflower print slipcover in cream, yellow, and soft green.

    A small scale wildflower print suits a small living room, because the tiny flowers read almost like texture from across the room rather than a loud pattern. On a loveseat or a small sofa, small flowers in cream, yellow, and soft green keep the seat light and do not shrink the room visually the way a large print can.

    Pair a small wildflower cover with plain curtains and a light rug, and keep cushions plain or in one quiet stripe. This idea also works in a reading corner or a guest room, where a small chair with a wildflower cover can add cottage character without taking over the space. Check the print in daylight, since tiny flowers can look darker or busier under evening lamps.

    3. Large Scale Botanical Print as a Focal Point

    Large sofa with a large scale botanical print slipcover against plain walls.

    A large scale botanical print, with oversized leaves and blooms, works best when the sofa is the clear focal point of a room with plain walls. The large shapes need breathing room, so keep the rug plain, the curtains plain, and the side tables simple. A large print on a large sofa can anchor an open living area in the same way a plain sofa anchors it, but with more color.

    Limit other patterns to one small piece, such as a plain knit throw or a single striped pillow in a color from the print. If the room has patterned wallpaper, a large botanical cover will usually compete with it, so this idea suits plain painted walls best. Step back to the doorway and check the balance: the sofa should draw the eye once, not fight with every other surface.

    4. Blue and White Floral on a Cream Base

    Sofa with a blue and white floral slipcover on a cream base with light wood furniture.

    A blue and white floral on a cream base gives a cottage room a cooler, crisper feel than a pink floral, and it suits coastal cottage rooms as well as classic ones. Blue flowers with green leaves on cream work with white walls, light wood, and woven baskets, and they pair well with plain blue or cream pillows.

    Use this palette in a bright room, since blue and white can look cold in a dark, north facing room with little daylight. Add warmth through wood, a natural rug, and brass or wood lamp bases, rather than through a second strong color. For rooms that need that warm balance, see these cozy room decorating ideas.

    5. Pink Peony Print for a Soft Bedroom Sofa

    Bedroom seating area with a pink peony print slipcovered sofa and white bedding.

    A pink peony print suits a bedroom sofa, a chaise, or a seating area at the foot of a bed, where a softer, romantic palette fits the room. Peonies in blush and cream, with soft green leaves, work with white bedding, light wood bedside tables, and plain curtains. Keep bedroom florals calmer than living room florals, since the bedroom is used for rest.

    Repeat the blush in one small place only, such as a pillow or a small vase of stems on a bedside table, and keep the rest of the bedding plain. A peony cover in a bedroom also benefits from a washable fabric, since bedroom seating is used daily for reading and dressing. Check that the cover fits the seat depth, so it does not slide when used as a dressing seat.

    6. Cottage Rose Armchair as a Single Floral Accent

    Single armchair with a cottage rose print slipcover beside a window.

    A single armchair in a cottage rose print can bring floral into a room that already has a plain sofa, without committing the whole seating area to pattern. Place the chair where it gets daylight, such as beside a window or at an angle to the sofa, and give it a plain cushion and a small side table so it reads as a reading chair, not as a leftover.

    This single accent approach suits renters and small budgets, since one chair cover costs less in time and effort than a full sofa cover, and it can be swapped later. Keep the chair floral in the same color family as the room pillows, so it links to the sofa rather than standing apart. If the room has no other floral, add one small floral art print or a vase of stems nearby to repeat the theme quietly.

    7. Floral Covers for Dining Chairs

    Dining chairs with floral slipcovers around a wood dining table.

    Floral covers for dining chairs add cottage character to a kitchen or dining area, and they protect chair seats at the same time. Choose a small or medium floral that reads well at close range, since dining chairs are seen from a short distance, and keep the tablecloth or table runner plain so the chairs stay the pattern in the room.

    Fit matters more on dining chairs than on a sofa, because a loose cover will shift every time someone pulls a chair out. Look for covers with ties or an elastic hem, and check that the cover clears the floor and does not catch on chair legs. In a busy dining area, a washable cover is the practical choice, and a spare set lets one set wash while the other stays in use. For a farmhouse dining room that suits this look, see these farmhouse decor ideas.

    8. Slipcovered Bench for an Entry or Bedroom

    Bench with a small floral print slipcover at the foot of a bed.

    A slipcovered bench in a floral print gives an entry, a hallway, or the foot of a bed a soft cottage note, and it adds a useful seat for putting on shoes or laying out clothes. A bench cover in a small floral suits a narrow space, since the print is seen in a long, low strip rather than across a large sofa.

    Keep the bench styling simple: one plain cushion or a folded throw on top, and nothing underneath that fights the print. In an entry, choose a washable fabric and a darker floral base if shoes and bags will brush against it daily. Measure the bench length and height before ordering, since bench sizes vary far more than sofa sizes, and a cover made for a different length will bunch at the ends.

    9. Floral Mixed With Gingham Checks

    Floral slipcovered sofa styled with cream and sage gingham check pillows.

    Floral mixed with gingham checks is a classic cottage pairing, and it works when both patterns share at least one color. Use the floral on the sofa or chair, and gingham on pillows or a table runner, in a small check so the two patterns do not compete at the same scale. Cream and sage gingham suits most florals, while cream and dusty pink gingham suits a rose print.

    Keep the gingham to two or three pieces, and keep the rest of the room plain, since floral plus gingham plus a third pattern quickly looks crowded. Test the pair together in daylight: hold a gingham pillow against the floral cover and check that the shared color actually matches, rather than sitting close to it. If the colors clash, switch the gingham to plain cream and keep the floral alone.

    10. Floral Mixed With a Quiet Stripe

    Floral slipcovered sofa with a narrow striped pillow in sage on cream.

    Floral mixed with a quiet stripe suits rooms where gingham feels too country, since a narrow stripe adds structure without a second busy pattern. Use the stripe on pillows, a throw edge, or a dining chair cushion, in a color taken from the floral, such as sage, dusty blue, or soft pink. A thin stripe on cream reads as texture from a distance, which is what a floral room needs.

    Avoid a wide, bold stripe beside a large floral, since both will demand attention at the same scale. One striped piece is usually enough; a second striped piece should be in the same stripe and color, so the room reads as planned. This pairing works well on a floral sofa with plain curtains, where the stripe gives the seating a tidy edge.

    11. Floral Sofa With Rattan and Natural Wood

    Floral slipcovered sofa with a rattan chair, wood coffee table, and woven basket.

    A floral sofa with rattan and natural wood furniture gives a cottage room a relaxed, collected feel, since the natural materials soften the print. Pair the floral cover with a rattan chair, a wood coffee table, and a woven basket, and keep metal finishes warm and simple, such as wood or aged brass. The wood and rattan stop the floral from looking too formal.

    Keep the rug natural, such as jute or a plain woven rug, and keep wall art simple, with wood frames rather than ornate ones. This combination suits a sunroom, a living room with garden views, or a coastal cottage, where natural light and plants already soften the room. Add one green plant near the sofa to link the floral print to living greenery.

    12. Floral Loveseat for a Small Space

    Floral slipcovered loveseat in a small living room with a small side table.

    A floral loveseat suits a small space, such as a studio, a small living room, or a large bedroom corner, where a full sofa would crowd the floor. Choose a small or medium print for a loveseat, since a large print can overwhelm a short seat, and keep the surrounding furniture low and plain so the loveseat stays the focus.

    Leave clear walkways around the loveseat, and use a small side table rather than a large coffee table, so the room stays usable. A loveseat cover also washes more easily than a full sofa cover, which suits a small home without a large laundry routine. If the room has a patterned rug, choose a floral in colors already in the rug, so the two patterns share a palette instead of competing.

    13. Floral Reading Nook Chair

    Floral slipcovered reading chair in a quiet corner with a lamp and side table.

    A floral reading nook chair gives a quiet corner its own character, separate from the main seating. Place the chair beside a window or a lamp, with a small side table for a book and a cup, and a plain throw folded over one arm. The floral makes the corner feel intentional, even when the rest of the room stays plain.

    Keep the nook palette tight: the chair floral, one plain throw, and one small plant or book stack, with nothing else patterned nearby. This idea suits a bedroom corner, a landing, or a living room corner that is otherwise unused. Choose a cover that is comfortable to sit in for an hour, with a fit that does not bunch at the seat, since a reading chair is used more than a display chair.

    14. Floral Sofa Balanced With Plain Curtains and Walls

    Floral slipcovered sofa with plain cream curtains and plain walls.

    A floral sofa balanced with plain curtains and plain walls is the safest way to live with a strong floral every day. Plain curtains in cream, linen, or a quiet solid taken from the print let the sofa carry the pattern, while plain walls keep the room from closing in. This balance matters most with a large or dark floral, which needs calm surfaces around it.

    Check the curtain color against the floral base color, not just against the wall: a cream curtain that is warmer than the floral base can make the floral look grey by comparison. Keep wall art to plain frames and simple subjects, and keep the rug plain or in a quiet texture. The result is a room that feels floral without feeling patterned on every surface.

    15. Washable Floral for a Family Room

    Family room with a washable floral slipcovered sofa and a plain throw on one seat.

    A washable floral slipcover suits a family room, since the cover can be removed and washed after spills, pet hair, and daily use, which a fixed floral upholstery cannot. Choose a midweight, washable fabric in a floral that hides light marks, such as a small print with green leaves, rather than a pale floral on a white base that will show every mark.

    Read the care label before buying, and keep the wash routine simple enough to follow: a gentle cycle when the label allows, and air drying when possible, so the cover keeps its shape. Keep a spare plain throw on the most used seat, so pets and children sit on a washable layer rather than directly on the floral. This practical choice lets a family room keep a cottage look without constant worry about the sofa.

    16. Long Skirted Floral Slipcover for a Tailored Look

    Sofa with a long skirted floral slipcover falling to the floor.

    A long skirted floral slipcover, with fabric falling to the floor, gives a sofa or chair a tailored cottage look and hides the legs and frame underneath. The skirt suits a traditional cottage room, a bedroom, or a formal living room, where a neat floor line matters more than a relaxed, casual drape. Keep the skirt straight and even, and check that it clears rugs and does not bunch at the corners.

    A skirted cover needs more fabric and a careful fit, so measure the sofa height to the floor and note whether the floor is hard or carpeted, since a skirt sits differently on each. Choose a floral with a clear repeat, so the pattern lines up across the skirt rather than breaking awkwardly at the hem. In a room with pets, a skirt will collect more hair at floor level, so shake or vacuum the hem between washes.

    17. Seasonal Floral Swaps Through the Year

    Floral slipcovered sofa restyled for autumn with warm throws and a folded spring cover nearby.

    Seasonal floral swaps let one sofa change through the year without new furniture: a bright spring floral, a lighter summer floral, and a muted autumn floral, each on a removable cover. Store the off season covers washed, fully dry, and folded in a clean, dry place, so the swap takes minutes and the stored print does not fade or mark in storage.

    Keep the room palette steady while the floral changes, so pillows and throws do not need replacing each season: plain cream, sage, and wood pieces work with most florals. In fall, pair a muted floral with warm throws and wood accents, as in these fall living room decor ideas. Label each stored cover with the sofa it fits, so the right cover is found without unfolding every spare.

    Conclusion

    Floral slipcovers work best when one print leads the room and everything else stays calm. Choose a print scale that suits the room size, match one flower color in pillows or art, and mix floral with only one other pattern at a time, such as gingham or a quiet stripe. Check fit, skirt length, and the care label before buying, and keep a wash routine you can follow in a busy home. With those choices, a floral cover can give a sofa, chair, or dining set a fresh cottage look that is easy to live with and easy to change by season. For more ideas from Dwell Ovell, browse the home page for home decor guides.

    FAQs

    How do I choose a floral slipcover print scale?

    Choose a floral slipcover print scale by room size and furniture size: small prints suit small rooms, loveseats, and chairs, while large prints suit a large sofa in a room with plain walls. If the room already has patterned wallpaper or a patterned rug, a small print will compete less than a large one.

    What colors go with floral slipcovers?

    Colors that go with floral slipcovers are the quiet tones already in the print, such as cream, sage, dusty pink, soft blue, and natural wood. Pick one flower color and repeat it in a pillow, a throw, or art, and keep walls, curtains, and rugs plain or in a single quiet tone, so the floral stays the main pattern.

    Can floral slipcovers work in a small room?

    Yes, floral slipcovers can work in a small room when the print is small or medium and the rest of the room stays plain. A floral loveseat or a single floral chair adds cottage character without crowding the space, while plain curtains, a light rug, and low furniture keep walkways clear and the room feeling open.

    How do I mix floral slipcovers with other patterns?

    Mix floral slipcovers with other patterns by adding only one other pattern at a time, such as gingham or a narrow stripe, and keeping a shared color between the two. Keep the second pattern smaller in scale than the floral, limit it to two or three pieces, and keep curtains, walls, and rugs plain, so the room does not look crowded.

    Are floral slipcovers washable?

    Many floral slipcovers are washable, but always check the care label first, since some fabrics need a gentler setting or hand washing. When the label allows machine washing, use a gentle cycle, wash the cover on its own or with similar colors, and air dry it when possible, so the print and fit hold up over time.

    How do I keep a floral slipcover from looking dated?

    Keep a floral slipcover from looking dated by choosing a print with a light base and fresh colors, rather than a dark, heavy floral, and by styling it with plain linen, natural wood, and simple frames. Avoid matching floral curtains, floral wallpaper, and a floral rug in the same room, since too much of the same pattern is what makes a floral room feel old fashioned.

  • How to Style and Care for White Couch Slipcovers

    How to Style and Care for White Couch Slipcovers

    To style and care for white couch slipcovers, fit the cover snugly, smooth wrinkles, and layer natural pillows and a soft throw, then keep it fresh with prompt spot care, regular washing on a gentle cycle, and air drying before refitting. This guide covers measuring, fitting, styling, washing, stain care, and seasonal swaps step by step.

    A white slipcover can make a living room feel bright and calm, but it also shows every wrinkle, spill, and pet hair. The answer is a routine, not constant fussing: a good fit, a small styling palette, and a simple wash cycle you actually follow. Work through the steps in order, from measuring and fitting to styling and care, and the sofa will look relaxed and clean on an ordinary day, not only on wash day. For warm accent ideas that pair well with a white base, see these fall living room decor ideas.

    Key Takeaways

    • Measure the sofa and check the slipcover size before fitting, so the cover sits snugly instead of bagging or pulling.
    • Choose a white shade that suits the room light, and keep the styling palette to two or three natural tones.
    • Fit the cover from the back to the front, tuck excess fabric into crevices, and smooth wrinkles by hand.
    • Style with pillows and a throw that add texture, and keep one accent color repeated at least twice.
    • Deal with spills promptly, wash on a gentle cycle when the care label allows, and air dry before refitting.
    • Rotate cushions, protect the sofa from strong direct sun, and swap accents by season rather than replacing the slipcover.

    Supplies You May Need

    • A measuring tape for sofa width, seat depth, back height, and arm width
    • A spare set of pillow covers in natural tones, so the sofa can be restyled while covers are in the wash
    • A soft lint roller and a clean, light colored cloth for spot care
    • A laundry bag for ties, if the slipcover has loose ties or a separate cushion cover set
    • A place to air dry the slipcover flat or on a line, away from direct heat

    1. Measure the Sofa Before Choosing a Slipcover

    Measuring tape across a sofa seat and back before fitting a white slipcover.

    Measure the sofa before you buy or refit a slipcover, because a cover made for a different sofa shape will never sit well, however carefully you tuck it. Measure the overall width from outer arm to outer arm, the seat depth from the front edge to the back cushion, the back height from the seat to the top of the back, and the arm height and width. Note whether the sofa has a chaise, a corner section, loose back cushions, or a single bench cushion, since each shape needs a different cover pattern.

    Write the measurements down and compare them with the size range given for the slipcover. If the sofa falls between two sizes, check how the cover is shaped: a cover with separate cushion covers and elastic or tie details will usually adjust better than a single loose drape. Keep the measurements with the care label, so a second cover can be ordered later without measuring again.

    2. Choose a Fabric Weight and Weave for Daily Use

    White slipcover fabric swatches in different weights and weaves on a sofa seat.

    Choose a fabric weight that matches how the sofa is used every day. A light, thin fabric will show the sofa shape underneath and may wrinkle quickly, while a heavier cotton or cotton blend weave usually drapes more smoothly and holds its shape after washing. Feel the fabric if you can, and look for a weave that is tight enough that the sofa color underneath does not show through the white.

    Think about who uses the sofa. In a home with children or pets, a washable, midweight fabric that can be laundered often is more practical than a delicate weave that needs special handling. In a low traffic reading room, a softer, lighter weave may be fine. In both cases, the care label matters more than the fabric name: if the label does not allow machine washing, the slipcover will be hard to keep white in daily use.

    3. Pick a White Shade That Suits the Room Light

    Warm and cool white fabric swatches held against a sofa in daylight.

    Pick a white shade that suits the room light, not just the shade that looks best in a photo. A bright, cool white can look crisp in a sunny room with pale floors, but it can look stark in a north facing room with little daylight. A warm white, with a soft cream note, usually suits rooms with warm wood, brass, or beige rugs, while a cooler white suits rooms with grey, silver, or pale blue accents.

    Hold a fabric swatch against the sofa in daylight and again in evening lamplight, and check it beside the rug, curtains, and wall color. If the white clashes with the wall, the sofa will look grey or yellow by comparison, even when the fabric itself is fine. For help matching the white to the rest of the room, see these living room color schemes, and keep wall and trim whites in the same warm or cool family as the slipcover.

    4. Fit the Slipcover From Back to Front

    White slipcover being draped over the back of a sofa.

    Fit the slipcover starting at the back of the sofa and working toward the front, so the main body of the cover is in place before you shape the seat and arms. Drape the cover over the back, center it so the seams line up with the sofa corners, and pull it down evenly on both sides. Then work the cover over each arm, checking that the arm seams sit on the arm edges rather than sliding toward the seat.

    Once the back and arms are placed, smooth the fabric down the front of the sofa and tuck the seat area last. Step back and check both sides from the front: if one side hangs lower, lift and recenter the cover before tucking, rather than pulling one side tight after the other side is already tucked. A centered start saves repeated adjustments later.

    5. Tuck, Smooth, and Shape the Cushions

    Hands tucking white slipcover fabric into a sofa seat crevice.

    Tuck excess fabric into the crevices between the seat and back, and between the seat and arms, using your hands or a smooth, blunt tool such as a wooden spoon handle. Push the fabric in a little at a time, working from the center outward, so the tuck stays even and does not bunch at one end. The goal is a smooth seat surface with no loose folds that slide out when someone sits down.

    Shape each cushion cover separately if the slipcover has them, aligning seams with cushion edges and smoothing wrinkles from the center toward the corners. Sit on each cushion briefly, stand up, and smooth the fabric again: this shows where the cover pulls or bags in real use. A cover that looks smooth when empty but bags badly after sitting may need a firmer cushion underneath or a tighter tuck at the back crevice.

    6. Style With Pillows in Natural Tones

    White slipcovered sofa styled with pillows in linen, oatmeal, and sage tones.

    Style a white slipcovered sofa with pillows in natural tones, such as linen, oatmeal, sage, soft grey, or warm tan, so the white stays the main color and the pillows add warmth. Start with two larger pillows at the ends, add medium pillows in front of them, and finish with one small accent near the center if the sofa is wide enough. Keep the pillow count low enough that each seat can still be used without moving a pile first.

    Repeat one accent color at least twice, for example in a pillow and a throw, or in a pillow and a piece of art nearby, so the arrangement looks planned. Limit strong patterns to one or two pillows, and pair each patterned pillow with a plain one beside it. On a white base, texture matters as much as color: linen, knit, and woven covers each read differently, even in the same tone.

    7. Add a Throw Without Hiding the Slipcover

    Soft oatmeal throw folded over the arm of a white slipcovered sofa.

    Add a throw for warmth and texture, but keep it from hiding the slipcover you chose the white for. Drape the throw over one arm, fold it across the back at one end, or fold it in thirds and lay it across a seat that is not the main sitting spot. A throw in a natural tone, such as oatmeal, soft grey, or muted green, adds a layer without competing with the white.

    Choose a throw weight that suits the season: a light cotton throw for summer evenings, a heavier knit or wool style throw for winter. Keep the throw within reach of the main seat, so it is used rather than folded away as decoration. If the throw keeps sliding off the arm, fold it more narrowly or drape it over the back instead, where it has more fabric to grip.

    8. Balance the White Sofa With the Rest of the Room

    White slipcovered sofa with a wood coffee table, woven basket, and light rug.

    Balance the white sofa with the rest of the room, so it does not look like a bright island in a darker space. Repeat the white, or a near white, somewhere else in the room, such as in curtains, a lamp shade, or a light rug border. Add one mid tone, such as wood in a coffee table or a woven basket, to ground the seating area, and one darker note, such as a dark frame or a deep green plant pot, so the eye has a resting point.

    Check the view from the doorway, since that is how most visitors see the room first. If the sofa looks too bright from there, add a warm toned rug or a wood tray on the coffee table to break up the white at floor level. If the room looks flat, add texture rather than color: a woven basket, a wood frame, and a linen pillow each add interest without changing the palette.

    9. Deal With Spills Promptly and Gently

    Hands blotting a spill on a white slipcover with a clean cloth.

    Deal with spills promptly, since a stain that sits on white fabric is harder to shift later. Blot the spill with a clean, light colored cloth, pressing gently rather than rubbing, which can spread the mark and push it deeper into the weave. Work from the outside of the mark toward the center, and change to a clean part of the cloth as the mark lifts.

    Check the care label before using any cleaning product, and test anything new on a hidden part of the slipcover first, such as the underside of a cushion cover. Avoid advice that promises a single product will remove every stain: different spills respond differently, and a method that suits one mark may set another. If the mark remains after blotting and a gentle wash, repeat the wash rather than using a stronger treatment without checking the label.

    10. Wash the Slipcover on a Gentle Cycle

    White slipcover being loaded into a washing machine.

    Wash the slipcover when it starts to look dull or after a spill that blotting did not fully lift, following the care label for water temperature and cycle. In general, a gentle cycle with a mild detergent suits most washable cotton slipcovers, and washing the cover on its own, or with similar light colors, helps keep the white bright. Close any zippers or ties before washing, so they do not catch on other fabric.

    Remove the slipcover from the sofa in sections, keeping cushion covers with their cushions, so refitting is straightforward. Shake each piece outside before washing to remove crumbs and pet hair, and check pockets or folds for small items. If the slipcover has a separate skirt or tie set, wash those pieces in a laundry bag so ties do not tangle around other items.

    11. Dry and Refit Before the Cover Sets Wrinkled

    White slipcover air drying on a line in soft daylight.

    Air dry the slipcover when the care label allows, since high heat can shrink fabric and make refitting difficult. Lay the cover flat or hang it on a line out of strong direct sun, and refit it while it is still slightly damp if the label allows: a damp cover is easier to smooth and shape, and it dries into the sofa shape with fewer wrinkles. Smooth each section by hand as you fit it, tucking crevices last, as in step 5.

    If the cover must be tumble dried, use the lowest heat setting the label allows and remove it promptly, before it is fully dry, so it can be smoothed on the sofa. Check the fit after the first wash and dry: if the cover has shrunk slightly, refit it while damp and let it finish drying on the sofa. Keep a note of the wash setting that worked, so the next wash follows the same routine.

    12. Handle Common Marks by Type, Not by Guesswork

    White slipcover being checked for marks with a lint roller nearby.

    Handle common marks by type, starting with the gentlest method that suits the mark and the fabric. For a food or drink spill, blot first, then wash as in step 10, rather than rubbing the mark while it is still wet. For dust and everyday soil, shake the cover outside and wash on the regular routine, since built up dust dulls white faster than a single spill.

    For pet hair, a lint roller or a damp cloth wiped in one direction usually lifts more hair than shaking alone, and washing the cover after a heavy shedding period helps. For marks from shoes or bags on the arm, wipe the arm section with a damp cloth and check whether the mark lifts before washing the whole cover. In every case, check the care label first, and do not mix cleaning methods on the same mark without rinsing and checking the result.

    13. Protect the Sofa From Sun, Pets, and Daily Wear

    White slipcovered sofa by a window with sheer curtains filtering sunlight.

    Protect the slipcover from the wear that dulls white fastest: strong direct sun, repeated sitting in the same spot, and pet claws on the same arm. If the sofa sits in strong sun for part of the day, use curtains or a sheer panel during the brightest hours, and rotate seat cushions regularly so one cushion does not fade or flatten faster than the others. Rotate back cushions as well if they are loose, so wear spreads evenly.

    Keep a throw on the seat most used by pets, so claws and hair land on a washable layer rather than on the slipcover itself, and trim pet nails on a regular routine. Fluff and rotate pillows weekly, and shake the slipcover sections outside between washes to remove dust. These small habits keep white looking fresh far longer than washing alone, since they slow the wear that washing cannot reverse.

    14. Swap Accents by Season and Store the Spare Set Well

    White slipcovered sofa restyled for winter with a knit throw and warm pillows.

    Swap accents by season instead of replacing the slipcover, so the white base stays the same while the room changes. In spring and summer, use light linen pillows, a pale throw, and a green plant note. In fall and winter, switch to warmer tones, a heavier knit throw, and a wood or brass accent on the coffee table. Store the off season pillow covers washed, folded, and in a clean, dry place, so the swap takes minutes.

    If you keep a second slipcover, store it the same way: washed, fully dry, folded loosely, and out of direct sun, so it does not yellow in storage. Label the storage bag with the sofa measurements from step 1, so the spare can be identified without unfolding it. A white slipcover that is swapped and stored well will look fresh each season, without needing a new cover every year.

    Conclusion

    A white couch slipcover works best when fitting, styling, and care are treated as one routine. Measure and fit the cover snugly, choose a white shade that suits the room light, and style with natural pillows and a throw that add texture without hiding the white. Keep the cover fresh with prompt spot care, gentle washing, and air drying, protect it from strong sun and daily wear, and swap accents by season. Follow those steps, and a white sofa can stay bright, relaxed, and comfortable to live with. For more ideas from Dwell Ovell, browse the home page for home decor guides.

    FAQs

    How do I keep a white couch slipcover looking clean?

    A white couch slipcover stays clean with a simple routine: blot spills promptly, shake the cover outside between washes, wash it on a gentle cycle when the care label allows, and air dry it before refitting. Rotate cushions and keep a throw on the most used seat, so wear and marks do not build up in one spot.

    Can I wash a white couch slipcover in a washing machine?

    Many washable slipcovers can be machine washed, but always check the care label first, since some fabrics need a gentler setting or hand washing. When the label allows machine washing, use a gentle cycle, close zippers and ties, and wash the cover on its own or with similar light colors, then air dry it if the label allows.

    How do I fit a white slipcover so it does not look baggy?

    Fit the cover from the back to the front, center the seams on the sofa corners, and tuck excess fabric into the crevices between seat and back and between seat and arms. Smooth wrinkles from the center outward, shape each cushion cover separately, and refit the cover while it is still slightly damp after washing, if the label allows, so it dries into shape.

    What color pillows go with a white couch slipcover?

    Natural tones work best with a white couch slipcover, such as linen, oatmeal, sage, soft grey, and warm tan, with one accent color repeated at least twice in the room. Limit strong patterns to one or two pillows, pair each patterned pillow with a plain one, and use texture, such as linen beside knit, to add interest without adding more color.

    How often should I wash a white couch slipcover?

    Wash a white couch slipcover when it starts to look dull, after a spill that blotting did not fully lift, or on a regular routine that suits how the sofa is used, such as every few weeks in a busy home and less often in a low traffic room. Shaking the cover outside and spot care between washes will stretch the time between full washes.

    How do I stop a white slipcover from yellowing or fading?

    A white slipcover is less likely to yellow or fade if it is kept out of strong direct sun during the brightest hours, washed with similar light colors, and stored fully dry and out of sunlight when not in use. Avoid drying it on high heat, rotate cushions so one spot does not fade faster than the rest, and follow the care label for water temperature and drying.

  • How to Choose Pet Friendly Sofa Slipcovers for Everyday Use

    How to Choose Pet Friendly Sofa Slipcovers for Everyday Use

    Choose a pet friendly sofa slipcover by starting with a tightly woven, machine washable fabric in a color close to your pet’s coat, then match the fit to your sofa shape and check that cushion, arm, and back pieces stay put when pets jump up. A second washable cover makes laundry day simple and keeps the sofa usable every day.

    A slipcover earns its place in a pet home only if it handles real daily use: a dog shaking off rain by the door, a cat kneading the same arm every evening, fur collecting along the seat seams. The right cover protects the sofa underneath, washes without fuss, and goes back on in minutes. The wrong one slides off, shows every hair, and ends up folded in a closet. This guide walks through each choice in order, from measuring the sofa to setting a washing routine, so you can buy once and live with the cover comfortably. For more living room textile ideas, see these fall living room decor ideas.

    Key Takeaways

    • Start with your pet’s habits, not the color chart: shedding, scratching, muddy paws, and jumping each point to different fabric and fit choices.
    • Choose a tightly woven, machine washable fabric, and check the care label before you buy, not after the first wash.
    • Measure the sofa, note its arm shape and cushion style, and match the cover type to that shape so it stays in place.
    • Pick a color or pattern close to your pet’s coat, or a midtone pattern that breaks up visible fur between washes.
    • Protect the spots pets use most: seat cushions, armrests, and the front edge where paws push off.
    • Buy a second cover if the budget allows, so one can wash while the other stays on the sofa.
    • Set a simple routine: shake out and lint roll daily, wash on a regular cycle, and refit while the fabric is slightly damp if the maker allows it.

    What You Need Before You Shop

    • A tape measure, plus the sofa’s width, depth, seat height, arm height, and back height written down
    • A note of the sofa style: arm shape (rolled, track, or sloped), cushion style (attached or loose), and leg height
    • A photo of the sofa from the front and the side, for comparing fit guides
    • A note of your pet’s habits: shedding level, scratching spots, muddy paw frequency, and favorite sleeping place on the sofa
    • A fabric swatch or a spare cushion cover to test fur pickup and washing, if you can get one
    • A lint roller, a rubber grooming mitt, or a damp cloth for daily fur removal
    • A laundry plan: washer capacity, drying space, and how often you are willing to wash the cover

    1. Measure Your Sofa and Note Its Shape

    Person measuring the width of a sofa with a tape measure before choosing a slipcover.

    Measure the sofa before you look at covers, since fit decides whether a cover stays put or slides off every time a pet jumps up. Record the full width from outer arm to outer arm, the depth from the front edge to the back, the seat height from the floor, and the height of the arms and the back. Note whether the arms are rolled, flat track arms, or sloped, and whether the cushions are loose or attached, since each shape suits a different cover style.

    Write the numbers down and keep them with you while you shop, and compare them with the maker’s size chart rather than guessing from a name like “three seater,” which varies widely. Measure twice at the widest points, including any feet or legs that add height, and check doorways and hall turns too if the cover ships in a bulky box. A cover sized from real measurements fits closer, wrinkles less, and gives claws fewer loose folds to catch.

    2. Start with Your Pet’s Habits

    Dog and cat using a sofa in different ways, one curled on a seat cushion and one kneading the armrest.

    Watch how your pet actually uses the sofa for a few days before choosing, since habits matter more than breed labels. A heavy shedder calls for a color that hides fur and a fabric that releases it in the wash. A cat that kneads or scratches needs a tight weave with no loose loops to snag. A dog that comes in muddy needs a cover you can remove and wash often, plus a washable throw for the seat during wet weather.

    Note where your pet sleeps, which arm gets kneaded, and whether paws push off the front edge when jumping down. Those spots take the most wear, so they deserve the strongest fabric and the best coverage. If more than one pet uses the sofa, plan for the heaviest wearer: the cover that handles the scratcher and the shedder together will also handle a calm napper with ease.

    3. Choose a Durable, Tightly Woven Fabric

    Tightly woven fabric swatches in neutral tones laid across a sofa seat cushion.

    Fabric weave matters more than thickness alone. A tightly woven fabric gives claws less to catch on and keeps fur sitting on the surface, where a lint roller or vacuum can lift it, instead of working deep into the fibers. Look for a smooth, close weave and run your hand across it: if you can easily lift a thread with a fingernail, a cat’s claw will find it too.

    Avoid loose weaves, open knits, and fabrics with long loops or raised piles that trap fur and snag. A plain weave in a sturdy cotton blend, a canvas weight cotton, or a smooth synthetic blend is a practical starting point for most pet homes. Ask for a swatch when possible and test it at home: rub it with a dry cloth, press a piece of tape on it to mimic fur pickup, and wash it once before committing to a full cover.

    4. Put Washability First

    Removable sofa slipcover being lifted from a cushion near a washing machine for laundering.

    A pet slipcover that cannot go through the wash regularly will not last in a pet home, no matter how good it looks on day one. Check the care label before you buy: machine washable, a normal wash temperature your machine can reach, and a drying method you can actually use. If the label calls for dry cleaning only, or for line drying you have no room for, the cover will spend more time waiting to be cleaned than on the sofa.

    Think about the full laundry cycle, not just the wash. A cover that fits your washer without cramming will clean better and wear more slowly than one you have to force in. Check whether the fabric shrinks on first wash, whether colors hold after repeated washes, and whether the cover can go back on while slightly damp, which often makes fitting easier. If the maker allows it, wash a new cover once before first use so any early shrinkage happens before you fit it.

    5. Check the Fit: Loose, Relaxed, or Tailored

    Sofa in a neat tailored slipcover with fitted lines and tucked seat cushions.

    Slipcovers come in loose, relaxed, and tailored fits, and each behaves differently with pets. A loose cover drapes softly and is easy to remove, but it can bunch under a jumping dog and needs frequent straightening. A relaxed fit follows the sofa shape more closely with some softness at the seams, which suits most family rooms. A tailored fit looks neat and stays put best, but it demands accurate measurements and a sofa shape the maker supports.

    Match the fit to your sofa and your patience for daily tidying. If your pet launches onto the sofa from the floor, a closer fit with elastic edges, ties, or tuck-in flaps will hold its shape better. If you like to change covers with the seasons, a relaxed fit is faster to swap. Whichever fit you pick, check how the cover handles the seat cushions: separate cushion covers fit better and wash more easily than one large piece stretched over the whole seat.

    6. Pick Colors and Patterns That Hide Pet Hair

    Sofa in a midtone warm gray slipcover with a light colored dog resting on the seat.

    Color is a practical choice in a pet home, not just a style choice. A cover close to your pet’s coat color will show far less fur between washes than a high contrast color: cream covers show dark fur quickly, and charcoal covers show light fur just as fast. If you have pets of several colors, a midtone warm gray, taupe, or muted green is a forgiving middle ground.

    Patterns help too. A small, low contrast pattern, such as a subtle check, a fine stripe, or a tone on tone print, breaks up the outline of fur and light marks better than a flat solid color. Keep the pattern quiet enough that it still suits the room, and repeat the cover color somewhere else, such as a throw or a cushion, so the sofa links to the rest of the space. Avoid very pale solids if your pet sheds heavily, and avoid very dark solids if your pet is light colored.

    7. Look for Claw Resistance and Repair-Friendly Details

    Close view of a reinforced double stitched seam on a sofa arm slipcover.

    No fabric is fully claw proof, so look for details that reduce damage and make repairs simple. A tight weave, reinforced seams at the arms and seat edges, and double stitched stress points all help a cover last longer under kneading and scratching. Covers with separate pieces for arms, back, and cushions are easier to repair or replace one section at a time than a single piece cover.

    Check the seams before you buy: pull gently at an arm seam and a seat seam to see whether stitching holds firm and fabric puckers evenly. Look for covers sold with spare fabric or matching repair patches, and keep a needle and matching thread at home for quick seam fixes. If your cat scratches one arm repeatedly, a washable arm cap or a folded throw over that arm can take the wear instead of the cover itself, and it is far cheaper to replace.

    8. Protect Cushions, Arms, and Backs Separately

    Sofa with separate cushion covers, arm covers, and back panel in matching washable fabric.

    Pets wear out a sofa unevenly, so think of the cover as separate zones rather than one sheet. Seat cushions take weight, fur, and moisture. Arms take kneading, scratching, and leaning. The back takes fur where pets rest their heads, and the front edge takes pressure from paws pushing off. A cover system with separate cushion covers, arm covers, and a back panel lets you wash the dirtiest piece without stripping the whole sofa.

    When you fit the cover, tuck fabric firmly into the creases between cushions and arms, and check the fit after a pet has used the sofa a few times, since fabric settles. Add foam inserts or non-slip pads under the seat cover if it slides, and use the cover’s ties or elastic hems as the maker directs rather than leaving them loose. Pay attention to the front edge in particular: a cover that pulls tight there will not ride up when a dog jumps down.

    9. Test Comfort for People and Pets

    Person and dog sitting comfortably together on a slipcovered sofa in a bright living room.

    A cover that protects the sofa but feels stiff, slippery, or noisy will not stay on the sofa for long, since both people and pets will avoid it. Sit on the covered sofa yourself, lean back, and shift position a few times: the fabric should stay in place, breathe in warm weather, and not slide you forward off the seat. Watch your pet too: if a dog slips on a smooth cover when jumping up, a slightly textured weave or a non-slip base layer may suit better.

    Check the cover in the seasons you live with. A heavy canvas that feels fine in winter can feel hot in summer, while a light cotton that suits summer may feel thin under a large dog in winter. If your home runs warm, favor a breathable weave and a lighter color that does not hold heat. Comfort is what keeps the cover in daily use, and a cover in daily use protects the sofa far better than a heavy cover folded away.

    10. Plan for Layers: Throws and Washable Toppers

    Washable throw folded over the seat of a slipcovered sofa beside a basket of clean throws.

    Layers are the simplest way to extend a slipcover’s life in a pet home. A washable throw over the seat or the favorite sleeping spot takes the daily fur and dirt, and it can go in the wash midweek while the main cover stays on. A second throw on the arm your cat kneads protects the seam underneath. Layers also let you change the room’s look without buying a new cover.

    Keep layers light and washable, and fix them so they do not slide: tuck the throw into the seat crease, use a throw with a textured underside, or fold it over the back and seat in one piece. Too many layers can trap heat and fur between them, so use one or two at a time and wash them on a regular cycle. Choose throws in colors that match or repeat the cover color, so the sofa still looks planned rather than piled up.

    11. Check Fastenings, Ties, and Non-Slip Backing

    Hands tying a slipcover tie at the back of a sofa with elastic hem and tucked fabric.

    Fastenings decide whether a cover survives a week of pets or needs refitting every evening. Look for elastic hems that grip the sofa base, ties that anchor the cover at the back or under the seat, tuck-in flaps that hold fabric in the creases, and zippers on cushion covers that close smoothly without catching fabric. Test each fastening before you rely on it: tie the ties, tuck the flaps, and sit down firmly to see what moves.

    Non-slip backing or a separate non-slip pad under the seat cover helps on smooth sofa frames and leather bases, where fabric tends to travel. Avoid fastenings with small buttons, beads, or dangling ties within a pet’s reach, since chewing pets may pull them loose. If a tie comes undone often, re-tie it under the sofa frame or behind a cushion where paws cannot reach it, and check fastenings each time you refit after washing.

    12. Think About Seasonal Swaps and a Spare Cover

    Two folded spare sofa slipcovers in different fabric weights stacked on a closet shelf.

    A second cover is one of the most useful purchases for a pet home. With a spare, one cover can be in the wash while the other is on the sofa, so the sofa is never left bare on laundry day. A spare also covers accidents: if a cover tears or stains badly, the sofa stays protected while you repair or replace it. If a full second cover is too much, a spare set of cushion covers plus a washable throw gives most of the same protection.

    Seasonal swaps work well too. A lighter, breathable cover suits summer shedding and warm rooms, while a slightly heavier cover suits winter, when pets spend more time indoors and muddy paws are common. Store the off-season cover washed, fully dry, and folded in a breathable bag, and check it for damp or odors before refitting. Label the bag with the sofa it fits, since covers for different sofas look alike once folded.

    13. Set a Care Routine Before You Buy

    Lint roller, rubber grooming mitt, and folded cloth in a basket beside a slipcovered sofa.

    Decide the care routine before you buy, and choose a cover that fits the routine you will actually keep. A realistic routine for most pet homes is: shake the cover or throw outside daily or every other day, lint roll or vacuum the seat and arms, wash the cover on a regular cycle that matches shedding and dirt levels, and refit promptly so the sofa is not left bare. Spot clean muddy paw marks with a damp cloth as soon as you notice them, rather than letting them set.

    Keep cleaning supplies close to the sofa: a lint roller, a rubber mitt, and a damp cloth in a nearby basket make daily care a one minute job instead of a chore. Vacuum the sofa underneath the cover when you wash it, since fur and grit collect there too. If the routine you can keep is a wash every two weeks, choose a darker midtone or a pattern that hides fur well between washes, and use a throw on the favorite spot to stretch the interval.

    Conclusion

    Choosing a pet friendly sofa slipcover comes down to a few practical decisions made in the right order: measure the sofa, watch your pet’s habits, pick a tightly woven washable fabric, match the fit to the sofa shape, and choose a color that hides fur between washes. Add separate protection for cushions, arms, and the front edge, check fastenings and comfort, and keep a spare cover and a simple washing routine. Done this way, a slipcover stops being a cover you fight with and becomes part of everyday living with pets: the sofa stays protected, the room still looks cared for, and laundry day stays simple.

    FAQs

    Can a slipcover really protect a sofa from pets?

    Yes, a well fitted, washable slipcover protects the sofa underneath from fur, dirt, claws, and spills, as long as it covers the seat, arms, and back and is washed regularly. It will not make a sofa indestructible, and heavy scratching can still wear fabric over time, so check seams and high wear spots often.

    What fabric is best for a sofa slipcover with dogs?

    A tightly woven, machine washable fabric in a sturdy cotton blend or a smooth synthetic blend is a practical choice for most dog homes, since it releases fur in the wash and gives claws less to catch. Test a swatch at home for fur pickup and washing before buying a full cover, and favor separate cushion covers for easy laundering.

    What fabric works best for a sofa slipcover with cats?

    A smooth, tight weave without loops or raised pile works best for cat homes, since claws catch less easily on flat fabric than on nubby or looped textures. Reinforced seams at the arms and a washable throw over a favorite kneading spot add extra protection where cats work the fabric most.

    How often should I wash a pet sofa slipcover?

    Wash the cover as often as shedding and dirt demand, which for many pet homes means every one to two weeks, with throws washed more often. Shake the cover out and lint roll between washes, spot clean muddy marks promptly, and always follow the care label for temperature and drying.

    Should I buy a loose or tailored slipcover for a pet home?

    A relaxed or tailored fit usually works better than a very loose cover in a pet home, since closer fits with elastic hems, ties, or tuck-in flaps stay in place when pets jump up. A loose cover is easier to remove and swap, but it bunches and needs straightening more often.

    How do I keep a slipcover from sliding off the sofa?

    Tuck fabric firmly into the seat and arm creases, use the cover’s ties and elastic hems as directed, and add a non-slip pad under the seat cover if the sofa base is smooth. Check the fit after washing, refit while the fabric is slightly damp if the maker allows it, and re-tuck after pets have used the sofa a few times.