Category: Living Room

Comfortable seating, thoughtful layouts, and finishing touches for a living room that feels like home.

  • How to Style Fake Flowers in a Vase for a Natural Look

    How to Style Fake Flowers in a Vase for a Natural Look

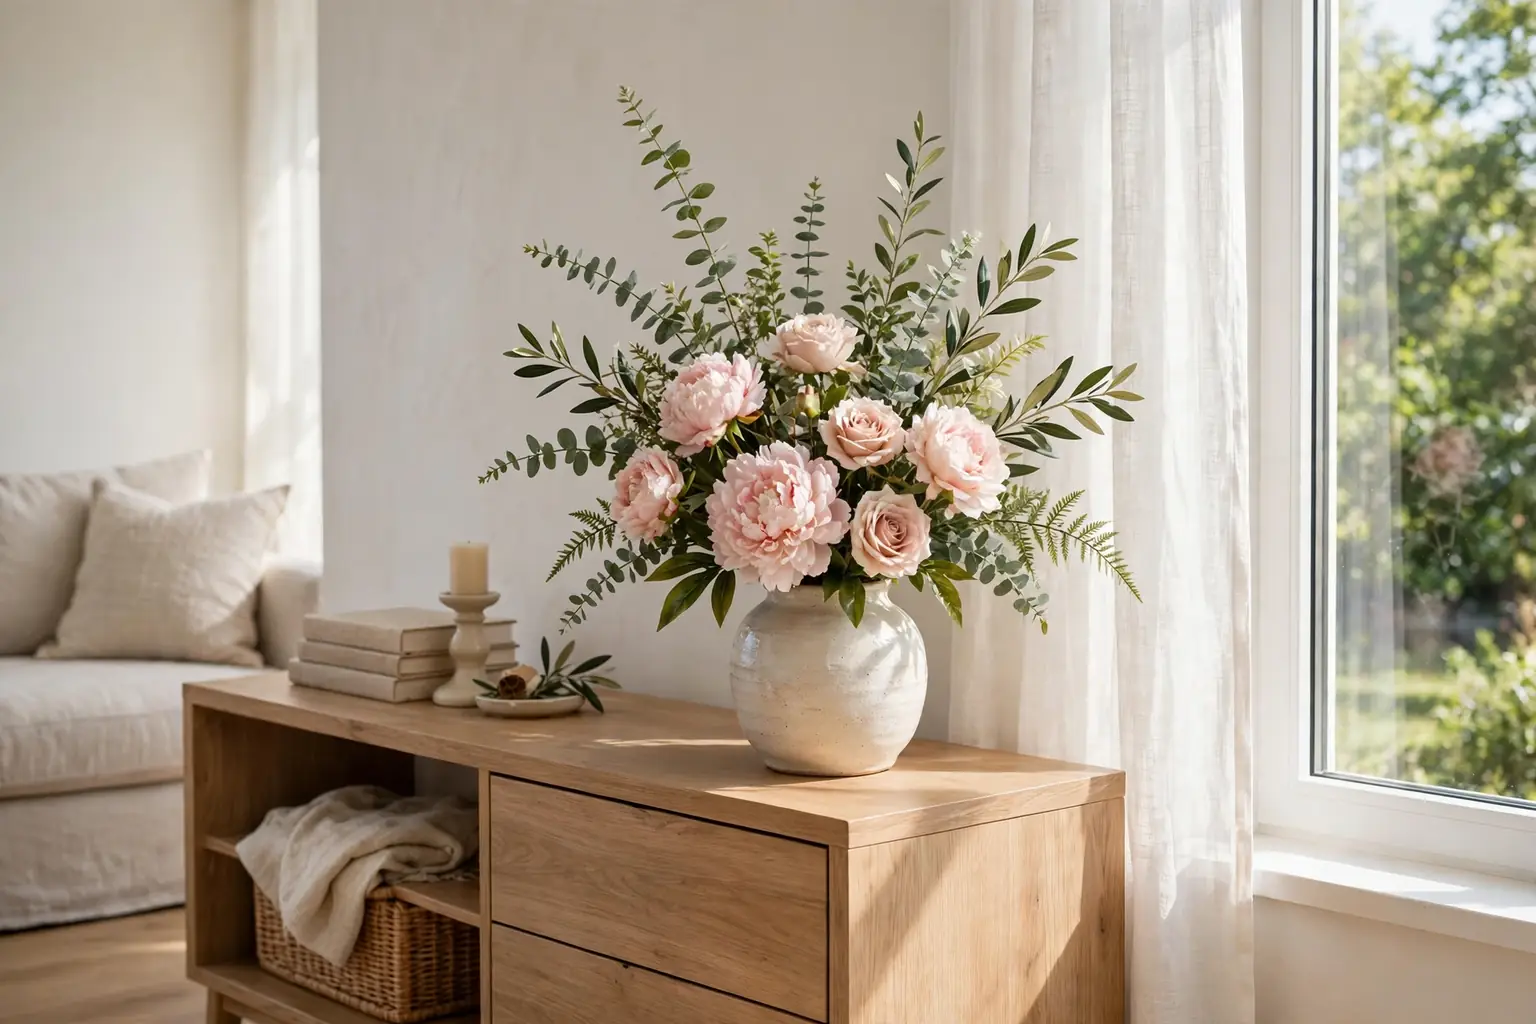
    Style fake flowers in a vase for a natural look by trimming stems to varied lengths, layering greenery first, then focal blooms at different heights, and hiding the stems inside the vase. Soften stiff petals by hand, step back to check the shape from all sides, and keep the palette to two or three colors that suit the room.

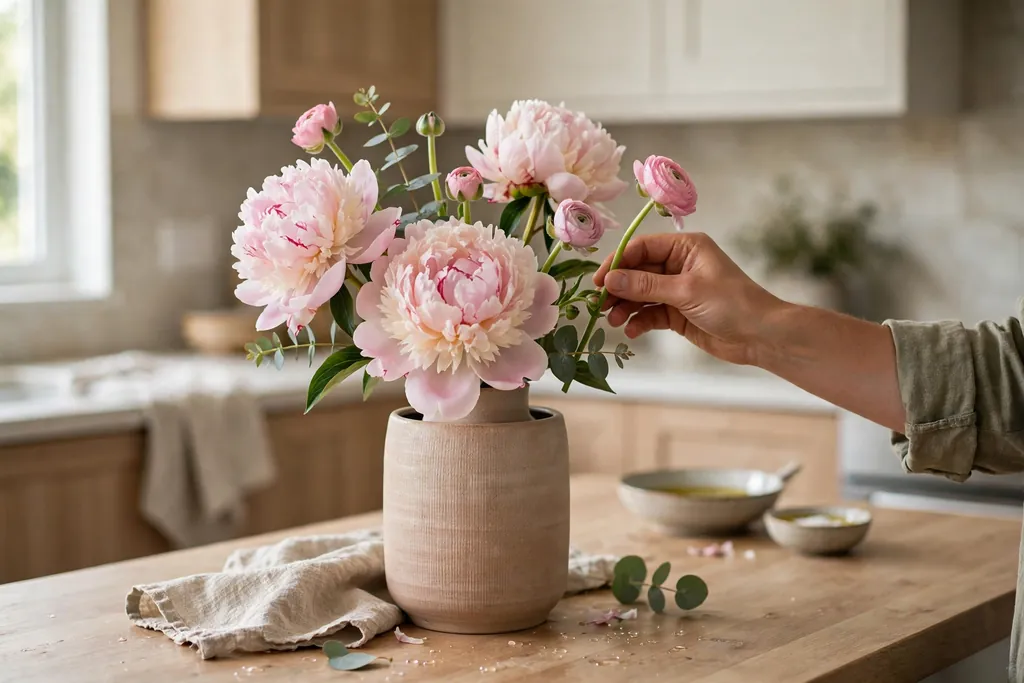
    Most artificial arrangements give themselves away in the same few places: every stem is the same length, every bloom faces forward, the stems show through clear glass, and the petals sit flat and stiff. Fresh flowers never grow that way. They lean, they turn, some blooms open wider than others, and a few leaves sit lower than the rest. Copy those small irregularities, and a faux arrangement starts to read as a bouquet rather than a bundle of plastic stems. For fresh flower ideas to borrow shapes from, see these fall flower arrangements.

    Key Takeaways

    • Start with the vase and the spot: a low wide vase suits a dining table, a tall vase suits a console or mantel.
    • Vary stem lengths and bloom heights so the shape looks grown, not packed.
    • Layer greenery first, then focal blooms, then fillers, so no single layer looks pasted on.
    • Hide stems inside the vase with stones, moss, or a smaller inner container.
    • Bend stems gently and turn some blooms sideways or down, since real blooms rarely all face forward.
    • Soften petals and leaves by hand before you set the vase in place.
    • Keep the palette to two or three colors and check the shape from all sides, not just the front.

    Materials and Supplies

    • A vase that suits the spot, plus a smaller jar or container that fits inside it if the vase is clear glass
    • Faux flower stems: focal blooms, secondary blooms, greenery, and filler stems or berries
    • Wire cutters or strong scissors, for trimming faux stems to length
    • Floral tape, clear tape, or a small rubber band, for binding stems together
    • Stones, marbles, dried moss, or sand, for hiding stems inside a clear vase
    • A soft cloth and a small brush, for dusting finished arrangements
    • A tray or mat, to protect tables under heavy or wide vases
    • A ruler or tape measure, to check the height of the finished arrangement against its spot

    1. Pick a Vase That Suits the Spot
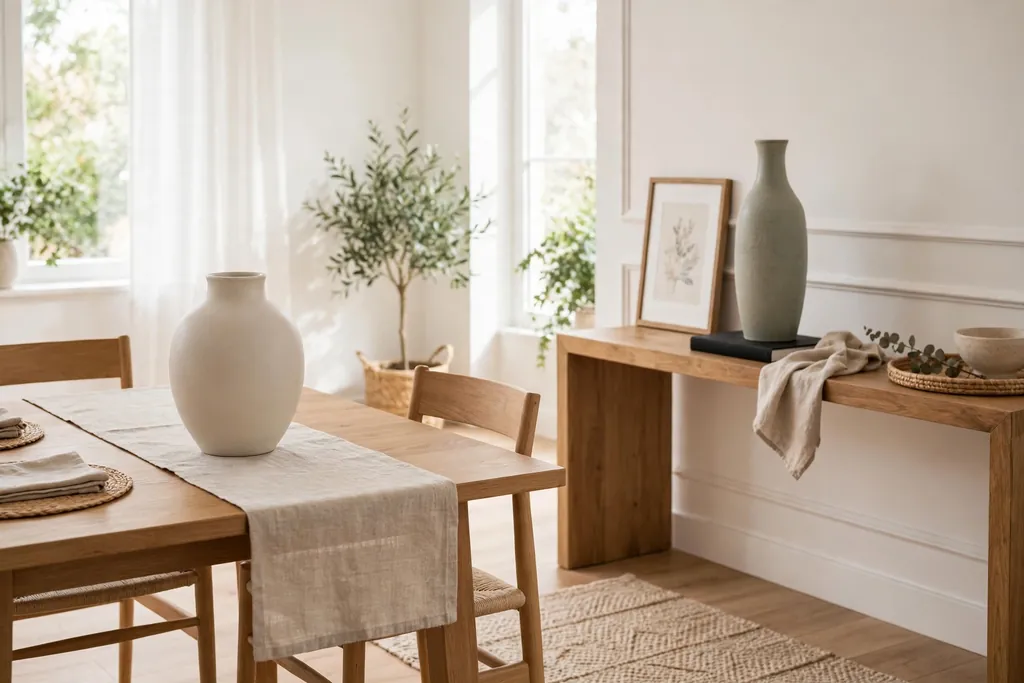
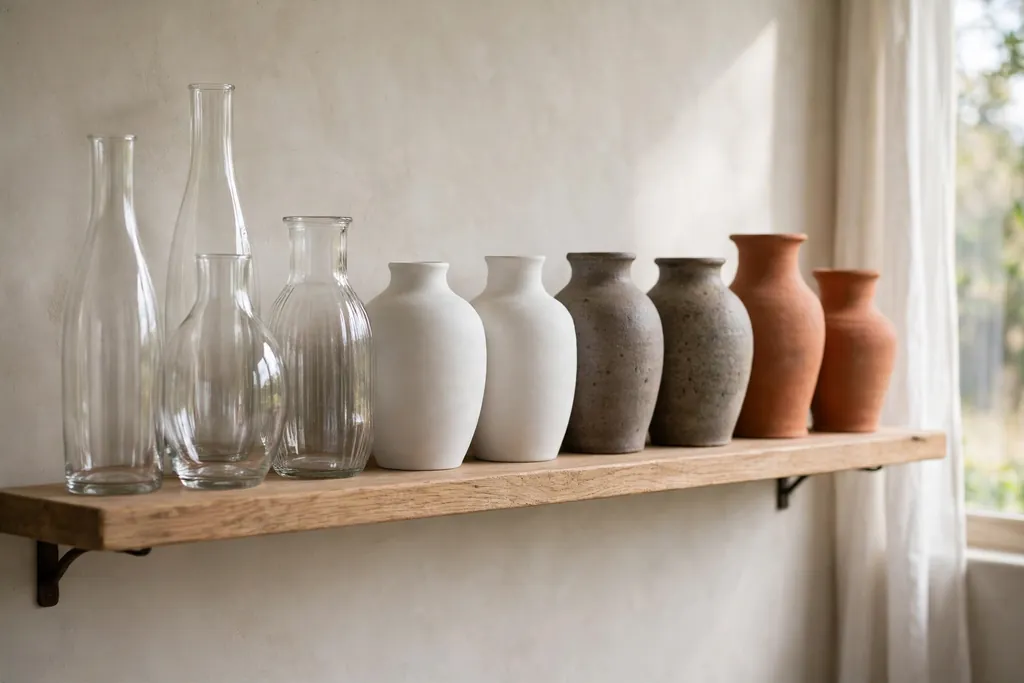
    Empty ceramic vase on a dining table and a tall vase on a console showing two spots for flower arrangements.

    Choose the vase before you arrange a single stem, and choose it for the spot where it will live. A dining table vase should stay low and narrow enough that people can see across the table, while a console or mantel can take more height, since no one sits across from it. A small spot such as a windowsill, a bathroom shelf, or a bedside table suits a bud vase or a small jar with only a few stems.

    Check the weight as well as the size. A tall bunch of faux stems can be top heavy, and a light vase tips easily when it is bumped. A heavier ceramic or stoneware vase holds a tall arrangement steady, while a clear glass vase shows the stems, so it needs a plan for hiding them, covered in step 9. Set the empty vase in its spot first and look at it from the door of the room, since that is the view most visitors will have.

    2. Sort Stems by Type, Height, and Color
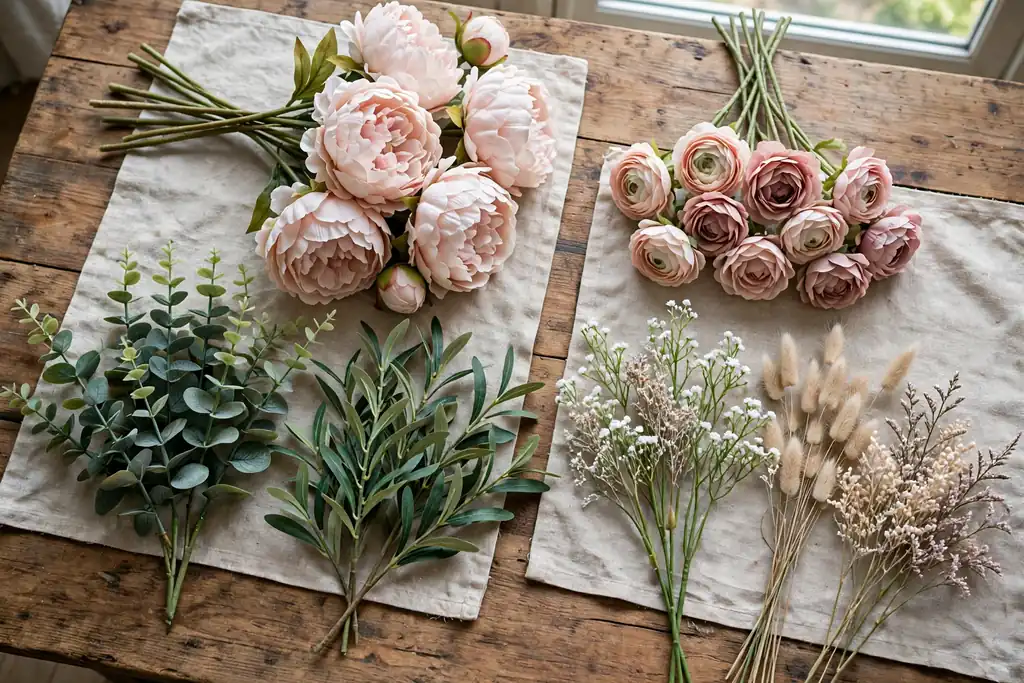
    Faux flower stems sorted into groups on a wooden table with focal blooms

    Lay every stem out on a table before you start, and sort it into groups: focal blooms, secondary blooms, greenery, and fillers. Focal blooms are the largest or most eye catching flowers, such as peonies, roses, or dahlias. Secondary blooms are smaller flowers that support them. Greenery gives the shape its outline, and fillers such as berries, buds, or small sprigs close the gaps.

    Check each stem as you sort it. Straighten any stem that arrived bent in the wrong place, and set aside any bloom that looks crushed, since one damaged bloom draws the eye in a finished vase. Group colors together too, and decide on two or three main colors before you arrange. If the bunch includes a color that does not fit the room, leave those stems out rather than forcing them in, since a limited palette reads as more natural than a mix of every color in the pack.

    3. Trim Stems to Varied Lengths
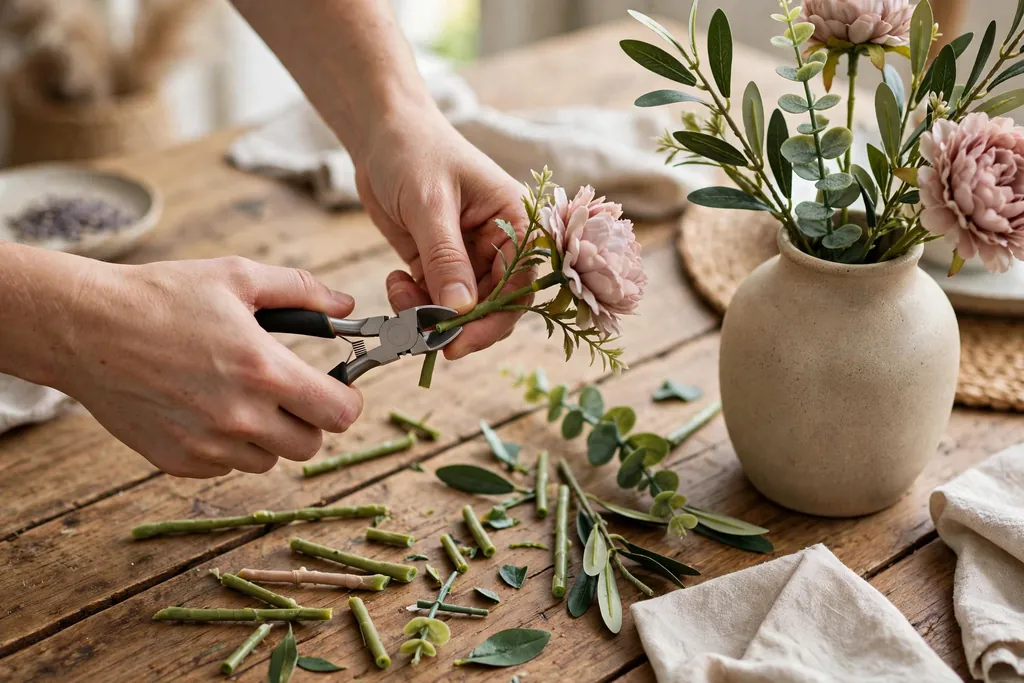
    Hands trimming faux flower stems to varied lengths with wire cutters over a wooden table.

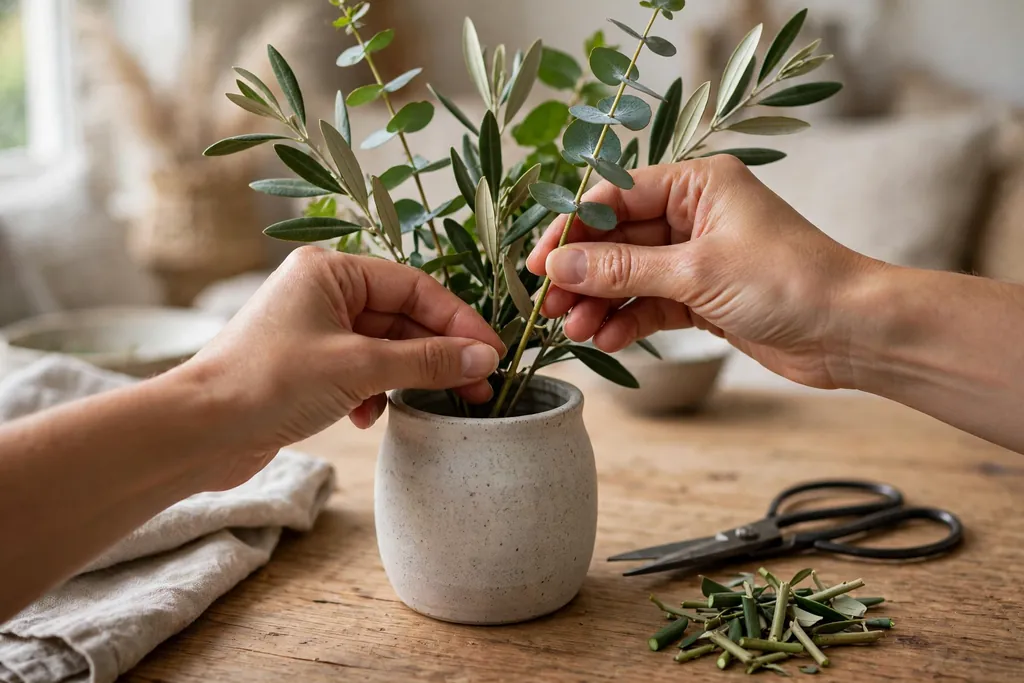
    Cut stems to length with wire cutters, not household scissors, since many faux stems have a wire core that dulls a light blade. Work from the tallest stems down, and cut in small amounts, since you can always trim more but you cannot add length back. Aim for a finished height that suits the vase: the tallest blooms should rise clearly above the rim, while the shortest greenery can sit just above it or at rim level.

    Do not cut every stem to the same length. Fresh bouquets have blooms at several heights, and a single flat top line is one of the clearest signs of a faux bunch. Cut focal stems longest, secondary stems a little shorter, and filler stems shorter still, with a spread of at least a few inches between the tallest and shortest stems. Keep the cut ends tidy, and save the trimmings until the arrangement is done, since a short offcut can fill a gap later.

    4. Bend and Shape Each Stem Before Arranging
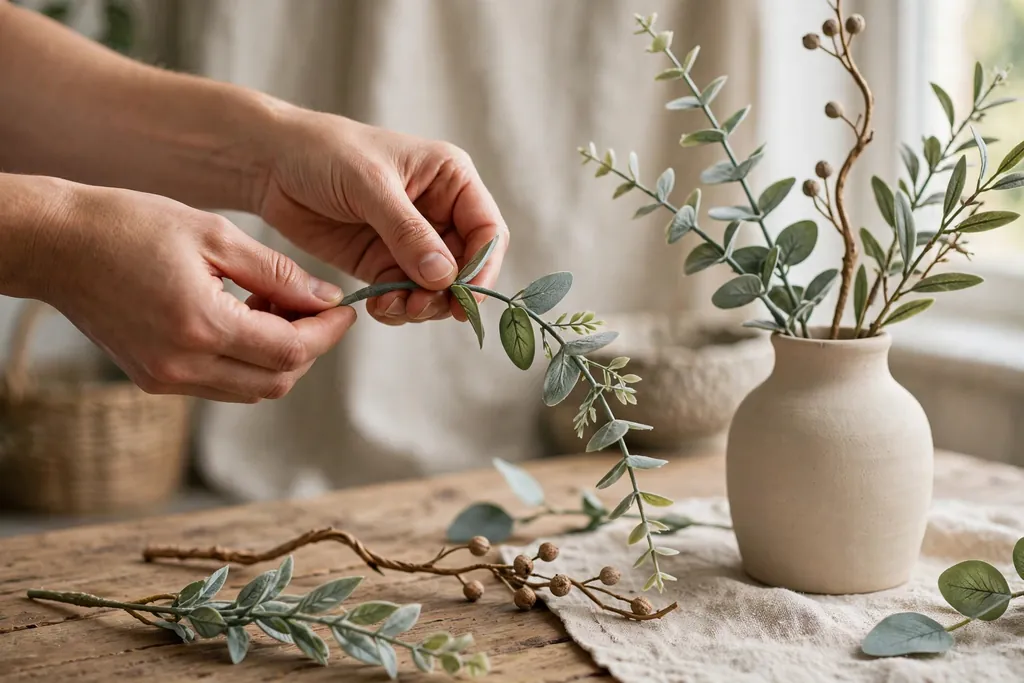
    Hands gently bending a faux flower stem into a slight curve with shaped stems and a vase nearby.

    Faux stems arrive straight from the pack, and straight stems make a stiff bouquet. Bend each stem gently by hand before it goes in the vase, giving it a slight curve rather than a sharp kink. Bend greenery outward so it frames the blooms, and bend a few bloom stems so their heads tilt slightly sideways or down, the way a heavy fresh bloom nods on its stem.

    Work slowly, and bend a little at a time. A wire core holds a gentle curve well, but a sharp bend can crease the stem covering and show a pale line. If a stem resists bending, warm it briefly between your hands first, then try again. Shape the stems as a group too: hold the bunch loosely in one hand, let the stems fall into a natural spread, and note which stems need more curve to fill a thin side.

    5. Build a Greenery Base First
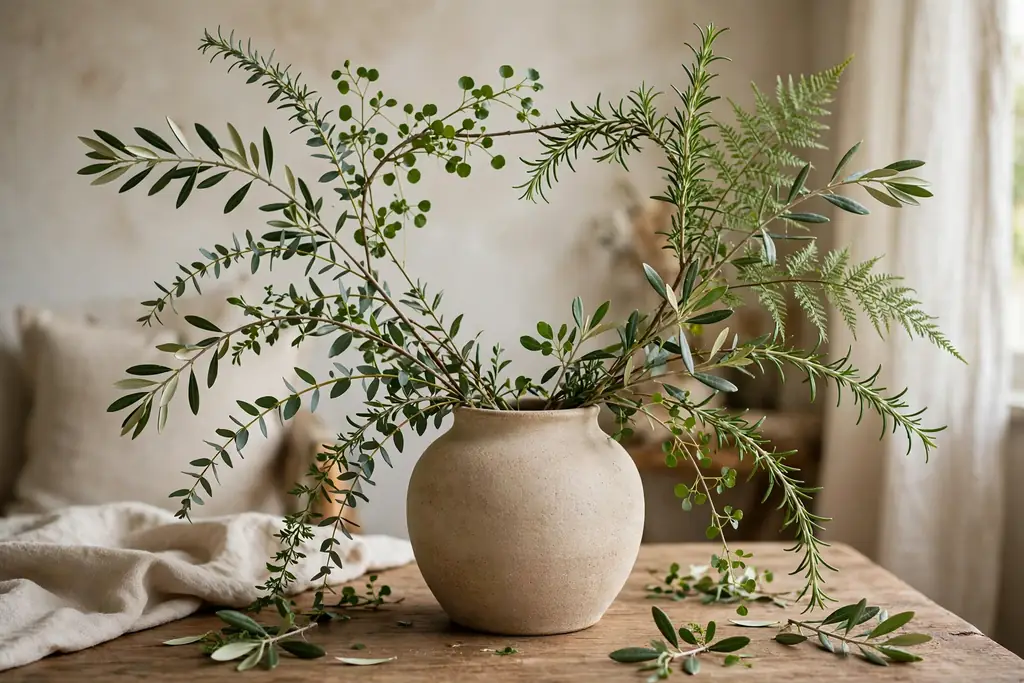
    Greenery stems arranged loosely in a ceramic vase forming an uneven frame before blooms are added.

    Start the arrangement with greenery, not flowers. Place three to five greenery stems in the vase first, spread around the rim so they form a loose frame. Let some greenery lean outward and some stand taller, so the outline is uneven rather than round and flat. This base does two jobs at once: it hides the mechanics of the arrangement, and it gives the blooms something to sit against, the way leaves support fresh flowers.

    Use more than one kind of greenery if you have it, such as a broad leaf stem plus a finer fern or eucalyptus style stem. Mixed greenery looks more like a gathered bouquet than a single repeated leaf shape. Keep the greenery below the height of the tallest blooms, since greenery that towers over the flowers makes the arrangement look like a plant with a few blooms stuck in it. Step back after the base is in, and add one more greenery stem wherever the frame looks thin.

    6. Place Focal Blooms in Odd Numbers
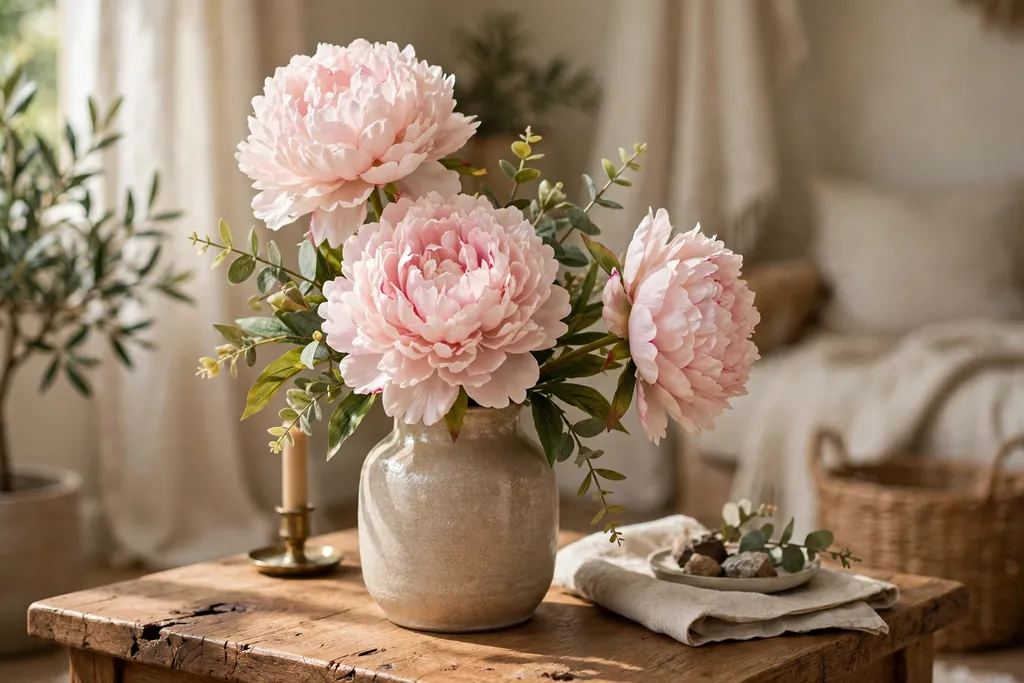
    Three large faux peonies at varied heights in a vase with one bloom turned partly sideways on a side table.

    Add focal blooms next, in odd numbers such as three or five, since odd groups look less staged than even pairs. Place the first focal bloom near the center and slightly taller than the rest, then place the others around it at varied heights and angles. Turn at least one bloom partly sideways, so the arrangement does not read as a flat front row of faces.

    Push each focal stem down into the vase firmly, and check that it stays where you put it. If a stem slides or spins, bind it to a greenery stem with a small piece of floral tape low down, where the tape will sit inside the vase. Leave clear space between focal blooms, since crowded focal blooms flatten each other and hide their shapes. The gaps you leave now are filled in the next steps, not by pushing more large blooms in.

    7. Add Secondary Blooms at Varied Heights
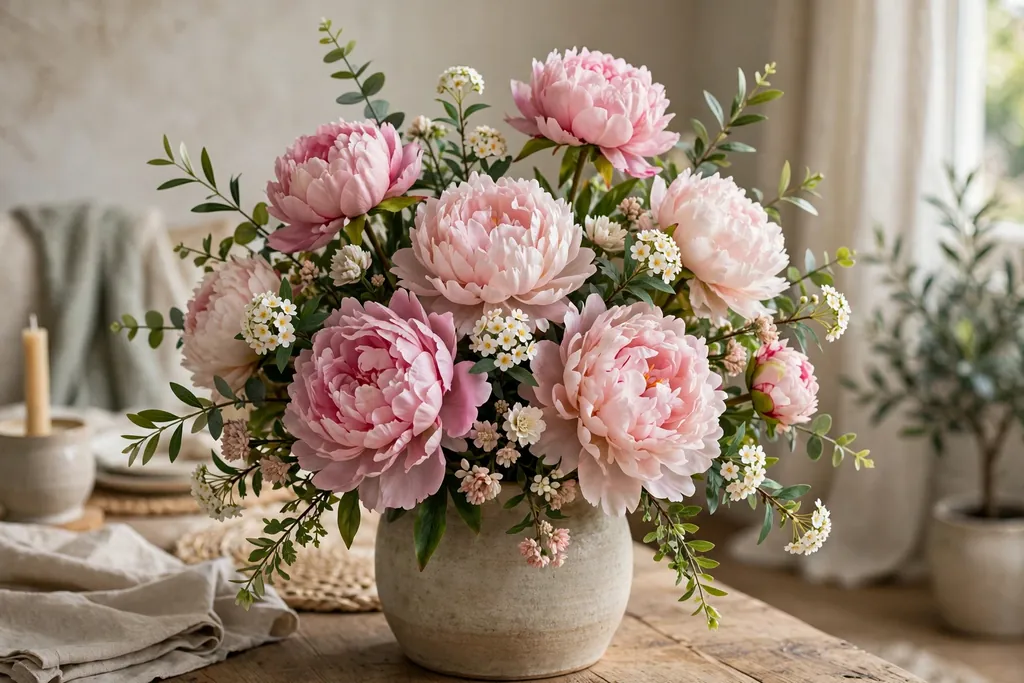
    Smaller faux blooms added between large peonies in a vase at varied heights with greenery between them.

    Secondary blooms fill the middle layer of the arrangement and link the focal blooms to the greenery. Add them one at a time, placing each at a different height from its neighbors. Some should sit just below a focal bloom, some should sit between two focal blooms, and one or two can sit lower, near the rim, to soften the edge of the vase.

    Keep turning stems as you work, so some secondary blooms face forward, some face partly sideways, and one faces slightly down. Check the arrangement from the side as well as the front, since a bouquet seen from a sofa or a doorway is rarely seen straight on. If one side looks heavier than the other, move a secondary bloom to the thin side rather than adding a new stem, since moving a stem costs nothing and keeps the palette under control.

    8. Fill Gaps With Berries, Buds, and Small Sprigs
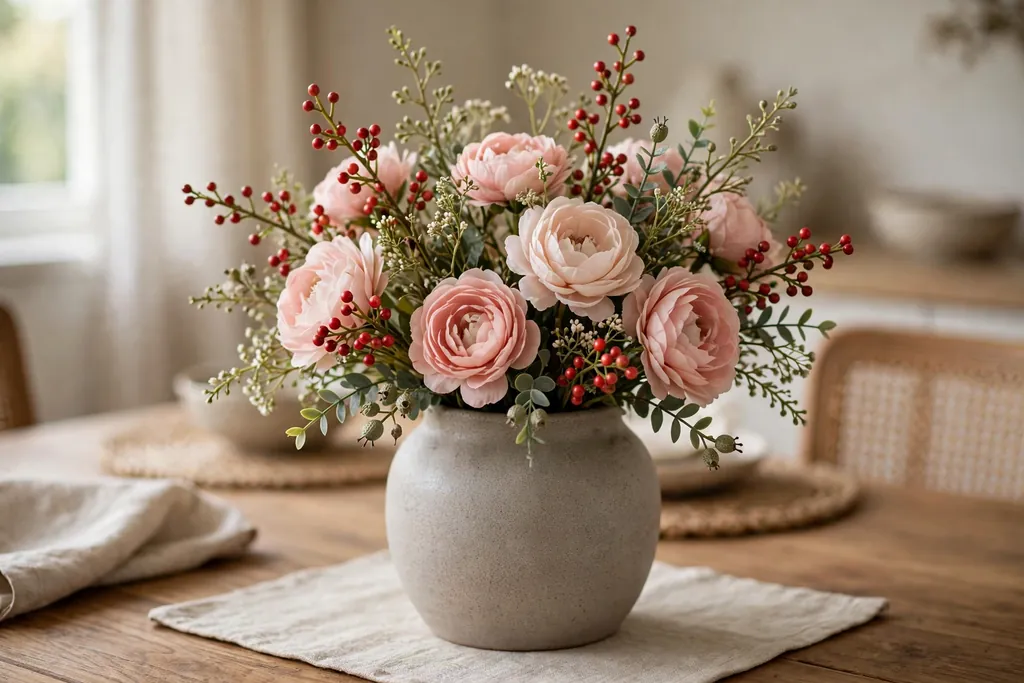
    Berry sprigs and small filler stems tucked into gaps between faux blooms in a vase on a dining table.

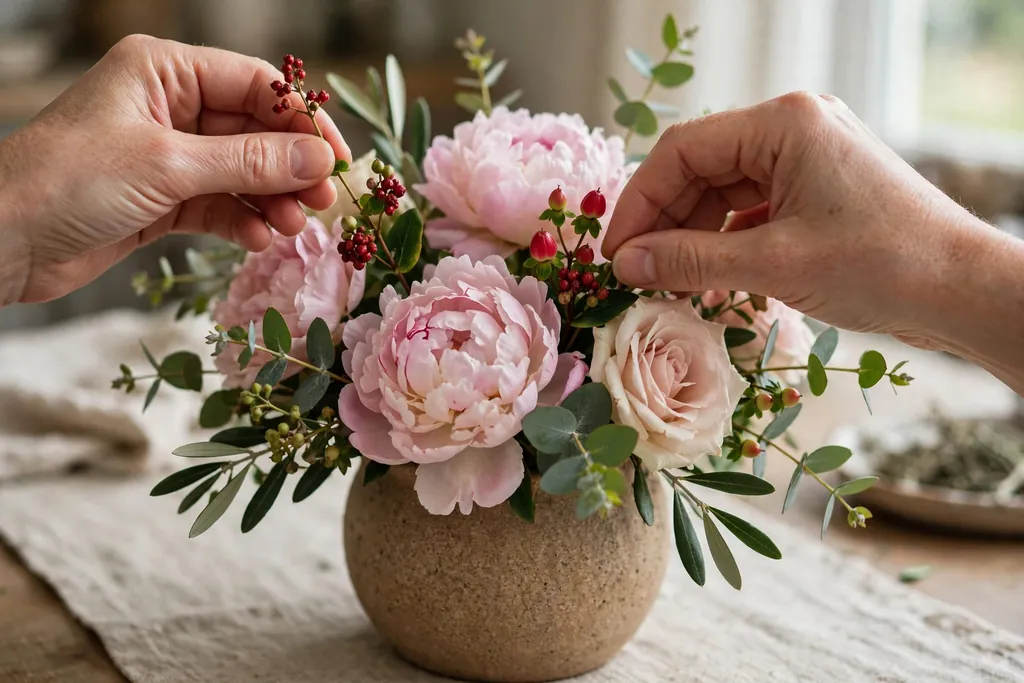
    Fillers close the small gaps that make an arrangement look thin, without adding more large blooms. Tuck berry sprigs, small buds, and fine filler stems into the spaces between focal and secondary blooms, pushing each filler stem down until its tip sits just below the blooms around it. Fillers should read as texture, not as separate flowers competing for attention.

    Use fillers sparingly at first, and step back after every few stems. It is easy to overfill a faux arrangement, and an overfilled vase looks packed rather than natural. Aim for a shape where you can still see some greenery and some space between blooms, the way a fresh bouquet shows leaves and air between its flowers. Save a few filler stems for the final check in step 10, when small gaps show up more clearly.

    9. Hide the Stems Inside the Vase
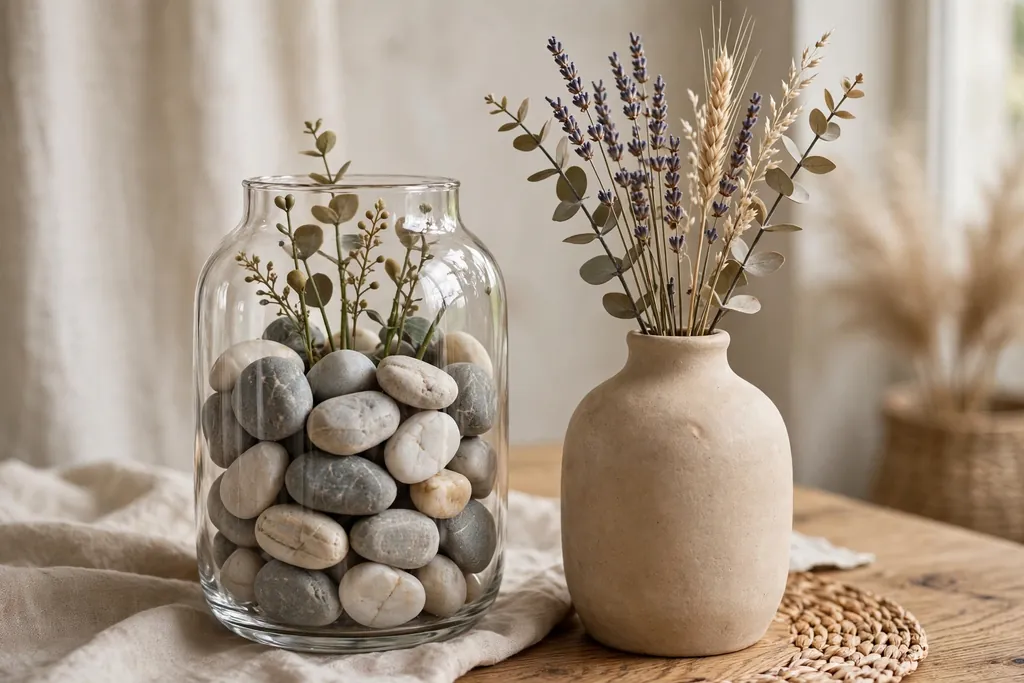
    Clear glass vase with stones hiding faux flower stems inside beside an opaque ceramic vase.

    Visible faux stems are the fastest giveaway, especially in clear glass. If the vase is clear, hide the stems before the arrangement goes on display. One simple method is to set a smaller opaque jar inside the vase and arrange the stems in that jar, so only the jar, not the stems, shows through the glass. Another method is to fill the bottom of the vase with stones, marbles, or sand up to the level where the stems bunch together.

    For opaque vases, the same idea still helps: wrap the gathered stems with floral tape low down, so they form one tidy bunch rather than a loose tangle, and tuck dried moss over the top of the bunch where it meets the rim. Check the vase at eye level, since stems that look hidden from above can still show from a seated view. If the vase sits on a low coffee table, this seated check matters most.

    10. Soften Petals and Leaves by Hand
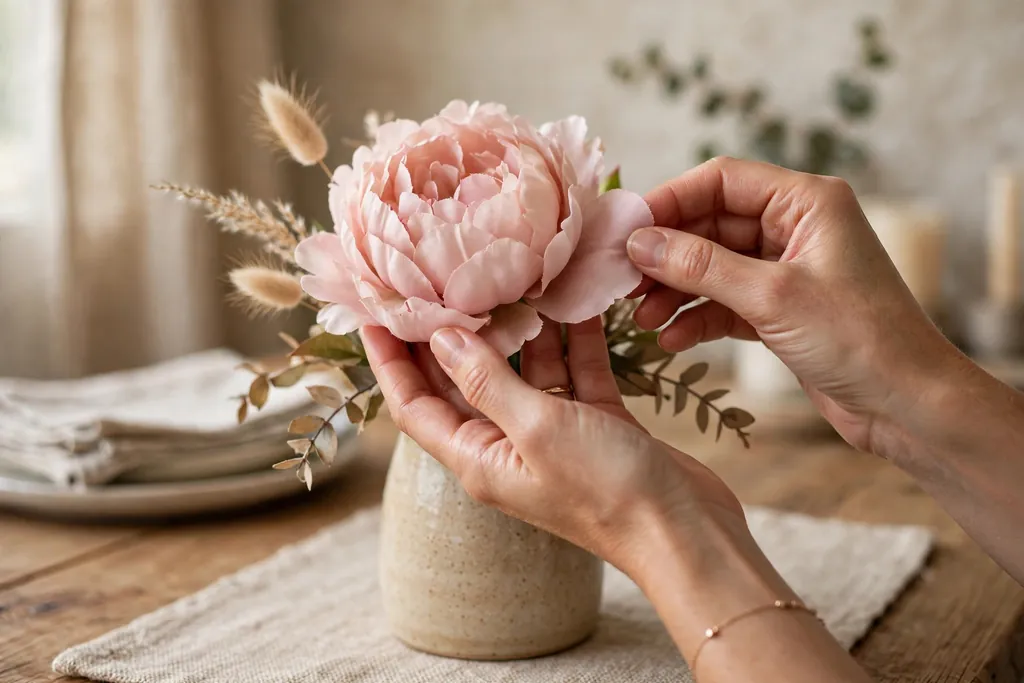
    Hands softening the petals of a faux peony in a vase by cupping the bloom and bending outer petals outward.

    Stiff petals are a clear sign of a faux flower, so soften every bloom by hand before you finish. Gently cup each bloom and bend the outer petals slightly outward, then ruffle the inner petals a little, so no two blooms open in exactly the same way. Open one bloom a little wider than the others, and leave one bloom slightly more closed, the way buds and open flowers sit side by side in a fresh bunch.

    Do the same for leaves: bend a few leaves down, curl one leaf edge slightly, and turn some leaves so their undersides show. Leaves that all point the same way look printed, while leaves at varied angles look grown. Work bloom by bloom, and check the result after each one, since overworking a petal can crease it. If a petal does crease, turn that bloom partly sideways so the crease sits out of direct view.

    11. Check the Shape From Every Side
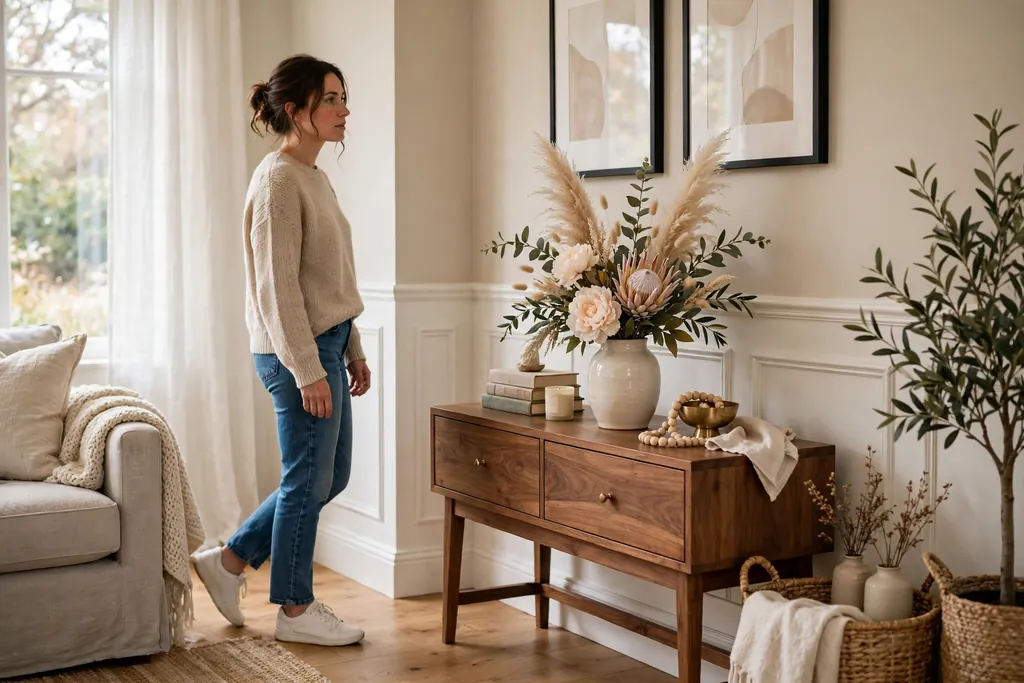
    Person stepping back to check a faux flower vase arrangement from the side on a console in a living room.

    Step back and check the arrangement from the front, both sides, and above, then turn the vase slowly and look for thin spots, flat sides, or blooms that all face one way. An arrangement that will sit against a wall only needs a good front, but one that will sit on a dining table or a kitchen island will be seen from all sides, so it needs a full shape.

    Fix what you find by moving stems, not by adding more. Turn a bloom that faces the wrong way, pull a greenery stem out to fill a thin side, and push a stem deeper if it sticks out too far. Set the vase in its real spot for this check, not just on the work table, since light and background change how full the shape reads. A vase that looks full in bright kitchen light can look thin in a dim corner, and a dim corner may need one extra greenery stem.

    12. Match the Palette to the Room and the Season
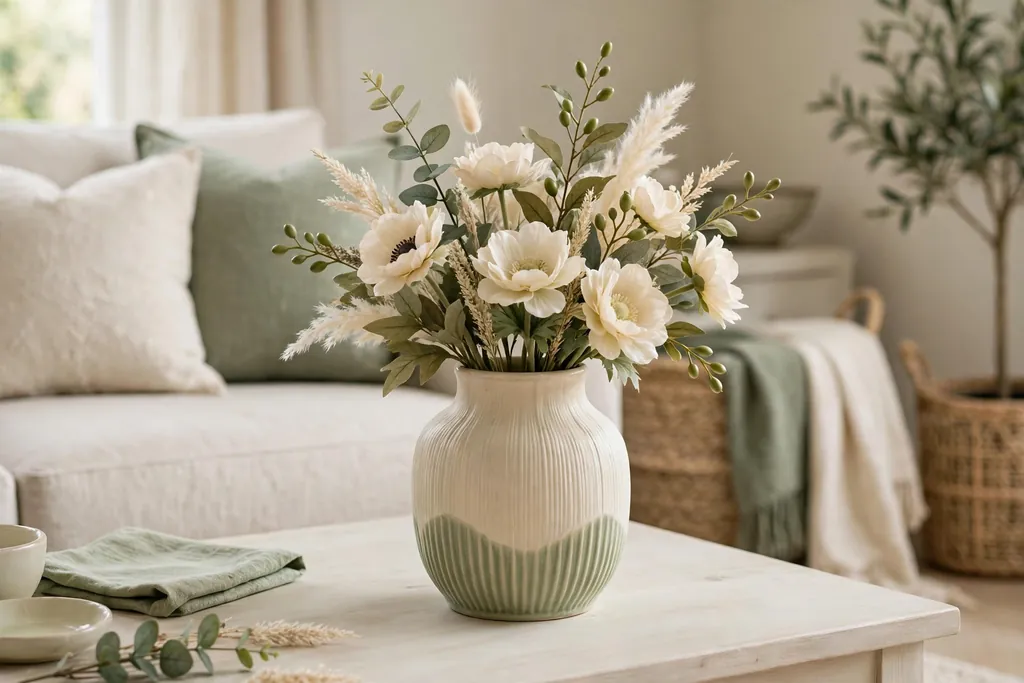
    Faux flower vase in soft cream and green tones on a pale living room table with matching cushions behind it.

    A natural looking arrangement suits the room it sits in. In a pale room, soft whites, creams, and pale greens blend in and let the shape lead. In a room with strong color, pick one color from the room, such as a cushion color or a curtain color, and repeat it in the blooms, so the vase reads as part of the room rather than a separate object. Keep the total palette to two or three colors, with greenery counted as one of them.

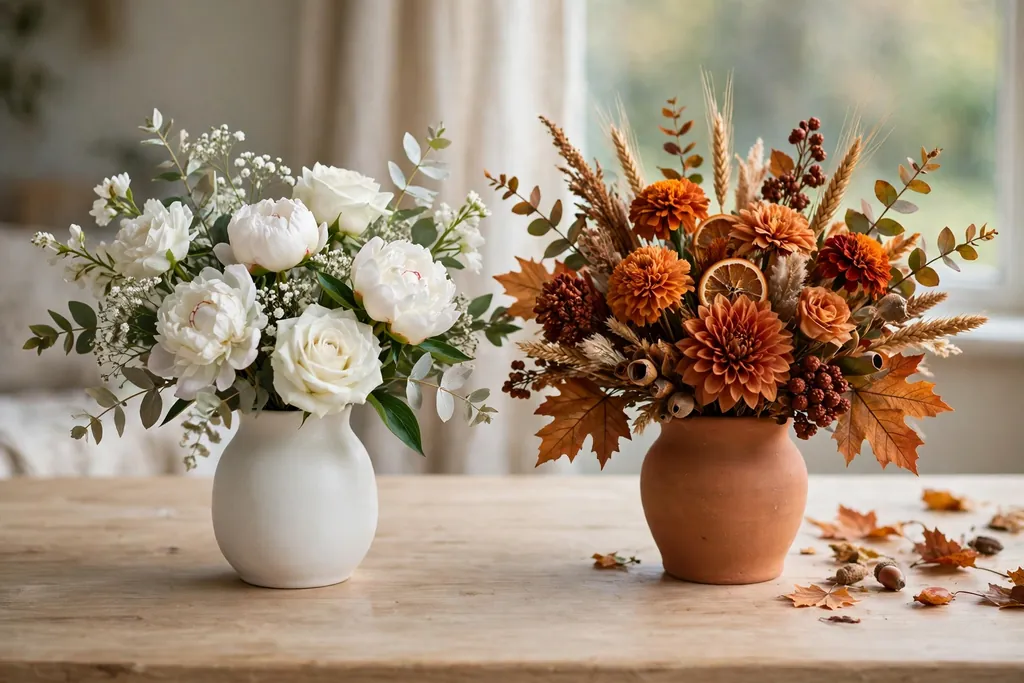
    Seasonal swaps keep the same vase working all year. Swap warm rust and gold blooms for pale spring blooms, or swap bright summer stems for muted winter greenery, and keep the greenery base if it still suits the new blooms. For seasonal vase ideas that carry over to fresh stems as well, see these Christmas vase styling ideas. Store the out of season stems in a box, grouped by color, so the next swap takes minutes rather than a fresh search through the house.

    13. Style the Surface Around the Vase
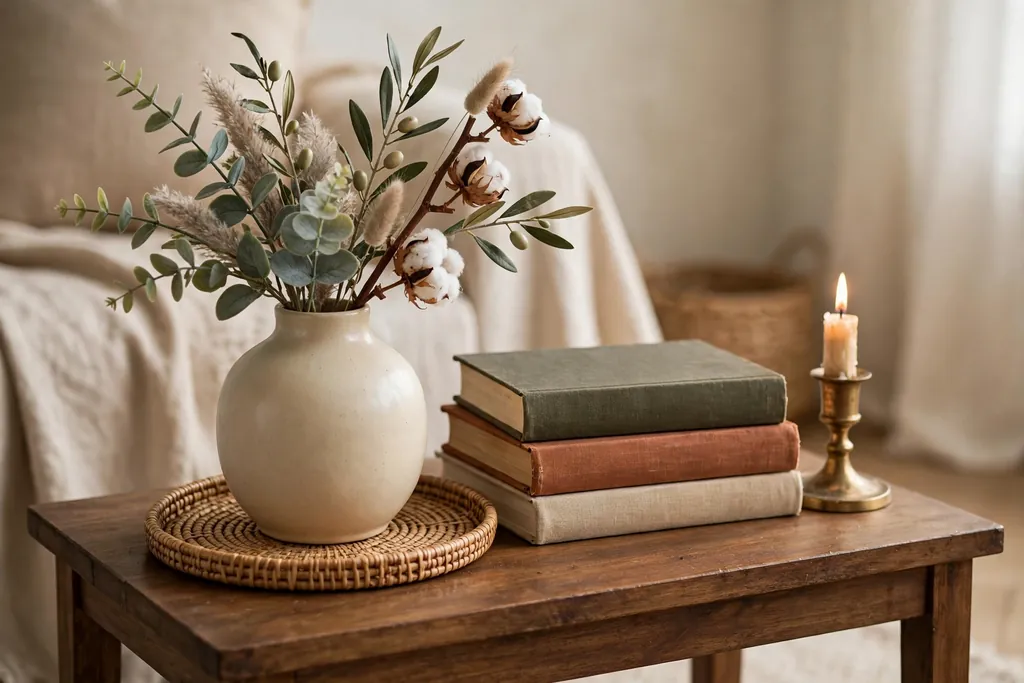
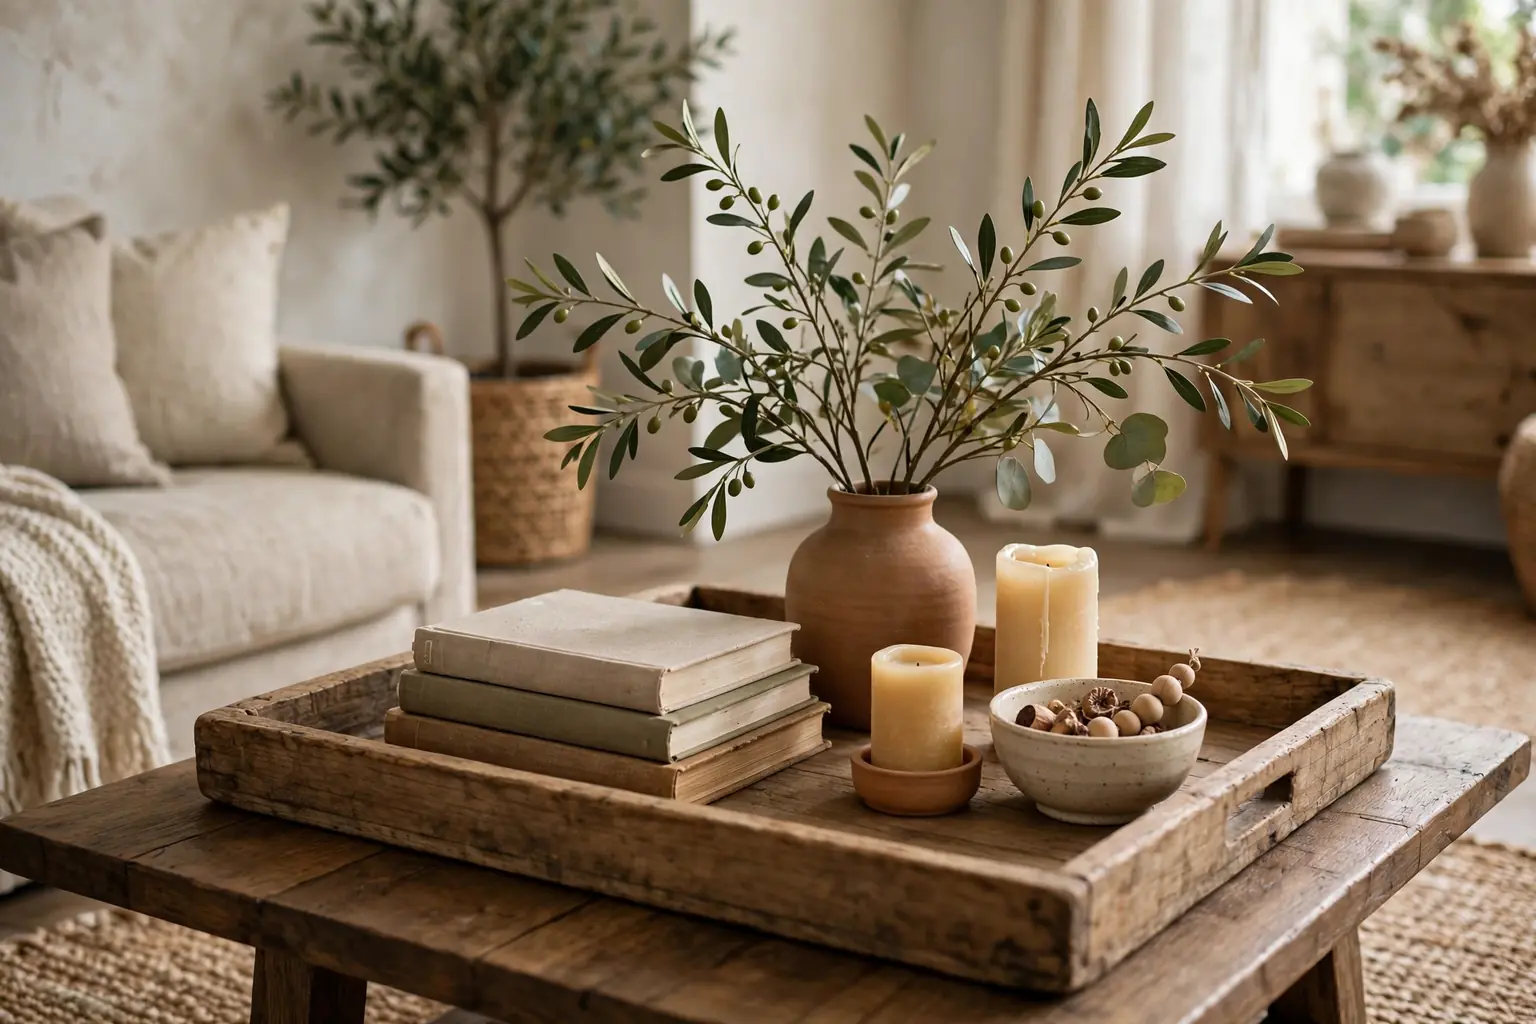
    Ceramic vase with faux flowers on a small tray beside a stack of books and a candle holder on a side table.

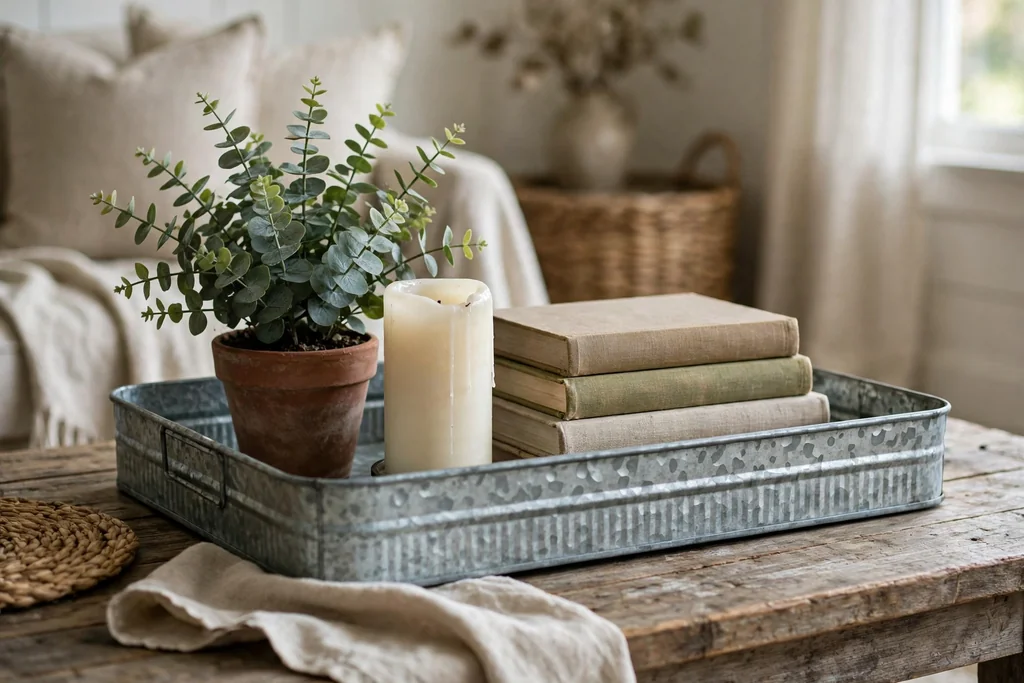
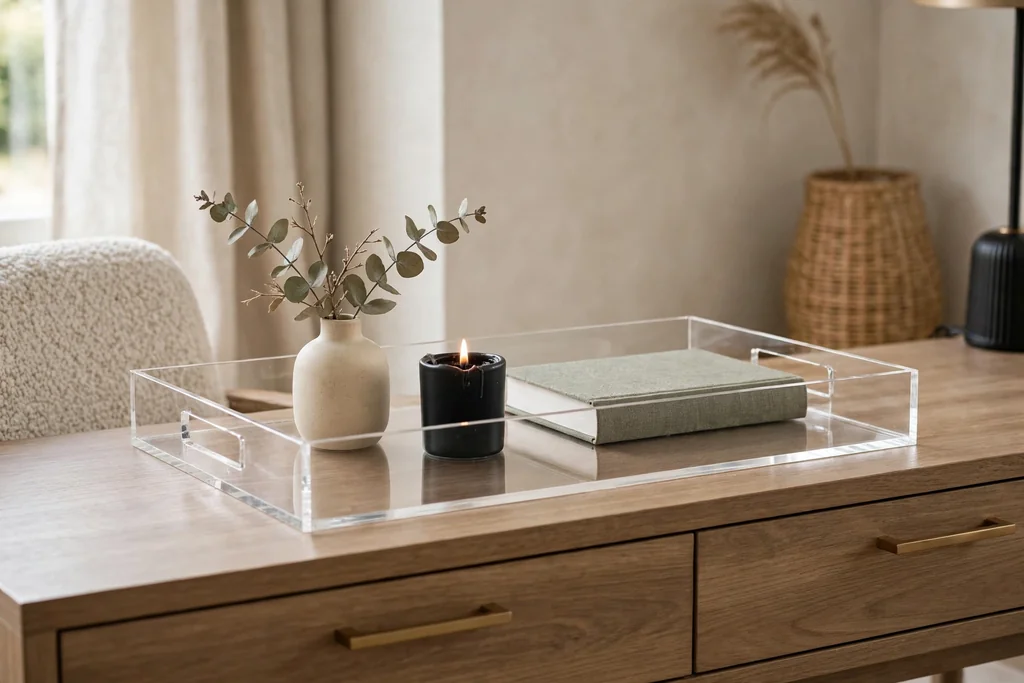
    The surface around the vase is part of the display, so style it with restraint. A small tray under the vase gathers the display into one group and protects the table, and one or two quiet objects beside it, such as a small stack of books or a single candle holder, give the vase scale. Leave clear space around the group, since a crowded surface makes even a good arrangement look cluttered.

    Match the scale of the neighbors to the vase. A tall vase suits a tall candle holder or a small stack of books beside it, while a low bowl suits a single small object or nothing at all. Keep flames clear of faux stems and fabric, and use flameless candles near dried material. If the vase sits on a dining table, leave room at each place setting, and choose a vase that lifts off in one move when the table needs to clear for a meal.

    14. Dust, Reshape, and Refresh Over Time
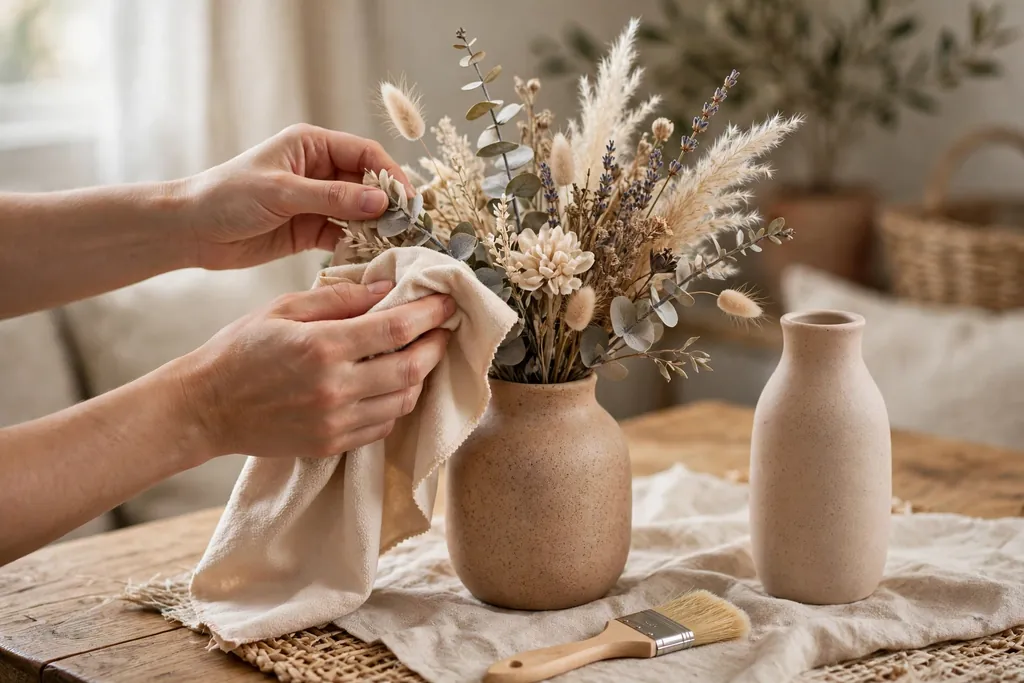
    Hands dusting faux flowers in a vase with a soft cloth beside a small brush on a table.

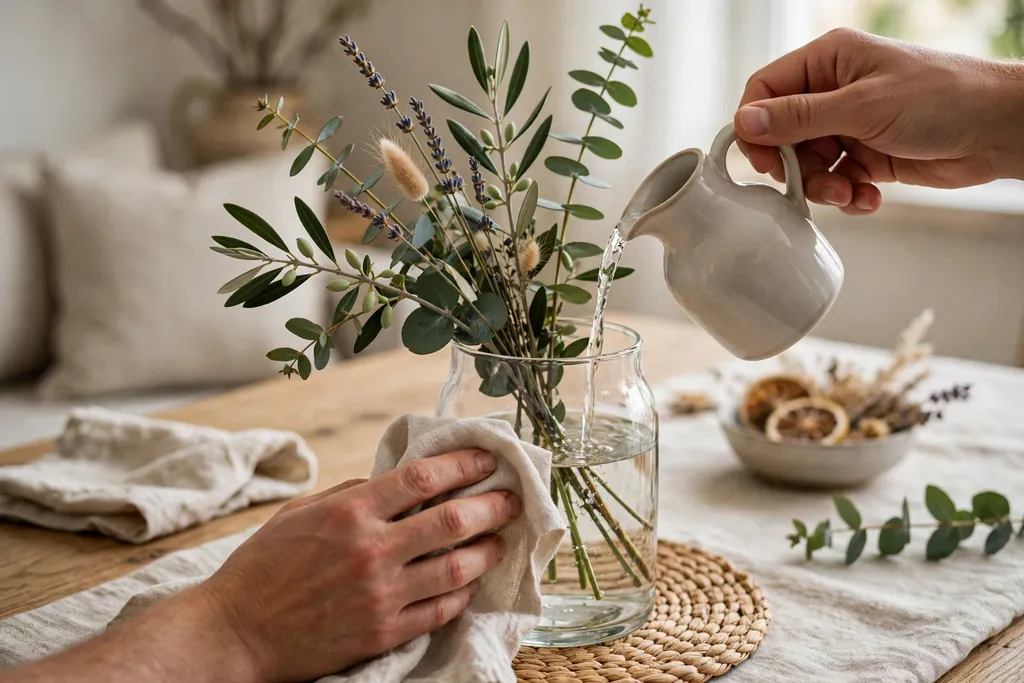
    Faux flowers need little care, but they do need dusting, since dust dulls petals and greenery fast. Dust the arrangement every few weeks with a soft cloth or a small brush, working from the top down so dust falls away from the blooms. For a deeper clean, hold the vase steady and blow gently across the blooms, or wipe each large petal with a slightly damp cloth, then let the arrangement dry before it goes back in place.

    Reshape as you dust. Stems settle and lean over time, especially in a warm room, so straighten any stem that has drifted, re-soften any petal that has flattened, and swap one tired bloom for a fresh stem from storage if the color has faded. Keep the arrangement out of direct sun, since sun fades faux colors faster than shade, and keep it away from heat vents. With regular dusting and small reshapes, a well styled faux vase can hold its natural look for a long time.

    Conclusion

    Styling fake flowers in a vase for a natural look comes down to a few steady habits: choose a vase that suits the spot, vary stem lengths and bloom heights, layer greenery, focal blooms, and fillers in that order, and hide the stems inside the vase. Soften petals and leaves by hand, turn some blooms sideways, check the shape from every side, and keep the palette to two or three colors that suit the room. Dust and reshape the arrangement now and then, swap stems with the seasons, and the vase will read as a planned bouquet rather than a bundle of stems, with no watering and no wilting to manage.

    FAQs

    How do you make fake flowers look real in a vase?

    Start by varying stem lengths and bloom heights, bending stems into gentle curves, and turning some blooms sideways instead of facing them all forward. Hide the stems inside the vase, soften petals and leaves by hand, and keep the palette to two or three colors. These small irregularities copy how fresh flowers grow, and they do more for a natural look than any single stem choice.

    What is the best vase for fake flowers?

    The best vase is one that suits the spot and hides the stems well: a low wide vase for a dining table, a tall heavy vase for a console or mantel, and an opaque ceramic or stoneware vase if you want the stems fully hidden. Clear glass works well too, as long as you hide the stems with a smaller inner jar, stones, or sand. Choose a vase with a stable base, since tall faux bunches can be top heavy.

    How do you hide fake flower stems in a clear vase?

    Set a smaller opaque jar inside the clear vase and arrange the stems in that jar, so only the jar shows through the glass. Another option is to fill the bottom of the vase with stones, marbles, or sand up to the point where the stems bunch together. For a softer look, tuck dried moss over the top of the bunch where it meets the rim, and check the vase at eye level from a seated view.

    How tall should fake flowers be in a vase?

    Let the tallest blooms rise clearly above the rim, with enough stem inside the vase to keep the bunch steady, and keep the shortest greenery at or just above rim level. A useful starting point is a finished height that suits the spot: low enough to see across a dining table, taller on a console or mantel, and clear of any mirror or artwork above the vase. Trim in small amounts and test the height in the real spot before you finish.

    Can you mix fake flowers with real greenery?

    Yes, mixing faux blooms with real greenery can help a vase look more natural, as long as you check the real greenery often and replace it as it dries. Keep the real stems in water if the vase holds water, or use a small jar of water inside a larger vase so the faux stems stay dry. Remove real greenery promptly when it wilts, since one wilted stem draws attention to the whole arrangement.

    How do you clean and care for fake flowers in a vase?

    Dust the arrangement every few weeks with a soft cloth or a small brush, working from the top down, and wipe large petals with a slightly damp cloth for a deeper clean. Reshape stems and re-soften petals as you dust, and swap any faded bloom for a stored stem. Keep the vase out of direct sun and away from heat vents, since sun fades faux colors and heat can warp stems over time.
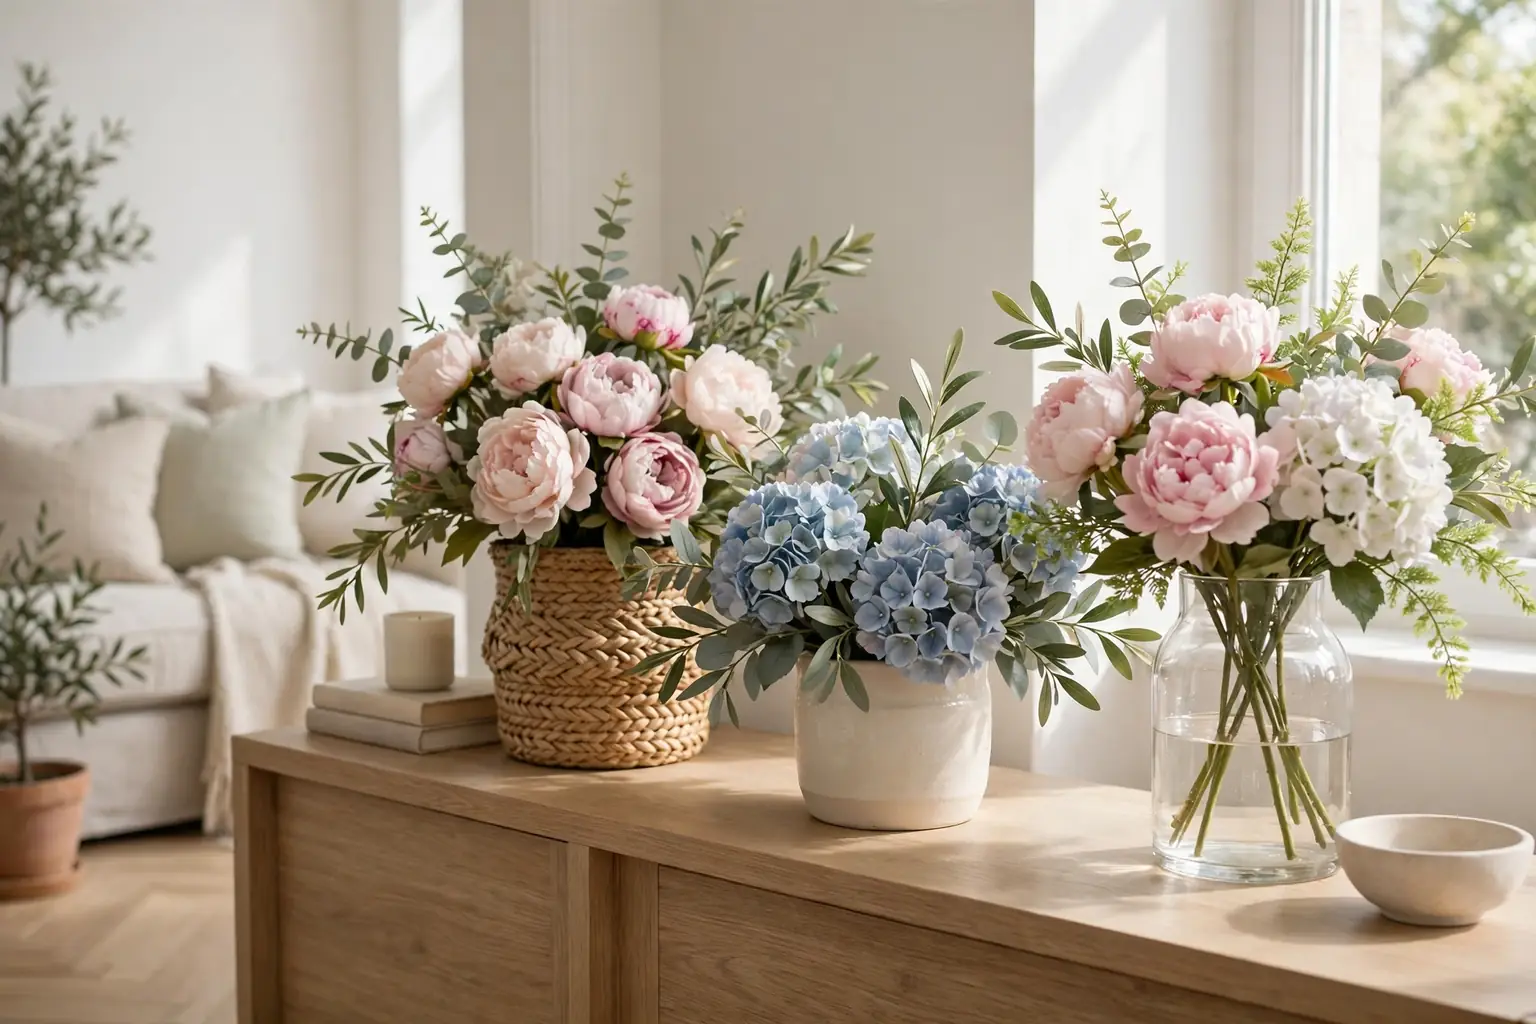
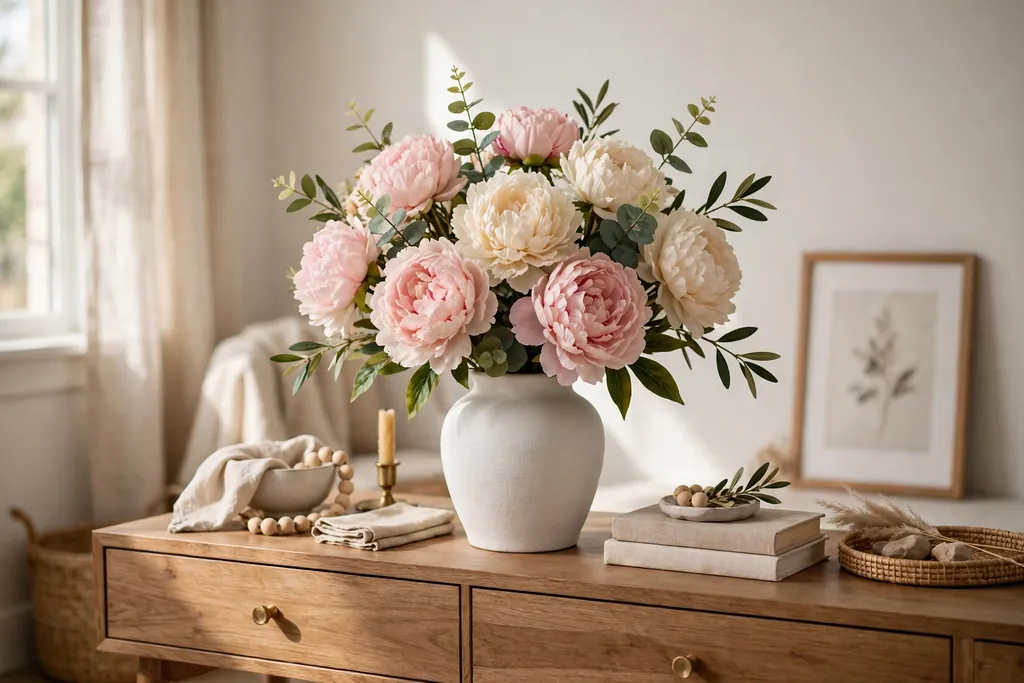
  • 21 Artificial Flower Arrangement Ideas That Look Natural

    21 Artificial Flower Arrangement Ideas That Look Natural

    Artificial flower arrangements look natural when you choose realistic stems with varied petal shapes, mix bloom sizes with greenery, and set them in a container that fits the spot. Bend stems to different heights, keep the palette to two or three colors, and leave space between blooms so the shape reads as a loose bunch, not a stiff bundle.

    The difference between a convincing arrangement and one that looks flat usually comes down to a few small choices. Real flowers are never perfectly even, so a good faux arrangement should not be either. Vary the stem heights, turn some blooms to the side, add a few leaves and filler stems, and check the shape from across the room, not just up close. For seasonal color ideas to pair with these arrangements, see these fall flower arrangements and these artificial fall flower arrangements.

    Key Takeaways

    • Choose realistic stems first: varied petal shapes, soft colors, and flexible stems that bend without creasing.
    • Mix bloom sizes with greenery and filler, so the arrangement has depth instead of one flat layer of color.
    • Bend stems to different heights and turn some blooms sideways, the way real flowers grow.
    • Keep the palette to two or three colors, and repeat one color in the room for a planned look.
    • Match the container and the total height to the spot: low for a dining table, tall for a corner, small for a desk.
    • Dust stems now and then, keep faux flowers out of direct sun, and store them upright so they hold their shape.
    • One set of stems can serve several displays if you swap containers and filler with the seasons.

    1. Real Touch Peonies in a Ceramic Vase

    Real touch peonies in blush and cream in a white ceramic vase on a living room console.

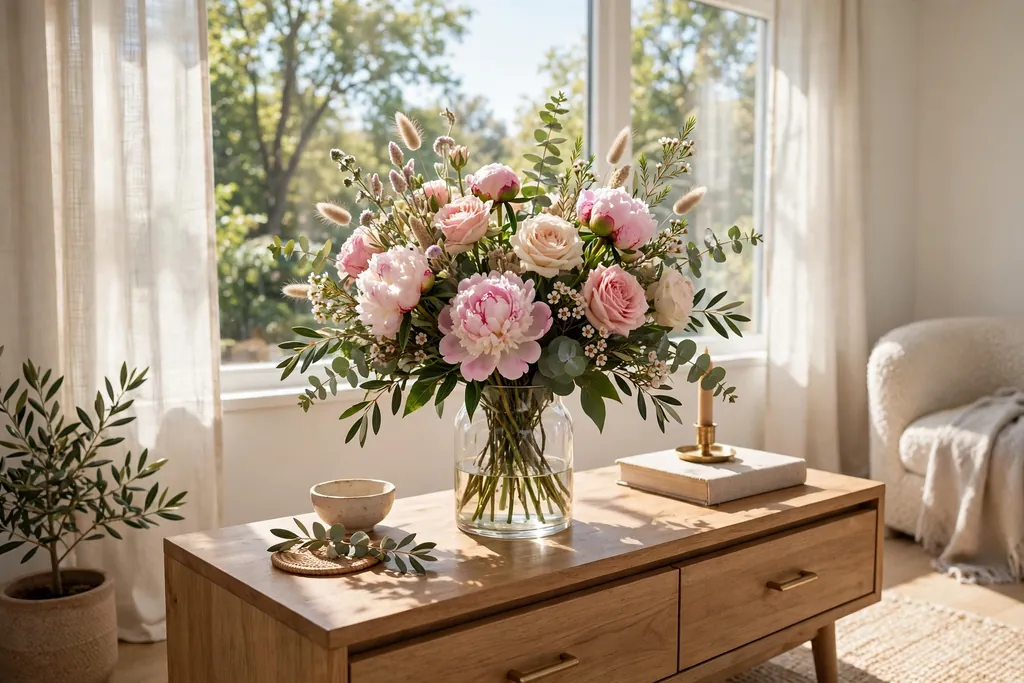
    Real touch peonies are the easiest way to start, because their layered petals and soft colors already read as real from a normal viewing distance. Choose five to seven stems in blush, cream, or soft pink, add two or three leafy stems, and set them in a mid height ceramic vase in white, cream, or sage. The solid vase hides the stem ends and grounds the soft blooms.

    Trim the stems so the tallest bloom sits about one and a half times the vase height, then bend the outer stems slightly outward for a rounded shape. Turn the vase as you build, and check it from the side guests will see most. Place it on a living room console, a sideboard, or a coffee table where it can be enjoyed up close.

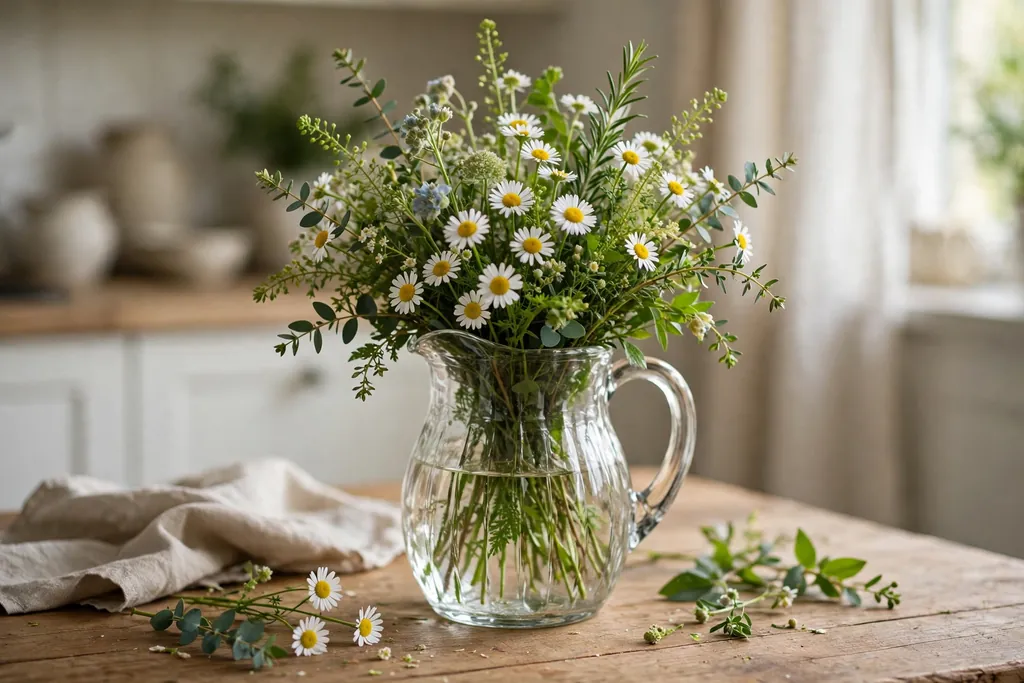
    2. Wildflower Mix in a Glass Pitcher

    Wildflower mix of small daisies and greenery in a clear glass pitcher on a kitchen table.

    A wildflower mix in a glass pitcher suits a kitchen table or an open shelf, where a relaxed bunch feels right. Combine small faux daisies, cosmos style blooms, and a few sprigs of greenery in cream, pale yellow, and dusty pink, and stand them in a clear glass pitcher. The pitcher shape gathers the stems without forcing them into a tight dome.

    Keep the stems loose and uneven, with a few taller stems rising above the rest. Glass shows the stems, so trim them cleanly and remove any loose leaves inside the pitcher. This arrangement lifts away in one move when the table is needed, and it pairs well with wood tables and simple tableware.

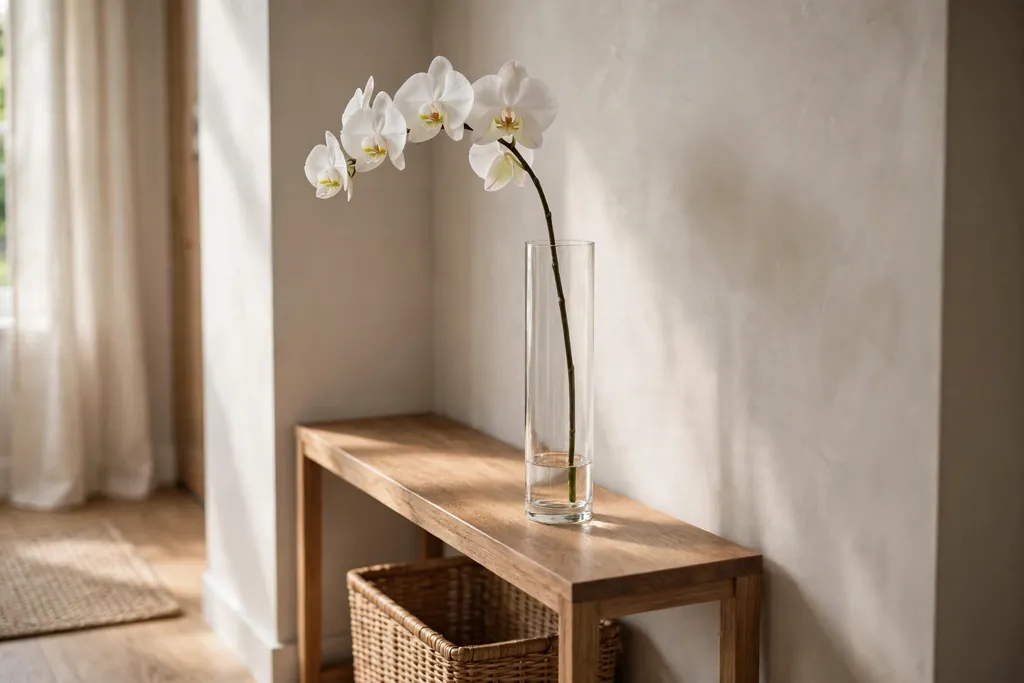
    3. Single Orchid Stem in a Tall Slim Vase

    Single white orchid stem in a tall slim glass vase on a narrow entryway console.

    A single orchid stem is the most restrained arrangement in this list, and it works where a full bouquet would crowd the spot. Choose one realistic phalaenopsis style stem with several open blooms and a couple of buds, and stand it in a tall, slim vase in clear glass or white ceramic. A single stem needs no filler, and adding more would weaken the clean look.

    Set the vase on an entryway console, a bathroom shelf, or a narrow hallway table, where its height draws the eye without taking up much depth. Keep the stem upright and slightly curved, as a real orchid grows, and dust the blooms gently now and then. If the stem leans, add a small stone or a short piece of foam inside the vase to hold it steady.

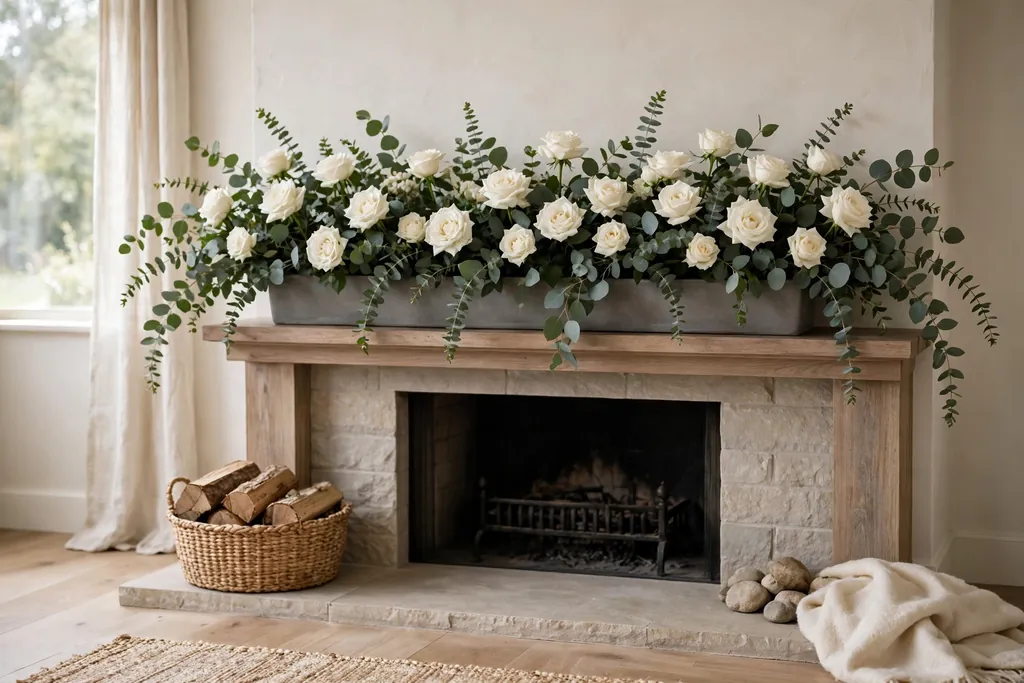
    4. Low Trough of Eucalyptus and White Roses

    Long low trough of white roses and eucalyptus on a fireplace mantel.

    A long, low trough of eucalyptus and white roses suits a mantel, a sideboard, or a long console, where a round bouquet would leave the ends bare. Lay a strip of floral foam along a wood or ceramic trough, then set short white rose stems along it, with eucalyptus sprigs between them and a few stems trailing slightly over the ends.

    Keep the total height low so the trough does not block a mirror or artwork above the mantel. This shape also works as a dining table runner when the trough is short enough to leave room for plates. For table arrangements that need to stay low for conversation, see these Thanksgiving flower arrangements.

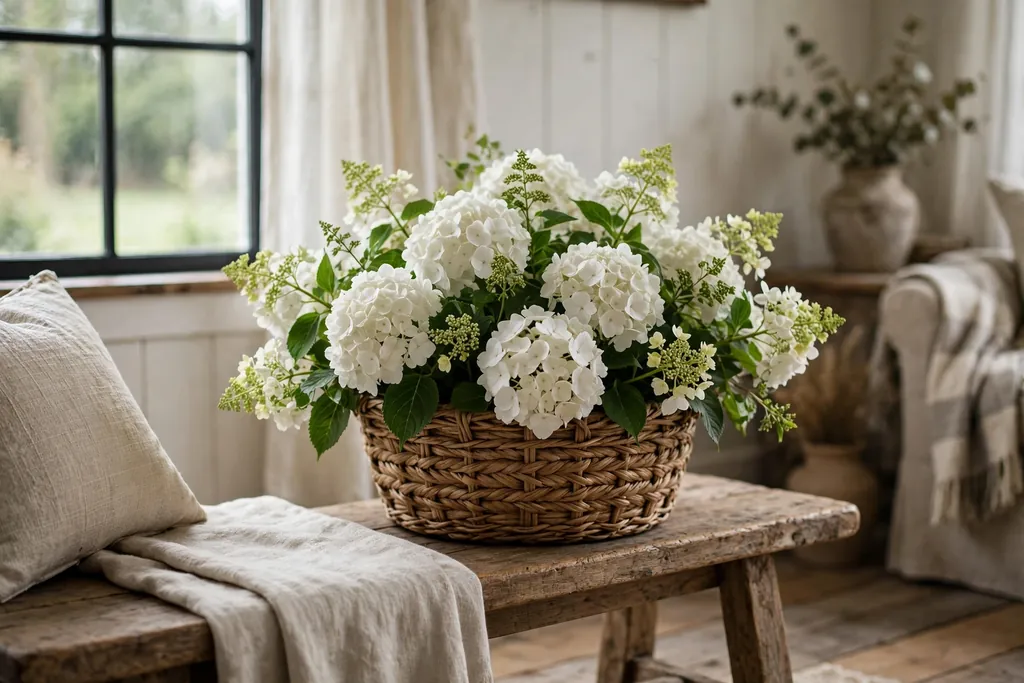
    5. Hydrangeas in a Woven Basket

    White hydrangeas in a woven basket on a bench in a farmhouse living room.

    Hydrangeas in a woven basket give a farmhouse living room a full, gathered look without a formal vase. Fill a basket with three to five large faux hydrangea heads in white, pale blue, or dusty pink, add a few leafy stems to fill gaps, and set the basket on a bench, a side table, or the floor beside a fireplace. The basket hides foam and stem ends well.

    Choose a basket with a sturdy base so the wide hydrangea heads cannot tip it forward, and set a mat underneath if the basket sits on a wood surface. This arrangement suits rooms with wood furniture and linen fabrics, and it can move from a living room to a bedroom in seconds when you want a change.

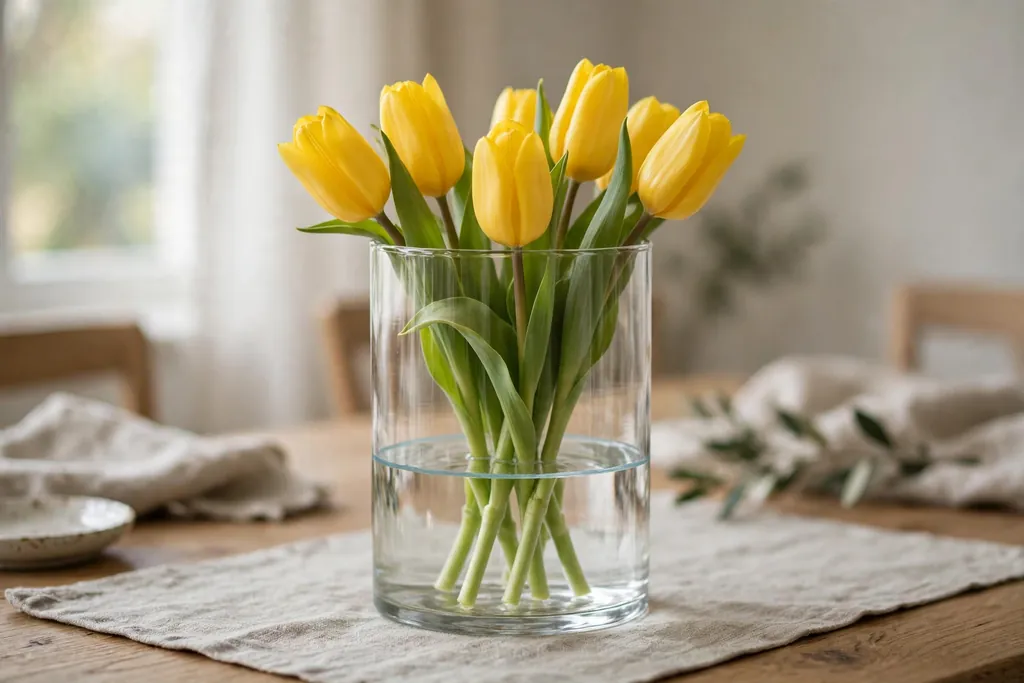
    6. Tulips in a Clear Cylinder With a Faux Water Line

    Yellow tulips in a clear glass cylinder with a faux water line on a dining table.

    Tulips in a clear cylinder look most convincing when the stems appear to stand in water, even though no water is needed. Choose a straight sided glass cylinder, add a short inner layer of clear gel beads or a clear acrylic disc near the base, and stand six to nine faux tulips in it so the stems pass through that layer. The effect reads as fresh cut stems in water from across the room.

    Keep the tulip colors simple, such as all white, all soft yellow, or a mix of pink and white, and let the stems lean slightly in different directions. Set the cylinder on a dining table, a console, or a windowsill in indirect light, since strong sun can fade faux petals over time. Wipe the glass now and then, since fingerprints show more on clear cylinders than on ceramic.

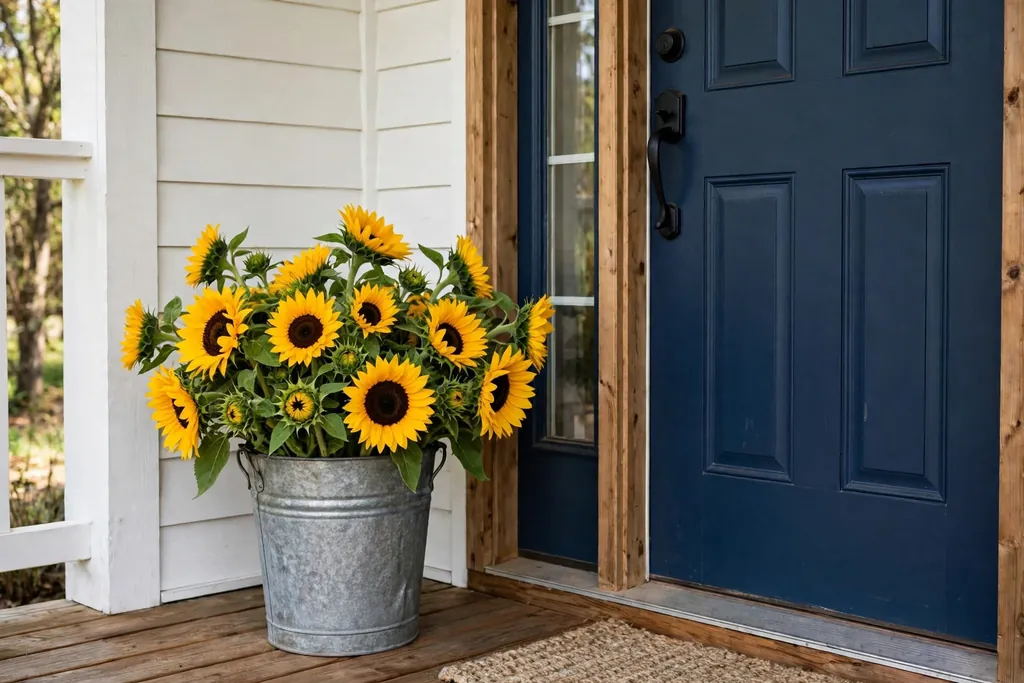
    7. Sunflowers in a Galvanized Bucket for the Porch

    Sunflowers in a galvanized bucket beside a front door on a porch.

    Sunflowers in a galvanized bucket bring artificial flower arrangements outside, where fresh blooms fade fast in sun and wind. Fill a galvanized bucket with tall faux sunflowers, add a few wheat stems and leafy branches for fullness, and weight the base with stones so wind does not tip it. Set the bucket beside a front door or on a porch step.

    Choose stems suited to outdoor use where possible, and bring the bucket under cover in heavy rain or strong wind to keep the blooms in shape. A metal bucket suits farmhouse, rustic, and cottage porches, and it pairs well with a plain doormat and a wooden bench. Check the stems after storms and replace any that have faded badly.

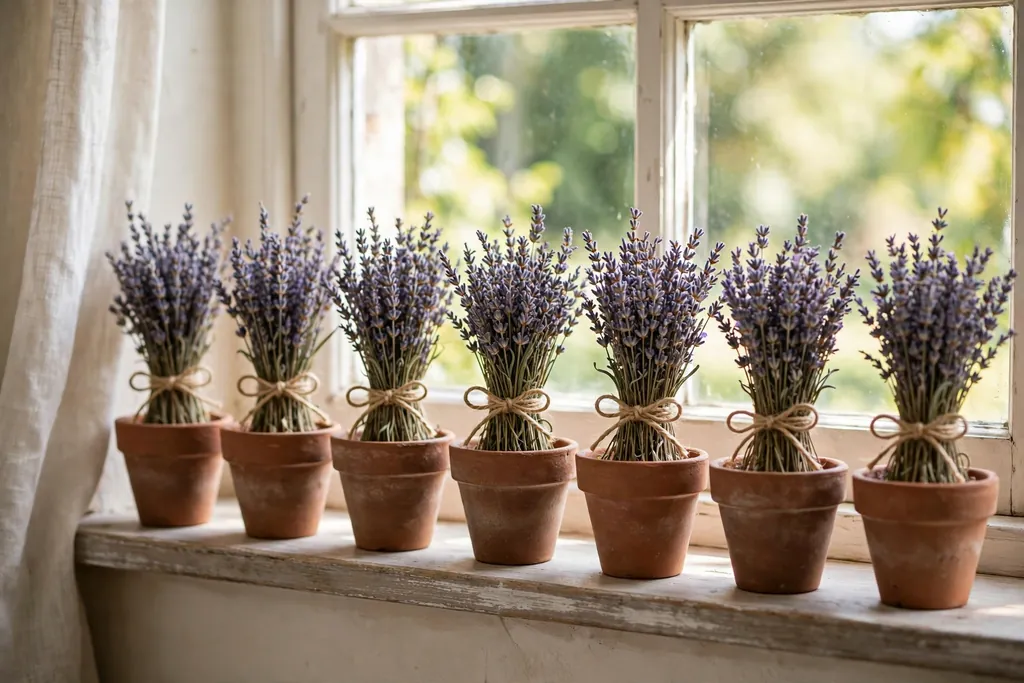
    8. Lavender Bundles in Terracotta Pots Along a Windowsill

    Small terracotta pots of lavender bundles lined along a sunny windowsill.

    Lavender bundles in terracotta pots suit a windowsill, a kitchen shelf, or a bathroom ledge, where a large bouquet would crowd the space. Fill three small terracotta pots with short faux lavender bundles, one bundle per pot, and line them along the sill with small gaps between them. Add a few green stems to each pot so the lavender looks rooted rather than stuck in place.

    Terracotta warms up a white or pale windowsill, and the small scale suits rooms where fresh flowers would struggle with steam or low light. Set each pot on a small saucer to protect the sill, and keep the pots clear of window handles and curtains. This row also works on a narrow mantel, where three small pots read as one display.

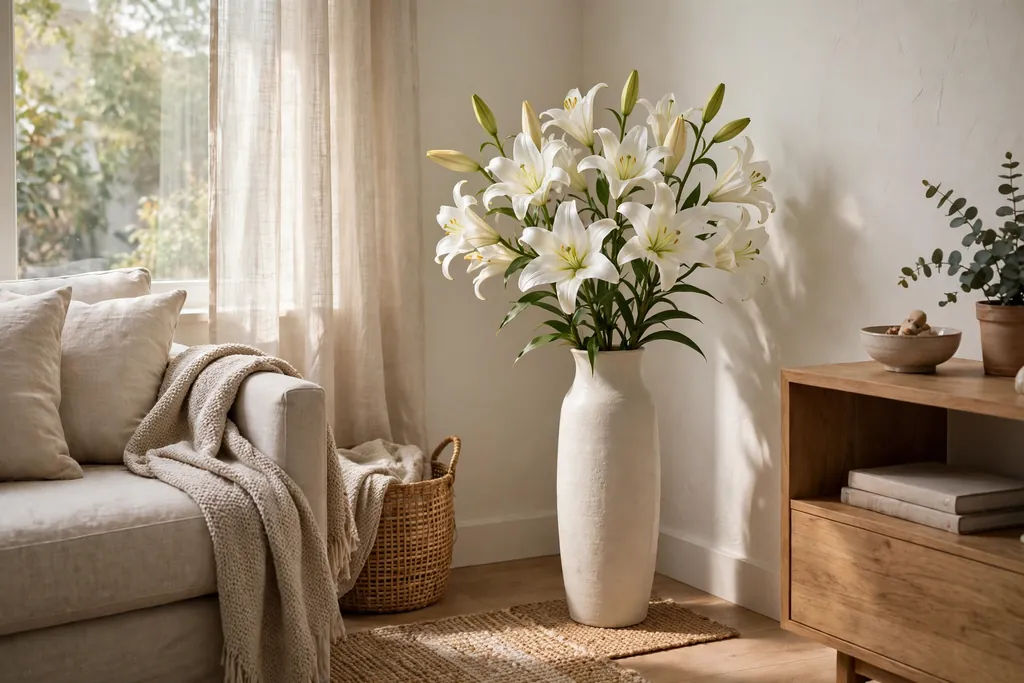
    9. White Lilies in a Tall Floor Vase for a Corner

    White lilies in a tall floor vase in a living room corner.

    White lilies in a tall floor vase give a bare corner height and a clean focal point without a table. Choose a heavy floor vase that will not tip, then add five to seven long faux lily stems with a few leafy branches for width. Keep the total height below door frames and light fixtures, and place the vase where it will not be brushed by bags or coats.

    Keep the palette quiet, white lilies with green leaves, since height alone makes this arrangement a focal point. Skip small filler pieces that would get lost at this scale, and dust the stems with a dry cloth now and then. Straighten any bent stems after moving the vase, and step back to check the shape from the seating area.

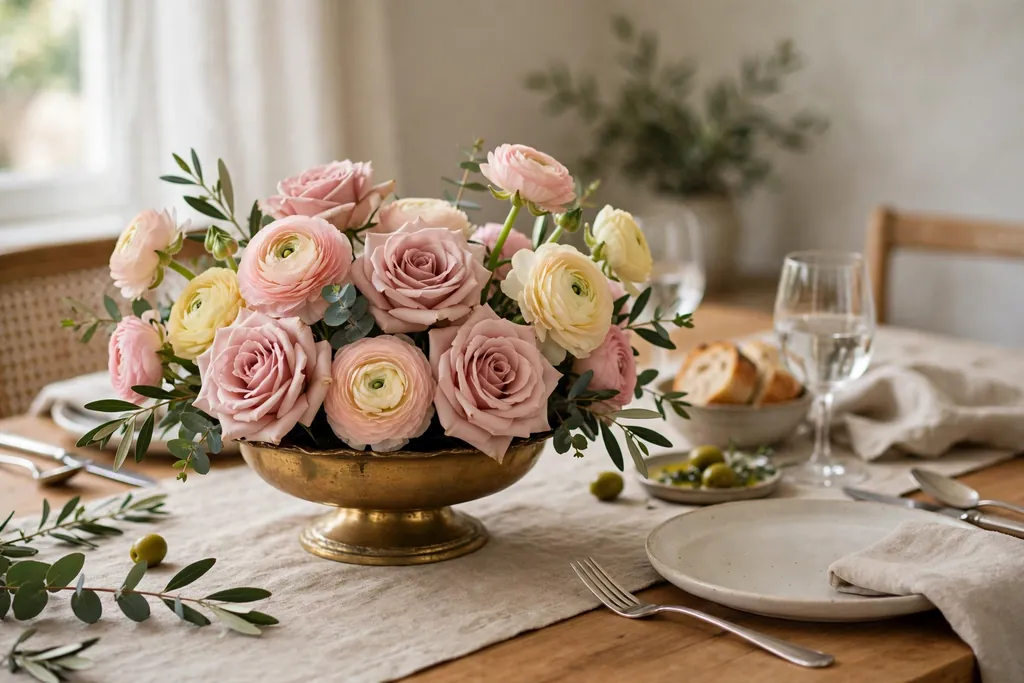
    10. Roses and Ranunculus in a Low Gold Compote

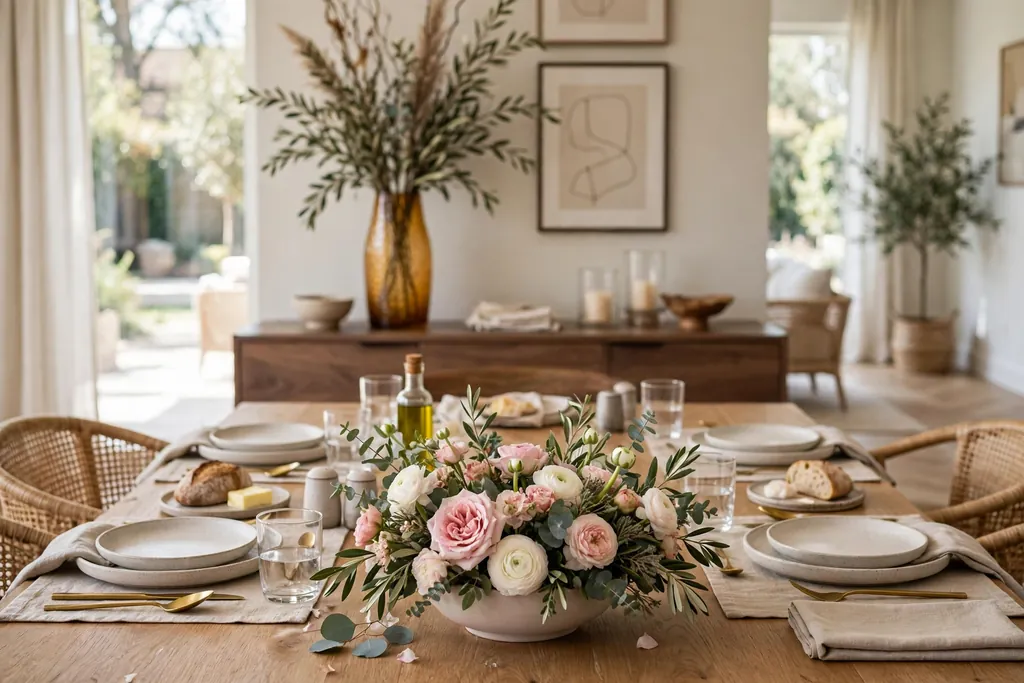
    Roses and ranunculus in a low gold compote on a dining table set for a meal.

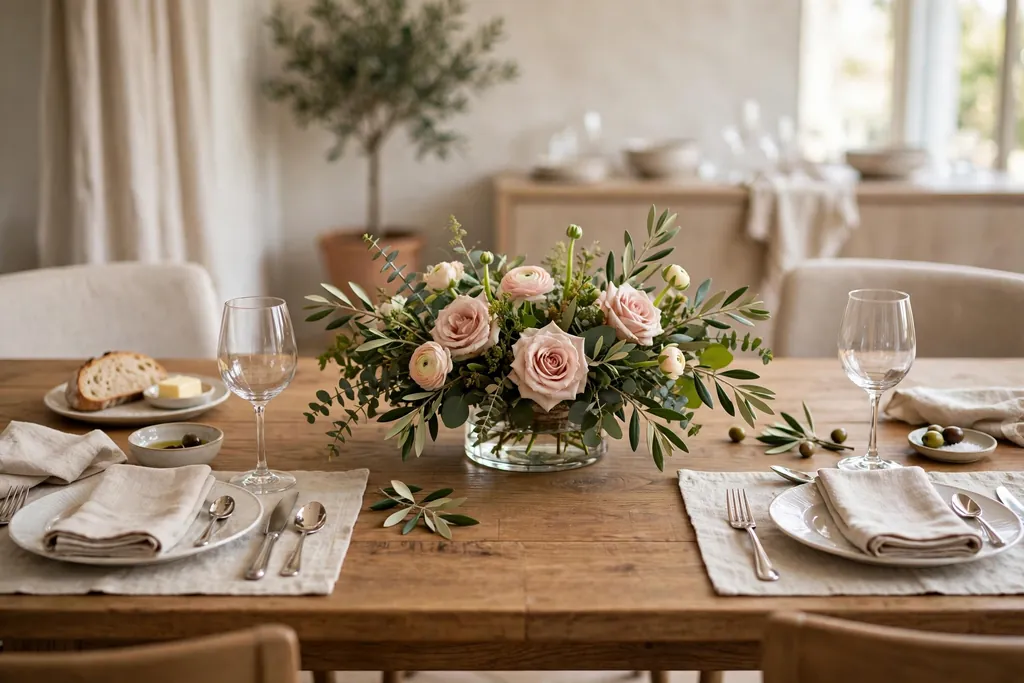
    Roses and ranunculus in a low gold compote make a dressed up dining table centerpiece that still leaves sightlines clear. Set a low, wide compote on a charger or a tray, arrange faux roses as focal blooms, add ranunculus style blooms in a matching or softer tone, and finish with a few small leaves. Keep the tallest stem below eye level when seated.

    This palette suits a dining room with warm wood and soft lighting, and it pairs well with cream plates and linen napkins. Because the arrangement is low, guests can see across the table without leaning around it. Lift the whole compote away in one move when the table needs clearing for serving.

    11. Pampas Grass and Dried Look Stems in a Tall Vase

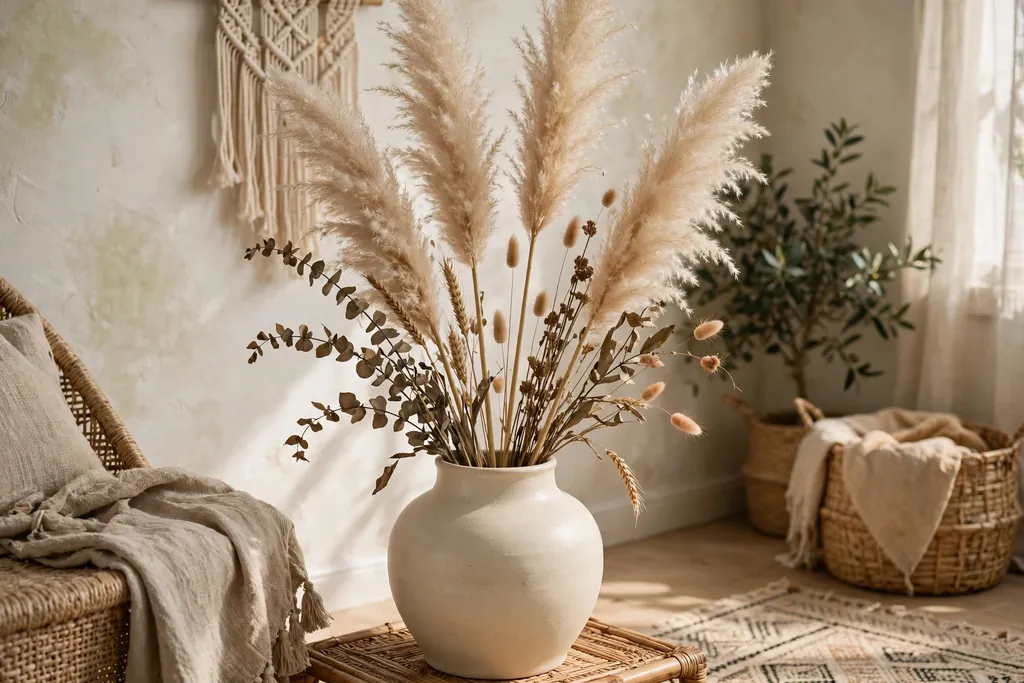
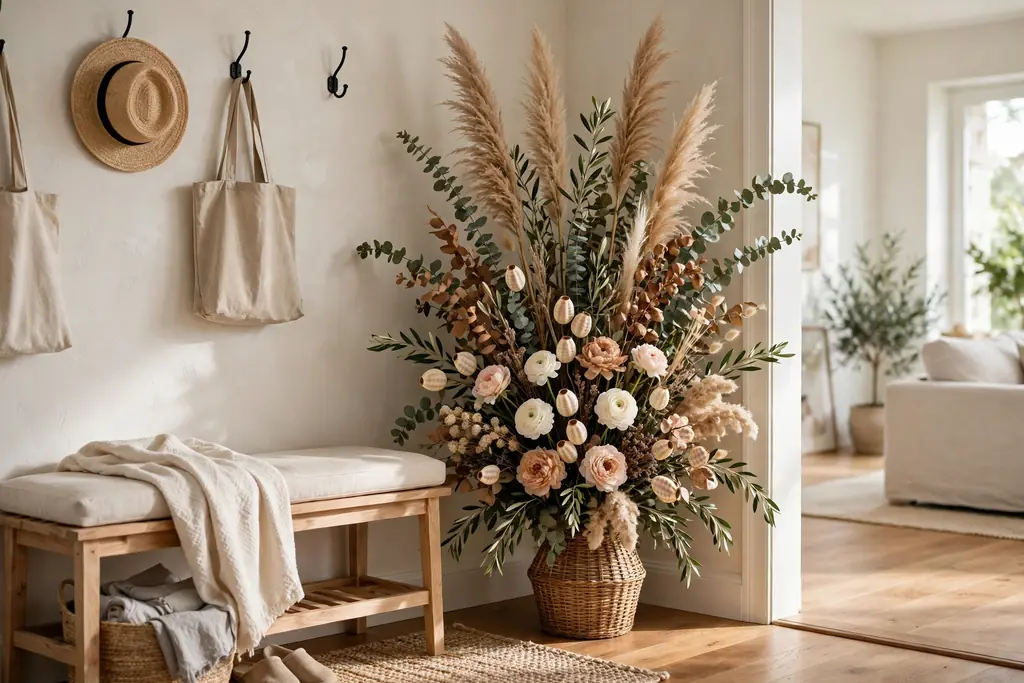
    Tall pampas grass plumes and dried look stems in a cream ceramic vase in a boho living room corner.

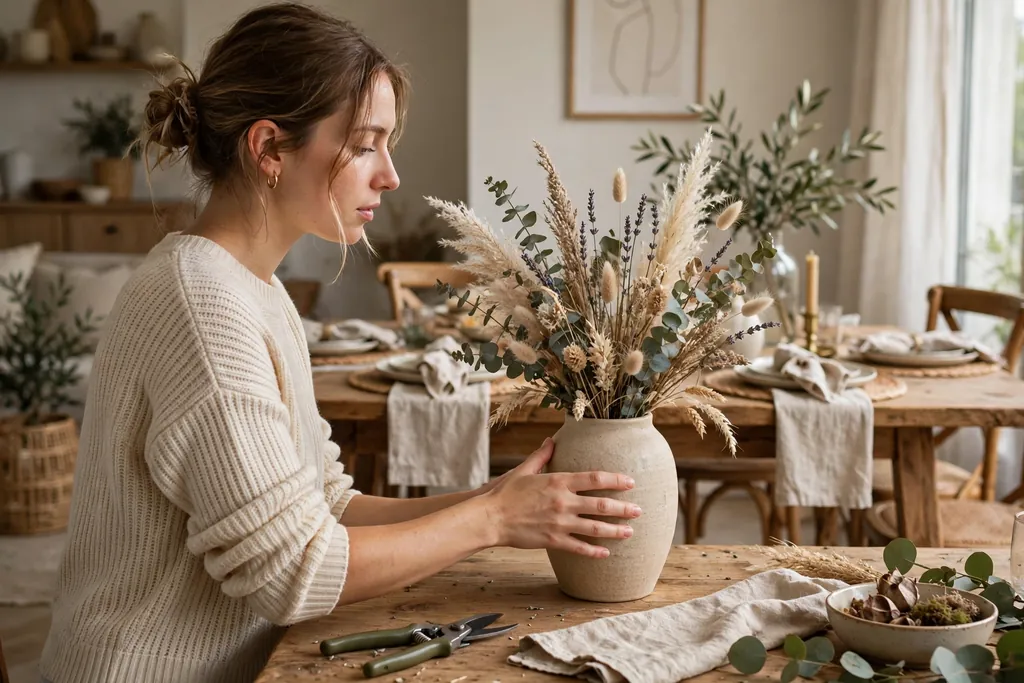
    Pampas grass and dried look stems give a boho corner texture without the shedding that real dried grasses bring. Choose a tall ceramic vase in cream, sand, or terracotta, then add five to nine tall faux pampas plumes with a few dried look wheat stems and palm style leaves. Fan the stems out so the vase mouth is filled but the plumes still move freely.

    Set the vase in a living room corner, beside a reading chair, or at the end of a console, where its height frames the seating area. Keep faux grasses away from open flames and strong heat, and shake the plumes outdoors now and then to remove dust. This arrangement needs no water and no trimming, which suits a spot that is hard to reach.

    12. One Vase, Four Seasons of Stem Sets

    One neutral vase with four sets of artificial stems for spring, summer, autumn, and winter arranged beside it.

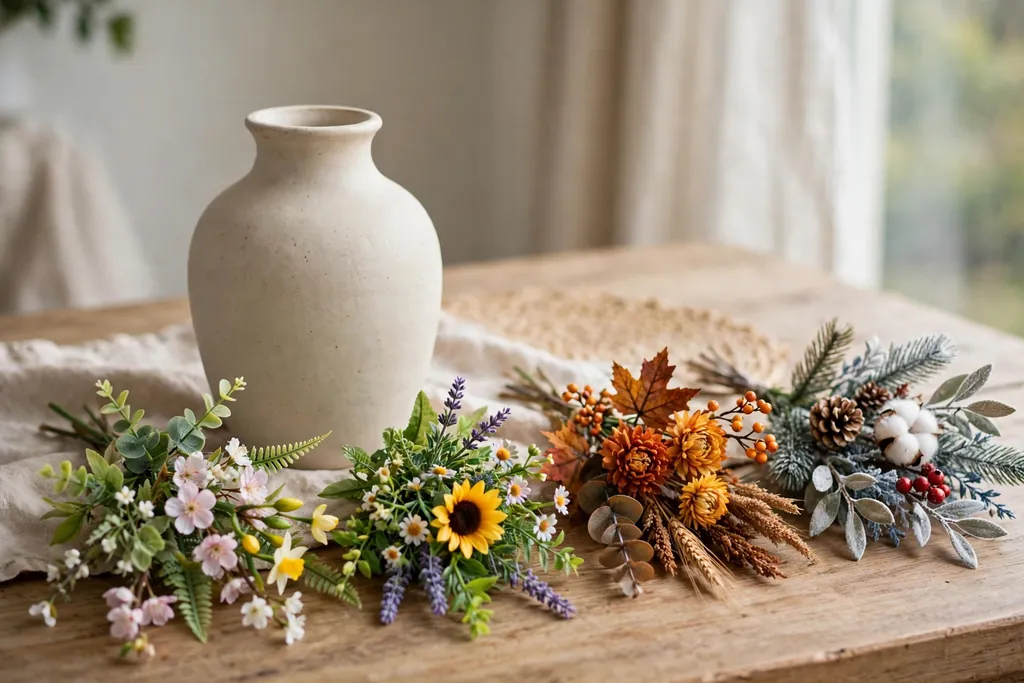
    One vase with four sets of stems is a technique, not a single bouquet, and it saves both money and storage space. Choose one good vase in a neutral color, then build four small stem sets: spring tulips and blossom branches, summer wildflowers, autumn mums and berries, and winter greenery with white blooms. Store each set upright in a labeled bag or box.

    Swap the sets when the season changes, keeping the same filler greenery where it suits more than one season. This approach works best when the vase is simple, since a strongly seasonal vase would fight with at least one set. Label each set as you pack it away, so the next swap takes minutes rather than a search through stored stems.

    13. Wall Pocket Arrangement for a Narrow Hallway

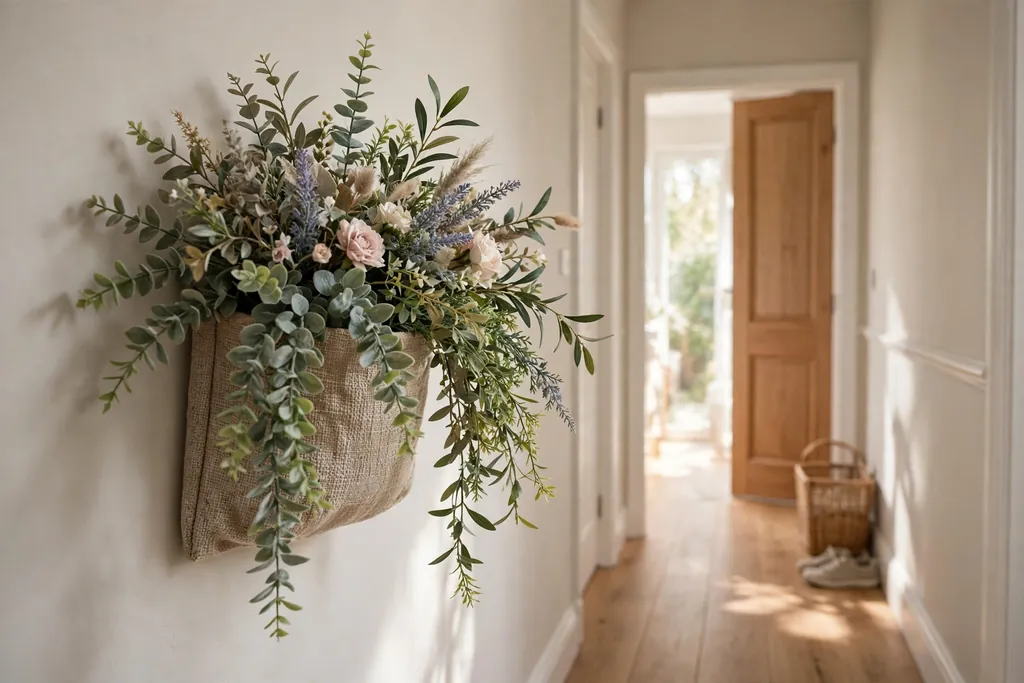
    Wall pocket planter with artificial blooms and leafy sprays spilling over the front edge in a narrow hallway.

    A wall pocket arrangement solves a hallway or a small entry where there is no floor or table space for a vase. Hang a flat backed wall pocket or a half basket planter on the wall, then fill it with faux blooms and leafy sprays that spill slightly over the front edge. Keep the arrangement shallow so it does not catch coats, bags, or shoulders passing by.

    Choose a wall fixing rated for the weight of the pocket and stems, and hang it at eye level or slightly above, clear of door swings. This idea suits hallways, stair landings, and small entries, and it pairs well with a mirror or a row of hooks below it. Take the pocket down now and then to dust the wall behind it and check the fixing.

    14. Bud Vase Trio for a Vanity or Bedside Table

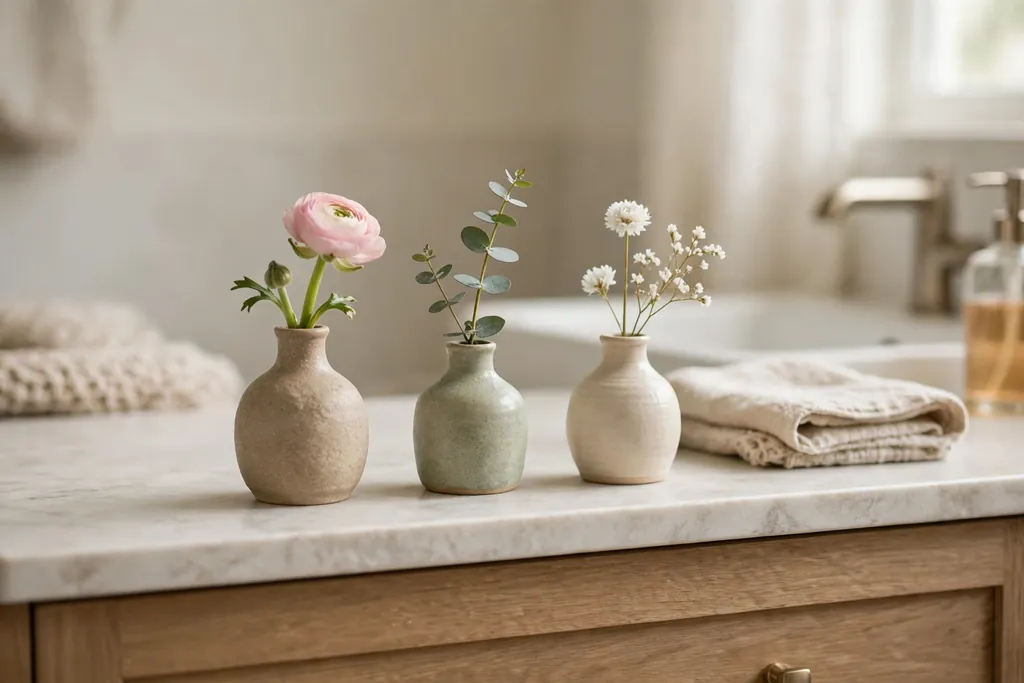
    Trio of small bud vases with single short stems on a bathroom vanity.

    A bud vase trio suits a bathroom vanity, a bedside table, or a narrow shelf, where one large arrangement would crowd the surface. Use three small vases in different heights, put one or two short stems in each, and keep the flowers in one color family, such as cream, blush, and pale green. The small scale makes this a good use for leftover stems from a larger bouquet.

    Group the vases close together so they read as one display, not three separate items. If a stem is too tall for its vase, trim it so the bloom sits just above the rim. In a bathroom, faux stems have a clear advantage, since steam and low light do not affect them, and the trio can stay out all year with only occasional dusting.

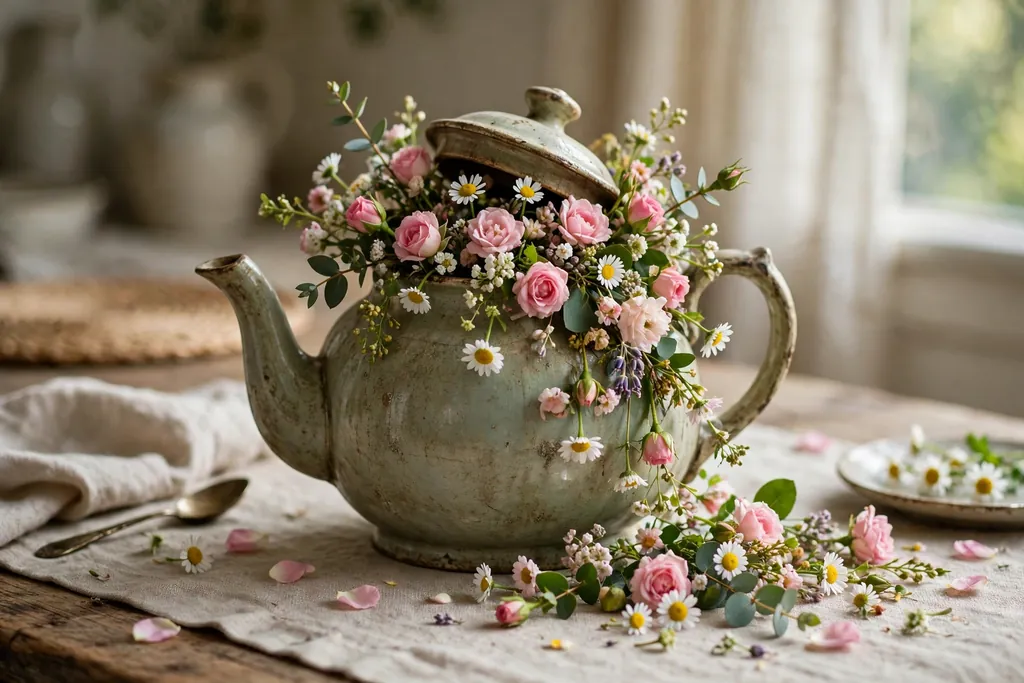
    15. Vintage Teapot Arrangement for a Tea Table

    Vintage teapot with small roses and daisies spilling from its opening on a tea table.

    A vintage teapot arrangement turns a shelf find into a talking point for a tea table or a display shelf. Set a small block of foam inside a teapot, then add short faux roses, small daisies, and a few leafy sprigs so the blooms spill gently from the spout side and the open lid. Keep the arrangement compact, so the teapot shape still reads clearly.

    Place the teapot on a tea table, a bookshelf, or a kitchen hutch, where it can be seen up close. This idea suits cottage, vintage, and traditional rooms, and it pairs well with a stack of books or a small tray underneath. Because the teapot is small, choose short stems and small blooms, and avoid tall stems that would hide the teapot itself.

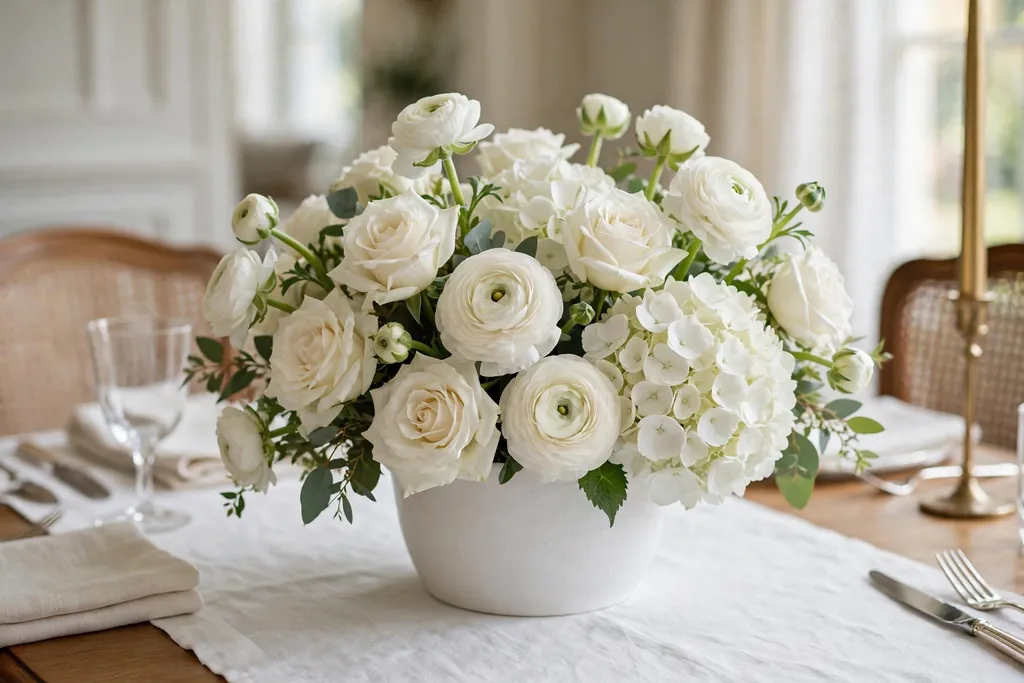
    16. All White Monochrome Arrangement for a Formal Table

    All white roses, ranunculus, and hydrangeas in a white container on a formal dining table.

    An all white monochrome arrangement suits a formal table, a wedding style gathering, or a room with strong patterned plates, where color would compete with the tableware. Combine white faux roses, ranunculus, and hydrangea heads with pale green leaves, and set them in a white or clear container. Leave space between the stems so each bloom can be seen.

    Restraint is the point here: no mixed colors, no bright filler, and no extra decoration. The white palette keeps the table calm and lets the plates, glassware, and linen carry the color. Keep the arrangement low on a dining table, and save a taller version for a sideboard or a console, where height does not block conversation.

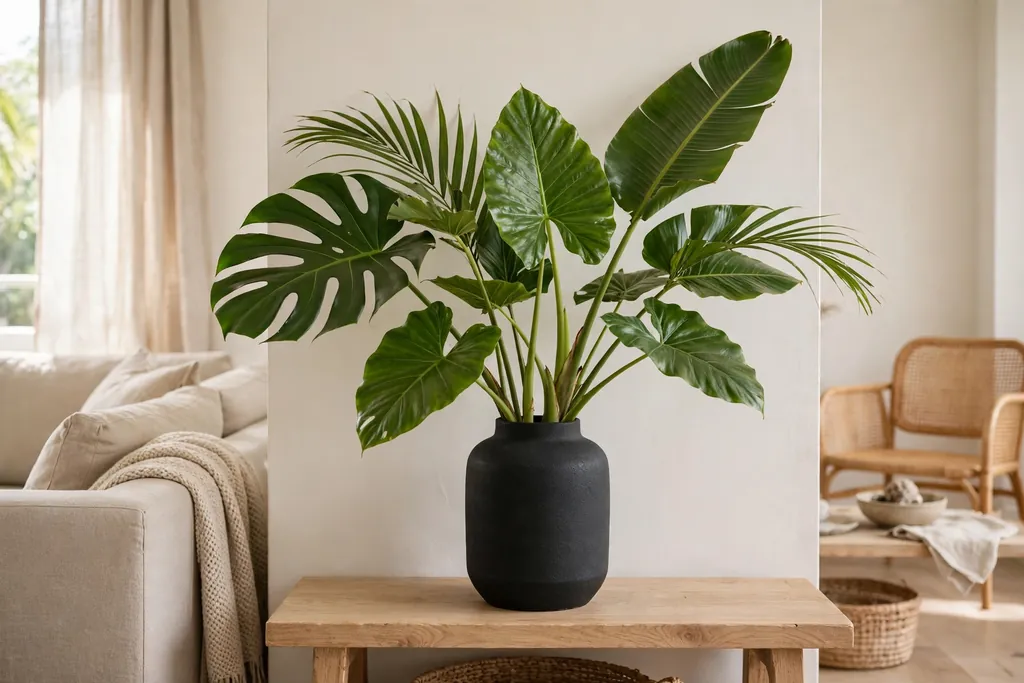
    17. Tropical Stems in a Matte Black Vase

    Tropical stems with large green leaves in a matte black vase against a light wall in a modern living room.

    Tropical stems in a matte black vase suit a modern living room, where a soft pastel bouquet might look out of place. Choose faux bird of paradise style blooms, monstera style leaves, and a few tall palm fronds, and set them in a matte black ceramic or metal vase. The dark vase makes the green leaves and bold bloom shapes stand out.

    Keep the arrangement tall and architectural, with a few stems rising well above the rest and clear space between them. Set the vase on a console, a side table, or a floor stand against a light wall, where the dark container reads as a deliberate accent. Dust the large leaves with a dry cloth, since dust shows more on broad, smooth leaves than on small petals.

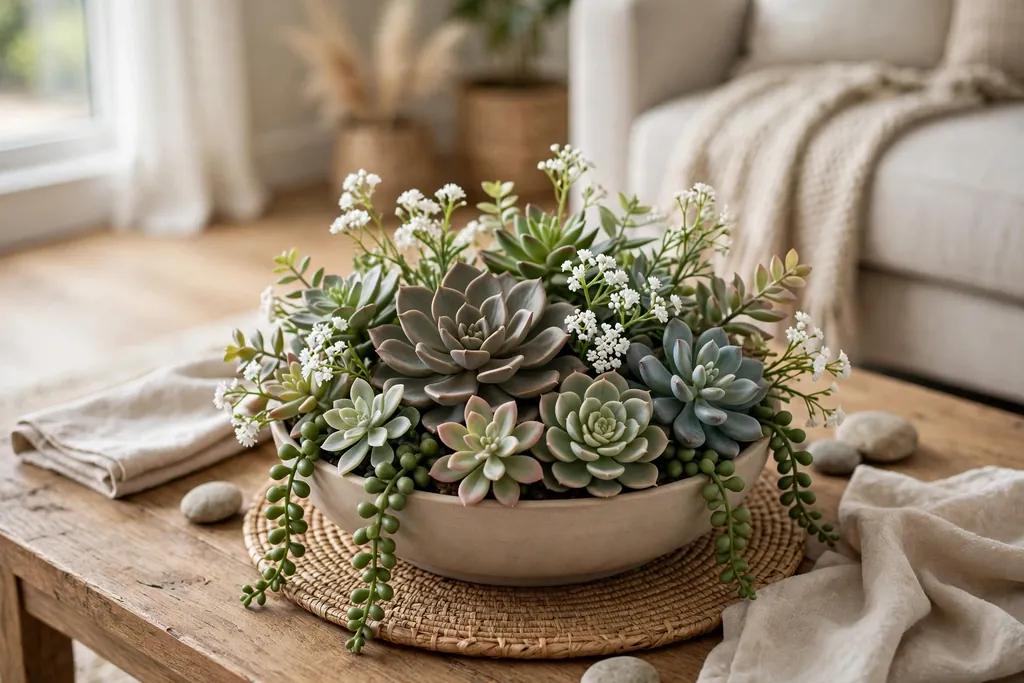
    18. Faux Succulents and Small Blooms in a Shallow Bowl

    Faux succulents and small white blooms in a shallow bowl on a coffee table.

    Faux succulents and small blooms in a shallow bowl suit a coffee table, where a tall arrangement would block the television or conversation. Fill a wide, shallow bowl with a layer of foam, set two or three faux succulent rosettes in it, and tuck small white or blush blooms and a few pebbles between them. Keep the whole display low and wide.

    This arrangement suits modern, desert style, and relaxed living rooms, and it needs no watering, which matters on a table that also holds books and cups. Lift the whole bowl aside when the table is needed, and return it after. Choose a bowl finish that matches other decor in the room, and dust the succulent leaves before guests arrive.

    19. Asymmetrical Branch Arrangement for an Entry Console

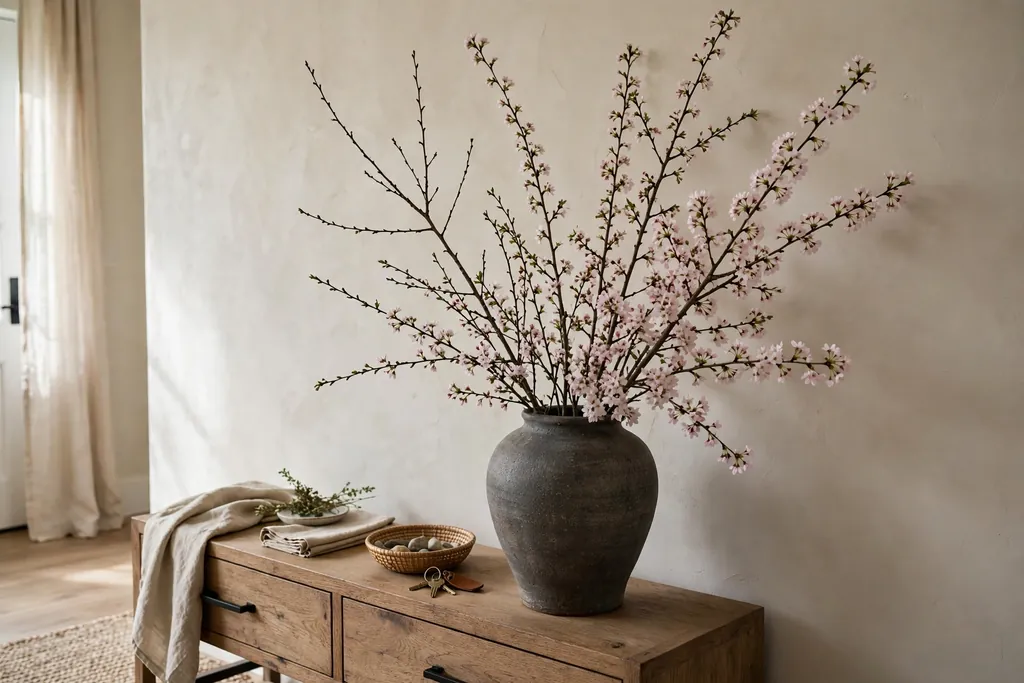
    Asymmetrical arrangement of tall blossom branches with small blooms on one side in a heavy vase on an entry console.

    An asymmetrical branch arrangement gives an entry console height and movement without a dense bouquet. Choose a tall, heavy vase, then add three to five long faux branches, such as blossom, willow, or birch style branches, with a few small blooms clustered on one side only. Let one branch rise higher than the rest, and let another lean outward, so the shape feels grown rather than arranged.

    Set the arrangement at one end of the console so keys, mail, and a small tray still have room. Trim branches to fit the ceiling height, leaving clear space above the tallest stem. This idea differs from a single orchid stem because the branches create a wide, airy outline, and it differs from a floor vase of lilies because the blooms are sparse and the branches do the work.

    20. Arrangement Inside a Lantern for Evening Glow

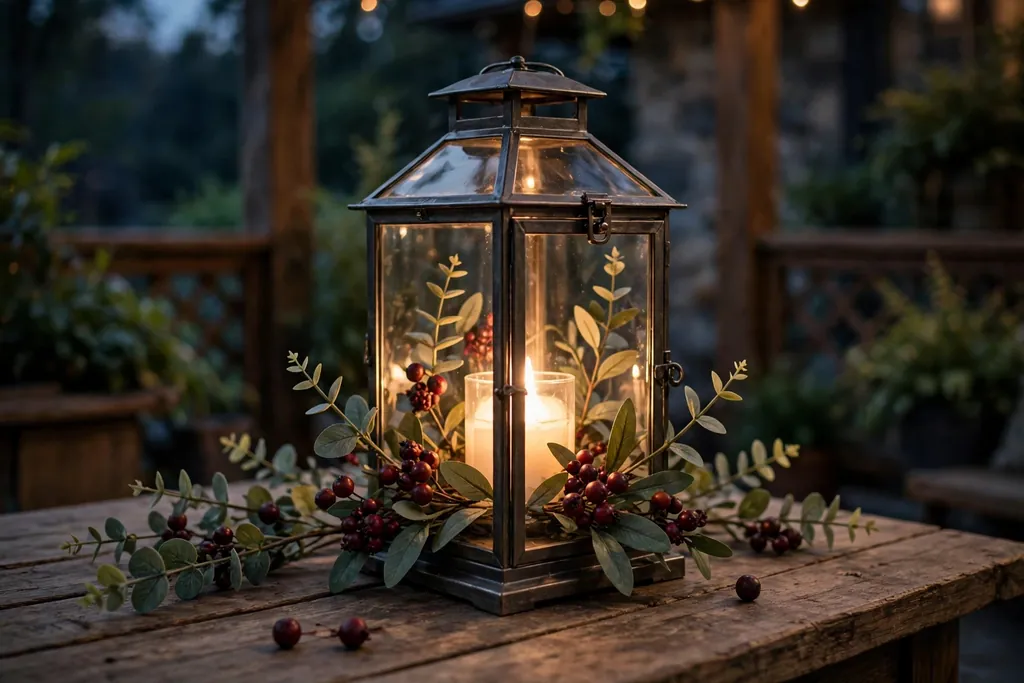
    Glass lantern with artificial leaves, berries, and a battery candle glowing on a porch table in the evening.

    An arrangement inside a lantern suits a porch, a hearth, or a side table in the evening, when light matters as much as flowers. Place a small bunch of faux leaves, berries, and one or two short blooms inside an open glass lantern, then add a battery candle in the center so the display glows after dark. Keep the stems short and clear of the candle, and use battery candles only, never a real flame near faux foliage.

    Choose a lantern size that fits the spot, with glass panels that show the leaves from all sides. This idea works well where a full vase would feel too formal, such as a porch step or a bathroom shelf. Switch the battery candle on in the evening for a warm glow, and dust the glass panels so the display stays clear.

    21. Small Stoneware Pot Arrangement for a Desk

    Small stoneware pot with short rose and eucalyptus stems on a home office desk beside a laptop.

    A small stoneware pot arrangement suits a desk or a home office, where a large bouquet would crowd papers and a screen. Choose a small stoneware pot, add two or three short faux stems, such as a small rose, a sprig of eucalyptus, and a tiny filler bloom, and set the pot to one side of the desk, clear of the keyboard and mug. Keep the total height below eye level when seated.

    This small scale has a practical benefit: it adds color to a work spot without blocking light or reaching into the work area. Pick a calm color, such as cream or soft green, so the arrangement does not distract during video calls. Dust the stems weekly, since a desk gathers dust faster than a display shelf, and swap the stems when you want a fresh look without buying a new pot.

    Conclusion

    Artificial flower arrangements look natural when the stems, the container, and the spot work together. Start with realistic stems, vary the heights, keep the palette to two or three colors, and match the total height to the room. Try one idea from this list, live with it for a few days, and adjust a stem or two until the shape reads well from across the room. With those habits, a faux arrangement can stay out all year, move between rooms, and still look planned rather than stiff.

    FAQs

    How do I make artificial flower arrangements look less fake?

    Start with realistic stems that have varied petal shapes and soft, uneven colors, then bend stems to different heights and turn some blooms sideways. Add greenery and filler between blooms, keep the palette to two or three colors, and check the shape from across the room, since a bunch that looks even up close often looks stiff from a distance.

    What are the best flowers for realistic artificial arrangements?

    Peonies, roses, hydrangeas, tulips, orchids, and lilies tend to look most convincing, because their petal shapes and colors are easy to copy well. Choose stems with layered petals, slight color variation within each bloom, and flexible stems you can bend, and avoid stems with flat, shiny petals or colors that look too bright for a real flower.

    How do I arrange fake flowers in a vase so they look natural?

    Start with one focal bloom in the center, add supporting blooms at varied heights around it, and finish with greenery and filler to fill gaps without crowding the blooms. Bend outer stems slightly outward, turn some blooms to the side, and step back to check the outline, then trim or bend any stem that sticks out too far.

    Can artificial flower arrangements go outside?

    Yes, if you choose stems suited to outdoor use and protect them from the worst weather. Weight the container so wind cannot tip it, bring the arrangement under cover in heavy rain or strong wind, and keep faux stems out of constant direct sun, which fades colors over time. Check the stems after storms and replace any that have faded badly.

    How do I clean artificial flower arrangements?

    Dust stems with a dry cloth, a soft brush, or a cool hair dryer held at a distance, working from the top of each stem down to the base. For a deeper clean, wipe leaves and petals with a slightly damp cloth and let the arrangement dry fully before returning it to its spot, and avoid soaking foam or fabric blooms, which can hold dampness.

    How long do artificial flower arrangements last?

    A well made artificial arrangement can last several years with basic care, since it does not wilt, drop petals, or need water. Its life depends on sun exposure, dust, and handling: arrangements kept out of direct sun, dusted now and then, and stored upright between seasons hold their shape and color far longer than ones left in a sunny window or packed flat.


  • 17 Large Flower Arrangement Ideas for Tables and Entryways

    17 Large Flower Arrangement Ideas for Tables and Entryways

    Large flower arrangements work best when the container, height, and placement match the spot: keep dining table displays low and wide so guests can see across, and give entryway displays height in a heavy, stable vase. Build around one focal bloom, add supporting stems at varied heights, and keep the palette to two or three colors for a planned look.

    A large arrangement earns its size by filling a space that a small bouquet cannot. A wide console, a long dining table, or an empty entry corner all swallow a single bunch, while a full display with varied heights and a clear shape holds the eye from across the room. The ideas below cover both jobs: table displays that stay useful during a meal, and entryway displays that greet people at the door. For seasonal flower ideas to pair with these layouts, see these fall flower arrangements and these Thanksgiving flower arrangements.

    Key Takeaways

    • Match height to the spot: low and wide for dining tables, tall and grounded for entryways.
    • Use a heavy, stable container for tall or wide arrangements, and set it on a tray or mat where water could mark the surface.
    • Build around one focal bloom, add supporting blooms at varied heights, and finish with filler greens or branches.
    • Keep the palette to two or three colors so a large display reads as one plan rather than a crowded mix.
    • Check sightlines from a seat at the table and from the room door before you settle an arrangement.
    • Give a large arrangement room to breathe: clear space around the container matters as much as the flowers in it.
    • Fresh stems need water checks every two days; dried stems suit entryways that are rarely tended.

    1. Low Wide Compote Bowl Centerpiece

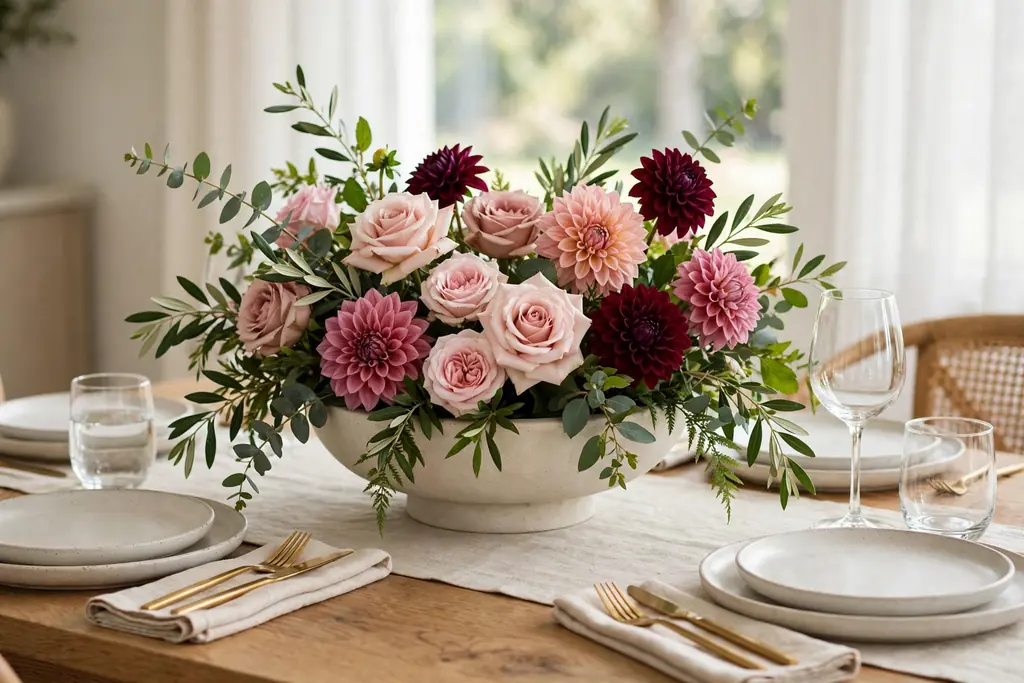
    Low wide compote bowl with roses, dahlias, and greenery as a dining table centerpiece.

    A low, wide compote bowl is the most useful large centerpiece for a dining table. The foot lifts the blooms just enough to read as a display, while the wide bowl holds plenty of stems without rising above eye level when seated. Fill it with a ring of greenery first, then set focal blooms such as roses, dahlias, or peonies in the center, and tuck smaller blooms around the edge so the shape stays round and full from every seat.

    Keep the tallest stem below the seated eye line, and leave clear space at each place for plates and glasses. A compote bowl suits a round or square table best, since its round shape echoes the table. Check the water level before a meal, since a wide bowl holds a shallow pool that runs low faster than a tall vase.

    2. Tall Floor Vase with Branches for the Entryway

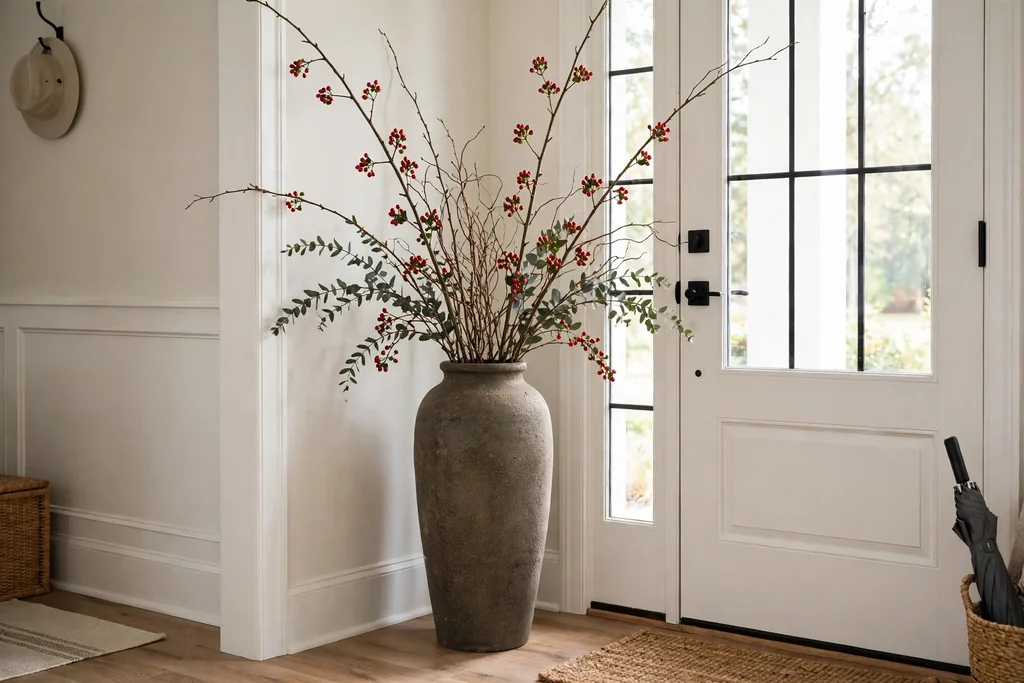
    Tall heavy floor vase with long branches and berry stems in an entryway corner beside a door.

    A tall floor vase with branches gives an entryway height without the weight and water needs of a huge bouquet. Place five to seven tall branches, such as birch, willow, or eucalyptus, in a heavy floor vase, and add a few stems of berries or dried grasses for color near the top. The branches draw the eye upward and fill a bare corner beside a door or bench.

    The vase must be heavy enough that the branches cannot tip it when someone brushes past with a bag or a coat. Set it against a wall or in a corner rather than in the walking path, and trim branches so at least a hand width of clear space remains below the ceiling. Swap branches as they dry and drop leaves.

    3. Ceramic Urn on a Console Table

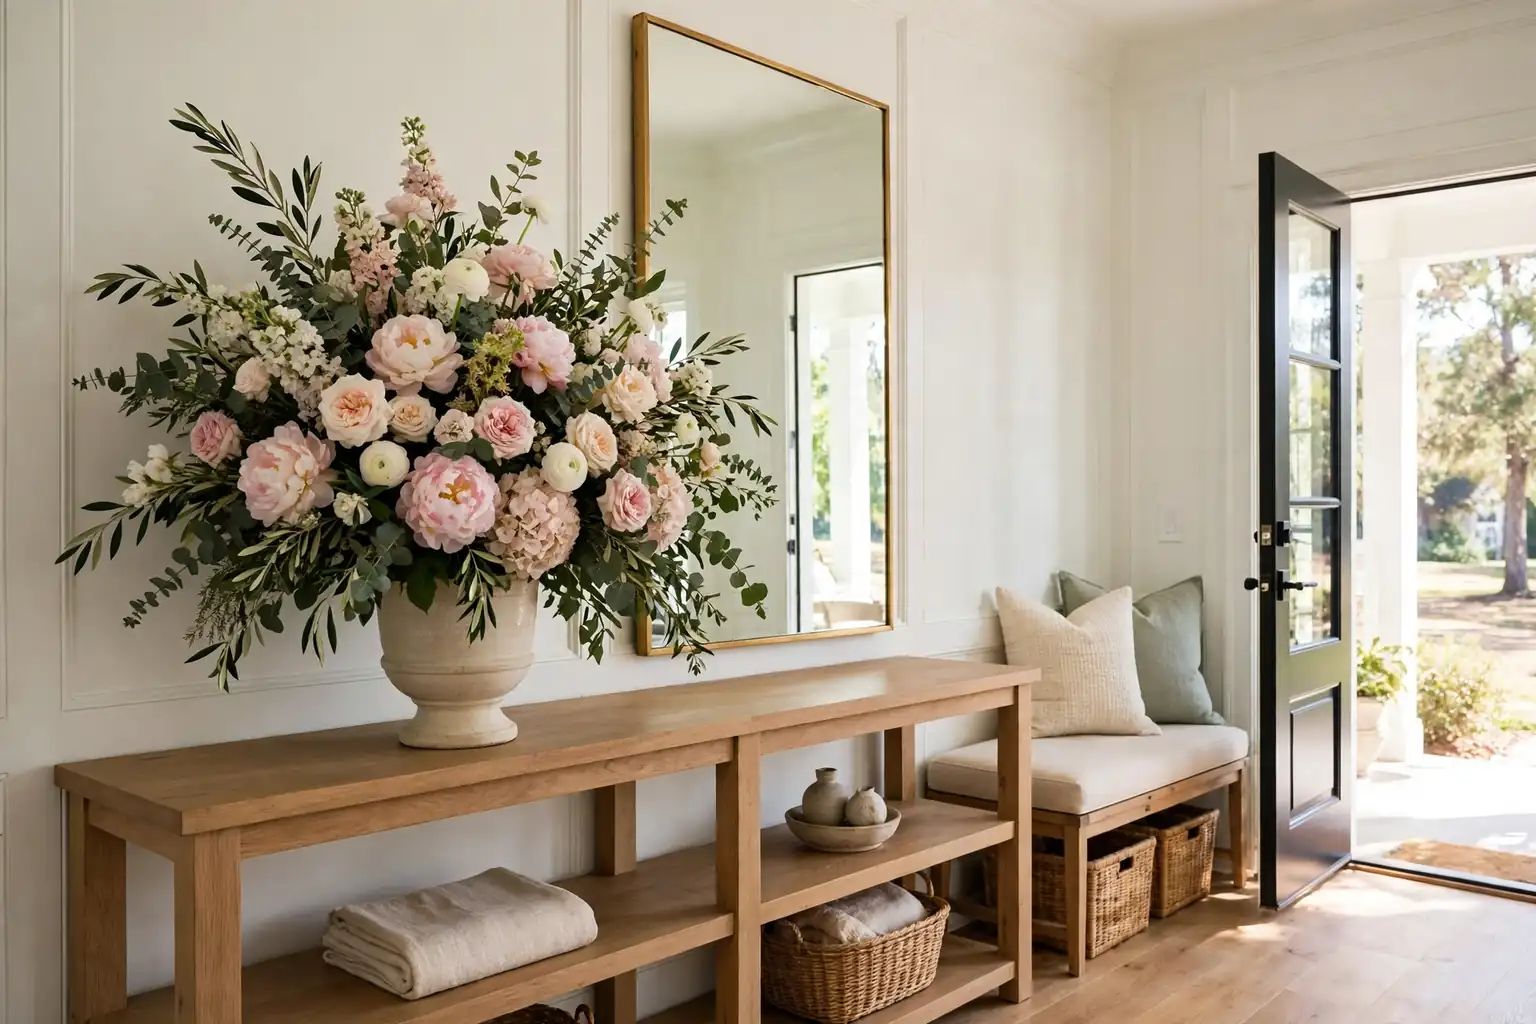
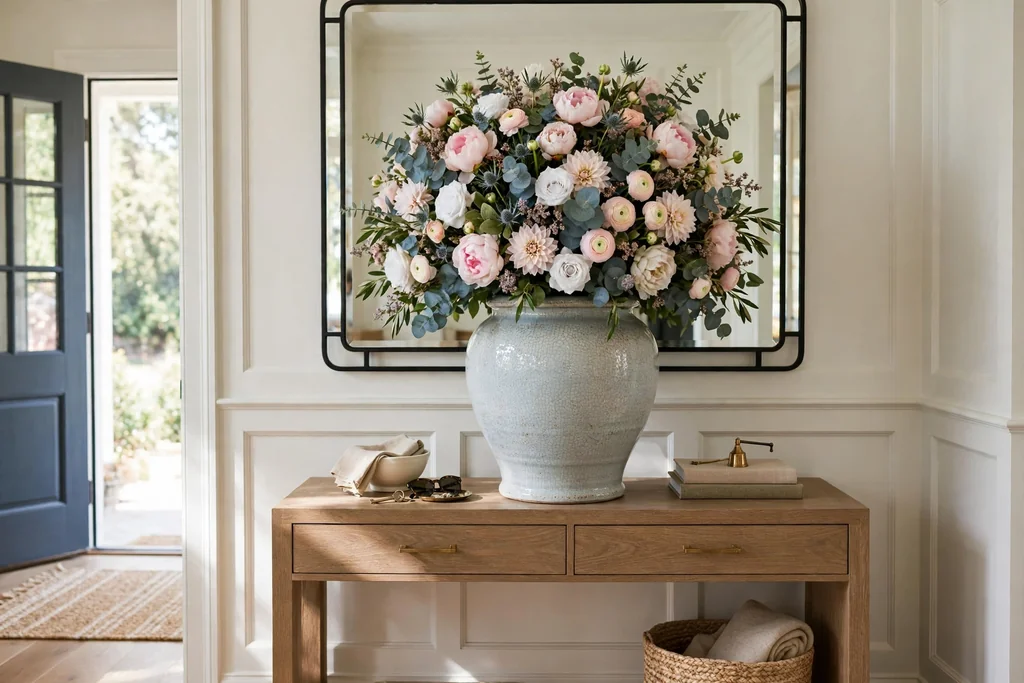
    Large ceramic urn with a domed flower arrangement on a console table under a mirror.

    A large ceramic urn suits a console table in an entryway or living room because its solid shape anchors the surface. Choose an urn with a mouth wide enough for a full bunch, and build a domed shape: tall stems in the center, medium stems around them, and trailing greenery at the edge to soften the rim. The ceramic hides stems and water, so the blooms lead and the mechanics stay out of sight.

    An urn also adds weight, which helps a console display survive bumps from keys and bags. Place the urn at one end of the console or in the center under a mirror, and leave room beside it for a tray or a small lamp. Wipe the outside dry after watering, since a wet urn can mark a wood console.

    4. Long Low Trough for a Rectangular Table

    Long low wooden trough with short flower stems down the center of a rectangular dining table.

    A long, low trough runs down the center of a rectangular table and keeps a large display from blocking conversation. Line a wooden or metal trough with small jars of water, then fill each jar with short stems so the whole trough reads as one continuous arrangement. Use one flower type repeated along the trough for a calm look, or repeat a small mixed bunch at intervals for a fuller effect.

    Leave clear space at each end of the trough for serving dishes, and keep every stem below seated eye level. A trough suits a long table better than a single round bowl, since it follows the table shape and leaves room for plates on both sides. Lift the trough off in one move when you need the full surface for serving.

    5. Three Matching Large Vases Down a Long Table

    Three matching large vases with the same flower mix spaced down a long dining table.

    Three matching large vases repeat one arrangement along a long table instead of building one very wide centerpiece. Fill each vase with the same mix, such as roses, greenery, and one filler, and space the vases evenly down the center, with room between them for serving dishes and candles. The repeat gives a long table rhythm and lets guests see across between the vases.

    This layout works for a table where a single huge display would crowd the food. Use vases of the same shape and color so the three read as one plan, and keep each vase narrow enough that plates still fit on both sides. When the meal ends, the vases can move to other rooms as separate displays.

    6. Raised Pedestal Arrangement for an Entry Table

    Raised pedestal vase with a full rounded flower arrangement on an entry table.

    A raised pedestal arrangement lifts a large display above an entry table, which suits a table that already holds a tray, a lamp, or a stack of books. Set a footed stand or a tall, narrow pedestal vase on the table, and build a full, rounded shape on top, with blooms facing outward on all sides. The height makes the display visible from the door, even when the table surface is busy.

    Check the total height against the mirror or artwork above the table, and leave clear space below it so the pedestal does not crowd the frame. A pedestal display needs a stable base, since the raised weight can tip more easily than a low bowl. Keep it near the wall side of the table, away from the path where coats and bags swing.

    7. Large Clear Glass Cylinder with Layered Stems

    Large clear glass cylinder with layered flower stems on a modern console table.

    A large clear glass cylinder suits a modern table or console because the glass shows the stems and water as part of the display. Layer the stems by length: tall stems at the back, medium stems in the middle, and short blooms at the front, so the arrangement reads clearly through the glass from the side. Use one or two flower types in a limited palette, since the clear glass adds visual detail of its own.

    Clear glass needs clean water and wiped sides to stay neat, since cloudy water shows at once. Change the water every two days and trim stems at an angle each time. Set the cylinder on a tray or mat, and keep it out of direct sun, which warms the water and shortens bloom life.

    8. Woven Basket Arrangement Beside an Entryway Bench

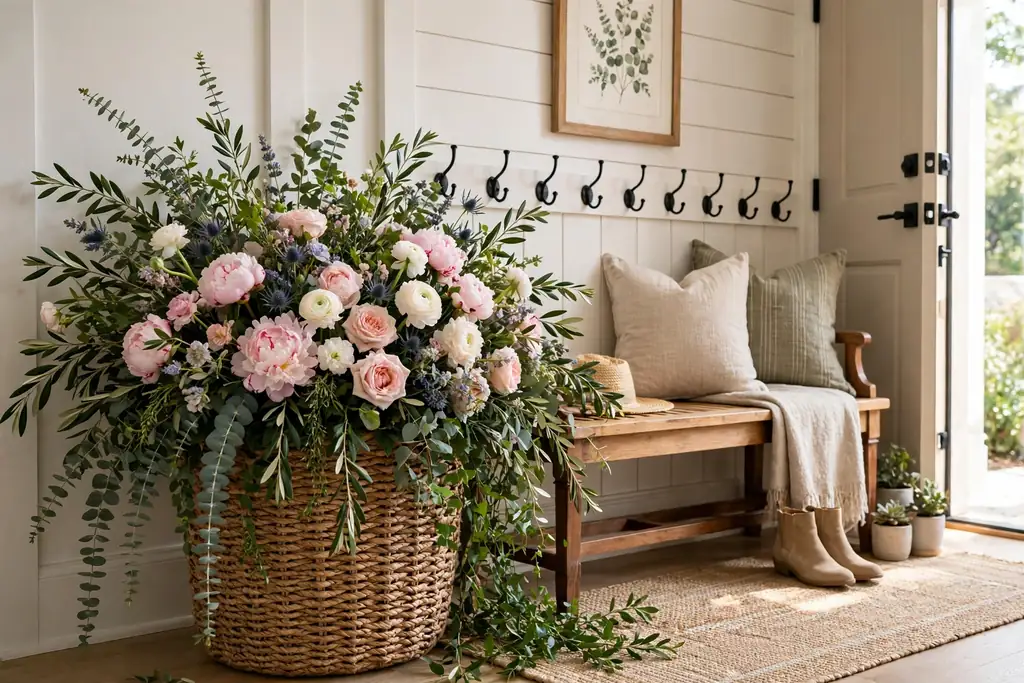
    Large woven basket with full blooms and greenery beside an entryway bench.

    A large woven basket arrangement softens an entryway bench and gives a big display a relaxed, gathered feel. Line a wide basket with a waterproof tray, set a jar of water inside, and arrange full blooms such as dahlias or chrysanthemums with filler greens, letting a few stems spill over the basket edge. The basket shape suits a bench, a hearth side, or a hallway corner where a formal vase would feel stiff.

    Check the water level often, since a basket hides the jar from view. Keep the basket low enough to see over from a standing position, and place a tray under it to catch dropped petals. When the fresh blooms fade, keep the basket and refill it with dried stems for a no-water version.

    9. All-White Massed Hydrangea Bowl for a Formal Table

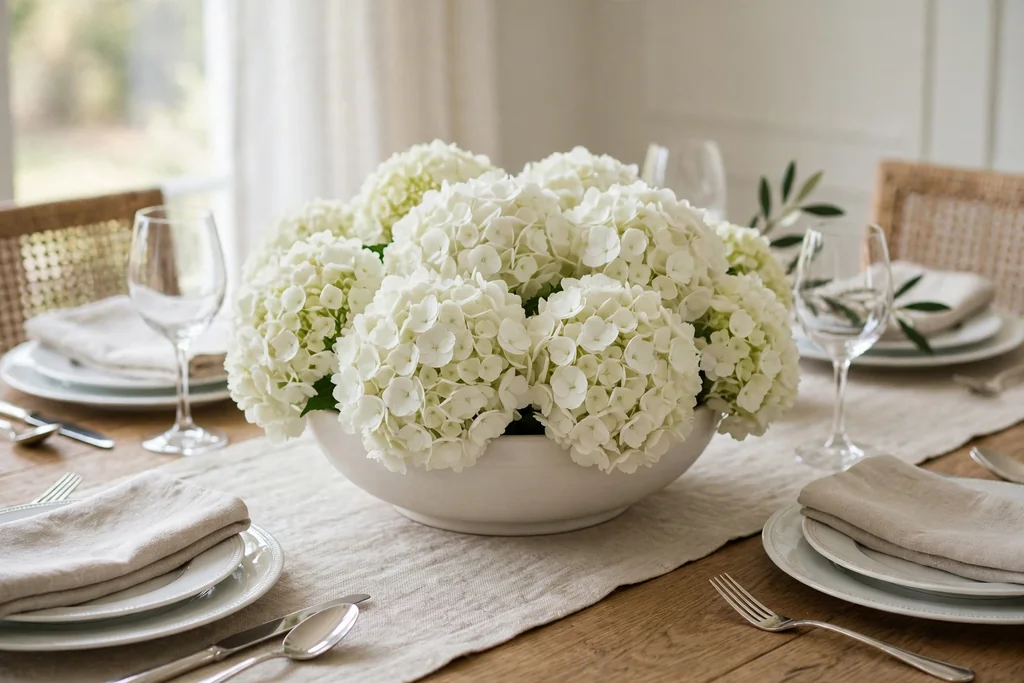
    Low wide bowl packed with white hydrangea heads on a formal dining table.

    A massed hydrangea bowl uses one flower type in large numbers for a formal table display. Fill a low, wide bowl with hydrangea heads packed close together, so the surface reads as one cloud of white, and add only a little greenery at the base to hide the stems. The single-flower massing gives a large display a calm, formal look that suits white plates, linen napkins, and a dressed up meal.

    Hydrangeas drink heavily, so check the water daily and mist the heads lightly if the room is dry. Keep the bowl low enough to see across the table, and set it on a charger or tray to protect the tablecloth. Replace any head that browns promptly, since one faded head stands out in a single-color display.

    10. Asymmetric Garden-Style Arrangement for a Round Table

    Asymmetric garden-style flower arrangement with varied stem lengths on a round dining table.

    An asymmetric garden-style arrangement suits a round table, where a display is seen from all sides and a strict dome can look stiff. Build the shape with varied stem lengths and a relaxed outline: a tall focal stem leaning slightly to one side, supporting blooms at mixed heights, and trailing greenery that falls over the rim on one side only. The uneven shape keeps the eye moving around the table.

    Use a plain ceramic or stoneware container so the loose shape, not the vase, carries the interest. Turn the arrangement as you build it, checking the shape from each seat, and trim any stem that blocks a view across the table. This style suits a casual gathering, where a formal centerpiece would feel too rigid.

    11. Large Arrangement with Fruit and Branch Accents for a Console

    Large console flower arrangement with branch accents and decorative fruit at the base.

    A large console arrangement with fruit and branch accents adds texture and a seasonal feel to an entryway or sideboard. Build a full base of blooms and greenery in a wide vase or urn, then tuck in a few branches with berries and two or three firm decorative fruits, such as small apples or lemons, placed where they can be seen but not hidden inside the blooms. The fruit gives the display weight at the base and a color link to the room.

    Use decorative fruit only, and keep it separate from fruit that will be eaten, since it sits against wet stems and foliage. Anchor the branches so they cannot slip, and check the fruit often, removing any piece that softens. This arrangement suits a sideboard or buffet, where guests walk past it, better than a dining table, where fruit takes up serving space.

    12. Dried Large Arrangement for a Low-Care Entryway

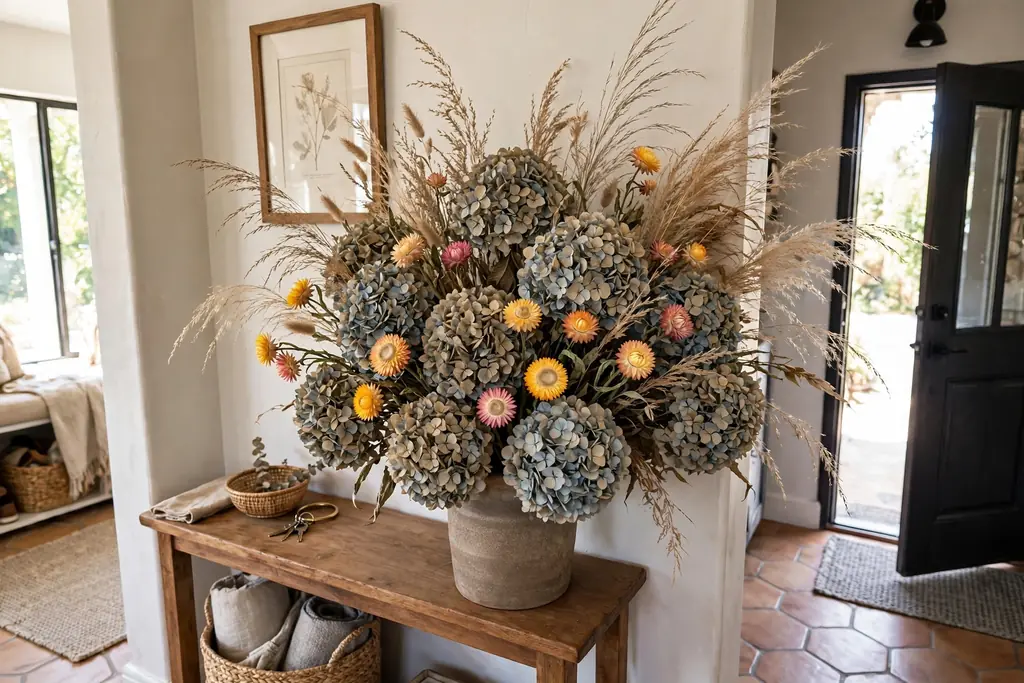
    Large dried flower arrangement with hydrangea heads, grasses, and strawflowers in an entryway.

    A large dried arrangement suits an entryway that is rarely tended, such as a guest room hall or a high shelf above a console. Combine dried hydrangea heads, grasses, wheat, and strawflowers in a dry vase with no water, building height with tall grasses at the back and full heads at the front. Dried stems hold their shape for months, so the display needs no watering and no stem trimming.

    Keep dried arrangements out of damp rooms and away from open flames and strong heat, since dry material is flammable and damp air softens it. Dust the stems gently with a soft brush or a cool hair dryer now and then. When the season changes, store the arrangement in a box to protect it, and reuse the stems next year.

    13. Stone Planter Arrangement for a Wide Entry Hall

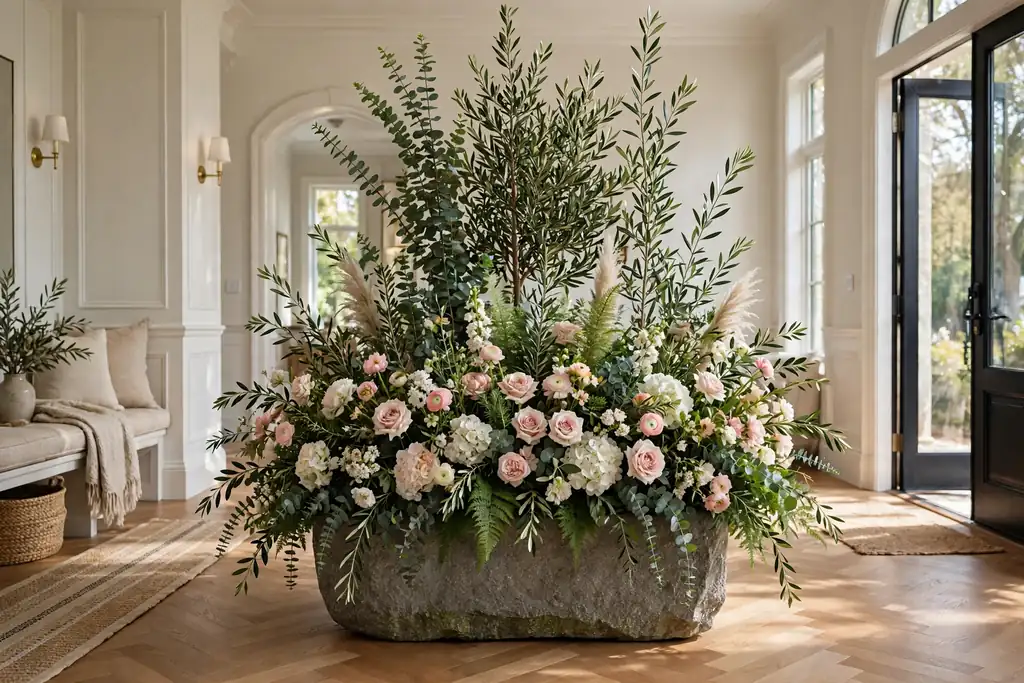
    Large stone planter with a wide full flower arrangement in a wide entry hall.

    A large stone or concrete planter suits a wide entry hall, where a light vase would look lost against the scale of the space. Set a heavy planter on the floor or on a low stand, fill it with a wide, full arrangement of blooms and tall greenery, and let the shape spread outward to match the width of the hall. The weight and rough texture of stone ground the display and suit a hall with tile or wood floors.

    A stone planter needs a waterproof liner or an inner jar, since stone can be porous and heavy to move once filled. Place it where it cannot be bumped by a door swing, and leave a clear walking path beside it. Water in place and empty any tray under the liner so the floor stays dry.

    14. Paired Large Vases Flanking a Mirror

    Two matching large vases with the same flower mix flanking a mirror above a console.

    Paired large vases flanking a mirror frame an entryway console and give the wall a balanced, finished look. Place one large vase on each side of the console, fill both with the same flower mix and a similar height, and keep the mirror or artwork above clear between them. The pair reads as one display and makes a narrow console feel wider and more planned.

    Match the two vases in shape and color, and build both arrangements to a similar height and fullness, so neither side looks heavier than the other. Leave room in the center of the console for a tray or a small lamp, and check the pair from the room door, where the symmetry first shows. This layout suits a console under a mirror better than a dining table, where a pair would crowd the center.

    15. Tall Centerpiece with Low Satellite Posies

    Tall centerpiece flower arrangement with small low posies in bud vases on a large dining table.

    A tall centerpiece with low satellite posies gives a large table both height and table-level detail. Build one tall, full arrangement in the center of the table, then place small posies in bud vases or short jars at intervals around it, using the same flowers in smaller numbers. The tall center draws the eye, while the low posies fill the table without blocking views.

    This layout works best on a large round or long table, where the center arrangement alone would leave the ends bare. Keep the satellites low, below seated eye level, and leave clear space at each place setting. Guests can take a posy home at the end of a gathering, which makes the layout do double duty as a small favor.

    16. Large Kitchen Island Arrangement Seen from All Sides

    Large rounded flower arrangement in a wide stable container on a kitchen island.

    A large kitchen island arrangement must look full from every side, since an island is walked around rather than sat across from. Build a rounded shape in a wide, stable container, with focal blooms spread around the whole arrangement, not grouped on one face, and trailing greenery at the edge all the way around. Turn the container as you build it, and check the shape from each side of the island.

    Keep the height low enough that cooks can see across the island while working, and leave clear counter space on at least one side for prep and serving. A heavy container matters here, since an island gets bumped often. Set the arrangement on a tray so it can slide aside in one move when the full counter is needed.

    17. Large Corner Arrangement that Anchors an Entryway

    Large tall flower arrangement in an entryway corner angled toward the room beside a bench.

    A large corner arrangement anchors an entryway where a bare corner meets two walls and a plain console would leave the space empty. Place a tall, wide container in the corner itself, angled so the fullest face points into the room, and build a shape that spreads toward both walls: tall stems at the back near the corner, medium blooms in the middle, and lower stems spilling forward. The corner gives the arrangement support on two sides and keeps it out of the walking path.

    Trim stems so the tallest point leaves clear space below the ceiling, and keep the front of the display low enough to see over from the door. A corner arrangement suits a hall with no console, or a corner beside a bench where a table would crowd the path. Check it from the front door, where guests first see it, and shift a stem if one side looks heavier than the other.

    Conclusion

    Large flower arrangements work when the container, height, and placement fit the spot. Keep dining table displays low and wide, give entryway displays height in a heavy, stable vase, and build around one focal bloom with supporting stems at varied heights. Choose a layout from the ideas above that matches your table shape and your entryway, test it from the views people will actually have, and keep fresh stems watered and dried stems dusted. A large display built this way fills a room without crowding it, and it holds its shape from the door to the table.

    FAQs

    How large should a flower arrangement be for a dining table?

    Start with the table size: a large dining table suits a display about one third of the table length, kept low enough to see across when seated. A low, wide bowl or a long trough usually fits better than one tall vase, since it fills the center without blocking conversation or crowding plates.

    What container is best for a large flower arrangement?

    Use a heavy, stable container that matches the display: a low compote bowl or trough for a table, and a tall urn, floor vase, or stone planter for an entryway. The container should hold enough water for fresh stems, or hold a jar inside, and it should sit on a tray or mat where water could mark the surface.

    How do I keep a large arrangement from looking crowded?

    Limit the palette to two or three colors, build around one focal bloom, and leave space between stems so each bloom can be seen. Step back and check the shape from the distance it will usually be seen, then remove or trim any stem that makes one side look heavier than the other.

    Can I use a large flower arrangement in a small entryway?

    Yes, but choose height over width in a small entryway, so the display fills the vertical space without blocking the path. A tall, narrow vase with branches against a wall works better than a wide bowl, and a corner placement keeps the arrangement out of the way of coats and bags.

    How often should I change the water in a large fresh arrangement?

    Change the water every two days, trim stems at an angle each time, and remove leaves below the waterline. Wide, shallow containers run low faster than tall vases, so check the water level daily for low bowls and troughs, and top it up before a meal or a gathering.

    Do large dried arrangements last longer than fresh ones?

    Yes, dried arrangements last for months with no water, which makes them a good choice for entryways that are rarely tended. Keep them out of damp rooms and away from open flames, dust them gently now and then, and store them in a box between seasons to protect the stems.


  • How to Arrange Flowers in a Vase for a Balanced Display

    How to Arrange Flowers in a Vase for a Balanced Display

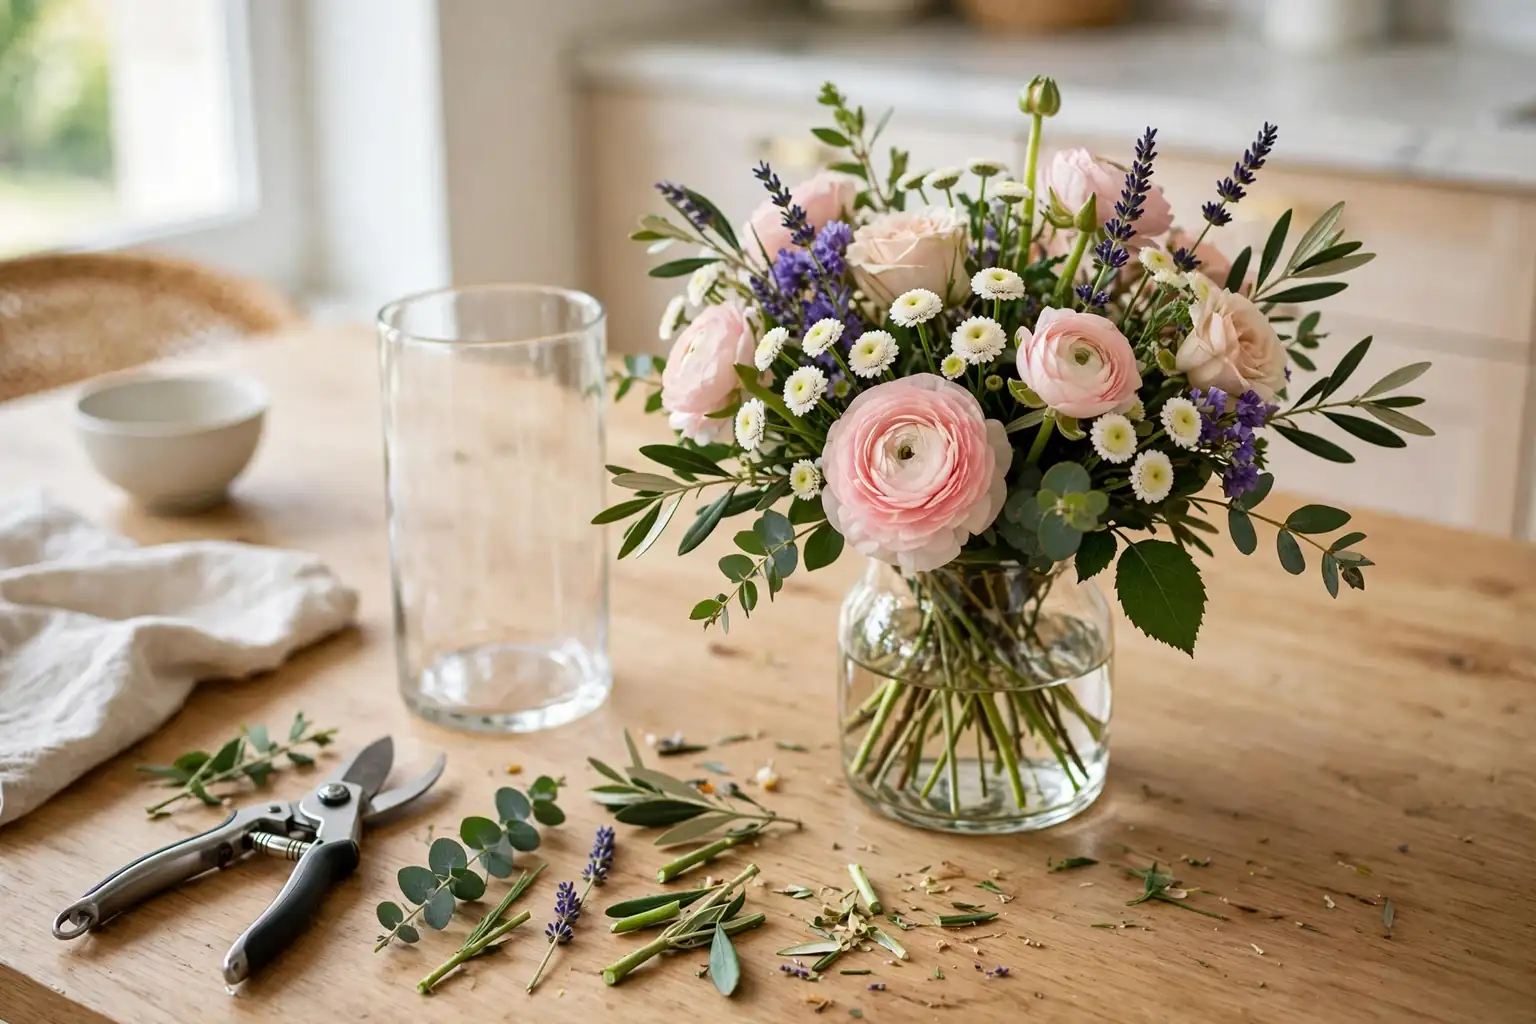
    To put flowers in a vase, start with a clean vase filled with fresh water, trim the stems at an angle, remove leaves below the waterline, build a base of greenery, place large focal blooms first, add smaller flowers around them, fill gaps with filler stems, then turn the vase and adjust until the shape looks even from all sides.

    That sequence is the whole method in one paragraph, and the steps below walk through it slowly so nothing is left to guess. A balanced display is not about rare flowers or a costly vase. It comes from clean water, stems cut to the right length, a greenery base that holds the shape, and a few minutes spent turning the vase and checking it from the side where people will see it. For seasonal arrangement ideas to try once you know the steps, see these fall flower arrangements and these Christmas vase styling ideas.

    Key Takeaways

    • Clean the vase and use fresh water before any stem goes in, since residue clouds water fast and shortens bloom life.
    • Trim stems at an angle and remove every leaf that would sit below the waterline.
    • Build a greenery base first, so later stems have something to rest against and the shape holds.
    • Place large focal blooms first, then medium flowers, then filler stems to fill gaps.
    • Keep the palette to two or three colors so a mixed bunch reads as one plan.
    • Turn the vase often and check the shape from all sides, not only from the front.
    • Keep dining table arrangements low and narrow enough to see across, and save tall displays for consoles and mantels.
    • Change the water every two to three days and trim stem ends a little each time.

    Materials and Supplies

    • A clean vase suited to the bunch, with a mouth wide enough to hold the stems snug
    • Fresh flowers: a few large focal blooms, several medium flowers, greenery stems, and filler stems
    • Sharp scissors or stem snips, for clean angled cuts
    • Fresh, cool water and a jug for topping up
    • A small tray or mat, to protect the table while you work
    • A clean cloth, for wiping the outside of the vase
    • Flower food, if a packet came with the bouquet, used as directed on the packet
    • Optional: clear floral tape, for a simple grid across a wide mouthed vase

    1. Choose the Vase and the Spot First

    Person setting an empty glass vase on a dining table to check its size and spot.

    Pick the vase and the spot before you unwrap the flowers. A dining table needs a low, narrow arrangement so guests can see each other across it, while a console or a mantel can take more height. A side table or a windowsill suits a small vase with only a few stems. Measure the space above the spot as well, so tall stems do not press against a mirror, a shelf, or a light fitting.

    Set the empty vase in its spot and look at it from the distance where people will see it. A vase that looks right up close can look lost from across a room, and a vase that looks full on a counter can crowd a small table. Check that the base sits level and that the vase is heavy enough for the bunch you plan to use, since a top heavy bunch in a light vase tips easily.

    If the vase mouth is much wider than the bunch, plan a grid now rather than after the flowers are in. A simple grid of clear floral tape across the mouth, or a smaller jar of water set inside the vase, gathers the stems and keeps them from falling outward. This one check saves most of the adjusting later.

    2. Gather and Sort the Flowers

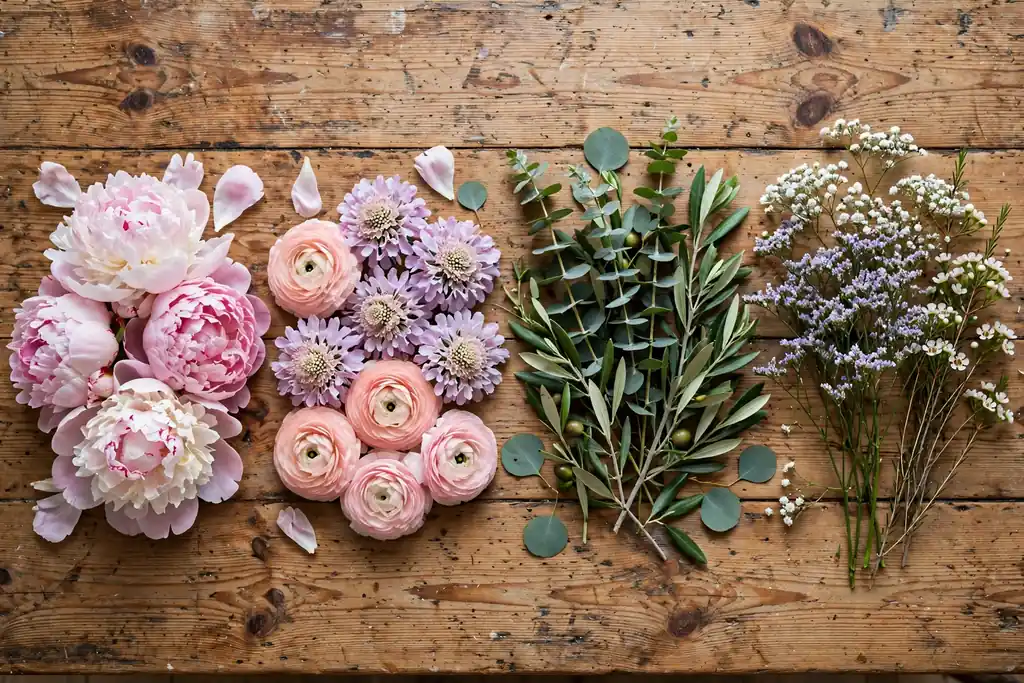
    Mixed flower bunch sorted into groups of large blooms, medium flowers, greenery, and filler stems on a table.

    Unwrap the bunch gently and lay every stem on a clean table. Sort the stems into groups: large focal blooms, medium flowers, greenery, and small filler stems. Focal blooms are the largest, boldest flowers in the bunch, such as roses, dahlias, or sunflowers. Medium flowers support them, greenery gives shape, and filler stems such as berries or small buds fill the gaps between larger blooms.

    Look at each stem before you cut anything. Set aside any stem that is broken, wilted, or badly bent, and keep spares in water in a cool spot in case a stem fades later. Note which stems are longest and which are shortest, since length decides where each stem will sit in the vase. A quick sort now keeps you from hunting through a pile with wet hands later.

    Keep the palette in mind as you sort. If the bunch holds many colors, pick two or three to lead and use the rest sparingly, or the display can look busy. One shared color across the focal blooms, or one repeated greenery tone, is often enough to pull a mixed bunch together.

    3. Clean the Vase and Fill It With Fresh Water

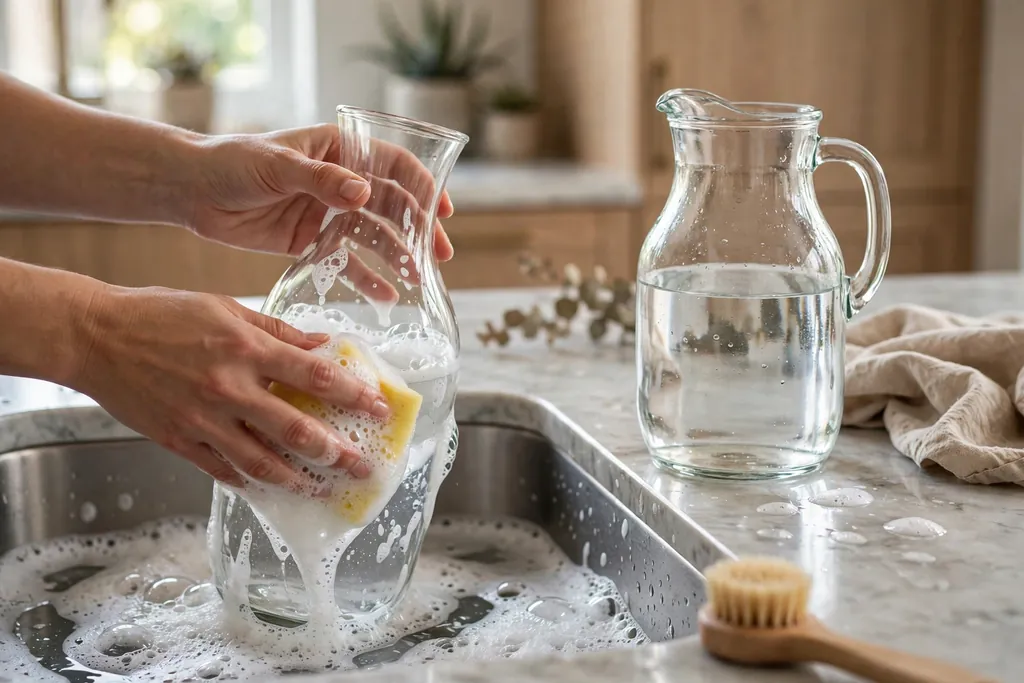
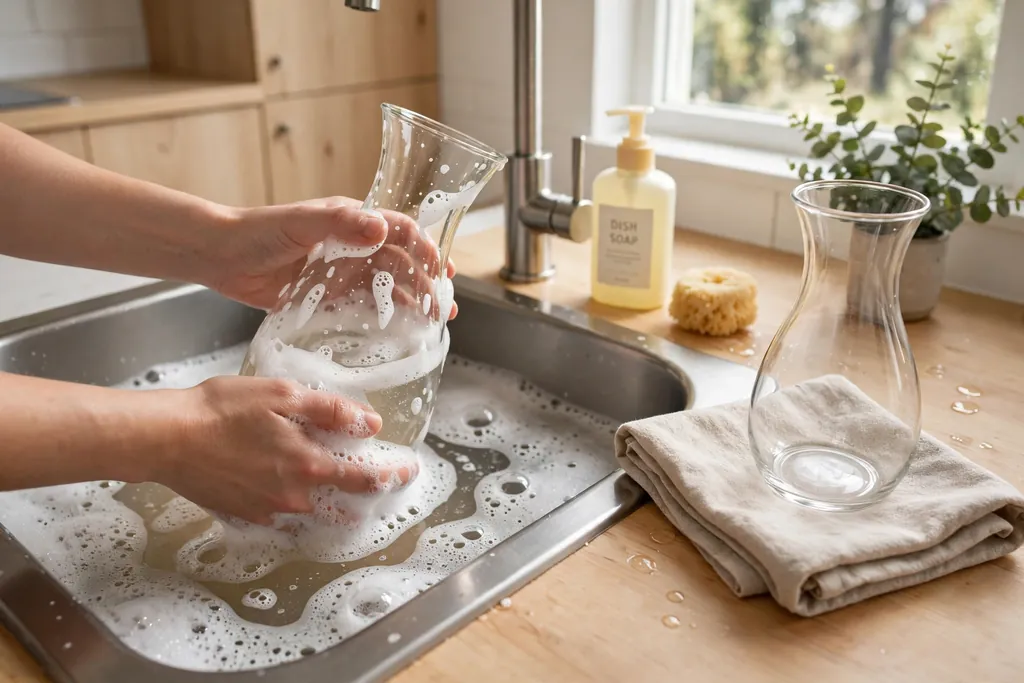
    Hands washing a clear glass vase in warm soapy water at a kitchen sink.

    Wash the vase with warm soapy water, rinse it well, and dry the outside. Residue from a past arrangement clouds fresh water fast and can shorten bloom life, so a clean vase is worth the minute it takes. For a narrow necked vase, a bottle brush reaches the inside, and a soak in warm soapy water loosens residue that a cloth cannot reach.

    Fill the vase about two thirds full with fresh, cool water. That level gives most stems enough water without forcing you to remove a large number of leaves, and it leaves room to top up later without spilling. If a flower food packet came with the bouquet, mix it in as directed on the packet and stir until it dissolves.

    Check the vase for chips and cracks before you fill it, especially around the rim and the base. A chipped rim can cut stems and hands, and a cracked base can leak onto a table. Set the filled vase on a tray or mat while you work, so drips stay off wood and linen.

    4. Remove Leaves Below the Waterline

    Hands stripping leaves from a flower stem over a tray before arranging.

    Strip every leaf that would sit below the waterline, one stem at a time. Leaves in water break down fast, cloud the water, and can cause stems to soften sooner. Pull leaves off by hand where they come away cleanly, or snip them off close to the stem where they resist.

    Leave the leaves on the upper part of each stem in place. Upper leaves add fullness and help the arrangement look like a gathered bunch rather than bare stems with blooms on top. If a stem is very leafy near the top, thin out only the leaves that cross over a bloom or block the shape you want.

    Work over a bin or a tray so stripped leaves do not pile up on the table. This step takes only a few minutes for a standard bunch, and it makes the largest single difference to how long the water stays clear and how long the flowers last.

    5. Trim the Stems at an Angle

    Hands trimming a flower stem at an angle with scissors beside a vase.

    Trim each stem at an angle with sharp scissors or stem snips, cutting about one to two inches off the end, or more if the stem is too long for the vase. An angled cut gives the stem end more surface to take up water than a flat cut, and a sharp tool leaves a clean cut that drinks better than a crushed end from dull scissors.

    Trim one stem, hold it beside the vase, and check the length before you cut the rest. The bloom should rise clearly above the rim, with enough stem inside the vase to keep the bunch steady. If the blooms barely clear the rim, the stems are too long for that vase, or the vase is too tall for that bunch, and trimming more will not fix a poor match.

    Cut stems one at a time as you place them, rather than cutting the whole bunch to one length at the start. Stems placed at the back or the center often need to stay longer than stems at the front or the edges, and cutting as you go lets you set each height by eye. Drop each trimmed stem into the water at once, so cut ends do not dry out while you work.

    6. Build a Greenery Base

    Greenery stems forming a loose base in a glass vase before flowers are added.

    Start the arrangement with greenery, not with blooms. Place greenery stems around the rim first, angling them outward a little, then add a few taller greenery stems near the center. The greenery forms a loose frame that shows the outer shape of the finished display and gives later stems something to rest against.

    Cross the greenery stems lightly inside the vase so they lock together and hold the shape. In a wide mouthed vase, the tape grid or inner jar from step 1 does the same job. The base should look full but not dense, since blooms still need room to sit between the leaves.

    Step back and look at the greenery shape before you add any flowers. It should read as a rounded or gently domed outline, with no wide bare gap on one side. Add one more greenery stem where a gap shows, and pull back any stem that sticks far past the rest. A sound base makes the flower steps much easier.

    7. Place the Focal Blooms First

    Hands placing large focal roses into a vase filled with a greenery base.

    Place the large focal blooms next, since they set the focus of the whole display. Put the first focal bloom near the center or slightly off center, at the tallest height you want for the arrangement. Then place the remaining focal blooms around it in a loose triangle or an uneven group, at slightly varied heights, so the eye moves across the display instead of landing on one flat row.

    Turn the vase a quarter turn after every two or three focal blooms, and check the shape from the new side. Focal blooms placed only from the front leave the back thin, and a display seen from all sides needs focal blooms on all sides. Keep at least a small gap between focal blooms, since the medium flowers and filler stems will fill those gaps later.

    Resist the urge to pack focal blooms together in the center. A display with one clear group of large blooms and open space around them reads calmer and more planned than a tight ball of large blooms with no room to breathe. If a focal bloom faces the wrong way, turn the stem in the vase rather than bending the neck of the flower.

    8. Add Medium Flowers Around the Focal Blooms

    Medium flowers being added between focal blooms in a vase arrangement.

    Add medium flowers next, placing them between and slightly below the focal blooms. These flowers link the large blooms together and set the middle layer of the display. Angle them outward a little more than the focal blooms, so the shape widens gently from the top toward the rim.

    Vary the heights of the medium flowers rather than setting them all at one level. A few stems a little taller and a few a little shorter give the display depth, and the varied heights keep it from looking like a flat hedge. Place medium flowers on all sides as you go, turning the vase often, so no side ends up thin while another side looks crowded.

    Check the color balance as you add this layer. If one color clusters on one side, move a stem or two to the opposite side to spread it around. A repeated color on at least two sides of the vase keeps the display from looking lopsided, even when the flower types differ from side to side.

    9. Fill Gaps With Filler Stems

    Hands tucking small berry filler stems into gaps in a vase arrangement.

    Fill the remaining gaps with small filler stems, such as berries, small buds, or airy sprigs. Tuck filler stems into bare spots between larger blooms, letting a few rise a little above the main shape and a few sit lower near the rim. Filler stems soften hard edges between blooms and make the display look gathered rather than assembled in rows.

    Use filler stems sparingly at first, then add more where gaps still show. It is easy to add one more sprig, and much harder to pull a stem out of a finished display without disturbing the stems around it. Let a few filler stems lean outward past the rim, since that loose edge keeps the display from looking stiff.

    Step back and look for three things: a gap that shows the vase mouth or bare stems, a spot where two large blooms crowd each other, and a side that looks thinner than the rest. A single filler stem in the right gap often fixes all three at once. If a gap is wide, a medium flower moved from a crowded spot fills it better than a thin filler stem.

    10. Shape the Outline and Check the Balance

    Person turning a vase arrangement on a table to check its shape and balance.

    Shape the outline by looking at the display as one shape, not as separate flowers. A rounded, gently domed outline suits most tables, while a taller, looser outline suits a console or an entryway. Trim any stem that sticks far past the outline, and add a stem where the outline dips inward.

    Check the balance from the front, from both sides, and from above. One side often looks heavier than the other, usually because most of the large blooms ended up on the side you faced while arranging. Turn the vase, shift one or two stems to the thin side, and check again. Balance does not mean perfect symmetry, it means no side looks empty and no side looks overloaded.

    Also check the height against the spot. A dining table display should stay low enough to see across when seated, and a mantel display should leave clear space below a mirror or artwork above it. Trim the tallest stems down a little if the display crowds the space above it, rather than moving the whole vase to a spot where it does not belong.

    11. Set the Height and Width for the Table

    Low flower arrangement in a glass vase on a dining table with clear sightlines across it.

    Set the final height and width with the table in mind. On a dining table, the display should leave clear room at each place for plates and glasses, and guests should be able to see each other across it without leaning around flowers. A low bowl, a small vase, or a trio of small vases often works better on a dining table than one tall, wide vase.

    On a coffee table or a side table, the display can go a little wider, since no one sits across it to talk. Keep it narrow enough that it does not crowd books, cups, or a lamp on the same surface. On a console or a mantel, height is welcome, as long as the total height leaves clear space above and the base sits well back from the edge.

    Test the display in its spot before you call it done. Sit at the dining table and check sightlines, stand at the room door and check the console display from there, and walk past the side table to check that the vase cannot be bumped easily. A display that works in its spot matters more than one that looks good only on a work counter.

    12. Adjust Stem Lengths and Spacing

    Hands adjusting a single stem length in a vase arrangement beside scissors.

    Make a final pass on stem lengths and spacing, one stem at a time. Pull a stem out, trim a little more if it sits too high, and return it to the same spot. Push a stem a little deeper if it floats above the shape, and pull a stem out a little if it sinks below its neighbors. Small changes at this stage have a large effect, since the shape is nearly set.

    Space the stems so air can move between them and each bloom can be seen. Stems packed tight trap moisture and hide smaller blooms, while stems spaced too far apart let the display fall apart. Aim for blooms that touch lightly or sit close together, with greenery and filler stems bridging the space between them.

    If a stem will not stay where you put it, the problem is usually the base, not the stem. Add one more greenery stem crossed against it inside the vase, tighten the tape grid, or move the stem to a spot where neighboring stems hold it. A stem that needs constant adjusting will keep moving after you walk away, so fix the support now.

    13. Top Up the Water and Clean the Vase Outside

    Hands topping up water in a vase arrangement and wiping the outside of the vase.

    Top up the water to the level you set in step 3, since arranging always splashes a little out and stems drink as you work. Check that every stem end sits under water, and add flower food only as directed on the packet if you have not already mixed it in. Wipe the outside of the vase with a clean cloth, and wipe the table under it, so drips do not mark wood or linen.

    Remove any petal, leaf, or bit of stem that fell into the water or onto the table. Debris in the water clouds it fast, and debris on the table makes a fresh display look untidy. Set the vase on a small tray or mat if the table marks easily, especially under ceramic, metal, or terracotta vases that can leave a ring when wet.

    Take one last look at the display in its spot, from the side where people will see it most. A clean vase, clear water, and a tidy surface around it are part of the display, and they cost nothing beyond a minute of wiping.

    14. Place the Display and Keep It Looking Fresh

    Finished flower arrangement in a glass vase on a console table in a bright living room.

    Place the finished display in its spot and leave it for an hour, then check it once more. Fresh stems settle as they drink, and a shape that looked full at first can open out or lean as stems relax. Trim any stem that droops below the line you want, add a filler stem where a gap appears, and top up the water before guests arrive.

    Keep fresh displays out of direct sun and away from heat vents and ripening fruit, since heat and sun shorten bloom life. Change the water every two to three days, trimming a little off the stem ends each time, and remove spent blooms promptly so they do not stain nearby petals. Small vases run dry fast, so check their water level daily.

    For a longer lasting version of the same display, swap faded stems for fresh ones and keep the greenery base, which often lasts longer than the blooms. For table styling that pairs with a finished vase display, see these Thanksgiving flower arrangements. When the last blooms fade, wash the vase, dry it fully, and store it clean, so the next bunch starts from a clean vase and fresh water.

    Conclusion

    Putting flowers in a vase comes down to a steady order: a clean vase and fresh water, stems trimmed at an angle with leaves below the waterline removed, a greenery base that holds the shape, focal blooms placed first, medium flowers and filler stems filling around them, and a final check from all sides in the spot where the display will live. Keep the palette to two or three colors, keep table displays low enough to see across, and change the water every few days with a small trim each time. With that routine, a simple bunch from a shop or a garden looks planned, stays upright, and lasts as well as the stems allow.

    FAQs

    How do you put flowers in a vase so they stay upright?

    Put flowers in a vase so they stay upright by building a greenery base first, using a vase mouth that holds the bunch snug, and crossing stems lightly inside the vase so they lock together. A tape grid across a wide mouth, or a smaller jar of water inside the vase, also gathers the stems. Choose a vase heavy enough for the bunch, and check that the base sits level in its spot.

    Should I cut flower stems before putting them in a vase?

    Yes, trim flower stems at an angle with sharp scissors or stem snips before putting them in a vase, cutting about one to two inches off each end. An angled cut gives the stem more surface to take up water, and a sharp cut drinks better than a crushed end. Drop each trimmed stem into water at once, and trim a little more each time you change the water.

    How much water should I put in a vase for flowers?

    Fill the vase about two thirds full with fresh, cool water, so most stem ends sit well under water without forcing you to strip a large number of leaves. Check that every stem end stays under water after arranging, and top up the level as stems drink. Change the water every two to three days rather than only topping it up, since fresh water keeps stems firm longer.

    What order should I put flowers in a vase?

    Put greenery in first to form a base, then large focal blooms, then medium flowers, then small filler stems to fill gaps. Greenery shows the outer shape and holds later stems, focal blooms set the focus, medium flowers link the large blooms together, and filler stems soften edges and fill bare spots. Turn the vase often so every side gets flowers, not only the front.

    How do I make a vase arrangement look balanced?

    Make a vase arrangement look balanced by placing focal blooms at varied heights, spreading each color to at least two sides of the vase, and checking the shape from the front, both sides, and above. Trim any stem that sticks far past the outline, add a stem where the outline dips inward, and shift one or two stems to any side that looks thin. Balance means no side looks empty and no side looks overloaded, not perfect symmetry.

    How long do flowers last in a vase?

    Flowers in a vase usually last several days to about two weeks, depending on the flower type, the freshness of the bunch, and the care it gets. Clean water changed every two to three days, stem ends trimmed a little each time, leaves kept out of the water, and a cool spot away from direct sun and heat all help blooms last longer. Remove spent blooms promptly, and check small vases daily since they run dry fast.


  • How to Choose Vases for Different Flower Arrangements

    How to Choose Vases for Different Flower Arrangements

    Choose a vase by matching its shape, size, and mouth to the flowers you plan to use: tall narrow vases suit long stems, low wide bowls suit short full arrangements, and a mouth that holds stems snug keeps the shape steady. Pick a sturdy, easy to clean material and a color that supports the blooms, not one that fights them.

    Most vase mistakes come from choosing the container before the flowers. A tall bunch in a short wide bowl falls outward, a short bunch in a tall narrow vase disappears inside it, and a heavy bunch in a light vase tips at the slightest bump. Start with the stems in hand, look at their length, weight, and spread, and then pick the vase that holds that shape with little fuss. For arrangement ideas to pair with your vase choice, see these fall flower arrangements and these Christmas vase styling ideas.

    Key Takeaways

    • Start with the flowers, not the vase: length, weight, and spread decide the shape and size you need.
    • Tall narrow vases suit long stems, low wide bowls suit short full arrangements, and bud vases suit single stems.
    • A mouth that holds stems snug keeps the shape steady; a mouth that is too wide lets stems fall apart.
    • Heavy or tall arrangements need a heavy, stable base, and table arrangements need to stay low enough to see across.
    • Clear glass shows stems and water, ceramic hides them, and each choice changes the look of the same bouquet.
    • A quiet vase color lets bold flowers lead, while a colored vase works best with a simple, limited palette.
    • Keep a small set of core vases, one tall, one medium, one low bowl, and a few bud vases, and most bouquets will have a home.

    Materials and Supplies

    • A tape measure, to check vase height against the spot where the arrangement will sit
    • The flowers you plan to arrange, or a note of their stem length and bunch width
    • The vases you already own, gathered in one place so you can compare shapes side by side
    • A small tray or mat, to protect tables under vases that may drip or sweat
    • Clean water and a pair of sharp scissors or stem snips, for trimming stems before arranging
    • A soft cloth, for wiping glass and ceramic vases before and after use
    • A notebook or phone note, to record which vase worked for which bouquet for next time

    1. Start With the Arrangement, Not the Vase

    Person holding a mixed flower bunch beside empty vases in different shapes on a wooden table.

    Decide what the arrangement should do before you reach for a vase. A dining table centerpiece needs to stay low and leave room for plates and glasses. A console display can go taller and fuller, since no one sits across from it. A single stem on a bedside table needs only a small bud vase, not a large floor vase.

    Lay the bunch on a table and look at it as a group. Note how long the stems are, how wide the bunch spreads when held loosely, and where the weight sits. Top heavy bunches with large blooms need more support at the base than light, airy bunches with small blooms. This quick look tells you more than a vase label ever will.

    If you buy flowers first and choose the vase at home, you can test freely. Try the bunch in two or three vases you own, step back, and see which one holds the shape with the least adjusting. The vase that needs the fewest stems moved around is usually the right one.

    2. Match Vase Shape to Flower Type

    Three vases side by side with tall stems in a narrow vase, roses in a rounded vase, and a single stem in a bud vase.

    Vase shape guides how stems sit, so match it to the flower type. Long stemmed flowers such as lilies, sunflowers, and tall branches need a tall vase that supports a good length of stem, so the blooms rest above the rim without flopping. A vase with a narrower neck helps here, since it gathers tall stems into one group.

    Round, full flowers such as peonies, roses, and dahlias suit a vase with a rounded body and a mouth wide enough to let the blooms open out. A straight cylinder also works for these, since it gives the bunch room to spread while keeping the stems upright. For a mixed bouquet with varied stem lengths, a vase that narrows slightly at the neck holds the mix together while letting shorter blooms sit lower.

    Single stems and small posies suit bud vases. A bud vase holds one stem upright and lets a single bloom carry a small spot such as a windowsill, a bathroom shelf, or a place setting. Short, trailing stems and compact clusters suit a low bowl, where the flowers can spread sideways instead of standing tall.

    3. Get the Size and Proportion Right

    Mixed bouquet in a well proportioned ceramic vase on a dining table with blooms above the rim.

    Proportion is what makes an arrangement look settled rather than crowded or lost. As a starting point, let the flowers rise clearly above the rim, with enough stem inside the vase to keep the bunch steady. If the blooms barely clear the rim, the vase looks too tall for the bunch. If only a short length of stem sits inside a tall vase, the bunch can lean and tip.

    Think about the vase and the flowers as one shape, not two separate parts. A wide bunch needs a vase with enough body to balance it, while a slim bunch suits a slimmer vase. A very large vase with a small bunch looks empty, even if the flowers themselves are lovely, and a small vase with a large bunch looks strained.

    Test proportion by eye before you commit. Hold the bunch beside the vase, then set it in and step back to the distance from which the arrangement will usually be seen. A table arrangement is seen from a seat nearby, while a console arrangement is seen from across the room, and each view can change which size reads best.

    4. Choose a Mouth Width That Supports the Stems

    Flower stems held snug in the narrow mouth of a ceramic vase beside a wider empty vase.

    The mouth of the vase does much of the arranging work. A mouth that is close to the width of the bunch holds stems snug and keeps the shape you set. A mouth much wider than the bunch lets stems fall outward until the arrangement looks flat and scattered, unless you add enough filler to fill the gap.

    A narrow mouth suits a small bunch, a few tall stems, or a single type of flower that you want to keep upright in a tight group. A medium mouth suits a standard mixed bouquet, since it gives stems room to angle slightly while still holding the group together. A wide mouth suits a large, full arrangement built in a bowl or a wide cylinder, where many stems fill the opening on their own.

    If a favorite vase has a mouth that is too wide for the bunch, you can still use it. Add more filler stems, use a smaller inner jar of water inside the vase to gather the stems, or choose a fuller bunch for that vase and save the smaller bunch for a narrower one. The aim is a bunch that stays put without constant adjusting.

    5. Pick a Material for the Room and the Stems

    Shelf of empty vases in clear glass, white ceramic, stoneware, and terracotta in natural light.

    Material changes both the look and the daily care of a vase. Clear glass shows the stems and the water, which suits a fresh, simple bouquet and a modern room, but it also shows cloudy water and stem ends, so it needs water changes and wiping to stay neat. Colored glass softens the view of stems while still letting light through, and it suits rooms where a clear vase would look too plain.

    Ceramic and stoneware hide stems and water completely, which suits a full bouquet where the blooms should lead and the mechanics should stay out of sight. These materials also add weight, which helps a tall or heavy arrangement stay stable. They suit farmhouse, rustic, and traditional rooms, and they pair well with textured table linens and wood tables.

    Metal, terracotta, and wooden containers each bring their own care needs. Metal can mark a table when wet, so it needs a tray or mat underneath. Terracotta is porous, so fresh stems usually need a jar or liner inside it. Wooden boxes and baskets need a waterproof liner as well. Whatever material you choose, check that it holds water safely or can hold a jar inside, and set it on a mat if the table marks easily.

    6. Use Color to Support or Quiet the Flowers

    White blooms in a quiet white vase beside warm autumn blooms in a terracotta vase on a light wood table.

    Vase color sets the tone for the whole arrangement. A quiet color such as clear glass, white, cream, or pale gray lets the flowers lead, and it suits a mixed bouquet with several colors. When the flowers are the star, a quiet vase keeps the eye on the blooms instead of splitting attention.

    A colored vase works best when the flowers are simple. A green vase with white blooms, a blue vase with yellow blooms, or a terracotta vase with warm autumn blooms each use one clear color link between vase and flowers. Keep the rest of the palette limited when the vase is colored, so the display reads as one plan rather than a mix of competing colors.

    Also consider the room. A vase that matches the wall color or the tableware blends in and lets the flowers stand out, while a vase in a strong accent color becomes part of the room decor even when it holds only greenery. If you are unsure, start with a neutral vase, then add a colored one once you know which flower colors you buy most often.

    7. Match the Vase to the Arrangement Style

    Formal arrangement in a classic urn vase beside a loose garden bouquet in a ceramic pitcher on a console table.

    Different arrangement styles ask for different vases. A formal arrangement, with even heights and a clear focal bloom, suits a classic urn, a footed bowl, or a straight cylinder in a quiet color. The vase should look tidy and balanced, so it supports the formal shape rather than pulling attention away from it.

    A loose, garden style arrangement, with varied stem lengths and a relaxed outline, suits a pitcher, a crock, a mason jar, or a ceramic vase with a slightly uneven finish. These containers forgive a less exact shape and let stems lean a little, which suits the informal feel. A minimal arrangement, with only a few stems and clear space between them, suits a plain cylinder, a slim bud vase, or a simple ceramic vase with no pattern.

    A seasonal arrangement can use the vase to carry part of the theme. A rustic crock suits autumn stems, a bright ceramic vase suits spring blooms, and a metallic or frosted glass vase suits winter greenery. For seasonal table ideas, see these Thanksgiving flower arrangements. Keep the seasonal link light, though, so the vase can still serve other seasons with different stems.

    8. Fit the Vase to the Spot

    Low bowl flower arrangement on a dining table with clear sightlines and a tall vase on a console behind it.

    Where the arrangement will sit matters as much as the flowers in it. A dining table vase should stay low and narrow enough that guests can see each other across the table, and it should leave room at each place for plates and glasses. A low bowl, a small trio of bud vases, or one modest cylinder usually works better on a dining table than a tall, wide vase.

    A mantel or console can take more height, since no one sits across from it. Tall cylinders, floor vases, and large ceramic vases suit these spots, as long as the total height leaves clear space below a mirror or artwork above. An entryway console suits a sturdy vase that can take a bump from bags and keys, so weight and a stable base matter there.

    Small spots need small vases. A windowsill, a bathroom shelf, a bedside table, or a desk suits a bud vase or a small jar with one to three stems. A floor vase suits a corner, a hearth side, or the end of a long console, where its height frames the room instead of crowding a table. Measure the spot, including the height above it, before you choose.

    9. Plan for Fresh Stems, Dried Stems, or Both

    Fresh flower bouquet in a glass vase with water beside a dried flower arrangement in an open basket.

    Fresh stems need water, so the vase must hold water safely or hold a jar of water inside. Check for leaks before you fill a new vase, especially with ceramic, metal, or wooden containers, and change the water regularly so stems stay firm. Remove leaves that would sit below the waterline, since they cloud the water faster.

    Dried stems need no water, so the vase choice opens up. Baskets, open crocks, and containers that cannot hold water all work for dried flowers, grasses, and branches. Dried stems are also lighter, so a tall dried arrangement in a light vase can still tip if it catches a draft, and it should sit away from open flames and strong heat.

    A mixed arrangement with both fresh and dried stems needs a vase that holds water for the fresh stems while keeping the dried stems out of the water as much as possible. A jar inside a wider vase can help here, with fresh stems in the jar and dried stems grouped around it. Keep dried stems dry and out of damp rooms, since damp air softens them.

    10. Build a Small Collection That Covers Most Arrangements

    Core collection of vases on a shelf with a tall cylinder, a medium rounded vase, a low bowl, and small bud vases.

    You do not need a vase for every bouquet. A small core collection covers most everyday arrangements: one tall cylinder or tall narrow vase for long stems, one medium rounded vase for mixed bouquets, one low wide bowl for short full arrangements, and two or three bud vases for single stems and small spots. With those, most bunches from a shop or garden have a fitting home.

    Add to the core only when a gap shows up again and again. If you often arrange branches, add a heavy floor vase. If you often set a long table, add a set of matching small vases that can repeat down the table. If you often use dried stems, add a crock or basket that suits them. Buying one vase at a time, for a real gap, builds a collection you actually use.

    Store the collection where you can see it. Vases hidden in a high cupboard get forgotten, while vases on one shelf or in one cabinet get reached for. Keep the core set together, clean and dry, so choosing a vase takes a minute rather than a search through the house.

    11. Test the Pairing Before You Commit

    Person adjusting a flower arrangement in a vase on a dining table while checking the shape from a seat.

    Before you settle an arrangement in its spot, test the pairing in three quick steps. First, set the filled vase on the table or surface where it will live and check that it sits level and does not wobble. A vase that rocks on an uneven surface needs a mat underneath or a different spot.

    Second, check the view from where people will actually see it. Sit at the dining table and check sightlines across it. Stand at the room door and check the console or mantel display from there. Step back and look for one side that looks heavier than the other, then shift a stem or turn the vase slightly until the shape reads evenly.

    Third, leave the arrangement for an hour and check it again. Fresh stems settle as they drink, and a shape that looked full at first can open out or lean as stems relax. Trim any stem that droops below the line you want, add a filler stem where a gap appears, and top up the water before guests arrive.

    12. Care for Vases and Keep Arrangements Looking Their Best

    Hands washing a clear glass vase in warm soapy water at a kitchen sink with a clean vase drying beside it.

    Good care keeps both vases and flowers looking their best for longer. Wash vases with warm soapy water after each use, rinse well, and dry them before storing, since residue inside a vase clouds fresh water faster. For narrow necked vases, a bottle brush reaches the inside, and a soak in warm soapy water loosens residue that a cloth cannot reach.

    Check vases for chips and cracks before each use, especially around the rim and the base. A chipped rim can cut stems and hands, and a cracked base can leak onto a table. Retire a damaged vase from fresh flowers and use it for dried stems only, or replace it, rather than risking a leak on wood or linen.

    For the flowers themselves, trim stems at an angle before arranging, remove leaves below the waterline, and change the water every couple of days, trimming a little off the stem ends each time. Keep fresh arrangements out of direct sun and away from heat vents and ripening fruit, since heat and sun shorten bloom life. With clean vases and fresh water, even a simple bunch in a well chosen vase holds its shape and color well.

    Conclusion

    Choosing a vase for a flower arrangement comes down to a few steady checks: the flowers first, then a shape and size that support them, a mouth that holds the bunch snug, a material and color that suit the room, and a spot where the finished height works. Build a small core collection, test each pairing from the view people will actually have, and keep vases clean and dry between uses. With those habits, the vase stops being a guess and becomes a quiet support for the flowers, and most bouquets will look planned with little extra effort.

    FAQs

    How do I choose a vase for a bouquet I already bought?

    Start with the bunch itself: note the stem length, the bunch width, and the weight of the blooms. Choose a vase tall enough to support a good length of stem, with a mouth close to the bunch width so the stems stay snug, and a base heavy enough to hold the bunch steady. Test the bunch in two vases if you can, and keep the one that holds its shape with the least adjusting.

    What vase shape is best for roses?

    A rounded vase or a straight cylinder suits roses well, since both give the blooms room to open while keeping the stems upright. Choose a mouth wide enough that the rose heads do not crowd each other, and a vase tall enough that the stems sit steadily inside it. A single rose suits a bud vase, while a full bunch of roses suits a medium rounded vase.

    What vase is best for tall flowers such as lilies and sunflowers?

    Tall flowers need a tall vase with a narrower neck, so the long stems stay grouped and upright instead of falling outward. The vase should also be heavy enough that the top heavy blooms cannot tip it, and it should sit where it cannot be bumped easily, such as a console or a side table rather than a crowded dining table.

    How tall should a vase be compared to the flowers?

    Let the flowers rise clearly above the rim, with enough stem inside the vase to keep the bunch steady. If the blooms barely clear the rim, the vase is too tall for the bunch, and if only a short length of stem sits inside a tall vase, the bunch can lean. Judge by eye from the distance the arrangement will usually be seen, and trim stems to adjust rather than forcing a poor match.

    Should I choose a clear glass vase or a ceramic vase?

    Choose clear glass when you want a light, simple look and do not mind seeing stems and water, and choose ceramic when you want the blooms to lead and the mechanics to stay hidden. Clear glass suits modern rooms and simple bouquets, while ceramic adds weight and warmth and suits fuller bouquets and traditional rooms. Keep one of each in your core collection, and most bouquets will have a good option.

    Can I use a vase with a wide mouth for a small bunch?

    Yes, but a small bunch in a wide mouthed vase will fall outward unless you fill the gap. Add more filler stems, use a smaller inner jar of water inside the vase to gather the stems, or save the wide vase for a fuller bunch and use a narrower vase for the small bunch. A snug fit at the mouth is what keeps a small arrangement looking planned.


  • 19 Ways to Decorate with Candlesticks Around Your Home

    19 Ways to Decorate with Candlesticks Around Your Home

    Decorating with candlesticks works best when you group them in odd numbers, vary the heights, and keep flames clear of curtains, greenery, and paper. Use one main group per surface, match the holder material to the room, and let the candles add height and warm light without blocking views or crowding plates.

    Start with the candlesticks you already own, then add one idea at a time to a mantel, a table, a shelf, or a nightstand. Check that each holder sits level, that tapers fit snugly, and that the group leaves room for everyday use. For seasonal table versions of these groups, see the fall table decor guide, and for a holiday table with candle groups, browse the Christmas table setting ideas.

    Key Takeaways

    • Group candlesticks in odd numbers and vary the heights, so the group looks balanced from across the room.
    • Use one main candlestick group per surface, and keep the rest of that surface simple.
    • Match the holder material to the room: brass for warmth, glass for light rooms, wood for rustic rooms, and black metal for modern rooms.
    • Keep flames clear of curtains, dried greenery, paper, and fabric, and use flameless candles near children, pets, or dried material.
    • Check that holders sit level, tapers fit snugly, and candles stay clear of shelves, mirrors, and wall art above them.
    • Start with pieces you already own, then add one new height, material, or tray to complete a group.

    1. Brass Tapers in a Row on the Mantel

    Brass candlesticks in a row on a mantel with cream taper candles.

    Set three or five brass candlesticks in a row along the mantel, with the tallest in the middle and shorter ones at the sides, and use cream tapers in each. The brass adds a warm metal note that suits a living room fireplace, and the row gives the mantel a clear focal point without a large arrangement. Keep the group centered, so it reads as one display rather than scattered pieces.

    Check the height of the tapers against the mirror or art above the mantel, and leave a clear gap between the flame and anything hanging above. Use a small tray or drip plates under the holders if wax drips are a concern, and trim wicks before lighting. For a mantel near curtains, use flameless tapers in the same brass holders for the same look without a flame.

    2. Low Trio as a Dining Table Centerpiece

    Three candlesticks of different heights as a low dining table centerpiece.

    Set three candlesticks of different heights in a row or a small triangle at the center of the dining table, with short tapers or pillar candles in each. The trio adds height and glow to evening meals, while staying low enough for guests to see across the table. Keep the rest of the centerpiece simple, such as a plain runner or a few small sprigs at the base.

    Center the trio, leave room for serving dishes on both sides, and set the tallest holder in the middle of a long table or at the back of a round table. Check that tapers fit snugly, so candles do not lean over plates, and use a tray under the group to catch wax and to lift the whole centerpiece off in one move. For a table with children, use flameless candles in the same holders.

    3. Matching Pair on an Entryway Console

    Matching pair of tall candlesticks on an entryway console with a mirror between them.

    Set a matching pair of tall candlesticks at the ends of an entryway console, with a mirror, a framed print, or a small bowl between them. The pair frames the console, gives guests a warm welcome at the door, and adds height to a narrow surface without crowding it. Use tapers in a color that repeats one color from the entryway rug or wall art.

    Keep the pair the same height and material, so the console looks planned, and leave the middle clear for keys, mail, or a small dish. If the console sits under a mirror, check that the candles do not reflect glare into the walkway, and keep flames clear of any hanging coats or scarves. Use flameless tapers here if the entryway is busy or if candles will burn while you are out of the room.

    4. Hurricane Holders on a Kitchen Windowsill

    Candlesticks inside clear hurricane glass holders on a kitchen windowsill.

    Set candlesticks inside clear hurricane glass holders along a kitchen windowsill, with pillar candles or short tapers inside. The glass shields the flame from drafts near the window, catches wax, and gives the sill a soft glow in the evening. This idea suits a kitchen with a wide sill and a view, since the glass keeps the display tidy and easy to wipe clean.

    Space the holders evenly, keep them clear of curtains and blinds, and choose holders wide enough that the candle does not touch the glass. Wash the glass before use, since fingerprints show more on clear glass than on colored holders. Use battery pillar candles inside closed hurricanes, since a real flame needs air, and never set a lit candle close to a curtain hem.

    5. Single Candlestick on a Bedroom Nightstand

    Single slim candlestick on a bedroom nightstand beside a book.

    Set one slim candlestick on a bedroom nightstand, beside a small clock, a book, or a glass of water, with a taper in a soft cream or pale color. A single holder adds a calm, quiet note to the bedroom, and it suits a small nightstand where a large group would crowd the lamp and the book. Keep the holder close to the back of the nightstand, so it stays clear of bedding.

    Choose a holder with a wide, stable base, since nightstands get bumped in the dark, and keep the flame clear of bedding, curtains, and paper. For most bedrooms, a flameless taper gives the same soft glow with less risk, and it can stay on through the evening without worry. Dust the holder often, since bedroom surfaces collect dust near lamps and books.

    6. Pillar Candlesticks on a Bathroom Tray

    Pillar candlesticks on a small tray on a bathroom counter.

    Set two or three pillar candlesticks on a small tray on a bathroom counter or a stool beside the bath, with short pillar candles in each. The tray keeps the group contained, protects the counter from wax, and gives a plain bathroom a calm, spa-like note. Use white or cream pillars, so the group suits towels and tiles in any color.

    Keep the tray clear of water splashes, towels, and lotions, and set it where it will not be knocked when you reach for the tap. Use flameless pillar candles in a bathroom used by children, and keep real flames clear of towels and shower curtains. Wipe the tray after use, since steam and water spots show on metal and wood trays.

    7. Mixed Heights on a Coffee Table Tray

    Candlesticks of three heights on a tray on a coffee table.

    Set candlesticks of three different heights on a round or rectangular tray on a coffee table, with tapers or short pillars in each. The tray groups the candles into one display, protects the table from wax, and lets you lift the whole group off when you need space for drinks or books. Vary the heights by at least a few inches, so each candle shows clearly.

    Keep the tray to one side of the coffee table, leaving the other side free for everyday use, and keep the tallest candle below eye level when you are seated. Use flameless candles on a coffee table used by children or pets, and keep the group clear of magazines and fabric coasters. Choose a tray material that suits the room, such as wood for a rustic room or metal for a modern room.

    8. Staggered Group on a Bookshelf

    Three candlesticks at staggered heights on a bookshelf between books.

    Set three candlesticks at staggered heights on one bookshelf, between books, a small plant, and a framed photo. The staggered heights break up a long row of books, add warm light to a reading corner, and give the shelf a lived-in look without a large display. Use holders in one material, such as brass or black metal, so the group reads as one unit.

    Leave a clear gap above each candle, since shelf boards sit close overhead, and keep flames clear of book spines and paper. For most bookshelves, flameless tapers are the safer choice, since they give the same glow without heat near paper. Dust the shelf often, and move the group to a lower shelf if the top shelf sits close to the ceiling.

    9. Hearth Cluster Beside the Fireplace

    Cluster of pillar candlesticks on a stone hearth beside a fireplace.

    Set a cluster of candlesticks on the hearth beside the fireplace, with pillar candles of different heights in sturdy holders. The cluster adds glow to the fireplace area when the fire is not lit, and it suits a living room where the hearth is wide enough to hold a group safely. Use holders with wide bases, so they sit steady on stone or tile.

    Keep the cluster clear of the firebox opening, and never light candles on the hearth while a fire is burning, since heat and drafts can affect the flames. Use flameless pillar candles here for most of the year, so the hearth stays lit without added heat. Wipe stone or tile under the holders, since wax and soot collect near a fireplace.

    10. Row of Candlesticks Along a Window Ledge

    Row of candlesticks along a wide window ledge with cream taper candles.

    Set a row of candlesticks of the same material along a wide window ledge, with tapers in a single color, such as cream or white. The row catches evening light, frames the window, and adds height to a ledge that often stays empty. This idea suits a living room or dining room with a deep ledge and a view worth framing.

    Space the holders evenly, keep them clear of curtains and blinds, and check that each holder sits level on the ledge. Use flameless tapers on a ledge near curtains or in a room where candles will burn while you are in another room. Clean the ledge before setting the row out, since dust shows on a bare ledge, and keep the row short enough to leave room at the ends.

    11. Candlesticks on a Hallway Chest

    Two candlesticks on a hallway chest beside a small bowl.

    Set two or three candlesticks on a hallway chest or a narrow side table, with a small bowl, a stack of books, or a framed photo beside them. The group gives a hallway a warm focal point, and it suits a chest that otherwise holds only keys and mail. Use holders in a material that matches the chest hardware, such as brass with brass pulls or black metal with dark wood.

    Keep the group to one end of the chest, so the rest of the surface stays free for everyday items, and keep flames clear of coats, scarves, and paper mail. For a busy hallway, flameless candles give the same welcome glow without a flame near passing coats. Wipe the chest top often, since hallways collect dust near the front door.

    12. Candlesticks in Hurricanes on a Covered Porch

    Candlesticks inside hurricane glass holders on a covered porch table.

    Set candlesticks inside hurricane glass holders on a covered porch table or bench, with pillar candles inside. The glass shields the flame from wind, catches wax, and gives a porch a soft evening glow. This idea suits a covered porch or a sheltered patio, where the group stays dry and out of strong wind.

    Use sturdy holders with wide bases, since porch surfaces can be uneven, and keep the group clear of cushions, throws, and dried leaves. Use flameless candles on a porch used by children or in windy weather, and bring real candles inside when rain or strong wind is expected. Wipe the glass after outdoor use, since dust and pollen collect on porch surfaces.

    13. Autumn Tray with Wood Holders and Pumpkins

    Wood candlesticks on a wood tray with small pumpkins and pillar candles.

    Set wood candlesticks on a wood tray on a dining table or a sideboard, with small pumpkins, a few dried leaves, and pillar candles in the holders. The wood and autumn shapes give a warm seasonal note, and the tray keeps the group contained and easy to move. Use cream or rust pillars, so the group suits a fall palette without a large arrangement.

    Keep dried leaves and pumpkins clear of any real flame, and use flameless candles when dried material sits close to the holders. Set the tray in the center of a long table or at one end of a sideboard, leaving room for serving dishes. Shake the tray outside after the season, since dried leaves crumble and wood trays collect dust.

    14. Holiday Group with Red and Green Tapers

    Brass candlesticks with red and cream tapers and pine sprigs on a mantel.

    Set brass or gold candlesticks on a mantel or a dining table for the holidays, with red, green, or cream tapers in each, and a few pine sprigs at the base. The holiday colors give a clear seasonal note, and the brass suits both a mantel display and a holiday table. Keep the group low on a dining table, so guests can see across it.

    Keep pine sprigs clear of real flames, and use flameless tapers when greenery sits close to the holders. For a mantel group, vary the heights, with the tallest in the middle, and keep the group centered under the mirror or art above. Store holiday tapers flat after the season, so they do not bend in storage.

    15. Spring Pastel Tapers with Fresh Flowers

    White candlesticks with pastel tapers and a small vase of fresh flowers.

    Set white or glass candlesticks on a dining table or a sideboard in spring, with pastel tapers in soft pink, pale yellow, or light green, and a small vase of fresh flowers beside them. The pastel candles and fresh flowers give a light spring note, and the group suits a bright room with pale walls. Keep the flowers in a separate vase, so water stays clear of the candle holders.

    Trim flower stems often, change the water, and keep fresh flowers clear of flames. Use tapers in one pastel color for a calm table, or mix two pastels for a livelier group, and repeat one pastel in napkins or a runner. For a spring gathering, set the group on a tray, so it lifts off in one move when serving starts.

    16. Black Metal Candlesticks in a Modern Room

    Black metal candlesticks of different heights with white tapers on a console.

    Set black metal candlesticks of different heights on a console, a sideboard, or a mantel in a modern room, with white or cream tapers in each. The black metal gives a clean, simple note that suits plain walls, pale wood, and minimal furniture, and the white tapers keep the group bright. Use three holders, with the tallest in the middle, for a balanced group.

    Keep the rest of the surface simple, such as one bowl or one framed print, so the black holders stand out clearly. Check that the holders sit level on smooth surfaces, and use felt pads under metal bases to guard against marks. For a modern room with children or pets, flameless white tapers give the same clean look without a flame.

    17. Crystal and Glass Holders on a Sideboard

    Crystal candlesticks with white tapers on a sideboard in a bright dining room.

    Set crystal or clear glass candlesticks on a sideboard or a dining room buffet, with white tapers in each, and a small bowl or a framed photo beside them. The glass catches light from windows and lamps, and it suits a bright dining room or a formal sideboard. Use holders of two heights, so the group has shape without blocking a mirror above.

    Wipe glass holders before a gathering, since fingerprints show more on clear glass than on metal or wood, and check that tapers fit snugly in glass cups. Keep the group clear of serving dishes, so the sideboard still works for meals, and use flameless tapers if the sideboard sits near curtains. Store glass holders where they will not chip, such as wrapped in cloth in a sturdy box.

    18. Rustic Wood Candlesticks on a Farmhouse Table

    Chunky wood candlesticks with cream pillar candles on a farmhouse dining table.

    Set chunky wood candlesticks on a farmhouse dining table or a kitchen table, with cream pillar candles in each, and a simple linen runner under the group. The wood suits a rustic room, pairs well with cream napkins and plain plates, and gives a long table a warm, sturdy centerpiece. Use two or three holders, with the tallest in the middle.

    Choose holders with flat, sanded bases, so they sit level on a wood table, and wipe them clean after meals, since wood can mark if left damp. Keep the group low enough to see across the table, and set it on a runner or a tray to catch wax. For everyday farmhouse meals, use flameless pillars in the same wood holders for the same warm look.

    19. Painted Candlesticks as a Small Space Accent

    Painted sage candlesticks on a small shelf beside a small plant.

    Paint plain wood candlesticks in a color that matches your room, such as cream, sage, or soft blue, and set one or two on a small shelf, a stool, or a narrow windowsill. The painted finish gives old or plain holders a fresh look, and a single painted holder suits a small space where a large group would crowd the surface. Use tapers in a matching or neutral color, so the painted holder stays the focus.

    Sand and prime the holders before painting, let each coat dry fully, and seal the finish if the holders will sit near a window or a bathroom. Keep the painted group small, with one or two holders, and pair it with a small plant or a book, rather than a large display. For a rented home, painted holders are an easy change, since they cost little and move with you.

    Conclusion

    Candlesticks work in almost every room when you keep the group simple, vary the heights, and match the holder material to the room. Start with one surface, such as a mantel, a dining table, or a nightstand, and build a group of three holders in one material. Keep flames clear of curtains, greenery, and paper, and switch to flameless candles where a real flame would sit too close to fabric or dried material. With those basics in place, you can repeat the same idea in other rooms, changing only the holder material, the candle color, or the season, and each room will still feel balanced and calm.

    Frequently Asked Questions

    How many candlesticks should I group together?

    Group candlesticks in odd numbers, such as one, three, or five, since odd groups look more balanced than even groups on most surfaces. Use three as a starting point for a mantel, a dining table, or a coffee table tray, and vary the heights, so each candle shows clearly.

    What is the safest way to use candlesticks at home?

    The safest way is to set holders on a level, stable surface, keep flames clear of curtains, greenery, paper, and fabric, and never leave a lit candle burning unattended. Use flameless candles near children, pets, dried material, or curtains, and trim wicks before lighting real candles, so flames stay steady and short.

    What candle size fits a standard candlestick holder?

    Most standard candlestick holders take a taper candle with a base close to seven eighths of an inch wide, but holder sizes vary, so measure the cup before buying candles. If a taper wobbles, wrap the base with a small strip of foil or use a holder adapter, so the candle sits snug and upright.

    How do I stop candlesticks from looking cluttered?

    Keep one main candlestick group per surface, use holders in one material, and leave empty space around the group, so it reads as one display. Remove extra small items from that surface, keep the candle colors to one or two, and vary only the heights, rather than mixing many materials and colors at once.

    Can I use candlesticks outdoors?

    You can use candlesticks outdoors on a covered porch or a sheltered patio, inside hurricane glass holders that shield the flame from wind. Use sturdy holders with wide bases, keep the group clear of cushions and dried leaves, and bring real candles inside in rain or strong wind, or use flameless candles instead.

    How do I clean wax from candlesticks?

    To clean wax from candlesticks, let the wax harden fully, then lift it off gently with a soft cloth or a plastic scraper, and wipe the holder with warm, soapy water. For brass holders, dry them at once after washing, so water spots do not form, and for wood holders, wipe them dry rather than soaking them.


  • 17 Lemon Decor Ideas for a Fresh and Cheerful Home

    17 Lemon Decor Ideas for a Fresh and Cheerful Home

    Lemon decor works best when you keep yellow as one clear accent against white, cream, wood, or green, and repeat it in two or three spots per room. Use whole lemons, lemon prints, or lemon yellow textiles on tables, doors, shelves, and beds, and keep the rest of the room calm so the citrus color stays fresh rather than loud.

    Start with one easy piece, such as a bowl of lemons on the dining table or lemon pillows on the sofa, then add a second lemon note nearby, such as a print on the wall or a yellow towel in the kitchen. Keep most of the room in white, cream, or pale green, so the yellow reads as a bright accent and not a full color scheme. For a light summer base that pairs well with lemon yellow, see the summer decor ideas guide, and for a low table centerpiece style that also suits a lemon bowl, browse the fall table decor guide.

    Key Takeaways

    • Use yellow as one clear accent per room, repeated in two or three spots, against a calm base of white, cream, wood, or green.
    • Start with one easy piece, such as a lemon bowl or lemon pillows, then add a second lemon note nearby.
    • Keep centerpieces low and narrow, so guests can see across the table and serving dishes still fit.
    • Use whole lemons for display, and replace any piece that softens or marks the surface under it.
    • Keep real flames clear of dried lemon slices, fabric, and paper, and use flameless candles near dried material or children.
    • Store seasonal lemon pieces together, so the look is easy to set out again and easy to swap for another season.

    1. Lemon Bowl Centerpiece on the Dining Table

    Wide shallow white bowl filled with whole lemons in the center of a dining table.

    Fill a wide, shallow white or glass bowl with whole lemons, and set it in the center of the dining table. The yellow fruit gives instant color, smells clean, and can be used in cooking, so the display is practical as well as decorative. A low, wide bowl suits a dining table better than a tall arrangement, since guests can still talk across it and pass serving dishes easily.

    Use whole fruit, not cut fruit, and check the bowl every few days, moving any soft piece to the kitchen. Set the bowl on a small mat if the table marks easily, and keep it away from the table edge. For a larger table, use one big bowl rather than several small ones, so the centerpiece reads as one clear group.

    2. Lemon Wreath on the Front Door

    Front door wreath made with faux lemons and green leaves.

    Hang a wreath made with faux lemons, green leaves, and a simple twine or ribbon loop on the front door. The wreath gives a clear welcome note at the entry, and the yellow fruit stands out against most door colors, from white and navy to natural wood. Faux lemons suit a front door best, since they hold up in sun, wind, and rain with no care.

    Hang the wreath at eye level, centered on the door, using a hook over the door or a nail rated for the wreath weight. Check that the door still opens and closes fully with the wreath in place. At the end of the season, store the wreath in a bag or box, so the leaves do not crush and the lemons stay clean for next year.

    3. Lemon Print Pillows on the Sofa

    Sofa with lemon print pillows in yellow, white, and green beside plain cream pillows.

    Swap two sofa pillow covers for lemon print covers in yellow, white, and green, and keep the rest of the pillows plain. The print carries the lemon theme clearly, while plain pillows in cream or pale green keep the sofa calm. Two printed pillows are enough on a standard sofa, with one at each end or grouped at one corner.

    Choose covers with a zipper, so they wash easily and swap fast when the season changes. Mix one small lemon print with one larger lemon print, rather than two identical prints, so the pair looks collected rather than matched. If the sofa is already patterned, use solid lemon yellow covers instead of a print, so the two patterns do not fight.

    4. Lemon Branches in a Clear Glass Vase

    Tall clear glass vase holding lemon branches with leaves and small whole lemons on a console table.

    Set lemon branches with leaves and small whole lemons in a tall, clear glass vase on a console, side table, or dining sideboard. The branches give height and a natural shape, while the clear glass keeps the focus on the fruit and leaves. This idea suits an entry, a living room corner, or a sideboard where a full arrangement would crowd the surface.

    Trim the stems so the arrangement sits about one and a half times the height of the vase, and keep the vase clear of table edges and walkways. Use faux branches for a display that stays put for weeks, or fresh branches for a short gathering, changing the water every few days. Wipe the glass before guests arrive, since fingerprints show more on clear glass than on colored vases.

    5. Dried Lemon Slice Garland on the Mantel

    Dried lemon slice garland draped along a mantel with flameless candles.

    String dried lemon slices with twine, leaving a small gap between each slice, and drape the garland along a mantel, a shelf, or a window frame. The thin, pale slices catch light and add a citrus note without the bulk of whole fruit, and the garland suits a mantel that already holds candles or framed prints. Dried slices also store well flat, so the garland can be reused.

    Thread the twine through two small holes near the edge of each slice, and keep the garland clear of any real flame, since dried fruit can catch fire. Use flameless candles on the mantel while the garland is up, and keep the garland away from the stove or a hot lamp. If a slice breaks, replace it with a spare slice rather than restringing the whole garland.

    6. Lemon Tea Towels in the Kitchen

    Kitchen oven handle with a lemon print tea towel beside plain white towels.

    Hang lemon print tea towels on the oven handle or fold them over a kitchen rail, and keep the rest of the kitchen towels plain white or cream. The towels add a small, useful lemon note where cooking happens, and they cost little to change when the season ends. A lemon print towel also pairs well with white dishes and wood boards already in most kitchens.

    Choose cotton towels that wash well, and rotate them often, so no single towel stays damp for days. Keep printed towels for display and hand drying, and use plain towels for heavy jobs, so the print stays bright longer. For a matched look, use the same print on a pot holder or an apron, but keep the print to one or two pieces, not the whole kitchen.

    7. Lemon Tiered Tray on the Kitchen Counter

    Three tier tray on a kitchen counter styled with faux lemons, a small plant, and a candle holder.

    Style a two or three tier tray on the kitchen counter with small lemon pieces: faux lemons on one tier, a tiny plant or a small candle holder on another, and a folded lemon towel or a small sign on the third. The tray groups the pieces into one display, so the counter stays tidy, and it lifts off in one move when the counter needs clearing for cooking.

    Put heavier items on the bottom tier, so the tray stays steady, and keep the total group low enough to see over from the next room. Wipe the tiers after use, since kitchen grease and dust collect in the rims. If the tray will sit near the sink, use faux lemons and wipeable pieces only, so splashes do not mark paper or fabric items.

    8. Lemon Slices in Glass Candle Holders

    Glass hurricane holder with lemon slices around a battery candle on a dining table.

    Set lemon slices upright inside a wide glass hurricane or a tall glass cylinder, then place a battery candle in the center, so the slices glow softly around the light. The glass keeps the slices in place, the yellow color shows through clearly, and the holder works on a dining table, a mantel, or a bathroom shelf. Battery candles suit this idea best, since a real flame inside a closed glass holder needs air and a safe setup.

    Use slices cut thick enough to stand on their own, or use dried slices pressed against the glass, which hold their shape longer. Keep the holder on a stable surface, clear of curtains and table edges, and wipe the glass before the meal or gathering. For a table, use one holder as the centerpiece rather than a row of them, so guests still have room for plates and glasses.

    9. Framed Lemon Prints on the Wall

    Kitchen wall with three framed lemon prints in white frames above a sideboard.

    Hang two or three framed lemon prints, such as a lemon branch, a sliced lemon, or a bowl of lemons, in white or light wood frames on a kitchen or dining wall. Framed prints give a lasting lemon note that needs no care, and the pale frames keep the wall bright. A small group of prints works better than one large print, since the group can fit a narrow wall or a space above a sideboard.

    Lay the frames on the floor first to plan spacing, then hang the largest print slightly off center to anchor the group. Keep the frames at eye level, with even gaps between them, so the group reads as one display. If the wall already holds art, swap one or two prints for the lemon season, rather than adding a whole new wall of frames.

    10. Lemon Print Table Runner

    Dining table with a lemon print runner, white plates, and folded napkins.

    Lay a lemon print runner down the center of the dining table, then set plain white or cream plates, simple glasses, and folded napkins at each place on either side of it. The runner adds lemon color along the whole table without covering it, and it suits both everyday meals and larger gatherings. A runner also protects the middle of the table and frames a lemon bowl centerpiece well.

    Smooth the runner flat and center it, so it does not slide when plates are set down, and let it hang evenly at both ends. If the runner is thick, use it alone and skip a tablecloth, so plates sit level. Wash and iron the runner before a gathering, since creases show more on a bare table than under a patterned cloth.

    11. Lemon Topiary on the Console

    Lemon topiary with a round ball of faux lemons and green leaves in a white pot on a console table.

    Place a lemon topiary, a round ball of faux lemons and green leaves on a short stem in a white or terracotta pot, on a console, an entry table, or a sideboard. The topiary gives a neat, rounded shape that suits a small surface, and it needs no water or care. One topiary is enough on a narrow console, while a pair suits a wide sideboard with space between them.

    Center the pot on the surface, and keep the topiary clear of door swings and walkways, so it does not get knocked. Dust the leaves and lemons with a dry cloth now and then, since dust shows more on faux greenery than on real plants. If the pot is light, add a small stone inside the base, so the topiary stays steady.

    12. Lemon Napkin Rings at Each Place

    Place setting with a folded napkin held by a small faux lemon napkin ring beside a white plate.

    Wrap a small faux lemon, a lemon slice, or a lemon yellow bead ring around each folded napkin, and set one napkin at each place. The napkin ring marks each seat with a small citrus detail, and it works for everyday meals as well as gatherings, since it takes only a minute per place. Use the same ring at every place, so the table looks matched.

    Fold napkins in a simple rectangle or roll, so the ring sits flat and does not slip. Keep the lemon piece small, so it does not crowd the plate or the glass, and remove it before washing napkins. For a gathering, add a short green sprig tucked under the ring, but keep the ring itself the same at every place.

    13. Lemon Accents in the Bathroom

    Bright bathroom shelf with lemon yellow hand towels and a small bowl of faux lemons.

    Add lemon yellow hand towels, a lemon print soap dish, or a small bowl of faux lemons on a bathroom shelf, and keep the rest of the bathroom in white or pale green. The yellow towels give a bright note in a small room, and they wash easily, so the look stays fresh. One or two lemon pieces are enough in a bathroom, since the room is small and extra pieces crowd the sink and shelves.

    Roll towels rather than folding them into thick stacks, so they take less shelf space and are easy to grab. Keep faux lemons away from the shower spray and the sink splash zone, so they do not spot or stain. Swap the yellow towels for plain ones when the lemon season ends, and store them with the other seasonal towels.

    14. Potted Lemon Tree by a Sunny Window

    Small potted lemon tree with green leaves and small fruit beside a sunny kitchen window.

    Place a small potted lemon tree, real or faux, beside a sunny window in the kitchen, living room, or sunroom. A real tree adds green leaves, white blossoms in season, and small fruit, while a faux tree gives the same shape with no care. The pot suits a floor spot near the window or a sturdy plant stand, where the tree gets light without blocking the walkway.

    Water a real tree based on the plant label and the season, and check drainage, so the pot does not sit in standing water. Turn the pot a quarter turn every week or two, so the tree grows evenly toward the light. For a faux tree, dust the leaves now and then, and keep it away from a hot radiator, so the leaves do not warp.

    15. Lemon and Greenery Shelf Vignette

    Open shelf styled with a small bowl of lemons, a green plant, stacked books, and a white candle holder.

    Style one open shelf with a small bowl of lemons, a green plant, a stack of two books, and a plain white candle holder, leaving clear space around the group. The shelf vignette gives a lemon note at eye level, and the green plant and white pieces keep the yellow from standing alone. One vignette per shelf is enough, since a crowded shelf hides each piece.

    Group the pieces in odd numbers, with the tallest piece at the back, and leave empty space at each end of the shelf, so the group reads as one display. Dust the shelf before styling, and step back to check the group from across the room, since a shelf vignette is seen from a distance. If the shelf already holds many items, swap one or two pieces for lemon items, rather than adding a whole new group.

    16. Lemon Yellow Throw in the Bedroom

    Bedroom with white bedding, a lemon yellow throw across the foot of the bed, and a pale green pillow.

    Drape a lemon yellow throw across the foot of the bed or fold it over an armchair, and pair it with white or cream bedding and one pale green pillow. The throw adds a warm, sunny note to the bedroom without repainting or changing the bedding, and it works as a practical layer for cool evenings. A throw is easy to swap, so the bedroom can change with the season in minutes.

    Fold the throw neatly during the day, rather than bunching it, so the bed looks tidy, and wash it on a regular cycle, since yellow fabric shows marks more than darker colors. Keep the rest of the bedding plain, so the throw stays the one yellow note in the room. If the bedroom is small, use a throw on the chair only, and keep the bed in white.

    17. Lemon Planters on the Porch or Patio

    Porch entry with two planters holding green plants and faux lemons beside a front door.

    Set two planters by the front door or on the patio, each holding green plants with a few faux lemons tucked among the leaves, or a small lemon tree in a large pot. The planters give a bright welcome at the entry, and the yellow fruit stands out against green leaves and a wood or stone floor. A pair of planters suits a wide entry, while one planter suits a narrow porch.

    Choose pots heavy enough to stay steady in wind, and use a weighted base or a stone inside a light pot. Keep the planters clear of the door swing and the walkway, so guests can pass easily. At the end of the season, bring faux lemons inside and store them dry, and move a real potted tree indoors before cold nights if the plant label advises it.

    Conclusion

    Lemon decor does not need a full room makeover or a large budget. Start with one easy piece, such as a lemon bowl or lemon pillows, keep the rest of the room in white, cream, wood, or green, and repeat the yellow in two or three spots. Whole lemons, lemon prints, and lemon yellow textiles each suit a different room, from the kitchen counter to the bedroom and the porch. Try one idea from this list first, keep what works for your home, and add a second lemon note only where the room still feels calm.

    Frequently Asked Questions

    Does lemon decor work all year round?

    Yes, lemon decor works all year, since yellow reads as fresh in spring and summer and as a bright accent in fall and winter. Keep the lemon pieces small in colder months, such as a bowl on the table or a print on the wall, and pair them with warm wood and cream, so the look stays calm rather than summery.

    What colors go well with lemon decor?

    White, cream, pale green, natural wood, and soft blue go well with lemon yellow, since they keep the room calm and let the yellow stand out. Avoid pairing lemon yellow with many other bright colors at once, since the room can look busy. Repeat each color at least twice in the room, so the palette feels planned.

    Are real or faux lemons better for decor?

    Faux lemons are better for long displays, wreaths, garlands, and outdoor spots, since they hold their shape and color with no care. Real lemons suit a short display, such as a table centerpiece for a gathering, since they smell fresh and can be used in cooking after. Replace any real lemon that softens or marks the surface under it.

    How do I keep lemon decor from looking too themed?

    Use lemon as one accent per room, repeated in two or three spots, and keep the rest of the room plain. Mix lemon pieces with plain white, wood, and green items, rather than filling every surface with lemon prints. One lemon bowl, one print, or one set of pillows is enough to carry the theme in most rooms.

    Where is the best place to start with lemon decor?

    Start with the dining table or the kitchen counter, since a lemon bowl or a tiered tray gives a clear result in minutes and uses pieces you already own. Once that spot feels right, add a second lemon note nearby, such as a print on the wall or a towel on the oven handle, and stop before the room feels crowded.

    How do I care for real lemons used as decor?

    Keep real lemons whole, check them every few days, and move any soft piece to the kitchen before it marks the bowl or table. Set the bowl on a mat if the surface marks easily, and keep lemons out of direct sun, since heat softens them faster. For displays longer than a week, use faux lemons instead.


  • 19 Apothecary Jar Filler Ideas for Every Season

    19 Apothecary Jar Filler Ideas for Every Season

    Fill apothecary jars by matching the filler to the season and keeping one clear palette per jar. Spring suits pastel eggs, fresh blooms, and moss. Summer suits shells, sand, and citrus. Fall suits pinecones, mini pumpkins, and dried leaves. Winter suits ornaments, fir, and cranberries. Year-round fillers like layered sand, herbs, and fairy lights bridge the gaps between seasons.

    Start with a clean, dry jar and one base layer, such as sand, moss, or faux snow, then add the main filler and one small accent, such as a ribbon on the lid or a sprig tucked beside the jar. Keep tall fillers below the lid when the jar will stay closed, and leave room at the top so the display reads as full rather than crowded. For table styling that pairs with jar displays, see the fall table decor guide, and for a system that rotates decor through the year, see the seasonal decor swaps guide. For winter vase ideas that sit well beside apothecary jars, browse the Christmas vases guide.

    Key Takeaways

    • Match one palette per jar: two or three colors plus one neutral base, repeated in the filler and the accent.
    • Start with a base layer, such as sand, moss, or faux snow, so smaller fillers sit level and do not sink out of sight.
    • Keep table jars low and narrow enough to see across, and save tall branch fillers for consoles and mantels.
    • Use battery lights inside closed jars, and keep real flames clear of dried material, fabric, and paper.
    • Store each season filler in its own labeled bag or box, so the next swap takes minutes.
    • Clean jars before refilling, and check dried and fresh fillers for dust, fading, or moisture before they go back on display.

    1. Pastel Eggs on a Moss Base

    Glass apothecary jar filled with pastel eggs nested on green moss.

    Spread a layer of green moss across the bottom of the jar, then nest pastel eggs in pink, blue, yellow, and mint on top, with the largest eggs at the back and smaller ones toward the front. The moss hides gaps between the eggs and gives the jar a fresh spring base that suits a dining table, a console, or an entry shelf. Use eggs in matte finishes rather than shiny ones, so the group reads as soft rather than loud.

    Keep the lid off if the jar sits on a table where guests will see inside, or set the lid beside the jar as part of the display. Store the eggs in tissue between seasons, since painted finishes can chip when eggs knock together in a box. For a smaller jar, use only three or four eggs and let the moss show around them.

    2. Fresh Tulips in Water

    Glass apothecary jar holding fresh tulip stems in clear water.

    Fill the jar halfway with clean water, trim tulip stems at an angle, and stand five to seven stems inside, so the blooms sit just above the rim. The clear glass shows the stems and the water line, which suits a spring table or a kitchen counter, and the tulips give height without a wide arrangement. Choose one color, such as yellow or soft pink, so the jar reads as one clear idea.

    Change the water every two days and trim the stems again if they start to droop, since tulips keep growing in water and can lean toward the light. Keep the jar away from direct sun and fruit bowls, both of which shorten bloom life. When the tulips fade, rinse the jar well before the next filler, since flower water can leave marks on glass.

    3. Cherry Blossom Branches

    Tall glass apothecary jar with pale pink cherry blossom branches.

    Stand two or three cherry blossom branches in an empty jar, with the tallest branch near the back and shorter ones angled toward the front. The pale pink blooms give a light spring note at height, which suits a console or a mantel where a tall jar can frame the space without blocking a view. Use faux branches if the jar will stay up for weeks, since fresh branches drop petals quickly.

    Trim the branch ends so they sit flat on the jar base and do not rock, and check that the jar is heavy enough that the branches cannot tip it forward. Keep the branches clear of walkways and door swings, since tall stems catch on sleeves and bags. At the end of spring, wipe the branches and store them flat so the blooms keep their shape.

    4. Lemon Slices and White Blooms

    Glass apothecary jar with dried lemon slices around the inside wall and small white blooms in the center.

    Layer dried lemon slices upright around the inside wall of the jar, then fill the center with small white blooms, such as faux daisies or white ranunculus, so the yellow ring shows through the glass. The citrus ring gives a bright summer note that suits a kitchen table or a breakfast nook, and the white blooms keep the look calm. Use fully dried slices, since soft slices bend and can mark the glass.

    Set the jar on a small mat if the table marks easily, and keep it out of strong sun, which fades both dried citrus and faux blooms over time. Replace the lemon slices each season, since they darken with age and dust. For a smaller jar, use half slices along one side only and keep the blooms low.
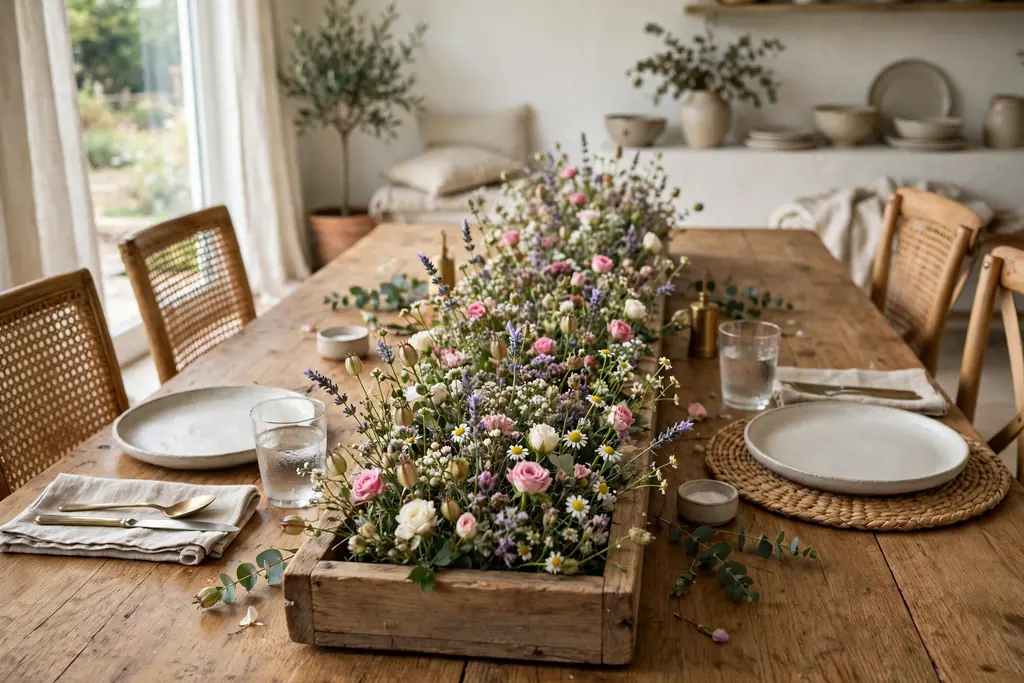
    5. Layered Sand and Seashells

    Glass apothecary jar with sloped layers of sand and seashells pressed into the top layer.

    Pour fine sand into the jar in two or three layers, tipping the jar slightly as you pour so each layer slopes, then press small seashells into the top layer and lean one larger shell against the glass. The sloped layers show through the glass and give a coastal summer display that suits a bathroom shelf, a side table, or an entry console. Use shells in cream, white, and soft grey so the sand color stays the main note.

    Rinse and dry shells fully before they go in, since sand and salt residue can cloud the glass over time. Keep the jar lid on if the jar sits near a walkway, so sand stays put when the jar is moved. If a shell sinks, lift it out and press it back into a fresh top layer rather than shaking the jar, which flattens the slopes.
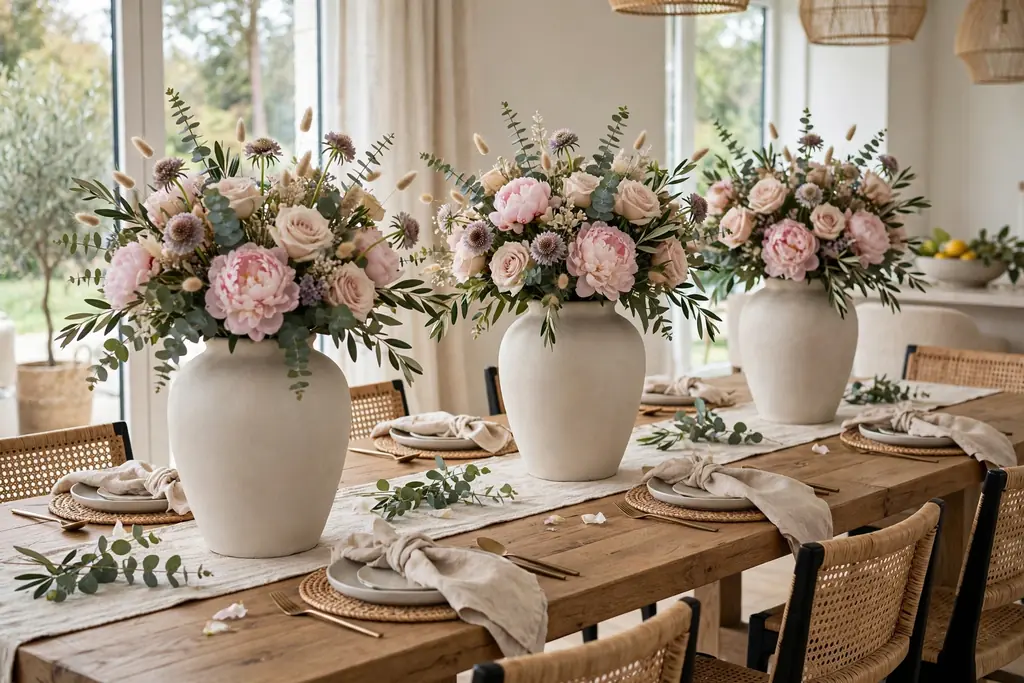
    6. Sea Glass and Driftwood Pieces

    Glass apothecary jar half filled with sea glass and small driftwood pieces on top.

    Fill the jar halfway with sea glass in soft blue, green, and white, then tuck two or three small pieces of driftwood on top, angled so they catch the light. The frosted glass pieces give a muted coastal color that suits a living room shelf or a bedroom dresser, and the driftwood adds a natural shape that breaks up the smooth glass. Keep the pieces small enough to lift out easily for cleaning.

    Wash sea glass before filling, and dry it fully, since water spots show on frosted glass once it dries inside a closed jar. Use a lid to keep dust out, and wipe the outside of the jar with a dry cloth when the glass starts to look dull. If driftwood sheds bark, shake it outside first and brush loose pieces off before it goes in.

    7. Sunflower Heads and Wheat Stems

    Wide mouth glass apothecary jar with faux sunflower heads and dried wheat stems.

    Stand three or four faux sunflower heads on short stems in the jar, with dried wheat stems tucked between them, so the yellow blooms sit just above the rim and the wheat adds height behind. The mix suits late summer and early fall, and it works on a dining table where a low, cheerful centerpiece fits better than a tall bouquet. Keep the stems short enough that guests can see across the table.

    Use a jar with a wide mouth for this filler, since narrow mouths crowd the stems and bend the blooms. Dust the faux blooms with a soft cloth before display, and store them upright between seasons so the petals do not flatten. For a smaller table, use one sunflower head and two wheat stems only, and let the jar glass show around them.

    8. Pinecones and Acorns

    Glass apothecary jar filled with small pinecones and acorns tucked into the gaps.

    Fill the jar with small pinecones first, then tuck acorns into the gaps, with one larger pinecone near the front of the glass as a focal point. The brown tones and rough shapes give a woodland fall display that suits a mantel, a bookshelf, or a side table, and the mix of sizes keeps the jar from looking flat. Use a lid to keep dust out between cleanings.

    Clean gathered pinecones fully and check them for insects before bringing them inside, and dry them well so they do not hold moisture in a closed jar. If small acorns worry you near young children, use larger pinecones only and skip the acorns. Shake the jar gently outdoors before the first display, since pinecones shed scales and dust.

    9. Mini Pumpkins with Dried Leaves

    Glass apothecary jar with mini pumpkins nested on dried leaves.

    Set a layer of dried leaves across the bottom of the jar, then nest three or four mini pumpkins in cream, muted orange, and pale green on top, with a few more leaves tucked between them. The small pumpkins give a clear fall note without a large arrangement, and the jar suits a kitchen counter, a dining table, or an entry shelf through autumn. Choose pumpkins small enough to lift out through the jar mouth.

    Check real mini pumpkins every few days and move any soft one to the kitchen, since one spoiling pumpkin can mark the rest. For a display that stays up all season, use faux pumpkins and dried leaves, and wipe them clean before storing. Keep the jar lid off for real pumpkins, so moisture does not build up inside.

    10. Cinnamon Sticks and Dried Orange Slices

    Glass apothecary jar with cinnamon sticks around the inside wall and dried orange slices in the center.

    Stand cinnamon sticks upright around the inside wall of the jar, tie the bundle loosely with twine if the sticks will not stand on their own, then fill the center with dried orange slices and a few star anise pieces. The warm brown and orange tones suit fall and carry into winter, and the jar gives a gentle scent near a table or a console without a candle. Use slices that are fully dry, so they hold their shape upright.

    Keep dried material clear of real flames, and use battery candles nearby instead of a lit candle inside the jar. Replace the orange slices each season, since they darken over time, and store the cinnamon bundles flat between seasons. For a narrow jar, use shorter sticks cut to fit below the lid.

    11. Cranberries and Fir Sprigs in Water

    Glass apothecary jar filled with water, floating cranberries, and fir sprigs down the sides.

    Fill the jar two thirds full with clean water, add a handful of fresh cranberries so they float, then tuck short fir sprigs down the sides so the green shows through the glass. The red berries and green fir give a classic winter note that suits a dining table or a holiday side table, and the water line adds a fresh, clear layer. Use a wide jar so the berries spread rather than stacking in one column.

    Replace the water and cranberries every few days, since fresh cranberries soften over time, and rinse the jar before refilling. Keep the jar on a mat if the table marks easily, and use a battery candle beside the jar rather than a floating flame inside it. For a longer lasting version, use faux cranberries and faux fir with no water.

    12. Glass Ornaments and Faux Snow

    Glass apothecary jar with small glass ornaments nested on faux snow.

    Pour a layer of faux snow across the bottom of the jar, then nest small glass ornaments in red, gold, and silver on top, with the largest ornament near the front of the glass. The snow layer lifts the ornaments into view and gives a winter display that suits a mantel, a console, or a side table through the holidays. Choose ornaments large enough to show through the glass, rather than tiny ones that sink out of sight.

    Set the lid on to keep dust off the faux snow, and store the ornaments in a divided box at the end of the season so they do not chip. If the jar will sit near a walkway, keep it away from the table edge, since glass ornaments make a jar top heavy. Shake faux snow outside before the first use, since loose fibers drift onto nearby surfaces.

    13. Fir Branches with Battery Fairy Lights

    Glass apothecary jar glowing with battery fairy lights woven through short fir branches.

    Coil a short string of battery fairy lights loosely inside the jar, then tuck short fir branches around the lights, so the branches hide the wire and the lights glow through the green. The lit jar suits a winter evening table, a mantel, or a dark hallway corner, and it works as a night light level glow in a living room. Use battery lights only inside a closed jar, since a real flame needs air and a safe holder.

    Hide the battery pack behind the jar or under a small cloth, and set the lights on a timer so they switch off on their own. Keep the branches clear of the battery pack contacts, and replace the batteries before the display starts to dim unevenly. For a spring version of the same idea, swap the fir for faux blossom stems and keep the same lights.

    14. Red and Pink Candy Hearts

    Glass apothecary jar filled with red, pink, and white candy hearts.

    Fill the jar with red, pink, and white candy hearts, pouring them in slowly so they settle without breaking, then set one larger heart or a small paper heart on top as a focal point. The candy colors give a clear Valentine note that suits a kitchen counter, a dining table, or a bedroom dresser in February. Use wrapped candies if the jar will sit in a warm room, so the color does not transfer to the glass.

    Keep the lid on to keep the candy fresh and dust free, and check the jar for moisture before filling, since damp glass can mark candy wrappers. For a display that stays up past February, swap the hearts for red and pink glass beads in the same jar. If children can reach the jar, use wrapped candy only and keep the jar back from the table edge.

    15. Dried Lavender and Mixed Herbs

    Glass apothecary jar holding a tied bundle of dried lavender and herb sprigs.

    Bundle dried lavender stems with a few sprigs of rosemary and thyme, tie the bundle with twine, and stand it upright in the jar, so the purple buds sit just above the rim. The dried herbs give a calm, fragrant display that suits a bathroom shelf, a kitchen counter, or a bedroom dresser in any season. Keep the bundle loose enough that air moves between the stems.

    Shake the bundle outside before it goes in, since dried herbs shed buds and leaves, and keep the jar lid off so the scent can spread. Replace the bundle when the color fades or the buds start to drop heavily, and compost the old stems. For a smaller jar, use lavender alone and skip the mixed herbs, so the purple stays the one clear note.

    16. Coffee Beans with a Pillar Candle

    Glass apothecary jar half filled with coffee beans holding a short pillar candle in the center.

    Fill the jar halfway with whole coffee beans, set a short pillar candle in the center, then fill around the candle with more beans until the candle sits steady and the beans reach just below the candle top. The brown beans give a warm, neutral display that suits a kitchen table, a coffee station, or a living room shelf in any season. Use a candle wide enough that it does not tip when the jar is moved.

    Use a battery pillar candle if the jar will sit near curtains, dried material, or children, and keep any real flame clear of the beans and the jar rim. Never leave a lit candle burning unattended, and keep the flame below the jar rim so heat does not build up inside the glass. Replace beans that pick up dust with a fresh scoop from the bag.

    17. Layered Colored Sand

    Glass apothecary jar with thin sloped layers of colored sand.

    Pour colored sand into the jar in thin layers, alternating two or three colors, and tip the jar slightly with each pour so the layers slope in different directions. The striped layers show through the glass and suit any room, since the palette can match the room: soft blues for a bathroom, warm neutrals for a living room, or bright tones for a craft room. Use fine sand, since coarse grains blur the layer lines.

    Pour slowly and keep the jar still between layers, so the colors do not mix at the edges. Set the lid on once the layers are done, so the pattern stays put when the jar is moved or dusted. If a layer smudges, scoop out the top layer only and repour it, rather than emptying the whole jar.

    18. Fairy Lights with Sheer Fabric

    Glass apothecary jar glowing softly with battery fairy lights woven through white sheer fabric.

    Gather a length of sheer fabric, such as white or cream tulle, loosely inside the jar, then weave a short string of battery fairy lights through the folds, so the light glows softly through the fabric. The lit jar suits a bedroom dresser, a bathroom shelf, or a dark hallway in any season, and it gives evening glow without a candle. Use battery lights only, and keep the fabric clear of any real flame.

    Set the lights on a timer so they switch off on their own, and fluff the fabric after the lights are in, so no dark gaps show through the glass. Wash or replace the fabric when it starts to look grey, since sheer fabric collects dust inside a closed jar. For a seasonal change, swap the white fabric for a soft seasonal color and keep the same lights.

    19. One Jar, Four Seasonal Filler Kits

    One glass apothecary jar on a table beside four small labeled boxes of seasonal fillers.

    Keep one favorite jar on display all year, and build four small filler kits, one per season, each in its own labeled bag or box: spring eggs and moss, summer shells and sand, fall pinecones and leaves, winter ornaments and faux snow. At each season change, empty the jar, wipe it clean, and pour in the next kit, adding one accent from the room, such as a ribbon that matches the season palette. The kit system keeps the jar fresh without buying new pieces each season.

    Label each kit with the season and a short list of what is inside, and store the kits together in one bin so the swap takes minutes. Check each kit before it goes back on display, and remove anything faded, chipped, or damp. Photograph the styled jar once per season, so next year you can repeat the arrangement without guessing at the layers.

    Conclusion

    Apothecary jar fillers work best when one jar holds one clear idea: a base layer, a main filler, and one small accent, in two or three colors. Start with the season, pick fillers that suit the spot, and keep table jars low and console jars a little taller. Store each season kit labeled and clean, so the next swap is quick, and reuse the same jars year after year with new fillers. One jar, changed four times a year, can carry the season in any room without a full redecoration.

    FAQs

    What do you put in apothecary jars for each season?

    Use pastel eggs, moss, and fresh blooms for spring, shells, sand, and citrus for summer, pinecones, mini pumpkins, and dried leaves for fall, and ornaments, fir, and cranberries for winter. Year-round fillers like layered sand, dried herbs, coffee beans, and fairy lights work in any season. Pick one palette per jar, start with a base layer, and keep the filler below the lid when the jar stays closed.

    How do you layer fillers in an apothecary jar?

    Start with a base layer, such as sand, moss, or faux snow, then add the largest filler pieces first and tuck smaller pieces into the gaps. Pour sand slowly and tip the jar slightly so layers slope, and press shells or ornaments into the top layer so they show through the glass. Leave room at the top so the display reads as full rather than crowded, and set the lid on only when the tallest piece fits below it.

    Can you put fresh flowers in an apothecary jar?

    Yes, fresh flowers work in an apothecary jar when the jar holds water and the stems are trimmed at an angle. Tulips, short roses, and single stems suit wide mouth jars, and the water should be changed every two days. Keep fresh arrangements out of direct sun and away from fruit bowls, and rinse the jar well before the next filler, since flower water can leave marks on glass.

    Are apothecary jars safe for candles?

    Apothecary jars suit battery candles in almost every case, and battery pillars and fairy lights give the same glow without heat or flame risk. A real flame inside a closed jar needs air and a safe holder, and it should stay clear of dried material, fabric, paper, and the jar rim. Never leave a lit candle burning unattended, and use battery candles near children, curtains, and dried fillers.

    How do you store apothecary jar fillers between seasons?

    Store each season filler in its own labeled bag or box, with fragile pieces wrapped in tissue and dried pieces kept dry. Clean each piece before it goes back in the box, fold fabric flat, and keep all four season kits in one bin so the next swap takes minutes. Check each kit before display, and remove anything faded, chipped, damp, or shedding heavily.

    What size apothecary jar works best on a dining table?

    A small to medium jar with a wide mouth works best on a dining table, since it holds enough filler to read clearly without blocking sightlines. Keep the total height low enough to see across when seated, and use taller jars on consoles, mantels, and side tables instead. For a long table, use two or three small jars spaced apart rather than one large jar in the center.


  • 21 Decorative Tray Ideas for Coffee Tables, Consoles, and Counters

    21 Decorative Tray Ideas for Coffee Tables, Consoles, and Counters

    A decorative tray works best when it groups three to five pieces on one flat base, fits the surface with room to spare, and keeps one item taller than the rest. Choose wood for warmth, rattan for texture, marble for a kitchen counter, or mirrored glass for a console, then add a candle, a small vase, and a book.

    Start with the surface you want to dress. Measure the space first, then pick a tray that leaves at least a few inches clear on each side, so the tray looks placed rather than crowded. Group items by height, with one tall piece, one mid-height piece, and one low piece, and leave a little empty space on the tray itself. For a seasonal table version of this grouping, see the fall table decor guide.

    Key Takeaways

    • Pick a tray that fits the surface with room to spare, and keep three to five pieces on it.
    • Group by height: one tall piece, one mid-height piece, and one low piece reads as one arrangement.
    • Match the tray material to the room: wood for warmth, rattan for texture, marble for counters, mirrored glass for consoles.
    • Leave empty space on the tray and around it, so the group looks calm rather than crowded.
    • Use trays to corral small items, such as remotes, keys, oils, and toiletries, into one tidy spot.
    • Keep candle flames clear of fabric, paper, and dried material, and use flameless candles near children or dried stems.

    1. Wood Tray with Books and a Candle on a Coffee Table

    Wood tray on a coffee table with stacked books, a pillar candle, and a small ceramic dish.

    Set a rectangular wood tray in the center of a coffee table, with a stack of two books, a short pillar candle in a glass holder, and a small ceramic dish for coasters. The wood adds warmth to a plain table, and the books give the tray a clear purpose. Keep the candle low, so guests can see across the table when seated.

    Choose a tray with raised edges, so books and the candle holder stay in place when the table is bumped. If the coffee table is small, use one book instead of two, and skip the dish, so the tray still leaves room for cups. Wipe the wood tray after spills, and do not leave a lit candle unattended.

    2. Round Rattan Tray for a Coastal Coffee Table

    Round rattan tray on a coffee table with a vase of greenery, a candle, and a shell dish.

    Place a round rattan tray on a light wood or white coffee table, with a small vase of greenery, a candle in a clear holder, and a folded linen napkin or a small shell dish. The round shape softens a square table, and the woven texture suits a coastal or relaxed living room. Keep the vase short, so the group stays low.

    Rattan trays are light, so they are easy to lift off when the table needs to clear for a meal or a game. Dust the weave with a dry cloth, and keep it away from standing water, since rattan can mark when left damp. For a smaller table, use a single vase and a candle only, and let the weave itself carry the texture.

    3. Mirrored Tray on an Entry Console

    Mirrored tray on an entry console with a vase of stems, candles, and a key dish.

    Set a mirrored tray on an entry console, with a small vase of fresh stems, two short candles in holders, and a tiny dish for keys. The mirror reflects light in a hallway, and it makes a narrow console look brighter. Keep the group to one side of the console, so mail and bags still have room.

    Wipe the mirror surface before guests arrive, since fingerprints show more on glass than on wood. Use a tray with a raised rim, so keys and small items do not slide off. If the console sits near a door that opens often, choose a heavier mirrored tray, so it does not shift when the door moves.

    4. Marble Tray for Cooking Oils on a Kitchen Counter

    Marble tray on a kitchen counter with cooking oil bottles, a salt dish, and a herb pot.

    Place a marble tray beside the stove or on a kitchen counter, with two or three cooking oil bottles, a small salt dish, and a tiny herb pot. The stone surface wipes clean after splashes, and it keeps bottles grouped in one spot instead of spread along the counter. Choose a tray size that fits the bottles with a little room left over.

    Keep the tray away from direct heat, and do not set hot pans on it. Wipe oil drips promptly, since they can mark grout or a light counter if left standing. If counter space is tight, use the tray for oils only, and move the salt dish to a shelf, so the tray still earns its place.

    5. Black Metal Tray for Remotes on a Coffee Table

    Black metal tray on a coffee table with a remote control, coasters, and a small candle.

    Use a black metal tray on a coffee table to hold the television remote, a pair of coasters, and a small candle or a tiny plant. The dark tray hides small marks, and it gives loose remotes one fixed home, so they stop drifting to the sofa cushions. Pick a tray with low sides, so remotes are easy to pick up.

    Line the tray base with a thin felt pad if the table scratches easily, since metal edges can mark soft wood. Keep the tray near the seat where remotes are used most, rather than in the center of a large table. At the end of the evening, return remotes to the tray, so the table starts tidy the next day.

    6. Woven Tray on an Ottoman Used as a Coffee Table

    Large woven tray on a padded ottoman with magazines, a candle, and a tiny bowl.

    Set a large woven tray on a padded ottoman, with a small stack of magazines, a candle in a sturdy holder, and a tiny bowl. The tray gives a soft ottoman a flat, stable surface for cups and books, and it lifts off in one move when extra seating is needed. Choose a tray with a firm base, so cups do not tip on the padding.

    Test the tray with a full cup before regular use, and keep the candle in a holder with a wide base. If the ottoman is round, match it with a round tray, and if it is square, use a square or rectangular tray, so the edges line up. Store the tray upright when the ottoman is used as a footrest.

    7. Brass Bar Tray on a Console or Sideboard

    Brass tray on a console sideboard with glasses, a bottle, a carafe, and a napkin bowl.

    Arrange a brass tray on a console or sideboard as a small drinks station, with two glasses, a small bottle, a cocktail shaker or a carafe, and a tiny bowl for citrus or napkins. The brass adds a warm metal note, and the tray contains drips and rings on the console surface. Keep the group compact, so the sideboard still holds other decor.

    Wipe brass after spills, since acidic drinks can mark the finish if left standing. Use coasters under glasses even on a tray, so condensation does not pool. For a household without alcohol, use the same brass tray for sparkling water, juice, and glasses, so the station suits every guest.

    8. Ceramic Tray for Toiletries on a Bathroom Counter

    Ceramic tray on a bathroom counter with a soap dispenser, a lotion bottle, and a ring dish.

    Place a ceramic tray on a bathroom counter, with a soap dispenser, a small lotion bottle, and a tiny dish for rings or hair ties. The tray keeps daily items grouped and off the bare counter, and it makes cleaning simple, since you lift one tray instead of each bottle. Choose a tray with a glazed finish, so water wipes off easily.

    Keep the tray clear of the tap splash zone, so bottles stay dry between uses. Wash the tray weekly, since soap and water spots collect along the rim. If the counter is narrow, use a slim rectangular tray, and keep only the items used every day on it.

    9. Galvanized Metal Tray with Greenery on a Farmhouse Coffee Table

    Galvanized metal tray on a farmhouse coffee table with a potted plant, a candle, and books.

    Set a galvanized metal tray on a farmhouse coffee table, with a small potted plant or a vase of greenery, a pillar candle in a glass holder, and a stack of two books. The metal adds a rustic note that suits wood furniture, and the greenery softens the hard tray edge. Keep the plant in a pot with a saucer, so water does not reach the tray.

    Dry the tray after watering the plant, since standing water can mark metal over time. If the tray feels sharp at the rim, place a folded cloth under it, or choose a tray with a rolled edge. For a plain version, swap the plant for a simple vase of stems, and keep the candle and books the same.
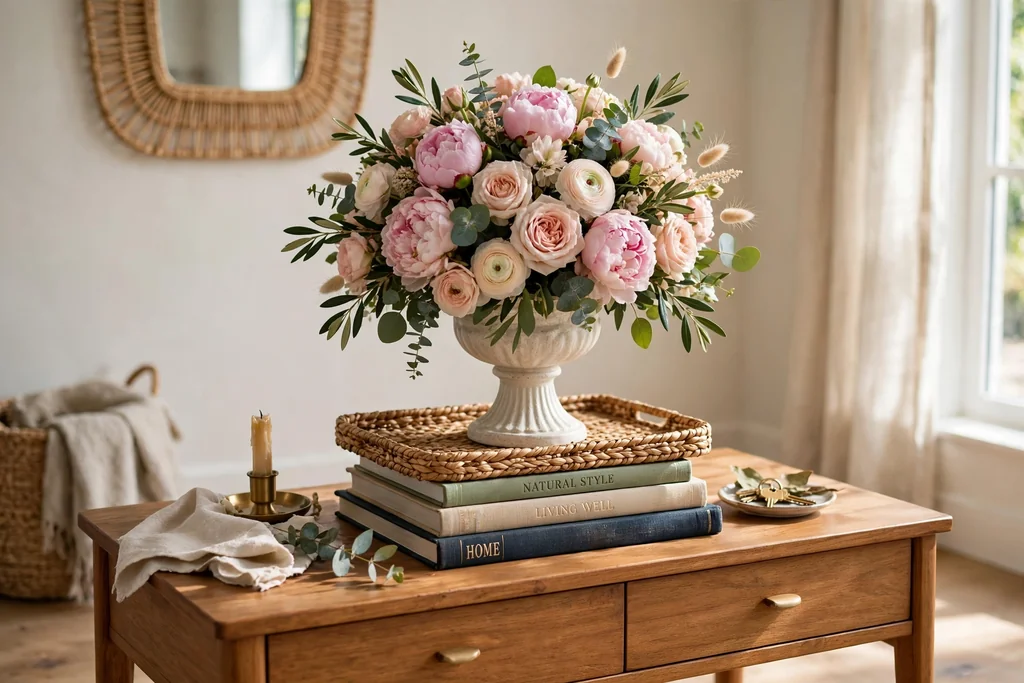
    10. Clear Acrylic Tray on a Modern Console

    Clear acrylic tray on a modern console with a small vase, a candle, and a book.

    Use a clear acrylic tray on a modern console, with a small vase, a short candle, and one book or a small sculpture. The clear tray almost disappears, so the items on it look as if they float on the console, and it suits a room with glass, chrome, or pale wood. Keep the group small, since a clear tray shows every item from all sides.

    Wipe acrylic with a soft cloth, since paper towels can leave fine marks. Do not set hot items on acrylic, and keep it out of strong direct sun for long hours, since heat can warp thin trays. If the console is long, use two small acrylic trays spaced apart, rather than one long tray, for a balanced look.

    11. Bamboo Coffee Station Tray on a Kitchen Counter

    Bamboo tray on a kitchen counter with mugs, a coffee jar, a sugar bowl, and a spoon dish.

    Build a coffee station on a bamboo tray on a kitchen counter, with two mugs, a small jar of coffee or tea, a sugar bowl, and a tiny spoon dish. The bamboo adds warmth to a kitchen, and the tray keeps the whole station together, so morning cups need no hunting through cupboards. Place the tray near the kettle or coffee maker, but clear of steam.

    Wipe the bamboo after spills, and do not soak it, since bamboo can warp when left damp. Keep the tray to one row of items, so mugs are easy to lift without knocking the jar. Refill the jar when it runs low, and wash mugs daily, so the station stays ready.

    12. Stone Tray for Keys and Mail on an Entry Console

    Stone tray on an entry console with a key dish, mail, and a tiny vase.

    Set a stone tray on an entry console, with a small dish for keys, a spot for mail, and a tiny vase or a candle. The heavy stone stays put when keys are tossed in, and it gives the entry one clear drop zone, so keys stop landing on chairs and counters. Choose a tray with a shallow bowl shape, so small items do not roll off.

    Keep the mail pile small, and sort it weekly, so the tray does not become a paper stack. Wipe stone with a damp cloth, and dry it after, since water spots show on dark stone. If the console is narrow, use a long, slim stone tray, and keep the vase at one end only.

    13. Seasonal Fall Tray on a Coffee Table

    Fall tray on a coffee table with mini pumpkins, a candle, dried stems, and a book.

    Style a fall tray on a coffee table, with two mini pumpkins, a candle in a glass holder, a small vase of dried stems, and a folded throw or a book at the base. The tray keeps seasonal pieces contained, so the fall look does not spread across the whole table. Use warm tones, such as rust, cream, and wood, and keep the group low.

    Keep dried stems clear of any real flame, and use a flameless candle if the stems are dry. Swap the pumpkins for pinecones in late fall, and keep the candle and vase the same, so the tray changes with little effort. Store seasonal pieces in the tray itself between seasons, if space allows.

    14. Gold Tray with Candles on a Holiday Console

    Gold tray on a holiday console with candles, ornaments, and greenery.

    Arrange a gold tray on a holiday console, with three candles in holders of two heights, a small ornament cluster, and a sprig of greenery. The gold catches candlelight in the evening, and the tray keeps wax and ornament dust off the console. Keep the candles in holders, and leave space between them, so flames do not touch greenery.

    Use flameless candles if the console sits near curtains or if children will pass by often. Trim candle wicks before lighting, and never leave lit candles unattended. After the holiday, remove the ornaments and greenery, and keep the gold tray with plain candles for everyday use.

    15. White Lacquer Tray for Mugs and Fruit on a Kitchen Counter

    White lacquer tray on a kitchen counter with mugs, a fruit bowl, and a tiny vase.

    Place a white lacquer tray on a kitchen counter, with two mugs, a small fruit bowl, and a tiny vase or a candle. The white tray brightens a dark counter, and it groups breakfast items in one spot, so mornings run faster. Choose a tray with a smooth, wipe-clean finish, since kitchen trays meet spills often.

    Wipe the tray after breakfast, since coffee rings show on white. Keep fruit in a bowl rather than loose on the tray, so juice does not mark the lacquer. If the counter is busy, use the tray for mugs only, and move the fruit bowl to the table, so the counter still looks tidy.

    16. Reclaimed Wood Tray with a Lantern on a Console

    Reclaimed wood tray on a console with a lantern, books, and a vase of stems.

    Set a reclaimed wood tray on a long console, with a small lantern, a stack of two books, and a tiny vase of stems. The rough wood suits a rustic or farmhouse room, and the lantern gives evening light without a large lamp. Keep the lantern flame, or battery candle, clear of the books and stems.

    Check that the wood tray sits flat, since reclaimed boards can warp slightly, and add small felt pads under uneven corners. Dust the tray with a dry cloth, and keep it away from radiators, since dry wood can crack in strong heat. For a shorter console, use the lantern and one book only.

    17. Candle Tray on a Dining Sideboard

    Candle tray on a dining sideboard with pillar candles, greenery, and a tiny dish.

    Group candles on a tray on a dining sideboard, with three pillar candles in glass holders, a small sprig of greenery, and a tiny dish. The tray protects the sideboard from wax, and it lets you move the whole candle group to the dining table in one lift. Keep the candles low enough to see over when seated at the table.

    Use battery candles if the sideboard sits under a shelf or near fabric. Trim wicks, and keep the tray clear of paper napkins and table linens when candles are lit. Wipe wax drips from the tray promptly, since cooled wax is harder to remove from a tray rim.

    18. Two Tier Tray for Herbs and Jars on a Kitchen Counter

    Two tier tray on a kitchen counter with herb pots above and spice jars below.

    Use a two tier tray on a kitchen counter, with small herb pots on the top tier and jars of spices or tea on the lower tier. The tiers use vertical space, so a small counter holds more without spreading out, and the herbs stay near the stove for cooking. Choose a tray with a stable base, so the top tier does not tip when a jar is lifted.

    Water herbs over the sink, not over the tray, so the lower tier stays dry. Keep the tray near light if the herbs are fresh, and move it to a shelf if the counter gets too hot from the stove. Label jars clearly, so the lower tier stays useful rather than decorative only.

    19. Velvet Lined Tray for Jewelry on a Bedroom Console

    Velvet lined tray on a bedroom console with a jewelry dish, a perfume bottle, and a vase.

    Place a velvet lined tray on a bedroom console or dresser, with a small jewelry dish, a perfume bottle, and a tiny vase or a candle. The soft lining protects jewelry and perfume bottles from scratches, and it gives a dressing area one tidy spot for daily pieces. Keep the tray near a mirror, so it suits a morning routine.

    Dust the velvet with a soft brush, and keep perfume away from direct sun, since light can change scent over time. Limit the tray to pieces worn often, and store the rest in a closed box, so the tray does not crowd. If the tray will hold rings, add a small ring dish, so tiny pieces do not roll off.
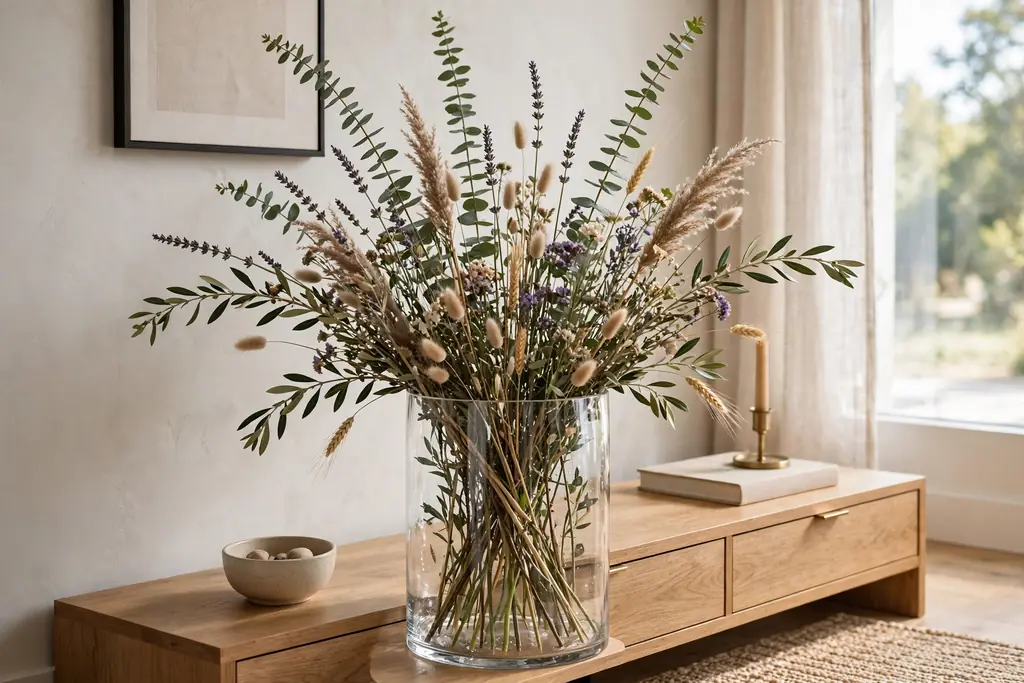
    20. Small Round Tray for a Vase and Candle on a Console Corner

    Small round tray on a console corner with a bud vase, a candle, and a tiny dish.

    Set a small round tray at one end of a console, with a single bud vase, a short candle, and a tiny dish or a small stone. The small tray suits a console corner that cannot hold a large group, and it gives an empty end a finished look without blocking the center. Keep the vase short, so the group stays in scale with the console.

    Use a tray color that repeats a color already in the room, such as wood, brass, or white, so the small group looks planned. If the console holds a large mirror or art above it, keep the tray group lower than the frame, so the eye moves up to the art. Swap the stems weekly, so the small group stays fresh.

    21. Oversized Tray as a Centerpiece on a Large Coffee Table

    Oversized tray on a large coffee table with a tall vase, books, candles, and a bowl.

    Use one oversized tray as the centerpiece on a large coffee table, with a tall vase of stems, a stack of three books, a candle group, and a decorative bowl. The large tray anchors a big table, so the center does not look empty, and it groups several pieces into one clear arrangement. Measure the table first, and choose a tray that covers about half the table length, no more.

    Leave room at the table edges for cups and books in daily use, and keep the tall vase at one end of the tray, so sightlines stay open from the sofa. Lift the whole tray off when the table needs to clear for a meal, and return it as one piece after. If the table is glass, add felt pads under the tray, so the base does not scratch the top.

    Conclusion

    A good decorative tray starts with the surface, not the shopping list. Measure first, pick a material that suits the room, and group three to five pieces by height, with empty space left on the tray. Try one idea from this list on a coffee table, a console, or a counter, and adjust the group until it looks calm and useful in daily life. A tray that holds the items you actually reach for will stay styled longer than one filled only for a photo.

    FAQs

    What size tray should I use on a coffee table?

    Choose a tray that covers about half the coffee table length and leaves a few inches clear on each side. A tray that is too large crowds the table, and a tray that is too small looks lost, so measure the table before you buy or style one.

    How many items should go on a decorative tray?

    Group three to five items on a decorative tray, with one tall piece, one mid-height piece, and one low piece. Fewer items look bare on a large tray, and more than five items tend to look crowded, so remove one piece if the group feels busy.

    What is the best tray material for a kitchen counter?

    Marble, stone, bamboo, or lacquered wood work well on a kitchen counter, since they wipe clean after spills. Marble suits oils and jars near the stove, bamboo suits a coffee station, and lacquered wood suits mugs and fruit, so match the material to what the tray will hold.

    Can I use a tray on an ottoman as a coffee table?

    Yes, a firm-based tray on an ottoman gives a soft surface a flat spot for cups and books. Choose a tray with a rigid base, test it with a full cup first, and lift the tray off when the ottoman is needed as extra seating.

    How do I style a tray on a narrow entry console?

    Keep the group to one side of a narrow console, with a small tray, a tiny dish for keys, and one vase or candle. Leave the rest of the console clear for mail and bags, and choose a slim tray that does not overhang the console edge.

    How often should I change tray decor?

    Change tray decor when the season changes, or when the items on it stop being useful, such as swapping fall pumpkins for winter greenery. Keep the tray and one or two base pieces the same, and swap only the seasonal accent, so the change takes minutes rather than a full restyle.


  • 23 Sunroom Decorating Ideas for a Bright and Comfortable Room

    23 Sunroom Decorating Ideas for a Bright and Comfortable Room

    Sunroom decorating ideas work best when you start with light, washable fabrics, seating that faces the view, and shade you can adjust through the day. Add plants that suit bright light, a rug to ground the seating, and low evening light, then repeat one calm palette so the glass room feels bright, comfortable, and easy to use all year.

    A sunroom is a room with a lot of glass and a lot of sun, so comfort depends on practical choices as much as on color. Fabrics fade, plants dry out, and seats that face a wall waste the best feature in the room. The 23 ideas below start with layout and light, then cover seating, plants, storage, and seasonal changes, so you can pick one change or work through the room in order. The same calm base that works in a farmhouse living room works here too, with lighter fabrics and more attention to sun and shade.

    Key Takeaways

    • Face seating toward the view or toward each other, and leave clear paths to doors and windows.
    • Choose light, washable fabrics and fade resistant cushions, since sunroom fabric gets strong daily sun.
    • Add shade in layers: sheers for soft light, plus blinds or shades you can lower at midday.
    • Group plants by light and water needs, and keep pots on trays so water does not mark floors or tables.
    • Ground the seating with one rug, repeat one calm palette at least twice, and leave some glass clear.
    • Plan for evening use with low lamps or lanterns, and for seasonal change with throws and cushion covers you can swap.

    1. Face the Seating Toward the View

    Sunroom seating facing large windows with a garden view and a small table between chairs.

    Set the sofa or main chairs so they face the largest window or the best garden view, with a small table between them for cups and books. This layout uses the reason the room exists, and it keeps conversation natural when two people sit facing each other across the table.

    Leave a clear path to each door, and keep tall furniture clear of the main window wall, so the view stays open from the seats. If the room is long, place seating at the garden end and a smaller table or reading chair at the house end, so each zone has its own use.

    2. Slipcovered Sofa in Light Linen

    Light cream linen slipcovered sofa in a bright sunroom with pale cushions.

    Choose a slipcovered sofa in white, cream, or pale grey linen, so the main seat stays light in a bright room and the cover can be washed. The relaxed linen look suits a sunroom, and a spare cover lets you keep the sofa fresh through summer dust and garden use.

    Pair the sofa with wood or rattan legs showing below the skirt, so the soft seat has a solid base. Keep cushion covers in the same light family, and add one accent color through pillows only, so the sofa does not compete with the view outside.

    3. Rattan Armchairs for Casual Seating

    Rattan armchairs with thick pale cushions angled around a small table in a sunroom.

    Add one or two rattan armchairs with thick seat cushions, placed at an angle to the sofa so the group feels open rather than boxed in. Rattan is light to move, which helps when you want to shift a chair into sun or shade, and its woven texture suits a glass room.

    Choose cushions with removable, washable covers in a pale neutral, and add a small side table beside each chair for a drink. Check that chair legs sit level on the floor, and use small felt pads under the feet so rattan does not mark wood or tile.

    4. Sheer Linen Curtains for Soft Light

    Sheer white linen curtains on tall sunroom windows filtering soft daylight.

    Hang sheer linen curtains on a rod close to the ceiling and wider than each window, so the panels can stack clear of the glass when you want full light. Sheers soften glare without blocking the view, and they give the room a finished edge in the evening.

    Use curtain rings with clips for a relaxed gathered look, and let the panels fall to the floor with a small break rather than pooling, so they stay clean. Wash sheers on a gentle cycle and hang them damp to reduce creases, and keep the color close to the wall color for a calm frame.
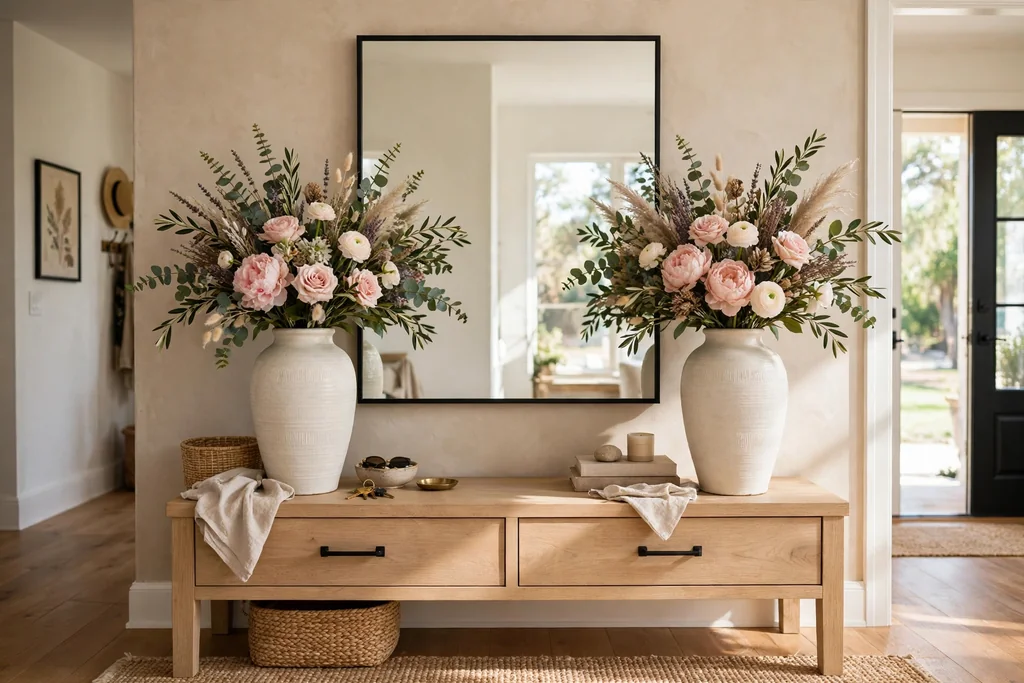
    5. Bamboo Shades for Midday Shade

    Bamboo woven shades lowered halfway over sunroom windows at midday.

    Add bamboo or woven wood shades inside the window frames, so you can lower them at midday when the sun is strongest and raise them fully in the morning and late afternoon. The natural woven texture adds warmth beside linen and rattan, and the shades roll up small when not needed.

    Measure each window before ordering, since sunroom windows often vary in width, and choose a cordless or looped control that keeps cords clear of children and pets. Dust the shades with a dry cloth, and lower them on the sunniest side first, rather than closing the whole room.

    6. Natural Fiber Rug to Ground the Seating

    Natural jute rug under a coffee table and sofa legs in a bright sunroom.

    Lay a natural fiber rug, such as jute or sisal, under the coffee table and front legs of the seating, so the group reads as one zone on a hard floor. The woven texture adds warmth underfoot, and a neutral rug lets cushions and plants carry the color.

    Choose a rug pad under the rug so it does not slide on tile or wood, and vacuum both sides of the rug edge weekly, since sunroom floors gather dust and pollen. In a small sunroom, one rug in the seating zone is enough, since a second rug can crowd the floor.

    7. Grouped Potted Plants for Bright Light

    Group of potted plants in varied heights on the floor and low stands in a sunroom.

    Group potted plants in threes on the floor and on low stands, mixing one tall plant, one medium plant, and one trailing plant, so the group has height and shape. Sunrooms suit plants that like bright light, but check each plant label for its light needs before placing it in direct sun.
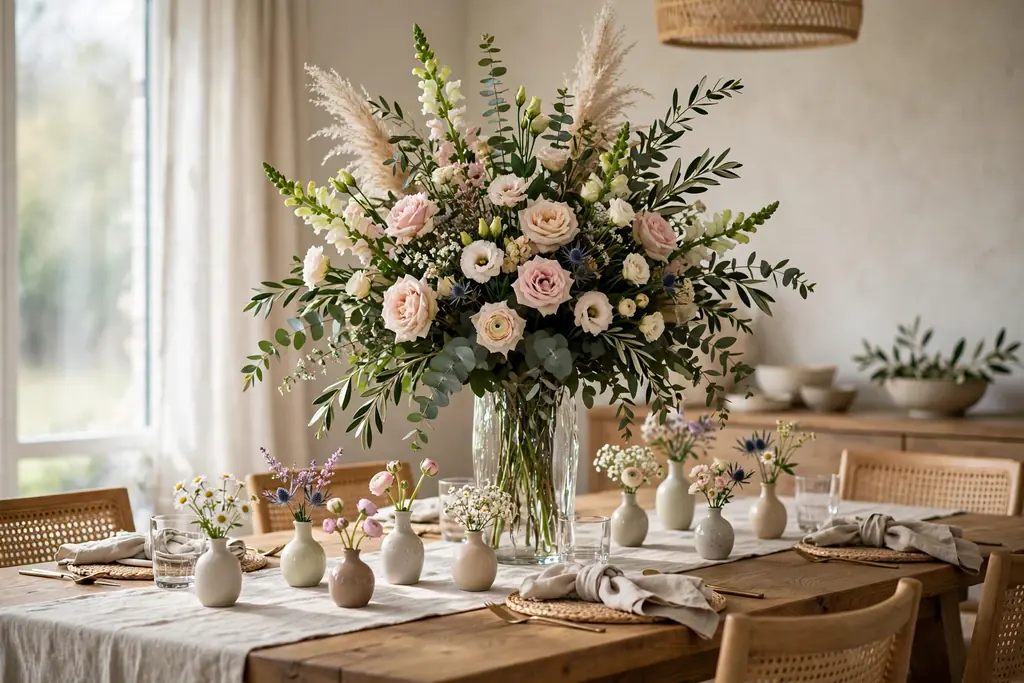
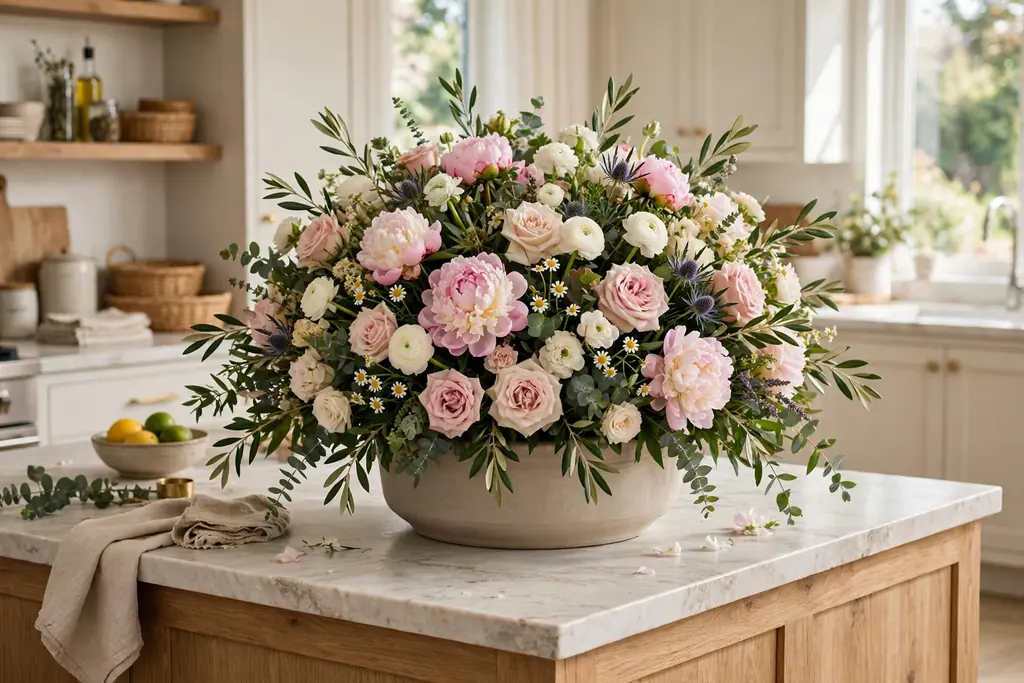
    Set each pot on a saucer or tray, and water plants over the tray so spills do not mark the floor. Rotate pots a quarter turn each week so growth stays even, and move any plant that scorches or wilts to a spot with softer light for a few days.

    8. Hanging Planters Near the Glass

    Hanging planters with trailing plants near sunroom glass, clear of the main view.

    Hang one or two planters from ceiling hooks near, but not against, the glass, using trailing plants that can hang down without blocking the view. Hanging planters use vertical space well in a small sunroom, and they keep floor space clear for seating.

    Use hooks rated for the weight of a watered pot, and hang planters where you can reach them easily for watering. Water over a tray or take the planter down to water it, so drips do not fall on seats or the floor below.

    9. Small Breakfast Table by the Windows

    Small round breakfast table with two chairs by bright sunroom windows.

    Set a small round table with two chairs by the brightest window, so the sunroom works as a breakfast spot as well as a sitting room. A round table fits a corner or a window bay better than a square table, and two chairs leave room to move around it.

    Use a wipe clean top or a washable cloth, since breakfast tables see daily use and spills. Keep the centerpiece low, such as a small vase or a single candle in a holder, so the table stays usable and the view stays clear across it.

    10. Reading Nook with an Armchair and Lamp

    Reading nook with a deep armchair, side table, and floor lamp in a sunroom corner.

    Place one deep armchair in a corner with a small side table and a floor lamp at chair height, so the sunroom has a defined place to read that is not the main sofa. Add a cushion for back support and a throw folded over the chair arm, ready for cooler evenings.

    Keep the chair clear so it stays an invitation rather than a pile for clothes or bags. In a tight room, a floor cushion beside a low shelf works instead, with the same small lamp beside it, and the same calm palette as the rest of the room.

    11. Daybed or Chaise for Afternoon Lounging

    Daybed with a light throw and washable pillows along a sunroom window wall.

    Add a daybed or a chaise lounge along one window wall, dressed with a firm mattress pad, a flat sheet, and two or three pillows in washable covers. A daybed gives the sunroom a place to nap or stretch out, and it can serve as extra seating when guests visit.

    Keep a light throw folded at one end, and place a small table or stool at the side for a book and a drink. If the daybed sits in direct sun, use a shade or sheer panel above it at midday, so the seat stays comfortable and fabric fades more slowly.

    12. Wicker Coffee Table with a Tray

    Wicker coffee table with a tray holding a candle, small plant, and books in a sunroom.

    Use a low wicker or rattan coffee table in the center of the seating group, with a wood or metal tray on top to group a candle, a small plant, and a stack of books. The tray keeps small items contained, and the whole tray lifts off in one move when you need the table clear.

    Leave clear space on the table for cups, since a coffee table must work as well as look good. Wipe the wicker with a dry cloth for dust and a damp cloth for spills, and keep the tray small enough that cups still fit beside it.

    13. Washable Cushion Covers in One Palette

    Sofa with washable cushion covers in cream, sage, and soft blue in a sunroom.

    Swap cushion covers to a small palette, such as cream, sage, and soft blue, using plain, knit, and one subtle pattern, and repeat one of those colors somewhere else in the room. Washable zip covers make seasonal and practical changes simple, since covers wash and store flat.

    Keep the number of cushions to what fits without a pile on the floor when someone sits down. If the sofa is already patterned, use plain covers in one color only, so the room stays calm and the view stays the main feature.

    14. Light Wall Palette of White and Cream

    Sunroom with white and cream walls, light furniture, and green plants in daylight.

    Paint the solid walls white, cream, or a very pale warm grey, so the room reflects daylight and the window frames, plants, and furniture stand out. A light wall color also makes a small sunroom feel larger, since dark walls can close in a glass room.

    Test the paint beside your floor and cushion colors in daylight and evening light, since white shifts a lot under warm bulbs. Keep trim in the same light family, and let one accent color come through textiles and plants rather than a bold wall.

    15. Coastal Blue and White Accents

    Sunroom with blue and white accents, a striped pillow, and a blue ceramic vase.

    Add coastal blue and white accents through two or three pieces only, such as a striped pillow, a blue ceramic vase, and a white throw, so the room gains a fresh seaside note without a full theme. Blue suits sunrooms because it links to sky and garden tones outside.
    Keep the blue to one shade family, such as soft navy or pale sky blue, and repeat it in at least two places so it looks planned. If the room already has a strong accent color, use blue sparingly, in one or two spots only, so the palette does not split.
    16. Botanical Prints on the Solid Wall

    Framed botanical prints hung in a row on a solid sunroom wall above a bench.

    Hang two or three framed botanical prints on the one solid wall, at eye level from the seats, using the same frame color and similar print sizes for a calm group. Botanical prints suit a sunroom because they link the indoor plants to the garden outside.

    Hang prints with fixings rated for their weight, and keep glass frames secure, since sunroom walls can get warm in direct sun. Avoid hanging prints on glass or in direct sun if the print will fade, and choose one wall for art so the window walls stay clear.

    17. Lanterns and Low Lamps for Evenings

    Sunroom in the evening with lanterns and low lamps giving warm light beside seating.

    Set lanterns with battery candles on the coffee table and side tables, and add table lamps with linen shades at seating height, so the sunroom works after dark without harsh overhead light. Low, warm light makes cream, wood, and plant tones look richer in the evening.

    Use battery candles inside lanterns near fabric or dried stems, and keep real flames in holders, clear of curtains and throws, and never left burning unattended. Put lamps at both ends of the seating area so no one sits in shadow, and keep switches within reach of the sofa.

    18. Ceiling Fan for Air Movement

    Sunroom ceiling fan with light wood blades centered over a seating group.

    Fit a ceiling fan with light wood blades and a simple light kit, centered over the seating group, so warm air moves on still summer days and the room stays usable without closing the windows. A fan also helps on mild days when you want air movement but no draft from an open door.

    Choose a fan size suited to the room, and set the blades high enough to clear heads and tall plants. Dust the blades often, since sunroom dust shows on light blades, and use the fan on a low setting first, so papers and light throws do not blow around.

    19. Baskets and a Storage Bench for Clutter

    Storage bench with woven baskets holding throws and magazines in a sunroom.

    Place a storage bench under a window or against the solid wall, with woven baskets inside or beneath it for throws, magazines, and garden tools. Baskets keep daily clutter out of sight while the bench top stays clear for a plant, a tray, or extra seating.

    Label baskets only if the household needs it, and keep one basket empty for quick tidy ups before guests arrive. Shake baskets outside monthly, since woven fibers gather dust, and replace a basket when the weave starts to fray at the rim.

    20. Seasonal Cushion and Throw Swap

    Sunroom sofa with a heavier knit throw and warmer cushion covers for cooler months.

    Plan a simple seasonal swap: light cotton throws and pale cushion covers for summer, and heavier knit throws and warmer covers for cooler months, stored in one labeled basket or bag. The same approach works in a fall living room, with warmer colors and thicker fabrics for the cooler season.

    Swap one layer at a time, starting with throws, then cushion covers, so the room changes without a full restyle. Wash the outgoing covers before storing them, and store them dry and flat, so the next swap takes minutes rather than a wash day.

    21. Small Coffee Cart by the Door

    Small rolling coffee cart with mugs and a teapot near a sunroom door.

    Set a small rolling cart near the sunroom door with mugs, a small teapot or coffee pot, and a jar for spoons, so drinks stay in the sunroom and trips to the kitchen drop. A cart works well in a sunroom used for morning coffee or afternoon tea.

    Keep the cart stable and clear of the main walkway, and put heavier items on the bottom shelf. Wipe the cart after use, and move it aside when the room needs extra floor space for guests, since a cart on wheels is easy to shift.

    22. Windowsill Herbs in Matching Pots

    Small herb pots in matching white pots lined along a sunny sunroom windowsill.

    Line the sunniest windowsill with small herb pots in matching terracotta or white pots, such as basil, mint, and parsley, so the sill works as a small kitchen garden. Herbs suit a sunroom sill because they get bright light and stay within reach for cooking.

    Water herbs lightly and set each pot on a small saucer, so damp soil does not mark the sill. Trim herbs often for cooking, which also keeps them bushy, and move any herb that wilts in strong midday sun to a slightly shaded spot on the same sill.

    23. Entry Bench with Hooks and a Mat

    Low entry bench with wall hooks and a washable mat just inside a sunroom door.

    Place a low bench just inside the sunroom door, with wall hooks above it for hats and light jackets, and a washable mat under it for shoes. This entry zone keeps garden shoes and outdoor gear from spreading into the seating area, and it gives guests a clear place to settle.

    Keep the bench top mostly clear, with one small tray for keys or sunglasses, so it stays usable as a seat. Shake the mat outside weekly, and wipe the bench after wet days, since sunroom entries see mud and pollen from the garden.

    Conclusion

    A bright sunroom works best when layout, light, and fabric choices come first. Face seating toward the view, layer sheers with shades you can adjust, choose washable fabrics, and group plants by their light needs. Then add one rug, one calm palette, and low evening light, and swap throws and cushion covers as the seasons change. Start with the one idea that fixes your biggest daily problem, whether that is glare, seating, or storage, and add the next idea only when the first one feels settled.

    FAQs

    How do you decorate a sunroom on a small budget?

    Start with textiles, plants, and shade, since cushion covers, a rug, sheers, and grouped pots change a sunroom for less than new furniture. Use pieces you already own first, such as a side table, a lamp, and baskets, then add one larger piece, like a rug or a chair, only when you know the layout works.

    What furniture works best in a sunroom?

    Light, movable furniture works best, such as a slipcovered sofa, rattan chairs, a wicker coffee table, and a small side table for each seat. Choose washable cushion covers and fade resistant fabric where possible, and keep pieces low enough that they do not block windows or the view.

    How do you keep a sunroom from getting too hot?

    Use shade in layers, with sheer curtains for soft light and bamboo shades or blinds you can lower at midday, and open windows or run a ceiling fan for air movement. Keep dark fabrics and heavy rugs to a minimum in the sunniest spots, since they hold heat, and move heat sensitive plants out of direct midday sun.

    What plants are good for a sunroom?

    Plants that suit bright light work well, but the right plant depends on how much direct sun your room gets and how often you water. Check each plant label for light and water needs, group plants with similar needs together, and start with a few pots so you can learn what thrives before filling every sill and corner.

    How do you make a small sunroom feel larger?

    Keep walls light, leave some glass clear, and use one rug, one palette, and low furniture that does not block windows. Choose a round table, hanging planters, and a storage bench that serves two uses, and avoid filling every wall and corner, since open floor and clear glass make a small room feel larger.

    Can a sunroom be used all year?

    Yes, a sunroom can be used all year if it has shade for summer, a heat source or warm throws for cooler months, and fabrics and plants suited to changing light. Add low evening light for dark winter afternoons, swap cushion covers and throws by season, and check windows and doors for drafts before the coldest months.


  • 25 Outdoor Patio Decorating Ideas for a Comfortable Retreat

    25 Outdoor Patio Decorating Ideas for a Comfortable Retreat

    A comfortable outdoor patio starts with shaded seating, a clear place to eat, soft light for evenings, and plants that soften hard edges. Choose weatherproof furniture sized to your patio, add a rug to mark the seating area, layer light with string lights and lanterns, and finish with pots, shade, and a heat source for cool nights.

    The 25 ideas below work for a small concrete slab as well as a large paved patio, since most of them scale down to one chair and one pot, or up to a full seating and dining group. Start with seating and shade, then add light and plants. Keep a clear path from the house door to the seating area, and leave room to pull out chairs and walk around the table with ease.

    Key Takeaways

    • Start with seating and shade, since a patio that is too hot or has nowhere comfortable to sit will go unused.
    • Size furniture to the patio, leaving clear walkways around chairs, tables, and planters.
    • Use an outdoor rug to mark the seating area and to make hard paving feel softer underfoot.
    • Layer light with overhead string lights, lanterns, and solar path lights, so the patio works after dark.
    • Repeat two or three colors across cushions, pots, and throws, so many separate pieces read as one planned space.
    • Choose weatherproof fabrics and finishes, or store cushions and throws in a bench or basket when rain is expected.
    • Add plants at different heights, from ground pots to a trellis wall, to soften fences and walls.

    1. Deep Seat Sofa Group with Washable Cushions

    Deep seat outdoor sofa group with washable cushions around a low coffee table on a patio.

    A deep seat sofa group turns a patio into an outdoor living room. Set a two or three seat sofa with two armchairs around a low coffee table, facing each other so conversation feels natural. Thick seat cushions make the group comfortable for long sits, and a coffee table holds drinks, books, and a small lantern within reach.

    Choose cushions with removable, washable covers, since outdoor cushions gather dust, pollen, and spills. Measure the group before buying, and leave at least 60 centimeters of walking space around the seating. If the patio is small, a loveseat with one chair gives the same living room feel in less space.

    2. Layered Outdoor Rugs for a Softer Floor

    Layered outdoor rugs under a patio coffee table and seating group.

    Layered outdoor rugs soften a concrete or stone patio in one step. Lay a larger flat rug in a plain color first, then add a smaller patterned rug on top, centered under the coffee table. The layers mark the seating area clearly, even on a long patio that also holds a dining table and a grill.

    Pick rugs rated for outdoor use, so they dry after rain and resist fading in sun. Shake them out weekly, and lift them now and then to check for damp marks on the paving below. A rug with a simple stripe or border pairs well with plain cushions, since the rug carries the pattern.

    3. Overhead String Lights for Evening Glow

    Warm string lights hung over a patio seating area at dusk.

    Overhead string lights give a patio a warm glow after dark and make evening sits feel planned rather than improvised. Hang them in straight lines or a gentle zigzag from the house wall to posts, a pergola, or a fence, high enough that no one walks into them. Warm white bulbs suit most patios and flatter wood, stone, and plants alike.

    Use outdoor rated lights and a weatherproof outlet or timer, and check the span before fixing hooks so the lights do not sag into the seating area. Keep one run over the seating group and another over the dining table, so both areas are lit. In winter, take the lights down or check them for damage before switching them on again.

    4. Pergola with Climbing Vines for Natural Shade

    Wood pergola with climbing vines shading patio chairs.

    A pergola with climbing vines gives shade that grows fuller each year and softens a plain patio roofline. Set the pergola over the seating area, with posts fixed firmly to the patio or to footings, and train vines such as jasmine, grape, or climbing roses along the top beams. The leaves filter sun in summer and let more light through when they thin in cooler months.

    Prune the vines once or twice a year to keep growth off gutters and to stop heavy stems from pulling on the beams. Choose a vine suited to your light and climate, and give it a trellis or wires to climb at first. A pergola also gives a clear place to hang string lights and outdoor curtains.

    5. Cantilever Umbrella for Flexible Shade

    Cantilever umbrella shading a patio sofa group.

    A cantilever umbrella shades a seating group without a pole in the middle of the table or chairs. The offset pole stands to one side, with a heavy base, and the canopy swings over the sofa or dining table as the sun moves. This makes it easy to shade a corner seat in the morning and a dining table at midday with the same umbrella.

    Choose a base weight rated for the canopy size, and close the umbrella in strong wind so it cannot tip or lift. A light colored canopy reflects heat and keeps the shade cooler, while a tilt function lets you angle the shade as the sun drops. Keep the base clear of walkways so no one trips over it.

    6. Fire Pit Conversation Circle

    Chairs in a circle around a patio fire pit at dusk.

    A fire pit conversation circle gives the patio a clear evening focus. Set low chairs in a circle around a fire pit, with enough room to stretch legs and to reach a side table for drinks. The circle suits cool evenings, when guests gather around the heat, and it works on a paved area away from overhangs and dry plants.

    Follow local rules for open flames, and keep the fire pit on a nonflammable surface with a safe distance from furniture, fences, and house walls. Use a spark screen when the fire is lit, and let ashes cool fully before clearing them. A portable fire bowl gives the same circle on a smaller patio, with chairs pulled in close.

    7. Outdoor Dining Table for Shared Meals

    Outdoor dining table with chairs and a simple centerpiece on a patio.

    An outdoor dining table makes the patio a place for shared meals, not only for sitting. Choose a table sized to your usual group, with chairs that slide out with ease and leave walking room behind them. A wood or metal table with a simple centerpiece, such as a low bowl of lemons or a small potted herb, keeps the table usable without a full table setting every day.

    Protect the table with a cover in heavy rain if the finish needs it, and wipe spills promptly so they do not stain. If the patio is narrow, a rectangular table against a wall with a bench on one side seats more people in less space. Add a shade umbrella or pergola over the table so midday meals stay comfortable.

    8. Bistro Set for a Small Patio

    Small bistro set with two chairs and a round table in a patio corner.

    A bistro set suits a small patio, a balcony edge, or a narrow side yard where a full dining set would crowd the space. Two chairs and a small round table fit in a corner, leaving room for a pot or two and a clear path to the door. The set works for morning coffee, reading, and a light lunch for two.

    Choose folding chairs if the set must be stored in winter, and pick a table top that wipes clean after meals. A bistro set in metal or wood suits most house styles, and a single patterned cushion on each chair adds color without extra pieces. Keep the set near the door, so it is easy to use on a short break.

    9. Hanging Egg Chair for a Cozy Corner

    Hanging egg chair with a cushion and throw in a patio corner.

    A hanging egg chair fills a patio corner with a cozy seat that feels separate from the main group. Hang the chair from its own sturdy stand, with a thick seat cushion and a small throw, and place it where it can swing a little without hitting a wall, a planter, or a railing. The curved shape shelters the sitter and suits reading and quiet breaks.

    Check the stand and hanging point for weight rating and wear each season, and keep the swing path clear of children running past. A cushion in a plain color lets the chair shape stand out, while a patterned throw adds warmth on cool evenings. If the chair sits in rain, bring the cushion indoors or use a quick dry fill.

    10. Hammock for Lazy Afternoons

    Striped hammock hung between posts on a patio.

    A hammock gives a patio a relaxed seat for lazy afternoons and naps. Hang it between two sturdy posts, trees, or a freestanding stand, with the ends fixed at a height that lets the middle hang low enough to sit into with ease. A striped or plain cotton hammock suits most patios, and a small pillow at one end makes it comfortable for reading.

    Check ropes, hooks, and fabric for wear before each season, and take the hammock down in storms or winter. Keep the ground below clear of sharp stones and pots, so stepping out of the hammock is safe. A hammock with a stand works where there are no trees or posts, and it can move to follow shade through the day.

    11. Sun Loungers with a Shared Side Table

    Two sun loungers with a shared side table on a sunny patio.

    Sun loungers with a shared side table make a sunny patio corner easy to use all afternoon. Set two loungers side by side, facing the sun or the garden, with one low side table between them for drinks, sunscreen, and a book. Adjustable backs let each person sit up to read or lie flat to rest, without moving the whole lounger.

    Choose loungers with weatherproof frames and quick dry cushions, and fold or stack them in winter if storage is tight. A small side table with a lower shelf holds extra towels and keeps the top clear. Place loungers where they do not block the path to the dining area, and leave room to walk around the foot of each lounger.

    12. Planter Clusters at Different Heights

    Cluster of planters at different heights beside a patio door.

    Planter clusters at different heights add green to a patio without a garden bed. Group three or five pots of varied heights in a corner or beside the door, with a tall plant at the back, medium plants in the middle, and trailing plants at the front. The mix of heights draws the eye up and softens a plain wall or fence.

    Use pots with drain holes and saucers, and match the plants to the light the spot gets, with sun lovers in open spots and shade plants near walls. Water when the top of the soil feels dry, and feed plants through the growing season as the pot label directs. Keep the cluster clear of walkways, and move tender pots indoors before frost.

    13. Trellis Garden Wall for Green Privacy

    Trellis garden wall with climbers and hanging pots on a patio fence.

    A trellis garden wall covers a plain fence or wall with living green and gives a patio a garden feel in a small footprint. Fix a wood or metal trellis to the wall, with a small gap behind it for air, and plant climbers at the base or hang small pots from the trellis frame. The wall suits narrow patios where floor space for pots is short.

    Water climbers at the base, and tie new stems to the trellis as they grow so the cover stays even. Prune once a year to keep the wall tidy and to stop growth from blocking windows or lights. A trellis with potted herbs and small flowers gives color at eye level, while a climber alone gives a fuller green screen.

    14. Herb Pots by the Door for Cooking and Scent

    Herb pots in terracotta beside a patio kitchen door.

    Herb pots by the door give a patio scent, green, and fresh leaves for cooking in one small group. Set pots of basil, mint, rosemary, thyme, and parsley near the kitchen door or beside the dining table, where they are easy to reach while cooking. Mint grows fast, so give it its own pot to stop it from crowding other herbs.

    Water herbs when the top of the soil feels dry, and snip leaves from the top so the plants stay bushy. Most herbs need sun for at least part of the day, so place the pots where they get morning or midday light. Label the pots if guests cook with you, and bring tender herbs indoors before frost.

    15. Privacy Lattice Screens for a Sheltered Feel

    Lattice privacy screens with climbing plants along a patio edge.

    Privacy lattice screens shelter a patio from neighbors and wind without building a solid wall. Set freestanding lattice panels along one side of the patio, fixed to posts or heavy planters, and let climbing plants or hanging pots soften the frame. The open pattern lets air and light through while breaking the direct view.

    Check that the screens are stable in wind, with posts set firmly or bases weighted, and keep them clear of walkways and fire pits. A lattice screen also gives a place to hang lanterns, small pots, or outdoor art. Paint or stain the lattice to match the fence or furniture, so it reads as part of the patio rather than a temporary fix.

    16. Outdoor Curtains for Soft Shade and Privacy

    Outdoor curtains drawn across one side of a shaded patio.

    Outdoor curtains on a rod or wire give a patio soft shade and privacy that can be opened or closed as needed. Hang weatherproof curtains from a pergola beam, a wall mounted rod, or a freestanding frame, and draw them across the sunny or overlooked side in the afternoon. Light colors keep the shade bright, while a heavier weave blocks more sun and wind.

    Use curtains rated for outdoor use, and tie them back in strong wind so they do not pull on the rod. Wash or hose them down at the start of the season, and take them down in winter to keep the fabric fresh. Curtains pair well with string lights, since the fabric softens the light in the evening.

    17. Lanterns with Battery Candles for Table Light

    Lanterns with battery candles grouped on a patio table at dusk.

    Lanterns with battery candles give a patio safe table light that can move from the dining table to the seating group as the evening goes on. Group three lanterns of varied heights on a table or along a low wall, with battery candles inside for a steady glow. The glass protects the flame effect from wind, and the light flatters food, faces, and plants alike.

    Use battery candles where wind, children, or pets make real flames risky, and keep real candles inside glass with a stable base if you use them. Bring lanterns indoors in storms, and wipe the glass clean so the light stays bright. Black metal lanterns suit most patios, while wood or brass lanterns warm a rustic space.

    18. Solar Path Lights Along the Walkway

    Solar path lights along a walkway to a patio seating area at dusk.

    Solar path lights along the walkway make a patio safe and welcoming after dark, without wiring or running costs. Set small stake lights along the path from the door to the seating area, spaced evenly and clear of mowing and foot traffic. The lights charge in daylight and switch on at dusk, marking the edges of the path.

    Choose lights with a warm white glow, and keep the solar panels clear of leaves and shade from pots. Replace rechargeable batteries when the light fades, and move a light that sits in deep shade to a sunnier spot. Path lights work best as a guide, with string lights or lanterns giving the main light in the seating area.

    19. Chiminea for Warmth on Cool Evenings

    Chiminea beside two chairs on a small patio in the evening.

    A chiminea gives a patio warmth on cool evenings in a compact shape that suits smaller spaces than a full fire pit. Set the chiminea on a nonflammable surface, away from overhangs, fences, and dry plants, with a clear space around it for safety. The chimney directs smoke up and away from seats, so guests can sit close without smoke in their faces.

    Burn only dry wood suited to the chiminea, and let ashes cool fully before clearing them. Cover the chiminea in rain to protect the finish, and check the chimney and body for cracks each season. A chiminea beside one or two chairs makes a quiet evening corner, while a larger fire pit suits a full group.

    20. Storage Bench for Cushions and Throws

    Storage bench with a cushion beside a patio seating group.

    A storage bench holds cushions, throws, and small outdoor games, and gives guests an extra seat. Set a wood or resin bench beside the seating group or against a wall, with a hinged lid that lifts with ease. Inside, keep cushions in a dry bag or basket, so they stay clean and ready to use.

    Check the bench lid for water leaks after rain, and wipe the inside dry if needed. A bench with a cushion on top reads as seating, while a plain bench top can hold a tray of drinks or a lantern. Keep heavy items at the bottom of the bench, and leave the top clear so the bench can seat guests at short notice.

    21. Side Tables at Every Seat

    Small side tables beside patio chairs holding drinks and a book.

    Side tables at every seat mean no one has to balance a drink on an armrest or the ground. Place a small table beside each chair and at each end of a sofa, sized to hold a drink, a book, and a phone. Tables in the same material as the main furniture tie the group together, while a mix of wood and metal adds a collected look.

    Choose tables with a stable base that will not tip on uneven paving, and keep the tops clear of clutter so guests can set things down. A side table with a lower shelf holds a spare throw or a small lantern. On a small patio, one shared table between two chairs still gives each seat a place within reach.

    22. Drinks Station on a Rolling Cart

    Rolling drinks cart with glasses and a pitcher near a patio dining table.

    A drinks station on a rolling cart keeps glasses, a pitcher, and snacks in one place and lets the host stay with guests. Set a bar cart or a small side table near the dining area, with glasses on top, bottles or a pitcher below, and a small tray for napkins. The cart rolls to the table for meals and back to a corner when the meal ends.

    Keep the cart stable on level paving, and lock the wheels when it is in use. Use unbreakable glasses outdoors where children play, and bring glassware indoors at night. A cart with a removable tray doubles as a serving tray, so food and drinks can move from the kitchen to the patio in one trip.

    23. Basket of Throws for Cool Evenings

    Woven basket of folded throws beside a patio sofa.

    A basket of throws keeps a patio usable when the temperature drops after sunset. Set a large woven basket beside the sofa or the fire pit, filled with two or three washable throws in the patio palette. Guests can take a throw as they sit down, and the basket keeps the throws tidy during the day.

    Choose throws that wash well and dry quickly, and bring the basket indoors in rain. A basket with handles moves from the seating group to the fire pit as the evening goes on. Keep the basket clear of walkways, and fold the throws neatly so the basket reads as decor, not storage alone.

    24. Tabletop Fountain for Gentle Sound

    Small tabletop fountain on a patio side table near seating.

    A tabletop fountain adds gentle water sound to a patio and masks street noise without taking floor space. Set a small solar or plug in fountain on a side table or a low wall, where the sound can be heard from the seating group but the splash stays clear of cushions. The moving water also draws birds to the patio during the day.

    Keep the water level topped up, and clean the pump and basin as the maker directs so the flow stays steady. Place the fountain on a level surface with a tray beneath it if it sits near wood furniture. In frost, empty the fountain and store it indoors so ice cannot crack the basin.

    25. Outdoor Mirror and Wall Decor for Light

    Weatherproof outdoor mirror and metal wall decor above a planter on a patio wall.

    Outdoor mirror and wall decor reflect light and give a plain patio wall a focal point. Hang a weatherproof mirror or a set of metal wall pieces on a sheltered wall, facing the seating area so it reflects plants and light rather than a fence. The reflection makes a small patio feel wider and brighter, especially in a shaded corner.

    Fix wall decor firmly, with fixings suited to the wall material, and check them after storms. Choose pieces rated for outdoor use, since indoor mirrors and art can tarnish or warp outside. Keep wall decor clear of the fire pit and the grill, and pair it with a planter below so the wall display feels grounded.

    Conclusion

    A comfortable patio does not need a full redesign. Pick seating that fits the space, add shade for the hottest part of the day, layer light for evenings, and finish with plants and a heat source. Start with one seating group and one shade idea, then add the smaller touches, such as lanterns, a throw basket, and herb pots, as you learn how you use the patio. With those layers in place, the patio can serve as a second living room through much of the year, for quiet mornings, shared meals, and relaxed evenings outside.

    FAQs

    What is the first step in decorating an outdoor patio?

    The first step is to measure the patio and decide how you will use it, for sitting, eating, or both. Seating and shade come next, since they set the size and layout of everything else, from rugs to planters and lights.

    How do I make a small patio feel comfortable?

    A small patio feels comfortable with a bistro set or a loveseat, one shade source, and plants at different heights. Keep walkways clear, use a rug to mark the seating area, and choose folding or stackable pieces that can be stored when not in use.

    What kind of furniture lasts best on a patio?

    Weatherproof furniture lasts best on a patio, with frames in metal, teak, or resin and cushions in outdoor rated fabric. Removable, washable cushion covers help, since outdoor cushions gather dust and spills, and a storage bench keeps cushions dry in rain.

    How can I add shade to a patio without a pergola?

    You can add shade to a patio without a pergola with a cantilever umbrella, a shade sail, or outdoor curtains on a frame. Each option shades a seating or dining area, and an umbrella or sail can move or come down as the sun and seasons change.

    What lighting works best for a patio at night?

    String lights, lanterns, and solar path lights work best together for a patio at night. String lights give the main glow over seating and dining areas, lanterns add movable table light, and solar path lights mark the walkway safely.

    How do I keep patio plants alive through the season?

    Patio plants stay alive with the right light, drain holes, and watering when the top of the soil feels dry. Match plants to the sun the spot gets, feed them through the growing season as the pot label directs, and move tender pots indoors before frost.


  • 19 Wrap Around Porch Ideas for Comfortable Outdoor Living

    19 Wrap Around Porch Ideas for Comfortable Outdoor Living

    A wrap around porch works best when each side has a clear job, such as seating on the sunny side, dining near the kitchen door, and a quiet chair at the far end. Start with one seating group, add shade and light, then use rugs and planters to mark each zone.

    The 19 ideas below suit porches that run along two or more sides of a house, from a narrow deck to a wide, covered porch. Many of them scale down to one chair and one planter, or up to a full dining group, and the same zoning approach that makes a fall porch ideas list feel welcoming works here all year, with seasonal pieces swapped as the weather changes. A farmhouse decor palette of wood, cream, and green keeps the zones feeling connected, even when each side serves a different purpose.

    Key Takeaways

    • Give each side of the porch a job: seating, dining, reading, or a quiet corner, so no stretch of decking sits unused.
    • Put the main seating group where the view and the breeze are best, and keep the path to each door clear.
    • Use outdoor rugs, planters, and light to mark zones, rather than walls or screens that block airflow.
    • Choose outdoor rated fabrics, fans, and lights, or bring cushions and throws indoors in rain, so the porch stays tidy.
    • Repeat two or three colors, such as cream, sage green, and warm wood, across textiles, pots, and cushions.
    • Keep one side flexible, with a bench or a small table that can serve guests, games, or extra dining seats.

    1. Rocking Chairs at the Corner Bend

    Two rocking chairs at the corner bend of a wrap around porch with a small table between them.

    Two rocking chairs at the corner bend make the turn of the porch a natural place to sit and watch the yard from two directions. Set the chairs at a slight angle to each other, with a small table between them for drinks, and leave enough room behind each chair for the rockers to move freely. The corner gives each chair a different view, so two people can sit together without facing the same way.

    Choose chairs rated for outdoor use, and add cushions with removable, washable covers, since porch cushions gather dust and pollen. If the corner is narrow, one rocking chair still works, placed beside the railing with a small side table. Add a folded throw over one chair arm for cool evenings.

    2. Porch Swing on the Long Side

    Wooden porch swing with cream cushions hanging on the long side of a wrap around porch.

    A porch swing on the long side of the house gives the porch its most inviting seat, with room to sway and a view down the length of the deck. Hang the swing from sturdy ceiling joists, with chains rated for the weight, and add a seat cushion and two back cushions in cream or natural linen. The long side suits a swing best, since it can move freely without hitting a wall or a door.

    Check the chains and hooks each season for rust or wear, and tighten them as needed. If the swing faces rain, use quick dry foam cushions or bring the cushions indoors at night. Keep one end of the swing clear of planters, so guests can step on and off with ease.

    3. Outdoor Sectional for a Living Room Zone

    Outdoor sectional sofa with a coffee table on a rug on a wrap around porch.

    An outdoor sectional turns one stretch of the porch into a living room, with a sofa, a corner seat, and a coffee table grouped on one rug. Set the sectional against the house wall, facing the yard, with the coffee table in reach of every seat. The grouped layout suits a wide porch best, where the sectional can sit clear of the walking path.

    Choose a sectional with outdoor rated cushions and a frame that handles rain, and keep a storage box nearby for extra cushions. If the porch is narrow, a two seat sofa and one chair give the same living room feel in less space. Add one throw and one lantern on the table to finish the group.

    4. Long Dining Table for Gatherings

    Long wooden dining table with chairs on a wrap around porch near a kitchen door.

    A long dining table near the kitchen door turns the porch into the main place for family meals in warm weather. Set a wood or metal table with six to eight chairs along the wall, so guests can reach the kitchen with ease, and leave room behind each chair to pull out. The long shape suits a wrap around porch, since it fits the length of the deck better than a round table.

    Use placemats and a simple centerpiece, such as a low planter or a group of candles in glass holders, so the table stays clear for serving. If the table sits outside the roof line, choose a table rated for outdoor use and bring table linens indoors after meals. A bench on one side adds seats for children without extra chairs.

    5. Daybed for Afternoon Rests

    Porch daybed with pillows and a light throw in a covered corner of a wrap around porch.

    A porch daybed gives the quiet end of the porch a place for naps, reading, and long afternoon rests. Set the daybed against the house wall, with a thick mattress, several pillows, and a light throw, and keep a small side table nearby for a book and a drink. The daybed suits a covered corner best, where it stays dry and shaded through the day.

    Choose a mattress cover that can be removed and washed, and bring pillows indoors in rain or overnight in wet weather. If a full daybed feels too large, a wide chaise lounge gives the same restful seat in a smaller footprint. Place the daybed where the breeze reaches it, so it stays cool on warm afternoons.

    6. Bistro Set for Morning Coffee

    Small bistro table with two chairs on the side of a wrap around porch facing a garden.

    A small bistro set at the side of the porch makes a simple spot for morning coffee, with two chairs and a round table that fit a narrow stretch of decking. Set the table near the railing, facing the garden, with one chair on each side, and keep the path behind the chairs clear. The small scale suits a side porch that cannot hold a full seating group.

    Choose a metal or wood set rated for outdoor use, and add one cushion to each chair for comfort. If the spot faces morning sun, add a small shade, such as a porch curtain or a tall planter, so the table stays pleasant through breakfast. Bring paper and fabric items indoors after use, since damp fabric can stain if left out overnight.

    7. Reading Chair with a Lamp and Side Table

    Deep reading chair with a lamp and side table in a sheltered corner of a wrap around porch.

    A reading chair with a lamp and a side table turns a sheltered corner into a private reading spot, away from the main seating group. Set a deep armchair near a post or a wall, with a small table for a book and a drink, and a portable or battery lamp for evening reading. The single chair needs little floor space, so it fits corners that larger groups cannot use.

    Pick a chair with outdoor rated fabric, or keep a washable cover on it, and bring the lamp indoors in rain if it is not rated for outdoor use. Add a small basket beside the chair for books and magazines, so the corner stays tidy. A footrest or a low stool makes long reading sessions more comfortable.

    8. Fire Table Seating for Cool Evenings

    Fire table with four chairs on a wide stretch of a wrap around porch in the evening.

    A fire table with four chairs extends porch use into cool evenings, with warmth at the center of a small seating circle. Set the fire table on a flat, stable part of the deck, with chairs pulled close enough to feel the warmth, and keep the table clear of fabric, dried plants, and paper. The fire table suits a wide, open stretch of porch, where smoke and heat can rise freely.

    Follow the maker’s safety guidance for clearance and fuel, and never leave a lit fire table unattended. Use a cover when the table is not in use, and keep a clear path to the door, so guests can move away from the heat with ease. If open flame is not practical for your porch, a group of large lanterns gives a similar warm glow without fire.

    9. Hanging Egg Chair at the Quiet End

    Hanging egg chair with a cushion at the quiet end of a wrap around porch.

    A hanging egg chair at the quiet end of the porch gives one person a sheltered, swaying seat for reading or resting. Hang the chair from its own stand or from a sturdy ceiling joist, with enough clearance to swing gently without hitting the wall or railing. The rounded shape suits a far corner, where it can sit apart from the main seating group.

    Check the stand and hooks for weight and wear each season, and add a seat cushion and a small pillow for comfort. If the chair faces rain, bring the cushion indoors at night, and keep the chair under the roof line when possible. One egg chair also gives children a favorite porch seat, so place it where adults can see it from the main group.

    10. Built-In Bench Along the Railing

    Built-in wood bench with cushions along the railing of a wrap around porch.

    A built-in bench along the railing adds seating without filling the porch with loose chairs, and it follows the line of the porch itself. Build or place a wood bench against the railing on a long side, with a seat cushion and two or three back pillows, and leave the walking path clear in front of it. The bench suits narrow porches best, since it uses the edge of the deck rather than the center.

    Add storage under the bench seat, if the design allows, for cushions, throws, or small garden tools. If the bench sits in sun, use a light cushion color that stays cool, and bring cushions indoors in heavy rain. A bench also gives extra seats at dining time, when guests can carry a plate to the railing side.

    11. Outdoor Rugs to Mark Separate Zones

    Outdoor rugs marking seating and dining zones on a long wrap around porch.

    Outdoor rugs mark separate zones on a long porch in one move, so the seating, dining, and reading areas read as distinct rooms. Lay one rug under the sectional, a second under the dining table, and a smaller rug at the reading chair, each large enough to sit under the front legs of the furniture. The rugs define each zone clearly, even on a porch with more than one use.

    Pick rugs rated for outdoor use, so they dry quickly after rain, and shake them out weekly so leaves and dirt do not build up underneath. If a rug sits on painted wood, lift it now and then to check for damp marks. Repeat one color across the rugs, such as cream or sage, so the zones feel connected rather than separate.

    12. Ceiling Fans for Airflow on Still Days

    Ceiling fans over seating zones on a covered wrap around porch.

    Ceiling fans keep a covered wrap around porch comfortable on still, warm days, when a long porch can feel hot despite the shade. Mount one fan over each main seating zone, sized to the porch width, with outdoor rated motors and blades, and set the fans to move air down over the seats. Fans suit a covered porch best, where they can hang from the ceiling joists.

    Check the fan mounts and blades each season for wear, and clean the blades so dust does not settle on the seating below. If wiring a new fan feels like a large job, a portable outdoor fan gives airflow to one zone without new wiring. Pair fans with shade on the sunny side, so the porch stays cool through the afternoon.

    13. String Lights and Lanterns for Evenings

    Warm string lights and lanterns on a wrap around porch at dusk.

    String lights and lanterns give a wrap around porch a warm glow after dark, when guests most often use it. Drape warm white string lights along the porch ceiling edge, around posts, or across a beam, with the cord tucked out of the walking path, and set lanterns on tables and steps for light at seat height. The two layers of light make the whole porch usable after sunset.

    Choose outdoor rated lights and a timer so they switch on at dusk without daily effort. Keep bulbs clear of dried leaves, curtains, and fabric, and check cords each season for wear. Warm white suits a porch better than cool white, since it echoes candlelight and keeps the porch feeling calm. Battery candles inside lanterns are a safe choice where wind or children make real flames risky.

    14. Outdoor Curtains for Shade and Privacy

    Outdoor curtains tied back along the sunny side of a wrap around porch.

    Outdoor curtains give a wrap around porch shade, privacy, and shelter from wind, without closing off the view entirely. Hang weather resistant curtains from a rod or wire along the sunny or street facing side, and tie them back when you want the porch open. The curtains suit a porch that faces a road or a neighbor, where privacy matters as much as shade.

    Choose curtains rated for outdoor use, in a light color that blocks sun without darkening the porch, and wash them as needed so pollen does not build up. Weight the hems or use tiebacks, so a breeze does not lift the fabric onto tables or lights. Keep curtains clear of fire tables, candles, and heaters, and bring them indoors in storms if they are not rated for high wind.

    15. Planters and Hanging Baskets Along the Railing

    Planters and hanging baskets with trailing plants along the railing of a wrap around porch.

    Planters and hanging baskets along the railing add living color to every side of a wrap around porch, and they soften the long line of the deck. Set large planters at the corners and beside the steps, with smaller pots spaced along the railing, and hang one basket from each post or ceiling hook, with trailing plants that spill over the rim. The plants draw the eye along the porch and tie it to the garden.

    Water hanging baskets more often than floor pots, since they dry out faster in wind and sun, and set each floor planter on a saucer or a flat stone to protect the decking. Match the plant to the light on each side: ferns and ivy for shade, geraniums and ornamental grass for sun. In cold weather, move tender plants close to the house wall for shelter, as in many exterior decorating for fall plans.

    16. Serving Station Near the Kitchen Door

    Serving station with a tray and plates beside the kitchen door on a wrap around porch.

    A serving station near the kitchen door makes porch dining simple, with drinks, plates, and serving dishes within easy reach of the table. Set a console table, a bar cart, or a sideboard against the wall beside the kitchen door, with a tray for drinks, a stack of plates, and a small planter on top. The station keeps the dining table clear for guests, since serving pieces stay off the table itself.

    Keep the station tidy and restock it before meals, so guests can help themselves without trips indoors. Choose a station rated for outdoor use, or bring it under the roof line in rain, and wipe it clean after meals. A cart with wheels suits a long porch best, since it can move to the seating zone for drinks and back to the door for serving.

    17. Games Table for Family Evenings

    Games table with four chairs and board games on a wrap around porch.

    A games table gives the porch a shared activity for family evenings, with a small table and four chairs set apart from the main seating group. Set a sturdy table near the railing, with chairs on all sides, and keep a basket or a box nearby for board games, cards, and puzzles. The table suits a side of the porch that gets evening light, so games can run after dinner.

    Choose a table with a wipe clean top, since drinks and snacks sit beside the games, and pick chairs that can be moved to the dining group when extra seats are needed. If the table sits outside the roof line, bring games indoors after play, so damp does not damage boards and cards. A games table also gives teenagers a porch spot of their own, away from adult conversation.

    18. Herb Pots by the Kitchen Door

    Herb pots with rosemary, thyme, and mint grouped by a kitchen door on a wrap around porch.

    Herb pots by the kitchen door add scent and useful green to the porch, and they sit within easy reach of cooking. Group three pots of different heights near the kitchen door, with rosemary, thyme, and mint, and water them in the morning so the soil stays damp but not soaked. Guests brush past the scent on the way to the dining table, and the herbs can go to the kitchen after.

    Set each pot on a saucer to protect the decking, and trim herbs often, since regular picking keeps the plants bushy. Mint spreads fast, so keep it in its own pot rather than sharing a planter. In cold weather, move tender herbs close to the house wall for shelter, or bring them indoors overnight in frost.

    19. Four Season Corner with Heaters, Throws, and Storage

    Sheltered four season porch corner with a heater, throws, and a storage bench on a wrap around porch.

    A four season corner keeps one part of the porch usable through cold months, with a heater, warm throws, and a storage bench for cushions. Set a small seating group in the most sheltered corner, with an outdoor rated heater placed at a safe distance from fabric and furniture, and a bench or box nearby for throws and cushion covers. The corner suits a covered side best, where wind and rain reach it least.

    Follow the heater maker’s safety guidance for clearance, and never leave a heater running unattended. Bring throws indoors in wet weather, and store cushions in the bench when the porch is not in use, so the corner stays ready for a mild winter day. Swap the throws and the planter contents with the season, and keep the seating and the heater in place all year.

    Conclusion

    A comfortable wrap around porch does not need new furniture on every side or a full redesign. Pick one seating group, one dining spot, and one quiet corner, then use rugs, planters, and light to mark each zone and keep the paths to the doors clear. Start with the side you use most this week, and add shade or light next, so the porch grows into a set of small outdoor rooms you use every day.

    FAQs

    What is a wrap around porch?

    A wrap around porch is a porch that runs along two or more sides of a house, often around a corner, giving access and outdoor living space on more than one side. It differs from a front porch, which covers only the entrance, since a wrap around porch can hold seating, dining, and quiet corners on separate sides.

    How do you arrange furniture on a wrap around porch?

    Arrange furniture on a wrap around porch by giving each side a job, such as seating on the sunny side, dining near the kitchen door, and a reading chair at the quiet end. Use rugs and planters to mark each zone, keep the paths to every door clear, and place the largest group where the view and the breeze are best.

    What furniture works best on a wrap around porch?

    Rocking chairs, a porch swing, an outdoor sectional, a long dining table, and a daybed work best on a wrap around porch, since they suit different sides and uses. Choose outdoor rated frames and cushions, add a storage bench for throws and cushion covers, and keep one side flexible with a bench or a small table for extra guests.

    How do you keep a wrap around porch comfortable in summer?

    Keep a wrap around porch comfortable in summer with ceiling fans for airflow, outdoor curtains or shade on the sunny side, and light colored cushions that stay cool. Place seating where the breeze reaches it, water plants in the morning, and bring cushions indoors in heavy rain so the porch stays dry and tidy.

    How do you light a wrap around porch for evenings?

    Light a wrap around porch for evenings with string lights along the ceiling edge for overall glow, plus lanterns on tables and steps for light at seat height. Use warm white, outdoor rated lights on a timer, keep cords out of walking paths, and add battery candles inside lanterns where wind or children make real flames risky.

    Can a wrap around porch be used in cold weather?

    A wrap around porch can be used in cold weather in its most sheltered corner, with an outdoor rated heater, warm throws, and a storage bench for cushions. Follow the heater maker’s safety guidance for clearance, keep fabric clear of the heater, bring throws indoors in wet weather, and swap planter contents with the season.