Category: Living Room

Comfortable seating, thoughtful layouts, and finishing touches for a living room that feels like home.

  • 17 Memorial Day Decorating Ideas for Your Home and Porch

    17 Memorial Day Decorating Ideas for Your Home and Porch

    Memorial Day decorating works best with a calm red, white, and blue palette used in a few clear spots: the front porch, the front door, the dining table, and the living room. Add a flag, fresh flowers, and warm evening light, keep one pattern dominant in each display, and leave room for guests to sit, eat, and move around.

    The 17 ideas below cover porches, entries, living rooms, kitchens, dining tables, and the backyard, so you can style one spot or dress the whole home for the day. Memorial Day is a day of remembrance, so keep the mood calm and respectful: one flag, one wreath, or one vase of flowers can say more than a house full of decorations. For more seasonal styling ideas, visit the Dwell Ovell home page, and see how a limited palette holds a season together in Fall Decor Ideas.

    Key Takeaways

    • Use red, white, and blue in a few focal spots, such as the front porch, the front door, and the dining table, rather than in every corner.
    • Choose navy, bright red, and white as the core palette, and let one of the three lead in each display.
    • Mix flags, stars, and stripes, but keep one pattern dominant in each room so the look stays calm.
    • Add a quiet remembrance note, such as a single candle or a small vase of flowers, to mark what the day means.
    • Use battery candles and outdoor rated string lights for evening glow, and keep open flames away from fabric, paper, and dry plants.
    • Style surfaces you already use, such as the porch, the kitchen counter, and the dining table, before adding new displays.
    • Store flags, bunting, and fabric pieces folded flat or rolled in a dry box, so they are ready to use again next year.

    1. Flag Display on the Front Porch
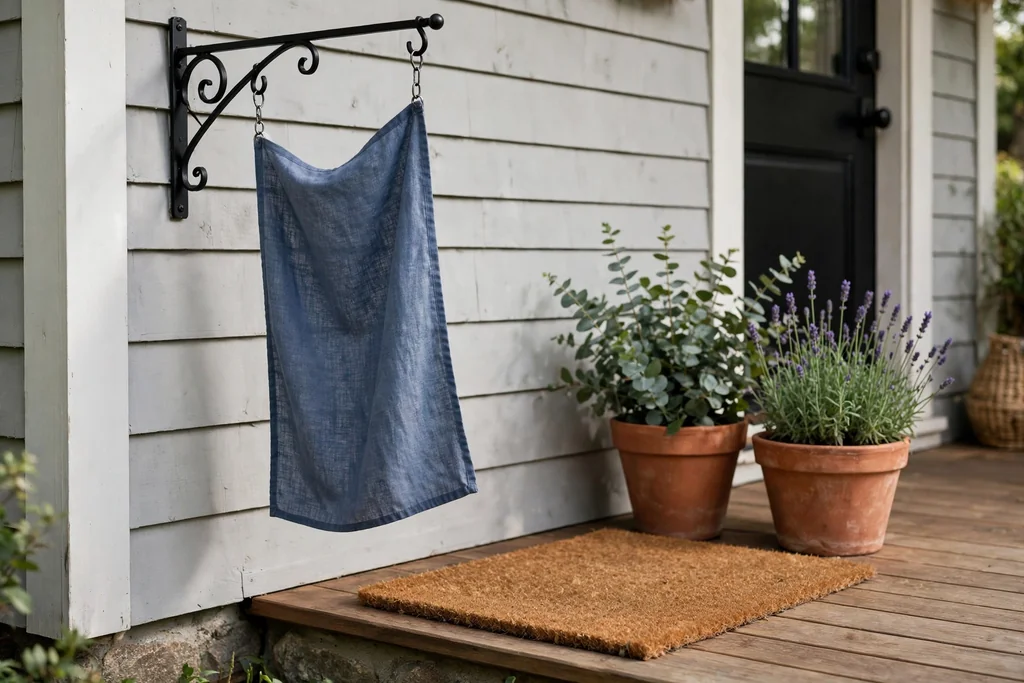
    A flag hanging from a porch bracket beside a plain doormat and planters.

    Hang a full size flag from a porch bracket, or place a garden flag near the steps, so the porch reads as festive from the street. A single flag works best with a plain doormat and one or two planters, since the flag itself carries the theme.

    Check that the flag hangs free and does not catch on the rail or the door. Fix the bracket firmly, and take the flag inside during strong wind or heavy rain to keep it in good shape.

    2. Red, White, and Blue Wreath on the Front Door

    A wreath of red, white, and blue flowers and stars hanging on a front door at eye level.

    Hang a wreath made with fabric flowers, wood stars, or ribbon in red, white, and blue on the front door. Keep the wreath flat against the door so it does not block the handle, and hang it at eye level for the clearest view.

    A wreath suits a painted door in navy, white, or red, since the colors stand out against a plain background. Pair it with a simple doormat and skip extra door decor, so the wreath stays the focus of the entry.

    3. Striped Bunting Across the Porch Rail
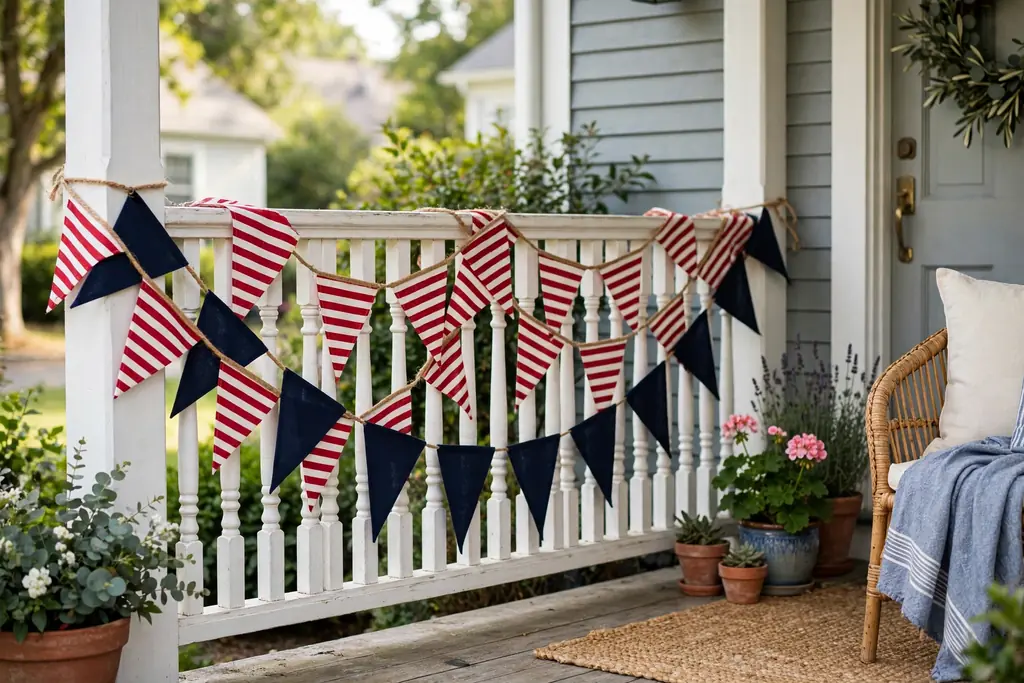
    Red and white striped bunting with navy pennants draped along a porch rail.

    Drape striped bunting in red and white along the porch rail, with a gentle dip between posts and the ends tied neatly at each side. Add small navy pennants between the stripes to bring in the third color.

    Bunting suits a porch rail because it is light and easy to fix with small removable ties. Keep it clear of walkways and steps, and balance it with plain planters at each end of the porch.

    4. Quiet Remembrance Corner Indoors
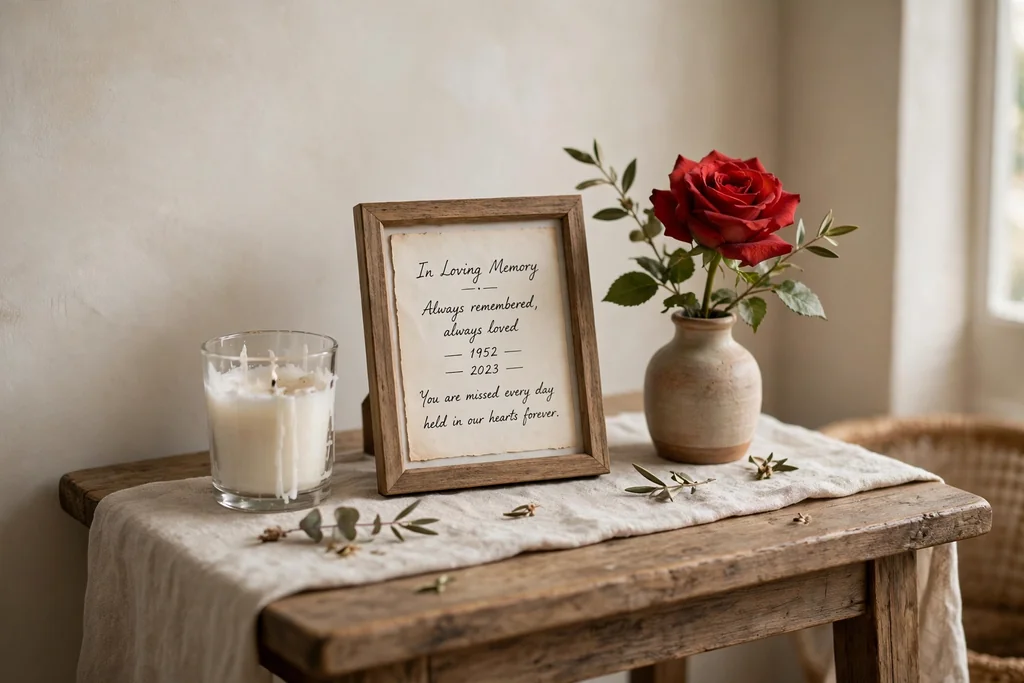
    A small remembrance table with a single white candle

    Set aside a small table or shelf as a remembrance corner, with a single white candle, a small framed photo or printed remembrance note, and a small vase with one red flower. Keep the display simple and uncluttered, so it feels calm rather than busy.

    This corner works well in a living room or hallway where guests pass through. Use a battery candle if the corner sits near fabric or paper, and keep the rest of the surface clear.

    5. Red, White, and Blue Flower Planters by the Door
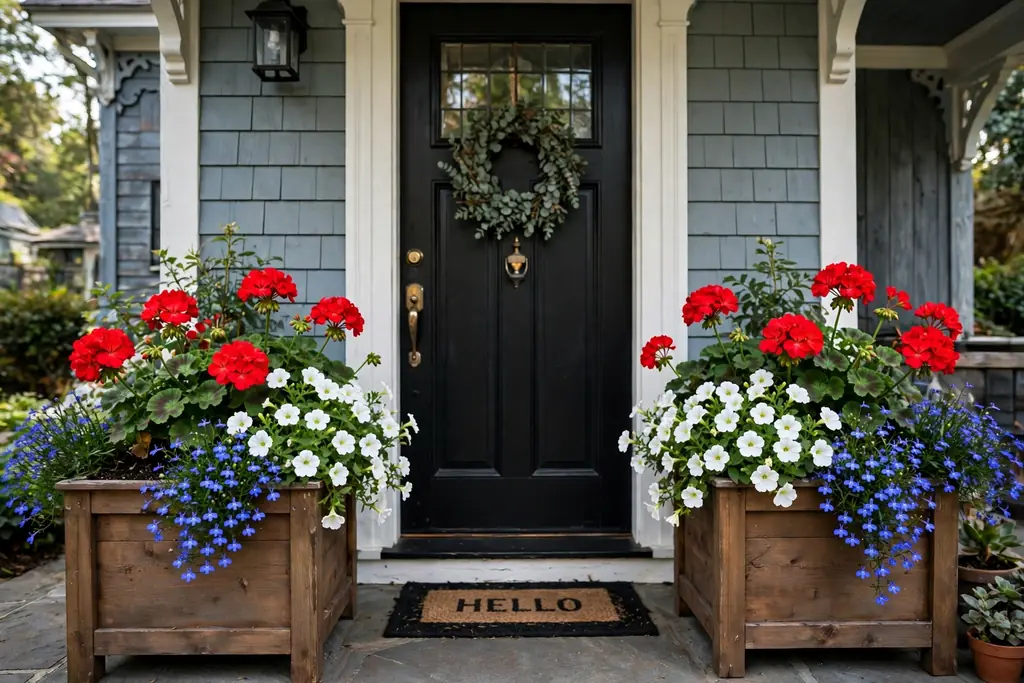
    Porch planters with red geraniums, white petunias, and blue lobelia flanking a front door.

    Fill porch planters with red geraniums, white petunias, and blue lobelia for a living patriotic display that lasts past the holiday. Place one planter on each side of the door for balance, and water the plants in the morning so they look fresh through the day.

    Choose planters in a plain color, such as white, navy, or terracotta, so the flowers carry the color. Deadhead spent blooms during the week to keep the planters looking tidy.

    6. Layered Doormats at the Entry
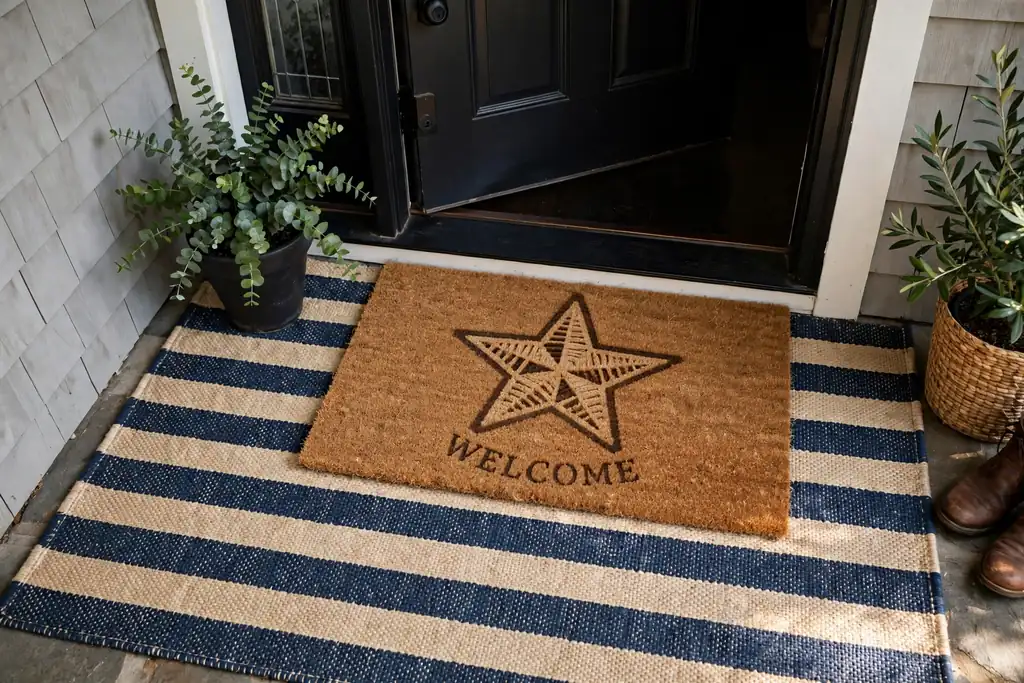
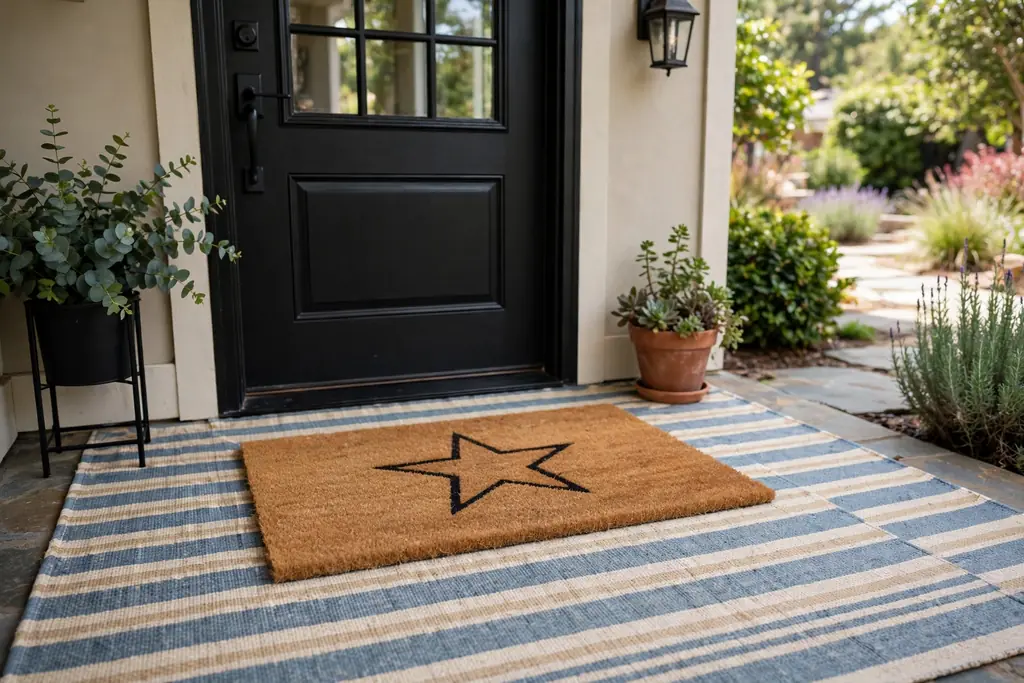
    A striped outdoor rug layered under a coir doormat with a star design at a front door.

    Layer a larger striped outdoor rug under a smaller coir doormat at the front door. The two layers add texture and help catch dirt, and the combination looks planned rather than bare.

    Keep the top mat flat and low so the door opens freely. A simple star design or a plain striped pattern works well, and the rug underneath can stay in place for the whole summer.

    7. Porch Chairs with Navy Cushions and Striped Throws
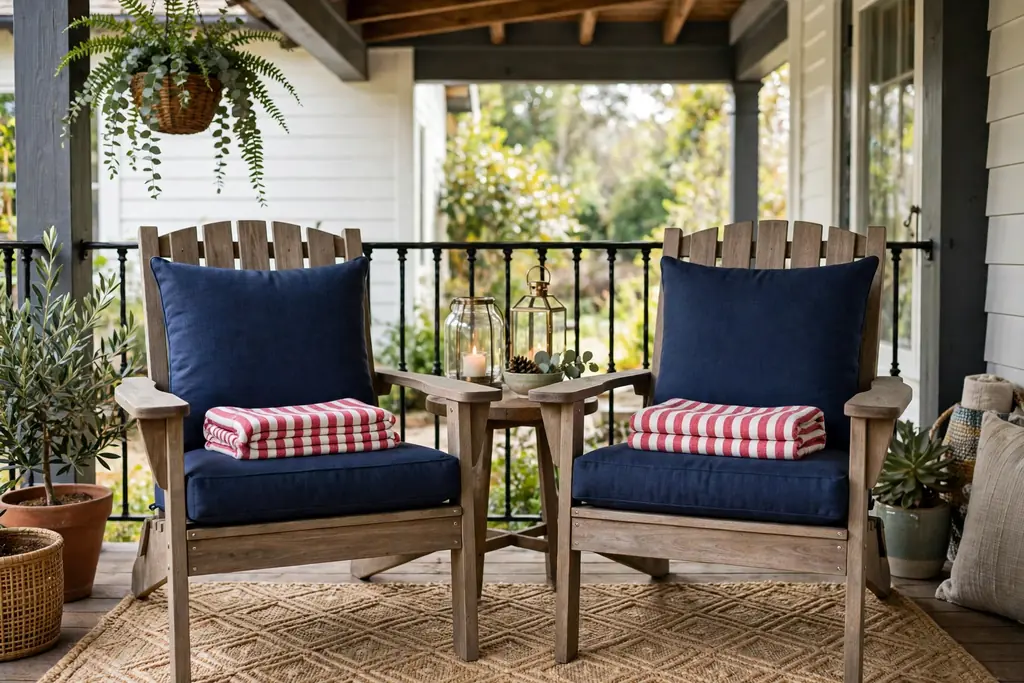
    Porch chairs with navy cushions and folded red and white striped throws.

    Add navy seat cushions and a folded red and white striped throw to each porch chair, so the seating feels ready for guests. The chairs become a spot for morning coffee or an evening chat once the day’s gatherings wind down.

    Use outdoor rated fabric if the chairs stay outside in rain. Bring cushions inside overnight in wet weather to keep them fresh, and store throws in a basket by the door.

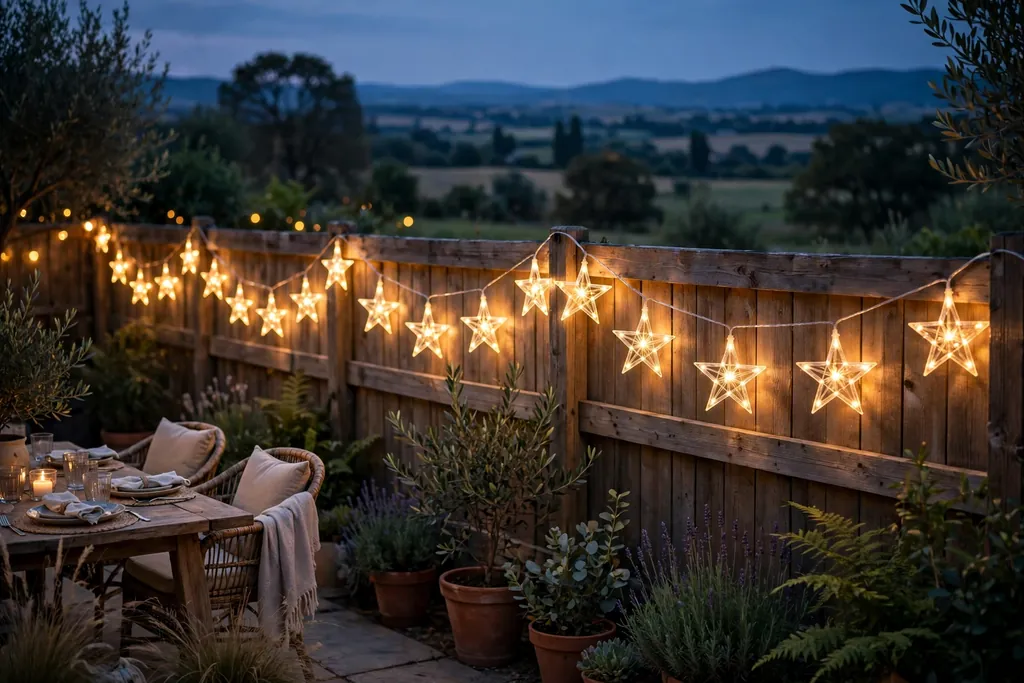
    8. Star String Lights Along the Porch or Patio
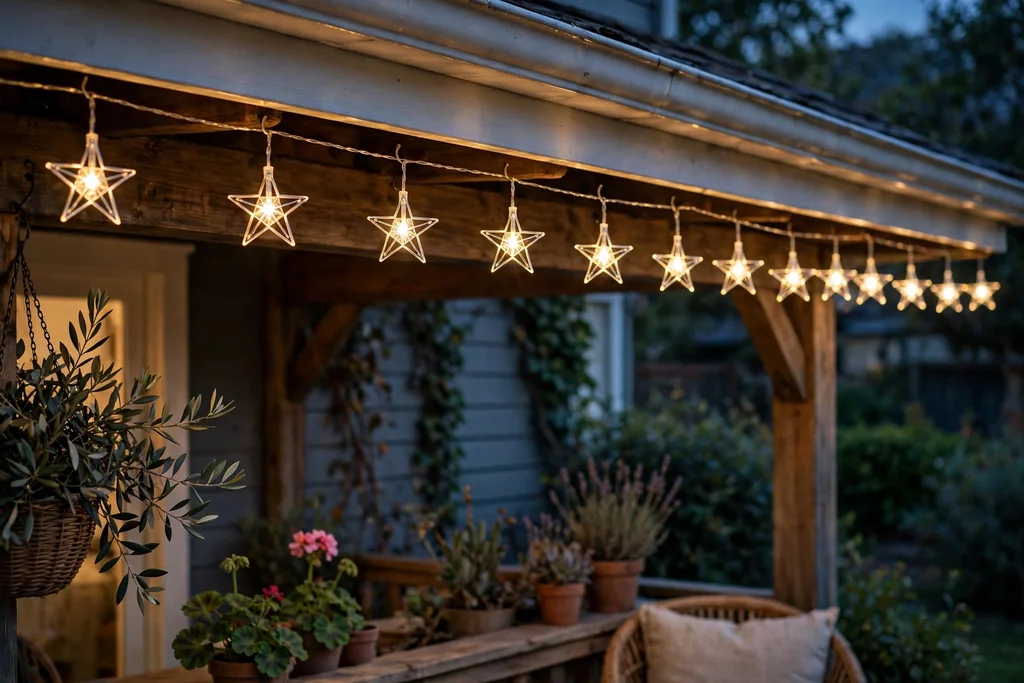
    Star shaped string lights hanging along a porch roof edge in the evening.

    Hang star shaped string lights along a porch roof edge, a pergola, or a patio fence, spacing the stars evenly so the line reads clearly after dark. Warm white bulbs suit a calm evening, while red, white, and blue bulbs give a bolder party feel.

    Check cords for damage before hanging lights, and keep cords clear of walkways. Switch lights off when you leave the house or go to sleep.

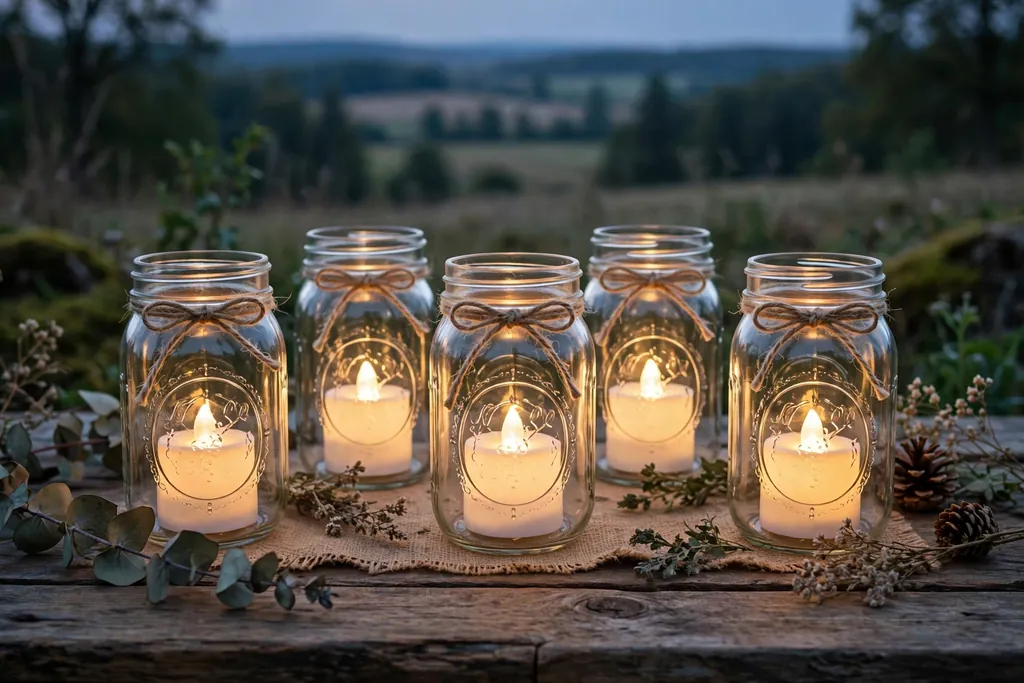
    9. Mason Jar Lanterns with Battery Candles on the Steps
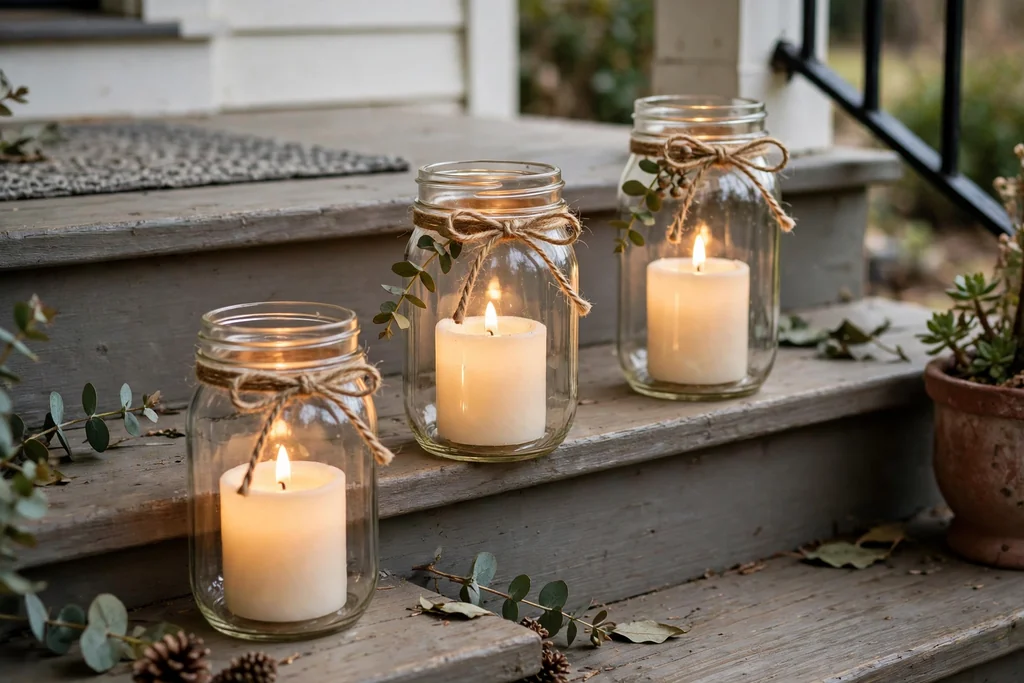
    Mason jars with battery candles and twine tied around the necks on porch steps.

    Place battery candles inside clear mason jars, tie twine or ribbon in red, white, or navy around the neck of each jar, and set the jars along the porch steps or a windowsill. The glass softens the light and gives the display a relaxed, handmade feel.

    Use jars of the same size for a neat row, or mix two sizes and group them in threes. Battery candles are the safe choice here, since the jars sit near fabric, paper, and plants, and they can stay lit through the evening without attention.

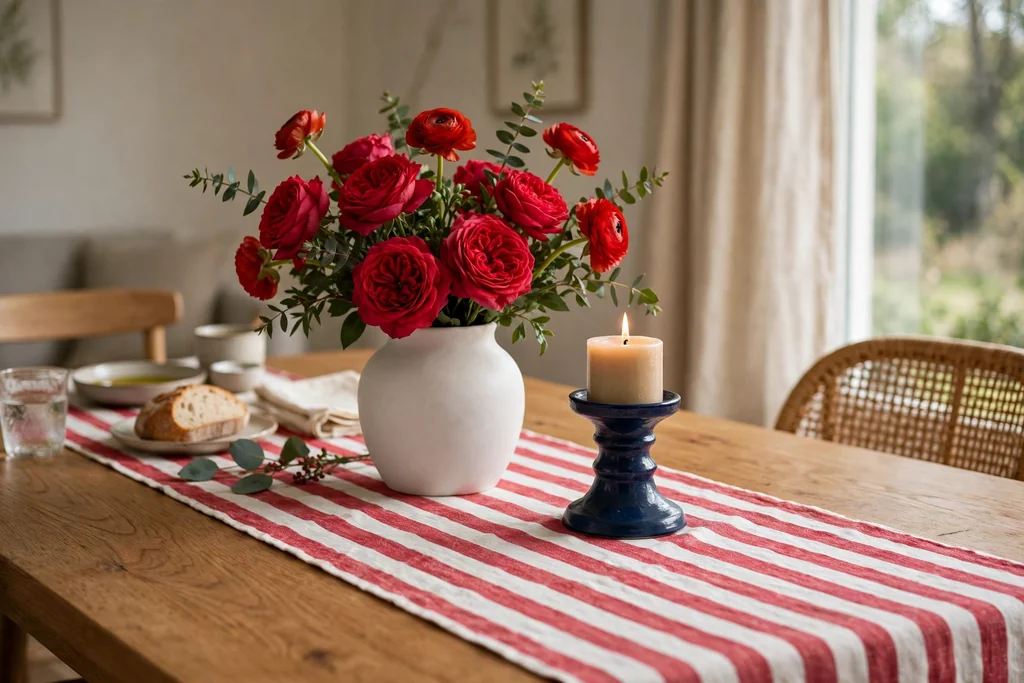
    10. Striped Table Runner Centerpiece for the Dining Table
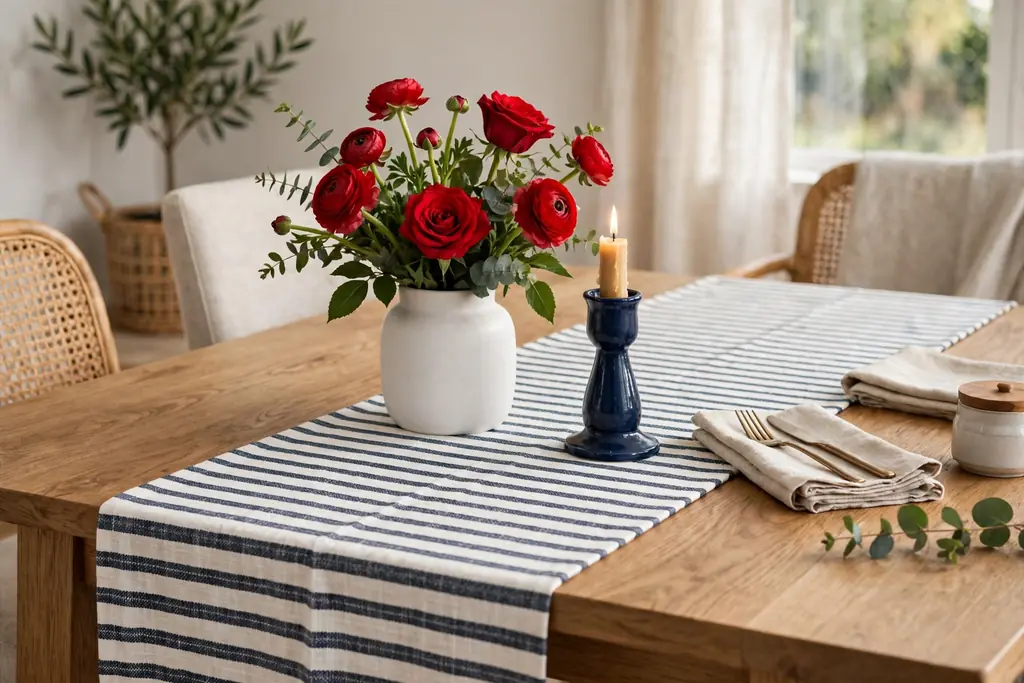
    A dining table with a striped runner, a white vase of red flowers, and a navy candle holder.

    Lay a striped or star print runner down the center of the dining table, then build a low centerpiece on top of it with a white vase, red flowers, and a small navy accent such as a candle holder. Keep the arrangement low so guests can talk across the table.

    A runner defines the table without covering it, which leaves room for plates and glasses. Choose a washable fabric if the table will be used for a cookout meal, and fold the runner away after the day to keep the print fresh.

    11. Star Place Cards for the Cookout Table
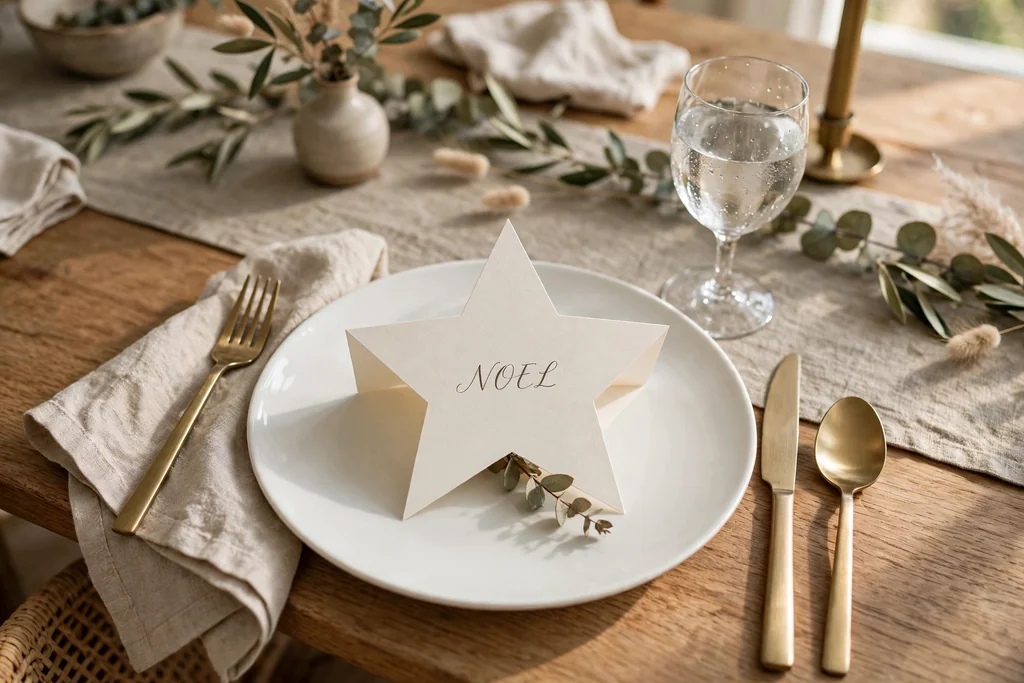
    A dinner table place setting with a star shaped place card on a white plate.

    Place a star shaped place card on each plate or beside each napkin, with a guest name written in plain lettering. The cards add a personal touch to a cookout table without taking up much space.

    Use card stock in white or navy, and keep the stars small so they do not crowd the plate. Guests can take the cards home, which makes them a simple favor as well as decor.

    12. Patriotic Throw Pillows on the Sofa
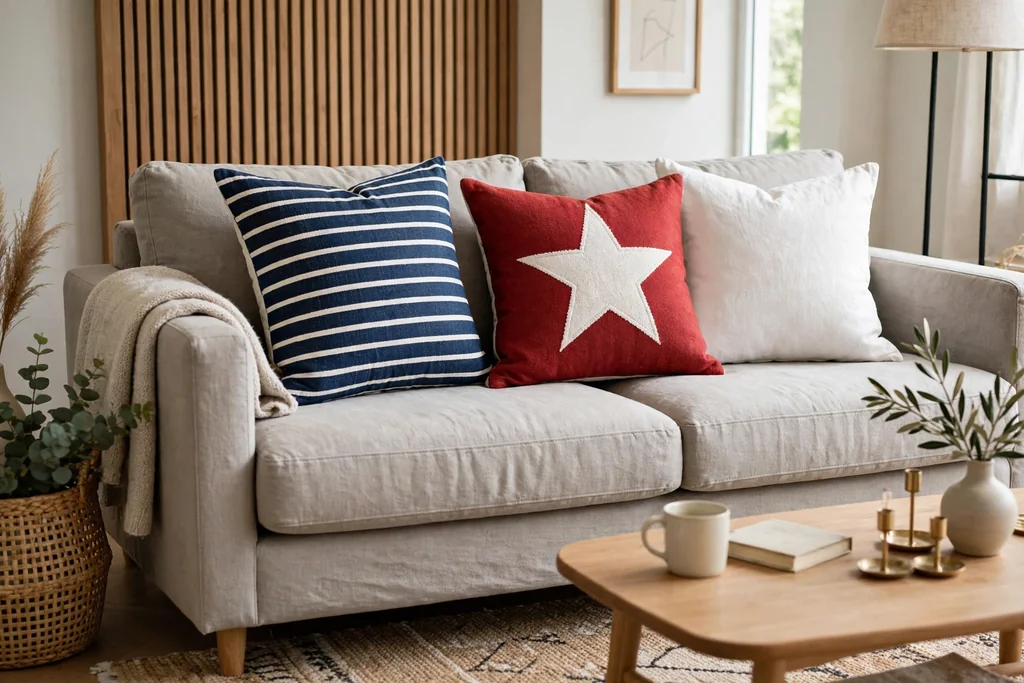
    A sofa with navy striped, red star, and plain white throw pillows.

    Swap everyday sofa pillows for covers in navy stripes, red stars, and plain white, mixing two patterns with one plain cover so the sofa stays calm. A pillow swap changes the whole living room in minutes, with no other changes needed.

    Choose washable covers if the sofa gets daily use, and store the swapped covers flat in a dry box. One or two patterned pillows per sofa is enough; a full set of patterned covers can feel busy.

    13. Mantel Display with Small Flags and Candles
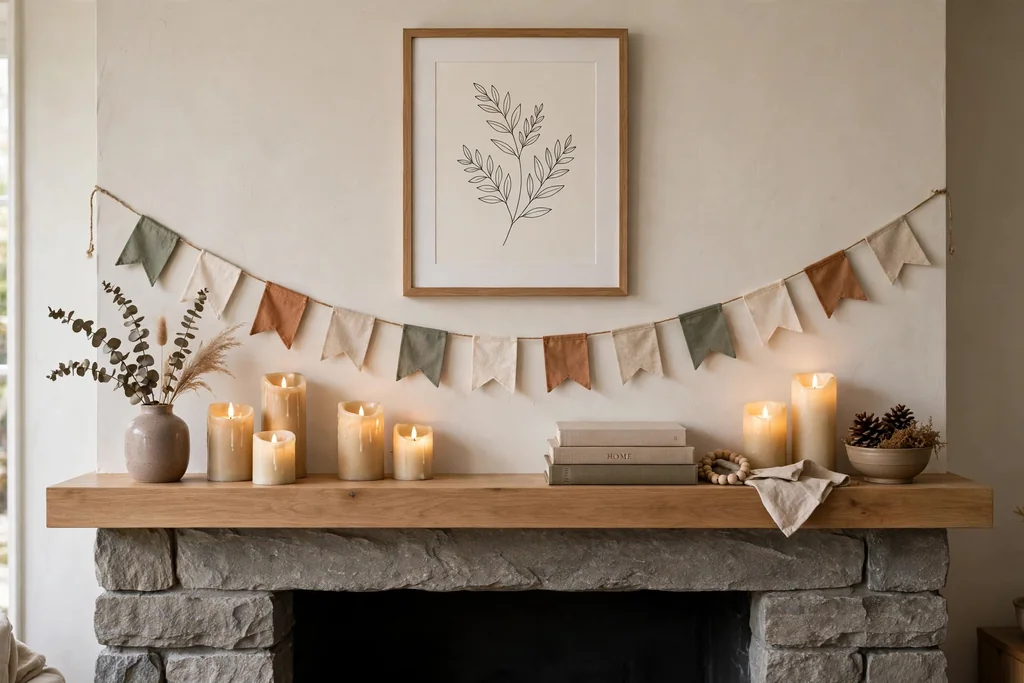
    A mantel styled with small flags, battery candles, and a framed print above.

    Style the mantel with two small flags in plain holders, a row of battery candles, and one framed print or simple wreath above. Keep the display low and spaced out, so the mantel reads as calm and balanced.

    Balance the flags with plain vases or candle holders at each end, and keep paper and fabric clear of any open flame. A mantel display suits a living room gathering, since guests see it as soon as they sit down.

    14. Patriotic Tiered Tray in the Kitchen
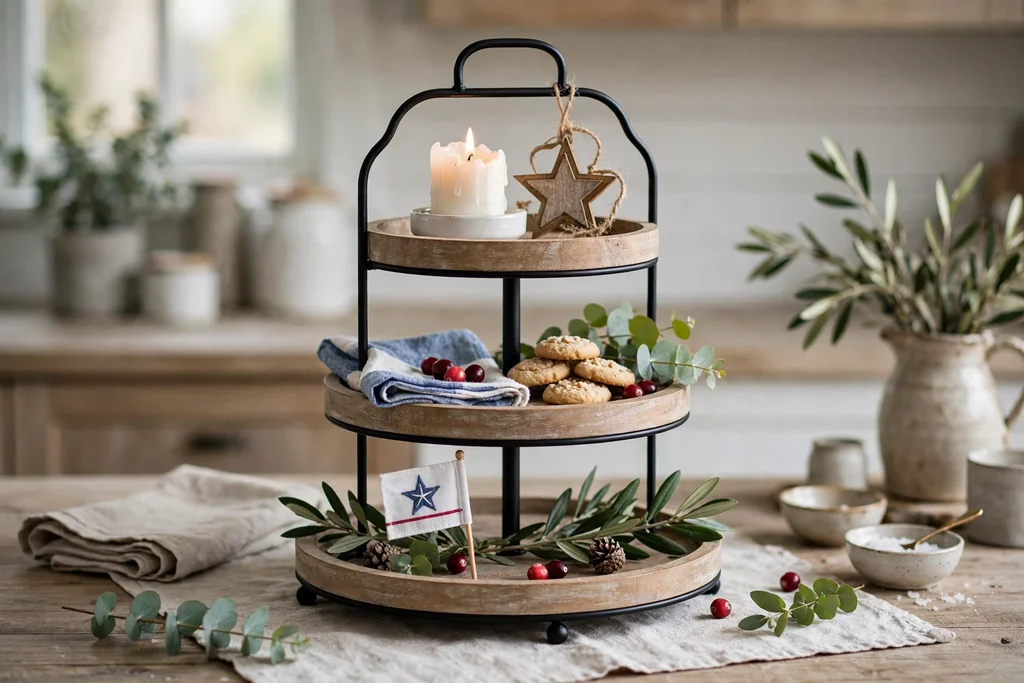
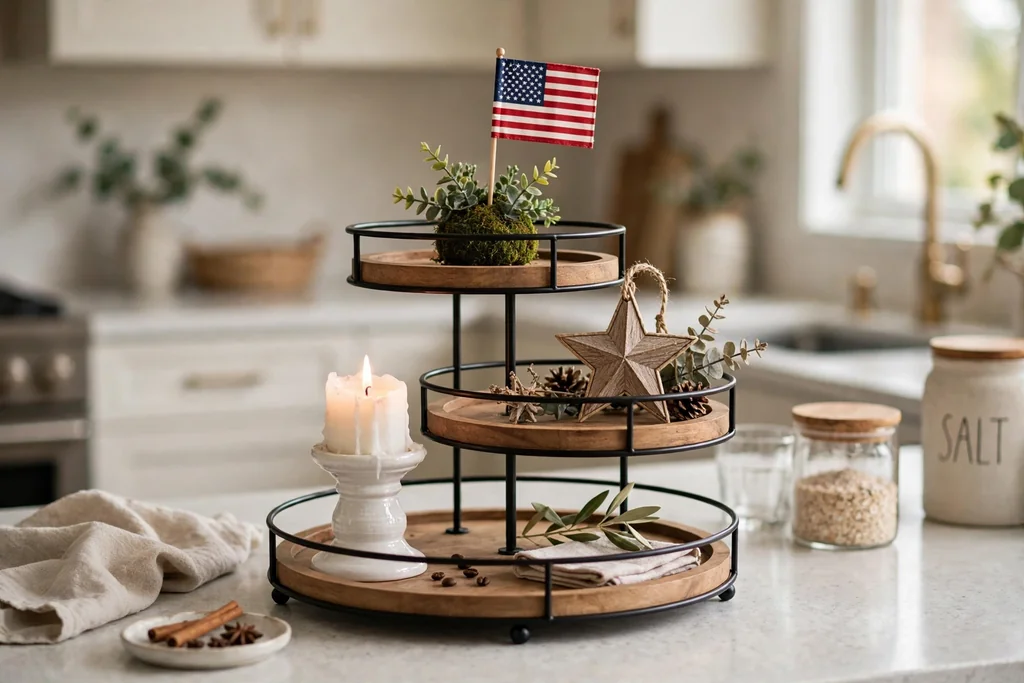
    A tiered kitchen tray styled with a tiny flag, a star ornament, and a white candle holder.

    Style a two or three tier kitchen tray with a tiny flag, a star ornament, a small white candle holder, and a few red berries or small flowers. The tray keeps small pieces contained on a counter or island, and it is easy to move when you need the space.

    Group items in odd numbers on each tier, and leave one small gap on each level so the tray does not look crowded. Swap the tray pieces out after the holiday and reuse the tray for summer fruit or herbs.

    15. Paper Star Garland Across a Window
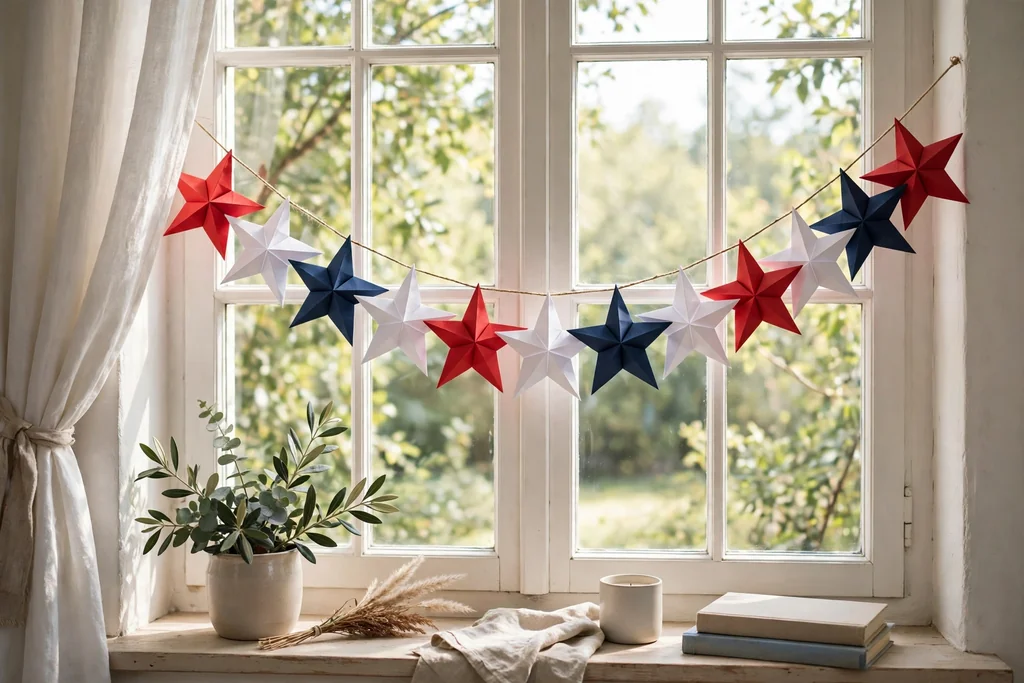
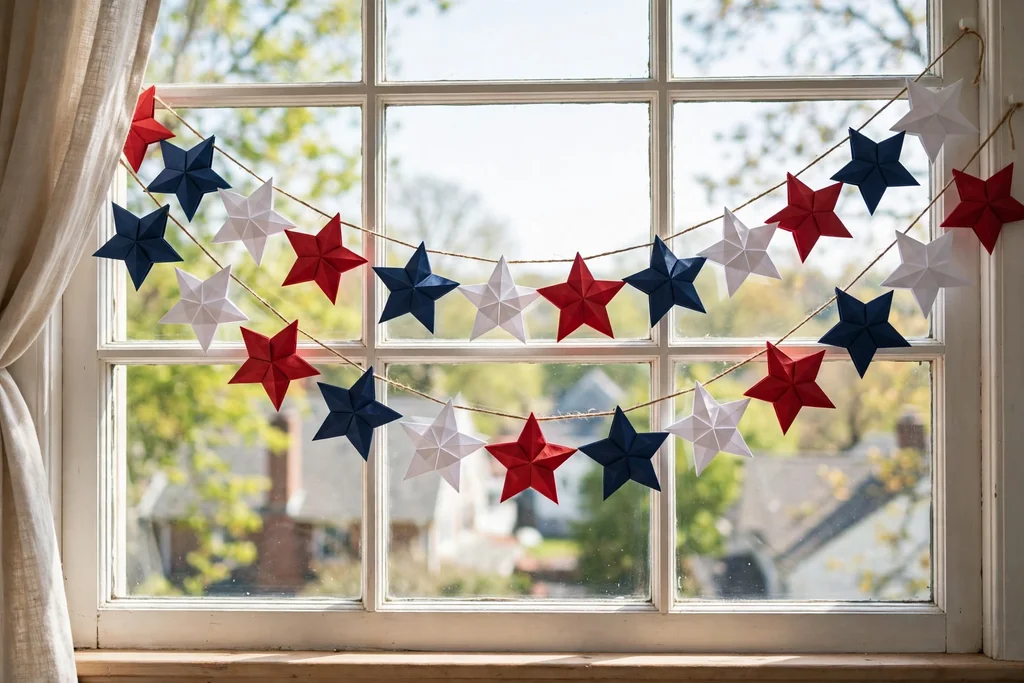
    A garland of red, white, and navy paper stars strung across a bright window.

    String paper stars in red, white, and navy across a bright window, spacing them evenly so daylight shows through the gaps. A window garland adds color to a room without taking up any surface space.

    Use lightweight paper stars and clear tape or small hooks, so the garland comes down cleanly after the day. Pair it with plain curtains, so the stars stay the focus of the window.

    16. Backyard Picnic Table with a Striped Cloth
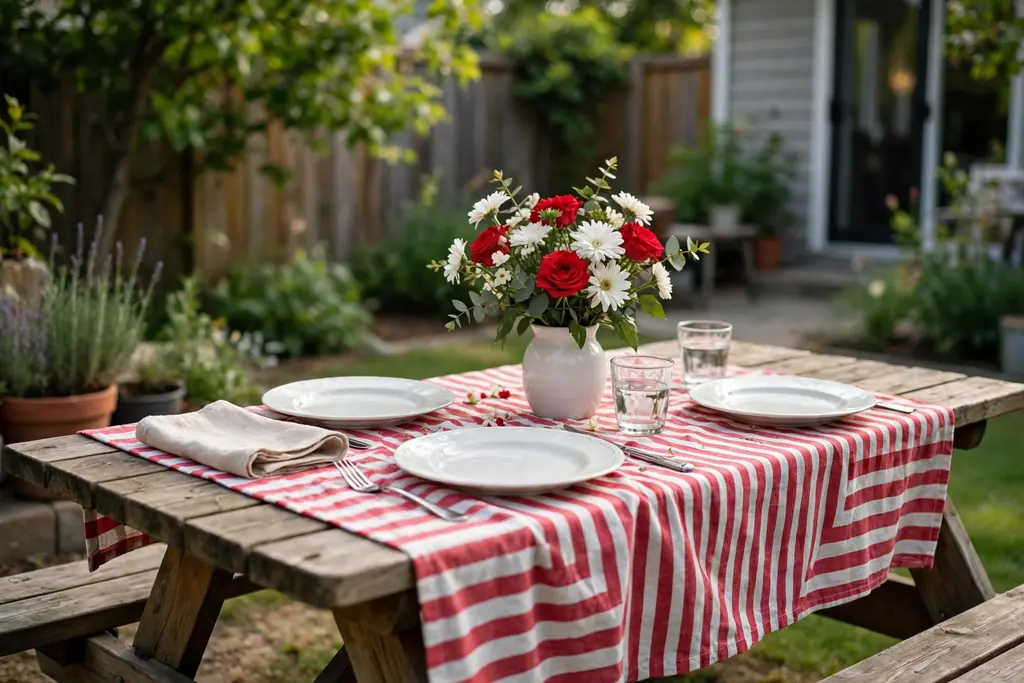
    A backyard picnic table with a red and white striped cloth, white plates, and a vase of red and white flowers.

    Set a backyard picnic table with a red and white striped cloth, plain white plates, and a low vase of mixed red and white flowers. A picnic setup suits a relaxed outdoor meal, and the striped cloth carries the theme on its own.

    Weigh the cloth down with clips or small stones at the corners on a breezy day, and keep serving dishes in the shade. Fold the cloth away after the meal so the stripes stay crisp for the next gathering.

    17. Entry Console Vase with Red, White, and Blue Flowers
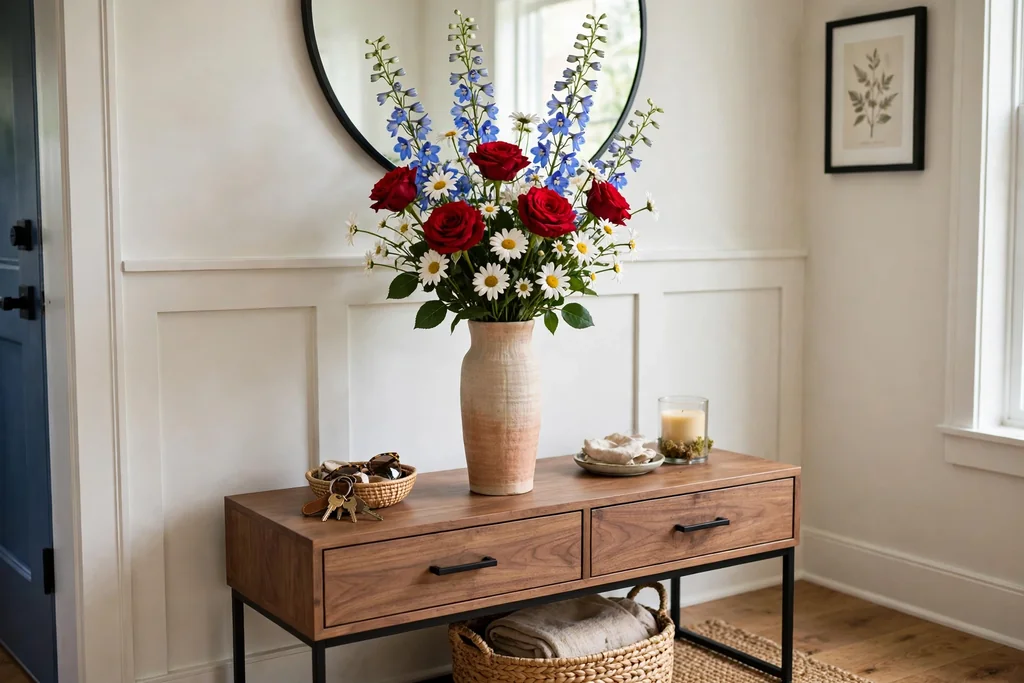
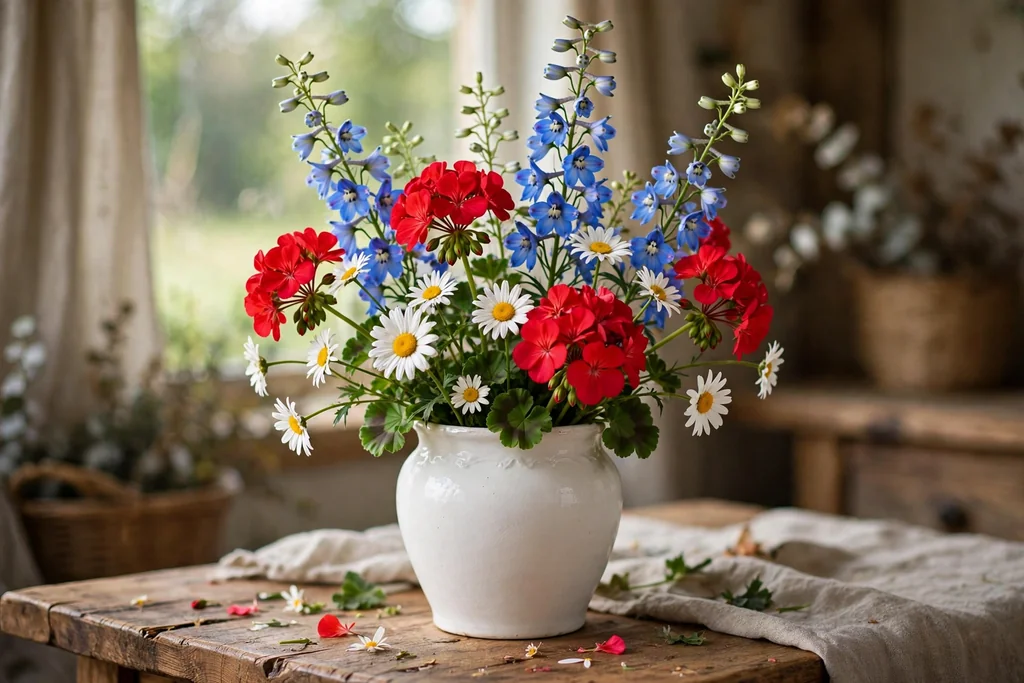
    A tall vase with red roses, white daisies, and blue delphinium on an entry console table.

    Place a tall vase of red roses or geraniums, white daisies, and blue delphinium on an entry console, so guests see fresh color as soon as they step inside. A single large arrangement suits a console better than several small ones, since it reads clearly from the door.

    Trim stems so the arrangement sits about one and a half times the height of the vase, and change the water daily to keep the flowers fresh. Keep the rest of the console clear, with room for keys and mail.

    Conclusion

    Memorial Day decor does not need a full room makeover. A flag at the porch, a wreath on the door, a dressed table, and warm light in the evening can change how a home feels for the day, while a quiet candle or a single flower marks what the day means. Pick the ideas that fit your rooms and your routine, repeat navy, red, and white across two or three spots, and leave the rest of the house calm. Save this list and revisit it next spring to see which ideas you want to repeat.

    FAQs

    What colors should I use for Memorial Day decorating?

    Use navy, bright red, and white as the core colors for Memorial Day decorating, since they read clearly as patriotic and pair with most room colors. Pick one color as the main tone in each display, use the second as an accent, and keep the third for small details, so no single room feels crowded with all three at full strength.

    How can I decorate for Memorial Day in a respectful way?

    Keep the mood calm by using one flag, one wreath, or one vase of flowers as the focus, and add a quiet note such as a single candle or a small remembrance display. Avoid loud or crowded displays, and leave space for guests to gather and talk, since the day is about remembrance as well as time with family.

    How do I decorate a small space for Memorial Day?

    Choose small scale items like a paper star garland, a single vase of red and white flowers, and one striped throw, and style surfaces you already use, such as a windowsill, a shelf, or a side table. Skip large displays that block walkways, and use vertical space with a door wreath or a window garland, since one clear focal point per room is enough in a small home.

    How can I decorate for Memorial Day on a small budget?

    Start with a flag, bunting, paper stars, and pillow covers, since these pieces cost little and make a visible difference in a room. Style one focal point per room, such as the mantel or the front door, and reuse vases, jars, candle holders, and baskets you already own, adding a few new pieces each year instead of buying a full set at once.

    Are real or faux flowers better for Memorial Day decor?

    Fresh flowers are better for a one day centerpiece, since they look and smell their best on the day of the gathering, while faux flowers are better for a display that stays up for a week or more. Fresh stems need daily water and shade from direct sun, while faux stems need only a quick dust and can be stored and reused next year.

    Can I reuse Memorial Day decor next year?

    Yes, you can reuse Memorial Day decor next year if you store flags, bunting, fabric covers, and faux flowers folded flat or rolled in a dry box, with paper between layers to stop prints from sticking together. Fabric and metal pieces store well, while paper stars need a flat box and gentle handling, and battery lights should be stored with the batteries removed.


  • 23 Fourth of July Home Decor Ideas for a Festive Celebration

    23 Fourth of July Home Decor Ideas for a Festive Celebration

    Fourth of July home decor works best when you repeat red, white, and blue in a few clear spots: the front door, the mantel, the table, and the porch. Use flags, bunting, stars, and stripes in those places, keep the rest of the room calm, and add warm light in the evening for a festive look that feels like home.

    The 23 ideas below cover porches, living rooms, kitchens, bedrooms, bathrooms, and patios, so you can dress one spot or style the whole house. Pick a small palette of navy, bright red, and white, repeat it in two or three rooms, and leave everyday paths, seats, and table space clear. For more seasonal styling ideas, visit the Dwell Ovell home page, and see how a limited palette holds a season together in Fall Decor Ideas.

    Key Takeaways

    • Repeat red, white, and blue in a few focal spots, such as the front door, the mantel, and the table, rather than in every corner.
    • Choose navy, bright red, and white as the core palette, and use one of the three as the main color in each display.
    • Mix flags, stars, and stripes, but keep one pattern dominant in each room so the look stays calm.
    • Use battery candles and string lights for evening glow, and keep open flames away from fabric, paper, and dry plants.
    • Style surfaces you already use, such as the porch, the kitchen counter, and the dining table, before adding new displays.
    • Store flags, bunting, and fabric pieces folded flat or rolled in a dry box, so they are ready to use again next year.

    1. Classic Flag Display on the Front Porch

    A flag hanging from a porch bracket beside a plain doormat and planters.

    Hang a full size flag from a porch bracket, or place a garden flag near the steps, so the porch reads as festive from the street. A single flag works best with a plain doormat and one or two planters, since the flag itself carries the theme.

    Check that the flag hangs free and does not catch on the rail or the door. If you use a bracket, fix it firmly and take the flag inside during strong wind or heavy rain to keep it in good shape.

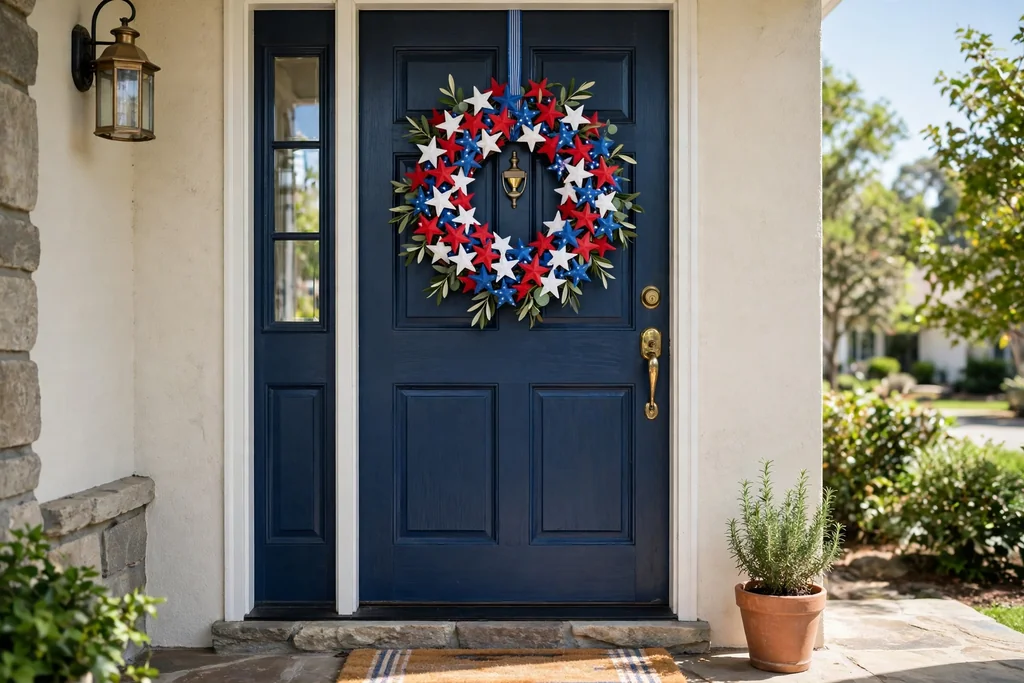
    2. Star Wreath on the Front Door

    A wreath of red, white, and blue stars hanging on a front door at eye level.

    Hang a wreath made with fabric stars, wood stars, or metal stars in red, white, and blue on the front door. Keep the wreath flat against the door so it does not block the handle, and hang it at eye level for the clearest view.

    A star wreath suits a painted door in navy, white, or red, since the stars stand out against a plain background. Pair it with a simple doormat and skip extra door decor, so the wreath stays the focus of the entry.

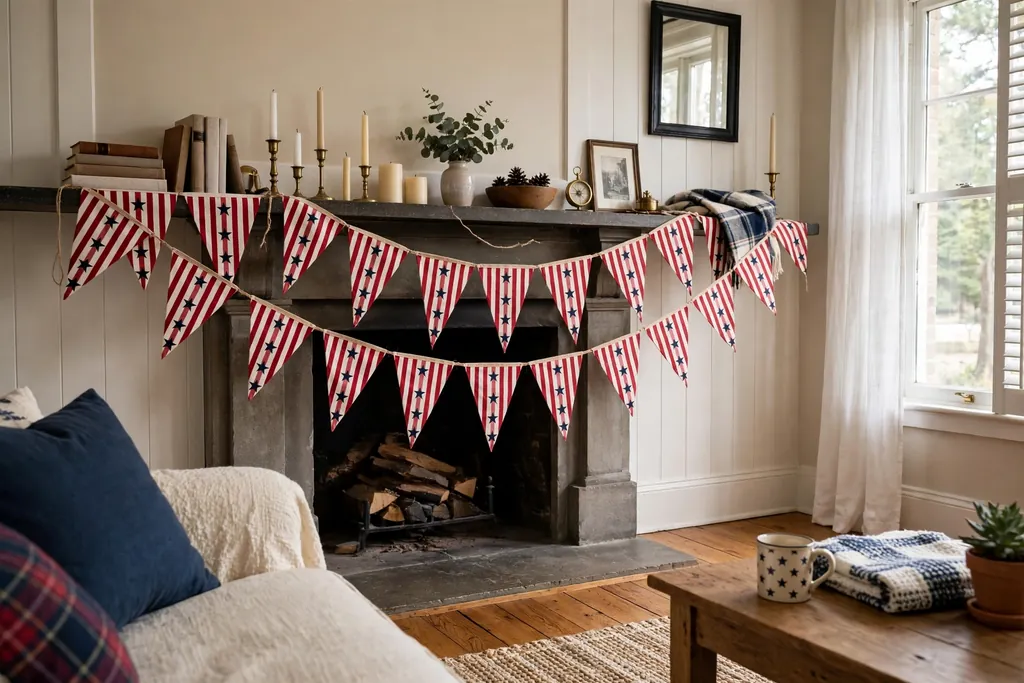
    3. Striped Bunting Across the Mantel

    Red and white striped bunting with navy stars draped across a mantel.

    Drape striped bunting in red and white across the mantel, with a gentle dip in the middle and the ends trailing slightly at each side. Add small navy stars or plain navy pennants between the stripes to bring in the third color.

    Bunting suits a mantel because it is light and easy to fix with small removable hooks. Keep it clear of candles and lamps, and balance it with plain vases or candle holders at each end.

    4. Mason Jar Lanterns with Battery Candles

    Mason jars with battery candles and twine tied around the necks on a table.

    Place battery candles inside clear mason jars, tie twine or ribbon in red, white, or navy around the neck of each jar, and set the jars along a table, a porch rail, or a windowsill. The glass softens the light and gives the display a relaxed, handmade feel.

    Use jars of the same size for a neat row, or mix two sizes and group them in threes. Battery candles are the safe choice here, since the jars sit near fabric, paper, and plants, and they can stay lit through the evening without attention.

    5. Red, White, and Blue Table Runner Centerpiece

    A dining table with a striped runner, a white vase of red flowers, and a navy candle holder.

    Lay a striped or star print runner down the center of the dining table, then build a low centerpiece on top of it with a white vase, red flowers, and a small navy accent such as a candle holder. Keep the arrangement low so guests can talk across the table.

    A runner defines the table without covering it, which leaves room for plates and glasses. Choose a washable fabric if the table will be used for a cookout meal, and fold the runner away after the day to keep the print fresh.

    6. Star String Lights on the Patio

    Star shaped string lights hanging along a patio fence in the evening.

    Hang star shaped string lights along a patio fence, a pergola, or the edge of a porch roof, spacing the stars evenly so the line reads clearly after dark. Warm white bulbs suit a relaxed evening, while red, white, and blue bulbs give a bolder party feel.

    Check that the lights are rated for outdoor use and that the cord reaches an outlet without crossing a walkway. Use clips rather than nails on painted wood, and set the lights on a timer so they switch off on their own.

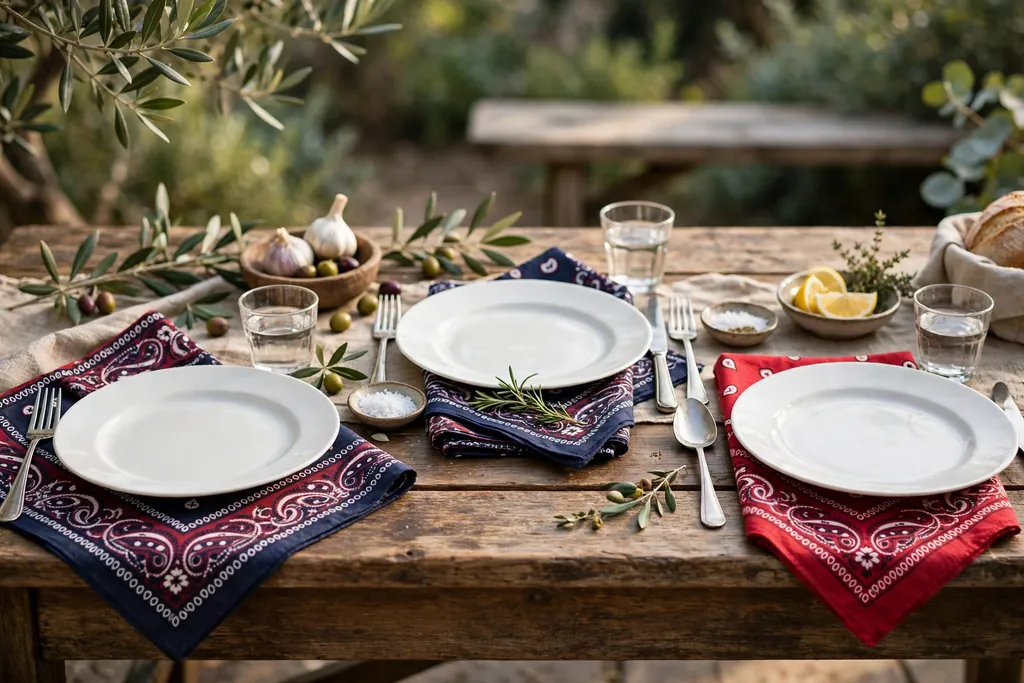
    7. Bandana Print Table Setting

    A table setting with red and navy bandana print napkins and plain white plates.

    Use bandana print napkins or placemats in red and navy on the table, paired with plain white plates and simple glassware. The bandana print carries the theme, so the rest of the setting can stay plain and the table still looks dressed for the day.

    Fold the napkins in a simple rectangle or roll them with a napkin ring, and keep one print per place setting. Mix red and navy bandanas at alternate seats for a livelier table, or use one color for a calmer look.

    8. Patriotic Throw Pillows on the Sofa

    A sofa with navy striped, red star, and plain white throw pillows.

    Swap two or three sofa cushions for covers in navy stripes, red stars, or plain white with a small flag motif. Place the boldest pillow at each end of the sofa and a plain one in the middle, so the sofa looks styled rather than crowded.

    Pillow covers are a fast change, since the inserts stay the same and only the covers are swapped. Choose washable covers if the sofa gets daily use, and store the holiday covers flat in a drawer when the season ends.

    9. Firework Print Gallery Wall

    A gallery wall of framed firework and star prints in red, white, and blue above a sofa.

    Hang a small group of framed prints showing firework bursts, stars, or abstract red, white, and blue shapes on one living room wall. Use simple frames in white, navy, or natural wood, and keep the spacing even between frames.

    A gallery wall works best in one clear stretch of wall, such as above a sofa or a console. Plan the layout on the floor first, hang the largest print in the middle, and swap only the prints, not the frames, when the season changes.

    10. Layered Doormats at the Entry

    A striped outdoor rug layered under a coir doormat with a star design at a front door.

    Layer a larger striped outdoor rug under a smaller coir doormat with a star or flag design at the front door. The two layers add color and texture, and the combination looks planned rather than bare.

    Keep the top mat flat and low so the door opens freely, and choose a rug that can handle rain. Shake both mats out after the holiday weekend, and store the top mat flat if you plan to reuse it next year.

    11. Patriotic Tiered Tray in the Kitchen

    A tiered kitchen tray styled with a tiny flag, a star ornament, and a white candle holder.

    Style a two or three tier kitchen tray with small patriotic pieces: a tiny flag, a star ornament, a small jar of red and white candy, and a plain white candle holder. Keep each tier light, with one main piece and one small filler, so the tray does not look crowded.

    A tiered tray suits a kitchen counter or an island because it takes up little space and can be moved for cooking. Change only the small pieces for each holiday, and keep the tray itself in place through the summer.

    12. Paper Star Garland Across a Window

    A garland of red, white, and navy paper stars strung across a bright window.

    Cut paper stars in red, white, and navy, string them on twine or thread, and hang the garland across a window or along a shelf. The stars catch daylight and cast a soft pattern, which suits a bright room.

    Use card stock rather than thin paper, so the stars hold their shape and do not curl. Hang the garland with small removable hooks at each end, and keep it clear of curtains that could tangle with the string.

    13. Red, White, and Blue Flower Arrangements

    A white vase with red geraniums, white daisies, and blue delphinium on a table.

    Arrange red geraniums, white daisies or carnations, and blue delphinium or cornflowers in a plain white or glass vase for a table, a mantel, or a porch. Group the colors in blocks rather than mixing every stem, so each color shows clearly.

    Fresh flowers suit a centerpiece for a single day, while faux stems suit a display that stays up for a week. Trim fresh stems at an angle, change the water daily, and keep the arrangement out of direct sun so it lasts through the evening.

    14. Navy and Red Patio Cushions

    Patio chairs with navy and red cushions and one striped cushion on each chair.

    Swap patio chair cushions for navy and red covers, and add one striped cushion to each chair for contrast. The bold colors hold up well outdoors and make a plain patio set look ready for guests.

    Use outdoor rated fabric if the chairs stay outside, and bring cushions in overnight during rain. Store the covers in a dry box at the end of summer, and wash them before storing so stains do not set.

    15. Letter Board with a July 4th Message

    A felt letter board reading Happy Fourth on a mantel beside a plain vase.

    Write a short July 4th message on a felt letter board, such as “Happy Fourth” or “Stars and Stripes”, and place the board on a mantel, a console, or a kitchen shelf. Keep the message to a few words so it reads clearly from across the room.

    A letter board suits a small surface, since it adds the theme without taking much space. Pair it with one plain vase or candle holder, and change the message for each holiday to reuse the board through the year.

    16. Striped Bedding Swap in the Bedroom

    A bed with navy and white striped bedding and a red throw across the foot.

    Change the bed to striped bedding in navy and white, and add one red throw or a pair of red pillowcases for the holiday accent. The stripes carry the theme, while the plain walls and furniture keep the bedroom calm for sleep.

    Layer the throw across the foot of the bed rather than covering the whole bed, so the look stays light in summer. Choose breathable cotton or linen bedding for warm nights, and keep the rest of the bedding plain.

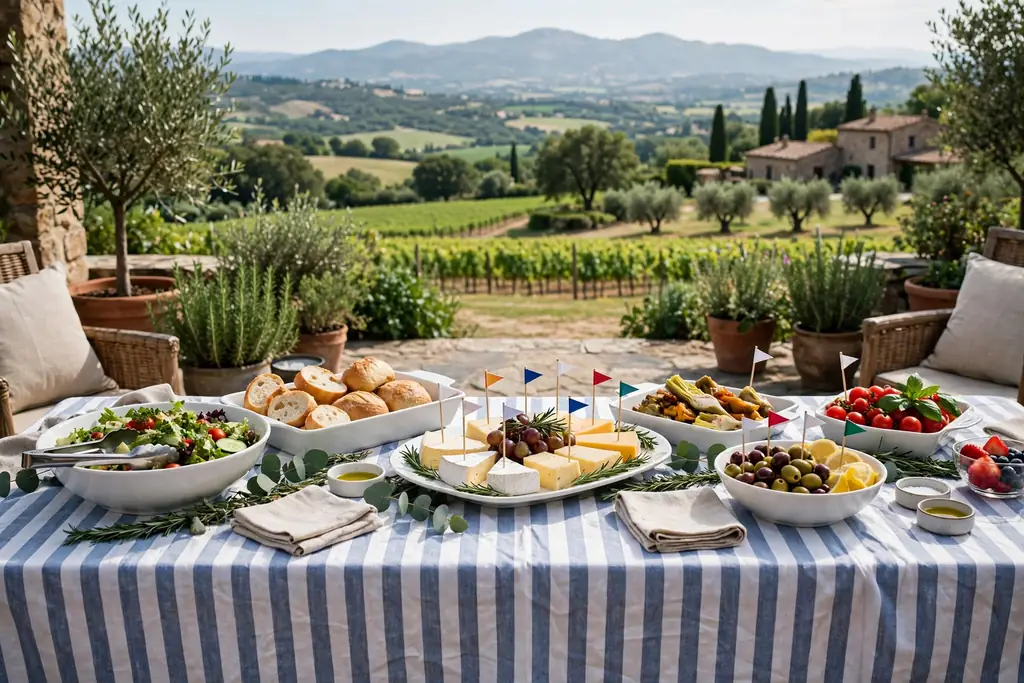
    17. Outdoor Buffet Table for a Cookout

    An outdoor buffet table with a striped cloth, white serving dishes, and small flag picks.

    Set a buffet table on the patio with a striped cloth, plain white serving dishes, and small flag picks marking each dish. Place drinks at one end and plates at the other, so guests move along the table in one direction.

    Keep the table clear of tall decor that blocks the food or the serving space. Use weighted covers for dishes left outside, and bring paper goods inside at the end of the evening to keep the patio tidy.

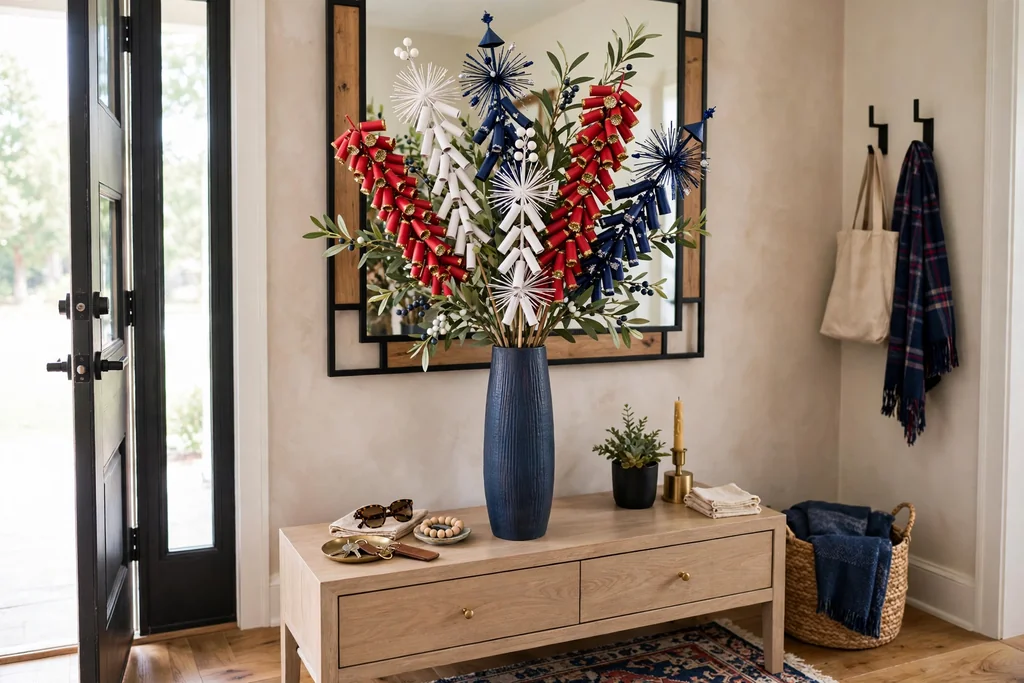
    18. Firecracker Picks in a Console Vase

    A tall vase with red, white, and navy firecracker style picks on a console table.

    Place red, white, and navy firecracker style picks in a tall vase on a console or an entry table, mixed with a few plain white stems. The picks add height and color without taking up much table space.

    This display suits a narrow console, since the vase itself is the only piece needed. Keep the picks away from open flames, and use unlit decorative picks only, so the display stays safe indoors.

    19. Striped Window Panels in the Living Room

    Living room windows with navy and white striped panels and white sheers behind them.

    Hang striped panels in navy and white on the living room windows for the holiday week, paired with plain white sheers behind them. The stripes frame the view and bring the theme into the room without changing the furniture.

    Use lightweight fabric so the panels hang straight and let daylight through. Hang the panels high and wide, so the windows look larger, and swap them back to plain panels after the holiday.

    20. Star Place Cards for the Dinner Table

    A dinner table place setting with a star shaped place card on a white plate.

    Cut star shapes from card stock, write one guest name on each star, and place a star on each plate or beside each napkin. The stars double as a place setting accent and a small favor guests can take home.

    Use one color for all the stars, or alternate red, white, and navy around the table. Keep the stars flat and small, so they do not crowd the plate, and use a pen that reads clearly on dark card.

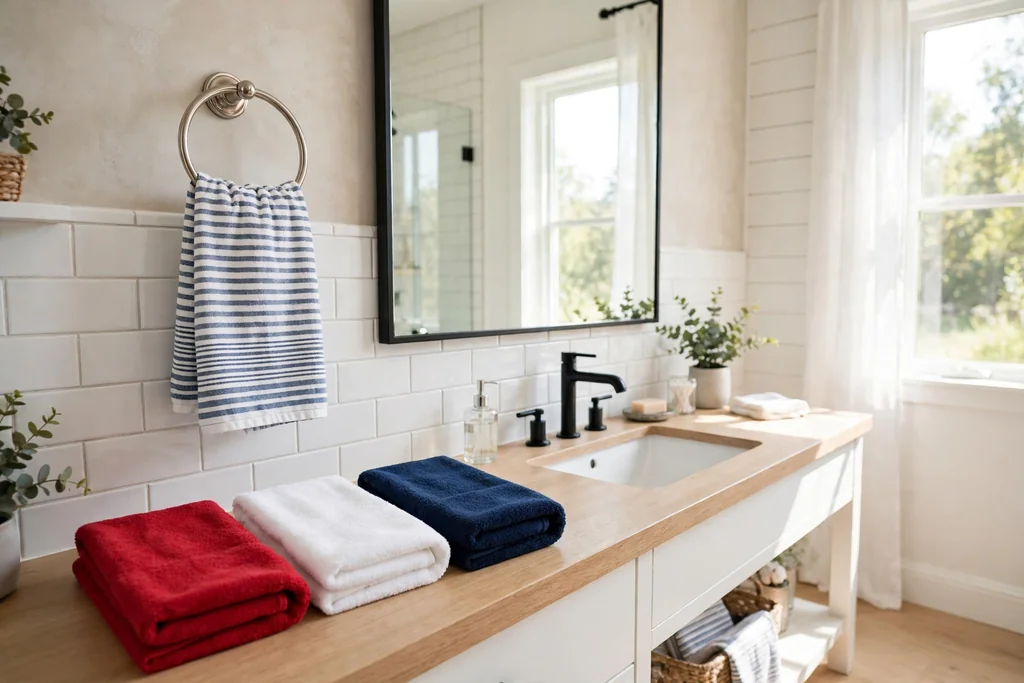
    21. Red, White, and Blue Towel Swap in the Bathroom

    A bathroom with red, white, and navy hand towels and a striped towel on a ring.

    Swap hand towels for red, white, and navy towels in the bathroom, and fold a striped towel over the towel ring as the main accent. The change gives the bathroom a festive feel with very little effort.

    Choose towels that match the bathroom tiles or the shower curtain, and keep a spare set ready for guests. Wash the holiday towels after the weekend and store them with the rest of the seasonal linen.

    22. Porch Chairs with Patriotic Cushions and Throws

    Porch rocking chairs with striped cushions and folded red throws in the evening.

    Add striped cushions and a folded red or navy throw to each porch chair or rocking chair, so the porch becomes a comfortable spot for the evening. The chairs then look dressed even before guests arrive.

    Use outdoor rated fabric for chairs that stay outside, and bring throws inside overnight in wet weather. Keep one chair clear of decor, so there is always a plain seat ready for use.

    23. Small Flag Garden Along the Walkway

    A front walkway lined with small flags on short sticks leading to a front door.

    Line a front walkway or a garden bed edge with small flags on short sticks, spacing them evenly and pushing each stick firmly into the soil. The row of flags leads the eye to the front door and marks the path for evening guests.

    Use flags of the same size for a neat line, and place them clear of the walking surface so no one trips. Collect the flags after the holiday, dry them if they got wet, and store them upright in a bundle for next year.

    Conclusion

    Fourth of July decor does not need a full room makeover. A flag at the door, bunting on the mantel, a dressed table, and warm light on the patio can change how a home feels for the holiday. Pick the ideas that fit your rooms and your routine, repeat navy, red, and white across two or three spots, and leave the rest of the house calm. Save this list and revisit it next summer to see which ideas you want to repeat.

    FAQs

    What colors should I use for Fourth of July home decor?

    Use navy, bright red, and white as the core colors for Fourth of July home decor, since they read clearly as patriotic and pair with most room colors. Pick one color as the main tone in each display, use the second as an accent, and keep the third for small details, so no single room feels crowded with all three at full strength.

    How can I decorate for the Fourth of July on a small budget?

    Start with flags, bunting, paper stars, and pillow covers, since these pieces cost little and make a visible difference in a room. Style one focal point per room, such as the mantel or the front door, and reuse vases, jars, candle holders, and baskets you already own, adding a few new pieces each year instead of buying a full set at once.

    How do I decorate a small space for the Fourth of July?

    Choose small scale items like a star garland, a single vase of red and white flowers, and one striped throw, and style surfaces you already use, such as a windowsill, a shelf, or a side table. Skip large displays that block walkways, and use vertical space with a door wreath or a window garland, since one clear focal point per room is enough in a small home.

    Are real or faux flowers better for Fourth of July decor?

    Fresh flowers are better for a one day centerpiece, since they look and smell their best on the day of the gathering, while faux flowers are better for a display that stays up for a week or more. Fresh stems need daily water and shade from direct sun, while faux stems need only a quick dust and can be stored and reused next year.

    How do I keep Fourth of July decor safe around candles and lights?

    Keep open flames away from fabric, paper, bunting, and dry plants, and use battery candles and outdoor rated string lights wherever decor sits close to flammable material. Check cords for damage before hanging lights, keep cords clear of walkways, and switch lights off when you leave the house or go to sleep.

    Can I reuse Fourth of July decor next year?

    Yes, you can reuse Fourth of July decor next year if you store flags, bunting, fabric covers, and faux flowers folded flat or rolled in a dry box, with paper between layers to stop prints from sticking together. Fabric and metal pieces store well, while paper stars need a flat box and gentle handling, and battery lights should be stored with the batteries removed.

  • 25 Summer Decor Ideas for a Light and Airy Home

    25 Summer Decor Ideas for a Light and Airy Home

    Summer decor ideas work best when you keep rooms light, pale, and uncluttered: white and sand tones, sheer curtains, natural fibers, clear glass, and fresh greenery let daylight move through the home. The 25 ideas below use those elements room by room, so each space feels cool, bright, and easy to live in all summer.

    Start with the largest surfaces first: sofa covers, curtains, bedding, and rugs set the tone, and smaller pieces such as vases, bowls, and baskets finish the look. Keep most of the room in white, cream, sand, and pale blue, and let one natural texture or one green plant carry the interest. For seasonal styling in other parts of the year, see the fall decor ideas on Dwell Ovell, and for a pale coastal base that works in summer too, see the coastal fall decor guide.

    Key Takeaways

    • Keep two thirds of each room in white, cream, sand, or pale blue, so daylight stays the main feature.
    • Swap heavy fabrics for linen, cotton, rattan, and seagrass, which read light and breathe well in warm weather.
    • Use sheer curtains, mirrors, and clear glass to move light deeper into the room.
    • Add fresh greenery or a bowl of citrus for color, rather than adding many small colored objects.
    • Leave clear space on tables, shelves, and floors, so each display has room around it.
    • Repeat one or two natural materials through the home, so rooms feel linked without matching exactly.

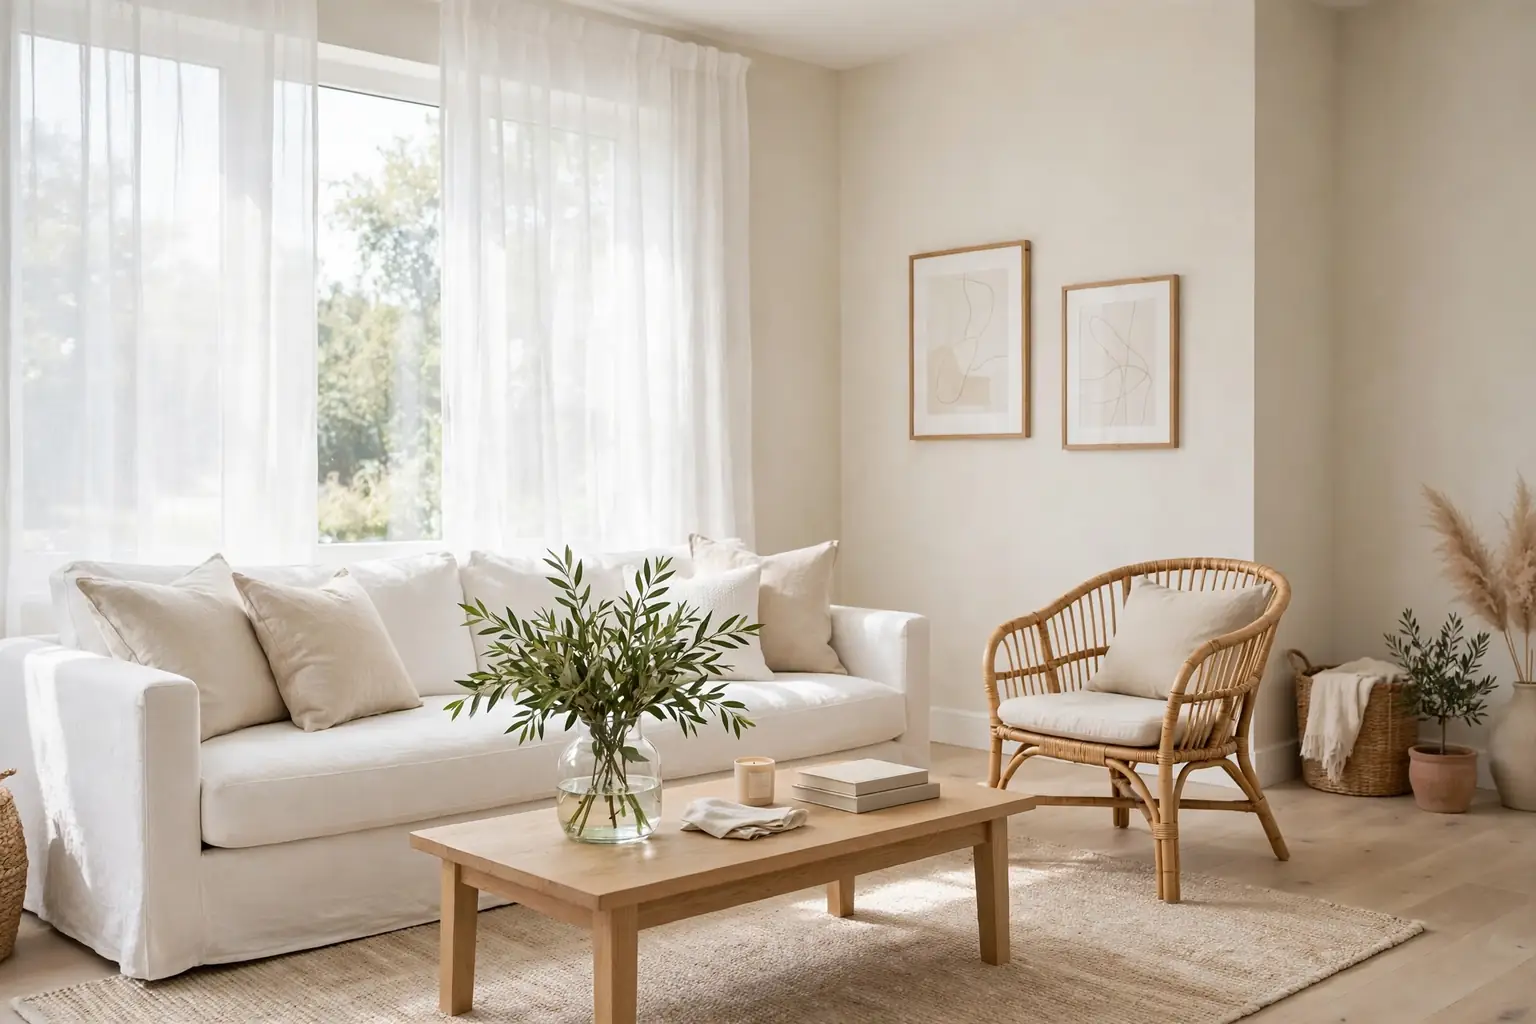
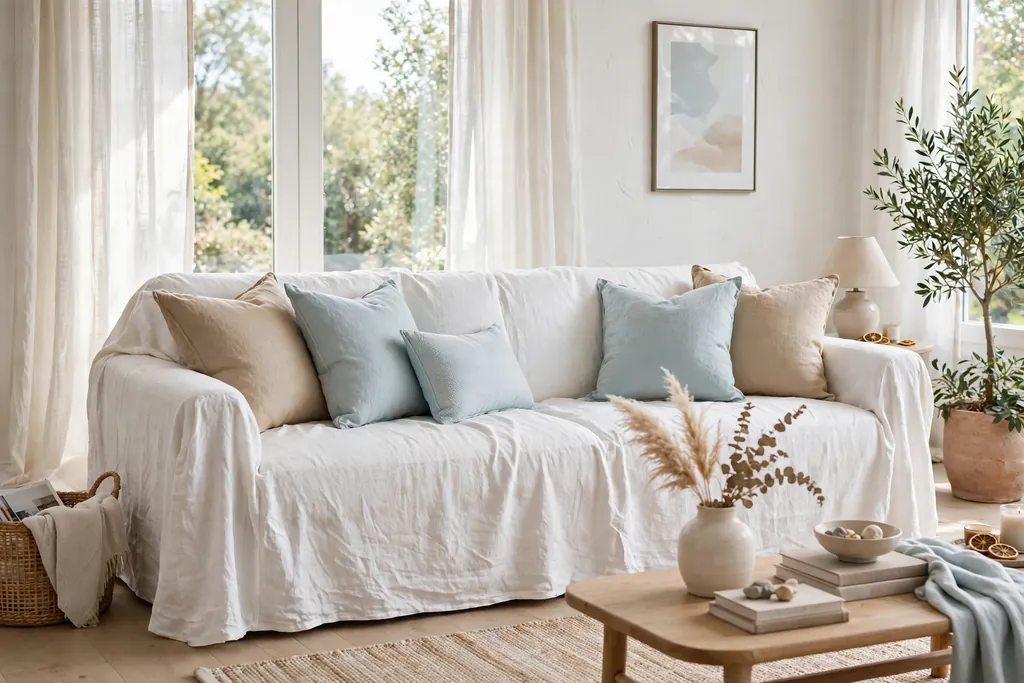
    1. White Linen Slipcovers on the Sofa

    Sofa covered in a white linen slipcover with sand and pale blue cushions in a bright living room.

    Cover a dark or patterned sofa with a white or cream linen slipcover to lighten the whole living room at once. Linen wrinkles a little, which suits a relaxed summer room, and a washable cover can be laundered when it needs freshening.

    Keep the rest of the seating simple while the slipcover is on. Plain cushions in sand or pale blue sit well against white linen, and a light throw folded over one arm adds softness without adding weight.

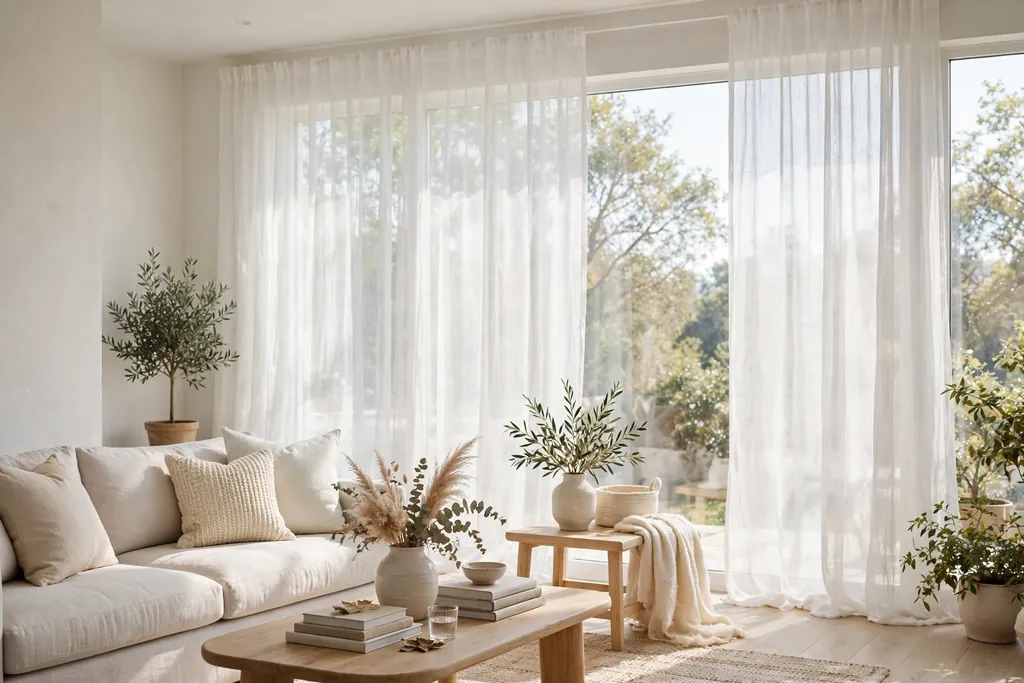
    2. Sheer White Curtains at Every Window

    Sheer white curtains filtering daylight at a large living room window.

    Hang sheer white curtains on the windows you use most, so daylight filters in while the room still has privacy. Sheers soften strong summer sun and make a room feel taller, since the eye follows the fabric from rod to floor.

    Hang the rod close to the ceiling and let the panels fall to just above the floor. Keep the fabric plain, with no heavy pattern, so the light stays even and the window remains the focus.

    3. Pale Blue and Sand Throw Pillows

    Light sofa styled with pale blue and sand throw pillows in linen and cotton.

    Swap dark winter pillow covers for pale blue and sand covers in linen or cotton. Two or three pillows are enough on a standard sofa, and a mix of one solid, one stripe, and one plain textured cover keeps the group from looking flat.

    Place the darkest pillow at each end of the sofa and the lightest in the middle, so the eye moves across the seat. Store the winter covers together in one bag, so the swap is easy to reverse.

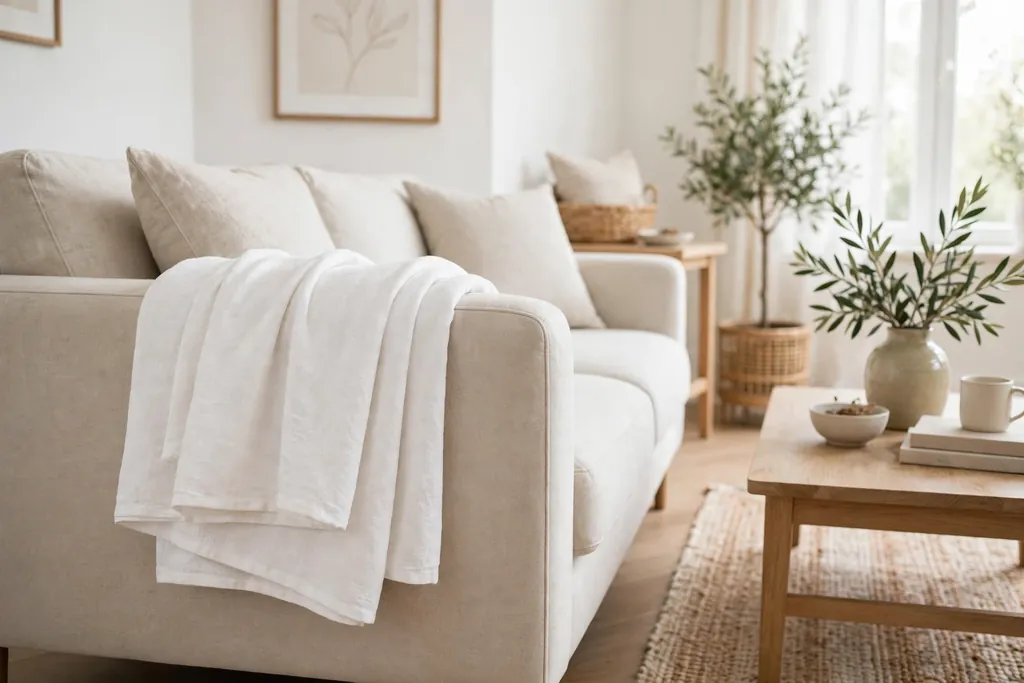
    4. Lightweight White Cotton Throw

    Lightweight white cotton throw folded over the arm of a light sofa.

    Replace a heavy knit throw with a lightweight white cotton throw, folded neatly over a sofa arm or across the foot of a chair. Cotton is easy to wash, and white reads cool against wood, rattan, and pale upholstery.

    Use the throw as a practical layer for cool evenings rather than as a thick blanket. Folded, not bunched, it looks tidy during the day and is ready to use at night.

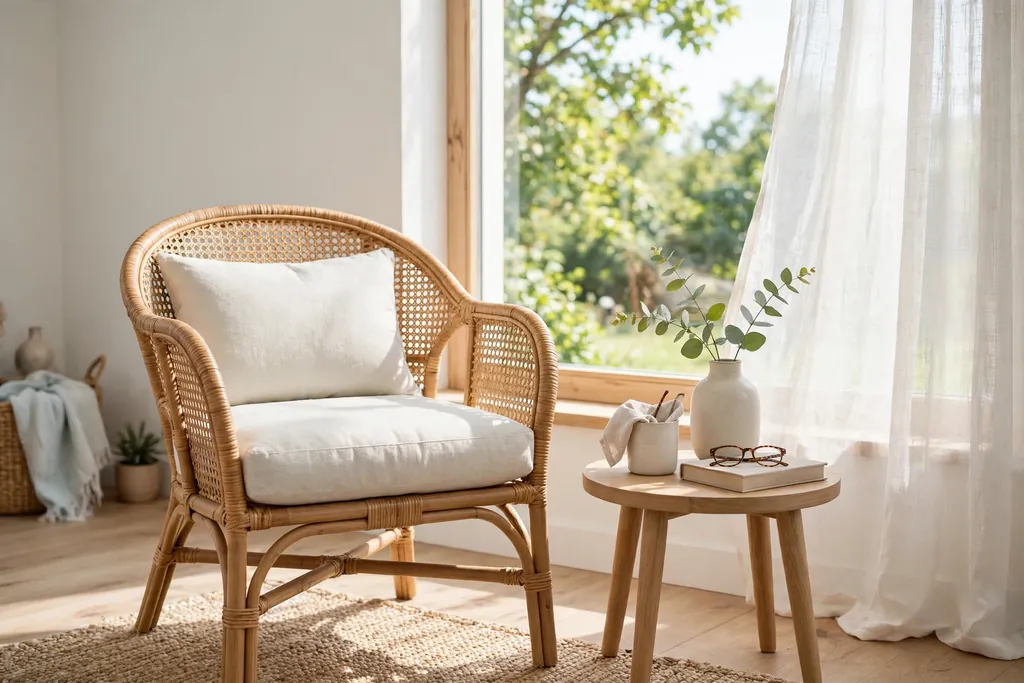
    5. Rattan Accent Chair in a Bright Corner

    Rattan accent chair with a pale cushion beside a bright window and a small side table.

    Place a rattan accent chair near a window, with a small side table and a pale cushion. Rattan brings an open, woven texture that suits summer, and the chair gives a bright corner a clear purpose.

    Keep the chair away from direct midday sun if the cushion fabric fades easily, and add a small plant beside it. One chair is enough in a small room; a pair works in a larger living room with space between them.

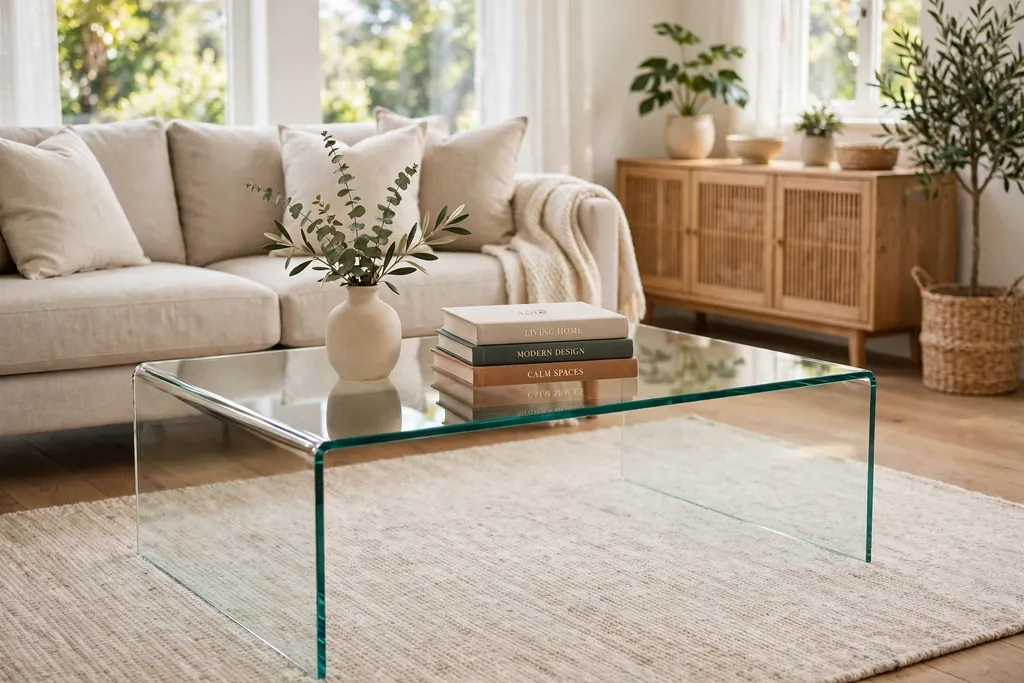
    6. Clear Glass Coffee Table

    Clear glass coffee table with a small vase and books on a light rug in a living room.

    Use a clear glass coffee table, or a glass top on a light wood base, to keep the center of the living room open. Glass lets the rug and floor show through, so the room feels larger than it does with a solid dark table.

    Style the top with only two or three items, such as a small vase, a stack of books, and a candle in a glass holder. Wipe the glass often in summer, since fingerprints and dust show more on a clear surface.

    7. Whitewashed Wood Side Tables

    Whitewashed wood side table beside a light armchair with a small vase.

    Add a whitewashed wood side table beside the sofa or an armchair, in place of a dark wood table. The pale washed finish keeps the wood grain visible while lightening the piece, and it pairs well with linen, glass, and rattan.

    Keep the tabletop clear except for a lamp or a small vase, so the table stays useful for a drink or a book. In a small room, choose a round top, which is easier to walk past than a square corner.

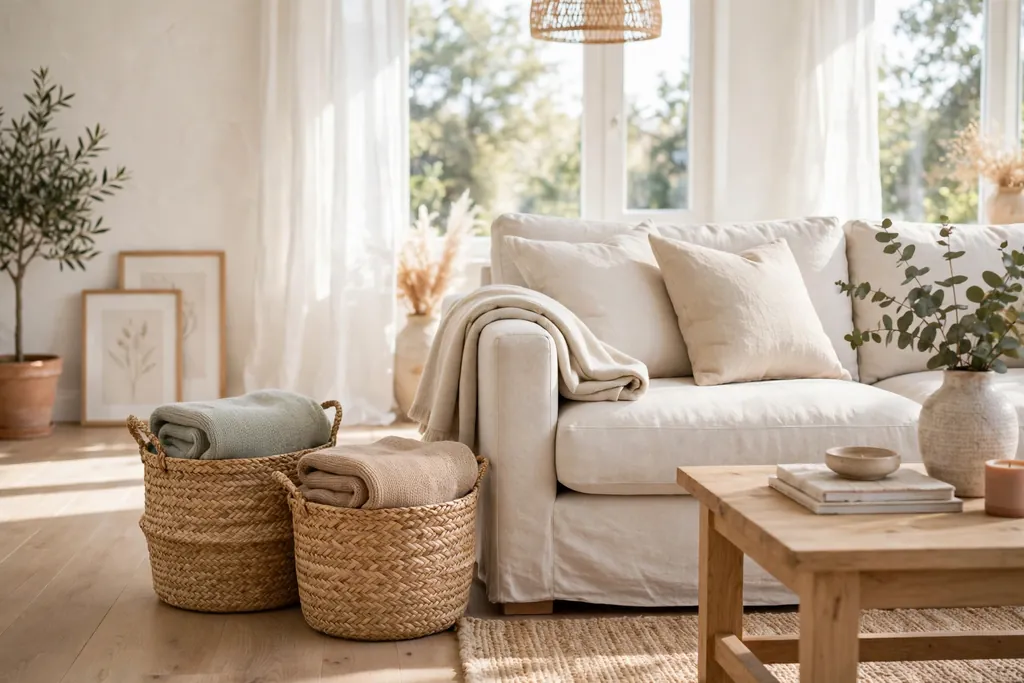
    8. Seagrass Baskets for Everyday Storage

    Seagrass baskets holding folded throws beside a light sofa.

    Set seagrass baskets beside the sofa, by the door, and in the bedroom for throws, magazines, toys, and shoes. Baskets hide daily clutter while adding a natural woven texture that suits summer.

    Choose baskets with handles, so they are easy to move for cleaning, and keep one basket per job rather than filling one large basket with mixed items. Empty each basket once a week, so it does not slowly fill with things that belong elsewhere.

    9. Fresh Greenery in Clear Glass Vases

    Fresh green eucalyptus stems in a clear glass vase on a light wood table.

    Cut fresh greenery from the garden, or buy a bunch of eucalyptus or olive stems, and place it in a clear glass vase on a table or shelf. Green leaves against clear glass give instant summer color without paint, pattern, or new furniture.

    Trim stems so the arrangement sits about one and a half times the height of the vase, and change the water every few days. One tall vase makes a stronger statement than several small vases crowded together.

    10. Lemon and Lime Bowl on the Dining Table

    Shallow white bowl filled with lemons and limes in the center of a dining table.

    Fill a shallow white or glass bowl with lemons and limes, and set it in the center of the dining table. Citrus adds fresh yellow and green color, smells clean, and can be used in cooking, so the display is practical as well as decorative.

    Use whole fruit, not cut fruit, and replace pieces as they soften. Keep the bowl low and narrow, so guests can still talk across the table and pass serving dishes easily.

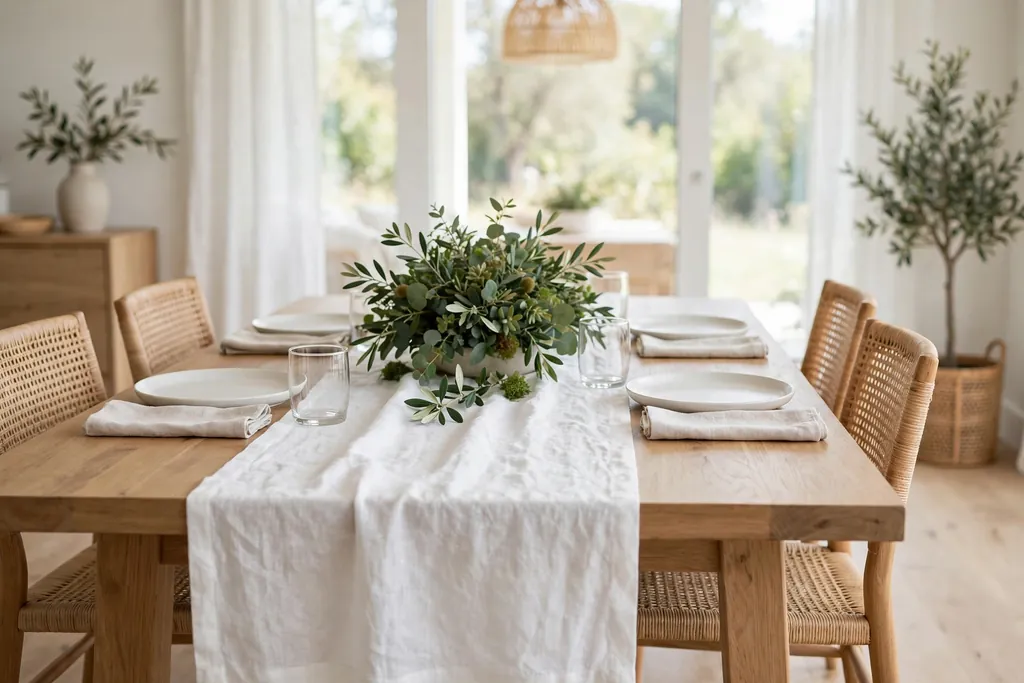
    11. White Linen Table Runner

    Dining table with a white linen runner, plain plates, and a low green centerpiece.

    Lay a white linen table runner down the center of the dining table, in place of a full tablecloth. A runner protects the middle of the table, frames a centerpiece, and leaves the wood visible at each side, which keeps the table looking light.

    Pair the runner with plain white or cream plates and simple glassware. For a meal, the runner can stay in place under a low centerpiece, as long as serving dishes still have room at each end.

    12. String Lights on the Porch or Patio

    Warm white string lights hung along a porch rail in the early evening.

    Hang warm white string lights along a porch rail, a patio fence, or under a pergola, so outdoor evenings have soft light without harsh bulbs. Battery or solar strands work well where there is no outdoor outlet nearby.

    Space the strands evenly and fix them with small clips rather than nails, so they can come down easily at the end of the season. Use one set of lights as the main outdoor glow, and keep other outdoor decor simple.

    13. Crisp White Cotton Bedding

    Bedroom with crisp white cotton bedding, pale pillows, and a light throw at the foot of the bed.

    Change the bed to crisp white cotton sheets and a white or cream duvet cover, with pillowcases to match. White bedding makes a bedroom feel clean and cool, and it gives a clear base for one or two pale accent pillows.

    Fold a light cotton throw across the foot of the bed for cool nights, and keep the bedside tables clear except for a lamp and a small vase. White bedding shows dust and marks more readily, so wash it on a regular cycle.

    14. Woven Straw Placemats at the Table

    Dining table set with woven straw placemats, plain plates, and linen napkins.

    Use woven straw or seagrass placemats under each place setting, instead of a full tablecloth or dark mats. Straw adds texture and a warm natural tone, and each mat defines a place without covering the whole table.

    Wipe mats clean after meals and store them flat, so they do not curl at the edges. Pair straw mats with plain plates and linen napkins for a table that looks dressed but still relaxed.

    15. White Ceramics on Open Kitchen Shelves

    Open kitchen shelves styled with white ceramic bowls, plates, and mugs.

    Style open kitchen shelves with white ceramic bowls, plates, and mugs, grouped by size and shape. White ceramics reflect light and make a kitchen feel tidy, even when the shelves hold everyday dishes.

    Keep everyday items at the front, where they are easy to reach, and decorative pieces at the back. Leave breathing room between groups, so the shelves look styled rather than crowded, and keep the total number of pieces low.

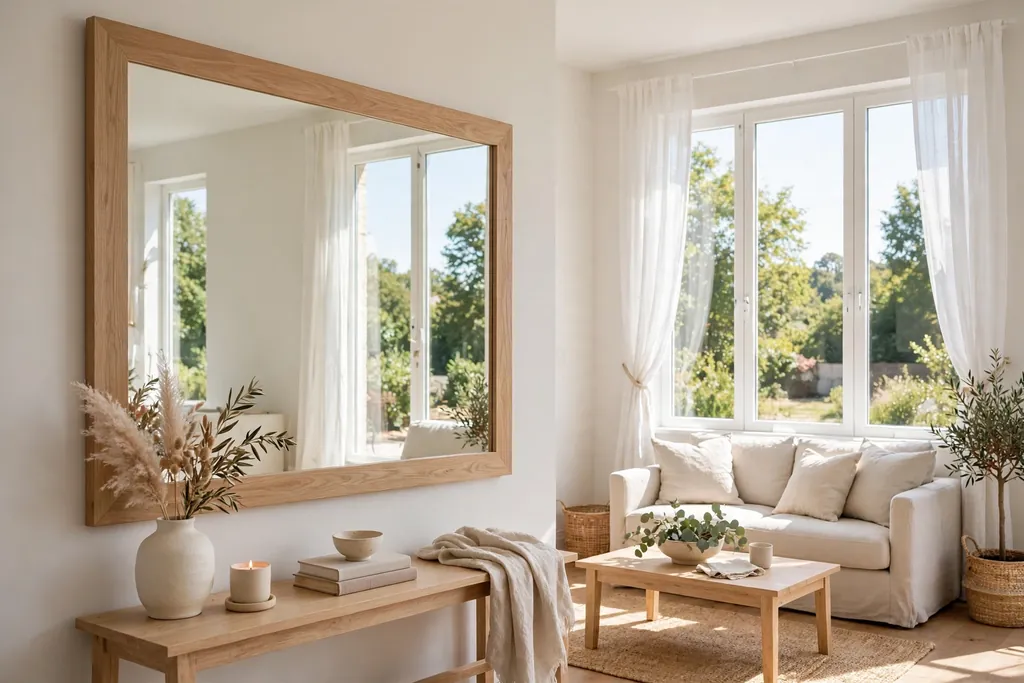
    16. Large Mirror Opposite a Window

    Large mirror with a light wood frame on a wall opposite a bright window.

    Hang a large mirror on the wall opposite a window, so it reflects daylight and the view back into the room. A mirror doubles the sense of light in a room that gets sun from only one side, and it makes a small room feel wider.

    Choose a simple light wood or white frame, and hang the mirror at eye level, centered on the window opposite. Keep the wall around the mirror plain, so the reflection stays the main feature.

    17. Natural Fiber Rug Over Bare Floors

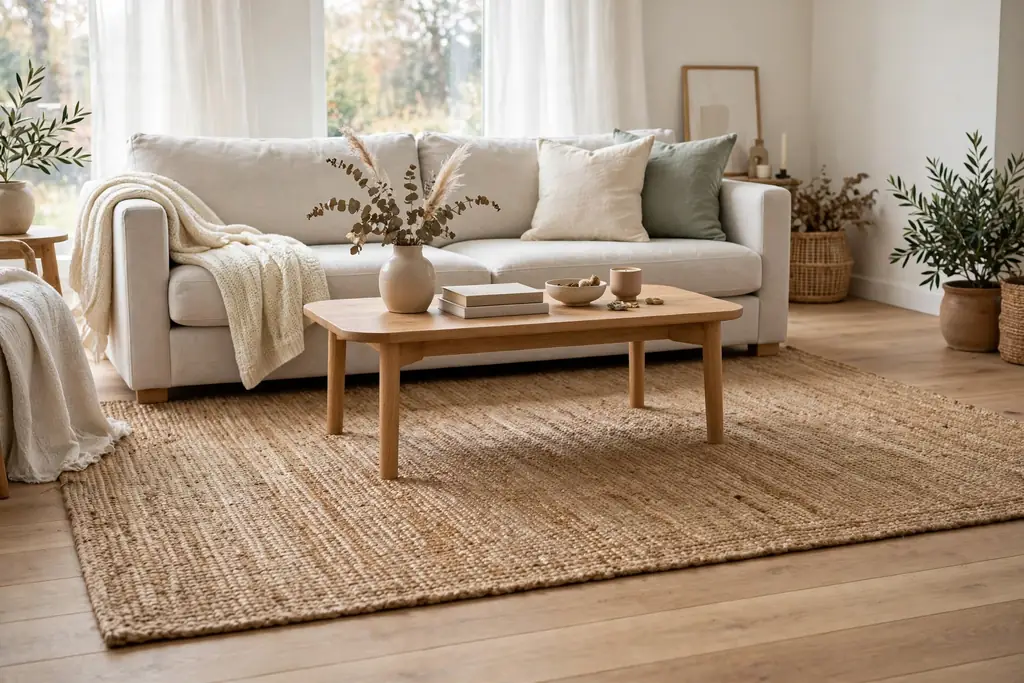
    Flatweave jute rug over a bare wood floor under a light sofa and coffee table.

    Lay a flatweave jute or sisal rug over bare wood or tile floors, in place of a thick pile rug. A natural fiber rug adds warmth underfoot while keeping the floor visible at the edges, which suits a light summer room.

    Choose a rug large enough to sit under the front legs of the sofa or dining chairs, and use a rug pad underneath to stop it slipping. Shake the rug outside regularly, since natural fibers trap dust and sand in summer.

    18. Light Coastal Prints in Pale Frames

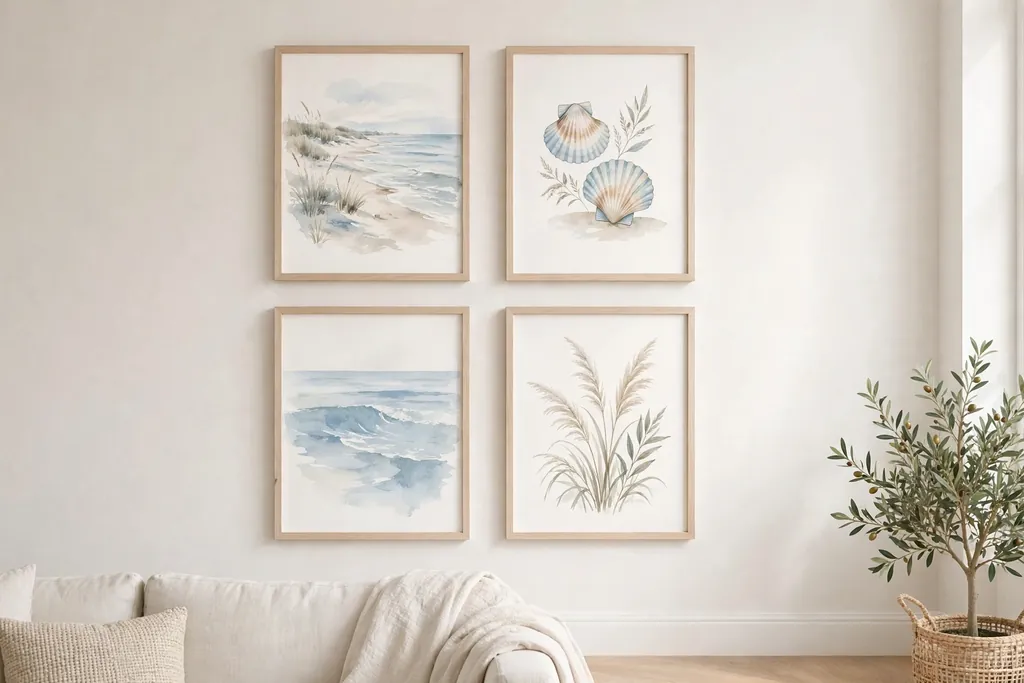
    Light coastal prints in pale wood frames hung as a small gallery wall.

    Hang two or three light coastal prints, such as shore scenes, botanical drawings, or pale landscapes, in pale wood or white frames. Light art keeps walls bright, while the pale frames link the prints into one group.

    Lay the frames on the floor first to plan spacing, then hang the largest print slightly off center to anchor the group. If a wall already holds art, swap one or two prints for summer, rather than adding a whole new wall of frames.

    19. Potted Herbs on the Kitchen Windowsill

    Potted basil, mint, and parsley in white pots on a bright kitchen windowsill.

    Grow potted herbs such as basil, mint, and parsley on the kitchen windowsill, in plain white or terracotta pots. Herbs add fresh green color, smell pleasant, and can be picked for cooking, so the display earns its place.

    Water pots based on the plant label and the weather, and check drainage so pots do not sit in standing water. Keep the pots in a row with even spacing, and trim the herbs often so they stay full rather than leggy.

    20. White Lanterns with Battery Candles

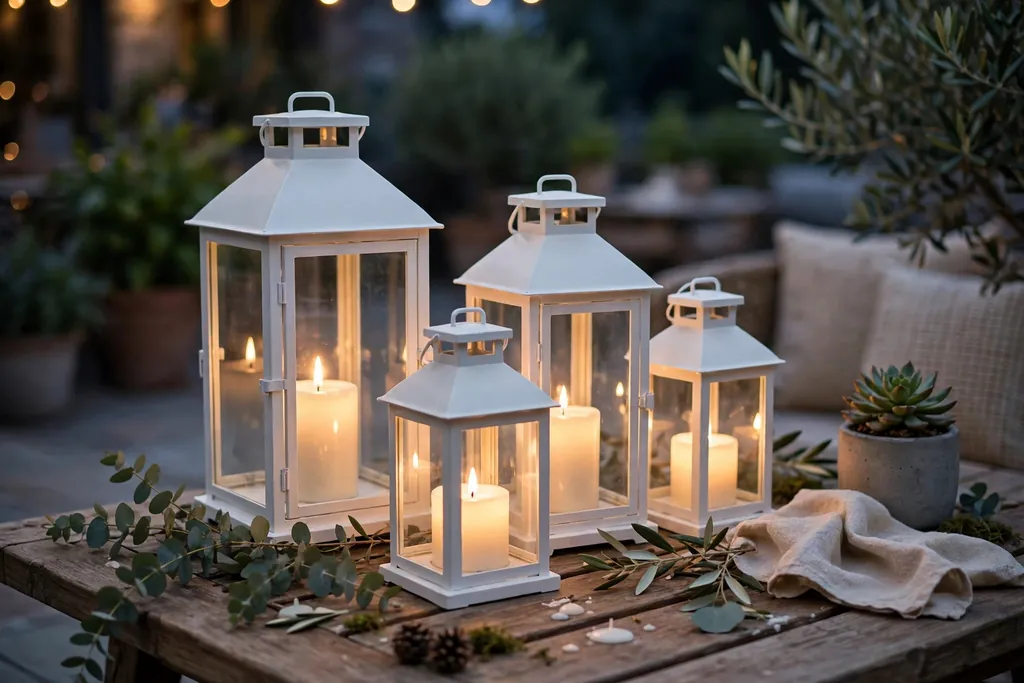
    White lanterns with battery candles grouped on a patio table in the evening.

    Group two or three white lanterns on a porch, a patio table, or a mantel, each holding a battery candle. Lanterns give soft evening light, and white frames blend with pale summer decor in a way dark metal does not.

    Use different lantern heights, so the group looks collected rather than matched, and keep lanterns away from table edges and curtains. Battery candles are a safer choice than real flames near fabric, plants, and outdoor cushions.

    21. White and Sea Blue Towels in the Bathroom

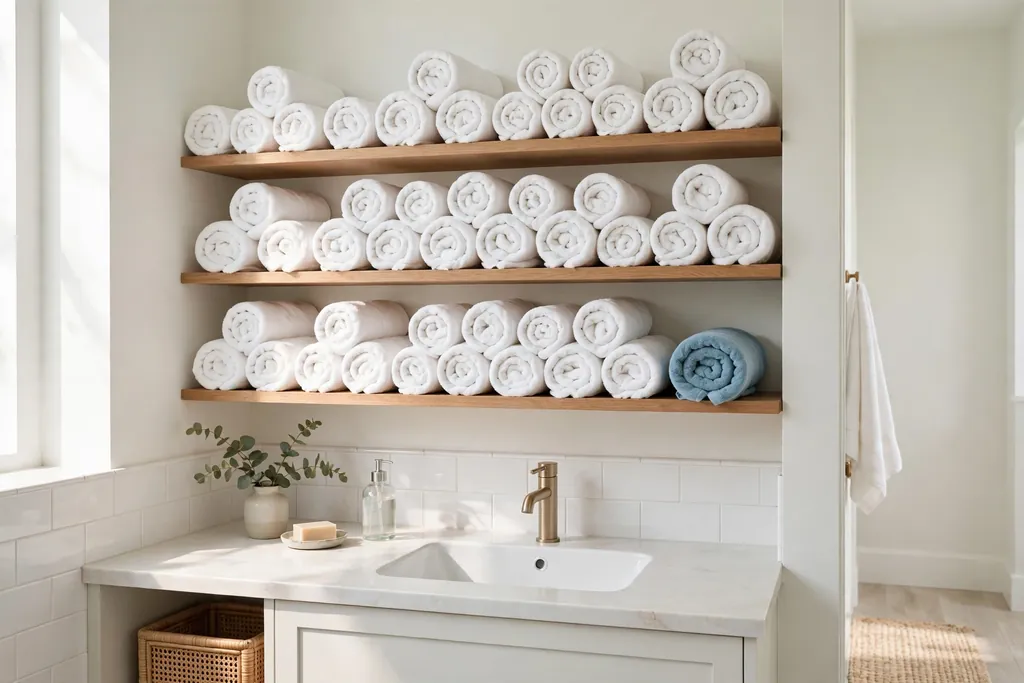
    Bright bathroom with rolled white towels and one sea blue towel on open shelves.

    Swap dark bathroom towels for white towels with one sea blue accent towel, folded or rolled on open shelves or a towel rail. White towels make a small bathroom feel cleaner and brighter, while the blue towel adds a hint of summer color.

    Roll towels rather than folding them into thick stacks, so they take less shelf space and are easy to grab. Wash towels often in summer, and keep a spare towel on a ring or hook for guests.

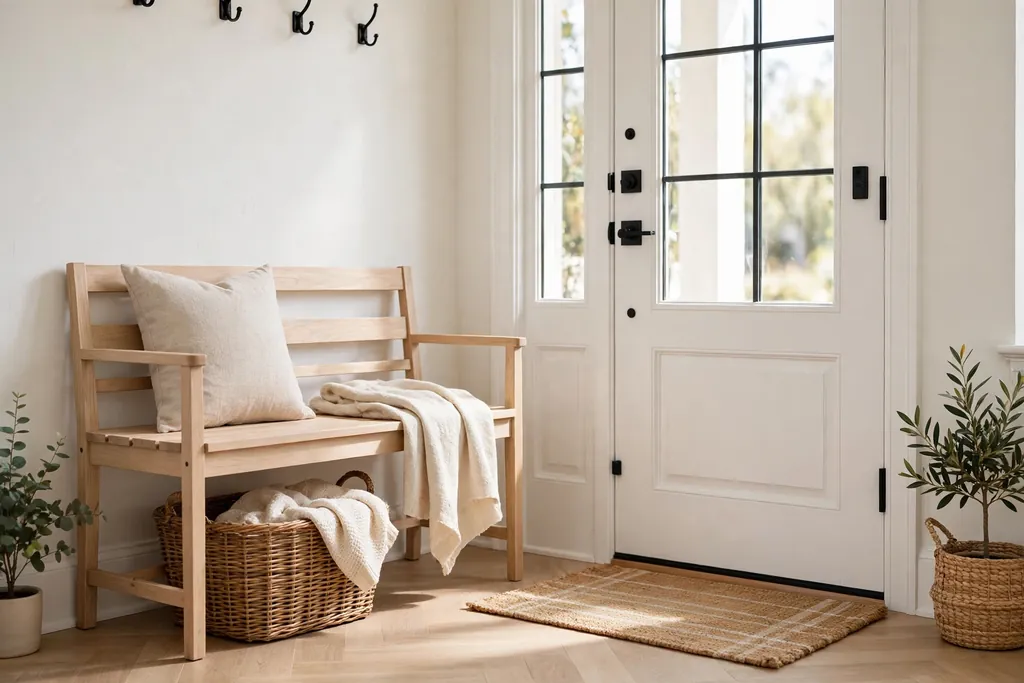
    22. Entry Bench with a Woven Basket

    Light wood entry bench with a woven basket underneath beside a front door.

    Place a light wood bench by the front door, with a woven basket underneath for shoes, sandals, or a beach bag. The bench gives a place to sit while putting on shoes, and the basket keeps entry clutter out of sight.

    Keep the bench top clear except for a small dish for keys, so the entry stays useful as well as tidy. One basket is enough in a narrow entry; a second basket only helps if the entry is wide enough to stay clear.

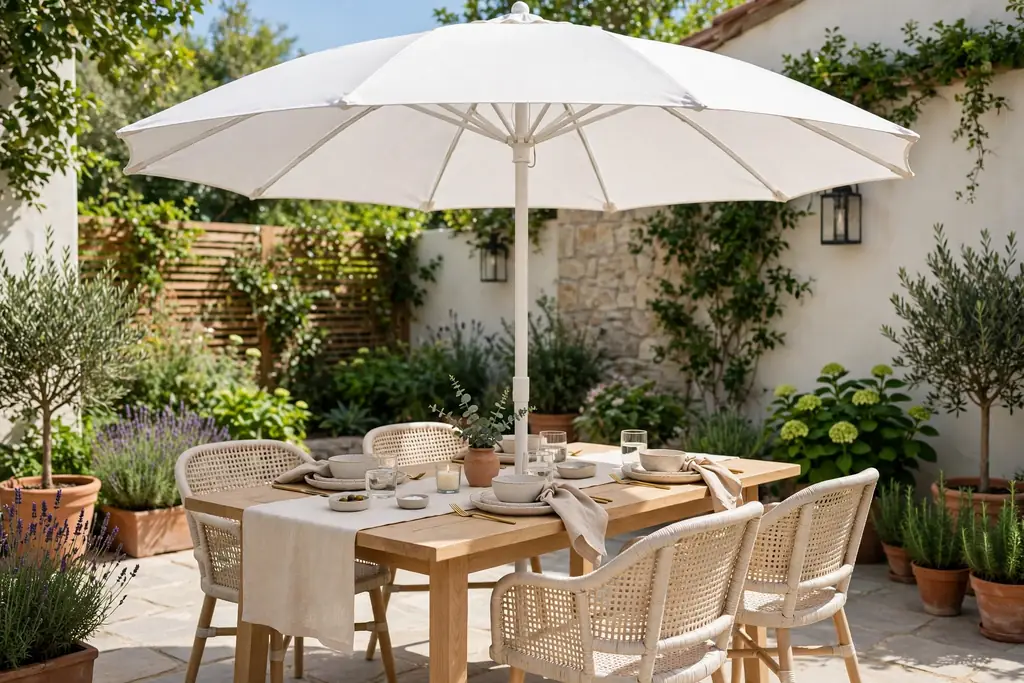
    23. White Patio Umbrella Over Outdoor Dining

    White patio umbrella shading an outdoor dining table with light chairs.

    Set a white patio umbrella over an outdoor dining table, so summer meals have shade without a dark canopy that heats up in the sun. White fabric reflects light and keeps the patio feeling bright, even under cover.

    Choose an umbrella large enough to shade the table and chairs, and use a weighted base so it stays steady in a breeze. Close the umbrella in strong wind, and store it dry at the end of the season.

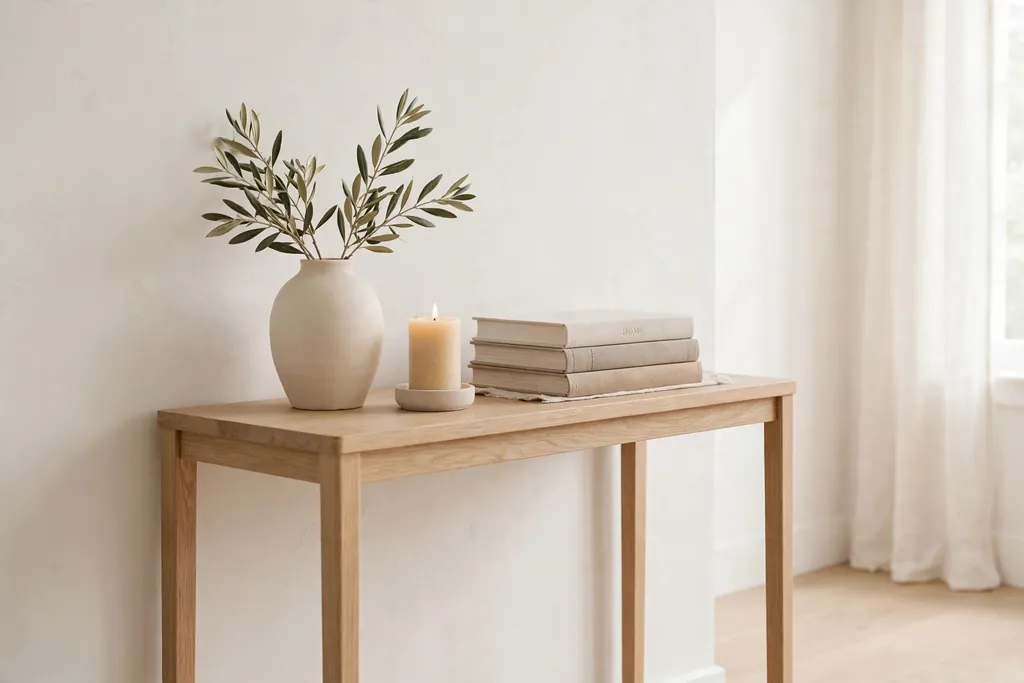
    24. One Simple Vignette Per Surface

    Console table styled with one simple vignette of a vase, a candle, and stacked books.

    Style each table, shelf, and mantel with one simple vignette: three items at most, such as a vase, a candle, and a small stack of books. One vignette per surface keeps rooms calm, and the empty space around it lets each piece show.

    Step back and look at the surface from across the room before adding anything else. If the display feels busy, remove one item first, and only add a new piece if the surface still looks bare after that check.

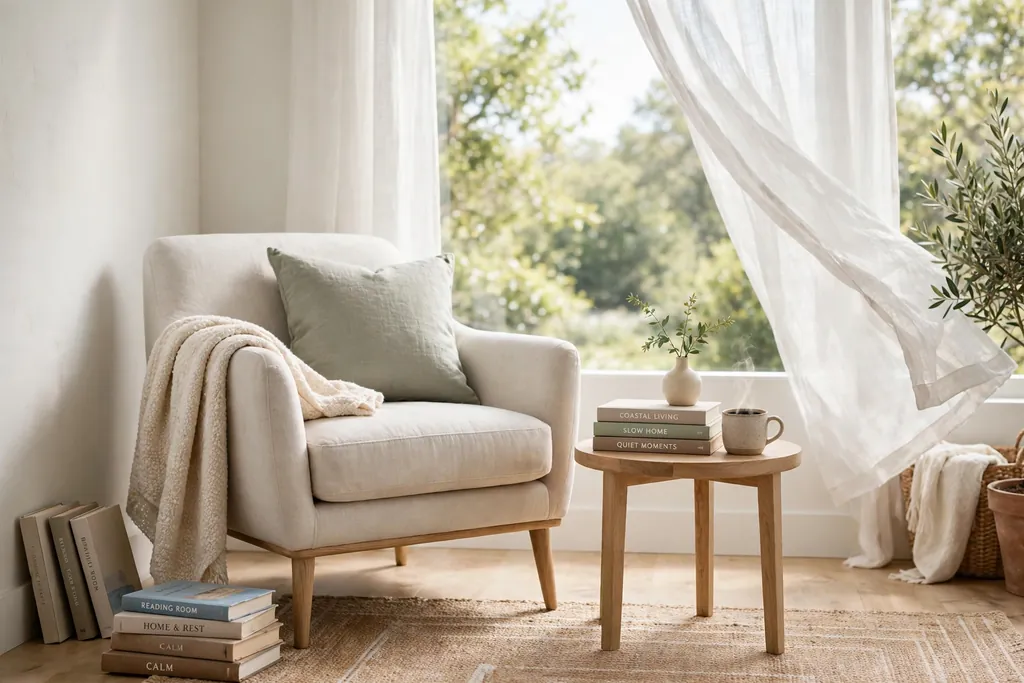
    25. Breezy Reading Nook by the Window

    Breezy reading nook with a light armchair, small side table, and books beside a bright window.

    Create a reading nook by a window with a light armchair, a small side table, a pale cushion, and a floor lamp for evenings. A window nook uses daylight for reading and gives a bright corner a clear use through the summer.

    Place the chair at an angle to the window, so light falls on the book without glare, and keep the side table small so the chair stays easy to get in and out of. A woven basket beside the chair can hold a throw and a few books when the nook is not in use.

    Conclusion

    A light and airy summer home does not need new furniture or a full room makeover. White linen, sheer curtains, rattan, seagrass, fresh greenery, and a pale palette do most of the work, and one simple vignette per surface keeps the result calm. Pick the ideas that fit your rooms and your daily routine, repeat one or two natural materials through the home, and leave clear space around each display. The rooms will feel brighter, cooler, and easier to live in all summer.

    FAQs

    What colors make a home feel light and airy in summer?

    White, cream, sand, pale blue, and soft sage make a home feel light and airy in summer, because pale colors reflect daylight instead of absorbing it. Keep two thirds of each room in those tones, and use one stronger accent, such as sea blue or leaf green, in small doses through pillows, towels, or plants.

    How do I make a small room feel airy in summer?

    You make a small room feel airy in summer by using sheer curtains, a mirror opposite the window, a clear glass or light wood table, and one simple vignette per surface. Remove extra furniture and heavy textiles first, then add pale colors and natural fibers, since a small room shows clutter faster than a large one.

    What fabrics are best for summer decor?

    Linen and lightweight cotton are best for summer decor, because they breathe well, wash easily, and drape softly in pale colors. Use linen for slipcovers, curtains, and table runners, cotton for bedding and throws, and rattan or seagrass for baskets and chairs, so the room stays light in both color and texture.

    How can I decorate for summer without buying new furniture?

    You can decorate for summer without buying new furniture by swapping textiles, changing pillow covers and bedding to white or pale tones, adding sheer curtains, and styling surfaces with greenery, citrus, or white ceramics you already own. A slipcover can lighten a dark sofa, and a mirror or a natural fiber rug can change how a room feels without replacing any large piece.

    How do I keep a light summer room from looking bare?

    You keep a light summer room from looking bare by adding texture rather than color: woven baskets, rattan, linen, jute, clear glass, and fresh greenery all add interest while keeping the palette pale. Use one vignette per surface, repeat one natural material through the home, and add plants at different heights, so the room feels layered instead of empty.

    What should I do first when styling a home for summer?

    Start with the largest surfaces first, since sofa covers, curtains, bedding, and rugs set the tone for the whole room. Once those are pale and light, add smaller pieces such as vases, bowls, and baskets, and finish by editing each surface down to one simple vignette, so the home feels bright without feeling crowded.


  • 15 Easter Pillow Cover Ideas for a Cheerful Home Refresh

    15 Easter Pillow Cover Ideas for a Cheerful Home Refresh

    The best Easter pillow covers use soft pastels, one clear motif, and a washable fabric, so a sofa, bed, or porch bench feels fresh for spring without a full room change. Choose two or three covers in pastel pink, yellow, mint, or lilac, pair them with plain covers you already own, and keep one motif as the focus.

    Start by checking the insert size, since a cover one or two inches smaller than its insert looks fuller on a sofa or bed. Pick a palette of three pastel colors at most, and repeat one of them in a throw or a small vase of spring flowers nearby, so the new covers connect with the rest of the room. For more seasonal pillow styling, see Fall Pillow Covers: 17 Cozy Ideas to Refresh Your Sofa, and browse the Dwell Ovell home page for ideas for every room.

    Key Takeaways

    • Limit the Easter palette to three pastel colors, and repeat one color elsewhere in the room so the covers look planned.
    • Use a cover one or two inches smaller than its insert for a full, plump shape on sofas and beds.
    • Keep one motif as the focus, such as bunnies or eggs, and pair it with plain or striped covers.
    • Choose washable cotton or linen covers for sofas and porches used every day, and save velvet or embroidered covers for lighter use.
    • Mix two solids, one pattern, and one texture so an Easter sofa looks layered rather than busy.
    • Store Easter covers clean, dry, and folded flat, with tissue between embroidered covers, so they keep their shape for next spring.

    1. Pastel Bunny Silhouette Covers on a Sofa

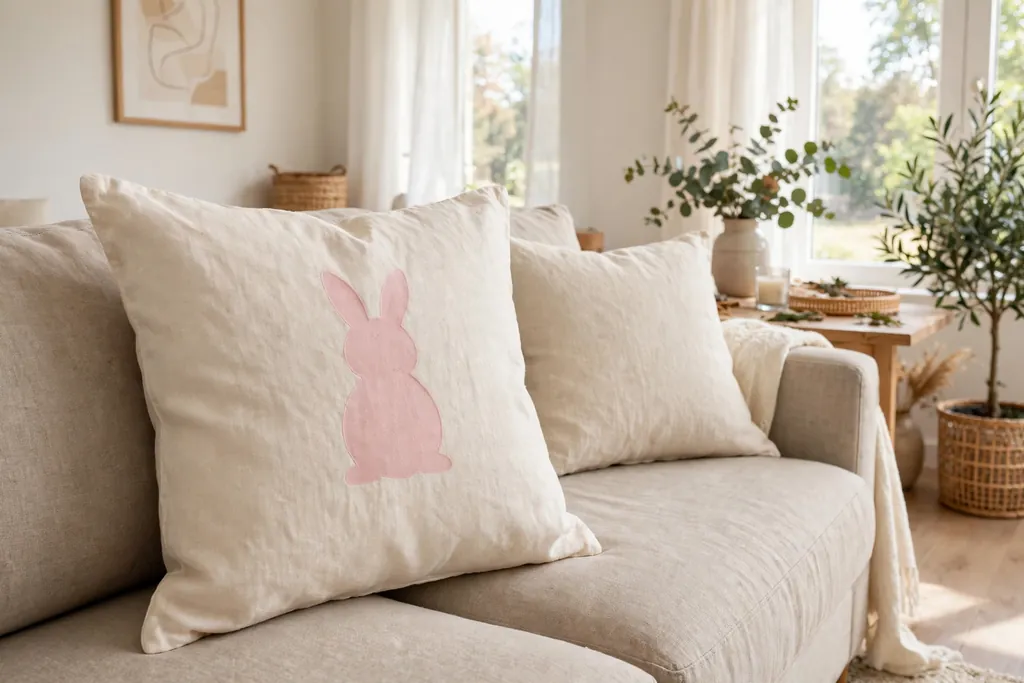
    Cream linen pillow cover with a pastel pink bunny silhouette on a neutral sofa.

    A single bunny silhouette in soft pink, mint, or grey on a cream linen cover gives a sofa a clear Easter note without a loud print. Place two silhouette covers at the ends of a neutral sofa, with plain cream or pale grey covers between them, so the motif reads from across the room.

    Silhouette covers suit a living room because the simple shape stays calm next to other spring decor. Choose a printed silhouette for easy washing, or an appliqued felt bunny if you want a little texture. Keep the rest of the sofa plain, so the bunny shape stays the focus.

    2. Embroidered Egg Covers in Soft Colors

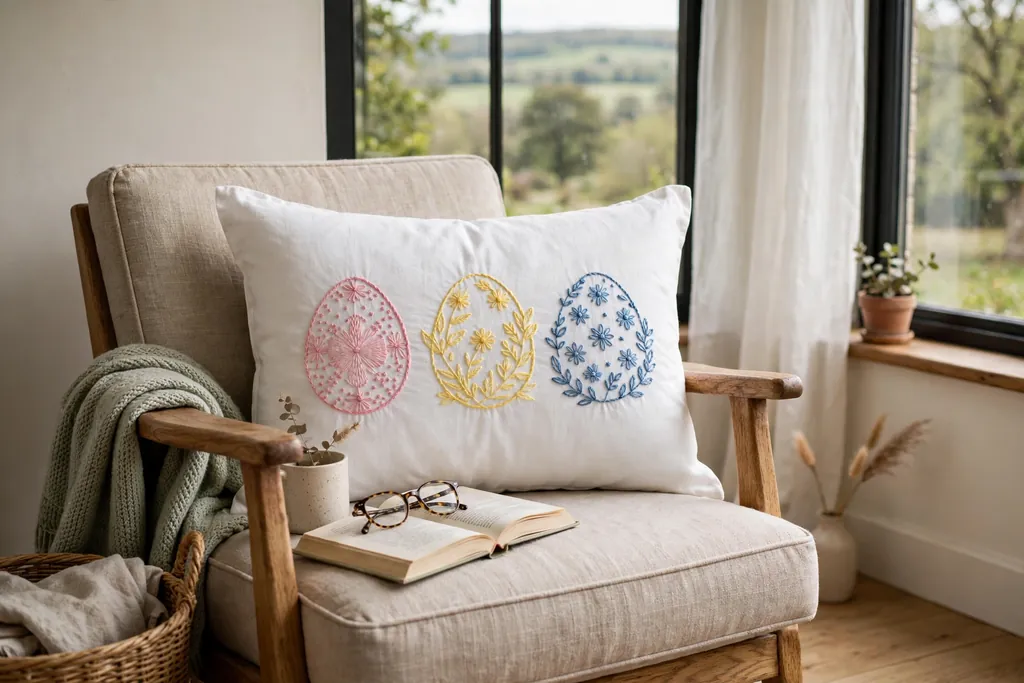
    White pillow cover with embroidered pastel eggs in pink, yellow, and blue thread on a reading chair.

    Embroidered eggs in pastel thread on a white or oatmeal cover add a crafted detail that suits a sofa or a reading chair. Look for eggs stitched in pink, yellow, and blue thread, spaced evenly across the cover, with a plain border so the stitching stands out.

    Embroidery reads best up close, so these covers work well on chairs and small sofas where guests sit near the pillows. Wash them gently inside a laundry bag, and press from the back if ironing is needed, so the raised threads keep their shape. Pair embroidered covers with solid linen covers in one of the thread colors.

    3. Gingham Check Covers in Spring Pastels

    Pink gingham check pillow covers on a sofa with cream solid covers beside them.

    Pink, mint, or butter yellow gingham covers bring a fresh, cottage feel to a sofa or a bedroom bench. The small, even check reads as a pattern without competing with a bunny or egg motif nearby, which makes gingham a good partner cover.

    Use gingham on one or two pillows per sofa, and pair it with solid covers in cream or white. Gingham suits farmhouse, cottage, and traditional rooms, and it also works in a modern room when the rest of the palette stays pale. Wash gingham with similar colors, and check that the dye is colorfast before the first wash.

    4. Carrot Patch Print Covers for a Kitchen Bench

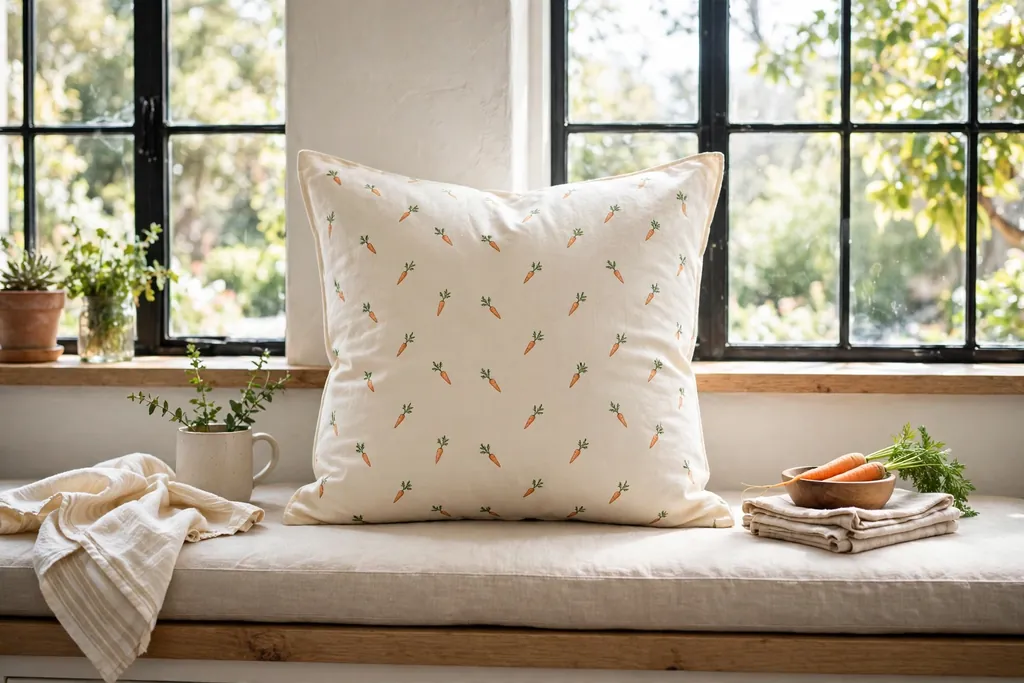
    Cream cotton pillow cover with a small carrot print on a kitchen bench seat.

    A carrot print in soft orange and green on a cream or natural cotton cover adds a playful Easter note to a kitchen bench or breakfast nook seat. The vegetable motif feels right in a kitchen, where it can sit near a bowl of fruit or a small potted herb.

    Keep the carrot print to one or two covers, and pair it with plain cream covers so the print does not crowd the bench. Cotton covers wash well, which matters in a kitchen where spills happen. If orange feels strong for the room, choose a print with small carrots and plenty of cream ground showing between them.

    5. Watercolor Spring Floral Covers for a Bedroom

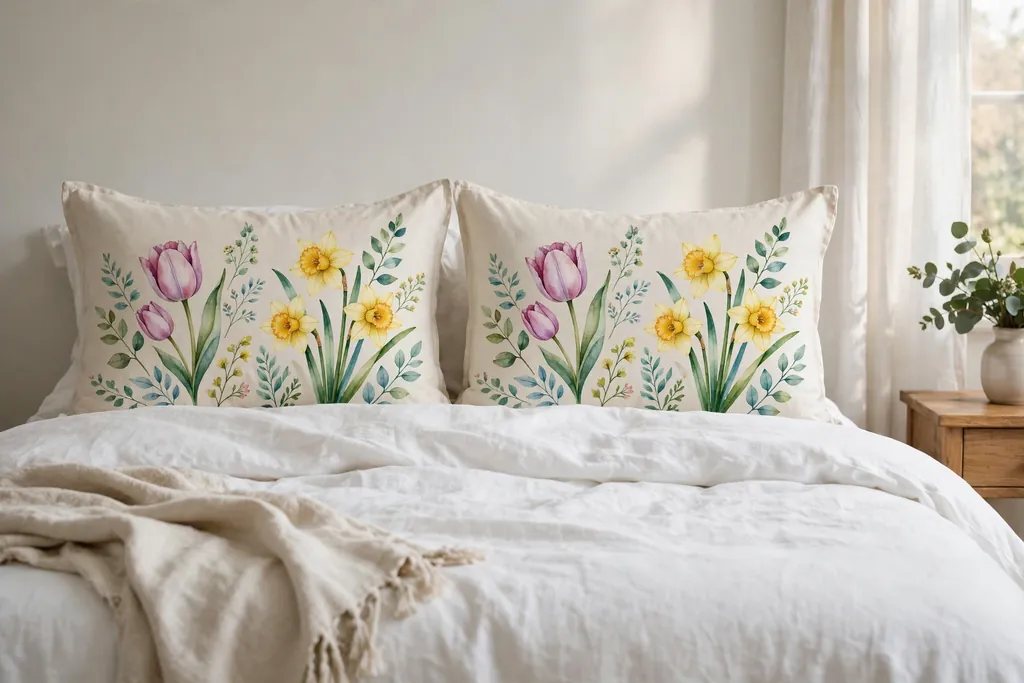
    Pale pillow covers with a watercolor tulip and daffodil print on a bed with white bedding.

    Watercolor tulips, daffodils, and cherry blossom on a pale cover bring Easter color to a bedroom without a holiday motif. Place two floral covers in front of plain white sleeping pillows, so the bed looks dressed for spring but still calm enough for sleep.

    Floral covers suit a bedroom because the soft, painted look pairs well with white bedding and light wood furniture. Choose a print with a pale ground, such as cream or blush, and repeat one flower color in a throw at the foot of the bed. Wash floral covers with similar colors to keep the soft tones from fading.

    6. Pom Pom Trim Covers in Butter Yellow

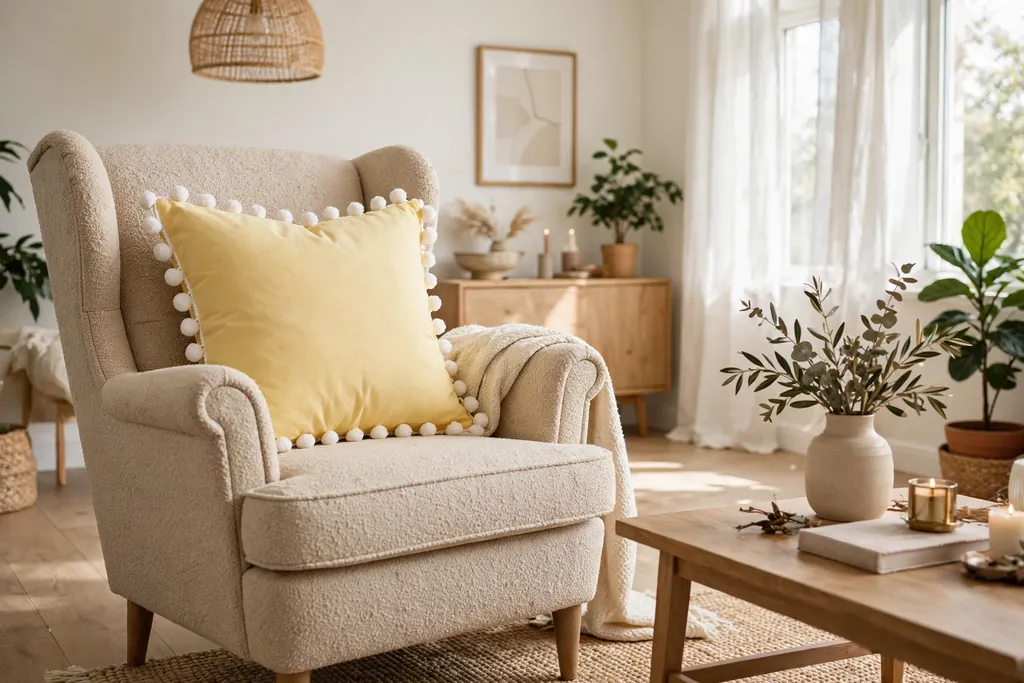
    Butter yellow pillow cover with white pom pom trim on an armchair.

    Butter yellow covers with small white pom pom trim add a light, cheerful edge detail to a sofa or an armchair. The trim outlines the cover and gives a solid color cover a finished look, which helps it stand out next to plain linen covers.

    Use pom pom trim covers as single accent pillows, since the trim is a strong detail on its own. Wash them gently in a laundry bag, so the trim does not tangle or flatten, and dry them flat, fluffing the pom poms by hand once dry. Butter yellow pairs with cream, mint, and soft grey covers for a balanced spring palette.

    7. Appliqued Bunny Ear Covers for a Family Room

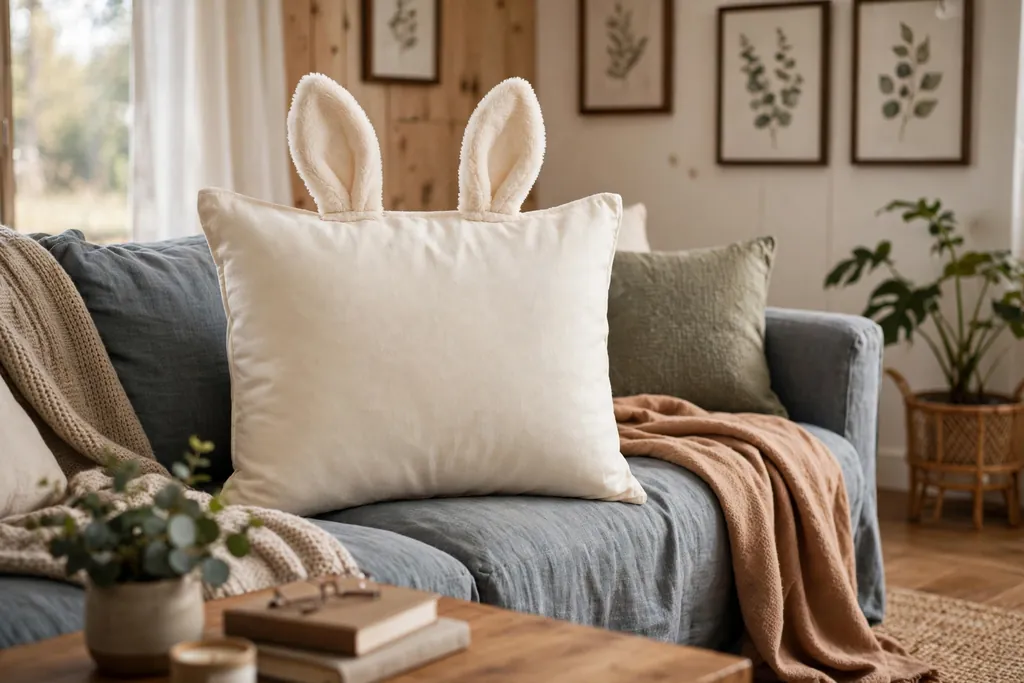
    Cream pillow cover with soft bunny ears sewn on the top edge, upright on a family room sofa.

    Covers with soft bunny ears stitched or sewn onto the top edge make a fun Easter pillow for a family room or a child’s bedroom. The ears stand up from the pillow, so the cover works best on a sofa or bed where the pillow sits upright against a back cushion.

    Choose bunny ear covers in cream, grey, or soft pink, with ears in a matching or slightly darker tone. Keep the rest of the bedding or sofa plain, since the ears are the feature. Wash these covers gently, and reshape the ears while damp so they dry standing upright.

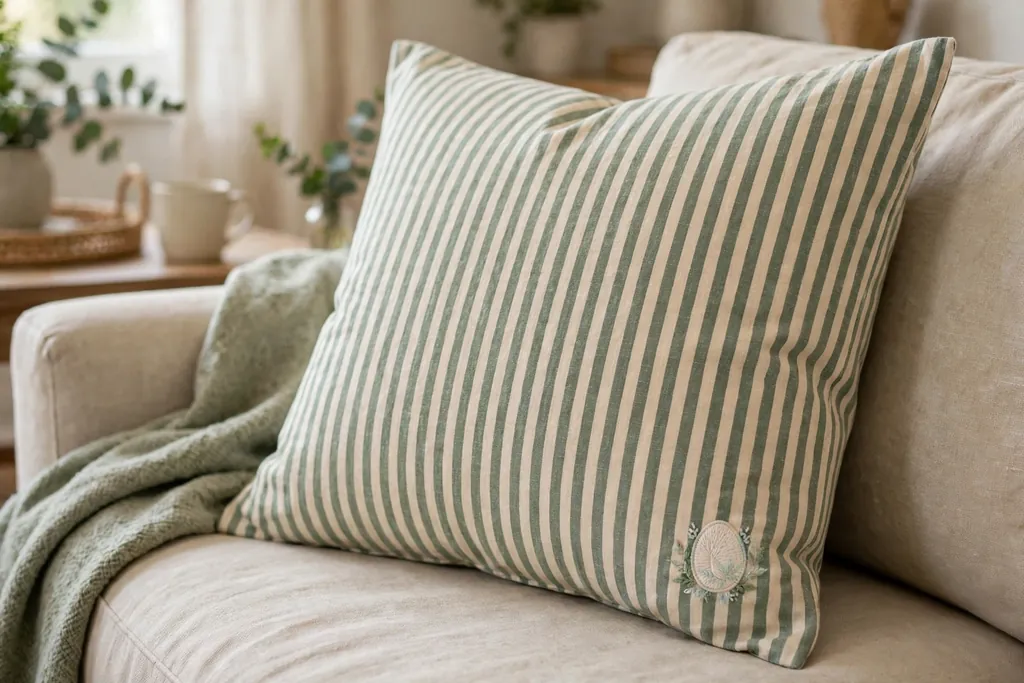
    8. Sage and Cream Ticking Stripe Covers with Egg Embroidery

    Sage and cream ticking stripe pillow cover with a small embroidered egg at one corner on a sofa.

    Narrow sage and cream ticking stripes with a small embroidered egg at one corner give a sofa a quiet Easter detail. The stripe is calm enough for everyday use, while the single egg marks the season without turning the whole cover into a holiday print.

    Ticking stripe suits rustic, farmhouse, and traditional rooms, and it bridges the gap between a solid cover and a bold print on the same sofa. Use it on one or two pillows, and repeat the sage in a solid cover elsewhere on the sofa. Cotton ticking washes well, and a medium iron setting keeps the stripes crisp.

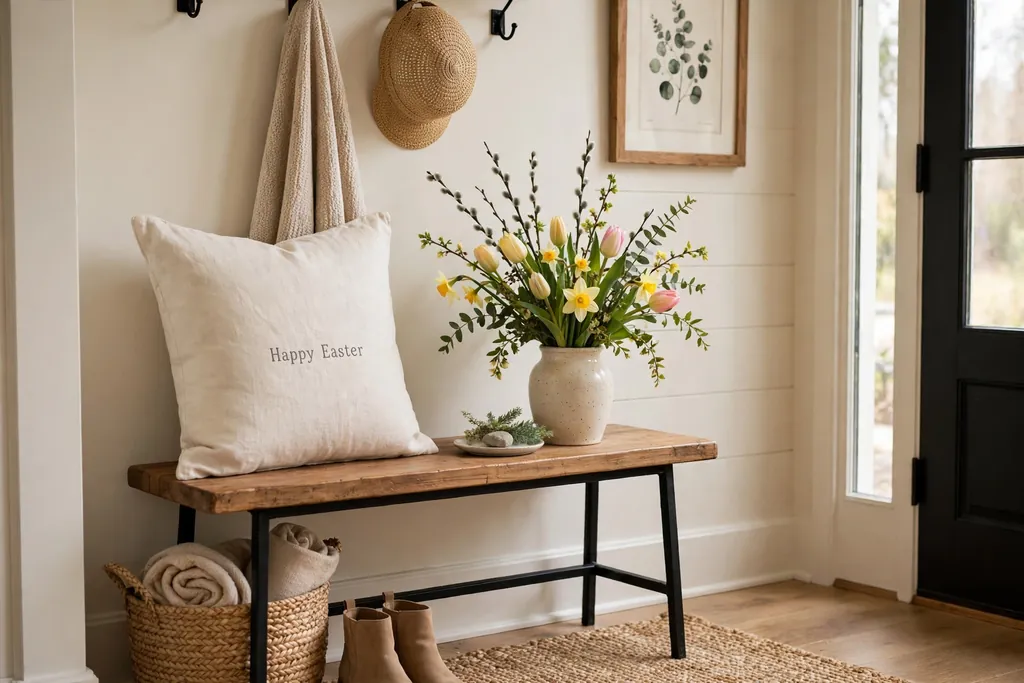
    9. Happy Easter Typography Covers for an Entryway Bench

    Cream pillow cover with small grey Happy Easter lettering on an entryway bench.

    A simple “Happy Easter” message in soft grey or sage lettering on a cream cover suits an entryway bench, where guests see it as they arrive. Keep the lettering small and centered, with plenty of plain fabric around it, so the cover reads as welcoming rather than loud.

    Typography covers work well in an entryway because the message is read at a glance. Pair the message cover with a plain pastel cover beside it, and add a small basket or a vase of spring stems nearby. Choose a printed message for easy washing, since entryway pillows get frequent handling.

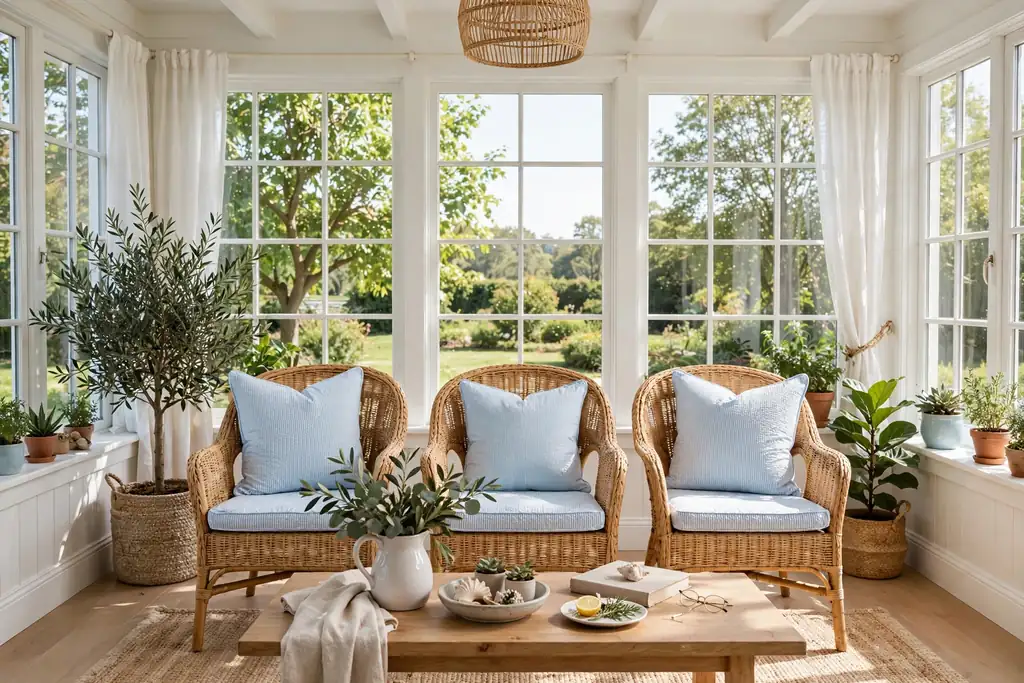
    10. Seersucker Covers in Pastel Blue for a Sunroom

    Pastel blue seersucker pillow covers on chairs in a bright sunroom.

    Seersucker covers in pastel blue or mint add a light, crinkled texture that suits a sunroom or a bright living room. The puckered weave feels cool and casual, which fits rooms that get warm in spring sun.

    Use seersucker on the pillows you lean against most, since the texture is comfortable and the fabric breathes well. Pair seersucker with smooth cotton covers in white or cream, so the crinkle stands out as a texture contrast. Wash seersucker gently and skip heavy ironing, since the puckered texture is part of the look.

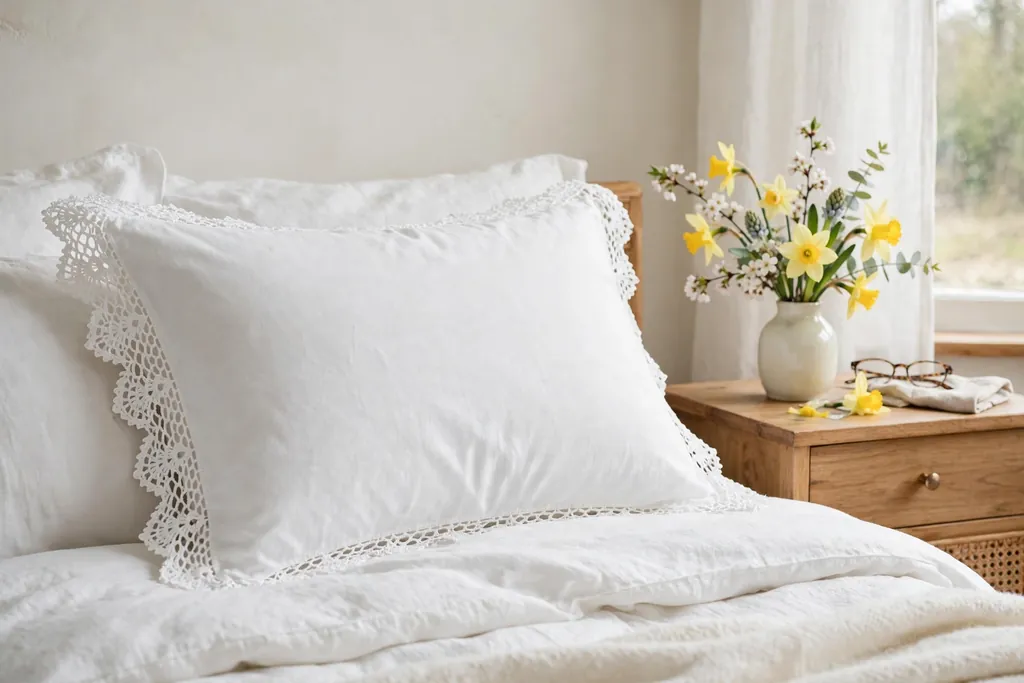
    11. Crochet Edge Covers for a Vintage Bedroom

    White pillow cover with a crochet lace edge on a bed with white bedding.

    Cream or white covers with a crochet or lace edge bring a vintage note to a bedroom or a guest room bed. The handmade edge softens a plain cover and pairs well with white bedding, light wood, and small spring flowers on a nightstand.

    Crochet edge covers suit a bed because they are seen up close, where the edge detail can be appreciated. Place them in front of sleeping pillows, with a pastel solid cover behind them for a layered look. Wash them gently in a laundry bag, and dry them flat so the edge keeps its shape.

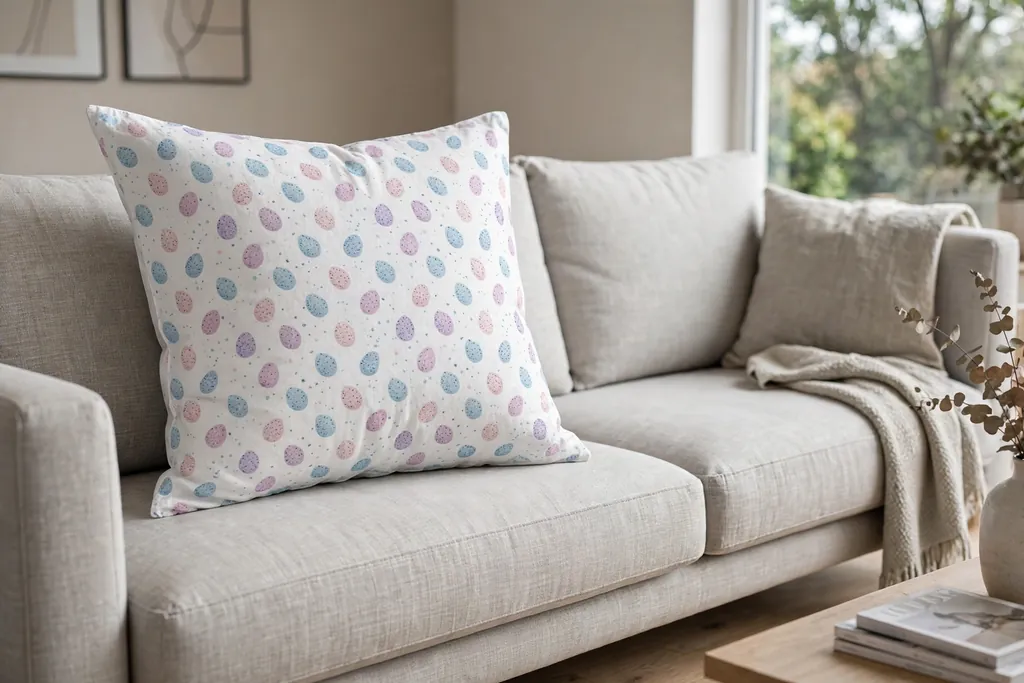
    12. Speckled Egg Print Covers for a Modern Living Room

    White pillow cover with a small speckled egg print in soft blue, pink, and lilac on a modern sofa.

    Small speckled eggs in soft blue, pink, and lilac on a white or pale grey cover give a modern living room a subtle Easter pattern. The small scale of the print keeps it calm, which suits rooms with clean lines and little other pattern.

    Use speckled egg covers on one or two pillows, with solid covers in white, grey, or one pastel from the print. The small print also works on a lumbar pillow in front of larger square covers. Choose a cotton or linen blend for everyday use, and wash with similar colors to keep the pale ground bright.

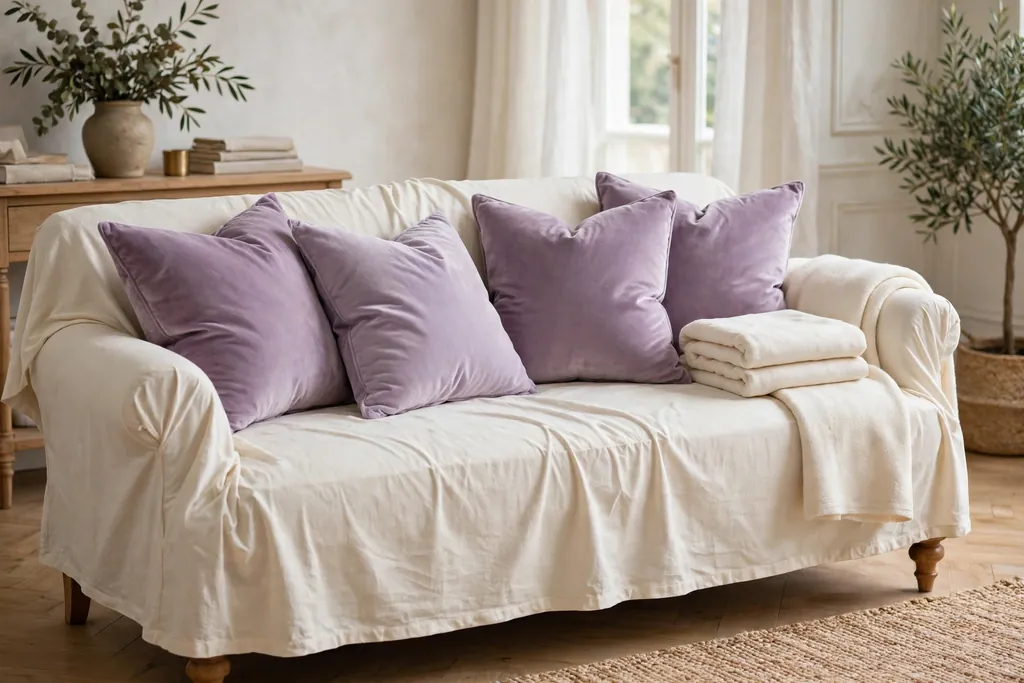
    13. Soft Lilac Velvet Covers for an Elegant Sofa

    Soft lilac velvet pillow covers on an elegant sofa with cream covers beside them.

    Soft lilac velvet covers add a gentle spring color and a smooth, rich texture to a sofa in a more formal living room. Velvet catches light softly, so lilac reads as elegant rather than bright, especially next to cream and pale grey covers.

    Use velvet covers on pillows that get light use, since the pile shows pressure marks where people lean. Brush the pile lightly after use to keep it even, and keep velvet covers away from long stretches of direct sun, which can fade the color unevenly. Pair lilac velvet with a cream boucle or linen cover for texture contrast.

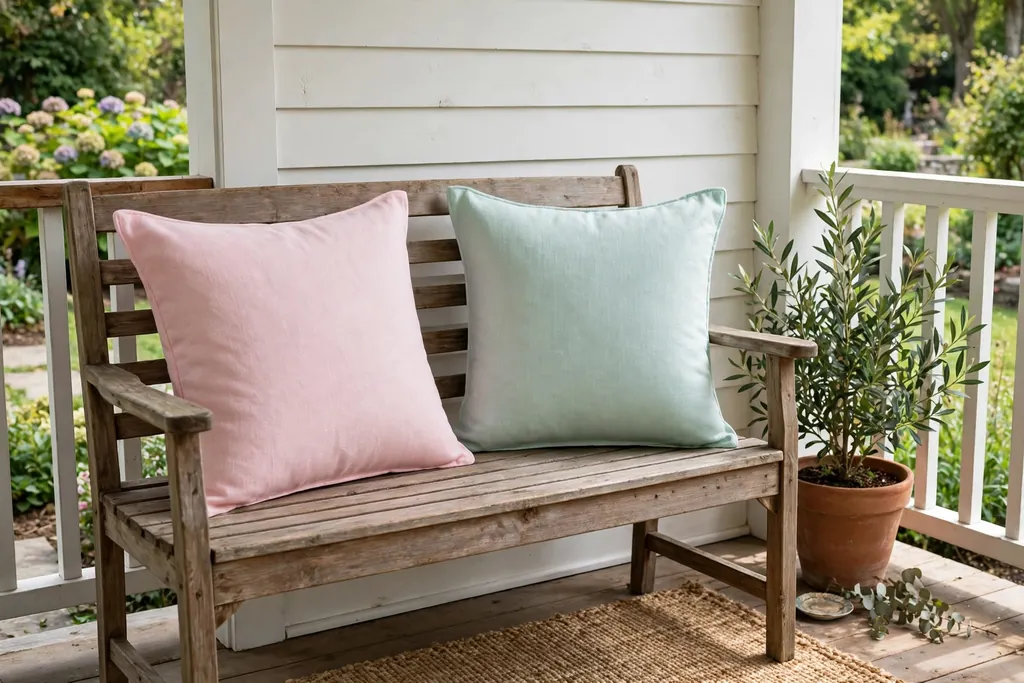
    14. Outdoor Pastel Covers for a Porch Bench

    Pastel pink and mint outdoor pillow covers on a porch bench with a potted plant nearby.

    Pastel covers in a weather resistant fabric bring Easter color to a porch bench or patio chair without worry about spring showers. Look for covers in soft pink, yellow, or mint with a wipe clean or quick dry finish, and a hidden zipper that keeps rain out of the insert.

    Outdoor covers suit a porch because they can stay out through the Easter season, then be stored for summer. Pair a pastel outdoor cover with a plain cream outdoor cover, and add a small potted plant nearby to echo the spring palette. Shake outdoor covers outside between washes, and store them dry at the end of the season.

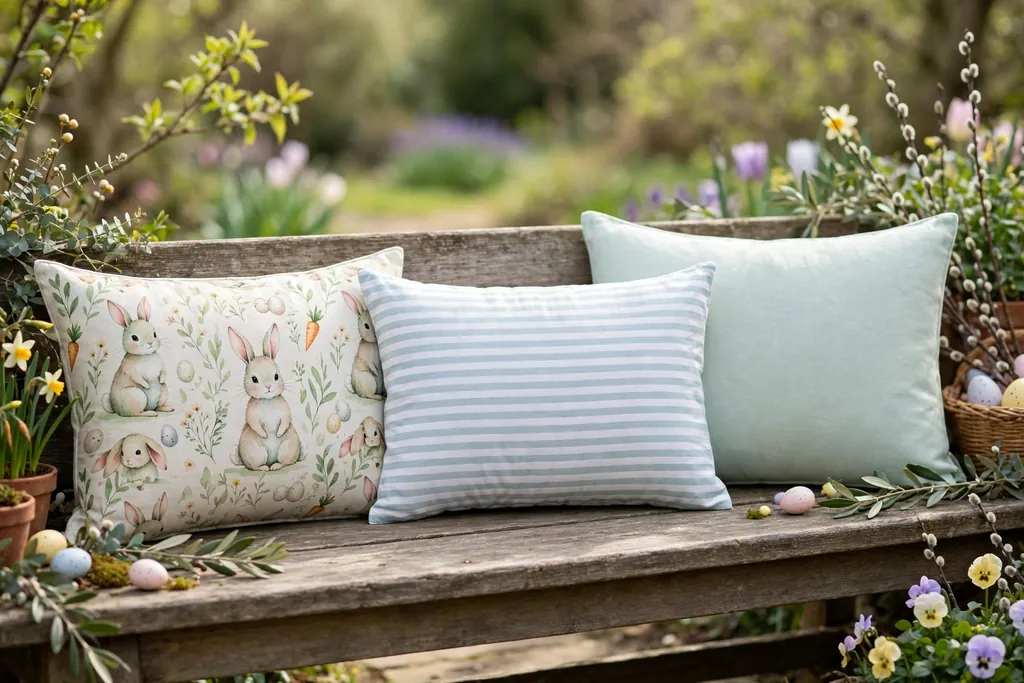
    15. Mix and Match Easter Lumbar Covers for a Bed or Bench

    Mixed Easter lumbar pillow covers in a bunny print, a stripe, and a solid pastel on a long bench.

    A set of lumbar covers in mixed Easter patterns, such as one bunny print, one stripe, and one solid pastel, gives a bed or a long bench a styled look in one step. The long rectangular shape breaks up a row of square pillows and runs neatly along the back of a bench.

    Place the lumbar in front of square sleeping pillows on a bed, or centered on a bench, with plain covers at each end. Keep the three lumbar patterns in one pastel family, such as pink, cream, and mint, so the mix looks planned. Lumbar covers also suit a window seat, where their low shape does not block the view.

    Conclusion

    Easter pillow covers work best when the palette stays soft, one motif leads, and the fabric suits the room. Start with two or three covers in pastels you already like, pair them with plain covers you own, and check the insert size before ordering. Swap the covers out after Easter, store them clean and dry, and the same set will be ready for next spring. Save the ideas you like, and try one new combination each year to keep the seasonal refresh feeling fresh.

    FAQs

    What colors work best for Easter pillow covers?

    Pastel pink, yellow, mint, lilac, and soft blue work best for Easter pillow covers, since they read as spring colors without overpowering a room. Limit the mix to three pastel colors, and pair them with cream or white covers so the sofa or bed stays calm.

    How many Easter pillow covers should I use on a sofa?

    Two or three Easter covers are enough for most sofas, paired with plain covers you already own. Place one patterned cover at each end of the sofa, or use a single feature cover in the center, so the Easter motif stays a highlight rather than covering every pillow.

    Are Easter pillow covers washable?

    Most cotton and linen Easter pillow covers are washable, but embroidered, appliqued, and velvet covers often need gentle washing or dry cleaning. Always check the care label before washing, and wash patterned covers with similar colors to protect the print or stitching.

    What size Easter pillow cover should I buy?

    Buy a cover one or two inches smaller than your insert, so the pillow looks full and plump rather than flat. Measure the insert before ordering, and check whether the cover size given is the finished cover size or the recommended insert size, since brands label them differently.

    Can I use Easter pillow covers outdoors?

    Yes, you can use Easter pillow covers outdoors if they are made from a weather resistant fabric with a quick dry or wipe clean finish. Standard cotton or velvet covers should stay indoors, since rain and strong sun can stain or fade them, and damp inserts can develop odors.

    How do I store Easter pillow covers after the season?

    Store Easter covers clean, dry, and folded flat, with tissue paper between embroidered or appliqued covers to protect the detail. Keep them in a closed box or bag away from damp and direct sun, and they will hold their color and shape until next spring.


  • 15 Valentine Pillow Ideas for a Simple Seasonal Refresh

    15 Valentine Pillow Ideas for a Simple Seasonal Refresh

    Valentine pillows refresh a room fast when you swap one or two covers for red, pink, or heart patterned designs and keep the rest of the sofa or bed neutral. The 15 ideas below cover velvet, linen, knit, and applique pillows for sofas, beds, chairs, and window seats, with simple color and size tips for each spot.

    Start with the pillows you already own, then add one or two Valentine pieces in a color that already appears in the room, such as a red throw or a pink vase. Check the insert size before you buy a cover, since a cover one or two inches smaller than its insert looks fuller on a sofa or bed. For more seasonal pillow styling in a different palette, see Fall Pillow Covers, and visit the Dwell Ovell home page for more room ideas.

    Key Takeaways

    • Swap one or two covers, not the whole sofa or bed, so the Valentine look stays simple and easy to remove.
    • Keep the base neutral in cream, grey, or beige, and let red, pink, or burgundy be the accent color.
    • Use a cover one or two inches smaller than its insert for a full, plump shape.
    • Repeat one Valentine color in a throw or a vase, so the new pillows connect with the rest of the room.
    • Choose washable covers for everyday sofas and chairs, and store seasonal covers clean, dry, and folded flat.
    • Mix one pattern or texture with plain covers, so hearts and prints stay the focus instead of competing.

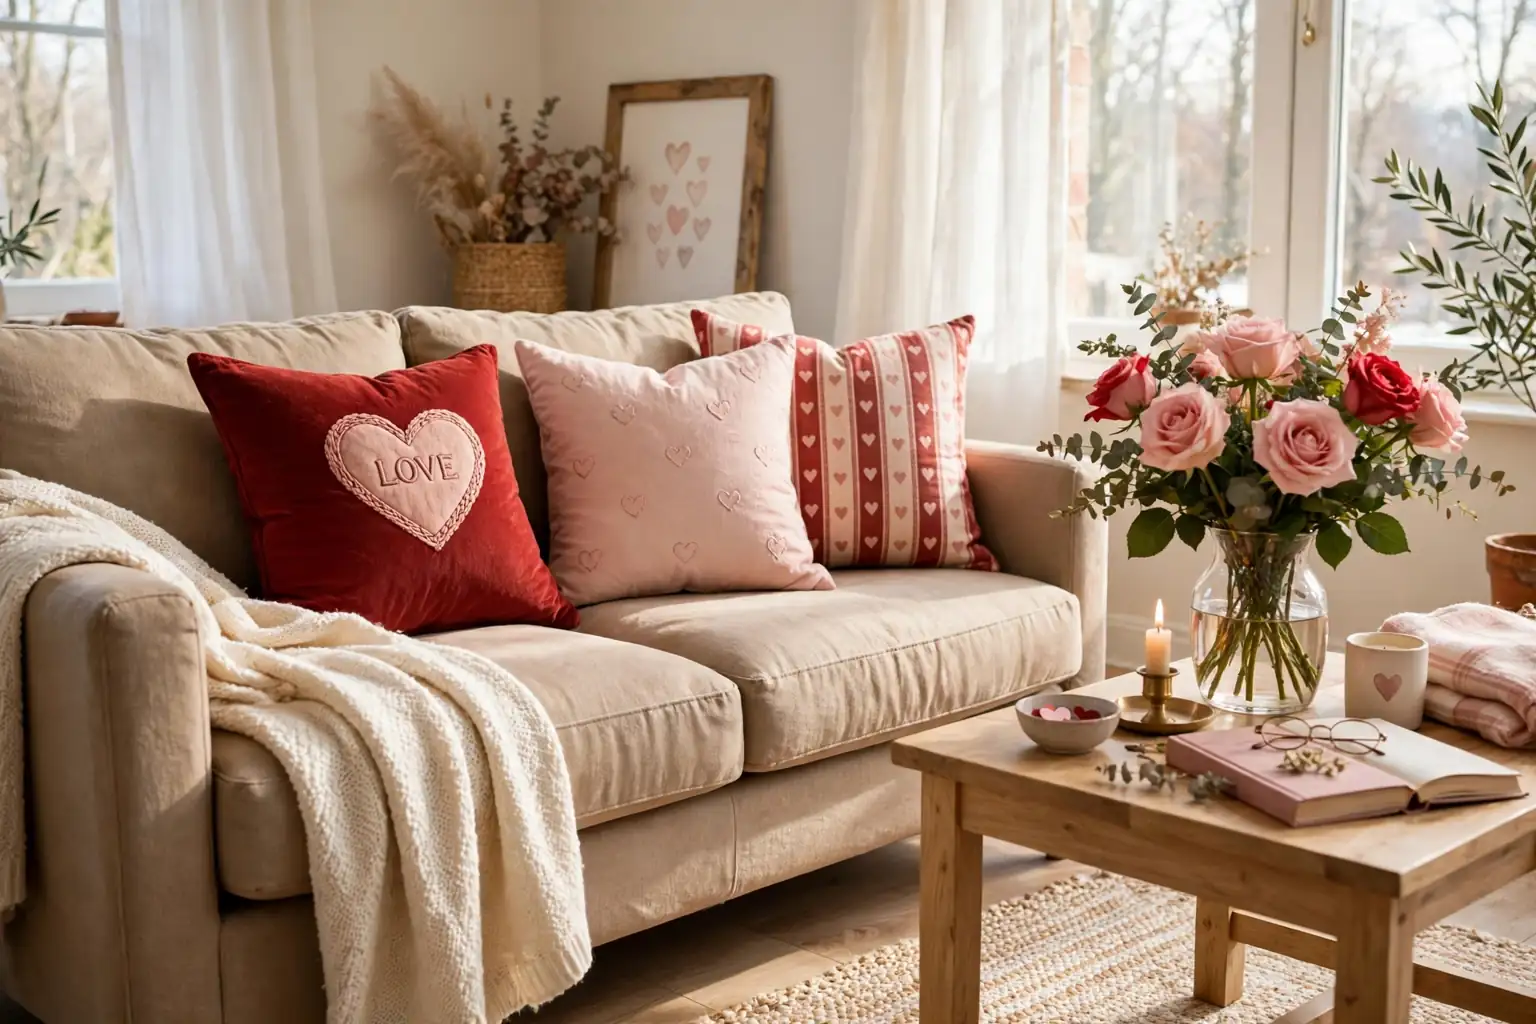
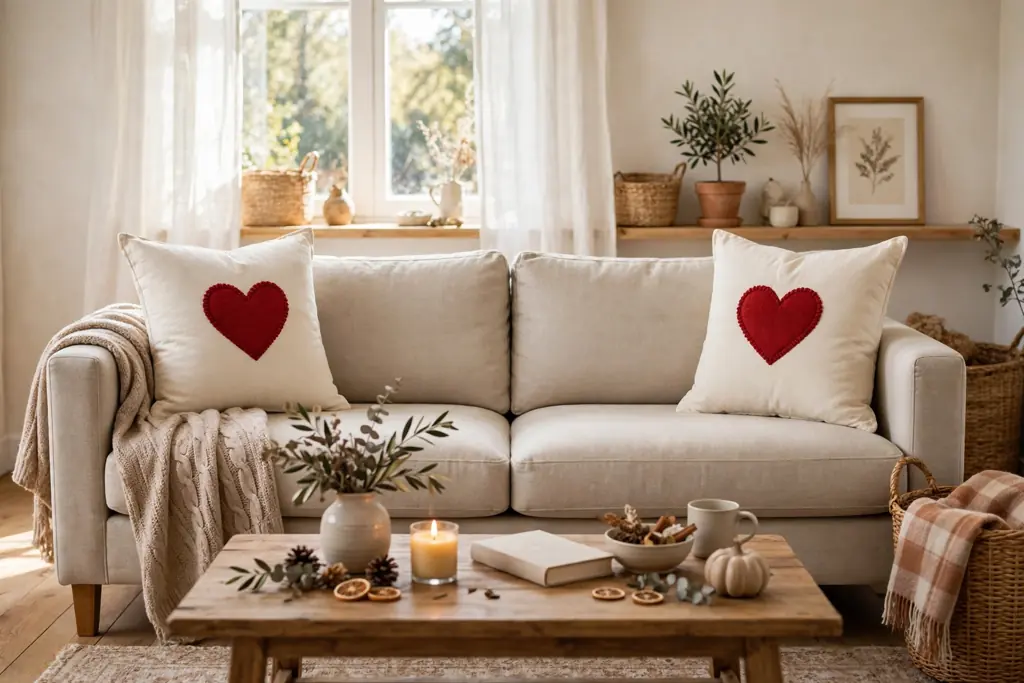
    1. Red Heart Applique Pillows on a Sofa

    Cream square pillows with a single red heart applique at each end of a neutral sofa.

    Place two cream square pillows with a single red heart applique at each end of a neutral sofa. The applique gives a clear Valentine motif, while the cream ground keeps the look calm enough for daily use.

    Applique suits a sofa where pillows are seen more than leaned on heavily, since raised fabric shapes hold their form best with gentle use. Pair the applique pillows with plain cream or grey covers in the middle, and keep other patterns off the sofa so the hearts stay the focus.

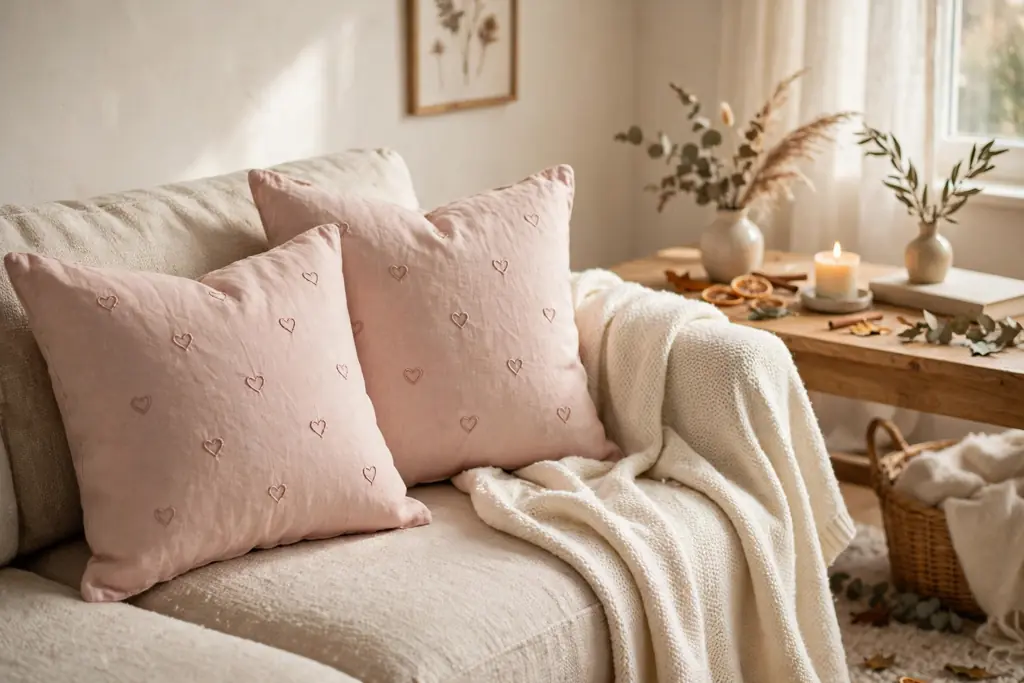
    2. Blush Linen Pillows with Embroidered Hearts

    Blush linen pillows with small embroidered hearts on a sofa beside a plain cream cover.

    Choose blush linen covers with small embroidered hearts in a slightly darker pink thread, and use them on a sofa or a bedroom chair. The soft color reads as Valentine styling without the bold contrast of bright red.

    Linen wrinkles naturally, which suits a relaxed room, and the small embroidery adds detail that shows up close. Wash these covers gently inside a laundry bag to protect the stitching, and pair them with plain white or cream covers so the embroidery is easy to see.

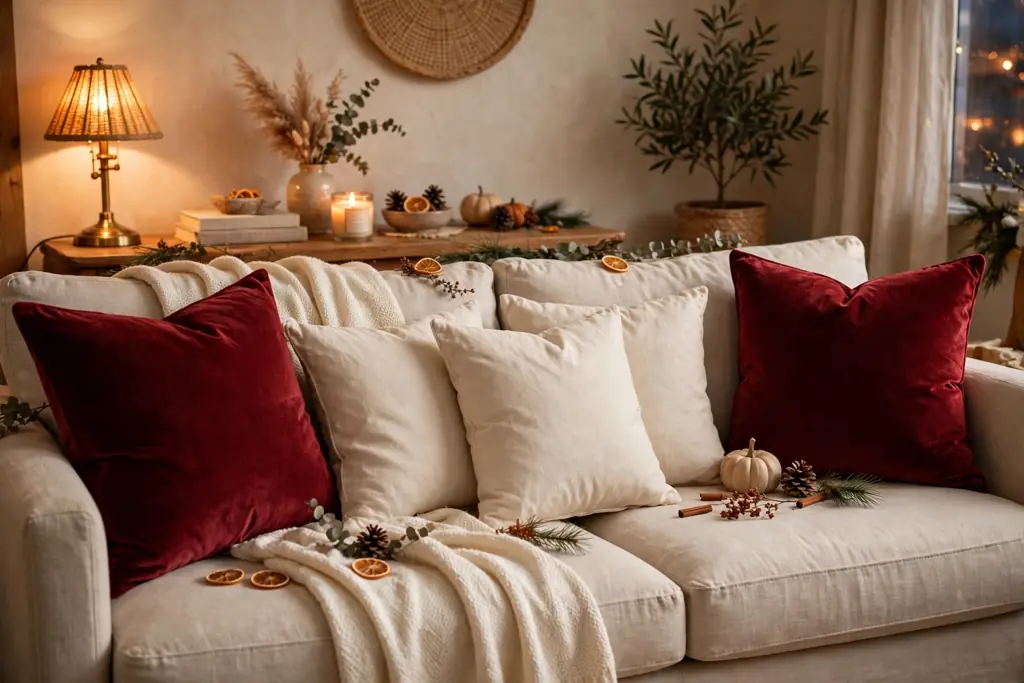
    3. Deep Red Velvet Pair for a Living Room Sofa

    Two deep red velvet square pillows at each end of a living room sofa.

    Use two deep red velvet square pillows, one at each end of a living room sofa, to frame the seating area. Velvet catches light and gives a rich color, so two pillows are often enough for the whole sofa.

    Velvet suits rooms used mainly for sitting and reading, since the fabric shows pressure marks where people lean. Brush the pile lightly after use to keep it even, and pair red velvet with cream, grey, or beige covers to soften the contrast.

    4. Cream Pillows with a Single Red Heart Print

    Cream pillow with one large red heart print in front of plain square pillows on a sofa.

    Pick a cream pillow with one large red heart printed in the center, and place it in front of plain square pillows on a sofa or bed. A single printed heart is a simple way to mark the season without changing the whole bedding or sofa set.

    This idea works well in a small room, where one bold pillow can carry the theme. Keep the print centered and the cover plain elsewhere, and repeat the red once more in the room, such as in a candle or a small vase, so the pillow does not look isolated.

    5. Pink and White Striped Pillows for a Bed

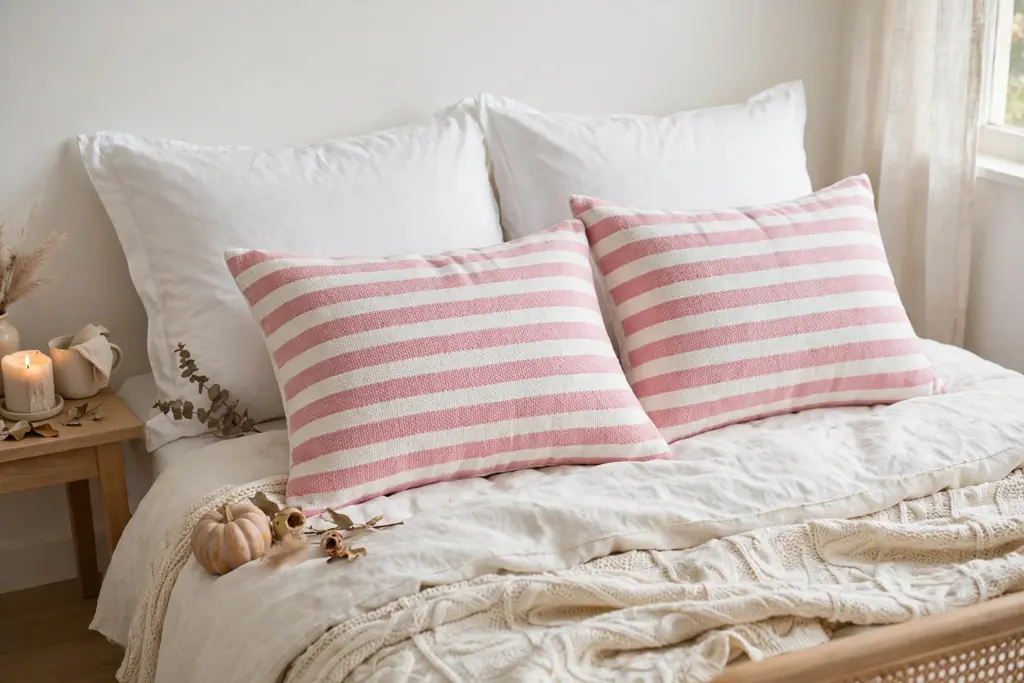
    Pink and white striped pillows in front of plain white sleeping pillows on a bed.

    Dress a bed with pink and white striped pillows in front of plain white sleeping pillows. Stripes add pattern and color, but the white keeps the bed feeling light and fresh for February.

    Use stripes on the front row only, and keep the duvet or quilt plain or lightly patterned, so the bed does not look busy. Pink stripes pair well with white, cream, and pale grey bedding, and they suit a bedroom that already has soft, light walls.

    6. Heart Shaped Pillow as a Bed Accent

    One red heart shaped pillow at the center of a bed in front of regular square pillows.

    Add one heart shaped pillow in red or blush pink at the center of a bed, in front of the regular square pillows. The shape itself carries the Valentine theme, so the fabric can stay plain.

    A heart shaped pillow works best as a single accent, since two or more shaped pillows can crowd a bed. Choose a firm fill so the shape holds up when propped against other pillows, and store it flat after the season so the points do not bend out of shape.

    7. Red Gingham Pillows on a Reading Chair

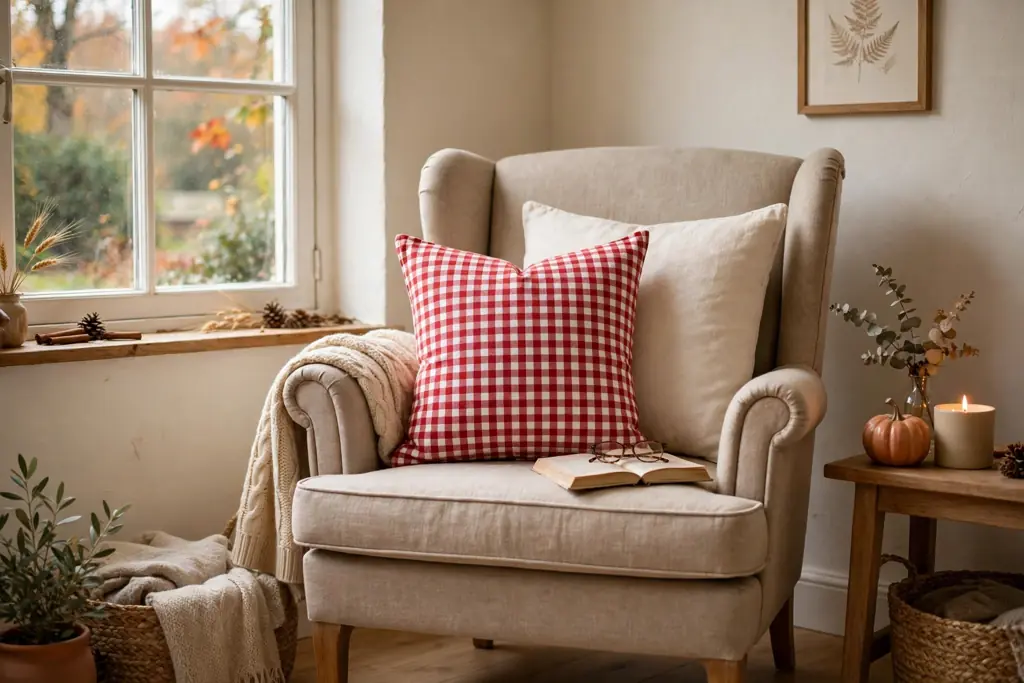
    Red and white gingham pillow on a reading chair with a plain cream cushion behind it.

    Place a red and white gingham pillow on a reading chair, paired with a plain cream cushion behind it. Gingham adds a small, even check pattern that feels casual and warm, and it suits farmhouse, cottage, and traditional rooms.

    Gingham is lighter than a large plaid, so it works on a single chair without dominating the corner. Wash gingham covers with similar colors, and check that the dye is colorfast before the first wash if the cover is new.

    8. Lumbar Pillow with Love Lettering

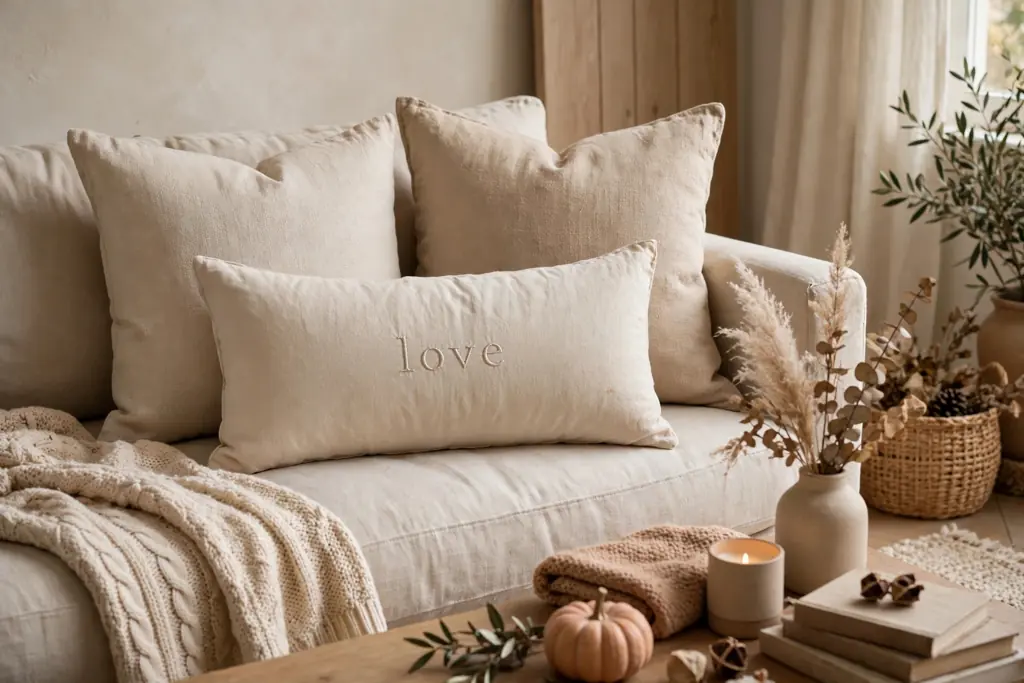
    Long lumbar pillow with simple love lettering centered on a sofa in front of square pillows.

    Use a long lumbar pillow with simple love lettering, such as the word love in a plain script, centered on a sofa or across a bed. The long shape breaks up a row of square pillows, and the lettering gives a clear seasonal message.

    Keep the lettering color simple, such as red on cream or white on blush, so it reads clearly from across the room. Place the lumbar in front of two square pillows, and keep nearby covers plain, since lettering plus another pattern can look crowded.

    9. Rose Print Pillows for a Bedroom

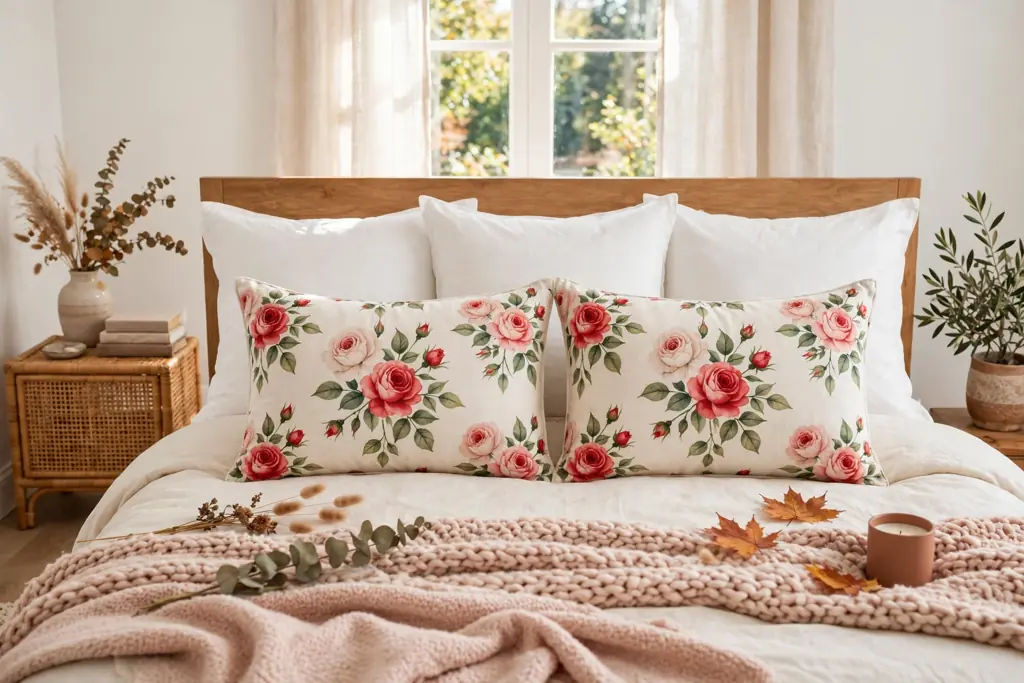
    Rose print pillows in red and blush on a cream ground as the front row on a bed.

    Choose pillows with a rose print in red and blush on a cream or pale pink ground, and use them as the front row on a bed. Roses suit Valentine styling, and a print on a light ground keeps the bedroom feeling soft rather than heavy.

    Use rose print on one or two pillows only, with solid covers behind them in one of the print colors. This keeps the print as a feature and avoids pattern overload, especially in a bedroom with patterned bedding or curtains.

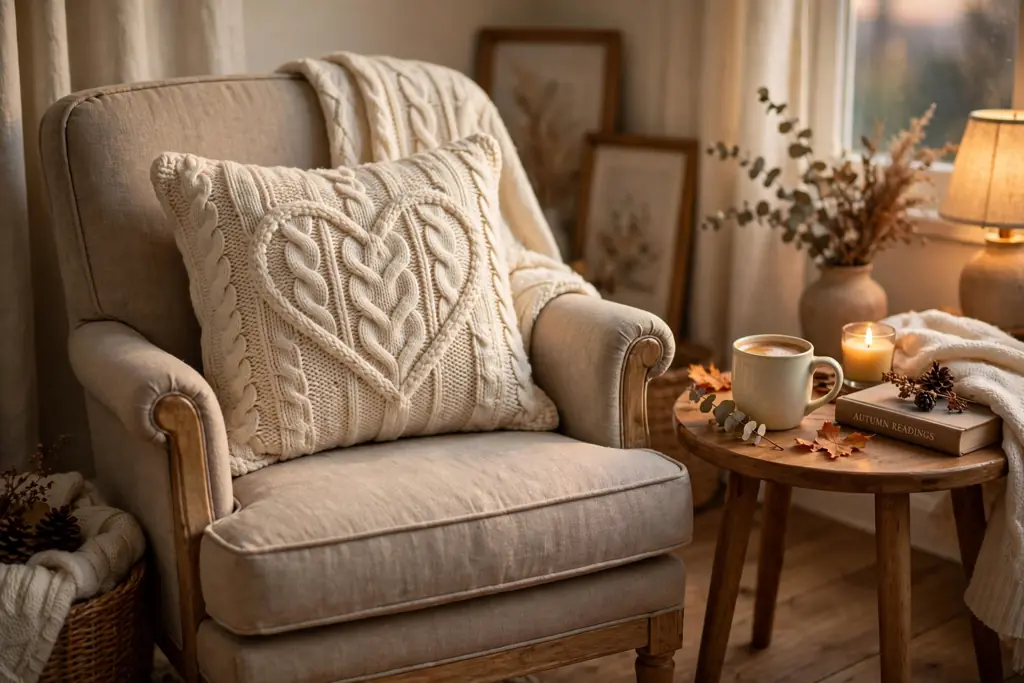
    10. Knit Heart Pillows for a Cozy Corner

    Knit pillow with a heart motif in cream on a reading chair beside a small side table.

    Add a knit pillow with a heart motif in cream or soft red to a reading chair or a corner bench. Knit texture feels warm and handmade, which suits a corner used for reading and resting in cooler months.

    Knit covers can stretch with use, so choose a cover with a firm lining and a hidden zipper that holds its shape. Wash knit covers gently and dry them flat, since heat and tumbling can shrink or distort the knit, and trim loose threads close to the fabric rather than pulling them.

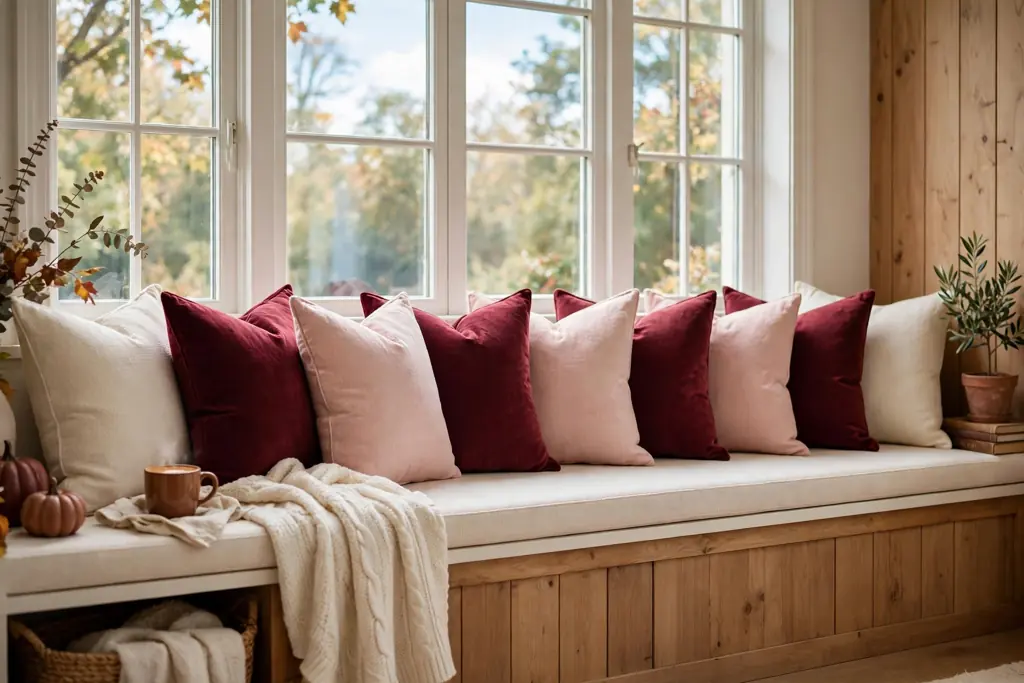
    11. Burgundy and Blush Mix on a Window Seat

    Burgundy and blush pillows alternating along a window seat with cream pillows at each end.

    Style a window seat with two burgundy pillows and two blush pillows, alternating the colors along the seat. The deeper burgundy grounds the display, while blush keeps it light enough for daytime use.

    Window seats get strong light, so choose covers that hold color well and rotate the pillows now and then to even out fading. Add a plain cream pillow at each end to frame the color mix, and keep the seat cushions plain so the pillows stand out.

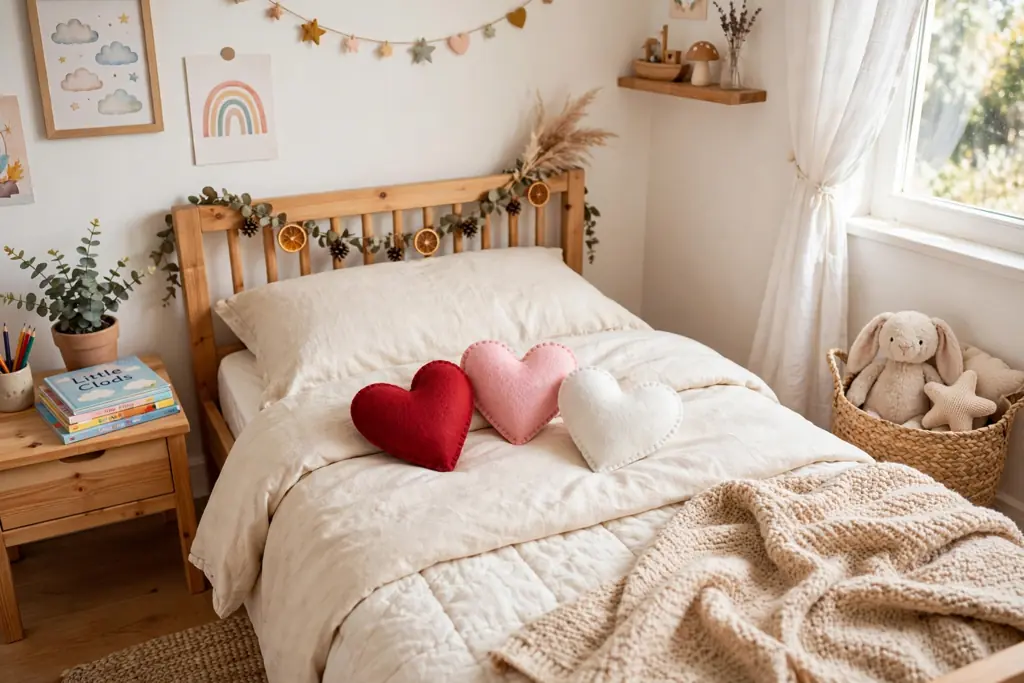
    12. Felt Heart Pillows for a Child’s Room

    Small felt heart pillows in red, pink, and white on a child's bed.

    Use small felt heart pillows in red, pink, and white on a child’s bed or reading chair. Felt holds its shape well, so small heart pillows look neat, and the soft fabric suits a room where pillows are moved and played with often.

    Keep the hearts the same size for a calm look, or mix two sizes and alternate them along the bed. Felt is light and easy to wash by hand, and it stores flat, so these pillows can come back each February without losing their shape.

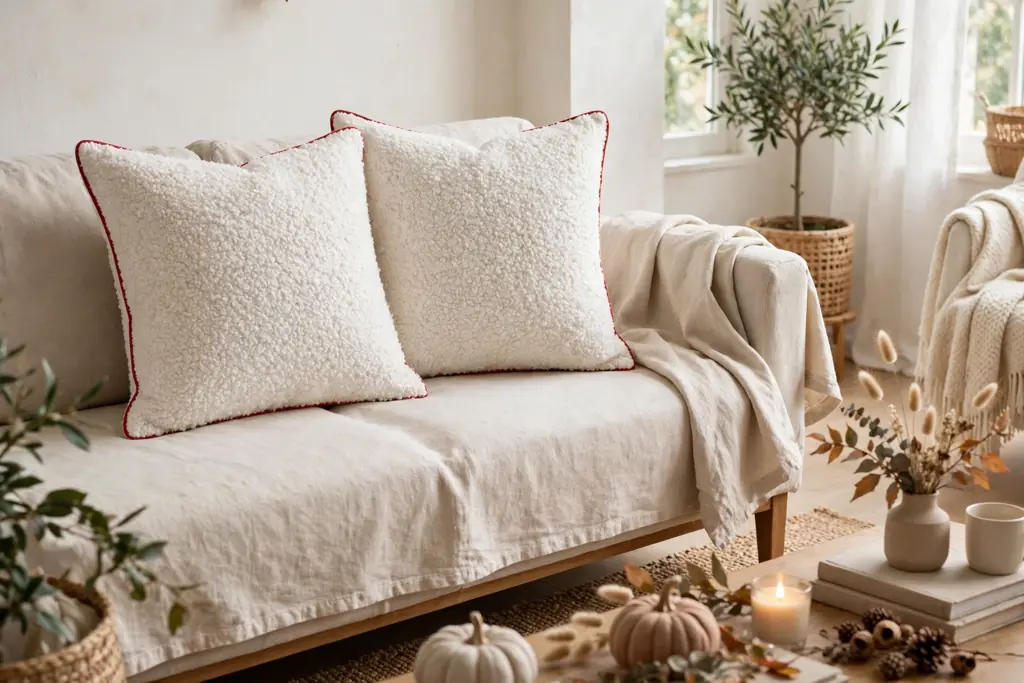
    13. White Boucle Pillows with Red Piping

    White boucle pillows edged with thin red piping on a sofa with plain covers nearby.

    Pick white boucle pillows edged with thin red piping, and place them on a sofa or bed with plain covers nearby. Boucle adds a soft, nubby texture, and the red piping gives a Valentine note without a heart print or bold color block.

    Boucle can snag on jewelry, zippers, and pet claws, so place these pillows where they get gentle use, and trim snags rather than pulling them. The piping also helps the pillow hold its shape, and it draws the eye to the edge of the pillow rather than the center.

    14. Satin Blush Pillows for a Bedroom Chair

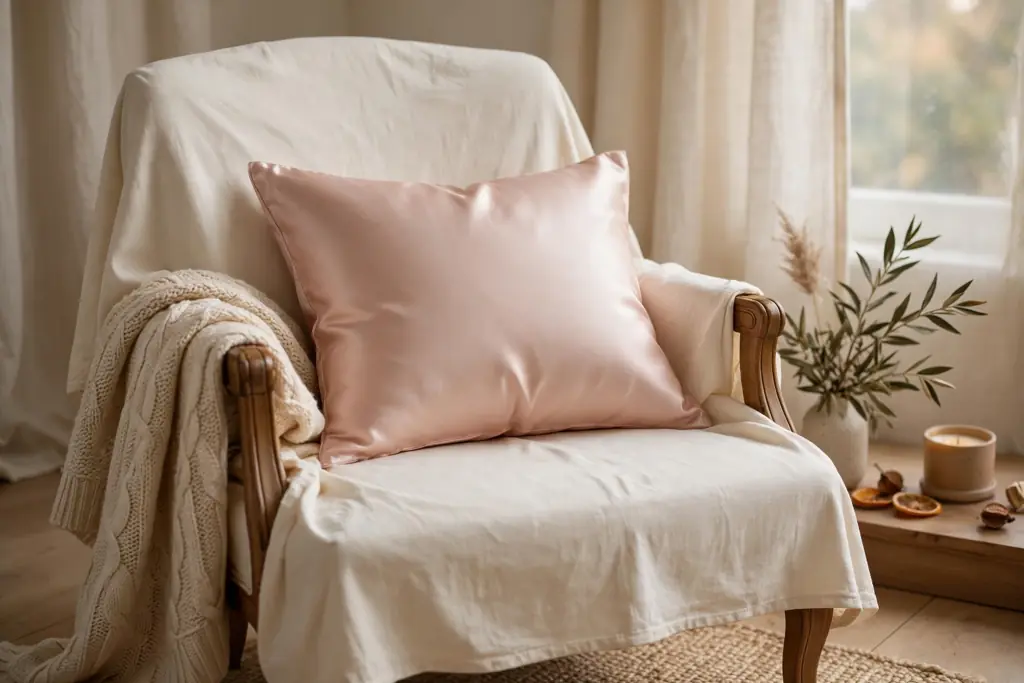
    Satin blush pillow on a bedroom chair with a plain cream cover behind it.

    Add a satin blush pillow to a bedroom chair or vanity chair, paired with a plain cream cover behind it. Satin has a smooth sheen that suits a dressing area, and blush keeps the color soft for a bedroom.

    Satin shows creases more than cotton or linen, so smooth the cover after washing and store it flat. Use satin as an accent pillow rather than the pillow leaned on for long periods, since the smooth surface can slip out of place on a chair.

    15. One Bold Valentine Pillow on a Neutral Sofa

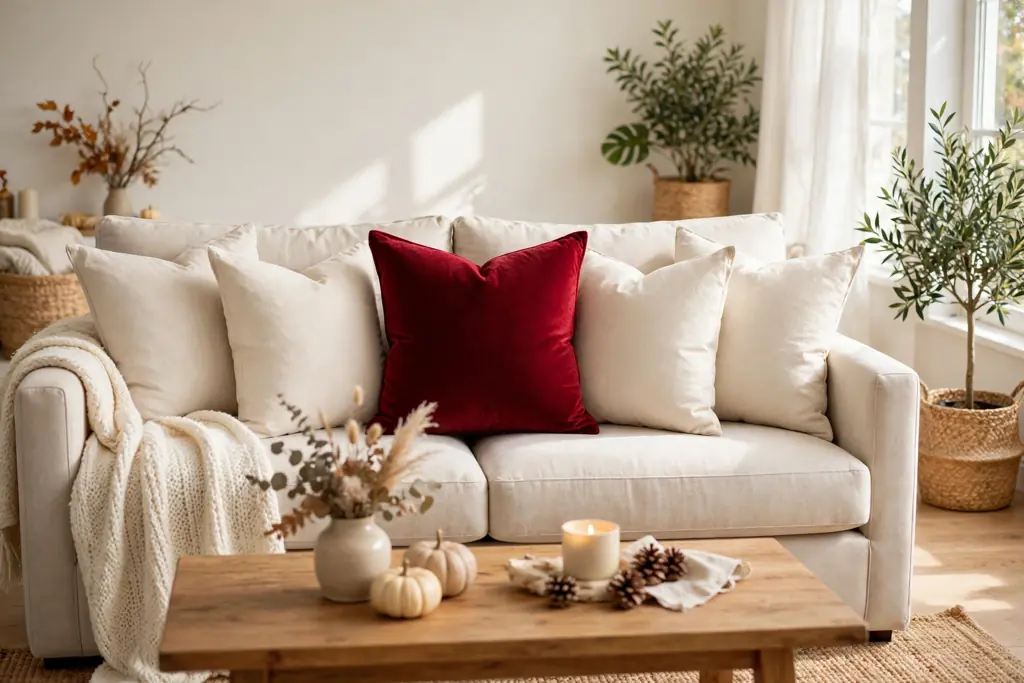
    One bold deep red velvet pillow at the center of a neutral sofa with plain cream pillows around it.

    Place a single bold Valentine pillow, such as a large red heart print or a deep red velvet square, at the center of a neutral sofa. One strong pillow can carry the whole theme, which suits a room where the sofa already has patterned cushions or a colorful throw.

    Keep every other pillow plain in cream, grey, or beige, and repeat the red once in a nearby item, such as a book cover or a candle. This approach also makes the seasonal change fast, since only one cover needs to be swapped in February and swapped out again after.

    Conclusion

    Valentine pillows work best as a small, planned change: one or two covers in red, pink, or burgundy, a neutral base around them, and one repeated accent elsewhere in the room. Pick the fabric and shape that suit the spot, check the insert size before you buy, and keep the rest of the sofa or bed simple. With that approach, the room feels ready for Valentine season without a full redecoration, and the covers store easily until next year.

    FAQs

    How many Valentine pillows should I put on a sofa?

    You should put one or two Valentine pillows on a sofa, with plain covers around them, so the seasonal pillows stay the focus. On a three seat sofa, two Valentine pillows at the ends work well, while on a smaller loveseat, one bold pillow in the center is usually enough.

    What colors work best for Valentine pillows?

    Red, blush pink, burgundy, and cream work best for Valentine pillows, since they carry the seasonal theme while still pairing with neutral sofas and bedding. Keep the palette to three main colors, such as cream, blush, and red, so the mix reads as planned rather than scattered.

    What size Valentine pillow cover should I buy?

    You should buy a Valentine pillow cover one or two inches smaller than its insert, so the pillow looks full and plump on a sofa or bed. For a 20 inch insert, choose an 18 inch cover, and check the exact insert size before ordering, since sizes vary by maker.

    Can Valentine pillows work in a bedroom as well as a living room?

    Yes, Valentine pillows work in a bedroom as well as a living room, since the same covers suit a bed front row, a bedroom chair, or a window seat. On a bed, use the Valentine pillows as the front row in front of plain sleeping pillows, and keep the duvet plain or lightly patterned.

    How do I store Valentine pillows after February?

    You store Valentine pillows after February by washing the covers if the care label allows it, then folding them flat or storing shaped pillows in a box with paper between layers. Keep them clean, dry, and away from direct sun, so colors stay even and applique, embroidery, and felt shapes keep their form.

    Are Valentine pillows suitable for everyday sofas with children or pets?

    Yes, Valentine pillows can suit everyday sofas with children or pets if you choose washable cotton or linen covers and avoid delicate satin or raised applique on the most used seats. Shake covers outside between washes, spot clean spills promptly, and place delicate pillows on a chair or bed that gets gentler use.


  • 19 Valentine Garland Ideas for Mantels, Shelves, and Doorways

    19 Valentine Garland Ideas for Mantels, Shelves, and Doorways

    Valentine garland works best when you match the material to the spot: felt and wood beads hold their shape on a mantel, paper and ribbon suit a doorway, and small pom-poms or dried flowers sit neatly on a shelf. The 19 ideas below cover classic, rustic, modern, and handmade styles for every room.

    A good garland needs only three decisions: where it will hang, how long it should be, and how bold the color should read from across the room. Measure the mantel, shelf, or doorway first, then add extra length for swags or a soft dip in the middle. For more seasonal styling ideas, visit the Dwell Ovell home page.

    Key Takeaways

    • Match the material to the spot: sturdy felt, wood, and beads suit mantels, while light paper and ribbon suit doorways.
    • Measure first and add extra length for swags, so the garland reaches both ends without pulling tight.
    • Repeat one color or material along the full length to keep a long garland looking calm rather than busy.
    • Pair a bold garland with plain nearby decor, so the hearts stay the focus of the display.
    • Use removable hooks or ties on painted mantels and door frames to avoid marks when the season ends.
    • Store garlands loosely coiled or flat in a box, with paper between layers, so hearts and lights keep their shape.

    1. Classic Felt Heart Garland on a Mantel

    Felt hearts in red, pink, and white strung on twine and draped along a mantel.

    Cut or buy felt hearts in red, pink, and white, then string them on twine with even gaps between each heart. Drape the strand along the mantel with a gentle dip in the middle, and let the ends hang a few inches past each side for a relaxed finish.

    Felt holds its shape well, so this garland looks neat from across the room and does not curl at the edges. Keep the hearts the same size for a calm look, or mix two sizes and alternate them for a livelier rhythm.

    2. Paper Heart Chain Across a Doorway

    Paper heart chain in red and blush pink spanning the top of a white doorway.

    Fold and cut paper hearts, then link them into a chain that spans the top of a doorway. Use card stock rather than thin paper, so the chain hangs straight and does not tear when it is moved.
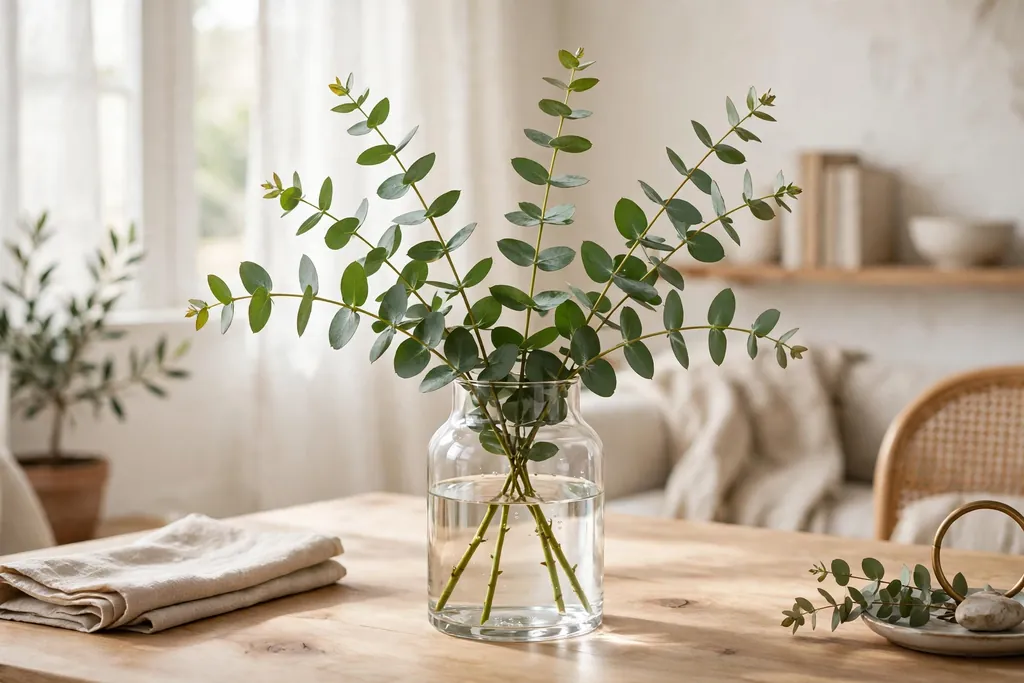
    This is a good choice for a doorway because paper is light and easy to tape or pin at each side. Use one color for a simple look, or alternate red and blush pink for a softer effect in a pale room.

    3. Dried Rose and Eucalyptus Garland on a Shelf

    Dried rose buds and eucalyptus sprigs threaded on twine along a wooden shelf.

    Thread small dried rose buds and short eucalyptus sprigs onto twine, spacing them so the green and the rose tones show in turn. Lay the garland along the front edge of a shelf, with the sprigs facing outward.

    Dried flowers suit a shelf because they sit close to eye level, where their texture can be seen. Keep the garland shallow and light, so it does not hide books or framed prints placed behind it.

    4. Wooden Bead Garland with Hearts on a Mantel

    Wooden beads in natural, white, and red tones with flat wooden hearts draped across a mantel.

    String smooth wooden beads in natural, white, and red tones, then add a flat wooden heart every few beads. Drape the strand in a single swag across the mantel, or loop it twice for a fuller line.

    Wood beads bring a warm, rustic note that pairs well with candles and plain ceramic vases. A tassel at each end finishes the strand and gives you a neat way to anchor it to a mantel hook.

    5. Pom-Pom Garland Along a Shelf Edge

    Soft yarn pom-poms in blush, cream, and red hanging along the front edge of a shelf.

    Make or buy soft yarn pom-poms in blush, cream, and red, then string them close together on strong thread. Hang the garland along the front edge of a shelf so the pom-poms sit just below the shelf line.

    Pom-poms add softness and color without weight, which suits a narrow shelf. Keep the pom-poms small, about the size of a coin, so the garland reads as a trim rather than a bulky border.

    6. Fairy Light Heart Garland on a Mantel

    Warm white fairy lights woven through a heart garland on a mantel in the evening.

    Weave a warm white fairy light strand through a simple heart garland, keeping the bulbs near the front so they show. Drape the lit garland along the mantel and tuck the battery pack behind a vase or candle at one end.

    Lights work well in the evening, when the mantel becomes a focal point. Use battery lights for a mantel without a nearby outlet, and check the strand before hanging so no dark gaps break the line.

    7. Vintage Valentine Card Bunting in a Doorway

    Vintage style Valentine cards clipped to ribbon bunting across a doorway.

    Print or copy vintage style Valentine cards onto card stock, then clip or glue them to ribbon to form bunting across a doorway. Space the cards evenly and keep them all facing the same way, so the display reads clearly from the hall.

    This idea suits a doorway because the cards can be seen from both rooms. Choose cards with a shared color range, such as cream, rose, and soft red, so the bunting looks planned rather than random.

    8. Crochet Heart Garland on a Shelf

    Small crochet hearts in cotton yarn joined on twine along a shelf beside a vase.

    Crochet small hearts in cotton yarn, then join them with a simple chain stitch or string them on twine. Lay the garland along a shelf, letting it curve gently around a vase or a small plant.

    Crochet hearts have a handmade texture that suits a shelf display viewed up close. Use one yarn weight for the whole strand, so the hearts stay the same size and the garland hangs evenly.

    9. Ribbon and Tassel Garland Swagged on a Mantel

    Ribbons in red, pink, and cream with small tassels swagged across a mantel.

    Cut ribbons in red, pink, and cream to equal lengths, then tie them at intervals along a cord, adding a small tassel between each ribbon group. Swag the cord across the mantel, with the ribbons hanging down at different lengths.

    Ribbon moves gently in a room with air flow, so this garland feels light even in a bold color mix. Keep the ribbon widths similar, and trim the ends at an angle for a tidy finish.

    10. Faux Greenery and Rose Garland Over a Doorway Arch

    Faux greenery garland with red and blush roses draped over a doorway arch.

    Drape a faux greenery garland over the top of a doorway arch, then tuck in faux roses in red and blush pink at even intervals. Secure the garland with small removable hooks at each side and at the top center.

    Greenery gives the doorway a full, arching frame, while the roses carry the Valentine theme. Faux stems hold up well in a high traffic doorway, where fresh flowers would be brushed and damaged.
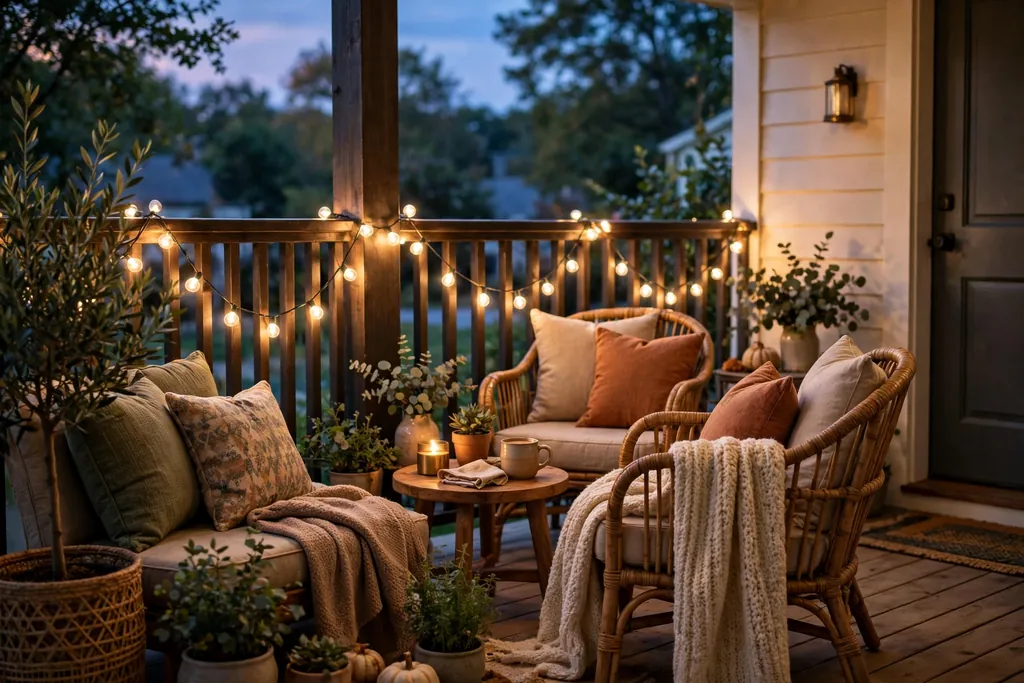
    11. Painted Wooden Heart Garland on a Shelf

    Painted wooden hearts in red, white, and soft pink strung on jute twine along a shelf.

    Paint flat wooden hearts in red, white, and soft pink, then string them on jute twine with a small bead between each heart. Stand the garland along the back of a shelf, or lay it across the front edge with the hearts facing out.

    Painted wood suits a shelf because the hearts stay flat and do not roll or curl. A matte paint finish reads softer than gloss in a small room, and a clear seal keeps the paint from chipping in storage.

    12. Burlap and Lace Garland on a Rustic Mantel

    Burlap pennants and lace trim pieces strung on twine across a rustic wood mantel.

    Cut burlap into small pennants or hearts, then alternate them with lace trim pieces on a length of twine. Drape the garland across a wood mantel, pairing it with plain candles and a simple vase.

    Burlap and lace together give a rustic but soft look, with the coarse burlap balanced by the fine lace edge. Keep the pieces small, so the garland does not hide the mantel itself.

    13. Paper Doily Heart Garland in a Doorway

    White paper doily hearts strung on thread across a pale doorway.

    Fold paper doilies into heart shapes, or cut heart shapes from doily patterned paper, then string them on white thread across a doorway. The open lace pattern lets light through, so the garland looks light even in a narrow hall.

    This idea suits a white or pale doorway, where the doily pattern shows clearly. Use thread rather than thick cord, so the fine paper does not tear at the hanging points.

    14. Velvet Ribbon and Bow Garland on a Shelf

    Small velvet bows in deep red and blush pink tied along a ribbon on a shelf.

    Tie small velvet bows in deep red and blush pink along a velvet ribbon, spacing the bows evenly. Lay the ribbon along a shelf, with the bows facing forward and the ribbon ends trailing a few inches at each side.

    Velvet adds depth of color that flat ribbon cannot match, which suits a shelf in a room with low light. Keep the bows small and the spacing even, so the garland reads as a neat trim.

    15. Letter Banner Garland Spelling Love on a Mantel

    Large felt panels spelling LOVE with small hearts at each end across a mantel.

    Cut large letters to spell LOVE, one letter per card or felt panel, then string the panels on twine across the mantel. Add a small heart at each end of the banner to frame the word.

    A word banner works best as the single bold piece on a mantel, with plain decor on either side. Make the letters large enough to read from across the room, and keep the background color plain so the letters stand out.
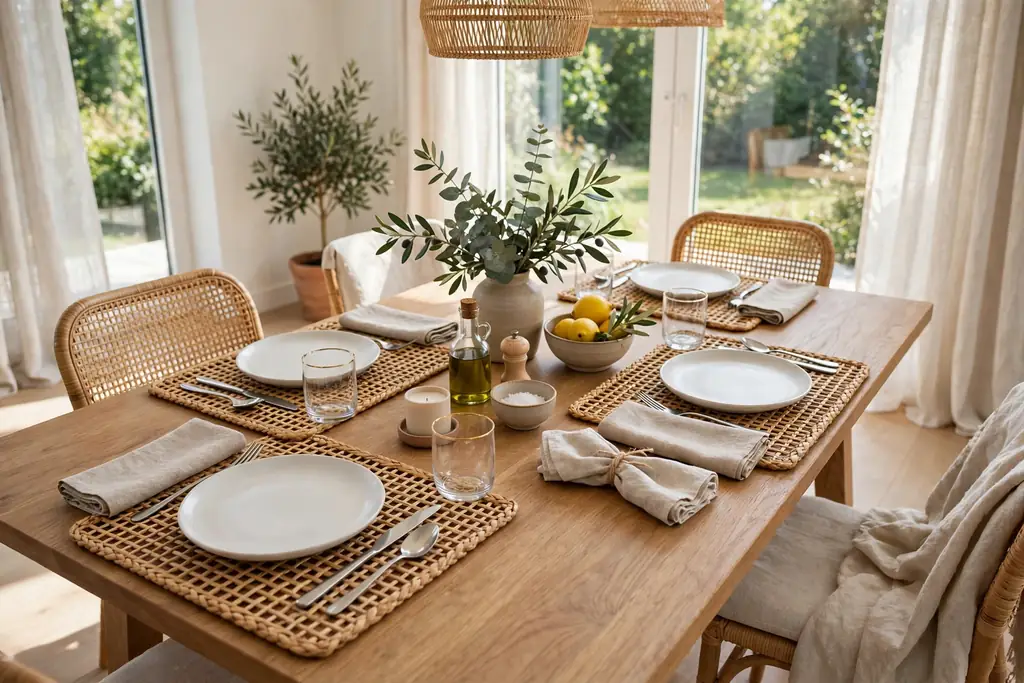
    16. Tulle and Heart Garland as a Doorway Curtain

    Vertical tulle strands with small felt hearts hanging as a curtain in a doorway.

    Hang several vertical strands of tulle from the top of a doorway, then attach small felt or paper hearts at different heights along each strand. The strands form a soft curtain that can be parted to walk through.

    Tulle suits a doorway used for a party or a family gathering, where a curtain adds a festive entry. Keep the strands light and the hearts small, so the curtain parts easily and does not tangle.

    17. Metallic Foil Heart Garland on a Modern Mantel

    Gold and red foil hearts on clear thread draped in strands across a modern mantel.

    String foil hearts in gold and red on clear thread, then drape two or three strands across a modern mantel at slightly different heights. The foil catches light, so the garland adds shine without extra decoration.

    This style suits a mantel with clean lines and plain decor, where shine becomes the main detail. Space the strands so they do not tangle, and keep nearby candles unlit if foil hangs close to a flame.

    18. Fabric Scrap Rag Garland on a Shelf

    Fabric scrap strips in red, pink, cream, and gingham tied along twine on a shelf.

    Cut fabric scraps in red, pink, cream, and gingham into strips, then tie them along a length of twine to form a full rag garland. Lay it along a shelf, fluffing the strips so they stand out evenly.

    A rag garland uses leftover fabric and suits a casual, farmhouse style shelf. Mix plain and patterned scraps, but keep the color range tight, so the garland looks warm rather than scattered.
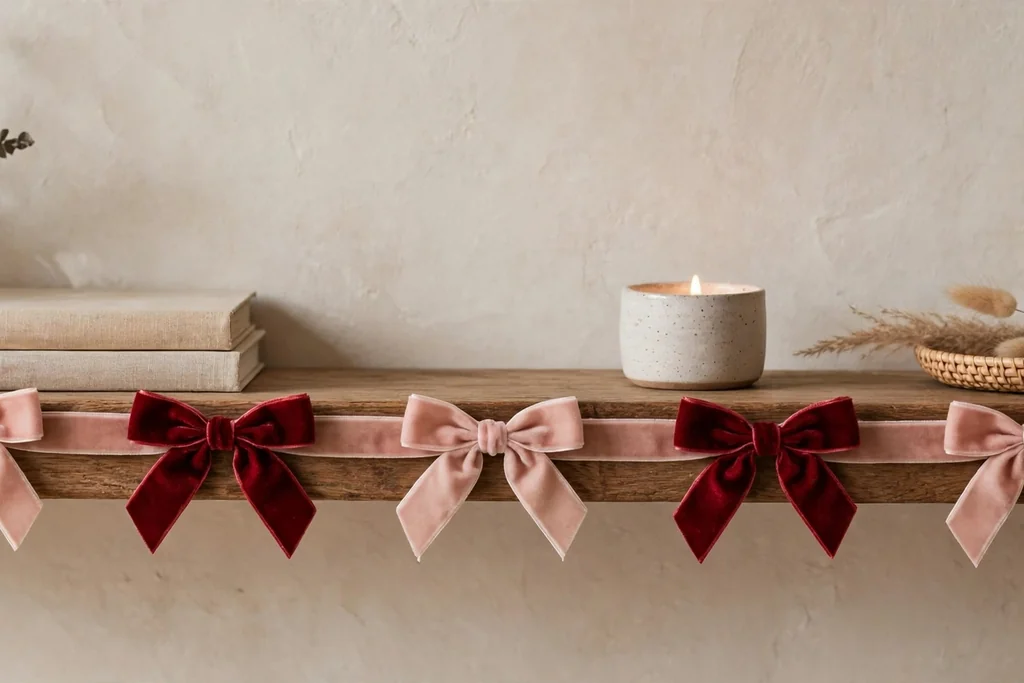
    19. Photo Clip Garland with Small Prints on a Doorway

    Small prints and heart shaped cards clipped with wooden clips to twine across a doorway.

    String twine across a doorway or along a wide shelf, then use small wooden clips to hang small prints, notes, or heart shaped cards along the line. Space the clips evenly and keep the prints the same size.

    This garland turns a doorway into a personal display, since the prints can show family moments or favorite places. Use copies of prints rather than originals, and keep the line light so it does not sag in the middle.

    Conclusion

    Valentine garland does not need to be large to make a room feel ready for the season. Pick one material that suits the spot, measure before you hang, and let the garland be the main Valentine detail in that part of the room. With the mantel, shelf, or doorway dressed, the rest of the room can stay simple, and the garland will still carry the theme.

    FAQs

    Where should I hang Valentine garland first?

    Hang Valentine garland on the mantel first, since the mantel is usually the focal point of a living room and the garland will be seen from across the room. If your home has no mantel, use a doorway or a wide shelf instead, and keep the garland at eye level so the hearts show clearly.

    How long should a Valentine garland be for a mantel?

    A Valentine garland for a mantel should be the width of the mantel plus about one third extra, so it can dip in the middle and still reach both ends. For a mantel that is 5 feet wide, plan for about 7 feet of garland, and add more if you want the ends to hang down the sides.

    What material is best for a Valentine garland in a doorway?

    Paper, ribbon, and tulle are best for a Valentine garland in a doorway, because they are light and easy to fix at each side without heavy hooks. Felt and wood also work, but they need stronger fixings, since a doorway garland is often brushed when people walk through.

    How do I hang garland without damaging a mantel or door frame?

    You hang garland without damage by using removable adhesive hooks, small clips, or ties looped around existing fixtures, rather than nails or pins. Check the weight rating of the hook against the garland, test the hold before leaving it in place, and remove the hook slowly at the end of the season.

    Can I reuse a Valentine garland next year?

    Yes, you can reuse a Valentine garland next year if you store it loosely coiled or flat in a box, with paper between layers to stop hearts from crushing or sticking together. Felt, wood, fabric, and faux greenery store well, while paper garlands need a flat box and gentle handling to survive storage.

    How do I keep a long garland from sagging in the middle?

    You keep a long garland from sagging by fixing it at the middle as well as at both ends, using a small hook or tie at the center point. For a doorway or a wide mantel, add one extra support point for every 3 to 4 feet of garland, and keep the garland itself light by choosing paper, ribbon, or felt over heavy wood.


  • How to Change Seasonal Decor Without Redecorating Your Whole Home

    How to Change Seasonal Decor Without Redecorating Your Whole Home

    Change seasonal decor without redecorating by keeping your furniture, wall color, and large pieces the same and swapping only small, easy layers: pillow covers, throws, table linens, wreaths, art prints, and small accents. Pick one small palette per season, change the entry and living room first, then repeat one or two touches elsewhere.
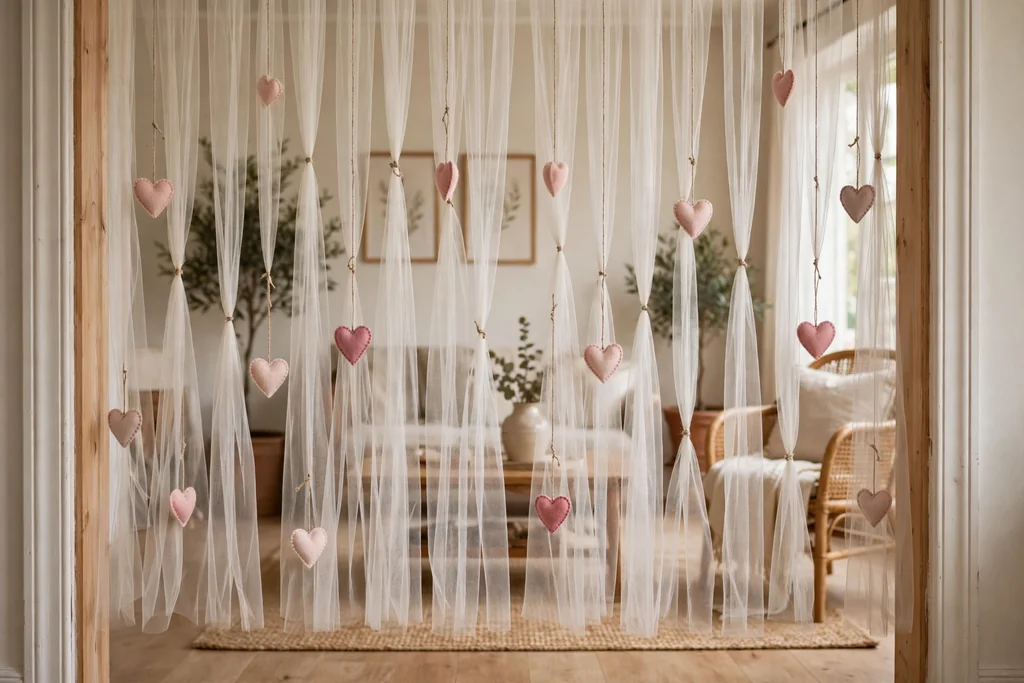
    This method works because the eye reads color, texture, and small focal points before it reads furniture. A sofa does not need to change for a room to feel like fall or spring. New covers, a different throw, and a fresh centerpiece do that work. For season-specific inspiration to pair with this method, browse these fall decor ideas. The steps below build one reusable system, so each season change gets faster and costs less than the last.

    Key Takeaways

    • Keep furniture, wall color, and large pieces constant, and change only small layers each season.
    • Build one labeled swap kit per season so the next change takes an hour or less.
    • Limit each season to three or four colors, and repeat one color in at least three rooms.
    • Change the entryway and living room first, since those rooms set the tone for the whole home.
    • Swap covers, not inserts, and swap prints, not frames, to save money and storage space.
    • Store off-season pieces clean, dry, and labeled, and edit each display before you call it done.

    1. Define Your Year-Round Base

    Calm living room with a neutral sofa, plain cushions, and a wood coffee table as a year-round base.

    Start by naming the pieces that never change. These are usually the sofa, the main rug, the bed frame and bedding base, the dining table, and the largest art or mirror in each room. Choose calm, plain versions of these pieces when you can, in cream, beige, grey, wood, or soft green, so seasonal colors sit neatly on top of them.

    Walk through each room and note anything that fights with many colors, such as a loud patterned rug or a bright accent chair. You do not need to replace those pieces. Just plan seasonal swaps that tone them down, for example a plain throw over a patterned chair, or a solid runner under a busy centerpiece. A calm base is what makes the rest of this guide work.

    2. Build One Seasonal Swap Kit Per Season

    Open labeled storage bin holding folded pillow covers, a throw, a table runner, and a wreath.

    A swap kit is a single labeled bin that holds everything you need for one season, so you are not hunting through closets each time. Pack one bin per season, and keep the bins in the same spot year after year. When the season changes, you take out one bin and put the old season back in it.

    Your basic swap kit list:

    • Two to four pillow covers in the season palette
    • One throw in a seasonal color or texture
    • One table runner or set of placemats
    • One wreath for the front door
    • Two or three framed prints or art cards that fit your existing frames
    • One set of hand towels or kitchen towels in a seasonal tone
    • A small group of accents, such as a vase filler, a candle set, or a tray
    • Spare batteries for battery candles and string lights

    Buy slowly. Start with pillow covers and a throw, then add one kit item per season until each bin is full. A kit built over a year feels planned, while a kit bought all at once often holds pieces you never use.

    3. Pick a Small Palette for the Season

    Fabric swatches in rust, gold, cream, and brown on a table beside a small vase of dried stems.

    Choose three or four colors for the season, with one strong color, one or two supporting colors, and one calm neutral. For fall, that might be rust, gold, cream, and wood brown. For spring, it might be sage, soft yellow, white, and light wood. Write the palette on a card and keep it in the swap kit bin.

    Use the palette as a filter for every swap. If a piece does not match at least one palette color, it stays in the bin. This one rule keeps rooms from looking busy, even when you decorate several rooms at once. It also makes shopping easier, since you can pass over anything outside the palette without a second thought.

    4. Start With the Entryway

    Entryway console with a seasonal wreath above it, a basket below, and a small vase of stems.

    The entryway is the first room guests see, and it is also the room you pass through every day, so a small change there has a large effect. Swap the wreath on the door, change the doormat layer, and set out one seasonal item on the console, such as a small vase of stems or a bowl of pinecones.

    Keep the entry practical. Leave clear space for keys, mail, shoes, and bags, and keep walkways open. A basket for scarves in cold months or a tray for sunglasses in warm months adds a seasonal note while also keeping the entry tidy. When the entry feels right, the rest of the house tends to follow.

    5. Swap Pillow Covers, Not Whole Pillows

    Neutral sofa with rust and cream pillow covers and one cover half slipped onto an insert.

    Pillow covers are the fastest seasonal swap in the home. Keep your inserts year-round and change only the covers, which fold flat for storage and cost less than full pillows. Choose a cover one or two inches smaller than its insert so the pillow looks full and holds its shape.

    Mix two solids, one pattern, and one texture on a sofa, and repeat one cover color elsewhere in the room, such as in a throw or a piece of art. For cover ideas by fabric and pattern, see these fall pillow covers. Wash covers before storing them, fold them flat, and keep each season set together in its bin so you can find the full set next year.

    6. Change Throws and Table Linens

    Dining table with a folded seasonal throw, a table runner, and folded linen napkins.

    Throws and table linens cover large areas, so they shift a room faster than small accents do. Drape a seasonal throw over one sofa arm or across the foot of the bed, and change the table runner or placemats to match the season palette. Keep the rest of the bedding and sofa cushions the same.

    Choose washable fabrics for pieces that get daily use, and keep a spare set ready so the look lasts through the week. Fold throws neatly when they are not in use, and keep one extra throw in a basket for guests. A linen change takes minutes, yet it makes the dining table feel set for the season even on an ordinary weekday.

    7. Update the Mantel or Main Shelf in Layers

    Mantel styled in layers with a garland, candle holders, a vase, and a small framed print.

    Work on the mantel or the main shelf in three layers: a base, a middle, and a small accent. The base might be a garland or a runner. The middle might be two candle holders or a pair of vases. The small accent might be a framed print, a tiny plant, or a seasonal figurine.

    Change only the top layer each season if you want the simplest version of this step. Keep the candle holders and vases in place, and swap the garland, the print, and the small accent. Step back after each change and check the balance from across the room. If one side looks heavy, move one piece rather than adding more.

    8. Refresh the Dining or Coffee Table Centerpiece

    Dining table with a low centerpiece tray holding a vase of stems and battery candles.

    Build the centerpiece on a tray or a low board so you can lift the whole display off the table in one move. Start with the largest item in the middle, such as a vase of stems or a bowl, then fill gaps with smaller pieces, such as candles or a short garland. Keep the display low so people can talk across the table.

    Change the centerpiece with the season by swapping stems, candles, and one or two small pieces, while keeping the tray and the vase. Fresh stems suit spring, dried stems suit fall, and simple greenery suits winter. Clear wilted or dusty pieces promptly, since one tired item can make the whole table look neglected.

    9. Swap Wall Art and Framed Prints

    Gallery wall with botanical prints in plain wood frames and one print leaning below.

    Art changes a wall faster than paint does, and swapping prints inside existing frames costs little and needs no new holes in the wall. Keep your frames up year-round and change only the prints or art cards inside them. Botanical prints suit spring, landscapes suit summer, leaf art suits fall, and simple line art suits winter.

    Plan the layout on the floor before you hang anything, and keep spacing even between frames. Swap prints in one or two frames per room rather than redoing a whole gallery wall, so the change feels fresh without feeling like a project. Store off-season prints flat, between sheets of plain paper, so they stay clean and unbent.

    10. Change Wreaths and Door Decor

    Front door hung with a seasonal wreath of dried leaves and berries.

    A wreath is the clearest seasonal signal on a house, and it takes seconds to hang. Choose one wreath per season that matches your palette, and hang it at eye level on the front door, checking that it does not block the handle or the lock. Use a simple hook or hanger that leaves no marks.

    If you have an interior door or a large mirror that suits a wreath, repeat a smaller version there for a connected look. Bring wreaths inside during heavy rain or strong wind if they are not rated for outdoor use, and store them in a wreath bag or a large box so they keep their shape. One good wreath, reused each year, beats three thin ones bought in a rush.

    11. Add Seasonal Scent and Light

    Tray with lanterns, battery candles, and dried orange slices on a side table.

    Scent and light change how a room feels without changing how it looks, which makes them useful for seasons when you want a light touch. Use battery candles in lanterns or holders for a warm evening glow, and set out a seasonal scent through a simmer pot, a candle, or fresh stems, depending on what suits your home.

    Keep safety first. Never leave a lit candle or a pot on the heat unattended, keep flames away from curtains, dried stems, and paper, and use battery candles near fabric and dried greenery. Put string lights on a timer so they switch off on their own. Scent should stay subtle, since a strong scent in every room quickly becomes tiring.

    12. Rotate Small Accents Room by Room

    Sideboard styled with a tray of vases, candle holders, and a small bowl.

    Small accents are vases, candle holders, trays, bowls, books, and baskets that you already own. Move them between rooms instead of buying new ones for each season. A tray from the living room can anchor a bedroom dresser, and a vase from the kitchen can hold stems on a side table.

    Work room by room, and change no more than three small items per room. Group items in odd numbers, leave breathing room between groups, and repeat one material, such as wood, brass, or ceramic, across rooms for a calm, connected feel. If a surface starts to look crowded, remove one item before adding another. Editing is part of decorating, not a sign that the room failed.

    13. Store Off-Season Pieces in Labeled Bins

    Shelf with labeled storage bins for spring, summer, fall, and winter decor.

    Good storage is what makes this system last. Clean each piece before it goes back in the bin, fold textiles flat, and wrap fragile items in tissue or plain cloth. Label each bin with the season and a short list of what is inside, and keep a photo of the styled room taped inside the lid if that helps you next year.

    Store bins in a dry spot, off the floor if the area can get damp, and keep the current season bin in the easiest spot to reach. At the end of each season, check the bin before you close it. Remove anything you did not use, and note one item you wish you had owned, so next season shopping stays focused and short.

    14. Do a 20-Minute Walk-Through Edit

    Tidy living room ready for guests with seasonal touches and warm evening light.

    Finish every season change with a slow walk through the house, room by room, with fresh eyes. Look for crowded surfaces, clashing colors, blocked walkways, and displays that only look good from one angle. Fix small problems on the spot, and move anything that does not earn its place back into the bin.

    Check the house in evening light too, since battery candles and lamps change how colors read after dark. Take a quick photo of each styled room, which makes it easier to spot imbalance and to repeat the look next year. When the walk-through finds nothing left to fix, the season change is done, and the house is ready to enjoy.

    Conclusion

    Changing seasonal decor without redecorating comes down to a calm base, a small palette, and a kit of swappable layers. Keep your furniture and wall color steady, change covers, throws, linens, wreaths, prints, and small accents, and store each season in a labeled bin. The first change takes the longest, since you are building the system. Every change after that gets faster, cheaper, and easier to enjoy.

    Start with one season and one room if the full plan feels large. Pick a palette, swap the entry and the sofa, and see how far a few small layers go. For more seasonal ideas to add to your kit over time, browse the Dwell Ovell decor ideas index. Save this guide, and use the same steps next season, so your home feels fresh four times a year without a single room makeover.

    FAQs

    How often should I change seasonal decor?

    Change seasonal decor four times a year, at the start of each season, or whenever the weather and light clearly shift in your area. A full change takes about an hour once your swap kits are built, and a light refresh of one or two rooms takes far less. If a season feels long, swap one small item mid-season, such as stems or a candle color, for a fresh note.

    What is the cheapest way to change seasonal decor?

    The cheapest way is to swap what you already own: move accents between rooms, change pillow covers instead of pillows, and swap prints inside frames you already have. Natural items such as pinecones, dried stems, and branches from your yard add seasonal color at no cost. Add one or two new kit items per season rather than buying a full set at once.

    How do I keep seasonal decor from looking cluttered?

    Keep seasonal decor from looking cluttered by limiting each room to one focal point, such as a mantel, a table centerpiece, or a wreath, and leaving clear space around it. Use a palette of three or four colors, group small items on a tray, and remove one item before adding another. If a surface looks busy, take a photo of it, since a photo often shows crowding that the eye misses in person.

    How should I store seasonal decor between seasons?

    Store seasonal decor clean and dry in labeled bins, one bin per season, with fragile items wrapped in tissue or plain cloth and textiles folded flat. Keep bins in a dry spot off the floor, and label each bin with the season and a short list of its contents. Check each bin at the end of the season and remove pieces you did not use, so storage stays lean.

    Can I use the same seasonal decor in a small home?

    Yes, small homes suit this method well, since it relies on swaps rather than new furniture or large displays. Choose small-scale items such as one wreath, a set of pillow covers, and a low table centerpiece, and style surfaces you already use, such as a windowsill, a side table, or a shelf. One clear focal point per room is enough, and covers and prints store flat, which saves space.

    Do I need to match seasonal decor in every room?

    No, you do not need to match every room exactly. Repeat one palette color and one material in at least three rooms so the home feels connected, and let each room keep its own function and style. Bedrooms can stay calmer than living rooms, and bathrooms need only a towel and scent change. A shared color thread matters more than identical displays.


  • 21 January Decorating Ideas for a Fresh and Cozy Home

    21 January Decorating Ideas for a Fresh and Cozy Home

    January decorating works best when you clear away holiday clutter, keep a calm winter palette, and add soft light, natural greenery, and cozy layers room by room. Start with one room, use pieces you already own, and make small swaps that feel fresh, restful, and easy to live with all winter.

    January is a good month to reset rather than redecorate. Take down holiday pieces, wipe surfaces, and look at each room in daylight before you add anything back. For more seasonal ideas to pair with these looks, browse the Dwell Ovell decor ideas index. Keep a simple palette of cream, soft white, wood tones, and one muted accent, then repeat it from room to room so the whole home feels settled and calm.

    Key Takeaways

    • Start with a clear out: remove holiday pieces and clutter before adding any new decor.
    • Keep a calm winter palette of cream, white, wood, and one muted accent through the home.
    • Use soft light, natural greenery, and layered textiles to add warmth without crowding rooms.
    • Make small swaps first, such as cushions, throws, table linens, and entry baskets.
    • Give every item a place, with baskets and trays that make daily tidying quick.
    • Reuse what you own: rearrange furniture, move art, and restyle shelves before buying anything.

    1. Fresh Evergreen Sprigs in Simple Vases

    Fresh evergreen sprigs and eucalyptus in plain glass vases on a wooden mantel.

    Place fresh evergreen sprigs, eucalyptus, or pine in plain glass or ceramic vases on a mantel, table, or windowsill. The green adds life to a bare January room, and the scent feels clean and seasonal without any holiday colors. Trim stems at an angle and change the water every few days to keep sprigs fresh longer.

    Use one tall vase for a strong focal point, or group three small vases of different heights on a sideboard. Keep the arrangement loose and natural, with a few stems leaning outward, rather than a tight, formal bouquet. When sprigs dry out, replace them with bare branches or dried stems for a longer lasting look.

    2. Swap Holiday Red for Cream and Soft White

    Living room decorated in cream and soft white with a pale sofa and linen cushions.

    Put away red ribbons, ornaments, and holiday prints, and bring in cream, soft white, and pale wood tones. The lighter palette makes rooms feel brighter in short winter days and gives the eye a rest after a busy December. Keep one muted accent, such as sage, dusty blue, or warm gray, for cushions or a throw.

    Work through one room at a time so the change feels manageable. Swap cushion covers, table runners, and towels first, since those carry the most color. If a room still feels flat, add texture with knit, linen, or woven pieces rather than adding more color.

    3. Layer Wool Throws and Linen Cushions

    Sofa layered with a wool throw and linen cushions in cream, oatmeal, and soft gray.

    Layer a wool throw over a sofa arm or chair back, and mix linen and knit cushions in cream, oatmeal, and soft gray. The mix of textures makes seating feel inviting on cold evenings, and layers can be folded back easily when the room warms up. Choose covers you can wash, since winter throws get daily use.

    Limit the mix to three or four cushion colors so the sofa stays calm. Fold a throw in thirds and drape it neatly over one arm, or roll it in a basket near the sofa for easy reach. Swap a heavy patterned cover for a plain one if the room starts to feel busy.

    4. Clusters of Warm Candlelight

    Candles of different heights grouped on a tray on a coffee table.

    Group candles of different heights on a tray on a coffee table, mantel, or windowsill, and use battery candles near fabric, paper, and dried greenery. Warm light softens a room in the early dark of January evenings and makes a plain corner feel cared for. Keep candles away from curtains and never leave a lit candle unattended.

    Use a tray to contain wax and to lift the whole group in one move for cleaning. Mix plain pillar candles with small votives, and keep the tallest candle at the back so the group reads as one display. If you use real candles, trim wicks and place them on a heat safe surface.

    5. A Cleared Mantel with Winter Branches

    Cleared mantel with a vase of winter branches and two candle holders.

    Clear the mantel completely, wipe it down, and start again with just a few pieces: a vase of winter branches, two candle holders, and one framed print or mirror. The empty space around each piece lets the mantel breathe, and the simple grouping suits January better than a crowded holiday display. Step back and check the balance from across the room.

    Keep the tallest piece at one end or in the center, and leave gaps between items rather than filling every inch. A length of plain greenery laid flat can ground the display without adding color. Change the branches every few weeks to keep the mantel feeling fresh.

    6. An Entry That Handles Winter Coats and Boots

    Tidy entry with a boot tray, a basket for scarves, wall hooks, and a bench.

    Set a sturdy tray for boots, a basket for scarves and gloves, and hooks at a height every household member can reach. A tidy entry makes winter mornings easier and stops coats and shoes from spreading into the living room. Add a small bench or stool if space allows, so shoes can be put on seated.

    Label or assign one hook and one basket per person in a busy household. Keep a small brush and cloth near the door for muddy boots, and empty the tray weekly so it does not overflow. A mirror by the door adds light and gives a last check before leaving.

    7. A Kitchen Shelf Reset with White Ceramics

    Open kitchen shelves styled with white ceramics, glass jars, and wooden boards.

    Take everything off one set of open shelves, clean the shelves, and put back only white or cream ceramics, glass jars, and a few wooden boards. The pared back shelves make a kitchen feel lighter and make daily items easier to find. Keep everyday plates and bowls within easy reach and move rarely used pieces higher.

    Group items by use, such as mugs together and bowls together, and leave space between groups. Add one small plant or herb pot for a touch of green, and keep it where it gets light but stays clear of the stove. If a shelf still looks crowded, remove one item at a time until it feels settled.

    8. Winter Bedding in Soft White Layers

    Bedroom with white and cream layered bedding and a folded wool blanket.

    Make the bed with white or cream sheets, a warm duvet, and a folded wool or cotton blanket at the foot. The layered look feels clean and restful, and extra layers can be added or removed as the night warms or cools. Choose a simple pillow arrangement, with sleeping pillows plus two or three decorative cushions at most.

    Shake out the duvet and smooth the top blanket each morning so the bed looks made with little effort. Keep a spare blanket in a basket near the bed for cold nights. If the room feels cold in color, add warmth with a wooden tray, a warm toned lamp, or natural linen curtains.

    9. A Winter Dining Table Centerpiece

    Dining table with a plain linen runner, candles, and a short length of greenery.

    Build a low centerpiece with a plain runner, a few candles, and a short length of greenery or a bowl of pinecones. Keep it low and narrow so people can see and talk across the table, and keep it simple enough to lift off in one move for serving. A plain linen runner in cream or natural linen suits January well.

    Use a tray under candles and greenery to protect the table and to keep the group together. For everyday meals, leave just the runner and one candle group in place, and add greenery or pinecones when guests come. Wipe the runner or shake it out weekly so it stays fresh.

    10. Bare Branches as a Sculptural Focal Point

    Tall bare branches in a heavy vase beside a console in a calm living room.

    Place tall bare branches in a heavy vase on the floor or on a console, and let their shape carry the display. Bare branches suit January because they echo the season outside, cost little, and need no water once dry. Choose branches with interesting forks and a balanced shape, and trim any that crowd the vase.

    Keep the vase heavy enough that it cannot tip, and place it where it will not block a walkway. A few branches are enough; too many will look like a thicket. If you want a hint of color, tie a single length of plain ribbon near the top, or add a small cluster of dried seed heads.

    11. A Living Room Layout Moved Toward Conversation

    Living room seating arranged for conversation with chairs angled toward a sofa.

    Pull chairs and the sofa a little closer together, angle chairs toward the sofa, and make sure every seat has a small table or surface nearby. A layout built around conversation feels warmer in winter, when people spend more time indoors. Check that walkways stay clear and that no seat has its back to the main light.

    Try the change for a few days before moving heavy pieces back. Move a floor lamp near the main seating group so reading light lands where people sit. If the room has a fireplace or stove, angle seating toward it as a natural focal point, and keep a basket of throws nearby.

    12. Mirrors to Bounce Winter Light

    Bright room with a large mirror opposite a window reflecting daylight.

    Hang a mirror opposite or beside a window so it reflects daylight deeper into the room. In January, when daylight is short, a mirror can make a room feel brighter without adding lamps. Choose a plain frame that matches the room, and hang the mirror at eye level for the view it reflects.

    Check what the mirror reflects before fixing it in place: a window, a plant, or a calm wall works well, while a cluttered corner will look doubled. In a small room, a leaning floor mirror can open up a wall, but keep it secure and clear of walkways. Wipe the glass weekly so the reflection stays clear.

    13. A Room by Room Declutter with One Basket

    Living room being tidied with a basket on a clear coffee table.

    Carry one basket through a room and collect anything that belongs elsewhere, is broken, or has not been used in months. Work room by room, and put the basket contents away, donate usable items, or recycle what is worn out before starting the next room. The basket rule keeps the job short and stops clutter from moving to another room.

    Set a timer for twenty minutes per room so the task stays doable. Start with visible surfaces, such as tables and counters, then move to one drawer or shelf. Keep a small box for items to pass on, and take it out of the house the same day so it does not become a new pile.

    14. A Cozy Reading Corner by a Window

    Cozy reading corner by a window with an armchair, a floor lamp, and a basket of books.

    Place a comfortable chair near a window, add a floor or table lamp with warm light, and keep a basket with a throw and a few books beside it. A dedicated corner gives winter evenings a clear place to rest, and it needs little more than a chair, light, and a surface for a cup. Choose a chair with arms that support reading for a while.

    Keep the corner simple: one chair, one lamp, one small table, and the basket. If the window is drafty, add a heavier curtain or a draft stopper, and place a small rug under the chair for warmth. Rotate the books and the throw cover each month so the corner feels cared for.

    15. A Winter Wreath for an Interior Door

    Simple winter wreath of pinecones and dried seed heads on an interior door.

    Hang a simple wreath of pinecones, dried seed heads, or plain greenery on an interior door or a wall. An interior wreath brings a winter note inside without holiday colors, and it suits a hallway, bedroom door, or kitchen wall. Keep the wreath flat and light so the door still closes easily.

    Choose natural tones and one simple bow in linen or plain ribbon if you want a finish. Hang it with a removable hook so the door paint stays clean. If the wreath sheds, shake it outdoors and keep it away from heat sources and open flames.

    16. Calm Winter Prints Swapped into Existing Frames

    Wall with calm winter prints of bare trees in frames over a console.

    Swap bright or holiday prints for calm winter scenes, such as bare trees, quiet landscapes, or simple botanical prints, using frames you already own. Changing only the print is a quick, low cost way to shift a room toward January, and the old prints can be stored flat for later. Match print sizes to the frames so no trimming is needed.

    Hang one larger print as a focal point, or group three small prints in a row over a console. Keep the wall color in mind: soft prints suit pale walls, while a darker frame can ground a print on a white wall. Step back after hanging to check height, with the center near eye level.

    17. A Bathroom Reset with White Towels and a Wood Tray

    Bathroom with plain white towels, a wooden tray, and a small plant.

    Replace patterned towels with plain white or cream towels, fold them neatly, and set a wooden tray on the counter with soap, a small plant, and a candle. The simple grouping makes a bathroom feel clean and calm, and the tray keeps daily items together. Keep only what is used daily on the counter.

    Store spare towels rolled in a basket or on a shelf, and keep cleaning products under the sink. Wipe the tray and counter weekly, and swap hand towels often in winter when hands are washed more. A small plant that likes humidity, kept away from direct water, adds a soft green note.

    18. A Hallway Gallery Given Breathing Room

    Hallway gallery with evenly spaced frames along a calm wall.

    Take down crowded hallway frames, keep the pieces you like best, and rehang them with even spacing and a straight line at the center. A hallway with fewer, well spaced frames feels calmer and wider, and the walk through the home feels more settled. Measure spacing with a tape rather than guessing by eye.

    Use matching frames or a single frame color to tie the group together. Hang larger pieces first, then fill gaps with smaller ones, leaving at least a hand width between frames. If the hallway is narrow, keep frames flat to the wall and avoid deep frames that jut into the walkway.

    19. Layered Rugs for Warmth Underfoot

    Living room with layered rugs, a flat weave rug under a smaller wool rug.

    Layer a flat weave rug under a smaller wool or cotton rug in a living room or bedroom, keeping the top rug centered on the seating or bed. Layered rugs add warmth underfoot in cold months and let you use a favorite smaller rug over a plain larger base. Keep rug edges flat and use a rug pad so layers do not slip.

    Choose rugs in the room palette, with the larger rug plain and the top rug carrying any pattern. Leave floor visible around the edges so the room does not feel covered. Vacuum layered rugs regularly, since dust settles between layers, and lift the top rug to clean beneath it.

    20. Baskets That Give Blankets and Toys a Home

    Living room corner with woven baskets holding folded blankets.

    Place lidded or open baskets in the living room, bedroom, and entry for blankets, toys, chargers, and small clutter. Baskets make tidying quick at the end of the day, since each item has a clear home, and natural woven baskets suit a calm winter palette. Choose a size that fits the items, not a basket that invites overflow.

    Assign one basket per category, such as blankets in one and toys in another, and label baskets in a shared family room if that helps. Empty baskets weekly and return stray items to their rooms. Keep basket handles clear so baskets can be carried for cleaning.

    21. Winter Lanterns on the Porch

    Front porch with lanterns, evergreen sprigs, and pinecones by the door.

    Set lanterns with battery candles on porch steps, beside the front door, or on a porch table, and add a small bundle of evergreen or pinecones at the base. Lantern light makes a January entry feel welcoming after dark, and battery candles stay safe outdoors in cold weather. Keep lanterns steady and clear of walkways.

    Use lanterns of different heights in a group of two or three, and keep glass clean so light shows clearly. Bring fabric bows or paper decorations inside during rain or snow. Check batteries weekly in cold weather, since cold can shorten battery life.

    Conclusion

    January decorating does not need a full makeover. Clear the holiday clutter, keep a calm palette, and add soft light, greenery, and warm layers where you spend the most time. Start with one room, reuse what you own, and let each small swap settle before moving to the next. The result is a home that feels fresh, restful, and ready for the months ahead.

    FAQs

    How do I start decorating in January after the holidays?

    Start by removing all holiday decor, then clean surfaces and look at each room in daylight before adding anything back. Choose one room first, keep a calm palette of cream, white, and wood, and add just greenery, soft light, and one or two cozy layers.

    What colors work best for January decorating?

    Cream, soft white, pale wood, sage, dusty blue, and warm gray work well for January, since they feel calm and bright in short winter days. Keep one muted accent and repeat it through the home, rather than mixing many strong colors at once.

    How can I make my home feel cozy in January without clutter?

    Use layered textiles, warm candlelight, and natural greenery, and keep surfaces mostly clear so each piece has space around it. Give blankets, toys, and small items a basket home, and remove one item from a crowded surface before adding another.

    What is the simplest January refresh for a living room?

    Swap cushion covers to cream or soft gray, drape a wool throw over the sofa, clear the mantel to a few winter pieces, and add a mirror or lamp to lift the light. Rearrange seating toward conversation, and keep the palette to three or four colors.

    Should I keep any greenery up in January?

    Yes, plain evergreen sprigs, eucalyptus, bare branches, and pinecones suit January well, since they echo winter without holiday colors. Replace fresh sprigs when they dry out, and keep greenery away from heat sources and open flames.

    How do I decorate a small home in January?

    Focus on light, clear surfaces, and multi use pieces, such as a basket that holds blankets, a mirror that brightens a room, and a tray that groups candles. Keep the palette light, leave floor and surface space visible, and decorate one small area at a time.


  • 15 Personalized Photo Ornament Ideas for Meaningful Holiday Decor

    15 Personalized Photo Ornament Ideas for Meaningful Holiday Decor

    A personalized photo ornament turns a favorite picture into a tree decoration you can hang, gift, or keep for years. Choose a clear bauble, wood slice, acrylic disc, metal print, or fabric shape, add one sharp photo, and finish with a name, date, or short message. The best choice depends on the photo, the tree, and who will receive it.

    Photo ornaments work because they carry a specific memory, not just a color or theme. A wedding photo, a first home, a grandparent, a pet, or a family trip all read at a glance on a tree, and they invite conversation when guests notice them. Start with the photo first, then pick a format that suits its shape, its colors, and where it will hang. A bright, detailed photo suits a clear print surface, while a soft, older photo suits wood, fabric, or a sepia treatment. For more nostalgic seasonal looks to pair with these ornaments, see the vintage Christmas decor ideas. Keep each ornament light enough for the branch it will hang on, and protect printed photos from strong sunlight and damp storage.

    Key Takeaways

    • Start with one sharp, well lit photo per ornament, and crop it to the ornament shape before printing.
    • Match the format to the photo: clear surfaces suit bright, detailed pictures, while wood, fabric, and sepia suit soft or older pictures.
    • Add a name, date, or short message so the ornament still tells its story years later.
    • Keep ornaments light, hang them on sturdy branches, and test the loop before the tree goes up.
    • Use copies of precious original photos, and keep the originals safe in an album or a digital backup.
    • Store photo ornaments in tissue lined boxes, away from sunlight and damp, so prints stay clear.

    1. Clear Fillable Photo Baubles

    Clear glass bauble ornament with a family photo inside hanging on a Christmas tree branch.

    A clear fillable bauble holds a printed photo curled gently inside a transparent ball, so the picture shows through from every side. Open the two halves, curl the photo with the image facing out, and slip it inside with a small amount of fake snow, dried greenery, or plain tissue for support. Close the halves firmly, add a ribbon loop, and hang the bauble where light can pass through it.

    This format suits bright, colorful photos, such as a family portrait or a beach trip, because the clear shell adds shine without covering detail. Print on sturdy photo paper rather than thin copy paper, so the curl holds its shape and the ink does not smudge inside the ball. If the photo slips, add a small piece of tissue behind it to hold it in place. Avoid very large prints, since a photo that is too wide will crease at the edges and hide faces.

    2. Wood Slice Photo Transfers

    Wood slice ornament with a photo transferred onto the wood hanging by twine.

    A wood slice photo transfer places a picture on a thin round slice of wood, with the grain showing softly through lighter parts of the image. Print the photo in reverse on plain paper, brush transfer medium over the wood, press the paper face down, and let it dry fully before rubbing the paper away with a damp cloth. Seal the finished slice with a clear matte finish, drill or use a pre drilled hole, and hang it with twine.

    This idea suits rustic trees, cabin style rooms, and outdoor themed displays, where wood, pine, and twine already set the tone. Photos with strong contrast and simple backgrounds transfer most clearly, while very dark photos can lose detail in the grain. Test the method on a spare slice first, since drying time and rubbing pressure affect the result. A short handwritten date on the back turns the slice into a dated keepsake.

    3. Flat Acrylic Photo Discs

    Flat acrylic photo disc ornament with a family portrait hanging on a Christmas tree.

    A flat acrylic disc prints a photo on a clear, round panel that hangs like a modern ornament, with light passing around its edges. The photo is printed on the back of the disc or set behind clear acrylic, so the front stays smooth and easy to wipe clean. Add a simple ribbon or cord loop through a hole at the top, and hang the disc near the outer branches, where it can catch light.

    Acrylic suits sharp, modern photos and clean, simple trees, since the flat shape and clear edge keep attention on the picture itself. Round discs suit single portraits, while a larger disc can hold a small group photo without crowding faces. Keep the disc away from heavy neighboring ornaments, since acrylic can scratch if it knocks against glass or metal. Wipe it with a soft dry cloth, and store it flat with tissue over the printed side.

    4. Brushed Metal Photo Discs

    Brushed gold metal photo disc ornament with a wedding portrait hanging on a tree.

    A brushed metal photo disc prints a picture on a thin metal round with a soft, matte sheen, giving the photo a firm, lasting feel. The metal surface adds gentle contrast, so portraits and landscape photos both read clearly, and the disc hangs flat against the tree without swinging much. Choose a silver, gold, or copper tone that matches the rest of the tree, and add a ribbon loop in a plain, matching color.

    Metal discs suit photos meant to last, such as wedding portraits, anniversary pictures, and milestone family photos, since metal resists bending and fading better than paper based formats. Keep the disc light by choosing a small or medium size, and check the branch weight before hanging a full set. If the metal edge feels sharp, cover it with a thin ribbon border or choose a disc with a finished, rolled edge.

    5. Mini Photo Snow Globe Ornaments

    Mini snow globe ornament with a winter family photo inside and falling glitter snow.

    A mini photo snow globe ornament sets a small photo inside a clear, water filled or sealed globe, with glitter or fake snow that drifts when the globe is shaken. The photo sits upright on a small base inside the globe, and the base can carry a name, a year, or a short message. Hang the globe from a sturdy branch, or stand it on a mantel or shelf when the tree is not up.

    This format suits winter photos, such as a snowy vacation, a first snowfall, or a family ski trip, since the falling snow matches the picture. Keep the globe small and light, since a water filled globe is heavier than a hollow bauble, and hang it low on the tree where a fall would do less harm. Check the seal before hanging, and keep the globe away from heat sources and direct sun, which can cloud the liquid over time.

    6. Fabric Photo Pillow Ornaments

    Fabric pillow ornament with a child photo printed on cream cotton hanging on a tree.

    A fabric photo pillow ornament prints a picture on soft fabric, then sews it into a small, lightly stuffed pillow shape with a ribbon loop. Print the photo on printable fabric or have it printed on cotton, cut two matching shapes, sew them together with the photo on the front, and add a small amount of stuffing before closing the seam. Round, heart, and star shapes all work, and a plain backing fabric keeps the ornament light.

    Fabric ornaments suit homes with young children or pets, since they are soft, light, and safe on low branches. They also suit cozy, handmade trees, where felt, linen, and cotton already appear. Photos with bold shapes and clear faces print best on fabric, since fine detail can soften in the weave. If the fabric is washable, spot clean only, and store the ornament flat so the stuffing keeps its shape.

    7. Ceramic Photo Tile Ornaments

    Round ceramic tile ornament with a family photo and cream border hanging on a tree.

    A ceramic photo tile ornament prints a picture on a small glazed tile, giving the photo a smooth, firm surface and a clean, finished edge. The tile can be round, square, or shaped like a house or star, and it hangs from a ribbon loop through a hole or a glued hanger on the back. A thin border around the photo, in cream, gold, or a plain color, helps the picture stand out on a busy tree.

    Ceramic suits formal trees and mantel displays, where a firm, weighty ornament reads as a keepsake rather than a casual decoration. Hang ceramic tiles on strong branches near the trunk, or display them on a small stand, since tile is heavier and breakable if dropped. Photos with clear faces and simple backgrounds suit tile best, because glaze can soften very fine detail. Wrap each tile in tissue for storage, and keep tiles apart so edges do not chip.

    8. Multi Photo Mini Frame Ornaments

    Small wood mini frame ornament holding three family photos hanging on a tree branch.

    A multi photo mini frame ornament groups two to four small photos in one hanging frame, so one ornament can hold a short story, such as a year of milestones or a family of siblings. Use a small wood or metal frame with several openings, or mount small prints on a backing board inside a single frame. Keep each photo small and clearly cropped, so faces stay readable at tree distance.

    This idea suits grandparents, parents, and anyone who wants one ornament per child, per trip, or per year, rather than a full set of single photo ornaments. Choose photos with similar lighting and color, so the group reads as one piece, and add a small label with a year or a family name on the frame. Hang the frame where guests can step close and look, such as near the front of the tree or on a mantel hook, since small photos need a closer view.

    9. Star Shaped Photo Ornaments

    Gold star shaped ornament with a celebration photo in the center hanging on a tree.

    A star shaped photo ornament cuts or prints a picture into a star outline, so the photo itself takes the shape of a classic tree decoration. The star can be wood, acrylic, metal, or stiff card, with the photo mounted on the front and a plain backing on the reverse. Hang stars near the top of the tree, mixed with plain stars, or use one large photo star as a tree topper for a small tree.

    Stars suit celebration photos, such as a graduation, a new job, a wedding, or a first home, since the shape already signals a highlight. Keep the star size in balance with the tree: small stars suit tabletop trees, while larger stars suit full size trees. Crop the photo so the main face or subject sits in the center of the star, away from the points, where cropping can cut off important detail.

    10. Heart Shaped Photo Keepsake Ornaments

    Red heart shaped ornament with a couple photo and cream ribbon loop hanging on a tree.

    A heart shaped photo keepsake ornament pairs a picture with a heart outline, making it a clear choice for couples, close family, and memorial ornaments. The heart can be wood, ceramic, fabric, or acrylic, with the photo on the front and a name, date, or short line of text on the back. A simple ribbon loop in red, cream, or gold finishes the piece without competing with the photo.

    Heart ornaments suit anniversary photos, wedding pictures, and photos of loved ones who are missed at the holidays, since the shape carries meaning on its own. Keep the design plain, with one photo and one short message, so the ornament reads as sincere rather than crowded. Hang heart ornaments at eye level, where they are easy to see and easy to lift down for a closer look.

    11. Film Strip Photo Ornaments

    Vertical film strip ornament with four small travel photos hanging on a tree branch.

    A film strip photo ornament arranges three to five small photos in a vertical strip, like frames from a roll of film, telling a short sequence in one hanging piece. Print the photos in a row on a strip of card, acrylic, or fabric, add small sprocket style borders or plain dividers, and hang the strip from a ribbon loop at the top. The strip can follow one day, one trip, or one year in order.

    Film strips suit travel photos, a baby first year series, and a set of holiday mornings over several years, since the sequence adds meaning that a single photo cannot carry. Keep each frame small but sharp, and order the photos from top to bottom in time order, so the story reads clearly. Hang the strip where it can hang straight, away from heavy branches that could bend it, and keep the total length short enough to clear the branch below.

    12. Sepia Photos in Vintage Brass Frames

    Small ornate brass frame ornament holding a sepia family portrait hanging on a tree.

    A sepia photo in a vintage brass frame ornament gives an old or old style photo a formal, aged setting on the tree. Print the photo in warm sepia tones, mount it in a small ornate brass frame, and hang it with a dark ribbon or a thin cord. The brass frame adds weight and detail, so the ornament suits trees with gold, cream, and deep green tones.

    This idea suits scanned family photos from past decades, wedding photos from parents or grandparents, and portraits meant to feel historic. Scan the original photo at a high resolution and print a copy, keeping the original safe, since brass frames and tree light can fade prints over time. Keep the frame small, so its weight stays safe on a branch, and hang it near the front of the tree, where the sepia tones and frame detail can be seen.

    13. Pet Photo Paw Ornaments

    Paw shaped wood ornament with a dog photo in the center hanging on a tree.

    A pet photo paw ornament combines a pet picture with a paw shape, a paw print accent, or a small bone detail, making the ornament easy to spot as a pet tribute. The paw shape can be wood, acrylic, or ceramic, with the pet photo mounted in the center and the pet name added below the picture. A plain ribbon loop keeps the focus on the photo and the paw outline.

    Pet ornaments suit households where a dog, cat, or other pet is part of family holidays, and they make thoughtful gifts for pet owners. Choose a clear, close photo where the pet face fills the frame, since a distant photo will lose detail in a small ornament. Add the pet name and, if wanted, the year, so the ornament stays clear when many pet ornaments share one tree. Hang pet ornaments at a height where children and guests can find them easily.

    14. Clay Footprint and Photo Ornaments for a First Christmas

    Clay ornament with a baby footprint impression beside a small first Christmas photo.

    A clay footprint and photo ornament pairs a small clay impression of a baby foot or hand with a first Christmas photo, marking a milestone year in one keepsake. Press the print into soft, air dry clay, let it dry fully, and mount a small photo beside or below the print on the same ornament, or on a backing card behind it. Add the baby name and the year in plain lettering, and seal the clay before hanging.

    This idea suits a baby first Christmas, a first holiday in a new home, and gifts for grandparents, since the print and the photo together record growth at one point in time. Make the print early, while the clay is soft and the baby is calm, and keep a spare piece of clay for a second try. Keep the finished ornament light and hang it low or display it on a stand, since clay can break if dropped. Store it wrapped in tissue, with the photo side protected.

    15. Shadow Box Photo Ornaments with Small Keepsakes

    Deep shadow box ornament with a wedding photo and small keepsakes inside hanging on a tree.

    A shadow box photo ornament sets a picture inside a deep, small frame, with room for tiny keepsakes beside it, such as a dried flower, a ticket stub, a small shell, or a snippet of ribbon. The depth keeps the keepsakes in place behind clear glass or acrylic, while the photo stays at the back of the box. Hang the box from a strong loop, or stand it on a mantel, since the added depth makes it heavier than a flat ornament.

    Shadow box ornaments suit trips, weddings, and milestone years, where one photo alone does not carry the full memory. Choose only two or three small, flat keepsakes, and fix each one in place, so nothing shifts when the ornament moves. Keep the photo as the largest item in the box, and leave clear space around it, so the keepsakes support the picture rather than covering it. Label the back with the year and the event, so the story stays attached to the ornament.

    Conclusion

    A personalized photo ornament works best when the photo leads and the format supports it, rather than competing with it. Pick one clear picture, choose a material that suits its tone and the tree it will hang on, and add a name or date so the memory stays clear in future years. Start with one or two ornaments, check how they hang and how they look in tree light, then build a set over time. The most meaningful trees are rarely the most crowded ones: a few well chosen photo ornaments, spaced where they can be seen, will carry more memory than a tree covered in pictures no one can read.

    Frequently Asked Questions

    What is the best photo to use for a personalized photo ornament?

    The best photo is a sharp, well lit picture where the main face or subject fills much of the frame, since small ornaments hide fine detail. Choose a photo with simple background and good contrast, crop it to the ornament shape, and print a test copy at the final size before making the full ornament.

    How do you protect a photo ornament from fading?

    Keep photo ornaments out of strong, direct sunlight, use printed copies rather than original photos, and store them in tissue lined boxes in a cool, dry place. Avoid damp storage and heat sources, and seal wood, clay, and transfer ornaments with a clear finish made for the material, following the product directions.

    What size photo do I need for a photo ornament?

    Most photo ornaments use small prints, often between two and four inches across, depending on the ornament shape and size. Measure the ornament opening or print area first, crop the photo to that shape, and print a test at the exact size, since a photo that looks clear on a screen can lose faces when printed small.

    Can photo ornaments be washed or cleaned?

    Most photo ornaments should be dusted gently with a soft, dry cloth rather than washed, since water can damage prints, fabric, and transfer finishes. Acrylic and metal ornaments can be wiped with a soft dry cloth, while fabric, wood, and paper based ornaments should be kept dry and stored with tissue between pieces.

    How do you hang a heavy photo ornament safely?

    Hang heavy ornaments, such as ceramic tiles, brass frames, and shadow boxes, on strong branches near the trunk, using a sturdy loop and a hook rated for the weight. Test the branch by hanging the ornament and checking for bending or slipping, and move heavier pieces lower on the tree, where a fall would cause less damage.

    What makes a good personalized photo ornament gift?

    A good photo ornament gift pairs a meaningful photo with a clear name, date, or short message, in a format that suits the recipient tree and home. Choose a light, durable format for shipping, wrap the ornament in tissue inside a sturdy box, and include a short note explaining the photo, so the gift reads as personal even before it reaches the tree.


  • 17 Ways to Display 12 Days of Christmas Tree Ornaments

    17 Ways to Display 12 Days of Christmas Tree Ornaments

    Display a 12 Days of Christmas set by giving each ornament its own clear spot in story order, from the partridge on day one through the drummers on day twelve, on a tree, mantel, shelf, or wall rail where light reaches every piece and no ornament hides behind another.

    A 12-piece set works best when the order is easy to follow. The song gives the set a built-in sequence, so a display that keeps day one through day twelve in order will read at a glance, even to a guest who only looks for a few seconds. Start by laying the ornaments out in order on a table and checking which pieces are large, heavy, or fragile. Heavy pieces need strong branches or a flat surface, fragile glass needs space around it, and small pieces need a spot near eye level or they will vanish. Once you know the order and the sizes, pick a display that fits the room you have, not the room you wish you had. A small set on a crowded tree can look lost, while the same set on a mantel rail or a tiered tray can look planned and calm. For a wider seasonal look to pair with this set, see the vintage Christmas decor ideas.

    Key Takeaways

    • Keep the set in story order, day one through day twelve, so guests can follow the song from piece to piece.
    • Give each ornament its own space, with light on it and no piece hidden behind another.
    • Put heavy ornaments on strong branches or flat surfaces, and fragile glass where it will not be bumped.
    • Match the display to the room: a tree, mantel, shelf, wall rail, or table display can each carry a full set.
    • Repeat one ribbon color, one metal finish, or one greenery type through the display to tie the 12 pieces together.
    • Label or number the pieces lightly at first, until you and your family know the order by heart.

    1. Hang the Set in Story Order Down One Side of the Tree

    Christmas tree with Twelve Days of Christmas ornaments hung in story order down one side.

    Hang the 12 ornaments in a clear line down one side of the tree, starting with the partridge near the top and ending with the drummers near the base. Work from the top down so you can check spacing as you go, and keep each ornament on its own branch tip where it can be seen from the front of the room. This method suits a main tree, since it uses the tree you already have and keeps the set together in one readable run.

    Step back after every three or four ornaments and check the line from across the room. If two ornaments sit at the same height on facing branches, move one slightly up or down so the eye follows a steady path. Keep plain ornaments in matching colors near the set, rather than between the 12 pieces, so the story order is not broken. Place the heaviest piece on a strong inner branch, even if that pulls it slightly off the line, since a safe hang matters more than a straight line.

    2. Give the Set Its Own Small Tabletop Tree

    Small tabletop Christmas tree decorated with a Twelve Days of Christmas ornament set.

    Put the 12 ornaments on a small tabletop tree of their own, with no other ornaments competing for attention. A tree about two to three feet tall suits most sets, since 12 pieces can fill it without crowding, and the small size lets you place it on a side table, a bookshelf top, or a kitchen counter. Use warm white lights only, so color and detail on each ornament stay easy to see.

    Hang the partridge near the top and work down in order, placing larger pieces low and small pieces at eye level. Leave a few empty branch tips between pieces, so each ornament has breathing room and the tree does not look stuffed. This display works well in a room without a full-size tree, and it lets children follow the song by pointing to each piece in turn. Store the small tree with the set, if space allows, so the display goes up the same way each year.

    3. Line the Set Along a Mantel Garland in Order

    Mantel garland with Twelve Days of Christmas ornaments lined up in order.

    Lay a simple pine or cedar garland along the mantel, then hang or nest the 12 ornaments along it from left to right, in story order. Use small hooks, short ribbon loops, or ornament stands tucked into the garland, and keep the spacing even so the line reads like a sentence across the mantel. This method suits a living room where the mantel is already a focal point, and it keeps the set at eye level for guests seated nearby.

    Balance the garland before you add ornaments: check that it sits level, does not droop at the center, and leaves room for stockings or candles if those also live on the mantel. Place heavier ornaments near the ends, where the garland rests on the mantel, and lighter pieces toward the center. If a piece keeps slipping, set it in a small stand on the mantel in front of the garland instead of forcing a hook into thin greenery.

    4. Hang Each Ornament from a Wall Mounted Branch Rail

    Wall mounted branch with Twelve Days of Christmas ornaments hanging from ribbon loops.

    Fix a single bare branch, a wooden dowel, or a slim wall rail to the wall, then hang the 12 ornaments from it in order, with ribbon loops of the same length or graduated lengths. A wall rail suits a hallway, a dining room wall, or a narrow room where a tree would block a walkway, and it turns the set into wall art for the season. Choose a rail long enough that ornaments do not touch, and fix it into wall studs or with fixings rated for the total weight.

    Vary the ribbon lengths slightly, with longer drops at the center and shorter drops at the ends, or keep every drop the same for a tidy row. Either way, keep the order left to right and check the rail from the side, since ornaments that look even from the front can swing into each other when a door closes. Add a small paper tag or a numbered card under each piece for the first season, so guests can match each ornament to its day.

    5. Frame the Set in a Divided Shadow Box

    Divided shadow box holding a Twelve Days of Christmas ornament set in separate compartments.

    Set the 12 ornaments into a large shadow box with 12 compartments, one piece per compartment, arranged in rows that read left to right and top to bottom in story order. A shadow box suits fragile or valuable pieces, since the glass front keeps dust and hands off the ornaments while still showing every detail. Line the back of the box with plain linen, felt, or wrapping paper in a color that contrasts gently with the ornaments.

    Fix each ornament with a small stand, a pin through its loop, or museum putty on its base, and test the box flat before you hang it, so nothing shifts when it goes upright. Keep the box out of direct sun, since sun fades paint and heats glass, and hang it where it can be viewed up close, such as a hallway or above a sideboard. Label each compartment lightly on the back or on a small card beside the box, rather than writing on the box itself.

    6. Arrange the Set on a Tiered Tray Vignette

    Three tier tray holding a Twelve Days of Christmas ornament set in story order.

    Build the display on a two or three tier tray, placing four ornaments per tier in story order, starting at the top tier with days one to four. A tiered tray suits a kitchen island, a dining table, or a coffee table, and it keeps the set contained in one movable display that can be lifted off the table when serving food. Use small stands, tiny cups, or a ring of tissue to keep round ornaments from rolling.

    Keep the tallest or bulkiest pieces on the bottom tier, where the tray is most stable, and the smallest pieces on the top tier, where they sit closest to eye level. Add only a little greenery, such as a few pine sprigs or a small pinecone, so the ornaments stay the focus. Check the tray from all sides, since a table display is seen from more than one angle, and turn any ornament that faces only one way so its best side shows to the room.

    7. Hang the Set from a Chandelier at Varied Heights

    Chandelier with Twelve Days of Christmas ornaments hanging at varied heights above a table.

    Hang the 12 ornaments from a chandelier or a ceiling light fitting, using ribbon loops at varied heights, in story order around the fitting. This method suits a dining room, since the set hangs above the table where guests look during a meal, and the light from the fitting shines through glass or metallic pieces. Use only lightweight ornaments for this display, and keep every piece clear of bulbs and heat.

    Tie each ribbon to a sturdy part of the fitting, not to a shade or a loose chain link, and test the weight before you hang the full set. Keep the longest drops at the outer edge and shorter drops near the center, or reverse that pattern, as long as ornaments do not knock together when air moves. Take the set down before cleaning the fitting, and check ribbons each season, since heat and dust weaken ribbon over time.

    8. Show Each Ornament in Its Own Glass Jar

    Row of clear glass jars on a shelf, each holding one Twelve Days of Christmas ornament.

    Place each ornament in its own clear glass jar, cloche, or apothecary jar, and line the 12 jars in a row on a shelf, sideboard, or windowsill in story order. Single jars suit delicate pieces, since each ornament gets its own dust cover and cannot knock against its neighbors. Choose jars tall enough that the lid closes without pressing the ornament, and set a small fold of tissue under each piece so it sits level.

    Keep the jars in the same style, with the same lid finish, so the row reads as one set rather than a collection of odd jars. If the jars vary in height, place the tallest at the ends or sort them in a gentle rise and fall, and keep the order labels on the shelf in front of each jar, not on the glass. This display works well in a kitchen or bathroom shelf display, where a tree would not fit, and it packs away neatly, jar by jar, at the end of the season.

    9. String the Set as a Garland Across a Doorway or Window

    Garland of Twelve Days of Christmas ornaments strung in order across a doorway.

    Thread the 12 ornaments onto a long ribbon, cord, or thin garland, spacing them evenly in story order, and hang the strand across a doorway, a window, or a wall. A garland display suits a room that needs color at height without a tree, and it lets the set move with the room: a doorway garland greets guests, while a window garland catches daylight. Use a cord strong enough for the total weight, and fix both ends to hooks rated for that weight.

    Space the ornaments so the strand hangs in a gentle swag, not a tight straight line, and check that the lowest point clears heads in a doorway. Alternate the hanging direction of each ornament slightly, so flat pieces face forward rather than edge on. If the garland will hang in a window, keep ornaments out of direct midday sun, and bring the strand inside during strong wind if the window opens.

    10. Place One Ornament per Bookshelf Section

    Bookshelf with Twelve Days of Christmas ornaments placed one per shelf section among books.

    Set the 12 ornaments along bookshelves, one piece per shelf section or book stack, in story order from the top shelf down or from left to right. A bookshelf display suits a living room or study where shelves already hold books and small objects, and it lets each ornament act as a bookend or a focal point among plain books. Use a small stand or a folded cloth under each piece so it does not roll off the shelf.

    Pull a few books forward or turn a stack sideways to make a flat spot for each ornament, and keep the ornament clear of the shelf edge. Match the ribbon color on each piece to the room, so the 12 spots feel linked even though they sit apart. Check the display at night, when shelf lighting or lamp light changes which pieces stand out, and move a piece that falls into shadow to a better lit section.

    11. Hang the Set from a Leaning Ladder Display

    Wooden ladder leaning against a wall with Twelve Days of Christmas ornaments hanging from its rungs.

    Lean a wooden ladder or a blanket ladder against a wall, then hang the ornaments from its rungs in story order, with the partridge on the top rung and the drummers near the base. A ladder display suits a corner, an entry, or a room with an empty wall, and it gives the set a tall, narrow footprint that fits beside a sofa or a door. Fix the ladder foot so it cannot slip, and keep the ladder clear of walkways.

    Hang two or three ornaments per rung, spaced so they do not touch, and use ribbon loops long enough that pieces hang clear of the rung below. Drape a little greenery or a single strand of lights along one side of the ladder, keeping lights away from fabric ribbons and dry greenery. This display packs flat at the end of the season, since ornaments come off the rungs and the ladder folds or leans in storage.

    12. Arrange the Set in a Wreath Ring Around a Mirror

    Greenery wreath ring with Twelve Days of Christmas ornaments fixed around it in order.

    Form a large wreath ring from greenery, or use a plain wreath frame, and fix the 12 ornaments around the ring in story order, clockwise from the top. Hang the finished ring on a wall or around a round mirror, so the set frames a reflection and draws the eye from piece to piece around the circle. This method suits an entry or a dining room wall where a round shape breaks up straight furniture lines.

    Fix each ornament with wire or a short ribbon tied to the frame, and test the ring flat before hanging, so no piece drops when the ring goes upright. Place the largest or heaviest pieces at the bottom of the ring, where the frame bears weight best, and keep small pieces near the top. Balance color around the ring, so one side does not carry all the bright pieces while the other side looks plain.

    13. Build a Table Centerpiece in a Wooden Crate or Tray

    Low wooden crate on a dining table holding a Twelve Days of Christmas ornament set as a centerpiece.

    Set the 12 ornaments in a low wooden crate, a shallow tray, or a dough bowl, arranged in story order in rows, and use the crate as a dining table or coffee table centerpiece. A crate display suits a rustic or farmhouse room, and it keeps the set low enough that guests can see across the table. Line the crate with tissue, moss, or a plain cloth, and nest each ornament in its own hollow so round pieces do not roll.

    Sort the ornaments by size within the crate, with larger pieces at the back or ends and smaller pieces toward the front, so every piece shows from a seated view. Add a few pine sprigs or pinecones between pieces, but leave gaps so the crate does not look stuffed. Lift the whole crate off the table when serving food, and keep the display away from candles and hot dishes, since heat and spills damage ornament finishes.

    14. Hang the Set on a Branch Tree in a Vase

    Tall bare branches in a heavy vase with Twelve Days of Christmas ornaments hanging from the branches.

    Stand several tall bare branches in a heavy vase or jug, then hang the 12 ornaments from the branches in story order, working from the top of the tallest branch down. A branch tree suits a small home, a tabletop, or a room where a full tree is not wanted, and it gives the set a natural, open look with plenty of air around each piece. Choose a vase heavy enough that the branches cannot tip, and trim branch tips so no ornament hangs past the vase edge.

    Hang the lightest ornaments on thin outer twigs and heavier pieces on thick inner branches, close to the vase. Check the branch tree from the front and the side, since branches seen from behind can hide an ornament that looks clear from the front. This display also works on a porch or in a sheltered entry, as long as wind cannot swing the branches into each other.

    15. Space the Set Along a Staircase Banister Garland

    Staircase banister garland with Twelve Days of Christmas ornaments spaced along it in order.

    Drape a garland along the staircase banister, then hang or nest the 12 ornaments along it in story order, from the bottom newel post to the top. A banister display suits a home with a staircase that guests use and see on arrival, and it spreads the set over a long line that can be followed step by step. Fix the garland with ties or hooks, never with tape that can damage the banister finish, and keep ornaments clear of the handrail grip.

    Place ornaments on the outer face of the garland, where they show from the hall, and keep them high enough that hands on the rail do not brush them. Space the pieces evenly along the run, rather than clustering them at the newel posts, and check the display from the bottom of the stairs, where the full line is visible. For fragile pieces, set them in small stands on the stair treads beside the garland instead of hanging them where they could be knocked.

    16. Hang the Set in a Window at Varied Heights

    Window with Twelve Days of Christmas ornaments hanging from ribbons at varied heights.

    Hang the 12 ornaments in a window, each on its own ribbon from a curtain rod, a tension rod, or a branch fixed across the frame, in story order from left to right and at varied heights. A window display catches daylight and, in the evening, shows the set as a silhouette against the glass, which suits a front room or a kitchen window. Use suction hooks or rod clips rated for the weight, and keep ribbons clear of window locks and handles.

    Cut ribbons in a gentle pattern, such as short, medium, and long drops that repeat, so the eye moves across the window without a flat line. Keep fragile glass away from the glass pane, where cold and knocks can damage it, and move the display if condensation forms on the window. This method also works for a set that will be seen from outside, since the order reads from the street as well as from inside.

    17. Reveal One Ornament per Day on a Numbered Rail

    Wall rail with numbered hooks and a row of Twelve Days of Christmas ornaments in a daily reveal display.

    Mount a rail, a row of hooks, or a strip of pegs on a wall, and hang one new ornament each day, in story order, over 12 days, with a small numbered tag beside each hook. A daily reveal suits families who want the set to build slowly, since each morning brings one new piece, and by the last day the full set hangs together. Start with an empty rail and a card that lists the 12 days, so children can check off each reveal.

    Fix the rail at a height children can reach for the lower hooks, and keep higher hooks for adults to fill. Use the same ribbon and tag style for every piece, so the rail looks planned even when only a few ornaments hang on it. Photograph the rail on the last day, when all 12 pieces hang together, and keep the numbered tags with the set in storage, so next year the reveal runs in the same order. For safe handling of older or fragile pieces in a daily reveal, follow the care steps in the antique Christmas ornaments guide.

    Conclusion

    A 12 Days of Christmas set earns its place when every piece can be seen, in order, without crowding. Pick one display from this list that fits your room, your tree, or your wall, lay the ornaments out in story order first, and check weight, light, and spacing before you fix anything in place. A tree line, a mantel garland, a shadow box, or a numbered rail can each carry the full set, as long as heavy pieces sit on strong support, fragile pieces get space, and the order stays clear from day one to day twelve. Once the display is up, step back, look from across the room, and move any piece that hides behind another. The set will then read the way the song reads: one gift at a time, building to a full, joyful group.

    FAQs

    What is the best way to display 12 days of Christmas tree ornaments?

    The best way is to give each ornament its own clear spot in story order, on a tree, mantel, shelf, or wall rail, with light on every piece and space between pieces. Start by laying the set out in order on a table, checking weight and fragility, then pick the display that fits your room and keeps day one through day twelve easy to follow.

    In what order should I hang a 12 days of Christmas ornament set?

    Hang the set in the order of the song: partridge in a pear tree on day one, turtle doves on day two, French hens on day three, calling birds on day four, golden rings on day five, geese on day six, swans on day seven, maids on day eight, ladies on day nine, lords on day ten, pipers on day eleven, and drummers on day twelve. Keep that order on a tree, mantel, rail, or shelf so guests can follow the story.

    How do I display a 12 days ornament set if I have no tree?

    You can display the set without a tree on a mantel garland, a wall rail, a bookshelf, a tiered tray, a shadow box, or a branch tree in a vase. A wall rail or a shadow box works well in a small room, while a tiered tray or a crate centerpiece suits a table display that can be moved when you serve food.

    How do I keep fragile ornaments safe in a 12 days display?

    Keep fragile ornaments safe by giving each piece space, placing it on a strong branch or a flat surface, and keeping it away from heat, direct sun, high traffic spots, and the edge of a shelf or mantel. Use a shadow box or single glass jars for the most delicate pieces, use ribbon loops or stands rated for the weight, and remove fragile pieces first at takedown time.

    Can I mix a 12 days set with other Christmas ornaments?

    You can mix a 12 days set with other ornaments, but keep the 12 pieces together in order and use plain ornaments in matching colors around them, rather than between them. Mixing works best when the other ornaments share a color palette or finish with the set, so the story group still reads as one group on the tree or mantel.

    How should I store a 12 days of Christmas ornament set?

    Store the set in story order, with each ornament wrapped alone in tissue and packed in its own compartment in a divided box, in a cool, dry place. Keep a numbered list or small tags with the box so the order is clear next season, keep heavier pieces at the bottom of the box, and check the box once a year for damp, damage, or loose caps and loops.


  • 19 Polymer Clay Christmas Ornament Ideas for Beginners

    19 Polymer Clay Christmas Ornament Ideas for Beginners

    Beginners can make polymer clay Christmas ornaments by conditioning soft clay, shaping it with cutters or by hand, adding a hanging hole before baking, curing it in a home oven at the brand’s stated temperature, and sealing it for a lasting finish. Start with round baubles, flat cutouts, and small figures, using only clay, a rolling pin, cutters, and ribbon.

    Work on a clean, smooth surface, and condition each color by kneading it until it bends without cracking. Keep a small set of basics nearby: a rolling pin or pasta roller for clay, a craft knife, a toothpick or skewer for holes, and a lined baking tray. For more seasonal ideas to pair with these handmade pieces, browse the Dwell Ovell decor ideas index. Hang finished ornaments on sturdy branches, or pair them with older pieces shown in 25 vintage Christmas decor ideas.

    Key Takeaways

    • Condition clay well before shaping, since soft, crack free clay gives cleaner edges and stronger ornaments.
    • Make the hanging hole before baking, and widen it slightly, since clay can shrink a little as it cures.
    • Start with flat cutouts and round baubles, then move to small figures once you are comfortable with the basics.
    • Bake on a lined tray at the temperature stated on your clay brand, and let pieces cool fully before sealing or stringing.
    • Seal painted or detailed pieces with a thin coat of clay safe varnish so colors and small details last through the season.
    • Store clay ornaments in divided boxes with tissue between pieces, so painted surfaces and small parts do not rub together.

    1. Marbled Round Baubles

    Marbled polymer clay baubles in cream, red, and deep green with ribbon loops.

    Roll two or three colors of clay into thin ropes, twist them together lightly, then roll the twist into a ball and smooth it in your palms until the marbled pattern stays visible but the surface feels even. Press a small eye pin into the top before baking, so you have a secure loop for ribbon. A set in cream, red, and deep green suits a classic tree, while cream and gold reads softer on a pale tree.

    Keep the marble loose rather than overworking it, since too much rolling turns the colors into one muddy shade. Bake the balls on a lined tray, turning them once if your oven heats unevenly, and add ribbon loops only after the pieces cool. These baubles are a good first project because they need no cutter and no painting.

    2. Terrazzo Speckled Flat Rounds

    Flat round polymer clay ornaments with terrazzo speckles in red, green, and gold.

    Roll a sheet of cream or pale gray clay, then press tiny cut pieces of red, green, gold, and dark blue clay into the surface to copy the speckled look of terrazzo stone. Smooth the sheet lightly with a roller so the chips sit flush, then cut rounds with a circle cutter and pierce a hanging hole near the top edge. The result looks modern on a tree, yet the method is simple enough for a first session.

    Use small chips and leave space between them, so each color reads clearly against the base. A thin coat of varnish after baking makes the speckles look polished without changing the flat shape. Make a set of six or eight rounds in the same palette for a matched group.

    3. Gingerbread People with Icing Details

    Polymer clay gingerbread people ornaments with white icing details on a tree branch.

    Cut gingerbread people from a sheet of warm brown clay, then use a fine tipped tool or a small piping tip to add white dots, buttons, and squiggles after baking, or press thin white clay ropes into place before baking. Keep the shapes simple, with rounded arms and legs, so they bake evenly and do not snap at thin joints. Add a hanging hole at the top of the head before the pieces go in the oven.

    Painted icing detail gives the most control for beginners, since a mistake can be wiped off before it dries. Seal painted pieces lightly so the white detail does not rub off in storage. These ornaments also work as gift tags when tied to a wrapped box with twine.

    4. Candy Cane Striped Discs

    Red and white striped polymer clay disc ornaments with ribbon loops.

    Roll red and white clay into thin ropes, lay them side by side, and roll them flat into a striped sheet, keeping the stripes even in width. Cut the sheet into round discs, then shape each disc into a candy cane hook only if you want a curved form, or leave them flat for an easier first try. Pierce a hole near the top before baking, and add a small red ribbon bow after cooling.

    The key to neat stripes is rolling the sheet in one direction, from the center outward, so stripes stay straight. If a stripe breaks, patch it with a thin rope of the same color and roll again lightly. A set of striped discs looks crisp next to plain red and white baubles.

    5. Pierced Snowflake Cutouts

    White polymer clay snowflake ornaments with pierced patterns hanging near a window.

    Roll white or pale blue clay to an even thickness, cut snowflake shapes with a cutter, then pierce small dots and lines into each arm with a toothpick or a fine needle tool before baking. The pierced pattern lets light through in a subtle way and gives a flat cutout more detail than paint alone. Use a thin, even sheet so the arms do not droop in the oven.

    Work on parchment paper so finished snowflakes lift off without bending. If an arm tears, press the edges back together gently and smooth the join with a fingertip. Hang snowflakes near the outer tips of branches, where their pale color stands out against green.

    6. Miniature Gnome Figures

    Small polymer clay gnome ornaments with pointed hats and cream beards on a mantel.

    Build a small gnome from three simple parts: a round body in red or green, a pointed hat, and a small round nose, with a beard made from a flattened ball of cream clay pressed below the nose. Keep the gnome under two inches tall so it stays light on a branch, and press the parts together firmly before baking so joints hold. Add a loop at the top of the hat for hanging.

    Gnomes are forgiving for beginners because the beard hides the join between the hat and the body. Use a toothpick to add a few lines to the beard for texture, and keep the nose small so the face stays balanced. A row of gnomes in different hat colors makes a playful set for a mantel garland.

    7. Faux Wood Slice Ornaments

    Polymer clay ornaments with a faux wood slice grain pattern and twine loops.

    Roll a sheet of tan clay, cut rounds, then press a wood grain pattern into each round with a toothpick, drawing rings from the center outward and a few short bark marks around the edge. Add a darker brown edge by rolling a thin rope of dark clay around the rim, or paint the rim after baking for a cleaner edge. Pierce a hole near the top before baking.

    This idea suits a rustic tree, since the wood look pairs well with pinecones, twine, and plain greenery. Keep the grain lines light and uneven, like real wood, rather than perfectly spaced. Hang wood slices with twine loops for a natural finish.

    8. Gold Leaf Star Ornaments

    Deep green polymer clay star ornaments with gold leaf on the points.

    Cut stars from a sheet of deep green, navy, or cream clay, bake them, and then apply small pieces of gold leaf to the raised points with a soft brush and a thin layer of leaf adhesive, following the adhesive maker’s directions. Gold leaf adds a warm shine without painting skill, since torn edges and small overlaps still look intentional on a star shape. Add a hanging hole before baking.

    Seal the leaf lightly after it sets, so it does not flake during handling. Stars in one color with gold leaf look neat mixed with plain baubles, and they also work as tree toppers on a small tabletop tree. Handle finished stars by their edges to keep the leaf intact.

    9. Tiny Christmas Tree Ornaments

    Tiny green polymer clay Christmas tree ornaments with small red and gold balls.

    Shape a small tree from a cone of green clay, then press tiny balls of red, gold, and cream clay onto the surface as ornaments, working from the bottom up. Add a small star on top and a short trunk at the base, pressing each part firmly into the cone before baking. Keep the tree under three inches tall so it bakes evenly and hangs without pulling a branch down.

    A flat backed tree is easier for beginners: press the cone gently against a flat surface so one side stays flat for hanging against a wall or window. Add a loop at the top before baking, and seal the tiny balls lightly so they stay in place. These small trees look charming grouped on a mantel as well as on a tree.

    10. Angel Figures with Folded Wings

    Cream polymer clay angel ornaments with folded wings on a tree branch.

    Form a simple angel from a cone shaped dress, a round head, and two flattened teardrop wings pressed onto the back. Keep the wings thick enough to hold their shape in the oven, and press them into the dress rather than resting them on top, so the join is strong. Add a small halo from a thin gold clay ring, or paint one after baking.

    Angels are a good step up from flat cutouts because they teach joining parts, yet the shapes stay simple. Bake angels upright on a lined tray, and check that wings do not touch the tray edge. A set of angels in cream and gold suits a quiet, classic tree.

    11. Stacked Snowman Ornaments

    Stacked white polymer clay snowman ornaments with orange noses and red scarves.

    Roll three balls of white clay in decreasing sizes, press them together in a stack, and add a small orange cone nose, black dot eyes, and a thin scarf made from a flattened strip of red or green clay. Keep the bottom ball the largest and the head the smallest, and press the joints firmly so the stack holds its shape. Add a hanging loop at the top before baking.

    Snowmen are easy to repeat, so they make a good set for gifts: make several at once, varying only the scarf color. If a joint cracks after baking, a drop of clay safe glue can fix it, but firm pressing before baking usually prevents the problem. Store snowmen upright so small noses do not bend.

    12. Reindeer Head Ornaments

    Brown polymer clay reindeer head ornaments with antlers and red noses.

    Cut a reindeer head shape from brown clay, or build one from an oval face, two small ears, and two antlers made from thin, branched clay ropes. Press the antlers firmly into the top of the head, and add a red nose ball and two small dark eyes. Keep antlers short and thick for a first try, since long thin antlers can snap.

    Bake reindeer heads flat on a lined tray, with antlers supported so they do not droop. A flat reindeer head hangs well on a tree and also works on a gift or a wreath. Make a small group with different nose colors, keeping one red nosed piece as the focal point of the set.

    13. Miniature Wreath Ornaments

    Small green polymer clay wreath ornaments with red berries hanging on a door.

    Roll green clay into a thin rope, join the ends into a ring, then press tiny red balls and small leaf shapes around the ring as berries and foliage. Keep the ring small, about two inches across, and press each berry firmly into the rope so it does not fall off after baking. Add a ribbon loop at the top before the piece goes in the oven.

    A wreath ornament teaches ring shaping and small detail work in one short project. Use two shades of green for the ring and leaves to add depth without extra steps. Hang wreaths on a tree, a doorknob, or a bottle neck for a small seasonal touch.

    14. Bell Shaped Ornaments with a Clapper

    Red and gold polymer clay bell ornaments with small clappers on a tree branch.

    Shape a bell from a hollow cone or a solid cone with a rounded bottom edge, then add a small ball at the base as a clapper, attached with a short clay stem or a jump ring after baking. Press a loop into the top before baking, and add a simple band of gold or red clay around the rim for detail. Keep the bell small so it stays light on a branch.

    Bells ring softly only if the clapper moves freely, so leave a small gap between the clapper and the bell body if you use a jump ring. For a simpler version, fix the clapper in place and let the bell read as a shape rather than a working bell. Either way, bells pair well with ribbon and greenery on a mantel.

    15. Little Cottage Ornaments

    Small polymer clay cottage ornaments with snowy roofs on a mantel.

    Build a small cottage from a rectangular block for the walls, a triangular prism for the roof, and tiny details such as a door, two windows, and a dusting of white clay as snow on the roof. Press the roof firmly onto the walls before baking, and keep the cottage under three inches tall so it hangs without straining a branch. Add a hanging loop at the roof peak.

    Cottages suit a village style tree or a mantel display, and they pair well with a full village scene. For a simpler first cottage, skip the snow detail and paint the door and windows after baking instead. Seal painted cottages lightly so the small details last.

    16. Stamped Heart Ornaments

    Red polymer clay heart ornaments with stamped patterns and ribbon loops.

    Roll a sheet of red, cream, or dusty pink clay, cut heart shapes, then press a rubber stamp, a lace scrap, or a textured button into the surface to leave a clear pattern. Press evenly and lift straight up, so the pattern stays sharp. Pierce a hanging hole near the top of the heart before baking, away from the stamped area.

    Stamped hearts are quick to make in a batch, and each one can carry a different pattern. If a stamp sticks, dust it lightly with cornstarch before pressing. Hearts work on a tree, on gifts, and on a garland strung across a mantel.

    17. Keepsake Handprint Ornaments

    Cream polymer clay keepsake handprint ornaments with painted prints.

    Roll a sheet of soft clay to an even thickness, press a small hand gently into the surface, then cut around the print with a round or heart shaped cutter, keeping the print centered. Smooth the edges with a fingertip, pierce a hanging hole, and bake following the clay brand’s directions. Paint the print in a contrasting color after baking, or leave it plain for a subtle keepsake.

    Press the hand straight down and lift straight up, without rocking, so fingers stay clear. If a print smudges, smooth the sheet and try again before baking, since the clay stays workable until it cures. Date the back with a toothpick before baking, so the year stays part of the keepsake.

    18. Botanical Leaf Imprint Ornaments

    Sage green polymer clay ornaments with botanical leaf vein imprints.

    Roll a sheet of sage green or cream clay, lay a real leaf vein side down on the surface, and roll over it lightly once so the vein pattern transfers. Lift the leaf carefully, cut around the imprint with a cutter or a knife, and pierce a hanging hole before baking. The leaf veins give a detailed, natural look with almost no drawing skill needed.

    Choose leaves with strong veins, such as maple or oak, and press only once, since a second roll can blur the pattern. Remove any leaf bits from the surface before baking. Leaf ornaments suit a natural tree with wood, twine, and dried orange slices.

    19. Monogram Letter Ornaments

    Cream polymer clay monogram letter ornaments with painted letters on a tree.

    Cut a single letter from a sheet of clay using a letter cutter, or shape one by hand from rolled ropes of clay, then smooth the edges and add small dots, stars, or a thin border for detail. Pierce a hanging hole at the top of the letter before baking, and paint the letter in a contrasting color after it cools for a clear, readable finish. Keep letters at least two inches tall so thin strokes do not break.

    Monogram ornaments make personal gifts, since each one carries an initial for a family member or a friend. Make a full set for a tree, using the same color and border style so the letters read as a group. Seal painted letters lightly to protect the finish in storage. For care tips that also apply to fragile older ornaments, see how to identify, display, and store antique Christmas ornaments.

    Conclusion

    Polymer clay Christmas ornaments are a friendly first clay project because the steps stay the same across most ideas: condition, shape, pierce a hole, bake, cool, and seal. Start with marbled baubles, flat cutouts, and stamped hearts, then try gnomes, cottages, and keepsake handprints once you trust your shaping. Make a few pieces at a time, keep a simple color palette, and let each batch cool fully before you string and hang it. With a small set of tools and one or two clay colors to start, you can build a tree full of handmade ornaments that suit your home and make thoughtful gifts.

    FAQs

    How do beginners start making polymer clay Christmas ornaments?

    Beginners should start with conditioned clay, a rolling pin, simple cutters, and one or two colors, making flat cutouts or round baubles first. Condition the clay by kneading it until it bends without cracking, roll it to an even thickness, cut or shape the ornament, pierce a hanging hole, and bake it following the clay brand’s directions. Keep the first batch small so you can learn how your oven and clay behave together.

    What tools do I need for polymer clay ornaments?

    You need clay, a smooth work surface, a rolling pin or pasta roller for clay, a craft knife, cutters, a toothpick or skewer for holes, a lined baking tray, and ribbon or twine for hanging. A small set of fine tools for detail, plus paint and a clay safe varnish for finishing, covers most beginner projects. You do not need a kiln, since polymer clay cures in a home oven.

    What temperature should I bake polymer clay ornaments at?

    Bake polymer clay at the temperature and for the time stated on the clay brand you use, since brands differ and a single temperature does not fit every clay. Place pieces on a lined tray, keep them out of direct contact with heating elements, and let them cool fully before handling, sealing, or stringing. If pieces feel soft after cooling, check the brand’s directions before rebaking, rather than guessing a higher temperature.

    How do I make a hanging hole that does not close during baking?

    Make the hole before baking with a toothpick, skewer, or small drill bit, and wiggle the tool gently to widen the hole slightly, since clay can shrink a little as it cures. Keep the hole at least a short distance from the edge so the clay around it stays strong. If a hole closes after baking, a small hand drill can reopen it, but a wider hole before baking usually prevents the problem.

    Can polymer clay ornaments go outside?

    Polymer clay ornaments are best kept indoors, since cold, rain, and strong sun can dull finishes and weaken painted details over time. Use them on indoor trees, mantels, shelves, and gifts, and bring any ornament used on a covered porch inside during wet or freezing weather. Sealed pieces handle brief indoor display near a window better than unsealed ones, but indoor use still gives the longest life.

    How do I store handmade clay ornaments after Christmas?

    Store handmade clay ornaments in a divided box with tissue between pieces, in a cool, dry place away from direct sun and heavy items stacked on top. Keep painted and gold leaf pieces apart so surfaces do not rub, and keep small parts such as noses and antlers facing up. Label the box by year or set, so next season’s tree goes up with the same groups together.


  • 17 Embroidered Ornament Ideas for a Handmade Christmas

    17 Embroidered Ornament Ideas for a Handmade Christmas

    Embroidered ornaments are handmade Christmas decorations made by stitching designs onto fabric, felt, or linen, then shaping the piece into a ball, star, hoop, or keepsake. Choose a simple pattern and sturdy fabric, then finish each ornament with a hanging loop and a neat backing so it holds its shape on the tree.

    Start with one easy design, such as a star or a snowflake, before moving to detailed pieces like birds or cottages. Use a hoop to keep fabric taut while you stitch, and keep thread lengths short so stitches stay even and do not tangle. For more seasonal ideas to pair with these handmade pieces, see the vintage Christmas decor ideas and browse the Dwell Ovell decor ideas index. Group finished ornaments by color or theme on the tree, and keep heavier pieces on strong lower branches.

    Key Takeaways

    • Start with a simple pattern and a short stitch list, then build skill with each ornament.
    • Use sturdy fabric or felt, a hoop for tension, and short thread lengths for even stitches.
    • Finish every ornament with a hanging loop and a backing so it holds its shape and hides raw edges.
    • Repeat one or two thread colors through the set for a calm, collected look on the tree.
    • Date or initial keepsake ornaments so they carry family meaning from year to year.
    • Store embroidered ornaments flat or in divided boxes with tissue between pieces to protect stitches.

    1. Classic Cross Stitch Baubles

    Cross stitch bauble ornament with a small tree motif hanging on a Christmas tree branch.

    Stitch a small cross stitch motif, such as a tree, a star, or a snowflake, onto evenweave fabric, then gather the fabric over a plain bauble form or pad it into a round pillow shape. Keep the motif centered and use two or three thread colors so the design reads clearly from across the room. Add a ribbon loop at the top and a plain felt backing.

    Work the full motif before shaping the bauble, and press the stitched piece lightly from the back. If the fabric puckers, loosen the hoop tension on the next piece and use shorter thread lengths. These baubles suit a tree with a mix of glass and handmade ornaments, since their flat stitch texture stands out against shiny surfaces.

    2. Felt Stars with Blanket Stitch Edges

    Red felt star ornament with cream blanket stitch edges hanging on a Christmas tree.

    Cut two star shapes from wool felt, stitch a simple motif on the front star, then join the pair with blanket stitch around the edge, leaving a small gap for light stuffing. Use a contrasting thread color for the edge so the star shape stays bold. Add a hanging loop of ribbon or twine at one point.

    Keep stuffing light so the star stays flat enough to hang well and does not pull the tree branch down. Felt stars work well for a first embroidery project, since felt does not fray and small mistakes are easy to hide in the edge stitching. Make a set in one color family for a calm tree, or mix red, green, cream, and gold.

    3. Mini Embroidery Hoop Ornaments

    Mini wooden embroidery hoop ornament with a stitched Christmas tree design.

    Stitch a small design inside a mini wooden hoop, trim the fabric at the back, and glue or stitch a felt circle over the back to cover raw edges. Add a ribbon loop through the hoop screw or tied around the top. Hoop ornaments suit tiny scenes, single words, initials, and simple motifs such as trees, bells, or snowflakes.

    Keep the design smaller than the hoop opening so no stitch is hidden under the wood rim. Tighten the hoop screw gently, since overtightening can crack a small hoop or distort the fabric. Hang hoop ornaments near the outer tips of branches, where their round frames catch light and show the stitching clearly.

    4. Monogrammed Initial Ornaments

    Cream linen ornament with a large embroidered initial in deep red thread.

    Stitch one large initial in backstitch, chain stitch, or satin stitch on a small round or oval of linen, then back it with felt and add a loop. A single letter makes a clear personal gift and a simple tree ornament, and it suits beginners who want one strong focal stitch rather than a busy scene. Add a small sprig, star, or dot motif beside the letter for balance.

    Choose a thread color that contrasts with the fabric, such as deep red on cream or gold on green. Keep letter stitches even by marking the letter lightly on the fabric first. These ornaments also work as gift tags tied to wrapped presents, then hung on the tree after the gift is opened.

    5. Linen Snowflakes with French Knots

    White embroidered snowflake ornament on natural linen with French knot details.

    Stitch a six point snowflake on natural linen using straight stitches for the arms and French knots for the points and center. Keep each arm the same length and space the knots evenly so the snowflake looks balanced. Back the linen with felt, cut the pair into a circle or a snowflake outline, and add a fine loop for hanging.

    Snowflakes in white or pale blue thread suit a tree with silver, white, and green ornaments. If French knots feel tricky at first, practice a row on scrap fabric, and keep the thread wrapped the same number of times for knots of the same size. A set of snowflakes in matching thread gives a quiet, wintry layer to the tree.

    6. Redwork Christmas Trees

    Redwork Christmas tree ornament stitched in red thread on cream fabric.

    Redwork uses one color of red thread on white or cream fabric, so a simple tree outline, ornaments, and a star become the whole design. Stitch the tree with backstitch or stem stitch, then add small redwork details such as dots for baubles and a short line for the trunk. Finish the piece as a round, square, or tree shaped ornament with a plain backing.

    Redwork suits a tree with a red and cream palette, and it pairs well with plain red baubles and wooden ornaments. Keep stitches small and even, since a single color leaves every stitch visible. Press the finished piece from the back before backing it, so the red thread stays crisp against the light fabric.

    7. Embroidered Cardinal Birds

    Embroidered cardinal bird ornament in red thread on cream fabric.

    Stitch a cardinal in red thread on a cream or pale green ground, using satin stitch for the body, backstitch for the outline, and a small black stitch for the eye and beak area. Add a branch in brown stem stitch and a few green leaves so the bird has a perch. Shape the finished piece as a round ornament or a bird shaped ornament with felt backing.

    Cardinals stand out on a green tree, so hang them near the outer branches where the red can be seen. Keep the bird design simple, with a clear body shape and few colors, so it reads as a bird from a short distance. These ornaments make thoughtful gifts for bird lovers and for anyone who likes a natural theme at Christmas.

    8. Embroidered Angel Ornaments

    Embroidered angel ornament in cream and gold thread hanging near the top of a tree.

    Stitch an angel with a simple dress shape, wings in chain stitch or feather stitch, and a small halo in gold thread or a single French knot ring. Use soft colors such as cream, gold, and pale blue on a light ground, and keep the face blank or marked with two tiny stitches, so the angel stays gentle and folk style rather than detailed. Back the piece with felt and add a loop.

    Angel ornaments suit the top of a small tree, a mantel garland, or a window display, where they can be seen at eye level. Keep wings symmetrical by stitching one wing, then mirroring the stitch count on the other side. A set of angels in matching thread colors gives a calm, unified look to a tree or a branch display.

    9. Embroidered Wreath Ornaments

    Round embroidered wreath ornament with green leaves and red berry knots.

    Stitch a round wreath of leaves in stem stitch or lazy daisy stitch, then add small berries in French knots and a bow at the bottom in red thread. Use two greens for depth, and keep the wreath ring even by marking a circle on the fabric first. Finish the piece as a round ornament, or cut the wreath shape out and back it with felt.

    Wreath ornaments echo a front door wreath on a small scale, and they suit trees with greenery, pinecones, and wooden ornaments. Hang them on plain branches so the ring shape stays visible, and avoid crowding them with large baubles. A wreath ornament also works tied to a gift or hung on a door handle for a small seasonal touch.

    10. Embroidered Cottage Ornaments

    Embroidered cottage ornament with a snowy roof and warm windows.

    Stitch a small cottage with a pitched roof, a door, two windows, and a wisp of smoke in stem stitch, using warm colors for the house and white for snow on the roof. Add a tiny tree beside the house and a path of straight stitches to the door. Keep the cottage small and simple, since too much detail will blur at ornament size. Back it with felt and add a loop.

    Cottage ornaments suit a village themed tree or a mantel display with small houses and bottle brush trees. Hang cottages together in one area of the tree to suggest a small street, or spread them out so each one can be noticed. These ornaments pair well with plain wooden houses and cream or gold baubles.

    11. Embroidered Hearts with Names and Dates

    Red embroidered heart ornament with a stitched name and date in cream thread.

    Stitch a heart outline in chain stitch or backstitch, fill it with a name, a date, or a short word such as joy or peace, and add a small motif such as a star or a sprig above the word. Use one thread color for the heart and a second color for the lettering so the name stays easy to read. Pad the heart lightly and back it with felt.

    Name and date hearts make lasting keepsakes for weddings, first Christmases, and family milestones, and they are easy to spot on the tree each year. Keep lettering large and simple, since small script is hard to read on fabric. Store keepsake hearts in tissue so the stitching stays clean and the padding keeps its shape.

    12. Embroidered Mitten Ornaments

    Small embroidered mitten ornament in red felt with a cream snowflake motif.

    Cut a mitten shape from felt or sturdy fabric, stitch a snowflake, a tree, or a stripe pattern on the front, then join front and back with blanket stitch, leaving the cuff open or closed with a stitched band. Add a loop at the cuff so the mitten hangs with the fingers pointing down. Use red, green, cream, or blue felt with contrasting thread.

    Mitten ornaments suit a cozy tree with knit stockings, wooden ornaments, and plaid ribbon. Make pairs in matching colors for a balanced look, or make single mittens in different colors for a playful set. Keep stuffing light so mittens stay flat, and check that the loop is stitched through both layers so it does not pull free.

    13. Embroidered Woodland Mushroom Ornaments

    Embroidered mushroom ornament with a red cap and white dots.

    Stitch a mushroom with a red or rust cap in satin stitch, white dots in French knots, and a cream stem in stem stitch, then add a small leaf or fern beside it. Keep the mushroom shape simple and bold so it reads clearly on a tree. Finish the piece as a round ornament or cut it into a mushroom outline backed with felt.

    Mushroom ornaments suit a woodland themed tree with pinecones, acorns, moss tones, and wooden ornaments. Hang them low enough to be seen up close, since their small details reward a closer look. A woodland set also works on branches in a vase on a side table, where the ornaments can be enjoyed without a full tree.

    14. Embroidered Gingerbread Figures

    Embroidered gingerbread figure ornament with white icing stitches.

    Stitch a gingerbread person shape in brown thread on cream fabric, or stitch the outline and details of a gingerbread figure onto felt, using white thread for icing lines, dots for buttons, and a small bow at the neck. Keep the figure simple, with a clear head, body, arms, and legs, and a smiling face in two tiny stitches. Back it with felt and add a loop.

    Gingerbread ornaments suit a kitchen tree, a tree near the dining table, or a tree with cookie and candy themed decorations. They pair well with plain brown and cream baubles and with wooden cookie cutters hung as ornaments. These ornaments are also good gifts for bakers, since they echo holiday baking without using food.

    15. Mini Embroidered Stocking Ornaments

    Mini embroidered stocking ornament in green felt with a cream cuff and star motif.

    Cut a small stocking shape from felt or fabric, stitch a cuff band, a tree, a star, or an initial on the front, then join front and back with blanket stitch. Add a loop at the cuff for hanging, and keep the stocking small enough to hang on a branch without drooping. Use classic colors such as red, green, and cream, or one color per family member.

    Mini stockings suit a tree with a mantel stocking theme, and they make sweet place markers when tied to a chair or a napkin at the Christmas table. Make one per person with an initial on the cuff for a personal touch. Keep the design on the front only, so the back stays flat against the branch or table setting.

    16. Embroidered Snowman Ornaments

    Embroidered snowman ornament with a red scarf and black button knots.

    Stitch a snowman from three stacked circles in white thread on a blue or cream ground, using black French knots for eyes and buttons, orange thread for a carrot nose, and a scarf in red or green stem stitch. Add a small hat in black or brown thread and a few snow dots around the figure. Finish as a round ornament with felt backing.

    Snowman ornaments suit a tree with a winter theme, white and blue baubles, and snowflake ornaments. Keep the snowman centered and the scarf simple so the figure stays clear at a small size. These ornaments work well for children to help choose colors for, and they hang well near the middle of the tree where they can be seen from across the room.

    17. Embroidered Star Tree Topper

    Large embroidered gold star tree topper with satin stitch points on a small Christmas tree.

    Stitch a large star in gold or cream thread on sturdy fabric or felt, using satin stitch for the points and French knots or small beads at the center for sparkle. Pad the star lightly, back it with felt, and add a cone or a loop at the back so it can sit on top of a small tree or hang as the largest ornament on a full tree. Keep the star size in proportion to the tree.

    A star topper in embroidery gives a handmade finish to the whole tree, and it ties together the smaller embroidered ornaments below. Check the fit on the tree before finishing the back, since a topper that is too heavy will tilt. For a tall tree, use the star as a large hanging ornament instead, and top the tree with a plain star or angel.

    Conclusion

    Embroidered ornaments give a Christmas tree a handmade layer that glass and store bought ornaments cannot match, since each stitch shows time, care, and personal choice. Start with one simple design, finish it well, and add a few more each year so the collection grows with meaning. Choose colors and themes that suit your home, keep ornaments stored with care, and enjoy a tree that tells your own story each December.

    Frequently Asked Questions

    What fabric is best for embroidered ornaments?

    Linen, cotton, and wool felt are good choices for embroidered ornaments, since they hold stitches well and keep their shape when backed. Linen suits detailed cross stitch and redwork, cotton suits printed or drawn patterns, and felt suits simple shapes that do not fray. Choose a fabric weight that is firm enough to hold its shape but light enough to hang on a branch.

    What stitches should a beginner learn first for embroidered ornaments?

    Backstitch, stem stitch, chain stitch, and French knots cover most simple ornament designs, so start with those four stitches. Backstitch gives clean outlines, stem stitch gives smooth curves, chain stitch gives bold lines and filling, and French knots give dots for berries, eyes, and snow. Practice each stitch on scrap fabric before starting an ornament.

    How do you finish the back of an embroidered ornament?

    Cut a felt circle or shape to match the front, stitch or glue it over the raw edges, and add a hanging loop caught between the front and back layers. A felt backing hides thread ends, keeps the ornament flat, and protects the stitching when the ornament is stored. Press the front lightly from the back before adding the backing.

    How do you keep embroidered ornaments from fading or getting dusty?

    Keep embroidered ornaments out of strong sunlight, brush dust off gently with a soft dry brush, and store them in tissue in a dry box between seasons. Avoid washing stitched ornaments unless the thread and fabric are known to be washable, since water can dull thread colors and distort padding. Spot clean only with a dry cloth when possible.

    Can embroidered ornaments be washed?

    Most embroidered ornaments should not be washed, since water, heat, and agitation can distort stitches, fade thread, and flatten padding. If an ornament must be cleaned, test a hidden spot first, use cool water only on washable cotton thread and fabric, and dry it flat away from heat. In most cases, gentle dry dusting and careful storage are safer.

    How long does it take to make one embroidered ornament?

    A simple embroidered ornament usually takes one to three hours, depending on the size of the design and the number of stitches. Small felt stars and snowflakes are often the quickest, while detailed birds, cottages, and angels take longer because they use more colors and stitches. Work in short sessions and keep the project in a hoop between sessions so the fabric stays taut.