Category: DIY & Styling

Simple styling projects and affordable ways to refresh your home.

  • 19 Rehearsal Dinner Table Decoration Ideas for an Intimate Gathering

    19 Rehearsal Dinner Table Decoration Ideas for an Intimate Gathering

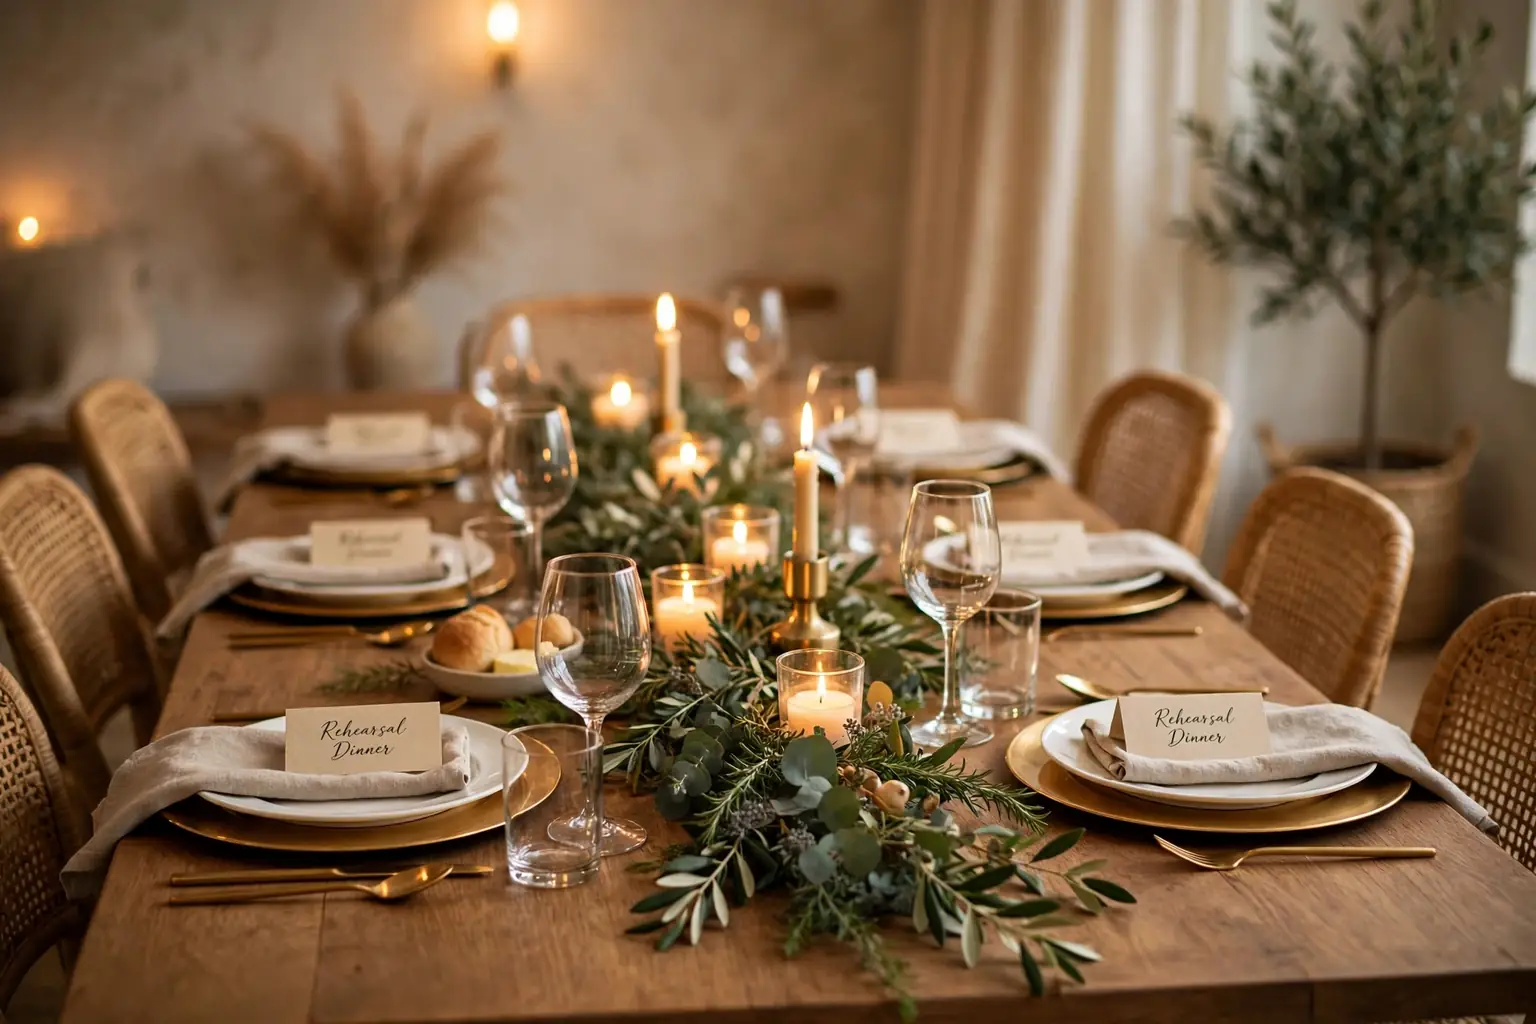
    Rehearsal dinner table decorations work best with one low centerpiece, a simple palette, and one personal detail at each place, so guests can talk across the table and the evening feels close rather than formal. Keep flowers low, use candlelight, repeat one color in napkins and cards, and leave room for plates and serving dishes.

    Start with the base you already own, such as a plain tablecloth or runner, everyday plates, and cloth napkins in a soft neutral. Then add one layer at a time: a low centerpiece, candles in safe holders, and a personal detail such as a place card or a menu card. For more low centerpiece ideas in a warm seasonal palette, see the fall table decor guide, and for a candlelit table in a different palette, browse the Valentine table decorations. Keep the centerpiece low enough to see across, leave room for serving dishes, and choose pieces you can lift off in one move when the table needs to clear.

    Key Takeaways

    • Keep the centerpiece low and narrow, so guests can see each other and serving dishes still fit.
    • Pick one palette and repeat it in the runner, napkins, candles, and cards, so the table looks planned.
    • Start with plates, glasses, and napkins you already own, then add one or two personal layers.
    • Set one clear personal detail at each place, such as a place card, a menu card, a photo, or a small favor, and keep the rest simple.
    • Use candlelight with care: keep flames clear of greenery, fabric, and paper, and use flameless candles near children or dried material.
    • Leave empty space at each place for elbows, glasses, and serving dishes, and test the full setting before guests arrive.

    1. Low Greenery Runner Down the Center
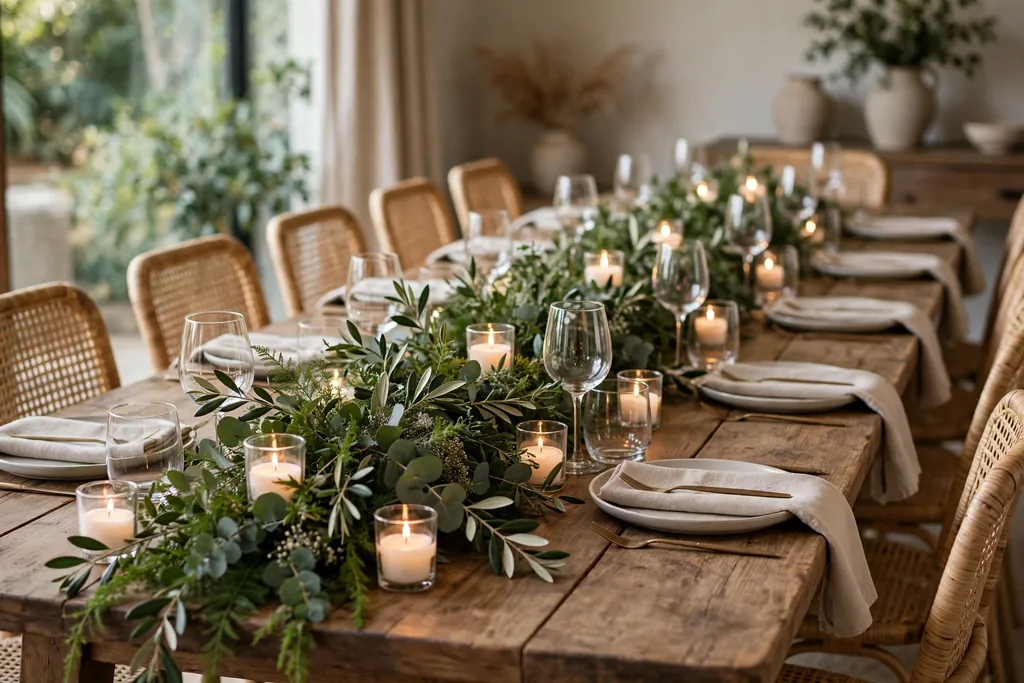
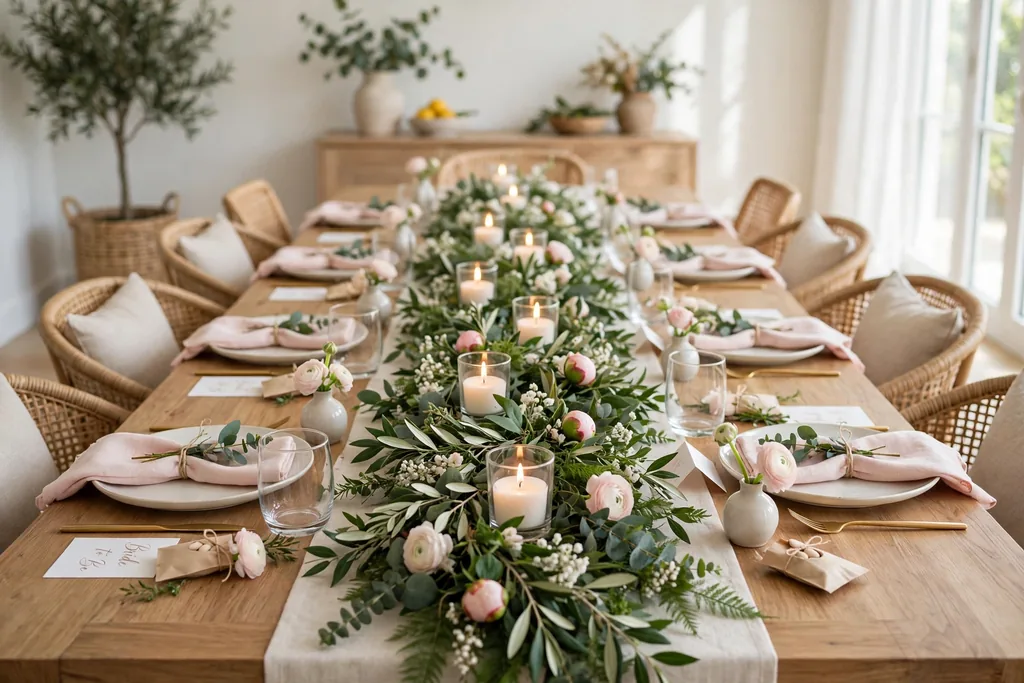
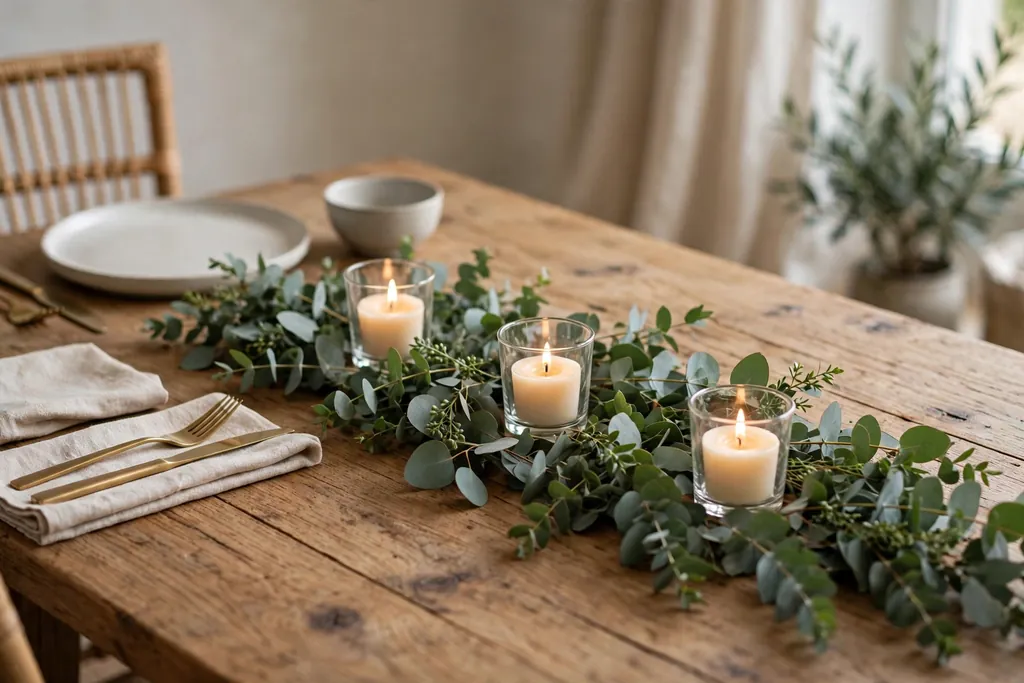
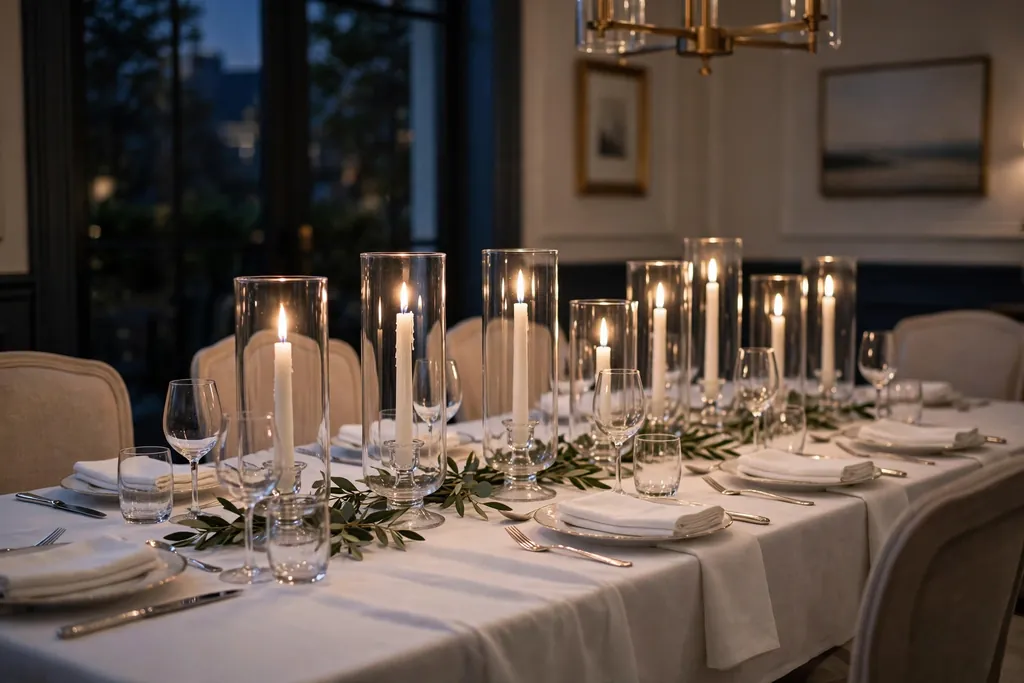
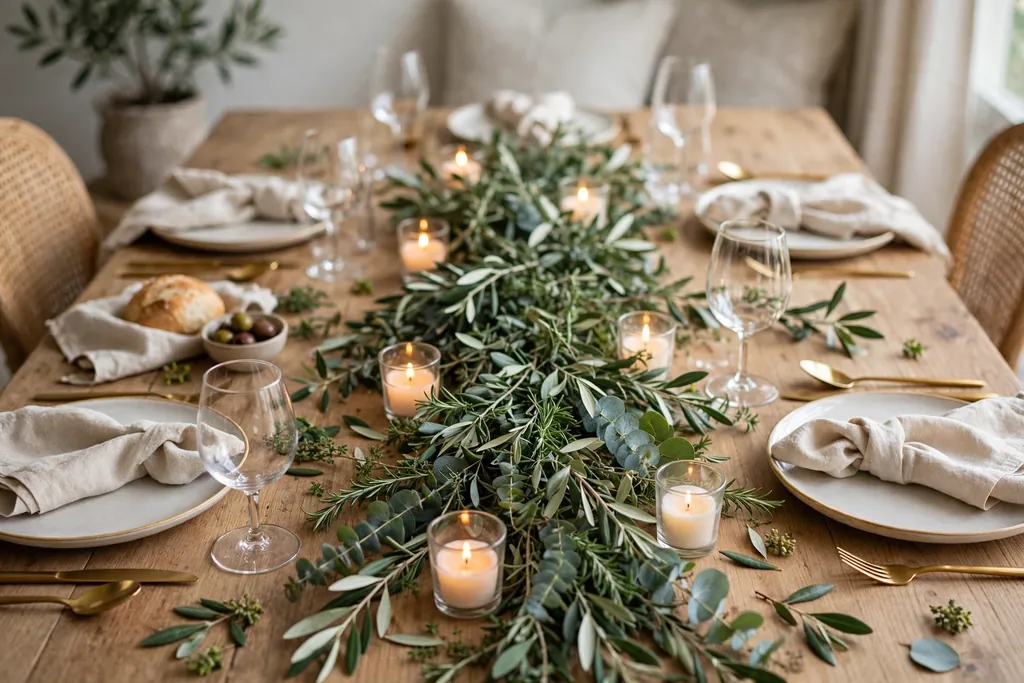
    Long dining table with a low greenery runner and small votive candles in glass holders.

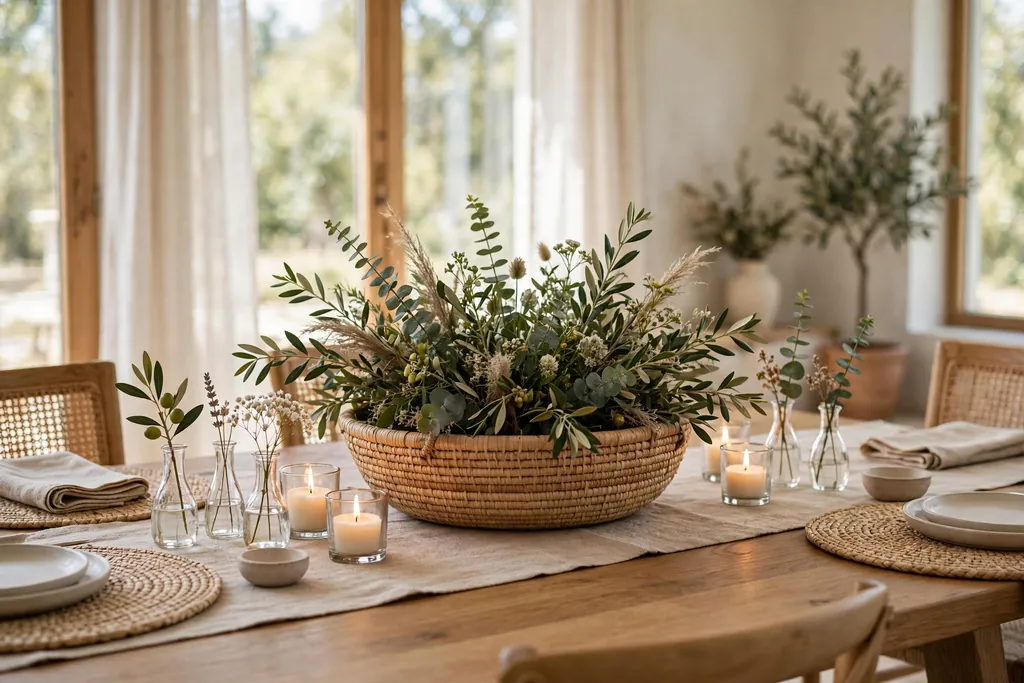
    Lay a loose greenery runner down the center of the table, using eucalyptus, olive branches, or soft fern stems, and trim it so it stays inside the table edges and does not brush plates or glasses. The green line carries color along the whole table without adding height, which suits a rehearsal dinner where conversation matters more than a tall arrangement. Add two or three small votive candles in glass holders along the runner for evening light.

    Secure the runner so it does not slide when plates are set down, and keep any real flame clear of dry leaves. If fresh stems shed, switch to faux greenery you can wipe clean, or use short sprigs tucked into napkin ties instead of a full runner. For a table with a light cloth, set the runner on a narrow mat first, so stems and water marks do not reach the fabric.

    2. Bud Vase Trio with Single Stems
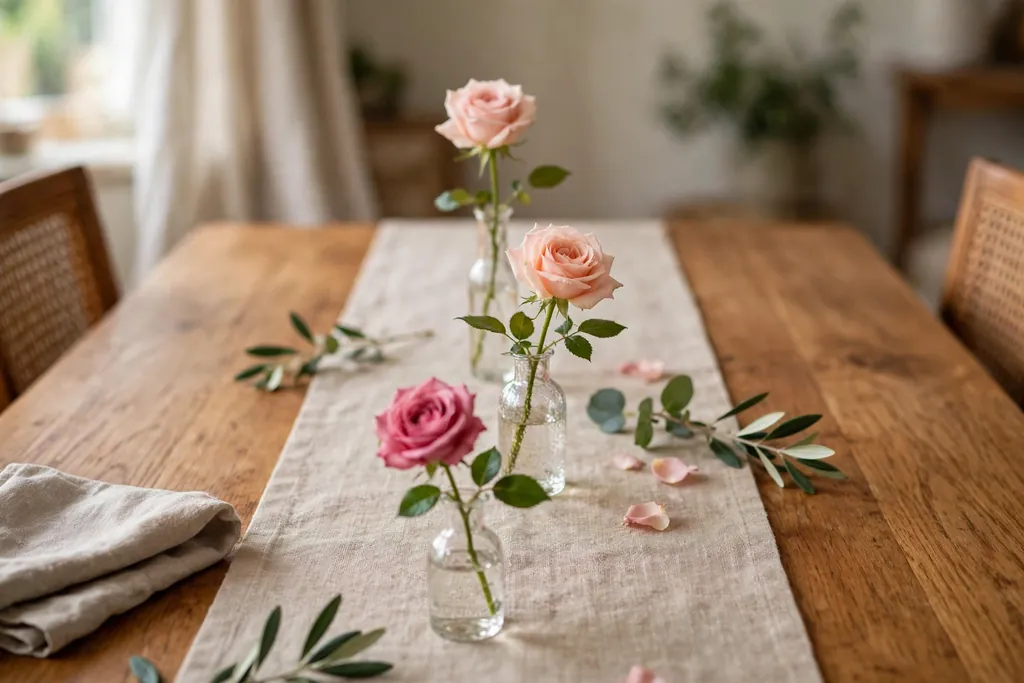
    Three small bud vases with single rose stems down the center of a dining table.

    Set three small bud vases down the center of the table, each holding one stem, such as a rose, a ranunculus, or a spray of greenery, with the vases spaced so each place still has room. The trio reads as one loose centerpiece, costs little, and works well on a small table where a large arrangement would crowd the plates. Use the same flower in each vase, or one color in three vase shapes, so the group looks matched.

    Choose vases with a heavy base, so they cannot tip when plates are set down nearby. Change the water the day of the dinner if the vases will sit out for hours, and keep loose petals off the table with a small tray under the group. For a longer lasting version, use one high quality faux stem in each vase and keep fresh blooms for the couple’s places only.

    3. Lantern Centerpiece with Battery Candles
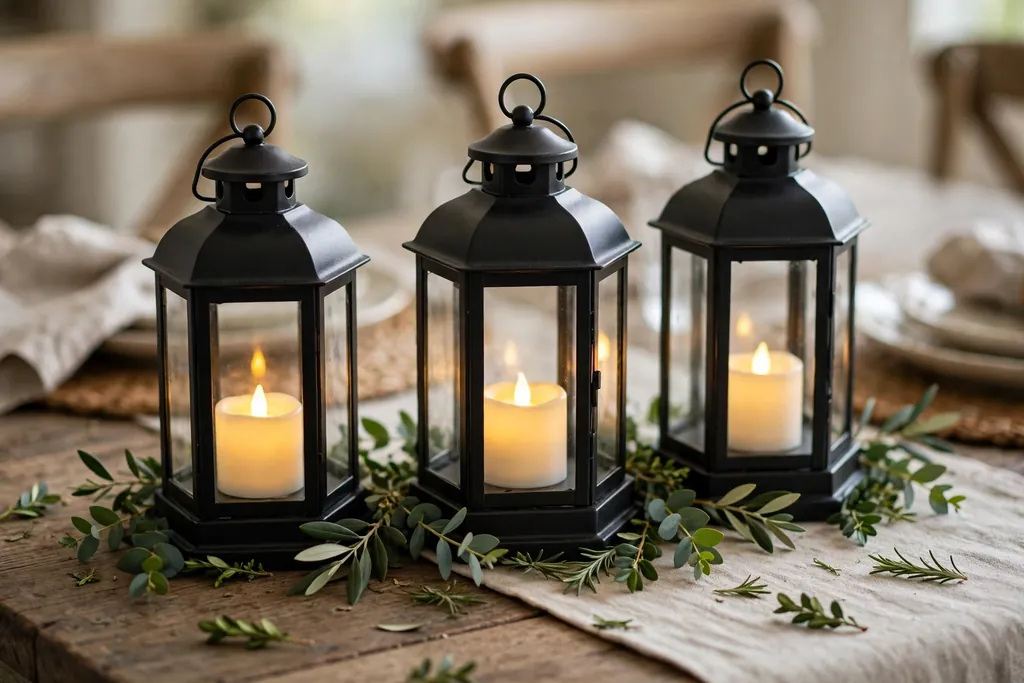
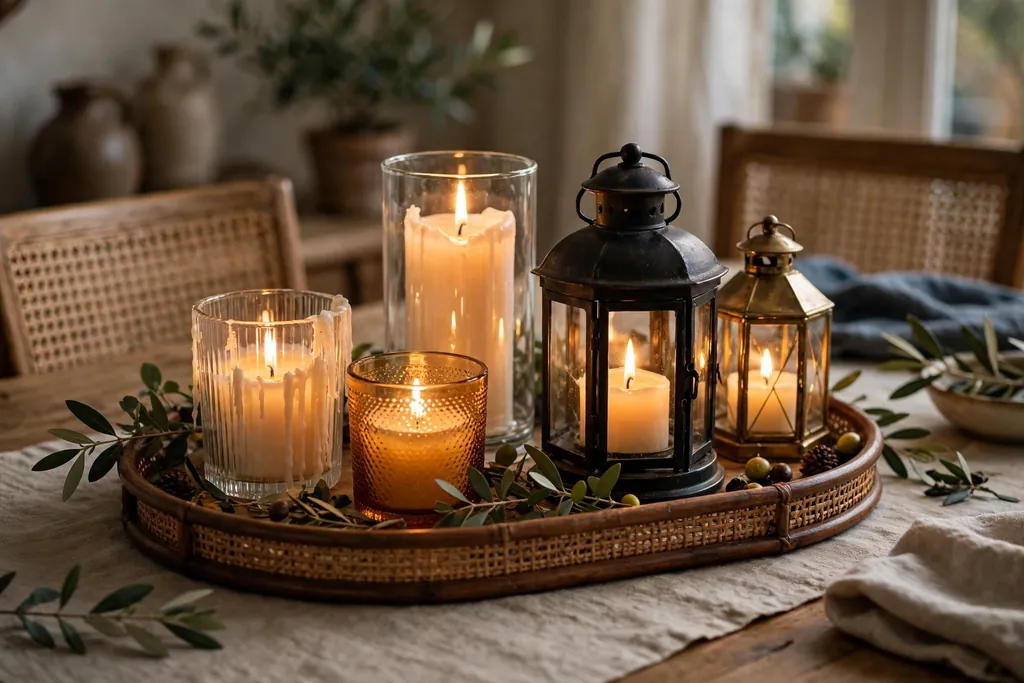
    Dining table center with lanterns holding battery candles and short green sprigs around the bases.

    Set one or two lanterns with battery candles in the center of the table, then group a few short sprigs or small blooms around the bases. Lanterns give a steady, sheltered glow and a clear focal point, and they lift off the table in one move when serving needs the full surface. Choose lanterns short enough to see over when guests are seated.

    Place a small tray or runner under the lantern group to protect the table and to keep sprigs contained. Use battery candles inside closed or narrow lanterns, since a real flame needs air and a safe holder. If the table is small, use one lantern only, and add a second lantern to a sideboard for the same glow without crowding the plates.

    4. Handwritten Place Cards with a Sprig
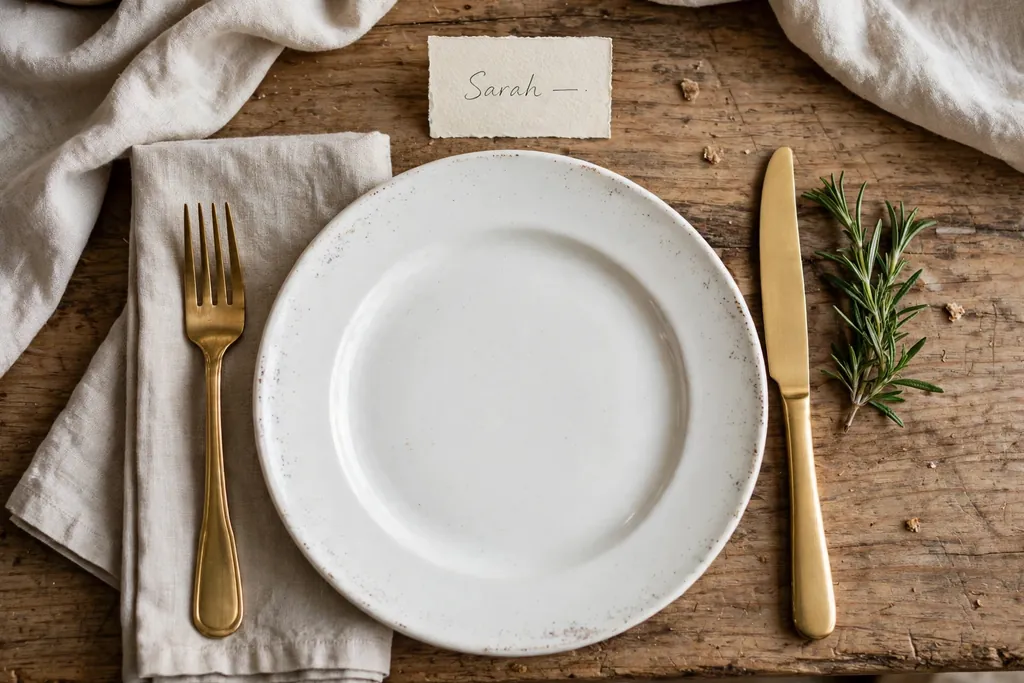
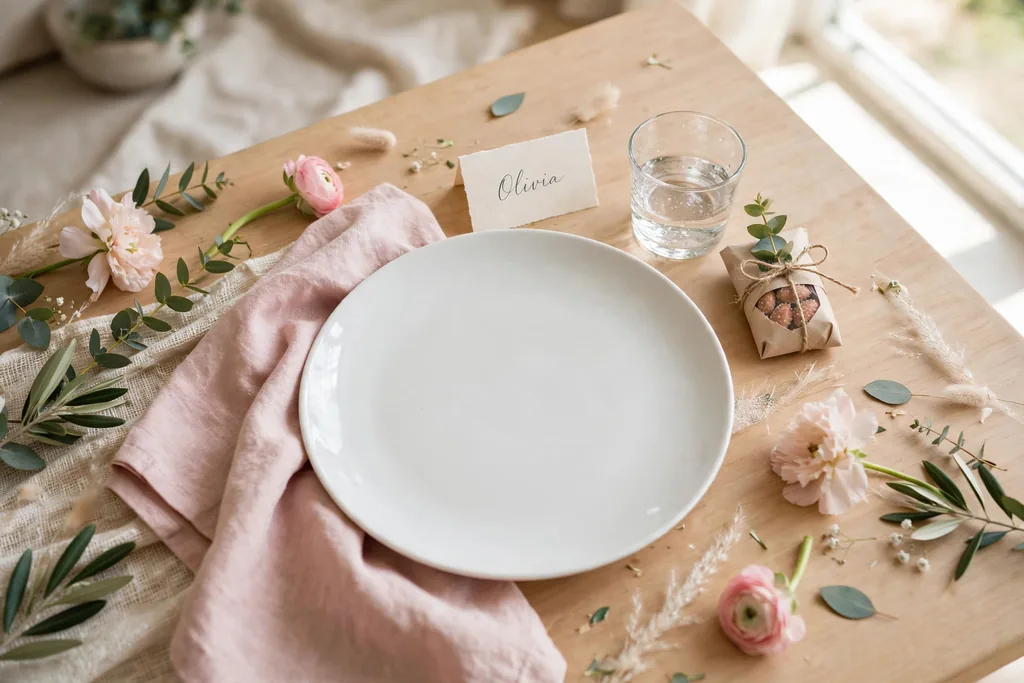
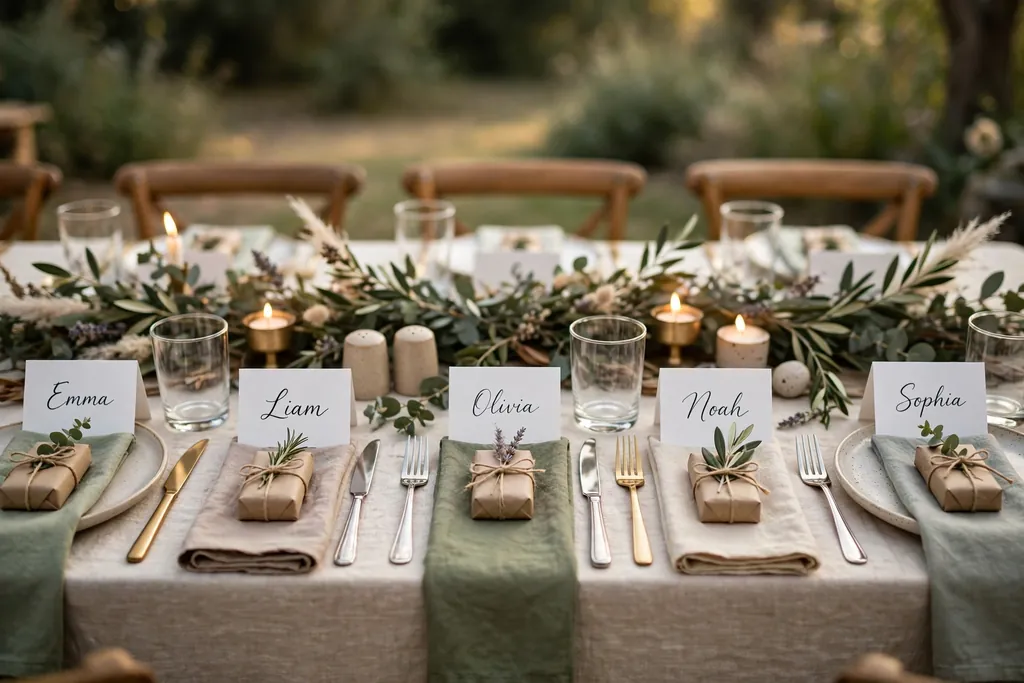
    Place setting with a small handwritten place card and a green sprig beside the plate.

    Set one small place card at each place, with the guest name written in clear, large lettering, and lay a short sprig of greenery, rosemary, or lavender beside the card or tucked under a napkin fold. Place cards mark each seat, help guests settle in, and double as a small keepsake, and they work for a family dinner as well as a larger rehearsal gathering. Keep the card small enough to sit beside a plate without crowding the glass.

    Write names before setting the table, so cards are ready when plates go down, and keep the note short, since a long note will be read once and then set aside. For a close gathering, add a first name only, which feels warm and informal. Use the same sprig at every place, so the table looks matched from across the room.

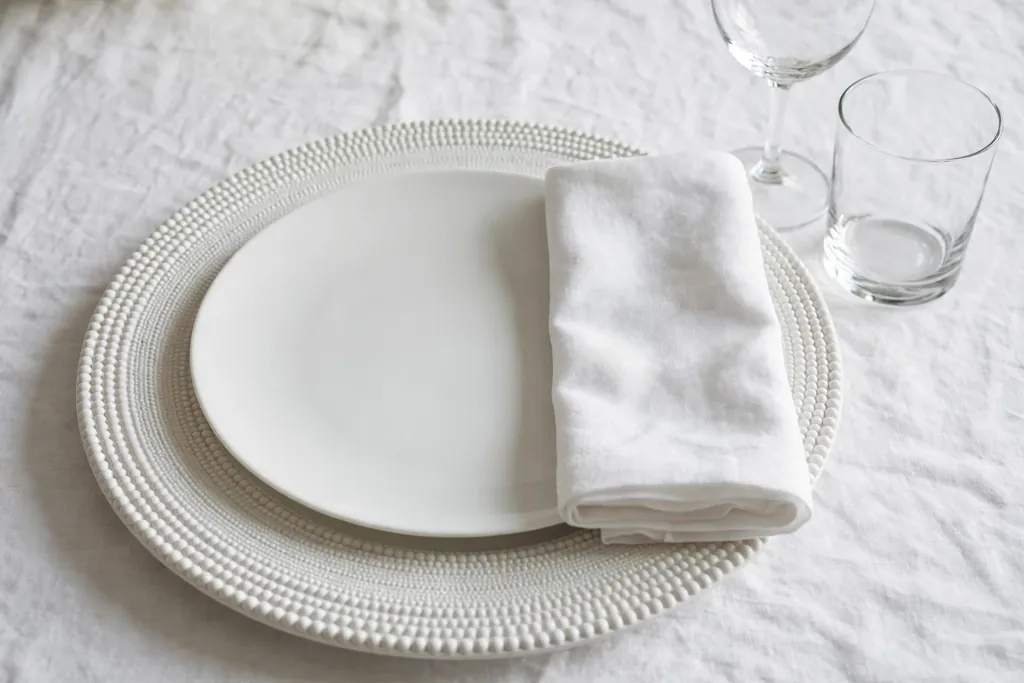
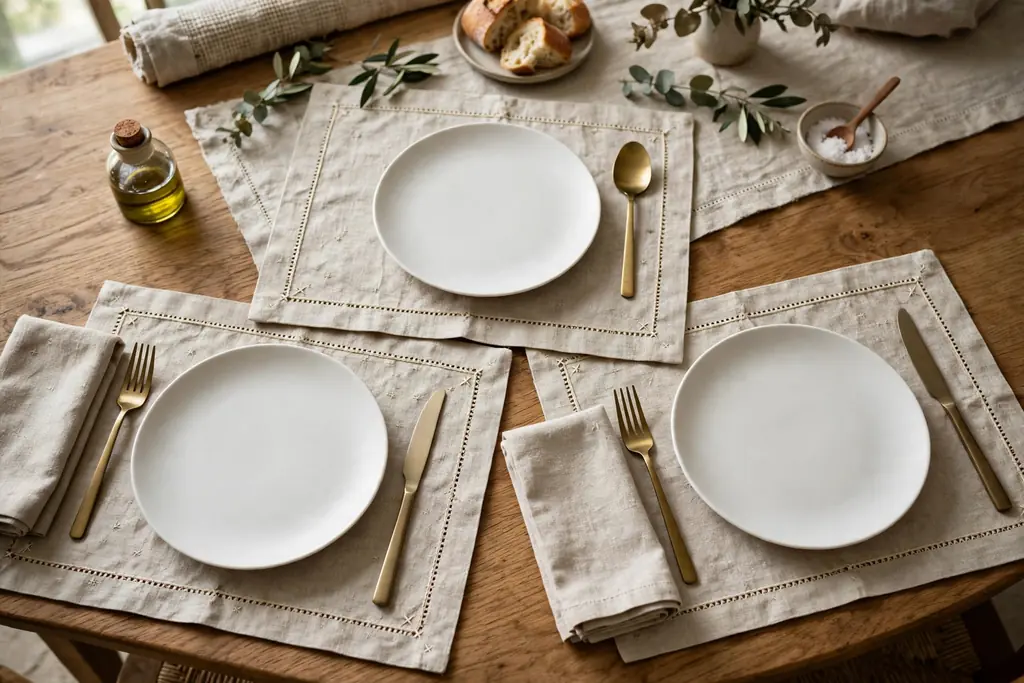
    5. White Plates on Gold Chargers
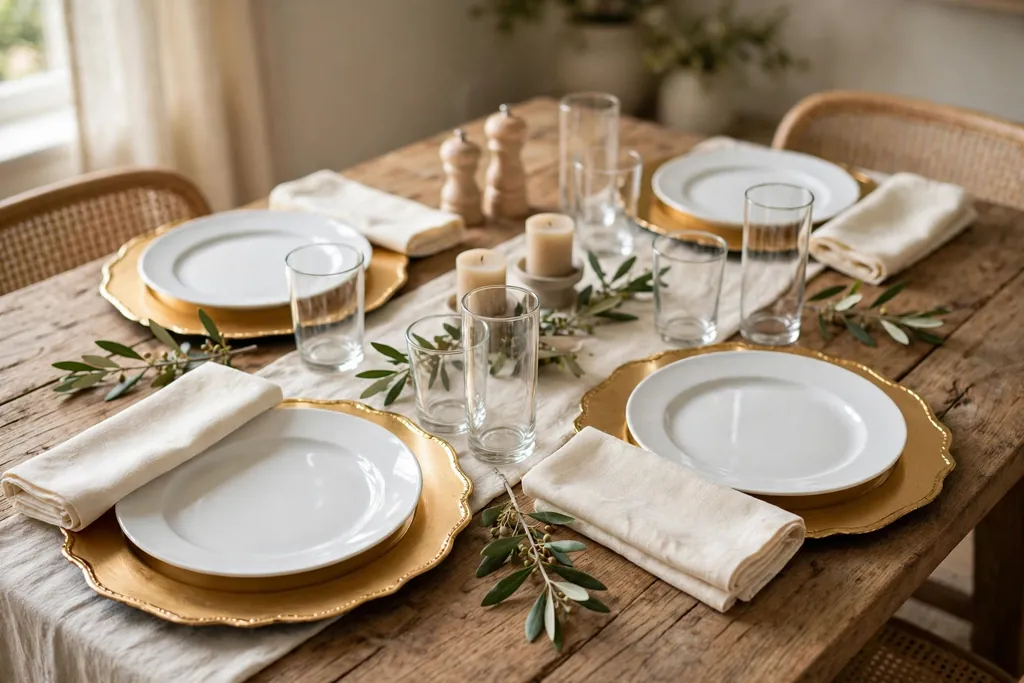
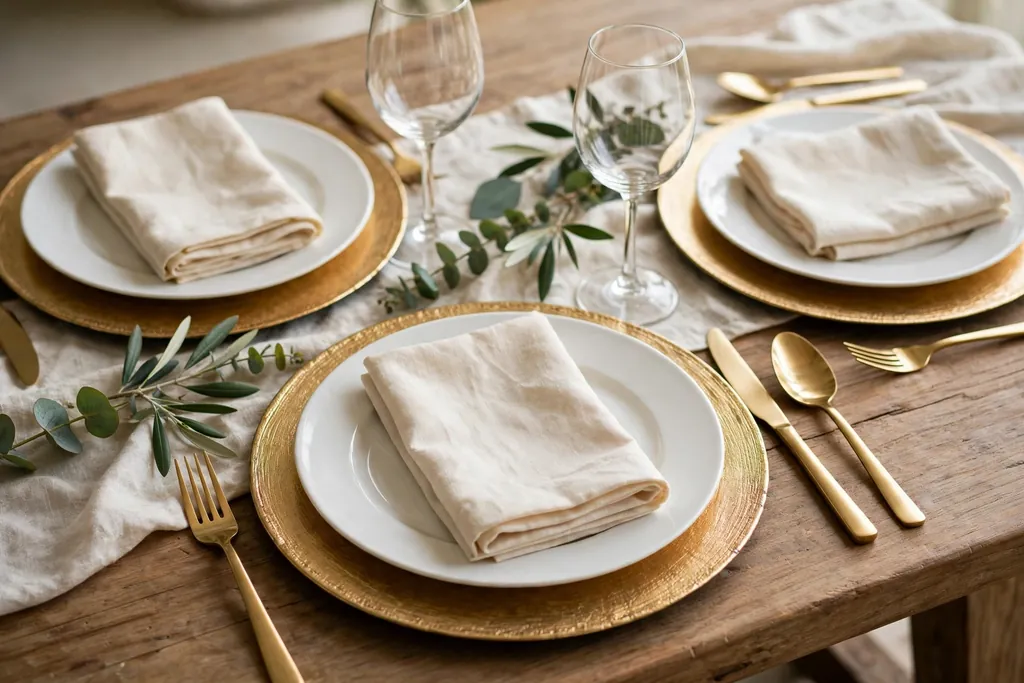
    Dining table with white plates on gold chargers, cream napkins, and clear glasses.

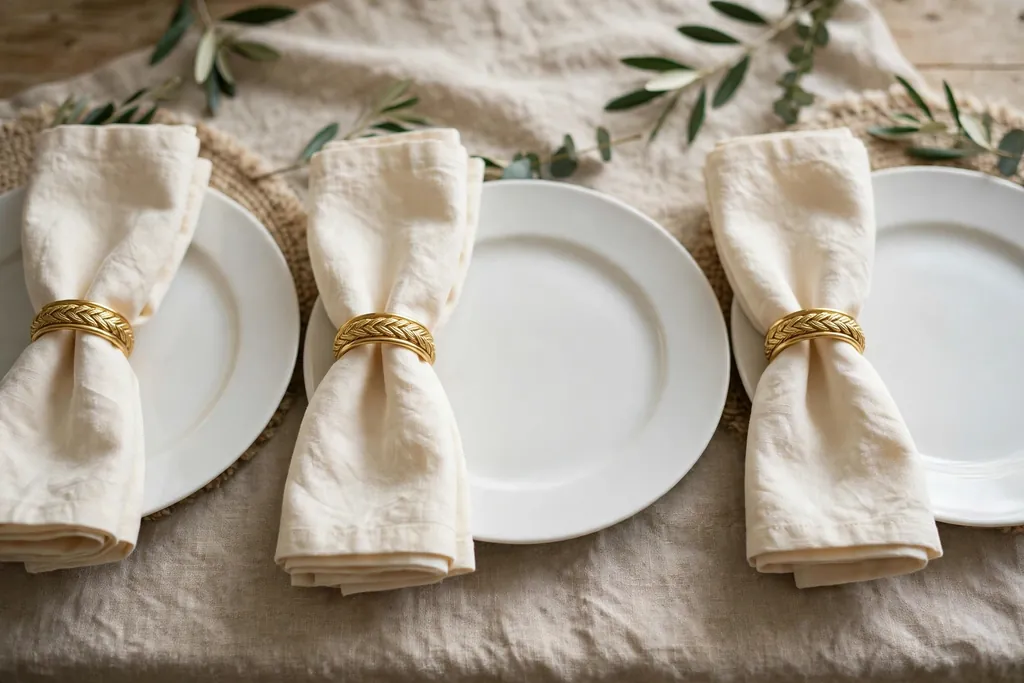
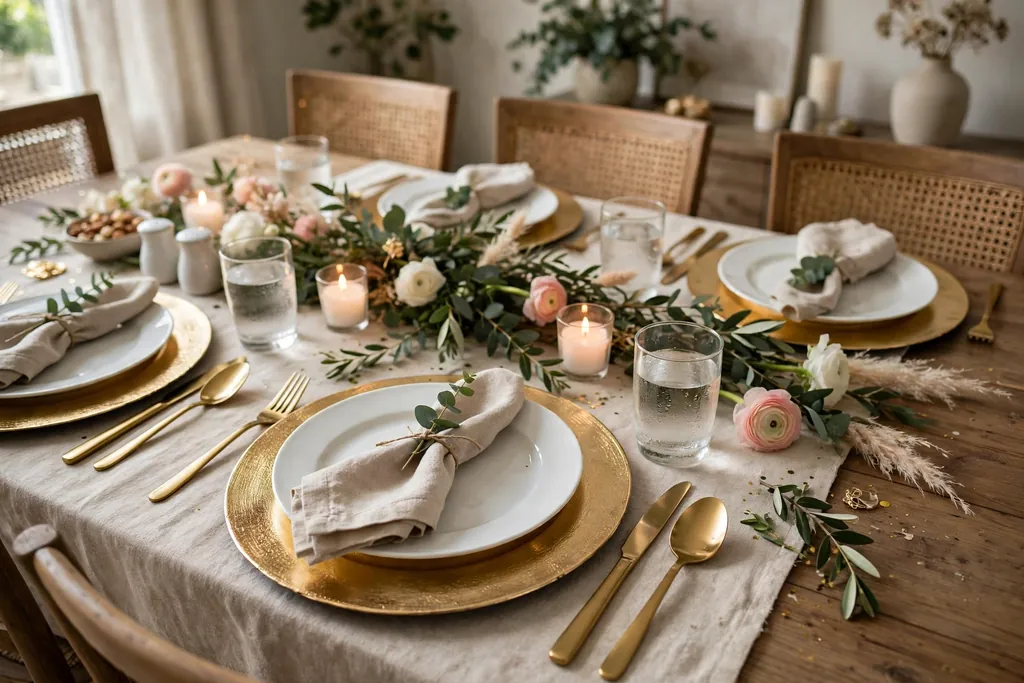
    Set white or cream plates on gold chargers, add cream or blush napkins folded in a simple rectangle, and finish each place with clear glasses and simple cutlery. The gold chargers give a plain table a dressy note at once, and they work with a plain tablecloth as well as a soft linen runner. Keep the gold to chargers and one candle holder, so the table stays warm rather than busy.

    Lay the cloth flat first, then center one charger at each place, with the plate on top and the napkin to the left or on the plate. Polish gold chargers before the meal, since fingerprints show more on metal than on wood. If gold chargers feel too formal for a casual rehearsal dinner, use them only for the couple’s places and keep the other places plain.

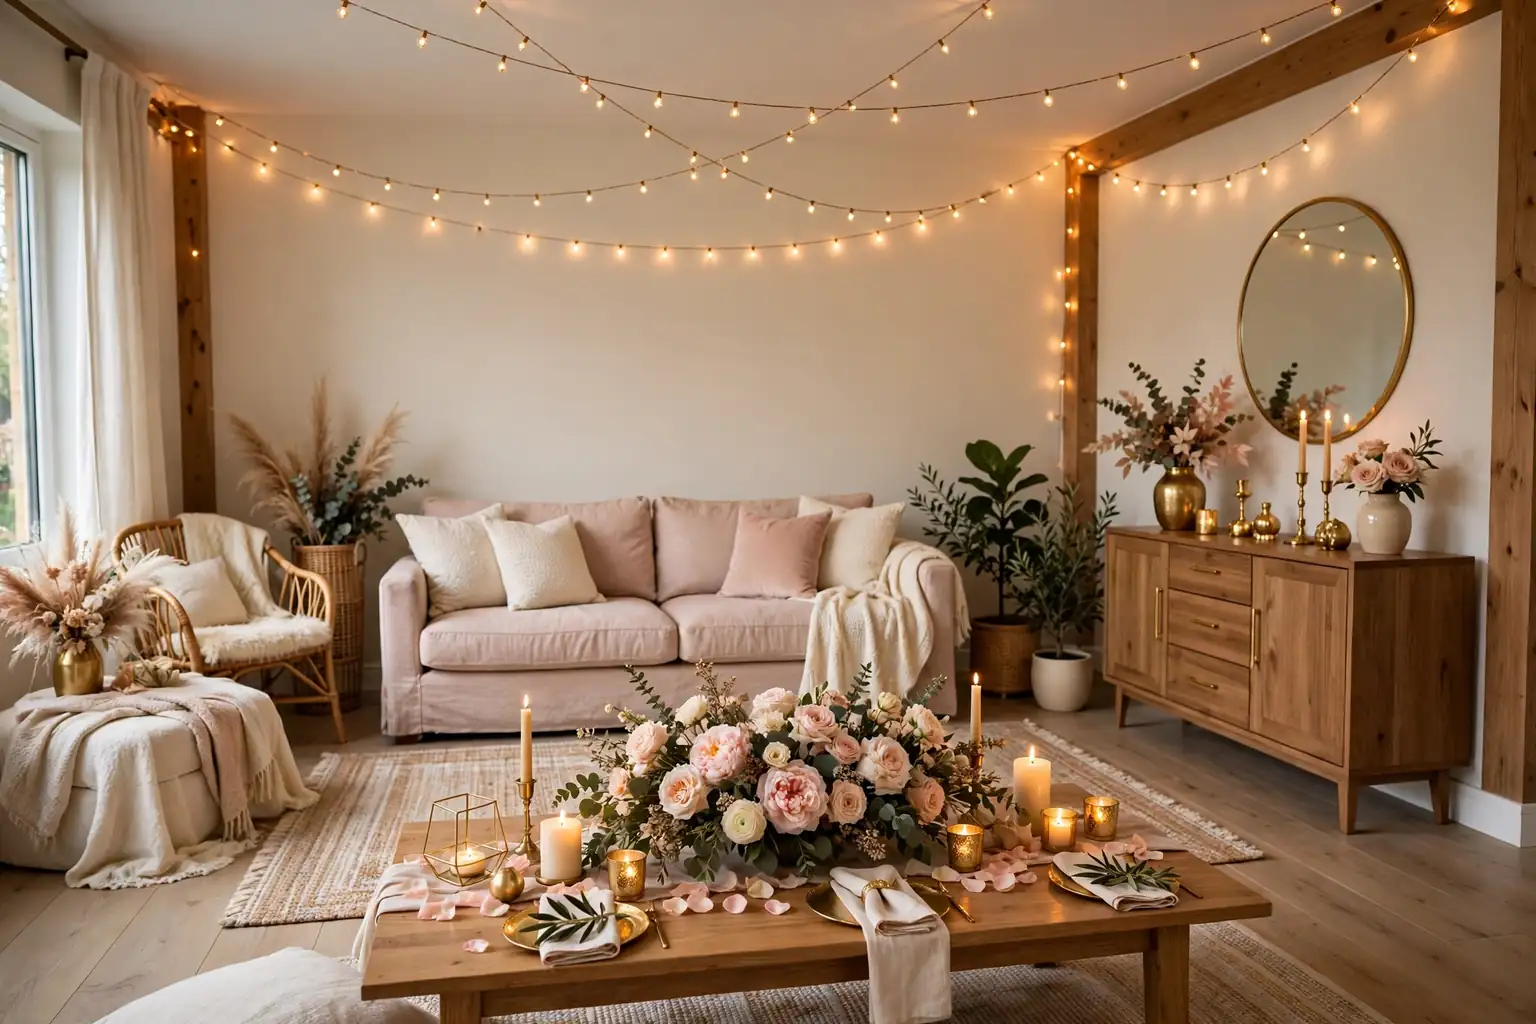
    6. Blush Linen Runner with Rose Petals
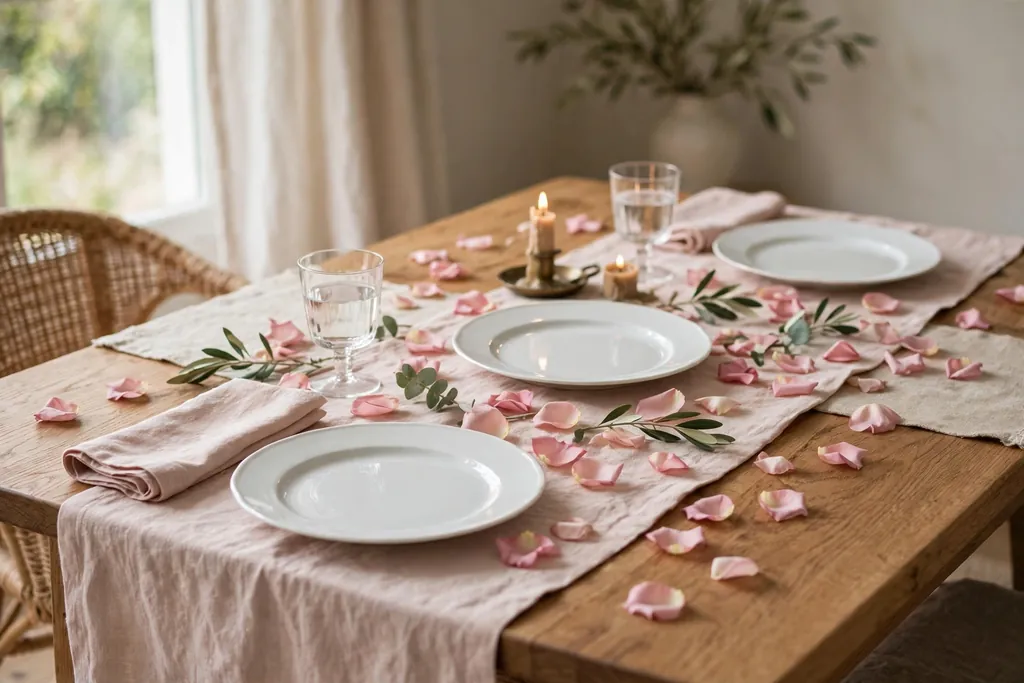
    Dining table with a blush linen runner scattered with rose petals and white plates.

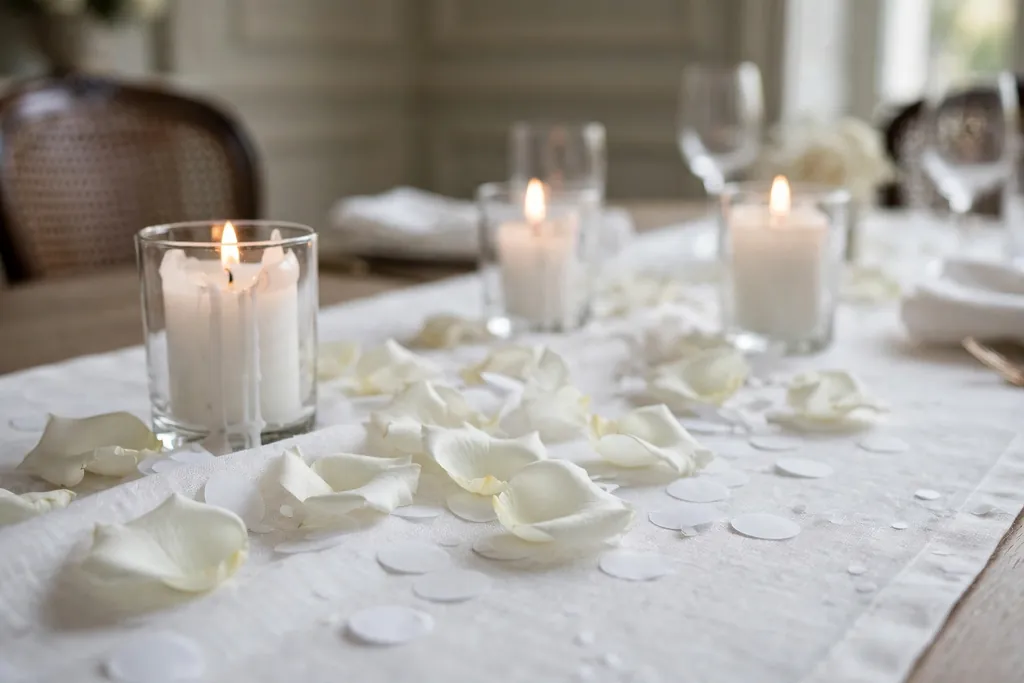
    Lay a blush pink linen runner down the center of the table, then scatter fresh or faux rose petals lightly along it, leaving the ends clear for serving dishes. The soft pink base carries a gentle wedding color, while the petals add shape without height, so the table stays easy to talk across. Pair the runner with white plates and cream napkins, so the blush stays the single color note.

    Scatter petals sparingly, about a small handful per place setting length, so they do not end up in food or glasses. Use faux petals if the table will be set hours ahead, since fresh petals can wilt and mark light linen. After the meal, gather the runner and shake it outside to collect the petals in one move.

    7. Photo Place Markers for Each Guest
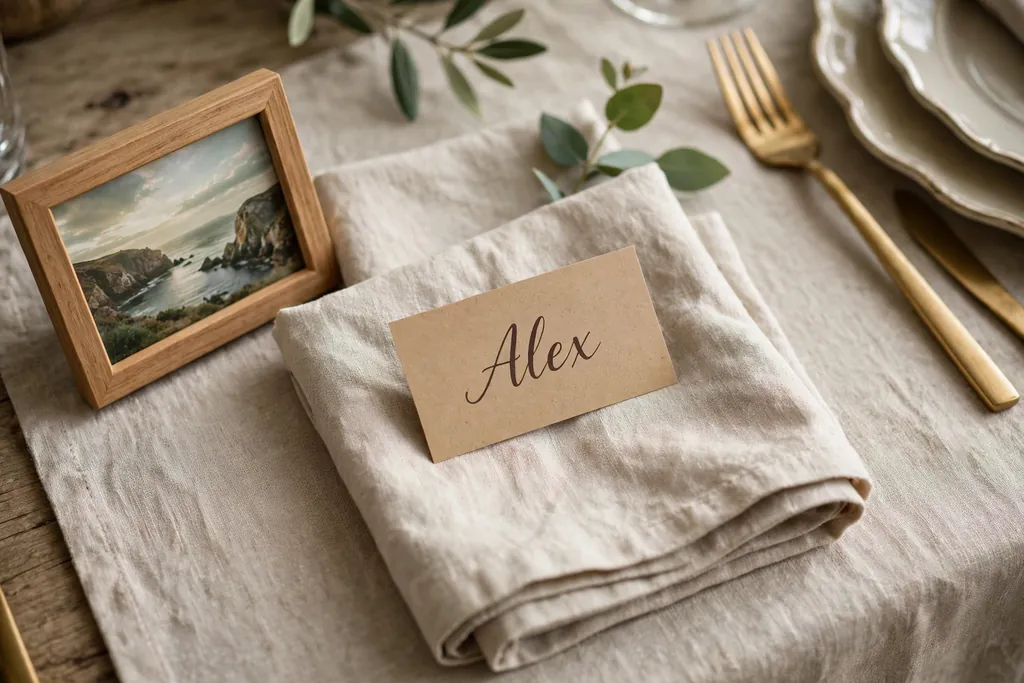
    Place setting with a small framed photo and a name card on a napkin.

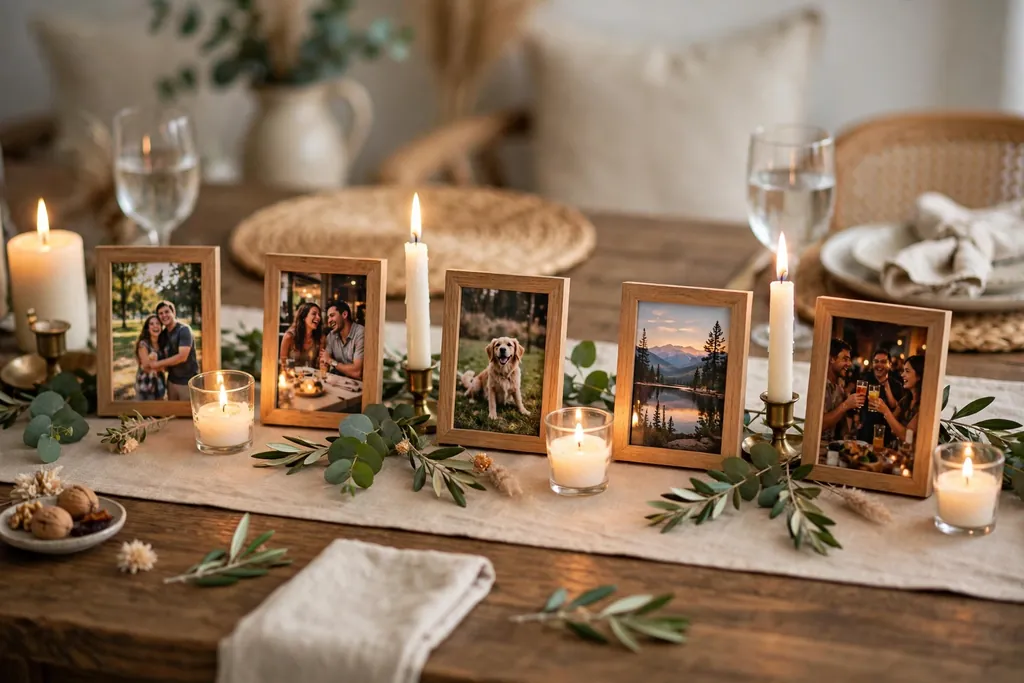
    Set one small photo at each place, such as a print of the guest with the couple, propped against the glass or laid flat on the napkin, with the guest name written on a small card below it. The photo works as a place marker and a personal touch, gives guests something to look at while they settle in, and guests can take it home after the meal. Keep the print small enough to sit beside a plate without crowding the glass.

    Use plain white, kraft, or blush card mounts to match the table palette, and print photos in the same size, so the table looks matched. Write names clearly on the front of each card. For guests who do not have a photo with the couple, use a photo of the couple alone with a short welcome line, so no place looks different from the rest.

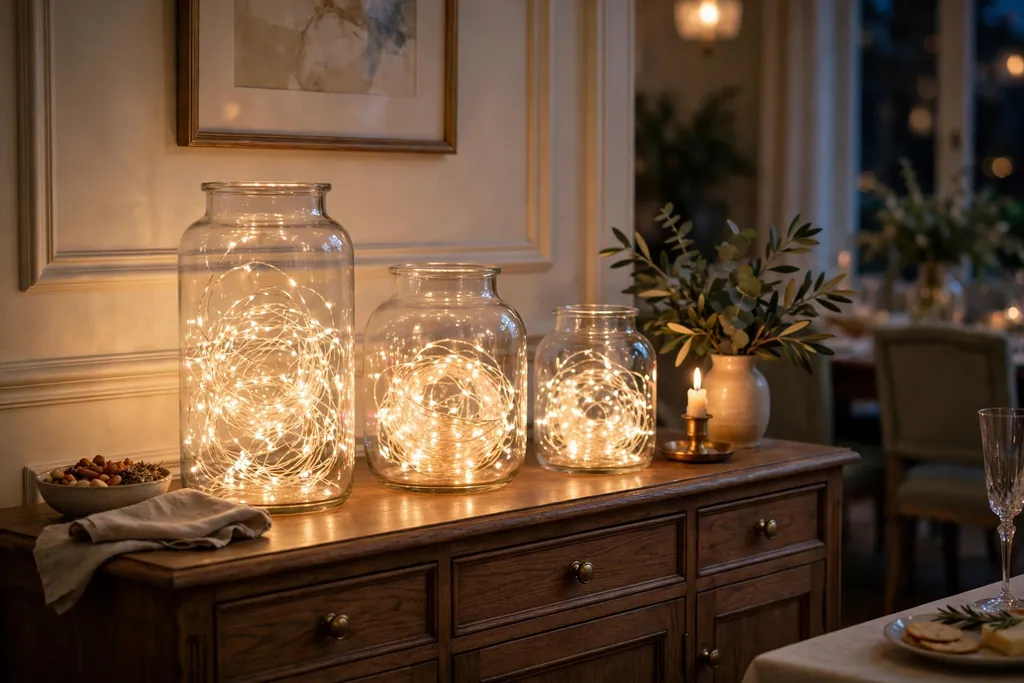
    8. Fairy Lights in Glass Bottles
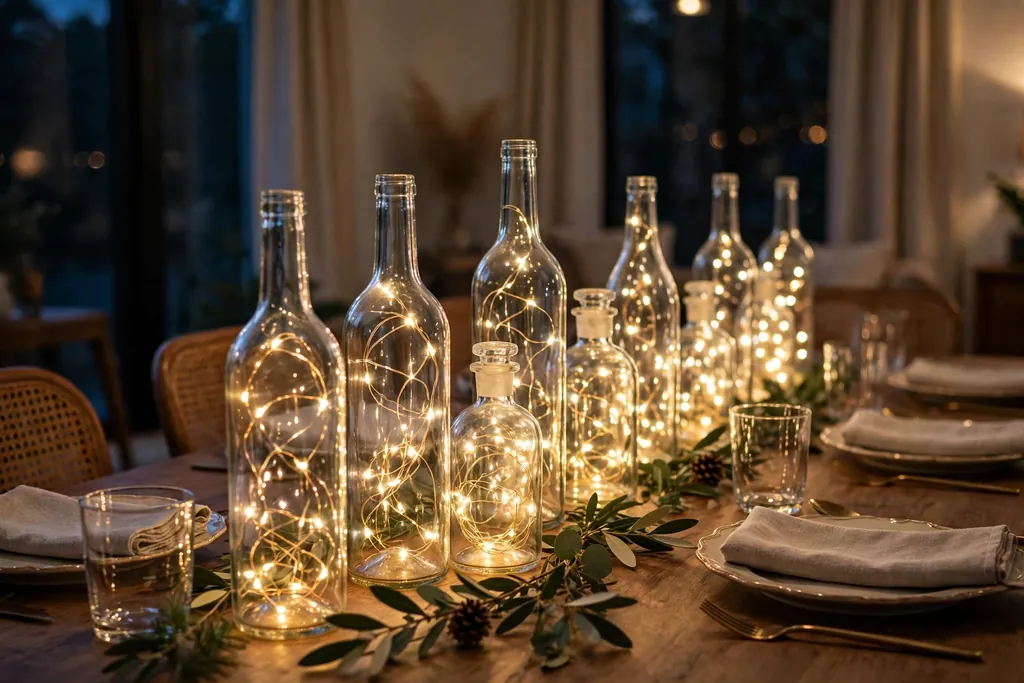
    Clear glass bottles holding battery fairy lights down the center of a dining table in the evening.

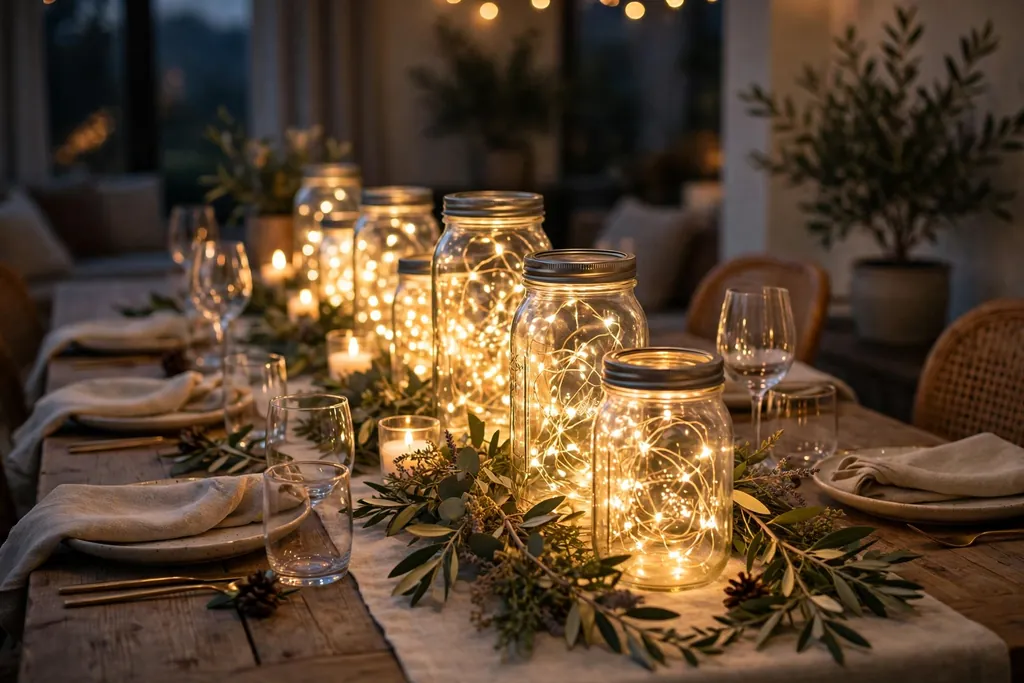
    Set two or three clear glass bottles down the center of the table, each holding a short strand of battery fairy lights, with the bottles spaced so the light spreads along the table without blocking sightlines. The bottles catch the light softly in the evening, and they suit a small room where overhead light feels harsh. Use bottles of different heights, with one taller bottle and two shorter ones, but keep the total group low.

    Use battery lights only inside narrow bottles, and keep the battery packs tucked behind the bottles or under the runner, so cords do not cross the table. Wash the bottles before the meal, since fingerprints show more on clear glass than on colored glass. If the table will hold hot dishes, set the bottles on a tray, so they can move in one step when serving starts.

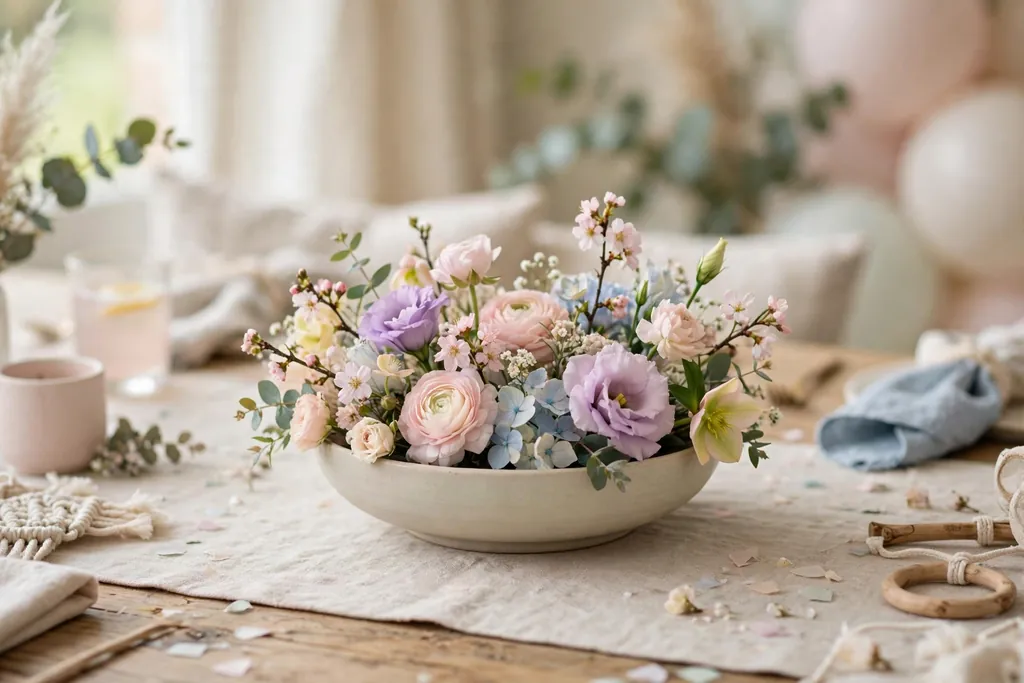
    9. Low Floral Compote Bowl
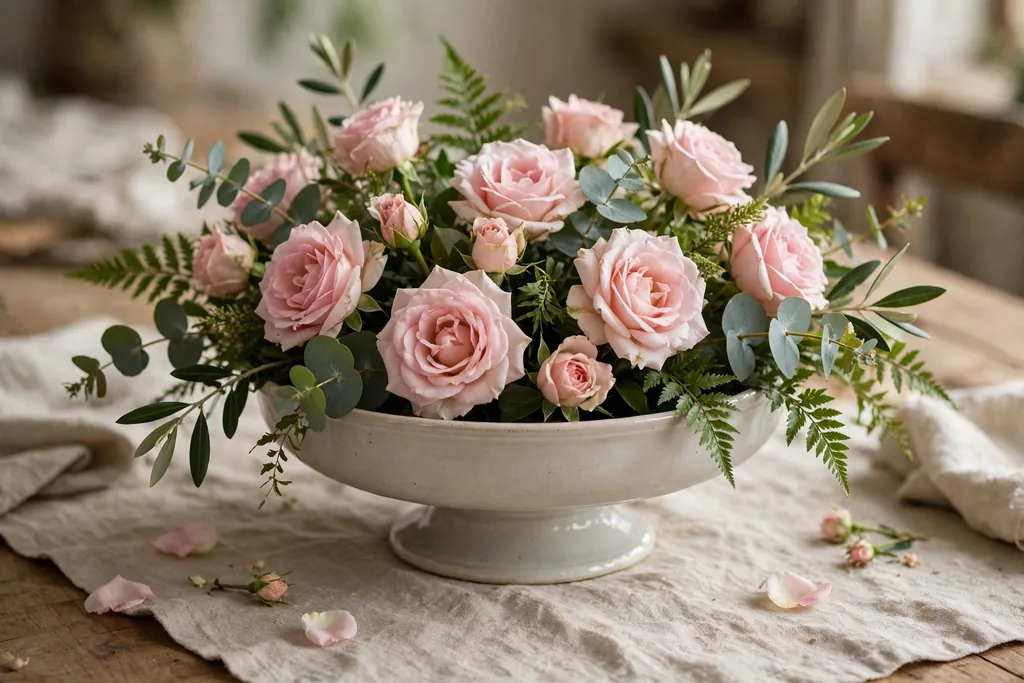
    Low wide compote bowl with soft pink roses and green leaves as a table centerpiece.

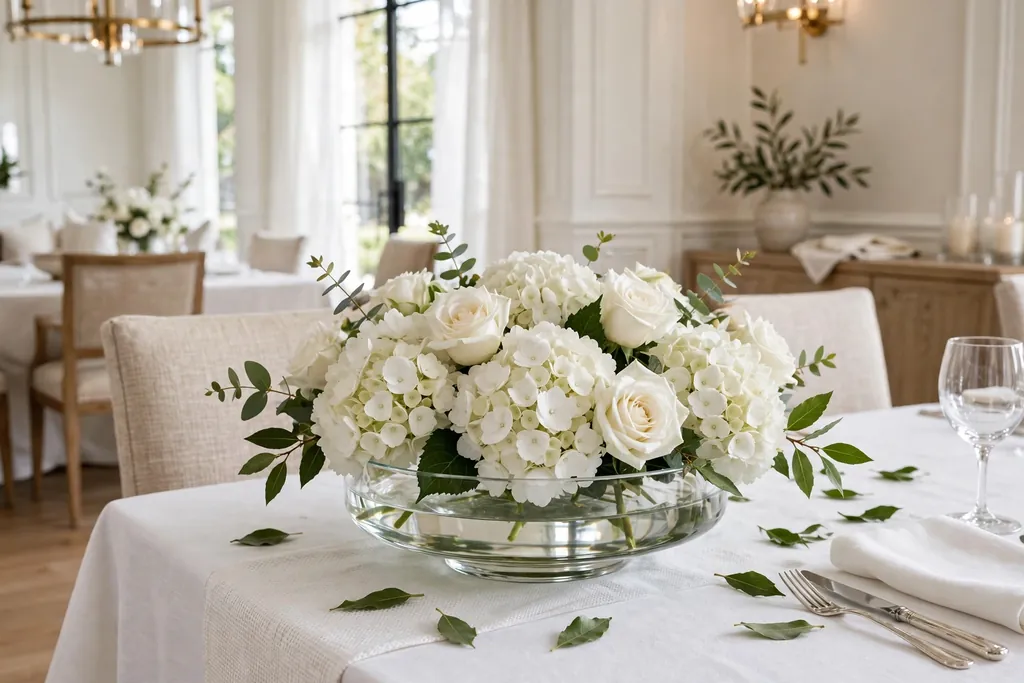
    Trim garden roses, ranunculus, or mixed soft blooms short and set them in a low, wide compote bowl or footed dish, so the blooms sit just above the rim and the whole group stays below eye level. The low bowl gives a full flower look without a tall arrangement, and it suits a round table as well as a long table for a close gathering. Add a few short green leaves between the blooms, and place the bowl in the center with room for serving dishes at each end.

    Use a bowl with a heavy base, so it cannot tip when plates are set down nearby. Change the water the day of the dinner if the bowl will sit out before the meal, and keep loose petals off the table by placing a small tray or mat under the bowl. If fresh blooms are out of budget, use high quality faux blooms in the same low bowl for the same shape.

    10. Wood Board with Candles and Blooms
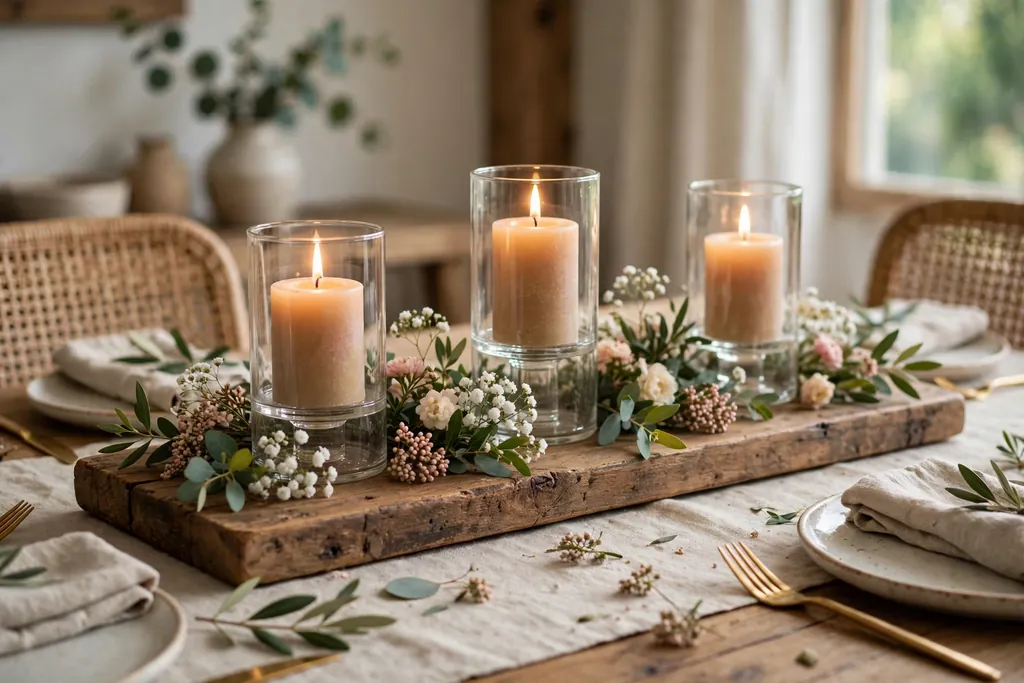
    Long wood board centerpiece with pillar candles in glass holders and small blooms on a dining table.

    Set a long wood board down the middle of the table, then group short pillar candles in glass holders and a few small blooms or sprigs along it. The board keeps the group contained, so it reads as one centerpiece, and it lifts off in one move when you need the full table for serving. Use battery candles if the board will sit near dried stems or if children will be at the table.

    Choose a board with a flat, sanded top, so candle holders sit level and do not wobble. Wipe the board clean after the meal and do not soak it, since wood can warp when left damp. Swap one candle for a small vase of blooms if the group looks too plain, and keep the total group low enough to see across.

    11. Printed Menu Cards at Each Place
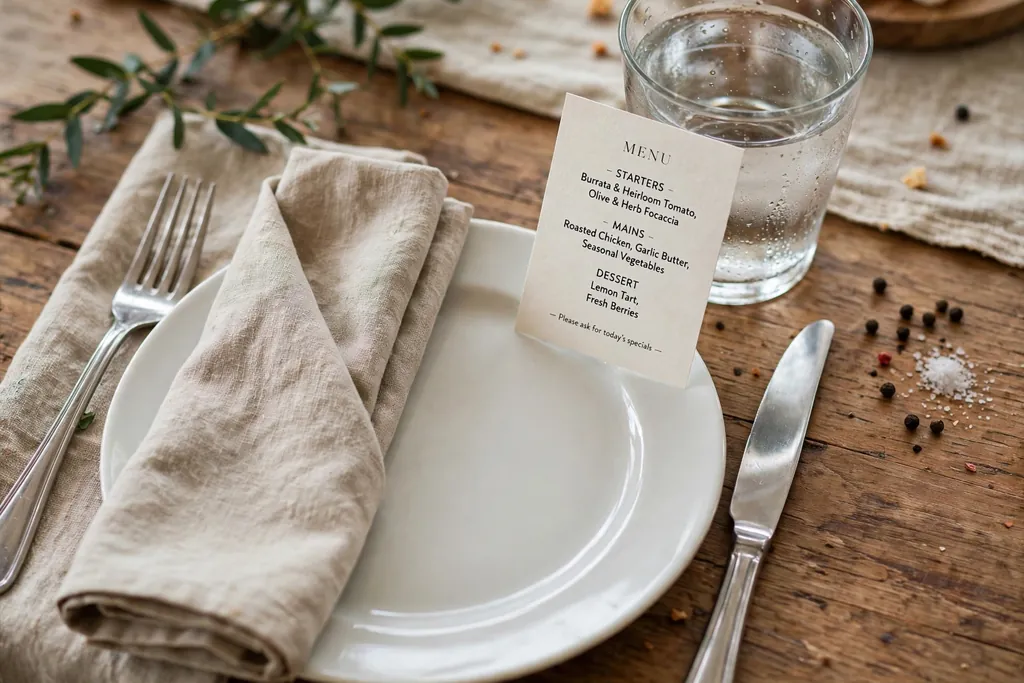
    Place setting with a small printed menu card propped against a glass.

    Set one small printed or handwritten menu card at each place, listing the courses for the evening, with the couple’s names and the date at the top in simple lettering. The card marks each seat, gives guests something to read while they settle in, and doubles as a keepsake after the meal. Prop the card against the glass or lay it flat on the napkin, and keep it clear of plates and food.

    Keep the menu short, with course names only, since a long card will be read once and then set aside. Use the same card stock and lettering at every place, so the table looks matched. For a casual rehearsal dinner, use one shared menu card in the center with the courses written on it, and set a simple place card at each place instead.

    12. Herb Sprig Napkin Ties
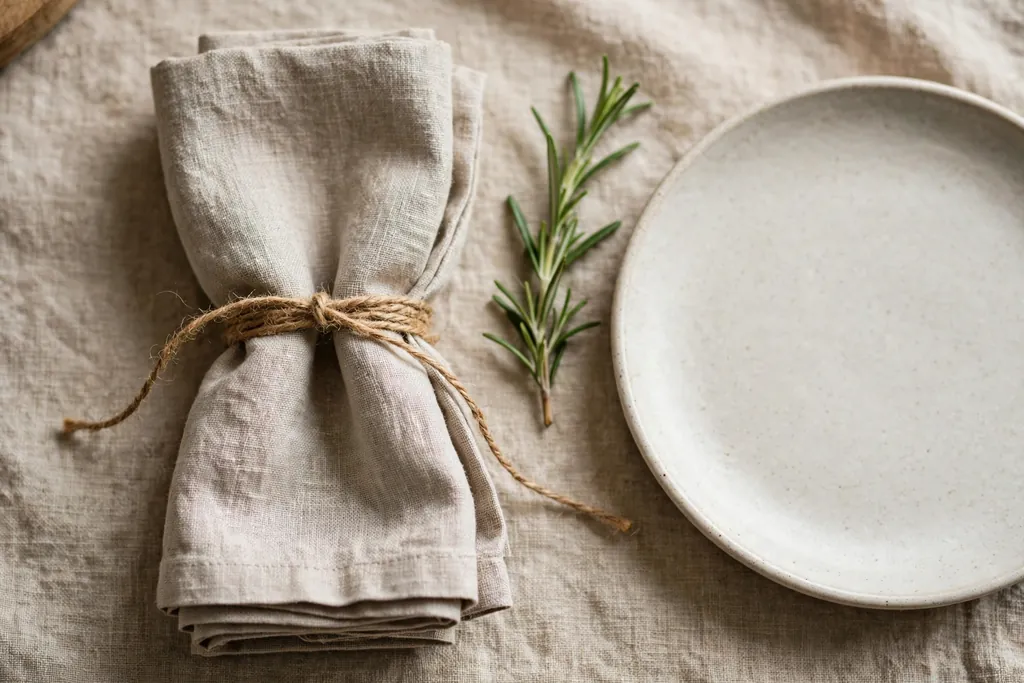
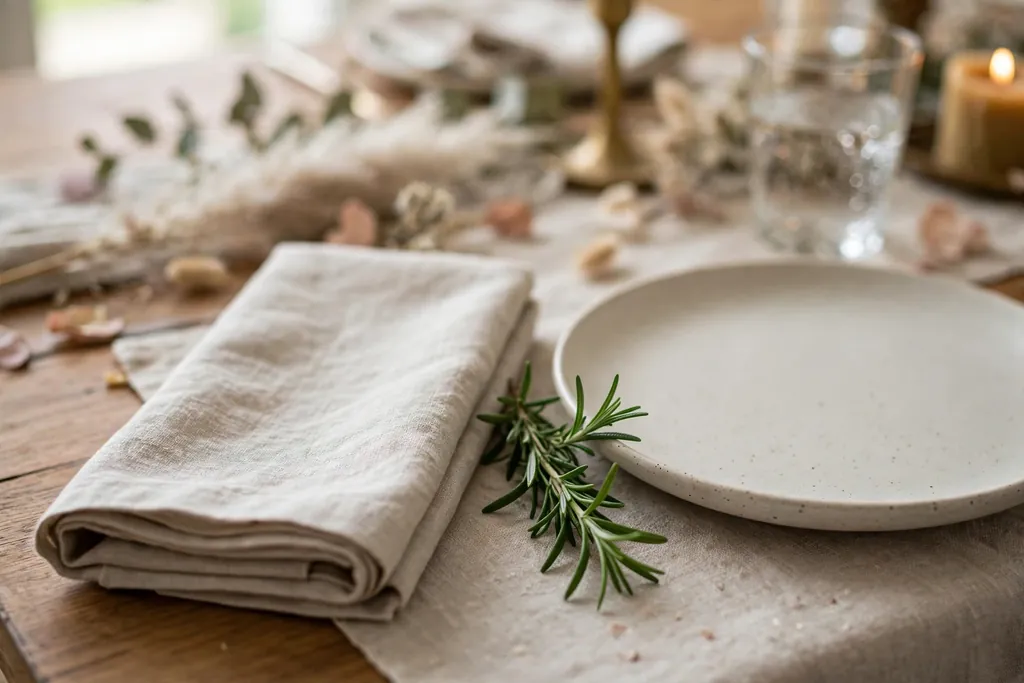
    Folded napkin tied with twine and a short rosemary sprig beside a plate.

    Wrap a length of twine or narrow ribbon around each folded napkin two or three times, tie it in a simple knot, and tuck a small herb sprig, such as rosemary, thyme, or lavender, under the tie. This small detail dresses an everyday place setting in minutes and costs little, since twine and fresh herbs store well and suit a dinner table. Fold napkins in a simple rectangle or roll so the tie sits flat, and keep the sprig short so it does not brush the plate.

    Use the same herb at every place, so the table looks matched, and remove the sprig before washing napkins. For a gathering, write a guest name on a small card and tuck it under the same tie, so the napkin tie doubles as a place card. If fresh herbs wilt in a warm room, use dried lavender sprigs in the same tie for a longer lasting version.

    13. Mismatched Vintage China Places
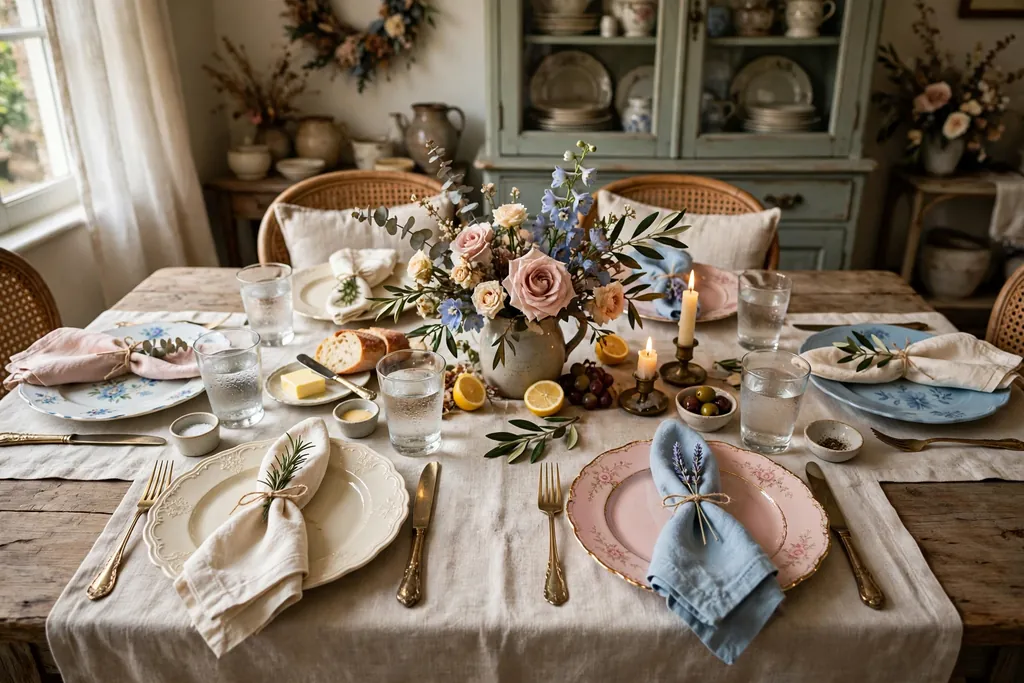
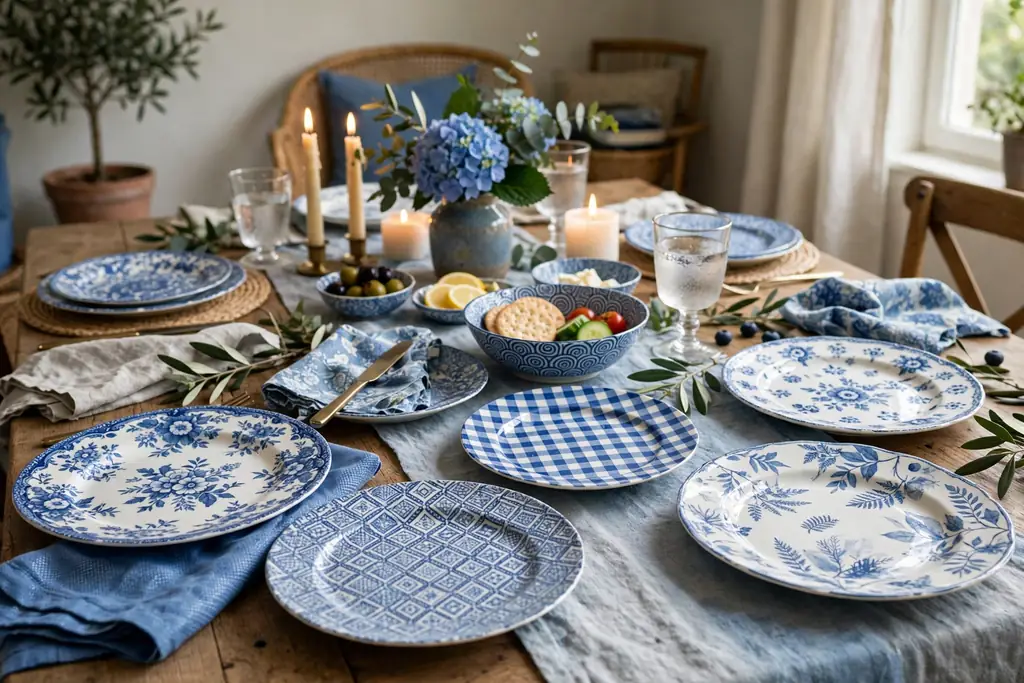
    Dining table with mismatched vintage plates in cream, blush, and soft blue at each place.

    Use mismatched vintage style plates at each place, in one shared palette such as cream, blush, and soft blue, with plain glasses and simple cutlery, so each place feels collected rather than copied. The mix suits a home rehearsal dinner and a relaxed room, and it lets hosts use plates they already own or have gathered over time. Keep the palette tight, with one main color and one accent, so the mix looks planned rather than random.

    Center one plate at each place, and keep napkins and the centerpiece simple, so the plates stay the main detail. Wash vintage plates by hand if they have a delicate edge, and check each plate for chips before setting the table. If one plate stands out too much, move it to the couple’s place, where a distinct plate looks planned.

    14. Brass Holders with Cream Taper Candles
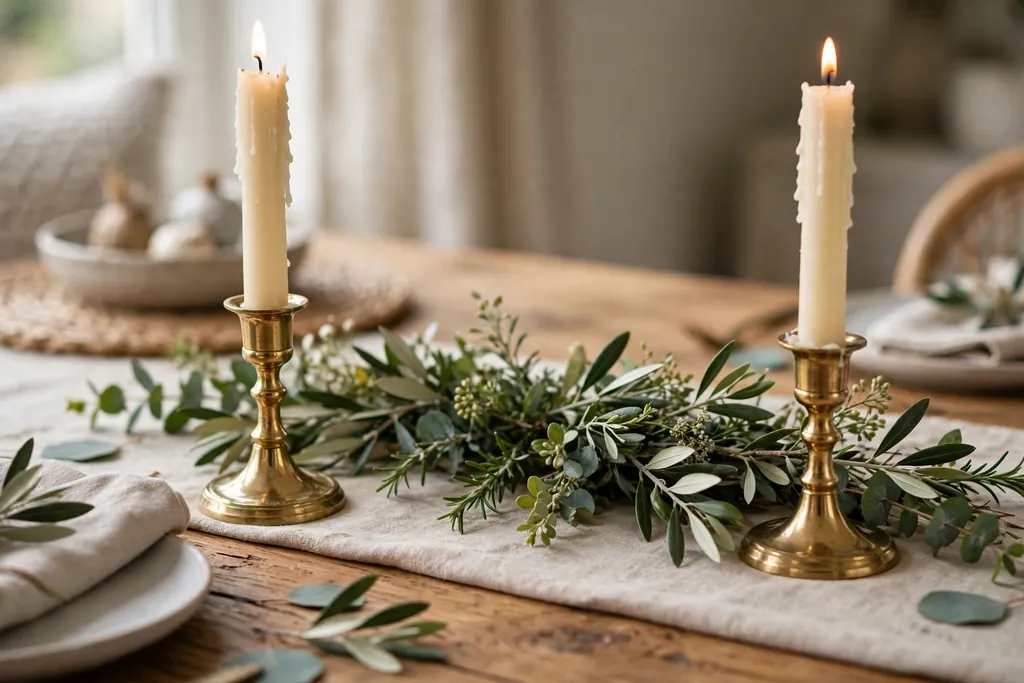
    Dining table center with brass candlesticks holding cream taper candles beside a short greenery runner.

    Set brass candlesticks of two heights down the center of the table, with cream taper candles in each, and keep the rest of the centerpiece simple, such as a short greenery runner or a few small blooms at the base. Brass adds a warm metal note that suits both a home dinner and a small venue gathering, and it works with cream, blush, and soft green palettes. Keep the candle group low enough to see across when guests are seated.

    Check that candlesticks sit level and that tapers fit snugly, so candles do not lean or drip onto the table. Use a tray or small plates under the candlesticks if wax drips are a concern, and trim wicks before lighting. For a table with children, use flameless tapers in the same brass holders for the same look without a flame.

    15. One Centerpiece for a Small Round Table
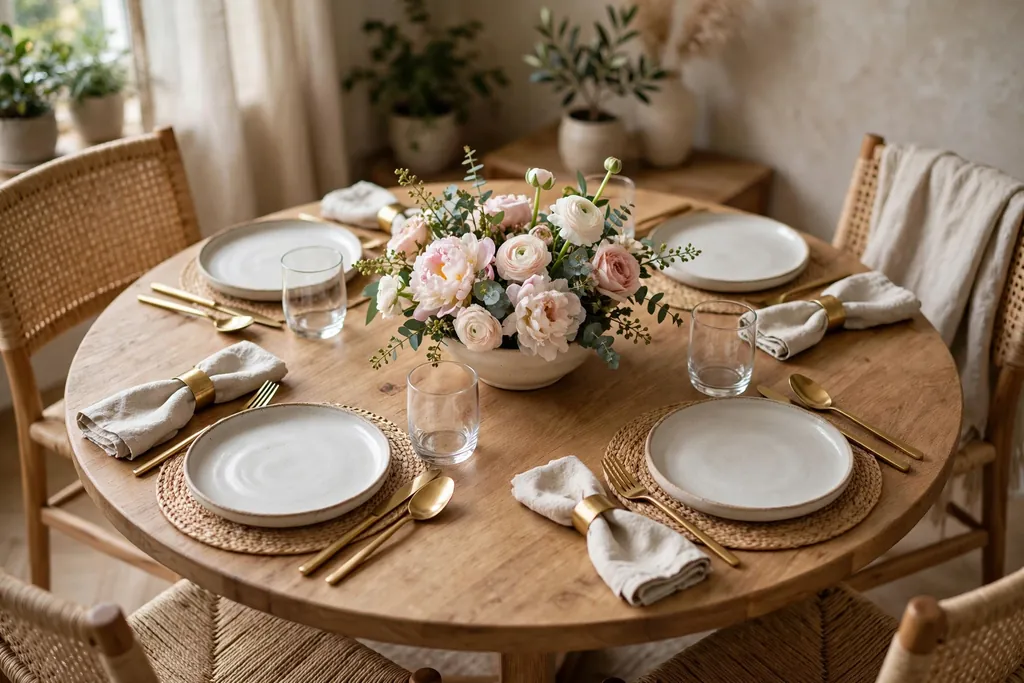
    Small round dining table with one low bowl of blooms in the center and matching places around it.

    For a small round table, use one centerpiece only, such as a low bowl of blooms, one lantern, or a small candle group on a tray, set in the exact center with equal space around it for every place. One group keeps a round table easy to talk across, since every guest faces the same center, and it leaves the rest of the table free for plates and serving dishes. Pair the centerpiece with matching place settings all the way around, so no seat feels like an afterthought.

    Keep the centerpiece below eye level when guests are seated, and choose a tray base if the group holds candles, so the whole centerpiece lifts off in one move. Skip a runner on a round table, since a runner rarely sits well on a round top, and use placemats or a round cloth instead. For a larger group at several round tables, repeat the same centerpiece at each table, so the room looks matched.

    16. Table Number Cards with a Short Note
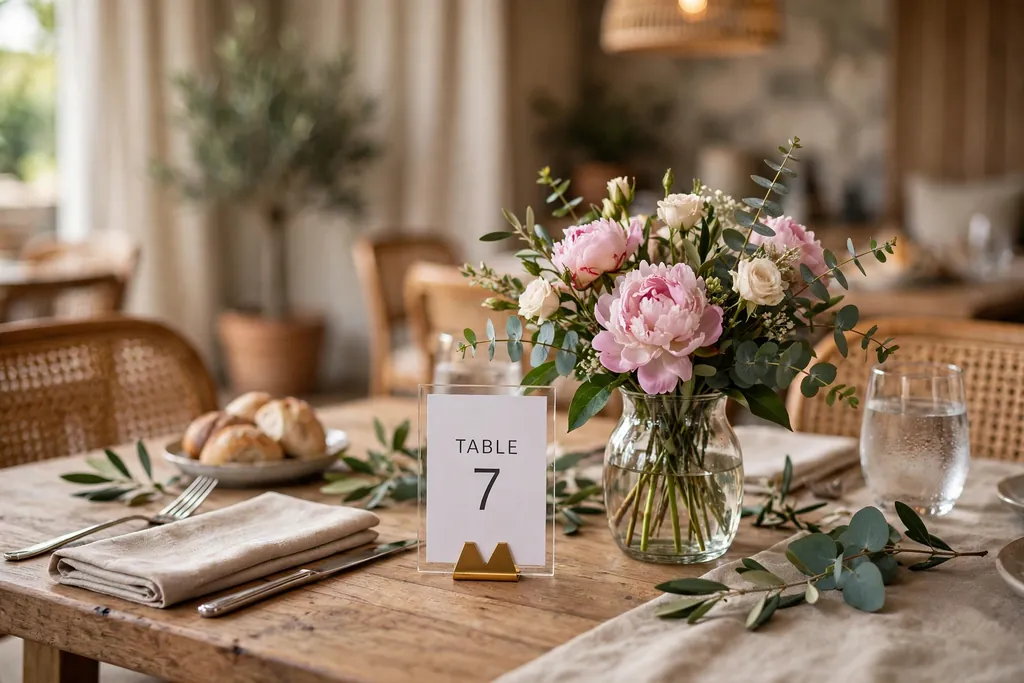
    Dining table with a small table number card in a holder beside a vase of blooms.

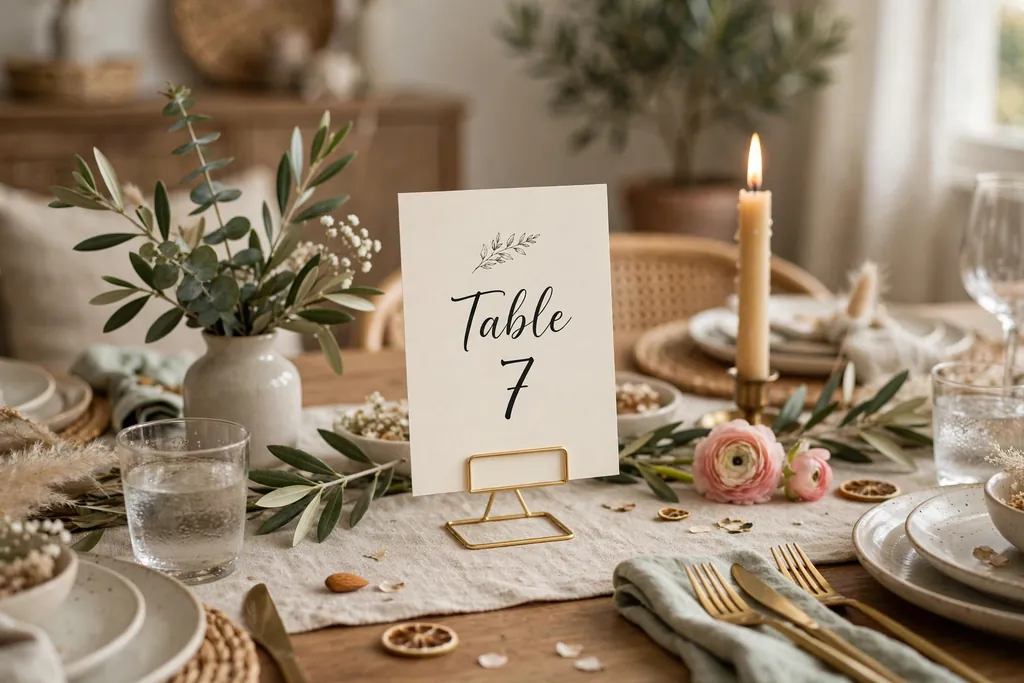
    Set one small table number card at each table, with the number in large, clear lettering and a short note below it, such as a welcome line or one sentence about the couple. The card helps guests find their table, gives each table a finished look, and doubles as a small keepsake for the couple. Prop the card in a small holder or lean it against a vase, so it stands above the centerpiece without blocking sightlines.

    Keep the note short, since a long note will be read once and then set aside, and use the same card stock and lettering at every table. For a single table rehearsal dinner, use one welcome card in the center with the couple’s names and a short note, so the table still gains a personal detail. For more holiday table ideas with place cards and menu cards, browse the Christmas table setting ideas.

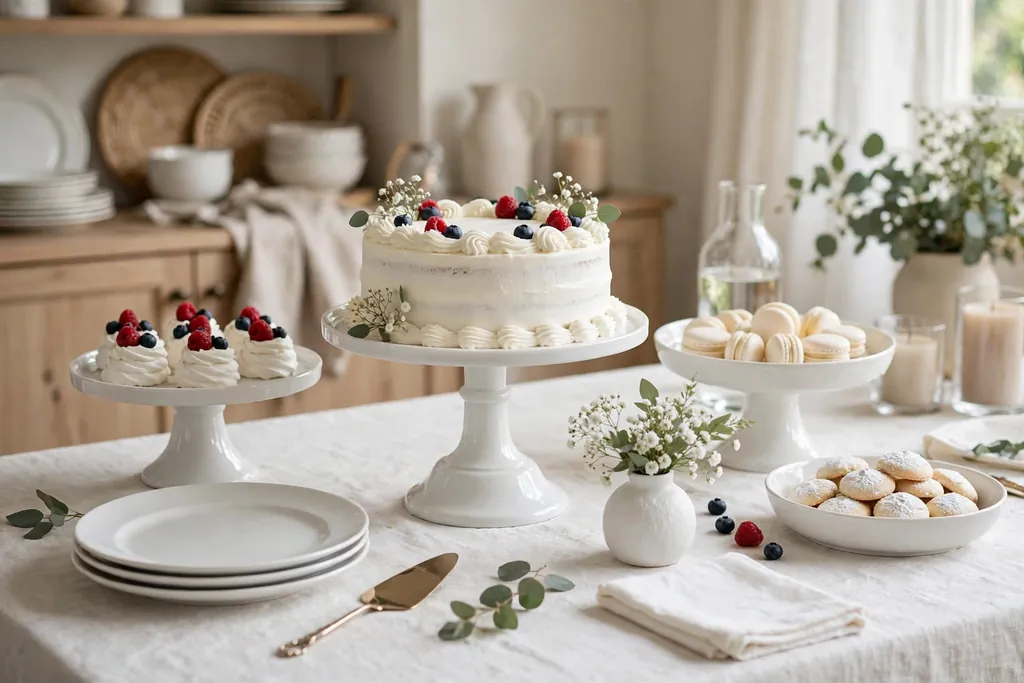
    17. Tiered Stand of Small Desserts
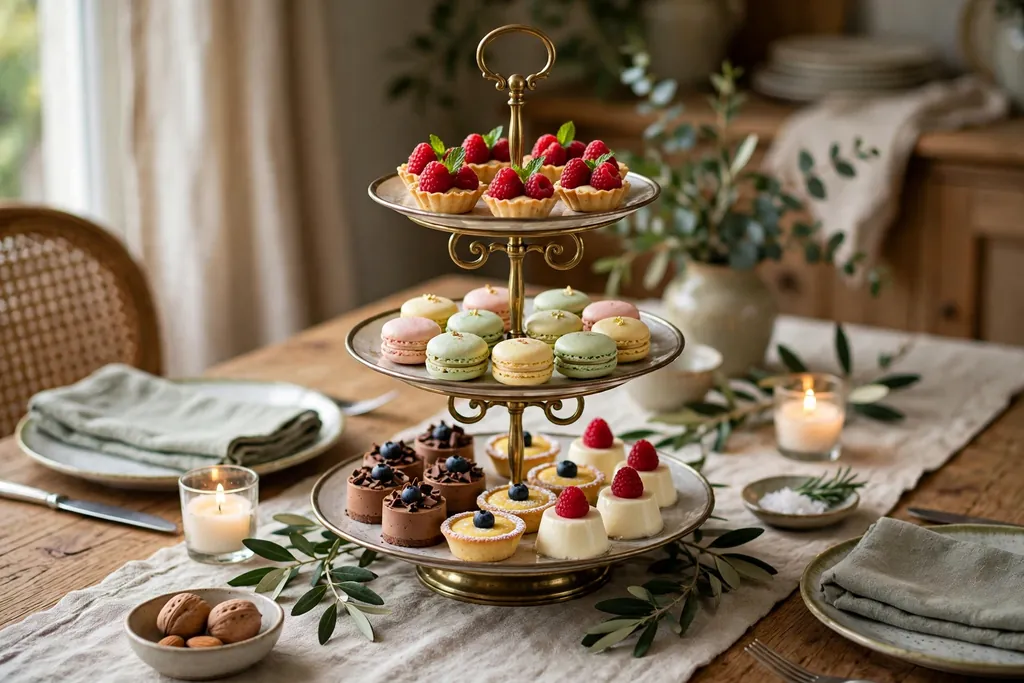
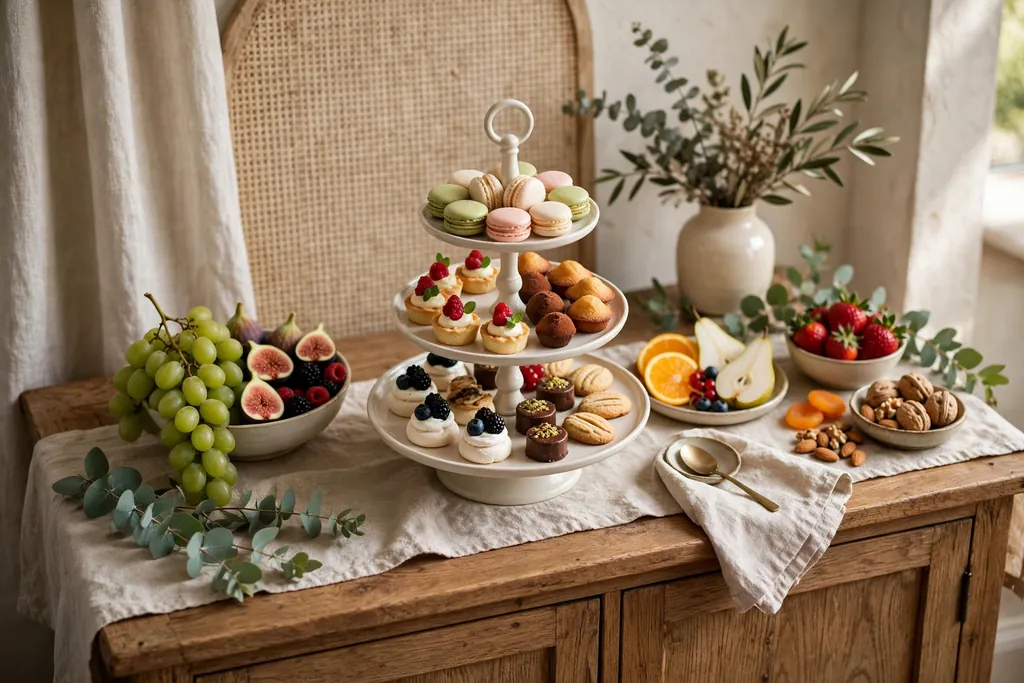
    Tiered stand holding small desserts as a centerpiece on a dining table.

    Set a two or three tier stand at one end of the table or in the center of a round table, and fill it with small desserts, such as mini cupcakes, chocolate dipped strawberries, or small cookies, so the centerpiece also serves dessert. A tiered stand gives height without blocking the center, since it sits in one spot rather than along the whole table, and it suits a close gathering where dessert can stay in view during the meal.

    Keep the stand stable and clear of the main serving path, and put heavier items on the bottom tier. If the stand will hold food, use it for food only, and set a separate small vase of blooms beside it rather than mixing decor into the food tiers. Cover desserts until serving time, and wipe the tiers after use.

    18. Small Favor Boxes at Each Place
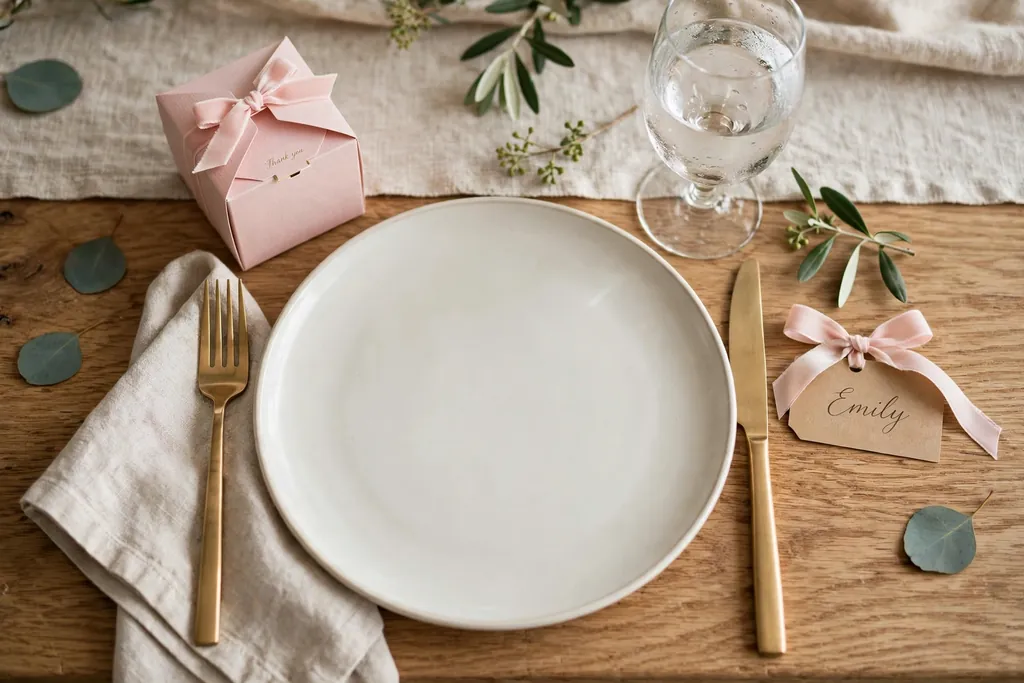
    Place setting with a small blush favor box and a name tag tied with ribbon beside the plate.

    Set one small favor box at each place, in a color that matches the table palette, holding a small treat or a short note, with the guest name written on a small tag tied to the box. The favor marks each seat, gives guests something to take home, and adds a finished detail to a plain place setting without taking up much room. Keep the box small enough to sit beside a plate without crowding the glass.

    Use the same box and tag at every place, so the table looks matched, and tie each tag the same way. Choose favors that travel well, such as wrapped sweets or a small candle, rather than items that melt or crush in a bag. For a close gathering, write a first name only on each tag, which feels warm and informal.

    19. Candle Cluster on a Mirrored Tray
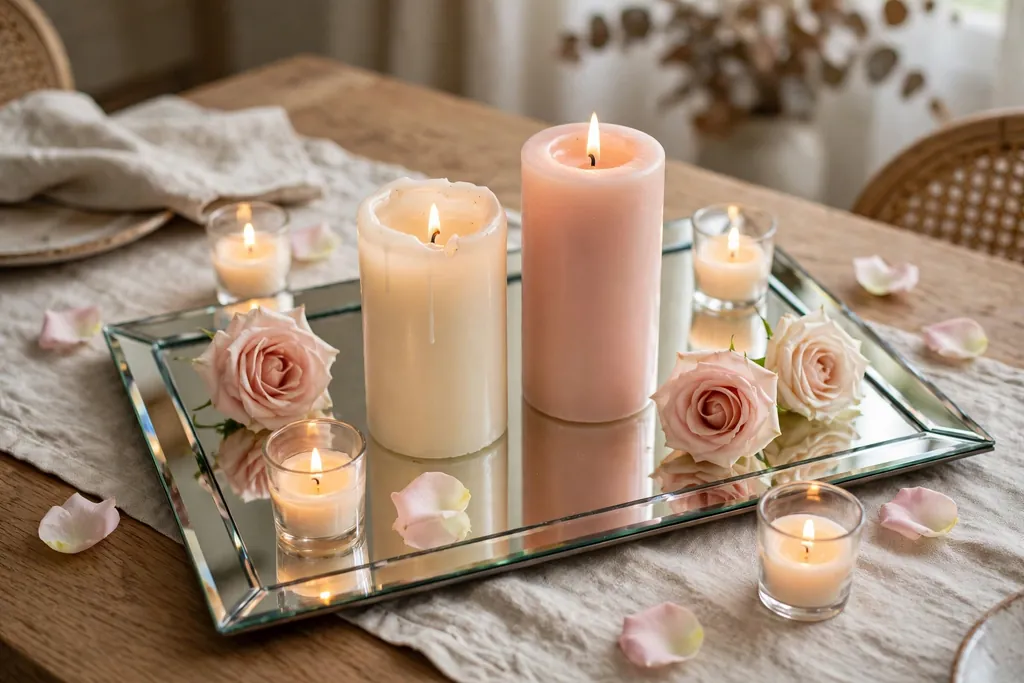
    Mirrored tray with cream and blush pillar and votive candles and rose heads on a dining table.

    Group pillar and votive candles in shades of cream and blush on a mirrored tray, with a few rose heads or short green leaves tucked between the holders. The tray keeps the group contained, so it reads as one centerpiece, and it lifts off in one move when you need the full table for serving. The mirrored base reflects candlelight softly, which suits an evening rehearsal dinner in a small room.

    Use a tray with a raised edge to contain wax, and keep candles in holders on a heat safe surface. Mix heights, with one taller pillar at the back and shorter votives at the front, but keep the total group low enough to see across. Use battery candles if the tray will sit near petals or paper cards, and wipe the mirrored base before the meal, since fingerprints show on a mirror finish.

    Conclusion

    A rehearsal dinner table does not need a new dinner set or a large budget. Start with the plates, glasses, and napkins you already own, pick one palette, keep the centerpiece low, and set one clear personal detail at each place. A greenery runner, a lantern, or a candle group gives the table its glow, while place cards, menu cards, photos, and small favors make the evening feel close and personal. Try one idea from this list for your rehearsal dinner, keep what works for your table, and change only one layer at a time until the setting feels like yours.

    Frequently Asked Questions

    What are rehearsal dinner table decorations?

    Rehearsal dinner table decorations are the centerpiece, linens, place settings, and personal details used on the tables at a rehearsal dinner, the meal held the night before a wedding for the couple, their families, and the wedding party. They usually stay simpler and more personal than wedding reception decor, with one low centerpiece, a simple palette, and one personal detail at each place.

    How do I decorate a rehearsal dinner table on a small budget?

    Decorate a rehearsal dinner table on a small budget by starting with plates, glasses, and napkins you already own, then adding one low centerpiece, such as a greenery runner, bud vases, or candles in holders you already have. Add one personal detail at each place, such as a handwritten place card or a herb sprig napkin tie, and keep the palette to one or two colors, so the table looks planned without new dishes.

    What centerpiece works best for an intimate rehearsal dinner?

    A low centerpiece works best for an intimate rehearsal dinner, such as a greenery runner, a low floral bowl, a lantern with a battery candle, or a small candle group on a tray. Keep the centerpiece below eye level when guests are seated, leave room for serving dishes, and use one main group per table rather than several competing clusters, so guests can talk across the table.

    Should rehearsal dinner tables match the wedding theme?

    Rehearsal dinner tables do not need to match the wedding theme exactly, but they look best when they share one color or one detail with the wedding, such as the same flower, the same metal, or the same palette in a softer form. A rehearsal dinner can stay more casual and personal than the wedding, with handwritten cards, photos, and home details that would not suit a large reception.

    How many places can I set on a small rehearsal dinner table?

    The number of places on a small rehearsal dinner table depends on the table size, but a good guide is to leave about 60 centimeters, or about two feet, of width per place, with room for a plate, a glass, and cutlery, plus space for elbows. For a very small table, use one centerpiece only, fold napkins flat, skip chargers and a runner, and set extra dishes on a sideboard, so the table stays free for eating.

    What should I put at each place for a rehearsal dinner?

    Put one clear personal detail at each place for a rehearsal dinner, such as a handwritten place card, a printed menu card, a small photo, a herb sprig napkin tie, or a small favor box, plus the usual plate, cutlery, glass, and napkin. Keep the rest of the place simple, so the personal detail stands out, and repeat the same detail at every place, so the table looks matched.
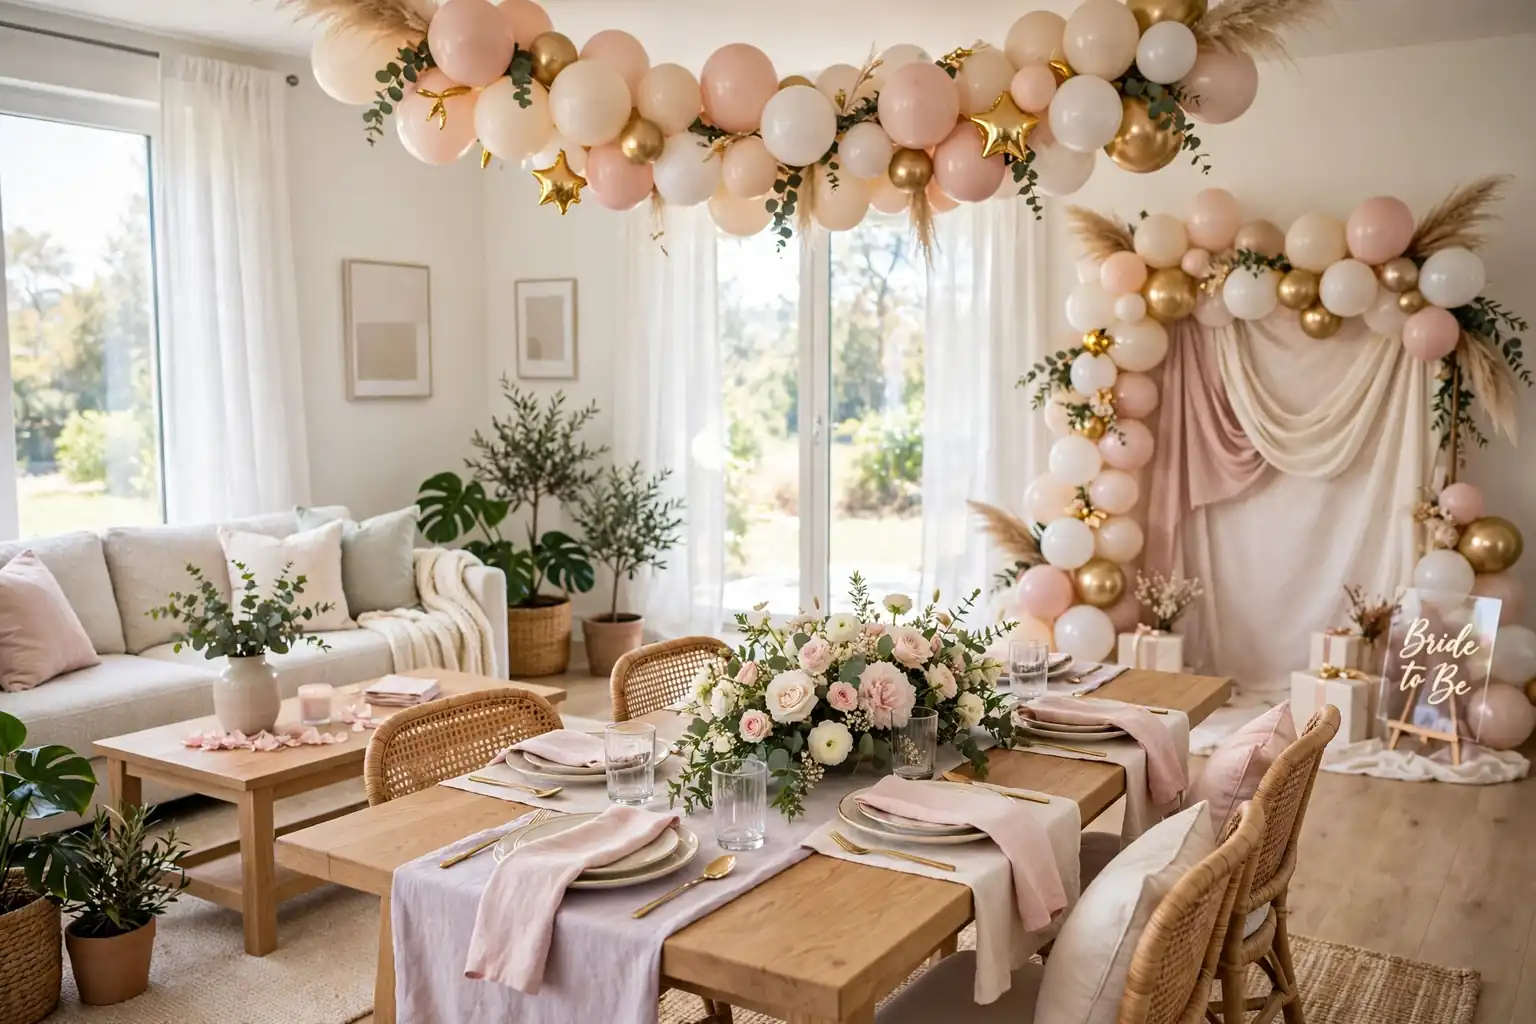
  • 23 Bridal Shower Decorating Ideas for a Welcoming Home Event

    23 Bridal Shower Decorating Ideas for a Welcoming Home Event

    Bridal shower decorating ideas for a home event start with a clear entry, one focal table, and soft color repeated across the room. Use balloons or flowers at the door, a low centerpiece on the main table, a photo spot, and a drink station. The 23 ideas below cover entry, tables, walls, and favors for a welcoming gathering.

    Start with the base you already own: a plain cloth or runner, everyday plates, and cloth napkins in a soft neutral. Then add one bridal shower layer at a time, such as a balloon garland, a flower centerpiece, or a welcome sign. Keep centerpieces low enough to see across, leave room for food and gifts, and choose pieces you can lift off in one move when the room needs to clear. Pick one palette, such as blush and cream with one metal accent, and repeat it at the entry, the table, and the photo spot, so the whole home reads as one event.

    Key Takeaways

    • Pick one palette of two soft colors plus white and one metal accent, and repeat it at the entry, the table, and the photo spot.
    • Keep centerpieces low and narrow, so guests can see each other and serving dishes still fit.
    • Give the event one clear focal point, such as a dessert table or a photo backdrop, and keep the rest of the decor simple.
    • Use textiles first: a cloth, runner, napkins, and chair ties carry most of the color and wash easily.
    • Plan the flow: entry, seating, food, gifts, and favors each need their own clear spot, so guests are never crowded into one corner.
    • Choose candlelight with care: keep flames clear of balloons, paper, and fabric, and use battery candles near paper decor or with children present.

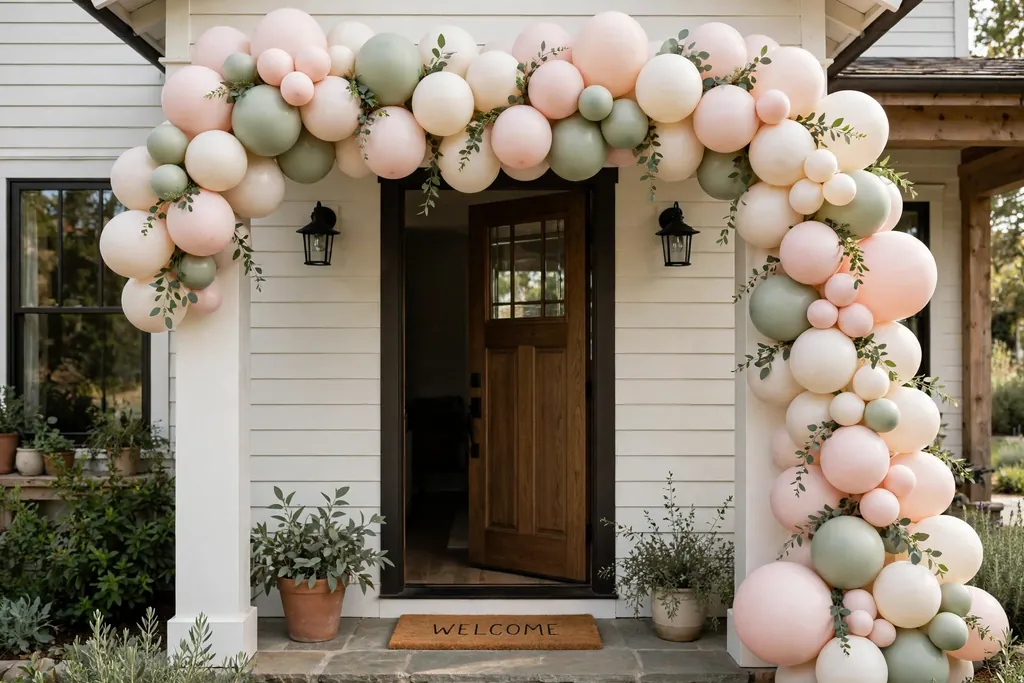
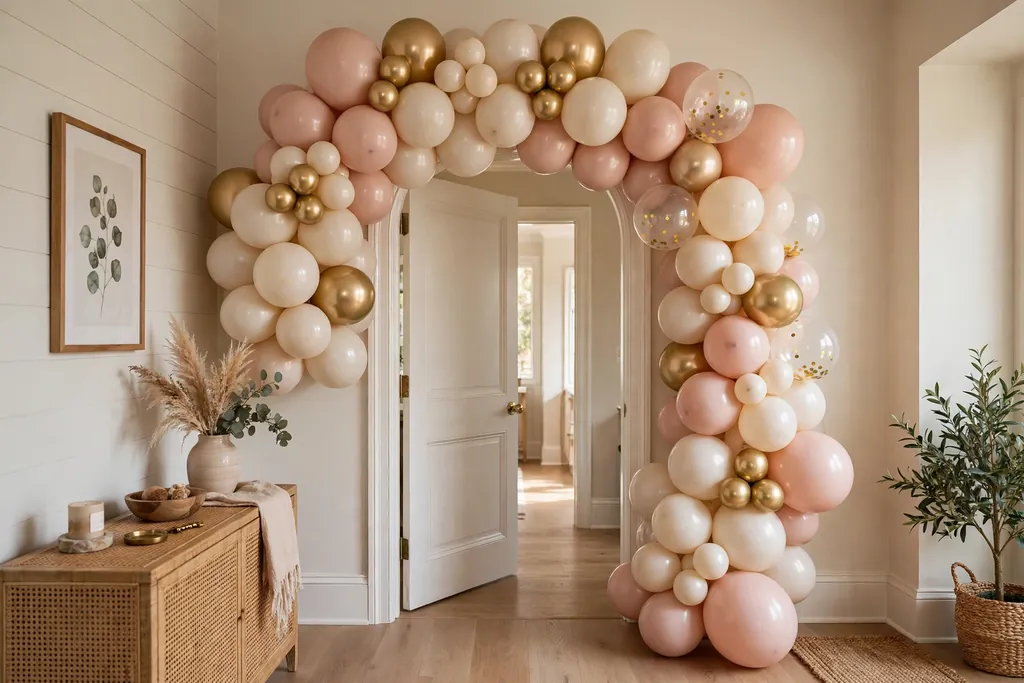
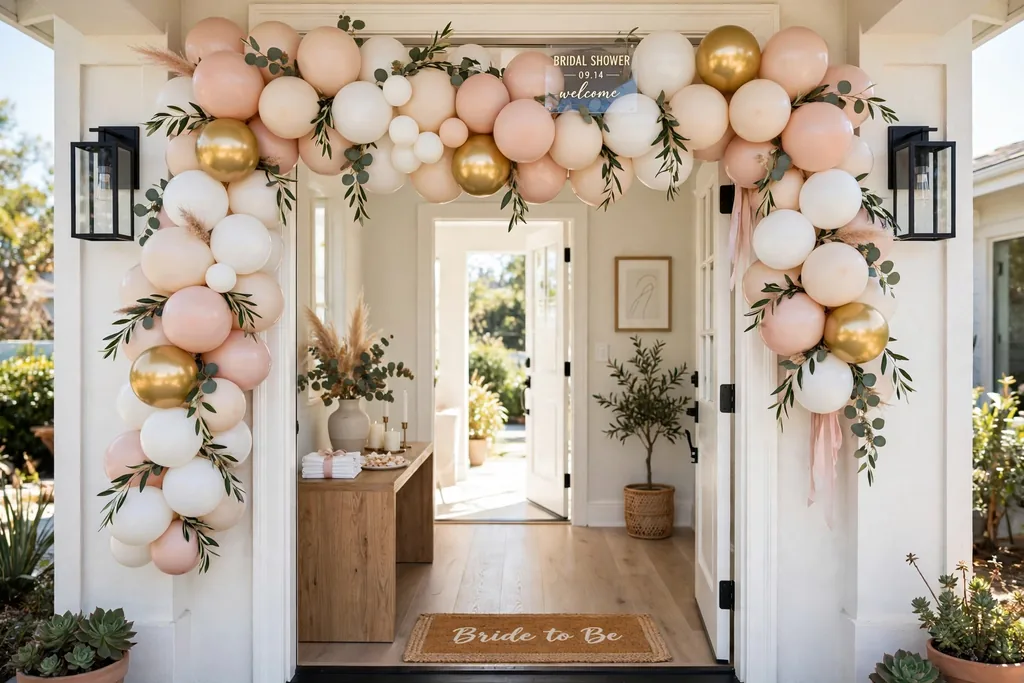
    1. Balloon Garland Arch at the Entry

    Balloon garland arch in blush, cream, and white with gold accents across a home entry doorway.

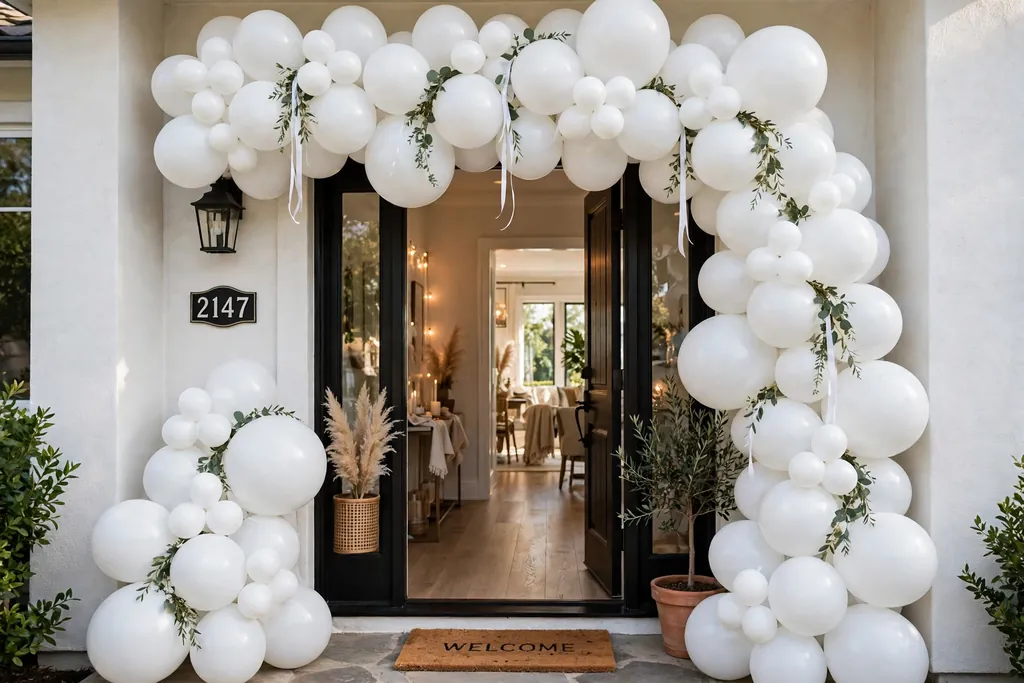
    Hang a balloon garland in the shower palette across the front door frame or the entry wall, so guests know at once they have arrived at a celebration. Mix two balloon sizes in blush, cream, and white, with a few gold balloons for accent, and shape the garland into an arch or a loose swag that follows the door frame. Anchor it well at both ends, so it does not slip while guests come and go.

    Keep the garland clear of the door swing and the walkway, and leave headroom above the path, so tall guests can pass without ducking. If the entry is narrow, use a half arch on one side of the door instead of a full arch, which gives the same welcome note with less bulk. Save a few spare balloons and a small pump for quick fixes before guests arrive.

    2. Fresh Flower Centerpieces in Mixed Vases

    Low fresh flower arrangements in mixed glass vases down the center of a bridal shower table.

    Set low flower arrangements down the center of the main table using vases you already own in mixed shapes, such as bud vases, short jars, and one wider vase. Use one flower type in each vase, or the same mix in every vase, in the shower palette, with short green stems between blooms. The mixed heights look collected rather than formal, and each vase can move to a sideboard after the meal.

    Trim stems so blooms sit just above the vase rim, and keep the total height low enough to see across. Change the water the morning of the event, and remove any stem that wilts, since one cloudy vase can spoil the group. For a long table, space three or five vases evenly, and leave room between them for serving dishes and glasses.

    3. Dessert Table with a Tiered Display

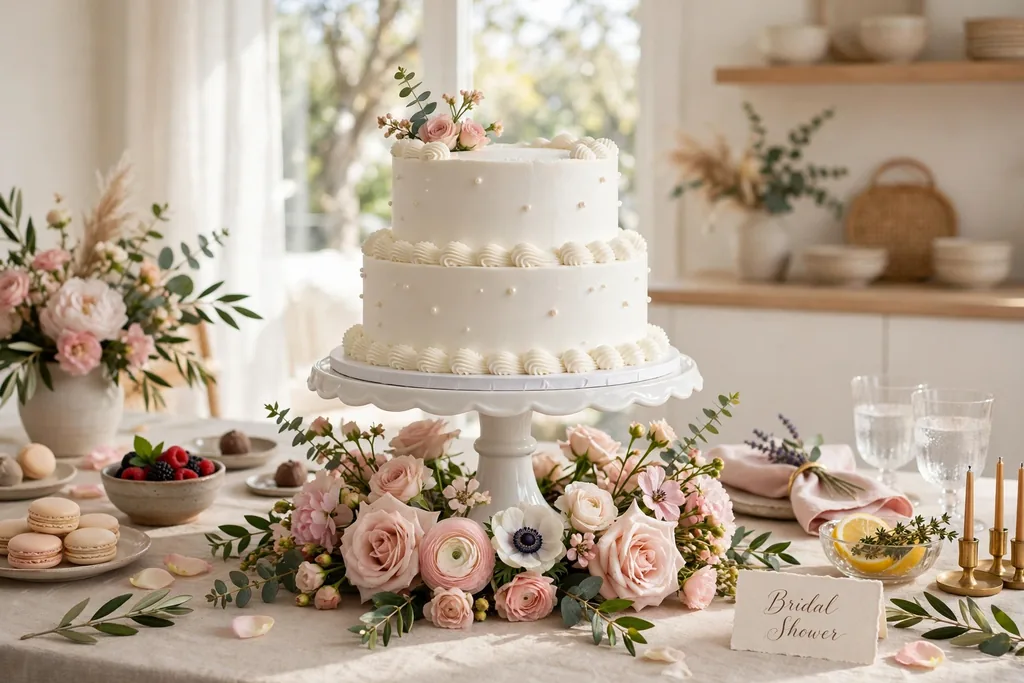
    Dessert table with a tiered stand of cupcakes and treats, a plain blush cloth, and small flower stems.

    Set a dessert table against a wall with a tiered stand at the center, holding small treats such as cupcakes, cookies, and fruit, so the table works as both food and decor. Add a plain cloth in the shower palette, a few small flower stems in bud vases, and one cake plate at a different height, so the table has shape without crowding. Keep the table near the main seating, so guests can help themselves without crossing the whole room.

    Put heavier items on the bottom tier of the stand and lighter treats on top, and keep the table clear of the main walkway. Cover treats until serving time, and set small plates and napkins at one end, so guests do not need to hunt for them. If the table will hold food only, set the flower decor on a separate tray beside it, so crumbs and petals do not mix.

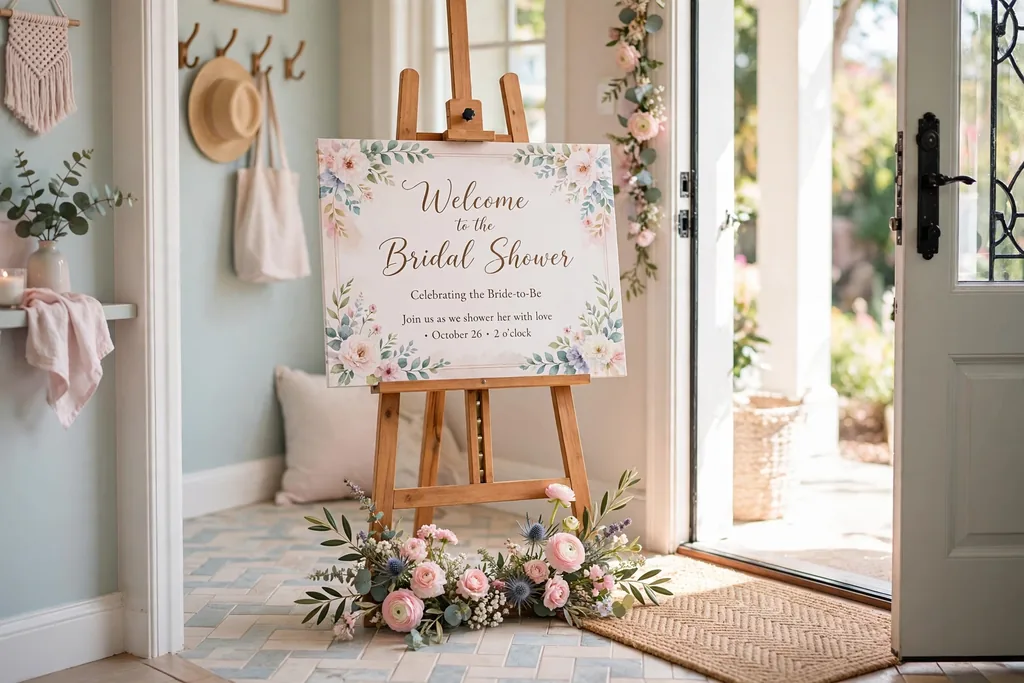
    4. Welcome Sign at the Door

    Welcome sign on an easel just inside a home door with small flowers at its base.

    Place a welcome sign on an easel just inside the door, with a short greeting for the bridal shower and the guest of honor noted by first name only if the host prefers it. A chalkboard, a printed sign in a simple frame, or a hand lettered board all work, as long as the lettering is large and easy to read from a few steps away. Add two small flower stems or a balloon bunch at the base, so the sign reads as part of the decor.

    Keep the sign clear of the door swing and the coat area, and check it in daylight and in evening light before guests arrive, since chalk and pale print can fade in bright sun. If the entry is tight, hang the sign on the wall beside the door instead of using an easel, which saves floor space and still greets every guest.

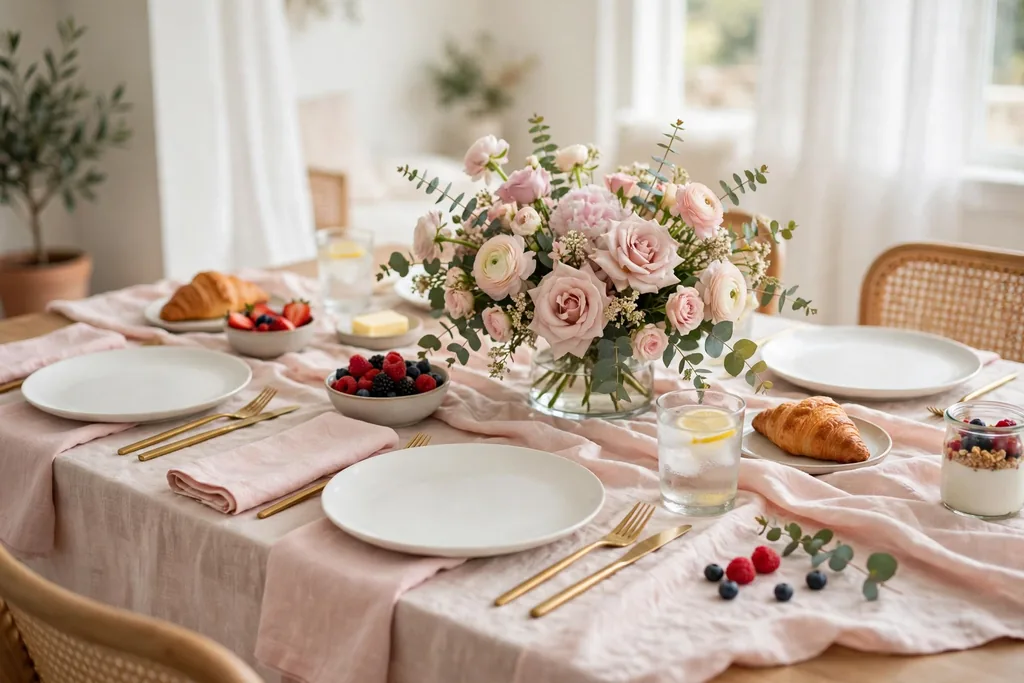
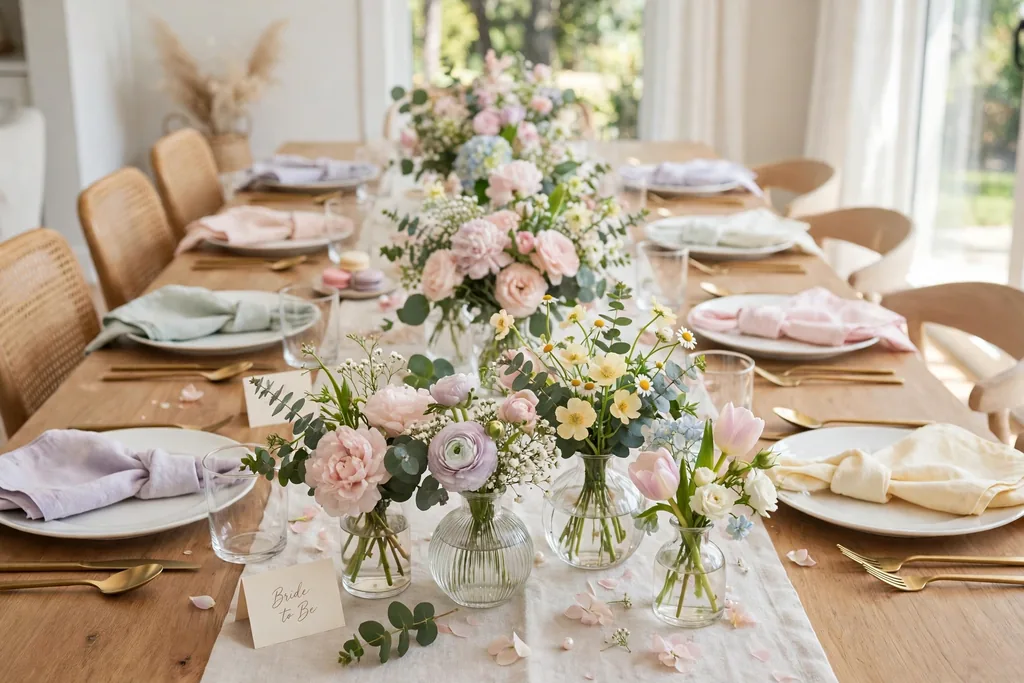
    5. Pastel Linen Table Setting for Brunch

    Brunch table with a pastel linen cloth, white plates, matching napkins, and a low flower vase.

    Lay a pastel linen cloth in blush, mint, or pale blue over the brunch table, then set plain white plates at each place, so the cloth carries the color and the plates stay calm. Add cloth napkins in a matching pastel, clear glasses, and one small flower stem at each place or a low vase at the center. This simple pairing suits a morning shower, since it looks fresh in daylight and needs no patterned dishes.

    Iron or steam the cloth before the event, since creases show more on pastel linen than on a patterned cloth. If the cloth is light in color, use a plain undercloth or table protector beneath it, so a spill does not mark the table during the meal. For a larger group, use the same napkin fold at every place, so the table looks matched from the end of the room.

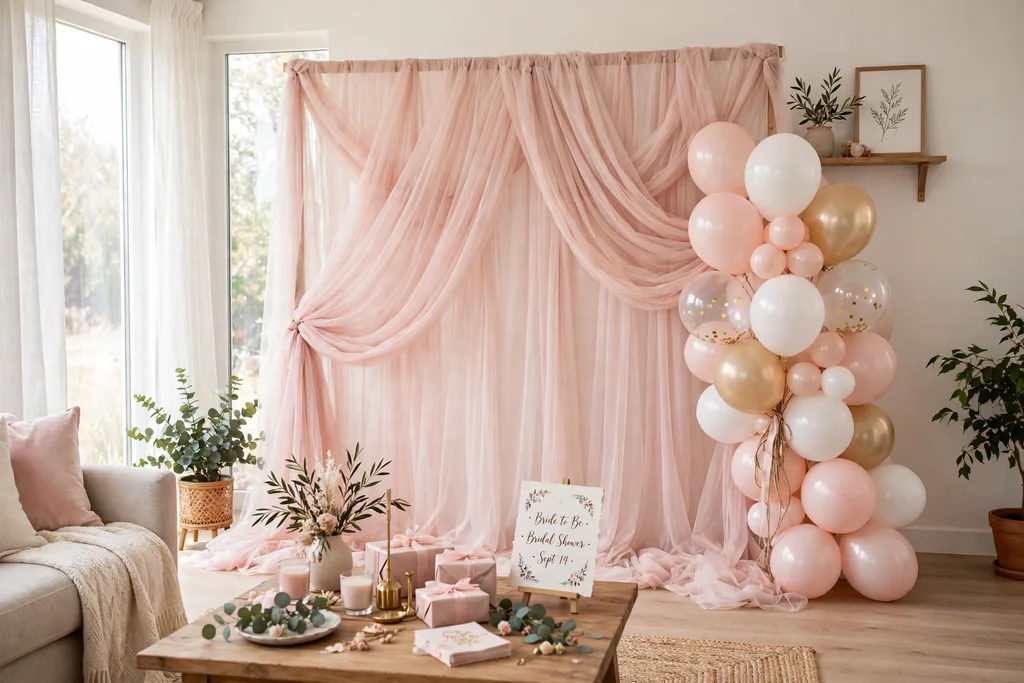
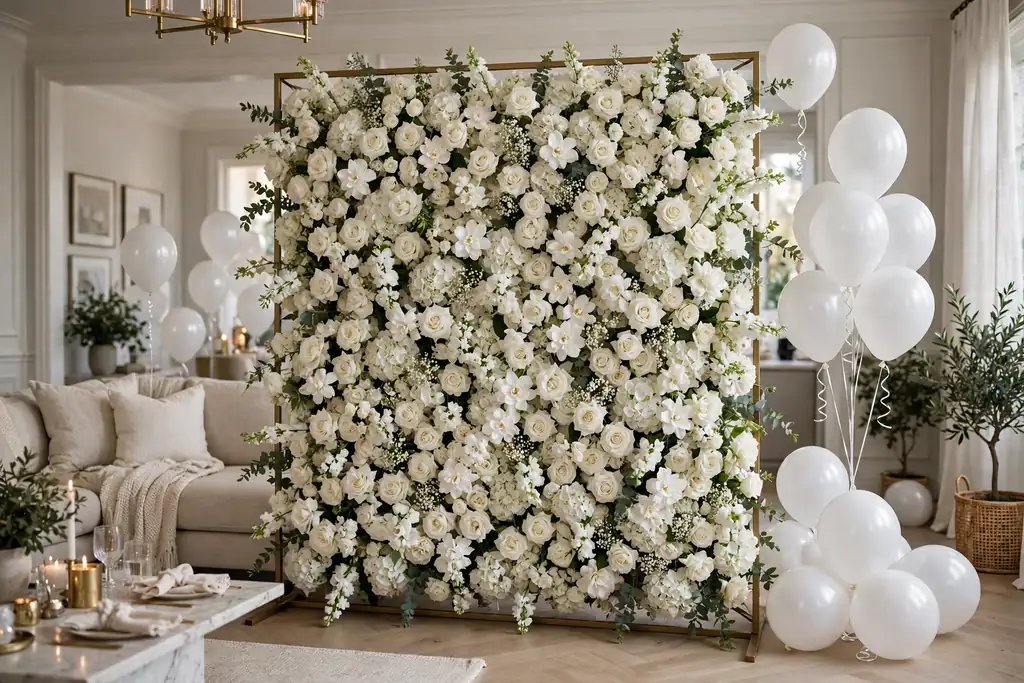
    6. Fabric Photo Backdrop Wall

    Fabric photo backdrop wall in soft tulle with a balloon bunch at one side in a living room.

    Hang a length of fabric, such as soft tulle, linen, or crepe, across one blank wall to make a photo backdrop, and add a balloon bunch or paper fans at one side for shape. The backdrop gives photos a clean background, hides a plain wall or a busy shelf, and marks one corner of the room as the photo spot. Choose fabric in the shower palette, and hang it from a rod or removable hooks, so it falls straight and does not pull paint.

    Weight the bottom edge lightly or tape it flat to the floor line, so it does not billow when guests walk past. Keep the backdrop clear of candles and food, and leave floor space in front of it for two or three people to stand together. A small basket of photo props beside the backdrop, such as frames and signs, lets guests pose without hunting for items around the room.

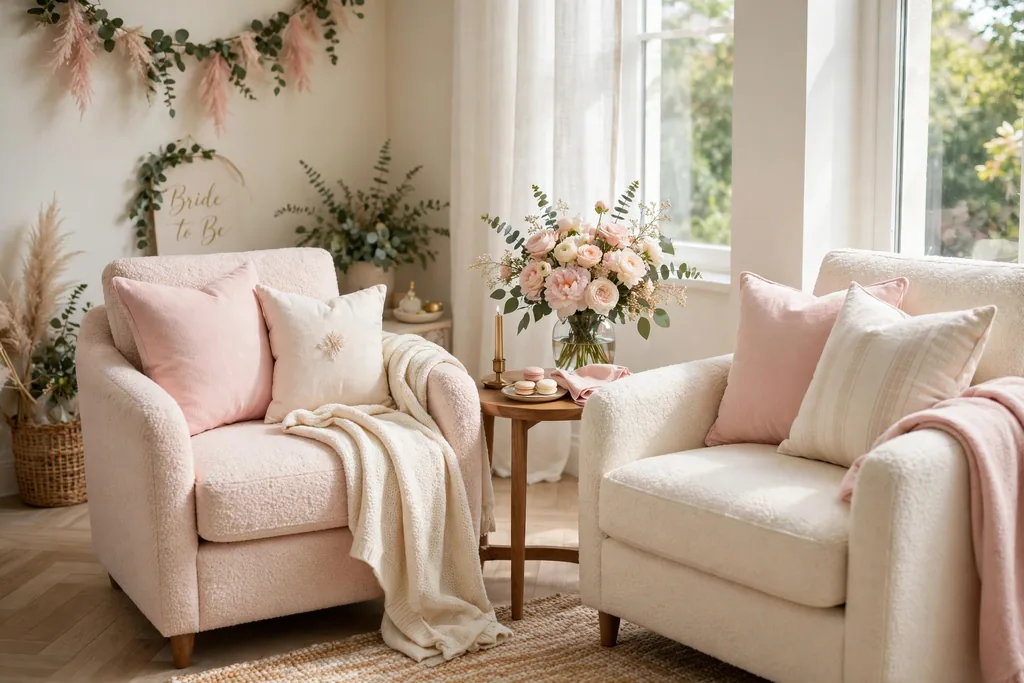
    7. Cozy Lounge Corner with Cushions

    Cozy lounge corner with armchairs, pastel cushions, a throw, and a small side table with flowers.

    Set a lounge corner with a sofa or two armchairs, extra cushions in the shower palette, and a small side table for drinks, so guests who want to chat have a spot away from the food table. Add a soft throw over one chair arm and a small vase of flowers on the side table, and keep the corner near natural light if the room allows it. This corner also gives the guest of honor a comfortable seat for opening gifts.

    Keep walkways clear around the chairs, and do not block the path to the food or gift tables with the lounge group. Choose cushions with removable covers, since drinks and food travel, and spills happen at gatherings. If floor space is tight, use floor cushions on a rug instead of extra chairs, which seats more guests in the same footprint.

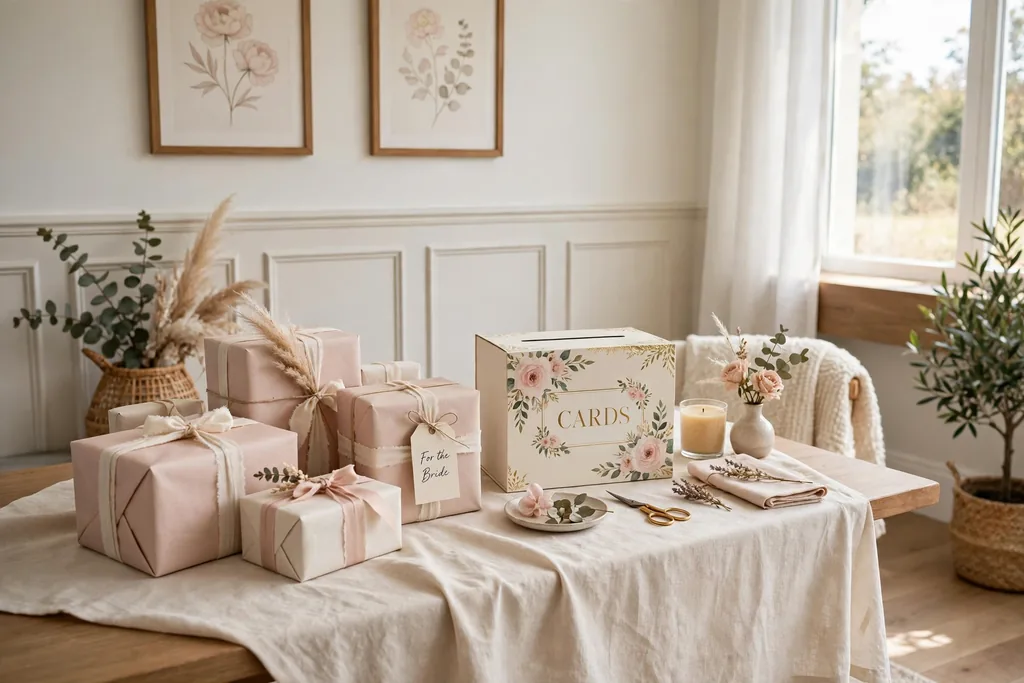
    8. Gift Table with a Card Box

    Gift table with wrapped presents, a decorated card box, and a plain cloth along a living room wall.

    Set a gift table near the entry or along one wall, with a plain cloth, a decorated card box, and a small sign noting where cards go. The card box keeps envelopes safe and tidy, and the separate gift table keeps presents clear of food and seating, so nothing is knocked over during the event. Place larger gifts at the back of the table and smaller ones at the front, so the table looks full without hiding anything.

    Leave space beside the table for guests to set down bags and coats while they place gifts, and keep the table clear of the main walkway. If gifts will be opened during the event, leave an empty chair and a small bin or bag beside the table for wrapping paper, so cleanup stays simple. Check the card box slit before guests arrive, since a narrow slit can tear envelopes.

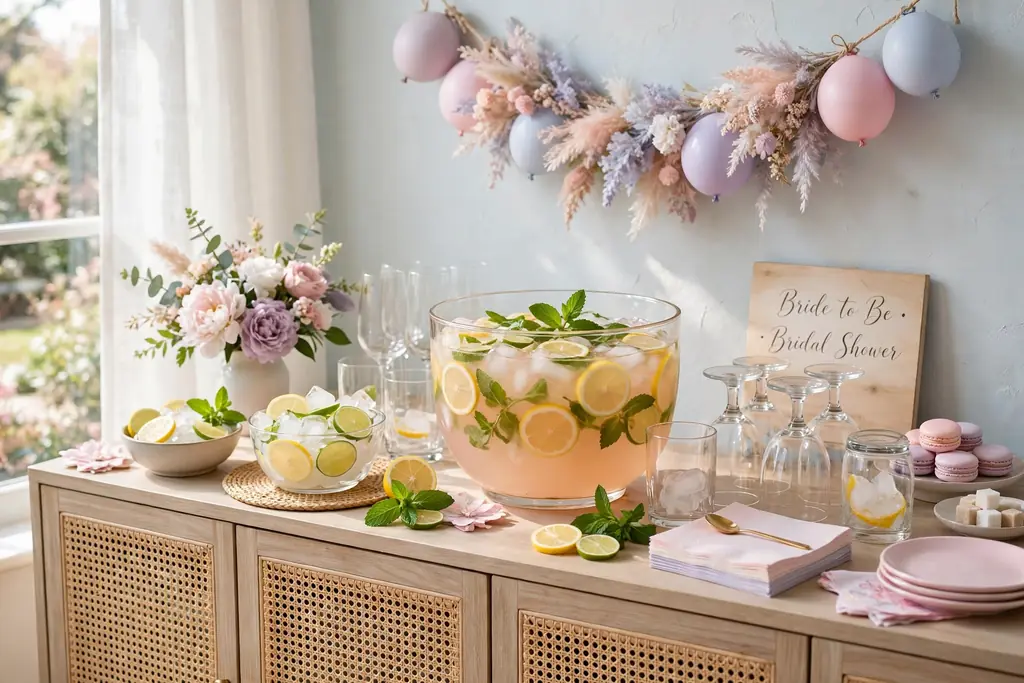
    9. Drink Station with a Signature Punch

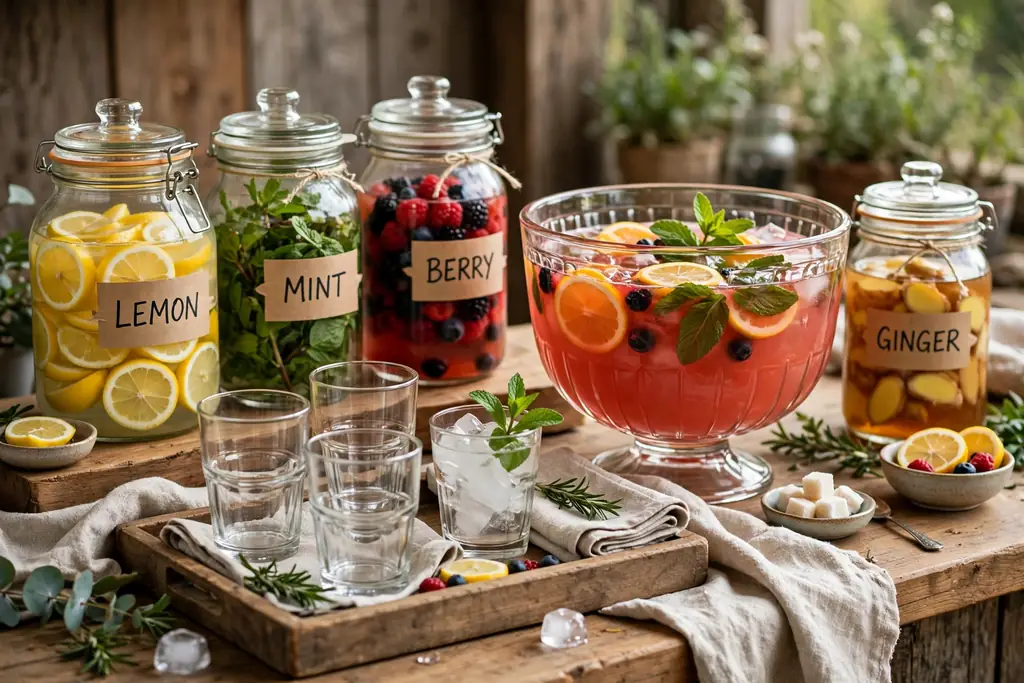
    Drink station sideboard with a punch bowl, glasses, ice, citrus slices, and mint.

    Set a drink station on a sideboard or a small table with a large punch bowl or jug, glasses, ice, and garnish such as citrus slices and mint, so guests can help themselves without crowding the kitchen. Add a small framed card naming the drink, and offer sparkling water and a nonalcoholic option beside it, so every guest has a choice. Keep the station near the main seating but clear of the food path, so refills do not block serving.

    Put heavier items, such as the punch bowl, at the back of the table, and keep a cloth nearby for drips. Refill ice and glasses before guests sit down, and label any drink that contains common allergens in plain words on the card. If children are present, use sturdy glasses on the station and keep the station at the adult end of the table.

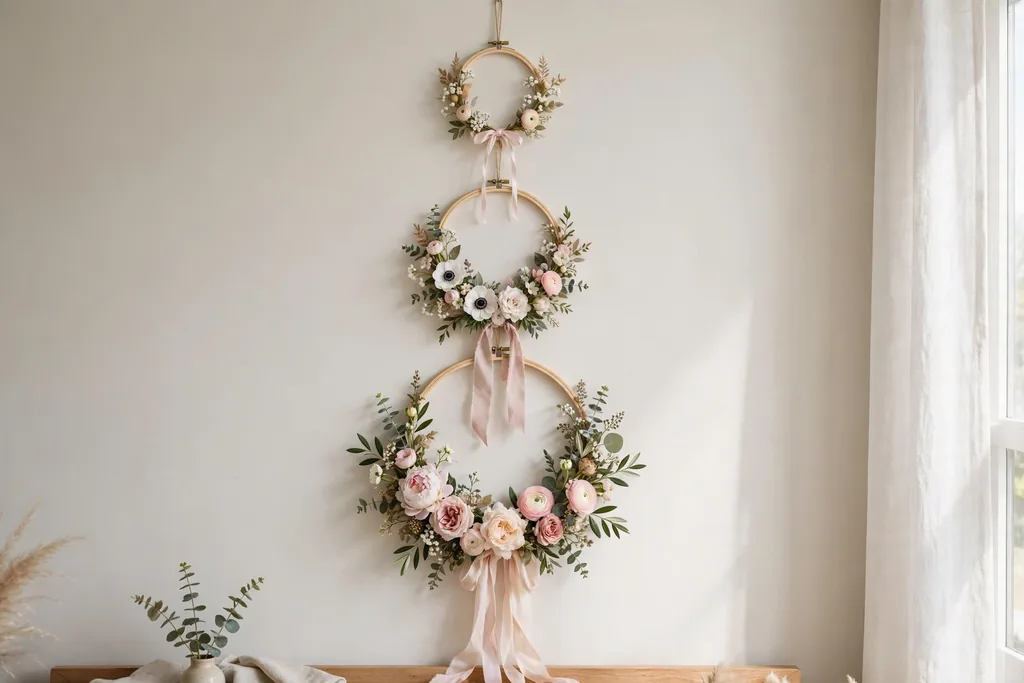
    10. Hanging Floral Hoops on the Wall

    Three floral hoops of varied sizes with flower stems and ribbon hanging on a living room wall.

    Hang two or three embroidery hoops or metal rings on a blank wall, each dressed with a few faux or fresh flower stems and a short length of ribbon, for wall decor that adds shape without taking floor space. Vary the hoop sizes, with one larger hoop in the middle and smaller ones at the sides, and hang them at eye level, so guests notice them as they enter the room. This idea suits a wall that is too small for a full backdrop.

    Use removable hooks rated for the hoop weight, and check that hoops hang level before guests arrive. Keep fresh stems in small water tubes if the hoops will hang for hours, or use faux stems for a longer event, since fresh blooms can wilt in a warm room. If the wall is already busy with art, hang the hoops on a plainer wall instead, so they stand out.

    11. Greenery Garland Runner on the Main Table

    Greenery garland runner with small blooms and candles in holders down a long dining table.

    Lay a greenery garland down the center of the main table, letting it dip slightly at the ends, then tuck in a few small blooms and one candle in a holder at each end to anchor it. The garland carries color along the whole table, which suits a long dining table for a gathering, and it leaves room for plates and glasses on both sides. Use faux greenery if the table will be set hours ahead, since fresh stems can wilt and shed.

    Secure the garland so it does not slide when plates are set down, and trim it to fit the table, leaving room at each end for serving dishes. Keep fresh or faux garlands clear of real flames, and use battery candles along the garland. Shake a fresh garland outside before bringing it in, and dust a faux garland before laying it out, so leaves do not drop onto plates.

    12. Place Cards with a Small Favor

    Table place setting with a handwritten place card and a small favor beside a white plate.

    Set one place card at each seat, with the guest name written in clear, large lettering, and a small favor beside it, such as a mini candle, a small soap, or a packet of seeds. The card marks each seat, so guests settle quickly, and the favor doubles as a thank you guests can take home. Use cards in the shower palette, and keep the favor small enough to sit beside a plate without crowding the glass.

    Write names before the event and check spelling against the guest list, since a misspelled card is noticed at once. If seating is open rather than assigned, use the cards as welcome notes instead, with one short line for each guest, and skip the seat plan. Keep favors clear of food and hot dishes, and set aside a few spare cards and favors for last minute guests.

    13. Cake Stand Display with Fresh Blooms

    Cake on a raised stand with fresh blooms around the base on a dessert table.

    Place the cake on a raised stand at the center of the dessert table, with a few fresh blooms or green stems tucked around the base, so the cake becomes the focal point of the room. A stand adds height without blocking views, and the blooms tie the cake to the rest of the table decor. Choose a stand wide enough for the cake plate, with a stable base, and set it where guests can see it from the seating area.

    Keep the cake clear of direct sun and heat, since frosting softens fast in a warm room, and keep blooms clear of the cake surface itself, using stems around the base only. If the cake will be cut during the event, leave a knife, a server, and small plates beside the stand, so serving does not need a hunt through the kitchen. Cover the cake until serving time if the room is dusty or busy.

    14. Paper Pom-Poms and Lanterns Overhead

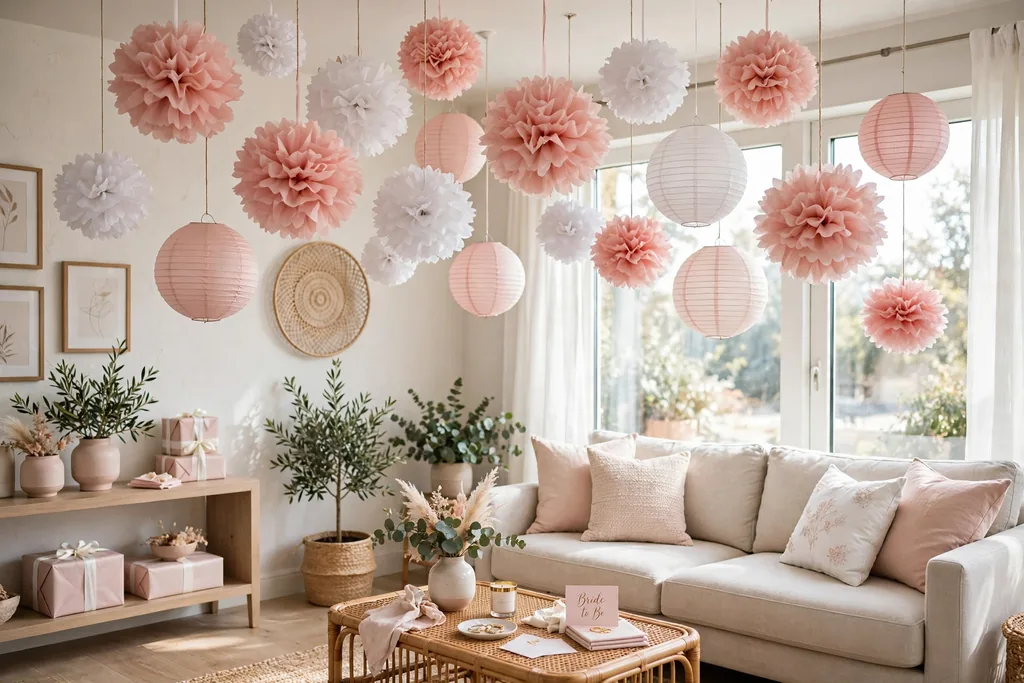
    Paper pom-poms and paper lanterns in blush and white hanging from a living room ceiling.

    Hang paper pom-poms and paper lanterns from the ceiling in the shower palette, at varied heights, so the room gains color overhead without taking table or floor space. This idea suits a living room with a plain ceiling, and it works well above a food table or a lounge corner, where guests look up as they gather. Use lightweight paper pieces, and hang them from removable hooks or tape rated for ceiling use.

    Keep paper pieces clear of light bulbs, candles, and ceiling fans, and hang them high enough that tall guests do not brush them. If the ceiling is low, use fewer pieces and hang them near the walls rather than over the center of the room, so the space still feels open. Take the pieces down after the event and store them flat, since crushed paper lanterns are hard to reuse.

    15. Advice and Wishes Card Station

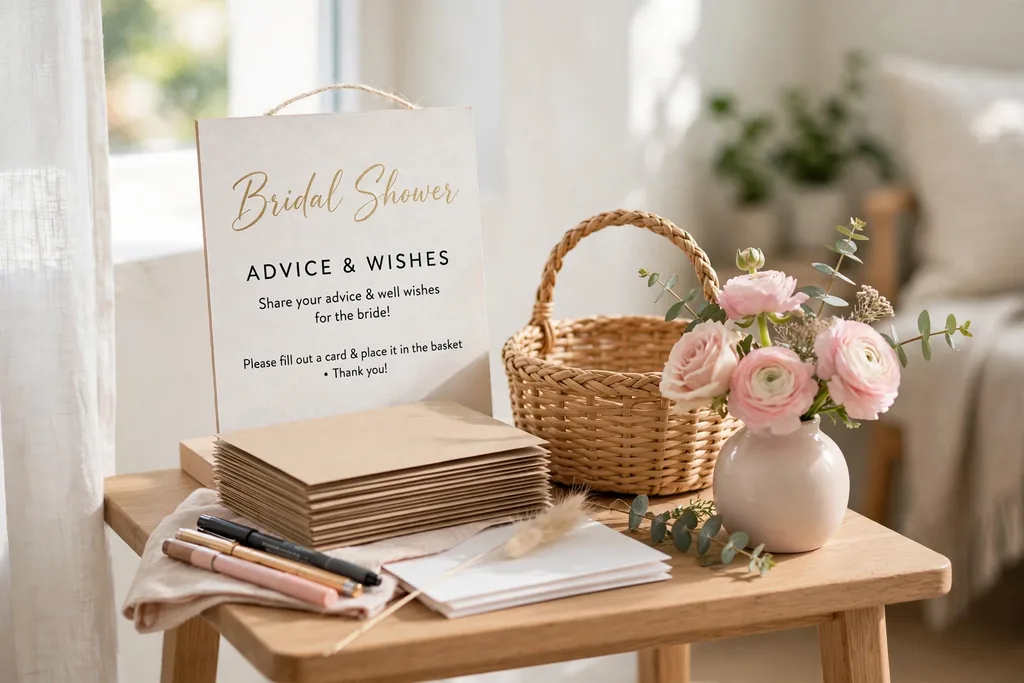
    Advice and wishes card station with blank cards, pens, a basket, and a small vase of flowers.

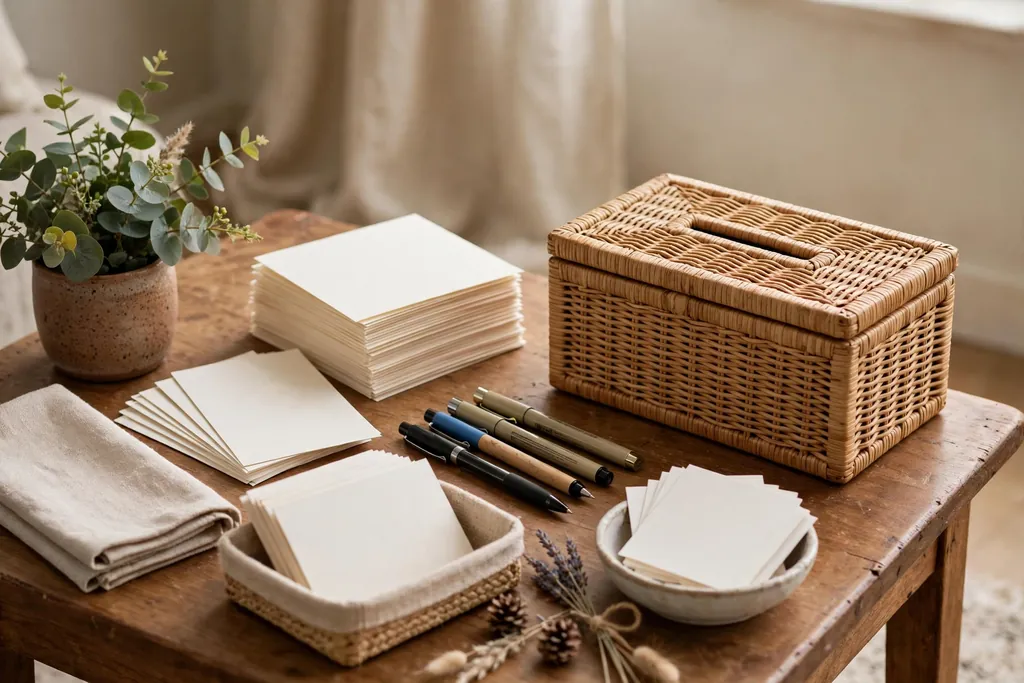
    Set a small station with blank cards, pens, and a box or basket, inviting guests to write advice or wishes for the guest of honor. Add a short sign explaining the station, a few sample prompts on a card, such as a favorite memory or one wish for the couple, and a small vase of flowers to mark the spot. The cards give guests a quiet activity between courses, and the guest of honor keeps them after the event.

    Place the station on a side table near the seating area, not in the main walkway, and check pens before guests arrive, since dry pens stall the station. Keep the cards small, so guests write a few lines rather than a long letter, and set aside a ribbon or a folder to bundle the finished cards. If children are present, add crayons and larger cards at a lower table, so they can join in.

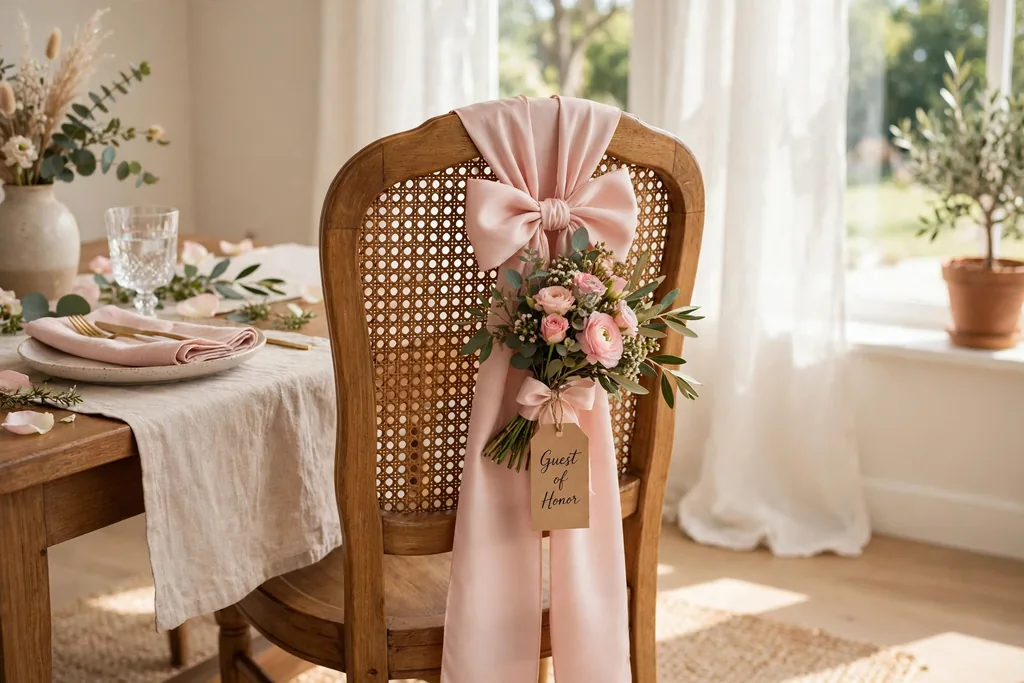
    16. Decorated Chair for the Guest of Honor

    Dining chair with a blush sash bow and a small flower bunch tied to the chair back.

    Mark the guest of honor chair with a simple sash, a small flower bunch tied to the chair back, or a short banner across the top rail, so her seat stands out without a large throne style setup. This small detail helps photos, since the guest of honor is easy to spot, and it gives her a clear seat at the main table or in the lounge corner. Use ribbon or fabric in the shower palette, tied in a simple bow that will not slip.

    Tie the sash the same way on both sides, and keep ribbon clear of chair legs and walkways, so no one trips. Remove fresh flowers before the chair is used for a meal if petals could drop onto food, or use faux stems for the chair detail. If the chair will move during gift opening, use a sash that stays tied through the move, rather than a loose banner that needs refitting.

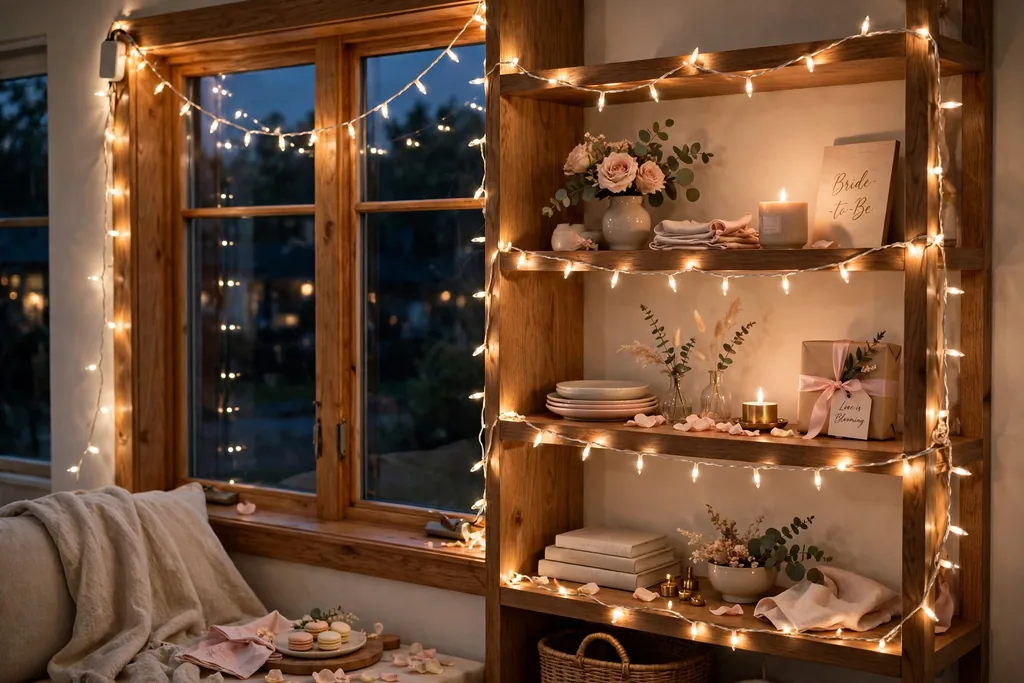
    17. String Lights Around Windows and Shelves

    Battery string lights draped along a window frame and open shelves in a living room in the evening.

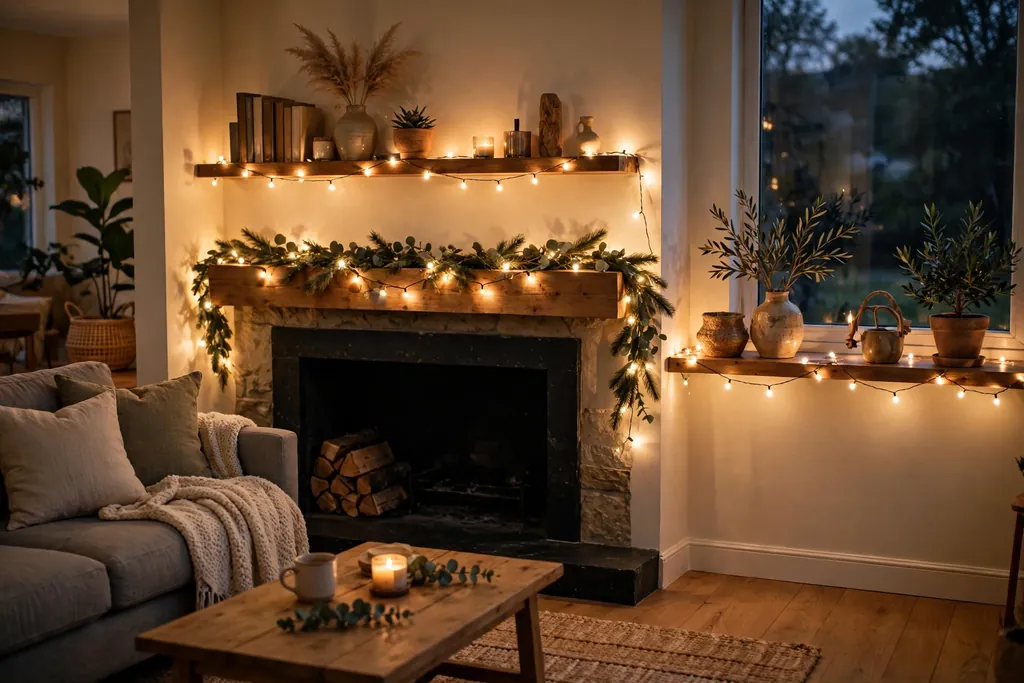
    Drape battery string lights along a window frame, a mantel, or open shelves, so the room gains soft light in the evening without new lamps. String lights suit a living room shower, since they add warmth to corners that overhead lights leave flat, and battery lights need no outlet near the display. Choose warm white lights for a calm glow, and keep the wire neat along edges, so it reads as decor rather than clutter.

    Use battery lights near fabric, paper, and balloons, and keep plug in lights clear of curtains and water. Check batteries before the event, and set a timer or switch the lights on just before guests arrive, so they last through the evening. If the room has strong daylight, string lights matter less, so save them for an evening shower or a dim corner.

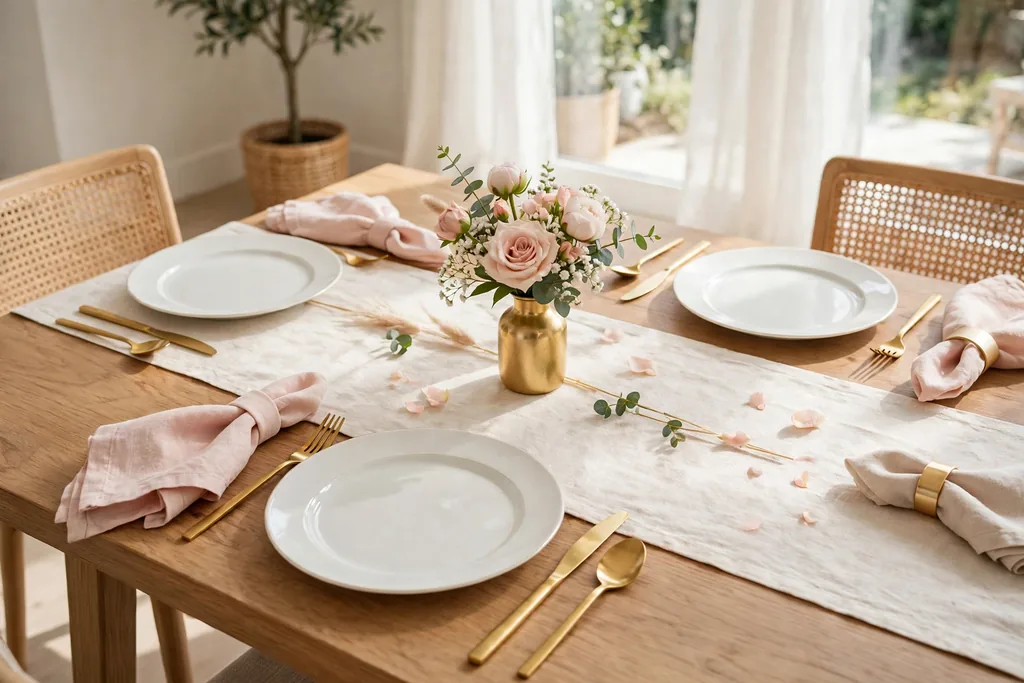
    18. Blush and Gold Table Palette

    Dining table with blush napkins, gold cutlery, white plates, and a cream runner.

    Set the main table with blush napkins, gold toned cutlery, white plates, and a cream runner, so the table gains a bridal note from tableware alone, without a large centerpiece. Add one gold accent at the center, such as a small gold vase or gold candle holders, and keep the rest of the table plain, so the blush and gold stay the single accent. This palette suits both a brunch and an afternoon shower.

    Repeat the blush at least twice, such as napkins plus flowers, and repeat the gold at least twice, such as cutlery plus candle holders, so the table looks planned. Polish gold toned cutlery before the event, since marks show more on metal than on plain steel. For a larger group, use the same napkin fold at every place, so the table looks matched from the end of the room.

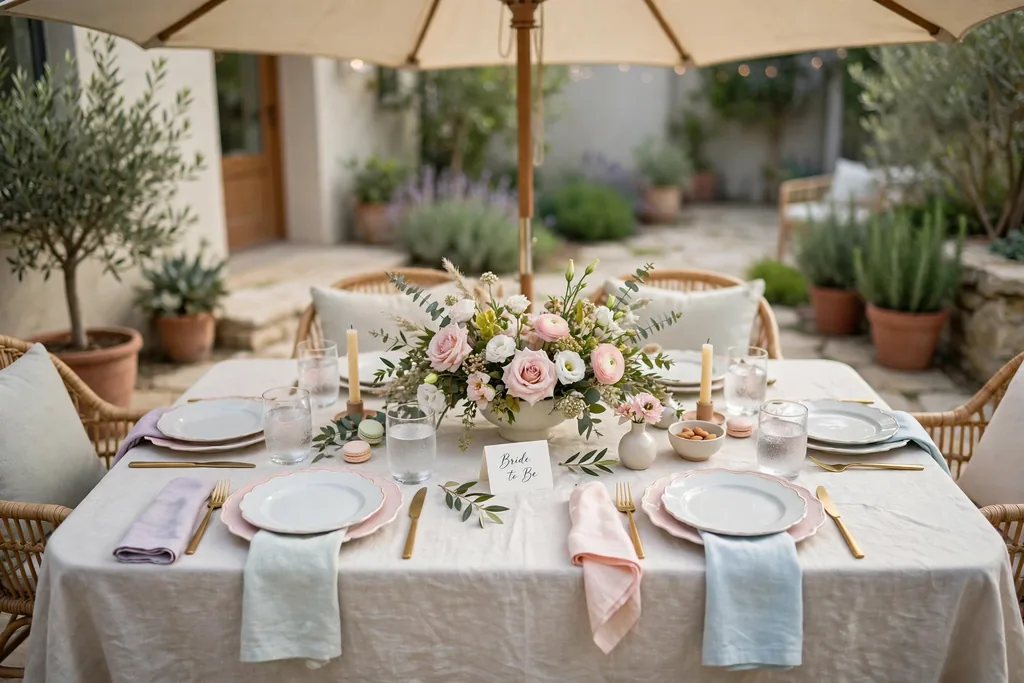
    19. Patio or Garden Setup for Mild Weather

    Patio table set for a bridal shower with a light cloth, low flowers, and a shade umbrella.

    Move the main seating outside for mild weather, with a patio table, a light cloth, and a low flower centerpiece, so the shower gains fresh air and garden light. Add a shade umbrella or a canopy if the sun is strong, and weight the cloth with clips, so a breeze does not lift it onto plates. Keep one indoor room set as a backup, so a change in weather does not stall the event.

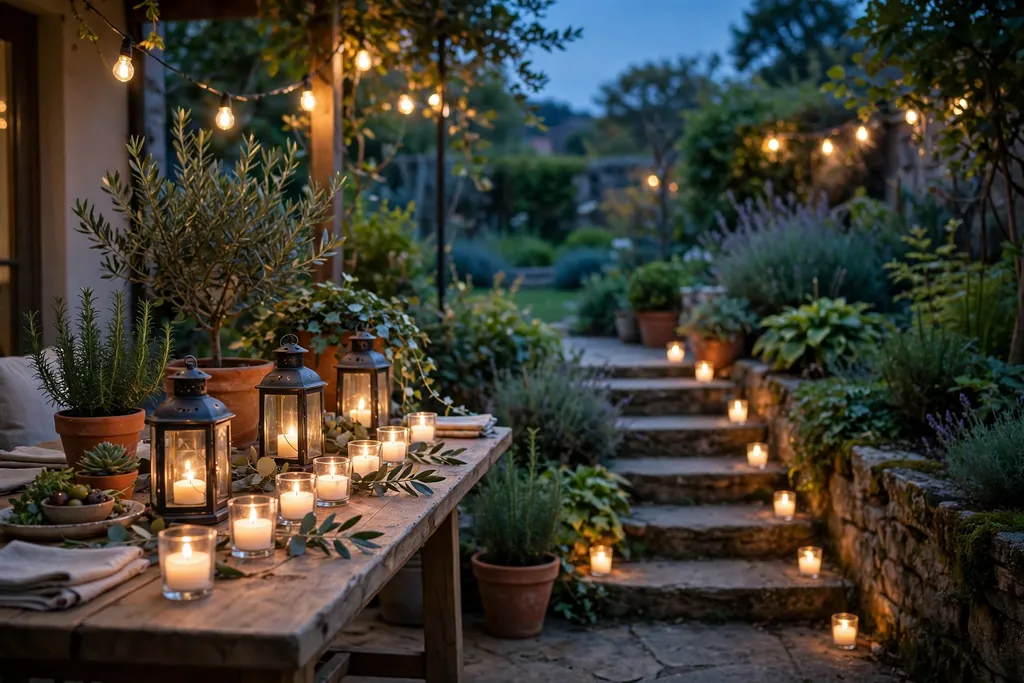
    Choose sturdy glasses and heavier vases outdoors, since outdoor tables get knocked more often, and keep paper decor clear of wind and damp. Bring cushions and paper pieces inside if rain starts, and set the gift and card tables under cover from the start, so presents and cards stay dry. For an evening patio shower, add string lights and battery lanterns for steady light after sunset.

    20. Game Table Corner

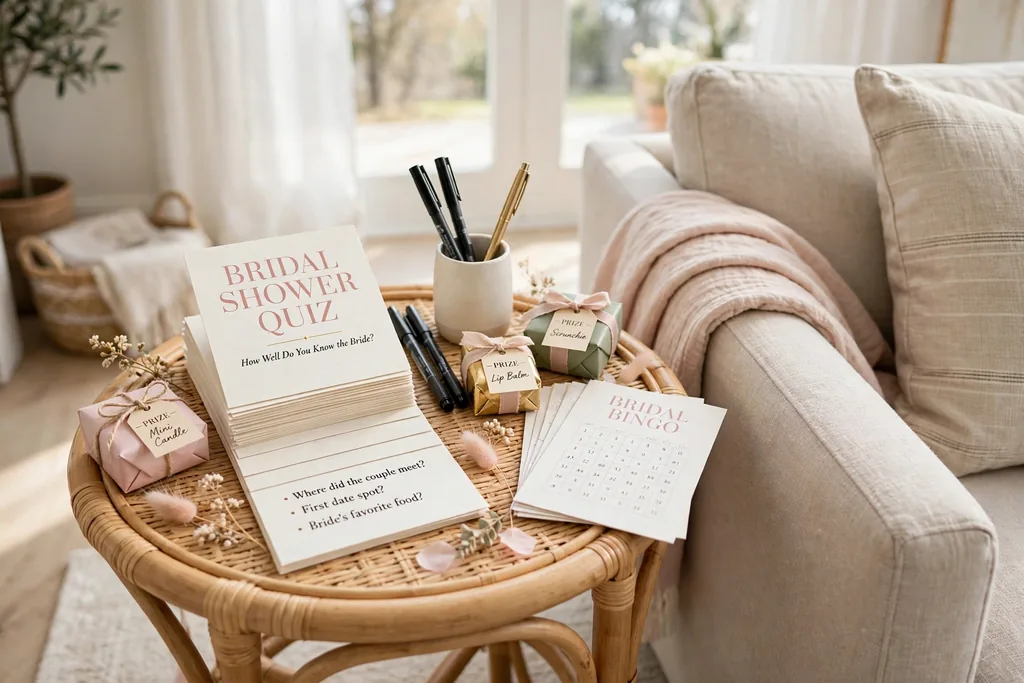
    Small side table with bridal shower game cards, pens, and small prizes near seating.

    Set a small side table with two or three shower games, such as a quiz, a bingo card set, or a ring toss, with pens and a small prize for each game, so guests have an activity between courses. Keep the table near the seating area but clear of food, and add a small sign naming each game in plain words. A game corner suits a longer shower, since it gives guests something to do while gifts are opened or food is served.

    Keep game pieces large enough to handle easily, and set aside spare pens and cards, since pieces go missing at gatherings. If the group is large, run games in short rounds rather than one long game, so no guest waits long for a turn. For guests who prefer to chat, keep the game table optional, so no one feels pressed to join.

    21. Favor Table with Take-Home Bags

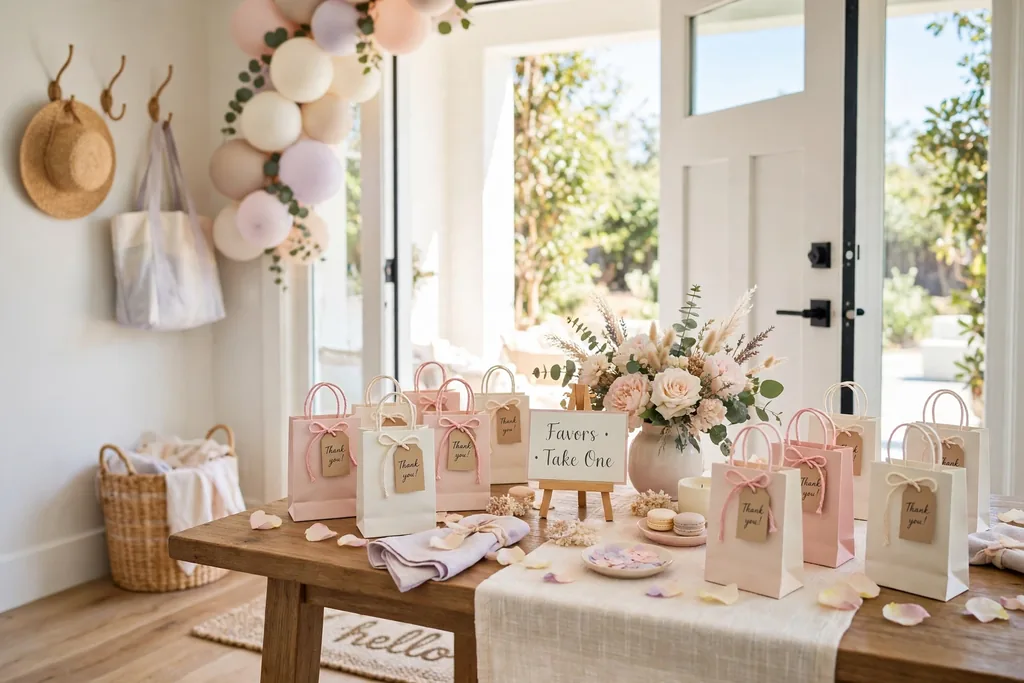
    Favor table near an exit with small gift bags in blush and cream and a short sign.

    Set a favor table near the exit with small bags or boxes in the shower palette, each holding a small gift such as a mini candle, a packet of tea, or a small plant, so guests leave with a thank you. Add a short sign noting that favors are for each guest, and keep the table clear of the gift table, so guests do not mix up gifts coming in with favors going out. Place the table where guests pass it on their way out, not in the center of the room.

    Fill bags before the event and count them against the guest list, with a few spares for extra guests. Keep favors light and small, so guests can carry them easily, and keep any plant favors in small pots with saucers, so soil does not mark bags or hands. If favors include food, label common allergens in plain words on a card at the table.

    22. DIY Flower Bar for Guests

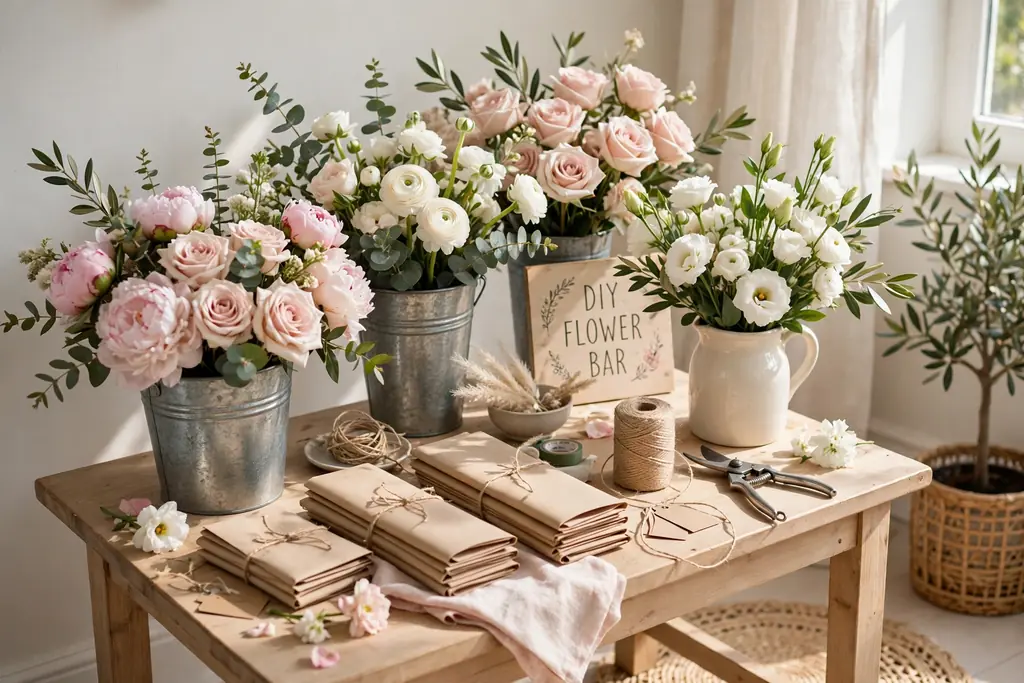
    DIY flower bar with buckets of fresh stems, scissors, twine, and paper wraps on a side table.

    Set a flower bar on a side table with buckets of fresh stems, scissors, twine, and small paper wraps, so each guest can build a small bouquet to take home. Sort stems by type in separate buckets, with a short sign showing three simple bouquet steps, and keep a bin nearby for trimmings. A flower bar doubles as decor while guests use it, and it gives each guest a personal favor shaped by their own taste.

    Keep scissors safe by using blunt tipped craft scissors and keeping sharp tools with the host, and set the bar on a surface that wipes clean, since water and stems drip. Trim stems for guests who ask, and keep buckets topped with water through the event, so stems stay fresh. If the guest list is large, set out two bars or refill buckets in rounds, so no guest waits long.

    23. Memory Table with Photos and Keepsakes

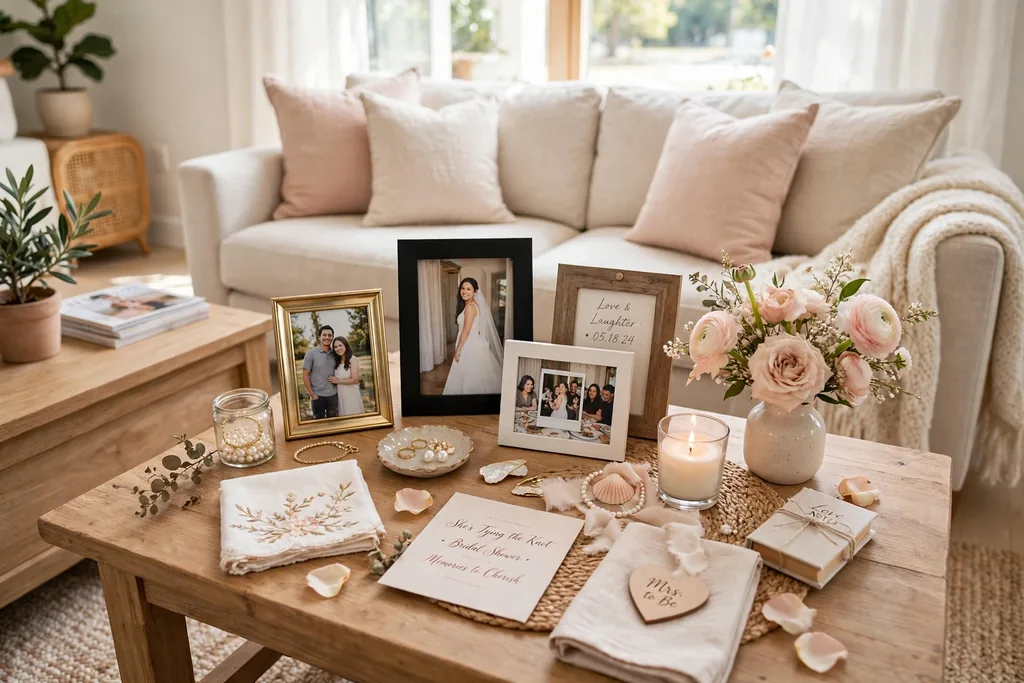
    Memory table with framed photos, keepsakes, and a small vase of flowers near seating.

    Set a memory table with framed photos of the guest of honor, a few keepsakes, and a small vase of flowers, so guests can look back and chat about shared moments. Use photos from different years, with short captions noting the occasion in plain words, and keep the table near the seating area, so guests can browse it between courses. A memory table suits a home shower, since it uses photos the host already owns and needs no new decor.

    Keep frames stable and clear of food and drinks, and use copies of precious photos rather than originals, so nothing irreplaceable is at risk. If the table is small, use three or four frames rather than a crowded group, so each photo shows. Add a small notebook beside the table for guests to note a memory, which the guest of honor can keep with the advice cards.

    Conclusion

    Bridal shower decorating ideas for a home event do not need a large budget or a new set of dishes to work. A clear entry, one low centerpiece, a photo spot, a drink station, and a small favor at each place will carry most showers, and the rest of the list can be added one idea at a time as space and time allow. Start with the palette, set the main table first, then add the entry, the walls, and the favor table in that order.

    For more table ideas in another seasonal palette, see spring tablescapes and fall table decor, and for a romantic table palette to compare, see Valentine table decorations. Keep what you use often, store balloons, fabric, and paper pieces together in one box, and let the room return to a simple, usable base when the shower ends. Save this list on Pinterest for your next celebration, and work through it one idea at a time.

    FAQs

    How do I decorate for a bridal shower at home without a large budget?

    Use what you already own first: a plain cloth, everyday plates, and cloth napkins, then add one low cost layer, such as a balloon garland, paper pom-poms, or a flower bar. Textiles and paper carry most of the color for little cost, and a single palette repeated at the entry, the table, and the photo spot makes the whole room look planned without new dishes or furniture.

    What colors work best for bridal shower decorating ideas?

    Blush, cream, and white with one metal accent, such as gold, work well together, because they suit living rooms, dining tables, and photo backdrops in daylight and evening light. Repeat each color at least twice, such as blush napkins with blush flowers, so the room looks planned. Keep one bright accent to a few pieces, so the palette stays calm enough for a home event.

    How do I set up a bridal shower photo spot at home?

    Hang fabric across one blank wall, add a balloon bunch or paper fans at one side, and leave floor space in front for two or three people to stand together. Keep the backdrop clear of candles and food, weight the bottom edge so it does not billow, and set a small basket of props beside it. Good daylight or a simple lamp aimed at the backdrop, not at guests, gives clear photos.

    How many decorations does a home bridal shower need?

    A home bridal shower needs one clear entry detail, one focal table, one photo spot, and small details at each place, rather than decor in every corner. Start with a balloon garland or welcome sign, a low centerpiece, a backdrop, and place cards or favors, then add a drink station and a game corner only if space allows. Fewer, repeated details look more welcoming than many competing pieces.

    How do I keep bridal shower centerpieces from blocking conversation?

    Keep centerpieces low and narrow, below eye level when guests are seated, and leave the middle of the table partly open. A low flower vase, a greenery garland, or a row of short candles all sit low enough to see across. If a taller piece is needed for a large table, use slim stems in a narrow vase, so guests can see around them.

    How do I plan the flow of a home bridal shower?

    Plan five clear spots: entry, seating, food, gifts, and favors, each with its own table or corner, so guests are never crowded into one place. Put the gift table near the entry, food near the seating, and favors near the exit, with walkways clear between them. Check the flow by walking it yourself before guests arrive, and move any piece that blocks a path or a doorway.


  • 25 Baby Shower Decoration Ideas for a Beautiful Home Celebration

    25 Baby Shower Decoration Ideas for a Beautiful Home Celebration

    Baby shower decoration ideas for a home celebration work best when you pick one soft palette, one clear focal point, and simple pieces guests can enjoy without crowding the room. Start with balloons or a backdrop, add a low table centerpiece, and finish with a dessert table, a gift spot, and small personal touches that welcome the guest of honor.

    The 25 ideas below suit a living room, a dining room, or a combined open plan space, and most of them use pieces you can set up the day before. Pick a palette first, such as blush and cream, sage and white, or soft blue and cream, then repeat it in balloons, table linen, and flowers. The same low centerpiece rule that keeps a spring tablescape easy to talk across applies here, and the soft layers in these cozy room decorating ideas show how warm light and texture can make a party room feel calm rather than busy.

    Key Takeaways

    • Pick one palette of two or three soft colors and repeat each color at least twice, in balloons, linen, and flowers.
    • Give the room one focal point, such as a balloon arch or a backdrop, and keep the rest of the decor simple around it.
    • Keep table centerpieces low and narrow, so guests can see each other and serving dishes still fit.
    • Group decor by zone: entry, main table, dessert table, gift table, and one photo or games corner.
    • Use battery candles near balloons, paper, and fabric, and keep real flames clear of all decor.
    • Choose pieces that lift off in one move after the party, such as a backdrop panel, a tray centerpiece, and boxed favors.

    1. Pastel Balloon Arch at the Entry

    Pastel balloon arch in blush, cream, and sage over a home entry doorway.

    A pastel balloon arch at the entry tells guests they have arrived at a celebration before they see the main room. Build the arch over a doorway or along one wall, using balloons in your palette, such as blush, cream, and soft sage, with a few larger balloons mixed among smaller ones for shape. Anchor both ends with weights or ties to furniture that will not move during the party.

    Keep the arch clear of the walking path and away from ceiling fans, light fixtures, and open flames. If the arch sits near a door that guests use often, leave the center open and wide, so no one brushes balloons on the way in. Deflate and sort balloons after the party, and keep any uninflated balloons out of reach of small children.

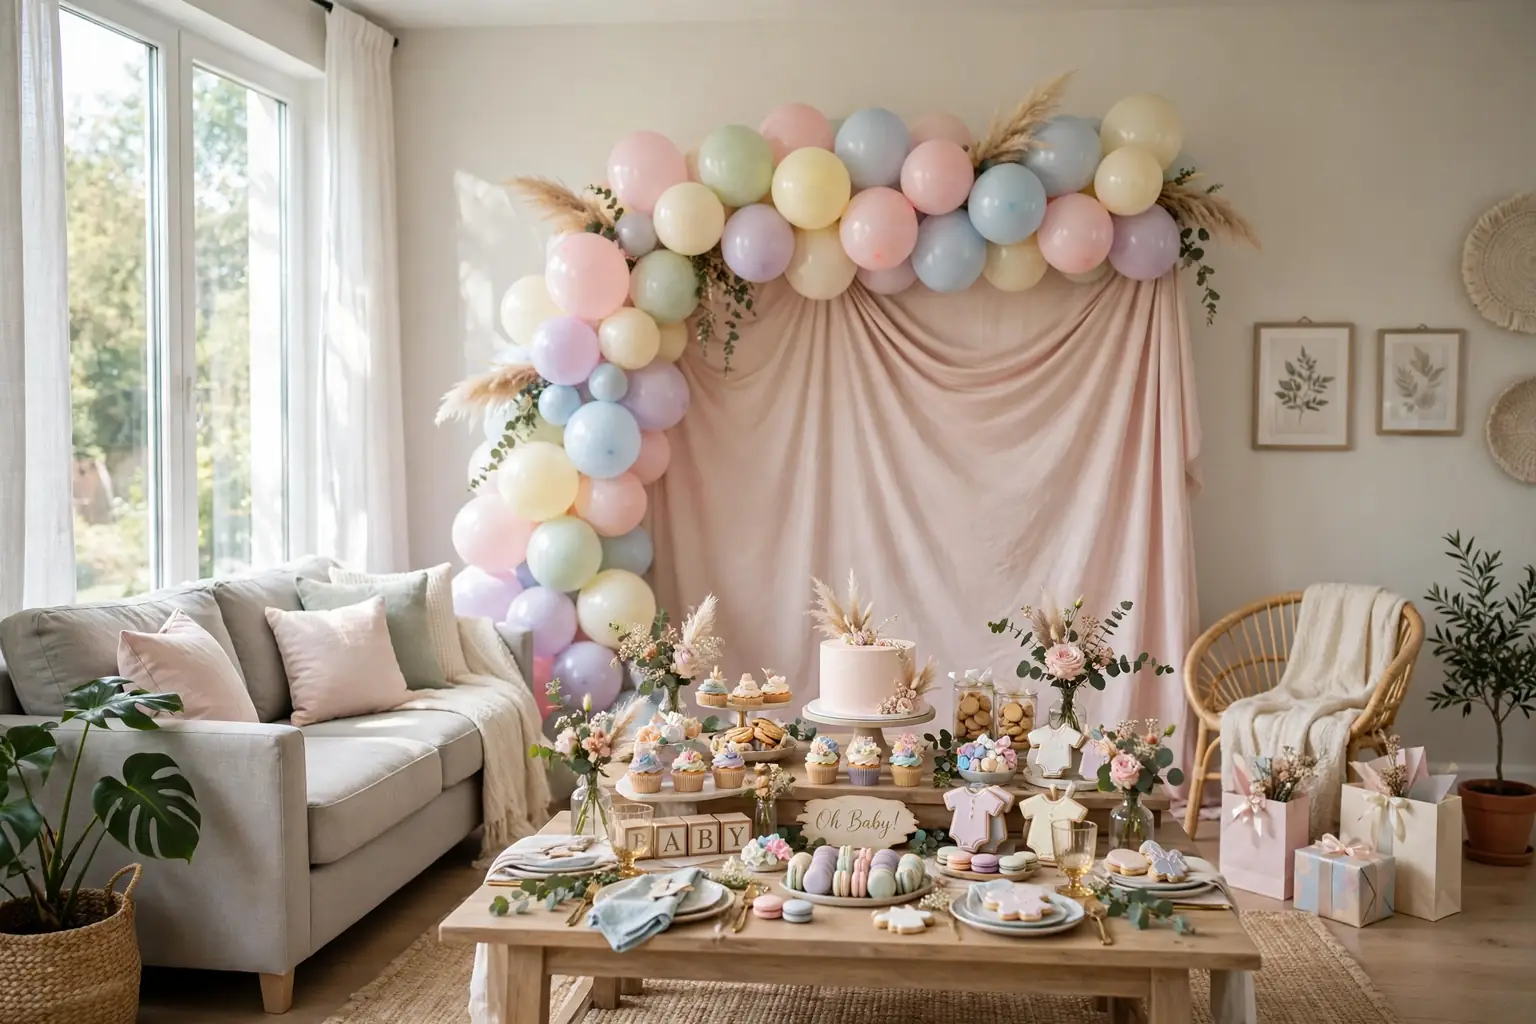
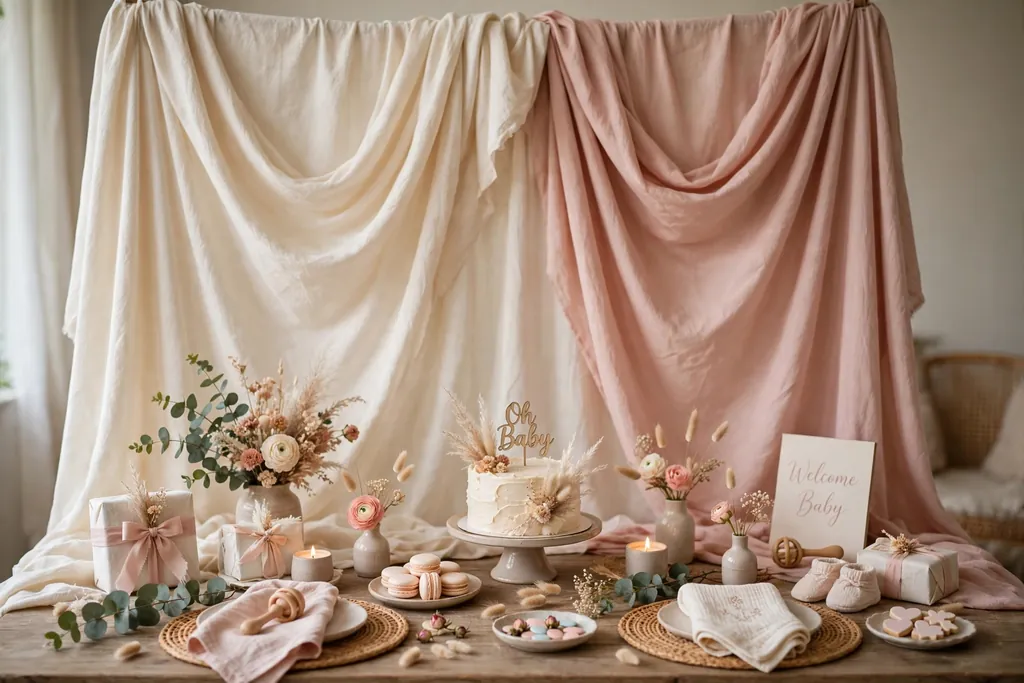
    2. Soft Fabric Backdrop Behind the Main Table

    Soft cream and blush fabric backdrop hanging behind a decorated baby shower table.

    A soft fabric backdrop behind the main table gives photos a clean background and marks the guest of honor seat. Hang lengths of muslin, linen, or tulle from a stand or a curtain rod, in cream or a pale palette color, with gentle folds rather than a flat sheet. Layer two tones, such as cream over blush, for depth without pattern.

    Secure the stand so it cannot tip, and keep the fabric clear of candles and food. Weight the base with sandbags or heavy books hidden behind a plant if the stand feels light. After the party, the same fabric can serve as a tablecloth or a curtain panel at home, so it earns a second use.

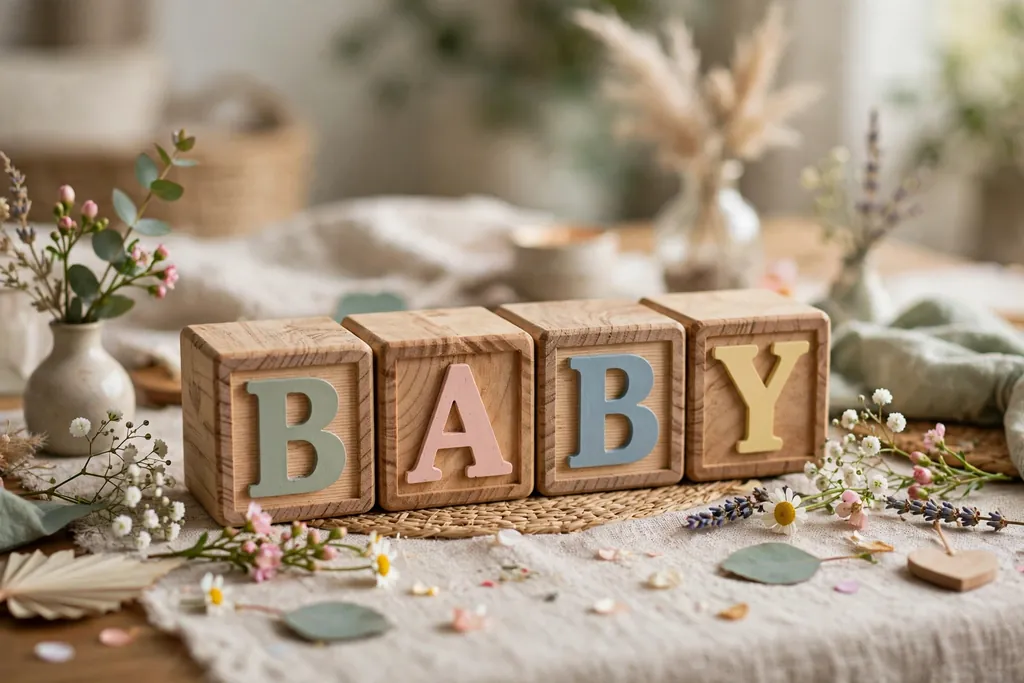
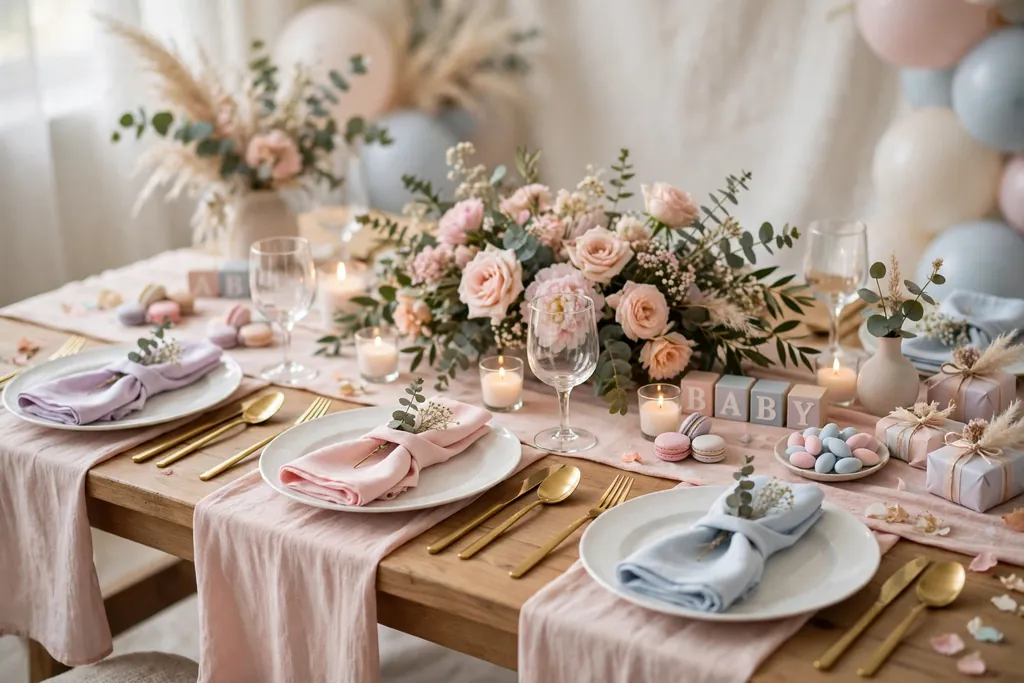
    3. Baby Block Stacks as Table Markers

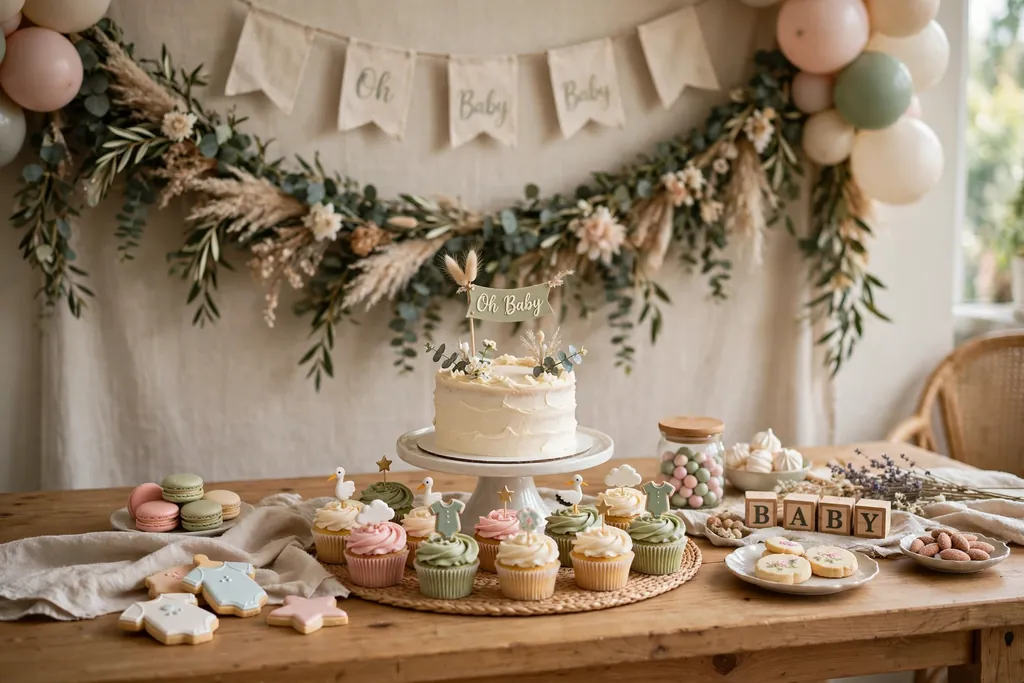
    Wooden baby blocks stacked to spell BABY on a baby shower table with small flowers.

    Wooden or cardboard baby blocks stacked to spell a word, such as BABY, make a playful centerpiece that guests notice at once. Set one stack at the center of each table, or one large stack on the main table, with small flowers or greenery tucked beside the base. Keep the stack low, with three or four blocks high at most, so sightlines stay open.

    Use blocks that sit flat and stable, and keep them clear of drinks, since a spill can mark painted blocks. If small children attend, use large, lightweight blocks that cannot be a choking risk, and set the stack on a tray so it lifts off in one move when food is served.

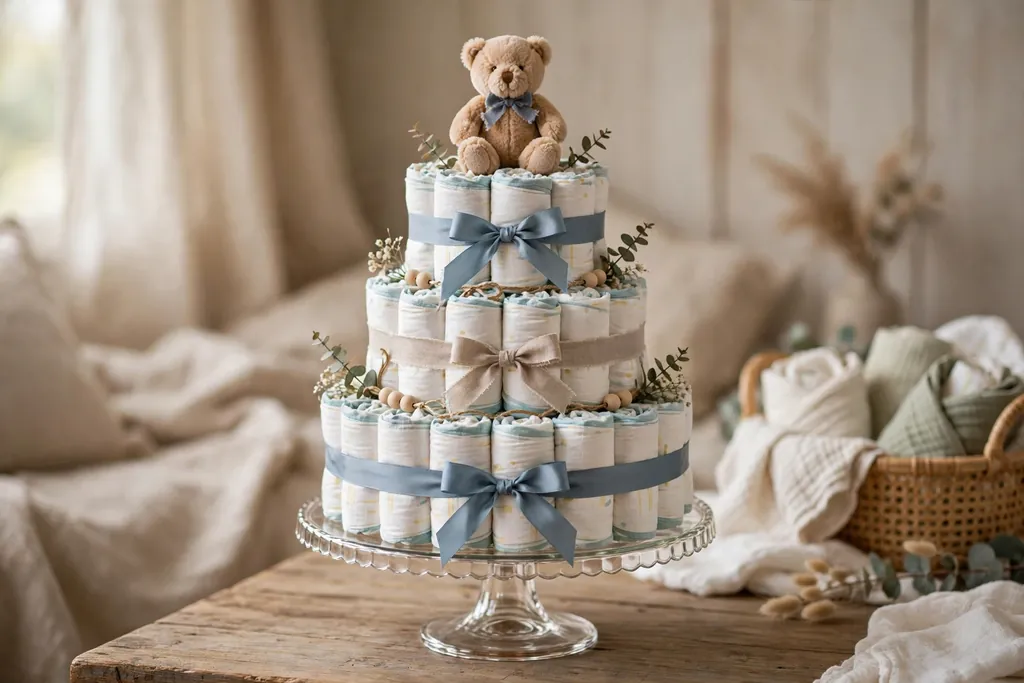
    4. Diaper Cake Display on the Dessert Table

    Tiered diaper cake with ribbon and a small plush topper displayed on a cake stand.

    A diaper cake, made from rolled diapers arranged in tiers and tied with ribbon, works as both decor and a useful gift. Set it on a cake stand at one end of the dessert table, with a small topper, such as a plush toy or a paper flower, and a ribbon in your palette around each tier. Keep it clear of food plates, so guests do not mistake it for cake.

    Build the cake on a firm base board, and wrap the finished tiers lightly if the party is outdoors or in a warm room. After the party, the guest of honor can take the diapers home as they are, so avoid gluing anything to the diapers themselves. Use ribbon and pins only, and check that no small pins stay loose in the diapers.

    5. Low Floral Bowls for the Main Table

    Low wide bowl of short stemmed pastel flowers as a baby shower table centerpiece.

    Low floral bowls keep the table pretty without blocking conversation. Fill wide, shallow bowls with short stemmed flowers in your palette, such as roses, ranunculus, or carnations, with a few green leaves between blooms, and set one bowl at the center of each table. The low, round shape suits both round and long tables.

    Change the water the morning of the party, and trim stems at an angle so blooms stay fresh through the day. Keep pollen heavy blooms clear of food plates, and set each bowl on a small mat if the table marks easily. If fresh flowers are out of budget, use good quality faux blooms in the same low bowls.

    6. Pastel Table Settings with a Simple Runner

    Pastel baby shower table setting with a blush runner, white plates, and folded napkins.

    Pastel table settings start with a plain runner in blush, sage, or cream, then white plates, clear glasses, and folded napkins in one palette color. The runner carries most of the color, so plates and glasses can stay plain and easy to use. Add one small detail at each place, such as a sprig of greenery on the napkin, to tie places together.

    Iron or steam the runner before the party, since creases show more on pale linen than on patterned cloth. Keep the runner narrow enough that plates sit flat on the table, not on the fabric edge. The same low, calm approach used for valentine table decorations works here, with pastel shades in place of red and pink.

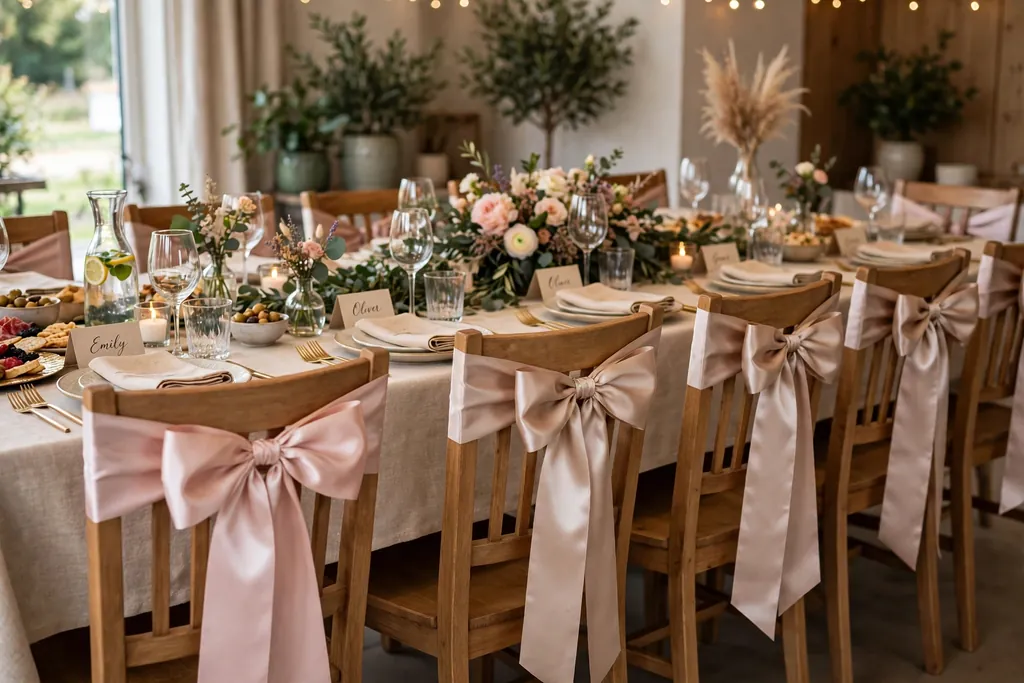
    7. Ribbon Bows on Dining Chairs

    Dining chairs with wide satin ribbon bows tied on the back rails at a party table.

    Ribbon bows tied to dining chairs add color behind each guest without taking up table space. Tie a wide satin or grosgrain ribbon around the top rail of each chair, finishing in a simple bow, in one palette color or in two alternating colors. The bows suit a table that is already full, since they use no surface at all.

    Cut ribbons to the same length, and tie each bow the same way, so chairs look matched from across the room. Use a simple knot under the bow to keep it from slipping, and keep ribbon ends clear of chair legs and walkways. Remove ribbons before washing chair covers, and store them flat so they do not crease.

    8. Dessert Table with a Tiered Cake Stand

    Dessert table with a tiered cake stand, cupcakes, and a garland backdrop.

    A dessert table with a tiered cake stand gives the party a clear sweet focal point. Set the main cake or cupcakes on a stand at the center of a side table, with smaller plates of cookies or fruit around it, and a backdrop or garland behind the table to frame it. Keep heavier items on the lowest tier, and lighter treats above.

    Leave room at the front of the table for plates and serving tools, and keep the table clear of the main walking path, so guests can queue without blocking seats. Cover treats until serving time, and wipe the stand after use. If the table holds food only, set flower decor beside it rather than among the food tiers.

    9. Onesie Clothesline Garland

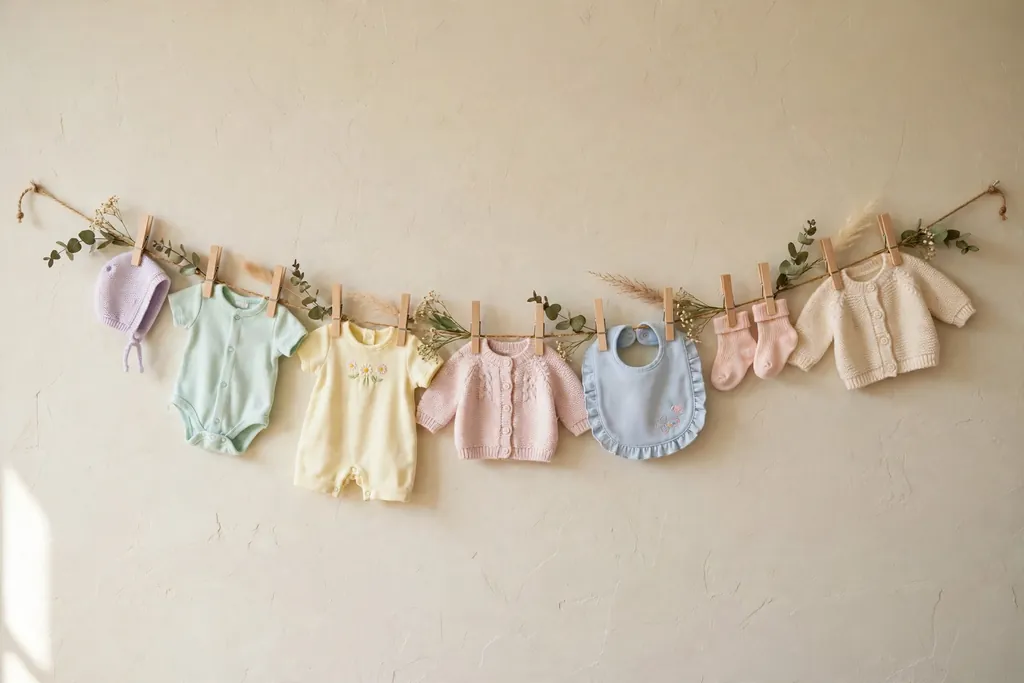
    Small pastel baby clothes clipped on a twine clothesline garland across a wall.

    A onesie clothesline garland strings small baby clothes on twine across a wall, a mantel, or a window, clipped with small pegs. Use plain or pastel onesies, bibs, and socks in your palette, spaced evenly along the line, with one or two small paper stars or hearts between items. The line reads as decor during the party and as a useful gift after it.

    Hang the line high enough that guests do not brush it with their heads, and secure both ends so it does not sag onto food or candles. Wash new clothes before hanging them, and keep the line clear of heat sources. After the party, fold the clothes into a gift box for the guest of honor.

    10. Photo Memory Table

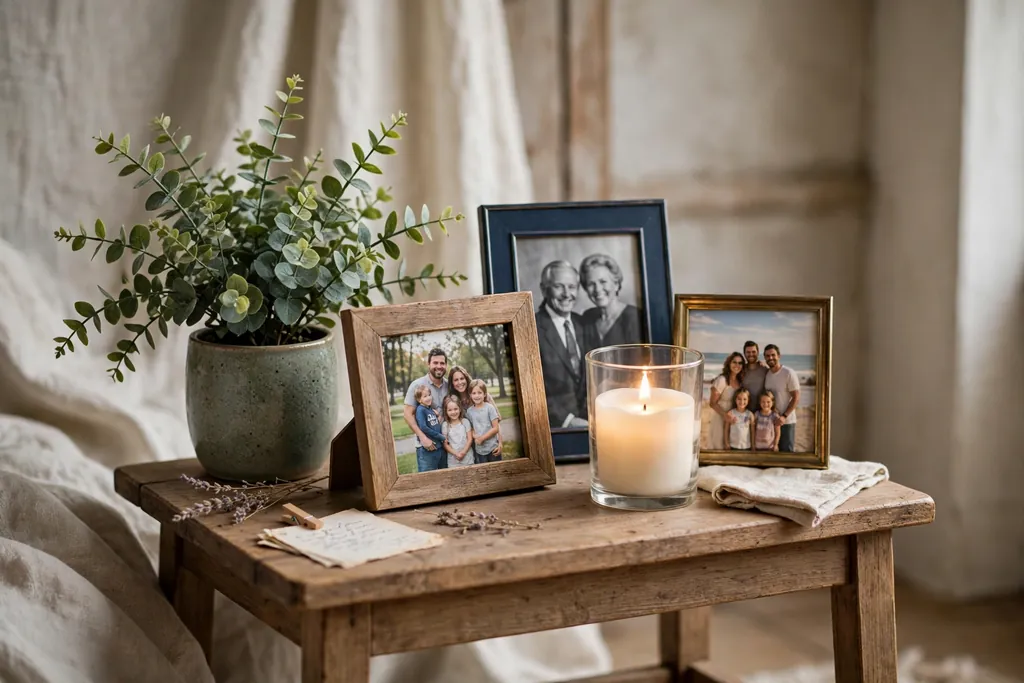
    Small memory table with framed family photos, a plant, and a battery candle.

    A photo memory table gives guests something to look at while they settle in. Set a small table near the entry with framed photos of the parents, a few ultrasound prints if the family wishes to share them, and one or two keepsakes, such as a first pair of shoes. Keep frames at varied heights, with a small plant or candle beside them, so the table looks styled rather than crowded.

    Label nothing that the family would rather keep private, and ask before printing any photo that includes other people. Keep the table clear of drinks, since a spill can damage prints, and set it where guests can step aside to look without blocking the entry. Battery candles suit this table, since paper prints sit close by.

    11. Gift Table with a Basket and a Card Box

    Gift table with a large basket of wrapped gifts and a decorated card box.

    A gift table with a basket and a card box keeps presents tidy and gives guests a clear place to leave them. Set a sturdy table near the entry, with a large basket or crate for wrapped gifts, a decorated box with a slot for cards, and a small sign that names the table. Keep the table against a wall, so gifts do not block a walkway.

    Empty the card box into a safe spot partway through a long party, so it does not overflow. Keep the gift table away from the dessert table, so food and gifts do not mix, and leave a chair beside it for a helper who can watch larger gifts. After the party, the same basket can hold baby supplies at home.

    12. Wishes for Baby Card Station

    Wishes card station with blank cards, pens, and a decorated jar on a side table.

    A wishes card station invites guests to write a short note for the baby, which the family can keep. Set out small blank cards, pens, and a decorated jar or box on a side table, with a short sign that explains the idea in one line. Use cards in your palette, with a simple border or a small star print, so the station matches the room.

    Keep pens that write smoothly and do not bleed through thin card, and test one card before the party. Set the station away from drinks, so cards stay clean, and leave a few spare cards for guests who want to write more than one note. After the party, tie the cards with ribbon and store them with the baby book.

    13. Hanging Clouds and Stars from the Ceiling

    Paper clouds and stars hanging from clear thread above a baby shower table.

    Hanging paper clouds and stars from the ceiling adds a gentle night sky note above the party, without taking up floor or table space. Cut or buy clouds in white and stars in cream and gold, hang them from clear thread at varied heights over the main table or a corner, and keep the group small enough that light still reaches the table. The shapes suit a neutral palette as well as a pastel one.

    Hang shapes clear of ceiling fans, light bulbs, and open flames, and keep the lowest shape above head height. Use light paper, so a falling shape cannot hurt anyone, and secure each thread with a small hook or tape that leaves no mark. Take the shapes down the same day, since paper creases if left hanging in damp air.

    14. Teddy Bear Display in a Reading Corner

    Plush teddy bears arranged in an armchair with a folded baby blanket.

    A teddy bear display in a reading corner gives the room a soft, welcoming focal point for photos. Set one large plush bear in an armchair, with two or three smaller bears beside it, a folded baby blanket over the chair arm, and a small stack of picture books on a side table. Keep the corner clear of walkways, so guests can step in for a photo without blocking seats.

    Use bears that are clean and in good shape, and keep them clear of food and drinks. If the bears are gifts, tag them so they go home with the right family, and keep one bear out of the display if it holds special meaning and should stay clean. After the party, the bears can move to the nursery.

    15. Place Cards and Small Favors at Each Seat

    Place cards with guest names and small wrapped favors set at a party table.

    Place cards and small favors at each seat help guests settle in and give them a keepsake to take home. Set one small card with the guest name at each place, leaning against the glass or laid on the napkin, with a small favor beside it, such as a wrapped cookie, a small candle, or a packet of flower seeds. Keep favors small enough to sit beside a plate without crowding the glass.

    Write names in clear, large lettering, and check the seating list before the party, so no guest finds a missing card. If a guest has a food allergy, choose a non food favor for that place, or label food favors clearly. Guests can take favors home in a small bag set by the door, so nothing is left behind.

    16. Drink Station with Labeled Jars and a Punch Bowl

    Drink station with labeled glass jars, a punch bowl, and glasses on a tray.

    A drink station with labeled jars and a punch bowl keeps guests served without crowding the main table. Set a side table with a large punch bowl or drink dispenser, two or three labeled jars for water, juice, and a sparkling drink, and a tray of glasses beside them. Label each jar in clear handwriting, and note any drink that contains common allergens.

    Keep the station near the main room but clear of the entry, so guests can refill without blocking arrivals. Set glasses on a tray with a lip, so a spill stays contained, and refill jars before they run empty. After the party, wash jars and labels off, and store the dispenser clean and dry.

    17. Decorated Games Corner

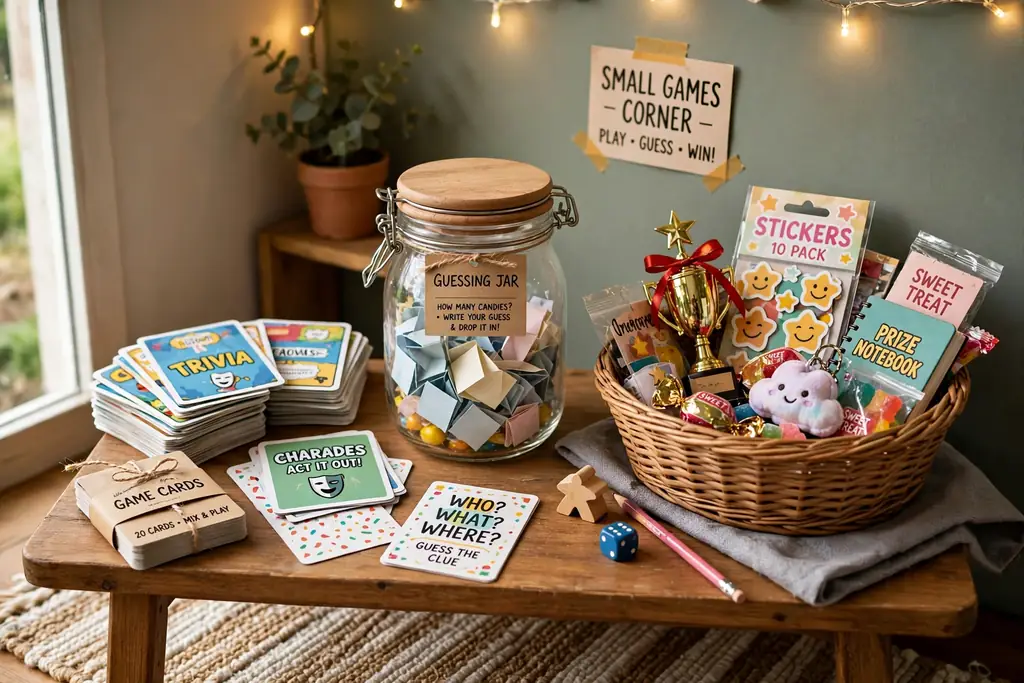
    Small games corner table with game cards, a guessing jar, and a prize basket.

    A decorated games corner gives guests a place to play without moving the main table decor. Set a small table with game cards, a guessing game jar, and a prize basket, dressed with a runner in your palette, a small balloon bunch, and a framed sign that names the game. Keep the table near seating, so guests can join a game without leaving the party.

    Choose games that need no loud equipment and no mess, such as a baby name quiz or a guess the item jar, and keep game pieces large enough to handle with ease. Set a small bin beside the table for used cards, so the corner stays tidy. After the party, pack game cards flat for reuse at a future gathering.

    18. Floral Hoop Wreath on the Wall

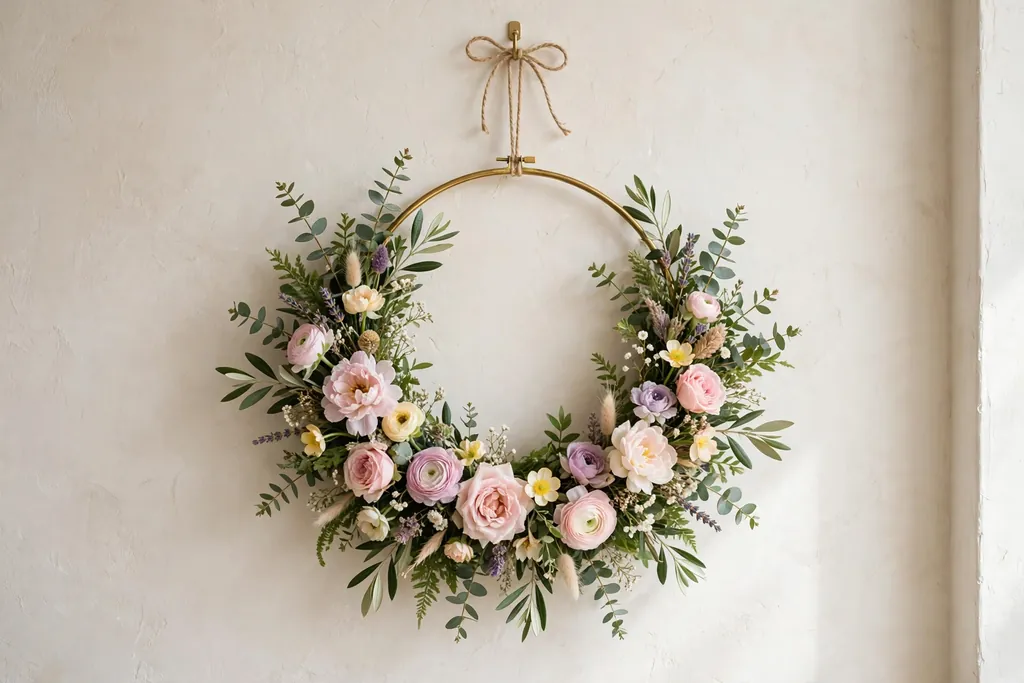
    Floral hoop wreath with greenery and pastel flowers hanging on a wall.

    A floral hoop wreath on the wall makes a simple, pretty focal point that suits a small room. Wrap a metal or wood hoop with greenery, add a cluster of flowers in your palette on one side, and hang it at eye level over a console or beside the backdrop. The open center keeps the wall feeling light, unlike a full wreath.

    Hang the hoop from a secure hook rated for its weight, and keep it clear of candles and heat. If fresh flowers wilt fast in a warm room, use faux blooms on the hoop and save fresh flowers for the table. After the party, the hoop can hang in the nursery or over a door at home.

    19. Pastel Pom-Pom Garland Across a Mantel

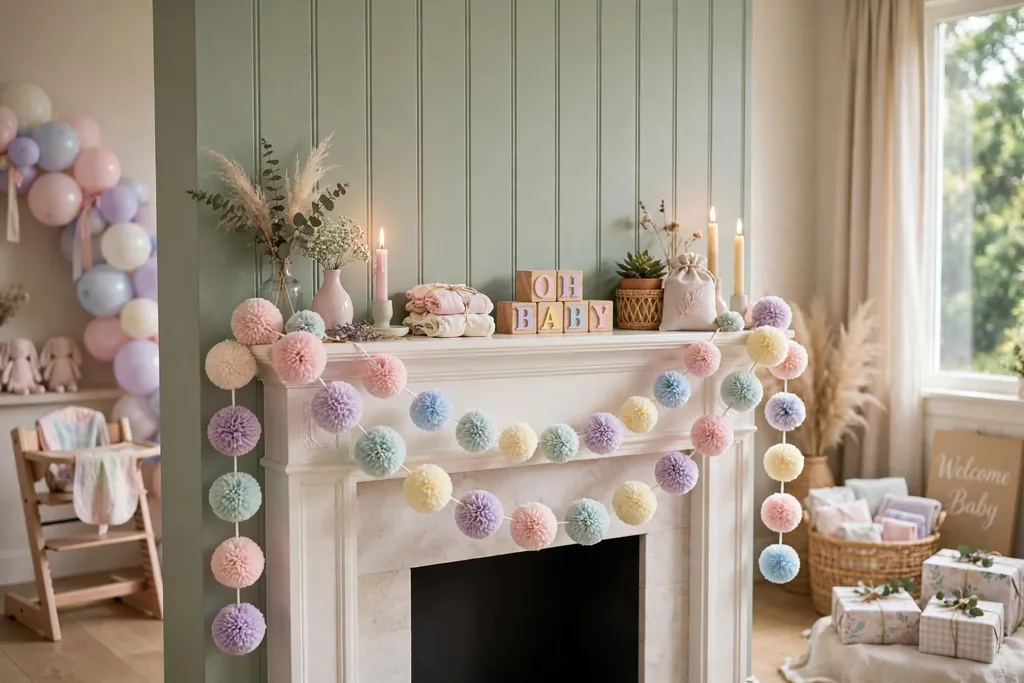
    Pastel pom-pom garland draped across a mantel in a baby shower room.

    A pastel pom-pom garland across a mantel or window adds soft color at eye level without a large structure. String tissue or wool pom-poms in your palette along twine, spaced evenly, and drape the garland along the mantel edge or across a window frame. Use two sizes of pom-poms for shape, with larger ones at the center and smaller ones at the ends.

    Secure both ends so the garland does not slide when doors open, and keep it clear of candles and heat, since tissue pom-poms catch fire easily. Use wool pom-poms near any flame, or battery candles only near tissue garlands. Fold the garland flat after the party for reuse.

    20. Candle Cluster with Greenery on a Tray

    Battery candle cluster with greenery on a round tray as a table centerpiece.

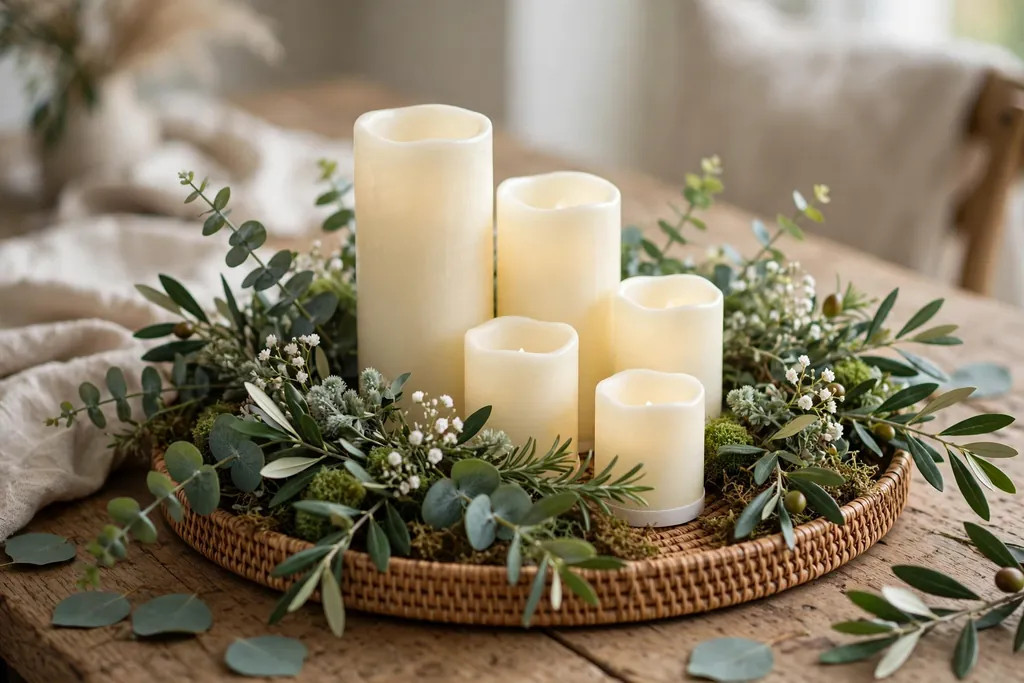
    A candle cluster with greenery on a tray gives the table warm light in one contained group. Set three or four battery candles of two heights on a round tray, with a few short green leaves or small flowers tucked between holders, and place the tray at the center of a side table or at one end of the main table. The tray keeps the group together, so it lifts off in one move when food is served.

    Use battery candles near balloons, paper, and fabric, and keep real flames clear of all decor if you use them, never leaving them burning unattended. Mix heights, with one taller candle at the back and shorter ones at the front, but keep the total group low enough to see across. Wipe the tray after use, and store candles with batteries removed.

    21. Decorated Chair for the Guest of Honor

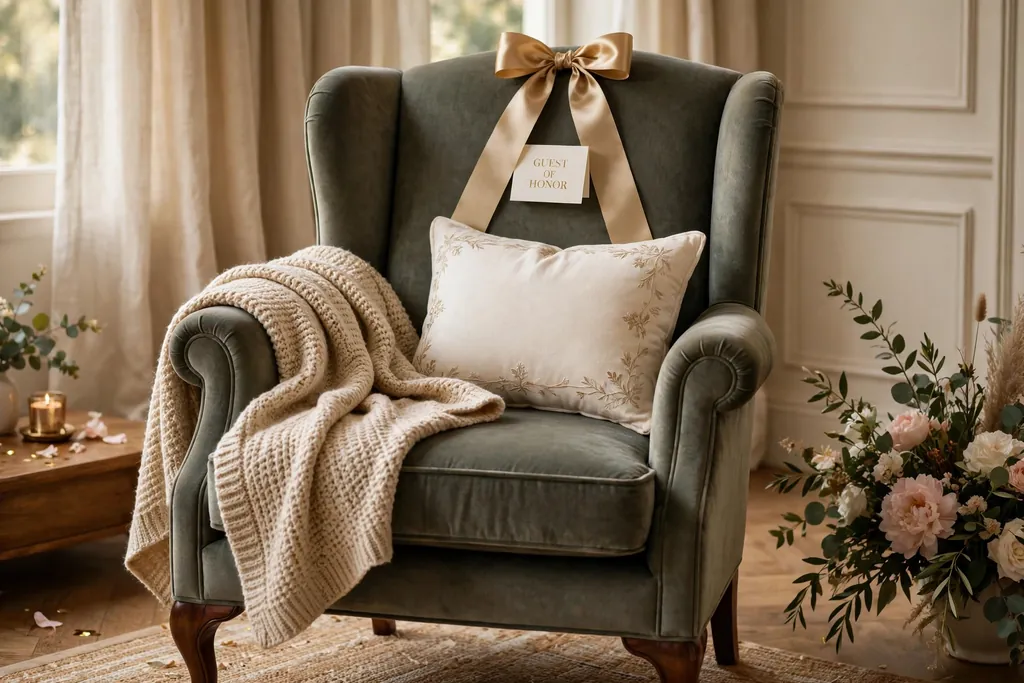
    Decorated armchair for a guest of honor with a throw, cushion, and ribbon bow.

    A decorated chair for the guest of honor marks her seat clearly and gives photos a clear focus. Dress one armchair with a soft throw, a cushion in your palette, a ribbon bow on the back, and a small balloon bunch tied to one arm, set where she can see the room and reach a side table for a drink. Keep the chair comfortable first, with decor that does not poke or slip when she sits down.

    Tie balloons loosely, so they can be moved aside if they block her view, and keep the chair clear of the main walking path. Add a footstool if the chair sits low, and keep a glass of water within reach. After the party, remove ribbons and balloons, and leave the throw and cushion for everyday use.

    22. Book Stack Centerpieces

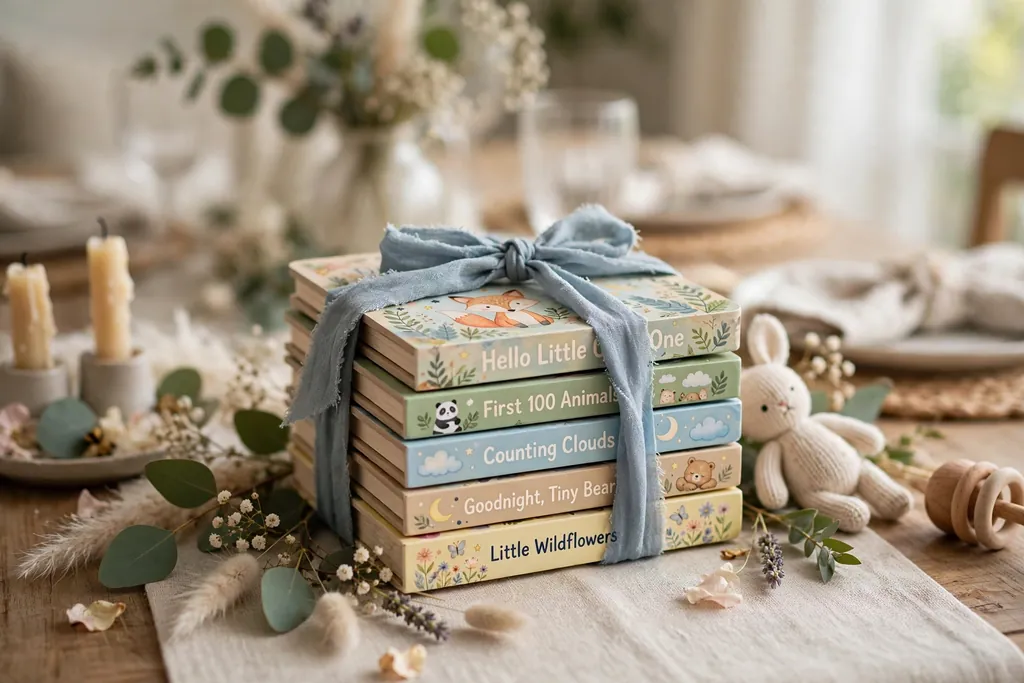
    Stack of small children's books tied with ribbon as a baby shower table centerpiece.

    Book stack centerpieces use small stacks of picture books or classic children’s books as a table focus, tied with ribbon in your palette. Set one stack of three or four books at the center of each table, with a small vase of flowers or a tiny plush toy beside it, and keep the stack low, so guests can see across it. The books suit a shower where guests bring a book in place of a card.

    Choose books with clean covers and no torn pages, and keep them clear of drinks, since a spill can damage paper. If the books are gifts, tag each stack so it goes home with the family, and keep one stack as decor only if the books should stay clean. After the party, the books can move to a nursery shelf.

    23. Sage and White Greenery Tablescape

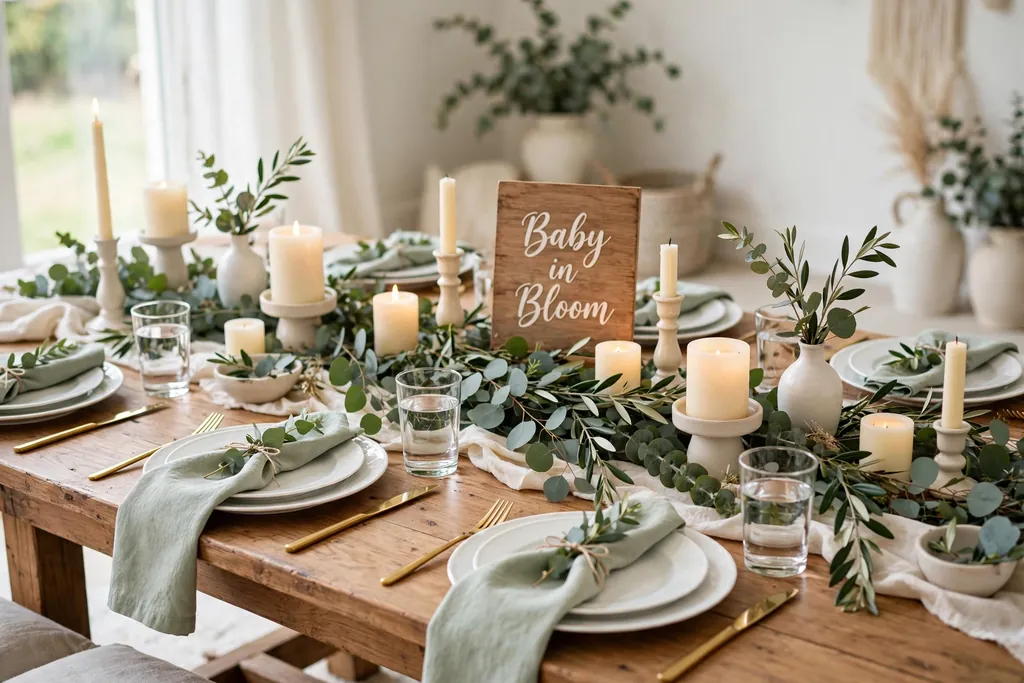
    Sage and white baby shower tablescape with a eucalyptus runner, white plates, and cream candles.

    A sage and white greenery tablescape suits a neutral baby shower, where green leaves carry the color instead of pink or blue. Lay a white cloth, set white plates and clear glasses, then add a eucalyptus or olive leaf runner down the center, with small white blooms and cream candles between leaves. The green and white pairing feels calm and fresh, and it suits any season.

    Keep the runner narrow, so plates sit flat, and trim leaves short, so they do not brush food. Use faux greenery if fresh leaves wilt fast in a warm room, and wipe leaves clean before setting them out. The same green and white restraint used in a spring tablescape works here, with eucalyptus in place of spring flowers.

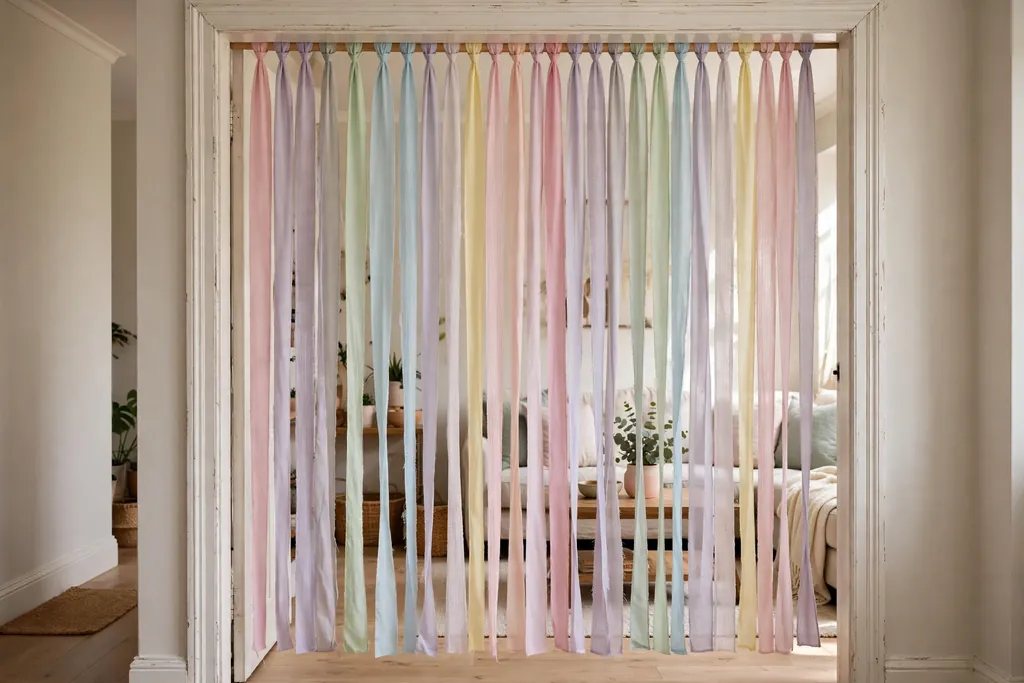
    24. Ribbon Curtain Across a Doorway

    Ribbon curtain in pastel shades hanging across a home doorway.

    A ribbon curtain across a doorway marks the party room clearly and adds movement as guests walk through. Hang lengths of ribbon in your palette from a tension rod or a curtain wire, spaced closely enough to read as a curtain, but loosely enough that guests can pass through with ease. Use two or three ribbon widths for texture, with satin and grosgrain mixed.

    Hang the curtain high enough that it does not catch on heads or bags, and keep it clear of candles and heat. Secure the rod so it cannot fall, and test the doorway width before the party, so guests with a pram or a wheelchair can pass with ease. After the party, roll the ribbons for reuse at a future celebration.

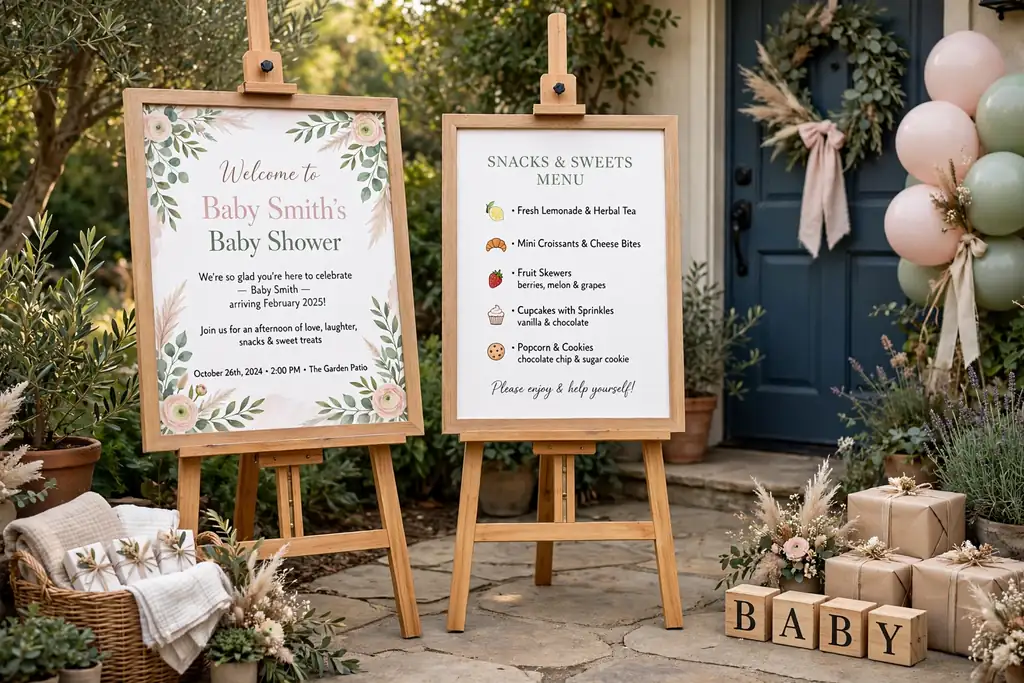
    25. Framed Menu and Signage Boards

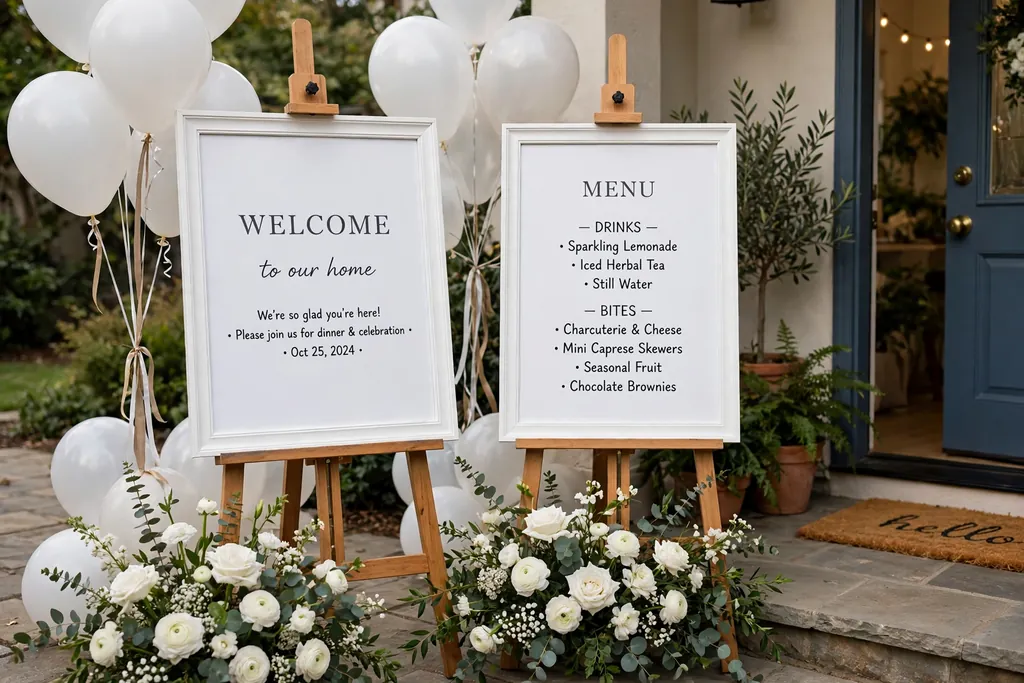
    Framed welcome and menu boards standing on easels at a baby shower entry.

    Framed menu and signage boards give guests clear guidance and add a styled detail to the dessert table and the entry. Set one framed board at the entry with a welcome line, one at the dessert table with a short menu, and one at the games corner with simple instructions, all in the same frame style and handwriting or print. Keep each board short, with large lettering guests can read from a few steps away.

    Use frames that stand stable on a table or an easel, and keep boards clear of food and drinks. Print boards on card stock rather than thin paper, so they stand straight and last through the party. After the party, the family can keep the welcome board as a keepsake, with a photo of the party beside it.

    Conclusion

    A beautiful home baby shower does not need a large budget or a full room redesign. Pick one soft palette, one focal point, and low, simple table decor, then group the rest by zone: entry, main table, dessert table, gift table, and one corner for photos or games. Start with the arch or backdrop and the main table, add the dessert and gift tables next, and finish with small personal touches, such as place cards, wishes cards, and favors, so guests feel welcomed from the door to the last goodbye.

    FAQs

    What is the easiest baby shower decoration idea for a small home?

    The easiest baby shower decoration idea for a small home is a pastel balloon bunch, a fabric backdrop on one wall, and a low floral bowl on the main table. These three pieces mark the celebration clearly, need no large furniture moves, and leave the room usable for seating and serving.

    How do I choose a color palette for baby shower decorations?

    Choose a baby shower color palette by picking two or three soft colors you already like, such as blush and cream, sage and white, or soft blue and cream, and repeating each color at least twice across balloons, linen, and flowers. A neutral palette of sage, white, and cream suits guests who prefer no pink or blue theme.

    How far in advance should I set up baby shower decorations?

    Set up baby shower decorations the day before the party where possible, starting with the backdrop, balloon arch, and table linen, and leaving fresh flowers, food tables, and balloons that lose air for the morning of the party. A day before setup leaves time to fix a sagging garland or a missing ribbon before guests arrive.

    What decorations work best for a baby shower on a small budget?

    Baby shower decorations on a small budget work best when you use paper garlands, a fabric backdrop, ribbon chair bows, and one low floral bowl per table, rather than large hired pieces. These pieces cost little, use materials you can reuse, and still give the room a clear focal point and a finished table.

    How do I decorate a baby shower table without blocking conversation?

    Decorate a baby shower table without blocking conversation by keeping the centerpiece low and narrow, such as a shallow floral bowl, a book stack, or a candle tray, and leaving empty space at each place for plates and glasses. Keep tall pieces, such as balloon arches and backdrops, on walls or at the entry, not in the center of the table.

    Can I reuse baby shower decorations after the party?

    You can reuse many baby shower decorations after the party, such as fabric backdrops, ribbon, frames, baskets, and faux flowers, by packing them flat and clean on the same day. Fresh flowers, balloons, and paper garlands last a shorter time, so keep those for the party itself, and save the sturdy pieces for a future gathering or for nursery decor.


  • 21 Engagement Party Decor Ideas for a Celebration at Home

    21 Engagement Party Decor Ideas for a Celebration at Home

    Engagement party decor for a celebration at home works best with one clear palette, one low table centerpiece, and a few personal touches, such as a photo display, a welcome sign, and a toast station. Start with the rooms guests use, then add balloons, lights, and flowers in that palette, and leave space to eat, talk, and move around.

    Start with the base you already own, such as everyday plates, plain glasses, cloth napkins, and a plain tablecloth or runner, then add one layer at a time. Keep the centerpiece low and narrow, leave room for serving dishes, and repeat one accent, such as gold, blush, or greenery, in at least two rooms. For low centerpiece ideas in a different seasonal palette to compare, see the fall table decor guide, and for a relaxed gathering layout with a drink station and a lounge corner, browse the Friendsgiving decor ideas.

    Key Takeaways

    • Pick one palette, such as blush, cream, and gold, and repeat each color at least twice across the rooms guests will use.
    • Keep the table centerpiece low and narrow, so guests can see across the table and serving dishes still fit.
    • Give decor a hosting job: a welcome sign, place cards, a drink station, and a message station all help guests settle in.
    • Add one personal layer, such as a photo timeline or message cards, so the party feels like a celebration of the couple, not a generic gathering.
    • Use candlelight with care: keep flames clear of fabric, paper, and greenery, and use flameless candles near children or dried material.
    • Leave empty space at each place and a clear path through the room, and test the full setup before guests arrive.

    1. Balloon Arch Over the Entry Doorway

    Balloon arch in blush, cream, and gold framing an entry doorway in a home.

    Frame the entry doorway with a balloon arch in the party palette, such as blush, cream, and gold, so guests know at once that they have arrived at a celebration. Build the arch on a frame or a strip that fits the doorway, with larger balloons at the base and smaller ones filling gaps near the top, and keep the walkway clear underneath.

    Secure the arch to the door frame or to weighted bases on each side, so it cannot slip when the door opens. Keep balloons clear of ceiling fans, light fixtures, and open flames, and check that the arch does not block the door handle or lock. If the doorway is narrow, use a half arch on one side instead, so guests still walk through easily.

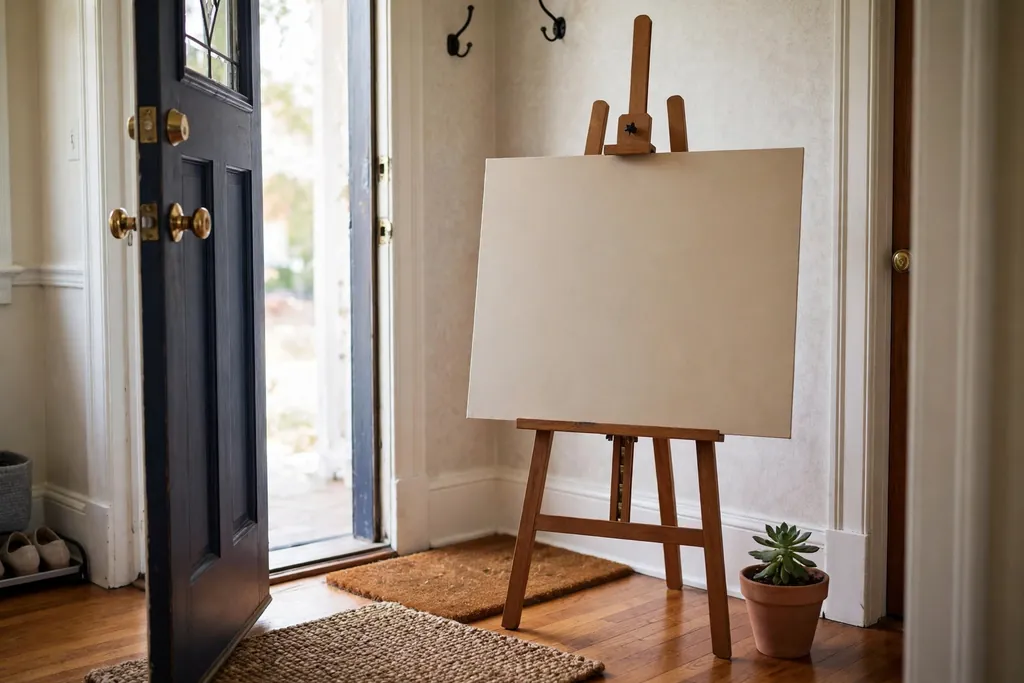
    2. Welcome Sign on an Easel by the Door

    Welcome sign on an easel just inside a front door with a small plant beside it.

    Set a welcome sign on an easel just inside the door, with the couple’s names and a short line such as “Welcome to our engagement party.” The sign greets guests before they reach the table, and it marks the start of the party zone in a home where rooms flow into each other.

    Write names in large, clear lettering, and keep the message to one or two lines, so guests can read it at a glance. Place the easel where it does not block the path, and put a small plant or a candle in a holder beside it if the corner looks bare. For a casual party, use a chalkboard or kraft paper sign that can be reused or kept after the night.

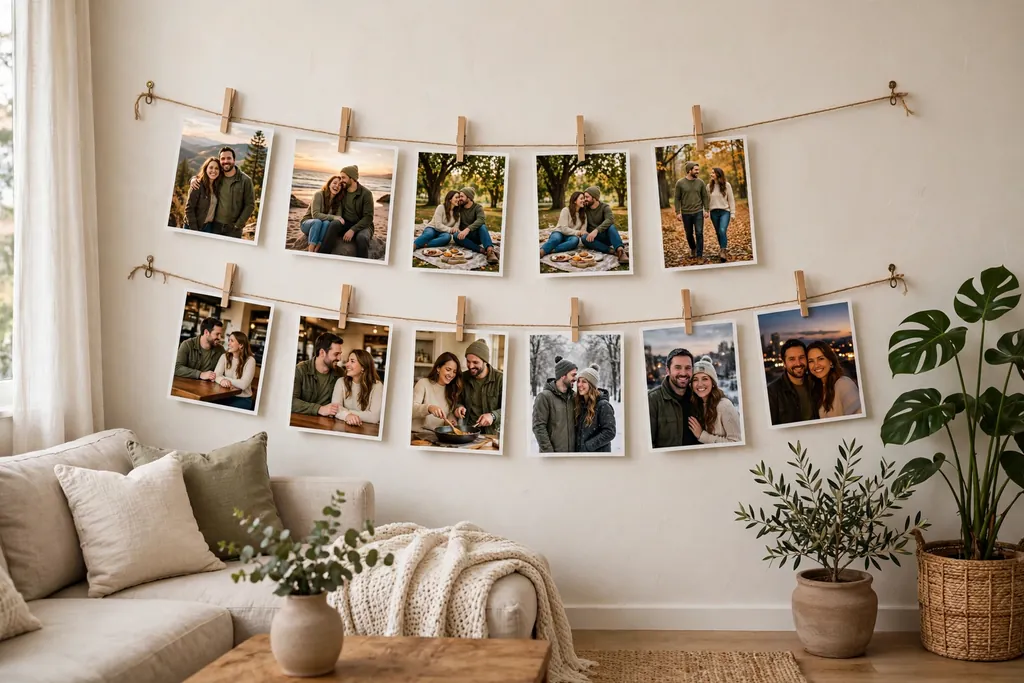
    3. Photo Timeline on a String Display

    String photo timeline with printed couple photos clipped along a living room wall.

    Hang a photo timeline along one wall, with printed photos of the couple in order, from early dates to the engagement, clipped to string or twine with small clips. The timeline gives guests something to look at while they arrive, and it starts conversation without any extra hosting work.

    Hang the string at eye level, and mix group photos with small everyday shots, so the display feels personal rather than formal. Leave one empty clip at the end where guests can add a photo from the evening. Take the display down with care after the party, and return borrowed prints to their owners.

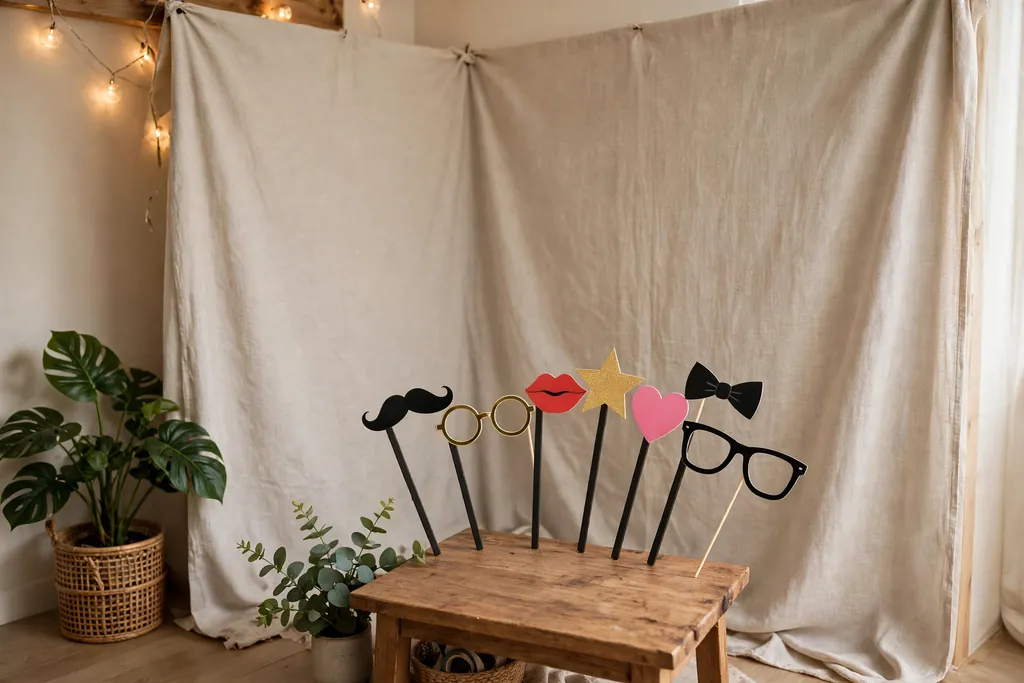
    4. Photo Booth Backdrop with a Props Table

    Photo booth corner with a plain fabric backdrop and a small table of props on sticks.

    Set up a photo booth corner with a simple backdrop, such as a plain curtain, a paper garland, or a fabric panel, and a small table of props, such as signs, hats, and frames on sticks. Guests can take their own photos during the party, and the corner keeps cameras and posing out of the main dining area.

    Place the backdrop against a plain wall with good light, and keep the props table beside it rather than in front of it, so guests can reach props without blocking the shot. Use props that are light and safe, and keep a small basket for props that fall or break. For a small home, use one corner of the living room rather than a full wall.

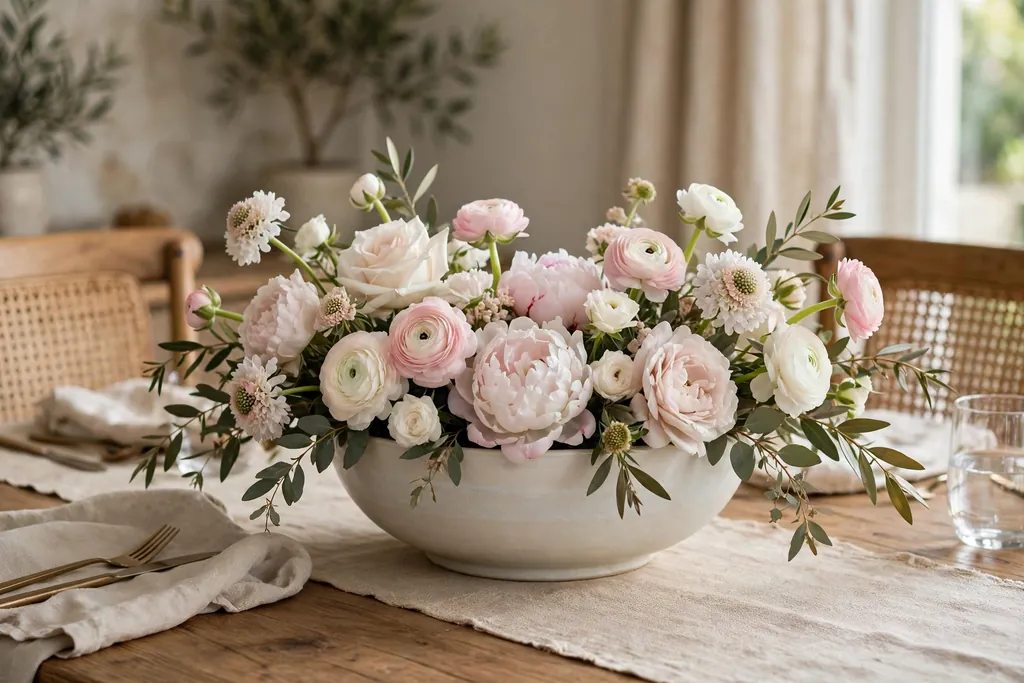
    5. Low White and Blush Flower Centerpiece

    Low white and blush flower centerpiece in a wide bowl on a dining table.

    Set a low centerpiece of white and blush flowers in a wide bowl or a short vase at the center of the table, so blooms sit just above the rim and the group stays below eye level. The soft colors suit an engagement party, and the low shape leaves sightlines open for conversation across the table.

    Trim stems short and add a few green leaves between blooms, then place the bowl in the center of a round table or slightly off center on a long table, with room for serving dishes at each end. Change the water every day or two if the centerpiece stays out before the party, and keep loose petals off the table with a small tray or mat under the bowl. For more flower centerpiece ideas in a romantic palette, see the Valentine table decorations.

    6. Candle Cluster on a Tray

    Candle cluster in varied glass holders and lanterns on a tray on a dining table.

    Group candles of different heights in glass holders, jars, and lanterns on a tray at the center of the table or on a sideboard, and light them as the evening starts. Mixed holders look collected and relaxed, and a tray keeps wax, glass, and light contained in one place, so the group lifts off in one move when serving needs the surface.

    Use flameless candles inside narrow jars and near paper or fabric, and use real candles only in proper holders on a stable surface. Keep the cluster low on the table, so guests can see across it, and never leave real flames burning unattended. Wipe the tray after the party, since wax and dust collect in the rims.

    7. Gold Chargers and Linen Place Settings

    Dining place settings with gold chargers under white plates and cream linen napkins.

    Set gold chargers under everyday plates at each place, with linen napkins in cream or blush and plain glasses, so a normal dinner table gains a celebration layer with no new dinner set. Center one charger at each place, set the plate on top, and keep cutlery in its usual spots, so the table still works for a seated meal.

    Choose chargers with a flat top, so plates sit level and glasses do not wobble. Wipe chargers clean after the meal, and store them flat. Repeat the gold at least once more in the room, such as in candle holders or a picture frame, so the metal reads as a planned palette rather than a single accent.

    8. Dessert Table with a Tiered Stand

    Dessert table with a tiered stand of small bites and fruit on a sideboard.

    Set a dessert table or one end of a sideboard with a two or three tier stand, and fill it with small bites, fruit, and a few fresh blooms or greenery sprigs for color. A tiered stand gives dessert its own spot, so the main table can clear while guests keep grazing, and it adds height without blocking the center of the room.

    Put heavier items on the bottom tier, and keep the stand stable and clear of the main serving path. If the stand will hold food, use it for food only, and set a separate small decor group beside it rather than mixing decor into the food tiers. Cover treats until serving time, and wipe the tiers after use.

    9. Self Serve Drink Station with Labels

    Self serve drink station on a sideboard with a tray, glasses, a jug, and small labels.

    Set a drink station on a sideboard, a cart, or one end of the table, with a tray holding glasses, a jug or dispenser, and small labels for each drink. Guests can help themselves without leaving the gathering area, and labels answer questions about what is in each jug.

    Keep the station on a tray, so drips stay contained and the whole station lifts away after the party. Put sturdy glasses at the front, and keep hot drinks clear of the table edge where guests pass. Wipe the tray during the evening if the station gathers drips, and refill jugs from the kitchen rather than moving the whole station.

    10. Warm String Lights Across the Living Room

    Living room with warm white string lights along a mantel and a shelf in the evening.

    Hang warm white string lights along a mantel, a doorway, or a shelf in the living room, and add them early, before guests arrive, so the room already feels warm. String lights give a relaxed evening glow that overhead light cannot match, and they suit a party that runs into the night.

    Use battery lights with a timer where plugs are hard to reach, and keep paper or fabric decor clear of real flames and heat sources near the lights. Hang lights loosely, so they do not pull on hooks or frames, and check that cords do not cross a path where guests could trip. Keep one main light on as well, so guests can read labels and move safely.

    11. Paper Tassel Garland Over the Mantel

    Paper tassel garland in blush, cream, and gold draped over a mantel.

    Drape a paper tassel garland in blush, cream, and gold over the mantel or along a shelf, letting it dip slightly in the middle and trail a little at each end. A garland marks the main gathering room and carries the party palette above eye level, where it does not crowd the table.

    Secure the garland with small hooks or clear clips so it does not slip, and trim it to fit the space. Keep paper garlands clear of real flames and heat sources, and use flameless candles nearby. Fold the garland flat for storage after the party, so the tassels do not crush.

    12. Fresh Greenery Runner Down the Table

    Dining table with a low eucalyptus runner and short candles in holders.

    Lay a loose greenery runner, such as eucalyptus or olive branches, down the center of the table, then set short candles in holders along it at uneven intervals. The greenery carries color along the whole table without adding height, and it suits a long dining table for a gathering.

    Trim the stems so they stay inside the table edges and do not brush plates or glasses. Secure the runner so it does not slide when plates are set down, and keep real flames clear of dry leaves. Use flameless candles if the runner will sit near curtains or if children will be at the table, and shake fresh stems outdoors before laying them out.

    13. Gold Ring Napkin Rings at Each Place

    Folded cream napkins with gold ring napkin rings beside white plates.

    Wrap each folded napkin with a gold ring napkin ring, or tie a simple gold band around the napkin, as a nod to the engagement ring itself. The ring detail sits at every place, so the theme repeats quietly across the table without a large themed centerpiece.

    Fold napkins in a simple rectangle or roll, so the ring sits flat, and use the same ring at every place, so the table looks matched. Keep the ring light enough that it does not pull the napkin off the plate, and remove rings before washing napkins. For a casual table, use a gold ribbon tie instead of a metal ring for the same effect with less cost.
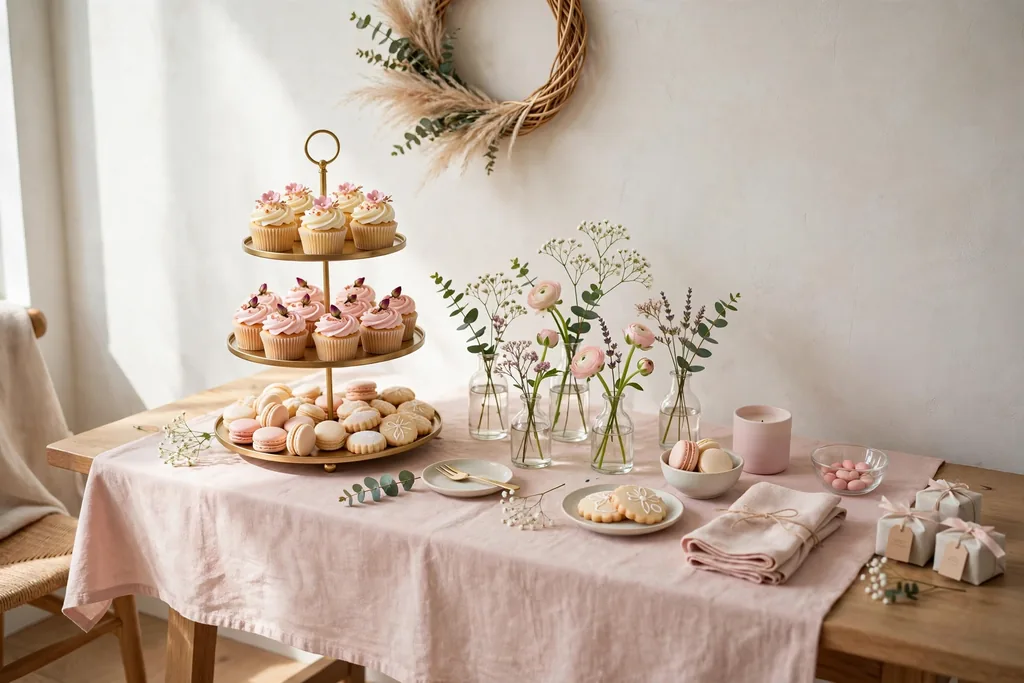
    14. Message Cards Station for the Couple

    Message cards station on a side table with cards, pens, and a box for wishes.

    Set a message station on a side table, with cards, pens, and a short written prompt, such as “Write a wish for the couple,” plus a box or tray to collect the cards. Guests write a short note during the evening, and the couple keeps the cards after the party as a record of the night.

    Keep the cards small enough to write in a minute or two, and write the prompt in large lettering, so guests understand the station at a glance. Put pens that do not smudge in a small cup, and keep the box clear of drinks. Read a few cards aloud only if the couple is comfortable with it, and keep the rest private.

    15. Lounge Corner with Throws and Floor Cushions

    Lounge corner with floor cushions, folded throws in a basket, and a small lamp.

    Set aside a lounge corner away from the table, with a sofa or a few chairs, floor cushions, and folded throws in a basket. An engagement party often runs long after the meal, and a lounge corner gives guests somewhere to sit, talk, and rest without standing in the kitchen.

    Put the basket of throws where guests can reach it, and keep the corner clear of serving traffic. Use washable cushion covers if the group is large, and keep one low side table nearby for drinks. A small lamp or a string of warm lights in this corner keeps the light soft after the main meal ends.

    16. Garden Lanterns and Lights for a Patio Party

    Patio at dusk with lanterns and battery candles along a table and garden steps.

    Set lanterns with battery candles along a patio table, on steps, and beside a garden path, so an outdoor part of the party feels lit and safe after dark. Lanterns give steady, sheltered light, and they lift off the table in one move when serving needs the full surface.

    Place lanterns where they will not block a walkway or an elbow, and use battery candles inside closed or narrow lanterns, since a real flame needs air and a safe holder. Wipe lantern glass before the party, since fingerprints show more on glass than on wood, and bring paper or fabric decor inside if rain is forecast.

    17. Toast Station with Glasses and a Small Sign

    Toast station on a sideboard with glasses ready and a small sign.

    Set a toast station on a sideboard or a tray, with glasses ready, a small sign marking the toast time, and a chilled bottle or jug nearby. The station tells guests where to gather for the toast, and it keeps glasses in one place rather than scattered across rooms before the moment arrives.

    Keep the station near the main gathering room but clear of the buffet flow, so guests can reach it without crossing servers. Use sturdy glasses if children will be near the station, and keep the sign short, such as “Toast at eight.” Clear the station after the toast, so the sideboard can serve dessert or coffee.

    18. Clear Confetti Balloon Bunch on a Sideboard

    Clear confetti balloons in gold and blush anchored in a heavy vase on a sideboard.

    Tie three to five clear balloons filled with gold and blush confetti to a ribbon bunch, and anchor the ribbons inside a heavy vase or a small weighted box on a sideboard. The balloons rise above the furniture without blocking sightlines at seated eye level, since the anchor sits low and the balloons float well above heads.

    Choose a vase heavy enough that the balloons cannot pull it over, and keep the bunch clear of ceiling fans, light fixtures, and open flames. Trim ribbons to different lengths, so the balloons sit at slightly different heights. For a table with young children, use the bunch on a sideboard instead of the dining table, where it cannot be pulled down during the meal.

    19. Engaged Banner Across a Wall or Mantel

    Engaged banner in gold letters across a living room wall above a mantel.

    Hang a banner reading “Engaged” or “She Said Yes” across a wall, a mantel, or a doorway in the main party room, in letters that match the palette. A banner names the occasion in one glance, and it gives the photo corner and the table a shared focal point.

    Hang the banner at a height where it shows in photos but does not block a doorway or a light fixture, and secure both ends so it does not slip during the evening. Use one banner only in the main room, so the message stays clear, and keep other wall decor simple nearby. Store the banner flat after the party if the couple wants to reuse it.

    20. Rose Petal Scatter Along a Runner

    Dining table runner scattered lightly with blush rose petals beside a low centerpiece.

    Scatter fresh or faux rose petals lightly along a plain runner, leaving the ends clear for serving dishes, so the table gains soft color without height. The petal scatter suits a blush and cream palette, and it pairs well with a low flower centerpiece and candlelight.

    Scatter petals sparingly, about a small handful per place setting length, so they do not end up in food or glasses. Use faux petals if the table will be set hours ahead, since fresh petals can wilt and mark light linen. After the meal, gather the runner and shake it outside to collect the petals in one move.

    21. Keepsake Favor Table by the Door

    Small favor table by a front door with identical keepsakes and a thank you sign.

    Set a small favor table by the door, with one small keepsake per guest, such as a candle, a packet of seeds, or a small box of treats, plus a short thank you sign. Guests pick up a favor as they leave, so the party ends with a clear goodbye moment, and the table keeps favors out of the dining area during the meal.

    Keep the favors small and identical, so no guest needs to choose, and place the table where guests pass on the way out but not where it blocks the entry path. Label the favors only if a label is needed, such as an ingredient note, and keep the sign short. Pack any favors left at the end of the night for the couple to keep or send on.

    Conclusion

    An engagement party at home comes together when one palette runs through the rooms, the table stays low and open, and one or two personal touches mark the occasion. Pick the ideas that fit your rooms and your guest list, set them up in full before guests arrive, and leave the rest of the evening for conversation, toasts, and photos. Save this guide to plan your own celebration, and start with the entry, the table, and one photo display, since those three spots shape how the whole party feels.

    FAQs

    How do you decorate for an engagement party at home?

    Start with one palette, such as blush, cream, and gold, then add a welcome sign, a low table centerpiece, string lights, and one photo display. Keep the centerpiece low, leave room for serving dishes, and repeat the palette in at least two rooms, so the whole home feels like one party rather than separate decorated spots.

    What colors work best for engagement party decor?

    Blush, cream, and gold work well for an engagement party at home, since they suit flowers, candlelight, and linen, and they photograph softly in evening light. White and greenery suit a calm, fresh look, while deep green and gold suit an evening party. Pick one main palette, and repeat each color at least twice.

    How many decorations do you need for a small engagement party?

    A small engagement party needs a welcome sign, one table centerpiece, string lights or candles, a photo display, and a drink station, since those five spots cover arrival, dining, light, and conversation. Add a favor table or a message station only if you have room, and skip decor in rooms guests will not use.

    How do you keep an engagement party table low enough to talk across?

    Use a centerpiece that stays below eye level when guests are seated, such as a low flower bowl, a greenery runner, or a candle tray, and keep tall items, such as balloon bunches and banners, on sideboards or walls instead. Test the table by sitting at it before guests arrive, and move anything that blocks a face across the table.

    Can you decorate for an engagement party without buying a full new set?

    Yes, you can decorate with pieces you already own, such as everyday plates, plain glasses, cloth napkins, a plain runner, and candle holders, plus one or two new layers, such as a balloon bunch or a banner. Paper garlands, message cards, and a photo string display cost little, and they carry most of the party theme without new tableware.

    How far ahead should you set up engagement party decor?

    Set up balloons, banners, garlands, and the photo display the day before or the morning of the party, and set the table a few hours ahead, so fresh flowers and petals stay fresh. Light candles and place favors last, just before guests arrive, and keep a small box of spare clips, tape, and candles nearby for quick fixes.


  • 19 White Party Decoration Ideas for an Elegant Home Gathering

    19 White Party Decoration Ideas for an Elegant Home Gathering

    White party decorations work best when you build the look from layers of white texture, soft light, and one or two natural accents, rather than from a single white item. Start with white linens and low white flowers, add candles and white balloons, then finish with a clear entry, a dessert display, and a simple backdrop for photos.

    The 19 ideas below cover the table, the room, the entry, and the photo spot, so you can dress a small dinner or a larger gathering with the same palette. Keep centerpieces low enough to talk across, repeat white in at least three places, and leave room for plates, glasses, and serving dishes. The same low centerpiece approach that keeps a fall table decor easy to use works here too, and the place setting ideas in Valentine table decorations show how one repeated detail at each seat ties a table together.

    Key Takeaways

    • Start with white linens, then add light, flowers, and one focal piece, such as an arch or a dessert table, rather than decorating every surface at once.
    • Mix white textures, such as linen, cotton, glass, ceramic, and paper, so an all white room reads as layered instead of flat.
    • Keep centerpieces low and narrow, so guests can see each other and serving dishes still fit on the table.
    • Repeat white in at least three places, such as the table, the entry, and the backdrop, so the theme feels planned from the door onward.
    • Use battery candles near fabric, paper, dried flowers, and children, and keep real flames in stable holders clear of anything that can catch.
    • Add one soft accent, such as green leaves, clear glass, or warm wood, to keep the white palette calm rather than stark.

    1. Layered White Linen Tablecloth and Runner

    Dining table with a layered white linen tablecloth and a white textured runner.

    A white linen tablecloth with a second white runner down the center sets the whole party palette in one step. Lay the cloth so it hangs evenly at both ends, then center a runner in a different white texture, such as cotton gauze over smooth linen, or a waffle weave over plain cotton. The two layers catch light differently, which keeps the table from looking flat.

    Iron or smooth both layers before guests arrive, since creases show more on white than on color. Keep the runner inside the table edges, so plates and glasses sit on the cloth rather than on a folded edge. If the table is used for a hot meal, skip a runner that slides, and use a heavier linen runner that stays put.

    2. White Balloon Arch Over the Entry

    White balloon arch over a home entry doorway for a party.

    A white balloon arch over the entry tells guests the party theme before they step inside. Build the arch from white balloons in two or three sizes, clustered on a frame or a strip, and fix it over a doorway, a garden gate, or the entrance to the party room. The arch frames the first photo of the evening and marks the gathering space clearly.

    Anchor the frame well, so it cannot tip if guests brush past it, and keep the arch clear of doors that swing. For an outdoor arch, add weights at the base and check the forecast for wind. If the arch will stay up for hours, inflate balloons close to party time, since heat and sun can soften them.

    3. Low White Flower Centerpiece

    Low white flower centerpiece with white roses and hydrangeas in a wide bowl.

    A low white flower centerpiece brings the party table to life without blocking conversation. Set white roses, hydrangeas, or ranunculus short in a wide, low bowl or a row of small white vases, with a few green leaves between the blooms, and keep the whole group below eye level when guests sit down. The white blooms suit any table shape, from round to long.

    Change the water daily if the centerpiece stays out before the party, and trim stems at an angle so they drink well. Keep the arrangement narrow on a long table, so serving dishes fit at each end. If fresh flowers are out of budget, use high quality faux blooms in the same low bowl, and mix in a few real green leaves for scent.

    4. White Taper Candles in Glass Hurricanes

    White taper candles in clear glass hurricane holders on a party table.

    White taper candles in glass hurricanes give the table steady, sheltered light. Set tapers of two heights in clear glass hurricanes down the center of the table, with a little space between each holder, and keep the rest of the centerpiece simple, such as a short flower stem or a plain runner. The glass shields the flame from drafts and catches the light.

    Check that each taper fits snugly, so candles do not lean or drip, and trim wicks before lighting. Use a tray or small plates under the hurricanes if wax drips are a concern. For a table with children, or near paper and fabric, use flameless tapers in the same hurricanes for the same glow without a flame.

    5. White Fabric Ceiling Drape

    White fabric draped across a living room ceiling in soft swags.

    White fabric draped across the ceiling turns a plain room into a party space. Hang lengths of white voile or chiffon from ceiling hooks or a central point, letting the fabric fall in soft swags toward the walls, and keep the lowest point well above head height. The drape softens overhead light and hides plain ceilings, pipes, or beams.

    Fix hooks into solid ceiling points, and test the weight before the party, since long fabric pulls harder than it looks. Keep fabric clear of light bulbs, candles, and heaters, and use flameless candles in the room if fabric hangs low. Take the drape down soon after the party, since white fabric marks easily in storage if folded damp.

    6. White Paper Lanterns Overhead

    White paper lanterns hung overhead at staggered heights with soft light.

    White paper lanterns hung overhead add soft, even light at low cost. Hang round paper lanterns in two or three sizes from the ceiling at staggered heights, with battery lights inside, and group them over the table, the dance area, or the entry. The paper glows gently, which suits evening gatherings better than bare overhead bulbs.

    Keep lanterns clear of open flames, and use battery lights only inside paper lanterns. Hang them high enough that guests cannot bump them, and check that cords and hooks hold the weight. Fold lanterns flat after the party, and store them in a dry box, since paper creases and damp both spoil the shape.

    7. White Chair Covers with Simple Sashes

    Dining chairs with white covers and simple white sashes tied at the back.

    White chair covers with a simple sash dress everyday chairs for a party. Slip a white cover over each dining chair, smooth it over the back and seat, and tie a white or cream sash in a plain knot or bow at the back. The covers hide mismatched chairs, so a mixed set reads as one planned group.

    Choose covers that fit your chair shape, and test one cover before buying a full set, since loose covers slip and tight covers tear. Keep sashes tied neatly, and trim long sash ends so they do not catch on chairs or walkways. After the party, wash covers promptly, since white fabric shows food and drink marks fast.

    8. White Dessert Display Table

    White dessert display table with a white cake stand and white serving dishes.

    A white dessert display table gives the party a focal point away from the main table. Cover a side table or console in white linen, then set a white cake stand, white plates, and a few white serving dishes at varied heights, with one small white flower vase at the back. The display works as decor until dessert time, then as the serving station.

    Keep the display stable, with heavier items at the back and lighter items at the front, and leave a clear path for guests to reach it. If the display holds food, cover items until serving time, and set out small plates and napkins nearby. Use plain white dishes, so the food itself provides the color.

    9. Layered White Place Settings with Textured Chargers

    White place setting with a textured white charger, plain white plate, and folded napkin.

    Layered white place settings with textured chargers make each seat feel considered. Set a textured white charger, such as beaded, woven, or scalloped, under a plain white dinner plate, then add a folded white napkin and clear glassware. The charger adds pattern at each place without a new dinner set, and the plain plate keeps the setting calm.

    Center each charger on the place, so plates do not slide off the edge, and keep cutlery in its usual spots, so the table still works for a real meal. Wash chargers before the party, since dust shows on white texture. If chargers feel too formal for the meal, use them at the main table only, and keep a simpler setting at a second table.

    10. White Flower Wall Photo Backdrop

    White flower wall photo backdrop with white blooms arranged on a frame.

    A white flower wall gives guests a photo backdrop that matches the party theme. Fix white faux flowers, white paper blooms, or white fabric panels to a freestanding frame or a wall, in a dense group at head height, and leave a little floor space in front for guests to stand. The wall becomes the natural photo spot, which keeps cameras away from the food table.

    Build the frame on a stable base, so it cannot tip if guests lean on it, and check that flowers are fixed firmly. Keep the backdrop near good light, such as a window in daytime or a lamp in the evening, so photos come out bright. After the party, the panel can move to a bedroom wall or be stored flat for the next gathering.

    11. White String Lights in Glass Jars

    White string lights coiled inside clear glass jars on a sideboard.

    White string lights coiled inside glass jars make soft table and shelf lights. Coil one short string of warm white lights into each clear jar or bottle, set the battery pack behind the jar, and group two or three jars on a sideboard, a windowsill, or the dessert table. The glass spreads the light gently, which suits a party that runs into the evening.

    Use battery lights with a timer, so the jars switch on without daily effort, and keep cords out of walkways. Check that jars sit level and cannot roll, and keep them clear of paper and fabric if the lights warm up. For a larger room, repeat the same jar on each table, so the light feels planned rather than random.

    12. White Tissue Pom-Pom Garland

    White tissue pom-pom garland hung across a mantel.

    White tissue pom-poms strung as a garland add soft shape overhead or along a wall. Make or buy pom-poms in two sizes, string them on white cord at uneven gaps, and hang the garland across a mantel, a doorway, or above the dessert table. The pom-poms read as festive without color, and they fold flat for storage.

    Hang the garland with small hooks or tape that will not mark paint, and keep it clear of candles and heaters. Fluff each pom-pom before hanging, since flat pom-poms look thin from across the room. If the party is outdoors, use paper pom-poms only in dry weather, and bring them inside at the first sign of rain.

    13. White Drink Station with Clear Glassware

    White drink station with white pitchers, clear glasses, and white napkins.

    A white drink station keeps serving tidy and on theme. Cover a side table in white linen, set out white pitchers or a white punch bowl, clear glasses, white napkins, and a small white tray for spoons or stirrers, with one short white flower stem at the back. Guests can serve themselves without crowding the main table, and the station doubles as decor.

    Keep the station near the main room but clear of the main walkway, and set a small towel nearby for spills. Label drinks simply, such as one card per pitcher, so guests do not have to ask. Use pitchers with lids or covers if drinks will sit out for hours, and refill from the kitchen rather than crowding the station with spare bottles.

    14. White Favor Table with Wrapped Boxes

    White favor table with small white boxes tied with white ribbon.

    A white favor table near the door gives guests a small gift to take home. Cover a small table in white linen, set out small white boxes or bags tied with white ribbon, one per guest, and add a short card with a thank you note. The table also marks the exit, so guests find their favors naturally as they leave.

    Count favors before the party, and set out one per expected guest, with a few spares kept aside. Keep boxes small enough to carry easily, and tie ribbons firmly, so boxes do not open in bags. If favors hold food, check for common allergies before choosing the contents, and note the contents on the card.

    15. White Lounge Seating Corner

    White lounge seating corner with white cushions and a small side table.

    A white lounge corner gives guests a place to sit away from the table. Group a white slipcovered chair or bench with white cushions, a small white side table, and a floor lamp or a jar light, in a corner of the party room. The corner suits guests who want to talk without sitting at the main table, and it balances a room that is otherwise all table and standing space.

    Keep the corner clear of the main walkway, and leave room for guests to step in and out without moving furniture. Choose washable cushion covers, since white seating marks fast at a party. If space is tight, one chair and one side table still give the same quiet corner, placed beside a window or a bookshelf.

    16. White Petal and Confetti Table Scatter

    White rose petals and paper confetti scattered along a white table runner.

    A white petal and confetti scatter adds detail down the center of the table without height. Scatter white rose petals, white paper confetti shapes, or small white beads lightly along a runner, between candles and flowers, leaving the ends clear for serving dishes. The scatter ties the table together and fills gaps between larger pieces.

    Scatter sparingly, about a small handful per place setting length, so petals and confetti do not end up in food or glasses. Use faux petals if the table will be set hours ahead, since fresh petals can wilt and mark light linen. After the party, gather the runner and shake it outside to collect the scatter in one move.

    17. White Welcome Sign and Menu Board

    White welcome sign and menu board near a party entry.

    A white welcome sign and menu board greet guests and answer questions before they ask. Set a white board or framed card near the entry with a short welcome line, and a second board near the food table listing the menu or the order of the evening. The boards keep the party running smoothly, since guests can find food, drinks, and timings without asking the host.

    Write in large, clear lettering, and keep each board to a few short lines, since a long board will be read once and then ignored. Prop boards where guests naturally pause, such as beside the door or at the end of the food table, and keep them clear of plates and glasses. Use the same board style at both spots, so they read as a pair.

    18. White Lantern Pathway to the Door

    White lanterns with battery candles along a pathway to a front door.

    White lanterns along the path to the door guide guests in after dark. Set white lanterns with battery candles along the walkway, the porch steps, or the garden path, spaced evenly, with one larger lantern at the door itself. The line of light marks the route clearly and sets the party tone before guests reach the arch or the door.

    Use battery candles in outdoor lanterns, since wind makes real flames risky, and check that lanterns sit level and cannot tip. Bring lanterns indoors in storms, and wipe the glass clean so the light stays bright. For a short path, three lanterns are enough, with one at each end and one in the middle.

    19. White Ceiling Balloon Cluster

    White balloon cluster gathered at a living room ceiling with hanging ribbons.

    A white ceiling balloon cluster fills the space above the party without a frame. Tie white balloons in small bunches, with ribbons hanging to different lengths, and fix the bunches to ceiling hooks or let helium balloons float to the ceiling, so the white shapes gather overhead. The cluster suits a room where an arch or a drape would crowd the walls, since it uses ceiling space only.

    Keep balloons clear of ceiling fans, light fixtures, and open flames, and trim ribbons so they hang above head height. For a longer lasting display, use air filled balloons on a frame near the ceiling rather than helium, which softens over hours. Take balloons down soon after the party, since popped balloons leave small pieces that are easy to miss on the floor.

    Conclusion

    An elegant white party does not need a new room or a long shopping list. Pick white linens, one low flower centerpiece, and soft candlelight, then add an entry detail and a photo backdrop, and repeat white in at least three places. Start with the table this week, add the entry and the backdrop next, and the room will read as a planned white gathering rather than a collection of white items.

    FAQs

    What is the easiest way to decorate for a white party?

    The easiest way to decorate for a white party is to start with white linens, low white flowers, and white candles, then add one focal piece such as a balloon arch or a dessert table. These three layers set the theme fast, and the focal piece gives guests a clear photo spot and a sense of occasion.

    How do I keep an all white party from looking flat?

    Keep an all white party from looking flat by mixing white textures, such as linen, cotton, glass, ceramic, paper, and wood, and by adding one soft accent, such as green leaves or clear glass. Texture gives the eye something to follow, while the accent keeps the white palette calm rather than stark.

    What flowers work best for white party decorations?

    White roses, hydrangeas, ranunculus, peonies, and white carnations work best for white party decorations, since they hold their shape, suit low arrangements, and pair with candles and glass. Mix one large bloom type with one smaller filler, such as white spray roses or green leaves, so the arrangement looks full without many stems.

    Can I host a white party outdoors?

    You can host a white party outdoors if you weight balloons and lanterns against wind, use battery candles, and bring paper decor inside at the first sign of rain. Choose washable white linens and sturdy white furniture for the garden, and keep the dessert table in shade, so food and white fabric stay in good shape.

    How many white decorations do I need for a small gathering?

    For a small gathering, you need white linens, one low centerpiece, one set of candles, and one entry or backdrop detail, rather than a full room of decor. Four or five well placed pieces, repeated in white at the table, the entry, and one other spot, will read as a theme without crowding a small room.

    How do I keep white party decorations clean during the party?

    Keep white party decorations clean during the party by choosing washable linens and covers, setting drinks on trays or coasters, and keeping food away from fabric drapes and paper lanterns. Lay a washable cloth under the dessert table, keep a towel at the drink station, and wash white covers promptly after the party, since marks set fast on white fabric.


  • 23 Party Table Decoration Ideas for Celebrations at Home

    23 Party Table Decoration Ideas for Celebrations at Home

    Party table decorations work best when you start with one low centerpiece, a clear color palette, and place settings guests can use. Choose a runner or cloth, add candles or flowers at a height that keeps sightlines open, and finish with place cards, napkins, and one personal detail. The 23 ideas below cover birthdays, holidays, and casual gatherings at home.

    A party table has to work as hard as it looks good. Guests need room for plates, glasses, and serving dishes, and they need to see each other across the table. Start with the base layer, a cloth, runner, or bare table, then add one main centerpiece. Add smaller details only where they do not crowd a place setting. Keep flames clear of paper, balloons, and dried material, and use battery candles near children or loose paper decor.

    Key Takeaways

    • Start with one low centerpiece and a palette of two or three colors, repeated in the runner, napkins, and at least one centerpiece item.
    • Keep the centerpiece below eye level when guests are seated, so conversation and serving dishes still fit.
    • Build the table in layers: cloth or runner first, then chargers and plates, then napkins, place cards, and small details last.
    • Mix one personal detail, such as photos, a welcome sign, or handwritten place cards, with reusable basics like candles, glass holders, and plain plates.
    • Plan for clearing up: use a tray or board under the centerpiece, keep confetti off plates and food, and choose items you can lift off in one move.
    • Check safety before guests arrive: keep real flames clear of paper and fabric, secure balloons away from candles, and keep small loose pieces away from young children.

    1. Balloon Cluster Centerpiece

    Small cluster of balloons in soft colors on weights at the center of a party dining table.

    Set a small cluster of three to five balloons on short weights or in a low stand at the center of the table, rather than a tall arch that blocks faces. Use balloons in your party palette, with one plain color and one pattern or foil balloon for contrast. Keep the cluster low and tight, so it reads as a centerpiece and not as loose balloons drifting over plates.

    Anchor the cluster well, since a balloon that floats free can land in food or near a candle. Place the weights on a small tray or board so they do not mark the table. For a longer party, inflate balloons close to party time, and keep spares and a pump nearby. This idea suits birthdays and milestone parties best, where balloons set the mood at a glance.

    2. Low Fresh Flower Compote

    Low compote bowl of short fresh flowers on a party dining table with plain place settings.

    Arrange short fresh flowers in a low compote bowl or wide footed dish, so blooms sit just above plate height and guests can see across the table. Choose flowers with sturdy stems and little scent, since strong scent can compete with food. Mix one main flower with filler greenery, and trim stems so no bloom droops onto a plate.

    Fill the compote with water and a small amount of floral foam or a flower frog if the bowl is wide, so stems stay upright. Place the compote on a small mat to catch drips, and remove any leaves that would sit below the water line. For a budget version, use one kind of flower in a single color, grouped tightly, which looks planned without a mixed bouquet.

    3. Candle Trio in Glass Holders

    Three candles of different heights in glass holders down the center of a party table.

    Set three candles of different heights in glass holders down the center of the table, with the tallest at the middle and shorter ones at the sides. Glass holders protect the table from wax and keep flames steady in a draft. Use unscented candles for a meal table, so candle scent does not compete with food.

    Space the holders far enough apart that glasses and serving dishes still fit between them. For tables with children, or where paper decor sits nearby, use battery candles in the same holders for the same glow without a flame. Wipe glass holders before the party, since fingerprints and dust show clearly in candlelight.

    4. Bold Patterned Runner as the Base

    Bold patterned runner down a dining table with plain plates and napkins.

    Lay a bold patterned runner down the center of the table and keep the rest of the table plain, so the runner carries the party color. A stripe, polka dot, or simple geometric print works well, in two colors from your palette. Let the runner hang evenly at both ends, and check that plates sit level on it.

    A runner suits a table you do not want to cover fully, since it leaves wood or a plain cloth visible at the sides. Pair it with plain plates and napkins in one runner color, so the table does not look busy. After the party, a runner folds small for storage, which makes it easy to reuse for another occasion in a different color scheme.

    5. Confetti Scatter Away from Plates

    Narrow band of large paper confetti shapes along the center of a party table, clear of plates.

    Scatter confetti only along the center of the table, in a narrow band between place settings, and keep it clear of plates, glasses, and food. Use larger paper shapes, such as circles or stars, which are easier to pick up than fine glitter confetti. Match the confetti to your palette, with one metallic shape mixed into a plain color.

    Keep confetti off serving dishes and away from candles, since paper near a flame is a risk. For a table with young children, use larger shapes only, and skip confetti on a table where food will be served directly from shared bowls. A small tray under the centerpiece can hold the confetti band in place and make clearing up faster.

    6. Personalized Place Cards

    Small handwritten place cards leaning on plates at a party dining table.

    Write each guest name on a small card and set one card at each place, either leaning on the plate or tucked into a napkin fold. Use clear, large lettering, and keep the card short, with a name and, if you like, a short welcome word. Place cards help guests settle quickly, which matters most at a larger gathering or a mixed group.

    Choose card stock that stands on its own, or use a small holder, such as a folded card tent or a simple clip stand. Match the card color to your napkins or runner, and use the same pen or print style at every place. For a casual party, a handwritten card feels personal; for a larger party, printed cards keep names easy to read.

    7. Tiered Dessert Stand as a Centerpiece

    Tiered dessert stand with small desserts at the center of a party table.

    Set a two or three tier stand at the center or one end of the table, filled with small desserts such as cupcakes, cookies, or fruit pieces. The stand adds height without blocking the whole table, since its tiers are narrow and guests can see past them. Put heavier items on the bottom tier and lighter items on top, so the stand stays steady.

    Use the stand for food only, and keep candles and loose paper away from it, so nothing falls into the food. If the party table also holds the main meal, set the dessert stand on a side table instead, and move it to the main table when dessert is served. Wipe the tiers after the party, since crumbs and icing collect in the rims.

    8. Fresh Fruit Bowl Centerpiece

    Wide shallow bowl of lemons, oranges, and grapes as a centerpiece on a party table.

    Fill a wide, shallow bowl with fruit in your party colors, such as lemons, oranges, apples, or grapes, and set it at the center of the table. Fruit gives real color and shape, and guests can eat from it during the party. Choose fruit with firm skins, and wash it before setting it out, even if it will stay in the bowl as decor.

    Keep the bowl low and wide rather than tall, so it does not block sightlines. Check the fruit during a long party and remove any soft piece, since one spoiling piece can mark the rest. At the end of the party, the bowl moves to the kitchen in one step, which makes clearing the table simpler than packing away a floral arrangement.

    9. Fresh Greenery Runner

    Loose greenery runner down the center of a party dining table with small candles in glass holders.

    Lay a loose greenery runner down the center of the table, using eucalyptus, olive branches, or other sturdy leafy stems. Greenery softens the table without adding height, and it suits almost any color palette, since green pairs with both bright party colors and calm neutrals. Trim stems so they stay inside the table edges and do not brush plates.

    Use fresh greenery for a party the same day, and mist it lightly if the room is warm and dry. For a party that spans several days, or a table near a heat source, use good quality faux greenery you can wipe clean instead. Tuck two or three small candles in glass holders along the runner to anchor it, keeping flames clear of the leaves.

    10. Mixed Patterned Plates

    Mixed patterned plates in a shared blue color family set on a party dining table.

    Use patterned plates in one shared color family, rather than a full matching set, so the table looks collected and lively. Mix a stripe with a dot or a plain plate with a floral rim, keeping one color, such as blue, green, or red, common to every plate. Set one plate at each place, centered on a charger or placemat.

    Check that plates are the same size, so place settings line up even when patterns differ. For a larger party, use the same two or three patterns in rotation, so no single place looks out of step. Patterned plates carry much of the party color, which means you can keep the runner and napkins plain and still have a festive table.

    11. Folded Napkins with a Fresh Sprig

    Folded napkin with a short fresh rosemary sprig beside a plate on a party table.

    Fold each napkin into a simple rectangle or roll, then tuck a short fresh sprig, such as rosemary, lavender, or a small eucalyptus stem, into the fold or under a napkin ring. This small detail dresses an everyday place setting in minutes, and the sprig adds scent and color without a full arrangement. Keep the sprig short so it does not brush the plate.

    Use the same sprig at every place, so the table looks matched, and remove sprigs before washing napkins. For a food table, choose sprigs that are safe to have near food and that will not shed leaves onto plates. Rosemary suits a dinner party, while a small flower stem suits a birthday or spring gathering.

    12. Drink Station at One End of the Table

    Drink station tray at the end of a party table with a jug, glasses, and lemon slices.

    Set a drink station at one end of the table, on a tray, with a jug of water or punch, glasses, and a small bowl of lemon slices or mint. A tray keeps spills contained and lets you lift the whole station off the table when the meal is served. Keep the station at the end, not the center, so it does not block the centerpiece or crowd place settings.

    Label the jug if you serve more than one drink, with a small card leaning on the tray. Place glasses upside down on the tray until guests arrive, so they stay clean, and keep a small cloth nearby for drips. For a party with children, use sturdy cups and a jug with a lid, and keep the station low enough for older children to reach safely.

    13. Small Framed Photos Along the Table

    Small framed photos set along the center of a party table between candles.

    Set three to five small framed photos along the center of the table, between candles or small plants, to mark the occasion. For a birthday, use photos from past birthdays; for a milestone, use photos that show the guest of honor over time. Keep frames small and low, so they do not block faces or take space from plates.

    Use the same frame color or material at every spot, so the photos read as one display rather than a random group. Place photos facing outward, toward the seats, and angle them slightly so guests can see them without picking them up. For a casual party, unframed prints on small stands work just as well and pack away flat.

    14. Metallic Chargers Under Everyday Plates

    Gold metallic chargers under everyday white plates on a party dining table.

    Set a metallic charger, in gold, silver, or copper, under each everyday plate, so a normal dinner set gains a party layer with no new dishes. Center one charger at each place, set the plate on top, and keep napkins and cutlery in their usual spots, so the table still works for a meal. Metallic chargers catch candlelight and suit evening parties well.

    Choose chargers that are flat and stable, so plates sit level and glasses do not wobble. Wipe chargers after the party, since fingerprints show clearly on metal, and store them flat so they do not bend. If you use a patterned runner as well, keep the charger in a plain metallic finish, so the table has one strong pattern rather than two competing ones.

    15. Kids Activity Place Settings

    Child place setting with a coloring sheet and crayons beside a plate on a party table.

    For a party with children, set each child place with a small activity, such as a coloring sheet, a few crayons, or a simple puzzle, beside the plate. This keeps children settled while adults talk, and it doubles as a party favor they can take home. Keep activities flat and small, so they do not crowd the plate or glass.

    Use washable crayons and paper that can handle a spill, and skip small loose pieces for very young children. Place the activity on a placemat, so crayons do not mark the table, and set one activity per child rather than a shared pile that can cause arguments. For a mixed-age party, give older children a word puzzle and younger children a coloring sheet.

    16. Cake Stand as the Focal Point

    Celebration cake on a raised stand at the center of a party dining table.

    Set the celebration cake on a raised cake stand at the center or one end of the table, so it becomes the focal point of the party table. A stand lifts the cake above plates and napkins, which makes it easy to see and photograph, and it keeps the cake clear of spills. Choose a stand that fits the cake with room to spare at the edges.

    Place the stand on a stable part of the table, away from the edge and away from candles, and keep a cake server nearby. If the cake will sit out for a long time, keep it away from direct sun and heat, and cover it loosely until serving time. For a party where the cake is the main event, keep the rest of the centerpiece low, so the cake stays the star.

    17. Paper Lanterns Above the Table

    Paper lanterns hung at different heights above a party dining table.

    Hang paper lanterns or honeycomb balls above the table, at different heights, to add party color without taking space from the table itself. Use lightweight lanterns in your palette, hung from the ceiling or a simple line, with enough clearance that guests do not bump them when they stand. This idea suits a room with a high ceiling best.

    Keep lanterns clear of real candles and light fittings that give off heat, and use battery lights inside lanterns if you want them to glow. Hang lanterns before you set the table, so you can check heights from a seated position. After the party, lanterns fold flat for storage, which makes them easy to reuse for another celebration.

    18. Handwritten Menu or Welcome Sign

    Handwritten menu sign on a small stand at the end of a party table.

    Set a handwritten menu or welcome sign at one end of the table, or on a small stand at the center, so guests know what to expect. Write the menu in clear lettering, with each course or dish on its own line, and add the guest of honor name or party date at the top for a personal touch. A sign also helps guests with food choices, since they can read the menu before serving starts.

    Use a board, framed card, or folded card tent, depending on table size, and keep the sign low enough to see over. Check spelling and dish names before the party, since a menu sign is read closely. For a casual party, a welcome sign with a short message works just as well as a full menu, and it takes less time to prepare.

    19. Color Blocked Tablecloth and Napkins

    Party table with a plain navy tablecloth and contrasting white napkins.

    Dress the table with a plain tablecloth in one strong party color, then use napkins in a contrasting color, so the table reads as two clear color blocks. For example, pair a navy cloth with white napkins, or a green cloth with cream napkins. This simple pairing looks planned and festive without a pattern.

    Iron or steam the cloth before the party, since creases show clearly on a plain color, and check that the cloth hangs evenly at all sides. Keep plates plain, so the color blocks stay the focus, and add one centerpiece in a neutral material, such as glass or wood, to ground the colors. A color blocked table suits a party where you want a bold look with little effort.

    20. Potted Herb Favors Down the Center

    Small potted herbs in terracotta pots down the center of a party table.

    Set small potted herbs, such as rosemary, thyme, or mint, down the center of the table, one pot per guest or one pot between two guests. The pots act as a low centerpiece during the party and as a favor guests can take home after it. Use plain terracotta or white pots, so the green plants carry the color.

    Water the herbs lightly before the party, and set each pot on a small saucer to protect the table. Label each pot with the herb name, so guests know what they are taking home. For a dinner party, rosemary and thyme suit the table well, since their scent is light; mint needs its own pot, since it grows fast and spreads.

    21. Table Numbers and a Seating Guide

    Small table number card on a stand at the center of a party table.

    For a larger party, number each table and set a small table number card at the center, with a seating guide at the entrance or at the end of the table. Table numbers help guests find their seats without asking, and they help you plan who sits together. Use cards that match your place cards, in the same color and lettering style.

    Keep table numbers low and stable, on a small stand or folded card, so they do not fall into food. If you have only one table, a single number is not needed; instead, use a seating guide card that lists who sits where, set at the end of the table. Check the guide against your guest list before the party, since a wrong name causes confusion at the door.

    22. Marquee Numbers or Letters for a Milestone

    Battery lit marquee numbers on a party table beside a low centerpiece.

    Set marquee numbers or letters on the table, spelling an age, initials, or a short word such as a milestone year, to mark the occasion. Place the marquee at one end of the table or on a side table beside it, so it does not block the centerpiece or crowd plates. Battery lit marquee letters glow well in the evening and photograph clearly.

    Choose a size that fits the table, with letters tall enough to read from across the room but small enough to leave room for serving dishes. Keep marquee lights clear of paper decor and balloons, and switch them on just before guests arrive, so batteries last through the party. For a birthday, numbers work best; for an engagement or anniversary, initials suit the table.

    23. Glass Jars with Fairy Lights for Evening

    Glass jars with warm fairy lights down the center of an evening party table.

    Set glass jars with battery fairy lights down the center of an evening party table, with the lights coiled loosely inside each jar. The jars glow softly without a flame, which makes them safe near paper decor, balloons, and children. Use jars of different heights, with the tallest at the middle, and keep the total group low enough to see across.

    Use warm white lights for a dinner party and colored lights for a birthday, matching your palette. Check batteries before the party, and switch lights on just before guests arrive. Wipe jars before setting them out, since dust shows in the glow, and keep jars clear of serving dishes, so guests can lift them aside when the table needs to clear.

    Conclusion

    A good party table starts with a clear palette, one low centerpiece, and place settings that work for a meal. Pick one idea from each group in this guide, a centerpiece, a table base, a place setting detail, and one personal touch, and you will have a table that looks festive without feeling crowded. Keep flames safe, leave room for serving dishes, and choose details you can reuse, so the next celebration at home starts from a table you already know how to set. For more seasonal table ideas, see fall table decor and the Dwell Ovell home page.

    FAQs

    How do you decorate a party table at home without spending a lot?

    Start with what you already own: plain plates, a runner or cloth, glass holders, and candles. Add one low centerpiece, such as a fruit bowl, greenery, or potted herbs, and one personal detail, such as handwritten place cards. Reuse candles, chargers, and glass holders across parties, and change only the runner, napkins, or balloons for a new look.

    What should be the centerpiece of a party table?

    A low centerpiece that guests can see over works best, such as a flower compote, a candle trio in glass holders, a fruit bowl, or a greenery runner. Choose one main centerpiece per table, not several competing groups, and keep it narrow enough to leave room for plates and serving dishes. The centerpiece should suit the occasion and the time of day, with candles or fairy lights for evening parties and flowers or fruit for daytime gatherings.

    How high should party table decorations be?

    Keep the main centerpiece below eye level when guests are seated, so they can see each other across the table. Keep centerpiece items low above the table surface, with taller items, such as a cake stand or marquee letters, at the end of the table rather than the center. Overhead decor, such as paper lanterns, can sit higher, since it does not block the table itself.

    How do you decorate a party table for a birthday?

    Use a clear color palette, a balloon cluster or paper lanterns for instant party color, and one personal detail, such as photos, a welcome sign, or marquee numbers for the age. Keep the cake on a raised stand as the focal point, and add kids activity place settings if children will attend. Keep the centerpiece low, so guests can talk and eat comfortably, and use battery candles near balloons and paper decor.

    What colors work best for party table decorations?

    Two or three colors work best, with one main color, one supporting color, and one neutral, such as white, cream, or wood. Repeat each color at least twice, in the runner, napkins, and at least one centerpiece item, so the table looks planned rather than random. For a calm table, use soft colors with one metallic accent; for a lively birthday, use two bright colors with white as the neutral.

    How do you keep a party table safe with candles and children?

    Keep real flames in glass holders, clear of paper, balloons, dried material, and fabric, and never leave them burning unattended. Use battery candles near children, loose paper decor, or dried greenery, and keep small loose pieces, such as confetti and small favors, away from very young children. Secure balloons on weights away from candles, and place the drink station at the end of the table, so spills do not reach the centerpiece.

  • 17 DIY Placemat Ideas to Personalize Your Dining Table

    17 DIY Placemat Ideas to Personalize Your Dining Table

    To make DIY placemats, pick a material that suits your table, cut it to about 12 by 18 inches, finish the edges, and use the same size at every place. Fabric, cork, rope, leather, and paper all work, and most projects need only basic tools and one test piece before you make a full set.

    A placemat frames each plate, protects the table, and sets the color story for the whole setting, so it is one of the easiest ways to change how a dining table looks. You do not need a new dinner set or a full room refresh to get a different feel at dinner. Start with the table you already own, the plates you use most, and one material you enjoy working with, then make one test placemat before you cut fabric or board for a full set. The 17 ideas below cover sewn, no-sew, woven, printed, and upcycled projects, so you can pick a weekend project or a quick evening make. For seasonal table styling, see the fall table decor ideas and spring tablescapes on Dwell Ovell.

    Key Takeaways

    • Measure your largest dinner plate first, then choose a placemat at least 2 inches wider than the plate on each side, so cutlery and a glass fit without crowding the next place.
    • Make one test placemat before a full set, and check that it lies flat, holds a plate steady, and washes or wipes clean the way you need it to.
    • Match the material to the meal: washable cotton and oilcloth suit everyday family meals, while linen, leather, and embroidered styles suit slower, special dinners.
    • Pair a patterned placemat with plain plates, and a plain placemat with patterned or colored dishes, so one layer leads at each place.
    • Repeat one color or texture from the placemats in one other detail, such as napkins or a centerpiece, so the table looks planned rather than crowded.
    • Store placemats flat or rolled, never folded hard across a printed, painted, or stitched design, so they keep their shape for the next meal.

    1. Simple Sewn Cotton Placemats with Mitered Corners

    Sewn cotton placemats with mitered corners under white plates on a wood table.

    Cut cotton fabric into rectangles of about 12 by 18 inches, with a matching backing piece for each one, and sew around the edges with a mitered corner so each corner lies flat and square. Press the seams as you go, turn the placemat right side out through a small gap, and topstitch close to the edge to close the gap and add a neat finish. A plain cotton or a small print both work, and a solid backing keeps the placemat from looking unfinished when it shifts on the table.

    This is a good first sewing project because the shape is simple and mistakes are easy to fix before you sew a full set. Wash and press the fabric before cutting, since cotton can shrink, and cut all pieces at the same time so the set matches. Use the same thread color throughout, and test the topstitch on a scrap piece first, so the stitch length looks even on the finished placemats.

    2. No-Sew Fabric Placemats with Iron-On Hem Tape

    No-sew fabric placemat being pressed with an iron and hem tape.

    Lay a rectangle of cotton or linen face down, fold each edge in twice to hide the raw edge, and press iron-on hem tape inside each fold to hold it in place. Work one edge at a time, following the heat and time guidance on the hem tape pack, and let each edge cool before you move the placemat, so the bond sets fully. A firm press with the iron matters more than speed, and a pressing cloth protects delicate fabric from shine marks.

    No-sew placemats suit a renter, a quick refresh before guests arrive, or anyone who does not own a sewing machine. Choose a medium weight fabric that holds a fold, since very thin fabric can ripple and very heavy fabric can resist the tape. Wash these placemats gently and check the hems after the first wash, since a loose corner can be re-pressed before it becomes a larger problem.

    3. Quilted Patchwork Placemats from Fabric Scraps

    Quilted patchwork placemats in mixed prints under plain plates.

    Sew small fabric squares into a patchwork top, add a thin batting layer and a backing fabric, then quilt through all three layers with straight lines or a simple grid. Bind the edges with a folded fabric strip, pressed and stitched in place, so the layers stay together through washing. The padding gives a soft base under plates and mutes sound on a hard table, which suits a busy family meal.

    Patchwork placemats work well when you already have a scrap box, since each placemat can mix prints that share one color. Keep the pieces in a similar weight, press each seam open or to one side in the same way, and square up each placemat before binding, so the set sits evenly at the table. Use plain plates with a patchwork set, since the placemat already carries the pattern at each place.

    4. Coiled Rope Placemats for a Natural Table

    Round coiled rope placemats under stoneware plates on a wood table.

    Wind thick cotton rope into a flat coil, stitching each round to the last with a sewing machine or by hand, until the mat reaches the size you need. Start with a tight center coil, keep the tension even so the mat stays flat, and finish the outer end by tucking it under and stitching it down firmly. A round or oval shape both suit this method, and a natural rope color pairs well with wood tables and plain stoneware.

    Rope placemats add texture without pattern, so they suit tables that already have patterned plates or colored glass. Check that the finished mat sits level, since an uneven coil can rock a plate, and trim any loose fibers after the first use. Spot clean rope mats and let them dry flat, since a wet rope mat can curl at the edges if it dries folded or hung up.

    5. Cork Placemats with a Fabric Backing

    Cork placemats with fabric backing under plates on a dining table.

    Cut cork sheet or thin cork tiles into rectangles, then glue a fabric backing to the underside so the mat grips the table and protects it from scratches. Seal the cork top with a clear sealant made for cork, following the drying time on the pack, and let the mats dry flat before you use them. Cork gives a warm, natural surface that wipes clean, and the fabric backing stops the mat from sliding on a polished table.

    This project suits a table that sees hot plates and mugs, since cork handles heat better than many fabrics, but it still needs care with very hot dishes straight from the oven. Keep the cork layer thin enough to cut cleanly with a sharp craft knife and a straight edge, and sand the cut edges lightly so they feel smooth. If a corner lifts, re-glue it and press it flat under a heavy book overnight.

    6. Stenciled Canvas Placemats in One Color

    Stenciled canvas placemats with a leaf motif beside paint supplies.

    Cut heavy cotton canvas into rectangles, hem or bind the edges, then stencil a single motif, such as a leaf, a stripe, or a simple border, in one paint color made for fabric. Tape the stencil flat, dab paint on with a stencil brush rather than brushing back and forth, and lift the stencil straight up so the edges stay crisp. Let the paint dry fully, then heat set it if the paint maker advises that step, so the design survives washing.

    One color keeps a stenciled set calm and easy to repeat at every place, and a single motif repeated in the same spot gives a matched set without a complex design. Test the stencil on scrap canvas first, since canvas texture can change how paint sits, and keep the motif clear of the area where the plate sits, so the design stays visible during the meal. Wash stenciled placemats gently and avoid harsh scrubbing on the painted area.

    7. Hand-Stamped Cotton Placemats with Fabric Paint

    Cotton placemats being hand stamped with fabric paint shapes.

    Stamp simple shapes onto plain cotton placemats with fabric paint, using a carved potato stamp, a foam shape, or a bought stamp. Load the stamp lightly, press it straight down without rocking it, and lift it cleanly, then space the shapes evenly across the mat, leaving the center clear for the plate. Let the paint dry fully and heat set it if the paint maker advises that step, before you wash or use the mats.

    Hand stamping suits a family project, since each person can stamp their own place, and it suits a themed table where one repeated shape carries the whole idea. Keep to one or two paint colors for a tidy result, and test the stamp on scrap fabric first, so the shapes print cleanly and at the right size. For a related handmade table idea, see the hand stamped placemats in the Valentine’s Day placemat ideas on Dwell Ovell.

    8. Embroidered Linen Placemats with a Simple Border

    Embroidered linen placemats with a stitched border under plain plates.

    Choose plain linen placemats or hemmed linen rectangles, then stitch a simple border, such as a running stitch, a stem stitch line, or a small repeated motif, near the edge of each mat. Mark the border lightly with a washable fabric marker, work the same design at every place, and press the finished mats from the back so the stitches sit neatly. A single thread color, such as cream on natural linen or navy on white, keeps the set calm.

    Embroidered placemats suit a slower dinner where the table is viewed up close and fabric texture matters, and they pair well with plain plates and clear glasses. Keep the stitching clear of the plate area, so plates sit level, and keep the design simple enough to repeat evenly across a full set. Wash linen placemats gently, press them while slightly damp, and store them flat so the stitched border does not crease.

    9. Macrame Placemats with Knotted Cotton Cord

    Macrame placemats in knotted cotton cord under plates.

    Knot cotton cord into a flat macrame panel using square knots and simple fringe-free edges, working from a top cord down to the finished length. Keep the knots even and the tension steady, since loose knots make a wavy edge and tight knots can pull the panel narrow. Finish the sides with a clean row of knots and trim any cord ends close, so the mat lies flat under a plate.

    Macrame placemats suit a relaxed, natural dining room with wood, rattan, or woven chairs, and they read as a crafted piece rather than a plain mat. Use a cord thickness that still lets a plate sit steady, since very chunky cord can rock a plate, and test one mat with your largest plate before you knot a full set. Shake macrame mats outside after meals and spot clean spills promptly, since cord can hold crumbs in the knots.

    10. Wipe-Clean Oilcloth Placemats for Everyday Meals

    Wipe-clean oilcloth placemats in a simple print under plates.

    Cut oilcloth or vinyl coated fabric into rectangles, seal or bind the edges so the layers do not peel, and wipe the mats clean after meals instead of washing them. A simple straight cut works when the material is thick enough to hold its shape, while a bound edge gives a softer finish and suits a thinner oilcloth. Choose a print that suits your kitchen, and keep the same size at every place so the table looks even.

    Oilcloth placemats suit everyday family meals, tables with young children, and outdoor dining, since spills wipe off and the mats dry fast. Avoid placing very hot dishes directly on vinyl, and keep sharp knives off the surface, since cuts show on coated fabric. Store oilcloth mats flat or rolled with the print facing out, since a hard fold can leave a lasting crease in the coating.

    11. Round Braided Rag Placemats from Fabric Scraps

    Round braided rag placemats in mixed cotton strips under plates.

    Braid three long fabric strips together, coil the braid into a round mat, and stitch each round to the last so the mat holds its shape. Use strips of similar weight, such as old cotton shirts or sheets, and join new strips with a small overlap so the braid stays even. A round mat suits a round table or a breakfast nook, and a mix of prints in one color family keeps the set from looking random.

    Braided rag placemats use up fabric that would otherwise go to waste, and the thick braid protects a wood table from plates and mugs. Press the finished mat under a heavy book overnight if it curls after coiling, and check that it lies flat before you make the rest of the set. Wash rag mats gently and dry them flat, since a thick braid takes longer to dry than a single layer of cotton.

    12. Burlap Placemats with a Stenciled Monogram

    Burlap placemats with a stenciled monogram under stoneware plates.

    Cut burlap into rectangles, bind or hem the edges to stop fraying, and stencil one letter or a simple word at one corner in a contrasting fabric paint. Burlap sheds fibers, so shake each mat outside before use, press it flat, and keep the stenciled area clear of the plate so the letter stays visible. A plain stoneware plate and a simple napkin suit burlap well, since the coarse texture already carries the rustic note.

    Monogrammed burlap placemats suit a farmhouse table, a gathering where each guest has a marked place, or a host who wants a personal detail without a full new setting. Use a bold stencil font that reads from across the table, and test the paint on scrap burlap first, since the open weave can let paint bleed. Layer a small white napkin on top of each placemat to soften the look, and avoid lace or velvet nearby, which would clash with the rustic tone.

    13. Faux Leather Placemats Cut to a Clean Shape

    Faux leather placemats in a clean cut shape under plain plates.

    Cut faux leather into rectangles, ovals, or rounded corner shapes with a sharp rotary cutter and a straight edge, then finish the edges with edge paint or a simple topstitch. Faux leather needs no hemming, since it does not fray, so the cut edge itself becomes the finish, and a clean, steady cut matters more than any extra trim. Choose a color that repeats in one other detail on the table, such as napkins or candle holders, so the set feels planned.

    Faux leather placemats suit a modern dining room and an evening meal, since the smooth surface wipes clean and pairs well with plain plates and simple cutlery. Keep the mats away from very hot dishes and open flames, and wipe them with a soft cloth after meals rather than soaking them. Store faux leather mats flat, since a fold can leave a crease that shows on the smooth surface.

    14. Kraft Paper Placemats Guests Can Write On

    Kraft paper placemats with handwritten notes beside pens.

    Cut kraft paper into placemat sized rectangles, or tear sheets from a kraft paper roll, and set out pens or crayons so guests can write names, notes, or small drawings on their own mat. The paper protects the table, and the personal notes become part of the decoration, which suits a casual family dinner, a gathering with children, or a relaxed celebration where formality would feel out of place. Use plain plates so the writing shows.

    Paper placemats are single use, so they suit occasions rather than everyday meals, and they cost little to make for a large group. Keep the pens simple and non bleeding, so ink does not soak through to the table, and place a plain underlayer on a light wood table if you worry about marks. Recycle or compost the paper after the meal where local rules allow it.

    15. Pressed Flower Placemats Sealed Under Clear Vinyl

    Pressed flower placemats sealed under clear vinyl on a bright table.

    Arrange dried, pressed flowers and leaves on a fabric or paper base, cover the arrangement with clear vinyl, and stitch or seal the edges so the flowers stay flat and protected. Press the flowers fully before you start, since damp stems can mark the base, and keep the arrangement clear of the plate area, so the flowers stay visible during the meal. A clear cover lets the botanical shapes show while keeping the surface wipe clean.

    Pressed flower placemats suit a spring or summer table, a brunch, or a garden room, where the floral detail ties the table to the season. Use flowers that press flat, such as small ferns, daisies, or leaves, rather than thick blooms that will not sit level under vinyl. Store these mats flat and out of direct sun, since strong sun can fade dried flowers over time, and wipe the vinyl gently rather than scrubbing it.

    16. Denim Placemats Upcycled from Old Jeans

    Denim placemats made from old jeans under plain plates.

    Cut the legs of old jeans into flat panels, join panels with a straight seam or a topstitched overlap, and hem or fringe the edges to finish each mat. Denim is sturdy, washes well, and suits a casual table, and details such as a pocket or a seam can become a feature if you plan where they sit, clear of the plate area. Wash the jeans before cutting, so the panels shrink before you sew them, not after.

    Denim placemats suit a family kitchen, a casual dinner with friends, or a home where durability matters more than a formal look. Mix light and dark denim in one set only if the tones share a similar wash, so the table does not look patchy, and pair denim mats with plain plates and simple glasses. If a pocket sits at a place, use it for a napkin or cutlery only when it lies flat, since a bulky pocket can tilt a plate.

    17. Placemats with a Sewn Cutlery Pocket

    Placemat with a sewn cutlery pocket holding cutlery and a napkin.

    Sew a basic placemat in cotton or linen, then add a flat pocket on one side, sized to hold a knife, fork, and napkin, stitched on three sides and open at the top. Place the pocket at the right or left edge, matching how each guest sits, and keep the pocket shallow enough that cutlery handles do not slide out when the mat is lifted. Topstitch the pocket edges for strength, since this part gets the most pulling during meals.

    A cutlery pocket turns the placemat into a complete place setting, which suits a buffet, an outdoor meal, or a table where space is tight and a separate cutlery roll would crowd the setting. Make the pocket from the same fabric or a contrast print, and test it with your actual cutlery before you sew a full set, since long handled cutlery needs a deeper pocket than short handled sets. Wash pocket placemats with the pockets open and dry them flat, so the pocket does not hold damp fabric against the mat.

    Conclusion

    DIY placemats work best when you start with one test piece, a size that fits your plates, and a material that matches how you actually use your table. A sewn cotton set suits everyday meals, a wipe-clean oilcloth set suits busy family tables, and a stitched, stamped, or pressed flower set suits a slower dinner where detail gets noticed. Pick one idea from this list, make a single placemat, and check how it looks and feels at your table before you commit to a full set. With that test done, the rest of the set is a repeat of a project you already know works. For more table ideas from Dwell Ovell, browse the home page for home decor guides.

    FAQs

    What size should DIY placemats be?

    DIY placemats should be about 12 by 18 inches for a standard dinner place, so a dinner plate fits in the center with room for cutlery on either side. Check your largest plate first, then choose a placemat at least 2 inches wider than the plate on each side, so the setting does not look cramped. For a small table or a breakfast nook, a slightly smaller mat can work, as long as the plate and cutlery still fit without crowding the next place.

    What is the easiest DIY placemat to make with no sewing?

    No-sew fabric placemats with iron-on hem tape are the easiest option, since you only need fabric, hem tape, and an iron, with no sewing machine or hand stitching. Cut the fabric to size, fold each edge in twice, press the tape inside each fold, and let each edge cool before you move the mat. Oilcloth placemats are another simple no-sew option, since the coated fabric holds its shape with a straight cut and wipes clean after meals.

    Which material is best for washable DIY placemats?

    Cotton is best for washable DIY placemats, since it washes well, presses neatly, and suits everyday family meals. Wash and press cotton before cutting, so shrinkage happens before you sew, and use a medium weight fabric that holds its shape at the table. Oilcloth and vinyl coated fabric are better when you want a wipe-clean surface rather than a machine wash, since they dry fast and suit tables with young children.

    How do I stop DIY placemats from sliding on the table?

    You stop DIY placemats from sliding by adding a fabric backing, a thin non slip mat, or a small piece of shelf liner under each placemat, or by choosing a material with a textured back, such as cork. Test the grip before the meal, especially on a polished wood or glass table, and avoid loose cloth layers that can shift when plates are set down. A placemat that grips well also helps plates stay steady during the meal.

    Can I make placemats from old clothes or fabric scraps?

    Yes, you can make placemats from old clothes or fabric scraps, and quilted patchwork, braided rag, and denim placemats are all built for that purpose. Use pieces of similar weight, wash them before cutting so shrinkage happens early, and press each seam so the finished mat lies flat. Keep the prints in one color family for a matched set, and pair a busy scrap placemat with plain plates, so the pattern does not compete with patterned dishes.

    How many placemats should I make for a full set?

    You should make one placemat per guest, plus one or two spares, so a dinner for six needs eight placemats in total. Count the places at the table, not the chairs in the room, and make the spares in the same design, so a spill does not leave one place looking different from the rest. A test placemat counts as one spare when it matches the set, which gives you a useful backup from the first project.

  • 19 Basket Decorating Ideas for Storage and Seasonal Displays

    19 Basket Decorating Ideas for Storage and Seasonal Displays

    Decorating a basket starts with a basket that fits the spot, one clear decoration such as a liner, ribbon, paint, or wrap, and contents that stay tidy. Match the basket size to what it will hold, keep the decoration simple enough to clean or swap, and let one seasonal fill carry the look.

    Start with the basket you already own, and check it first: a sturdy base, handles that hold weight, and a weave that will not snag fabric or scratch a table. Add one decoration at a time, then fill the basket and step back to check the size, color, and height in the room. For a table version of a seasonal basket, see the fall table decor guide, and for the same grouping rule applied to closed storage, browse the craft storage cabinet guide.

    Key Takeaways

    • Pick the basket for the job first: size, handle strength, and base shape matter more than the decoration.
    • Add one clear decoration, such as a liner, ribbon, paint, or wrap, and keep the rest plain.
    • Keep storage baskets easy to clean: use removable liners and washable fills where the basket will be handled often.
    • Swap only the fill for a new season, so one decorated basket can serve all year.
    • Keep display baskets low and stable, and keep flames, water, and heavy items clear of dried fills.
    • Label storage baskets in plain words, so everyone in the house puts things back in the right place.

    1. Fabric Liner Basket

    Woven basket with a cream fabric liner folded over the rim, holding folded yarn.

    Line a plain woven basket with a fabric liner, cut to fit the inside, with the top edge folded over the rim and stitched or pinned in place. The liner hides a worn interior, protects soft contents such as yarn or baby clothes, and gives a plain basket a finished look with no paint or glue. Choose a washable cotton fabric in a solid color or a simple stripe that suits the room.

    Measure the basket before cutting, and leave extra fabric at the top for the fold, since a liner that pulls tight will slip inside when the basket is lifted. Wash the fabric first if it may shrink, and make a second liner in a different color, so you can swap the look while one liner is in the wash. For a basket that holds heavier items, stitch the liner to a stiff base board cut to the basket floor.

    2. Ribbon Wrapped Handle Basket

    Woven basket with wide rust ribbon wrapped around its handles and a small bow.

    Wrap wide ribbon around each basket handle, winding it evenly from one end to the other, and finish with a simple bow at the base of each handle. The ribbon adds color and a soft grip, suits a gift basket or a basket carried to a gathering, and comes off easily when the season changes. Choose grosgrain ribbon for a grip that stays put, and a color that matches the basket fill.

    Wind the ribbon with a slight overlap, so no bare handle shows through, and secure the ends with a small stitch or a dot of craft glue on the underside. Keep the bow small and flat, so it does not catch on a door frame or a table edge. For a basket that will be carried often, wrap the handles again over the first layer after a few weeks, since ribbon can loosen with use.

    3. Painted Two Tone Basket

    Woven basket with a painted sage green lower half and a natural upper half on a wood floor.

    Paint the lower half of a woven basket in one solid color and leave the upper half natural, with a clean line where the two meet. The painted base grounds the basket, hides scuffs near the floor, and gives a plain basket a clear, modern look that suits a living room or bedroom. Use paint made for the basket material, and test it on the base first.

    Tape the line before painting, and paint in thin coats, so the weave still shows through and the basket stays flexible. Let each coat dry fully before adding the next, and seal the painted area if the basket will sit on a floor that gets mopped. For a softer look, paint only the rim band or one wide stripe near the base, and keep the rest of the basket natural.

    4. Stenciled Pattern Basket

    Plain basket with a stenciled diamond pattern around the outside in cream paint.

    Stencil a simple repeated pattern, such as dots, diamonds, or small leaves, around the outside of a plain basket, using a stencil and a small brush. The pattern gives a plain basket a custom look, suits a basket that will sit in plain sight, and lets you match a room color with one paint shade. Keep the pattern small and evenly spaced, so it reads as a border rather than a busy print.

    Hold the stencil flat against the weave and dab the paint lightly, since a loaded brush will bleed under the stencil edge. Practice on the back of the basket first, and wipe the stencil clean between repeats, so later repeats stay sharp. For a basket used by children, use a large, simple shape, such as stars, and keep the pattern to one band near the rim.

    5. Rope Wrapped Basket

    Basket fully wrapped in natural cotton rope, sitting on a light wood table.

    Wrap thick cotton rope around a plain basket from the base upward, gluing each row snugly against the last, until the whole outside is covered. The rope gives a smooth, coastal look, hides a stained or mismatched basket, and adds grip when the basket is carried. Use rope in a natural color for a calm look, or dyed rope for a stronger color note in the room.

    Start at the base and work upward in even rows, pressing each row tight so no gaps show the old basket beneath. Trim the rope end flush at the rim and tuck it inside, so it does not fray. For a large basket, wrap only the lower two thirds and leave the top weave showing, which saves rope and keeps the basket lighter.

    6. Yarn Wrapped Basket

    Basket wrapped in chunky cream and rust yarn bands beside a reading chair.

    Wrap chunky yarn around a basket in horizontal bands, changing color at each band, to give a soft, knitted look that suits a bedroom or a reading corner. The yarn softens a stiff basket, adds warmth beside a chair or bed, and lets you use leftover yarn in colors that already appear in the room. Choose a thick yarn that covers the weave in one or two passes.

    Wind the yarn firmly and keep the tension even, so bands do not sag or bunch. Secure each color change on the inside of the basket, where the knot will not show. For a basket that will hold heavy items, wrap the yarn over a sturdy basket and keep the handles clear, since yarn over a handle can slip when the basket is lifted.

    7. Greenery and Dried Flower Rim Basket

    Woven basket with faux greenery and dried flowers tucked around its rim on a console table.

    Tuck short stems of faux greenery and dried flowers around the rim of a basket, fixing them in place with wire or by weaving them through the top rows. The rim fill turns a plain storage basket into a display piece, suits an entryway or a mantel, and needs no water or upkeep. Use stems in one color family, such as cream, sage, and pale gold, for a calm look.

    Trim stems short, so they sit close to the rim and do not tip the basket or brush a wall. Fix each stem at two points, so it stays put when the basket is moved. For a basket that will also hold items, keep the rim fill to one side only, so the opening stays clear for reaching inside.

    8. Fall Harvest Basket

    Wide shallow basket filled with small pumpkins, gourds, and pinecones on a porch step.

    Fill a wide, shallow basket with small pumpkins, gourds, pinecones, and a few dried leaves, and set it on a porch step, a hearth, or a console table. The harvest fill gives a clear fall display, uses items that store well, and can move from the porch to the table for a gathering. Vary the pumpkin sizes, with one larger pumpkin in the middle and smaller ones at the sides.

    Set the heaviest items at the bottom and the lightest leaves on top, so the basket stays stable. Keep dried leaves clear of real flames, and use battery candles if you add candlelight beside the basket. At the end of the season, keep the basket and swap only the fill, so the same basket can carry a winter or spring display next.

    9. Christmas Basket Display

    Sturdy basket with pinecones, evergreen sprigs, and gold ornaments beside a fireplace.

    Fill a sturdy basket with pinecones, faux evergreen sprigs, and a few plain ornaments in one metal finish, such as gold or silver, and set it beside a door, a fireplace, or a staircase. The basket display gives a holiday note without a tree, suits a small room or an entryway, and packs away in one piece after the season. Keep the tallest sprigs at the back and the ornaments low, so the group stays balanced.

    Use shatterproof ornaments near a doorway or a floor basket, since a basket at floor level can be bumped. If you add fairy lights, use battery lights with a timer, and keep the battery pack where you can reach it without lifting the whole display. For a basket that will also hold gifts, keep the display fill to a shallow top layer, so gifts can sit beneath it.

    10. Spring Flower Basket

    Light basket filled with pink faux tulips and green leaves on a bright windowsill.

    Fill a light basket with faux tulips, daffodils, or cherry blossom stems, plus a few green leaves, and set it on a table, a windowsill, or a porch bench. The flower fill gives a clear spring display, needs no watering, and can be refreshed by swapping one stem color at a time. Choose stems in one main color, such as pink or yellow, with white as a second color.

    Cut stems to two heights, so the group has shape without blocking a window or a conversation across the table. Fix the stems in a block of floral foam inside the basket, so they stay upright when the basket is moved. For a real flower version, set a watertight container inside the basket first, and check the water level daily, since a woven basket will mark if it gets wet.

    11. Summer Beach Basket

    Natural basket with shells, driftwood, and a folded striped towel in a sunroom.

    Fill a natural basket with shells, a small piece of driftwood, and a folded striped towel, and set it in a bathroom, a sunroom, or an entryway. The beach fill gives a summer note, suits a coastal or relaxed room, and can hold real beach items, such as sunscreen and a book, during the season. Keep the shells large enough to handle easily, and rinse gathered shells before bringing them inside.

    Set the towel at the back as a backdrop, and group the shells in one small cluster rather than scattering them, so the basket still looks tidy. For a basket used at the beach, skip fragile shells and use the basket for towels and dry clothes only. At the end of summer, wash the basket and store the shells in a small box, so the basket is ready for a fall fill.

    12. Blanket Basket by the Sofa

    Large deep basket beside a sofa holding rolled throws with tops folded over the rim.

    Set a large, deep basket beside the sofa, roll two or three throws inside, and fold the top of each throw over the rim. The blanket basket keeps throws in reach for evenings on the sofa, hides folded blankets in plain sight, and suits a living room better than a pile on a chair. Choose a basket tall enough that the throws stand upright without tipping.

    Roll throws rather than folding them flat, since rolled throws take less room and are easier to pull out one at a time. Wash throws on a regular cycle, since a basket beside a sofa collects dust. For a small living room, use a narrow basket with one throw and a small cushion, so the basket does not crowd the walkway.

    13. Rolled Towel Basket in the Bathroom

    Medium basket on a bathroom stool holding rolled white hand towels standing upright.

    Set a medium basket on a bathroom counter or a stool, roll hand towels and washcloths inside, and stand the rolls upright with the folded ends facing out. The towel basket keeps fresh towels in reach, suits a guest bathroom, and looks tidy with no extra shelving. Choose a basket that fits the counter or stool, and leave room for one spare roll.

    Roll towels tightly, so they stand on their own and do not unroll when one is pulled out. Keep the basket away from direct shower spray, and wash the liner, if you use one, with the towels. For a small bathroom, use a wall basket or a hanging basket with one rolled towel, so the counter stays clear.

    14. Toy and Book Basket for Children

    Low wide basket in a play corner holding upright board books and soft toys with a plain label.

    Set a low, wide basket in a play corner or a bedroom, fill it with board books standing upright and a few soft toys on top, and add a simple label on the front. The low basket lets children reach books and toys on their own and put them back, and it keeps a play area tidy with one container. Choose a basket with no sharp edges and a base that will not tip when a child pulls a book out.

    Keep the basket light, with books at the bottom and soft toys on top, so it stays stable. Sort the contents weekly, and move outgrown books or broken toys, since a full basket soon becomes a mixed bin. For a shared room, use one basket per child, each with a different label color, so sorting stays simple.

    15. Pantry Basket with Labels

    Row of matching baskets on a pantry shelf with plain labels for snacks and baking supplies.

    Line a row of matching baskets on a pantry shelf, one per group, such as snacks, baking supplies, or tea and coffee, and fix a plain label to the front of each basket. The labeled baskets keep pantry shelves tidy, let you pull out one whole group at a time, and suit a kitchen with open shelves. Use baskets that fit the shelf depth, with handles that clear the shelf edge.

    Label each basket in plain words, such as snacks or baking, and keep the label facing out. Put daily items at hand level and backup stock higher or lower, so the most used basket is the easiest to reach. Wipe baskets clean when a spill happens, and check labels each season, since pantry groups change as cooking habits change.

    16. Plant Basket Cover

    Leafy potted plant in a woven basket cover on a wood floor beside a window.

    Set a potted plant, still in its nursery pot, inside a woven basket, so the basket acts as a cover that hides the plastic pot. The basket cover gives a plant a finished look, suits a floor plant or a table plant, and lets you move the plant for watering without a heavy ceramic pot. Choose a basket slightly wider than the pot, so air can move around it.

    Set a saucer or a watertight tray inside the basket first, and lift the plant out to water it, so the basket stays dry. Check the basket base each month for damp marks, and let it dry fully if it gets wet. For a hanging plant, use a basket with a strong handle and a light pot, and hang it from a hook rated for the full weight when watered.

    17. Gift Basket Arrangement

    Gift basket lined with tissue paper holding tea items, a small jar, and greenery sprigs.

    Build a gift basket by lining a basket with tissue paper, setting the tallest gift at the back, and filling gaps with smaller gifts and a few sprigs of greenery or a ribbon curl. The arrangement looks finished as a gift, suits a hostess gift, a birthday, or a housewarming, and lets the basket itself stay as part of the gift. Choose gifts in one theme, such as tea, baking, or bath items, so the basket reads as one gift rather than a mixed box.

    Wrap fragile items first, and set heavy items at the bottom, so nothing crushes a lighter gift. Finish with a clear wrap only if the basket will travel, and tie the wrap with a ribbon at the top. For a gift that will be opened at once, skip the wrap and set a card on top, so the gifts show clearly.

    18. Table Centerpiece Basket

    Low wide basket centerpiece on a dining table with candles in holders and small stem vases.

    Set a low, wide basket in the center of a dining table, and fill it with a short candle group in holders, a few small vases with single stems, or a bowl of fruit. The centerpiece basket keeps the group contained, lifts off in one move when the table needs to clear, and suits both everyday meals and gatherings. Keep the whole group low, so guests can see across the table.

    Use battery candles if the basket holds dried stems or paper, and keep real flames in holders, clear of the basket weave. For a fruit centerpiece, line the basket first, and check the fruit every few days, moving any soft piece to the kitchen. For a small table, use a single small basket with one candle and one stem, rather than a large group.

    19. Wall Hung Basket Display

    Three flat-backed baskets hung on a wall in a triangle, each with one dried stem.

    Hang two or three flat-backed baskets on a wall in a row or a triangle, and leave them empty or fill each one with a single dried stem or a small faux plant. The wall display turns baskets into wall art, suits a hallway, a stairwell, or a dining room wall, and uses wall space that a floor basket cannot. Choose baskets in the same material but different sizes, so the group looks planned.

    Fix each basket with a hook rated for its weight, and test the hang by pressing gently before filling it. Keep the group clear of door swings and high traffic, where a hanging basket could be bumped. For a rented home, use removable hooks and light baskets, so the wall stays undamaged when the display comes down.

    Conclusion

    A decorated basket works best when the basket fits the job, the decoration stays simple, and the fill can change with the season. Start with one idea from this list that fits a basket you already own, such as a liner, a ribbon wrap, or a seasonal fill, and use the basket for a week before adding another layer. Storage baskets stay useful when they are labeled, easy to clean, and sized for the shelf or the spot beside a chair. Display baskets stay fresh when only the fill changes, so one good basket can carry a harvest display in fall, a holiday display in winter, and flowers in spring. Try one basket first, keep what works, and change only one detail at a time until the basket feels like part of the room.

    Frequently Asked Questions

    What is the easiest way to start decorating a basket?

    The easiest way to start decorating a basket is to add a fabric liner, since a liner hides a worn interior, protects soft contents, and can be removed for washing. Measure the basket first, cut the fabric with extra at the top for a fold over the rim, and make a second liner in another color for an easy change.

    How do I keep a decorated basket useful for storage?

    A decorated basket stays useful for storage when the decoration is removable or washable, the basket size matches its contents, and the basket is labeled in plain words. Use a liner for soft items, keep handles clear for carrying, and avoid decorations that shed, snag, or block the opening.

    What should I put in a basket for a seasonal display?

    A seasonal basket should hold one clear fill, such as small pumpkins and pinecones for fall, evergreen sprigs and ornaments for Christmas, or faux tulips for spring. Keep the tallest items at the back, the heaviest items at the bottom, and the whole group low and stable, so the basket can move without tipping.

    Can I use a basket as a plant cover?

    Yes, you can use a basket as a plant cover by setting the potted plant, still in its nursery pot, inside a basket slightly wider than the pot. Set a saucer or a watertight tray inside first, lift the plant out to water it, and check the basket base for damp marks, so the weave stays dry.

    How do I decorate a basket without paint or glue?

    You can decorate a basket without paint or glue by adding a fabric liner, wrapping ribbon around the handles, tucking faux greenery around the rim, or changing the fill for the season. These methods come off easily, leave the basket undamaged, and let one basket serve both storage and display.

    How do I hang baskets on a wall safely?

    Hang baskets on a wall safely by choosing flat-backed, light baskets, fixing each one with a hook rated for its full weight, and testing the hang with a gentle press before adding any fill. Keep the group clear of door swings and high traffic, and use removable hooks in a rented home, so the wall stays undamaged.


  • How to Make a DIY Rope Basket for Stylish Home Storage

    How to Make a DIY Rope Basket for Stylish Home Storage

    To make a DIY rope basket, coil cotton rope in a flat spiral for the base, then coil upward to form the walls, joining each row with glue or stitches as you go. Add handles, trim the end, and let the basket dry before use. The process takes a few hours and needs only rope, glue or thread, and scissors.

    A coiled rope basket is a practical first rope project because the method stays the same from start to finish: each new row sits beside the last one and is fixed in place before you move on. That repetition makes it easy to control the size and shape as you work, and it leaves room to change direction, add a color accent, or stop at any height that suits the spot. This guide walks through the process in order, from planning the size to finishing the rim and handles, so the basket holds its shape and stands up to daily use.

    Key Takeaways

    • Decide the basket size and job first, since the base width and wall height follow from what the basket will hold.
    • Use soft cotton rope that coils easily, and test a short coil before you commit to a full basket.
    • Join each row as you go with glue or stitches, rather than coiling first and fixing later, so rows stay tight and even.
    • Build the walls slowly, checking the shape from the side often, so the basket rises straight instead of leaning or flaring.
    • Finish the rim and handles with care, since the top edge and handles take the most strain in daily use.
    • Let glue dry fully before you load the basket, and spot clean it rather than soaking it.

    Supplies You May Need

    • Cotton rope, soft and flexible, in one main color
    • A smaller amount of rope in a second color, if you want accent rows
    • A hot glue gun and glue sticks, or a large needle and strong thread for stitching rows together
    • Sharp scissors or a craft knife for cutting rope cleanly
    • A bowl, bucket, or pot to use as a mold for shaping the basket
    • Cling film or a plastic bag to cover the mold so glue does not stick to it
    • Clips, clothespins, or binder clips to hold rows in place while glue sets
    • A tape measure or ruler for checking base width and wall height
    • A fabric remnant and a needle and thread, if you plan to add a liner
    • A lighter or matches for sealing cut rope ends, used with care and kept away from the glue gun

    1. Decide the Size, Shape, and Job

    Tape measure and notebook with basket size notes beside a shelf space.

    Start by deciding what the basket will hold, since that choice sets the base width and wall height. A small basket for keys, remotes, or craft tools needs a base of about six to eight inches and low walls, while a basket for blankets or toys needs a base of ten to twelve inches and taller walls. Measure the shelf, table, or floor spot where the basket will sit, and note the largest width and height that fit without blocking a drawer or door.

    Choose a shape that suits the spot and your skill level. A round basket is the simplest first shape, because the coil turns evenly and the walls rise in a steady circle. An oval basket works well on a narrow shelf, but it needs more care to keep both sides even. Write down the target base width and wall height before you buy rope, so you can judge how much rope the project needs and stop coiling at the right point rather than guessing as you go.

    2. Gather Rope and Supplies

    Coils of natural cotton rope and accent rope with scissors and a glue gun on a table.

    Choose soft cotton rope that bends into a tight coil without springing back or cracking. Rope around one quarter to three eighths of an inch thick suits most home baskets: thinner rope gives a finer look but takes more rows, while thicker rope builds height fast and gives a chunkier result. Check the rope by coiling a short length in your hand; it should lie flat against itself without gaps and hold a curve without kinking.

    Set out all supplies before you start, so you do not pause mid coil with glue cooling or rows slipping. You need the rope, glue gun or needle and thread, scissors, clips, and the mold you plan to use, plus a clear work surface large enough to turn the basket as it grows. If you plan accent rows, keep the second color rope beside the main rope and decide now where the accents will fall, such as two rows near the rim or a band partway up the wall.

    3. Choose a Mold and Protect Your Work Surface

    Bowl covered in cling film as a mold for a rope basket on a work table.

    A mold helps a first basket keep a steady shape, especially while the walls rise. Find a bowl, bucket, or pot close to the base width you planned, with sides that slope gently outward or run straight, so the finished basket slides off easily. A mold with a narrow neck or a sharp inward curve will trap the basket, so test the fit by picturing the basket lifting straight up off the mold.

    Cover the mold with cling film or a plastic bag, smoothing it over the outside so glue cannot bond the rope to the mold. Protect your table with an old cloth or cardboard, since hot glue drops and loose fibers land on the surface as you work. Set the mold upside down on the table if you plan to coil the base on its flat bottom, or right side up if you prefer to coil the base flat on the table and use the mold only for shaping the walls.

    4. Start the Coil for the Base

    Hands starting a tight flat spiral coil of cotton rope on a table.

    Begin the base with a tight flat spiral, since a neat center gives the whole basket a steady start. Fold the rope end back on itself for about two inches and glue or stitch the fold in place, so the raw end sits hidden inside the coil rather than sticking out. Then wind the rope around that folded end, pressing each new loop flat against the last one and fixing it with a dot of glue or a few stitches at regular points around the circle.

    Work slowly for the first few rounds, since gaps or overlaps at the center show in the finished base and tilt the rows that follow. Keep the coil flat on the table, pressing it down lightly after each round, and check from above that the spiral stays round. If a gap opens, pull the row back, add a little more glue or an extra stitch, and press the rows together before moving on. A firm, flat start makes every later step easier.

    5. Coil the Base to Full Width

    Flat round coiled rope base measured with a tape measure.

    Keep coiling outward, row by row, until the flat base reaches the width you planned in step 1. Measure across the base after every few rows, since it is easy to coil past the target while focused on keeping rows tight. Fix each row to the last one as you go, with glue dots spaced a few inches apart or stitches at matching intervals, and clip each new row in place for a moment when the glue sets.

    Keep the tension even as you coil: rope pulled too tight curls the base upward at the edges, while rope left too loose leaves gaps between rows. If the base starts to cup, ease the tension on the next rows and press the coil flat; if gaps appear, press the rows together and add an extra fixing point. Stop when the base measures the planned width, and mark that point in your mind, since the next step changes the direction of the coil.

    6. Turn the Coil Up to Form the Walls

    Rope coil turning upward from the base to form the first wall rows on a mold.

    To form the walls, start stacking each new row on top of the last row instead of beside it, so the coil rises instead of spreading. Place the next row on the outer edge of the base, angle it slightly upward, and fix it to the row below with glue or stitches. The first wall row sets the angle for the rest, so take time with it: a row that leans outward makes a flared basket, while a row stacked straight up makes a tall, straight sided basket.

    If you use a mold, slide the base over the mold now, with the base sitting on the mold bottom and the wall rows rising against the mold sides. The mold guides the angle and stops the walls from leaning as they grow. Keep the coil snug against the mold, but not so tight that the finished basket cannot slide off. Check the first two wall rows from the side before you continue, and adjust the angle while the glue is still easy to correct.

    7. Keep Rows Tight and Even as You Build Height

    Half built rope basket with even wall rows and clips holding the latest row.

    Continue coiling upward, row by row, until the walls reach the height you planned. Fix each row to the one below it at regular points, and check the height at several spots around the basket after every few rows, since one side often grows faster than the other when you favor one hand. Turn the basket as you work, so you always fix the row in front of you and can see the shape from the side.

    Watch for two common faults as the walls grow. If rows drift apart, press them together and add extra glue or stitches at the gap before the next row covers it. If the wall starts to lean, ease the coil back toward the mold and hold it with clips until the glue sets. Work in short stretches rather than rushing the full height at once, and pause to compare the basket with your planned height, so you stop at the right row rather than coiling past it.

    8. Add a Color Accent or Wrapped Row

    Rope basket wall with an accent color row partway up the side.

    An accent row adds interest without changing the method, and the simplest place for one is near the rim or as a band partway up the wall. To add an accent, cut the main rope, seal the cut end, and join the accent rope with glue or a few stitches, hiding the join on the inside of the wall where it will not show. Coil the accent rope for one or two rows, fixing it like every other row, then switch back to the main rope the same way.

    Keep accents simple on a first basket: one or two rows in a second color, or a single row wrapped in fabric or twine, reads clearly and does not break the rhythm of the coil. Avoid switching colors every row, since each join is a weak point and a place where the coil can slip. If you use dyed rope, check that the color does not rub off on your hands or on light items the basket will hold, and keep accent rows away from the base, where they wear fastest.

    9. Finish the Top Edge Cleanly

    Tapered rope end tucked and glued flat against the top rim of a rope basket.

    The top edge takes the most handling, so finish it with care. Coil the last row at the planned height, then taper the rope end by cutting it at an angle so it tucks neatly against the row below instead of ending in a blunt step. Glue or stitch the tapered end firmly in place, pressing it flat against the wall and holding it with a clip until the glue sets or the stitches hold.

    Run your finger around the rim to check for loose spots, gaps, or a raised end that could catch on clothes or skin. Add a small extra dot of glue or an extra stitch anywhere the rim feels loose, and trim any stray fibers with scissors for a tidy edge. A clean, firm rim also makes the next step easier, since handles attach best to a rim that holds its shape when pulled.

    10. Make and Attach Rope Handles

    Rope handle loop being stitched to the outside wall of a rope basket below the rim.

    Handles make the basket easy to lift, and simple rope loops suit the coiled style. Cut two equal lengths of rope for the handles, each long enough to arch a few inches above the rim with enough spare at each end to fix to the wall. Seal the cut ends, then shape each length into a loop and hold it against the outside of the basket, opposite sides for balance, with the ends sitting flat against the wall just below the rim.

    Fix each handle end with several stitches through the wall rows, or with a generous amount of glue held by clips until set, and add a second fixing point a row lower for strength. Test each handle by lifting the empty basket, then by lifting it with a light load, and check that the handle ends do not pull away from the wall. If a handle shifts, add more stitches before the basket goes into use, since a handle that fails under load drops the contents.

    11. Trim Loose Ends and Secure the Last Row

    Trimming loose thread ends and stray fibers from a finished rope basket.

    With the rim and handles in place, inspect the whole basket for loose ends, stray fibers, and rows that need an extra fixing. Trim thread ends close to the wall, snip loose rope fibers flush with the coil, and seal any fresh rope cuts with a quick pass of heat, keeping the flame away from glue and thread. Press each row once more, and add glue or stitches anywhere two rows still part when you press them gently.

    Pay close attention to the join points where you changed colors or started the handles, since those spots carry extra strain. A few extra stitches at a join cost little time and stop a row from peeling later. When the basket feels firm all around, with no row lifting and no handle end shifting, the structure is done, and the remaining steps cover removing the mold, adding a liner, and putting the basket to use.

    12. Remove the Mold and Check the Shape

    Finished rope basket sliding off its covered bowl mold.

    Slide the basket gently off the mold, easing it upward and turning it slightly as you lift, rather than forcing it straight off. Remove the cling film or plastic bag, and check the inside of the basket for glue strings or film scraps, trimming or peeling them away. Set the basket on a flat surface and look at it from the side and from above: the base should sit flat without rocking, and the rim should sit level all around.

    If the basket rocks, press the base flat and check whether one wall row sits lower than the rest, then add a small fixing to hold the low side in place. If a wall leans slightly, push it back toward the mold shape and hold it with clips while you add a few extra stitches. Leave the basket empty overnight so glue sets fully and the shape settles, and do not load it until the structure feels firm and dry to the touch.

    13. Add a Fabric Liner

    Fabric liner folded over the rim of a rope basket.

    A liner is optional, but it suits baskets that hold small items, snacks, or toiletries, since it stops small things from slipping through gaps between rows. Measure the inside of the basket, then cut a fabric piece a little larger than the inside, with enough extra at the top to fold over the rim. Sew a simple open topped bag shape, with seams on the outside, and press the seams flat before fitting it.

    Set the liner inside the basket, fold the top edge over the rim, and fix it in place with a few stitches through the rim rows or with small clips that you can remove for washing. Keep the liner loose enough to lift out for cleaning, rather than gluing it to the basket, since a removable liner lasts longer and lets you wash it on its own. If you skip the liner, the basket still works well for larger items such as blankets, toys, and magazines that cannot slip through the coil.

    14. Style, Use, and Care for the Basket

    Finished rope basket with a liner holding rolled towels in a bathroom.

    Place the finished basket where it will earn its keep, such as beside a sofa for blankets, in an entryway for keys and small daily items, in a bathroom for rolled towels, or in a bedroom for craft supplies. Group it with the room rather than hiding it: a rope basket suits natural textures, wood, linen, and plants, and it works best when the items inside match its size, so nothing overflows the rim or strains the handles.

    Care for the basket with simple habits. Spot clean marks with a damp cloth and mild soap, then let the basket air dry fully before you put items back, since trapped damp softens glue and can leave a musty smell. Avoid soaking the basket or putting it in a washing machine, and keep it out of constant damp, such as a spot right beside a shower. Empty it now and then, shake out dust and fibers, and check the rim, handles, and joins, adding a stitch or a dot of glue at the first sign of wear.

    Conclusion

    A DIY rope basket comes down to one repeated action: coil the rope, fix each row to the last, and keep checking the size and shape as you go. Plan the size first, start with a flat, tight base, turn the coil up into even walls, and finish with a firm rim and strong handles. A liner adds a neat finish for small items, and simple care keeps the basket useful for a long time. Start with a small round basket to learn the coil, then adjust the size, height, and accent rows for the next one. For more storage ideas from Dwell Ovell, browse the home page, and see how a craft storage cabinet groups supplies by use, or how to organize a small bedroom with zones and fixed places for daily items.

    FAQs

    How much rope do I need for a DIY rope basket?

    The amount of rope depends on the basket size and rope thickness, so buy more than you expect to use and keep the spare for repairs or a second basket. A small basket with a six to eight inch base needs far less rope than a large blanket basket, and thicker rope builds height with fewer rows. Measure your planned base and wall height first, then check the rope length on the label before you start coiling.

    What kind of rope works best for a rope basket?

    Soft cotton rope works best for a first rope basket, because it coils flat, bends without kinking, and holds glue and stitches well. Rope around one quarter to three eighths of an inch thick suits most home baskets, giving a balance of fine detail and steady height. Avoid stiff synthetic rope for a first basket, since it springs back from the coil and leaves gaps between rows.

    Should I glue or sew the rows of a rope basket?

    Both methods work, and the choice depends on the tools you have and how much strain the basket will take. Hot glue is fast and suits a basket that holds light items, while stitching with strong thread takes longer but holds better under heavier loads and survives more handling. Many makers use glue to hold rows in place while they work, then add stitches at the rim, handles, and joins for strength.

    Why does my rope basket lean or flare as I coil?

    A basket leans when one side grows faster than the other, or when the wall rows drift away from the mold or the planned angle. Turn the basket as you work, check the height at several points around the rim after every few rows, and keep each new row snug against the mold. If a lean appears, ease the coil back into line and hold it with clips until the glue sets, before you add more rows on top of it.

    How do I keep a rope basket clean?

    Spot clean a rope basket with a damp cloth and mild soap, then let it air dry fully before you put items back inside. Avoid soaking the basket or machine washing it, since water softens glue, loosens stitches, and can leave damp trapped between rows. A removable fabric liner helps, because you can lift it out and wash it on its own while the basket stays dry.

    Can I use a DIY rope basket for heavy items?

    A rope basket suits light to medium items such as blankets, toys, magazines, towels, and craft supplies, but it is not the best choice for very heavy items such as books or tools. Heavy loads strain the handles and the rim, and they can pull rows apart over time. For heavier storage, keep loads modest, carry the basket by its base as well as its handles, and check the handle fixings often.

  • 21 Planter Decoration Ideas for Indoor and Outdoor Spaces

    21 Planter Decoration Ideas for Indoor and Outdoor Spaces

    Planter decoration works best when the pot, the plant, and the spot fit together: choose a container that suits the light and scale of the space, match the plant to indoor or outdoor conditions, and group planters by height so the display reads as planned rather than random.

    A planter is more than a holder for soil. Its material, color, and shape set the tone of a corner, a porch, or a table, and its size decides whether a plant looks settled or cramped. The ideas below cover small indoor groups, large outdoor statements, and simple methods for changing a display with the seasons. Start with the spot you see most often, then build out from there.

    Key Takeaways

    • Match the planter to the light, scale, and water needs of the spot before you choose a plant.
    • Group planters in odd numbers and varied heights so a display looks planned from the main viewpoint.
    • Use drainage holes and saucers or trays, especially indoors, to protect floors and furniture.
    • Repeat one material or color across a group to tie separate planters together.
    • Place tall and trailing plants where they have room to grow without blocking paths or light.
    • Change a planter display with the seasons by swapping plants, not by buying new pots each time.

    1. Terracotta Cluster by the Front Door

    Terracotta pots of varied heights clustered beside a front door.

    Group three or five terracotta pots of varied heights beside the front door, with the tallest at the back and the smallest at the front. Terracotta suits an entry because its warm clay color works with brick, wood, and painted doors, and its weight keeps pots steady in wind. Use plants that suit the light at the door, such as hardy shrubs for a sunny step or shade tolerant ferns for a covered porch.

    Keep the cluster clear of the swing of the door and the main walking path. Set pots on a tray or on pot feet outdoors so water drains away from the step, and check soil moisture more often in hot weather, since clay pots dry out faster than plastic or glazed pots. A cluster reads as one welcome display when the pots share the same material, even if the plants differ.

    2. Tall Ceramic Planters in a Living Room Corner

    Tall glazed ceramic planters with upright plants in a living room corner.

    Place two tall ceramic planters in an empty living room corner to give the room height and a clear focal point. Glazed ceramic holds moisture longer than terracotta, which suits indoor plants that prefer steady soil moisture, and its smooth finish suits rooms with polished furniture and soft fabrics. Choose a plant with an upright shape, such as a snake plant or a fiddle leaf fig, so the height of the pot and the plant work together.

    Set the planters where they get the light the plant needs, and keep them clear of heating vents and cold drafts from exterior doors. Use a saucer inside a decorative outer pot, or a pot with a drainage hole set on a waterproof tray, so watering does not mark the floor. Two matching planters look settled, while two different heights add movement to a corner that otherwise sits empty.

    3. Hanging Planters in a Bright Window

    Hanging planters with trailing plants in front of a bright window.

    Hang two or three planters at varied heights in front of a bright window to use vertical space that floor pots cannot reach. Trailing plants such as pothos or string of pearls suit hanging planters, since their stems fall below the pot and soften the window frame. Choose hangers with a secure hook fixed into a stud or a ceiling anchor rated for the weight of a watered pot.

    Hang the lowest planter high enough that no one walks into it, and keep a small watering can nearby, since hanging pots dry out faster in sun and moving air. Rotate each planter a quarter turn every week or two so growth stays even on all sides. A window group works best when the plants share similar light and water needs, so one watering routine suits them all.

    4. Wall Mounted Planters Above a Hallway Console

    Wall mounted planters with small plants above a hallway console table.

    Fix wall mounted planters above a hallway console table to add green at eye level without taking up floor or table space. Shallow wall planters suit small trailing or compact plants, and a row of three keeps the display tidy in a narrow hall. Mount the brackets firmly into studs or use wall anchors rated for the weight of soil, plant, and water.

    Choose plants that cope with the light in the hall, and keep watering simple by using planters with a removable inner pot that you can lift out, water, and drain before putting back. Place a small tray on the console below only if drips are a risk, and wipe the wall behind the planters now and then to catch dust and water marks. This idea suits rented homes too, provided the fixings suit the wall type and the landlord rules allow them.

    5. Tiered Plant Stand in an Empty Corner

    Tiered plant stand with potted plants at different heights in a corner.

    Use a tiered plant stand to turn an empty corner into a layered planter display. A stand with three or four levels holds small and medium pots at different heights, so every plant gets light and air, and the group takes up less floor space than the same pots spread in a row. Place sun loving plants on the top tier and plants that cope with less light lower down.

    Check the stand for stability before you load it, and keep heavier pots low if the stand feels top heavy. Water each pot in place over a tray, or lift pots to a sink and return them once they have drained, to protect the floor. A tiered stand suits a living room, a bedroom corner, or a covered porch, and it makes it easy to move the whole display for cleaning or for a change of season.

    6. Woven Basket Planters in a Bedroom

    Woven basket planters with houseplants beside a bed in a bedroom.

    Set potted plants inside woven baskets to soften a bedroom with natural texture. Baskets suit bedrooms because their woven surface reads as warm and quiet beside bedding and wood furniture, and they hide plain nursery pots without repotting. Use a plastic liner or a saucer inside each basket so watering does not soak the weave.

    Choose low maintenance plants for a bedroom, such as a snake plant or a pothos, and place baskets where they get indirect light rather than harsh midday sun through a south facing window. Keep baskets off damp floors and check the liner after watering, since trapped water can stain the basket or the floor below. One large basket planter beside a dresser and one small basket on a nightstand give a bedroom a matched pair without crowding it.

    7. Concrete Planters for a Patio Seating Area

    Large concrete planters with shrubs beside patio seating.

    Use concrete planters around a patio seating area to add weight, structure, and a clear edge to the space. Concrete suits outdoor seating because it stands up to wind and rain, and its plain gray tone pairs with wood, metal, and woven outdoor furniture. Place a pair of large concrete planters beside a sofa or dining table, with a small tree, a shrub, or a tall grass in each.

    Concrete pots are heavy once filled, so set them in their final spot before you add soil and plants. Use pot feet or a riser under each planter so water drains and the patio surface does not stain. For more patio planter ideas, see Outdoor Patio Decorating Ideas. In winter, move tender plants indoors or protect the planter from repeated freezing and thawing, since trapped water can crack concrete over time.

    8. Wooden Trough Planters Along a Patio Edge

    Wooden trough planters with herbs and flowers along a patio edge.

    Line a patio edge with wooden trough planters to mark a border between seating and garden without building a fence. A long trough holds a row of plants at one height, which reads as a low hedge and softens a hard patio edge. Wood suits patios with decking or wooden furniture, and a trough can hold herbs, flowers, or small shrubs in one shared bed.

    Line the inside of a wooden trough with a waterproof liner that still allows drainage, and drill drainage holes if the trough lacks them, since standing water rots wood and plant roots alike. Water the whole trough evenly, and check the ends, which dry out faster than the middle in sun and wind. Replace the liner or the trough boards when they show rot, and keep the trough clear of walkways so guests do not trip over it.

    9. Raised Planter Bed for a Small Patio Garden

    Raised wooden planter bed with vegetables and herbs on a patio.

    Build or buy a raised planter bed to give a small patio a garden bed that sits at a comfortable working height. A raised bed suits patios because it keeps soil contained, lifts plants off hot paving, and makes watering, weeding, and harvesting easier on knees and back. Fill it with a mix suited to what you plan to grow, such as vegetables, herbs, or cut flowers.

    Place the bed where it gets the sun your chosen plants need, and leave walking room on at least one long side for care and harvesting. Water raised beds more often than ground beds, since their soil warms and dries faster, and top up the soil level each season as it settles. A raised bed with a simple wood frame suits most patios, while a metal bed suits a more modern outdoor space.

    10. Vintage Metal Containers as Porch Planters

    Vintage metal buckets planted with flowers on a porch.

    Turn vintage metal containers, such as old buckets, watering cans, or enamel pots, into porch planters with a story. Metal containers suit a porch because their worn finish pairs with wood steps, rocking chairs, and seasonal door decor, and each piece differs in shape and patina. Use them for annual flowers or herbs that you can replace each season, so the container stays the feature.

    Drill drainage holes in the base of any container that lacks them, and set it on a saucer or a small stand to protect porch boards from rust marks. Check for sharp edges before planting, and line the inside with a pot or a liner if the metal has rust that could stain soil or hands. Keep metal planters out of the hottest afternoon sun if you grow tender plants, since metal heats up fast and dries soil quickly.

    11. Vertical Pocket Planter Wall on a Balcony

    Vertical pocket planter wall with herbs on a balcony wall.

    Hang a pocket planter wall on a balcony railing or wall to grow many plants in a small footprint. Felt or fabric pockets hold one plant each in a vertical grid, which suits balconies where floor space is short but wall space is free. Use herbs, small flowers, or trailing plants, and place sun lovers at the top and shade tolerant plants lower down, where upper pockets cast shade.

    Water a pocket wall slowly from the top, so water reaches each pocket without flooding the lowest row, and check the wall behind it for damp after watering. Feed plants lightly through the growing season, since pocket soil dries out fast and holds few nutrients. Take the wall down or protect tender plants before frost, and fix it firmly so wind cannot pull it from its hooks.

    12. Glass Terrarium Planters on Open Shelving

    Glass terrarium planters with small plants on open shelving.

    Place glass terrarium planters on open shelving to add small planted displays that do not need floor space. A terrarium suits a shelf because its glass walls show the layers of soil, stones, and plants from every side, and its small size fits between books, vases, and framed photos. Use plants that suit the terrarium type: open terrariums for succulents and cacti, closed terrariums for plants that like humidity.

    Keep terrariums out of direct sun, since glass heats up and can scorch leaves, and water sparingly, since a terrarium has no drainage hole and excess water has nowhere to go. Open the lid of a closed terrarium now and then to let fresh air in and to check for mold on the soil surface. One terrarium per shelf keeps the display calm, while a pair of different sizes adds interest without clutter.

    13. Stone Planters Lining Garden Steps

    Stone planters with compact shrubs lining garden steps.

    Set stone planters along garden steps to frame the path and to guide the eye up or down the garden. Stone suits steps because its weight keeps planters steady, and its natural color blends with paving, gravel, and garden walls. Use one planter on each side of the bottom step and one on each side of the top step, or a single planter at each landing, so the path stays clear.

    Choose compact plants that do not spill across the steps, such as small shrubs, lavender, or clipped boxwood, and trim them back so they never narrow the walking width. Use pot feet under stone planters to help drainage and to stop them staining the steps. In winter, check that water does not freeze in the pots and crack the stone, and move tender plants to shelter before hard frost.

    14. Rattan Planters in a Sunroom

    Rattan planters with green plants in a bright sunroom.

    Use rattan planters in a sunroom to add woven texture that suits bright, plant filled rooms. Rattan suits a sunroom because its light, open weave pairs with wicker chairs, light curtains, and wood floors, and it softens the look of plain plastic nursery pots. Place a large rattan planter beside a chair and smaller ones on a side table or a plant stand.

    Keep rattan planters indoors or in a covered sunroom, since rain and long sun exposure can dry and weaken the weave. Use a liner or a saucer inside each planter, and lift the pot out for watering so the rattan stays dry. Choose plants that like bright indirect light for a sunroom, and rotate them now and then so growth stays even toward the windows.

    15. Trailing Planters on Top of a Tall Bookcase

    Trailing plants in planters on top of a tall bookcase.

    Place trailing planters on top of a tall bookcase to use high space that often sits empty. Trailing plants such as pothos, philodendron, or ivy fall down the sides of the bookcase and soften its straight edges, while the pots themselves stay out of the main living area. This idea suits rooms where floor space is tight but wall height is free.

    Water trailing planters with care, since drips fall a long way: lift the pot down to water it, or use a pot with a saucer and water slowly until the soil is damp but not soaked. Check that the bookcase is fixed to the wall if it is tall, and keep the top clear of heavy pots that could tip if the case is bumped. Trim trailing stems now and then to keep them from tangling with books or blocking a light fixture.

    16. Mini Succulent Planters on a Coffee Table Tray

    Mini succulent planters grouped on a tray on a coffee table.

    Group mini succulent planters on a tray on a coffee table to make a low display that guests can see without blocking conversation. Small succulents suit a coffee table because they need little water, stay compact, and come in varied leaf shapes and colors. A tray keeps the group together, protects the table from water marks, and lets you move the whole display for cleaning or for a meal.

    Use pots with drainage holes set on the tray, and water succulents only when the soil feels dry right through, since overwatering is the main cause of failure indoors. Keep the tray near a window or in a bright room, and rotate it weekly so plants do not lean toward the light. Three or five mini planters suit most coffee tables, while more than that can crowd the surface and leave no room for cups or books.

    17. Tabletop Centerpiece Planters for Dining

    Low planter centerpiece with small plants on a dining table.

    Use low planters as a dining table centerpiece to bring green to meals without blocking views across the table. A long low trough, or three small pots in a row, suits a dining table because the display stays below eye level when guests sit down. Use herbs, small flowering plants, or succulents, and keep the arrangement narrow so plates, glasses, and serving dishes still fit.

    Choose plants without strong scent for a dining centerpiece, since heavy fragrance can clash with food, and wipe leaves now and then to keep dust off the table. Move the centerpiece to a sideboard when you need the full table for a large meal, and return it afterward so the table still looks dressed between meals. This idea works indoors at a dining table and outdoors on a patio table, provided the plants suit the light in each spot.

    18. Oversized Planter with an Indoor Tree in the Entry

    Oversized planter with a tall indoor tree in an entry hall.

    Place one oversized planter with an indoor tree in an entry hall to give the space a clear focal point on arrival. A large planter suits an entry because it fills a corner that small pots would leave looking empty, and a tree adds height that draws the eye up and makes the hall feel taller. Choose a tree suited to the light in the hall, such as a fiddle leaf fig for bright light or a dracaena for lower light.

    Set the planter on a wheeled saucer or a plant caddy if you need to move it for cleaning, since a filled oversized pot is heavy. Check the ceiling height and the door swing before you buy, so the tree has room to grow without touching a light fixture or blocking the door. Water slowly and check drainage, since a large pot holds a lot of soil and can stay wet at the bottom long after the surface feels dry.

    19. Seasonal Rotation Planters by the Door

    Planter by a door with seasonal flowers and evergreen branches.

    Keep one or two planters by the door for seasonal rotation, and change only the plants as the seasons change. This method suits entries and porches because the pots stay in place while the display changes: spring bulbs and pansies, summer geraniums or petunias, fall mums and ornamental kale, and winter evergreen branches with pinecones. Rotation keeps a display fresh without buying new pots each season.

    Plan the rotation in advance, and keep a note of what grew well in each pot, so next year you can repeat successes and drop plants that struggled. Clear out spent plants fully before replanting, top up the soil, and check drainage holes for blockages. Store empty pots under cover in winter if they are not in use, and bring tender plants indoors before the first frost in your area.

    20. Hand Painted Patterned Planters as Focal Points

    Hand painted patterned planters with stripes on a porch bench.

    Paint plain planters with a simple pattern, such as stripes, dots, or a band of color around the rim, to make them focal points in their own right. Hand painted planters suit a porch bench, a patio table, or a bright kitchen shelf, where a bold pattern can carry the display even with a simple green plant inside. Keep the pattern to one or two colors so the planter reads as deliberate rather than busy.

    Use paint suited to the planter material and to outdoor use if the planter will sit outside, and seal it if the maker instructions call for a sealant. Paint the outside only, and keep paint away from the drainage hole and the inside soil area, so plant roots stay clear of paint. Let planters dry fully before planting, and touch up chips at the start of each season to keep the pattern looking fresh.

    21. Window Box Planters on a Kitchen Windowsill

    Window box planters with herbs on a kitchen windowsill.

    Set window box planters on a kitchen windowsill to keep herbs and small flowers within reach while you cook. A window box suits a kitchen because its long, narrow shape fits a sill, holds several small plants in one container, and keeps them in the light they need. Grow herbs you use often, such as basil, parsley, and chives, in separate sections or in their own small pots inside the box.

    Check the sill width and weight before you fill the box, and use a tray under it to catch water and protect the sill paint. Water window boxes more often than floor pots, since sill soil warms in sun and dries fast, and snip herbs from the top so plants stay bushy. If the window opens inward, keep the box clear of the opening path, and move tender herbs away from cold drafts in winter.

    Conclusion

    Planter decoration comes down to a few steady choices: a container that suits the material and scale of the room or garden, a plant that suits the light and water of the spot, and a grouping that leaves room to walk, sit, and care for the plants. Start with one spot you use every day, such as a front door, a kitchen sill, or a patio corner, and build a display there before you spread planters through the whole home. With drainage sorted and a simple watering routine in place, a planter display can stay fresh through the seasons with only small changes to plants and placement.

    FAQs

    What is the easiest way to start with planter decoration?

    Start with three pots of varied heights in one material, placed where you see them daily. This small group is easy to water and to adjust, and it shows you how much light and water the spot offers before you add more planters.

    Do planters need drainage holes?

    Yes, most planters need drainage holes so excess water can leave the soil. Without drainage, roots can sit in wet soil and rot, especially indoors. If a decorative pot has no hole, use it as an outer cover and keep the plant in an inner pot with holes that you lift out to water and drain.

    How do I choose a planter size for a plant?

    Choose a pot one size larger than the current root ball, with room for fresh soil around it but not so much empty soil that it stays wet. A pot that is too large holds excess water, while a pot that is too small dries out fast and limits growth. Repot when roots fill the pot and water runs straight through.

    What plants work best in indoor planters?

    Snake plants, pothos, philodendron, and ZZ plants suit many indoor planters because they cope with varied light and need less frequent watering. Match the plant to your room light: bright indirect light suits most houseplants, while low light rooms suit snake plants and ZZ plants better than sun loving succulents.

    How do I keep outdoor planters looking good through the seasons?

    Use the seasonal rotation method in idea 19: keep the pots in place and swap the plants as the seasons change. Top up soil, clear drainage holes, and check for frost damage each season, and move tender plants indoors before hard frost.

    Can I mix planter materials in one display?

    Yes, you can mix materials, provided one element repeats across the group, such as a shared color, a similar shape, or a matched plant type. Without a repeat element, mixed materials can look random, so start with one shared material or color and add a second material in small amounts.

  • How to Create a Terracotta Herb Pot Display for Your Kitchen or Patio

    How to Create a Terracotta Herb Pot Display for Your Kitchen or Patio

    To create a terracotta herb pot display, choose a sunny spot, pick pots with drainage holes, and plant one herb per pot in a free draining soil mix. Group the pots by height and water needs, label each herb, and place the display where you can reach it easily for cooking and care.

    Terracotta suits herbs well because the porous clay lets excess water move out through the pot wall, which helps soil dry between waterings. That same quality means pots dry faster than plastic pots, so a display needs a steady watering check, especially in sun or wind. This guide walks through the whole process in order, from picking a spot and herbs to planting, arranging, and keeping the display in good shape through the seasons.

    Key Takeaways

    • Pick a spot with at least four to six hours of direct sun for most common kitchen herbs, and check the light at different times of day before you plant.
    • Use terracotta pots with drainage holes, one herb per pot, so plants with different water needs do not share the same soil.
    • Use a free draining soil mix and water only when the top inch of soil feels dry, since herbs suffer more from wet roots than from a short dry spell.
    • Group pots by height, with taller herbs at the back and trailing herbs at the front, so every plant gets light and air.
    • Label each pot at planting time, because young herbs can look alike before they grow their full leaves and scent.
    • Check water, light, and growth weekly, and prune little and often to keep plants bushy and useful for cooking.

    Supplies You May Need

    • Terracotta pots in two or three sizes, each with at least one drainage hole
    • Saucers or trays to catch water under indoor pots, and a tray or stand for a patio group
    • A free draining potting mix, plus coarse grit or perlite if your mix holds a lot of water
    • Small stones or broken pot pieces to cover drainage holes without blocking them
    • Herb plants or seeds, such as basil, parsley, chives, mint, rosemary, thyme, and oregano
    • Plant labels and a waterproof marker, or small wooden markers
    • A watering can with a fine rose, and a small trowel
    • Pruning snips or clean kitchen scissors
    • A tray, crate, shelf, or plant stand to group the pots into a display
    • Gloves, if you prefer them for potting work

    1. Choose a Sunny Spot You Can Reach Every Day

    Sunny kitchen windowsill with empty terracotta pots ready for herbs.

    Start with light, because light decides which herbs will thrive and where the display will work best. Most kitchen herbs, including basil, rosemary, thyme, and oregano, need at least four to six hours of direct sun each day. A south facing kitchen windowsill, a bright counter near a window, or a patio spot that gets morning and midday sun all fit that need. Watch the spot through a day before you commit, since a place that looks bright at noon can sit in shade by mid afternoon.

    Reach matters as much as light. You will water, snip, and check these plants often, so place the display where you pass it daily, close to the kitchen door for a patio group or near your cooking counter indoors. Avoid spots right beside a heat vent, a hot stove, or a door that slams in wind, since sudden heat and strong drafts dry terracotta pots fast. If your only sunny spot is small, plan a compact group of three to five pots rather than a large display that crowds the space.

    2. Pick Herbs That Suit Your Cooking and Your Spot

    Fresh herb plants including basil, parsley, chives, rosemary, and thyme on a counter.

    Choose herbs you actually cook with, so the display earns its place and gets used. Basil, parsley, and chives suit frequent kitchen use, while rosemary, thyme, and oregano suit roasts, soups, and salads and cope well with drier soil. Mint is useful but grows fast and spreads, so it always needs its own pot, never a shared container. If you are new to herbs, start with four or five reliable kinds and add more once you know how they grow in your spot.

    Match each herb to the light and water your spot offers. Mediterranean herbs such as rosemary, thyme, and oregano prefer sun and soil that dries out between waterings, while parsley and chives prefer steadier moisture and cope with a little less sun. Basil likes warmth and regular water, and it suffers in cold drafts, so keep it indoors or in a sheltered patio spot until nights stay warm. Grouping herbs by these needs later, at the arranging stage, is much easier when you plan the groups now.

    3. Choose Terracotta Pots With Drainage and Room to Grow

    Terracotta pots in small, medium, and large sizes grouped on a table.

    Pick pots with at least one drainage hole in the base, since herbs in pots without drainage soon sit in wet soil and their roots rot. Standard round terracotta pots work well, and a mix of sizes adds shape to the display: small pots for chives and thyme, medium pots for basil and parsley, and a larger pot for rosemary, which grows into a woody shrub over time. Check that each pot sits level and does not rock, and that a saucer fits under it without blocking the drainage hole.

    Soak new terracotta pots in water for a few hours before planting, or at least wet them well, because dry clay pulls moisture straight out of fresh potting mix. If you reuse old pots, scrub them clean and rinse them, since old soil and salts can carry pests or disease to new plants. Avoid pots with cracks through the base or a glazed inside that stops the clay from breathing, and keep pot sizes close enough that the group still reads as one display rather than a random collection.

    4. Gather Trays, Stands, and Labels Before You Plant

    Saucers, a wooden crate, plant labels, and a watering can beside terracotta pots.

    Set out everything you need before you open the soil bag, so planting stays quick and tidy. You need saucers for indoor pots, a tray or stand for the group, labels for each herb, and a watering can filled and left to reach room temperature. A shallow tray under a kitchen group protects counters and lets you move the whole display for cleaning. Outdoors, a wooden crate, a tiered stand, or a low bench lifts pots off cold or wet ground and improves air flow around them.

    Prepare labels at this stage, not after planting, when soil on your hands makes writing hard. Write each herb name clearly on a label or marker, and add the planting date if you like to track growth. Keep a few spare labels, since markers fade outdoors and pots sometimes move. Having the display base ready also helps you judge spacing: set the empty pots on the tray or stand and check that each pot has room for its plant to spread without crowding its neighbors.

    5. Prepare Drainage So Water Can Leave the Pot

    Placing a broken pot piece over the drainage hole of a terracotta pot.

    Good drainage starts at the base of the pot. Place a small piece of broken pot or a flat stone loosely over each drainage hole, so soil does not wash out while water still flows through. Do not fill the bottom of the pot with a deep layer of gravel, since that layer can trap water just above it and leave roots sitting wet. A single cover over the hole is enough, with the potting mix doing the rest of the drainage work.

    Use a free draining potting mix, not heavy garden soil, which compacts in pots and holds too much water. A general potting mix with added coarse grit or perlite drains better and keeps air around the roots. Mix it in a bucket or tray before filling, and moisten it lightly so it holds together when squeezed but breaks apart easily. Dry potting mix can repel water at first, so damp mix gives new roots a better start and helps water spread evenly at the first watering.

    6. Fill the Pots and Set the Planting Depth

    Terracotta pot filled with damp potting mix below the rim.

    Fill each pot with damp potting mix to about an inch below the rim, leaving room for watering without soil spilling over the edge. Press the mix down gently with your fingers to remove large air pockets, but do not pack it hard, since compacted mix drains poorly and roots struggle to spread. Check the depth against the herb plant: the top of its root ball should sit level with the soil surface, not buried deep and not perched high above it.

    If you plant from seed, follow the depth on the seed packet as a guide, and sow only a few seeds per pot, thinning to the strongest seedling later. Seeds need steady moisture until they sprout, so cover the pot loosely or check it daily and mist when the surface dries. For bought plants, tease out any roots that circle tightly around the root ball, since loosened roots grow outward into the new mix faster. Set the plant in the center of the pot, fill around it, and firm the mix lightly.

    7. Plant One Herb Per Pot and Water It In Well

    Planting a basil plant into a terracotta pot.

    Plant one herb per pot, even when small plants make a shared pot tempting. Herbs grow at different speeds, and a fast grower such as mint or basil soon shades a slower neighbor, while different water needs mean one plant stays too wet or too dry. A single herb per pot also lets you move a plant that struggles, replace one that fails, and harvest without disturbing its neighbors. For a fuller look, use more pots, not fuller pots.

    Water each pot well right after planting, until water runs from the drainage hole, then let the pot drain fully before you place it on a saucer or tray. This first watering settles the mix around the roots and shows you whether drainage works. Empty saucers after watering so pots do not stand in water, and check indoor pots again after half an hour, since terracotta can keep draining for a while. A plant that wilts in the first day often needs shade and water, not more soil, so move it out of harsh midday sun until it settles.

    8. Label Every Pot While the Herbs Are Young

    Wooden plant labels in terracotta herb pots facing outward.

    Push a label into each pot at planting time, near the edge so it does not crowd the plant or block watering. Young basil, oregano, and mint seedlings can look much alike, and labels stop you from snipping the wrong herb for a recipe. Place labels on the same side of each pot, facing outward, so you can read the whole display at a glance from your usual cooking or patio spot.

    Use labels that survive your setting: wooden markers suit a sheltered kitchen, while plastic or metal markers last longer outdoors in rain and sun. Rewrite faded labels promptly, and add a note for herbs with special needs, such as mint in its own pot or rosemary that prefers drier soil, if that helps you remember the care each plant needs. Labels also help guests and family members harvest the right herb, which keeps the display useful for the whole household.

    9. Arrange the Display by Height and Water Needs

    Terracotta herb pots arranged by height on a tiered stand.

    Arrange the pots as a group, not as a row of equal pots, so the display looks planned and every plant gets light. Put taller herbs such as rosemary and basil toward the back or the center of a stand, medium herbs such as parsley in the middle, and low or trailing herbs such as thyme and oregano at the front or the edges. On a tiered stand, place sun lovers on the top tier and herbs that cope with a little shade lower down, and leave a small gap between pots for air to move.

    Group by water needs as well as height, so watering stays simple: keep rosemary, thyme, and oregano together where soil can dry out, and keep parsley, chives, and basil together where you check moisture more often. Step back and look at the group from the side you see most often, then adjust any pot that hides behind a taller neighbor. A display that looks good from the kitchen door or the patio chair is the one you will enjoy and keep up.

    10. Place the Kitchen Display for Light and Easy Snipping

    Terracotta herb pots on a kitchen windowsill near a cooking counter.

    In the kitchen, place the display on a windowsill, a shelf by a window, or a counter that gets direct sun for part of the day. Keep pots close to where you cook, so snipping a handful of basil or parsley becomes part of meal prep rather than a trip to another room. Turn each pot a quarter turn every few days, since herbs lean toward the window and turning keeps growth even and full on all sides.

    Protect the surface under the pots with saucers or a tray, and wipe up spills promptly, since terracotta can leave damp marks on wood. Keep pots away from the stove, where heat and steam dry soil fast and can scorch leaves, and away from a sink splash zone that keeps soil constantly wet. If winter light drops, move the display to your brightest window and cut back on watering, since plants grow slowly in low light and wet soil causes more harm than a dry spell.

    11. Place the Patio Display for Sun, Shelter, and Drainage

    Terracotta herb pots on a sunny patio bench against a wall.

    On a patio, choose a spot with sun for most of the day and some shelter from strong wind, which dries terracotta pots fast and can topple light pots. A spot against a wall or near a rail often gives both sun and shelter, and a bench, crate, or stand lifts pots off the ground so water drains away instead of pooling under them. Check that rain can run off the surface under the pots, and move pots off a spot where water puddles after storms.

    Outdoor pots dry faster than indoor pots, so check soil daily in hot weather and water early in the day, when less water evaporates and leaves dry before night. Bring tender herbs such as basil indoors or into shelter when nights turn cold, and move the whole display if a storm brings heavy wind. In a small patio, a vertical stand or a wall mounted shelf keeps the display compact while still giving each pot sun and air.

    12. Water by Checking the Soil, Not by a Fixed Schedule

    Checking soil moisture with a finger in a terracotta herb pot.

    Water herbs when the top inch of soil feels dry to your finger, not on a fixed day each week, since sun, wind, pot size, and plant growth change how fast soil dries. Push your finger into the mix: if the top inch feels dry, water slowly until water runs from the drainage hole, then empty the saucer. If the mix still feels damp, wait and check again the next day. Terracotta pots dry from the outside as well as the top, so a pot that looks dry on the surface may still hold moisture deeper down.

    Water at the soil level, not over the leaves, to reduce disease and keep foliage dry. Morning watering suits most herbs, giving leaves time to dry and roots time to take up water before the heat of the day. In winter, water far less, since growth slows and pots dry slowly indoors. Watch for signs of trouble: yellow leaves and soft stems often point to too much water, while dry, crisp leaf edges and wilting that lifts after watering point to too little.

    13. Feed Lightly, Prune Often, and Harvest for Cooking

    Snipping fresh basil and parsley from terracotta pots for cooking.

    Feed herbs lightly, since too much fertilizer produces soft, weak growth with less flavor. A half strength liquid plant food once every four to six weeks during active growth is enough for most potted herbs, and many herbs need no feed at all in winter when growth slows. Skip feeding a newly planted herb for the first few weeks, while roots settle, and always water first so fertilizer does not sit on dry roots.

    Prune little and often to keep plants bushy and productive. Pinch the top few inches of basil and mint regularly, snip parsley stems from the outside of the plant, and trim rosemary and thyme lightly after a flush of growth. Harvest in the morning when leaves hold the most scent, using clean snips, and never take more than about a third of a plant at once. Regular snipping stops herbs from growing tall and bare at the base, and it keeps fresh growth coming for cooking through the season.

    14. Refresh the Display Through the Seasons

    Refreshed terracotta herb pot display in spring light with new growth.

    Refresh the display as seasons change, so it stays useful rather than tired. In spring, replace any herb that did not survive winter, top up pots where soil has settled, and move tender herbs outside only after cold nights pass. In summer, check water daily, prune fast growers, and harvest often to stop plants from flowering too early, since flowering can change flavor in herbs such as basil. Remove spent stems promptly and keep pots spaced for air in humid weather.

    In autumn, bring tender herbs indoors before frost, cut back woody herbs lightly, and reduce watering as growth slows. In winter, keep the display in your brightest spot, water sparingly, and accept slower growth until spring returns. Every year or two, repot herbs that have outgrown their pots into the next size up with fresh mix, and replace cracked or salt stained pots. A display refreshed this way can last for years, with the same terracotta pots holding new herbs each season.

    Conclusion

    A terracotta herb pot display works best when the basics stay simple: a sunny spot, pots with drainage, one herb per pot, and soil that dries between waterings. Arrange the group by height and water needs, label each pot, and place it where you can reach it for cooking and care. With light feeding, regular pruning, and a seasonal refresh, the display gives you fresh herbs close at hand in the kitchen or on the patio. Start with a few herbs you cook with often, learn how they grow in your spot, and add more pots as your confidence grows. For more ideas from Dwell Ovell, browse the home page for home decor guides.

    FAQs

    How many hours of sun do terracotta herb pots need?

    Most kitchen herbs need at least four to six hours of direct sun each day, so place the display on a sunny windowsill or a patio spot that gets morning and midday sun. Herbs such as parsley and chives cope with a little less sun, while rosemary, thyme, and oregano do best in full sun. If your spot gets less light, choose shade tolerant herbs and expect slower growth.

    Why do terracotta pots dry out faster than plastic pots?

    Terracotta is porous, so water moves through the clay wall and evaporates from the outside of the pot as well as from the soil surface. This helps soil dry between waterings and reduces the risk of wet roots, but it means you must check soil moisture more often, especially in sun or wind. Soaking new pots before planting and watering at soil level help keep moisture even.

    Should I plant more than one herb in a terracotta pot?

    Plant one herb per pot, because herbs grow at different speeds and need different amounts of water, so a shared pot often leaves one plant too wet or too dry. Mint in particular spreads fast and should always have its own pot. Use more pots for a fuller display, grouped by height and water needs, rather than crowding several herbs into one container.

    How often should I water herbs in terracotta pots?

    Water when the top inch of soil feels dry to your finger, then water slowly until water runs from the drainage hole and empty the saucer. In hot or windy weather this may mean daily checks outdoors, while indoor pots in winter may need water only once a week or less. Always check the soil first, since a fixed schedule ignores changes in sun, wind, and growth.

    Which herbs grow best in terracotta pots?

    Basil, parsley, chives, mint, rosemary, thyme, and oregano all grow well in terracotta pots with drainage holes and free draining soil. Mediterranean herbs such as rosemary, thyme, and oregano prefer sun and drier soil, while parsley and chives prefer steadier moisture. Start with herbs you cook with often, and keep mint in its own pot so it does not crowd its neighbors.

    What do I do with terracotta herb pots in winter?

    Bring tender herbs such as basil indoors before frost, move the display to your brightest window, and water sparingly while growth slows. Hardy herbs such as rosemary, thyme, and chives may survive a mild winter outdoors in a sheltered spot, but pots can crack in hard frost, so move them to shelter or wrap the pots when a hard freeze is forecast. In spring, replace any herb that did not survive and refresh the soil.

  • 19 Ways to Style Terracotta Pots in Your Garden

    19 Ways to Style Terracotta Pots in Your Garden

    To style terracotta pots in your garden, group pots in varied sizes, match plants to sun and water needs, and repeat the warm clay color in two or three spots so beds, paths, and patios read as one plan. Start with one anchor pot, then add smaller companions.

    Terracotta suits a garden because the clay color sits well beside soil, stone, wood, and green leaves, and the pots age gently outdoors. The risk is a scattered look, with single pots dotted around beds and patios that never quite connect. A few simple habits fix that: repeat pot sizes, keep one color thread, vary heights, and leave clear space around each group so plants can grow. For porch styling that pairs well with clay pots, see these fall front porch decor ideas.

    Key Takeaways

    • Start with one anchor pot, then add smaller companions in the same clay tone, so each group has a clear focal point.
    • Group pots in odd numbers and varied heights, and repeat terracotta in two or three spots across the garden.
    • Match each plant to the sun and water of its spot, and check drainage before planting, since clay pots dry out faster than plastic pots.
    • Keep paths and steps clear, with pot groups set to the sides, so the garden stays easy to walk through and water.
    • Use saucers, pot feet, and a level base to keep pots stable, protect surfaces, and help water drain away.
    • Rotate seasonal plants, tidy spent blooms, and group tender pots together for winter shelter when frost is forecast.

    1. Flank the Entrance With a Matching Pair

    Matching pair of large terracotta pots with green plants flanking a garden gate.

    Place one large terracotta pot on each side of a garden gate or front door, planted with the same plant in both pots, for a calm and balanced entrance. A pair works because the eye reads the two pots as one idea, even when the rest of the garden is informal. Choose pots tall enough to be seen from the path, and set them back from the walking line so the door stays easy to reach.

    Plant both pots on the same day, with the same soil mix and plant size, so they grow at a similar rate. Water them on the same routine, and trim them together, since one full pot beside one thin pot breaks the pair at once. If only one side has room, use a single large pot plus a smaller companion beside it, rather than forcing a pair into a narrow space.

    2. Build a Tiered Tower From Stacked Pots

    Tiered tower of stacked terracotta pots planted with trailing and compact flowers.

    Stack terracotta pots in decreasing sizes to make a tiered tower that adds height in a small footprint. A central rod through the drainage holes keeps the stack stable, and each tier can hold a different plant, such as trailing leaves at the top and compact flowers below. A tower suits a patio corner, a porch step, or the end of a path, where a wide bed would block movement.

    Fill each tier with soil as you build, and plant the top tier last, so soil does not spill onto lower plants. Water the top tier slowly, since water will drain down through the stack, and check the lower tiers before watering again. Keep the tower away from a spot where children or pets bump into it, and set the base pot on level ground so the stack does not lean.

    3. Gather Herbs in a Cluster by the Kitchen Step

    Cluster of terracotta herb pots by a kitchen step with basil, mint, and parsley.

    Gather terracotta herb pots in a cluster by the kitchen step or back door, so herbs are easy to pick while cooking and easy to water in one trip. Use one large pot for a vigorous herb, such as mint, which can crowd smaller plants, and smaller pots for herbs that stay compact. A cluster by the door also keeps herbs in sight, so they are used rather than forgotten in a far bed.

    Label each pot if the herbs look alike when young, and keep the cluster on a tray or saucers so water does not stain the step. Trim herbs often, since regular picking keeps plants bushy rather than tall and thin. In hot weather, check the cluster daily, because small clay pots dry out faster than beds, and move the most tender pots into light shade during a heat spell.

    4. Line a Path With a Row of Pots

    Row of terracotta pots with matching plants lining one side of a garden path.

    Line one side of a garden path with terracotta pots in a repeated size, planted with the same plant or a shared color, to guide the eye along the walk. A row works best when the pots sit at even spacing on a level edge, with low plants that do not block the path or brush against legs. Keep the row on one side only, so the path stays open and the display reads as an edge, not a barrier.

    Choose plants that suit the path light, since a sunny path and a shaded path need different plants even in the same pots. Water the row in order, from one end to the other, and check the pots at the sunny end first, since they dry out first. If the path is narrow, use smaller pots set back from the edge, and keep one pot-free gap where a hose or wheelbarrow needs to pass.

    5. Mix Sizes in a Corner Group

    Mixed size group of terracotta pots in a garden corner with tall plants at the back.

    Mix three or five terracotta pots of different sizes in a garden corner, with the tallest at the back and the smallest at the front, so the group looks collected rather than lined up. A corner group fills a spot that is hard to plant, such as where a fence meets a wall, and it gives a small garden a focal point without a new bed. Vary plant heights as well, with a taller plant in the back pot and trailing plants in the front pots.

    Set the pots on a level base, such as a flat stone slab, so they do not sink into soft soil after rain. Leave a small gap between pots for air and watering, rather than packing them tight, since crowded pots hide each other and make watering awkward. Step back and check the group from the main viewing spot, such as a patio chair, and move one pot at a time until the shape reads well from there.

    6. Plant One Specimen Tree in a Large Pot

    One small tree in a large terracotta pot as a garden anchor near a seating area.

    Plant one specimen tree, such as a small olive, citrus, or bay tree suited to a pot, in a single large terracotta pot as a garden anchor. A large pot gives the tree room for roots and weight for stability, and the clay color grounds the tree in the garden better than a bright container. Place the anchor where it can be seen from a seating area, and leave clear space around it so the canopy can grow without brushing a wall or fence.

    Check the plant label for pot size, sun, and frost needs before planting, since a tree that outgrows its pot quickly will need frequent repotting. Water deeply but less often than for small pots, and check drainage each season, since a blocked hole in a large pot is hard to fix once the tree is established. Feed and prune only as the plant label directs, and plan how the pot will be moved, since a large planted pot is heavy.
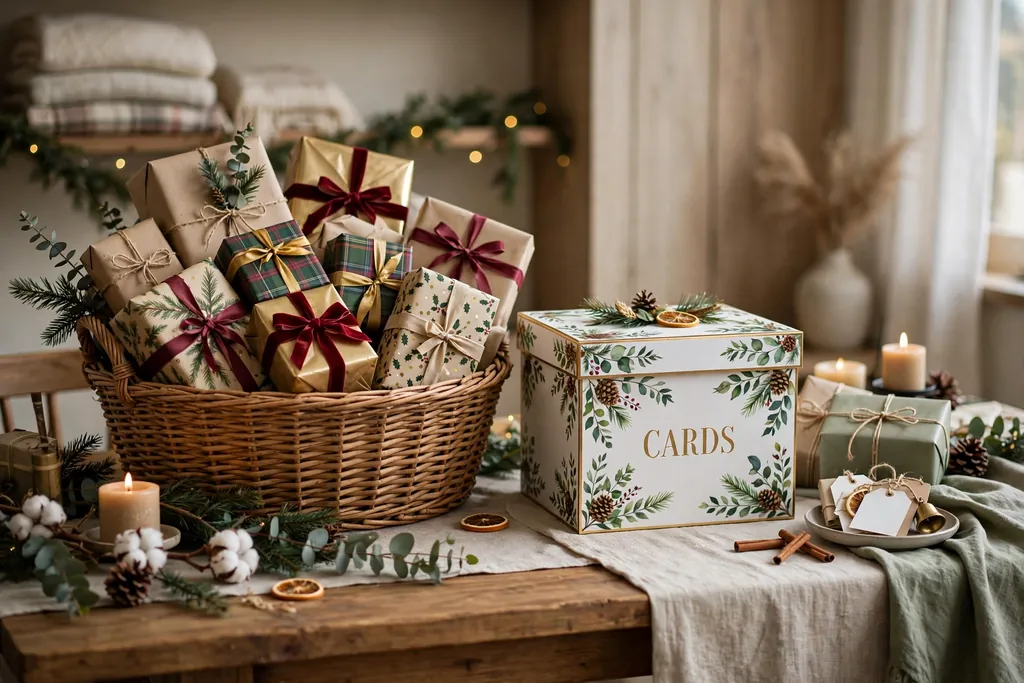
    7. Let Trailing Plants Spill Over the Rim

    Trailing plants spilling over the rim of a terracotta pot on a garden wall.

    Let trailing plants spill over the rim of a terracotta pot, so a plain pot gains softness and height without extra structure. Trailing stems suit a pot set on a wall, a step, or a high shelf, where the stems can hang freely and be seen from below. Pair one trailing plant with one upright plant in the same pot, so the pot has height in the center and softness at the edge.

    Trim trailing stems when they grow thin at the base, and pinch back the tips to encourage fuller growth, following the plant label for that plant. Water the pot from the top slowly, so water reaches the roots rather than running down the trailing stems. If the pot sits on a step, keep the trailing stems clear of the walking surface, so they are not stepped on or tripped over.

    8. Collect Succulents in a Dry Corner

    Collection of succulents in terracotta pots in a dry sunny garden corner.

    Collect succulents in terracotta pots in a dry, sunny corner, where the clay helps soil dry between waterings and the warm pot color suits the plants. Group succulents of different shapes, such as rosettes, upright stems, and low spreading types, in pots of similar clay tone, so the group reads as a collection rather than a random set. A dry corner near a south facing wall often suits succulents, since the wall reflects warmth and shelters the pots from cold wind.

    Use a free draining soil mix suited to succulents, and water only when the soil feels dry well below the surface, since overwatering is the most common problem for potted succulents. In cold areas, plan to move the pots under cover before frost, since many succulents are tender and clay pots can crack in a hard freeze. Keep the pots on pot feet, so rain drains away instead of pooling under the base.

    9. Rotate Seasonal Flowers Through the Year

    Terracotta pots with bright seasonal flowers in rust, gold, and cream tones on a patio.

    Rotate seasonal flowers through terracotta pots, so the same pots look fresh in spring, summer, and fall without buying new containers each season. Start with spring bulbs, follow with summer bedding plants, and finish with fall flowers such as mums, changing only the plants and the top layer of soil. A shared color thread, such as warm rust, gold, and cream, keeps the rotation calm even when the flowers change.

    When one season ends, remove spent plants, loosen the top soil, and check drainage before replanting, since old roots can block the hole. Keep a note of which plants did well in each pot, so the next rotation repeats the successes and drops the plants that struggled. For seasonal styling beyond the garden, see these summer decor ideas for light, warm weather looks that pair well with clay pots.
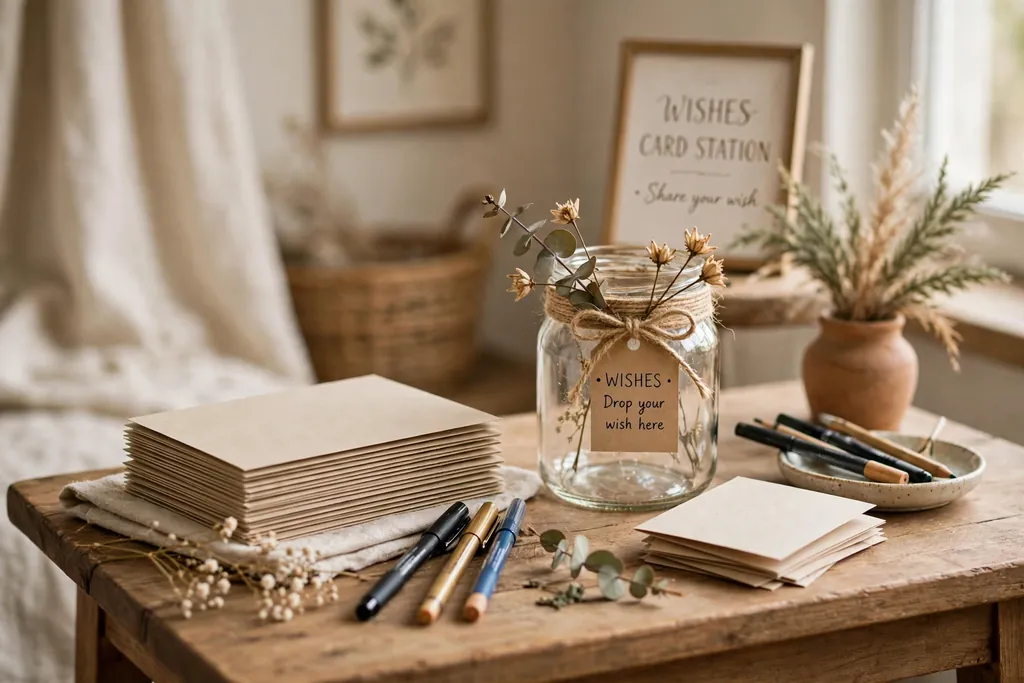
    10. Whitewash a Few Pots for a Light Corner

    Whitewashed terracotta pots with green plants in a light shaded garden corner.

    Whitewash a few terracotta pots for a light corner, such as a shaded seating area or a pale wall, where plain clay can look dark. A thin whitewash lets the clay texture show through while lifting the color, so the pots still read as terracotta rather than as painted plastic. Use whitewash only on a few pots in one area, and keep the rest plain, so the light pots act as an accent rather than a new color scheme.

    Test the whitewash on one pot first, and let it dry fully before planting, since a wet finish can flake onto soil. Seal the finish only if the product label directs it, and keep whitewashed pots out of the wettest spots, since constant damp can wear the finish faster. Pair whitewashed pots with green plants and pale gravel or stone, so the light color has a calm base to sit on.

    11. Age Pots Naturally in a Sheltered Spot

    Weathered terracotta pots with a soft moss patina in a sheltered spot under a tree.

    Age terracotta pots naturally by placing them in a sheltered, damp spot, such as under a tree or beside a north facing wall, where moss and a soft patina can form over time. Aged pots suit a cottage garden, a woodland edge, or a bed of ferns, where a new, bright clay pot can look too fresh. The aging process takes a season or more, so set the pots where they can stay undisturbed while the surface changes.

    Do not force aging with harsh treatments, and avoid sealing a pot you want to age, since a seal stops the surface from changing. Check the pots each season for cracks, since a pot left damp through winter can crack in frost, and move aged pots under cover in a hard freeze if they are small. Mix one or two aged pots with plain pots, so the weathered look reads as part of the garden rather than as neglect.

    12. Edge a Bed With a Low Pot Border

    Low border of small terracotta pots along the edge of a garden bed.
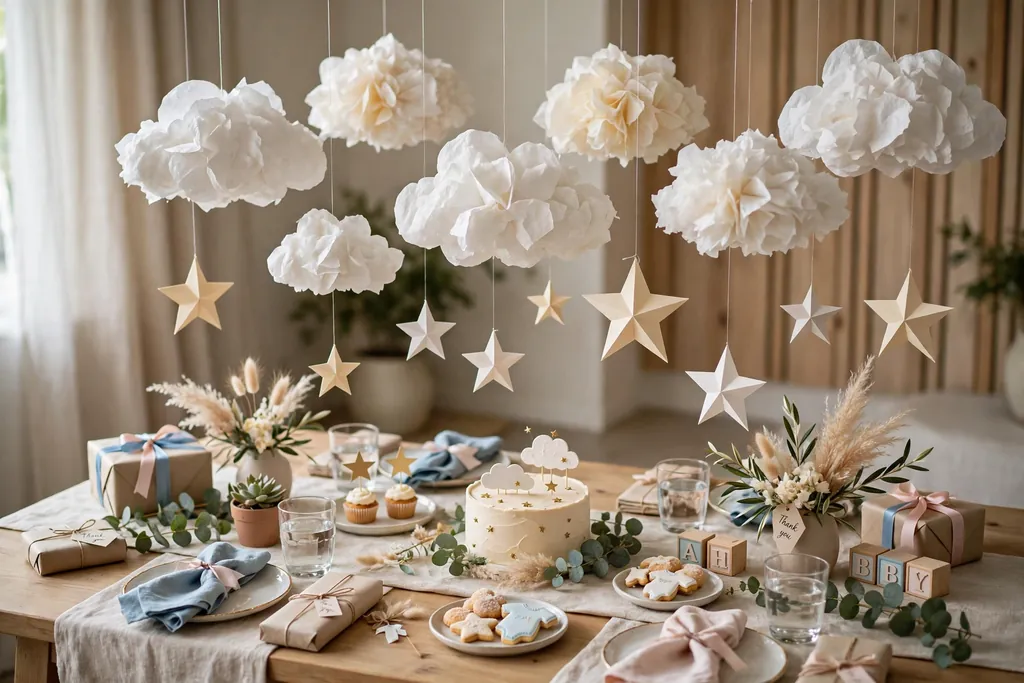
    Edge a garden bed with a low border of small terracotta pots, set rim to rim along the bed edge, planted with compact herbs or low flowers. A pot border marks the edge clearly, keeps soil in the bed, and lets you change the edge planting without digging a new border. It suits a vegetable bed, a herb bed, or a cottage bed where a formal stone edge would look too hard.

    Bury each pot to about half its depth, so the rim sits just above soil level and the pots do not tip when brushed. Plant the border pots with plants that stay low, and trim them often, since a tall border plant will hide the bed behind it. Water the border pots on the same routine as the bed, and check them after heavy rain, since small pots at a bed edge dry out and wash out faster than the bed itself.
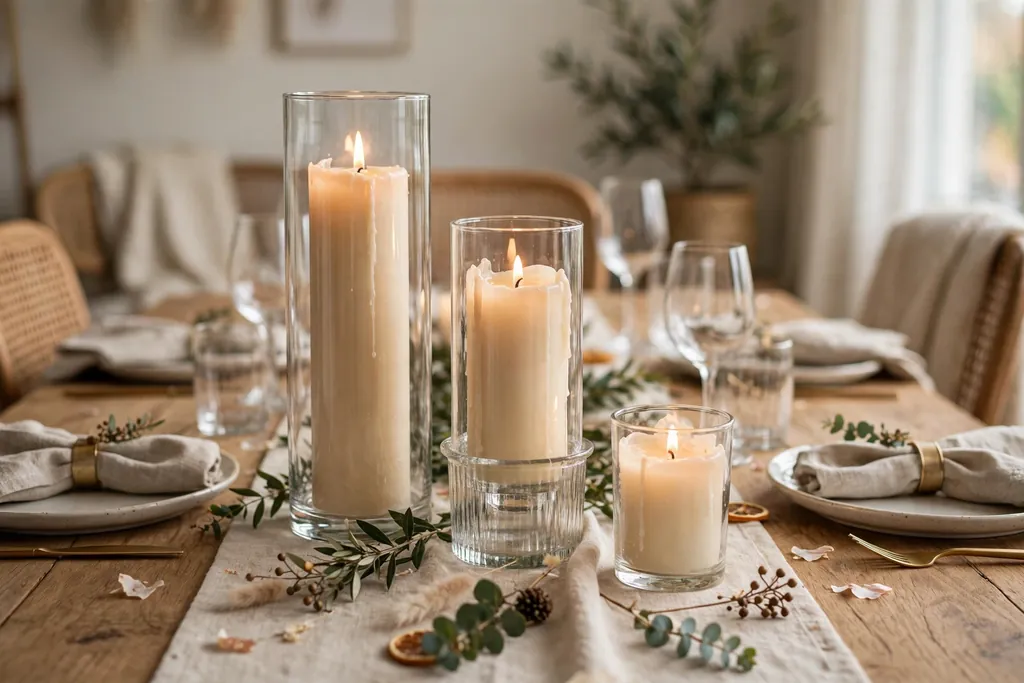
    13. Cluster Pots as a Patio Table Centerpiece

    Three small terracotta pots as a centerpiece on a patio table with compact herbs.

    Cluster three small terracotta pots as a patio table centerpiece, with one taller pot in the center and two lower pots beside it, planted with compact herbs or flowers. A table cluster brings the garden onto the patio table without blocking talk across the table, since the plants stay low and the pots stay within the center of the table. Choose plants with a light scent or no scent, so the centerpiece suits a meal as well as a quiet coffee.

    Keep the cluster on a tray, so water does not mark the table and the pots can be lifted off together when the table is needed for serving. Trim the center plant often, so it does not grow tall enough to block the view across the table. At the end of the day, check the tray for standing water, and tip it out, since pots sitting in water can rot roots and stain the tray.

    14. Hang and Mount Pots on a Fence or Wall

    Terracotta pots mounted on brackets on a garden fence with compact and trailing flowers.

    Hang and mount terracotta pots on a garden fence or wall, using brackets made for pots, to add planting height without taking floor space. Wall pots suit a small garden, a narrow side passage, or a bare fence that needs softening, and they bring flowers and herbs to eye level. Use small or medium pots only, since a large planted pot is heavy and can pull a weak bracket from the fence.

    Fix each bracket firmly, following the bracket instructions, and check the fixings each season, since wet soil adds weight and wind adds movement. Plant wall pots with compact or trailing plants, and water them slowly, since water runs out of a wall pot fast and can splash the wall below. Keep wall pots clear of gates and hinges, so they do not block movement or catch on a swinging gate.

    15. Stage Pots on Steps and a Plant Shelf

    Terracotta pots staged on garden steps and a plant shelf with larger pots low.

    Stage terracotta pots on garden steps and a plant shelf, with larger pots low and smaller pots high, so the display rises in steps and each pot can be seen. A step display suits a porch, a patio edge, or a slope, where the steps themselves give height without a new structure. Keep one step clear for footing, and set pots to the sides of steps, so the display never blocks a safe path.

    Use a sturdy shelf rated for outdoor use, and set the heaviest pots on the lowest shelf, so the shelf stays stable. Water the top shelf first, and check the lower pots before watering again, since drips from above can keep lower soil wet longer than expected. Move the shelf display under cover in strong wind if the pots are small, since a shelf of light pots can tip more easily than pots on the ground.
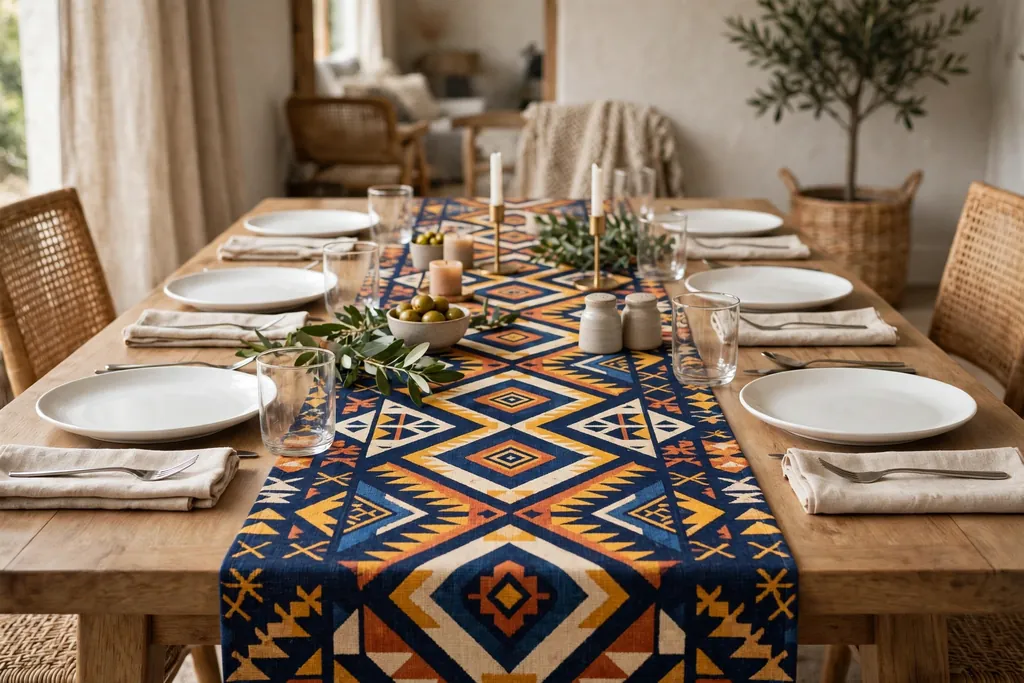
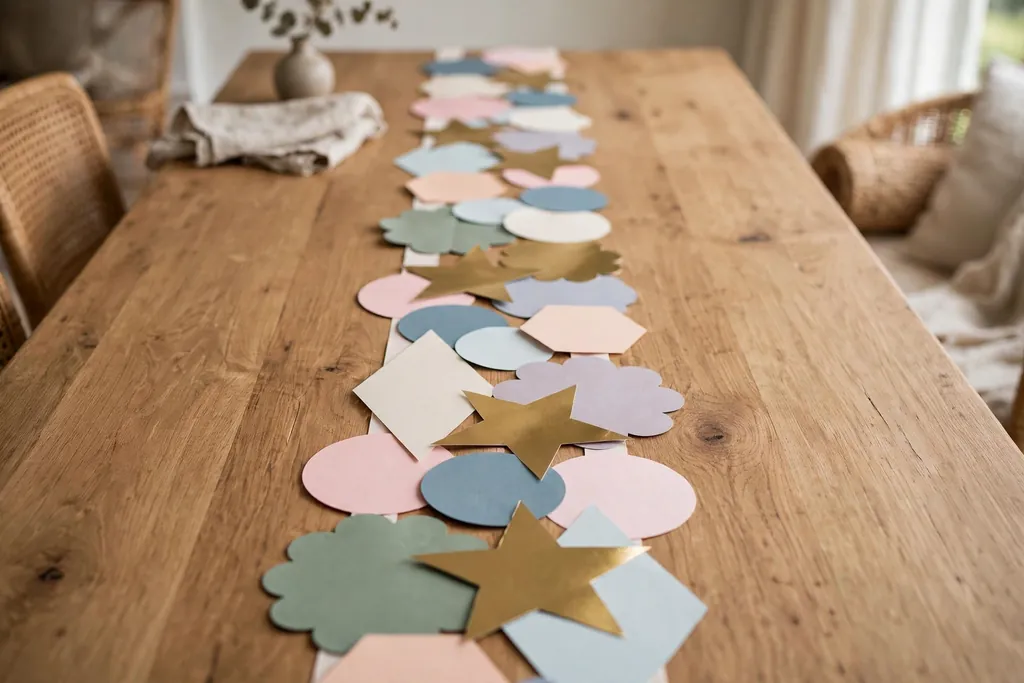
    16. Turn One Large Pot Into a Water Bowl
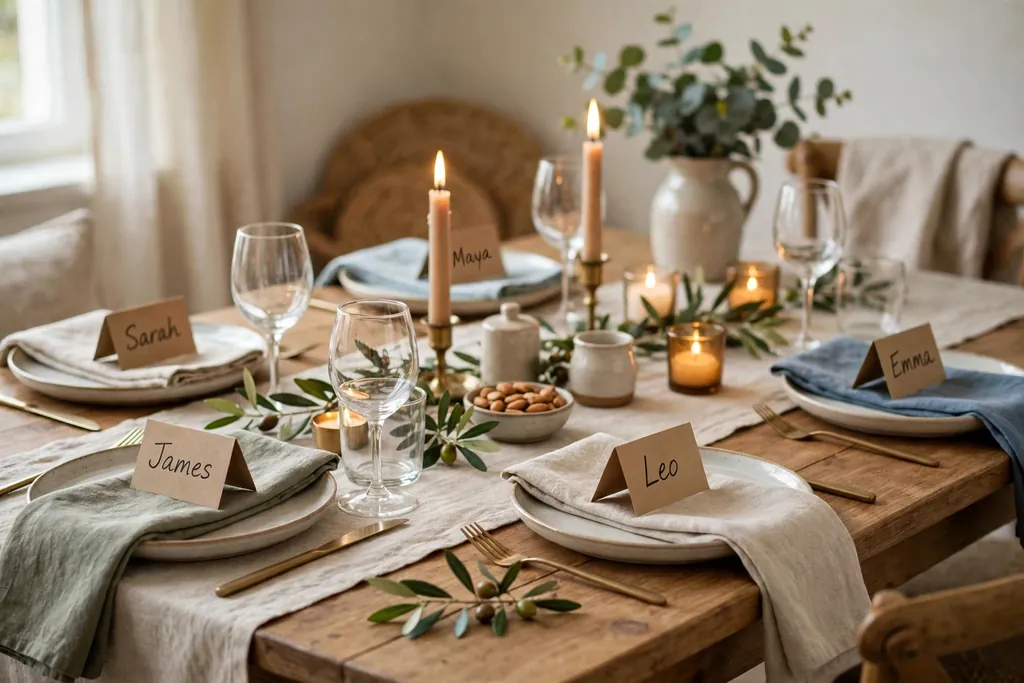
    Large terracotta pot used as a still water bowl in a calm garden corner.

    Turn one large, watertight terracotta pot into a simple water bowl, by sealing the drainage hole as the sealant label directs and setting the pot in a calm, level spot. A water bowl adds a still, reflective surface to a garden, and birds may visit it, so it suits a quiet corner near seating. Keep the bowl shallow enough to be safe and easy to clean, and set it where it can be reached for topping up and cleaning.

    Change the water often, and scrub the bowl when algae forms, since still water left unchanged can smell and attract insects. In winter, empty the bowl before a hard freeze, since ice can crack a clay pot, and store the pot under cover if it is not frost hardy. If a watertight pot is not available, use a bowl insert inside the pot instead, so the clay pot acts as a holder rather than as the water container itself.

    17. Grow Vegetables in Large Pots on a Sunny Patio

    Large terracotta pots with tomato and pepper plants on a sunny patio.

    Grow vegetables in large terracotta pots on a sunny patio, with one plant per large pot for crops such as tomatoes, peppers, or courgettes, following the plant label for pot size and support. Large pots give roots room and keep vegetables close to the kitchen, and the patio warmth can help sun loving crops. Place the pots where they get the sun the crop needs, and leave space between pots for air, picking, and watering.

    Support tall crops with a stake or cage fixed in the pot, and tie stems loosely as they grow, so wind does not snap them. Water vegetable pots deeply and check them daily in hot weather, since large clay pots on a sunny patio dry out fast, and a dry pot can stress a fruiting plant. Feed only as the plant or feed label directs, and harvest often, since regular picking keeps many vegetable plants producing.

    18. Fill a Shade Corner With Ferns and Hostas

    Terracotta pots with ferns and hostas in a shaded garden corner under a tree.

    Fill a shade corner with terracotta pots planted with ferns and hostas, where the warm clay color lifts a dark spot and the plants suit low light. A shade corner under a tree or beside a north facing wall often stays damp, so check drainage and use pot feet to keep pots out of standing water. Group the pots at varied heights, with taller ferns at the back and low hostas at the front, so each plant can be seen.

    Water shade pots less often than sunny pots, and check the soil before watering, since shade soil stays damp longer and overwatering can rot roots. Watch for slugs on hostas, and check leaves often, since a shaded, damp corner suits slugs as well as plants. In winter, move tender shade pots under cover if frost is forecast, and leave hardy ferns in place only if their label says they suit winter outdoors in a pot.

    19. Group Pots for Winter With Evergreens

    Winter group of terracotta pots with small evergreens and ivy near a house wall.

    Group terracotta pots for winter with evergreens, such as small conifers, ivy, and winter heather suited to pots, so the garden keeps structure when summer plants end. A winter group near the door or a patio seating area gives color and shape through the cold months, and grouping pots together shelters each pot a little from wind. Wrap tender pots in frost protection as the plant label directs, and set the group close to a house wall for extra shelter.

    Water winter pots sparingly, only when the soil is dry and the weather is above freezing, since wet soil in a freeze can crack clay pots. Check the group after storms, and clear fallen leaves from pot surfaces, so evergreens get light and air. For more seasonal outdoor styling, see these easter outdoor decorations for spring porch and garden ideas to plan once winter ends.

    Conclusion

    Terracotta pots work best in a garden when they are grouped with intent, matched to sun and water, and repeated in a few calm spots rather than scattered singly. Start with an entrance pair or a single anchor tree, add a herb cluster and a mixed corner group, and keep paths clear and pots stable on level bases. Rotate seasonal flowers, protect tender pots in winter, and let trailing plants and shade plants soften the edges. Follow those habits, and clay pots will look settled in every season, from spring bulbs to winter evergreens. For more ideas from Dwell Ovell, browse the home page for home decor guides.

    FAQs

    How do I style terracotta pots in a garden?

    Style terracotta pots in a garden by grouping them in odd numbers and varied heights, repeating the clay color in two or three spots, and matching each plant to the sun and water of its spot. Start with one anchor pot, add smaller companions, keep paths clear, and leave space around each group so plants can grow.

    Do terracotta pots need drainage holes?

    Yes, terracotta pots need drainage holes in most cases, since water that cannot drain away can rot roots and, in winter, freeze and crack the pot. Check the hole before planting, keep it clear of soil with a small stone or mesh cover if needed, and set the pot on feet or a saucer that lets water drain away.

    Why do terracotta pots dry out so fast?

    Terracotta pots dry out fast because unglazed clay is porous, so water moves through the pot wall as well as draining from the base, and small pots hold less soil than beds. Water clay pots more often than plastic pots in hot weather, check the soil daily in summer, and group pots together to slow drying in wind.

    How do I keep terracotta pots from cracking in winter?

    Keep terracotta pots from cracking in winter by emptying water bowls before a freeze, moving tender and small pots under cover, and grouping hardy pots close to a house wall for shelter. Water sparingly in winter, avoid letting pots sit in standing water, and check pots for cracks each spring before replanting.

    What plants grow best in terracotta pots?

    Plants that grow best in terracotta pots include herbs, succulents, trailing plants, seasonal flowers, and small trees suited to pots, since clay pots suit plants that like soil to dry a little between waterings. Match each plant to the pot size, sun, and frost needs on its label, and use one large pot per vigorous plant, such as mint or a tomato plant.

    How many terracotta pots should I group together?

    Group terracotta pots in threes or fives for most displays, since odd numbers read as planned and varied heights keep the group from looking like a row. Use a pair only at an entrance, where symmetry suits the door, and keep each group small enough that every pot can be watered and reached without moving other pots.