Author: Clara Bennett

  • 29 Korean Apartment Design Ideas to Make Any Room Feel Cozier

    29 Korean Apartment Design Ideas to Make Any Room Feel Cozier

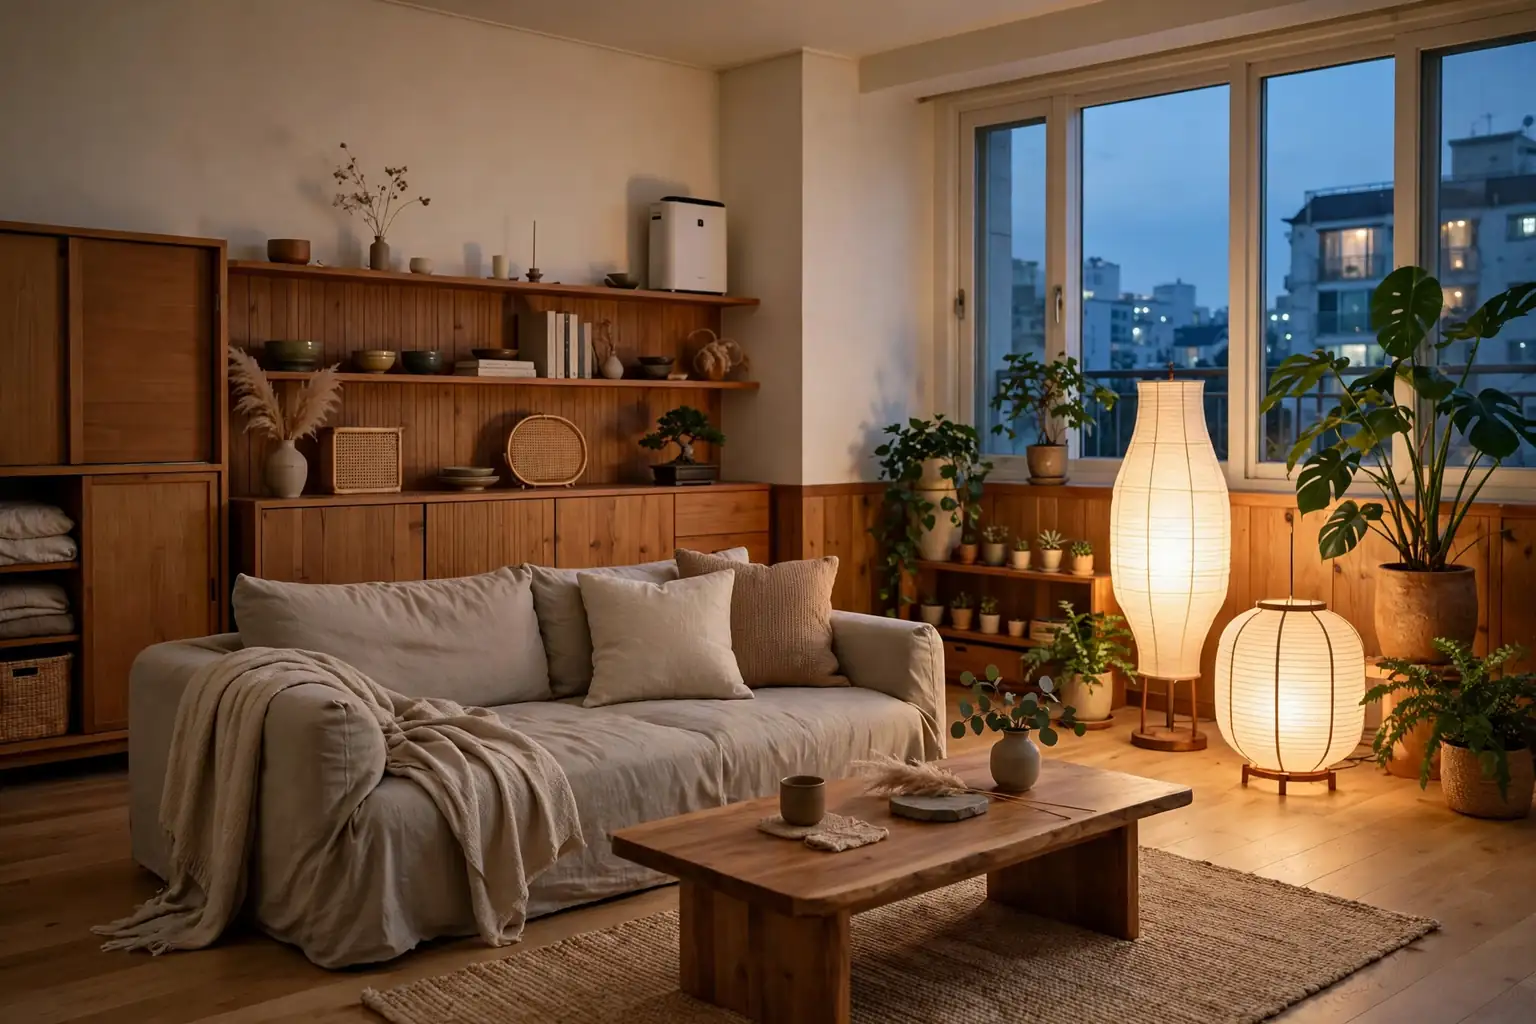
    A Korean apartment often works hard in a small footprint, with one room serving as a living room, a dining spot, and a place to rest. That inviting look is not about buying new furniture. It comes from low lines, warm wood, soft layers, and light that stays gentle in the evening. These 29 Korean apartment design ideas cover the living room, bedroom, kitchen, entry, and balcony, with storage and seating that suit rented and compact homes. Start with one calm base and one comfortable seat, then add layers that fit your routine. For small space layout basics, the zoning ideas in these studio apartment decorating ideas pair well with the room by room ideas below.

    Key Takeaways

    • Start with a calm base of warm white, soft beige, and light wood, then add color in cushions, throws, and art you can move.
    • Keep furniture low and light in look, so a small room keeps its sense of height and air.
    • Give every daily routine a spot: sleeping, eating, working, reading, and coming home each deserve a small zone.
    • Layer light at more than one level, with a paper lamp, a floor lamp, and a small warm light for evenings.
    • Use hidden storage and furniture that does two jobs, so surfaces stay clear and the room stays easy to tidy.
    • Add soft texture and one or two plants, rather than filling every shelf, to keep the room warm without clutter.

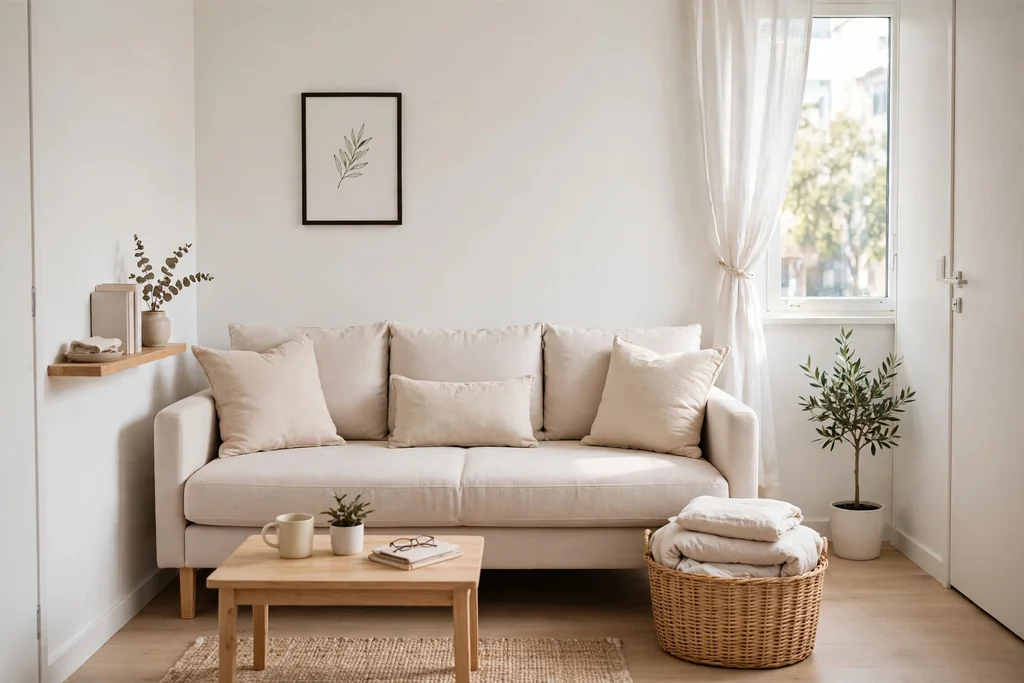
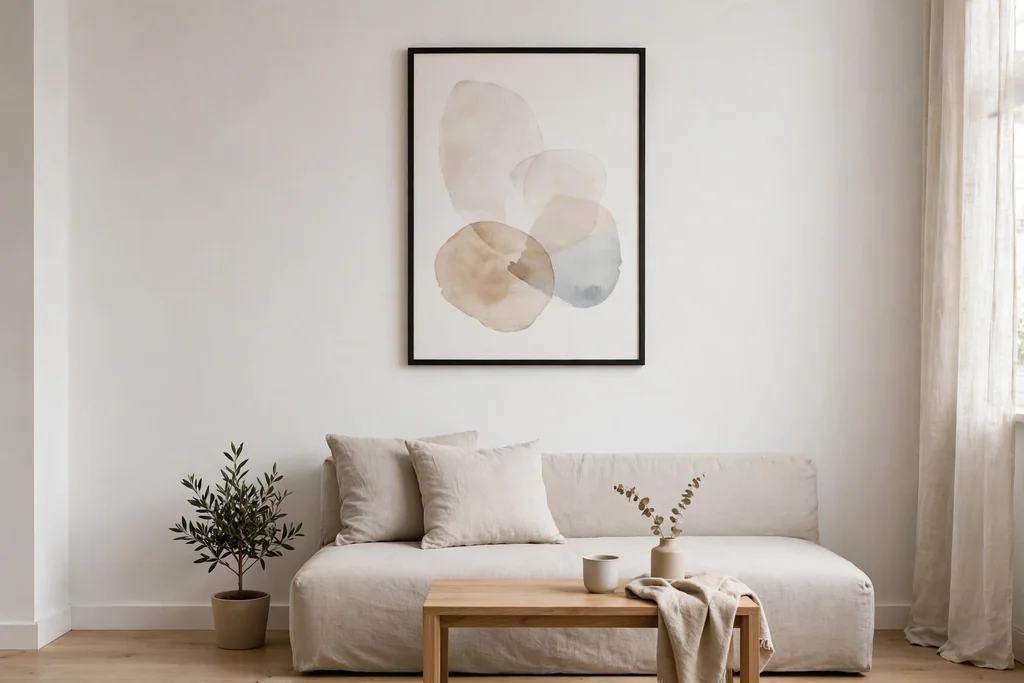
    1. Warm Wood and White Base
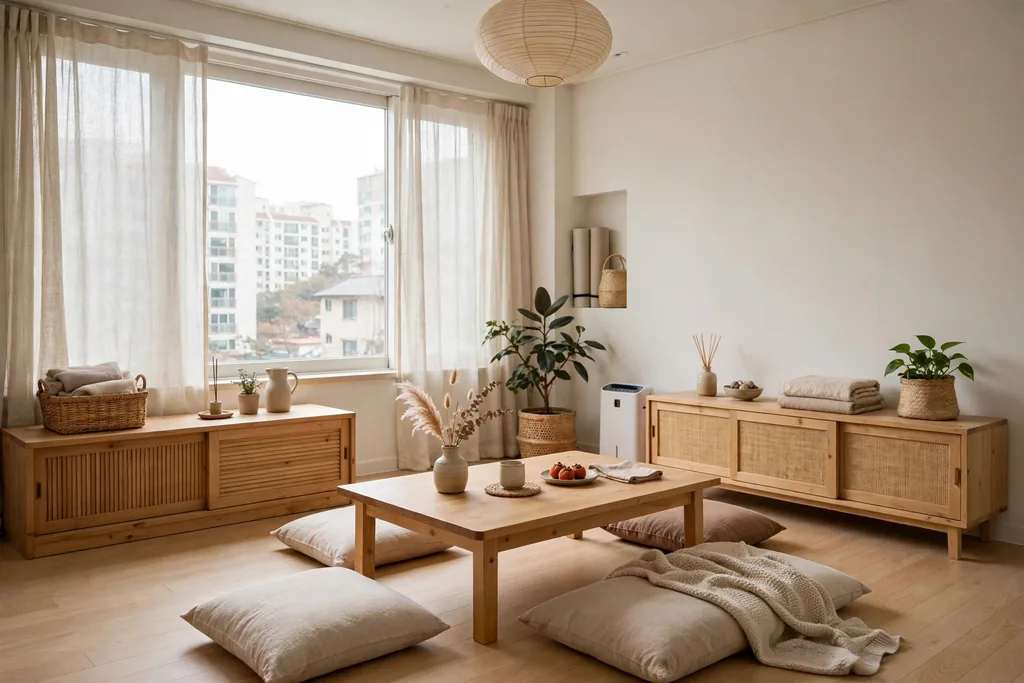
    Korean apartment living room with warm white walls, light wood floor, and low wood furniture.

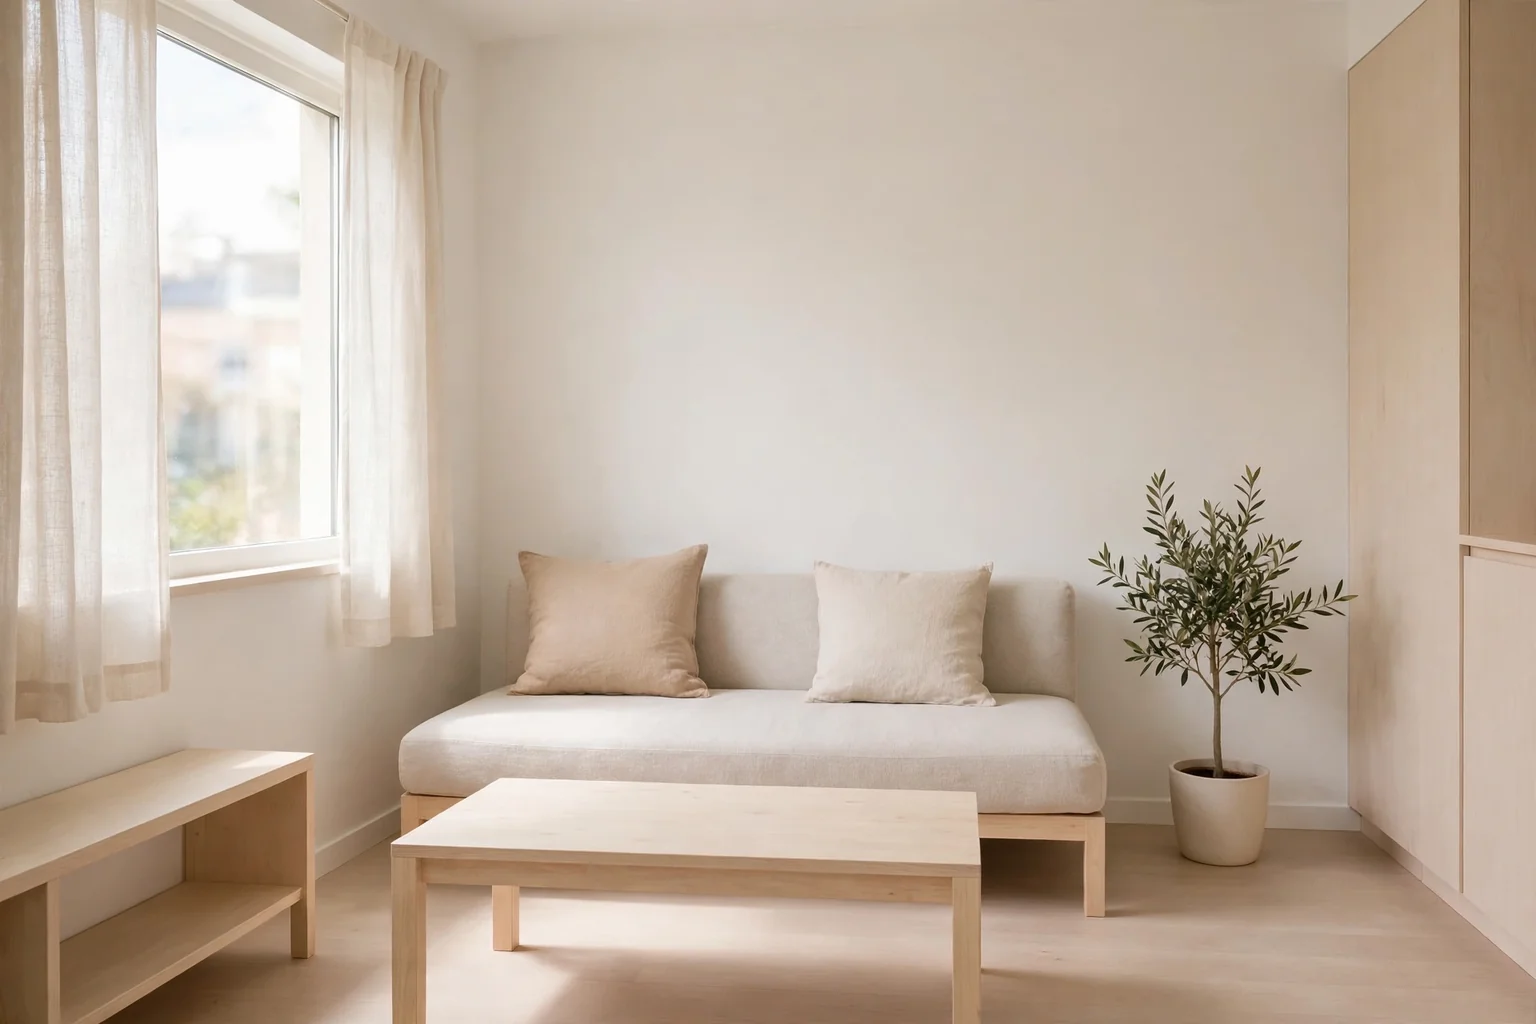
    Pair warm white walls with light wood floors and furniture to set a calm base for the whole apartment. Light wood on a bed frame, a low table, or open shelves adds warmth without darkening a small room, and white walls keep daylight moving through the space. Keep the largest pieces in these two tones, so smaller items in soft beige, sage, or muted blue can sit against them without clashing.

    If you rent and cannot change floors or wall color, get the same base from a large light rug, light wood toned furniture, and plain white or cream bedding. Repeat the wood tone in two or three places, such as a shelf, a frame, and a tray, so the room reads as planned rather than random. Avoid mixing many dark and light wood tones in one room, since that can make a small space feel busy.

    2. Low Platform Bed With Storage
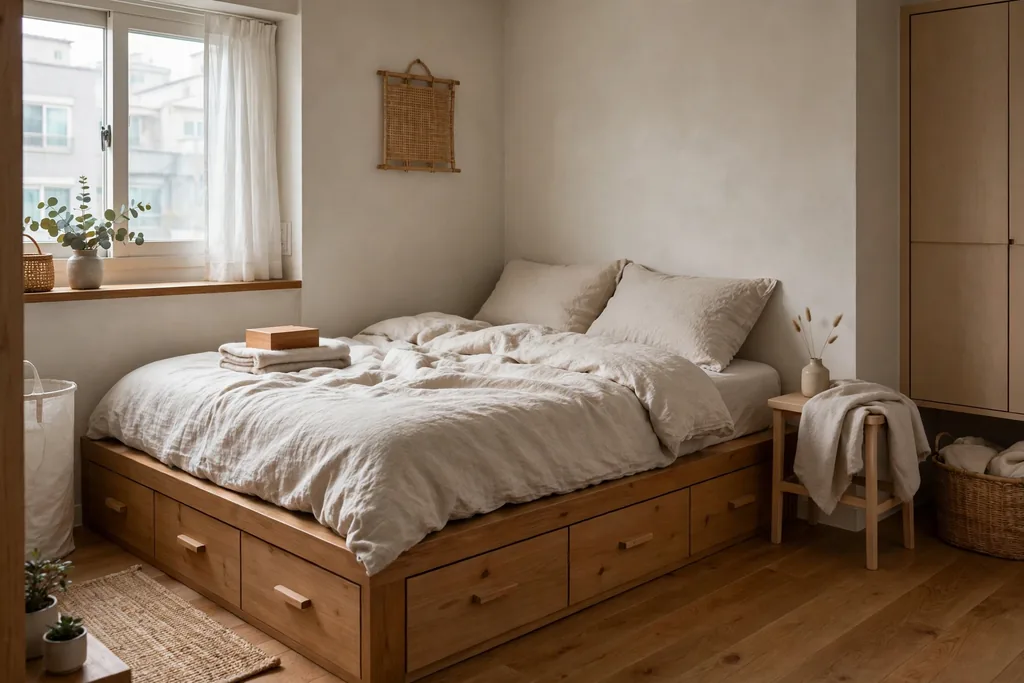
    Low platform bed with storage drawers and neutral bedding in a small Korean bedroom.

    Choose a low platform bed to give the bedroom a grounded, restful feel and to free up visual height above the bed. A low frame suits a small bedroom because it leaves more wall visible, which makes the room feel taller, and it pairs well with a simple padded headboard or a plain wall with one piece of art. Keep bedding in soft, solid colors with one folded throw at the foot of the bed.

    Use drawers or boxes under the platform for off season clothes, spare bedding, or bags, so the room needs one less chest of drawers. Measure the platform height before you buy, so you can sit on the edge of the bed with ease and so drawers open fully without hitting a rug. Keep the top of the bed made each morning, since a low bed is the first thing the eye meets in a small bedroom.

    3. Floor Seating Corner for Relaxed Living
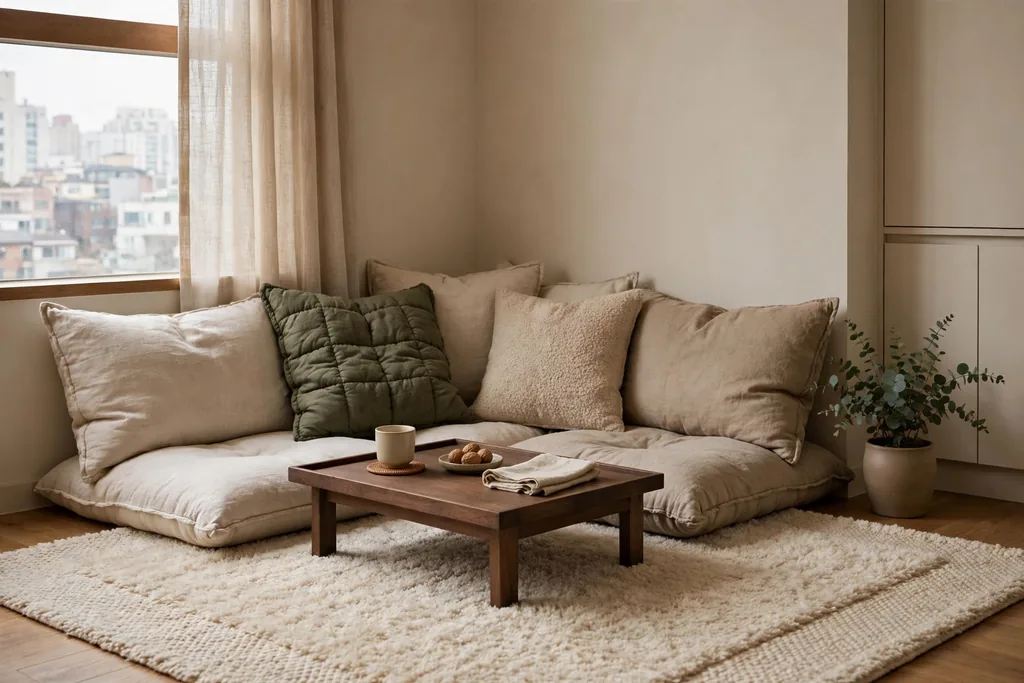
    Floor seating corner with thick cushions, low tray table, and soft rug in a Korean apartment.

    Build a floor seating corner with thick floor cushions, a low tray table, and a soft rug for reading, tea, and quiet evenings. Floor seating suits a Korean inspired living room because it keeps the eye line low and leaves the room feeling open, and it can be packed away when you need floor space for guests or exercise. Choose cushions with firm filling and washable covers, so the corner stays comfortable and easy to keep fresh.

    Place the corner near a window or a wall with a shelf for books and a cup, and add a small basket for throws so the corner works as a complete spot. If sitting on the floor is hard on your knees, add a low backrest cushion or a short bench beside the cushions for support. Keep the rug large enough for all the cushions, so the corner reads as one seating group rather than scattered pads.

    4. Warm Floor Layers Inspired by Ondol Living
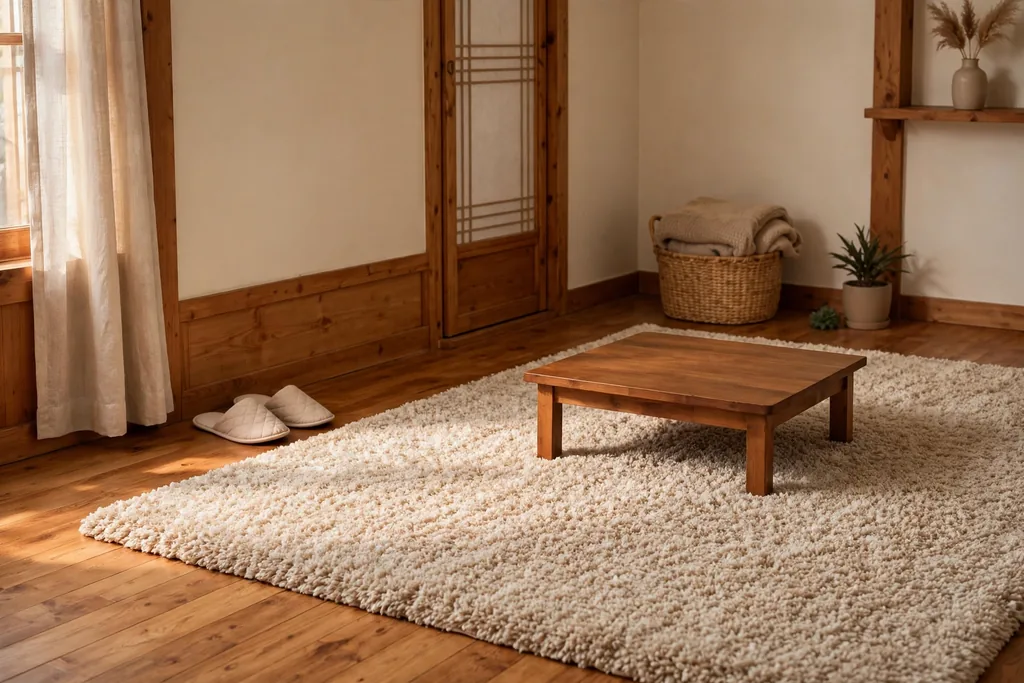
    Thick rug and low table on a warm apartment floor with slippers by the wall in a Korean home.

    Take inspiration from ondol floor living by making the floor itself a comfortable place to sit and rest. Use a thick rug over a soft underlay, warm slippers by the door, and a low table for meals or tea, so the floor feels like part of the living space rather than just a surface to walk on. This approach suits apartments with hard floors, which can feel cold in winter and echoey all year.

    Add a washable rug in the living area and a smaller rug beside the bed, and keep a pair of indoor slippers at the entry so the floor stays clean for sitting. If your home has underfloor heating, check the rug maker guidance for heat suitability before you buy a very thick rug. A floor level lifestyle works best when the floor is kept clear, so store shoes, bags, and chargers off the floor in a basket or cabinet.

    5. Sliding Doors and Light Room Dividers
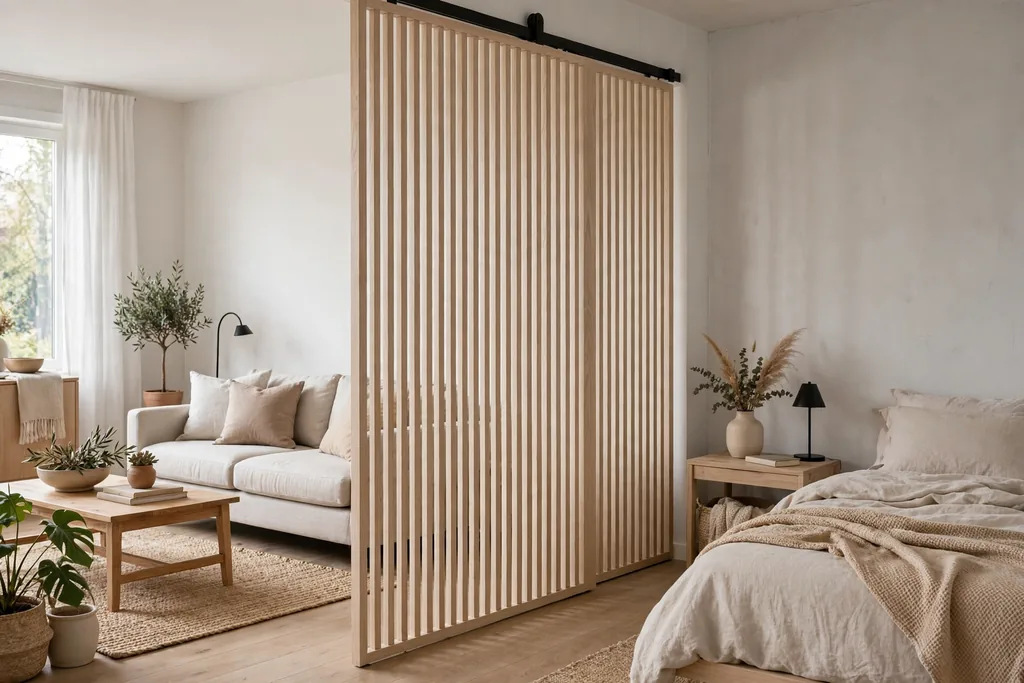
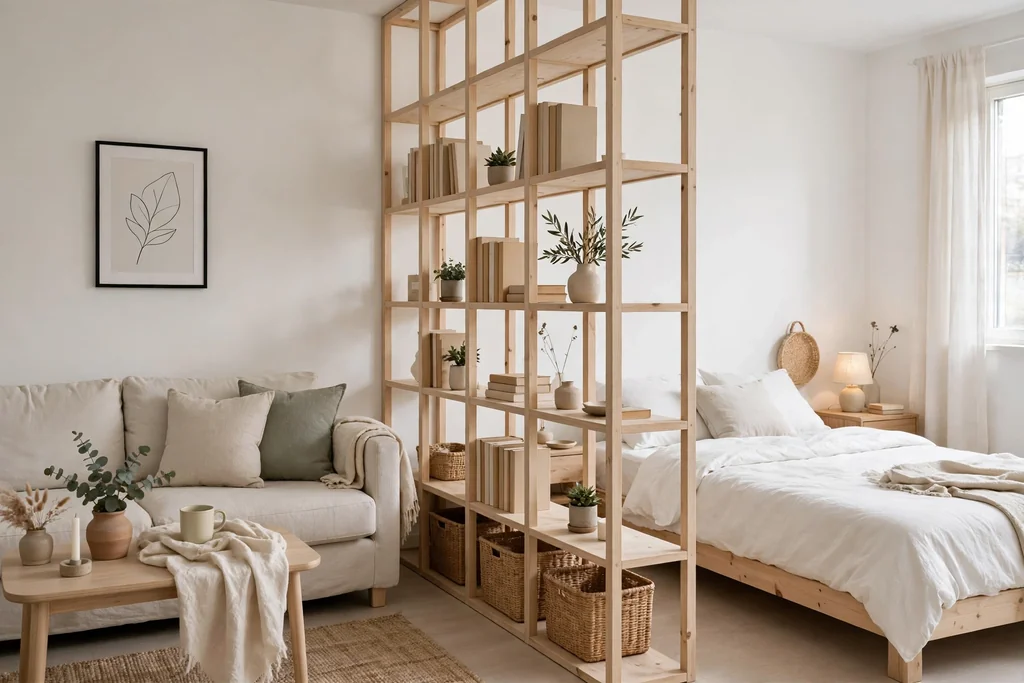
    Light sliding divider with pale wood slats separating sleeping and living zones in a studio apartment.

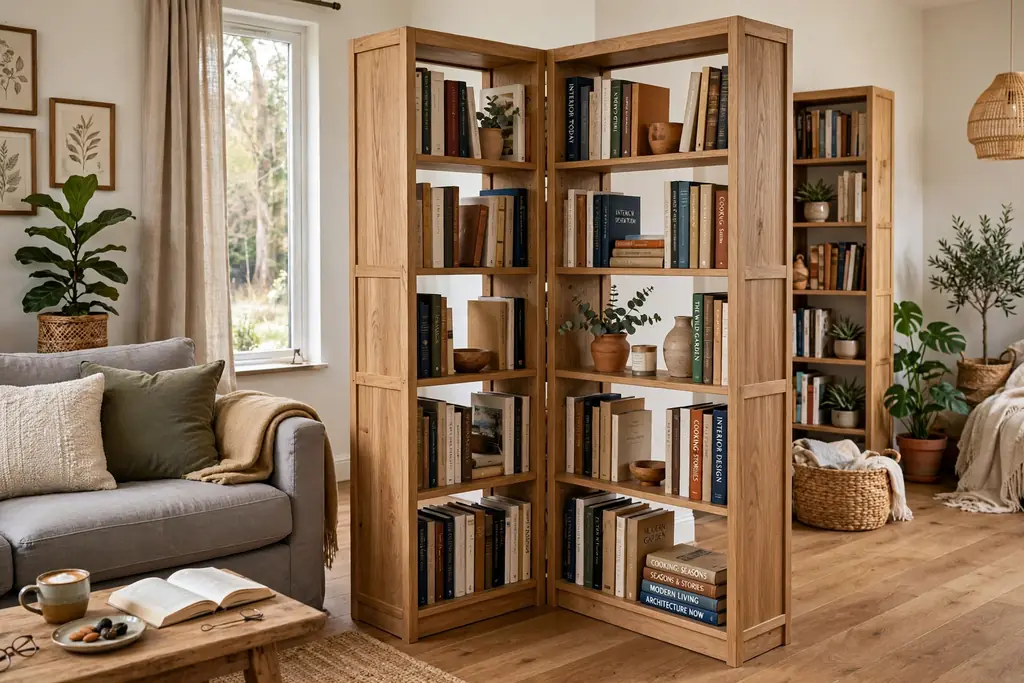
    Use a sliding door, a light curtain, or an open shelf unit to divide a studio or a long room without blocking daylight. A divider that slides or hangs gives you privacy for sleep or work when you need it, and opens the room again during the day, which matters in a one room home. Choose a light material, such as pale wood slats, sheer fabric, or an open shelf, so light still reaches both sides.

    Hang a ceiling track curtain if a solid divider would block too much light, and extend the track past the bed or desk so the curtain stacks out of the way. An open shelf divider adds storage as well as a boundary, but keep the shelves partly open so the room does not feel walled in. Check your lease before fixing a track to the ceiling, and use a freestanding screen if fixing is not allowed.

    6. Paper Lantern Light for Soft Evenings
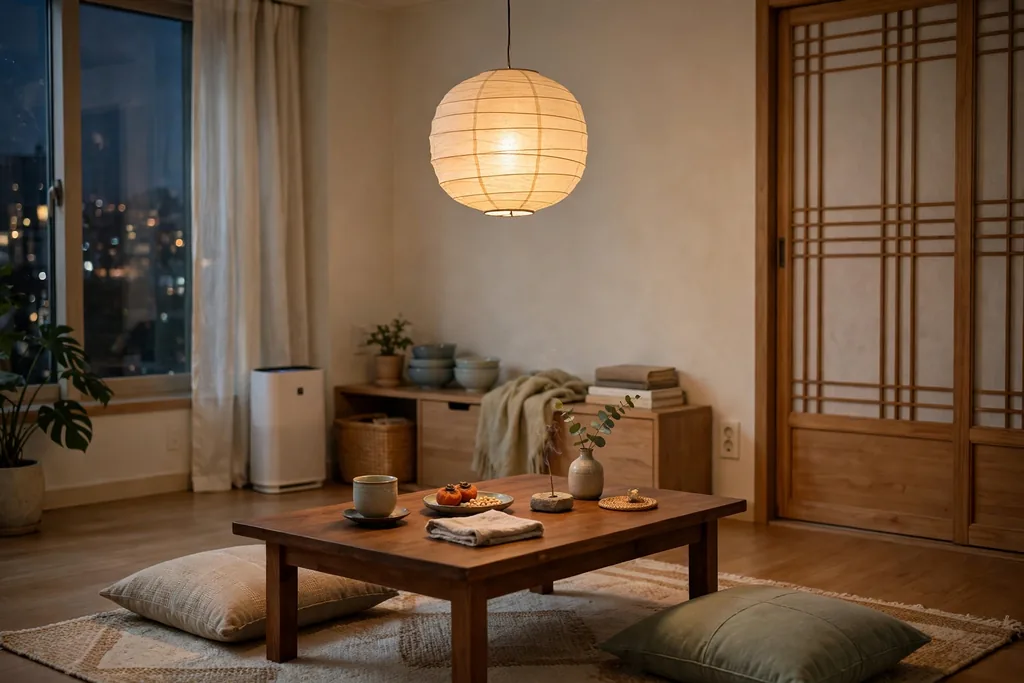
    Paper lantern lamp glowing softly over a low table in a cozy Korean apartment living room.

    Hang a paper lantern or place a paper shaded lamp in the living room or bedroom for soft, even evening light. Paper shades spread light gently and hide the harsh point of a bare bulb, which helps a small room feel calm after dark. Choose a warm white bulb and a shade size that suits the room, since a very large lantern can dominate a small ceiling.

    Hang the lantern over a seating area or a low table, not over a walkway where it could be bumped, and keep it clear of curtains and bedding. A floor standing paper lamp works well in a corner where ceiling hanging is not allowed, and it can move with you when you rearrange the room. Pair the paper light with one smaller lamp, so you can read without turning on a bright overhead light.

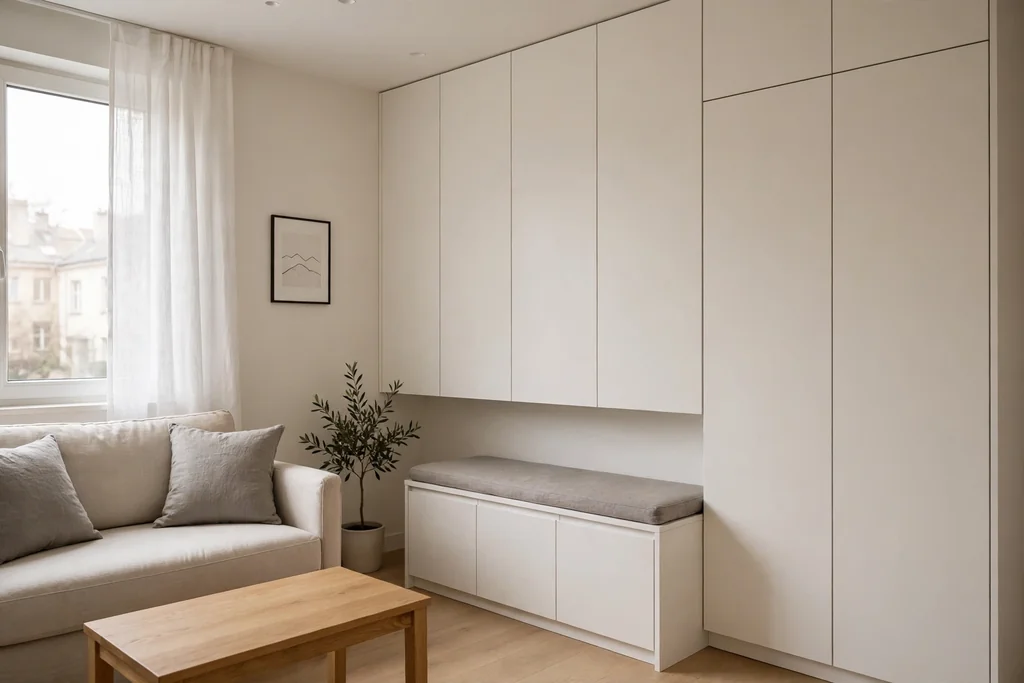
    7. Built In Look Wardrobe Wall
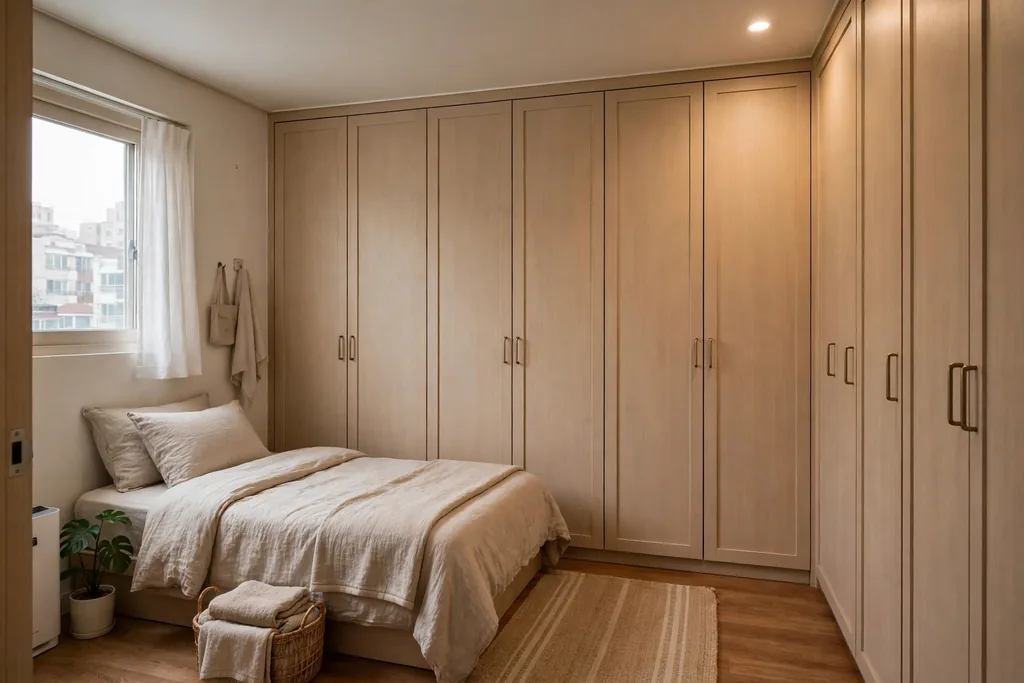
    Full wall of matching light wardrobes with simple handles in a small Korean bedroom.

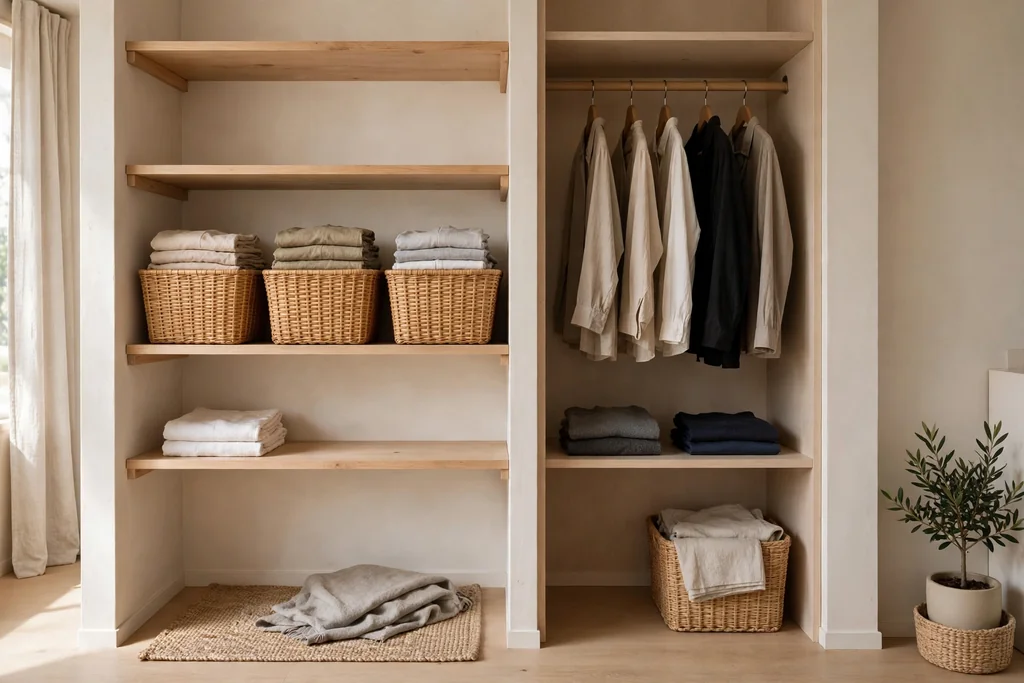
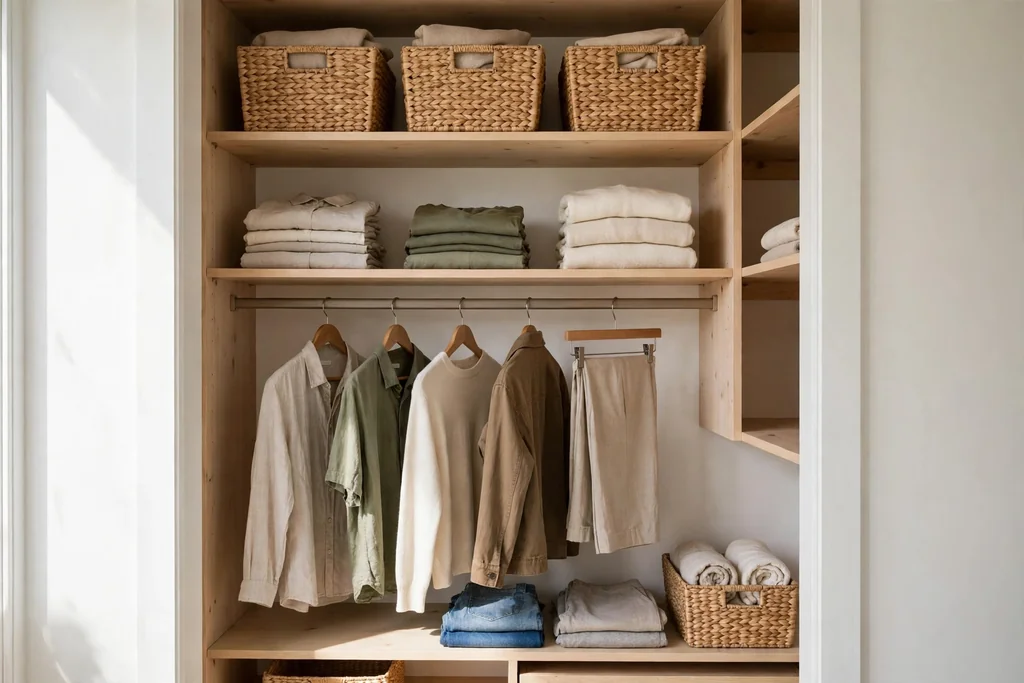
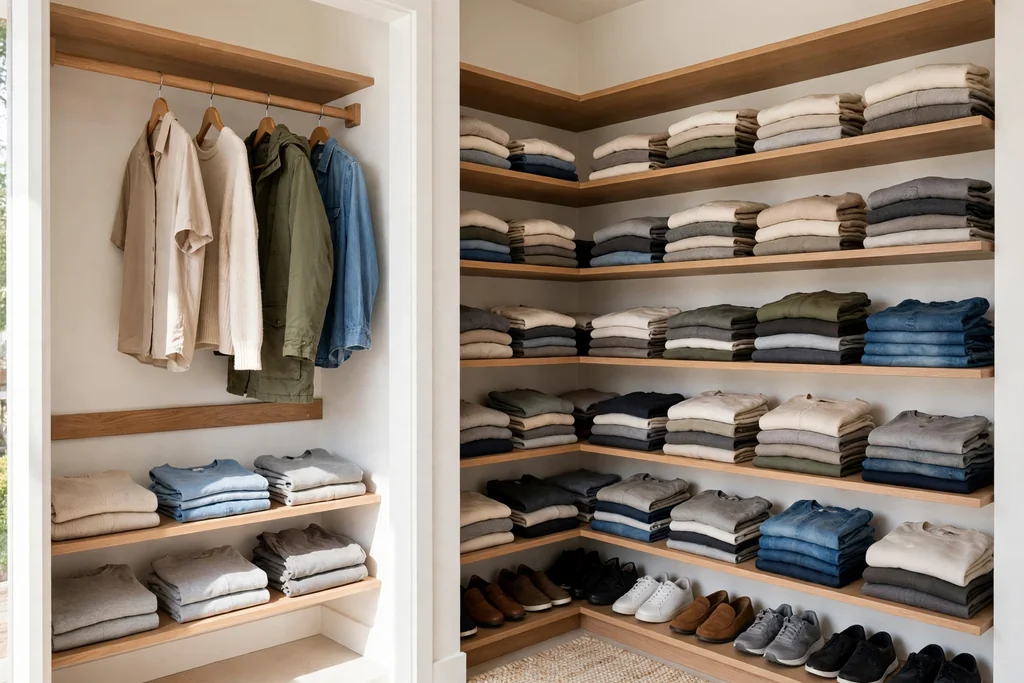
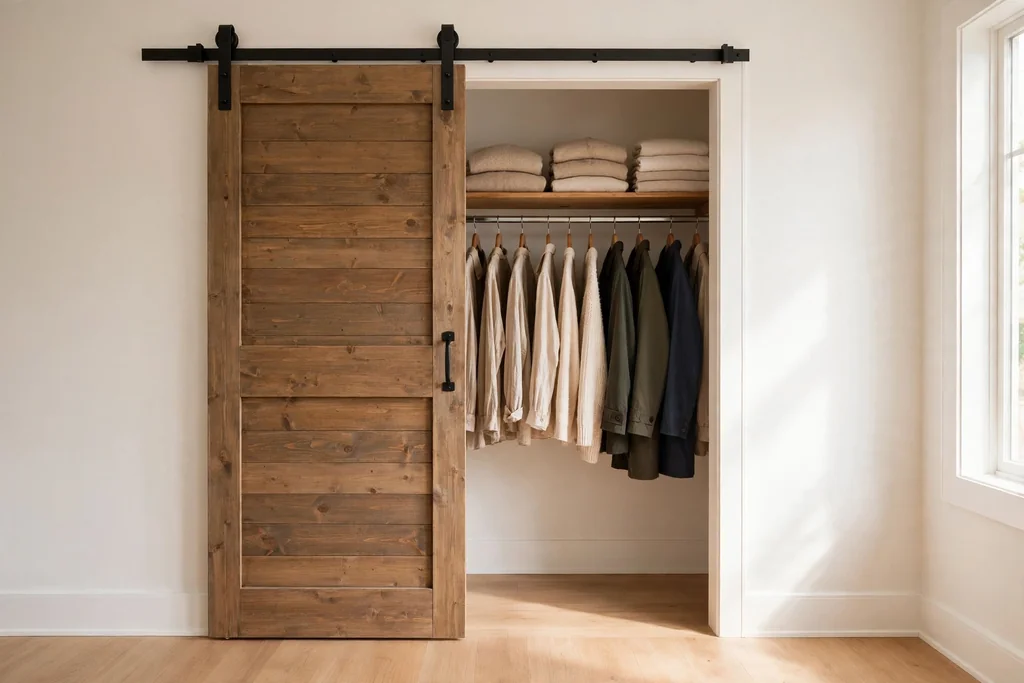
    Give the bedroom a built in look by running wardrobes or tall cabinets along one full wall in a single color. A wall of matching doors reads as architecture rather than a row of separate wardrobes, and it hides clothes, bedding, and bags behind closed fronts. Keep handles simple and the color close to the wall color, so the wall feels calm rather than heavy.

    If built in units are not possible in a rental, use two matching freestanding wardrobes with a top board or a curtain rail across them to link the look. Inside, use boxes and hanging shelves to sort clothes by season or use, since a tidy inside makes the outside easier to keep closed. Leave one section for daily clothes at hand height, and store off season items up high or under the bed.

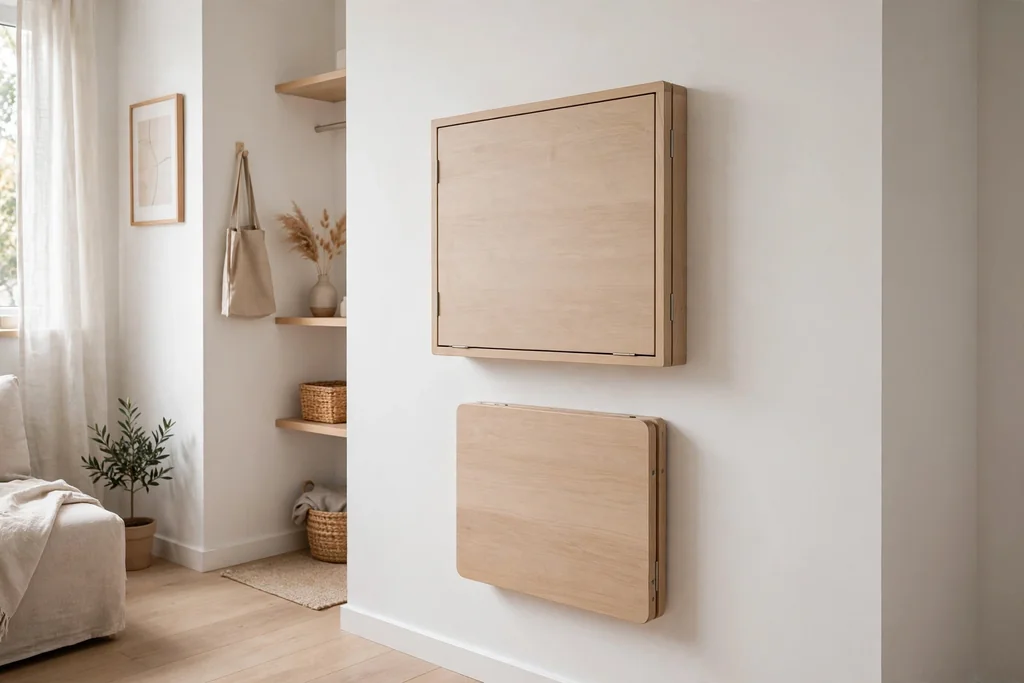
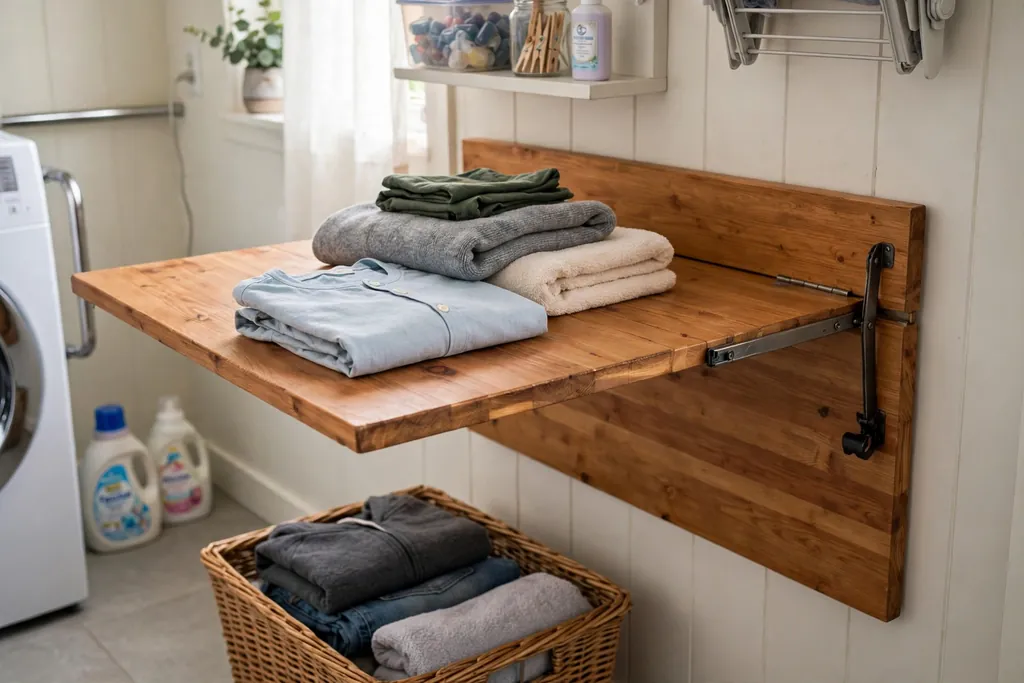
    8. Fold Away Table for Dining and Work
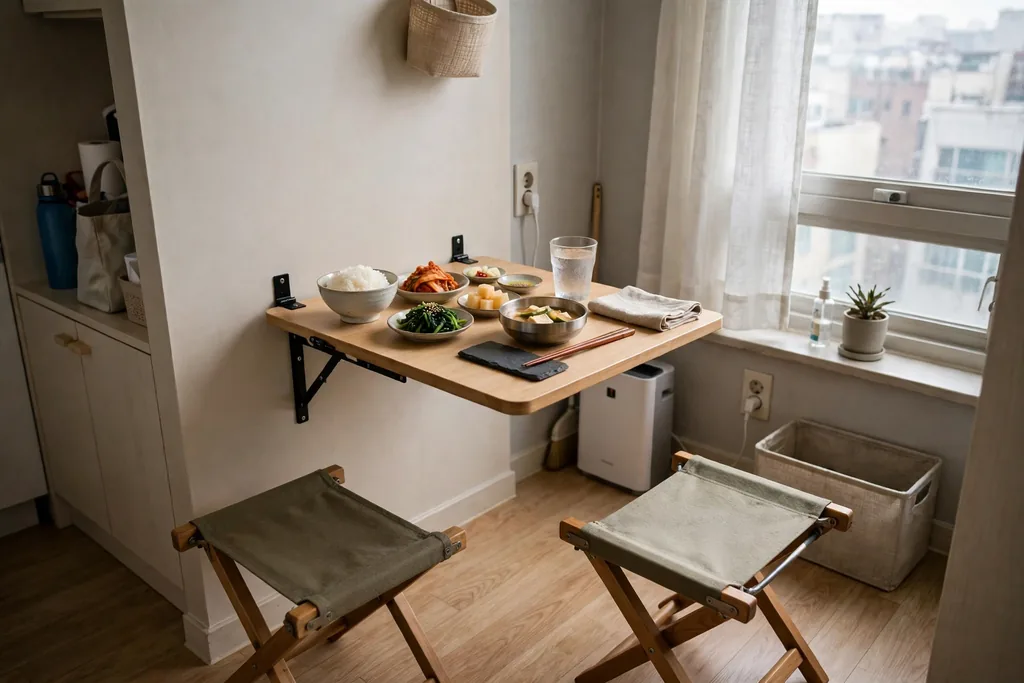
    Fold down wall table set for a meal with folding stools in a small Korean apartment.

    Use a fold down wall table or a drop leaf table so a small apartment can have a real dining spot without a table standing in the middle of the room all day. Fold it down for meals, study, or a puzzle, then fold it away to free the floor for walking or guests. Two stackable stools or folding chairs stored nearby complete the setup without a full dining set.

    Fix a wall table firmly into studs or suitable anchors, and check the weight rating before you load it with books or a laptop. A drop leaf table on casters is a good choice if wall fixing is not allowed, since it can roll to the wall when closed. Keep the table clear as a habit, because a fold away table only helps if folding it away stays easy, and keep a small tray for condiments so meals do not spread across the whole surface.

    9. Balcony Turned Into a Tea Nook
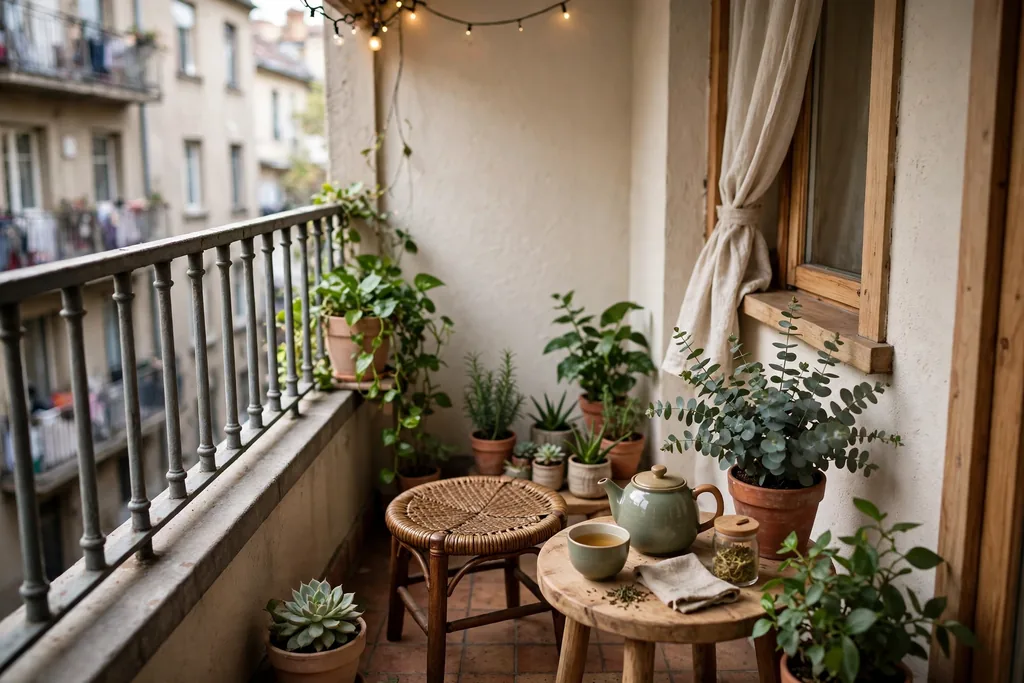
    Small apartment balcony tea nook with a low stool, side table, and potted plants.

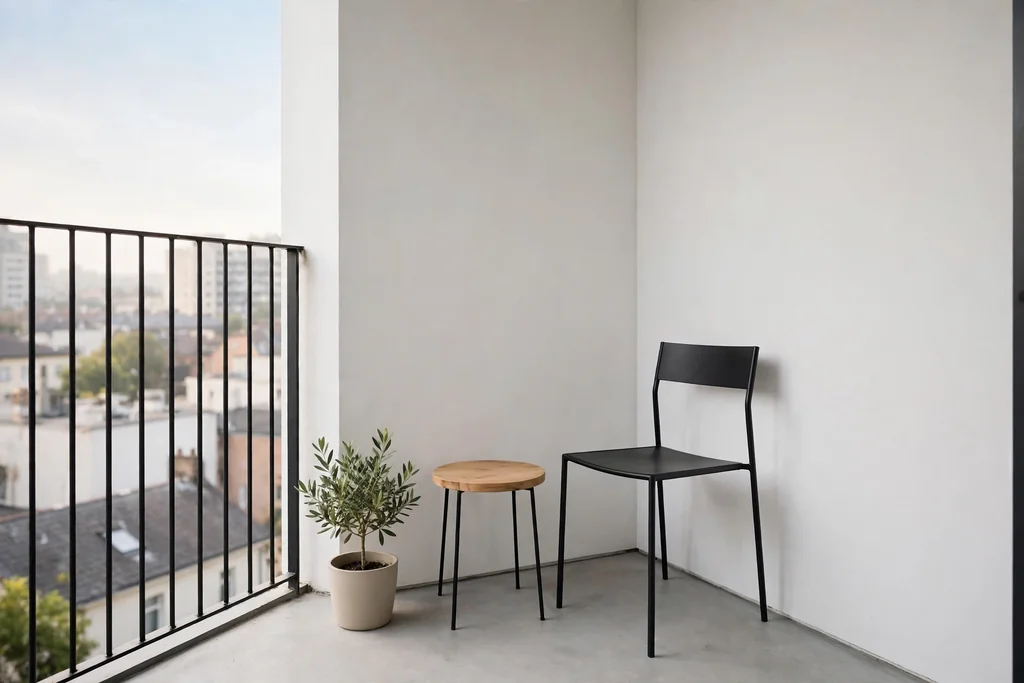
    Turn a small balcony into a tea nook with a low stool, a small side table, and one or two pots, so the balcony becomes a daily pause rather than a storage ledge. Many Korean apartments have a balcony used for laundry or storage, and carving out even a chair sized corner for sitting gives that space a second job. Choose weather resistant pieces that can stay outside, and bring cushions in when rain is forecast.

    Keep the nook to what fits without blocking the door or a drying rack, and add a small tray for a teapot and cups so the spot feels ready to use. A trailing plant or a small herb pot adds green without taking floor space, and a wind screen or a tall pot can cut drafts on an open balcony. Check building rules before fixing anything to the railing, and keep the route from the door clear for safety.

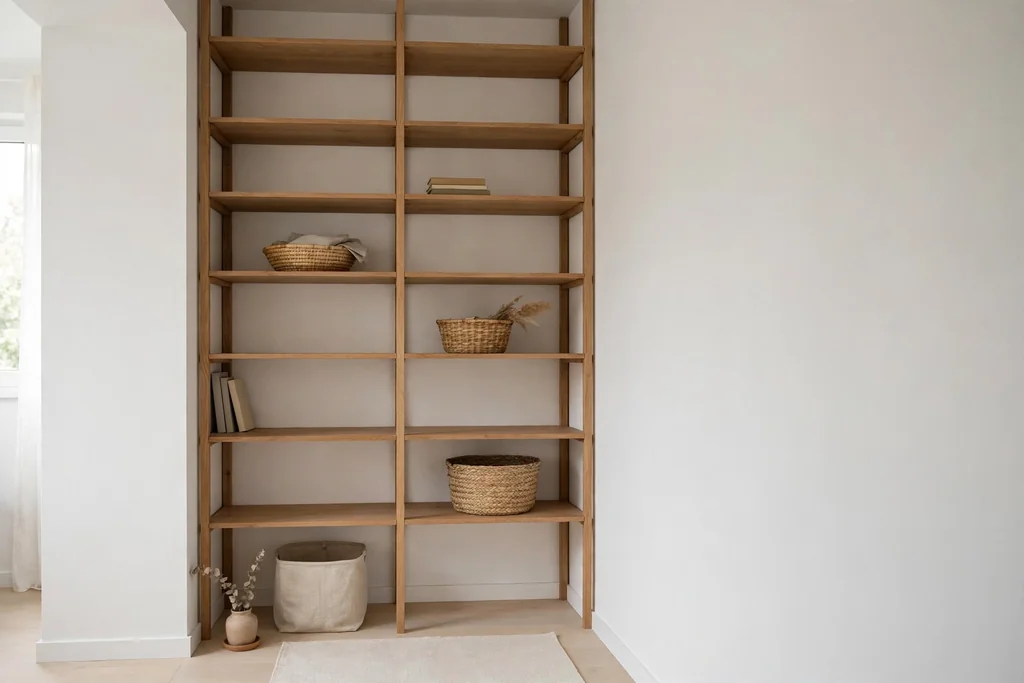
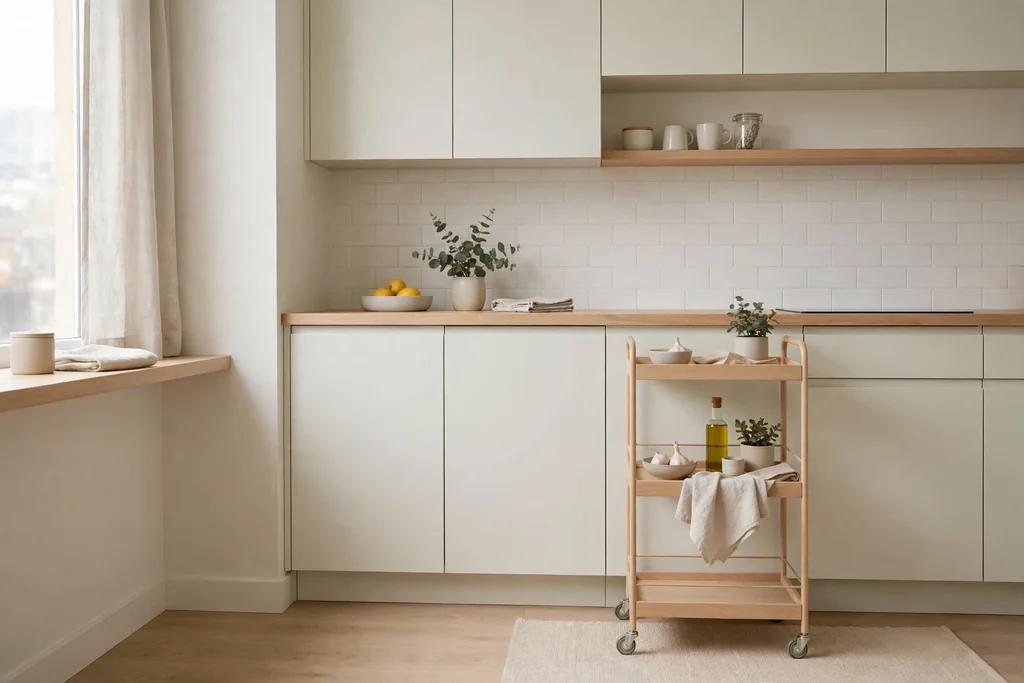
    10. Compact Kitchen With Open Shelves
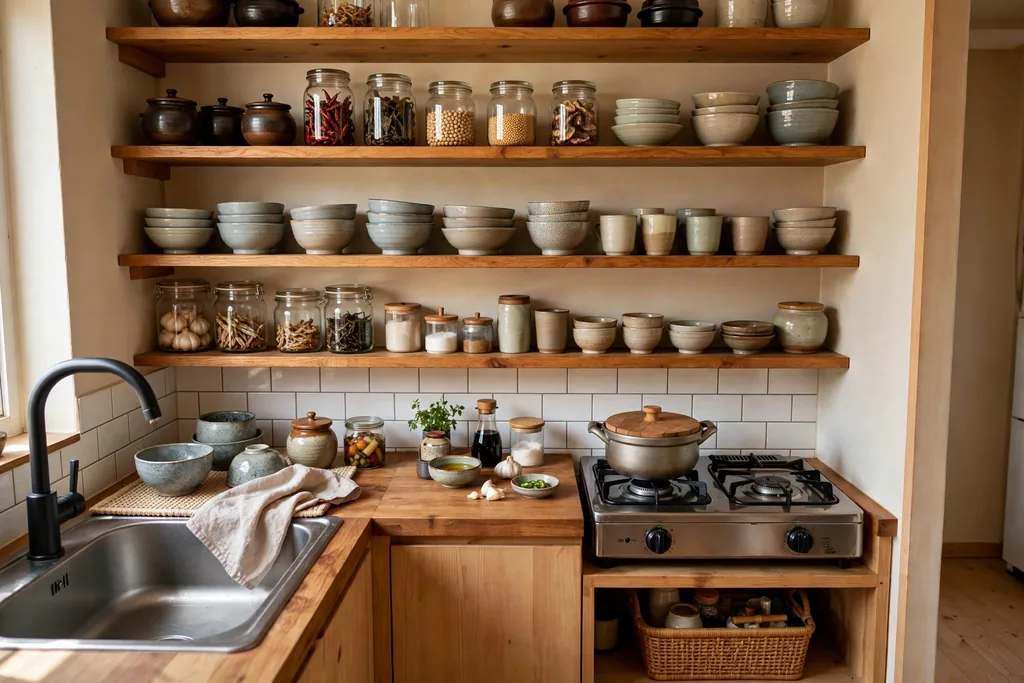
    Compact Korean kitchen with open wood shelves holding bowls, cups, and jars.

    Open up a compact kitchen with one run of open shelves for daily bowls, cups, and jars, while keeping less used items behind closed doors. Open shelves make a small kitchen feel less boxed in, and they put daily items within one reach, which speeds up cooking and tidying. Keep the shelf display to items you use weekly, in matching or plain colors, so the shelf reads as tidy rather than crowded.

    Place heavy items low and light items high, and anchor shelves firmly following the maker instructions. Group similar items together, such as bowls in one stack and mugs in one row, and leave a little empty space at the end of each shelf. A small rail under the shelf for utensils or cups adds storage without another shelf, and a tray on the counter can hold oils and sauces used daily.

    11. Entryway Shoe Cabinet and Bench
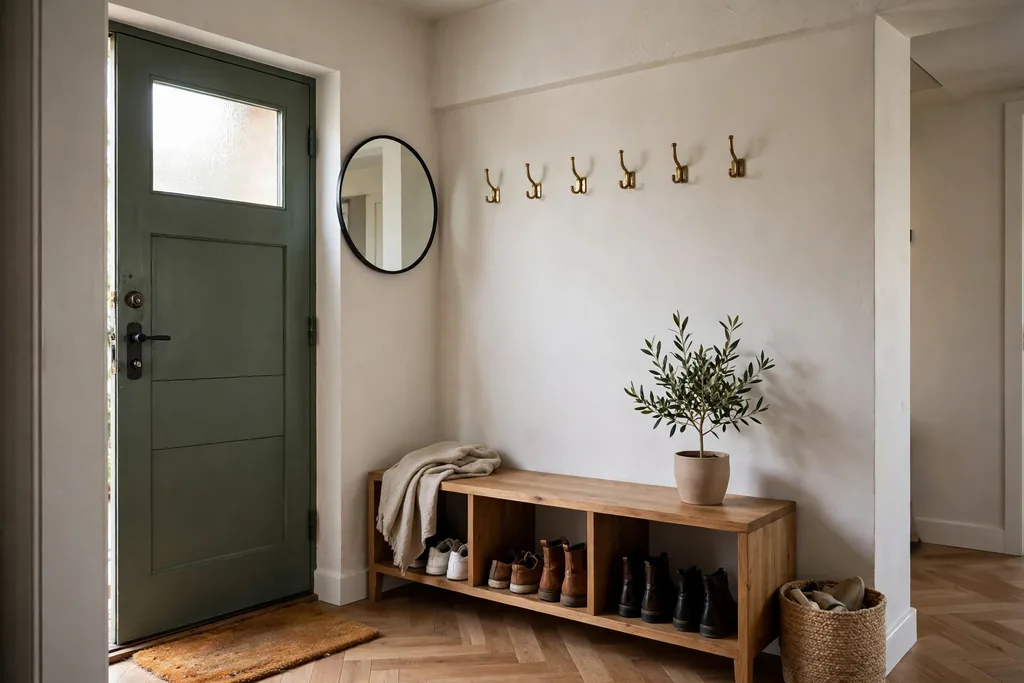
    Apartment entry with a low shoe cabinet bench, hooks, and a mirror by the front door.

    Set a low shoe cabinet with a bench top by the front door, so shoes, keys, and bags have a home the moment you come in. A bench top gives you a seat for putting on shoes, and closed cabinet doors hide footwear that would otherwise spread across the entry floor. Add a small tray or dish on top for keys and a hook row above for coats and bags.

    Measure the entry before you buy, and leave a clear path from the door into the room, since a cabinet that blocks the walkway will be worked around rather than used. Keep daily shoes in the cabinet and off season shoes in a box elsewhere, so the cabinet never overflows. A mirror above the bench gives a last check before leaving and bounces light into a narrow entry.

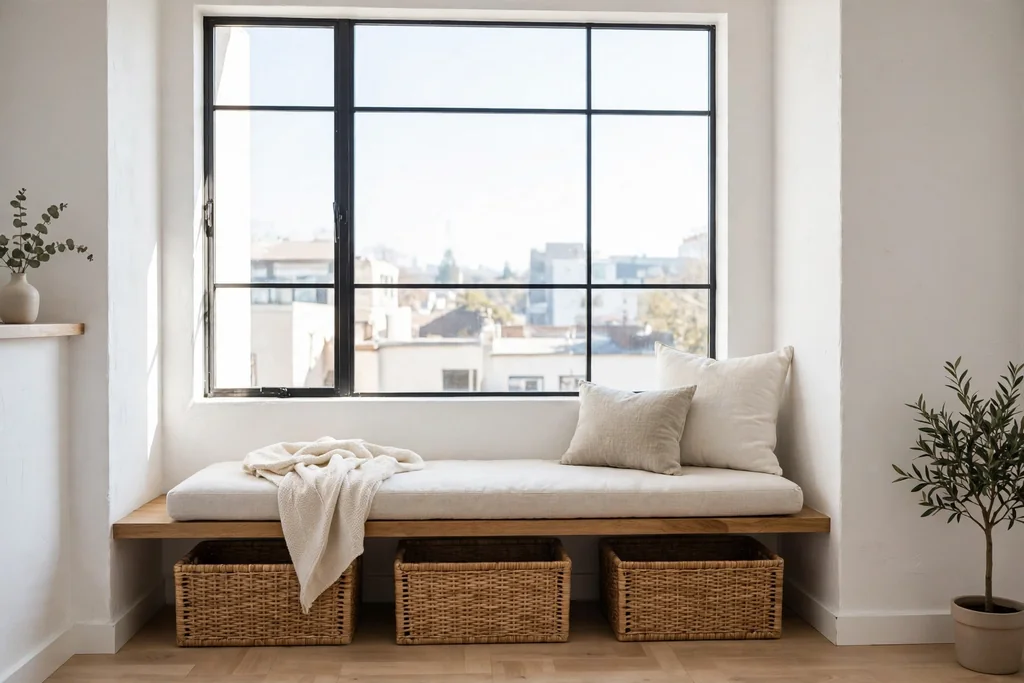
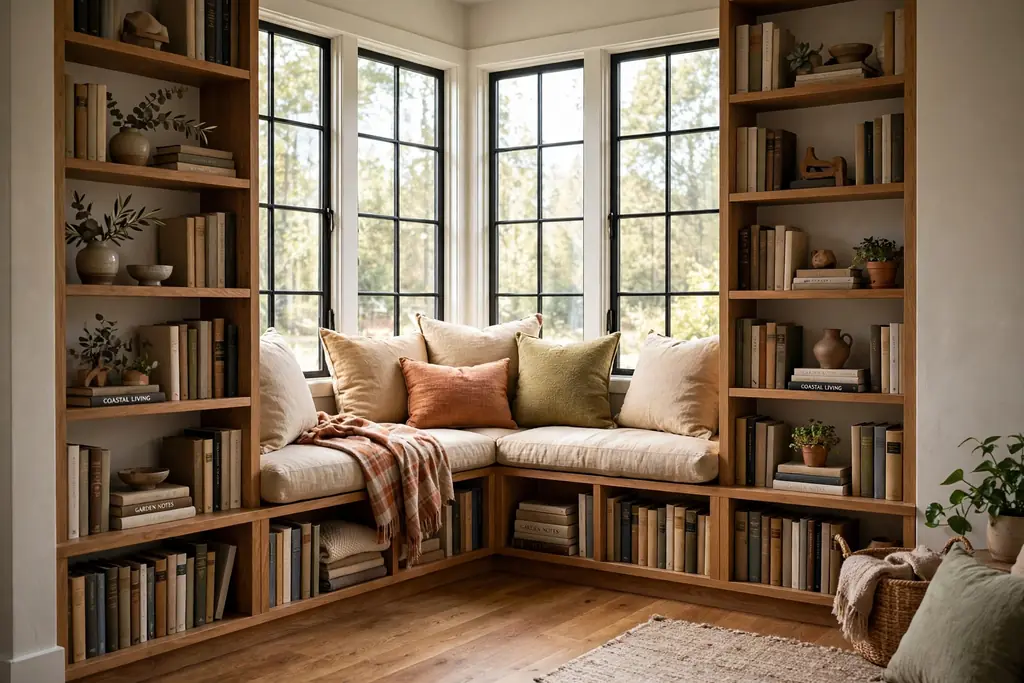
    12. Window Reading Nook With Deep Cushions
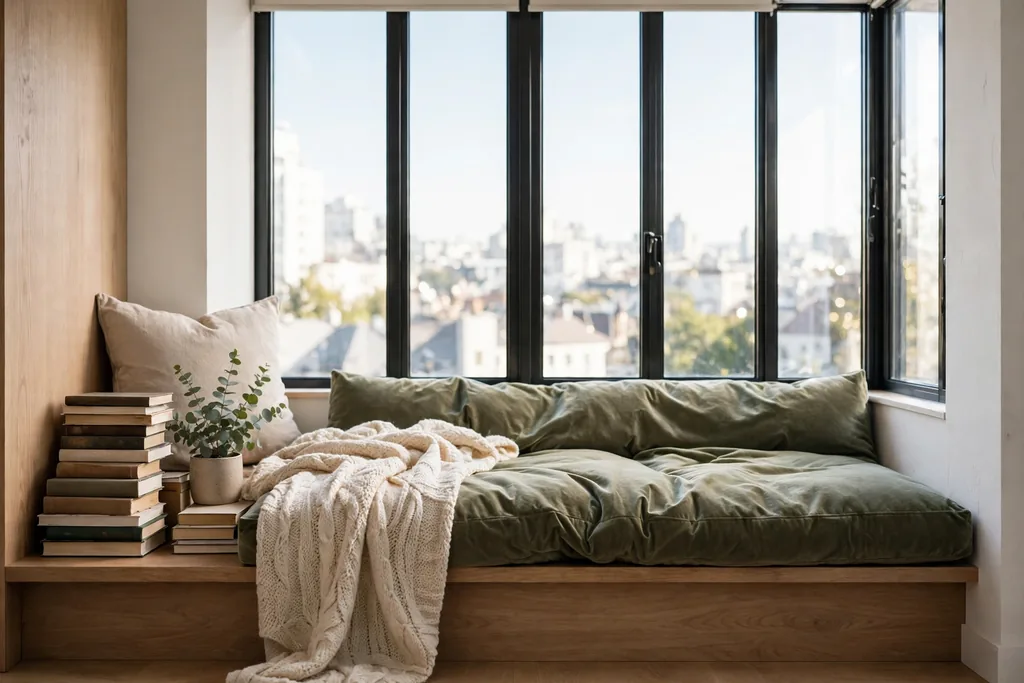
    Window reading nook with a deep cushion, throw, and books beside a bright apartment window.

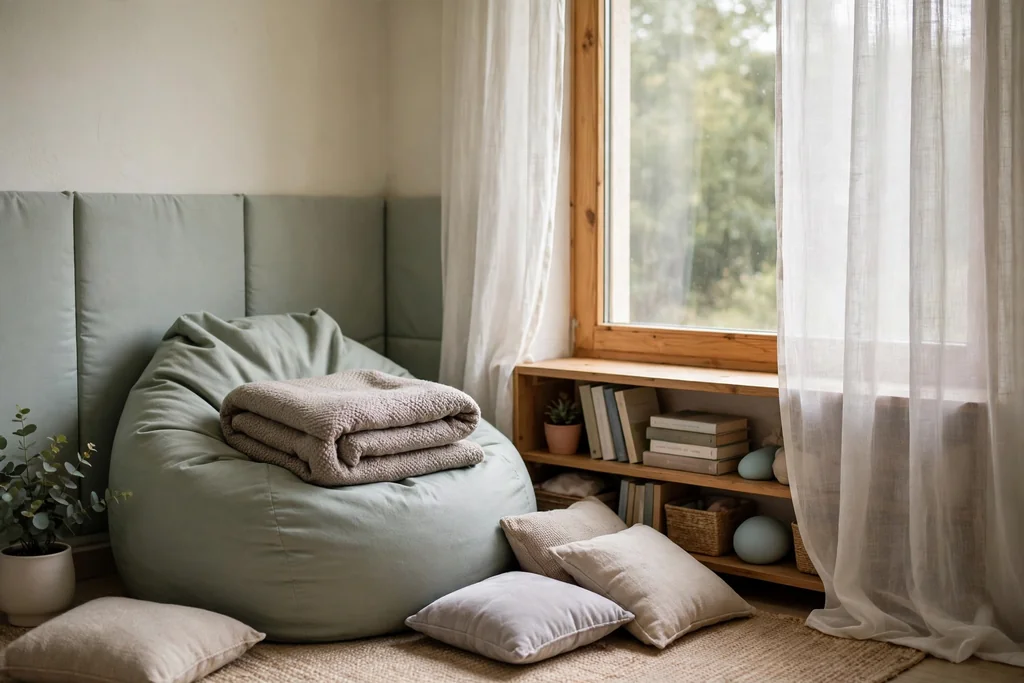
    Make a window reading nook with a deep cushion on a low bench or a wide sill, a throw, and a small shelf for books. A window seat uses a stretch of wall that often stays empty, and it gives the apartment a quiet corner for reading, looking out, and slow mornings. Choose a cushion with a washable cover, since a seat beside a window collects dust and light fading faster than other seats.

    Add a small wall lamp or a clip light for evening reading, and keep a basket beside the seat for the current book and a throw. If a built in bench is not possible, a low storage bench pushed against the window wall does the same job and adds a place for shoes or bags underneath. Keep the window opening clear, and check that cushions do not block a vent or a radiator.

    13. Low Sofa and Low Coffee Table Living Room
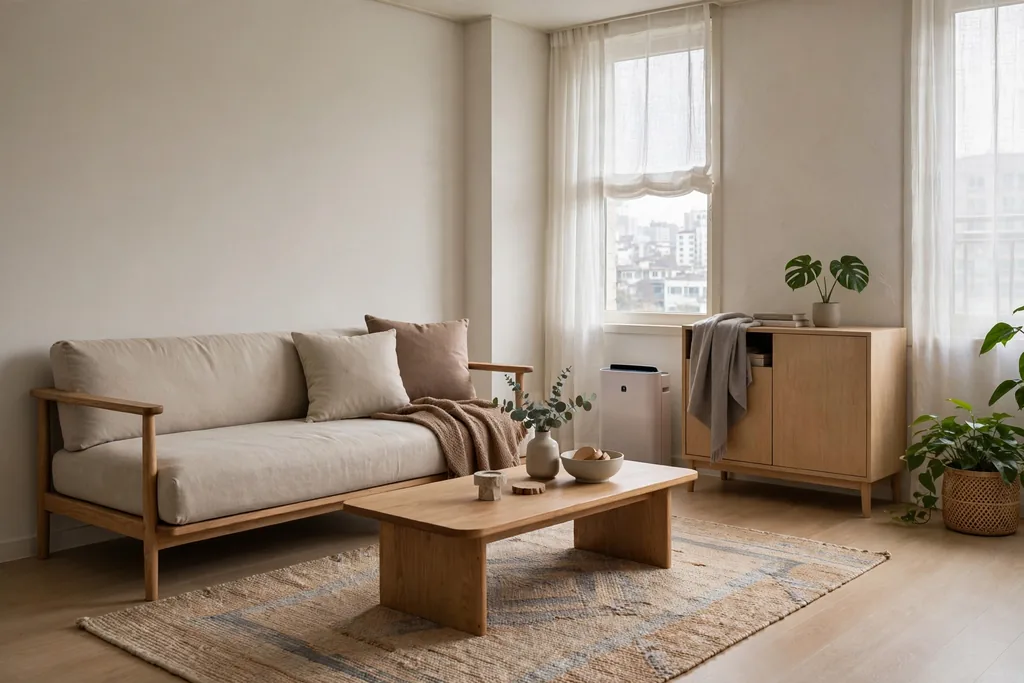
    Low sofa with slim arms and a low coffee table on a rug in a Korean apartment living room.

    Choose a low sofa with slim arms and a low coffee table to keep the living room feeling open and grounded. Low furniture leaves more wall visible above it, which helps a small room feel taller, and it suits floor cushions and a low rug layered beside it. Pick a sofa depth that lets you sit with feet on the floor, and a coffee table height that sits just below the seat height for easy reach.

    Keep the coffee table surface mostly clear, with one tray for remotes and a small plant or candle, so the room stays easy to tidy. A sofa with raised legs shows more floor underneath and can make the room feel lighter, while a sofa close to the floor reads cozier and more grounded. The seating guidance in these cozy apartment living room ideas shows how one rug and a floated seating group can define the living zone in a small home.

    14. Plants at Different Heights by the Window
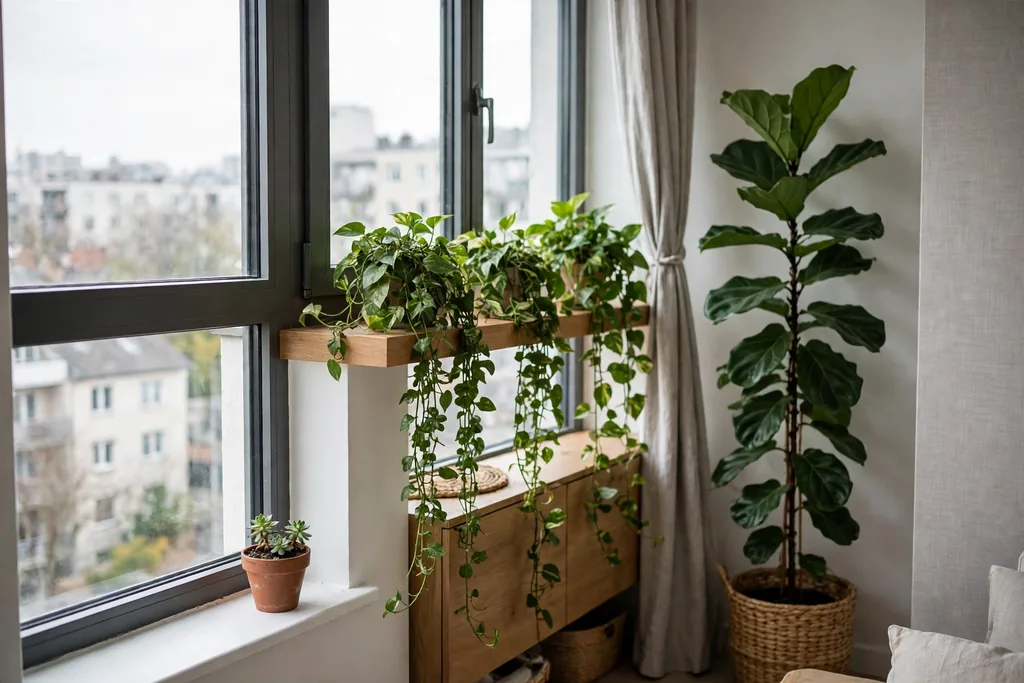
    Apartment window with plants at three heights, a tall floor plant, trailing shelf plants, and a small pot.

    Place plants at three heights near a window: a tall floor plant in a corner, trailing plants on a shelf, and a small pot on the sill or a side table. Plants at different heights keep green from crowding one surface, and they soften the straight lines of shelves and window frames. Match each plant to the light it will actually get, since a bright window suits different plants than a dim corner.

    Start with three or four plants rather than a dozen, so watering stays manageable, and group plants that need similar water together. Use saucers under pots on wood floors, and wipe leaves now and then so they stay healthy in a small room. A tall plant can also screen a view you do not love, while trailing plants soften a shelf edge without taking floor space.

    15. Neutral Bedding With One Soft Accent
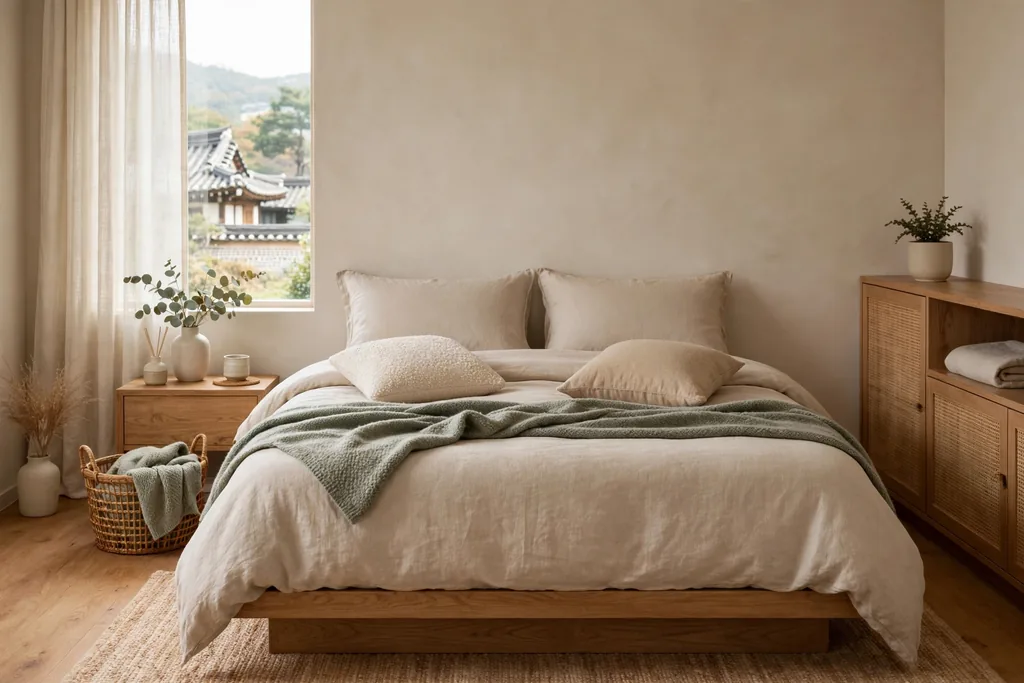
    Bed dressed in neutral bedding with one soft accent throw and cushions in a Korean bedroom.

    Dress the bed in neutral bedding in white, cream, or soft beige, then add one accent color in a throw and two cushions. A neutral bed makes a small bedroom feel restful and lets you change the mood by swapping only the throw and cushions, rather than buying new bedding. Choose natural feeling fabrics such as cotton or linen blends, with a lighter layer for warm nights and a warmer layer for cold ones.

    Keep sleeping pillows separate from daytime cushions, and store extra bedding in one labeled box so the bed never doubles as a storage pile. Make the bed each morning, since a made bed sets the tone for the whole bedroom, especially in a studio where the bed is visible from the living area. Fold the throw at the foot of the bed so it looks intentional rather than tossed aside.

    16. Wall Mounted Desk for a Work Corner
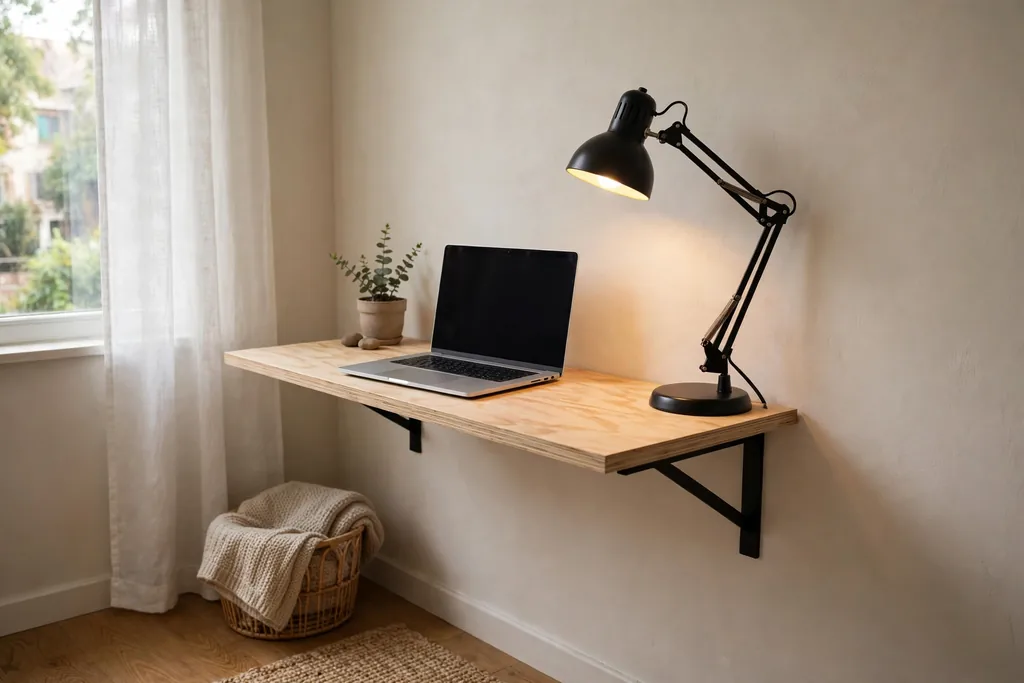
    Slim wall mounted desk with a laptop and task lamp in a quiet apartment work corner.

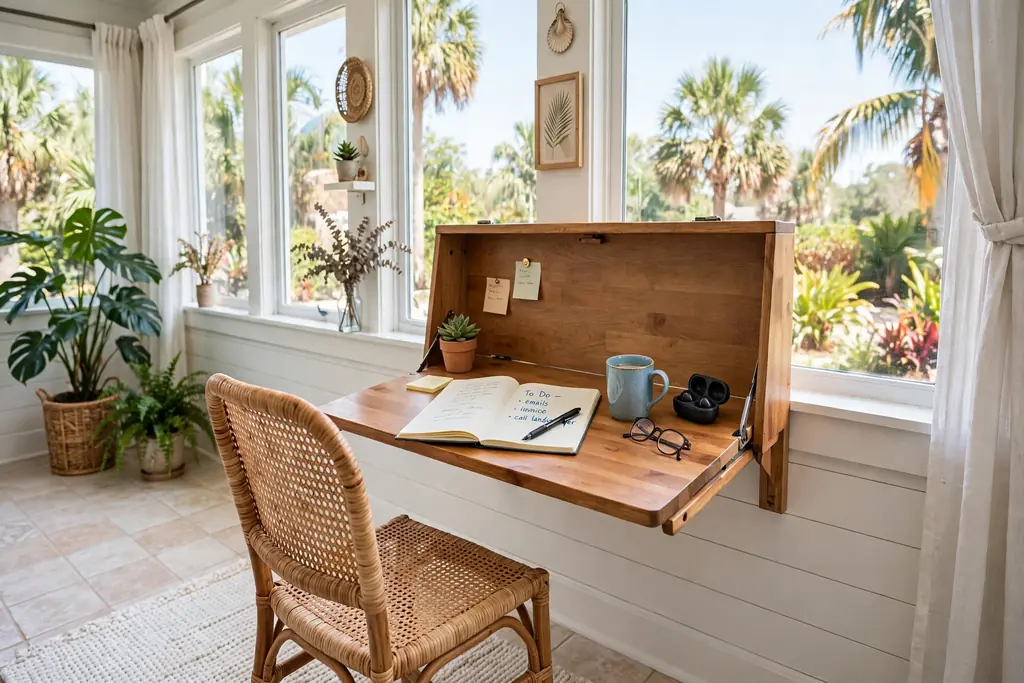
    Mount a fold down or slim wall desk in a quiet corner to give work a clear home that closes away at the end of the day. A wall desk needs little floor space, and closing it at night marks the shift from work to rest, which matters when the living room is also the office. Mount it at a comfortable writing height, and keep a small shelf above it for a laptop, notebook, and charger.

    Choose a chair that slides fully under a nearby table or folds flat, so the work corner does not block the room when work ends. Keep work papers in one tray or drawer, and put the charger in a fixed spot so cables do not spread across the floor. If wall fixing is not allowed, a narrow console table against the wall with a laptop stand gives a similar corner without drilling.

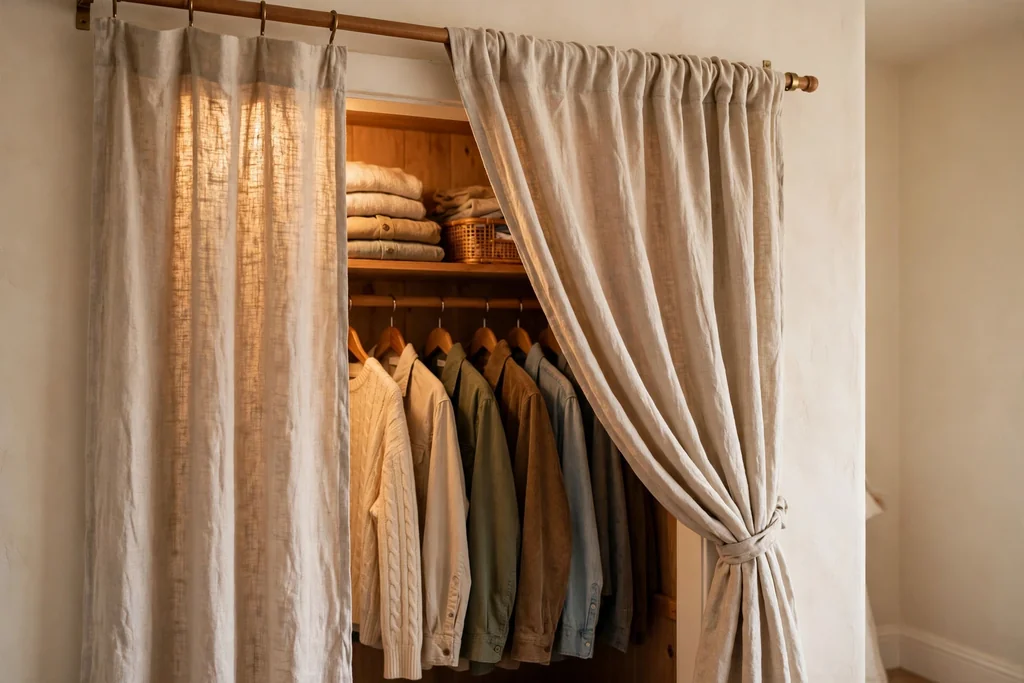
    17. Curtain Divider for a Studio Sleeping Zone
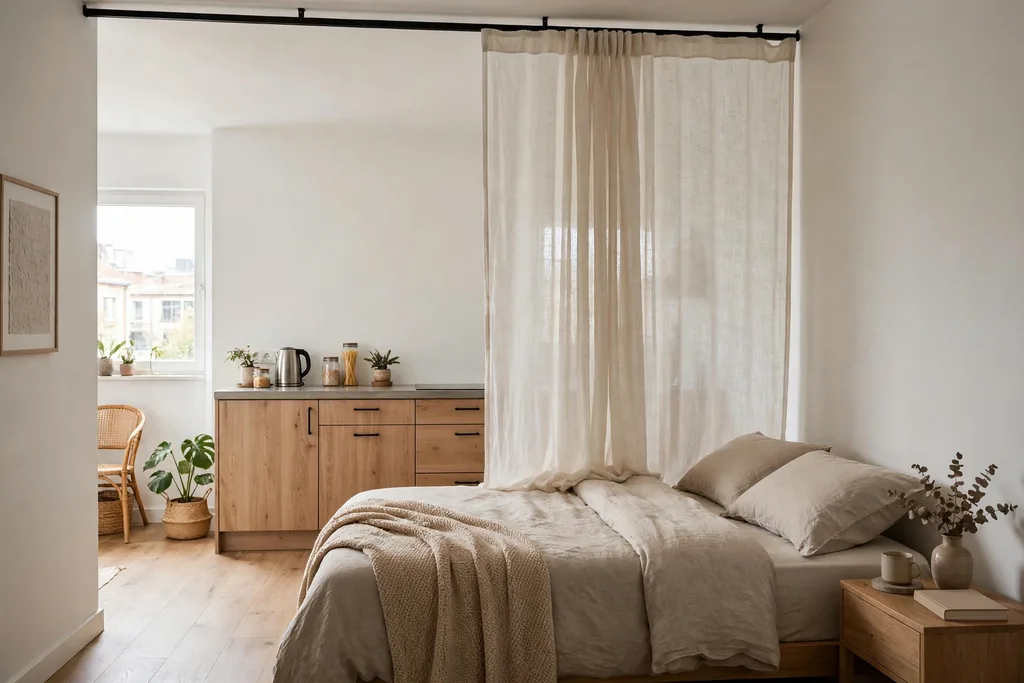
    Light curtain on a ceiling track partly drawn across a bed zone in a studio apartment.

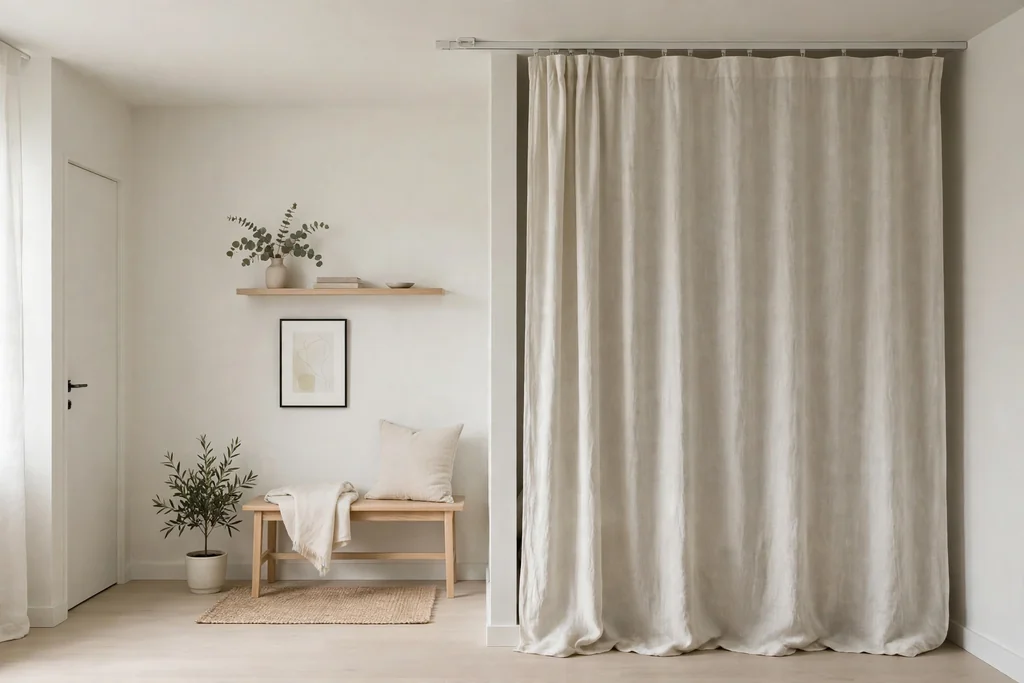
    Hang a curtain from a ceiling track to close off the sleeping zone in a studio at night and open the whole room again in the morning. A curtain divider is softer and lighter than a solid screen, and it can be drawn in seconds, which suits a room that changes jobs through the day. Choose a fabric heavy enough to block the view of the bedding, but light enough to slide easily with one hand.

    Hang the curtain as close to the ceiling as possible so the sleeping area feels taller, and extend the track a little past the bed on each side so the curtain stacks out of the way during the day. Washable fabric is a practical choice, since a bed curtain collects dust and cooking smells faster than a window curtain. Keep the curtain clear of a heater or a lamp, and check the track fixings suit your ceiling type before you buy.

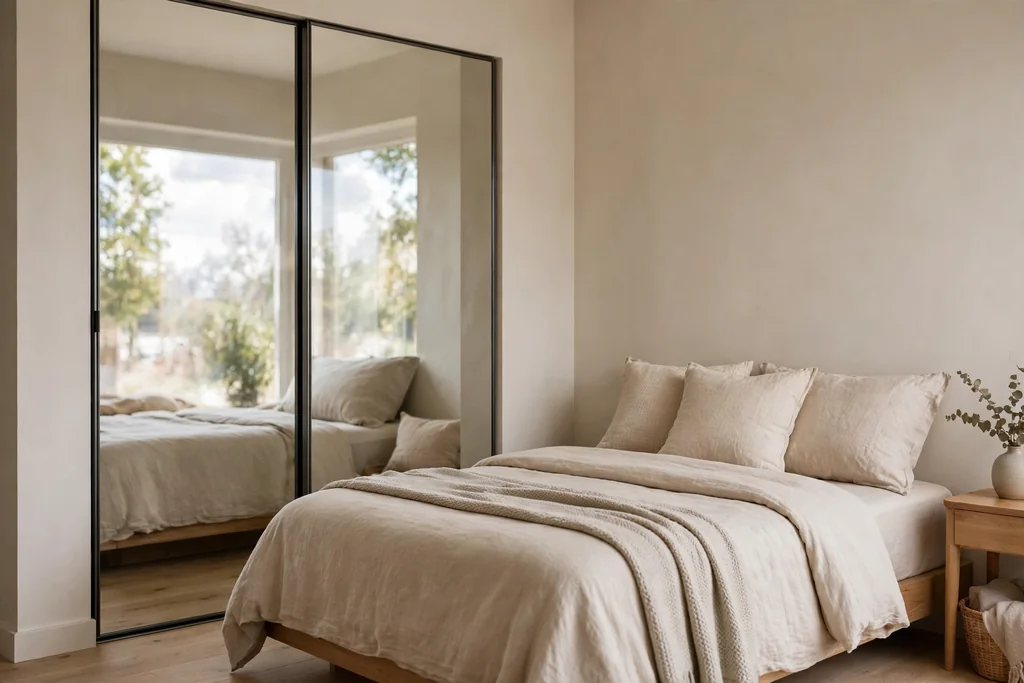
    18. Large Mirror Opposite the Window
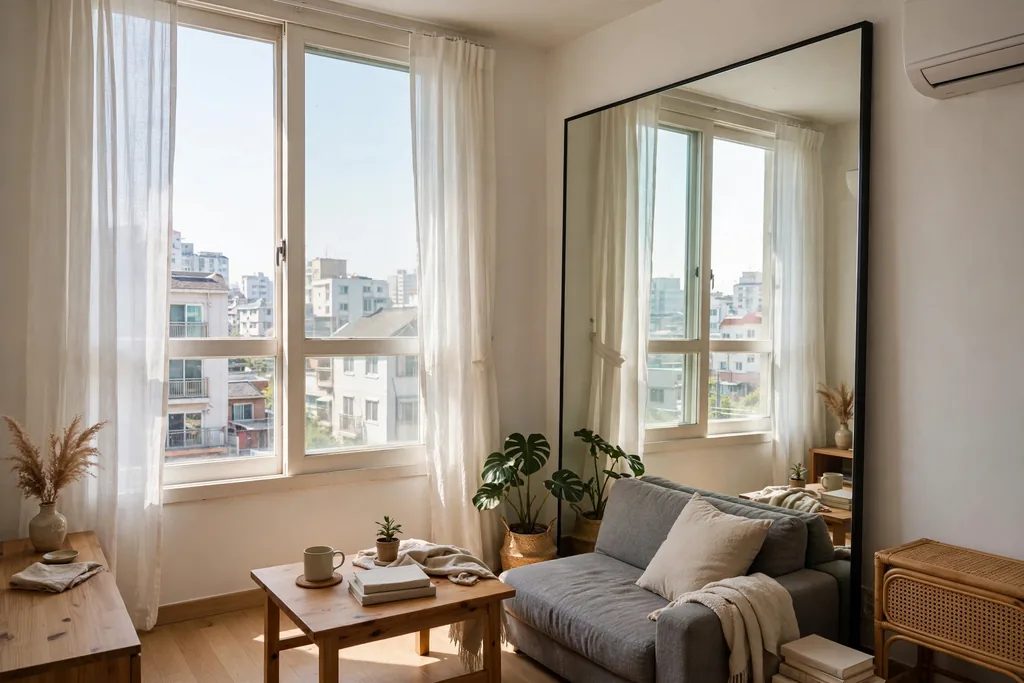
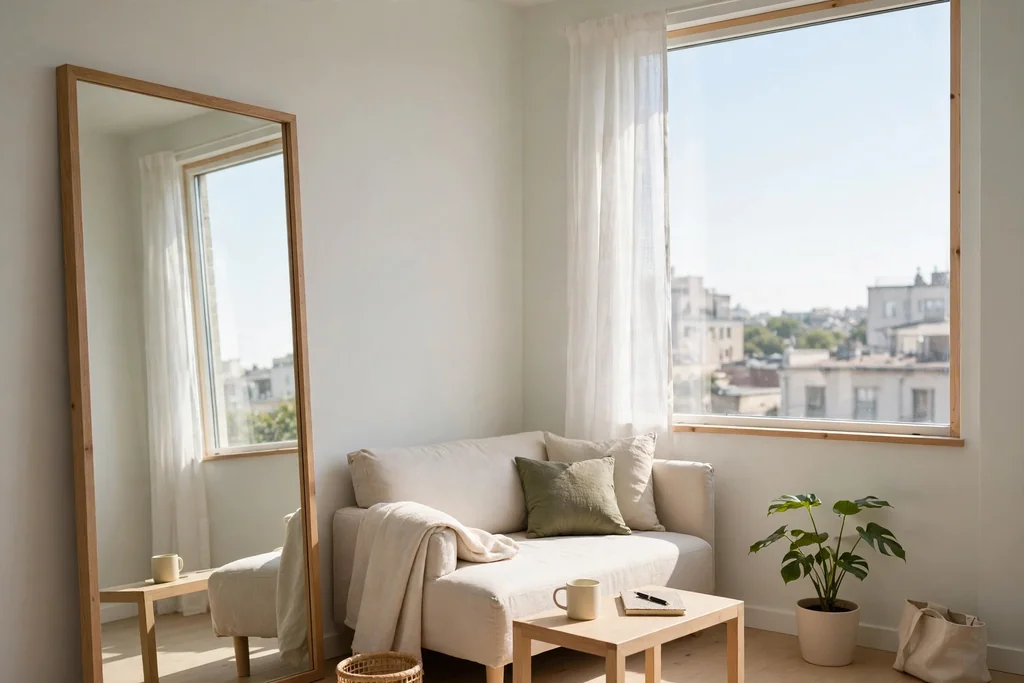
    Large mirror opposite a bright window in a small Korean apartment living room.

    Place a large mirror opposite or beside a window to bounce daylight deeper into the room and make the far wall feel farther away. In a small apartment, that extra sense of depth matters, because the room has no hallway or second room to give your eyes a break. Lean a full length mirror against the wall if hanging is not allowed, and secure it so it cannot slide on a smooth floor.

    Check what the mirror reflects before you fix its position, since a mirror that reflects a messy corner doubles the mess. Aim it toward the window, a plant, or a calm stretch of wall for the best result. One large mirror usually works better than several small ones scattered across the room, and a simple frame in light wood or black suits most Korean inspired rooms.

    19. Layered Warm Light for Evenings
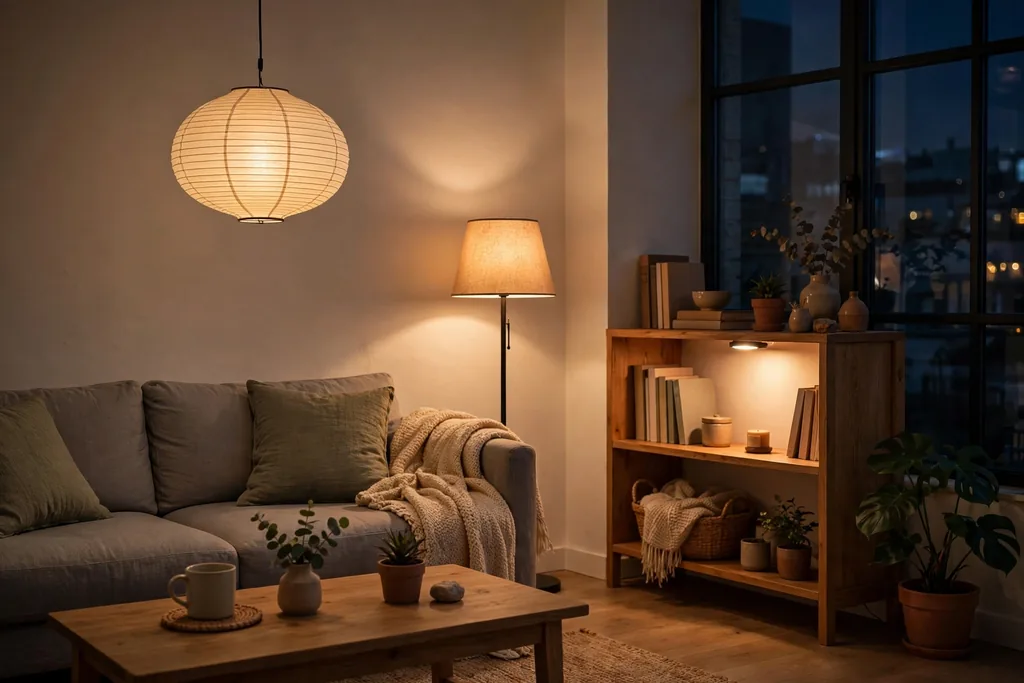
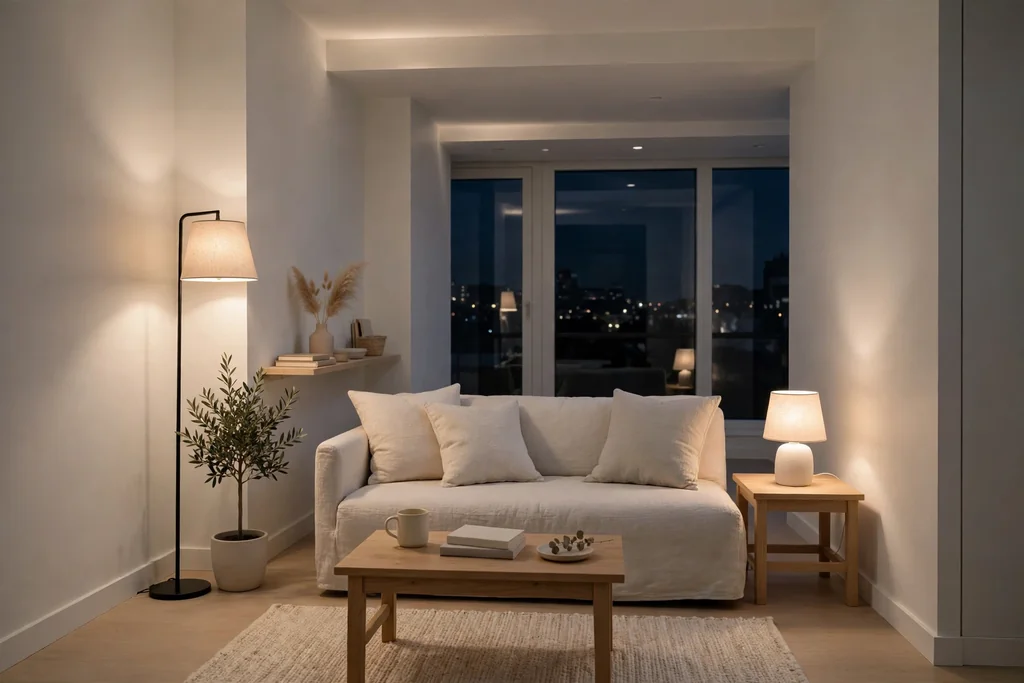
    Apartment living room in the evening lit by a paper lamp, floor lamp, and small shelf light.

    Layer light at three levels for evenings: a soft ceiling or paper light for the whole room, a floor or table lamp where you sit, and a low glow on a shelf or side table. A single ceiling light flattens a small room and feels harsh after dark, while layered light lets you shift from a bright daytime room to a calm evening one. Use warm white bulbs throughout, so the levels agree rather than clash.

    Put the brightest light where you need to see, such as beside the reading chair, and keep the overall level soft in the evening. Dimmable bulbs or smart plugs let you change the mood without rewiring, which matters in a rental where electrical changes are limited. Switch off the harsh overhead light after dinner and let the lamps set a calmer mood for the night, with a small light left on near the entry for coming home.

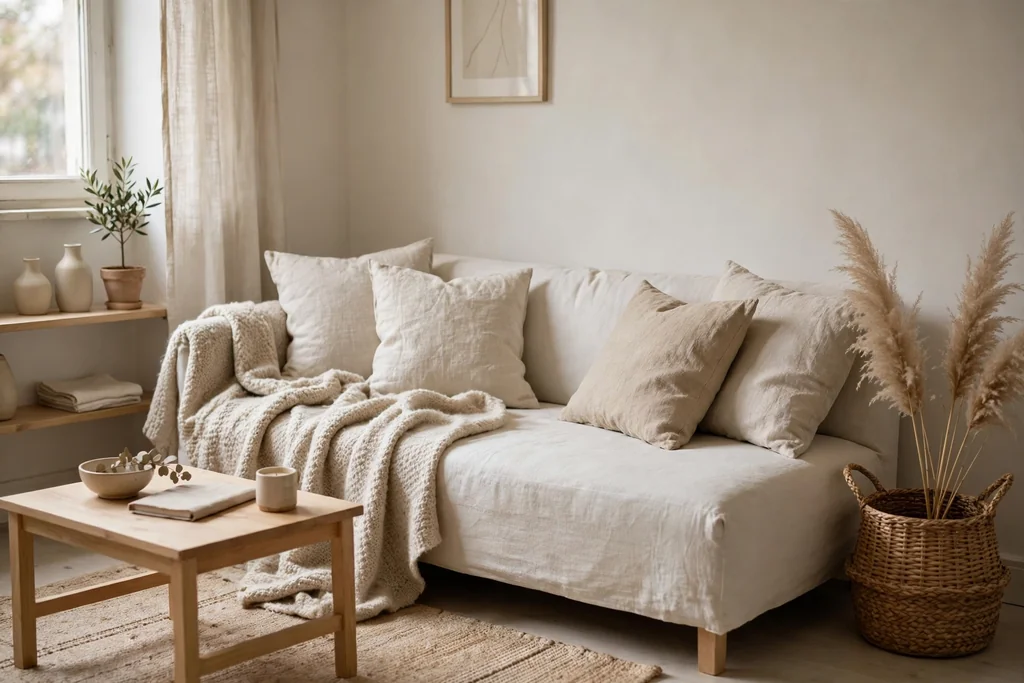
    20. Textile Layers for Warmth Without Clutter
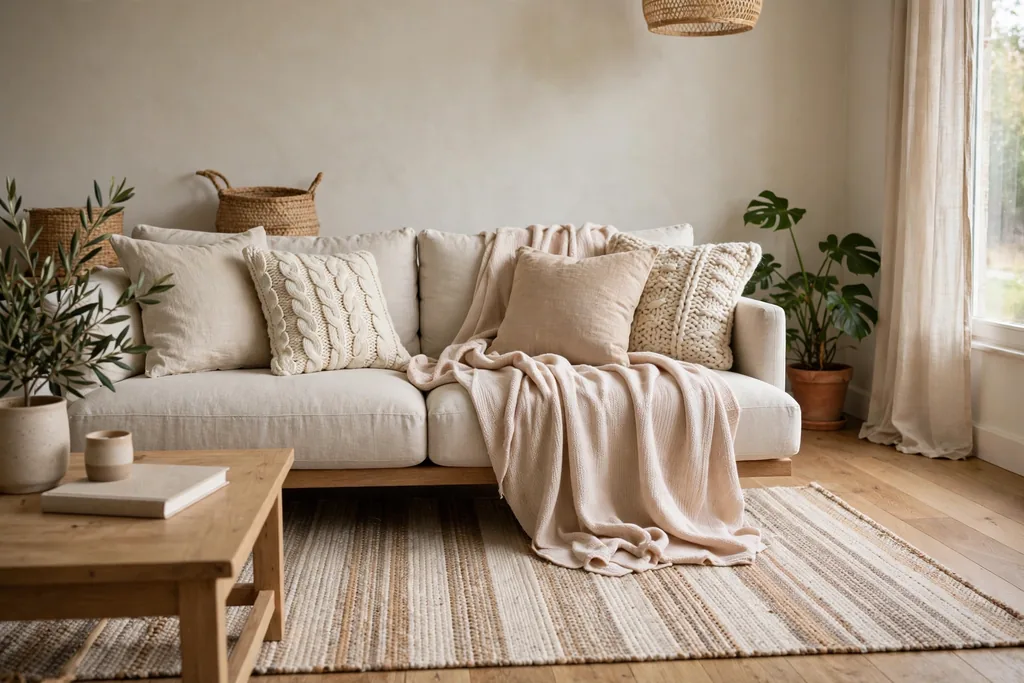
    Living room layered with a flat weave rug, soft throw, and linen and knit cushions on a sofa.

    Layer textiles for warmth: a flat weave rug to anchor the seating, a softer rug or throw on top in the sitting zone, and cushions in two textures such as linen and knit. Hard apartment floors can feel cold and echoey, and textiles soften them faster than new furniture. Start with the rug, since it defines the seating group, then add a throw folded over one sofa arm and cushions that repeat one accent color.

    Choose washable covers where you can, since apartment seating sees daily use, and shake out or vacuum the layers regularly so they stay fresh. Limit strong color to two or three accents, such as a cushion, a piece of art, and a plant pot, and repeat those accents in more than one spot so the room feels connected. Remove one item for every new decorative piece you add, and the room will stay warm rather than crowded.

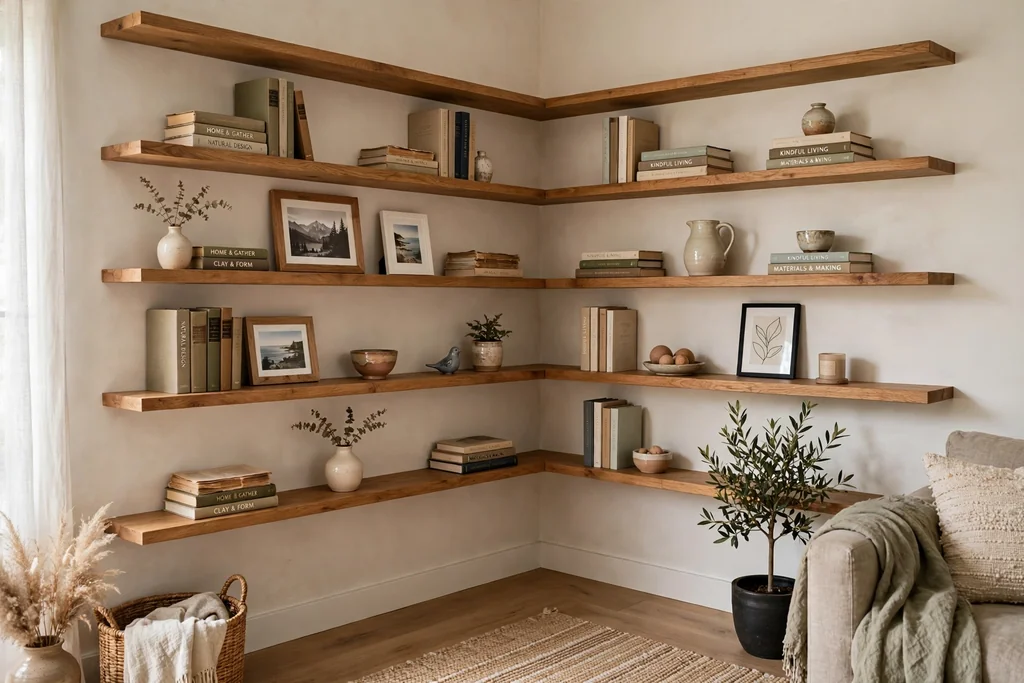
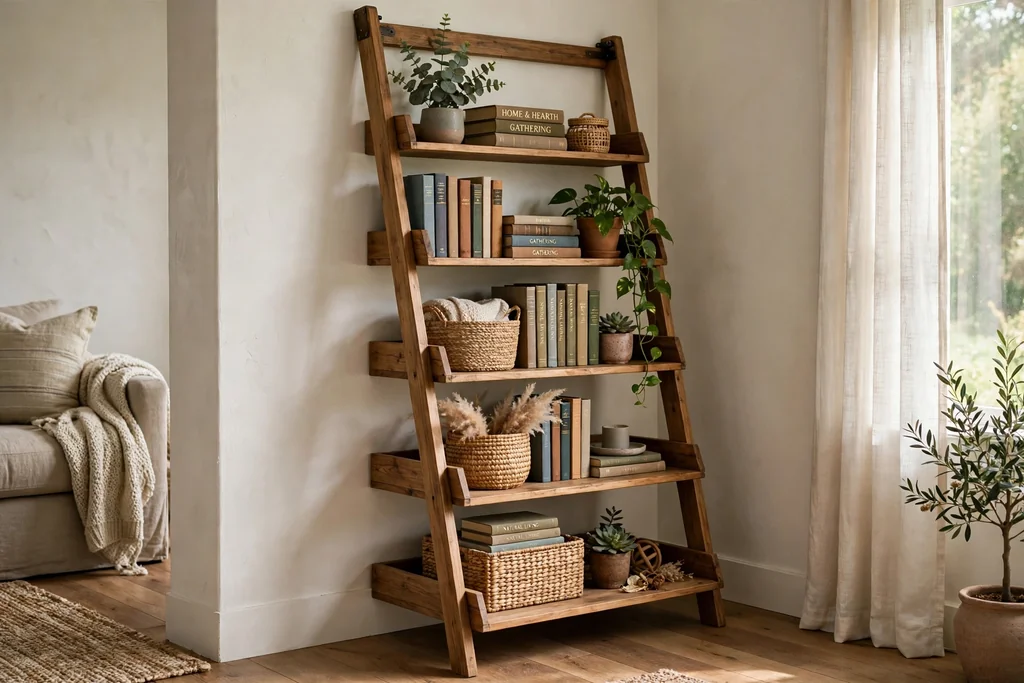
    21. Display Shelf for Books and Keepsakes
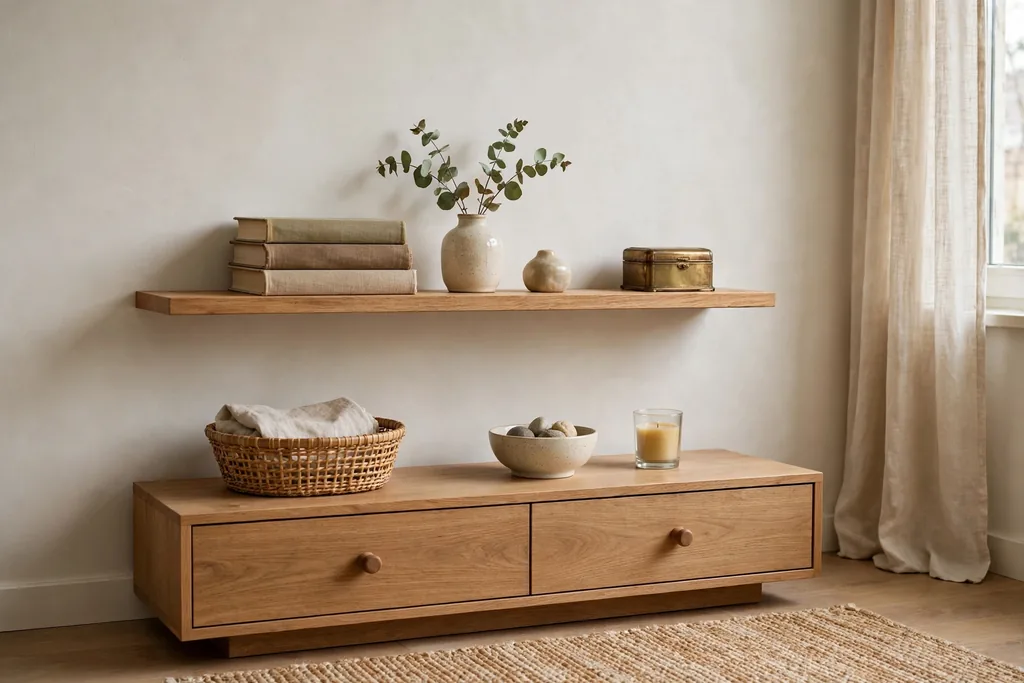
    Single display shelf with books, a small vase, and keepsakes above a low console in an apartment.

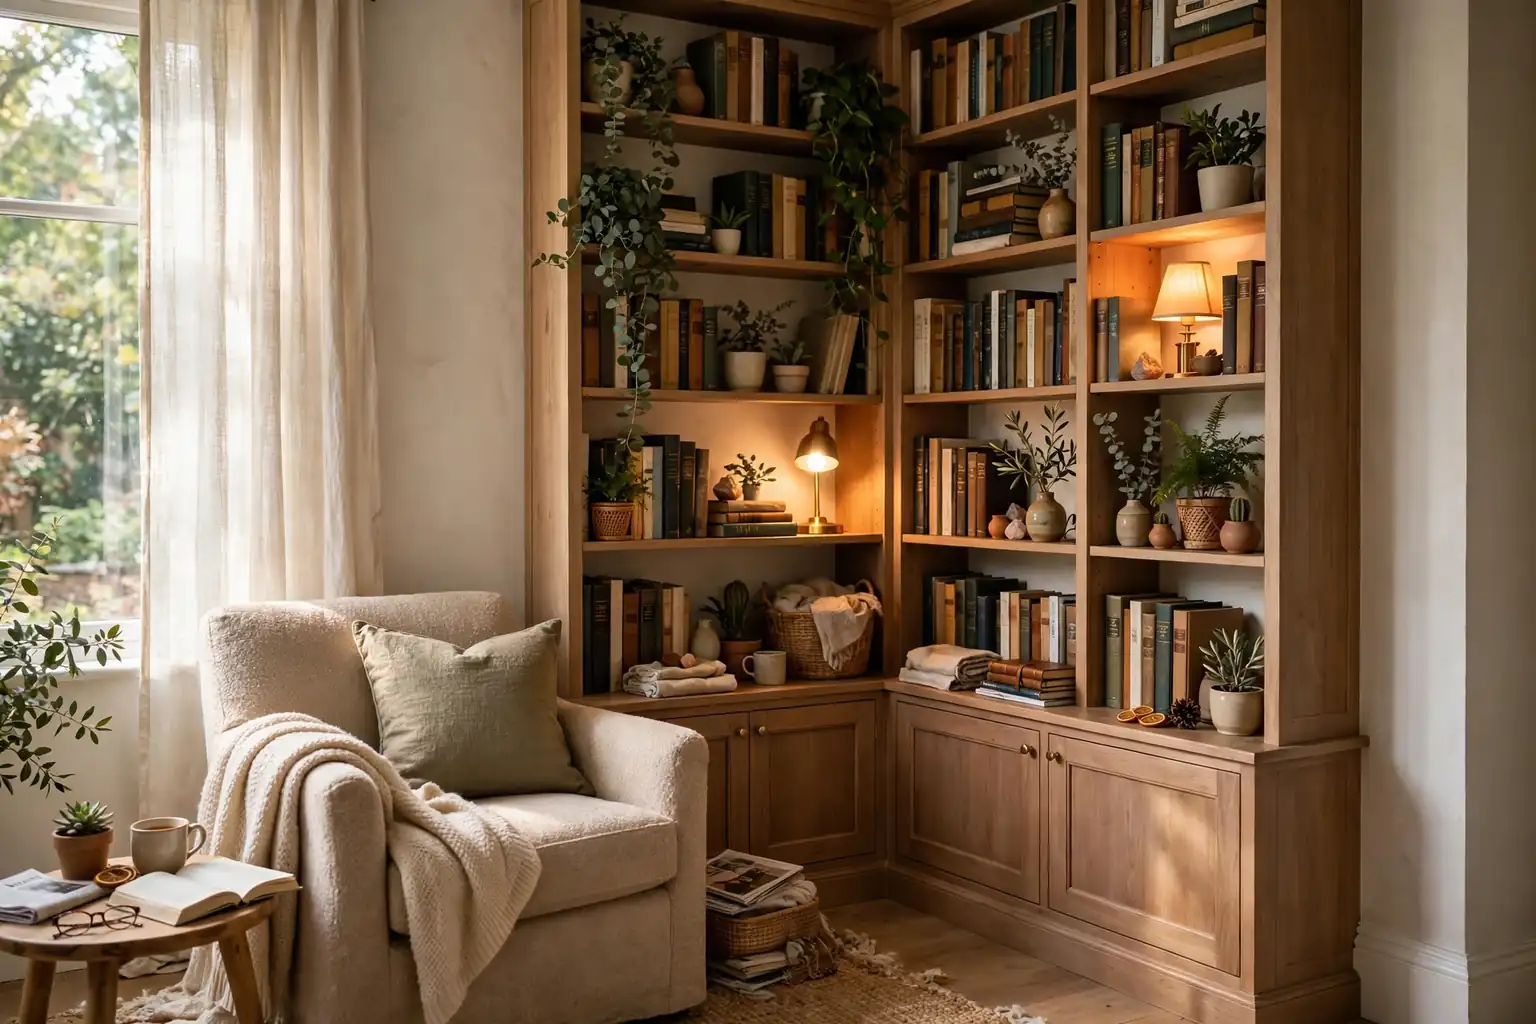
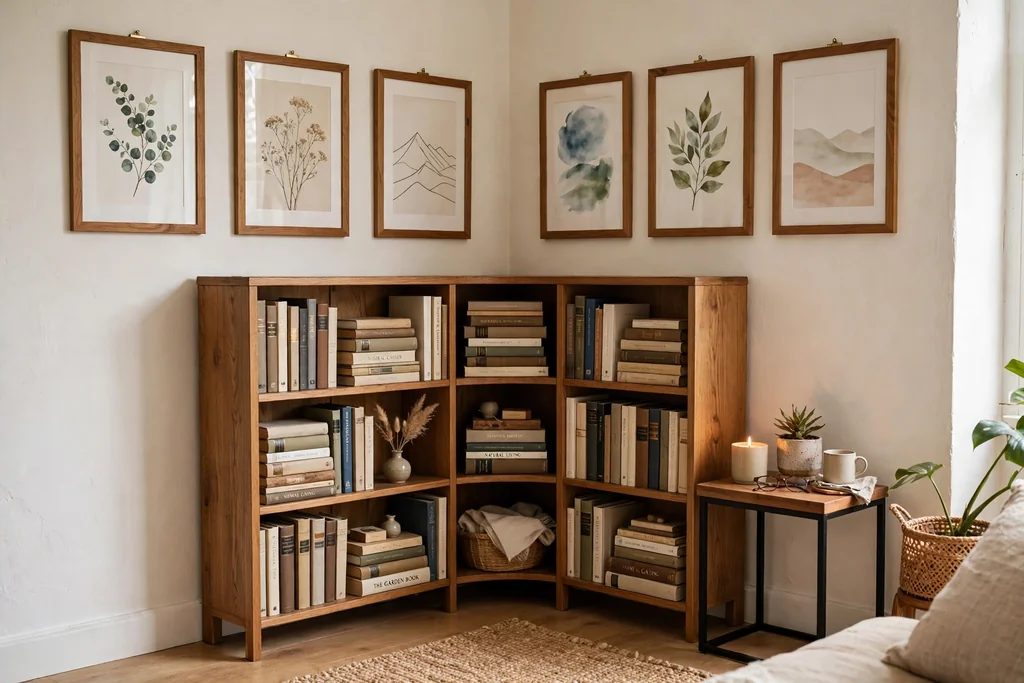
    Dedicate one shelf, not every shelf, to books and keepsakes, so display feels chosen rather than crowded. A single display shelf with books, a small vase, and one or two meaningful objects gives the room personality without filling every surface. Arrange books in a mix of upright rows and one flat stack, and leave empty space at one end so the shelf looks intentional.

    Keep the rest of the shelving for closed storage or plain daily items, so the display shelf stands out. Rotate the display with the seasons or when you find a new print, rather than adding more objects each time. Use a picture ledge for art you can swap easily, which suits renters who want to limit holes, and lean the largest frame at the back with smaller frames in front.

    22. Dining Nook With Bench Seating
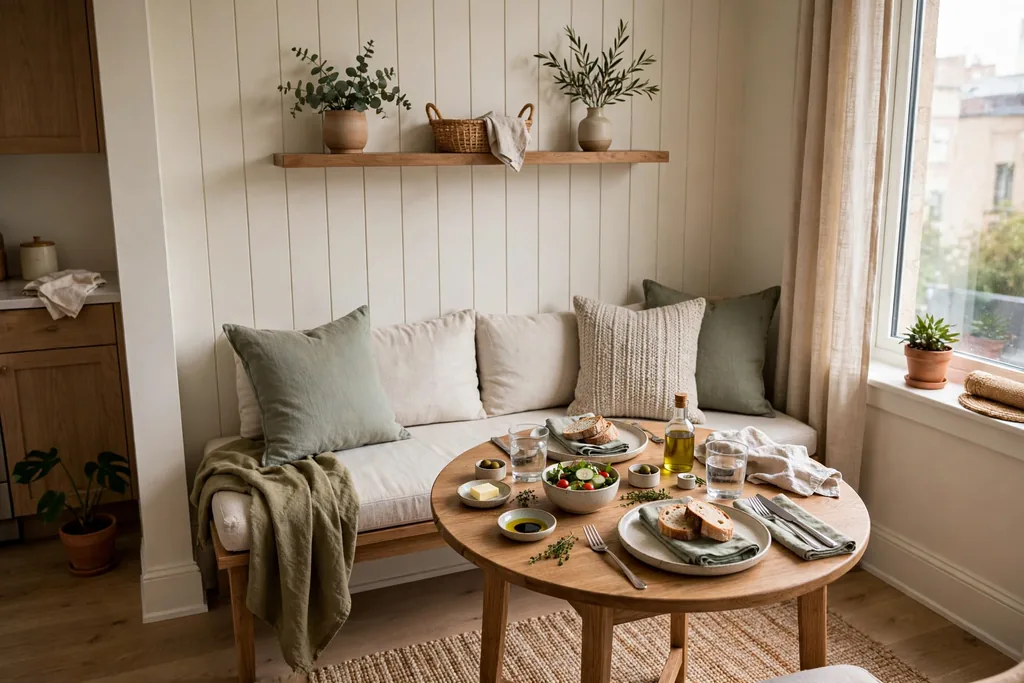
    Dining nook with a bench against the wall and a small table set for a meal in an apartment.

    Build a dining nook with a bench against the wall and a small table, so a tight corner can seat three or four people without a full dining set. A bench tucks close to the wall, needs no chair clearance behind it, and can hold storage underneath for placemats or board games. Pair it with one or two chairs on the open side, so people can slide in and out with ease.

    Keep the table size modest, with room for plates and a low centerpiece that people can talk across, and store extra placemats and napkins in a nearby drawer or basket. A cushion on the bench makes a long meal comfortable, and a washable cover keeps it practical near food. Site the nook near the kitchen if you can, so carrying food is short, and keep the route to the table clear.

    23. Bathroom With Warm Wood and Closed Storage
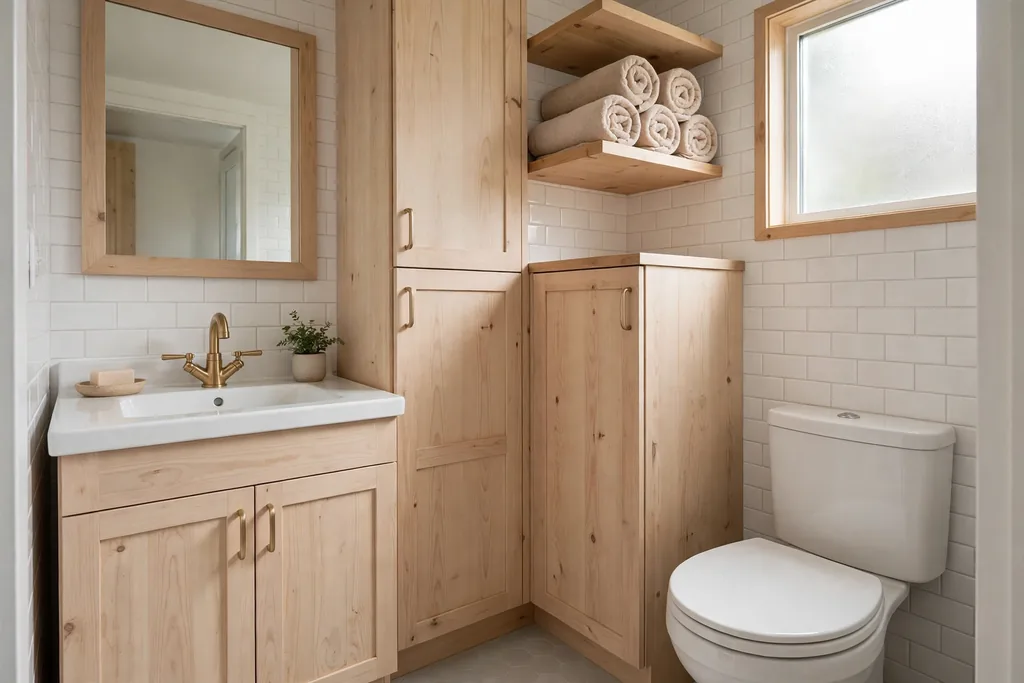
    Small bathroom with light wood accents, closed storage, and rolled towels on a shelf.

    Warm up a plain bathroom with light wood accents, such as a wood framed mirror, a wood tray, and a wood stool, paired with closed storage for toiletries. Wood softens tile and white fittings, and closed storage keeps counters clear, which matters most in a small bathroom. Choose wood items made for damp rooms, and wipe them dry after showers so they last.

    Add a wall shelf above the toilet or beside the mirror for daily items, with matching dispensers so the shelf reads as tidy. Keep towels rolled on the shelf or in a basket, and store backup supplies in a cabinet rather than on the counter. A small plant that suits humidity, placed where it will not be splashed, adds green without taking counter space, and a warm light bulb keeps the room from feeling clinical.

    24. Balcony Drying and Laundry System
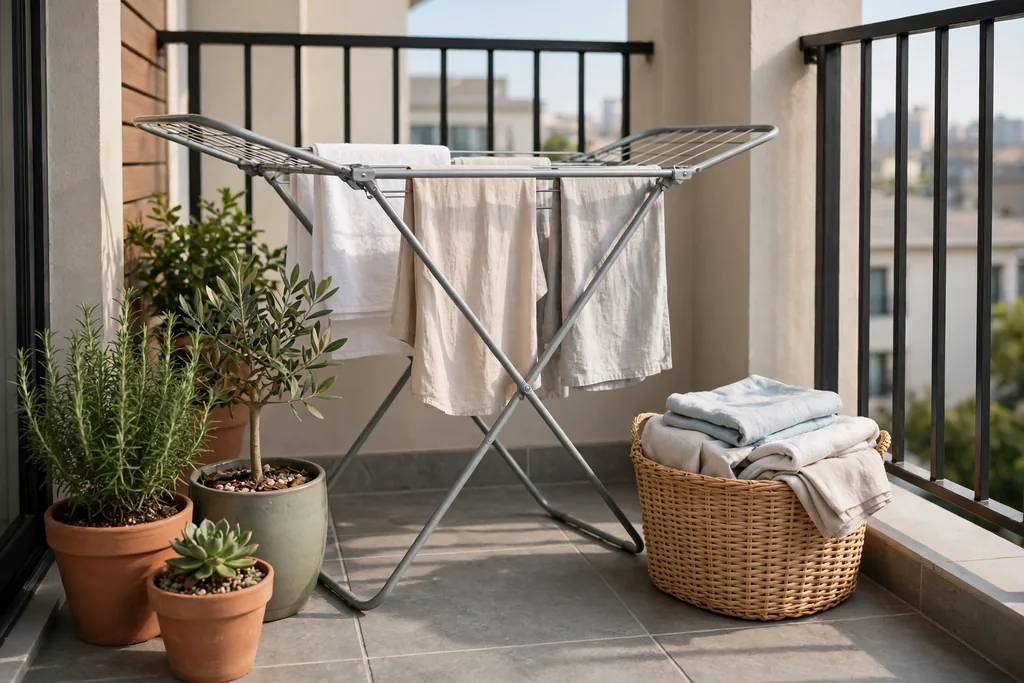
    Tidy balcony laundry setup with a folding drying rack and a basket beside potted plants.

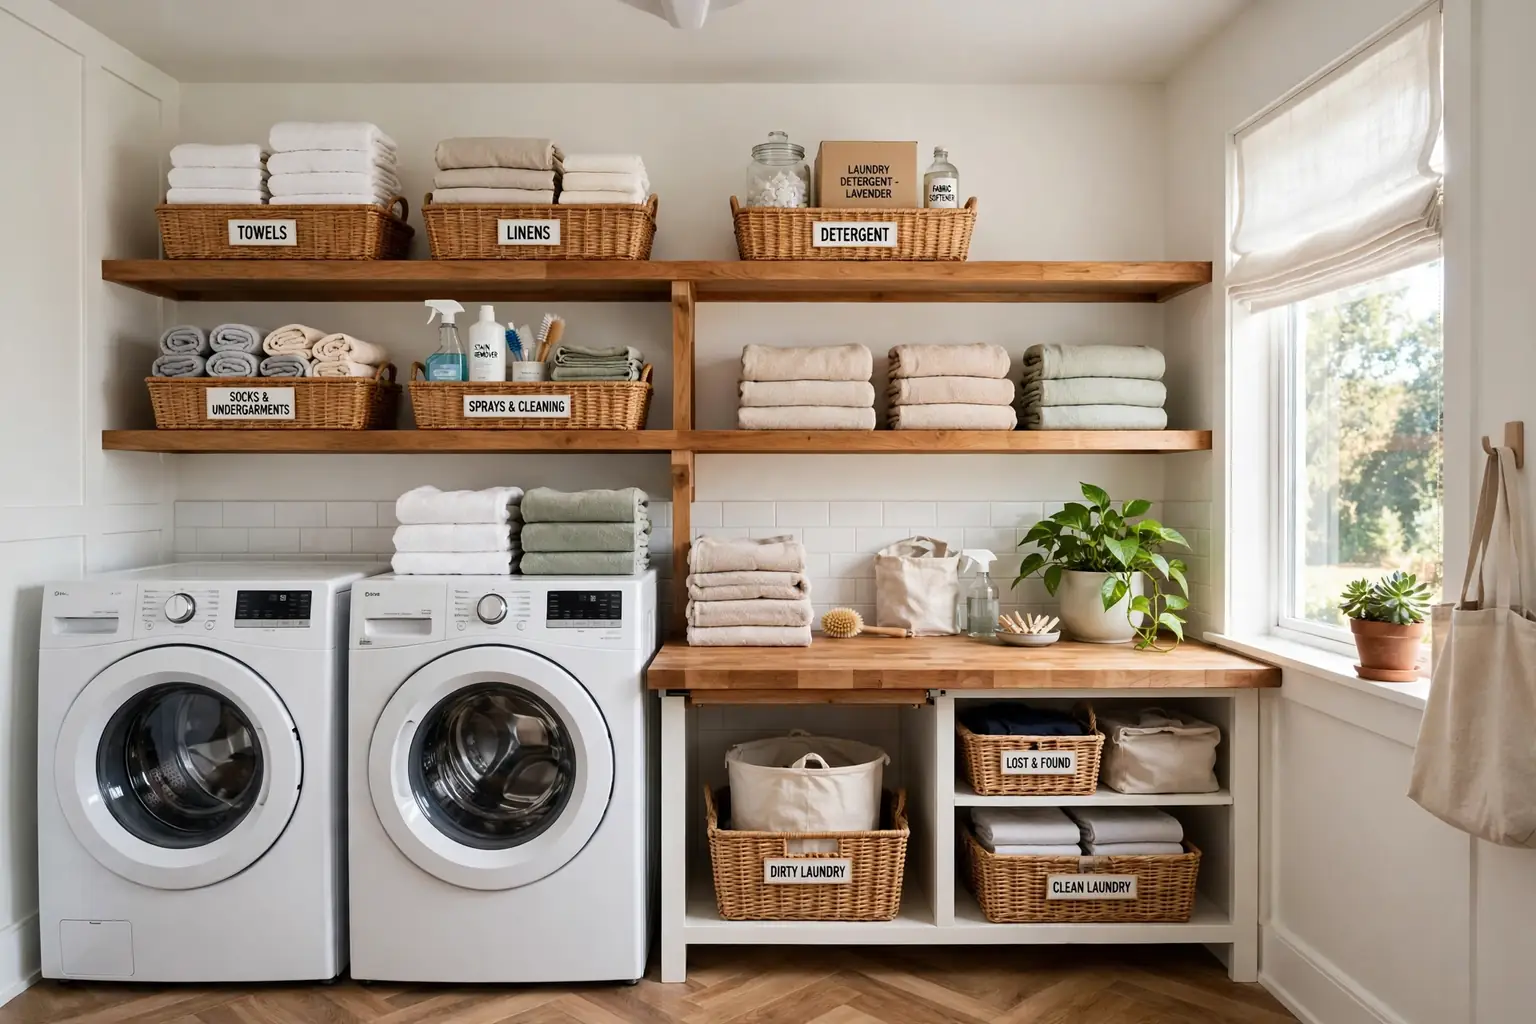
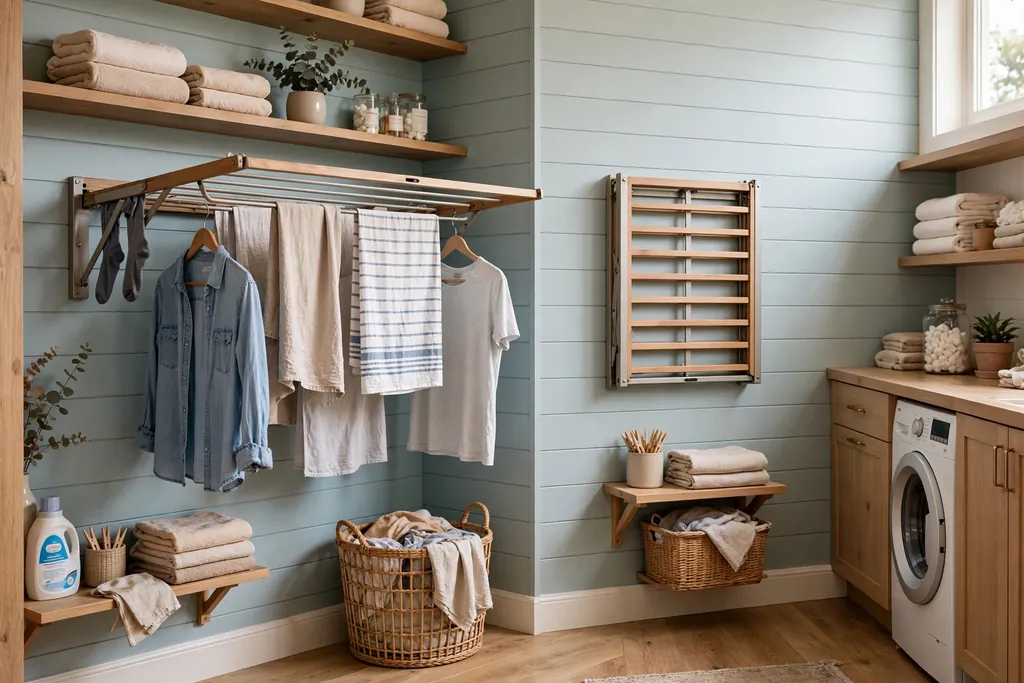
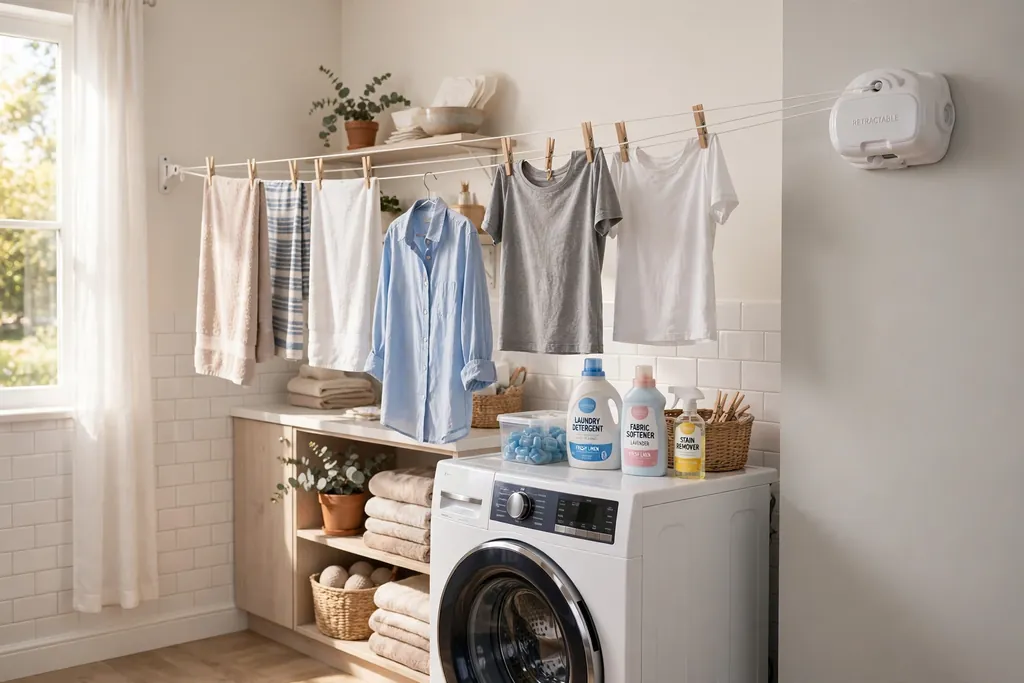
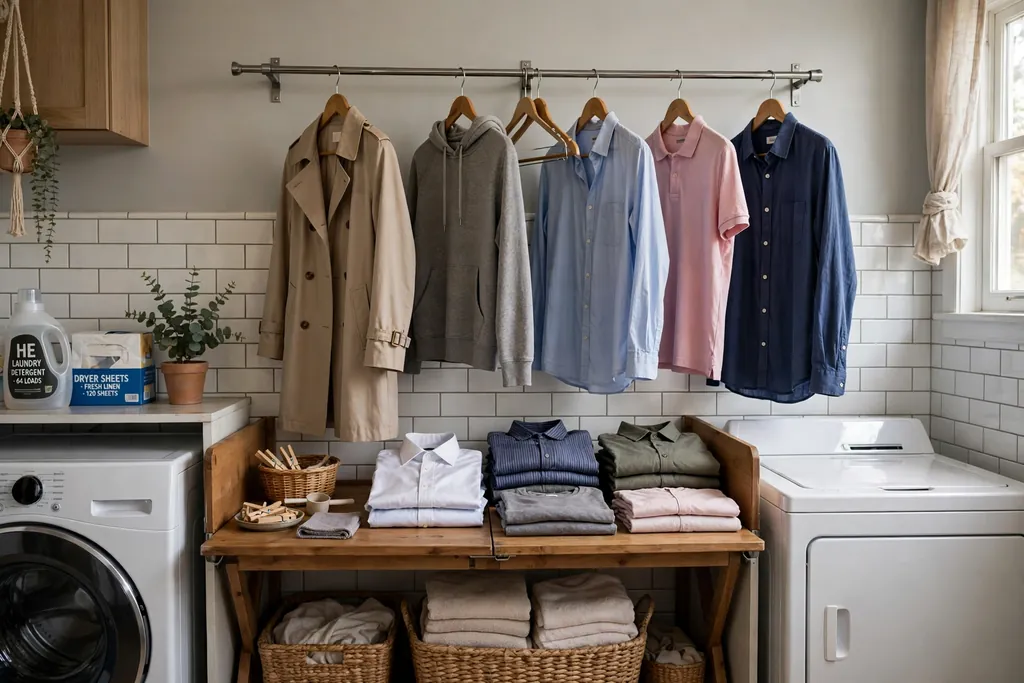
    Set up a tidy laundry system on the balcony or in a utility corner, with a folding drying rack, a basket for clean laundry, and a small shelf for supplies. Many small apartments dry clothes indoors or on a balcony, and a planned system keeps that daily job from taking over the living room. Choose a rack that folds flat against the wall when not in use, and keep pegs and hangers in one small box.

    Sort laundry into one basket for washing and one for folding, so clean clothes do not pile on chairs. If the balcony is the drying spot, keep the rack clear of the tea nook seat and the door route, and bring clothes in before evening damp sets in. A lidded basket for dirty laundry near the bathroom or bedroom stops piles from forming in the living area, and a weekly laundry day keeps the system working.

    25. Seasonal Bedding and Curtain Swap
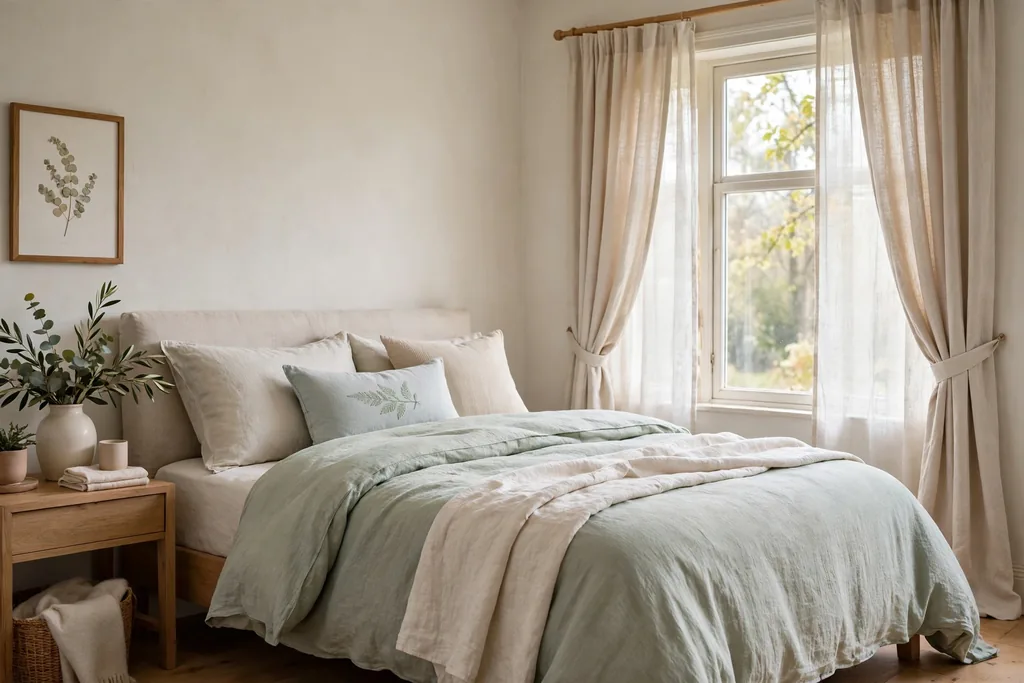
    Bedroom with fresh seasonal bedding and curtains in soft tones beside a window.

    Swap bedding and curtains with the seasons to change the feel of the apartment without buying new furniture. Use lighter cotton bedding and sheer curtains in warm months, and warmer bedding with heavier curtains in cold months, so the room suits the weather and feels fresh twice a year. Store the off season set in one labeled box under the bed or on top of the wardrobe.

    Choose curtain colors that match the bedding accent, so the swap feels planned across the room, and wash the stored set before you pack it away. A seasonal swap is also a good time to check cushions, throws, and rugs for wear, and to rotate the display shelf. Keep the swap to one afternoon, and put the new set on the bed and windows the same day, so the room changes in one clear step.

    26. Hidden Storage in Every Room
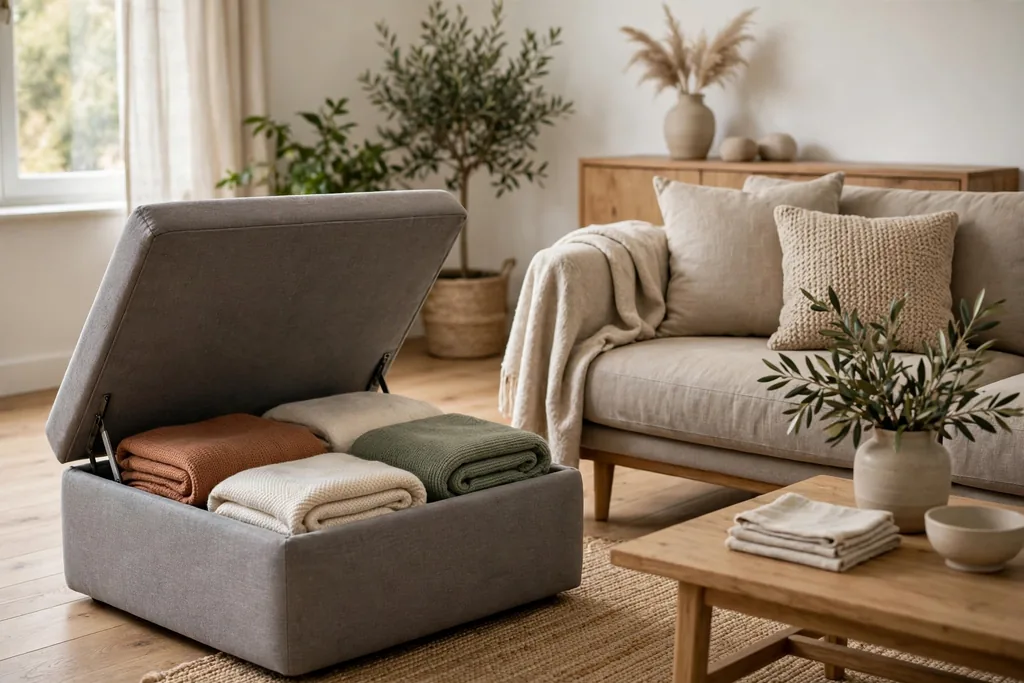
    Living room with a storage ottoman open showing folded throws beside a low sofa.

    Give every room one piece of hidden storage: a storage ottoman in the living room, a platform bed in the bedroom, a bench with a lid in the entry, and a cabinet in the bathroom. Hidden storage keeps daily clutter out of sight without adding more furniture to the floor plan, and it makes tidying a matter of putting things back rather than deciding where they belong. Choose pieces with lids or doors that open fully without hitting nearby furniture.

    Keep only items you reach for often inside each hidden store, because a storage seat filled with things you never use becomes a box you never open. Label boxes inside wardrobes and cabinets, and do a short reset once a week, walking each room with a basket and returning anything that has drifted out of place. When everything has a home, a small apartment stays calm even on busy days.

    27. Calligraphy and Print Accent Wall
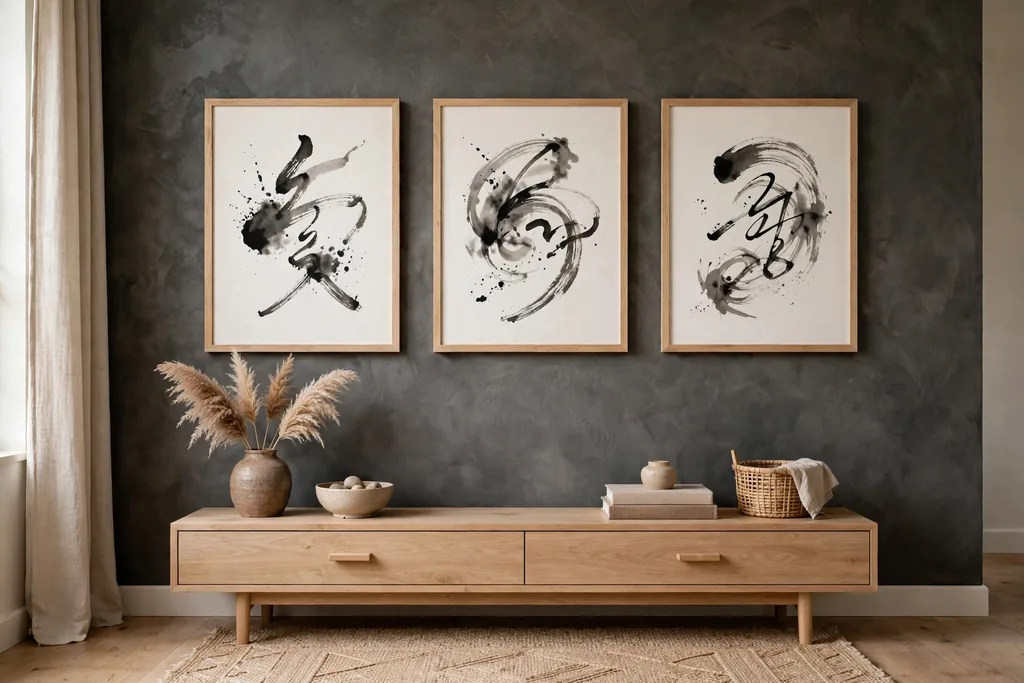
    Accent wall with framed Korean calligraphy prints in light wood frames above a low console.

    Create one accent wall with framed Korean calligraphy, a Hangul print, or a simple landscape print in a plain frame, rather than covering every wall with art. One focused wall gives the room a cultural anchor and a talking point, while the other walls stay calm and give the eye rest. Choose prints in muted colors that match the room accent, and keep frames in one finish, such as light wood or black, so the group reads as a set.

    Hang the group at eye level above a sofa, a low console, or the bed, and lay the frames on the floor first to test the layout before anything goes up. Use adhesive strips or picture ledges if drilling is not allowed, and check the weight rating for each frame. Leave one wall in the room free of art, so the accent wall stands out and the small room does not feel crowded.

    28. Small Kitchen Table for One or Two
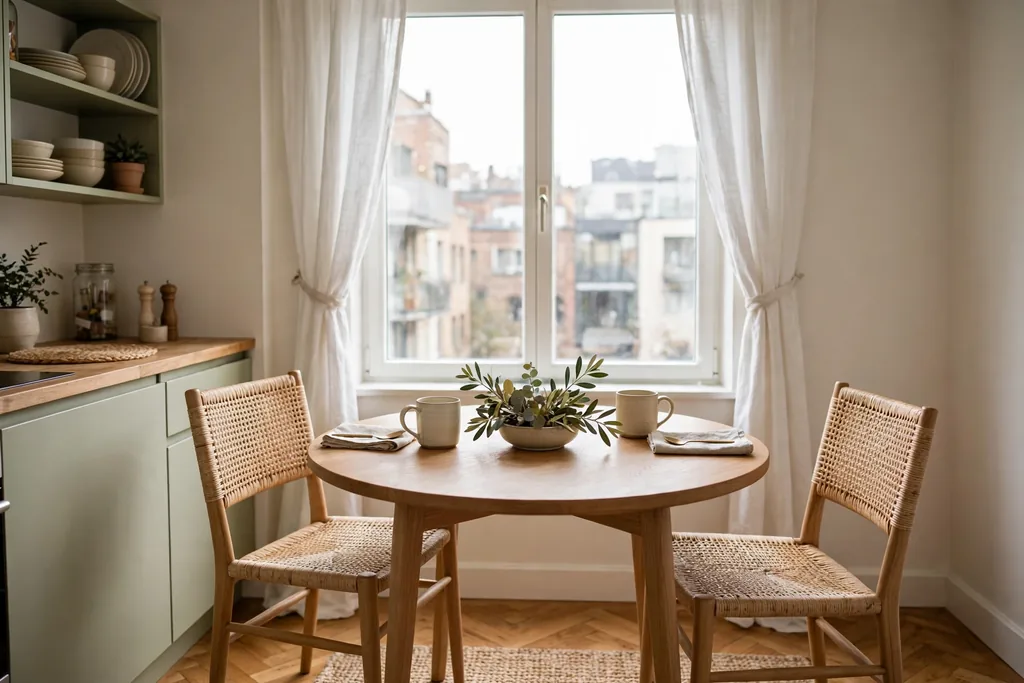
    Small round kitchen table for two set by a window with a low centerpiece in an apartment.

    Set a small round table for one or two people in the kitchen corner or by a window, so everyday meals have a proper place even when a full dining room is missing. Eating at a table, even a small one, turns a solo dinner into a pause in the day rather than a task finished standing up. Choose a pedestal base, so chairs tuck in and no one bumps a corner leg, and keep the centerpiece low and moveable.

    Store placemats and napkins in one nearby drawer, so setting the table does not become a search through cupboards, and keep the table clear between meals so it can switch to work or a puzzle. The solo living ideas in these solo apartment ideas show how one small table can serve meals, work, and guests in a home for one person. A round table also suits a tight corner, since it has no sharp corners to catch a hip in a walkway.

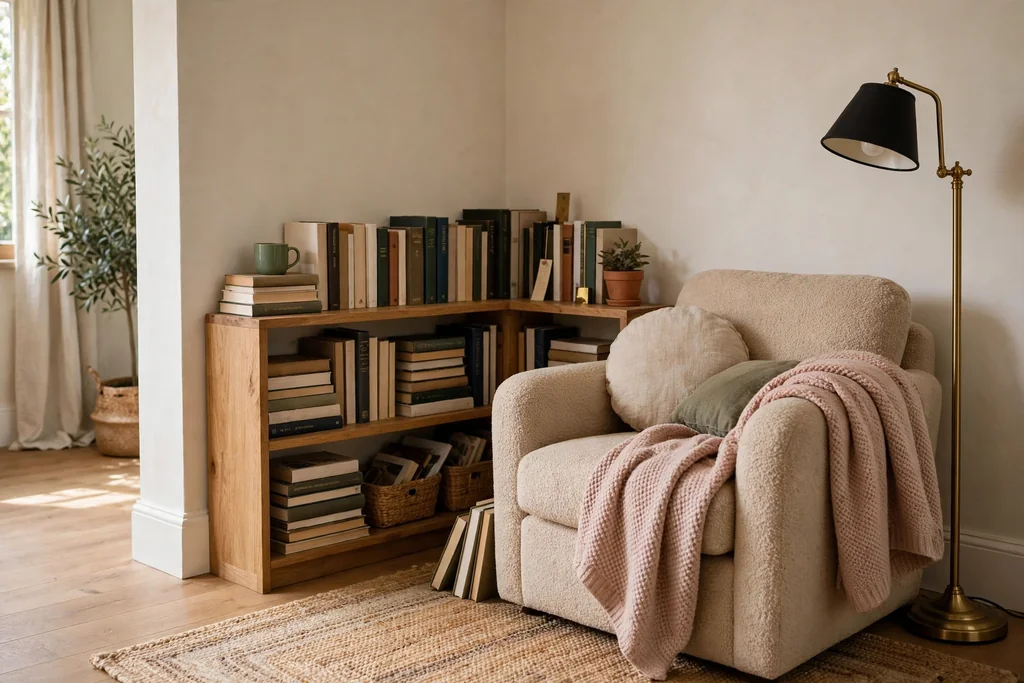
    29. Evening Wind Down Corner With Tea
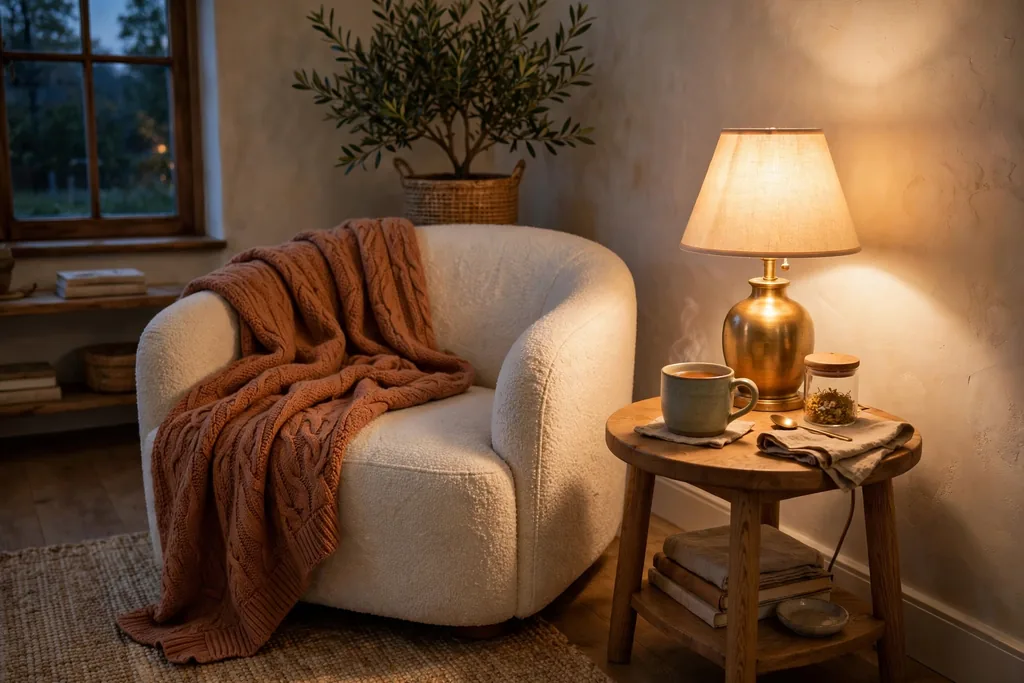
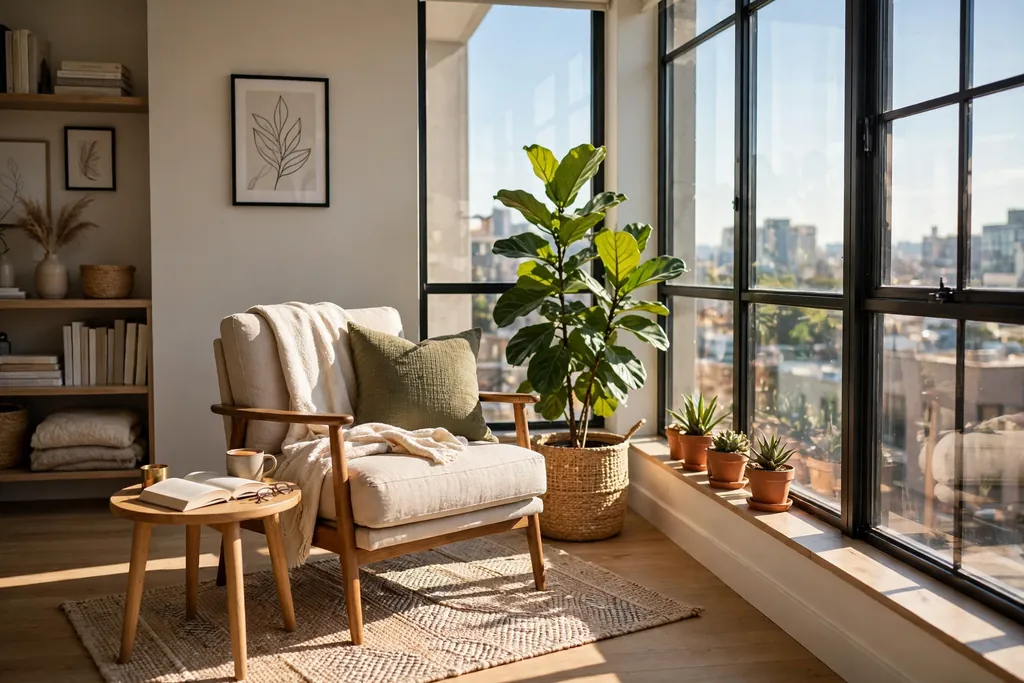
    Evening wind down corner with a comfortable chair, warm lamp, tea on a side table, and a throw.

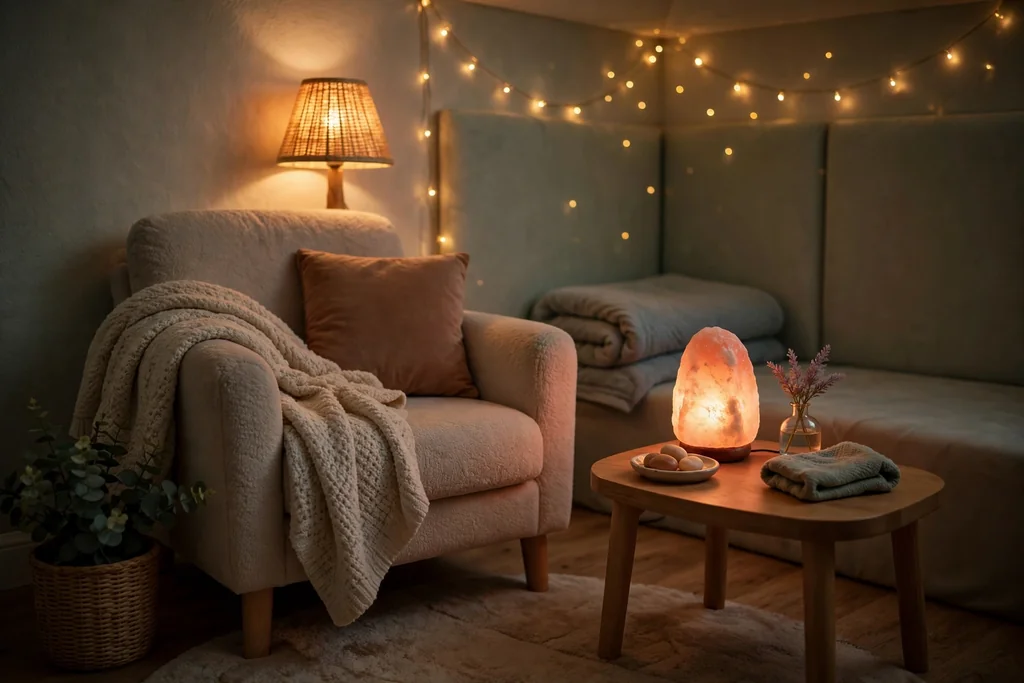
    Finish the apartment with an evening wind down corner: a comfortable chair or floor cushion, a small side table for tea, a warm lamp, and a basket for a book and a throw. A wind down corner gives the end of the day a place of its own, separate from the work corner and the dining table, so evenings feel slower and more restful. Keep the corner away from screens where possible, or turn the main screen off when you sit there.

    Set a simple tea ritual for the corner: a teapot or mug, a small tray, and a place for the cup when you finish, so the corner is ready each evening without setup. Add a candle style light or a dim lamp, and keep the throw folded in the basket so the corner looks inviting even when empty. Use the corner for reading, tea, and quiet talk, and let it be the last lit spot in the apartment before bed.

    Conclusion

    A Korean apartment feels cozier when the base stays calm, the furniture stays low, and every daily routine has a small, clear spot. Start with warm wood and white, one comfortable seat, and layered light, then add the storage, textile, and balcony ideas that solve your biggest daily frustrations. Try one or two ideas this weekend, live with them for a week, and adjust before adding more. Pick the idea that fits the room you use most, set it where you will actually sit, eat, or sleep, and let the rest of the apartment grow around it one calm layer at a time. Save this list on Pinterest before your next home trip, and work through it one room at a time.

    FAQs

    How can I make a small Korean apartment feel cozy without clutter?

    Start with a calm base of warm white and light wood, then add warmth through textiles and light rather than more objects. Use a rug to anchor seating, layer light at more than one level, and give every everyday item a home in closed storage. Add one accent color in cushions and art, and remove one item for every new decorative piece you bring in, so the room stays warm rather than crowded.

    What colors work best for a Korean apartment?

    Warm white, soft beige, and light wood form a calm base that suits small rooms and daylight. Add muted accents such as sage, soft blue, dusty pink, or warm grey in cushions, throws, and art, and repeat one accent in two or three spots so the room feels connected. Keep strong color to small, moveable items, so you can change the mood without repainting or replacing large furniture.

    Is low furniture practical in a small apartment?

    Yes, when it is chosen for comfort as well as looks. A low platform bed, a low sofa, and a low table leave more wall visible, which helps a small room feel taller, and they pair well with floor cushions and rugs. Check seat heights before you buy, add a backrest cushion for floor seating if needed, and keep walkways clear, so low furniture feels restful rather than hard to use.

    How do I add Korean style to a rental without permanent changes?

    Use renter friendly pieces first: freestanding shelves, curtains on a track or tension rod, picture ledges, rugs, paper lamps, and low furniture that moves with you. Avoid drilling, painting, or changing fixed fittings until you check your lease, and use adhesive strips rated for the weight of each frame. A calm base, warm wood tones, and soft light give the Korean inspired feel without any permanent work.

    What is the easiest Korean apartment idea to start with?

    Start with bedding, light, and one rug. Swap in neutral bedding with one soft accent throw, add a paper shaded lamp for warm evening light, and lay a rug that anchors the main seating group. These three changes affect how the room feels every day, need no building work, and cost less than new furniture. Once that base works, add a floor seating corner or a display shelf one step at a time.

    How can I store more in a Korean apartment without adding bulky furniture?

    Use furniture that does two jobs and storage that hides away: a platform bed with drawers, a storage ottoman, a bench with a lid in the entry, and a wardrobe wall with closed doors. Take storage up the wall on one wall only, keep heavy items low, and use boxes inside cabinets so each category has a home. A short weekly reset keeps hidden storage working, since a tidy inside is what keeps the outside looking calm.

  • 22 Apartment Ideas for Couples to Make Every Corner Count

    22 Apartment Ideas for Couples to Make Every Corner Count

    Sharing an apartment means sharing every decision, from where the sofa goes to who gets the top shelf. A room that works for one person can feel cramped or uneven for two, especially when schedules, hobbies, and sleep habits differ. The ideas below focus on fair splits, shared zones, and small routines that keep a rented home calm. Start by agreeing on a simple base palette and a few ground rules, then pick the ideas that solve your most frequent friction points first. For wider small space guidance, see these studio apartment decorating ideas.
    Key Takeaways

    • Agree on a calm base palette first, then let each person add personal touches in their own zone so the home reads as shared, not split down the middle.
    • Give each person a defined home for daily items, such as a bedside table, a closet section, a bathroom basket, and an entry hook, so clutter has a fair place to go.
    • Use zones rather than walls to mark sleeping, working, cooking, and relaxing areas, especially in a studio or one bedroom apartment.
    • Favor renter friendly changes, such as freestanding furniture, removable hooks, baskets, and layered light, and check your lease before drilling or mounting anything heavy.
    • Build two-person routines into the layout, such as a breakfast nook, a shared calendar spot, and a laundry system, so the home supports daily life for both people.
    • Test a layout for a week before buying more furniture, since a small change in placement often solves a problem that new storage would only hide.

    1. Start With a Shared Style Board

    Couple arranging color swatches and room photos on a shared style board.

    Make a simple board, on paper or on a phone, with colors, materials, and room photos you both like. Each person adds five images, then you keep only the ones you both can live with and note the ones that are a firm no. This step prevents the common pattern where one person chooses everything and the other quietly dislikes the result.

    Use the board as a shopping filter. When a new cushion, rug, or lamp does not fit the agreed colors or materials, leave it in the shop. Revisit the board when a room feels stuck, and swap one image out for a new shared favorite. A board you both built is easier to defend than a single taste imposed on a shared home.

    2. Give Each Person a Bedside Table

    Bedroom with two matching bedside tables, lamps, and books on each side of the bed.

    Two bedside tables, even small ones, give each person a lamp, a book, a glass of water, and a charging spot without negotiating over one shared surface. Matching tables keep the bed looking balanced, while different lamps or books let each side keep its own character.

    Keep the tops to three items each as a habit, so the tables stay useful rather than becoming extra storage. If floor space is tight, use wall mounted shelves or narrow stools at the same height as the bed. The point is parity: neither person should have to reach across the bed for a light or a phone charger.

    3. Split the Closet Into Two Clear Zones

    Shared closet divided into two clear zones with separate rails and shelves.

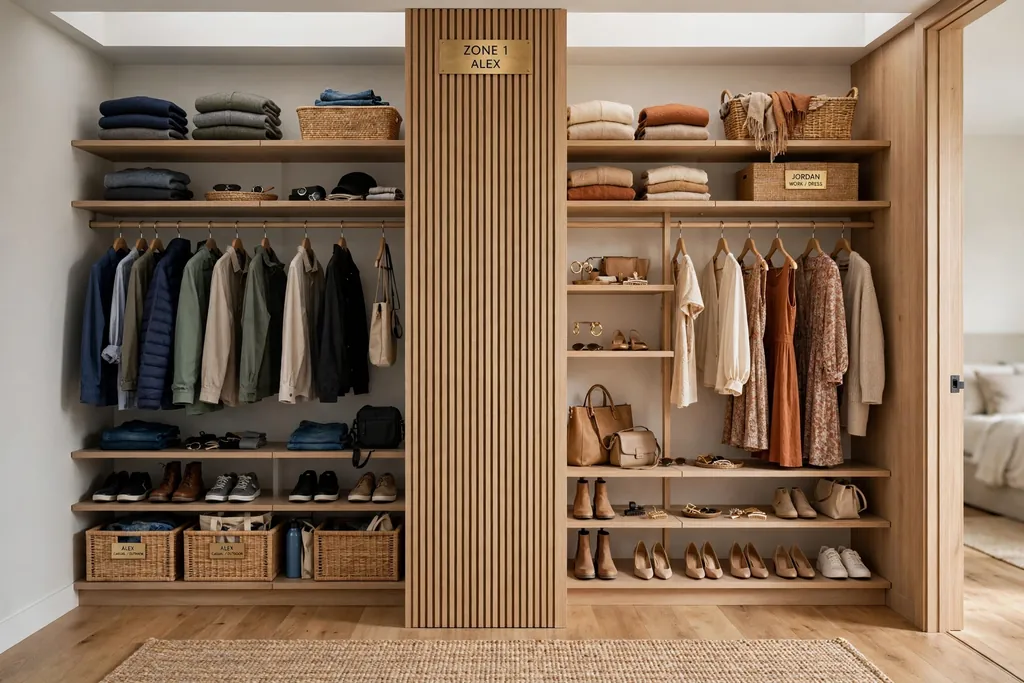
    Divide the closet by person, not by garment type alone, and mark the split with a divider, a different hanger color, or a labeled shelf. Each person then owns one section for hanging clothes, one shelf, and one drawer or basket, which makes tidying a personal job rather than a shared argument.

    Review the split when seasons change, since one person may own more coats or more folded knitwear. Keep a shared section only for items you truly share, such as spare bedding or bags. A fair split that is visible every morning works better than a verbal agreement that fades after a week.

    4. Build a Two-Person Entry Landing

    Apartment entry with two hooks, two trays, and a shoe basket by the door.

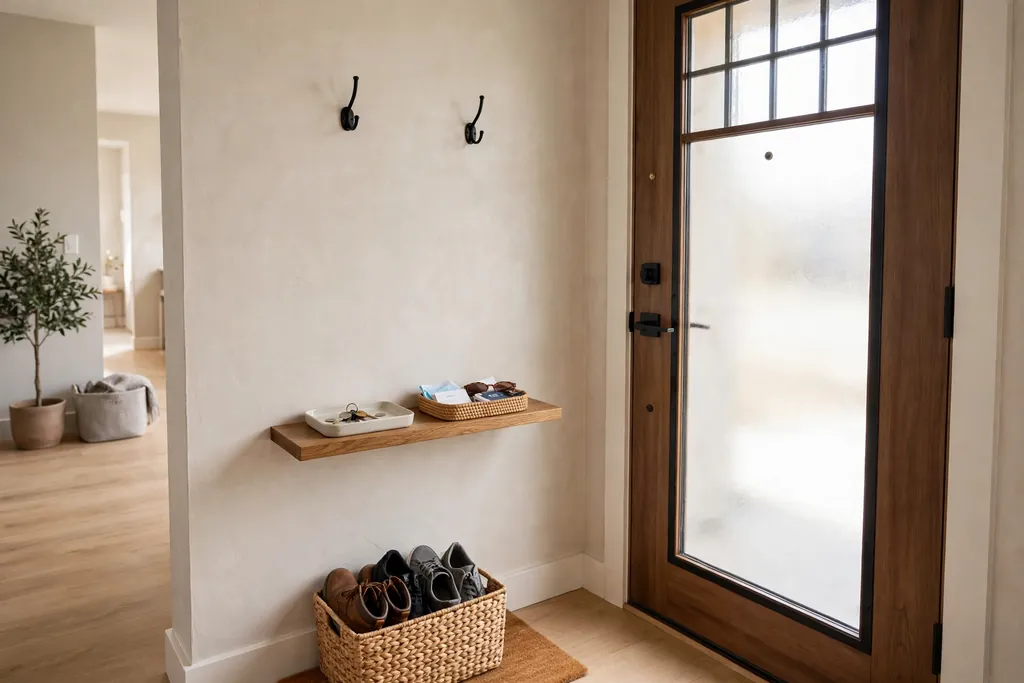
    An entry landing with two hooks, two small trays, and one shared basket for shoes stops bags and keys from spreading across the living room. Each person gets a hook at their own height and a tray for keys, sunglasses, and a wallet, while the basket holds shoes that would otherwise block the door.

    Place a small bench or stool nearby if there is room, so shoes can be changed without balancing in the hall. Empty the trays once a week, since an entry that collects mail and loose change soon stops working as a landing. A clear entry also sets a calm tone for the rest of the apartment.

    5. Make a Breakfast Nook for Two

    Small breakfast nook for two with a round table, two chairs, and coffee by a window.

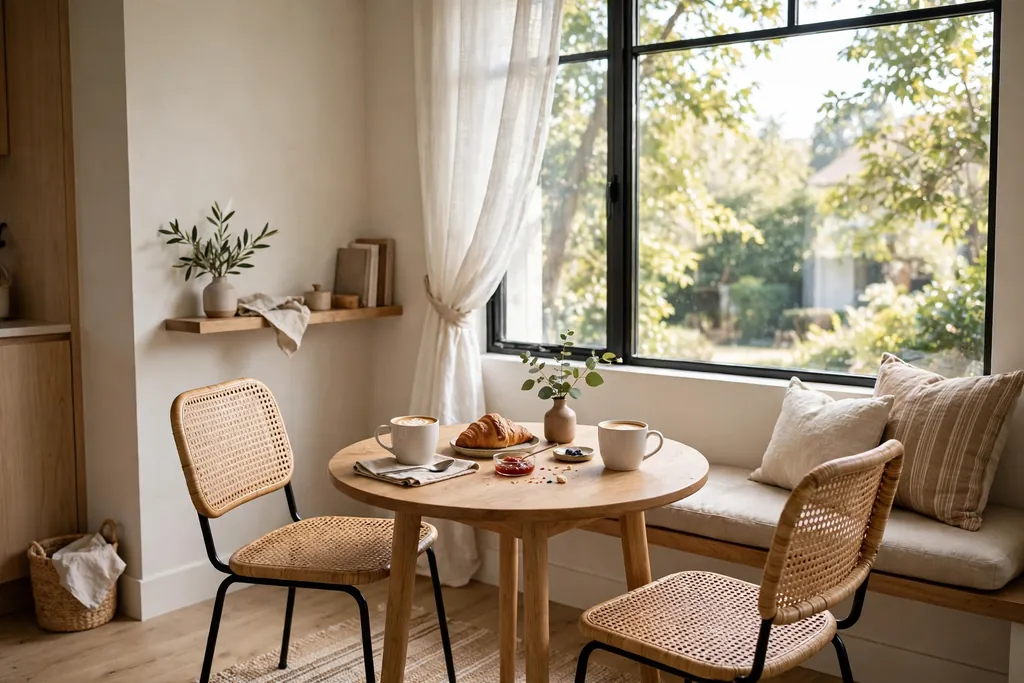
    A small table with two comfortable chairs, set near a window or in a kitchen corner, gives a couple a daily meeting point that is not the sofa or the bed. Keep the table clear overnight, so breakfast does not start with clearing yesterday’s work or mail. A washable tablecloth or two placemats mark it as a dining spot, even in a kitchen that doubles as a workspace.

    Add one small shared ritual, such as coffee together before phones come out, and the nook earns its floor space fast. If a full table will not fit, a fold down wall table with two folding chairs gives the same two-person ritual in a fraction of the space. Store the chairs where they are easy to reach, or the nook will sit unused.

    6. Set Up Side-by-Side Workstations

    Two side-by-side desks with lamps and laptops in a bright apartment work corner.

    Two desks side by side, or one long desk shared down the middle, let a couple work in the same room without competing for the only good spot. Each person needs their own lamp, power strip, and a small tray for pens and notebooks, even when the desk surface is shared.

    Agree on quiet hours and call rules before the first workday, since shared work space fails on noise more often than on size. Use a small divider, a plant, or a shelf unit between the two halves if focus matters more than conversation. Keep cables in one channel along the back of the desk, so neither workstation creeps into the other.

    7. Arrange the Sofa for Movie Nights Together

    Couple relaxing on a sofa with a throw, cushions, and a low table for movie night.

    A sofa that seats two comfortably, with a shared throw, two cushions, and a low table within reach, turns an ordinary evening into a shared habit. Place the sofa so both seats have a clear view of the screen and a lamp behind, rather than one good seat and one awkward corner.

    Add a small basket for remotes, chargers, and snacks, and a tray on the table to keep drinks steady. Keep one seat free of work bags and laundry, so sitting down together does not require a tidy up first. The living room ideas in these cozy apartment living room ideas pair well with this setup when the living area is small.

    8. Create Two Reading Chairs in One Corner

    Two armchairs angled toward each other with a shared side table and floor lamp.

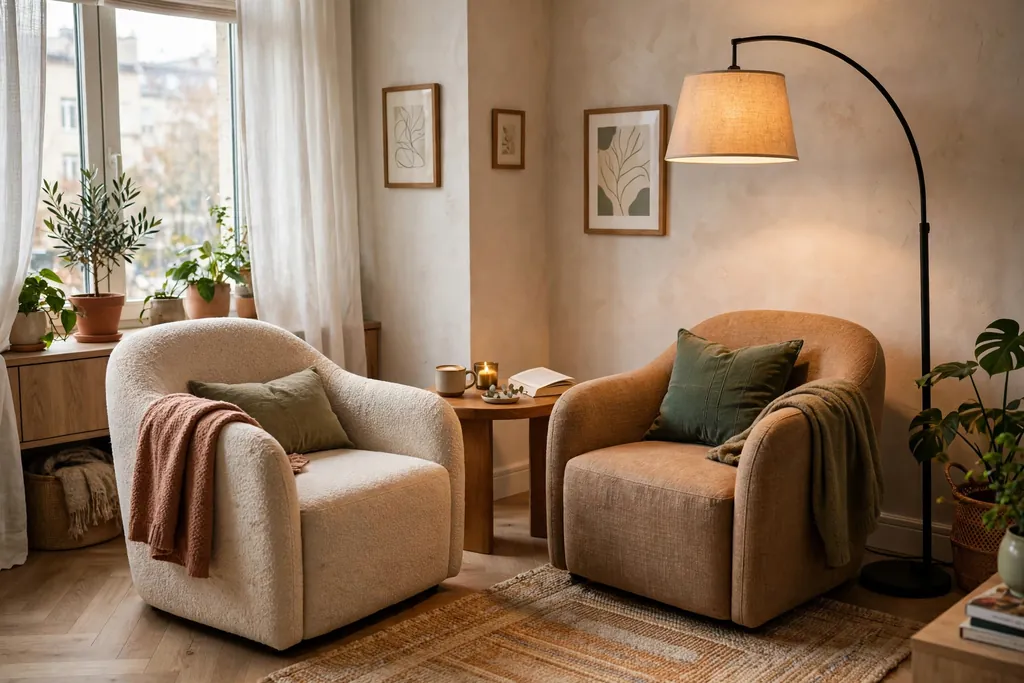
    Two armchairs angled toward each other, with a shared side table and a floor lamp between them, give a couple a place to read side by side without sharing one sofa. Each chair keeps its own throw and book, while the shared table holds two drinks and one lamp that serves both readers.

    Choose chairs that fit the corner with a clear walkway around them, and avoid pushing them so close that neither person can stand up easily. A small basket beside one chair holds current books for both people. This corner suits evenings when one person wants quiet and the other wants company in the same room.

    9. Divide Kitchen Work Into Two Zones

    Two people cooking together in a small kitchen with separate prep and stove zones.

    A small kitchen works better for two cooks when each person has a zone: one at the stove and one at the counter, or one washing and one prepping. Keep the most used tools for each job near its zone, such as knives and boards near prep and pans near the stove, so neither cook has to cross the other for every step.

    Use a rolling cart as a shared middle station for ingredients and finished dishes, and park it out of the walkway when cooking ends. Label one shelf or basket per person for snacks and lunch items, so shared shelves stay fair. Cook together once a week with a simple recipe, and adjust the zones based on where you actually bump into each other.

    10. Set a Table for Two, Even in a Small Room

    Small dining table set for two with placemats, two chairs, and a plant centerpiece.

    A table set for two, with placemats, two chairs pulled out, and a small candle or plant in the middle, makes weeknight dinners feel planned rather than rushed. Keep the table size honest: a round table for two fits a corner better than a large table that blocks the kitchen walkway.

    Store extra chairs elsewhere and bring them out only for guests, so the daily table stays set for two. Clear the table after dinner as a shared job, with one person clearing and one wiping, so the ritual ends cleanly. A table that is always ready invites slower meals, which is the point of the setup.

    11. Share the Bathroom With Separate Baskets

    Small apartment bathroom with two labeled baskets and a shared tray by the sink.

    Two baskets, one per person, on a shelf or under the sink, end most bathroom clutter in a shared apartment. Each basket holds daily toiletries, hair tools, and small items, while shared items such as soap and towels live in a separate tray. This split keeps counters clear without a daily negotiation over shelf space.

    Add a second towel rail or two hooks if there is wall room, and keep a small stool or tray for items used by both people. The bathroom ideas in these apartment bathroom ideas cover renter friendly storage that suits this split, from over door organizers to tension shelves. Review the baskets monthly and remove anything neither person has used.

    12. Build a Gallery Wall From Both Lives

    Gallery wall above a sofa mixing photos and prints from two people in matching frames.

    A gallery wall that mixes photos, prints, and small mementos from both people tells a shared story instead of decorating for one taste. Each person chooses three pieces, then you arrange them together on the floor first, balancing sizes and frames before hanging anything.

    Use one frame color or one mat color to tie different images together, and leave one empty space for a future piece you find together. Keep the wall to one area, such as above the sofa or along a hall, so the rest of the apartment stays calm. Rotate one piece each season, so the wall grows with the household rather than freezing at move in day.
    13. Solve Sleep Differences With Two Duvets

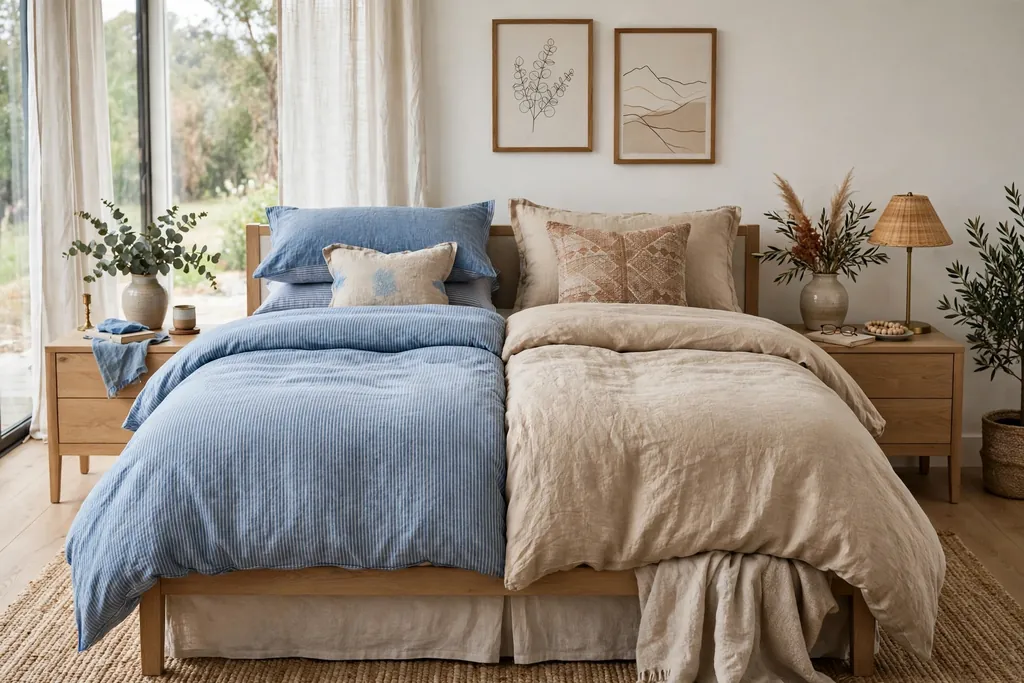
    Bed made with two separate duvets and different pillows for each sleeper.

    Two separate duvets on one bed, a common approach in colder climates, let each person choose their own warmth without stealing covers in the night. Each duvet is sized for one person, so turning over does not pull warmth from the other side, and washing one duvet is easier than washing a large shared one.

    Add separate pillows in different firmness if sleep needs differ, and keep a shared throw folded at the foot of the bed for cooler nights. Agree on a bedtime light rule, such as one reading lamp on the side of the early riser, so different schedules disturb sleep less. Test the setup for a week before judging it, since it looks unusual but feels practical fast.

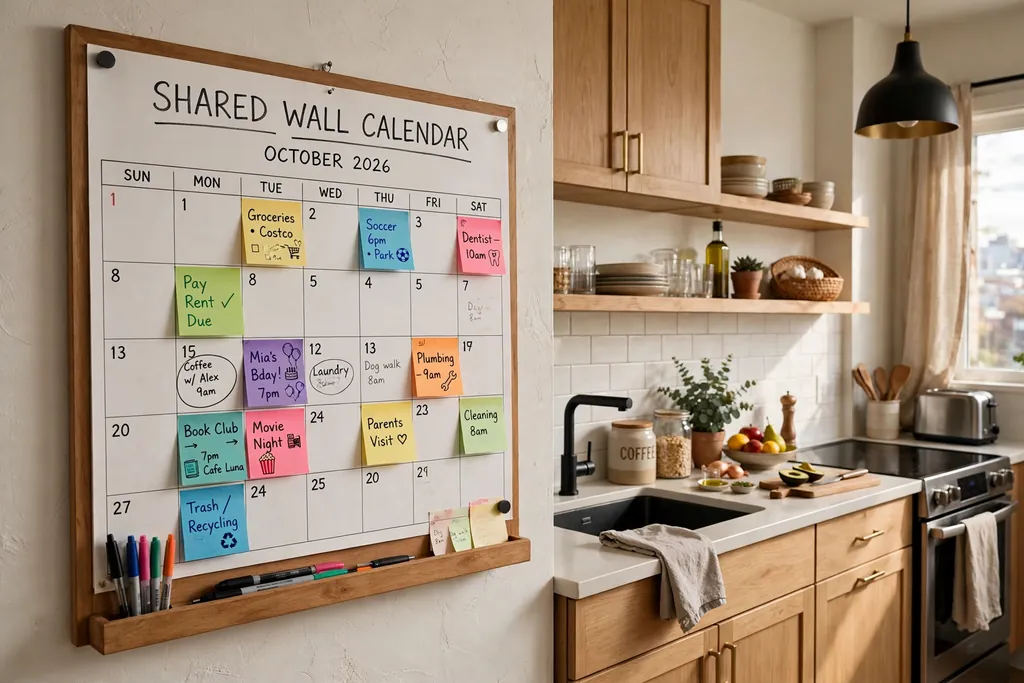
    14. Put a Shared Calendar on the Wall

    Shared wall calendar with two pen colors marking events near an apartment kitchen.

    A wall calendar, a whiteboard, or a framed planner near the entry or kitchen gives a couple one place to see bills, guests, travel, and work deadlines. Each person adds their own events in a different pen color, and shared events get both colors or a shared symbol, so the week is visible at a glance.

    Review the calendar together once a week, for five minutes, and move anything that clashes before it becomes a problem. Keep the board to dates and short notes, not long lists, and wipe it clean at the start of each month. A visible shared plan reduces the need to ask the same scheduling questions every day.

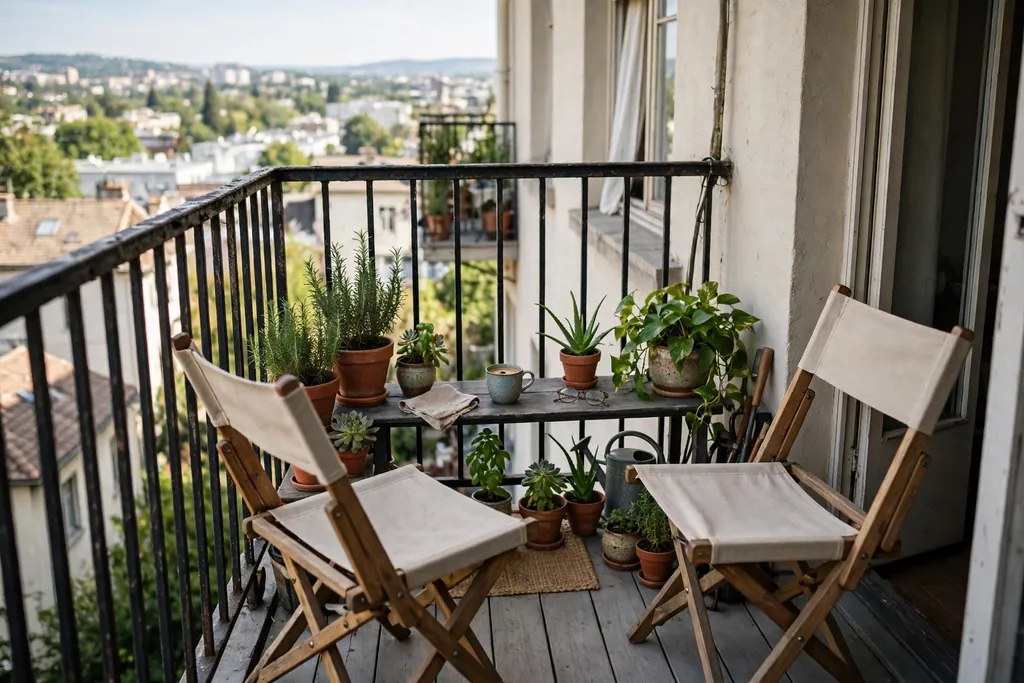
    15. Make the Balcony a Spot for Two

    Small balcony with two folding chairs, a narrow table, and potted plants.

    A balcony with two chairs, a small table, and one shared plant pot gives a couple an outdoor room, even when the space is narrow. Foldable chairs suit a small balcony, since they can be stored inside during storms, while a narrow table holds two cups without blocking the door.

    Add a windproof candle or a small solar lamp for evenings, and keep a watering can nearby if plants share the space. Agree on one balcony job each, such as one person watering and one sweeping, so the small outdoor area stays inviting. Use the balcony for morning coffee or evening air, not for storage, or it will stop feeling like a room.

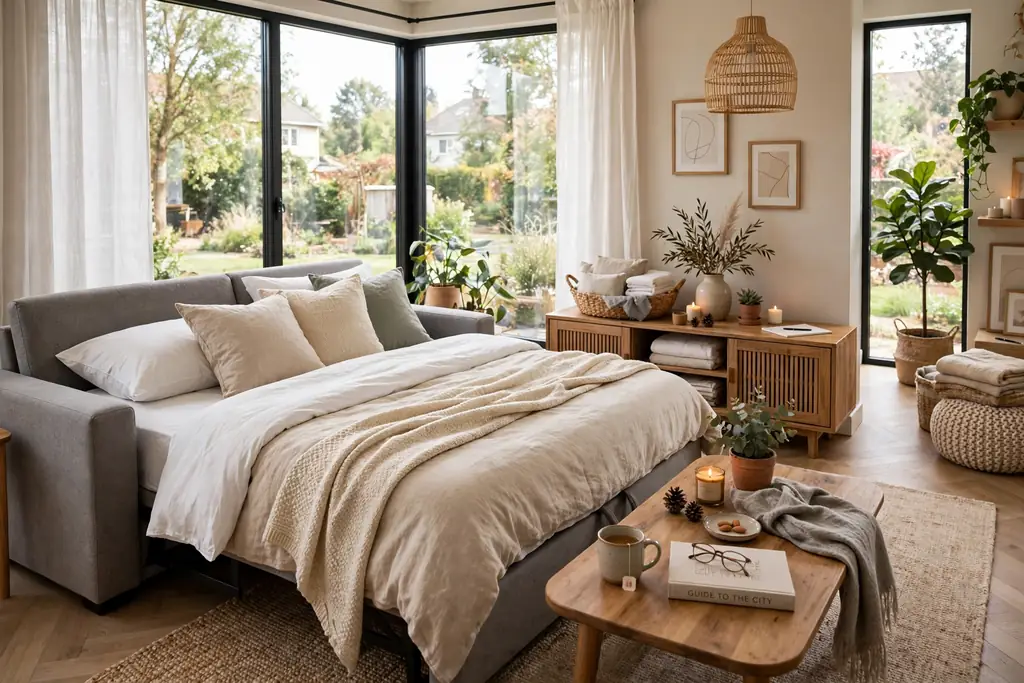
    16. Keep a Sofa Bed Ready for Guests

    Living room with an open sofa bed made up with sheets and pillows for a guest.

    A sofa bed, or a daybed with proper bedding stored nearby, lets a couple host overnight guests without giving up a room. Keep the bedding in one labeled basket or drawer, with sheets, pillows, and a throw, so making up the bed takes minutes rather than a search through the closet.

    Test the sofa bed mechanism before guests arrive, and keep the living area clear enough that the bed can open fully. Agree on a simple guest rule, such as one night or a weekend, so hosting stays enjoyable for both hosts. A guest ready living room also helps when one person needs the bedroom for rest while the other hosts a friend.

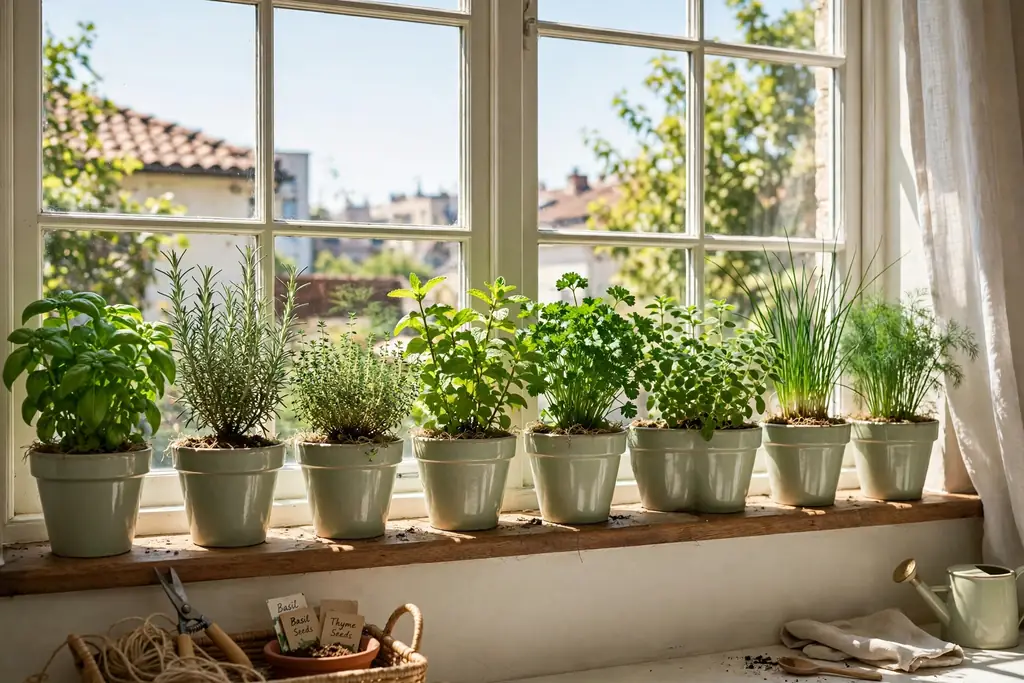
    17. Grow a Shared Window Garden

    Sunny windowsill garden with herbs and potted plants in matching pots.

    A windowsill garden with herbs, small potted plants, or trailing greens gives a couple a low cost shared project with a daily payoff. Choose plants that match the actual light on that sill, and place them in matching pots so the collection reads as one arrangement rather than a random row.

    Split care by task, not by plant, so one person waters and the other prunes or feeds, and both people notice when a plant needs help. Keep a small tray under the pots to protect the sill, and rotate pots weekly so growth stays even. Herbs near the kitchen earn their place fastest, since they go straight into cooking.

    18. Create a Listening Corner for Music and Podcasts

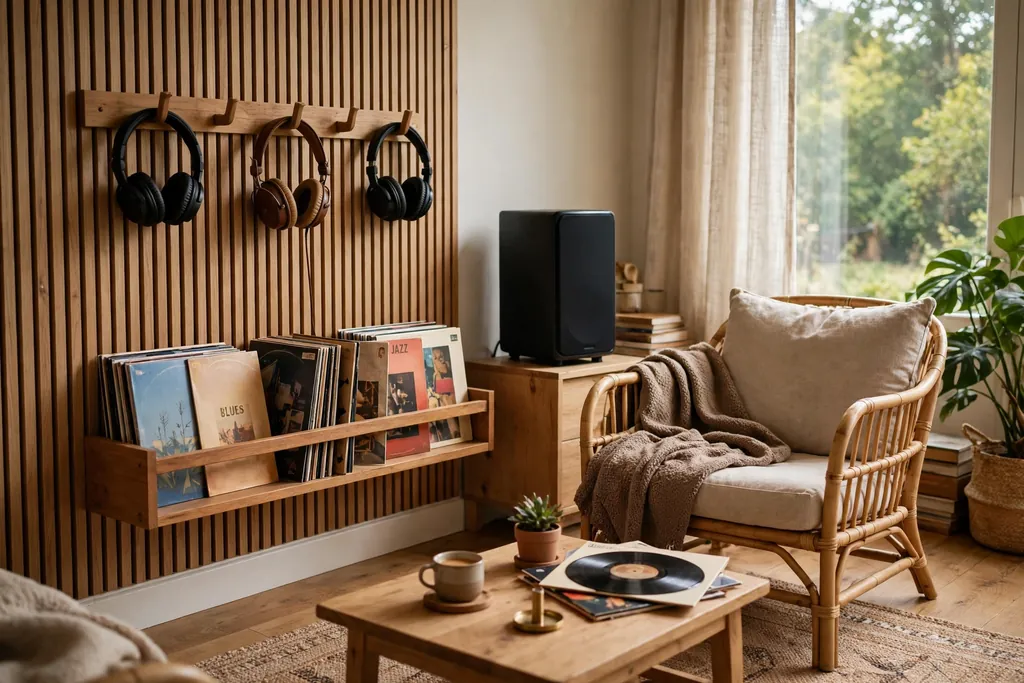
    Cozy listening corner with a speaker, headphones on hooks, and a small record shelf.

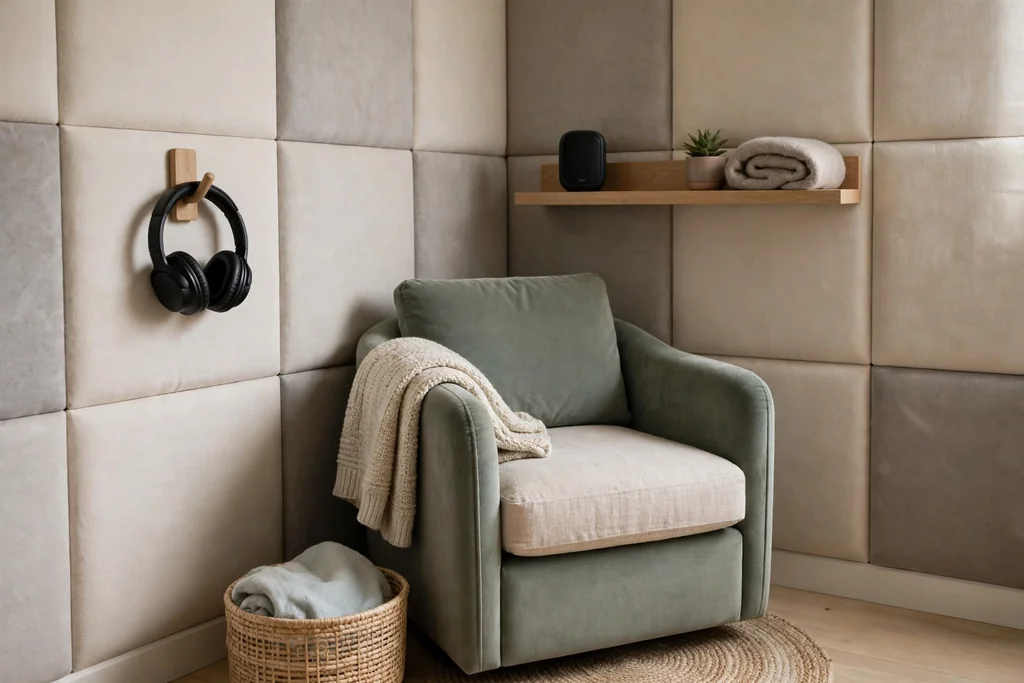
    A listening corner with a speaker, two headphones, and a small shelf for records or books gives a couple a shared sound setup without sound filling the whole apartment. Place the speaker where both seats can hear it at low volume, and keep headphones on hooks nearby for times when one person wants quiet.

    Agree on volume and quiet hours, especially in a building with thin walls, and use a rug under the corner to soften sound. A shared playlist or a weekly podcast pick turns the corner into a habit, not just equipment. Keep cables tidy with one small box, so the corner stays easy to use rather than a tangle to avoid.

    19. Run a Shared Laundry System

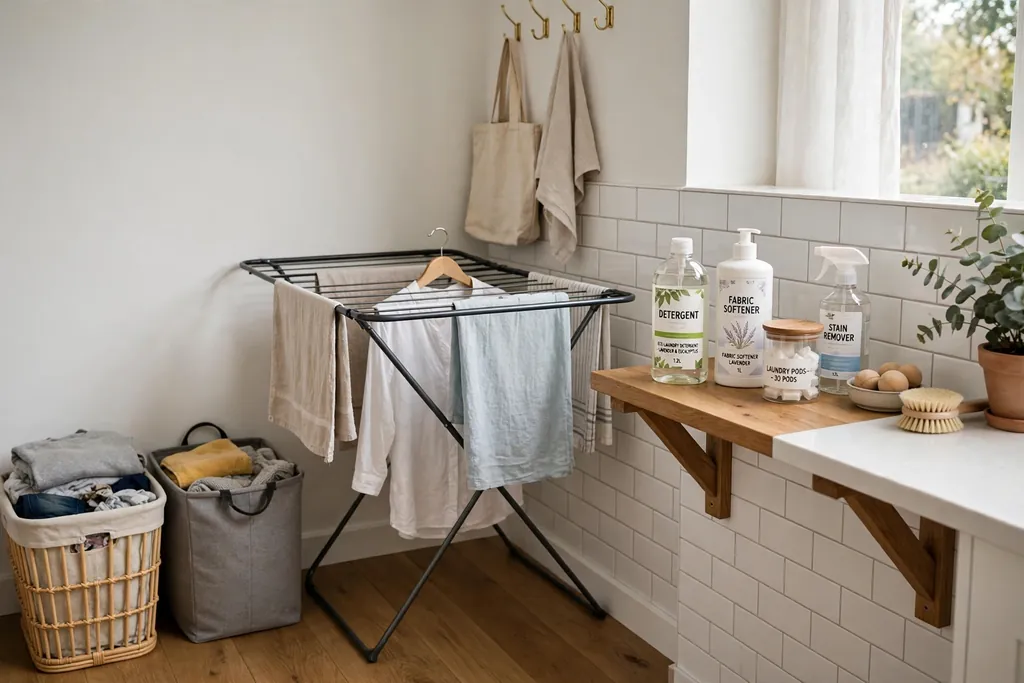
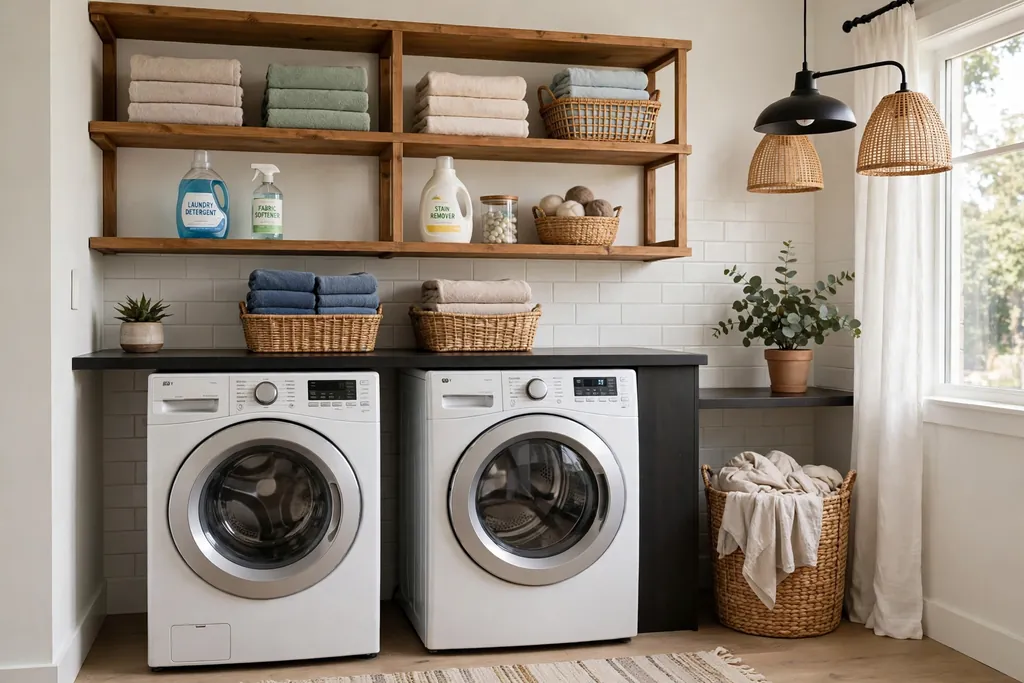
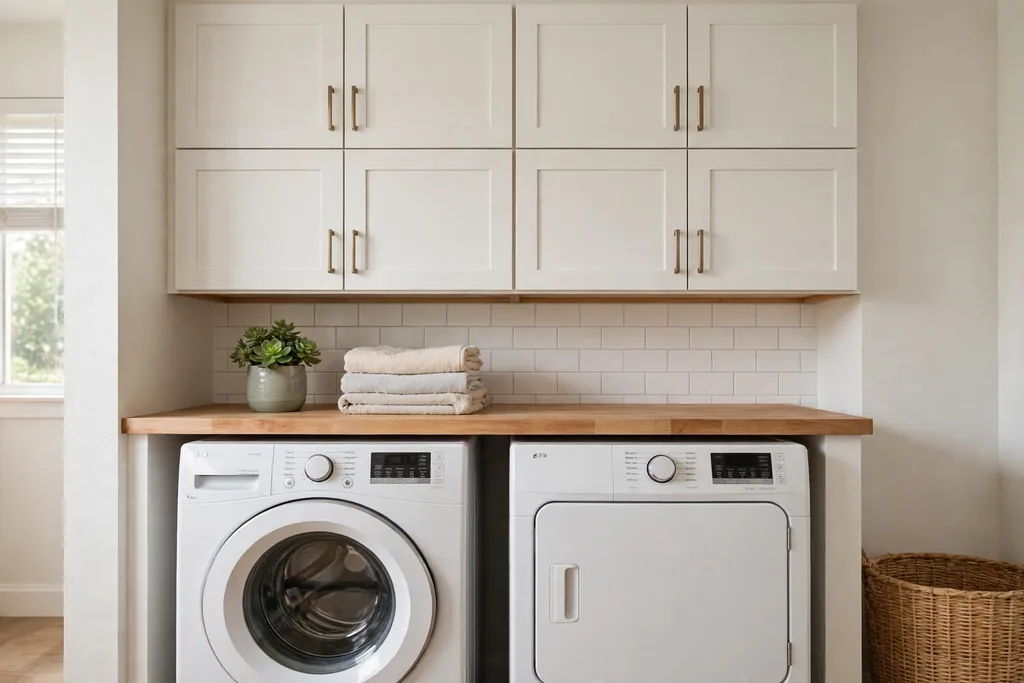
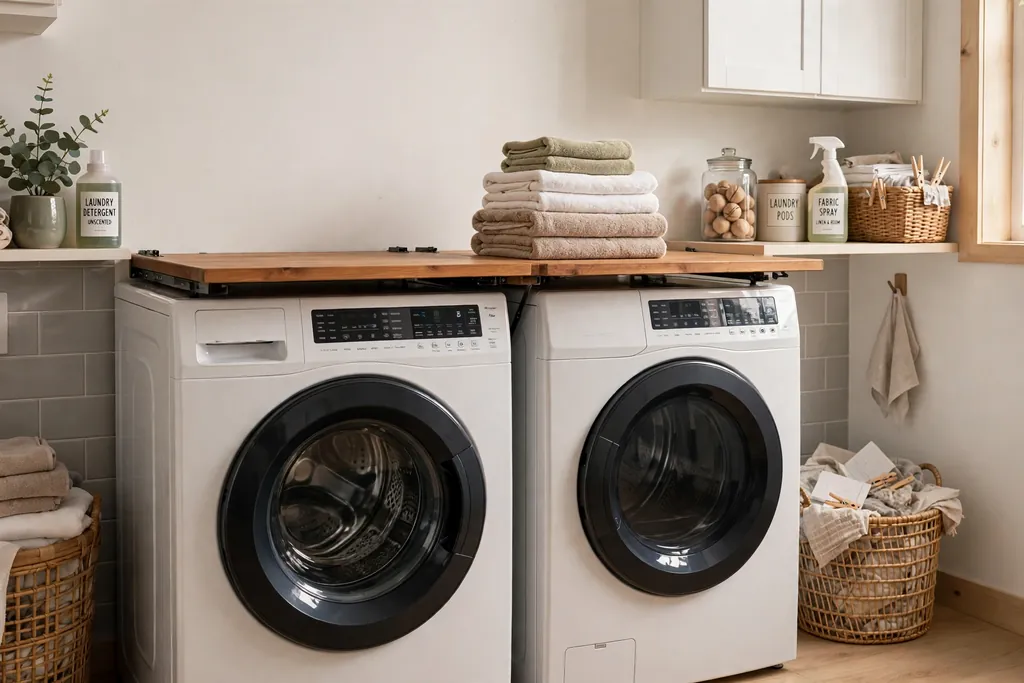
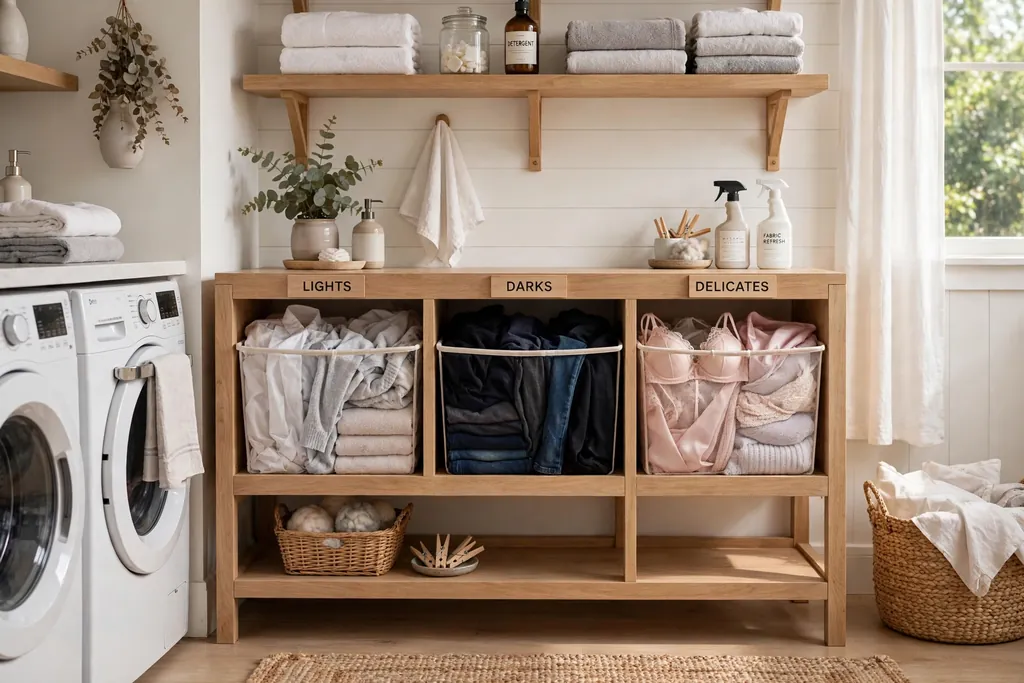
    Laundry corner with two hampers, a drying rack, and a shelf for detergent.

    A laundry system with two hampers, one for lights and one for darks, plus a shared drying rack, keeps a couple’s washing fair and visible. Each person sorts their own clothes into the hampers, and washing becomes a shared job on a set day rather than a surprise pile.

    Add a small shelf for detergent and a basket for items that need special care, and keep the drying rack near a window or a ventilated spot. Fold together when the load finishes, since folding is faster with two people and clothes reach drawers sooner. Review the system when seasons change, since heavy winter washing needs more rack space than summer washing.

    20. Keep a Travel and Memory Shelf

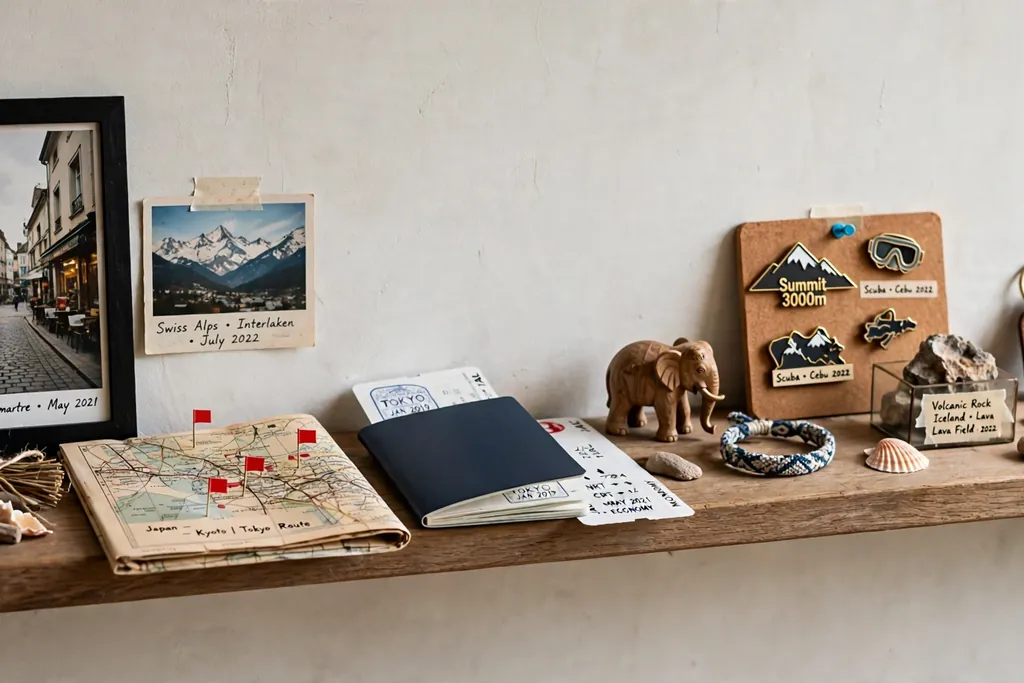
    Wall shelf with travel photos, small souvenirs, and keepsakes from two people.

    One shelf for travel photos, tickets, small souvenirs, and shared keepsakes gives a couple a place to remember trips and milestones without filling every surface. Each person adds items in turn, and the shelf is edited together once a year, keeping only pieces that still mean something to both people.

    Use small boxes or trays on the shelf for loose items, so the display stays tidy and dusting stays simple. Place the shelf where you both see it daily, such as a hall or living room wall, rather than in a bedroom corner. A single shared shelf honors both histories better than two separate collections competing for wall space.

    21. Layer Evening Light for Two Routines

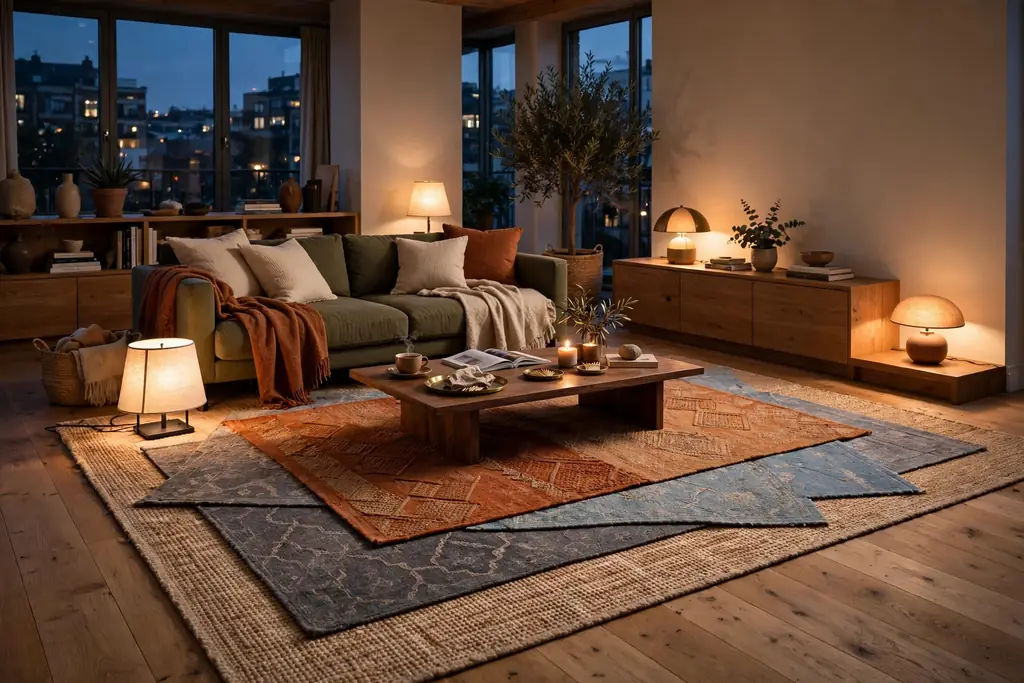
    Apartment living room in the evening with layered floor, table, and low lamps.

    Evening light should serve two routines at once: one person reading and one winding down, or one cooking and one relaxing. Use three levels, a soft ceiling or floor light for the room, a task lamp where one person reads or works, and a low lamp or candle style light near the sofa for the other person.

    Put lamps on separate switches or smart plugs, so each person can set their own side without affecting the other. Keep bright overhead light off in the evening when possible, since softer layers help the apartment feel calm after a busy day. Check glare from each seat before settling lamp positions, so neither person sits in a harsh beam.

    22. Try a Seasonal Room Swap

    Apartment reading corner moved to the sunny side of the room with a chair and plant.

    A seasonal swap, where you move one zone or one piece of furniture for a season, keeps a shared apartment fresh without new purchases. Swap the reading corner to the sunny side in winter, move the balcony chairs inside during cold months, or trade closet sections when heavy coats arrive.

    Test each swap for a week, and keep only the changes both people prefer, returning the rest to their old spots. Note what worked on the shared calendar, so next year the swap takes minutes. A home that changes a little with the seasons suits two people better than a layout fixed on move in day and never questioned again.

    Conclusion

    A good apartment for two is not about perfect matching furniture or a larger floor plan. It is about fair splits, clear zones, and routines that let both people feel at home in the same rooms. Start with the shared style board and the entry landing, then add the bedroom, bathroom, and kitchen ideas that remove your most frequent daily friction. Live with each change for a week, keep what both of you like, and adjust the rest together. Save this guide to Pinterest so you can return to the ideas when your next season, guest visit, or move in calls for a fresh arrangement.

    FAQs

    How can a couple decorate a small apartment without arguing about style?

    Start with a shared style board where each person adds five images and you keep only the ones you both accept. Agree on a calm base palette for large pieces, then let each person choose personal touches in their own zone, such as their bedside table or reading chair. Revisit the board when a room feels stuck, and judge new items against it before buying.

    How do two people share a small closet fairly?

    Divide the closet by person and mark the split visibly with a divider or different hanger colors. Give each person a hanging section, a shelf, and a drawer or basket, and keep shared items such as spare bedding in a separate section. Review the split each season, since coat and knitwear needs change through the year.

    What is the best layout for a couple in a studio apartment?

    Use zones rather than walls: a rug and sofa back for living, a curtain or open shelf for sleeping, and a small table for dining or work. Keep one calm base color across zones, and give each person a defined personal spot, such as a bedside shelf and a work corner. The studio zoning ideas linked in the introduction show how rugs, dividers, and curtains can mark those zones without blocking light.

    How can a couple share a bathroom without clutter?

    Give each person a basket for daily items and keep shared soap, towels, and cleaning items in a separate tray. Add a second towel hook or rail if wall space allows, and review both baskets monthly to remove unused products. Counters stay clear when every item has a named home, and the split makes tidying a personal job.

    How do couples handle different sleep schedules in one bedroom?

    Use separate duvets and pillows in different firmness if warmth or support needs differ, and agree on a bedtime light rule so one reading lamp does not disturb the other person. A white noise machine or headphones can help when one person rises earlier. Test the setup for a week, since small sleep changes often need a few nights to judge fairly.

    Can a couple work from home together in a small apartment?

    Yes, with side-by-side desks or one long shared desk, separate lamps and power strips, and agreed quiet hours and call rules. A plant or low shelf between the two halves helps focus without building a wall. Keep cables in one channel and clear both desks at the end of the day, so work does not spread into evening living space.


  • 24 Minimalist Small Apartment Ideas for Homes of Every Size

    24 Minimalist Small Apartment Ideas for Homes of Every Size

    A small apartment feels calm when every piece has a clear job and nothing extra crowds the floor. Minimalist decorating is not about empty rooms. It is about choosing fewer, better pieces, keeping surfaces clear, and giving storage a fixed place so daily life stays easy. These 24 minimalist small apartment ideas cover colour, furniture size, storage, light, and simple zones for sleeping, working, eating, and relaxing. Start with the spot that bothers you most, such as a cluttered entry or a sofa that is too large, then add one idea at a time and live with it before you change more.

    Key Takeaways

    • Keep one calm base palette across the apartment, so rooms read as one home rather than a set of competing corners.
    • Choose furniture sized for the room, with clear walkways, rather than pieces borrowed from a larger home.
    • Give every item a home, and favour closed storage for the things you do not need to see every day.
    • Use height, mirrors, and light to make a small room feel open, without adding more furniture.
    • Keep only one or two display pieces per surface, and move the rest into closed storage or out of the home.
    • Review the apartment once a week, since small rooms show clutter faster than large ones.

    1. Keep One Calm Base Palette

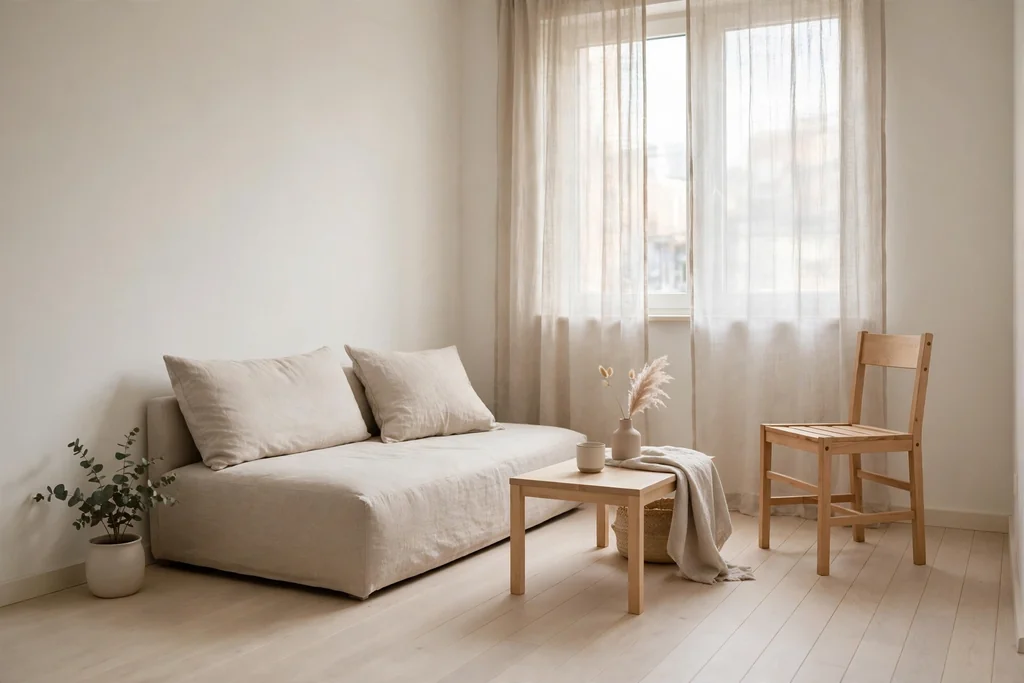
    Small minimalist apartment in one calm warm white palette with pale wood floor and a low sofa.

    Use one calm base colour on walls, large furniture, and bedding, such as warm white, pale grey, or soft beige. When the biggest surfaces agree, the apartment reads as one calm room instead of several small areas competing for attention. This base also makes it easier to change accent items later, since cushions, art, and a rug can change without repainting or replacing furniture.

    Add colour in small, movable layers: a cushion, a throw, a plant pot, or a framed print. Keep the base colour consistent from the living area into the entry and sleeping area, since a small apartment has few doors to hide a sudden colour change behind. If a wall colour already works, build around it rather than starting again.

    2. Choose Right-Size Furniture

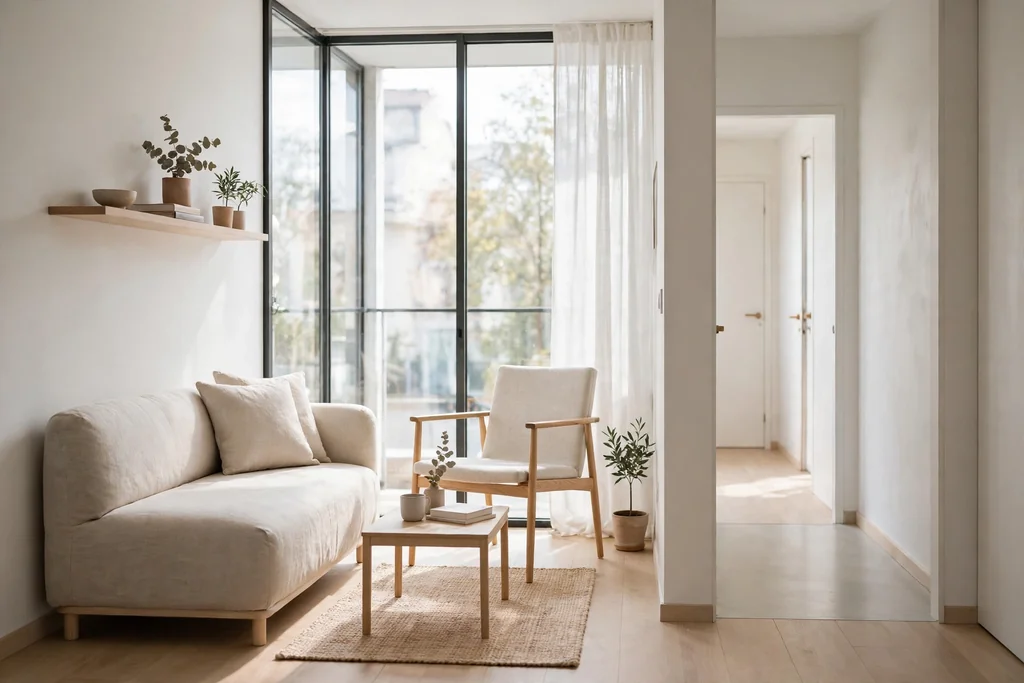
    Small minimalist apartment with a low sofa and slim armchair leaving a clear walkway.

    Measure the room and the doorways before you buy, then choose furniture made for apartments rather than full-size pieces. A low, slim sofa, a narrow armchair, and a small side table leave room to walk, sit, and open doors without squeezing past corners. In a small room, a piece that is slightly too large affects every other choice, from rug size to storage placement.

    Leave a clear walkway through the main path of the room, and check that drawers, doors, and chairs can open fully. Furniture with visible legs also helps, since floor showing beneath a sofa or cabinet makes the piece look lighter. If a piece blocks a path, it is too large for that spot, even if it fits on paper.

    3. Let One Sofa Do Two Jobs

    Small minimalist apartment with a sofa bed dressed as a sofa and bedding folded in a basket.

    Choose a sofa that also works as a bed, or a daybed that reads as seating by day, when the apartment has no guest room. A sofa bed gives visitors a real place to sleep without a second bed taking up floor space all week. A daybed suits a studio or a small living room where the same piece must serve both sitting and sleeping.

    Dress a daybed with firm cushions along the wall so it reads as a sofa during the day, and keep proper sheets folded nearby for the night. For a sofa bed, test the fold-out action before you buy, and store bedding close to the sofa so changing it over stays quick. This one change can free a whole corner for a desk, a reading chair, or clear floor.

    4. Favour Closed Storage

    Small minimalist apartment living room with closed storage bench and hidden cabinets.

    Use closed storage for most everyday items, so surfaces stay clear even when the cupboards are full. Cabinets with plain fronts, a storage bench, and a closed media unit hide chargers, games, spare linens, and paperwork without adding visual noise. Closed storage suits a minimalist apartment well, since the room stays calm even on a busy day.

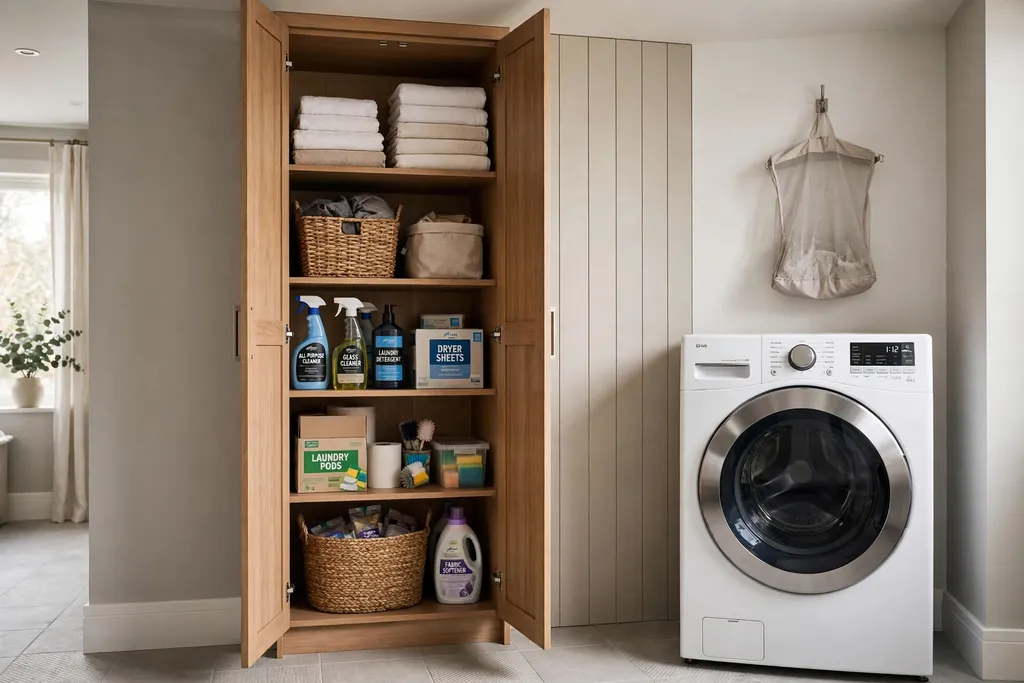
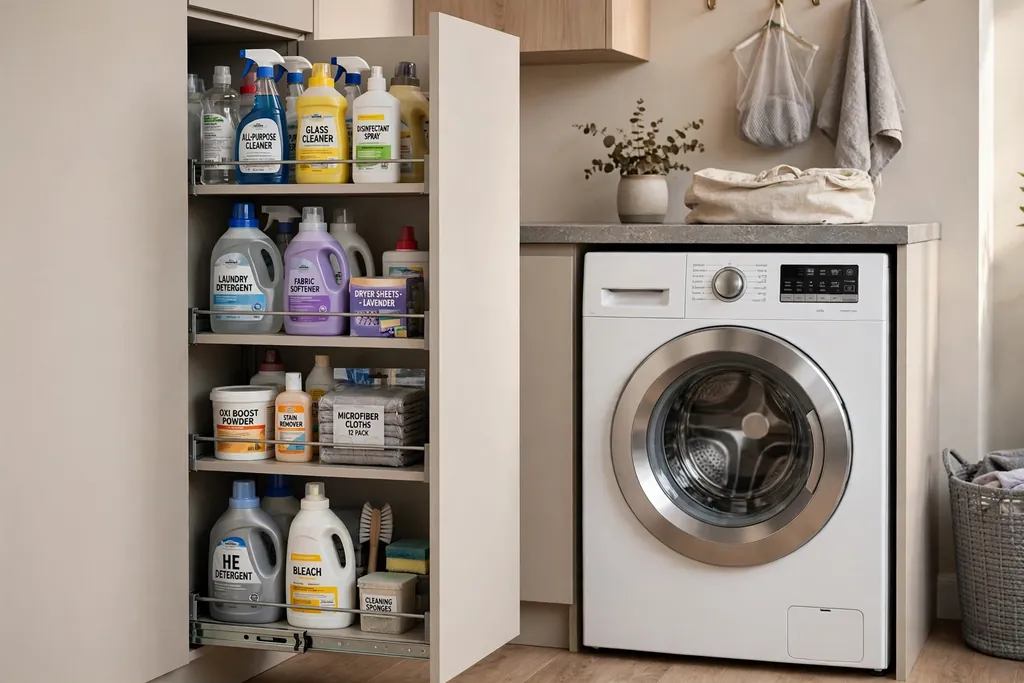
    Sort each closed unit by use, such as one cabinet for cleaning supplies and another for linens, and label the inside of a door if more than one person uses it. Keep one open shelf or one tray for daily items only, such as keys and a phone charger, so the open spot does not grow into a pile. When a cabinet fills up, that is a signal to pass on items you no longer use.

    5. Run Shelving to the Ceiling

    Small minimalist apartment with open shelves reaching to the ceiling holding books and baskets.

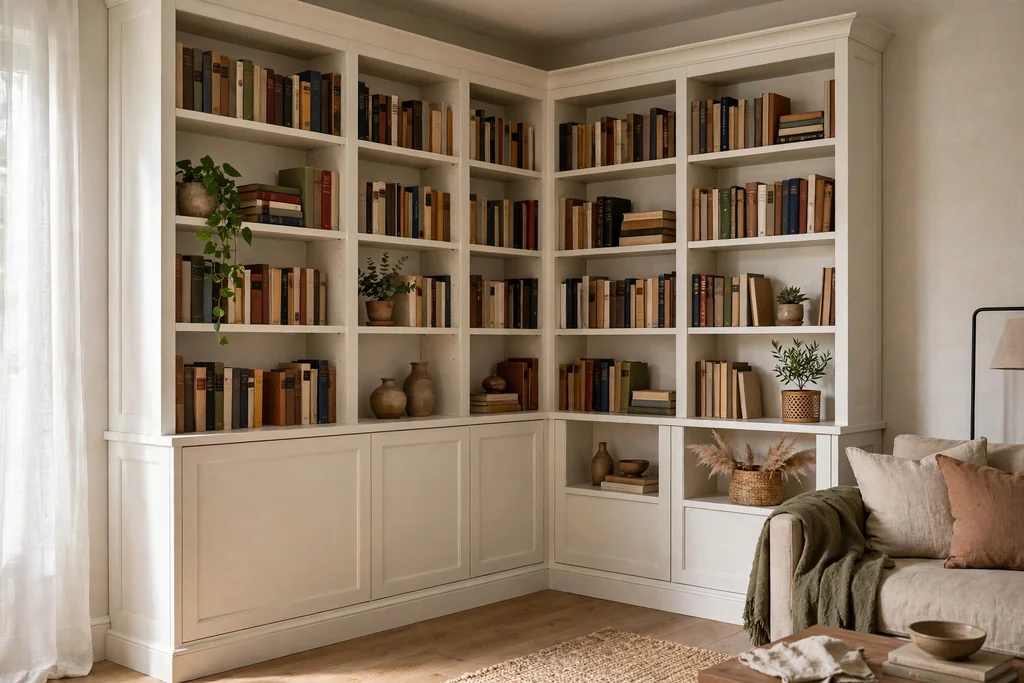
    Run shelves up to the ceiling on one wall, such as the wall above a desk or beside the bed, to use height that often stays empty. High shelves hold books, baskets, and items you use less often, and they free lower wall space for art, a mirror, or a work surface. One tall run of shelves usually works better than shelves on every wall, which can make a small room feel boxed in.

    Put everyday items at arm height and lighter, rarely used items up high, and use closed boxes on the top shelf so the highest row looks tidy from below. Fix shelves into studs or proper anchors, and do not overload them beyond the maker rating. A small step stool stored nearby makes the top shelf genuinely usable.

    6. Add a Fold-Down Desk

    Small minimalist apartment with a fold-down desk closed flat against a white wall.

    Fit a fold-down desk on the wall for work, study, or bills, and fold it away when the workday ends. A wall desk gives you a real work surface without a desk standing in the middle of the room all day, which matters in a small apartment where one room must serve several jobs. Two small shelves above it can hold notebooks and chargers.

    Fix a wall desk firmly into studs or suitable wall anchors, and check the weight rating before you load it with books or a laptop. Keep the desk clear as a habit, since a fold-away desk only helps if folding it away stays easy. If wall fixing is not allowed, a slim console table that doubles as a desk gives a similar result with no drilling.

    7. Place a Mirror Opposite the Window

    Small minimalist apartment with a large mirror opposite a bright window.

    Place a large mirror opposite or beside a window to bounce daylight deeper into the room and make the far wall feel farther away. In a small apartment, that extra sense of depth matters, since there is no hallway or second room to give your eyes a break. Lean a full-length mirror against the wall if hanging is not allowed, and secure it so it cannot slide on a smooth floor.

    Check what the mirror reflects before you fix its position, since a mirror facing a messy corner doubles the mess. Aim it toward the window, a plant, or a calm stretch of wall for the best result. A mirror with a simple frame suits most apartments, and one large mirror usually works better than several small ones scattered across the room.

    8. Divide With an Open Bookshelf

    Small minimalist apartment with an open bookshelf dividing living and sleeping areas.

    Use an open bookshelf as a soft divider between living and sleeping areas in a studio or a one-room apartment. Unlike a solid wall or a tall wardrobe, an open shelf still lets light and air pass through, while giving the sleeping area a sense of privacy. Place books, baskets, and a few display pieces on the living side, and keep the bedroom side tidy so it does not become a second display wall.

    Anchor the shelf to the wall if your lease allows it, following the maker instructions, since a tall freestanding shelf can tip. If anchoring is not allowed, choose a low, wide unit instead of a tall narrow one, and keep heavy items on the lowest shelves. For more zoning ideas in a one-room home, these studio apartment decorating ideas show how rugs, curtains, and shelves can mark each zone.

    9. Use Sheer Curtains for Soft Light

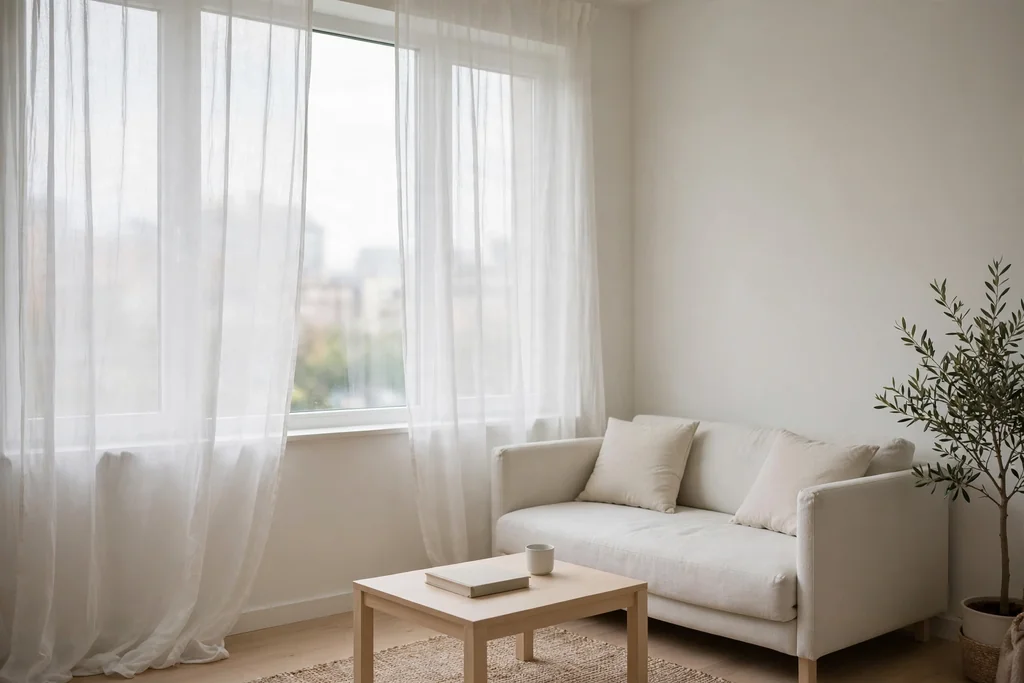
    Small minimalist apartment with sheer white curtains softening daylight at a large window.

    Hang sheer curtains at the window to soften daylight and give privacy without blocking light. Sheers suit a minimalist apartment because they add softness without heavy fabric, dark colour, or a busy pattern competing with the room. They also let you keep the window mostly uncovered during the day, which helps a small room feel open.

    Hang the curtain rod close to the ceiling and a little wider than the window, so the window looks taller and the curtains stack clear of the glass when open. Choose a washable fabric, since window curtains collect dust, and keep the same treatment on windows in one open room so the space reads as planned. If you need darkness for sleep, add a simple blind behind the sheer layer.

    10. Pick a Round Table for Dining

    Small minimalist apartment corner with a round pedestal dining table and two slim chairs.

    Choose a round pedestal table for dining in a small apartment, since the round shape has no sharp corners to bump into and a single central leg leaves room for chairs on all sides. A small round table seats two to four people in a tight corner, and chairs can tuck fully underneath when the meal ends. This keeps the dining spot from taking over the living area.

    Place the table where chairs can pull out without hitting a wall or a sofa, and keep the tabletop clear between meals with only a small vase or candle as a centrepiece. If you often host more people, an extendable round table gives extra seats on occasion without a large table standing in the room every day. For rooms that must hold both a sofa and a table, these small living room dining room combo ideas cover shared layouts and storage.

    11. Set Up a Simple Entry Zone

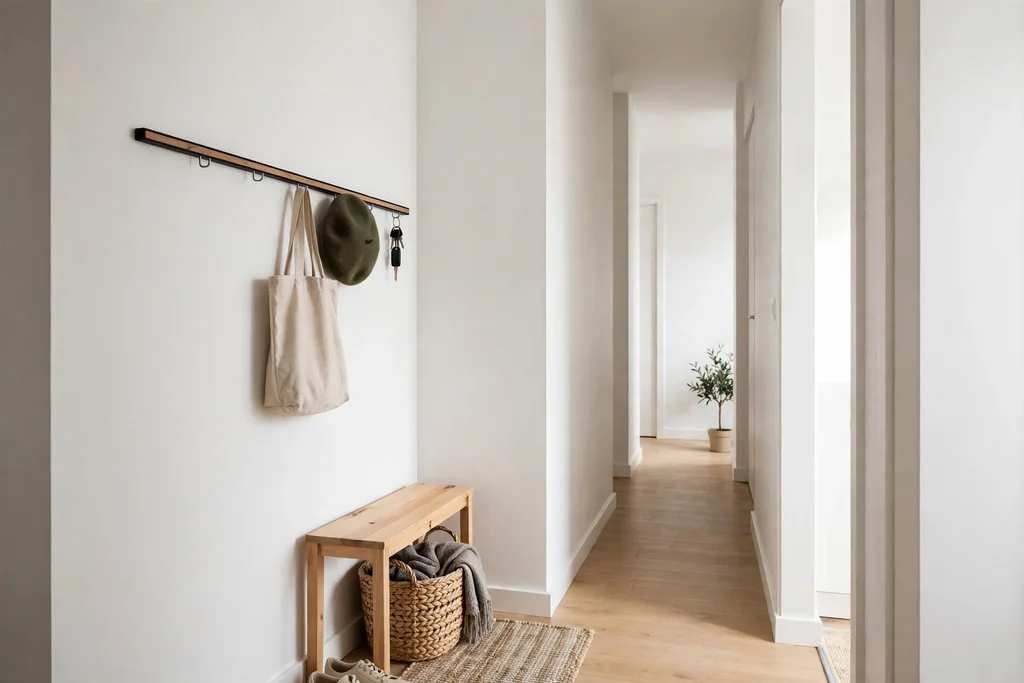
    Small minimalist apartment entry with a wall hook rail, small bench, and a basket.

    Give the entry a simple zone with a hook rail, one small bench or stool, and one basket for shoes or bags. Without a zone, coats, keys, and parcels land on the first chair or table inside the door, and that clutter spreads into the living room. A defined entry stops the mess at the door, even when the entry is only a short stretch of wall.

    Keep the zone to the items you use daily, and move seasonal coats and spare bags into closed storage elsewhere. A small tray or dish for keys and a hook at a height children can reach, if children live in the home, make the zone work for everyone. Check the zone each evening, since a one-minute reset keeps it from growing back into a pile.

    12. Choose a Low Platform Bed

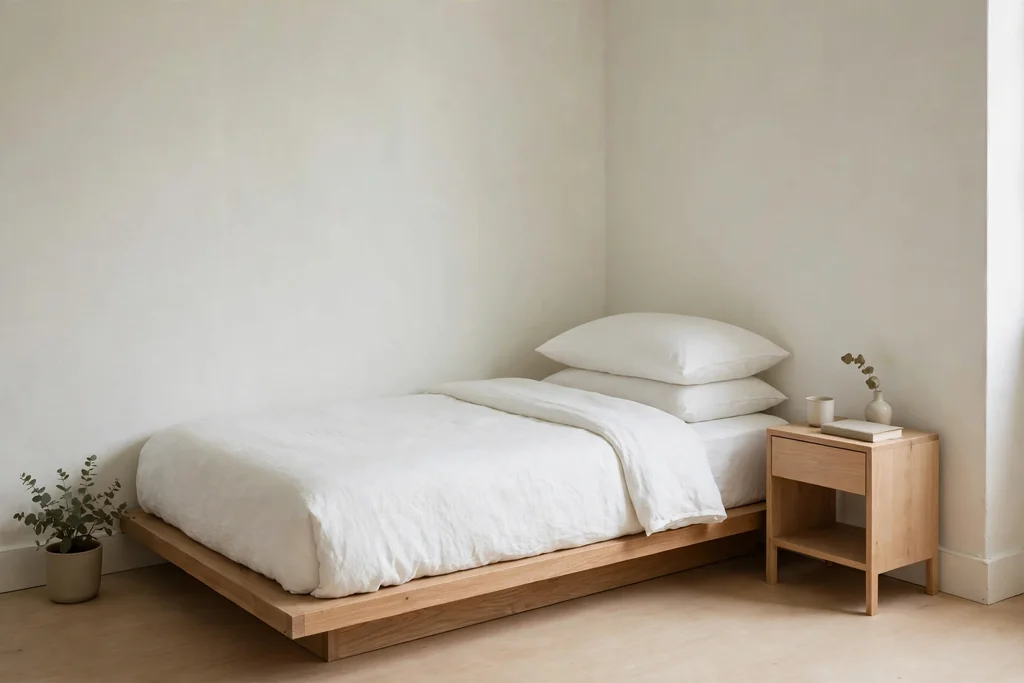
    Small minimalist apartment bedroom corner with a low platform bed and plain white bedding.

    Choose a low platform bed for a small sleeping area, since a low frame keeps the room feeling open and leaves wall space above the bed for a shelf or a single print. A platform bed also avoids a bulky headboard and a tall frame competing with the rest of the room, which helps a small bedroom or a studio corner feel calm at night.

    Use the space under the platform for flat storage boxes if the design allows it, and keep bedding in one calm colour so the bed reads as a quiet block rather than a busy pattern. For more bedroom storage that keeps the room restful, these bedroom storage ideas cover under-bed drawers, wardrobes, and closed nightstands. Keep the bedside to one lamp and one book, and move chargers and clutter into a drawer.

    13. Use Nesting Tables You Can Move

    Small minimalist apartment with nesting side tables beside a pale sofa.

    Use nesting tables beside the sofa instead of one heavy coffee table, since they stack into a small footprint when you are alone and pull apart into two or three side tables when friends visit. That flexibility suits a room where the layout changes through the day, from work to rest to guests, without buying extra furniture for each use.

    Choose tables light enough to move with one hand, with stable legs that do not wobble on a rug. Round tops are a good choice in tight walkways, since they have no sharp corners to catch a hip. Keep the largest table beside the sofa and tuck the smaller ones under it or beside the bed, so they are close when needed and out of the way when not.

    14. Keep Kitchen Fronts Flat and Plain

    Small minimalist apartment kitchen with flat white cabinets and a tidy pale wood counter.

    Choose flat, plain kitchen fronts in one light colour, with simple handles or handle-free doors, to keep a small kitchen calm. Busy door profiles, mixed finishes, and open racks full of mixed items make a small kitchen look crowded fast, even when it is tidy. Plain fronts let the worktop and a few daily items take the focus instead.
    Keep only daily items on the worktop, such as a kettle and a chopping board, and store the rest behind closed doors. Group items inside cabinets by use, such as cooking in one cabinet and baking in another, so you open one door for one task. If a full kitchen change is not possible, painting or replacing only the most visible fronts can give a similar calm effect.

    15. Fit a Floating Vanity in the Bathroom

    Small minimalist apartment bathroom with a floating vanity and large mirror.

    Fit a floating vanity in a small bathroom, since floor showing beneath the unit makes the room look larger and cleaning the floor becomes easier. A floating vanity with one drawer and a simple mirror above it gives a place for daily items without a bulky cabinet filling the wall. Keep the counter to a soap dish, a toothbrush holder, and one small plant or candle at most.

    Store spare supplies in a closed cabinet or a basket on a high shelf, rather than on the vanity top, so the bathroom stays calm on busy mornings. Choose a vanity depth that leaves a clear path to the door and the shower, and check the plumbing position before you buy. A large mirror above the vanity also bounces light around a small bathroom, much like a mirror in a living room.

    16. Layer Light at Different Heights

    Small minimalist apartment living room with layered lighting from a floor lamp and table lamp.

    Layer light at different heights instead of relying on one ceiling light for the whole apartment. A floor lamp beside the sofa, a small table lamp on a shelf, and a task light at a desk or kitchen counter each serve one job, and together they make a small room feel warm in the evening without harsh overhead light. Dimmer switches, where already fitted, let you lower the light for rest and raise it for cleaning.

    Keep lamp shades in one calm colour family, and choose warm bulb tones across the room so zones do not clash. Place lights where you actually sit, read, and work, rather than centring them on the ceiling alone. If floor space is tight, a wall lamp or a clip-on shelf light gives layered light without a lamp base taking up floor room.

    17. Hang One Large Artwork

    Small minimalist apartment with one large framed artwork above a low sofa.

    Hang one large artwork on the main wall instead of many small frames scattered across the room. One large piece gives the eye a clear focus and leaves the rest of the wall calm, which helps a small apartment feel planned rather than crowded. A single print, photograph, or textile in a simple frame suits most rooms and is easy to change later.

    Hang the centre of the artwork at eye level from a standing position, and leave blank wall around it so the piece has room to breathe. If you love a collection, group it in one tight grid on one wall only, rather than spreading small frames across every wall. Keep the frame style simple and consistent with the room, so the art adds interest without adding noise.

    18. Add Warmth With Natural Texture

    Small minimalist apartment sofa with linen cushions, a wool throw, and a woven basket.

    Add warmth with natural texture instead of extra colour or pattern, using linen, wool, cotton, wood, and woven baskets. Texture gives a minimalist room depth without clutter, since a linen cushion, a wool throw, and a wooden tray each feel different to the eye and to the touch while staying in one calm palette. This is a good way to keep a pale room from feeling cold or bare.

    Limit texture to a few places: bedding, sofa cushions, a rug, and one or two baskets. Too many textures in one room can feel as busy as too many colours, so repeat one or two materials across the apartment for a planned look. Choose washable covers where possible, since textured fabrics in a small home are used daily and need regular cleaning.

    19. Build a Window Seat With Storage

    Small minimalist apartment window seat bench with storage baskets underneath.

    Build a window seat from a low bench or a pair of sturdy cabinets topped with a cushion, and use the space underneath for shoes, bags, or spare bedding. A window seat turns an otherwise empty stretch of wall into a reading spot, a dining bench, or a place to sit while you put on shoes, without adding a separate chair and a separate storage unit.

    Add a small shelf or a wall hook nearby for a book, a phone, or a cup, so the seat works as a complete spot rather than a bare bench. Keep the cushion in a washable cover, since a seat beside a window collects sun and dust, and keep the cushion firm enough to sit on for a full meal or a long read. If you rent, a freestanding bench gives most of the same benefit with no fixed building work.

    20. Add a Slim Rolling Cart

    Small minimalist apartment kitchen with a slim rolling cart beside the counter.

    Add a slim rolling cart to a small kitchen or bathroom, since it adds a work surface and storage that can move where it is needed and park out of the way when it is not. Use it as extra counter space beside the stove, a coffee station in the morning, or a side table when friends visit. Shelves or drawers in the cart can hold utensils, dry goods, or cleaning supplies that have no home in a small kitchen.

    Pick a cart that fits through the gap between your counters and your seating area, and check its height against your worktop so it feels comfortable to use. Lock at least one wheel when the cart is in use, especially on a smooth floor, and keep the top clear of items you need to reach daily. A cart with a plain finish in the kitchen palette will blend in rather than add a new colour to the room.

    21. Use Matching Baskets for Open Storage

    Small minimalist apartment shelves with matching woven baskets holding folded clothes.

    Use matching baskets on open shelves or in a closet, so open storage reads as planned rather than patched together. Baskets of one material, such as woven seagrass or cotton, in no more than two sizes, give closed storage without doors and let you pull out one basket instead of searching a whole shelf. Label the front of each basket, so everyone in the home knows where items belong.

    Sort baskets by type, such as scarves in one, chargers in another, and spare linens in a third, and keep each basket light enough to lift with one hand. Replace a basket when the weave frays, since a damaged basket snags clothes. Open shelves with baskets suit a room that needs soft texture as well as order, and they work well in closets, entry zones, and bathroom shelves.

    22. Keep the Balcony Simple

    Small minimalist apartment balcony with one slim chair, a small table, and one plant.

    Keep a small balcony simple with one slim chair, one small table, and one plant, rather than a full outdoor set that crowds the space. A balcony in a small apartment works best as a single-purpose spot: morning coffee, evening air, or a place for one plant to grow. One chair also leaves room to step outside, water plants, and clean the floor without moving furniture each time.

    Choose weatherproof pieces that fold or stack, so the balcony can clear quickly in bad weather or when you need the space for drying laundry. Keep the balcony floor mostly clear, and store cushions inside when not in use, since a small outdoor space shows clutter from inside the apartment too. If the balcony is tiny, a rail-mounted table and one folding chair give a seat without any floor-hungry furniture.

    23. Screen the Bed With a Curtain

    Small minimalist apartment with a curtain on a ceiling track screening a bed alcove.

    Screen a bed alcove with a curtain on a ceiling track, so you can close off the sleeping area at night and open the whole room again in the morning. This works well in a studio where a bookshelf divider would block too much light, or where the bed sits in an alcove with no room for furniture around it. A curtain also softens the edge between sleeping and living without building a wall.

    Hang the curtain as close to the ceiling as possible so the bed area feels taller, and extend the track a little past the bed on each side so the curtain can stack out of the way during the day. Choose a fabric heavy enough to block the view of the bedding, but light enough to slide easily with one hand. Washable fabric is a practical choice, since a bed curtain collects dust and cooking smells faster than a window curtain.

    24. Run a Short Weekly Reset

    Small minimalist apartment living room with a clear floor and one basket for tidying.

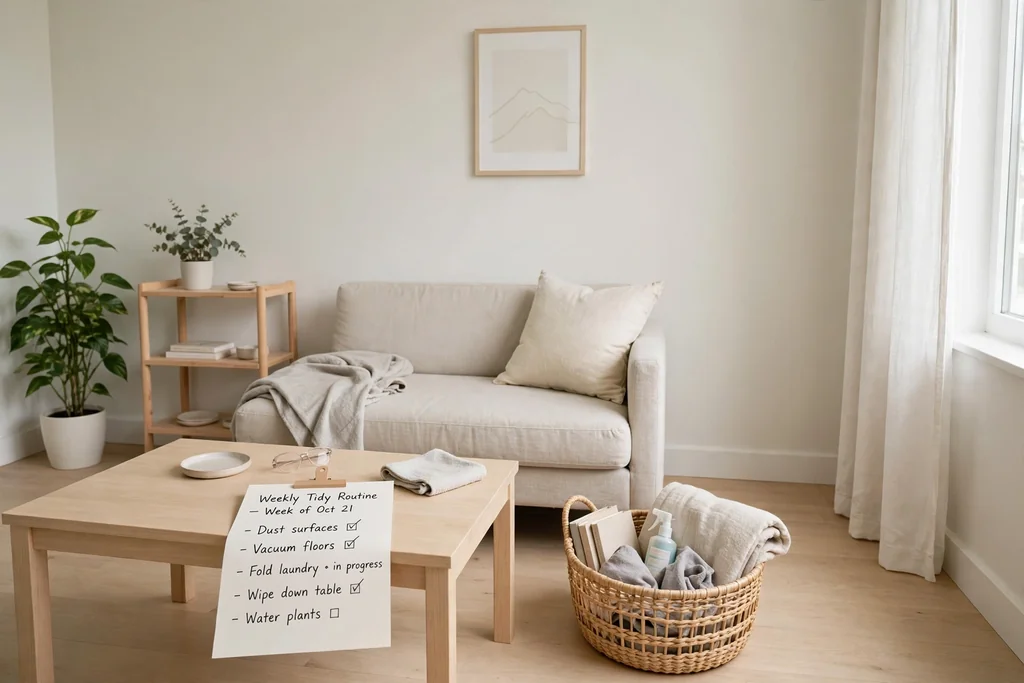
    Run a short weekly reset to keep a minimalist apartment calm, since small rooms show clutter faster than large ones. Set aside fifteen minutes once a week to return items to their homes, clear surfaces, wipe the kitchen and bathroom tops, and check the entry zone. A regular reset stops small piles from growing into a full tidy-up, and it makes daily life easier during the week.

    Use one basket for the reset: carry it through the apartment, collect items that belong elsewhere, and put each one away before the basket goes back to its home. At the end of the reset, check for one item to pass on, donate, or recycle, so the apartment does not slowly refill. A weekly reset works best when it stays short and regular, rather than long and rare.

    Conclusion

    A minimalist small apartment works when the base stays calm, the furniture fits the room, and every item has a home. You do not need to change everything at once. Pick the idea that solves your biggest daily frustration, whether that is a cluttered entry, a sofa that is too large, or a kitchen with no clear surface, and live with that change for a week. Then add the next idea that fits your space, your lease, and your budget. Small, steady choices keep the apartment easy to live in, easy to clean, and easy to enjoy. Save this guide to revisit when you move, redecorate, or need a fresh idea for one corner at a time.

    FAQs

    1. What is the first step for a minimalist small apartment?

    Start by clearing one surface and one storage spot, such as the entry and a single drawer, before you buy anything. Measure the room, list what you use daily, and give those items fixed homes first. Once daily items have places, it becomes clear what is extra and what still needs a storage solution.

    2. How do I keep a minimalist apartment from feeling cold?

    Use warm base colours, such as warm white or soft beige, and add natural texture through linen, wool, wood, and woven baskets. Layer light at different heights, add one plant, and keep one large artwork rather than bare walls everywhere. Warmth in a minimalist home comes from texture and light, not from filling every surface.

    3. Can I make a small apartment minimalist while renting?

    Yes. Focus on freestanding furniture, removable hooks, curtains, rugs, baskets, and rolling carts, and check your lease before you drill or mount anything heavy. A fold-down desk, a bookshelf divider, and a curtain for a bed alcove can all work without permanent changes, and they move with you to the next home.

    4. How much storage does a minimalist apartment need?

    It needs enough closed storage for daily items, seasonal items, and cleaning supplies, plus one open spot for items you reach for every day. Measure what you own before you buy storage, and keep one shelf or drawer partly empty at the start, so new items have a place without pushing older items onto surfaces.

    5. What furniture should I avoid in a small apartment?

    Avoid oversized sofas, heavy coffee tables with no storage, and single-purpose pieces that block walkways or door swings. If a piece forces you to squeeze past it daily, or if it holds only one small job, a smaller or multipurpose piece usually serves the room better. Test door, drawer, and chair clearance before you commit.

    6. How often should I tidy a minimalist small apartment?

    Do a one-minute reset each evening for the entry and kitchen surfaces, and a short weekly reset for the whole apartment. Small rooms show clutter quickly, so frequent short resets work better than a long tidy-up once a month. During the weekly reset, pass on one item you no longer use to stop the home slowly refilling.


  • 34 Creative Fruit Tray Ideas for a Warm, Inviting Home

    34 Creative Fruit Tray Ideas for a Warm, Inviting Home

    A fruit tray is one of the easiest ways to make a table feel cared for. It takes little cooking, suits guests of many ages, and brings natural color to a room without a new purchase. These 34 creative fruit tray ideas cover everyday boards, party layouts, breakfast trays, seasonal displays, and small trays for one or two people. Start with ripe, in season fruit, keep the board low for easy reaching, and add one dip if the occasion calls for it. The basket basics in these creative fruit basket ideas pair well with trays, since both start with fruit you pass daily.

    Key Takeaways

    • Start with the tray size first, then buy fruit to fill it, so the board looks full without waste.
    • Use two or three anchor fruits for color and shape, then fill gaps with smaller fruit and berries.
    • Keep cut fruit chilled until serving, and set the tray out no more than two hours before eating.
    • Put dips in small bowls on the tray, so they stay neat and do not run across the fruit.
    • Leave one clear edge on the tray for hands, tongs, or a small knife, so serving stays simple.
    • Match the tray to the occasion: wood for everyday warmth, marble or slate for a party, and a small board for a quiet breakfast.

    1. Classic Round Wood Board with Concentric Rings

    Round wood board with fruit arranged in concentric rings and a dip bowl in the center.

    Arrange fruit in rings on a round wood board, with a small bowl in the center and larger fruit around the edge. Start with orange slices or strawberries on the outer ring, then add grapes, blueberries, and kiwi slices in tighter rings toward the middle. The ring pattern looks planned even with simple fruit, and it keeps each kind easy to reach.

    Use a board with a rim or a slight lip if the fruit is cut, so juice stays on the board. Keep the center bowl for a dip or for berries that roll, and refill the outer ring first as guests eat, since it empties fastest. A round board suits a dining table or a coffee table, where people reach from more than one side.

    2. Long Rectangular Marble Slab for a Buffet

    Long marble slab with fruit arranged in straight rows for a buffet table.

    Use a long rectangular marble or stone slab when the tray must feed a line of guests at a buffet or an island. Lay fruit in straight rows along the length, with taller items such as pineapple wedges at the back and flat slices at the front. Rows make refilling fast, since you can see at a glance which row is low.

    Chill the slab in the fridge for an hour before arranging, so cut fruit stays cool longer on the table. Put small bowls of dip at one end rather than in the middle, so the line keeps moving. Wipe the slab between refills, since juice from berries can stain a pale surface if it sits too long.

    3. Two Tier Stand for a Small Table

    Two tier stand with large fruit below and small soft fruit on the top tier.

    Build a fruit tray on a two tier stand when table space is short but you still want variety. Put larger, sturdy fruit such as apples, oranges, and grapes on the bottom tier, and smaller, softer items such as berries, figs, and cut melon on the top tier. Height draws the eye and frees the table for plates and drinks.

    Keep the stand steady by placing the heaviest tier at the bottom, and do not overload the top. This layout suits afternoon tea, a brunch table, or a small kitchen counter. If the stand wobbles, move it to a flat tray base, or use a single tier board instead for safety.

    4. Citrus Rainbow Arc

    Citrus slices arranged in a rainbow arc across a flat tray with mint at the ends.

    Arrange citrus slices in a rainbow arc across a flat tray, moving from red grapefruit through orange, lemon, and lime. Overlap each slice slightly so the arc reads as one band of color, and tuck mint leaves at the two ends to finish the shape. A citrus arc needs no extra decoration, since the fruit colors carry the whole tray.

    This tray suits a bright kitchen, a summer table, or a party where the tray is also part of the decoration. Cut the slices evenly, about the same thickness, so the arc stays level. Serve with a small bowl of honey yogurt at one end, and keep a fork or picks nearby, since citrus slices are easier to lift with a pick than with fingers.

    5. Berry Tray with Small Dip Bowls

    Shallow tray of mixed berries with two small bowls of dip in the gaps.

    Fill a shallow tray with strawberries, blueberries, raspberries, and blackberries, and set two small bowls of dip in the gaps. One bowl can hold yogurt and one can hold melted chocolate or a cream cheese dip, so guests choose sweet or plain. Berries fill a tray fast, so this is a good choice when time is short.

    Wash berries gently and dry them well before arranging, since wet berries soften fast and mark the tray. Put softer raspberries on top of firmer strawberries rather than underneath, and keep the tray chilled until serving. This tray works well for a dessert table, where small bites matter more than large slices.

    6. Tropical Tray with a Pineapple Centerpiece

    Tropical fruit tray with a pineapple centerpiece surrounded by mango, kiwi, and papaya.

    Cut a pineapple into a centerpiece shape, such as a hollowed half or a tall crown of wedges, and arrange mango, kiwi, papaya, and passion fruit around it. The pineapple gives height in the middle, while the softer tropical fruit fills the lower edge. Add lime wedges and a few mint leaves for a fresh scent and a sharp color contrast.

    Tropical fruit ripens at different rates, so buy it a few days ahead and check each piece on the day. Keep the tray simple beside the pineapple, since too many extras hide the centerpiece. This tray suits a summer party, a poolside table, or a brunch where a bold centerpiece sets the mood.

    7. Melon Fan with Mint

    Melon wedges fanned in overlapping rows on a wide tray with mint leaves.

    Slice cantaloupe, honeydew, and watermelon into thin wedges, then fan them in overlapping rows across a wide tray. Alternate the melon colors so each row shows a new shade, and tuck mint leaves between rows. A fan layout shows off the melon flesh and makes each wedge easy to lift without disturbing the rest.

    Use a sharp knife and a steady board, since melon slices slip when cut too thick. Chill the melon well, and drain any juice before arranging, so the tray stays dry. This tray is a good fit for hot days, when guests want something cool and light, and it pairs well with a bowl of lime yogurt.

    8. Fruit and Cheese Pairing Tray

    Fruit and cheese board with apple slices, grapes, figs, and cheese wedges.

    Pair fruit with cheese on one board, matching firm fruit with soft cheese and sweet fruit with salty cheese. Try apple slices with cheddar, grapes with brie, figs with goat cheese, and pear slices with blue cheese, with crackers in a separate small pile at one end. The fruit keeps the board fresh, while the cheese makes it filling enough for an evening table.

    Keep cheese portions small and cut, so guests can try more than one pairing. Put a small knife beside each cheese, and keep the board out of direct sun, since soft cheese softens fast. This tray suits a wine evening, a small gathering, or a light supper, and it works well as a follow up to a main meal.

    9. Kids Shape Tray with Cut Fruit Stars

    Bright tray of fruit cut into stars and flowers with berries filling the gaps.

    Cut melon, pineapple, and apple into stars, hearts, and flower shapes with small cutters, and arrange them on a bright tray with berries filling the gaps. Shapes turn plain fruit into a game, and children are more likely to try a new fruit when it looks fun. Keep the shapes large enough to hold, and put any small cutters away before serving.

    Use firm fruit for shapes, since soft fruit tears in the cutter. Add a small bowl of yogurt dip with a spoon, and keep the tray low on the table so children can reach it safely. This tray suits birthdays, school holiday snacks, and family picnics, and it also works as a lunchbox idea when packed in a lidded box.

    10. Breakfast Tray with Yogurt and Granola Bowls

    Breakfast fruit tray with yogurt and granola bowls surrounded by banana, berries, and kiwi.

    Build a breakfast fruit tray around two small bowls: one of yogurt and one of granola, with sliced banana, berries, mango, and kiwi arranged around them. Guests spoon yogurt into a bowl, add fruit, and top it with granola, so the tray becomes a build your own breakfast station. Keep the bowls small, so the tray still has room for fruit.

    Set the tray on the table only when breakfast is ready, since yogurt should not sit out long. Offer a spoon in each bowl and a small jug of honey beside the tray. This layout suits a slow weekend morning, a guest breakfast, or a brunch table, and it keeps the kitchen counter clear while everyone serves themselves.

    11. Chocolate Dip Dessert Tray

    Dessert fruit tray with a chocolate dip bowl in the center and grouped fruit around it.

    Set a bowl of warm chocolate dip in the center of a tray, and arrange strawberries, banana slices, pineapple chunks, and apple wedges around it in separate groups. Each fruit keeps its own section, so guests can see what to dip and the chocolate stays in the bowl rather than spreading across the tray. Add a few marshmallows or plain biscuit pieces at one edge if the tray is for a party.

    Keep the chocolate bowl small and refill it rather than filling a large bowl that cools and thickens. Put a fork or picks beside the tray, since dipped fruit is easier to eat with a pick. This tray suits a dessert table, a movie evening, or a celebration, and it works best when the fruit is cut just before serving.

    12. Holiday Tray with Cranberries and Rosemary

    Holiday fruit tray with red and green fruit, cranberries, and rosemary sprigs.

    Make a holiday fruit tray with red and green fruit, such as strawberries, red grapes, green grapes, and kiwi, and scatter fresh cranberries and short rosemary sprigs in the gaps. The cranberries add deep red color, while the rosemary looks like small pine branches and adds a fresh scent. Keep the rosemary as decoration at the edges, clear of the fruit guests will eat.

    This tray suits Christmas, a winter party, or a New Year table, where red and green already set the mood. Use firm fruit that holds up for a few hours, and chill the tray until guests arrive. A small bowl of white chocolate dip in the center gives a pale contrast to the red and green, and it keeps the tray from looking too dark.

    13. Autumn Harvest Tray with Figs and Persimmons

    Autumn fruit tray with figs, persimmons, pears, grapes, and pomegranate seeds on wood.

    Arrange autumn fruit such as figs, persimmons, pears, red grapes, and pomegranate seeds on a wood board, with a few walnuts in their shells at one edge. Cut figs in half to show the inside, and slice persimmons into wedges so the orange flesh stands out against the darker grapes. This tray leans on ripe autumn fruit rather than on decoration, so the fruit itself sets the season.

    Buy figs and persimmons when they yield slightly to pressure, and use them the same day, since both soften fast. Keep the board in a cool spot until serving, and add a small knife for the figs. The tray suits an autumn dinner, a harvest table, or a quiet evening, and it pairs well with the tray styling in these fall kitchen decor ideas.

    14. Summer Picnic Tray in a Lidded Basket Tray

    Picnic fruit tray in a shallow lidded basket with sturdy fruit and a small berry box.

    Pack a fruit tray for a picnic in a shallow basket tray with a lid or a cloth cover, using sturdy fruit such as apples, grapes, strawberries in a small box, and melon wedges wrapped separately. A lidded tray travels well, keeps insects off, and lifts out as one unit at the picnic spot. Keep soft berries in a lidded box inside the tray, so they do not crush under heavier fruit.

    Chill the fruit before packing, and keep the tray in the shade once you arrive. Bring a small bag for peels and stems, and pack wipes for sticky hands. This tray suits a park lunch, a beach day, or a garden picnic, and it works best when every piece can be eaten by hand with no knife needed at the spot.

    15. Brunch Tray with Fruit and Small Pastries

    Brunch tray with fruit at the center and small pastries around the edge.

    Combine fruit with small pastries on one brunch tray, with berries, melon, and citrus at the center and mini croissants or small muffins around the edge. Keep the pastries in a separate section from cut fruit, so crumbs and juice do not mix. A small pot of jam or honey beside the fruit lets guests sweeten pastries or yogurt as they wish.

    This tray suits a weekend brunch, a guest morning, or a celebration breakfast, where one tray must cover both sweet and fresh tastes. Bake or buy pastries fresh that morning, and arrange the tray just before serving, so pastries stay crisp. Offer coffee or tea nearby, since a brunch tray works best as part of a full table rather than on its own.

    16. Afternoon Tea Tiered Fruit Tray

    Tiered cake stand with small fruit pieces on each level for afternoon tea.

    Use a tiered cake stand for an afternoon tea fruit tray, with small fruit and bite size pieces on each level. Put strawberries and grapes on the bottom tier, kiwi and melon cubes in the middle, and berries and mint on the top tier. Small pieces suit tea, since guests eat standing or from a small plate, and the tiers keep the table tidy.

    Keep each tier to one or two kinds of fruit, so the stand does not look crowded. Add a small bowl of clotted cream or yogurt on the table beside the stand, rather than on a tier, so it stays steady. This tray suits a tea party, a baby shower, or a quiet afternoon with friends, and it pairs well with sandwiches and small cakes on a separate stand.

    17. Red Only Tray for a Celebration Table

    Red only fruit tray with strawberries, raspberries, grapes, and watermelon cubes.

    Build a tray using red fruit only, such as strawberries, raspberries, red grapes, watermelon cubes, cherries, and pomegranate seeds, arranged in groups by shade from pale pink to deep red. A single color tray looks bold on a plain tablecloth, and it suits a celebration where the color is part of the theme, such as a birthday or an anniversary.

    Mix textures so the tray does not look flat: whole cherries beside cut watermelon, soft raspberries beside firm grapes. Keep the tray chilled and add a small bowl of white yogurt dip for contrast. If red fruit is out of season, use frozen berries only for a sauce bowl, and keep the tray itself to fresh fruit that holds its shape.

    18. Garden Green Tray with Herbs and Edible Flowers

    Green fruit tray with grapes, kiwi, honeydew, herbs, and edible flowers.

    Arrange green fruit such as green grapes, kiwi slices, honeydew, green apple wedges, and lime slices on a tray, and finish it with fresh mint, basil leaves, and edible flowers that are safe to eat. The herbs add scent and a garden feel, while the flowers give small color notes without changing the green theme. Check that every flower used is food safe, and keep flowers clear of the fruit guests will cut.

    This tray suits a garden party, a spring lunch, or a table where fresh herbs are already part of the meal. Wash herbs and flowers gently and dry them before arranging, since wet leaves wilt fast. Serve with a lime and mint water jug nearby, so the tray and the drinks share the same fresh note.

    19. Stone Fruit Tray for Late Summer

    Stone fruit tray with peaches, nectarines, plums, cherries, and apricots grouped together.

    Fill a tray with stone fruit at its peak: peaches, nectarines, plums, cherries, and apricots, with some cut in half to show the stone and some left whole. Stone fruit needs little arrangement, since the range of blush, gold, and deep purple colors already looks rich. Group each kind together, and put a small knife on the tray for guests who want to slice a whole piece.

    Buy stone fruit ripe but firm, and check it on the day, since ripe peaches bruise easily in a pile. Keep the tray in a cool room and serve it the same day it is cut. This tray suits a late summer dinner, a farm stand style table, or a simple dessert after a grilled meal, where fresh fruit is the whole dessert.

    20. Winter Citrus and Pomegranate Tray

    Winter tray with sliced citrus, whole clementines, and pomegranate seeds.

    Make a winter tray from citrus that peaks in cold months, such as blood oranges, navel oranges, clementines, and grapefruit, plus pomegranate seeds scattered over the top. Peel clementines whole for easy eating, slice the larger citrus into rounds, and add pomegranate seeds in the gaps for deep red contrast. The tray brings bright color to a winter table, when other fresh fruit is scarce.

    Cut citrus just before serving, and keep the tray chilled until guests arrive, since cut citrus dries out in warm air. Add a small bowl of honey for drizzling, and keep napkins nearby, since citrus juice runs. This tray suits a winter party, a holiday brunch, or a January table that needs a fresh note.

    21. Small Board for One or Two People

    Small fruit board for one person with sliced apple, grapes, berries, and strawberries.

    Scale a fruit tray down to a single small board for one or two people, with one apple sliced, a small bunch of grapes, a handful of berries, and two or three strawberries. A small board stops waste, keeps the fruit fresh, and still feels like a treat rather than a plain bowl. Use a board that fits on a lap tray or a small side table, so it suits a quiet evening.

    Choose fruit you will finish that day, and cut only what you need, since a small board is easy to refill the next day. Add a tiny bowl of yogurt if you want a dip, but keep the board mostly fruit, so it stays light. This tray suits a solo snack, a date evening, or a desk break, and it is the best starting point if you are new to fruit trays.

    22. Large Party Tray with Refill Zones

    Large party fruit tray arranged in zones with tongs at each end.

    Plan a large party tray in zones, with each zone holding one kind of fruit and a clear empty zone at one end for refills. Use a very large board or two boards side by side, and put sturdy fruit such as grapes, apples, and oranges at the back, with cut melon and berries at the front where they are easy to reach. Zones let you refill one kind at a time without rebuilding the whole tray.

    Count roughly one generous handful of fruit per guest, and keep a backup bowl of washed fruit in the fridge for refills. Put tongs or picks at each end of the tray, so two people can serve at once without crowding. This tray suits a party of twenty or more, a buffet, or a community gathering, where the tray must last through the evening.

    23. Budget Tray with Seasonal Fruit Only

    Budget fruit tray with generous groups of three seasonal fruits and a yogurt dip.

    Build a budget fruit tray from seasonal fruit only, choosing the three cheapest ripe kinds at the market that week and filling the tray with generous amounts of those, rather than small amounts of many kinds. Seasonal fruit tastes better and costs less, and a tray with three kinds in full groups looks more generous than a tray with ten kinds in thin lines. Add a simple dip made from yogurt and honey to finish it.

    Check market prices before you plan the tray, and buy fruit that is ripe now rather than fruit that needs days to soften. Use a plain wood board or a tray you already own, so the cost stays in the fruit. The budget approach in these kitchen ideas on a budget uses the same rule: spend on the part guests notice most, and keep the rest simple.

    24. Luxury Tray with Exotic Fruit

    Luxury tray with dragon fruit, starfruit, passion fruit, and mango cut to show shapes.

    Make a luxury tray with exotic fruit such as dragon fruit, starfruit, passion fruit, rambutan, and mango, cut to show their shapes and colors. Slice starfruit into stars, halve dragon fruit to show the speckled flesh, and spoon passion fruit into a small bowl on the tray. Exotic fruit needs little else, since the shapes and colors are the decoration.

    Buy exotic fruit from a market that stocks it fresh, and ask when it arrived, since some kinds spoil fast after cutting. Keep portions small, since guests may want to taste each kind rather than fill up on one. This tray suits a special celebration, a tasting evening, or a table where the fruit itself is the talking point.

    25. Poolside Tray Chilled on Ice

    Poolside fruit tray set over ice with watermelon, grapes, berries, and citrus in shade.

    Serve a poolside fruit tray on a bed of ice, using a tray with a raised rim or a shallow pan set over ice in a larger tray. Arrange watermelon, grapes, berries, and citrus slices on top, and keep the tray in the shade. Ice keeps cut fruit cool and safe in heat, and it stops melon and berries from softening in the sun.

    Use a tray that will not slip on wet hands, and keep the ice layer thin, so the fruit sits above melting water rather than in it. Refill the ice as it melts, and bring the tray inside when swimming ends, since fruit should not sit out for hours in heat. This tray suits a pool party, a hot afternoon, or a garden day where guests eat outdoors.

    26. Bite Size Skewer Tray

    Tray of short fruit skewers laid in neat rows with a dip bowl at one end.

    Thread small fruit pieces onto short skewers, such as grape, melon cube, strawberry, and pineapple chunk on each skewer, and lay the skewers in neat rows on a tray. Skewers make fruit easy to eat while standing, and they stop guests from handling loose fruit with wet hands. Alternate colors on each skewer, so every skewer looks the same and the tray reads as one pattern.

    Use short, blunt ended skewers for safety, especially if children are present, and keep the skewers in a single layer, so they do not tangle. Chill the skewers until serving, and put a small bowl of dip at one end for dipping the fruit end only. This tray suits a standing party, a work gathering, or a buffet where guests hold a plate in one hand.

    27. Fruit Kabob Tray with a Dip Station

    Kabob tray grouped by theme with three dip bowls at the end of the tray.

    Build a kabob tray with longer skewers grouped by theme: one group of berry and melon kabobs, one group of tropical kabobs, and one group of citrus and grape kabobs, each group in its own row. Set two or three dip bowls at the end of the tray, such as yogurt, chocolate, and honey lime, so guests can match a dip to each kabob group. Grouping by theme helps guests choose fast at a busy table.

    Make kabobs the morning of the party, and keep them covered and chilled until serving. Trim skewer ends to the same length, so the rows sit level on the tray. This tray suits a large party, a barbecue dessert table, or a celebration where fruit must travel from the kitchen to the table in one move, since kabobs lift cleanly.

    28. Carved Watermelon Bowl Tray

    Carved watermelon bowl filled with melon balls, berries, and grapes on a large tray.

    Hollow a small watermelon into a bowl, fill it with melon balls, berries, and grapes, and set it in the center of a larger tray with extra fruit around the base. The watermelon bowl is both container and centerpiece, and it keeps the fruit cool from the chilled rind. Scoop the flesh with a melon baller, and keep the rind thick enough to hold its shape when filled.

    Chill the watermelon well before carving, and cut a flat base so it sits steady on the tray. Drain juice from the bowl before filling, and serve the tray within a few hours, since a filled rind softens over time. This tray suits a summer party, a barbecue, or a birthday table where a centerpiece matters as much as the fruit.

    29. Heart Shaped Tray for an Anniversary

    Heart shaped fruit arrangement with strawberries, raspberries, and watermelon hearts.

    Arrange fruit in a heart shape on a round or square tray, using strawberries, raspberries, and watermelon hearts cut with a cutter to form the outline, and grapes or blueberries to fill the inside. A heart tray needs a clear outline first, so place the outline fruit before filling the middle, and keep the shape low and flat, so it reads clearly from above.

    Use a tray with a plain background, such as white or pale wood, so the red heart stands out. Keep the tray chilled and carry it flat to the table, since a heart shape shifts if the tray tilts. This tray suits an anniversary, a Valentine table, or a wedding shower, where the shape itself carries the message.

    30. Rustic Crate Tray for a Farmhouse Table

    Rustic wood crate tray lined with cloth and filled with apples, pears, and grapes.

    Use a shallow wood crate or a wood tray with high sides as a rustic fruit tray, lining it with a clean cloth and filling it with apples, pears, grapes, and a few sprigs of greenery. The crate gives a farmhouse feel, and the high sides keep round fruit from rolling off the table. Keep the cloth flat and tucked in, so it does not bunch under the fruit.

    Choose a crate that is food safe and clean, and line it if the wood is rough or unsealed. Put heavier fruit at the bottom and softer fruit on top, and refill from the back so older pieces come forward first. This tray suits a farmhouse kitchen, a harvest dinner, or a country style table, and it works well as a permanent counter display that you refill daily.

    31. Clear Glass Tray with Layered Fruit

    Clear glass tray with layered bands of berries, kiwi, and orange slices.

    Use a clear glass tray or a glass cake plate so guests can see the fruit from the side as well as from above, and layer the fruit in bands of color: berries at the bottom edge, kiwi slices next, then orange slices on top. Glass shows juice and color, so keep the tray clean and dry, and wipe the rim before serving. A glass tray suits a pale table or a modern room, where wood would look heavy.

    Keep the fruit to firm kinds that hold their shape, since soft fruit marks glass fast. Chill the glass tray before arranging, so it feels cool to the touch and keeps fruit fresh longer. This tray suits a formal lunch, a bridal shower, or a table where the tray itself should look light and open.

    32. Black Slate Tray for a Modern Table

    Black slate tray with bright fruit arranged in straight rows and a white dip bowl.

    Arrange bright fruit on a black slate tray, where the dark background makes oranges, berries, kiwi, and melon look sharper. Use a simple pattern, such as straight rows or a single arc, since the contrast already gives the tray its impact, and extra decoration can crowd it. Add white cheese cubes or a small white dip bowl for one pale note against the slate.

    Chill the slate before serving, and wipe it dry, since water marks show on dark stone. Keep the tray away from the edge of the table, since slate is heavy and can chip if dropped. This tray suits a modern kitchen, an evening party, or a dinner table with dark plates, where a wood board would blend in too much.

    33. Breakfast in Bed Small Tray

    Small breakfast in bed tray with a bowl of berries and banana, a yogurt pot, and a drink.

    Build a tiny breakfast in bed tray with a small plate of fruit, such as berries, sliced banana, and a few grapes, plus a yogurt pot and a drink on the same tray. Keep the fruit in a small bowl on the tray, rather than loose, so nothing rolls if the tray moves. A breakfast in bed tray is about care and ease, not size, so one small bowl of fresh fruit is enough.

    Use fruit that needs no cutting in bed, such as berries and grapes, and keep the tray light and steady. Add a napkin and a spoon, and clear the tray soon after eating, since fruit left in a warm bedroom softens fast. This tray suits a birthday morning, a guest stay, or a slow weekend, and it also works as a small gift tray for someone resting.

    34. Use Up Ripe Fruit Tray with Fruit Cups

    Tray of small fruit cups filled with mixed cut fruit and topped with mint leaves.

    Turn ripe fruit that must be eaten today into a tray of small fruit cups, with each cup holding a mix of cut melon, berries, grapes, and banana, topped with a mint leaf. Cups stop soft fruit from bruising in a pile, and they let guests take one portion at a time. This tray reduces waste, since it uses fruit that is ripe now rather than fruit that will soften tomorrow.

    Cut the fruit in the morning, fill the cups, and chill them until serving, adding banana last so it does not brown. Keep a spoon in each cup or beside the tray, and label any cup that holds nuts or a dip, for guests with allergies. This tray suits the day after a party, a fridge clear out, or a weekday snack table, where good fruit should not go to waste.

    Conclusion

    A good fruit tray starts with ripe fruit, a tray that fits the table, and a layout guests can read at a glance. Rings, rows, tiers, and zones all work, as long as each kind of fruit has its own place and the tray stays full without waste. Start small if you are new to trays, with one board, three kinds of fruit, and one dip, then add a new layout or a seasonal theme each time you make one. For everyday storage and refill habits, the ideas in these creative fruit basket ideas help a tray stay part of daily life rather than a one off display. Save this list on Pinterest, pick the tray that fits your next gathering, and build it the morning of the event for the freshest result.

    FAQs

    How much fruit do I need for a fruit tray?

    Plan roughly one generous handful of fruit per guest for a snack tray, and a little more if the tray is the main dessert. For ten guests, that means about three pounds of mixed fruit, plus one small dip bowl. Buy one or two anchor fruits in larger amounts, such as grapes and melon, and smaller amounts of berries and exotic fruit, so the tray looks full without waste.

    How far ahead can I make a fruit tray?

    Cut firm fruit such as melon, pineapple, and grapes up to a day ahead, and keep them covered and chilled in separate boxes. Cut soft fruit such as banana, apple, and pear on the day, since they brown and soften fast. Arrange the tray the morning of the event, or up to four hours ahead if it stays chilled, and add berries and mint last.

    How do I keep cut fruit from browning?

    Toss apple, pear, and banana slices in a little lemon juice as soon as you cut them, and keep the tray chilled and covered until serving. Cut these fruits last, and do not leave the tray in warm air for hours. If a slice browns, replace it rather than mixing it back into the tray, since one brown piece draws the eye.

    What dips go well with a fruit tray?

    Yogurt mixed with honey, cream cheese dip with vanilla, melted chocolate, and a lime and honey dip all suit most fruit trays. Offer one dip for a small tray and two for a party tray, in small bowls set on the tray. Keep dips chilled until serving, and put a spoon in each bowl, so guests do not double dip with fruit.

    How do I arrange a fruit tray so it looks full?

    Start with the largest fruit and any dip bowls first, then fill the gaps with medium fruit, and finish with small berries and leaves in the smallest gaps. Group each kind together rather than scattering single pieces, since groups look planned and make refilling easy. If a gap stays empty, add a small bunch of grapes or a mint sprig rather than spreading the fruit thin.

    Can I make a fruit tray on a budget?

    Yes. Choose three seasonal fruits that are ripe and well priced that week, buy them in generous amounts, and skip exotic fruit and large amounts of berries, which cost more per pound. Use a board or tray you already own, make a yogurt and honey dip at home, and refill the tray from a backup bowl in the fridge, so the tray stays full through the event without buying extra kinds.


  • 16 Southern Home Decor Tips Worth Trying

    16 Southern Home Decor Tips Worth Trying

    Southern style is less about one look and more about a feeling: rooms that welcome people in, stay comfortable through long summers, and still look cared for on an ordinary Tuesday. It leans on light paint, natural wood, washable fabrics, and pieces with a clear job, from a porch chair built for sitting to a quilt folded at the foot of the bed. These 16 Southern home decor tips work room by room, and most need no building work at all. For a related take on warm, wood filled rooms, these aesthetic farmhouse living room ideas show the same calm base applied to a small space.

    Key Takeaways

    • Start with a light base: warm white walls, natural wood, and one calm rug color keep a Southern room bright without feeling cold.
    • Choose fabrics you can live with: washable linen, cotton quilts, and sheer curtains suit heat, pets, children, and frequent guests.
    • Give the porch and the entry the same care as the living room, since those are the first rooms a visitor meets.
    • Repeat one accent, such as blue and white or natural wood, in at least two places so the room looks planned.
    • Layer light and air: a ceiling fan, sheer curtains, and lamps at more than one level make a room usable all day.
    • Keep surfaces easy to tidy: open shelves, baskets, and a drinks cart only work when each item has a home.

    1. Start With Warm White Walls and Natural Wood Trim

    Bright Southern living room with warm white walls, natural wood trim, light wood floors, and a cream sofa.

    Warm white walls give a Southern room its light base, and natural wood trim keeps that base from feeling plain. Paint the walls a warm white rather than a cold, blue white, and let wood show in door frames, window trim, baseboards, or a mantel shelf. The wood adds warmth at the edges of the room, where the eye rests, while the light walls bounce daylight around the space.

    This suits almost any room, since paint and trim paint are easier to change than furniture. Test the white on a large board in morning and evening light before you buy a full can, because warm whites can look yellow under some bulbs. For help pairing wall tones with trim, these wall color combinations show how one main color and one supporting color share a room.

    2. Add One Beadboard or Shiplap Wall

    Southern entry hallway with one white beadboard accent wall, a wood bench, and a woven basket.

    One beadboard or shiplap wall gives a room clear Southern character without closing it in. Pick the wall behind the sofa, the bed, or the entry bench, and run the boards vertically for beadboard or horizontally for shiplap, in warm white. Keep the other walls plain so the texture reads as a feature, not as a pattern repeated everywhere.

    This suits a flat room that needs a focal point, or a hallway that feels unfinished. In a rental, use removable panels and check your lease before fixing anything to the wall. Paint the boards the same warm white as the other walls if you want texture without contrast, or one shade deeper for gentle definition. Keep the board height in proportion to the room: full height suits a small entry, while a chair rail height suits a long dining wall.

    3. Choose a Slipcovered Sofa in Washable Linen

    Relaxed Southern living room with a cream linen slipcovered sofa, soft cushions, and a jute rug.

    A slipcovered sofa is a practical Southern choice, because the cover can be removed and washed after muddy shoes, pets, or a summer gathering. Choose a sofa with slim arms, raised legs, and a seat depth that lets you sit upright comfortably, then add cushions in linen or cotton for softness. A light cover in cream, oatmeal, or pale sage keeps the seating group from dominating the room.

    This suits a family room or a room that hosts guests often. Measure the wall and the rug zone first, and leave room to walk past both ends of the sofa. Wash the cover as advised on the label, and keep a spare set if the sofa gets daily use, so the room never waits on laundry day. A slipcover also lets you change the room color later by changing covers, not furniture.

    4. Layer a Jute Rug Under a Patterned Cotton Rug

    Southern seating area with a flat jute rug layered under a smaller patterned cotton rug.

    Layering a flat jute rug under a softer patterned cotton rug gives a Southern seating area texture underfoot and a clear zone for chairs and a table. Start with a jute rug large enough to sit under the front legs of the sofa and chairs, then layer a smaller cotton rug on top, straight or at a slight angle. The jute adds a natural, relaxed feel, while the cotton layer softens the floor for bare feet.

    This suits hard floors that feel cold or echoey, and it works well when you cannot change the flooring. Choose a low pile cotton rug so chairs slide easily and doors still open over it. Use a rug pad under the jute to stop it sliding, and shake both rugs out regularly, since layered rugs collect dust between the layers. The same layering method appears in these brown and cream living room ideas, where two rugs set the whole seating balance.

    5. Hang Linen Curtains High and Wide

    Bright Southern window with sheer cream linen curtains hung high and wide on a dark wood rod.

    Linen curtains hung high and wide make a window look larger and let in more daylight, which matters in a Southern room built around light and air. Mount the rod close to the ceiling and wider than the frame, so the panels stack on the wall when open and cover the full frame when closed. Choose a plain or sheer linen in cream or oatmeal, and let the panels fall to just above the floor.

    This suits a room with a small window or a low ceiling, where the window needs help to feel generous. Keep the fabric light enough to move easily in a breeze, and wash it as advised on the label, since linen near a window collects dust. If privacy matters at night, add a simple blind behind the curtains rather than a second heavy layer. A sheer layer alone suits a window that faces a garden or a porch.

    6. Make a Rocking Chair Nook on the Porch

    Welcoming Southern front porch with two white wooden rocking chairs, cushions, and potted plants.

    Two rocking chairs and a small side table turn a porch into a room, not just a passage to the front door. Place the chairs where they catch a breeze and a view, add a cushion to each seat, and keep a small table within reach for a drink and a book. A porch rug in an outdoor fabric defines the sitting zone and softens wood or concrete underfoot.

    This suits any porch with room for two chairs to rock without hitting the wall or the rail. Check that the chairs sit level, and use outdoor cushions with removable covers so rain does not ruin them. Add one potted plant on each side of the nook to frame it, and keep the path to the door clear. Even a small porch can hold one rocker and a stool, which is enough to make sitting outside a daily habit.

    7. Bring Wicker and Rattan Seating Indoors

    Sunroom with natural wicker and rattan chairs with cream cushions and potted plants.

    Wicker and rattan chairs bring porch ease indoors, and they suit a sunroom, a living room corner, or a bedroom reading spot. Choose chairs with a sturdy frame and a cushion in a washable cover, since natural weave shows wear if cushions are thin or loose. Pair wicker with wood, linen, and one plant, so the chair reads as part of the room rather than as a piece left over from outside.

    This suits a room that feels too formal or too heavy, since woven texture lightens the whole seating group. Keep wicker out of strong direct sun indoors where it can dry and crack, and dust the weave with a soft brush. One wicker chair beside a sofa is often enough; a full set can make a living room feel like a porch. Use a small side table beside the chair so it works as a complete reading spot.

    8. Use Blue and White in the Dining Room

    Classic Southern dining room with blue and white porcelain, a wood table, and fresh flowers.

    Blue and white is a classic Southern dining pairing, because it feels fresh in summer and calm in winter. Use it in a tablecloth or placemats, in plates or a serving bowl, and in one larger note such as blue cushions on dining chairs or a blue painted sideboard. Keep the rest of the room in warm white and natural wood, so the blue reads as an accent, not as a theme that takes over.

    This suits a dining room used for both family meals and guests, since blue and white tableware works for both. Mix one pattern, such as a stripe or a simple floral, with plain white pieces, so the table looks collected rather than matched. Wash table linens after use, and store the blue pieces together so setting the table stays quick. A single blue vase of fresh flowers can carry the pairing on a day when the full set stays in the cupboard.

    9. Dress the Bed With a Cotton Quilt

    Cozy Southern bedroom with a white cotton quilt folded at the foot of a wood bed.

    A cotton quilt folded across the foot of the bed, or layered over plain bedding, gives a Southern bedroom a finished look without heavy blankets. Choose a quilt in white, cream, or a soft pattern, and pair it with plain linen or cotton sheets and two sleeping pillows plus one or two decorative pillows. The quilt adds pattern and warmth at the foot of the bed, where it is easy to pull up on a cool night and easy to fold back in the morning.

    This suits a bedroom that feels plain in solid bedding, or a room where a thick duvet is too warm for most of the year. Wash the quilt as advised on the label, and keep it out of strong direct sun if the pattern could fade. A quilt also suits a guest room, since it looks made even when the bed is simply dressed, and guests can add or remove it as they like.

    10. Style a Magnolia and Greenery Centerpiece

    Southern dining table centerpiece of fresh magnolia leaves and white blooms in a stoneware vase.

    A centerpiece of magnolia leaves, or other sturdy greenery, with a few white blooms gives a Southern table a natural focal point that lasts longer than cut flowers alone. Use a low, simple vase or bowl so guests can see across the table, and keep the arrangement wide rather than tall. Add one candle on each side if the table is long, and keep all greenery clear of flames.

    This suits a dining table, a console, or a coffee table, and it works in every season if you swap the blooms and keep the greenery. Trim stems at an angle, change the water often, and remove any leaves that sit below the water line. If fresh magnolia is hard to find where you live, use any sturdy local greenery with large leaves and the same low, wide shape. Keep the arrangement simple: one vase, one type of greenery, and one bloom type is enough.

    11. Hang a Woven Pendant Light Over the Table

    Warm Southern dining room with a large woven rattan pendant light over a wood table.

    A woven rattan or wicker pendant over a dining table or kitchen island adds warmth and texture at eye level, and it softens a room with hard surfaces. Hang one large pendant over a round table, or two or three smaller pendants in a row over a long table or island. The bottom of the pendant should sit high enough to see across the table, and low enough to pool light where people eat or work.

    This suits a dining room or kitchen that relies on one harsh ceiling light. Use a warm white bulb, and check the fitting and wiring guidance before you hang a new light, or ask an electrician if the wiring is old. A woven shade also casts a soft pattern on the ceiling in the evening, which adds atmosphere without extra lamps. Keep the shade dust free with a soft brush, since weave collects dust over time.

    12. Style Open Shelves With Ironstone and Wood Boards

    Southern kitchen with open wood shelves styled with white ironstone plates and wood boards.

    Open shelves in a kitchen or dining area give everyday pieces a display job, and white ironstone with wood boards is a calm Southern mix. Fit two or three shelves on one wall, anchor them into studs or suitable fixings, and keep everyday plates and bowls at arm height with lighter display pieces up high. Mix stacks of white plates, a wood board leaned upright, a glass jar, and one small plant, and leave open space on each shelf so the wall reads as styled rather than packed.

    This suits a kitchen that needs storage but cannot spare floor space for a cabinet. Keep heavy items low, and use the shelves for pieces you actually use, so they stay clean and useful. Dust the shelves weekly, since open storage shows dust faster than a closed cabinet. If open shelves feel too exposed for your whole kitchen, try one short run beside the stove or sink first.

    13. Set Up a Sweet Tea and Lemonade Corner

    Southern living room corner with a wood bar cart set with a glass pitcher, glasses, and lemons.

    A small drinks corner makes Southern hospitality easy, because guests can help themselves without a full kitchen tour. Use a bar cart, a sideboard, or one shelf near the seating area, and keep a glass pitcher, glasses, a bowl of lemons, and a small jar of mint together on a tray. Add a stack of coasters and a cloth for spills, so the corner stays tidy after guests leave.

    This suits a living room, a porch, or a dining room used for gatherings. Keep the corner near seating but out of the main walking route, and refill the pitcher before guests arrive rather than during the visit. In cooler months, the same corner can hold a kettle, mugs, and tea, so the setup earns its place all year. Wash glasses after each use, and keep the tray clear of anything that does not belong to drinks.

    14. Hang a Botanical Gallery Wall in Wood Frames

    Southern living room wall with botanical prints in matching wood frames above a cream sofa.

    A gallery wall of botanical prints in matching wood frames adds Southern character to a plain wall without a large piece of art. Use frames in one wood tone, mix two or three sizes, and lay the arrangement on the floor first so the spacing stays even. Include leaf prints, a simple landscape, and one family photo if you like, and keep the overall shape roughly rectangular so the wall looks planned.

    This suits a sofa wall, a hallway wall, or a stair wall that leads into the living room. Use picture hanging strips rated for each frame weight, or hooks suited to your wall type, and hang the center of the group at eye level. Leave one frame out at first, so you can adjust the spacing without rehanging the whole wall. Keep the prints in the same color family, such as green, cream, and soft brown, so the mix looks linked.

    15. Fit a Wood Blade Ceiling Fan

    Airy Southern living room with a wood blade ceiling fan, high ceiling, and tall windows.

    A ceiling fan with wood blades is both a Southern staple and a practical cooling aid, since moving air makes a warm room feel cooler without lowering the temperature. Choose blades in a wood tone that matches your trim or furniture, and a fan size suited to the room: a small fan in a small bedroom will not move enough air, while a very large fan can dominate a small room. Fit the fan so the blades sit clear of doors, beams, and tall furniture.

    This suits a living room, bedroom, or porch with a suitable ceiling and wiring. Follow the maker guidance for fitting and balance, and ask an electrician if the ceiling box is not rated for a fan. Run the fan with windows open on mild days for a breeze, and with air conditioning on hot days to spread cool air. Dust the blades regularly, since a fan spreads whatever sits on them.

    16. Finish With a Welcoming Entry Landing

    Welcoming Southern entryway with a wood bench, woven basket, wall hooks, and a lantern.

    An entry landing gives coats, bags, and keys a home, so the rest of the house stays tidy. Place a wood bench or a small console by the door, add wall hooks for coats and bags, a woven basket for shoes or throws, and a lantern or small lamp for warm light. Keep a small dish or tray on the console for keys, so they are found in one place every time.

    This suits any entry, large or small: a narrow console and two hooks work in a tight hall, while a bench and baskets suit a wider entry. Keep the walking route clear, and empty the basket once a week so it does not become a dumping spot. A fresh plant or a small vase of greenery on the console makes the landing feel cared for, and it gives visitors a warm first sight of the house.

    Conclusion

    Southern decor works best when it starts with comfort and ends with care: light walls, wood that warms the edges, fabrics you can wash, and a porch and entry that welcome people before they reach the living room. You do not need all 16 tips at once. Start with the base, add one seating idea and one textile idea, then let the smaller details, such as a centerpiece, a gallery wall, or a drinks corner, follow as you live in the room.

    Save this list on Pinterest before your next room refresh, and work through it one area at a time: walls and light first, then seating and textiles, then the porch and entry details that make the whole house feel welcoming.

    FAQs

    What defines Southern home decor?

    Southern home decor leans on warm white walls, natural wood, washable linen and cotton, woven textures such as wicker and jute, and rooms built for gathering, from porches to dining tables. It favors light, air, and practical comfort over formal pieces that cannot be used daily. The tips in this guide apply that base room by room, so you can take the parts that suit your house and leave the rest.

    How can I get a Southern look on a small budget?

    Start with paint, textiles, and layout, which cost less than new furniture. Paint one wall or refresh trim in warm white, swap cushion covers for linen or cotton, layer a jute rug you already own under a patterned rug, and move a chair to the porch for a sitting nook. Add greenery from the garden for a centerpiece, and hang prints you already own in matching wood frames for a gallery wall.

    Does Southern decor only suit large houses?

    No. The same ideas scale down well: a slipcovered loveseat instead of a large sofa, one beadboard wall instead of four, a single rocking chair on a small porch, and a narrow console with hooks in a tight entry. The key is to pick fewer, larger moves and leave walking routes clear, so a small room still feels open and easy to use.

    What colors work best for Southern decor?

    Warm white, cream, natural wood tones, soft sage, and dusty blue form the calm base, with blue and white as a classic accent in dining rooms and bedrooms. Keep strong color to one or two notes per room, such as blue cushions or a blue sideboard, and repeat that color once more in a vase or a throw. Test paint in daylight and lamplight, since warm tones shift a lot between the two.

    How do I keep a Southern room from looking too themed?

    Limit themed items to a few, and let the rest of the room stay plain and useful. One woven pendant, one gallery wall, or one blue and white table setting is enough per room, while the sofa, rug, and curtains stay in calm neutrals. Avoid matching every item to one motif, and mix in pieces you already own, such as wood furniture, plain linen, and real plants, so the room looks lived in rather than staged.

    Can Southern decor work in a rental?

    Yes, most of these tips need no building work. Use removable beadboard panels, slipcovers, layered rugs, linen curtains on a tension rod or existing rod, wicker chairs, a drinks cart, and a gallery wall hung with strips rated for each frame weight. Check your lease before fixing shelves, fans, or panels to walls or ceilings, and keep original fittings safe so you can restore the room when you leave.


  • 30 Florida Room Ideas to Bring More Personality Home

    30 Florida Room Ideas to Bring More Personality Home

    A Florida room sits between indoors and outdoors: lots of glass, warm light, and a breeze that makes even a plain chair feel like a holiday. The best ones are not showrooms. They are rooms you use every day, for morning coffee, reading, long lunches, and quiet evenings with the windows open. These 30 Florida room ideas cover seating, plants, light, color, storage, and practical details for heat, humidity, and strong sun. Start with how you want to use the room, then pick seating and shade that support that life, and add color in layers you can change.

    Key Takeaways

    • Start with use, not decor: decide whether the room is mainly for lounging, dining, work, or plants, then plan seating and shade around that job.
    • Choose materials that cope with sun and humidity, such as wicker, rattan, washable slipcovers, and outdoor grade cushions.
    • Layer light control: sheer curtains for daytime glare, woven shades for strong sun, and lanterns for soft evening light.
    • Keep the palette light and add color in cushions, rugs, art, and pots, so a seasonal change is easy.
    • Leave clear paths to doors and windows, and keep one surface clear, so the room stays calm instead of crowded.
    • Plan for Florida weather: washable fabrics, secure light items, and plants that suit bright, humid rooms.

    1. White Wicker Seating Set

    White wicker sofa and chairs with pale cushions in a bright Florida room.

    Start with a white wicker seating set if you want the classic Florida room look in one move. A sofa and two chairs in white or natural wicker read light and airy, and they pair with almost any cushion color. This suits a room that gets a lot of sun, since wicker does not hold heat the way dark leather can.

    Arrange the set around a low coffee table, facing the best view or the garden door. Keep cushions in a washable fabric, and store spare covers where you can reach them. Dust wicker with a dry cloth or a soft brush, and keep it out of standing water, since damp feet can mark the weave over time.

    2. Rattan Peacock Chair as a Focal Point

    Rattan peacock chair with a cushion in a sunny Florida room corner.

    Add a rattan peacock chair if one corner needs a clear focal point. The tall, fanned back makes a strong shape against glass, and it gives the room a relaxed, collected feel without a full furniture change. This suits a reading corner or a spot by the brightest window.

    Place the chair where it can be seen from the door, with a small side table for a book and a drink. Add one cushion in a solid color, and keep the area around the chair clear so the shape stays visible. Check the chair depth before you buy, since peacock chairs are wider than a standard armchair.

    3. Coastal Striped Rug Under the Seating

    Florida room seating on a cream and soft blue striped rug.

    Lay a coastal striped rug under the seating to mark the living zone and add color underfoot. Wide stripes in cream and soft blue or sand feel relaxed, and a flatweave rug is easy to shake out and clean. This suits a tile or wood floor that needs warmth without wall to wall carpet.

    Size the rug so the front legs of the sofa and chairs rest on it, and leave a border of bare floor around the edge. For more rug sizing and placement guidance, see these living room rug ideas. Choose an indoor outdoor rug if the room opens straight to a patio, since it will cope better with sandy feet and damp shoes.

    4. Tropical Plant Cluster by the Glass

    Cluster of tropical plants in pots beside glass Florida room windows.

    Group tropical plants by the glass for a Florida room that feels lush without a remodel. Palms, monstera, and philodendron suit bright, humid rooms, and a cluster of three or five pots at different heights looks more natural than a single plant alone. This suits a corner that gets bright light but not harsh midday sun on every leaf.

    Use pots with drainage holes and saucers, and check soil before watering, since humid air already adds moisture. Rotate plants every few weeks so growth stays even, and move a plant back from the glass if its leaves scorch. Keep one tall plant for height, one trailing plant for softness, and one mid sized plant to fill the middle.

    5. Ceiling Fan for Airflow and Comfort

    Florida room with a ceiling fan and light over wicker seating.

    Fit a ceiling fan if the room feels warm even with the windows open. Moving air makes a sunny room far more comfortable, and a fan with a light gives you one fitting for both jobs. This suits any Florida room, especially one with a high ceiling where warm air gathers above head height.

    Choose a fan size that suits the room, and hang it high enough to walk under safely. Run it with windows open on mild days, and pair it with sheer curtains that can move gently in the breeze. Clean the blades often, since dust shows fast on a fan in a bright room.

    6. Sheer Linen Curtains for Soft Daylight

    Sheer white linen curtains at large Florida room windows in daylight.

    Hang sheer linen curtains to soften glare while keeping daylight and the garden view. Sheers blur the view from outside during the day, yet they let the room stay bright, which suits a room where you wake or read with the light. Hang panels from a simple rod, and let them fall just above the floor.

    Keep the rest of the window plain, with no heavy valance, so the sheer can do its work. Wash sheer panels often, since pale linen shows dust and pollen more than heavier fabric. Add a second, heavier panel on a separate rod only if you need full darkness or extra privacy at night.

    7. Woven Wood Shades for Strong Sun

    Woven bamboo shades partly lowered over Florida room windows.

    Add woven wood shades for windows that get strong afternoon sun. Bamboo or rattan shades filter light, add warm texture, and roll up out of the way when you want a full view. This suits west facing glass, where sheer curtains alone may not cut the glare enough.

    Mount shades inside the frame for a clean look, or outside the frame if you want to cover more glass. Pair them with sheers for a layered window: shades down for strong sun, sheers alone for soft morning light. Dust woven shades with a dry cloth, and check cords and fittings if children or pets use the room.

    8. Daybed Reading Nook in a Sunny Corner

    Daybed reading nook with cushions and books in a sunny Florida room corner.

    Build a daybed reading nook in the sunniest corner for a seat that also works as a nap spot. A daybed with a firm base, a back cushion along the wall, and a pile of washable cushions invites long reading sessions. This suits a corner with a side window, where you get light without sitting in direct sun all day.

    Keep a small shelf or basket beside the daybed for books, and add a reading lamp that can move with you. Use a light throw for cooler evenings, and keep the daybed made up during the day so it reads as a sofa, not an unmade bed. A daybed also gives overnight guests a simple place to sleep.

    9. Morning Coffee Corner by the Garden Door

    Small coffee corner with two chairs and a round table by a Florida room garden door.

    Set a morning coffee corner by the garden door for a small daily ritual. Two light chairs, a small round table, and a tray for cups turn an empty spot near the door into the place you start the day. This suits a Florida room that opens to a patio, since you can step outside with your coffee in one move.

    Keep the table clear except for a small plant or a candle, and store cups on a nearby shelf or cart so the corner stays ready. Choose chairs that are easy to move, so the corner can grow into a larger breakfast spot when guests visit. A washable table top helps, since coffee rings show fast on pale wood.

    10. Hanging Hammock Chair for Relaxed Seating

    Hanging hammock chair with a cushion in a bright Florida room.

    Hang a hammock chair for relaxed seating that uses vertical space instead of floor space. A woven or macrame hammock chair swings gently, suits a quiet corner, and gives the room a holiday feel without a large sofa. This suits a room with a strong ceiling joist or a sturdy stand, where floor space is tight.

    Check the weight rating and the fixing before you hang it, and leave clear space around the chair so it can swing without hitting glass or furniture. Add one firm cushion for back support, and keep a small side table within reach. If ceiling fixing is not possible, a freestanding stand gives the same seat with no drilling.

    11. Botanical Gallery Wall on the Solid Wall

    Botanical gallery wall in light wood frames on a white Florida room wall.

    Hang a botanical gallery wall on the one solid wall in the room, since glass walls leave little room for art. Prints of palms, citrus, ferns, and coastal plants in simple light wood frames bring the garden inside and give the room personality. This suits a wall beside the door or behind the sofa, where art can be seen from across the room.

    Lay the frames on the floor first, plan even spacing, and hang the center of the display at eye level. Mix print sizes, but keep one frame style so the wall feels planned rather than random. Swap one print with the seasons if you want a small change without redecorating the whole room.

    12. Potted Citrus Trees in Terracotta Pots

    Potted citrus trees in terracotta pots in a bright Florida room.

    Place potted citrus trees in terracotta pots for scent, fruit, and a clear Florida note. A lemon or lime tree in a large pot suits a bright corner, and terracotta suits the warm, earthy side of a coastal palette. This suits a room with strong light and a door to the patio, so the tree can spend mild days outside.

    Choose a pot with drainage, use a light potting mix, and water only when the top soil feels dry. Feed as the plant label advises, and prune lightly to keep the shape compact indoors. Keep the tree clear of curtains and walkways, since a large pot can block a path fast.

    13. Driftwood or Light Wood Coffee Table

    Light wood coffee table with books and a plant in a Florida room seating area.

    Choose a driftwood or light wood coffee table to keep the seating zone warm and natural. Pale wood lifts a room full of white wicker, and a weathered finish hides small marks better than a dark polished top. This suits a room where the table holds books, drinks, and plants every day.

    Keep the table top mostly clear, with a tray to corral remotes and coasters. Choose a table with a lower shelf or a drawer if you need a place for magazines and throws. Wipe spills promptly, and use coasters under cold drinks, since condensation marks pale wood quickly in a humid room.

    14. Washable Slipcovered Sofa for Everyday Use

    White slipcovered sofa with washable covers in a bright Florida room.

    Pick a washable slipcovered sofa if the Florida room is used daily by family, pets, or guests. A white or sand slipcover looks fresh, and removable covers mean a spill or sandy paws do not ruin the sofa. This suits a main seating spot, especially near a garden door where dirt comes in often.

    Buy a second set of covers if the budget allows, so one set can wash while the other stays on the sofa. Keep the slipcover fit neat by tucking it after washing, and smooth it weekly so it does not look loose. Pair the pale sofa with colored cushions, which are easier to change than the sofa itself.

    15. Coral and Teal Cushions for Coastal Color

    Pale Florida room sofa with coral and teal cushions.

    Add coral and teal cushions for coastal color that you can change in minutes. Two or three cushions in coral, teal, and sand on a pale sofa give the room a clear color story, without painting a wall or buying new furniture. This suits a room that already has a calm base of white, wicker, and wood.

    Repeat one cushion color once more in a throw, a rug stripe, or art, so the color looks planned. For a calm coastal palette to pair with these brights, see these coastal bedroom ideas. Use outdoor grade cushion inserts if the room gets damp or the cushions sit near open windows, since they dry faster than standard foam.

    16. Lanterns and String Lights for Evenings

    Florida room in the evening lit by lanterns and string lights.

    Use lanterns and string lights for evenings when the room shifts from bright sun to soft light. Battery or solar lanterns on the floor, on a shelf, and on the table give a warm glow, and a string of lights along a beam or window frame adds a gentle sparkle. This suits a Florida room used for supper or quiet evenings after sunset.

    Keep lanterns clear of curtains and cushions, and choose warm white bulbs so the light feels calm rather than harsh. Use a timer or a remote for string lights, so you do not need to reach behind furniture each night. Store spare batteries with the lanterns, so an evening is not cut short by a dead light.

    17. Small Tabletop Fountain for Gentle Sound

    Small tabletop fountain on a side table in a plant filled Florida room.

    Add a small tabletop fountain for gentle sound and a calm focal point. Moving water suits a plant filled room, and a small fountain on a side table or a sturdy shelf adds life without the work of a large water feature. This suits a quiet reading corner, where the sound can be heard without dominating conversation.

    Place the fountain on a waterproof tray, keep it clear of books and fabric, and top up the water as it evaporates in a warm room. Clean the pump as the maker advises, since still water can grow algae in bright light. If the sound distracts you, choose a fountain with an adjustable flow, or run it only in the evening.

    18. Lemonade Bar Cart for Easy Hosting

    Bar cart with glasses and a lemonade pitcher in a bright Florida room.

    Set a lemonade bar cart for easy hosting in a room made for long, lazy gatherings. A cart with glasses, a pitcher, lemons, and a small ice bucket turns the Florida room into a serving spot, and it can roll to the patio when the party moves outside. This suits a room used for weekend lunches and family visits.

    Keep the cart stocked with the basics, and leave one shelf clear for the pitcher and glasses in use. Choose a cart with wheels that lock, so it stays put on a tile floor. Wipe the cart after use, since citrus and sticky drinks mark pale finishes fast, and store glassware out of direct sun.

    19. Fold Down Work Nook by a Window

    Fold down desk work nook by a bright Florida room window.

    Fit a fold down work nook by a window for a desk that disappears when work ends. A wall mounted fold down desk, a light chair, and a small shelf give you a place for laptop work with daylight and a garden view, without a full office taking over the room. This suits a Florida room that must work as both a living room and a home office.

    Keep only daily work items on the desk, and store the rest in a basket or a closed box nearby. Fold the desk up at the end of the day, so the room returns to a living space. Check the fixing weight rating, and keep cables tidy with a small clip, so the nook looks calm when folded away.

    20. Casual Dining Nook for Indoor Al Fresco Meals

    Casual round dining table and chairs by glass Florida room windows.

    Create a casual dining nook for indoor meals that feel almost outdoors. A small round table and four light chairs by the glass give you a breakfast and lunch spot with daylight and a view, without the heat or insects of eating outside. This suits a Florida room with a clear window wall and room for chairs to pull out.

    Choose chairs that tuck under the table, and keep the tabletop clear between meals so the nook does not look like a dining room all day. For more ideas on fitting dining and living into one space, see these small living room dining room combo ideas. Use a washable tablecloth or placemats for daily meals, since they protect the table from plates and glasses.

    21. Retro Pastel Rattan for Vintage Florida Style

    Retro pastel rattan chair in mint in a bright Florida room.

    Try retro pastel rattan for vintage Florida style, with soft mint, peach, or pale yellow on a classic rattan frame. Pastel rattan suits a room with white walls and a patterned tile floor, and it gives the room a distinct personality without a themed collection of objects. This suits a smaller Florida room, where one pastel chair can carry the whole vintage note.

    Keep the rest of the room calm, with white cushions and one pastel repeat in a throw or a pot, so the color does not fight the glass and plants. Mix one vintage piece with newer pieces, rather than filling the room with retro furniture, so the room feels collected rather than staged. Dust rattan with a soft brush, and keep pastel cushions out of the strongest sun to slow fading.

    22. White Beadboard Walls for a Classic Finish

    White beadboard wall behind wicker seating in a Florida room.

    Add white beadboard walls for a classic Florida finish that suits both old and new houses. Vertical beadboard adds texture to a solid wall, brightens a dim corner, and pairs with wicker, wood, and coastal color. This suits the wall behind the sofa or the wall beside the garden door, where a plain wall needs interest.

    Paint beadboard in a moisture resistant finish, and seal joints, since humid air finds gaps fast. Keep beadboard to one or two walls, and let glass walls stay clear, so the room does not feel boxed in. A pale beadboard wall also gives art and plants a clean backdrop, which helps both stand out.

    23. Patterned Cement Tile Floor for Character

    Patterned blue and white cement tile floor in a bright Florida room.

    Lay patterned cement tile on the floor for character underfoot and a floor that copes with sandy feet. A patterned tile in blue and white, or terracotta and cream, gives the room a clear identity, and tile is easy to sweep and mop after a day outside. This suits a Florida room with a garden door, where shoes and pets bring in dirt daily.

    Keep the pattern scale in proportion to the room, with larger patterns for larger rooms and smaller repeats for small rooms. Seal cement tile as the maker advises, and use a grout color close to the main tile tone so the floor reads as one surface. Pair a patterned floor with plain furniture, so the floor can be the main pattern in the room.

    24. Glass Garden Table for Plants Underfoot

    Glass topped garden table with plants beneath in a Florida room.

    Use a glass garden table for a seating zone where plants stay part of the view. A glass topped table with a lower shelf for pots, or a table placed over a low planter, lets greenery show through without taking extra floor space. This suits a plant lover with a small Florida room, where every surface must earn its place.

    Keep the glass clean, since dust and water marks show fast in bright light, and choose sturdy pots that will not tip if the table is bumped. Place only one or two small plants under the glass, so the table still works for drinks and books. If the table sits in strong sun, move heat sensitive plants to a shadier shelf.

    25. Window Seat With Hidden Storage

    Window seat with storage and cushions along Florida room glass windows.

    Build a window seat with hidden storage for a seat, a reading spot, and a place to hide cushions, throws, and games. A bench along the glass wall, with a lift up lid or drawers beneath, uses a wall that is often wasted, and it gives the room a built in feel. This suits a Florida room with a long window wall and a shortage of closed storage.

    Make the seat cushion in a washable fabric, and add back cushions for comfort, since a bare bench is hard to sit on for long. Keep the storage for light items, such as throws and board games, rather than heavy books that strain the lid. Leave one end of the seat clear, so it can hold a tray for coffee or a book.

    26. Beadboard Ceiling With Light Wood Beams

    White beadboard ceiling with light wood beams in a Florida room.

    Finish the ceiling with white beadboard and light wood beams for a room that feels finished from above as well as below. Beadboard brightens a plain ceiling, beams add warmth and structure, and the combination suits both a flat ceiling and a sloped sunroom roof. This suits a room where you look up often, such as a daybed nook or a dining nook.

    Keep beams slim and pale, so they do not darken the room, and paint beadboard white to bounce light down. Add a ceiling fan or a pendant between beams, rather than fighting them, so the ceiling reads as one plan. Check beam fixings and weight before hanging lights or plants from them.

    27. Lattice Privacy Screen With Climbing Vines

    Lattice privacy screen with climbing vines beside a Florida room.

    Add a lattice privacy screen with climbing vines for privacy that still lets air and light through. A freestanding lattice panel, or a fixed screen beside the glass, softens a view of a neighbor or a driveway, while jasmine or another climbing plant adds scent and green. This suits a Florida room that faces a busy street or a close neighbor.

    Place the screen outside the glass where possible, so vines get sun and rain, and keep it clear of walkways and doors. Choose a vine that suits your light and watering routine, and prune it so it does not block the whole window. Inside, a light sheer curtain can add a second layer of privacy at night.

    28. Storm Ready Styling for Florida Weather

    Tidy Florida room with cushions stored in a bench and clear paths to doors.

    Plan storm ready styling so a Florida room can be secured fast when bad weather is forecast. Choose light items that are easy to move, store cushions in a bench or a closed basket, and keep glass items off high shelves near windows. This suits any Florida room, but it matters most in a room with a lot of glass and a garden door.

    Keep a simple routine: bring loose outdoor items inside, close and latch windows, and move plants away from glass that could flex in high wind. Use washable fabrics and tile or sealed floors, so a wet entry dries fast after a storm. After bad weather, check seals and screens, and air the room well before putting cushions back out.

    29. Pet Friendly Corner With Washable Bedding

    Pet friendly Florida room corner with a washable dog bed and water bowl.

    Make a pet friendly corner with a washable bed, a water bowl on a tray, and a basket for toys. A corner by the glass, with a view outside, gives a dog or a cat a sunny spot, while washable bedding keeps the room fresh. This suits a household where pets spend the day in the Florida room.

    Choose a bed cover that washes well, and keep a lint roller nearby for wicker and cushions. Place the water bowl on a tray with a raised edge, so spills stay off tile or wood floors. Keep pet toys in one basket, and rotate them, so the corner stays tidy rather than spreading across the whole room.

    30. Plant Propagation Shelf by the Brightest Window

    Plant propagation shelf with glass jars of cuttings by a bright Florida room window.

    Finish with a plant propagation shelf by the brightest window, where cuttings in glass jars turn a sunny wall into a living display. A narrow shelf, a few jars of water, and cuttings from pothos, philodendron, or tradescantia give you new plants for the house, and the jars catch light beautifully. This suits a plant lover who already has a tropical cluster and wants a small project corner.

    Change the water weekly, keep jars out of the harshest midday sun, and move rooted cuttings to soil once roots are a few inches long. Label jars if you are growing several types, so you know what to pot up later. Keep the shelf tidy, with one row of jars and a small tray underneath, so drips do not mark the sill.

    Conclusion

    A Florida room with personality starts with how you live in it, not with a single showpiece. Pick seating you will actually use, shade that handles strong sun, and materials that cope with humidity, then add color in cushions, rugs, art, and plants. Keep paths clear, keep one surface calm, and plan a simple storm routine, so the room stays easy to enjoy all year. Save the ideas that fit your light, your floor, and your daily routine, and start with the change you will notice every morning, whether that is a wicker chair by the glass or a coffee corner by the garden door. For rug sizing that supports a new seating zone, see these living room rug ideas.

    FAQs

    What is a Florida room?

    A Florida room is a glass filled sunroom or enclosed porch, often added to a Florida house, that sits between indoors and outdoors. It usually has large windows or screens, a solid roof, and a floor that copes with outdoor shoes, such as tile or sealed wood. People use it as a second living room, a dining nook, a reading room, or a plant room, depending on light and size.

    How do I keep a Florida room cool in summer?

    Use layered shade and airflow together. Add woven shades or sheer curtains for strong sun, run a ceiling fan, and open windows or doors on opposite sides for a cross breeze when the weather allows. Choose light colors, washable fabrics, and plants that suit bright rooms, and keep heat holding items, such as dark leather, out of direct sun.

    What furniture lasts best in a Florida room?

    Wicker, rattan, light wood, and metal frames with outdoor grade cushions tend to last best, since they cope with sun and humidity better than heavy upholstery. Choose washable slipcovers, indoor outdoor rugs, and sealed or painted wood, and keep cushions out of standing water. Bring soft furnishings inside during storms, and check fixings and finishes once a season.

    Can a Florida room work as a dining room?

    Yes, if there is room for chairs to pull out and a clear path to the kitchen or garden door. A small round table suits most Florida rooms, since it seats four without sharp corners, and light chairs that tuck under the table keep the room open between meals. Keep the tabletop clear, use washable placemats, and add a pendant or lanterns for evening meals.

    How do I stop sun fading in a Florida room?

    Layer window treatments, and rotate cushions, rugs, and art so no one piece sits in the same strong sun all year. Use sheer curtains or woven shades on the sunniest glass, choose fade resistant outdoor grade fabrics for cushions, and move delicate plants and pastel cushions back from west facing glass in summer. A rug pad and regular rotation also help a rug fade evenly.

    What plants suit a bright Florida room?

    Palms, monstera, philodendron, pothos, snake plants, and potted citrus suit bright, humid Florida rooms, as long as they get the right light for their type. Check each plant label, since some need direct sun and others need bright indirect light, and use pots with drainage. Water only when the soil feels dry, and move a plant back from glass if its leaves scorch or fade.


  • 11 Sensory Room Ideas to Refresh Your Space

    11 Sensory Room Ideas to Refresh Your Space

    A sensory room is a place where light, sound, touch, and movement are kept gentle on purpose. It can be a whole spare room, a corner of a living room, or a small nook by a window, and it does not need specialist equipment to work well. The best rooms start with one calm base, soft light, a comfortable seat, and a clear floor, then add one or two features that suit the person using it. These 11 sensory room ideas cover lighting, texture, sound, scent, and movement, so you can build a room that helps someone rest, focus, or settle after a busy day.

    Key Takeaways

    • Start with a calm base: soft light, a plain rug, and one comfortable seat, before adding any special features.
    • Choose one sense at a time, such as light or touch, and test it for a week before adding another.
    • Keep the room uncluttered, since too many bright items at once can undo the calm you are trying to create.
    • Give everything a home, such as a basket or a low shelf, so the room is easy to reset after use.
    • Make controls easy to reach, so lights, sound, and seating can be adjusted without help.
    • Use washable covers and wipe clean surfaces where hands, feet, and play materials touch them daily.

    1. Soft Glow Lighting Corner

    Sensory room corner lit by soft warm lamps and string lights beside a cushioned chair.

    Set the lighting low and warm first, since bright overhead light is often the first thing that makes a room feel harsh. Use two or three small lamps with warm bulbs, a salt lamp, or a string of fairy lights, and put them on a dimmer or a smart plug so the level can change through the day. This suits almost any sensory room, because soft light calms the whole space before a single feature is added.

    Keep the lamps at different heights, such as one on a low table and one on the floor, so the glow spreads evenly instead of pooling in one spot. The layered lighting approach in these cozy apartment living room ideas works well here, even in a larger room. Avoid flashing or fast color changing modes for the main lights, and save stronger color for one feature, such as a bubble tube, so the room keeps one clear focal point.

    2. Bubble Tube Focal Point

    Tall glowing bubble tube with rising bubbles in the corner of a calm sensory room.

    A tall bubble tube gives the room a slow, steady focal point to watch, with bubbles rising through color changing water. Place it in a corner where it can be seen from the main seat, on a stable base, and keep the area around it clear so the tube is easy to reach for switching it on and off. It suits children and adults who like to watch movement, and it works as a quiet activity on its own.

    Choose a tube size that fits the room, since a very tall tube can dominate a small corner. Keep a towel nearby for small splashes when the tube is filled or cleaned, and follow the maker guidance for water changes and cleaning. If a real bubble tube is out of budget, a tall lamp with a slow color fade, or a jar of water with a light beneath it, gives a similar slow glow at a much lower cost.

    3. Touch and Texture Wall

    Tactile sensory wall panel with fabric, wood, felt, and bumpy tile sections at hand height.

    Fix a panel of different textures to one wall at hand height, using sections of soft fabric, smooth wood, ribbed felt, bumpy silicone, and cool metal. A texture wall invites touch without needing a table full of loose items, and it suits a hallway end, a bedroom wall, or the side of a play corner. Keep each section large enough to explore with a whole hand, not just a fingertip.

    Mount the panel firmly, with no sharp edges or loose pieces that could come away, and check the fixings often if children use the wall daily. Mix only four or five textures to start, since too many in one panel can feel busy rather than interesting. Label nothing on the panel itself, and let the person using it find their favorites by touch, then add more sections only for textures they return to often.

    4. Calm Corner Nook

    Quiet calm corner nook with a beanbag, a weighted blanket, and a low bookshelf.

    Build a small nook with a beanbag or a deep floor cushion, a weighted blanket, and a low shelf holding two or three quiet items, such as books or a soft toy. Tuck it into a corner or beside a window, and use a rug to mark where the nook begins, so the rest of the room can stay open. This suits small homes well, since a nook needs only a corner, not a whole room.

    The zoning advice in these studio apartment decorating ideas helps a nook share a room with sleeping or living areas, using a rug and a curtain rather than a wall. Keep the nook free of screens and noisy toys, and keep the blanket within reach so the person using it can choose pressure and warmth for themselves. A basket beside the seat holds the blanket and books when the nook is not in use.

    5. Fiber Optic Star Ceiling

    Darkened sensory room corner with fiber optic star lights glowing on the ceiling.

    Hang fiber optic strands from the ceiling, or fix a star light panel above the main seat, so the room has a field of tiny twinkling lights to lie under. This works best in a room that can be darkened, since the stars show up most clearly when other lights are low. It suits bedtime wind downs, quiet reading, and anyone who likes to look up and rest.

    Keep the light source box out of reach and easy to switch off, and choose a slow twinkle setting rather than a fast flash. A dark curtain over the window helps the stars show during the day, and a plain ceiling color makes the points of light stand out. If ceiling fixing is not allowed, a fiber optic lamp on a side table, or a star projector aimed at the ceiling, gives a similar effect without any drilling.

    6. Sound Zone for Listening

    Small sound zone with a comfortable chair, headphones on a hook, and a small speaker.

    Give sound its own zone with a comfortable chair, a small speaker, and a pair of headphones hung on a hook nearby. Play slow nature sounds, soft instrumental music, or white noise at a low volume, and keep the controls simple, such as one speaker with a single volume dial. A sound zone suits people who settle best with steady background sound, and it keeps audio from filling the whole house.

    Add soft wall panels or a thick rug in the zone, since hard floors and bare walls make sound echo and feel louder than it is. Keep a short list of favorite sounds near the speaker, so the choice is quick and does not become a long search. If headphones are used, set a volume limit where the device allows it, and keep the listening time short for young children, with breaks for quiet.

    7. Gentle Swing or Hammock Chair

    Indoor hanging hammock swing chair with soft cushions and a thick rug underneath.

    Hang a hammock chair or a pod swing from a ceiling joist or a sturdy freestanding frame, with a thick rug underneath and cushions inside. Slow swinging gives gentle movement that many people find settling, and a pod shape adds a sense of enclosure without closing the room off. This suits a corner with clear space around it, so the swing can move without hitting furniture.

    Fix the swing only with hardware rated for the weight it will carry, following the maker instructions, and test it with an adult before a child uses it alone. Keep the swing low enough that feet can touch the floor to stop it, and keep the floor beneath it soft. If ceiling fixing is not allowed, a freestanding frame gives the same movement and can move rooms when the layout changes.

    8. Tactile Table for Hands-On Play

    Low tactile play table with trays of kinetic sand, smooth stones, and textured balls.

    Set up a low table with trays for hands-on materials, such as kinetic sand, smooth stones, dried beans in a closed tray, textured balls, and scoops. A tactile table suits children who learn through touch, and it keeps messy materials in one place with a wipe clean mat underneath. Change only one tray at a time, so the table stays inviting rather than overwhelming.

    Store the materials in lidded boxes on a low shelf beside the table, using the closed storage approach in these bedroom storage ideas to keep small items sorted and dust free. Keep a damp cloth nearby for quick cleanups, and check small items often for wear, removing anything cracked or broken. A timer on the table can help end play calmly, since a clear finish is part of what makes the table work day after day.

    9. Slow-Moving Projected Visuals

    Calm sensory room wall showing a slow-moving projected image of ocean waves.

    Aim a small projector at a plain wall to show slow-moving visuals, such as ocean waves, drifting clouds, or an aurora scene, with the sound off or very low. Projected visuals suit a room where a screen would feel too bright or too busy, since the image is large, soft, and easy to watch from floor cushions. This works well in the evening, when the room can be darkened.

    Keep the projector on a stable shelf out of the walking route, and keep the image slow, since fast cuts and bright flashes undo the calm effect. Choose one scene per session, rather than flipping between scenes, and set a clear end time. If a projector is not available, a slow-moving lava style lamp, or a light that casts moving water patterns on the wall, gives a smaller version of the same gentle motion.

    10. Gentle Scent Station

    Small scent station shelf with an aroma diffuser giving off gentle mist.

    Set up a small scent station on a shelf with an aroma diffuser, two or three mild scents, and a dried lavender bundle, placed near the main seat but out of reach of small hands. Scent can help mark the room as a place to rest, since the same gentle smell each time becomes part of the routine. Keep the scent light, since a strong smell can be as tiring as a loud noise.

    Use only scents the person using the room enjoys, and test one scent at a time for a few days before adding another. Keep the diffuser clean following the maker guidance, and never leave it running in a closed room for long periods. If anyone in the home has asthma, allergies, or scent sensitivity, skip the diffuser and use a plain cloth pouch of dried lavender instead, which gives a faint scent with no mist.

    11. Texture Path for Bare Feet

    Indoor sensory stepping path of flat mats with different textures arranged in a curve.

    Lay a gentle path of flat texture mats across the rug, such as a soft grass-like mat, a smooth pebble mat, a ribbed foam mat, and a cork mat, arranged in a curve that can be walked in bare feet or socks. A texture path suits children who seek touch through their feet, and it adds movement to the room without needing large equipment. Keep the path short, with only three or four mats to start.

    Fix the mats to the rug or floor with a non-slip backing, so they do not slide when stepped on, and check the edges often for curling. Walk the path slowly the first few times, and remove any mat that feels painful rather than interesting, since the goal is pleasant touch, not a test of endurance. Store spare mats in a basket at the end of the path, so the route can change shape without new purchases.

    Conclusion

    A good sensory room is built slowly, one calm choice at a time, not bought in a single order. Soft light, a comfortable seat, and a clear floor do most of the work, and one or two favorite features, such as a bubble tube, a texture wall, or a swing, give the room its character. Start with the idea that suits the person using the room best, live with it for a week, and add another only when the first one earns its place. The storage ideas in these bedroom storage ideas and the zoning tips in these studio apartment decorating ideas pair well with this guide when the sensory room shares space with a bedroom or a studio. Pick the ideas that fit your room, your budget, and the person using it, and save this guide to Pinterest so you can find your favorite setup again.

    FAQs

    What is a sensory room?

    A sensory room is a space where light, sound, touch, scent, and movement are kept gentle and easy to control. It can be a whole room or a small corner, and its purpose is to give someone a place to rest, focus, or settle. The room usually has soft lighting, comfortable seating, and a few chosen features, such as a texture wall or a bubble tube, rather than a large collection of equipment.

    How much space do I need for a sensory room at home?

    A corner of a room is enough to start. A calm nook needs only space for a seat, a rug, and one feature, such as a lamp or a texture panel. A whole spare room gives more choice, such as a swing or a projector, but it is not required. Start with the space you have, and add features that fit it, rather than clearing a room before you begin.

    What is the best lighting for a sensory room?

    Soft, warm, dimmable light works best for most sensory rooms. Use two or three small lamps at different heights, rather than one bright ceiling light, and keep flashing or fast color changing modes off for the main lights. Save stronger color for one feature, such as a bubble tube or a star ceiling, so the room keeps one clear focal point.

    How do I build a sensory room on a small budget?

    Start with free or low cost changes: dim the lights, add a rug and cushions you already own, and make a texture panel from fabric and cardboard. Then add one low cost feature at a time, such as fairy lights, a scent pouch, or a tactile tray with sand and stones. A bubble tube, a swing, or a projector can wait until you know which sense the person using the room responds to most.

    Are sensory rooms only for children?

    No. Sensory rooms suit children, teens, and adults, and the features change with the person using the room. A child may use a tactile table and a texture path, while an adult may prefer a sound zone, a scent station, and a swing chair for winding down after work. The same calm base, soft light, a comfortable seat, and a clear floor, works at any age.

    How do I keep a sensory room calm instead of overstimulating?

    Add one feature at a time, and keep the rest of the room plain. Limit bright colors, loud sounds, and strong scents, and give every item a home so the room can be reset quickly. Watch how the person using the room responds, and remove anything that causes restlessness or avoidance. A room with three well chosen features usually works better than a room filled with ten.


  • 26 Creative Closet Ideas for Small Spaces

    26 Creative Closet Ideas for Small Spaces

    A small closet can still hold a lot when every inch has a job. The trick is not a bigger closet, but a better layout: rails at two heights, shelves that reach the ceiling, and small tools that keep shoes, bags, and accessories visible instead of buried. These 26 creative closet ideas for small spaces cover reach-in closets, corners, entry closets, and rooms with no closet at all, with renter friendly options alongside built-in ones. Start by emptying the closet and sorting what you wear, then pick the ideas that fit your width, height, and door type. For the wider storage picture, these bedroom storage ideas show how a closet can share the load with the rest of the room.

    Key Takeaways

    • Measure width, depth, and height before buying anything, since a few inches decide whether a rail, drawer, or shoe shelf fits.
    • Hang short clothes on two rails to double hanging space, and reserve one tall section for coats and long dresses.
    • Put daily items at eye and hand level, seasonal items up high, and rarely worn pieces at the back or in boxes.
    • Use slim, matching hangers and shelf dividers, since mixed hangers and collapsing stacks waste more space than they save.
    • Give shoes, bags, and accessories their own homes, so they stop landing on the closet floor.
    • Add light inside the closet, since a dark closet hides what you own and makes getting dressed slower.

    1. Double Hanging Rails for Short Clothes

    Small closet with two hanging rails holding shirts and jackets.

    Fit two rails, one above the other, in the section that holds shirts, jackets, and folded trousers. Short clothes need far less height than a single long rail allows, so a second rail turns dead air below the first rail into a full row of hanging space. This is the single biggest gain in most small closets, and it suits both built-in systems and freestanding rail kits.

    Measure your longest shirt first, then set the lower rail so shirts clear the floor or a shoe shelf below. Keep one section of the closet at full height for coats and long dresses, so nothing gets folded that should hang. Use the same hanger style on both rails, since mixed hangers crowd the rail and make clothes hard to slide.

    2. A Shelf That Reaches the Ceiling

    Closet shelf near the ceiling holding labelled boxes and spare bedding.

    Run a shelf close to the ceiling for items you reach for a few times a year, such as spare bedding, holiday clothes, or luggage. The top of a closet is often empty because the standard shelf sits too low, leaving a gap that collects dust and nothing else. A high shelf claims that gap for real storage.

    Keep a small step stool nearby, since a shelf you cannot reach safely becomes a place where things are forgotten. Use closed boxes or bins on the high shelf, so the top row looks tidy from below and dust stays off the contents. Label each box on the side that faces out, and keep the weight light enough to lift down with one hand.

    3. Slim Matching Hangers

    Closet rail with slim matching hangers holding neatly spaced clothes.

    Swap bulky hangers for slim, matching ones, and watch a crowded rail breathe. Thick wooden and plastic hangers each take more width than the garment on them, and mixed shapes catch on each other when you pull one item out. Slim hangers line up neatly and let clothes slide freely.

    Choose one hanger type for the whole closet, with clips for trousers and skirts if you hang those items. Keep a small count of sturdy hangers for heavy coats, since slim hangers can bend under a winter coat. When the rail fills again, the hanger count is a useful signal: if you need more hangers, it may be time to pass on clothes you no longer wear.

    4. A Drawer Unit at the Base

    Small drawer unit at the base of a closet holding folded clothes.

    Place a small drawer unit or a set of stacking drawers on the closet floor for folded items, underwear, and accessories. Drawers beat open piles because each drawer holds one category, and you can open one without disturbing the rest. A unit with three or four shallow drawers suits a reach-in closet better than one deep drawer.

    Sort drawers by type, such as tops in one, sleepwear in another, and gym clothes in a third, and add small dividers inside so stacks stay upright. Leave a little air above the top drawer so the rail above it still clears hanging clothes. If the closet has no floor space to spare, a hanging shelf unit with drawer inserts gives a similar result.

    5. Slanted Shoe Shelves

    Slanted shoe shelves at the base of a closet showing pairs of shoes.

    Fit slanted shelves at the base of the closet so shoes sit at an angle, visible at a glance, instead of stacked in a dark pile. A slant shows each pair, which makes it easier to pick shoes in the morning and harder to forget pairs at the back. Two or three low shelves hold a surprising number of pairs in a narrow footprint.

    Keep tall boots off slanted shelves, since they slide, and store boots upright on the floor beside the shelves or in tall boot holders. Wipe shoes before putting them away, so dirt does not build up on the shelf below. If you buy shoes often, leave one shelf partly empty, since a full shoe shelf is the first place overflow lands on the floor.

    6. Labelled Clear Bins Up Top

    Clear labelled bins on a closet top shelf holding seasonal clothes.

    Store seasonal clothes and rarely used items in clear bins on the top shelf, with a label on each bin. Clear sides let you see what is inside without pulling every box down, and labels save you from opening three bins to find one item. This works well for swimwear in winter, heavy knitwear in summer, and occasion clothes.

    Keep bins shallow enough to lift safely from a step stool, and avoid packing them so full that the lid will not close. Put a short list on the label, such as “winter hats, gloves, scarves,” rather than a single vague word. Review the bins each season when you swap clothes, and move out anything you did not wear during its season.

    7. An Organizer on the Inside of the Door

    Pocket organizer on the inside of a closet door holding shoes and accessories.

    Hang a pocket organizer or a row of hooks on the inside of the closet door for shoes, accessories, and small items that otherwise fill shelves. The door is unused space in most closets, and a flat organizer adds storage without taking a single inch of rail or shelf. Clear pockets suit shoes and small accessories, while fabric pockets give a calmer look.

    Keep heavy items off a hanging organizer, since weight can pull it off the door or stop the door closing fully. Sort pockets by use, such as daily shoes at eye level and occasion pairs higher up. If the door is used often, choose hooks with a soft backing to protect the door surface, and check that nothing rattles when the door moves.

    8. Mirrored Sliding Doors

    Small bedroom closet with mirrored sliding doors reflecting daylight.

    Replace hinged doors with mirrored sliding doors to save swing space and bounce light around the room. A hinged door needs clear floor in front of it, which a small bedroom may not have, while a sliding door moves along the wall instead. The mirror also gives you a full length view for dressing without a separate mirror taking wall space.

    Check what the mirror reflects before fitting it, since a mirror facing a messy corner doubles the mess. Keep the track clean, since dust in the track makes sliding doors stick. If sliding doors are not possible, a mirror fixed to the inside of a hinged door gives the same dressing view without changing the door type.

    9. A Curtain in Place of Doors

    Closet fronted by a soft linen curtain in a small bedroom.

    Hang a curtain in place of closet doors for a soft, flexible front that costs little and needs no swing space. A curtain suits a closet in a tight corner or a room where a door would hit the bed, and it hides the closet contents when closed while opening fully for access. Choose a washable fabric, since closet curtains collect dust.

    Hang the curtain as close to the ceiling as the opening allows, so the closet looks taller, and extend the rod past the opening so the curtain stacks neatly to one side. Pick a fabric heavy enough to hide the contents but light enough to slide with one hand. If you like an open look, tie the curtain back during the day and close it at night.

    10. An Open Closet With Matching Baskets

    Open closet with matching baskets on shelves and clothes on rails.

    Remove the doors and style the closet as open storage with matching baskets for the items you want hidden. An open closet works well in a small room because there is no door to work around, and it forces a tidy habit, since everything is visible. Baskets give closed storage without doors, one basket per category.

    Use baskets of one material and no more than two sizes, and label the front of each one, so the open closet reads as planned rather than patched together. Keep daily clothes on the rails and folded stacks neat, since an open closet shows every pile. Dust the open shelves weekly, since open storage collects lint faster than closed storage.

    11. L-Shaped Shelving in a Corner Closet

    Corner closet with L-shaped shelves holding folded clothes and shoes.

    Wrap shelves around the corner in an L shape to use both walls of a corner closet instead of only the front wall. Corner closets often waste one side, since a single straight rail leaves the return wall empty. L-shaped shelves turn that return wall into folded clothes storage, shoe shelves, or accessory space.

    Keep the deepest corner for rarely used items, since reaching into a corner is awkward, and put daily items on the easy side. A small turntable in the corner section helps for accessories or shoes, so nothing hides at the back. Leave the middle of the closet clear for hanging, so the corner shelves do not block access to the rail.

    12. Zones by Use: Daily, Work, and Occasion

    Closet divided into daily, work, and occasion zones on separate rails.

    Divide the closet into zones by use, with daily clothes at the front, work clothes together, and occasion clothes at the back or up high. Zoning stops the morning search through everything you own, since you only open the zone you need. It also makes it clear which zone is overfull when the closet starts to feel tight.

    Hang each zone in the same order every time, such as tops, then trousers, then jackets, so the eye learns where things live. Keep a small gap between zones, even if it is only one empty hanger, so the sections stay distinct. Review the occasion zone once a year, since clothes kept for rare events are the ones most likely to stay unworn.

    13. Shelf Dividers for Folded Stacks

    Closet shelf with dividers keeping folded knitwear stacks upright.

    Add shelf dividers to keep folded stacks upright and separate, so one pulled jumper does not topple the whole shelf. Folded clothes slide and collapse without a boundary, and dividers give each stack its own slot, like books on a shelf. This works best for knitwear, jeans, and T-shirts stored on open shelves.

    Fold clothes to the same width so stacks line up, and file them in rows rather than tall piles where you can. Keep each stack to a height you can lift with one hand, and leave one slot empty for new items or laundry in progress. Wipe the shelf when you refold, since folded stacks collect lint at the edges.

    14. Hooks and Rings for Scarves, Belts, and Ties

    Scarves, belts, and ties hanging on hooks and rings in a closet.

    Hang scarves, belts, and ties on hooks, rings, or a multi-loop hanger instead of folding them into a drawer. Small accessories tangle in drawers and disappear at the bottom of piles, while hanging keeps each one visible and ready to grab. A single ring hanger can hold many scarves in the width of one garment.

    Sort by color or by season on the hanger, so you can find a match without pulling everything off. Keep heavy belts on a hook rather than a ring, since weight can stretch a fabric loop. If you own very few accessories, a row of small hooks on the closet side wall does the same job with less hardware.

    15. Side-Wall Hooks for Bags and Hats

    Closet side wall with hooks holding bags and hats.

    Fix a row of hooks on the closet side wall for bags, hats, and tomorrow’s outfit. Side walls are often bare, yet they sit at hand height and hold items that otherwise land on the floor or on a chair. One hook per bag keeps straps from tangling, and hats hung by their inner band keep their shape better than hats stacked in a pile.

    Keep the heaviest bag on the lowest hook, and check that hooks are fixed into studs or with fixings rated for the load. Leave a gap between hooks so bags do not press against each other and mark the leather or fabric. If you rent, removable hooks give a similar result, but check their weight rating and test one hook before loading them all.

    16. A Pull-Out Valet Rod

    Pull-out valet rod under a closet shelf holding one planned outfit.

    Fit a pull-out valet rod under a shelf for a temporary hanging spot while you plan an outfit or unpack laundry. A valet rod pulls out when you need it and pushes back flush when you do not, so it takes no permanent space. It suits small closets because it gives you a staging area without a chair or a hook on the door.

    Use the rod for one outfit at a time, such as tomorrow’s clothes or items that need steaming, and clear it daily so it does not become a second rail. Fix it near the front of the closet, where it is easy to reach, and check that it clears the door when pulled out. A valet rod also helps when steaming, since you can hang the garment where you can work around it.

    17. A Pull-Down Rail for High Closets

    Tall closet with a pull-down rail lowered to hand height.

    Fit a pull-down rail in a tall closet so high hanging space is usable without a step stool every day. A pull-down rail lowers clothes to hand height with a handle, then lifts them back up, which makes the top half of a tall closet as useful as the bottom half. This suits rooms with high ceilings where the upper rail would otherwise sit empty.

    Check the weight rating before loading it, and keep heavy coats on the lower rail, since a loaded pull-down rail is harder to lift. Follow the maker instructions closely, since the rail carries weight above your head. If a pull-down rail is out of reach, a high shelf with labelled bins is a simpler use of the same space.

    18. Battery Light Inside the Closet

    Closet interior lit by a warm LED strip above the hanging rail.

    Add a battery light or a motion sensor strip inside the closet so you can see colors and details without room light alone. Closets are often dark, especially with sliding doors, and poor light leads to mismatched clothes and forgotten items at the back. A strip along the top or a small light under each shelf makes a clear difference.

    Choose a warm white light so colors look true, and place it where it lights the clothes rather than your eyes. Rechargeable strips suit renters, since they stick on and need no wiring, but check the battery or charge level monthly. If the closet has a power point nearby, a plug-in strip gives steadier light, but keep cables away from hanging clothes.

    19. A Turntable for Deep Corners

    Turntable in a deep closet corner holding shoes and small bags.

    Place a turntable in a deep corner section for shoes, bags, or accessories that would otherwise hide at the back. Deep closet corners are hard to reach, and items pushed to the back tend to stay there. A turntable brings the back to the front with one spin, so every item stays in rotation.

    Keep the turntable light enough to spin with one hand, and group similar items on it, such as shoes on one and small bags on another. Avoid stacking items on a turntable, since a tall stack topples when it spins. If the corner is very deep, a turntable on a low shelf works better than one on the floor, where it is harder to see.

    20. A Rolling Cart for Accessories

    Slim rolling cart in a closet holding accessories on tiers.

    Keep a slim rolling cart in the closet for accessories, underwear, or laundry in progress, and roll it out when you need it. A cart suits a narrow gap beside the hanging section, and it moves to the mirror or the bed when you are choosing accessories. Tiers keep categories separate, with daily items on top and spares below.

    Choose a cart with wheels that lock, so it does not drift when you pull a drawer or a tier. Keep the cart to one routine, such as accessories and jewelry, rather than general overflow, since a cart filled with mixed items becomes a second closet floor. Wipe the tiers regularly, since small accessories shed lint and dust.

    21. Seasonal Swap Boxes

    Labelled seasonal swap boxes on a closet shelf with folded clothes.

    Rotate clothes by season using labelled swap boxes, so only the current season hangs in the main closet. A small closet cannot hold every season at once without crowding, and swapping twice a year frees a full rail for the clothes you actually wear now. Keep the out-of-season box on the top shelf or in another room.

    Wash and fold clothes before packing them away, and add a short list to the box lid so you know what is inside without opening it. When the season changes, swap the boxes in one session and review each item as you hang it back up. Anything you did not wear last season is a good candidate to pass on before it goes back in the box.

    22. A Low Double Rail for Kids

    Child's closet with a low double rail holding small clothes at child height.

    Set a low double rail in a child’s closet so small clothes hang at a height kids can reach. Children’s clothes are short, so two low rails fit easily, and a rail at child height lets kids choose and hang up their own clothes. This builds a tidy habit early, since putting clothes away is simple when the rail is within reach.

    Place daily clothes on the lower rail and occasion or next-size clothes on the upper rail, and label the sections with pictures for younger children. Keep the floor below clear for shoes and a small basket for laundry, so the closet stays easy to use. As the child grows, raise the rails, so the same closet grows with them.

    23. An Entry Closet as a Mudroom Station

    Entry closet set up as a mudroom station with coat hooks and shoe shelf.

    Turn the entry closet into a mudroom station with hooks for coats, a shoe shelf below, and a basket for hats, gloves, and keys. Entry closets often hold a mix of coats and random household items, which makes the front door area messy. Giving the entry closet one clear job keeps coats, shoes, and bags by the door instead of spread through the house.

    Hang one hook per person at a height each person can reach, and keep a tray or a low shelf for wet shoes so the floor stays dry. Add a small basket for each person if space allows, so gloves and scarves have a home. Clear the entry closet each season, since coats and gear change with the weather and old items pile up fast.

    24. A Spare Closet as a Mini Office

    Spare closet converted into a mini office with a desk board and shelves.

    Convert a spare closet into a mini office when clothes can move elsewhere, with a desk board at sitting height, shelves above, and a light under the top shelf. A closet office suits a small home with no spare room, since the closet already has walls, a power point nearby in many homes, and a door that can close the work away. Remove the doors or keep them for closing time at the end of the day.

    Fit the desk board firmly into studs or with brackets rated for the load, and keep cables tidy with clips along the wall. Use the upper shelves for books and supplies, and leave the desk surface clear for daily work. If the closet must still hold some clothes, hang a short rail on one side and keep the desk on the other, so both jobs share the space.

    25. A Sliding Door That Saves Swing Space

    Small bedroom closet with a sliding barn style door saving floor space.

    Swap a hinged closet door for a pocket door or a barn style sliding door to free the floor space the door swing used to need. In a small bedroom, the swing of a hinged door can block a bed, a dresser, or a walkway, while a sliding door moves along the wall. This change alone can make a tight room feel easier to move around in.

    Check the wall beside the closet for switches, vents, and light fittings before choosing a barn door, since the door needs a clear track. A pocket door needs wall space inside the wall, so it suits a remodel more than a quick swap, and it needs a builder to fit it well. For a simpler change, removing the door and hanging a curtain, as in Idea 9, gives most of the same floor gain. The zoning advice in these studio apartment decorating ideas helps when a closet without a hinged door sits in a room that also serves as a living area.

    26. A Front Capsule Rail for the Week

    Front closet rail holding a week's outfits in day order.

    Keep a short rail or a few hangers at the front of the closet for the week’s outfits, chosen in one session. A capsule rail stops the daily search through the whole closet, since the week’s clothes are already picked and visible. It also shows at a glance whether the week needs laundry, ironing, or a fresh choice.

    Pick outfits on a quiet evening, and hang them in day order from left to right, with accessories on the same hangers where possible. Keep the capsule rail to five or seven outfits, so it stays a short, useful row rather than a second full closet. At the end of the week, return unworn items to their zones and pick the next set, so the system resets cleanly.

    Conclusion

    A small closet works best when it has a clear layout, not more stuff in it. Double rails, high shelves, slim hangers, and a home for shoes and accessories cover most of the gain, and small additions such as a light, a valet rod, or a door organizer make the closet easier to use every day. Start with one change, such as the double rail or the shelf dividers, and live with it for a week before adding another, so each addition earns its place. The storage ideas in these bedroom storage ideas and the zoning tips in these studio apartment decorating ideas pair well with this guide when the closet shares a room with sleeping or living space. Pick the ideas that fit your closet, your lease, and your routine, and save this guide to Pinterest so you can find your favorite setup again.

    FAQs

    How do I organize a very small reach-in closet?

    Start by emptying the closet and sorting clothes into keep, seasonal, and pass on piles. Then measure the width, depth, and height, fit double rails for short clothes, add a drawer unit or shoe shelves at the base, and use the top shelf for labelled bins. Keep daily items at eye level and seasonal items up high, and review the closet each season so it does not fill up again.

    What is the best way to double hanging space in a small closet?

    Fit a second rail below the first for shirts, jackets, and trousers, and keep one full height section for coats and long dresses. Use slim, matching hangers so clothes slide freely and take less width. This combination usually adds more usable space than any other single change in a reach-in closet.

    How can renters improve a small closet without drilling?

    Use freestanding rail kits, hanging shelf units, over door organizers, removable hooks, and battery lights, all of which need no drilling. A rolling cart and matching baskets also add storage without fixing anything to the wall. Check your lease before using removable hooks on painted surfaces, and test one hook first.

    How do I keep shoes tidy in a small closet?

    Give shoes their own shelves, such as slanted shelves at the base of the closet or a door organizer for flat pairs, and keep boots upright on the floor. Sort daily shoes at eye or hand level and occasion shoes higher up. Leave one shelf partly empty, since a full shoe shelf pushes overflow onto the floor.

    Should I remove closet doors in a small room?

    Removing doors can help when a hinged door blocks a bed or a walkway, and a curtain or sliding door gives most of the same floor gain with a tidier front. An open closet suits you if you keep clothes neat, since everything stays visible. If you prefer hidden storage, sliding doors or a curtain hide the contents without needing swing space.

    How often should I rotate and review a small closet?

    Swap seasonal clothes twice a year, and review the whole closet at the same time, checking each item as you hang it back up. A quick monthly check of the shoe shelf, the top bins, and the door organizer stops small piles from becoming clutter. Pass on anything you did not wear during its season, so the closet keeps room for what you wear now.


  • 22 Creative Corner Bookshelf Ideas for a Welcoming, Lived-In Look

    22 Creative Corner Bookshelf Ideas for a Welcoming, Lived-In Look

    A living room corner is easy to ignore. It is too small for a sofa, too awkward for a table, and too dark for a plant that needs full sun. Yet a corner bookshelf can change that dead space into the most used spot in the room. A shelf built for a corner keeps books close at hand without eating up floor space. These 22 ideas cover built-ins, floating shelves, reading nooks, desks, storage, and styling. Measure the corner from both walls first, then start with the books you reach for most. These living room rug ideas show how to size a rug to the seating group.

    Key Takeaways

    • Measure the corner from both walls, including skirting boards, sockets, and door swings, before you buy or build anything.
    • Anchor tall, heavy, or freestanding corner shelves to the wall, and put heavy books low so the unit stays stable.
    • Give the corner a job first: reading, working, display, or storage, and let that job decide the shelf style.
    • Leave breathing room on every shelf, with gaps between book groups and one partly empty shelf for new titles.
    • Add light at shelf level, since a dark corner will stay unused even with good books on it.
    • Style with a mix of upright books, horizontal stacks, plants, and one or two personal items, but keep walkways clear.

    1. Floor-to-Ceiling Built-In Corner Bookcase

    Floor-to-ceiling built-in corner bookcase wrapping two living room walls, painted warm white and filled with books.

    Run a built-in bookcase from floor to ceiling around both walls of the corner for the most storage a corner can offer. A built-in looks fitted rather than added, and it turns two plain walls into one continuous library wall. Paint it the same color as the trim for a quiet look, or use natural wood when you want the shelves to stand out against pale walls.

    Put heavy reference books and large hardbacks low, everyday paperbacks at eye level, and lighter items such as baskets and vases up high. Leave one shelf partly empty so new books have a place to go. A built-in suits a corner beside a sofa or a fireplace, where a full height unit will not block a walkway or a window.

    2. Triangular Corner Shelf Unit

    Triangular wooden corner shelf unit fitted into a living room corner, holding books, a small plant, and a candle.

    Fit a triangular shelf unit into the corner itself, with shelves shaped to meet both walls at a right angle. This is the most direct answer to a tight corner, since no space is wasted behind a square bookcase pushed into an angle. Measure the depth from the corner point outward, and allow room to pull books out without hitting a curtain or a door frame.

    Use the top shelf for a plant or a small clock, and keep the middle shelves for books you use weekly. A triangular unit also works well beside a tall cabinet, where it softens a hard edge and fills a gap that would otherwise collect dust. Choose adjustable shelves if your collection mixes tall art books and small paperbacks.

    3. Floating Corner Shelves on Both Walls

    Floating wooden corner shelves wrapping both walls of a living room corner, holding books, framed photos, and small ceramics.

    Fix floating shelves so they wrap around the corner, with one run on each wall meeting at the angle. Floating shelves keep the floor clear, which helps a small living room feel open, and they let you set the height of each shelf to suit the books below it. Two or three shelves per wall are usually enough, since more can make the corner look crowded.

    Fix floating shelves into studs or use fixings rated for the weight, since a shelf of hardbacks is heavier than a shelf of ornaments. Keep a bookend or a small rail at each open end so books do not slide off. Reserve floating shelves for favorites and for books with covers you enjoy seeing, since they hold fewer books than a full bookcase.

    4. Corner Reading Nook with a Low Bookshelf

    Cozy living room reading nook in a corner, with a low bookshelf, an armchair, a floor lamp, and a soft throw.

    Set a comfortable armchair in the corner, with a low bookshelf beside it and a floor lamp behind one shoulder, to make a reading nook that gets used daily. The chair gives the corner a purpose, the low shelf keeps the current book within reach, and the lamp makes evening reading possible. Angle the chair slightly toward the room so the corner feels part of the living space, not cut off from it.

    Add a small side table for a cup and a basket for the book you are reading now. For a calm, lived-in base around the nook, these Swedish living room ideas show how pale walls, soft layers, and a chair placed where the light is best can warm a whole room. Keep a throw on the chair arm, and keep the walking route past the chair clear.

    5. Leaning Ladder Shelf in the Corner

    Leaning ladder bookshelf tucked into a living room corner, holding books, plants, and baskets.

    Lean a ladder shelf into the corner for a light, renter friendly option that needs little fixing to the wall. The shelves get deeper toward the bottom, so place large books low and smaller books and plants higher up. The open frame keeps both walls visible, so the shelf feels lighter than a closed bookcase, which suits a small or dark corner.

    Place it beside a sofa or near a window, where it can hold books without blocking light. Check that the feet sit flat on the floor and that the top rests evenly against the wall, and anchor the top if children use the room. Keep heavy items off the top two rungs, and leave one shelf for a basket that hides chargers and small clutter.

    6. Corner Window Seat with Bookshelves

    Corner window seat in a living room with bookshelves built into its base, cushions on the seat, daylight from the window.

    Build or place a window seat in a corner with windows, with bookshelves in its base and along one side wall. The seat gives you a place to sit with a book in daylight, while the shelves below hold the rest of the collection. Add a cushion and a washable cover, since a window seat takes more wear than a shelf alone.

    Keep the shelf openings facing the room, not the window, so books stay dry and easy to reach. Store oversized art books on the lowest shelf, where their weight is stable. This idea suits a corner with a wide window and a wall long enough for a bench, and it pairs well with a small side table for tea.

    7. Rotating Corner Bookshelf Tower

    Tall rotating corner bookshelf tower in a living room corner, with books on all sides and a small plant on top.

    Use a tall rotating tower in the corner when you want to reach books on all sides without pulling the unit out. A tower suits a corner near a sofa or a desk, since you can spin it to the section you need and spin it back when you are done. Choose a tower with a stable base and a smooth turn, and keep it clear of curtains that could catch as it turns.

    Group books by type on each face, such as fiction on one side and reference on another, so you learn where to spin. Keep the top for a light plant or a small clock, not for heavy books, since weight up high makes a tower harder to turn. This is a good pick for a rented home, since a tower moves with you.

    8. Corner Bookshelf with a Built-In Desk

    Corner bookshelf with a small built-in desk and chair in a living room corner, books above the desk, a lamp on the desk.

    Fit a small desk into the corner below the bookshelf, so the corner works for reading and for writing, homework, or paying bills. Books on the shelves above stay close to the desk, which suits reference books, notebooks, and a dictionary you check often. Keep the desk depth shallow enough that you can reach the shelves without standing up and leaning across the work surface.

    Add a task lamp, a cable tidy, and one drawer or basket for pens and paper, so the desk stays clear for work. Keep the chair light enough to pull out without hitting the shelves. This idea suits a living room corner that must also serve as a home office, since it gives work a defined place without taking a whole wall.

    9. Glass-Door Corner Bookcase for Display

    Corner bookcase with glass doors in a living room, displaying books and ceramics behind clear glass.

    Choose a corner bookcase with glass doors when you want to show a collection but keep dust, pets, and small hands off the books. Clear glass keeps the spines visible, while reeded or tinted glass softens the view of a busy collection. This is the best choice for a shelf near a fireplace or a busy doorway, where open shelves would collect dust fast.

    Keep the doors closed when the room is dusty, and wipe the glass inside and out when you clean the room. Inside, sort books by author or by subject, and leave a little space on each shelf so you can remove a book without pulling the whole row forward. A glass-door case also suits signed books, photo books, and sets you want to keep together.

    10. Corner Bookshelf Layered with Plants

    Living room corner bookshelf mixed with trailing houseplants, books, and small pots.

    Mix trailing and upright plants through a corner bookshelf so the corner reads as green and alive, not just stored. Plants soften the straight lines of shelves, and a trailing plant on a high shelf draws the eye up into the corner. Place plants in pots with saucers, and water them over a sink, not on the shelf, so pages stay dry.

    Keep plants at one end of each shelf or on dedicated plant shelves, with books grouped at the other end, so watering and dusting stay simple. Choose plants that suit the corner light, since a dark corner will not suit sun lovers. Rotate plants now and then so growth stays even, and trim trailing stems before they cover the book spines.

    11. Low Corner Bookshelf for Children

    Low corner bookshelf for children in a living room, colorful picture books facing forward, fabric bins below.

    Set a low corner bookshelf at child height, with picture books facing forward and fabric bins on the lowest shelf for toys and small sets. A low shelf lets children choose their own books and put them back, which builds a reading habit without an adult lifting books down each time. Anchor the unit to the wall, even though it is low, since children may climb or pull on it.

    Use sturdy, wipe clean shelves, and keep the books upright with bookends, so small hands can pull one out without toppling the row. Rotate the books every few weeks, so the shelf stays inviting and the collection does not outgrow the space. Keep the corner near the family seating area, not in a separate room, so reading stays part of daily life.

    12. Corner Bookshelf with Shelf Lighting

    Living room corner bookshelf lit with warm shelf lights in the evening, books glowing softly.

    Add warm light to a corner bookshelf with slim shelf lights, a small picture light, or a lamp placed to wash across the spines. Light matters in a corner because corners are often the darkest part of a room, and a dark shelf will stay unused even when the books are good. Warm white light suits a living room better than cool white, which can make wood and paper look harsh.

    Place lights under each shelf or along the top, and hide cables behind the unit or in a cable channel. Battery lights suit a rented home, while wired lights suit a built-in shelf planned in advance. Test the light level at dusk, and add one brighter reading light beside the chair if the shelf light alone is not enough to read by.

    13. Reclaimed Wood Corner Shelves

    Rustic reclaimed wood corner bookshelf in a living room, rough timber shelves holding old books and a pottery vase.

    Build corner shelves from reclaimed wood for a warm, rustic corner with visible grain, knots, and a history of use. Rough timber suits old books, pottery, and woven baskets, and it adds texture to a room full of smooth painted surfaces. Sand the wood well, seal it, and check each board for nails or splinters before you load it with books.

    Mix shelf depths so large books and small objects both fit, and use simple black metal brackets that suit the timber. Keep the finish matte rather than glossy, so the wood reads as aged rather than new. This idea suits a corner in a farmhouse or cottage style room, and it pairs well with a wool throw and a wooden chair.

    14. Minimal White Corner Bookshelf

    Minimal white corner bookshelf in a small bright living room, a few books and one vase per shelf.

    Choose a plain white corner bookshelf with clean lines when the room is small and you want the books, not the furniture, to carry the interest. A white shelf blends into pale walls, which keeps the corner feeling open, and it suits a modern room where other furniture is also simple. The key is restraint: fewer books per shelf, wider gaps, and one vase or frame per shelf at most.

    Leave one shelf partly empty on purpose, since a full white shelf can still look crowded. Group books by height, and turn a few covers outward as quiet display pieces. Wipe the shelves often, since white shows dust faster than wood, and keep the corner near daylight so the white reads as bright rather than flat.

    15. Freestanding Corner Bookshelf as a Room Divider

    Freestanding double-sided corner bookshelf used as a room divider in a living room, books visible from both sides.

    Place a freestanding double-sided bookshelf at an angle to the corner to divide a living area from a dining or work zone. Books visible from both sides make the divider feel like furniture, not a barrier, and the unit gives both zones their own storage. Choose a unit with a solid back on one side only if you need to hide one zone, and open on both sides when you want light to pass through.

    Anchor the divider to the floor or to a wall bracket where possible, since a freestanding unit can tip if a child climbs it. Keep heavy books low on both sides, and leave the top shelf for light items. This idea suits an open plan room where the corner marks the edge of the living zone, and it works best when the divider is no taller than eye level from the seating side.

    16. Corner Bookshelf Beside a Fireplace

    Living room corner with a small fireplace and built-in bookshelves beside it, books and candles on the shelves.

    Use the corner beside a fireplace for bookshelves on one or both walls, so the fire corner becomes a reading corner as well. Books near a fire feel right, but they need care: keep shelves clear of the fire opening by a safe margin, keep throws and paper away from the hearth, and choose a shelf finish that copes with dry, warm air. A low shelf beside the fire suits the books you are reading now, while higher shelves hold the rest.

    Add a chair angled toward both the fire and the shelves, and a small table for a cup. For spacing and grouping lessons that carry over from other rooms, the corner shelf advice in these kitchen bookshelf ideas shows how to measure a tight corner and keep books within easy reach. Check the heat on the nearest shelf on a cold evening before you store valuable books there.

    17. Corner Bookshelf with Art Above

    Corner bookshelf in a living room with framed art prints hung on the walls above the shelves.

    Hang framed art, prints, or photos on the walls above a corner bookshelf, so the corner reads as a small gallery as well as a library. Art above the shelves draws the eye up and stops the corner from feeling like storage alone. Keep the frames consistent in color or material, and hang the center of the group at eye level when seated, so it suits the chair below.

    Start with three or four pieces and add over time, rather than filling both walls in one go. Use art with pale backgrounds and soft colors if the shelves are already colorful, or bold prints if the books are mostly neutral. Leave a gap between the top shelf and the lowest frame, so you can lift books out without knocking a frame.

    18. Classic Dark Wood Corner Bookcase

    Classic dark wood corner bookcase in a traditional living room, leather-bound books, a brass lamp, and a wing chair nearby.

    Choose a classic dark wood corner bookcase for a traditional living room, with paneled sides, a cornice top, and shelves sized for hardbacks. Dark wood suits leather-bound books, brass lamps, and a wing chair, and it gives a corner a settled, library feel that lighter shelves do not. Keep the walls around it pale, so the dark unit reads as a feature rather than a shadow.

    Put the heaviest books on the lowest shelves, and use bookends that match the wood or the brass in the room. Dust dark wood often, since dust shows clearly on it, and polish it only as the maker advises. This idea suits a corner that already holds a traditional sofa or a fireplace, where a modern white shelf would look out of place.

    19. Corner Bookshelf for Records and Music

    Living room music corner with a corner bookshelf holding vinyl records and books, a record player on a low cabinet.

    Give a corner bookshelf a second job as a music corner, with vinyl records, music books, and a record player on a low cabinet below. Records need shelves deep enough for their sleeves and strong enough for their weight, so measure a record sleeve before you buy. Keep the player on a stable, level surface, away from speakers that vibrate, and leave room to flip through records without pulling books down.

    Sort records by genre or by artist, and keep a small crate or bin for records you play most. Add a lamp with warm light, since a music corner is often used in the evening. This idea suits a living room corner near the main seating, where music is part of conversation rather than kept in a separate room.

    20. Corner Bookshelf with Closed Storage Below

    Corner bookshelf with closed cabinets below and open shelves above in a living room, books and a vase on the open shelves.

    Combine open shelves above with closed cabinets below, so the corner holds books you want to see and clutter you want to hide. Cabinets below suit board games, chargers, photo albums, and oversized books that do not stand well on open shelves. Keep the cabinet doors plain and matched to the shelf color, so the unit reads as one piece.

    Put the books you reach for most on the open shelves at eye level, and use the cabinets for items you need weekly rather than daily. Label the inside of a cabinet door if the household shares the storage, so games and albums go back to the right place. This mix also helps a corner look tidy on days when the open shelves are full, since the lower half stays calm.
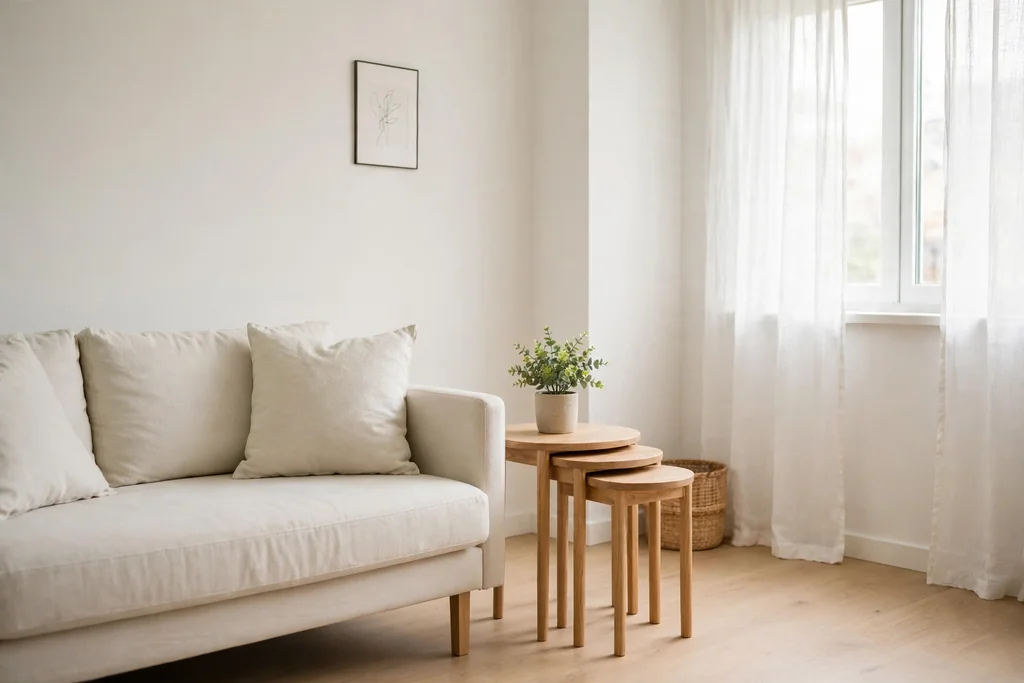
    21. Color-Blocked Corner Bookshelf

    Corner bookshelf in a living room with books arranged by color in blocks of red, blue, green, and cream spines.

    Arrange the books on a corner bookshelf by spine color, in blocks of red, blue, green, cream, and black, for a corner that works as art as well as storage. Color blocking suits a living room where the shelf is a focal point, and it can pull together cushion colors and art already in the room. Work shelf by shelf, and keep one neutral block for books that do not fit any color group.
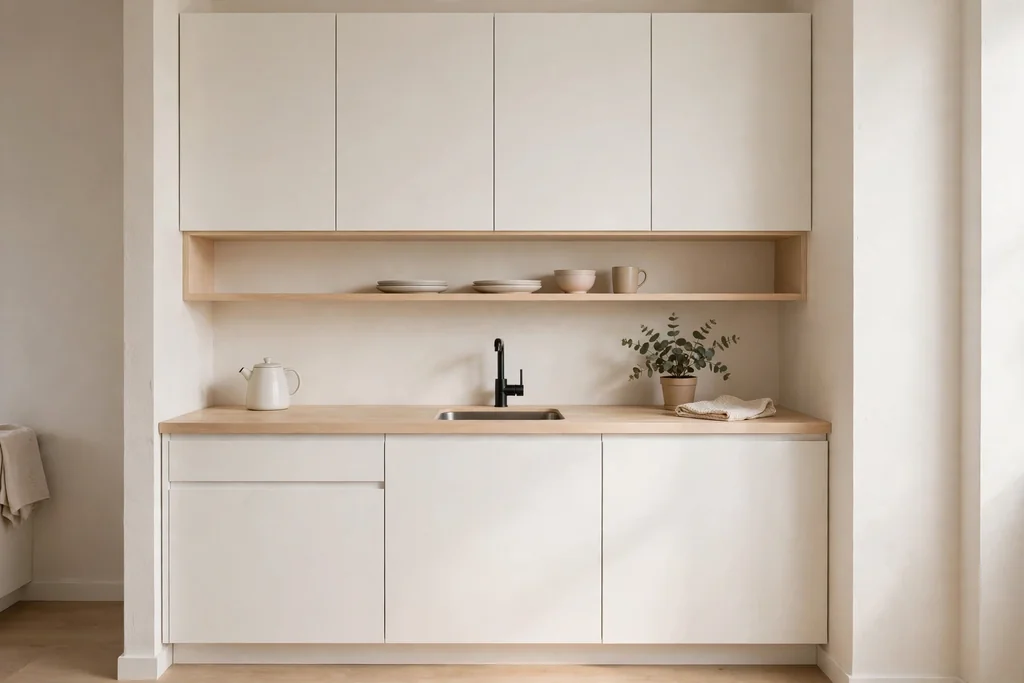
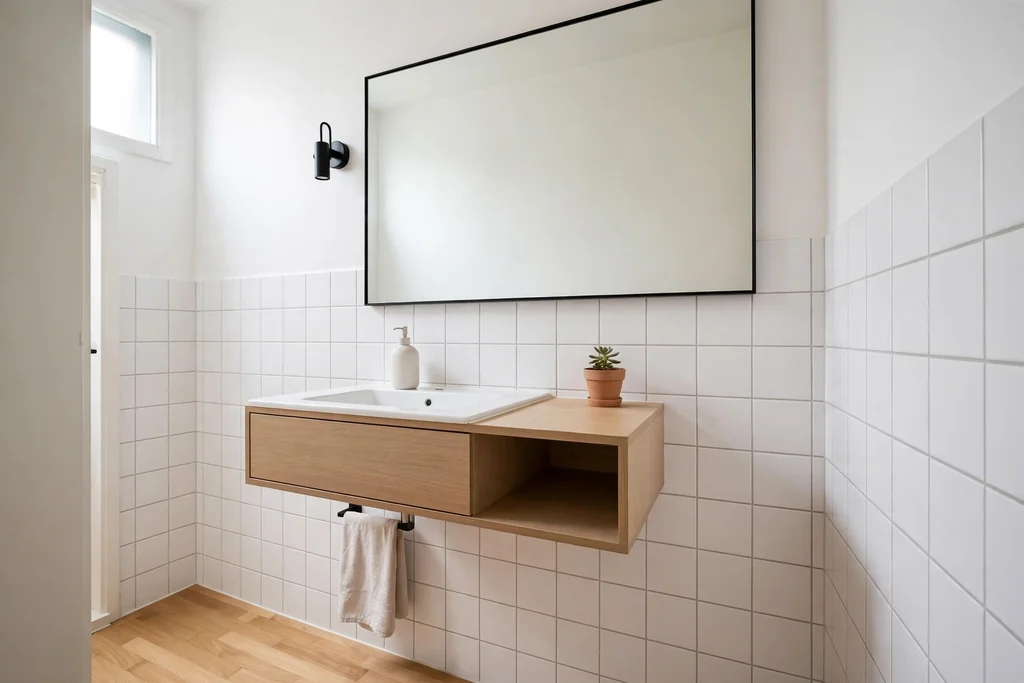
    Accept that color order is not subject order, so keep a small group of daily reference books together at eye level regardless of color. Step back and check the blocks from the sofa, since a block that looks even up close can look patchy from across the room. Re-sort only when you add a batch of new books, not after every single purchase, or the system becomes a chore.

    22. Budget Corner Bookshelf from Crates

    Budget corner bookshelf made from stacked wooden crates in a living room corner, books and a small plant in the crates.

    Stack sturdy wooden crates in a corner to build a bookshelf with little cost and no fixed joinery. Crates suit a first home, a rented room, or a corner you want to test before you commit to a built-in. Turn some crates on their sides for tall books and some upright for small books and plants, and fix the stack to the wall with a bracket so it cannot topple.

    Sand the crates, line the ones that hold paperbacks with plain paper if the wood is rough, and keep heavy books in the lowest crates. Paint the crates one color for a tidy look, or leave them natural for a rustic corner. When you move, the crates come apart and pack flat, which is the main advantage over a fixed bookcase.

    Conclusion

    A good corner bookshelf starts with the corner itself, not the shopping list. Measure from both walls, decide what the corner must do, and pick one idea from this list that fits that job. Anchor tall units, put heavy books low, leave breathing room, and add light so the corner gets used after dark. Start with the books you reach for most, style one shelf at a time, and let the corner grow as your collection grows. A corner that holds books you love, a chair you sit in, and a lamp you switch on each evening will feel lived in because it is lived in.

    Save this list on Pinterest before your next living room refresh, and start with the corner closest to your favorite seat.

    FAQs

    What is the best bookshelf shape for a corner?

    A triangular unit or a bookcase built to wrap both walls uses the corner best, since a square bookcase pushed into a corner leaves dead space behind it. Floating shelves on both walls also work well in a small room, since they keep the floor clear. Measure from both walls, including skirting boards, before you choose, and allow room to pull books out without hitting a curtain or door frame.

    How do I anchor a corner bookshelf safely?

    Fix tall or freestanding shelves to the wall with brackets or straps rated for the unit weight, using fixings suited to your wall type. Put heavy books low, keep the unit level, and check the fixings after the first few weeks of use. Anchor even low units in a home with children, since a child may climb or pull on a shelf. If you rent, ask about approved fixings before you drill.

    How many books should I put on a corner shelf?

    Leave about a tenth of each shelf empty, so you can slide books out and add new titles without restacking the whole row. Group books by height, use bookends at open ends, and mix upright rows with one horizontal stack per shelf for a relaxed look. A shelf that is packed edge to edge looks like storage, while a shelf with gaps and one plant or frame looks like a room you live in.

    How can I light a dark corner bookshelf?

    Use warm shelf lights under each shelf, a picture light above the top shelf, or a floor lamp placed to wash light across the spines. Battery lights suit a rented home, while wired lights suit a built-in shelf planned in advance. Test the light at dusk, keep cables behind the unit, and add a reading lamp beside the chair if shelf light alone is not enough to read by.

    What should I put on a corner bookshelf besides books?

    Mix books with a few useful or personal items: a plant, a framed photo, a small vase, a basket, or a clock. Keep non-book items to about one per shelf, so the shelf still reads as a bookshelf, and put heavier items low. Avoid fragile ornaments on high shelves in a home with children or pets, and keep candles clear of books, curtains, and throws.

    Can a corner bookshelf work in a small living room?

    Yes, if you choose a light option and keep the floor clear. Floating shelves, a ladder shelf, or a low unit suit a small room better than a floor-to-ceiling built-in, which can crowd the corner. Use pale colors, leave gaps on the shelves, and keep the chair or seating small enough that the walking route past the corner stays clear. A small corner shelf that holds the books you read now is more useful than a large one that blocks the room.


  • 18 Front Door Color Ideas for a Cozy Seasonal Update

    18 Front Door Color Ideas for a Cozy Seasonal Update

    A front door sets the mood of a house before anyone steps inside, and a single coat of paint is one of the simplest ways to change that mood. The trick is choosing a color that still feels right when the porch changes around it, from spring pots to autumn leaves to a winter wreath. These 18 front door color ideas pair each shade with the house styles it suits, the hardware that flatters it, and one seasonal styling note, so the color works all year rather than for one month only. Start with your siding and light, narrow the list to three shades, and test them on the door itself.

    Key Takeaways

    • Match the color to the house first: deep shades suit brick and stone, soft shades suit pale siding, and mid tones suit most houses in between.
    • Check the color in morning, midday, and evening light, since sun and shade change how a door color reads from the street.
    • Hardware is part of the color: brass warms cool shades, black sharpens bright ones, and nickel keeps pale shades quiet.
    • Keep the porch styling simple beside a strong color, and let a quiet color carry more wreath, pot, and mat detail.
    • A seasonal swap of one wreath, one mat, and one pair of pots refreshes the entry without repainting.
    • Use a durable exterior paint in satin or semi gloss, so the door wipes clean and holds its color through wet weather.

    1. Deep Navy with Polished Brass Hardware

    Deep navy front door with polished brass hardware on a house with white siding.

    Deep navy is a steady, almost neutral blue that looks calm beside white siding, red brick, and gray stone. It suits colonial, craftsman, and traditional houses, and it stays handsome from spring through winter because it never fights the planting around it. Polished brass hardware warms the cool blue, and a brass house number or mail slot repeats that warmth without adding another color to the entry.

    Keep the porch restrained beside navy: one pair of green pots, a plain mat, and a simple wreath let the door hold the focus. In autumn, a wreath of dried leaves reads clearly against the dark panels, and in winter, fresh greenery stands out just as well. Choose a semi gloss finish so the navy keeps its depth in flat midday light, and test the shade on a shaded door, since navy can read nearly black where sun never reaches it.

    2. Warm Terracotta with Autumn Planters

    Warm terracotta front door with autumn planters of mums and ornamental grasses.

    Warm terracotta brings the color of baked clay to the entry, and it feels right at home beside cream siding, warm stone, and stucco. It suits Mediterranean, Spanish inspired, and cottage houses, and it pairs naturally with the rust, gold, and green tones of autumn planting. Fill the porch pots with mums, ornamental grasses, and trailing ivy, and the door color and the planting will echo each other without matching exactly.

    Terracotta also carries well into spring, when pots of tulips and fresh green herbs soften it again. Use oil rubbed bronze or matte black hardware to keep the look grounded, and a natural coir mat to repeat the earthy tone at foot level. Because terracotta is a mid depth warm shade, it shows less dust than pale colors, which makes it a practical pick for a door near a busy street.

    3. Sage Green with Cream Trim for Spring

    Sage green front door with cream trim and spring pots of white flowers.

    Sage green is a soft, gray leaning green that feels calm and garden-like, and cream trim keeps it from reading too cool. It suits cottages, farmhouses, and houses with white or cream siding, where a stronger green might feel too loud. In spring, sage pairs with pots of white flowers and fresh herbs, and the whole entry reads light and cared for without much effort.

    Through summer and autumn, sage stays easy to live with: green wreaths blend in quietly, while a wreath of dried grasses or pale berries gives gentle contrast. Satin nickel or aged brass hardware both suit sage, so choose the finish already present on your porch light. Test sage beside your siding in daylight, since a green that leans yellow can look warmer than the sample card suggests next to warm stone.

    4. Classic Black with a Wreath That Changes Each Season

    Classic black front door with a fresh green seasonal wreath and a lantern.

    Classic black is the most flexible door color of all, since it suits nearly every house style and lets seasonal decor do the talking. A black door beside white trim reads crisp in summer, and the same door with a fresh green wreath and a lantern reads warm and welcoming in winter. The color itself never needs to change, which makes it a smart pick if you like to refresh the porch often.

    The rule with black is contrast: keep the trim bright, the mat simple, and the wreath the one strong seasonal note. Brass hardware adds warmth, while matte black hardware gives a seamless, modern line. If your entry is fully shaded, check black at dusk before committing, since it can swallow panel detail in low light. A semi gloss finish helps the panels catch what light there is.

    5. Buttery Yellow for a Cheerful Cottage Entry

    Buttery yellow front door on a small cottage with white trim and flower pots.

    Buttery yellow is a soft, warm yellow that makes a small cottage or bungalow feel sunny even on a gray day. It suits white siding, pale brick, and houses with flower filled front beds, where the door becomes one more bloom in the garden rather than a loud accent. Pair it with white trim and a pot of white or pink flowers, and the entry feels fresh from spring through early autumn.

    Keep hardware simple in satin nickel or white, so the yellow stays the single warm note. A plain mat in natural fiber grounds the color, and a simple green wreath in spring keeps the look garden-like. Buttery yellow fades faster than deeper shades on a south facing door, so choose a quality exterior paint and expect to refresh it sooner than you would a navy or black door.

    6. Forest Green with Lanterns and Warm Wood

    Forest green front door with warm wood planters and glowing porch lanterns.

    Forest green is a deep, woodland green that suits brick, stone, and houses with mature trees around them. It feels settled and traditional, and it pairs beautifully with warm wood planters, a wooden bench, and lantern light in the evening. Brass or copper lanterns beside a forest green door give the entry a warm glow that softens the deep color after dark.

    In autumn, pots of gold mums and a wreath of dried leaves sit naturally against forest green, and in winter, fresh fir and pine cones need no other decoration. Keep the trim cream or white for contrast, since dark trim beside a dark door can flatten the whole entry. Forest green hides dust well, which makes it a forgiving choice for a door that faces a road or a dusty drive.

    7. Cranberry Red with Winter Greenery

    Cranberry red front door with a winter wreath of fir and pine cones.

    Cranberry red is a deep, slightly dark red that feels festive in winter without looking like a holiday decoration all year. It suits colonial, traditional, and brick houses, where red already appears in the masonry and the door can echo it at a deeper tone. In December, a wreath of fresh fir, pine cones, and a simple bow reads clearly against cranberry, and a pair of lanterns completes the entry.

    For the rest of the year, cranberry stays dignified: spring pots of white flowers cool it down, and summer green planting keeps it from feeling heavy. Use brass hardware to warm the red, and cream trim to give it a clean edge. Test cranberry in full sun, since bright light can pull it toward a brighter red than the sample suggests, especially on a south facing door.

    8. Soft White with a Seasonal Mat and Pot Rotation

    Soft white front door with a seasonal mat and terracotta pots at the entry.

    Soft white is a quiet door color that works when the house already has strong color elsewhere, such as red brick, dark shutters, or bold stone. Instead of repainting each season, rotate the mat, the pots, and the wreath: a striped mat and herb pots in spring, terracotta pots and mums in autumn, and a green wreath and lantern in winter. The door stays calm, and the seasonal notes carry the change.

    Choose a warm white rather than a stark white if your siding is cream or warm stone, so the door does not look cold beside it. Matte black hardware gives a soft white door definition, while brass adds a little warmth. Soft white shows dirt and scuffs faster than deeper shades, so plan on a wipe down each season and keep touch up paint on hand for the kick plate area.

    9. Teal with Natural Planters for a Fresh Summer Entry

    Teal front door with natural wood planters and white summer flowers.

    Teal sits between blue and green, rich without going dark, and it brings a fresh, coastal feel to the entry in summer. It suits stucco, coastal cottages, and white sided houses, and it pairs well with natural wood planters, woven baskets, and pale stone steps. Pots of white flowers and trailing green plants keep the look breezy rather than themed.

    In autumn, teal still works if the porch planting turns to grasses and late color rather than orange tones, which can clash with its cool base. Copper or oil rubbed bronze hardware picks up warmth from brick or timber nearby. Teal is a forgiving mid depth shade that hides dust well, which makes it practical for a front door that gets daily use and little shelter from the street.

    10. Plum with Gold Hardware for Rich Autumn Evenings

    Plum front door with gold hardware and autumn pots of gold mums.

    Plum is a deep purple leaning shade that feels rich and a little dramatic, best on houses that can carry one strong color note. It suits Victorian, eclectic, and arts and crafts houses, especially with dark trim or stained wood around the entry. Gold toned hardware underlines its warmth, and a lantern with warm light makes plum glow in the early dark of autumn evenings.

    Pair plum with pots of gold mums and deep green foliage in autumn, and keep the rest of the porch simple so the door stays the focus. In spring, white flowers and fresh green pots lighten it again. Check plum at dusk before painting, since low light strengthens the purple note, which some owners love and others find too much for a front door.

    11. Powder Blue with White Trim for a Light Entry

    Powder blue front door with white trim on a coastal style house.

    Powder blue is a pale, slightly gray blue that feels clean and quiet at the entry, and white trim gives it the contrast it needs to read as a deliberate color. It suits coastal homes, pale brick, and gray siding, where a strong door color would fight the facade. In spring, pots of white and pink flowers echo the softness, and the whole entry feels airy.

    Polished nickel or chrome hardware keeps the palette cool and light. Powder blue shows dirt faster than deeper shades, so a washable semi gloss paint and a mat that actually gets used will help it stay fresh. On a very sunny facade, test one step deeper than the swatch you first pick, since pale blue can wash out to near white in strong sun.

    12. Charcoal Gray with Matte Black Hardware for a Modern Entry

    Charcoal gray front door with matte black hardware on a modern house.

    Charcoal gray is a near black gray that gives a modern or transitional house a sharp, tailored entry without the full drama of black. It suits gray siding, dark stone, and houses with black window frames, where the door can repeat the darkest tone of the facade. Matte black hardware gives a seamless look, while a single brass house number adds one clear point of contrast if you want it.

    Keep the porch palette restrained beside charcoal: one pair of planters in a pale glaze, a plain mat, and a simple wreath let the door hold its clean line. In winter, fresh greenery is the one soft note the entry needs, and it reads beautifully against gray. On a north facing door, charcoal can read pure black, so confirm that is the effect you want before painting.

    13. Olive Green with Terracotta Pots for a Garden Entry

    Olive green front door with terracotta pots of herbs and lavender.

    Olive green is a muted, earthy green that suits houses with gardens, stone walls, and natural materials around the entry. It feels quiet and organic, and terracotta pots beside it repeat the warm clay tone that olive needs to avoid looking flat. Herbs, lavender, and trailing plants in those pots make the entry feel like an extension of the garden rather than a separate display.

    Olive pairs with aged brass or oil rubbed bronze hardware, and with a natural coir mat at foot level. Through the seasons, olive stays steady: spring herbs, summer lavender, autumn grasses, and a winter wreath of dried foliage all sit comfortably against it. Test olive beside your siding, since a green that leans yellow can look warmer than expected next to warm stone or cream trim.

    14. Chocolate Brown with a Woven Basket and Warm Light

    Chocolate brown front door with a woven basket and a warm porch lantern.

    Chocolate brown is a deep, warm brown that suits rustic, craftsman, and timber framed houses, where wood already plays a large part in the facade. It feels grounded and welcoming, and a woven basket of pine cones or dried foliage beside the door repeats its natural warmth. A lantern with warm light beside a chocolate door makes the entry glow in autumn and winter evenings.

    Keep the trim cream or warm white for contrast, since dark trim beside a dark brown door can flatten the entry. Brass hardware warms the brown further, while oil rubbed bronze keeps it quiet and rustic. Chocolate brown hides scuffs well, which suits a busy family entry, and it pairs naturally with a wooden bench or a pair of wooden planters that age gracefully outdoors.

    15. Blush Pink with Brass Numbers for a Soft Spring Door

    Blush pink front door with brass house numbers and white spring tulips.

    Blush pink is a pale, warm pink that suits cottages, small colonials, and houses with soft landscaping, where it reads as a gentle color note rather than a bold statement. In spring, pots of white tulips and fresh green foliage keep it fresh, and brass house numbers add a warm, jewelry-like detail against the pale panels. White trim gives blush the clean edge it needs to look deliberate.

    Keep the porch simple beside blush: one pair of pale pots and a plain mat are enough, since the color itself is the decoration. In autumn, switch to pots of soft grasses rather than strong orange tones, which can clash with pink. Blush shows marks faster than deeper shades, so choose a washable semi gloss finish and expect a seasonal wipe down, especially around the handle.

    16. Slate Blue Gray with Stone Steps for a Calm Entry

    Slate blue gray front door with stone steps and pale planters.

    Slate blue gray is a muted blue with a strong gray base, calm and tailored from the street. It suits stone houses, gray siding, and traditional suburban facades, because it borrows color from the masonry around it. Stone steps, a pale planter pair, and a simple mat complete an entry that feels settled rather than decorated, which suits owners who prefer quiet color.

    Matte black or pewter hardware fits its muted character. Slate blue gray can look flat on an overcast day, so a semi gloss finish helps it keep a little life and sheen. In autumn, a wreath of dried grasses gives gentle contrast without breaking the calm palette, and in winter, fresh greenery is the one color note the entry needs.

    17. Emerald Green with a Topiary Pair for a Formal Entry

    Emerald green front door with a pair of clipped topiary trees in matching pots.

    Emerald green is a clear, saturated green that suits formal houses, Georgian facades, and entries with symmetry to spare. A pair of clipped topiary trees in matching pots on either side of an emerald door makes the entry feel planned and grand, and the green of the trees echoes the door without matching it exactly. Brass hardware and a brass lantern complete the classic look.

    Emerald needs tidy surroundings to shine: swept steps, trimmed pots, and a plain mat keep the focus on the door and its topiary pair. In winter, the topiary stays green, so the entry keeps its structure when flower beds go bare. For shade specific guidance on deep greens and blues, these blue front door colors show how undertone and light change a dark door color through the day.

    18. Two Tone Door and Frame for Seasonal Flexibility

    Two tone entry with a deep green front door and cream painted frame and trim.

    A two tone entry paints the door one color and the frame, sidelights, or trim a second, related color, which gives seasonal flexibility without repainting. Try a deep green door with cream trim, a navy door with a pale gray frame, or a black door with warm wood trim. The frame color lightens the whole entry, so a deep door color feels less heavy on a shaded porch.

    This approach suits houses where a single dark color would swallow the entry, and it lets you change the seasonal mood with the wreath and pots alone, since the frame already adds a second tone. Keep the two colors close in depth, one deep and one light, rather than two strong colors competing for attention. Test both shades together on the door and frame in daylight, since a pairing that works on sample cards can shift beside your siding. For entry ideas that work inside the door as well, these kitchen entryway ideas show how one small change at a doorway can change how the whole space feels.

    Conclusion

    A cozy seasonal entry does not need a new door color each year. It needs one color that suits your siding, your light, and your house style, plus hardware that flatters it and a simple seasonal swap of wreath, mat, and pots. Narrow your list to three shades, test them on the actual door in morning, midday, and evening light, and choose the one that still feels right when the porch planting changes. Start with the color that fixes the weakest part of your entry, whether that is a door that disappears against the facade or one that clashes with it, and let the seasonal details follow.

    Save this list on Pinterest before your next paint trip, and work through it one shade at a time: siding and light first, then hardware, then the porch details that make the entry yours through every season.

    FAQs

    How do I choose a front door color that works in every season?

    Start with your siding, roof, and stone, then pick a color that sits comfortably beside them in all light. Deep shades such as navy, forest green, and charcoal work year round because seasonal decor changes around them. Test three samples on the actual door and check them morning, noon, and evening before you commit to a full repaint.

    Should the front door color match the shutters or trim?

    It does not need to match exactly, but it should relate to them. A door that repeats one tone from the shutters, the trim, or the stone looks planned, while a door that introduces a wholly new color family can feel random. If your shutters are dark, a deep door color usually sits better than a pale one, and white trim gives most door colors the contrast they need.

    What finish should I use on a front door?

    Satin or semi gloss is the usual pick for a front door. Both wipe clean, resist weather better than flat paint, and give the color a little life in flat light. Semi gloss shows brush marks more than satin, so use a high quality brush or spray, and level each coat carefully. A durable exterior formula matters more than the exact sheen on a door that faces sun and rain.

    How often should a painted front door be repainted?

    Most painted front doors hold their color for five to ten years, depending on sun exposure, shelter, and paint quality. South facing doors fade fastest, and pale colors show wear sooner than deep ones. Touch up scuffs around the handle and kick plate each season, and repaint when fading, chalking, or peeling appears rather than on a fixed schedule.

    Can I paint a front door a bold color on a traditional house?

    Yes, if the bold color still relates to the house. A deep red, forest green, or navy suits many traditional houses, since those shades have historic roots and sit well beside brick and stone. Keep the trim classic, the hardware simple, and the porch styling restrained, so the door reads as one confident choice rather than a collection of competing details.

    What is the easiest way to refresh a front door without repainting?

    Swap the wreath, the mat, and the porch pots, and clean or change the hardware. Those three changes shift the entry for a new season in under an hour, and they cost far less than paint. Clean the door first, oil the hinges, and polish the hardware, since a clean door with fresh seasonal details often looks newly painted on its own.


  • 31 Smart Laundry Room Organization Ideas for More Style

    31 Smart Laundry Room Organization Ideas for More Style

    A laundry room works hard, yet it often gets the least planning in the house. Clothes pile on the washer, detergent bottles crowd the shelf, and clean towels end up in a heap because nothing has a set home. These 31 smart laundry room organization ideas fix that with storage that suits small rooms, rentals, and family homes alike. You will find wall storage, sorting stations, folding spots, drying options, and small habits that keep the room tidy between wash days. Start with the clutter point that bothers you most, then add one idea at a time.

    Key Takeaways

    • Give every group a home: detergent, towels, hampers, drying clothes, and small supplies each need one set spot.
    • Use the walls and the space above the machines first, since floor space in a laundry room is usually scarce.
    • Sort at the source with labeled bins, so wash day starts with loads already grouped.
    • Keep daily items at easy reach and move seasonal or bulky items to a high shelf.
    • Add one folding surface and one drying option, since those two jobs cause most of the pileups.
    • Label bins and review the room once a season, so new items do not quietly take over.

    1. Open Shelves Above the Machines

    Open wooden shelves above a washer and dryer holding folded towels, detergent bottles, and baskets.

    Fit two open shelves above the washer and dryer for detergent, folded towels, and baskets you reach for every wash day. Open shelves keep daily items visible, so you can see at a glance what needs refilling, and they cost less than cabinets. Keep the lowest shelf high enough to load the machines without bumping your head, and leave a clear gap above the machines for hoses and lids.

    Group items by job on each shelf: washing supplies on one, towels and cloths on another. Use matching baskets for small items, so the shelves read as tidy rather than crowded. For wall storage lessons that carry over well here, these kitchen wall storage ideas show how to group items and leave breathing room on open shelves.

    2. Closed Cabinets Above the Machines

    White closed cabinets above a washer and dryer in a tidy laundry room, with folded towels on the counter below.

    Choose closed cabinets above the machines when you want a calmer look or need to keep supplies away from children and pets. Doors hide mismatched bottles, spare parts, and cleaning products, which matters in a room guests may pass through. Pick shallow cabinets that still clear the machine lids, and fix them into studs or with fixings rated for the load.

    Keep one shelf inside each cabinet for daily supplies and a higher shelf for spares. Label the inside of a door with a short list of what lives where, so family members put things back in the right place. Closed cabinets pair well with one open shelf below them for the two or three items you grab every load.

    3. Floor-to-Ceiling Storage Tower

    Tall floor-to-ceiling storage tower cabinet beside a washer, with shelves holding towels, baskets, and cleaning supplies.

    Add a tall, narrow storage tower beside the machines to hold towels, bedding, ironing supplies, and bulk detergent in one unit. A tower uses vertical space that a short cabinet wastes, and it keeps the room from spreading into other rooms. Measure the width, the door swing, and the space needed to pull the machine out for service before you order.

    Plan the inside from the top down: rarely used items high, daily towels at eye level, and heavy detergent low. Leave one shelf partly empty at the start, so new supplies have a place. A tower with doors keeps dust off folded towels, which matters in a room where lint is always in the air.

    4. Slim Pull-Out Pantry Between the Machines

    Slim tall pull-out pantry slid open beside a washing machine, with shelves of detergent bottles and cleaning supplies.

    Fit a slim pull-out pantry in the gap beside a machine for detergent, stain spray, and cleaning bottles. The whole unit slides out, so you can see every bottle without reaching to the back of a deep cupboard. Measure the gap, the skirting boards, and the machine door swing first, since pull-outs need a clear path to open fully.

    Group bottles by job, such as washing, stain care, and freshening, and put heavy bottles low. Wipe the shelves now and then, since drips from detergent bottles collect fast. If the gap is too narrow for a fitted unit, a slim freestanding pull-out cart gives much of the same benefit.

    5. Rolling Cart in the Side Gap

    Slim rolling cart in the narrow gap beside a washer and dryer, holding detergent, dryer sheets, and spray bottles.

    Slide a slim rolling cart into the side gap beside the washer or dryer for supplies you use every load. A cart moves out for cleaning, moves to the folding spot when needed, and costs little compared with fitted storage. Choose a cart with wheels that lock, so it stays put while you pull a bottle from it.

    Use the top tier for daily detergent and dryer sheets, the middle for stain care, and the lowest for spare supplies. Keep the cart narrow enough to slide without scraping the machine, and do not overload it, since a heavy cart is hard to move and can mark the floor. Wipe the tiers weekly, since laundry rooms collect lint and drips.

    6. Labeled Bins on Open Shelves

    Open laundry room shelves with matching labeled bins and baskets holding towels and supplies.

    Place matching labeled bins on open shelves for towels, cloths, pegs, and small supplies, so each group has a visible home. Labels stop the slow drift where one bin ends up holding a mix of everything, and they help everyone in the house put things back correctly. Use short, plain labels such as towels, cloths, pegs, and spares.

    Keep bins light enough to lift with one hand, and store heavy detergent elsewhere. Line a bin with fabric if it holds small items that slip through the weave. Replace a bin when it frays or cracks, since a damaged bin snags towels and looks untidy even when it is full.

    7. Clear Jars for Detergent, Pods, and Powders

    Clear glass jars filled with laundry detergent powder, pods, and pegs on a laundry room shelf beside a washer.

    Decant detergent powder, pods, and pegs into clear jars on a shelf, so you can see stock levels and grab the right product fast. Clear jars also stop half empty boxes from collapsing and spilling across a shelf. Use jars with lids that close firmly, and keep them out of reach of small children, since detergent pods and powders need safe storage.

    Label each jar with the product name and the dose, since powders and pods can look alike once they leave their boxes. Keep a small scoop in the powder jar, and refill jars from bulk packs stored in a cabinet. Wash and dry jars fully before refilling, so damp powder does not clump.

    8. Fold-Down Wall Drying Rack

    Fold-down wall-mounted drying rack in a laundry room with clothes hanging to dry.

    Fix a fold-down drying rack to the wall for clothes that cannot go in the dryer. It folds flat when not in use, so it suits small rooms where a freestanding rack would block the walkway. Fix it into studs or with fixings rated for wet clothes, which weigh more than dry ones, and site it where drips will not fall on clean laundry.

    Hang items with space between them, so air moves and clothes dry faster. Keep the rack clear of the machine doors and the folding counter, so you can still move around the room. Fold it away after clothes dry, and wipe the bars now and then to stop dust settling on damp fabric.

    9. Retractable Clothesline Across the Room

    Retractable clothesline stretched across a bright laundry room with shirts and towels hanging to dry.

    Stretch a retractable clothesline across the laundry room for a drying line that disappears when wash day ends. It suits rooms with a clear wall-to-wall run and no room for a permanent rack. Fix both ends firmly, and test the line with a wet load before you rely on it, since a sagging line drops clothes onto the floor.

    Use the line for shirts, towels, and items that benefit from air drying, and retract it once clothes are dry so the room feels open again. Keep the line clear of shelves and light fittings, and wipe it before use if the room is dusty. A retractable line also works well above a bathtub in a combined laundry and bathroom space.

    10. Hanging Rod for Air-Dry Clothes

    Clothes hanging on hangers from a wall-mounted rod in a laundry room, above a folding counter with folded shirts.

    Mount a hanging rod on the wall or under a shelf for shirts and delicates on hangers. A rod keeps air-dry clothes off chairs and door handles, and it lets you move a whole load to the closet in one trip. Fix the rod into studs, since a rod full of wet clothes carries real weight, and leave clearance below for the longest garment.

    Hang clothes with a small gap between hangers, so air reaches each piece. Keep a few empty hangers on the rod, so you are not hunting for one when a load finishes. If wall space is short, a short rod inside a tall cabinet gives the same benefit for a smaller number of items.

    11. Over-Door Rack for Sprays and Small Supplies

    Over-door rack on a laundry room door holding spray bottles, lint rollers, and small cleaning supplies.

    Hang an over-door rack on the laundry room door for spray bottles, lint rollers, and small supplies. It uses space that otherwise holds nothing, needs no drilling, and keeps supplies visible when you walk in. Choose a rack with a flat profile, so the door still closes fully and does not mark the frame.

    Limit the rack to items you use weekly, since an overloaded door is hard to open and looks messy. Put the heaviest bottle lowest, and keep the top hooks for light items such as a lint roller. If the door is used often, choose a rack with a soft backing to protect the door surface.

    12. Pegboard Wall for Brushes and Tools

    Pegboard wall in a laundry room with hooks holding brushes, a lint roller, scissors, and small cleaning tools.

    Fix a pegboard to a free wall for brushes, a lint roller, scissors, and small laundry tools. Hooks move as your tool set changes, so the board stays useful even when supplies change. Paint or stain the board to match the room, and frame the edges so it looks finished rather than like a workshop offcut.

    Plan the layout on the floor first, with the most used tools at easy reach and heavier items low. Leave space around each item, so you can lift it off without knocking its neighbor. A small shelf or cup at the base of the board holds a timer, a stain pen, and other small tools that do not hang well.

    13. Magnetic Caddy on the Side of a Machine

    Magnetic caddy attached to the side of a washing machine holding dryer sheets, a lint roller, and stain spray.

    Attach a magnetic caddy to the side of a metal washer or dryer for dryer sheets, a lint roller, and stain spray. It keeps the most used small items within arm’s reach of the machine, without taking shelf or counter space. Check that your machine side is magnetic first, since some machines have a nonmagnetic finish, and keep the caddy light.

    Use one pocket for dryer sheets, one for a lint roller, and one for stain spray, so each item has a set slot. Wipe the caddy now and then, since lint settles on flat surfaces near a dryer. If the caddy slides when you pull an item, move heavier items to a shelf and keep only light items in the caddy.

    14. Folding Counter Over Front-Load Machines

    Wooden folding counter installed over front-load washer and dryer machines, with a stack of folded towels.

    Fit a wooden counter over front-load machines to create a folding surface at a comfortable height. A counter stops clean clothes from piling on the machines themselves, and it gives you a clear place to fold each load as it finishes. Measure the machine depth and leave room for hoses and ventilation, and check the machine manual before fitting a fixed counter.

    Keep the counter mostly clear, with only a small basket for pegs or a spray bottle at one end. Fold straight from the dryer onto the counter, then carry folded stacks away, so the surface is ready for the next load. Wipe the counter after folding, since lint and stray socks collect there fast.

    15. Fold-Down Folding Table

    Fold-down wooden table fixed to a laundry room wall, open with folded clothes on it, above a laundry basket.

    Fix a fold-down table to a free wall when a fixed counter will not fit. It folds flat when not in use, which suits small rooms and hallways where the laundry area shares space with a walkway. Fix it to studs, since it must hold a pile of clothes and leaning elbows, and choose a size that fits the room without blocking a door.

    Fold it down only when the room is clear of through traffic, so no one walks into the open edge. Keep a basket below it for clothes waiting to be folded, and fold the table away after each session so the room stays open. A small shelf above the table holds pegs and a spray bottle within reach.

    16. Pull-Out Ironing Board in a Drawer

    Pull-out ironing board slid out from a drawer under a laundry room counter, with an iron resting on it.

    Fit a pull-out ironing board in a drawer under the counter for ironing without storing a full board. It slides away when not needed, which suits small rooms where a standing board would live in the way. Measure the drawer depth and the board length first, since the board must fit fully inside when closed.

    Keep the iron in a heat safe spot nearby, and let the board cool before sliding it back in. A pull-out board suits quick touch ups and small loads, while a full board still suits a large ironing session. If a pull-out board will not fit, a compact tabletop board stored upright in a tall cabinet is a good second choice.

    17. Three-Bin Sorting Station

    Laundry sorting station with three labeled bins for lights, darks, and delicates.

    Set up three bins labeled lights, darks, and delicates, so each load is sorted before wash day. Sorting at the source saves time, stops a dark sock from joining a white load, and makes wash day a matter of carrying one bin to the machine. Place the station where dirty clothes naturally arrive, such as near the laundry door or the hallway.

    Use bins that are easy to carry or that lift out of a frame, and empty each bin as soon as it fills. Wash the bins now and then, since dirty laundry leaves a smell in fabric bins. If three bins will not fit, start with two, one for lights and one for darks, and add a small delicates bag that hangs on a hook.

    18. Tilt-Out Hamper in a Cabinet

    Wooden cabinet with a tilt-out laundry hamper pulled open showing clothes inside.

    Build or buy a cabinet with a tilt-out hamper to hide dirty laundry behind a furniture front. The hamper tilts open for loading and closes to hide the pile, which keeps the room looking tidy even between wash days. Choose a hamper bag that lifts out for carrying to the machine, and wash the bag regularly.

    Keep the cabinet near the machines, so the trip from hamper to washer is short. Do not overload the hamper, since a full bag is heavy and can strain the tilt mechanism. A tilt-out hamper suits a laundry room that doubles as a hallway or a bathroom, where an open hamper would always be on view.

    19. Cubby Shelf for One Basket Per Person

    Wall of cubby shelves in a laundry room, each cubby holding a woven basket for one person's laundry.

    Build a cubby shelf with one basket per person for clothes waiting to be washed or folded. Each person has a set cubby, so clean clothes do not mix and dirty clothes do not pile on the floor. Label each cubby with a name or a color, and keep the baskets the same size so the shelf looks planned.

    Empty each cubby on wash day, and return folded clothes to the same cubby, so the owner can collect them easily. Keep the cubbies at a height everyone can reach, or give children lower cubbies and adults higher ones. A cubby shelf also works well in a mudroom that shares space with laundry.

    20. Lost Sock and Small Items Basket

    Small basket on a laundry room shelf holding single socks and small laundry items, beside a washer.

    Keep a small basket on a shelf for single socks, hair ties, and small items found in the washer or dryer. A set spot for strays stops them from piling on the machine or getting thrown away, and it gives you one place to check when a sock goes missing. Empty the basket once a month, and pair up what you can.

    Put the basket near the machines, where strays are found, and keep it small, so it does not become another junk basket. If a sock stays single for a season, it is fair to let it go. A small basket also suits coins and buttons found in pockets, which you can return to their owner from one place.

    21. Stain Treatment Caddy by the Machine

    Small stain treatment caddy with spray bottles, a brush, and a cloth on a laundry room counter beside a washing machine.

    Keep a stain treatment caddy by the machine with spray, a brush, a cloth, and a stain guide card. Treating a stain at once works better than treating it after a wash, and a caddy means you do not hunt for supplies while the stain sets. Keep the caddy in one spot, such as on the counter end or in the pull-out pantry.

    Use the caddy only for stain care, so it stays stocked and ready. Refill the spray before it runs out, and replace a worn brush, since a stiff brush can damage fabric. Keep stain products out of reach of small children, and follow the care label on each garment before treating it.

    22. Drawer Dividers for Small Laundry Supplies

    Open laundry room drawer with dividers organizing small supplies such as pegs, dryer balls, stain pens, and measuring cups.

    Fit dividers in a laundry drawer for pegs, dryer balls, stain pens, measuring cups, and spare buttons. Dividers stop small supplies from sliding into one mixed pile, and they make a drawer work much harder without new furniture. Use adjustable dividers or small boxes inside the drawer, and sort by job, so you can see each group at a glance.

    Keep only laundry supplies in the drawer, and move anything you reach for less than once a month elsewhere. Wipe the drawer now and then, since lint and powder settle in drawers near a washer. If the drawer is deep, use shallow trays on top for the smallest items, so nothing hides at the bottom.

    23. Under-Sink Organizer for Cleaning Bottles

    Under-sink cabinet in a laundry room with stacked organizers and cleaning bottles arranged neatly around the pipes.

    Fit stacked organizers under the laundry sink for cleaning bottles, sponges, and gloves, arranged around the pipes. The space under a sink is often wasted, yet it sits close to water and drains, which suits cleaning supplies. Measure around the pipes first, and choose organizers that slide out, so bottles at the back stay reachable.

    Group bottles by job, keep the most used ones at the front, and put a small tray under any bottle that drips. Wipe the organizers now and then, since leaks and drips collect under sinks. Keep products that must stay out of reach of children in a cabinet with a latch, rather than an open under-sink shelf.

    24. Shelves in a Stacked Machine Closet

    Stacked washer and dryer in a small closet with shelves above and beside holding baskets, detergent, and folded towels.

    Add shelves above and beside stacked machines in a closet for baskets, detergent, and folded towels. A stacked closet has little floor space, so shelves do most of the storage work, and they keep supplies close to the machines. Fix shelves into studs, leave room to pull the machines out for service, and keep the top shelf for light items only.

    Use small baskets on the shelves for pegs and dryer sheets, so nothing falls behind the machines. Keep a step stool nearby if the top shelf is high, so you actually use it instead of piling items on the floor. For small space planning that applies here too, these small kitchen remodel ideas show how to use height and corners when floor space is short.

    25. Hanging Pockets on the Inside of a Cabinet Door

    Inside of a laundry cabinet door with hanging pockets holding spray bottles, cloths, and small supplies.

    Hang a pocket organizer on the inside of a cabinet door for spray bottles, cloths, and small supplies. The pockets use space that otherwise holds nothing, keep supplies hidden when the door closes, and cost little. Choose pockets sized to your bottles, so tall bottles do not tip out when the door moves.

    Keep the heaviest bottles low in the pockets, and check the door hinges now and then, since added weight can loosen them over time. Use one pocket per group, such as stain care, freshening, and cloths, so you can find an item without emptying the whole organizer. This idea suits renters, since it needs no drilling.

    26. Wall Baskets for Cloths and Small Supplies

    Woven baskets hanging on hooks on a laundry room wall, holding cleaning cloths, pegs, and small supplies.

    Hang woven baskets on wall hooks for cleaning cloths, pegs, and small supplies. Wall baskets keep soft items off counters and shelves, add warmth to a plain laundry room, and let you grab a cloth with one hand. Use hooks fixed into studs, since a full basket carries weight, and keep baskets at easy reach height.

    Sort cloths by job, such as dusting, wiping, and polishing, with one basket per job, so you do not grab the wrong cloth. Wash the baskets now and then, since laundry rooms collect lint, and replace a basket when the weave frays. A row of matching baskets looks planned, while mixed baskets can still work if each holds one clear group.

    27. Color-Coded Baskets for Each Family Member

    Row of laundry baskets in different colors on a shelf in a laundry room, each holding folded clothes.

    Give each family member a basket in a set color for their laundry, so loads stay separate from hamper to closet. Color coding stops mix ups, helps children take part, and makes it easy to see whose laundry is waiting. Use the same color for the hamper basket, the folding basket, and a shelf label, so the system is clear at a glance.

    Keep the baskets the same size and shape, so they stack or sit neatly on a shelf. Empty each basket on wash day, and return folded clothes in the same basket, so the owner can put them away. If the household is large, use two colors per person, one for dirty laundry and one for clean, to keep the flow clear.

    28. High Shelf Bin for Seasonal and Bulky Items

    High shelf in a laundry room with a large labeled bin for seasonal and bulky bedding, above cabinets and a washer.

    Place a large labeled bin on a high shelf for seasonal bedding, beach towels, and bulky items you use a few times a year. High storage keeps bulky items out of daily circulation, while still keeping them in the laundry room where they are washed and stored. Label the bin clearly, so you do not open three bins to find one item.

    Use a bin with a lid, to keep dust off bedding, and keep it light enough to lift down safely, or use a step stool. Review the bin once a year, and move out items you did not use, so the high shelf does not become a store for things no one needs. Keep the bin clear of pipes and vents, so air still moves around it.

    29. Shelf Dividers for Folded Linens

    Laundry room shelf with shelf dividers keeping stacks of folded towels and bed linens upright and separated.

    Fit shelf dividers on linen shelves to keep stacks of towels and bedding upright and separated. Dividers stop tall stacks from toppling into each other, and they make it easy to pull one towel without disturbing the rest. Use dividers sized to your shelf depth, and sort stacks by type, such as bath towels, hand towels, and bedding.

    Leave one section partly empty, so new towels have a place without pushing older stacks over. Fold towels to a similar size, so stacks sit evenly between dividers. For storage grouping ideas that work for linens as well as clothes, these bedroom storage ideas show how matching bins and dividers keep shelves calm.
    30. Pet Wash Supply Bin

    Laundry room corner with a dedicated bin holding pet towels, a pet bed cover, and pet hair roller supplies beside a washer.

    Keep a separate bin for pet towels, pet bed covers, and pet hair rollers, so pet laundry does not mix with family laundry. Pet hair and smells transfer easily in a shared wash, and a set bin makes it easy to run pet items as their own load. Label the bin clearly, and keep it near the machines, where pet items are washed.

    Wash pet items on their own, check pockets and seams for treats or small toys, and clean the lint filter after a pet load, since pet hair clogs it fast. Keep a spare pet towel in the bin, so a muddy walk does not leave you hunting for a clean one. Replace the bin if it starts to hold a smell, even after washing.

    31. Chalkboard Laundry Plan and Care Notes

    Small chalkboard on a laundry room wall showing a weekly laundry plan, beside shelves with baskets and a washer.

    Hang a small chalkboard in the laundry room for the weekly wash plan, care notes, and a running list of supplies to buy. A fixed plan stops the pileup where every load waits until the weekend, and care notes stop a wool sweater from joining a hot wash. Write the plan at the top, care notes in the middle, and the shopping list at the bottom.

    Wipe the board clean each week, so old items do not linger and get bought twice. Keep the board near the machines, with chalk or chalk markers in a small cup hung alongside. A magnetic chalkboard adds a second use, holding care labels and school notes with magnets, as long as paper stays clear of steam from the washer.

    Conclusion

    A smart laundry room is not about buying more storage, it is about giving every item a set home and keeping the daily jobs easy. Start with one wall, one sorting station, and one folding surface, then add drying space and small supply storage only where a pile still forms. Measure before you buy, fix heavy storage well, and label bins so everyone in the house can keep the system going.

    Pick one idea from this list today, set it where you actually do laundry, and let the room prove its worth for a week before you add the next change. Save this list on Pinterest before your next laundry room tidy, and work through it one area at a time: storage first, then sorting, then the folding and drying details that make wash day calmer.

    FAQs

    How do I organize a very small laundry room?

    Start with the walls and the space above the machines, since floor space is usually the scarcest resource. Add one shelf or cabinet, one sorting bin, and one folding option, such as a fold-down table, before buying anything else. Keep daily items at easy reach, move seasonal items high, and review the room once a season to remove what you no longer use.

    What should I store in laundry room cabinets?

    Store detergent, stain care, cleaning products, spare pegs, dryer sheets, and folded towels in laundry cabinets, grouped by job. Keep daily items at eye level, spares higher, and heavy bottles low. Keep products that need safe storage, such as detergent pods, out of reach of small children, and keep a small gap between groups so you can see stock levels.

    How can I keep laundry from piling up between wash days?

    Sort clothes at the source with labeled bins for lights, darks, and delicates, and wash a load when a bin fills rather than waiting for a free day. Fold straight from the dryer onto a counter or table, and return folded clothes to their owner the same day. A weekly plan on a chalkboard helps, since it spreads loads across the week instead of saving them all for the weekend.

    What is the best drying option for a small laundry room?

    A fold-down wall rack or a retractable clothesline usually works best in a small room, since both disappear when not in use. A hanging rod suits shirts and delicates on hangers, while a small freestanding rack suits a room with floor space to spare. Hang items with space between them, so air moves and clothes dry faster, and site drying space where drips will not fall on clean laundry.

    How do I stop losing socks in the laundry?

    Use mesh wash bags for small socks, check pockets before washing, and keep a small lost sock basket near the machines for strays. Pair socks as soon as they leave the dryer, and check the machine seal and filter for socks that slip out of a load. Empty the lost sock basket once a month, pair what you can, and let go of singles that have waited a season.

    Should laundry supplies be stored in open or closed storage?

    Use both: open shelves for daily items you grab every load, and closed cabinets for mismatched bottles, spare supplies, and products that need safe storage. Open storage works best when items are grouped in matching bins, while closed storage suits rooms guests pass through. Mix the two, with daily supplies open at easy reach and spares closed above them, for a room that is both handy and calm.

  • 12 Mediterranean Garden Ideas to Add Character to Your Space

    12 Mediterranean Garden Ideas to Add Character to Your Space

    A Mediterranean garden is built on sun, scent, and simple materials: warm stone, terracotta, gravel, and plants that cope with heat and dry soil. You do not need a villa or a large plot to get the feeling. One olive tree in a pot, a lavender lined path, or a shaded seat beside a wall can carry the whole style. These 12 Mediterranean garden ideas cover courtyards, slopes, patios, and small balconies, so you can start with a single pot by the door or plan a full outdoor room. Pick the structure first, then the plants that suit your sun, soil, and watering routine. For a closely related Greek take on the same palette, see these Greek garden ideas.
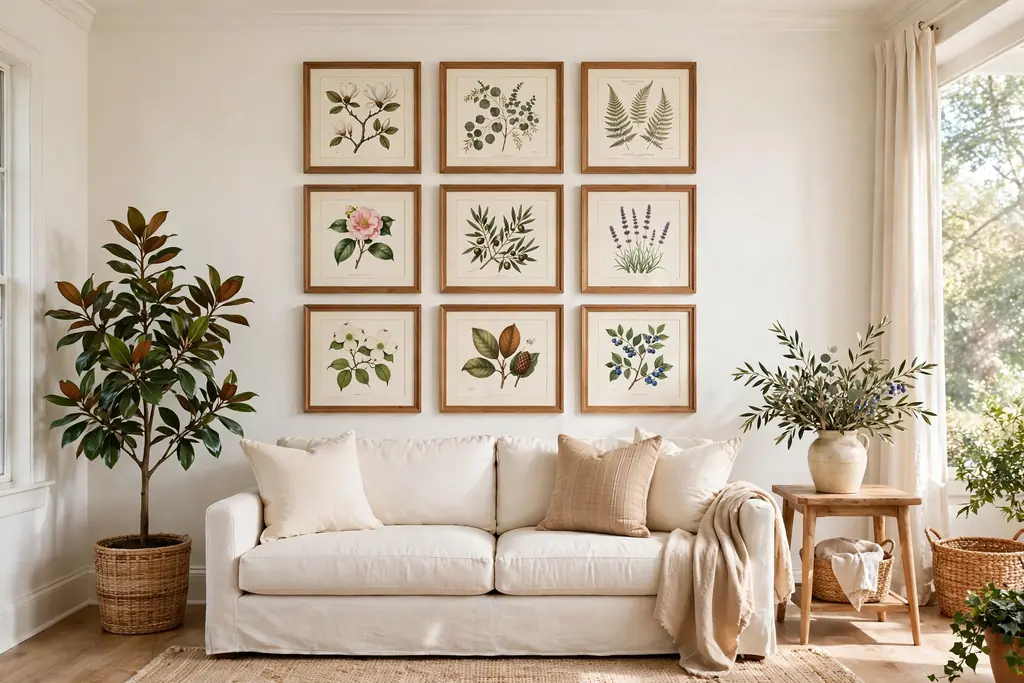
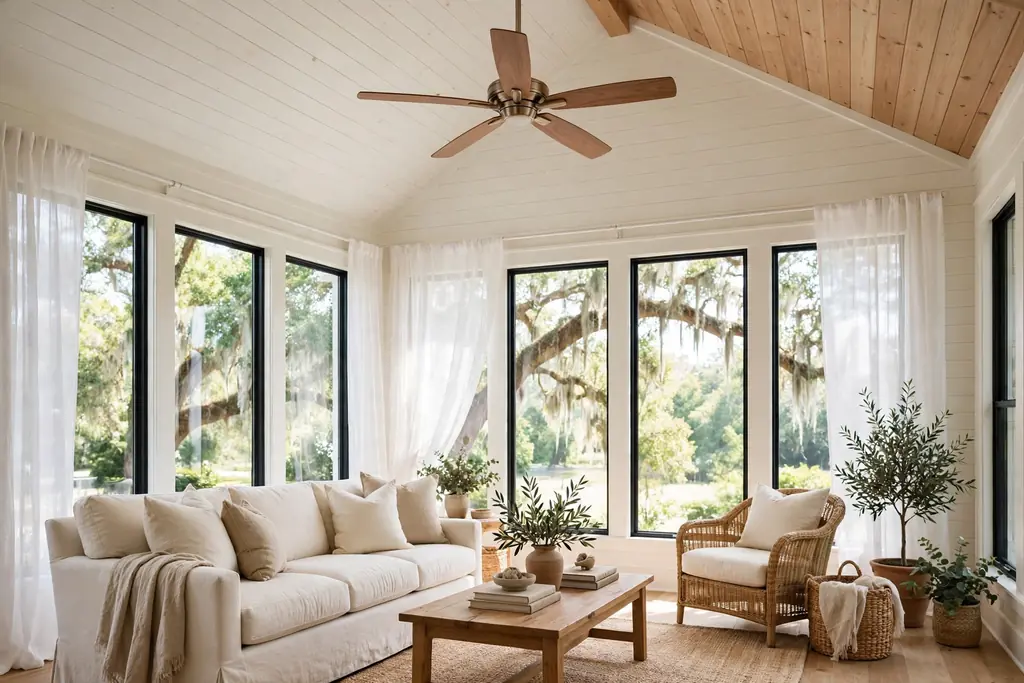
    Key Takeaways

    • Start with structure: a tree, a pergola, a terrace, or a seating spot, then plant around it.
    • Keep the palette small: warm stone, terracotta, whitewash, blue tile, and green carry the Mediterranean look without clutter.
    • Choose sun and drought tolerant plants, such as olive, lavender, rosemary, citrus, and bougainvillea, for hot, dry spots.
    • Use gravel, pebbles, and stone underfoot to keep beds tidy and cut down on watering and mowing.
    • Pots make the style possible on a balcony or rented patio, where beds are not an option.
    • Plan shade and scent for evenings: a vine, jasmine, lantern light, and a table set for long meals extend the hours you use the garden.

    1. Make an Olive Tree the Focal Point of a Gravel Court

    Olive tree with silvery green leaves in a sunny gravel courtyard beside a warm stone wall.

    Set one olive tree in the middle of a gravel court, or in a wide pot if you have no bed, and let it anchor the whole space. The silver green leaves, gnarled trunk, and open shape read as Mediterranean at once, even before anything else is planted. Gravel underfoot keeps the court tidy, drains well after rain, and suits the dry soil olives prefer.

    Choose the sunniest, most sheltered spot you have, and use a gritty, free draining mix in a pot with drainage holes. Water deeply, then let the top of the soil dry before watering again, since olives suffer more from wet feet than from a dry spell. Underplant with low lavender or creeping thyme, or leave the gravel bare with a stone edging, so the tree keeps its clear, sculptural shape.

    2. Group Terracotta Pots by the Entrance

    Cluster of terracotta pots with geraniums, herbs, and a small citrus plant beside a garden entrance.

    Cluster terracotta pots in two or three sizes by a door, gate, or set of steps, and fill them with geraniums, herbs, and one taller plant such as a small citrus or a bay. The warm clay tone ties the group together, while the mix of heights keeps it from looking like a row of identical pots. This is the fastest Mediterranean idea on the list, and it works on a step, a landing, or a paved front path.

    Keep the planting simple so the pots themselves stay part of the picture, and use saucers on painted or stone steps to stop staining. Terracotta dries fast in sun and wind, so check the soil with a finger and water when the top feels dry. Move tender plants under cover before the first hard frost if your winters are cold, and swap summer geraniums for winter pansies or small evergreens when the season changes.

    3. Line a Path with Lavender and Rosemary

    Stone garden path lined with rows of purple lavender and green rosemary in bright summer sun.

    Plant lavender and rosemary along both sides of a stone or gravel path, so every walk through the garden brushes past scent and color. The two plants share the same needs, full sun and free draining soil, and their purple flowers and grey green foliage sit well against warm stone. A scented path turns a plain route from the house to a seat into a garden feature in its own right.

    Space plants so air can move between them, and trim lavender lightly after flowering and rosemary after growth starts in spring, without cutting into old bare wood. Both plants need little water once settled, and bees visit them through summer, so site the path where you can enjoy the scent from a seat as well as on the move. In wet winters, raise the bed slightly or add grit to the soil, since both plants dislike sitting in water.

    4. Grow a Grapevine Over a Pergola for Dining Shade

    Wooden pergola covered with grapevine leaves shading a long outdoor dining table in a Mediterranean garden.

    Build a wooden pergola over a dining spot and train a grapevine across the top, so summer meals happen in dappled shade that opens up again in winter after leaf fall. A vine covered pergola is the classic Mediterranean outdoor room: sturdy posts, a long table, and shade that changes with the season. Site it over a flat, level area with room to pull chairs out without hitting a post.

    Run wires along the beams and train one or two main stems along them, tying in side shoots as they grow, and prune in winter to keep fruiting wood near the frame. Leave headroom so the vine can be pruned from below with a step ladder, and keep the pergola clear of roof drains and gutters. In a small garden, a single vine over a lean to frame against a wall gives the same shade on a smaller footprint.

    5. Set a Tiled Fountain as the Courtyard Centerpiece

    Small courtyard fountain with blue and white mosaic tiles against a warm plaster wall, surrounded by potted plants.

    Place a small tiled fountain against a warm plaster wall, with blue and white patterned tiles and a shallow basin, and let the sound of water set the mood of a courtyard. Moving water cools the air, masks street noise, and gives a small space a clear focal point without new planting. Surround the base with pots of different heights, and keep the pump access clear for cleaning.

    Top up the water in hot weather, clean the basin regularly to stop algae, and drain or cover the fountain before hard frost if it is not frost proof. If plumbing is a problem, a solar pump in a shallow tiled bowl gives a similar trickle without a mains connection. Keep the fountain out of the main walking line, so the courtyard stays easy to cross, and site it where you can hear it from the seat, not only from the path.

    6. Terrace a Slope with Dry Stone Walls

    Dry stone terraces stepping down a sunny Mediterranean hillside garden planted with herbs and lavender.

    Turn a slope into usable Mediterranean levels with low dry stone walls, each level planted with herbs, lavender, and small shrubs, and stone steps joining them. Terraces stop soil washing downhill, give every plant a level patch of well drained soil, and make a steep garden far easier to work on. Start at the lowest level and build upward, so each wall has solid support.

    Pack gritty soil into the gaps as you build, or tuck sedum and small thyme into existing crevices once the wall is up, since these plants need almost no soil and cope with heat reflected from stone. Keep tall walls, generally anything above knee height, in the hands of a professional, and check local rules before you build. For more stepped layouts, see these tiered garden ideas, which cover stone, timber, and planted terraces in detail.

    7. Grow Citrus Trees in Large Pots on the Patio

    Lemon and orange trees with fruit in large terracotta pots on a sunny stone patio.

    Grow a lemon or orange tree in a large terracotta pot on a sunny patio, and you get blossom scent in spring, glossy leaves all year, and fruit you can pick from your own doorstep. Citrus in pots suits renters and small gardens, since the tree moves with you and needs no bed. Choose the sunniest, most sheltered spot, and use a pot with drainage holes and a free draining mix.

    Water deeply, then let the top of the mix dry before watering again, and feed during the growing season following the product label. Move the pot indoors or wrap it if your winters are cold, since citrus is tender and a hard frost can damage leaves and fruit. Underplant with trailing thyme or small stones for a finished surface, and prune lightly to keep an open shape that lets light reach the fruit.

    8. Cover a Sunny Wall with Bougainvillea Color

    Whitewashed Mediterranean garden wall covered with magenta bougainvillea flowers above a stone bench and terracotta pots.

    Train bougainvillea up a sunny wall, on wires or a trellis fixed firmly to the surface, and let its bright magenta, orange, or pink bracts do the work of a whole flower bed. A flowering wall gives color at eye level and above, needs little ground space, and suits a courtyard, a side passage, or the front of a house. Plant on the sunny side so flowers face the path or seat, and prune after flowering to keep growth off gutters and walkways.

    Bougainvillea needs full sun and free draining soil, and it flowers best when it is not overwatered. In cold areas, grow it in a large pot and move it under cover for winter, so you keep the color without risking the plant. Fix the support firmly, since a mature vine is heavy, and keep side shoots trimmed back from doors and windows so the wall stays easy to use and maintain.

    9. Plant a Kitchen Herb Bed by the Door

    Raised stone herb bed beside a kitchen door planted with basil, oregano, thyme, sage, and rosemary.

    Plant a raised herb bed near the kitchen door with basil, oregano, thyme, sage, and rosemary, so picking for a meal takes a minute rather than a trip across the yard. Mediterranean herbs share the same needs, sun and free draining soil, and they give scent, cooking leaves, and flowers for bees from one small bed. Keep mint in its own pot, since it spreads fast and will crowd its neighbors.

    Harvest little and often, snipping stems in the morning, and replace woody plants every few years when they stop producing fresh growth. A stone or terracotta edging keeps the bed tidy and stops soil washing onto paths in heavy rain. Label herbs while they are young, since many look alike before they flower, and put the herbs you use daily nearest the door, with less used plants further along the bed.

    10. Build an Outdoor Cooking Corner with a Clay Oven

    Mediterranean outdoor cooking corner with a domed clay pizza oven, stone worktop, and stacked firewood.

    Set up an outdoor cooking corner with a domed clay oven or a simple grill, a stone worktop, and storage for firewood, so summer cooking moves outside and the garden gains a working heart. A cooking corner suits a sheltered spot near the house, with a flat, level surface and room to carry food and plates without crossing a lawn. Keep the oven clear of overhanging branches and fences, and follow the maker guidance for heat clearance and safe use.

    Add a small table for herbs, tomatoes, and oil, a shelf for plates, and a hook for tools, so everything for a meal is within reach. A herb pot or two beside the worktop keeps flavoring close at hand, and a simple shade sail or vine frame above the work area makes midday cooking comfortable. Store cushions and table linen indoors overnight, and sweep ash and leaves from the corner so it is ready without a long tidy up.

    11. Frame a View or Entrance with Cypress Trees

    Gravel garden path lined with tall slender cypress trees leading toward a stone house, with lavender at the edges.

    Plant tall, slender cypress trees in a pair by a gate, or in a loose row along a path, to frame a view and give the garden its vertical lines. Cypress trees are the classic Mediterranean punctuation mark: dark green, narrow, and formal, they draw the eye along a path and make a flat garden feel designed. They suit entrances, drive edges, and the ends of a long border, where their height can be seen from the house.

    Give each tree room for its mature spread, and avoid planting them hard against a wall or fence, since they need air movement to stay healthy. Cypress trees need sun and well drained soil, and they cope with heat and wind once established. Underplant with lavender or gravel at their feet, so the base looks finished, and keep the path beside them clear of fallen needles in autumn so the surface stays safe to walk on.

    12. Light an Evening Courtyard with Lanterns and Jasmine

    Mediterranean garden courtyard at dusk with glowing lanterns, a mosaic table, chairs, and jasmine plants.

    Finish the garden for evenings with lanterns on a table and along a wall, a mosaic topped table with chairs, and jasmine planted where you sit, so the space stays inviting after sunset. Mediterranean gardens are used most in the evening, when the air cools and scent carries, and warm lantern light on plaster walls gives a courtyard its best hours. Keep the lighting low and warm, with candles or solar lanterns rather than harsh overhead lights.

    Plant jasmine at the base of a wall or post near the seat, tie stems in as they grow, and prune after flowering to keep it tidy. Jasmine needs sun for the best flowers, but its roots prefer cool, moist soil, so mulch the base and water in dry spells. Set the table where it catches the last sun and the first lantern light, and keep a basket or box nearby for cushions, so the evening seat is ready in a minute.

    Conclusion

    A Mediterranean garden with character is not about owning the largest plot or the rarest plants. It is about one clear structure, a small palette of warm materials, plants that love sun and dry soil, and a seat you actually use in the evening. Start with the idea that fits your space best, an olive tree, a pot cluster, a scented path, or a pergola, and add a second idea once the first is settled. The related planting and color advice in these Greek garden ideas pairs well with the courtyard, terrace, and pot ideas above.

    Keep this list handy for your next free hour outside, and build your Mediterranean garden one clear step at a time: structure first, then scent and shade, then the evening light that makes the whole space feel like a place to linger.

    FAQs

    What plants suit a Mediterranean garden in a cold climate?

    Choose hardy plants for the structure, such as lavender, rosemary in a sheltered spot, sedum, and ornamental grasses, and grow tender stars such as olive, citrus, and bougainvillea in large pots you can move under cover for winter. A sunny wall, a sheltered corner, and free draining soil all raise your chances, since cold plus wet soil damages more plants than cold alone. Check the hardiness of each variety before buying, and protect pots with wrapping or a cold frame in hard frost.

    How often should I water a Mediterranean garden?

    Water deeply but infrequently, so roots grow down rather than staying near the surface. Most established Mediterranean plants, including olive, lavender, and rosemary, need little water once settled, and they suffer more from constant wet soil than from a dry spell. Pots dry faster than beds, so check pot soil with a finger and water when the top feels dry, especially in wind and heat. Water the soil, not the leaves, in the morning or evening, and mulch gravel or stone surfaces to hold moisture.

    Can I make a Mediterranean garden on a small balcony?

    Yes, pots make the style possible with no bed at all. Use one olive or citrus tree in a large pot as the focal point, add terracotta pots of lavender, rosemary, and geraniums, and finish with a small chair and a lantern. Fix pots so wind cannot move them, use a free draining mix, and water more often than a ground bed, since pots dry fast. A trellis panel with jasmine or a climbing rose gives a wall of green without taking floor space.

    Should I use gravel or lawn in a Mediterranean garden?

    Gravel suits the style better in most cases, since it drains well, needs no mowing, keeps beds tidy, and matches the dry, sunny character of the Mediterranean. Use gravel for courts, paths, and around pots, and keep a small lawn only where you truly use it for play or sitting. Edge gravel with stone or timber so it stays in place, and lay a weed membrane beneath it to cut down on weeding in the first season.

    How do I get shade in a Mediterranean garden without a large tree?

    Use a pergola with a grapevine, a shade sail over a seating area, or a tall pot grown olive or bay that can be moved to where shade is needed. A vine pergola gives seasonal shade that opens in winter, while a sail gives instant cover and can come down in storms. Site any shade over the seat you use at midday, not over a path you only cross, and leave headroom for pruning and for carrying food and drinks beneath it.

    What is the cheapest way to start a Mediterranean garden?

    Start with pots and seed, not structures. A cluster of terracotta pots with herbs and geraniums, a packet of lavender seed or a few small plants along a path, and gravel over an existing paved area give the look for a modest outlay. Add one larger plant, such as a small olive in a pot, once the pots are settled, and save structures such as a pergola or terrace for a later season. Reuse stone, timber, and pots you already own, and repeat one material so a small garden still reads as a planned space.