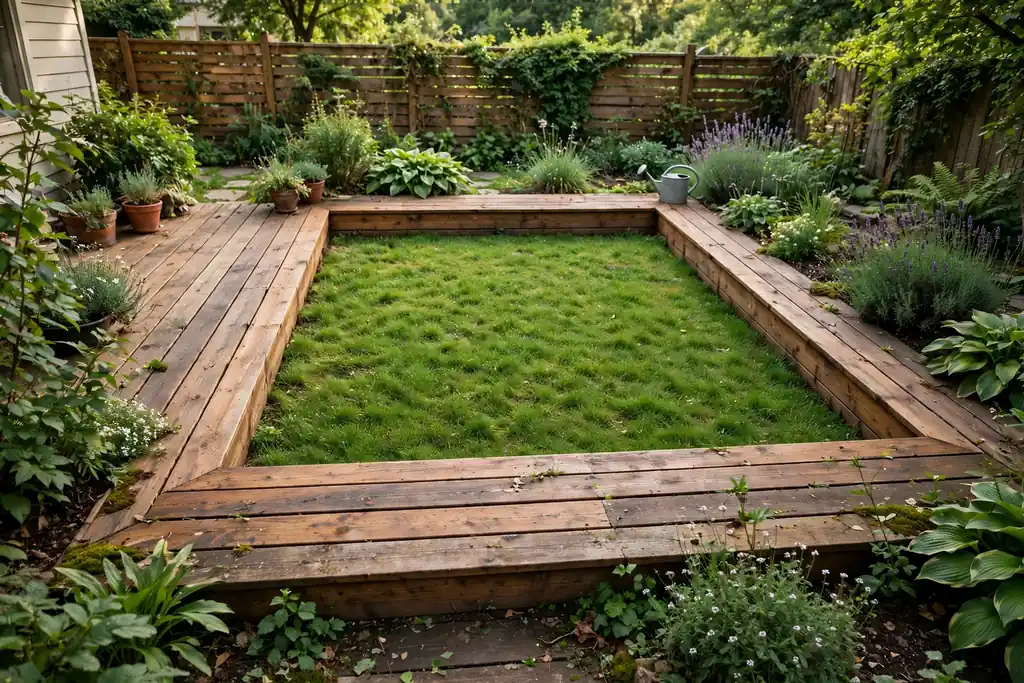
Author: Clara Bennett

  • 24 Inexpensive Privacy Fence Ideas for a Stylish Room That Works

    24 Inexpensive Privacy Fence Ideas for a Stylish Room That Works

    A yard feels different once you can sit in it without feeling watched. You do not need a tall, costly wall to get that feeling. Tight boards, a bamboo screen, a row of shrubs, or a trellis with climbers can all block the view while keeping the space open to light and air. These 24 inexpensive privacy fence ideas cover full fences, screens that fix to what you already have, and living options that improve with time. Start with the boundary that bothers you most, measure it, and pick the option that fits your budget, your tools, and your local rules.

    Key Takeaways

    • Measure the boundary first and price the job by the run, not by the panel, so the total stays honest.
    • Tight vertical or horizontal boards give the most privacy per dollar on a new fence.
    • Screens that fix to an existing fence or railing cost less than a full rebuild and suit renters.
    • Living screens take a season or two to fill in, so pair them with a temporary screen at first.
    • Leave gaps for air and drainage behind solid screens, and keep fixings clear of damp soil.
    • Check local height rules and boundary lines before you build, since limits vary by area.

    1. Tight Vertical Board Fence
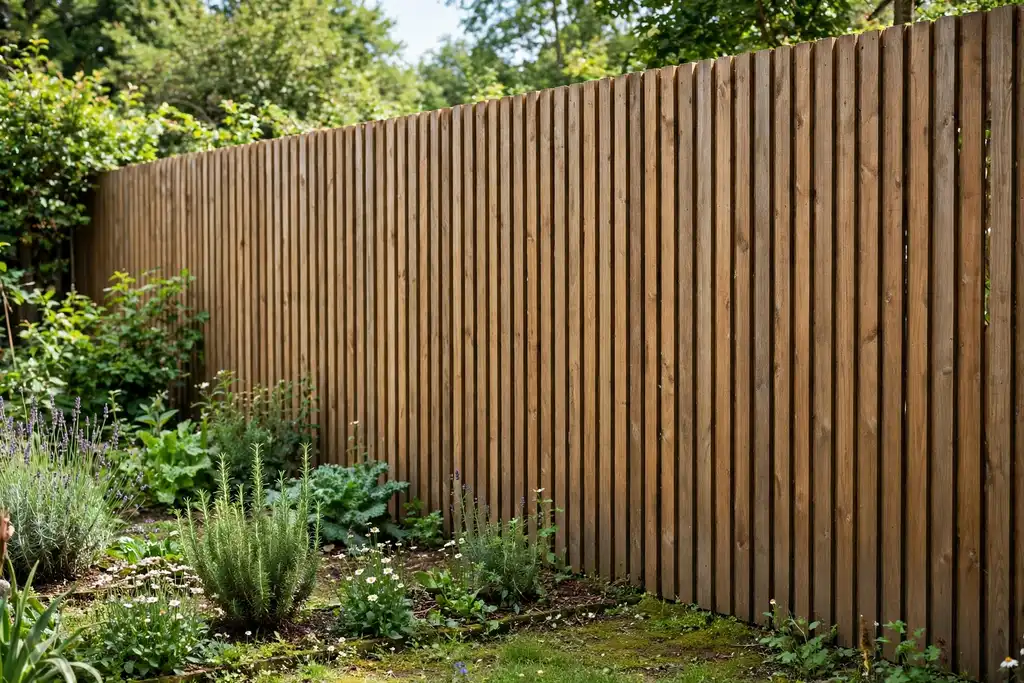
    Tight vertical board fence with no gaps along a garden boundary in daylight.

    Set vertical boards close together, with no gaps, for the simplest full privacy fence. Vertical boards suit most yards, shed rain well, and are easy to replace one at a time if a board warps or splits. Use pressure treated boards rated for outdoor use, and fix each board to at least two horizontal rails for a firm hold.

    Keep the bottom of the boards just clear of the soil so they dry after rain, and cap the top rail or add a top board to keep water out of the end grain. A single coat of stain or paint, refreshed every few years, protects the wood and lets you match the fence to the house. This is the baseline other ideas in this list build on.

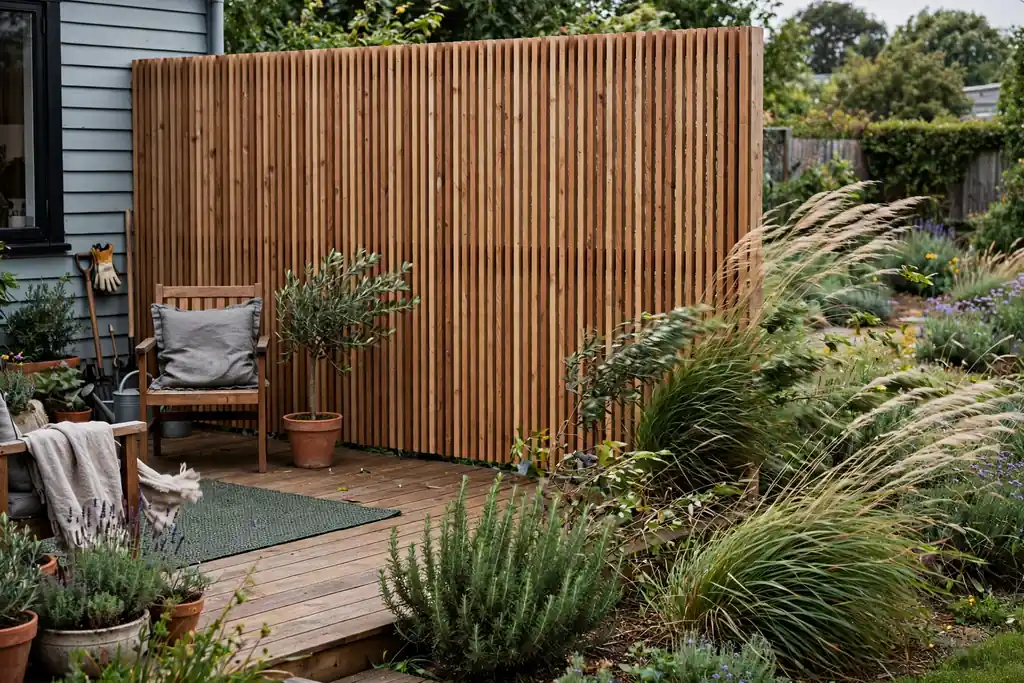
    2. Horizontal Slat Fence
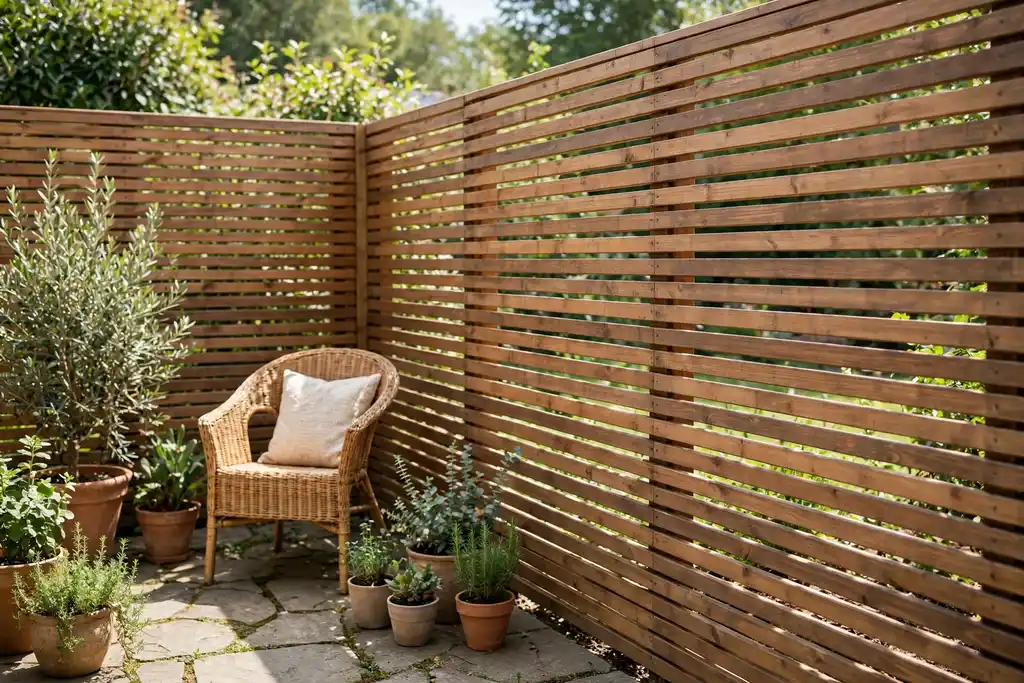
    Horizontal slat fence beside a patio with a chair and potted plants.

    Run boards horizontally for a clean, current look that reads more like cladding than a farm fence. Horizontal slats suit patios and small yards, where the long lines make the space feel wider. Leave a small, even gap between slats if you want light and air, or butt them tight for full privacy.

    Fix the slats to sturdy posts, since horizontal boards put more load on the posts than vertical boards do. Space the posts closer together on long runs, and use a spacer block while fixing so the gaps stay even. A dark stain makes the gaps read as shadow lines, while a pale wash keeps the fence light in a small garden.

    3. Board on Board Fence
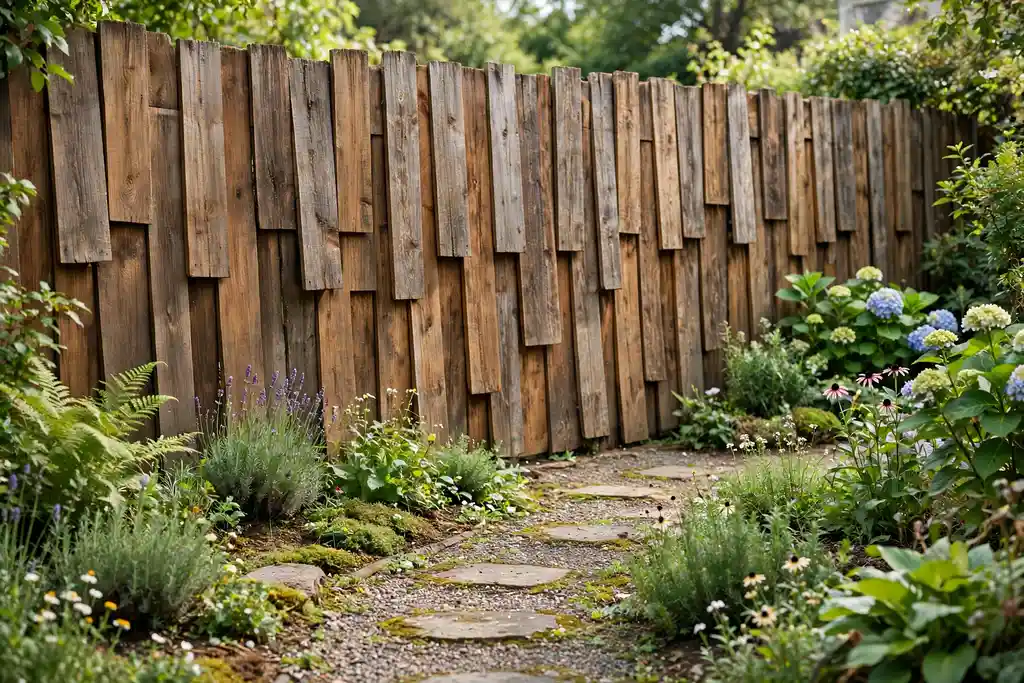
    Board on board fence with overlapping boards seen from a garden path.

    Overlap boards on alternate sides of the rails so every seam is covered from both directions. A board on board fence blocks angled views better than a single layer of boards, which matters on a corner plot or beside a raised path. It also looks finished from both sides, which helps when the fence faces a neighbor.

    Use the same board size on both faces and keep the overlap even, about a third of a board width, so the pattern stays tidy. The double layer uses more timber than a single layer fence, so price it by the full run and buy a few spare boards for repairs. Stain both faces before fixing if you can, since the overlaps are hard to reach later.

    4. Lattice Top Fence
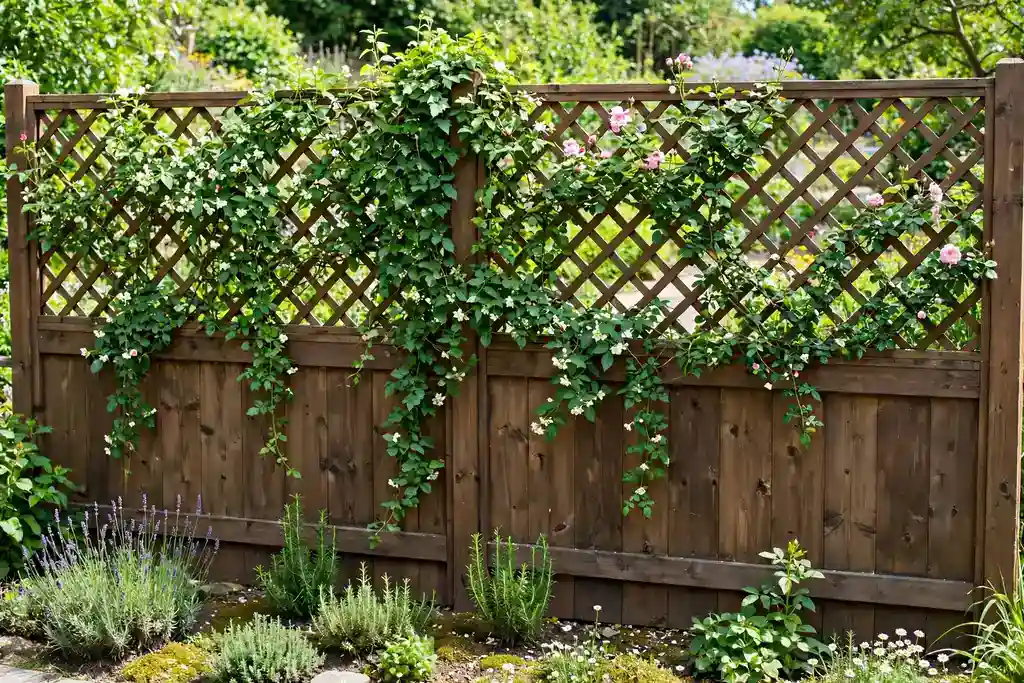
    Solid garden fence with a lattice top panel and climbing plants.

    Add a lattice panel along the top of a solid fence to gain height and privacy without a full solid wall. The lattice breaks the sight line from upstairs windows while letting light and air through, and it gives climbers a frame to grow over. This suits yards where a full height solid fence would feel heavy or break local rules.

    Fix the lattice to the posts, not just to the top rail, so wind cannot work it loose. Choose a lattice with small openings for more screening, and paint or stain it to match the fence below. Train a light climber, such as jasmine or clematis, through the lattice for a green top edge in summer.

    5. Pallet Wood Fence
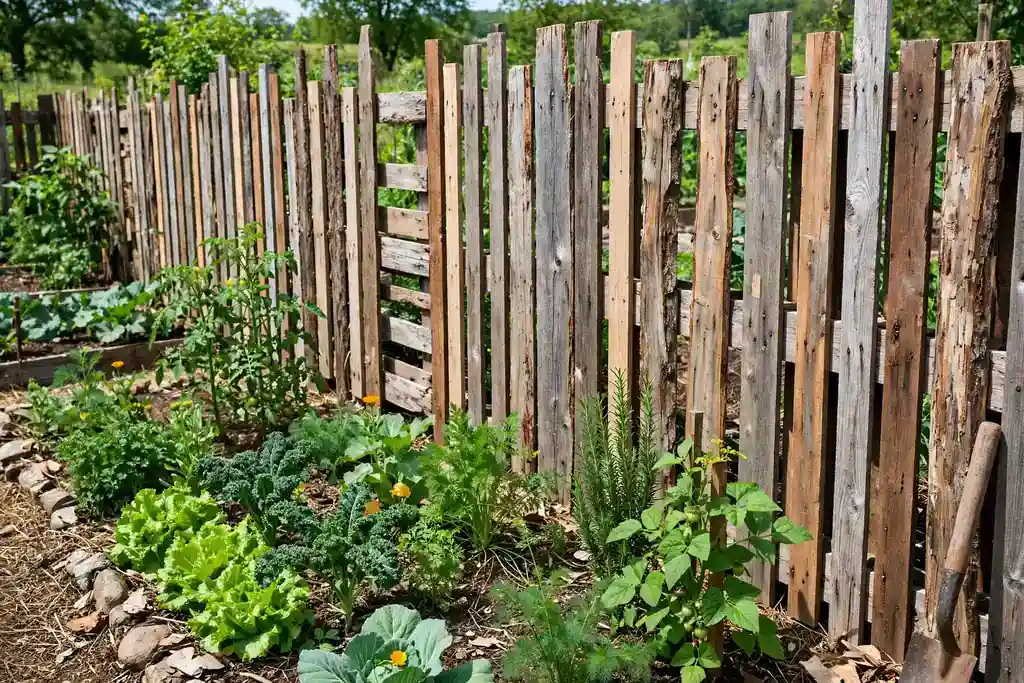
    Rustic pallet wood fence along a vegetable garden edge.

    Take apart clean, dry pallets and use the slats for a low cost fence with a rustic, varied look. Pallet wood suits a vegetable garden edge, a side passage, or a workshop yard, where a rough finish fits the setting. Check each pallet for stamps and damage first, and avoid pallets that carried chemicals or look stained.

    Sort the slats by length, cut them to a common height, and fix them to rails on solid posts. Sand the faces that people touch, and stain the finished fence to even out the mixed timber tones. Pallet fences need more sorting time than bought boards, but the timber itself can cost very little.

    6. Bamboo Screen Fence
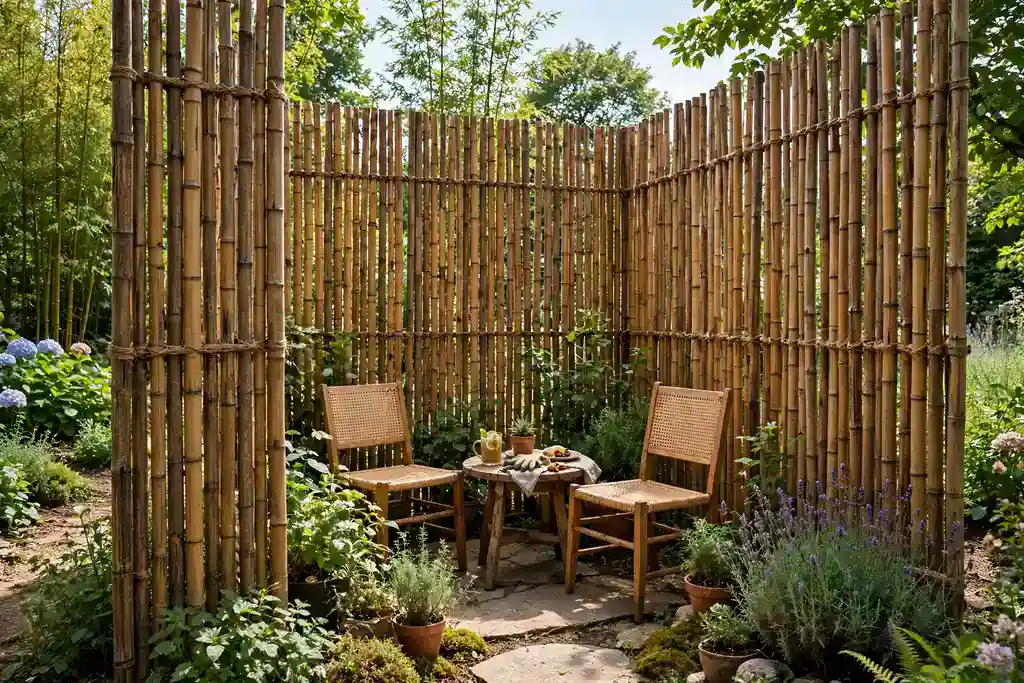
    Bamboo pole screen fence around a garden seating area.

    Fix bamboo poles or a rolled bamboo screen to posts for a warm, natural fence that suits a tropical or relaxed garden. Bamboo poles give a bold, rounded texture, while a rolled screen is quicker to hang and easier to cut to size. Both work well around a seating area, a hot tub, or a pool edge.

    Use posts at close spacing, since bamboo screens are light but catch wind, and tie or screw the screen at several heights so it cannot flap. Seal the cut ends of poles to slow splitting, and keep the base clear of standing water. Replace individual poles as they weather, rather than rebuilding the whole screen.

    7. Reed Screen on an Existing Fence
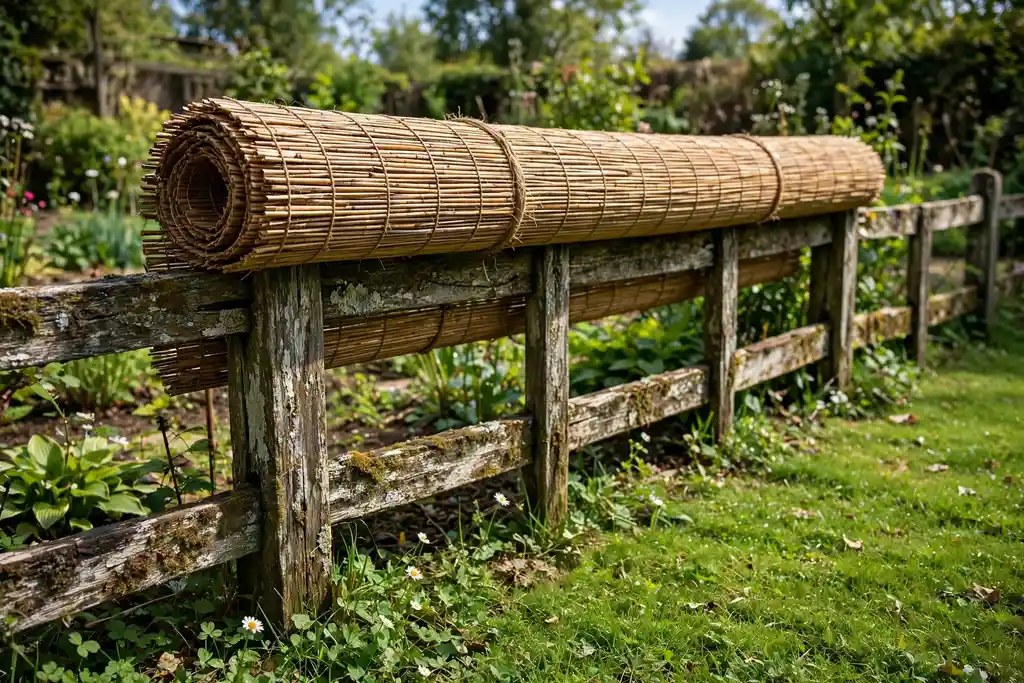
    Reed screen rolled over an old garden fence.

    Roll a reed or willow screen over a tired fence or a chain link fence for instant privacy at a fraction of rebuild cost. The screen hides gaps, rust, and mismatched boards, and it softens a hard boundary with a natural texture. It suits renters too, since it fixes with wire ties and comes down again.

    Unroll the screen along the fence, pull it taut, and tie it to the fence at top, middle, and bottom, every few feet. Trim the top edge level and fold the cut ends under so they do not fray. Expect to replace a reed screen every few seasons, and check the ties after strong wind.

    8. Chain Link Dressed With Privacy Slats
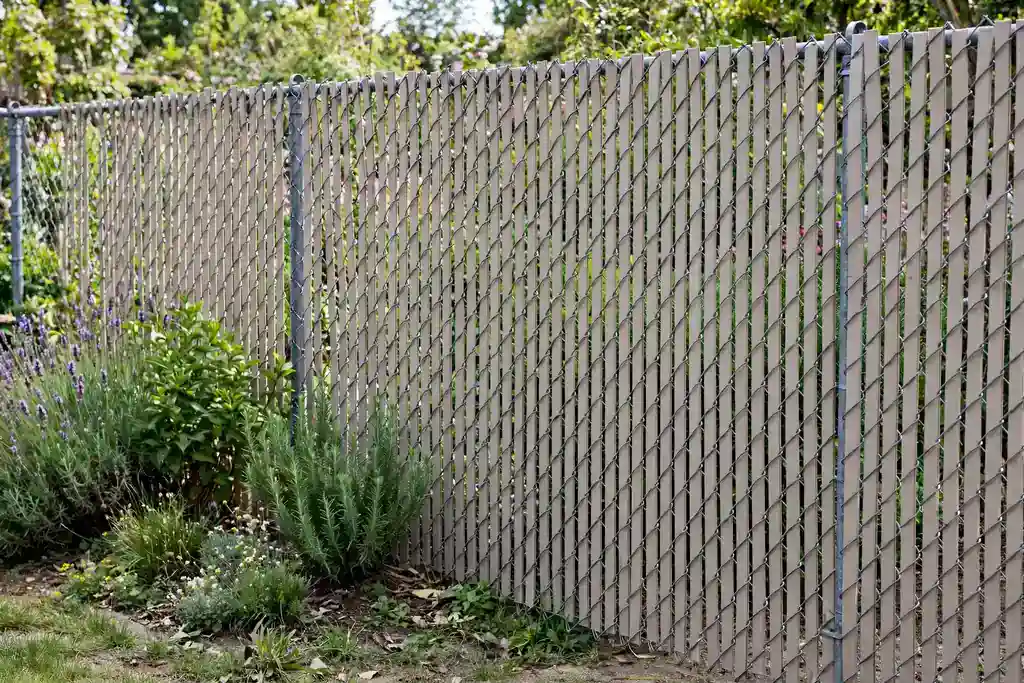
    Chain link fence with privacy slats threaded through the mesh.

    Thread privacy slats through an existing chain link fence to turn an open fence into a screened one without new posts. Slats come in plastic, wood, and woven styles, and they slide into the mesh from the top. This is one of the cheapest routes to privacy where a chain link fence already stands.

    Work one section at a time, weaving each slat through the mesh and locking it at the top rail. Mix in a few slats in a second color if you want a simple pattern, and leave the gate section free until last so you can still get through. Check that the added slats do not overload older posts in strong wind, and tighten loose posts first.

    9. Corrugated Metal Panel Fence
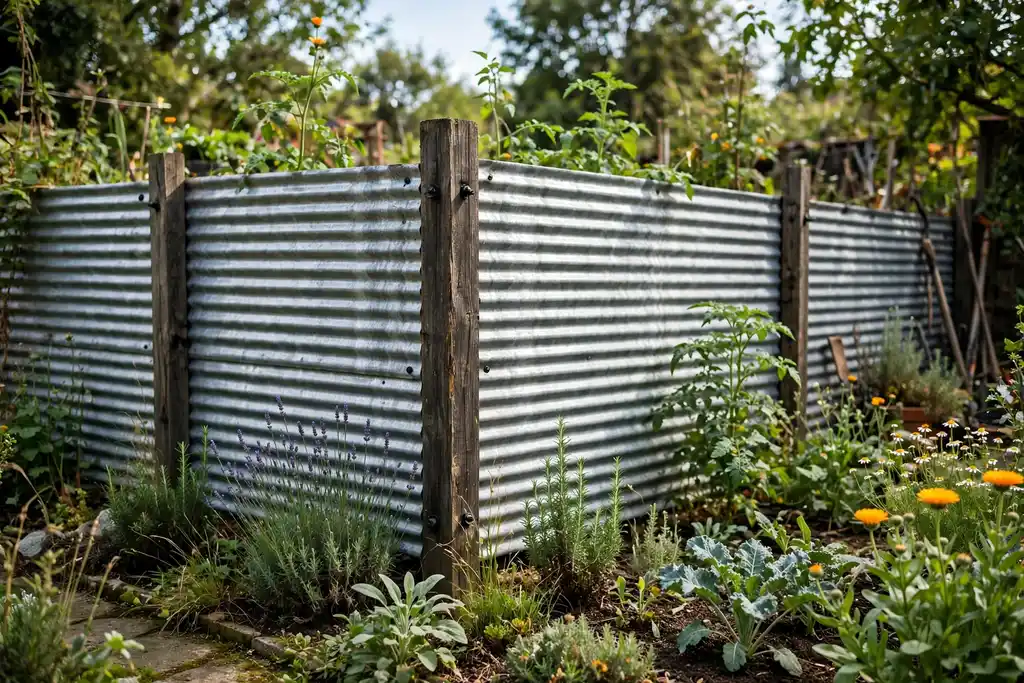
    Corrugated metal panel fence with wood posts in a garden.

    Use corrugated metal panels between wood posts for a strong, low care fence with a modern, industrial feel. Metal panels need no painting, resist rot, and give full privacy at once, which suits a side passage, a workshop yard, or a contemporary garden. The ridges also add texture that flat boards lack.

    Fix the panels into grooved posts or behind timber battens, and cap the top edge with a timber or metal capping so the cut edge is safe to touch. Wear gloves when cutting panels, and seal cut edges to slow rust. Pair metal panels with wood posts and a timber gate to soften the look from the seating area.

    10. Living Hedge Fence

    Dense evergreen hedge forming a green garden boundary.

    Plant a row of dense evergreen shrubs, such as laurel, privet, or boxwood, for a fence that grows thicker and taller each year. A hedge suits a front garden or a large boundary, where a built fence would look hard, and it gives birds shelter and seasonal interest. It also absorbs sound better than a flat board fence.

    Plant in a prepared trench with compost, space the shrubs by the label, and water well in the first year. Trim once or twice a year to keep the hedge dense from the base up, since a hedge that is only trimmed at the top grows bare at the bottom. While the hedge fills in, use a temporary reed screen behind it for privacy in the first season.

    11. Trellis With Climbing Plants
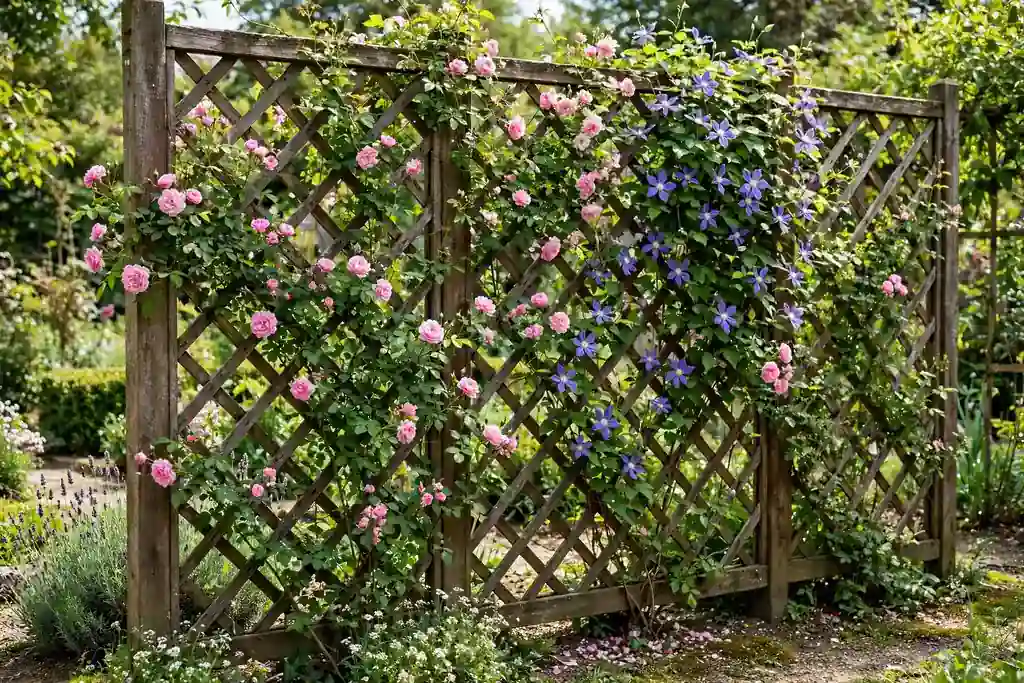
    Trellis fence covered with flowering climbing plants.

    Stand a trellis panel on posts and grow climbers over it for a green screen that changes with the seasons. A trellis fence suits a patio edge or a garden room divider, where a solid fence would block too much light. Roses, jasmine, clematis, and ivy all work, with different levels of winter cover.

    Fix the trellis with a gap behind it so air moves and the frame dries, and tie stems loosely as they grow. Choose evergreen climbers for year round cover, or mix an evergreen with a flowering climber for summer color. Prune after flowering as the plant type requires, and keep climbers clear of gutters and windows.

    12. Willow Hurdle Fence
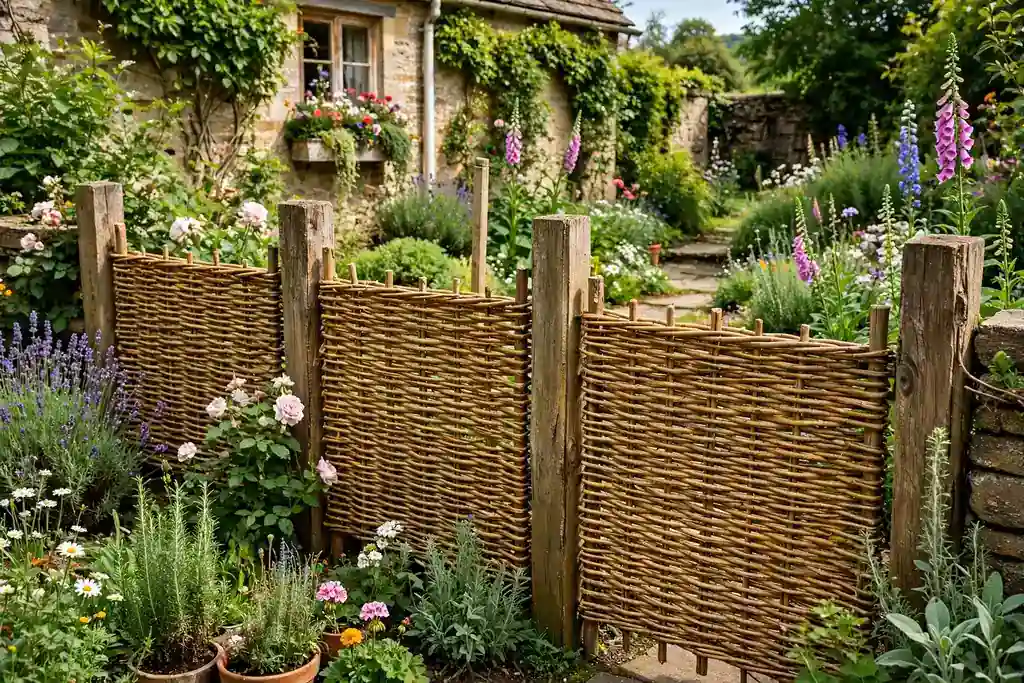
    Woven willow hurdle fence panels between posts in a cottage garden.

    Set woven willow hurdle panels between posts for a ready made natural fence with a cottage feel. Hurdles suit a vegetable garden, a cottage path, or a curved boundary, since the panels can follow a gentle curve. They arrive woven and fix quickly, which keeps labor low.

    Drive posts at the panel width, slot each hurdle between two posts, and fix it with wire or screws so wind cannot lift it. Keep the base of the hurdle clear of soil to slow rot, and expect a lifespan of several years outdoors before the weave needs replacing. For a seat beside the new boundary, these garden bench ideas show how to pick a spot first and match the seat to it.

    13. Outdoor Curtain Panels
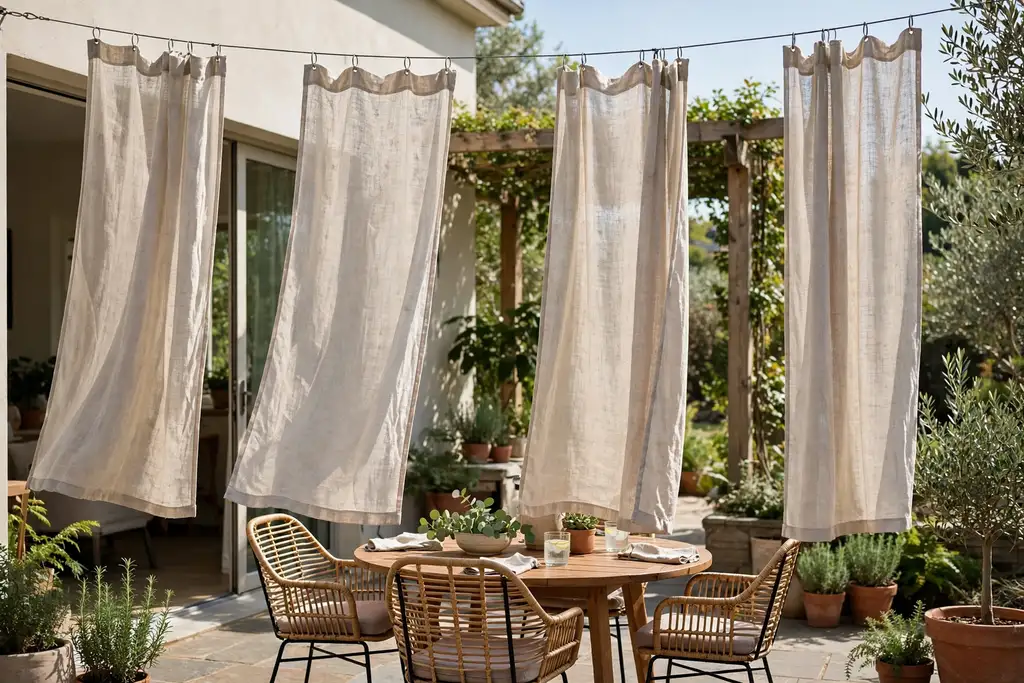
    Outdoor curtain panels hanging from a wire on a patio.

    Hang outdoor fabric panels from a wire or a rod between posts to screen a patio, a balcony, or a seating nook. Curtains suit renters and small spaces, since they need no building work, and you can open them for sun and close them for privacy. They also soften a hard fence or railing with moving fabric.

    Use fabric rated for outdoor use, with weighted hems or tiebacks so it does not blow about. Fix the wire to solid posts or wall brackets, and leave enough slack for the panels to gather. Bring the panels in during storms and over winter to keep them fresh, and wash them as the maker directs.

    14. Shade Cloth Screen
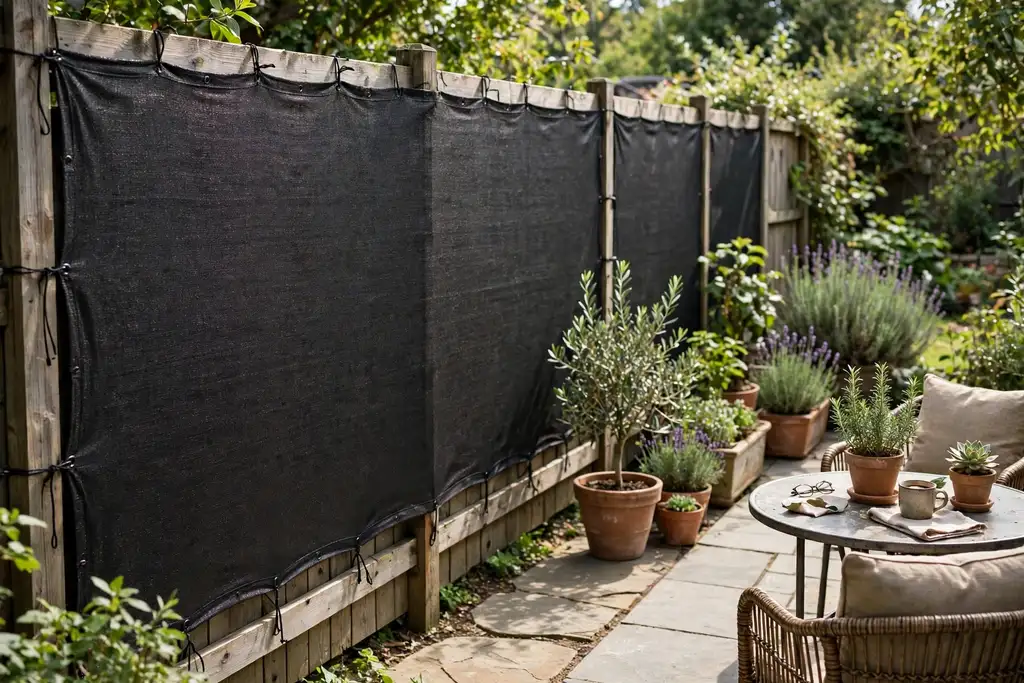
    Dark shade cloth screen fixed to a garden fence.

    Fix shade cloth to a fence, a railing, or a simple post frame for a light, low cost screen that also cuts sun and wind. Shade cloth suits a balcony, a dog run, or a vegetable patch, where full boards would block too much air. It comes in different densities, so you can choose how much you can see through it.

    Stretch the cloth taut and fix it with cable ties or eyelets at close spacing, so it does not sag or flap. Choose a dark green or black cloth for the most privacy, and a lighter color where you want more daylight. Trim the edges neatly and check the fixings after the first strong wind, since a loose cloth tears fast.

    15. Fence Topper Panels
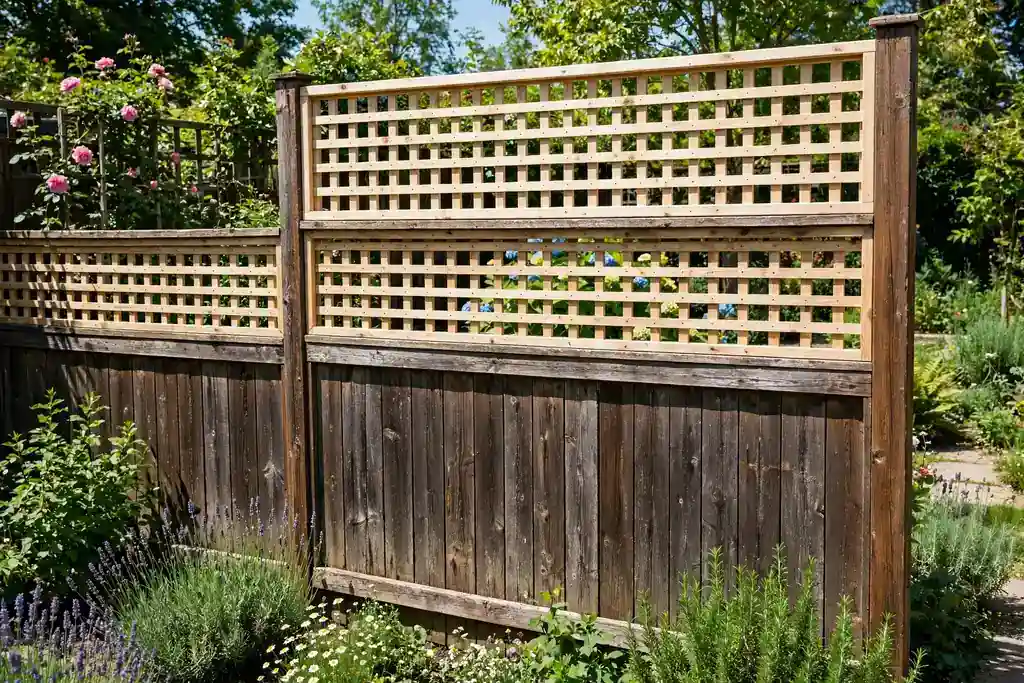
    Fence with lattice topper panels added above the old top rail.

    Add a short extension panel to the top of an existing fence to raise its height by a foot or two. Toppers come as lattice, slatted, or solid panels, and they suit yards where the fence is sound but just too low for privacy from a raised deck or a neighboring window. They cost far less than a new fence.

    Check local height rules before adding a topper, and fix it to the posts, not only to the old top rail. Match the topper material to the fence below, or use a contrasting slat panel for a deliberate layered look. If the old posts are weak, add new posts beside them first, since the topper adds wind load.

    16. Planter Box Fence
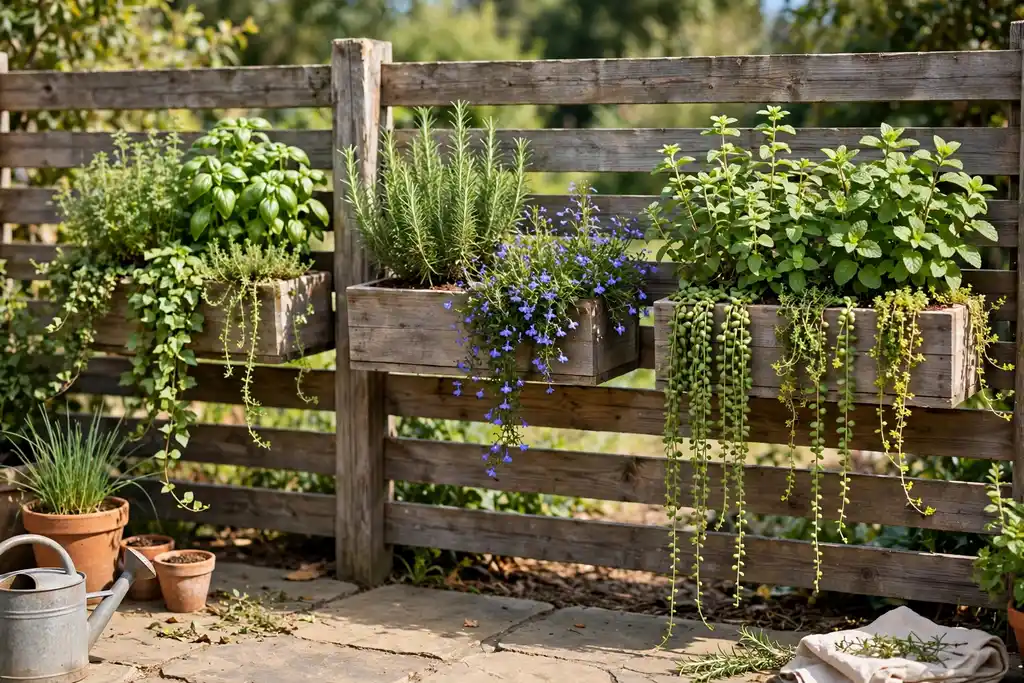
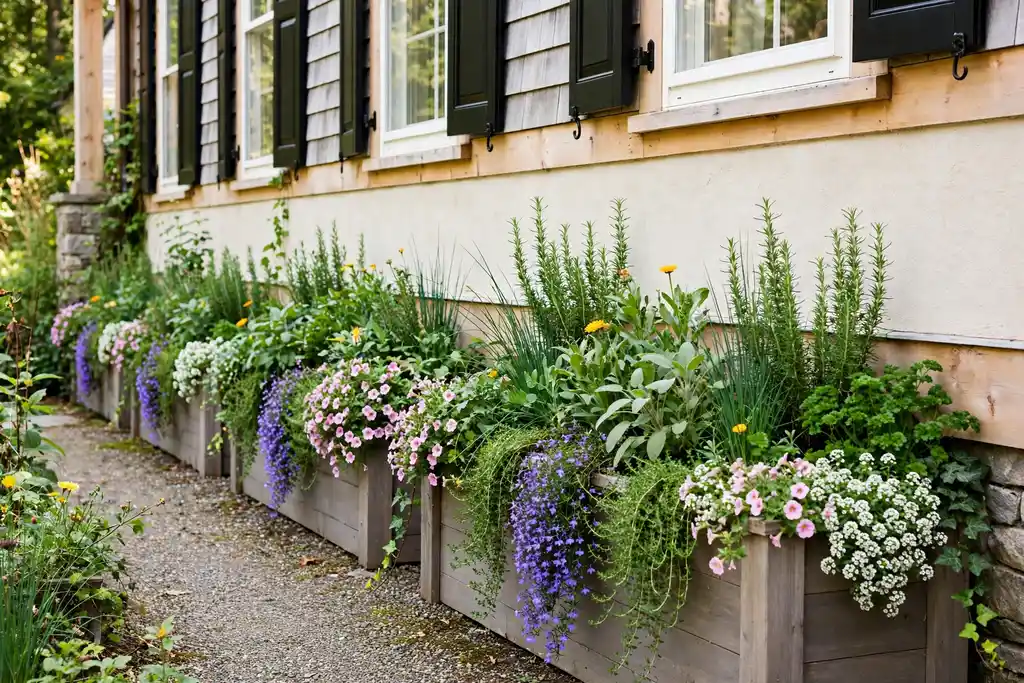
    Wood fence with planter boxes holding herbs and trailing plants.

    Build or buy a fence with planter boxes fixed to it, so plants add a second layer of screening above the boards. A planter fence suits a patio edge, a balcony, or a small yard, where the fence also has to earn its place as growing space. Herbs, trailing plants, and small shrubs all work in the boxes.

    Fix the boxes to the posts, not just to the boards, and line them so water does not rot the fence behind. Water pots more often than beds, since boxes dry out fast in sun and wind, and keep trailing plants trimmed back from paths. For level based planting ideas, these tiered garden ideas show how to give each level a clear job.

    17. Cinder Block Base With a Wood Top
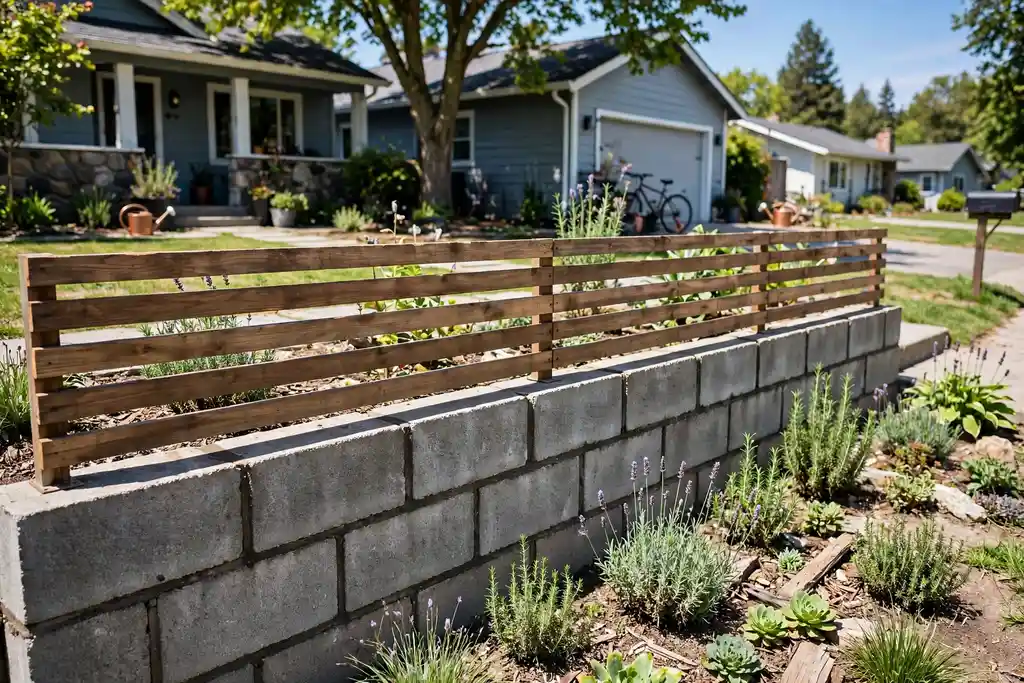
    Low cinder block wall topped with wood slats in a front yard.

    Build a low cinder block wall and top it with wood slats or a timber cap for a fence that is solid at the base and lighter above. The block base blocks views at ground level, stops dogs pushing through, and needs little care, while the wood top keeps the fence from feeling like a wall. This suits a front yard or a sloped boundary.

    Set the blocks on a firm footing, level each course, and cap the top course before fixing the wood above. Render or paint the blocks to match the house, and leave weep gaps at the base so water drains. Keep the wood top clear of soil and seal it as you would a timber fence.

    18. Painted Fence in a Dark Color
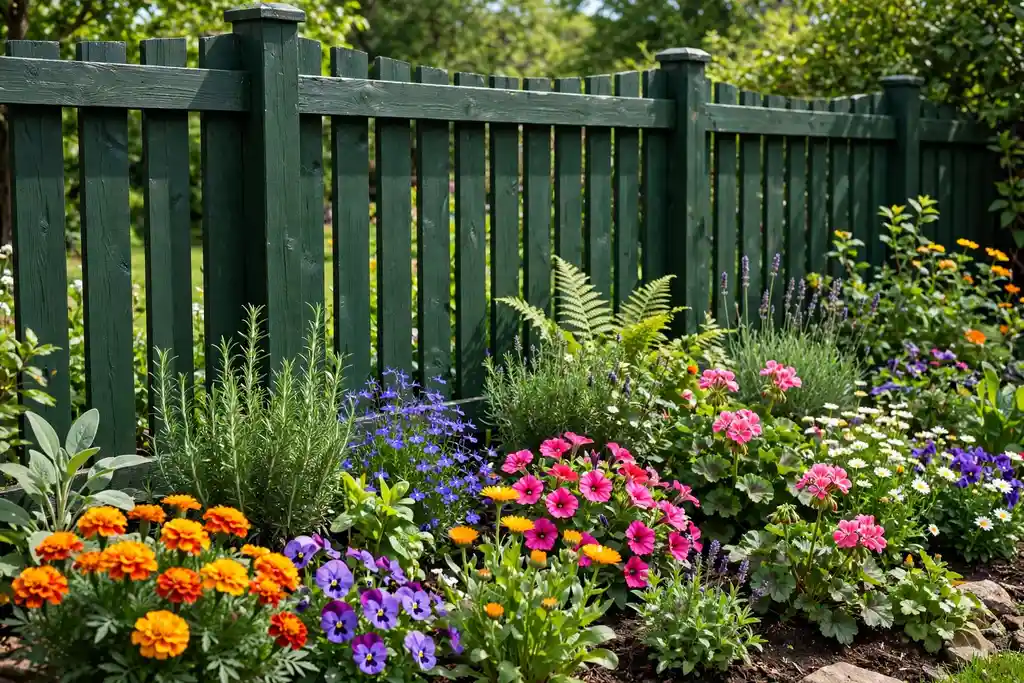
    Garden fence painted dark green with bright planting in front.

    Paint an existing fence in a dark green, charcoal, or black to make it recede and make planting stand out. A dark fence reads as a backdrop rather than a barrier, so a small yard feels deeper and the planting in front of it looks brighter. This is the cheapest change on this list if the fence itself is sound.

    Clean the fence, repair loose boards, and use a paint or stain made for exterior wood. Two thin coats last longer than one thick coat, and a sprayer speeds the job on a long run. Keep paint off planting by covering beds first, and repaint the sunny side more often, since sun breaks paint down fastest.

    19. Gabion Basket Fence
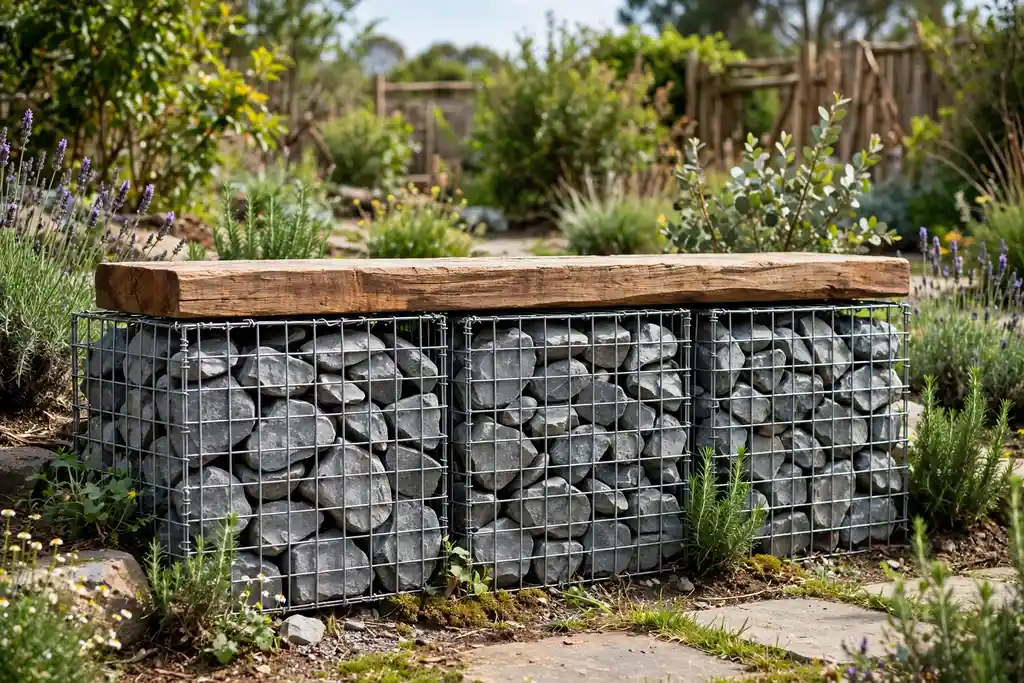
    Gabion baskets filled with stone topped with a timber plank.

    Fill wire gabion baskets with stone for a low, sturdy fence base, then add a timber or metal top for extra height. Gabions suit a contemporary garden, a sloped edge, or a boundary where stone already appears in the landscape. They drain freely, so they cope well with wet ground.

    Set the baskets on a level, firm base, fill them in layers, and pack the face stones neatly so the front looks tidy. Wear gloves when handling cut wire, and cap sharp ends. Top the baskets with a timber plank or a slatted panel, fixed to posts set inside the baskets, for a seat height wall that also screens views.

    20. Brushwood Fence

    Brushwood roll fence fixed to posts around a garden.

    Fix rolled brushwood, made from thin twigs bound together, to posts for a dense, natural screen with a rustic look. Brushwood suits a cottage garden, a pool surround, or a boundary that needs full privacy at once, since the rolls arrive thick and opaque. It also softens sound better than a flat panel.

    Unroll the brushwood along the posts, pull it taut, and wire it at top, middle, and bottom. Trim the top edge level and tuck loose twigs back into the roll. Brushwood weathers over time and sheds a few twigs, so sweep the base now and then, and expect to replace a roll after several seasons in wet weather.

    21. Reclaimed Door and Shutter Screen
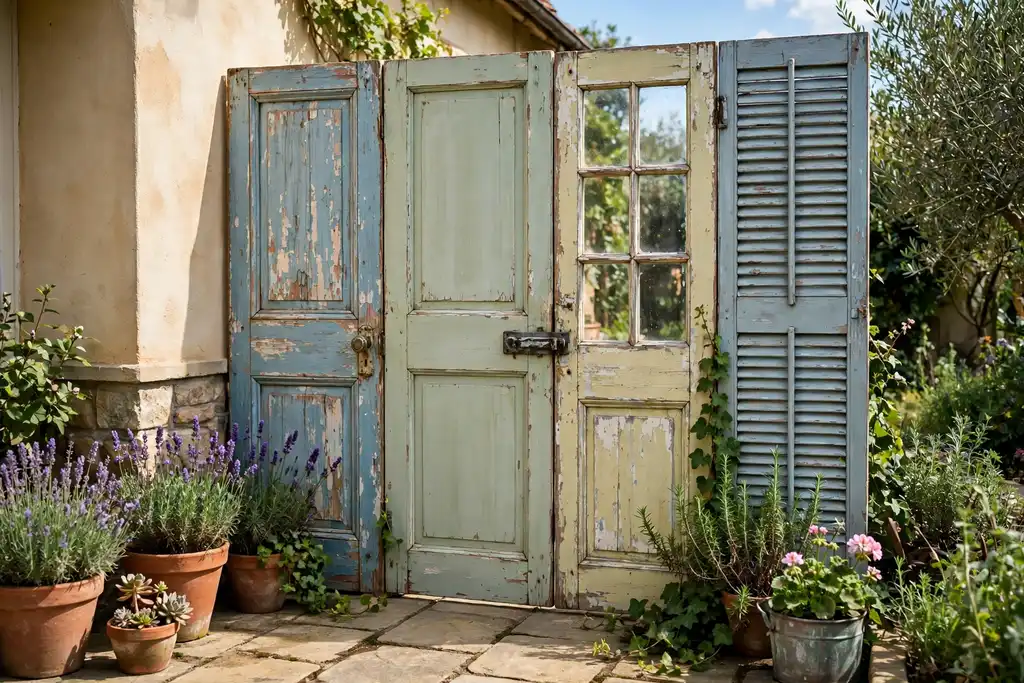
    Freestanding screen made from painted old doors and shutters.

    Join old doors, shutters, or window frames into a freestanding screen for a one of a kind boundary with character. This suits a garden room divider, a patio corner, or a short run where a full fence would be too much, and it reuses timber that would otherwise go to waste. Paint the pieces in one color to pull the mix together.

    Hinge the pieces together so the screen can fold, and fix the end pieces to posts or heavy feet so it stands firm. Sand rough edges, check old paint for lead before sanding, and seal the finished screen for outdoor use. Keep the screen clear of soil at the base, and move it under cover in winter if the pieces are fragile.

    22. Staggered Slat Fence With a Gap
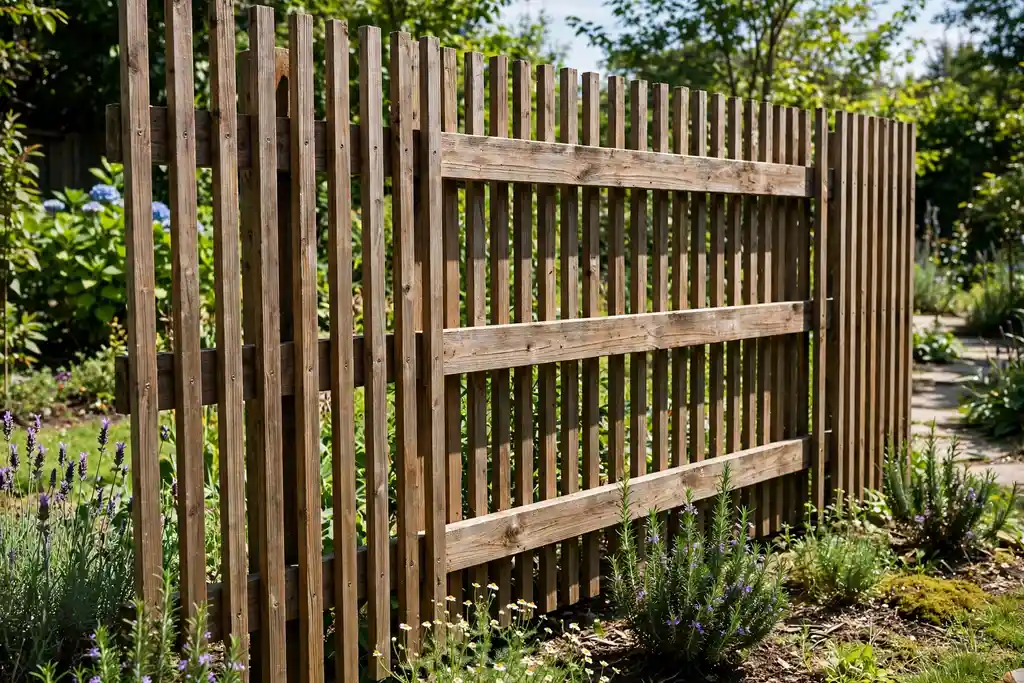
    Staggered slat fence with slats on both sides of the rails.

    Fix slats alternately to the front and back of the rails, so the fence looks open from straight on but blocks views from an angle. A staggered slat fence lets air and some light through while still screening a seating area, which suits a windy yard where a solid fence would catch too much wind. It also looks the same from both sides.

    Use a spacer to keep the slat spacing even, and check the view from the neighbor side as you build, since the angle matters more than the front view. Stain both faces before fixing, since the rear slats are hard to reach later. Add a top cap to keep rain out of the rail ends.

    23. Bamboo and Wood Mixed Fence
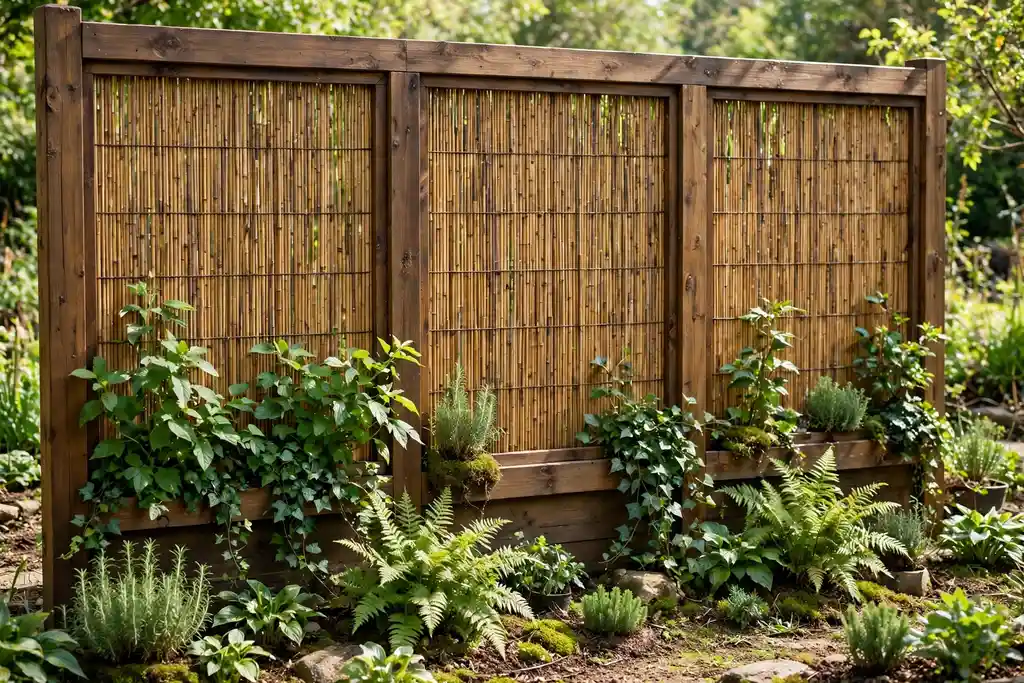
    Wood framed fence with bamboo infill panels in a garden.

    Combine a wood frame with bamboo infill panels for a fence that is stronger than a bamboo screen alone and warmer than plain boards. The wood frame carries the load, while the bamboo gives texture and a natural color that suits planting. This suits a garden with a relaxed, tropical feel.

    Build the frame from treated timber posts and rails, then fix bamboo poles or a bamboo mat inside each frame bay. Keep the bamboo clear of the ground with a bottom rail, and seal cut ends. For rooftop lessons on screens that must cope with wind, these rooftop garden ideas cover trellis screens and wind load in detail.

    24. Two Layer Fence: Solid Below, Plants Above
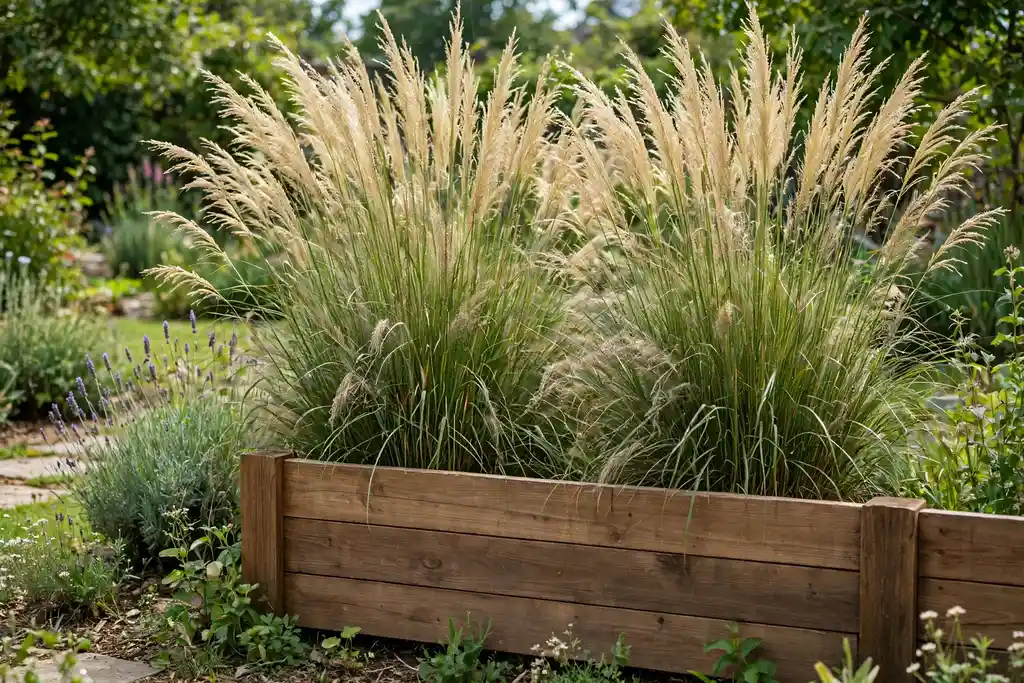
    Low solid fence with tall grasses planted behind it.

    Pair a low solid fence with tall planting behind it for privacy that grows better each year. The solid base gives instant cover at sitting height, while shrubs, grasses, or bamboo above block views from standing height and upstairs windows. This suits a yard where a tall solid fence would feel closed in.

    Build the solid section to about waist height, then plant a row of tall grasses, bamboo in pots, or evergreen shrubs just behind it. Keep the planting in pots if bamboo is involved, since it spreads fast in open soil. Trim the planting once a year to keep it dense from the base, and leave a gap behind the fence for air and access.

    Conclusion

    Privacy does not have to mean a tall, costly wall. Start with the boundary that bothers you most, measure it honestly, and pick the option that fits your budget and your tools. A tight board fence gives the most cover at once, a screen over an existing fence costs far less, and a hedge or trellis improves every year you keep it. Whichever idea you choose, build it well at the posts and the base, since those are the parts that decide how long it lasts. Pick one idea from this list, start with a single run, and add planting or paint only after the fence itself feels right.

    Save this list on Pinterest before your next yard project, and work through it one boundary at a time: measure first, then material, then the planting that makes the fence yours.

    FAQs

    How tall should a privacy fence be?

    Most privacy fences are between 6 and 8 feet tall, but the right height depends on your yard and your local rules. A fence at sitting eye level, around 5 to 6 feet, screens a patio well, while a taller fence is needed beside a raised deck or an upstairs window. Check local height limits and boundary rules before you build, since limits vary by area and by whether the fence faces a street.

    What is the cheapest way to add privacy to an existing fence?

    A rolled reed or bamboo screen, or a shade cloth panel, is usually the cheapest route, since both fix to the fence you already have with wire ties. Privacy slats threaded through chain link are also low cost. These options need no new posts and no digging, and they can be removed again, which suits renters.

    How do I keep a wood privacy fence from rotting?

    Keep the boards clear of soil, cap the top rail, and let air move behind the fence. Use timber rated for outdoor and ground contact use, seal cut ends, and stain or paint the fence every few years. Clear leaves and debris from the base, since damp debris held against wood speeds rot.

    Can I build a privacy fence on a slope?

    Yes, but the method matters. Step the fence down the slope in level panels, which leaves small triangular gaps at the base, or rake the boards to follow the slope for a closed base. Stepped panels suit most bought panels, while a raked fence needs boards fixed one at a time. Fill base gaps with stone or planting where pets or views are a concern.

    What plants give privacy fastest?

    Fast growing evergreen shrubs, tall ornamental grasses, and bamboo in pots give the quickest living cover. Bamboo grows fastest but must stay in pots or root barriers, since it spreads. For a hedge, buy the largest plants your budget allows and plant them closer than the label spacing for quicker fill, then thin them later if needed.

    Do I need my neighbor’s permission to build a fence?

    Rules vary, but in many areas you can build on your own side of the boundary up to a set height without permission. A fence on a shared boundary, or one above the local height limit, often needs agreement or a permit. Talk to your neighbor early, agree the line in writing if you share costs, and check local rules before you dig.

  • 34 Fall Front Porch Planter Ideas to Bring More Personality Home

    34 Fall Front Porch Planter Ideas to Bring More Personality Home

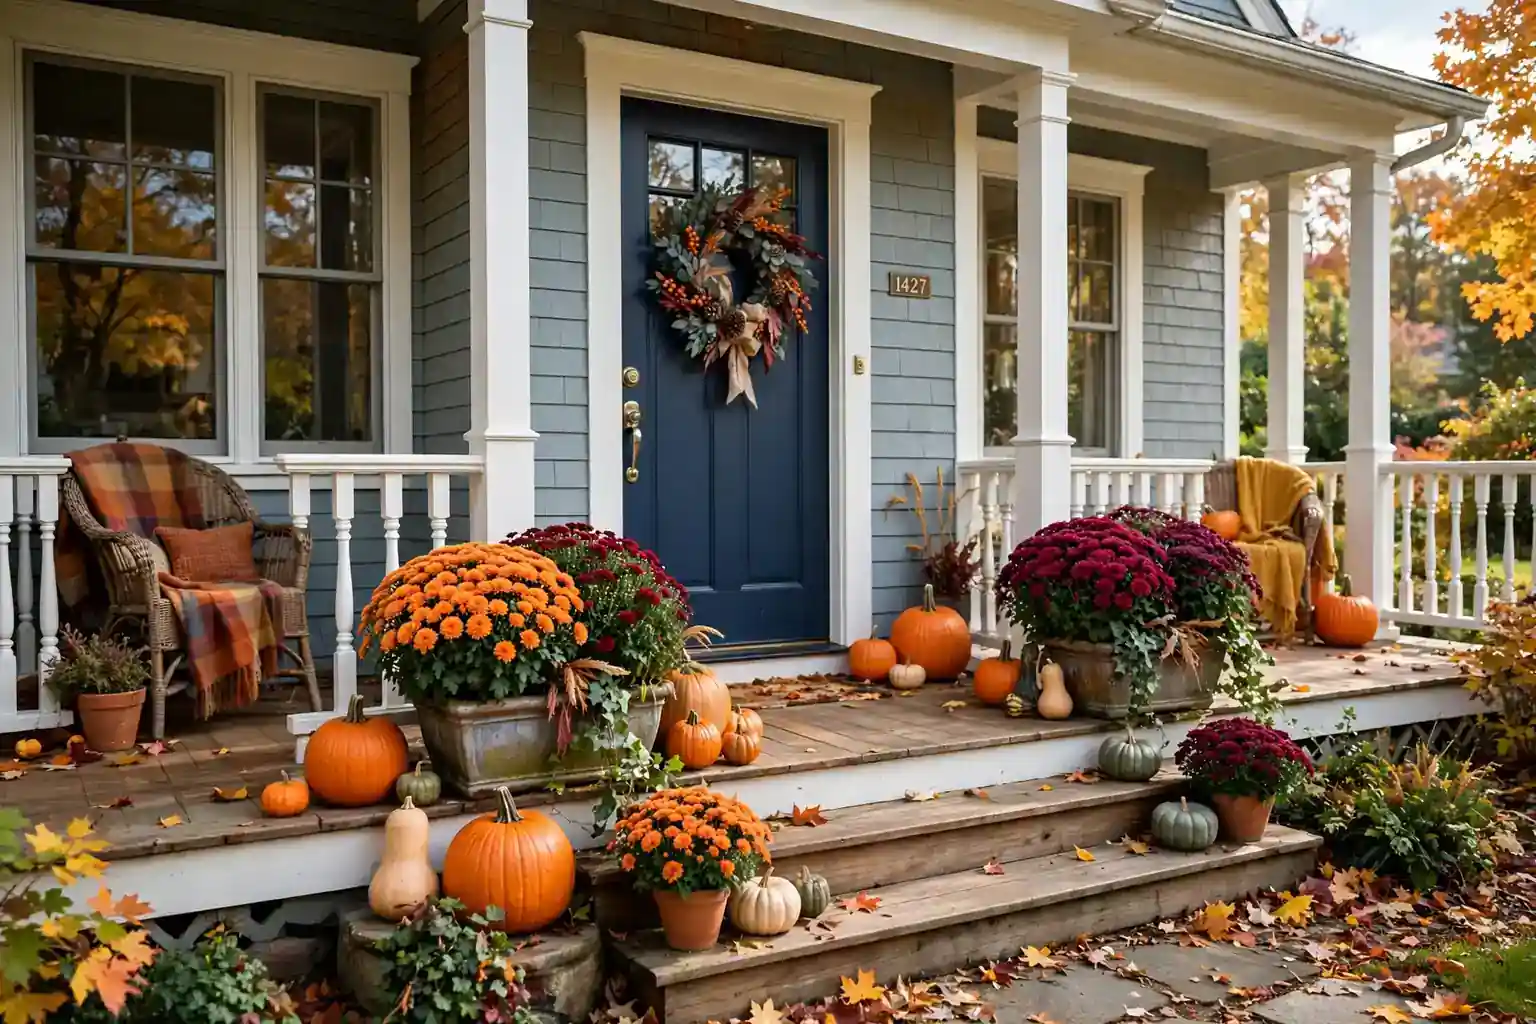
    A front porch planter does more work in fall than at any other time of year. It is the first thing guests see, it frames the door, and it can carry color long after summer flowers fade. These 34 fall front porch planter ideas cover mums, pumpkins, ornamental kale, grasses, herbs, and rustic containers, with notes on sun, watering, and scale. Start with the size of your porch and the light it gets, then pick one planter style to repeat. For color at the door itself, these blue front door colors show how a painted door can set the whole palette.

    Key Takeaways

    • Match the planter to the porch: tall urns suit wide entries, while small pots and hanging planters suit narrow porches and steps.
    • Use a simple structure in each pot: one tall plant, one full mid layer, and one trailing plant at the edge.
    • Mums, ornamental kale, grasses, and hardy foliage hold up best in cool fall weather, while tender summer plants fade fast.
    • Repeat one color or one container material across the porch so a mix of planters still looks planned.
    • Check drainage, weight, and sun before planting, and water less often as nights cool.
    • Plan for late fall too, with evergreens, pinecones, and birch stems that carry a planter past the first frost.

    1. Matched Mum and Pumpkin Pair by the Door

    Matching pots with orange mums flanking a front door, with pumpkins at the base of each pot.

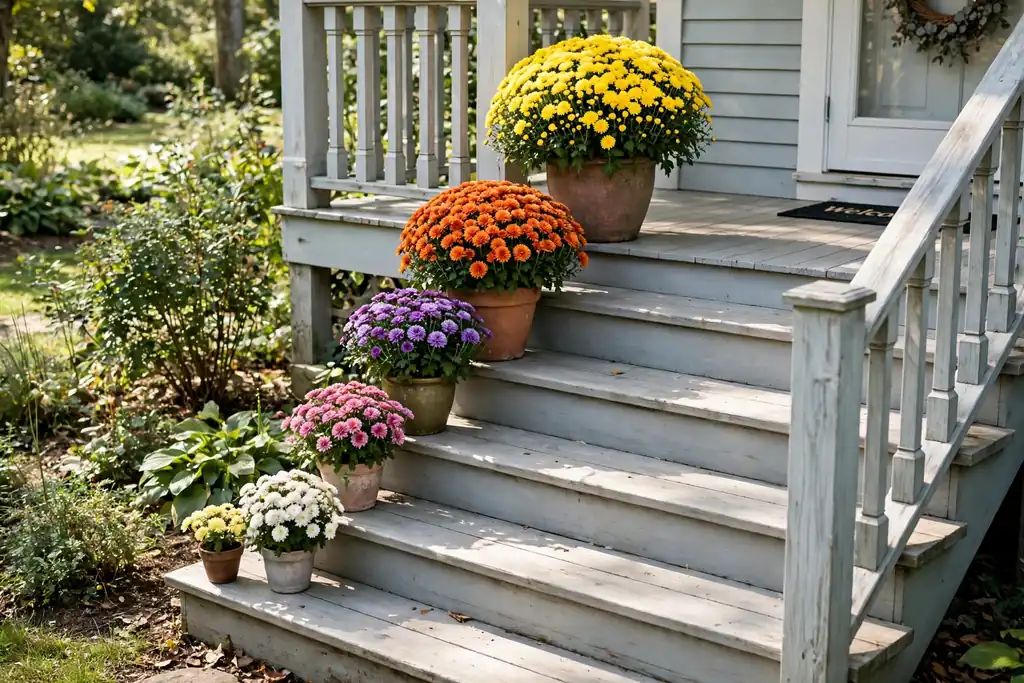
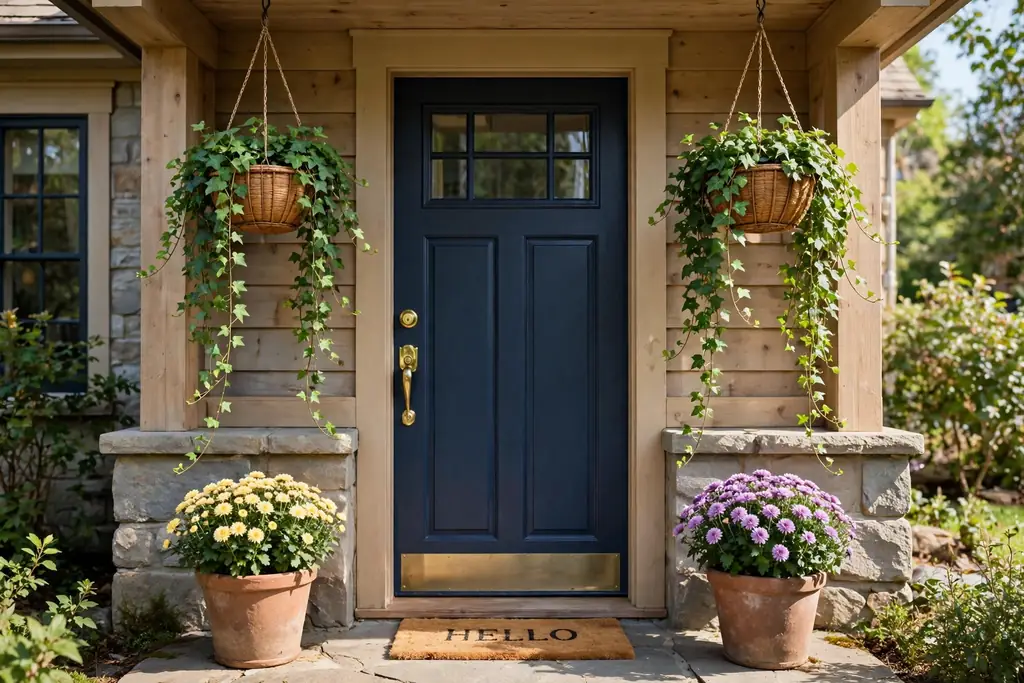
    Place a matching pot on each side of the door, fill each with one full mum, and set a pumpkin at the base of each pot. Symmetry suits a centered door and a straight path, and it reads clearly from the street. Choose pots large enough that the mums do not look lost beside the door, and keep the path clear so guests can pass without brushing the plants.

    Pick mums in one color, such as rust, gold, or burgundy, and repeat that color in a door mat or wreath if you like. Water mums at the soil level and deadhead faded blooms to keep them going. Swap the pumpkins for plain gourds late in the season if the first set softens.
    2. Thriller, Filler, and Spiller in Tall Urns

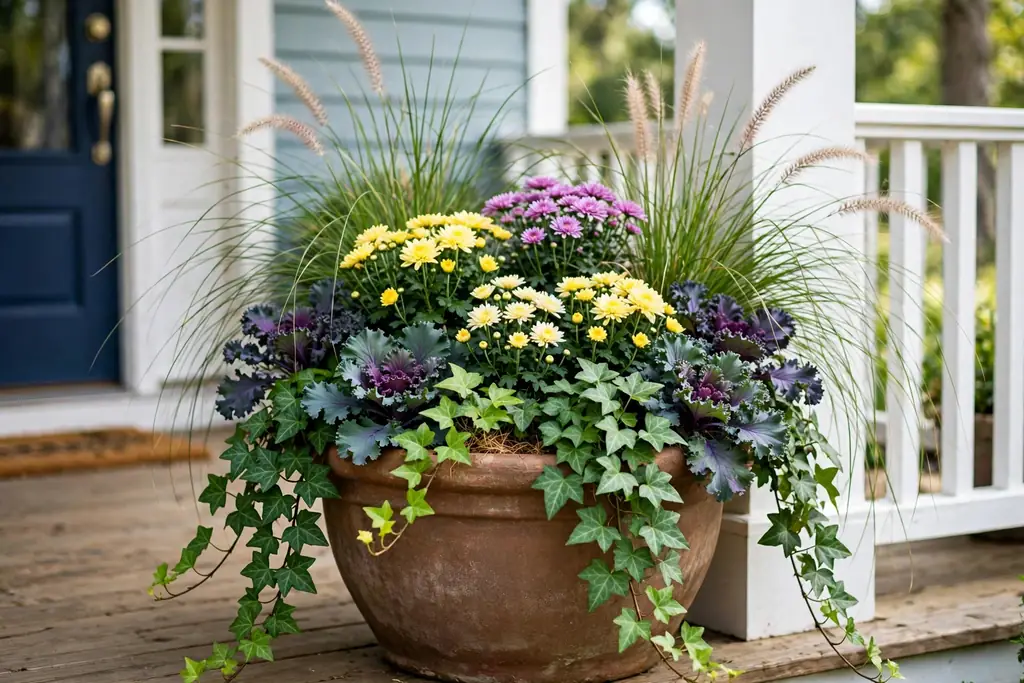
    Tall urn planter with a grass center, mums around it, and trailing ivy over the edge.

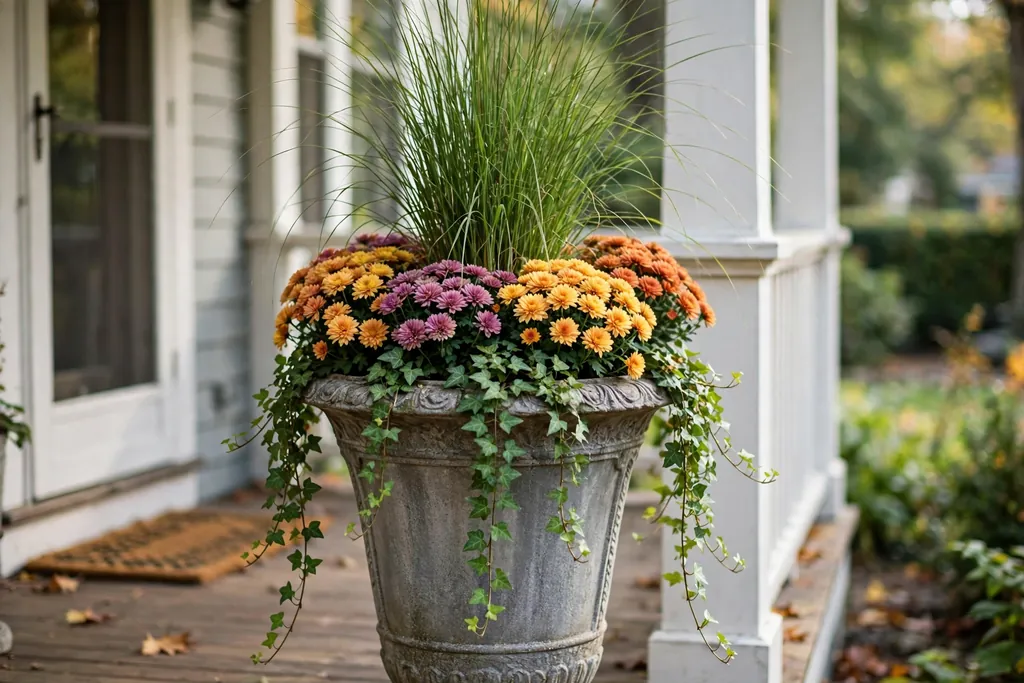
    Use tall urns and build each one in three layers: a tall grass or upright plant in the center, full mums or kale around it, and ivy or trailing sedum spilling over the edge. This classic formula works because each layer has a job, and the tall center gives the planter height without a second pot. It suits wide porches and flanks a door well.

    Keep the thriller in proportion to the urn, about one and a half times the pot height at most, so it does not topple in wind. Plant fillers close enough to look full on day one, and trim trailers that block the path. Water the whole pot evenly, since the center plant dries out first in sun.

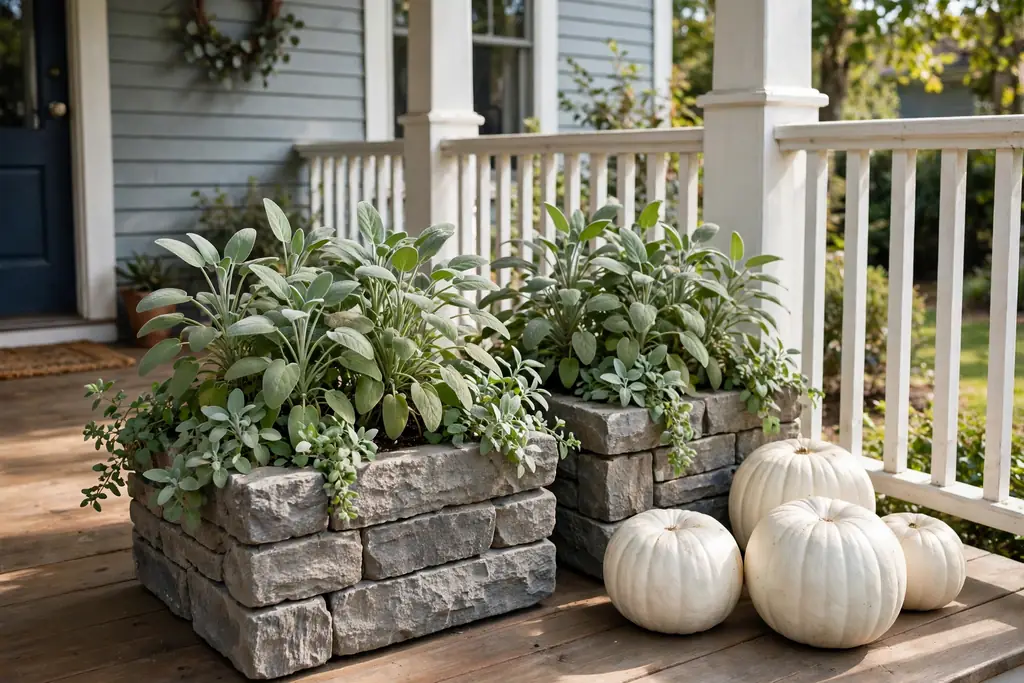
    3. White Pumpkins and Sage Greenery in Stone Planters

    Stone planters with sage foliage and white pumpkins beside them on a front porch.

    Pair white and pale green pumpkins with sage toned foliage in stone or concrete planters for a calm fall look. The pale palette suits light colored houses, grey siding, and porches that already have a lot of color elsewhere. Stone planters also add weight, which helps on windy porches.

    Use dusty miller, sage, or pale ornamental cabbage as the green base, and set one white pumpkin beside each pot rather than inside it, so the planting has room to grow. Wipe stone planters clean before planting, and raise them on feet if the porch surface stains easily. This look lasts well into late fall, since the foliage does not depend on blooms.

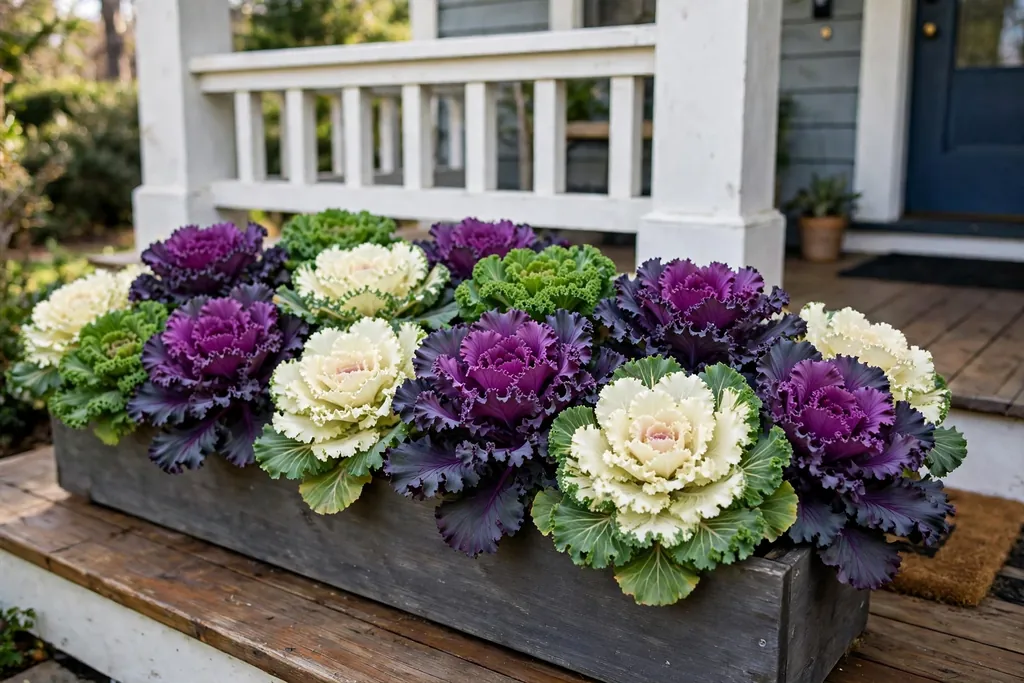
    4. Ornamental Kale and Cabbage Border Planters

    Low wide planter filled with purple, cream, and green ornamental kale and cabbage.

    Fill low, wide planters with ornamental kale and cabbage in purple, cream, and green for color that improves as nights cool. These plants are grown for their leaves, so they keep their shape after mums fade, and they suit porches that get at least a few hours of sun. Plant them close together for a full, ruffled edge.

    Water at the base and remove yellow lower leaves as they appear. Kale and cabbage look best with a simple pot, such as plain terracotta or dark grey, so the leaves stay the focus. If a hard frost is forecast, cover the pots overnight with cloth, and they will often recover by morning.
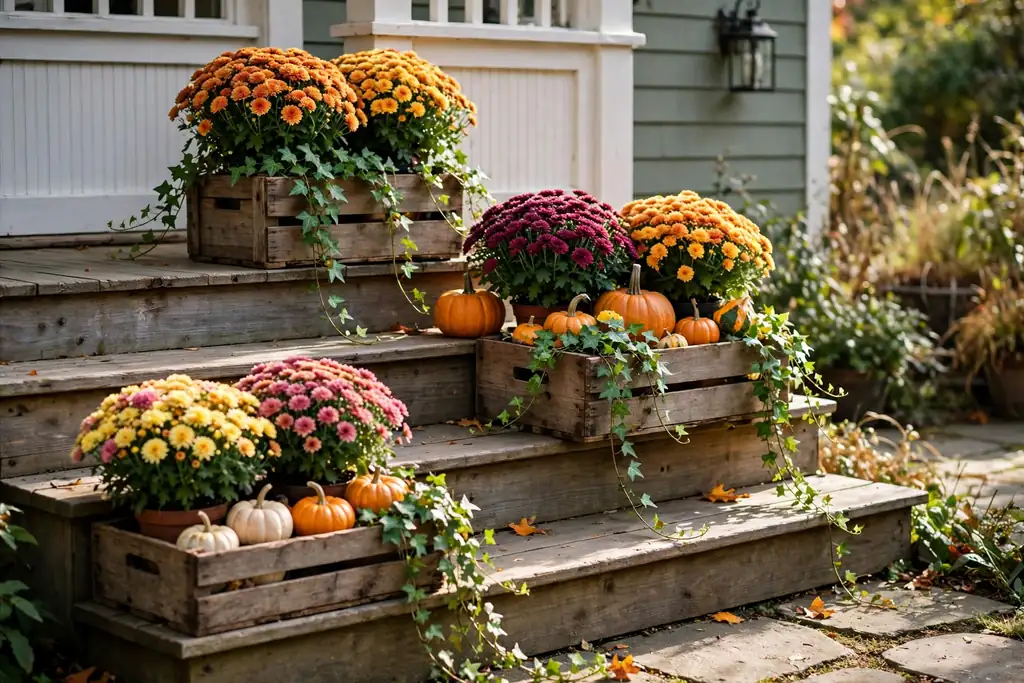
    5. Rustic Wooden Crate Planters on the Steps
    Wooden crates on porch steps filled with potted mums, small pumpkins, and trailing ivy.

    Set wooden crates on porch steps and fill them with potted mums, small pumpkins, and trailing ivy, keeping the plants in their nursery pots inside the crate. Crates suit farmhouse and cottage porches, and they let you change plants without repotting. Line the crate with plastic with drainage holes cut in it, so wood stays drier.

    Place one crate per step or group two crates at the bottom step, and keep at least one step tread clear for safe footing. Choose crates in similar wood tones, and add a small pumpkin or pinecone on top of the soil for a finished look. Store crates under cover in winter to slow weathering.

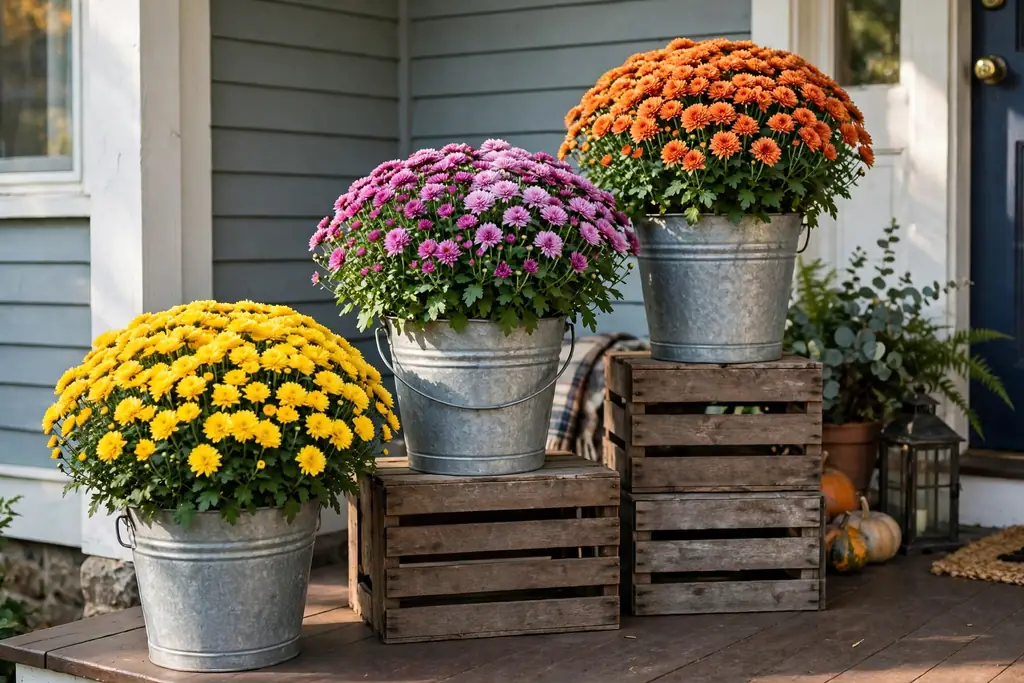
    6. Galvanized Bucket Trio at Different Heights

    Three galvanized buckets at different heights planted with mums on a front porch.

    Group three galvanized buckets at different heights, using an upturned pot or a small stool under the tallest one, and plant each with mums in one color family. The metal finish suits rustic and modern porches alike, and the height change keeps the group from looking flat. Drill drainage holes if the buckets do not have them, and set a saucer underneath on painted wood.

    Use one plant type per bucket for a tidy look, or mix a mum with a trailing plant in the tallest bucket only. Galvanized metal heats up in sun, so check soil moisture more often on warm days. Wipe the buckets dry after rain to slow rust at the seams.

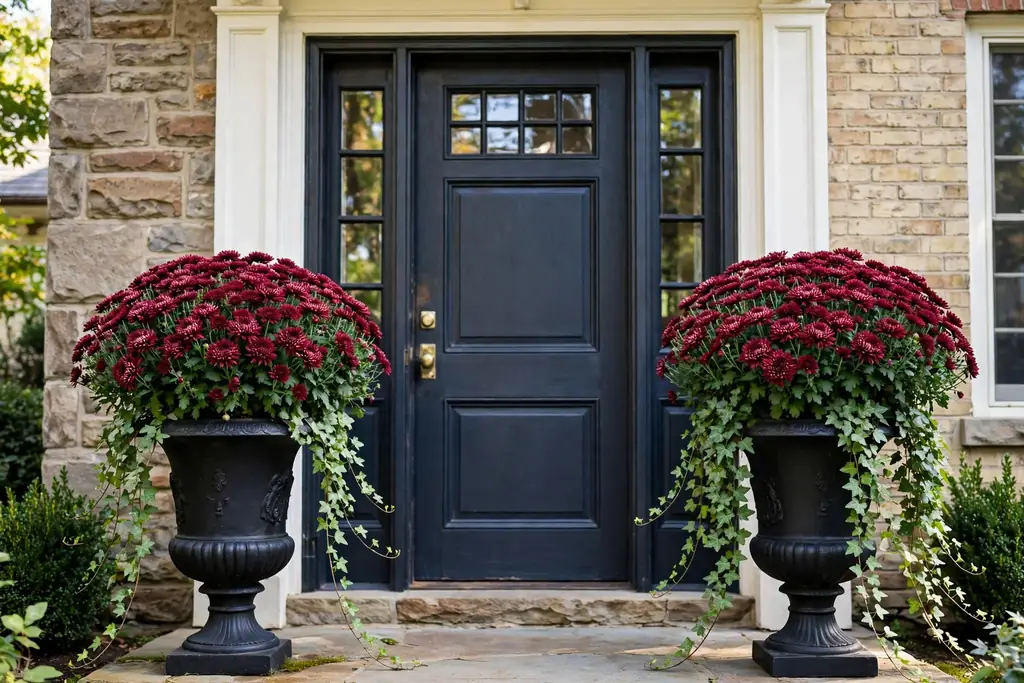
    7. Black Urns with Burgundy Mums and Trailing Ivy

    Black urns with burgundy mums and trailing ivy flanking a front door.

    Choose black urns, plant burgundy or deep red mums in the center, and let ivy trail down the sides for a formal fall entry. Black containers suit brick, white siding, and dark doors, and they make warm flower colors stand out. Keep both urns the same size and plant them the same way for a balanced look.

    Ivy needs little care in fall, but trim it before it reaches the ground or blocks the door swing. Water mums regularly until the soil stays cool and damp, then water less. If ivy is not hardy in your area, use it as a seasonal trailer and compost it at the end of fall.

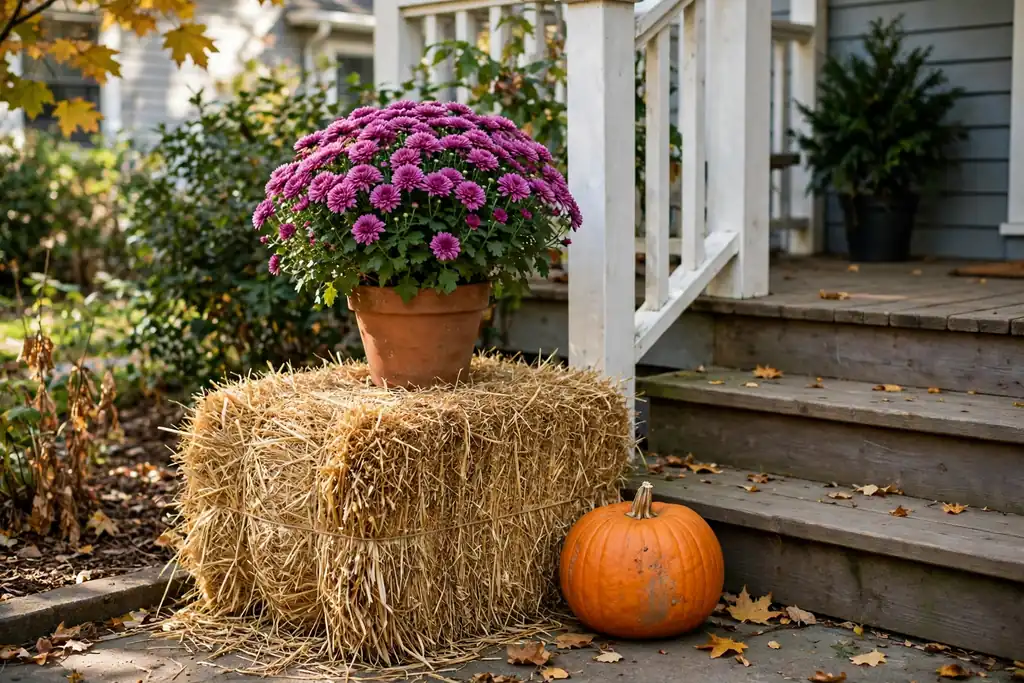
    8. Hay Bale Base with Pots on Top

    Small hay bale topped with potted mums and a pumpkin beside porch steps.

    Set a small hay bale beside the porch steps, top it with two or three potted mums and a pumpkin, and tuck dried grasses around the base. A hay bale lifts plants to eye level and adds a harvest note without a large build. It suits country porches and wide front yards, but keep it clear of the walkway.

    Place the bale on a flat surface and set a board under the pots if the bale surface is uneven. Hay breaks down in rain, so use this display for a few weeks rather than the whole season, and move it under cover in heavy storms. Check the bale for dampness at the base, and replace it if it starts to smell musty.

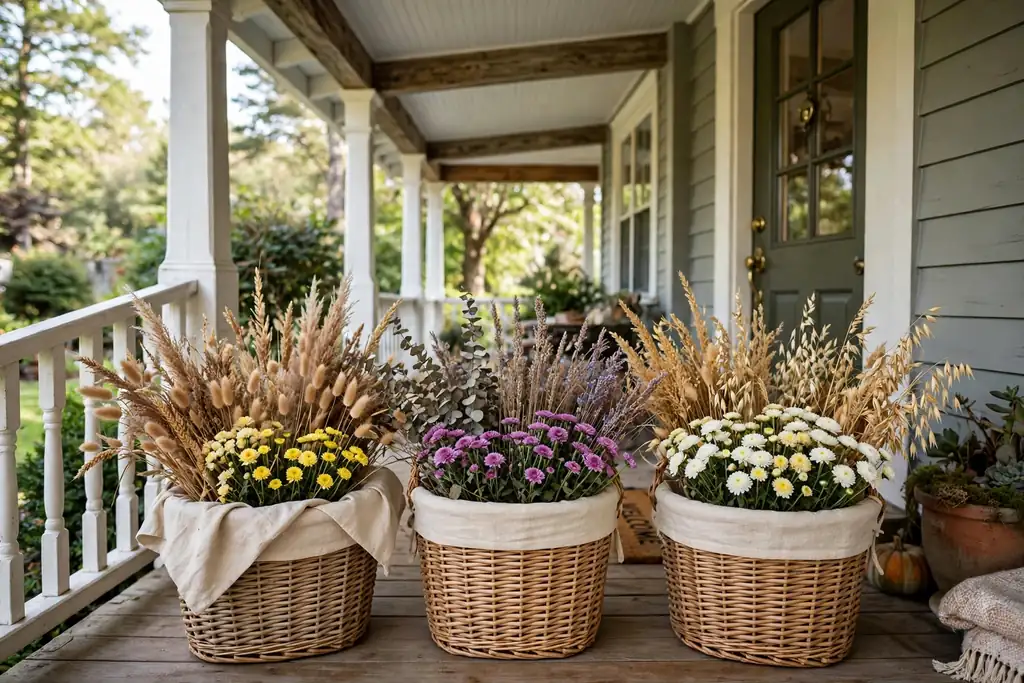
    9. Wicker Basket Planters with Dried Grasses

    Lined wicker baskets with dried grasses and small mums on a covered front porch.

    Use lined wicker baskets as planters, filled with dried grasses, wheat stems, and a small mum or two for color. Baskets suit covered porches best, since rain softens wicker, and they add a soft, woven texture next to wood and stone. Line each basket with plastic, cut drainage holes, and set the plants in their pots inside.

    Keep baskets on a bench or a step rather than directly on wet ground, and bring them inside in heavy rain. Dried grasses need no water, so water only the live plants, and keep dried stems away from open flames such as candles or lanterns. This planter works well as a short term display near the door.

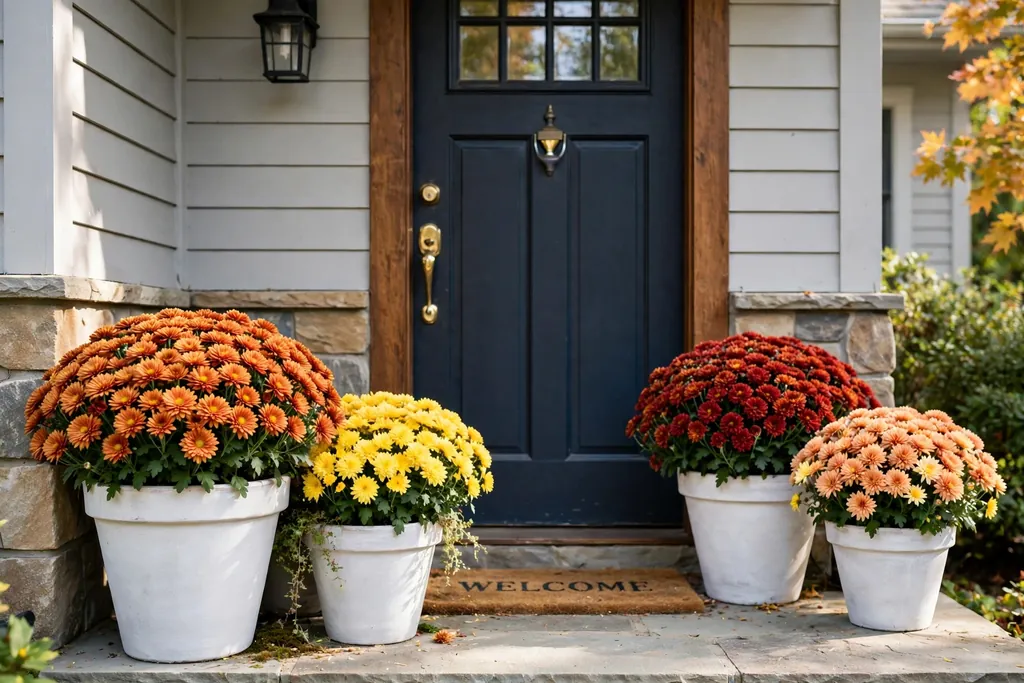
    10. Chalk White Terracotta Pots with Mixed Mums

    Chalk white terracotta pots with mixed warm colored mums near a front door.

    Paint plain terracotta pots in chalk white, or buy whitewashed pots, and plant them with mums in mixed warm colors. The pale pots calm a busy mix of flower colors and suit white trim, light brick, and coastal style porches. Use exterior paint made for masonry or terracotta, and let pots dry fully before planting.

    Group three white pots of different sizes near the door, and repeat the white in a door mat frame or a lantern. Terracotta dries out faster than plastic or glazed pots, so check soil daily in warm spells. Bring painted pots inside before a hard freeze, since terracotta can crack when wet soil freezes.

    11. Stepped Pots Down the Porch Steps

    Pots of decreasing size lined down porch steps, planted with mums.

    Line porch steps with pots that get smaller as they rise, so the planting climbs toward the door in a clear sequence. This idea suits porches with wide steps and a straight approach, and it uses space that often stays bare. Keep the outer edge of each step clear, and place pots against the house side or the rail side, not the middle of the tread.

    Use one plant family, such as mums, in every pot, and change only the pot size or the flower color as you go up. The stepped line echoes tiered planting, and the ideas in these tiered garden ideas show how levels can give each planting a clear job. Water from the top step down, and catch runoff before it stains the steps.

    12. Hanging Planters Beside the Door

    Hanging planters with trailing ivy and small mums on each side of a front door.

    Hang two planters from porch hooks, one on each side of the door, filled with trailing ivy, small mums, and a few dried stems for height. Hanging planters suit small porches with no floor space for large pots, and they draw the eye up to the door. Hang them high enough to walk under without ducking, and use sturdy hooks rated for a watered pot.

    Water hanging pots more often than floor pots, since they dry out fast in wind. Choose light containers, such as resin or lined baskets, to keep the weight down. Turn the planters every week or two so growth stays even, and bring them inside before a frost if the plants are tender.

    13. Railing Planters Along the Porch Rail

    Long planters fixed to a porch rail, filled with ivy, small mums, and ornamental kale.

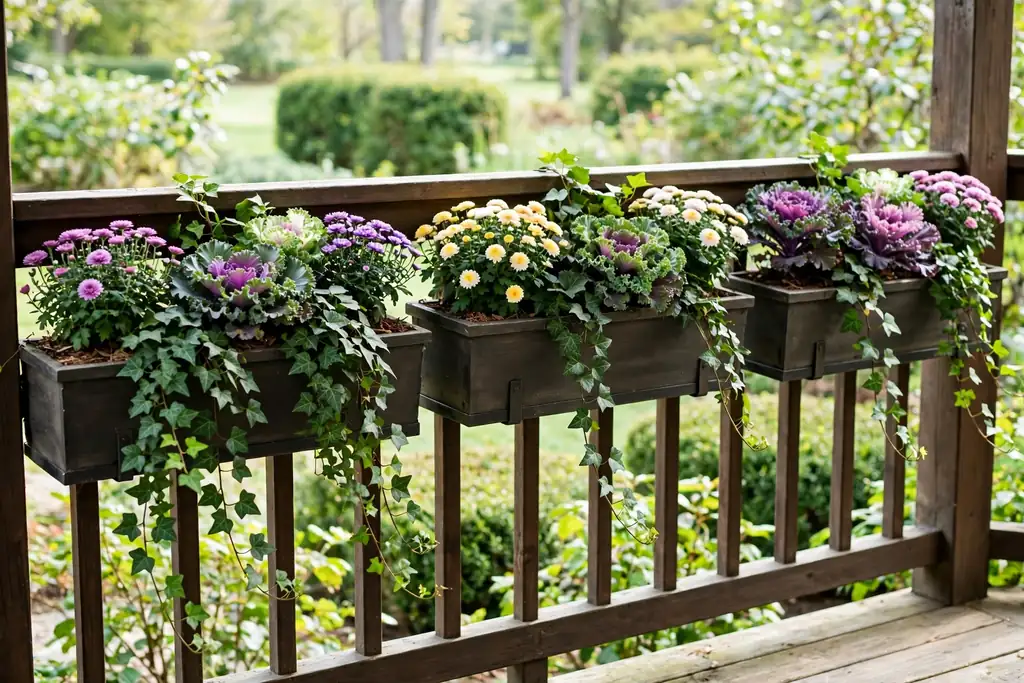
    Fix long planters to the porch rail and fill them with trailing ivy, small mums, and ornamental kale for a planted edge at hand height. Railing planters suit porches with a long rail and a view worth framing, and they leave the floor clear for chairs and foot traffic. Use brackets made for rail planters, and check that the rail can carry a watered planter.

    Plant trailers at the outer edge so they spill outward, and keep upright plants toward the porch side. Water slowly, since rail planters are shallow and dry out fast, and empty drip trays after rain. Choose plants that suit the rail light, with sun lovers on a south rail and foliage plants on a shaded rail.

    14. Tall Grasses with Pumpkins at the Base

    Large pots of tall ornamental grasses with pumpkins and gourds around the base.

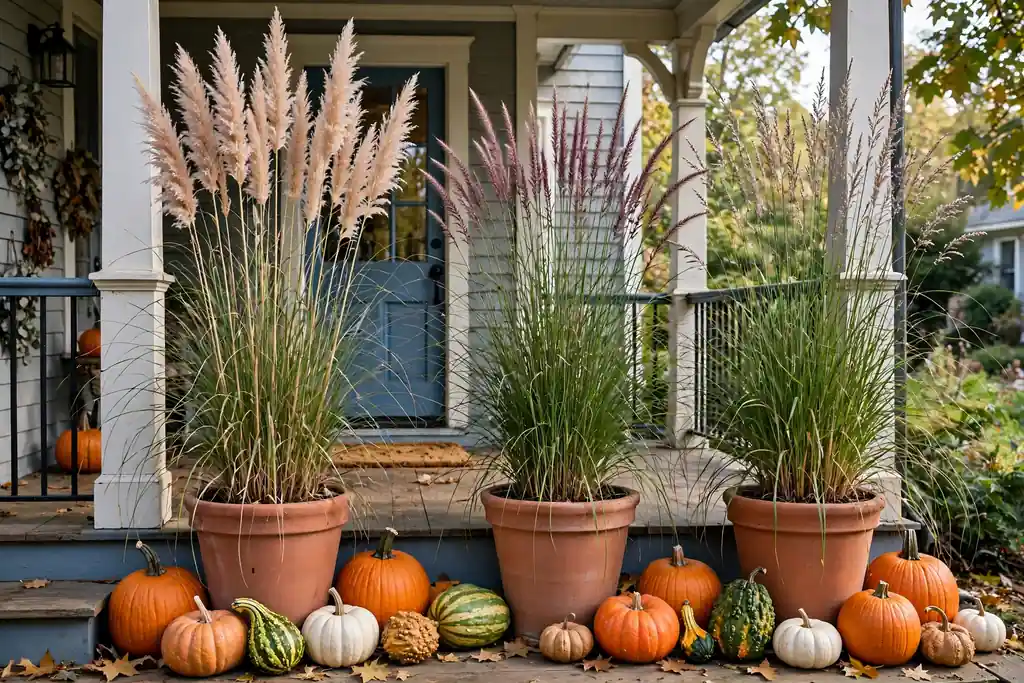
    Plant tall ornamental grasses in large pots, and set pumpkins and gourds around the base for a simple, strong fall shape. Grasses give height and movement, while pumpkins add color at ground level, and the pairing needs little upkeep. This suits modern porches and houses with a plain facade, where one strong shape reads better than many small pots.

    Choose grasses that stay upright in wind, and cut back any stems that flop over the path. Pumpkins at the base should sit on a flat surface, not on soil that stays wet, so set them on a board or a stone. Replace pumpkins as they soften, and leave the grasses standing until late fall for texture.

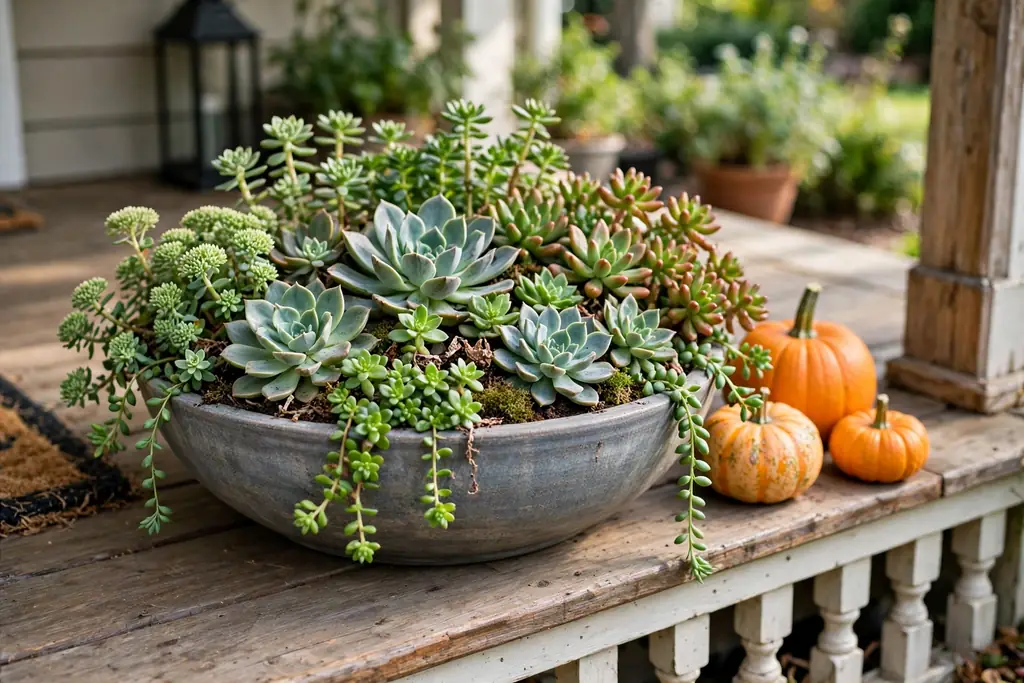
    15. Succulent and Sedum Planters for a Dry Porch

    Shallow bowl planter with sedums and succulents, with small pumpkins beside it.

    Build a fall planter from sedums, hens and chicks, and other succulents in a shallow bowl or a wide pot, with a few small pumpkins beside it for seasonal color. This suits covered or dry porches, and porches where watering is easy to forget, since succulents need far less water than mums. Use a gritty, free draining mix, and a pot with drainage holes.

    Keep succulents in sun if possible, and water only when the soil is dry to the touch. Add autumn toned sedums, which color up in cool weather, for fall interest without flowers. Bring tender succulents inside before frost, and leave hardy sedums outside with a little shelter from standing water.

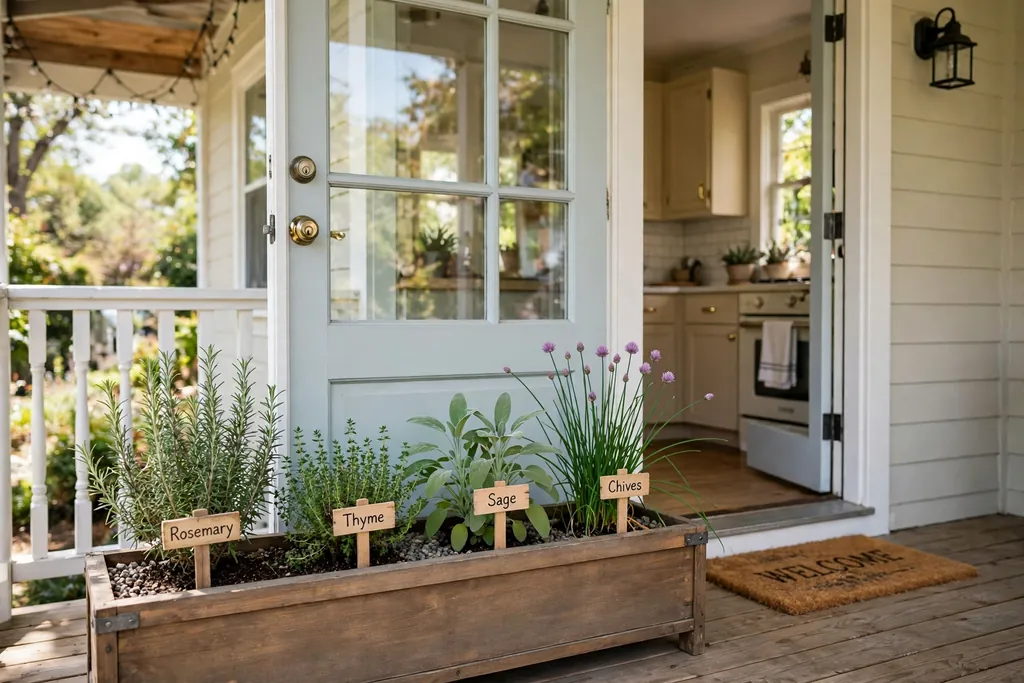
    16. Fall Herb Planters for the Kitchen Door

    Long planter with rosemary, thyme, sage, and chives by a kitchen door.

    Plant rosemary, thyme, sage, and chives in a long planter by the kitchen door or the porch steps, so fall cooking herbs stay within reach. Herbs add scent and green structure, and many cope well with cool fall days. Use a free draining mix, and keep mint in its own pot, since it spreads fast and crowds neighbors.

    Pick little and often to keep plants bushy, and snip stems in the morning when oils are strongest. Move tender herbs inside before a hard frost, and leave hardy rosemary and thyme outside with shelter from cold wind. Label young herbs, since many look alike before they grow, and water at the base rather than over the leaves.

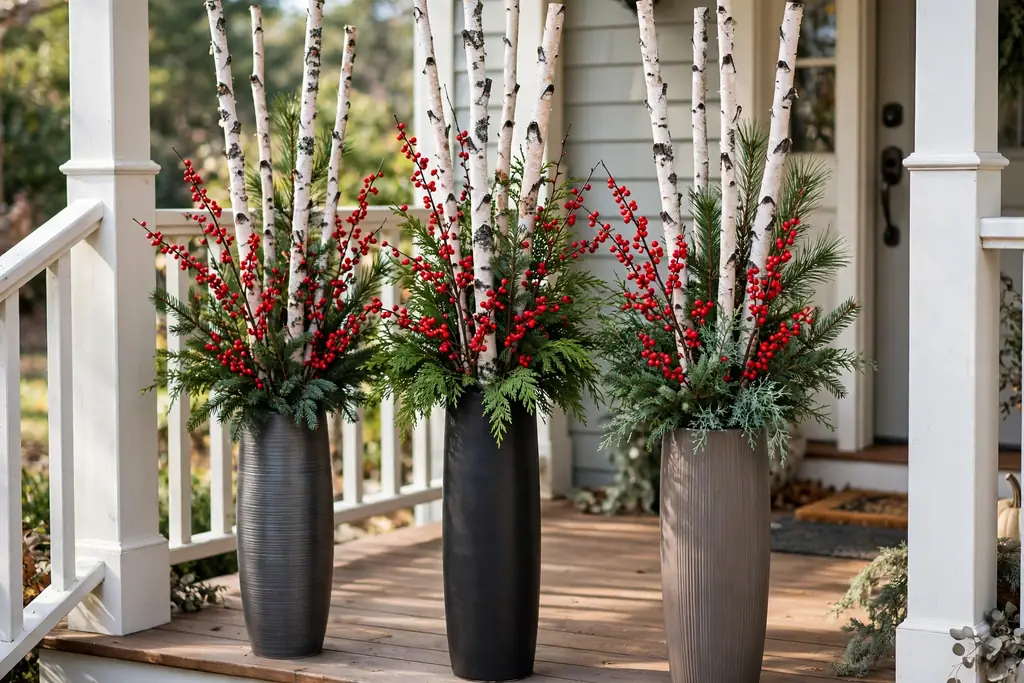
    17. Berry Branches and Birch Stems in Tall Pots

    Tall narrow pots with birch stems, red berry branches, and evergreen sprigs.

    Fill tall, narrow pots with birch stems, berry branches, and a few evergreen sprigs for a vertical fall display that needs no flowers. This suits narrow porches and entries where a wide pot would block the path, and it lasts well into late fall. Push stems firmly into soil or floral foam, and brace them if wind is strong.

    Use real or good quality faux berry branches, and keep the color palette to red berries, cream birch, and green sprigs for a clear look. Add a small pumpkin at the base to ground the tall stems. Check stems after storms, and replace any that snap or fade, since one broken stem shows clearly in a tall arrangement.

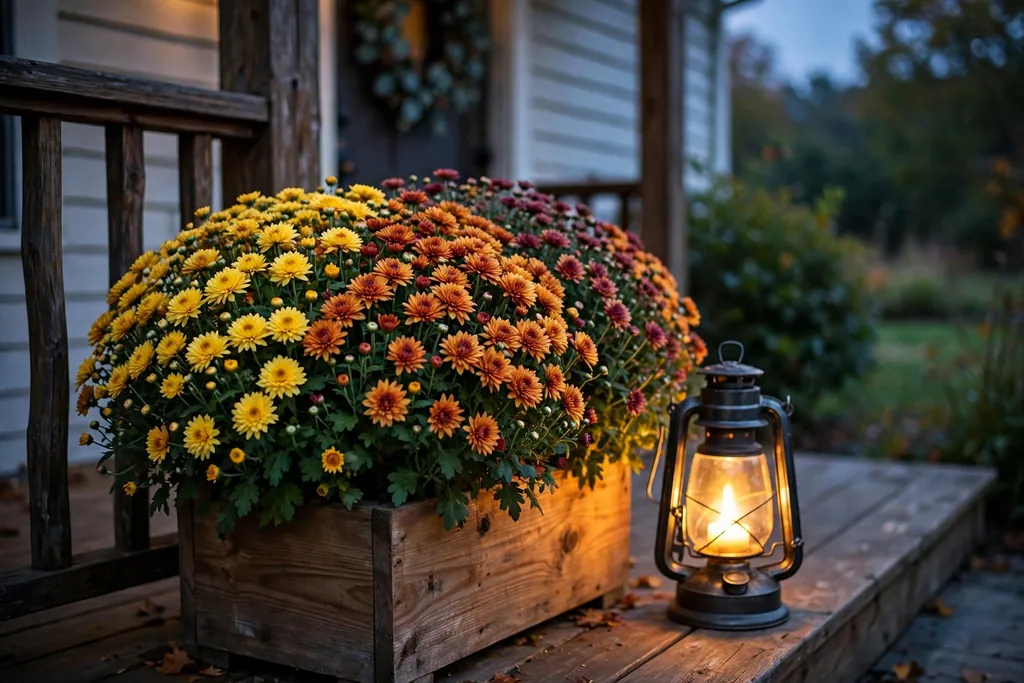
    18. Lantern and Planter Pairings on Each Side

    Front porch planter with mums beside a lantern glowing at dusk.

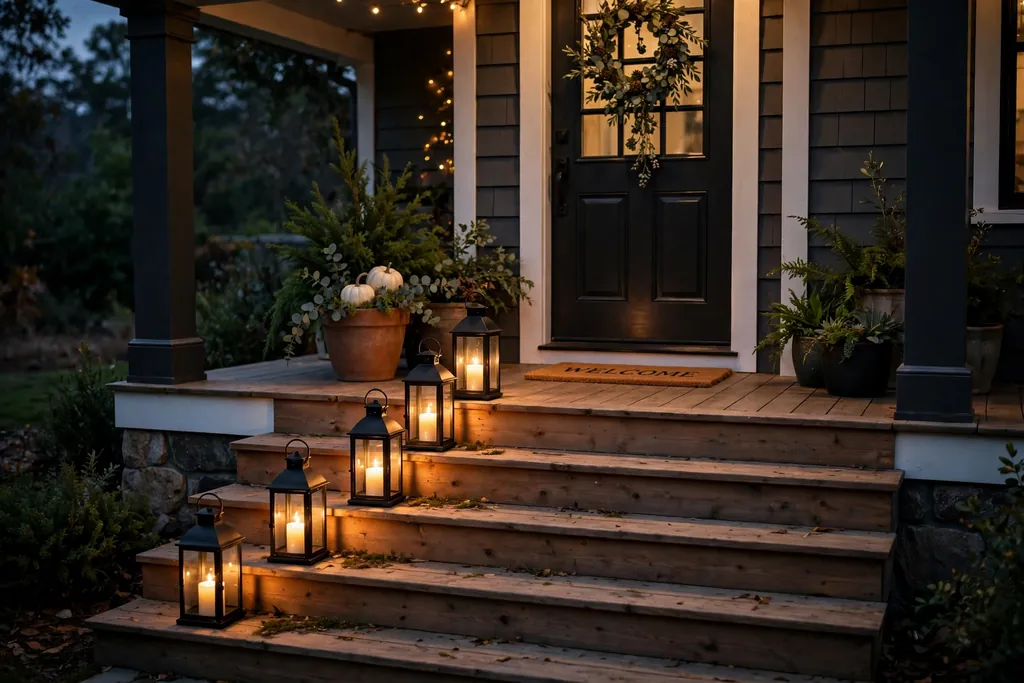
    Place a lantern beside each porch planter, rather than inside it, so light and planting work together at dusk. Use battery candles in the lanterns for safety, and plant the pots with mums or kale in a color that shows up in low light, such as gold or cream. This pairing suits porches used in the evening, and it frames the door after dark.

    Keep lanterns on a stable, flat surface, and clear of dry leaves and dried grasses. Choose lanterns in the same finish as your door hardware for a linked look. Turn lights on at dusk for a welcoming entry, and store real candles away from plants and fabric, since dry foliage catches fire easily.

    19. Copper Pots with Copper Toned Foliage

    Copper pots with rust, bronze, and gold foliage on a front porch.

    Use copper or copper toned pots, and plant them with foliage in rust, bronze, and deep gold for a warm, metal led fall display. Copper suits brick houses, warm wood doors, and porches with brass hardware, and it ages to a soft patina that still reads as fall. Use real copper only where the budget allows, and copper toned resin elsewhere for the same color at lower weight.

    Pair copper pots with plain green foliage, such as ivy or ornamental grasses, so the metal stays the warm note. Wipe pots clean after rain, and set them on feet to avoid stains on stone. If the patina darkens more than you like, a gentle clean with a soft cloth restores some shine without harsh chemicals.

    20. Blue and White Ceramic Pots with Orange Mums

    Blue and white ceramic pots with bright orange mums on a front porch.

    Set orange mums in blue and white ceramic pots for a sharp color contrast that stands out from the street. The blue and orange pairing suits white houses, coastal porches, and entries that need one bold note. Use glazed ceramic for a clean finish, and keep the pot size large enough that the mum fills it without crowding.

    Place the pots where they get sun, since mums bloom best with light, and water at the base to keep blooms dry. Bring glazed ceramic inside before a hard freeze if the pots are not rated for frost, since trapped water can crack them. Repeat the blue once more, in a door mat or a house number plaque, to link the pots to the house.

    21. Vintage Wagon Planters for a Country Porch

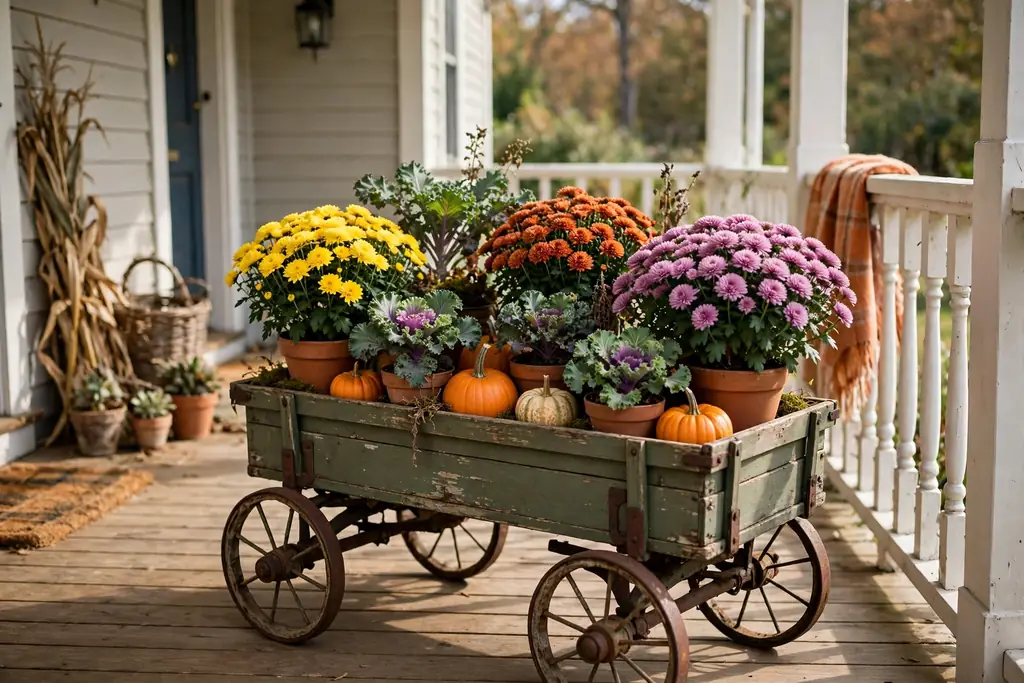
    Small vintage wagon filled with potted mums, kale, and pumpkins on a porch.

    Use a small vintage style wagon or a wooden wheelbarrow as a planter, filled with potted mums, kale, and a few pumpkins. A wagon suits a wide porch or a front yard edge, and it gives a long, low display that reads as one piece. Keep plants in their pots inside the wagon, so you can lift them out for watering and winter storage.

    Set the wagon on level ground, and chock the wheels so it does not roll. Line the bed with plastic to protect wood, and drill or leave drainage gaps so water does not pool. This display works best as a seasonal feature, so move the wagon under cover in winter and store the plants separately.

    22. Milk Can Planters by the Steps

    Old style milk cans beside porch steps, topped with a potted mum and dried grasses.

    Place one or two old style milk cans beside the porch steps, and set a potted mum or a bunch of dried grasses in the top of each can. Milk cans suit farmhouse porches and narrow entries, since they are tall and slim, and they add height without a wide footprint. Use cans with a stable base, and set the plant pot inside the can opening, not loose soil in the can itself.

    Add a small pumpkin at the base of each can to ground the tall shape. Check cans for rust inside, and line them if needed, so rust does not stain the porch. Bring cans inside in winter, since standing water inside a metal can can freeze and split seams.

    23. Stacked Pot Towers for Small Porches

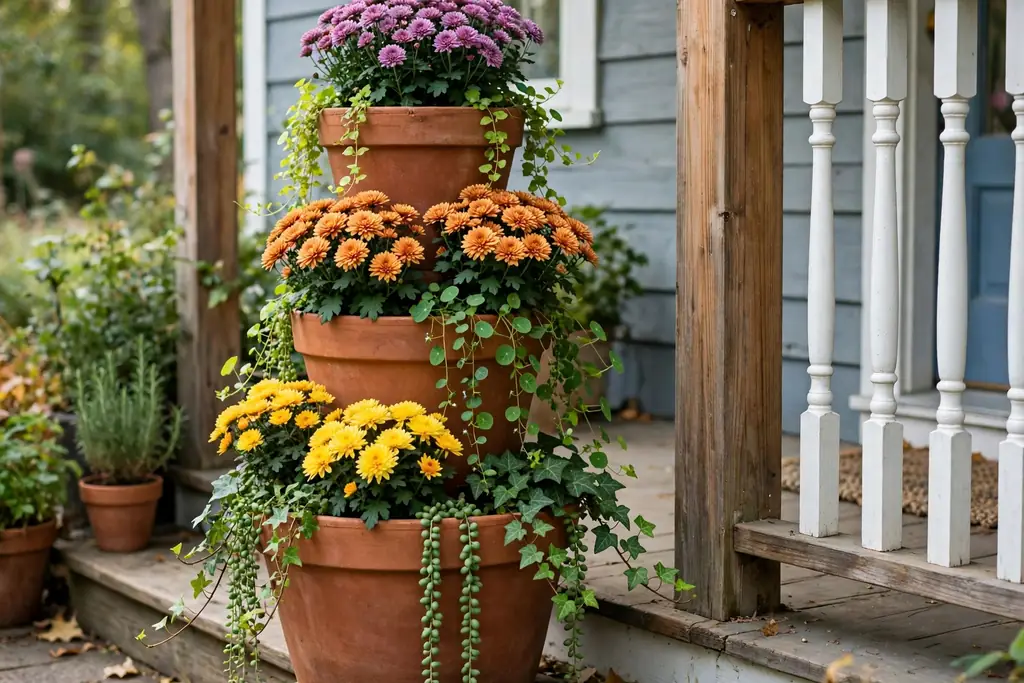
    Stacked pot tower of three decreasing pots planted with mums and trailing plants.

    Build a pot tower by stacking three pots of decreasing size, with a rod through the center for stability, and plant mums and trailers in each level. A tower suits a small porch corner, since it gives three layers of planting in the footprint of one large pot. Use light pots, such as resin or plastic, to keep the tower stable and easy to move.

    Plant trailers in the top and middle levels so they spill over each pot edge, and keep upright plants in the bottom pot for balance. Water each level slowly, since water runs down through the tower, and check that the rod stays straight after rain. Take the tower apart for winter storage, and store pots nested to save space.

    24. Half Barrel Planters with Mums and Kale

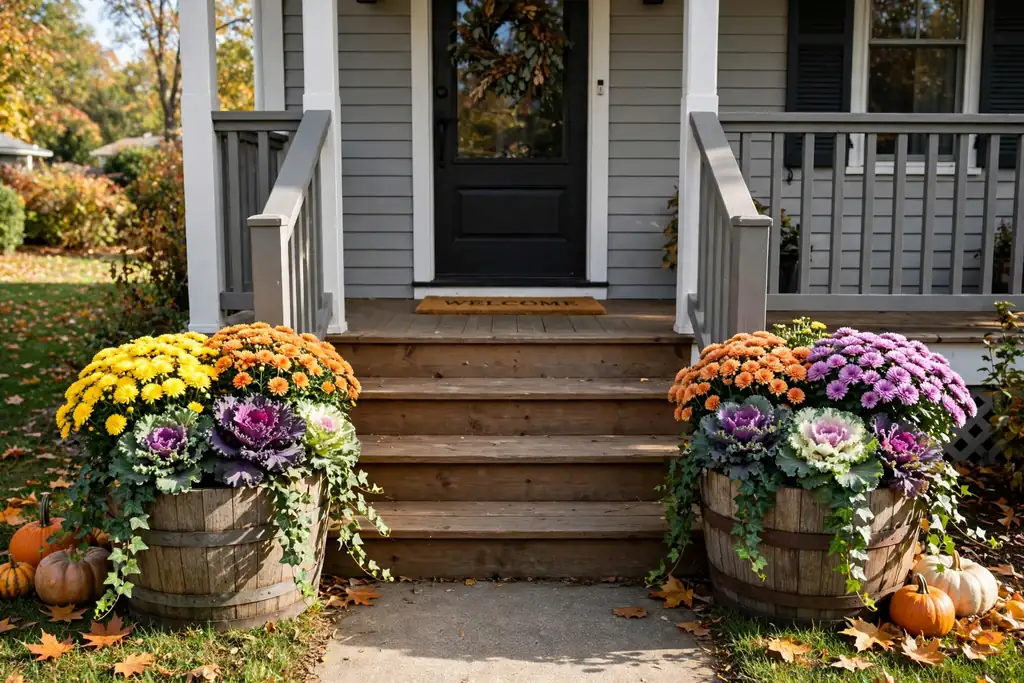
    Half barrel planters with mums and ornamental kale on each side of porch steps.

    Fill half barrels with a mix of mums and ornamental kale, and set one barrel on each side of the steps for a full, rustic entry. Half barrels hold a lot of soil, so they suit large porches and houses with a wide facade, and they dry out more slowly than small pots. Line the barrel with plastic, cut drainage holes, and raise it on bricks for airflow.

    Plant the tallest kale in the center, mums around it, and a trailer at the front edge for a finished shape. Water deeply but less often, since barrel soil stays damp longer, and check the base for rot each season. Half barrels are heavy when watered, so place them where they will stay for the season.

    25. Cream and Green Monochrome Planters

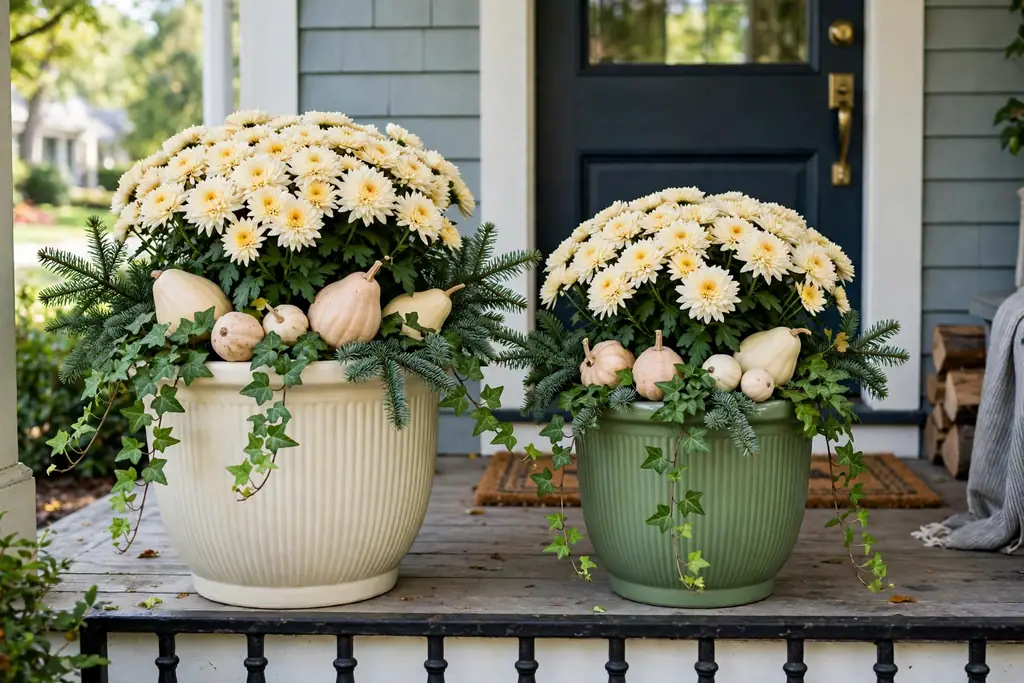
    Cream and green planters with cream mums, pale gourds, ivy, and evergreen sprigs.

    Keep the whole porch to cream and green, with cream mums, pale gourds, ivy, and evergreen sprigs in plain cream or sage pots. A monochrome scheme suits houses with a lot of pattern elsewhere, such as patterned brick or a busy door, and it looks calm from the street. Use foliage for texture, since color contrast is low, with ruffled kale, smooth ivy, and spiky grasses side by side.

    Repeat cream in at least two pots, and green in every pot, so the scheme holds together. Cream mums show dirt fast, so deadhead often and keep pots clear of muddy paths. This scheme carries well into late fall, since evergreen sprigs and ivy stay green after blooms fade.

    26. Jewel Tone Planters with Purple and Orange

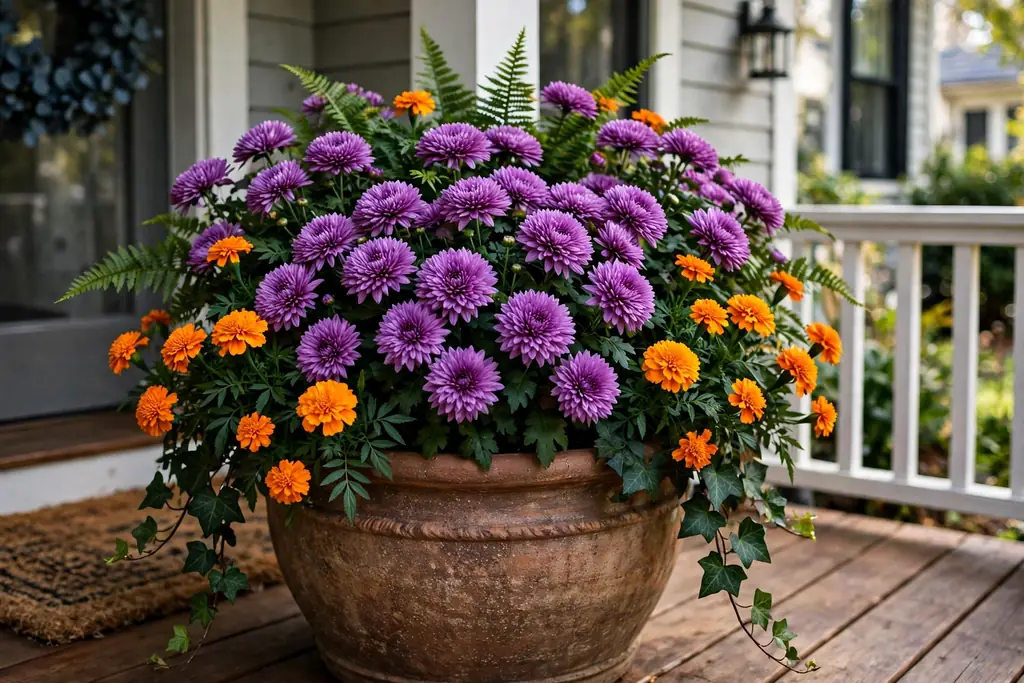
    Large pot with purple mums, orange marigolds, and deep green foliage.

    Mix purple mums, orange marigolds or mums, and deep green foliage in one or two large pots for a jewel tone display. Jewel tones suit grey houses, dark doors, and porches that need warmth, and they photograph well in autumn light. Keep the mix to two flower colors plus green, so the pot looks rich rather than busy.

    Plant purple at the back or center, orange around it, and green trailers at the edge for depth. Water evenly, since mums and marigolds dry out at different rates, and deadhead both to keep blooms coming. If one color fades early, replace just that plant, and the pot keeps its jewel tone balance.

    27. Mini Pumpkin Topiary in an Urn

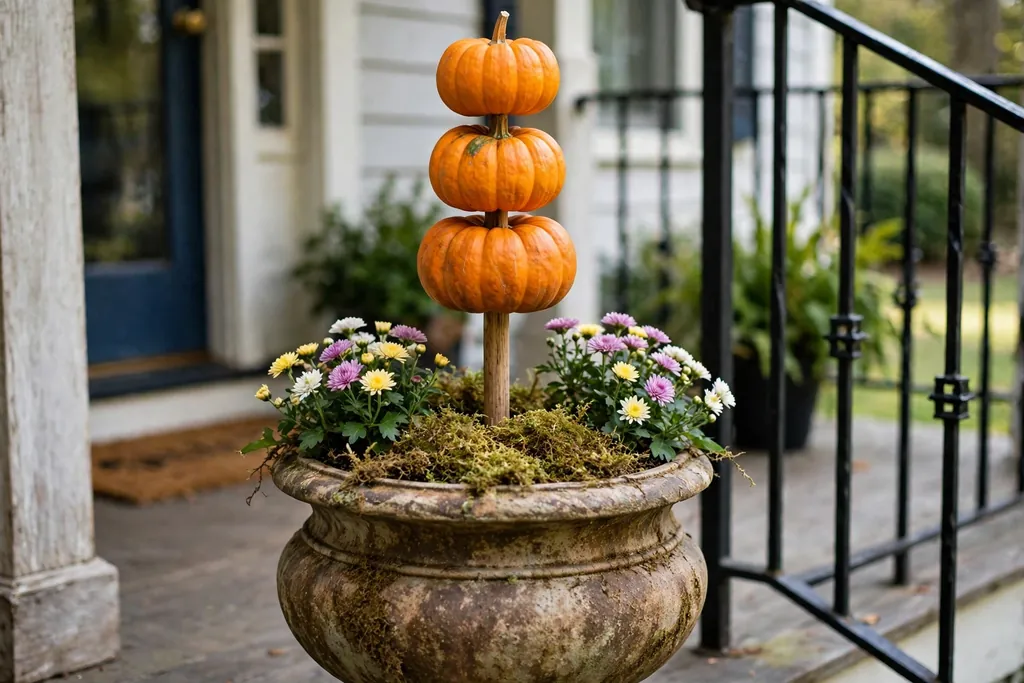
    Urn with three stacked mini pumpkins on a dowel, with moss and small mums at the base.

    Stack three mini pumpkins of decreasing size on a dowel in an urn, with moss and small mums around the base, for a topiary shape that needs no pruning. This suits a formal porch or a narrow entry, since it gives height in a small footprint, and it is easy to build in an afternoon. Use firm, unblemished pumpkins, and a dowel that fits snugly through their centers.

    Set the urn where it will not be bumped, since the stack is top heavy, and keep it under cover in rain to slow softening. Replace pumpkins as they soften, and compost them at the end of the display. For a longer lasting version, use faux mini pumpkins on the dowel and live mums at the base.

    28. Pinecone and Evergreen Transition Planters

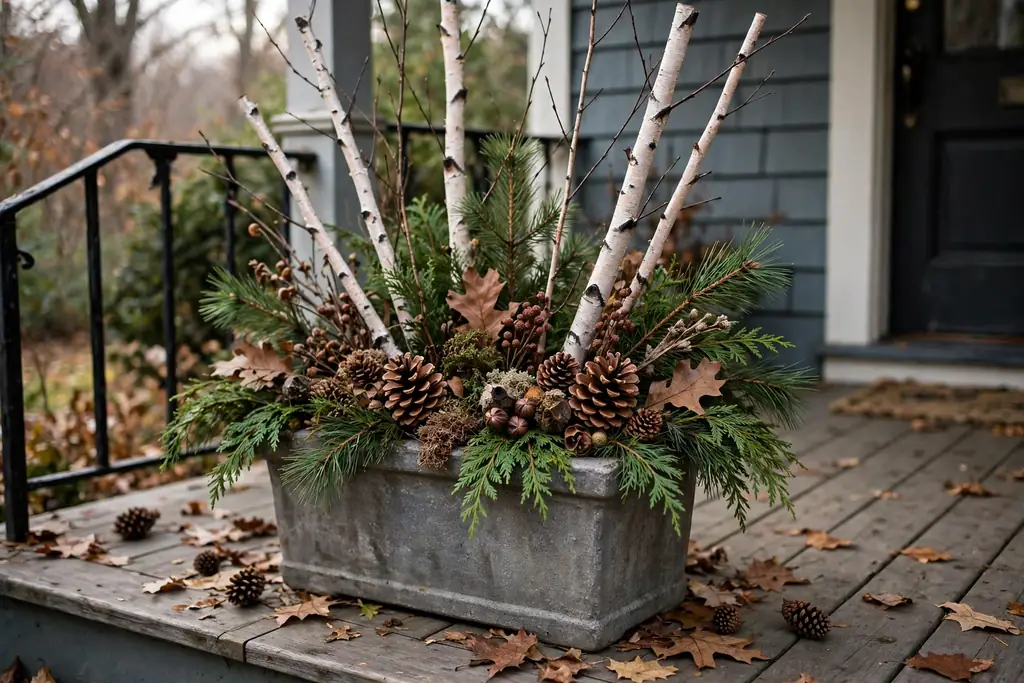
    Planter with evergreen sprigs, pinecones, and birch stems for late fall.

    Build a late fall planter with evergreen sprigs, pinecones, and birch stems, with one or two mums left for early color. This planter bridges fall and winter, so you do not need to replant in November, and it suits porches that stay decorated into the holiday season. Push evergreen stems firmly into soil, and nest pinecones among them at different heights.

    Water the soil lightly to keep stems fresh, and mist evergreens on dry days. Keep pinecones dry where possible, since wet cones close up and lose their shape. Add a ribbon or a small lantern beside the pot, not inside it, if you want a holiday note without changing the planting.

    29. Wheat and Dried Flower Planters

    Tall pot with wheat stems, dried grasses, and dried flowers in gold and rust.

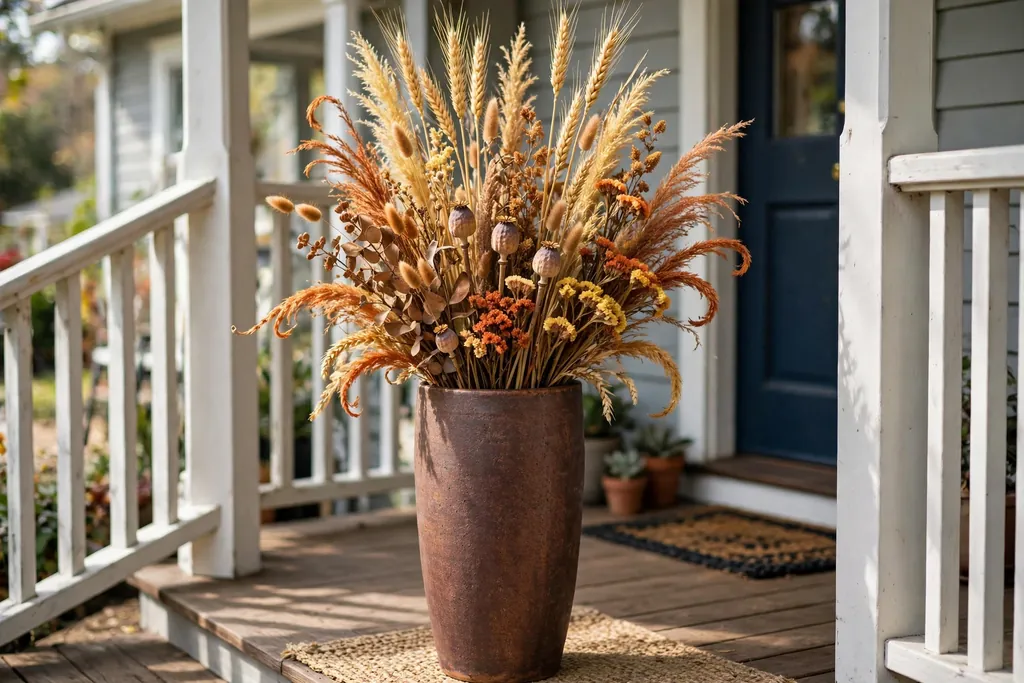
    Fill tall pots with wheat stems, dried grasses, and dried flowers in gold, rust, and cream for a harvest planter that needs no watering. Dried planters suit covered porches and sheltered entries, where wind and rain will not break stems, and they last the whole season with no upkeep. Bundle stems in small groups, and push them into soil or foam at varied heights.

    Keep dried planters away from open flames, heaters, and lanterns with real candles, since dry stems catch fire easily. Dust stems gently with a soft cloth, and replace any that snap. This planter pairs well with a live mum pot beside it, so the porch still has fresh color next to the dried display.

    30. Bench Flanked Planters for a Sitting Porch

    Porch bench with a large planter on each side, filled with mums, grasses, and trailers.

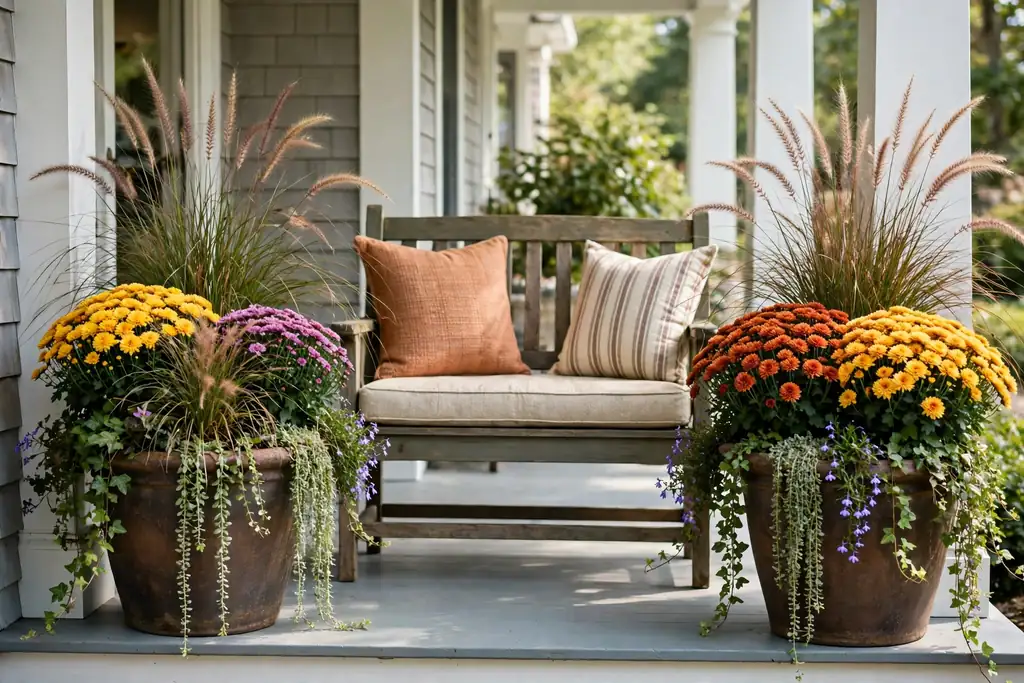
    Place a bench on the porch, and set a large planter on each side of it, filled with mums, grasses, and trailers that soften the bench ends. This idea suits porches used for sitting, since planting frames the seat rather than blocking it, and it gives a reason to pause at the door. Keep planters clear of the bench legs, so the bench stays stable and easy to move.

    Choose planters at bench seat height or slightly lower, so they do not block the view from the bench. Water at the base, and trim trailers before they cover the bench seat. A cushion in a fall color on the bench links the seat to the planters without more pots.

    31. Color Blocked Pot Row Along the Path

    Row of same size pots along a front path, each with mums in a single fall color.

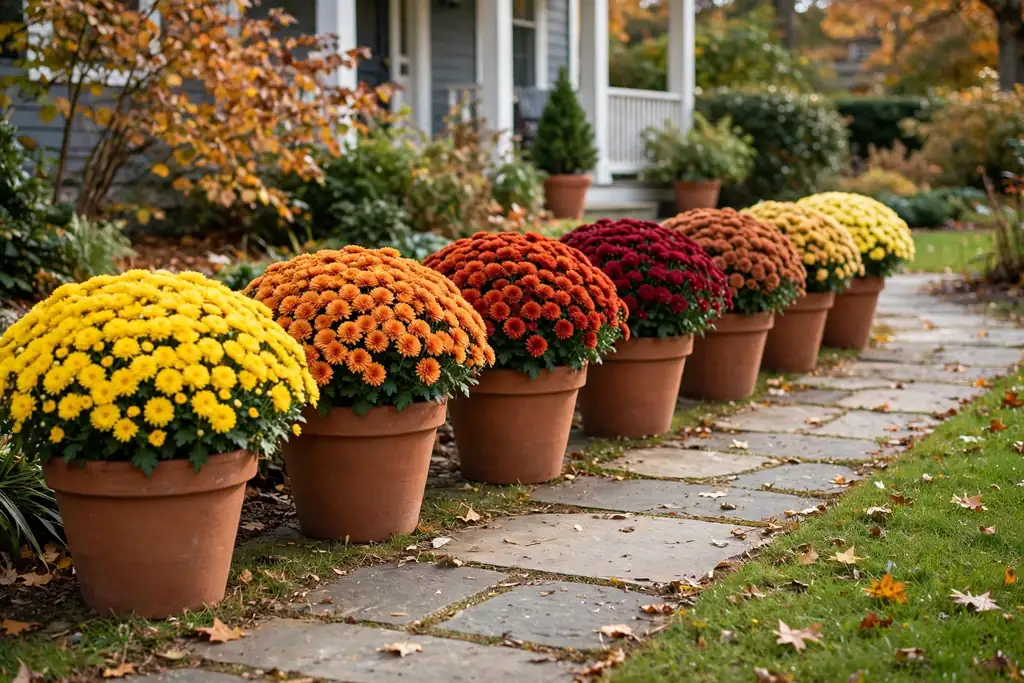
    Line the front path with pots in a single color each, such as gold mums in the first pot, rust in the second, and burgundy in the third, for a color blocked walk to the door. This suits long, straight paths and plain facades, where a row of color guides the eye to the entry. Use pots in the same size and material, so color, not container shape, does the work.

    Space pots evenly, and keep them clear of the path edge so guests can pass. Water each pot on the same schedule, and replace a faded pot with a fresh plant in the same color to keep the row even. This row works well with a plain door mat, since the pots already carry the color story.

    32. Shade Porch Planters with Ferns and Heuchera

    Shade porch pots with ferns, burgundy and lime heuchera, and ivy.

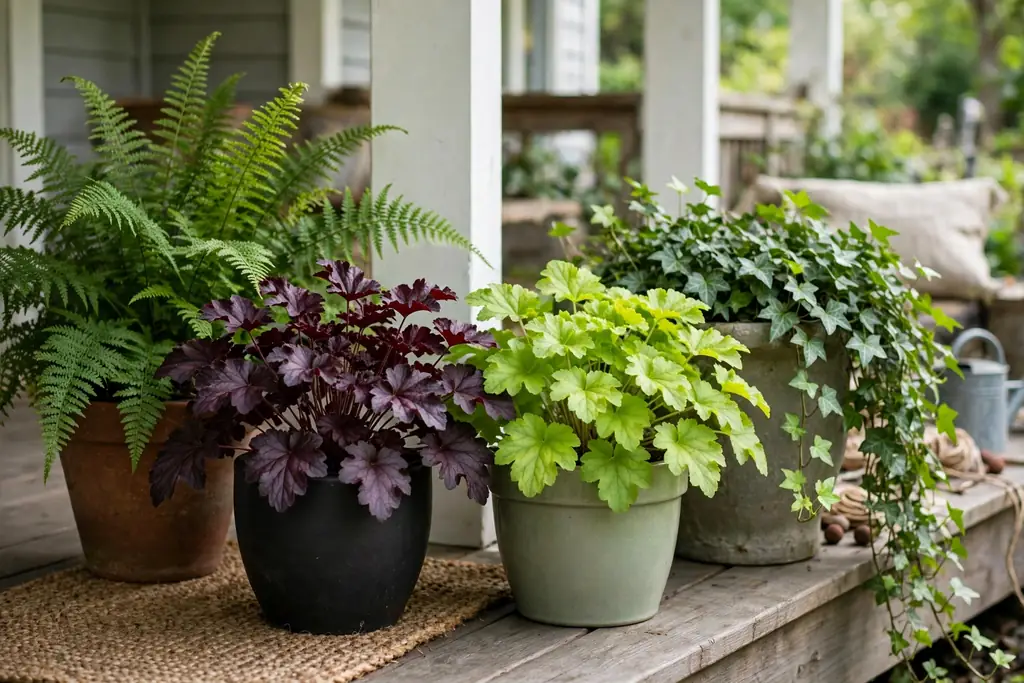
    Plant shade tolerant fall pots with ferns, heuchera in burgundy and lime, and ivy for porches that get little direct sun. North facing and covered porches need foliage first, since mums bloom poorly in shade, and heuchera gives leaf color all season. Use a moist, free draining mix, and water when the top inch of soil feels dry.

    Group three shade pots near the door, and repeat heuchera color in at least two of them for a linked look. Ferns need shelter from wind, so place them in the most protected corner. Bring tender ferns inside before frost, and leave hardy heuchera outside with a mulch layer over the soil.

    33. Sunny Porch Planters with Peppers and Marigolds

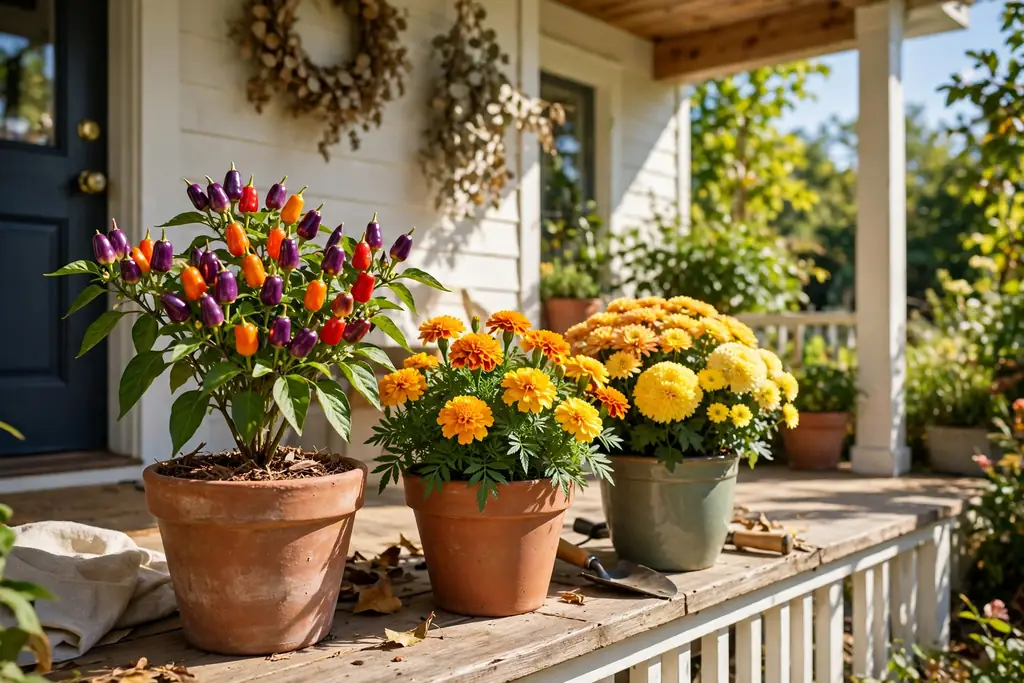
    Sunny porch pots with ornamental peppers, marigolds, and sun loving mums.

    Use ornamental peppers, marigolds, and sun loving mums in pots on a sunny south facing porch, where heat and light keep blooms going into fall. Ornamental peppers add small, bright fruits in red, orange, and purple, and they suit porches that stay warm late in the season. Plant them in full sun, and water when the soil dries, since pots in sun dry out fast.

    Keep ornamental peppers away from young children and pets if you are unsure whether a variety is edible, and label the pot if needed. Deadhead marigolds often to keep blooms coming, and replace plants that fade with fresh mums in the same color. Sunny pots need a saucer on painted wood, since frequent watering can stain surfaces.

    34. Refreshed Summer Pots Without Repotting

    Refreshed summer pot with new mums and kale added around healthy ivy and grasses.

    Refresh summer pots for fall by lifting out faded annuals, dropping in potted mums and kale, and topping the soil with fresh mulch, without emptying the whole pot. This suits gardeners with good pots already in place, and it saves time, soil, and cost. Check that the pot still drains well, and clear blocked holes before you add new plants.

    Keep any healthy summer foliage, such as ivy or grasses, and build fall color around it, so the pot does not look bare while new plants settle. Water the refreshed pot well on day one, then follow fall watering, less often as nights cool. This is the fastest fall planter on this list, and it works on any porch with pots already in place.

    Conclusion

    Fall front porch planters work best when you start with porch size and light, then repeat one container or one color across the entry. Mums and kale carry early fall color, grasses and berries add height, and evergreens, pinecones, and birch stems carry the display into late fall. Pick two or three ideas from this list that fit your porch, build them first, and add more pots only if the entry still looks bare. Save this list on Pinterest before your next porch refresh, and carry the same fall palette indoors with these fall bedroom decor ideas when you move inside.

    FAQs

    What plants last longest in fall front porch planters?

    Ornamental kale and cabbage, heuchera, ivy, ornamental grasses, and evergreen sprigs usually last longest, since they are grown for leaves or structure rather than blooms. Mums last well too if you buy plants with many buds still closed, water at the base, and deadhead faded flowers. Tender summer annuals fade fastest in cool nights, so replace them first when you refresh a pot.

    How often should I water fall porch planters?

    Water when the top inch of soil feels dry, which may be every two or three days in warm, sunny spells and once a week or less as nights cool. Pots in sun and wind dry out faster than pots on a covered porch, and small pots dry out faster than large ones. Water at the base in the morning, let excess drain away, and empty saucers so roots do not sit in water.

    Can I use the same pots for fall that I used in summer?

    Yes, if the pots drain well and are not cracked. Empty out faded annuals, clear blocked drainage holes, top up with fresh mix, and drop in potted mums, kale, or grasses. Keep healthy trailers or grasses from summer if they still look good, and add fresh mulch to finish the pot. Bring terracotta and glazed ceramic pots inside before a hard freeze if they are not rated for frost.

    What is the easiest fall planter for a small porch?

    Start with one matched pair of pots by the door, or a single pot tower in a corner, filled with mums and a trailer. A pair needs little space, reads clearly from the street, and can be built in under an hour. Hanging planters and railing planters are also good for small porches, since they use vertical space and leave the floor clear.

    How do I keep pumpkins in planters from rotting too fast?

    Choose firm pumpkins with no soft spots or cuts, set them on a dry board or stone rather than wet soil, and keep them out of standing water. Wipe pumpkins dry after rain, and turn them every week or two to check the underside. Replace any pumpkin that softens right away, since one rotting pumpkin can mark a pot and attract insects to nearby plants.

    Do fall porch planters need full sun?

    Not all of them do. Mums, marigolds, and ornamental peppers bloom best in sun, while ferns, heuchera, ivy, and many foliage plants do well in shade. Check the light on your porch through the day, and match plants to it: sun lovers on a south facing porch, foliage plants on a north facing or covered porch. A pot in the wrong light will fade fast, even with good watering.


  • 16 Above Ground Pool Deck Ideas to Refresh Your Space

    16 Above Ground Pool Deck Ideas to Refresh Your Space

    An above ground pool deck changes how a pool feels, because it gives you a level place to step in, a dry spot for towels and drinks, and a place to sit that is not just wet grass. Without a deck, the pool wall can feel like a barrier. With one, the pool becomes part of the yard. These 16 above ground pool deck ideas cover wraparound platforms, partial decks, steps, shade, seating, storage, lighting, and planting for round and oval pools. Start with safe entry and a dry walking surface, then add the comfort details that make you stay outside longer.

    Key Takeaways

    • Put safe entry first: wide steps, a firm handrail, a slip resistant surface, and a gate that keeps unsupervised access closed.
    • Match the deck shape to the pool: a wraparound deck suits a pool used daily, while a partial deck suits a small yard and a tight budget.
    • Keep boards, fixings, and the pool wall clear of soil and standing water, with air moving under the deck frame.
    • Give the deck zones: one for entry, one for sitting or eating, and one for towels, toys, and gear, so wet and dry areas stay separate.
    • Add shade and soft evening light early, since comfort decides whether the deck gets used after the first swim.
    • Soften the pool wall with skirting, planters, or a planted edge, so the pool reads as part of the garden rather than a bare tank.

    1. Wraparound Deck Around the Whole Pool

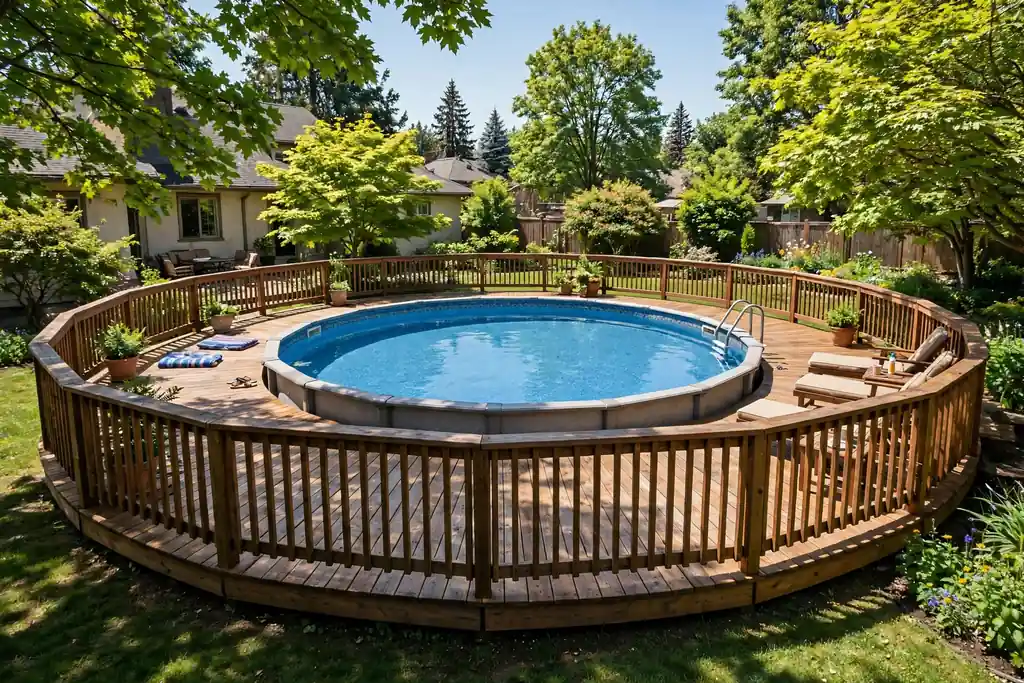
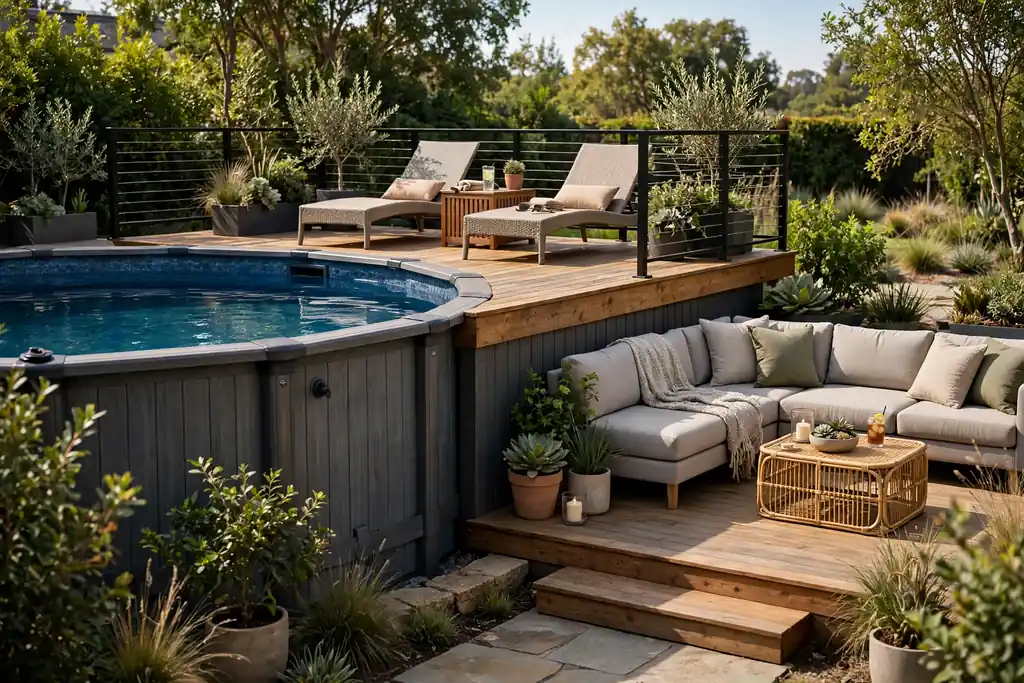
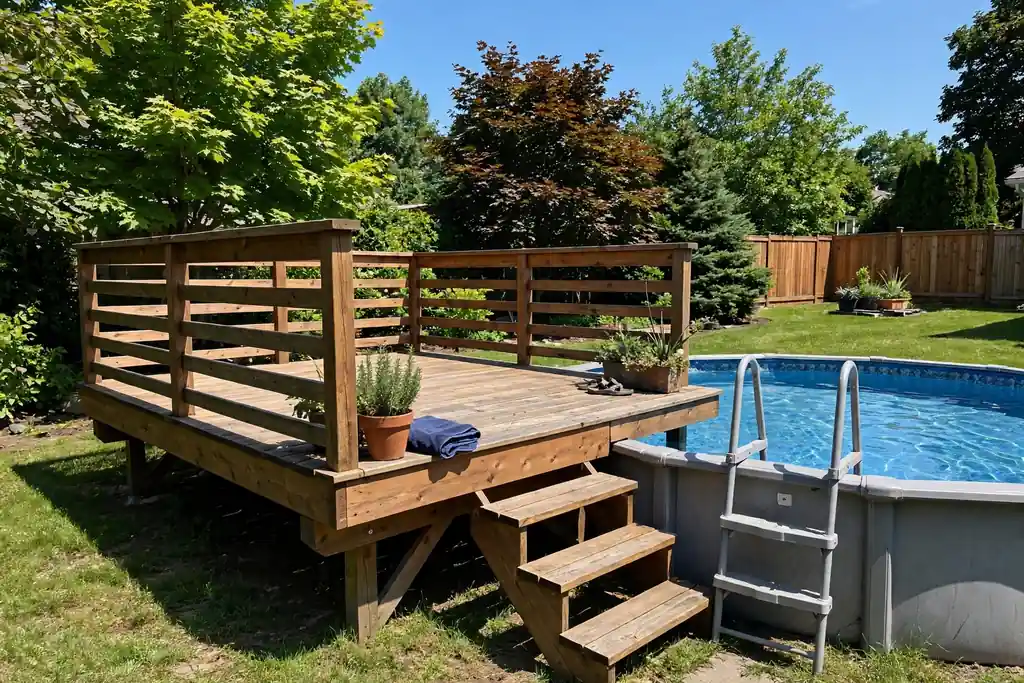
    Wraparound wooden deck running all the way around a round above ground pool.

    Build a deck that runs all the way around the pool, so you can enter from any side and walk the full circle without stepping onto grass. A wraparound deck suits a pool used daily, since it gives room for loungers on one side, a table on another, and a clear entry path that never crosses a seating area. Keep the deck surface level with the top rail or just below it, so the step into the pool stays short and steady.

    Leave a small gap between the deck edge and the pool wall for access and for the pool to move slightly with water and temperature changes, and never fix deck boards tightly against the pool liner or top rail. Use a removable board or a hinged section near the pump, filter, and skimmer, so routine care stays easy. Sweep the deck after swimming, since wet leaves and grit make boards slippery.

    2. Partial Deck on One Side of the Pool

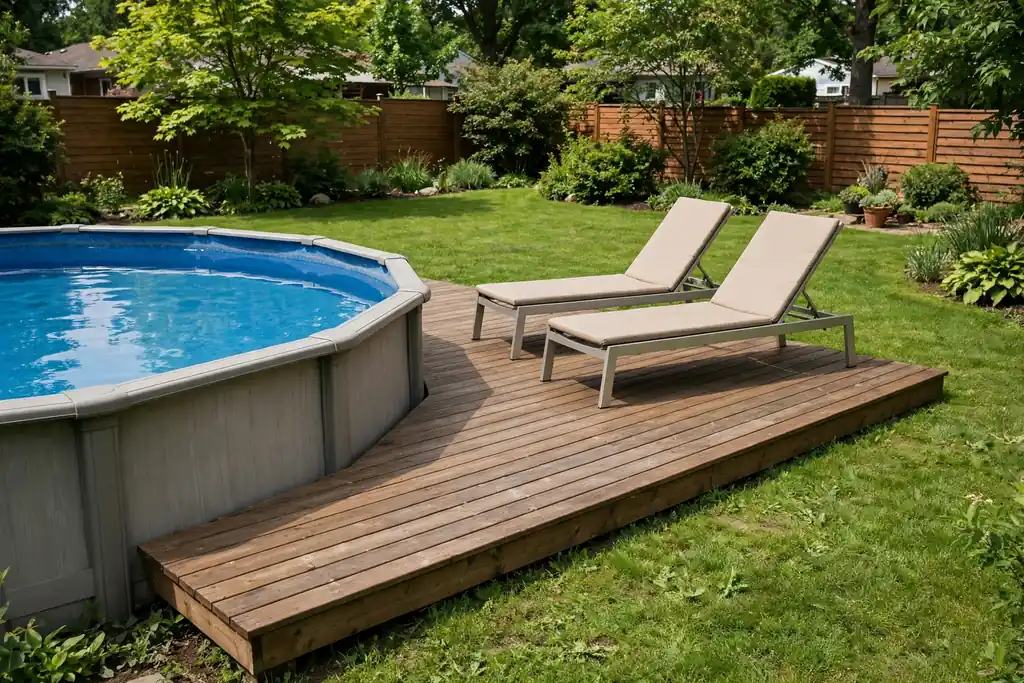
    Partial wooden deck along one side of an above ground pool with loungers and a lawn.

    Build a deck along one side of the pool only, usually the side nearest the house or the sunniest side, when a full wraparound deck would fill the yard. A partial deck gives you a proper entry, a place for two loungers, and a towel rail, without paving the whole garden. It also costs less in boards and framing, and it leaves lawn on the other sides for play and planting.

    Place the partial deck where you enter the pool most often, and make it wide enough for a chair, a step, and a person passing behind it. Add a simple skirt or planted pots along the exposed pool wall on the other sides, so the pool still looks finished from the lawn. If you later extend the deck, keep the board direction and height the same, so the join reads as one design.

    3. Freestanding Platform Deck Beside the Pool

    Freestanding platform deck beside an above ground pool with a step to the pool ladder.

    Set a freestanding platform deck beside the pool, rather than fixing it to the pool wall, so the deck stands on its own posts and the pool stays fully accessible for liner changes and repairs. A freestanding deck suits renters, pools that may move, and yards where the ground slopes, since the platform can be levelled on its own footings. Keep a short, stable step between the platform and the pool ladder or entry steps.

    Leave a clear gap between the platform and the pool wall, wide enough to reach a hand in for cleaning but narrow enough that a foot cannot slip through. Anchor the platform firmly, check it for rocking after heavy rain, and add a handrail on the open side where the drop to the lawn is more than a low step. A freestanding deck also makes it easy to add a second platform later, joined by a step.

    4. Two Level Deck with a Sun Deck and a Lower Lounge

    Two level pool deck with an upper sun deck and a lower lounge joined by one shallow step.

    Split the pool deck into two levels, with an upper sun deck beside the pool and a lower lounge a step down, to give a long or wide deck two clear jobs without a staircase. The upper level holds entry steps, loungers, and towels, while the lower level holds a table, shade, and a quiet seat away from splashes. One shallow step between levels marks the change without blocking movement.

    Keep the step low, deep, and clearly edged, and use the same boards on both levels so the deck still reads as one design. Place the level you use most nearest the house, and the quieter level toward the garden view. For yards where the ground itself slopes, the ideas in these tiered garden ideas show how to give each level a clear job and a safe step between them.

    5. Wide Entry Steps with a Firm Handrail

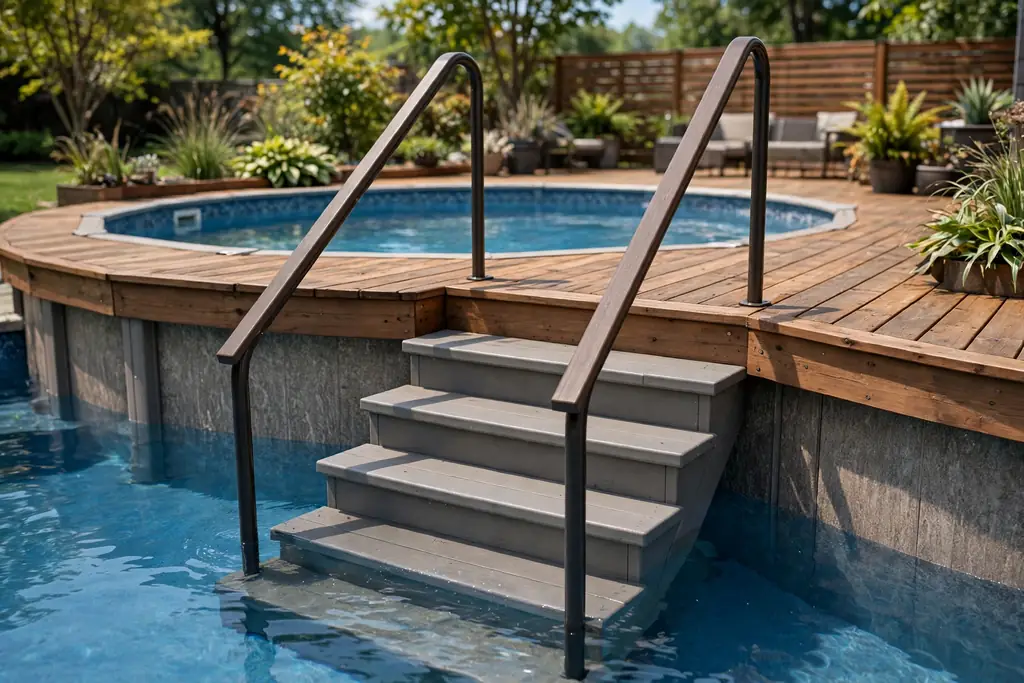
    Wide entry steps with a firm handrail leading from a pool deck toward pool water.

    Build wide entry steps from the deck into the pool area, with a firm handrail on at least one side, so children, older swimmers, and anyone carrying a towel can enter steadily. Wide steps suit above ground pools better than a narrow ladder, since they give a full foot on each tread and a place to pause before the last step into the water. Keep each tread deep, level, and slip resistant, and use a contrasting nosing so the step edge reads clearly when wet.

    Fix the handrail to the deck frame, not to the pool wall alone, and check it for wobble each spring. Keep the steps clear of toys, shoes, and pool floats, and add a small landing at the top where a swimmer can stand dry before turning to the deck. If the pool has a ladder as well, keep the ladder as a second exit, not the only one, so the steps stay the main route.

    6. Privacy Screen Wall on the Overlooked Side

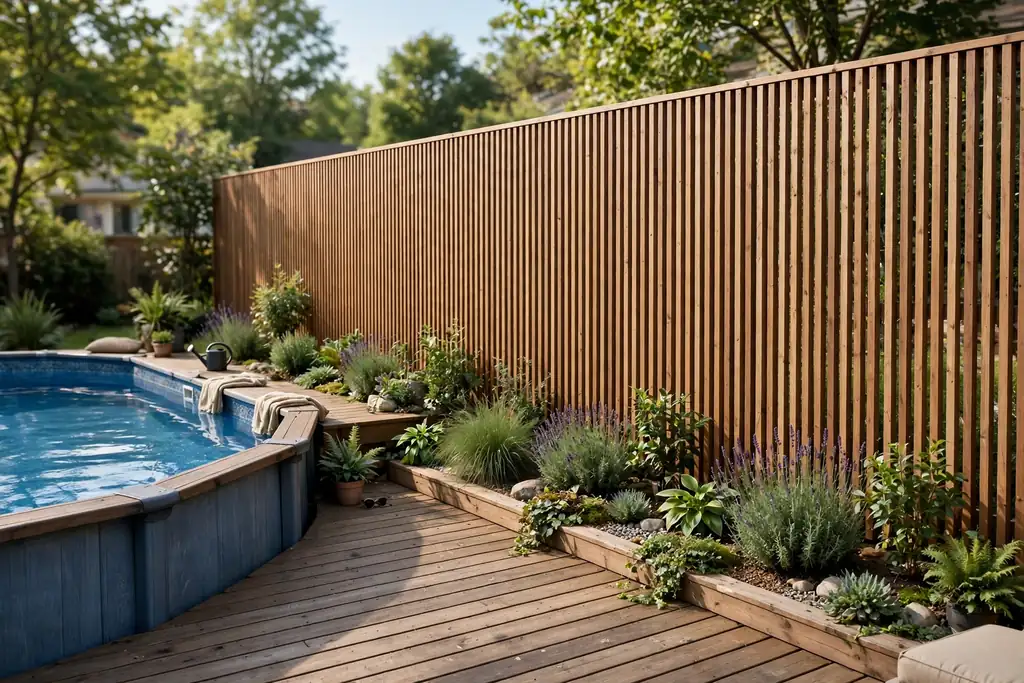
    Privacy screen wall along the overlooked side of an above ground pool deck.

    Stand a privacy screen along the overlooked or windy side of the pool deck to cut wind and give swimmers privacy without building a solid wall around the whole pool. Screens suit decks close to neighbours, and they give climbers a place to grow while still letting air through. Choose panels that let some air pass, since a solid screen catches more wind and puts more load on its fixings.

    Fix screens firmly to posts set beside the deck frame, and check that they do not block the pump, filter, or access to the pool wall. Plant climbers at the base for a green screen in summer, and keep the panels clear of the grill and any heat source. A screen on the windward side often makes the whole deck feel calmer, even before plants cover it, and it gives towel hooks and a small shelf a useful home.

    7. Pergola Over the Deck Lounge Area

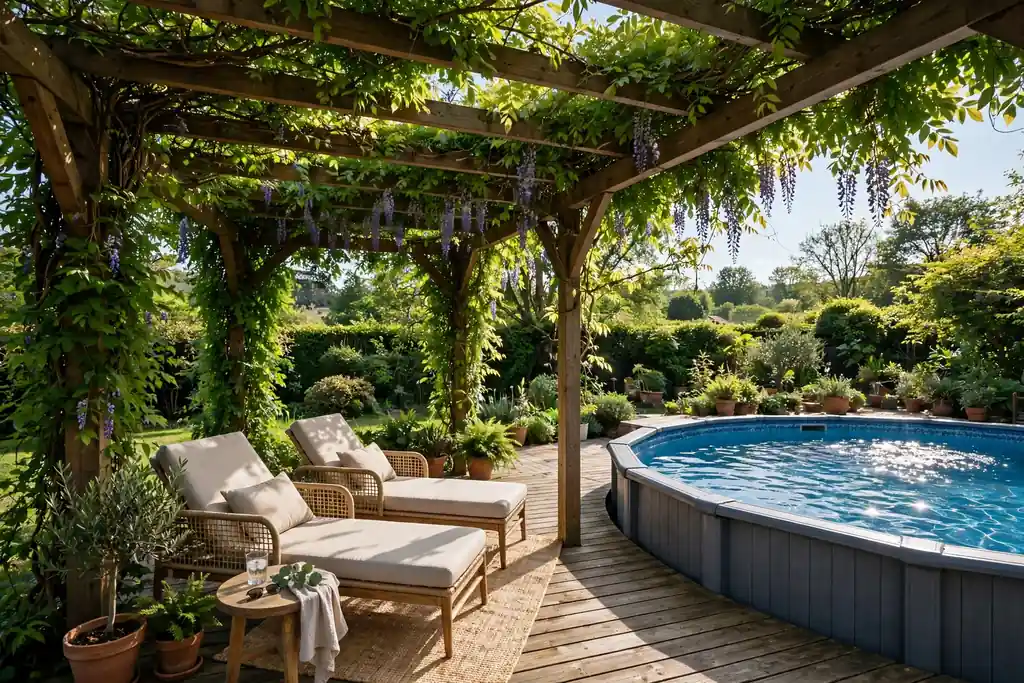
    Pergola with climbing plants over the lounge area of an above ground pool deck.

    Build a pergola over the lounge part of the pool deck, away from the splash zone, to give dappled shade, a sense of enclosure, and a frame for climbing plants and string lights. A pergola suits a pool deck because its posts can sit on or beside the deck frame, and it marks the sitting zone clearly apart from the wet entry zone. Choose timber or metal posts that suit the house style, and fix them firmly so wind does not rock the frame.

    Train climbers such as jasmine or grape vine along the top beams, tying stems loosely as they grow, and keep climbers clear of gutters and the pool skimmer, since leaves in the water mean extra cleaning. Leave headroom under the beams so tall guests can stand comfortably, and keep the pergola roof open rather than solid over the pool itself, so rain and light still reach the water. A rug and two chairs below a pergola often make a bare deck feel like a room.

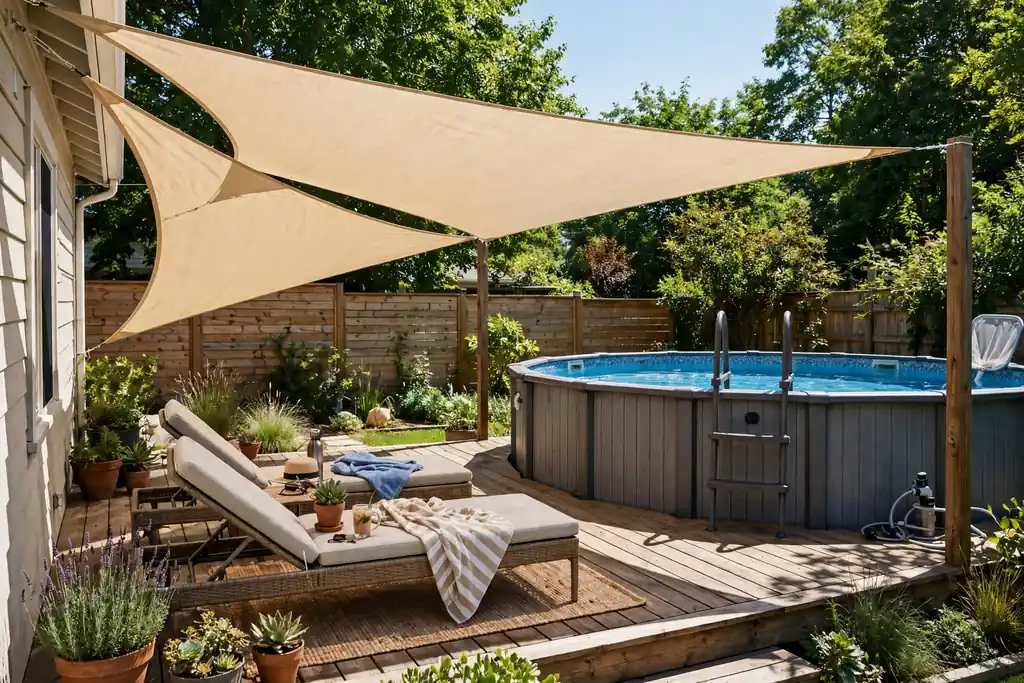
    8. Shade Sail Over the Sunny Corner

    Shade sail stretched over the sunny corner of an above ground pool deck.

    Stretch a shade sail over the sunniest corner of the pool deck for instant shade where a pergola would be too fixed or too heavy. A sail gives broad shade, moves gently in the breeze, and can be taken down in storms, which suits decks that need shade only in high summer. Fix it to strong posts or wall points rated for wind load, with a slight slope so rain runs off one side rather than pooling in the middle.

    Choose a light, breathable fabric in a warm neutral, and test the shade pattern at midday before fixing the final points. Keep the sail clear of the pool water where possible, since a sail dripping after rain can chill swimmers, and store it dry over winter. A sail plus a screen on the windward side often makes a hot, exposed deck comfortable for most of the day, without shading the whole pool.

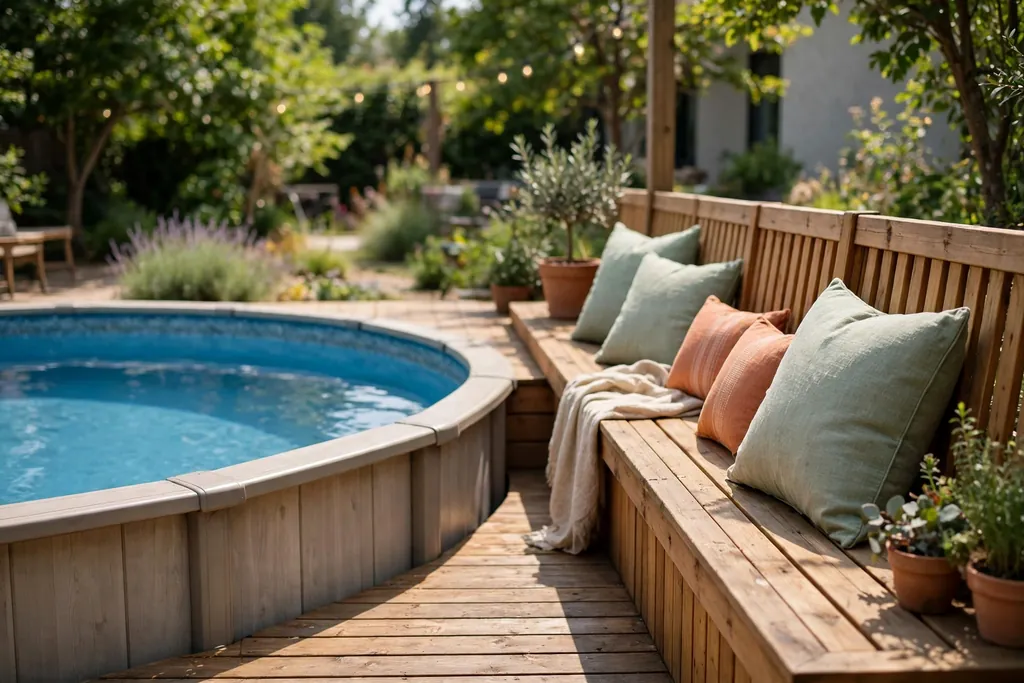
    9. Built-In Bench Around the Deck Edge

    Built-in wooden bench running along one edge of an above ground pool deck.

    Run a built-in bench along one edge of the pool deck to give seating that never needs to be carried in or out, and that leaves the middle of the deck open for entry and play. A fixed bench suits small pool decks, where loose chairs would crowd the space, and it doubles as a boundary that marks where the deck ends and the lawn begins. For seating that works in gardens as well as on decks, these garden bench ideas show how to choose a spot first and match the seat to it.

    Build the bench at a comfortable sitting height, with a back rest only where the deck faces a view you want to lean into, since a backless bench is easier to sit on from either side. Leave a gap under the bench front for feet, and choose boards that match or tone with the deck so the bench reads as part of the structure. Add loose cushions for comfort, and store them nearby in a dry box, since poolside cushions soak up splashes fast.

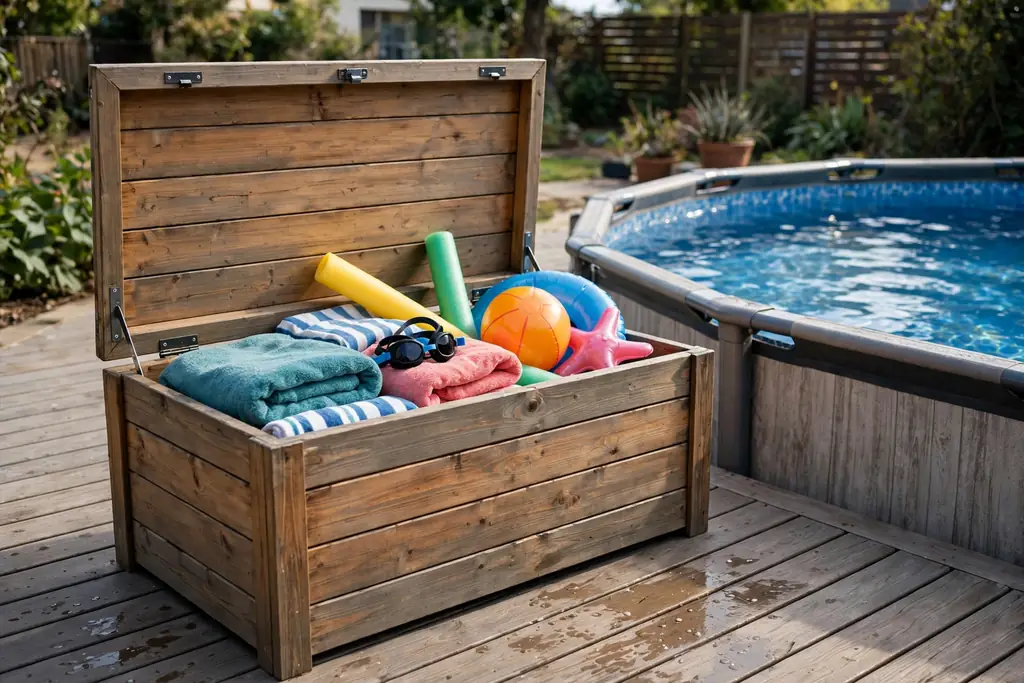
    10. Storage Bench and Under Deck Storage for Pool Gear

    Storage bench box on a pool deck with its lid open showing towels and pool toys.

    Use the space under a low deck edge for a storage hatch, or build bench boxes into the deck seating, to hide towels, pool toys, goggles, and cleaning gear. Pool gear gathers fast, and hidden storage keeps it dry and out of sight without taking a whole shed. Choose boxes made for outdoor use, with lids that close fully to keep rain out, and keep heavy items at the bottom so boxes stay stable.

    Leave clearance behind bench boxes so lids open fully, and never seal the whole under deck space, since air must still move under the boards to keep the frame dry. Label one box for towels and one for toys, so the right box opens first after a swim. Storage close to the entry steps means towels are close at hand, so swimmers are less likely to drip through the house.

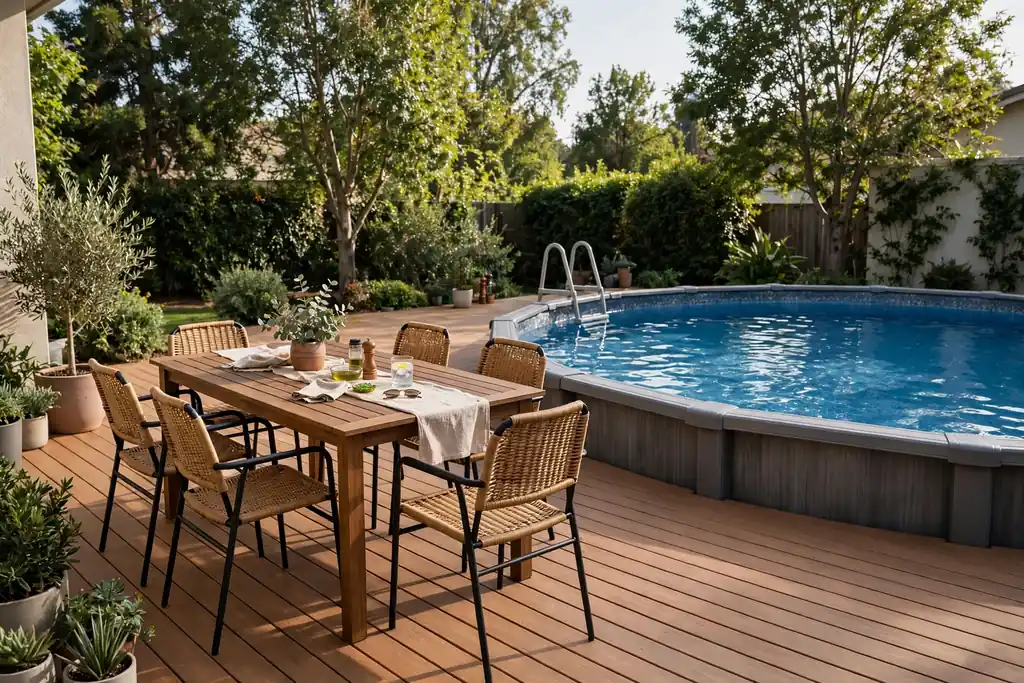
    11. Dining Deck Near the Pool but Clear of Splashes

    Dining table and chairs on a pool deck section clear of the main splash zone.

    Place a dining table and chairs on the deck section furthest from the main splash zone, so meals stay dry while swimmers stay close. A poolside dining deck earns its place fastest in summer, when lunch moves outside, and it only needs a flat area, a table that seats your household, and a shade option for midday. Keep the table clear of the entry steps and leave room to pull chairs out without stepping off the deck edge.

    Choose a table with a top that wipes clean and chairs that stack or fold for stormy days, and add a low centerpiece pot that still lets people see across the table. A washable outdoor rug under the table defines the dining zone and catches crumbs, and a small side bench gives extra seats for guests without a second table. Keep food and glass away from the pool edge, so a knocked drink does not land in the water.

    12. Lounge Deck with Loungers and a Washable Rug

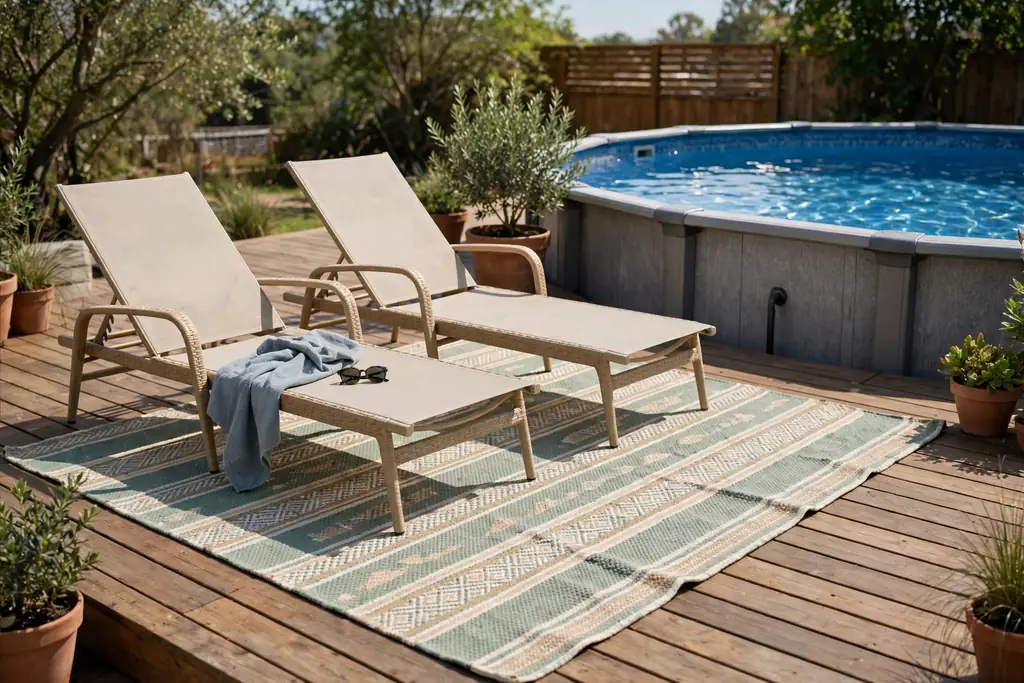
    Loungers and a washable outdoor rug on an above ground pool deck.

    Set two loungers, a small side table, and a large washable outdoor rug on the deck to make a lounge that invites long sits between swims. A rug softens boards underfoot, defines the seating zone, and adds colour that can change with the seasons. Choose weather resistant cushions with removable covers, and bring them inside during long wet spells so they stay fresh.

    Face the loungers toward the sun at the time you use them most, and leave a clear path behind them for access to the entry steps. A side table at each end holds drinks, sunscreen, and a book, and a basket for towels keeps the lounge ready without extra furniture. Keep the rug flat and grippy, so it does not curl at the edges and trip bare feet, and rinse it after a dusty week so grit does not scratch the boards.

    13. String Lights and Solar Post Lights for Evenings

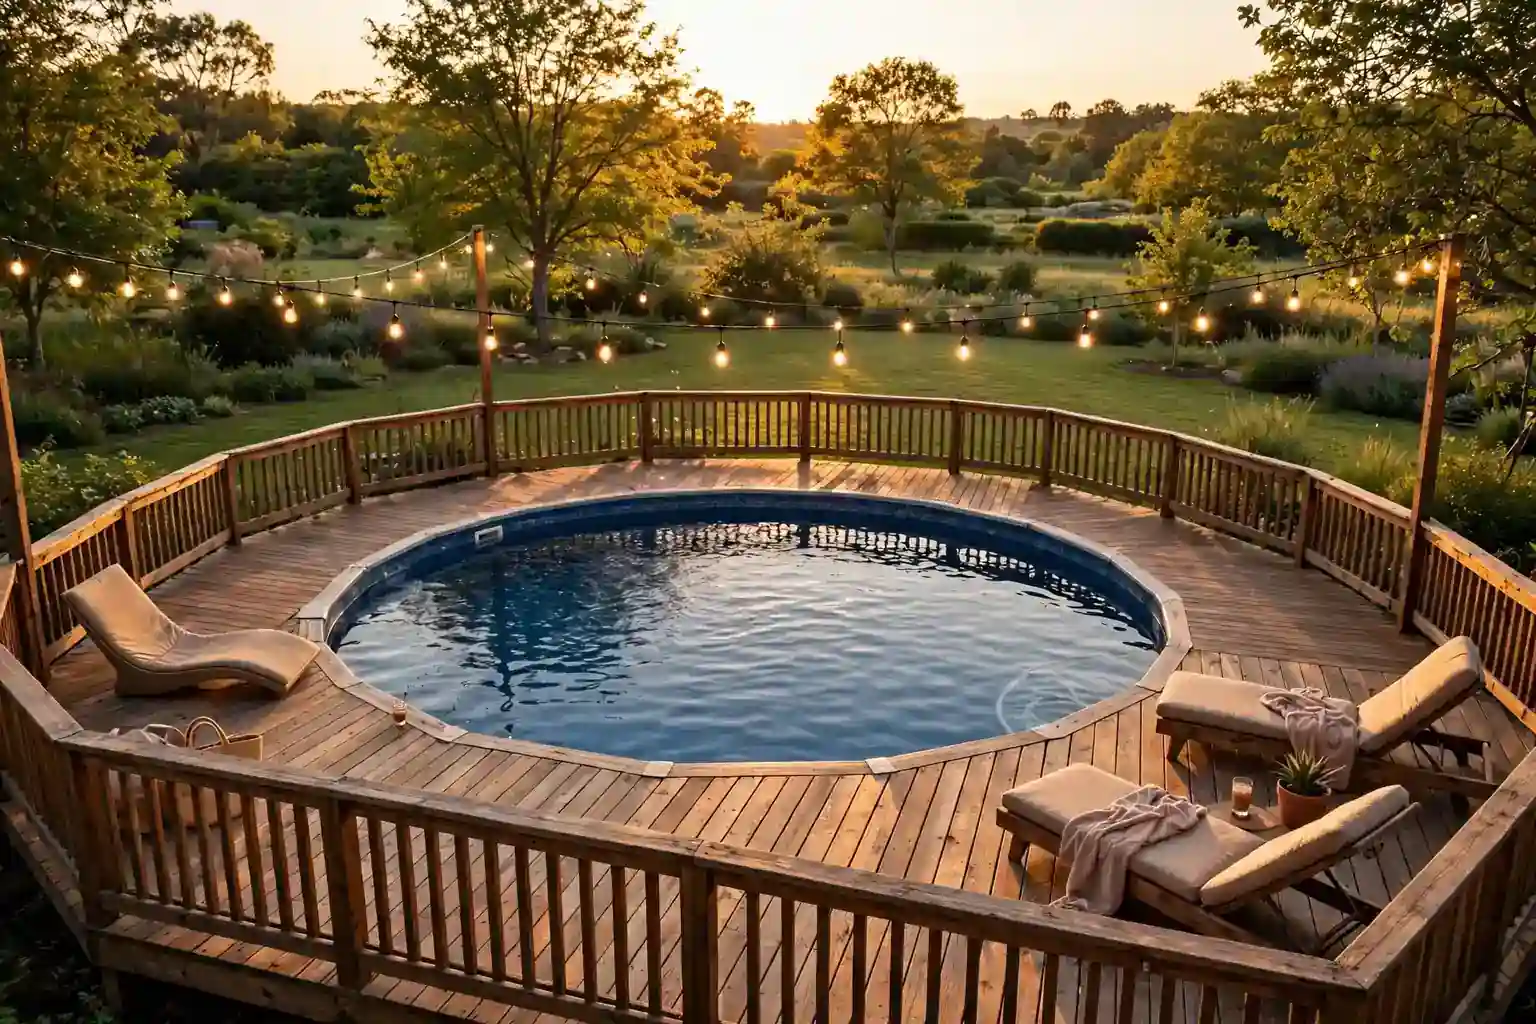
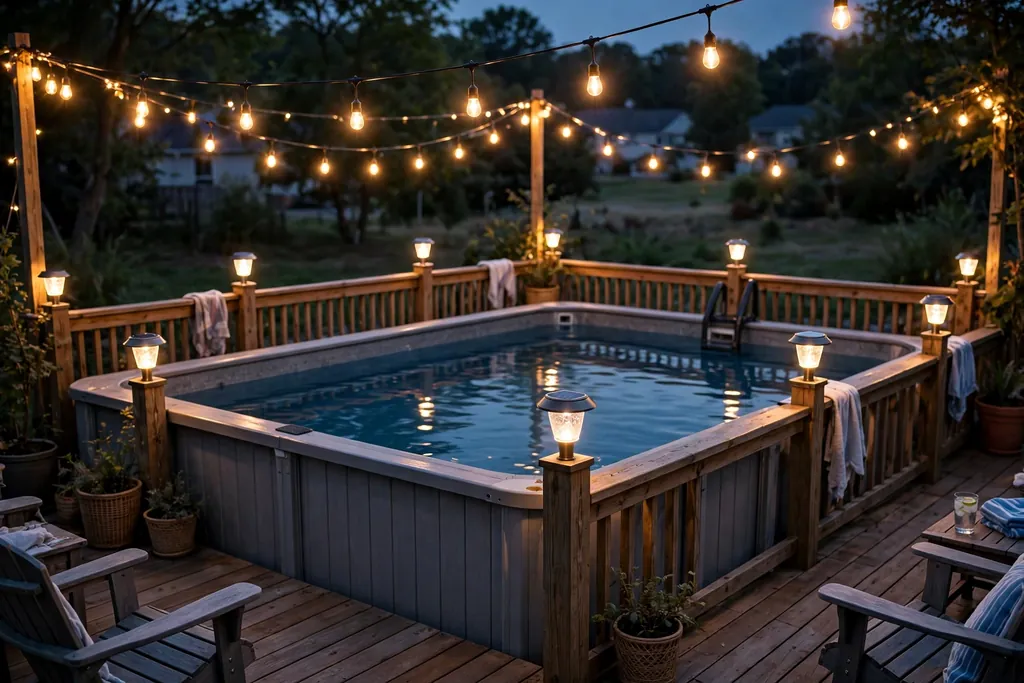
    String lights and solar post lights glowing over a pool deck at dusk.

    Fix string lights along deck posts, a pergola, or a simple post and wire run to keep the pool deck usable after sunset with soft, warm light. Light at deck level should be low and warm, so it feels relaxed rather than harsh, and so it does not glare into neighbouring windows. Solar or plug-in strings both suit a pool deck, as long as cables are kept out of walkways and solar panels get sun during the day.

    Drape strings in gentle swags rather than tight straight lines, so the light feels relaxed and the wire does not strain at the fixings. Add solar post cap lights along the deck edge and near each step, since a missed step is most likely where light is lowest. Test the light level at dusk before guests arrive, and keep all electrical fittings rated for outdoor use and clear of the pool water. Never run a mains cable across a wet deck.

    14. Planters and Skirting to Soften the Pool Wall

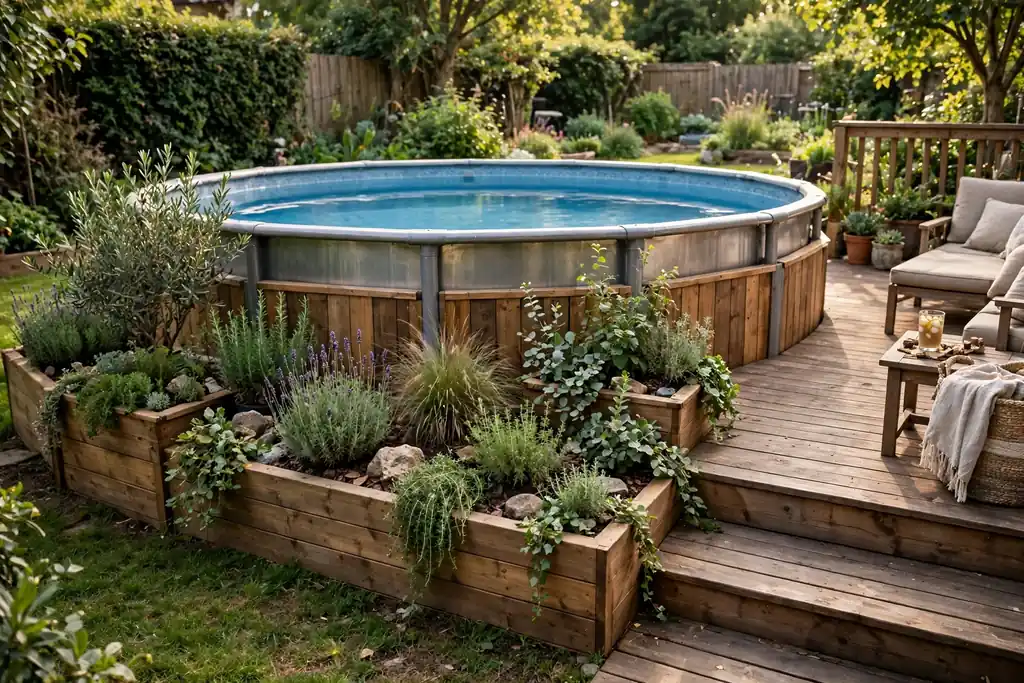
    Planters and skirting boards softening the wall of an above ground pool beside a deck.

    Set planters along the deck edge and add skirting boards below the deck to hide the pool wall, pipes, and framing, so the pool reads as part of the garden rather than a bare tank. Skirting suits above ground pools best, since the wall height is the hardest part to make look finished, and a simple vertical board skirt with gaps for air gives a tidy finish. Planters on the deck above the skirt add colour at eye level.

    Line each planter so soil does not sit against the deck frame, and give every planter drainage holes that lead away from the boards. Plant a mix of one upright plant, one mid height plant, and one trailing plant per planter for a full look, and water planters more often than beds, since they dry out fast in sun and wind. Keep planters clear of the entry steps, the gate swing, and the pump access panel.

    15. Safety Gate and Slip Resistant Deck Surface

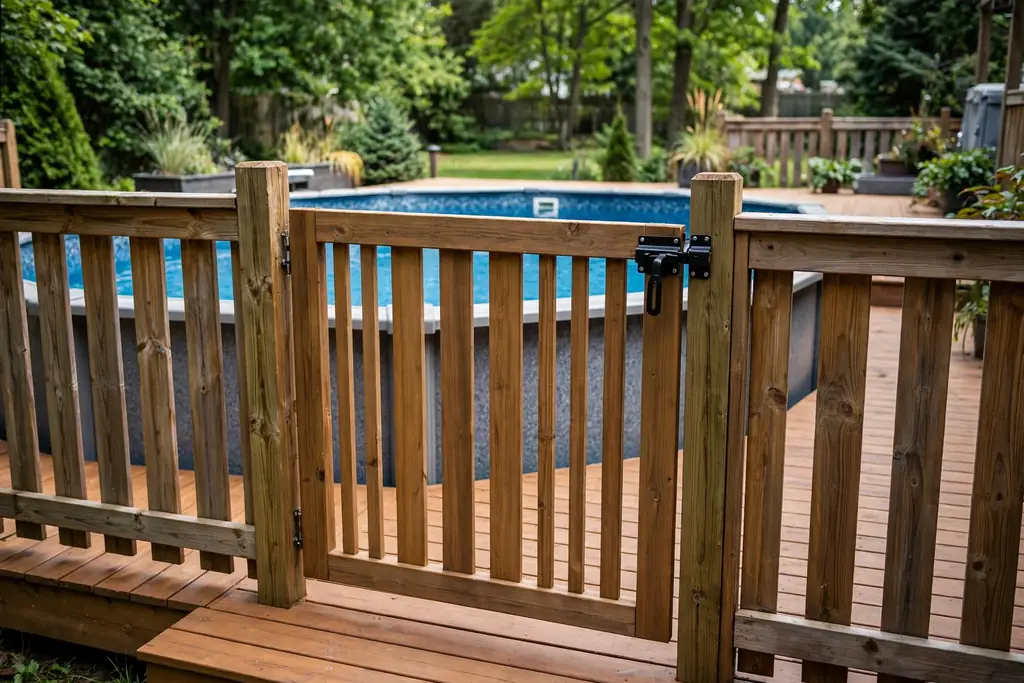
    Safety gate with a latch at the entry to an above ground pool deck.

    Fit a self closing, self latching gate at the deck entry, and choose a slip resistant deck surface, to make the pool area safer for children and for bare feet. A gate matters most when the deck gives access to the pool, since it keeps unsupervised entry closed even when the yard gate is open. Check local pool safety rules first, since gate height, latch height, and fencing rules vary by area.

    Choose boards with a grippy finish, keep the surface swept clear of leaves and algae, and wash the deck a few times each season so a slippery film does not build up. Keep the gate latch working every week in summer, test it after storms, and never prop the gate open during a gathering unless an adult is watching the pool. A clear, dry path from the house to the gate also helps, since wet feet on grass carry mud onto the deck.

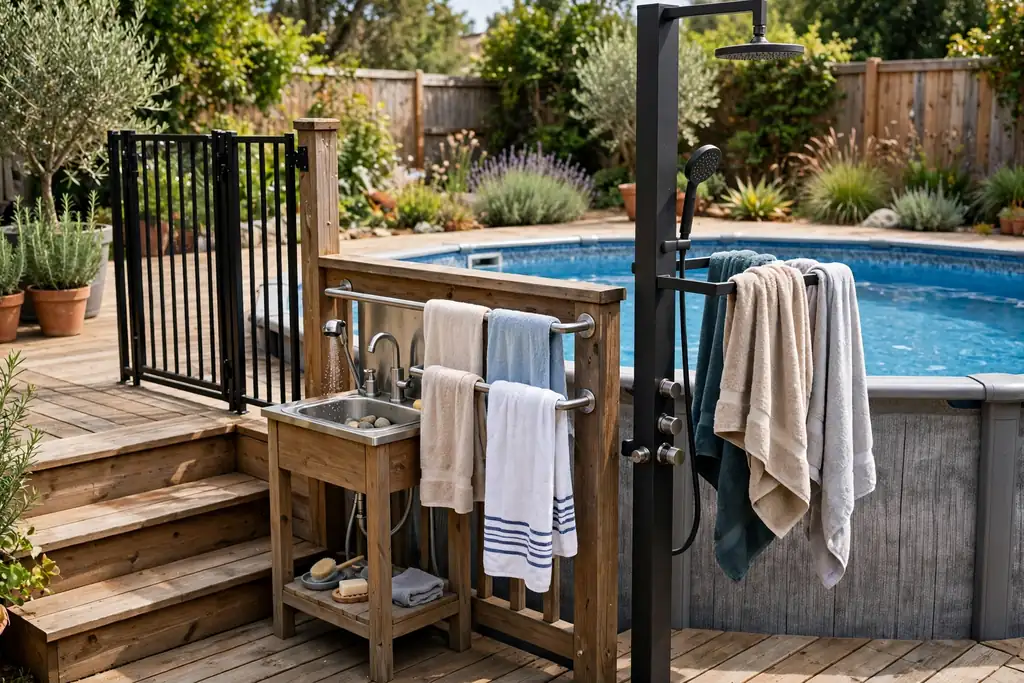
    16. Rinse Station and Towel Rail by the Entry

    Rinse station and towel rail beside the entry to an above ground pool deck.

    Set a simple rinse station and a towel rail beside the deck entry, so swimmers rinse off grass and sunscreen before they go inside, and towels have a dry home. A rinse station can be a short outdoor shower head on a post, a foot wash tap, or a bucket and hose point on a gravel pad, as long as water drains away from the deck boards and the pool pump. Keep the rinse area off the main deck, so the deck itself stays dry.

    Fix a towel rail or a row of hooks to the privacy screen or a post near the entry, at a height children can reach, and add a small bench or stool for changing shoes. Drain the rinse pipe before frost if your winters freeze, and keep soap and shampoo away from the pool water, since they affect water care. A rinse station by the entry often saves the most indoor cleaning of any pool deck addition.

    Conclusion

    A good above ground pool deck starts with safe entry, not the shopping list. Keep it level, slip resistant, and well drained, then choose a deck shape that fits the pool and the yard, one comfortable seat, and one shade option. Add zones for entry, sitting, and gear, and keep steps, gates, drains, and pump access clear. Pick one idea from this list, set it where you will actually swim and sit, and add lighting, planting, and comfort details only after that first seat and step feel right.

    Save this list on Pinterest before your next garden trip, and work through it one area at a time: structure first, then entry and safety, then the shade and seating that make the deck yours.

    FAQs

    How wide should an above ground pool deck be?

    A pool deck should be wide enough for a person to walk past a seated person and for the entry steps to land clear of furniture. A narrow strip beside the pool quickly feels crowded, while a deck wide enough for a lounger, a side table, and a passing route feels usable all day. Measure from the pool wall outward, mark the width with tape on the ground, and walk the route with a chair in place before you build.

    Can a deck be attached directly to an above ground pool?

    Some decks are built to meet the pool top rail, and others stand freestanding beside the pool, and the right choice depends on the pool maker guidance, the pool wall strength, and local rules. Never fix heavy deck framing tightly to a pool wall or liner, and leave a small gap plus a removable section near the pump, filter, and skimmer. If in doubt, build freestanding and ask a professional or the pool maker before attaching anything to the pool.

    What is the best deck surface for bare feet around a pool?

    A slip resistant surface matters more than the board material alone, since every pool deck gets wet. Timber with a grippy finish feels warm underfoot, while composite with a textured finish needs less upkeep and resists splinters. Whichever surface you choose, sweep it clear, wash off algae and sunscreen film regularly, and keep the deck clear of standing water and soil.

    Do I need a gate or fence around an above ground pool deck?

    Rules vary by area, and they often depend on pool depth, deck height, distance from property lines, and whether children can reach the pool from the yard. A self closing, self latching gate at the deck entry is a sensible step in most family gardens, even where the yard is already fenced. Check local pool safety rules and, if in doubt, ask your local office before you build, especially for decks used by children.

    How do I stop an above ground pool deck from rotting?

    Keep air moving under the deck, keep boards clear of soil and mulch, and sweep leaves so damp debris does not sit on the surface. Use timber rated for outdoor ground contact or composite boards as the maker directs, fix drainage so rain runs away from the house and off the deck, and check the frame and board fixings each spring. Replace any soft board before rot spreads, and keep skirting gaps open for air.

    How can I hide the side of an above ground pool?

    Skirting boards below the deck, planters along the deck edge, and a planted border around the exposed wall all help the pool blend into the garden. Keep skirting gaps open for air, leave access to the pump and filter, and avoid piling soil against the pool wall. A mix of low edging plants at the front and taller plants behind the pool wall reads as a garden border rather than a cover up, and it still leaves room for care and cleaning.


  • 30 Ground Level Deck Ideas That Feel Both Cozy and Current

    30 Ground Level Deck Ideas That Feel Both Cozy and Current

    A ground level deck is the easiest outdoor room to love, because it sits close to the lawn, needs no long staircase, and connects the house to the garden in one step. It gives you a dry, level place for morning coffee, evening meals, and quiet reading, without the height and cost of a raised deck. These 30 ground level deck ideas cover boards, borders, seating, shade, lighting, and planting for a low deck that drains well and feels lived in. Start with a level base and one comfortable seat. For yards where the ground slopes, the ideas in these tiered garden ideas show how to give each level a clear job.

    Key Takeaways

    • Keep a ground level deck low, level, and well drained, with boards clear of soil and a gap for air under the frame.
    • Choose boards for how you will use the deck: timber for warmth, composite for low upkeep, and a grippy finish for wet weather.
    • Give the deck zones: one for sitting, one for eating, and one for planting, so it feels like a room, not a platform.
    • Add shade, soft light, and a wind break early, since comfort decides whether you actually use the deck.
    • Keep the step to the lawn low and wide, with a clear path and no trip edge at the door.
    • Mix evergreen structure with seasonal pots, so the deck looks cared for in every season.

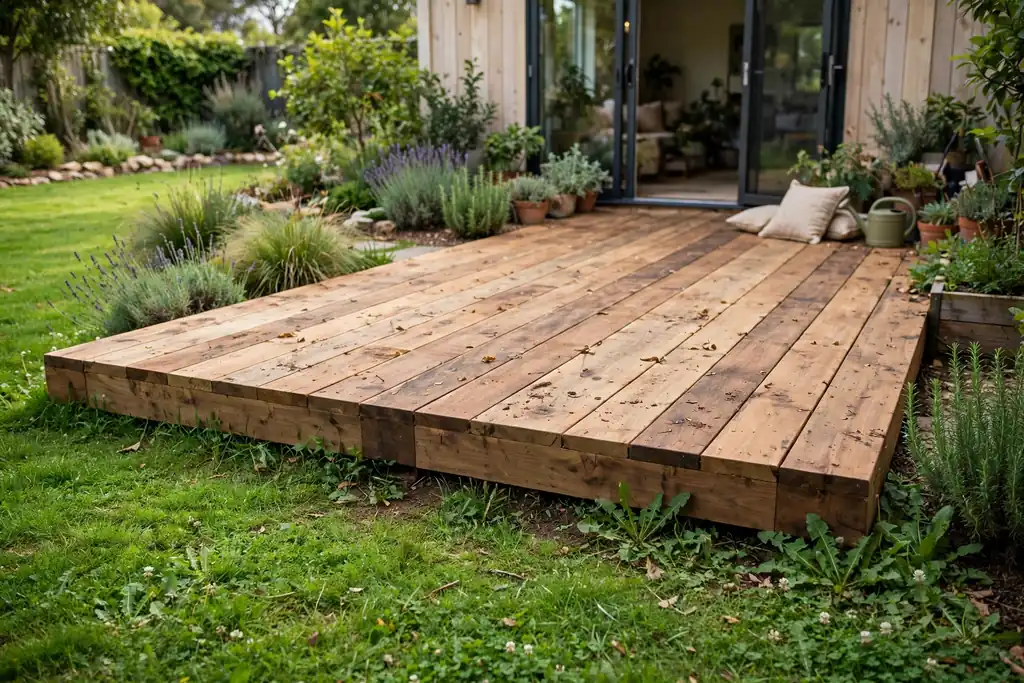
    1. Wide Plank Timber Deck Flush with the Lawn

    Wide plank timber deck sitting almost level with a green lawn.

    Lay wide plank timber boards so the deck surface sits almost level with the lawn, with only a small step down to the grass. A flush deck feels like part of the garden rather than a platform added on top of it, and it suits bungalows, patios doors, and homes where step free movement matters. Choose timber rated for outdoor ground contact, and keep the board ends clear of soil so air can move under the deck.

    Leave small gaps between boards for drainage and for the timber to expand in wet weather, and brush the surface regularly so leaves do not trap damp. A warm brown or natural grey finish suits most gardens, and a clear oil finish, reapplied as the maker directs, keeps the boards from drying out and splintering.

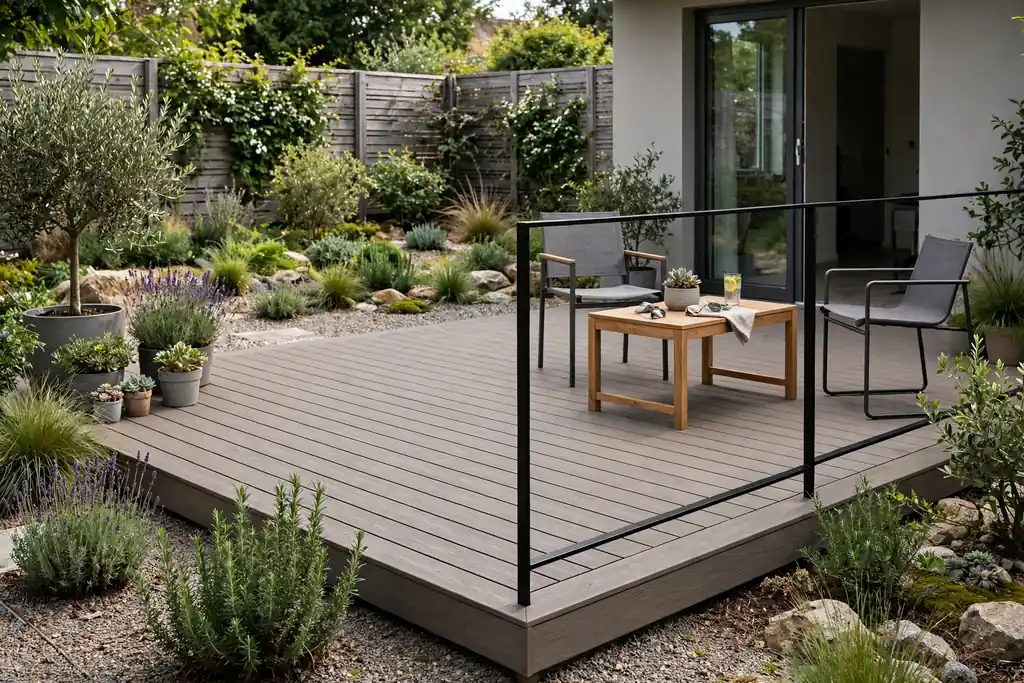
    2. Low Upkeep Composite Deck in Warm Grey

    Low upkeep composite deck in warm grey with simple outdoor furniture.

    Choose composite boards in a warm grey for a ground level deck that needs little more than sweeping and an occasional wash. Composite suits busy households and shaded gardens, where timber would stay damp and need frequent oiling. The even colour also calms a mixed garden, letting planting and furniture provide the change through the seasons.

    Check the board fixing system before you buy, since hidden clips give a clean surface with no visible screws, while face screws are easier to replace one board at a time. Keep the deck clear of standing water, sweep grit off the surface so it does not scratch, and leave the expansion gaps the maker specifies at board ends and edges.

    3. Picture Frame Border Around the Deck

    Deck with a picture frame border of boards running around the main field.

    Frame the deck with a border of boards running at right angles to the main field, like a picture frame, to give even a plain rectangle a finished edge. The border hides cut board ends, marks the deck edge clearly at dusk, and gives the eye a clean line to follow. It suits decks of any size, and it works in timber or composite, as long as the border boards are the same thickness as the field boards.

    Plan the border width before you cut the field boards, so the last full board lands neatly against the frame. Use a contrasting tone for the border only if the rest of the garden is simple, since a strong contrast can dominate a small deck. Keep the border boards level with the field, so chairs and tables do not rock at the join.

    4. Deck Built Around a Mature Tree

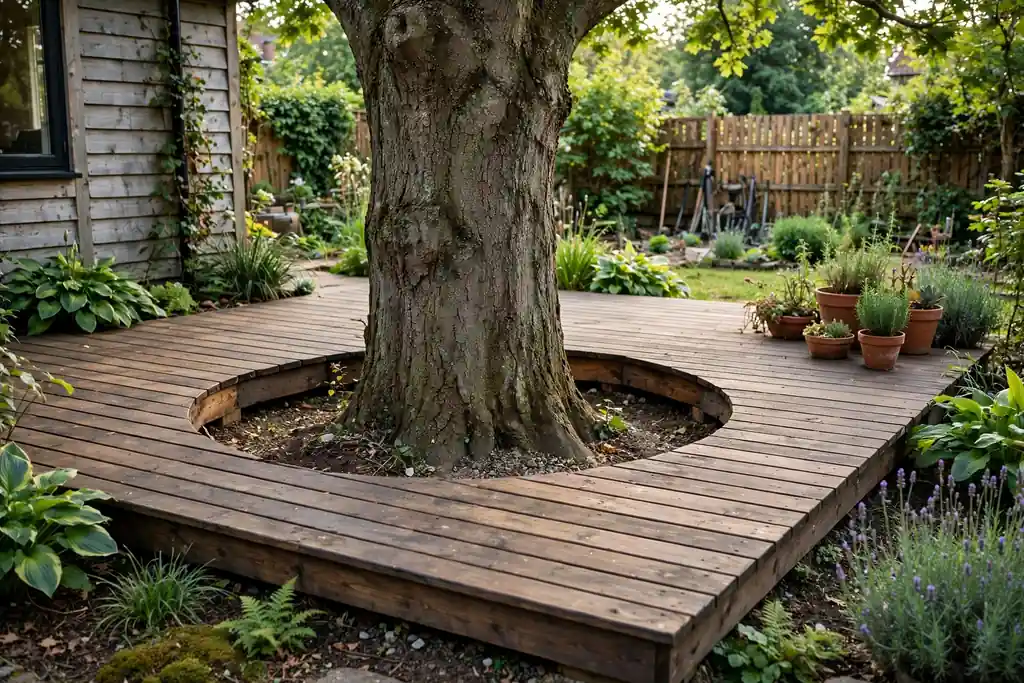
    Ground level deck built around a mature tree trunk with a wide opening.

    Build the deck around a mature tree, leaving a generous opening for the trunk and room for it to grow. A tree deck gives instant shade, a natural focal point, and a reason to sit outside on hot days, without waiting years for new planting to grow. Keep the opening wide, at least a hand span clear of the bark all round, and never fix boards tightly against the trunk.

    Raise the frame on posts rather than filling soil against the trunk, since piled soil and trapped damp can harm the tree. Sweep fallen leaves from the opening so they do not rot against the bark, and check the gap each year, widening the opening if the trunk has thickened. A bench ring or a few pots around the opening finishes the feature without crowding the tree.

    5. Built-In Bench Along the Deck Edge

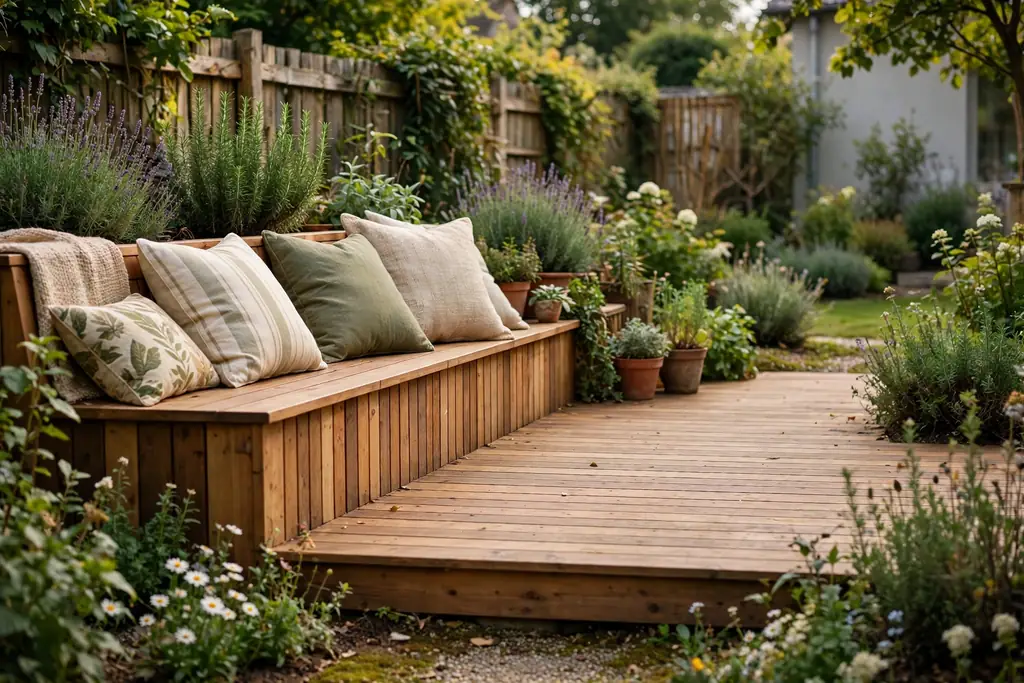
    Built-in wooden bench running along one edge of a ground level deck.

    Run a built-in bench along one edge of the deck to give seating that never needs to be carried in or out, and that leaves the middle of the deck open. A fixed bench suits small decks, where loose chairs would crowd the space, and it doubles as a boundary that marks where the deck ends and the lawn begins. For seating that works in gardens as well as on decks, these garden bench ideas show how to choose a spot first and match the seat to it.

    Build the bench at a comfortable sitting height, with a back rest only where the deck faces a view you want to lean into, since a backless bench is easier to sit on from either side. Leave a gap under the bench front for feet, and choose boards that match or tone with the deck so the bench reads as part of the structure. Add loose cushions for comfort, and store them nearby in dry weather.

    6. Planter Boxes Built Into the Deck Edge

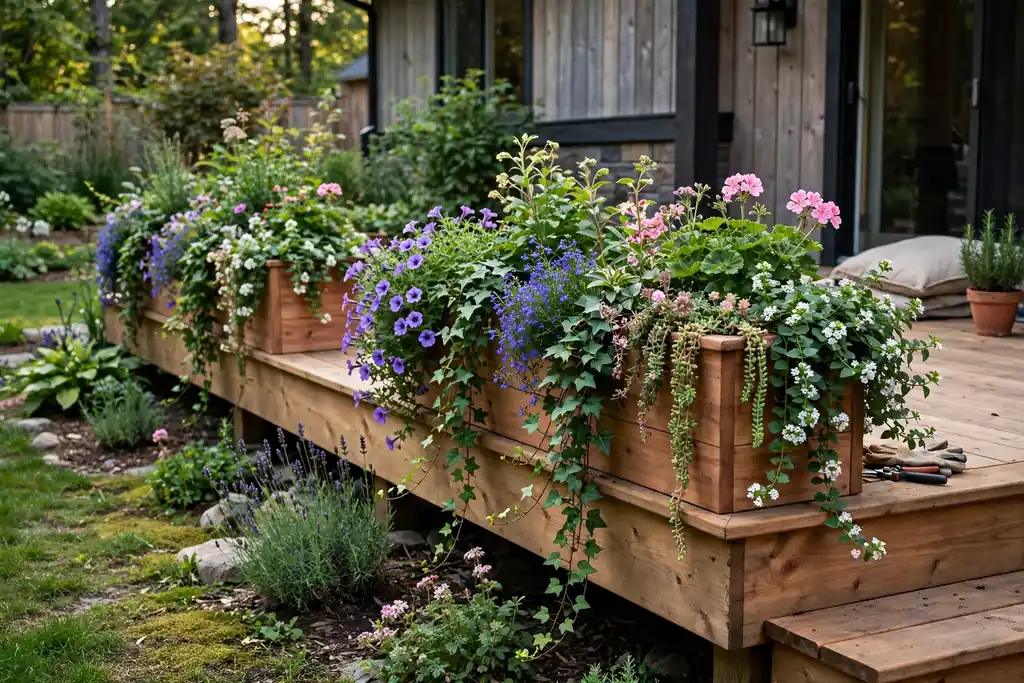
    Planter boxes built into the edge of a ground level deck with trailing plants.

    Set planter boxes into the deck edge, either as raised boxes along one side or as square planters dropped into the deck surface, so planting is part of the deck rather than an afterthought. Built-in planters soften hard edges, give trailing plants a place to spill, and let you change colour with the seasons without moving heavy pots. They suit decks beside a fence or a wall, where a planted edge breaks up a plain boundary.

    Line each box so soil does not sit against the deck frame, and give every box drainage holes that lead away from the boards. Plant a mix of one upright plant, one mid height plant, and one trailing plant per box for a full look, and water boxes more often than beds, since they dry out fast in sun and wind. Keep planters clear of door swings and the main path across the deck.

    7. Dining Deck Right Outside the Back Door

    Dining table and chairs on a deck right outside a back door.

    Place a dining table and chairs on the deck closest to the back door, so carrying food, plates, and drinks is short and level. A dining deck earns its place fastest in summer, when meals move outside most evenings, and it only needs a flat area, a table that seats your household, and a shade option for midday. Keep the table clear of the door swing and leave room to pull chairs out without stepping off the deck edge.

    Choose a table with a top that wipes clean and chairs that stack or fold for stormy days, and add a low centerpiece pot that still lets people see across the table. A washable outdoor rug under the table defines the dining zone and catches crumbs, and a small side bench gives extra seats for guests without a second table.

    8. Lounge Deck with a Sofa and Outdoor Rug

    Low outdoor sofa and coffee table on an outdoor rug on a ground level deck.

    Set a low outdoor sofa, a coffee table, and a large outdoor rug on the deck to make a lounge that invites long sits rather than quick visits. A rug softens boards underfoot, defines the seating zone, and adds colour that can change with the seasons. Choose weather resistant cushions with removable covers, and bring them inside during long wet spells so they stay fresh.

    Face the sofa toward the best view, whether that is the garden, a fire feature, or the evening sun, and leave a clear path behind it for access to the lawn. A side table at each end holds drinks and books, and a basket for throws keeps the lounge ready for cooler evenings without extra furniture. Keep the rug flat and grippy, so it does not curl at the edges and trip passers by.

    9. Pergola Over the Main Seating Area

    Pergola with climbing plants over the seating area of a ground level deck.

    Build a pergola over the main seating area to give dappled shade, a sense of enclosure, and a frame for climbing plants and string lights. A pergola suits a ground level deck because its posts can sit on or beside the deck frame without a tall structure, and it marks the sitting zone clearly. Choose timber or metal posts that suit the house style, and fix them firmly so wind does not rock the frame.

    Train climbers such as jasmine, clematis, or grape vine along the top beams, tying stems loosely as they grow, and prune after flowering as the plant type requires. Keep climbers clear of gutters and roof lines, and leave headroom under the beams so tall guests can stand comfortably. A pergola plus a rug below it often makes a bare deck feel like a room in one weekend.

    10. Shade Sail Over the Sunny Corner

    Shade sail stretched over the sunny corner of a ground level deck.

    Stretch a shade sail over the sunniest corner of the deck for instant shade where a pergola would be too fixed or too heavy. A sail gives broad shade, moves gently in the breeze, and can be taken down in storms, which suits rented homes and decks that need shade only in high summer. Fix it to strong posts or wall points rated for wind load, with a slight slope so rain runs off one side rather than pooling in the middle.

    Choose a light, breathable fabric in a warm neutral, and test the shade pattern at midday before fixing the final points. Keep the sail clear of fire features and climbing plants that could snag it, and store it dry over winter. A sail plus a screen on the windward side often makes a hot, exposed deck comfortable for most of the day.

    11. Fire Table Zone on a Stone Pad

    Fire table on a stone pad at one end of a ground level deck at dusk.

    Set a fire table on a stone or paver pad at one end of the deck, rather than directly on boards, to give evening warmth with a safe, heat resistant base. A fire zone makes a deck usable later in the year, and it gives evening gatherings a focal point that draws chairs together. Check local rules first, keep the pad clear of cushions, planters, and overhanging climbers, and keep water or a fire blanket nearby.

    Use the fire table only in calm weather, on a stable base, and never leave it lit unattended. If open flame is not allowed where you live, a cluster of large lanterns with candles or battery lights on the same stone pad gives a similar glow without the risk. Store fuel safely and away from the seating area, and sweep ash from the pad after use.

    12. String Lights on Deck Posts

    String lights draped along posts over a ground level deck at dusk.

    Fix string lights along deck posts, a pergola, or a simple post and wire run to keep the deck usable after sunset with soft, warm light. Light at deck level should be low and warm, so it feels cozy rather than harsh, and so it does not glare into neighboring windows. Solar or plug-in strings both suit a ground level deck, as long as cables are kept out of walkways and solar panels get sun during the day.

    Drape strings in gentle swags rather than tight straight lines, so the light feels relaxed and the wire does not strain at the fixings. Test the light level at dusk before guests arrive, and add one brighter task light near a cooking or reading spot if needed. Bring plug-in strings inside in winter if the maker advises it, and check outdoor rated fittings before first use.

    13. Solar Post Cap Lights Along the Edge

    Solar post cap lights glowing along the edge posts of a ground level deck.

    Fit solar post cap lights to short deck posts or edge posts to mark the deck boundary and light the step to the lawn after dark. Post caps suit ground level decks because they need no wiring, sit at a low height that does not glare, and charge from daylight on the deck itself. They also help guests find the deck edge and the steps when the main lights are off.

    Space caps evenly along the edge, and keep one cap near each step and near the door, where a missed step is most likely. Clean the small solar panels now and then, since dust and leaves cut charging, and replace rechargeable cells when the light fades early. Caps pair well with string lights above, giving light at two heights without a harsh overhead glare.

    14. Wide Steps Down to the Lawn

    Wide shallow steps leading from a ground level deck down to a lawn.

    Build wide, shallow steps from the deck to the lawn, spanning much of the deck width, so the move from deck to garden feels easy and open. Wide steps suit families, gardeners carrying trays, and anyone with a walking aid, since there is no narrow pinch point at the deck edge. Keep each step low and deep enough for a full foot, and use the same board or a non slip nosing so the step reads clearly.

    Add a handrail only where the drop or the user needs it, since a rail across wide steps can block the open feel, but never skip a rail where safety calls for one. Keep the bottom step clear of soil and mulch so it does not rot, and sweep leaves from the treads so they stay grippy after rain. A pot at each end of the steps anchors the transition in planting.

    15. Step Free Ramp Deck for Easy Access

    Gentle step free ramp leading up to a ground level deck beside steps.

    Add a gentle ramp beside or instead of steps to make the deck step free for wheelchairs, pushchairs, and trolleys. A ramp is one of the most useful ground level deck features, since the deck is already low, so only a short, gentle slope is needed. Keep the slope gentle, the surface grippy, and the ramp wide enough to turn at the top and bottom.

    Edge the ramp with a low kerb or a contrasting board so wheels stay on the surface, and keep the ramp clear of pots, hoses, and door mats. A ramp that doubles as a plant edged path, with low planting on one side, looks like part of the garden rather than an add on. Check the finished height at the door threshold, so the ramp meets the doorway without a lip.

    16. Storage Hatch and Bench Boxes Under the Deck Edge

    Storage bench box on a ground level deck with its lid open showing cushions.

    Use the space under a low deck edge for a storage hatch, or build bench boxes into the deck seating, to hide cushions, watering cans, tools, and small pots. Deck gear gathers fast, and hidden storage keeps it dry and out of sight without taking a whole shed. Choose boxes made for outdoor use, with lids that close fully to keep rain out, and keep heavy items at the bottom so boxes stay stable.

    Leave clearance behind bench boxes so lids open fully, and never seal the whole under deck space, since air must still move under the boards to keep the frame dry. Label one box for cushions and one for tools, so the right box opens first. Storage close to the lounge corner means cushions are close at hand, so you are more likely to use the deck on a whim.

    17. Grill and Prep Station at One End

    Grill and small prep table at one end of a ground level deck.

    Set a grill and a small prep table at one end of the deck, near the back door but clear of seating, so cooking outside stays easy and smoke drifts away from guests. A grill station needs a heat resistant base, a stable table for trays and tools, and room to move around the grill safely. Keep the station away from pergola fabric, cushions, and low climbers, and store fuel and tools in a lidded box nearby.

    Add a small shelf or a wall hook for tongs, brushes, and a thermometer, and a bin or a bucket for ash and waste so the deck stays tidy during cooking. A prep table with a lower shelf holds plates and trays, so trips back indoors stay short. Clean the grill and the table after use, since grease and food scraps attract pests and stain boards.

    18. Container and Herb Garden Corner

    Container and herb pots grouped in a corner of a ground level deck.

    Group containers and herb pots in one deck corner near the kitchen door for fresh leaves within a few steps of cooking, plus colour that changes with the seasons. Herbs such as rosemary, thyme, basil, mint, and chives grow well in pots, and they add scent as well as flavour. Grow mint in its own pot, since it spreads fast and can take over a shared planter.

    Raise pots on feet so water drains freely and does not stain the boards, and group them in clusters of three or five so the corner reads as a garden, not a row of stray pots. Label herbs while they are young, water pots often in hot weather, and pick little and often to keep plants bushy. In winter, move tender herbs to a sheltered corner or indoors, and replace annual herbs each spring.

    19. Slatted Privacy Screen on the Windy Side

    Slatted privacy screen along the windy side of a ground level deck.

    Stand a slatted screen along the windy or overlooked side of the deck to cut wind and give privacy without building a solid wall. Screens suit decks close to neighbours, and they give climbers a place to grow while still letting air through. Choose panels that let some air pass, since a solid screen catches more wind and puts more load on its fixings.

    Fix screens firmly to posts set beside the deck frame, and check that they do not block paths, drains, or access to the house. Plant climbers at the base for a green screen in summer, and keep the panels clear of the grill and fire zone. A screen on the windward side often makes the whole deck feel calmer, even before plants cover it.

    20. Low Floor Cushion Lounge for Lazy Days

    Outdoor rug with floor cushions and a low table on a ground level deck.

    Lay a large outdoor rug and add floor cushions, a low table, and a basket for throws to make a relaxed lounge that can change shape for guests. Floor seating suits a ground level deck because it is light, flexible, and easy to pack away in a storm, and it sits at lawn height, so children and pets join in easily. Choose a washable rug and cushions with removable covers, and keep the setup on a dry, level patch of deck.

    Move the lounge to follow shade during the day, and stack cushions in a storage box at night. Keep food and drinks on a low tray so cups do not tip on soft seating, and keep the rug edges flat so they do not trip passers by. This lounge pairs well with string lights in the evening, when low seating and warm light make a small deck feel like a room.

    21. Hammock Corner Between Two Sturdy Posts

    Hammock hung between two sturdy posts at a quiet corner of a ground level deck.

    Hang a hammock between two sturdy posts at a quiet deck corner for a lazy reading spot that moves gently in the breeze. A hammock suits a ground level deck because the posts can be set beside the deck frame at lawn height, with no tall structure needed, and the hammock itself packs away in winter. Check the post fixings and the hammock weight rating, set the posts on firm footings, and keep a clear swing zone around the hammock.

    Add a small side stool for a book and a drink, and a light blanket for cooler evenings. Avoid hanging a hammock from a pergola or a fence unless that structure is rated for the load, since a garden fence is not always built for swinging weight. Take the fabric inside in wet weather to keep it fresh, and check ropes and fixings each spring.

    22. Small Fountain Corner for Sound and Calm

    Small fountain in a sheltered corner of a ground level deck with plants nearby.

    Set a small fountain or a wide water bowl in a sheltered deck corner for sound, reflection, and birds. Moving water masks street noise, which makes a deck seating area feel more private, and a still bowl reflects sky and planting. Choose a light bowl or a solar fountain, keep the water shallow, and place it where you can reach it for cleaning.

    Refresh the water often, especially in hot weather, and keep the bowl clear of fallen leaves. If mosquitoes are a problem in your area, a small solar fountain that keeps water moving helps. Keep the feature away from seating cushions and electrical items, and empty it before frost if the bowl could crack. A fountain near the lounge corner gives the whole deck a calm background sound.

    23. Gravel Border and Stepping Stones Off the Deck

    Gravel border and stepping stones leading from a ground level deck into a lawn.

    Edge the deck with a gravel border and a few stepping stones leading into the lawn, so the move from boards to grass feels gradual and stays usable after rain. Gravel drains fast, stays light underfoot, and gives a clean line that stops lawn from creeping onto the boards. Use a shallow layer of gravel over a weed barrier, and set stepping stones level with the gravel so feet do not catch.

    Choose stones wide enough for a full step, and keep the path route clear of drains and door thresholds. Plant low edging plants such as thyme or small grasses along the gravel edge to soften the line, and top up gravel each spring where it has thinned. A gravel border also gives pots and a boot scraper a dry home beside the deck steps.

    24. Two Low Levels with a Shallow Step Between

    Ground level deck split into two low levels joined by one shallow step.

    Split a ground level deck into two low levels, joined by one shallow step, to give a long or wide deck two distinct rooms without a staircase. One level can hold dining, the other lounging, and the single step marks the change without blocking movement. Keep the step low, deep, and clearly edged, and use the same boards on both levels so the deck still reads as one design.

    Place the level you use most nearest the house, and the quieter level toward the garden view. A low level change also helps drainage, since each level can fall slightly away from the house. Add a pot or a post cap light at each end of the step, so the level change is easy to see at dusk as well as in daylight.

    25. Diagonal Boarding for a Wider Feel

    Deck boards laid diagonally across a ground level deck frame.

    Lay the deck boards diagonally across the frame to make a narrow or small deck feel wider and more dynamic. Diagonal boards draw the eye across the deck rather than along its shortest side, and they suit decks where the main view is at an angle to the house. The pattern needs more boards and more cuts than straight boarding, so plan the layout and allow extra material.

    Keep the board gaps even, since uneven gaps show more clearly on a diagonal, and use a picture frame border to hide the angled cut ends at the deck edge. Diagonal boarding pairs well with a simple furniture layout, since the boards already provide visual interest. Sweep diagonally laid boards along the board direction, so dirt does not lodge in the gaps.

    26. Patterned Inlay Panel as a Deck Centrepiece

    Patterned herringbone inlay panel set into the middle of a ground level deck.

    Set a patterned inlay panel, such as a herringbone or chevron square, into the middle of the deck as a centrepiece under a table or a lounge rug. An inlay gives a plain deck a crafted focal point without changing the whole board layout, and it suits decks where one area deserves extra attention. Keep the inlay flush with the surrounding boards, so chairs and tables do not rock at the join.

    Plan the inlay size before you lay the field boards, so the panel lands centrally and the surrounding boards meet it neatly. Use a second board tone for the inlay only if the rest of the deck is simple, since a strong pattern can dominate a small deck. Seal the inlay as the maker directs, and check the joints each spring, since patterned cuts can open if boards move.

    27. Railing Bar Ledge for Drinks and Snacks

    Wide bar ledge along the edge of a ground level deck holding drinks and snacks.

    Fix a wide, flat bar ledge along the deck edge or along a low railing, so guests have a place to set drinks and snacks without a table. A bar ledge suits decks used for gatherings, since it adds serving space without taking floor area, and it gives standing guests a natural place to gather. Choose a board or a stone top that wipes clean, and fix it firmly so leaning weight does not loosen it.

    Keep the ledge at a comfortable standing height, and leave a clear path behind it so people can pass without squeezing. Add a few stools only where the ledge faces the garden, not where it blocks the steps, and keep food and glass away from the deck edge where they could fall to the lawn. A bar ledge beside the grill station also gives cooks a landing spot for trays.

    28. Swing Bench Nook in a Sheltered Corner

    Swing bench hanging from a sturdy frame in a sheltered corner of a deck.

    Hang a swing bench from a sturdy frame in a sheltered deck corner for a gentle, sociable seat that suits two people. A swing bench suits a ground level deck because the frame sits at deck height, takes little floor space, and adds a soft, moving shape among straight boards and planters. Check the frame weight rating, set it on level ground, and keep a clear swing zone around it.

    Add weather resistant cushions and a small side table for drinks, and a throw for cooler evenings. Avoid hanging a swing from a pergola unless that structure is rated for the load, since a pergola frame is not always built for swinging weight. Bring cushions inside in wet weather, and check chains and fixings each spring before the swing gets daily use.

    29. Four Season Deck with Heater and Lanterns

    Ground level deck set for cool weather with a patio heater, lanterns, and throws.

    Set up the deck for four season use with a patio heater, warm lanterns, and a basket of throws, so the deck stays inviting beyond summer. A heater extends evening use into spring and autumn, lanterns give soft light without wiring, and throws make a cool evening sit comfortable rather than brief. Place the heater clear of pergola fabric, cushions, and climbers, and follow the maker safety guidance for clearance and fuel.

    Store throws in a dry box beside the lounge corner, so they are close at hand when the temperature drops. In winter, sweep the deck clear of leaves and ice, and bring fabric items inside during long wet spells. A four season setup does not need a full redesign, just one warm seat, one safe heat source, and light that works at dusk.

    30. Curved Edge Deck Following a Flower Bed

    Ground level deck with a curved edge following a flower bed.

    Shape one edge of the deck as a gentle curve that follows a flower bed, so the deck and the planting share one flowing line. A curved edge suits gardens with rounded beds, cottage planting, or a lawn that already curves, and it softens the rectangle that most decks default to. The curve needs careful board cutting and a flexible or segmented edge trim, so plan the radius before you cut.

    Plant the bed beside the curve with a mix of heights, low edging plants at the front and taller plants behind, so the curve reads from the deck as well as from the lawn. Keep the curved edge clear of furniture legs, since chairs placed on a curve can rock if a leg lands off the boards. Sweep the curve regularly, since leaves gather in a curved edge more than on a straight one.

    Conclusion

    A good ground level deck starts with the ground itself, not the shopping list. Keep it low, level, and well drained, then choose one comfortable seat, one shade option, and boards that suit how you will use the deck. Add zones for sitting, eating, and planting, and keep steps, drains, and paths clear. Pick one idea from this list, set it where you will actually sit, and add lighting, planting, and comfort details only after that first seat feels right.

    Save this list on Pinterest before your next garden trip, and work through it one area at a time: structure first, then seating, then the shade and planting that make the deck yours.

    FAQs

    How high should a ground level deck sit above the ground?

    A ground level deck usually sits just above the ground, low enough that only one shallow step or a small ramp is needed to reach the lawn. Keep boards clear of soil, with air moving under the frame, so the structure stays dry. The exact height depends on drainage, the door threshold, and local rules, so measure from the door and plan the step before you build.

    Do ground level decks need planning permission or a permit?

    Rules vary by area, and they often depend on deck height, size, distance from property lines, and whether the deck sits near a protected tree or a drainage route. Low decks often fall under simpler rules than raised decks, but that is not guaranteed everywhere. Check local rules and, if in doubt, ask your local planning office before you build, especially for decks near boundaries or drains.

    What is the best board material for a ground level deck?

    Timber gives warmth and a natural look, and it suits gardens where the deck should blend with planting. Composite needs less upkeep, resists splinters, and suits shaded or busy households, but it costs more up front. Whichever material you choose, pick a grippy finish for wet weather, follow the maker fixing guidance, and keep boards clear of standing water and soil.

    How do I keep a ground level deck from rotting?

    Keep air moving under the deck, keep boards clear of soil and mulch, and sweep leaves so damp debris does not sit on the surface. Use timber rated for ground contact, seal or oil it as the maker directs, and fix drainage so rain runs away from the house and off the deck. Check the frame and board fixings each spring, and replace any soft board before rot spreads.

    How can I make a small ground level deck feel bigger?

    Use diagonal boards or a light board colour to draw the eye across the deck, keep furniture low and few in number, and use built-in seating along one edge instead of loose chairs all round. A wide step to the lawn, a gravel border, and planting at the deck edge all blur the boundary with the garden, which makes a small deck feel like part of a larger outdoor room.

    How much upkeep does a ground level deck need through the year?

    Sweep regularly, wash the surface a few times a year, and check fixings, gaps, and drainage each spring. Timber decks need oiling or sealing as the maker directs, while composite decks mainly need sweeping and washing. Bring cushions and fabric items inside during long wet spells, clear leaves in autumn, and check steps, lights, and screens before the main outdoor season.


  • 11 Mirror Wall Decor Ideas for a Welcoming, Lived-In Look

    11 Mirror Wall Decor Ideas for a Welcoming, Lived-In Look

    A mirror on the wall does more than show a reflection. It brings in light, opens up a small room, and gives a plain wall a clear focal point. The trick is to hang it where it reflects something worth seeing, such as a window, a plant, or a calm stretch of wall, and to size it to the furniture below it. These 11 mirror wall decor ideas cover round, arched, and sunburst mirrors, gallery walls, leaning mirrors, and full mirrored panels, so you can find one that fits your room and your budget. Start by standing where you sit most and noting what the mirror would reflect.

    Key Takeaways

    • Check the reflection before you hang anything: aim the mirror at a window, a plant, or a calm wall, never at clutter.
    • Size the mirror to the furniture below it, usually about two thirds of the sofa, console, or mantel width.
    • Hang the center of a mirror at eye level from where you see it most, and lower above a sofa or console.
    • Use fixings rated for the mirror weight and your wall type, especially for large or vintage framed mirrors.
    • One large mirror suits a big wall, while a grid or a tight cluster works better on a narrow wall.
    • Keep the rest of the wall quiet around a statement mirror, so the mirror stays the focal point.

    1. Round Mirror Above the Sofa

    Living room with a large round mirror in a wood frame above a sofa.

    Hang one large round mirror above the sofa for a simple focal point that softens a wall full of straight lines. The curve breaks up the rectangle of the sofa, the rug, and the coffee table, and it suits almost any style, from plain wood frames in a calm room to brass frames in a warmer one. Choose a diameter that spans about two thirds of the sofa width, so the mirror looks sized to the furniture rather than lost above it.

    Hang it so the bottom edge sits 6 to 8 inches above the sofa back, and check the reflection from your usual seat. A round mirror above the sofa should reflect the opposite wall or a window, not the ceiling. If the wall is very wide, add a small sconce or a plant on each side, but keep the sides simple so the round shape stays the focus.

    2. Leaning Full-Length Mirror in a Corner

    Full-length mirror leaning against a living room corner wall beside a chair.

    Lean a full-length mirror against the wall in a corner for a relaxed look that needs no hanging at all. This suits renters and anyone who rearranges often, since the mirror moves in seconds and leaves no holes. Choose a mirror taller than the side table or chair beside it, so it reads as a deliberate piece rather than a mirror waiting to be hung.

    Anchor the top edge to the wall with a small anti-tip strap if children or pets could knock it, and place a non-slip pad behind the bottom edge so it cannot slide on a hard floor. Keep it out of the main walkway, and angle it slightly so it reflects the window or the seating area. A leaning mirror also gives a last look before leaving the house when it stands near the door.

    3. Grid of Matching Square Mirrors

    Grid of nine matching square mirrors with thin frames on a living room wall.

    Hang a grid of matching square mirrors for instant order on a wall that feels bare. Use nine mirrors in three rows of three, or six in two rows of three, with equal gaps of 2 to 3 inches between them. Keep the frame color the same across the grid, and let the small differences in reflection give the display its life.

    This layout works well above a console table, on a hallway wall, or on the wall opposite the bed. Lay the mirrors on the floor first, measure the full block, and mark the wall with painter tape before you hang anything. A grid suits a room that already has a lot of pattern elsewhere, since the even spacing keeps the wall calm.

    4. Arched Mirror Over a Console Table

    Arched mirror above a console table with a lamp and a small vase in a hallway.

    Place an arched mirror over a console table in a hallway or living room for a soft, classic shape that suits narrow walls. The arch draws the eye upward, which helps a low ceiling or a tight entry feel taller, and the console below gives the mirror a clear base. Match the mirror width to about two thirds of the console width, and keep the tabletop simple with one lamp, a small vase, or a bowl.

    Hang the mirror so its lowest point sits 6 to 8 inches above the tabletop, leaving room for the lamp or vase in front of it without blocking the glass. A wood frame suits a warm room, while a slim black or brass frame suits a plainer scheme. If the console holds keys and mail, add a small tray so the reflection stays tidy.

    5. Mixed-Shape Mirror Gallery Wall

    Gallery wall of round, oval, arched, and rectangular mirrors in brass frames.

    Build a gallery wall from mirrors in mixed shapes, such as round, oval, arched, and rectangular pieces, for a collected display that still reads as one piece. This suits a wall that needs interest but cannot take a single huge mirror, such as a stair wall or a wall beside a door. Keep one element consistent, such as brass frames or wood frames, so the mix looks planned rather than random.

    Hang the largest mirror first, near the center of the arrangement, then fill around it with smaller pieces, keeping gaps of 2 to 4 inches. Check each reflection as you go, since a gallery of mirrors can easily reflect clutter from several angles. For spacing and grouping advice, the grid and cluster ideas in these bedroom wall art ideas apply just as well to a mirror gallery.

    6. Sunburst Mirror as a Statement Piece

    Sunburst mirror with brass rays on a plain living room wall above a sideboard.

    Hang a sunburst mirror on a plain wall for a statement piece that needs no other art beside it. The rays give the wall shape and movement, and the small central mirror bounces a little light without dominating the room. This suits a wall above a sideboard, in a dining area, or at the end of a hallway, where a flat mirror might feel plain.

    Keep the wall around it empty and the nearby furniture simple, since the rays already carry plenty of detail. Choose a size that fits the wall with clear space on all sides, and hang it at eye level from a standing view. A gold or brass sunburst suits a warm room, while a black or wood version suits a quieter scheme. Dust the rays now and then, since they show dust faster than a flat frame.

    7. Floor-to-Ceiling Mirrored Panels

    Living room wall fitted with floor-to-ceiling mirrored panels beside a low console.

    Fit floor-to-ceiling mirrored panels on one wall to open up a small or dark room. Full panels bounce the most light and double the sense of space, which helps a narrow living room, a basement room, or a room with one small window. Use panels with slim seams, and keep the wall opposite the panels calm, since every detail there will be reflected.

    This is a bigger job than hanging one mirror, so measure carefully and fix the panels with hardware suited to their weight, or hire a fitter for large panels. Keep furniture in front of the panels low and simple, such as a low console or a bench, so the reflection stays clean. Avoid mirrored panels on a wall that faces a television, since the moving reflection can distract viewers.

    8. Vintage Framed Mirror With Patina

    Vintage mirror in a worn gold frame above a wooden dresser in warm lamp light.

    Hang a vintage framed mirror with a worn gold or dark wood frame for a settled, traditional feel. The patina and aged frame add character that a new mirror cannot match, and it suits wooden furniture, warm lamp light, and rooms that already mix old and new pieces. Look for a frame with sound joints and a clear, undamaged mirror, since resilvering an old mirror is a specialist job.

    Use fixings rated for the weight, since vintage frames with thick wood and old glass are often heavier than they look, and check the wall type before hanging. Hang it above a dresser, a console, or a fireplace, where the frame can be seen up close. If the mirror has foxing or small age spots, treat them as part of the piece rather than a flaw, and keep the rest of the wall plain so the frame stands out.

    9. Mirror Above the Fireplace Mantel

    Rectangular mirror above a fireplace mantel with a simple sofa seating area.

    Hang a mirror above the fireplace mantel to give the fireplace a finished focal point and to bounce light around the seating area. A rectangular mirror that matches the mantel width, or a round mirror centered above it, both work, as long as the mirror does not extend past the mantel ends. Keep the mantel itself simple, with one or two low items, so the mirror stays visible.

    Check what the mirror reflects from the sofa, since a mantel mirror often faces the seating area and can reflect the television or a cluttered shelf. If the fireplace is used often, hang the mirror high enough that heat and soot do not reach it, and wipe it regularly, since mantel mirrors show dust fast. A plain frame suits a busy mantel, while a detailed frame suits a plain one.

    10. Layered Mirrors on a Picture Ledge

    Picture ledges holding layered mirrors of different sizes above a console table.

    Stand mirrors on a picture ledge for a display you can rearrange without new holes in the wall. Fit one or two long ledges above a console or a sofa, then layer mirrors of different sizes, with larger pieces at the back and smaller ones in front. You can swap a mirror in minutes, which makes ledges ideal for testing a layout before you hang anything properly.

    Keep the ledge depth in mind: shallow ledges suit flat framed mirrors, while deeper ones hold small objects such as a vase or a candle beside the mirrors. Leave one end of the ledge empty so the display does not look packed, and use a small lip or rail on the ledge so mirrors cannot slide forward. This idea suits renters and anyone who likes to change the display with the seasons.

    11. Mirror Opposite a Window to Bounce Daylight

    Large mirror on a wall opposite a bright window, reflecting daylight across a living room.

    Hang a large mirror on the wall opposite a window to bounce daylight across the room and make it feel wider. This is the most useful mirror placement in a room with one window or a north facing aspect, where light is limited. Place it where it reflects the window itself or a pleasant view, not a cluttered corner, and keep its frame in the same finish as other pieces in the room.

    Keep the mirror large enough to matter, rather than a small decorative piece, and hang it securely with fixings suited to its weight. Wipe it often, since a mirror facing a window shows dust and fingerprints faster than one on a side wall. This placement also suits a combined living and dining room, as shown in these small living room dining room combo ideas, where one mirror can brighten both zones at once.

    Conclusion

    A welcoming mirror wall starts with the reflection, not the frame. Check what the mirror will show from your usual seat, size it to the furniture below it, and hang it securely at a height that suits the room. Start with one idea from this list, such as a round mirror above the sofa or a mirror opposite the window, and live with it for a week before adding more. A single well placed mirror will do more for a room than a wall full of small ones hung at random. For sizing and grouping help, the rug placement advice in these living room rug ideas and the gallery spacing ideas in these bedroom wall art ideas pair well with the mirror ideas above.

    Keep this list handy for your next free hour at home, and build your mirror wall one piece at a time: measure first, check the reflection, hang it well, and let the light do the rest.

    FAQs

    What size mirror should I hang above a sofa?

    Choose a mirror about two thirds of the sofa width, so it looks sized to the furniture rather than lost above it or wider than the sofa. Hang it with the bottom edge 6 to 8 inches above the sofa back, and check the reflection from your usual seat before fixing it. A round mirror suits most sofas, while a rectangular mirror suits a wide sofa on a long wall.

    Where is the best place to hang a mirror for more light?

    Hang a large mirror on the wall opposite a window, so it reflects daylight back across the room. This works best in a room with one window or a north facing aspect, where light is limited. Keep the mirror large enough to matter, and aim it at the window or a pleasant view, not at clutter or a blank wall.

    Can I hang a heavy mirror on a plasterboard wall?

    Yes, if you use fixings rated for the mirror weight and the wall type, such as heavy duty plasterboard anchors or a fixing into a stud where one is available. Check the mirror weight on a scale if you are unsure, and follow the fixing maker instructions. For very large or vintage framed mirrors, a stud fixing or a professional fitter is the safer choice.

    How high should I hang a mirror on a wall?

    Hang the center of the mirror at eye level from where you see it most, usually around 57 to 60 inches from the floor for a standing view. Above a sofa, console, or mantel, hang it lower, with the bottom edge 6 to 8 inches above the furniture. In a hallway, hang it so most household members can see their full reflection or at least head and shoulders.

    Is a leaning mirror safe in a home with children or pets?

    A leaning mirror can be safe if you anchor the top edge to the wall with an anti-tip strap and place a non-slip pad behind the bottom edge so it cannot slide. Keep it out of main walkways and away from doors that could swing into it. If the corner is very busy, a wall hung mirror with proper fixings is the safer option.

    How do I keep a mirror wall from looking cluttered?

    Let one mirror or one tight group lead, and keep the rest of the wall quiet. Use matching frames for a grid, or one shared frame finish for a mixed gallery, and keep gaps even. Check every reflection before fixing, and remove any item the mirror shows that you would rather not double, such as open storage or a messy desk.


  • 26 Tiny Laundry Room Ideas for a Cozy Seasonal Update

    26 Tiny Laundry Room Ideas for a Cozy Seasonal Update

    A tiny laundry room can still work hard when every inch has a job. The trick is to move storage up the walls, use the gaps beside and above the machines, and give folding, drying, and sorting each a small, clear spot. These 26 tiny laundry room ideas cover stacked machines, fold-down shelves, slim carts, drying solutions, and sorting systems, plus simple seasonal swaps that keep the room feeling cozy all year. Start with the change that solves your biggest daily annoyance, whether that is nowhere to fold, nowhere to dry, or nowhere to put supplies, then add one more idea at a time.

    Key Takeaways

    • Measure first: machine width, door swing, vent and hose clearance, and the gap beside the machines decide which ideas will fit.
    • Use the walls: shelves, peg rails, fold-down boards, and over-door storage add room without taking floor space.
    • Give every job a spot: washing, drying, folding, sorting, and supplies each need one clear place, even if that place is small.
    • Keep daily items at hand height and seasonal or rarely used items higher up, so the room stays easy to use.
    • Swap, do not stack: seasonal towels, rugs, and scents refresh the room without adding clutter.
    • Keep paths, vents, and lint filters clear, and leave room to open machine doors and pull out hampers fully.

    1. Stack the Washer and Dryer Into One Tower

    Stacked washer and dryer tower in a narrow laundry closet with a shelf beside it.

    Stacking the washer and dryer frees a full machine width of floor space, which can become a hamper spot, a slim cabinet, or simply room to stand and fold. A stacking kit made for your exact machines keeps the dryer steady and safe, so check the maker guidance before you buy. Put the washer on the bottom, since it is heavier and vibrates more, and keep the controls within easy reach.

    Leave the clearance the maker asks for around the tower, and keep the vent hose and water hoses free of kinks. A small step stool nearby helps shorter household members reach the dryer controls and the top of the tower. If stacking is not possible in a rental, ask about a stacking kit rather than moving plumbing, since the kit is the part that makes the tower stable.

    2. Add a Countertop Over Front-Loading Machines

    Wood countertop over two front-loading washing machines with folded towels on top.

    A countertop across the top of two side-by-side front-loading machines turns wasted space into a folding surface. Use a board cut to fit the full width, with a small lip or rail at the back so items do not slide behind the machines. A light wood or laminate board wipes clean and suits most rooms.

    Keep the counter clear of heavy items, since you need to reach the machine tops for cleaning and service. Use it for folding, for a small basket of daily supplies, and for a plant or a framed print at one end. If your machines are different heights, level the board with small feet or a support cleat on each side wall.

    3. Install a Fold-Down Folding Shelf on the Wall

    Fold-down wall shelf in a small laundry room with a basket of folded clothes on it.

    A fold-down shelf gives you a folding table only when you need it, then folds flat against the wall when the room is in use for loading machines. Mount it at counter height on the clearest wall, with brackets rated for the weight of a full basket of laundry. A shelf about the depth of a folded towel stack is enough, since deeper shelves crowd the walkway.

    Fold it down for sorting and folding, and fold it up before you open machine doors or carry a basket through. Keep the wall above it free for a small shelf or a peg rail, so supplies stay close without sitting on the folding surface. This idea suits a narrow room best, where a fixed table would block the path.

    4. Slide a Slim Rolling Cart Into the Gap Beside the Machines

    Slim rolling cart pulled out from the gap beside a washing machine with detergent bottles.

    The narrow gap beside a washer or dryer is often wasted, yet a slim rolling cart fits it well and pulls out when you need supplies. Choose a cart narrower than the gap, with two or three tiers and wheels that lock, so it stays put during wash cycles. The top tier can hold detergent and stain spray, the middle tier dryer sheets and cloths, and the lowest tier spare supplies.

    Label the front edge of each tier if the household shares the room, so everyone returns items to the same spot. Wipe the tiers often, since detergent drips collect fast in a small space. A cart like this also works beside a bed or a vanity, and the same logic appears in these bedroom storage ideas, where slim carts serve one routine rather than general overflow.

    5. Hang a Fold-Away Wall-Mounted Drying Rack

    Fold-away wall-mounted drying rack with shirts hanging in a small laundry room.

    A wall-mounted drying rack that folds flat gives you drying space without a floor rack blocking the room. Mount it on a wall with clear air flow, away from the machines, and open it only on wash days. Bars spaced a few inches apart dry shirts, small items, and delicates faster than a crowded rail.

    Hang heavier items, such as jeans, near the wall brackets where the rack is strongest, and lighter items toward the outer edge. Close the rack when it is empty so the room feels open again. If the wall is shared with a living space, check for pipes and wiring before drilling, and use fixings rated for a full, wet load.

    6. Run a Retractable Clothesline Across the Room

    Retractable clothesline stretched across a tiny laundry room with clothes hanging.

    A retractable clothesline stretches across the room for drying, then reels back into a small housing when you are done. Mount the housing on one wall and the hook on the opposite wall, at a height where hangers and clothespins are easy to reach. One line suits delicates and a few shirts, while two parallel lines handle a full small load.

    Use the line for items that should not go in the dryer, and keep it away from the dryer vent so warm air does not blow lint onto clean clothes. Wipe the line before use if the room is dusty, and retract it after each load so it does not become a permanent obstacle. This is a good renter option when the housing uses small screws that are easy to patch later.

    7. Fit Cabinets Up to the Ceiling

    White cabinets reaching to the ceiling above a washer and dryer in a small laundry room.

    Cabinets that run to the ceiling use the full wall height for supplies that you reach for weekly rather than daily. Keep detergent and daily items on the lowest shelf, and move seasonal supplies, spare linens, and bulk buys to the top shelves. Closed doors hide the visual noise of bottles and boxes, which matters in a room you see every day.

    Add a small step stool that lives in the room, so the top shelves stay usable rather than decorative. Label the inside of each door with the shelf contents if the household shares the room. Leave a gap above the machines for venting and service access, and never block a vent or a shut-off valve with a fixed cabinet.

    8. Use Open Shelves With Matching Labelled Baskets

    Open wood shelves with matching labelled baskets above a washing machine.

    Open shelves above the machines or on a clear wall hold baskets that hide supplies while keeping them easy to grab. Use baskets in one material, such as cotton rope or woven seagrass, in two sizes at most, and label each one by job, such as washing, drying, stain care, and cleaning. Matching baskets make open shelves look planned rather than patched together.

    Keep each basket light enough to lift with one hand, since high shelves and heavy baskets are a poor mix. Put daily supplies at hand height and spare stock higher up. Once a month, empty each basket and return only what you actually used, since laundry shelves quietly collect empty bottles and single socks.

    9. Mount a Peg Rail for Tools and Everyday Supplies

    Wood peg rail on a laundry room wall holding a lint roller, brush, and tote bag.

    A peg rail along one wall holds a lint roller, a small brush, scissors, a measuring cup, and a tote bag on hooks that you can move as needs change. Mount the rail at hand height, with hooks spaced so items do not knock together. A rail with a small shelf on top adds room for a jar of clothespins or a small plant.

    Group hooks by job, so stain care tools sit together and drying tools sit together. Keep the rail clear of the machine door swing, and use hooks with a closed end so items do not slide off when a machine vibrates. A peg rail also suits a hallway or entry, since it uses wall space that a cabinet would waste.

    10. Add a Tilt-Out or Pull-Out Hamper

    Pull-out hamper drawer open in a laundry cabinet with clothes inside.

    A tilt-out or pull-out hamper hides dirty laundry inside a cabinet front, so the room looks tidy even on wash day eve. A single tilt-out bin suits a small household, while a pull-out unit with two bins lets you sort lights and darks as you go. Line the bins with washable bags that lift out for carrying to the machines.

    Keep the hamper near the machines, with enough clearance for the front to open fully. Empty it on a set day each week, and wipe the bin monthly to stop odors. If a built-in unit is not possible, a slim lidded hamper in the same spot gives most of the same benefit with no fitting work.

    11. Sort With Three Slim Bins on a Low Shelf

    Three slim sorting bins labelled for lights, darks, and delicates on a low shelf.

    Three slim bins, one each for lights, darks, and delicates, turn sorting into a habit rather than a wash day chore. Set them on a low shelf or in a row under a countertop, with labels on the front of each bin. Slim bins fit where a wide hamper would block the path, and they stack neatly when one is empty.

    Teach the household one rule: clothes go in a bin, not on the machine or the floor. Wash a bin when it is full, and return the empty bin to its spot right away. If space allows only two bins, use one for everyday loads and one for delicates, and sort the rest at the machine.

    12. Put a Tall Narrow Cabinet in the Dead Corner

    Tall narrow cabinet in a laundry room corner holding brooms and cleaning supplies.

    A tall, narrow cabinet fits a corner or a strip of wall that is too small for a wide unit, and it holds brooms, mops, ironing supplies, and tall bottles upright. Choose a cabinet with adjustable shelves, so tall items fit on one shelf and small items stack on another. A door keeps the contents out of sight, which helps a tiny room feel calm.

    Measure the door swing before you buy, since a cabinet door that hits a machine door wastes the whole unit. Keep the heaviest items low, and put the iron and cleaning sprays where you can reach them without moving other items. A narrow cabinet also works in a bathroom, where the same dead corner problem appears.

    13. Use the Machine Sides With Magnetic Shelves and Hooks

    Magnetic shelves and hooks on the side of a washing machine holding detergent and a lint roller.

    The flat metal sides of a washer or dryer can hold magnetic shelves and hooks for detergent, a lint roller, and a small basket of clothespins. Magnetic storage uses no wall space and no drilling, which suits renters and very tight rooms. Choose magnets rated for the weight you plan to hang, and test them with a full bottle before trusting them.

    Keep magnetic items off the door seals and control panels, and remove them before a service visit. Wipe the machine side first, so dust does not weaken the grip. This idea works best for light, daily items, while heavy bulk supplies stay on a shelf or in a cabinet.

    14. Hang an Over-Door Organizer for Sprays and Small Items

    Over-door organizer with clear pockets holding sprays and small laundry items.

    An over-door organizer with clear pockets turns the inside of the laundry room door into storage for stain sprays, dryer balls, clothespins, and spare supplies. Hang it on the inside face so the pockets do not show from the hall, and keep heavy bottles low so the door still swings freely. Clear pockets let you see each item at a glance, which stops duplicate buying.

    Reserve the top pockets for light items, such as mesh wash bags and spare cloths. The same door trick works in a small bathroom, and these apartment bathroom ideas show how an over-door organizer keeps toiletries visible without a new cabinet. Trim the hooks if the door rubs the frame, and check that the door still latches.

    15. Fix a Wall-Mounted Ironing Board Cabinet

    Wall-mounted ironing board folded down from a slim cabinet in a laundry room.

    A wall-mounted ironing board folds down from a slim cabinet when you need it and folds away when you do not, freeing the floor space a freestanding board would take. Mount it near an outlet, at a height that suits the main iron user, and keep the cabinet stocked with the iron, a spray bottle, and a small pressing cloth. A cabinet door hides the board completely between uses.

    Let the iron cool before folding the board away, and keep the cord wrapped so it does not catch on the cabinet edge. If ironing is rare in your home, the same cabinet can hold a steamer and a lint roller instead, so the wall space still earns its keep.

    16. Keep a Foldable Step Stool Tucked in a Slim Slot

    Foldable step stool tucked in a slim slot beside a washing machine.

    A foldable step stool that lives in a slim slot beside the machines or behind the door makes high shelves usable every day, not just on step ladder days. Choose a stool that folds flat to an inch or two thick, with a non-slip top and feet that grip tile or vinyl. A slot about the width of the folded stool keeps it from sliding into the walkway.

    Hang the stool on a hook if floor space is truly zero, and keep it in the laundry room rather than another room, so reaching a high shelf never becomes a reason to skip putting things away. Check the stool weight rating, and replace it if the hinges loosen or the feet wear smooth.

    17. Cover a Utility Sink With a Removable Board for Folding Space

    Wood board resting over a utility sink in a laundry room with folded clothes on top.

    A board cut to rest over a utility sink turns the sink into a folding surface or a sorting spot when the sink is not in use. Use a light board with handles or finger holes at each end, so you can lift it off quickly for hand washing. A board with a small lip at the back stops folded items from sliding into the sink.

    Store the board upright beside the sink when it is not in use, and dry the sink rim before laying the board down, so moisture does not warp it. This idea suits a room with a sink but no counter, since it adds a work surface with no fixed fitting and no lost sink use.

    18. Add Under-Shelf Hooks and a Rail for Spray Bottles

    Spray bottles hanging from hooks under a laundry room shelf.

    Hooks under a shelf and a short rail under a cabinet hold spray bottles by their triggers, keeping them off the counter and easy to grab. Mount the hooks in a row with room between bottles, so you can lift one without knocking the next. A rail with sliding hooks adjusts as your bottle collection changes.

    Keep stain sprays and cleaning sprays on separate hooks, and label the rail if the household shares the room. Check that bottles hang clear of the machines below, since vibration can loosen a poorly seated hook. This small change often frees more counter space than a new shelf, because bottles are the items that crowd a laundry counter most.

    19. Place a Small Rug and Swap It With the Seasons

    Small washable rug in warm autumn colors in front of a washing machine.

    A small, washable rug in front of the machines softens a hard floor and catches lint and drips before they spread. Choose a low pile rug that fits the clear floor area without curling under a machine door, and add a non-slip pad beneath it. Wash the rug with a towel load on a regular cycle, so it never becomes a source of dust.

    Keep a second rug in rotation, one in a warm autumn palette and one in a lighter spring palette, and swap them with the seasons for an easy refresh. A rug swap is one of the cheapest seasonal updates in the home, since it changes the whole feel of the room in under a minute.

    20. Swap Hand Towels, Curtain, and Basket Liners for a Seasonal Palette

    Rust and cream hand towels and basket liners in a small laundry room.

    Hand towels, a small window curtain, and basket liners are the fastest seasonal swap in a tiny laundry room, since they carry most of the room color. Choose one palette per season, such as warm rust and cream for autumn, deep green and natural linen for winter, and fresh sage and white for spring. Swap all three at once, so the room reads as a set rather than a single new towel.

    Store the off-season set in one labelled basket on a high shelf, so the swap takes minutes and the old set does not pile up elsewhere. Wash the set before storing it, and fold it as a bundle, so next season starts tidy. This habit also stops the slow build-up of single towels that no longer match anything.

    21. Set Up a Seasonal Scent Station

    Small tray with dryer balls, linen spray, and sachets on a laundry room shelf.

    A small scent station on one shelf or tray groups dryer balls, a linen spray, sachets for drawers, and a jar of baking soda for freshening loads. Keep the tray to one small group, so it reads as a station rather than clutter, and refill it when you swap the seasonal towels. A woody or spiced scent suits autumn and winter, while a clean cotton or herbal scent suits spring and summer.

    Label the linen spray clearly, and keep scent products away from the dryer heat and out of reach of small children. A scent station also helps a small room smell fresh between loads, since laundry rooms hold damp air longer than larger rooms. Rotate scents with the seasons, and retire any product that no longer smells pleasant.

    22. Add a Lost-Sock Bin and a Lint Bin on the Wall

    Two small labelled wall bins for lost socks and lint near a dryer.

    A small wall bin for single socks and a small bin for lint stop two common laundry annoyances from spreading across the room. Mount both bins near the machines, at a height where you can drop items in with one hand while holding a basket. Check the sock bin on wash day, and pair socks before they reach the drawer.

    Empty the lint bin after every dryer load, and keep it away from the dryer vent so lint does not blow back into the room. Two small bins beat one large bin here, since lint and socks have different jobs and different emptying rhythms. Label each bin, so guests and family members use the right one without asking.

    23. Label Every Bin and Shelf With a Simple Family Load System

    Labelled bins and shelves in a tidy small laundry room with a simple sorting system.

    Labels turn a tidy laundry room into a room the whole household can keep tidy. Use one simple system, such as lights, darks, delicates, and towels, and put the same label words on bins, shelves, and the hamper. Short labels in a clear, readable style work better than long explanations, since laundry is a quick job done on the move.

    Print or write labels on cards that slide into holders, so you can change them when routines change. Put a label at the front of each shelf, not on top, since front labels are the ones you see when you walk in. Review the labels each season, and remove any label for a category the household no longer uses.

    24. Brighten the Room With a Warm Plug-In Light and a Small Mirror

    Tiny laundry room with a warm plug-in light and a small mirror on the wall.

    Many tiny laundry rooms have one harsh overhead light and no window, which makes sorting colors hard and the room feel cramped. A warm plug-in light on a shelf or a battery light under a cabinet softens the room and helps you tell navy from black. Add a small mirror on the clearest wall, since it bounces light and makes the room feel wider.

    Keep plug-in lights away from water and the dryer vent, and choose warm white bulbs so the room feels calm rather than clinical. A mirror also helps you check a shirt for lint before it goes in the dryer. If wiring changes are not allowed in a rental, plug-in and battery options give most of the benefit with no electrician visit.

    25. Keep a Folding Basket Station Ready at the Door

    Folding basket station near a laundry room door with hangers and a mending bag.

    A folding basket station near the door holds one empty basket, a small stack of hangers, and a bag for items that need mending, so clean laundry moves out of the room instead of piling on the machines. Hang the hangers on a hook and set the mending bag on a shelf, so the station takes almost no floor space. When a load finishes, fold straight into the basket and carry it out.

    Keep only one basket at the station, since two baskets invite a pile. Return the empty basket right after putting clothes away, so the station is ready for the next load. This habit matters most in a tiny room, where a single basket left on the machines blocks the next wash.

    26. Finish With One Framed Print and a Hardy Plant

    Tiny laundry room corner with a framed print and a pothos plant on a high shelf.

    One framed print and one hardy plant give a tiny laundry room a finished feel without adding clutter or a cleaning burden. Choose a print in a moisture-safe frame, hung where steam from the dryer will not reach it directly, and a plant that copes with warm, humid air, such as pothos in a hanging pot or on a high shelf. One plant usually looks better than a crowded collection in a small room.

    Water the plant on wash day, so plant care joins an existing routine and is less likely to be forgotten. Keep the print and the plant in the same palette as the seasonal towels, so the room feels planned. Swap the print with the seasons if you like, but keep the count to one, since the room has little wall space to spare.

    Conclusion

    A tiny laundry room does not need a remodel to work well. It needs clear jobs for each wall, each gap, and each shelf, plus a few habits, such as sorting as you go, folding straight into a basket, and emptying lint after every load. Seasonal swaps for towels, rugs, and scents keep the room feeling fresh without new furniture or new clutter. Pick the one idea that fixes your biggest daily frustration, live with it for a week, then add the next idea that the room still needs. Small rooms reward small, steady changes more than one big overhaul.

    FAQs

    1. What is the best first change for a tiny laundry room?

    Start with the problem that annoys you daily. If folding space is missing, add a fold-down shelf or a countertop over the machines. If supplies are scattered, add a slim cart or labelled baskets first. One clear fix shows results fast and makes the next change easier to choose.

    2. Can I stack a washer and dryer in a rental?

    It depends on your machines and your lease. Use a stacking kit made for your exact models, and ask the landlord before moving machines, changing vents, or altering plumbing. If stacking is not allowed, a slim cart, over-door storage, and wall shelves add room without moving the machines.

    3. How do I dry clothes in a tiny laundry room without a floor rack?

    Use a wall-mounted fold-away rack, a retractable clothesline, or a line over the bath or sink area where air can move. Hang items with space between them, keep the rack away from the dryer vent, and fold racks away when empty so the room stays open.

    4. What should I store on high shelves in a laundry room?

    Put seasonal supplies, spare linens, bulk buys, and rarely used items on high shelves, and keep daily detergent, stain spray, and dryer supplies at hand height. Keep a foldable step stool in the room, so high shelves stay usable, and label each shelf so the household can find things without moving everything.

    5. How can I make a laundry room feel cozy for each season?

    Swap the small, colorful items: hand towels, a rug, basket liners, and the scent station. Choose one palette per season and swap all of them at once, then store the off-season set in one labelled basket. These swaps change the room fast and cost far less than new furniture.

    6. How do I stop a tiny laundry room from smelling damp?

    Keep air moving, wipe up drips, leave machine doors open briefly after a wash so drums dry, and clean the lint filter after every dryer load. A scent station with dryer balls and linen spray helps, but it cannot replace dry surfaces and clear vents, so check hoses and vents if damp smells persist.


  • 22 Front Walkway Ideas to Make Small Spaces Work Harder

    22 Front Walkway Ideas to Make Small Spaces Work Harder

    A front walkway in a small yard has to do more than lead to the door. It needs a clear route for guests, a safe step in wet weather, room for a parcel drop, and a first view that feels cared for, all in a few short metres. One strong material, neat edging, and a plant or light repeated along the route can make a small front yard feel finished. These 22 front walkway ideas cover stone, brick, gravel, wood, and concrete, plus lighting, planting, and small seating spots that fit a tight plot. Measure your path width and door landing first, then pick the idea that suits your slope, shade, and budget.

    Key Takeaways

    • Keep the main route at least wide enough for two people to pass with a bag or a pram, and keep it clear of pots and bins.
    • Choose one main path material and repeat it at the door landing, so a short walk looks planned rather than patched together.
    • Edge every loose material, such as gravel or mulch, so it stays on the path and off the lawn.
    • Add light at ankle height along the path, not only at the porch, so the route is safe after dark.
    • Use planting beside the path, not on it, and keep shrubs trimmed back from the walking line.
    • In a small yard, let the path do two jobs, such as a seating pad, a bench nook, or a planter border, instead of adding separate features.

    1. Straight Flagstone Path with Ground Cover Joints

    Straight narrow flagstone front walkway with low green ground cover plants growing between the stone joints.

    Lay large flat flagstones in a straight line from the street or driveway to the door, and plant low ground cover between the joints. The straight line suits a small yard because it wastes no space on curves, and the wide stones give a steady step for all ages. Ground cover softens the stone and keeps weeds down once it fills in.

    Set each stone level with its neighbours, with a firm base under it, so no stone rocks when stepped on. Leave joints wide enough for the plants you choose, and water them until they root. This path pairs well with a simple front door color, and the door shades in these blue front door colors show how a painted door can anchor a stone walk.

    2. Stepping Stones Set in Gravel

    Stepping stone front walkway set in pale gravel, with large flat stones leading to a house front door.

    Set large stepping stones in a bed of pale gravel for a path that drains well and costs less than a full paved walk. The stones give a firm step, while the gravel fills the gaps and stops mud from forming in wet weather. This suits a small yard where you want a relaxed look without a solid slab of paving.

    Space the stones at a natural walking stride, and test the spacing by walking it before you fix them in place. Use a landscape fabric and edging under the gravel to keep it in place. Keep the gravel level just below the stone tops, so a shoe does not catch, and rake it back into place after heavy rain.

    3. Brick Herringbone Walkway

    Brick herringbone pattern front walkway in warm red brick leading to a house front door.

    Lay bricks in a herringbone pattern for a walkway that looks formal and stays firm underfoot. The interlocking pattern spreads weight well, which helps a path that gets daily use, and brick suits older homes and cottages as well as newer brick facades. A herringbone walk also hides small repairs better than a simple running bond.

    Use a firm, level base and a border row of bricks set on edge to hold the pattern in place. Keep the joints tight and fill them with sand, then sweep in more sand after the first rain. Brick can get slippery when wet, so choose a brick with a rough face for the walking surface, and clean moss from shaded spots each season.

    4. Gentle Curved Gravel Path

    Gentle curved gravel front walkway with dark metal edging winding through a small front garden to a house front door.

    Give a small front yard a softer feel with one gentle curve in a gravel path, rather than a sharp bend that wastes space. A single curve slows the eye down and makes a short walk feel longer, and it lets you plant a small bed in the curve where a straight path would leave a bare corner. Keep the curve wide and easy to walk, not a tight S shape.

    Edge the gravel with steel, stone, or brick so it does not drift onto the lawn. Use a firm base and a gravel size that packs down, rather than large loose stones that roll underfoot. Add one focal plant or pot at the curve, so the bend has a reason to be there, and keep the path wide enough for a wheelie bin on collection day.

    5. Concrete Pavers with Grass Joints

    Concrete paver front walkway with strips of green grass growing between large square pavers.

    Lay large concrete pavers with strips of grass between them for a path that looks green and modern while staying firm to walk on. The grass joints break up a hard surface, help rain soak in, and keep a small yard from feeling paved over. This works best where the path gets some sun, since grass in deep shade thins out.

    Set the pavers level on a firm base, with joints wide enough to mow or trim. Choose a tough grass or ground cover for the joints, and keep the grass cut short so it does not trip anyone. In a dry spell, water the joints first, since they dry out faster than a lawn, and top up any bare patches in spring.

    6. Wide Door Landing with Matched Planters

    Wide paved landing pad at a house front door with matching planters holding green shrubs on both sides.

    Widen the paved area right at the front door into a landing, and flank it with two matching planters. A landing gives guests a place to stand while the door opens, room for a parcel, and a safe step that is not crowded by pots. Matching planters make the door the clear focus, even on a short walk.

    Make the landing at least as wide as the door plus room to step aside, and keep the surface level with the threshold. Choose planters that are heavy enough not to tip, and plant them with shrubs that stay in shape, rather than tall plants that block the door or the house number. Water the planters on a set day each week, so they stay full through the season.

    7. Low Steps for a Sloped Front Yard

    Low wide stone steps forming a front walkway up a gentle slope to a house front door, with low plants beside the steps.

    Turn a sloping front yard into a series of low, wide steps instead of a steep ramp of paving. Low steps give a safe, steady climb, and each step can double as a small planting ledge or a place to set a pot. Wide steps suit small yards because they feel less steep than narrow, tall steps.

    Keep each step the same height, since a single uneven step is the one people trip on. Use a rough, non slip surface, and add a handrail if the slope is steep or if older guests visit often. Check the step depth by walking it with a bag in each hand, and keep the edges clear of loose stones and leaves in autumn.

    8. Wood Plank Boardwalk Path

    Wood plank boardwalk style front walkway over a small front garden bed to a house front door.

    Lay wood planks as a boardwalk path across a small front garden for a warm, informal walk that suits a cottage or a coastal home. Timber softens a yard full of stone and brick, and planks can bridge a damp or uneven patch without a full concrete base. A boardwalk also lifts the walking surface slightly, which helps after rain.

    Choose timber rated for outdoor ground contact, and leave small gaps between planks for drainage. Fix the planks firmly so none lift or rock, and add a non slip finish or grooves on shaded boards. Plan to clean and reseal the timber each year, since an unsealed boardwalk greys and roughens fast in sun and rain.

    9. Patterned Tile Inset Walkway

    Front walkway with patterned decorative tile insets set into plain stone paving, leading to a house front door.

    Set patterned tiles as insets into a plain stone or concrete walk for a path with one clear detail, rather than a whole walk of busy pattern. A tile inset at the door, at a bend, or as a repeated band gives a small yard a crafted look without the cost of tiling the full path. It also lets you echo a tile color already used at the porch or door.

    Keep the tiles level with the surrounding paving, and use tiles rated for outdoor frost and foot traffic, not indoor wall tiles. Fix them on a firm bed so they do not crack or lift in winter. Choose a pattern that reads well from standing height, since a tiny detailed tile will be lost underfoot, and seal the tiles to protect the color.

    10. Solar Light Lined Evening Path

    Front walkway at dusk lined with small solar path lights glowing warmly on both sides, leading to a house front door.

    Line a short front walk with small solar path lights so the route is safe and welcoming after dark, with no wiring to run. Solar lights suit a small yard because a handful of lights covers the whole path, and they switch on by themselves at dusk. Place them where they mark the edge, not in the middle of the walking line.

    Space the lights evenly, and keep them clear of shrubs that shade the solar panel during the day. Choose warm white lights for a calm evening look, and check that the path still gets light from the porch as well, since solar lights alone can be dim on a cloudy winter day. Clean the panels twice a year to keep them charging well.

    11. Raised Bed Border Along the Walk

    Front walkway bordered by a low raised garden bed with flowers and herbs on one side, leading to a house front door.

    Build a low raised bed along one side of the walk for flowers, herbs, or small shrubs, so the path gains planting without losing walking width. A raised bed defines the edge of the walk, keeps soil off the path, and makes weeding and watering easier than a ground level bed. It suits a small yard where every bed must earn its place.

    Keep the bed wall low, so it does not feel like a wall beside a narrow path, and cap it with a flat stone that can hold a pot or a trowel. Fill it with plants that stay within the bed, and trim any stems that lean over the walk. Water the bed deeply but less often, so roots grow down rather than spreading across the path.

    12. Permeable Pavers for a Wet Front Yard

    Permeable paver front walkway with small gaps filled with gravel between pavers, leading to a house front door.

    Use permeable pavers with gravel filled gaps for a front walk that lets rain soak through instead of pooling on the surface. This suits a yard that stays wet, a path at the bottom of a slope, or a home where runoff from paving is a problem. The gaps also give a small yard a lighter, less solid look than a full slab.

    Lay the pavers on a free draining base, following the maker guidance for your soil type, and fill the gaps with clean gravel, not soil that will wash out. Keep the path swept, since leaves and mud can clog the gaps over time. Check after heavy rain that water drains away, and top up the gravel in any gaps that settle.

    13. Narrow Path with a Built In Bench Nook

    Narrow front walkway with a small bench nook beside the path near a house front door, with potted plants.

    Cut a small bench nook into the side of a narrow front walk, so there is a place to sit, wait, or set down bags without blocking the path. A nook works in a small yard because it uses a corner or a gap beside the path, rather than a separate seating area that needs its own paving. A low stone or wood bench is enough, with one pot beside it.

    Keep the bench clear of the main walking line, and make sure the nook does not narrow the path below a comfortable width. Choose a bench material that copes with rain, and add a cushion only if you will bring it inside in wet weather. Keep the nook tidy, since a bench that collects parcels and tools soon blocks the walk it was meant to serve.

    14. White Gravel Path with Dark Edging

    White gravel front walkway with dark stone edging in a straight line to a house front door.

    Lay white gravel inside a dark stone or brick edge for a crisp, high contrast path that makes a small front yard look larger and brighter. The dark edge frames the pale gravel and stops it from spreading, while the white surface bounces light back toward the house on a dull day. This suits a modern or coastal home with pale siding.

    Use a firm base and landscape fabric under the gravel, and choose a gravel size that packs down underfoot. Rake the gravel weekly in the first month, until it settles, and top it up once a year. Keep leaves off the white surface in autumn, since they stain it, and avoid placing the path under a tree that drops sap or berries.

    15. Stamped Concrete That Looks Like Stone

    Stamped concrete front walkway with a stone pattern texture leading to a house front door.

    Use stamped concrete for a walk that has the look of stone slabs at a lower cost and with fewer joints to weed. Stamped concrete suits a small yard because it can be poured as one firm, level surface, with no loose stones to shift. The pattern can match the house style, from large slabs to a cobble look.

    Choose a pattern and color that suit the house, and keep the color close to the natural stone it copies, rather than a bright tint that dates fast. Add a non slip finish, since smooth concrete gets slick in rain, and seal it every few years to protect the color. Plan the joints in the concrete so cracks form along the pattern lines, not across the middle of the walk.

    16. Path with a Small Rain Garden Beside It

    Front walkway beside a small rain garden with native grasses and stones, leading to a house front door.

    Place a small rain garden beside the front walk, a shallow planted dip that catches rain from the path and roof, so the walk stays drier and the yard gains a planting feature. A rain garden suits a small yard because it can be as small as a single bed, planted with grasses and flowers that cope with wet and dry spells.

    Site the rain garden where water already flows, not at the highest point of the yard, and keep it clear of the walking line. Use plants that suit your soil and sun, and mulch the bed to hold moisture in dry weeks. Clear leaves from the inlet after storms, so water can still flow in, and check that the garden drains within a day after rain.

    17. Arched Trellis Entry Over the Walk

    Front walkway passing under a wooden trellis arch with climbing green vines at the start of the path.

    Put a wooden or metal trellis arch over the start of the front walk, with climbing plants growing up the sides, so the entry to the yard has a clear frame. An arch marks the start of the walk, gives a small yard a sense of arrival, and adds height without taking ground space. It suits a cottage, a garden home, or a house with a plain front fence.

    Keep the arch wide enough for two people and tall enough to walk under without ducking, even once plants grow in. Fix the posts firmly, since a trellis catches wind, and prune the climbers each year so they do not narrow the path or block the house number. Choose a climber that suits your sun and that you can reach to prune from a step ladder.

    18. Two Tone Path: Stone and Brick Mix

    Front walkway mixing large flat stones with brick edging and brick bands across the path, leading to a house front door.

    Mix stone slabs with brick bands across the path for a two tone walk that ties together a stone house and a brick feature, or a brick house with stone steps. The mix adds interest to a short walk without needing a pattern across the whole surface, and the brick bands can mark the door landing or a bend. This suits a small yard where one material alone would look plain.

    Keep the stone and brick level with each other, since a lip between materials is a trip risk. Use the brick as a band or a border, not as random patches, so the mix looks planned. Match the brick color to an existing feature, such as the house brick or a chimney, so the path feels part of the home rather than an extra idea.

    19. Path That Widens into a Small Seating Pad

    Front walkway widening into a small paved seating pad with two chairs and a small table near a house front porch.

    Widen the front walk at one point into a small paved seating pad with two chairs and a tiny table, so the walk becomes a place to sit as well as a route. A seating pad suits a small yard because it uses the path itself, rather than a separate patio, and it gives a front yard a social use. Place it where it gets morning or evening sun, depending on when you will sit there.

    Keep the pad clear of the main walking line, so guests can still pass without stepping around chairs. Choose chairs that fold or stack, so the pad can clear fast for a delivery or a gathering. Add one pot and a small mat, and keep the pad swept, since a seating pad that collects leaves soon looks unused.

    20. Low Hedge Lined Formal Path

    Formal straight front walkway lined with low clipped green hedges on both sides leading to a house front door.

    Line a straight front walk with low clipped hedges on both sides for a formal, tidy look that suits a traditional or symmetrical house front. Low hedges frame the path, hide bare soil, and give a small yard a finished edge in every season. Keep the hedges low, so they do not close in a narrow path or hide the door from the street.

    Choose a hedge plant that stays dense at a low height with one or two trims a year, and plant it back from the path edge so it does not narrow the walk as it grows. Water new hedges well in the first year, and trim them in late spring and late summer. Leave a gap in the hedge at any side gate, so the path still connects to the rest of the yard.

    21. Path with House Numbers Set into the Walk

    Front walkway with a low stone pillar and house number sign beside the path near the street, leading to a house front door.

    Set the house number into the walk itself, on a stone pillar, a low wall, or a plaque beside the path near the street, so visitors and deliveries find the house fast. A clear number at the path start saves guests from hunting along the facade, and it gives a small yard a practical detail that also looks finished. This suits a house set back from the street or hidden by planting.

    Place the number where it can be read from the street, with good contrast against its background, and light it if the path is used after dark. Keep the number clear of shrubs that will grow over it, and check it each spring after winter growth. Match the number style to the house, so it reads as part of the entry rather than a last minute addition.

    22. Seasonal Planter Rotation Along a Short Walk

    Short front walkway lined with seasonal flower planters in terracotta pots with colorful blooms, leading to a house front door.

    Line a short front walk with pots that change with the seasons, from spring bulbs to summer flowers to autumn foliage and winter evergreens, so a small path always looks cared for. A pot rotation suits a small yard because pots can move, swap, and refresh without digging a bed, and a short walk needs only a few pots to look full. Keep the pots on one side, or in pairs, so the walking line stays clear.

    Choose pots that are frost proof if they stay out in winter, and group them by water need, so watering stays simple. Swap the planting four times a year, or at least twice, and compost spent plants rather than leaving them to fade by the door. Keep a spare pot ready, so a failed plant can be replaced in minutes, not weeks.

    Conclusion

    A small front walk works hardest when it is clear, level, and easy to keep. Start with the route itself: a firm surface, neat edging, and a landing at the door. Then add one or two extras that suit your yard, such as lights for dark evenings, a raised bed for planting, or a bench nook for waiting. Avoid adding every idea at once, since a short walk gets crowded fast. Pick the material that suits your house, test the width by walking it with bags, and keep plants and pots off the walking line. A walk built this way welcomes guests, copes with rain, and still leaves room in a small yard for the lawn and beds beside it.

    Keep this list handy for your next free weekend, and start with the step that fixes the biggest daily problem: drainage, darkness, or a narrow landing. Then add the planting and seating details that make the walk yours.

    FAQs

    How wide should a front walkway be in a small yard?

    Aim for a main walk at least 1.2 metres wide, so two people can pass and a pram or a wheelie bin fits. A walk narrower than 1 metre feels cramped and makes it hard to step aside at the door. If space is tight, keep the full width clear of pots, bins, and overhanging shrubs, and widen the area at the door into a landing, even if the rest of the walk stays narrow.

    What is the cheapest front walkway material for a small space?

    Gravel with stepping stones is usually the lowest cost option, since it needs no large slabs and little skilled labour. A firm base, edging, and landscape fabric keep the gravel in place and cut long term upkeep. Concrete pavers are a step up in cost but last longer with less raking. Get a local quote for both, since delivery and base work change the total more than the surface material alone.

    How do I stop a gravel front walkway from spreading onto the lawn?

    Edge the gravel with steel, brick, or stone set at or just above the gravel level, and lay landscape fabric under the gravel to stop it sinking into soil. Use a gravel size that packs down, rather than large round stones that roll. Rake the gravel back into place after heavy rain, and top it up once a year, since some loss at the edges is normal even on a well edged path.

    What lighting works best along a short front walkway?

    Use low path lights at ankle height along the edges, plus a porch light at the door, so the whole route is lit without glare. Solar lights suit a short walk because a few lights cover it and no wiring is needed, but they need sun on the panel during the day. For a shaded walk, use wired low voltage lights instead, and keep the light warm white for a calm evening look.

    How can I make a front walkway safer in wet or icy weather?

    Choose a rough, non slip surface, keep the walk level with no rocking stones, and clear leaves, moss, and ice promptly. A permeable paver or gravel path drains better than a solid slab, which helps in rain. In winter, keep a grit bin near the door and treat the walk before ice forms, rather than after. Add a handrail if the walk includes steps or a slope.

    Do I need planning permission for a new front walkway?

    In many areas a simple like for like path replacement needs no permission, but rules differ by location, especially for a paved front garden, a listed home, or a home in a conservation area. Check your local planning rules before you pave a large area or change drainage, since some areas limit impermeable paving at the front. If in doubt, ask your local planning office with a simple sketch of the planned walk.


  • 18 Front Yard Landscaping Ideas to Add Character to Your Space

    18 Front Yard Landscaping Ideas to Add Character to Your Space

    The front yard is the first part of a home most visitors see, yet it often gets less care than the back garden. A plain lawn and a single shrub by the door can leave a house looking unfinished, even when the inside is full of care. These 18 front yard landscaping ideas give the front of a home a clear shape, color through the seasons, and a path that feels welcoming. They cover beds, paths, trees, lighting, seating, and low care planting for small yards, slopes, shady plots, and dry sunny fronts. Start with the path and the entry, then build planting around them one bed at a time.

    Key Takeaways

    • Start with the route to the door: a clear, wide, well lit path sets the tone for the whole front yard.
    • Layer planting by height, with low edging at the front, mid height shrubs and flowers in the middle, and a tree or tall shrub at the back or corner.
    • Repeat one or two colors and one edging material across the yard so separate beds read as one plan.
    • Mix evergreen structure with seasonal flowers, so the yard looks cared for in winter as well as in summer.
    • Keep house numbers, the mailbox, and the door visible, and keep plants clear of paths, driveways, and sight lines at the street.
    • Choose plants for your sun, soil, and watering routine first, and add high care plants only where you will enjoy tending them.

    1. Layered Foundation Beds

    Layered foundation beds with low edging plants, mid height shrubs, and tall corner shrubs beside a house wall.

    Plant foundation beds in layers so the house wall never shows a single flat row of shrubs. Put low edging plants such as creeping thyme, small hostas in shade, or dwarf mondo grass at the front, mid height shrubs and perennials in the middle, and taller shrubs near corners and beside the door. This stepped shape gives depth from the street and keeps the bed looking full even when one plant is out of flower.

    Leave a gap of soil or gravel between the house wall and the first plants for air flow and for reaching the wall for repairs. Water new shrubs deeply until roots settle, then mulch to hold moisture and cut weeds. Prune lightly to keep shrubs below window sills, and replace any plant that blocks a window or crowds the path.

    2. Curved Walkway with Clean Edging

    Gently curved front walkway with brick edging and low plants on both sides leading to a house door.

    Replace a straight, cracked concrete path with a gently curved walkway edged in brick, stone, or steel. A curve slows the eye, makes a small yard feel larger, and gives room for planting pockets on both sides of the path. Keep the curve gentle, since a path that zigzags sharply is tiring to walk and hard to mow beside.

    Lay pavers or flagstones on a firm, level base with a slight fall away from the house for drainage. Edge the path firmly so soil and mulch stay out of the joints, and keep the walking width wide enough for two people or a stroller. Plant low, tough edging plants beside the path, but keep them trimmed back so they never narrow the walk.

    3. Planting that Frames the Front Door

    Front door framed by a pair of planters with green shrubs and seasonal flowers on a porch.

    Frame the front door with a pair of planters, two matching shrubs, or a bed that steps up to the porch, so visitors know at once where to go. Symmetrical planters suit formal houses, while a looser group of pots in varied heights suits cottages and bungalows. Choose plants that stay neat by the door, since overgrown stems can block the handle, the lock, or the doorbell.

    Add a splash of door color to finish the entry, and the shade guide in these blue front door colors shows how undertone and hardware change the way a color reads on a real door. Keep the door step clear, sweep leaves from the threshold often, and swap seasonal pots at the door so the entry always looks tended.

    4. Low Hedge Frame for the Whole Yard

    Low green hedge framing a front yard along a path, with lawn and flower beds inside the hedge line.

    Plant a low hedge along the front boundary or along the path to give the yard a frame without closing it off. A hedge of boxwood, dwarf holly, or lavender, kept at knee to waist height, marks the edge of the property, hides a plain fence base, and makes lawn and beds read as one garden. Low hedges also keep sight lines open for drivers and walkers at the street.

    Space plants by their mature width, not by how they look in the pot, and water well in the first year. Clip once or twice a year to keep the top level, and feed in spring if growth looks pale. Where winters are harsh, choose a hedge plant proven hardy in your area rather than one that needs wrapping each year.

    5. Ornamental Tree as a Focal Point

    Small flowering ornamental tree as a focal point in a front yard with lawn and flower beds.

    Plant one ornamental tree, such as a flowering cherry, a small maple, or a crepe myrtle suited to your climate, as the focal point of the front yard. A single tree gives shade, seasonal color, and a sense of scale that shrubs alone cannot give. Place it where it frames the house from the street, not where it blocks the front windows or drops heavy fruit on the path.

    Check mature height and spread before planting, and keep the tree clear of power lines, driveways, and underground utilities. Stake a young tree for its first year or two, water deeply in dry spells, and mulch in a wide ring without piling mulch against the trunk. Prune to keep one clear trunk and a balanced crown.

    6. Seasonal Flower Drifts

    Drifts of colorful summer flowers in a front yard bed along a path, with repeated color groups.

    Plant flowers in drifts of five or more of one type, rather than single plants dotted across a bed, so color reads clearly from the street. Tulips and daffodils for spring, coneflowers and black eyed Susans for summer, and asters and mums for autumn give a long run of color if you mix types in the same bed. Repeat the same drift in two or three spots to tie the yard together.

    For tall, cheerful summer color beside a front path, the planting notes in these sunflower garden ideas show how height and spacing keep tall flowers upright and tidy. Deadhead spent blooms, cut back tired stems, and refresh mulch each spring. Keep flower beds edged so lawn grass does not creep into the planting.

    7. Rock and Gravel Bed for Dry Sunny Spots

    Rock and gravel front bed with lavender, sedum, ornamental grasses, and large feature stones in sun.

    Turn a dry, sunny strip where grass struggles into a rock and gravel bed with drought tolerant plants. Lavender, sedum, ornamental grasses, and agave types suited to your climate need far less water than lawn, and gravel mulch keeps weeds down and shows off stone color. This idea suits south facing fronts, narrow strips beside driveways, and yards where watering is limited.

    Lay landscape fabric only if weeds are severe, since it can block water over time, and use a gravel depth that stays in place in wind and rain. Set a few larger feature stones first, then plant in groups around them. Keep gravel out of the lawn and path with a firm edge, and top up gravel every year or two as it settles.

    8. Terraced Beds for a Sloped Front Yard

    Terraced front yard slope with low stone walls, level planting beds, and steps between levels.

    Step a sloped front yard into two or three low terraces with stone, brick, or timber walls, so each level holds soil, water, and plants instead of letting rain wash them to the street. Low terraces also give flat places to plant and make mowing or weeding safer than working on a steep bank. Keep each wall low, generally knee height or less, unless a professional builds it.

    The stepped layouts in these tiered garden ideas show how to give each level a clear job, from flowers near the street to shrubs near the house. Build from the bottom level up, add drainage behind each wall, and leave a step or path between levels for access. Plant ground cover on the wall tops to soften the hard edges.

    9. Mailbox Garden Bed

    Small tidy garden bed around a mailbox post with low flowers and a stone edge beside a pavement.

    Turn the patch around the mailbox into a small, tidy garden bed that greets visitors before they reach the house. Plant low flowers, dwarf shrubs, or ornamental grasses that stay clear of the mailbox door, the house number, and the path used by the mail carrier. A bed edged in stone or brick keeps soil off the pavement and gives the spot a finished look.

    Choose plants that cope with road salt, heat from pavement, and occasional splashes in winter if your street is treated. Keep plants below the mailbox so mail stays easy to reach, and trim any stems that lean over the pavement. One or two pots beside the post give the same effect where the ground is paved or the soil is poor.

    10. Front Yard Seating Nook

    Front yard seating nook with a wooden bench, two chairs, and flower beds near a path.

    Set a bench or two chairs in a front yard nook where you can watch the street, greet neighbors, and enjoy morning sun. A seat near the path, under a tree, or beside a flower bed turns the front yard from a display into a place people actually use. Choose weather resistant seating with a firm, level base, and add a small side table for a cup or a book.

    Keep the seat clear of the main path so walkers can pass, and plant scented flowers or herbs nearby for evening scent. A low hedge or a pair of planters behind the seat gives a sense of enclosure without blocking views. Bring cushions inside in wet weather, and sweep the seating pad often so it stays inviting.

    11. Path Lighting for a Warm Entry

    Front path lined with low warm lights leading to a lit front door at dusk.

    Line the front path with low solar or low voltage lights, and add a lantern or wall light by the door, so the entry feels warm and safe after dark. Light should mark the path edges and steps, not flood the whole yard, and warm white light suits most house styles better than harsh blue white light. Place lights where they will not be hit by mowers or snow shovels.

    Check solar lights get sun on their panels during the day, and clean panels each season. For wired lights, keep cables buried and clear of digging zones, and use a timer or dusk sensor so lights switch on without daily effort. Test the light level at dusk before guests arrive, and add one brighter light at any step or change of level.

    12. Privacy Planting Without a Tall Fence

    Layered shrubs and ornamental grasses screening a front yard from the street without a tall fence.

    Use layered shrubs, ornamental grasses, and a small tree to soften views into the front yard without building a tall solid fence. A staggered row of shrubs at varied heights gives privacy from the street while letting air and light through, and it looks softer than a fence from both sides. This approach also avoids fence height rules that vary by street and neighborhood.

    Plant the tallest shrubs furthest from the path and lower plants in front, so the screen reads as planting, not as a wall. Leave gaps for the driveway sight line and for access to utilities. Prune to keep the screen below window height where you want light indoors, and choose evergreen shrubs for year round screening in at least part of the row.

    13. Evergreen Structure for Winter Interest

    Front yard in winter with evergreen shrubs, a small conifer, and seasonal pots by the door.

    Add evergreen shrubs, small conifers, or broadleaf evergreens so the front yard keeps its shape in winter when flowers and leaves are gone. Boxwood balls, dwarf spruce, holly, and yew give form, color, and a backdrop for seasonal pots by the door. Evergreens also make spring bulbs and summer flowers look better, since they anchor each bed.

    Place evergreens at corners, beside the door, and at bed ends where their shape matters most. Water new evergreens well before winter, especially in dry autumns, and mulch to protect roots from freeze and thaw cycles. Clip lightly to keep their natural shape, and avoid shearing every evergreen into a ball unless that formal look suits the house.

    14. Pollinator Friendly Front Border

    Pollinator friendly front border with coneflowers, salvias, and lavender visited by bees and butterflies.

    Plant a front border with flowers that feed bees, butterflies, and other pollinators through the seasons, using native or well adapted plants where possible. Coneflowers, salvias, lavender, catmint, and asters give nectar from spring into autumn, while a mix of flower shapes suits different insects. A pollinator border also adds color and movement to the front of the house.

    Avoid spraying the border, leave some seed heads standing into autumn for birds, and include a shallow water dish with stones for insects to land on. Group the same flower in drifts, as in idea 6, so pollinators find food easily. Keep the border edged and weeded so it reads as a planned garden, not as a wild patch.

    15. Mulch and Stone Ground Cover

    Fresh bark mulch in front yard beds with a stone path edge and tidy bed lines.

    Refresh mulch in beds and use stone in paths and dry zones to give the front yard a tidy, finished surface with less weeding. Bark mulch holds moisture, feeds soil as it breaks down, and makes bed edges look clean, while stone suits paths, drainage strips, and areas under eaves where rain drips. A consistent ground cover color across beds ties the whole yard together.

    Spread bark mulch two to three inches deep, keeping it clear of tree trunks and shrub stems. Top up mulch each spring, and pull weeds before mulching so they do not grow through. Where stone is used, keep it out of lawn areas with a firm edge, and rinse dusty stone after laying so its true color shows.

    16. Raised Planter Boxes Along the Facade

    Low raised planter boxes along a house facade filled with trailing flowers and herbs.

    Build low raised planter boxes along the front facade or beside the porch to lift flowers and herbs to a comfortable height and to add structure to a plain wall. Raised boxes suit houses with poor soil, shallow roots from nearby trees, or a high foundation that leaves a bare strip. They also make planting easy to reach for watering and deadheading.

    Use rot resistant timber or stone for the boxes, add drainage holes or a gravel base, and fill with a mix of garden soil and compost. Plant trailing flowers at the front edge so they soften the box, and taller plants at the back near the wall. Water raised boxes more often than ground beds, since they dry out faster in sun and wind.

    17. Small Water Feature Near the Entry

    Small bubbling rock water feature near a front entry with plants and stone paving.

    Place a small bubbling rock, a wall fountain, or a ceramic bubbler near the entry to add sound and movement that makes the front yard feel calm and cared for. Moving water also masks street noise on a busy road, which makes a front seating nook more pleasant. Keep the feature small and simple, since a large pond needs far more care and safety planning.

    Site the feature on a level, stable base where you can reach the pump for cleaning, and keep it clear of paths so splashes do not make paving slippery. Run it on a timer, clean leaves and algae often, and drain it before hard frosts if the maker advises it. In a family yard, keep water shallow and edges rounded.

    18. Low Care Native Planting Plan

    Low care front yard planted with native grasses, shrubs, and perennials suited to sun and dry soil.

    Build the front yard around native or well adapted plants that suit your soil, rainfall, and sun, so the yard needs less water, less feeding, and less fuss through the year. Native grasses, shrubs, and perennials often cope better with local pests and weather than tender imports, and they support local birds and insects. Start by noting which parts of the yard are sunny, shady, wet, or dry, then match plants to each spot.

    Group plants with similar water needs together, so one bed is not overwatered to suit a single thirsty plant. Mulch well, water new plants until established, then cut back to occasional deep watering. Keep a simple sketch of what is planted where, so you can replace failures with plants that have already proved themselves in your yard.

    Conclusion

    A front yard with character does not need a full rebuild or a large budget. It needs a clear path to the door, planting layered by height, a focal point such as a tree or a well planted bed, and details such as lighting, edging, and seating that show the space is used and cared for. Pick the two or three ideas that fit your sun, slope, and routine first, such as a curved path, layered beds, and path lighting, then add one idea each season. Over time, those small, steady changes build a front yard that welcomes visitors, suits the house, and stays easy to look after. Save this guide to Pinterest for later, and use it as a checklist as you plan your next front yard project.

    FAQs

    What is the easiest front yard landscaping idea to start with?

    Start with layered foundation beds, a clean path edge, and fresh mulch. These three steps need no building work, they make the yard look tended at once, and they give a base for later ideas such as lighting, a tree, or a seating nook. Work on the bed nearest the door first, since that is the area visitors see most.

    How can I add curb appeal on a small budget?

    Focus on edging, mulch, and a few drifts of seasonal flowers, then add path lighting and a pair of planters by the door. These low cost steps change how the yard reads from the street without new paths or walls. Repeat one flower color and one edging material across the yard so the result looks planned rather than patched together.

    What plants work best for a low maintenance front yard?

    Choose evergreen shrubs for structure, ornamental grasses for movement, and drought tolerant perennials such as lavender, sedum, and coneflowers for color, matched to your sun and soil. Native and well adapted plants usually need less water and care than tender types. Avoid plants that need frequent clipping or watering unless they sit where you enjoy tending them.

    How do I landscape a sloped front yard?

    Step the slope into low terraces, plant ground cover to hold soil, and add a path with steps between levels. Terraces stop soil and mulch washing to the street, and each level gives a flat place to plant. Keep walls low or use a professional for taller walls, and plan drainage behind each wall so water does not build up after heavy rain.

    How can I get privacy in a front yard without a tall fence?

    Use layered shrubs, ornamental grasses, and a small tree in staggered rows to soften views while letting light and air through. Keep the screen below window height where you want indoor light, and leave the driveway sight line clear. Check local fence and planting rules before building anything solid near the street.

    What front yard landscaping mistakes should I avoid?

    Avoid planting trees too close to the house, blocking the door or house number with shrubs, and choosing plants that need far more water or sun than the spot gives. Also avoid paths that are too narrow, lighting that glares into neighbors windows, and beds with no edging, since mulch and soil soon spread onto paths and lawn. Plan for mature plant size, not pot size, before you plant.


  • 31 Dark Hallway Ideas to Make Your Next Refresh Easier

    31 Dark Hallway Ideas to Make Your Next Refresh Easier

    A dark hallway can feel like a missed room, a stretch you hurry through on the way to somewhere better. With the right paint, light, and a few well chosen pieces, it can feel calm and finished. These 31 dark hallway ideas cover paint and paneling, lighting layers, mirrors, runners, and storage. Start with light first, then colour, then storage, since a hallway that is easy to walk through and easy to see in will always feel better than one that is only well decorated.

    Key Takeaways

    • Light first, colour second: add warm light at more than one height before you commit to a deep paint colour.
    • Keep the walkway clear and put storage on the walls or in one shallow piece, never in the path.
    • Use mirrors and pale ceilings, runners, or trim to balance dark walls so the passage still feels open.
    • Repeat one dark tone and one warm material, such as wood or brass, so the hallway reads as planned.
    • Test paint in the hallway light at night, since dark colours change a lot under warm bulbs.
    • Start small: one wall, one runner, or one row of sconces can change the whole passage.

    1. Paint Every Wall Charcoal with White Trim

    Hallway with charcoal walls, white trim and doors, and a pale floor.

    Paint all the hallway walls a soft charcoal and keep the trim, doors, and ceiling white for a clean edge. The white frames each doorway and stops the dark walls from blurring into one flat stretch. This suits a hallway with several doors, since the trim gives the eye a clear rhythm as you walk through.

    Use a washable matte or eggshell finish, since hallways take scuffs from bags and shoes. Paint a test patch and check it at night under your usual bulbs before you commit to the whole passage. Keep the floor pale or mid toned if you can, so the room keeps one lighter surface.

    2. Paint Only the Far End Wall Dark

    Long hallway with pale side walls and a deep green wall at the far end.

    Paint just the wall at the far end of a long hallway a deep colour, and keep the side walls pale. The dark end wall pulls the eye forward and makes a very long passage feel shorter and more settled. This is a low risk first step if you are unsure about going dark on every wall.

    Choose a colour with some warmth, such as deep green or warm charcoal, so the end wall feels like a backdrop rather than a dead end. Hang one framed print or a small mirror on it, and keep the rest of the wall bare so the colour itself does the work.

    3. Add Dark Wood Paneling on the Lower Walls

    Hallway with dark wood paneling on the lower walls and pale walls above.

    Fit dark wood paneling or beadboard on the lower half of the walls, with a pale colour above. The paneling protects the part of the wall that takes the most knocks, and it adds a crafted feel that flat paint alone cannot give. A simple chair rail marks the change between the two finishes.

    Paint the paneling a deep walnut or charcoal tone, and keep the upper walls warm white or pale grey. This split keeps the hallway from feeling heavy at eye level, which matters in a narrow space. Wipe the paneling down regularly, since lower walls collect dust and shoe marks.

    4. Hang Moody Botanical Wallpaper

    Hallway with moody botanical wallpaper in deep green and pale trim.

    Use a botanical wallpaper in deep green or navy on one or two hallway walls for pattern without a full repaint. Leaves and stems break up a long flat wall, and a dark background keeps the pattern from feeling busy. This suits a hallway with little furniture, since the wall itself becomes the interest.

    Keep the ceiling and trim pale, and choose a paper that can be wiped clean. If the hallway is very narrow, paper the far end wall only, and paint the side walls a colour pulled from the paper. That keeps the pattern as a feature, not a tunnel.

    5. Paint the Ceiling Dark and Keep Walls Pale

    Tall hallway with a dark painted ceiling, pale walls, and a hanging light.

    Reverse the usual plan: paint the ceiling a deep tone and keep the walls pale. A dark ceiling can make a tall, narrow hallway feel less like a shaft, and it draws attention to a pretty light fitting or a row of beams. This works best where the ceiling is high enough that the dark colour does not press down on you.

    Use a matte finish on the ceiling so it does not reflect light unevenly. Keep the walls a warm white and add one dark piece, such as a bench or a console, to link the ceiling to the rest of the passage. If the hallway feels lower after painting, add brighter bulbs and reassess before changing anything else.

    6. Run a Row of Warm Wall Sconces

    Dark hallway lit by a row of warm wall sconces at even spacing.

    Fix a row of warm wall sconces at even spacing along one hallway wall. Sconces give light at eye level, which flatters both the walls and the people walking through, and they create a gentle rhythm that pulls you along the passage. Choose bulbs around warm white for a soft evening glow.

    Space the sconces evenly and keep them at the same height, about head height or just above. If wiring new sconces is not possible, battery sconces with a remote give a similar look with no drilling into plaster. Keep the shades simple so the light spreads along the wall rather than glaring into your eyes.

    7. Add Picture Lights Over Hallway Art

    Dark hallway wall with framed prints lit by small picture lights.

    Fit a small picture light over each framed print in the hallway, or over one larger piece at the far end. Picture lights give focused pools of warm light that make art readable in a dark passage, and they double as low level lighting in the evening. They suit hallways where a ceiling light alone leaves the walls in shadow.

    Choose battery picture lights if you do not want new wiring, and check that each light sits centred over its frame. Keep the art itself light in tone, such as a pale print or a landscape, so it stands out against a dark wall. Two or three lit frames are enough; lighting every frame can feel like a gallery corridor.

    8. Hide an LED Strip Along a Picture Rail

    Dark hallway with a warm LED glow along a picture rail near the ceiling.

    Run a warm LED strip along the top of a picture rail or behind a slim cornice to wash the ceiling with soft light. The glow bounces down the walls and lifts a dark hallway without a visible fitting, which keeps the passage calm and uncluttered. This is a good fit for a hallway with no room for a pendant or a table lamp.

    Pick a warm white strip and a dimmer, so you can lower the light in the evening. Fix the strip so the diodes themselves stay hidden from view at eye level. If the hallway has no picture rail, a slim timber batten painted the wall colour can hold the strip just as well.

    9. Hang a Large Mirror at the End of the Hall

    Hallway with a large mirror on the far end wall catching daylight.

    Hang one large mirror on the far end wall of the hallway, where it can catch light from a door or a room beyond. The mirror gives the passage a clear destination and bounces whatever daylight reaches the hall back along its length. A simple frame in wood or black keeps the look calm.

    Check what the mirror reflects before you fix it, since a mirror facing a cluttered room doubles the clutter. Aim it toward a window, a plant, or a calm stretch of wall where possible. The mirror placement advice in these studio apartment decorating ideas works just as well here: one large mirror usually beats several small ones scattered along the wall.

    10. Build a Mirror Gallery on One Wall

    Hallway wall with a group of mirrors in plain black frames.

    Group three or four mirrors of different shapes on one hallway wall, with plain frames in one finish. The mirrors catch light from different angles and act as decor in a passage too narrow for a console or a chair. This suits a windowless hallway, where every bit of reflected light helps.

    Keep the frames in one material, such as black metal or pale wood, so the group reads as one arrangement. Hang the largest mirror at eye level in the middle, and place smaller ones around it with even gaps. Avoid mirrors directly opposite each other, which can bounce reflections back and forth in a distracting way.

    11. Lay a Patterned Runner in Deep Tones

    Dark hallway floor with a long patterned runner in deep tones.

    Lay a long runner in deep tones, such as charcoal, rust, or dark green, down the centre of the hallway floor. A runner marks the walking path, softens footsteps, and protects the floor in the highest traffic strip of the house. A pattern hides marks better than a solid dark colour.

    Choose a low pile runner with a nonslip backing, and measure around door swings before you buy. Leave a margin of bare floor on each side so the runner does not look squeezed against the walls. Shake it outside weekly and wash it when the season changes, since hallway runners collect dirt fast.

    12. Paint the Floorboards a Deep Colour

    Hallway with floorboards painted deep charcoal and pale walls.

    Paint wooden hallway floorboards a deep charcoal or near black for a bold floor that hides scuffs well. A dark floor grounds the passage and lets pale walls and a light runner stand out. This suits older boards with marks that sanding alone cannot fully remove.

    Use a floor paint made for foot traffic, and seal it well so it stands up to daily wear. Keep the walls pale or mid toned if the floor is very dark, and add a pale runner to break up the stretch. Recoat worn spots promptly, since a dark floor shows chips more than a pale one.

    13. Hang a Gallery Wall with Light Frames

    Dark hallway wall with a gallery of prints in light wood frames.

    Hang a gallery wall of prints in light wood or white frames against dark hallway walls. Light frames pop against a deep background, so the art reads clearly even in low light. Mix print sizes, but keep the frames in one or two finishes so the wall stays calm.

    Plan the layout on the floor first, and keep even gaps between frames. Start with the largest print at eye level in the centre, then build outward. Leave the top of the wall empty if the hallway is low, since art hung too high is hard to see and makes the passage feel taller and thinner than it is.

    14. Place a Slim Console Table with a Lamp

    Slim console table in a dark hallway with a small lamp and a key bowl.

    Set a slim console table against one hallway wall and top it with a small lamp, a bowl for keys, and one plant or vase. The lamp gives warm light at hand height, and the table gives the hallway a landing spot without blocking the walkway. This works best in a hallway at least wide enough for a shallow table plus a clear path.

    Choose a table no deeper than a dinner plate is wide, and keep the top to three items at most. A lamp with a warm bulb makes the corner inviting in the evening, and a bowl keeps keys from drifting onto the floor. Check that the table does not block a door swing before you fix anything above it.

    15. Fit a Built-In Bench with Shoe Storage

    Low bench in a dark hallway with shoe baskets stored underneath.

    Fit a low bench along one hallway wall, with shoe storage underneath in baskets or open cubbies. A bench gives you a seat for putting shoes on, and the storage below stops shoes from lining the walkway. This is the single most useful piece for a busy family hallway.

    Keep the bench shallow so the walkway stays clear, and limit the shoes below to one pair per person. The bench and hooks setup in these kitchen entryway ideas shows the same idea at a back door, and it works just as well along a hallway wall. Add a cushion in a washable cover for comfort.

    16. Fix a Peg Rail for Coats and Bags

    Wooden peg rail on a dark hallway wall holding coats and a bag.

    Fix a wooden peg rail along one hallway wall for coats, bags, and hats. A rail uses wall space instead of floor space, which matters in a narrow passage, and it gives every daily item a fixed home. Space the pegs wide enough that a coat on one peg does not cover the next.

    Fix the rail into studs so it holds a wet coat and a heavy tote without pulling loose. Keep one peg free for guests, and move out of season coats to a closet so the rail never fills up completely. A rail in warm wood also softens a dark wall, since it adds a natural material at eye level.

    17. Add a Slim Picture Ledge for Rotating Art

    Slim picture ledge on a dark hallway wall with leaning frames and a plant.

    Fix a slim picture ledge along one hallway wall and lean framed prints, small photos, and one small plant on it. A ledge lets you swap art without new holes each time, which suits renters and anyone who likes to change displays with the seasons. It also keeps art off the floor in a narrow passage.

    Keep the ledge shallow and the frames light, since a loaded ledge on a hallway wall takes knocks from passing bags. Lean larger frames at the back and smaller ones in front, and leave a gap at each end so the ledge does not run into a door frame. Dust the ledge weekly, since hallway ledges collect dust fast.

    18. Fit Dark Built-In Cupboards Along One Wall

    Dark hallway with shallow built-in cupboards painted to match the walls.

    Fit shallow built-in cupboards along one hallway wall, painted the same dark tone as the walls, for coats, cleaning supplies, and spare linens. Cupboards that match the wall colour read as part of the architecture rather than as bulky furniture, so a narrow hallway stays calm. Closed doors hide clutter completely.

    Keep the cupboards shallow, about the depth of a coat on a hanger or less, so the walkway stays clear. The closed storage approach in these bedroom storage ideas applies here too: daily items at easy reach, seasonal items higher, and rarely used pieces out of the main flow. Add a small light inside deep cupboards so the back stays usable.

    19. Borrow Light with a Glazed Interior Door

    Dark hallway ending in a glazed interior door with frosted panes.

    Swap a solid interior door at the end of the hallway for a glazed door with frosted or reeded panes. The glass borrows daylight from the room beyond while keeping privacy, which can change a windowless hallway completely. Frosted glass suits bathrooms and bedrooms; clear glass suits living rooms.

    Keep the door frame painted the same colour as the trim, so the new door reads as part of the hallway rather than a foreign piece. If replacing the door is not possible, a glazed panel above the door, known as a transom, can borrow some light with less work. Check that the door still closes fully and latches after fitting.

    20. Add a Transom Window Above a Door

    Interior door in a dark hallway with a transom window above it.

    Fit a transom window above an interior door to let light from a brighter room spill into a dark hallway. A transom works where a full glazed door is not wanted, such as a bedroom door, and it adds a period detail that suits older homes. Fixed transoms are simpler than opening ones and need no hardware.

    Keep the transom glass clear or lightly frosted, depending on how much privacy the room beyond needs. Paint the transom frame to match the door trim. If cutting a new opening is not an option, a light coloured door and a bright room beyond can still help, since a pale door reflects more light than a dark one.

    21. Run a Dark Stair Runner Up the Hall Stairs

    Stairs off a dark hallway with a dark carpet runner on the treads.

    If the hallway includes stairs, run a dark stair runner up the centre of the treads, fixed with rods or staples. A runner quiets footsteps, adds grip, and links the hallway floor to the upper landing in one continuous line. A dark runner hides wear better than a pale one on busy stairs.

    Choose a low pile carpet made for stairs, and fix it firmly so it does not shift underfoot. Match the runner to the hallway runner where possible, or pick a tone from the same family, so the two read as one scheme. Vacuum the edges regularly, since stair runners collect dust along the borders.

    22. Choose Plants That Cope with Low Light

    Dark hallway with snake plants and pothos in plain ceramic pots.

    Add plants that cope with low light, such as snake plants, ZZ plants, and pothos, in a dark hallway. Plants soften hard walls and dark paint, and these types survive with little daylight as long as they are not overwatered. One tall plant at the end of the hall, plus one trailing plant on a shelf, is enough for most passages.

    Use pots in one material, such as terracotta or plain ceramic, so the plants read as a group. Check the soil before watering, since low light plants in dark halls need far less water than plants by a window. If the hallway has no daylight at all, rotate plants to a brighter room for a week each month to keep them healthy.

    23. Warm the Scheme with Natural Wood

    Dark hallway warmed by a natural oak bench and wooden frames.

    Add natural wood in a bench, frames, a peg rail, or a console to warm up dark hallway paint. Wood brings a natural tone that stops charcoal or navy walls from feeling cold, and it links the hallway to wooden floors or doors elsewhere in the house. Oak and walnut both work, as long as you repeat one tone rather than mixing many.

    Keep the wood finish consistent across the pieces you add, and let the wood be the warm note rather than adding many warm colours at once. A wooden bench, wooden frames, and a wooden mirror frame together are enough. If the hallway floor is already wood, match the new pieces loosely to it rather than exactly.

    24. Use Brass Fittings for a Warm Contrast

    Dark hallway with brass light fittings, hooks, and a mirror frame.

    Use brass for light fittings, door handles, hooks, and mirror frames against dark hallway walls. Brass catches warm light and gives a small bright point in a dark passage, which keeps the scheme from feeling flat. A little brass goes a long way, so one or two fittings per stretch of wall is enough.

    Choose one brass finish, such as brushed or aged, and repeat it across the fittings you change. Lacquered brass needs less polishing than unlacquered brass, which darkens with handling. If brass feels too formal for your house, black metal fittings give a similar clean line with less shine.

    25. Keep the Ceiling and Runner Pale

    Dark hallway walls balanced by a pale ceiling and a pale runner.

    Balance dark walls with a pale ceiling and a pale or mid toned runner. The pale ceiling reflects light down into the passage, and the pale runner breaks up a dark floor, so the hallway keeps one light surface above and one below. This balance matters most in a hallway with no windows.

    Paint the ceiling a warm white rather than a stark white, so it does not clash with warm bulbs. A runner in natural jute, pale wool, or a light pattern also softens footsteps. If the walls are very dark, this pale top and bottom frame is what stops the passage from feeling like a tunnel.

    26. Hang an Arched Mirror for a Softer Shape

    Dark hallway wall with an arched mirror in a thin black frame.

    Hang an arched mirror, with its rounded top, on a dark hallway wall to soften the straight lines of doors and frames. The arch shape echoes a doorway and gives the passage a gentler feel than a rectangular mirror. It suits both period homes and newer homes with arched doorways.

    Hang the mirror so its centre sits at eye level, and keep the wall around it bare so the shape stands out. A thin black or wood frame keeps the mirror from competing with the wall colour. Pair it with a small sconce on each side if the wall is wide enough, for a balanced arrangement.

    27. Lay Patterned Tiles in Deep Colours

    Dark hallway floor with patterned tiles in deep charcoal and navy.

    Lay patterned floor tiles in deep colours, such as charcoal, navy, or dark green, on the hallway floor. Patterned tiles give a dark hallway a finished floor that hides dirt and wear, and they suit the hard wearing needs of a passage that takes wet shoes and daily traffic. A small pattern works better than a large one in a narrow space.

    Use a grout colour close to the tile tone so the floor reads as one surface rather than a grid. Seal the tiles and grout well, since hallway floors take more water than other rooms. If full tiling is too much work, tiling just the entry section of the hallway gives most of the benefit.

    28. Make a Reading Nook at a Wide Landing

    Wide hallway landing with a small chair, a floor lamp, and a shelf.

    If the hallway widens into a landing, set a small chair, a floor lamp, and a narrow shelf there as a reading nook. A landing is often wasted space, and a chair turns it into a pause point rather than a bare corner. This suits homes where the hallway meets a window or a stair landing with room to spare.

    Keep the chair small and the shelf narrow, so the landing still works as a walkway. A floor lamp with a warm bulb makes the nook usable in the evening, and a small basket beside the chair holds books and a throw. If the landing is too narrow for a chair, a wall mounted fold down seat gives a similar perch with less footprint.

    29. Light the Inside of a Hallway Cupboard

    Hallway cupboard with a small light inside showing shelves and coats.

    Fit a small battery light inside a hallway cupboard or coat closet, so the contents are visible the moment the door opens. A dark cupboard in a dark hallway is easy to ignore, and a light inside makes it genuinely usable rather than a place where things go and are forgotten. This is a quick, low cost change.

    Use a motion sensor light or a tap light, so you do not need new wiring. Stick it to the inside top of the cupboard, where it lights the shelves below. Keep the cupboard sorted with one shelf per type of item, since a light only helps if you can see what you are looking for.

    30. Swap Accessories with the Seasons

    Dark hallway with a light summer runner, pale art, and green stems.

    Swap small hallway accessories with the seasons to keep a dark passage feeling fresh without repainting. In spring and summer, use a lighter runner, pale art, and green stems in a vase; in autumn and winter, return to deeper tones, heavier textures, and warm candlelight style lamps. The dark walls stay, and only the light layers change.

    Change only three things at a time, such as the runner, the art on one ledge, and the vase contents, and leave the furniture and lighting as they are. This keeps the hallway useful all year, since the working parts never move. Store the out of season pieces in one labelled box in the hallway cupboard.

    31. Paint the Doors Dark Against Pale Walls

    Pale hallway with doors painted deep charcoal and white trim.

    Reverse the usual dark hallway by painting the doors a deep colour and keeping the walls pale. Dark doors give the passage depth and rhythm, and they link the hallway to dark furniture or fittings in the rooms beyond. This suits a hallway where you want a dark note without committing to dark walls.

    Paint all the hallway doors the same deep tone, such as charcoal, navy, or deep green, and keep the trim and walls pale for contrast. Use a durable satin finish on doors, since they take more handling than walls. Repeat the door colour in one other hallway piece, such as a bench cushion or a frame, so the doors feel intentional rather than isolated.

    Conclusion

    A dark hallway works when light, storage, and colour are planned together, not when one of them is left to chance. Start with warm light at more than one height, add a mirror or a pale surface to balance the dark walls, and give coats and shoes a fixed home off the walkway. Then choose one dark treatment, whether paint, paneling, tiles, or dark doors, and repeat one warm material through the passage so it reads as a finished room. Walk the hallway at night after each change, and adjust the bulbs or the runner before you add more. For small passages, the mirror and zoning ideas in these studio apartment decorating ideas and the landing zone setup in these kitchen entryway ideas pair well with the ideas above.

    Keep this list handy for your next free weekend, and start with the change that fixes your biggest annoyance: light first if the hall feels gloomy, storage first if it feels cluttered, and paint last, once you know how the passage behaves at night.

    FAQs

    What is the best paint colour for a dark hallway?

    A soft charcoal, deep green, or warm navy usually works best, since these colours have enough depth to feel intentional without turning black in low light. Test a patch on the wall and check it at night under your usual bulbs, since dark colours change a lot between daylight and warm evening light. If the hallway has no windows, lean toward a colour with warm undertones rather than a cold grey, which can feel flat. Keep the trim and ceiling pale to hold the contrast.

    How do I stop a dark hallway from feeling gloomy?

    Layer light at more than one height: a ceiling light plus sconces, a console lamp, or a hidden LED strip. Add a mirror to bounce light along the passage, and keep at least one pale surface, such as the ceiling, the trim, or the runner, to balance the dark walls. Warm bulbs help more than bright white ones, since they make dark paint feel rich rather than harsh. If the hallway still feels gloomy, lighten the runner or add a glazed door to borrow light from a brighter room.

    Can a narrow hallway handle dark walls?

    Yes, if the walkway stays clear and the dark colour is balanced. Paint one wall dark first, or use dark paneling on the lower walls with a pale colour above, and see how the passage feels at night before painting more. Mirrors, pale ceilings, and a light runner all help a narrow hallway feel open. Keep furniture shallow and wall mounted where possible, so the floor stays free and the eye has room to move along the passage.

    What lighting works best in a windowless hallway?

    A mix of sources works best: a ceiling light for general light, sconces or picture lights for warm light at eye level, and a hidden LED strip or a console lamp for a soft glow. Put the lights on a dimmer where possible, so the hallway can be bright when you need to find something and soft in the evening. Warm white bulbs suit dark walls better than cool white bulbs, which can make deep paint look grey. Battery sconces and picture lights are a good option where new wiring is not practical.

    What kind of runner suits a dark hallway?

    A low pile runner with a nonslip backing suits a dark hallway best, since it handles daily foot traffic and can be cleaned easily. A pattern in deep tones hides marks better than a solid colour, while a pale or mid toned runner can balance very dark walls or floors. Measure around door swings first, and leave a margin of bare floor on each side so the runner does not look squeezed. Washable runners are worth choosing for a hallway, since this strip collects the most dirt in the house.

    How can I add storage to a dark hallway without blocking it?

    Use the walls and the backs of doors instead of the floor: a peg rail, slim shelves, a picture ledge, and shallow built-in cupboards all add storage while the walkway stays open. If you need floor storage, choose one shallow piece against a wall, such as a low bench with shoe storage underneath, and keep everything else off the floor. Stand in the hallway after setup and check that you can walk through without turning sideways, and move out of season items to a closet so the hallway only holds daily gear.


  • 12 Lantern Decor Ideas for Indoors and Outdoors to Try Now

    12 Lantern Decor Ideas for Indoors and Outdoors to Try Now

    Lanterns are one of the easiest ways to add warm light to a room or a porch without rewiring anything. A single glass lantern softens a dark corner, a pair frames a doorway, and a row along a garden path makes an evening outside feel planned rather than improvised. These 12 lantern decor ideas cover coffee tables, fireplaces, bedrooms, bathrooms, porches, patios, and gardens, with safe candlelight notes for each spot. The layered lighting advice in these cozy apartment living room ideas pairs well with lantern light, since a lantern works best as one glow among several, not the only light in the room.

    Key Takeaways

    • Start with one lantern and one clear spot, then repeat the look only where the light is actually needed.
    • Match the light source to the spot: real candles only where you stay nearby, battery candles for bedrooms and shelves, solar for garden paths.
    • Group lanterns in odd numbers and mix heights rather than lining up identical lanterns in a row.
    • Keep glass clean and wicks trimmed, since a dirty lantern gives a dull glow no matter how good it looks.
    • Choose one finish, such as black metal, wood, or brass, and repeat it in at least two places so the look feels planned.
    • Move lanterns between indoors and outdoors with the seasons instead of buying a new set for every spot.

    1. Coffee Table Lantern Cluster

    Three lanterns of different heights grouped on a tray on a coffee table in a living room.

    Group three lanterns of different heights on a coffee table, with the tallest at the back and the smallest at the front, so the group reads as one display from the sofa. A tray under the cluster keeps the table tidy, protects the surface from heat and wax, and lets you lift the whole display away when you need the table for games or a meal. This suits living rooms where the coffee table is the natural focal point in the evening.

    Use battery candles inside the cluster if the table sits within reach of children or pets, and keep at least one lantern unlit or empty so the group does not look crowded. Add a small stack of books or a low plant beside the tray, not inside it, so the lanterns stay the focus. Change the candle colour with the season, warm white for most of the year and a deeper tone for winter evenings.

    2. Fireplace Hearth Lantern Pair

    Two lanterns, one tall and one medium, standing on a fireplace hearth in a living room.

    Place a pair of lanterns on the hearth of an unused fireplace, one tall and one medium, to give the fireplace a purpose through the warmer months. The glass reflects the room light during the day, and candlelight in the evening gives the fireplace a glow without a fire. This works well in living rooms where the fireplace is a focal point but is not lit every night.

    Never place a lit candle lantern inside a working fireplace while a fire is burning, and keep lanterns clear of the opening if the fireplace is in use. For a working fireplace, use the lanterns on the hearth only when the fire is out and cool. Battery candles make this idea simple for daily use, since you can switch them on with a remote and leave them glowing all evening without watching a flame.

    3. Entryway Console Lantern Welcome

    One large lantern on an entryway console beside a small dish for keys and a plant.

    Set one substantial lantern on an entryway console beside a small dish for keys, so guests are met with warm light as soon as they step inside. A lantern at entry height draws the eye past the door and into the house, and it gives a narrow hallway a focal point without taking floor space. Choose a lantern large enough to be seen from the door, rather than a small one that disappears among keys and mail.

    Keep the console top clear around the lantern, with only the key dish and perhaps a small plant, so the entry still works as a landing spot. A battery candle on a timer is ideal here, since it switches on before you get home in winter and you never need to remember it. If the console sits near a mirror, the lantern light doubles in the reflection and the entry feels brighter.

    4. Dining Table Lantern Centerpiece

    Low lantern centerpiece on a dining table with a runner and greenery beside it.

    Build a dining table centerpiece around a single low, wide lantern, or a row of three small lanterns down the middle of a long table, keeping the light below eye level so guests can see each other across the table. A lantern centerpiece suits everyday meals as well as gatherings, since it can stay on the table between meals and only needs the candle lit at dinner. Add a simple runner and a few sprigs of greenery or a short vase of flowers beside the lanterns, not in front of them.

    Check the height before a dinner party by sitting at the table and looking across it, and swap a tall lantern for a shorter one if it blocks faces. Use unscented candles for dining, since a strong scent competes with food. After the meal, blow out real candles and leave the lanterns in place, so the table still looks dressed for the next morning.

    5. Bedroom Bedside Lantern Glow

    Small lantern glowing on a bedside table beside a bed in a calm bedroom.

    Place a small lantern on a bedside table as a soft evening light, with a battery candle inside so you can fall asleep without worrying about a live flame. A lantern gives a bedroom a calmer glow than a bright bedside lamp, and it works well for reading wind down time when paired with a low lamp on the other side of the bed. Choose a lantern with a handle or a closed top so it is easy to move if you need the table space.

    Keep the lantern away from curtains, bedding, and anything that could fall onto it, even with a battery candle, since good habits matter for every light source. A warm white battery candle looks closest to real candlelight, while a flickering setting adds movement without a flame. If you share the room, a lantern on each bedside table keeps the light balanced on both sides.

    6. Bathroom Spa Shelf Lantern

    Lantern on a bathroom shelf beside a folded towel and a small plant.

    Style a lantern on a bathroom shelf or on the edge of a wide bath surround, with a battery candle and a folded towel nearby, to give the bathroom a calm, spa like feel. Bathrooms often have harsh overhead light, and a low lantern glow softens the room for an evening bath. A lantern with a closed glass design suits a bathroom, since it keeps splashes away from the candle inside.

    Never use a real candle lantern near a bath where it could be knocked into water, and never leave a lit candle unattended in a bathroom. Battery candles remove that worry entirely and still give the flicker that makes the idea work. Keep the lantern off the floor and away from the direct splash zone, and wipe the glass after steamy baths so water marks do not dull the glow.

    7. Porch Step Lantern Path

    Lanterns placed on porch steps leading up to a front door in the evening.

    Line porch steps with a lantern on every second step, or one on each side of the bottom step, to guide guests to the door after dark. Step lanterns make a porch feel welcoming and they mark the edges of the steps, which helps visitors see where to place their feet. Heavy lanterns or lanterns with a flat, stable base suit steps best, since they are less likely to be knocked over.

    Use battery or solar candles on steps, since a real flame on a step is easy to bump and hard to watch from inside. Place lanterns toward the wall side of each step rather than the open edge, so they do not narrow the walking path. Bring glass lanterns inside during storms or high winds, and choose a weather resistant finish for any lantern that stays out through the season.

    8. Patio Table Lantern Centerpiece

    Large lantern in the middle of a patio table with small potted herbs around it.

    Set a large lantern in the middle of a patio table, surrounded by a few small potted herbs or a low bowl of stones, for an outdoor centerpiece that needs no power point. A patio lantern lets dinner outside run past sunset, and it can move to a side table or the ground beside a chair when the table is cleared. One large lantern usually works better outdoors than several small ones, since wind and table clutter can make small lanterns look lost.

    Choose a lantern rated for outdoor use, with glass panels that latch or sit firmly in the frame, so a gust does not rattle them loose. A battery candle with a timer suits a patio table, since you can set it once and have light every evening. Keep a spare set of batteries or a second candle nearby during a gathering, so the table never goes dark halfway through the meal.

    9. Garden Path Solar Lantern Line

    Solar lanterns lined along a garden path among plants at dusk.

    Place solar lanterns along a garden path at even intervals, with the solar panel facing the sky and clear of overhanging plants, so they charge by day and glow by night. A path line works best when the lanterns match in style but vary slightly in height, which keeps the path from looking like a runway. Start with the turns and the steps first, since those are the spots where light matters most, then fill the straight stretches.

    Check the path after dark before fixing positions, since a lantern hidden behind a shrub gives no light where feet land. Wipe solar panels a few times a season, since dust and pollen cut charging more than most people expect. In winter, move solar lanterns to the sunniest stretch of the path or bring them in for a full charge, since short days give them less power.

    10. Hanging Lanterns From a Pergola or Branch

    Lanterns hanging at different heights from a pergola beam above outdoor seating.

    Hang two or three lanterns at different heights from a pergola beam or a sturdy tree branch, using hooks and wire rated for the lantern weight, to add light above a seating area without a table lamp. Hanging lanterns suit outdoor dining and evening sitting areas, since the light falls from above and leaves the table free. Vary the drop lengths by at least a few inches so the lanterns look grouped rather than lined up.

    Check the branch or beam before hanging, and hang lanterns where they cannot swing into faces or into a grill. Battery candles are the safe choice for hanging lanterns, since a real candle in a swinging lantern is a fire risk and hard to light. Take hanging lanterns down before storms, and store the hooks with the lanterns so the setup is quick to repeat next weekend.

    11. Window Sill Lantern Row

    Small lanterns lined along a deep window sill in a front room in the evening.

    Line a deep window sill with two or three small lanterns, spaced so daylight can still reach the room and the glass catches light from both sides. A window sill row gives a room a glow that is visible from outside as well as inside, which makes it a good choice for a front room in the evening. Small lanterns suit sills best, since a large lantern can block the window and crowd the sill.

    Keep lanterns away from curtain edges and blinds cords, and use battery candles on a sill so heat never builds up near fabric. A row of matching lanterns works on a long sill, while a single lantern suits a narrow one. In winter, a window sill lantern row pairs well with the warm light of the room behind it, and it can stay in place all season with only a battery change.

    12. One Lantern, Four Seasonal Swaps

    One lantern on a console surrounded by pinecones and evergreen sprigs for winter.

    Keep one good lantern and change only what sits around it through the year, so a single piece carries four different looks without new purchases. In spring, set it beside a small pot of fresh green leaves. In summer, pair it with a bowl of shells or pale stones. In autumn, add a few pinecones and a plaid cloth under the tray. In winter, surround it with evergreen sprigs and a red candle. The lantern stays the same, and the season comes from the small items around it.

    This idea suits anyone who likes seasonal decorating but not seasonal storage, since only the small extras change. Store the extras in one labelled box, with the lantern candle and spare batteries, so each swap takes minutes. Photograph each version once, so you can repeat a favourite next year without guessing what worked. The same swap approach works indoors on a console and outdoors on a porch, with weather hardy extras outside.

    Conclusion

    Lantern light works indoors and outdoors because it is small, movable, and warm, and the best lantern display is usually the simplest one that fits the spot. Start with a single lantern where you sit in the evening, choose the safe light source for that spot, and add a second or third only where the light is needed. Move lanterns between rooms and outside as the seasons change, and let one finish and one style run through the house so the look feels connected. For small rooms, the zoning advice in these studio apartment decorating ideas helps a lantern corner share space with seating and sleeping areas without crowding either.

    Try one idea this week, such as a coffee table cluster or a porch step pair, and live with it for a few evenings before adding more. Save this list to your lantern and lighting board on Pinterest so you can find it when you are ready for the next room or the next season.

    FAQs

    Are real candles safe to use inside lanterns?

    Real candles are safe in lanterns only when you stay in the room, keep the lantern away from curtains, bedding, and anything that can fall onto it, and place it on a stable, heat resistant surface. The glass guards the flame from drafts, but it does not remove the need to watch it. Never leave a lit candle lantern unattended, near children or pets, or in a room where you might fall asleep. Battery candles give the same glow without these limits and suit bedrooms, bathrooms, and high shelves.

    Should I choose battery, solar, or real candles for lanterns?

    Choose by spot. Real candles suit a dining table or a fireplace hearth where you sit nearby and can watch the flame. Battery candles suit bedrooms, bathrooms, shelves, and hanging lanterns, where a flame is risky or hard to reach, and many come with timers and remotes. Solar suits garden paths and outdoor spots with direct sun, since they need no batteries and switch on by themselves. Many homes use all three, one type per spot, rather than one type everywhere.

    What size lantern works best on a coffee table or a porch?

    On a coffee table, a lantern between 20 and 30 centimetres tall usually suits a standard table without blocking conversation, and a cluster should mix heights rather than match exactly. On a porch, go larger, since outdoor spaces swallow small decor, and a lantern of 30 centimetres or more reads well from the path. Measure the spot first, and leave clear space around the lantern for cups, books, or foot traffic. When in doubt, one larger lantern beats two small ones that disappear in the space.

    Can lanterns stay outside all year?

    Lanterns made for outdoor use, with weather resistant metal and firmly seated glass, can stay outside through most of the year, but glass lanterns last longer if they come in during storms, hard frost, and long wet spells. Bring candles and battery units inside when not in use, since damp shortens battery life and can stain glass. Wipe frames and glass at the start of each season, and check hooks, latches, and solar panels before putting lanterns back out in spring.

    How do I style lanterns without making a room look cluttered?

    Limit lanterns to one display per room, or one per zone in a large open room, and keep the rest of the surface clear. Group in odd numbers, repeat one finish, and vary heights so the group looks planned. Remove one item from a surface for every lantern you add, and keep the area around the lantern free of small clutter. A tray helps, since it gives the group a clear boundary and makes the whole display easy to lift away when the surface is needed.

    How do I clean glass lanterns and remove candle soot?

    Let the lantern cool fully, remove the candle, and wash the glass panels with warm water and a drop of washing up liquid, then dry with a soft cloth to avoid water marks. For soot, a paste of bicarbonate of soda and water rubbed gently on the inside of the glass usually lifts the marks without scratching. Trim candle wicks before each lighting to cut future soot, and keep the lantern out of strong drafts, which make flames smoke. Clean solar panels with a damp cloth a few times a season so they keep charging well.


  • 27 Exterior House Color Schemes to Refresh Your Home’s Look

    27 Exterior House Color Schemes to Refresh Your Home’s Look

    Picking an exterior color is really picking a small team of colors: the main wall shade, the trim, the door, and the roof all have to get along. A wall color that looks right on a swatch can turn cold beside a brown roof, or disappear against grey stone. These 27 exterior house color schemes cover classic, coastal, farmhouse, Mediterranean, and modern houses, and each one names the full combination so you can picture it on your own home. Start with your roof and your fixed materials, test large samples in real daylight, and choose the scheme that fits both.

    Key Takeaways

    • Start with what you cannot change: roof color, brick, and stone set the limits for every paint choice that follows.
    • Give every scheme a clear job for each color: one main wall color, one trim color, and one accent for the door or hardware.
    • Test a scheme on a large board in morning, midday, and evening light, since exterior colors shift more than interior ones.
    • Repeat the accent once more, in planters, a light fixture, or house numbers, so the scheme looks planned rather than random.
    • Match the scheme to the house style: crisp white and black suits colonial and modern forms, warm cream and terracotta suits Mediterranean forms, soft sage suits cottages and farmhouses.
    • Keep planting in the plan: green shrubs and pale gravel change how a wall color reads from the street.

    1. Classic White Siding with Black Trim and a Red Door

    House with white siding, black window trim, and a red front door.

    White siding with black trim is the most dependable classic scheme, because the strong outline makes the shape of the house easy to read from the street. Paint the siding a clean, warm white, keep window frames, corner boards, and fascia in black, and paint the door a true red. The red is the single warm note, and it draws the eye straight to the entry.

    Keep the roof grey or black, since a brown roof can make white siding look yellow by comparison. A black mailbox, black lanterns, and a plain stone path repeat the trim color at ground level without adding new colors. This scheme suits colonial, farmhouse, and traditional suburban houses, and it photographs well in every season because the contrast stays clear in snow, sun, and rain.

    2. Warm Cream Stucco with Terracotta Roof Tiles

    House with warm cream stucco walls, terracotta roof tiles, and a wood front door.

    Warm cream stucco with terracotta roof tiles suits Mediterranean and Spanish style houses, because the wall color and the roof share the same warm, sun-baked family. Render the walls in a soft cream with a yellow base, keep the roof in natural terracotta, and use a wood door with iron details. The cream keeps the house bright, while the terracotta roof gives it weight and warmth.

    Keep window frames in a warm white or light bronze, since bright white can look harsh against cream stucco. Pale gravel, clay pots, and olive or lavender planting suit this scheme and repeat its warm, dry-climate character. Cream stucco shows dirt near the ground, so a darker stone base or a gravel border helps the lower walls stay tidy between washes.

    3. Soft Sage Green with Cream Trim and a Wood Door

    Cottage with soft sage green siding, cream trim, and a natural wood front door.

    Soft sage green with cream trim suits cottages, farmhouses, and craftsman houses, because the muted green sits comfortably beside lawns, trees, and garden beds. Paint the siding a grey leaning sage, keep window frames, porch posts, and fascia in cream, and set a natural wood door against the green. Cream warms the sage in a way that bright white would not, since white can make sage look cold.

    Repeat the wood once more in planters, a bench, or porch brackets, so the door does not stand alone. A grey or brown roof both suit sage, while a black roof can sharpen the scheme for a more modern cottage. Sage reads greyer on cloudy days, so test it on the wall that faces the street, and pick a shade one step clearer than the sample you first like if your house sits in shade.

    4. Pale Grey Siding with White Trim and a Navy Door

    House with pale grey siding, white trim, and a navy front door.

    Pale grey siding with white trim and a navy door is a calm, tailored scheme that works on almost any suburban house. Paint the siding a light, neutral grey, keep the trim bright white, and paint the door navy. The navy gives the entry depth without the heaviness of black, and it reads as a color rather than as another neutral. For more navy door shades in this family, see these blue front door colors.

    Keep the roof grey or black, and use nickel or black hardware to suit the cool palette. A navy door pairs well with white planters and green shrubs, which stop the grey and white from feeling flat. Pale grey shifts with light, looking bluer on a bright day and warmer at dusk, so check the siding sample beside the roof and the trim before committing.

    5. Butter Yellow Cottage with White Porch and Green Shutters

    Cottage with butter yellow siding, a white porch, and green shutters.

    Butter yellow with a white porch and green shutters is a cheerful cottage scheme that stays gentle rather than loud. Paint the siding a soft butter yellow, keep the porch rails, posts, and window trim white, and paint the shutters a muted leaf green. The white porch reads as a bright frame around the yellow walls, while the green shutters tie the house to the garden.

    Keep the roof grey or soft brown, and use a white or green door to avoid adding a fourth strong color. Butter yellow looks stronger across a whole wall than on a small chip, so pick a shade one step paler than the sample you first like. This scheme suits small cottages and bungalows best, where the yellow can stay friendly, and it needs decent daylight, since yellow can turn dull on a heavily shaded, north facing wall.

    6. Natural Red Brick with Cream Trim and a Charcoal Roof

    House with natural red brick walls, cream trim, and a charcoal roof.

    Natural red brick with cream trim and a charcoal roof is a scheme built on a material you do not paint. Keep the brick bare, paint the trim, fascia, and porch details cream, and choose a charcoal grey roof. Cream softens the brick without the stark edge that bright white gives, and the charcoal roof grounds the warm brick from above.

    Keep the door in a warm wood stain, a deep green, or a classic black, since all three sit well against red brick. A brick path or brick steps repeat the main material at ground level, and cream planters keep the entry bright. Red brick varies a lot from house to house, so hold the cream sample against your own brick in daylight: a pink leaning brick needs a warmer cream, while an orange leaning brick suits a cooler cream.

    7. Sky Blue Coastal Cottage with White Shutters

    Coastal cottage with pale sky blue siding and white shutters.

    Sky blue with white shutters gives a coastal cottage color without turning it into a beach theme. Paint the siding a pale, clear sky blue, keep shutters, trim, and porch rails white, and use a white or pale wood door. The white shutters read as a crisp pattern across the blue walls, which suits small cottages with several windows on the front.

    Keep the roof light grey or white, and use pale gravel or sand colored paths to suit the coastal feel. A single brass lantern or a wood bench adds warmth, since blue and white alone can feel cool. Sky blue can wash out to near white in very strong sun, so test it one step deeper than the swatch you first pick, and check it in midday light before painting the whole house.

    8. Warm Greige with Bronze Hardware and a Wood Door

    House with warm greige siding, bronze lanterns, and a wood front door.

    Warm greige, a blend of grey and beige, with bronze hardware and a wood door is a quiet, modern neutral scheme. Paint the siding a warm greige, keep the trim a shade lighter in warm white, and add bronze in the door hardware, lanterns, and house numbers. The bronze warms the neutral walls and gives the entry a clear focal point after dark.

    Keep the roof grey or brown, since greige sits between those two families and suits both. A natural wood door repeats the warmth of the bronze and stops the scheme from feeling flat. Greige shifts through the day, looking greyer in morning light and warmer at night, so test it on two walls, one facing the street and one in shade, before choosing the final shade.

    9. Olive Green Farmhouse with Black Window Frames

    Farmhouse with olive green siding, black window frames, and a wood front door.

    Olive green with black window frames suits a farmhouse because the earthy green and the dark frames feel settled rather than new. Paint the siding a muted olive with a brown base, set black framed windows into the walls, and keep the trim cream or pale stone. The black frames give the olive a tidy outline, while cream trim keeps the entry bright.

    Use a wood door and wood porch posts to warm the scheme, and keep the roof brown or grey, since both suit olive. If you want to go darker still, these dark exterior house color schemes show how deep greens and charcoals behave on larger houses. Olive can turn muddy beside cool grey stone or a grey roof, so test the pair on site and pick a greener olive if your roof runs cool.

    10. Navy and White Colonial Revival

    Colonial house with navy siding, white shutters, and brass lanterns.

    Navy siding with white trim suits a colonial revival house because the symmetrical form and divided windows give the strong color structure to sit on. Paint the siding navy, keep shutters, corner boards, and window trim white, and add brass in the door hardware and lanterns. Brass warms the cool navy and gives the entry a clear focal point.

    Use a navy with a grey base rather than a bright blue, so the house reads as calm and classic from the street. Keep the roof grey or black, since a brown roof can pull navy toward purple in warm evening light. A white door frame helps the entry stand out against the navy wall, and a red brick path or chimney adds a traditional warm note that suits the colonial form.

    11. Taupe Stucco with Pale Stone Accents

    House with taupe stucco walls, pale stone around the door, and stone steps.

    Taupe stucco with pale stone accents suits a house with traditional or Mediterranean bones, because the warm neutral and the stone feel settled together. Render the walls in a warm taupe, and use pale limestone or light stone for the door surround, window sills, and steps. The stone gives the taupe a light edge without the sharpness of white paint.

    Keep the roof brown or grey, and use bronze or black hardware, since bright brass can look too crisp against taupe. A wood door in a mid stain suits this scheme and repeats the warmth of the stone. Taupe absorbs light like other mid tones, so keep the entry well lit and the planting pale near the door, which matters because a dim entry can make taupe read darker than planned.

    12. Hunter Green Shutters on a Cream House

    House with cream siding, hunter green shutters, and a green front door.

    Hunter green shutters on a cream house is an accent scheme: the walls stay pale, and the shutters carry the color. Paint the siding a warm cream, keep the trim white or cream, and paint the shutters a deep hunter green. The green reads as a pattern across the front of the house, which suits houses with several windows and a simple, symmetrical facade.

    Repeat the green once more in the front door or in planters, so the shutters do not stand alone. A brown or grey roof both suit cream and hunter green, and brass hardware fits the traditional character of the pair. This scheme is a good first step for owners who want color but are not ready to paint the whole house, since shutters can be repainted far more easily than siding.

    13. Warm White and Walnut Contemporary

    Contemporary house with warm white walls and a dark walnut clad entry section.

    Warm white walls with dark walnut cladding suit a contemporary house because the two materials give the pale color texture to play against. Keep the main walls in a warm white render or siding, clad one section, such as the entry or a gable, in dark walnut boards, and set black framed windows into the white walls. The walnut section marks the entry and stops a large white house from looking plain.

    Keep other materials quiet: black metal, pale stone, and plain concrete suit walnut, while bright trim fights it. A pale stone path leading to the entry helps visitors find the door, and a wood bench repeats the walnut note at ground level. The same rule about giving each color a clear job applies indoors too, as these wall color combinations show for rooms. Protect the cladding with an exterior oil suited to the wood, and plan on regular care, since dark wood shows weathering faster than painted siding.

    14. Dusty Blue with Red Brick Accents

    House with dusty blue siding, white trim, and a red brick chimney.

    Dusty blue siding with red brick accents pairs a cool, muted blue with the warmth of bare brick. Paint the siding a grey leaning dusty blue, keep the trim white, and let a red brick chimney, brick steps, or a brick porch base carry the warm note. The brick stops the blue from feeling cold, while the blue keeps the brick from dominating the front of the house.

    Keep the roof grey or charcoal, and use a white or wood door to avoid adding a third strong color. Dusty blue suits coastal, cottage, and traditional houses, and it reads as a soft neutral in low light, which makes it forgiving on a shaded lot. Check the blue against your own brick in daylight, since a pink leaning brick needs a cooler blue, while an orange leaning brick suits a warmer, greyer blue.

    15. Terracotta and Cream Mediterranean Villa

    Mediterranean villa with terracotta walls, cream window surrounds, and a wood door.

    Terracotta walls with cream trim suit a Mediterranean villa because the warm clay color and the pale trim echo sun baked plaster and stone. Paint the main walls a soft terracotta, keep window surrounds, arches, and trim cream, and use a wood door with iron details. The cream outlines the arches and windows, which matters most on a villa with curved forms.

    Keep the roof in terracotta tiles or a warm brown, and use pale gravel, clay pots, and olive planting at the entry. Terracotta looks stronger across a whole wall than on a chip, so pick a shade one step softer than the sample you first like, especially on a small house. A cream door or cream trim on the porch keeps the entry bright, since terracotta absorbs light like other warm mid tones.

    16. Soft Peach Stucco with White Trim

    House with soft peach stucco walls, white trim, and a wood front door.

    Soft peach stucco with white trim is a gentle warm scheme that suits Spanish, Mediterranean, and coastal houses. Render the walls in a pale peach with a pink base, keep the trim, window surrounds, and porch details white, and use a wood or white door. The white keeps the peach fresh, while the peach keeps the white from looking stark.

    Keep the roof in terracotta tiles or warm brown, and use pale stone or gravel at the entry to suit the warm palette. Peach can turn pink beside cool grey stone or a grey roof, so test the pair on site and pick a peach with a warmer, apricot base if your roof runs cool. This scheme suits houses with arched windows or curved stucco details, where the soft color follows the form rather than fighting it.

    17. Slate Blue with a Stone Chimney

    House with slate blue siding, a natural stone chimney, and stone steps.

    Slate blue siding with a stone chimney pairs a cool, grey leaning blue with the texture of natural stone. Paint the siding a muted slate blue, keep the trim white or pale grey, and let a stone chimney or stone porch piers carry the natural note. The stone adds texture at the level people see up close, where a flat blue wall would otherwise meet the lawn without a break.

    Repeat the stone once more at ground level, in stone steps or a low garden wall, so the chimney does not stand alone. A grey or black roof suits slate blue, and a wood door adds warmth beside the cool walls. Slate blue shifts with light, looking bluer on a bright day and greyer at dusk, so test it on the wall that faces the street before committing.

    18. Cream and Chocolate Brown Craftsman

    Craftsman house with cream siding, chocolate brown trim and brackets, and a wood door.

    Cream siding with chocolate brown trim suits a craftsman house because the deep brown picks out the brackets, beams, and porch details that define the style. Paint the siding a warm cream, keep the trim, brackets, and porch posts in chocolate brown, and use a wood door in a mid stain. The brown gives the cream a rich outline, while the cream keeps the house bright.

    Keep the roof brown or dark grey, and use bronze or black hardware to suit the warm palette. A stone porch base or stone steps repeat the craftsman character at ground level. Cream and chocolate brown need decent daylight, so on a heavily shaded lot, pick a cream one step brighter than the sample you first like, and keep the porch well lit so the brown details stay readable.

    19. Pale Mint with a Deep Green Door

    Cottage with pale mint siding, white trim, and a deep green front door.

    Pale mint siding with a deep green door is a fresh, light scheme that suits cottages, bungalows, and coastal houses. Paint the siding a pale mint with a grey base, keep the trim white, and paint the door a deep forest green. The deep green door gives the pale walls a clear focal point, and it ties the house to the garden without painting the whole house green.

    Keep the roof grey or soft brown, and use black or bronze hardware to suit the green door. A white porch and pale planters keep the entry bright, since mint can look washed out beside dark soil or dark mulch. Mint reads greener in shade and paler in sun, so test it on the front wall through a full day, and pick a mint with enough grey in it to stay calm rather than bright.

    20. Brick and Cream Tudor Revival

    Tudor house with cream render panels, dark timber framing, and red brick details.

    Brick and cream Tudor revival is a scheme built on pattern: cream render panels, dark timber framing, and red brick details. Keep the brick bare on the lower story or chimney, render the upper panels cream, and paint the timber framing dark brown or black. The dark timber draws the pattern of the house clearly, while the cream panels keep it bright.

    Keep the roof dark brown or charcoal, and use a wood door with iron details to suit the Tudor character. A brick path or brick steps repeat the main material at ground level, and cream planters keep the entry light. This scheme suits houses that already have the Tudor form, since the pattern needs real timber or trim boards to carry it, and painted lines alone will not give the same effect.

    21. Sand and Driftwood Coastal

    Coastal house with warm sand siding, driftwood grey trim, and a pale wood door.

    Sand colored siding with driftwood grey trim suits a coastal house because both colors come from the beach palette without turning the house into a theme. Paint the siding a warm sand, keep the trim, shutters, and porch details in a weathered driftwood grey, and use a pale wood door. The grey trim gives the sand a soft outline, while the pale wood door keeps the entry warm.

    Keep the roof light grey or pale brown, and use pale gravel, dune grass, and light stone at the entry. Sand can look yellow beside a brown roof, so hold the sample against the roof in daylight before choosing. This scheme suits beach cottages, shingle style houses, and coastal new builds, where the muted palette sits comfortably beside sand, grass, and sea light.

    22. White Painted Brick with Black Shutters and a Wood Door

    House with white painted brick, black shutters, and a wood front door.

    White painted brick with black shutters and a wood door suits a traditional house that needs a fresh, clean look without losing its brick texture. Paint the brick a warm white, keep the shutters and window frames black, and set a natural wood door against the white wall. The brick texture stays visible through the paint, which keeps the house from looking flat, while the wood door is the single warm note.

    Keep the roof grey or black, and use black hardware and lanterns to repeat the shutter color. A pale stone path or light steps help, since a white house with a dark path can lose its entry at dusk. Check the brick condition first, since painted brick needs sound mortar and a breathable paint suited to masonry, and a white finish shows dirt near the ground, so a gravel border helps.

    23. Mustard and Charcoal Mid-Century Ranch

    Mid-century ranch with muted mustard siding, charcoal trim, and a charcoal roof.

    Mustard siding with charcoal trim suits a mid-century ranch because the bold, warm yellow and the dark trim match the clean lines and low roof of the style. Paint the siding a muted mustard, keep the trim, fascia, and window frames charcoal, and use a wood or charcoal door. The charcoal outlines the long, low form of the ranch, while the mustard gives it a clear color identity.

    Keep the roof charcoal or dark grey, and use simple, plain landscaping with grasses and pale gravel to suit the modern character. Mustard looks stronger across a whole wall than on a chip, so pick a shade one step softer than the sample you first like, and test it in full sun, since yellow deepens a lot in bright light. This scheme suits ranches best, where the low, wide form can carry a strong color without feeling loud.

    24. Blush Pink Stucco with White Trim

    House with blush pink stucco walls, white trim, and a wood front door.

    Blush pink stucco with white trim is a soft, warm scheme that suits Spanish, Mediterranean, and coastal houses. Render the walls in a pale blush with a warm base, keep the trim, window surrounds, and porch details white, and use a wood or white door. The white keeps the blush fresh, while the blush keeps the white from looking stark.

    Keep the roof in terracotta tiles or warm brown, and use pale stone, clay pots, and green planting at the entry. Blush can turn peach beside warm stone or orange leaning brick, so test the pair on site and pick a blush with a cooler, pinker base if your fixed materials run warm. This scheme suits houses with arched details and curved stucco, where the soft color follows the form.

    25. Grey Stone and White Render Mix

    House with grey stone on the lower story and white render on the upper walls.

    Grey stone with white render suits a house that already has stone, because the mix lets the stone lead and the render brighten the rest. Keep the stone bare on the lower story, chimney, or entry section, render the remaining walls white, and keep the trim white or pale grey. The white render stops a full stone house from feeling heavy, while the stone gives the white a natural, textured partner.

    Keep the roof grey or charcoal, and use a wood door to warm the cool palette. A stone path or stone steps repeat the main material at ground level, and pale gravel suits the mix. Grey stone varies from warm to cool, so hold the white sample against your own stone in daylight: a warm stone needs a warmer white, while a cool stone suits a brighter white.

    26. Teal Door on a Warm Grey House

    House with warm grey siding, white trim, and a teal front door.

    A teal door on a warm grey house is an accent scheme: the walls stay neutral, and the door carries the color. Paint the siding a warm grey, keep the trim white or warm white, and paint the door a rich teal. The teal gives the entry a clear focal point without painting the whole house a strong color, which suits owners who want one bold note.

    Repeat the teal once more in a planter glaze or house numbers, so the door does not stand alone. A grey or black roof suits warm grey, and brass or bronze hardware picks up warmth beside the cool teal. Teal is a forgiving mid depth shade that hides dust well, which makes it practical for doors on busy streets, but test it in shade, since teal can turn dark on a north facing entry.

    27. All White Monochrome with Mixed Textures

    All white house mixing horizontal siding, painted brick, and smooth render textures.

    All white monochrome with mixed textures suits a modern or traditional house that wants a clean look without feeling plain. Use white across siding, brick, and render, but vary the texture: horizontal siding on one section, painted brick on another, and smooth render on the entry. The texture changes give the white depth and shadow through the day, which keeps a large white house from looking flat.

    Keep the trim white as well, and let the door, hardware, and planting carry the contrast: a wood door, black lanterns, and green shrubs give the eye somewhere to rest. A grey or black roof suits all white walls, since a brown roof can make white look yellow. All white shows dirt near the ground, so a stone base or gravel border helps the lower walls stay tidy, and a wash down each season keeps the white bright.

    Conclusion

    A good exterior scheme is a small team of colors with clear jobs, not one favorite shade stretched across the whole house. Start with your roof, brick, and stone, since those set the limits, then choose a main wall color, a trim color, and one accent for the door or hardware. Test large samples in real daylight, repeat the accent once more at ground level, and let the house style guide the choice: crisp contrast for colonial and modern forms, warm neutrals for Mediterranean forms, soft greens and blues for cottages and farmhouses. Once the scheme sits right from the street, the rest of the front garden gets easier, because planting, paths, and lighting only need to echo colors that are already there.

    Save this list on Pinterest for your next painting project, and work through it in order: pick the scheme for your roof and style first, test samples second, then paint the trim and door before the main walls, so you can stop and adjust if the balance feels off.

    FAQs

    How do I pick an exterior house color scheme for my roof color?

    Start with the roof, since it is the hardest part to change. A grey or black roof suits cool schemes such as pale grey, slate blue, and navy, while a brown roof suits warm schemes such as cream, taupe, sage, and terracotta. Hold wall samples against the roof in daylight, and avoid pairing a warm wall color with a cool roof, or the reverse, unless a neutral trim separates them.

    Should the trim be white, cream, or a contrasting color?

    White trim suits cool schemes and gives the crispest outline, while cream trim suits warm schemes and softens the edge. A contrasting trim, such as black or chocolate brown, works when the house has strong architectural details worth outlining, such as craftsman brackets or colonial shutters. Pick the trim after the wall color, and test both together on a large board.

    How many colors should an exterior scheme have?

    Three is a good limit: one main wall color, one trim color, and one accent for the door, shutters, or hardware. A fourth color can work when it comes from a fixed material, such as brick or stone, rather than from paint. More painted colors than that tend to chop the house into pieces instead of tying it together.

    How do I test an exterior paint color before painting the whole house?

    Paint a large board, at least two feet square, and move it around the house through the day, checking it in morning, midday, and evening light. Hold it against the roof, the trim, and any brick or stone, since a wall color is judged against those surfaces, not on its own. Two coats on the board give a truer reading than one thin coat.

    What exterior color scheme works best for a small house?

    Pale main colors with one stronger accent work best on a small house, since pale walls keep the house looking open from the street. Put the stronger color on the door, the shutters, or one section only, and keep the trim light. Dark main colors can work on a small house with simple architecture, but they need pale trim and bright planting to keep the entry readable.

    Do exterior colors fade, and how do I keep a scheme looking fresh?

    Yes, sun and weather fade exterior paint over time, with south and west facing walls fading fastest. Choose a quality exterior paint suited to your siding, wash the walls down each season, and touch up the trim and door first, since those are the parts people see up close. A scheme with a pale main color and a strong door color is easy to refresh, because repainting the door alone can lift the whole front.


  • 22 Closet Design Ideas for a Relaxed, Pulled-Together Home

    22 Closet Design Ideas for a Relaxed, Pulled-Together Home

    A closet that works feels quiet in the morning. You open the door, see what you need, and get dressed without digging through a pile or hunting for a missing shoe. A closet that does not work does the opposite: it hides clothes, wastes the top shelf, and turns a small daily task into a search. These 22 closet design ideas cover layouts first, then doors, shelves, shoes, accessories, and light, so you can fix the part that causes the most trouble first. Start by emptying the closet, sorting what you actually wear, and measuring the width, depth, and door swing before you buy anything.

    Key Takeaways

    • Measure first: width, depth, hanging length, and door swing decide which closet layout will actually work.
    • Give daily clothes the easy spots at eye level, and move seasonal or rarely worn pieces up high or to another closet.
    • Double hanging for shirts and trousers frees more space than a single long rail in most closets.
    • Closed bins and doors calm the look, while a small amount of open storage keeps daily items easy to grab.
    • Light inside a closet, even a simple battery light, makes colors easier to tell apart in the morning.
    • Keep one empty bin or shelf so new clothes have a home instead of landing on a chair or the closet floor.

    1. Double Hanging Rails for Shirts and Trousers

    Bedroom closet with double hanging rails holding shirts on top and trousers below, with a shelf above.

    Swap one long rail for two stacked rails and you gain a full second row of hanging space for shirts, blouses, trousers, and jackets. The upper rail holds shirts and short jackets, the lower rail holds trousers and skirts, and a shelf above the top rail still holds folded items or boxes. This layout suits most reach-in closets, since short clothes rarely need the full height of the closet.

    Measure your longest shirt and trouser before you set the rail heights, so hems clear the rail below and shoes or boxes below still fit. Use slim, matching hangers so clothes slide easily and take up less width. Keep one tall section at one end for coats and dresses, so long pieces are not forced onto a short rail and crushed at the hem.

    2. Floor-to-Ceiling Built-In Closet Wall

    Floor-to-ceiling built-in closet wall with closed pale doors beside a bed in a calm bedroom.

    Run closet storage from floor to ceiling along one wall for the most storage in a bedroom with a plain, straight wall. The tall run removes wasted space above a standard wardrobe and gives a clean, built-in look, especially when the doors match the wall color. Inside, plan hanging space, shelves, and drawers around what you own, not around a standard layout that may not fit your clothes.

    Keep daily clothes between waist and eye level, shoes low, and seasonal boxes up high where a small step stool can reach them. Leave room for doors and drawers to open fully, and keep sockets and light switches clear of the frame. For a full wardrobe wall in a bedroom, these bedroom wardrobe ideas show fitted, sliding, and freestanding options to compare before you commit to a built-in run.

    3. Walk-In Closet with a Center Island Bench

    Walk-in closet with a low center island bench, wall rails with hanging clothes, and drawers.

    A walk-in closet with a low island or bench in the center gives you a place to fold, lay out an outfit, and sit while you put on shoes. The island can hold drawers for accessories, a tray for jewelry, and a folded sweater stack on top, while rails and shelves run around the walls. This layout suits a walk-in with enough floor space to walk around the island without squeezing past hanging clothes.

    Keep the island narrow enough that you can reach the back of the wall shelves from the walkway, and keep the top mostly clear so it stays useful for laying out clothes. A padded bench top makes the island double as seating, and a mirror on one wall lets you check an outfit without leaving the closet. If the walk-in is small, a slim ottoman gives most of the same benefit in less space.

    4. Open Closet with Shelves and a Rail

    Open closet with a hanging rail, shelves with folded clothes, and baskets in a bright bedroom corner.

    Skip doors and use an open rail with shelves above and below for a closet you can see at a glance. An open setup suits people who dress quickly, like to plan outfits the night before, or enjoy a boutique style display of favorite pieces. It also costs less than a fitted wall and can be built from a simple rail, brackets, and shelves in a spare wall or alcove.

    The trade-off is dust and visual clutter, so keep the rail to clothes you wear often and store the rest in closed boxes on the top shelf. Group clothes by type and color, hang them facing the same way, and leave a little space between hangers so outfits are easy to pull out. Add a small tray on a shelf for belts, scarves, and sunglasses, and dust the open shelves weekly.

    5. Sliding Mirrored Closet Doors

    Bedroom closet with sliding mirrored doors reflecting daylight beside a made bed.

    Choose sliding doors with a mirror finish when floor space is tight and you want the room to feel larger. Sliding doors need no swing space, so a bed or a chair can sit closer to the closet, and the mirror reflects daylight across the room. This works well in a small bedroom or a room with a bed close to the closet wall.

    Keep the mirror clean with a soft cloth, and check the sliding track for dust so the doors glide smoothly. If a full mirror feels too bright, use one mirrored door and one plain door, or a mirror panel on the door you use most. Fix the doors firmly on their track, and keep the floor in front of the closet clear so the doors slide fully open.

    6. Glass-Front Doors with Soft Interior Light

    Glass-front closet doors with soft interior lighting showing neatly hung clothes and folded knitwear.

    Fit glass-front doors with a soft light inside for a closet that shows neat clothes and makes morning choices easier. Glass suits a closet with a tidy habit, since everything is visible, and the light helps you tell navy from black on dark mornings. Use frosted or ribbed glass if you want a softer view that still hides small clutter.

    Keep the display simple: hang clothes by color, fold knitwear in even stacks, and use matching boxes for small items. Wipe the glass inside and out with a soft cloth, and check that lights do not touch fabric. If you rent, a glass-front freestanding wardrobe gives a similar look without fitting work, and it can move to your next room.

    7. Angled Shoe Wall with Clear Shelves

    Closet shoe wall with angled shelves displaying pairs of shoes in rows.

    Turn one closet wall into an angled shoe wall, with slanted shelves that show each pair at a glance instead of hiding shoes in a pile on the floor. Angled shelves suit shoes you wear often, since you can see each pair and pull one out without moving the rest. Keep daily shoes at easy reach, and move occasion shoes higher or to a box.

    Keep heavy boots on the floor or on a flat low shelf, since angled shelves suit lighter shoes better. Wipe shoes before putting them away, so dirt does not build up on the shelves. One shoe wall per person is usually enough, and a second wall often signals that it is time to pass on unworn pairs. Leave a small gap at the bottom of the wall for a tray that catches dirt from outdoor shoes.

    8. Matching Bins for Folded Clothes

    Open closet shelves holding matching woven bins with labels for folded clothes.

    Matching bins turn open shelves into closed storage without doors. Use bins of one material, such as woven seagrass or cotton, in two sizes at most, and label the front of each one. Sort by type, such as knitwear in one, gym clothes in another, and sleepwear in a third, so you can pull out one bin instead of searching a shelf.

    Keep bins light enough to lift with one hand, and store heavy items elsewhere. Line bins with fabric if they hold small items that slip through the weave. Replace a bin when the weave frays, since a damaged bin snags clothes. Open shelves with bins suit a closet that needs soft texture as well as order, and they keep folded stacks from toppling when you pull one item out.

    9. High Seasonal Boxes with Clear Labels

    Top closet shelf with labeled lidded boxes for seasonal clothes above hanging rails.

    Use the top shelf for seasonal boxes, with a clear label on each box for winter coats, summer clothes, or holiday pieces. Seasonal rotation keeps the daily closet slim, since out-of-season clothes no longer crowd the rails you use every morning. Swap the boxes twice a year, at the same time you review what you did not wear.

    For more ways to keep a bedroom calm while you rotate clothes, these bedroom storage ideas cover beds, closets, walls, and small pieces you can add without a remodel. Keep a small step stool near the closet if the top shelf is high, so you actually use it instead of piling items on the floor. Choose boxes with lids that keep out dust, and keep one box empty for items you plan to pass on.

    10. Pull-Out Drawers with Accessory Trays

    Pull-out closet drawer open to show trays for watches, jewelry, and sunglasses.

    Add pull-out drawers with shallow trays inside for watches, jewelry, sunglasses, and small accessories that otherwise scatter across a shelf. A drawer with dividers keeps each group separate, so you can see everything when the drawer opens and put each piece back in its own spot. This suits a walk-in closet or a built-in run with room for at least one bank of drawers.

    Keep daily pieces in the top drawer and rarely worn pieces lower down. Line trays with soft fabric so metal and glass do not scratch, and wipe the trays now and then to clear dust. If drawers are not possible, a shallow tray on a shelf gives a similar result, as long as it has a fixed spot and a clear edge so items do not slide off.

    11. Pull-Out Racks for Belts, Scarves, and Ties

    Closet side wall with a pull-out rack holding belts, scarves, and ties.

    Fit a pull-out rack on the side wall of the closet for belts, scarves, and ties, so each piece hangs separately instead of tangling in a drawer. A pull-out rack slides out for choosing and slides back flat against the wall, which suits a narrow closet where a full accessory drawer would not fit. Group belts on one rack, scarves on another, or use hooks on the rack for mixed pieces.

    Keep the rack at a height where you can see each piece without bending, and do not overload it, since a heavy rack sticks and pulls clothes off nearby hangers. Roll scarves instead of hanging them if they are delicate, and keep silk pieces away from rough hooks. A rack near the mirror or dressing nook saves a second trip across the room in the morning.

    12. Built-In Laundry Hamper in the Closet

    Bedroom closet with a built-in pull-out laundry hamper bin beside hanging clothes.

    Build a laundry hamper into the closet, with a pull-out bin or a tilt-out basket, so worn clothes go straight into laundry instead of onto a chair or the floor. A hamper in the closet suits a bedroom closet used daily, since it keeps dirty clothes out of sight and in one place until wash day. Use one bin for darks and one for lights if you sort laundry at the closet.

    Choose a bin with airflow, so clothes do not stay damp, and line it with a washable bag that lifts out for carrying to the machine. Empty the hamper on wash day and wipe the bin now and then. Keep the hamper away from clean clothes if space allows, so worn clothes do not transfer lint or odor to fresh outfits.

    13. Dressing Nook with a Mirror and a Stool

    Walk-in closet dressing nook with a mirror, a small stool, and a shallow shelf.

    Carve a small dressing nook into a walk-in closet, with a mirror, a small stool, and a shallow shelf for daily items. The nook gives you a spot to sit, check an outfit, and put on shoes without leaving the closet or balancing on one foot in the bedroom. It suits a walk-in with a spare corner or the end of a long closet run.

    Keep the nook lit with a small lamp or a mirror light, and keep only daily items on the shelf, with the rest in drawers nearby. Choose a stool that slides fully under the shelf so the walkway stays clear. If you share the closet, place the nook at one end, so one person can dress while the other still reaches the main rails.

    14. Painted Back Wall for a Reach-In Closet

    Reach-in closet with a soft green painted back wall, rails, and shelves with clothes.

    Paint the back wall of a reach-in closet in a soft color, or line it with removable wallpaper, to make a plain closet feel finished every time you open the door. A pale sage, warm white, or soft blue back wall makes clothes stand out, while a simple pattern adds interest without taking any storage space. This is a low cost makeover that suits renters, since removable wallpaper peels off without damage.

    Paint or paper the back wall before you fit new shelves, so edges stay neat behind the units. Keep the color light if the closet is small and dark, since a dark back wall can make clothes harder to see. Add a light at the same time if the closet has none, since color alone will not help if the closet stays shadowed.

    15. L-Shaped Corner Closet Layout

    L-shaped corner closet with hanging rails on two walls and shelves in the corner.

    Wrap closet storage around a corner in an L shape when a single straight wall is too short or a door and a window break up the walls. The corner section can hold long hanging clothes or deep shelves, while the straight run holds daily clothes and drawers. This uses wall space that often goes to waste and keeps storage in one zone instead of spreading it across the room.

    The corner needs care, since deep corners are hard to reach. Use a pull-out rail or simply store seasonal boxes in the deepest part, with daily clothes on the easy-to-reach rails. Measure both walls and the corner angle, since older rooms are rarely square, and leave room for doors to open without hitting the bed or the closet frame.

    16. Split Zones for a Shared Closet

    Shared closet split into two zones with separate rails, shelves, and bins for two people.

    Split a shared closet into two clear zones, one per person, with a divider rail, a change of hanger color, or a shelf unit down the middle. Each zone gets its own hanging rail, shelf, and drawer or bin, so clothes do not drift into the other side and mornings stay calm. This suits couples, siblings, or roommates who share one closet and one getting-ready time.

    Agree on the split by what each person owns, not by an exact half, since one person may need more hanging space and the other more shelves. Label bins and keep shared items, such as ironing supplies or shoe care, in one shared spot at the end of the run. Review the split each season, and move the divider if one side fills up while the other stays empty.

    17. Daily Outfit Rail for the Week Ahead

    Short closet rail holding a week of outfits hung in day order near a closet door.

    Add a short daily outfit rail near the closet door for the week ahead, with five to seven outfits hung in day order. A weekly rail cuts morning decisions, since you choose outfits once on Sunday instead of each morning, and it keeps the main closet tidy because daily clothes are not pulled out and put back each day. It suits busy mornings, school runs, and work weeks with a set routine.

    Hang the next day outfit at the front of the rail each evening, and return worn clothes to the laundry or the main closet the same day so the rail resets. Keep the rail short, since a long rail becomes a second closet and loses its purpose. If floor space is tight, a wall rail or a valet hook on the closet door gives a one-day version of the same idea.

    18. Hooks and Over-Door Storage for Bags and Hats

    Inside of a closet door with hooks holding bags, a hat, and a scarf.

    Use hooks on the closet side wall and an over-door rack on the inside of the closet door for bags, hats, and tomorrow outfit. Hooks turn unused wall and door space into storage with no drilling into the main closet frame in many cases, and they keep bags off the floor where they get scuffed. Limit hooks to items you use daily, since an overloaded door is hard to open and looks messy.

    Hang the heaviest bag lowest, and keep the top hook for a light hat or scarf. Choose hooks with a flat profile, so the door still closes fully and does not mark the frame. Keep hooks clear of hanging clothes, or bags will push clothes aside and wrinkle them. If the door is used often, choose hooks with a soft backing to protect the door surface.

    19. LED Strip Lighting with a Motion Sensor

    Closet with warm LED strip lighting under shelves showing hanging clothes clearly.

    Fit LED strip lights along the top shelf or under each shelf, with a motion sensor that turns them on when the door opens. Light inside a closet makes colors easier to tell apart, shows the back of deep shelves, and stops you from pulling out the wrong item in a dark corner. LED strips suit closets of any size, since they are slim and give even light across a shelf.

    Keep lights away from fabric and follow the maker fitting guide, especially for wired lights, which need a professional where wiring is involved. Battery lights suit renters and small closets, but check batteries now and then so the light does not fade. Choose a warm white tone that matches the bedroom light, so clothes look the same in the closet as they do in the room.

    20. Fresh-Air Care: Cedar, Breathable Bags, and Dust Covers

    Closet with breathable garment bags for coats and cedar blocks on a shelf.

    Keep a closet fresh with cedar blocks or sachets, breathable garment bags for stored coats, and dust covers for rarely worn pieces. Cedar helps deter moths in wool and knitwear, breathable bags protect coats from dust while letting air move, and covers keep occasion clothes clean between wears. This care suits a closet with wool, silk, or stored seasonal clothes.

    Do not seal wool in airtight plastic for long storage, since trapped damp can damage fibers, and keep cedar away from direct contact with delicate fabric if the maker advises it. Air the closet now and then by leaving the door open, and wipe shelves before a seasonal swap. Replace cedar blocks when their scent fades, and wash garment bags when they collect dust.

    21. Under-Stairs and Sloped-Ceiling Closet Solution

    Under-stairs closet with low drawers under a sloped ceiling and a short hanging rail.

    Turn an under-stairs nook or a sloped-ceiling corner into a closet with low drawers under the slope, a short rail where the ceiling is higher, and shelves that step down with the ceiling line. The stepped layout uses space that a standard wardrobe cannot, since drawers fit under the low slope while hanging clothes use the tall end. This suits attic bedrooms, hall stairs, and rooms with a sloped roof.

    Keep daily clothes in the tall section and shoes, bags, or folded items in the low drawers, so you do not need to crouch for items you reach for each morning. Add a light at the tall end, since sloped corners stay dark, and measure the slope at several points before you order units. A curtain front suits an awkward shape well, since it follows the slope without custom doors.

    22. Hall Closet for Coats, Bags, and Shoes

    Hall closet near a front door with coat hooks, a shelf for hats, and a shoe tray below.

    Design a hall closet as a coat and bag station, with hooks at two heights, a shelf for hats and gloves, and a tray or low shelf for shoes. A hall closet keeps coats and bags by the front door, so bedroom closets stay free for clothes and the hallway stays clear of piles. It suits families, since children can reach low hooks while adults use the higher rail.

    Keep one hook per person plus one spare for guests, and keep the shoe tray to daily pairs only, with the rest in the bedroom closet. Add a small basket on the shelf for keys, gloves, and dog leads, so small items do not scatter across the hall. Wipe the shoe tray weekly, and review the hall closet each season so outgrown coats and unused bags move out.

    Conclusion

    A good closet starts with what you own and how you dress, not with a shopping list. Measure the space, give daily clothes the easy spots, use height for seasonal pieces, and add light so you can see what you have. One change, such as double hanging rails or a shoe wall, can make mornings calmer, and a second change can build on it without a remodel. Pick the idea that fixes your biggest daily frustration, try it for a week, and adjust the inside layout before you change anything else.

    Save this list on Pinterest before your next bedroom refresh, and work through it one area at a time: layout first, then shelves and shoes, then light and care that keep the closet pleasant to use.

    FAQs

    How do I start designing a closet that stays tidy?

    Start by emptying the closet, sorting what you actually wear, and measuring the width, depth, and door swing. Give daily clothes eye-level spots, move seasonal pieces up high, and leave one empty bin or shelf for new items. A closet stays tidy when every group has one clear home and the daily routine matches the layout.

    What is the best layout for a small reach-in closet?

    Double hanging rails for shirts and trousers, a shelf above for folded items or boxes, and a tall section at one end for coats and dresses work well in most small reach-in closets. Add hooks on the door for bags, keep shoes low on a shelf or tray, and add a light so the back of the closet stays visible. Measure hanging lengths before you set rail heights.

    How can I add storage to a closet without a remodel?

    Use a freestanding rail, shelf dividers, matching bins, over-door hooks, and a pull-out rack, all of which fit inside an existing closet without building work. A painted back wall and a battery LED light also refresh a closet with little cost. Start with the spot that causes the most mess, and add one piece at a time.

    Should closet doors be sliding, hinged, or open?

    Sliding doors save floor space and suit small bedrooms, hinged doors open fully and suit a closet you reach into often, and open closets suit people who like to see everything at a glance. Mirrored sliding doors also brighten a small room, while glass-front doors suit a tidy closet with interior light. Choose by floor space, light, and how tidy the closet stays.

    How do I organize shoes in a closet?

    Give shoes one wall or one shelf, keep daily pairs at easy reach, and move occasion shoes higher or into boxes. Angled shelves show each pair clearly, flat shelves suit boots, and a tray at the bottom catches dirt from outdoor shoes. Wipe shoes before storing them, and pass on pairs you have not worn in a season.

    How much light does a closet need?

    A closet needs enough even light to tell colors apart and see the back of shelves, which a strip light along the top shelf or under each shelf usually gives. A motion sensor saves you from hunting for a switch, and warm white light matches bedroom light so clothes look the same outside the closet. Keep lights clear of fabric, and use a professional for wired fitting.