Author: Clara Bennett

  • 22 Closet Door Ideas That Bring Practical Style Home

    22 Closet Door Ideas That Bring Practical Style Home

    A closet door does more than close a cupboard. It sets the look of a whole bedroom wall, decides how much floor space you need to get dressed, and controls light, air, and dust inside the closet. A door that swings into a bed, sticks on its track, or blocks a light switch will annoy you daily, even if it looks good in a photo. These 22 closet door ideas cover hinged, sliding, folding, glass, and hidden designs, for small rooms, rented rooms, walk-in closets, and shared bedrooms. Start by measuring the opening, the swing, and the space in front of it, then pick a door that suits how you use the closet each morning.

    Key Takeaways

    • Measure the opening, the door swing, and the clear floor in front of the closet before you choose a door type.
    • Sliding, pocket, and bifold doors save floor space, while hinged and French doors give full, easy access to the whole closet.
    • Mirrored and glass doors add light and a sense of space, but they need tidier storage inside to look good.
    • Louvered and cane doors let air move, which helps clothes in a damp or warm room, while solid doors keep dust out better.
    • Paint, trim, and handles can refresh a plain door without replacing the frame, which suits renters and tight budgets.
    • Check tracks, hinges, and wall fixings each year, since dust in a track and a loose hinge cause most door problems.

    1. Classic Paneled Hinged Doors
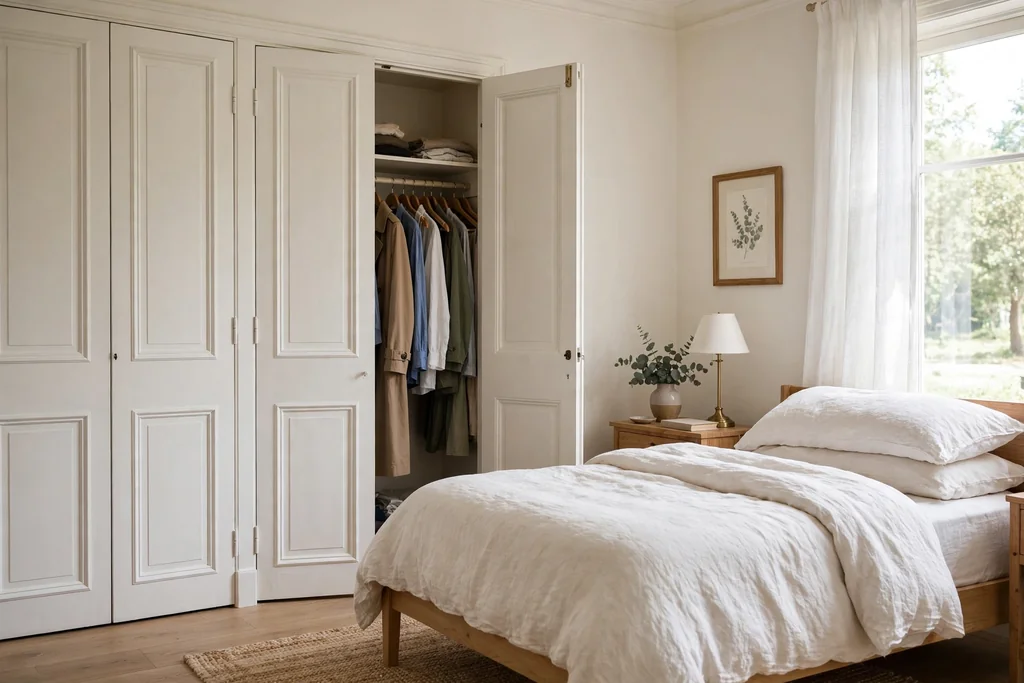
    Bedroom with classic white paneled hinged closet doors

    A classic paneled hinged door is the safe, familiar choice for a bedroom closet, and it suits almost any house style. The raised or recessed panels give the door a finished look, and the full swing opens the whole closet at once, so you can see hanging clothes, shelves, and shoes without sliding panels back and forth. Choose a panel style that matches the other doors in the room, so the closet reads as part of the room rather than an add-on.

    Hinged doors need clear floor space to swing, so check that the door does not hit the bed, a dresser, or a rug when it opens. Soft close hinges stop slamming, and a simple knob or lever in the same finish as the room hardware ties the look together. If the closet is wide, use a pair of hinged doors rather than one very wide door, since a wide door is heavy and harder to keep aligned.

    2. Sliding Bypass Doors
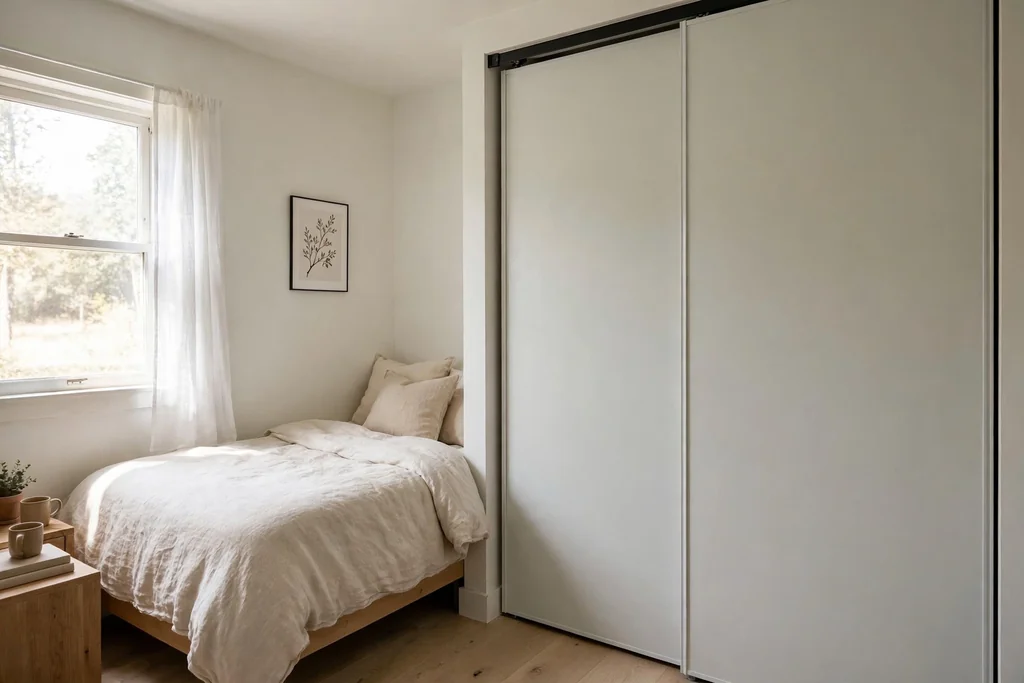
    Small bedroom with plain sliding bypass closet doors on a track

    Sliding bypass doors run on a top track, with one panel sliding in front of the other, so they need no swing space at all. This makes them a strong choice for a small bedroom, a room with a bed close to the closet, or a hallway closet where a swinging door would block the path. Plain panels in white or a pale wood tone keep the wall calm, and the track stays out of sight at the top.

    The trade-off is access: you can only open one half of the closet at a time, so plan the inside layout with that in mind. Put daily clothes on the side you open first, and seasonal boxes on the other side. Keep the track free of dust and check the rollers each year, since a dirty track is the main reason a bypass door sticks. For help planning what goes where inside, see these bedroom storage ideas.

    3. Full-Length Mirrored Sliding Doors
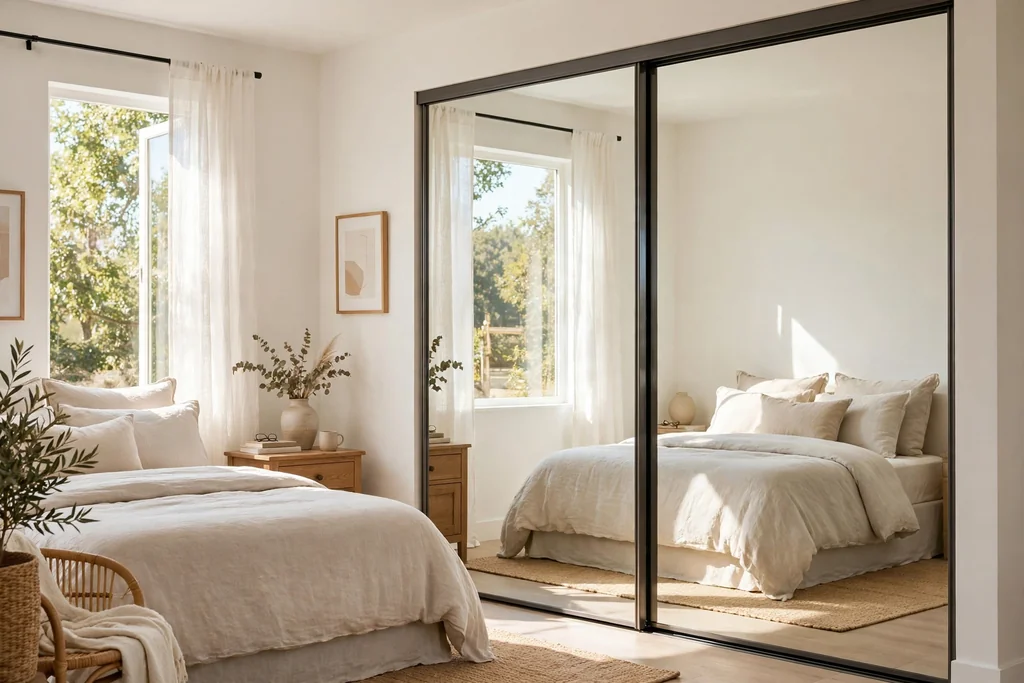
    Bright bedroom with full-length mirrored sliding closet doors reflecting a bed and window light.

    Full-length mirrored sliding doors do two jobs at once: they close the closet and they give you a dressing mirror. The mirror reflects daylight across the room, which helps a small or dark bedroom feel larger and brighter, and it saves the wall space a separate mirror would take. This suits a main bedroom where you dress each morning and want one clear check before you leave.

    Keep the mirrors clean with a soft cloth, and check the track for dust so the doors glide smoothly. If a full wall of mirror feels too bright, use one mirrored door and one plain door, or a mirror panel on the door you use most. Fix the doors firmly and keep the track level, since a mirror door that sticks or wobbles is hard to live with. Avoid placing a mirrored door where direct sun hits bedding for long hours.

    4. Bifold Doors for Tight Rooms
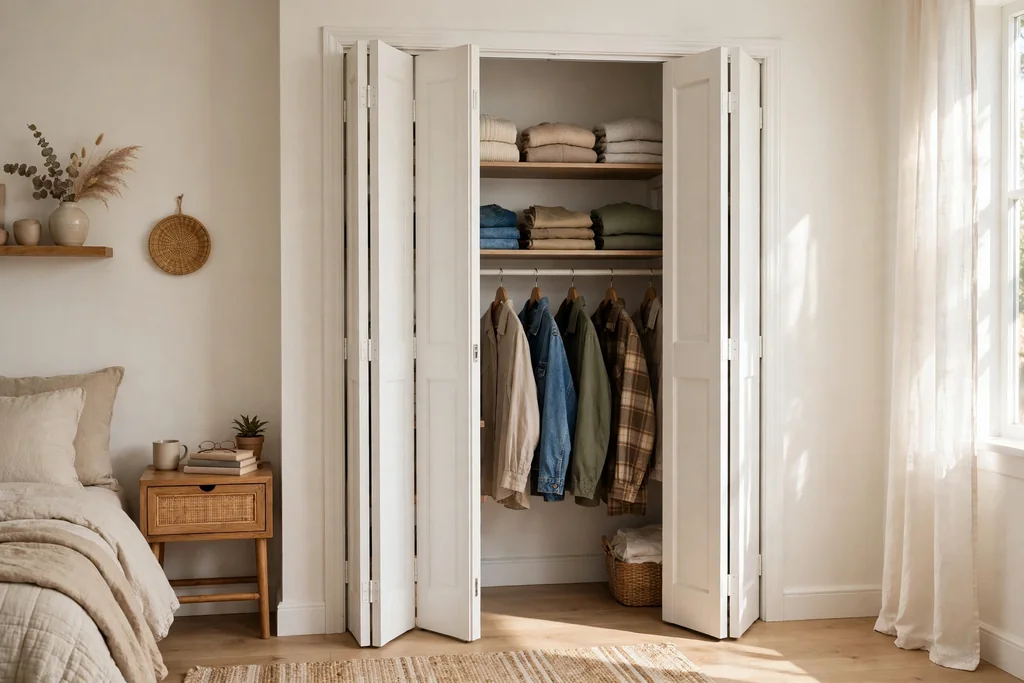
    Bedroom corner with white bifold closet doors folded partly open showing shelves and hanging clothes

    Bifold doors fold in the middle and stack to one side, so they open wider than a bypass door while still needing less swing space than a hinged door. This makes them a good fit for a narrow bedroom, a small closet in a hallway, or a room where furniture sits close to the closet wall. A pair of bifold doors can open most of the closet width, which helps when you need to reach shelves at both ends.

    Choose bifolds with a solid frame and good pivots, since light, hollow panels can sag or rattle over time. Keep the top track clear and check the pivot pins each year, tightening them before a door starts to drag. Paint bifolds the same color as the wall trim for a tidy look, or add simple panels to plain flat bifolds to give them a more finished face.

    5. Sliding Barn Doors
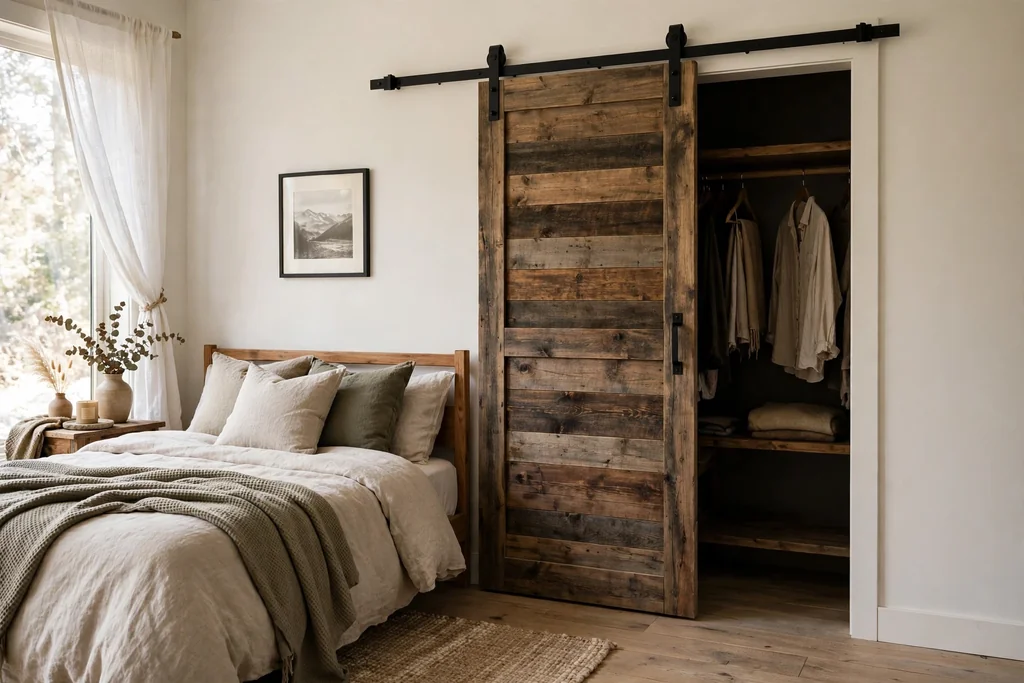
    Bedroom with a rustic wood sliding barn closet door on a black metal track

    A sliding barn door hangs on a visible track above the opening and slides to one side, giving a closet a warm, rustic or farmhouse feel. The exposed track becomes part of the look, especially in black metal with a wood door, and the door itself can be planked, paneled, or painted. This suits a bedroom with a plain wall beside the closet, since the door needs that wall space to slide open.

    Measure the wall beside the opening carefully, since a barn door covers that wall when open and can block a light switch, a socket, or a picture. Barn doors also leave a small gap at the sides, so they hide clothes less fully than a hinged door and let more dust in. Fix the track into studs or with fixings rated for the door weight, and add a soft stop so the door does not slam into the end of the track.

    6. French Double Doors
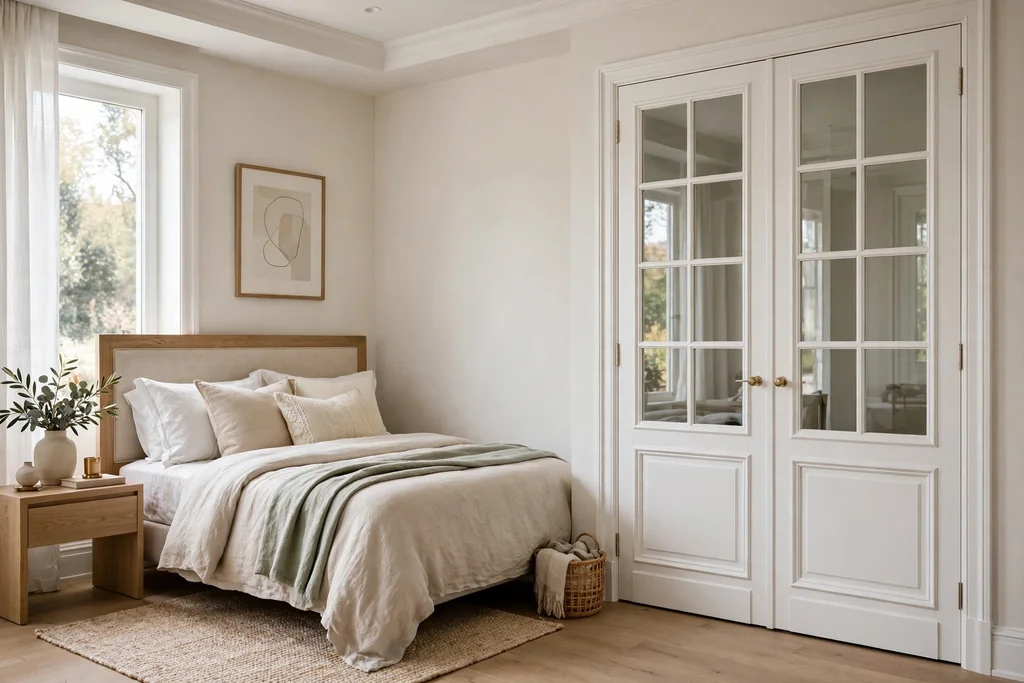
    Bedroom with white French double closet doors with glass panels

    French double doors open from the middle, giving a wide, clear opening and a balanced, elegant look on a large closet or a dressing area. With glass panels, they also let light into the closet, which helps you tell navy from black in the morning. With solid panels, they give the same wide access with more privacy and dust protection. This style suits a main bedroom with room for both doors to swing.

    Both doors need swing space, so keep the floor in front clear of a rug edge, a bench, or a laundry basket that would block them. Use matching handles on both doors, and add a bolt on the door you open less often, so it stays shut and does not rattle. If the closet is very wide, French doors are often easier to use than one huge hinged door, since each door is lighter.

    7. Louvered Doors for Airflow
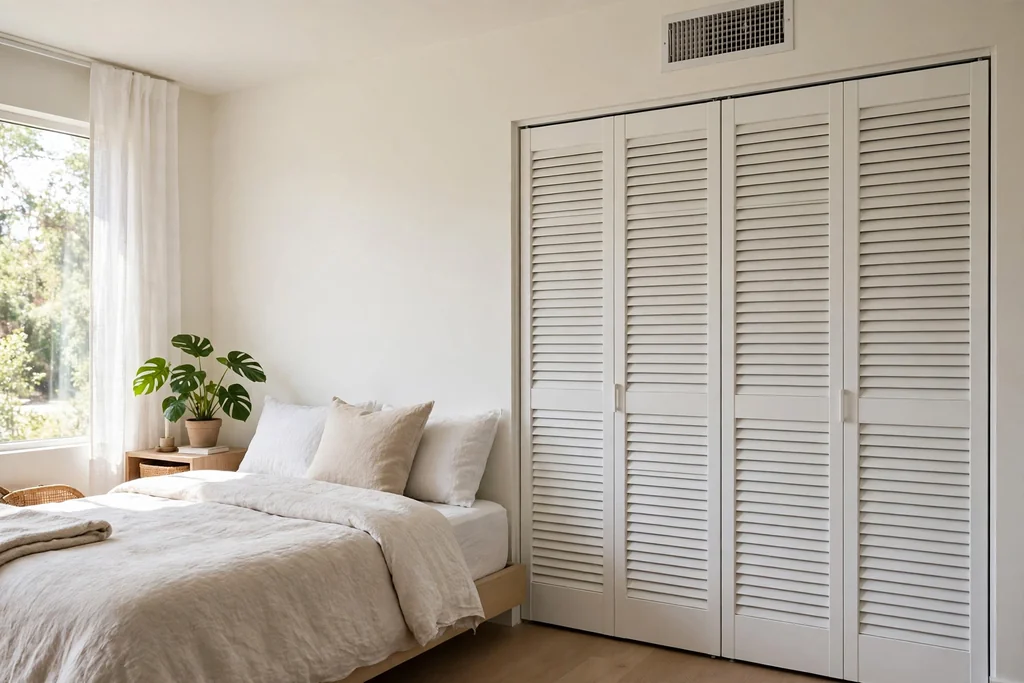
    Bedroom with white louvered slatted closet doors

    Louvered doors have angled slats that let air move in and out of the closet while still hiding clothes from direct view. This helps in a warm room, a closet near a bathroom, or a home where clothes can smell musty if air stands still. The slatted face also adds texture to a plain bedroom wall, and it suits coastal, cottage, and warm climate homes well.

    Dust settles on slats, so wipe them with a dry cloth or a soft brush now and then, and vacuum the slats when you clean the room. Louvered doors give less dust protection than solid doors, so store out of season clothes in closed boxes inside if dust is a problem. Paint louvered doors in a pale color to keep the slat shadows light, and check that the slats are fixed firmly before you hang a heavy hook on the door.

    8. Shaker Style Flat Panel Doors
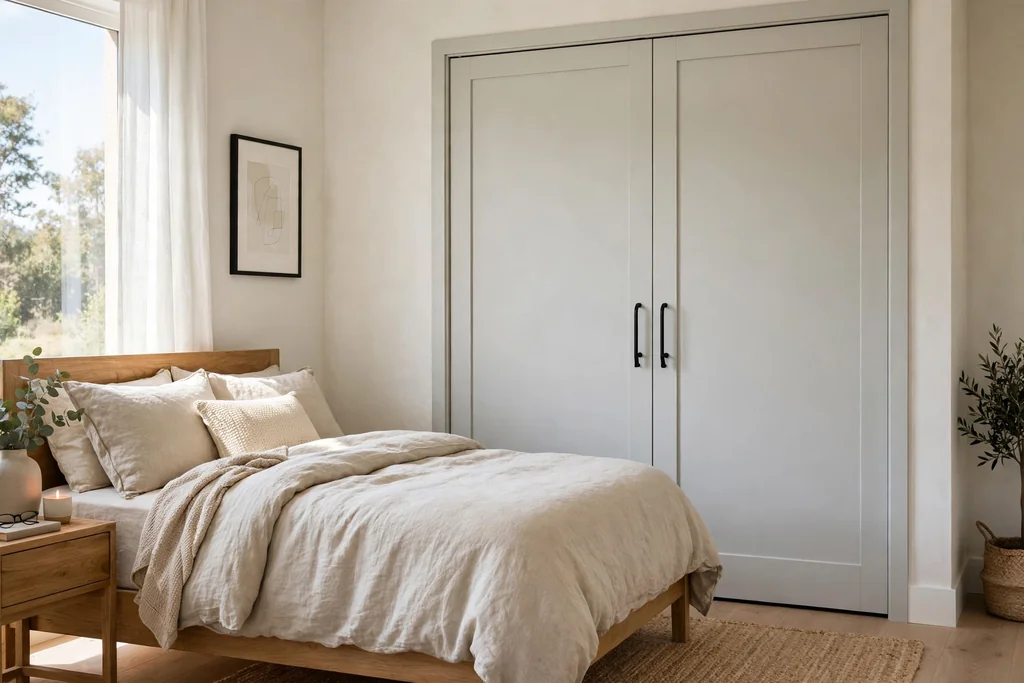
    Bedroom with pale grey Shaker style flat panel closet doors with simple frames and black handles

    Shaker style doors have a simple flat panel inside a clean frame, with no raised detail and no fuss. The plain face suits modern, farmhouse, and transitional bedrooms, and it is easy to paint, wipe clean, and match to other doors in the house. A Shaker closet door looks planned without drawing attention away from the bed or the window, which helps in a small room.

    Use a paint suited to doors and furniture, and allow full drying time between coats, since a rushed coat shows marks on a flat panel. Keep handles in one finish across all the doors in the room, so the closet reads as part of a set. If you already have flat doors, adding a simple frame of thin trim to each door can give a similar Shaker look without replacing the doors themselves.

    9. Frosted Glass Doors With Soft Light

    Modern bedroom with frosted glass sliding closet doors in a dark frame

    Frosted glass doors let light into a closet while keeping clothes softly out of view, which suits a dressing area or a closet without its own light. The frosted surface glows when the closet light is on, and it gives a modern, calm look that works with both wood and metal frames. This is a good middle ground if you like the light of glass but not the full display of clear glass.

    Wipe the glass with a soft cloth, and check that the closet light does not touch fabric or boxes inside. Use frosted or ribbed glass rather than clear glass if the closet is not always tidy, since frosted glass forgives a messy shelf. In a rented room, a frosted glass sliding door gives the same light benefit without a full remodel, as long as the track fits the existing opening.

    10. Two-Tone Painted Doors
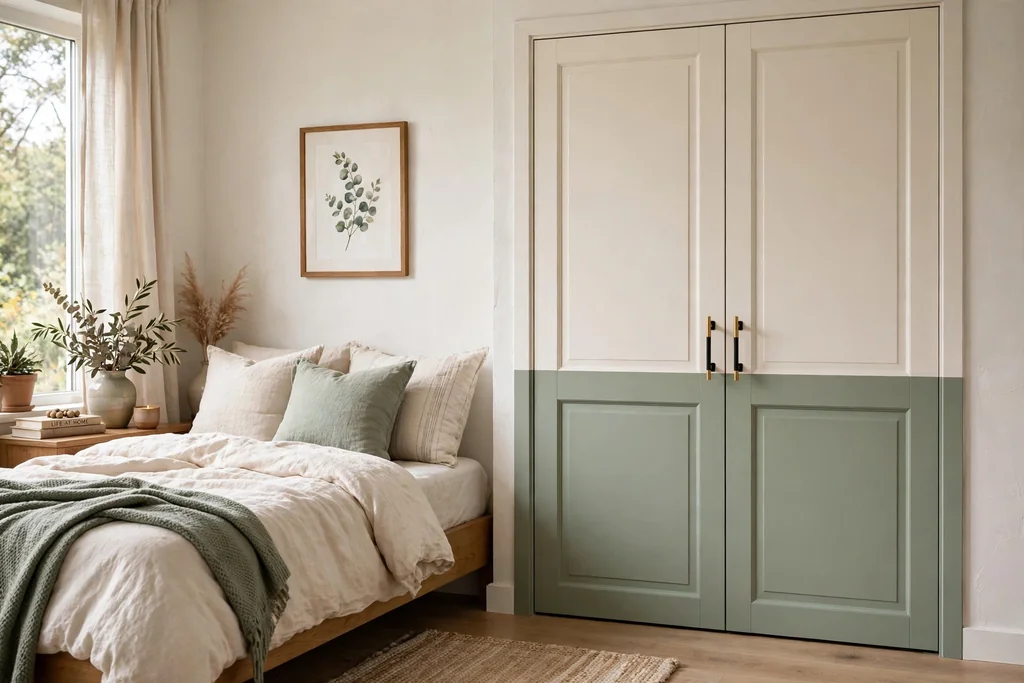
    Bedroom with two-tone painted closet doors

    Painting closet doors in two tones, such as sage green panels with a warm white frame, or a soft grey door with cream trim, breaks up a large run of doors and links the closet to bedding or curtains. Two tones work well on paneled and Shaker doors, where the frame and the panel can take different shades, and they give a plain closet a custom look for the cost of paint.

    Test paint samples on the door in daylight and evening light, since a shade can look darker on a large flat surface. Use paint suited to furniture and doors, and keep handles in one finish so the two tones read as one planned piece. Start with the lighter tone on the frame and the deeper tone on the panels, and step back often while you paint, since a small sample can mislead on a full door.

    11. Curtain Front Doors for Renters
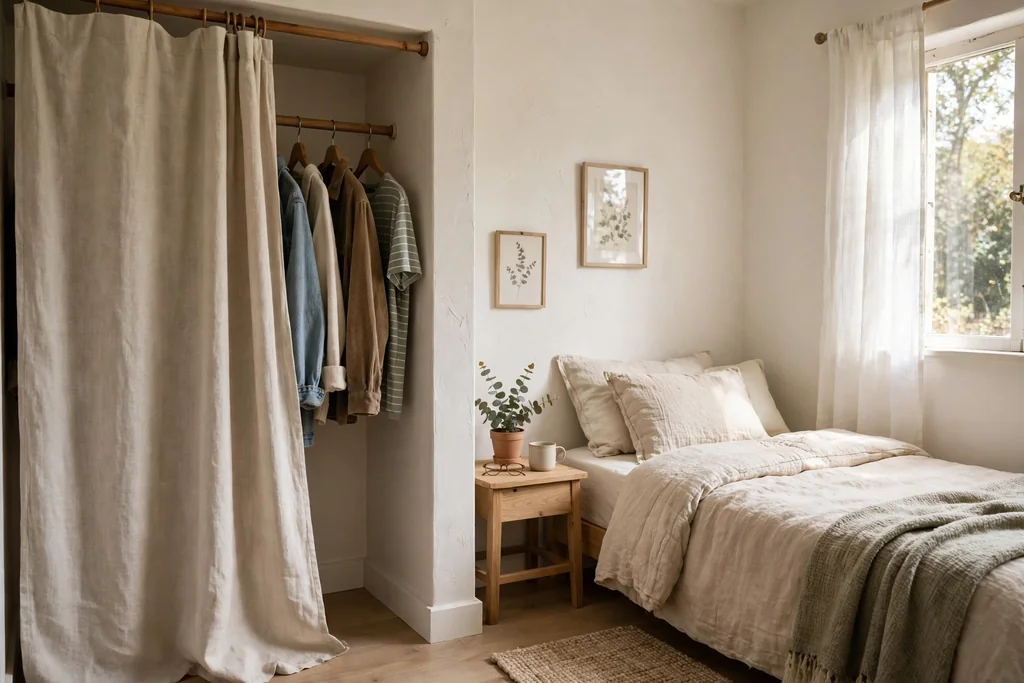
    Small bedroom with an open closet covered by a plain linen curtain on a rod

    A fabric curtain front replaces a hard door with a soft, simple cover that hangs from a rod or a track above the opening. This suits renters, small bedrooms, and closets where a swinging or sliding door would hit furniture, since a curtain needs no swing space and no track in the floor. A heavy cotton or linen curtain hangs straight, hides clutter, and softens the look of an open closet.

    Choose a curtain that covers the opening fully, with a simple rod or track at the top, and keep it clear of heaters. Wash the curtain when it collects dust, and use a plain or small check fabric to keep the look calm. The trade-off is dust protection and sound, since a curtain does not seal like a solid door, so store delicate clothes in closed boxes behind it if dust is a concern.

    12. Pocket Doors That Slide Into the Wall
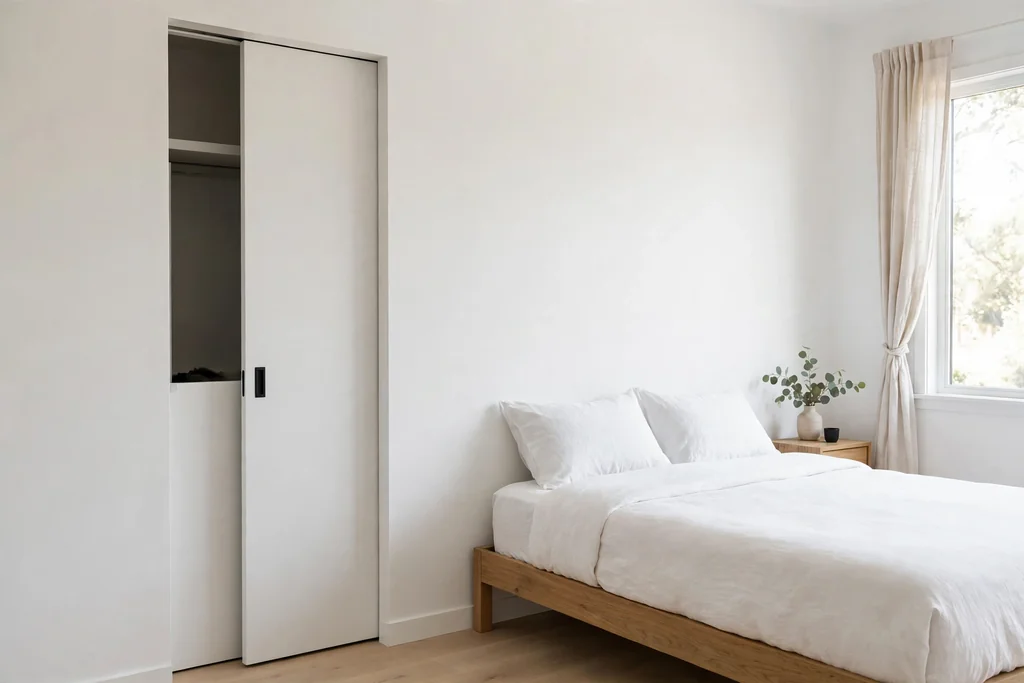
    Minimal bedroom with a pocket closet door slid partly into the wall

    A pocket door slides into a cavity inside the wall, so it needs no swing space and no wall space beside the opening when open. This is the neatest space saving option for a small bedroom, an en suite closet, or a room where a barn door would block a switch. When open, the door disappears, and when closed, it gives a clean, flush wall.

    Pocket doors need a wall with room for the pocket, and no pipes or wires in that section of wall, so check the wall before you plan one. Fitting a pocket door in an existing wall is a bigger job than swapping a hinged door, and repairs to the track are harder to reach. For a new build or a remodel, though, a pocket door is hard to beat for a tight room, and it keeps the floor fully clear.

    13. Accordion Folding Doors
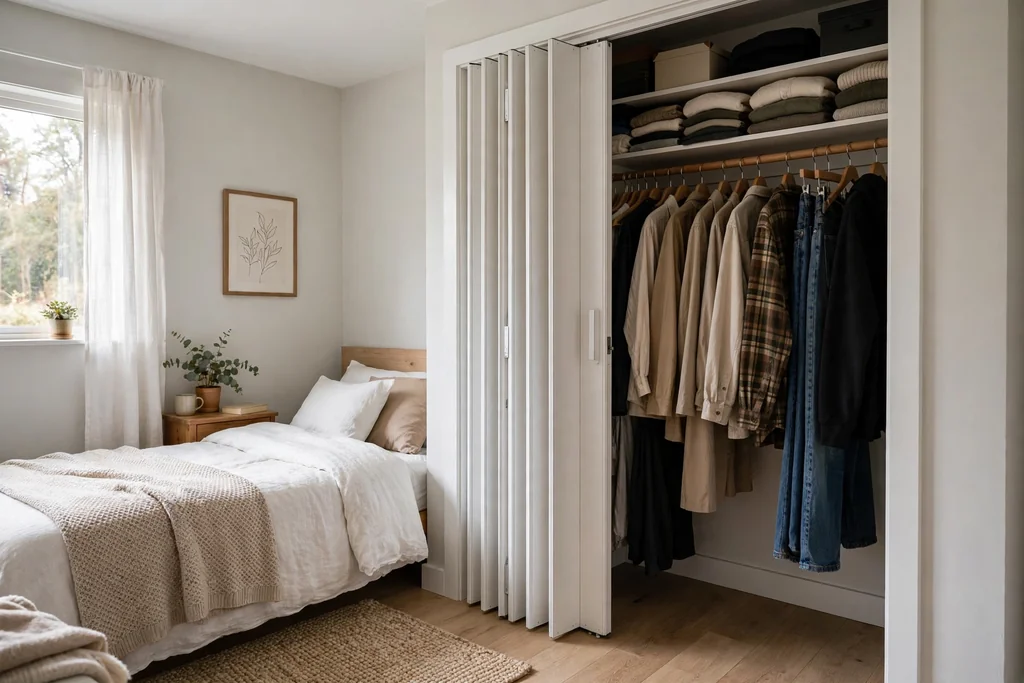
    Small bedroom with white accordion folding closet doors folded to one side

    Accordion doors fold into narrow pleats and stack to one side, so they fit closets in very small rooms, utility cupboards, and spaces where a standard door would be too wide. They are light, simple to fit, and easy to replace, which suits a first home, a rented room, or a closet that is used less often. A plain white accordion door blends into the wall trim and costs less than most hard door options.

    Accordion doors give less sound and dust protection than solid doors, and the pleats can look less finished than a paneled door, so they suit a secondary closet better than a main bedroom wardrobe. Keep the top track clean and check the pleat hinges, since a stiff pleat can pull the door off track. Choose a door width that matches the opening closely, rather than forcing a wide door into a narrow frame.

    14. Reclaimed Wood Plank Doors
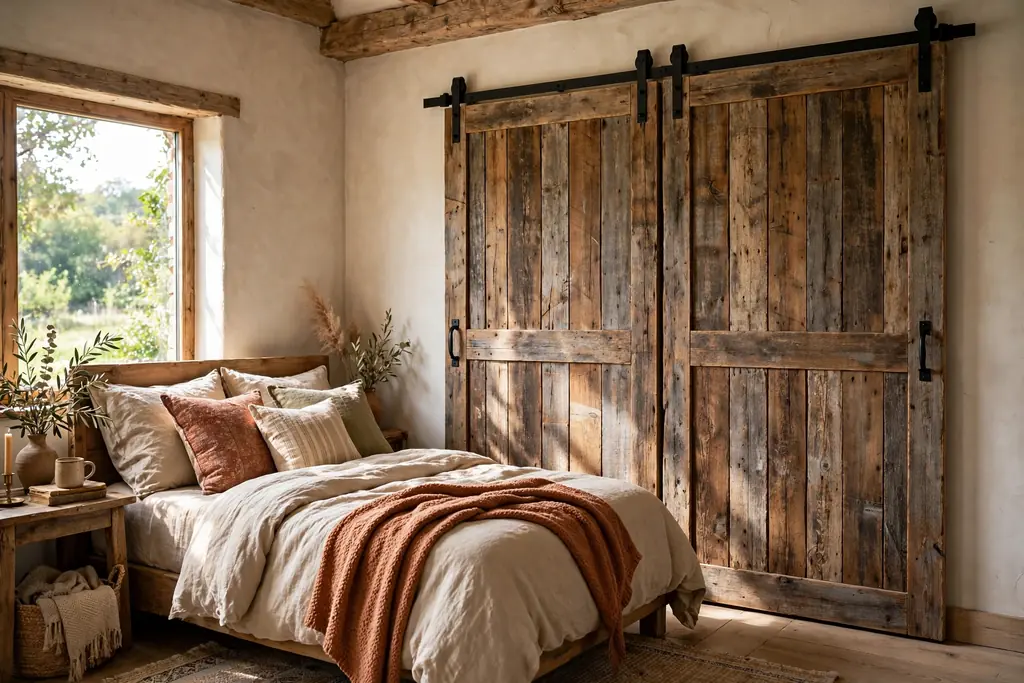
    Rustic bedroom with reclaimed wood plank sliding closet doors in warm weathered tones

    Reclaimed wood plank doors bring warm, varied timber tones to a bedroom, with each plank showing its own grain and color. This suits rustic, farmhouse, and cabin style rooms, and it gives a plain closet a strong focal point without paint or pattern. Use planks fixed to a solid backing frame, so the door stays flat and does not warp, and seal the wood to protect it from dust and marks.

    Check that reclaimed wood is clean, dry, and free of old fixings before you use it, and keep the door weight in mind, since solid wood is heavier than hollow doors. Fix the track or hinges to suit that weight, and use handles that suit the rustic look, such as black metal pulls. Pair a plank door with plain bedding and simple walls, so the wood stays the main feature of that wall.

    15. Cane Webbing Doors
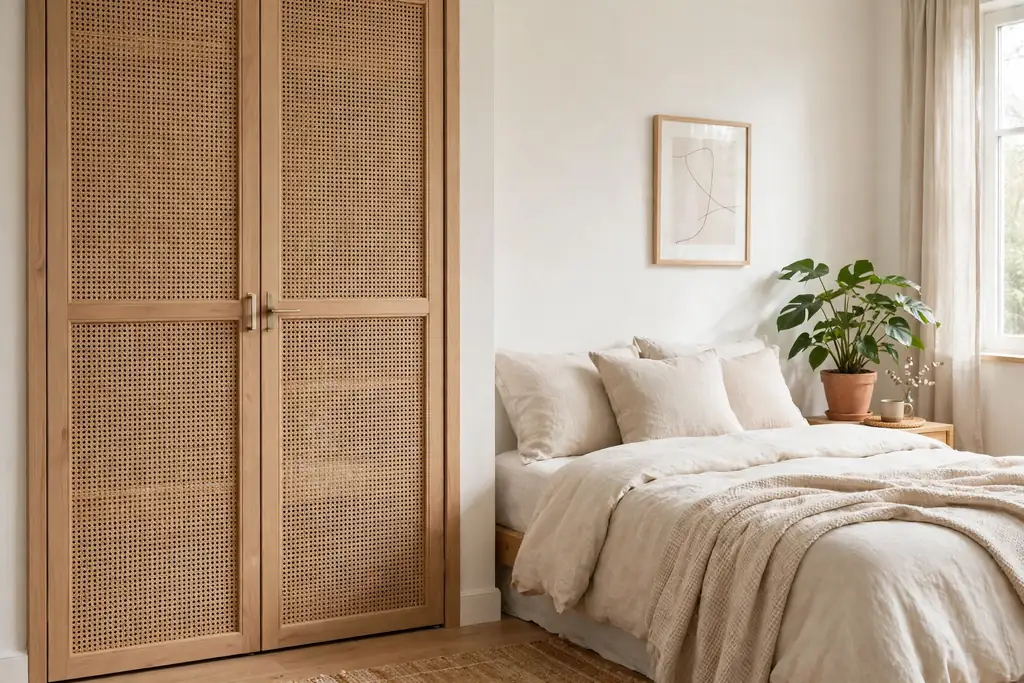
    Bedroom with cane webbing closet doors in a light wood frame

    Cane webbing doors set a woven cane panel inside a wood frame, giving a closet an airy, vintage feel with light and air passing through the weave. This suits bedrooms with rattan furniture, plants, and warm wood tones, and it softens a large run of closet doors better than a flat panel. The cane texture adds interest without a strong color, so it works with many bedding styles.

    Cane is lighter than solid wood but less strong than a solid panel, so handle the doors gently and avoid hanging heavy bags on them. Dust the weave with a soft brush, and keep cane doors away from constant damp, since damp can slacken the weave over time. If a cane panel is damaged, it can often be replaced without replacing the whole door frame, which keeps repairs simple.

    16. Flush Handleless Slab Doors
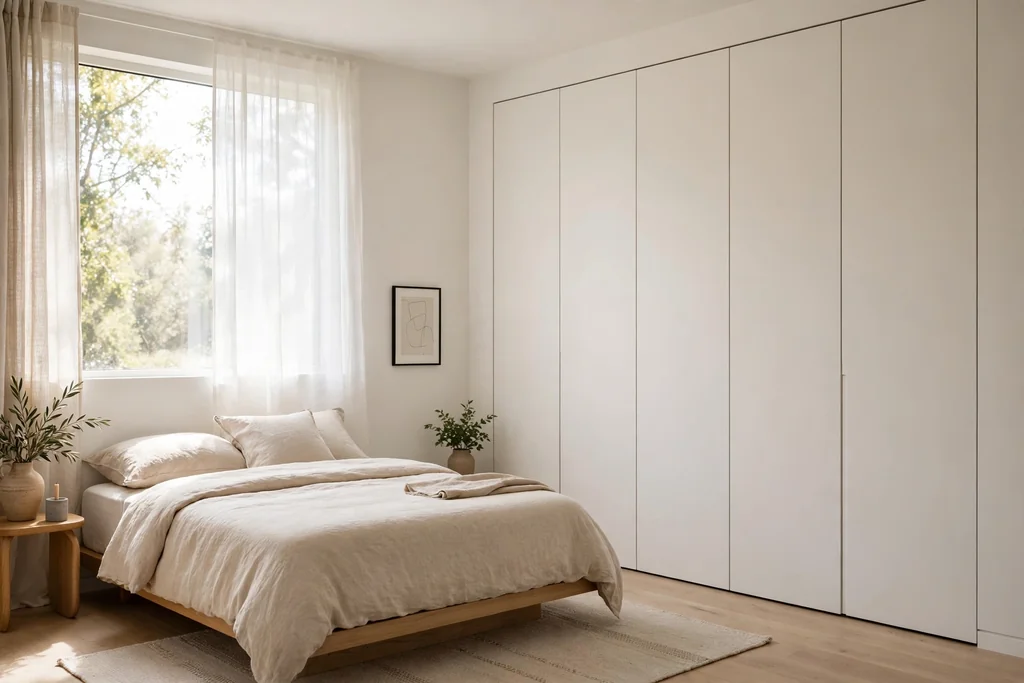
    Modern minimal bedroom with flush handleless flat slab closet doors in warm white

    Flush handleless slab doors have a flat face with no panels and no visible handles, opening with a push catch or a slim groove at the edge. The result is a quiet, modern wall that blends into the room, which suits a bedroom where you want the bed and the window to lead, not the storage. A matt finish shows fewer fingerprints than gloss, which matters on doors you touch daily.

    Keep the inside well organized, since a plain front gives no clue about what is behind it, and label boxes on high shelves. A push catch needs a firm, even push to work well, so check the catch alignment if a door starts to stick. For more ideas on planning the inside of a wardrobe once the doors are chosen, see these bedroom wardrobe ideas.

    17. Clear Glass Doors for a Display Closet
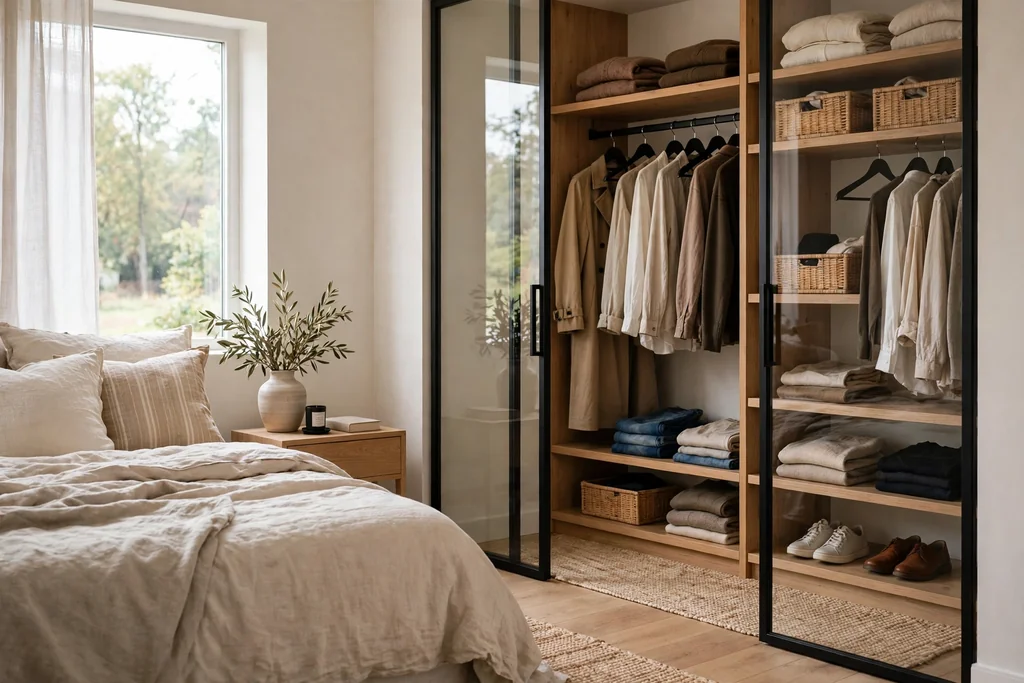
    Bedroom dressing area with clear glass closet doors in a black frame showing neatly hung clothes and shelves

    Clear glass doors in a slim frame show off a tidy closet, much like a shop display, and they make morning choices easier since you can see clothes without opening the door. This suits a dressing room, a closet with matching hangers and folded stacks, and anyone who enjoys seeing a curated wardrobe. Interior lighting inside the closet makes clear glass work best, especially on dark mornings.

    Keep the display simple: hang clothes by type and color, fold knitwear in even stacks, and use matching boxes for small items. Wipe the glass inside and out with a soft cloth, and check that lights do not touch fabric. If you rent, a clear glass freestanding wardrobe gives a similar look without fitting doors, and it can move to your next room.

    18. Arched Top Doors
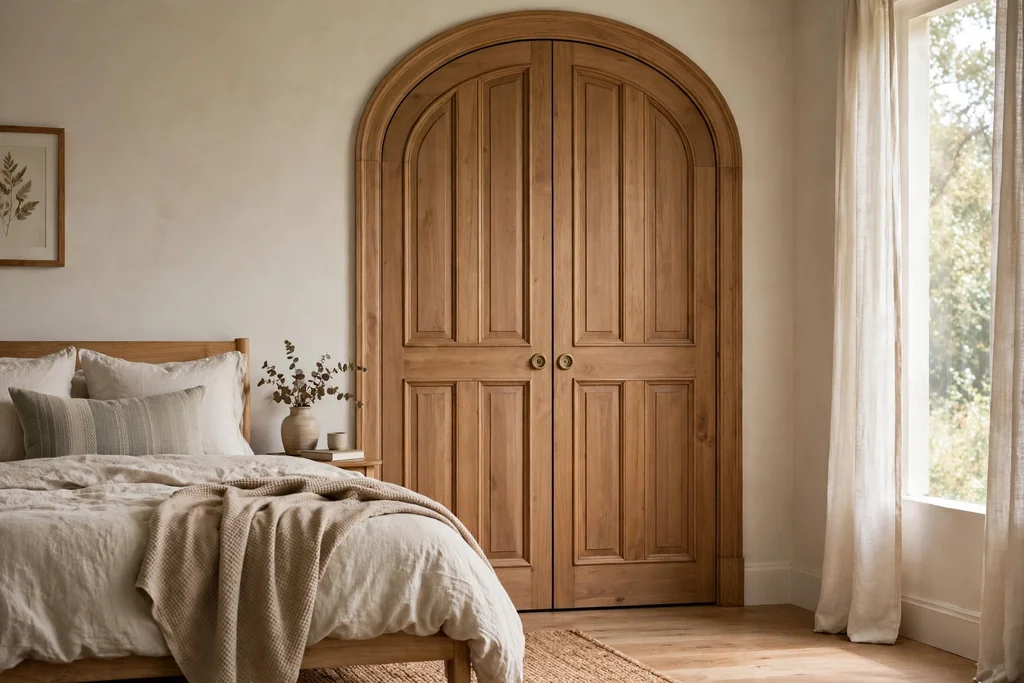
    Bedroom with arched top closet doors with a curved top and paneled wood

    Arched top doors have a curved top that softens a bedroom wall and suits cottage, Mediterranean, and traditional rooms. The arch draws the eye up and makes a standard closet feel more like a built-in feature, especially when the arch matches a window or a doorway elsewhere in the room. Painted white or in a soft wood tone, an arched door feels gentle rather than formal.

    Measure the arch carefully, since the curved top needs a matching frame and trim, and a standard rectangular door will not fit an arched opening without work. Keep the rest of the wall simple, so the arch stays the feature, and use handles that suit the curve, such as a small knob rather than a long bar. If a full arch is too much work, an arched mirror or arch trim above a rectangular door can hint at the same look.

    19. Chalkboard Panel Doors
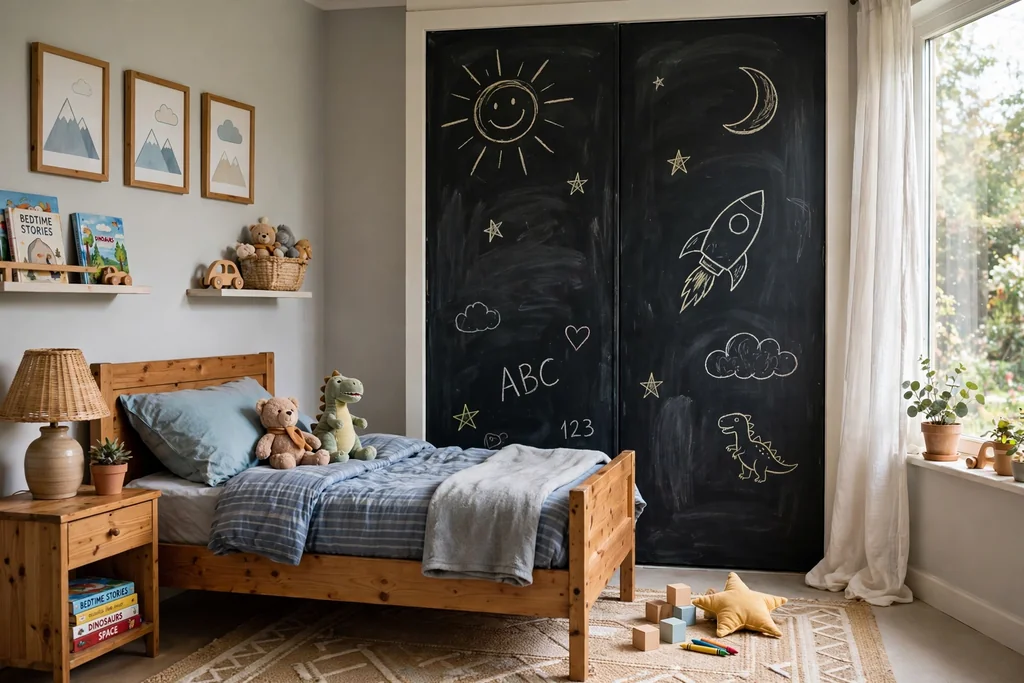
    Kids bedroom with closet doors painted as a dark chalkboard panel with simple chalk drawings

    Chalkboard panel doors paint one panel, or the full door face, with chalkboard paint, giving a closet door that doubles as a memo board. This suits a kids bedroom, a teen room, or a shared dressing area, where lists, outfit plans, and reminders can live right where you get dressed. The dark panel also adds contrast to a pale bedroom wall.

    Use chalkboard paint suited to doors, allow full drying and curing time, and condition the surface as the paint maker directs before first use. Keep chalk dust off clothes by wiping the board with a damp cloth now and then, and store chalk in a small tray or cup nearby. If you later want a plain door again, chalkboard paint can be sanded and repainted, so this is a low risk change.

    20. Vertical Wood Slat Sliding Doors

    Modern bedroom with vertical wood slat sliding closet doors in warm oak

    Vertical wood slat sliding doors use narrow oak or walnut slats fixed to a sliding panel, giving a warm, modern texture that suits Scandinavian and Japandi style bedrooms. The vertical lines draw the eye up and make a low ceiling feel taller, while the wood tone warms a pale room. Sliding panels need no swing space, so this style also works in a tight bedroom.

    Keep the slats even and the gaps consistent, since uneven slats show up quickly on a long door. Dust the slats with a soft brush, and seal the wood as the maker directs to protect it from marks. Fix the sliding track firmly, since a slatted wood door is heavier than a hollow panel door, and check the rollers each year so the door glides without catching.

    21. Hidden Doors Matched to the Wall
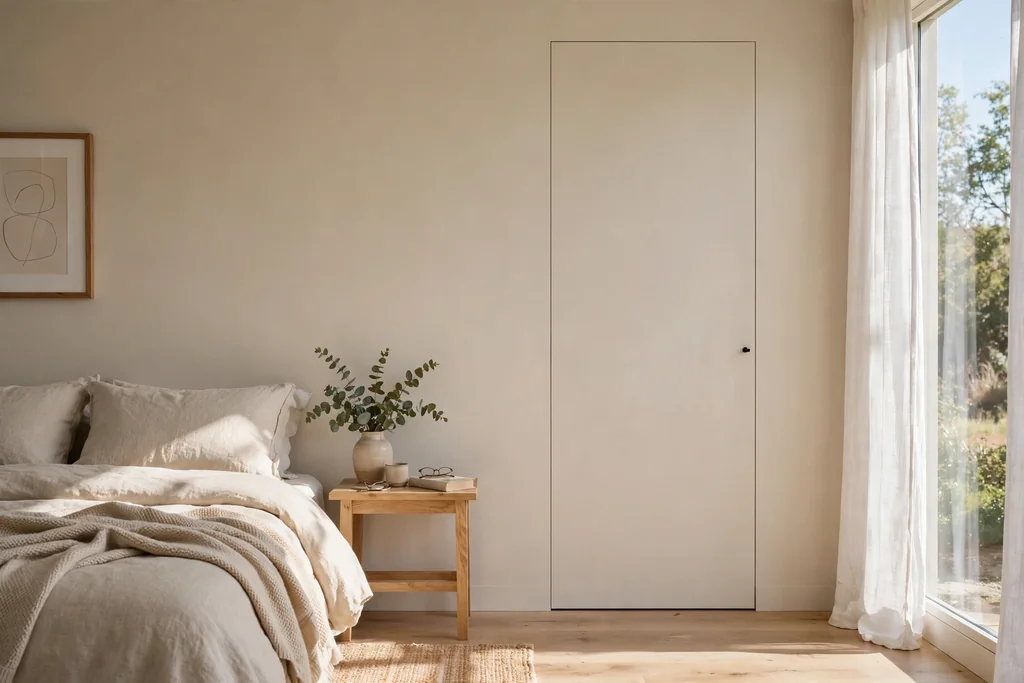
    Bedroom wall painted one color with a hidden closet door blended into the wall

    A hidden door is painted and trimmed to match the wall exactly, so the closet blends in and the room looks larger and calmer. With only a slim seam and a small handle to show, the closet disappears when closed, which suits a minimal bedroom, a small room, or a wall with art and shelving where a door would break the line. This is a strong choice when you want storage without a storage look.

    The seam and handle still need to work well, so use good hinges and check the alignment after painting, since paint build-up can make a tight door stick. Keep the wall finish simple around a hidden door, since busy wallpaper or paneling can make the seam harder to hide. Plan the inside layout before you hide the door, since you will open it less often if it blends in too well.

    22. Applied Trim Doors for a Built-In Look
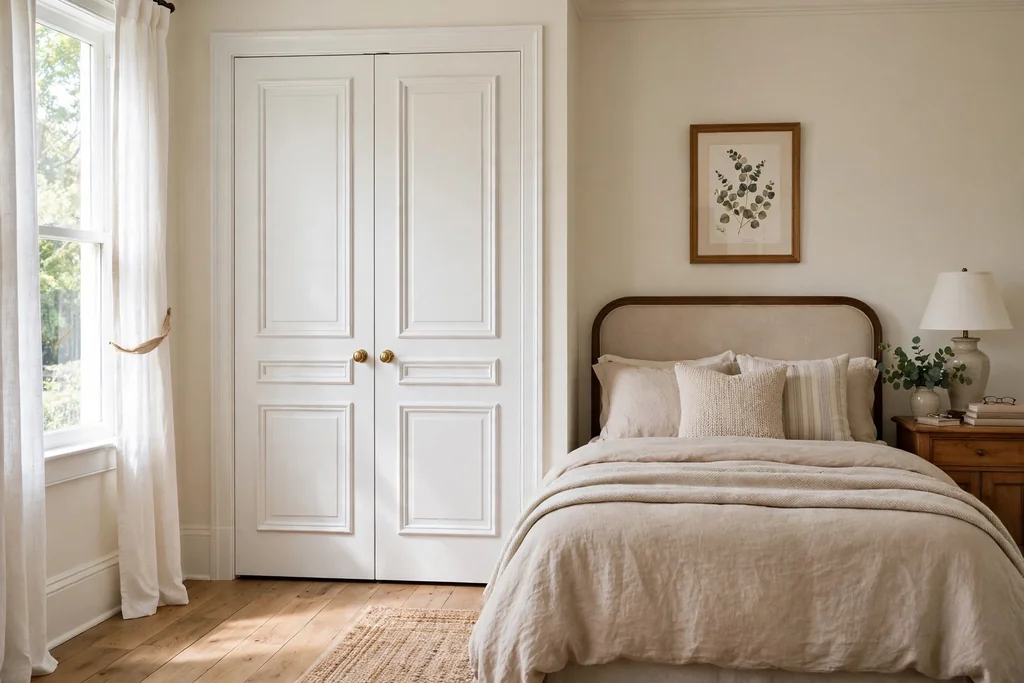
    Bedroom with plain closet doors upgraded with applied picture frame molding trim painted white

    Applied trim doors start with a plain flat door and add thin picture frame molding to the face, giving a paneled, built-in look for the cost of trim and paint. This is one of the easiest closet upgrades, since it needs no new frame, no new track, and no change to hinges, and it suits renters who can paint with permission and owners on a tight budget. The trim frames each door like a panel, which lifts a flat, dated door at once.

    Measure and cut the trim to leave an even border on all sides, glue and pin it firmly, and fill any gaps before painting, since gaps show through paint. Paint the door and trim in one color for a seamless panel look, or paint the trim a shade lighter for a subtle frame. Keep handles simple and in one finish, so the new trim, not the hardware, carries the upgrade.

    Conclusion

    The best closet door is the one that fits your opening, your floor space, and how you dress each morning, not just the one that looks good in a photo. Start by measuring the opening and the clear space in front of it, then choose a door type for that space: sliding or pocket for a tight room, hinged or French for full access, mirrored or glass for light, louvered or cane for air. Plan the inside layout to match the door, since a door that only opens halfway needs daily clothes on the easy side. Pick one idea from this list, try it on your closet, and adjust handles, paint, or trim before you change anything else. Save this list on Pinterest before your next bedroom project, and work through it one door at a time.

    FAQs

    How do I choose the right closet door for a small bedroom?

    Start with the floor space in front of the closet. If a bed or dresser sits close to the closet, sliding, bifold, pocket, or curtain doors save the swing space a hinged door needs. If you have clear floor space, hinged or French doors give wider access. Measure the opening width and height, check for light switches and sockets beside the opening, and pick the door that opens fully without hitting furniture.

    Are sliding closet doors better than hinged doors?

    It depends on the room. Sliding doors save floor space and suit tight bedrooms, but you can only open one half of the closet at a time. Hinged doors open the whole closet at once and give easier access to shelves at both ends, but they need swing space. For a wide closet in a large room, hinged or French doors are often easier to live with, while for a small room, sliding doors are usually the practical choice.

    Do mirrored closet doors make a room look larger?

    Yes, in most cases. A full-length mirror reflects daylight and the room itself, which can make a small or dark bedroom feel larger and brighter. The effect works best when the mirror faces a window or a light wall, and when the room in front of it is tidy. Keep mirrors clean, since smudges break the effect, and avoid placing a mirrored door where direct sun hits bedding for long hours.

    Can I replace closet doors without replacing the frame?

    In many cases, yes. Hinged, bifold, and sliding doors can often be swapped into an existing frame if the new door matches the opening size and the hinge or track type. Check the opening width, height, and depth first, and check whether the frame is square, since older frames can be out of square. A pocket door or a barn door may need a new track or wall work, so check the wall and fixings before you buy.

    Which closet door is best for airflow?

    Louvered doors and cane webbing doors give the most airflow, since air passes through the slats or weave while clothes stay mostly hidden. This helps in a warm room or a closet near a bathroom. Solid, glass, and mirrored doors give less airflow but better dust protection. If dust is also a concern, use louvered doors with closed boxes inside for out of season clothes.

    How can I update plain closet doors on a budget?

    Paint is the lowest cost change, followed by new handles, applied trim, and a curtain front. A two-tone paint job, a picture frame trim upgrade, or a linen curtain can change a plain door without a new frame or track. Start with one door, check the finish in daylight and evening light, and then finish the rest to match. Keep handles in one finish across all doors in the room for a planned look.


  • 32 Concrete Patio Ideas for a Fresh Take on Your Home

    32 Concrete Patio Ideas for a Fresh Take on Your Home

    A concrete patio is easy to dismiss as plain, until you see what finish, shape, and furniture can do with it. Concrete can look like stone, wood, or tile, it can curve around a garden, step down a slope, or hold a fire pit, a kitchen, and a quiet coffee corner. These 32 concrete patio ideas cover finishes first, then layouts and uses, so you can pick a surface you like and a setup that fits how you spend time outside. Start with drainage, sun, and access from the house, then choose one finish and one main use, and let planting and light soften the rest.

    Key Takeaways

    • Pick the finish first: brushed, stamped, stained, polished, or exposed aggregate sets the tone for furniture and planting.
    • Plan drainage and a slight fall away from the house before you pick a pattern, since standing water spoils even a good-looking slab.
    • Give the patio a clear job: dining, lounging, cooking, or quiet sitting, and size furniture to that job, not to the whole slab.
    • Add shade, planting, and warm light early, since bare concrete can feel hard and hot without them.
    • Keep joints, edges, and steps in mind: they control cracks, grip, and how the patio meets lawn, gravel, or beds.
    • Seal and clean as the finish maker directs, and recheck joints and edges each spring after frost and heavy rain.

    1. Brushed Concrete with Saw-Cut Joints

    Brushed concrete patio with neat saw-cut joints

    A brushed finish is the plain, honest starting point for a concrete patio, and saw-cut joints give it order. The light texture from brushing gives grip underfoot, while straight joints break a large slab into neat panels that help control cracking. Keep the panels in a size that suits the patio, and line a joint up with a door edge or a step so the pattern feels planned rather than random.

    Sweep joints clear and seal the surface as the finish maker directs, since dirt and moss settle in joints first. This finish suits family patios, paths, and spots where chairs scrape daily, because marks blend in and repairs are simple. Pair it with pots and a rug to soften the grey, and it stays practical year after year.

    2. Stamped Flagstone Pattern

    Stamped concrete patio patterned like large flagstones with garden chairs and shrubs.

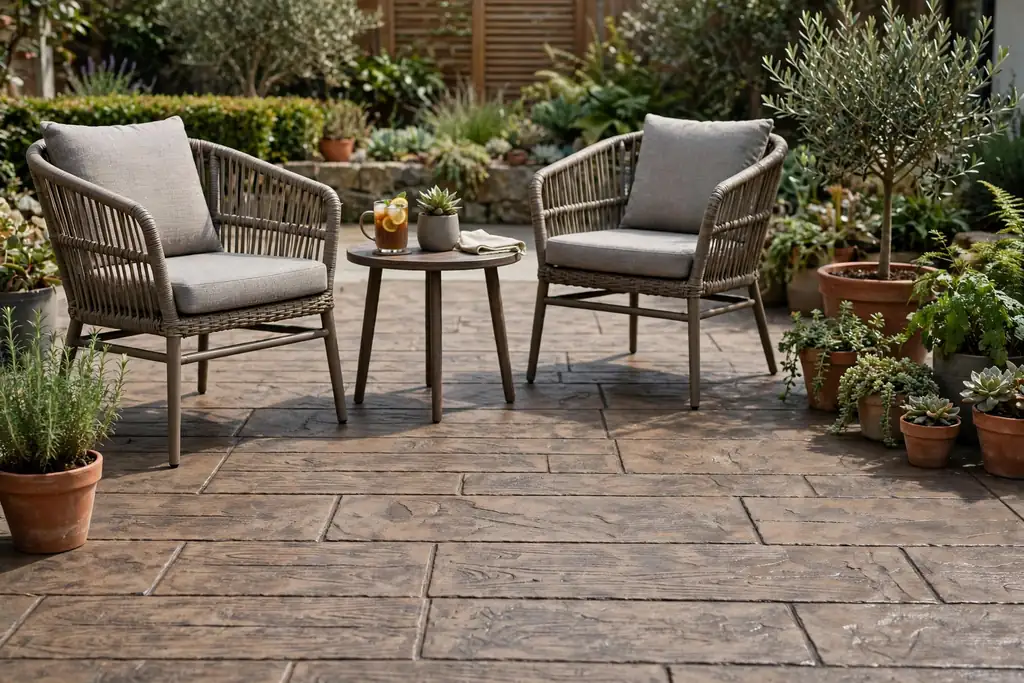
    Stamped concrete pressed with a flagstone pattern gives the look of large stones without the gaps and uneven edges of real stone. The pattern works best in soft grey or sand tones, with a slightly varied color so no two stones look identical. Keep the stone size in scale with the patio: large stones suit a wide patio, smaller ones suit a path or a compact seating area.

    A stamped surface needs a good sealer to protect the pattern and color, and it can be slippery when wet, so ask about a grip additive for shaded or poolside spots. Clean it with a gentle wash rather than harsh pressure washing close up, which can wear the sealer. Add simple furniture so the stone pattern stays the main feature.

    3. Warm Stained Concrete in Terracotta

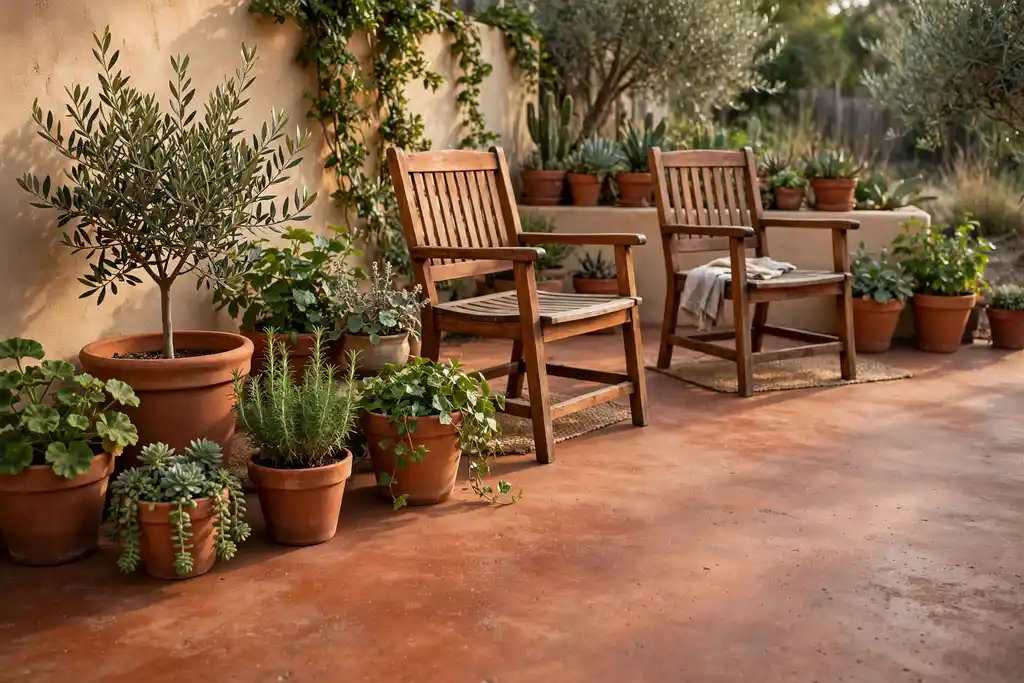
    Warm terracotta stained concrete patio with terracotta pots and wooden chairs.

    Stain gives grey concrete a warm terracotta tone that suits brick houses, clay pots, and Mediterranean planting. Acid or water based stains soak in rather than sitting on top, so the color varies gently across the slab, much like natural stone. Test the stain on a small hidden area first, since the starting concrete color changes the final shade.

    Seal stained concrete to lock in color and protect it from spills, especially near dining and grill areas. Reapply sealer when water stops beading, and wipe up oil and food spills promptly. Terracotta pairs well with wooden chairs, olive trees in pots, and green shrubs that cool the warm tone.

    4. Exposed Aggregate Finish

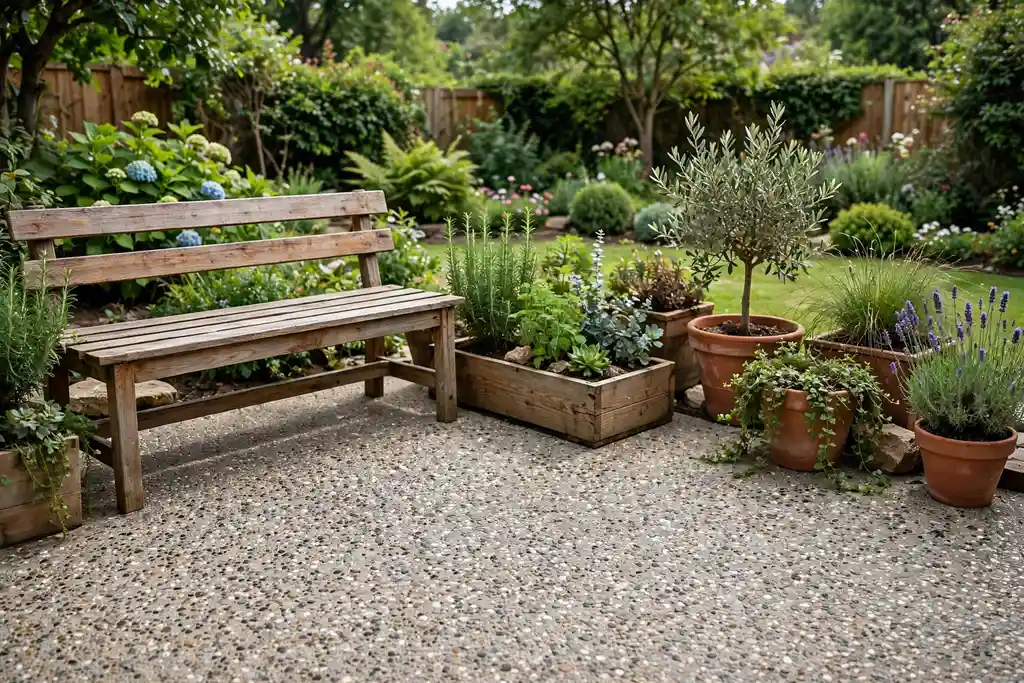
    Exposed aggregate concrete patio with speckled stone surface

    Exposed aggregate shows small stones in the concrete surface, giving texture, grip, and a speckled look that hides dirt well. It suits patios near gardens, because the stone tones echo gravel paths and rock edges. Choose a stone mix that suits your house color, and keep the surface level enough for chairs and a table to sit steady.

    This finish is hard wearing and low fuss, but it can feel rough under bare feet, so keep a rug or smooth stepping area near loungers if you walk barefoot. Wash it down now and then to clear leaves from the texture, and seal it if the maker advises it for stain resistance. It is a strong choice for a patio used daily.

    5. Large Slabs with Grass Joints

    Large concrete patio slabs with strips of green grass growing in the joints.

    Large concrete slabs laid with grass or ground cover in the joints soften a patio and help rain soak in between slabs. The grass strips break up a big paved area, so the patio reads more like a garden room than a car park. Keep slab sizes even and joints wide enough for grass to grow, usually a few inches, and choose a tough grass or ground cover for your light and foot traffic.

    Mow or trim the joints with the lawn, and edge them so grass does not creep over the slabs. This layout suits level ground and informal gardens, but it needs more upkeep than a solid slab, since joints need weeding and watering in dry spells. Place furniture on the slabs themselves, not across a joint, so chairs stay level.

    6. Polished Concrete for a Smooth Look

    Smooth polished concrete patio with modern outdoor furniture and minimal planters.

    Polished concrete gives a smooth, slightly reflective surface that suits modern houses and minimal furniture. The clean look makes a small patio feel larger, because there is no pattern to break up the space. Keep the color simple, pale grey or warm grey, and let one strong piece of furniture or one large planter carry the design.

    Polished concrete can be slippery when wet and shows dust and footprints more than textured finishes, so it suits covered patios or dry climates best, or spots with a grip treatment. Clean it with a soft mop and a mild cleaner, and avoid dragging heavy furniture across it. A rug under the seating area adds warmth without hiding the whole surface.

    7. Charcoal Concrete with a Pale Border

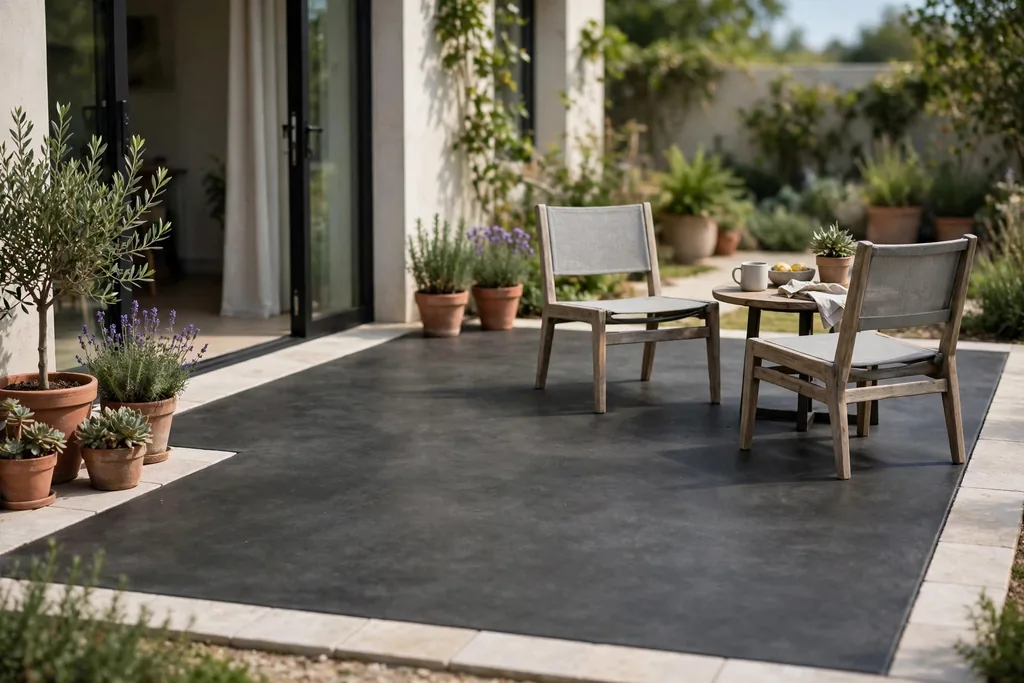
    Dark charcoal concrete patio with a pale stone border band and simple seating.

    A dark charcoal slab with a pale border band gives a crisp, modern frame to a patio. The border can be a different concrete tone, pale stone, or a lighter stain, laid as a band around the edge or around the seating zone. The contrast marks the patio edge clearly, which helps at dusk and where the patio meets lawn.

    Dark concrete absorbs heat in strong sun, so this idea suits shaded patios, cooler climates, or spots used mainly in the evening. Keep the border line straight and even, since any wobble shows against the dark field. Light furniture and green planting stand out well against charcoal, so keep both simple and let the frame do the work.

    8. Wood-Plank Stamped Concrete

    Stamped concrete patio patterned like wood planks with outdoor chairs and a table.

    Wood-plank stamped concrete gives the warmth of a wooden deck with the solid, low maintenance base of concrete. The plank pattern runs in long lines, so lay the planks toward the view or toward the garden to draw the eye outward. A warm brown grey tone suits wooden furniture and garden planting, and the joints between planks read as shadow lines.

    Seal the surface to protect the pattern, and add a grip additive if the patio stays damp under trees. Unlike real wood, this surface needs no sanding or oiling of boards, but it can fade in strong sun, so reapply sealer on the maker’s schedule. It suits patios where a deck would rot or need constant care, such as damp or shaded gardens.

    9. Curved Freeform Patio Shape

    Curved freeform concrete patio with rounded edges

    A curved patio softens a rectangular garden and flows around trees, beds, and lawn instead of cutting across them. Curves suit informal gardens, because furniture can sit in a bay while planting fills the curves at the edges. Mark the curve on the ground with a hose or rope first, walk it, and check that chairs, a table, and a path all fit before any concrete is poured.

    Curved edges need careful edging to stay neat, so use a flexible edge or a stone border that follows the line. Keep the curve gentle: tight bends waste space and make mowing awkward. Plant low shrubs and grasses along the outer curve to blur the edge between patio and garden.

    10. Stepped Two-Level Patio

    Two level stepped concrete patio with wide low steps

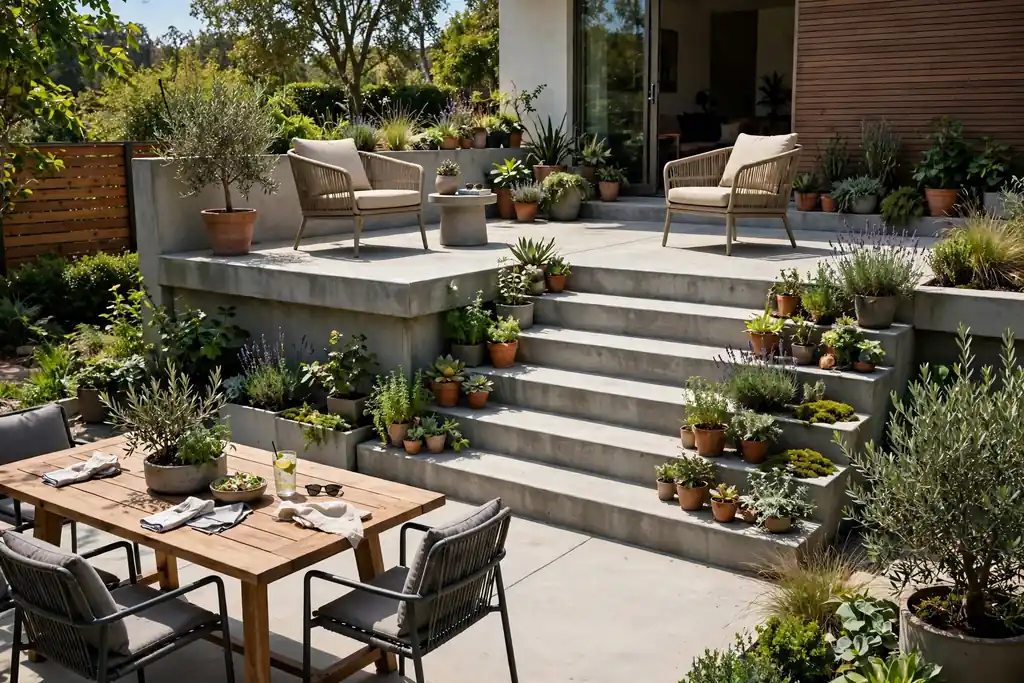
    A two-level patio suits a sloping garden or a house with a raised door, giving dining on one level and lounging on another. Wide, low steps between levels are safer and easier to carry food across than narrow, steep ones, and a landing at the top and bottom of the steps gives room to pause. Put the level you use most nearest the house door, so daily trips stay short.

    For layout ideas on working with levels, these tiered garden ideas show how to give each level a clear job. Keep furniture off the steps themselves, add a handhold or a low wall beside steps if the drop is high, and light the step edges for evening use. Two levels also let you use sun and shade at different times of day.

    11. Round Fire Pit Patio

    Round concrete patio with a central fire pit and chairs arranged in a circle.

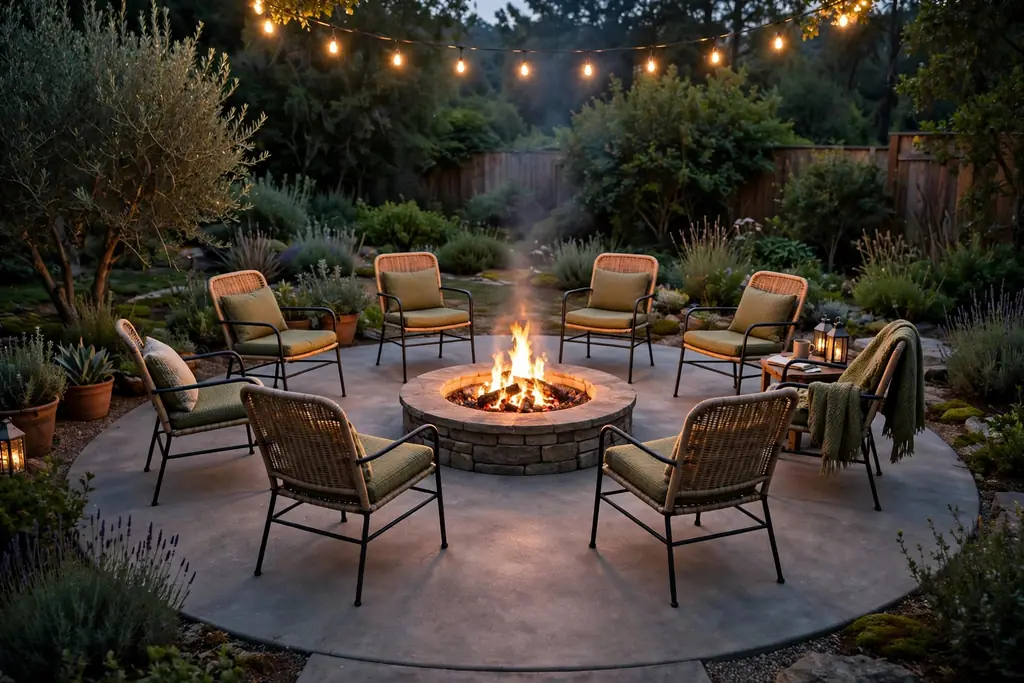
    A round concrete patio built around a fire pit makes the fire the natural center of the evening. A circular slab, or a circle marked in the concrete pattern, tells you where chairs go, and it keeps the fire at a safe distance from every seat. Use a fire bowl or a built fire pit rated for outdoor use, and keep it away from overhanging trees, cushions, and low roofs.

    Check local rules before you burn wood, and keep a clear, non-slip route to the house for carrying drinks and blankets. Store firewood away from the pit, and choose chairs that are easy to pull in and out of the circle. In the daytime the same circle works as a plain seating area, so the patio earns its space twice over.

    12. Pergola-Covered Dining Patio

    Concrete patio shaded by a wooden pergola with climbing plants and a dining table.

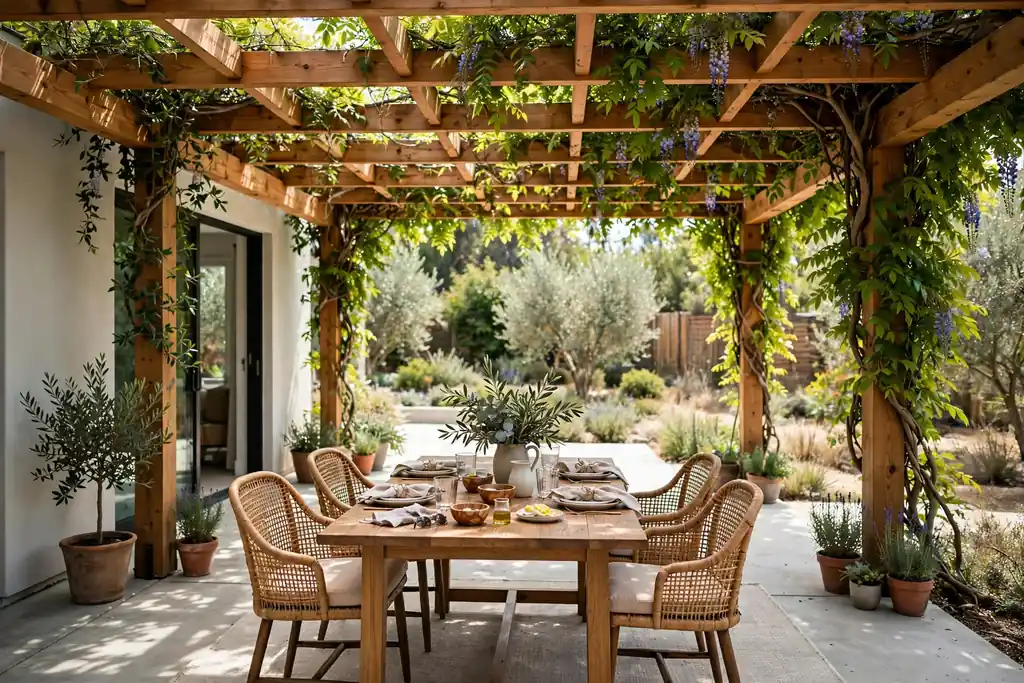
    A pergola over a concrete dining patio gives dappled shade and a clear dining zone without closing the space in. Train climbers over the top for summer shade, or leave the beams open and add a shade cloth in hot months. Size the pergola to the table, not just the patio, so every chair sits in shade at mealtimes and no chair leg lands on a post base.

    Fix the pergola firmly, since wind loads on a roof frame are higher than they look, and check that it does not block gutters or upstairs windows. String lights along the beams give evening dining a warm glow without new wiring. Keep the concrete under the pergola easy to sweep, since leaves and flowers from climbers will fall there.

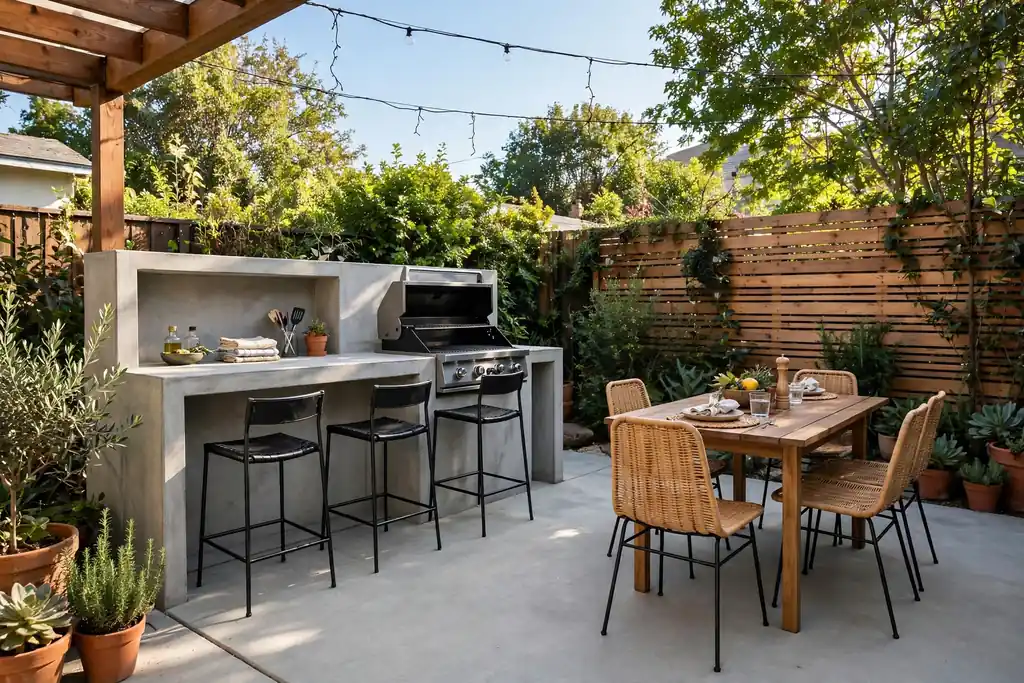
    13. Outdoor Kitchen Patio

    Concrete patio with an outdoor kitchen counter

    An outdoor kitchen patio puts the grill, counter, and dining table on one solid, easy to clean surface. Concrete suits this use well, because it resists heat, spills, and heavy foot traffic, and it wipes clean after cooking. Place the grill with its back to the wind where possible, keep the counter near the dining table, and leave a clear path from the house kitchen for carrying food.

    Plan water, power, and gas safely with a professional, and never run a gas line or wiring as a do it yourself job. Add shade over the cooking area, since standing at a grill in full sun is tiring, and add a bin and a hose point nearby for cleanup. A simple counter and a grill beat a large kitchen that leaves no room to sit.

    14. Poolside Concrete Patio

    Poolside concrete patio with lounge chairs and umbrellas beside a swimming pool.

    Poolside concrete needs to stay cool, grippy, and easy to drain, so choose a light color and a textured finish rather than dark, polished concrete. Light tones reflect heat, and a broom or exposed aggregate texture helps wet feet grip. Slope the slab gently away from the pool where drainage allows, and keep a clear, dry route from the pool steps to loungers and towels.

    Choose loungers and umbrellas that can be moved for cleaning, and rinse the patio after heavy pool use to clear chlorine and sunscreen. Avoid loose rugs near the pool edge, where they can slip, and keep planters back from the water so soil does not wash into the pool. A poolside patio works best when it is simple, pale, and easy to hose down.

    15. Built-In Concrete Bench Seating

    Concrete patio with a built-in concrete bench wall

    Built-in concrete bench seating along one patio edge saves space and gives a permanent seat that never needs storing. A low concrete bench wall, topped with outdoor cushions, can run along a wall, a planter, or the patio edge, leaving the center open for a table or a fire pit. Keep the seat height near chair height and the depth enough to sit back comfortably, and add cushions for warmth, since bare concrete stays cool.

    For seating ideas that pair well with a patio, these garden bench ideas show how to choose a spot first and match the seat to it. Drainage matters behind a built bench, so do not trap soil or water against the house wall. A built bench suits patios used daily, where loose chairs would constantly be moved and stored.

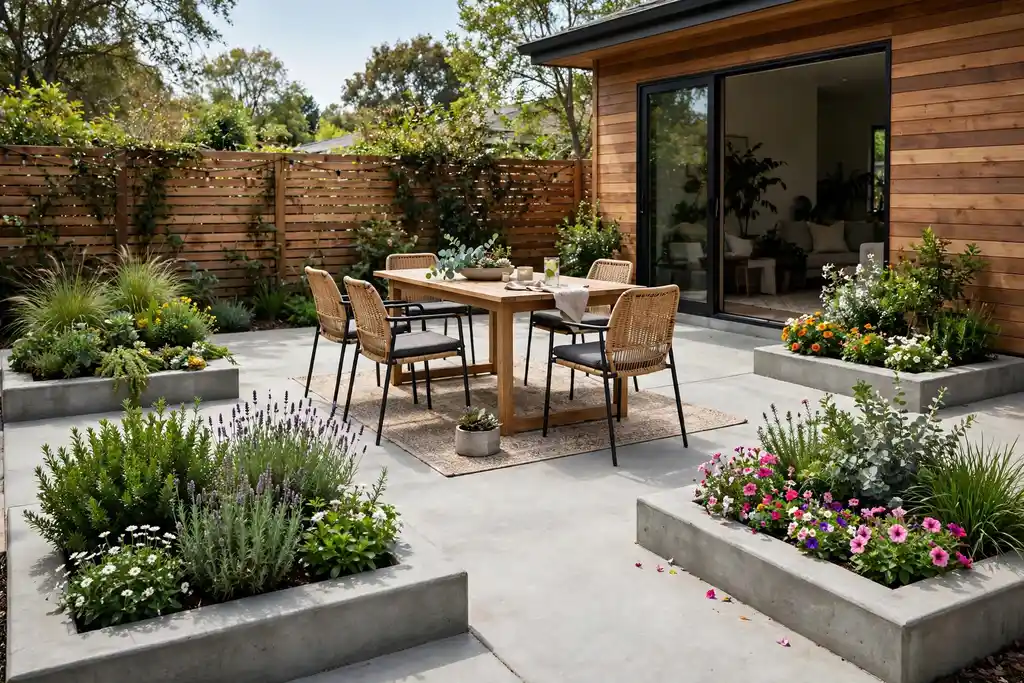
    16. Planters Built Into the Patio

    Concrete patio with square planters built into its corners filled with shrubs and flowers.

    Planters built into the patio corners or edges bring planting onto the concrete without pots that blow over or clutter the walking area. Square or rectangular planters cast as part of the patio give a clean, built-in look, and they let you plant shrubs, grasses, or small trees at sitting height. Line planters for drainage, and choose plants that suit the sun and wind on that corner.

    Keep planters out of the main walking route and away from door swings, and leave room to reach the soil for watering and pruning. Trees in planters need room for roots and regular watering, so pick small species or shrubs unless the planter is large. Built-in planters also mark zones: a planter between dining and lounging splits the patio without a wall.

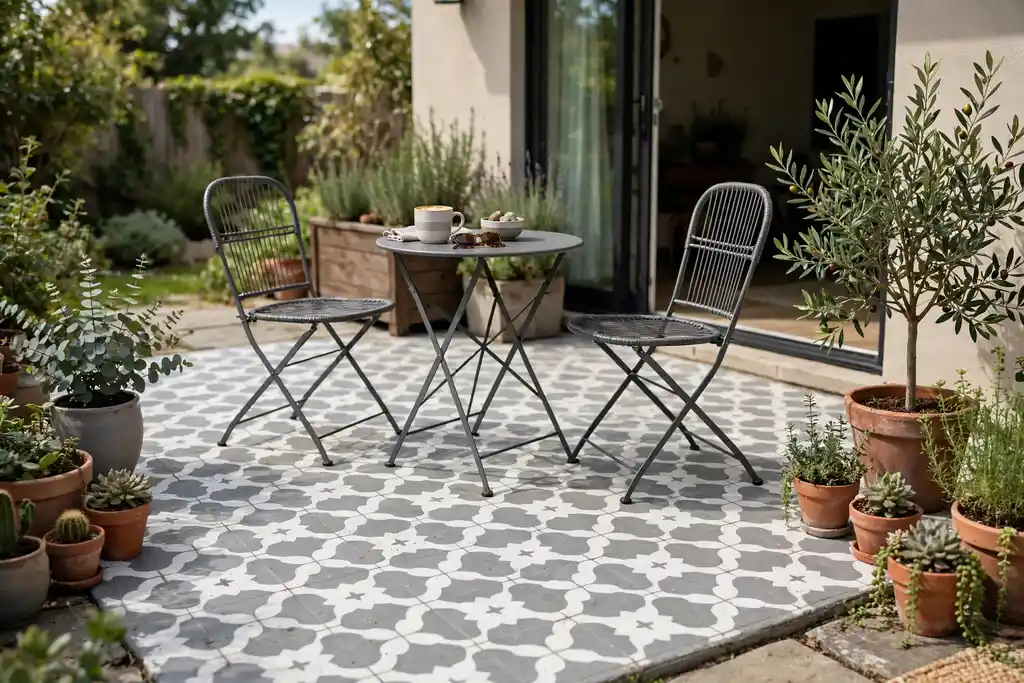
    17. Stenciled Painted Pattern

    Concrete patio painted with a stenciled tile pattern in grey and white with bistro chairs.

    A stenciled pattern painted onto existing concrete is a low cost way to refresh a plain patio without replacing it. Tile, star, or geometric stencils in two tones can give a patio the look of patterned tiles, and the paint can be kept to a seating zone or spread across the whole slab. Clean the concrete well first, since paint sticks poorly to dirt, algae, or old sealer, and test the stencil on a corner.

    Use paint made for exterior concrete and foot traffic, and seal it to protect the pattern from chairs and weather. Stenciled paint wears fastest where chairs scrape, so keep heavy furniture on pads and touch up the pattern each year if needed. This idea suits renters and small budgets, because it changes the look without building work.

    18. Painted Patio Rug Design

    Concrete patio with a large painted rug design in muted blue and cream under chairs.

    A painted rug design marks a seating zone on a concrete patio, much like an outdoor rug, but it never blows away or needs washing. Paint a large rectangle or border in muted tones under the chairs and table, with a simple border line to frame it. Keep the design flat and simple, since a busy pattern under furniture is hard to see and harder to paint neatly.

    Use exterior concrete paint and a clear sealer, and keep the painted area dry for the curing time the maker states. A painted rug suits covered patios best, where rain and sun wear it less, and it pairs well with plain cushions that pick up one color from the design. If the paint wears, a single color recoat is easier than repainting a full pattern.

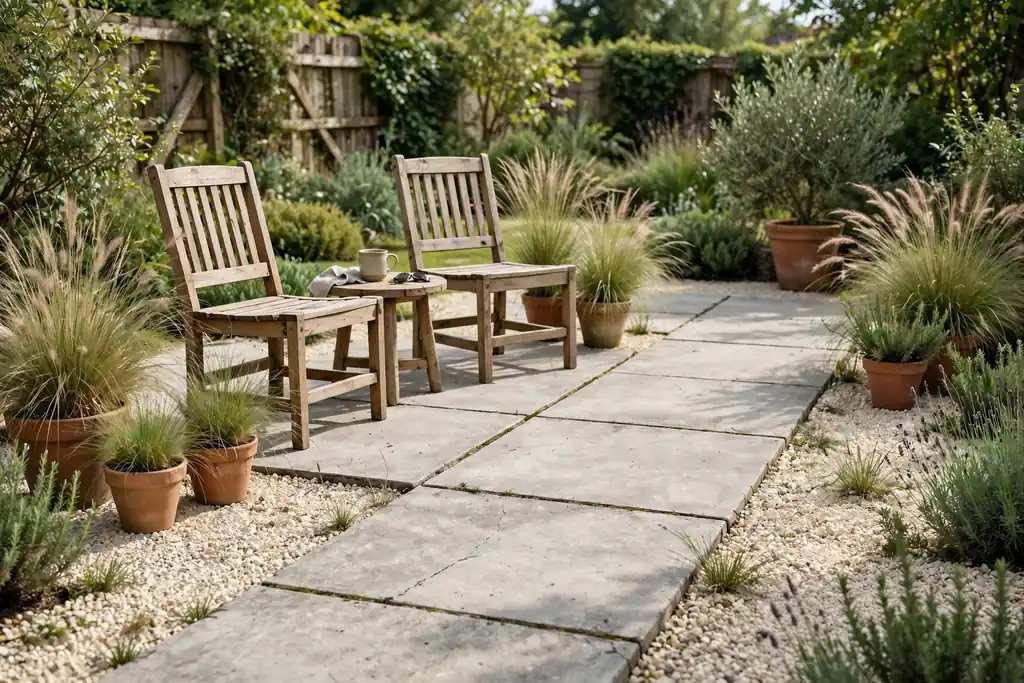
    19. Concrete Mixed with Gravel

    Concrete patio slabs combined with pale gravel areas

    Mixing concrete slabs with gravel areas breaks up a large patio and helps rain drain between solid sections. Use concrete where furniture sits, so chairs stay level, and gravel where you walk or where planting meets the patio. Pale gravel lightens grey concrete, while darker gravel suits modern furniture and charcoal tones.

    Keep gravel contained with a steel or stone edge, or it will spread onto the lawn and the concrete. Rake gravel level now and then, and top it up each year, since foot traffic moves it. This mix suits informal gardens and larger patios, where a single solid slab would look hard and flat, but it needs more upkeep than concrete alone.

    20. Evening Lighting Patio

    Concrete patio at dusk with warm string lights

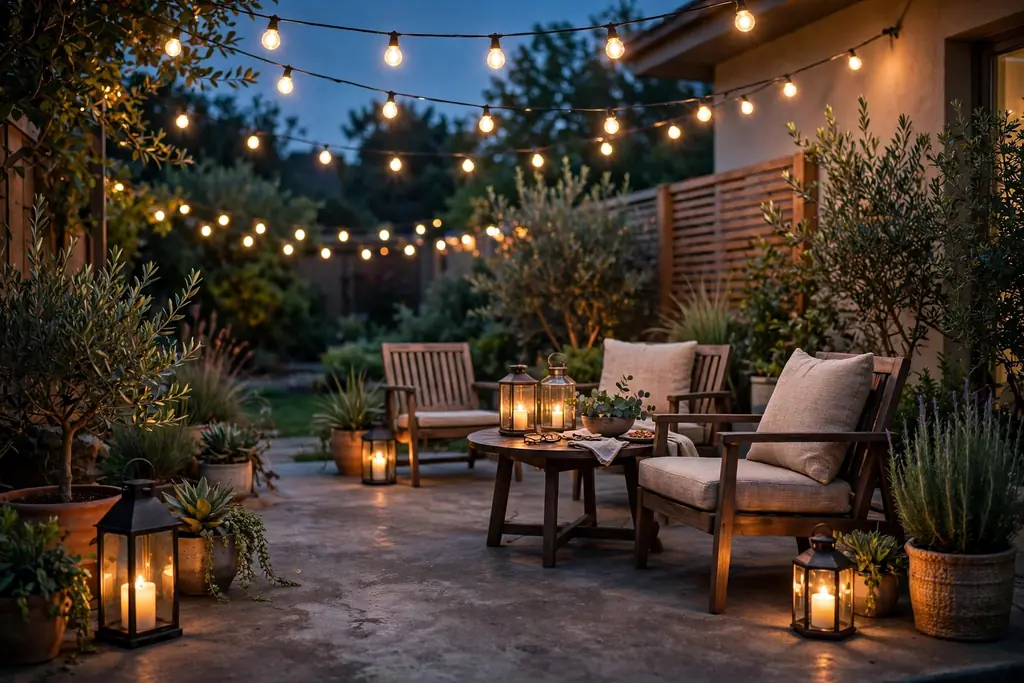
    Evening lighting makes a concrete patio usable after sunset and shows off its texture in a way daylight does not. String lights overhead, lanterns on the table, and low lights along steps or edges give warm, layered light without glare. Keep lights low and warm in tone, and avoid a single bright floodlight that flattens the space and glares into the house.

    Solar lights suit patios with no nearby power, but they need sun on their panels during the day to last the evening. Keep cables out of walkways, use outdoor rated fittings, and light step edges and level changes first for safety. A lit patio gets used far more than a dark one, even with the same furniture.

    21. Compact Patio for a Small Space

    Small compact concrete patio with two folding chairs

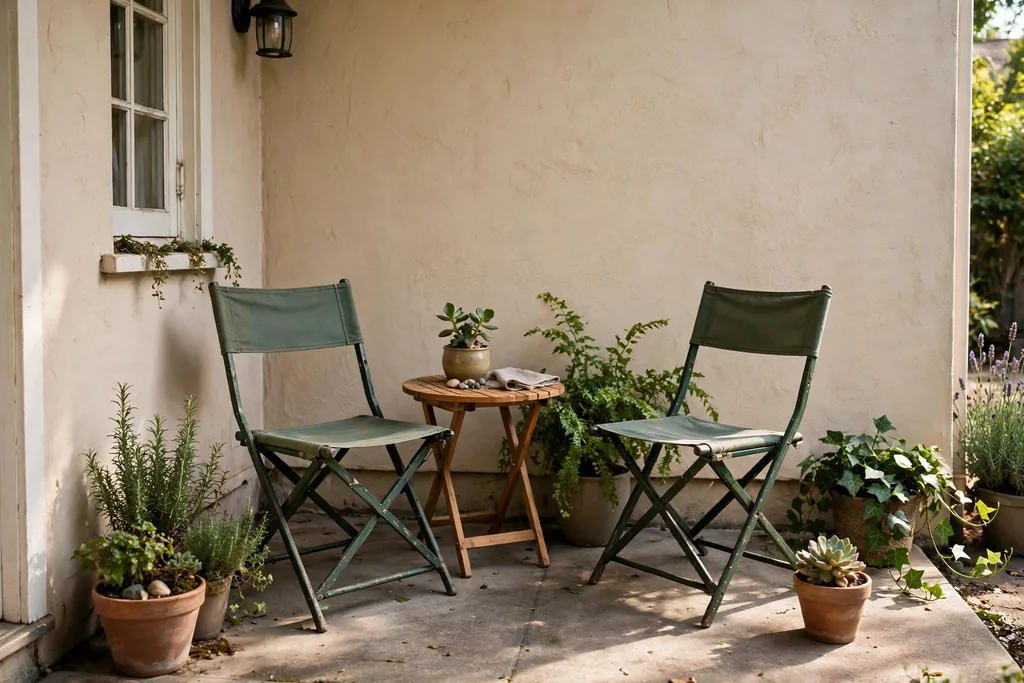
    A compact concrete patio for a small garden or yard needs one seat, one table, and one plant, not a full dining set. A small slab near the door, just large enough for two chairs and a side table, gives a daily outdoor spot without paving the whole garden. Keep furniture foldable or stackable, so the patio can clear for other uses, and use the wall for a trellis or a fold-down shelf.

    Choose a light concrete tone to keep the small space bright, and keep the path to the door clear. Pots at the corners soften the edges without taking floor space, and a single shade option, such as a parasol or a wall awning, makes the spot usable in sun. Measure chair pull-out space before you buy, since a small patio fails when chairs cannot move.

    22. Fountain Patio

    Concrete patio with a small stone fountain

    A fountain on a concrete patio adds moving water, sound, and a focal point that draws people to sit nearby. A small stone or concrete fountain in the center or against a wall suits a patio well, since the slab gives a level, splash-proof base. Keep the fountain within reach of power and water for the pump, and site it where splashes will not soak cushions or the house wall.

    Choose a shallow, easy to clean basin, and clean leaves and algae regularly so the pump lasts. In winter, drain the fountain and protect the pump as the maker directs, since frozen water can crack a basin. The sound of water also masks street noise, which helps a patio near a road feel calmer.

    23. Outdoor Fireplace Wall Patio

    Concrete patio with an outdoor fireplace wall and sofas facing it in evening light.

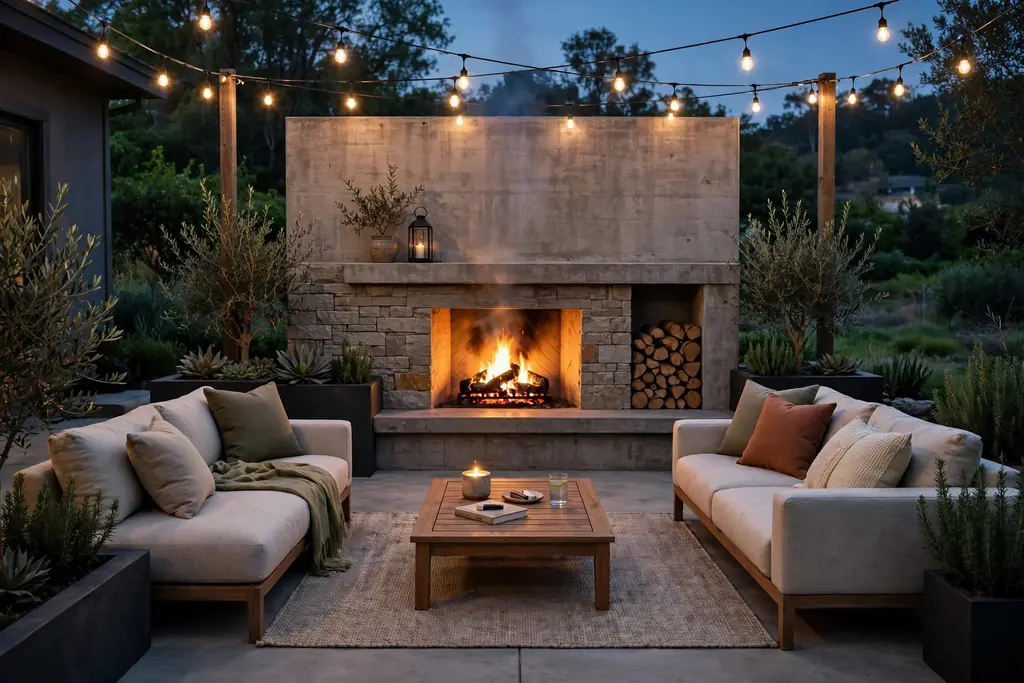
    An outdoor fireplace wall at one end of a concrete patio gives a strong focal point and extends evening use into cooler months. The wall can be built from stone, brick, or rendered block to suit the house, with seating facing it in a clear arc. Keep the fireplace clear of overhanging trees, roofs, and dry planting, and follow local rules for smoke, fuel, and distance from boundaries.

    Concrete suits a fireplace patio because it resists heat and sparks better than wood decking, but keep a non-slip hearth area in front of the fire clear of rugs. Store fuel away from the fire, and add side tables so drinks do not end up on the hearth. A fireplace wall also shelters the seating area from wind on one side, which helps on exposed patios.

    24. Minimalist Modern Patio

    Minimalist modern concrete patio with plain grey concrete

    A minimalist modern patio uses plain concrete, a few strong shapes, and little else. One low sofa, one large planter, and a simple table are enough, and the empty concrete around them gives the space calm. Keep colors to grey, white, black, and green, and avoid small ornaments that break the clean lines.

    This style suits modern houses and small patios, where clutter would crowd the space, but it needs good detailing, since flaws show on plain surfaces. Keep joints straight, edges sharp, and the slab clean, and choose furniture with simple lines to match. Planting should be bold and simple too: grasses, a single tree in a large pot, or a clipped shrub, rather than a mixed bed.

    25. Stone-Edged Rustic Patio

    Rustic concrete patio edged with a natural stone border and cottage garden flowers.

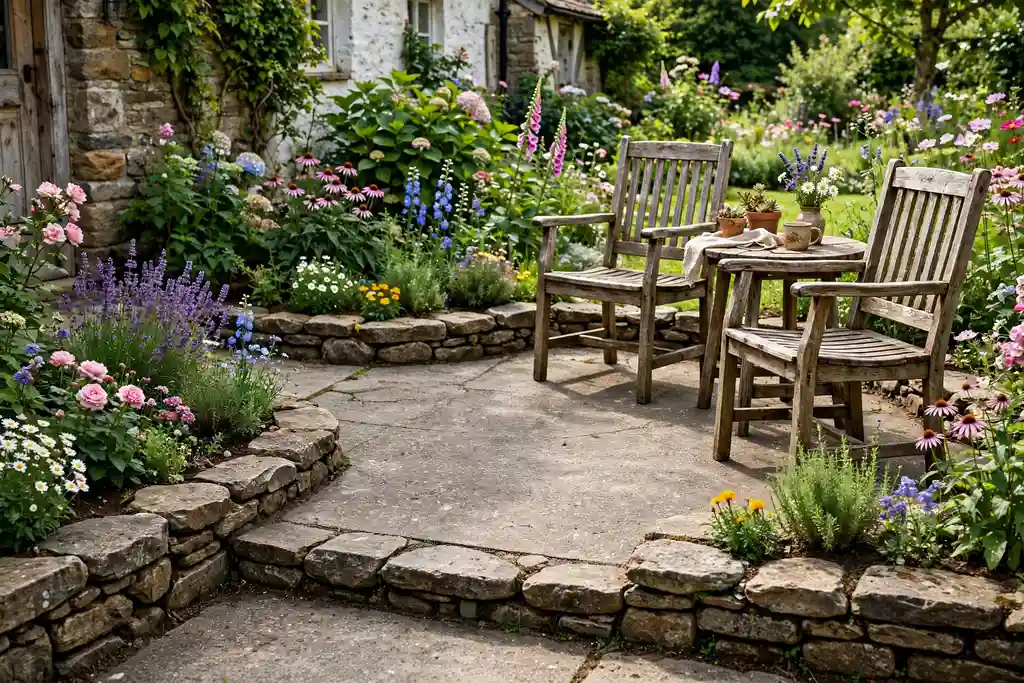
    A stone edge around a concrete patio gives a rustic, cottage feel and a firm border where patio meets lawn or beds. Natural stone, laid as a border course or as a low edging, softens the straight concrete edge and ties the patio to garden walls and paths. Keep the stone level with the concrete where chairs cross it, or step the edge down clearly so nobody trips.

    Plant cottage flowers and herbs just outside the stone edge so they spill slightly onto the border without blocking the seat. Stone edging also protects the concrete edge from mower damage and soil creep. This idea suits older houses, cottage gardens, and patios that sit beside flower beds rather than beside a modern extension.

    26. Shade Sail Patio

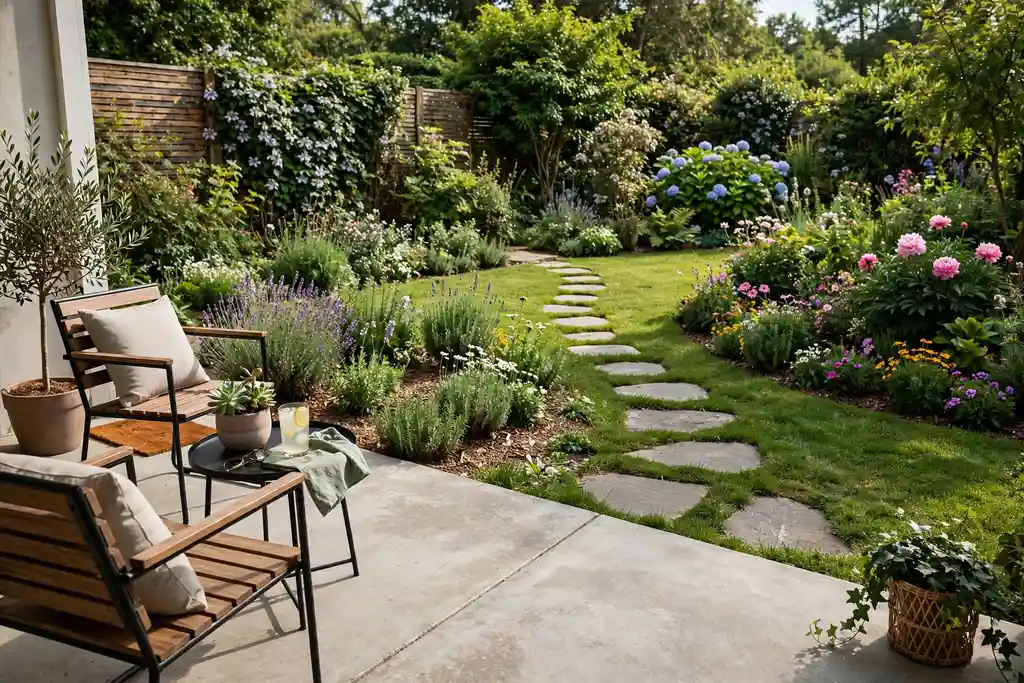
    Concrete patio shaded by a large triangular shade sail over outdoor dining chairs.

    A shade sail over a concrete patio gives large, soft shade at a lower cost than a fixed roof, and it can be taken down in winter or storms. Triangular or rectangular sails in a pale, sun rated fabric cool the seating area and cut glare on light concrete. Fix the sail to house walls and sturdy posts set in concrete footings, since wind loads on a sail are strong, and angle it so rain runs off away from seats.

    Keep the sail high enough to walk under comfortably and clear of trees that drop leaves onto it. A sail suits patios used mainly in summer, where a permanent roof would darken the house in winter. Take the sail down in high winds as the maker directs, and wash it each season to keep it bright.

    27. Stepping-Stone Link to the Garden

    Concrete patio connected to a garden by stepping stones through grass and flower beds.

    Stepping stones from a concrete patio into the garden make the patio feel like part of the garden, not a separate slab. Large, flat stones set in grass or gravel give a clear route to beds, a lawn, or a seating nook, and they let you keep most of the garden unpaved. Space the stones for a natural stride, keep them level and stable, and set them wide enough for a wheelbarrow or a pram if the route is used daily.

    Plant low ground cover or grass between the stones to soften the path, and keep the first stone flush with the patio edge so there is no trip step. Light the route if it is used at night, and keep it clear of pots and hoses. A good link also helps drainage, since water can soak in along the stone route rather than pooling on the patio.

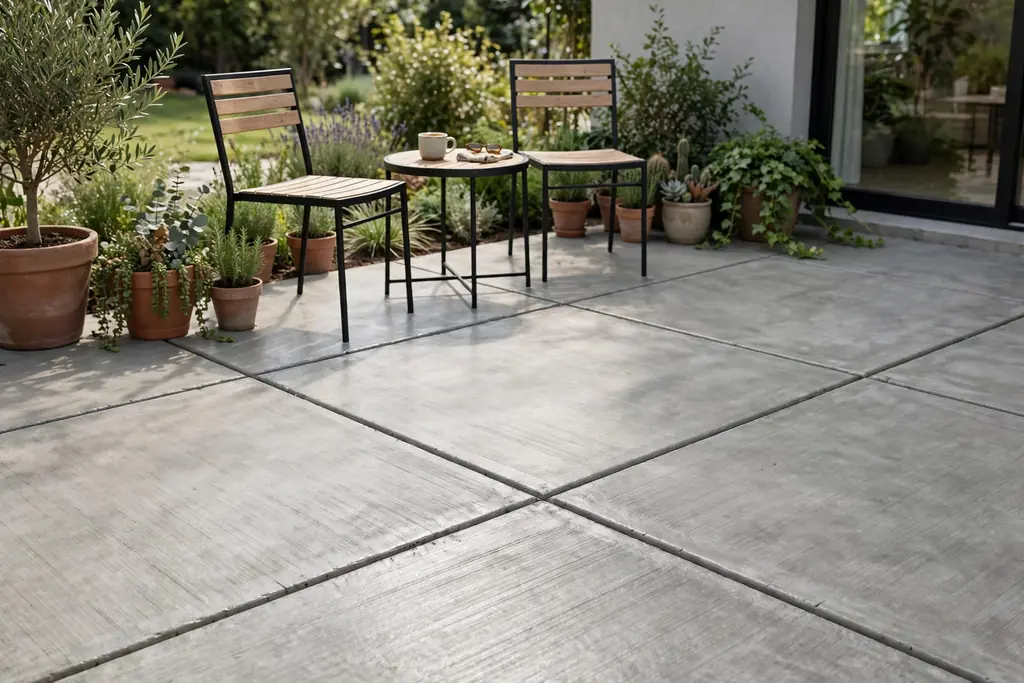
    28. Saw-Cut Geometric Grid

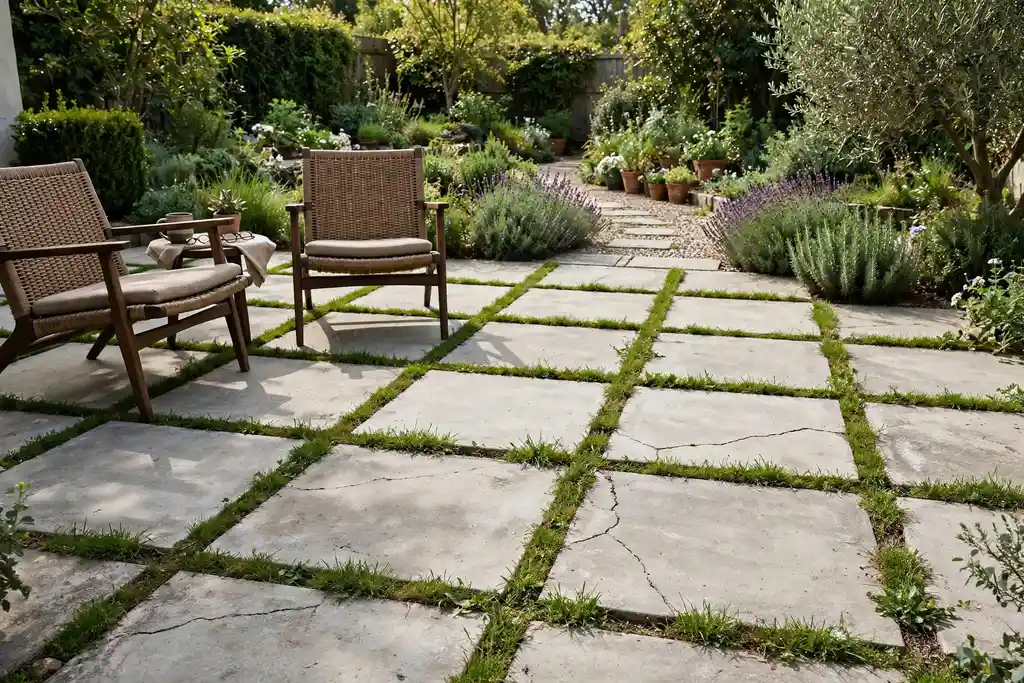
    Concrete patio with a saw-cut geometric grid pattern of large squares and modern chairs.

    A saw-cut geometric grid turns a plain slab into a pattern of large squares or rectangles, giving a modern, tiled look without separate pavers. The grid lines are cut into the concrete after pouring, so the surface stays level and easy to sweep, and furniture sits steady across the lines. Keep the grid size in proportion to the patio: large squares suit wide patios, smaller ones suit paths and compact areas.

    A grid also helps control cracking, since cuts give the slab planned lines to move along. Seal the cuts and the surface to keep dirt out, and sweep the lines clear. Pair the grid with simple furniture and one or two planters, since the pattern itself is the decoration, and a busy rug or patterned cushions can fight with it.

    29. Raised Beds Framing the Patio Edge

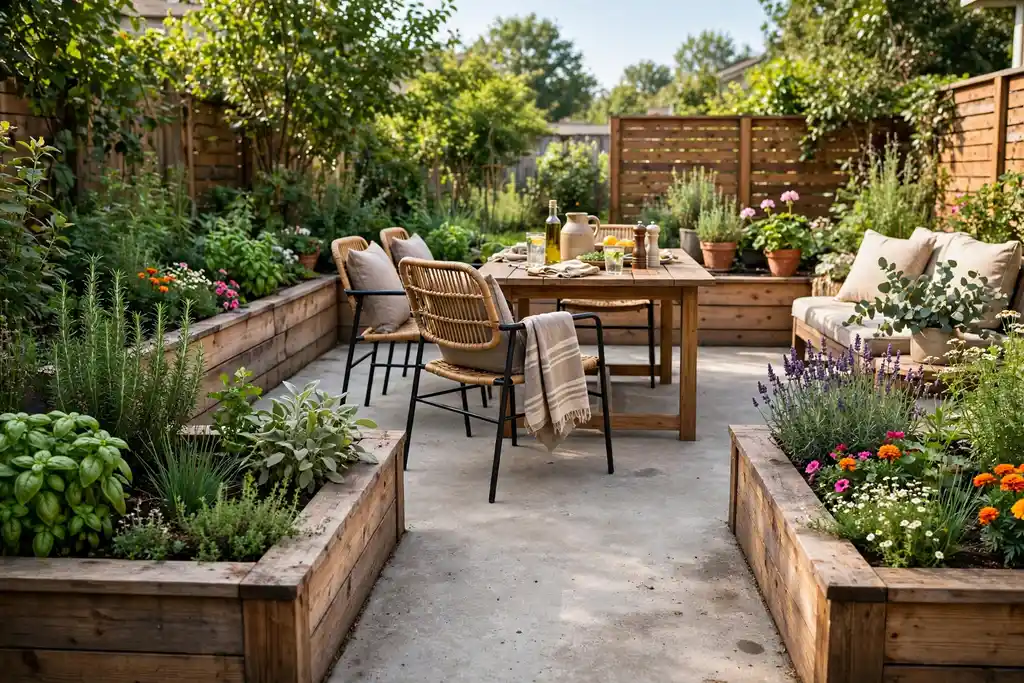
    Concrete patio framed on the outer edge by raised wooden garden beds with herbs and flowers.

    Raised beds along the outer edge of a concrete patio frame the space with planting and give a place for herbs, flowers, and vegetables close to the house. Wooden or stone beds, built to a comfortable working height, keep soil off the patio and make planting easy to reach from a chair. Put herbs and salads nearest the door for cooking, and flowers and shrubs further out for color and privacy.

    Keep beds back from door swings and paths, and line them so soil and water do not stain the concrete. Water beds carefully, since overflow will run onto the patio, and mulch the surface to hold moisture. Raised beds also lift planting to eye level from a low chair, which makes a small patio feel more enclosed and garden-like.

    30. Retractable Awning Patio

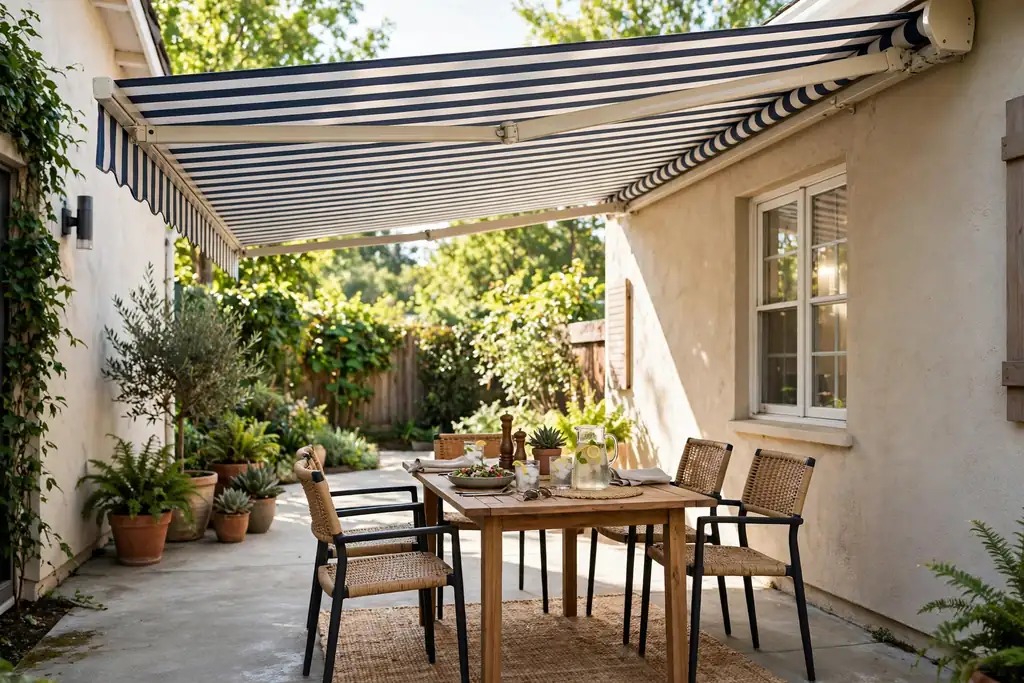
    Concrete patio covered by a retractable striped awning with chairs and a table in shade.

    A retractable awning attached to the house wall gives a concrete patio shade on demand and sun when you want it. Extend it for lunch and hot afternoons, retract it in winter, in high wind, or when you want sun on the slab. Choose a fabric rated for outdoor use and a frame fixed to solid wall structure, following the maker weight and fixing guides.

    Keep the awning clear of doors, gutters, and upstairs windows when extended, and retract it in storms as the maker directs. An awning suits patios beside a house wall where a pergola would darken rooms, and it pairs well with light concrete that would otherwise glare in sun. Wash the fabric each season, and check the mechanism yearly so it opens and closes smoothly.

    31. Lounge Zone with Sofa and Rug

    Concrete patio lounge zone with an outdoor sofa

    A lounge zone on a concrete patio turns part of the slab into an outdoor living room, with a sofa, a coffee table, and a rug. Keep the sofa low and deep, with weather resistant cushions and removable covers, and place the rug under the sofa front legs so it stays put. A rug softens concrete underfoot and marks the lounge zone clearly against a dining or walking area.

    Store cushions in a dry box when rain is forecast, and choose a rug made for outdoor use that dries fast after rain. Keep the lounge zone near the house door for easy access, but leave a clear path past it so nobody climbs over the sofa to reach the garden. Add a side table for drinks and a lantern for evenings, and keep the rest simple.

    32. Bistro Corner Patio

    Concrete patio corner with a small round bistro table

    A bistro corner patio gives a small concrete area a daily purpose: morning coffee, reading, or a quiet chat for two. A round bistro table and two chairs in a sunny corner, beside a wall with climbing plants, need little space and little upkeep. Choose a stable table that does not wobble on concrete, and chairs that fold or stack for cleaning and winter storage.

    Add one pot of scented plants beside the table and a cushion on each chair to make a short sit last longer. Site the corner where morning sun reaches it but wind is broken by a wall, and keep the route from the door clear so you can carry cups safely. A bistro corner suits small patios, side yards, and spots too small for a dining set, and it often gets used more than a larger patio.

    Conclusion

    A good concrete patio starts with use, not with a pattern book. Decide how you will sit, eat, cook, or gather outside, pick a finish that suits that use and your climate, and then add shade, planting, and light to soften the concrete. One well planned slab, used every day, will serve you better than a large patio with no clear job. Pick one finish and one layout idea from this list, test the furniture footprint on the ground, and build the rest around what you actually do outside.

    Save this list on Pinterest before your next garden project, and work through it one area at a time: finish first, then layout, then the seating and shade that make the patio yours.

    FAQs

    What is the best concrete finish for a patio?

    There is no single best finish, because the right choice depends on use, climate, and upkeep. Brushed concrete is practical and grippy, stamped concrete looks like stone or wood, stained concrete adds warm color, and exposed aggregate hides dirt and grips well when wet. Pick the finish that suits how you use the patio, then check slip, heat, and sealing needs for your spot.

    How do you stop a concrete patio from looking plain?

    Soften the slab with planting, shade, and furniture rather than covering it completely. Built-in planters, pots at the corners, a pergola or shade sail, a rug under the seating area, and warm evening light all break up grey concrete. A border band, a saw-cut grid, or a stained tone also gives the surface itself more interest without extra furniture.

    Is a concrete patio slippery when wet?

    Some finishes are slippery when wet, especially polished and sealed smooth concrete, while brushed and exposed aggregate finishes grip better. Ask about a grip additive in the sealer for shaded, poolside, or north facing patios, keep algae and moss off the surface, and light step edges for evening use. Footwear matters too: smooth soles slip more on wet sealed concrete than textured soles.

    How do you maintain a concrete patio?

    Sweep it regularly, wash it with water and a mild cleaner, and clear leaves and soil from joints and edges so moss does not settle. Seal the surface as the finish maker directs, and reapply when water stops beading or color starts to fade. Check joints, edges, and drainage each spring, and repair small cracks early so water and frost do not widen them.

    Can you paint an existing concrete patio?

    Yes, if the concrete is clean, sound, and dry, and you use paint made for exterior concrete and foot traffic. Clean off dirt, algae, and loose sealer first, test the paint and any stencil on a hidden corner, and seal the finished paint to protect it from chairs and weather. Painted patios wear fastest where chairs scrape, so use furniture pads and expect touch-ups.

    How much space does a concrete patio need for dining?

    Allow room for the table plus chair pull-out space on every side, not just the table footprint. As a guide, a table for four needs a clear area larger than the table itself so chairs can move and people can walk past, and a table for six needs more again. Tape the footprint on the ground, place the chairs, and walk the route past them before you pour or buy furniture, since a cramped patio gets used less.


  • 13 Chic Black Accent Wall Ideas to Give Your Space a New Look

    13 Chic Black Accent Wall Ideas to Give Your Space a New Look

    A black accent wall can give a room a clear focal point, but only when the rest of the room stays calm enough to let it lead. These chic black accent wall ideas cover paint, paneling, wallpaper, shelving, and fireplace walls, so you can pick a version that suits your room, your budget, and your lease. The key is balance: one dark wall, pale or warm surfaces beside it, and enough light to keep the room welcoming. Start by choosing the wall you see first when you enter the room, then test a large sample in morning light and evening lamplight before you commit.

    Key Takeaways

    • Paint only one wall black in most rooms, and keep the ceiling white or pale so the room keeps its height.
    • Matte or eggshell black reads softer than gloss, which can show every bump and brush mark.
    • Pair black with warm wood, cream, brass, or green plants so the wall feels warm rather than cold.
    • Add light on or near the black wall, such as a lamp, picture lights, or a mirror that catches daylight.
    • Test a large sample board in daylight and lamplight before painting a full wall.
    • In a rental, use removable wallpaper, leaning panels, or a painted board you can take with you.

    1. Matte Black Wall Behind the Bed

    Bedroom with a matte black accent wall behind a bed with white bedding and warm wood bedside tables.

    Paint the wall behind the bed in matte black and keep the bedding in white, cream, or soft grey, so the bed stands out against the dark backdrop. Matte paint softens the wall and hides small surface flaws better than gloss, which matters on a large bedroom wall. This suits a main bedroom where you want a calm, hotel-like focal point without adding furniture.

    Keep bedside lamps in warm white and add one wood or brass detail, such as a wooden tray or a brass lamp base, to stop the corner feeling cold. If the room is small, keep the other walls pale and the floor light, and leave the ceiling white. A black headboard in the same tone can blend in, while a wood or upholstered headboard in a pale fabric gives a clearer shape against the wall.

    2. Black Vertical Wood Paneling in a Living Room

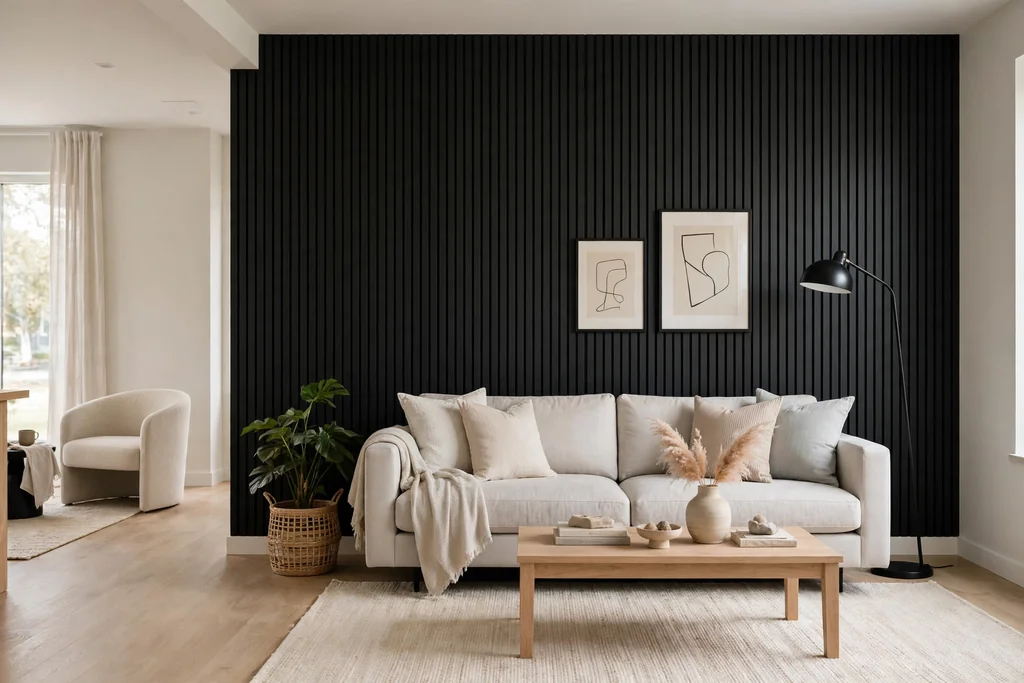
    Living room with black vertical wood paneling behind a pale sofa and a light rug.

    Fit vertical wood boards or slats on one living room wall and paint them black for a paneled wall with shadow and depth. The vertical lines draw the eye up and give the wall texture that flat paint alone cannot, which helps a plain living room feel finished. This works well behind a sofa or a television, where the paneling frames the main seating area.

    Use narrow boards for a neat, tailored look, or wider slats for a bolder, modern feel. Keep the gaps even and paint the boards and the wall behind them the same black, so the joints read as shadow lines rather than stripes. Pair the wall with a pale sofa, a light rug, and warm wood floors, and add a floor lamp nearby so the paneling shows its texture in the evening.

    3. Black Gallery Wall with Light Frames and Art

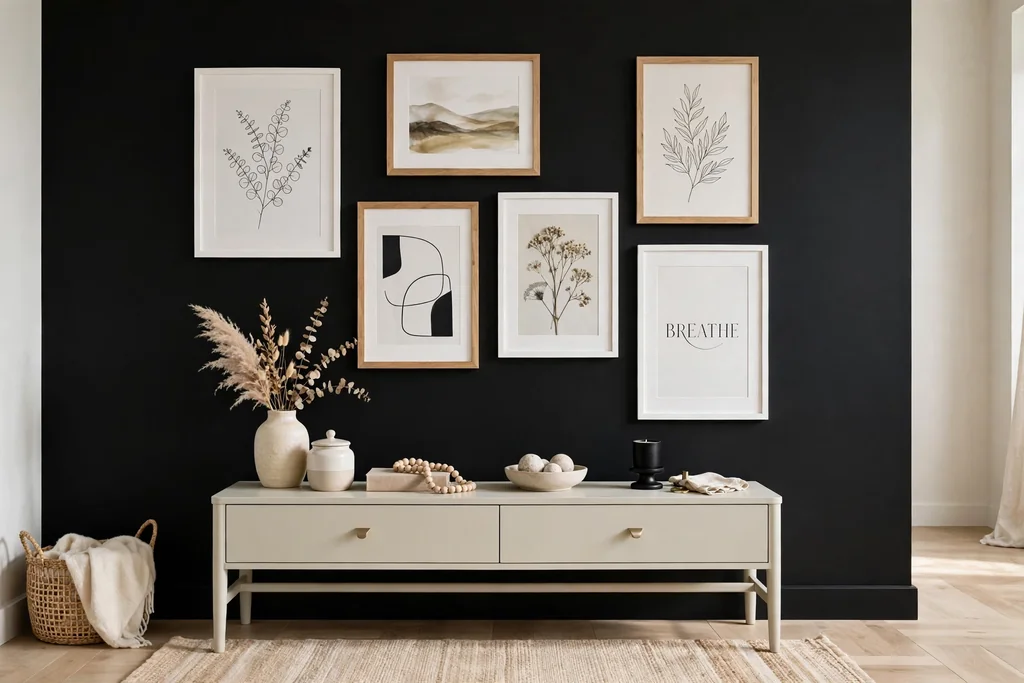
    Black gallery wall with art in white and wood frames above a pale console table.

    Use a black wall as the backdrop for a gallery of art in white, wood, or brass frames, so the pictures read clearly against the dark surface. Light frames give contrast that black frames would lose, and a mix of print sizes keeps the display from looking like a single block. This idea suits a hallway, a stair wall, or the wall beside a bed, where you can enjoy the art up close.

    Plan the layout on the floor first, with the largest piece in the center or slightly off center, and keep gaps of 2 to 3 inches between frames. Hang the center of the group at eye level from where you see it most. For more help choosing and hanging the pieces, see these bedroom wall art ideas. Leave one part of the wall empty so the gallery has room to breathe.

    4. Black Chalkboard Wall in a Kitchen or Study

    Kitchen black chalkboard wall with handwritten notes and a small shelf holding chalk.

    Paint one wall with chalkboard paint to make a black accent wall you can write on, draw on, and change with the week. In a kitchen it can hold a shopping list, a menu, or a note for the family, while in a study it can hold a schedule, a quote, or a brainstorming sketch. The wall stays useful even when you do not redecorate around it.

    Use two or three thin coats for an even writing surface, and season the wall by rubbing chalk over it and wiping it clean before the first use, following the paint maker instructions. Keep chalk and an eraser in a small cup or tray nearby, and use a damp cloth for a full clean. If chalk dust bothers you, chalk markers give a cleaner line and wipe off with water on most chalkboard paints.

    5. Black Wainscoting with White Walls Above

    Dining room with black wainscoting below a white chair rail and white walls above.

    Paint the lower half of the wall black and keep the upper half white or cream, with a chair rail or trim board marking the split. This gives a room the depth of a black wall without darkening the whole space, since the pale upper wall and white ceiling keep the room bright. It suits a dining room, a hallway, or a bedroom where full height black paint would feel too strong.

    Fit the rail at about one third of the wall height, or at chair height in a dining room, and paint the rail the same black or in white for a crisper edge. Use a washable paint finish on the lower section, since that part of the wall gets scuffs from chairs, bags, and hands. Keep art above the rail simple and light, so the upper wall stays calm against the dark base.

    6. Black Fireplace Wall as the Room Focus

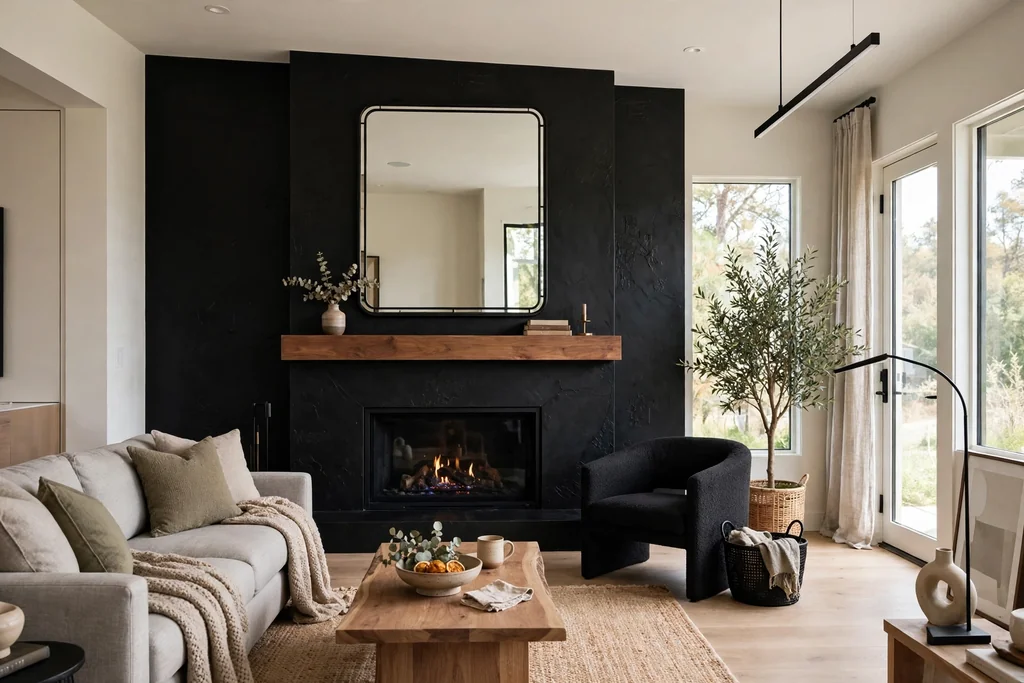
    Living room with a black fireplace wall, a wood mantel, and a mirror above the fire.

    Paint the fireplace wall black from floor to ceiling, including the chimney breast if you have one, so the fireplace becomes the clear center of the room. Black behind a fire surround makes the mantel, the fire, and any objects on the mantel stand out, and it suits both a working fireplace and a decorative one. Keep the other walls pale and the mantel in wood, stone, or white for contrast.

    Style the mantel with restraint: one mirror or one large print, plus a pair of candles or vases, rather than a crowded row. If the fireplace is not in use, a stack of logs, a large candle group, or a simple grate keeps the opening looking finished. Check that the paint you use near a working fire is rated for heat, and keep soft furnishings at a safe distance from the opening.

    7. Black Wall Behind a Sofa with Warm Wood Shelves

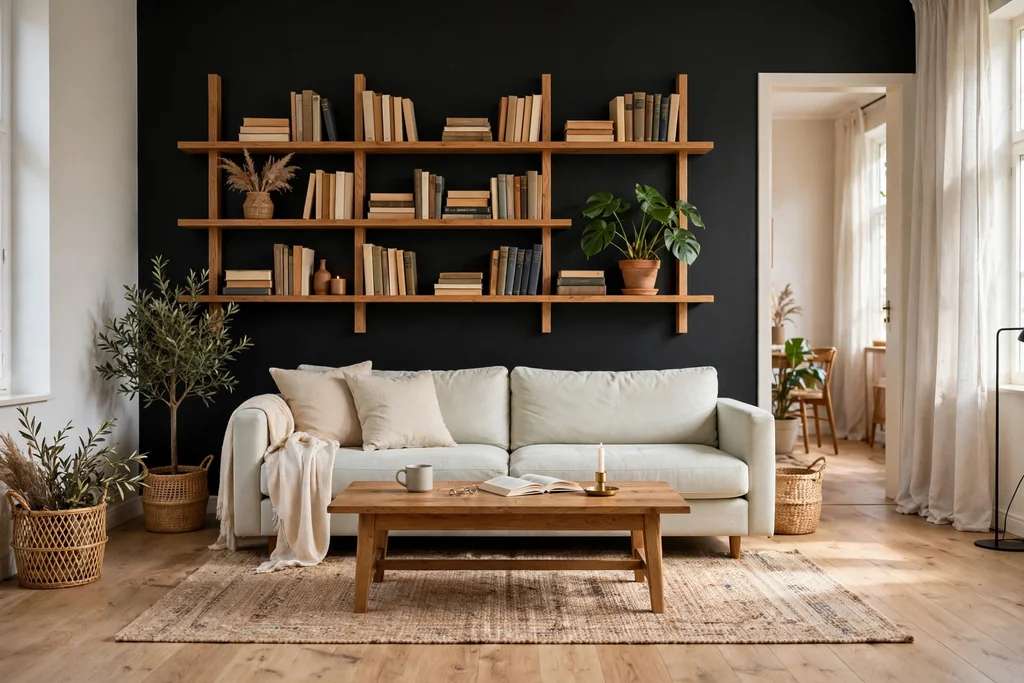
    Living room with a black wall, warm wood shelves with books and a plant, behind a pale sofa.

    Mount warm wood shelves on a black living room wall behind or beside the sofa, so books, plants, and simple objects stand out against the dark backdrop. The wood warms the black, and the shelves turn the wall into storage as well as a focal point. This suits a living room that needs both display space and a stronger anchor for the seating area.

    Fix shelves into studs or with fixings rated for the weight, and leave some shelf space empty so the display does not look packed. Mix books with one plant, one vase, and one framed photo per shelf, and repeat the wood tone in a coffee table or floor lamp. Keep the sofa in a pale or mid tone fabric, since a black sofa against a black wall can lose its shape in low light.

    8. Black Desk Wall for a Home Office

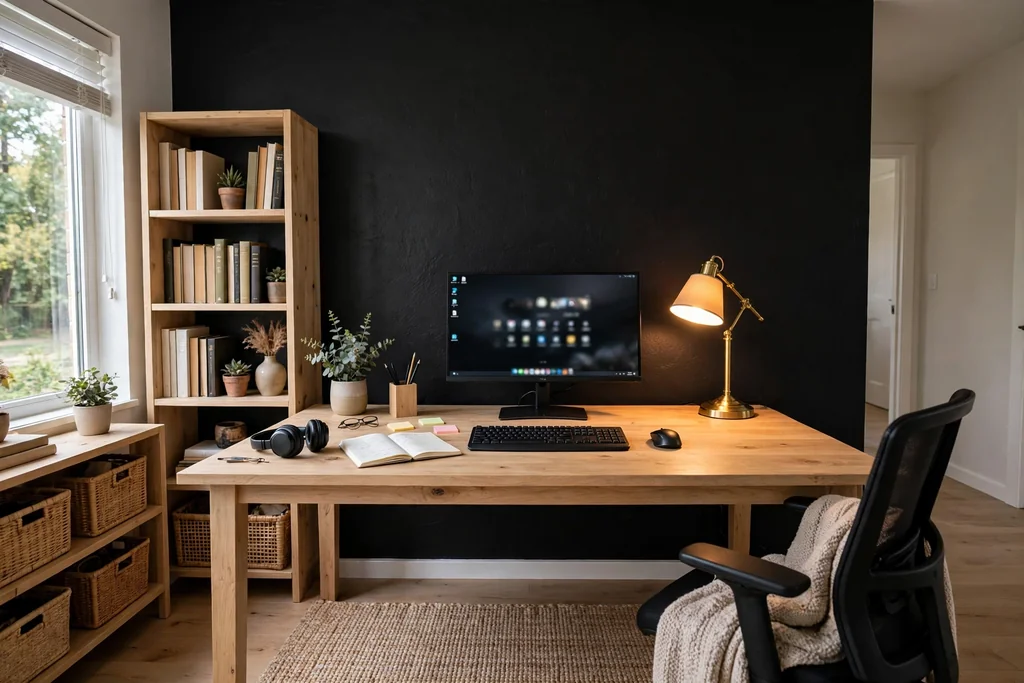
    Home office with a black desk wall behind a light wood desk and a warm desk lamp.

    Paint the wall behind your desk black to frame your workspace and cut visual clutter during video calls and focused work. A dark backdrop makes a pale desk, a monitor, and a desk lamp read clearly, and it gives a small office corner a defined zone even in a shared room. This works well in a spare room corner, a bedroom nook, or a living room alcove.

    Keep the desk surface light and add one warm lamp with a focused beam, so your work area stays bright against the dark wall. Add a pinboard or a single shelf in wood or brass, and keep cables tidy with clips or a tray, since loose cables show up more against black. If the office shares a bedroom, a black desk wall can also mark the end of the work zone when the day is done.

    9. Black Dining Wall with Brass and Warm Light

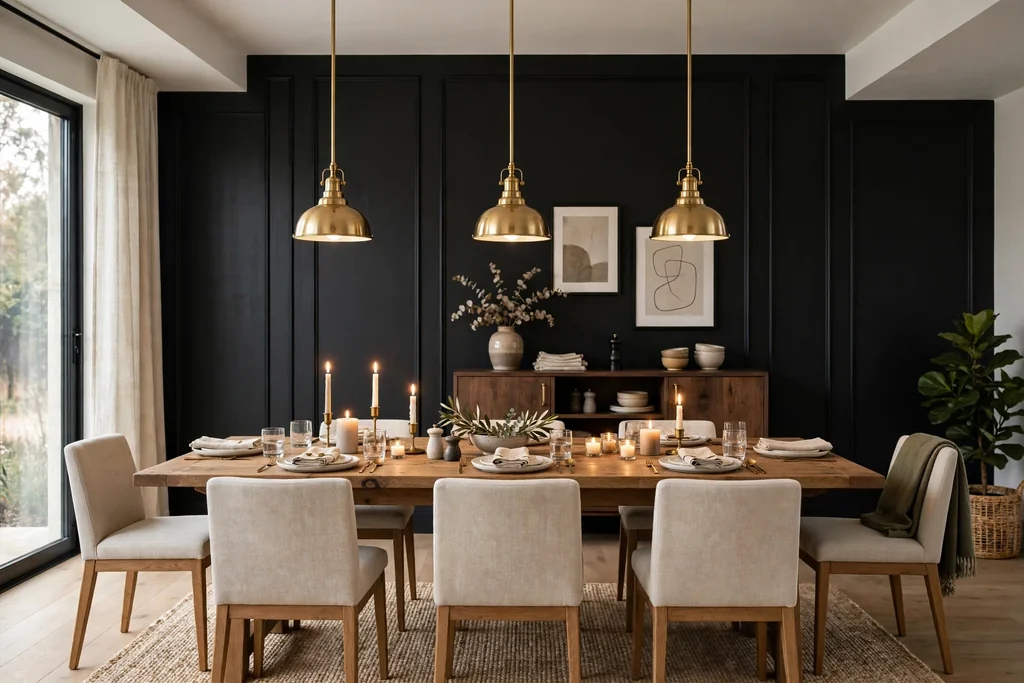
    Dining room with a black accent wall, brass pendant lights over a wood table, and candles.

    Pair a black dining room wall with brass details and warm light for a dining space that feels calm and a little formal in the evening. Brass candlesticks, a brass framed mirror, or brass pendant lights catch lamplight against the black, while a wood table keeps the room grounded. This suits a dining room used mainly in the evening, when warm light does most of the work.

    Hang one pendant or a pair of pendants low over the table, with warm white bulbs, and add candles for a second layer of light. Keep chairs in wood or a pale upholstery so the table setting reads clearly, and use a light tablecloth or pale placemats for contrast. If the dining room is also used in daylight, add a mirror on the black wall to bounce light back into the room.

    10. Black Limewash Wall with Soft Texture

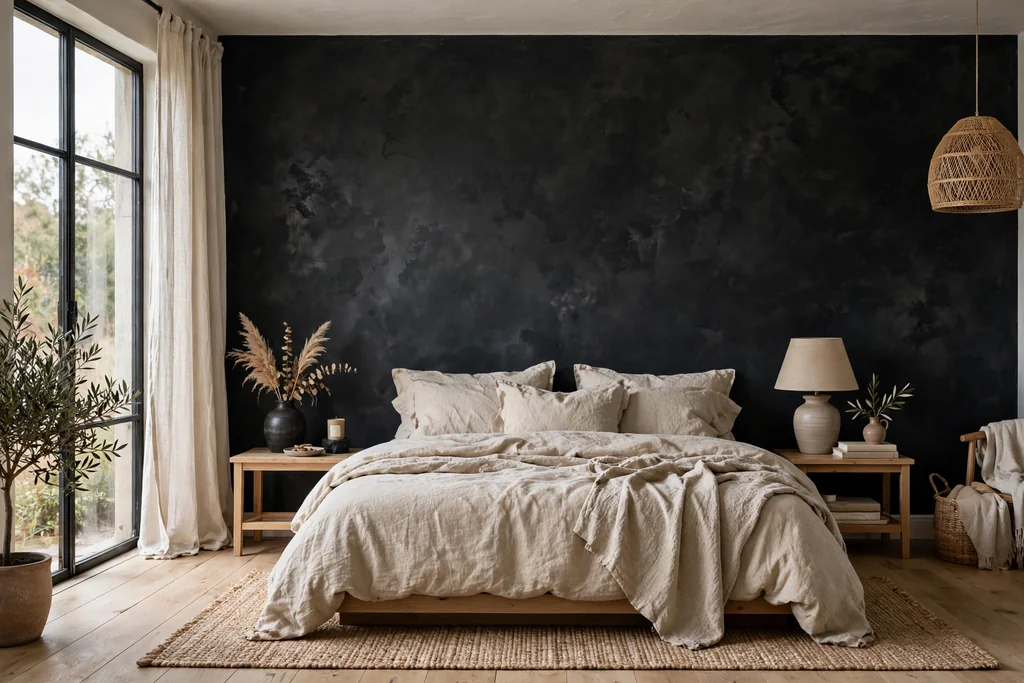
    Bedroom with a textured black limewash wall behind a bed with linen bedding.

    Use black limewash or a textured mineral paint for a black wall with soft, cloudy movement instead of a flat, even color. The texture catches light across the surface, so the wall changes through the day and feels less stark than a standard matte paint. This suits a bedroom or living room where you want depth without pattern, and it pairs well with linen, wool, and raw wood.

    Apply limewash with a block brush in loose, overlapping strokes, following the maker instructions, and expect variation from patch to patch, since that variation is the point of the finish. Test it on a board first, since limewash can dry lighter or darker than it looks when wet. Keep furniture and art simple against a limewash wall, so the texture itself stays the main feature.

    11. Removable Black Wallpaper for a Rental

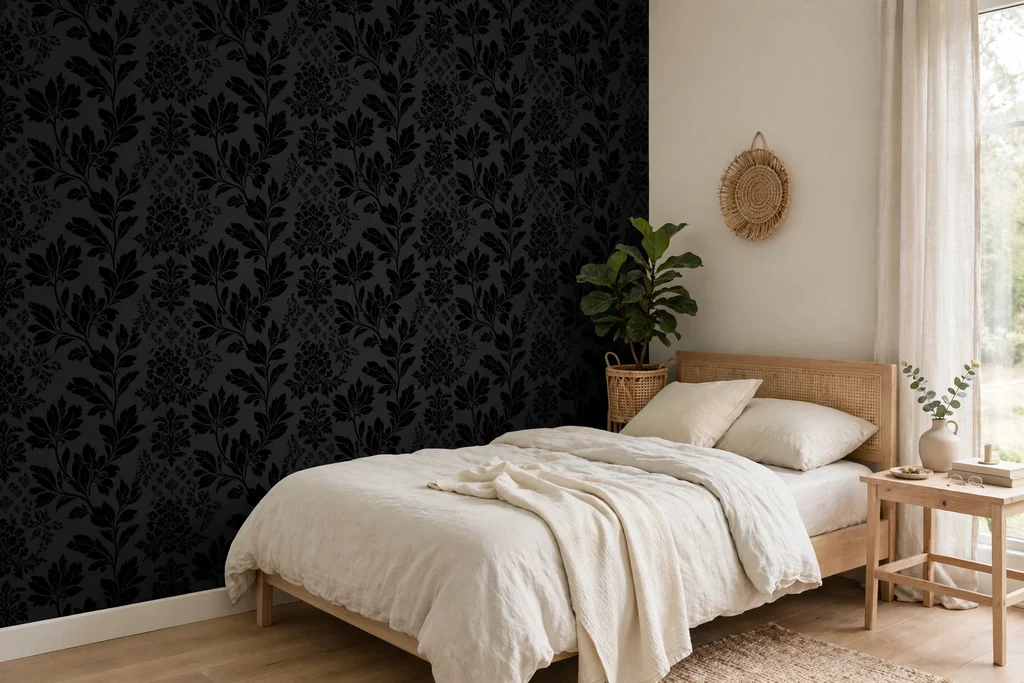
    Bedroom corner with removable black patterned wallpaper on one wall beside a pale bed.

    Hang removable black wallpaper on one wall for a black accent wall you can peel off when you move out. Patterned options, such as a subtle stripe, a small botanical print, or a faux linen texture, add interest that flat paint cannot, while a plain black removable paper gives the cleanest backdrop. This suits renters and anyone who wants to test a black wall before painting.

    Clean the wall first, measure carefully, and hang the first strip with a level, since a crooked first strip throws off the whole wall. Smooth out air bubbles with a plastic smoother as you go, and trim at the ceiling and baseboard with a sharp blade. Check the paper maker guidance for your wall type, and test a small piece in a hidden spot first if your walls are freshly painted or textured.

    12. Black Built-In Shelving Wall

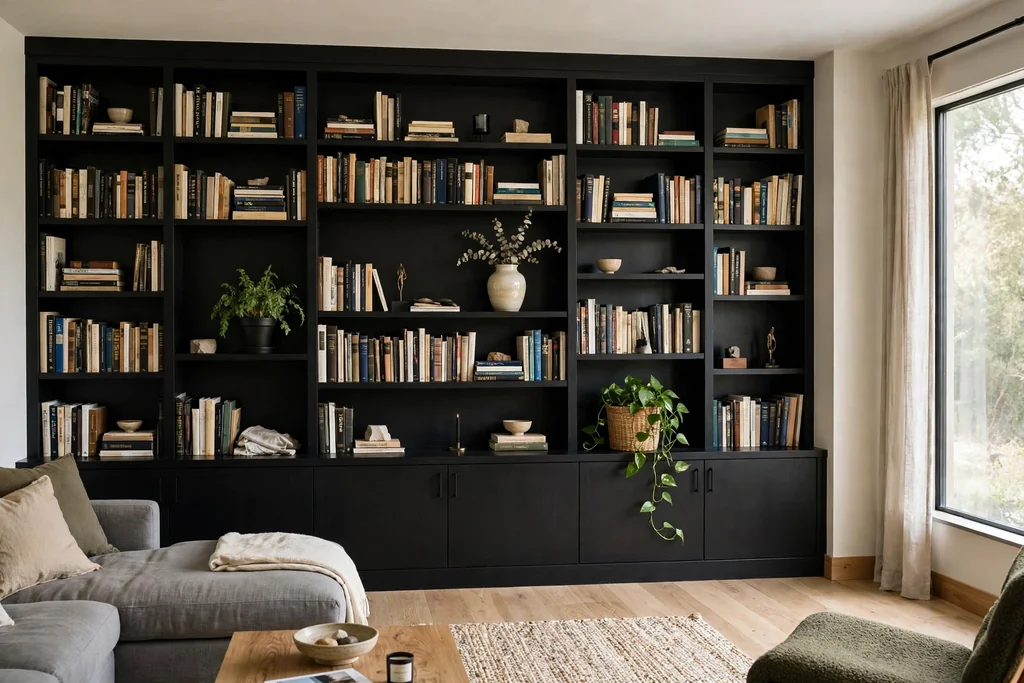
    Living room wall of black built-in shelves filled with books, a vase, and a plant.

    Paint a full wall of built-in shelves black, including the backs of the shelves, so books and objects sit against a dark, even backdrop. The black unifies shelves of different contents and makes the wall read as one piece of furniture rather than a set of separate bookcases. This suits a living room, a study, or a hallway wall with enough depth for shelves.

    Group books by size or color in loose blocks, and leave some shelves partly empty or styled with a vase or a plant, so the wall does not look like storage alone. Paint the shelf backs the same black as the frames, and add a picture light or a small lamp on the top shelf if the wall is in a dim corner. Keep the floor in front of the shelves clear, since a full shelving wall already gives the room plenty to look at.

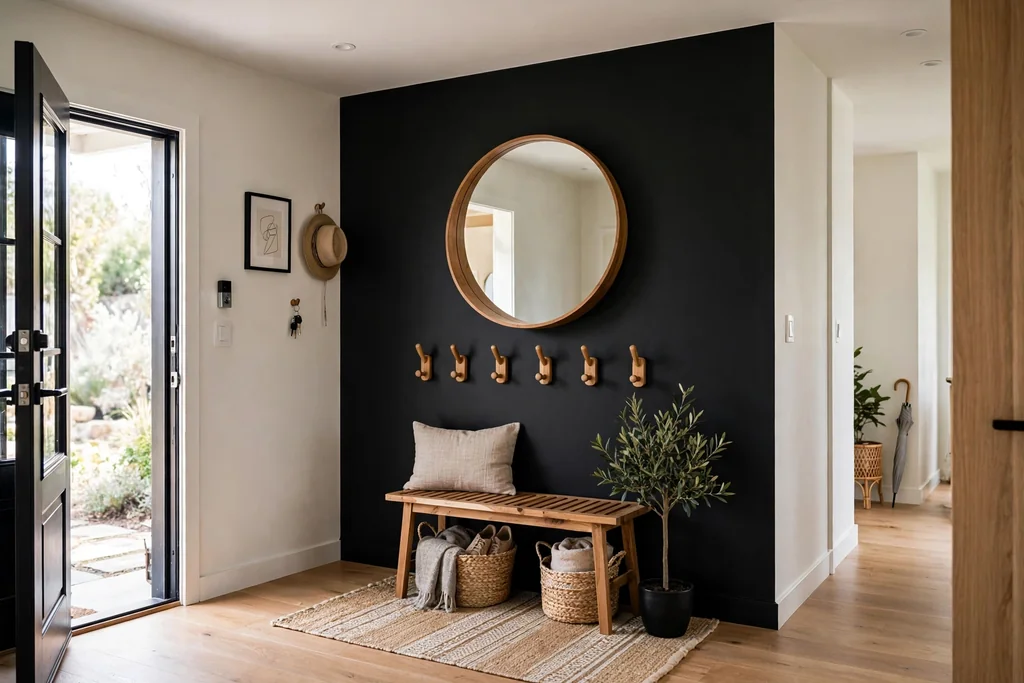
    13. Black Entryway Wall with a Mirror and Hooks

    Entryway with a black accent wall, a large round mirror, wooden hooks, and a small wood bench.

    Paint the entryway wall black and add a large mirror, a row of hooks, and a small bench or console, so a narrow hall gains a clear purpose and a focal point. The mirror bounces light and gives a last check before you leave, while hooks keep coats and bags off the floor. This suits a small entry, a mudroom wall, or the wall beside a front door.

    Hang the mirror at a height that suits the tallest person in the household, and keep hooks at two heights if children use the space too. Use a washable black paint, since entry walls get scuffed by bags and shoes, and add a pale rug or a wood bench to keep the floor light. Keep the opposite wall pale and the ceiling white, so the narrow space still feels open.

    Conclusion

    A black accent wall works best when it has a clear job: framing a bed, a sofa, a fireplace, or a desk, and when the rest of the room gives it light, warmth, and breathing room. Pick one wall, test your finish in daylight and lamplight, and pair the black with wood, cream, brass, or plants rather than more dark surfaces. For help pairing black with the rest of your palette, see these wall color combinations. Save this list on Pinterest before you start, and work through it in order: choose the wall first, test the sample second, then paint or paper only that wall, so you can stop and adjust if the balance feels off.

    FAQs

    Will a black accent wall make a small room feel smaller?

    It can, if every surface is dark, but one black wall with pale side walls, a white ceiling, and a mirror usually keeps a small room feeling open. Choose the wall with the main furniture on it, keep the floor light, and add a lamp near the black wall so it does not fall into shadow.

    What finish should I use for a black accent wall?

    Matte or eggshell suits most walls, since both hide small flaws and give a soft, even look. Use a washable eggshell or satin in a hallway, kitchen, or entryway, where the wall gets touched often, and save flat matte for a bedroom or a low traffic wall.

    What trim color works best with a black accent wall?

    Bright white or warm white trim gives the cleanest edge and keeps the room bright, while natural wood trim warms the black and suits a rustic or mid century room. Pick warm white trim if your other walls are cream, and bright white if they are a cool white or pale grey.

    Can I do a black accent wall in a rental?

    Yes, if you use removable wallpaper, a freestanding paneled board leaned against the wall, or large painted boards hung like art. Check your lease first, test the removable paper in a hidden spot, and keep the original wall color underneath untouched so you can return the room to its starting state.

    Which wall should I paint black?

    Paint the wall you see first when you enter the room, or the wall behind the main piece of furniture, such as a bed, sofa, fireplace, or desk. Avoid a wall broken up by many doors or windows, since the black will read as patches rather than one clear focal point.

    What colors go well with a black accent wall?

    Cream, warm white, warm wood, brass, sage green, dusty blue, and soft blush all sit well beside black, since each one adds warmth or lightness without competing for attention. Repeat your chosen accent once more in cushions, art, or a rug, so the black wall looks planned rather than isolated.


  • 28 Cheap and Easy Home Improvement Ideas to Inspire You

    28 Cheap and Easy Home Improvement Ideas to Inspire You

    A home can feel fresher without a remodel. Paint, hardware, lighting, and a few careful styling moves do most of the work, and many of the best low cost changes take a single weekend. Start with the surface you notice most, usually a wall, a door, or a kitchen cabinet run, then add one lighting change and one storage fix. These 28 cheap and easy home improvement ideas cover walls, kitchens, bathrooms, lighting, storage, and outdoor entries, so you can pick one project or build a fuller refresh over time. If the kitchen is your starting point, these kitchen ideas on a budget cover cabinets, counters, tile, and storage in more detail.

    Key Takeaways

    • Start with the largest visible surface, usually walls, cabinets, or a front door, before buying small accessories.
    • Keep one palette through the home: a wall color, a metal finish, and one wood tone, repeated in several rooms.
    • Test paint, tile, and peel-and-stick samples in daylight and evening light before covering a large area.
    • Favor reversible changes, such as hardware swaps, peel-and-stick tile, and window film, if you rent or plan a larger remodel later.
    • Choose washable, wipeable finishes near stoves, sinks, and entries, since budget materials still need to survive daily use.
    • Finish with one lighting fix and one storage fix, since a tidy, well lit home reads as more finished than a decorated but cluttered one.

    1. Repaint One Room in a Light Neutral

    Living room with walls freshly repainted in a light warm neutral color and white trim.

    Paint is the single change that shifts a room most for the least cost. A light neutral, such as warm white, cream, or pale greige, brightens the walls and lets furniture, art, and wood do the rest of the work. Clear the room as much as you can, clean the walls, fill small holes, and cut in the edges before rolling the large areas.

    Paint one wall first and check it in daylight and evening light before you commit to the full room. Keep the finish washable in hallways, kitchens, and rooms used by children or pets, since flat paint marks more easily. If you need help pairing the new wall color with trim and furniture, these wall color combinations show how a main color and a supporting color share a room.

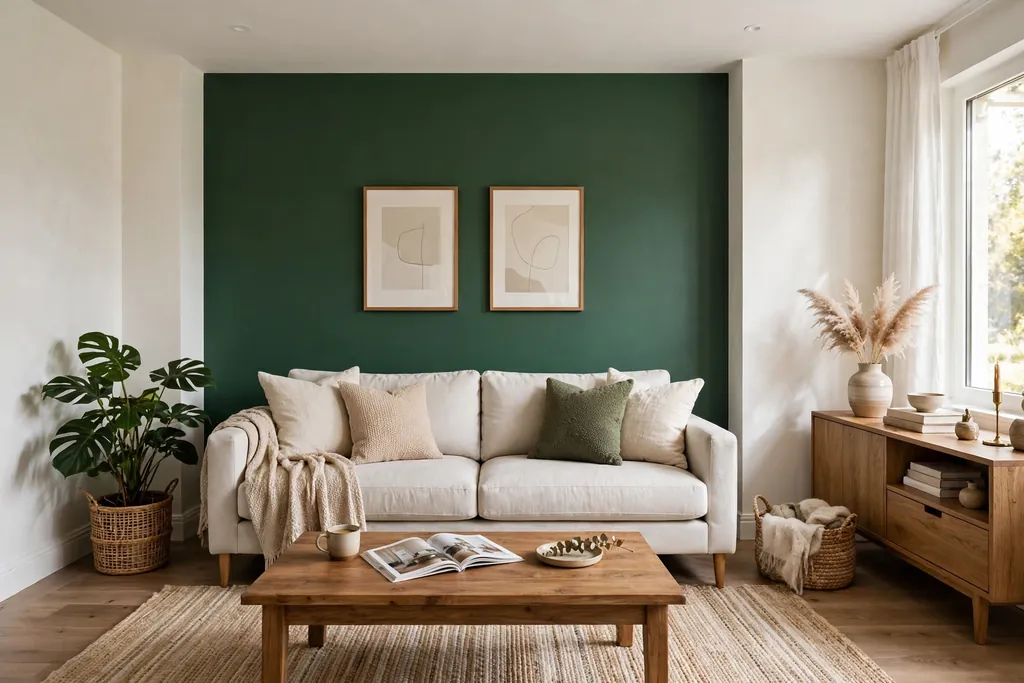
    2. Paint One Accent Wall

    Living room with one deep green accent wall behind a pale sofa.

    If repainting a whole room feels like too much, paint a single accent wall instead. One strong wall behind a sofa, a bed, or a sideboard gives the room a clear focal point, while the other walls stay calm. A deep green, navy, or terracotta suits a wall that already holds furniture, since the furniture breaks up the color.

    Use white or cream trim and a pale rug so the accent wall reads as a backdrop, not a dark corner. Repeat the accent color once more, in a cushion or a throw, so the choice looks planned. In a small or dim room, pick a shade with a touch of warmth, and keep the ceiling white.

    3. Swap Cabinet and Drawer Hardware

    Kitchen cabinets with new matte black knobs and cup pulls.

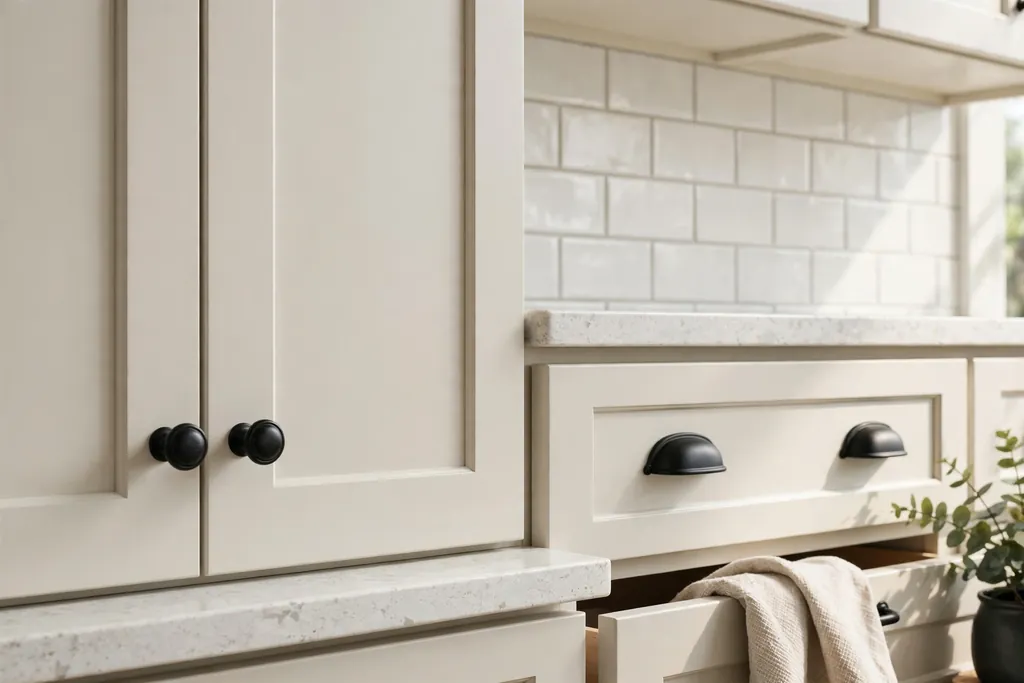
    New knobs and pulls change how cabinets feel every time you open a door, and the job takes an afternoon. One finish through the home, such as matte black, brushed nickel, or brass, reads as a plan, while mixed finishes can look unfinished. Measure the screw spacing on your existing pulls before ordering, since that spacing decides which replacements fit without new holes.

    Save the old hardware in a labelled bag, especially if you rent. Wipe new hardware near the stove each week, since kitchen grease dulls metal over time. If a few doors have knobs and others have pulls, keep that pattern and simply update the finish, so the change looks calm rather than busy.

    4. Refresh Kitchen Cabinets With Paint

    Kitchen with cabinets freshly painted soft sage green with brass knobs.

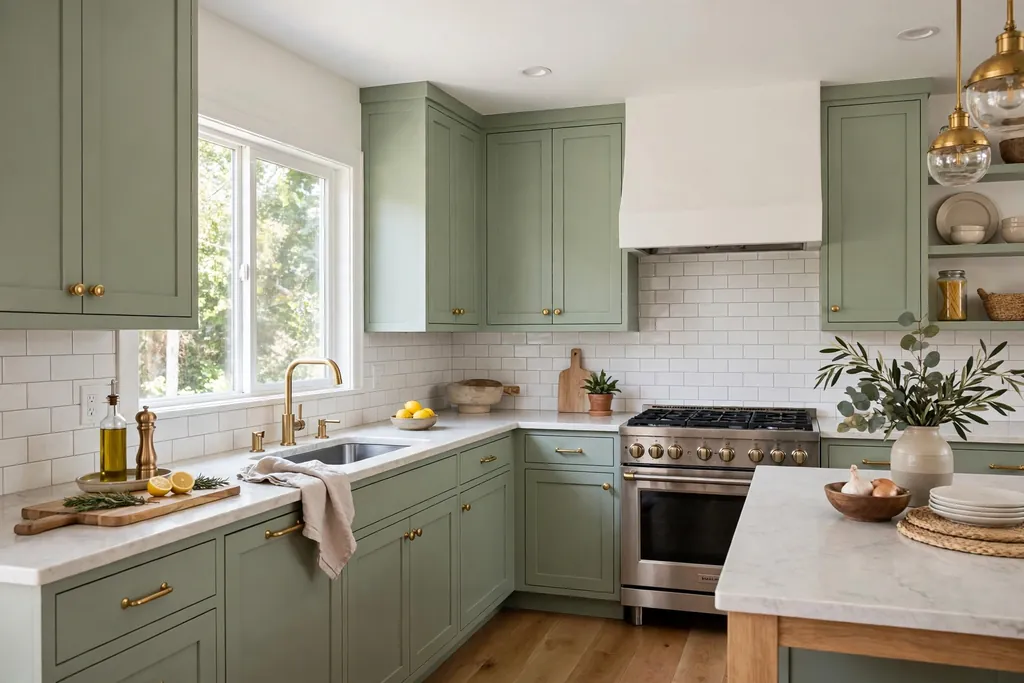
    If your cabinet boxes are sound but the color dates the kitchen, paint the doors and drawer fronts. A light neutral brightens the room, while a soft green or deep blue on lower cabinets only gives a two tone look with less risk. Clean and sand the doors first, remove the hardware, and use a primer made for cabinets so the paint grips and wipes clean.

    Paint one door as a test and check it beside your floor and counter in daylight and evening light. Label each door on the back as you remove it, so refitting takes minutes rather than a puzzle session. Keep the finish satin or semi gloss near the stove, since flat paint shows splashes and is harder to wipe.

    5. Lay Peel-and-Stick Backsplash Tiles

    Kitchen backsplash with white peel-and-stick subway tiles behind a cooker.

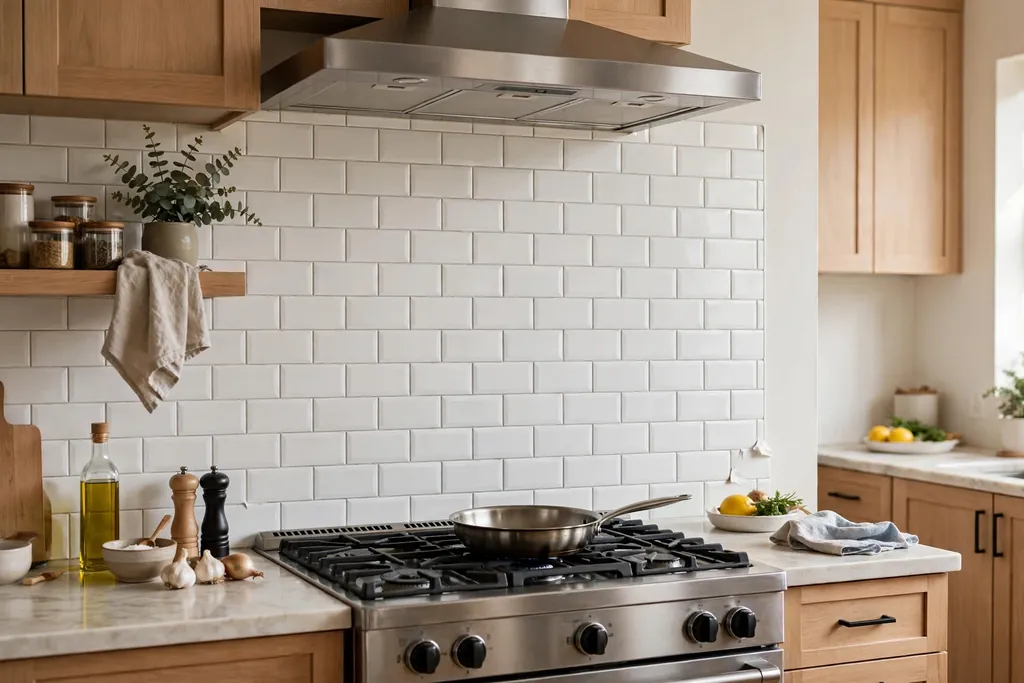
    Peel-and-stick tiles give a tiled backsplash look with no grout, no wet cutting, and no tiler. Clean the wall, start from a level line above the counter, and press each tile firmly, trimming around sockets with a sharp knife. A white subway look suits most kitchens and pairs with painted cabinets and wood counters.

    Check a sample tile beside your cabinets in daylight and evening light, since the printed finish can shift between lights. Keep peel-and-stick tiles clear of direct heat behind the cooker, and wipe them with a soft damp cloth. If a tile edge lifts near the sink, dry the wall fully and press it back, or replace that single tile.

    6. Lay Peel-and-Stick Floor Tiles in a Small Room

    Small laundry room floor with light peel-and-stick wood look tiles.

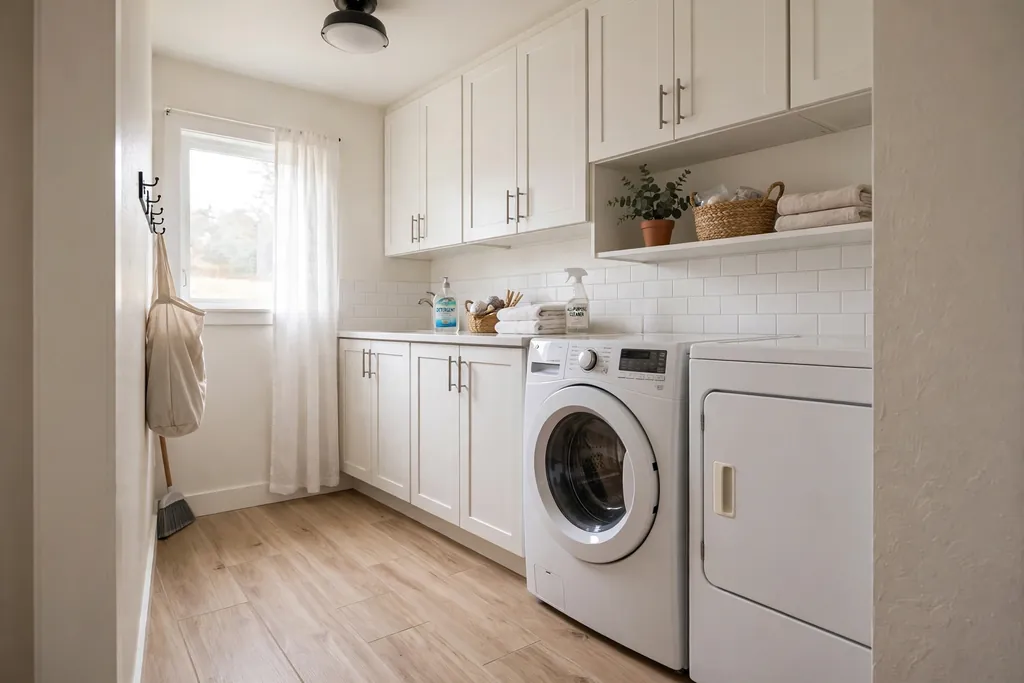
    Peel-and-stick floor tiles suit a small room, such as a laundry room, a bathroom, or an entry, where a full new floor would cost far more. Clean the existing floor, start from the center of the room so the cut tiles at the edges look even, and press each tile firmly into place. A light stone or wood look keeps a small room bright.

    This suits a smooth, sound floor, not a floor with deep damage or loose boards. Keep the tiles clear of standing water until you know how they handle your room, and wipe spills promptly. If one tile wears or lifts, you can replace that tile alone, which keeps this a low cost, low risk change.

    7. Paint the Front Door a Fresh Color

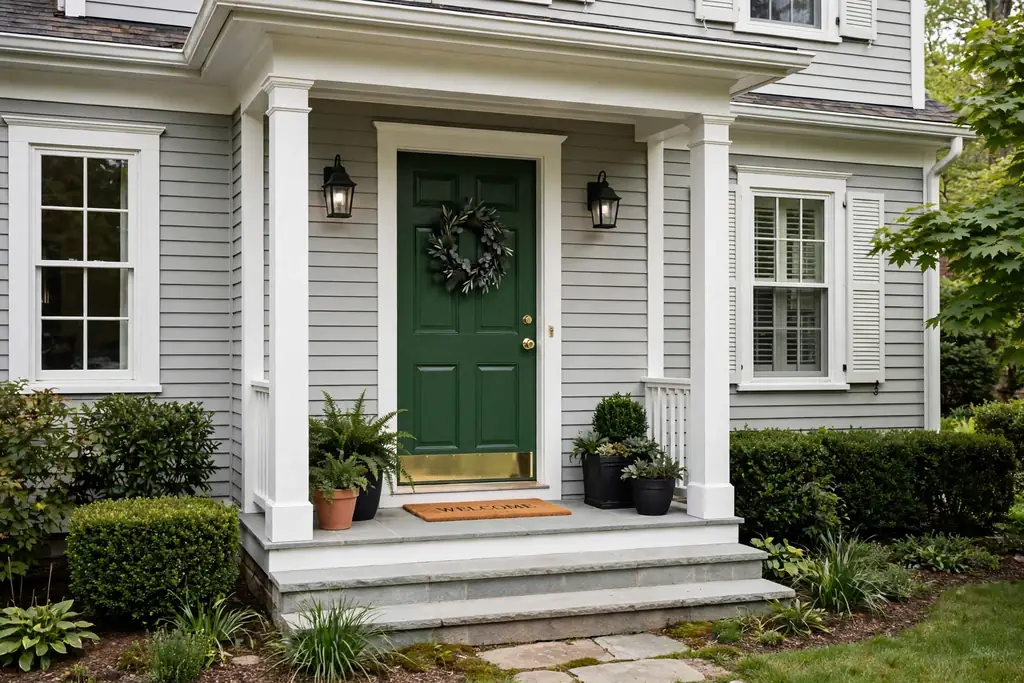
    House front entry with a front door freshly painted deep green.

    A front door is the first surface visitors see, and a fresh color changes the whole entry. A deep green, navy, red, or classic black suits many homes, and a satin or semi gloss finish stands up to weather and handprints. Clean the door, sand lightly, and remove the hardware or mask it carefully before painting.

    Paint in mild, dry weather and leave the door open long enough for the paint to dry without sticking to the frame. Step back to the street and check the color beside your brick, siding, and roof before the second coat, since door colors look stronger at full size. Keep the rest of the entry simple, so the door stays the focal point.

    8. Update Front Door Hardware and House Numbers

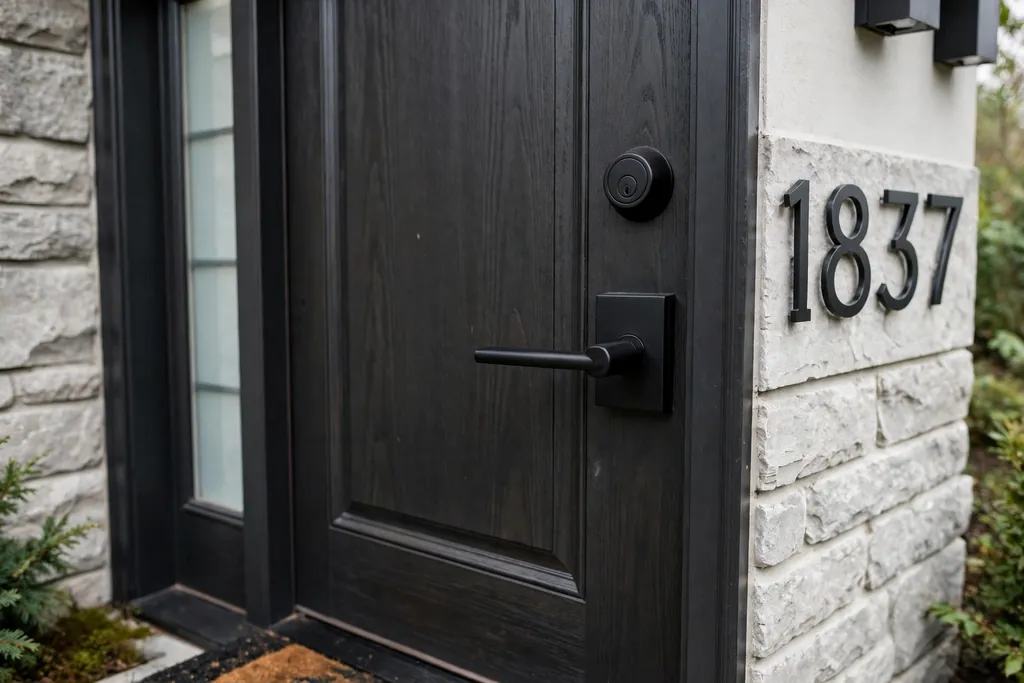
    Front door with new matte black handle, lock, and house numbers.

    New door hardware and house numbers finish a painted door and help visitors find your home. Match the finish to the door color and to any porch light, such as matte black with a dark door or brass with a deep green door. Check the existing screw holes and lock size before ordering, so the new fittings sit cleanly.

    Choose house numbers large enough to read from the street, and place them at eye level beside the door or on a porch post. Save the old hardware in a labelled bag if you rent. Wipe the new fittings often, since porch hardware collects dust and rain marks faster than indoor hardware.

    9. Replace Dated Light Fixtures and Shades

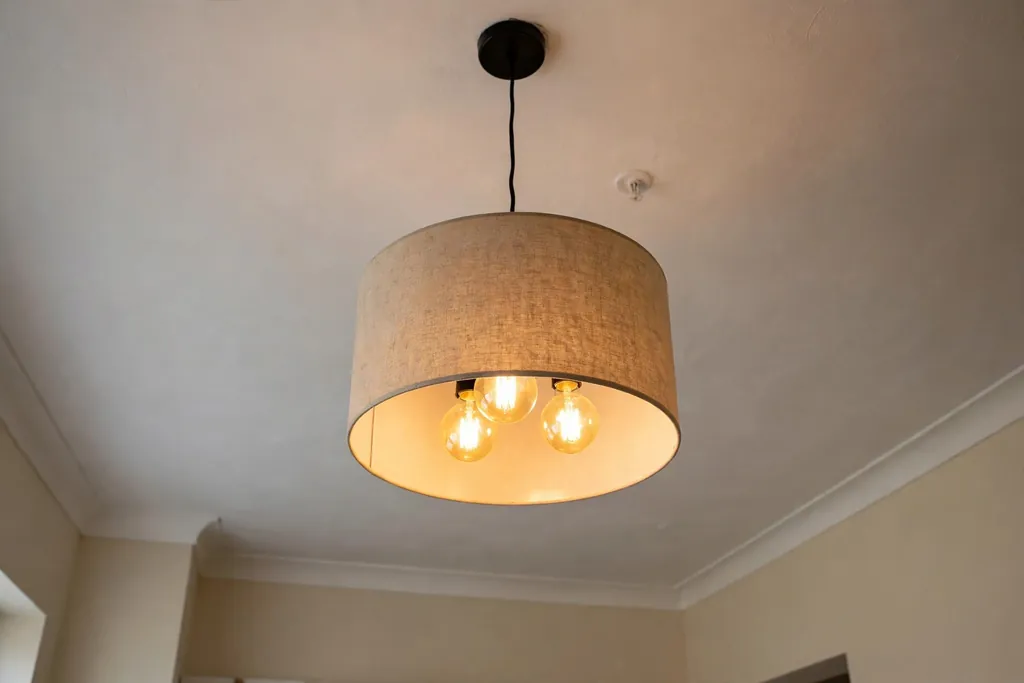
    Living room ceiling with a new simple drum pendant light fixture.

    A dated ceiling fixture or lampshade can age a whole room, even when the furniture is fine. Swap one fixture at a time, starting with the room you use most, and pick a simple drum, dome, or glass shade that suits the room rather than a bold statement piece. Turn off the power at the breaker before you start, and check that the new fixture fits the existing ceiling box.

    Match the new metal to taps or handles nearby, and keep other ceiling lights plain. Use warm white bulbs so the light feels soft in the evening. If you rent, save the old fixtures and their fittings in a labelled box, so the original lights can go back up later.

    10. Add LED Strips Under Cabinets and Shelves

    Kitchen counter lit by warm LED strip lights under upper cabinets in the evening.

    LED strips under upper cabinets light the work surface, make prep safer, and make a kitchen feel finished in the evening. Stick or clip the strips to the underside of the cabinets, hide the driver behind a cabinet, and choose warm white light so food and wood tones look natural. A dimmer, if your strip supports one, lets you lower the light for evening meals.

    Keep the strips clear of the cooker and steam, and run the cable where it cannot catch on doors or drawers. Battery strips suit renters and short runs, while plug in strips suit a full run of cabinets. The same idea works under a bookshelf or a wardrobe shelf, where a soft strip makes a dark corner useful.

    11. Fit Dimmer Switches and Warm Bulbs

    Living room wall with a new dimmer switch beside a warmly lit lamp.

    Dimmer switches change how a room feels at night for the cost of a small fitting. A dining room, living room, or bedroom with dimmed light feels calmer in the evening, and the same room can stay bright for reading or work during the day. Turn off the power at the breaker before fitting a switch, and check that your bulbs suit dimming, since not all bulbs do.

    Pair the dimmer with warm white bulbs in living spaces, where cool light can feel harsh after dark. Keep one bright, non dimmed light in a work zone, such as a kitchen counter or a desk, so tasks stay safe. If wiring feels beyond a simple swap, a short visit from an electrician still costs far less than a room remodel.

    12. Swap Switch Plates and Outlet Covers

    Room wall with new clean white light switch plates.

    Yellowed or cracked switch plates and outlet covers are small details that make a room look tired. New plates in white, matte black, or a metal that matches your hardware give walls a clean edge for very little cost. Turn off the power before you remove a plate, and keep the screws safe, since new plates sometimes ship with screws that do not match.

    Wipe the wall behind the old plate before fitting the new one, and check that the plate sits flat with no gaps. This is a good finishing job to pair with repainting, since fresh plates beside fresh paint read as one finished room. Save the old plates if you rent, so the room returns to its original state later.

    13. Hang Curtains Higher and Wider

    Living room window with linen curtains hung high and wide past the frame.

    Hanging a curtain rod close to the ceiling and wider than the window makes the window look larger and the ceiling look higher, with no building work. Place the rod a few inches below the ceiling and extend it beyond the window frame on both sides, so the curtains stack on the wall rather than covering the glass. Use a rod rated for the curtain weight.

    Choose a plain linen or cotton curtain in a light neutral for most rooms, since a busy pattern can fight with wall color and art. Let the curtains fall to the floor or just brush it, and keep the fabric washable where pets or children pass by. This single change suits living rooms and bedrooms best, where windows set the mood of the room.

    14. Add a Gallery Wall From Frames You Own

    Living room wall with a gallery wall of framed prints in wood frames.

    A gallery wall turns a blank wall into a personal display using frames, prints, and photos you already own. Lay the arrangement on the floor first, starting with the largest frame in the center, and keep even gaps between frames so the group reads as one display. Use paper templates on the wall to test the layout before you make holes.

    Mix frame sizes but keep one finish family, such as all wood or all black, so the wall looks planned rather than random. Hang the center of the group at eye level, and leave breathing room around the edges. If you rent, use picture hanging strips rated for the frame weight, and check the wall surface suits them before you start.

    15. Hang a Large Mirror to Bounce Light

    Bright living room with a large framed mirror reflecting a window.

    A large mirror opposite or beside a window bounces daylight deeper into a room and makes a small space feel wider. Place it where it reflects a pleasant view, such as a window, a plant, or a piece of art, rather than a cluttered corner. A simple wood or black frame suits most rooms and keeps the mirror from fighting with other details.

    Hang the mirror into a stud or with fixings rated for its weight, since a large mirror is heavy and a fall can damage the wall and the floor. Keep the glass clean, since a dusty mirror dulls the light it should bounce. In a hallway or entry, a tall mirror also gives a last check before you leave the house.

    16. Fit Floating Shelves on a Blank Wall

    Living room wall with wood floating shelves holding books and plants.

    One or two floating shelves give display and storage space on a blank wall, with no cabinet work. Use them for books, plants, or daily dishes, and fix them into wall studs or with fixings rated for the load. A pale wood shelf suits white walls, while a darker wood suits a room with wood floors or a wood table.

    Keep the shelf items to pieces you use or enjoy often, and leave clear space between groups so the shelf reads as tidy. Put heavy stacks low, or on a lower shelf, and keep shelves clear of direct stove steam in a kitchen. One well placed shelf beats three crowded shelves, so start with one and add a second only if the first stays tidy.

    17. Add Picture Frame Moulding to Plain Walls

    Dining room wall with white picture frame moulding rectangles.

    Thin wood moulding fixed to a wall in rectangle shapes gives a plain wall a framed, panelled look without new plasterwork. Cut the moulding to form even rectangles, fix it to the wall, fill small gaps, and paint the moulding and the wall the same color for a calm effect, or paint the moulding white for contrast. This suits hallways, dining rooms, and bedrooms with flat walls.

    Measure carefully so each rectangle matches its neighbors, and keep the moulding slim in a small room, since wide trim can crowd a narrow wall. Sand the edges smooth before painting, and use two thin coats rather than one thick coat. If you rent, check that the moulding can be removed without heavy wall repair, or use a removable panel instead.

    18. Refresh Grout Lines in Kitchens and Bathrooms

    Bathroom floor with clean refreshed light grey grout lines between white tiles.

    Dirty grout makes good tile look tired, and refreshed grout makes the same tile look new. Clean the grout lines first, then use a grout pen or grout colorant in a shade that matches the original grout, working one small section at a time. A light grey or warm white suits most floors and walls.

    This suits grout that is stained but sound, not grout that is cracked or missing. Seal the refreshed grout once it dries, so it resists stains near sinks and showers. Wipe tiles with a soft damp cloth after the work, and keep harsh scrubbing away from fresh grout until it cures fully.

    19. Reseal Caulk Around Tubs, Sinks, and Windows

    Bathroom bathtub edge with a clean new white caulk line.

    Old, cracked caulk lets water creep behind tubs and sinks, and it looks untidy even in a clean bathroom. Remove the old caulk with a scraper, clean and dry the joint fully, then apply a smooth new bead of sealant made for kitchens and bathrooms. Smooth the bead with a wet finger or a caulk tool, and wipe excess before it sets.

    This suits a sound joint with a small gap, not a joint with water damage or a loose fixture behind it. Keep the new sealant dry until it cures as directed, and check the seal once a year, since bathroom sealant wears with steam and cleaning. A clean caulk line makes a bathroom feel cared for, even when nothing else changes.

    20. Refresh a Bathroom With Curtain, Towels, and Mirror Frame

    Bathroom with a fresh shower curtain, folded sage towels, and a framed mirror.

    A bathroom can feel new with a fresh shower curtain, matching towels, and a simple frame around a plain mirror. Pick one color family for the curtain and towels, such as white with sage or navy, and keep the rest of the room plain so the set reads as a plan. A slim wood or painted frame stuck around a builder grade mirror hides the raw edge and gives the mirror a finished look.
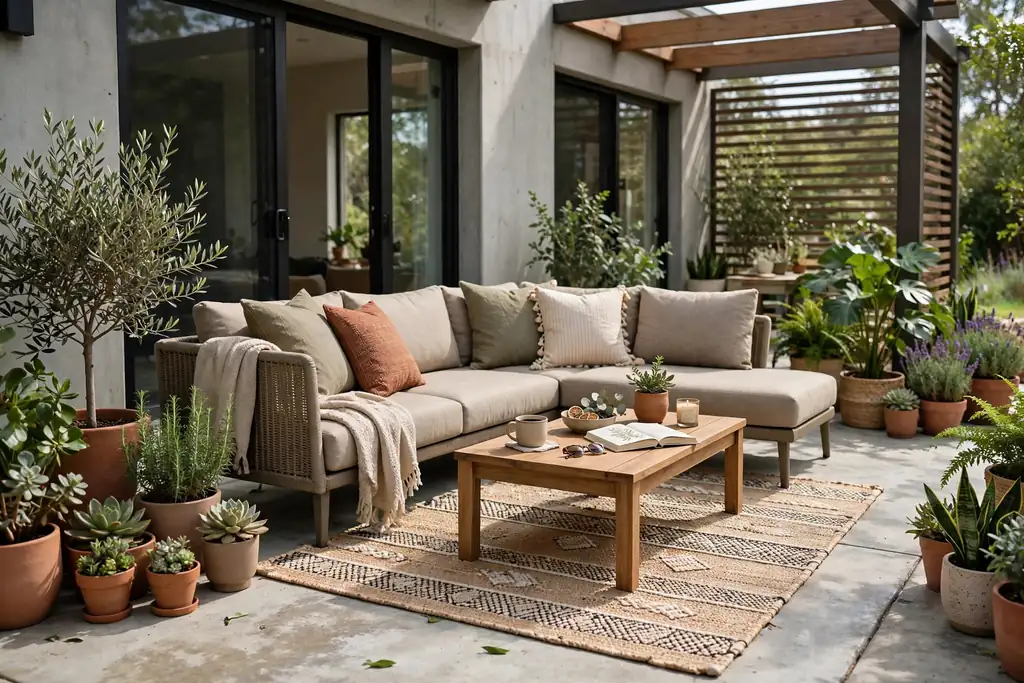
    Keep the shower curtain washable and the towels thick enough to dry well, since a bathroom needs practical textiles as much as pretty ones. Clear the counter to one tray for daily items, so the new textiles stay visible. This is a strong renter option, since the curtain, towels, and a stick on frame come down with little trace.

    21. Paint a Tired Piece of Furniture

    Bedroom with a wooden dresser freshly painted soft white with brass knobs.

    A tired side table, chair, or dresser can gain a second life with paint. Clean and sand the piece, prime it if the old finish is glossy, and apply two thin coats of furniture paint in a color that suits the room. A soft white, sage, or navy suits most pieces, and new knobs finish the change.

    Work in a ventilated space and give each coat its full drying time, since rushing leaves a soft finish that marks easily. Keep the painted piece clear of hot mugs and wet glasses until the paint cures, and use coasters and trays from day one. One painted piece per room is enough, since several painted pieces can make a room feel busy.

    22. Style Open Shelves With Books, Plants, and Baskets

    Open shelves styled with upright books, a small plant, and a woven basket.

    Open shelves look best when they hold a mix of books, plants, and baskets, with clear space between groups. Place books upright and flat in small stacks, add one plant per shelf for a living note, and use a basket for small items that would otherwise look messy. Keep daily items within easy reach and display pieces higher up.

    Leave breathing room between groups, since a crowded shelf reads as storage rather than styling. Rotate one or two pieces with the seasons, so the shelf stays fresh without new purchases. Dust the shelves weekly, since open storage collects dust faster than closed cabinets.

    23. Add an Entryway Drop Zone With Hooks and a Bench

    Entryway with a row of wood wall hooks, a small bench, and a basket.

    An entryway drop zone keeps coats, bags, and keys from spreading through the house. Fix a row of sturdy hooks at a height everyone in the household can reach, place a small bench or a stool below for sitting and for bags, and add a tray or a basket for keys and small items. Fix hooks into studs or with fixings rated for heavy coats and bags.

    Keep the drop zone to one wall, so the entry still feels open when you walk in. Add a washable mat under the bench for wet shoes, and clear the hooks once a week, so out of season coats do not crowd the space. This change suits rented homes too, since a freestanding bench and an over door hook rail need no holes at all.

    24. Lay Washable Runners and Rugs

    Hallway with a patterned washable runner rug on a wood floor.

    A washable runner or rug warms a hard floor, quiets footsteps, and ties furniture together, and it can go in the washing machine when it gets dirty. Place a runner in a hallway or kitchen, and a larger rug under a coffee table or a bed, with the front legs of furniture on the rug so the pieces read as one group. Choose a low pile rug in a busy zone, since thick pile trips feet and traps dirt.

    Pick a pattern that hides everyday marks, such as a simple stripe or a small repeat, and keep the rug color in the same family as your cushions or art. Use a non slip pad under the rug, especially on smooth floors and stairs. Shake the rug outside often, and wash it as directed, so it stays fresh rather than flat.

    25. Add Window Film for Privacy and Soft Light

    Bathroom window with frosted window film letting in soft light.

    Window film gives privacy and softens harsh light without new curtains or blinds. A frosted film suits a bathroom or a street facing window, while a light filtering film suits a room where you still want a view. Clean the glass fully, cut the film to size, and smooth it on with water and a smoothing card, trimming the edges carefully.

    This is a strong renter option, since most window film peels off cleanly. Keep the film clear of the window edges by a hair, so water does not lift it, and wipe it with a soft damp cloth. If a bubble stays after smoothing, lift that corner gently and reapply it, rather than pressing harder on the bubble.

    26. Bring in Plants and Simple Plant Stands

    Bright living room corner with houseplants on simple wood plant stands.

    Plants add life and color to a room for very little cost, and a simple plant stand lifts them to eye level where they show best. Start with easy plants that suit your light, such as a pothos for a bright room or a snake plant for a dim corner, and place them where you will notice them daily. Use pots with drainage holes and a saucer, so water does not mark floors and shelves.

    Group plants in odd numbers, such as three pots of different heights, rather than lining them up in a row. Check the light and water needs of each plant before you buy, since a plant in the wrong light fades fast. Rotate the pots each week, so growth stays even, and wipe large leaves with a damp cloth to keep them glossy.

    27. Refresh the Porch With Paint, Pots, and Solar Lights

    House porch with potted plants beside the front door and solar lights along the path.

    A porch refresh starts at the door and works outward: a clean door mat, two pots of plants beside the door, and solar lights along the path. Choose pots that suit the house style, such as terracotta for a cottage or simple black pots for a modern home, and plant them with hardy plants that suit your sun and shade. Place solar lights where they catch daylight, so they charge fully before evening.

    Sweep the porch, clean the light fittings, and paint any peeling trim before you add plants, since fresh details show best against a clean surface. Keep the path clear and the lights low, so visitors see the way without glare. This is a weekend job that changes how the whole house feels when you arrive home.

    28. Paint Interior Doors and Trim White

    Hallway with interior doors and trim freshly painted bright white.

    Interior doors and trim in a fresh white give a home a clean, consistent frame in every room. Clean the doors and trim, sand lightly, and use a primer made for glossy surfaces if the old paint shines. Apply two thin coats of white trim paint with a small roller for flat areas and a brush for edges, so the finish stays smooth.

    Paint one door first and check the white beside your wall color in daylight and evening light, since whites range from cool to warm. Keep the same white on all doors and trim in one home, so rooms flow together when doors stand open. Save the old door hardware in a labelled bag if you swap it at the same time, and refit it carefully so the hinges sit square.

    Conclusion

    A fresher home rarely needs a new layout or a large budget. It needs a clear color, one metal finish, good light, and storage that keeps surfaces clear. Start with the largest change you can manage, whether that is paint, a front door, or a floor, then add one lighting fix and one storage fix. After that, the small moves, a runner, a tray, fresh towels, and a plant, will read as finishing touches rather than cover ups. Save this list, pick one idea for this weekend, and add the next change when the first one feels settled.

    FAQs

    What is the cheapest way to improve a home?

    Start with paint and hardware. Repainting one room or one accent wall, swapping knobs and pulls for one consistent finish, and updating switch plates changes the largest surfaces and the details you touch daily for a low cost. After that, a washable runner, a gallery wall from frames you own, and a plant or two tidy and warm a room without any building work. These moves suit renters too, since hardware and decor can often be reversed.

    Which home improvements are best for renters?

    Renters get the best return from reversible changes: swap hardware and save the originals, lay peel-and-stick tile and floor tiles that lift cleanly, hang window film, use picture hanging strips, add a rolling cart or a freestanding bench, and refresh a bathroom with a curtain and towels. Check your lease before fixing shelves, rails, or moulding to walls, and use removable fixings rated for the weight. Keep old fittings in labelled bags, so the home returns to its original state at the end of the tenancy.

    Can I improve my home in one weekend?

    Yes, if you pick one room and one main change. In most homes that means painting a room or a front door, laying a peel-and-stick backsplash or floor in a small room, or building an entryway drop zone with hooks and a bench. Add a hardware swap in the same weekend, since doors and drawers are already part of the work, and finish with a runner and fresh towels. One weekend used this way gives a visible change on Monday, and the smaller ideas can follow the next weekend without rushing.

    Do cheap home improvements add value to a home?

    Simple, well done improvements can help a home show better, since fresh paint, clean grout, sound caulk, good lighting, and tidy storage make rooms feel cared for. They do not replace major repairs, such as a leaking roof or faulty wiring, and a buyer or a valuer will still weigh the structure, the layout, and the location first. Spend first on repairs and on changes that read as finished, such as paint and hardware, rather than on bold, personal finishes that the next owner may want to undo.

    How do I choose a paint color that will not date quickly?

    Choose a light neutral for most walls, such as warm white, cream, or pale greige, and add color in one place you can change easily, such as an accent wall, a front door, or a painted piece of furniture. Test a large sample beside your floor and trim in daylight and evening light before painting, since colors look stronger over a full wall. Keep the metal finish consistent, and let wood and white carry the rest of the room, so the scheme stays easy to update later.

    Where should I start if my whole home feels tired?

    Start with the room you use most and the change you see most. In most homes that means repainting the living room or the main bedroom, refreshing the kitchen with paint and hardware, or updating the entry with a painted door and a drop zone. Clear clutter first, so paint and new details show against a tidy room, then add one lighting fix. Once one room feels finished, the same palette and finish can carry into the next room, which keeps the whole home feeling consistent.


  • 22 Italian Home Decor Ideas to Make Any Room Feel Cozier

    22 Italian Home Decor Ideas to Make Any Room Feel Cozier

    An Italian home feels welcoming before it feels decorated. Warm plaster walls, worn wood, terracotta pots, and a table set for people to sit around all point to the same idea: a room made for long conversations, good food, and everyday comfort. These 22 Italian home decor ideas cover walls, floors, seating, lighting, textiles, and small details, so you can borrow one idea for a single room or build a whole home from them. Start with the bones of the room, then add seating and light, and finish with plants and pottery that make it feel lived in. For room by room detail, these Italian living room ideas show how the same warm materials work in a main gathering space.

    Key Takeaways

    • Start with warm, natural materials: plaster, terracotta, wood, stone, leather, and linen set the Italian tone before any decoration is added.
    • Keep one calm palette of warm whites, terracotta, olive, and walnut, and repeat it in the rug, cushions, and pottery.
    • Give each room a clear gathering point, such as a fireplace, a dining table, or a reading chair, and arrange seating to face it.
    • Mix old and new pieces: a worn wood table or an antique credenza sits well beside a simple modern lamp or a plain linen sofa.
    • Use plants, pottery, and candlelight for warmth, and keep surfaces mostly clear so the room stays calm and easy to use.
    • Choose pieces that suit daily life first, with washable linen, sturdy wood, and storage that hides clutter.

    1. Warm Limewash Walls

    Italian living room with soft warm terracotta limewash walls and warm white trim.

    Wash the walls in a soft terracotta or warm cream limewash to give the room its warm base. Limewash has a cloudy, hand finished look that plain paint rarely gives, and it suits both old houses and newer rooms that feel too flat. Choose a muted terracotta rather than a bright orange, and test a patch in daylight and lamplight before you commit.

    Keep the ceiling and trim in warm white so the walls stay the main color, and let wood, leather, and linen carry the rest of the palette. If a full room feels like too much, wash one wall behind the sofa and keep the others in warm white. The same plaster look works behind a bed, as shown in these Italian bedroom ideas, where a single warm wall changes the whole room.

    2. Terracotta Tile Floors Softened with a Wool Rug

    Italian room with warm terracotta tile floors softened by a large cream wool rug.

    Lay terracotta tiles, or choose a terracotta look tile, for a floor that feels warm underfoot and ages well. Terracotta suits kitchens and living rooms alike, and it pairs naturally with wood furniture and linen upholstery. A large wool rug over the tiles softens the seating area and keeps feet warm in winter.

    Size the rug to the seating group, with the front legs of the sofa and chairs resting on it, and keep a border of tile showing around it so the floor still reads as terracotta. Choose a rug in cream, rust, or a muted pattern, and pick a low pile rug for a busy family room, since it is easier to clean and doors clear it more easily.

    3. Exposed Wood Ceiling Beams

    Italian living room with exposed dark walnut wood ceiling beams and warm white walls.

    Leave ceiling beams exposed, or add slim wood beams to a plain ceiling, to bring warmth overhead. Dark walnut beams suit a rustic room, while pale oak beams keep a smaller room feeling light. Beams draw the eye up and make a plain ceiling feel like part of the design, not just a surface above it.

    Check the ceiling height first, since beams in a very low room can feel heavy. In a low room, use fewer, slimmer beams in a pale wood, and keep the ceiling itself in warm white. Painted beams in a soft cream are another option when dark wood would close the room in.

    4. Arched Wall Niches for Display

    Italian living room wall with arched niches holding a terracotta vase and a candle.

    Cut the hard lines of a rectangular room with arched wall niches, or suggest the same shape with arched shelving and an arched mirror. An arch is a classic Italian shape, and a niche gives pottery, a candle, or a small plant a place of its own instead of a crowded shelf. Paint the inside of the niche a shade deeper than the wall so the shape reads clearly.

    Use niches sparingly, one or two in a room, so they feel special rather than busy. A single arched niche beside a fireplace, with one terracotta vase and a candle, often works better than a whole wall of small arches. Keep the display simple and leave empty space around each object.

    5. Cognac Leather Sofa as the Anchor

    Italian living room anchored by a cognac leather sofa with olive and cream cushions.

    Anchor the room with a cognac leather sofa, a piece that grows more comfortable and better looking with use. Leather suits a family room because spills wipe off, and the warm brown tone sits well with terracotta walls, wood floors, and cream linen. Choose a simple shape with deep seats, since a fussy frame fights the relaxed Italian feel.

    Pair the sofa with cushions in olive, cream, and rust, and a wool throw for cooler evenings. Keep the rest of the seating simpler, such as plain wood chairs or a linen armchair, so the leather stays the main statement. Condition the leather as the maker directs, and keep it out of harsh direct sun.

    6. Relaxed Linen Slipcovered Sofa

    Relaxed linen slipcovered sofa in warm white in an Italian living room.

    Choose a linen slipcovered sofa for a softer, more casual Italian look. Slipcovers can be removed and washed, which makes linen practical for homes with children, pets, or frequent guests. The slightly wrinkled, relaxed drape is part of the appeal, so do not chase a pressed, formal finish.

    Pick a warm white, oatmeal, or pale sage linen, and add cushions in terracotta and olive for color. A slipcovered sofa pairs well with a wood coffee table and a wool rug, and it suits a room where comfort matters more than a sharp tailored line. Keep a spare slipcover if the sofa gets daily use, so one can wash while the other is on.

    7. Long Walnut Dining Table for Slow Meals

    Long walnut wood dining table set for a family meal in an Italian dining room.

    Center the dining area on a long walnut table built for slow meals and many guests. A thick wood top with visible grain feels handmade and sturdy, and it gives the room a piece with presence even when it is not set for dinner. This suits a household that eats together often, since the table becomes the room’s gathering point.

    Keep the tabletop mostly clear between meals, with one tray, a candle, and a small vase, so it stays ready for cups, plates, and homework. Choose chairs that are comfortable for a long sit, and leave enough room to pull each chair out fully. If the wood is rough, sand the top smooth and seal it so cups and glasses sit safely.

    8. Open Wood Shelves for Ceramics and Books

    Open thick wood shelves holding ceramics

    Hang open wood shelves on one wall for ceramics, books, and a few plants, and keep the display loose rather than packed. Open shelves suit an Italian room because they show the handmade pieces that give the room character, such as bowls, jugs, and old books with worn covers. Use thick wood shelves with simple brackets in iron or wood.

    Edit the shelves hard: one row of books, a stack of bowls, a plant, and empty space between groups. If the shelves look crowded, remove a third of the objects and see how the wall breathes. Dust open shelves weekly, and keep everyday items low and within reach, with display pieces higher up.

    9. Terracotta Pottery Grouped by Height

    Group of terracotta pottery vases

    Group terracotta pots, vases, and jugs in different heights on a bench, a sideboard, or a hearth. Terracotta is the fastest Italian detail to add, since the warm clay color links the room to the palette of walls and floors without any building work. A group of three or five pieces reads as deliberate, while a single small pot can look lost.

    Mix shapes, such as a tall jug, a round bowl, and a short vase, but keep the color family close so the group reads as one. Leave some pieces empty and put branches or dried stems in one or two only. Wipe the pots now and then, since terracotta shows dust, and use a saucer under any pot that holds a live plant.

    10. Potted Olive Tree in a Terracotta Pot

    Potted olive tree in a large terracotta pot beside a sofa in a bright Italian living room.

    Place a potted olive tree in a large terracotta pot near a bright window or beside the sofa for a living Italian detail. The silvery green leaves suit the warm palette, and the tree gives a corner height and softness that furniture alone cannot. Choose a pot heavy enough to hold the tree steady, and raise it on feet so water drains freely.

    Give the tree the brightest spot you have, and water only when the top of the soil feels dry, since olive trees dislike wet roots. Turn the pot now and then so growth stays even, and prune lightly to keep the shape open. In a cold climate, keep the tree indoors through winter and move it outside only in warm months.

    11. Murano Glass Lamps for Soft Evening Light

    Murano glass table lamps in amber and green glowing softly on side tables at dusk.

    Add Murano glass table lamps on side tables and a console for soft evening light in color. A lamp in amber, green, or soft blue glass glows when lit, and the colored glass adds warmth even during the day when the lamp is off. Place lamps where you sit in the evening, rather than lining them up along one wall.

    Use warm bulbs and keep the lamp shades simple, so the glass stays the focus. Group the glass by color family where you have more than one lamp, and leave space around each lamp so its color reads clearly. Clean the glass with a soft cloth, and keep lamps clear of curtains and throws.

    12. Wrought Iron Chandelier over the Seating Area

    Wrought iron candle style chandelier hanging over a seating area in an Italian living room.

    Hang a wrought iron chandelier over the seating area for a fixture that feels handmade and old. Iron suits a room with wood beams, stone, and terracotta, and a simple ring or candle style chandelier gives warm light without a fussy crystal look. Use warm bulbs and a dimmer, where one is already fitted, so the light can shift from bright to soft in the evening.

    Hang the chandelier high enough to walk under safely, and center it over the coffee table rather than the middle of the room if the seating group sits off center. If the ceiling is low, choose a flush or semi flush iron fixture in the same style, so the room keeps the iron detail without losing headroom.

    13. Majolica Tile Accent in the Kitchen

    Italian kitchen wall with a hand painted blue and white majolica tile backsplash above a stove.

    Use a border or a panel of hand painted majolica style tiles as a kitchen backsplash, a stair riser detail, or a framed tile panel on a plain wall. A blue and white or green and cream pattern gives a strong Italian detail without covering a whole room, and it works well where a rug would stain or a wall would stay bare. This suits a kitchen that needs one clear feature above the stove or sink.

    Keep the pattern simple and even, with the same tile repeated across the panel, and let the surrounding wall stay plain. If real tile work is not practical, a printed tile look panel gives a similar effect and can be moved. Seal the tile and grout as the maker directs, since a kitchen backsplash meets steam, splashes, and cooking marks daily.

    14. Striped Linen Curtains at Tall Windows

    Floor length striped linen curtains in cream and soft rust framing a tall window.

    Hang floor length striped linen curtains in cream and a soft rust or olive at tall windows to soften the room and frame the light. Linen falls in soft folds and suits the relaxed feel of the rest of the room, while a quiet stripe adds pattern without competing with pottery or art. Hang the panels high, near the ceiling, and wide, beyond the window frame, so the window reads as taller.

    Let the panels just brush the floor, since pooling fabric collects dust and can trip you in a busy room. Open the panels fully during the day so the room gets full daylight, and close them at night for privacy. Choose a plain or lightly striped linen close in color to the walls, so the window treatment links to the room rather than fighting it.

    15. Wool Throws and Cushions in Olive, Rust, and Cream

    Sofa layered with wool throws and cushions in olive

    Layer wool throws and cushions in olive, rust, and cream over sofas and chairs for warmth you can use every day. Throws make a room feel cozy at a glance, and they earn their place on cold evenings, so they are decoration and comfort in one. Keep the palette to those three tones so the layering stays calm even when several pieces are out.

    Fold one throw over an arm or the back of the sofa, and keep a second in a basket nearby for guests. Limit cushions to three or four on a standard sofa, in mixed textures rather than mixed patterns, so the seat stays comfortable. Wash throws as the maker directs, and rotate them so one set does not wear out before the others.

    16. Warm Vintage Rug under the Seating Group

    Italian living room seating group on a warm vintage rug in rust

    Lay a warm vintage style rug in rust, cream, and olive tones under the seating group to anchor the room and soften wood or tile floors. A rug with a faded, muted pattern suits Italian style better than a bright new pattern, since it reads as a piece with a past. Size the rug so the front legs of the sofa and chairs rest on it, with a border of floor showing around the edge.

    Choose a low pile rug for a room with doors that swing over it, and use a rug pad on smooth floors to reduce slipping. Keep the rug pattern in the room palette, so it grounds the room without competing with the sofa or the art. Vacuum the rug often in a busy room, and blot spills quickly rather than rubbing them in.

    17. Walnut Credenza for Hidden Storage

    Antique walnut credenza with doors under a round mirror in an Italian room.

    Use a walnut credenza to hide the clutter that open shelves cannot hold. A credenza with doors keeps board games, chargers, and spare throws out of sight, while its wood tone and aged hardware add warmth to the wall. Place it under a mirror or a framed print so it reads as furniture, not just storage.

    Keep the top of the credenza mostly clear, with a lamp at one end and a vase or a stack of books at the other. If the credenza is a genuine antique, check that doors and drawers close well and that the piece is stable on your floor. A credenza also serves as a serving surface when guests gather, which suits a room built for hospitality.

    18. Ceramic Plate Wall in the Dining Room

    Wall display of hand painted ceramic plates in blue

    Hang hand painted ceramic plates on a dining room wall as a collection that is also decoration. Plates in blue, cream, and terracotta suit Italian style, and a wall of plates gives a plain wall a clear focus without a large framed print. Arrange the plates on the floor first, and keep the spacing even, so the group reads as planned rather than scattered.

    Use plate hangers or fixings rated for the weight of each plate, and keep heavy plates low rather than high above a table where a fall could cause harm. Mix plate sizes, with one or two larger plates as anchors, and leave breathing room between pieces. Dust the plates with a soft cloth, and keep the wall group to one wall so the room stays calm.

    19. Windowsill Herb Pots in Terracotta

    Sunny kitchen windowsill with basil

    Set basil, parsley, and rosemary in terracotta pots on a sunny kitchen windowsill for fresh leaves where you cook. The pots suit the warm palette, the herbs sit within reach, and a sunny sill gives most kitchen herbs the light they need. This suits a kitchen with even a narrow sill and a cook who reaches for fresh herbs often. For more small kitchen detail, see these Italian kitchen ideas.

    Use pots with drainage holes and saucers, and water only when the top of the soil feels dry, since herbs dislike wet roots. Rotate the pots weekly so each plant grows evenly toward the light, and snip from the top to keep plants bushy. If your sill is very narrow, a slim wooden tray holds the pots together and catches drips in one place.

    20. Candlelit Lantern Corner for Evenings

    Cozy Italian reading corner at dusk with lit lanterns

    Set a reading chair, a small side table, and a group of lanterns in a corner for a candlelit evening spot. Lanterns give warm, low light that suits Italian rooms, and a dedicated corner makes evening reading a habit rather than an afterthought. Place lanterns on the table and the floor beside the chair, clear of curtains, throws, and paper.

    Use candles only in safe holders, never leave them lit unattended, and keep a clear path out of the corner. If open flame is not practical in your home, battery lanterns give a similar glow without the risk. Add a basket for books and a throw within reach, so the corner is ready whenever you sit down.

    21. Framed Italian Landscape Prints

    Framed Italian landscape prints of hills and coastlines in wood frames hung above a sideboard.

    Hang framed Italian landscape prints, such as hills, coastlines, or village streets, on one wall for a clear focus without a full wall treatment. Choose three pieces in similar sizes, and hang them in matching wood frames at eye level on one wall, centered on a sideboard or a sofa. Matching frames make different images look like a set, which is calmer than a mix of frame styles scattered around the room.

    Leave breathing room between frames, and use secure fixings suited to the wall and the weight. Avoid hanging heavy frames directly above pillows where fixings could fail, and keep the largest piece at the center of the group. If you prefer a quieter wall, use one large print above the sideboard and leave the other walls plain, so the art stays the focus.

    22. Small Aperitivo Corner for Gatherings

    Small bar cart with glasses

    Set a small bar cart or a tray on a sideboard with glasses, a few bottles, olives, and citrus for a casual aperitivo corner. The corner gives guests a place to gather before a meal, and it suits Italian hospitality, where drinks and small bites come before the main table. Keep the setup small, with only what you use weekly, so it stays tidy rather than becoming a crowded bar.

    Place the cart or tray near the seating area, clear of walkways, and keep a small board and a cloth nearby for serving. Restock glasses and small plates after each gathering, and wipe the cart top so it is ready for the next visit. If space is tight, a single tray on a credenza gives the same welcome in a smaller footprint.

    Conclusion

    A cozy Italian home starts with warm materials and one calm palette, not a long shopping list. Choose a warm wall color, a wood or leather anchor piece, and soft light, then add plants, pottery, and textiles one layer at a time. Keep surfaces mostly clear, give each room a gathering point, and pick pieces that suit daily life, since a room you use every day feels cozier than a room kept only for guests. Pick one idea from this list, set it where you will actually sit, and add the next layer only after that first change feels right.

    Save this list on Pinterest before your next home refresh, and work through it one room at a time: walls and floors first, then seating and light, then the small details that make the room yours.

    FAQs

    What colors work best for Italian home decor?

    Warm whites, cream, terracotta, olive, walnut brown, and soft rust form the core palette. Keep the palette to three or four tones in one room, and repeat them across walls, rugs, cushions, and pottery, so the room reads as calm rather than busy. Add a quiet blue or green only as an accent, such as in tiles or a single vase, rather than as a second main color.

    How can I get an Italian look in a small home or a rented home?

    Start with pieces you can move: terracotta pots, a vintage style rug, linen curtains, throws, and a potted olive tree. Use removable wallpaper in a plaster look or a single painted accent wall only if your lease allows it, and choose open shelves or a credenza over built in work. One strong detail, such as an arched mirror or a group of ceramic plates, often gives more character than many small items spread through the room.

    What is the difference between Italian farmhouse style and Tuscan style?

    The two overlap, and the names are often used for the same warm, rustic look: plaster walls, wood beams, terracotta, and worn wood furniture. Tuscan style leans more toward the countryside palette of terracotta, olive, and warm gold, while Italian farmhouse style often mixes in lighter linen, painted furniture, and a slightly more casual, coastal feel. Pick the palette and pieces that suit your light and your home, rather than chasing a strict label.

    Do I need real terracotta tiles or wood beams to get the look?

    No. Terracotta look tiles, a terracotta rug border, slim faux beams in pale wood, and terracotta pots give much of the same warmth without major building work. Real stone, tile, and beams suit a renovation, but paint, textiles, pottery, and plants carry the look in a rented home or a small budget refresh. Test samples in your own light before you commit to a large change.

    How do I keep an Italian style room from looking cluttered?

    Edit hard and keep surfaces mostly clear. Use closed storage, such as a credenza, for everyday clutter, and limit open shelves and wall displays to one group per wall with empty space around each piece. Keep the palette limited, repeat the same three or four tones, and remove a third of the objects from a crowded shelf or table to see how the room breathes.

    What plants suit Italian home decor besides an olive tree?

    Citrus trees in pots, rosemary, lavender, and trailing herbs suit the look and the warm palette, and they do well in bright spots near windows. Choose plants that suit your light level and your watering habits, and keep them in terracotta pots for a consistent look. Group plants in twos or threes near seating and windows, rather than scattering single pots through every room.


  • 23 Scottish Bathroom Ideas to Make Every Corner Count

    23 Scottish Bathroom Ideas to Make Every Corner Count

    A Scottish bathroom works best when honest materials do the talking. Wool, wood, slate, and stone give the room a Highland feel, while tartan and thistle add pattern in small, controlled doses. The trick is to keep the base calm: pale walls, plain tiles, and one or two strong colours, so the room feels settled rather than themed. These 23 Scottish bathroom ideas cover colour, tile, baths, storage, lighting, and small rooms, so you can start with towels and prints or plan a full refit. Begin with the bath and the vanity, since those set the scale, then add one storage fix and one soft layer. For the same palette in a bedroom, see these Scottish bedroom ideas.

    Key Takeaways

    • Start with one main Scottish note, usually tartan towels or a roll-top bath, and build plain surfaces around it.
    • Keep the palette small: slate grey, loch blue, heather purple, and forest tones, with cream, oat, and warm wood as the base.
    • Use stone, slate, and wood for texture, and keep bright pattern to towels, a blind, or one print group.
    • Free floor space first with wall hung fittings, recessed niches, and ladder shelves, before adding freestanding furniture.
    • Put storage where it is used: niches in the shower, baskets near the bath, and shelves above the toilet or beside the vanity.
    • Choose moisture tolerant finishes near the shower and sink, and keep wool, tweed, and untreated wood clear of direct spray.

    1. Tartan Towels and a Tartan Blind for Instant Character

    Small neutral bathroom with tartan towels and a tartan Roman blind at the window white tiles and a wood vanity

    Swap in tartan towels and a tartan Roman blind for the fastest Scottish change in a bathroom, with no paint and no building work. A muted green, navy, or red check on towels and one blind gives the room a clear identity, while white tiles and a plain vanity keep the pattern from taking over. This suits a rented bathroom or a plain white room that needs warmth, since both pieces can move with you.

    Keep the rest of the textiles solid in cream or oat, so the check reads as one planned accent rather than a collection of prints. Wash the towels separately first, since strong checks can shed dye, and choose a blind fabric that copes with steam, or hang the blind on a window clear of the shower. If tartan towels feel too bold, start with one tartan hand towel and a plain bath mat, then add the blind later.

    2. Slate Grey Tiles with a Stone Vessel Basin

    Bathroom with slate grey wall tiles and a natural stone vessel basin on a wood vanity

    Pair slate grey wall tiles with a natural stone vessel basin for a bathroom that nods to Highland rock without looking cold. The grey tiles give a calm, even background, while the stone basin adds a rough, natural edge that suits a wood vanity and matte taps. This combination works well in a medium bathroom, where the basin can sit proud of the vanity and be seen from the door.

    Keep the grout a mid grey so the tiles read as one surface, and seal the stone basin as the maker advises, since natural stone can mark from soap and toothpaste. Pair the basin with a simple round or rectangular mirror, and keep the counter mostly clear, so the stone stays the focus. If a stone basin is too large a step, use slate grey tiles with a plain white basin and a stone soap dish for a smaller version of the same palette.

    3. A Freestanding Roll-Top Bath with Claw Feet

    Freestanding white roll-top bath with dark claw feet in a bathroom with wood panelled walls and a sash window

    Set a freestanding roll-top bath with claw feet as the centre of a Scottish bathroom, for a traditional look that suits both cottages and older townhouses. The curved rim softens straight tile lines, and dark painted or metal feet ground the tub in the room. It suits a bathroom with enough floor space to walk around at least two sides of the bath, so cleaning and drying the floor stay easy.

    Check the floor can carry a full bath, and leave room for the taps, which often stand on the floor or mount on the rim. A simple wood bath tray and a folded towel on a stool complete the look without clutter. If a full roll-top does not fit, a back-to-wall freestanding tub in a similar shape gives much of the same presence with a smaller footprint and easier plumbing.

    4. A Heather Painted Vanity

    Bathroom with a muted heather purple painted vanity cabinet white basin and brass taps

    Paint a vanity in muted heather purple for a Scottish colour that feels softer than a deep green or navy, and pairs well with cream walls and brass or copper taps. Heather works as a moorland colour without needing tartan nearby, and it suits a vanity with panelled doors, where the paint can settle into the detail. Keep the basin white and the counter pale, so the purple reads as a single furniture colour.

    Sand and prime the vanity first, and use a moisture resistant paint made for cabinetry, so the finish lasts near a sink. Test the shade in daylight and evening light, since purple can shift under warm bulbs. If painting the vanity is not possible, a heather bath mat, towels, and a small vase of dried stems give the same colour note with no permanent change.

    5. Soft Grey Green Wood Panelling Behind the Vanity

    Bathroom wall with vertical wood panelling painted soft grey green behind a vanity and round mirror

    Fit vertical wood panelling painted soft grey green behind the vanity for structure that paint alone cannot give, with a colour borrowed from hills and moss. The boards add texture at eye level, and the muted green keeps a small room bright, which matters when the window is small or faces north. Panelling works best on one feature wall, with plain plaster above, so the room does not feel boxed in.

    Seal the boards with a moisture resistant paint, and keep the lowest boards clear of direct shower spray. Pair the panelling with a round mirror and a plain white basin, so the boards stay the main wall detail. If full panelling is too large a job, a single panelled section behind the vanity, fixed to battens, gives a similar effect in a weekend.

    6. Loch Blue Glazed Tiles in the Shower

    Shower wall with deep loch blue glazed tiles white grout and a rainfall shower head

    Tile the shower wall in deep loch blue glazed tiles for a colour that feels Scottish and still reads as a classic bathroom choice. The glaze catches light and keeps the shower bright, while the blue pairs well with white grout, a white bath, and wood or brass fittings. Use the blue on one shower wall or inside a niche, and keep the rest of the room pale, so the colour stays a feature rather than a full room scheme.

    Choose a tile size that suits the wall, since very small tiles add many grout lines in a wet area, and very large tiles need careful cutting around fittings. Wipe the tiles after steamy showers to stop water marks dulling the glaze. If deep blue feels too strong, use it as a single band of tiles at eye level, with pale tiles above and below.

    7. Reclaimed Barrel Wood Shelves for Towels

    Bathroom with open shelves made of dark reclaimed barrel wood holding rolled towels and jars

    Fix open shelves in dark reclaimed barrel wood above the toilet or beside the vanity for storage with a whisky country character. The dark, worn wood suits white tiles and cream towels, and two shelves hold rolled towels, jars, and a plant without a tall cabinet. This suits a bathroom with a free wall run, where open shelves stay clear of the shower spray.

    Mount the shelves into studs or use fixings rated for tile, and keep heavier items low, with lighter jars and a plant higher up. Leave one shelf partly empty, so the display reads as calm rather than crowded. If reclaimed wood is hard to source, dark stained oak shelves in the same sizes give a similar tone, and a single shelf above the toilet is enough to start.

    8. Thistle Prints in Black Frames

    Bathroom wall with framed thistle botanical prints in black frames above a towel rail

    Hang thistle botanical prints in simple black frames above the towel rail for a clear Scottish note that takes no floor or counter space. A line drawing or a muted botanical print suits cream walls and wood frames, while a larger coloured print suits a plain room that needs one focal point. Keep the group to three or four small frames with even spacing, so the wall reads as one arrangement.

    Use frames with sealed backs or acrylic covers, and avoid hanging unprotected paper directly beside the shower, where steam will cockle it over time. Hang the prints at eye level when standing, and repeat the thistle colour once more, in a towel or a bath mat, so the wall does not look isolated. If you rent, adhesive picture strips hold light frames well on tile and painted walls and remove cleanly.

    9. Natural Stone Flag Floor Tiles

    Bathroom with natural stone flag floor tiles a white freestanding bath and a wood stool

    Lay natural stone flag floor tiles for a Highland cottage floor that feels solid underfoot and suits both roll-top baths and wood vanities. The varied grey and warm tones of flagstone hide water marks better than a single pale tile, and the texture gives grip in a wet room. This suits a bathroom with good daylight, where the stone tones stay visible rather than reading as dark.

    Seal the stone before grouting and again after, as the maker advises, since unsealed stone can stain from soap and bath oils. Pair the floor with pale walls and a simple rug or mat by the bath, so the stone does not make the room feel heavy. If real flagstone is too thick for the door clearance, stone look porcelain tiles in large formats give a similar pattern with a thinner profile.

    10. Wall Hung Fittings for a Small Tenement Bathroom

    Small bathroom with a wall hung vanity and wall hung toilet showing clear floor tiles beneath

    Hang the vanity and the toilet on the wall in a small tenement bathroom, so the floor runs clear beneath them and the room looks larger and easier to clean. The open floor shows more tile, and a mop can reach under both fittings without moving furniture. This suits a bathroom with a short wall run, where a floor standing vanity would crowd the door swing. For more renter friendly small room storage, see these apartment bathroom ideas.

    Check that the wall can carry the load, and use a frame rated for a wall hung toilet before any tiling starts. Keep the pipework boxed in neatly behind the vanity, and choose a vanity depth that still leaves a clear walkway to the shower. If a full refit is not planned, a wall hung shelf above the existing toilet gives part of the same open feeling with far less work.

    11. A Victorian Black and White Checkerboard Floor

    Victorian style bathroom with black and white checkerboard floor tiles and a white pedestal basin

    Lay a black and white checkerboard floor for a Victorian Scottish bathroom, the kind found in older Edinburgh and Glasgow townhouses. The strong pattern grounds a white pedestal basin and a high cistern toilet, and it pairs well with plain white wall tiles and a single dark accent, such as black taps. This suits a bathroom where the floor is the main pattern, and the walls stay quiet.

    Start the pattern from the centre of the room, so cut tiles land evenly at the edges, and use a grout colour close to the tile tones to keep the grid crisp. A checkerboard floor shows dust and hair, so a quick sweep each day keeps it looking sharp. If a full checkerboard feels too bold, use it in a small cloakroom or as a border around a plain centre panel.

    12. A Matte Black Heated Towel Rail

    Bathroom with a matte black heated ladder towel rail holding white towels and black taps

    Fit a matte black heated ladder towel rail on the warmest free wall to dry towels, warm the room, and replace a separate towel ring and radiator in one fitting. A ladder rail holds two or three towels at once, and the heat helps damp towels dry between uses, which matters in a small room with little airflow. Choose a slim rail that fits the wall beside the bath or near the door, and keep the lowest bar clear of the floor so towels hang freely.

    Match the finish to the taps, such as matte black, so the rail reads as part of the plan. In a rented home, a freestanding heated rail or a plug in ladder rail gives much of the same benefit with no plumbing change. Keep towels folded over two bars rather than bunched on one, so air can move around the fabric.

    13. A Rainfall Shower Over the Bath with a Glass Screen

    Bath with a rainfall shower head and a clear glass screen in a small bathroom with white subway tiles

    Fit a rainfall shower over the bath and a single glass screen, so one tub serves both quick showers and long soaks without a separate shower tray. The glass screen keeps water in the bath while leaving the room open, which suits a small bathroom far better than a shower curtain that closes the space in. A rainfall head gives a calm, even spray, and a hand shower on a rail adds a practical rinse for the tub and for hair washing.

    Keep the screen fixed at the shower end, and hang it high enough that tall users stay under cover. Choose a thermostatic mixer so the temperature stays steady, and check water pressure before choosing a wide rainfall head, since a very wide head can feel weak on a low pressure line. Wipe the glass weekly to stop limescale marks building up.

    14. A Recessed Arched Niche in the Shower Wall

    Tiled shower wall with a recessed arched niche holding shampoo bottles and soap

    Cut a recessed arched niche into the shower wall for shampoo, soap, and razors, so bottles leave the tub edge and the shower floor stays clear. A niche uses the depth of the wall, which means storage appears without a shelf sticking into the shower. The arch shape echoes older Scottish architecture, and tiling the niche in the same tile as the shower keeps it reading as part of the wall rather than an add on.

    Place the niche at shoulder height for daily bottles, and keep it clear of the direct shower spray line where possible. Slope the niche base slightly toward the shower so water drains out. If cutting into the wall is not possible, a slim tension pole with corner shelves gives a similar tidy result with no building work.

    15. A Tweed Cushioned Stool and a Woven Basket

    Bathroom corner with a wooden stool with a tweed cushion and a woven basket of towels beside a bath

    Set a wooden stool with a tweed cushion beside the bath, with a woven basket of towels at its foot, for seating and storage that suit a Scottish bathroom without a cabinet. The stool holds a folded towel and a change of clothes within reach, while the basket keeps spare towels grouped and off the floor. Choose teak or another water tolerant wood for the stool, so it can sit near steam without warping.

    Keep the basket on a shelf or inside the vanity rather than beside the tub, since seagrass and cotton rope cope with humidity but not standing water. Empty the basket once a month, returning only what you actually used. If floor space is tight, a wall hung hook for the towel and a single basket on a shelf give the same pairing in a smaller footprint.

    16. Brushed Copper Taps with White Subway Tile

    Bathroom with brushed copper taps and a copper framed mirror above a white basin and white subway tiles

    Pair brushed copper taps with white subway tiles for a warm metal that suits both traditional and current Scottish bathrooms. Copper reads warmer than chrome against white tile, and it links well with wood vanities, brass mirrors, and tartan towels in muted tones. This suits a bathroom where the fittings are the main warm accent, and the walls and floor stay pale.

    Keep the copper finish consistent across the basin taps, the bath filler, and the towel rail, so the metal reads as one plan. Clean copper with a soft cloth and a cleaner suited to the finish, since harsh pads can dull the brushing. If copper taps are too large a change, start with a copper framed mirror and copper cabinet knobs, and keep the existing taps until the next refit.

    17. A Corner Soaking Tub for a Tight Room

    Small bathroom with a corner soaking tub fitted into the corner pale grey tiles and a wood bath tray

    Fit a corner soaking tub into a tight bathroom to gain a proper soak where a straight bath would block the door or the basin. A corner tub uses two walls at once, which frees the centre of the room for a vanity and a clear walkway. Choose a model with a flat rim on one side, so a wood bath tray can sit safely across it, and keep the taps on the wall or the rim where they stay clear of the bather.

    Check the door swing and the toilet position before ordering, since a corner tub changes the whole layout, not just the bath position. Pair the tub with pale tiles and a single strong accent, such as a tartan towel or a thistle print, so the unusual shape does not need more pattern to feel planned. If a corner tub still crowds the room, a deep Japanese style soaking tub in a short straight run is another compact option.

    18. A Linen Cafe Curtain on a Tall Sash Window

    Bathroom with a tall sash window dressed with a sheer linen cafe curtain and a white bath below the window

    Hang a sheer linen cafe curtain on a tall sash window for privacy that still lets daylight into the bathroom. The curtain covers the lower half of the glass, so the upper panes stay clear for light, and the linen falls in soft folds that suit a cottage or tenement bathroom. This suits a bathroom with a window facing a street or a neighbour, where full privacy film would block too much light.

    Hang the curtain on a tension rod inside the frame, so no drilling is needed, and choose a washable linen blend, since bathroom steam and dust collect on window fabric. Keep the curtain clear of radiators and the bath edge, and wash it now and then so it stays pale. If the window sits directly above the bath, a frosted film on the lower panes gives the same privacy with no fabric near the water.

    19. Stoneware Accessories Grouped on an Oak Tray

    Bathroom vanity counter with an oak tray holding a stoneware soap dispenser ceramic jars and a small vase

    Group stoneware soap dispensers, ceramic jars, and a small vase on an oak tray on the vanity, so daily items stay together and the counter stays clear. A tray turns a spread of bottles into one display, and stoneware in cream, grey, or muted blue suits a Scottish palette without adding a new pattern. Keep the tray to three or four pieces, with one plant or vase for height, so the group reads as calm rather than crowded.

    Choose a tray with low sides, so bottles stay put but remain easy to lift, and wipe the tray weekly, since soap and water collect under dispensers. Keep the tray clear of the basin edge, so drips fall into the sink rather than onto the wood. If counter space is very tight, a single stoneware dispenser and a small dish for rings give the same grouped effect in a smaller footprint.

    20. A Highland Fern on a High Shelf

    Bathroom with a potted fern on a high wooden shelf above a bath with trailing green leaves

    Set a potted fern on a high shelf above the bath or beside the window for green that suits bathroom humidity and indirect light. A fern brings a Highland plant note into the room without taking floor space, and trailing fronds soften hard tile lines. Choose a shelf clear of direct shower spray, and use a pot with drainage holes and a saucer, so water does not drip onto towels below.

    Check the soil before watering, since bathroom air already adds moisture, and rotate the plant to a brighter room for a few days each week if the bathroom has no window. One fern usually looks better than a crowded collection in a small room. If a live plant is too much upkeep, a single stem of dried heather in a stoneware vase gives a similar colour note with no watering.

    21. A Leaning Oak Ladder Shelf for Towels

    Bathroom with a leaning oak ladder shelf holding folded towels and baskets beside a vanity

    Lean an oak ladder shelf against a spare wall for four or five shallow shelves in the footprint of a towel rail, with no drilling needed. It suits a narrow wall beside the door or at the end of the tub, where a deep cabinet would block the walkway. Put heavier items, such as folded towels, on the lower rungs and lighter decor higher up, and add small adhesive pads under the feet so it does not slide on tile.

    Check that the top of the ladder cannot tip forward if a child or pet pulls on it, and anchor it if your household needs that extra safety. Keep the shelf to towels, baskets, and one plant, so it reads as storage rather than a display case. If floor space is very tight, a wall hung version of the same ladder shelf gives the same rungs with no floor footprint at all.

    22. A Round Mirror with Warm Sconces

    Bathroom vanity with a round mirror flanked by two warm wall sconces above a white basin

    Hang a round mirror with a warm sconce on each side above the vanity for light that flatters faces and softens a room full of straight tile lines. The round shape breaks the rectangle of the vanity, while sconces at eye level give softer, more even light than a single overhead fitting. Hang the mirror centred over the basin, a little narrower than the vanity, so the edges do not crowd the lights.

    Choose warm white bulbs, and a dimmable fitting if you want a low glow for evening baths. Battery or plug in sconces suit renters, while wired sconces give steadier brightness, and both should sit clear of direct shower spray. Keep the mirror clear of clutter below it, with one tray or soap dish only, so the mirror and lights stay the focus.

    23. A Pale Coastal Scheme with a Driftwood Mirror

    Pale grey and white coastal bathroom with a driftwood framed mirror white bath and seagrass basket

    Finish with a pale coastal scheme inspired by the Isle of Skye: grey white walls, a white bath, a driftwood framed mirror, and a seagrass basket for towels. The pale palette keeps a small bathroom bright, while the driftwood frame and natural basket add a coastal Scottish note without tartan or strong colour. This suits a bathroom with good daylight, where pale grey and white stay fresh rather than flat.

    Repeat the driftwood tone once more, in a stool or a tray, so the mirror does not look isolated, and add one soft blue accent, such as a towel or a vase, to link the room to the sea. Keep the floor in a warm pale tile, and use washable cotton towels, since a pale room shows marks quickly. If driftwood is hard to source, a weathered oak frame in a similar grey tone gives the same coastal feel.

    Conclusion

    A Scottish bathroom does not need a castle theme, it needs honest materials, one or two strong colours, and storage placed where it is used. Start with the bath and the vanity, since those set the scale and the palette, then free floor space with wall hung fittings, niches, and ladder shelves. Tartan towels, thistle prints, slate, and stone add character in small doses, while wool, tweed, and wood add warmth that suits cold mornings. Test paint and tile samples in daylight and evening light, keep wool and untreated wood clear of direct spray, and add one change at a time, checking that the door, the tub, and the basin still have a clear path. For the same warm, practical approach in a rented room, see these apartment bathroom ideas for storage and lighting that needs no remodel.

    FAQs

    How do I add Scottish character to a bathroom without a themed look?

    Use materials and plants rather than novelty items: tartan towels, slate tiles, wood panelling, thistle prints, a fern, and wool towels. One or two heritage details, such as a tweed cushion or a stoneware vase, are enough, and plain tiles and towels keep the room calm.

    What colours work best in a Scottish bathroom?

    Slate grey, loch blue, heather purple, and forest green form a calm base, with cream, oat, and warm wood to keep dark colours cosy. Keep bright colour to towels, a blind, or one print group, so the room feels planned rather than busy, and test deep colours in daylight and evening light before painting a large area.

    Can I use tartan in a small bathroom?

    Yes, if you keep it to one or two places. A tartan blind and matching towels give a clear Scottish note without covering every surface, and muted checks suit small rooms better than bold red ones. Keep the rest of the textiles solid, so the check stays the single pattern in the room.

    What is the best storage for a small Scottish bathroom?

    Use the walls first: recessed shower niches, barrel wood shelves, a ladder shelf, and baskets under the sink or on a shelf. One basket per job keeps bottles grouped, and a small tray on the counter holds only daily items, so the basin stays clear.

    Is a roll-top bath practical in a small bathroom?

    A roll-top bath needs floor space to walk around at least two sides, so it suits a medium or large room better than a tight one. In a small bathroom, a corner soaking tub or a back-to-wall freestanding tub gives a similar presence with a smaller footprint, and a rainfall shower over the bath adds a second use to the same tub.

    How do I keep wood and wool safe in a damp bathroom?

    Choose water tolerant woods such as teak for stools and trays, seal painted panelling with moisture resistant paint, and keep wool towels and tweed cushions on a heated rail or a shelf, clear of direct shower spray. Dry wood trays after use, and wash towels often so damp fabric does not stay in the room.


  • 33 Christmas Mantel Decor Ideas for Homes of Every Size

    33 Christmas Mantel Decor Ideas for Homes of Every Size

    A mantel is often the first thing people notice in a living room in December, so it is worth decorating with a plan rather than piling on pieces until it looks full. Start with the width you have, one clear focal point, and a color range you already use in the room. Then add layers: greenery or garland first, light second, and small details last. These 33 Christmas mantel decor ideas cover classic, rustic, modern, and small space mantels, plus options for homes without a working fireplace. Pick one idea as your base, and borrow details from two or three others rather than trying to use them all at once.

    Key Takeaways

    • Measure the mantel first: length, depth, and height above it decide how tall, wide, and heavy your display can be.
    • Choose one focal point, such as a wreath, a mirror, or a large print, then build the rest of the display around it.
    • Layer in order: garland or greenery, then candles or lights, then stockings and small ornaments.
    • Keep real flames away from greenery, paper, and fabric, and use flameless candles near anything that can burn.
    • Repeat one or two colors from the room so the mantel feels linked to the space, not separate from it.
    • For small or rented mantels, use light pieces, removable hooks, and a single strong garland instead of many heavy items.

    1. Classic Red and Green Garland with Matching Stockings

    Christmas mantel with a red and green evergreen garland and matching red stockings.

    Drape a full evergreen garland along the mantel shelf and hang matching stockings from it for the most familiar Christmas mantel look. Let the garland dip slightly between stocking hooks so the line feels soft rather than stiff, and keep the ends from hanging so low that they block the firebox. Red stockings with green trim, or the reverse, give a clear classic pairing.

    Add small red ornaments tucked into the garland only where they will not roll off, and keep one plain section near the center so the eye has a place to rest. If the mantel is narrow, use fewer stockings and space them wider apart. Check stocking hooks often if children pull on them, and keep filled stockings off a mantel that will be used for a real fire.

    2. Symmetrical Pillar Candles and Fresh Evergreen

    Christmas mantel with symmetrical white pillar candles and fresh evergreen sprigs.

    Place pillar candles in matching groups at each end of the mantel, with short evergreen sprigs laid flat between them, for a calm and balanced display. Symmetry suits formal rooms and wide mantels, since the eye reads the two ends as a pair. Use candles of two or three heights in each group so the arrangement does not look flat.

    Keep candles on heat safe holders and well clear of greenery, curtains, and paper. Flameless pillar candles give the same height and glow with less risk, which matters when greenery dries out late in the season. Step back from the doorway to check the balance before you finish, since a display that looks even up close can lean to one side from across the room.

    3. Frosted Eucalyptus with Soft White Fairy Lights

    Christmas mantel with frosted eucalyptus stems and soft white fairy lights.

    Swap dense pine for frosted eucalyptus stems and soft white fairy lights for a lighter, cooler mantel. Eucalyptus has a silvery green tone that works in rooms with grey, white, or pale wood, and its slim stems suit a shallow mantel shelf. Weave the lights through the stems rather than wrapping them tightly, so the glow spreads evenly.

    Add a few white or silver ornaments and keep stockings in a pale tone, such as cream or light grey, to hold the cool palette. Battery lights with a timer save you reaching behind the display each night. If you use fresh eucalyptus, expect it to dry and drop leaves, so place it away from the firebox and clear fallen leaves often.

    4. Rustic Woodland Pinecones and Wood Slices

    Rustic Christmas mantel with pinecones, wood slices, and branches on evergreen garland.

    Build a woodland mantel from pinecones, short branches, wood slices, and a plain evergreen base, with no shiny ornaments at all. Set a wood slice under a candle group at each end, scatter pinecones along the garland, and lean one or two bare branches behind the display for height. The natural textures do the work, so the color range can stay muted.

    This idea suits rooms with wood floors, stone fireplaces, and warm neutrals. Keep pinecones and wood away from open flame, and use flameless candles if you want light in the display. A burlap or linen runner under the garland can catch fallen needles and pinecone scales, and it lifts off easily for cleaning.

    5. Small Mantel, Simple White and Gold

    Small Christmas mantel with a slim garland, gold candle holders, and a small wreath.

    For a short or shallow mantel, keep the display to three things: a slim garland, two gold candle holders, and one small wreath or print above. White and gold read clearly at a small scale and do not crowd the shelf. Choose a garland that is thin rather than full, and trim any side branches that push past the mantel edges.

    Leave clear space at both ends of the shelf so the mantel still looks like a shelf, not a storage ledge. One pair of stockings is enough here, hung close to the center rather than spread across the full width. If the mantel sits above a working fireplace, keep gold ornaments and holders away from rising heat, which can dull finishes over time.

    6. Vintage Brass and Taper Candles

    Christmas mantel with vintage brass candlesticks and white taper candles.

    Use vintage style brass candlesticks with taper candles as the main height on the mantel, with only a low garland beneath them. Brass suits traditional rooms and pairs well with deep green, burgundy, and cream. Mix candlestick heights, but keep the tallest pair toward the center or the ends, not scattered at random, so the line stays readable.

    Place candles in stable holders on a tray or a heat safe mat, and never light taper candles under a low shelf, near garland, or where a curtain could brush them. Flameless tapers are a practical swap in a busy family room. Polish brass before the season if you want shine, or leave the patina if you prefer a softer, older look.

    7. Fresh Cedar with Dried Orange Slices

    Christmas mantel with fresh cedar garland, dried orange slices, and cinnamon sticks.

    Lay a fresh cedar garland on the mantel and tuck dried orange slices, cinnamon sticks, and a few pinecones into it for a scented, natural display. Cedar has a softer, flatter look than fir, which suits a mantel where you want detail without bulk. Orange slices add warm color without paint or glitter, and they link the mantel to kitchen decor.

    For the kitchen side of the same seasonal palette, these Christmas kitchen island decor ideas use fruit, greenery, and trays in a similar way. Keep dried fruit and cinnamon away from open flame, since both can burn. Replace cedar when it dries and sheds heavily, and keep the display clear of the firebox opening.

    8. Plaid Ribbon and Knit Stockings

    Christmas mantel with plaid ribbon bows and cozy knit stockings on a garland.

    Tie wide plaid ribbon into bows along the garland and hang knit stockings in cream, red, or green for a cozy, cabin style mantel. Plaid works best as one repeated pattern, so use the same ribbon for the bows, the stocking cuffs, and one wreath bow if you add one. Knit stockings add soft texture next to smooth greenery.

    Cut ribbon ends at an angle so they hang neatly, and fix bows with wire or a small clip rather than glue, so you can reuse them. Keep knit stockings light until Christmas Eve, since heavy filled stockings can pull a garland forward. This idea pairs well with a plaid throw on a nearby chair, but keep the rest of the room simple so the pattern does not compete with itself.

    9. Flocked Snowy Garland with White Ornaments

    Flocked snowy Christmas mantel with white and silver ornaments and white stockings.

    Choose a flocked garland that looks dusted with snow, then add only white, silver, and clear ornaments for a snowy mantel. Flocking gives instant winter color even in a warm climate, and a limited palette keeps a full garland from looking busy. Hang white stockings or white knit stockings to continue the snowy range.

    Shake flocked garland outdoors before you hang it, since loose flocking sheds, and keep it away from a working fire, where heat and dry flocking are a poor mix. Add white fairy lights to brighten the display in the evening, and keep the wall above the mantel plain or pale so the snowy garland stands out.

    10. Coastal Driftwood and Pale Blue Accents

    Coastal Christmas mantel with driftwood, pale blue ornaments, and white candles.

    Style a coastal Christmas mantel with a pale garland, driftwood pieces, pale blue ornaments, and white candles. Driftwood gives a beach house feel without shells scattered everywhere, and pale blue keeps the display cool and calm. Use a slim garland so the driftwood shapes stay visible, and place one larger driftwood piece at one end as an anchor.

    Keep the palette to white, sand, pale blue, and natural wood, and skip red entirely if you want the coastal look to read clearly. This idea suits rooms with light walls and natural fibers. If you use found driftwood, clean and dry it fully before bringing it indoors, and keep it clear of heat sources.

    11. Scandinavian Paper Stars and White Candles

    Scandinavian Christmas mantel with white paper stars, white candles, and sparse greenery.

    Hang paper stars above the mantel and line the shelf with white candles and a sparse evergreen garland for a calm Scandinavian look. Paper stars give height and light without a heavy frame, and they suit rooms that already favor pale wood, white walls, and simple furniture. Use stars in two sizes, with the largest at the center.

    Keep the shelf itself almost bare apart from candles and a few sprigs, since this style relies on space, not filling. Battery candles work well here, as paper stars must never sit near a real flame. Choose warm white light rather than cool white, so the pale display still feels warm in the evening.

    12. Farmhouse Wood Beads, Cotton Stems and Lanterns

    Farmhouse Christmas mantel with wood bead garland, cotton stems, and a lantern.

    Drape a wood bead garland over the mantel, add cotton stems in a jar or vase at one end, and set a lantern at the other end for a farmhouse mantel. Wood beads add a handmade feel, cotton stems add soft white detail, and a lantern gives height without a tall frame. Keep the colors to cream, natural wood, and soft green.

    Use a flameless candle inside the lantern, and keep cotton stems away from any real flame. A plain wooden sign or a small framed print above the mantel can finish the look, but keep the lettering short and the frame simple. This idea works well on a painted white or light grey mantel, where the natural tones stand out.

    13. Gold and Champagne Glamour

    Gold and champagne Christmas mantel with gold ornaments, ribbon, and candle holders.

    Build a gold and champagne mantel with a full garland, gold ornaments, champagne ribbon, and gold candle holders for a dressier look. This palette suits rooms with brass, warm metals, or cream furniture, and it reads well in evening light. Mix matte gold, shiny gold, and champagne so the display has depth rather than one flat shine.

    Keep stockings in gold, cream, or champagne to hold the palette, and skip red and green entirely here. Use warm white lights, since cool white can make gold look harsh. Check that ornaments are secure on the garland, as round gold balls roll easily off a shallow shelf. A gold framed mirror or print above the mantel ties the whole display together.

    14. Deep Jewel Tones with Velvet Ribbon

    Christmas mantel with deep jewel tone ornaments and dark velvet ribbon bows.

    Use deep jewel tones, such as emerald, burgundy, and navy, with velvet ribbon bows for a rich mantel that still feels calm. Velvet ribbon is the key detail: it looks soft, holds a bow shape well, and adds texture that shiny ribbon lacks. Pair it with a dark green garland and ornaments in only two jewel tones, not all of them at once.

    Add brass or gold candle holders to warm the dark colors, and keep the wall above the mantel simple so the colors are not fighting a busy print. Jewel tones suit rooms with dark wood or deep wall colors. If the room is small, use jewel tones in the ribbon and stockings only, and keep the garland plain green, so the display does not darken the whole wall.

    15. Kid Friendly Felt Garland and Soft Ornaments

    Kid friendly Christmas mantel with a felt ball garland and soft fabric ornaments.

    Make a kid friendly mantel with a felt ball garland, soft fabric ornaments, and stockings hung low enough for children to see, but not to pull down. Felt and fabric pieces will not shatter if they fall, which matters on a mantel in a family room. Use bright, simple colors and one clear pattern, such as stripes or dots, so the display looks planned rather than random.

    Keep candles, real or flameless, out of reach, and avoid small parts that could come loose. Hang stockings with sturdy hooks and test them with a light pull before the season starts. This idea also works as a second, smaller mantel display in a playroom or family room, leaving the main mantel for a calmer adult scheme.

    16. Paper Stars and Handmade Paper Garland

    Christmas mantel with handmade white paper stars and a paper garland.

    Cut or fold paper stars and a paper garland for a handmade mantel that costs little and suits a craft minded household. Paper snowflakes, folded stars, and a simple paper chain can fill a mantel without a bought garland, and children can help make the pieces. Use one paper color, such as white or cream, for a calm look, or two colors for a bolder display.

    Keep all paper well away from candles, lights that give off heat, and the firebox, and use battery lights only. Paper pieces are light, so fix them with removable hooks or tape that suits your wall finish. Store the paper pieces flat in a folder after the season, and they will last for another year if kept dry.

    17. Black and White Modern Mantel

    Modern black and white Christmas mantel with white candles and black holders.

    Style a modern mantel in black and white only: a plain green or black garland, white candles, black candle holders, and white stockings with black trim. The strict palette makes a small display look deliberate, and it suits rooms with modern furniture, black frames, or monochrome art. Keep the shapes simple, with straight candle holders and a slim garland.

    Add one texture, such as knit stockings or a linen runner, so the display does not look flat. Skip colored ornaments entirely here, since one red ball would break the scheme. Black and white also photographs well, which helps if you plan to share the room on social media or save the look for next year.

    18. Dried Flowers and Natural Linen

    Christmas mantel with dried flowers, natural linen, and a plain evergreen garland.

    Combine dried flowers, such as lavender, strawflower, or dried grasses, with a natural linen runner and a plain evergreen garland for a soft, garden style mantel. Dried flowers add muted color and texture that fresh flowers cannot hold for a whole season, and linen softens a hard stone or wood shelf. Keep the dried stems in small bunches tied with twine, rather than one large bouquet.

    Dried flowers and linen can burn easily, so keep them clear of the firebox and use only flameless candles in this display. This idea suits rooms with natural wood, rattan, or linen furniture. Replace any stems that crumble, and keep the display dust free with a light shake outdoors once during the season.

    19. Holly Berries and Classic Red Bows

    Christmas mantel with holly berry stems and classic red bows on evergreen garland.

    Use holly berry stems and classic red bows as the only decorations on a plain evergreen garland for a traditional mantel that is easy to repeat each year. Holly berries give strong red color in small amounts, so you do not need many ornaments, and red bows mark the rhythm of the display along the shelf. Space bows evenly, with one at the center and one near each end.

    Use faux holly if children or pets can reach the mantel, since real holly berries are not safe to eat. Keep berry stems clear of open flame, and check faux stems for loose berries before hanging. This idea works on almost any mantel width, since you can add or remove bows to fit the length.

    20. Lanterns at Different Heights

    Christmas mantel with lanterns at three different heights and a low garland.

    Place lanterns in three different heights along the mantel, with a low garland behind them, for a display built on light rather than ornaments. Lanterns give structure, they are easy to move, and they work on wide and narrow mantels alike. Use the tallest lantern at one end, the shortest at the other, and the middle height near the center, or group all three at one end for an asymmetrical look.

    Put flameless candles inside the lanterns, especially if the mantel is near curtains or greenery. Clear glass lanterns show the candle glow best, while metal lanterns give a stronger shape in daylight. Keep lantern doors closed and handles turned inward so they do not catch on sleeves or stockings.

    21. Mirror Behind the Garland to Double the Light

    Christmas mantel with a mirror above reflecting garland and candlelight.

    Hang or lean a mirror above the mantel, then place the garland and candles in front of it, so the mirror doubles the candlelight and greenery. A mirror suits a small or dark room, since it reflects light and makes the wall feel wider. Choose a mirror with a simple frame that matches the room, and keep the mantel display lower than usual so it does not block the reflection.

    Clean the mirror before the season, since dust shows clearly in candlelight. Keep candles at a safe distance from the mirror frame, especially if the frame is wood or gilt, and use flameless candles if the mirror sits close to the shelf. A round mirror softens a square mantel, while a tall rectangular mirror suits a wide mantel.

    22. Advent Countdown Display on the Mantel

    Christmas mantel with a small advent countdown of numbered kraft bags on a garland.

    Turn the mantel into an advent countdown with 24 small numbered pockets, boxes, or bags hung in a row or grouped along the garland. An advent display gives the mantel a daily job through December, and children can open one pocket each morning. Use small kraft bags, fabric pockets, or tiny boxes, all in one color range, so the display looks tidy rather than cluttered.

    Keep the countdown pieces light and hang them from the garland, not from stocking hooks that also hold heavy stockings. Fill pockets with small, non food treats if food rules or allergies are a concern, and keep the display away from heat. After December 25, the empty pockets can come down in one lift if they are strung on a single cord.

    23. Nativity Scene as the Focal Point

    Christmas mantel with a nativity scene at the center and a simple garland behind it.

    Place a nativity scene at the center of the mantel, with a simple garland running behind it and no competing ornaments nearby, for a mantel with a clear meaning. A nativity set needs space around it to read well, so keep the garland low and the candles to the ends. Choose a set sized to the mantel: small figures suit a narrow shelf, while larger figures need a wide, deep shelf.

    Set figures on a stable base, such as a tray or a folded cloth, so they do not slide on a polished shelf. Keep the scene away from the firebox edge, and use flameless candles for light around it. If the set is a family heirloom, place the most fragile figures toward the back, where they are less likely to be knocked.

    24. Nutcracker Collection in a Row

    Christmas mantel with a row of nutcracker figures and a plain garland behind them.

    Line up a nutcracker collection along the mantel shelf, with a plain garland behind it, for a display built on repetition. Nutcrackers work best in a row of three, five, or more, with heights varied but colors linked, so the line reads as a collection rather than a random group. Keep the tallest figures toward the center or the ends, and leave a small gap between each one.

    Secure tall nutcrackers on a non slip mat if the shelf is smooth, and keep them clear of stocking hooks that could knock them. This idea suits a wide mantel, but a narrow mantel can hold three nutcrackers and a short garland. After the season, wrap each figure separately, since painted details chip easily in a shared box.

    25. Lighted Village Scene

    Christmas mantel with a lighted miniature village scene and small bottle brush trees.

    Build a lighted village scene on the mantel with miniature houses, bottle brush trees, and battery lights, set on a white cloth to suggest snow. A village scene turns the mantel into a small landscape, and it suits a deep shelf where houses can sit in two rows without crowding the edge. Place taller houses at the back and smaller ones at the front, with trees between them.

    Use battery lights inside or behind the houses, and keep cords hidden under the cloth. Check that houses sit flat and cannot tip forward off the shelf, especially if the mantel is above a working fireplace where vibrations occur. This idea pairs well with a plain garland above, but keep the wall display simple so the village stays the focus.

    26. One Oversized Wreath as the Only Focal Point

    Christmas mantel with one oversized wreath above and a nearly bare shelf below.

    Hang one oversized wreath above the mantel and leave the shelf almost bare, with only a slim garland or two candle groups, for a bold but simple look. A large wreath suits a tall wall or a wide mantel, where a small wreath would look lost. Choose a wreath at least half the width of the mantel, and hang it from a sturdy hook rated for its weight.

    Keep the shelf display low so it does not compete with the wreath, and use one color from the wreath in the stockings or candles to link the two levels. Check the wreath hook before the season, since a heavy wreath can pull a weak adhesive hook off the wall. This is a good choice if you want impact with few pieces to store in January.

    27. Asymmetrical Arrangement for a Wide Mantel

    Wide Christmas mantel with an asymmetrical display, tall candles at one end and trailing garland.

    For a wide mantel, place the main group, such as tall candles and a large vase of branches, at one end, and let a garland trail to the other end with only small details. Asymmetry suits modern rooms and wide mantels, where a fully symmetrical display can look stiff. The heavy end anchors the display, while the light end keeps it from feeling crowded.

    Balance the look by repeating one color or material at both ends, such as the same candle color or the same greenery, so the light end does not look forgotten. Step back to check the balance from the doorway, since asymmetry is easy to overdo up close. This idea also works when a television or a door sits on one side of the fireplace, since the display can lean away from it.

    28. Layered Garlands, Thick and Thin Together

    Christmas mantel with two layered garlands, thick evergreen behind and thin eucalyptus in front.

    Layer two garlands on the mantel: a thick evergreen garland at the back and a thinner garland, such as eucalyptus, beaded, or berry, draped in front of it. Layering gives depth that a single garland cannot, and it suits a deep shelf where two rows can sit without pushing each other off. Keep the front garland lighter in color or texture so the two layers stay distinct.

    Fix both garlands with separate hooks or wire, since one hook holding both will sag in the middle. Add ornaments only to the front layer, so they are visible, and keep the back layer plain. If the mantel is shallow, skip this idea and use a single full garland instead, since two layers need depth to sit safely.

    29. Blue and Silver Winter Frost

    Blue and silver Christmas mantel with frosted branches, silver ornaments, and white lights.

    Style a winter frost mantel in blue and silver, with frosted branches, silver ornaments, blue ribbon, and white lights. Blue and silver suit rooms with cool walls, grey furniture, or a modern fireplace, and they carry well past Christmas into January as winter decor. Use frosted branches for height at the ends, and keep the garland slim so the silver details show.

    Mix matte silver, shiny silver, and pale blue, but keep red and gold out of this scheme. White fairy lights brighten the cool palette in the evening. If the room already has warm wood tones, add a silver tray under the candle group to link the cool mantel to the warm room without changing the whole palette.

    30. Blush Pink and Gold Whimsy

    Blush pink and gold Christmas mantel with pink ornaments, gold ribbon, and pink stockings.

    Use blush pink and gold for a softer, playful mantel: a plain green garland, blush ornaments, gold ribbon, and pink stockings. Blush pink suits rooms with light walls, cream furniture, or a nursery nearby, and gold keeps the display from looking too pale. Keep the pink to ornaments, stockings, and ribbon, with the garland itself plain green, so the color stays controlled.

    Add gold candle holders and warm white lights to hold the palette together in the evening. This idea works well in a small room, since pale colors do not weigh down the wall. If pink feels too strong for the whole mantel, use it in the stockings only and keep the ornaments gold and cream.

    31. Holiday Art Print Framed Above the Garland

    Christmas mantel with a framed holiday art print above and a simple garland below.

    Swap the usual mirror or wreath for a framed holiday art print above the mantel, with a simple garland below it. A print gives the mantel a clear theme, such as a winter landscape, a simple tree, or a seasonal saying, and it is easy to change each year. Choose a frame that matches other frames in the room, and size the print to the mantel width, not the whole wall.

    Hang the print securely, since a mantel print sits above a heat source and a busy room. Keep the garland low and plain so it does not hide the bottom of the frame. After the season, the print can go into storage flat, and the usual mirror or art can return, which makes this idea easy to reverse.

    32. Console Shelf Mantel for Homes Without a Fireplace

    Console table styled as a Christmas mantel with garland, stockings, and a mirror above.

    If your home has no fireplace, build a mantel on a console table or a wall shelf: a garland across the shelf, stockings hung from its front edge, and a framed print or mirror above. A console mantel gives the same focal point as a real mantel, and it can sit in a living room, hallway, or bedroom. Choose a console with a solid top and a front edge strong enough for stocking hooks.

    Keep the display light, since a console shelf is usually shallower than a real mantel, and use flameless candles for light. Place the console against a plain wall so the display reads as a mantel, not as a cluttered table. This idea also works in a rental, since the console moves with you and leaves no marks on the wall beyond a picture hook.

    33. Renter Friendly Mantel with No Nails or Damage

    Renter friendly Christmas mantel with removable hooks, a freestanding garland, and battery lights.

    Decorate a rented mantel with no nails and no damage: a freestanding garland, removable hooks rated for the weight, stockings hung from a tension rod or a mantel shelf hook, and battery lights. Removable hooks suit painted mantels and tile surrounds, but test one hook in a hidden spot first, since some finishes peel. A garland that sits on the shelf, rather than hanging from it, needs no fixings at all.

    Keep all pieces light and easy to lift off in one go, so you can return the mantel to plain in minutes. Avoid adhesive on brick, stone, or rough surfaces, where it may fail or leave residue, and use a freestanding candle group instead of wall hung pieces. For seating around the fireplace once the mantel is dressed, these fireplace seating ideas show how to group chairs without crowding the hearth.

    Conclusion

    A good Christmas mantel starts with the shelf you have, not the display you wish you had. Measure first, choose one focal point, layer greenery, light, and small details in that order, and repeat one or two colors from the room. Keep real flames clear of greenery and paper, use flameless candles where the risk is higher, and leave the display easy to take down in January. Pick one idea from this list as your base, add details from one or two others, and let the mantel feel like part of the room, not a separate project.

    Save this list on Pinterest before you start decorating, and work through it one step at a time: garland first, then light, then stockings and small pieces last.

    FAQs

    How do I decorate a Christmas mantel if I have no fireplace?

    Build a mantel on a console table or a wall shelf, as in Idea 32, with a garland across the shelf, stockings hung from its front edge, and a print or mirror above. Keep the display light and use flameless candles, since a console shelf is shallower than a real mantel. Place it against a plain wall so it reads as a focal point, and choose a console that moves with you if you rent.

    How do I hang stockings on a mantel without damage?

    Use stocking holders that sit on the shelf with a weighted base, or removable hooks rated for the stocking weight, and test one hook in a hidden spot first. Keep stockings light until Christmas Eve, and check hooks if children pull on them. Avoid nails in a rental, and avoid adhesive on brick, stone, or rough surfaces, where it may fail or leave residue.

    Can I use real candles on a Christmas mantel?

    You can, but only with care: place candles in stable holders, keep them clear of greenery, paper, fabric, and curtains, and never leave them lit unattended or under a low shelf. Flameless candles are the safer choice near dried greenery, paper stars, and knit stockings, and they give the same glow in the evening. Follow your fireplace instructions for clearances, since heat from a working fire adds to the risk.

    How do I decorate a small Christmas mantel without crowding it?

    Limit the display to three elements, as in Idea 5: a slim garland, one candle group, and one focal point above, such as a small wreath or print. Leave clear space at both ends of the shelf, use a thin garland rather than a full one, and hang only one or two stockings near the center. Pale colors and simple shapes also help a small mantel feel open rather than full.

    What color scheme should I choose for a Christmas mantel?

    Choose a scheme you already use in the room, then limit the mantel to that range plus green. Classic red and green suits traditional rooms, white and gold suits small or pale rooms, blue and silver suits cool rooms, and jewel tones suit rooms with dark wood. Repeating one color from a rug, sofa, or curtains links the mantel to the room and stops the display from looking separate.

    How do I keep a Christmas mantel looking good all season?

    Check the display once a week: remove fallen needles and loose ornaments, replace dried greenery, and test battery lights and flameless candles. Keep the mantel dust free, keep stockings light until Christmas Eve, and turn lights off when the room is empty. Store pieces in labeled boxes in January, with fragile figures wrapped separately, so next year starts with pieces in good shape.

    How far should decor sit from a working fireplace?

    Follow the fireplace maker instructions and any local rules for your fireplace type, since clearances vary. As a general habit, keep anything that can burn, including greenery, paper, fabric, and stockings, off the firebox opening and clear of rising heat, and keep candles away from the opening. When in doubt, use flameless candles, keep the display on the shelf rather than hanging into the opening, and ask a professional if you are unsure.


  • 14 Vintage Colorful Christmas Decor Ideas for a Warm, Inviting Home

    14 Vintage Colorful Christmas Decor Ideas for a Warm, Inviting Home

    Vintage Christmas decor has a warmth that new, matched sets often miss. A chipped glass ornament, a faded Santa figure, and a set of bright lights all carry a story, and together they make a room feel gathered over time rather than bought in one trip. These 14 vintage colorful Christmas decor ideas lean into that mix: reds, greens, pinks, blues, and golds side by side, with old pieces given a clear job in each room. Start with one anchor, such as the tree or the mantel, then repeat one or two colors around the room so the mix feels planned. For kitchen ideas that follow the same grouped, easy to clear logic, see these Christmas kitchen island decor ideas.

    Key Takeaways

    • Pick one anchor first, usually the tree or mantel, and let the rest of the room echo its colors.
    • Mix eras and finishes on purpose: shiny glass, matte ceramic, felt, and paper sit well together when the palette repeats.
    • Repeat one or two colors in each spot so a colorful mix reads as cheerful, not cluttered.
    • Give fragile vintage pieces safe spots: low shelves, closed cabinets, and spots away from doors and pets.
    • Use battery lights and flameless candles near old paper, fabric, and dried greenery.
    • Store the set in one labeled box with tissue between glass pieces, so next year starts easily.

    1. Dress the Tree in Multicolor Glass Ornaments

    Christmas tree decorated with multicolor vintage glass ornaments in red, teal, pink, gold, and blue.

    Hang a mix of vintage style glass ornaments in red, teal, pink, gold, and blue on one tree, and let the color do the work. Shiny, matte, and striped finishes add depth without a strict theme, and the mix suits trees of any size. Place larger ornaments lower and toward the inside of the branches, and save small, detailed pieces for eye level where they can be seen up close.

    Group ornaments by color in loose clusters of three rather than spacing every color evenly, which keeps the tree from looking flat. If your collection is small, add plain colored baubles in the same shades to fill gaps, and keep the most fragile heirlooms on sturdy branches away from the door side of the tree.

    2. Drape Vintage Tinsel and Bead Garlands

    Silver tinsel and colorful bead garlands draped in swags along a Christmas mantel.

    Layer silver tinsel garland with strands of colorful glass or wooden beads along the mantel, a doorway, or the tree. Tinsel catches light from across the room, while beads add weight and color that holds up in daylight too. Hang the tinsel first, then swag the beads in a looser curve so both layers stay visible.

    Keep garlands clear of candles, heaters, and open flames, and check old tinsel for shedding before hanging it over food or seating. On a mantel, anchor each swag with a small hook or a heavy ornament at the ends so the drape stays even. If you have pets, hang bead strands higher and skip tinsel where it could be pulled down.

    3. Line the Mantel With Retro Ceramic Trees

    Retro ceramic Christmas trees in green, pink, white, and blue lined along a mantel.

    Set a row of retro ceramic Christmas trees in green, pink, white, and blue along the mantel for a display that glows once lit. Ceramic trees work well in a line because their shapes repeat while their colors change, which gives the mantel a clear rhythm. Vary the heights, with the tallest at the ends or in the center, and leave a small gap between trees so each one reads on its own.

    Use battery lights inside trees with missing bulbs, and keep cords hidden behind the row. Add a short bead garland or a row of small bottle brush trees in front to fill the base line. Dust ceramic trees with a soft dry cloth, and store each one wrapped so painted details do not chip against a neighbor.

    4. Build a Bottle Brush Tree Village

    Bottle brush Christmas trees in many colors arranged as a small village with tiny houses on a sideboard.

    Arrange bottle brush trees in many colors and heights on a sideboard, windowsill, or stair landing to make a small forest that needs no watering. Bottle brush trees suit a village because they are light, cheap to group, and easy to move when you need the surface. Set tall trees at the back, short ones at the front, and add a few tiny houses, deer figures, or a fake snow blanket to ground the scene.

    Stick to two or three base colors for the trees, such as green, pink, and white, and let small bright accents carry the rest of the color. Keep the village off radiators and away from open windows where wind can topple light trees. When the season ends, pack trees upright in a box with dividers so their bristles keep their shape.

    5. Fill Bowls and Jars With Mismatched Ornaments

    Glass bowl filled with mismatched vintage Christmas ornaments in red, gold, teal, and pink on a console table.

    Gather spare and mismatched vintage ornaments in a large glass bowl, a footed dish, or a row of jars on a console or coffee table. This is a good home for single ornaments that do not fit the tree theme, and the glass lets every color show. Mix sizes, with large baubles at the bottom and small detailed pieces on top, and add a few pinecones or short evergreen sprigs for texture.

    Use shatterproof pieces in bowls placed where children or pets can reach, and keep true heirlooms in a higher spot. A bowl display also works as a centerpiece that lifts away in one move when you need the table. Change one or two pieces each week if you like, so the display feels fresh through December.

    6. Hang Bold Patchwork and Colorful Stockings

    Bright patchwork and colorful striped Christmas stockings hung from a decorated mantel.

    Swap plain stockings for patchwork, striped, or brightly colored vintage style stockings hung from the mantel or a shelf. Colorful stockings pull the eye to the fireplace and give children a clear, personal spot in the room. Mix patterns within one palette, such as red, green, and cream, so the set feels collected rather than random.

    Hang stockings from sturdy hooks, and keep them empty until Christmas Eve so they do not pull hooks loose or swing into the fire area. If you have no mantel, hang them from a shelf edge, a stair rail, or a row of wall hooks. Add a small name tag or a felt initial to each stocking to make the set feel made for your household.

    7. Light a Pastel and Bright Retro Tree

    Retro Christmas tree with pastel pink, mint, aqua, red, and gold ornaments and large colorful lights.

    Decorate one tree with a retro mix of pastel pink, mint, and aqua ornaments beside bold red and gold pieces, finished with large colorful lights. The pastel shades soften the bold colors, and the result feels nostalgic without looking washed out. Use a white or flocked tree if you want pastels to stand out, or a green tree if you want the bold colors to lead.

    Place large lights first so the glow spreads evenly, then add ornaments in clusters by color. Keep the topper simple, such as a star or a bow in one of the tree colors, so it does not fight the mix below. Step back after each round of ornaments and fill only the thin spots, which keeps the tree full without overloading branches.

    8. Display Vintage Christmas Cards on a Line

    Vintage Christmas cards clipped to a string hung along a living room wall.

    Clip vintage style Christmas cards to a string, ribbon, or wire along a wall, mantel, or doorway to turn cards into wall decor. A card line suits colorful vintage decor because old card art already mixes red, green, gold, and blue in small, framed doses. Space cards evenly and mix orientations, with larger cards at the ends to anchor the line.

    Use small clips rather than tape so cards stay clean for reuse or storage. Hang the line where cards will not catch on coats or doors, and keep it away from direct sun, which fades old print fast. Add a few new cards each year and retire the most fragile originals to a frame, so the display grows without risking the pieces you value most.

    9. String Colorful Paper Chains and Honeycomb Decorations

    Colorful paper chains in red, green, pink, and gold with honeycomb decorations hung across a doorway.

    Make or hang paper chains in red, green, pink, and gold across a doorway, along a stair rail, or above a table. Paper chains are light, cheap, and easy to size to any room, and they add the handmade color that vintage Christmas decor is known for. Alternate solid and striped papers, and keep each loop the same size so the chain hangs evenly.

    Add honeycomb balls, fans, or bells in matching colors at intervals for shape change, and hang them where they will not be bumped by tall guests. Paper decor suits rooms where glass and ceramic pieces would be at risk, such as a playroom or a hallway. Store paper chains flat in a large envelope or box, and replace any torn loops rather than hanging a damaged chain.

    10. Stage Retro Santas, Nutcrackers, and Angels

    Retro Santa figures, nutcrackers, and angel figurines in red, gold, and green grouped on a shelf.

    Group retro Santa figures, nutcrackers, and angels on a shelf, sideboard, or windowsill, with each figure given its own space. Figurines carry the color in vintage decor, from red coats and gold trim to painted faces and bright bases, and a shelf group lets you enjoy pieces that would get lost on a tree. Place tall figures at the back, small ones at the front, and turn each figure slightly so it faces the room.

    Keep figurines out of direct sun and away from radiators, which can crack paint and dry out wood. If a figure is fragile, place it behind a sturdier piece or inside a glass cabinet. Rotate one or two figures to a new spot each year so the shelf feels fresh, and photograph the group before packing it away so next year setup takes minutes.

    11. Tie Multicolor Velvet and Plaid Bows

    Christmas wreath and stair rail decorated with wide velvet bows in red and green and plaid ribbon.

    Tie wide velvet bows in red, green, and gold, mixed with plaid ribbon, on wreaths, stair rails, chair backs, and the tree. Bows add soft color and texture that glass and ceramic cannot, and they tie separate displays together when the same ribbon appears in more than one spot. Make loops full and even, and trim the tails at a slant so they hang neatly.

    Use wired ribbon for bows that must hold a shape on a wreath or rail, and plain ribbon for chair backs where a softer bow suits the seat. Keep bows clear of candles and heaters, and check that stair rail bows do not narrow the handrail grip. Save the best ribbon after the season by rolling it rather than folding it, which keeps wired edges from creasing.

    12. Set a Vintage Tin and Enamel Table Centerpiece

    Christmas table centerpiece on a vintage tin tray with an enamel pitcher of red berry stems, greenery, and colorful ornaments.

    Build a table centerpiece from vintage style tin trays, enamel pitchers, and small colorful dishes filled with greenery, berries, and ornaments. Tin and enamel pieces suit a colorful vintage table because their worn finishes sit calmly beside bright ornaments and fresh greenery. Set the tray in the center, add one taller piece such as a pitcher of berry stems, then fill around it with low bowls and a few ornaments.

    Keep the centerpiece low enough to see across the table, and leave room for serving dishes at meals. Line trays with a cloth or felt pad if the base could scratch the table, and wipe enamel pieces dry after use so water marks do not set. When the meal ends, the whole tray lifts away, which makes clearing up simple.

    13. Glow With Colored Glass Candle Holders and String Lights

    Colored glass candle holders in amber, red, green, and blue with string lights along a windowsill at dusk.

    Set colored glass candle holders in amber, red, green, and blue along windowsills and shelves, and pair them with warm or multicolor string lights. Colored glass gives a soft, tinted glow that suits vintage decor, and it adds color even in daylight when the candles are unlit. Group holders in odd numbers, and mix heights so the light does not sit in one flat line.

    Use flameless candles inside colored glass near curtains, paper, and dried greenery, and keep real flames away from anything that can catch. Check old string lights for frayed cords or cracked bulbs before hanging them, and switch lights off when the room is empty. A windowsill row of colored glass reads well from outside too, which gives the house a warm look from the street.

    14. Build a Vintage Colorful Cocoa Corner

    Hot cocoa corner with vintage style mugs in mixed bright colors on a tray, a jar of candy canes, and small retro ornaments.

    Set up a small cocoa corner with vintage style mugs in mixed colors, a tray of toppings, and a few retro ornaments or a small tree beside it. A cocoa corner gives colorful vintage decor a daily job, since guests can use the mugs and see the display at the same time. Choose a narrow console, a cart, or one counter corner, and keep everything on a tray so the station lifts away when you need the surface.

    Mix mug colors rather than matching them, and add one bright jar for candy canes and one small bowl for marshmallows. For a station that fits a small home, these hot cocoa bar ideas show how to build up with shelves and trays instead of spreading out. Keep hot water and perishable toppings close to serving time, and pack the seasonal mugs in one box when January arrives.

    Conclusion

    A warm, inviting vintage Christmas home does not need a matched set or a single color story. It needs a clear anchor, a palette that repeats from room to room, and old pieces placed where they can be seen and used. Pick the tree, the mantel, or the table as your starting point, add color in clusters rather than one piece at a time, and keep fragile items safe and lights checked. Save the ideas that fit your rooms, and let the mix grow a little each year as new finds join the old favorites.

    FAQs

    Can I mix vintage and new Christmas decor?

    Yes. Use new pieces in the same colors as your vintage items, and place them beside old pieces rather than in a separate display. A shared palette is what makes the mix look planned, and new plain baubles can fill gaps on a tree full of heirlooms.

    How do I keep a colorful Christmas room from looking cluttered?

    Repeat one or two colors in each display, group small items on trays or in bowls, and leave empty space on shelves and mantels. If a spot feels busy, remove one item at a time until the remaining pieces read clearly from the doorway.

    Are old Christmas lights safe to use?

    Check old lights for frayed cords, cracked bulbs, and loose plugs before use, and do not use a set that shows damage. Many people keep very old lights as display pieces and use new lights with a vintage look for actual lighting, which keeps the style without the risk.

    How should I store vintage glass ornaments?

    Wrap each ornament in tissue, place it in a divided box or a box with soft dividers, and store the box upright in a dry spot. Keep heavy items off the top of the box, label it clearly, and note which pieces are the most fragile on the lid.

    Can colorful vintage decor work in a small home?

    Yes, because color works in small doses. Use one colorful tree or mantel display, a bowl of ornaments, and a few bright stockings or bows, and keep the rest of the room simple. Small rooms suit grouped displays on trays and shelves, which add color without taking floor space.

    Where can I find vintage style Christmas decor?

    Look in charity shops, flea markets, and family storage boxes first, since those sources often hold the pieces with the most character. New vintage style pieces are also widely sold, so fill gaps with new items in matching colors rather than waiting for an exact old match.


  • 29 Christmas Garden Decoration Ideas for a Stylish Room That Works

    29 Christmas Garden Decoration Ideas for a Stylish Room That Works

    A garden at Christmas works best when it is treated like an outdoor room, with a clear entry, a lit path, a place to sit, and one or two spots that draw the eye. You do not need to decorate every bed and fence. A garland on the gate, lights in one tree, and lanterns along the path can carry the whole look, and the rest of the garden can stay calm and simple. These 29 Christmas garden decoration ideas cover entries, paths, fences, trees, seating, and small details, so you can pick the pieces that suit your space, your weather, and the time you have. Check each piece at dusk, when lights show their true effect.

    Key Takeaways

    • Start at the entry: a gate garland, a lit path, and a clear walkway set the tone for the whole garden.
    • Pick one lit focal point, such as a tree or a pergola, and keep the rest of the lighting soft and simple.
    • Use outdoor rated lights and lanterns, and keep cables off walkways and away from standing water.
    • Choose weather hardy greenery, pots, and fabrics, and bring cushions and throws inside when rain is forecast.
    • Group decorations in threes or in one clear zone, rather than spreading single items across the whole garden.
    • Check the display at dusk and from inside the house, since that is when most people will see it.

    1. Garland Over the Garden Gate

    Evergreen garland draped over a garden gate at Christmas.

    Drape a long evergreen garland over the top of the garden gate so visitors walk under greenery as they arrive. The gate is the first thing people see, so one full garland here does more work than small pieces scattered around the garden. Choose a garland thick enough to read from the street, and fix it at both ends plus the middle so it does not slip when the gate moves.

    Add a few pinecones or a simple bow at each end if you like, but keep the middle clear so the gate still opens freely. Check that the garland does not catch on the latch or drag on the ground. In wet weather, shake it out now and then and let it dry, since damp greenery left against a wooden gate can stain the wood over time.

    2. Twin Potted Trees by the Path

    Twin potted Christmas trees flanking a garden path.

    Place one potted Christmas tree on each side of the garden path, near the entry or the front door, to frame the walk in a balanced way. Potted trees suit small gardens well, since they need no digging and can move to a sheltered spot after the season. Pick trees of similar height and pot size so the pair looks planned rather than accidental.

    Decorate them lightly, with a few outdoor baubles and a short string of lights on each, and leave the natural shape visible. Weight the pots with stones at the base if wind is a problem in your garden, and water the trees during dry spells so the roots do not dry out. After Christmas, keep the trees in their pots for next year or plant them out if you have room.

    3. String Lights in a Garden Tree

    Garden tree wrapped in warm string lights at dusk.

    Wrap warm white string lights through the branches of one garden tree, starting at the trunk and working outward, so the whole canopy glows at dusk. A single lit tree gives the garden a focal point and makes the rest of the display feel calm by comparison. Choose lights rated for outdoor use, and keep the plug and any joins under cover and off the ground.

    Step back from the tree as you work to check for dark patches, and add a second short string only where a gap shows. Avoid pulling branches down with heavy lights, and do not climb higher than you can reach safely from a stable ladder with someone nearby. Take the lights down in dry weather after the season, and store them loosely coiled so the wires do not kink.

    4. Lanterns Along the Garden Path

    Garden path lined with glowing outdoor lanterns.

    Line the garden path with outdoor lanterns, spaced evenly on both sides or in a row on one side, to light the way after dark. Lanterns give a softer, steadier glow than string lights alone, and they mark the edges of the path clearly on dark evenings. Use battery candles or real candles in closed lanterns, and keep the glass clean so the light stays bright.

    Set each lantern on a flat stone or a level patch of ground so it cannot tip, and keep them clear of overhanging branches and dry leaves. Bring paper lanterns inside in rain, and use metal or glass lanterns for spots that stay wet. At the end of the evening, switch off or blow out the candles, and store the lanterns under cover so they are ready for the next night.

    5. Wreath on a Fence Panel

    Large evergreen wreath hung on a garden fence panel.

    Hang a large evergreen wreath on a fence panel that faces the path or the seating area, where it can be seen without blocking a gate. A fence wreath works well in gardens with no porch or door to decorate, and it gives a plain fence a clear festive center. Fix it with a sturdy hook or wire through the fence boards, and check that it sits flat so wind cannot spin it.

    Keep the wreath simple, with pinecones, dried orange slices, or a plain bow, and avoid heavy ornaments that pull the greenery out of shape. If the fence faces strong wind, choose a smaller wreath and tie it at two points. Take it down before it dries out fully, since dry wreaths shed needles and can become a fire risk near candles or lights.

    6. Living Christmas Tree in a Garden Bed

    Living Christmas tree in a garden bed with low evergreen plants.

    Plant a living Christmas tree as the center of a garden bed, or set a large potted tree into the bed for the season, so the tree looks like part of the garden rather than a decoration placed on top of it. A living tree suits a quiet corner where it can stay after Christmas, and it gives birds a sheltered spot through winter. Surround the base with mulch or low evergreen plants to hide the pot and tie the tree into the bed.

    Decorate it only with light outdoor ornaments, since heavy baubles can bend young branches. Keep the tree watered in dry spells, and avoid wrapping lights so tightly that they cut into the bark as the tree grows. If you plant the tree out for good, pick a spot with room for its full grown size, away from paths, fences, and overhead wires.

    7. Net Lights Over Garden Shrubs

    Garden shrubs covered in even net lights at dusk.

    Drape net lights over rounded garden shrubs to cover them evenly with light in minutes, without wrapping each branch by hand. Net lights suit boxwood, holly, and other dense shrubs, and they give a tidy, even glow that looks good from the house as well as the path. Lay the net over the top of the shrub and tuck the edges down the sides, then step back to check for bare patches.

    Use one net per shrub rather than stretching a single net across two plants, since stretched nets leave gaps and pull branches out of shape. Keep the plug and joins sheltered, and avoid nets on shrubs with sharp thorns unless you wear gloves. After the season, lift the nets off gently in daylight, so you can see and free any caught twigs before storing them.

    8. Winter Window Boxes with Pinecones and Berries

    Window boxes filled with evergreen sprigs, pinecones, and red berries.

    Fill garden facing window boxes with evergreen sprigs, pinecones, and red berries for a festive view from both inside and outside the house. Window boxes suit homes where the garden is seen mainly from indoors, since they frame the view from the window itself. Use a mix of pine, fir, and ivy so the box looks full even after a few sprigs drop.

    Push the stems firmly into damp soil or floral foam made for outdoor use, and add the pinecones last, wired in place so wind cannot roll them out. Check the boxes after storms, since wind can loosen light fillers, and replace any berries that birds have eaten or that have gone soft. Keep the boxes watered lightly in dry spells, since evergreen cuttings last longer when they do not dry out fully.

    9. Crate Display with Baubles and Greenery

    Wooden crate filled with evergreen sprigs and large outdoor baubles.

    Set a wooden crate beside the path or by the door, fill it with evergreen sprigs, and nestle a few large outdoor baubles among the greenery. A crate display is a quick way to use leftover baubles and cuttings, and it suits small gardens where a full tree would crowd the path. Line the crate with a plastic tray or an old saucer to catch water and protect the wood below.

    Place the largest baubles at the back and the smallest at the front, so the display reads well from the path, and keep the greenery taller at the back for depth. Move the crate under cover in heavy rain, since wet wood and wet baubles both dull quickly. At the end of the season, store the baubles wrapped in tissue and keep the crate dry for next year.

    10. Fire Bowl Seating Corner

    Fire bowl seating corner in a garden with chairs and a small table.

    Set a fire bowl in a clear corner of the garden, with two or three chairs around it and a small side table for drinks, to make a warm spot for Christmas evenings outdoors. A fire bowl suits gardens where people gather after dark, and it gives the seating area a reason to be used in winter rather than left empty. Keep the bowl on a level, fireproof base, well clear of fences, trees, dry leaves, and overhanging branches.

    Add thick cushions and a throw on each chair, and keep a basket of dry fuel nearby under cover. Never leave a lit fire bowl unattended, and keep a bucket of water or sand close by. Check local rules and neighbor considerations before lighting a fire, and let the bowl cool fully before covering it or moving it. When the fire is out, the corner still works as a seating spot with lanterns in place of flames.

    11. Frosted Branches in Tall Garden Urns

    Tall frosted branches standing in large garden urns.

    Stand tall bare branches in large garden urns, dusted with a light frost effect, to make a striking winter display by the door or at the end of a path. Bare branches suit modern and small gardens, since they take little floor space and need no soil care beyond a stable pot. Use branches of similar length, and pack the urn with stones or sand so the arrangement cannot tip in wind.

    Keep the frost effect light, so the branch shapes still show, and avoid spraying near lights or candles. Place the urns where they will not block the path, and check them after wind, since tall branches catch gusts. If you use real branches, trim any that overhang the walkway, and compost them after the season rather than leaving them to rot in the pot.

    12. Red Bows on Fence Posts

    Large red bows tied on garden fence posts along a path.

    Tie large red bows on the tops of fence posts along the path or around the seating area for a simple festive rhythm that needs no lights or power. Bows suit long fences, since one bow on every second or third post gives a pattern without covering the whole fence. Use weather resistant ribbon, and tie each bow firmly with wire or a cable tie hidden behind the knot.

    Keep the bow size in proportion to the post, so a small post does not look top heavy, and check the bows after storms, since wind can undo loose knots. Choose a ribbon color that stands out against your fence, such as deep red on dark wood or cream on a painted fence. Take the bows down before they fade or fray, and store the ribbon flat for reuse next year.

    13. Festive Path Lights

    Small festive path lights along the edges of a garden walk.

    Set small festive path lights along the edges of the garden walk, using warm white or soft colored lights on short stakes, to guide guests safely after dark. Path lights suit gardens with steps, curves, or uneven ground, since they mark the route clearly and prevent trips. Space them evenly, about one large step apart, and keep them low so the light falls on the path rather than into the eyes of walkers.

    Push the stakes firmly into soft ground, and avoid placing them where a mower, a wheelbarrow, or a foot will knock them over. Keep cables buried or clipped along the path edge, never stretched across the walk. If you use solar lights, place them where they get daylight during the day, and wipe the panels clean so they charge well through short winter days.

    14. Garden Bench with a Plaid Throw

    Garden bench dressed with a plaid throw and outdoor cushions.

    Dress a garden bench with a thick plaid throw and two outdoor cushions, so the bench looks inviting even on cold days and gives guests a place to sit and enjoy the lights. A dressed bench suits a sheltered spot near the house or under a tree, where it can be used for a short sit rather than a long stay outdoors. Choose a throw in a warm check that picks up the colors of your wreath or garland, so the bench ties into the rest of the display.

    Bring the throw and cushions inside overnight and in rain, since damp fabric chills quickly and can stain the bench. Fold the throw over the back of the bench rather than spreading it flat, so it stays clean and easy to grab. Add a lantern on the ground beside the bench, so the seat is lit and easy to find after dark.

    15. Baubles Hung from Bare Branches

    Outdoor baubles hung from bare branches in a winter garden.

    Hang outdoor baubles from the bare branches of a deciduous tree or a large branch arrangement, so color floats in the air above the garden bed. Bare branch baubles suit winter gardens well, since the tree has no leaves to hide the ornaments, and the display changes as the branches move in the wind. Use light baubles and short ribbons, so the branches do not bend under the weight.

    Hang the baubles at different heights, with larger ones lower down and smaller ones higher up, and keep them clear of the path so no one walks into them. Check the ribbons after wind, since loose baubles can drop and break on hard ground. Use shatterproof baubles over paths and seating areas, and save glass ornaments for spots where a fall would land on soil.

    16. White and Silver Frosty Garden Corner

    White and silver frosty garden corner with white lights and pale greenery.

    Make one corner of the garden white and silver, with white lights, silver baubles, and pale greenery, for a frosty look that stands out against dark winter soil. A single frosty corner suits gardens that already have strong color elsewhere, since it gives the eye a quiet place to rest. Use white fairy lights on the shrubs in that corner, and keep the ornaments to two tones so the look stays calm.

    Add a white planter or a pale stone ornament to anchor the corner in daylight, since lights alone disappear during the day. Avoid mixing in red or gold here, or the frosty effect will be lost. Check the corner at dusk, when the white lights should read as cool and bright rather than dull, and add a second string only if one side looks dark.

    17. Wood Slice and Lantern Display

    Wood slices stacked beside a garden path with a lantern on top.

    Stack a few wood slices beside the path, top them with a lantern, and tuck evergreen sprigs around the base for a rustic garden display. Wood slices suit cottage and woodland style gardens, since they look like part of the garden itself rather than a shop display. Choose slices of different sizes, with the largest at the bottom, and keep the stack low so it cannot topple.

    Set the lantern on the top slice, with a candle or battery light inside, and keep the sprigs clear of the flame if you use a real candle. Treat the wood with a weatherproof finish if you want to reuse the slices, or let them weather naturally for one season. Move the stack under cover in heavy rain, since wet wood can stain paving and attract slugs.

    18. Holly and Berry Border Edging

    Garden bed edged with holly sprigs and berry branches.

    Edge a garden bed with holly sprigs and berry branches pushed into the soil along the front, so the border looks festive even where no lights reach. Holly edging suits front gardens and beds seen from the street, since it frames the whole bed rather than one spot. Use sprigs of similar length, and push them in at a slight angle so they lean outward over the path edge.

    Wear gloves when handling holly, since the leaves are sharp, and keep the sprigs clear of walkways so no one brushes against them. Replace any sprigs that wilt or lose their berries, and compost them after the season. If you have pets or small children who use the garden, place the holly edging in beds they do not walk through, since holly berries should not be eaten.

    19. Miniature Christmas Scene on a Garden Table

    Miniature Christmas scene on a garden table with tiny trees and houses.

    Build a small Christmas scene on a garden table, with miniature trees, tiny houses, and a dusting of fake snow on a tray, for a detail guests discover up close. A tabletop scene suits a sheltered patio or a porch table, where it can be viewed at eye level and protected from wind. Keep the scene on one tray, so it can be carried inside in rain and brought out again in minutes.

    Use weather hardy miniatures outdoors, and save delicate pieces for indoors, since damp and frost can crack paint and glue. Add a small string of battery lights around the tray edge to light the scene at dusk. Check the table after wind, since light miniatures can blow off, and store the scene in a lidded box between uses so small parts do not go missing.

    20. Topiary with a Simple Star or Bow

    Shaped topiary topped with a simple star in a formal garden.

    Top a shaped topiary, such as a cone or a ball on a stem, with a single star or a large bow for a festive finish that needs no other decoration. A topped topiary suits formal gardens and front entries, since the shape is already neat and the star gives it a clear Christmas role. Fix the star or bow firmly with wire, and check that it sits straight from the path.

    Keep the rest of the topiary bare, so the single topper stands out, and trim any stray shoots before adding it. If the topiary is in a pot, weight the pot so wind cannot tip the tall shape. Take the topper down after the season and store it flat, so it keeps its shape for next year.

    21. Garland Along the Top of a Fence

    Evergreen garland running along the top of a garden fence.

    Run a long evergreen garland along the top of the garden fence, fixed at regular intervals, to give a long boundary a festive line that can be seen from across the garden. Fence garland suits gardens with a plain fence that needs softening, and it pairs well with a wreath or bows lower down. Fix the garland with wire or hooks every few feet, so it does not sag between fixings or slide in wind.

    Keep the garland clear of gates, so it does not snag when they open, and trim any pieces that hang over a neighbor boundary. Check the fixings after storms, since a loose garland can drop onto plants below. At the end of the season, compost the greenery and keep the wire and hooks for next year.

    22. Pergola Draped with Garland and Lights

    Garden pergola draped with garland and warm string lights.

    Drape garland and warm string lights across the beams of a garden pergola, so the structure becomes a lit outdoor room for Christmas evenings. A pergola display suits gardens with a seating area underneath, since the lights fall softly on the table and chairs below. Run the garland along the main beams first, then weave the lights through it, keeping plugs and joins under cover.

    Leave one beam clear if you need to hang a lantern or a heater, and keep the lights clear of any fabric roof or dry leaves. Check the display from underneath as well as from the path, since the pergola is seen from both angles. Take the garland down before it dries out, and store the lights loosely coiled for next year.

    23. Garden Table Set for a Christmas Meal Outdoors

    Garden table set for a Christmas meal with an evergreen runner and lanterns.

    Set the garden table for a Christmas meal outdoors, with a simple evergreen runner, candles in closed lanterns, and a small centerpiece of pinecones and sprigs. An outdoor table setting suits mild days and short festive gatherings, and it makes the garden feel like a room ready for guests. Use sturdy plates and glasses that can handle a breeze, and keep the tablecloth weighted or clipped so it does not lift.

    Place the centerpiece low, so guests can see each other across the table, and keep candles in lanterns rather than open flames near the runner. Have a plan to move indoors if rain starts, and bring cushions and throws out only when the meal begins. After the meal, clear the table promptly, since damp and cold can stain wood and fabric left out overnight.

    24. Wreath and Lights on the Garden Shed

    Garden shed door with a wreath and lights around the frame.

    Hang a wreath on the garden shed door and wrap a short string of lights around the door frame, to give a plain outbuilding a festive face. A shed display suits gardens where the shed is visible from the seating area or the path, since it turns a working building into part of the display. Fix the wreath with a hook over the door, and keep the lights clear of the door handle and hinges.

    Use outdoor lights with a plug that stays dry, and run the cable along the shed wall rather than across the ground. Keep the wreath small enough that the door still opens fully, and check the lights after rain, since shed roofs can drip onto the door frame. Take the display down before the wreath dries out, and store the lights with the rest of the garden lights.

    25. Hardy Winter Pots with Lights

    Hardy winter pots with battery lights wound around them at dusk.

    Plant hardy winter flowering plants in pots, such as cyclamen and hellebores in sheltered spots, and wind a short string of battery lights around each pot for a glow at soil level. Winter pots suit entries, steps, and seating corners, since they add color and light where taller displays cannot fit. Choose pots that drain well, and raise them slightly off the ground so water does not sit underneath in frost.

    Keep the plants watered in dry spells, and move the pots to a sheltered spot in hard frost if the plant type needs it. Wrap the lights loosely around the pot, not tightly around the stems, so the plants can grow and the lights do not damage them. Replace any plants that finish flowering, and reuse the pots and lights for spring bulbs after Christmas.

    26. Festive Bird Table

    Garden bird table dressed with evergreen sprigs and a simple bow.

    Dress the garden bird table with evergreen sprigs around the base and a simple bow on one post, so it joins the Christmas display while still serving the birds. A dressed bird table suits wildlife friendly gardens, since it keeps the table in use through winter when birds need food most. Keep the decorations on the posts and the base, and leave the feeding surface clear and clean.

    Do not put tinsel, glitter, or small loose ornaments on the bird table, since birds can peck at them, and keep any ribbon well away from the feeding area. Clean the table regularly, and keep fresh water nearby in a shallow dish that will not freeze solid overnight. Check the table after wind, since loose greenery can block the feeding surface.

    27. Candle Jars Along a Low Garden Wall

    Candle jars lined along the top of a low garden wall.

    Set candle jars along the top of a low garden wall, spaced evenly, to make a line of warm light that defines the edge of a bed or a seating area. Candle jars suit sheltered walls, since the glass protects the flame from wind and the wall keeps the jars at a safe height. Use jars of similar size, with a candle or a battery light inside each, and set them on a flat part of the wall so they cannot roll off.

    Keep the jars clear of overhanging branches and dry leaves, and never leave real candles burning unattended. Bring glass jars inside in hard frost, since water trapped in a jar can crack the glass when it freezes. At the end of the evening, blow out or switch off the candles, and wipe the jars clean so the light stays bright next time.

    28. Garden Swing with Lights and a Throw

    Garden swing wrapped in lights with a thick throw on the seat.

    Wrap a short string of lights around the frame of a garden swing, and drape a thick throw over the seat, so the swing becomes a cozy spot for Christmas evenings. A lit swing suits gardens with a sheltered corner, since it gives one person or two a quiet place to sit and look at the rest of the display. Keep the lights on the frame, not on the moving seat, so the wires do not stretch or snag as the swing moves.

    Choose a throw that can be brought inside easily, and add a cushion that stays dry under cover. Check the swing fixings and chains before the season, since winter use adds weight and movement. Take the lights down if high wind is forecast, since a swinging frame can tangle loose wires.

    29. Star on Top of the Tallest Garden Tree

    Large lit star on top of a tall garden tree at dusk.

    Place a large lit star on top of the tallest garden tree, or on a tall pole beside it if the tree top is out of safe reach, to finish the garden display with one clear landmark. A tall star suits gardens seen from the street, since it can be seen above fences and hedges and gives the whole display a focal point. Fix the star firmly with wire, and keep the cable run neat and sheltered.

    Do not climb to a height you cannot reach safely, and use a pole or a lower tree if the tallest tree is too high. Check the star after wind, since a loose star can swing and damage branches or lights. Take the star down in dry weather after the season, and store it in a box where it will not be crushed.

    Conclusion

    A stylish Christmas garden is not about covering every surface. It is about a clear entry, one lit focal point, a safe path, and a place to sit and enjoy the result. Start with the gate and the path, add lights to one tree or pergola, then pick two or three smaller ideas from this list that suit your garden size and your time. Check the display at dusk, move anything that looks crowded or dark, and bring soft furnishings inside when the weather turns. With that simple order, your garden can work as a welcoming outdoor room through the whole festive season, and most of the pieces can be stored and reused next year.

    Save this list before you start, and work through it one zone at a time: entry first, then paths, then seating, then small details last.

    FAQs

    How do I decorate a garden for Christmas on a small budget?

    Start with greenery, lights, and lanterns, since those three pieces carry most of the look. Cut evergreen sprigs from your own garden where you can, use one string of lights on a tree or a pergola, and line the path with jars or lanterns you already own. Add a wreath on the gate or fence as the single focal point, and skip large figures or many separate displays. Reuse pots, crates, and ribbons from year to year, and add one new piece each season rather than buying a full display at once.

    What Christmas lights are safe to use outdoors in the garden?

    Use lights marked for outdoor use, with a plug and joins that stay dry and off the ground. Keep cables off walkways, away from standing water, and clear of sharp edges on fences and pots. Check the wires for damage before you put them up, and replace any string with cracked insulation or loose bulbs. Switch lights off overnight and when you leave the house, and take them down in dry weather after the season so they can be checked and stored safely.

    How can I keep outdoor Christmas decorations safe in wind and rain?

    Fix garlands, wreaths, and stars at two or more points, weight pots with stones, and keep tall displays low or sheltered where wind is strong. Use weather resistant ribbon and shatterproof baubles over paths and seating areas, and bring cushions, throws, and paper decorations inside in rain. Check fixings after storms, and take down anything that has come loose before it falls. Store lights loosely coiled and dry, so they last for next year.

    When should I put up Christmas garden decorations?

    Most people put garden decorations up in late November or early December, when evenings are dark enough for lights to show well. Put up greenery and lights first, since they take the longest, and add soft furnishings and table settings last, close to the day they will be used. Take greenery down before it dries out fully, and take lights down in dry weather after Christmas, so they can be checked, cleaned, and stored for next year.

    How do I light a garden path for Christmas without trip hazards?

    Use low lights on stakes or lanterns set beside the path, never cables stretched across it. Space the lights evenly, keep them low so the light falls on the path surface, and mark any steps with an extra light on each side. Keep the path clear of loose greenery, pots, and cables, and check the route at dusk to spot dark patches. Battery lanterns work well where no outdoor power point is close, and they can be moved if the layout changes.

    Can I leave Christmas garden decorations out all winter?

    Greenery, lights, and sturdy ornaments can stay out through the festive season, but check them weekly for wind damage, damp, and fading. Bring cushions, throws, and paper items inside in rain and overnight, and take down wreaths and cut greenery before they dry out. Lights should be switched off when not in use, and any decoration that has come loose should be fixed or removed promptly. A short weekly check keeps the display looking good and safe until you take it down.


  • 22 Dreamy Girly Apartment Ideas to Bring More Personality Home

    22 Dreamy Girly Apartment Ideas to Bring More Personality Home

    A dreamy girly apartment is not about filling every corner with pink. It is about soft color, gentle light, and small personal details that make a small space feel like yours the moment you walk in. Think blush and cream, sheer fabric, fresh flowers, and furniture that works hard while still looking pretty. These 22 dreamy girly apartment ideas cover the living area, bedroom, kitchenette, bathroom, and entry, so you can refresh one corner at a time. Pick the ideas that fit your rooms, your lease, and your budget, and keep the details that show your taste rather than copying a whole look.

    Key Takeaways

    • Start with one soft base palette, such as blush, cream, and pale gold, and repeat it in cushions, bedding, art, and storage so rooms feel connected.
    • Choose renter friendly changes first: sheer curtains, removable wallpaper, leaning mirrors, layered rugs, and freestanding shelves need little or no permanent fixing.
    • Give every pretty piece a job, so trays, baskets, jars, and rails keep clutter tidy while still looking good in the open.
    • Layer light with daylight, table lamps, and warm fairy lights, rather than relying on one bright ceiling light.
    • Add personality in small, changeable layers: photos, keepsakes, flowers, and seasonal cushions are easier to swap than large furniture.
    • Keep one calm area in each room, so soft color and pretty detail feel dreamy rather than busy.

    1. Anchor the Living Area With a Blush Velvet Sofa

    Blush pink velvet sofa with cream cushions and a soft throw in a bright small apartment living room.

    A blush velvet sofa sets a soft tone for the whole living area. Velvet catches light gently, and the pale pink works with cream walls, light wood floors, and gold or brass details. Keep the sofa shape simple, with clean arms and short legs, so it suits a small apartment and leaves room for a coffee table and a side chair.

    Style it with cream cushions and one small patterned cushion in a floral or stripe. A light throw folded over one arm adds warmth without covering the color. If you rent, choose a washable or stain resistant velvet, and keep drinks on coasters to protect the fabric. This one anchor piece lets the rest of the room stay simple, which is often what makes a small space feel calm.

    2. Dress the Bed With a Sheer Canopy

    Apartment bed dressed with sheer white canopy drapes, blush floral bedding, and cream cushions.

    A sheer canopy gives a bedroom a soft, romantic feel without a heavy frame. Hang light voile panels from a ceiling mounted ring or a slim four poster frame, and let them fall to just above the floor. White or pale pink voile keeps the bed bright and lets air move through the room.

    Tie the panels back during the day so the bed still feels open, and let them fall at night for a sense of enclosure. Keep bedding simple underneath, in cream or a small floral print, so the canopy stays the main feature. This works well in a rented room because a ceiling ring needs only a few small fixings, and the panels can move with you.

    3. Hang a Pastel Gallery Wall of Personal Prints

    Gallery wall of framed pastel floral and botanical prints in white frames above a small apartment sofa.

    A gallery wall adds personality to a plain wall and lets you mix art, photos, and prints you love. Choose frames in one finish, such as white or light wood, and vary the sizes for interest. Lay the arrangement on the floor first, starting with the largest piece in the middle, then fill outward with smaller frames.

    Keep the spacing even, about a hand width between frames, and hang the center of the group at eye level from where you usually sit. Mix pastel floral prints, line drawings, and one personal photo so the wall feels collected over time. Use removable hooks or picture hanging strips if your lease limits nails, and swap one print when your taste changes.

    4. Layer Cloud Soft Bedding in Blush and Cream

    Apartment bed with layered cloud soft bedding in blush pink and cream, ruffled cushions, and a knit throw.

    Cloud soft bedding is the fastest way to make a bedroom feel dreamy. Choose a duvet in blush or cream, then layer it with a waffle throw and a linen cushion in a solid tone. The mix of soft textures keeps the bed inviting without looking busy, and it suits both plain walls and a patterned headboard wall.

    Fold the duvet back a third at the top to show a second layer, and place sleeping pillows flat with two decorative cushions in front. Wash bedding in cool water and skip heavy ironing, since a slightly relaxed look suits linen and cotton. Change the throw with the seasons, using a lighter cotton in summer and a thicker knit in winter.

    5. Set Up a Vanity Corner With Warm Globe Lights

    Small apartment vanity corner with a white desk, round mirror framed by warm globe lights, and a small vase of flowers.

    A vanity corner turns a spare stretch of wall into a place for getting ready. Use a small desk or console table, a stool that tucks underneath, and a round mirror framed by warm globe lights. A tray keeps perfume, a brush, and daily jewelry in one place, and a small drawer or box holds the rest.

    Place the vanity near natural light if you can, so makeup and hair are easier in the morning. Keep the surface clear except for the items you use every day. A small vase of flowers or a framed print above the mirror makes the corner feel finished rather than like a desk that happens to hold a mirror. For more small apartment zoning ideas, these studio apartment decorating ideas show how one clear job per zone stops a small room from feeling crowded.

    6. Layer Sheer Curtains for Soft Daylight

    Bright apartment window with layered sheer white and blush curtains filtering soft daylight over a small sofa.

    Layered sheer curtains soften daylight and make a small room feel dreamy even on a plain day. Hang a sheer white panel closest to the glass, then a blush or cream panel in front of it, on a rod set close to the ceiling and wider than the window frame. The extra width lets the panels stack on the wall, not over the glass, so you keep the light.

    Choose a light, washable fabric that filters light rather than heavy drapes, which can overwhelm a small room and collect dust. Hem or clip curtains so they just clear the floor or a radiator, and check that they do not block heaters or vents. One fabric across the flat, in the same tones, looks more polished than a different curtain in every room.

    7. Make a Reading Nook With a Cloud Chair

    Cozy apartment reading nook by a window with a deep cream boucle armchair, soft throw, floor lamp, and a book.

    A deep armchair by the window makes a quiet corner for reading, tea, and slow mornings. Choose a soft boucle or velvet chair in cream or blush, place it at a slight angle to the glass, add a floor lamp behind one shoulder, and keep a small side table within reach for a drink and a book. A cushion on the chair adds comfort on cold days.

    Add a basket beside the chair for books and a throw for evenings, and keep the window track clear so the window still opens for air. This single purpose corner works best when it stays just for reading, so resist using it as a dumping spot for bags and laundry. A small plant on the side table gives the nook life without taking floor space.

    8. Add a Pastel Accent Wall With Peel and Stick Paper

    Apartment bedroom with a soft pastel pink floral accent wall behind a bed with plain cream bedding.

    Removable pastel wallpaper gives a bedroom or living room a focal wall without paint or a long commitment. Choose a small scale floral in blush and cream so the pattern reads as soft rather than busy, and apply it to one wall only, usually behind the bed or the sofa. Smooth out air bubbles as you go, working from the top down.

    Keep the rest of the room plain so the pattern can breathe. Plain bedding, a simple rug, and solid cushions stop the room from feeling crowded. When you move, peel the paper off slowly from a corner, following the maker instructions, and check the wall underneath before you leave. Test a small piece first on textured or freshly painted walls.

    9. Drape Fairy Lights Above a Padded Headboard

    Apartment bedroom at dusk with warm fairy string lights above a padded blush headboard and cream bedding.

    Warm fairy lights above a padded headboard give a bedroom a soft evening glow. Choose a blush or cream upholstered headboard, then drape one short string of warm white lights along the top edge or around a mirror above the bed. Keep the lights away from bedding and curtains for safety, and use a timer plug so they switch on at dusk.

    Turn off the main ceiling light in the evening and let the smaller lights do the work. This suits a headboard, a mirror frame, or a bookshelf, but keep the string short so the glow stays gentle rather than bright. A dimmer or low wattage bulbs help too, and battery lights suit a spot with no nearby outlet.

    10. Style Open Shelves With Pastel Ceramics

    Open apartment shelves styled with pastel pink and cream ceramic bowls, mugs, and vases, a small plant, and a framed print.

    Open shelves suit a girly kitchen or living room when the display stays calm. Group pastel bowls, mugs, and vases in one or two tones, and leave gaps between groups so the shelf does not look crowded. Put heavy pieces low, store the prettiest ceramics at eye level, and add one small plant or framed print per shelf for life.

    Keep closed cupboards for the rest, including food, cleaning supplies, and mismatched items. Wipe shelves often, since open storage gathers dust faster than closed cabinets. If a shelf starts to feel busy, remove one group rather than adding another, and let the pastel tones repeat the colors already in your cushions and bedding.

    11. Build a Pretty Tea Corner for Slow Mornings

    Small apartment breakfast corner with a round white table, two chairs, a floral teapot and cups, and pink flowers.

    A round table in a bright corner makes a tea corner that seats two without blocking a walkway. Pair it with two pretty chairs, a floral teapot and cups, and a small vase of pink flowers. A washable runner protects the surface, and a pendant or wall light above the table marks the corner as its own place.

    Keep the table clear between meals so it can double as a laptop spot or a place to read. A small tray holds sugar, spoons, and napkins, so the corner stays tidy. If floor space is tight, choose a pedestal base rather than four legs, since it leaves more room for feet and chairs, and keep one chair tucked in when the corner is not in use.

    12. Lean an Arched Mirror Against the Wall

    Tall arched full length mirror with a slim gold frame leaning against a wall opposite a bright apartment window.

    An arched mirror makes a small apartment feel larger and brighter, and its curved top softens straight walls and square furniture. Lean it against a wall opposite a window so it reflects daylight, and secure the top to the wall with a small fixing or strap for safety. A slim gold or white frame suits a girly room and keeps the mirror light to move.

    Use the mirror as a dressing check near the bedroom or entry, and keep the area in front of it clear. A small plant or stool beside it softens the edge, but avoid placing clutter in front of the glass, since the reflection will double it. Clean the mirror with a dry cloth to avoid streaks, and check what it reflects before you fix its position.

    13. Layer Rugs to Zone an Open Plan Room

    Open plan small apartment living area with layered cream and blush rugs marking a sofa zone.

    In a studio or open plan apartment, rugs mark where one room ends and another begins. Use a large flat weave rug under the sofa to set the living zone, and a smaller, softer rug beside the bed for the sleeping zone. Leave a border of bare floor around each rug so the rooms still read as one apartment.

    Choose rugs in related tones, such as cream, blush, and pale gold, rather than matching sets. A rug pad keeps layers in place on smooth floors and adds comfort underfoot. In a dining corner, one rug large enough for pulled out chairs works better than two small ones that bunch under feet. Shake rugs outside regularly, since small rooms show dust fast.

    14. Create a Keepsake Shelf That Shows Your Story

    Apartment wall shelf styled as a personal keepsake display with framed photos, a trinket dish, a candle, and dried flowers.

    A keepsake shelf is where personality shows most clearly, because it holds the things only you would choose. Use one shelf, not a whole wall, and group framed photos, a small trinket dish, a candle, dried flowers in a vase, and one favorite book. Leave gaps between groups so each piece can be seen.

    Rotate the display with the seasons or with new memories, rather than adding more each time. A shelf that changes slowly feels collected, while a shelf that only grows feels crowded. Keep fragile pieces away from doorways and high traffic spots, and dust the shelf when you change it, so the display stays part of the room rather than a forgotten corner.

    15. Grow Trailing Plants in Pastel Pots

    Bright apartment window shelf with trailing green plants in pastel pink and cream pots in soft sunlight.

    Trailing plants soften a window and add life to a girly apartment without taking floor space. Fit a shelf across the window or just below it, and place two or three trailing plants in pastel or cream pots. Pothos, string of hearts, and trailing ivy suit bright, indirect light and forgive a missed watering.

    Water only when the top of the soil feels dry, and trim long trails back to keep the shape full. Rotate pots every few weeks so growth stays even. Keep plants clear of curtains and blinds, and use a saucer under each pot to protect the shelf from water marks. One shelf of plants is often enough, since more pots can crowd the light.

    16. Hide Clutter in Pretty Baskets and Labeled Boxes

    Apartment living corner with woven baskets and lidded cream storage boxes with small labels beside a sofa.

    Baskets and boxes keep a girly apartment looking calm even when life is busy. Use woven baskets for blankets, lidded boxes for papers and cables, and small labeled boxes inside drawers for jewelry, chargers, and spare keys. Labels matter, since you will only keep using a system you can find things in.

    Choose baskets in natural tones with a blush or cream liner, and keep one style per room so storage looks planned. Place a basket by the sofa for throws, one by the door for scarves and gloves, and one in the bedroom for laundry. Empty each basket once a month and return anything that no longer belongs there, so storage stays a help rather than a hiding place.

    17. Style a Bedside Table for Night and Morning

    Apartment bedside table styled for slow mornings with a small lamp, a book, a carafe of water, and a tiny vase with one pink flower.

    A bedside table works hardest at night and first thing in the morning, so style it for both. Keep a small lamp, a book, a carafe of water, and a tiny vase with one flower, and leave room for a phone and a candle. Three or four items are enough, since a crowded bedside is harder to use in the dark.

    Add a small dish for jewelry and a charger cable kept tidy in a clip, so the surface stays clear. If floor space is tight, a floating shelf at mattress height gives a similar result without a table. Clear the bedside each morning as part of making the bed, so the room starts the day calm. The same tidy, one job approach in these college apartment decor ideas helps small bedrooms stay polished without extra furniture.

    18. Give the Entry a Small Dreamy Moment

    Small apartment entry with wall hooks, a small round mirror, a console with fresh flowers, and a tray for keys.

    The entry sets the tone for the whole apartment, even if it is only a stretch of wall by the door. Add wall hooks for a bag and a coat, a small round mirror for a last check, and a console or shelf with a vase of fresh flowers and a tray for keys. Keep the palette soft, so the entry feels like part of the home rather than a separate hallway.

    Leave one hook free for guests, and keep the tray to keys, sunglasses, and one small item, so it stays easy to clean. A small rug or runner marks the entry zone and protects the floor, and a basket below holds shoes out of the walkway. This one small moment makes coming home feel cared for, without needing a large hall table.

    19. Soften the Kitchenette With Pastel Jars and Mugs

    Small apartment kitchenette counter styled with glass jars, pastel mugs on hooks, and a small vase with herbs.

    A kitchenette feels more personal when daily items look good in the open. Use glass jars for tea, coffee, and dry goods, pastel mugs on hooks or a small rail, and a small vase with herbs on the counter. Keep the colors to blush, cream, and one pale accent, so the kitchenette matches the rest of the apartment.

    Keep the counter clear except for what you use each day, and store the rest in a cupboard. A pretty tea towel, a small tray for oils or spoons, and one plant give the kitchenette warmth without clutter. Wipe jars and mugs often, since a small kitchen shows dust and splashes fast, and replace herbs when they fade so the corner always looks fresh.

    20. Give the Bathroom a Pretty Tray and Fresh Towels

    Small apartment bathroom sink with a ceramic tray holding soap and hand cream, folded blush towels, and a single pink flower stem.

    A bathroom feels more cared for when daily items sit on a tray instead of scattered around the sink. Use a small ceramic or bamboo tray for soap, hand cream, and a candle, and fold fresh towels in blush or white on a shelf or rail nearby. A small vase with a single stem adds a finishing touch.

    Keep the tray to three or four items so it stays easy to clean. Swap hand towels often, and store spare towels rolled in a basket if shelf space is tight. A pretty shower curtain in a soft print ties the room together, and a small bath mat in cream keeps the floor dry and warm underfoot. For a fuller girly take on the whole flat, these girly apartment ideas cover living, bedroom, kitchenette, and bathroom in one place.

    21. Make a Work Corner Pretty Without Losing Focus

    Small apartment work corner with a slim white desk, pretty chair, warm desk lamp, wall shelf with books, and a small plant.

    A small work corner works best when everything has a place and one pretty touch makes it yours. Use a slim desk against a wall, a chair that slides fully underneath, and a wall shelf above for books and supplies. A pen pot, a small tray for loose items, and a cable tidy keep the surface clear for work.

    Add one pretty touch, such as a framed print, a small plant, or a ceramic pen holder, and keep the rest practical. A desk lamp with warm light helps for evening work, and a closed box on the shelf hides chargers and spare cables. Clear the desk at the end of each day so the corner looks good even when you are not working, and face the chair toward a wall or window rather than toward the bed.

    22. Refresh the Look With a Seasonal Swap

    Apartment living room sofa restyled for a new season with fresh cushions in soft pink and cream and a vase of seasonal flowers.

    A seasonal swap keeps a dreamy apartment feeling personal without buying new furniture. Keep one soft base, such as cream bedding and a blush sofa, then change cushions, throws, and flowers with the season. Lighter cotton and fresh pastel flowers suit spring and summer, while a thicker knit throw and dried flowers suit cooler months.

    Store the off season set in one labeled box, so the swap takes minutes rather than a full tidy. Change only two or three items at a time, so the room still feels familiar, and keep the new colors close to your base palette. This small habit lets your taste show through the year, and it stops a pretty room from feeling fixed in one season.

    Conclusion

    A dreamy girly apartment grows from small, personal choices rather than one big redecoration. Start with a soft base palette, add one anchor piece per room, layer gentle light, and let keepsakes, flowers, and pretty storage show your taste. Try one idea from this list this week, such as sheer curtains, a keepsake shelf, or a bedside reset, then add the next corner when you are ready. Save the ideas you love, and let your apartment change slowly with you.

    FAQs

    What colors work best for a dreamy girly apartment?

    Blush, cream, pale gold, and soft white make a calm base that suits small rooms. Add one pale accent, such as sage, lilac, or dusty blue, in cushions or art, and repeat the base tones across rooms so the flat feels connected rather than patchy.

    How can I make a girly apartment feel dreamy without spending a lot?

    Start with changeable layers: sheer curtains, bedding, cushions, flowers, and a keepsake shelf. These cost less than new furniture, suit rented rooms, and can move with you, while still changing how a room feels at once.

    What is the best first idea for a small rented apartment?

    Layered sheer curtains and layered rugs are a strong first step, since they soften light, zone a studio, and need little or no wall fixing. Add a leaning mirror next, secured as the maker advises, for more daylight and a sense of space.

    How do I keep a girly apartment from looking cluttered?

    Give every pretty piece a job, keep one style of basket per room, and leave gaps on shelves and trays. Choose one calm area in each room, such as a plain wall or a clear table, so soft color and detail feel dreamy rather than busy.

    Can a dreamy girly look work in a studio apartment?

    Yes, if each zone has one clear job. Use rugs to mark living and sleeping areas, a soft base palette across the room, and storage that hides clutter, so the studio reads as one calm home rather than several small rooms pushed together.

    How often should I change cushions, flowers, and small details?

    Change flowers when they fade, and swap cushions and throws with the seasons or when your taste changes. A seasonal swap, stored in one labeled box, keeps the look fresh without a full redecoration, and it lets you keep favorites in rotation.


  • 24 Christmas Bathroom Decor Ideas to Refresh Your Space

    24 Christmas Bathroom Decor Ideas to Refresh Your Space

    A bathroom is one of the easiest rooms to dress for Christmas, because small changes show up fast in a small space. A mini tree on the vanity, a garland around the mirror, or a plaid mat by the tub can set the season without a remodel or a crowded counter. These 24 Christmas bathroom decor ideas cover counters, mirrors, showers, tubs, doors, and shelves, with options for small bathrooms, rentals, and family homes. Start with one focal point, such as the mirror or the shower curtain, then add towels and light only where the room still feels plain. For small room planning in general, these apartment bathroom ideas show how one wall or one storage fix can change a compact bathroom.

    Key Takeaways

    • Start with one focal point, such as the mirror, the shower curtain, or the vanity, before adding smaller pieces.
    • Keep counters, towel rails, and the walkway clear, so daily routines work the same in December as they do all year.
    • Use washable textiles for towels, mats, and curtains, since bathroom decor collects steam, splashes, and soap.
    • Choose flameless candles and battery lights near greenery, paper, and fabric, and keep real flames away from towels and curtains.
    • Repeat one accent color in three or four places, such as red, deep green, or gold, so the room reads as planned.
    • Store the whole set in one labeled box in January, with fragile ornaments wrapped and lights coiled separately.

    1. Mini Tree on the Vanity

    Small decorated evergreen tree in a pot on a bathroom vanity beside a sink.

    Set a small potted evergreen or a tabletop tree on the vanity, in a pot, basket, or wrapped base that suits the room. A mini tree gives the bathroom a clear seasonal center without taking the whole counter, and it is easy to move when you need the sink. Keep it on the side you use less, away from the faucet spray.

    Decorate lightly, with a few small shatterproof ornaments or a short string of battery lights, and leave room for soap and a toothbrush cup beside it. A plain tree with no ornaments can stay up through January as winter decor. Water a real mini tree sparingly and use a saucer under the pot to protect the counter.

    2. Evergreen Garland Around the Mirror

    Evergreen garland with pinecones framing a bathroom mirror above a vanity.

    Frame the bathroom mirror with a garland, real or faux, and fix it with removable hooks or clips so it does not damage the frame. A garland around the mirror draws the eye to the vanity and makes the whole room feel seasonal from the doorway. Keep the ends neat at the bottom corners so they do not block the light or fall into the sink.

    Add a few pinecones or small ornaments into the greenery if it looks bare, but keep the center of the mirror clear for daily use. Faux garland copes better with bathroom steam than fresh greenery and stores flat for next year. If the mirror is very wide, use one garland across the top only, rather than a full frame.

    3. Wreath Above the Toilet

    Evergreen wreath with a red ribbon hanging on a wall above a toilet.

    Hang a wreath on the wall above the toilet, where it fills an often empty wall without using any counter or floor space. A simple evergreen wreath with a red ribbon suits most bathrooms, and a lighter faux wreath is easier to hang on tile or painted walls with an adhesive hook. Center it above the tank and leave clearance so it does not get knocked when the lid opens.

    Keep the wreath shallow, so it does not jut into the room, and avoid loose berries or glitter that can shed into the tank or onto towels. This is a good first idea for a rental, since it needs one hook and comes down in seconds. Pair it with a plain hand towel in the same color to link the wall to the rest of the room.

    4. Festive Shower Curtain With Trees

    Bathroom with a shower curtain printed with Christmas trees and snowflakes.

    Swap in a shower curtain printed with trees, snowflakes, or a simple winter scene, since the curtain is the largest single surface in most bathrooms. One bold curtain can set the palette for towels and mats in one move, so keep the rest of the room quiet when the curtain is busy. Use a fabric outer curtain with a separate washable liner, which hangs better and lasts longer than a thin plastic curtain alone.

    Choose a curtain long enough to stay inside the tub, and wash both layers before the season if they have been stored. If you prefer a calmer room, pick a curtain in one deep color with a small motif, rather than a full scene. A seasonal curtain stores flat and is one of the fastest December changes you can make.

    5. Plaid Bath Mat by the Tub

    Red and green plaid bath mat on a bathroom floor beside a bathtub.

    Lay a plaid bath mat beside the tub or in front of the sink, in red and green, red and cream, or a muted tartan that matches your towels. Plaid reads as seasonal at once, and a mat is a practical piece you use every day, so it earns its place. Choose a washable cotton mat that dries faster than a thick pile rug, and keep a second mat in rotation for wash day.

    Place the mat flat with a non slip backing, and leave a clear step from the tub onto it. If the shower curtain already has a strong pattern, use a plain mat in one color from the curtain instead, so the room does not feel busy. A plaid mat is an easy swap back in January, with no hooks or fixings to remove.

    6. Candy Cane Striped Towels

    Red and white candy cane striped hand towels hanging on a bathroom towel ring.

    Hang hand towels with red and white candy cane stripes on the towel ring or rail, folded neatly so the stripe shows. Striped towels add color exactly where hands reach, and they wash with the normal laundry, which makes them a low effort seasonal swap. Keep bath towels plain in a matching red, cream, or deep green, so the stripe stays the accent rather than the whole room.

    Roll or fold spare striped towels on an open shelf if you have one, so guests can see the set at a glance. Avoid towels with loose trims or appliques near the sink, since they catch on rings and faucets. If your bathroom is small, one striped hand towel is enough, with the rest of the set in plain colors.

    7. Lanterns Beside a Freestanding Tub

    Lanterns with flameless candles beside a freestanding bathtub in a bathroom.

    Place one or two lanterns beside a freestanding tub, on the floor or on a small stool, with flameless candles inside for a soft evening glow. Lanterns give a bath a calm, seasonal feel without crowding the tub edge, and the glass protects the glow from drafts. Choose lanterns tall enough to read from the doorway, but stable enough not to tip if bumped.

    Keep lanterns away from towels, curtains, and the direct splash zone, and use a timer if the candles have one, so the light switches itself off. Metal, wood, or rattan lanterns each suit a different bathroom, so match the finish to your faucet or mirror frame. Store the lanterns with the candles removed in January, so batteries do not leak in storage.

    8. Ornament Filled Jar on an Open Shelf

    Clear glass jar filled with Christmas ornaments and pinecones on a bathroom shelf.

    Fill a clear glass jar or apothecary jar with spare ornaments, pinecones, and short evergreen sprigs, and set it on an open shelf or the vanity. A jar display uses items you may already own, keeps small ornaments contained, and adds color at eye level without a new purchase. Mix matte and shiny finishes so the jar catches the light, and keep the fill below the rim so it reads as one piece.

    Use shatterproof ornaments if children can reach the shelf, and keep the jar away from the sink edge where it could be knocked into the basin. A lidded jar stays cleaner in a steamy bathroom than an open bowl. When the season ends, the jar itself can stay on the shelf with plain contents, such as cotton balls or bath salts.

    9. Snowflake Clings on the Bathroom Window

    Bathroom window decorated with white snowflake window clings.

    Press snowflake window clings onto the bathroom window, where they add a seasonal pattern and a little extra privacy at the same time. Clings need no adhesive, so they peel off cleanly in January and suit rentals and frosted glass alike. Place larger flakes toward the center and smaller ones near the edges, and leave a clear patch at eye level if you like to see out.

    Wipe the glass first so the clings grip, and press out air bubbles from the center outward. Avoid covering a window that is your only ventilation, and keep clings off any window film the maker warns against. If the bathroom has no window, the same clings work on a mirror, as long as they do not block the area you use for grooming.

    10. Holiday Soap Dispenser and Tray Set

    Holiday soap dispenser and small dish arranged on a tray beside a bathroom sink.

    Group a seasonal soap dispenser, a small dish, and a hand towel on a tray beside the sink, so the daily items look arranged rather than scattered. A tray holds the set together, protects the counter from soap drips, and lifts off in one move for cleaning. Choose a tray with raised edges and a finish that copes with water, such as ceramic, coated wood, or metal.

    Keep the dispenser refillable and use your usual soap, so the change is visual only and does not force a new product on sensitive skin. Add one small seasonal piece, such as a pinecone or a mini ornament, and leave the rest of the tray clear for use. Wipe the tray weekly, since soap and water marks build up fast near a sink.

    11. Pine and Eucalyptus Shower Bundle

    Small bundle of pine and eucalyptus stems tied to a showerhead in a tiled shower.

    Tie a small bundle of pine and eucalyptus stems to the showerhead or shower hook, away from the direct water stream, for greenery and scent in the shower. A shower bundle is a rental friendly idea that needs no drilling and comes down when the stems dry out. Keep the bundle small so it does not block the water or shed into the drain.

    Replace fresh stems every week or two, and use faux stems if scent bothers anyone in the household or if shedding is a concern. Check that the tie is secure and that no stems hang low enough to touch your face or shoulders. This pairs well with plain towels and a simple curtain, since the shower itself becomes the seasonal detail.

    12. Fairy Lights in a Glass Bottle on a Shelf

    Glass bottle filled with warm fairy lights on a bathroom shelf.

    Coil a short string of warm white battery fairy lights inside a clear glass bottle or jar, and set it on a shelf or the windowsill for a soft glow in the evening. A light bottle adds light without a cord crossing the counter, and the battery pack can sit behind the bottle where the switch stays easy to reach. Choose lights made for indoor use and keep the battery pack dry and away from the sink.

    Use a timer if the lights have one, and switch them off overnight and when the house is empty. One bottle is usually enough in a small bathroom, with a second only in a large room or on a wide shelf. In January, remove the lights and use the bottle for cotton pads or dried stems, so the piece earns its shelf space all year.

    13. Red Bows on Towel Rings and Cabinet Knobs

    Small red ribbon bows tied to bathroom towel rings and cabinet knobs.

    Tie small red bows to towel rings, cabinet knobs, or the ends of a towel rail, using ribbon you can untie and reuse next year. Bows are one of the cheapest Christmas bathroom changes, and they add color to hardware that is already in the room. Keep bows small and flat, so they do not catch on towels or block a drawer from opening.

    Use the same ribbon width and shade in each spot, so the bows read as a set rather than random scraps. Avoid bows near the toilet paper holder or any handle you grip daily, where they will fray fast. This idea suits a bathroom that already has a garland or wreath, since the bows echo that greenery in miniature.

    14. Mini Stockings on the Towel Bar

    Mini Christmas stockings hanging from a bathroom towel bar.

    Hang two or three mini stockings from the towel bar or a row of hooks, spaced evenly and kept empty until Christmas Eve so they do not pull the bar down. Mini stockings suit a home with no fireplace, and they add a playful detail at a height children can see. Use light stockings and removable clips, and check that the bar fixings hold the extra weight before hanging more than a few.

    Keep stockings clear of the sink splash zone and away from any heater, and leave at least one towel rail free for daily towels. If the bathroom is shared, give each person a stocking in a different color or pattern. Fold them flat for storage, and wash them with the towels if they collect dust in the bathroom air.

    15. Pinecone and Greenery Vanity Tray

    Tray with pinecones, evergreen sprigs, and a candle holder on a bathroom vanity.

    Arrange pinecones, short evergreen sprigs, and one small candle holder on a tray on the vanity, keeping the display low and to one side of the sink. A tray groups the pieces, protects the counter from sap and candle wax, and lifts off in one move when you need the full surface. Choose a tray that sits flat and leaves clear space for soap and daily items.

    Use a flameless candle if the tray sits near towels or paper, and keep real flames clear of greenery at all times. Shake pinecones outdoors before bringing them in, since they can carry dust and loose seeds. This is a good place to reuse ornaments and greenery left over from the main tree, rather than buying a separate set for the bathroom.

    16. Nutcracker Figure Beside the Sink

    Nutcracker figure standing beside a bathroom sink on a vanity.

    Stand a nutcracker figure beside the sink or on a shelf, where its height and color make it a clear focal point in a small room. One figure is usually enough, since nutcrackers are detailed and can crowd a counter fast. Place it on the side of the sink you use less, on a tray or a folded cloth, so it does not sit in standing water.

    Choose a figure sized to the space, with a stable base that will not tip if the counter is bumped. Keep painted figures away from constant spray, and wipe them dry if splashes reach them. A nutcracker pairs well with red towels and a plain curtain, since the figure carries the pattern and the rest of the room can stay calm.

    17. Gingerbread House Display on a Shelf

    Ceramic gingerbread house display on a small stand on a bathroom shelf.

    Set a ceramic gingerbread house, or a sturdy decorative version, on a bathroom shelf, on a small plate or cake stand that catches any dust. A gingerbread house is a cheerful focal point that guests notice at once, and a ceramic version lasts in a steamy bathroom far better than a real one. Keep it away from the shower spray and the sink edge, where it could be knocked into water.

    Raise it slightly on its stand so it reads above jars and folded towels, and keep the shelf around it fairly clear so the house stays the focus. If you use a real gingerbread house elsewhere in the home, the bathroom version should be decorative only, so no one mistakes it for food. The same focal point idea works in the kitchen, as these christmas kitchen island decor ideas show with a gingerbread house at the center of an island.

    18. Red Berry Branches in a Vase

    Vase with red berry branches on a bathroom vanity beside a mirror.

    Stand red berry branches, real or faux, in a vase on the vanity or a shelf, for strong color and height with a very small footprint. A narrow vase leaves counter space free, and the berries link with garlands and wreaths in the same red range. Set the vase where it will not be knocked by elbows or towel ends, ideally against the wall or in a corner of the counter.

    Use faux stems if the bathroom is a main food free zone where shedding matters, since real berries drop as they age. Trim stems to fit the vase, and keep the arrangement low enough that it does not block the mirror. One vase of berries is enough in a small bathroom, with a second only in a large room or on a wide double vanity.

    19. Festive Bath Caddy Over the Tub

    Wooden bath caddy with a book, a candle, and greenery resting across a bathtub.

    Rest a bath caddy across the tub, with a book, a flameless candle, and a small sprig of greenery in its slots, for a seasonal bath setup that stores away after use. A caddy turns an ordinary bath into a slower evening routine, and it keeps items out of the water. Choose a caddy that spans your tub width with extendable sides, and check that it sits level before you trust it with a cup.

    Use a lidded cup or no drink at all near electronics, and keep the candle flameless if the caddy sits near towels or a book. Wood caddies need drying after each use to avoid warping, while bamboo and coated metal versions cope better with steam. Store the caddy upright behind the door when it is not in use, so it does not become a permanent clutter spot.

    20. Holiday Art Prints on the Wall

    Small framed holiday art prints hanging on a bathroom wall above a towel rail.

    Hang two or three small holiday prints, such as trees, snow scenes, or simple seasonal sayings, in matching frames on a free wall. Small prints give a bathroom personality without taking counter or floor space, and matching frames make the group read as one arrangement. Use frames with sealed backs or acrylic covers, and avoid hanging unprotected paper directly beside the shower, where steam will cockle it over time.

    Keep spacing even and the group centered over a towel rail, a shelf, or a stretch of plain wall. Adhesive picture strips hold light frames well on tile and painted walls and remove cleanly at move-out. Swap the prints for plain winter scenes in January if you want the frames to stay up, so the wall does not go bare.

    21. Advent Calendar on the Bathroom Door

    Fabric advent calendar with pockets hanging on the inside of a bathroom door.

    Hang an advent calendar on the inside of the bathroom door or on a hook beside it, where it adds a daily ritual to a room everyone visits. A fabric calendar with pockets, or a flat printed calendar, suits a bathroom better than one with loose chocolates, which do not cope well with steam. Hang it flat against the door so it does not swing into the walkway, and check that the door still closes freely.

    Fill fabric pockets with small non food treats, such as hair ties, mini soaps, or notes, if you want the calendar to last the full month. Keep the calendar clear of the shower spray and the towel rail, where it will snag. This is a fun idea for a family bathroom, and it comes down with one hook in January.

    22. Santa Hat Toilet Lid Cover

    Santa hat cover draped over a closed toilet lid in a Christmas bathroom.

    Drape a Santa hat cover over the closed toilet lid for a playful touch that guests notice at once and that costs very little. A lid cover suits a family bathroom or a guest bathroom best, where humor lands well, and it lifts off in seconds for cleaning or for guests who prefer a plain room. Choose a washable cover that fits your lid shape, and keep the seat itself clean and plain underneath.

    Remove the cover when the bathroom is in heavy use, since it can slip or collect splashes, and wash it with the towels before storing. Pair it with plain red or white towels, so the hat stays the joke rather than one of many loud pieces. If you prefer a calmer room, skip this idea and use the wreath or garland instead.

    23. Bath Bomb and Towel Basket Display

    Basket with rolled towels, bath bombs, and greenery beside a bathtub.

    Fill a basket with rolled towels, bath bombs, and a small sprig of greenery, and set it on a stool, a shelf, or the floor beside the tub. A basket display looks like a gift set and gives guests everything they need for a bath in one place, while hiding the visual noise of bottles and packets. Assign one basket per use, such as bath items in one and spare towels in another, so the display stays tidy.

    Use a basket with a liner or a wipeable base if it sits near water, and keep bath bombs in their wrappers until use, since steam can soften them. Refresh the greenery weekly and rotate towels so the same ones do not sit damp at the bottom. This basket can move to a guest room in January with plain towels, so the piece works beyond Christmas.

    24. Gold and White Whole Room Scheme

    Elegant bathroom with white towels, gold accents, and warm white lights for Christmas.

    Finish with a gold and white scheme for the whole room: white towels, a gold tray, gold ornaments in a jar, and warm white lights, with greenery kept to one garland or one wreath. A limited palette makes a small bathroom feel calm and planned, and gold reads as festive without needing red or green at all. Keep the base white, from towels to the shower curtain, so the gold accents stand out.

    Repeat gold in three or four places only, such as the tray, the mirror frame accents, the jar contents, and one candle holder, and leave the rest plain. Warm white lights suit this scheme better than colored lights, which can clash with the gold. This scheme is a good choice if the rest of your home is already colorful, since the bathroom then feels like a quieter stop on the way through the house.

    Conclusion

    A Christmas bathroom works best when one focal point leads and the rest of the room supports it. Pick a garland, a wreath, or a festive curtain as your base, add washable towels and a mat in one accent color, then use light and one or two small displays for the rest of the seasonal detail. Keep counters clear, flames flameless near fabric and greenery, and everything washable or easy to lift away for cleaning. Work through this list one area at a time, mirror, shower, tub, then shelves and door, and stop when the room feels cheerful rather than crowded. Save this list on Pinterest for the next December weekend, and pack the whole set into one labeled box in January so next year starts with the same easy base.

    FAQs

    What is the easiest Christmas bathroom idea to try first?

    Swap the hand towels and the bath mat for a seasonal set. Towels and mats change the color of the room at once, wash with the normal laundry, and need no hooks, fixings, or storage planning. Add a wreath or a garland next, once you see how the new colors sit with your tile and fixtures.

    How do I decorate a small bathroom for Christmas without crowding it?

    Choose one focal point, such as the mirror garland or the shower curtain, and keep everything else small and useful. Use the wall above the toilet, the inside of the door, and the window for decor, and leave counters for daily items only. Washable towels, a mat, and a jar on one shelf usually give a small bathroom enough seasonal color without blocking the walkway.

    Are real candles safe in a Christmas bathroom?

    Real candles need care near towels, curtains, greenery, and paper, and they should never be left burning unattended or placed where a towel could fall onto them. Flameless candles give the same glow with far less risk in a small, steamy room, and timers switch them off for you. If you use real candles, keep them on a stable tray, clear of anything flammable, and put them out before leaving the room.

    How do I keep Christmas bathroom decor clean in a steamy room?

    Choose washable textiles, lidded jars, and faux greenery where steam is heaviest, and wipe trays and shelves weekly. Wash towels and mats with the normal laundry, and shake or wipe faux garlands before storing them. Avoid unprotected paper prints beside the shower, loose glitter, and real berries in wet zones, since all three break down fast in bathroom air.

    Can I decorate a rented bathroom for Christmas?

    Yes, most of these ideas need no drilling or permanent change. Window clings, a seasonal shower curtain, striped towels, a plaid mat, a jar display, and bows on existing hardware all come down cleanly in January. For walls, use adhesive hooks and picture strips rated for tile or paint, and keep the original fixtures and fittings to reinstall if you change anything.

    When should I take Christmas bathroom decor down?

    Take food related displays and fresh greenery down first, soon after Christmas, since steam shortens their life. Wash towels, mats, and curtains, dry faux greenery and ornaments fully, and pack the set into one labeled box before the end of January. Keeping the box together means next December starts with a quick unpack rather than a fresh search through storage.


  • 34 Traditional Christmas Decor Ideas That Feel Both Cozy and Current

    34 Traditional Christmas Decor Ideas That Feel Both Cozy and Current

    Traditional Christmas decor works because it is familiar: evergreen, red berries, warm light, plaid, and pieces with a story behind them. The trick is restraint. Pick two or three classic colors, repeat them from room to room, and leave breathing space around each display so the home still feels calm. These 34 traditional Christmas decor ideas cover the tree, the mantel, the table, the porch, and the small corners guests notice most. Start with the tree and one garland, then add the rest a little at a time.

    Key Takeaways

    • Choose one classic palette, such as red, green, and gold, and repeat it through every room for a linked look.
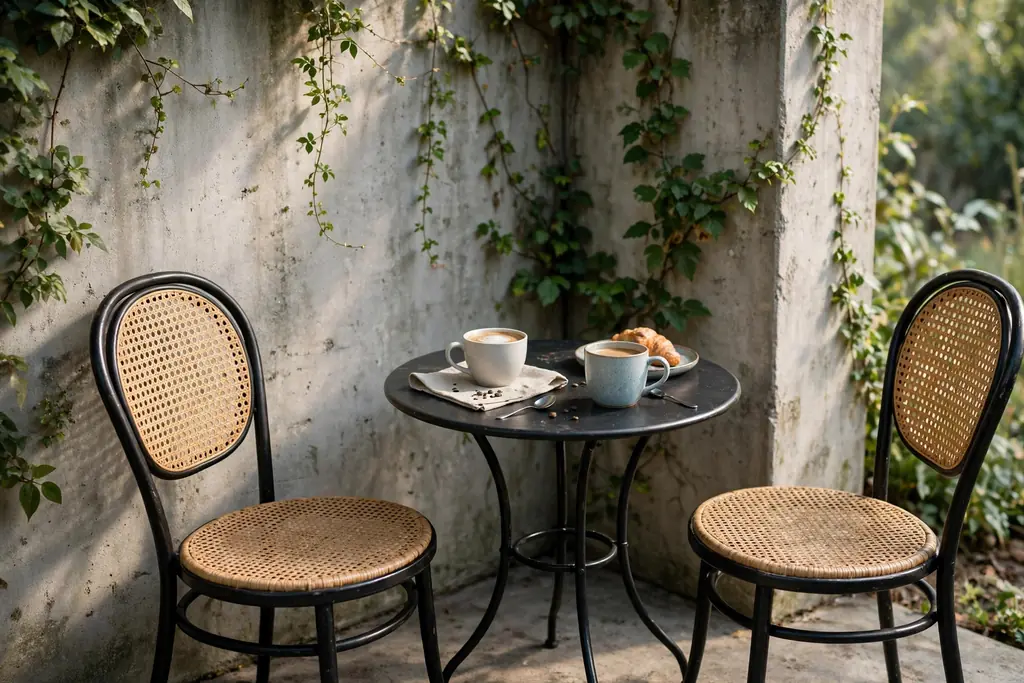
    • Start with the tree and the mantel, since those two displays carry most of the seasonal feeling in a home.
    • Use fresh or faux greenery as the base, then add light, ribbon, and one personal piece per display.
    • Keep walkways, cooking surfaces, and exits clear, and use flameless candles near greenery, paper, and fabric.
    • Mix one heirloom or handmade piece into each display so the decor feels personal rather than bought all at once.
    • Store each display in its own labeled box, so next December starts with the pieces you loved most this year.

    1. Classic Red and Green Tree with Glass Ornaments

    Christmas tree decorated with red and green glass ornaments and warm white lights.

    Decorate the tree in red and green first, with glass or matte baubles in both colors and a few gold pieces to catch the light. This is the palette most people picture at Christmas, and it suits wood furniture, cream walls, and patterned rugs without a fight. Hang larger ornaments deep in the branches and smaller ones near the tips, so the tree looks full from every angle.

    Step back twice while you work: once from the doorway and once from your usual seat. Move any ornament that hides behind a branch, and keep the lowest branches clear of walkways. If you are fitting a tree into a tight corner, these christmas tree corner ideas help with shapes and placement for small or awkward spaces.

    2. Plaid Ribbon Tree

    Christmas tree decorated with wide red and green plaid ribbon bows.

    Wrap wide plaid ribbon around the tree in loose loops, or tie it into bows at intervals down the branches. Plaid reads as traditional at once, and it links the tree to throws, runners, and cushions elsewhere in the room. Red and green plaid suits a classic tree, while black and cream plaid suits a quieter room.

    Use wired ribbon if you can, since it holds its shape and is easy to adjust. Cut lengths rather than one long piece, so a single bow can be fixed without redoing the whole tree. Keep ribbon away from hot bulbs, and remove it before the tree is taken down so it can be reused next year.

    3. Gold and Cream Tree

    Christmas tree with gold and cream ornaments and warm white lights.

    For a softer traditional tree, use gold and cream ornaments with warm white lights and a cream or gold ribbon. The look stays classic, but it feels lighter in a small room or a home with pale walls. Gold baubles in matte, shiny, and textured finishes keep the tree from looking flat.

    Add a few natural pieces, such as pinecones or dried orange slices, to warm up the metallic palette. Keep the topper simple, a star or a bow, so the gold does not compete with itself. This palette also pairs well with cream candles and gold candlesticks on the mantel.

    4. Warm White Lights Layered in the Branches

    Christmas tree branches layered with warm white string lights.

    String warm white lights deep inside the branches first, then add a second, lighter layer near the tips. Lights placed inside the tree give it depth and a glow that shows through the foliage, rather than a bright outline on the surface. Warm white suits traditional decor better than cool white, which can look stark against red and gold.

    Count your light strands before you start, and test each one. Work from the trunk outward, and keep cords tucked behind branches. Switch lights off when you leave the house or go to bed, and keep the tree at least three feet from radiators, heaters, and open flames.

    5. Heirloom Ornaments Grouped by Story

    Vintage heirloom Christmas ornaments grouped on tree branches.

    Give family ornaments a place of honor by grouping them together on one section of the tree, or on a small tabletop tree of their own. Old baubles, handmade pieces from childhood, and ornaments picked up on trips tell a story that new sets cannot. Grouping them keeps them visible instead of lost among matching sets.

    Hang fragile pieces higher, out of reach of pets and small hands, and use sturdy hooks. Write a short note for each piece, who made it or where it came from, and store the note with the ornament. That small record turns a box of decorations into a family history over time.

    6. Fresh Evergreen Garland on the Mantel

    Fresh evergreen garland with pinecones draped on a fireplace mantel.

    Drape a fresh evergreen garland along the mantel, letting it dip slightly in the middle and at each end. Fresh greenery smells like Christmas and softens a plain fireplace, and it needs little else: a few pinecones, red berries, and a string of warm lights finish it. Mist it lightly if the room is dry, and keep it away from open flames.

    If fresh garland sheds too much for your home, a good faux garland gives the same shape and stores flat. Fluff the branches before hanging, and fix the garland with hooks rather than nails where the mantel finish matters. Take it down before it dries out fully, since dry greenery near heat is a risk.

    7. Stockings Hung from the Mantel

    Knit Christmas stockings hung in a row from a decorated mantel.

    Hang one stocking per person from the mantel, in matching knit, velvet, or felt, with names added by hand or by a small tag. Matching stockings look planned, while different colors or patterns suit a home where each person picked their own. Space them evenly so the mantel does not look crowded at one end.

    Use stocking holders that grip the mantel shelf, and test the weight before filling them. Keep stockings away from a lit fire, and hang them only when the fire is cold if the mantel sits above a working fireplace. Empty stockings look neater through December, so fill them on Christmas Eve.

    8. Brass Candlesticks on the Mantel

    Brass candlesticks with cream taper candles on a Christmas mantel.

    Set a pair of brass candlesticks on the mantel, flanking a mirror, a wreath, or a framed print. Brass is a traditional metal that warms up greenery and red berries, and candlesticks add height that a flat garland alone lacks. Use cream or red taper candles, and keep the heights slightly different for a natural look.
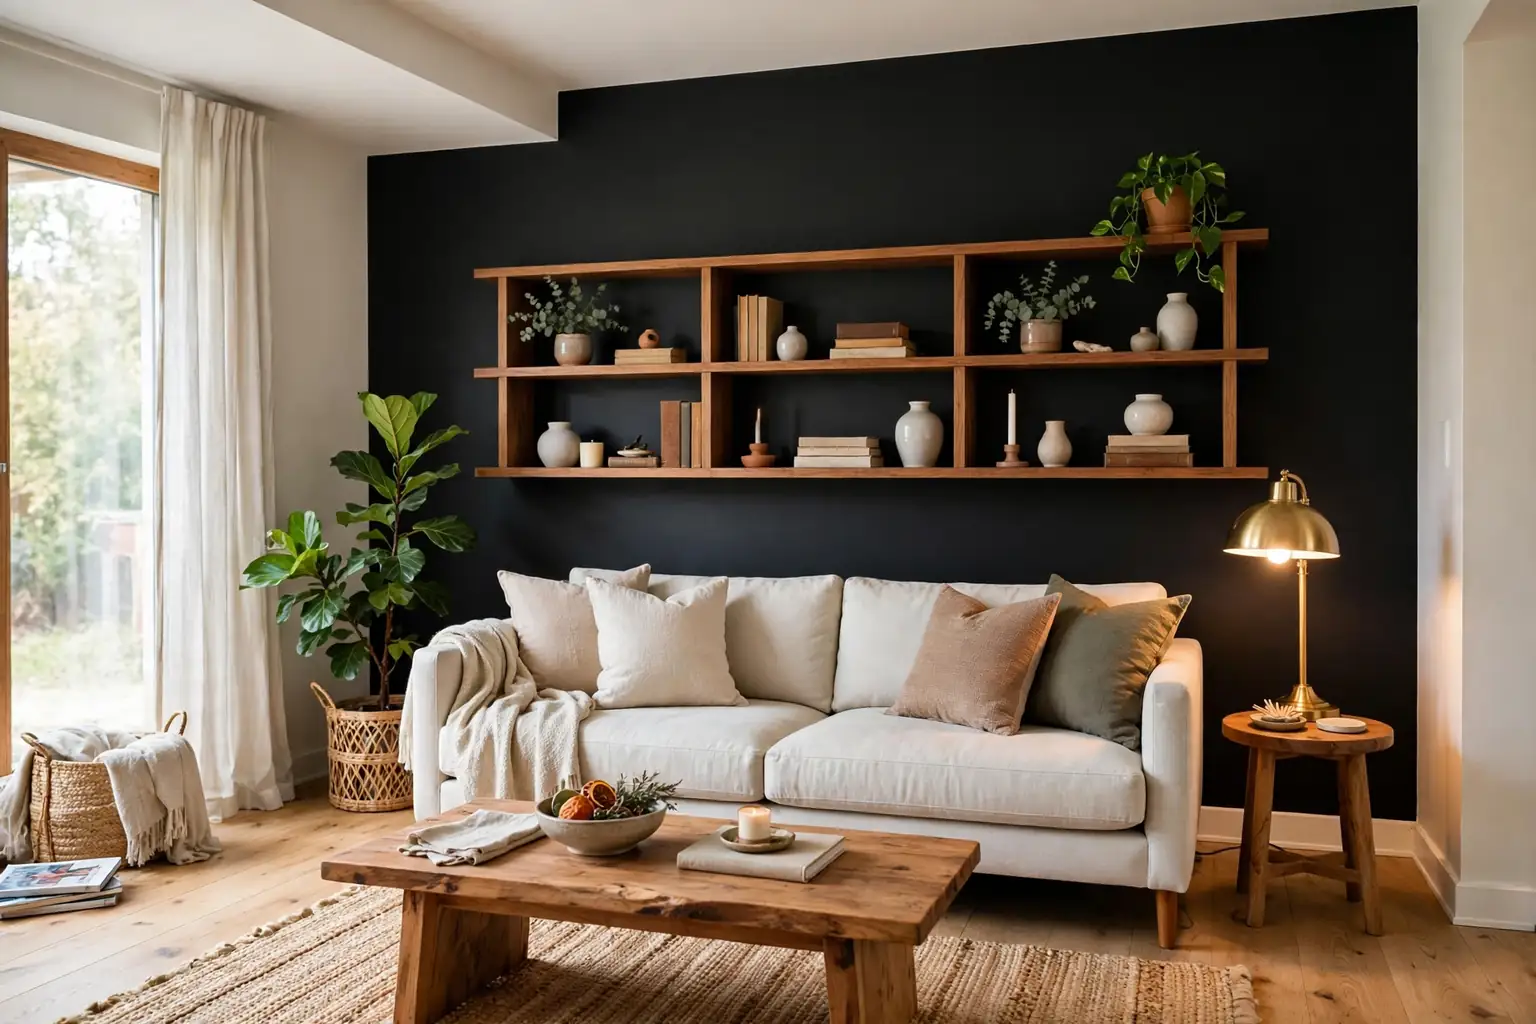
    Use flameless tapers if the mantel is near greenery or if children can reach it. If you use real candles, never leave them burning unattended, and keep them clear of the garland and stockings. Polish the brass before December so the metal reads clearly against the green.

    9. Nativity Scene on a Console Table

    Wooden nativity scene displayed on a console table with greenery.

    Set a nativity scene on a console table, a sideboard, or a low shelf where it can be seen without being knocked. A small set in wood, ceramic, or olive wood suits a traditional home, and placing it on its own surface gives it the quiet focus it deserves. Add a folded cloth underneath and a single candle or a small sprig of greenery beside it.

    Keep the figures grouped, not spread across the whole table, and place the tallest piece at the back. If children like to rearrange the figures, let them: a nativity that gets handled becomes part of the season. Pack each figure wrapped separately, since small pieces chip easily in a shared box.

    10. Nutcrackers Lined Up on the Stairs or Sill

    Row of red and green nutcrackers lined up on a stair ledge.

    Line up nutcrackers along a stair ledge, a deep windowsill, or the top of a bookcase. A row of nutcrackers in red, green, and gold uniforms is a classic display that needs no other decor around it. Vary the heights so the row reads like a small parade rather than a shelf of identical pieces.

    Keep the row away from edges where pieces can be knocked off, and dust them before display since painted figures show dust fast. If you collect one new nutcracker each year, the row grows into a record of past Christmases. Store them upright, wrapped, so paint and small parts stay intact.

    11. Wreath on the Front Door with a Red Bow

    Evergreen Christmas wreath with a wide red bow on a front door.

    Hang a fresh or faux evergreen wreath on the front door, finished with a wide red bow at the top or bottom. The wreath is the first traditional piece guests see, and a simple bow keeps it classic without extra ornaments. Choose a wreath sized to the door: too small looks lost, too large crowds the handle and letterbox.

    Hang it from a hook over the door or a suction hook rated for the weight, and check that the door still closes fully. Add a few pinecones or berries if the wreath looks bare, but stop before it looks busy. Take a photo of the finished door, since it helps you repeat the look next year.

    12. Porch Lanterns and Door Garland

    Front porch with evergreen garland and glowing lanterns beside the door.

    Frame the front door with a garland, and set lanterns with flameless candles on the porch steps or beside the door. The garland links the door to the wreath, and lanterns give a warm glow that welcomes guests after dark. Use two lanterns of different heights for balance, or a matching pair for a formal look.
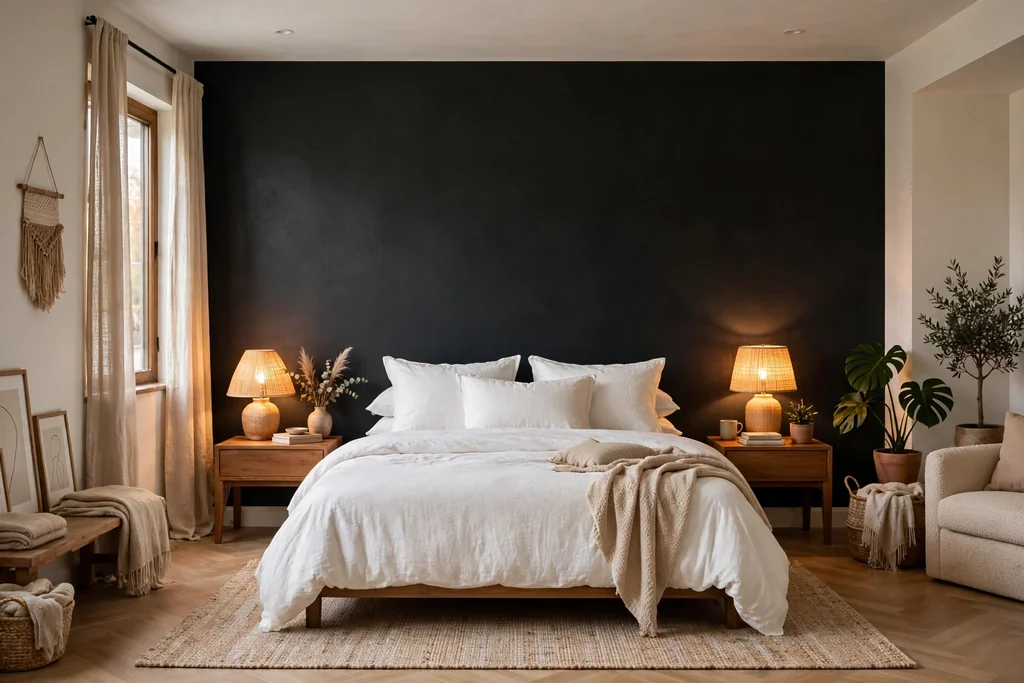
    Keep lanterns clear of the walking route and away from doormats that could catch. Battery candles with timers switch on at dusk on their own, which saves a daily trip outside. Bring real candles indoors in wind or rain, and store lantern glass wrapped so it does not chip.

    13. Window Candles in Every Front Window

    Electric window candles glowing in the front windows of a house at dusk.
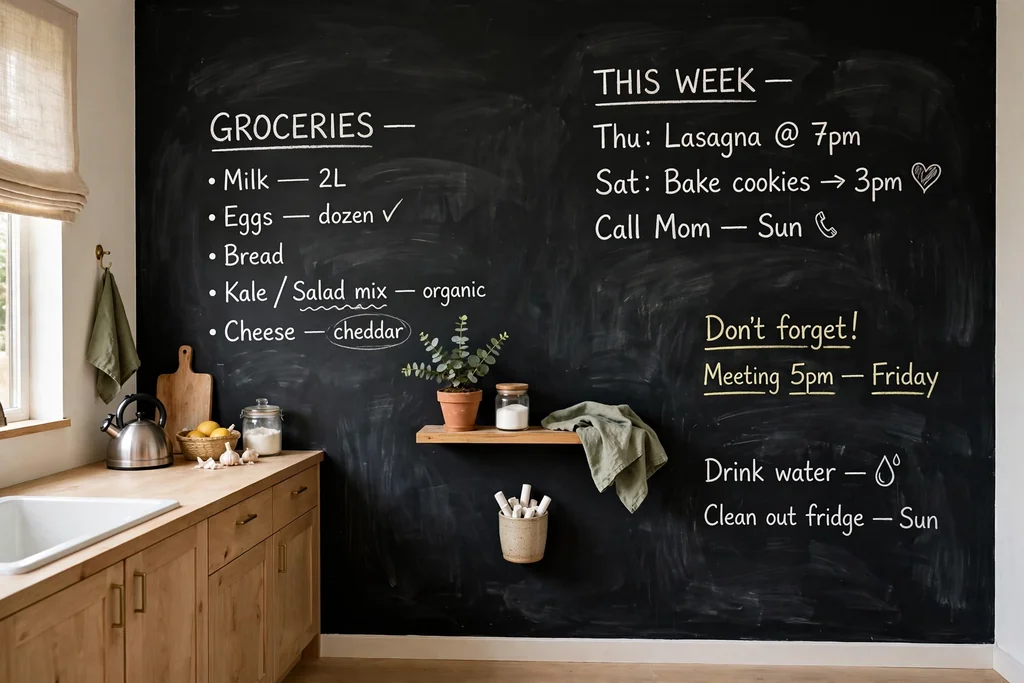
    Place one electric candle in each front window, at the same height, for a traditional look that shows from the street. Window candles are a quiet classic, and a row of them makes a house look cared for without a large display. Choose warm white candles with a steady glow, and set them on a small plate or saucer to protect the sill.
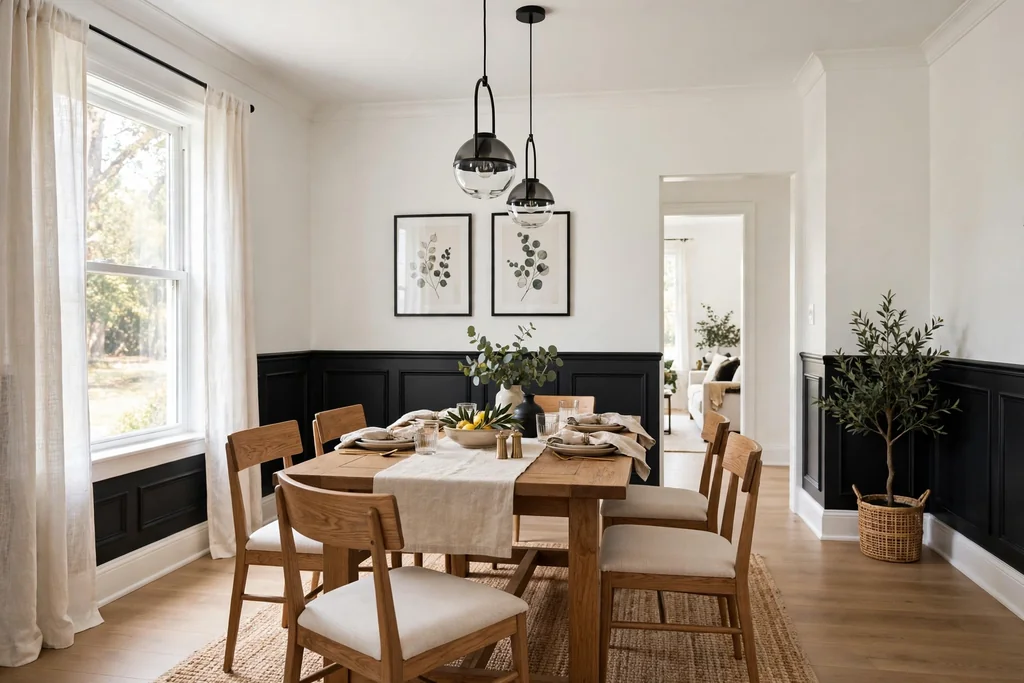
    Use candles with timers so the whole row lights at dusk together. Keep cords tucked and plugs clear of curtains, and keep real candles out of windows entirely, since curtains and drafts make them risky. One candle per window is enough: two per window starts to look cluttered from outside.

    14. Poinsettias in Baskets by the Fireplace

    Red poinsettias in woven baskets beside a fireplace.

    Set poinsettias in woven baskets or plain ceramic pots beside the fireplace, the entry console, or the stairs. Red poinsettias are the classic Christmas plant, and a basket softens the plastic pot they arrive in. Group two or three plants of different heights rather than lining up a row of identical pots.

    Water sparingly and empty saucers, since poinsettias dislike wet roots. Keep them away from cold drafts and hot radiators, and keep leaves out of reach of pets that chew plants. When the season ends, compost plants that have faded rather than nursing a bare stem indoors.

    15. Plaid Throws and Cushions in the Living Room

    Sofa dressed with red plaid throws and Christmas cushions.

    Swap in plaid throws and cushion covers for December, in red, green, or cream checks that match the tree. Textiles change a room fast, since they cover the largest surfaces after the walls, and they store flat in January. Fold one throw over the sofa arm and drape another over a chair, rather than covering every seat.

    Choose washable fabrics, since throws collect crumbs, pet hair, and cocoa spills. Keep one plain cushion on each seat so the pattern does not overwhelm the room. If the tree already wears plaid ribbon, use a simpler check on the sofa so the two patterns do not compete.

    16. Tartan Table Runner on the Dining Table

    Dining table set with a red tartan table runner.

    Lay a tartan or plaid runner down the dining table as the base for the whole table setting. The runner adds color and pattern without a full tablecloth, and it protects the table from hot dishes and candle wax. Red tartan suits a classic table, while green tartan suits a table with gold candles and cream napkins.

    Keep the runner flat and centered, with equal overhang at each end. If the table is long, use two shorter runners end to end rather than one that bunches. Wash the runner before storing it, since food marks set over a year in storage.

    17. Greenery and Taper Centerpiece

    Dining table centerpiece of evergreen sprigs and taper candles.

    Build the dining centerpiece from a low garland or a row of evergreen sprigs, with taper candles in holders rising above it. A low centerpiece matters at a dining table, since guests need to see each other across it. Keep the greenery below eye level and the candle flames above the sprigs, clear of anything that could catch.

    Use flameless tapers if children sit at the table or if the meal runs long. Set the centerpiece on a tray or a folded cloth so sap and needles do not mark the table. Add a few red berries or small gold baubles into the greenery, but keep the arrangement narrow so plates still fit.

    18. Holiday China on Open Display

    Holiday china plates and Christmas mugs displayed on open shelves.

    Bring out holiday china, even if it is only for display on open shelves or a dresser top. Red rimmed plates, a patterned serving bowl, or a set of Christmas mugs add tradition to a kitchen or dining room without a full table setting. Stack plates upright on a plate stand, and group mugs by color.

    Wash the pieces before display, since stored china gathers dust. If the set is incomplete, mix in plain cream pieces: the holiday pattern still reads clearly. Keep everyday plates in their usual spot, and decorate only one shelf, so the kitchen still works the same all season.

    19. Place Settings with a Sprig and a Name Card

    Christmas place setting with an evergreen sprig and handwritten name card.

    Set each place with a plain napkin, a small sprig of evergreen or rosemary, and a handwritten name card. This is a small touch with a large effect, since guests feel expected rather than just seated. The sprig adds scent and color for almost no cost, and the name card doubles as a keepsake.

    Tie the sprig and card together with twine or thin ribbon, and lay the bundle across the plate or beside the fork. Keep the sprig short so it does not brush sleeves or glasses. If you seat children at the table, use a small ornament or a candy cane in place of the sprig.

    20. Christmas Village on the Sideboard

    Lit Christmas village houses arranged on a sideboard.

    Set a Christmas village on a sideboard, a wide windowsill, or the top of a low bookcase, with houses, trees, and small figures grouped into a scene. A village works best as one display, not scattered pieces, so give it a clear base: a white cloth for snow, or a wooden board. Add battery lights inside a few houses for an evening glow.

    Keep the village out of the main walkway, since small pieces fall easily. Build it in layers, with taller houses at the back and smaller pieces at the front, so the scene reads from across the room. Pack houses in their own boxes, with figures wrapped separately, to avoid chips.

    21. Advent Calendar on the Hallway Wall

    Wooden advent calendar with small drawers hanging on a hallway wall.

    Hang an advent calendar in the hallway or kitchen, where the whole household passes it daily. A wooden calendar with small drawers, a fabric calendar with pockets, or a simple paper calendar all suit a traditional home. Fill drawers with small treats, notes, or a daily activity, not only sweets.

    Hang it at a height children can reach if they open it, and fix it firmly so daily pulling does not loosen it. Refill it each evening or once a week, whichever you will actually keep up. After Christmas, store the treats out and the calendar flat, ready for next December.

    22. Dried Orange and Cinnamon Garland

    Garland of dried orange slices, cinnamon sticks, and pinecones.

    String dried orange slices with cinnamon sticks and small pinecones into a garland for the tree, the mantel, or a window. This is an old fashioned decoration that smells good, costs little, and suits a traditional home better than plastic garland. Dry the slices fully before stringing, so they do not soften or mark surfaces.

    Thread them with twine and a large needle, spacing the slices evenly with a cinnamon stick or pinecone between each one. Keep the garland away from damp rooms, and compost it in January if it has faded. Make it a family project: children can thread the softer pieces while adults handle the needle.

    23. Popcorn and Cranberry Garland on the Tree

    Popcorn and cranberry garland draped on a Christmas tree.

    String popped popcorn and fresh cranberries on a long thread for a tree garland with a handmade feel. This is one of the oldest tree decorations, and it suits a family tree covered in heirloom ornaments and paper pieces. Pop the corn plain, without butter or salt, so it stays dry and does not stain branches.

    Work in short lengths, joining them on the tree, since one very long strand tangles fast. Keep the garland high if pets can reach it, and compost it after the season rather than storing it. If fresh cranberries are hard to find, use dried cranberries or wooden beads in red for the same rhythm.

    24. Bowls of Pinecones and Cinnamon

    Bowl filled with pinecones, cinnamon sticks, and dried orange slices.

    Fill wide bowls with pinecones, cinnamon sticks, and a few dried orange slices, and set them on coffee tables, side tables, and the entry console. A bowl of natural pieces is the easiest traditional display: it takes a minute to build, needs no power, and fills a bare surface. Mix large and small pinecones so the bowl looks gathered, not bought as a set.

    Add a drop of cinnamon or pine scent only if the household likes it, since strong scent can overwhelm a small room. Dust the bowls weekly, and keep them out of reach of small children who may mouth small pieces. In January, store the pinecones in a bag and reuse them next year.

    25. Gingerbread House as a Centerpiece

    Gingerbread house displayed on a cake stand as a table centerpiece.

    Set a gingerbread house, homemade, from a kit, or a ceramic version, on a board or cake stand at the center of a table or sideboard. A gingerbread house gives guests one clear focal point, so the rest of the surface can stay plain. Raise it slightly so it reads above bowls and plates, and keep it away from damp and direct heat.

    Photograph it early in the season, since a real house softens and fades as December goes on. If children helped build it, place it where they can see it without reaching it. A ceramic house stores for reuse and suits a home that prefers decor without food waste.

    26. Hot Cocoa Station at One End of the Counter

    Hot cocoa station with mugs, cocoa mix, and candy canes on a tray.

    Set a hot cocoa station at one end of a counter or sideboard: a tray with mugs, a jar of cocoa mix, spoons, and one seasonal item such as candy canes or a small sign. Keeping everything on one tray stops the station spreading across the counter during gatherings. For more kitchen ideas that pair with this approach, see these christmas kitchen island decor ideas.

    Set the station near the kettle or coffee maker to shorten the trip with hot water. Keep it away from the main prep zone, and wipe spills the same day so sugar does not mark the surface. Use vintage or mismatched mugs for a traditional feel, and keep one plain mug for guests who prefer tea.

    27. Basket of Christmas Books by the Chair

    Basket of Christmas books beside an armchair with a folded blanket.

    Fill a basket with Christmas books, carol sheets, and a few puzzle books, and set it beside a favorite chair. A book basket invites quiet evenings in a way that a screen does not, and it suits a traditional home where reading is part of the season. Add a small blanket to the basket handle, so the chair is ready for an evening sit down.

    Rotate the books weekly so children find something new, and keep the basket where it will be used, not in a hallway. Include one book for adults and one for children if the household shares the chair. Pack the basket away in January with the books inside, so it is ready to bring out next year.

    28. Festive Bedding Swap in the Bedroom

    Bedroom with red festive bedding and a folded plaid throw.

    Swap the bedroom bedding for December: a red or deep green duvet cover, flannel sheets, and a folded plaid throw across the foot of the bed. Bedding is the largest surface in a bedroom, so one swap changes the whole room. Keep the pillowcases plain so the pattern does not overwhelm the bed.

    Wash the summer cover before storing it, so the next swap is easy. Add one seasonal cushion, not a pile, since a bed still needs to be slept in. If the room is small, change only the throw and the cushion covers, and let the rest of the room stay as it is.

    29. Small Tabletop Tree in the Bedroom

    Small tabletop Christmas tree with lights on a bedroom dresser.

    Set a small tabletop tree on a bedroom dresser or nightstand, in a pot, a basket, or a wrapped base. A bedroom tree makes the season feel personal, since it is seen first thing in the morning and last thing at night. Keep it simple: warm lights and a few small ornaments suit a small tree better than a full set.

    Keep the tree clear of bedding and curtains, and use battery lights so no cord crosses the nightstand. A plain tree with no ornaments can stay through January as winter decor. If the dresser is crowded, a tiny tree on a wall shelf gives the same effect with no surface lost.

    30. Seasonal Towels and a Sprig in the Guest Bath

    Guest bathroom with red hand towels and a greenery sprig by the sink.

    Hang seasonal hand towels in the guest bathroom, in red, green, or cream, with a small sprig of greenery in a jar by the sink. Guests notice a bathroom that has been thought about, and towels are an easy swap that washes with the normal laundry. Add a plain soap and a spare towel, so the seasonal set stays decorative.

    Keep the sprig short and the jar stable, so it does not tip when the tap runs. Replace the greenery weekly if it fades. Keep spare plain towels nearby for heavy use days, and save the seasonal set for guests and weekends.

    31. Stair Garland with Bows

    Stair banister draped with evergreen garland and ribbon bows.

    Drape a garland along the stair banister, fixing it at intervals with wide ribbon bows. A stair garland carries the Christmas feeling between floors, and it is seen every time someone goes upstairs. Use a faux garland on stairs if fresh greenery sheds onto carpet, and fix it with ribbon ties rather than wire that could mark the rail.

    Keep the garland on the wall side of the rail where possible, so hands still grip the rail safely. Space the bows evenly, one at each newel post and one or two between, and keep the garland clear of the steps. Check the ties weekly, since a loose garland can slip onto a step.

    32. String Lights Along the Porch Railing

    Porch railing wrapped in warm white string lights at night.

    Run warm white string lights along the porch railing, tucked under the top rail so the bulbs glow without a visible cord. Railing lights frame the porch at night and link the door wreath to the rest of the house. Choose lights rated for outdoor use, and keep plugs sheltered from rain.

    Test the full strand before hanging, and fix it with clips rather than nails that could split the rail. Use a timer so the lights switch on at dusk. Take the lights down in January before winter weather weathers the cord, and store them coiled, not tangled.

    33. Wrapped Gifts Styled Under the Tree

    Wrapped gifts in red, green, and kraft paper arranged under a Christmas tree.

    Wrap gifts early in red, green, kraft, and cream paper, tied with ribbon, and arrange them under the tree as part of the display. Wrapped gifts fill the empty space under a tree and add color at floor level, where the tree itself has little detail. Use a limited palette of papers so the pile looks planned rather than random.

    Keep large gifts at the back and small ones at the front, and leave a gap at the tree base for watering if the tree is real. Hold back gifts for children until Christmas Eve if early piles cause daily unwrapping requests. Photograph the arrangement, since a styled pile is easy to disturb and hard to rebuild.

    34. Quiet Reading Nook with a Blanket and Lights

    Cozy Christmas reading nook with an armchair, blanket, and warm lamp light.

    Make a quiet corner for December evenings: a chair, a warm blanket, a small side table, and a lamp or a string of warm lights. A reading nook gives the season a slow place, away from the tree and the table, and it suits a home where Christmas is about rest as much as gathering. Add a basket for the book basket from Idea 27, so the nook and the books work together.

    Keep the nook near a window or a lamp, and clear the chair daily so it stays an invitation rather than a clothes pile. A soft lamp for evening reading helps the body wind down, and a washable blanket keeps the setup practical. This is the corner to sit in with cocoa after the house goes quiet.

    Conclusion

    Traditional Christmas decor does not need a large budget or a house full of new pieces. A red and green tree, a garland on the mantel, stockings in a row, and a candlelit table carry most of the season, and the smaller ideas in this list fill in the rooms around them. Pick the palette you already love, repeat it room to room, and add one personal piece to each display. Save your favorite idea from this list to a Christmas board on Pinterest, and start with the tree this weekend.

    Frequently Asked Questions

    What colors define traditional Christmas decor?

    Red, green, and gold are the classic trio, with cream, white, and natural wood as supporting tones. Red and green carry the tree and the wreath, gold adds warmth through baubles and candlesticks, and cream keeps the look calm. Pick two main colors and one accent, then repeat them through every room.

    How can traditional Christmas decor look current instead of dated?

    Use restraint: one classic palette, plain surfaces around each display, and warm white lights rather than mixed colors. Leave breathing space around the tree and the mantel, and mix one modern piece, such as a simple brass holder or a plain linen runner, into each classic display. The tradition comes from the pieces, the current feel comes from the editing.

    Is it better to use fresh or faux greenery?

    Fresh greenery smells wonderful and suits a mantel or door wreath for a few weeks, but it sheds and dries out, so keep it away from heat and flames. Faux greenery suits stairs, kitchens, and homes with allergies, and it stores for reuse. Many homes use both: fresh on the door, faux on the stairs.

    How do I decorate for Christmas on a small budget?

    Start with greenery, ribbon, and paper: a garland, dried orange slices, popcorn garland, and wrapped gifts under the tree cost little and cover a lot of space. Use bowls of pinecones, plaid throws you already own, and one new piece per year, such as a wreath or a set of candlesticks, rather than buying a whole look at once.

    How do I keep traditional decor safe around children and pets?

    Hang fragile ornaments high, keep small pieces out of reach, and use flameless candles near greenery, fabric, and paper. Keep trees and garlands clear of walkways and heat sources, switch lights off overnight, and keep poinsettias and small ornaments away from pets that chew plants or decorations.

    When should I put up and take down traditional Christmas decor?

    Most homes decorate in late November or early December, once the tree and garland are available, and take decor down in early January. Fresh greenery should come down before it dries out fully. Pack each display in its own labeled box, with fragile pieces wrapped separately, so next December starts smoothly.