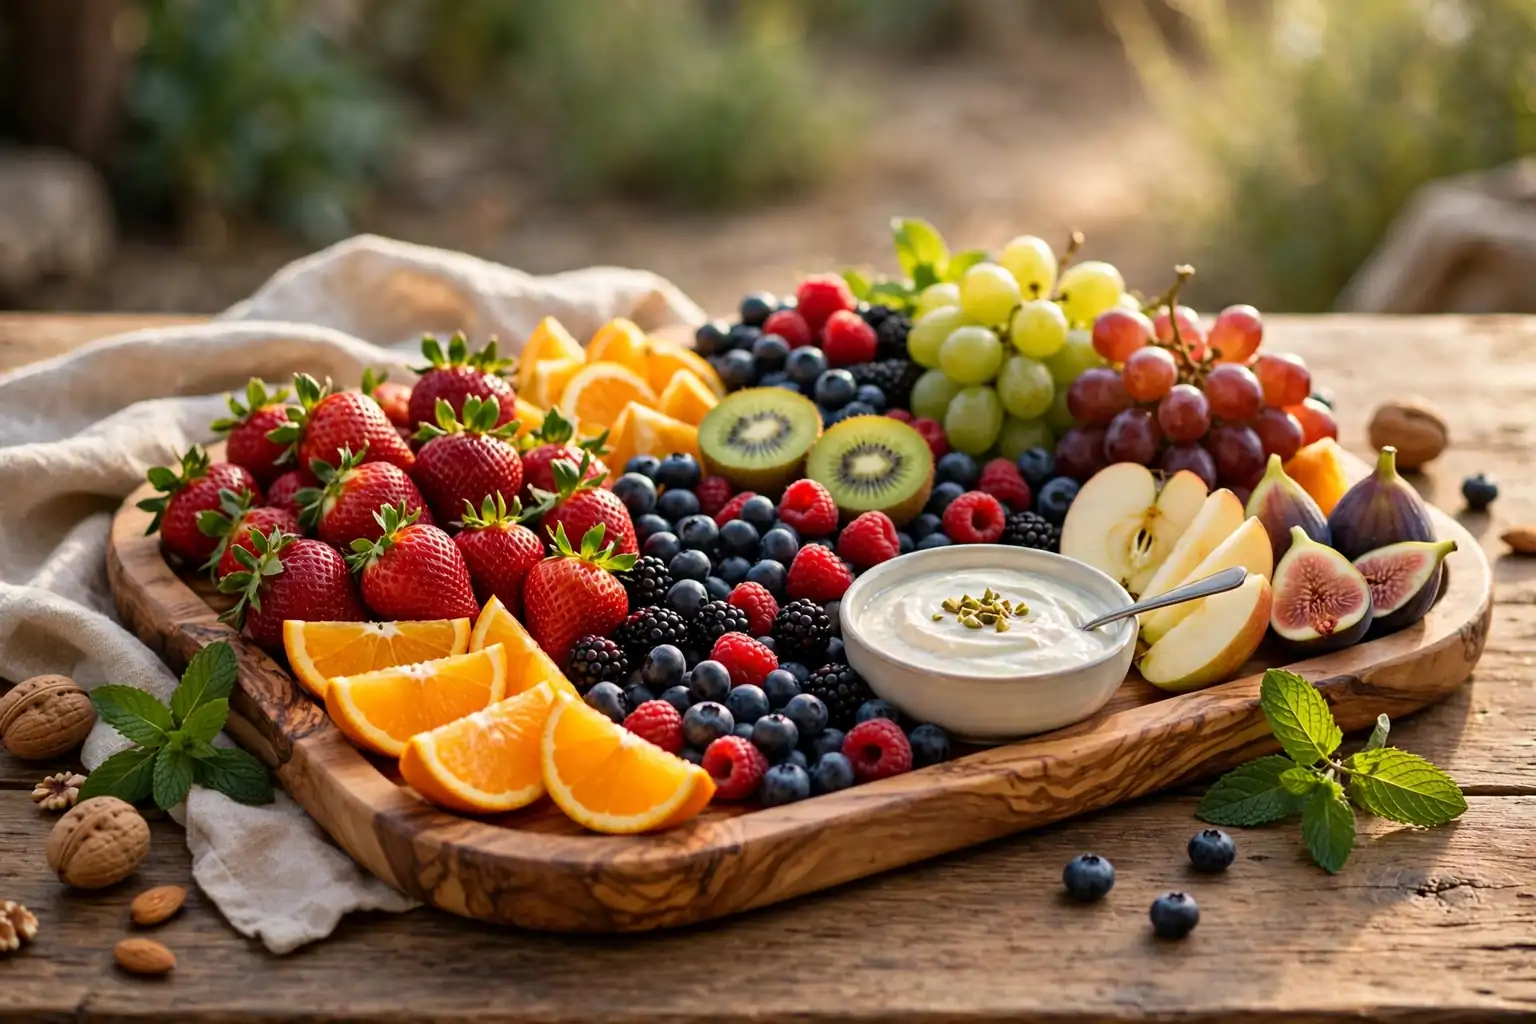
A fruit tray is one of the easiest ways to make a table feel cared for. It takes little cooking, suits guests of many ages, and brings natural color to a room without a new purchase. These 34 creative fruit tray ideas cover everyday boards, party layouts, breakfast trays, seasonal displays, and small trays for one or two people. Start with ripe, in season fruit, keep the board low for easy reaching, and add one dip if the occasion calls for it. The basket basics in these creative fruit basket ideas pair well with trays, since both start with fruit you pass daily.
Key Takeaways
- Start with the tray size first, then buy fruit to fill it, so the board looks full without waste.
- Use two or three anchor fruits for color and shape, then fill gaps with smaller fruit and berries.
- Keep cut fruit chilled until serving, and set the tray out no more than two hours before eating.
- Put dips in small bowls on the tray, so they stay neat and do not run across the fruit.
- Leave one clear edge on the tray for hands, tongs, or a small knife, so serving stays simple.
- Match the tray to the occasion: wood for everyday warmth, marble or slate for a party, and a small board for a quiet breakfast.
1. Classic Round Wood Board with Concentric Rings
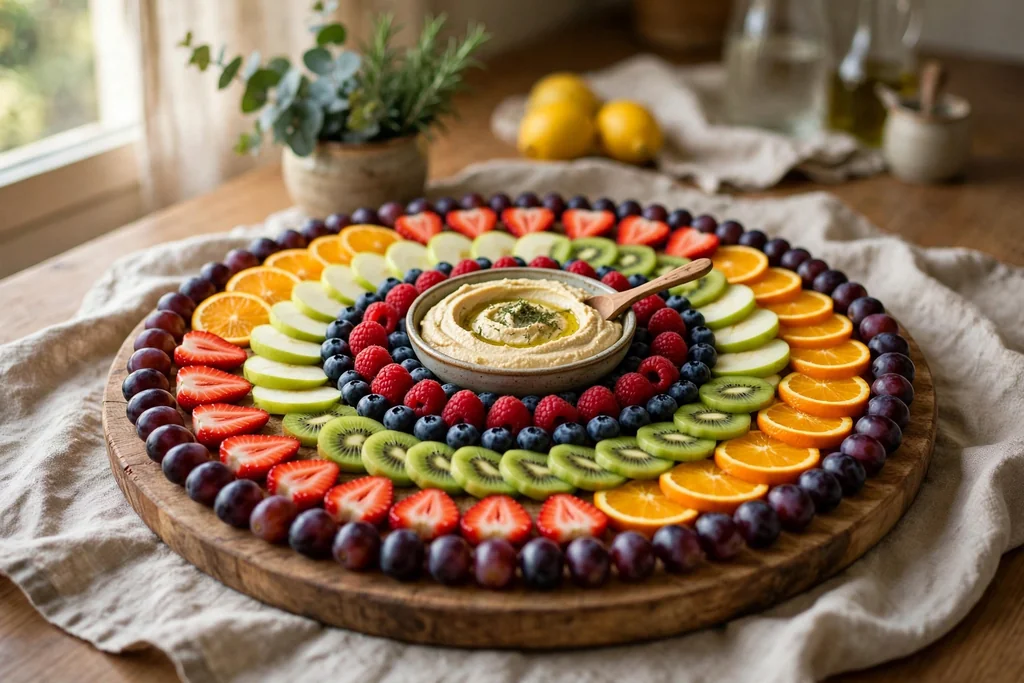
Arrange fruit in rings on a round wood board, with a small bowl in the center and larger fruit around the edge. Start with orange slices or strawberries on the outer ring, then add grapes, blueberries, and kiwi slices in tighter rings toward the middle. The ring pattern looks planned even with simple fruit, and it keeps each kind easy to reach.
Use a board with a rim or a slight lip if the fruit is cut, so juice stays on the board. Keep the center bowl for a dip or for berries that roll, and refill the outer ring first as guests eat, since it empties fastest. A round board suits a dining table or a coffee table, where people reach from more than one side.
2. Long Rectangular Marble Slab for a Buffet
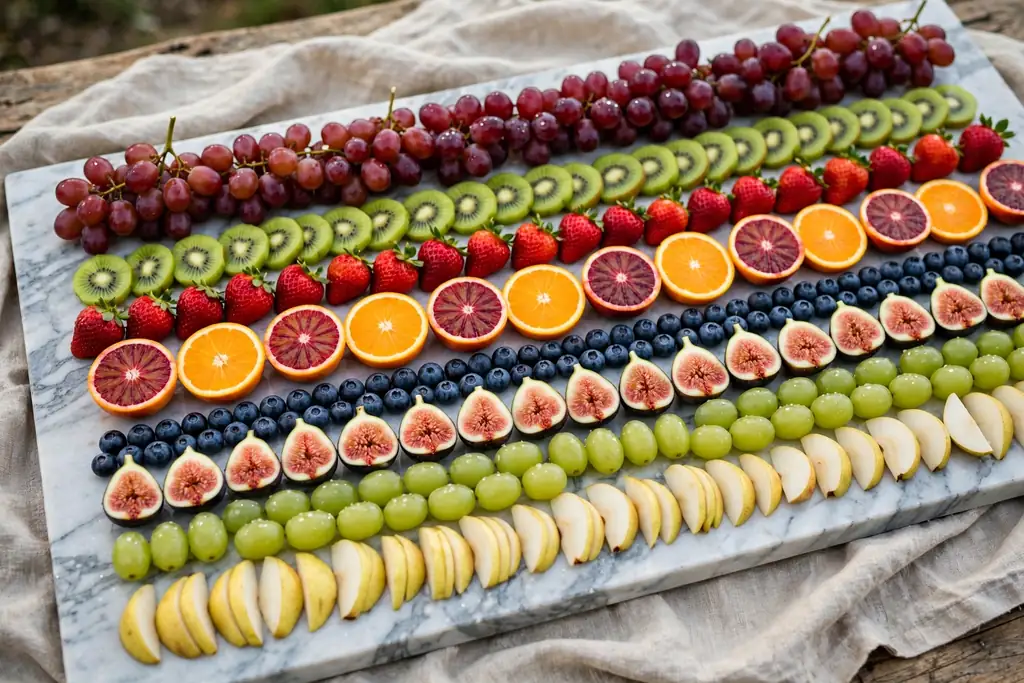
Use a long rectangular marble or stone slab when the tray must feed a line of guests at a buffet or an island. Lay fruit in straight rows along the length, with taller items such as pineapple wedges at the back and flat slices at the front. Rows make refilling fast, since you can see at a glance which row is low.
Chill the slab in the fridge for an hour before arranging, so cut fruit stays cool longer on the table. Put small bowls of dip at one end rather than in the middle, so the line keeps moving. Wipe the slab between refills, since juice from berries can stain a pale surface if it sits too long.
3. Two Tier Stand for a Small Table
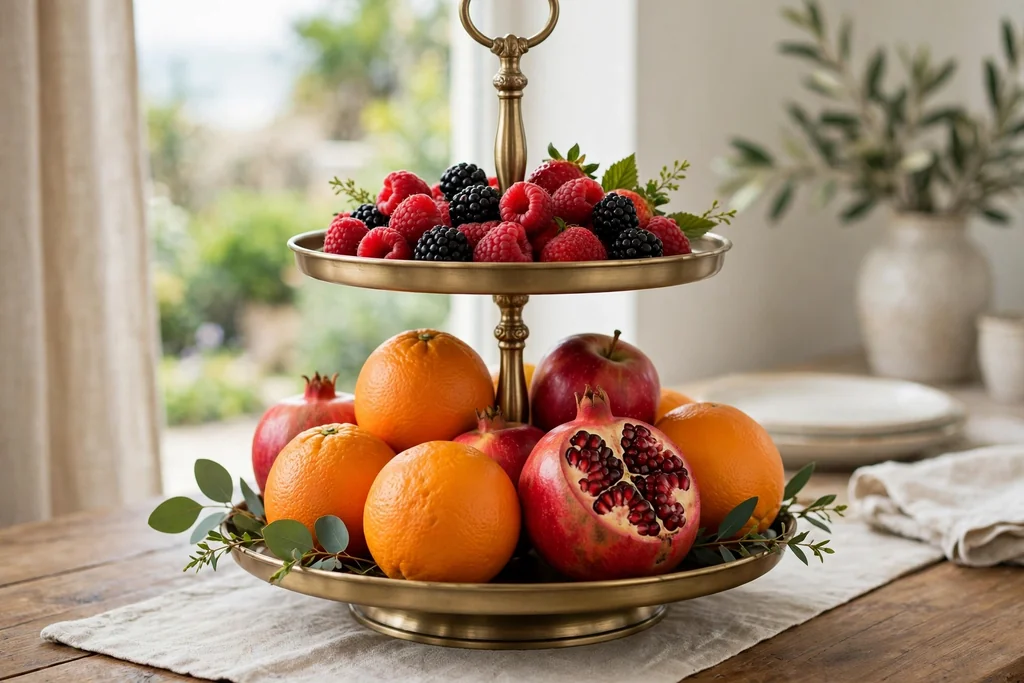
Build a fruit tray on a two tier stand when table space is short but you still want variety. Put larger, sturdy fruit such as apples, oranges, and grapes on the bottom tier, and smaller, softer items such as berries, figs, and cut melon on the top tier. Height draws the eye and frees the table for plates and drinks.
Keep the stand steady by placing the heaviest tier at the bottom, and do not overload the top. This layout suits afternoon tea, a brunch table, or a small kitchen counter. If the stand wobbles, move it to a flat tray base, or use a single tier board instead for safety.
4. Citrus Rainbow Arc
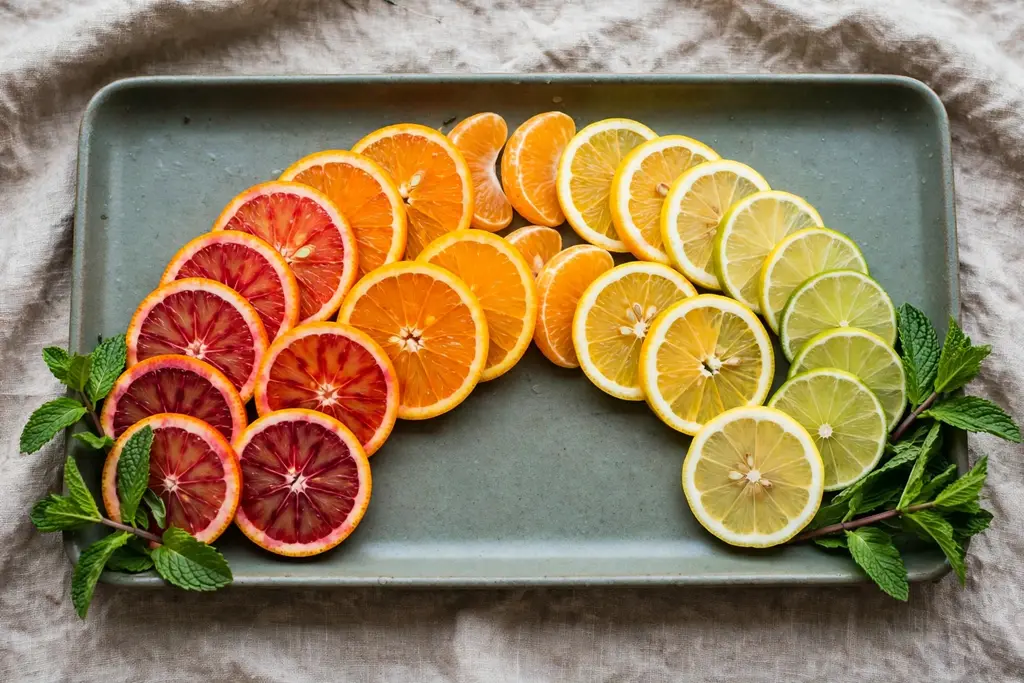
Arrange citrus slices in a rainbow arc across a flat tray, moving from red grapefruit through orange, lemon, and lime. Overlap each slice slightly so the arc reads as one band of color, and tuck mint leaves at the two ends to finish the shape. A citrus arc needs no extra decoration, since the fruit colors carry the whole tray.
This tray suits a bright kitchen, a summer table, or a party where the tray is also part of the decoration. Cut the slices evenly, about the same thickness, so the arc stays level. Serve with a small bowl of honey yogurt at one end, and keep a fork or picks nearby, since citrus slices are easier to lift with a pick than with fingers.
5. Berry Tray with Small Dip Bowls
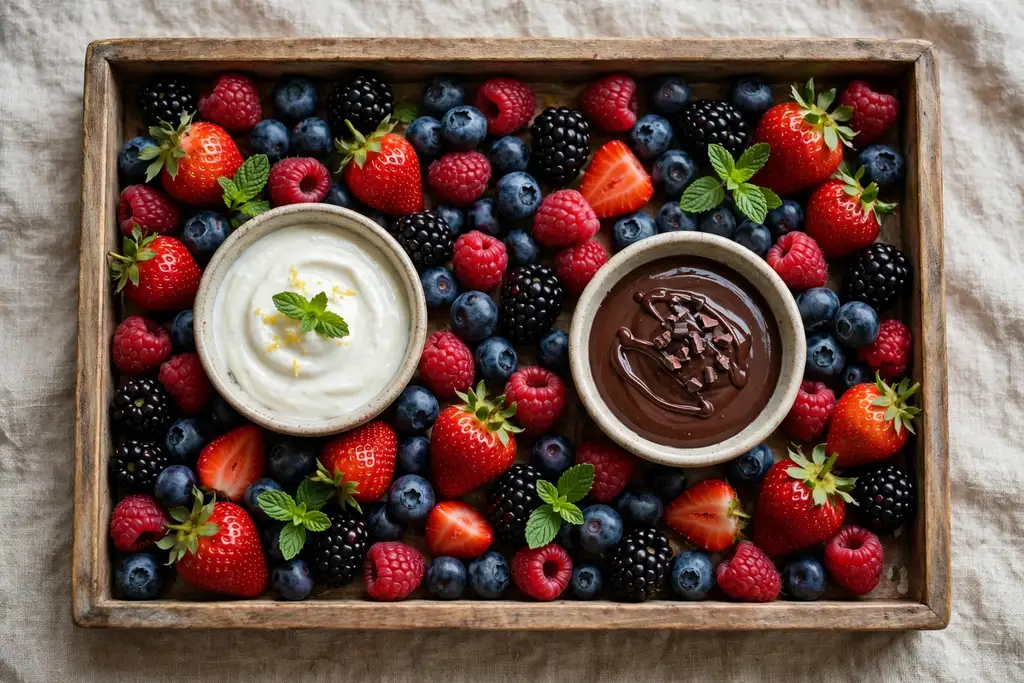
Fill a shallow tray with strawberries, blueberries, raspberries, and blackberries, and set two small bowls of dip in the gaps. One bowl can hold yogurt and one can hold melted chocolate or a cream cheese dip, so guests choose sweet or plain. Berries fill a tray fast, so this is a good choice when time is short.
Wash berries gently and dry them well before arranging, since wet berries soften fast and mark the tray. Put softer raspberries on top of firmer strawberries rather than underneath, and keep the tray chilled until serving. This tray works well for a dessert table, where small bites matter more than large slices.
6. Tropical Tray with a Pineapple Centerpiece
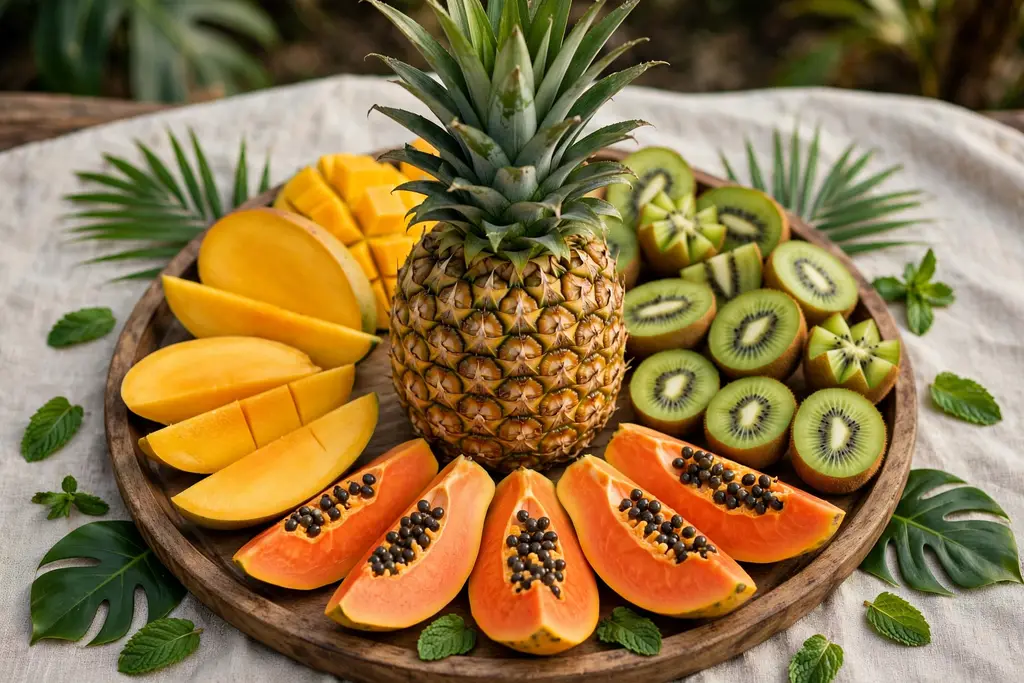
Cut a pineapple into a centerpiece shape, such as a hollowed half or a tall crown of wedges, and arrange mango, kiwi, papaya, and passion fruit around it. The pineapple gives height in the middle, while the softer tropical fruit fills the lower edge. Add lime wedges and a few mint leaves for a fresh scent and a sharp color contrast.
Tropical fruit ripens at different rates, so buy it a few days ahead and check each piece on the day. Keep the tray simple beside the pineapple, since too many extras hide the centerpiece. This tray suits a summer party, a poolside table, or a brunch where a bold centerpiece sets the mood.
7. Melon Fan with Mint
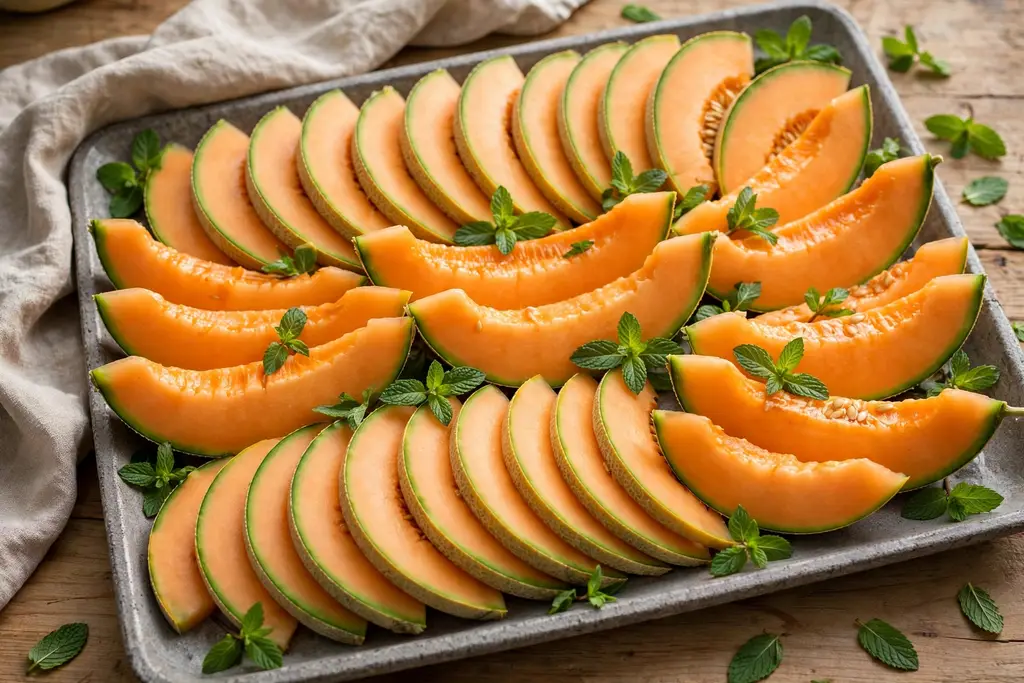
Slice cantaloupe, honeydew, and watermelon into thin wedges, then fan them in overlapping rows across a wide tray. Alternate the melon colors so each row shows a new shade, and tuck mint leaves between rows. A fan layout shows off the melon flesh and makes each wedge easy to lift without disturbing the rest.
Use a sharp knife and a steady board, since melon slices slip when cut too thick. Chill the melon well, and drain any juice before arranging, so the tray stays dry. This tray is a good fit for hot days, when guests want something cool and light, and it pairs well with a bowl of lime yogurt.
8. Fruit and Cheese Pairing Tray
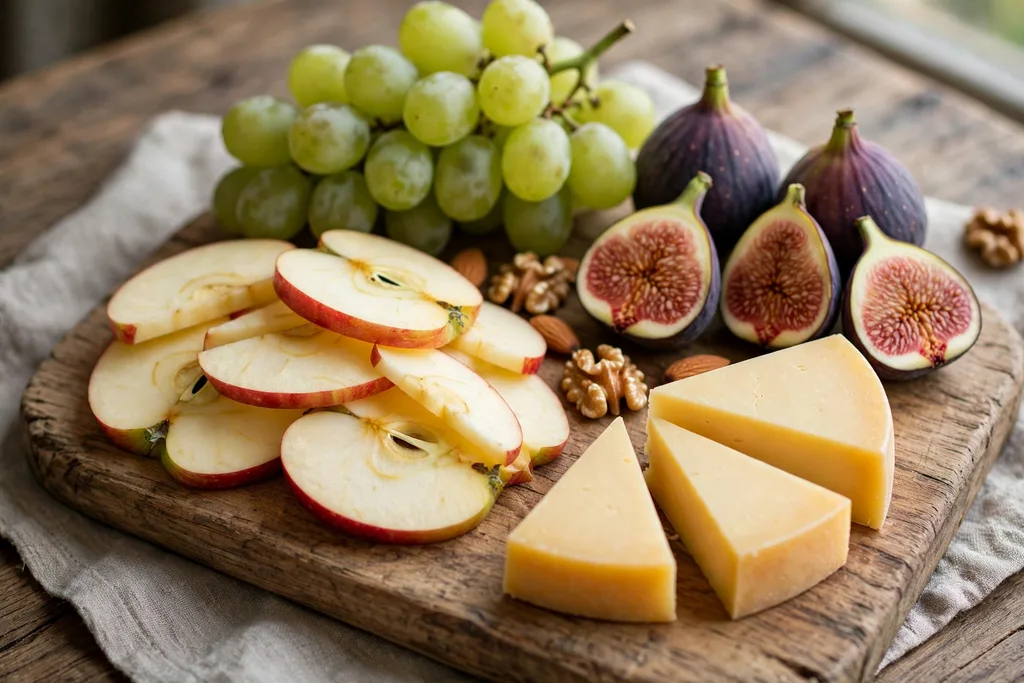
Pair fruit with cheese on one board, matching firm fruit with soft cheese and sweet fruit with salty cheese. Try apple slices with cheddar, grapes with brie, figs with goat cheese, and pear slices with blue cheese, with crackers in a separate small pile at one end. The fruit keeps the board fresh, while the cheese makes it filling enough for an evening table.
Keep cheese portions small and cut, so guests can try more than one pairing. Put a small knife beside each cheese, and keep the board out of direct sun, since soft cheese softens fast. This tray suits a wine evening, a small gathering, or a light supper, and it works well as a follow up to a main meal.
9. Kids Shape Tray with Cut Fruit Stars
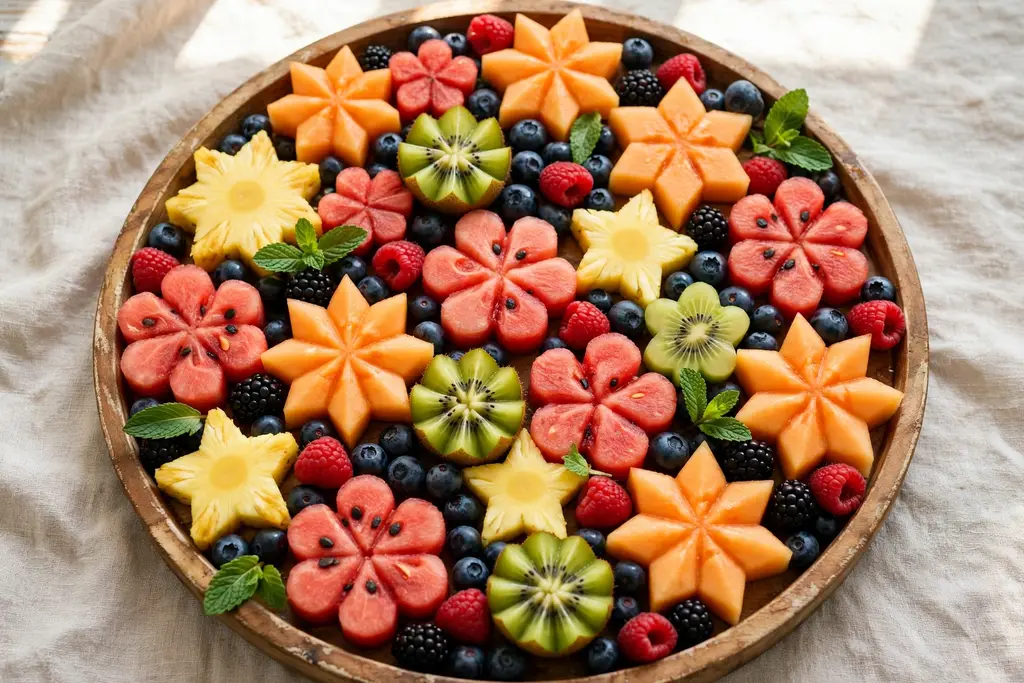
Cut melon, pineapple, and apple into stars, hearts, and flower shapes with small cutters, and arrange them on a bright tray with berries filling the gaps. Shapes turn plain fruit into a game, and children are more likely to try a new fruit when it looks fun. Keep the shapes large enough to hold, and put any small cutters away before serving.
Use firm fruit for shapes, since soft fruit tears in the cutter. Add a small bowl of yogurt dip with a spoon, and keep the tray low on the table so children can reach it safely. This tray suits birthdays, school holiday snacks, and family picnics, and it also works as a lunchbox idea when packed in a lidded box.
10. Breakfast Tray with Yogurt and Granola Bowls
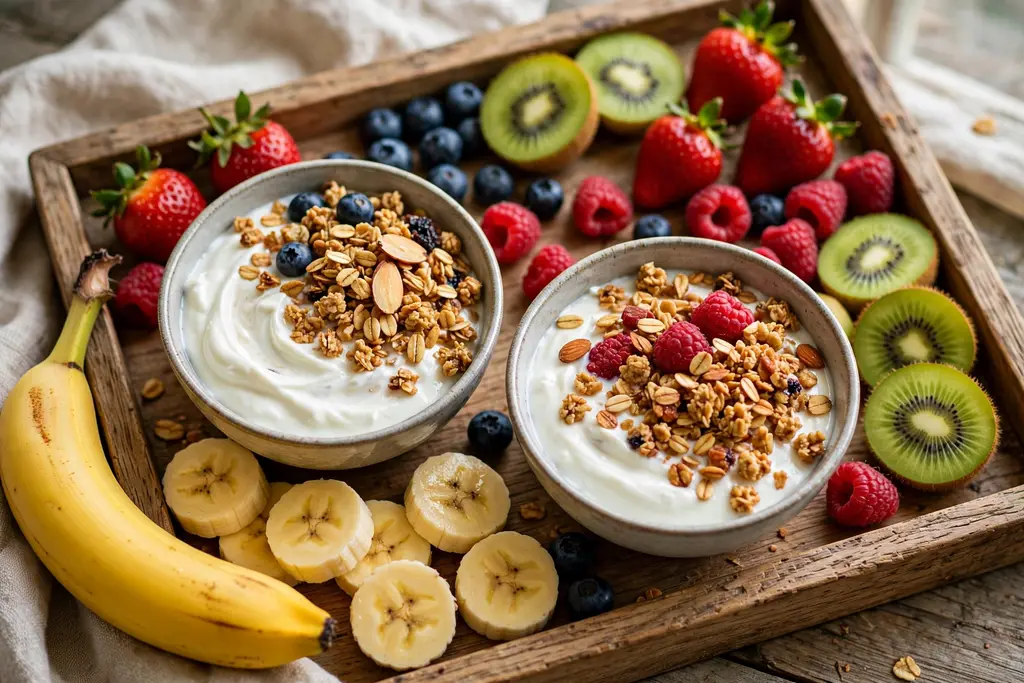
Build a breakfast fruit tray around two small bowls: one of yogurt and one of granola, with sliced banana, berries, mango, and kiwi arranged around them. Guests spoon yogurt into a bowl, add fruit, and top it with granola, so the tray becomes a build your own breakfast station. Keep the bowls small, so the tray still has room for fruit.
Set the tray on the table only when breakfast is ready, since yogurt should not sit out long. Offer a spoon in each bowl and a small jug of honey beside the tray. This layout suits a slow weekend morning, a guest breakfast, or a brunch table, and it keeps the kitchen counter clear while everyone serves themselves.
11. Chocolate Dip Dessert Tray
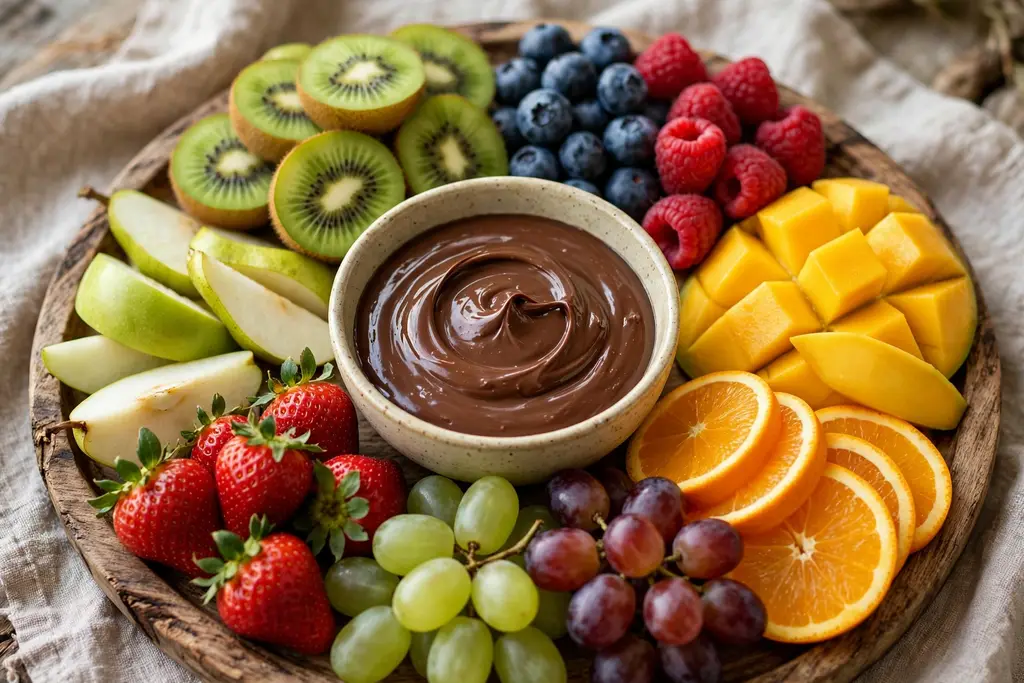
Set a bowl of warm chocolate dip in the center of a tray, and arrange strawberries, banana slices, pineapple chunks, and apple wedges around it in separate groups. Each fruit keeps its own section, so guests can see what to dip and the chocolate stays in the bowl rather than spreading across the tray. Add a few marshmallows or plain biscuit pieces at one edge if the tray is for a party.
Keep the chocolate bowl small and refill it rather than filling a large bowl that cools and thickens. Put a fork or picks beside the tray, since dipped fruit is easier to eat with a pick. This tray suits a dessert table, a movie evening, or a celebration, and it works best when the fruit is cut just before serving.
12. Holiday Tray with Cranberries and Rosemary
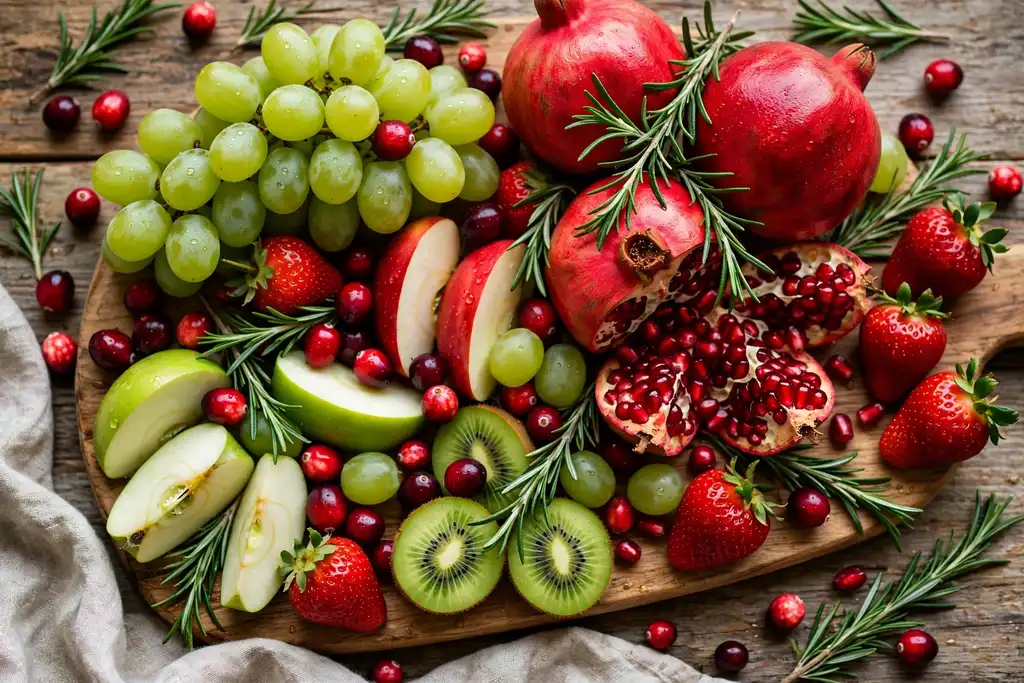
Make a holiday fruit tray with red and green fruit, such as strawberries, red grapes, green grapes, and kiwi, and scatter fresh cranberries and short rosemary sprigs in the gaps. The cranberries add deep red color, while the rosemary looks like small pine branches and adds a fresh scent. Keep the rosemary as decoration at the edges, clear of the fruit guests will eat.
This tray suits Christmas, a winter party, or a New Year table, where red and green already set the mood. Use firm fruit that holds up for a few hours, and chill the tray until guests arrive. A small bowl of white chocolate dip in the center gives a pale contrast to the red and green, and it keeps the tray from looking too dark.
13. Autumn Harvest Tray with Figs and Persimmons
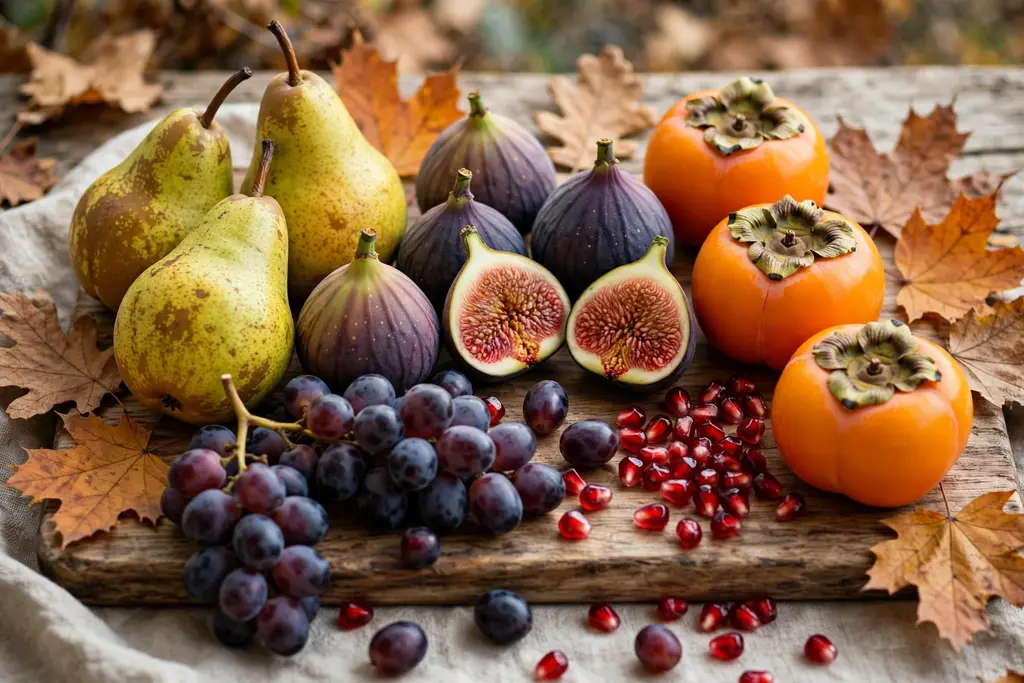
Arrange autumn fruit such as figs, persimmons, pears, red grapes, and pomegranate seeds on a wood board, with a few walnuts in their shells at one edge. Cut figs in half to show the inside, and slice persimmons into wedges so the orange flesh stands out against the darker grapes. This tray leans on ripe autumn fruit rather than on decoration, so the fruit itself sets the season.
Buy figs and persimmons when they yield slightly to pressure, and use them the same day, since both soften fast. Keep the board in a cool spot until serving, and add a small knife for the figs. The tray suits an autumn dinner, a harvest table, or a quiet evening, and it pairs well with the tray styling in these fall kitchen decor ideas.
14. Summer Picnic Tray in a Lidded Basket Tray
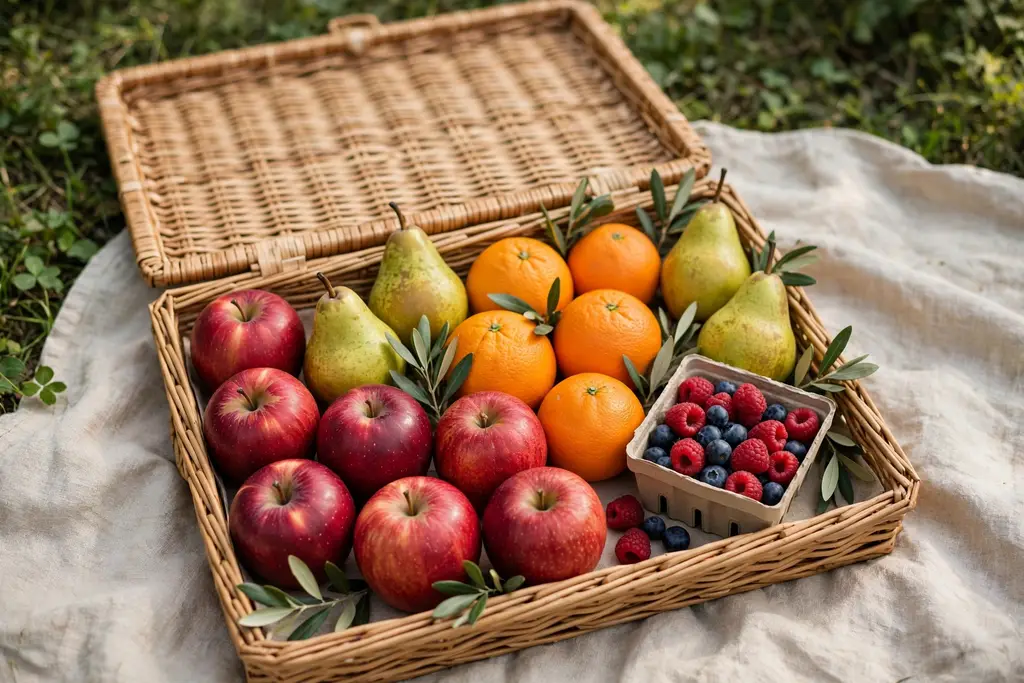
Pack a fruit tray for a picnic in a shallow basket tray with a lid or a cloth cover, using sturdy fruit such as apples, grapes, strawberries in a small box, and melon wedges wrapped separately. A lidded tray travels well, keeps insects off, and lifts out as one unit at the picnic spot. Keep soft berries in a lidded box inside the tray, so they do not crush under heavier fruit.
Chill the fruit before packing, and keep the tray in the shade once you arrive. Bring a small bag for peels and stems, and pack wipes for sticky hands. This tray suits a park lunch, a beach day, or a garden picnic, and it works best when every piece can be eaten by hand with no knife needed at the spot.
15. Brunch Tray with Fruit and Small Pastries
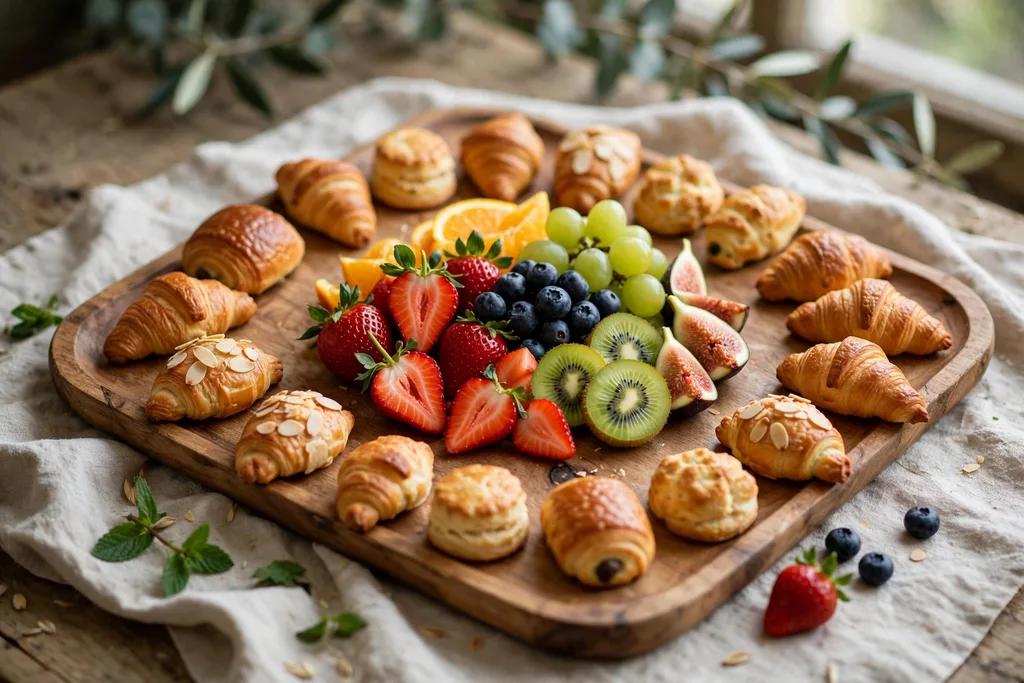
Combine fruit with small pastries on one brunch tray, with berries, melon, and citrus at the center and mini croissants or small muffins around the edge. Keep the pastries in a separate section from cut fruit, so crumbs and juice do not mix. A small pot of jam or honey beside the fruit lets guests sweeten pastries or yogurt as they wish.
This tray suits a weekend brunch, a guest morning, or a celebration breakfast, where one tray must cover both sweet and fresh tastes. Bake or buy pastries fresh that morning, and arrange the tray just before serving, so pastries stay crisp. Offer coffee or tea nearby, since a brunch tray works best as part of a full table rather than on its own.
16. Afternoon Tea Tiered Fruit Tray
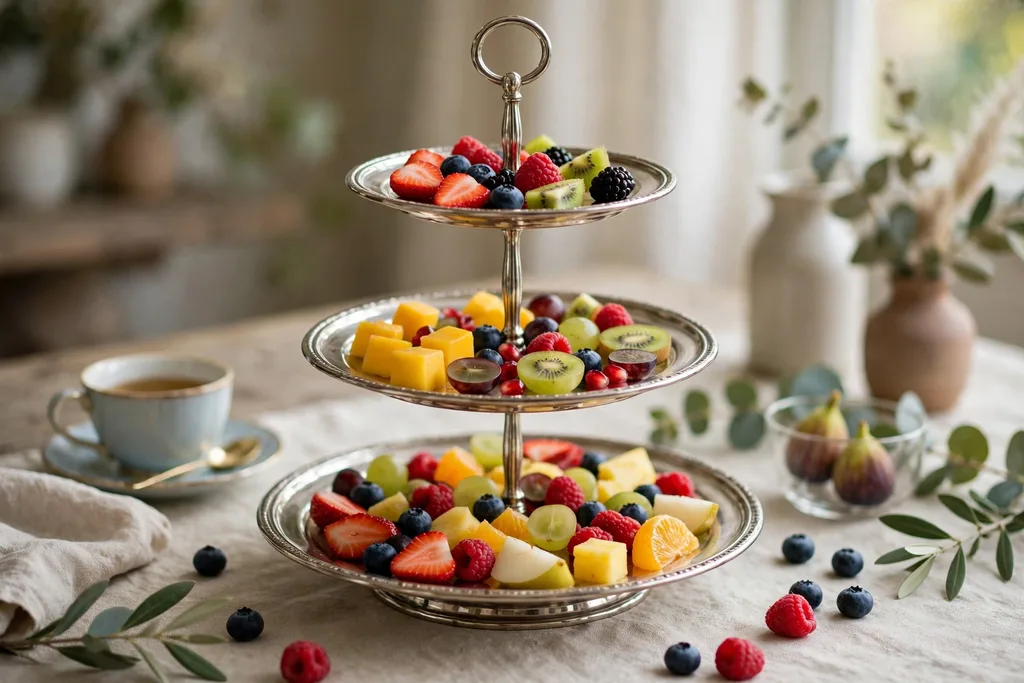
Use a tiered cake stand for an afternoon tea fruit tray, with small fruit and bite size pieces on each level. Put strawberries and grapes on the bottom tier, kiwi and melon cubes in the middle, and berries and mint on the top tier. Small pieces suit tea, since guests eat standing or from a small plate, and the tiers keep the table tidy.
Keep each tier to one or two kinds of fruit, so the stand does not look crowded. Add a small bowl of clotted cream or yogurt on the table beside the stand, rather than on a tier, so it stays steady. This tray suits a tea party, a baby shower, or a quiet afternoon with friends, and it pairs well with sandwiches and small cakes on a separate stand.
17. Red Only Tray for a Celebration Table
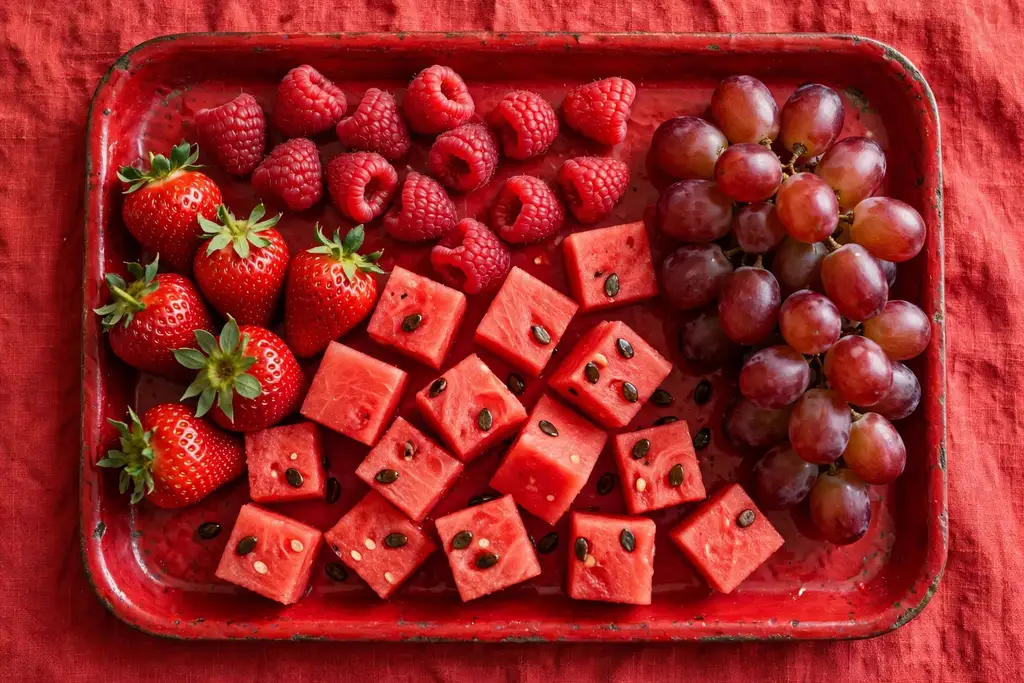
Build a tray using red fruit only, such as strawberries, raspberries, red grapes, watermelon cubes, cherries, and pomegranate seeds, arranged in groups by shade from pale pink to deep red. A single color tray looks bold on a plain tablecloth, and it suits a celebration where the color is part of the theme, such as a birthday or an anniversary.
Mix textures so the tray does not look flat: whole cherries beside cut watermelon, soft raspberries beside firm grapes. Keep the tray chilled and add a small bowl of white yogurt dip for contrast. If red fruit is out of season, use frozen berries only for a sauce bowl, and keep the tray itself to fresh fruit that holds its shape.
18. Garden Green Tray with Herbs and Edible Flowers
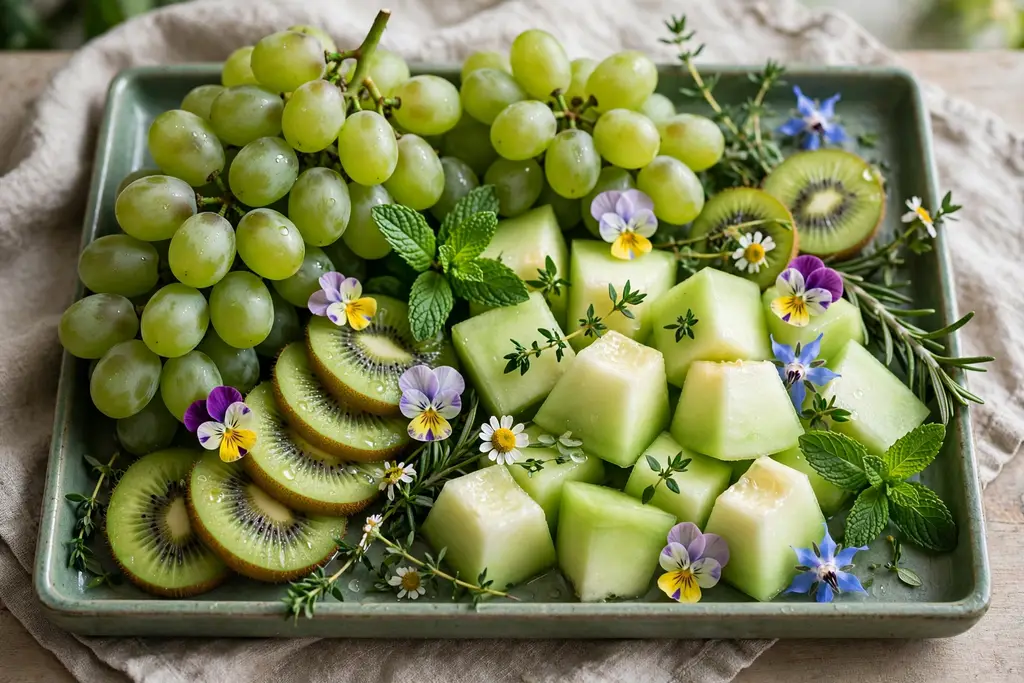
Arrange green fruit such as green grapes, kiwi slices, honeydew, green apple wedges, and lime slices on a tray, and finish it with fresh mint, basil leaves, and edible flowers that are safe to eat. The herbs add scent and a garden feel, while the flowers give small color notes without changing the green theme. Check that every flower used is food safe, and keep flowers clear of the fruit guests will cut.
This tray suits a garden party, a spring lunch, or a table where fresh herbs are already part of the meal. Wash herbs and flowers gently and dry them before arranging, since wet leaves wilt fast. Serve with a lime and mint water jug nearby, so the tray and the drinks share the same fresh note.
19. Stone Fruit Tray for Late Summer
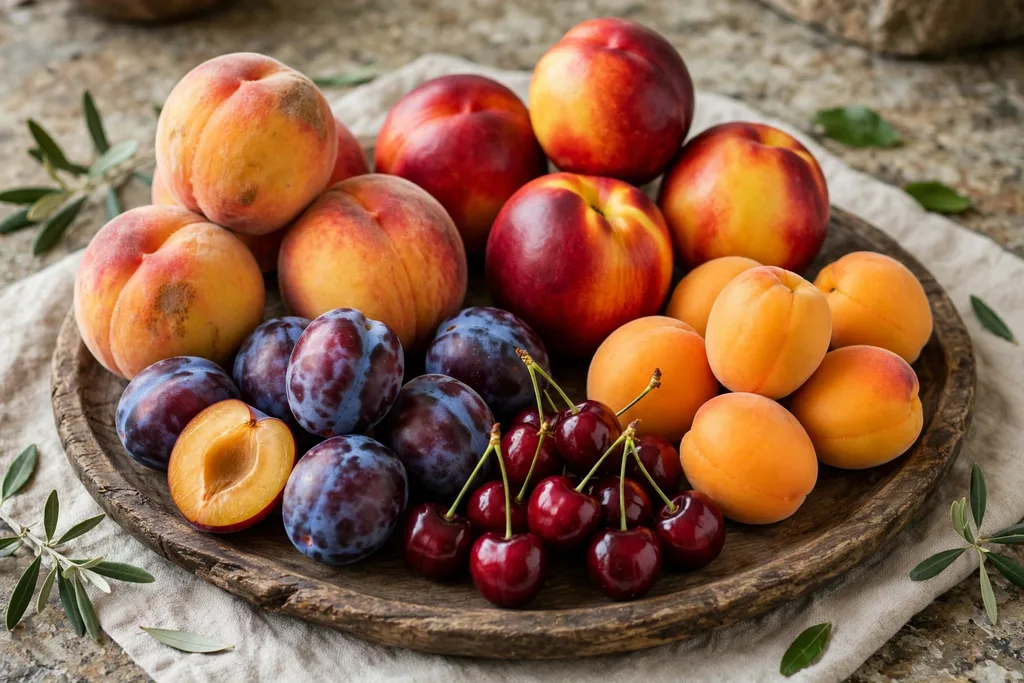
Fill a tray with stone fruit at its peak: peaches, nectarines, plums, cherries, and apricots, with some cut in half to show the stone and some left whole. Stone fruit needs little arrangement, since the range of blush, gold, and deep purple colors already looks rich. Group each kind together, and put a small knife on the tray for guests who want to slice a whole piece.
Buy stone fruit ripe but firm, and check it on the day, since ripe peaches bruise easily in a pile. Keep the tray in a cool room and serve it the same day it is cut. This tray suits a late summer dinner, a farm stand style table, or a simple dessert after a grilled meal, where fresh fruit is the whole dessert.
20. Winter Citrus and Pomegranate Tray
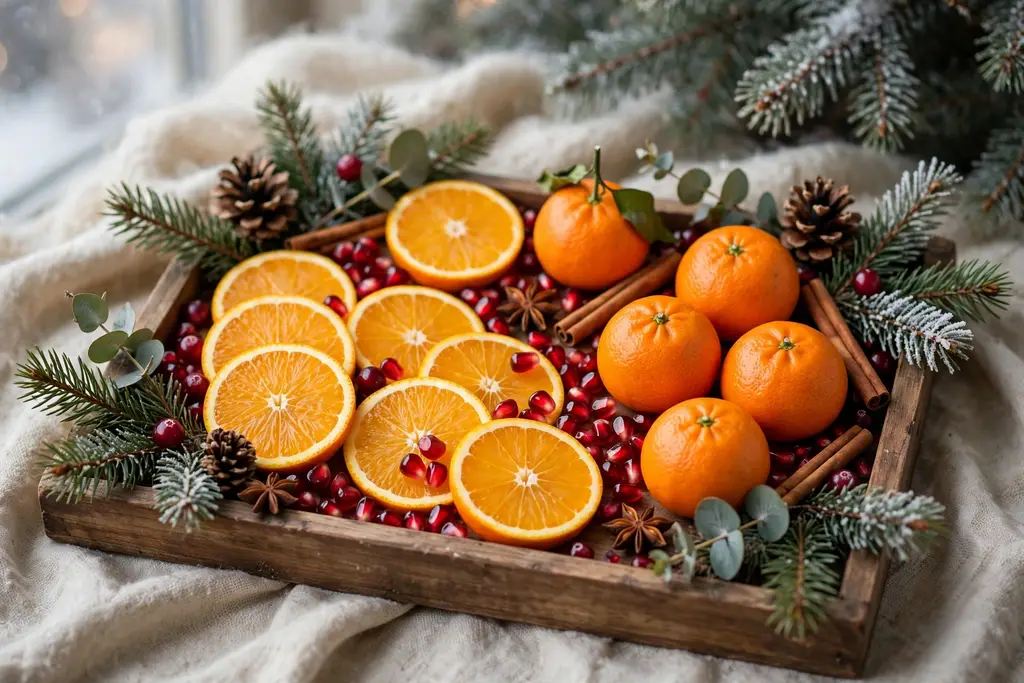
Make a winter tray from citrus that peaks in cold months, such as blood oranges, navel oranges, clementines, and grapefruit, plus pomegranate seeds scattered over the top. Peel clementines whole for easy eating, slice the larger citrus into rounds, and add pomegranate seeds in the gaps for deep red contrast. The tray brings bright color to a winter table, when other fresh fruit is scarce.
Cut citrus just before serving, and keep the tray chilled until guests arrive, since cut citrus dries out in warm air. Add a small bowl of honey for drizzling, and keep napkins nearby, since citrus juice runs. This tray suits a winter party, a holiday brunch, or a January table that needs a fresh note.
21. Small Board for One or Two People
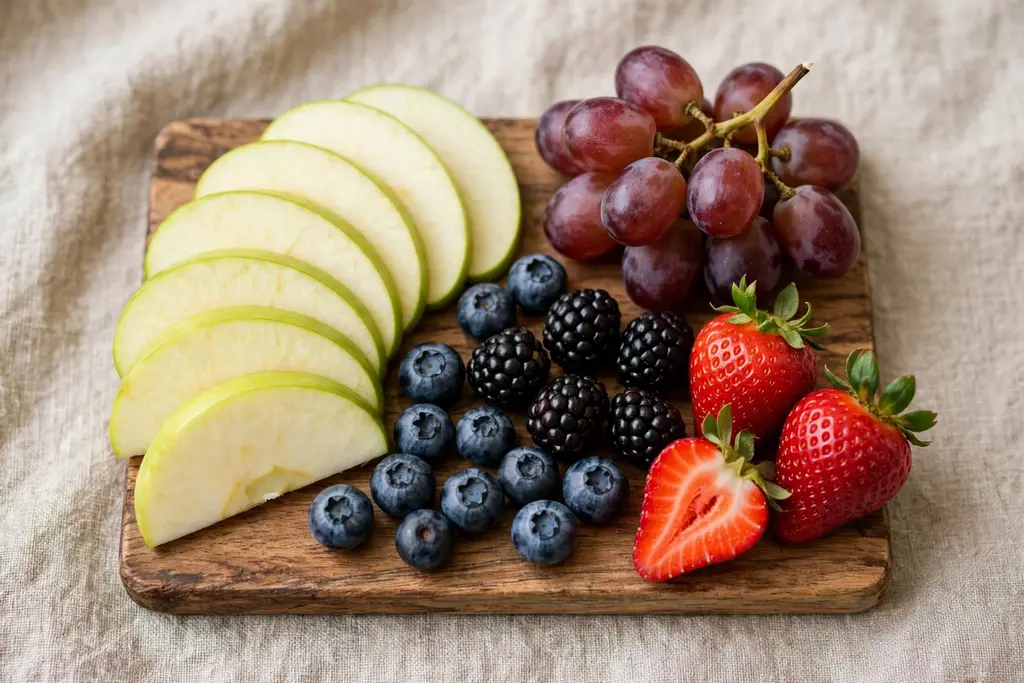
Scale a fruit tray down to a single small board for one or two people, with one apple sliced, a small bunch of grapes, a handful of berries, and two or three strawberries. A small board stops waste, keeps the fruit fresh, and still feels like a treat rather than a plain bowl. Use a board that fits on a lap tray or a small side table, so it suits a quiet evening.
Choose fruit you will finish that day, and cut only what you need, since a small board is easy to refill the next day. Add a tiny bowl of yogurt if you want a dip, but keep the board mostly fruit, so it stays light. This tray suits a solo snack, a date evening, or a desk break, and it is the best starting point if you are new to fruit trays.
22. Large Party Tray with Refill Zones
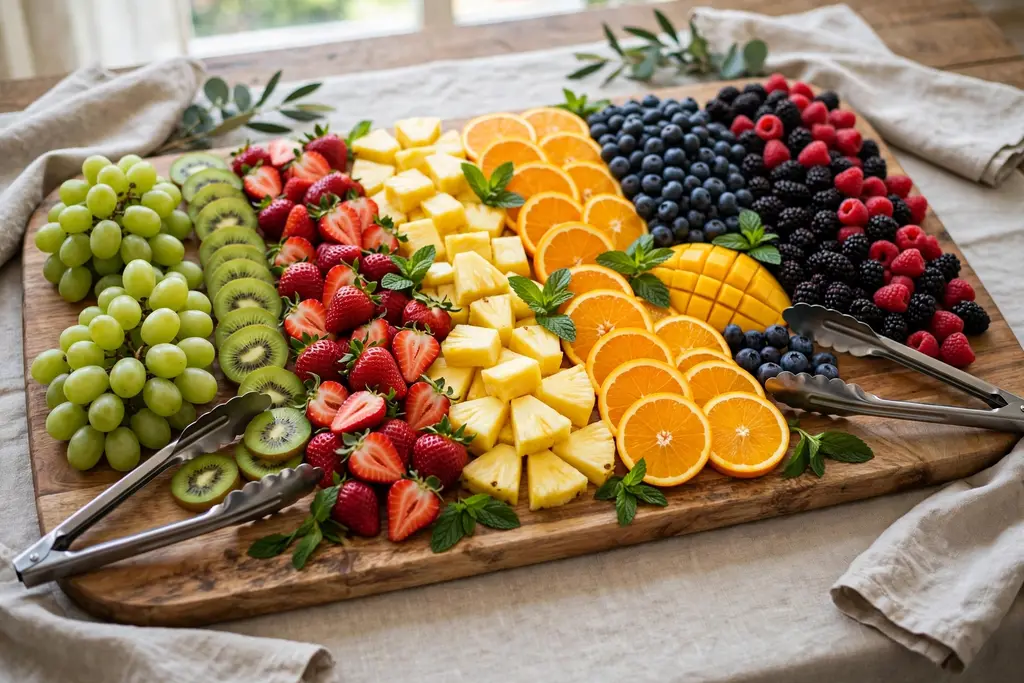
Plan a large party tray in zones, with each zone holding one kind of fruit and a clear empty zone at one end for refills. Use a very large board or two boards side by side, and put sturdy fruit such as grapes, apples, and oranges at the back, with cut melon and berries at the front where they are easy to reach. Zones let you refill one kind at a time without rebuilding the whole tray.
Count roughly one generous handful of fruit per guest, and keep a backup bowl of washed fruit in the fridge for refills. Put tongs or picks at each end of the tray, so two people can serve at once without crowding. This tray suits a party of twenty or more, a buffet, or a community gathering, where the tray must last through the evening.
23. Budget Tray with Seasonal Fruit Only
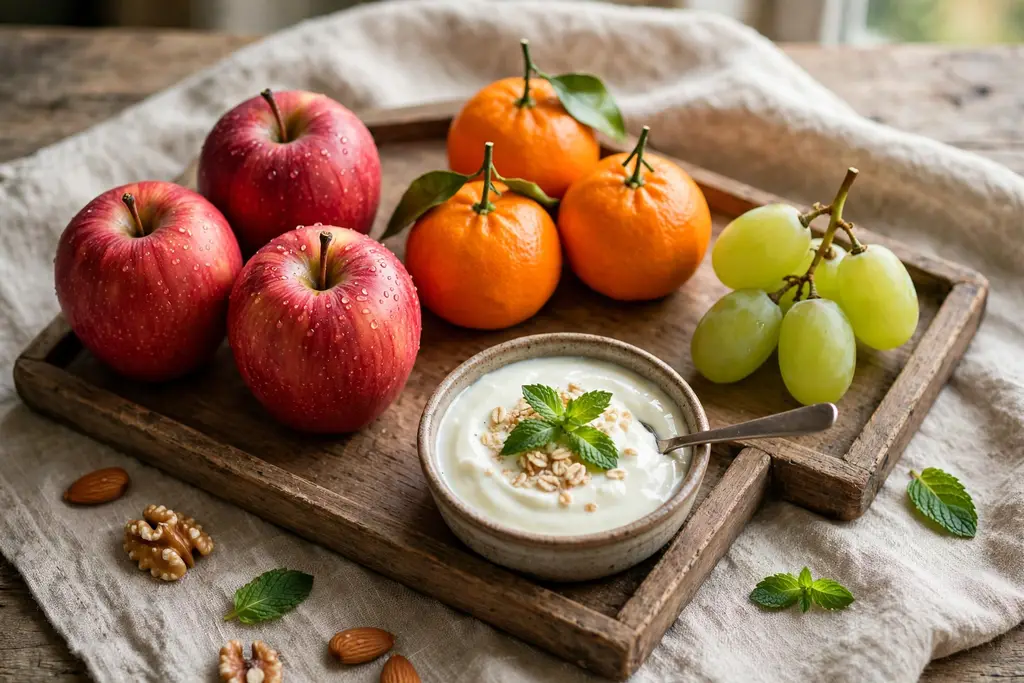
Build a budget fruit tray from seasonal fruit only, choosing the three cheapest ripe kinds at the market that week and filling the tray with generous amounts of those, rather than small amounts of many kinds. Seasonal fruit tastes better and costs less, and a tray with three kinds in full groups looks more generous than a tray with ten kinds in thin lines. Add a simple dip made from yogurt and honey to finish it.
Check market prices before you plan the tray, and buy fruit that is ripe now rather than fruit that needs days to soften. Use a plain wood board or a tray you already own, so the cost stays in the fruit. The budget approach in these kitchen ideas on a budget uses the same rule: spend on the part guests notice most, and keep the rest simple.
24. Luxury Tray with Exotic Fruit
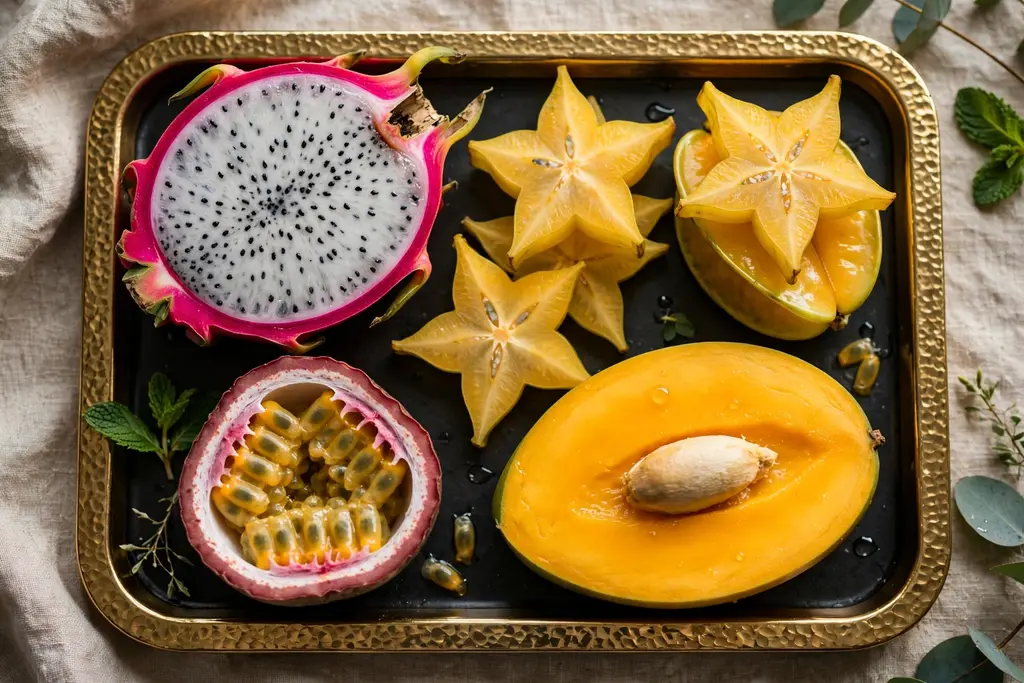
Make a luxury tray with exotic fruit such as dragon fruit, starfruit, passion fruit, rambutan, and mango, cut to show their shapes and colors. Slice starfruit into stars, halve dragon fruit to show the speckled flesh, and spoon passion fruit into a small bowl on the tray. Exotic fruit needs little else, since the shapes and colors are the decoration.
Buy exotic fruit from a market that stocks it fresh, and ask when it arrived, since some kinds spoil fast after cutting. Keep portions small, since guests may want to taste each kind rather than fill up on one. This tray suits a special celebration, a tasting evening, or a table where the fruit itself is the talking point.
25. Poolside Tray Chilled on Ice
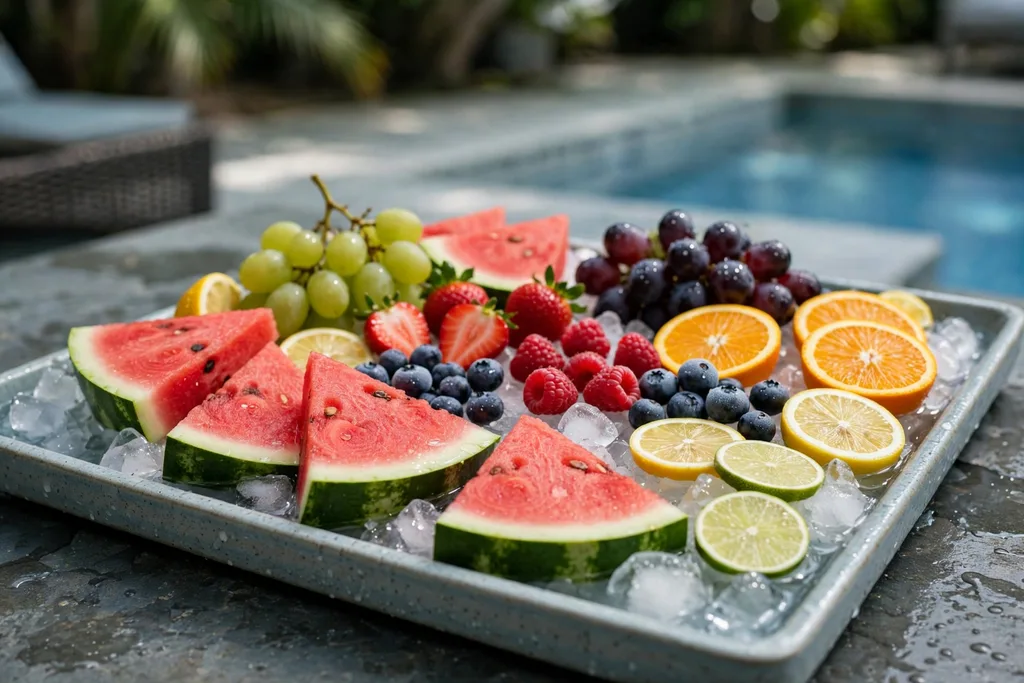
Serve a poolside fruit tray on a bed of ice, using a tray with a raised rim or a shallow pan set over ice in a larger tray. Arrange watermelon, grapes, berries, and citrus slices on top, and keep the tray in the shade. Ice keeps cut fruit cool and safe in heat, and it stops melon and berries from softening in the sun.
Use a tray that will not slip on wet hands, and keep the ice layer thin, so the fruit sits above melting water rather than in it. Refill the ice as it melts, and bring the tray inside when swimming ends, since fruit should not sit out for hours in heat. This tray suits a pool party, a hot afternoon, or a garden day where guests eat outdoors.
26. Bite Size Skewer Tray
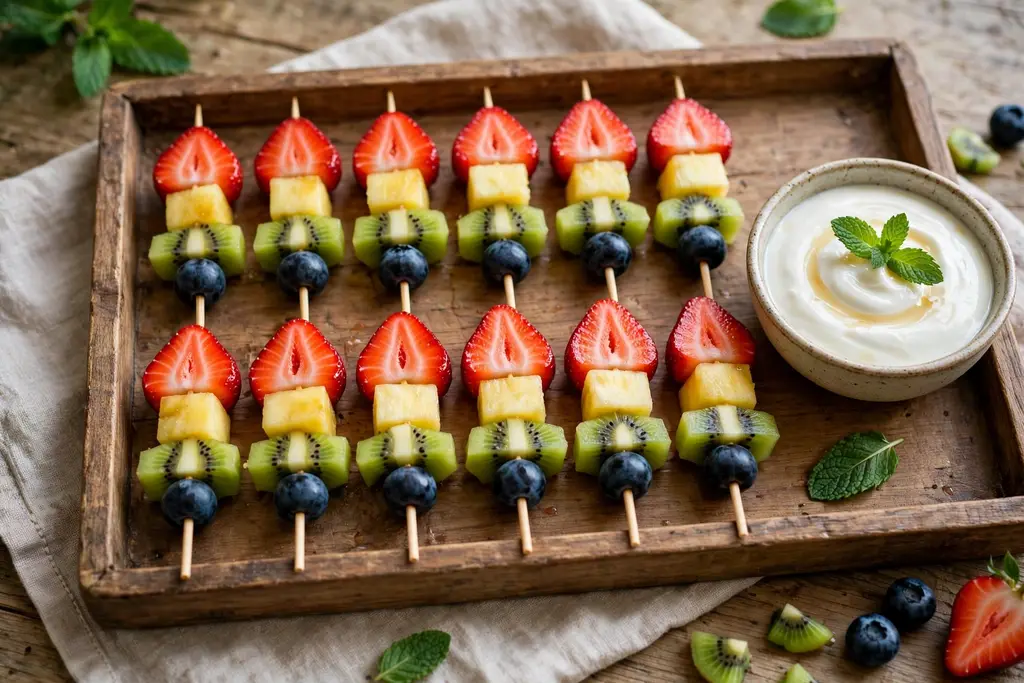
Thread small fruit pieces onto short skewers, such as grape, melon cube, strawberry, and pineapple chunk on each skewer, and lay the skewers in neat rows on a tray. Skewers make fruit easy to eat while standing, and they stop guests from handling loose fruit with wet hands. Alternate colors on each skewer, so every skewer looks the same and the tray reads as one pattern.
Use short, blunt ended skewers for safety, especially if children are present, and keep the skewers in a single layer, so they do not tangle. Chill the skewers until serving, and put a small bowl of dip at one end for dipping the fruit end only. This tray suits a standing party, a work gathering, or a buffet where guests hold a plate in one hand.
27. Fruit Kabob Tray with a Dip Station
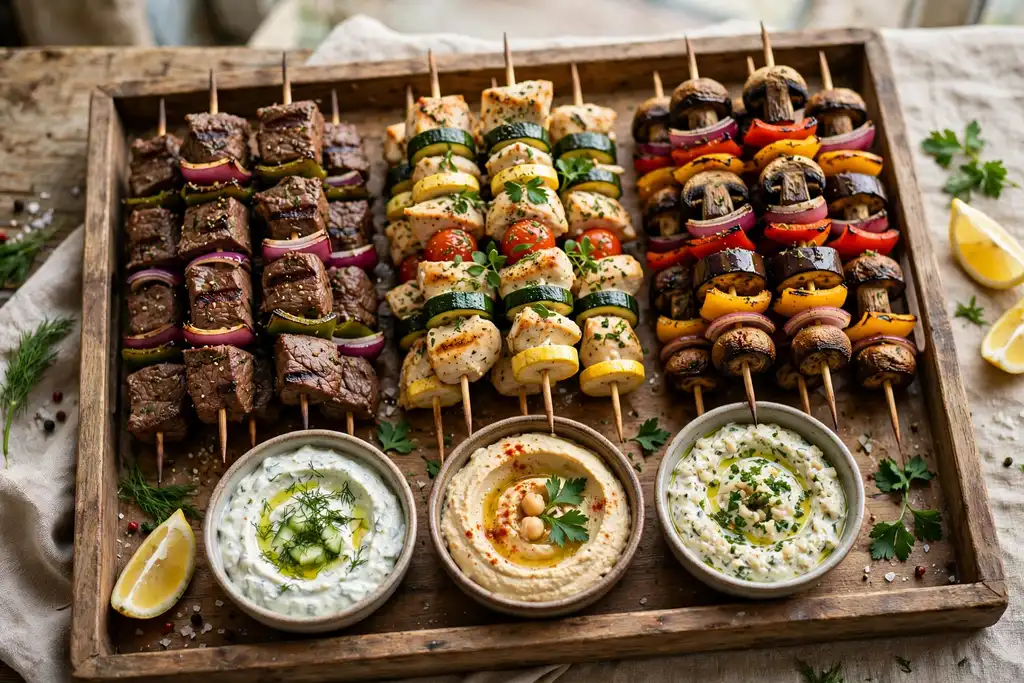
Build a kabob tray with longer skewers grouped by theme: one group of berry and melon kabobs, one group of tropical kabobs, and one group of citrus and grape kabobs, each group in its own row. Set two or three dip bowls at the end of the tray, such as yogurt, chocolate, and honey lime, so guests can match a dip to each kabob group. Grouping by theme helps guests choose fast at a busy table.
Make kabobs the morning of the party, and keep them covered and chilled until serving. Trim skewer ends to the same length, so the rows sit level on the tray. This tray suits a large party, a barbecue dessert table, or a celebration where fruit must travel from the kitchen to the table in one move, since kabobs lift cleanly.
28. Carved Watermelon Bowl Tray
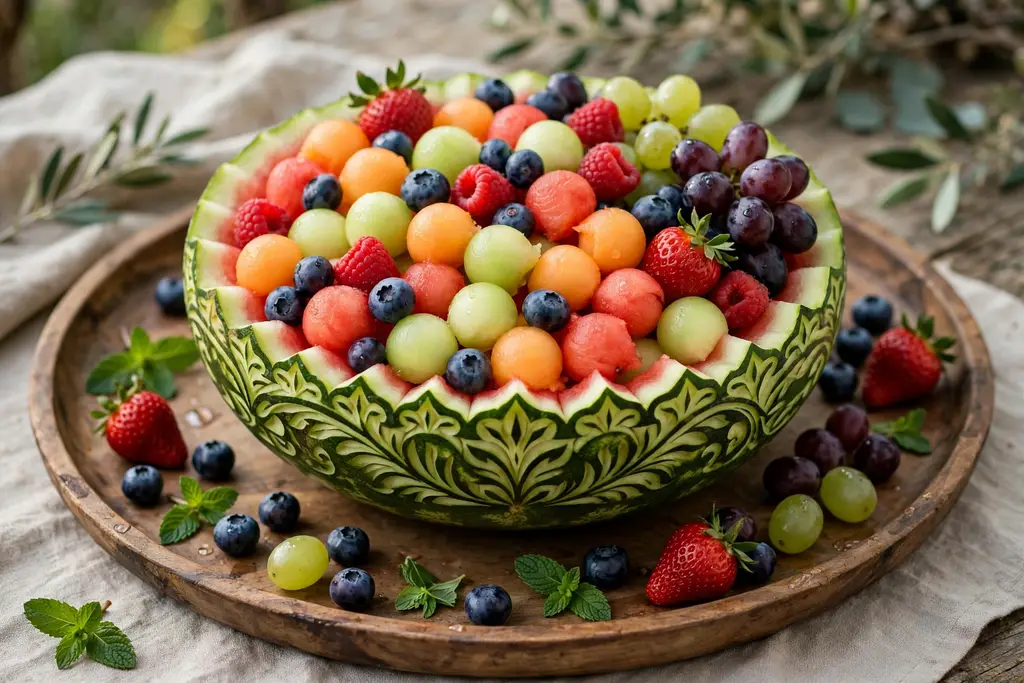
Hollow a small watermelon into a bowl, fill it with melon balls, berries, and grapes, and set it in the center of a larger tray with extra fruit around the base. The watermelon bowl is both container and centerpiece, and it keeps the fruit cool from the chilled rind. Scoop the flesh with a melon baller, and keep the rind thick enough to hold its shape when filled.
Chill the watermelon well before carving, and cut a flat base so it sits steady on the tray. Drain juice from the bowl before filling, and serve the tray within a few hours, since a filled rind softens over time. This tray suits a summer party, a barbecue, or a birthday table where a centerpiece matters as much as the fruit.
29. Heart Shaped Tray for an Anniversary
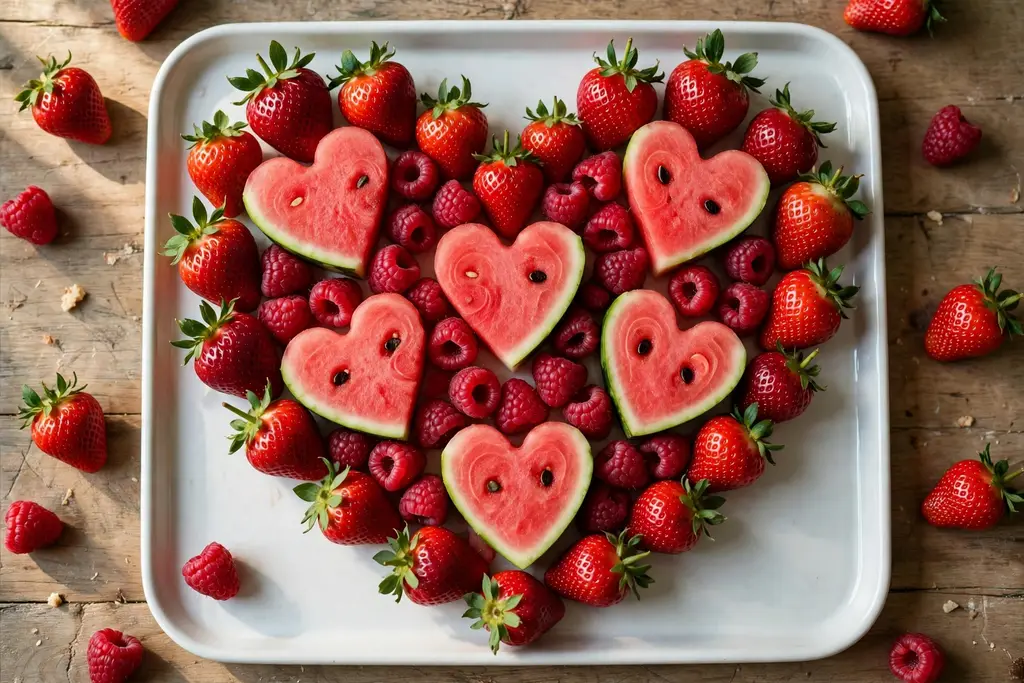
Arrange fruit in a heart shape on a round or square tray, using strawberries, raspberries, and watermelon hearts cut with a cutter to form the outline, and grapes or blueberries to fill the inside. A heart tray needs a clear outline first, so place the outline fruit before filling the middle, and keep the shape low and flat, so it reads clearly from above.
Use a tray with a plain background, such as white or pale wood, so the red heart stands out. Keep the tray chilled and carry it flat to the table, since a heart shape shifts if the tray tilts. This tray suits an anniversary, a Valentine table, or a wedding shower, where the shape itself carries the message.
30. Rustic Crate Tray for a Farmhouse Table
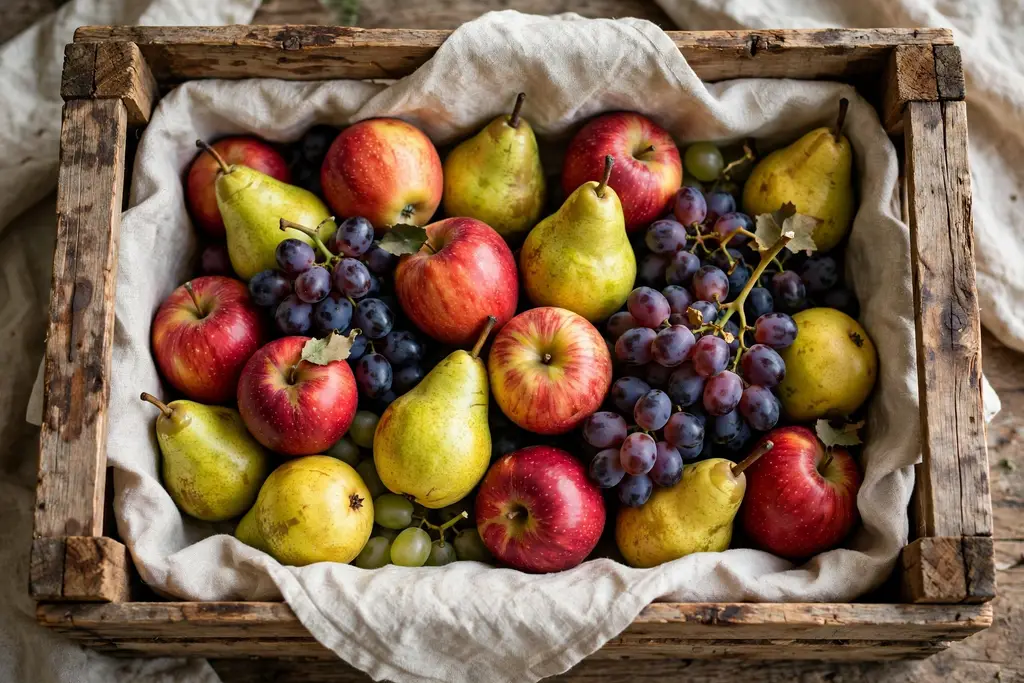
Use a shallow wood crate or a wood tray with high sides as a rustic fruit tray, lining it with a clean cloth and filling it with apples, pears, grapes, and a few sprigs of greenery. The crate gives a farmhouse feel, and the high sides keep round fruit from rolling off the table. Keep the cloth flat and tucked in, so it does not bunch under the fruit.
Choose a crate that is food safe and clean, and line it if the wood is rough or unsealed. Put heavier fruit at the bottom and softer fruit on top, and refill from the back so older pieces come forward first. This tray suits a farmhouse kitchen, a harvest dinner, or a country style table, and it works well as a permanent counter display that you refill daily.
31. Clear Glass Tray with Layered Fruit
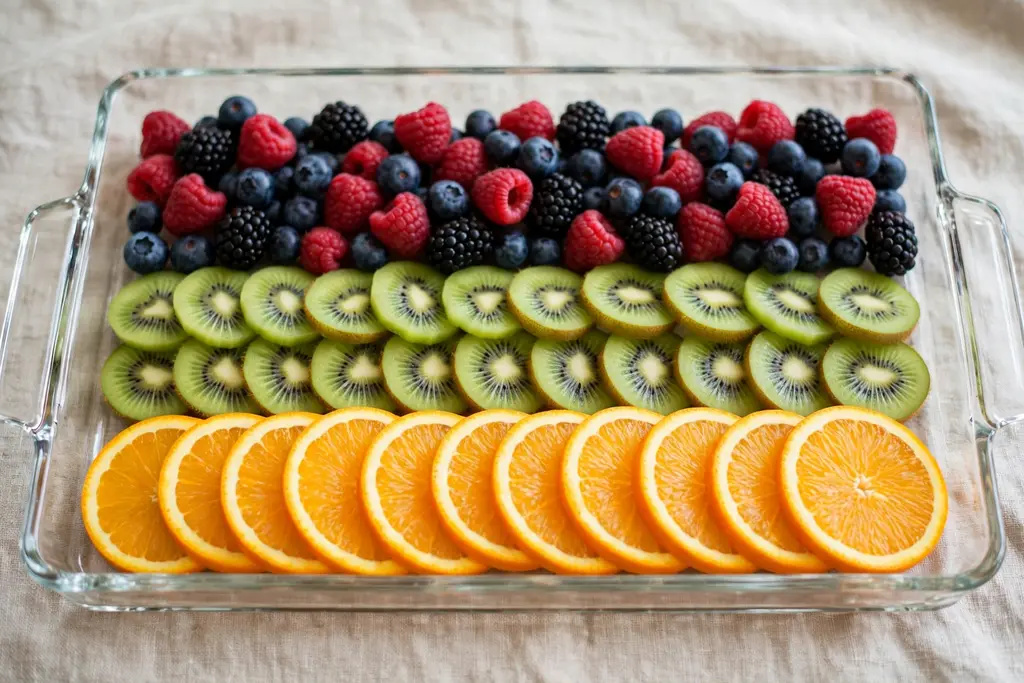
Use a clear glass tray or a glass cake plate so guests can see the fruit from the side as well as from above, and layer the fruit in bands of color: berries at the bottom edge, kiwi slices next, then orange slices on top. Glass shows juice and color, so keep the tray clean and dry, and wipe the rim before serving. A glass tray suits a pale table or a modern room, where wood would look heavy.
Keep the fruit to firm kinds that hold their shape, since soft fruit marks glass fast. Chill the glass tray before arranging, so it feels cool to the touch and keeps fruit fresh longer. This tray suits a formal lunch, a bridal shower, or a table where the tray itself should look light and open.
32. Black Slate Tray for a Modern Table
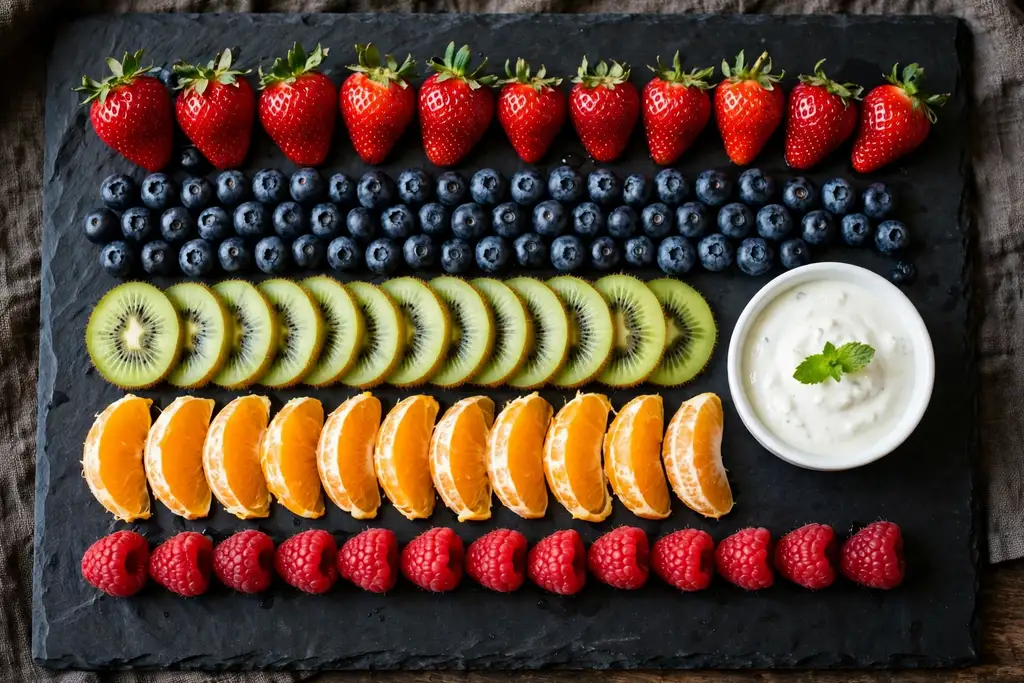
Arrange bright fruit on a black slate tray, where the dark background makes oranges, berries, kiwi, and melon look sharper. Use a simple pattern, such as straight rows or a single arc, since the contrast already gives the tray its impact, and extra decoration can crowd it. Add white cheese cubes or a small white dip bowl for one pale note against the slate.
Chill the slate before serving, and wipe it dry, since water marks show on dark stone. Keep the tray away from the edge of the table, since slate is heavy and can chip if dropped. This tray suits a modern kitchen, an evening party, or a dinner table with dark plates, where a wood board would blend in too much.
33. Breakfast in Bed Small Tray
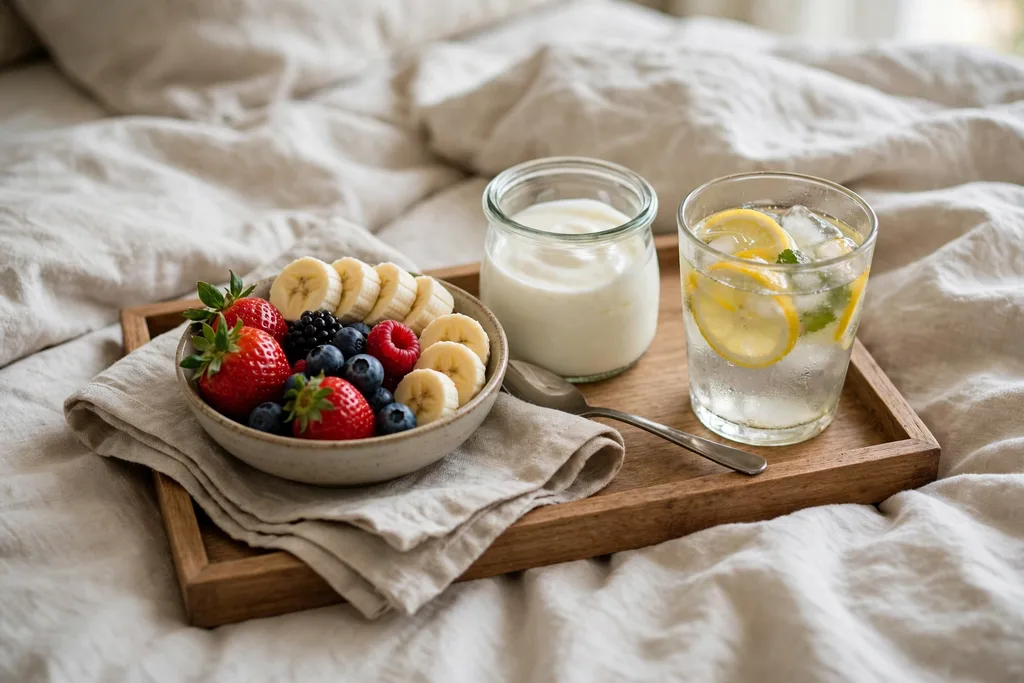
Build a tiny breakfast in bed tray with a small plate of fruit, such as berries, sliced banana, and a few grapes, plus a yogurt pot and a drink on the same tray. Keep the fruit in a small bowl on the tray, rather than loose, so nothing rolls if the tray moves. A breakfast in bed tray is about care and ease, not size, so one small bowl of fresh fruit is enough.
Use fruit that needs no cutting in bed, such as berries and grapes, and keep the tray light and steady. Add a napkin and a spoon, and clear the tray soon after eating, since fruit left in a warm bedroom softens fast. This tray suits a birthday morning, a guest stay, or a slow weekend, and it also works as a small gift tray for someone resting.
34. Use Up Ripe Fruit Tray with Fruit Cups
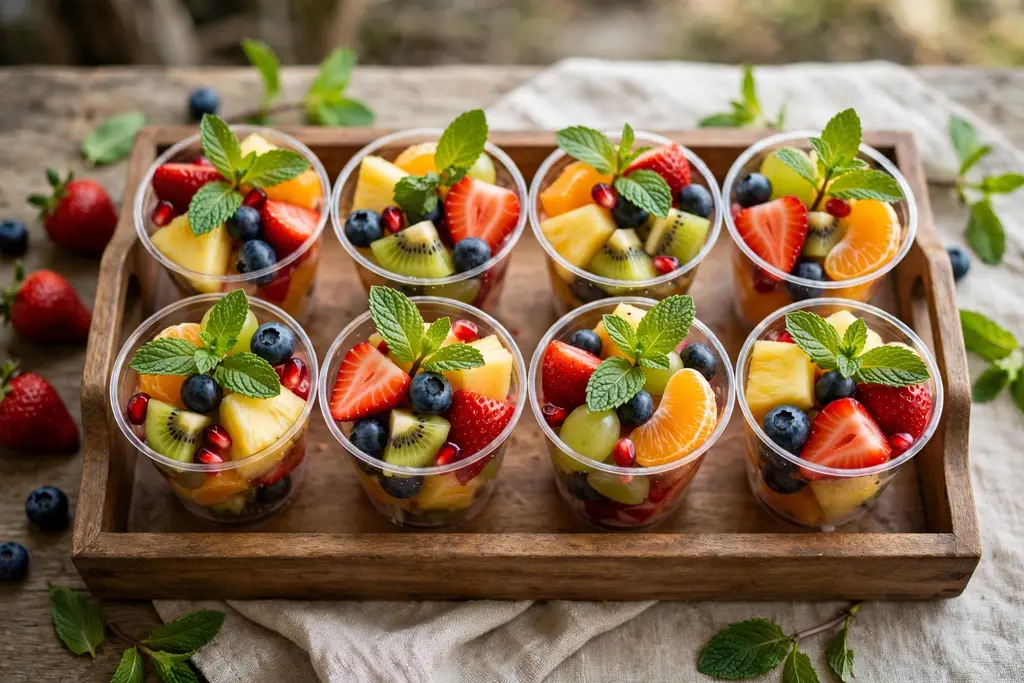
Turn ripe fruit that must be eaten today into a tray of small fruit cups, with each cup holding a mix of cut melon, berries, grapes, and banana, topped with a mint leaf. Cups stop soft fruit from bruising in a pile, and they let guests take one portion at a time. This tray reduces waste, since it uses fruit that is ripe now rather than fruit that will soften tomorrow.
Cut the fruit in the morning, fill the cups, and chill them until serving, adding banana last so it does not brown. Keep a spoon in each cup or beside the tray, and label any cup that holds nuts or a dip, for guests with allergies. This tray suits the day after a party, a fridge clear out, or a weekday snack table, where good fruit should not go to waste.
Conclusion
A good fruit tray starts with ripe fruit, a tray that fits the table, and a layout guests can read at a glance. Rings, rows, tiers, and zones all work, as long as each kind of fruit has its own place and the tray stays full without waste. Start small if you are new to trays, with one board, three kinds of fruit, and one dip, then add a new layout or a seasonal theme each time you make one. For everyday storage and refill habits, the ideas in these creative fruit basket ideas help a tray stay part of daily life rather than a one off display. Save this list on Pinterest, pick the tray that fits your next gathering, and build it the morning of the event for the freshest result.
FAQs
How much fruit do I need for a fruit tray?
Plan roughly one generous handful of fruit per guest for a snack tray, and a little more if the tray is the main dessert. For ten guests, that means about three pounds of mixed fruit, plus one small dip bowl. Buy one or two anchor fruits in larger amounts, such as grapes and melon, and smaller amounts of berries and exotic fruit, so the tray looks full without waste.
How far ahead can I make a fruit tray?
Cut firm fruit such as melon, pineapple, and grapes up to a day ahead, and keep them covered and chilled in separate boxes. Cut soft fruit such as banana, apple, and pear on the day, since they brown and soften fast. Arrange the tray the morning of the event, or up to four hours ahead if it stays chilled, and add berries and mint last.
How do I keep cut fruit from browning?
Toss apple, pear, and banana slices in a little lemon juice as soon as you cut them, and keep the tray chilled and covered until serving. Cut these fruits last, and do not leave the tray in warm air for hours. If a slice browns, replace it rather than mixing it back into the tray, since one brown piece draws the eye.
What dips go well with a fruit tray?
Yogurt mixed with honey, cream cheese dip with vanilla, melted chocolate, and a lime and honey dip all suit most fruit trays. Offer one dip for a small tray and two for a party tray, in small bowls set on the tray. Keep dips chilled until serving, and put a spoon in each bowl, so guests do not double dip with fruit.
How do I arrange a fruit tray so it looks full?
Start with the largest fruit and any dip bowls first, then fill the gaps with medium fruit, and finish with small berries and leaves in the smallest gaps. Group each kind together rather than scattering single pieces, since groups look planned and make refilling easy. If a gap stays empty, add a small bunch of grapes or a mint sprig rather than spreading the fruit thin.
Can I make a fruit tray on a budget?
Yes. Choose three seasonal fruits that are ripe and well priced that week, buy them in generous amounts, and skip exotic fruit and large amounts of berries, which cost more per pound. Use a board or tray you already own, make a yogurt and honey dip at home, and refill the tray from a backup bowl in the fridge, so the tray stays full through the event without buying extra kinds.