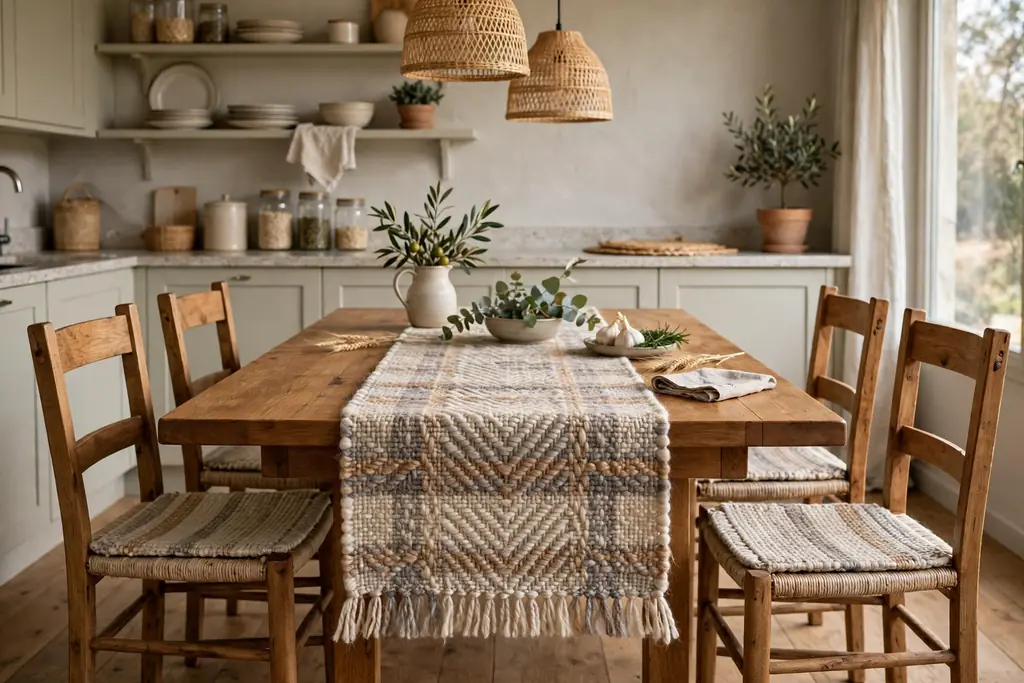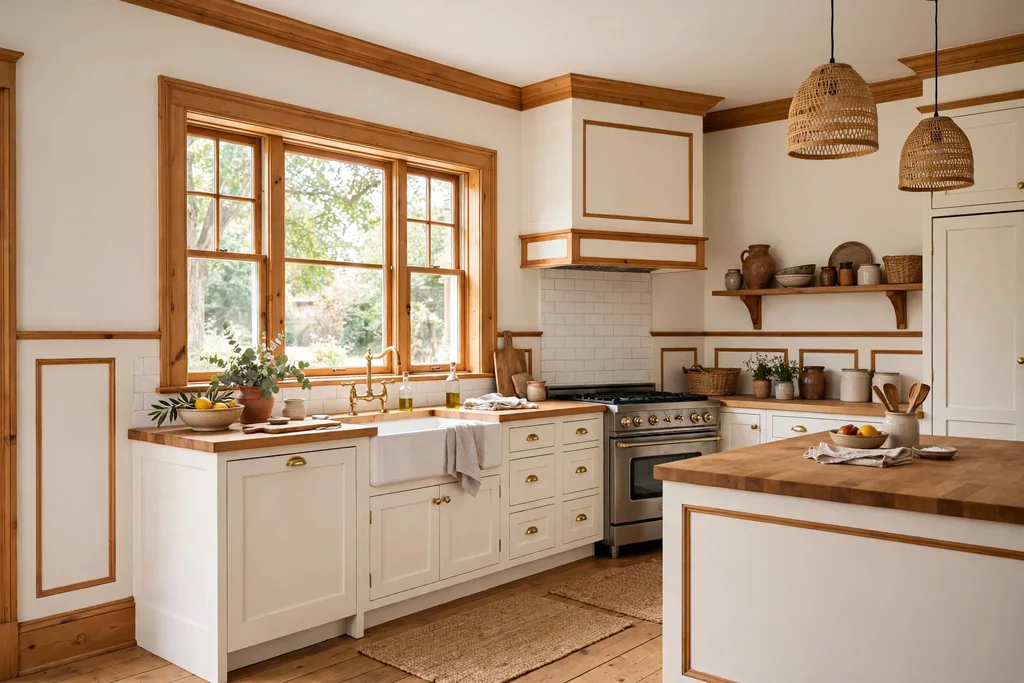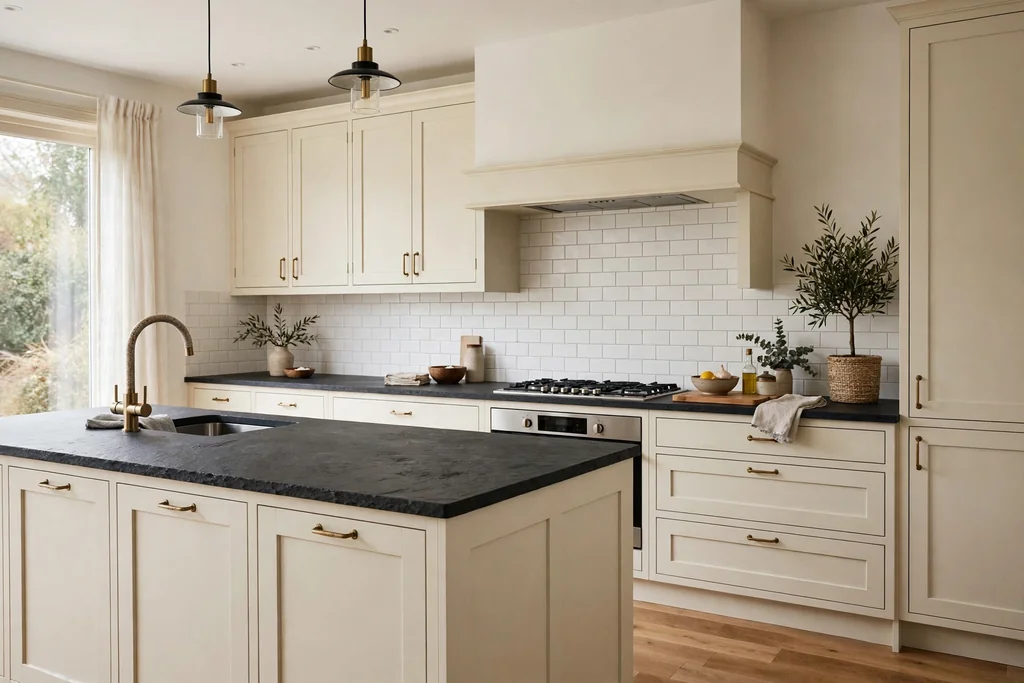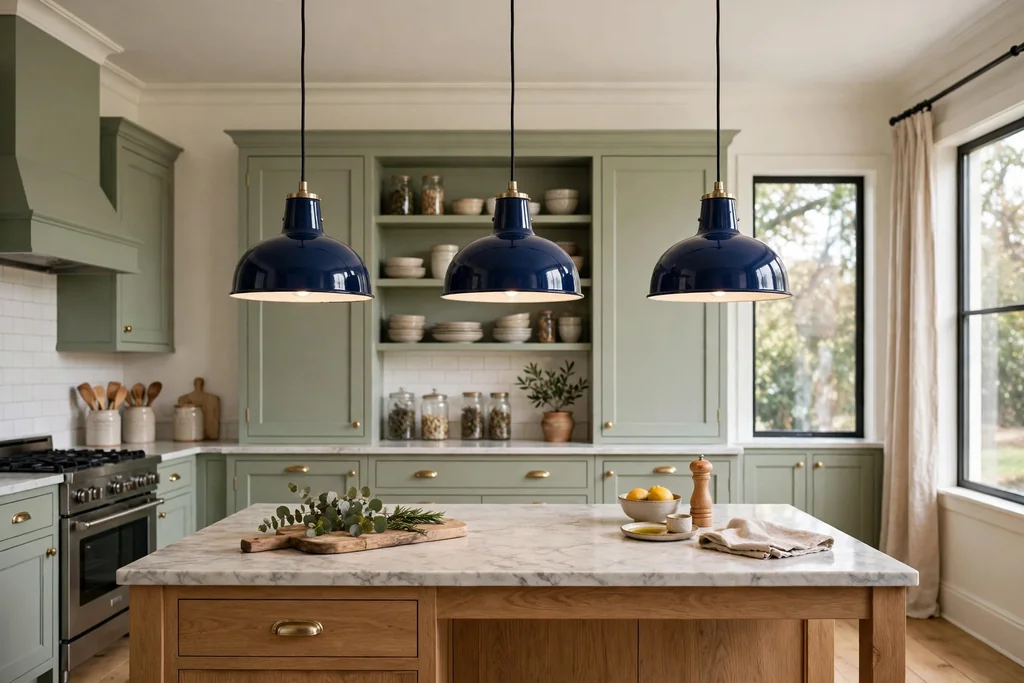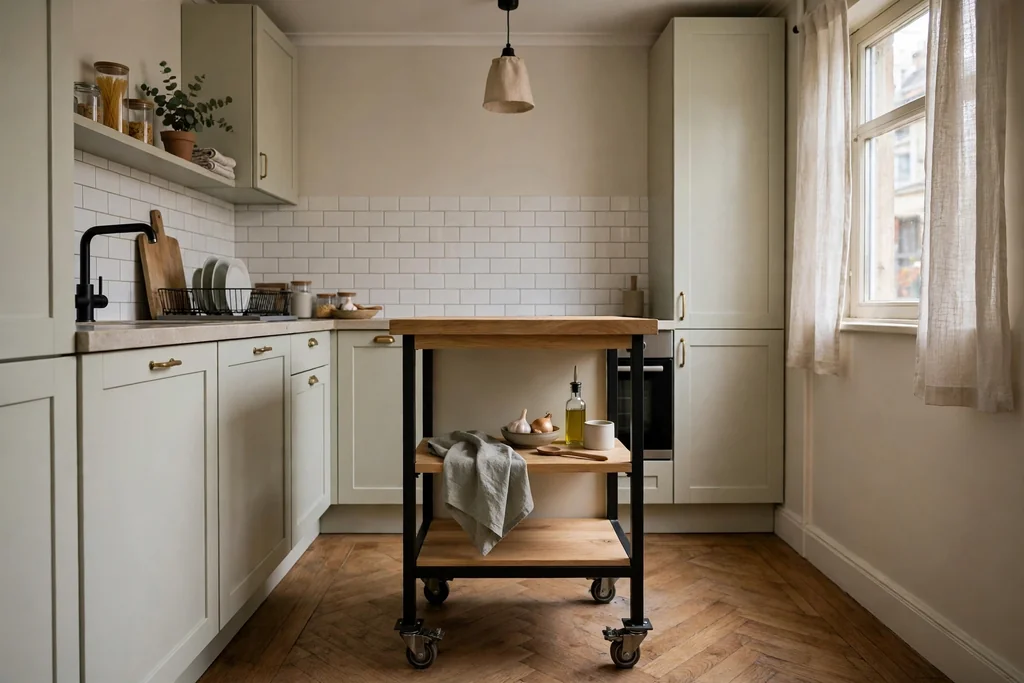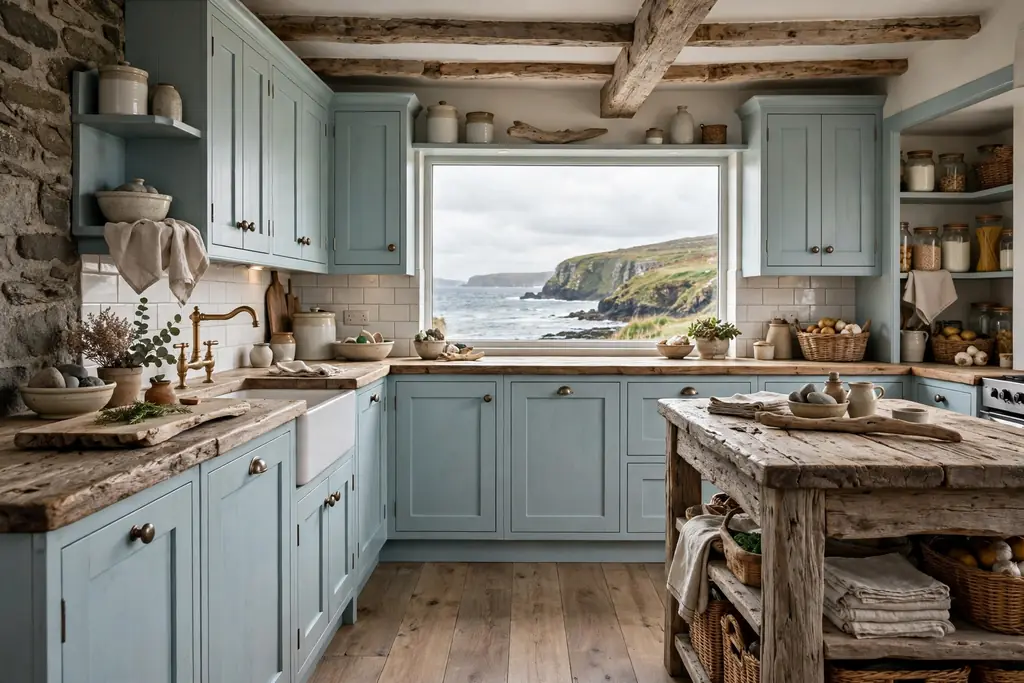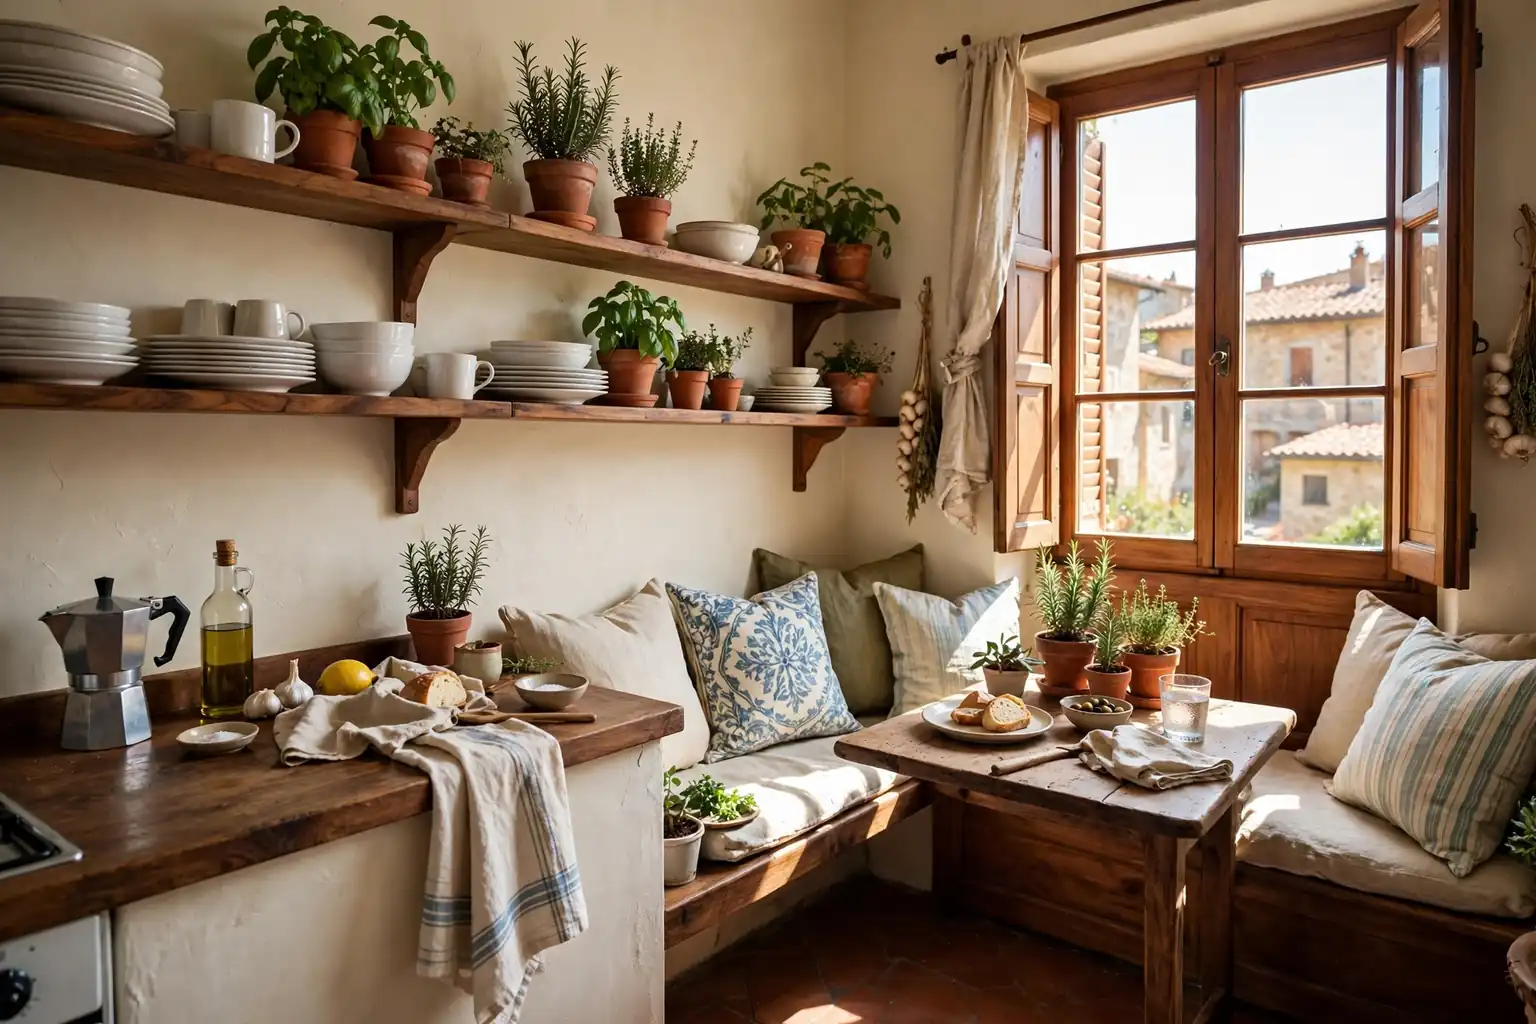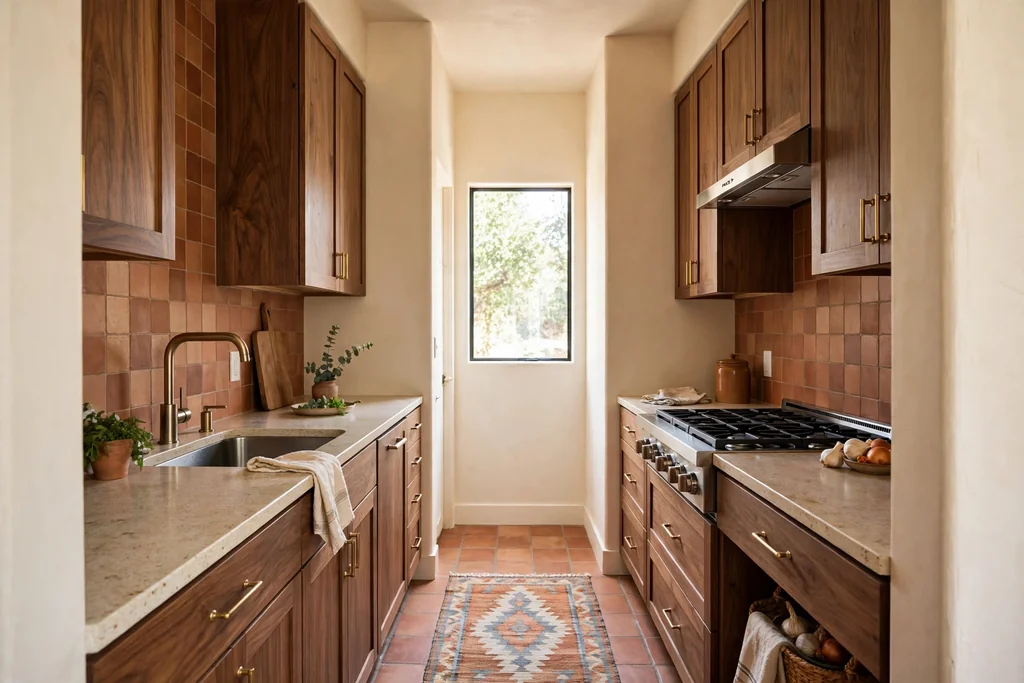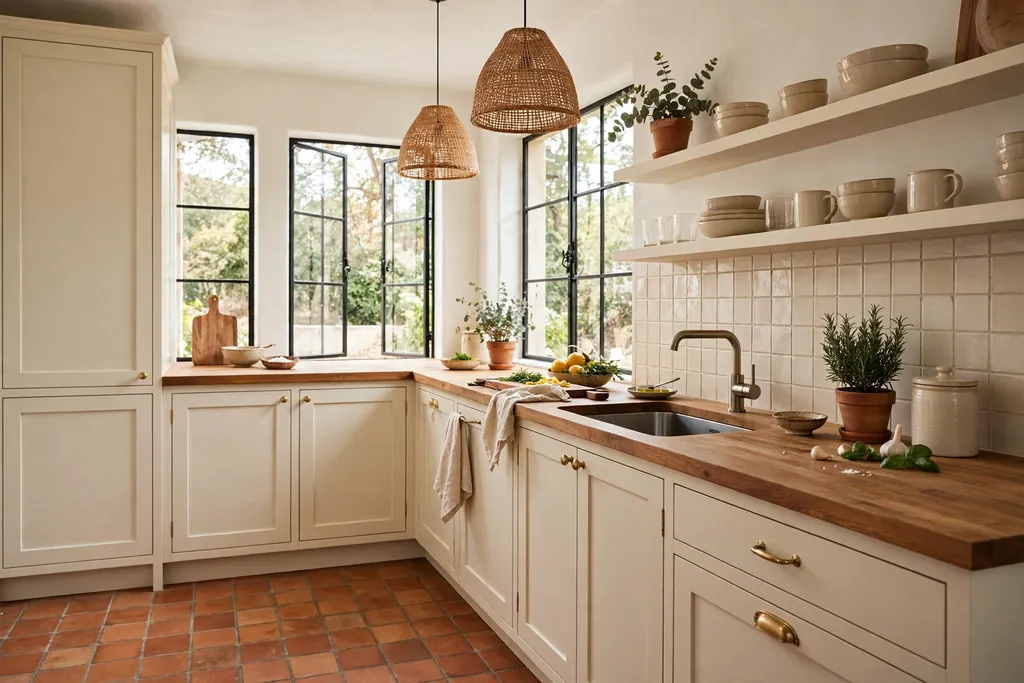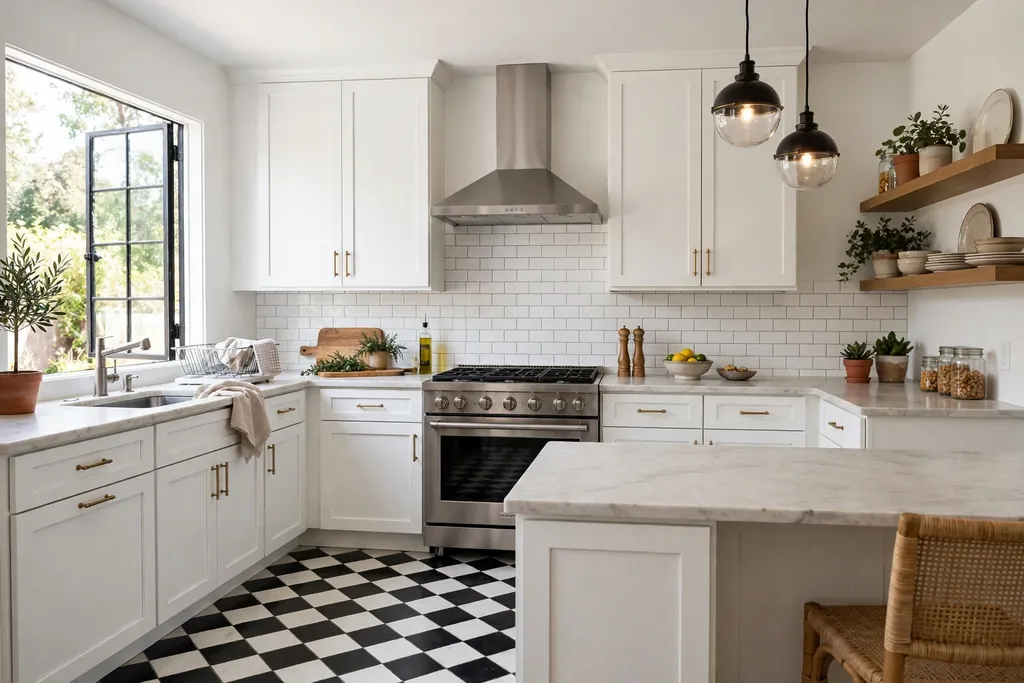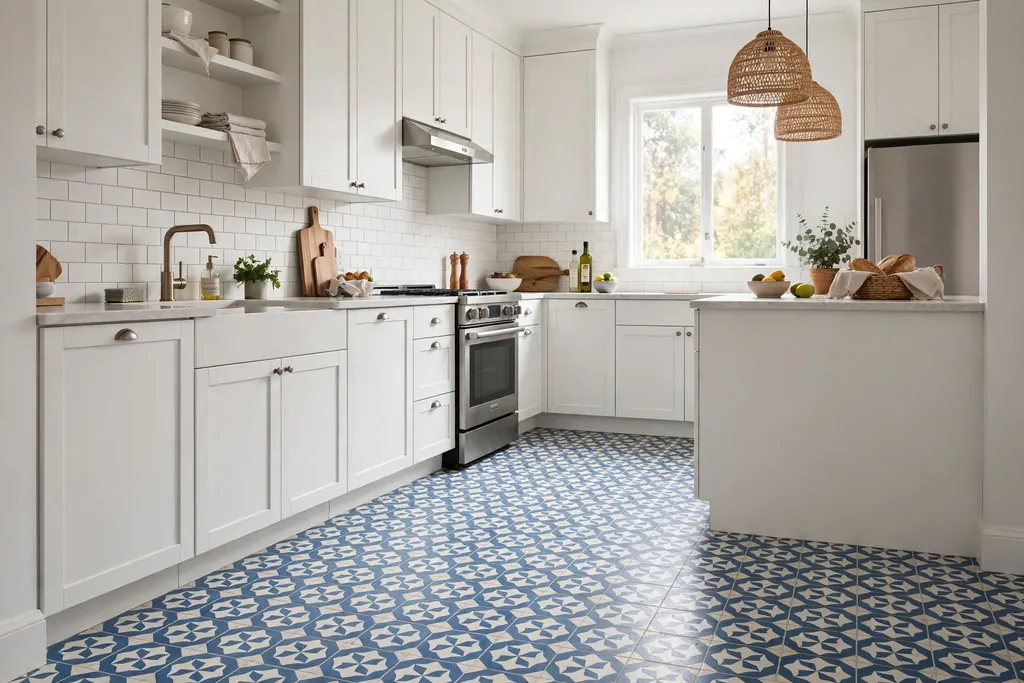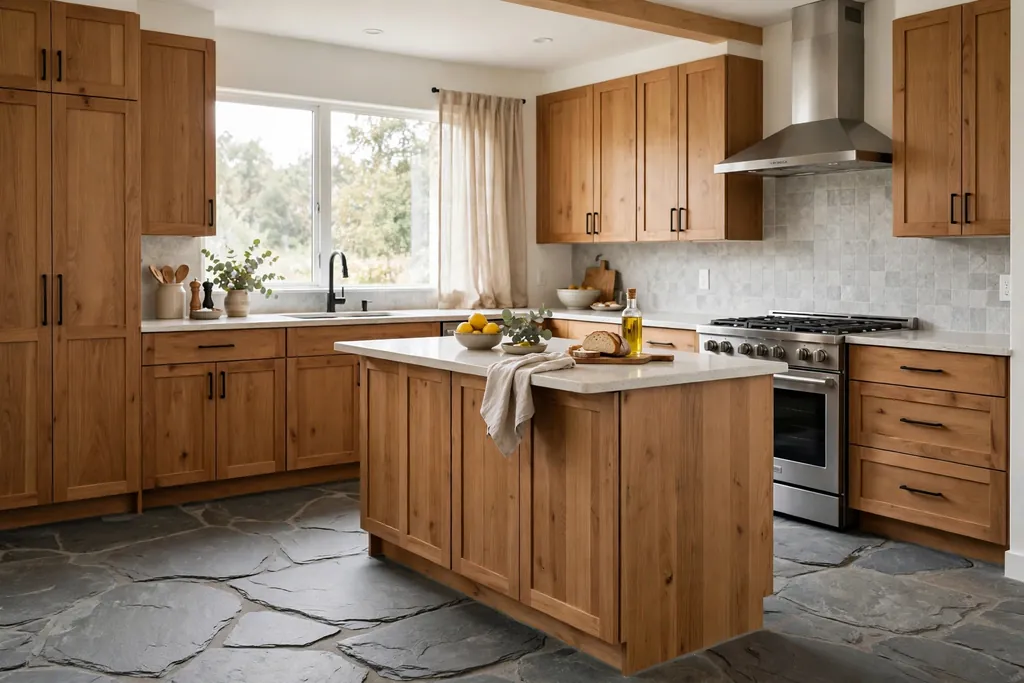
Category: Kitchen & Dining

Everyday kitchen organization and welcoming dining spaces.

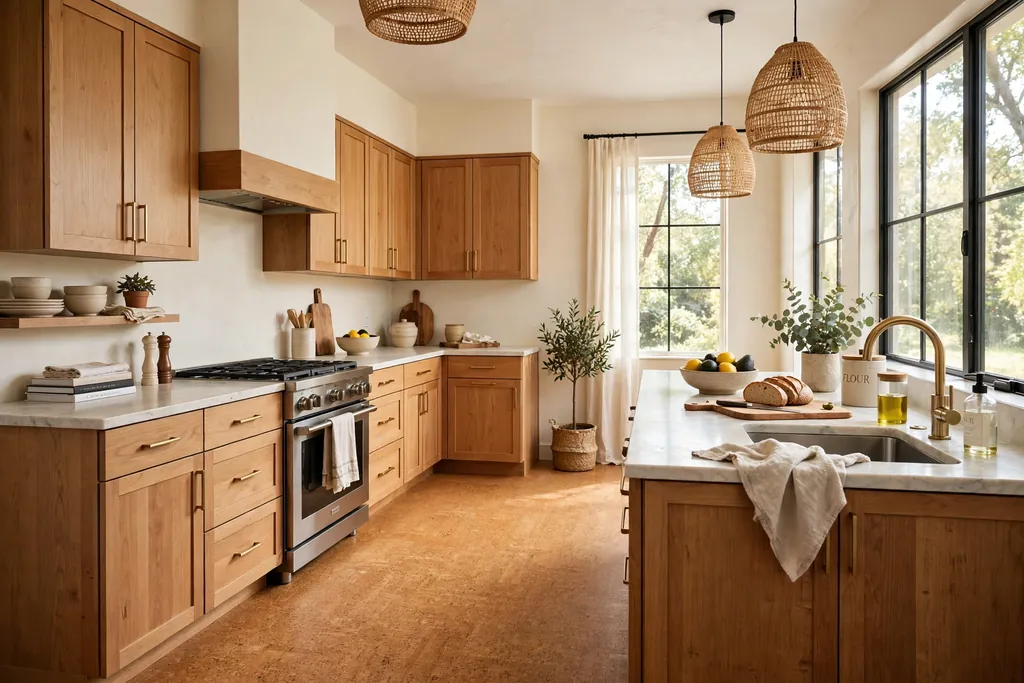
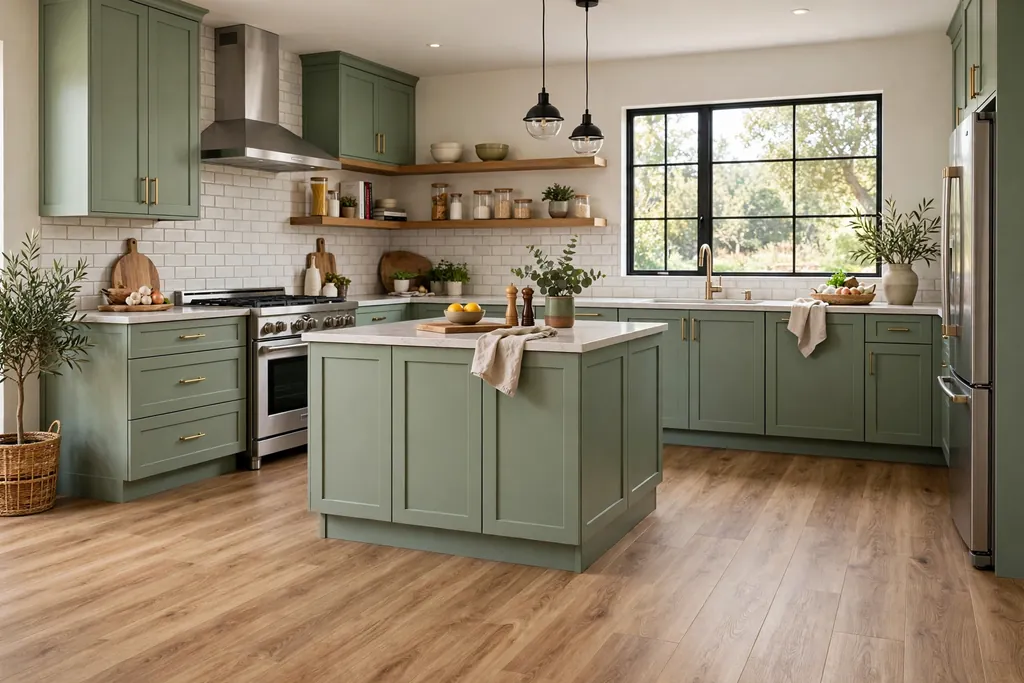
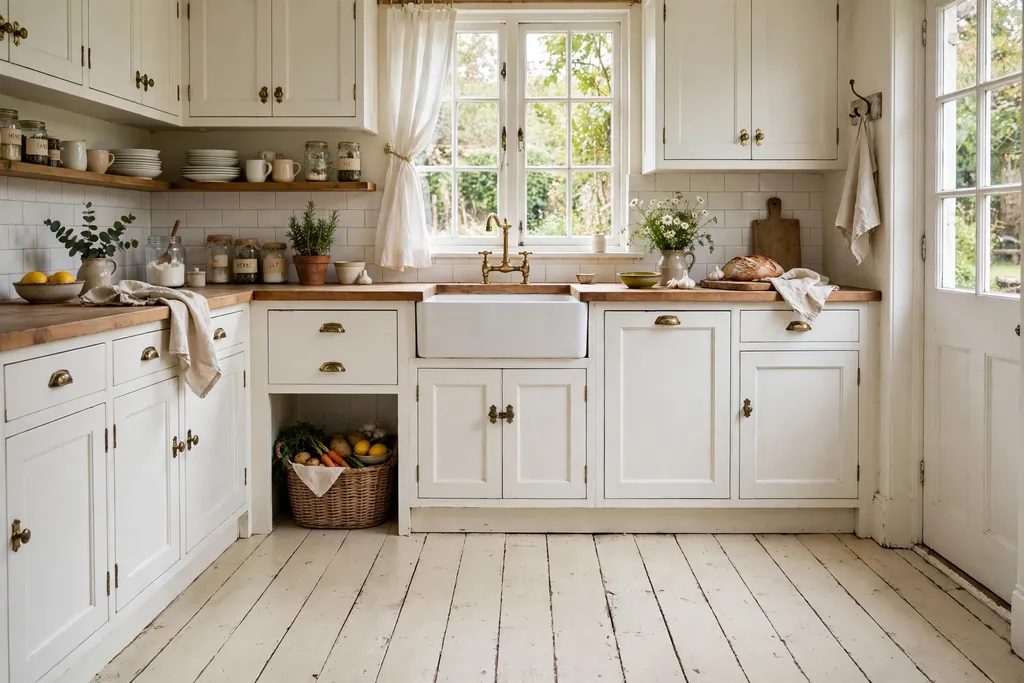
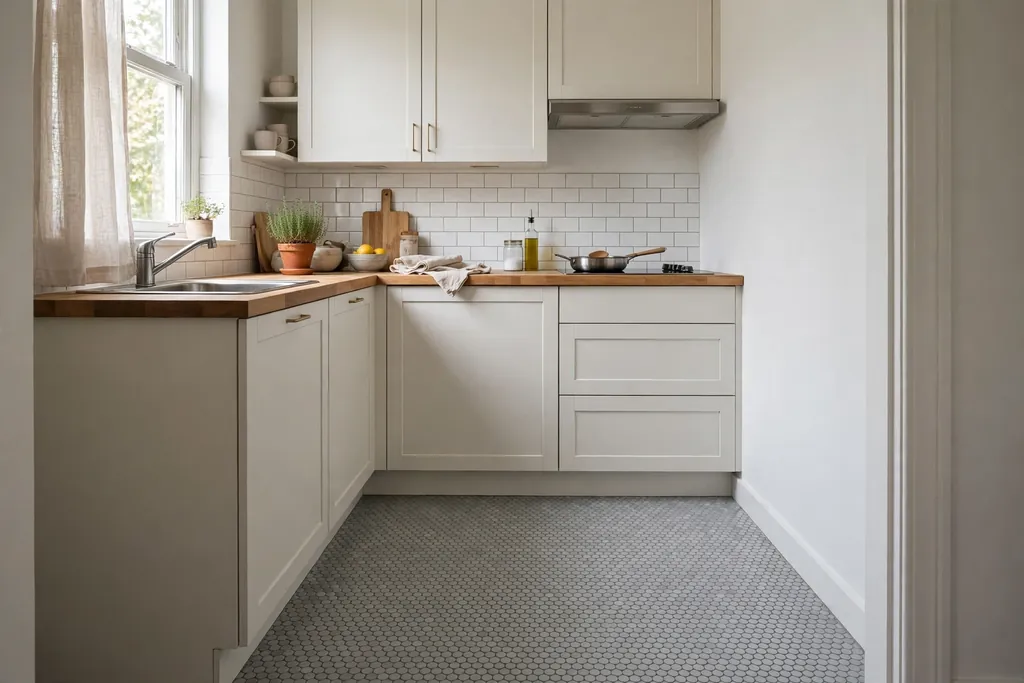
  • 32 Kitchens with Light Wood Cabinets to Try Now

    32 Kitchens with Light Wood Cabinets to Try Now

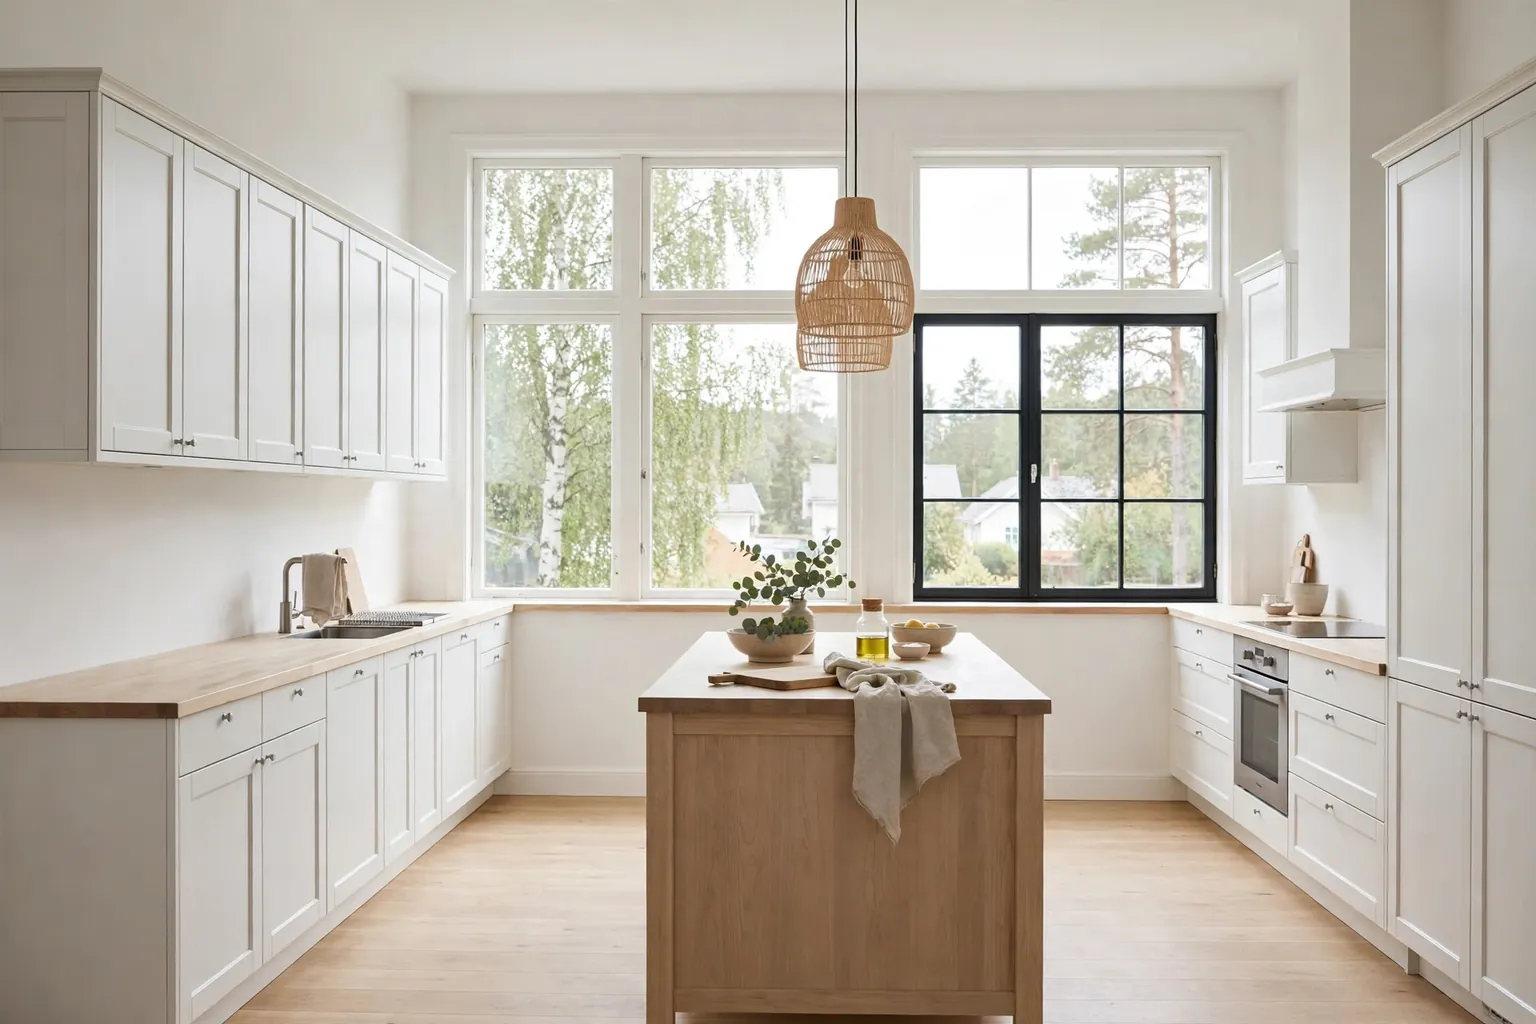
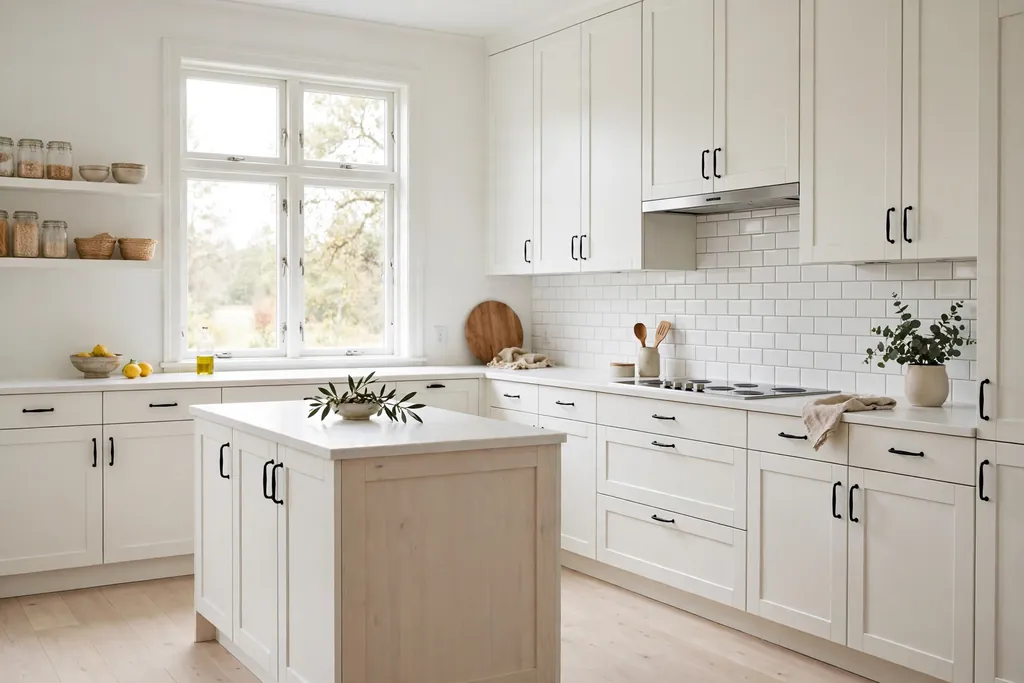
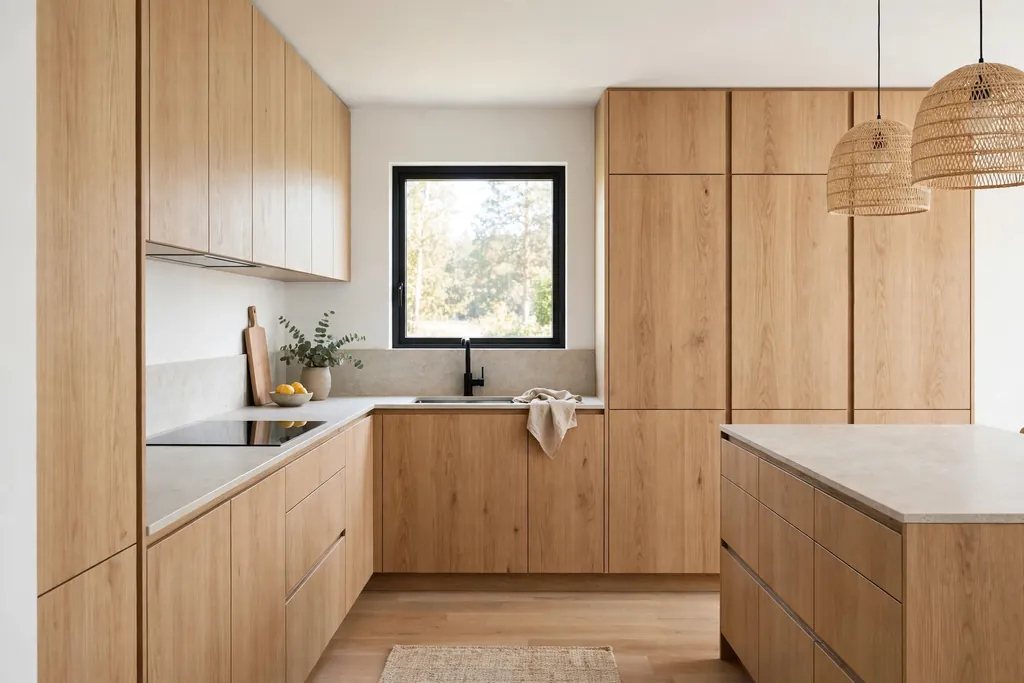
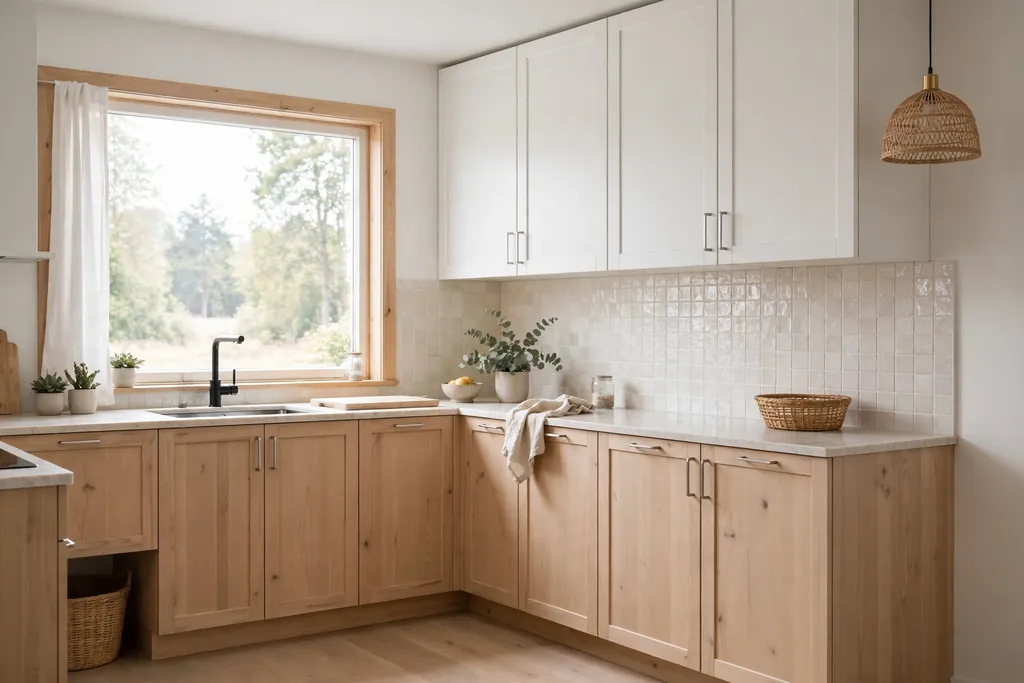
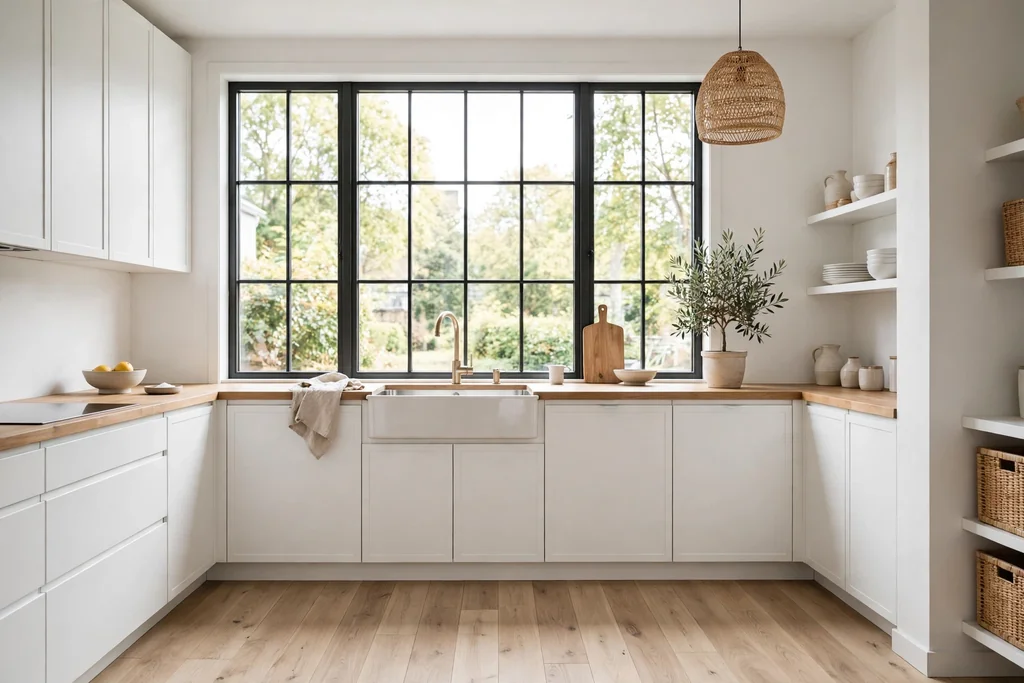
    Light wood cabinets give a kitchen warmth without weight. Pale oak, ash, and maple keep the room bright, show off grain, and pair with almost any counter, floor, or wall color. The trick is balance: one clear wood tone, one contrast, and counters that stay calm so the cabinets can carry the warmth. These 32 kitchens with light wood cabinets cover Shaker and flat-panel doors, islands, two-tone layouts, small galleys, and open-plan rooms, plus hardware, lighting, and storage details that make the look work day to day. If a painted finish also appeals, these beige kitchen cabinet ideas show how a warm painted tone pairs with wood counters and brass.

    Key Takeaways

    • Pick one light wood tone, such as pale oak, ash, or maple, and repeat it in at least two spots so the room reads as planned.
    • Pair light wood with one contrast only, such as black hardware, a dark counter, or a colored island, and keep the rest calm.
    • Test a large wood sample beside your floor, counter, and wall color in daylight and evening light before ordering.
    • Keep counters plain when the wood grain is strong, and let a patterned backsplash or floor carry detail instead.
    • Use warm under-cabinet lighting in the evening, since pale wood can look grey under cool bulbs.
    • Plan storage by task: deep drawers for pots, a tall pantry for dry goods, and a clear spot for daily coffee or baking gear.

    1. Classic Pale Oak Shaker Cabinets
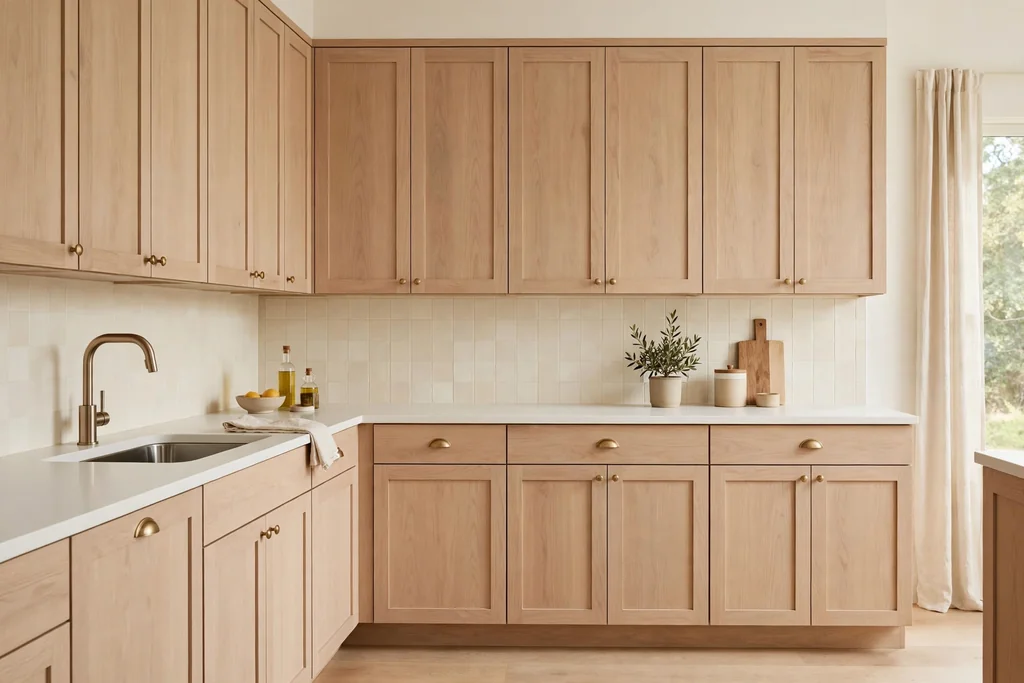
    Kitchen with pale oak Shaker cabinets, a plain white counter, and a simple cream backsplash.

    Start with the most reliable version: pale oak Shaker cabinets on every wall, with a plain counter and a simple backsplash. The recessed panel adds just enough detail to avoid a flat look, while the pale grain keeps the room bright and warm. This suits almost any home, and it gives a steady base for stone counters, a patterned rug, or brass taps.

    Keep the wall color in a soft warm white, so the oak does not look yellow by contrast. Choose a counter in white stone or pale wood, and repeat one warm material, like oak stools or a wood board, in two spots. Wipe doors near the stove each week, since pale wood shows cooking splashes.

    2. White Oak Flat-Panel Cabinets
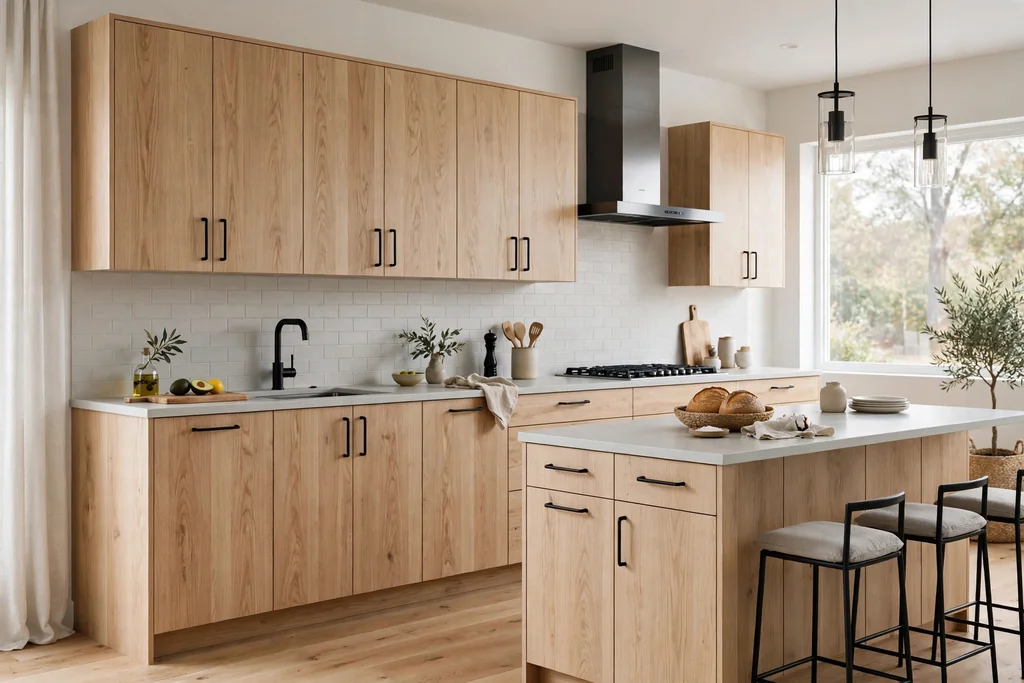
    Modern kitchen with white oak flat-panel cabinets, pale grey counters, and black handles.

    Choose white oak on flat-panel doors for a calmer, more modern take on light wood. Flat fronts keep the wall quiet, which suits a kitchen with a veined counter or a patterned floor. White oak has a soft, even grain that reads as warm rather than busy, and it bridges stainless appliances and pale floors in the same room.

    Pair white oak cabinets with white or pale grey counters and black or brushed nickel handles for a clean result. Check a large sample in morning and evening light, since oak can read pink or yellow under different bulbs. A matte finish keeps the grain clear without glare on large door fronts.

    3. Light Maple Cabinets with White Counters
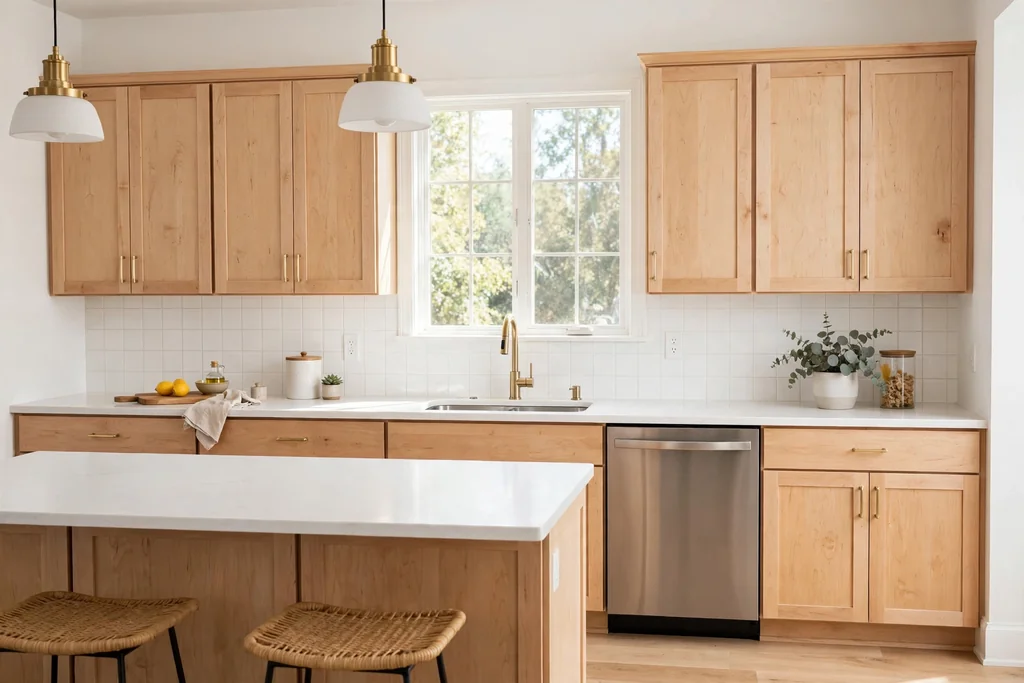
    Bright kitchen with light maple cabinets, white counters, and a plain white tile backsplash.

    Use light maple cabinets with white counters for a bright, even kitchen where the wood stays in the background. Maple grain is finer than oak, so the doors look smooth and calm, which suits a small kitchen or a room with a busy floor. White counters lift the pale wood further and make prep areas easy to see.

    Keep the backsplash plain, in white or cream tile, so the maple and the counter form one light block. Add warmth with wood stools or a wood board, rather than a second strong color. Seal the counter edges well near the sink, since white surfaces show water marks if splashes sit for long.

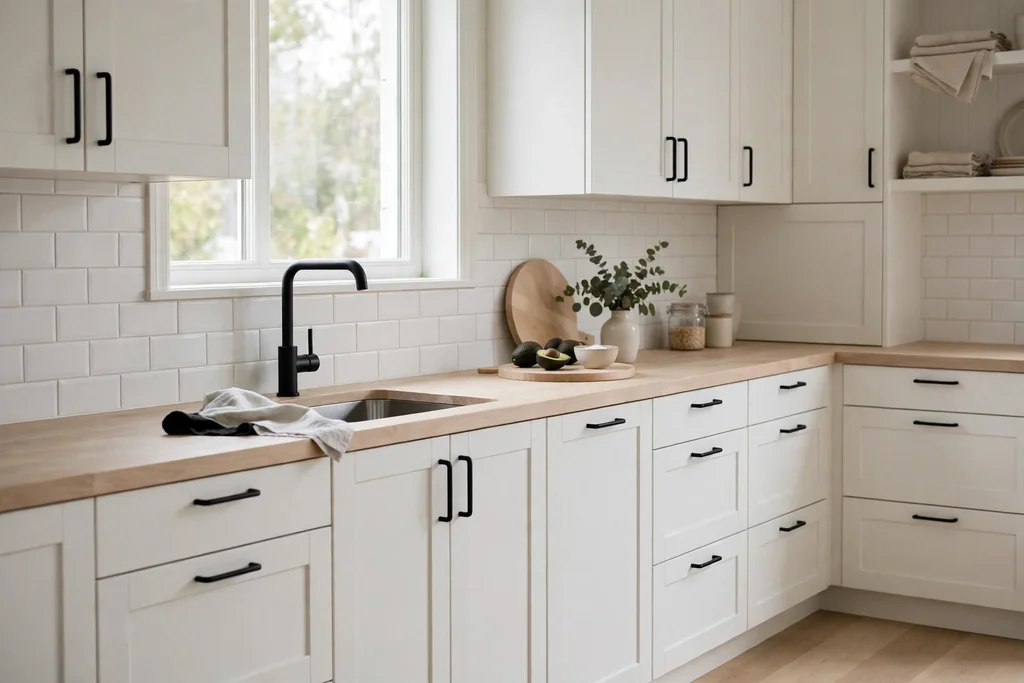
    4. Light Wood Cabinets with Black Hardware
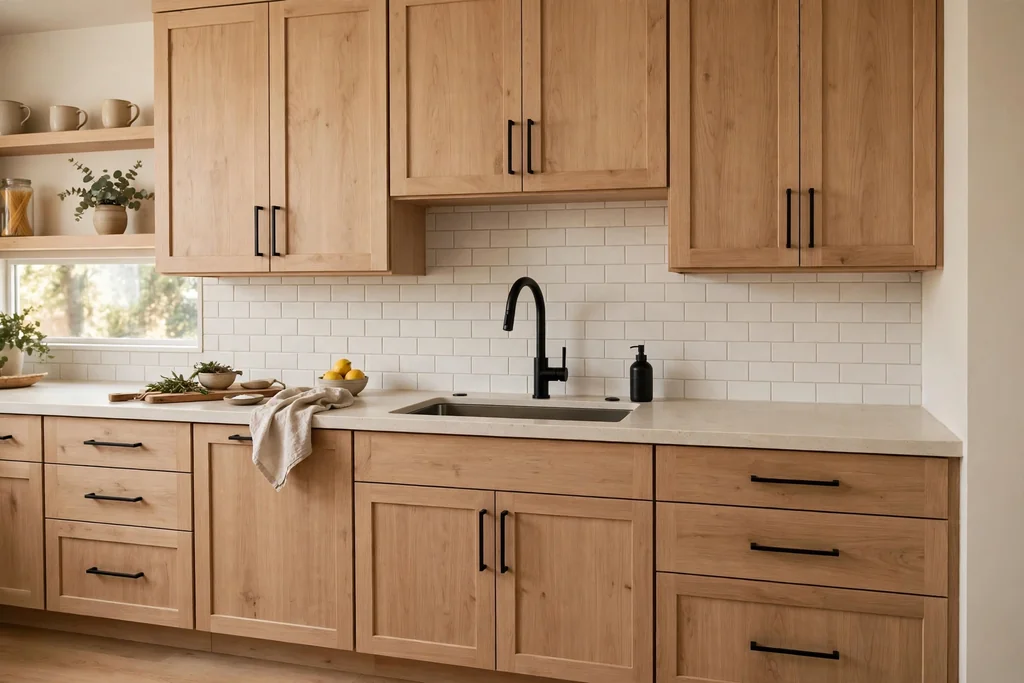
    Light wood kitchen cabinets with matte black handles and a black tap.

    Use matte black handles, knobs, and a black tap against light wood cabinets for a sharper, modern edge. Black outlines each door, adds contrast without a new color, and pairs well with dark counters, wood stools, and a black framed window. This suits a light wood kitchen that needs definition, such as a large room where pale tones start to blur together.

    Repeat black once or twice more, in a light fitting, a stool frame, or a rug border, so the hardware does not look isolated. Keep the rest of the room pale, so black stays an accent rather than a theme. Matte black shows fingerprints less than polished black, which helps on doors used many times a day.

    5. Light Wood Cabinets with Brass Handles
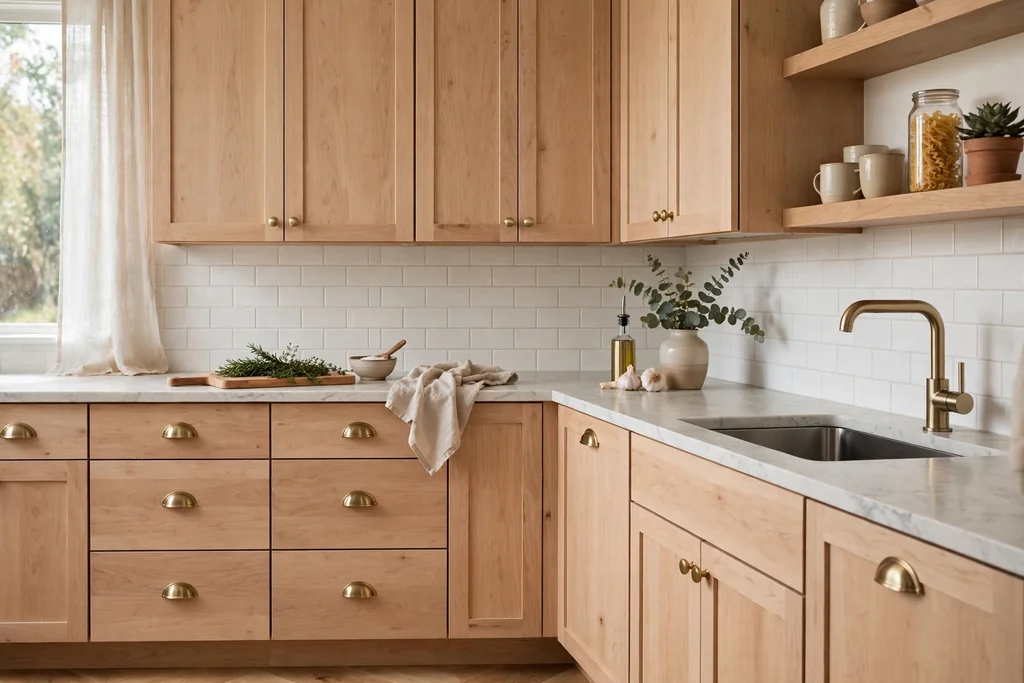
    Light wood kitchen cabinets with brushed brass knobs and cup pulls.

    Warm light wood cabinets with brushed brass knobs, cup pulls, and a matching tap for a soft lift. Brass warms pale oak and maple, suits wood floors and cream walls, and works with both Shaker and flat-panel doors. This is one of the easiest cabinet updates, since hardware swaps need no painting and no building work.

    Keep all the brass in the same finish, so knobs, pulls, and the tap read as one set. Save the old hardware in a labelled bag if you rent or may want to swap it back. Wipe brass with a soft cloth to keep the finish even, and check that new pulls match your existing screw spacing before ordering.

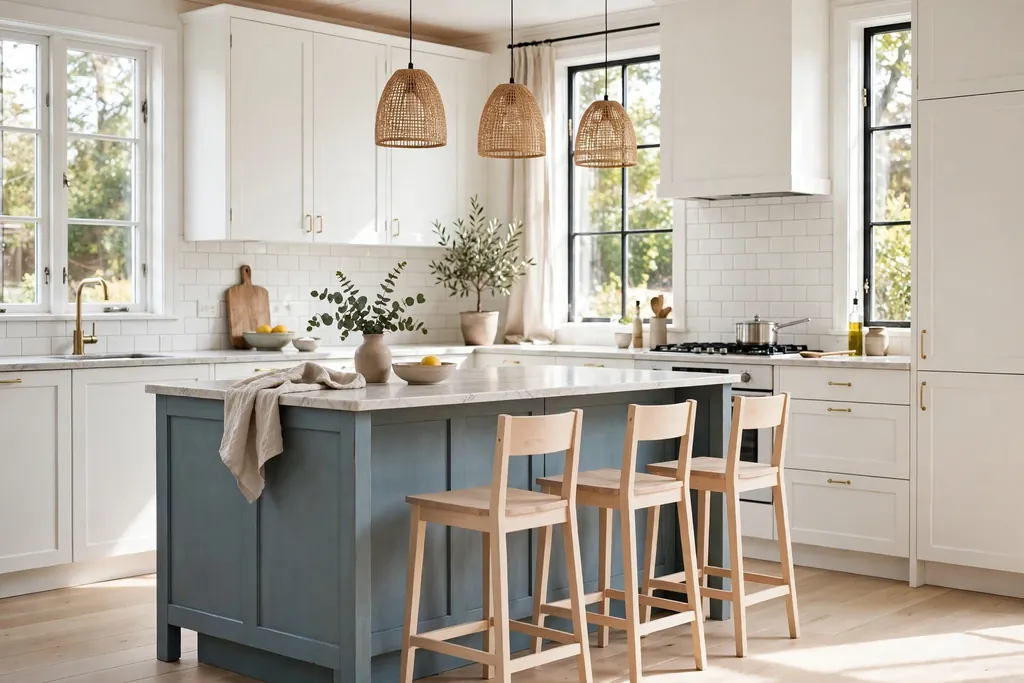
    6. Light Wood Island in a White Kitchen
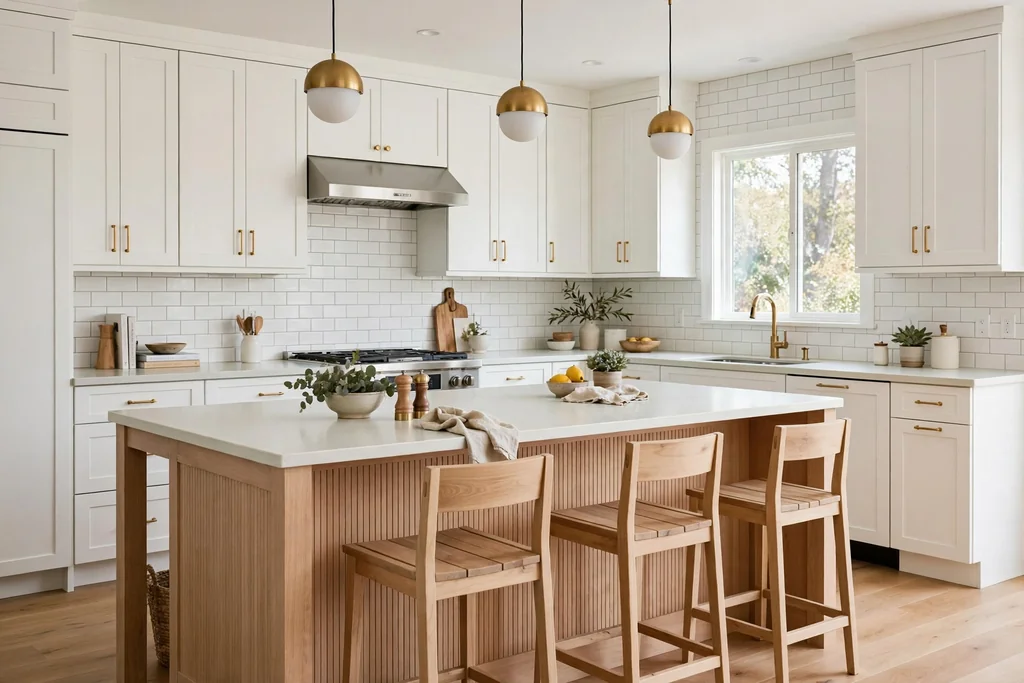
    White kitchen with a light wood island base, wood stools, and a pale counter.

    Keep the main cabinets white or pale, and build the island base in light wood. The island becomes a clear focal point, and the rest of the kitchen stays light, which makes the change lower risk and easier to reverse. A pale oak island suits a white kitchen, while a slightly deeper ash suits a kitchen with dark wood floors.

    Repeat the island wood once more, in stools, a rug, or a vase, so it looks planned rather than random. Choose a hard wearing counter for the island, since it takes the most daily use. This is a good first step if you like light wood but are not ready for wood cabinets everywhere.

    7. Two-Tone Light Wood Lowers with White Uppers
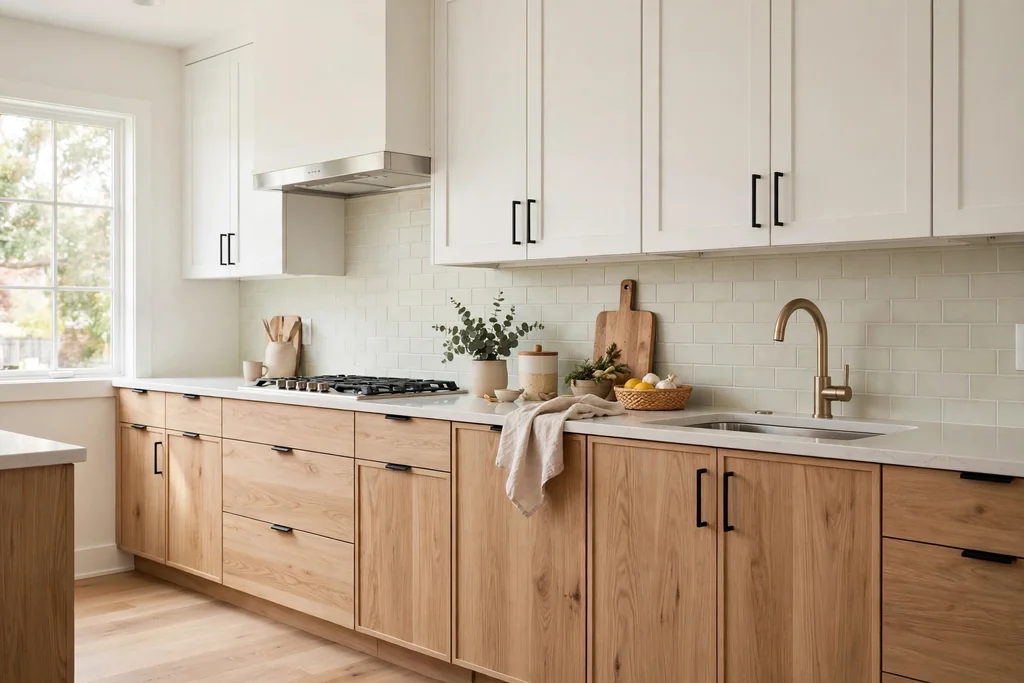
    Kitchen with light wood lower cabinets, white upper cabinets, and a pale backsplash.

    Use light wood on the lower cabinets and white on the uppers for a lighter take on a wood kitchen. The white uppers keep the eye moving up and make a small kitchen feel taller, while the wood base grounds the room and hides scuffs at kick height better than white. This split also makes a later change easier, since only half the cabinets need a new finish.

    Pair the scheme with a pale backsplash and a wood or white counter. A brass or black handle on the lower cabinets ties the two tones together. Keep the wall color plain so the two cabinet finishes can do the work, and repeat the wood once more, in a stool or a board, so the base tone does not look isolated.

    8. Light Wood Cabinets with Marble Counters
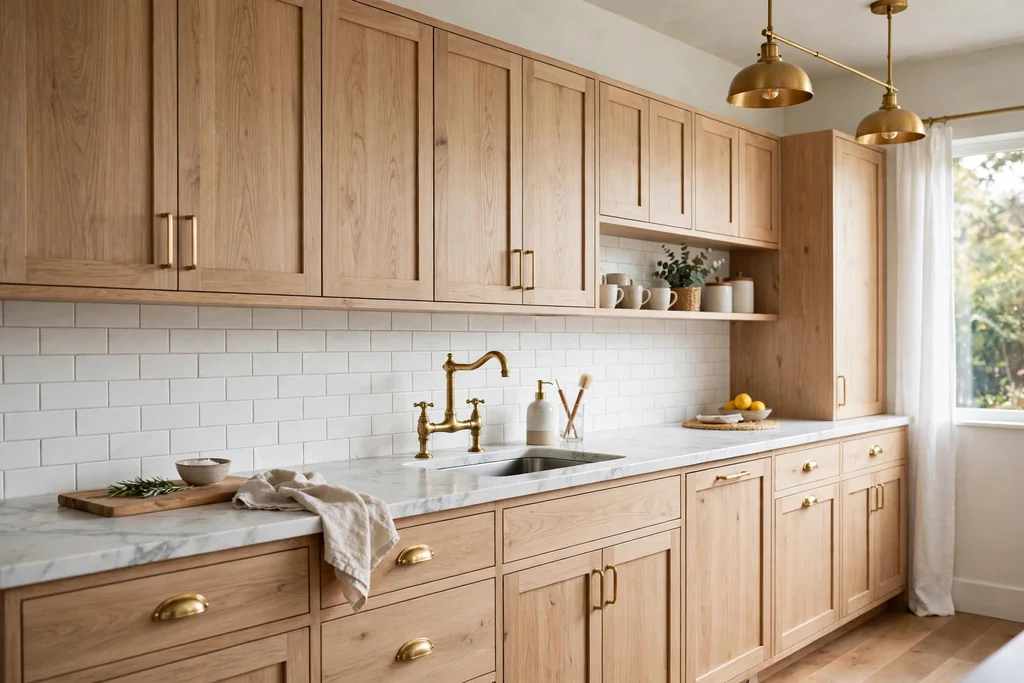
    Light wood kitchen cabinets with white marble counters and brass taps.

    Pair light wood cabinets with white marble counters, or a marble look surface, for a quiet, classic backdrop. The pale stone with soft veining lifts the warm doors, and it pairs well with brass taps, wood stools, and a cream backsplash. This suits a kitchen where you want the cabinets to feel warm and the counter to add gentle movement.

    Keep the backsplash plain, so the counter pattern stays clear. Seal stone on the schedule the supplier suggests, and wipe splashes promptly, since marble can stain from tomato, wine, and oil. If a full stone counter is out of reach, use stone on the island only and a plain surface on the perimeter.

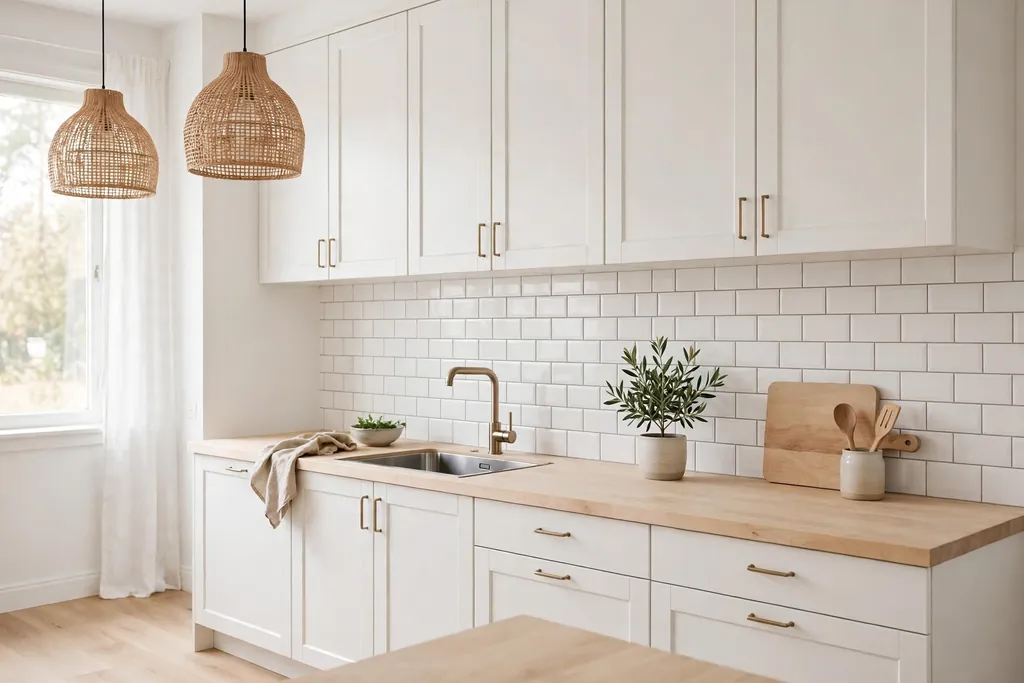
    9. Light Wood Cabinets with Butcher Block Counters
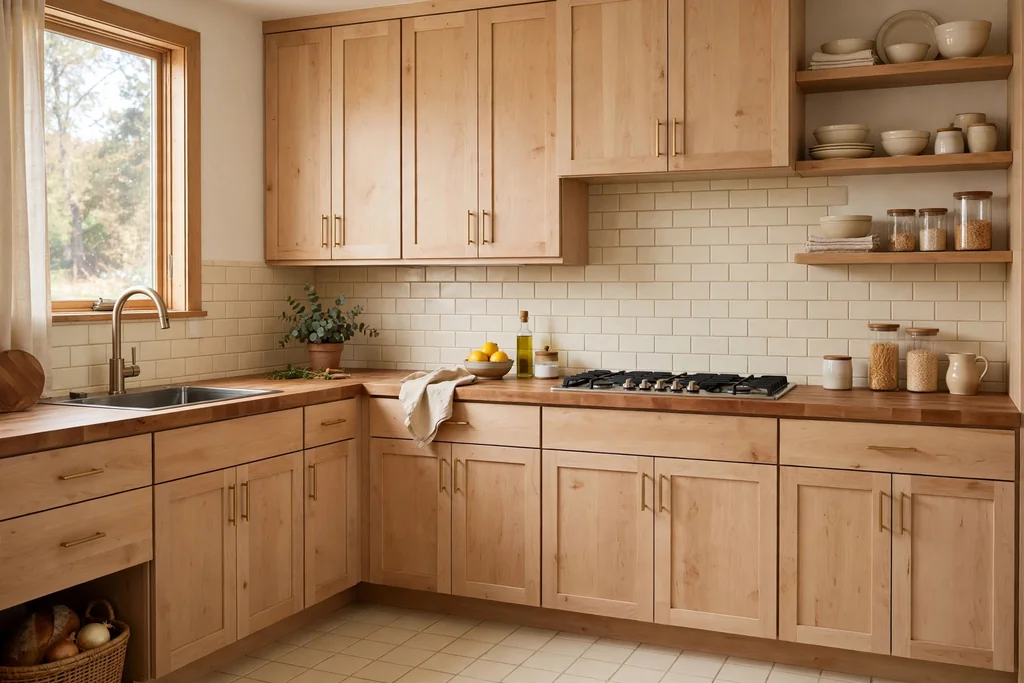
    Light wood kitchen cabinets with butcher block counters and cream tiles.

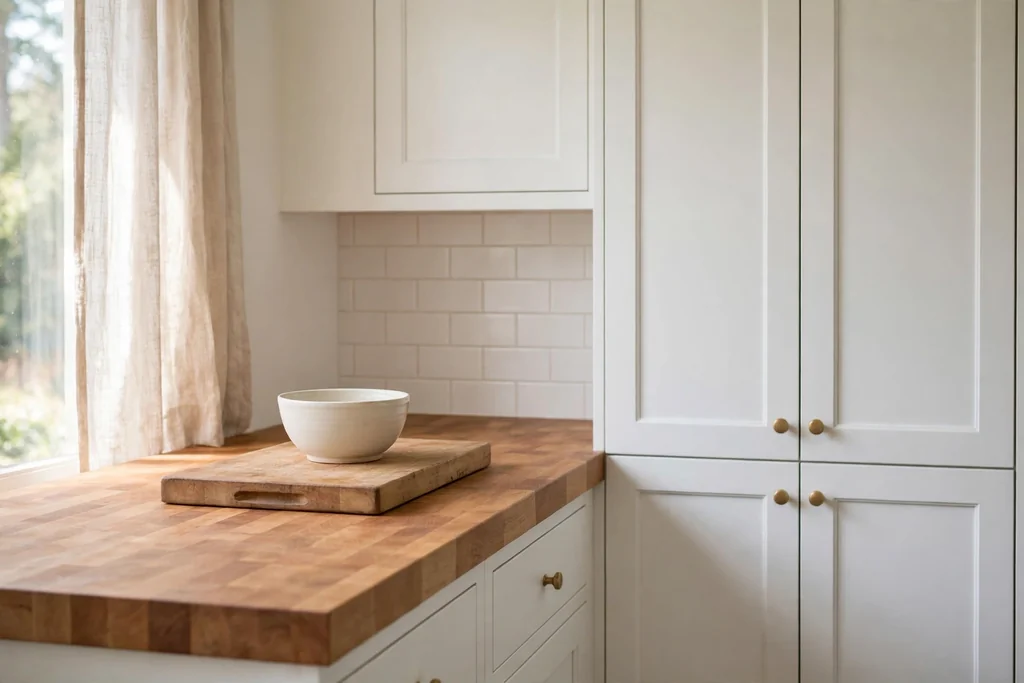
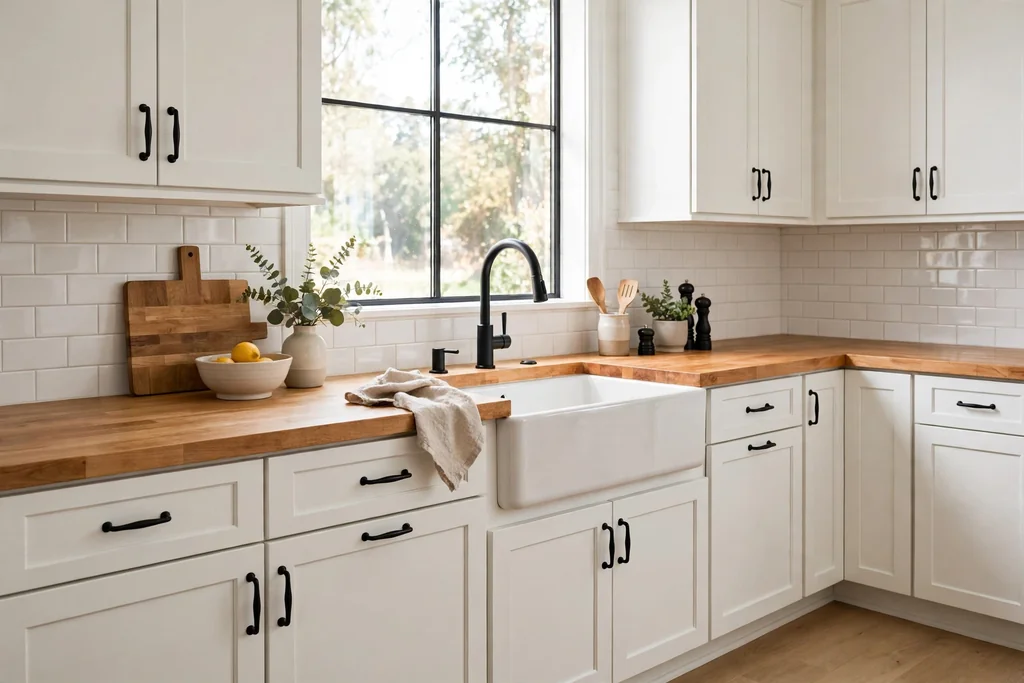
    Pair light wood cabinets with butcher block counters for a kitchen that feels warm from the first glance. The wood counter softens the cabinet doors, adds a work surface that suits chopping and baking, and pairs well with cream tiles and brass or black handles. This combination suits a cottage or farmhouse kitchen, and it also works in a simple modern room when the doors stay plain.

    Oil the butcher block on the schedule the maker suggests, and wipe it after wet jobs so water does not sit on the surface. Keep the backsplash plain, so the wood grain can carry the detail. Near the sink, a stone section avoids constant water contact on wood, so the counter stays in good shape longer.

    10. Light Wood Cabinets with a Sage Green Island
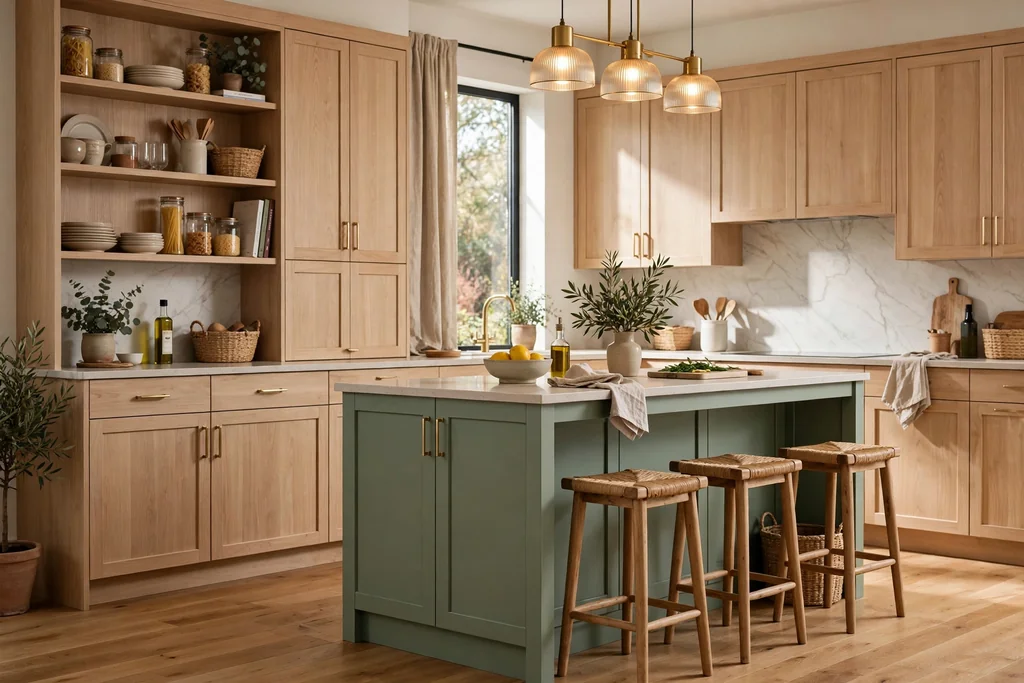
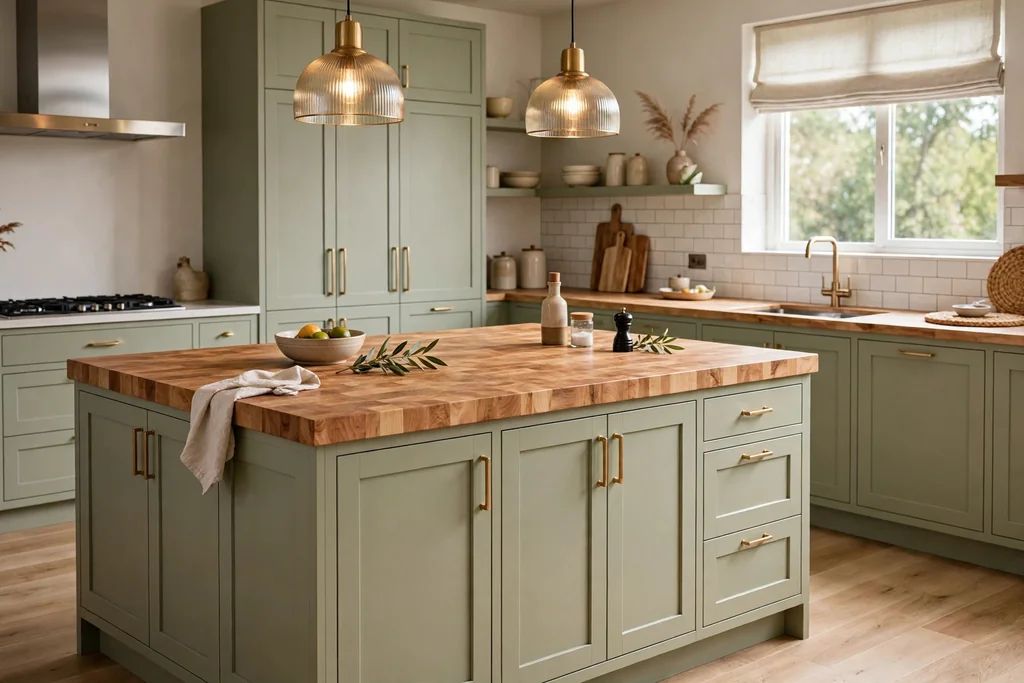
    Light wood perimeter cabinets with a sage green island and wood stools.

    Keep the perimeter cabinets in light wood and build the island in soft sage green for a calm, nature leaning contrast. The green reads as a gentle accent against the warm wood, and it pairs well with wood stools, cream tiles, and black or brushed nickel handles. This two-tone split suits an open plan kitchen, where the island is seen from the living area as well as the cooking zone.

    Repeat the sage once more, in a plant pot or a tea towel, so the island color does not sit alone. Keep the island counter plain, since two cabinet finishes plus a patterned counter can look busy. If sage feels too strong, use it on the island base only and keep the island doors in a simple Shaker style.

    11. Light Wood Cabinets with a Navy Island
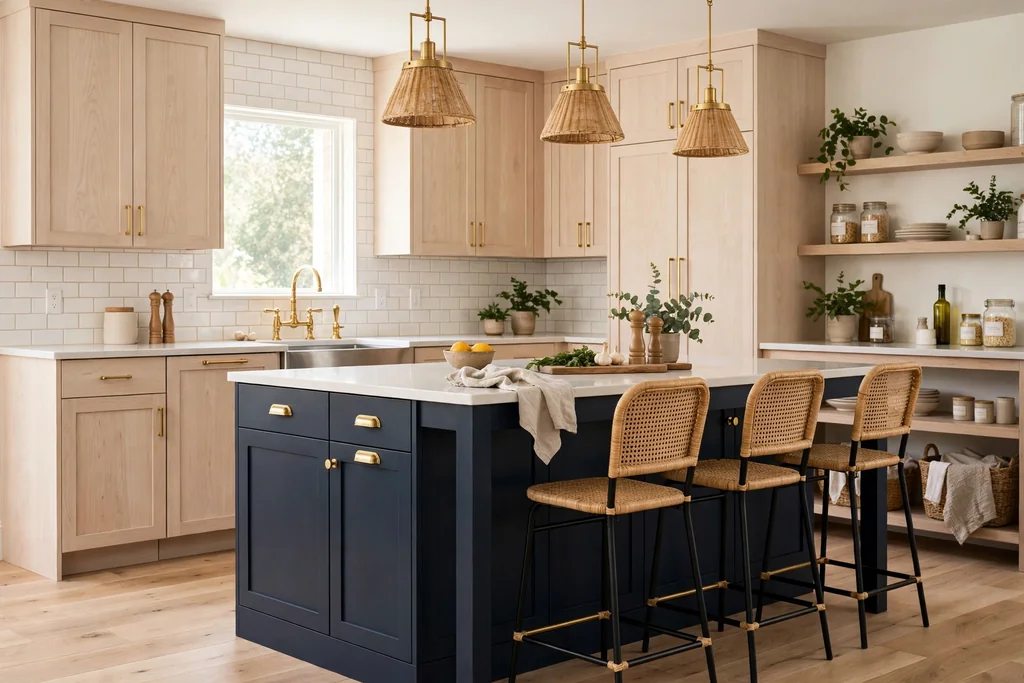
    Pale wood kitchen cabinets with a deep navy island and brass hardware.

    Pair pale wood perimeter cabinets with a deep navy island for a bold but grounded contrast. The navy anchors the room, the light wood keeps it from feeling dark, and brass or black hardware ties the two together. This suits a larger kitchen, where a dark island has room to breathe and does not crowd the walkways.

    Keep the island counter pale, so the navy reads as a solid block rather than a busy surface. Repeat the navy once more, in a stool cushion or a rug border, so the island color looks planned. In a small kitchen, use navy on the island base only and keep the island doors plain.

    12. Light Wood Cabinets over a Terracotta Tile Floor
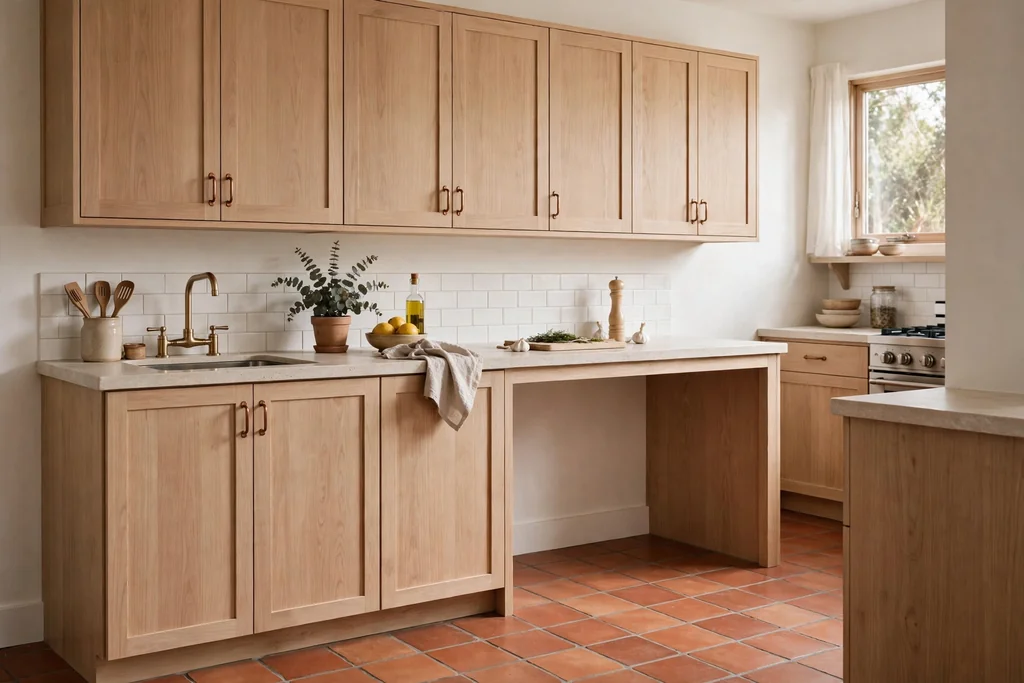
    Light wood kitchen cabinets over a terracotta tile floor.

    Set light wood cabinets over a terracotta tile floor for an earthy, Mediterranean leaning kitchen. The clay floor grounds the pale doors, adds color variation from tile to tile, and pairs well with cream tiles, wood counters, and black or aged bronze handles. This suits a sunny kitchen, where the warm floor and warm cabinets support each other rather than fighting.

    Seal terracotta before and after grouting, since it is porous, and expect the color to deepen slightly after sealing. Test the sealer on one tile first, and check it beside your cabinet sample before sealing the whole floor. Keep the counters plain, since a patterned counter plus a varied tile floor can look busy.

    13. Light Wood Cabinets That Brighten a Small Galley
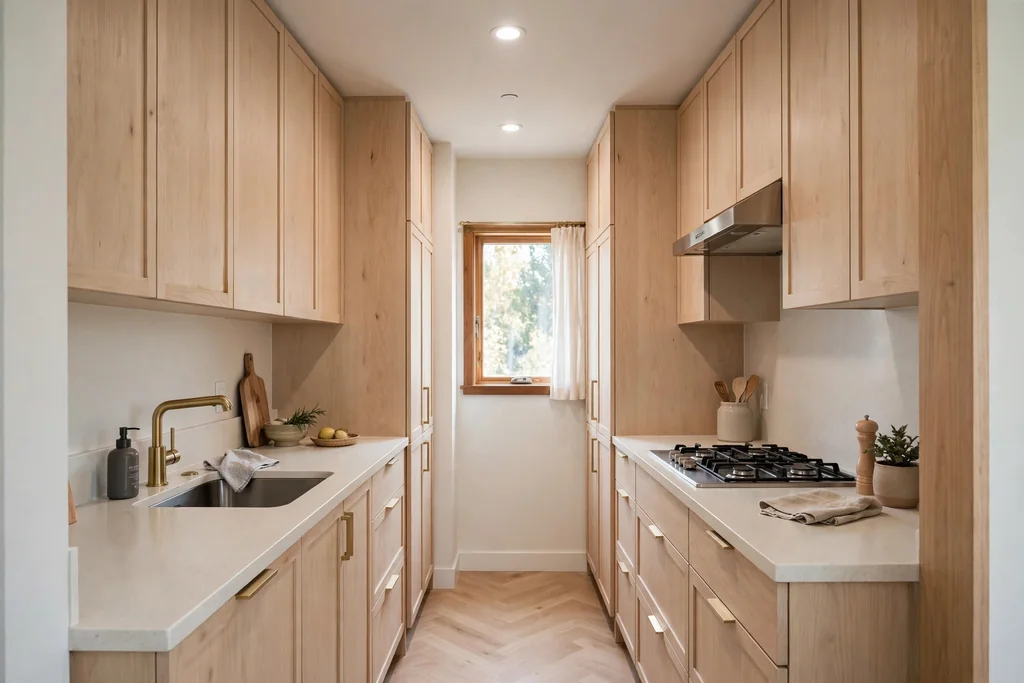
    Small galley kitchen with pale wood cabinets and pale counters.

    Use a pale wood, close to ash or light maple, on every cabinet in a small galley kitchen, and keep the counters and backsplash pale too. Light wood reflects more light than a mid brown, hides marks better than bright white, and keeps a narrow room feeling open without looking stark. This suits a galley kitchen or a kitchen with one small window.

    Leave one wall free of uppers if you can, so daylight reaches deeper into the room, and use warm under-cabinet lighting in the evening. Keep the floor in a light wood or pale tile, and avoid a dark counter, which can close the room in. Store rarely used items elsewhere so the small cabinets hold only daily gear.

    14. Floor-to-Ceiling Light Wood Pantry Cabinets
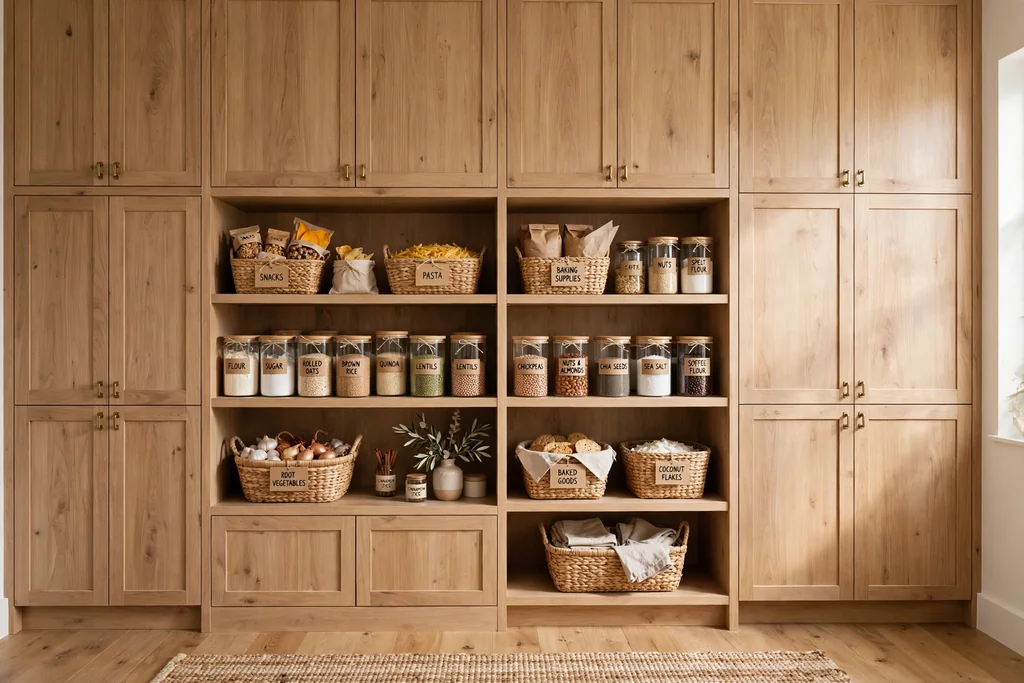
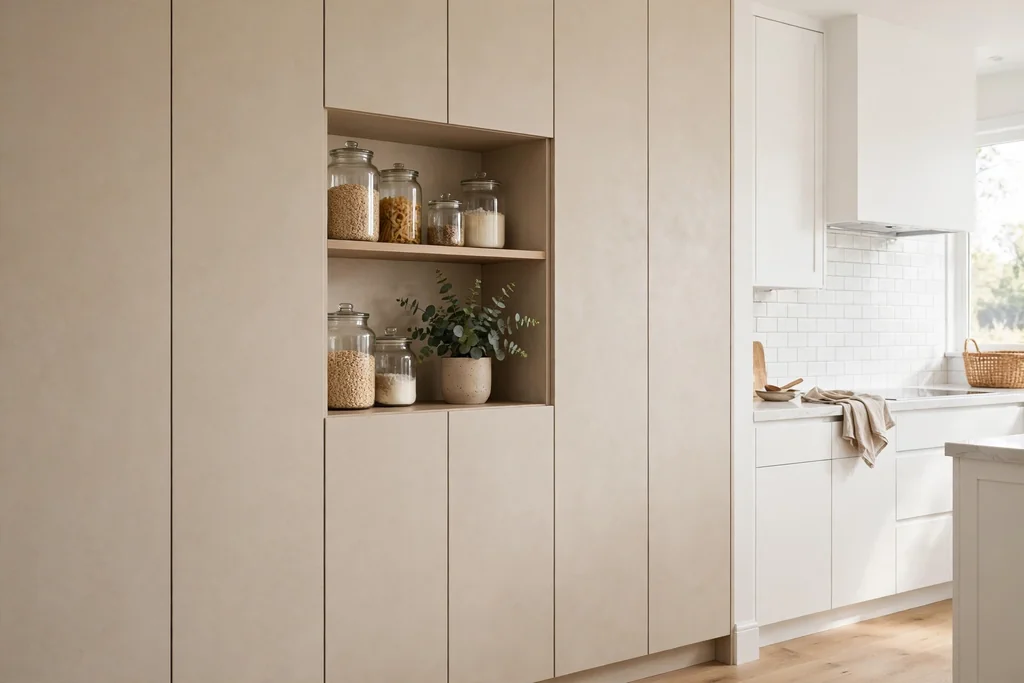
    Floor-to-ceiling light wood pantry cabinets with baskets and jars for dry goods.

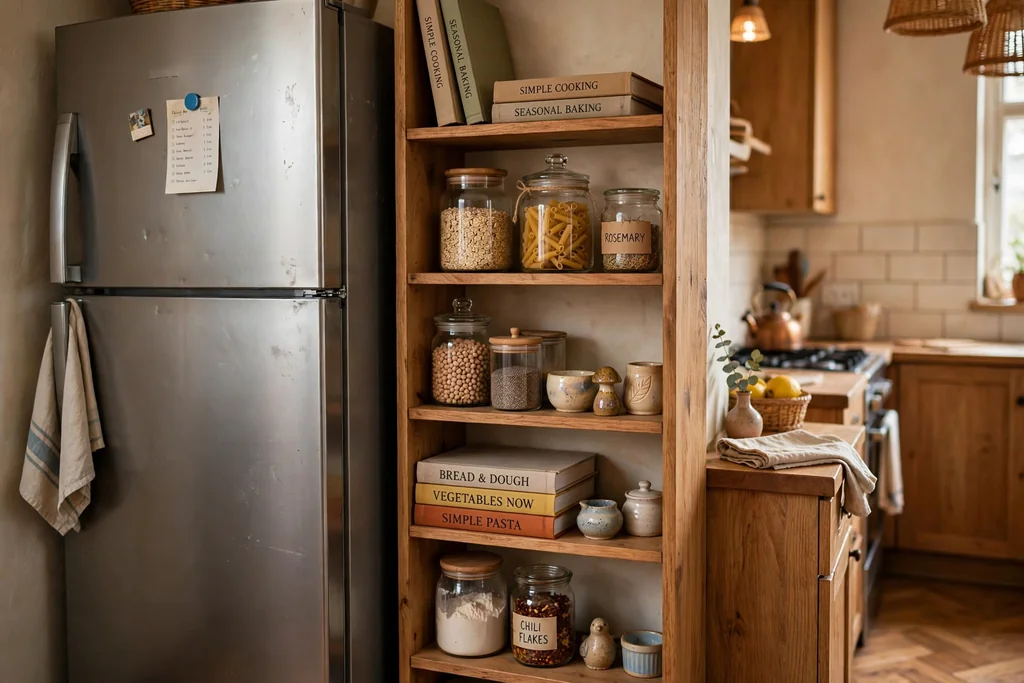
    Dedicate one wall to tall light wood pantry cabinets, floor to ceiling, for dry goods, small appliances, and cleaning gear in one place. A pantry wall keeps the rest of the kitchen free of tall units, so the cooking wall can stay low and open. It also makes shopping and meal planning easier, since everything is visible at a glance.

    Fit the pantry with adjustable shelves, a few baskets for loose items, and labels on the front of each shelf zone. Keep heavy items at waist height and light items up high. Put the pantry near the fridge or the main prep counter, so ingredients travel a short distance to the cooker.

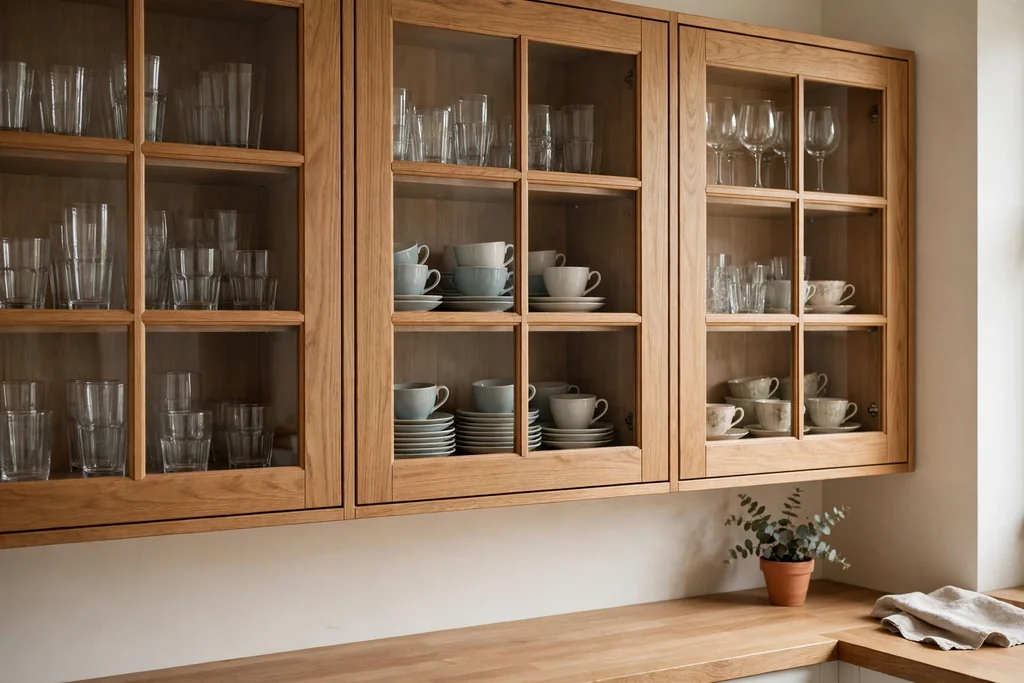
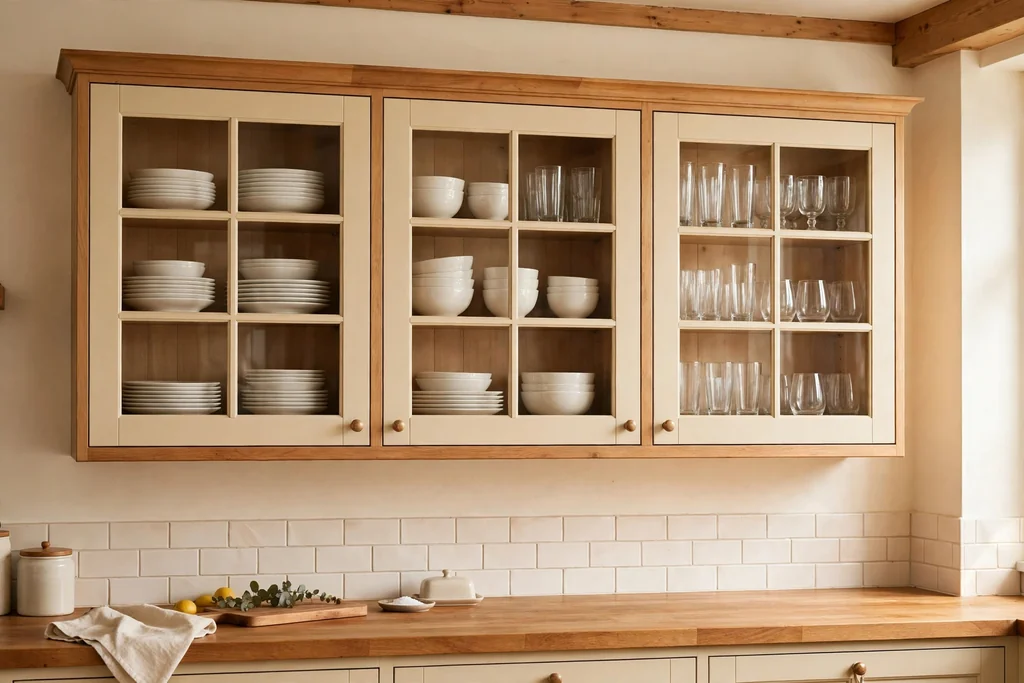
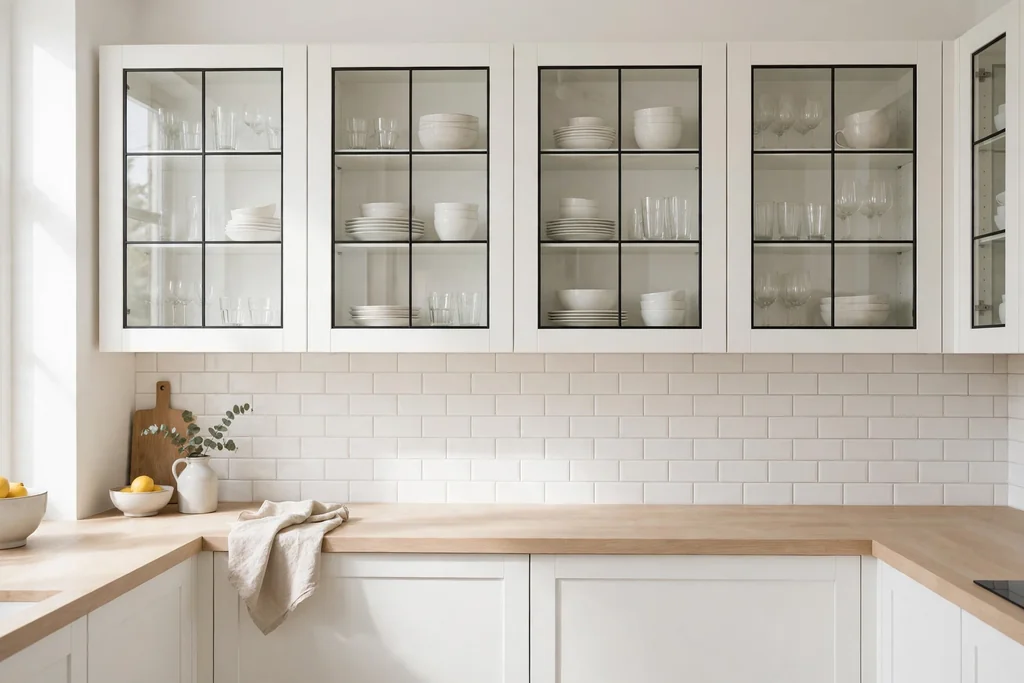
    15. Light Wood Cabinets with Glass Fronts
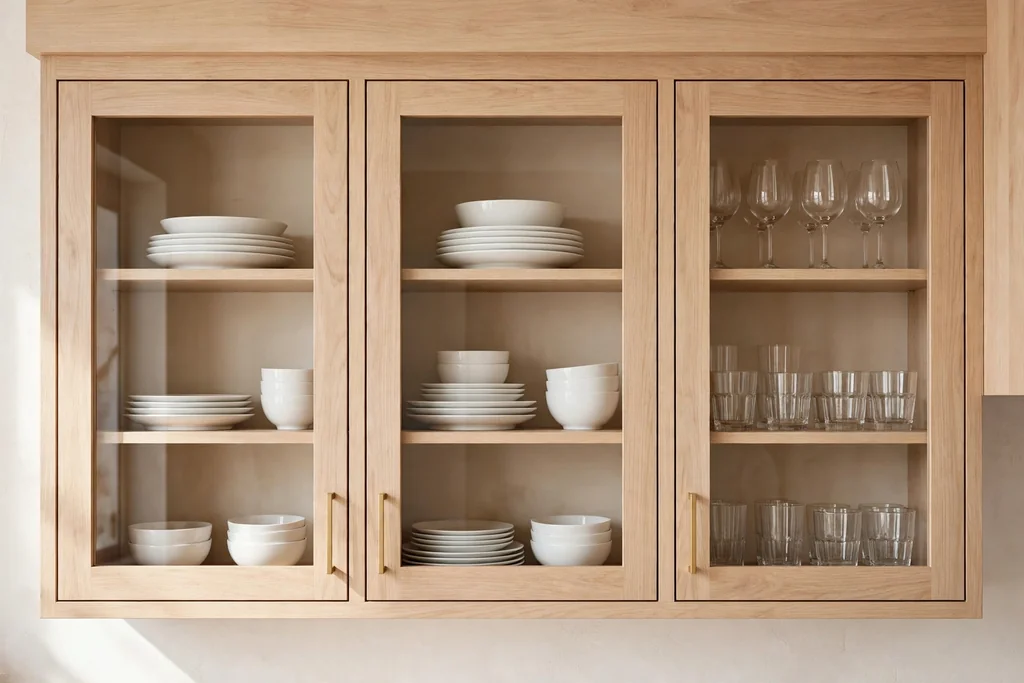
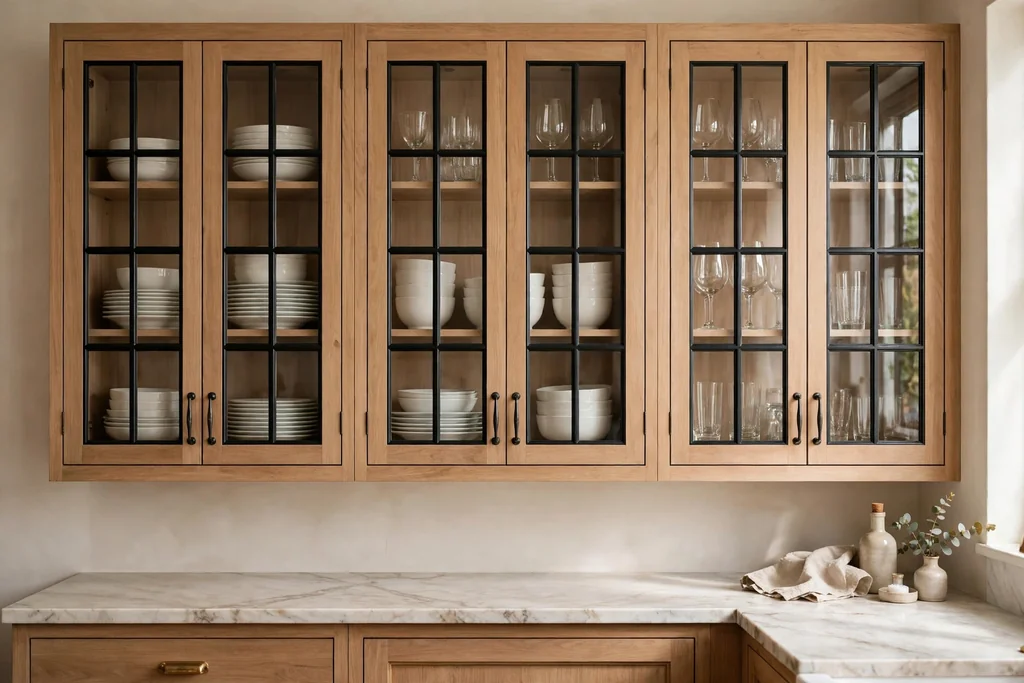
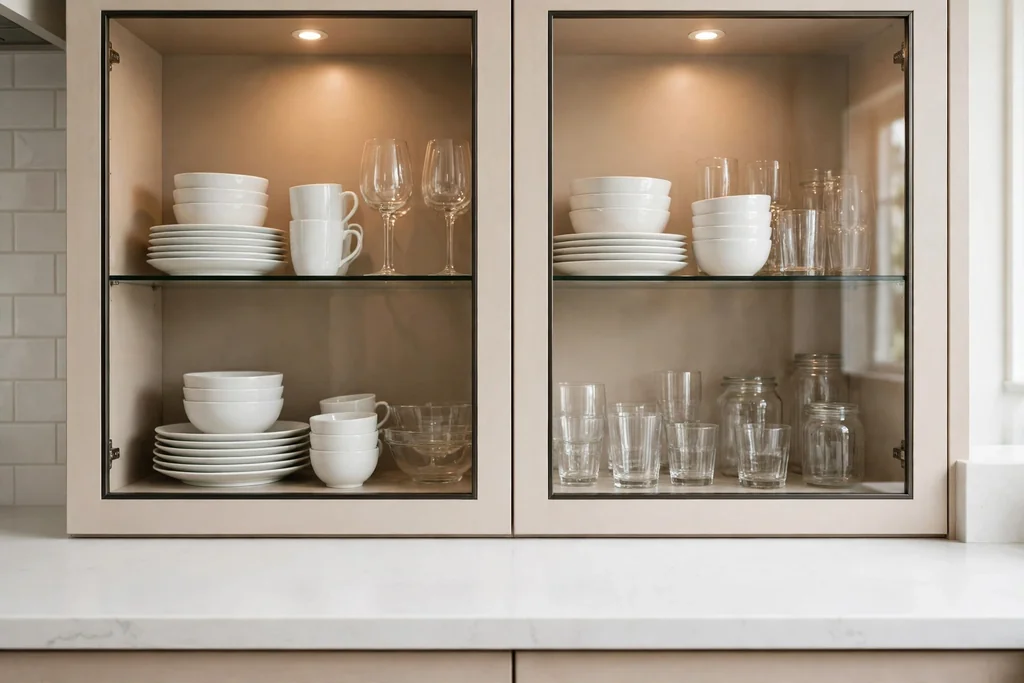
    Light wood glass-front upper cabinets displaying white dishes and clear glasses.

    Swap a few light wood upper doors for glass fronts, and display white dishes, clear glasses, and a few wood boards behind them. Glass breaks up a long run of wood doors, adds depth, and makes everyday pieces easy to find. It suits a kitchen with one straight run, where two or three glass doors are enough to change the whole wall.

    Keep the display simple, with one stack per shelf and space between groups, so the cabinets read as tidy. Put daily dishes at easy reach and rarely used pieces higher up. If glass feels too exposed, use reeded or frosted glass on one cabinet for a softer version of the same idea.

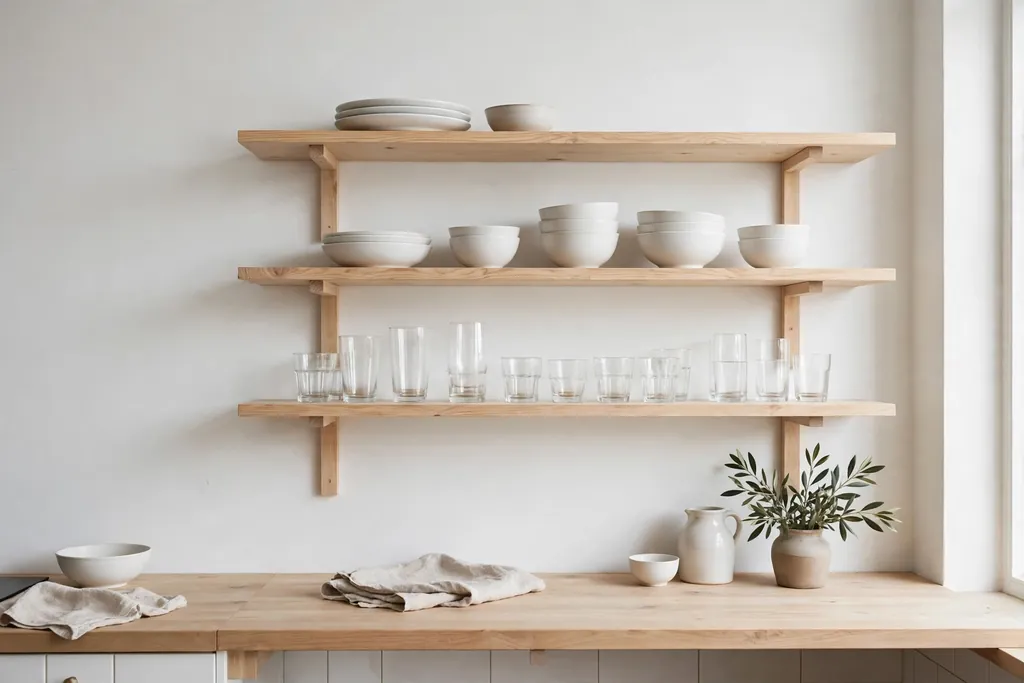
    16. Light Wood Cabinets beside Warm Wood Open Shelves
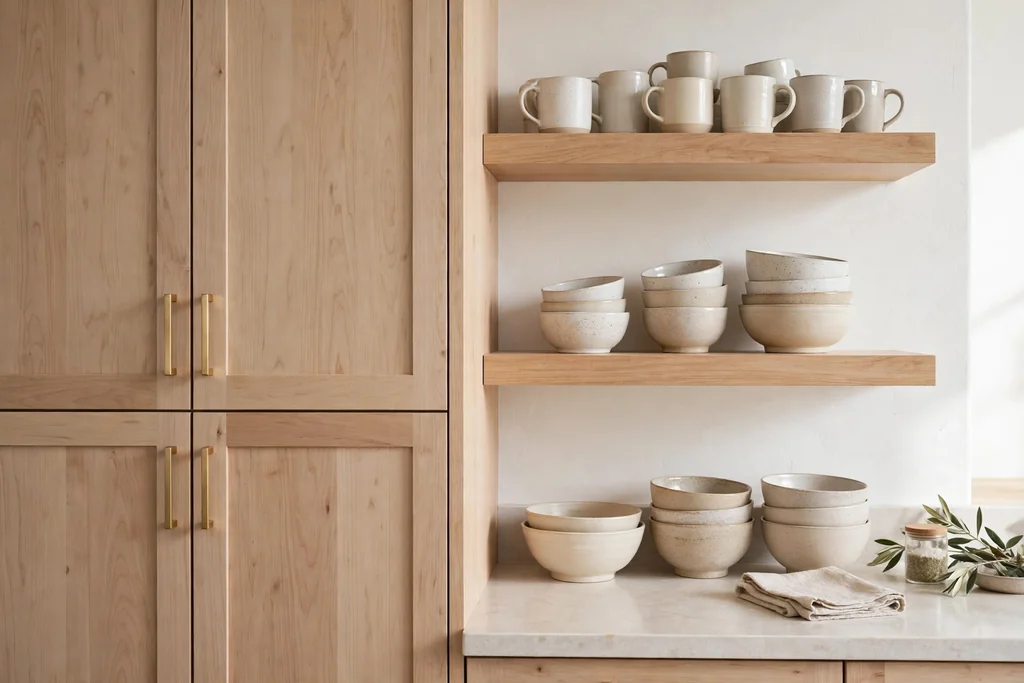
    Light wood cabinets beside matching open wood shelves holding mugs and bowls.

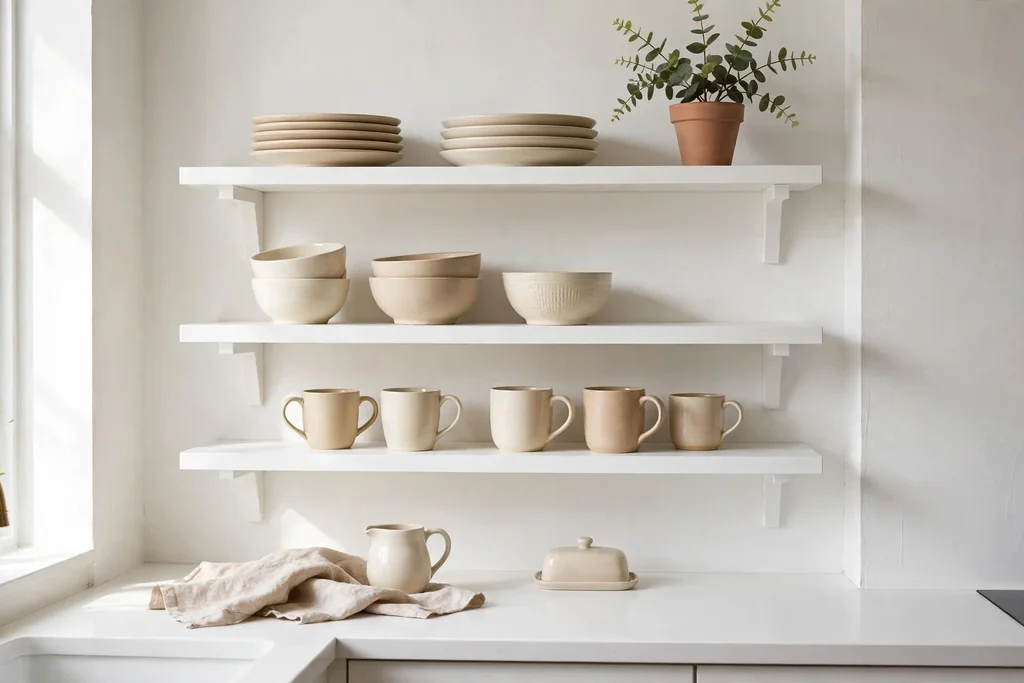
    Replace one short run of light wood uppers with open wood shelves in the same tone, and keep the rest of the cabinets closed. The shelves give you a spot for daily mugs, bowls, and plants, while the closed cabinets hide the less pretty storage. This mix is practical in a small kitchen, where a full wall of uppers can feel heavy, and the matching wood keeps the wall calm.

    Keep shelf items to pieces you use weekly, and dust them often, since open storage collects cooking film. Put the shelves near the sink or cooker, where daily dishes are most useful. Leave breathing room between groups so shelves read as calm, not crowded, and put heavy stacks low.

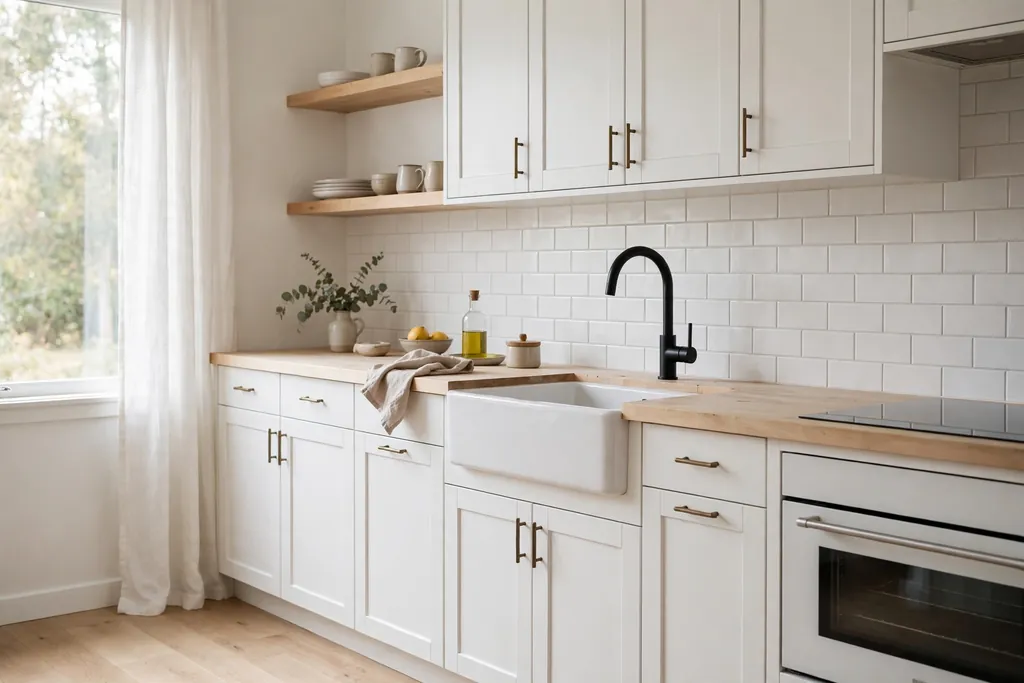
    17. Light Wood Cabinets around a Farmhouse Sink
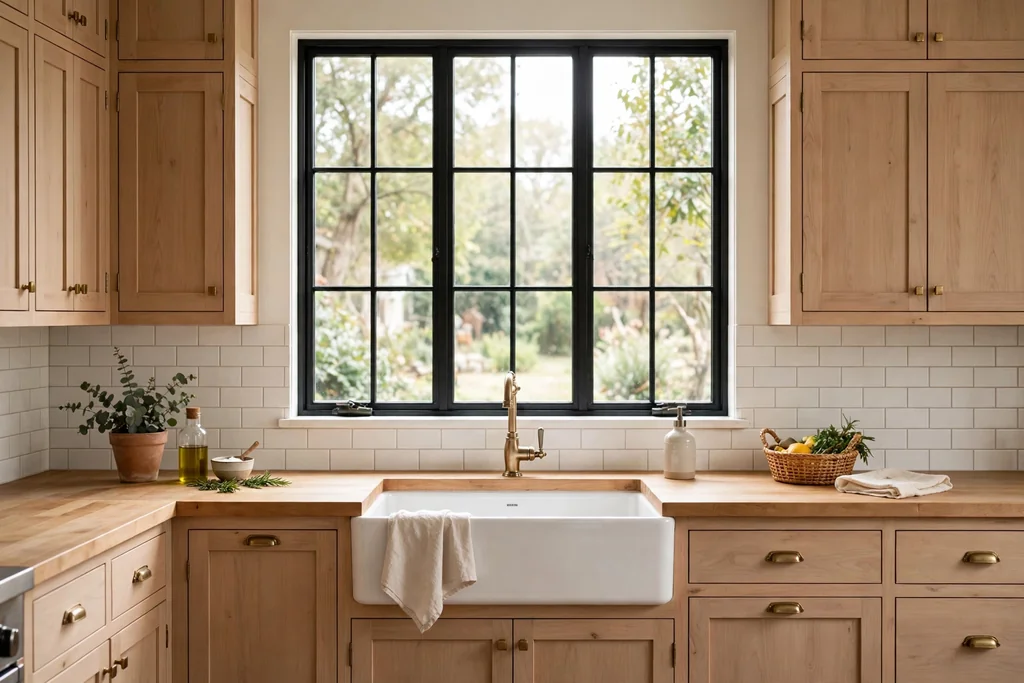
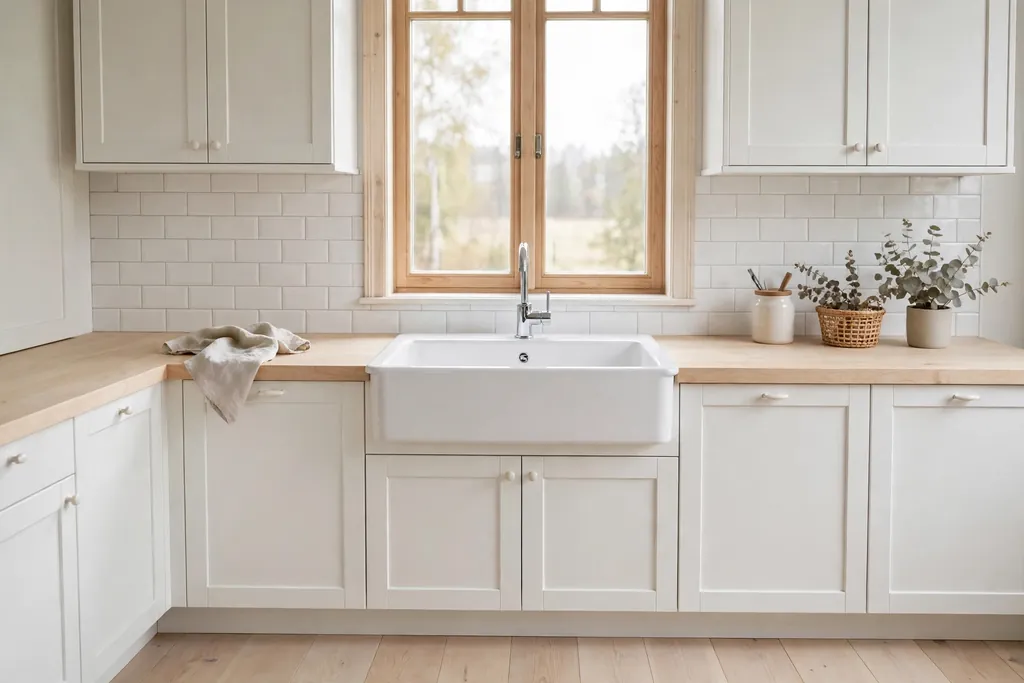
    Light wood cabinets around a farmhouse sink under a kitchen window.

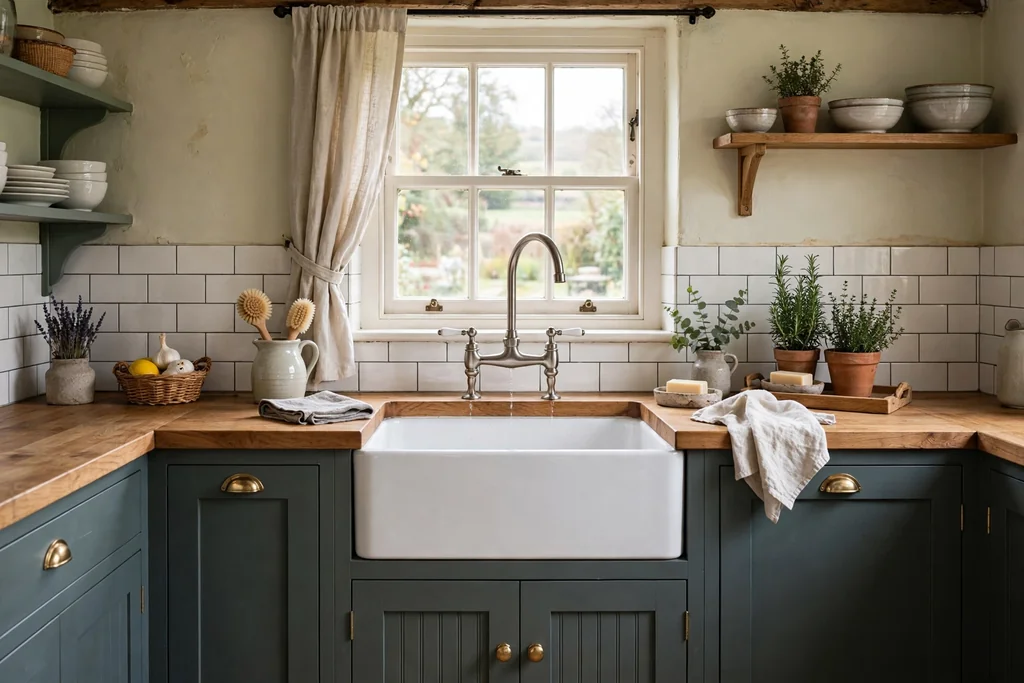
    Build the sink wall around a deep farmhouse sink, with light wood cabinets on either side and the sink front on show. The sink becomes a focal point, the deep bowl suits large pots and baking trays, and the light wood keeps the wall calm. This suits a kitchen with a window over the sink, where daylight makes the wood and the sink front glow. For window treatments that keep that daylight, see these kitchen window decor ideas.

    Choose a tap finish that matches your cabinet hardware, and keep the counter around the sink plain for wiping. A farmhouse sink needs a cabinet made to fit it, so check sizes before ordering. Clean the sink with a soft cloth and mild cleaner, and keep a wood board or a drying rack nearby for daily use.

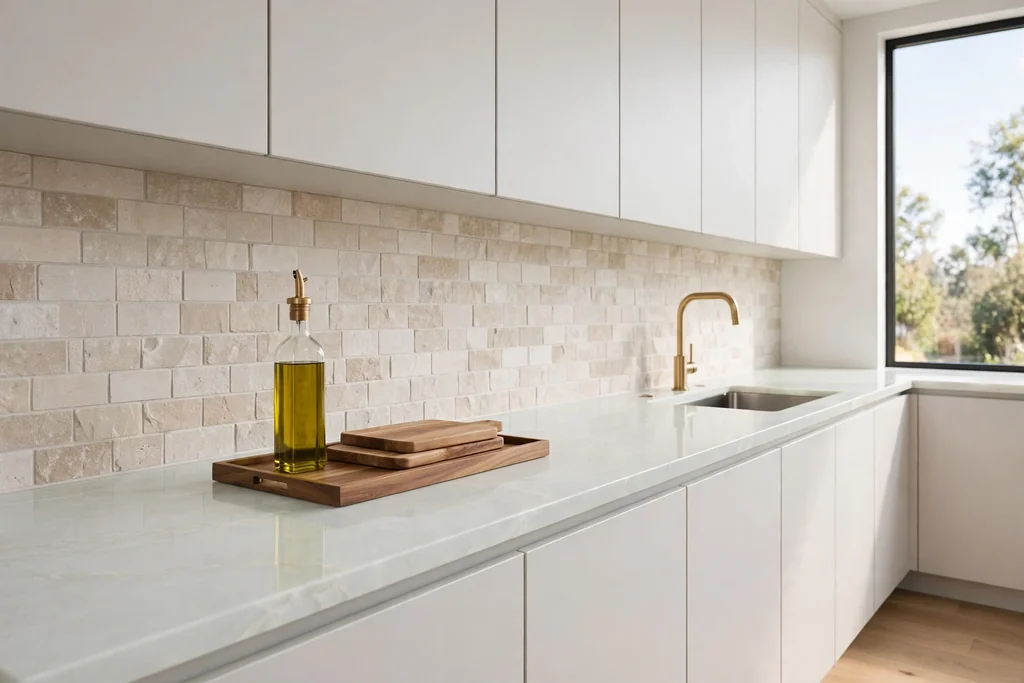
    18. Light Wood Cabinets with a Cream Tile Backsplash
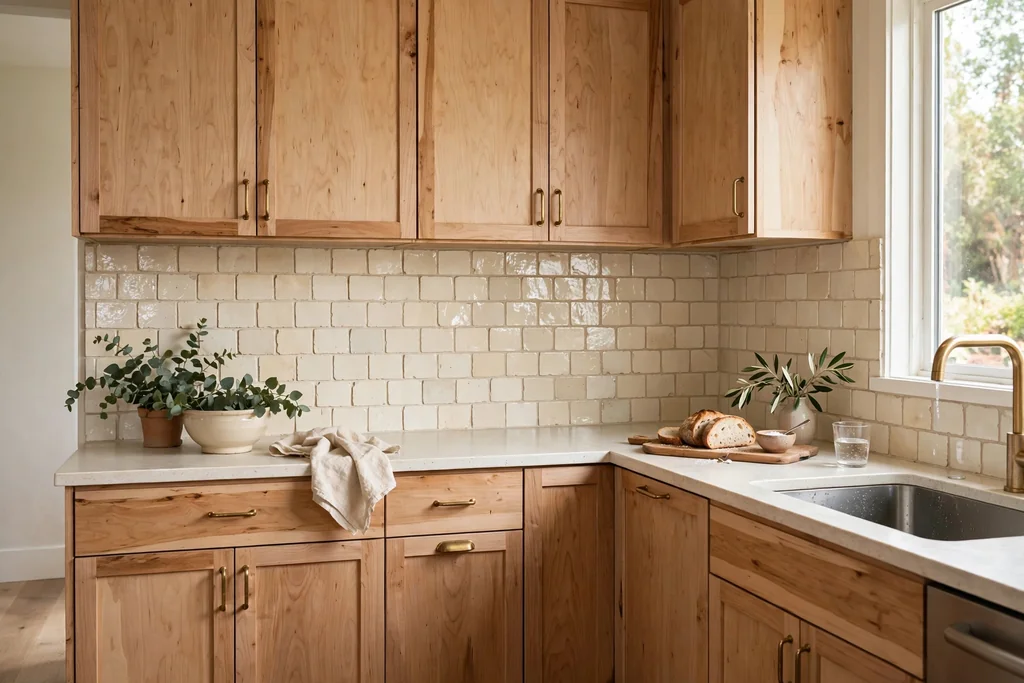
    Light wood cabinets with a handmade cream tile backsplash.

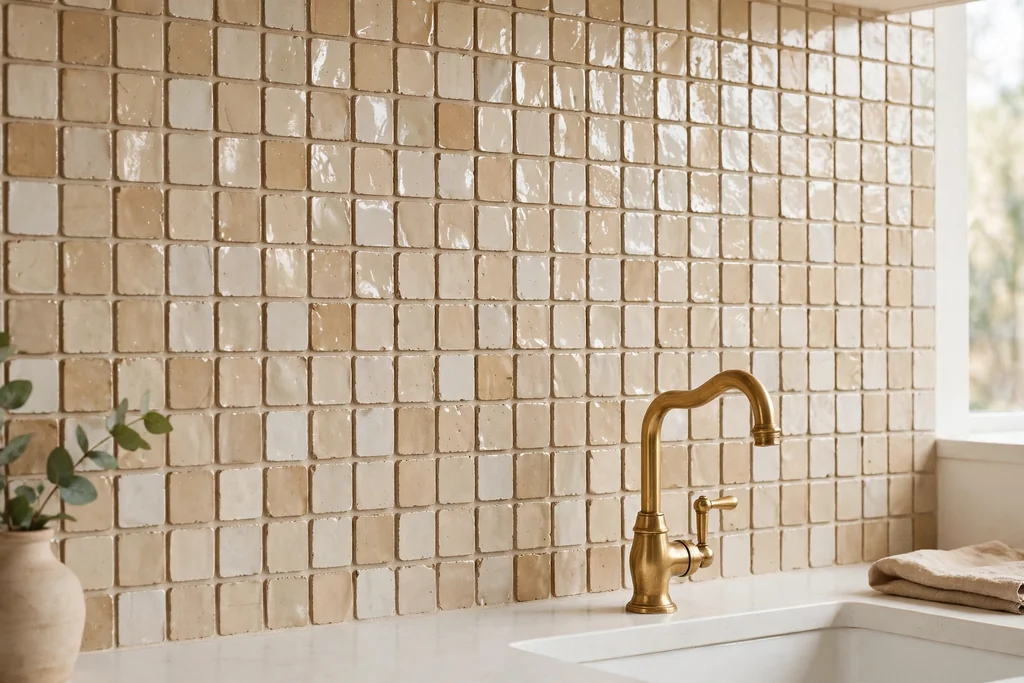
    Lay handmade tiles, such as soft cream zellige, as a backsplash behind light wood cabinets for texture without a new color. Each tile differs slightly in tone and shine, so the wall reads as gentle movement rather than a flat block. The glazed surface wipes clean, which makes handmade tile a practical pick as well as a pretty one.

    Lay the tiles close together with a narrow grout joint so the handmade edges stay visible, and mix tiles from several boxes before fixing so no one patch looks uneven. Seal grout in the splash zone behind the sink and cooker. Keep the counter plain, so the tile texture stays the focus.

    19. Light Wood Cabinets with Dark Stone Counters
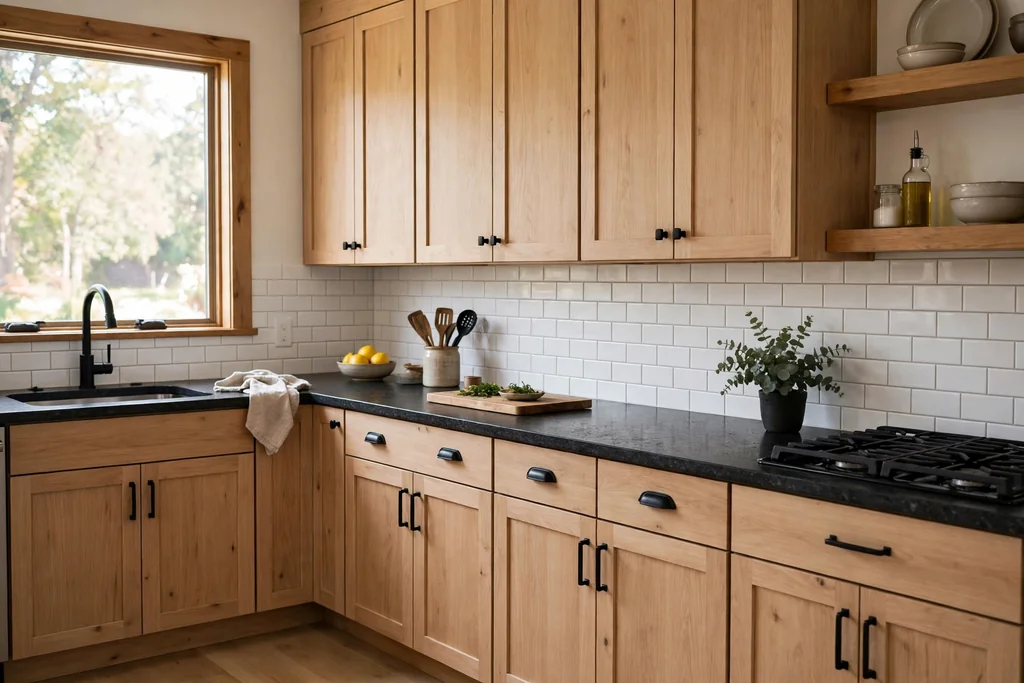
    Light wood kitchen cabinets with a dark stone counter and black hardware.

    Pair light wood cabinets with a dark stone counter, such as charcoal granite or soapstone, for a strong, grounded contrast. The dark surface outlines the pale doors, hides daily marks, and pairs well with black hardware and wood stools. This suits a kitchen with plenty of daylight, where a dark counter adds depth without closing the room in.

    Repeat the dark tone once more, in a light fitting or a stool frame, so the counter does not sit alone. Keep the backsplash pale, so the dark counter stays the main contrast. In a small or north facing kitchen, use the dark stone on the island only and a pale surface on the perimeter.

    20. Fluted Light Wood Cabinet Doors
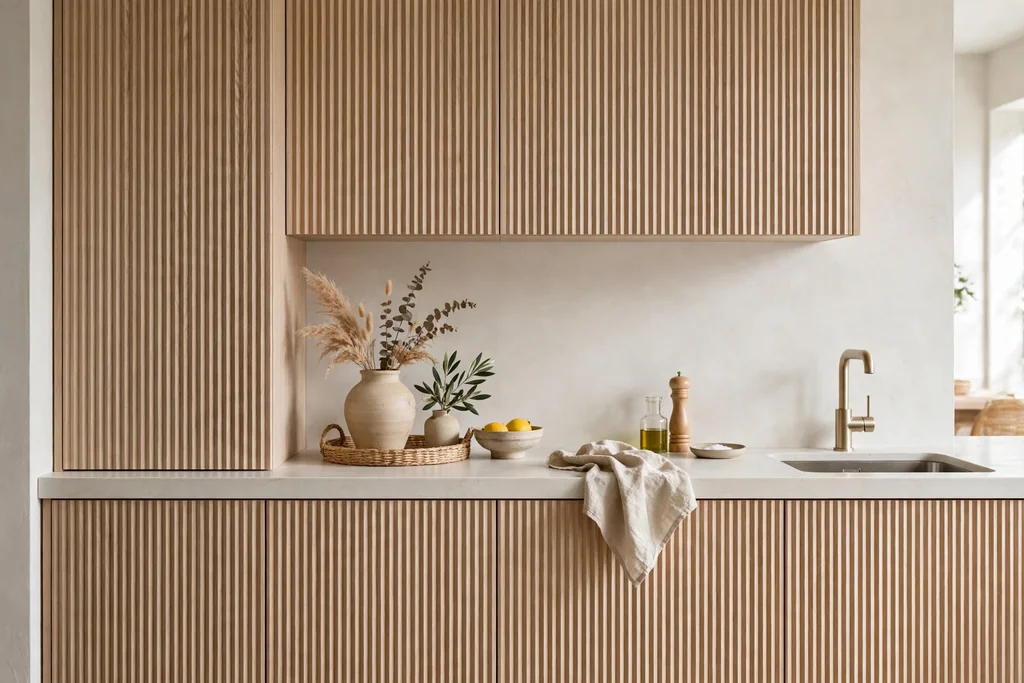
    Light wood fluted cabinet doors with a pale counter.

    Use fluted light wood doors, with fine vertical grooves, for texture that paint and flat wood cannot give. The grooves catch light and shadow, add a furniture feel, and pair well with pale counters and brass or black handles. This suits a kitchen where plain light wood feels too plain, but a strong color would feel too much.

    Keep the rest of the room simple, since fluting is detail enough on its own. Wipe grooves with a soft cloth, since dust settles in the channels over time. Use fluted doors on the island or one run first, if a full kitchen of fluting feels like too much texture.

    21. Light Wood Cabinets with Cane Door Inserts
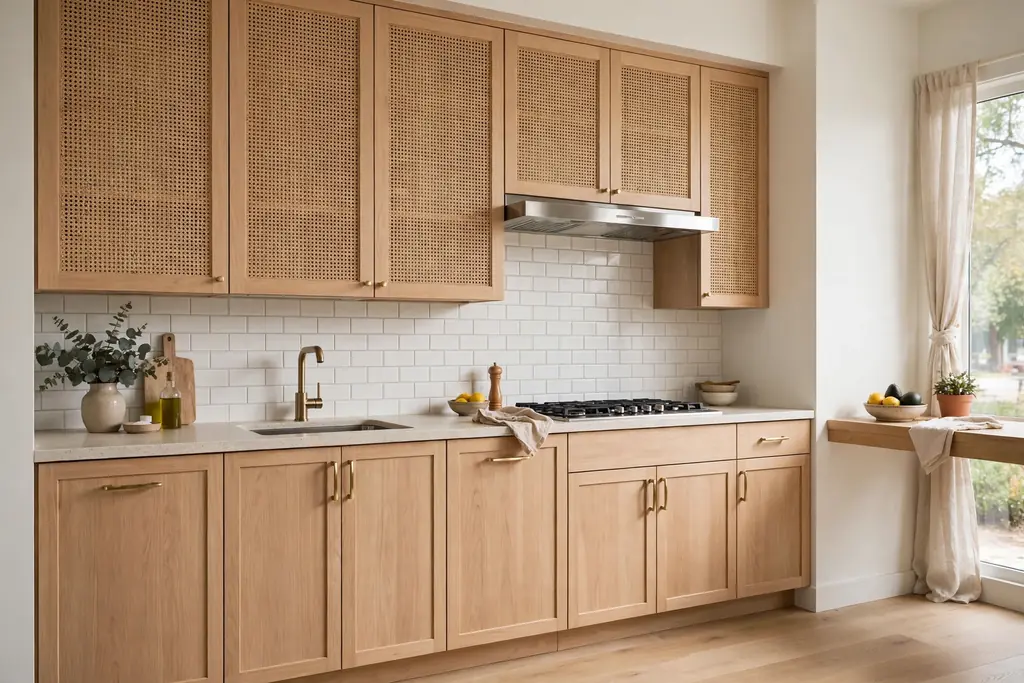
    Light wood cabinets with woven cane door inserts on the upper cabinets.

    Swap a few light wood upper doors for cane inserts, with a woven rattan panel framed in the same wood. Cane softens a long cabinet run, adds a natural pattern, and pairs well with cream walls, wood stools, and woven baskets. It suits a relaxed kitchen, where a fully closed wall of doors would feel heavy.

    Keep the items behind cane simple, since shapes show through the weave, and use cane on uppers rather than lowers, where it takes less wear. Dust the weave with a dry cloth, and keep it clear of the sink splash zone, since damp softens natural fibers over time. One or two cane doors are enough to change the wall.

    22. Light Wood Cabinets in a Scandinavian Kitchen
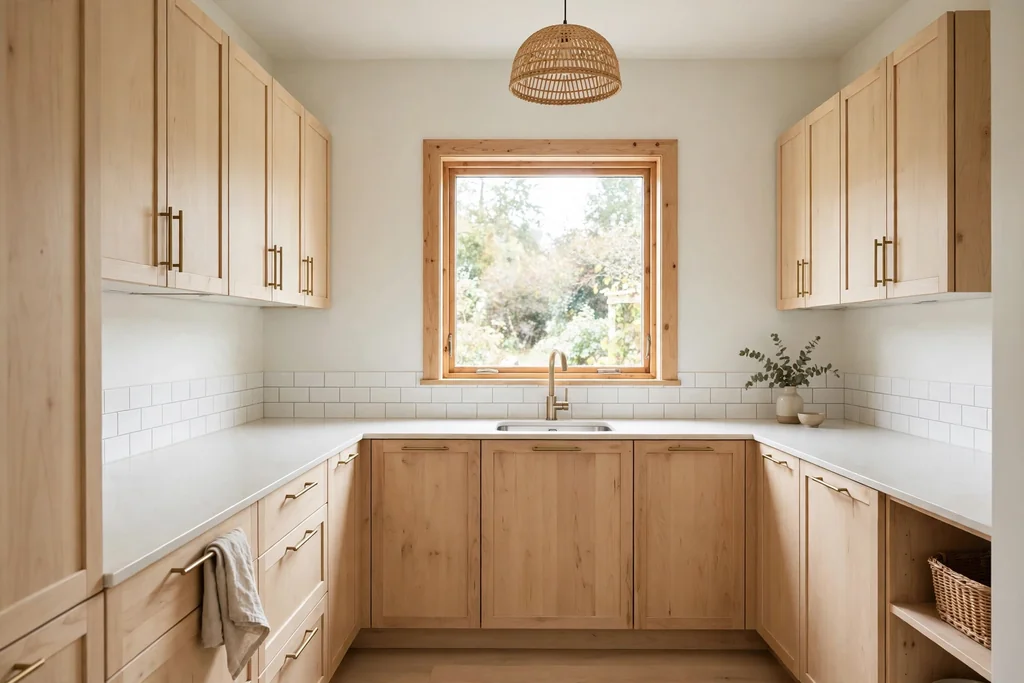
    Scandinavian kitchen with light wood cabinets, pale walls, and clear counters.

    Build a Scandinavian kitchen around light wood cabinets, pale walls, and clear counters, with warmth from linen, wool, and plants rather than strong color. Pale oak or ash cabinets, a wood island, and open wood shelves give the room its airy base, while soft textiles and warm light keep it comfortable for daily cooking. For the full pale room approach, see these Scandinavian kitchen design ideas.

    Keep the base pale: light wood, soft white walls, and one light counter material, repeated through the room. Add one dark anchor, such as a black tap, so the pale tones do not blur together. Give every daily item a closed home, and keep counters mostly clear, so the room stays calm between meals.

    23. Light Wood Cabinets with Warm Under-Cabinet Lighting
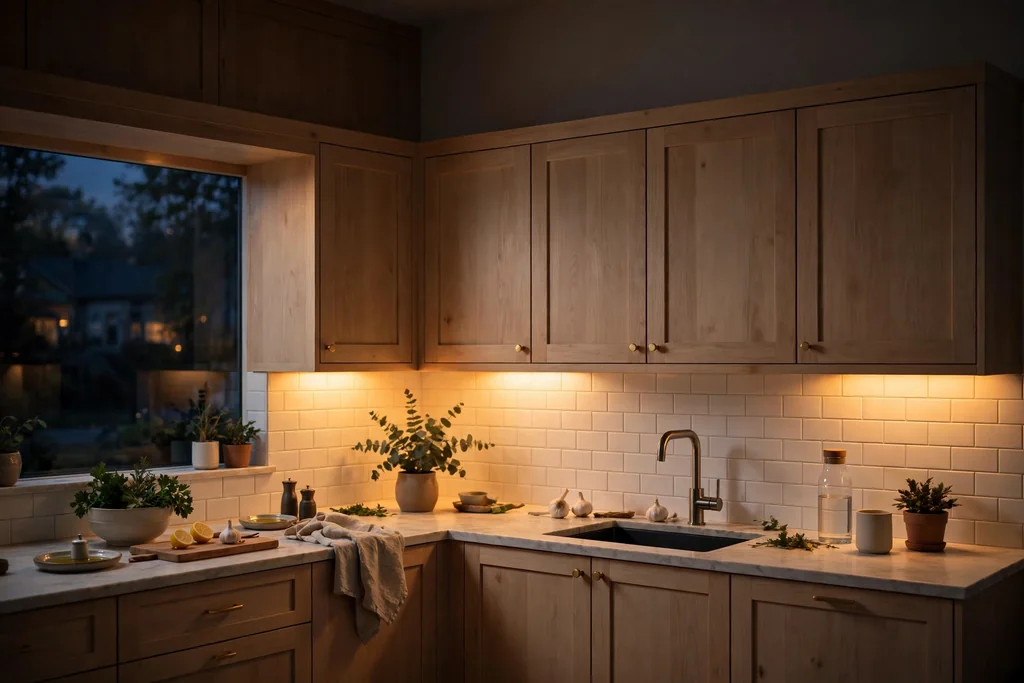
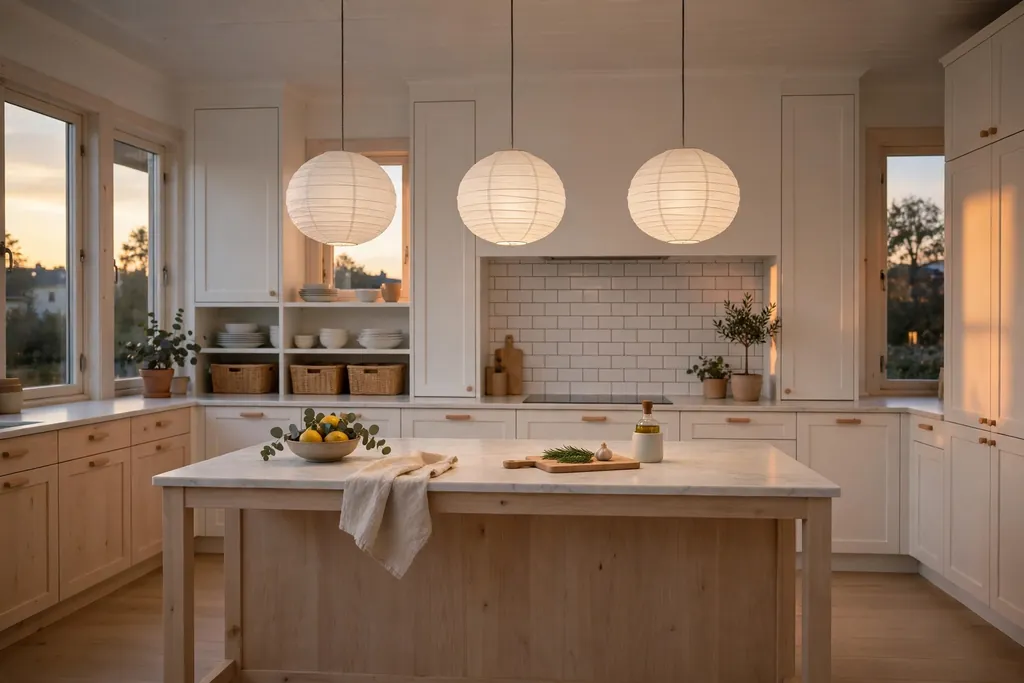
    Light wood kitchen cabinets with warm under-cabinet lighting in the evening.

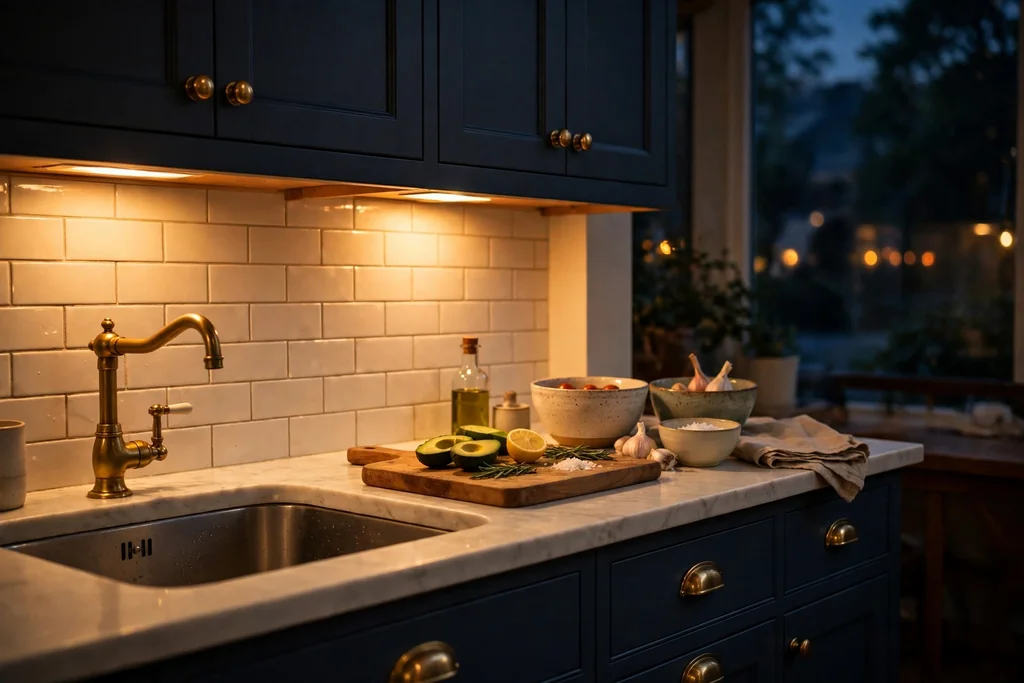
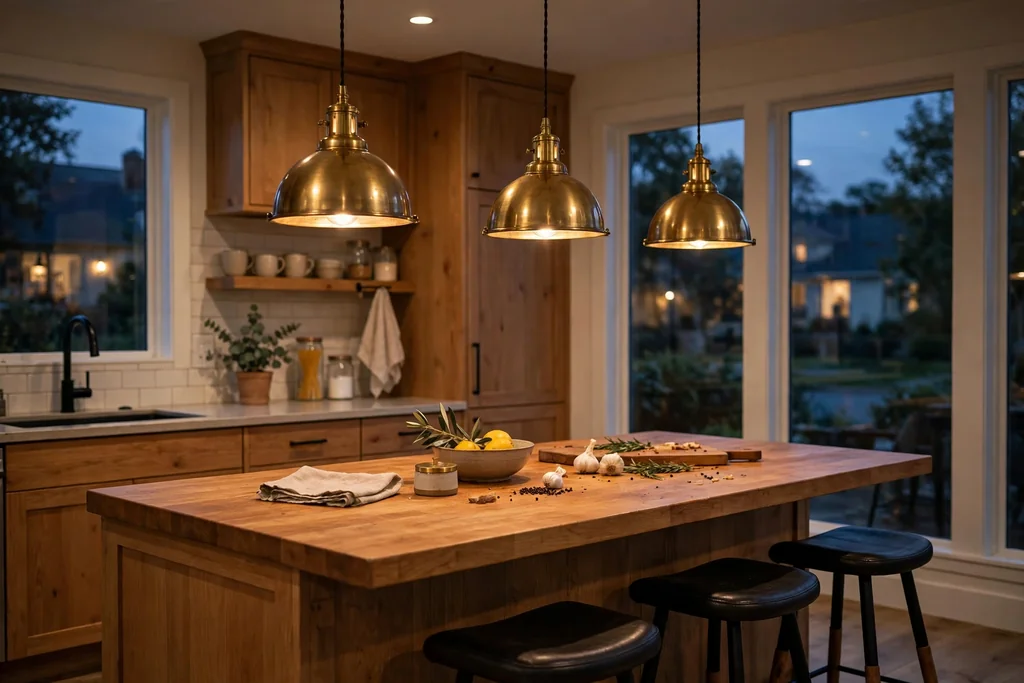
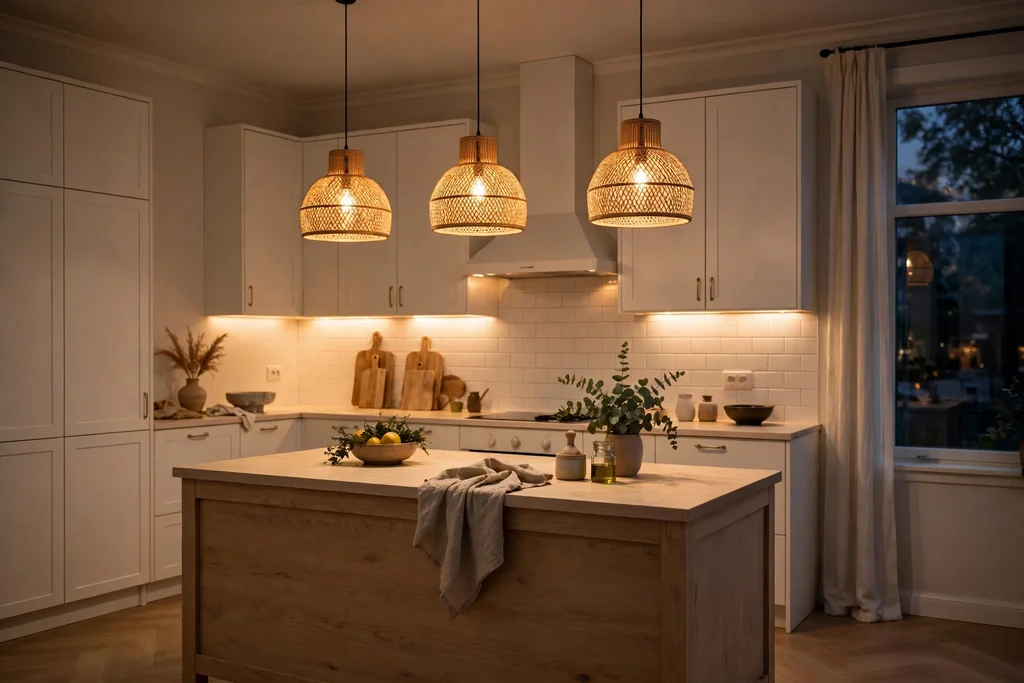
    Fit warm under-cabinet lights to light wood cabinets, so prep areas glow in the evening and the grain reads as warm rather than flat. Under-cabinet light does the real work for chopping and reading recipes, while pendants over the island give evening meals a soft focus. One warm white bulb color, used everywhere, keeps the room calm.

    Fit the lights toward the front of the cabinet, so light falls on the counter rather than on the wall, and choose warm white bulbs so food and wood tones look natural. Keep the lowest pendant well above the counter, so you can see across the table. Wipe light covers often, since kitchen air leaves a light film on glass over time.

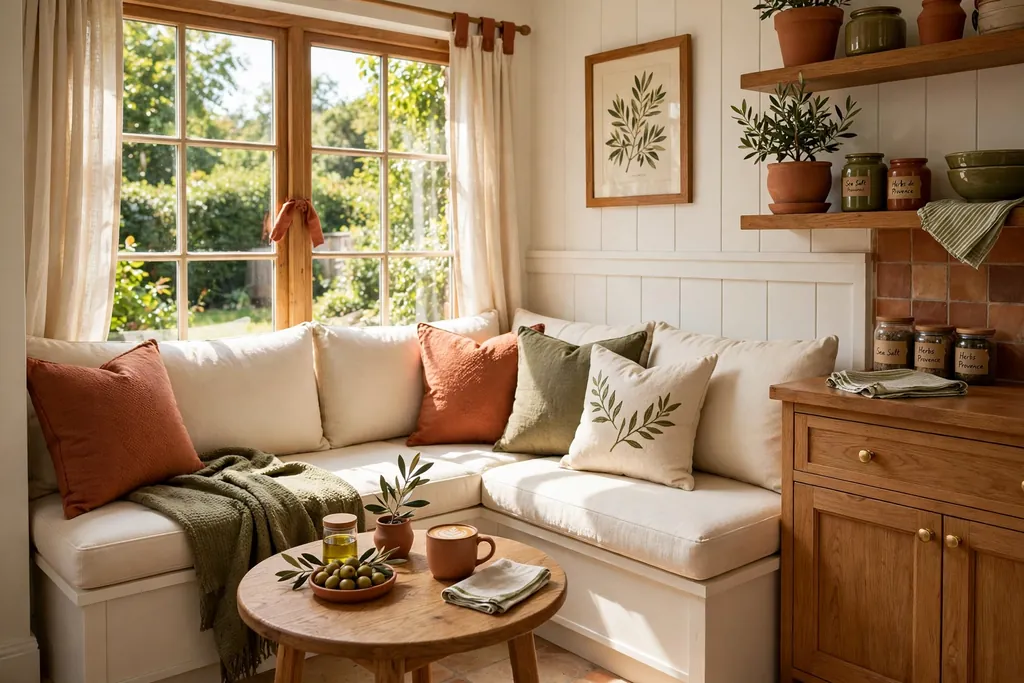
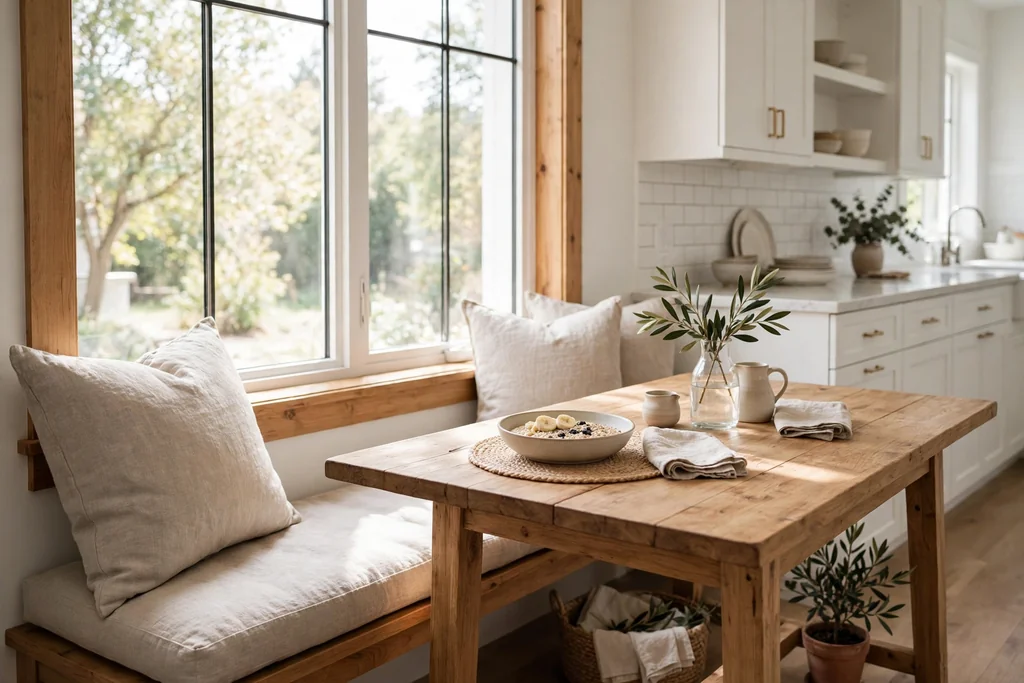
    24. Light Wood Cabinets with a Breakfast Nook
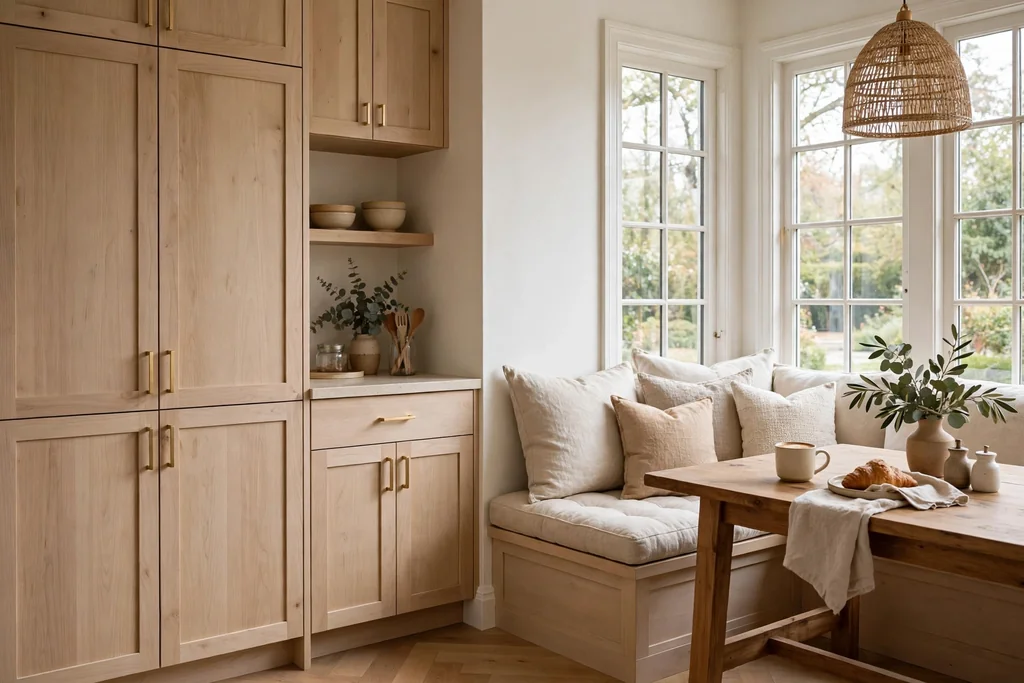
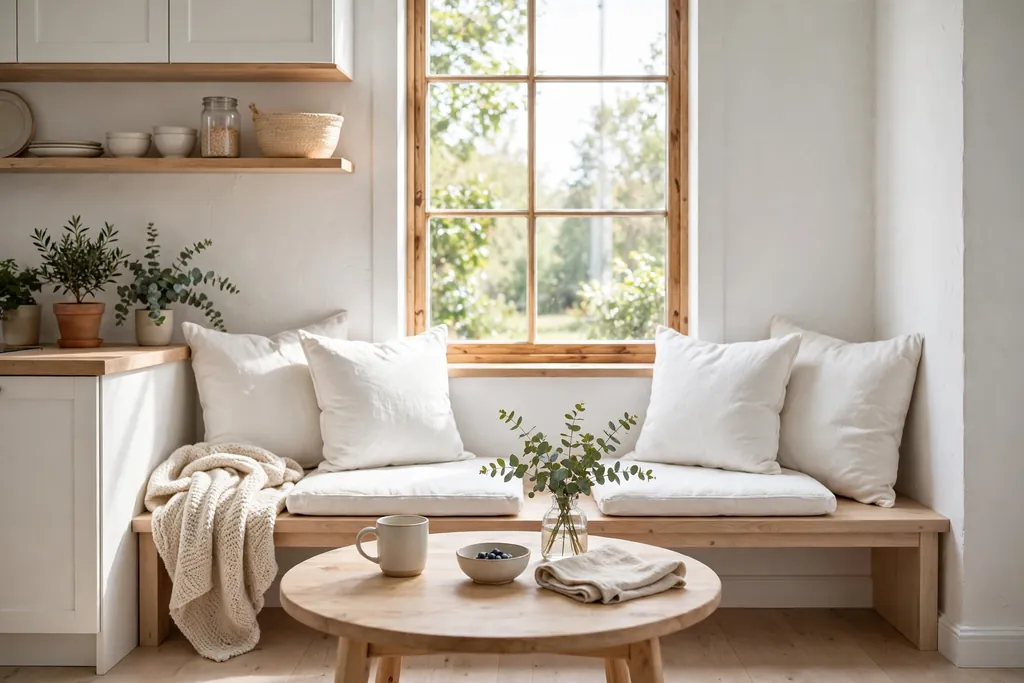
    Light wood kitchen cabinets beside a breakfast nook with a wood table and linen cushions.

    Pair light wood cabinets with a breakfast nook in the same wood, such as a bench along the wall, a small wood table, and linen cushions in white or oatmeal. A set place for slow mornings needs no full dining room, and the bench can hide placemats and table linens underneath. This suits a corner by a window best, where daylight does much of the work.

    Choose cushion covers you can remove and wash, since a breakfast seat gets daily use, and keep the table top wipeable for coffee and homework alike. Keep the nook to one material link with the kitchen, such as the same wood as the cabinets, so it reads as part of the room rather than a separate set.

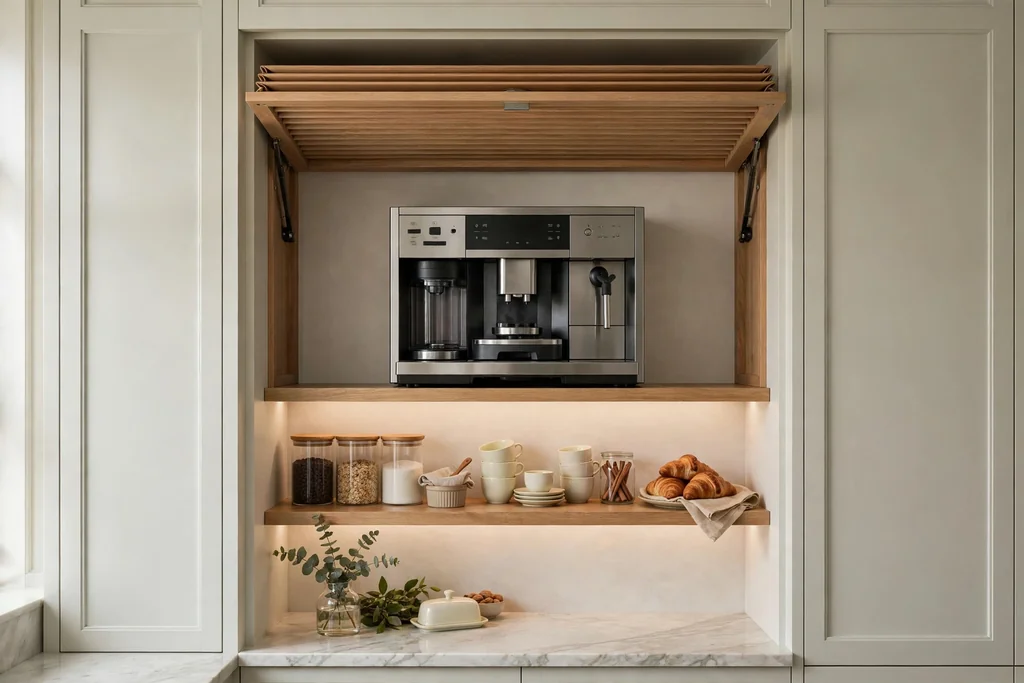
    25. Light Wood Cabinets with a Coffee Station
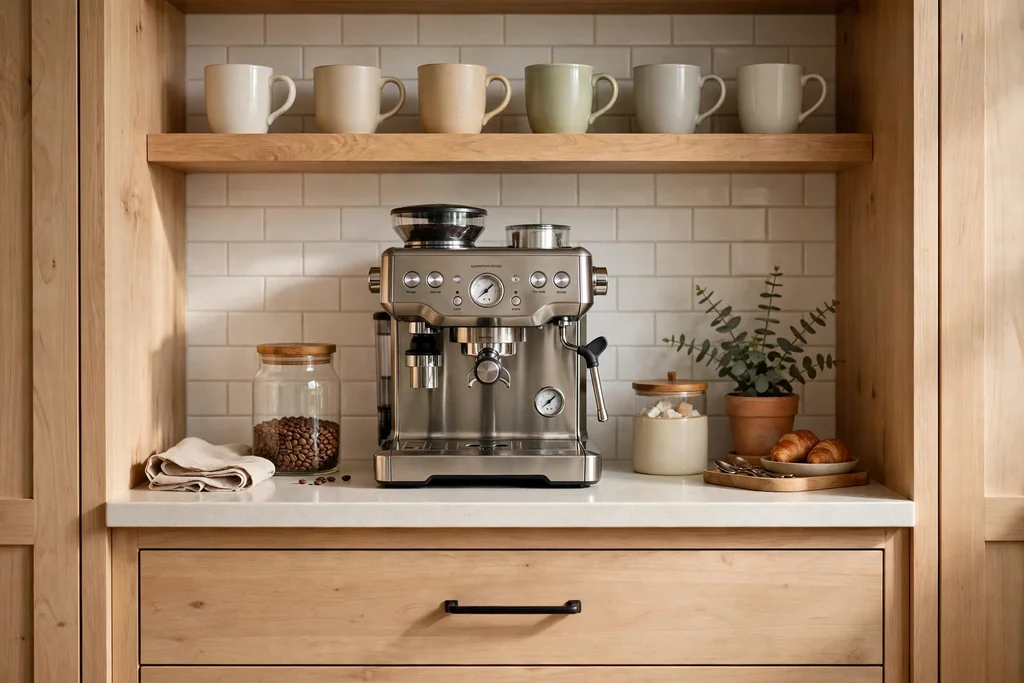
    Light wood cabinet coffee station with a machine, mugs on a shelf, and a drawer below.

    Carve a coffee station into one run of light wood cabinets, with a machine on the counter, mugs on a shelf above, and beans and filters in a drawer below. Grouping coffee gear in one spot keeps the main prep counter clear, and the wood surround makes the station feel like furniture rather than a gadget corner. This suits a kitchen where mornings run on a tight routine.

    Keep the station near a power point and away from the main sink splash zone, and add a small tray under the machine to catch drips. Put daily mugs at easy reach and rarely used cups higher up. A closed drawer for filters and pods keeps the station tidy between uses.

    26. Light Wood Cabinets with a Built-In Range Hood Cover
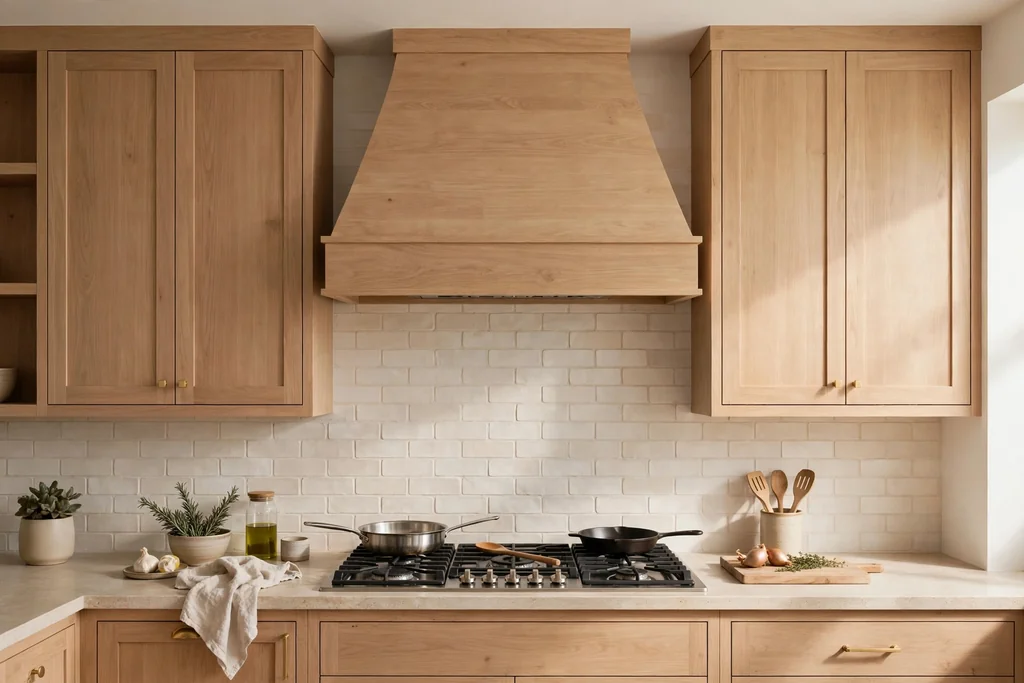
    Kitchen cooking wall with a light wood range hood cover matching the cabinets.

    Cover the range hood in the same light wood as the cabinets, so the cooking wall reads as one calm block of wood rather than a steel break. A wood hood cover suits a kitchen where the cooker sits on a main wall, and it lets the cabinets, rather than the appliance, set the tone. Keep the hood cover simple, with a plain panel or a slim trim, so it matches the door style.

    Check ventilation and clearance with the maker guidance before ordering a wood cover, since hoods need exact fitting and heat clearance. Keep the area around the hob easy to wipe, since cooking film settles on wood near the stove. A plain cream or stone backsplash behind the hob keeps the wall calm.

    27. Light Wood Cabinets in an Open-Plan Kitchen
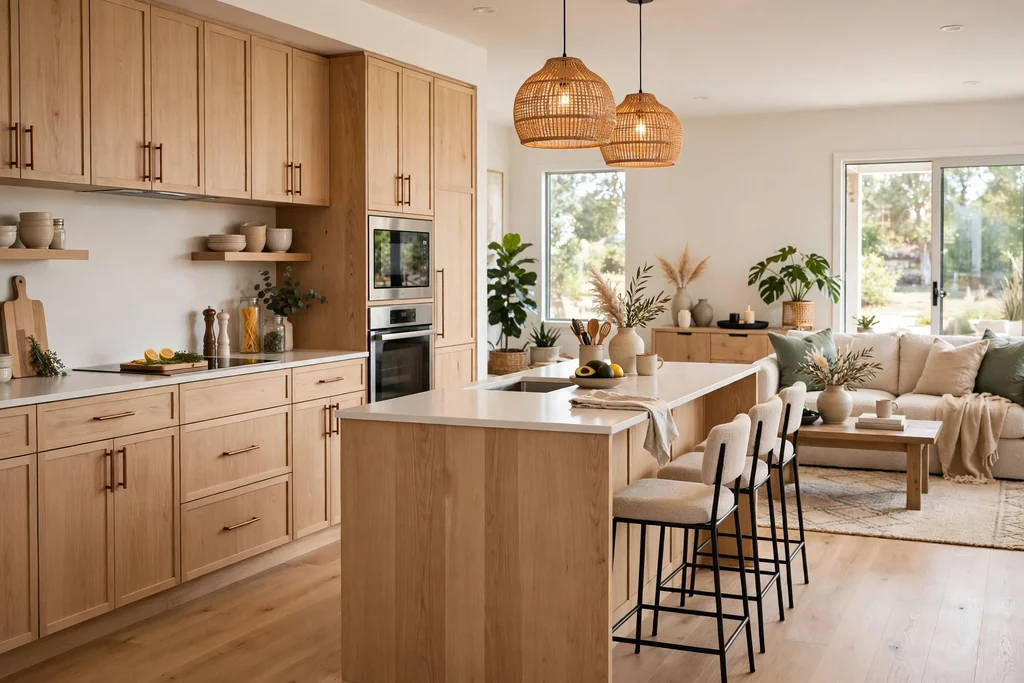
    Open-plan kitchen with light wood cabinets and an island facing a living area.

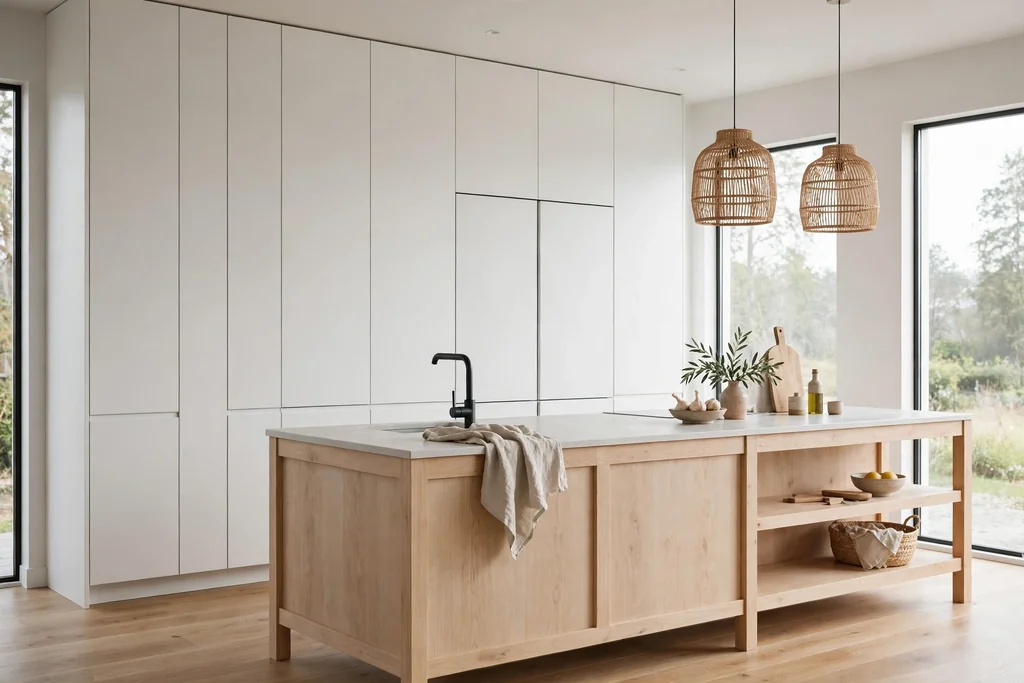
    Use light wood cabinets in an open-plan kitchen, where the cooking area faces the living space and the cabinets read as furniture. Pale wood softens the line between kitchen and living room, pairs with sofas and wood floors, and keeps a large room from feeling cold. Keep the island front simple, with flat panels and no extra trim, so the wood itself carries the look.

    Hide the largest appliances behind wood panels where you can, so the room reads as one space rather than a row of machines. Keep the island top mostly clear apart from one tray or a small vase, so it can shift from cooking to eating without a full tidy first. Repeat the wood once more in the living area, in a coffee table or a shelf, to link the two zones.

    28. Light Wood Cabinets with Walnut Accents
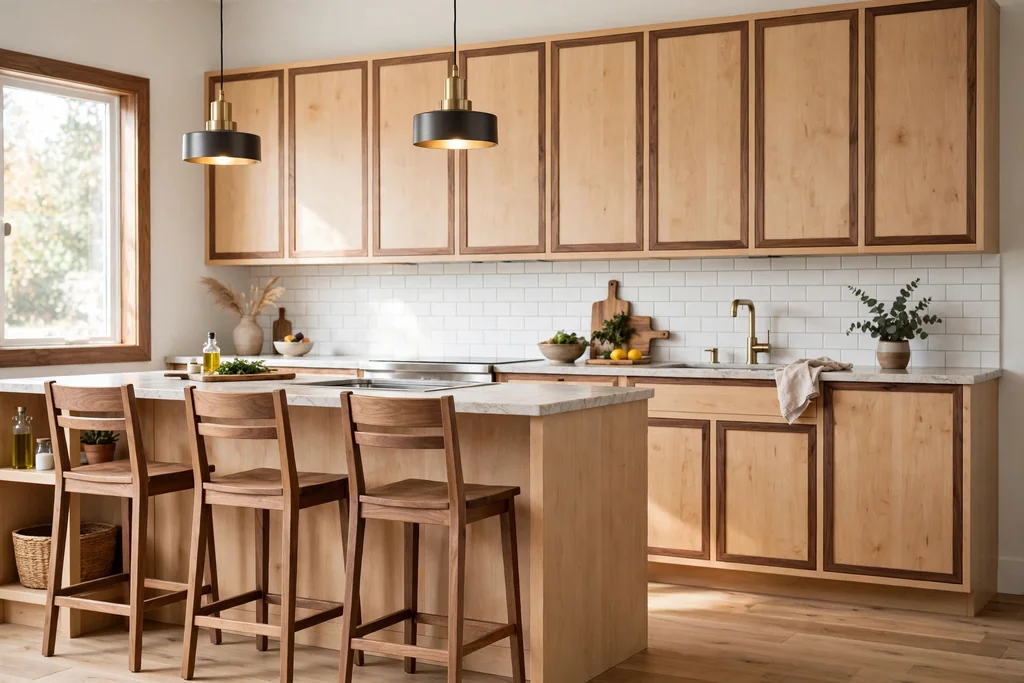
    Light wood kitchen cabinets with walnut trim accents and wood stools.

    Add walnut accents to light wood cabinets, such as a walnut toe kick, a wood shelf, or walnut handles on a few doors, for depth that pale wood alone cannot give. The dark wood outlines the light doors, adds a furniture feel, and pairs well with pale counters and brass or black handles. This suits a kitchen where full dark cabinets would feel too heavy, but plain light wood feels too plain.

    Repeat the walnut once more, in stools or a cutting board, so the accent looks planned. Match the stain tone to your floor carefully, since walnut beside a similar brown floor can blur together, so aim for clear contrast. Keep water from sitting on the wood finish near the sink.

    29. Light Wood Cabinets with a Stone Slab Backsplash
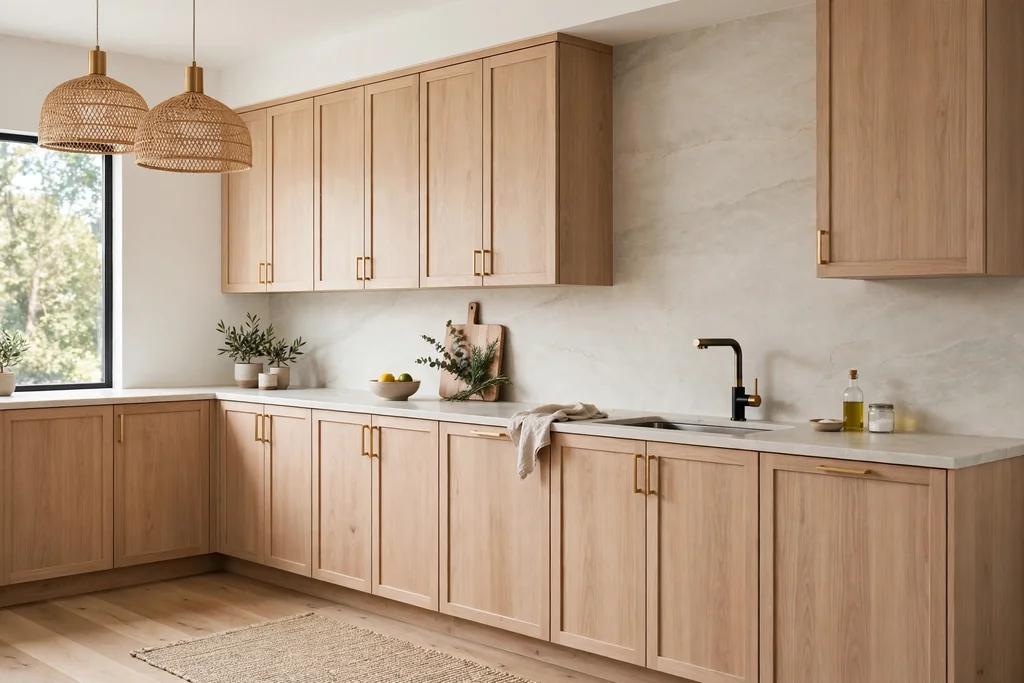
    Light wood cabinets with a pale stone slab backsplash and matching counter.

    Run one large stone slab, in pale marble or quartz, up the wall behind light wood cabinets as a full backsplash. A slab has almost no grout lines, so the wall reads as one calm surface, and the stone veining gives the kitchen gentle movement without a new color. This suits a kitchen with a short backsplash wall, where one slab can cover the whole run.

    Keep the counter in the same stone or a plain match, so the wall and counter read as one piece. Seal stone on the schedule the supplier suggests, and wipe splashes promptly near the cooker. If a full slab is out of reach, use it behind the hob only and a plain tile elsewhere.

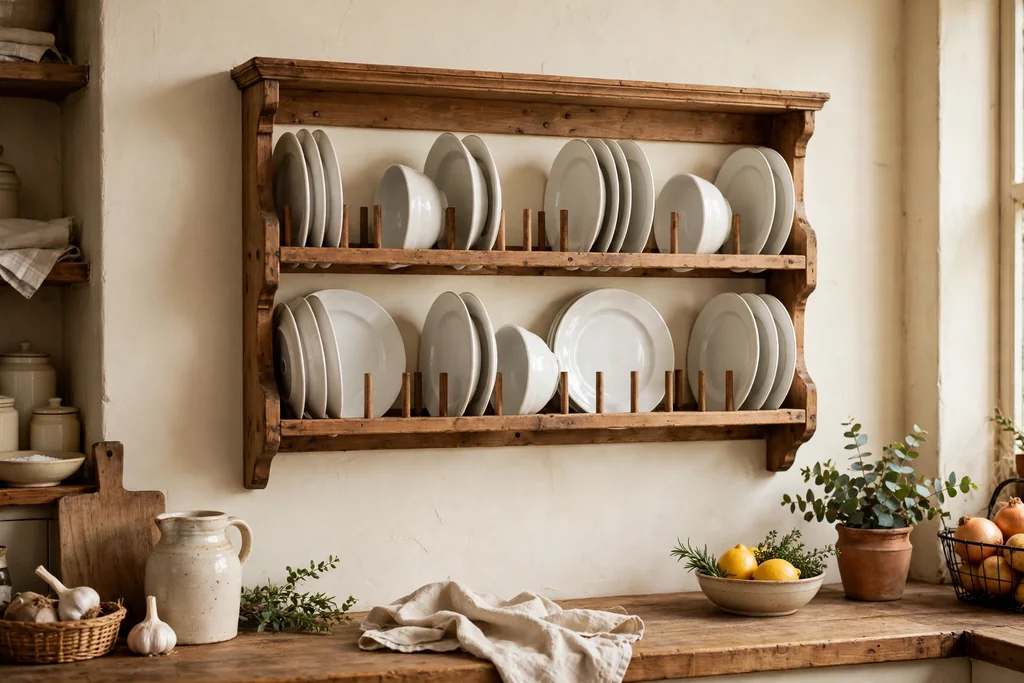
    30. Light Wood Cabinets with a Plate Rack and Hutch
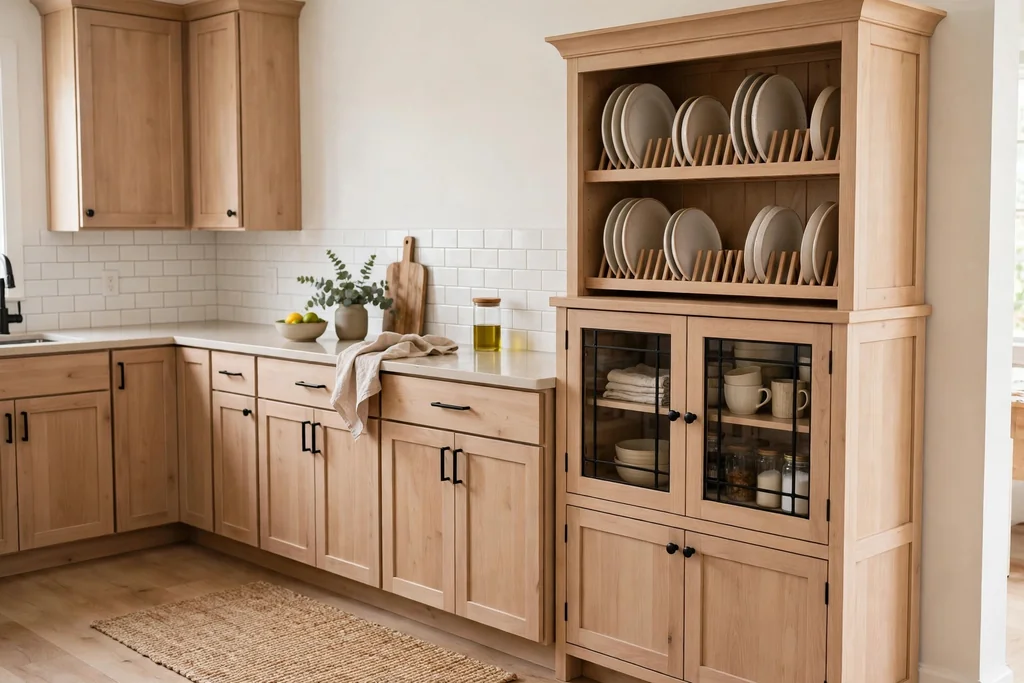
    Light wood plate rack and hutch unit at the end of a kitchen cabinet run.

    Build a plate rack or a hutch unit in light wood at the end of a cabinet run, with open slots for plates and a closed cupboard below. A hutch breaks up a long wall of doors, gives everyday plates an easy home, and adds a furniture feel that suits a farmhouse or cottage kitchen. It also gives you a spot for cookbooks and a vase at the top.

    Keep the rack to plates you use weekly, so it stays useful rather than decorative, and leave space between plates so they lift out without chipping. Put heavy stacks low and lighter bowls higher up. Dust the open rack weekly, since open storage near cooking collects a light film faster than closed cabinets.

    31. Light Wood Cabinets with a Hidden Appliance Garage
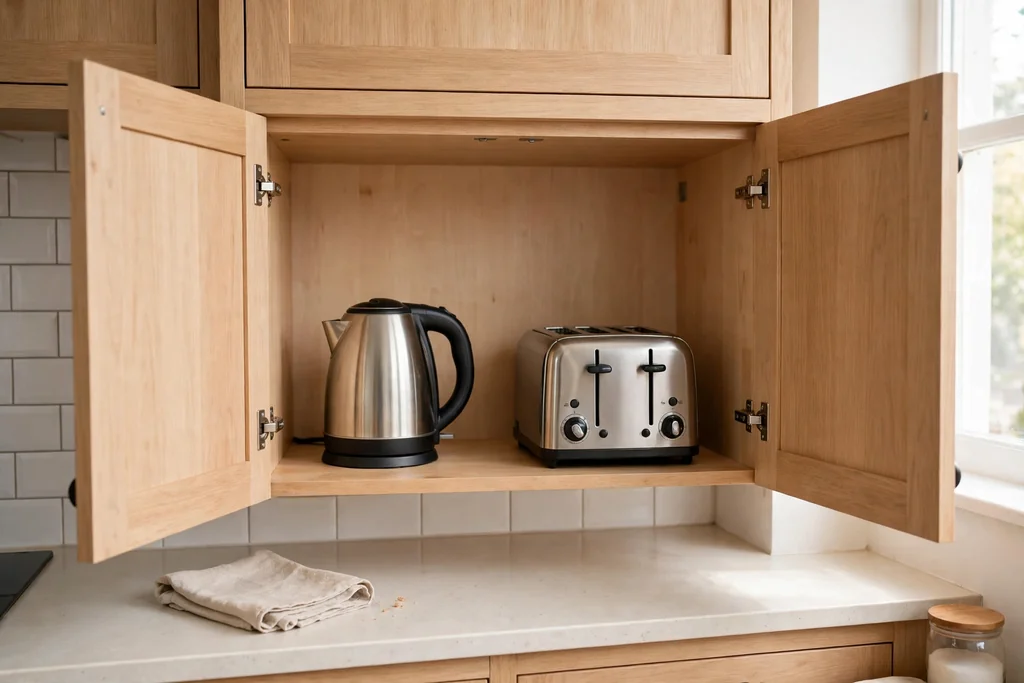
    Light wood appliance garage with doors open showing a kettle and toaster.

    Hide small appliances behind light wood doors in an appliance garage, a tall or counter height cupboard that opens to reveal the toaster, kettle, and blender, then closes to hide them. Closed storage keeps counters clear between meals, and the wood doors keep the wall calm. This suits a kitchen where the counter is short and every clear stretch matters.

    Fit a power point inside the garage if your wiring allows it, so appliances can stay plugged in, and keep the doors easy to open with one hand. Put daily appliances at counter height and rarely used ones higher up or in a pantry. Wipe the inside of the garage weekly, since steam from a kettle settles on wood over time.

    32. Light Wood Cabinets with Limewash Walls
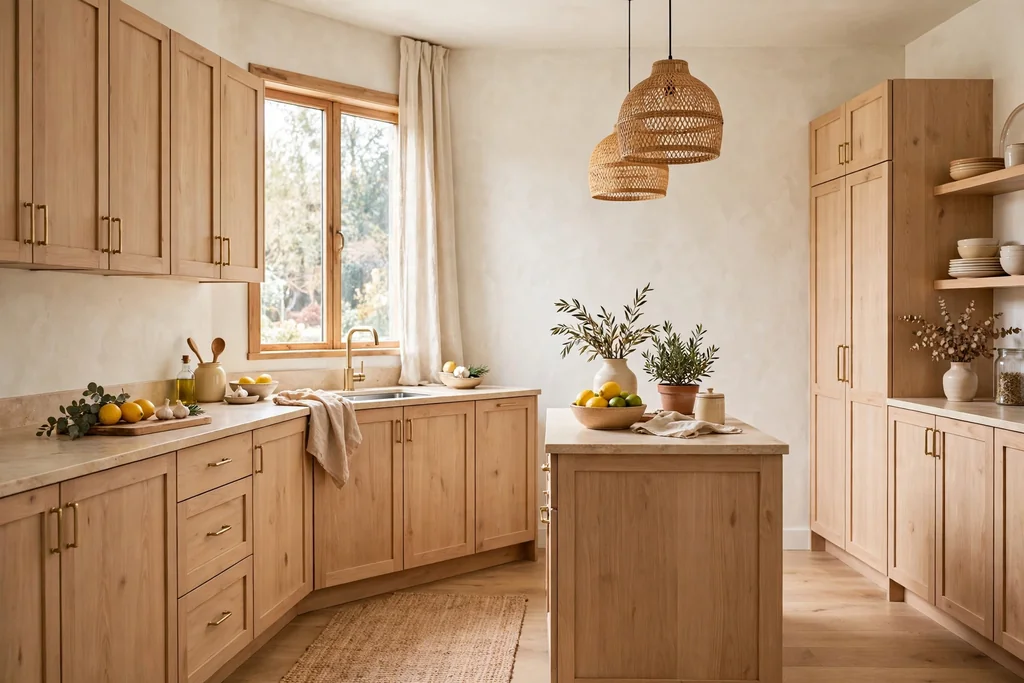
    Light wood kitchen cabinets with soft limewash walls in warm white.

    Pair light wood cabinets with limewash walls in a soft warm white or pale plaster tone, for a kitchen with gentle texture and no hard edges. Limewash adds subtle movement to the walls, softens the line between wall and wood, and pairs well with stone counters, linen, and plants. This suits a kitchen where flat painted walls feel too plain, but patterned tile would feel too busy.

    Test the limewash beside your wood sample first, since plaster tones shift a lot under kitchen lighting. Keep the counter and backsplash plain, so the wall texture stays the focus. Seal the limewash in the splash zone behind the sink and cooker, or use tile there and limewash on the remaining walls.

    Conclusion

    Light wood cabinets work best when one wood tone leads, one contrast supports it, and the rest of the room stays calm. Start with the sample test: a large piece of oak, ash, or maple beside your floor, counter, and wall color, in daylight and evening light. Then pick the pairing that fits your room, whether that is black hardware for definition, brass for warmth, a dark counter for depth, or a colored island for a focal point. Small rooms gain most from pale wood everywhere and warm under-cabinet light, while larger rooms can carry a dark island or a stone slab wall. Whichever idea you start with, keep counters mostly clear and repeat the wood once more, in stools, shelves, or a board, so the kitchen reads as one planned room.

    Save this list on Pinterest before your next kitchen refresh, and try one change first: hardware this week, lighting next week, and a larger cabinet or island change when the budget allows.

    FAQs

    Are light wood cabinets hard to keep clean?

    Light wood shows cooking splashes near the stove and sink, but a matte or satin finish wipes clean with a soft cloth and mild cleaner. Wipe doors near the hob weekly, keep water from sitting on wood finishes, and use a washable runner near the sink. Pale wood hides dust better than dark wood, but it shows grease film sooner, so a quick weekly wipe keeps it looking fresh.

    Which wood is best for light wood kitchen cabinets?

    Pale oak is the most common choice, with a warm grain that suits Shaker and flat-panel doors. Ash is paler and more even, which suits a modern kitchen, while light maple has a fine, smooth grain that suits a small or calm room. All three pair with white, cream, and stone counters. Order a large sample of each, and check it beside your floor and counter in daylight and evening light before ordering.

    Do light wood cabinets work in a small kitchen?

    Yes, light wood is one of the best choices for a small kitchen, since pale tones reflect light and keep a narrow room feeling open. Keep counters and backsplash pale, leave one wall free of uppers if you can, and use warm under-cabinet lighting in the evening. Avoid a dark counter in a very small kitchen, since it can close the room in, and store rarely used items elsewhere so the cabinets hold only daily gear.

    What countertop goes best with light wood cabinets?

    White stone, pale quartz, and butcher block are the safest pairings, since each keeps the room light and lets the wood grain show. White marble adds gentle movement, while butcher block adds warmth and suits chopping and baking. Dark stone works too, but only with plenty of daylight or on the island alone, so the room keeps its brightness. Keep the backsplash plain when the counter has strong veining.

    Should light wood cabinets have black or brass hardware?

    Both work, and the choice sets the tone. Matte black adds definition and a modern edge, which suits a large room where pale tones blur together. Brushed brass adds warmth and suits cream walls, wood floors, and classic door styles. Pick one finish and repeat it on knobs, pulls, and the tap, so the hardware reads as one set rather than a mix.

    Can I mix light wood cabinets with white cabinets?

    Yes, two-tone kitchens are a reliable way to use light wood without committing to it everywhere. Common splits are light wood lowers with white uppers, a light wood island in a white kitchen, or white perimeter cabinets with a wood pantry wall. Keep one wood tone and one white tone, repeat the wood once more in stools or shelves, and keep the counter and backsplash calm so the two finishes can do the work.
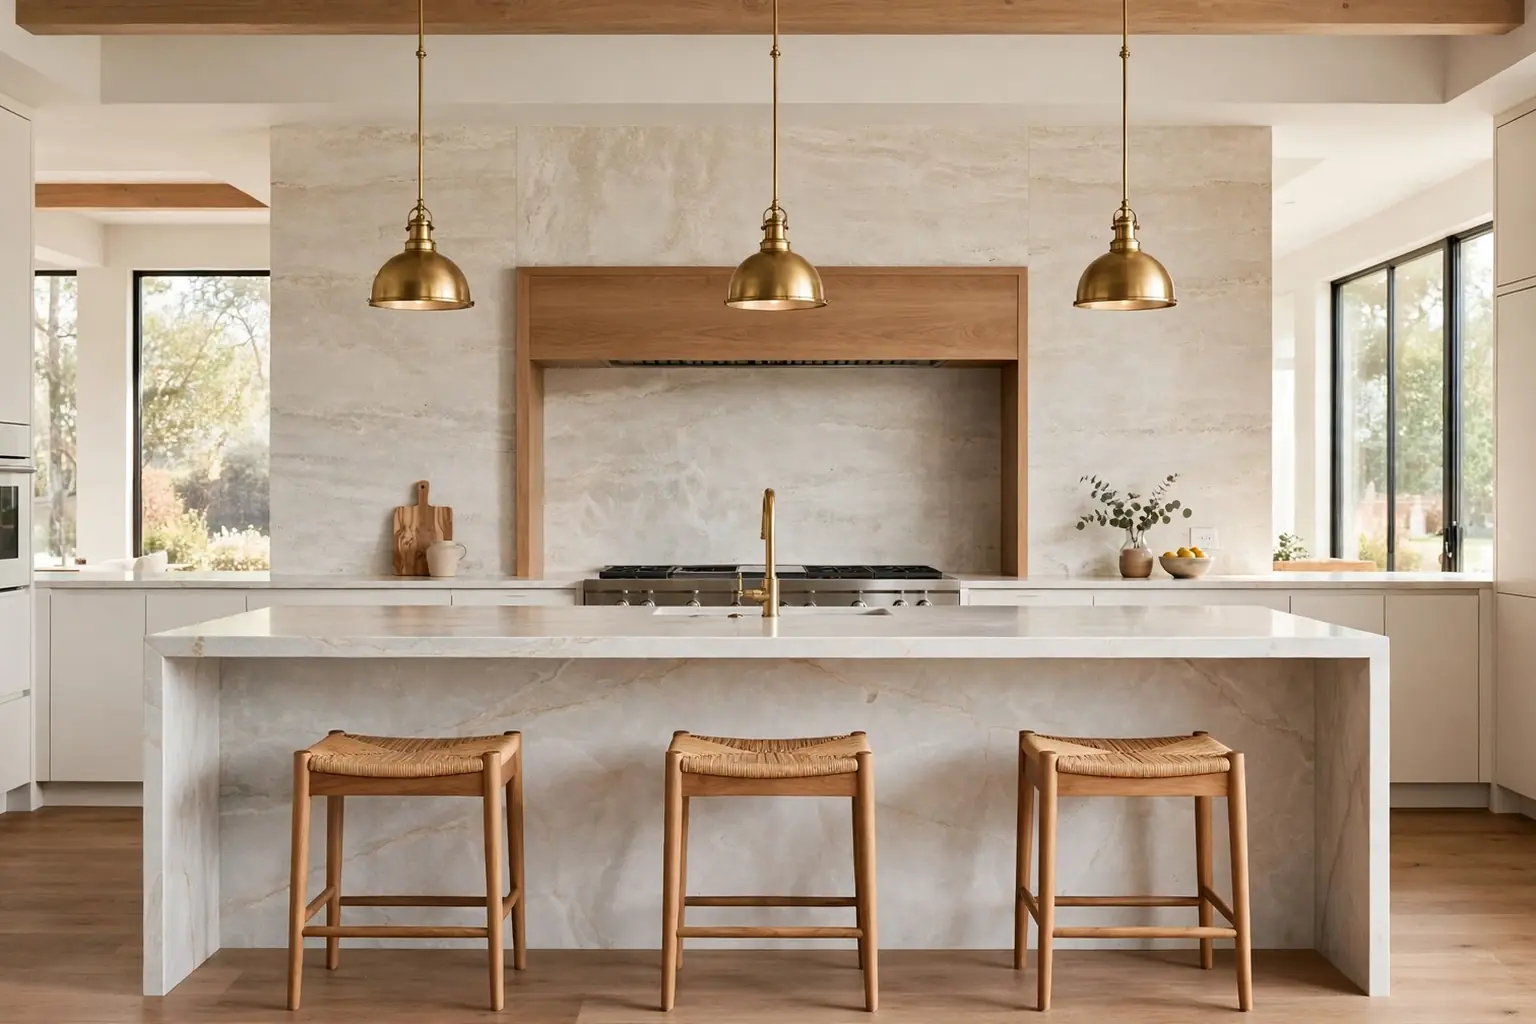
  • 13 Modern Luxury Kitchen Ideas That Bring Practical Style Home

    13 Modern Luxury Kitchen Ideas That Bring Practical Style Home

    A luxury kitchen earns its keep when it looks calm and cooks well on a Tuesday. The rooms that pull this off share a few habits: one or two fine materials used with restraint, storage that keeps counters clear, light layered for cooking and evening meals, and surfaces that wipe clean without fuss. These 13 modern luxury kitchen ideas follow that practical line, from handleless cabinets and waterfall islands to pantry walls and coffee stations. Pick the change that fixes your biggest daily frustration first, then add the next one in stages. For a broader look at refined rooms, these elegant kitchen ideas show how marble, brass, and warm wood work together without feeling formal.

    Key Takeaways

    • Keep the palette calm: two or three main colors, one metal finish repeated through the room, and one wood tone.
    • Spend on the surfaces you touch daily: counters, drawer runners, taps, and lighting, before decorative extras.
    • Give every daily job a home: prep, cooking, coffee, and clearing up, so counters stay mostly clear.
    • Layer the light: daylight, under cabinet task light, and pendants on a dimmer, so the room works at night as well as by day.
    • Choose finishes you can clean in minutes, since a luxury kitchen that is hard to keep clean soon stops feeling luxurious.
    • Test large samples beside your floor, counter, and cabinet color in daylight and evening light before a large change.

    1. Handleless Flat-Front Cabinets

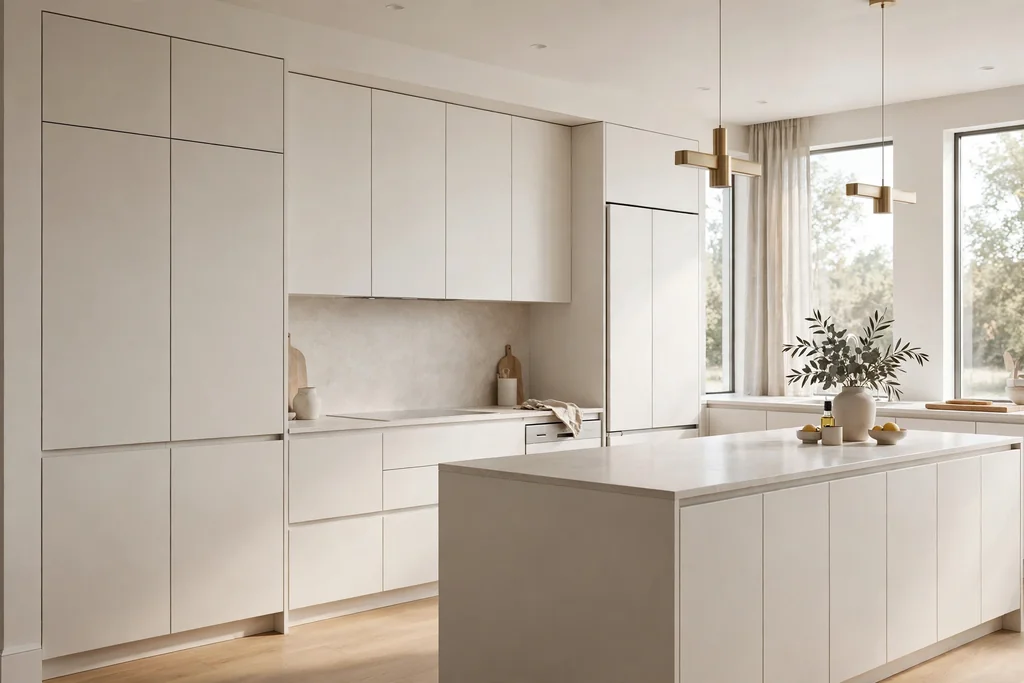
    Modern luxury kitchen with handleless flat-front cabinets in warm white.

    Flat-front cabinets with no visible handles give a modern luxury kitchen its quiet base. The doors read as one calm wall, which lets the counter, the island, and one good material carry the room. Choose a warm white, soft greige, or pale sage, and keep the finish matte or satin so fingerprints show less than on high gloss.

    Fit push-to-open doors on uppers you reach often, and slim recessed channels on base units where a grip matters. Check the door edge profile before ordering, since a sharp edge feels less comfortable than a softly rounded one. If you are keeping existing cabinet boxes, new flat fronts and a fresh paint job can give much of the same look for less work, provided the boxes are square and sound.

    2. A Waterfall Island in Quartz

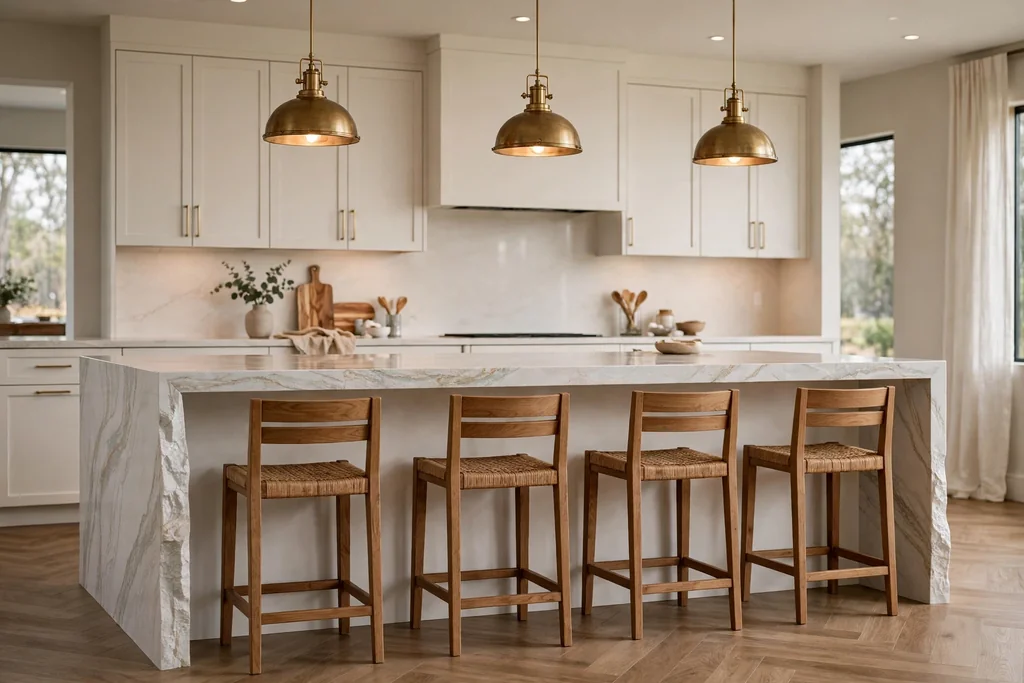
    Kitchen island with a waterfall edge in pale veined quartz and wood bar stools.

    A waterfall island runs the counter stone down both ends to the floor, so the island reads as one solid block rather than a slab on legs. Pale quartz with gentle veining suits this best, since the pattern can flow over the edge and down the side in a near match. Keep the rest of the island simple, with a plain front and no competing trim, so the stone does the work.

    Plan the seating side and the working side before ordering. A 12 inch overhang suits counter stools, while the working side needs a clear walkway and drawers that open fully. Ask the supplier how the vein match at the mitred edge will look, and view a full slab if you can, since a small sample will not show how veining moves across a large island.

    3. A Full-Height Stone Slab Backsplash

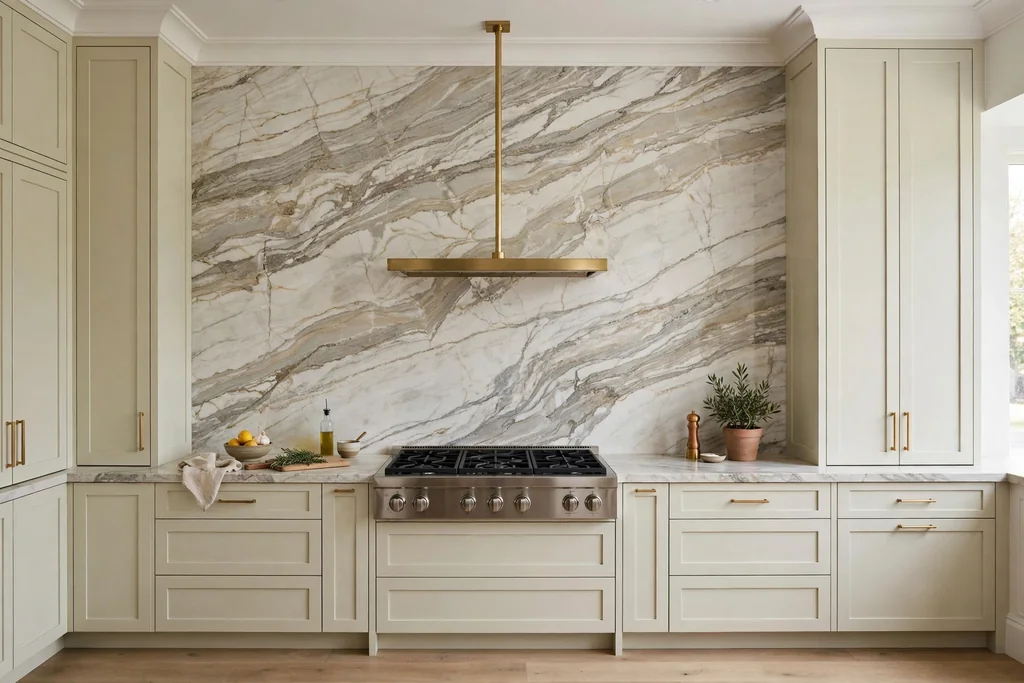
    Kitchen cooking wall with a full-height veined stone slab backsplash behind a range.

    A full-height stone slab backsplash runs from the counter to the underside of the cabinets, or to the ceiling, with no grout lines to clean. Using the same stone as the counter makes the cooking wall read as one planned surface, which suits open plan rooms where the wall stays in view. Choose gentle veining for a calm look, or a bolder vein if the wall is meant to be the main feature.

    Stop the slab at a clear line, such as the underside of a shelf, rather than fading out mid wall. Seal the stone as the supplier advises, and wipe cooking splashes promptly near the range. For more wall options, from tile to steel, these kitchen backsplash ideas compare cleaning, grout, and where each surface works best.

    4. Layered Island Lighting

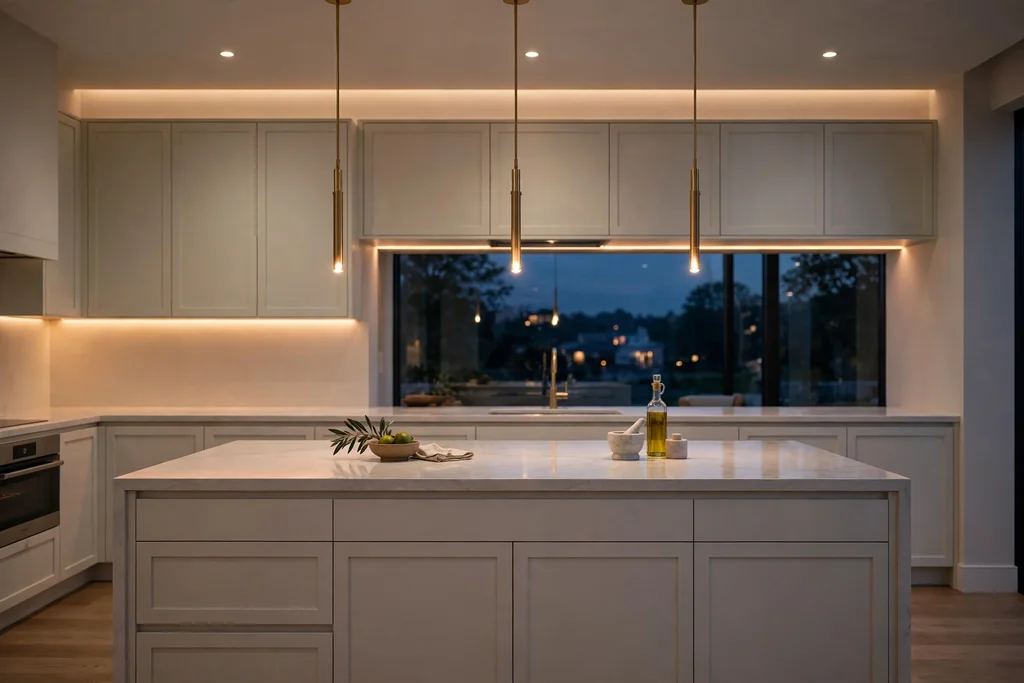
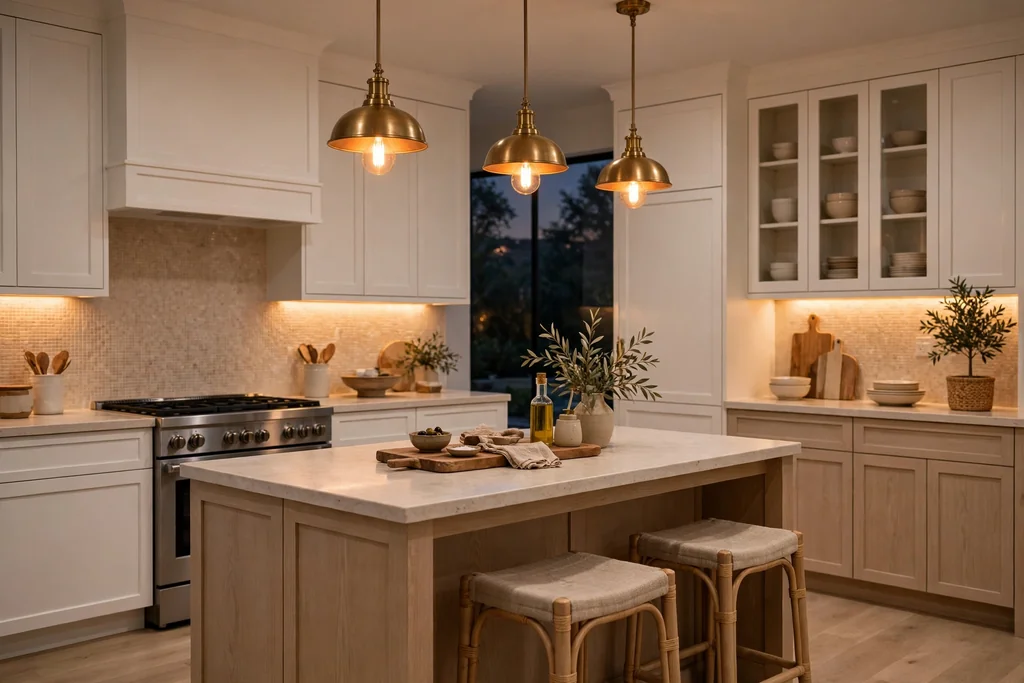
    Kitchen island at dusk with brass pendant lights and warm under cabinet lighting.

    One ceiling light rarely flatters a luxury kitchen. Layer three sources instead: slim pendants over the island for evening glow, LED strips under the upper cabinets for prep light, and a dimmer on the main circuit so the room can drop from cooking bright to dinner soft. Warm white bulbs keep food, wood, and skin tones looking natural.

    Hang pendants high enough to clear heads and steam, spaced evenly over the island, and match their metal to the tap or handles. Put the under cabinet strips on their own switch so prep light can stay on while pendants dim. Dust pendant shades often, since kitchen pendants collect a grease film over time, and check that strip drivers sit where they can be reached for replacement.

    5. Panel-Ready Appliances for a Seamless Wall

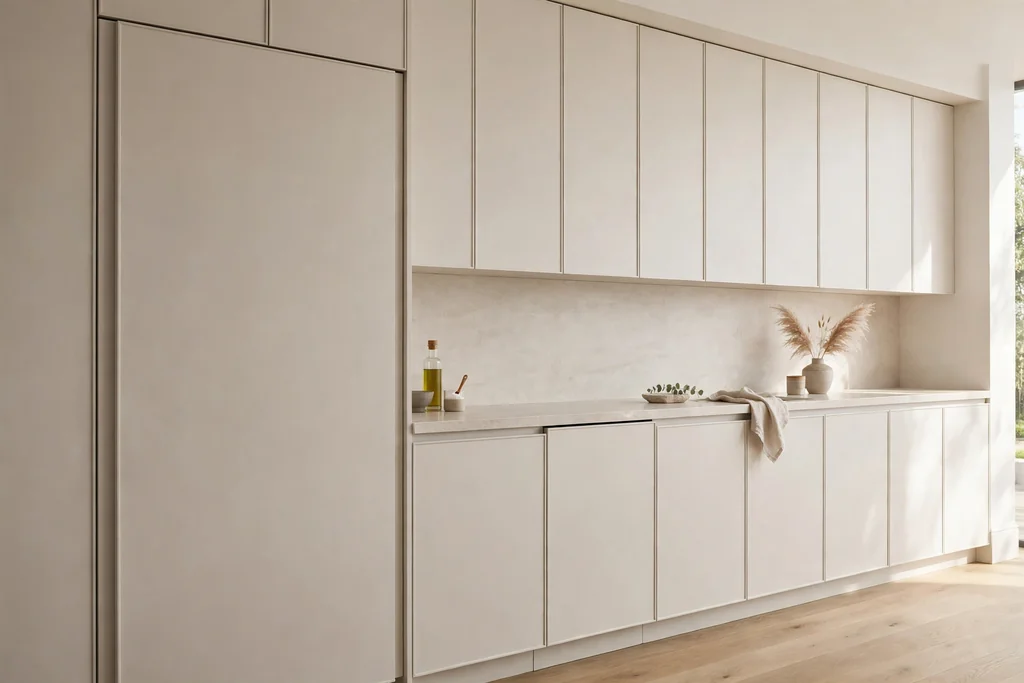
    Kitchen wall with panel-ready appliances hidden behind matching cabinet fronts.

    Panel-ready appliances hide the fridge and dishwasher behind cabinet fronts that match the rest of the run, so the kitchen wall reads as furniture rather than a row of machines. This suits small and open plan kitchens best, where appliances would otherwise break the calm line of the cabinets.

    Order panels with the cabinets, not after, so the color, grain direction, and handle position match. Check ventilation gaps and door swing clearances with the appliance maker before the panels are cut, since a panel that binds will wear fast. Keep one appliance visible if you like the professional look, such as a range, and panel the rest, so the room still has a clear cooking anchor.

    6. A Warm Walnut Accent

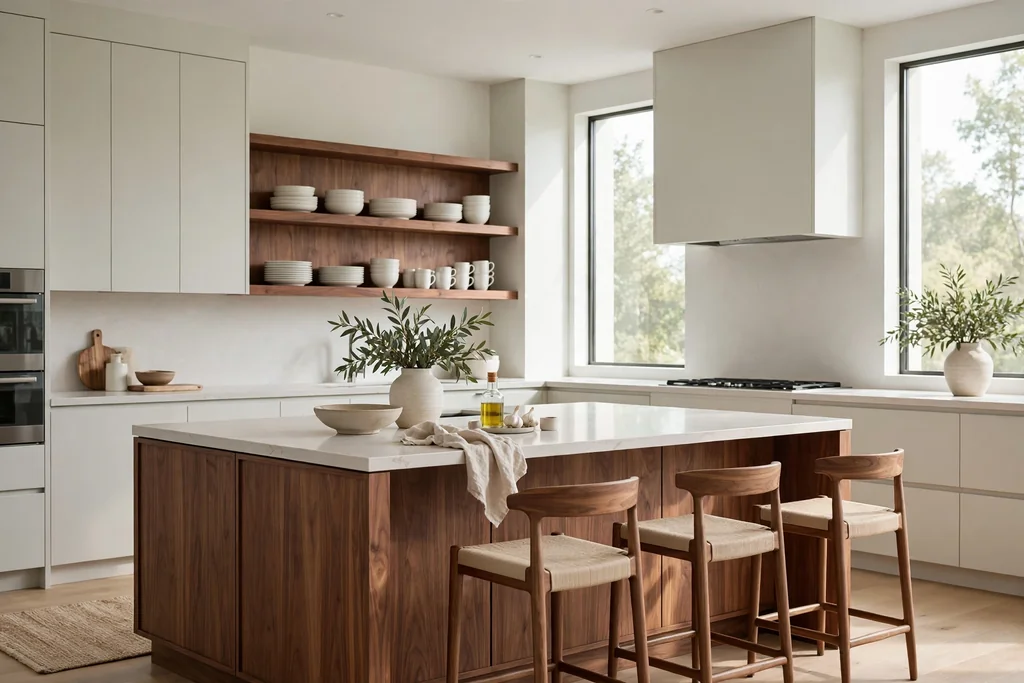
    Modern luxury kitchen with a warm walnut island base and open walnut shelves.

    One warm wood accent stops a pale luxury kitchen from feeling cold. Use walnut for the island base, one run of open shelves, or a thick shelf above the coffee station, and keep the rest of the cabinets pale so the wood reads as a deliberate note. Walnut pairs well with brass, cream stone, and soft white paint.

    Seal wood near the sink and range, and wipe spills promptly so the surface stays even. If solid walnut stretches the budget, a walnut veneer on the island base gives the same tone with less cost and less movement over time. Repeat the wood once more, in stools or a chopping board left on the counter, so the accent looks planned rather than random.

    7. A Statement Range Hood

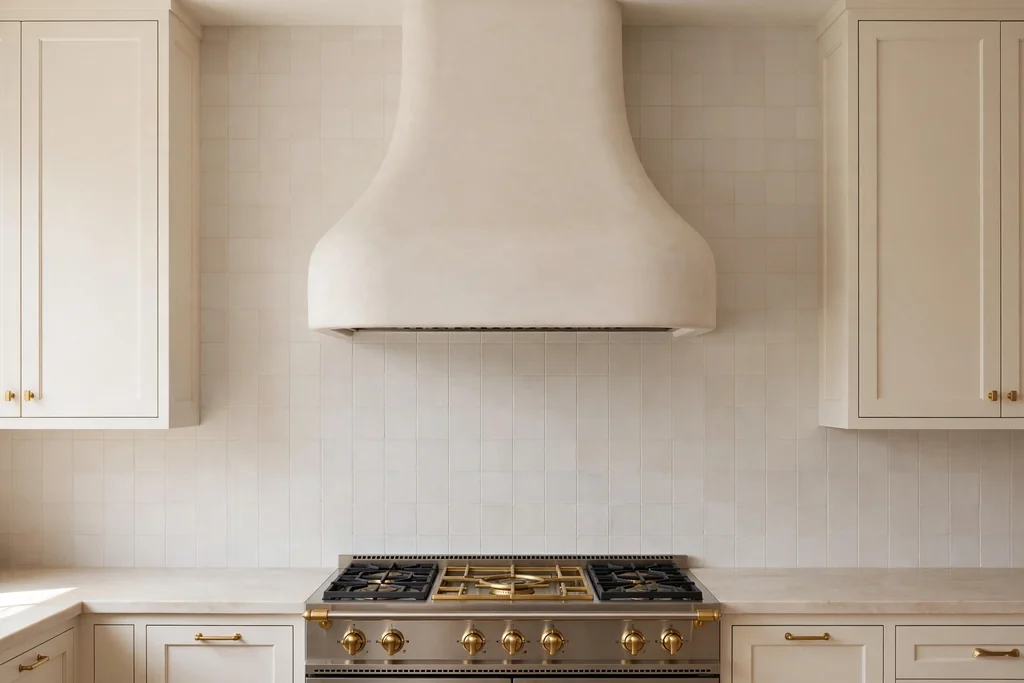
    Kitchen cooking wall with a statement plaster range hood above a range.

    A statement range hood turns the cooking wall into a focal point without changing every cabinet. A plaster hood in a soft curved chimney shape suits a calm modern kitchen, while a slim metal hood suits a room with steel appliances and a professional range. Keep the hood shape simple and the wall around it plain, so the hood carries the interest.

    Choose a washable paint finish for plaster, since hood surfaces collect grease film, and keep decorative trim clear of the heat zone. Check extraction rates and ducting with the maker before fixing the hood, since a hood that looks right but extracts poorly will leave cooking smells in an open plan room. For a softer version, paint the hood the same color as the walls and add a darker tile behind the range instead.

    8. Lit Glass-Front Display Cabinets

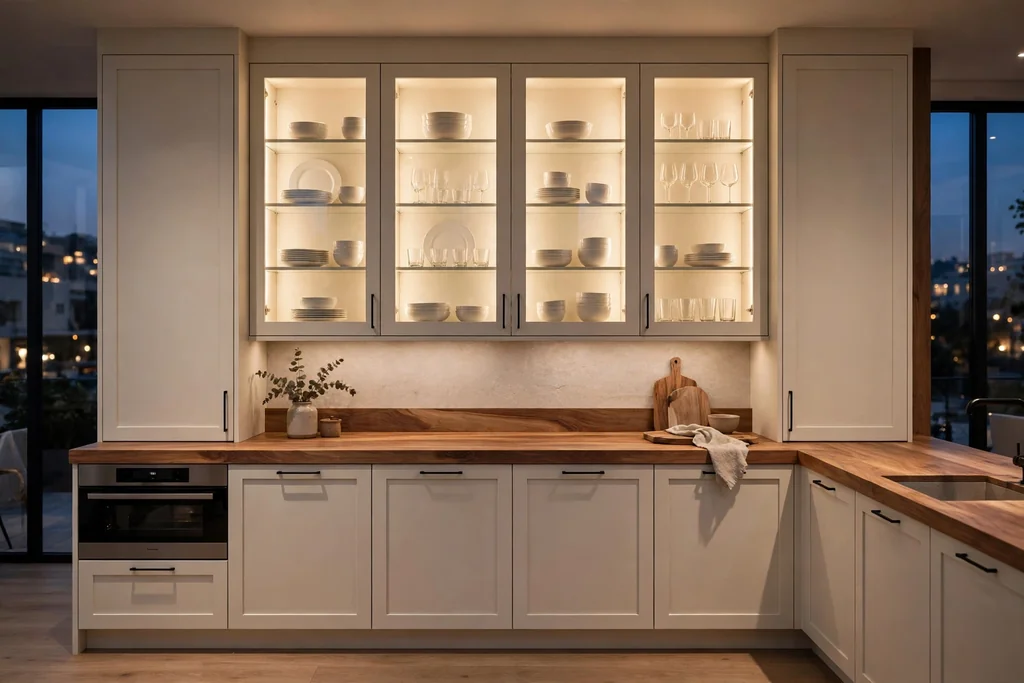
    Kitchen with lit glass-front upper cabinets showing white dishes and glassware.

    Glass-front upper cabinets break up a wall of solid doors and give you a place to show the pieces you actually use, such as white dishes, glassware, and wooden bowls. Add a small light inside each cabinet so the display glows in the evening, and the wall feels lighter after dark as well as by day.

    Use glass fronts on one run only, or on either side of a window or range, rather than everywhere, so the display stays calm. Keep what you show to a small set of related pieces, and leave space on each shelf so the cabinet does not look crowded. Clear glass shows everything, so it suits tidy households, while reeded glass softens the view and hides a less tidy shelf.

    9. Island Seating with Hidden Storage

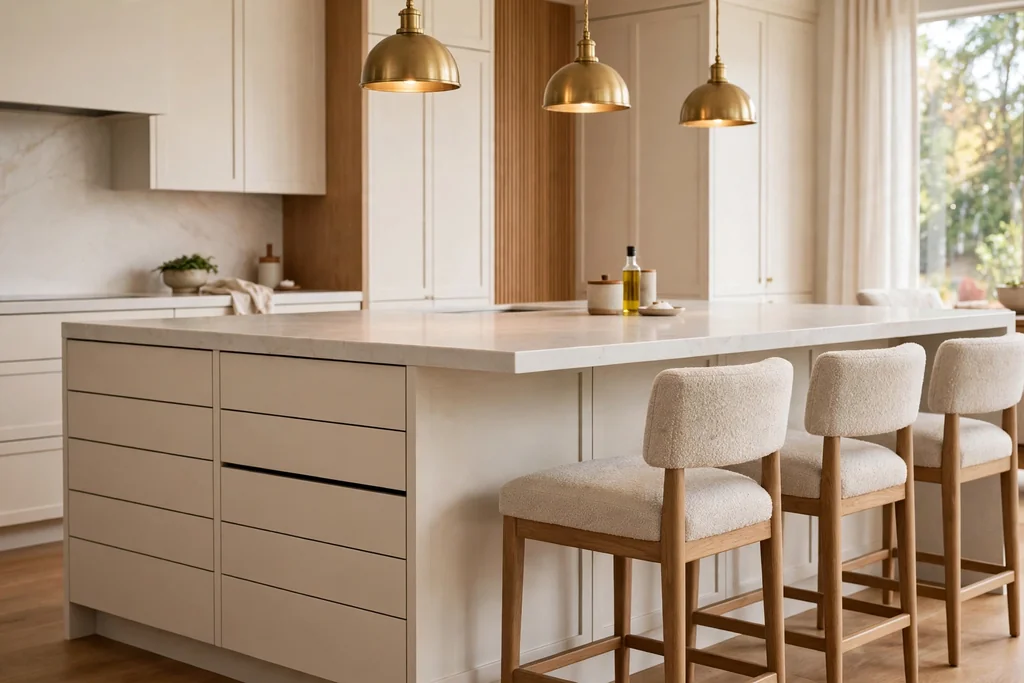
    Kitchen island with seating on one side and stools tucked under a quartz overhang.

    An island earns its floor space twice when one side seats people and the other side stores tools. Put seating on one side only, with stools that slide fully under the overhang, and deep drawers or a pull-out bin on the working side. A wood stool warms a stone top, while a washable cushion softens the seat for long mornings.

    Leave a clear walkway on the cooking side, and measure stool height against the counter before buying, since a stool even an inch too tall makes the overhang uncomfortable. If the room is small, a narrow island on lockable wheels can give the same prep and seating benefit and roll away when you need the floor back. Keep the island top clear apart from one tray, so it stays ready for prep.

    10. A Floor-to-Ceiling Pantry Wall

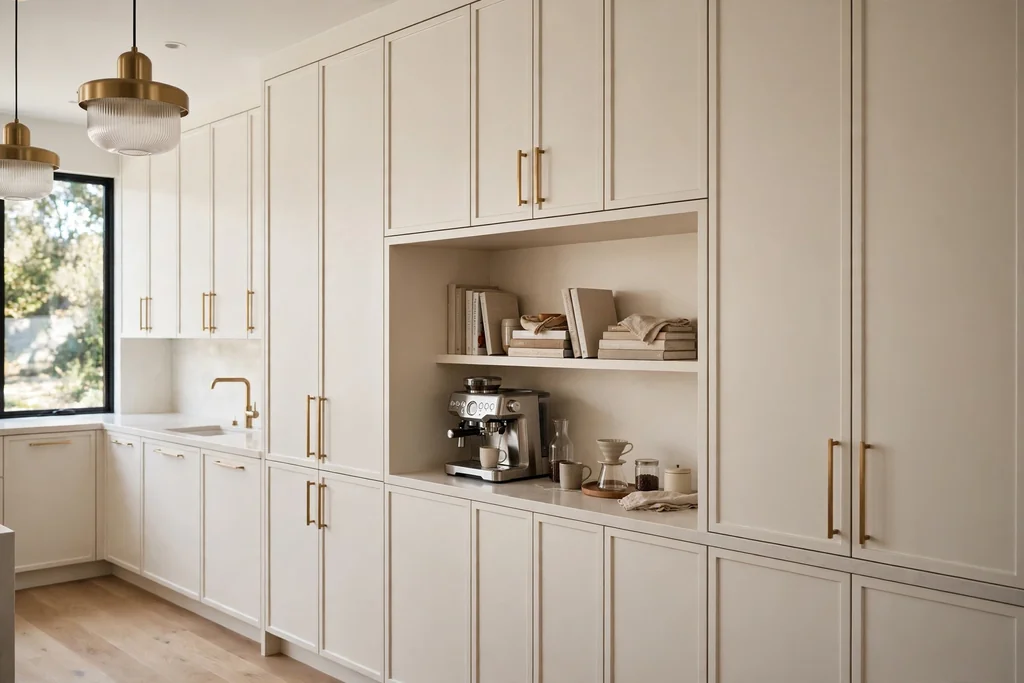
    Floor-to-ceiling pantry wall in warm white with an open niche and coffee station.

    A floor-to-ceiling pantry wall in the same color and handle style as the rest of the cabinets gives a kitchen a large amount of closed storage that reads as one calm panel. Put daily food at hand height, heavy items low, and rarely used items up top, and add one open niche for cookbooks or a coffee station so the tall run does not feel like a blank wall.

    Keep the pantry wall clear of the main cooking path, so doors can open without blocking the range or sink. Label the inside of doors or shelf fronts if more than one person cooks, so items return to the same spot. A pantry wall suits a large kitchen, or a small one where a separate pantry room is not possible, and it keeps bulk buying out of sight.

    11. Deep Drawers and Pull-Out Storage

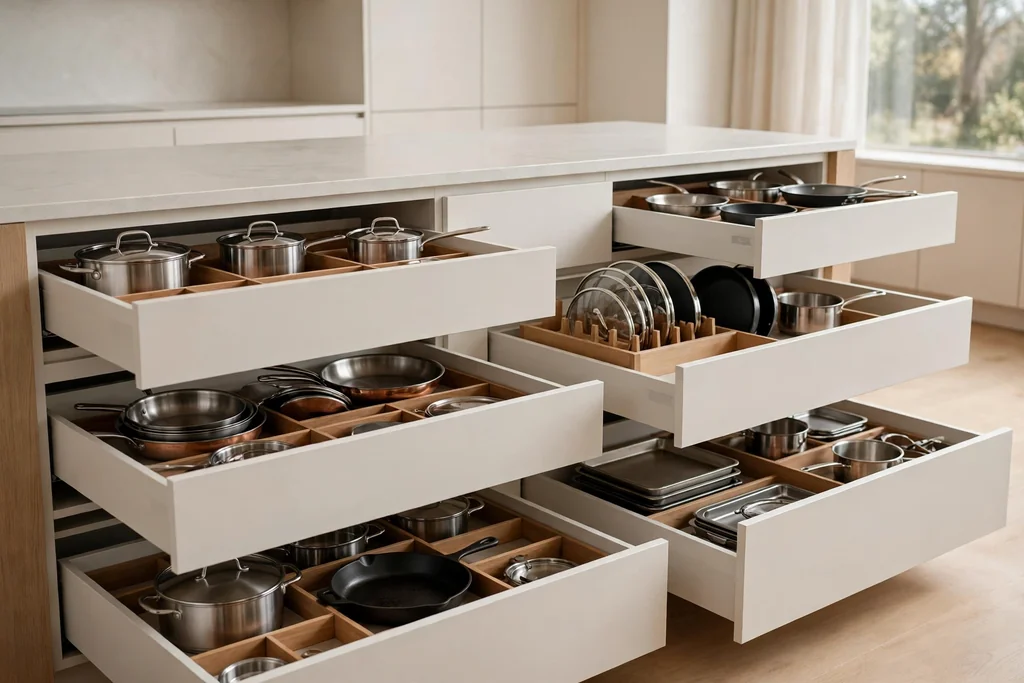
    Kitchen deep drawers pulled open showing organized pots, pans, and dividers.

    Deep drawers beat low cupboards for heavy items, since you can see and reach a pot without crouching into a dark corner. Fit wide drawers for pots and pans near the range, a pull-out larder beside the fridge, and dividers inside each drawer so lids, boards, and trays each have a slot. Soft close runners keep the room quiet and protect drawer fronts from slamming.

    Measure your largest pot and tallest pan before ordering drawer depths, and check the weight rating of the runners, since a drawer full of cast iron is heavy. Keep one shallow drawer near the prep zone for knives, peelers, and scissors, so small tools do not drift into deep drawers. Good drawer storage is the quiet luxury move: it changes daily cooking more than a new surface does.

    12. A Coffee and Breakfast Station

    Kitchen coffee and breakfast station in a recessed niche with cups and jars.

    A coffee and breakfast station gathers the machine, cups, jars, and breakfast bowls in one recessed niche or a tall cabinet with doors that fold back. This keeps morning clutter off the main counter and gives the first hour of the day a clear home. Place it near the fridge and away from the main cooking path, so breakfast makers and cooks do not collide.

    Add a small shelf for cups, a drawer for filters and spoons, and a power point inside the cabinet if your wiring allows it. Use closed doors or a tambour front so the station can vanish after breakfast, and wipe the niche weekly, since coffee splashes stain pale paint fast. If space is tight, a single shelf above a small counter run with a tray underneath gives much of the same benefit.

    13. Durable Finishes That Stay Easy to Clean

    Mostly clear pale quartz counter with a tray, sealed stone backsplash, and a brass tap.

    Luxury fades fast when a surface stains, chips, or shows every mark. Choose finishes that survive daily cooking: sealed quartz or sintered stone counters, wipeable satin cabinet paint, a sealed stone or porcelain backsplash, and a tap finish that resists water marks. Test a sample with tomato, oil, and coffee before committing, and ask the supplier how to reseal or repair each surface.

    Keep counters mostly clear, with one tray for oil, salt, and a board, so wiping down takes minutes rather than a full clear-out. Use felt pads under stools and boards, trivets under hot pans, and cutting boards for knives, since small habits protect fine surfaces longer than any sealant. A kitchen that cleans easily gets used more, which is the real point of the room. For low cost ways to keep a kitchen looking polished, these kitchen ideas on a budget cover paint, hardware, lighting, and storage fixes that pair well with the ideas above.

    Conclusion

    A modern luxury kitchen works when practical choices sit underneath the refined look. Start with calm cabinets and one fine material, add layered light and storage that keeps counters clear, then finish with a pantry wall or coffee station that fits your daily routine. You do not need every idea at once: pick the one that fixes your biggest frustration, test large samples in your own light, and add the next change only when the first one feels settled.

    Save this list on Pinterest before your next kitchen trip, and work through it one area at a time: cabinets and counters first, then storage and light, then the comfort details that make the kitchen yours.

    FAQs

    What makes a kitchen look luxurious without a full remodel?

    One or two fine materials used with restraint do most of the work. Try a new tap and matching hardware, layered lighting with a dimmer, a stone-look counter section, or lit glass-front cabinets on one run. Keep the palette calm and counters mostly clear, since a tidy, well lit kitchen reads as more refined than a decorated but cluttered one.

    Is a waterfall island worth the cost?

    A waterfall island suits a kitchen where the island is the visual center and you want one solid, furniture-like block. It costs more than a standard island because the stone must match over the edge and down the sides, so view a full slab first and confirm the vein match at the mitred edge. If the island is mainly a work surface, a standard overhang with a good stone top gives much of the same benefit for less.

    What is the best countertop for a luxury kitchen that gets daily use?

    Sealed quartz is a strong everyday choice, since it resists stains and needs little upkeep, while marble suits cooks who accept sealing and prompt wiping of acidic spills. Sintered stone handles heat well and wipes clean, though fitting needs care. Test samples with tomato, oil, and coffee, and choose the surface you can live with on a busy weeknight, not only on a showroom visit.

    How do I mix metals in a luxury kitchen without it looking messy?

    Repeat one main metal through the room, such as brass on the tap, handles, and pendants, and use a second metal only in small, deliberate spots, such as black on a range or stool frames. Keep the second metal to one or two items, and avoid adding a third finish. If brass feels too yellow beside your cabinets, pick a brushed or aged brass rather than a bright polished one.

    Can a small kitchen still feel luxurious?

    Yes, if every choice earns its space. Handleless flat-front cabinets, panel-ready appliances, a floor-to-ceiling pantry wall, and deep drawers make a small kitchen feel calm and fitted. Keep the palette pale, the counters clear, and the lighting layered, and choose one feature, such as a stone backsplash or a walnut shelf, rather than several competing ones.

    How do I keep a luxury kitchen looking new over time?

    Wipe counters and the backsplash after cooking, seal stone on the schedule the supplier suggests, and use trivets, cutting boards, and felt pads to protect surfaces. Keep one tray for daily items so clearing the counter takes minutes, and fix small chips or worn seals early, since small damage spreads faster than most people expect.


  • 34 Irish Kitchen Ideas for a Cozy Seasonal Update

    34 Irish Kitchen Ideas for a Cozy Seasonal Update

    An Irish kitchen earns its warmth from useful things done well: a deep sink, a dresser full of everyday pottery, a wood table that seats everyone, and light that stays soft through a grey afternoon. These 34 Irish kitchen ideas cover cabinets, worktops, storage, seating, textiles, and seasonal touches, so you can borrow one idea or build a whole cottage look over time. Start with the parts you touch daily, such as the sink, the cooker, and the table, then add colour and pattern around them. For a lighter base to pair with cream or sage cabinets, these white kitchen ideas show how pale units keep a small room bright.

    Key Takeaways

    • Start with the working core: a deep sink, a clear worktop, and a table or island you can sit at.
    • Cream, sage, navy, and warm wood make a calm base that suits both old cottages and newer homes.
    • A dresser, open shelves, and a pantry keep everyday pottery and jars in reach and on show.
    • Natural linen, wool, wood, and stone add warmth without needing a full refit.
    • Layer light with pendants, under-cabinet strips, and daylight from a clear window.
    • Change the season with textiles, greenery, and table displays, not with new cabinets.

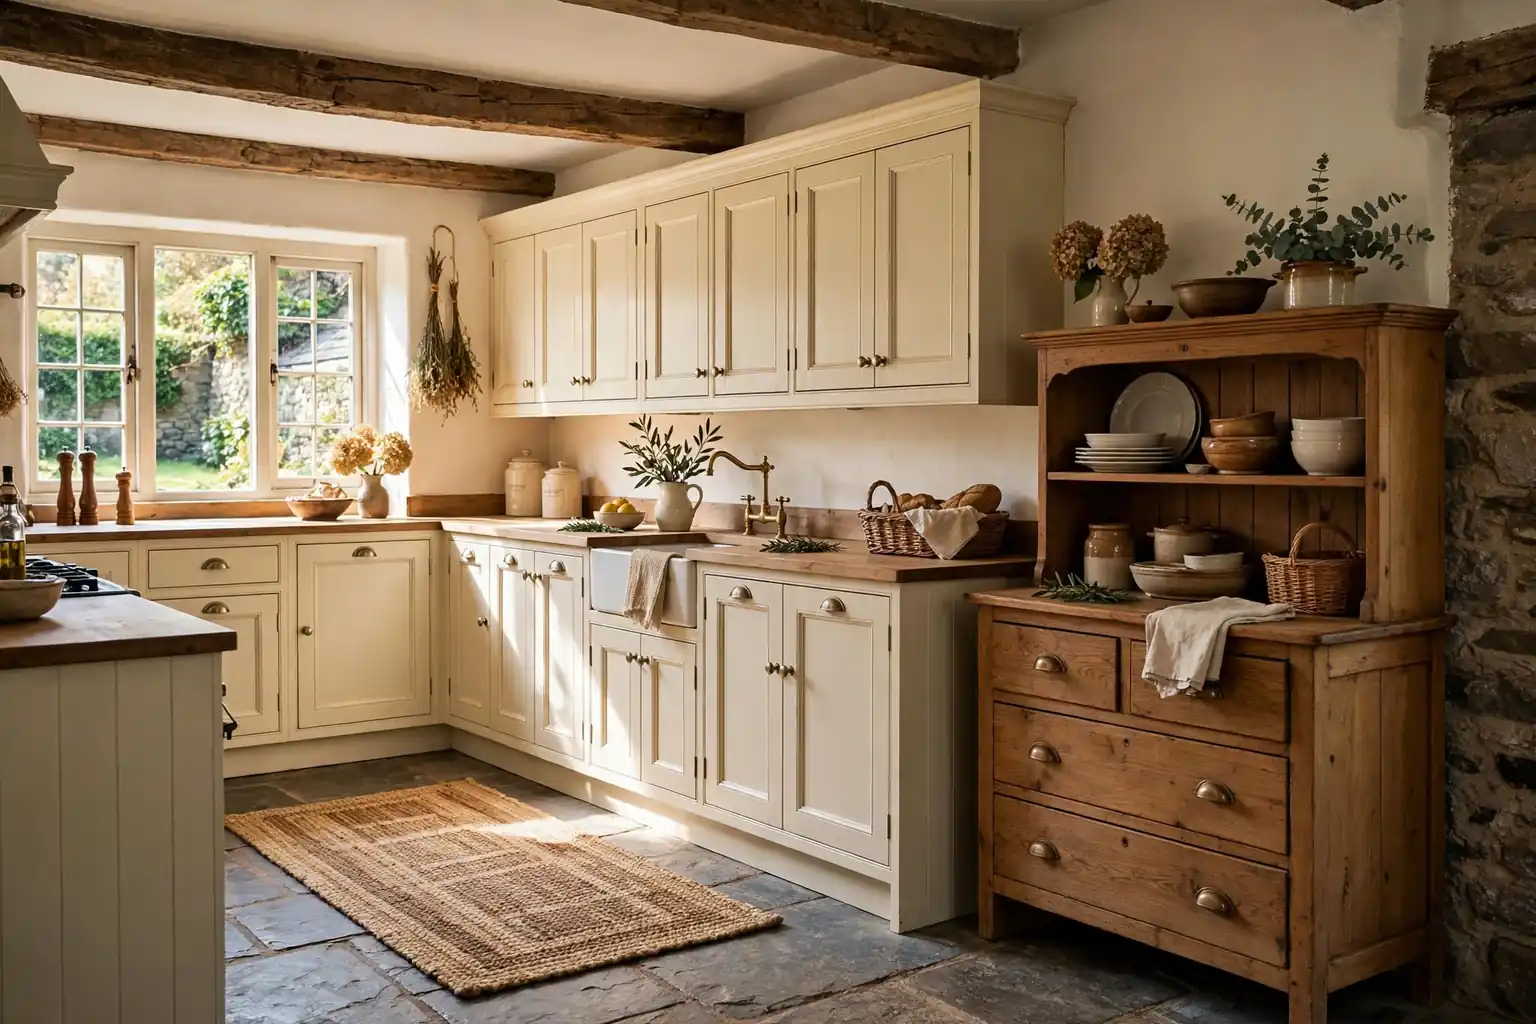
    1. Cream Shaker Cabinets with Brass Knobs

    Kitchen with cream Shaker cabinets and brass knobs.

    Cream Shaker cabinets give an Irish kitchen a calm, classic base that works with wood floors, stone counters, and coloured islands. The flat panelled doors suit both cottages and newer homes, and cream keeps the room bright on dull days. Brass knobs add a warm detail that suits the cream without looking fussy.

    Keep wall colour warm white so the cream reads as cream, not yellow, and repeat the brass on the tap or pendant fittings for a tied look. If your cabinets are sound, painting them cream and swapping the knobs can give most of the effect for far less work than a full refit.

    2. Sage Green Painted Cabinets

    Kitchen with sage green cabinets and a wood worktop.

    Sage green cabinets bring a soft country colour into the kitchen without darkening it. The green sits well with cream walls, wood worktops, and white pottery, and it suits a cottage or a farmhouse style home. It also hides everyday marks better than a very pale finish.

    Pair sage units with brass or dark bronze handles, and keep the worktop warm wood or pale stone so the green stays the main colour. Paint a test patch beside the window and beside the cooker, since sage can look greyer in low light than it does in the shop.

    3. Deep Navy Island with Cream Units

    Kitchen with a deep navy island and cream wall units.

    A deep navy island gives the kitchen a clear centre while cream units around the walls keep the room light. The contrast suits a larger kitchen best, where the island can hold seating, storage, and a worktop in one place. Navy also pairs well with brass, wood, and white pottery.

    Keep the island top pale or wood so the navy does not feel heavy, and use the same navy on one dresser or a bench cushion to link the room. If the kitchen is small, use navy on a single run of base units instead of a full island.

    4. Wood Dresser for Everyday Pottery

    Wood dresser in a kitchen holding plates, bowls, and jugs.

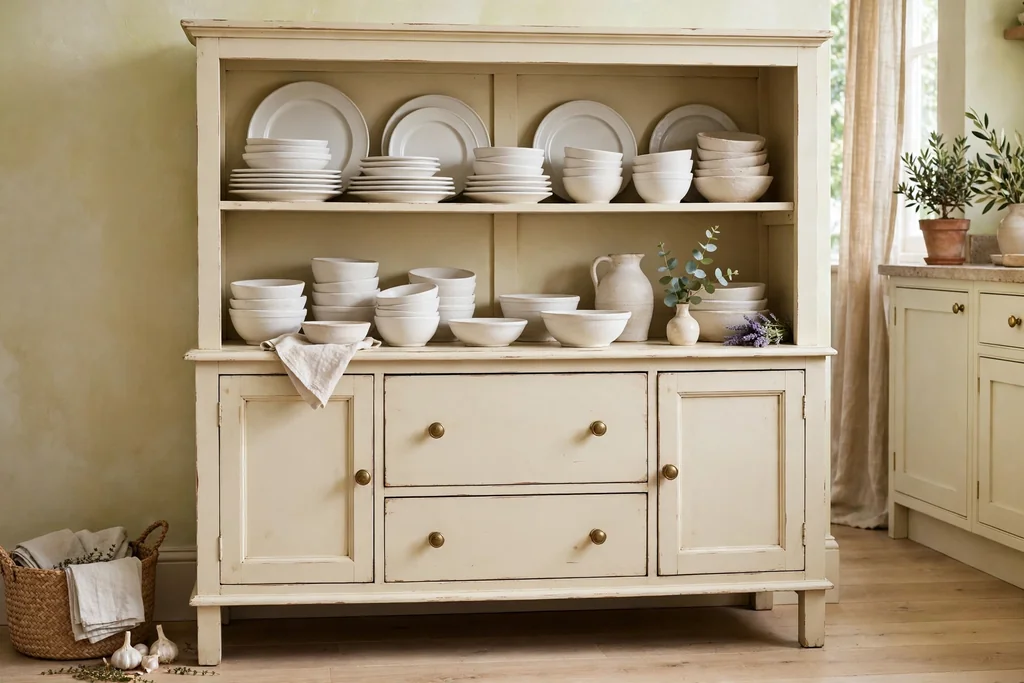
    A freestanding wood dresser is the heart of many Irish kitchens, holding plates, bowls, jugs, and mugs where they are easy to reach. It adds storage without fitted units, and the open top lets you show pottery and a small plant. A dresser also suits a rented home, since it moves with you.

    Group plates by size, keep daily mugs on hooks or on the lowest shelf, and leave one shelf partly clear so the display does not look crowded. A painted dresser in cream or sage can match the cabinets, while a plain wood dresser adds warmth to a pale room.

    5. Belfast Sink with a Bridge Tap

    Belfast sink with a bridge tap in a cottage kitchen.

    A Belfast sink suits an Irish kitchen because it is deep, wide, and practical for large pots, baking trays, and flower buckets. The front apron gives it a farmhouse look, and a bridge tap with two handles suits the period style. It works best with a wood or stone worktop that can support its weight.

    Check the cabinet and floor support before fitting, since a ceramic Belfast sink is heavy when full of water. Keep a wooden draining board or a rack beside it, and choose a tap height that clears tall pots without splashing.

    6. Open Shelving with Stoneware and Jugs

    Open kitchen shelves with stoneware bowls and jugs.

    Open shelves above a worktop put stoneware, jugs, and bowls on show and free up cupboard space for less pretty items. They suit a cook who reaches for the same bowls daily, and they make a plain wall feel lived in. Keep the shelves to two or three runs so the wall does not look cluttered.

    Use the same colour family for most pieces, with one or two patterned jugs for interest, and keep heavy items low. Wipe shelves weekly, since open storage gathers dust and cooking grease faster than closed cupboards.

    7. Patterned Floor Tiles for a Cottage Floor

    Cottage kitchen with patterned floor tiles in blue and cream.

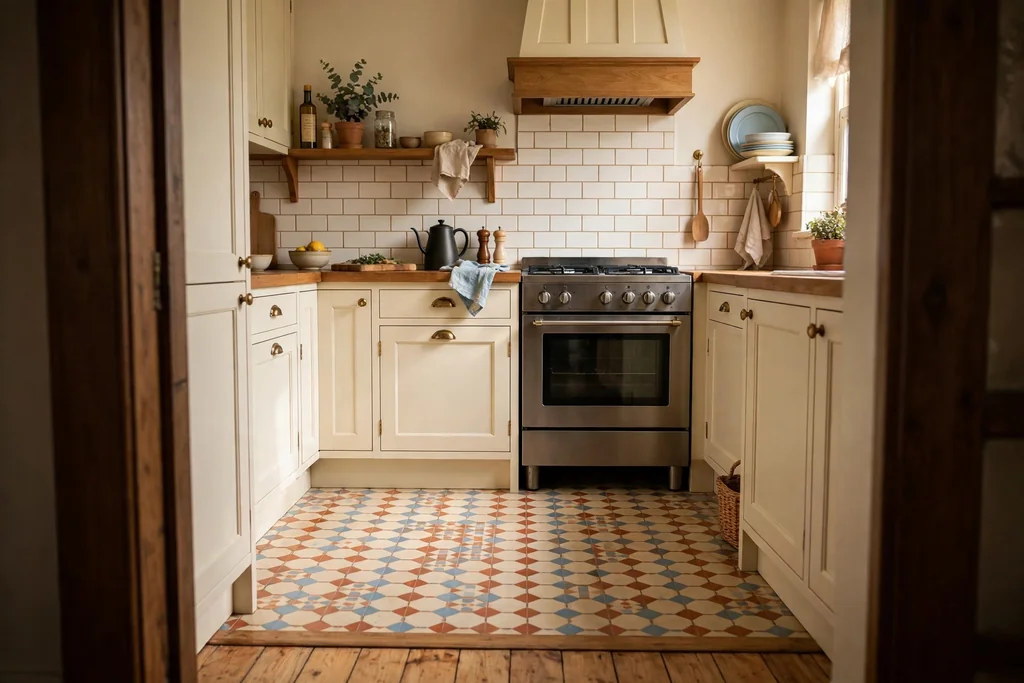
    Patterned floor tiles in soft blue, cream, and grey give a cottage kitchen a firm, easy to clean floor with plenty of character. They suit the area by the sink and cooker, where spills are common, and they pair well with plain cabinets. For tile ideas around the cooker and sink, these kitchen backsplash ideas show how pattern can stay calm when the rest of the room is plain.

    Lay the pattern straight and keep grout a mid tone, since very pale grout stains in a kitchen. If patterned tiles feel too bold for the whole floor, use them in a bordered panel by the sink and plain tiles or wood elsewhere.

    8. Exposed Beams and a Plank Ceiling

    Kitchen with exposed wood beams and a pale plank ceiling.

    Exposed beams and a painted plank ceiling give a kitchen a cottage structure that feels honest and warm. Pale painted planks keep the ceiling light, while darker beams add contrast and a sense of age. This suits a kitchen with good ceiling height, where beams do not press down on the room.

    Keep lighting simple with pendants hung below the beams, and avoid fixing heavy items to the beams without checking their strength. If the beams are not original, a few well placed wood beams can give the same look without a full ceiling rebuild.

    9. Stone Alcove for the Cooker

    Stone alcove around a cooker in a cottage kitchen.

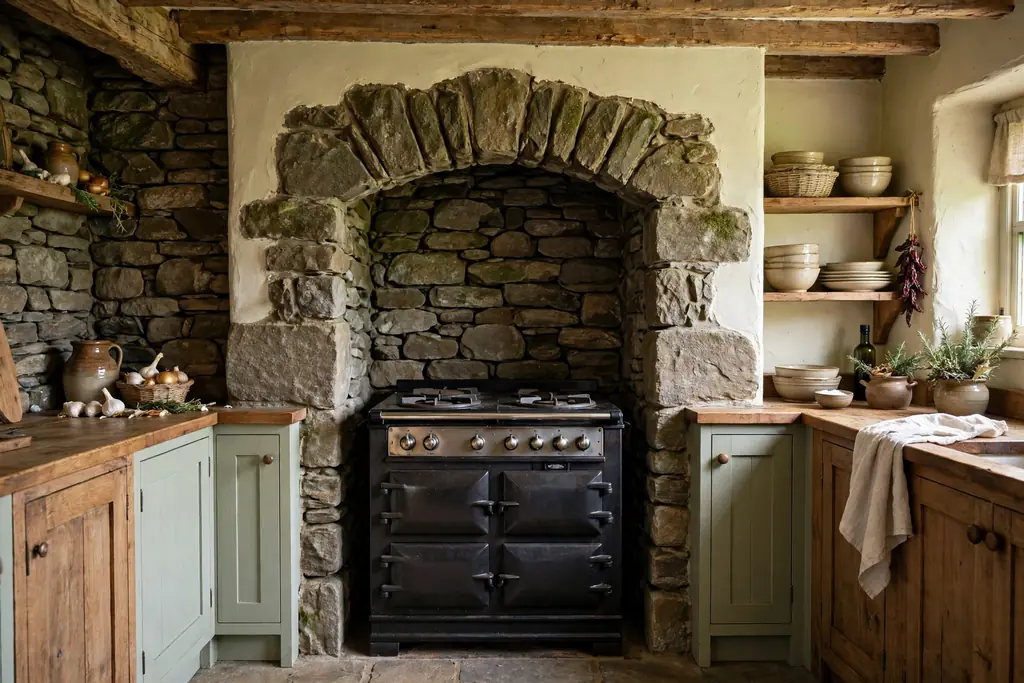
    A stone or plaster alcove around the cooker gives the kitchen a hearth-like centre and keeps heat and splashes contained. It suits a range cooker best, and it gives a natural place for a shelf holding oils, herbs, and a clock. The alcove also frames the cooker as the working heart of the room.

    Keep the alcove wide enough to move pots safely, and use a heat-safe surface behind the cooker. A wood mantel shelf above the alcove holds small items, but keep it clear of direct heat and steam.

    10. Cream Range Cooker as the Focal Point

    Cream range cooker in a cottage kitchen with worktop beside it.

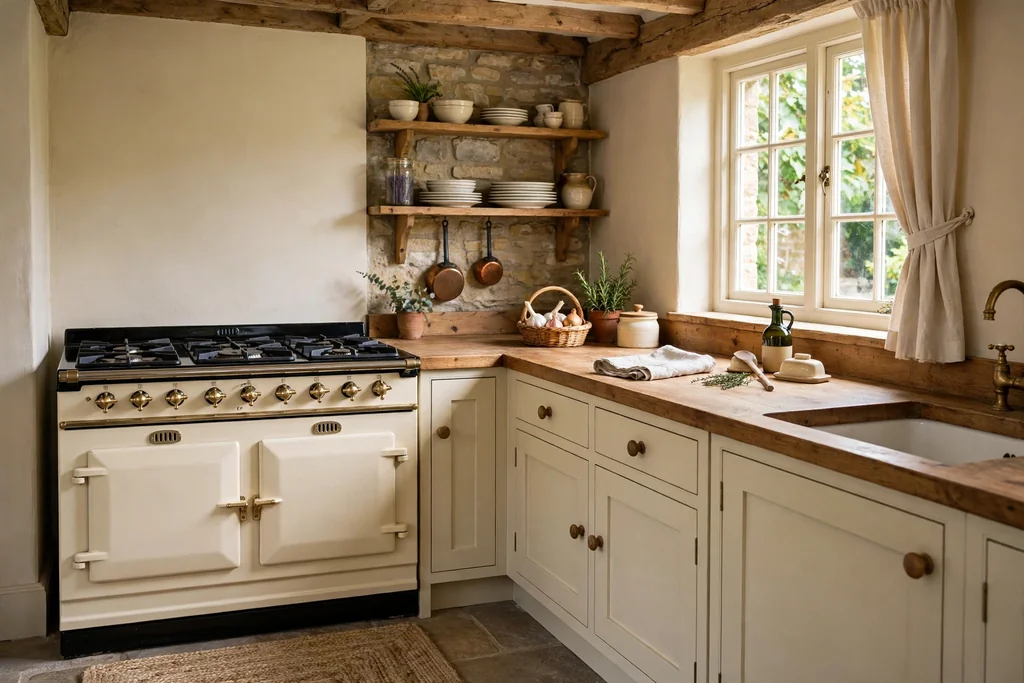
    A cream range cooker brings steady heat, oven space, and a classic look to an Irish kitchen, and it suits baking, roasting, and slow cooking. Its size makes it a natural focal point, so the rest of the kitchen can stay plain around it. Cream suits both painted and wood cabinets.

    Plan the layout so there is worktop on at least one side for hot trays, and keep a rail or hook nearby for oven gloves and towels. A range needs good ventilation and a heat-safe floor, so check the maker guidance before choosing the model.

    11. Linen Cafe Curtains at the Window

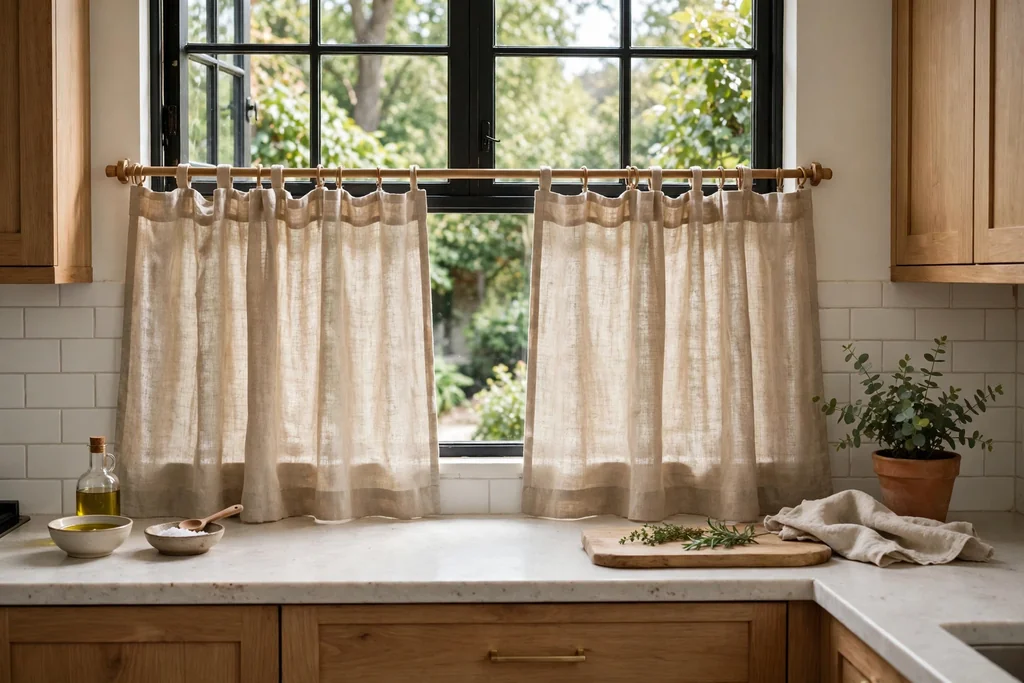
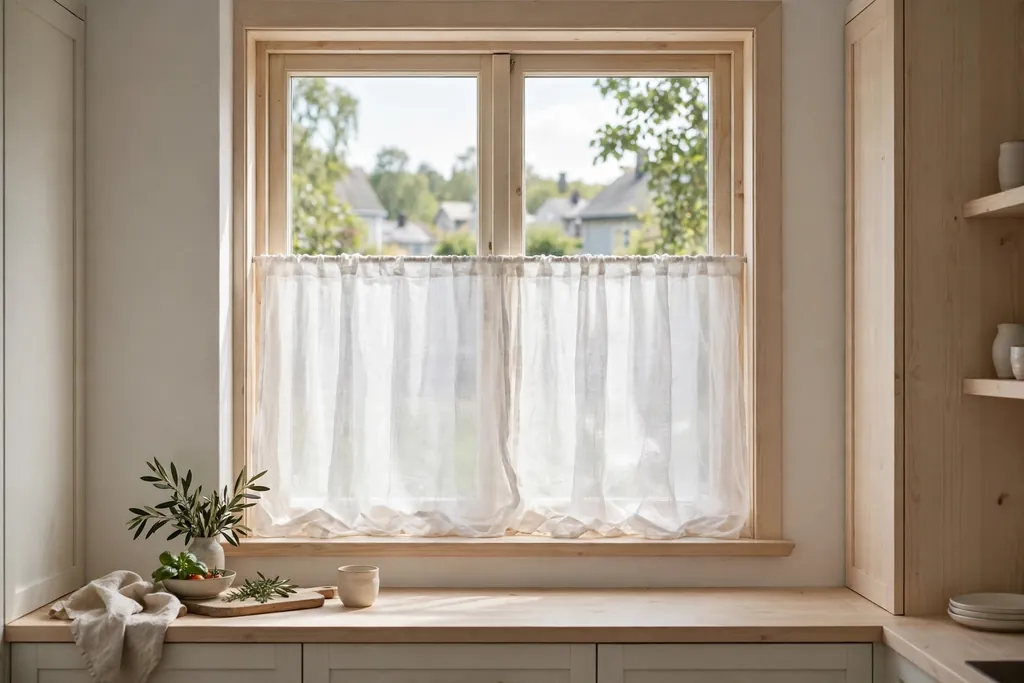
    Kitchen window with natural linen cafe curtains.

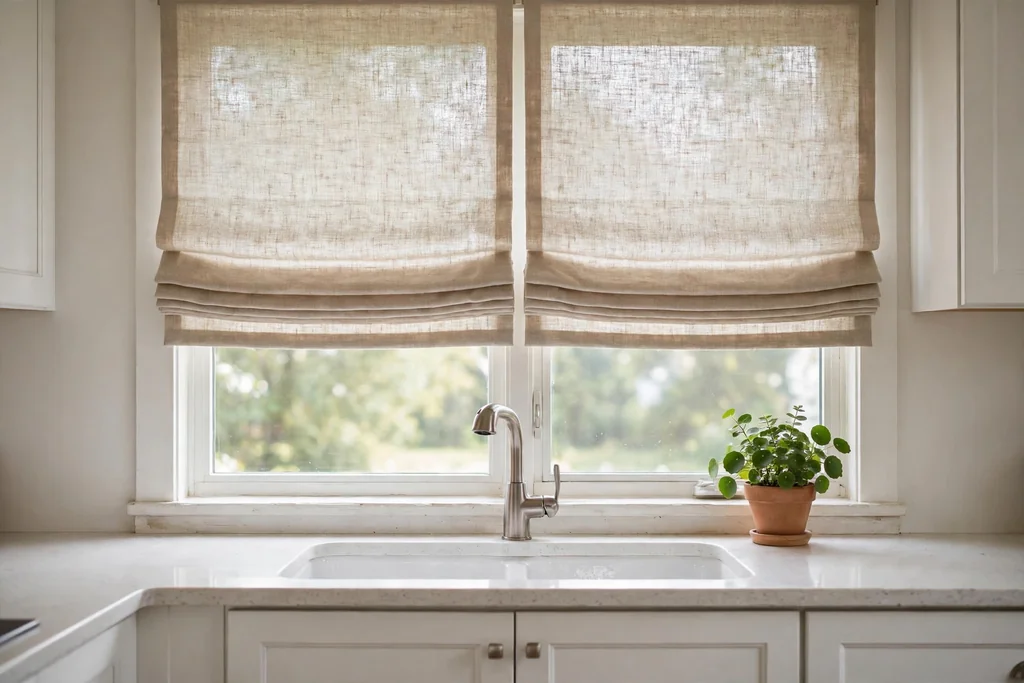
    Linen cafe curtains cover only the lower half of the window, giving privacy at the sink while letting daylight in above. Natural linen suits a cottage kitchen, softens a plain window, and washes well. They suit a kitchen that faces a road or a neighbour.

    Hang them on a slim tension rod inside the frame so they are easy to remove for washing, and choose a plain weave in cream, oatmeal, or soft green. Keep the fabric clear of the tap and cooker, and pair them with a clear sill for herbs or a small plant.

    12. Herb Garden on the Windowsill

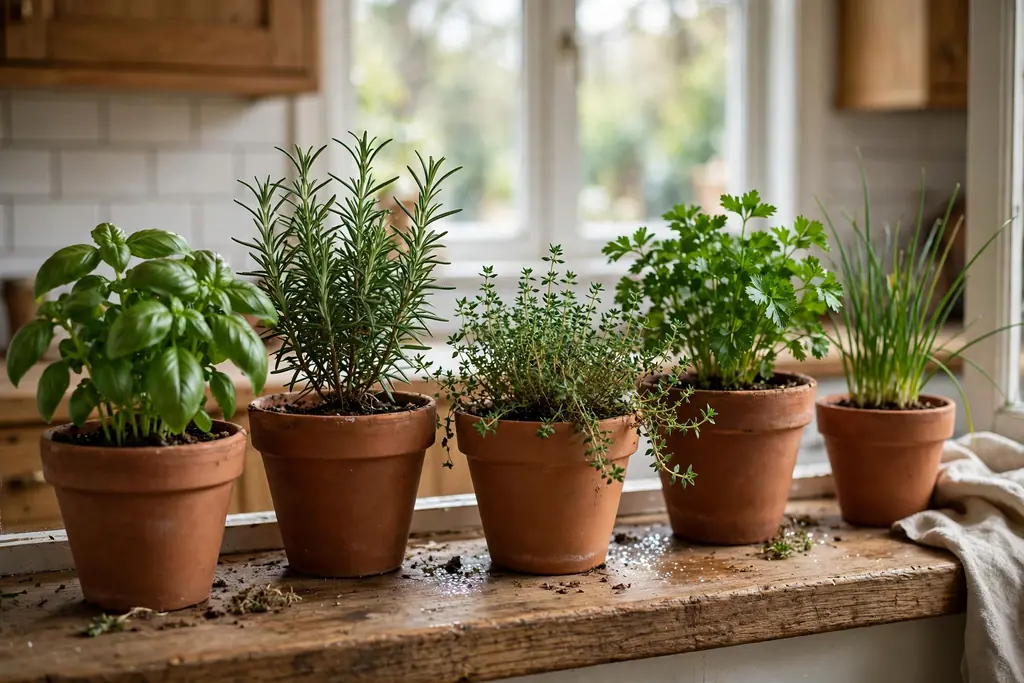
    Kitchen windowsill with terracotta pots of herbs.

    A windowsill herb garden keeps parsley, chives, mint, and thyme within reach of the chopping board, and it adds green to the kitchen all year. Small terracotta pots suit the cottage look, and a tray under them catches water. For ideas on dressing the space above the sink, these above kitchen sink ideas pair well with a herb sill.

    Give herbs the brightest sill you have, water little and often, and keep mint in its own pot since it spreads fast. Snip herbs often, since regular cutting keeps plants bushy and useful.

    13. Butcher Block Island Top

    Kitchen island with a butcher block wood top.

    A butcher block top on an island adds a warm, hard working surface for chopping, rolling pastry, and serving. Wood is kinder to knives than stone, and it suits cream, sage, and navy cabinets alike. It also ages well, gaining marks that suit a lived-in kitchen.

    Oil the top regularly with food-safe oil, wipe spills promptly, and use a board for raw meat to keep the surface hygienic. Sand out deep marks once a year if needed, then re-oil so the top stays sealed.

    14. Farmhouse Table with Bench Seating

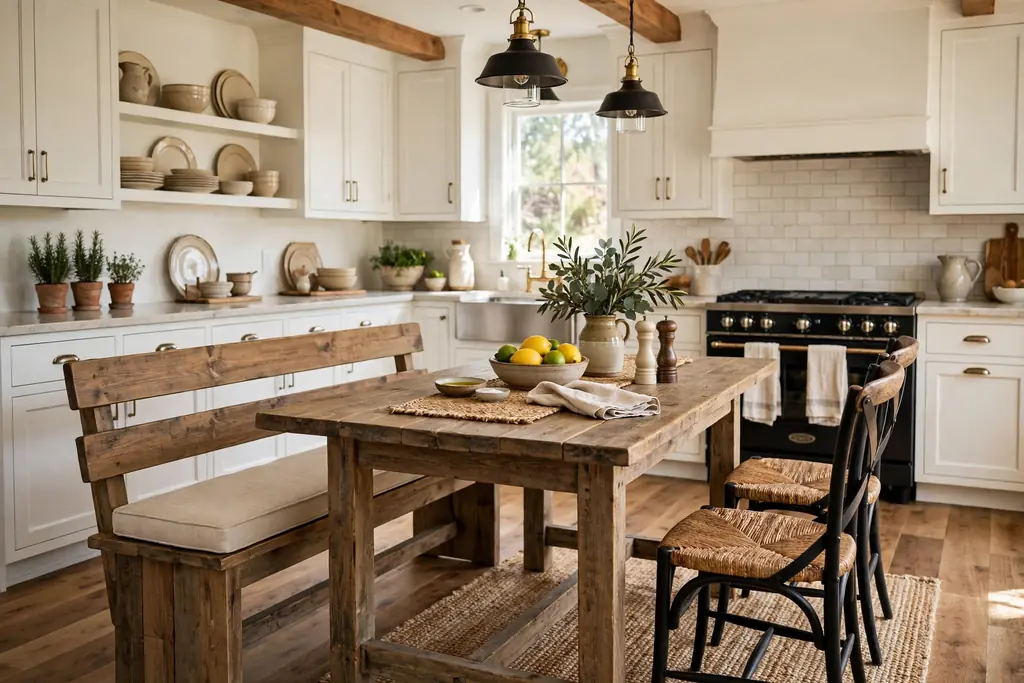
    Farmhouse table with bench seating in a kitchen.

    A long farmhouse table with bench seating seats family and guests without needing many chairs, and it doubles as a prep surface and a homework table. Wood tops suit the cottage look, and benches tuck under the table when not in use. This suits a kitchen with room for a table away from the main cooking path.

    Leave enough room to pull a bench out and walk past, and choose a table height that suits both dining and food prep. A washable runner protects the wood during meals and lifts off for baking days.

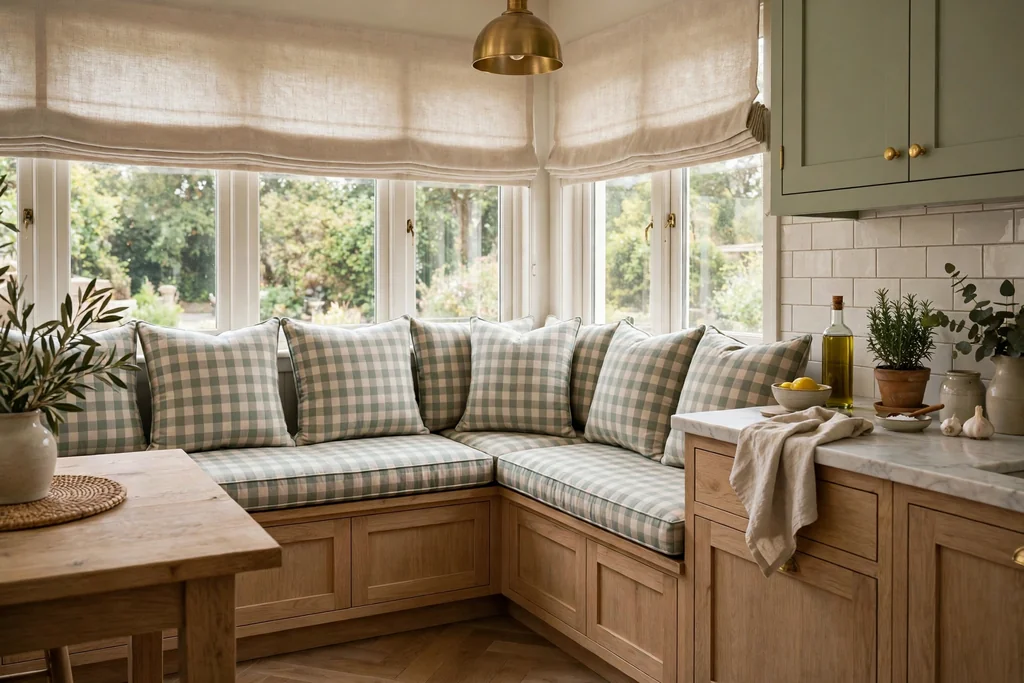
    15. Window Banquette Seating

    Window banquette seating with cushions in a kitchen corner.

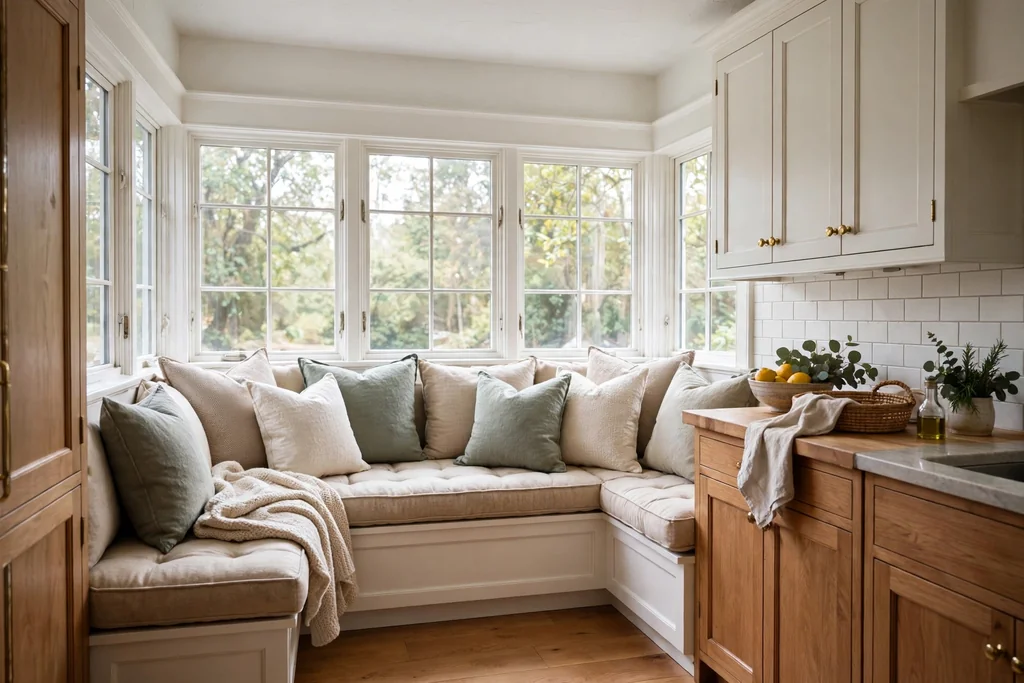
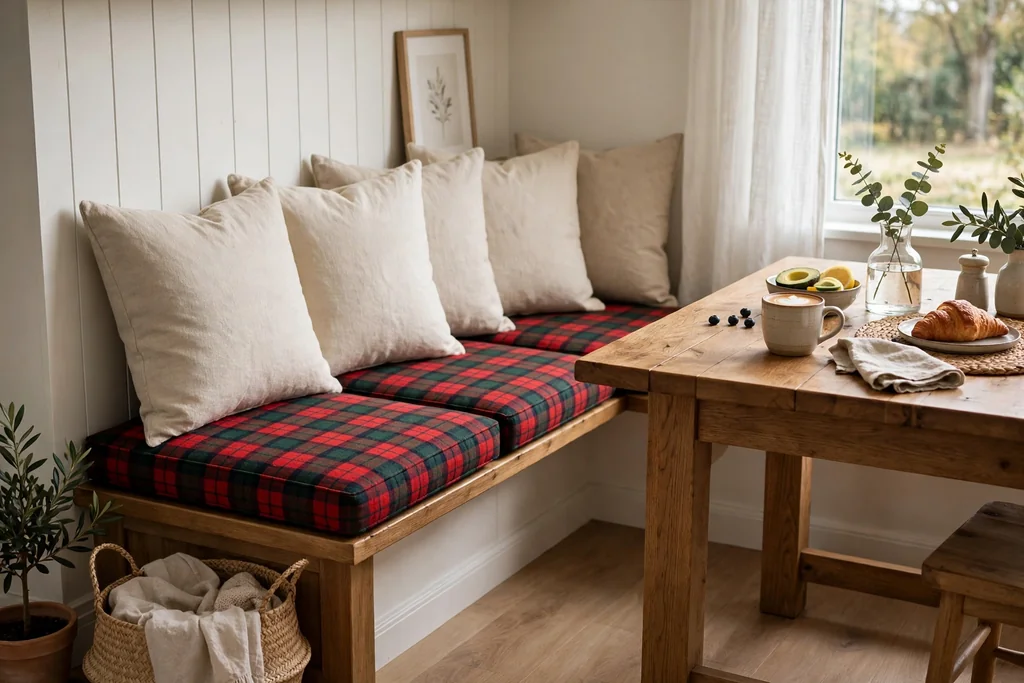
    A banquette in a bay or beside a window gives a kitchen a cosy eating corner with storage under the seat. It suits a small kitchen, since it uses a corner that chairs would crowd, and it makes breakfast feel like a treat. Cushions in a check or plain linen keep the seat comfortable.

    Build the base with lift-up lids or drawers for table linen and rarely used items, and keep the table small enough to slide in and out of easily. Add a pendant or wall light above the table so the corner works well in the evening too.

    16. Walk-In Pantry with Glass Jars

    Kitchen pantry shelves with glass jars of flour and oats.

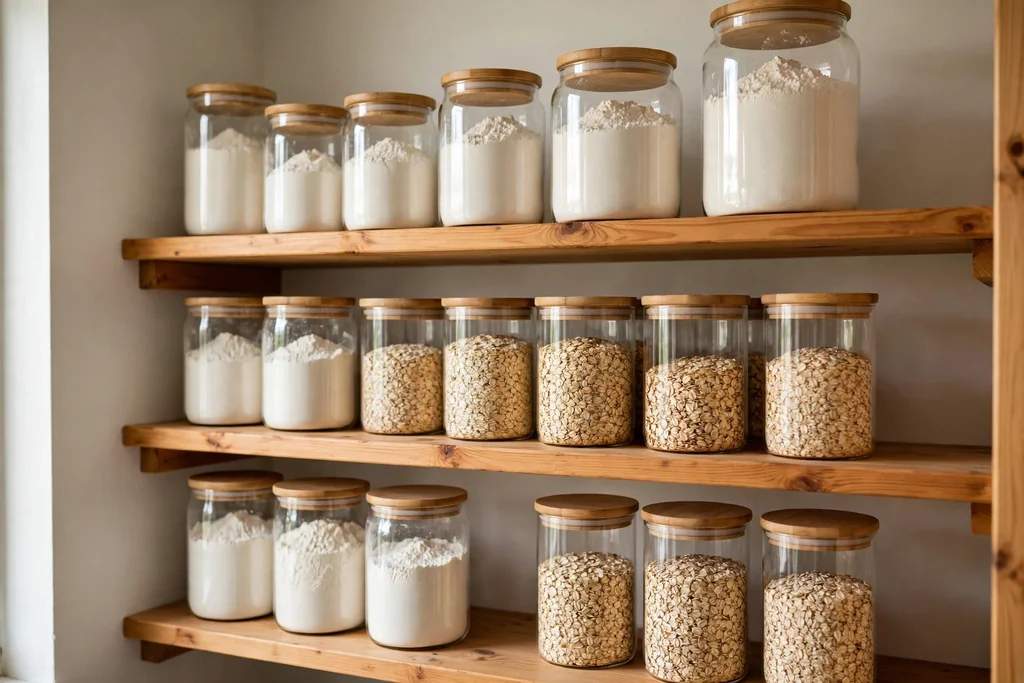
    A walk-in pantry or a tall larder cupboard keeps flour, oats, rice, and dried goods in glass jars where you can see what you have. Clear jars cut waste, since you notice when a staple runs low, and they look neat on wood shelves. This suits a baker and a busy family kitchen alike.

    Label jars clearly, keep heavy jars low, and group baking, breakfast, and cooking items in zones. Store food away from the cooker heat, and check jar seals regularly so flour and oats stay fresh.

    17. Copper Pot Rail over the Worktop

    Copper pot rail with hanging pans over a kitchen worktop.

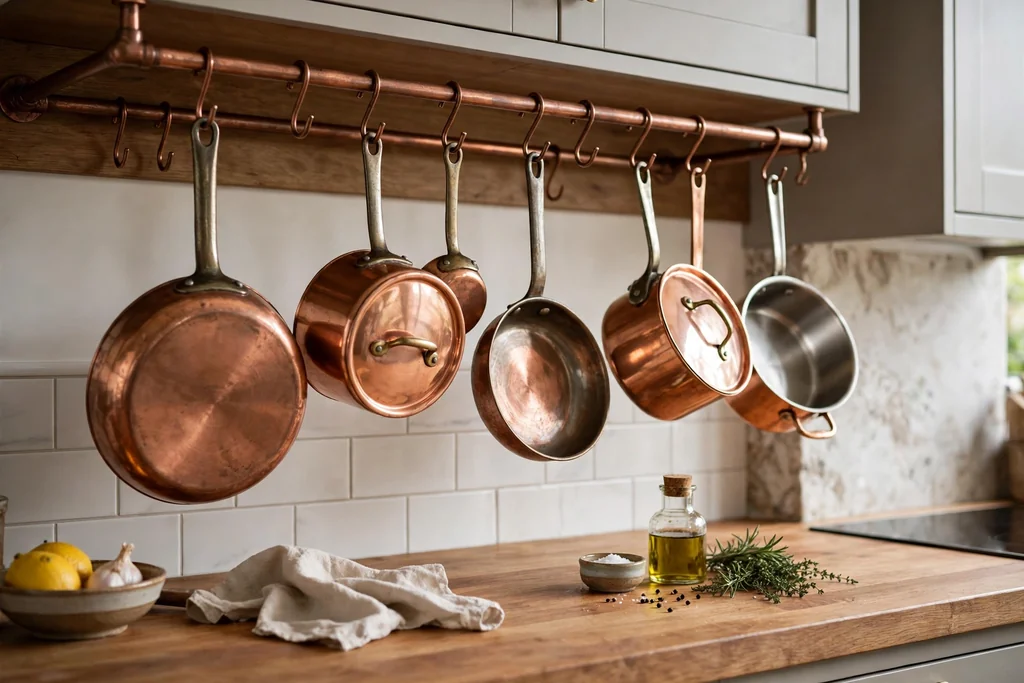
    A copper pot rail over a worktop or island keeps pans in reach and frees cupboard space for plates and food. Copper suits cream and wood kitchens, and it warms up as it ages. It works best for pans you use weekly, not for pieces that sit unused.

    Fix the rail into studs or solid wall, since full pans are heavy, and hang pans by size so the rail looks ordered. Polish only if you prefer a bright finish, or leave the copper to darken for a softer cottage look.

    18. Wall Plate Rack for Patterned Plates

    Wall plate rack holding patterned plates in a kitchen.

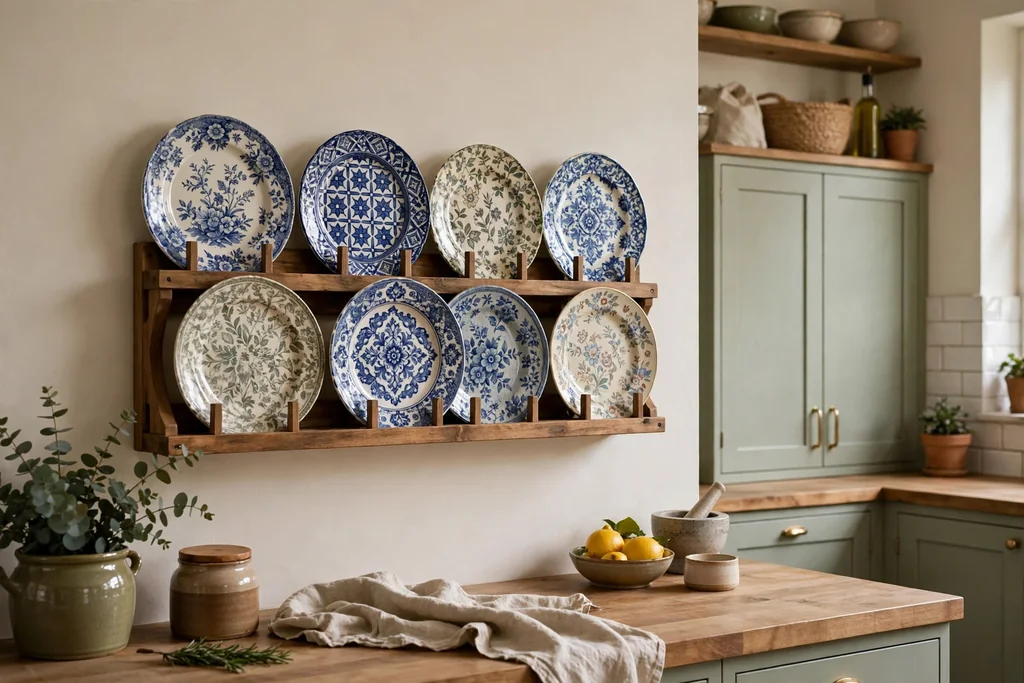
    A wall plate rack shows patterned plates and platters as decoration while keeping them easy to grab for serving. It suits a dining wall or the side of a dresser, and it adds colour without a full wall of open shelves. For more ways to dress a plain kitchen wall, these kitchen wall decor ideas show how one display can anchor a room.

    Use plates with a shared colour or pattern family, and fix the rack firmly so heavy platters stay safe. Keep daily plates in the dresser or a cupboard, and reserve the rack for serving pieces and favourites.

    19. Wool Runner and Woven Seat Pads

    Kitchen table with a woven wool runner and woven seat pads.

    A woven wool runner on the table and woven seat pads on chairs add texture and warmth to a cottage kitchen. Wool suits cooler rooms, and a runner protects the table while giving meals a finished look. Natural tones with one muted check or stripe keep the look calm.

    Choose washable or easily brushed wool blends for chairs, since kitchen seats see spills. Swap the runner with the season, using a heavier weave in winter and a lighter linen runner in summer.

    20. Warm White Walls with Wood Trim

    Kitchen with warm white walls and painted wood trim.

    Warm white walls with painted wood trim, such as a dado rail or window architrave, give a kitchen a clean base that still feels cottage-like. The trim adds shape to plain walls, and warm white avoids the cold look of a bright white in a north-facing room. This base suits any cabinet colour.

    Paint trim in the same warm white or one shade deeper, and keep wall art simple so the trim stays visible. If the room is small, keep the dado low so the wall still feels tall.

    21. Dark Slate Worktop with Cream Units

    Kitchen with a dark slate worktop and cream units.

    A dark slate worktop gives cream units a firm contrast and a practical surface for hot pots and baking. Slate suits a cottage kitchen because it looks natural and ages without a polished shine. It also pairs well with brass taps and wood dressers.

    Seal slate as the supplier advises, wipe acidic spills promptly, and use trivets for very hot pans to protect the seal. Keep the worktop clear of clutter so the dark surface does not make the room feel smaller.

    22. Enamel Pendant Lights over the Island

    Enamel pendant lights over a kitchen island.

    Enamel pendant lights in cream, sage, or navy hang over an island or table and give focused light where you chop and eat. The enamel shade suits a farmhouse kitchen, and the shape directs light down without glare. Two or three pendants suit a long island better than one large fitting.

    Hang pendants high enough to see across the island, and use warm white bulbs so the light feels soft in the evening. Put pendants on a dimmer if you can, so the same lights suit cooking and dining.

    23. Under-Cabinet Lighting for Worktops

    Kitchen worktop lit by warm under-cabinet lighting.

    Under-cabinet strips light the worktop directly, which makes chopping safer and the kitchen feel warm after dark. They suit kitchens with wall cabinets, and they remove the shadow your body casts under a ceiling light. Warm white strips suit a cottage kitchen better than a cool blue white.

    Fit strips near the front of the cabinet so light falls on the worktop, not the wall, and hide the driver in a cupboard. Add a separate switch or dimmer so task light and room light can work apart.

    24. Vintage Rug Runner by the Sink

    Vintage style rug runner by a kitchen sink.

    A vintage style rug runner by the sink softens a hard floor and warms the busiest spot in the kitchen. A flat weave runner is easier to clean than a thick pile rug, and a muted pattern hides splashes between washes. It suits a Belfast sink area and a long galley kitchen alike.

    Choose a washable runner or one you can shake out outdoors, and use a non-slip mat under it. Keep the runner clear of the cooker, and wash it regularly since the sink area sees water and food daily.

    25. Glass-Front Cabinets for Glassware

    Glass-front kitchen cabinets holding glasses and teacups.

    Glass-front cabinets show glasses, teacups, and small jugs while keeping them behind glass and free of dust. They suit a wall run above a worktop or beside a dresser, and they break up a long run of solid doors. Clear glass suits a tidy display, while ribbed glass hides less neat shelves.

    Keep the display simple, with glasses grouped by type and daily items at hand height. If the cabinet is high, keep a stable step stool nearby so reaching glasses stays safe.

    26. Check Cushions on the Banquette

    Banquette with muted check cushions in a kitchen.

    Check cushions in muted green, navy, or red give a banquette or bench a cottage pattern without needing new furniture. Checks suit wood seats and plain linen curtains, and they are easy to swap with the season. This is a low cost way to add an Irish country feel.

    Use removable covers for washing, and mix one check with plain cushions so the pattern does not crowd the seat. Keep cushion fill firm enough to support sitting through a long meal.

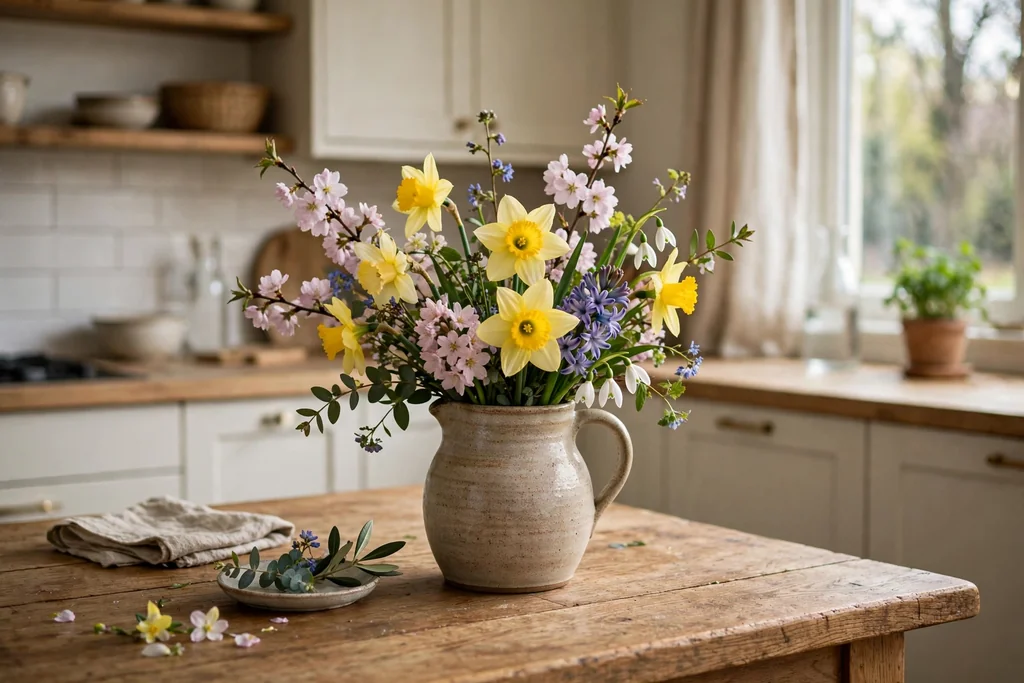
    27. Spring Flowers on the Kitchen Table

    Kitchen table with a jug of spring flowers.

    Spring flowers on the kitchen table, such as daffodils, tulips, or a jug of garden stems, mark the season with almost no effort. A simple jug or glass jar suits a cottage table better than a tall formal vase, and it keeps sight lines clear across the table. Change the stems weekly as they fade.

    Keep the arrangement low and to one side if the table is used for prep, and use a tray under the jug to catch drips. Pair spring flowers with a plain linen runner so the colour of the stems stands out.

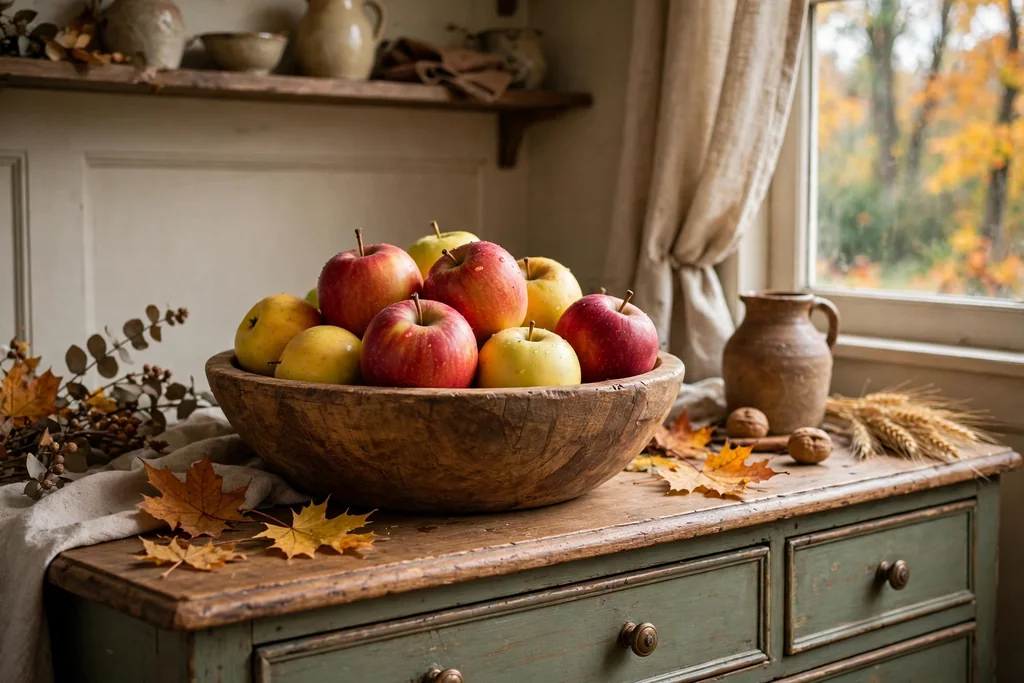
    28. Autumn Apple and Harvest Display

    Wood bowl of apples on a kitchen dresser in autumn.

    An autumn display of apples in a wood bowl, with a few leaves and a candle on the dresser, brings harvest colour into the kitchen. It suits the table or dresser top, and it uses fruit you can eat rather than items that sit unused. Keep the display simple so it still feels like a kitchen, not a shop window.

    Use a shallow bowl so fruit stays visible, and replace any soft fruit promptly. Pair the bowl with a woven runner and warm light in the evening for a harvest table feel.

    29. Evergreen Garland on the Dresser at Christmas

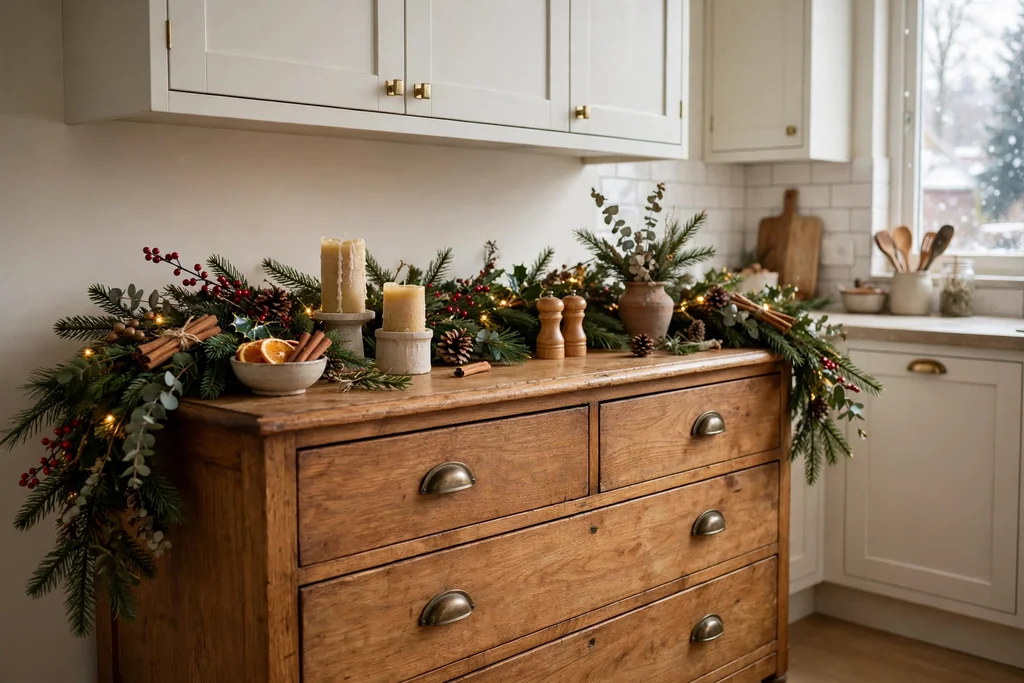
    Dresser top with an evergreen garland at Christmas.

    An evergreen garland along the dresser top or mantel gives a kitchen a Christmas feel without taking worktop space. Fresh greenery suits a cottage kitchen, and it pairs well with candles, dried oranges, and a few baubles. Keep the garland clear of the cooker and open flame.

    Use a faux garland if fresh greenery drops needles near food, and check candles are in stable holders away from the garland. Take the garland down promptly after Christmas so the dresser returns to daily use.

    30. Tea Station with a Teapot Collection

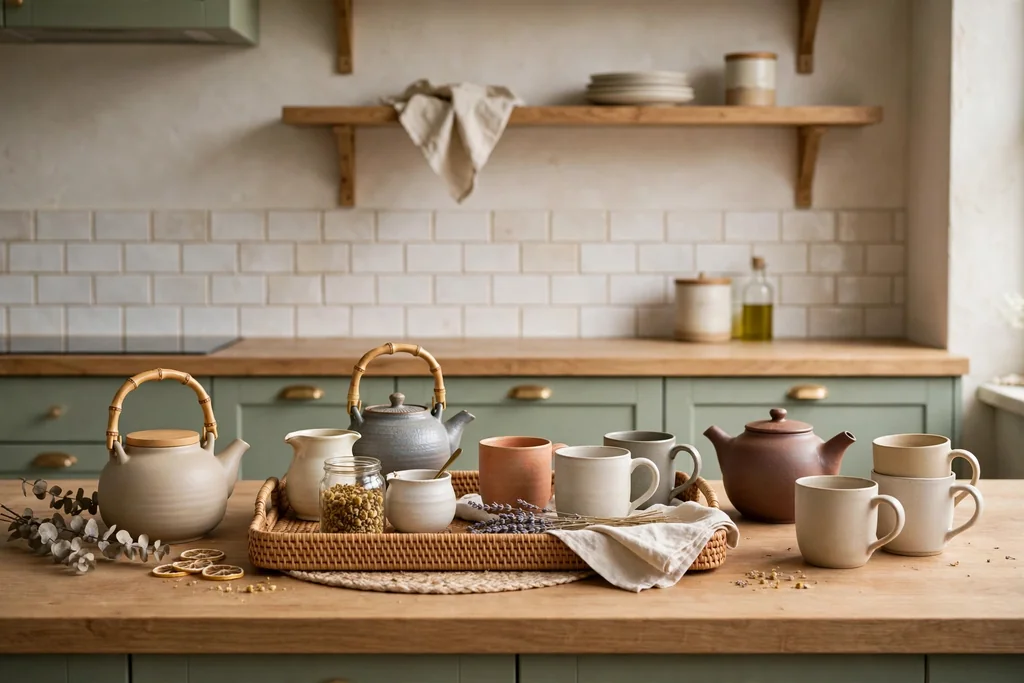
    Kitchen tea station with teapots, mugs, and a tray.

    A tea station on a dresser shelf or a small trolley keeps teapots, mugs, tea caddies, and a kettle in one place for daily tea. It suits a kitchen where tea is a ritual, and it stops tea items spreading across worktops. A tray under the station catches drips and keeps the area tidy.

    Group teapots by size, keep daily mugs at the front, and store rarely used pots higher up. Add a small jar of biscuits or a sugar bowl, and keep the station near the kettle so making tea stays a short task.

    31. Baking Corner with Boards and Scales

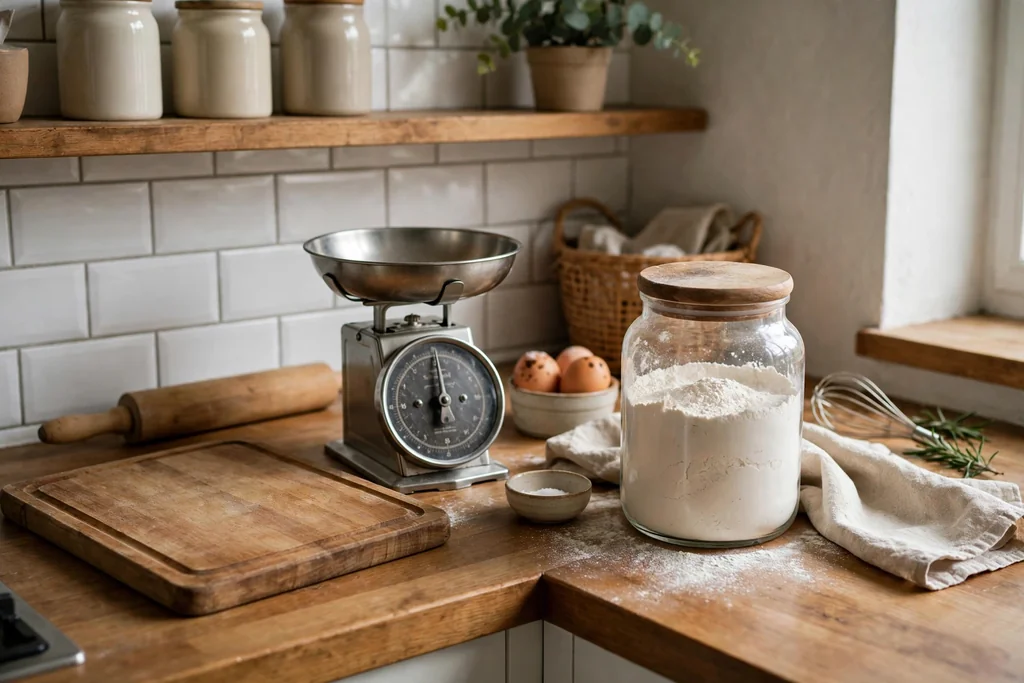
    Kitchen baking corner with a board, scales, and flour jar.

    A baking corner with a marble or wood board, scales, a flour jar, and a rolling pin keeps baking tools together and ready. It suits a kitchen with a clear stretch of worktop near the oven, and it makes weekend baking far simpler. Keep the corner tidy so it can still serve as prep space.

    Store flour in a sealed jar, keep the board upright or flat where it will not warp, and hang measuring cups on a hook nearby. Wipe the board after each bake, and keep a clean tea towel in the corner for hands and spills.

    32. Mudroom Hooks by the Kitchen Door

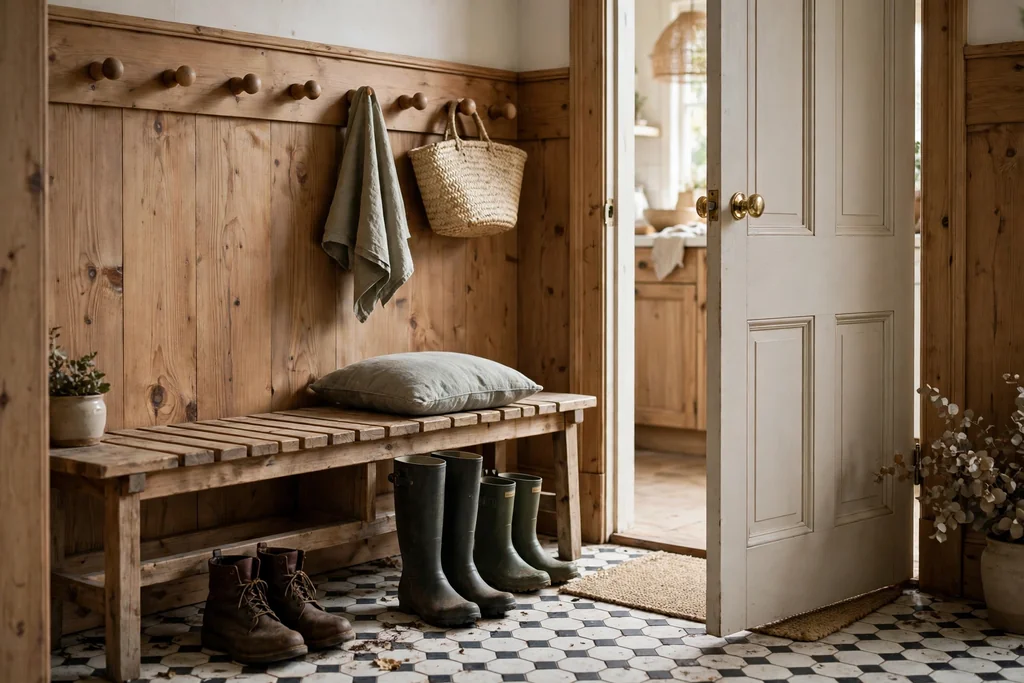
    Kitchen door area with wood peg hooks, a bench, and boots.

    Hooks, a bench, and a tray by the kitchen door give coats, bags, and boots a home before they reach the kitchen floor. This suits a back door or a utility link, and it keeps a cottage kitchen tidy through wet weather. A row of wood pegs suits the country look better than a tall metal rack.

    Label or assign hooks by person if the household is large, and keep a basket for hats and gloves. Sweep the tray area weekly, since boots bring in mud and leaves.

    33. Narrow Island on Castors for a Small Kitchen

    Narrow kitchen island on castors in a small kitchen.

    A narrow island on castors gives a small kitchen extra worktop and storage that can move out of the way when needed. It suits a galley or a small cottage kitchen, where a fixed island would block the path. For more small kitchen planning, these kitchen ideas on a budget show how one movable piece can do the work of a larger refit.

    Choose an island with a towel rail and a shelf, lock the castors while chopping, and keep its top clear for daily use. Measure doorways before buying, so the island can move to another room if needed.

    34. Coastal Irish Kitchen with Pale Blue and Driftwood

    Coastal Irish kitchen with pale blue cabinets and driftwood tones.

    A coastal Irish kitchen uses pale blue cabinets, driftwood tones, and sea glass accents to bring a seaside cottage feel inland. Pale blue keeps the room bright, wood adds warmth, and a few coastal details, such as a shell print or a rope-handled basket, finish the look without turning it into a theme room.

    Keep coastal details to a few pieces, and use plain linen and wood for the rest so the room still works as a kitchen. Pale blue suits cream walls and a light wood floor, and it pairs well with white pottery and brass fittings.

    Conclusion

    An Irish kitchen works best when the practical parts come first and the pretty parts earn their place. Cream or sage cabinets, a deep sink, a dresser, and a wood table give you a base that lasts, while linen, wool, light, and seasonal displays let you change the mood through the year. Pick the ideas that suit your room, your budget, and the way you cook, and add them one at a time. A kitchen that is easy to use, easy to clean, and pleasant to sit in will feel warm in every season, and these white kitchen ideas can help you keep that base light as you add colour.

    FAQs

    What makes a kitchen feel Irish rather than just farmhouse?

    An Irish kitchen leans on cottage details such as a Belfast sink, a wood dresser, linen curtains, and natural materials like wood, stone, and wool, rather than on one style label. The look comes from useful pieces used daily, not from themed decoration, so a dresser full of real pottery reads as Irish more than a sign or a print does.

    What colours suit an Irish kitchen best?

    Cream, warm white, sage green, navy, and pale blue all suit an Irish kitchen, with wood tones to warm them up. Cream and sage suit small or north-facing rooms, while navy works best as an island or a single run of units. Keep walls warm white so the cabinet colour reads clearly.

    Is a Belfast sink practical for a modern kitchen?

    Yes, a Belfast sink is practical if the cabinet and floor can support its weight and you have worktop beside it for draining. Its depth suits large pots and baking trays, and a bridge tap suits the style. Check plumbing and support before fitting, and choose a draining board or rack to match.

    How can I get an Irish cottage look in a small kitchen?

    Use a dresser or open shelves instead of extra fitted units, a narrow island on castors, and a banquette in a corner to save floor space. Keep cabinets cream or sage, use linen curtains and a washable runner, and let one or two seasonal displays do the decorating work.

    How do I update an Irish kitchen for each season?

    Change textiles and table displays rather than cabinets: spring flowers in a jug, an autumn bowl of apples, and an evergreen garland on the dresser at Christmas. Swap cushion covers and runners with the season, and keep the base of cream, wood, and stone the same all year.

    What is the best worktop for an Irish cottage kitchen?

    Butcher block suits baking and everyday prep, while slate or stone suits heat and a more formal look. Wood needs regular oiling, and slate needs sealing, so choose based on how much care you want to give. Many kitchens pair a wood island top with a stone run by the sink and cooker.


  • 16 Italian Kitchen Ideas to Make Small Spaces Work Harder

    16 Italian Kitchen Ideas to Make Small Spaces Work Harder

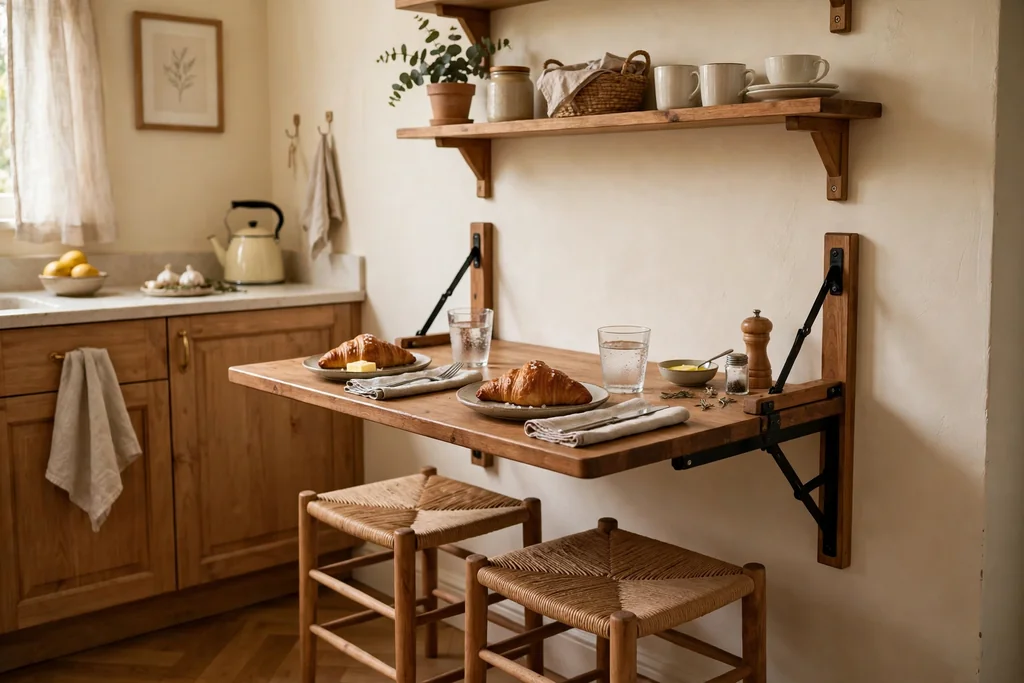
    Italian kitchens feel warm and welcoming even when the room is small. The look comes from sun warmed color, honest materials such as wood, terracotta, and linen, and storage that earns its place. These 16 Italian kitchen ideas use that approach for tight rooms: open shelves, a rolling island, a plate rack, a fold down table, and a bench nook that seats two without a full dining set. Each idea is simple to picture and easy to try in stages. Start with the change that fixes your biggest daily frustration, whether that is storage, counter space, or a bare wall. You can browse more home decorating guides for rooms beyond the kitchen.

    Key Takeaways

    • Keep the palette warm and limited: cream, terracotta, olive, and walnut, repeated across walls, tiles, and wood.
    • Choose storage that does two jobs, such as a rolling island, a plate rack, or a bench with space underneath.
    • Use the walls: open shelves, a hanging rail, and a tall narrow unit free up floor and counter space.
    • Let one Italian detail lead, such as an arch, a terracotta backsplash, or a patterned floor, and keep the rest of the room calm.
    • Layer warm light from under cabinet strips and a small pendant, and keep bright overhead light for tasks only.
    • Measure the aisle, the door swing, and the space in front of drawers before you choose a piece.

    1. A Warm Cream and Terracotta Palette for a Galley Kitchen

    Narrow galley kitchen with cream walls, terracotta accents, and walnut wood details

    A warm cream and terracotta palette gives a small galley kitchen an Italian feel before any furniture changes. Cream walls keep the narrow room bright, while terracotta on a backsplash, a rug, or a few pots adds the sun baked color of a Tuscan kitchen. This suits a galley kitchen with plain white walls and dark floors, where color alone can make the room feel planned.

    Keep the palette to three tones so the narrow space stays calm: cream for walls and upper cabinets, terracotta for accents, and walnut or olive for wood and textiles. Paint a sample on the wall and check it in daylight and evening light, since warm bulbs can deepen a pale tone. If you rent, bring the terracotta in through a washable rug, dish towels, and ceramic pots instead of paint or tile.

    2. Open Wooden Shelves in Place of Upper Cabinets

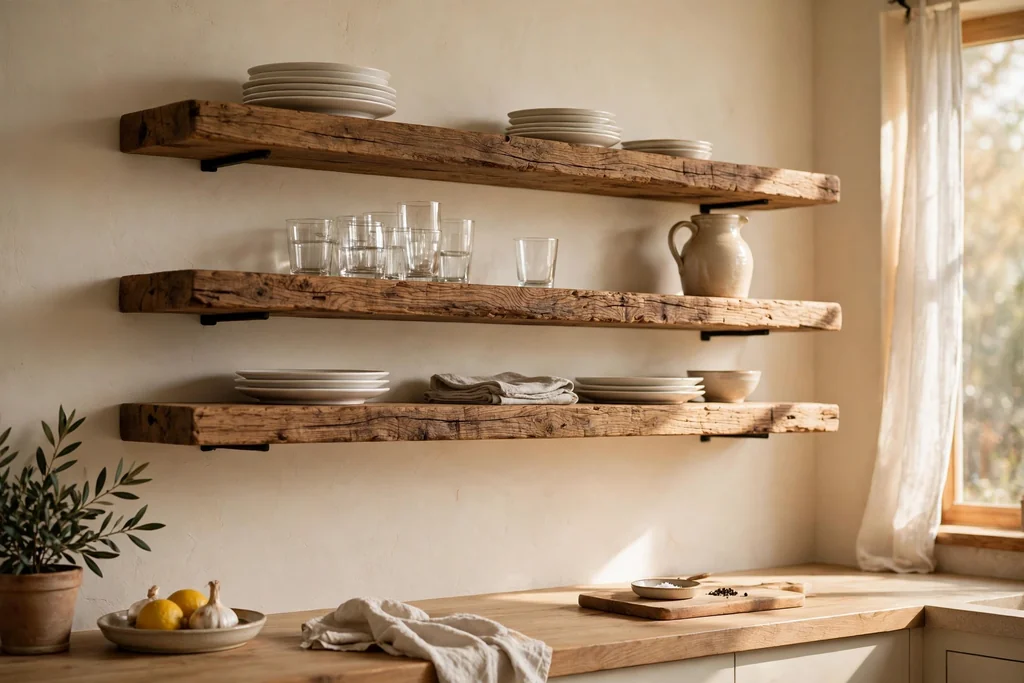
    Open wooden shelves holding white dishes, glasses, and a ceramic jug above a kitchen counter

    Open wooden shelves in place of upper cabinets make a small Italian kitchen feel taller and less boxed in. Thick wood shelves in walnut or warm oak hold everyday dishes and glasses where you can reach them, and the open wall keeps sight lines clear across the room. This suits a kitchen where upper cabinets crowd the counter and block light from a window.

    Limit each shelf to one row of items with space between groups, so the shelves read as storage rather than clutter. Put daily dishes at hand height, glasses above, and a small plant or ceramic jug at one end for warmth. Keep a step stool nearby if the top shelf sits above your reach, and dust the shelves weekly since open storage shows dust faster than closed cabinets.

    3. A Slim Rolling Butcher Block Island

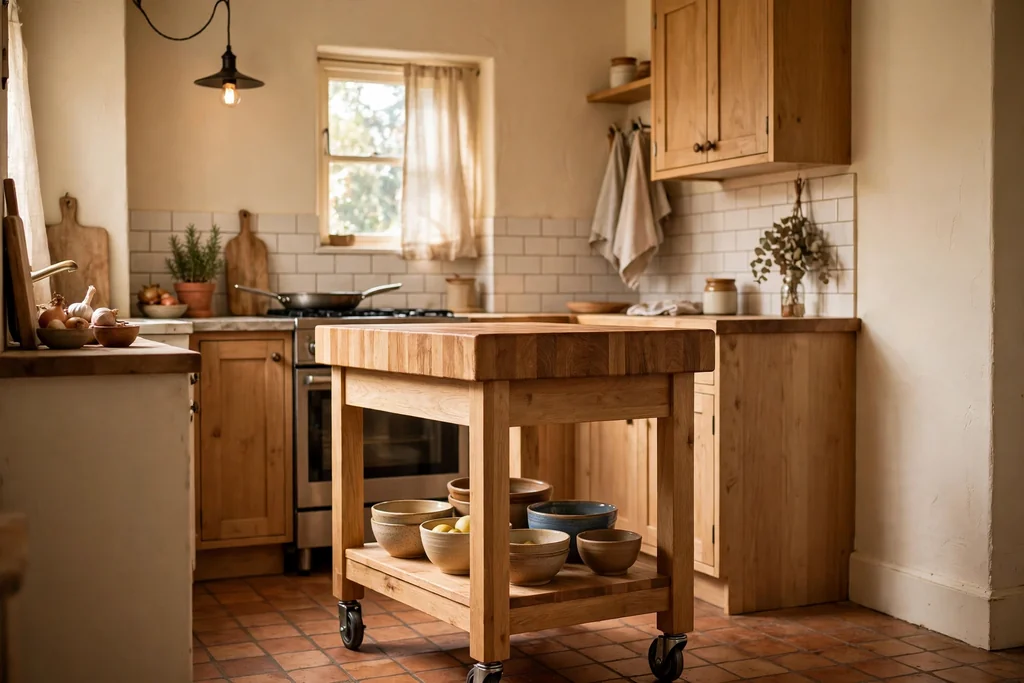
    Slim rolling butcher block island with a wood top and lower shelf in a small kitchen

    A slim rolling butcher block island adds counter space to a small kitchen without a fixed build. The wood top gives you a place to chop, roll pasta, and set down groceries, while shelves or a drawer below hold boards, bowls, and linens. Locking casters let you roll it against a wall when you need floor space and pull it out when you cook.

    Choose a width that leaves at least a comfortable walkway on each side, and measure your doorways if the island needs to move between rooms. Oil the butcher block top regularly with a food safe board oil, and keep the lower shelf for items you use daily so the island stays useful rather than becoming a dumping spot. A towel bar on one end adds a handy spot for a dish towel.

    4. A Terracotta Tile Backsplash

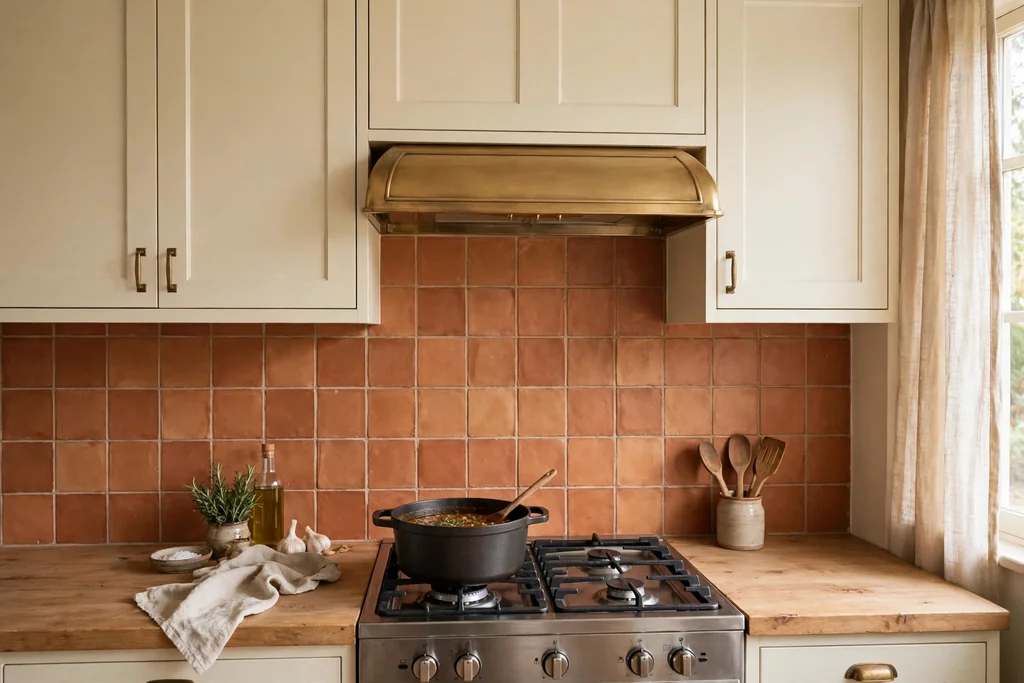
    Kitchen stove wall with a warm terracotta tile backsplash and cream cabinets

    A terracotta tile backsplash brings the baked clay color of Italian kitchens to the wall behind the stove and sink. The warm, slightly varied tone suits cream cabinets and wood counters, and it hides cooking marks better than a pale glossy tile. This suits a kitchen with plain walls that need one strong, warm feature.

    Run the tile in a simple straight or brick pattern so the color stays the focus, and use a grout tone close to the tile so the wall reads as one warm surface. Seal the tile and grout as the maker directs, since terracotta is porous and can stain near a stove. If a full tile job is too much, a small tiled panel behind the stove alone gives the same warmth for less work and cost.

    5. An Arched Niche for Cookbooks and Ceramics

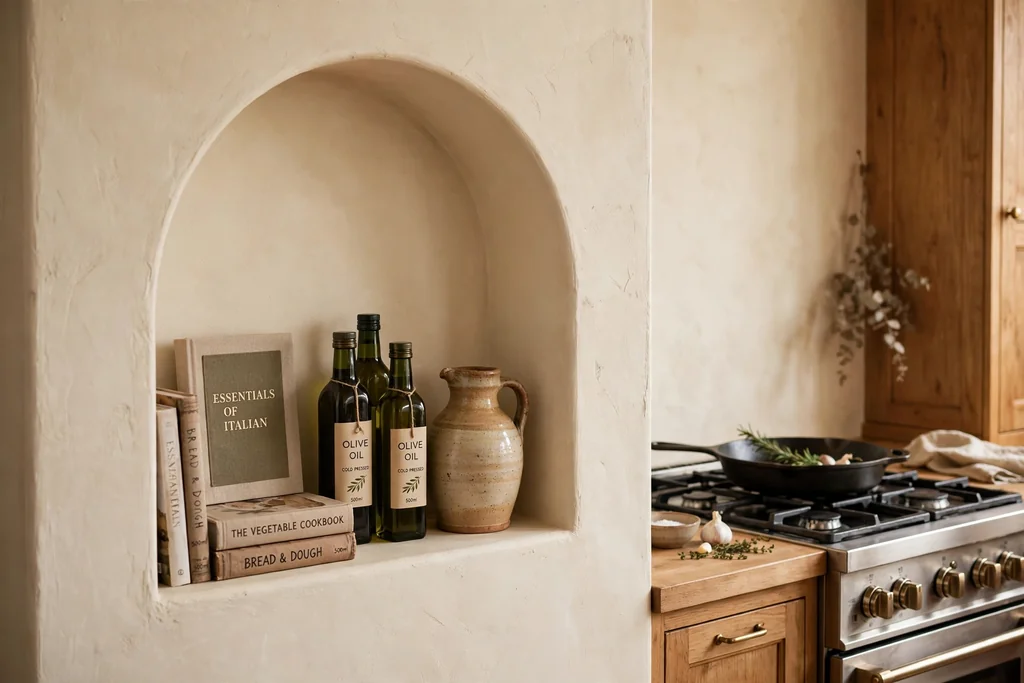
    Arched wall niche holding cookbooks, olive oil bottles, and a ceramic jug beside a stove

    An arched niche brings the curved doorways and windows of Italian homes into a small kitchen with one wall detail. A shallow arched recess beside the stove or sink holds cookbooks, olive oil bottles, and a ceramic jug, turning a blank wall into useful storage with a clear Italian shape. This suits a kitchen with one plain wall that needs character without new cabinets.

    Keep the niche shallow, only as deep as a cookbook, so it does not eat into the room or the wall cavity. Paint the inside a shade warmer than the wall, such as pale terracotta, so the arch reads clearly even from across the room. If cutting into a wall is not possible, a freestanding arched shelf unit in wood gives a similar shape with no building work.

    6. A Hanging Rail for Pots and Pans

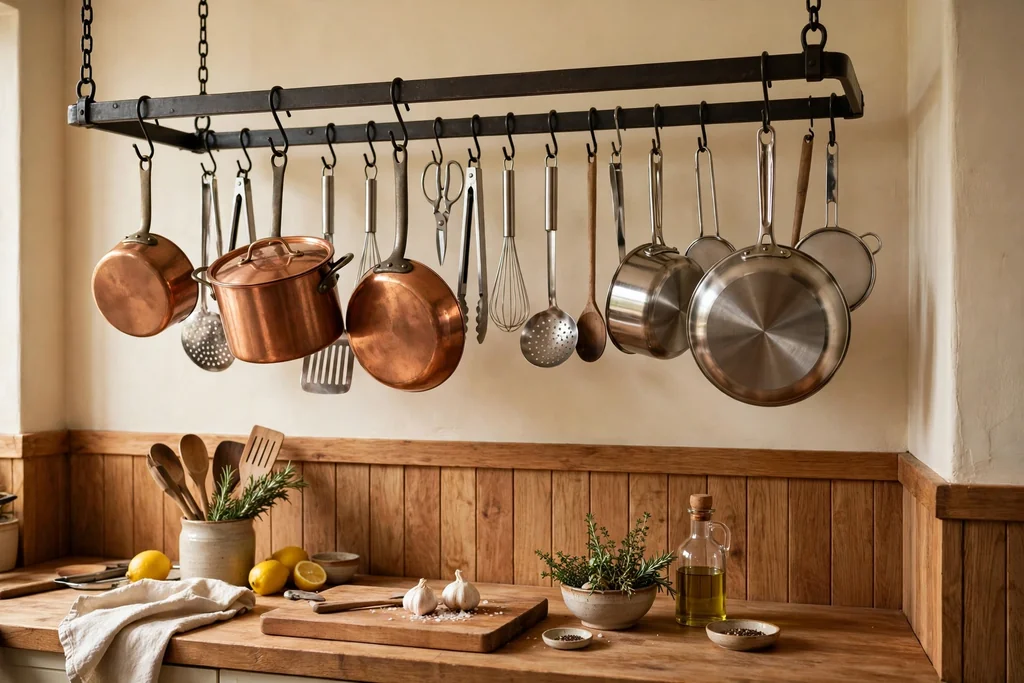
    Metal hanging rail with copper and steel pots and cooking tools above a kitchen counter

    A hanging rail for pots and pans frees a whole cabinet in a small Italian kitchen. A sturdy metal rail fixed to a wall or hung from the ceiling holds everyday pans, a colander, and cooking tools where you can grab them, and the dark metal suits wood shelves and terracotta nearby. This suits a cook who uses the same few pans daily and has run out of cabinet room.

    Hang the heaviest pans closest to the wall fixings, and leave space between pieces so they do not knock together. Check that the rail fixings go into studs or solid masonry, since a full set of pans is heavy. Keep rarely used items, such as a large roasting pan, in a cabinet instead, so the rail holds only what you reach for each week.

    7. A Pull-Out Pantry in a Narrow Gap

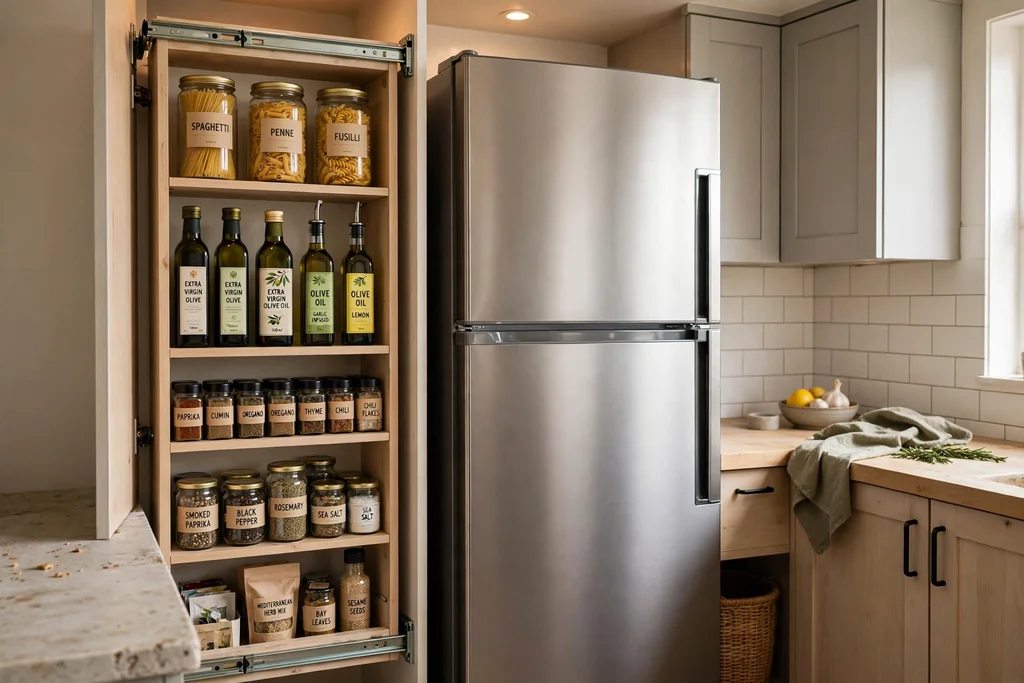
    Slim pull-out pantry unit slid open beside a fridge, showing jars of pasta, oils, and spices

    A pull-out pantry turns a narrow gap beside the fridge or stove into full height storage. Slim shelves on a rolling frame slide out to show oils, pasta, tinned tomatoes, and spices in one view, so nothing hides at the back of a deep cabinet. This suits a kitchen with a gap of even a few inches that currently holds nothing but a broom.

    Measure the gap twice, including skirting boards and door trim, before you order a unit, since a tight fit is what makes this work. Group items by use, with daily cooking staples at hand height and baking supplies higher up. Label the front edge of each shelf if several people cook, so jars go back to the same spot and the pantry stays easy to use.

    8. A Pasta Prep Corner with a Wood Board and Marble Slab

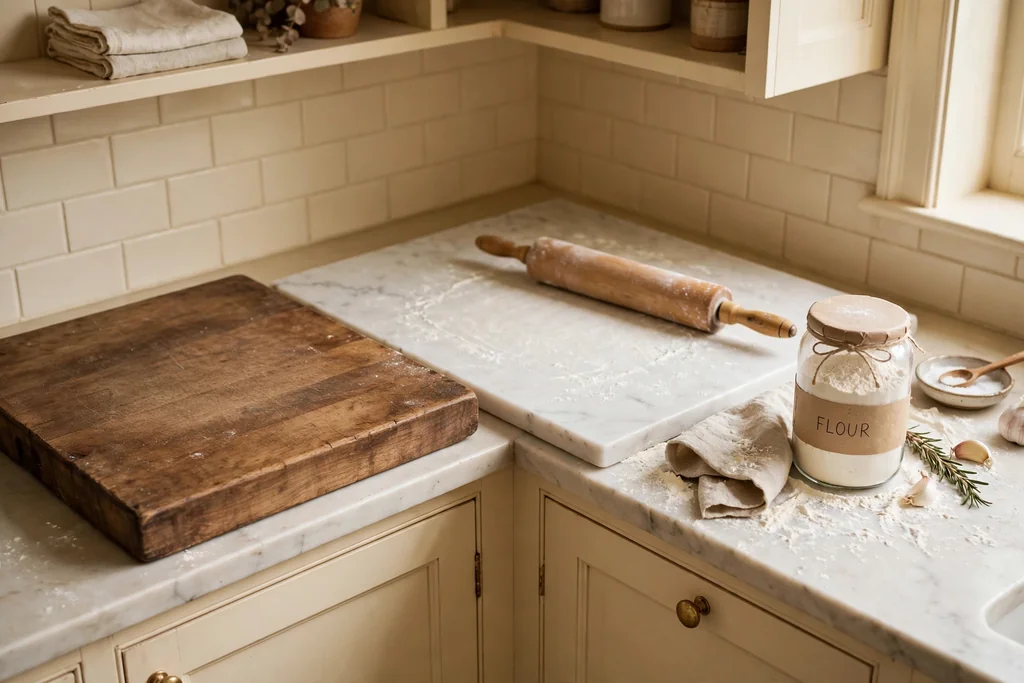
    Kitchen counter corner with a large wood board, a marble slab, flour, and a rolling pin

    A pasta prep corner gives a small kitchen one dedicated spot for rolling dough and shaping pasta. A large wood board on the counter and a marble slab beside it cover the two jobs of pasta making: kneading on wood and resting dough cool on stone. A jar of flour, a rolling pin, and a drying rack nearby keep the routine in one place.

    Place the corner at the end of a counter run, away from the sink splash zone, so flour stays dry and the board stays put. Store the board upright in a narrow slot when not in use if counter space is tight, and wipe the marble slab with a damp cloth after use. Even cooks who rarely make pasta can use the corner as a bread and pastry station.

    9. A Windowsill Herb Garden in Terracotta Pots

    Sunny kitchen windowsill with basil, parsley, and rosemary growing in terracotta pots

    A windowsill herb garden in terracotta pots brings fresh basil, parsley, and rosemary into a small Italian kitchen. The pots suit the warm palette, the herbs sit where you cook, and a sunny sill gives most kitchen herbs the light they need. This suits a kitchen with even a narrow sill and a cook who reaches for fresh herbs often.

    Use pots with drainage holes and saucers, and water only when the top of the soil feels dry, since herbs dislike wet roots. Rotate the pots weekly so each plant grows evenly toward the light, and snip from the top to keep plants bushy. If your sill is very narrow, a slim wooden tray holds the pots together and catches drips in one place.

    10. A Fold-Down Wall Table for Two

    Fold-down wall table set for two people in a small kitchen, with stools tucked nearby

    A fold-down wall table gives a small kitchen a dining spot that disappears when not in use. Fixed to the wall at counter height, the table folds up for two people to eat and folds flat against the wall after the meal, leaving the floor clear. This suits a kitchen with no room for a dining table but one free stretch of wall.

    Fix the table into studs or solid masonry, and choose a size that seats two without blocking a walkway when open. Pair it with two stools that tuck under a counter or hang on wall hooks when the table is folded. Keep the wall above the table clear of shelves so plates and glasses have room, and wipe the table down before folding it away.

    11. Glass Front Cabinets to Lighten the Upper Run

    Upper kitchen cabinets with glass fronts showing white dishes and glasses above a counter

    Glass front cabinets lighten the upper run of a small kitchen without giving up closed storage. The glass breaks up a long row of solid doors, lets light move through the room, and shows off plain white dishes and glasses that suit an Italian look. This suits a kitchen where solid upper cabinets make the room feel heavy.

    Use glass on one or two cabinets rather than the whole run, so the effect stays calm and the rest of the storage hides clutter. Keep the glass cabinets for matching dishes and glasses, and store mixed items behind solid doors. Clean the glass inside and out when you wash the dishes, since fingerprints show more on glass than on wood.

    12. A Traditional Plate Rack for Everyday Dishes

    Wooden wall plate rack holding upright white plates and bowls in a farmhouse kitchen

    A traditional plate rack, the kind found in Italian farmhouse kitchens, stores everyday plates upright where you can see and reach them. Plates slot into grooved wood rails on the wall or inside a cabinet, freeing a stack of plates from a deep cupboard and adding a warm wood detail to the room. This suits a household that uses the same plates daily and wants them within reach.

    Mount the rack at a height where the largest plate clears the counter below, and fix it into studs since a full set of plates is heavy. Keep the rack to one set of daily plates and bowls, so it stays neat rather than crowded. Dry plates fully before slotting them in, and wipe the wood rails now and then to keep dust from settling behind the plates.

    13. A Corner Bench Nook for Small Dining

    Corner bench nook with cushions and a small round table by a kitchen window

    A corner bench nook turns an unused kitchen corner into a dining spot for two or three people. A built-in or freestanding bench along two walls, paired with a small round or square table, seats more people than chairs in the same footprint because the bench uses the corner fully. This suits a kitchen with a bright corner near a window that currently holds nothing.

    Add a cushion in a washable linen or cotton cover, since bench seats get daily use, and keep the table small enough that everyone can slide in and out. Store table linens, placemats, or rarely used serving dishes in the bench base if it opens. Keep the wall above the bench simple, with one print or a small shelf, so the nook feels calm rather than crowded.

    14. Warm Under-Cabinet Light and Brass Fixtures

    Kitchen counter lit by warm under-cabinet light with brass tap and handles in the evening

    Warm under-cabinet light and brass fixtures give a small Italian kitchen a soft evening glow. A slim light strip under each upper cabinet lights the counter for cooking without a harsh overhead glare, while brass taps, handles, or a pendant add a warm metal accent that suits wood and terracotta. This suits a kitchen that feels flat or cold under a single ceiling light.

    Choose warm white bulbs for the strips, and place the strip toward the front of the cabinet so light falls on the counter rather than the wall. Keep brass to a few repeated touches, such as handles and a tap, so the metal reads as a theme rather than a mix. Wipe brass handles regularly, since kitchen grease dulls the finish faster than in other rooms.

    15. A Tall Narrow Shelf Unit Beside the Fridge

    Tall narrow open shelf unit beside a fridge holding cookbooks, jars, and ceramics

    A tall narrow shelf unit beside the fridge uses a strip of wall that often goes to waste. Open shelves from counter height to near the ceiling hold cookbooks, jars, and a few ceramic pieces, while the narrow width keeps the unit from crowding the fridge door swing. This suits a kitchen where the fridge stands against a wall with a gap too small for a cabinet.

    Anchor the unit to the wall so it cannot tip, and put heavy jars low and light items high. Leave the shelf nearest the fridge door clear of items that could block the door, and check the door swing before you fix the unit in place. A unit in the same wood tone as your shelves ties the whole kitchen together.

    16. Patterned Floor Tiles to Zone the Kitchen

    Small kitchen with patterned cream and terracotta floor tiles marking the cooking zone

    Patterned floor tiles give a small kitchen a clear zone and an Italian character underfoot. A patterned tile in cream, terracotta, and soft blue or green marks the cooking area, even in an open plan room, and the pattern draws the eye down and across the floor so the room feels wider. This suits a kitchen that opens into a living space and needs a visual boundary without a wall.

    Keep the pattern to the kitchen floor only, and let it stop at a clean edge such as a threshold strip or a change to wood flooring. Choose a tile with a slip resistant finish for a cooking area, and seal grout lines as the maker directs. If replacing a floor is too much, a large washable patterned rug over a plain floor gives a similar zoning effect for less work.

    Conclusion

    A small Italian kitchen works hardest when every piece earns its place: warm color on the walls, wood and terracotta you can touch, and storage that uses walls, gaps, and corners. Start with one idea from this list, such as open shelves or a rolling island, and add the next only when the first feels settled. Small changes stack up, and a kitchen that suits the way you cook will feel larger than its floor plan suggests. For more ideas across the home, visit Dwell Ovell.

    FAQs

    Can Italian kitchen style work in a very small kitchen?

    Yes. The style relies on warm color, wood, and terracotta rather than large furniture, so it suits small rooms. Pick one warm wall color, one wood tone, and one or two Italian details, such as a plate rack or a terracotta backsplash, and keep the rest of the room calm.

    What colors suit a small Italian kitchen best?

    Cream, warm white, terracotta, olive, and walnut form the core palette. Use cream on walls and upper cabinets to keep the room bright, terracotta and olive as accents, and walnut for shelves and boards. Limiting the palette to three or four tones keeps a small room from feeling busy.

    Are open shelves practical in a small kitchen?

    Open shelves work well for everyday dishes and glasses you use often, since they keep items visible and within reach. They suit kitchens where upper cabinets feel heavy. Keep shelves to one row of items with space between groups, and store rarely used or mismatched items behind closed doors.

    How can I add dining space to a kitchen with no room for a table?

    A fold-down wall table or a corner bench nook both seat two or three people without a full dining set. A fold-down table disappears after meals, while a bench nook uses a corner fully and can hide storage in its base. Measure the walkway first so the seating does not block movement.

    What is the easiest first Italian kitchen change to try?

    A windowsill herb garden in terracotta pots is the easiest start: it needs no building work, suits the warm palette, and gives you fresh herbs where you cook. A washable rug in terracotta tones or new cabinet handles in brass are similarly simple first steps.

    Do I need to renovate to get an Italian kitchen look?

    No. Many ideas in this list need no renovation, including open shelves, a rolling island, a hanging rail, a herb garden, and a fold-down table. Paint, textiles, and ceramics can carry the look, while tile and niche work are options for a later stage if you want them.


  • 30 Scottish Kitchen Ideas to Add Character to Your Space

    30 Scottish Kitchen Ideas to Add Character to Your Space

    Scottish character in a kitchen comes from honest materials used well: wood, stone, wool, tartan, and colours borrowed from hills, heather, and lochs. It does not need a castle theme or a room full of pattern. One tartan shade at the window, a wood panelled wall, or a freestanding larder can set the tone, while plain worktops and calm walls keep the room easy to cook in. These 30 Scottish kitchen ideas cover cabinets, walls, floors, sinks, storage, seating, and small details, so you can start with one change or build a layered scheme over time. Pick the ideas that suit your room size and light first, then repeat one or two colours from your tartan in solid pieces.

    Key Takeaways

    • Start with one main Scottish piece, usually wood cabinets, a stone sink, or a tartan textile, and build solids around it.
    • Use wood, stone, wool, and linen for texture, and keep bright pattern to one or two places in the room.
    • Repeat one or two colours from your tartan in cushions, curtains, or a rug so the scheme looks planned.
    • Pair deep green, heather purple, or navy with cream, oat, and warm wood so dark colours stay cosy, not heavy.
    • Choose washable, practical textiles near the sink and stove, since kitchen fabrics get daily splashes.
    • Renters can get the same character from textiles, baskets, and freestanding pieces, with no paint or fixed work.

    1. Paint Shaker Cabinets in Deep Highland Green

    Kitchen with deep green Shaker cabinets, brass handles, and cream walls.

    Paint Shaker cabinets in a deep green for a Highland feel that still works with plain worktops and wood floors. The flat panel doors keep the look calm, while the green gives the kitchen a clear identity. Test the paint beside your floor and worktop in daylight and lamplight, since green can look much darker at night.

    Pair the green cabinets with cream walls, brass handles, and one tartan accent, so the room stays cosy rather than dark. In a small or low light kitchen, use the deep green on the lower cabinets only, and keep the upper cabinets cream. Renters can get a similar depth from dark green cushions and a table runner instead of paint.

    2. Hang a Tartan Roman Shade at the Kitchen Window

    Kitchen window with a muted tartan Roman shade above a sink.

    Fit a tartan Roman shade at the kitchen window for pattern and privacy without taking floor space. Choose a flat shade rather than soft folds if the check is large, so the repeat stays readable when the shade is raised. A muted green or navy tartan suits most wall colours, while a bold red tartan needs plain cabinets nearby.

    Use a cordless or child safe fitting where needed, and keep the shade hem clear of the sink splash zone. Add a plain roller behind the shade if you need full darkness in the evening. Measure the window frame carefully, so the shade covers the glass fully when lowered.

    3. Build a Range Alcove With a Wood Mantel

    Range cooker in a wood mantel alcove with plain tile.

    Build or dress a range alcove with a simple wood mantel shelf above the cooker for a cottage focal point. The shelf gives a home to a clock, a small plant, or a jug, and the alcove frames the cooking zone. Keep the mantel clear of hanging items that could catch heat, and choose a wipeable finish near the stove.

    Size the alcove to the cooker width, and follow the cooker maker guidance for clearance above the hob. Pair the wood mantel with plain tile inside the alcove, so the shelf stays the focus. If fixed work is not practical, a freestanding shelf unit beside the range gives a smaller version of the same effect.

    4. Top a Butcher Block Island With Turned Legs

    Butcher block island with turned legs and stools in a cottage kitchen.

    Use a butcher block island with turned legs at the corners for a furniture look that suits a Scottish cottage kitchen. The wood top tolerates daily prep, while the legs stop the island reading as a plain box. Plan seating on one side only, and leave clear walkways around the island for safe movement with hot pans.

    Seal the wood top against spills, and use boards for citrus and tomato prep. Paint the island base a deeper tone than the wall cabinets, such as sage or navy, for a classic two tone scheme. Keep the counter in the same wood or stone as the rest of the room for a settled result.

    5. Display Stoneware on a Freestanding Kitchen Dresser

    Freestanding painted kitchen dresser displaying white stoneware.

    Place a freestanding dresser or hutch in the kitchen for plates, bowls, and jugs, with the upper shelves open and the lower cupboard closed. A painted dresser in cream or muted green links to the cabinets without matching them exactly, and it suits a Scottish kitchen because older kitchens often mixed fitted cabinets with separate furniture.

    Measure the wall and door swing before you buy, since a dresser is deep and needs clear space in front. Fix tall pieces to the wall if the household includes children, and keep the top shelf for light items you reach for rarely. Keep the display edited, with one colour family of dishes, so it reads as calm rather than crowded.

    6. Dress a Breakfast Nook With Tartan Bench Cushions

    Breakfast nook bench with tartan seat cushions and plain back cushions.

    Dress a breakfast nook bench with tartan seat cushions and plain back cushions, so the eating corner carries Scottish pattern without repainting. Use a muted tartan on the seat pads and solid cushions behind, so the seat stays comfortable and the pattern stays controlled. For more nook layouts, see these kitchen nook ideas.

    Choose seat pads with removable, washable covers, since a nook seat gets daily use and food spills. Keep the table top wipeable, and leave a clear route in and out of the bench. In a kitchen with no built in bench, a low bench with the same tartan pads beside a small table gives a similar result.

    7. Lay a Tartan Table Runner for Everyday Meals

    Kitchen table with a tartan runner and a small stoneware jug.

    Lay a tartan runner down the centre of the kitchen table to soften a hard surface, protect it from scratches, and link the table to the window or bench colours. Choose a runner that stops short of the table ends, so plates and placemats still have room. Leave clear zones for daily items, instead of covering the whole table with decor.

    A washable runner is the practical choice in a kitchen, since spills reach the table daily. Keep the runner colour close to one tartan accent in the room, and pair it with one small jug or a plain candle holder, rather than a crowded display. Fold the runner away for a plainer look when you want a change.

    8. Use Heather Purple as a Muted Kitchen Accent

    Kitchen with heather purple towels and a small vase of dried stems.

    Bring heather tones into the kitchen through two or three soft purple pieces, such as a kettle cover, a tea towel set, or a small vase of dried stems, paired with cream cabinets and light wood. Heather purple reads as a Scottish moor colour without needing tartan, and it suits kitchens that already have grey or oat tones.

    Repeat the same purple in only one more place, such as a cushion in the nook, and keep the rest of the room neutral. Sample the fabric beside your cabinets first, since purple can shift under warm kitchen lighting. If purple feels too strong, use it on one towel only and keep the rest of the textiles in oat or cream.

    9. Lay Flagstone or Stone Look Floor Tiles

    Kitchen with flagstone floor tiles, wood cabinets, and a farmhouse sink.

    Lay flagstone or stone look floor tiles for a cool, hard wearing kitchen floor that suits wood cabinets and a farmhouse sink. Large tiles suit a bigger floor, while smaller tiles suit a compact kitchen or a hallway run. The stone tones ground cream cabinets and wood counters, and they hide crumbs better than a plain pale floor.

    Use tile rather than a printed sheet if the floor sees heavy wear, and choose a grout colour close to the main tile tone to keep the floor calm. Seal the grout, and keep a spare box of tiles for repairs. If a full stone floor feels too cold, add a washable rug runner in the main walkway for warmth underfoot.

    10. Panel One Wall With Painted Beadboard

    Kitchen wall panelled with painted cream beadboard beside an island.

    Panel one kitchen wall, or the back of an island, with painted beadboard for lined cottage texture that flat plaster cannot match. Painted beadboard in cream or soft white brightens the work zone, while a natural wood finish warms a kitchen with pale cabinets. The vertical lines draw the eye up and make a low ceiling feel a little taller.

    Seal painted beadboard well, especially near the sink and stove, where steam and splashes land daily. Use a wipeable paint finish so cooking grease comes off with a damp cloth. If you like the lined look but want tile near the stove, use beadboard on the remaining walls and tile only in the splash zone.

    11. Fit a Belfast Sink With a Brass Bridge Tap

    Deep Belfast sink with a brass bridge tap in a wood kitchen.

    Fit a deep Belfast or farmhouse sink with a brass bridge tap for a traditional kitchen workhorse. The sink sits forward of the cabinet line, so you can stand close while washing large pots and baking trays, and the exposed front panel becomes a feature in itself. A single large bowl is more useful for most cooks than two small bowls, since it fits roasting pans flat.

    Check the cabinet below before you choose, because a heavy sink needs a special base cabinet and solid support. Fit a grid or mat in the base to protect the surface from heavy pans, and wipe the front panel when you clean the counters. Choose a tap finish that matches your other hardware, so the sink area reads as one planned group.

    12. Hang Copper Pans on a Wall Rail

    Copper pans hanging on a wall rail above a kitchen worktop.

    Hang copper and cast iron pans on a sturdy wall rail above a worktop for storage that is also a display. The warm metal suits wood cabinets and stone worktops, and keeping pans in reach shortens prep time. Fix the rail into wall studs or solid masonry, and check the weight rating before you load it with heavy pans.

    Keep the rail near the cooker, but clear of direct steam and splash, and leave the most used pan at the easiest height. Wipe the pans after use, since kitchen air leaves a film on metal. If wall space is short, a ceiling pot rack over an island gives a similar result, with head clearance checked first.

    13. Lay Warm Oak Plank Flooring

    Kitchen with warm oak plank flooring and cream cabinets.

    Lay wide plank oak flooring in a warm tone to ground a Scottish kitchen and soften the hard surfaces of stone and tile. Choose a matte or low sheen finish, which hides scratches better than high gloss, and run the planks in the direction of the longest wall to make the room feel larger. Protect the floor at the sink and dishwasher with a washable rug or mat.

    Wipe spills promptly, since standing water marks wood over time. If solid wood feels risky in a busy kitchen, engineered planks with a thick wear layer give a similar look with more stability. Repeat the oak tone once more, in a table top or a shelf, so the floor does not look isolated.

    14. Keep a Freestanding Larder for Pantry Storage

    Tall freestanding painted larder cabinet beside kitchen cabinets.

    Keep a tall freestanding larder cabinet for dry goods, baking supplies, and preserves behind closed doors. A larder with adjustable shelves, a few drawers, and door racks for jars and spices gives a Scottish kitchen flexible storage without a full remodel. Place it near the prep zone, not across the room, and label shelf edges or use matching jars so the contents stay easy to find.

    A painted larder in the island colour, or a stained wood one that matches the floor, reads as furniture rather than extra cabinetry. Fix tall pieces to the wall where needed, and keep the top clear except for one light item. For more traditional storage ideas, see these traditional kitchen ideas.

    15. Use Glass Front Cabinets With Mullioned Doors

    Mullioned glass front upper cabinets showing white dishes.

    Use glass front upper cabinets with mullioned doors to break up a long run of solid doors and give you a place to show everyday dishes and glassware. Mullioned doors, with thin wood bars dividing the glass into small panes, look more traditional than a single large sheet of glass. Keep the contents simple: matching white dishes, clear glasses, and one repeated accent, with space between groups.

    Add a small light inside the cabinet if wiring allows, and keep the glass clean, since fingerprints show more here than on solid doors. Use glass on one run of uppers, or on a single cabinet beside the sink, and keep the rest solid for everyday clutter. This balance keeps the kitchen warm without feeling like a display room.

    16. Choose a Thistle Motif Tile Backsplash

    Kitchen backsplash with small thistle motif tiles above a counter.

    Choose a tile backsplash with a small thistle motif, or a plain tile with one thistle accent tile repeated at intervals, for a clear Scottish note at eye level. A muted green or blue motif on a cream tile suits wood cabinets, while a large coloured tile suits a plain kitchen that needs one focal point. Keep the motif small and repeated evenly, so it reads as pattern rather than a picture.

    Run the tile to the underside of the upper cabinets, and finish exposed edges with a matching trim tile. Seal the grout in the cooking zone, and keep a spare box of tiles from the same batch for future repairs. If a motif tile feels too strong, use it only behind the range and plain tile elsewhere.

    17. Make a Cast Iron Range the Focal Point

    Cast iron range cooker as the focal point of a cottage kitchen.

    Make a cast iron range cooker the focal point of the kitchen, with plain cabinets and a simple tile wall behind it so the range stays the feature. A range with a cream or soft green finish suits a Scottish cottage kitchen, and its solid shape gives the room a settled centre. Choose the width to match your cooking, since a wider range suits cooks who use several pans at once.

    Before you buy, check the fuel type, the venting route, and the clearance your maker specifies around the range. Keep the wall behind it simple, with plain tile or beadboard, and keep the worktop beside it clear as a landing spot for hot trays. A range is a long term choice, so live with the colour sample in your kitchen light first.

    18. Swap in Tartan Tea Towels and an Oven Glove

    Tartan tea towels and oven glove hanging by a kitchen oven.

    Swap in tartan tea towels, a matching oven glove, and a pot holder for Scottish pattern you can change in seconds and wash often. The textiles add colour at the oven and sink, where the eye naturally lands, without changing cabinets or walls. Choose a washable cotton tartan, since kitchen textiles see spills and steam daily.

    Keep the rest of the textiles plain when the tartan set is out, so the pattern stays controlled. Hang towels on a rail clear of the hob, and keep a second set ready to swap in on laundry day. This is a good first tartan step for readers who like the pattern but worry it will look too strong on a larger surface.

    19. Grow Herbs on a Sunny Kitchen Windowsill

    Herbs in terracotta pots on a sunny kitchen windowsill.

    Grow herbs on a sunny kitchen windowsill in terracotta pots, so fresh flavour stays within reach while you cook. Parsley, chives, mint, and thyme suit a kitchen sill, and the green pots soften hard kitchen surfaces. Use pots with saucers to protect wood and paint, and water the plants over the sink, not at the table.

    Keep plants off the main worktop, except for one small pot that lifts away for cleaning, so prep space stays full. Choose pots in one material and similar sizes, so the sill reads as planned rather than crowded. If the sill is narrow, a single shelf above the sink holds the same pots with no loss of worktop space.

    20. Set Up a Baking Station for Shortbread and Oatcakes

    Baking station with a wood board, rolling pin, and flour jar on a worktop.

    Set up a baking station on one stretch of worktop with a wood board, a rolling pin, flour in a sealed jar, and a tray within reach, so shortbread and oatcake baking has a set place. A marble or wood board gives a cool, flat surface for pastry, while a jar of flour and a small bowl of sugar keep the station ready without cluttering the whole counter.

    Keep the station to one worktop zone, and clear it fully after baking, so the kitchen stays usable for daily cooking. Store baking trays in the drawer below, and keep a tea towel folded nearby for wiping flour. This station also suits bread baking, since the same board and jars serve both uses.

    21. Create a Hearth Bench Beside the Fireplace

    Small bench seat with a wool cushion beside a kitchen fireplace.

    Create a small bench seat beside a kitchen fireplace or range, with a wool cushion and a basket for kindling or logs, so the warmest corner becomes a sitting spot. The bench gives the cook company without blocking the work zone, and it suits a cottage kitchen where the fire is already a focal point. Keep the bench clear of the fire opening, following the fire maker guidance for safe distances.

    Use a washable cushion cover, since a hearth seat collects dust and ash, and keep the route to the cooker clear. If there is no fireplace, a bench beside a sunny window gives a similar warm corner, with a lamp for evening use. Keep the bench depth shallow enough to sit upright without feeling wedged.

    22. Add a Plate Rack Above the Counter

    Plate rack above a kitchen counter with white plates standing upright.

    Fit a plate rack above the counter, built into the wall or into an upper cabinet, to keep everyday plates upright, visible, and easy to grab. Fit vertical dividers sized to your largest dinner plates, with a grooved shelf below to catch drips from just washed plates. Keep the rack near the dishwasher or the serving area, not over the stove.

    Limit the rack to one plate style in a single colour, so the display reads as calm. Leave gaps between groups, and repeat one material, such as wood or brass, so the display stays tidy. This suits a traditional kitchen better than stacking plates in a deep drawer, since plates are reached daily.

    23. Use Two Tone Cabinets in Green and Cream

    Kitchen with deep green lower cabinets and cream upper cabinets.

    Use two tone cabinets, with deep green on the lower cabinets and cream on the upper cabinets, for a Scottish kitchen that stays bright. The dark base grounds the room, while the pale uppers keep the wall feeling open and make the ceiling feel higher. Repeat the green once more, in the island base or a nook bench, so the scheme looks planned.

    Keep the worktop and backsplash plain, so the two cabinet colours stay the focus. Test both paints beside your floor in daylight and lamplight before you commit, since green shifts a lot between the two. For more vintage cabinet pairings, see these vintage kitchen ideas.

    24. Top Counters With Slate or Dark Stone

    Kitchen with dark slate counters, cream cabinets, and brass hardware.

    Top counters with slate or dark stone for a cool, hard wearing work surface that suits wood cabinets and a farmhouse sink. A dark counter gives contrast against cream cabinets, and its matte finish hides small marks better than high gloss. Ask the supplier about sealing and care before installation, since stone can stain if spills sit on it.

    Use boards for citrus and tomato prep, wipe spills promptly, and keep a trivet near the stove for hot pans. If daily upkeep worries you, use dark stone on the island only, and a harder, lighter stone on the main prep run. Pair the dark counter with brass hardware, so the metal warms the stone.

    25. Hang Brass Pendants Over the Island

    Brass pendant lights hanging over a kitchen island.

    Hang two or three brass pendant lights over the island for task light and a warm metal note that suits wood and stone. Hang the shades about 30 to 36 inches above the counter, so the light falls on the work surface and the shades stay clear of sight lines. Use warm white bulbs and a dimmer, so the same pendants work for prep in the morning and for a quiet evening meal.

    Match the pendant metal to your hardware for a connected look, and keep cords or rods straight and level, since uneven pendants are easy to spot. Wipe the shades often, since kitchen air leaves a film on glass and metal. If space is tight, a single wide brass pendant over a small island gives most of the same effect.

    26. Store Root Vegetables in Wicker Baskets

    Wicker baskets of potatoes and onions on a kitchen shelf.

    Store potatoes, onions, and other root vegetables in labelled wicker baskets on a shelf or in the larder, so they stay ventilated and easy to reach. Wicker suits a Scottish cottage kitchen, and baskets keep bulky vegetables out of drawers that are better used for utensils. Line the baskets if needed, and keep them in a cool, dark spot away from the cooker.

    Use baskets with handles if you move them for cleaning, and keep them to vegetables you use each week, so nothing sits forgotten. Label each basket, so the cook can find onions without lifting every lid. In a small kitchen, one basket for onions and one for potatoes is enough, with the rest of the produce in the fridge.

    27. Upholster a Dining Chair Set in Tartan

    Dining chairs with tartan seat pads around a wood kitchen table.

    Upholster dining chair seats, or add tartan seat pads, in a muted check for Scottish pattern at table height. The check links the table to the window shade or nook bench, while the chair frames stay in plain wood. Choose a washable fabric, since dining chairs see food spills, and use a check that shares a colour with the table runner.

    Keep the table top plain when the chairs are patterned, so the table setting stays calm. If the tartan is bold, upholster two chairs only, such as the end chairs, and keep the side chairs in a solid colour from the check. This is a good way to test tartan in a kitchen before committing to a larger textile.

    28. Build a Bothy Style Breakfast Corner

    Bothy style breakfast corner with a low wood bench and round table.

    Build a bothy style breakfast corner with a low wood bench, a small round table, wool cushions, and a lantern style lamp on the wall, for a sheltered eating spot in a cottage kitchen. Keep the colours muted, with cream cushions, a tartan throw over the bench back, and dark wood, so the corner feels sheltered rather than crowded. Leave the wall above the bench mostly plain, with one small print.

    Keep the corner practical: a clear path to the cooker, a lamp you can reach from the table, and storage for the extra cushions close by. Use a safe lamp, not an open flame, near textiles and curtains. This idea suits a small kitchen or a kitchen diner, where a low bench makes the ceiling feel higher.

    29. Place Dried Heather in a Jug on the Table

    Dried heather stems in a stoneware jug on a kitchen table.

    Place a small bunch of dried heather stems in a sturdy jug on the kitchen table for a simple Scottish plant note that needs no watering. Heather suits a stoneware or wood jug, and its muted purple tones link to heather accents elsewhere in the kitchen. Keep the arrangement small, with space around it, so the table still works for daily meals.

    Dust the stems gently now and then, and replace them when they shed too much. If dried stems bother allergies in your household, use a framed heather print on the wall instead, or a small potted herb that suits your home. Keep the jug away from the edge of the table, so it cannot be knocked off easily.

    30. Keep a Rental Kitchen Scottish With Textiles Only

    Rental kitchen dressed only in tartan and wool textiles, no paint changes.

    Build a Scottish kitchen from textiles alone, with no paint, panels, or fixed work: tartan towels, a table runner, wool seat pads, a washable rug runner, and a basket of blankets for the nook bench. Textiles can be changed with the season, washed easily, and taken with you when you move, which makes them ideal for rentals. Start with the table, then add the window and one seating textile.

    Keep the base calm with plain cabinets and plain worktops, so the tartan and wool pieces stand out. Store any original fittings safely, and check your lease before changing anything fixed, so the kitchen can be returned to its original state. This controlled dose suits modern kitchens as well as traditional ones.

    Conclusion

    A Scottish kitchen works best when a few honest materials do the work: tartan in one or two places, wood cabinets and floors with visible grain, stone sinks and worktops, and colours borrowed from hills and heather. Start with the cabinets, add one wall or window change, and finish with storage and a seating corner if space allows. Live with each change for a few days before adding the next, and keep the base calm so the character pieces stand out. Save this list on Pinterest, and work through it one area at a time: cabinets, walls, floors, then storage and small details.

    FAQs

    What makes a kitchen look Scottish without looking themed?

    A Scottish kitchen looks characterful rather than themed when you use a few real materials and muted colours, not a room full of symbols. Tartan textiles, wood cabinets, stone sinks, and heather or deep green accents give the character, while plain worktops and cream walls keep the room restful. Limit tartan to one or two places, repeat one or two colours from the tartan in solids, and leave most surfaces plain. That balance gives a Scottish feel you can live with daily, rather than a display that tires quickly.

    Which tartan colours work best in a kitchen?

    Muted tartans in green, navy, or red with cream or grey lines work best in a kitchen, since they pair well with plain cabinets and wood worktops. A classic red tartan suits a table runner or tea towels that should be a focal point, while a muted green or navy tartan suits a Roman shade, seat pads, or a nook bench in a calmer room. Test the fabric beside your cabinets in daylight and lamplight, since tartan can look stronger at night. If you are unsure, start with a muted check on towels or a runner, and add a larger tartan piece only if the room still needs it.

    How can I add Scottish character to a small kitchen?

    Use tartan in one place only, keep the walls pale, and let wood texture do the rest. A folded tartan runner, a pair of tartan seat pads, or a tartan Roman shade gives character without closing in the room, while a plain rug and light wood keep the space feeling open. Avoid tartan on the window, the table, and the chairs at the same time in a small kitchen. A basket of vegetables, a small framed landscape print, and one warm pendant add character without taking worktop space.

    Can renters create a Scottish kitchen without painting or drilling?

    Yes, renters can build the whole look from textiles and freestanding pieces. Tartan towels and a runner, wool seat pads, a washable rug runner, a freestanding larder, and a tartan curtain on a tension rod all work without paint or fixed fittings. Use a freestanding dresser, a leaning framed print, and a bench in the nook for furniture character. Keep any original doors and fittings stored safely, and check your lease before removing anything fixed, so the kitchen can be returned to its original state.

    What worktops suit a Scottish kitchen best?

    Wood, slate, and dark stone all suit a Scottish kitchen, since each pairs well with wood cabinets and muted colours. Butcher block gives warmth and is easy to repair with a light sand and fresh oil, while slate and dark stone give a cool, hard wearing surface for pastry and hot pans. Keep the area near the sink well sealed, wipe up standing water promptly, and use boards for acidic prep. If you are unsure, use wood on the island and stone on the main prep run, so you get both looks in one kitchen.

    How do I mix tartan with other patterns in a kitchen?

    Mix tartan with one other pattern at most, vary the scale, and share a colour between the two. A large tartan check pairs well with a small stripe or a plain texture, while a small tartan pairs well with a larger, simple shape such as a knit or a wood grain. Keep the second pattern to one place, such as a cushion or a rug, and leave the rest of the room in solids. If the tartan is bold, skip a second pattern and use texture instead, such as wood, linen, or wool, to give depth without visual competition.


  • 11 Mid Century Modern Kitchen Ideas to Make Your Next Refresh Easier

    11 Mid Century Modern Kitchen Ideas to Make Your Next Refresh Easier

    Mid century modern kitchens are easy to recognize: flat cabinet fronts, warm wood, clean lines, and one or two bold details that keep the room from feeling plain. The style came from the 1950s and 1960s, when kitchens opened up, storage got simpler, and color showed up in small, confident doses. These 11 mid century modern kitchen ideas use that same mix, with cabinets, counters, tile, lighting, and seating that suit daily cooking. Start with the change that fixes your biggest frustration, such as dark cabinets or poor light, and add the next idea only when the first one feels settled. For a pared back take on the same clean lines, these minimalist modern kitchen ideas show how flat fronts and a limited palette work in a newer style.

    Key Takeaways

    • Let warm wood lead: walnut or teak tones on cabinets, an island, or open shelves set the period feel at once.
    • Keep lines clean: flat fronts, slim hardware, and plain counters keep the room calm so one bold detail can stand out.
    • Use color in one place: a painted island, a tile band, or seat cushions give the retro note without covering every surface.
    • Repeat one metal finish, such as brass, across hardware and lighting so the details read as a set.
    • Mix old and new where it helps: modern appliances and good task lighting keep a period look practical for daily cooking.
    • Measure before you buy: cabinet runs, island clearance, and pendant height decide whether a mid century piece fits the room.

    1. Flat-Front Walnut Cabinets

    Flat-front walnut kitchen cabinets with slim brass pulls and a plain white counter.

    Start with flat-front cabinets in walnut for the clearest mid century base a kitchen can have. With no raised panels or heavy trim, the cabinet run reads as one warm, calm surface, and the wood grain itself becomes the detail. Walnut suits white counters, cream walls, and brass hardware, and it warms a room that might otherwise feel cold.

    Keep the finish matte or satin, since high gloss fights the soft, natural feel of the style. Pair walnut lowers with a plain counter and a simple backsplash, so no single surface competes with the wood. If new cabinets are out of reach, refinishing sound doors in a walnut stain or a warm wood veneer gives much of the same effect. Test the stain beside your floor and counter first, since wood tones shift a lot between daylight and evening light.

    2. A Two-Tone Cabinet Run with White Uppers

    Kitchen with walnut lower cabinets and white upper cabinets with brass hardware.

    Pair walnut lower cabinets with white upper cabinets to lighten a kitchen that feels heavy. The dark wood grounds the room at counter level, where you see it most while cooking, while the white uppers lift the wall and bounce light around the space. This split also lets you keep the period wood without committing every cabinet to a dark tone.

    Use the same hardware on both runs, such as slim brass bar pulls, so the two tones read as one planned kitchen rather than two separate ones. Keep the counter plain and the backsplash simple, so the two-tone split stays the main feature. This approach suits a smaller kitchen well, since the white uppers keep the wall from closing in while the wood below still gives warmth.

    3. A Walnut Island with Tapered Legs

    Walnut kitchen island with tapered legs and an open shelf holding cookbooks.

    Give the island furniture legs, tapered and slightly angled, instead of a solid panel base. Mid century furniture stood on slim legs, and that same detail makes a kitchen island feel lighter and more like a table than a block. A walnut island top with an open shelf below also gives a handy spot for cookbooks, baskets, or large bowls.

    Leave enough clearance around the island for comfortable walking and for pulling a stool out, and keep the shelf to a few items you use often so it stays tidy. Pair the island with simple stools in wood or a dark metal frame, and keep the island front free of extra panels or trim. The legs do the period work, so the rest of the island can stay plain.

    4. Speckled Laminate Counters with a Clean Edge

    Speckled cream laminate kitchen counter with a clean edge beside flat-front cabinets.

    Choose a speckled laminate counter in cream, warm grey, or pale green for a period surface at a modest cost. Small speckles read as a calm surface from a distance and only show their retro detail up close, which suits flat-front cabinets and plain walls. A straight, clean front edge keeps the look crisp, while a softly rounded edge suits a more relaxed room.

    Laminate wipes clean and handles everyday prep well, but it needs care near heat: use trivets for hot pans and boards for cutting, and wipe spills promptly at the seams. Pair a speckled counter with plain cabinets and a simple backsplash, so the counter pattern is the one busy surface in the room. Similar period counters appear in these retro kitchen ideas, where laminate and chrome give the same 1950s and 1960s feel.

    5. A Geometric Tile Backsplash in Warm Tones

    Geometric tile backsplash in cream, mustard, and charcoal behind a kitchen stove.

    Run a geometric tile backsplash in two or three warm tones, such as cream, mustard, and charcoal, for pattern at eye level. Starburst, diamond, or small hexagon tiles give a clear mid century feel without a large print, and the band draws the eye along the cooking wall. Use the pattern behind the stove or across the full backsplash, and keep the cabinets and counters plain so the tile has room to stand out.

    Choose a grout color close to the main tile shade for a soft result, or a slightly darker grout if you want the pattern to read more clearly. Seal the grout in the stove zone, where splashes are most likely, and keep a spare box of tiles from the same batch for future repairs. Run the tile to the underside of the upper cabinets so the band is continuous.

    6. Open Walnut Shelves for Simple Dishware

    Open walnut kitchen shelves holding white plates, plain bowls, and clear glasses.

    Fit one or two open walnut shelves beside a window or above a short counter run, and style them with simple dishware in solid colors. Stacked white plates, plain bowls, and clear glasses read as mid century when the shapes are simple and the colors are few. The wood shelf links to walnut cabinets elsewhere in the room, so the display feels planned rather than added on.

    Limit the shelf to pieces you use weekly, in one or two colors, and leave at least a third of the shelf empty. Group plates in one stack and glasses in a short row, and keep heavier items low. Dust shelves weekly, since open storage collects cooking film faster than closed cabinets, and keep the shelves away from the stove, where steam and grease settle fastest.

    7. Sputnik and Globe Pendants Over the Island

    Sputnik style pendant lights with brass frames hanging over a kitchen island.

    Hang globe pendants or a sputnik-style light over the island for the most recognizable mid century lighting in a kitchen. Round glass globes with a brass or dark metal frame glow softly rather than glaring, while a sputnik fitting, with arms radiating from a center ball, suits the center of a small kitchen or a dining corner. Hang two or three globes in a line over the island, spaced evenly, with the bottom of each shade above head height when you stand at the counter.

    Use warm white bulbs and a dimmer, so the same lights work for morning prep and for evening meals. Match the light metal to your hardware, brass in most mid century rooms, so the fittings read as a set. Keep the shades simple, because the shape itself is already a strong period detail.

    8. Slim Brass Bar Pulls on Every Door

    Slim brass bar pulls on flat-front walnut kitchen cabinet doors.

    Swap busy hardware for slim brass bar pulls on drawers and doors for a small change with a large effect. Brass warms walnut and white cabinets alike, and the slim bar shape suits flat fronts far better than ornate knobs. Measure your existing hole spacing before ordering, since bar pulls come in fixed widths, and buy one sample first to check the brass tone against your faucet.

    Repeat brass in just two or three places, such as handles, faucet, and one light fitting, and keep other metals out of the main view. Wipe brass with a soft cloth and avoid harsh pads, which can dull the finish. If your appliances are stainless steel, that is fine, because steel reads as a working material rather than a competing metal.

    9. One Bold Accent Color on the Island

    Kitchen with a burnt orange painted island beside walnut and white cabinets.

    Paint the island in one bold accent color, such as burnt orange, mustard, or deep teal, and keep the rest of the kitchen calm. A single painted island gives the retro note in one clear place, and it is far easier to change later than a full cabinet repaint. The bold color works best against walnut or white cabinets, plain counters, and a simple floor.

    Repeat the island color in just one other small place, such as seat cushions, a dish towel, or a vase, so the island links to the room instead of sitting alone. Test the paint beside your floor and counter in daylight and evening light before you commit, since strong colors shift a lot between the two. If a painted island feels too bold, try the same color on stools or a single cabinet run first.

    10. A Built-In Breakfast Nook with a Tulip Table

    Kitchen breakfast nook with a built-in bench seat and a round tulip table.

    Turn an empty kitchen corner into a built-in breakfast nook with a bench seat and a round tulip table. The bench, in walnut or painted to match the cabinets, uses the corner well and holds storage underneath for table linens and board games. A tulip table, with one center pedestal instead of four legs, makes it easy to slide in and out of the bench, which matters in a tight corner.

    Keep the table small enough that chairs on the open side can pull out fully, and hang a simple pendant above the table for evening meals. Choose bench cushions in one solid color that repeats a color already in the room, such as the island accent or a tile tone, so the nook links to the kitchen. A nook like this also suits a kitchen where the main table sits in another room, because it gives family and guests a place to sit while you cook.

    11. A Freestanding Walnut Credenza for Kitchen Storage

    Freestanding walnut credenza with sliding doors against a kitchen wall.

    Add a freestanding walnut credenza against one wall for storage that looks like furniture rather than more cabinets. Mid century kitchens often mixed fitted cabinets with separate pieces, and a credenza with sliding doors or slim drawers holds table linens, baking trays, or small appliances without a full cabinet run. The wood tone links to walnut cabinets, while the legs and slim profile keep it from feeling heavy.

    Measure the wall and the door swing before you buy, since a credenza is deep and needs clear space in front. Fix tall or top-heavy pieces to the wall if the household includes children, and keep the top clear except for a bowl or a small plant, so it stays a useful surface rather than a display shelf. A credenza also gives a small kitchen extra storage without new cabinet work, and it pairs well with the open shelves in Idea 6.

    Conclusion

    A mid century modern kitchen works best when warm wood, clean lines, and one or two bold details share the room. Flat-front walnut cabinets, a tapered leg island, and slim brass hardware set the period base, while a geometric tile band, a painted island, or a sputnik light gives the room its character. Keep counters plain beside a patterned backsplash, test wood stains and paint colors in your own light, and make sure seating, lighting, and storage all work for daily cooking, not just for looks. With those basics in place, the kitchen feels warm and collected, and it still works as a busy family room.

    Save this list on Pinterest before your next kitchen refresh, and try one idea first: a hardware swap, an open shelf, or a painted island, then live with it for a week before you change the next surface. For more period kitchen details, the linked retro and vintage guides above pair well with this list.

    FAQs

    What defines a mid century modern kitchen?

    A mid century modern kitchen is defined by flat-front cabinets, warm wood tones such as walnut or teak, clean lines, slim hardware, and one or two bold details, such as geometric tile or a sputnik light. The style comes from the 1950s and 1960s, when kitchens opened up and storage got simpler. Keep the palette limited, with wood, white or cream, and one accent color, so the room reads as calm rather than busy.

    What wood is best for mid century kitchen cabinets?

    Walnut is the classic choice, with a rich brown tone and visible grain that suits flat fronts well. Teak is another period option, warmer and more golden, while oak works when you want a lighter wood tone. Choose a matte or satin finish, and test the stain beside your floor and counter in daylight and evening light, since wood tones shift a lot between the two.

    Can I get a mid century look without replacing my cabinets?

    Yes. Refinish or paint sound doors in a walnut stain or a warm wood tone, swap hardware for slim brass bar pulls, add open walnut shelves, and change the lighting to globe or sputnik pendants. A painted island in burnt orange or mustard, a geometric tile backsplash, and simple seating can refresh the room with no cabinet replacement. Start with hardware and lighting, which are the fastest changes.

    How do I mix mid century details with modern appliances?

    Keep the modern layout and appliances, and add mid century details in a limited set: walnut or wood tones, brass hardware, and one pattern, such as geometric tile. Leave the cabinet shapes, counters, and lighting modern in the rest of the room only if you want a softer mix, or go fully flat-front for a stronger period feel. If the room starts to feel busy, remove one patterned item before you add another. These vintage kitchen ideas show a similar mix of old details and practical new pieces.

    What colors work in a mid century modern kitchen?

    A warm base works best: walnut wood, white or cream cabinets, and plain counters, plus one bold accent such as burnt orange, mustard, avocado green, or deep teal. Use the accent in one place, such as the island, seat cushions, or a tile band, and repeat it once in a small item. Strong color on every surface will fight the calm look, so keep the largest surfaces quiet.

    Will a mid century kitchen suit a small kitchen?

    Yes, and it often suits a small kitchen well, because flat fronts, slim hardware, and light upper cabinets keep the walls from feeling busy. Use a two-tone cabinet run with white uppers, a tapered leg island or a small tulip table nook, and one open shelf instead of a full cabinet run. Keep the floor plain beside a patterned backsplash, and choose globe pendants that light the room without hanging low over walkways.


  • 26 Swedish Kitchen Ideas for a More Polished Space

    26 Swedish Kitchen Ideas for a More Polished Space

    A Swedish kitchen starts with light. White walls, pale wood, and clear counters do most of the work, while small details in blue, black, or natural linen give the room its character. Nothing needs to be grand or costly. A painted cabinet run, a wood counter, a linen curtain, or a well placed plant can shift a plain kitchen toward the calm, polished look Swedish rooms are known for. These 26 Swedish kitchen ideas cover cabinets, counters, tile, seating, windows, storage, and small finishing touches, so you can start with one change or build a full scheme over time. Begin with the change that fixes your biggest problem, test paint and tile samples in daylight and evening light, and keep work surfaces clear so cooking stays easy.

    Key Takeaways

    • Start with light: white or pale walls, a pale floor, and clear glass let daylight carry the room.
    • Pair white cabinets with one warm material, such as pale oak or birch, so the kitchen feels calm rather than cold.
    • Repeat one accent, such as muted blue, black hardware, or striped linen, in two or three places for a planned look.
    • Keep work surfaces plain and easy to clean, and store everyday items in closed cabinets or glass jars.
    • Test paint, tile, and wood samples beside your floor and counter in daylight and evening light before a large change.
    • Small, removable changes like curtains, towels, plants, and a fika tray suit renters and small budgets.

    1. White Shaker Cabinets with Pale Wood Floors

    Swedish kitchen with white shaker cabinets

    Paint shaker cabinets white for a kitchen that feels bright and orderly without looking bare. Shaker doors add simple shape, and a pale wood floor warms the white so the room feels lived in rather than clinical. This suits kitchens with good daylight, where white reads as fresh rather than stark.

    Keep handles simple in black or brushed steel, and choose a counter in pale wood or white stone so the cabinets stay the focus. If you worry about upkeep, paint one run first and live with it for a week before painting the rest. Wipe doors near the stove each week, since white shows cooking splashes.

    2. Light Oak Flat Front Cabinets

    Swedish kitchen with light oak flat front cabinets and a pale stone counter.

    Choose light oak flat front cabinets for a modern Swedish kitchen with a quiet wall of wood. Without framed doors breaking the surface, the grain itself becomes the feature, which suits open plan rooms where the kitchen stays in view. A pale oak keeps the room bright, while a deeper oak suits a larger kitchen with strong daylight.

    Keep one texture in the room to stop flat fronts from feeling flat, such as a stone counter or a woven runner. Clean the fronts with a soft cloth, since fingerprints show more on flat doors than on framed ones. For help choosing the right undertone for the rest of the room, see these ideas for colors for your kitchen cabinets.

    3. Two Tone White Uppers and Wood Lowers

    Swedish kitchen with white upper cabinets

    Use white on the upper cabinets and light wood on the lowers for a lighter take on a wood kitchen. The white uppers keep the eye moving up and make a small kitchen feel taller, while the wood base grounds the room. This split also makes repainting easier later, since only half the cabinets need a new color.

    Pair the scheme with a pale backsplash and a white or wood counter. A black or steel handle on the lower cabinets ties the two tones together. Keep the wall color plain so the two cabinet materials can do the work.
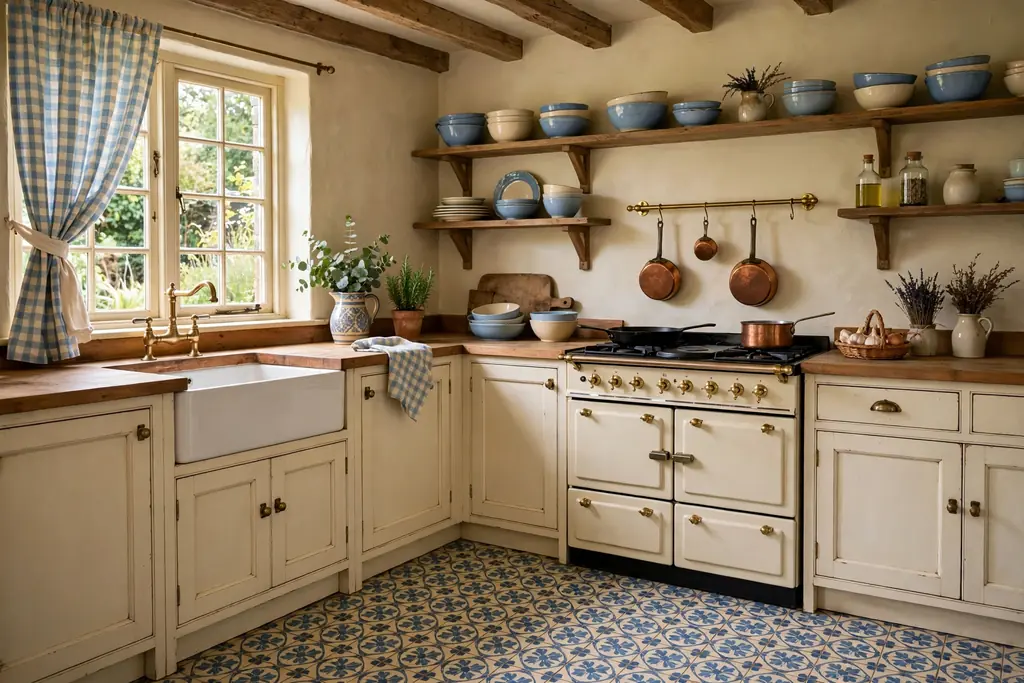
    4. Muted Swedish Blue Island

    Swedish kitchen with a muted blue island

    Paint only the island in a muted Swedish blue for color in one clear place. The blue reads as calm rather than bold, and it pairs well with white cabinets, pale wood stools, and a light counter. A blue island suits a white kitchen that feels too plain, and it is easier to repaint later than a full set of cabinets.

    Repeat the blue once more, in a rug, a vase, or a tea towel, so it looks planned rather than random. Choose a hard wearing counter for the island, since it takes the most daily use. Keep the rest of the room neutral, so the island stays the single color note.

    5. Open Light Wood Shelves with White Dishes

    Swedish kitchen with open light wood shelves holding white plates and clear glasses.

    Fit open light wood shelves on one wall and display white plates, bowls, and clear glasses against them. The wood warms the wall and adds display space without painting a single cabinet. This suits a kitchen with one blank wall or a short run above a counter.

    Keep the shelf items to daily pieces you actually use, and leave breathing room between groups so shelves read as tidy, not crowded. Our guide to how to style open shelves shows how to group by type and height. Dust open shelves weekly, since open storage collects cooking film.

    6. White Subway Tile Backsplash

    Swedish kitchen with a white subway tile backsplash

    Lay white subway tiles as a backsplash for a classic shape that suits almost any Swedish kitchen. A white tile with a pale grout feels soft and calm, while a white tile with a darker grout makes the brick pattern clearer. Subway tiles suit most kitchens because the shape is familiar and the size works around sockets and windows.

    Pair white tile with white cabinets and a pale wood counter, so the wall stays quiet. Order a few spare tiles for future repairs, and seal grout in the splash zone behind the sink and cooker. Check a tile sample under kitchen lights at night as well as in daylight, since white tiles shift tone between lights.

    7. Pale Butcher Block Counters

    Swedish kitchen with a pale butcher block wood counter

    Use a pale butcher block counter for warmth at hand level in a white kitchen. Light wood counters suit white cabinets, black handles, and white tile, and they give a work surface that feels softer than stone. This is a good choice for a kitchen where the counter is the main warm material in the room.

    Oil or seal the wood near the sink and stove, and wipe spills promptly so the surface stays even. Use boards for chopping and hot pans, and keep the backsplash simple so the wood grain stays clear. If a full wood counter is out of reach, use wood on the island only, with a pale stone counter on the main runs.

    8. White Ceramic Farmhouse Sink

    Swedish kitchen with a white ceramic farmhouse sink

    Fit a white ceramic farmhouse sink, with its deep bowl and front panel on show, for a practical sink that also suits a Swedish kitchen. A white sink suits white or wood cabinets, and it pairs well with a simple chrome or steel tap. The front panel is visible from across the room, so it acts as a decor piece as well as a sink.

    Keep the counter around the sink plain, and choose a tap finish that matches your cabinet handles. A farmhouse sink needs a cabinet made to fit it, so check sizes before ordering. Clean the sink with a soft cloth and mild cleaner to protect the glaze, and avoid harsh pads that can dull it.

    9. Light Wood Breakfast Nook Bench

    Swedish kitchen breakfast nook with a light wood bench

    Build or buy a light wood bench for a breakfast nook, with white cushions and a small wood table beside a bright window. A bench seats more people than chairs in the same footprint, and it suits a small kitchen where a full dining table would crowd the room. This is a good way to add seating that stays in view from the kitchen.

    Keep cushions washable, since kitchen seating takes daily spills, and add storage under the bench lid if your bench allows it. Keep the table small enough to slide in and out, and leave room to walk past the bench without turning sideways. A plain runner or a single vase keeps the nook calm.

    10. White Paper Pendants Over the Island

    Swedish kitchen island with white paper pendant lights above it.

    Hang two or three white paper pendants over the island for soft light and a clear Swedish note at eye level. Pendants work well in a row, spaced evenly, with the lowest point well above head height and clear of steam from the hob. A round paper shade suits most kitchens, while a slim drum shade suits a longer island.

    Match the pendant cord to the room, in white or black, and keep the rest of the ceiling lights plain. Use warm white bulbs so the paper glows warm in the evening, not cold. Dust the shades often, since kitchen pendants collect grease film over time.

    11. Sheer Linen Cafe Curtains

    Swedish kitchen window with sheer white linen cafe curtains on the lower half.

    Hang sheer linen cafe curtains on the lower half of the window for privacy at counter height while the top half stays open for daylight. Linen suits a Swedish kitchen because it softens the glass without a formal drape, and a plain natural color hides light splashes better than bright white. Hang the panels on a slim tension rod inside the frame if you rent, or on a small fixed rod if you own.

    Keep the hem just above the sill so fabric does not sit in water near the sink. Choose washable fabric, because kitchen curtains pick up grease film over time and need a regular wash. Keep fabric well clear of the stove and open flames.

    12. Herb Pots on the Windowsill

    Swedish kitchen windowsill with small herb pots in white ceramic pots.

    Line up small herb pots in white ceramic on the kitchen windowsill. The plants get strong light and stay within reach while you cook, and the white pots tie the sill to the rest of the room. Use pots of a similar size and material, so the row looks calm rather than collected at random.

    Set the pots on a narrow tray or saucers to protect the sill from water marks. Choose herbs based on the light your window actually gets, and keep the sill clear of the faucet splash zone where possible. For more ways to dress the window without blocking light, see these kitchen window decor ideas.

    13. Pale Wood Plank Flooring

    Bright Swedish kitchen with pale wood plank flooring and white cabinets.

    Lay pale wood plank flooring, or refresh an existing pale floor, for a kitchen floor that lifts the whole room. Light wood suits white cabinets, pale counters, and black or steel handles, and it makes a small kitchen feel larger than a dark floor would. A pale floor also links the kitchen to adjoining rooms in an open plan home.

    Use a finish suited to kitchens, with easy cleaning and grip, and keep spare boards for repairs. Choose a low pile runner in a plain tone over the floor in the main work zone if the wood feels cold underfoot. Wipe spills promptly near the sink and stove, since water marks show on light wood.

    14. White Glass Front Cabinets

    Swedish kitchen with white glass front cabinets displaying white dishes and clear glasses.

    Paint the frames of glass front cabinets white, and keep the doors and cabinet bodies white or pale wood. When the doors close, you get a clear view of white dishes and glasses, which suits a Swedish kitchen because the display stays light. This idea suits a kitchen that already has glass fronts, or one cabinet you can change as a test.

    Use white or clear dishes inside so the display stays calm, and keep the display simple with one or two stacks per shelf. If the glass feels too open, use glass on one cabinet only, with closed doors on the rest. This is a low cost way to add display space in a rented or recently fitted kitchen.

    15. Simple Black or Wood Hardware

    White Swedish kitchen cabinets with slim black bar handles and pale wood knobs.

    Swap cabinet knobs and drawer pulls for slim black bars or pale wood knobs for a small, reversible change. Simple hardware suits white, cream, or pale wood cabinets, and it lets you set the tone of the room without painting. This is a good weekend job, and it costs far less than new cabinets.

    Keep all the hardware in the same finish and style, so the change looks planned. Save the old hardware in a labelled bag in case you want to swap it back. Check that new pulls match your existing screw spacing, and wipe them often near the stove, since kitchen grease dulls metal and wood.

    16. Pale Stone Island with Wood Stools

    Swedish kitchen island with a pale stone top and light wood stools.

    Keep the main cabinets white or wood, and add an island with a pale stone top and light wood stools. The island becomes a clear working center and a place to gather, without repainting every cabinet. A pale stone top keeps prep work visible, and wood stools add warmth at seating height.

    Choose stools that slide fully under the island overhang, so the walkway stays clear. Keep the stool count to the island length, usually two for a short island and three for a long one, and leave room between seats. Wipe the stone top promptly after prep, and keep the island top clear apart from one tray or bowl.

    17. Light Wood Dining Table with White Chairs

    Swedish kitchen dining area with a light wood table and white chairs.

    Use a light wood dining table with white chairs in the kitchen dining area for a seating area that feels bright without new cabinets. A simple wood tabletop suits a small table for four, and it pairs well with white chairs and a plain runner. This is a good way to bring Swedish style into an open plan kitchen where the eating area stays in view.

    Keep chair cushions washable, since kitchen chairs take daily spills, and check that chair legs have floor protectors so they do not scratch pale wood or tile. If the table feels too plain on its own, add a single vase or a low candle lantern. Keep one chair spare for guests rather than crowding the table.

    18. Blue and White Striped Linens

    Swedish kitchen counter with blue and white striped linen tea towels and a white jug.

    Swap everyday tea towels for linen or cotton towels in blue and white stripes, and add a matching runner on the table or counter. Striped linens are the fastest Swedish change in a kitchen because they move through the room all day and wash easily. Hang them where they are used most: the oven handle, a hook by the sink, or the dishwasher bar.

    Keep two sets in rotation so a wet or stained set never stays on display. Store the folded spare set in a drawer, not on the counter. Keep towel ends well clear of burners, and never leave a towel draped where it can slip toward a hot pan.

    19. Potted Greenery Through the Kitchen

    Bright Swedish kitchen with potted green plants on a windowsill and shelves.

    Add potted green plants through the kitchen, on the windowsill, on open shelves, and on top of tall cabinets where light reaches them. Greenery softens white walls and pale wood, and it gives a Swedish kitchen its fresh, lived in feel. This suits a kitchen with at least one bright window, where plants can thrive without extra lights.

    Choose plants based on the light each spot actually gets, and keep pots on trays or saucers to protect wood and paint from water marks. Keep plants clear of direct stove steam and the sink splash zone where possible. Water on a set day each week, and wipe leaves when dust builds up.

    20. Candle Lanterns for Evening Light

    Swedish kitchen table in the evening with candle lanterns and warm light.

    Set candle lanterns on the kitchen table and windowsill for soft evening light, a long standing Swedish habit for dark winter evenings. Lanterns suit a white kitchen because the glass and metal add a warm glow without a strong color. Use flameless candles in a kitchen, since real flames near table linen and dried stems are a risk.

    Keep lanterns clear of the hob and the sink splash zone, and lift them off the table in one move when the table is needed for prep or homework. Change the lantern placement by season, with one on the table in winter and one on the sill in summer. Keep spare batteries or candles in a drawer so the evening light never runs out.

    21. Glass Jars and Woven Baskets for Pantry Storage

    Swedish kitchen pantry shelf with clear glass jars of grains and a woven basket.

    Store dry food in clear glass jars on light wood shelves, and use woven baskets for bread, onions, and small items that do not need a jar. Glass jars let you see what you have at a glance, and baskets add natural texture that suits a Swedish kitchen. This suits a kitchen where closed pantry space is short and everyday food needs to stay in reach.

    Keep the jars to the foods you use weekly, and store the rest in closed cabinets, so the shelves stay calm. Label the jars if more than one person cooks, so items return to the same spot. Wipe jars and baskets weekly, since open storage collects cooking film, and check basket bases for crumbs.

    22. One Small Swedish Folk Accent

    Swedish kitchen shelf with a small red painted wooden horse

    Add one small Swedish folk accent, such as a small red painted wooden horse on a shelf, a folk patterned cushion, or a single blue and white print in a wood frame. One accent gives the room a clear Swedish note, while a whole shelf of folk pieces can feel like a theme display. This suits a kitchen that already has white and wood in place, where one strong color can stand out.

    Keep the accent in the same red or blue family as your other small touches, such as striped linens or a blue island, so it links to the room. Place it where it is seen but not in the work zone, such as a shelf end or a wall above the dining table. If the accent feels too strong on its own, pair it with a plain white vase beside it.

    23. Blue and White Patterned Tile Backsplash

    Swedish kitchen with a blue and white patterned tile backsplash behind a cooker.

    Choose a patterned tile with blue and white in the design, such as a simple geometric or floral print, for a backsplash with more detail than plain white tile. Patterned tile works best on one wall, usually behind the cooker or sink, with plain tile or paint on the other walls. The pattern adds interest without needing blue cabinets.

    Keep counters and cabinet fronts plain, and pick one blue from the tile to repeat in a towel or a small accessory. Patterned tile can date faster than plain tile, so choose a pattern you like for its shape as well as its color. Ask your tiler about sealing, since some patterned tiles need extra care, and order spare tiles for repairs.

    24. A Fika Corner on the Counter

    Swedish kitchen coffee corner with a white pot

    Group your coffee items on one light wood tray on a small section of counter, with a white pot, two cups, and a plate for buns or biscuits. A fika corner, the Swedish coffee break, gives the kitchen a daily ritual spot, and the tray keeps small items from spreading. A defined corner feels dressed when you add a small plant or a striped towel beside it.

    Keep the tray away from the sink splash zone and the stove, and wipe it often, since drink areas gather drips. Lift the whole tray aside in one move when you need the counter for prep. If the counter is short, shrink the corner to a mug stand and one jar on a small tray.

    25. Wall Mounted Drop Leaf Table for a Small Kitchen

    Small Swedish kitchen with a wall mounted drop leaf table and light wood stools.

    Fit a wall mounted drop leaf table in a small kitchen for a table that folds up when you need the floor back. A white or pale wood leaf suits a Swedish kitchen, and two light stools beside it give seating without a fixed table. This is a good choice for a galley kitchen or a studio kitchen, where a full table would block the walkway.

    Fix the table securely into wall studs, and check that it holds the weight of plates and cups without sagging. Keep the leaf folded up when it is not in use, and store the stools against the wall. Wipe the leaf after meals, since a small table takes daily use in a small room.

    26. Removable Swedish Touches in a Rental Kitchen

    Swedish kitchen counter with removable white and wood touches

    Finish a rental kitchen with small, removable Swedish touches: a tray, a white vase, a small plant, striped towels, and a single framed print, all in white, pale wood, and muted blue. These pieces sit on existing surfaces and leave with you, so no landlord approval is needed for fixed work. Group them in twos and threes, with one cluster per surface at most, so the room stays calm.

    Hang nothing with fixed screws if your lease forbids it, and use removable hooks or freestanding pieces instead. Keep wood and linen away from the stove and sink splash zone where possible, and wipe small pieces weekly. When you move, pack the set together in one box, so the next kitchen gets the same scheme in one short job.

    Conclusion

    A Swedish kitchen works best when light has a clear job and a calm background. Start with white cabinets or pale wood, since those are the surfaces you see most, then repeat one accent in seating, tile, or linens. White, pale oak, and muted blue keep the room bright rather than cold, and plain work surfaces keep cooking easy. Small changes like curtains, towels, plants, and a fika tray let you test the style before a larger change, and they suit renters as well as owners. For a cooler balance to the warm wood, see these grey kitchen ideas for cabinets, counters, and islands that sit well beside a Swedish scheme.

    Save this list on Pinterest for your next free hour in the kitchen, and work through it in order: cabinets and counters first, then tile and lighting, then seating and windows, and finally the small table and tray touches.

    FAQs

    What makes a kitchen Swedish rather than just white?

    A Swedish kitchen pairs white with pale wood, natural linen, and simple shapes, rather than using white on its own. Light wood floors or counters, sheer curtains, plants, and one muted accent such as blue or black give the room warmth and character. Keep patterns simple, keep work surfaces clear, and let daylight do most of the work. If the room feels cold, add wood or greenery before adding color.

    What colors pair best with a Swedish kitchen?

    White, pale oak, birch, cream, and muted blue pair best with a Swedish kitchen, because they keep the room bright without competing with each other. Black hardware, steel taps, and natural linen add contrast in small amounts. Avoid adding many strong colors at once, since a Swedish scheme relies on one accent repeated in a few places. Use one other color only in small amounts, such as red in a single folk accent, and keep the main palette to three colors plus wood.

    Does a Swedish kitchen suit a small or dark kitchen?

    Yes, if you keep it to light surfaces and a few well placed pieces. In a small or dark kitchen, use white cabinets, a pale floor, sheer curtains, and one light wood element, and skip a dark island or a large patterned tile wall. A drop leaf table, open shelves on one wall only, and a single plant group keep the room easy to cook in. Test a large painted sample in your actual light, since white and pale wood shift tone between daylight and evening light.

    How do I keep a white Swedish kitchen clean?

    White kitchens need the same care as other pale kitchens, with a little extra care near the stove and sink. Wipe cabinet doors, taps, and handles with a soft damp cloth each week, and wipe spills on wood counters promptly so marks do not set. Choose washable paint and fabric for cabinets and curtains, and keep tea towels and runners washable, so the scheme stays fresh with routine cleaning. Glass jars and open shelves need a weekly dust, since open storage collects cooking film.

    Can renters create a Swedish kitchen without fixed changes?

    Yes. Renters can cover most of this list with no permanent work at all. Curtains on a tension rod, striped towels, a fika tray, plants, a drop leaf table on removable fixings where allowed, and a bench or stools all move with you. Hang framed prints with removable fixings if your lease allows them, and check your lease before fixing any shelf, rail, or table. Keep the old hardware in a labelled bag, so the kitchen returns to its original state at the end of the tenancy.

    How do I test a Swedish paint or tile sample before committing?

    Order or borrow a sample in the exact finish you plan to use, and place it beside your floor, counter, and cabinet color in the kitchen itself. Check it in morning daylight, afternoon light, and evening light under your usual bulbs, since white, blue, and wood tones shift a lot between lights. Live with the sample for a few days, and check it beside the tap and handles you already own. If the sample looks too cold in one light and too warm in another, choose a softer, warmer white or a paler wood, which tends to read more evenly through the day.


  • 22 Scandinavian Kitchen Design Ideas That Balance Style and Comfort

    22 Scandinavian Kitchen Design Ideas That Balance Style and Comfort

    A Scandinavian kitchen works when it feels bright in the morning and calm in the evening. Pale cabinets, light wood, and clear counters give the room its airy base, while soft textiles, warm light, and one or two natural materials keep it comfortable for daily cooking and long breakfasts. These 22 Scandinavian kitchen design ideas cover cabinets, counters, light, storage, seating, and small finishing touches, so you can pick the changes that fit your layout and budget. Start with the change that fixes your biggest daily frustration, such as a dark corner or a crowded counter. For a pale starting point that pairs well with wood, see these white kitchen ideas.

    Key Takeaways

    • Keep the base pale: white or soft grey cabinets, pale wood, and one light counter material, repeated through the room.
    • Add warmth with wood, linen, wool, and rattan, rather than with strong color or busy pattern.
    • Give every daily item a closed home, and keep counters mostly clear, so the room stays calm between meals.
    • Layer the light: daylight first, then under-cabinet task light, then warm pendants for evenings.
    • Repeat one metal finish and one wood tone, so mixed pieces still read as one planned room.
    • Start small if you rent or plan a larger change later: textiles, stools, a tray, and lighting shift the feel fast.

    1. White Flat-Front Cabinets with Light Oak Accents

    Scandinavian kitchen with white flat-front cabinets and light oak accents.

    White flat-front cabinets give a Scandinavian kitchen its clean base, with long, quiet lines and no raised panels to catch the eye. The flat fronts suit both small and large kitchens, since they read as one calm surface, and a matte or satin finish shows fewer marks than gloss in a busy cooking space. Keep the white warm rather than icy, so the room feels soft in evening light.

    Add light oak where hands and eyes land most: open shelf boards, a drawer front on the island, or a wood trim along the toe kick. The oak warms the white at once and links the cabinets to wood floors, stools, and boards elsewhere. Test the white beside your floor and counter in daylight and evening light first, since white shifts a lot under kitchen lighting.

    2. A Pale Wood Island with Simple Seating

    Pale wood kitchen island with slim stools and a clear top.

    A pale wood island anchors a Scandinavian kitchen as both a work surface and a gathering spot. Oak or ash keeps the island light in tone, so it does not darken an open plan room, and a plain slab or butcher block top feels warm to the touch for casual meals. Keep the island front simple, with flat panels and no extra trim, so the wood itself carries the look.

    Leave a clear overhang on the seating side, and choose slim stools in wood or with a dark metal frame that slide fully underneath. Two or three stools are enough for most islands, and they keep the walkway clear when the island is used for prep. Keep the island top mostly clear apart from one tray or a small vase, so it can shift from cooking to eating without a full tidy first.

    3. Open Pale Wood Shelves for White Ceramics

    Open pale wood shelves holding white ceramics in a kitchen.

    One or two runs of open pale wood shelves replace a block of upper cabinets with a lighter wall, and they suit a kitchen where daily dishes deserve an easy home. White plates, bowls, and mugs read as a calm group against pale wood, and the shelves stop a long cabinet run from feeling heavy. This works best on one wall or beside a window, rather than on every wall at once.

    Limit each shelf to items you use weekly, in white and one wood tone, and leave at least a third of each shelf empty. Stack plates in one group, stand bowls in a short row, and add one small plant at the end. Dust the shelves weekly, since open storage near cooking collects a light film faster than closed cabinets, and keep the remaining storage closed for items you use less often.

    4. A Handmade Cream Tile Backsplash

    Kitchen with a handmade cream tile backsplash behind the cooker.

    A handmade cream tile backsplash adds texture to a pale kitchen without adding strong color. Slight differences in tone and glaze catch light in a way flat tiles cannot, so the wall reads as crafted rather than factory perfect, and cream keeps the room warm where a bright white tile can feel cold. Use the tile on the backsplash only, and keep counters and cabinets plain, so the texture stays the focus.

    Order extra tiles, since handmade batches vary and a few spares help if a tile chips later. Seal the grout to keep cooking splashes from staining it, and wipe the surface with a soft cloth during a normal clean. If you want more pattern, lay the tiles in a stacked or herringbone layout on one wall, and keep the rest of the backsplash simple.

    5. Light Wood Floors with Soft White Walls

    Scandinavian kitchen with light wood floors and soft white walls.

    Light wood floors set the warm base of a Scandinavian kitchen, even when the cabinets stay white. Oak or ash boards in a pale, matte finish reflect daylight across the room and link the kitchen to adjoining rooms, which helps an open plan space feel like one room rather than two. Keep the wall color a soft white, close to the cabinet color, so floors, walls, and cabinets form one calm block.

    Protect the floor near the sink and cooker with a flat, washable runner, and wipe spills promptly so water does not sit on the wood. If a full wood floor is not practical, use wood-look planks in the same pale tone on the kitchen floor and real wood on stools, boards, and shelves, so the tone still repeats through the room. Keep rugs low pile, so chair and stool legs move freely.

    6. One Dark Anchor in Black Metal

    Pale Scandinavian kitchen with a black tap and black handles.

    A single dark anchor stops a pale Scandinavian kitchen from looking washed out, and black metal is the simplest way to add it. A black tap, black bar pulls, or dark stool frames give the eye a place to land, and the contrast makes white cabinets and pale wood look crisper. This is the smallest change on this list, and often the most effective.

    Repeat the black finish in just two places, such as the tap and the stool frames, and keep everything else pale. Avoid adding dark cabinets, dark counters, and dark floors at the same time, since that turns a pale kitchen into a dark one. If you rent, dark stools and a dark tray give the same anchor with no fixed change, and they can move with you.

    7. A Cozy Breakfast Nook with Linen Cushions

    Kitchen breakfast nook with a wood table and linen cushions by a window.

    A breakfast nook gives a Scandinavian kitchen its comfortable side: a set place for slow mornings that does not need a full dining room. A simple bench along the wall, a small wood table, and linen cushions in white, oatmeal, or soft grey make the corner inviting, while the bench can hide placemats and table linens underneath. This suits a corner by a window best, where daylight does much of the work.

    Choose cushion covers you can remove and wash, since a breakfast seat gets daily use, and keep the table top wipeable for coffee and homework alike. For more nook layouts, from banquettes to bay window seats, see these kitchen nook ideas. Keep the nook to one material link with the kitchen, such as the same wood as the island, so it reads as part of the room.

    8. Glass-Front Cabinets for Everyday Display

    White kitchen with glass-front cabinets showing white dishes.

    Glass-front upper cabinets break up a wall of white doors and give everyday dishes a calm display home. Clear glass suits tidy households and shows white dishes, glassware, and wood boards at a glance, while reeded glass softens the view and hides a less perfect shelf. Use glass fronts on one run, or on either side of a window or range, rather than everywhere, so the display stays calm.

    Keep what you show to a small set of matching or related pieces, and leave space on each shelf so the cabinet does not look crowded. Put daily items on lower shelves, where they are easy to reach, and add a small light inside the cabinet if you want the display to glow in the evening. If glass feels too exposed, use one glass door beside plain doors on the same run.

    9. A Butcher Block Section on the Counter

    Kitchen counter section with a warm butcher block top.

    A butcher block section gives a Scandinavian kitchen a warm work surface without replacing the whole counter. Use it on the island, on one run of counter, or as a thick board that stays in place for prep, and keep the rest of the counter in a pale stone or plain laminate. Wood suits pale cabinets and cream tile, and it softens a kitchen that has a lot of stone or steel.

    Oil the wood on a regular schedule, wipe spills promptly, and use boards for cutting so the surface keeps an even look. Near the sink, a stone section avoids constant water contact on wood, so the wood stays in good shape longer. The mix of white cabinets and one wood counter is often enough to make a pale kitchen feel relaxed without adding color elsewhere.

    10. Panel-Ready Appliances Behind Cabinet Fronts

    Scandinavian kitchen with appliances hidden behind cabinet fronts.

    Panel-ready appliances, or tall units that hide the fridge and dishwasher, give a Scandinavian kitchen long cabinet lines with no steel breaks. When the fridge and dishwasher wear the same fronts as the cabinets, the room reads as furniture rather than a row of machines, which suits an open plan kitchen most, where the kitchen faces the living area. Keep the oven and hob visible if you cook often, since a hidden oven can be less handy.

    Check ventilation and door clearance with the maker guidance before ordering panels, since integrated appliances need exact fitting. Hide the largest items first, and put the effort into the fridge and dishwasher before smaller appliances. For a pared back approach to the whole room, these minimalist modern kitchen ideas share the same flat-front, clear-counter logic.

    11. A Large Window with Sheer Linen Curtains

    Bright kitchen window with sheer linen curtains.

    Daylight is the main light source in a Scandinavian kitchen, so treat the window as a design feature, not an afterthought. A large window, kept mostly clear, lets daylight reach pale cabinets and wood floors, and sheer linen curtains soften the light without blocking it. Hang the curtains high and wide, so the window looks larger and the fabric clears the counter.

    Keep the sill to one or two items, such as a small plant or a soap tray, so light stays unblocked and the sill stays easy to wipe. Choose a plain linen in white or oatmeal, and keep fabric well clear of the hob and open flames. If privacy is a concern, add a simple roller blind inside the frame for evenings, and leave the linen in place for daytime softness.

    12. Layered Warm Lighting with Simple Pendants

    Scandinavian kitchen in the evening with warm pendant lighting.

    Layered warm lighting keeps a Scandinavian kitchen comfortable after dark, when daylight fades. Under-cabinet light does the real work for prep, while two or three simple pendants over the island or table give evening meals a soft focus, and a dimmable ceiling run covers the room as a whole. One fixture style, repeated, keeps the ceiling quiet and the room calm.

    Fit under-cabinet lights toward the front of the cabinet, so light falls on the counter rather than on the wall, and choose warm white bulbs so food and wood tones look natural. Hang pendants high enough to see across the table, and keep the lowest point well above the counter. Wipe shades often, since kitchen air leaves a light film on glass and metal over time.

    13. Herbs and Greenery on the Windowsill

    Kitchen windowsill with potted herbs and green plants.

    Herbs and greenery bring the natural side of Scandinavian design into the kitchen in the simplest way: a few pots on the windowsill, within reach while you cook. Basil, parsley, and chives stay useful daily, while a trailing plant or a small olive tree in a floor pot softens hard surfaces and links the kitchen to the view outside. Keep pots in plain ceramic, terracotta, or wood, so the plants, not the pots, carry the color.

    Water plants over the sink, not at the table, and choose pots with saucers to protect wood and paint. Keep plants off the main prep counter, except for one small pot that lifts away for cleaning, so work surfaces stay clear. If the windowsill is narrow, use one long trough or a wall rail with hanging pots above the sink instead.

    14. Woven Textures in Rattan, Linen, and Baskets

    Scandinavian kitchen with rattan stools and woven textures.

    Woven textures stop a pale kitchen from feeling flat, and they add warmth without color. Rattan stool seats, a linen runner, woven baskets for bread or produce, and a seagrass tray each add a natural pattern that the eye can rest on. Use two or three woven items in the room, rather than one of everything, so the texture reads as a thread, not a theme.

    Keep baskets for items you use often, such as bread, onions, or cloths, and label or sort them by use so they stay tidy. Wipe rattan and seagrass with a dry cloth, and keep woven items clear of the sink splash zone, since damp softens natural fibers over time. A woven pendant shade over the table repeats the same texture at eye level, if the room needs one more warm note.

    15. A Tall Pantry Wall with Deep Drawers

    Tall white pantry wall with a deep drawer open showing storage.

    A tall pantry wall gives a Scandinavian kitchen its calm surface: food, pans, and small appliances all live behind closed doors, so the main counter runs stay free. Deep drawers beat high shelves for heavy items, since you can see and reach the back without unloading the front, and pull-out shelves inside a tall unit keep breakfast items and cooking staples in clear zones. Keep the pantry fronts flush with the rest of the cabinets, so the wall reads as one calm block.

    Plan the pantry by zone: breakfast items near the top, cooking staples at counter height, and heavy pans low. Use clear bins or labels inside the drawers only if they help you find things faster, and leave one drawer partly empty for new items. A pantry wall works best when it sits on one wall, leaving the window wall and the island free for light and seating.

    16. A Soft Sage Island in a Pale Room

    Pale kitchen with a soft sage green island and white cabinets.

    A soft sage island adds gentle color to a Scandinavian kitchen without breaking its calm. Keep the main cabinets white, and paint only the island in sage, so the island becomes a clear focal point and the rest of the room stays pale, which makes the change lower risk and easier to reverse. Sage pairs well with pale wood, cream tile, and black or brass hardware, and it hides scuffs better than a white island base.

    Repeat the sage once more, in a small way, such as a linen towel, a vase, or a plant pot, so the island color looks planned rather than random. Choose a hard wearing paint for the island base, since it takes kicks, bags, and stool legs, and test the sage beside your floor and counter in daylight and evening light before you commit to the full island.

    17. Clear Counters with a Single Tray Rule

    Clear Scandinavian kitchen counter with one small tray.

    Clear counters are what make a Scandinavian kitchen feel calm between meals, and a single tray rule keeps them that way. One small tray for daily cooking items near the hob, plus a second tray for coffee items, is enough for most kitchens, and the tray keeps daily tools grouped, so the counter still looks clear even when you are cooking. Everything else lives behind a door.

    Work through one counter run at a time, and give each item you remove a real home: a drawer, a cabinet shelf, or a wall rail. If an item has no home, it will drift back to the counter within a week, so fix the storage first and the styling second. Wipe the tray when you wipe the counter, and keep the tray size small, since a large tray invites extra items to join it.

    18. A Long Wood Table for Kitchen Dining

    Long pale wood dining table with a bench and chairs in a kitchen.

    A long wood table in or beside the kitchen gives a Scandinavian home its gathering place, with room for family meals, homework, and guests without a separate dining room. A plain oak or ash top, with simple legs and no ornate detail, suits the style, and a bench on one side seats children close together while chairs on the other side stay flexible for guests. Keep the table top sealed, so spills wipe off, and use placemats for hot dishes.

    Leave clear walkway space on every side, wide enough to carry a hot dish safely, and keep one end of the table clear so someone can sit down without climbing over a bench. A single pendant or a simple linen runner marks the table as a set place, even in an open plan room, and the wood top links the dining spot to the island and shelves in the same tone.

    19. A Simple Sink with a Wood Board and Rail

    Simple kitchen sink with a plain tap and a wood board.

    A simple sink setup suits a Scandinavian kitchen better than a busy sink wall: one undermount or inset sink, a plain tap in black or brushed steel, and a wood board that fits over part of the bowl. The board adds prep space in a small kitchen and keeps the sink area tidy, while a wall rail above or beside the sink holds a dish brush, a cloth, and a soap bottle in one small group. Keep the counter around the sink plain, so the tap reads as a feature rather than one item among many.

    Choose a single large basin if you wash large pots and trays often, since it suits most cooks better than a split basin. Dry the tap after use if your water leaves marks, so the finish stays even, and keep a folded linen cloth nearby for drying hands and wiping the counter. If you change the tap, check that it fits your existing sink holes first.

    20. A Light Galley Layout for a Small Kitchen

    Small light galley kitchen with white cabinets and pale wood floors.

    A light galley layout makes a small Scandinavian kitchen feel larger, because two parallel runs in white and pale wood keep sight lines clear from end to end. Keep one run for cooking and the other for the sink and storage, with a clear walkway between them, and use the end wall for a window, a tall pantry, or a small table that folds away. Flat-front cabinets and a plain backsplash keep the narrow room from feeling busy.

    Use height well: tall units at one end, open shelves only on a short run, and light colors on every large surface. Keep the floor the same pale wood through the galley, so the room reads as one length rather than two halves, and add under-cabinet light on both runs, since a narrow kitchen needs task light more than a wide one. For low cost ways to refresh a small kitchen first, see these kitchen ideas on a budget.

    21. Wool Runners and Linen Towels as Soft Layers

    Scandinavian kitchen with a flat wool runner and linen towels.

    Wool runners and linen towels are the soft layers that make a pale kitchen comfortable underfoot and at hand. A flat wool runner along the main work run warms a wood floor, marks the cooking zone, and softens sound in a hard-surfaced room, while linen towels in white, oatmeal, or soft grey add a touch of texture at the oven and sink. Keep both in plain colors, so they add warmth without pattern competing with tile or wood.

    Choose a runner that lies flat and stays put, with a low pile so stool and drawer movement stays easy, and wash the towels in matching sets so the kitchen reads as planned. Keep the runner clear of the cooker splash zone, and hang towels on a rail or hook where they dry between uses, rather than draped over the oven door. Swap the runner by season if you like a change, and keep one spare set ready.

    22. A Quiet Finishing Layer of Candles, Ceramics, and Boards

    Kitchen counter with a candle, ceramics, and wood boards.

    A quiet finishing layer is what makes a Scandinavian kitchen feel lived in rather than staged: a candle in a plain holder, a small group of ceramics, and wood boards leaning against the backsplash. Keep the group to three items at most on any one surface, and leave the rest of the counter clear, so the details can be seen. This finishing layer suits the end of a refresh, once cabinets, light, and storage are settled, not the start.

    Use items you already cook with, such as a favorite board, a stoneware jug, and a candle you light at dinner, so the display stays honest and useful. Move the group aside in one move when you need the surface for prep, and wipe it weekly. If a surface starts to collect clutter again, remove one item at a time until the room feels calm, and keep the candle clear of curtains, towels, and the hob.

    Conclusion

    A Scandinavian kitchen that balances style and comfort comes down to a few calm choices repeated well: pale cabinets, one light wood tone, closed storage for daily items, and soft layered light. Start with the base, such as white flat-front cabinets or a pale wood island, add one warm texture and one dark anchor, and keep counters mostly clear so the details you chose can be seen. Small moves, such as linen curtains, a tray rule, or a wool runner, let you test the look before a larger change, and they suit renters as well as owners.

    Save this list for your next free weekend in the kitchen, and work through it in order: cabinets and light first, then storage and counters, then seating and textiles, and finally the small candle, ceramic, and board touches. For more pale kitchen and seating ideas to pair with this list, the linked guides above cover white cabinets, pared back layouts, and nooks that sit well beside calm neutrals.

    FAQs

    What defines a Scandinavian kitchen?

    A Scandinavian kitchen pairs pale color with natural materials and simple forms: white or soft grey cabinets, light wood floors or island tops, plain counters, and clear surfaces. Warmth comes from wood, linen, wool, and soft light, rather than from strong color or ornate detail, and storage stays mostly closed, so the room feels calm and easy to use.

    How do I keep a Scandinavian kitchen from feeling cold or bare?

    Mix your whites on purpose, and add one or two warm materials, such as pale wood, linen, or rattan. A wood island top, a warm white cabinet color, soft under-cabinet light, a wool runner, and one plant are usually enough to warm a pale room. Keep the largest surfaces calm, and put warmth in items you touch and see daily, such as stools, a tray, and a towel.

    What colors work best in a Scandinavian kitchen?

    A pale base works best, such as warm white, soft grey, or pale stone, with one warm wood tone and one quiet accent, such as soft sage or black metal. Keep the palette to two main colors plus wood, and repeat those colors in cabinets, counters, and seating. Strong color can still work as a small accent, such as a linen towel or a plant pot, but a full wall of strong color will fight the calm look.

    Can I create a Scandinavian kitchen without a full remodel?

    Yes. Clear the counters to one tray per zone, add sheer linen at the window, swap busy hardware for slim black or wood pulls, change the lighting to warm under-cabinet and dimmable pendants, and add a wood tray, slim stools, and a wool runner. A single open shelf and a group of white ceramics can refresh a wall with no cabinet work, and textiles shift the feel fastest of all.

    What is the best cabinet style for a Scandinavian kitchen?

    Flat-front cabinets in a matte or satin finish are the most reliable choice, in warm white or soft grey, with light oak accents on shelves or the island. They suit small and large kitchens alike, and they pair with plain counters and simple backsplashes. If you want a little detail, use a Shaker door in the same pale color on a pantry wall only, and keep the main runs flat.

    How should I light a Scandinavian kitchen?

    Layer three sources: daylight from a mostly clear window first, under-cabinet task light for prep second, and warm pendants over the island or table for evenings third. Choose warm white bulbs, fit under-cabinet lights toward the front of the cabinet, and use a dimmer on the main lights if you can, so the kitchen can shift from cooking bright to evening soft.


  • 18 Kitchen Flooring Ideas for a Relaxed, Pulled-Together Home

    18 Kitchen Flooring Ideas for a Relaxed, Pulled-Together Home

    A kitchen floor takes more daily use than any other floor in the house. It meets wet feet, dropped pans, muddy shoes, and chair legs, and it stays in view from the doorway, the table, and the living room beyond. The right floor makes the whole kitchen feel settled, while the wrong one can fight with cabinets and counters no matter how tidy the rest of the room is. These 18 kitchen flooring ideas cover wood, tile, stone, concrete, and softer options, so you can match a floor to the way you actually cook, clean, and gather. Start with the cabinets and counters you already have, order samples you can stand on in your own light, and keep the rest of the room calm so the floor can do its job. If your cabinets are white, these white kitchen ideas show how pale cabinetry pairs with warm wood, stone, and patterned tile floors.

    Key Takeaways

    • Choose the floor for how you cook and clean first, and let color and pattern follow, since a kitchen floor must handle water, grease, and dropped items every day.
    • Order samples and test them beside your cabinets, counters, and wall color in daylight and evening light before you commit to a full floor.
    • Keep the rest of the room plain when the floor carries pattern, and use a patterned floor to add interest when cabinets and counters are plain.
    • Wood warms a kitchen, tile and stone handle water best, and softer floors like cork and vinyl plank suit households that want comfort underfoot.
    • Repeat one tone from the floor elsewhere, such as in a wood counter, a stool, or a rug, so the floor reads as part of the room rather than a separate layer.
    • Ask about sealing, grout care, and spare pieces before fitting, since kitchen floors need repairs and cleaning plans from the start.

    1. Warm Oak Plank Wood Floor

    Kitchen with warm oak plank wood flooring, white cabinets, and a pale stone counter.

    Lay wide oak planks in a warm, mid tone for a kitchen floor that feels relaxed and familiar. Oak suits white, cream, sage, and navy cabinets alike, and its grain adds movement without a busy pattern. A matte or satin finish keeps the floor from looking glossy under kitchen lights, and it hides small marks better than a high shine finish.

    Keep counters simple in pale stone or wood so the oak stays the warm note in the room. Use felt pads on chair legs, wipe spills promptly, and place a mat at the sink and the back door where water lands most. If you have a dog, a mid tone oak with visible grain hides scratches better than a very pale or very dark floor.

    2. Herringbone Wood Floor

    Kitchen floor laid in a herringbone wood pattern with plain cream cabinets.

    Lay wood in a herringbone pattern for a floor with clear structure and a sense of craft. The zigzag layout draws the eye along the room and suits both classic kitchens and modern rooms with plain cabinets. Herringbone works best where the floor can be seen in a good stretch, such as an open plan kitchen or a room with an island that does not cover the whole floor.

    Keep the wood tone calm, since the pattern already gives plenty of interest, and pair it with plain cabinets and a simple backsplash. Herringbone fitting takes more time and more cuts than straight planks, so ask your fitter about waste and cost before you order. Use a rug runner in a plain tone in the main work run if you want to soften the pattern underfoot.

    3. Pale Whitewashed Wide Planks

    Bright kitchen with pale whitewashed wide plank flooring and white cabinets.

    Choose wide planks in a pale, whitewashed finish for a kitchen that needs light. The pale wood lifts a north facing room or a kitchen with small windows, and it pairs well with white cabinets, pale stone, and linen tones. Wide planks keep the floor calm, since fewer joints mean fewer lines across the room.

    Balance the pale floor with one warm material, such as a wood island top, oak stools, or brass handles, so the room does not feel washed out. Pale floors show crumbs and dirt more readily than mid tones, so a quick daily sweep matters. Choose a finish made for kitchens, and wipe water at once, since pale wood shows water marks if puddles sit.

    4. Dark Walnut Wood Floor

    Kitchen with a dark walnut wood floor, cream cabinets, and brass hardware.

    Lay dark walnut planks for a kitchen floor with depth and a grounded feel. Walnut suits cream cabinets, brass hardware, and marble look counters, and it makes a large kitchen feel more intimate. The dark tone also anchors a room with tall ceilings or a lot of white on the walls.

    Pair walnut with pale counters and light walls so the room stays bright, and add warm light under cabinets to keep the floor from reading black at night. Dark floors show dust, crumbs, and pet hair more than mid tones, so plan on regular sweeping. Use mats at entrances and felt pads under furniture to protect the finish where chairs move daily.

    5. Large-Format Stone-Look Porcelain Tile

    Kitchen with large-format stone-look porcelain floor tiles and pale cabinets.

    Use large-format porcelain tiles with a stone look for a kitchen floor that handles water with ease. Large tiles mean fewer grout lines, so the floor reads as calm and is quicker to mop. Stone-look porcelain gives the texture of limestone or sandstone without the sealing and staining worries of real stone.

    Choose a mid tone stone color, such as warm grey or pale beige, so crumbs do not stand out as they would on very pale or very dark tile. Pick a tile with some grip underfoot, since kitchen floors get wet, and match the grout to the tile tone for a seamless look. Keep spare tiles from the same batch for future repairs, since tile shades vary between batches.

    6. Terracotta Tile Floor

    Kitchen with a warm terracotta tile floor, cream cabinets, and a wood counter.

    Lay terracotta tiles for a kitchen floor with warmth, texture, and a Mediterranean feel. The earthy red brown tone suits cream cabinets, wood counters, and black hardware, and it warms up a kitchen with white walls. Terracotta tiles vary slightly from tile to tile, which gives the floor a handmade, lived-in character.

    Seal terracotta as advised by the supplier, since unsealed tiles stain from oil and tomato spills. Pair the floor with plain cabinets and a simple backsplash so the tile color leads. A terracotta floor suits a kitchen with good daylight, where the warm tone glows, and it pairs well with plants and woven baskets for a relaxed finish.

    7. Classic Black and White Checkerboard Tile

    Kitchen with a black and white checkerboard tile floor and white cabinets.

    Lay black and white checkerboard tile for a kitchen floor with a clear, graphic pattern. The checkerboard suits farmhouse, retro, and classic kitchens, and it sets the tone for the whole room at once. Small squares feel busy and vintage, while larger squares feel calmer and more modern, so choose the tile size to match the room.

    Keep walls and cabinets plain, in white, cream, or pale wood, so the floor can lead without competition. Use a plain rug runner in the main work zone if the pattern feels busy underfoot. Choose a tile finish suited to kitchens, with grip and easy cleaning, and keep spare tiles for repairs, since a cracked tile in a checkerboard stands out.

    8. Patterned Cement Tile Floor

    Kitchen with a patterned cement tile floor and plain white cabinets.

    Choose patterned cement tiles for a kitchen floor that acts as the room’s main decoration. A floral, star, or geometric pattern in two or three colors adds interest without new cabinets or wall color, and it suits a kitchen with plain white or wood cabinets. Patterned tile works best across the whole floor rather than in a small patch, so the pattern reads as a plan.

    Pick one color from the tile to repeat in a towel, a stool cushion, or a vase, and keep counters and backsplash plain. Cement tiles need sealing and gentle cleaning, so check the maker’s care advice before fitting. Order a few spare tiles, since patterned tiles can be hard to match later if a tile chips.

    9. Natural Slate Stone Floor

    Kitchen with a natural slate stone floor and wood cabinets.

    Lay natural slate for a kitchen floor with texture, variation, and a rugged, honest feel. Slate comes in greys, greens, and rust tones, and no two tiles look exactly alike, which gives the floor depth. It suits farmhouse kitchens, cottages, and rooms with wood beams or stone walls.

    Seal slate to resist stains, and choose a finish with enough grip for a wet kitchen floor. Slate feels cool underfoot, so pair it with warm wood cabinets or a wood island top, and add a rug in the seating area for comfort. Because slate tones vary, mix tiles from several boxes as you lay them so no one patch of color stands out.

    10. Marble-Look Porcelain Tile

    Kitchen with pale marble-look porcelain floor tiles and white cabinets.

    Use marble-look porcelain tile for a kitchen floor with pale stone veining and the easy care of porcelain. The soft grey veins add movement to a plain kitchen, and the pale base keeps the room bright. This suits white, cream, and pale grey cabinets, and it pairs well with brass hardware and a simple white backsplash.

    Keep the rest of the room plain so the veining stays the main detail, and choose a matte or lightly textured finish for grip. Unlike real marble, porcelain resists stains from lemon, tomato, and wine, which makes it a practical pick for a busy cooking kitchen. Lay large tiles with narrow grout joints for a calm, stone slab feel.

    11. Warm Brick Floor

    Farmhouse kitchen with a warm brick paver floor and cream cabinets.

    Lay brick pavers for a kitchen floor with warmth, texture, and a farmhouse character. Brick suits cream cabinets, wood counters, and black hardware, and it gives an older house a floor that feels original to the building. The rough surface and warm red brown tone soften a kitchen with a lot of white or steel.

    Seal brick to resist grease and water, and choose a paver made for interior floors rather than an outdoor brick. Brick floors are hard underfoot, so add a cushioned mat at the sink and stove where you stand longest. Keep the grout or mortar joints clean with a stiff brush, since cooking grease settles into rough joints over time.

    12. Polished Concrete Floor

    Modern kitchen with a smooth polished concrete floor and plain cabinets.

    Choose polished concrete for a kitchen floor with a smooth, modern, and hard wearing surface. Concrete suits open plan kitchens, industrial rooms, and homes with plain cabinets, since the floor stays quiet and lets furniture and food take the focus. A light grey or warm grey polish keeps the room bright, while a darker stain adds drama.

    Seal concrete as advised, and wipe spills promptly, since even sealed concrete can mark from strong colors if left sitting. Concrete feels hard and cool, so add warmth with wood stools, a wood table, and a rug in the seating zone. Rugs with a non slip backing stop slipping on a smooth polished floor, which matters when carrying hot dishes.

    13. Terrazzo Floor

    Kitchen with a speckled terrazzo floor and pale modern cabinets.

    Lay terrazzo for a kitchen floor with speckled color and a surface that hides crumbs well. Terrazzo mixes chips of stone, glass, or marble in a cement or resin base, so each floor has its own mix of tones. A pale base with warm grey, cream, and soft pink chips suits a modern kitchen, while a darker base suits a bolder room.

    Choose cabinet and wall colors from the lightest tones in the terrazzo mix, so the room stays calm. Keep the backsplash simple, since the floor already has plenty of detail. Seal the surface as advised by the supplier, and use felt pads under chairs, since terrazzo is hard and chair legs can mark a polished finish over time.

    14. Soft Cork Floor

    Kitchen with a warm honey toned cork floor and wood cabinets.

    Choose cork for a kitchen floor that feels warm, quiet, and kind to feet and dropped dishes. Cork gives slightly underfoot, which suits cooks who stand for long stretches, and it muffles sound in an open plan home. Natural cork tones range from pale honey to warm brown, and they pair well with wood cabinets and cream walls.

    Seal cork for kitchen use, and wipe water at once, since standing water is the main risk for cork floors. Use mats at the sink and dishwasher, and choose a cork tile or plank with a wear layer made for kitchens. Cork suits a household that wants comfort first and does not mind a floor with a softer, more natural look than tile or stone.

    15. Wood-Look Luxury Vinyl Plank

    Kitchen with wood-look luxury vinyl plank flooring and sage cabinets.

    Lay wood-look luxury vinyl plank for a kitchen floor that looks like wood and handles water like vinyl. The planks come in oak, walnut, and pale wood tones, and they suit renters and households with pets, since the surface resists scratches and spills. Vinyl plank also works well over an existing floor, which can keep fitting simpler.

    Choose a plank with a realistic grain and a matte finish, and check the wear layer before buying, since thicker wear layers last longer in a busy kitchen. Pair vinyl plank with cabinets in a tone that matches the wood look, and for help choosing that cabinet color, see these colors for your kitchen cabinets. Use a non slip rug pad under runners, and keep spare planks for repairs.

    16. Painted Floorboards

    Cottage kitchen with painted cream floorboards and white cabinets.

    Paint existing floorboards for a kitchen floor with a fresh color and a low cost change. White or cream paint lifts a dark kitchen, while a soft grey or sage paint adds color without new material. Painted boards suit cottages, farmhouses, and older homes where the boards are sound but tired.

    Sand and prime the boards first, and use a floor paint made for high traffic areas, since ordinary wall paint wears quickly under chairs and feet. Keep a small pot of the same paint for touch ups, and use a rug runner in the main work run to slow wear. Painted floors show scuffs over time, so treat touch ups as part of the look rather than a flaw.

    17. Penny Round Mosaic Tile

    Small kitchen with a penny round mosaic tile floor and plain cabinets.

    Use penny round mosaic tile for a kitchen floor with small scale texture and a vintage feel. The small round tiles suit a kitchen nook, a pantry floor, or a small galley kitchen, where a large tile pattern would feel too bold. A single color, such as soft grey or cream, keeps the floor calm, while a mix of two tones adds gentle movement.

    Grout lines are many on a mosaic floor, so seal the grout and plan on regular cleaning in the splash zone. Pair mosaic tile with plain cabinets and a simple counter, so the small pattern does not compete with a busy backsplash. Order spare sheets from the same batch, since mosaic shades vary and a repair sheet should match.

    18. Sheet Linoleum in a Plain Warm Tone

    Kitchen with a plain warm honey toned sheet linoleum floor and white cabinets.

    Lay sheet linoleum in a plain warm tone for a kitchen floor that is seamless, soft underfoot, and easy to clean. Sheet linoleum has almost no joints, so water has few places to sit, and it suits a small kitchen or a rental where a practical floor matters most. Warm tones such as honey, warm grey, or soft terracotta keep the room relaxed without a pattern.

    Keep cabinets and counters plain so the floor reads as a quiet background, and add color through a rug, stools, or tableware that you can change easily. Linoleum needs a smooth, clean subfloor for a good finish, so ask your fitter to check the base before laying. Use felt pads on furniture and avoid dragging heavy appliances across the sheet.

    Conclusion

    A relaxed kitchen floor starts with honest choices about water, cleaning, and daily wear, then adds color and pattern in a way the rest of the room can support. Wood warms the room, tile and stone handle spills best, concrete and terrazzo suit modern rooms, and cork, vinyl plank, and linoleum keep comfort and easy care in focus. Test samples beside your cabinets and counters, ask about sealing and spares, and repeat one floor tone elsewhere so the room feels pulled together. Save this list on Pinterest for your next kitchen refresh, and start with the floor you stand on most: the run between the sink, the stove, and the fridge.

    FAQs

    What is the best flooring for a busy kitchen?

    The best floor for a busy kitchen is one that handles water, grease, and dropped items with little fuss. Porcelain tile, stone-look porcelain, luxury vinyl plank, and sealed concrete all clean easily and resist stains. Wood and cork can work well too, if you wipe spills promptly and use mats at the sink and dishwasher. Choose the material that fits your cleaning habits as much as your style, since a floor you dread cleaning will never feel relaxed.

    Is wood flooring practical in a kitchen?

    Yes, wood works in a kitchen if you choose a finish made for the room and keep water from sitting on it. Wipe spills at once, use mats at the sink and back door, and add felt pads to chair legs. A mid tone oak with visible grain hides small marks better than very pale or very dark wood. If water damage worries you, wood-look vinyl plank gives a similar look with stronger water resistance.

    How do I choose a kitchen floor color?

    Start with your cabinets and counters, since those are harder to change than a rug or a stool. A warm wood floor suits white, cream, and sage cabinets, while a pale stone floor suits dark cabinets and keeps the room bright. Order samples and check them in daylight and evening light beside your cabinets, since floor colors shift a lot between lights. If you plan to change cabinets later, a mid tone neutral floor is the safest long term choice.

    Does a patterned kitchen floor suit a small kitchen?

    Yes, if the pattern stays calm and the rest of the room stays plain. A checkerboard in large squares, a soft patterned cement tile, or a single color mosaic can add character to a small kitchen without crowding it. Keep cabinets, counters, and backsplash plain, and use a plain rug runner in the main work run to calm the pattern underfoot. Avoid mixing a patterned floor with a patterned backsplash, since two strong patterns compete in a small room.

    What kitchen flooring is easiest to clean?

    Porcelain tile, sheet linoleum, and luxury vinyl plank are among the easiest kitchen floors to clean, since their surfaces wipe clean and resist most stains. Large-format tile has fewer grout lines to scrub, and sheet linoleum has almost no joints at all. Natural stone, cement tile, and brick need sealing and more care with grout, while wood and cork need prompt wiping of spills. Whatever you choose, a daily sweep and a weekly mop keep most kitchen floors in good shape.

    Can renters change a kitchen floor without a full remodel?

    Yes. Renters can use peel and stick vinyl tiles, a large washable rug, or a runner over an existing floor to change the look with no fixed work. Luxury vinyl plank in a click fit system also suits some rentals, but check your lease and get written permission before fitting anything fixed. Keep the original floor in good shape underneath, save any spare pieces, and choose a change you can remove cleanly at the end of the tenancy.


  • 31 Witchy Kitchen Aesthetic Ideas That Bring Practical Style Home

    31 Witchy Kitchen Aesthetic Ideas That Bring Practical Style Home

    A witchy kitchen is less about costumes and more about mood: dark cabinets, warm wood, dried herbs, brass details, and soft evening light. The look suits everyday cooking when each moody detail also earns its place, whether it stores something, adds light, or keeps a work surface clear. These 31 witchy kitchen aesthetic ideas cover cabinets, shelves, herbs, lighting, and table settings, so you can pick one change, live with it, and add another only if the room still feels calm and easy to cook in. For dark kitchen styling that also helps small rooms work harder, these gothic kitchen ideas pair well with the ideas below.

    Key Takeaways

    • Pick a small set of witchy details, such as black, brass, moons, and dried herbs, and repeat them so the room looks planned.
    • Keep at least one light surface, such as a pale counter, a light wall, or a bright window, so dark colors do not close the room in.
    • Give every decorative group a job: jars hold herbs, trays hold candles, and baskets hold linens or pantry goods.
    • Use flameless candles and battery lights near towels, paper, and dried plants, and keep real flames away from cooking areas.
    • Store daily items where you can reach them, and put purely decorative pieces higher or behind glass.
    • Change textiles and small details first, since towels, runners, and jars give a big shift without new cabinets.

    1. Matte Black Base Cabinets with Brass Pulls

    Kitchen with matte black base cabinets, brass cup pulls, and a pale countertop.

    Matte black base cabinets give a witchy kitchen a clear anchor without changing the layout. Keep the upper cabinets pale, or leave one stretch of wall light, so the dark lower half does not make the room feel low. Brass cup pulls soften the black and make the cabinets easy to open with wet or floury hands.

    Paint only after cleaning and lightly sanding the doors, and use a paint made for cabinets so the finish stands up to daily use. Try one door first and check it in daylight and evening light. If black on every base cabinet feels heavy, paint the island or one run only and keep the rest pale.

    2. Deep Green Cabinets with Butcher Block Counters

    Kitchen with deep green cabinets and a warm butcher block countertop.

    Deep green cabinets bring a forest note to the kitchen, and warm butcher block counters keep the green from feeling cold. This pairing suits cooks who want the moody look but still want a warm, natural work surface for chopping and rolling dough.

    Keep the counters oiled and use boards for cutting, since wood marks easily. Pair the green with black hardware or brass knobs, and keep the backsplash plain so the cabinet color stays the main detail. If full cabinet painting feels like too much, paint one run or the island in green and leave the rest in a pale neutral.

    3. A Plum Island as the Room Anchor

    Kitchen with a plum island, pale cabinets, and a wood countertop.

    A plum or aubergine island can anchor a witchy kitchen while the surrounding cabinets stay quiet. The island becomes the piece people notice first, and it gives you a clear spot for prep, serving, and gathering without painting the whole room dark.

    Keep the island top in wood or a pale stone so the plum reads as a color accent rather than a dark block. Add a shelf below for baskets, and keep the walkway around the island clear. If plum feels bold, test a painted board leaned against the island for a week before you commit to the color.

    4. Open Shelves for Jars and Everyday Dishes

    Open kitchen shelves with glass jars, dark mugs, and bowls.

    Open shelves put witchy kitchen pieces on show: glass jars, dark mugs, bowls, and a few dried stems. They also use wall space that a closed cabinet would make feel heavy, and they keep daily dishes where you can reach them.

    Keep each shelf to one or two groups, such as bowls on one shelf and mugs on another, and leave a gap at each end. The spacing advice in our guide on how to style open shelves helps keep a full shelf looking calm. Fix shelves into studs, keep heavy stacks low, and limit open shelves to one wall so the room still has closed storage for messier items.

    5. Labeled Apothecary Jars for Herbs and Dry Goods

    Labeled glass apothecary jars filled with dried herbs and dry goods on a shelf.

    Clear apothecary jars with simple labels turn pantry storage into a witchy display. Use them for dried herbs, teas, rice, beans, and baking goods, so the jars look good and you can see at a glance what needs restocking.

    Choose jars with tight lids, and keep them away from the stove, where steam and heat shorten the life of dried herbs. Label the front of each jar, and put daily herbs at hand height and rarely used goods higher. Decant only what fits, and keep the rest in its original bag in a closed cupboard until the jar empties.

    6. A Hanging Herb Drying Rack Near a Window

    Herb bundles hanging upside down on a rack near a kitchen window.

    A small hanging rack for drying herbs adds a practical witchy touch and gives you herbs for cooking all winter. Hang bundles of rosemary, thyme, mint, or oregano upside down in a dry spot with air moving around them, away from direct stove steam.

    Tie bundles loosely with twine, and leave space between them so air can reach each stem. Check bundles weekly, and crumble dried leaves into labeled jars once they feel crisp. Keep the rack clear of the stove and out of the main walkway, so no one brushes against falling leaves while carrying a hot pan.

    7. Potted Herbs in Dark Pots on the Windowsill

    Potted herbs in black pots lined along a kitchen windowsill.

    Move everyday herbs such as parsley, chives, mint, and basil into black, charcoal, or deep green pots and line them along the windowsill. The dark pots supply the witchy note while the herbs keep earning their place in daily cooking.

    Check each pot has drainage or an inner pot so roots do not sit in water. Keep the sill arrangement low and narrow so the window still opens and the sink area below stays easy to clean. Snip herbs from the top of each plant, and rotate pots weekly so growth stays even.

    8. Crescent Moon Cabinet Knobs and Drawer Pulls

    Kitchen drawers with crescent moon knobs in brass.

    Crescent moon knobs on a few cabinets or drawers add a witchy detail at hand level, where you notice it every day. Use them on one run, such as the island drawers or the pantry doors, rather than on every cabinet, so the moons stay special.

    Match the finish to your other hardware, such as brass or matte black, so the knobs link to the rest of the room. Check the size and grip before buying a full set, since small decorative knobs can be awkward on heavy drawers. Keep the remaining knobs plain, and let the moons carry the theme on their own.

    9. Moon Phase Wall Art Above a Counter or Table

    Moon phase wall art in a black frame above a kitchen counter.

    A moon phase print or a small row of moon plaques above a counter or table gives the kitchen a clear witchy focal point without taking any work space. Choose one piece, in a black frame, and hang it where you see it while cooking or eating.

    Keep the wall around the art plain, so the moon phases stand out, and hang the piece at eye level. If you rent, lean a framed print on a shelf instead of hanging it. Pair the moons with one other moon detail, such as the knobs in Idea 8, and keep the rest of the wall quiet.

    10. A Star and Moon Backsplash Accent

    Kitchen backsplash accent with star and moon tiles behind a stove.

    A small star and moon tile accent behind the stove or sink turns a plain cooking wall into a focal point, and it needs only a small area of tile. Mark the shape on the wall first, tile inside it, and keep the rest of the backsplash plain so the motif reads clearly.

    Use tiles that wipe clean and a grout sealer near the stove, since this wall sees steam and splashes. If full tiling feels like too much work, a peel-and-stick star and moon panel on one section gives a similar effect and can be removed later. Keep the panel width close to the stove or sink width, so it frames the zone rather than spreading across the whole wall.

    11. Black and White Checkerboard Floor

    Kitchen with a black and white checkerboard tile floor and pale cabinets.

    A black and white checkerboard floor adds a classic pattern underfoot and helps a witchy kitchen feel planned rather than plain. Small tiles suit a compact room, since large tiles can make the pattern feel out of scale.

    Use tiles that suit a kitchen floor, with grout sealed against spills, and keep a spare box of tiles for repairs. If new tiling is too much work, peel-and-stick checkerboard tiles on a sound existing floor give a similar look and can be removed later. Keep the walls and cabinets quiet, so the floor carries the pattern on its own.

    12. Candle-Style Pendant Lights Over the Island or Table

    Kitchen island with black iron candle-style pendant lights and warm bulbs.

    Pendant lights shaped like candle holders give evening light a witchy feel without real flames near curtains or paper. Use warm bulbs on a dimmer, and hang two small pendants over an island or one over a small table, rather than a large fitting that crowds a low ceiling.

    Choose a simple iron or black metal fitting so the light, not the shade, does the work. If you cook under the pendants, add under-cabinet light for the work surface, since candle-style bulbs alone are too dim for safe chopping. Keep spare bulbs in a drawer, since warm candle-style bulbs can be harder to find than standard bulbs.

    13. Flameless Candle Cluster on a Heat-Safe Tray

    Flameless candles in different heights grouped on a tray on a kitchen counter.

    Group two or three flameless candles in different heights on a tray on the island or a side counter, away from the stove. You get a warm evening glow while you cook or clear up, with no live flame near towels, paper, or dried plants.

    Set a timer if the candles offer one, and replace batteries before a gathering. Keep the tray clear of the sink splash zone, and move the whole tray in one motion when you need the counter for prep. A tray also stops wax-free candles from drifting across the counter into cooking zones.

    14. Wrought Iron Pot Rail with Cast Iron Pans

    Black wrought iron rail with hooks holding cast iron pans beside a stove.

    A wrought iron rail with hooks frees a whole cabinet shelf and puts pans where you grab them while cooking. Fix the rail into studs, hang the heaviest pan nearest a bracket, and leave space between pans so you can lift one off without knocking the next.

    Keep lids in a separate spot, since lids hung with pans tangle. This idea suits a wall beside the stove or a short stretch above a counter, but keep pans clear of the main walkway so no one brushes against a handle. Wipe the rail often, since steam leaves a film on iron near a stove.

    15. A Black Dutch Oven Left on the Stove as a Working Display

    Black Dutch oven on a stove in a moody kitchen.

    A black Dutch oven or a dark stockpot left on the stove works as a witchy centerpiece and as real cookware. Choose one heavy pot you use weekly for soups, stews, and braises, and keep its lid nearby so the pot stays ready for cooking rather than gathering dust.

    Wipe the outside after cooking, and keep the pot clear of the burners you use daily if it blocks a burner you need. If the stove is small, store the pot on a shelf by the stove instead, and bring it out for cooking days. One dark pot is enough; a row of unused pots quickly turns a work surface into storage.

    16. A Mortar and Pestle Station for Spices

    Mortar and pestle on a small board with spice jars on a kitchen counter.

    A mortar and pestle station gives the kitchen a hands-on witchy corner and a real tool for grinding spices, herbs, and garlic. Set the mortar on a small board or tray with two or three spice jars, so grinding stays in one spot and crumbs do not spread across the counter.

    Choose a heavy mortar that stays still while you grind, and keep it away from the counter edge. Rinse and dry it after use, since damp spice residue stains stone. If you grind spices weekly, keep the station out on the counter; if you grind rarely, store it in a cupboard and bring the tray out for cooking sessions.

    17. A Tea Station on One Tray

    Tea station tray with dark mugs, a tea jar, and a honey pot near a kettle.

    Set up one tray near the kettle with mugs, a small jar for tea, a honey pot, and a folded towel. A defined station keeps morning and evening drinks in one spot and stops supplies spreading across the counter, and it suits the witchy look when the mugs are dark and the jars are labeled.

    Restock the tray during your weekly shop so it never turns into clutter. Guests can help themselves without opening every cabinet, and the tray lifts off in one motion when you need the counter for prep. Keep the tray away from the stove, and wash mugs back to the tray after use so the station stays complete.

    18. A Small Display Shelf for Polished Stones and Found Objects

    Small kitchen shelf with polished stones, a shell, and a framed picture.

    A single small shelf for polished stones, a shell, a pinecone, and one or two small framed pictures adds a personal, collected feel to a witchy kitchen. Keep the shelf small and the group to a handful of pieces, so it reads as a display rather than clutter.

    Put the shelf away from steam and splashes, such as on a side wall or above a table, and dust it weekly, since kitchen grease settles on open surfaces. Choose objects you already own or find on walks, rather than buying a full set at once, so the shelf grows slowly and feels personal.

    19. A Dried Botanical Garland Along a Shelf Edge

    Dried orange slice and cinnamon garland along a kitchen shelf edge.

    Run a garland of dried orange slices, cinnamon sticks, and dried herbs along the front edge of a shelf or across the top of a window frame. The garland adds scent and color without taking counter space, and it suits the witchy palette of warm browns, rust, and deep green.

    Fix it with removable hooks or small clips, and keep it well clear of the stove, steam, and open flames, since dried plants and heat do not mix. A single run is enough; more than one can make a working kitchen feel busy. Replace pieces that fade or shed, and store the garland flat in a box between seasons.

    20. One Black Cat Accent, Used Sparingly

    Small black cat figure on a kitchen shelf beside jars.

    One black cat accent, such as a small figure on a shelf or a simple silhouette print in a frame, gives a witchy kitchen a playful note. Keep it to one piece, so the kitchen still feels like a place to cook rather than a themed display.

    Place the figure on a shelf away from steam, or hang the print where it is seen from the table. If you already have a cat print elsewhere in the home, skip this idea and use the shelf space for jars or cookbooks instead. The seasonal dark-kitchen styling in these Halloween kitchen decor ideas shows how one dark accent can carry a room without crowding it.

    21. Vintage Cookbooks and Old Books on a Shelf

    Shelf of vintage cookbooks with cloth covers in a kitchen.

    A shelf of old cookbooks, with cloth covers and worn spines, gives a witchy kitchen the look of a well-used recipe library. Stand books upright in one group, and keep the cookbooks you actually use at hand height, with purely decorative old books higher.

    Use a bookend to stop the row from toppling, and keep books away from the stove and sink, where steam and splashes damage covers. If a book is fragile, lay it flat on top of the row rather than pulling it in and out daily. A few books are enough; a full wall of books belongs in a library, not above a work counter.

    22. A Dark Stone-Look Countertop with Pale Veining

    Kitchen with a dark stone-look countertop with pale veining and black cabinets.

    A dark grey countertop with pale veining gives a witchy kitchen a solid work surface that still shows crumbs and spills less than a plain black top. The pale lines break up the dark surface and link it to a light sink, light dishes, or a pale wall.

    Wipe the top daily and use boards for cutting, since dark surfaces show scratches in bright light. Pair the top with one warm detail, such as wood boards or brass handles, so the kitchen does not feel cold. If a full new countertop is out of reach, a dark stone-look worktop cover on one run gives a similar look for less work.

    23. Amber and Smoked Glassware for Evening Meals

    Amber and smoked drinking glasses on a wooden kitchen table.

    Set out amber, smoked, or simple black stemmed glassware for evening meals. Colored glass catches low light and makes an ordinary weekday dinner feel special without any extra objects on the table.

    Keep everyday clear glasses for mornings if the darker glass feels heavy in daylight. Wash colored glass by hand if the maker advises it, and store it where it will not chip against heavier mugs. One set of six is enough; you do not need a full cabinet change to get the effect.

    24. A Matte Black Faucet with Matching Hardware

    Kitchen sink with a matte black faucet, black knobs, and a pale counter.

    A matte black faucet, with matching knobs and pulls, is a low-cost way to link dark cabinets, an iron rail, and a black hood into one scheme. Swap the faucet and hardware together, so the finishes match, and keep the sink and counter pale so the black details stand out.

    This change needs no new cabinets and takes an afternoon for most kitchens. Check the faucet fits your sink holes before buying, and keep the old hardware in a bag in case you move and want to refit it. Wipe the black finish with a soft cloth, since hard water marks show on matte black.

    25. An Arched Mirror or Arched Cabinet Detail

    Tall arched mirror in a black frame above a kitchen side counter.

    A tall arched mirror over a side counter, or arched trim on one or two cabinet doors, brings a soft gothic shape into the kitchen at eye level. The arch shape reads as witchy and old-world even when the rest of the room is plain and modern.

    Choose one arch detail, not both, so the shape stays special. Fix a mirror with fixings rated for its weight, and keep it clear of the faucet swing if it hangs near the sink. For cabinet doors, keep the arch shape the same on each door so the run looks planned.

    26. Botanical Prints in Black Frames

    Botanical herb prints in black frames hung in a row on a kitchen wall.

    Botanical prints of herbs, mushrooms, and leaves in thin black frames suit a witchy kitchen and link the herb jars and dried plants into one story. Hang two or three prints in a row on a side wall, or lean one large print on a shelf.

    Keep the frames the same color and the spacing even, so the group looks planned. Hang prints away from the stove, where steam and grease mark glass, and use prints of plants you actually grow or cook with, so the wall feels personal rather than generic.

    27. A Cozy Breakfast Nook with Dark Cushions

    Cozy kitchen breakfast nook with dark cushions, a wood table, and a candle tray.

    A small breakfast nook with dark cushions, a wood table, and a flameless candle on the table gives the witchy kitchen a place to sit and linger. Choose washable cushion covers in charcoal, plum, or deep green, and keep the table clear except for the candle tray.

    Add a basket under the bench or beside the table for placemats and napkins, so the nook stays tidy. If the nook is small, one bench and two chairs suit it better than a full set, and a cushion on the bench alone still gives the dark, cozy feel.

    28. Woven Baskets for Pantry and Linen Storage

    Woven baskets on kitchen pantry shelves holding linens and pantry goods.

    Woven baskets on pantry shelves, on top of cabinets, or under a bench hide linens, placemats, and pantry overflow while adding warm texture to a dark kitchen. Label each basket on the front, so you can find things without pulling every basket out.

    Choose baskets that fit the shelf with room to slide in and out, and keep heavy pantry goods low. Wash or wipe baskets seasonally, since kitchen dust settles in woven fibers. One basket per shelf is enough; a row of empty baskets quickly becomes clutter.

    29. A Chalkboard Menu Board for Weekly Meals

    Small chalkboard menu board leaning on a kitchen counter with a weekly menu.

    Lean a small chalkboard or letter board on the counter against the backsplash, or hang it on a side wall, with the weekly menu, a shopping list, or a simple moon drawing. It is a practical piece the family can use for lists and notes all year; only the message changes with the season.

    Keep chalk dust away from open food by placing the board near the door or fridge rather than beside the stove. Wipe it fully clean at the end of each week, and keep chalk in a small pot beside the board so it does not roll across the counter.

    30. A Simmer Pot Ingredients Jar by the Stove

    Labeled jar of simmer pot ingredients with dried orange slices and cinnamon by a stove.

    Keep a labeled jar of simmer pot ingredients, such as dried orange slices, cinnamon sticks, cloves, and star anise, on a shelf by the stove. When you want a warm scent while you cook, simmer a spoonful in water on the stove while you are in the room, and never leave the pot unattended.

    Keep the jar sealed and away from direct heat, and refill it from a larger pantry store. If anyone at home dislikes fragrance, skip the simmer pot and use the jar as a display piece only; fresh air from an open window works just as well. Keep scent light so it does not fight with food smells.

    31. A Witchy Table Setting for Gatherings

    Kitchen table set with black linen, brass candle holders, and dried stems in a dark vase.

    For a gathering, set the table with black or charcoal linen, brass candle holders with flameless candles, and a low centerpiece of dried stems in a dark vase. The setting feels witchy and special, but every piece is reusable and the table stays clear enough for serving dishes.

    Keep the centerpiece low so guests can see each other across the table, and build it on a tray so the whole setting lifts off in one motion before serving. Use plain plates and clear water glasses, so the dark linen and brass carry the theme without a full tableware change. After the meal, fold the linen back into the basket from Idea 28, so the setting stores as one set.

    Conclusion

    A witchy kitchen works when mood and cooking share the room. Start with one change, such as black cabinets, open shelves, or a tea tray, and add moon details, herbs, and candlelight only where they also store something, add light, or keep a surface clear. Keep one light surface in the room, use flameless light near towels and dried plants, and let daily items stay within reach. Work through this list in order: color first, then storage, then herbs, then light, then the table, and adjust after a week of real cooking. For more dark-kitchen styling, the gothic kitchen ideas and Halloween kitchen decor ideas guides pair well with the ideas above, and the shelf spacing in our guide on how to style open shelves helps keep every display calm.

    Keep this list handy for your next free hour at home, and build your witchy kitchen one shelf, one jar, and one candle at a time.

    FAQs

    What is a witchy kitchen aesthetic?

    A witchy kitchen aesthetic uses dark colors, natural materials, and old-world details, such as black cabinets, brass hardware, dried herbs, moon motifs, and candlelight, to give a kitchen a moody, collected feel. The look stays practical when each detail also has a job: jars store herbs, trays hold candles, and shelves hold daily dishes. Start with a small set of details and repeat them, rather than filling every surface at once.

    How do I make a witchy kitchen without painting all my cabinets?

    Change textiles and small details first: dark dish towels, a runner, labeled jars, a tea tray, moon knobs on one run, and a print or two on a side wall. These changes give a big visual shift without new cabinets. If you want a larger change later, paint one run or the island only, and keep the rest pale so the room stays bright enough to cook in.

    How do I keep a dark kitchen bright enough for cooking?

    Keep at least one light surface, such as a pale counter, a light wall, or a bright window, and layer your light: bright under-cabinet light for chopping, plus softer candle-style or lamp light for evenings. A mirror on a side wall can bounce window light around the room. Dark cabinets on the lower half with pale uppers also keep the room from feeling low and closed in.

    Are real candles safe in a witchy kitchen?

    Real candles and cooking are a risky mix, since towels, paper, dried plants, and curtains sit close to work surfaces in most kitchens. Flameless candles and battery lights give the same warm glow with no flame near those materials. If you use real candles, keep them on a heat-safe tray, well clear of the stove, towels, and dried plants, and never leave them burning in an empty room.

    What herbs work best for a witchy kitchen display?

    Use herbs you actually cook with, such as rosemary, thyme, mint, oregano, parsley, and basil, so the display earns its place. Keep fresh herbs in dark pots on the windowsill, dried bundles on a hanging rack away from stove steam, and crumbled dried leaves in labeled jars. Herbs kept near heat and steam lose flavor faster, so store jars away from the stove.

    How can renters get a witchy kitchen look without permanent changes?

    Use removable and freestanding pieces: peel-and-stick tile accents, a stained glass style film on part of a window, dark towels and linens, labeled jars, a tray-based tea station, freestanding shelves, and framed prints leaned on shelves. Removable hooks hold garlands and tea towels without new fixings. Keep the larger pieces portable, so the look moves with you.

    How do I stop a witchy kitchen from looking cluttered?

    Give every group a container and a limit: one tray for candles, one shelf for jars, one basket per pantry shelf, and one accent piece per wall. Leave gaps between groups on open shelves, and put daily items at hand height and decorative pieces higher. Step back across the room after each change, and remove one item if a shelf or counter looks crowded.


  • 12 Strawberry Kitchen Decor Ideas for a Fresh Take on Your Home

    12 Strawberry Kitchen Decor Ideas for a Fresh Take on Your Home

    Strawberries bring a clear red, a touch of green, and a summer feeling to a kitchen, but the theme works best with a limit. A strawberry print on every surface can feel busy, while one strong strawberry note, repeated in two or three smaller spots, reads as a plan. These 12 strawberry kitchen decor ideas cover cabinets, tile, windows, seating, walls, and small afternoon changes. Start with the spot you see most, test the red beside your floor and counters in daylight and evening light, and keep work surfaces plain so cooking stays easy. If you like a softer warm color first, these pink kitchen ideas show how blush cabinets pair with white, wood, and brass.

    Key Takeaways

    • Use one strawberry red through the room, and repeat it in at least two or three places, such as cabinets, curtains, and a towel, so it reads as a plan.
    • Pair strawberry red with white, warm wood, cream, pale stone, or soft green, and keep other strong colors to a minimum.
    • Test a strawberry paint, tile, or fabric sample beside your floor, counter, and cabinet color in daylight and evening light before a large change.
    • Put the fruit theme where hands and eyes land most: cabinets, tile, the window, seating, and the table, rather than on every surface.
    • Choose washable, wipeable finishes near the stove and sink, since kitchen surfaces pick up grease and water marks.
    • Small changes like knobs, towels, tableware, and a fruit bowl let renters try the theme with no fixed work.

    1. Strawberry Red Shaker Cabinets

    Kitchen with strawberry red shaker cabinets, white counters, and a wood floor.

    Paint shaker cabinets in a strawberry red for a kitchen that feels fresh and cheerful without shouting. Shaker doors keep the shape simple, and white walls, a pale counter, and a wood floor stop the red from feeling heavy. This suits a kitchen with good daylight, where the red reads as a warm fruit color rather than a bright warning color.

    Keep handles simple in brass or matte black, and choose a counter in white or pale grey so the cabinets stay the focus. If you worry about commitment, paint one run of cabinets first and live with it for a week before painting the rest. Wipe doors near the stove each week, since dark red paint shows pale dust and cooking splashes.

    2. Strawberry Print Tile Backsplash

    Strawberry print tile backsplash behind a kitchen cooker with white cabinets.

    Lay tiles printed with strawberries, leaves, and small white flowers as a backsplash for a fruit theme in a classic tile shape. A white tile with a scattered strawberry print feels light, while a tile with a larger fruit pattern feels bolder. Subway or square tiles suit most kitchens because the shape is familiar and the size works around sockets and windows.

    Pair strawberry tile with white cabinets and a plain counter, so the tile is the main color note. Order a few spare tiles for future repairs, and seal grout in the splash zone behind the sink and cooker. Check a tile sample under kitchen lights at night as well as in daylight, since red glazes shift a lot between lights.

    3. Strawberry Cafe Curtains at the Window

    Kitchen window with strawberry print cafe curtains above a sink.

    Hang strawberry print cafe curtains on the lower half of the kitchen window for privacy at counter height while the top half stays open for daylight. A small strawberry print on white or cream cotton suits a kitchen, and a washable fabric matters, since kitchen curtains pick up grease film over time. Hang the panels on a slim tension rod inside the frame if you rent, or on a small fixed rod if you own.

    Keep the hem just above the sill so fabric does not sit in water near the sink, and keep curtains well clear of the stove. Add one plain plant or a small tray on the sill, so the strawberry print stays the main window color. For more ways to dress the window without blocking light, see these kitchen window decor ideas.

    4. Open Shelves with Strawberry Dishes and Glassware

    Open kitchen shelves holding strawberry patterned dishes and red rimmed glasses.

    Paint open shelves white or pale wood, and display strawberry patterned plates, bowls, and red rimmed glasses against them. The dishes carry the fruit theme, while the shelves stay plain, so you can swap the theme later without repainting. This suits a kitchen with one blank wall or a short run above a counter.

    Keep the shelf items to daily pieces you actually use, and leave breathing room between groups so shelves read as tidy, not crowded. Dust open shelves weekly, since open storage collects cooking film. Put heavy stacks low, and keep shelves clear of direct stove steam.

    5. Strawberry Island in a Neutral Kitchen

    Strawberry red kitchen island with a pale counter in a white kitchen.

    Keep the main cabinets white or wood, and paint only the island strawberry red. The island becomes a clear focal point, and the rest of the kitchen stays neutral, which makes the change lower risk and easier to reverse. A strawberry red island suits a white kitchen, while a deeper berry red suits a kitchen with dark wood floors.

    Repeat the island red once more, in stools, a rug, or a vase, so it looks planned rather than random. Choose a hard wearing counter for the island, since it takes the most daily use. This is a good first step if you like strawberry red but are not ready for red cabinets everywhere.

    6. Breakfast Nook with Strawberry Cushions

    Breakfast nook with strawberry print cushions and a bowl of strawberries on a wood table.

    Use strawberry print cushions on a breakfast nook bench, plus a bowl of fresh strawberries or a small strawberry plant as the table centerpiece, for a seating area that feels dressed without new cabinets. A bench with red and white cushions suits a small table, and it pairs well with a wood tabletop and cream chairs. This is a good way to bring the theme into an open plan kitchen where the eating area stays in view.

    Keep cushion covers washable, since kitchen seating takes daily spills, and choose a firm foam that holds its shape on a bench. If the cushions feel too strong on their own, add a plain cream runner on the table to calm the print. Keep one chair spare for guests rather than crowding the nook.

    7. Strawberry Wallpaper on One Accent Wall

    Kitchen accent wall with strawberry print wallpaper behind a dining table.

    Paper one accent wall, usually the wall behind a table or a short run of cabinets, in a strawberry print wallpaper. A small strawberry repeat on a cream background feels fresh, while a large fruit print feels bolder and suits a bigger wall. One wall keeps the theme clear and makes future changes simple, since only that wall needs new paper.

    Keep the other walls plain, and repeat the red once in a towel or a small accessory so the wall does not look isolated. Choose a wipeable or washable wallpaper for a kitchen, and keep paper clear of the stove splash zone and the sink. If you rent, use a peel and stick paper made for kitchens, and test a corner first.

    8. Strawberry Shaped Knobs and Pulls

    White kitchen cabinets with strawberry shaped knobs and red drawer pulls.

    Swap cabinet knobs for strawberry shaped knobs, or plain red knobs with green leaf details, for a small, reversible change with a clear fruit shape. Strawberry knobs suit white, cream, or pale wood cabinets, and they let you test the theme before painting. This is a good weekend job, and it costs far less than new cabinets.

    Keep all the knobs in the same style and size, so the change looks planned, and mix in plain red pulls on drawers if full fruit knobs feel too much. Save the old hardware in a labelled bag in case you want to swap it back. Check that new knobs match your existing screw spacing, and wipe them often near the stove, since kitchen grease dulls paint.

    9. Strawberry Tea Towels, Apron, and Oven Mitt Set

    Strawberry print tea towels hanging on an oven handle with a matching apron nearby.

    Swap everyday tea towels for strawberry print towels, and add a matching apron and oven mitt, for the fastest strawberry change in a kitchen. Towels move through the room all day, and they wash easily, so the theme stays fresh with routine laundry. Hang them where they are used most: the oven handle, a hook by the sink, or the dishwasher bar.

    Keep two sets in rotation so a wet or stained set never stays on display. Store the folded spare set in a drawer, not on the counter. Keep towel ends well clear of burners, and never leave a towel draped where it can slip toward a hot pan.

    10. Strawberry Table Setting for Gatherings

    Table set with strawberry patterned plates, red rimmed glasses, and a white runner.

    Set the table with strawberry patterned plates, red rimmed glasses, and a plain white or red runner for a gathering table that still works for daily meals. Strawberry tableware suits white plates, plain linen napkins, and a wood table, and it works for a summer lunch as well as for guests. Keep the rest of the table plain so the fruit print stands out.

    Use a low bowl of strawberries or a small vase of green leaves as the centerpiece, so guests can see each other across the table. Wash printed plates and glasses by hand if the maker advises it, and store them apart from heavy stacks so the print does not scratch. If you set the table daily, keep one everyday set and one guest set, so the special pieces stay in good shape.

    11. Strawberry Countertop Display Station

    Kitchen counter station with a tiered stand of strawberries, jam jars, and a red utensil crock.

    Group strawberry items on one stretch of counter as a display and prep station: a tiered stand with strawberries, a jar of strawberry jam, a small cutting board, and a red utensil crock. The group adds color in one clear spot, and it suits a kitchen where a full remodel is not planned. Keep the group near the fridge, with the prep board within reach, and leave the work run beside the stove clear.

    Lift the whole group aside in one move when you need the counter for baking, and keep fresh fruit in the fridge until you need it, so the display stays tidy. Wipe the stand and crock weekly, since counter groups collect grease film near cooking areas. If the counter is short, shrink the station to a jam jar and one small bowl on a tray.

    12. Strawberry Runner Along the Sink Run

    Runner with a strawberry print on a wood kitchen floor along the sink run.

    Lay a runner with a strawberry print, or a plain red runner with a small strawberry border, along the sink run or in front of the stove. A runner softens hard floors, warms up early mornings, and defines the work zone without any fixed change, which suits renters well. Measure the run first and leave space for cabinet doors and the dishwasher to open fully.

    Use a thin rug pad on smooth floors to stop slipping while you carry hot dishes. Choose a low pile you can shake out daily and wash when cooking spills build up. Keep the runner clear of the oven door swing, and pick a washable fabric so the red print stays fresh.

    Conclusion

    A strawberry kitchen works best when the fruit theme has a clear job and a calm background. Start with the cabinets, island, or tile, since those are the pieces you see most, then repeat the same red in curtains, cushions, or a table setting. White, wood, cream, and soft green keep strawberry red fresh rather than loud, and plain work surfaces keep cooking easy. Small changes like knobs, towels, and a countertop station let you test the theme before a larger change, and they suit renters as well as owners. For a deeper red that sits well beside strawberry prints, see these red kitchen decor ideas for cabinets, islands, and seating.

    Save this list on Pinterest for your next free hour in the kitchen, and work through it in order: cabinets or island first, then tile and the window, then seating and walls, and finally the small table and counter touches.

    FAQs

    How do I use strawberry decor in a kitchen without making it look childish?

    Use strawberry red as a planned accent, not as a print on every surface. Keep cabinets, walls, and counters in white, cream, wood, or soft green in most of the room, and let the fruit theme appear in the cabinets or tile, plus one or two smaller spots such as curtains or cushions. Repeat the same red at least twice, so it reads as a plan rather than a single novelty object. If the room starts to feel too playful, swap one printed piece for a plain red or white piece and leave the fruit shape to the knobs, towels, or tableware.

    What colors pair best with strawberry red in a kitchen?

    White, cream, warm wood, pale stone, soft green, and matte black pair best with strawberry red, because they let the fresh fruit color stand out without competing with it. Avoid adding a second strong color in large amounts, such as bright yellow or bold blue on every surface, since two strong colors can fight each other. Use one other accent only in small amounts, such as green from herb pots or leaves in the print, and keep the main palette to three colors plus the red.

    Is strawberry print hard to keep clean in a kitchen?

    Strawberry print needs the same care as other kitchen colors, with a little extra care for pale dust and water marks on red surfaces. Wipe cabinets, knobs, and small items with a soft damp cloth each week, dry them at once if your water leaves marks, and avoid harsh pads that can scratch paint or print. Near the stove, wipe grease film often, since it dulls paint over time. Choose washable fabrics for curtains, cushions, towels, and runners, so the scheme stays fresh with routine laundry.

    Can renters add strawberry decor to a kitchen without fixed changes?

    Yes. Renters can cover most of this list with no permanent work at all. Knobs swap back, curtains hang on a tension rod, peel and stick wallpaper peels off, towels and a runner sit on existing surfaces, and a countertop station moves with you. Check your lease before fixing any shelf or paper, and keep the old hardware in a labelled bag, so the kitchen returns to its original state at the end of the tenancy.

    Does strawberry decor suit a small kitchen?

    Yes, if you keep it to a few well placed pieces. In a small kitchen, change the knobs, add one curtain or a set of cushions, and style one spot only, such as a shelf or a countertop station. Skip a full strawberry cabinet repaint and a large print wall if the room is dark, and let a towel or a runner carry the fruit tone instead. A short list keeps the room easy to cook in, and each strawberry piece you do use gets noticed instead of competing with five others.

    How do I test a strawberry red paint or tile before committing?

    Order or borrow a sample in the exact shade you plan to use, and place it beside your floor, counter, and cabinet color in the kitchen itself. Check it in morning daylight, afternoon light, and evening light under your usual bulbs, since red shades shift a lot between lights. Live with the sample for a few days, and check it beside the knobs and towels you already own. If the sample looks too bright in one light and too dark in another, choose a deeper, muted strawberry red, which tends to read more evenly through the day.


  • 18 White and Beige Kitchen Ideas for a Fresh Take on Your Home

    18 White and Beige Kitchen Ideas for a Fresh Take on Your Home

    White and beige are a calm pairing, but only when you use more than one shade of each. A kitchen with a single flat white and a single flat beige can look washed out, while a kitchen that layers warm white, cream, sand, and taupe feels soft and finished. These 18 white and beige kitchen ideas cover cabinets, counters, tile, floors, lighting, and seating, so you can refresh one corner or plan a full room. Start with the change you notice most, test samples in your own light, and keep one warm material in the mix. For a wider look at white rooms first, see these white kitchen ideas.

    Key Takeaways

    • Use at least three tones, such as bright white, warm cream, and sand beige, so the room has depth instead of one flat color.
    • Pick one warm material, like wood, brass, or rattan, to keep white and beige from feeling cold or clinical.
    • Put the strongest contrast where it helps most: dark handles, a wood counter, or a patterned floor, and keep the rest quiet.
    • Test paint and tile samples in morning and evening light, since beige shifts a lot through the day.
    • Layer texture through linen, wood grain, stone veining, and woven rugs, so a neutral room stays interesting without bold color.
    • Start small if you rent or want a quick refresh: hardware, stools, rugs, and open shelves change the look without paint or building work.

    1. White Shaker Cabinets Against Beige Walls

    White Shaker kitchen cabinets against soft beige walls with a pale counter.

    Paint Shaker cabinets in a warm white and keep the walls in a soft beige, so the cabinets stand out gently instead of blending into the wall. The Shaker frame gives the doors shape without fussy detail, and the beige wall behind them adds warmth that a pure white wall would not. This suits most homes, from farmhouse to transitional, and it works well in a kitchen with modest daylight.

    Keep the trim and ceiling in the same warm white as the cabinets, so the edges of the room stay clean. Choose a beige with a warm undertone if your kitchen gets cool light, and test a large swatch beside the floor before you commit. Wipe cabinet doors near the stove each week, since pale paint shows cooking splashes sooner than darker colors.

    2. Two-Tone Cabinets With Beige Lowers and White Uppers

    Kitchen with beige lower cabinets, white upper cabinets, and a pale counter.

    Use beige on the lower cabinets and white on the uppers for a lighter take on a two-tone kitchen. The white uppers keep the eye moving up and make a small kitchen feel taller, while the beige base grounds the room and hides everyday marks better than white. This split also makes repainting easier later, since only half the cabinets need a new color.

    Pair the scheme with a pale counter and a simple backsplash, so the two cabinet colors can do the work. Repeat one handle finish across both tones to tie them together, such as brushed brass or matte black. If you worry about commitment, paint the island or one run first and live with it for a week before painting the rest.
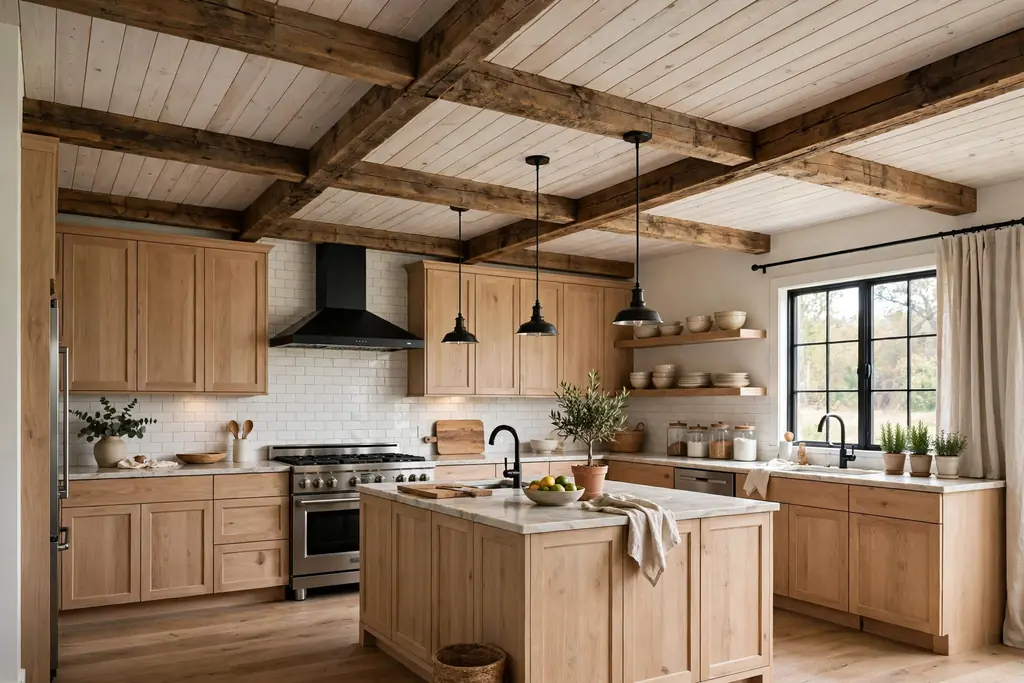
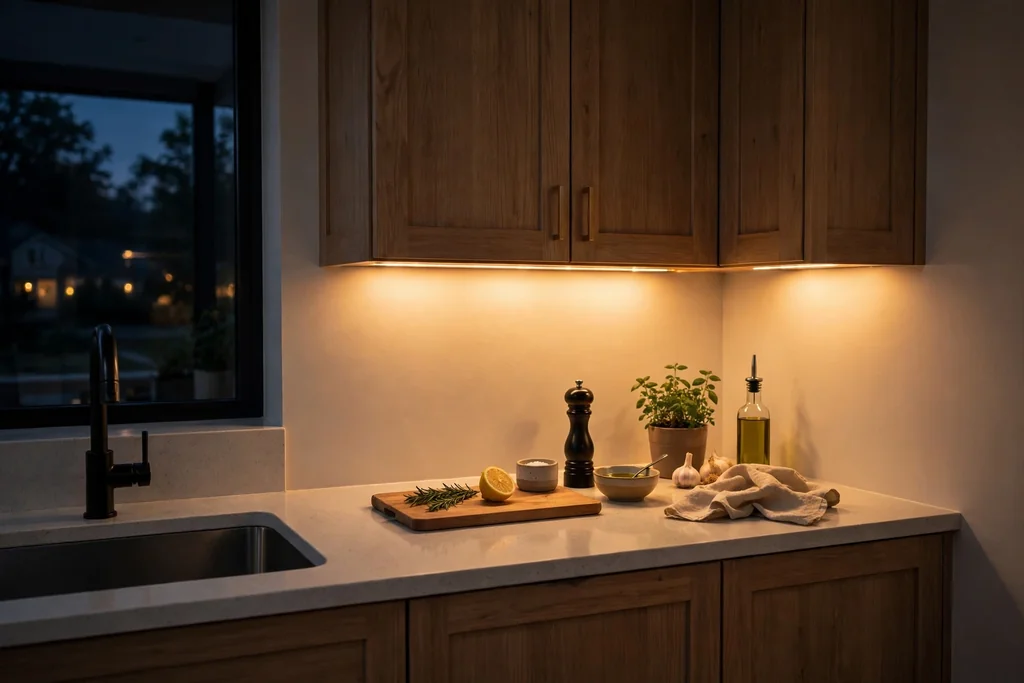
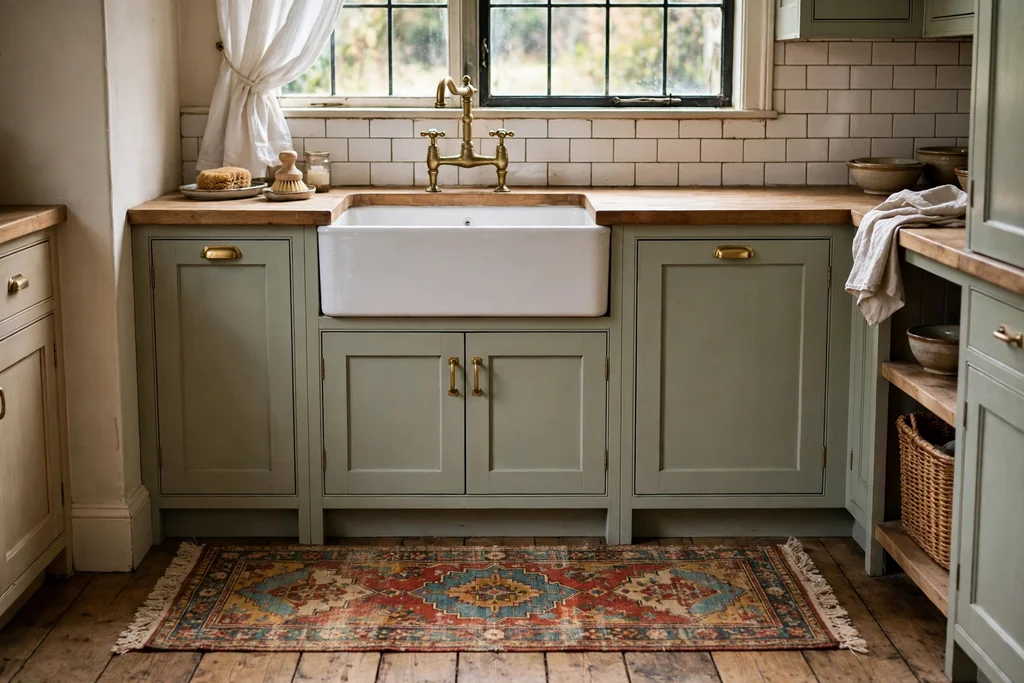
    3. Beige Island in an All-White Kitchen

    White kitchen with a warm beige island and a pale stone counter.

    Keep the main cabinets white and paint only the island in a warm beige, so the island becomes a clear focal point and the rest of the kitchen stays neutral. A beige island suits a white kitchen with wood floors or a stone counter, and it is a lower risk change than repainting every cabinet, since it is easy to repaint one piece later.

    Repeat the island tone once more, in stools, a runner, or a vase, so it looks planned rather than random. Choose a hard wearing counter for the island, since it takes the most daily use, and keep the island front simple so the beige reads as a calm block. For help choosing the right undertone for the rest of the room, see these ideas for colors for your kitchen cabinets.
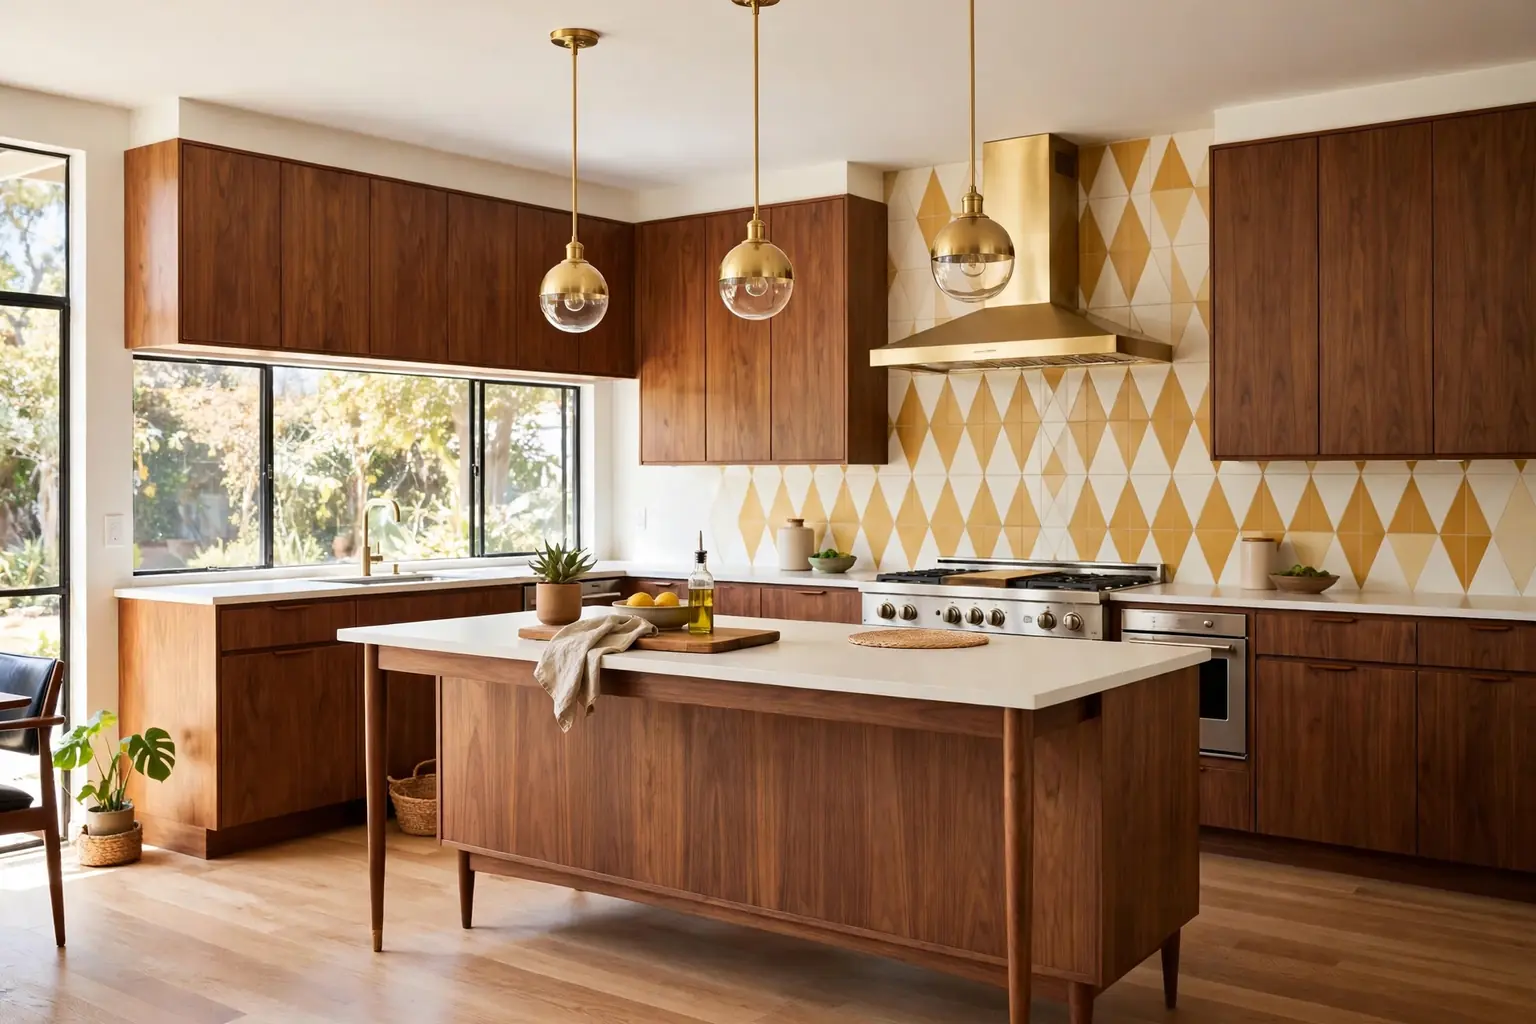
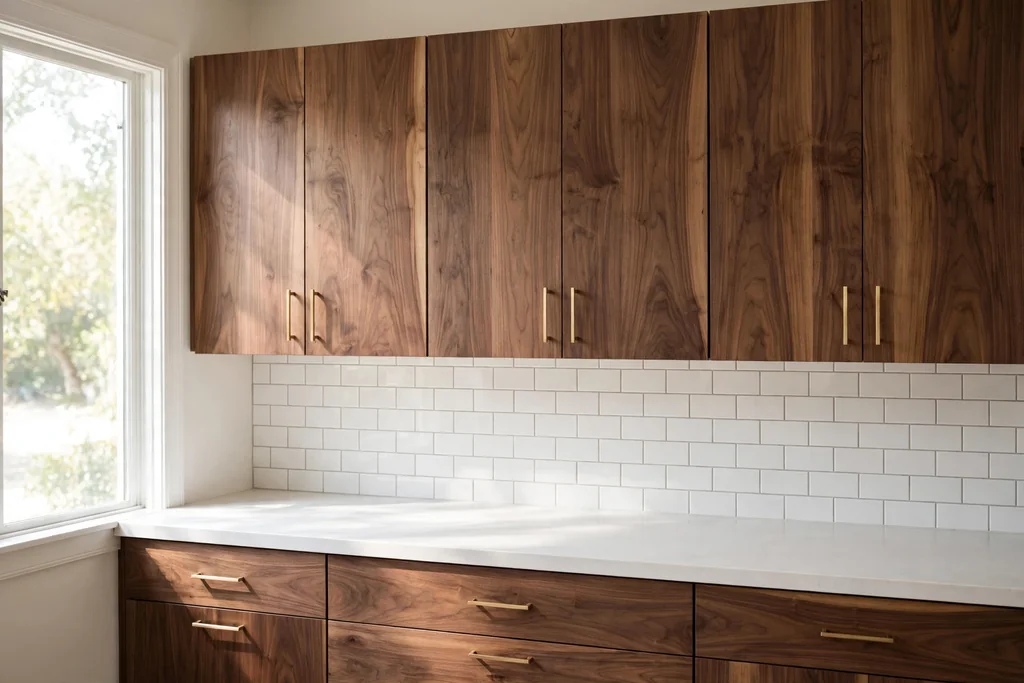
    4. Marble-Look Counters With Soft Beige Veining

    White kitchen with marble-look counters showing soft beige veining.

    Choose a marble-look counter with soft beige veining for movement across an otherwise plain surface. The veining links white cabinets to beige walls or floors, and it adds interest without a new color. This suits traditional and transitional kitchens, and it looks at home with Shaker cabinets, brass hardware, and a simple tile backsplash.

    Pick a slab with gentle veining if you want a calm look, or a bolder vein pattern if the counter is meant to be the main feature. Seal natural stone as advised by the supplier, wipe acidic spills quickly, and use trivets under hot pans. If you cook daily with citrus and tomato, consider a hard wearing quartz with a beige vein on the main prep run and save real marble for a serving area.

    5. Warm Wood Counters Against White Cabinets

    White kitchen cabinets with warm wood counters and brass handles.

    Add warm wood counters to white cabinets for instant warmth under your hands and eyes. Butcher block or a light oak counter softens the white, suits farmhouse and Scandinavian style kitchens, and pairs with black, brass, or nickel hardware. A wood counter is also pleasant to work on, since it is warm to the touch and kind to dishes and glasses.

    Use wood on an island or a single run of counter, rather than everywhere, if you want to limit care. Oil the surface on a regular schedule, wipe spills promptly, and use a board for cutting so the counter keeps an even look. Near the sink, a stone or quartz section avoids constant water contact on wood, and the mix of white cabinets and one wood counter is often enough to warm the whole room.

    6. Handmade Beige Tile Backsplash

    Kitchen backsplash of handmade-look beige tiles behind a white counter.

    Lay handmade-look beige tiles as a backsplash for texture that flat tiles cannot give. Slight variations in tone and surface catch light across the wall, so the backsplash reads as crafted rather than factory perfect. In a soft sand or cream beige, the tile adds depth without color, which suits a calm kitchen that still wants character.

    Use the tile on the backsplash only, and keep counters and cabinets plain, so the texture stays the focus. Order extra tiles, since handmade batches vary and a few spares help if a tile chips later. Seal the grout to keep cooking splashes from staining it, and wipe the surface with a soft cloth during a normal clean.

    7. White Open Shelves With Beige Dishes

    White open kitchen shelves holding beige and cream dishes and mugs.

    Swap a short run of upper cabinets for white open shelves, and display beige and cream dishes, bowls, and mugs on them. The shelves make a white and beige kitchen feel taller and more open, especially above a sink, and the beige dishes add the second color without paint. This works best when you keep the shelves to items you use often, so nothing sits long enough to gather dust.

    Style each shelf with stacked plates, a jug, and one small plant, and leave breathing room between groups so the shelves read as tidy, not crowded. Keep the rest of the kitchen storage closed, so the open shelves are a feature rather than a necessity. If dust is a worry, use open shelving for one short run only, and keep the remaining uppers closed for items you use less often.

    8. Beige Linen Roman Shades at the Window

    Kitchen window with beige linen roman shades filtering soft daylight.

    Hang beige linen roman shades at the kitchen window for soft light and a fabric layer that hard surfaces lack. Linen filters daylight gently, which suits beige walls, since harsh light can make beige look washed out. A shade in a tone deeper than the walls reads as a deliberate layer, not a match that disappears.

    Choose a washable or wipeable fabric near the sink, and mount the shade so it clears the window frame when raised, so daylight still fills the room. For a wider look at dressing the window without blocking light, the tone and fabric advice in these beige bedroom ideas applies well to kitchens too, since both rooms benefit from linen texture. Keep the shade clear of the tap splash zone where you can.

    9. Brass Hardware Warming White Cabinets

    White kitchen cabinets with brass cup pulls and knobs beside beige walls.

    Fit brass cup pulls and knobs on white cabinets, and let beige walls or a beige runner carry the second neutral. Brass warms white cabinets in a way that black or chrome cannot, adding a soft golden glow that suits traditional, farmhouse, and transitional kitchens. Cup pulls on drawers and knobs on doors are a classic pairing that still looks current.

    Match the brass to the tap and to any pendant or shelf brackets, so the metal reads as one thread through the room. If brass feels too yellow beside your white, pick a brushed or aged brass rather than a bright polished one. Swapping hardware is a low cost change you can test on one drawer bank before you buy pulls for the whole kitchen, which makes it a good first step for renters too.

    10. Beige Breakfast Nook With a White Table

    Breakfast nook with a white table, beige bench cushions, and a window.

    Build a breakfast nook in beige and white, with a white table, beige bench cushions, and a wood or rattan chair or two. The nook gives the kitchen a place to sit that feels dressed without new cabinets, and the beige cushions are easy to change by season. A small table suits a corner by the window, where daylight makes pale colors glow.

    Keep cushion covers washable, since kitchen seating takes daily spills, and add a plain runner on the table to calm the white top. If the nook is small, a bench against the wall saves floor space and adds storage under the seat for table linen. One pendant light over the table, in brass or rattan, ties the nook to the rest of the kitchen.

    11. Apron-Front Sink With a Beige Stone Surround

    White apron-front kitchen sink set into a beige stone surround.

    Fit an apron-front sink in white ceramic, and set it into a beige stone or tile surround, so the sink wall becomes a quiet feature. The deep basin handles large pots and baking trays with ease, and the beige surround links the sink to beige walls, floors, or an island. Pair it with white Shaker or beadboard cabinets and a simple bridge tap for a room that feels practical and welcoming.

    Check the cabinet size before you order, since apron sinks need a purpose built base unit. Keep the area around the sink clear, with a dish rack or a folded linen cloth nearby, and let the sink and surround do the talking rather than adding a busy backsplash behind it. A single large basin suits most cooks better than a split basin in this kind of kitchen.

    12. Layered Beige Rugs Along the Work Run

    White kitchen work run with layered beige rugs and a washable runner.

    Lay a large flat weave rug in sand beige along the main work run, then add a smaller washable runner in front of the sink or stove. Layered rugs soften hard floors, warm up early mornings, and define the work zone without any fixed change, which suits renters well. Measure the run first and leave space for cabinet doors and the dishwasher to open fully.

    Use a thin rug pad on smooth floors to stop slipping while you carry hot dishes. Choose a low pile you can shake out daily and wash when cooking spills build up, and keep rugs clear of the oven door swing. A beige rug with a subtle border or stripe adds pattern without breaking the calm palette, and it is easy to swap when it wears out.

    13. Glass-Front Cabinets With Beige Interiors

    Glass-front kitchen cabinets with beige interiors holding white dishes.

    Paint the inside of glass-front upper cabinets in a warm beige, and display white dishes and clear glassware against it. The beige interior adds depth behind the glass, so the cabinet reads as a dressed display rather than a plain box, and the white dishes stay the focus. Use glass fronts on one run of cabinets, or on either side of a window or range, rather than everywhere, so the display stays calm.

    Keep what you show to a small set of matching pieces, and leave space on each shelf so the cabinet does not look crowded. Clear glass shows everything, so it suits tidy households, while reeded glass softens the view and hides a less perfect shelf. Add a small light inside the cabinet if you want the display to glow in the evening, and keep daily items on lower shelves.

    14. Floor-to-Ceiling Beige Pantry Wall

    Floor-to-ceiling beige pantry wall with closed doors and open shelves.

    Build a floor-to-ceiling pantry wall in warm beige, with closed doors and a few open shelves for books, jars, and a plant. The beige wall reads as part of the room rather than a block of furniture, and it gives a kitchen generous storage without a bulky freestanding unit taking over the floor. Handleless doors keep the surface calm, and a full height unit uses wall space that a shorter cabinet would waste.

    Plan the interior before the doors: tall shelves for appliances at one end, drawers in the middle, and high shelves for seasonal items. Keep the beige a shade deeper than the walls so the pantry wall looks deliberate, and add under-cabinet light on the open shelves so the display glows at night. Measure door swings carefully, since a pantry wall that blocks a walkway will annoy you daily.

    15. Layered Lighting to Warm White Surfaces

    White and beige kitchen at night with under-cabinet lights and warm pendants.

    Layer three kinds of light so white and beige surfaces glow at night as well as by day: daylight or a bright ceiling light for prep, under-cabinet task light for counters, and warm pendants over an island or table for evenings. White surfaces bounce light well, but a single cold ceiling light can make beige look grey, so warm white bulbs matter more here than in a colorful kitchen.

    Put the task lights and pendants on separate switches or dimmers, so you can brighten the room for cooking and soften it for dinner. Keep pendant shades simple, in brass, rattan, or white, and hang them high enough to clear steam from the hob. Dust the shades often, since kitchen pendants collect a grease film over time, and a dimmer on the pendants is the cheapest way to change the mood of the room.

    16. Beige Upholstered Stools at a White Island

    White kitchen island with beige upholstered stools and a wood frame.

    Add beige upholstered stools at a white island for seating that softens the hard surfaces around it. A beige linen or leather seat on a wood or metal frame suits most kitchens, and the stools are easy to move when you need floor space. Choose stools that slide fully under the island overhang, so the walkway stays clear.

    Keep the stool count to the island length, usually two for a short island and three for a long one, and leave room between seats. Wipe frames often, since stool legs pick up floor dust and cooking splashes, and pick washable seat covers if the stools are used daily. If the stools are the only beige in the room, add one small match, such as a tray or a vase, so they do not look isolated.

    17. Patterned White and Beige Floor Tile

    Kitchen with patterned white and beige floor tile and plain white cabinets.

    Lay patterned floor tile in white and beige for a floor that carries the whole scheme. A simple geometric or encaustic-look pattern in two quiet tones adds interest underfoot without a bold color, and it suits galley kitchens and open plan rooms where the floor is always in view. The pattern also hides crumbs and marks better than a plain pale floor.

    Keep the rest of the room plain when the floor is patterned, with simple cabinets and a plain counter, so the floor stays the feature. Order spare tiles for future repairs, and seal grout in the splash zone near the sink and cooker. Check a tile sample under kitchen lights at night as well as in daylight, since beige tones shift a lot between lights, and pick a matte finish for grip underfoot.

    18. Herbs and Beige Pottery on Open Display

    Kitchen windowsill with herbs in beige pottery pots beside a sink.

    Finish the kitchen with herbs in beige pottery, grouped on a windowsill, a shelf, or a tray by the stove. The plants add life and a soft green note that keeps white and beige from feeling flat, while the beige pots tie the display to the rest of the room. Use pots of a similar size and material, such as plain ceramic or terracotta washed in beige, so the row looks calm rather than collected at random.

    Set the pots on a narrow tray or saucers to protect the sill and shelves from water marks. Choose herbs based on the light your window actually gets, and keep the sill clear of the tap splash zone where possible. For a warmer metal accent beside the pottery, the small touches in these rose gold kitchen ideas show how one repeated finish can link a display to taps and handles elsewhere in the room.

    Conclusion

    A white and beige kitchen works best when white and beige are each a family of tones and textures, not a single shade repeated everywhere. Start with the layer you notice most, usually cabinets or walls, then add wood, linen, and stone texture, and finish with one warm metal and one quiet pattern. Keep the palette tight, let light in, and give each tone a job, so the room feels fresh and calm rather than flat.

    Save this list on Pinterest before you start, and work through it one idea at a time: hardware and stools first for a quick refresh, then rugs and window treatments, then cabinets, tile, and floors when you have a weekend or a renovation to spare. For a wider look at white rooms to compare against your beige choices, see these white kitchen ideas.

    FAQs

    Will a white and beige kitchen look boring?

    It only feels boring when it is one flat white and one flat beige with no texture. Mix bright white, warm cream, sand, and taupe, and add linen, wood grain, stone veining, and woven rugs, and the room gains depth without bold color. One warm metal, such as brass, and one quiet pattern, such as a floor tile, also help, as long as both stay to a few places.

    What is the best white paint for kitchen cabinets with beige walls?

    A warm white with a slight yellow or cream undertone usually sits best beside beige walls, since a blue white can make beige look dingy by comparison. Test a large sample board beside your wall color, floor, and counter in morning and evening light before you commit. A washable satin or semi gloss finish is worth choosing, since pale cabinets show cooking splashes quickly.

    Should beige go on the upper or lower cabinets?

    Beige usually works better on the lower cabinets, with white uppers keeping the room feeling tall and light. Lower cabinets also take more knocks and marks, and beige hides everyday wear better than white. If your kitchen is large and bright, beige on all cabinets can work, but keep walls and counters pale so the room does not feel heavy.

    How do I stop beige from looking yellow or pink?

    Check the undertone of every sample beside your floor and counter, not on its own. Beige with a yellow base warms a cool room, while beige with a pink base can look rosy under warm bulbs. Test samples in your own light, and keep nearby whites in the same warm family, so one item does not make the rest look off.

    Is a white and beige kitchen hard to keep clean?

    Pale colors show crumbs, splashes, and scuffs sooner than mid tones, so plan for it rather than avoiding the palette. Choose washable paint finishes, sealed stone or quartz counters, sealed grout, and washable rug and cushion covers. A quick wipe of doors near the stove each week, and a washable runner in front of the sink, keep the room looking fresh without constant deep cleaning.

    Can I use white and beige in a small kitchen?

    Yes, and the pairing suits small kitchens well, since pale colors reflect light and make the room feel larger. Keep the palette to two or three tones, use white on uppers and walls, add beige on lowers or the island, and avoid a busy pattern on both the floor and the backsplash at once. Open shelves on one short run, good under-cabinet light, and a clear counter plan matter more than extra decoration in a small room.