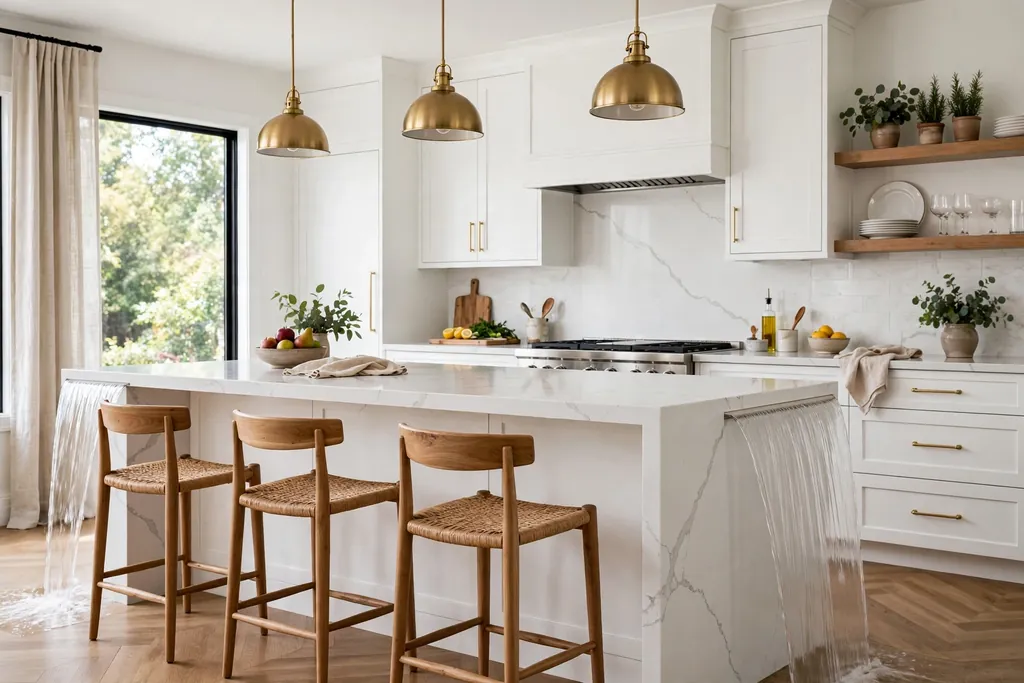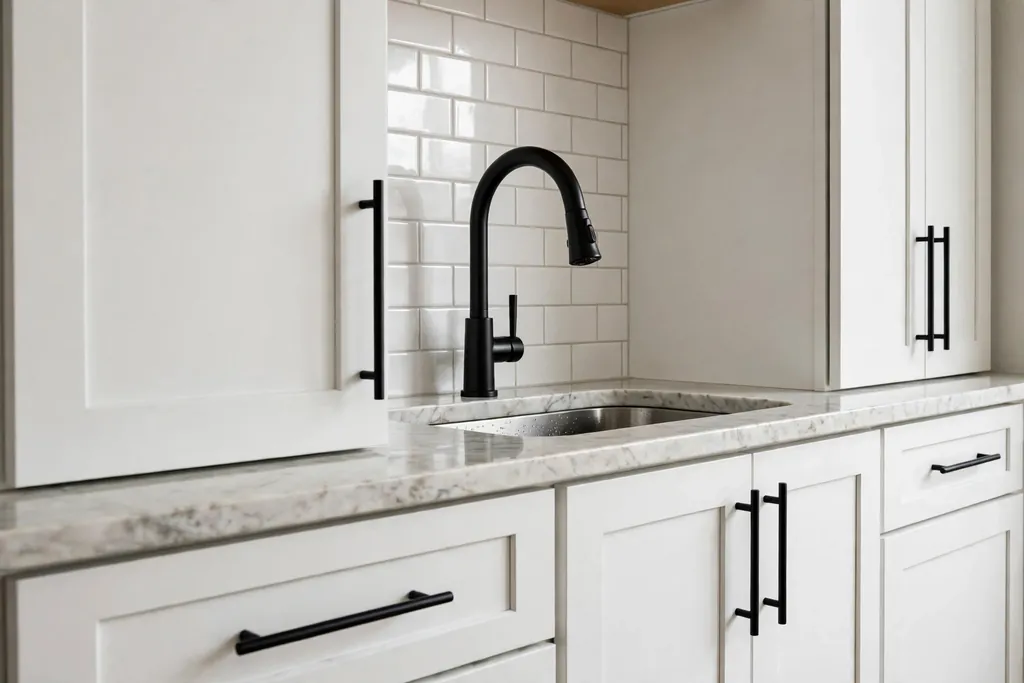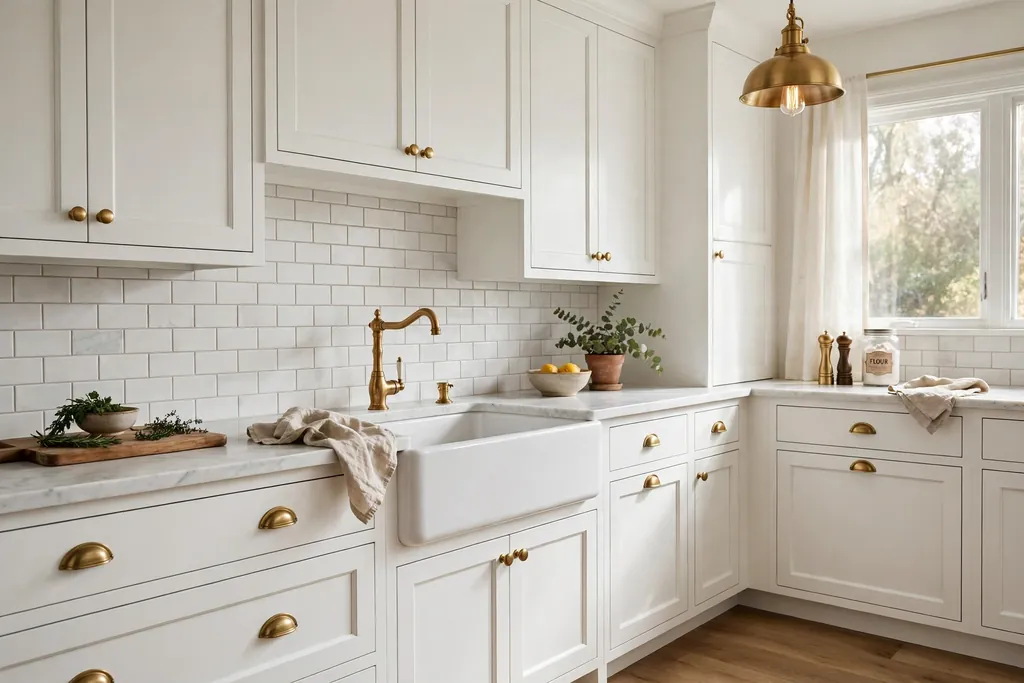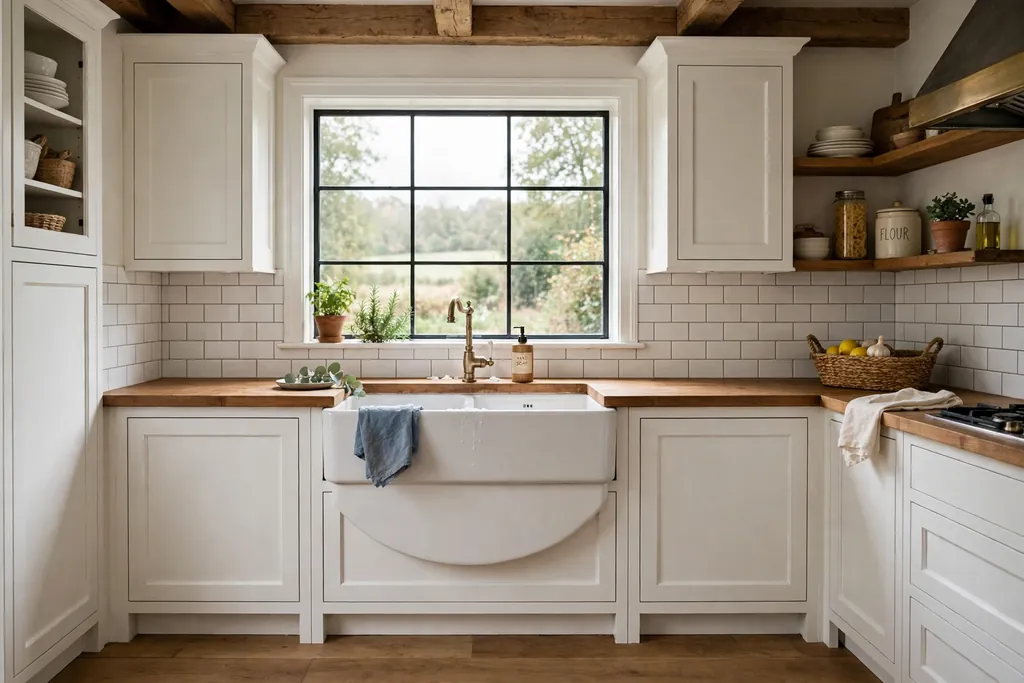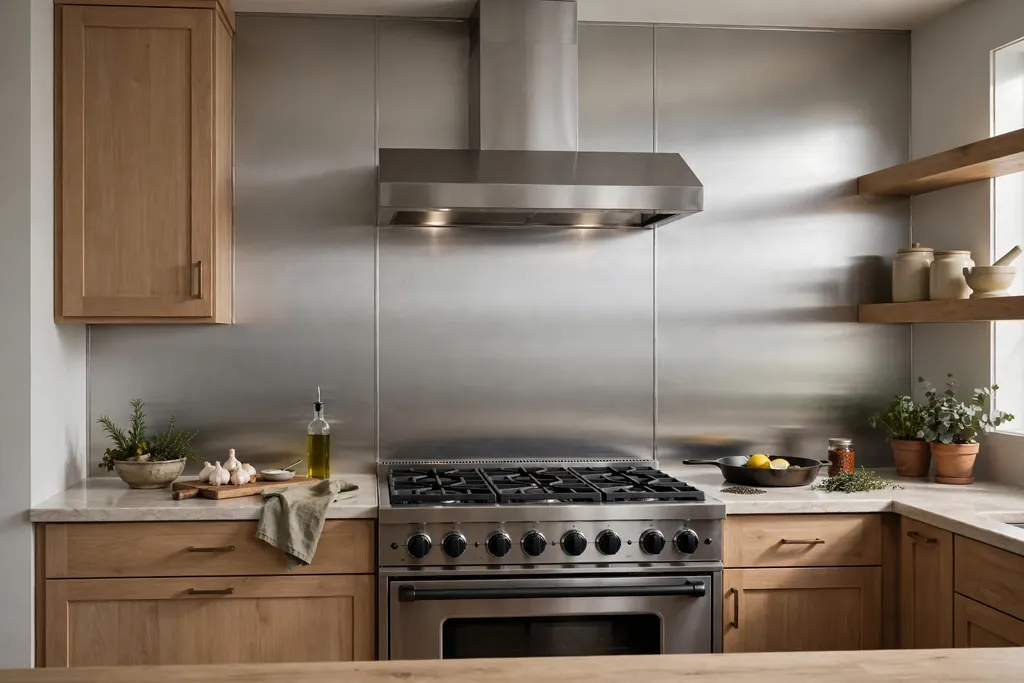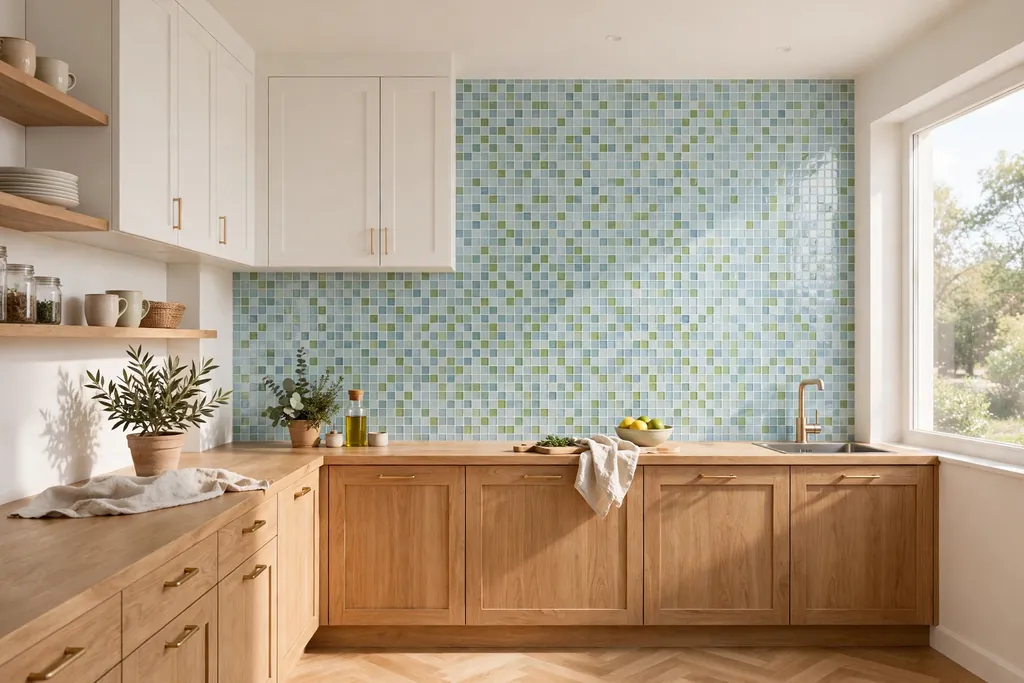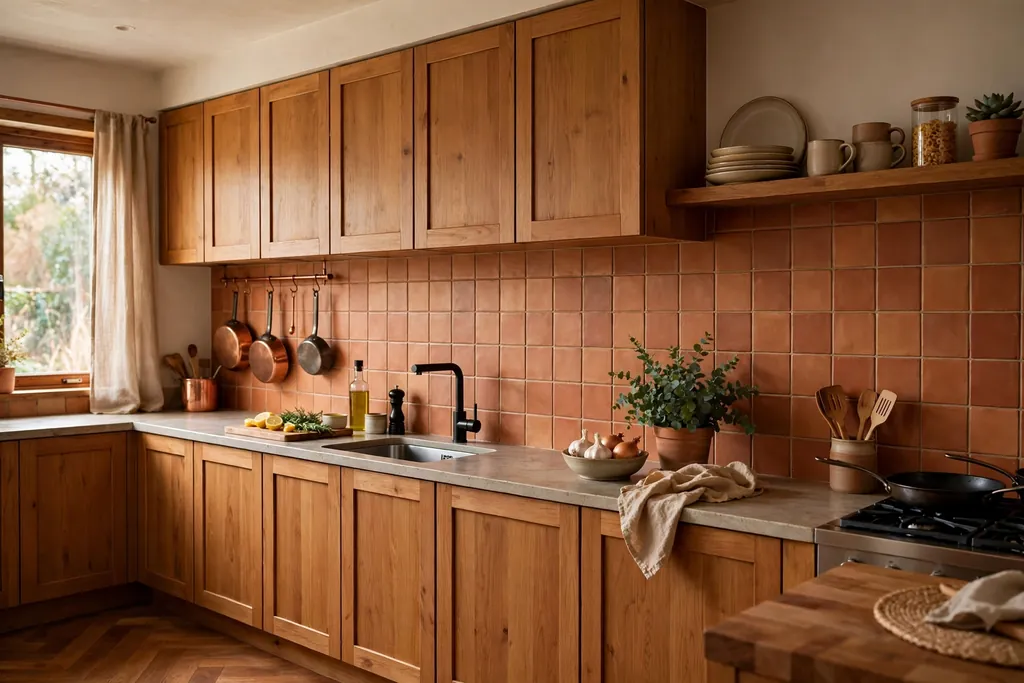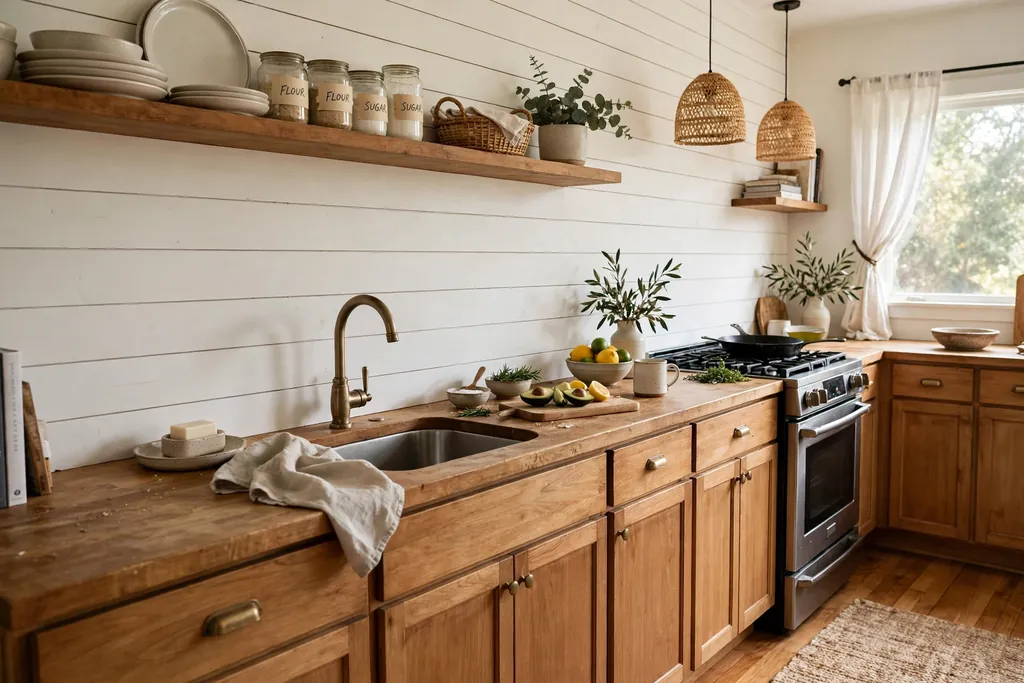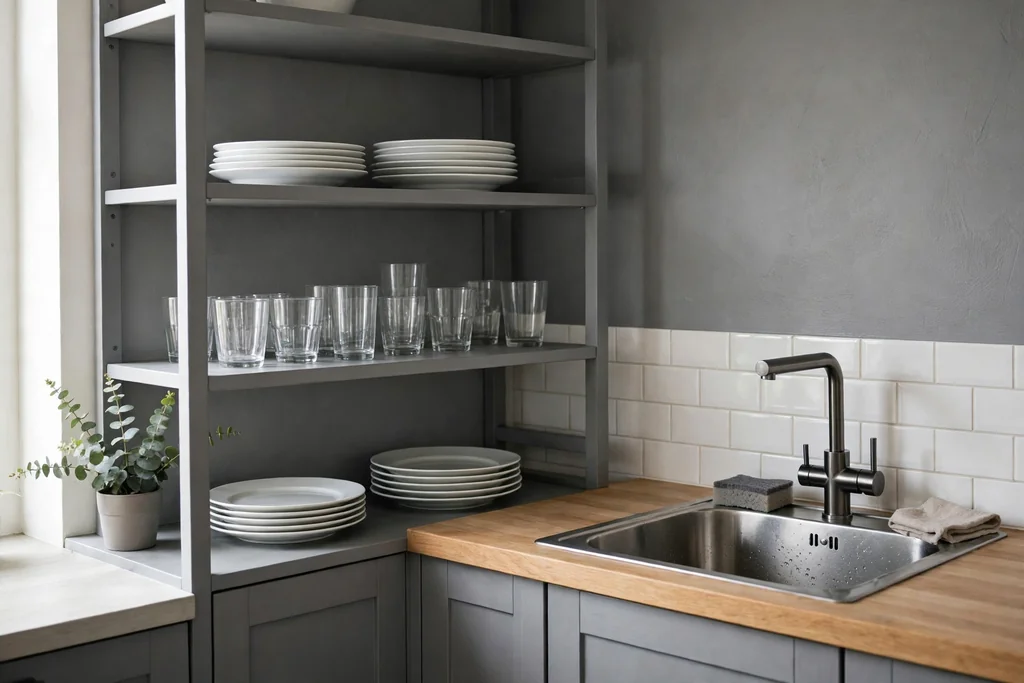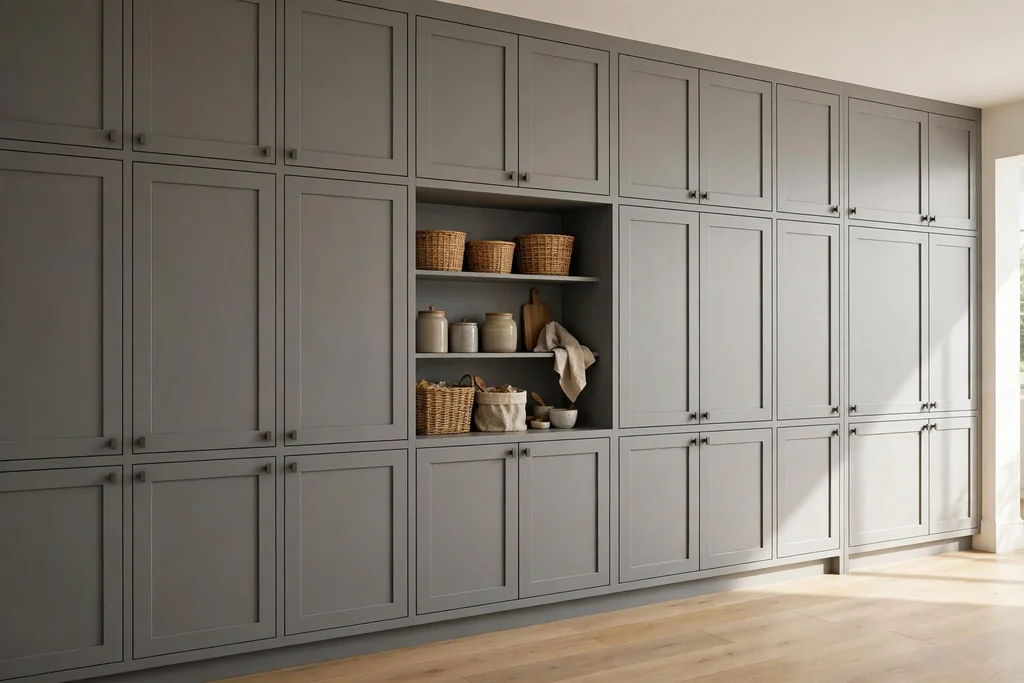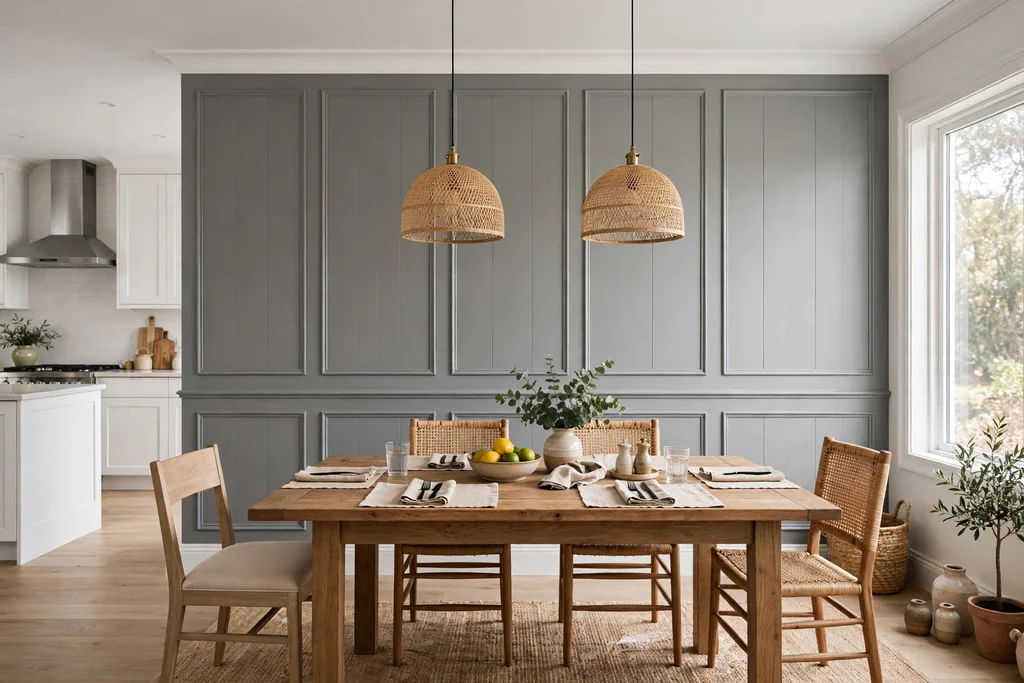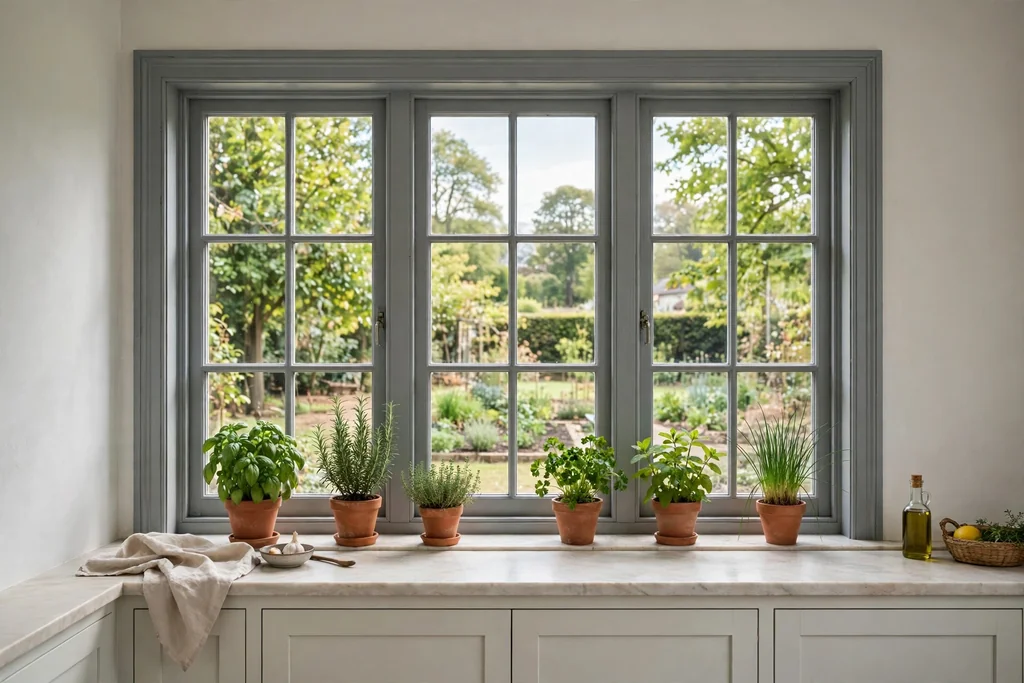
Category: Kitchen & Dining

Everyday kitchen organization and welcoming dining spaces.

  • 30 Above Kitchen Sink Ideas for a Relaxed, Pulled-Together Home

    30 Above Kitchen Sink Ideas for a Relaxed, Pulled-Together Home

    The wall above the kitchen sink is one of the most looked at spots in the house, yet it is often left blank. It has to work hard too: it takes splashes and steam, and anything hung there must stay clear of the tap and the window latch. A single choice, a shelf, a light, a window treatment, or a tile panel, can make the sink run feel planned. These 30 above kitchen sink ideas cover storage, lighting, window treatments, wall panels, and small decor. Start with the job you need most, light, storage, or privacy, and add only one layer at a time. For more window options, these kitchen window decor ideas cover privacy, light control, and sill styling.

    Key Takeaways

    • Keep the sink wall to one main job plus one small accent: a shelf plus a plant, a light plus a rail, or a window treatment plus a sill tray.
    • Choose splash friendly materials above the sink: sealed wood, tile, metal, glass, and washable fabric, and keep paper, raw wood, and loose fabric clear of the splash zone.
    • Leave clear space around the tap: nothing should block the tap arc, the window latch, or the plug socket you use every day.
    • Repeat one material from the rest of the kitchen, such as wood, black metal, or brass, so the sink wall reads as part of the room.
    • Put daily items within arm’s reach and pretty items higher up, so the sink wall stays useful and easy to wipe down.
    • Renters can cover most of this list with tension rods, suction hooks, magnetic shelves, and freestanding rails, with no drilling.

    1. Single Open Wood Shelf Above the Sink
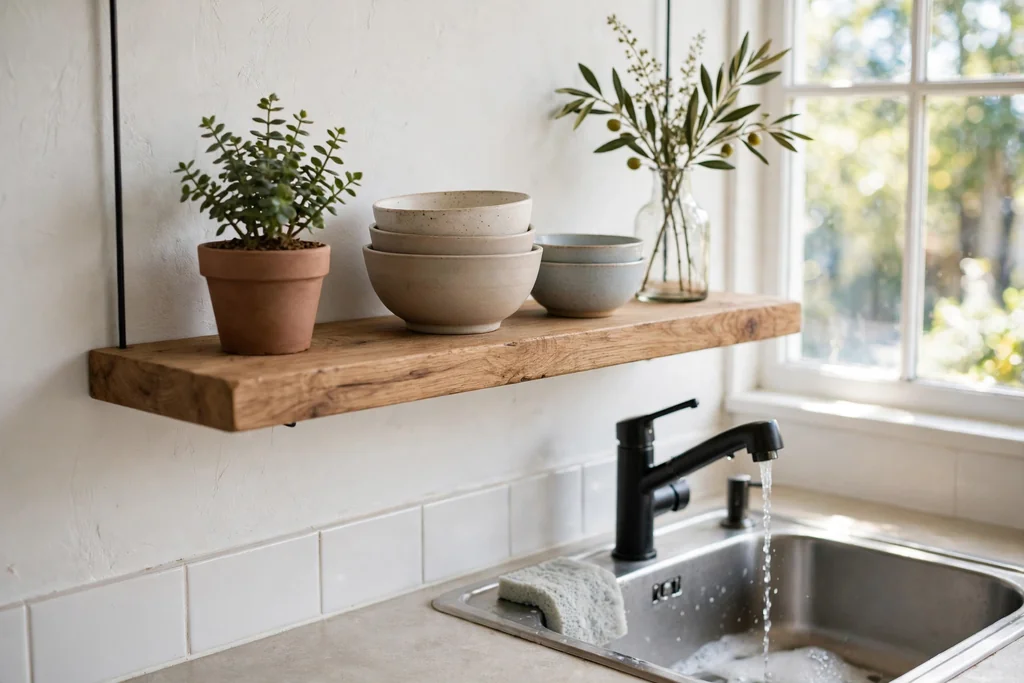
    Single open wood shelf above a kitchen sink holding bowls, a plant, and a vase.

    Fit one open wood shelf above the sink for a simple spot to hold daily dishes, a plant, and a small vase. A single shelf suits a narrow sink wall, since it adds storage without crowding the space the way a full cabinet would. Choose sealed wood in a tone that matches the counter or the floor, and keep the shelf deep enough for a stack of bowls but shallow enough to clear your head when you lean over the sink.

    Style it lightly: two stacks of everyday bowls, one small plant, and one soap dispenser kept at the end nearest the tap. Leave at least a third of the shelf empty so it reads as calm rather than packed. Wipe the shelf weekly, since the sink wall collects steam and soap spray, and reseal the wood if water starts to darken it.

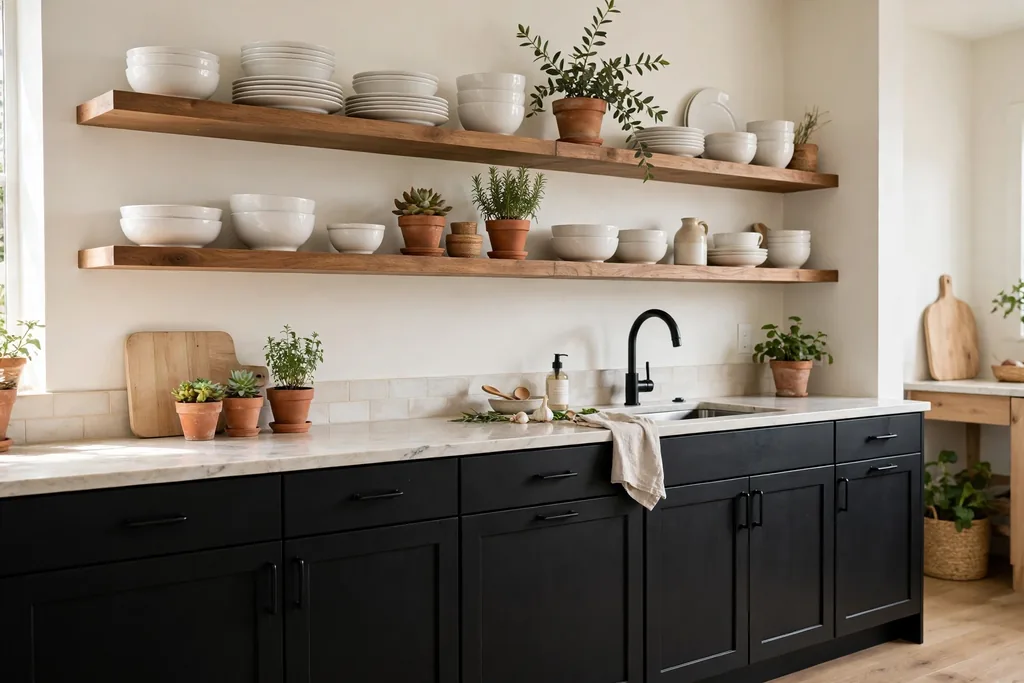
    2. Two Stacked Floating Shelves
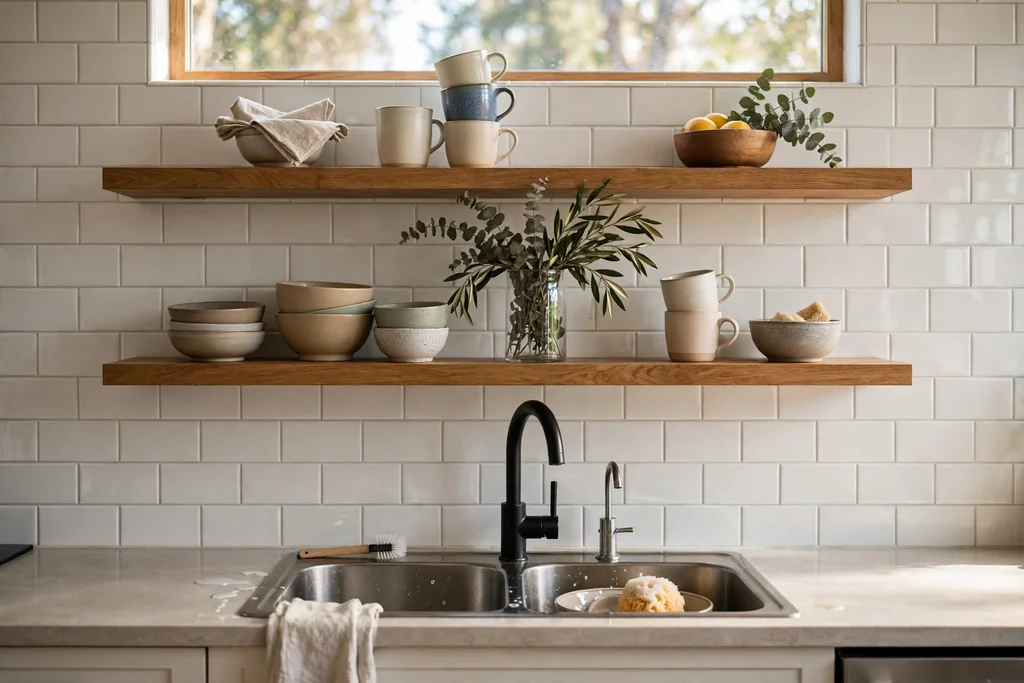
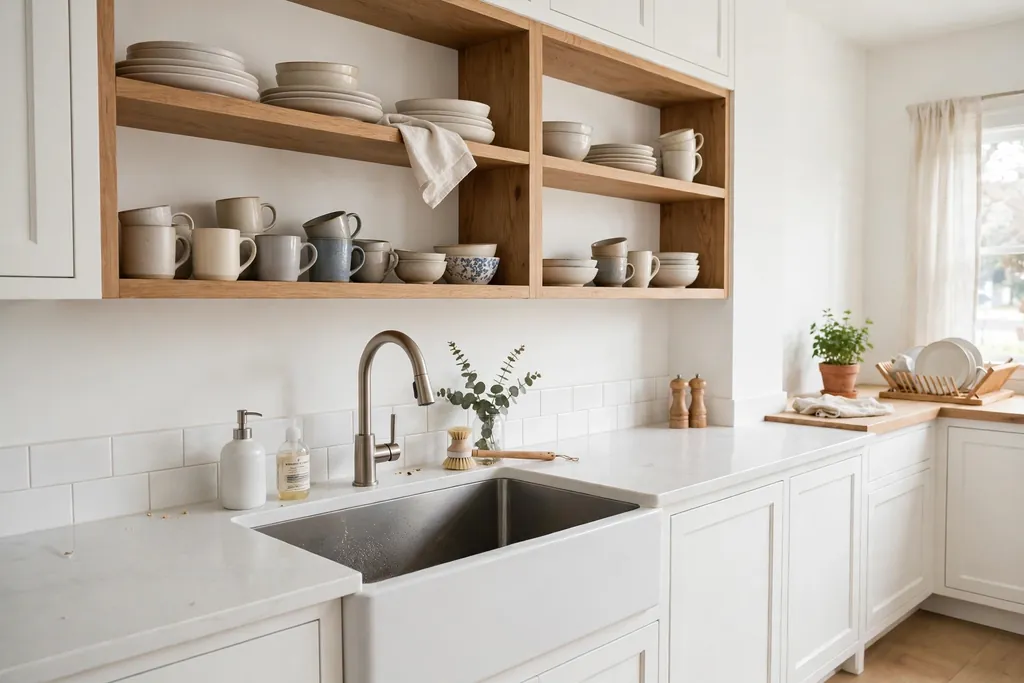
    Two stacked floating shelves above a kitchen sink holding cups, bowls, and a vase.

    Hang two floating shelves above the sink when one shelf is not enough storage but a wall cabinet would feel too heavy. The lower shelf holds daily cups and bowls, while the upper shelf holds lighter, less used pieces such as serving bowls and a vase. Staggering the heights this way keeps the sink wall open in the middle, where your eyes and hands need room.

    Keep both shelves in the same material and bracket style, and fix them into wall studs or solid wall fixings, since dishes are heavy. Put the lower shelf high enough that tall glasses clear it, and keep the top shelf for items you reach for once a week, not every day. If the wall is short, use shorter shelves so the stack does not crowd the window or the light.

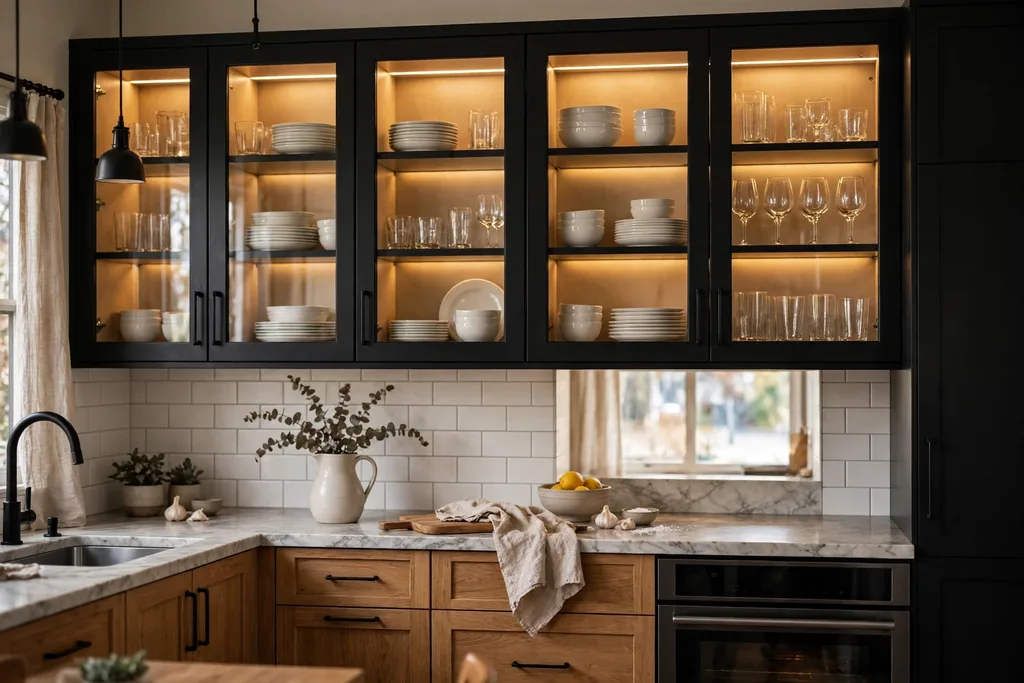
    3. Glass-Front Wall Cabinet Above the Sink
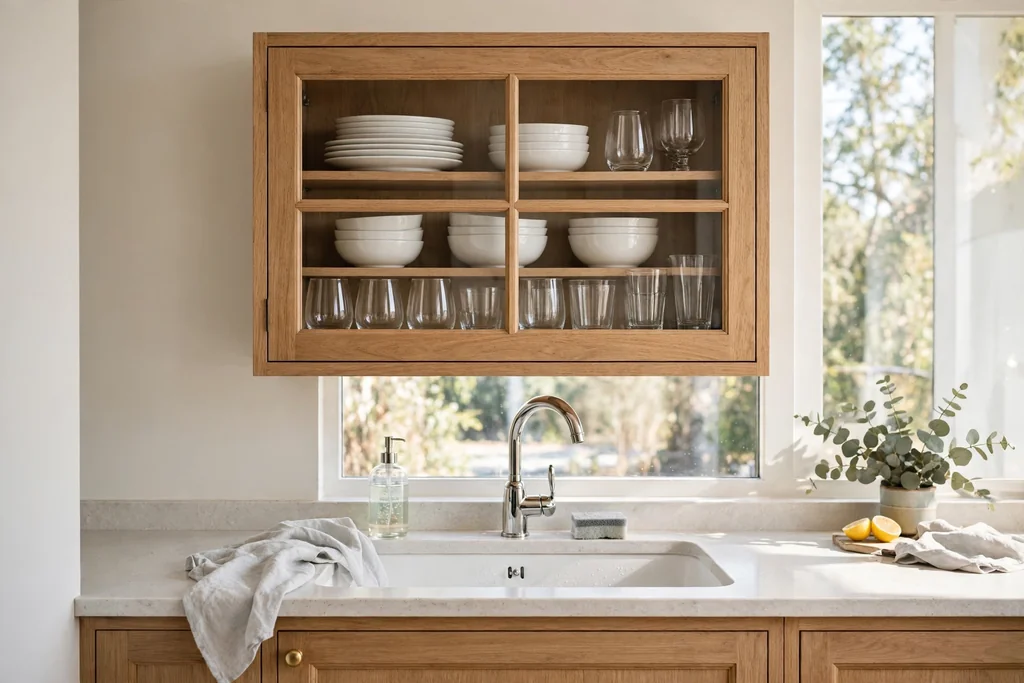
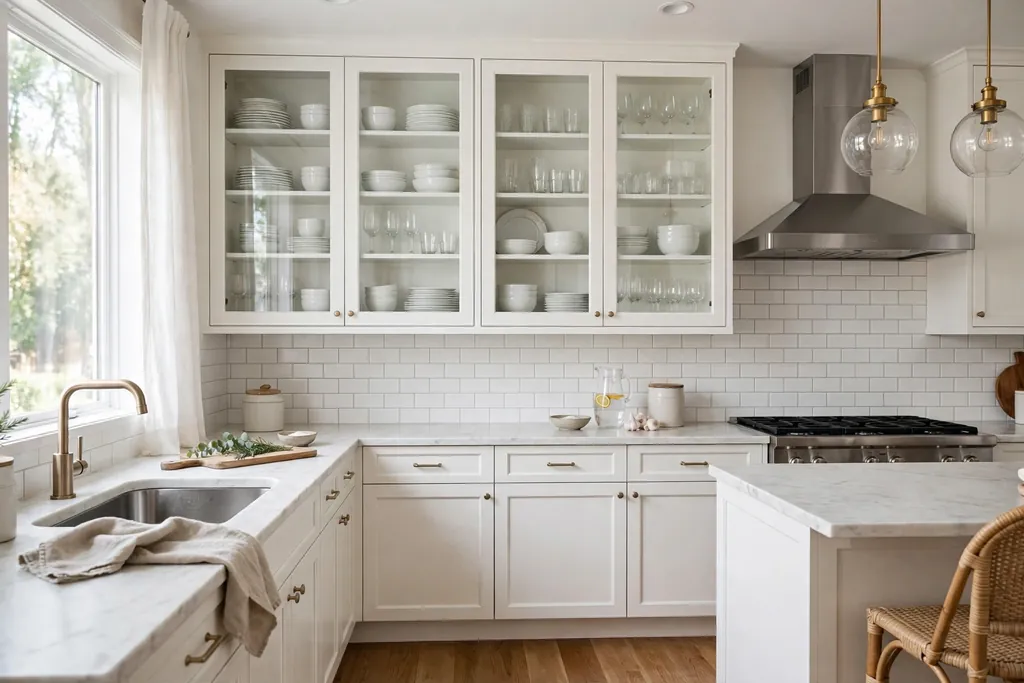
    Wall cabinet with a glass front above a kitchen sink holding white dishes and glasses.

    Fit a wall cabinet with a glass front above the sink for closed storage that still shows a little of what is inside. Glass doors keep dust and steam off the dishes, while the glass keeps the cabinet from looking like a solid box over the sink. This suits a kitchen where the sink wall is wide and a cabinet will not block a window.

    Choose clear glass if your dishes are plain and tidy, or ribbed glass if you want the contents softened. Keep the inside to one color family, such as white dishes and clear glasses, so the cabinet looks calm through the glass. Wipe the glass after cooking, since steam from the sink leaves marks, and keep the cabinet bottom clear of the tap arc.

    4. Recessed Niche Shelf in the Sink Wall
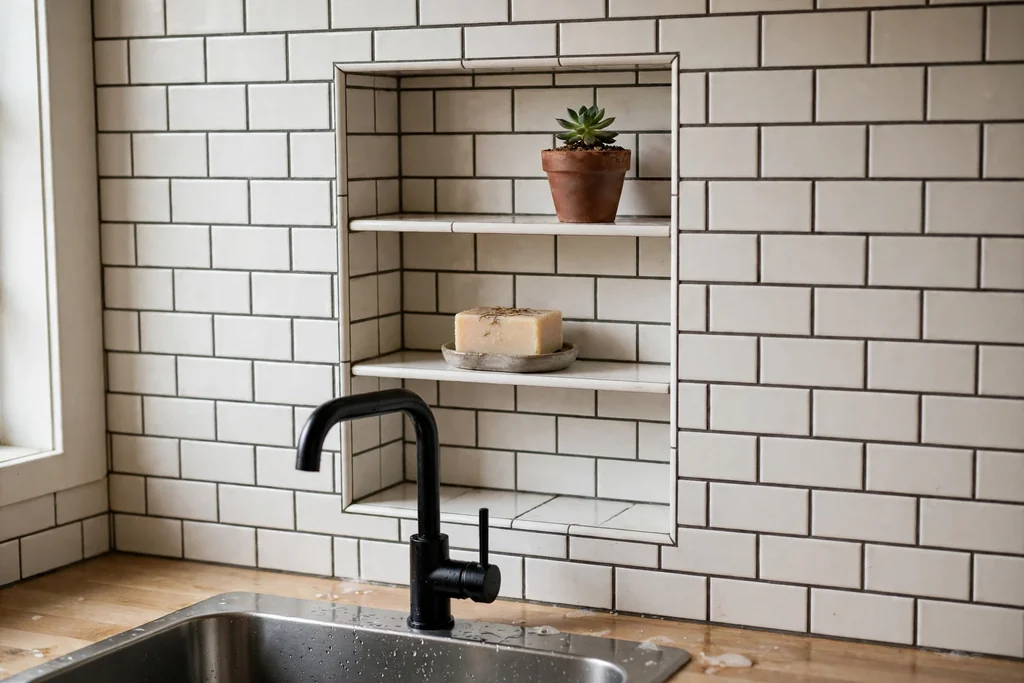
    Tiled recessed niche shelf in a kitchen sink wall holding soap and a small plant.

    Build a shallow recessed niche into the sink wall for storage that sits flush with the wall and takes no counter space at all. A niche suits a wall with room behind it, such as a stud wall, and it works well for soap, a sponge, and a small plant, right where you use them. Tile the inside of the niche to match the backsplash so it reads as part of the wall.

    Keep the niche shallow, so bottles sit safely without falling forward, and add a small lip at the front edge if the wall allows it. This is a job for a skilled fitter, since cutting into a wall needs care around pipes and wiring, so check what runs behind the wall first. A niche is a fixed change, so it suits owners more than renters.

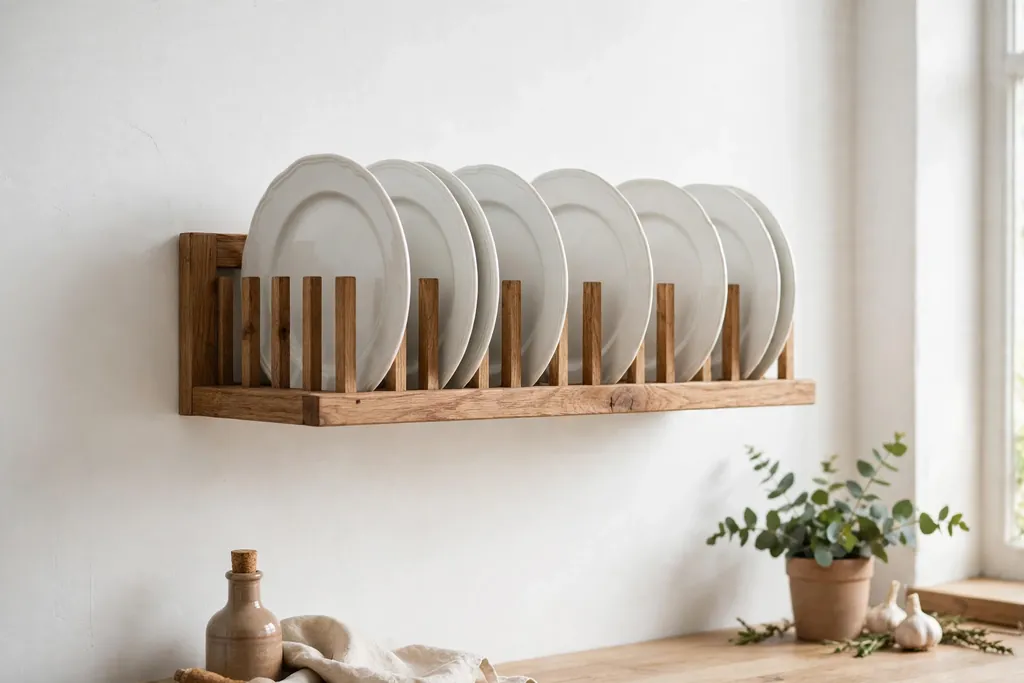
    5. Wall-Mounted Plate Rack Above the Sink
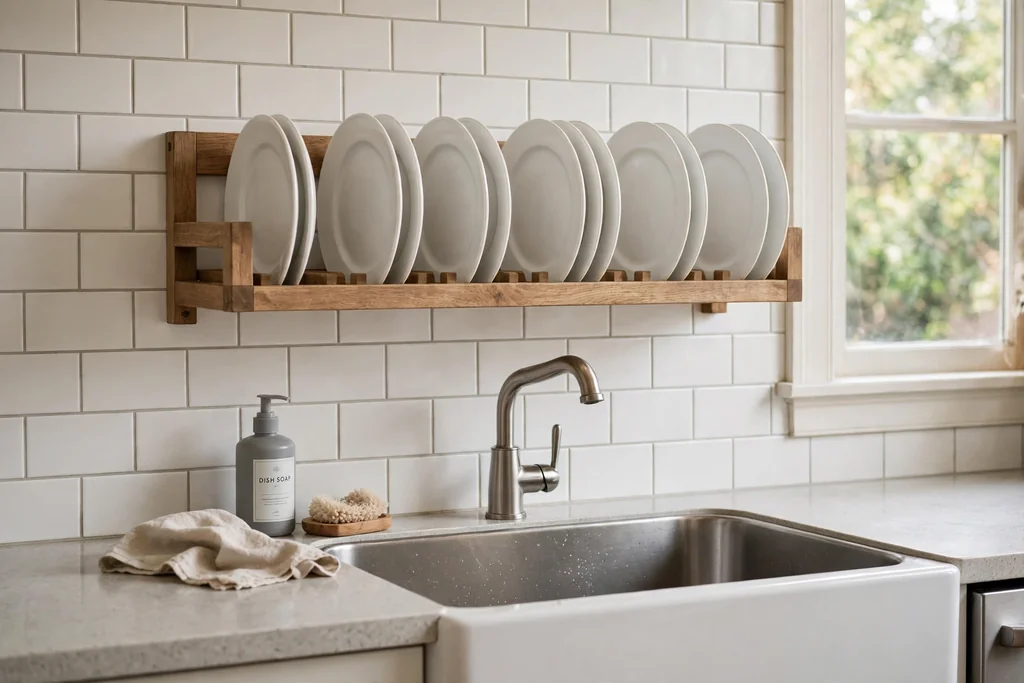
    Wall-mounted plate rack above a kitchen sink holding clean white plates.

    Mount a plate rack on the wall above the sink so clean plates drip dry right where they are stored. A wall rack suits a kitchen with limited cabinet space, and it turns everyday plates into a tidy display. Choose a rack with a drip tray or a sloped base, so water runs back toward the sink rather than down the wall.

    Keep the rack to plates you use daily, and leave space between plates so air moves and they dry fully. Fix the rack into studs, since a full rack of plates is heavy, and wipe the wall behind it weekly. If your plates are patterned, keep the rack simple in wood or black metal so the plates carry the color.

    6. Three Framed Prints in a Row
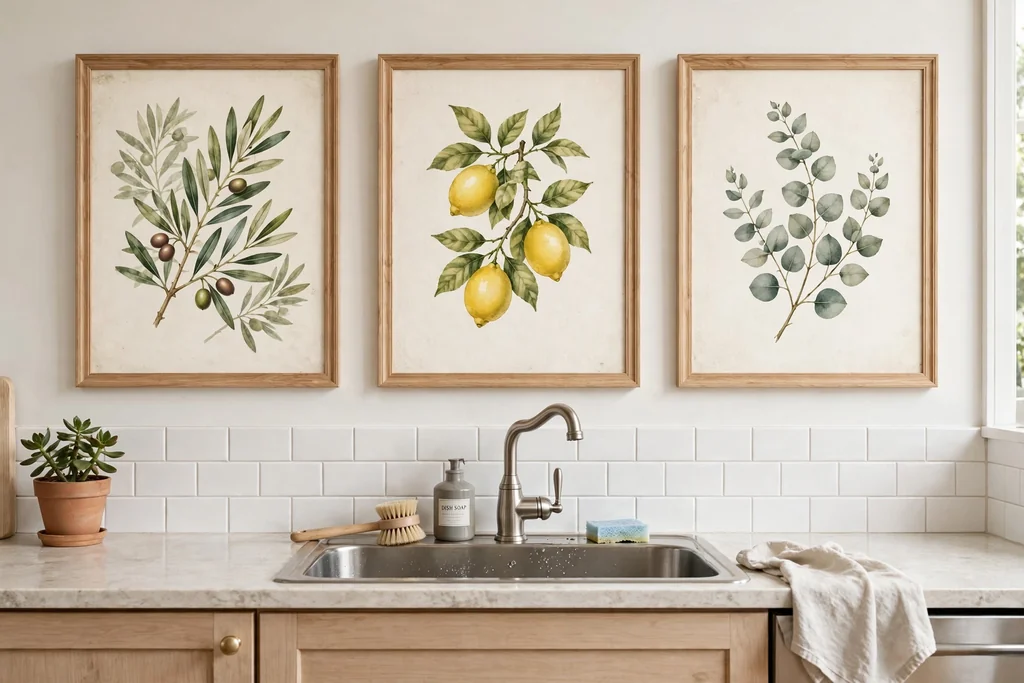
    Three framed prints in a row above a kitchen sink with matching wood frames.

    Hang three framed prints in a row above the sink for wall decor that costs little and changes easily. A row of three suits a wide sink wall, and matching frames keep the group looking planned even if the prints differ. Choose subjects that suit a kitchen, such as simple botanical prints, line drawings, or food market scenes, in colors already used in the room.

    Hang the row at eye level when standing at the sink, and keep the frames clear of direct splashes by placing them above the splash line. Use glass or acrylic over the prints to protect them from steam, and wipe the frames weekly. Swap one print by season if you like a change, and keep the other two in place so the row stays balanced.

    7. Chalkboard Memo Board Above the Sink
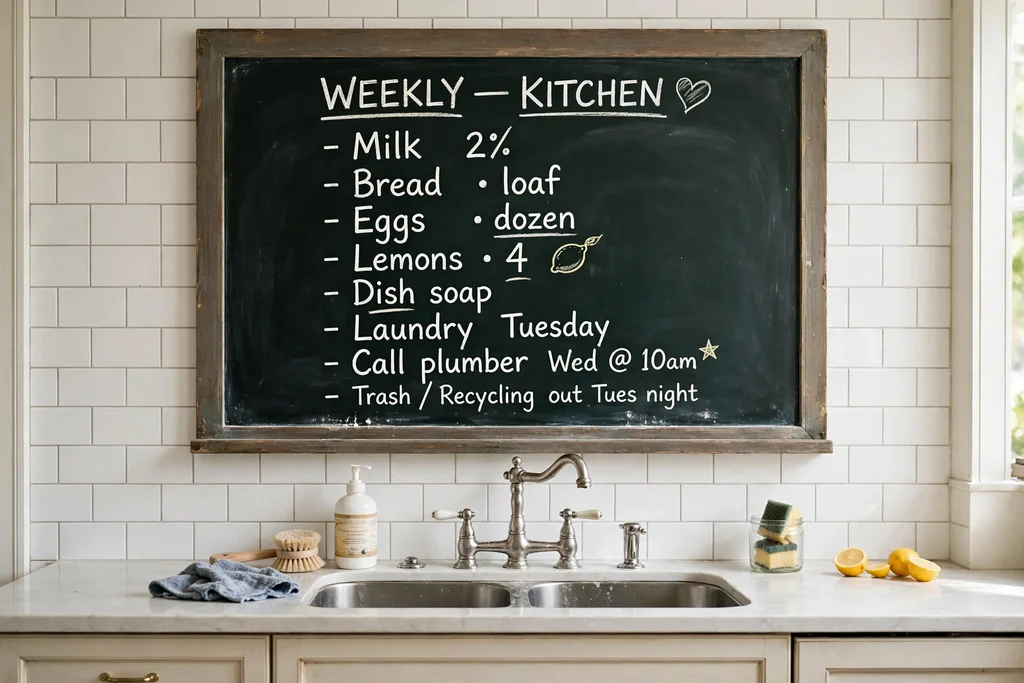
    Framed chalkboard memo board above a kitchen sink with handwritten list notes.

    Hang a chalkboard above the sink for shopping lists, meal notes, and reminders you see while you wash up. A framed chalkboard suits a family kitchen, since it is useful as well as decorative, and it can be wiped clean and started again each week. Choose a board with a wood or black metal frame that matches the kitchen hardware.

    Fix the board above the splash line and away from the tap arc, so chalk dust and water do not mix. Keep a small chalk tray or a cup of chalk markers on the sill or the nearest shelf, and write in large letters so notes read from across the room. If chalk dust bothers you, use a whiteboard with a similar frame instead, and wipe it with a damp cloth.

    8. Single Pendant Light Over the Sink
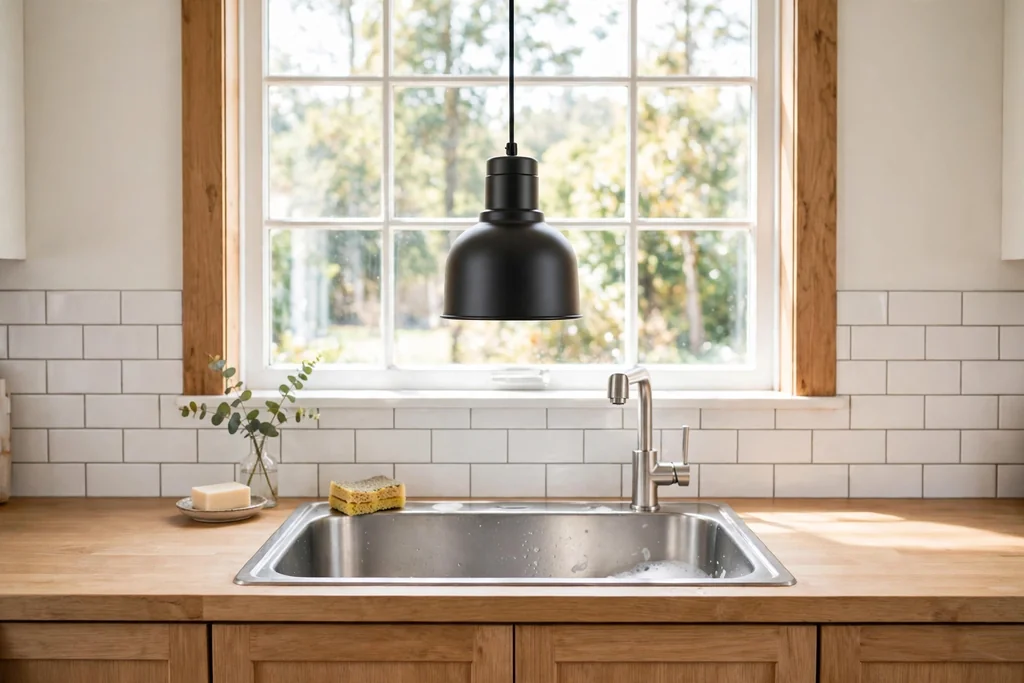
    Single pendant light hanging centered over a kitchen sink.

    Hang one pendant light centered over the sink for task light exactly where you wash up. A single pendant suits a sink on an island run or under a windowless wall, where a ceiling light alone leaves the sink in shadow. Choose a shade that directs light down onto the sink, such as a dome or a cone, in a finish that matches the tap or the handles.

    Hang the pendant high enough to clear your head and the tap, with the bottom of the shade well above eye level when you stand at the sink. Use a warm white bulb so the light feels calm in the evening, and pick a shade that wipes clean, since kitchen pendants collect a light film of grease. If the sink sits under a window, center the pendant on the window instead of the tap for a balanced look.

    9. Pair of Wall Sconces Flanking the Sink Window
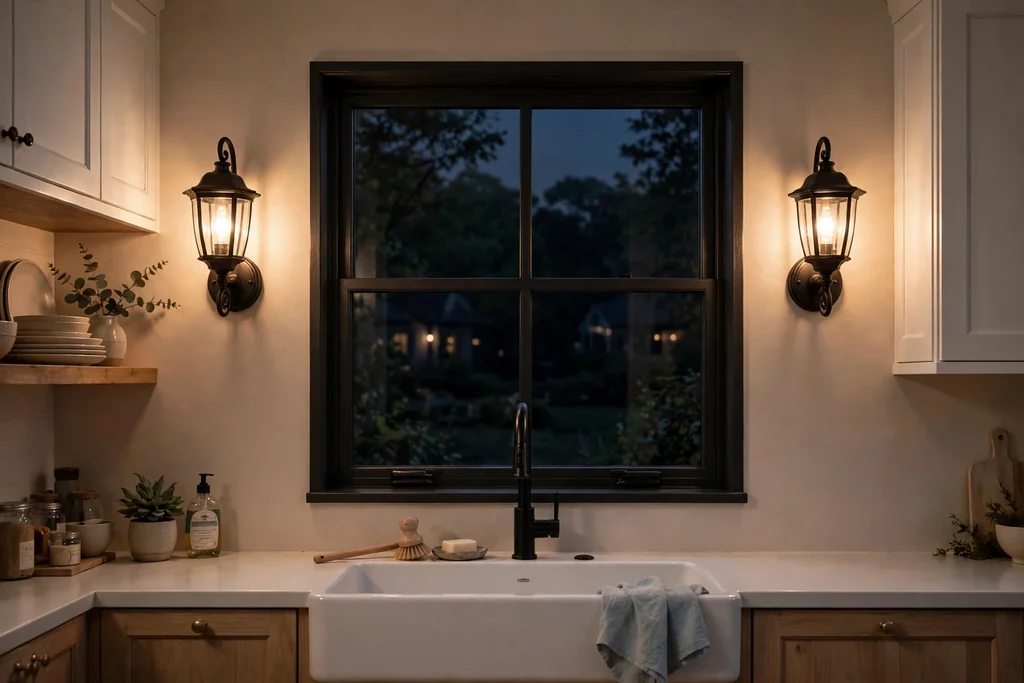
    Pair of wall sconces flanking a kitchen window above a sink.

    Fit a pair of wall sconces on either side of the sink window for soft, even light that flatters the whole sink run. Sconces suit a wide window wall, where one central light would leave the sides dark, and they add a finished look without taking counter space. Choose small sconces with shades that send light up and down, in a finish that matches the tap.

    Keep both sconces at the same height, roughly level with the middle of the window, and check that they clear the window trim and any cabinet doors nearby. This is a wired job, so plan it with an electrician if no wiring exists, and use dimmable bulbs if you want a lower light level in the evening. Wipe the shades often, since sconces near a sink collect steam marks.

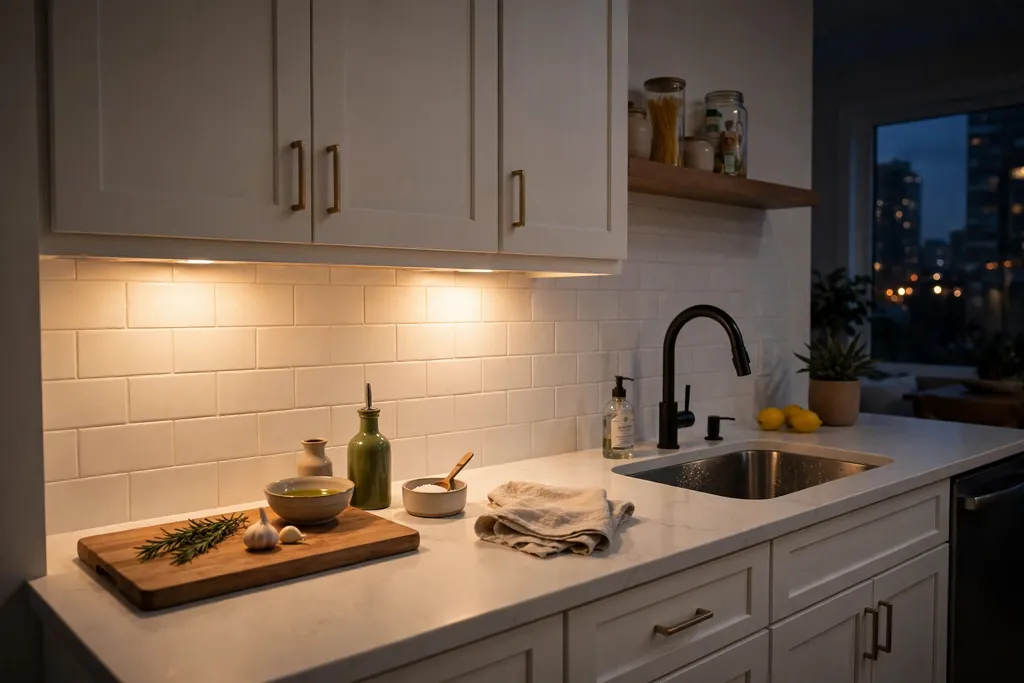
    10. Slim LED Task Light Under the Cabinet
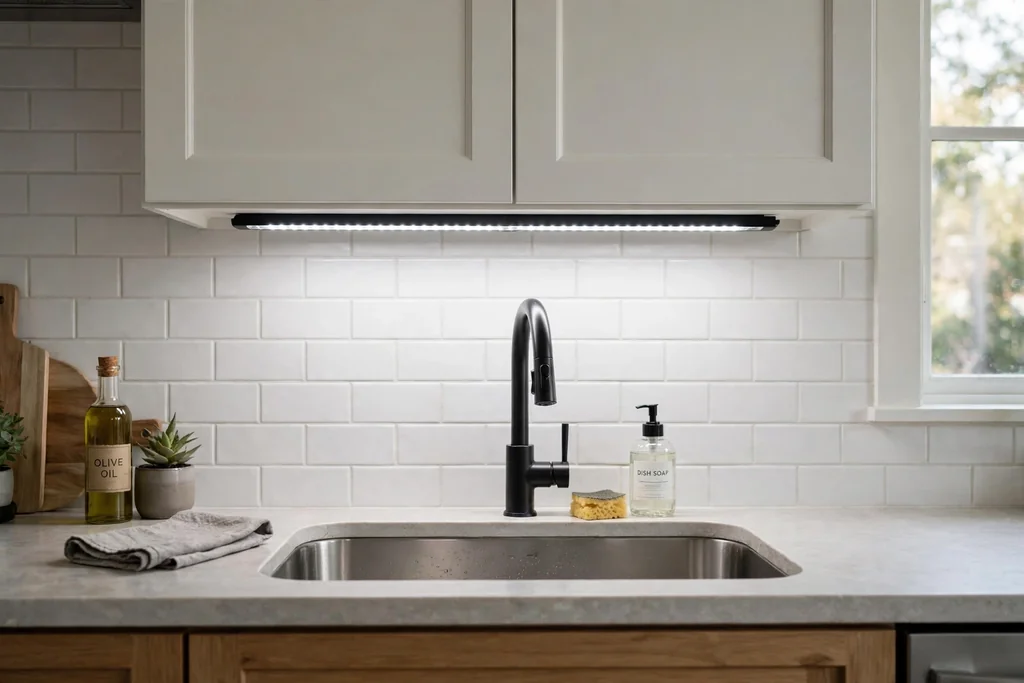
    Slim LED light bar under a wall cabinet above a kitchen sink.

    Fit a slim LED light bar under the wall cabinet above the sink for bright, shadow free light on the work surface. An LED bar suits a sink with a cabinet directly above it, where a pendant would not fit, and it hides neatly under the cabinet so only the light shows. Choose a bar that runs most of the cabinet width for even light across the sink.

    Fix the bar toward the front of the cabinet underside, so light falls on the sink and the counter rather than on the wall. Use a warm white color temperature for a calm kitchen, and plug the bar into a socket you can reach, or wire it to the cabinet light circuit if one exists. Wipe the bar cover when you clean the cabinets, since steam can dull the light over time.

    11. Cafe Curtains on the Sink Window
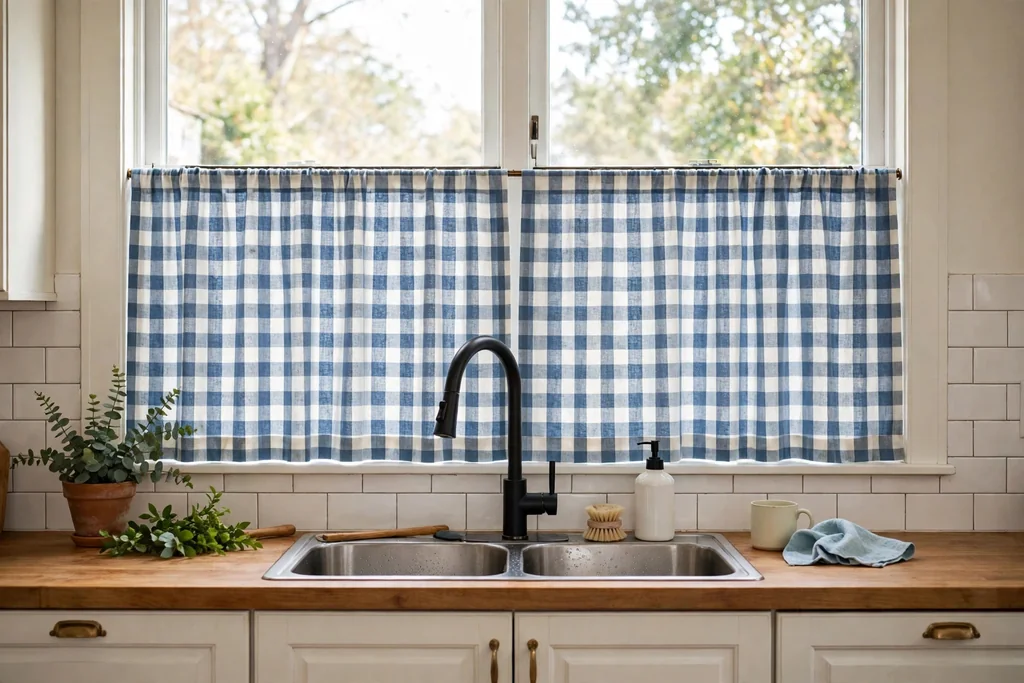
    Cafe curtains on the lower half of a kitchen window above a sink.

    Hang cafe curtains on the lower half of the sink window for privacy at counter height while the top half stays open for daylight. Linen or a linen look fabric suits a kitchen, since it softens the glass without a formal drape, and a plain natural color hides light splashes better than bright white. Hang the panels on a slim tension rod inside the frame if you rent, or on a small fixed rod if you own.

    Keep the hem just above the sill so fabric does not sit in water near the sink, and choose washable fabric, since kitchen curtains pick up grease film and need a regular wash. Cafe curtains suit a window that faces a street or a close neighbor, and they pair well with a small plant or a tray on the sill. If the window is very wide, use two panels per side so the curtain gathers evenly.

    12. Washable Roman Shade Above the Sink
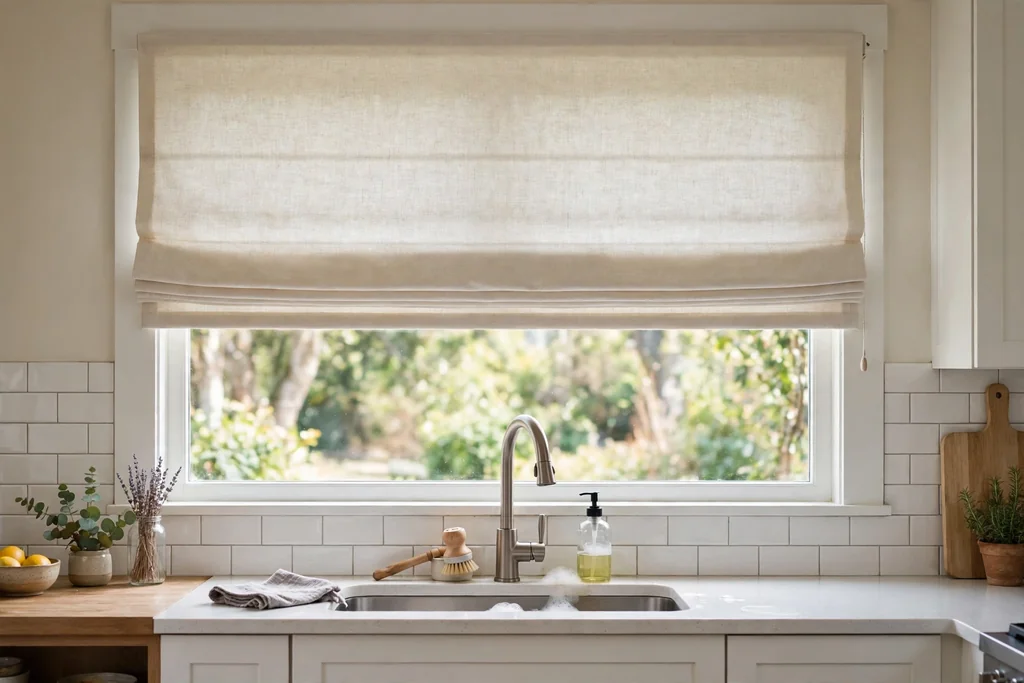
    Washable Roman shade above a kitchen sink window in light cotton fabric.

    Fit a Roman shade above the sink window for a tailored finish that folds up into a neat stack when you want the full view. A relaxed style, with a soft curve at the bottom, feels less formal than flat tailored folds and suits most kitchens. Pick a washable cotton or linen blend in a color already used on towels or seat cushions, so the shade links to the room.

    Mount the shade inside the frame for a clean line on a small window, or just above the frame to make a short window look taller. Keep cords short and secured, and follow current cord safety guidance if children use the room. A Roman shade suits a window set back from the tap, since fabric near a busy tap needs more frequent washing.

    13. Woven Bamboo Shade for Warm Texture
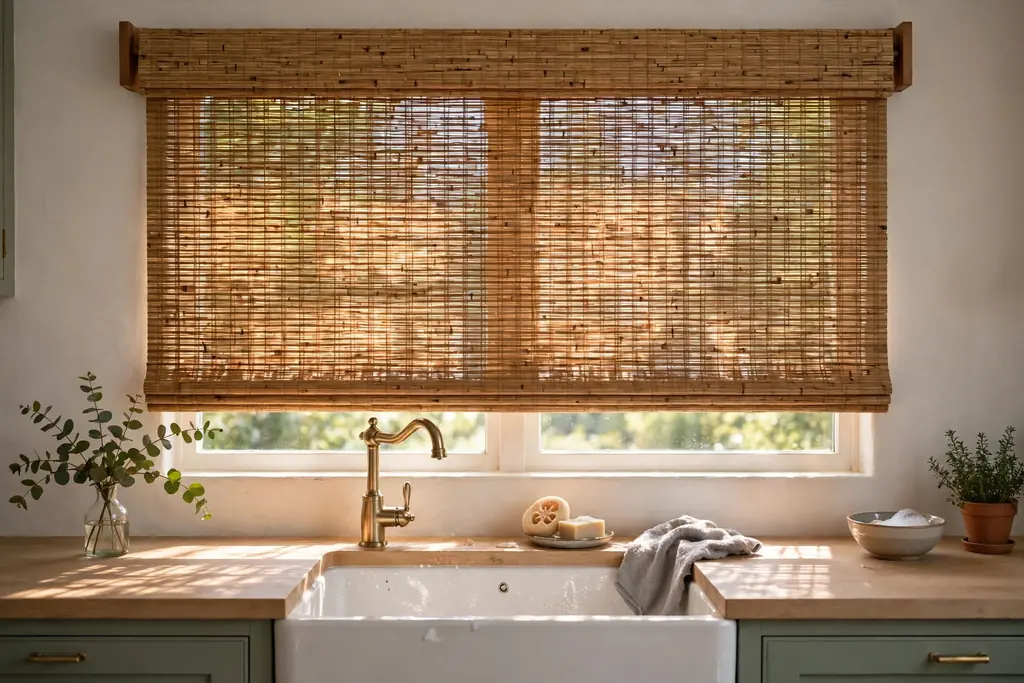
    Woven bamboo shade above a kitchen sink window filtering sunlight.

    Fit a woven bamboo or wood shade above the sink window for warm texture that white frames and stone counters often lack. The weave filters harsh sun into a softer pattern of light, and it blurs the view from a close neighbor while the room stays bright. This suits a window that gets strong afternoon sun, where plain glass can feel harsh.

    Measure carefully for an inside mount, and check that the rolled shade clears the tap if the window sits close over the sink. Woven shades are not the best choice where steam is constant, since natural fibers can hold moisture, so keep the shade raised while you run hot water for a long stretch. Dust the shade with a dry cloth, and wipe the sill below it after cooking splashes.

    14. Herb Pots on a Deep Window Sill
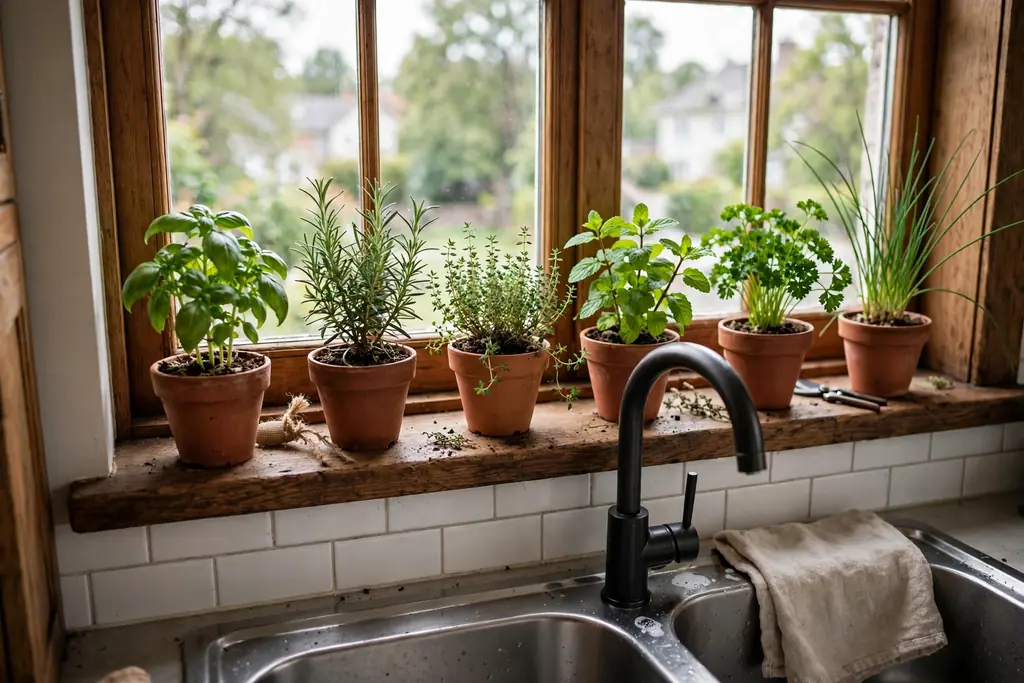
    Herb pots lined up on a deep kitchen window sill above a sink.

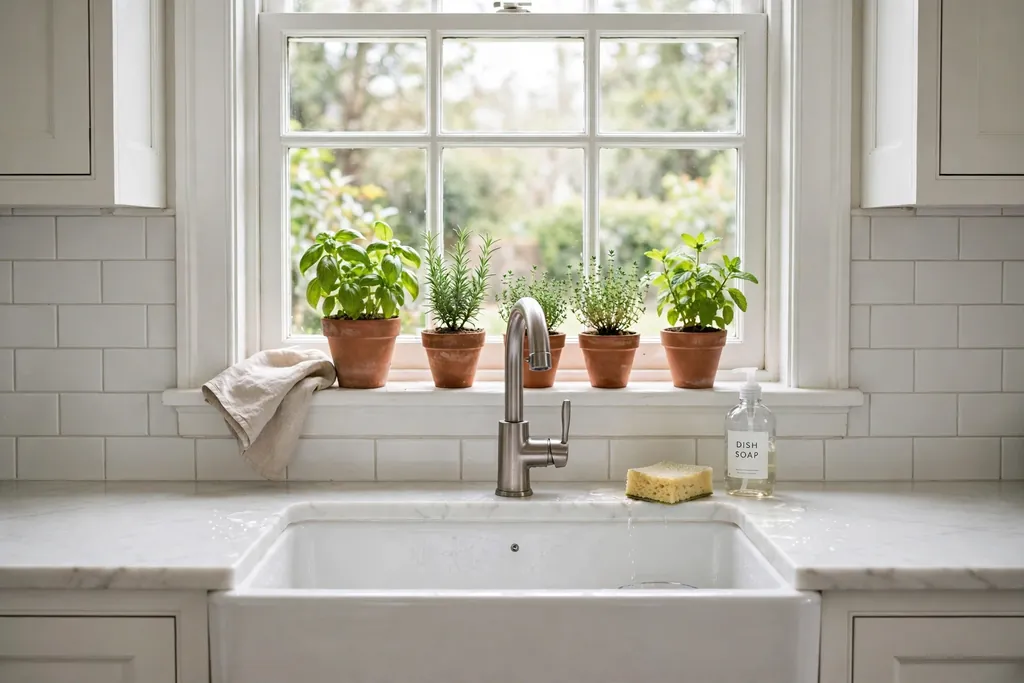
    Line the deep sill above the sink with small herb pots for plants that get strong light and stay within reach while you cook. Use pots of a similar size and material, such as plain terracotta or white ceramic, so the row looks calm rather than collected at random. Basil, mint, chives, and parsley are common sill herbs, but choose based on the light your window actually gets.

    Set the pots on a narrow tray or saucers to protect the sill from water marks, and keep the row to three or four pots so the sill stays easy to wipe. Snip herbs as you need them, and rotate the pots weekly so growth stays even. If your sill is too narrow for pots, use the hanging planter idea below instead of crowding the counter edge.

    15. Tension Rod with Hanging Planters Across the Window
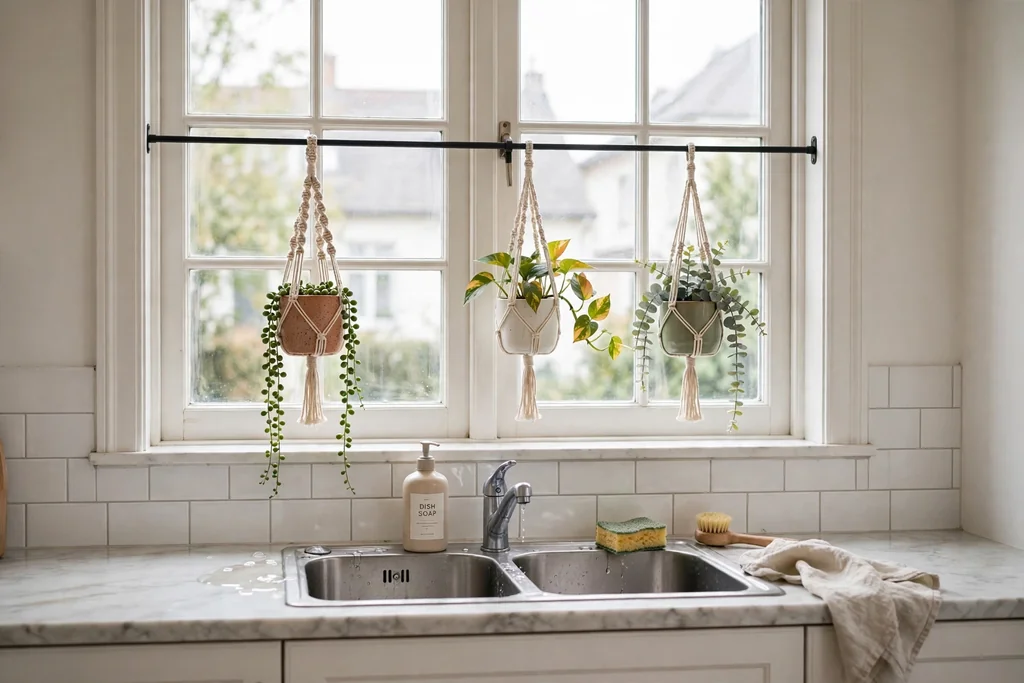
    Small hanging planters on a tension rod across a kitchen window above a sink.

    Fit a tension rod across the sink window and hang small planters from it for greenery that takes no sill or counter space. This suits a renter, since a tension rod needs no drilling, and it works well for trailing plants, whose leaves soften the window frame. Choose light planters and a rod rated for the weight, and hang them at the sides so the center of the window stays clear.

    Water the planters over the sink, so drips land where they belong, and check the rod grip weekly, since steam can loosen a tension fit. Keep the planters small and the plants trimmed, so they do not block the tap or the window latch. If the window opens inward, hang the planters on the frame side that stays still.

    16. Wall Rail with S-Hooks for Sink Tools
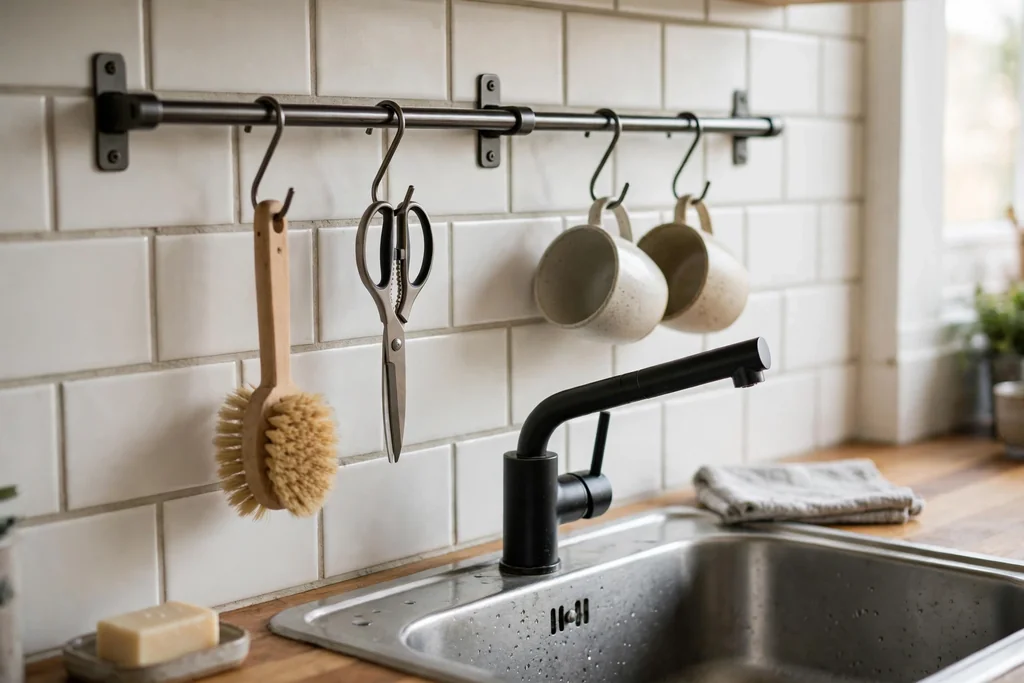
    Wall rail with S-hooks above a kitchen sink holding a brush, scissors, and cups.

    Fit a wall rail above the sink with S-hooks for the brush, sponge holder, scissors, and measuring cups you reach for daily. A rail suits a sink wall with no window, where a shelf would block the light, and it keeps wet tools off the counter so they dry faster. Choose a rail in stainless steel, brass, or black metal to match the tap and handles.

    Fix the rail into studs or solid fixings, and hang only light tools on it, so nothing heavy swings near the tap. Keep the rail above the splash line and leave one hook empty, so the rail reads as tidy rather than full. Wipe the rail weekly, since it sits in the splash zone, and move tools you rarely use to a drawer.

    17. Magnetic Shelf on the Backsplash for Soap
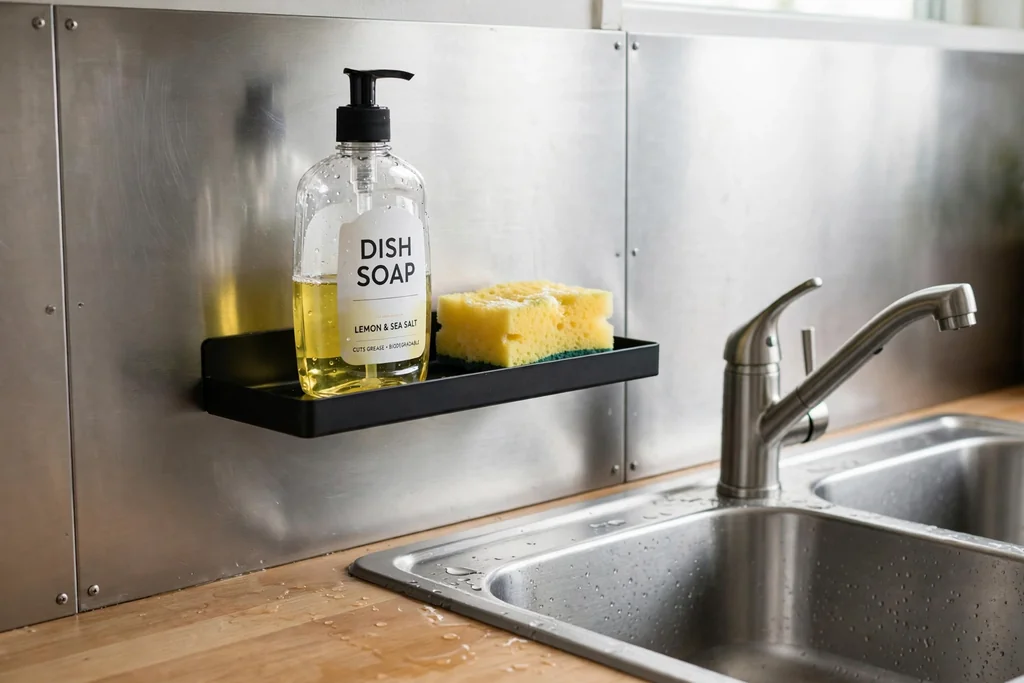
    Magnetic shelf on a steel backsplash above a kitchen sink holding soap and a sponge.

    Stick a magnetic shelf to a steel backsplash above the sink for soap, a sponge, and a small brush, right where you use them. A magnetic shelf suits a kitchen with a steel splash panel, and it can be moved or removed with no holes, which suits renters. Choose a shelf with a raised lip so bottles do not slide off when the wall is wet.

    Keep the shelf to two or three daily items, and wipe the steel behind it weekly so soap film does not build up. If your backsplash is tile rather than steel, use a suction shelf with the same layout instead, and check its grip after hot showers of steam. This small shelf frees the counter edge beside the sink, which is often the wettest spot in the kitchen.

    18. Tile Feature Panel Behind the Tap
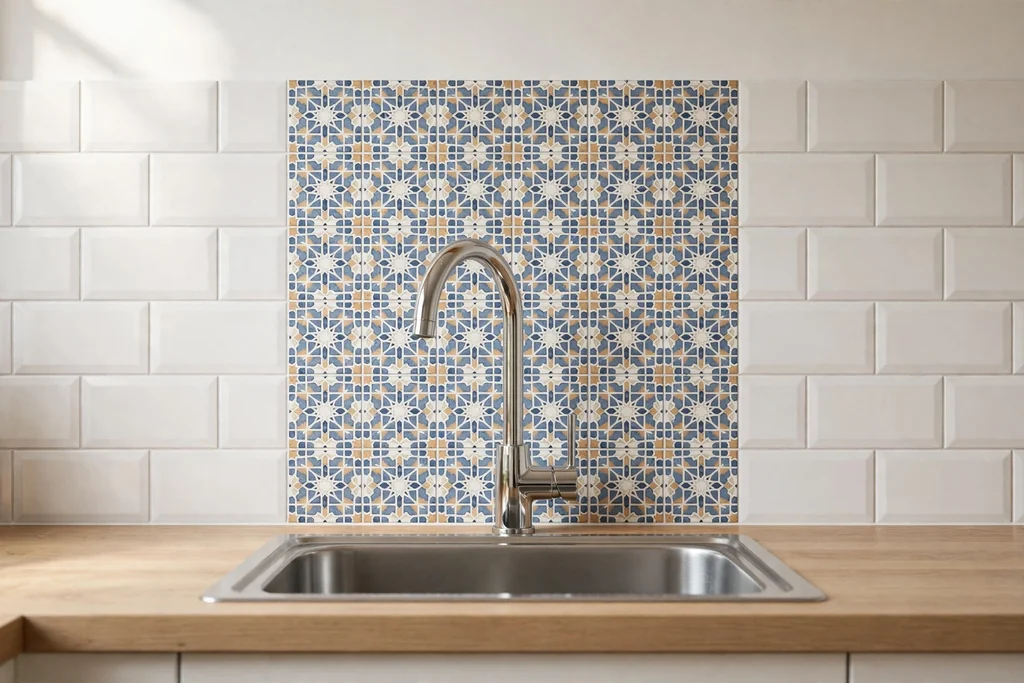
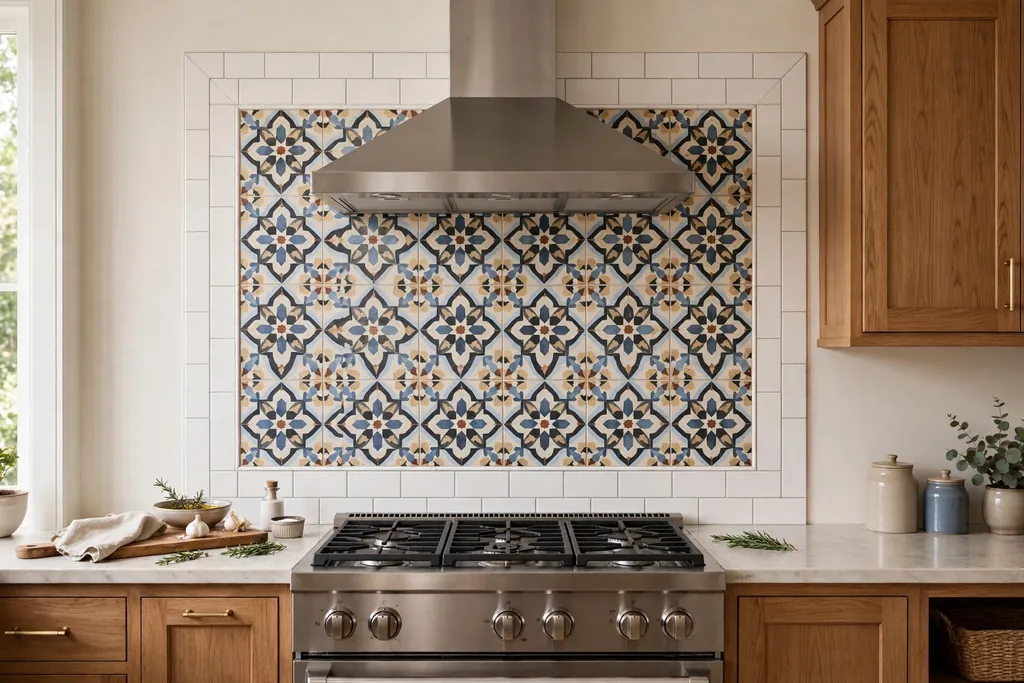
    Tile feature panel behind a kitchen tap above a sink.

    Lay a tile feature panel behind the tap for a wipe clean wall that also gives the sink a clear focal point. A panel of patterned, handmade, or colored tile, framed by plain tile on each side, suits a sink wall that would otherwise be plain plaster or paint. Keep the panel about the width of the sink plus a small margin, so the pattern does not overwhelm a small kitchen. For more tile options, see these kitchen backsplash ideas for materials, grout, and cleaning notes.

    Seal the tile and grout, especially in the splash zone behind the tap, and choose a grout color close to the tile for a calm look or a contrasting grout if you want each tile to stand out. Wipe the panel after washing up, since soap and water marks show on tile, and keep the counter below it plain so the panel stays the focus. Order a few spare tiles for future repairs.

    19. Beadboard Panel Above the Sink
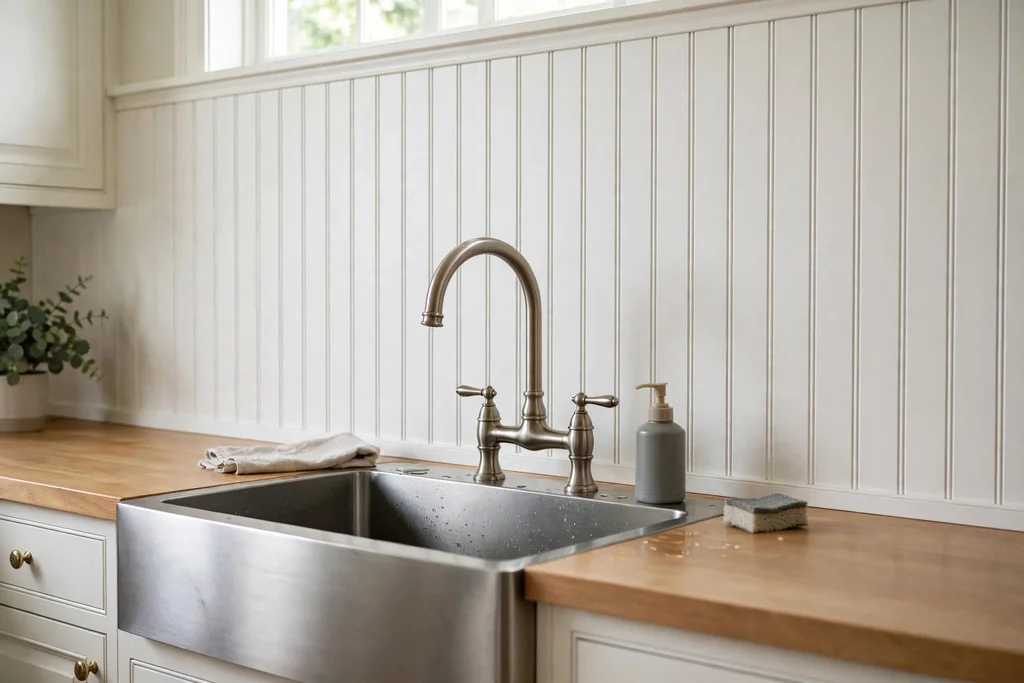
    White beadboard panel above a kitchen sink with a farmhouse tap.

    Fit a beadboard panel above the sink for vertical grooves that add texture without a tile pattern. Painted in white or pale cream, beadboard suits a kitchen with shaker cabinets, a farmhouse sink, and wood details, and it is simpler to fit than tile, since panels cover a large area quickly. Use beadboard made for kitchens, or seal standard panels well, and paint with a washable kitchen paint so splashes wipe off.

    Pay attention to the joints behind the sink, since water can sit in the grooves if the seal fails, and caulk the edges where the panel meets the counter and the cabinets. This idea works best where cooking is moderate and the wall does not face constant steam. Pair beadboard with a simple shelf or a single light, so the grooves stay the main detail on the wall.

    20. Mug Rail Under an Open Shelf
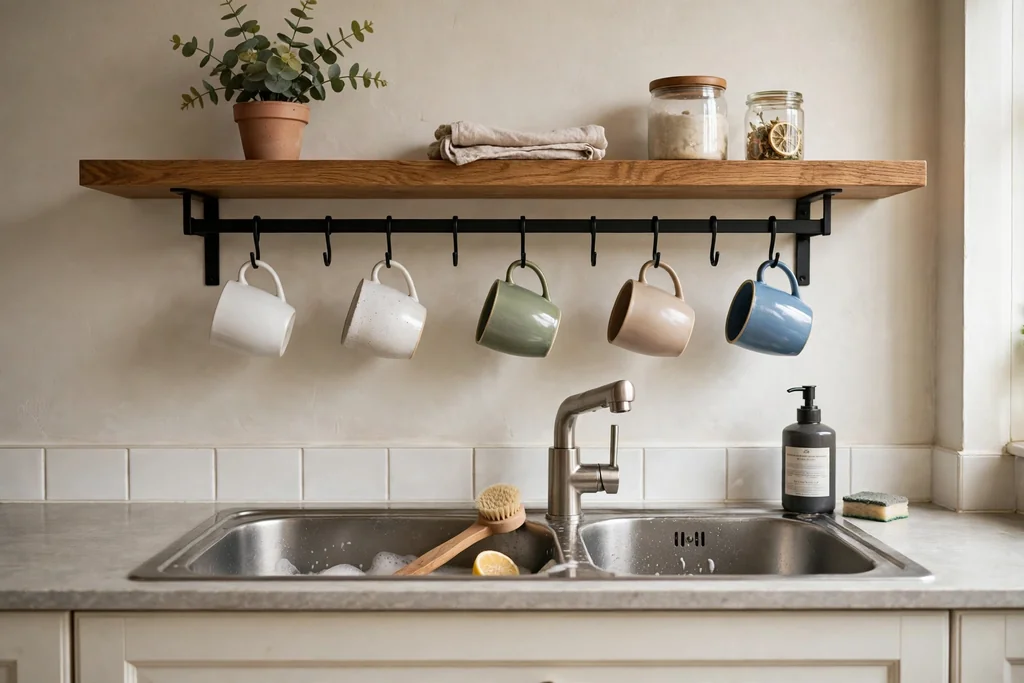
    Mug rail under an open shelf above a kitchen sink holding hanging cups.

    Fit a mug rail under the open shelf above the sink for cups that hang within reach and free shelf space for bowls. A rail with small hooks suits a household that uses the same mugs daily, and it keeps mugs off the counter where they often crowd the sink edge. Choose hooks in the same metal as the shelf brackets, so the shelf and rail read as one piece.

    Hang mugs by their handles, with space between them so they do not knock together, and keep the rail to four or six mugs. Wash mugs before hanging them, since a rail above a sink can collect steam, and wipe the rail when you wipe the shelf. If your mugs are heavy stoneware, check that the shelf fixings can carry the extra weight before you add the rail.

    21. Round Mirror Above a Windowless Sink
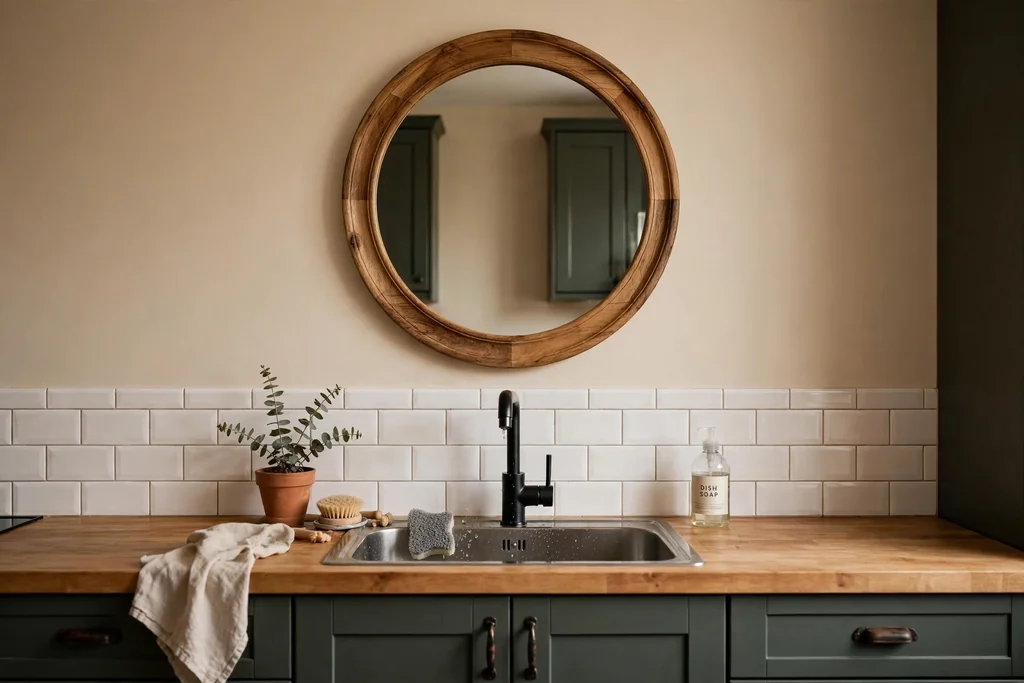
    Round mirror with a wood frame above a windowless kitchen sink.

    Hang a round mirror above a windowless sink for light and a sense of depth where no window exists. A mirror bounces light from the room back onto the sink wall, which makes a dark corner feel larger, and a round shape softens a kitchen full of straight cabinet lines. Choose a mirror with a wood, brass, or black frame that matches the tap and handles.

    Hang the mirror at eye level when standing at the sink, and keep it clear of the splash line, since water marks show fast on glass. Wipe the mirror with a dry cloth after washing up, and avoid hanging it where steam from a nearby kettle hits it directly. A mirror suits a small or galley kitchen best, where every bit of reflected light helps.

    22. Wall-Mounted Towel Bar and Paper Towel Holder
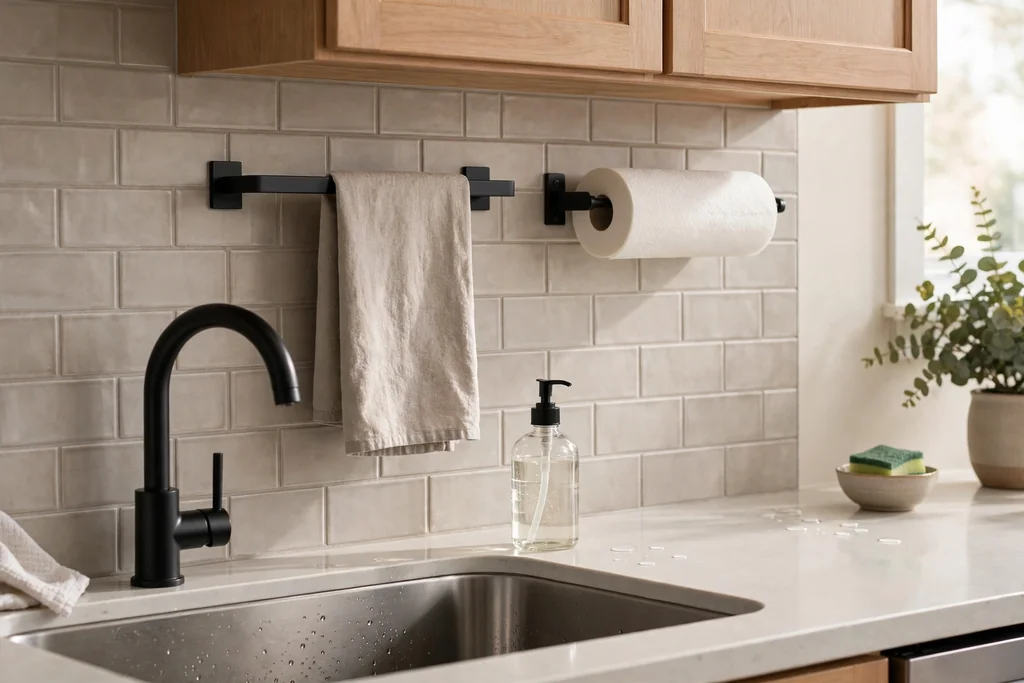
    Wall-mounted towel bar and paper towel holder above a kitchen sink.

    Fit a towel bar and a paper towel holder on the wall above the sink for the two items you reach for most while washing up. A combined bar and holder keeps towels off the counter and paper towels within one hand’s reach, which matters when your hands are wet. Choose a bar in the same metal as the tap, and mount it to one side of the sink so towels do not drip into the basin.

    Keep one hand towel on the bar and a spare folded nearby, rather than stacking several towels that stay damp. Refill the paper towel holder before it runs out, and wipe the bar weekly, since it sits in the splash zone. This is a renter friendly change if you use strong adhesive mounts rated for the weight, and a fixed change if you screw the bar into studs.

    23. Floating Shelf with a Built-In LED Strip
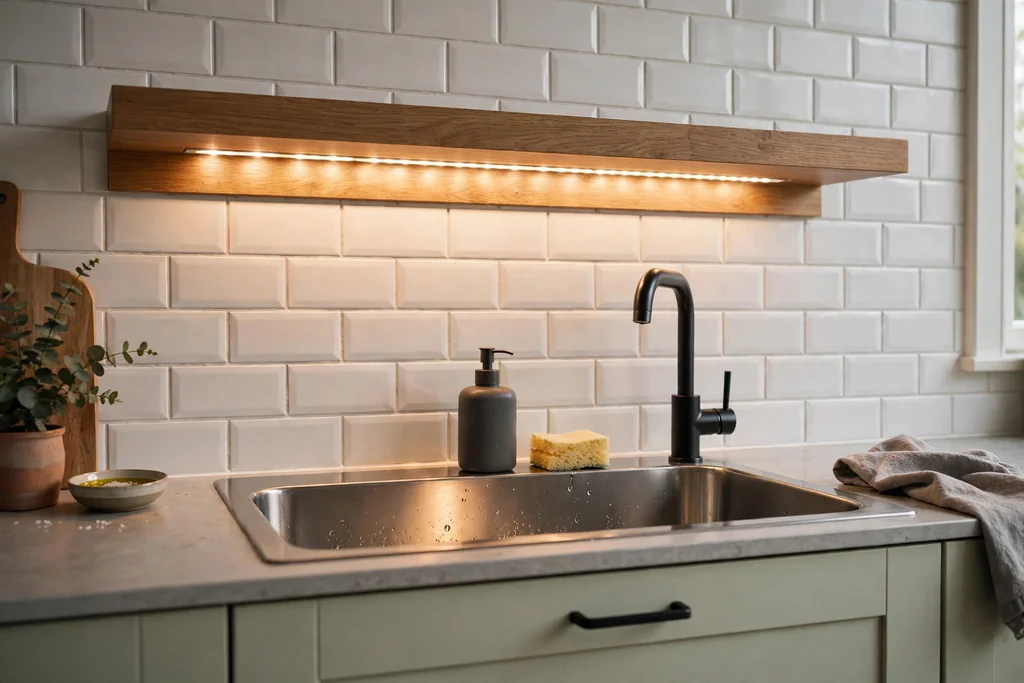
    Floating shelf with a built-in LED strip above a kitchen sink.

    Fit a floating shelf above the sink with an LED strip fixed under its front edge, so one piece gives both storage and light. This suits a sink wall with no cabinet and no wiring for a pendant, since a plug in LED strip needs only a nearby socket. The strip lights the sink below while the shelf above holds a plant, a vase, and a small stack of bowls.

    Hide the strip behind a small lip on the shelf front, so you see light, not the strip itself, and choose a warm white strip for a calm evening kitchen. Keep the shelf items light and few, so they do not block the light, and wipe the strip cover when you clean the shelf. Run the cord neatly down the wall side, tucked behind the shelf bracket, so it does not hang over the sink.

    24. Corner Shelves Wrapping the Sink Wall
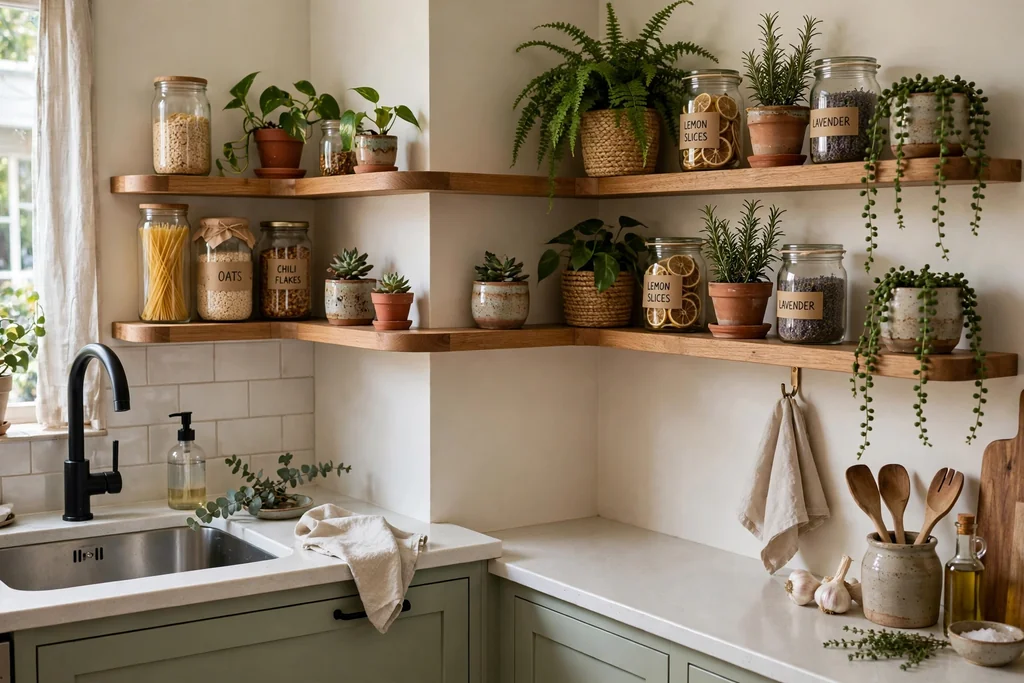
    Corner shelves wrapping from a sink wall onto a side wall holding plants and jars.

    Fit corner shelves that wrap from the sink wall onto the side wall for storage in a corner sink layout. Corner shelves suit an L shaped kitchen, where a straight shelf would leave the corner dead space, and they give a home to plants, jars, and small bowls that would otherwise crowd the counter. Choose shelves in the same wood and bracket style on both walls, so the wrap reads as one run.

    Keep the corner shelf items light, since corner fixings carry weight from two directions, and leave the front corner of each shelf clear so you can reach items without stretching over the sink. Style the side wall shelf with taller items and the sink wall shelf with daily pieces, so each side has a clear job. Wipe both shelves weekly, since corner spots collect dust.

    25. Pegboard Panel with Hooks and Small Bins
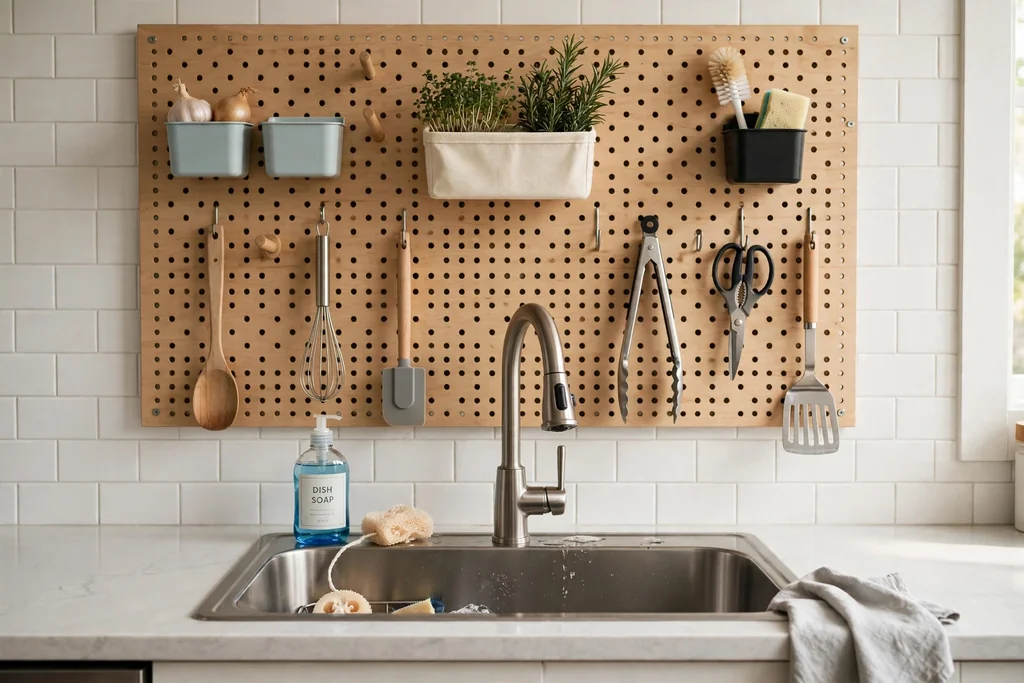
    Pegboard panel above a kitchen sink with hooks, small bins, and kitchen tools.

    Hang a pegboard panel above the sink for hooks, small bins, and a shelf that can be moved as your needs change. A pegboard suits a busy kitchen, since you can rearrange hooks for tools, measuring cups, and small plants without new holes, and the board itself can be painted to match the wall or the cabinets. Choose a sealed or painted board, since raw pegboard swells near steam.

    Fix the board into studs, and keep heavy items low and light items high, so the board stays balanced. Use small bins for sponges and brushes, and hooks for scissors and peelers, and leave some holes empty so the board does not look crowded. Wipe the board when you wipe the sink wall, and check that hooks sit firmly after you move them.

    26. Fold-Down Drying Rack Above the Sink
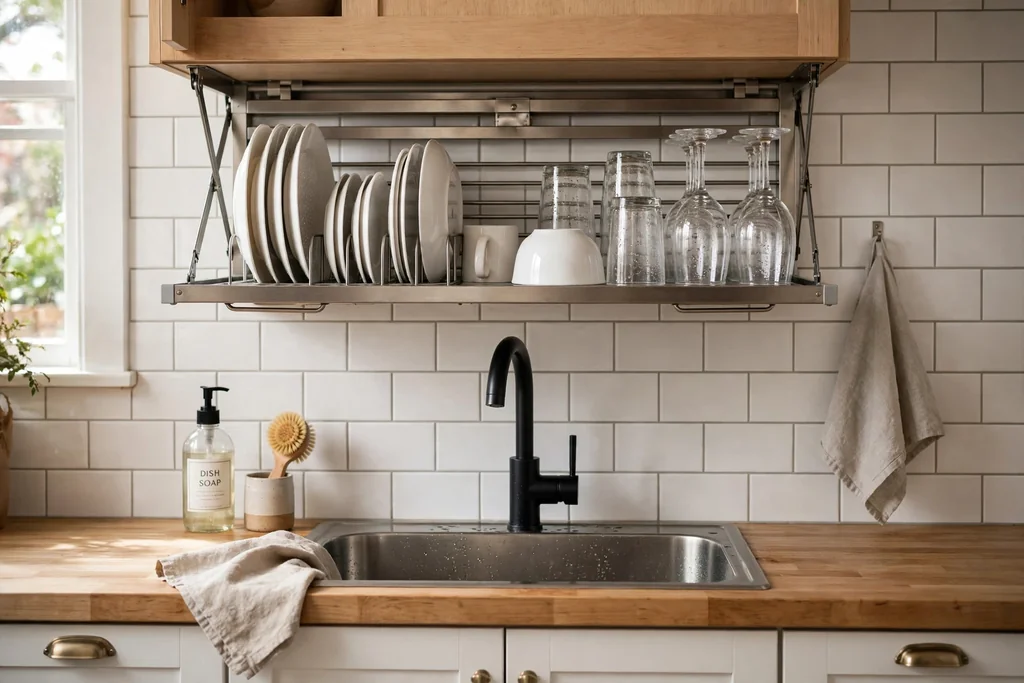
    Fold-down drying rack on a wall above a kitchen sink holding clean dishes.

    Fit a fold-down drying rack on the wall above the sink for dishes that drip dry over the basin, then fold flat when not in use. A fold-down rack suits a small kitchen with no counter space for a dish rack, since it uses wall space only while dishes dry. Choose a rack in stainless steel or coated metal that tolerates water, with a drip path back into the sink.

    Fold the rack down only for the dishes you wash by hand, and fold it up once they are dry, so the sink wall stays clear the rest of the day. Fix the rack into studs, since a full rack of wet dishes is heavy, and wipe the wall behind it after use. This is a practical pick for a single person household or a second sink, where a full time rack would be wasted.

    27. Labelled Jar Shelf for Cleaning Refills
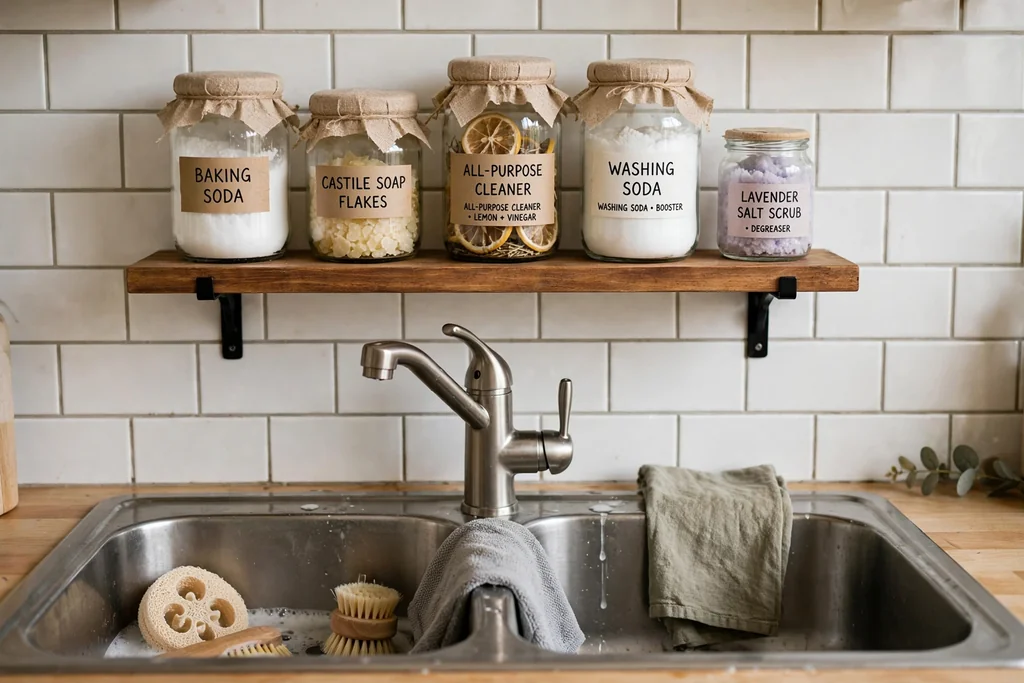
    Small shelf above a kitchen sink holding labelled glass jars of cleaning supplies.

    Fit a small shelf above the sink for labelled jars of soap refills, baking soda, and cleaning cloths, so sink supplies look tidy rather than scattered. A jar shelf suits a kitchen where cleaning supplies live under the sink in a jumble, since moving the daily jars to the wall frees cabinet space and keeps refills visible. Choose glass jars with lids, in one size, with simple labels you can read at a glance.

    Keep the shelf high enough that jars sit clear of splashes, and keep only safe, clearly labelled supplies on it, with anything hazardous stored out of reach of children. Refill jars before they run out, and wipe the shelf and jar lids weekly, since the sink wall collects soap spray. If you rent, use a small freestanding shelf on the sill or a suction shelf instead of a fixed shelf.

    28. Small Wreath on the Sink Window Frame
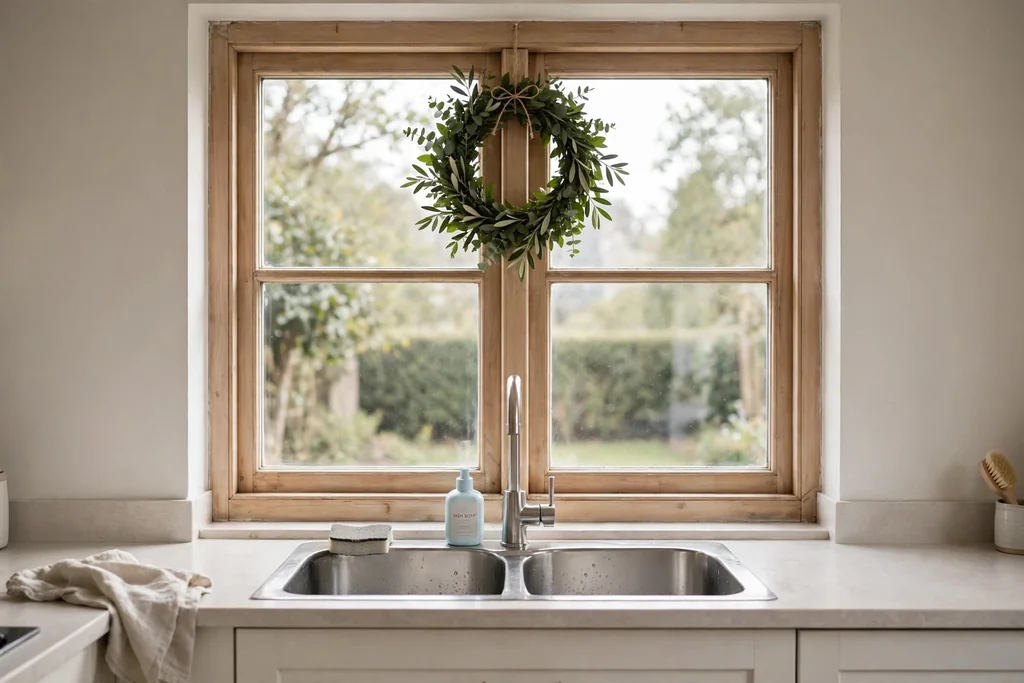
    Small green wreath hanging on a kitchen window frame above a sink.

    Hang a small wreath on the inside of the sink window frame for a seasonal note that takes no sill or counter space. Eucalyptus, plain green, dried herb, or simple twig wreaths all suit a kitchen, and a modest size, around a third of the window width, keeps the wreath from blocking much light. Hang it from a ribbon over the top of the frame or from a clear suction hook rated for the weight on clean glass.

    This is an easy change to make by season, and the same window can carry a plain green wreath most of the year. Keep dried foliage away from the stove and direct steam, and take the wreath down to shake it out when it collects dust. Pair a wreath with a plain window treatment, so the window does not carry two strong accents at once.

    29. Hanging Tiered Baskets from a Ceiling Hook
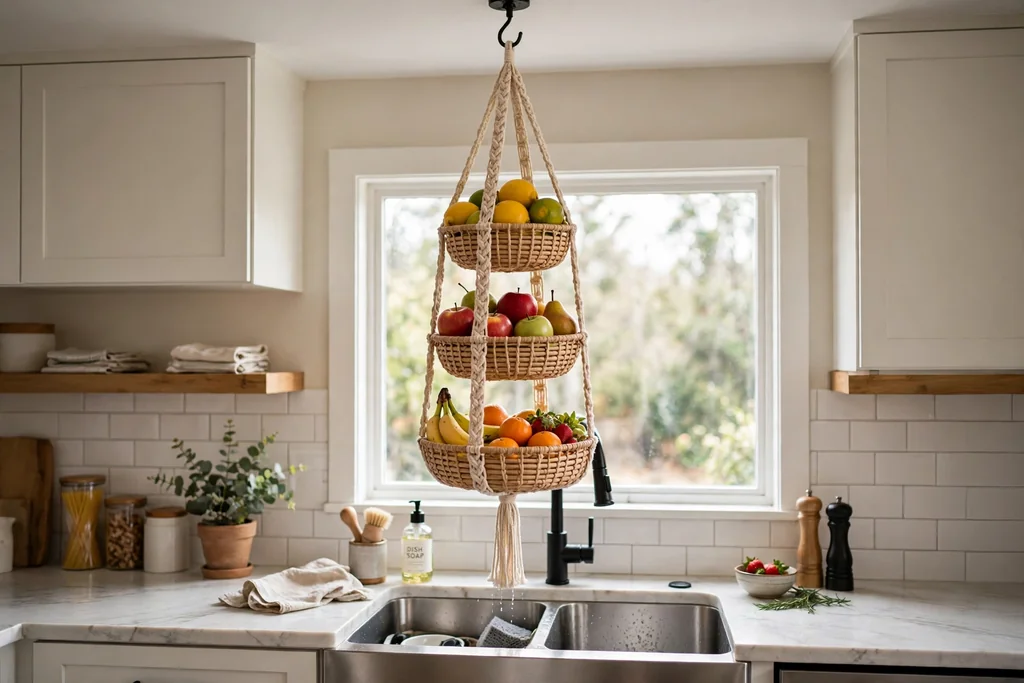
    Tiered hanging baskets from a ceiling hook above a kitchen sink holding fruit.

    Hang tiered baskets from a ceiling hook above the sink for fruit, onions, or small kitchen tools, using air space that would otherwise go unused. Tiered baskets suit a kitchen with a high ceiling and no cabinet above the sink, since they hang clear of the tap and the window. Choose baskets in wire, woven fiber, or coated metal, with a hook rated for the full weight.

    Hang the baskets to one side of the sink, not directly over the basin, so drips and falling items do not land in clean dishes. Keep the lowest basket at a height you can reach without stretching, and keep heavy produce in the bottom basket for balance. Wipe the baskets weekly, and check the ceiling hook monthly, since kitchen steam can loosen fixings over time.

    30. Valance Shelf Across the Top of the Window
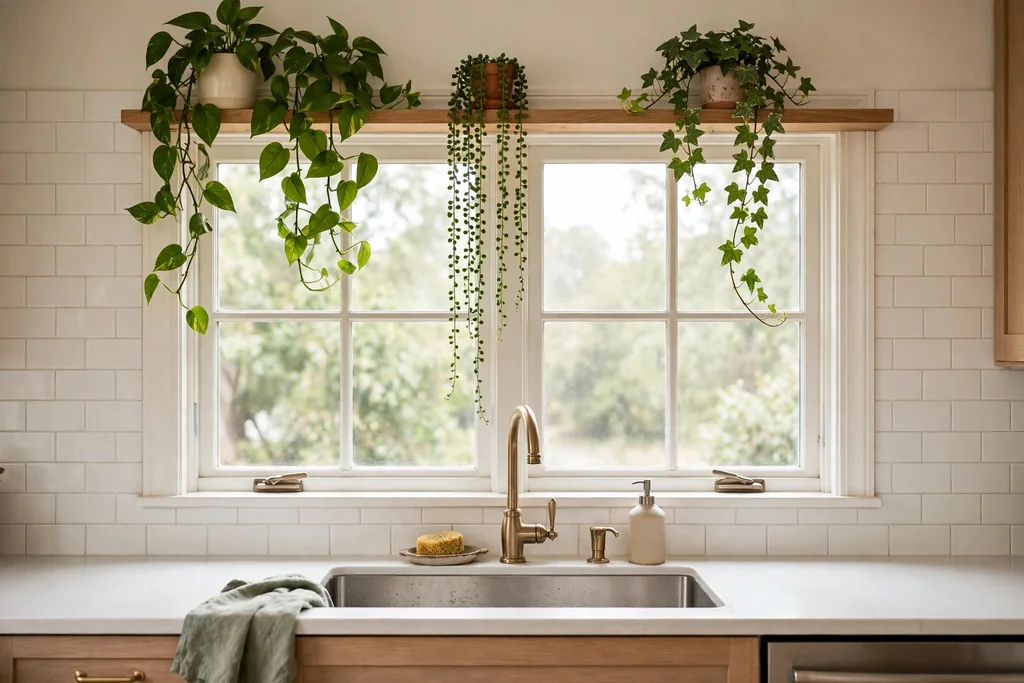
    Slim valance shelf across the top of a kitchen window above a sink holding trailing plants.

    Fit a valance shelf across the top of the sink window for trailing plants and a few light decorative pieces above eye level. A valance shelf suits a window with a plain top rail, since it adds a finished edge without covering the glass, and trailing plants soften the frame from above. Choose a slim wood shelf fixed into the frame or wall studs, in a tone that matches the window trim.

    Keep the shelf to light items only, such as small trailing plants and one vase, and leave the center clear so you can still reach the window latch. Water plants over the sink, and trim trailing stems so they do not hang into the tap area. Dust the shelf when you clean the window, since a high shelf collects dust out of sight.

    Conclusion

    The sink wall works best when it has one clear job and one small accent, not five competing ideas at once. Start with what you miss most: light if the sink feels dark, storage if the counter is crowded, privacy if the window faces a neighbor, or a wipe clean surface if splashes mark the wall. Add that one change, live with it for a week, and then add a plant, a rail, or a small piece of art if the wall still feels plain. Keep materials splash friendly, keep the tap arc clear, and repeat one finish from the rest of the kitchen so the sink wall feels like part of the room. For help choosing that finish, see these ideas for colors for your kitchen cabinets to match the sink wall to cabinets, counters, and hardware.

    Save this list on Pinterest for your next free hour in the kitchen, and work through it in order: window and light first, then storage, then one wall panel or decor piece, and finally the small tray, rail, and jar touches that keep daily washing up tidy.

    FAQs

    What should I hang above a kitchen sink?

    Hang one main piece plus one small accent, such as a shelf with a plant, a pendant light with a rail, or a window treatment with a sill tray. Avoid hanging heavy cabinets or large art directly over the tap, since they block light and get splashed. Choose splash friendly materials, keep the tap arc clear, and pick a finish that matches the tap or handles so the wall reads as planned.

    How do I decorate above a kitchen sink with no window?

    Use a mirror to bounce light, a pendant or LED strip for task light, and a shelf, rail, or pegboard for storage, since a windowless sink needs light and depth most. Keep the wall to one storage piece and one decor piece, such as a round mirror plus a small shelf, so the wall does not feel crowded. Wipe mirrors and shelves often, since a windowless corner shows steam marks more clearly.

    What is the best window treatment for a window over the sink?

    A cafe curtain, a Roman shade, or a woven shade usually works best, since each gives privacy and light control without hanging fabric near the tap. Cover only the lower half of the glass if privacy is the main need, and choose washable fabric or a wipe clean shade, since the area over a sink collects splashes and cooking film. Keep cords short and secured, and keep all fabric clear of the stove and open flames.

    How high should a shelf be above a kitchen sink?

    Hang a shelf high enough that tall glasses clear it and you can lean over the sink without hitting your head, usually with the shelf bottom well above the tap and the splash line. Measure from the counter, not from the sink rim, and test the height by standing at the sink and reaching for a glass before you fix the shelf. For two shelves, keep the lower shelf for daily items and the upper shelf for lighter, less used pieces.

    Can renters decorate above a kitchen sink without drilling?

    Yes. Renters can cover most of this list with tension rods, suction hooks and shelves, magnetic shelves on steel backsplashes, adhesive rails rated for the weight, and freestanding trays on the sill. Check your lease before fixing anything, keep the old hardware if you swap a fitting, and choose removable options for lights, such as plug in LED strips, rather than wired sconces or pendants.

    How do I keep the wall above the sink clean?

    Choose wipe clean surfaces, such as tile, sealed wood, metal, and glass, and wipe the sink wall weekly with a damp cloth to stop soap film and steam marks from building up. Keep fabric treatments washable, keep paper and raw wood clear of the splash zone, and seal grout and wood so water does not stain them. A small tray for soap and a sponge also helps, since it keeps wet items grouped instead of spread across the wall and counter.
  • 11 Red Kitchen Decor Ideas That Bring Practical Style Home

    11 Red Kitchen Decor Ideas That Bring Practical Style Home

    Red in a kitchen can be warm and welcoming, or loud and tiring, depending on the shade and where you use it. A deep cherry or brick red works like a warm neutral next to white and wood, while a bright postbox red is best kept to one or two spots you can change easily. The trick is to give red a clear job, then balance it with plain surfaces so cooking stays easy. These 11 red kitchen decor ideas cover cabinets, islands, tile, seating, lighting, and small afternoon changes. If you like a softer warm color first, these pink kitchen ideas show how blush cabinets pair with white, wood, and brass.

    Key Takeaways

    • Use one red through the room, and repeat it in at least two or three places, such as cabinets, stools, and a curtain, so it reads as a plan.
    • Pair red with white, warm wood, cream, pale stone, or soft grey, and keep other strong colors to a minimum.
    • Test a red paint or tile sample beside your floor, counter, and cabinet color in daylight and evening light before a large change.
    • Put red where hands and eyes land most: cabinets, the island, seating, and lighting, rather than on every surface.
    • Choose washable, wipeable finishes near the stove and sink, since kitchen surfaces pick up grease and water marks.
    • Small changes like hardware, towels, curtains, and a kettle pair let renters try red with no fixed work.

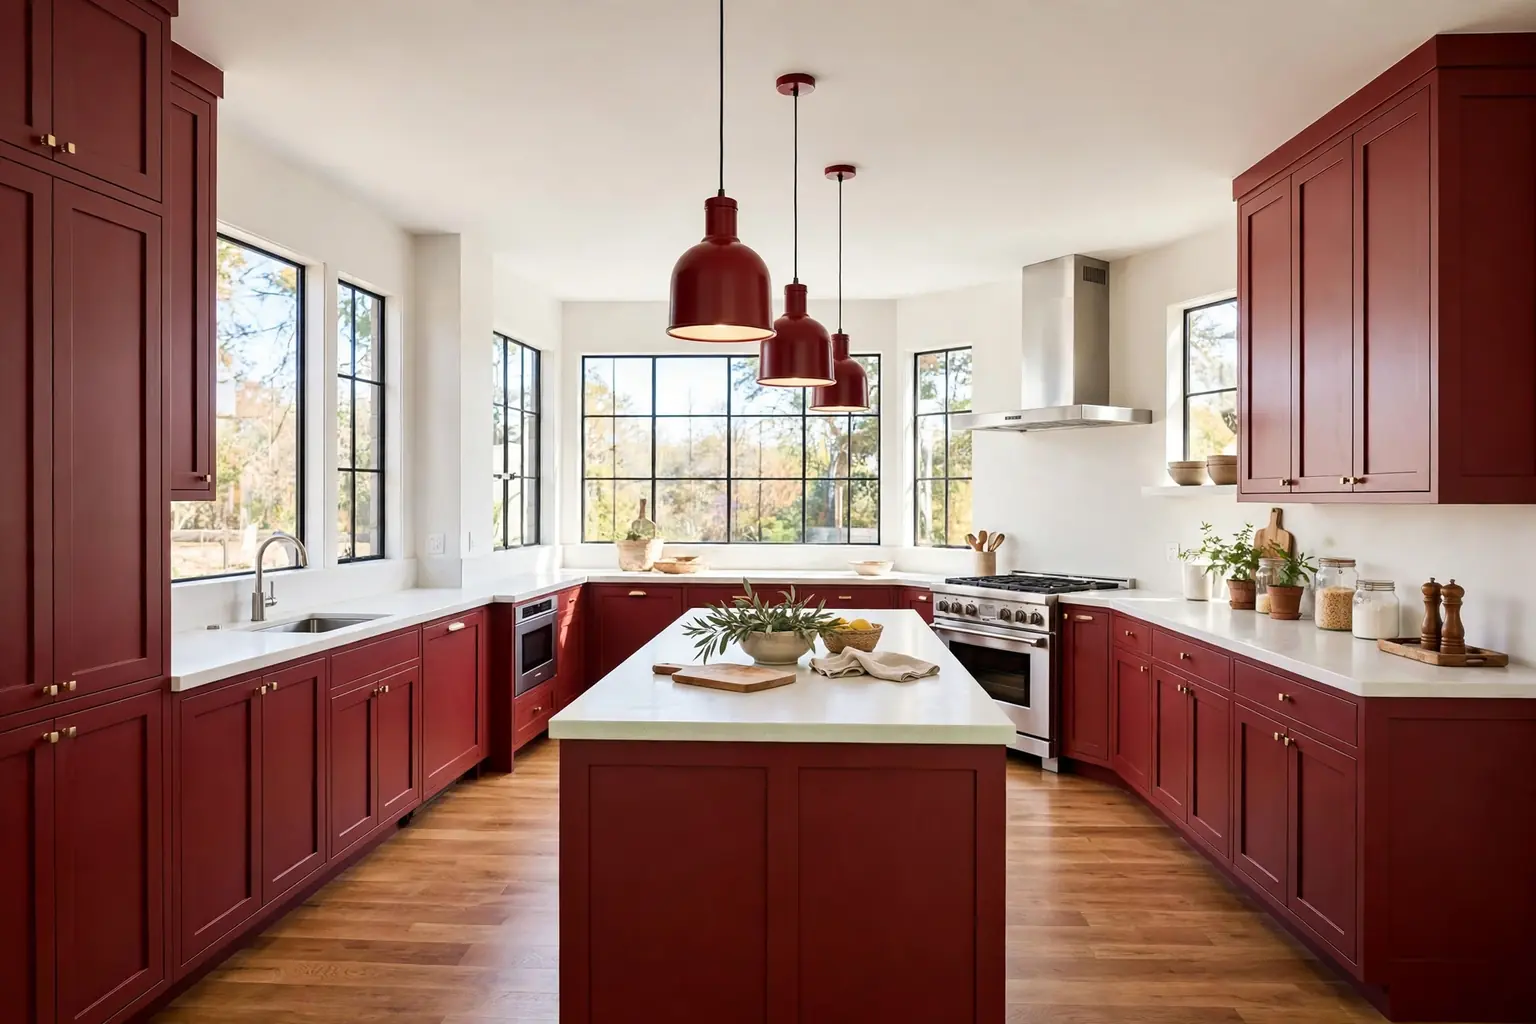
    1. Deep Red Shaker Cabinets

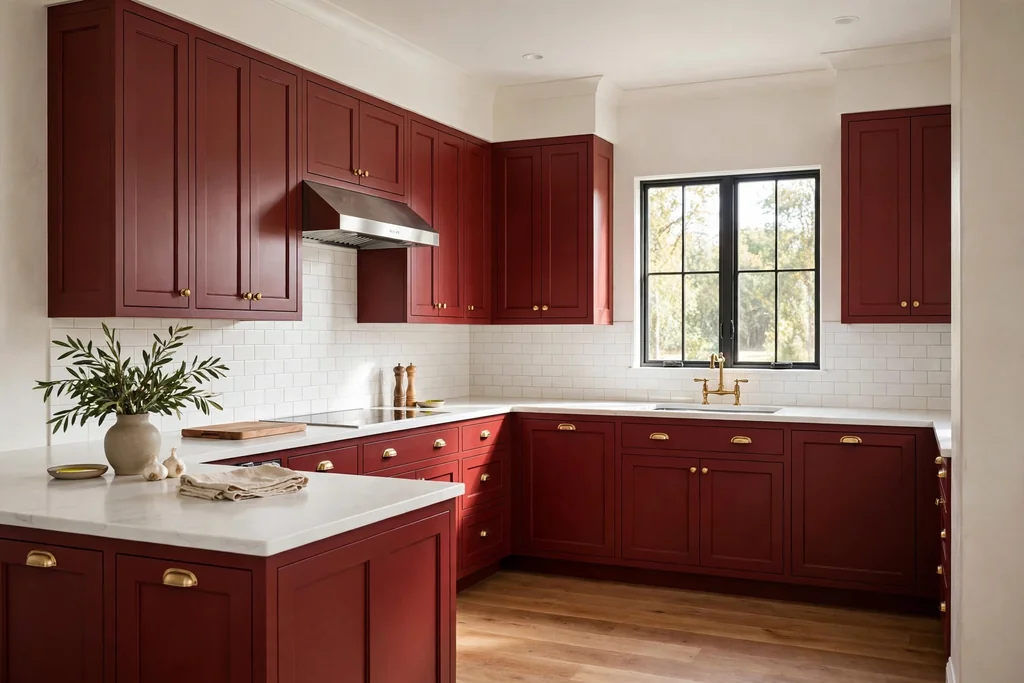
    Kitchen with deep red shaker cabinets, white counters, and a wood floor.

    Paint shaker cabinets in a deep red for a kitchen that feels warm and settled without shouting. Shaker doors keep the shape simple, and white walls, a pale counter, and a wood floor stop the red from feeling heavy. This suits a kitchen with good daylight, where the deep tone reads as a warm color rather than a bright one.

    Keep handles simple in brass or matte black, and choose a counter in white or pale grey so the cabinets stay the focus. If you worry about commitment, paint one run of cabinets first and live with it for a week before painting the rest. Wipe doors near the stove each week, since dark paint shows pale dust and cooking splashes. For help choosing the right undertone for the rest of the room, see these ideas for colors for your kitchen cabinets.

    2. Red Island in a Neutral Kitchen

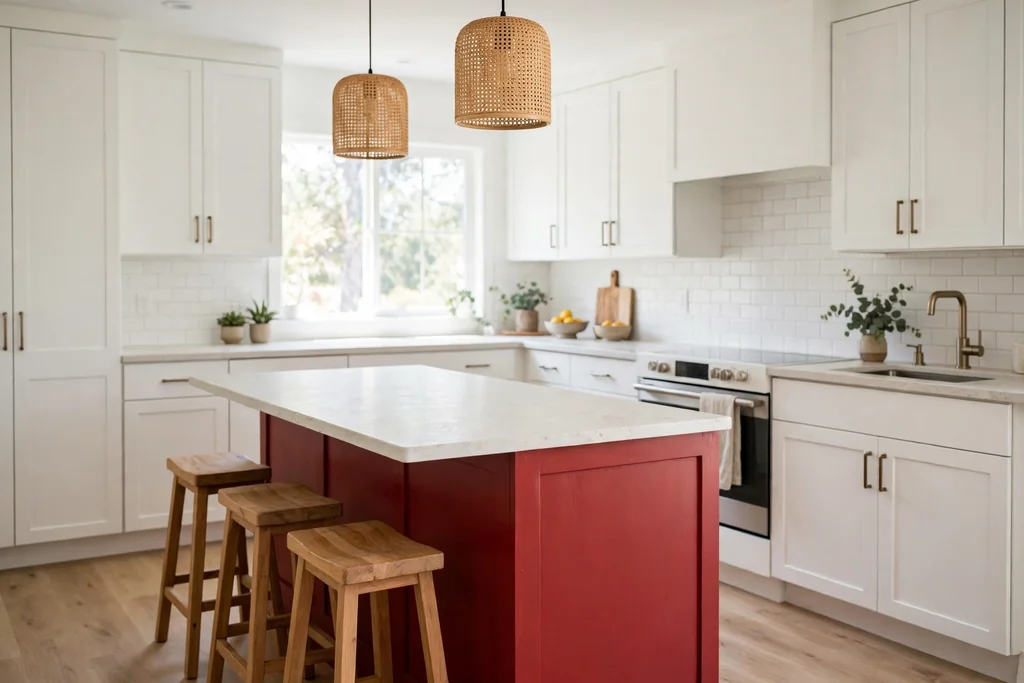
    Red kitchen island with a pale counter in a white kitchen.

    Keep the main cabinets white or wood, and paint only the island red. The island becomes a clear focal point, and the rest of the kitchen stays neutral, which makes the change lower risk and easier to reverse. A deep red island suits a white kitchen, while a brick red suits a kitchen with dark wood floors.

    Repeat the island red once more, in stools, a rug, or a vase, so it looks planned rather than random. Choose a hard wearing counter for the island, since it takes the most daily use. This is a good first step if you like red but are not ready for red cabinets everywhere.

    3. Glossy Red Subway Tile Backsplash

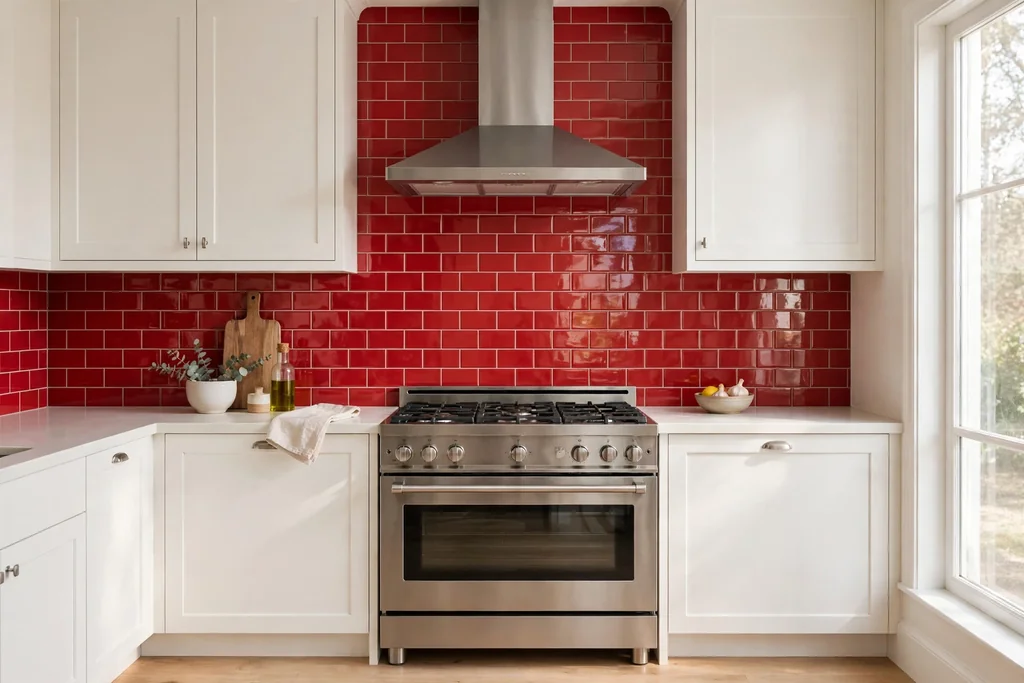
    Glossy red subway tile backsplash behind a kitchen cooker with white cabinets.

    Lay glossy red subway tiles as a backsplash for a classic shape in a bold color. A deep red tile with matching grout feels rich, while a brighter red with white grout feels more playful. Subway tiles suit most kitchens because the shape is familiar and the size works around sockets and windows.

    Pair red tile with white cabinets and a plain counter, so the tile is the main color note. Order a few spare tiles for future repairs, and seal grout in the splash zone behind the sink and cooker. Check a tile sample under kitchen lights at night as well as in daylight, since glossy finishes shift a lot between lights.

    4. Red Bar Stools at the Island

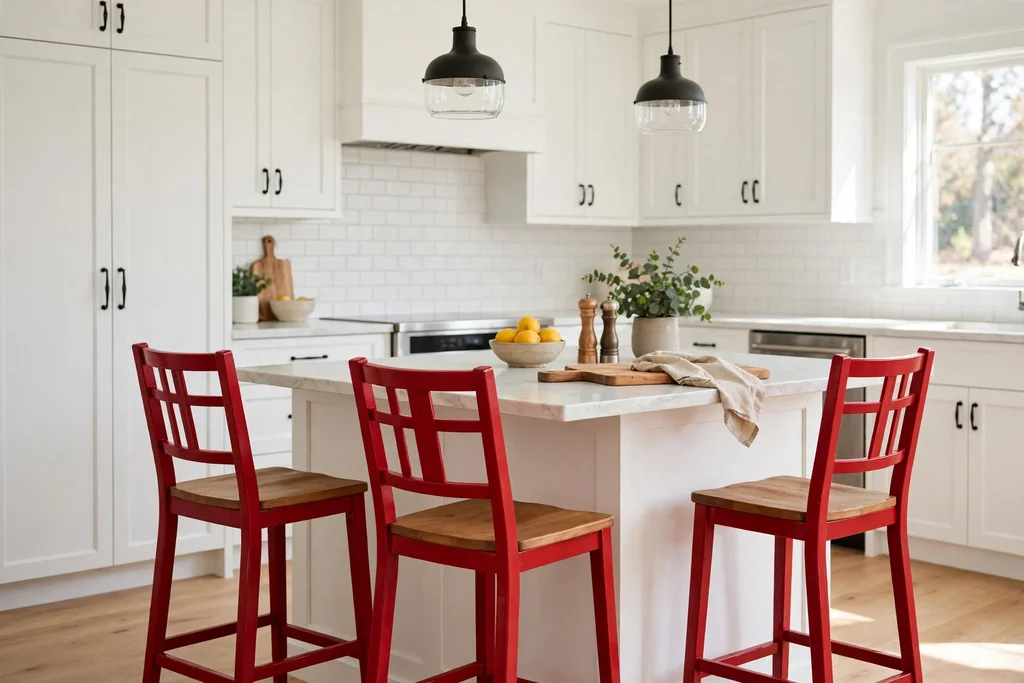
    Red bar stools at a kitchen island with a pale counter.

    Add red bar stools at the island for a seating change that also carries the color through the room. A red frame or seat with a wood or pale grey cushion suits most kitchens, and the stools are easy to move when you need floor space. Choose stools that slide fully under the island overhang, so the walkway stays clear.

    Keep the stool count to the island length, usually two for a short island and three for a long one, and leave room between seats. Wipe metal frames often, since stool legs pick up floor dust and cooking splashes. If the stools are the only red in the room, add one small match, such as a towel or a vase, so they do not look isolated.

    5. Red Pendant Lights Over the Island

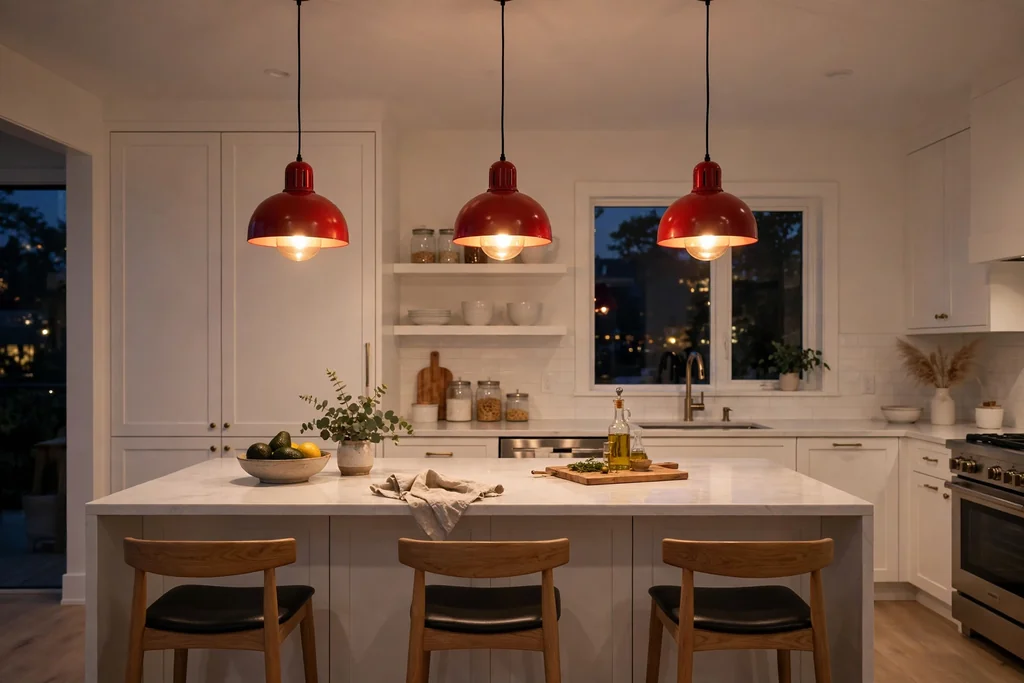
    Red pendant lights hanging over a kitchen island in the evening.

    Hang two or three red pendant lights over the island for warm color and a clear accent at eye level. Pendants work well in a row, spaced evenly, with the lowest point well above head height and clear of steam from the hob. A slim dome or cone shade in red suits most kitchens, while a glass shade shows the bulb and softens the color.

    Match the pendant red to the stools or island where you can, and keep the rest of the ceiling lights plain. Use warm white bulbs so the red reads warm in the evening, not harsh. Dust the shades often, since kitchen pendants collect grease film over time.

    6. Red Range Cooker as a Focal Point

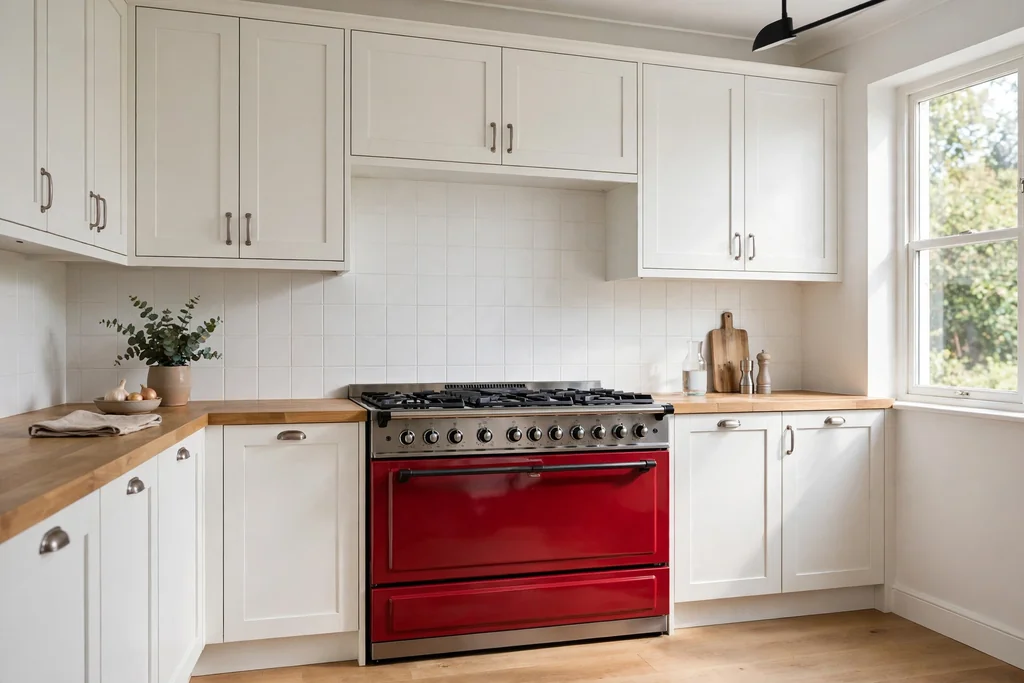
    Red range cooker in a kitchen with white cabinets and a plain backsplash.

    Make a red range cooker the center of the kitchen, with plain cabinets and a simple backsplash around it. A deep red cooker adds color in one strong piece, and it suits a farmhouse or retro style kitchen. The cooker draws the eye, so the rest of the room can stay calm and practical.

    Match one small item to the cooker, such as a kettle or a tea towel, and keep the other appliances in steel or white. Check the cooker color in person if possible, since red finishes vary a lot between makers. Keep the wall behind the cooker easy to clean, with tile or a wipeable panel.

    7. Red Open Shelves with White Dishes

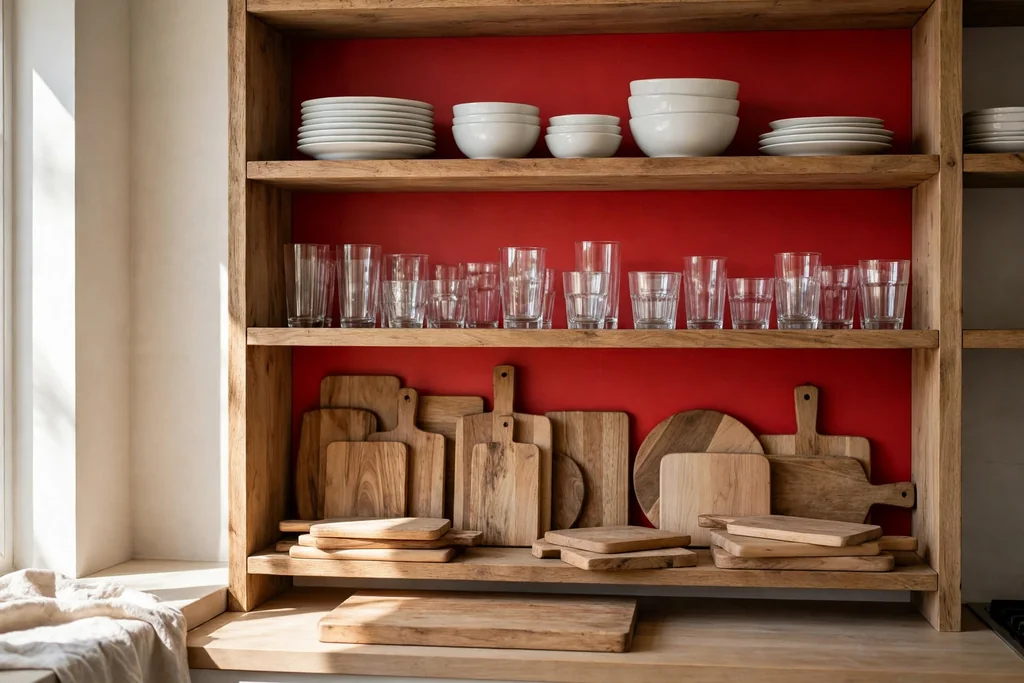
    Open kitchen shelves with red backs holding white dishes and glasses.

    Paint open shelves red, or back them with red boards, and display white dishes, clear glasses, and wood boards against them. The red frames the display and adds color without painting a single cabinet. This suits a kitchen with one blank wall or a short run above a counter.

    Keep the shelf items to daily pieces you actually use, and leave breathing room between groups so shelves read as tidy, not crowded. Dust open shelves weekly, since open storage collects cooking film. Put heavy stacks low, and keep shelves clear of direct stove steam.

    8. Red Hardware Swap on Cream Cabinets

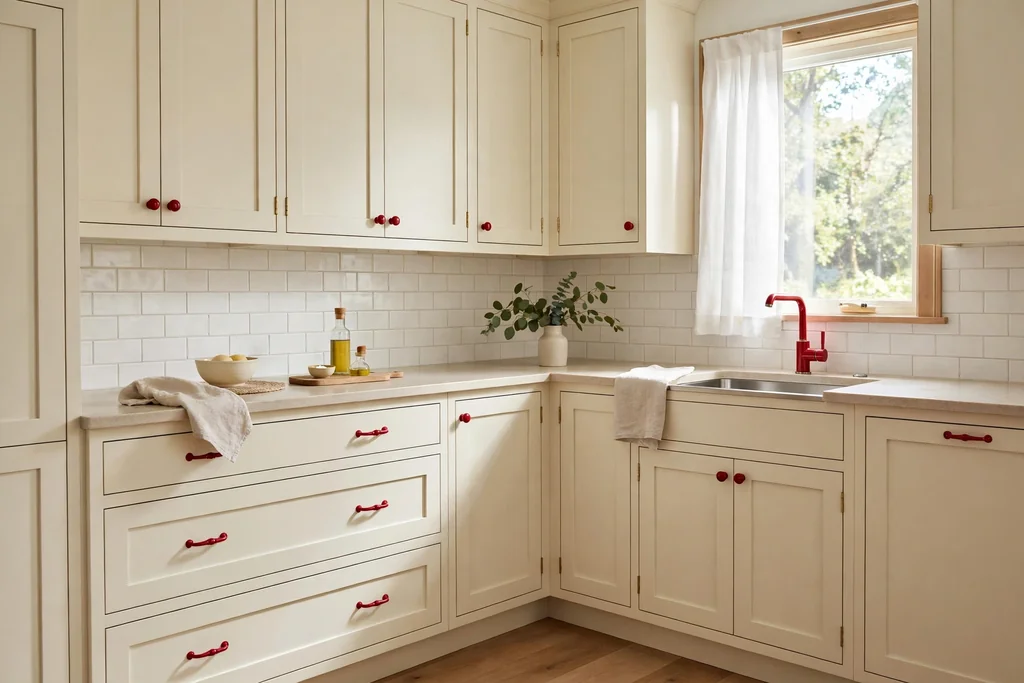
    Cream kitchen cabinets with red knobs and a matching red tap.

    Swap cabinet knobs and drawer pulls for red versions, and add a matching red tap if your sink allows it, for a small, reversible change. Red hardware suits white, cream, or pale wood cabinets, and it lets you test the color before painting. This is a good weekend job, and it costs far less than new cabinets.

    Keep all the hardware in the same red and finish, so the change looks planned. Save the old hardware in a labelled bag in case you want to swap it back. Check that new pulls match your existing screw spacing, and turn off the water before changing a tap.

    9. Red Dining Chairs in a Breakfast Nook

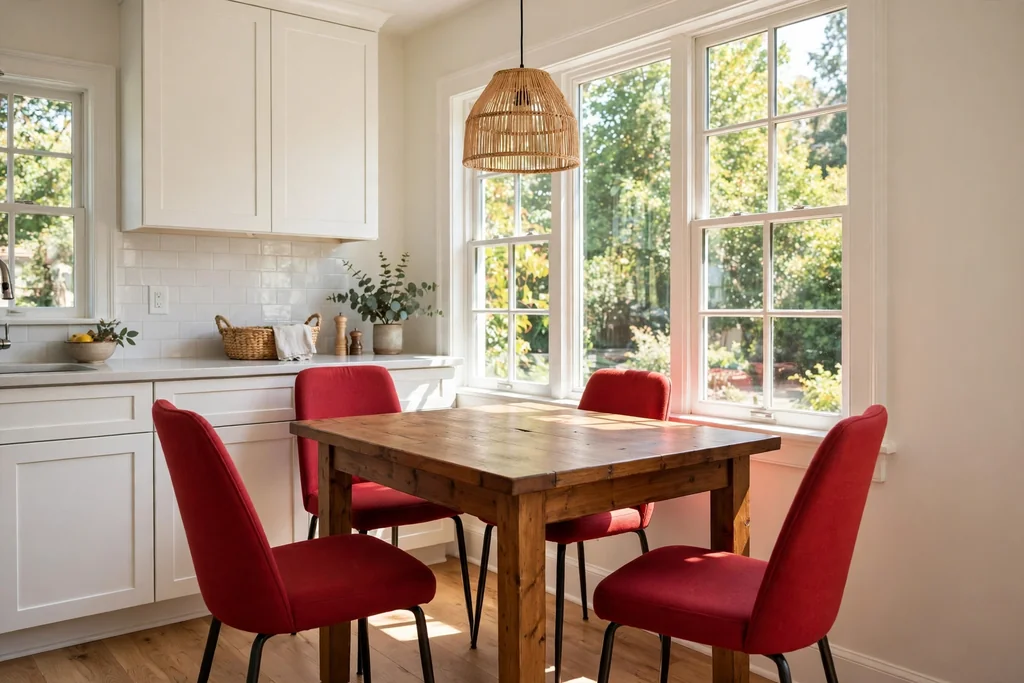
    Breakfast nook with red dining chairs and a wood table beside a window.

    Use red dining chairs, or plain chairs with red seats, in a breakfast nook for a seating area that feels dressed without new cabinets. A set of four chairs in a deep red suits a small table, and it pairs well with a wood tabletop and cream cushions. This is a good way to bring red into an open plan kitchen where the eating area stays in view.

    Keep chair cushions washable, since kitchen chairs take daily spills, and check that chair legs have floor protectors so they do not scratch wood or tile. If the chairs feel too strong on their own, add a plain runner on the table to calm the color. Keep one chair spare for guests rather than crowding the nook.

    10. Red Cafe Curtains at the Kitchen Window

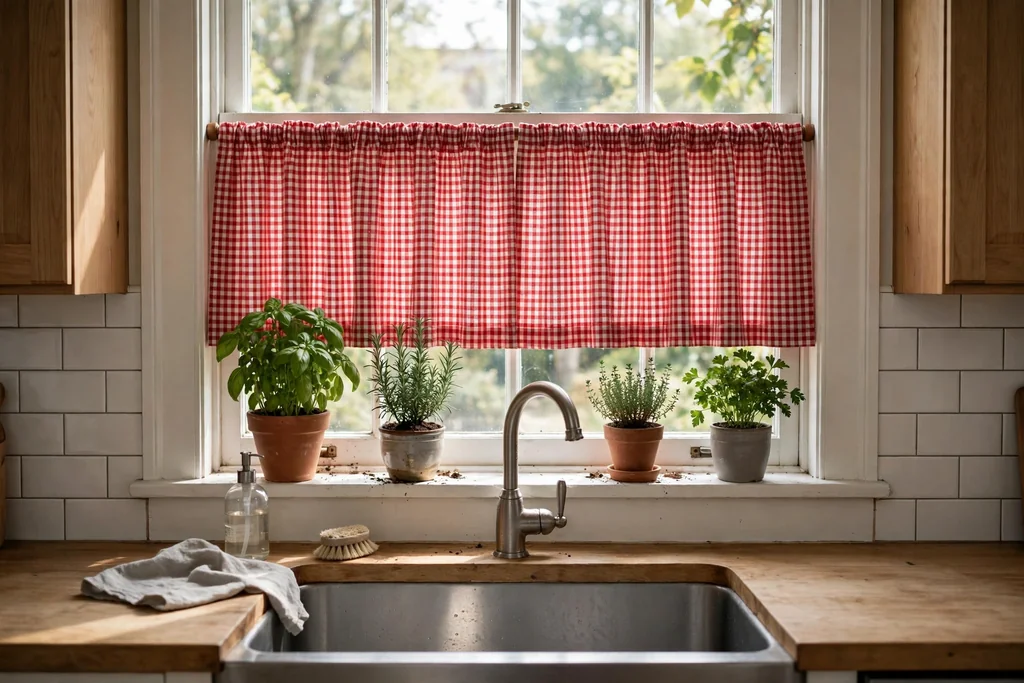
    Kitchen window with a red check curtain and herb pots on the sill above a sink.

    Hang red cafe curtains on the lower half of the kitchen window for privacy at counter height while the top half stays open for daylight. A plain red cotton or a small red check suits a kitchen, and a washable fabric matters, since kitchen curtains pick up grease film over time. Hang the panels on a slim tension rod inside the frame if you rent, or on a small fixed rod if you own.

    Keep the hem just above the sill so fabric does not sit in water near the sink, and keep curtains well clear of the stove. Add herb pots on the sill in plain terracotta or white, so the red stays the main window color. For more ways to dress the window without blocking light, see these kitchen window decor ideas.

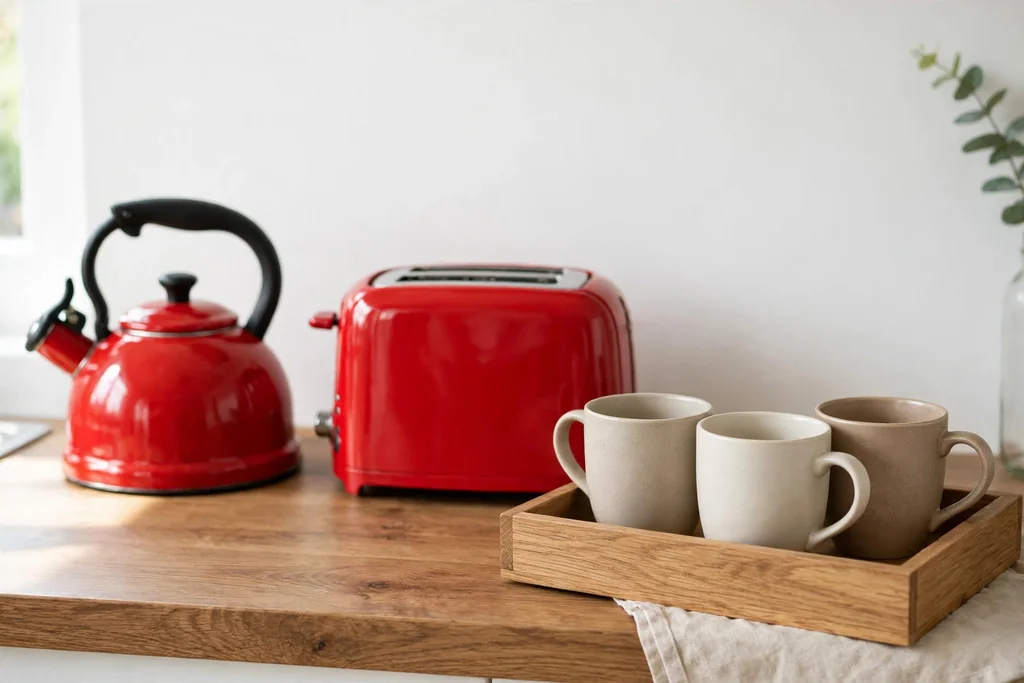
    11. Red Kettle, Toaster, and Tray Grouping

    Kitchen counter with a red kettle, red toaster, and mugs on a wood tray.

    Place a red kettle and toaster together on one stretch of counter, with mugs grouped on a wood tray, for a matched small appliance group. The group adds color in one clear spot, and it suits a kitchen where a full remodel is not planned. Keep the group near a socket, with cords tucked behind, and leave the work run beside the stove clear.

    Repeat the red once more nearby, such as a tea towel on the oven handle, so the group does not look random. Wipe the appliances often, since red shows pale dust and water marks, and keep the tray clear of items you do not use daily. This is the easiest idea on the list to reverse, and it travels well if you move.

    Conclusion

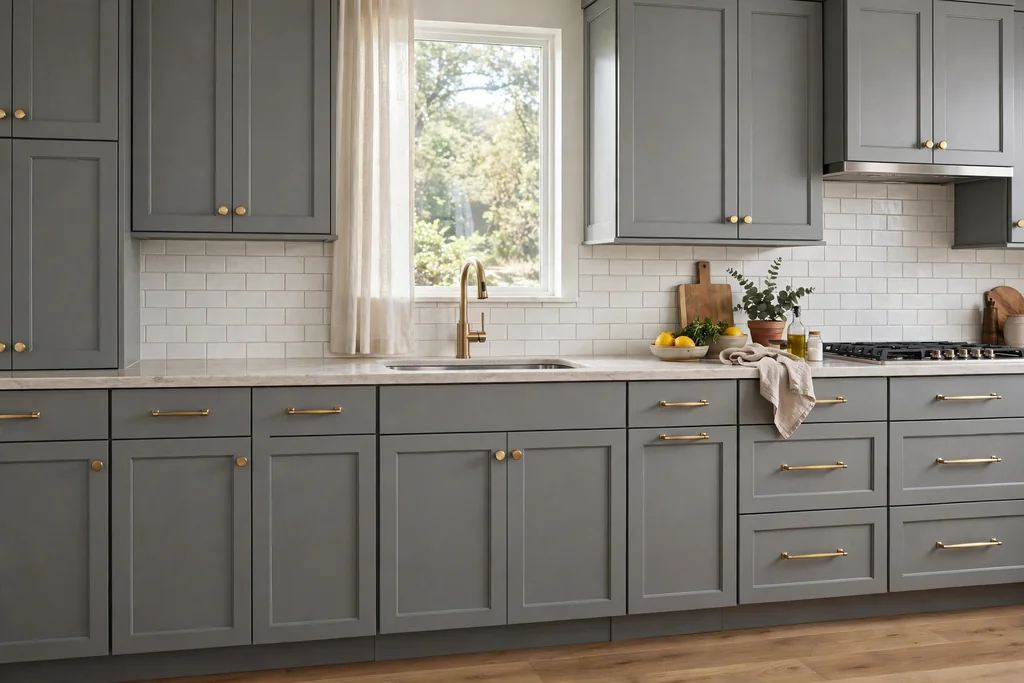
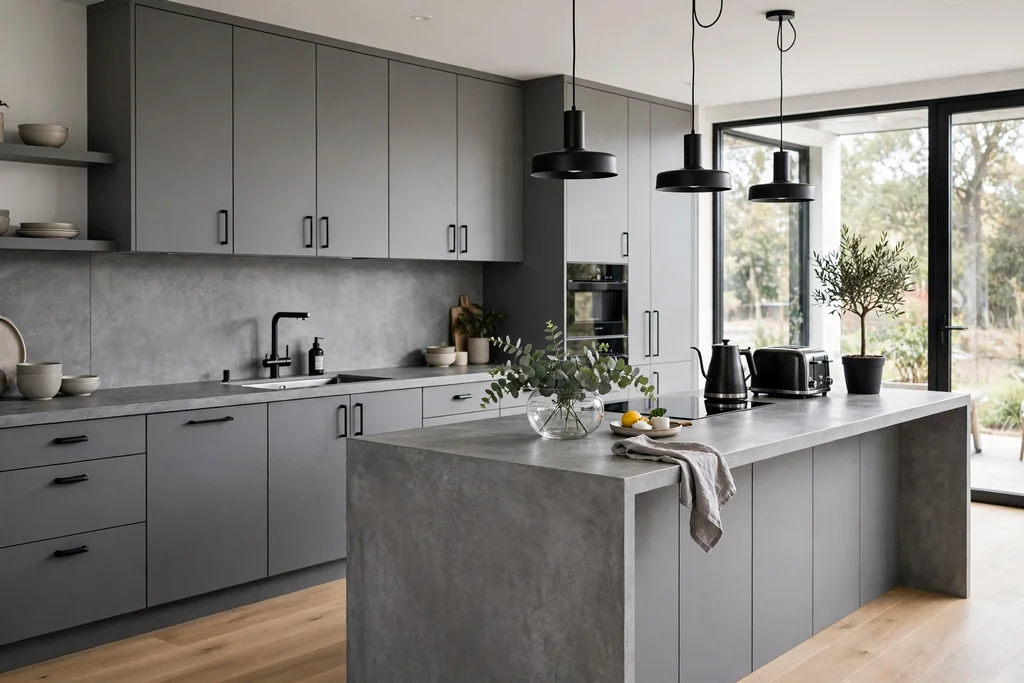
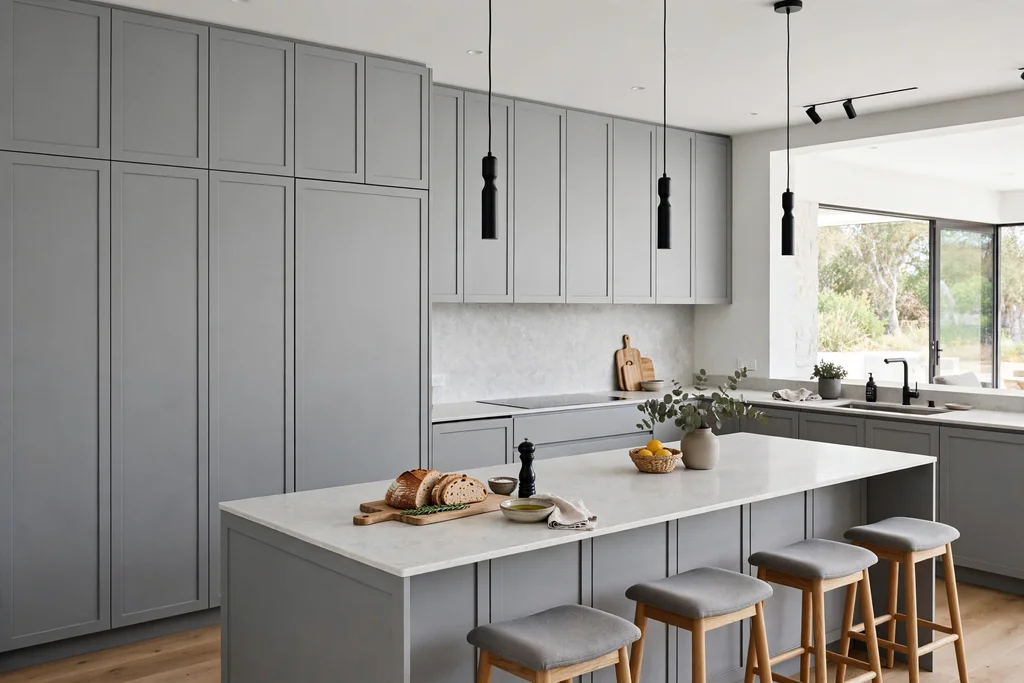
    A red kitchen works best when the color has a clear job and a calm background. Start with the cabinets, island, or cooker, since those are the pieces you see most, then repeat the same red in seating, tile, or a curtain. White, wood, cream, and soft grey keep red warm rather than loud, and plain work surfaces keep cooking easy. Small changes like hardware, curtains, and a kettle pair let you test the color before a larger change, and they suit renters as well as owners. For a cooler balance to the warm red, see these grey kitchen ideas for cabinets, counters, and islands that sit well beside red.

    Save this list on Pinterest for your next free hour in the kitchen, and work through it in order: cabinets or island first, then tile and lighting, then seating and the window, and finally the small counter touches.

    FAQs

    How do I use red in a kitchen without making it look too loud?

    Use red as a planned accent, not as a color across every surface. Keep cabinets, walls, and counters in white, cream, wood, or soft grey in most of the room, and let red appear in the cabinets or island, plus one or two smaller spots such as stools or a curtain. Repeat the same red at least twice, so it reads as a plan rather than a single bright object. If the room starts to feel too loud, swap one red piece for a plain wood or white piece and leave the red to the fittings you see most.

    What colors pair best with red in a kitchen?

    White, cream, warm wood, pale stone, soft grey, and matte black pair best with red, because they let the warm color stand out without competing with it. Avoid adding a second strong color in large amounts, such as bright yellow or bold blue on every surface, since two strong colors can fight each other. Use one other accent only in small amounts, such as green from herb pots, and keep the main palette to three colors plus the red.

    Is red hard to keep clean in a kitchen?

    Red needs the same care as other kitchen colors, with a little extra care for pale dust and water marks. Wipe cabinets, appliances, and hardware with a soft damp cloth each week, dry them at once if your water leaves marks, and avoid harsh pads that can scratch paint or metal. Near the stove, wipe grease film often, since it dulls paint over time. Choose washable finishes for cabinets and curtains, and keep fabric items washable, so the scheme stays fresh with routine cleaning.

    Can renters add red to a kitchen without fixed changes?

    Yes. Renters can cover most of this list with no permanent work at all. Knobs and pulls swap back, curtains hang on a tension rod, a kettle pair and a tray move with you, and stools and chairs add color without cabinets. Check your lease before fixing any shelf, rail, or panel, and keep the old hardware in a labelled bag, so the kitchen returns to its original state at the end of the tenancy.

    Does red suit a small kitchen?

    Yes, if you keep it to a few well placed pieces. In a small kitchen, change the hardware, add one pendant light or a set of stools, and style one spot only, such as the window or a single shelf. Skip a full red cabinet repaint and a large red tile wall if the room is dark, and let a curtain or towels carry the warm tone instead. A short list keeps the room easy to cook in, and each red piece you do use gets noticed instead of competing with five others.

    How do I test a red paint or tile before committing?

    Order or borrow a sample in the exact shade you plan to use, and place it beside your floor, counter, and cabinet color in the kitchen itself. Check it in morning daylight, afternoon light, and evening light under your usual bulbs, since red shades shift a lot between lights. Live with the sample for a few days, and check it beside the tap and handles you already own. If the sample looks too bright in one light and too dark in another, choose a deeper, muted red, which tends to read more evenly through the day.


  • 26 Rose Gold Kitchen Ideas for a Fresh Take on Your Home

    26 Rose Gold Kitchen Ideas for a Fresh Take on Your Home

    Rose gold sits between pink and copper, so it brings warmth to a kitchen without the bold shine of yellow gold or the cool feel of chrome. It works best as a repeated accent, not as a single shiny object in an otherwise plain room. A rose gold tap, a set of knobs, and a pendant light in the same finish will read as a plan, while one rose gold item on its own can look like an afterthought. These 26 rose gold kitchen ideas cover cabinets, islands, tile, seating, lighting, and small changes you can make in an afternoon. Start with the finish you can see most, test it beside your floor and counters in daylight and evening light, and keep work surfaces plain so cooking stays easy. If you like pink in a softer form, these pink kitchen ideas show how blush cabinets and pink accents pair with white, wood, and brass.

    Key Takeaways

    • Use one rose gold finish through the room, and repeat it in at least three places, such as the tap, knobs, and a pendant light.
    • Pair rose gold with white, warm wood, pale marble, cream, or soft grey, and keep other strong metals to a minimum.
    • Test a rose gold sample beside your floor, counter, and cabinet color in daylight and evening light before a large change.
    • Put rose gold where hands and eyes land most: taps, handles, island lighting, and seating, rather than on every surface.
    • Choose washable, wipeable finishes near the stove and sink, since kitchen metals pick up grease and water marks.
    • Small changes like knobs, towels, a kettle, and a tray let renters try rose gold with no fixed work.

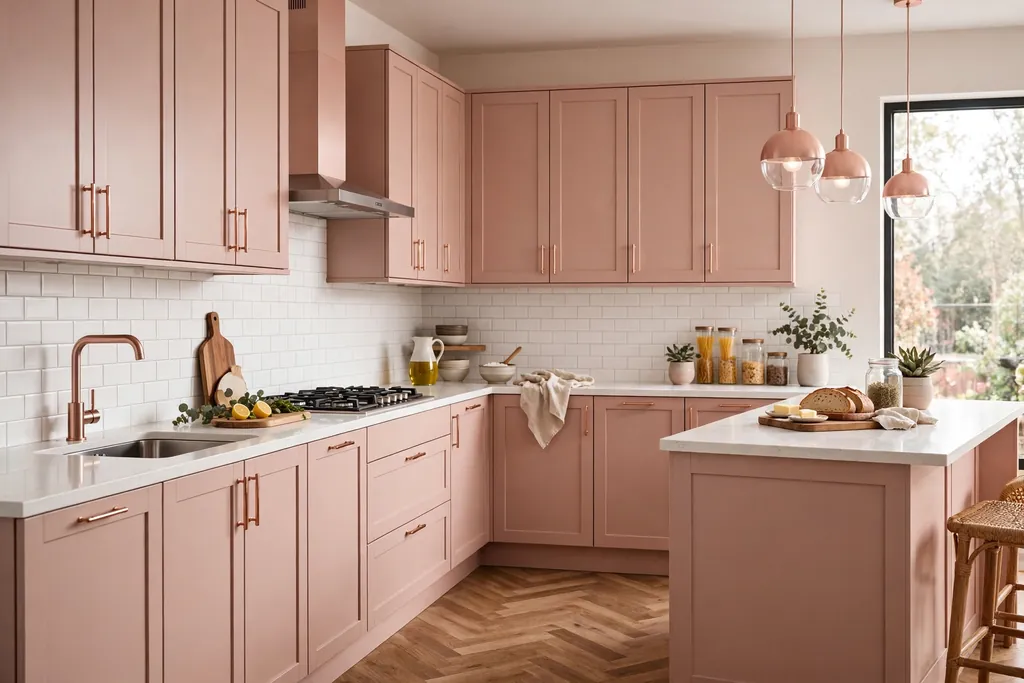
    1. Soft Rose Gold Shaker Cabinets

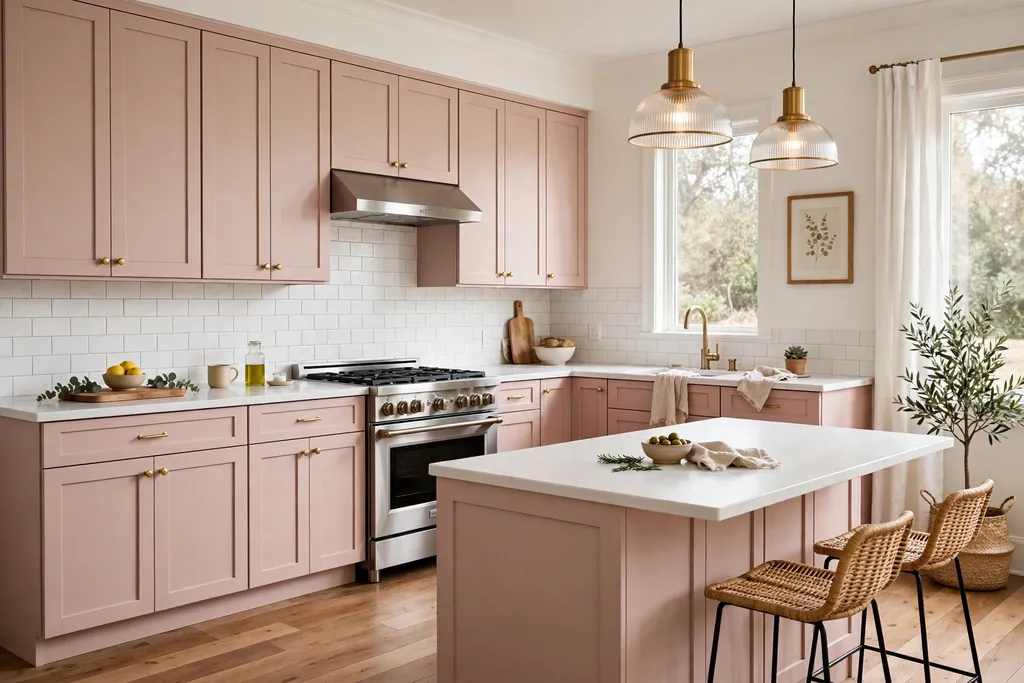
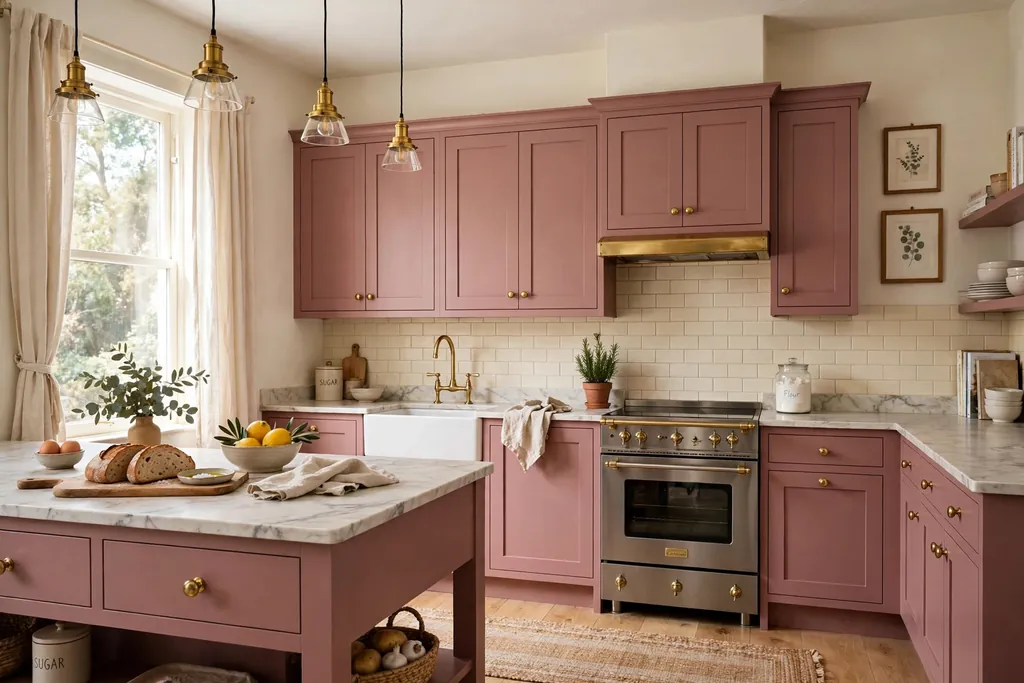
    Kitchen with soft rose gold shaker cabinets, white counters, and a wood floor.

    Paint shaker cabinets in a soft rose gold tone for a kitchen that feels warm and current without shouting. Shaker doors keep the shape simple, and white walls, a pale counter, and a wood floor stop the pink metal tone from feeling heavy. This suits a kitchen with good daylight, where the soft tone reads as a warm neutral rather than a bright color.

    Keep handles simple in a matching rose gold or brushed nickel, and choose a counter in white or pale grey so the cabinets stay the focus. If you worry about commitment, paint one run of cabinets first and live with it for a week before painting the rest. Wipe doors near the stove each week, since pale paint shows cooking splashes.

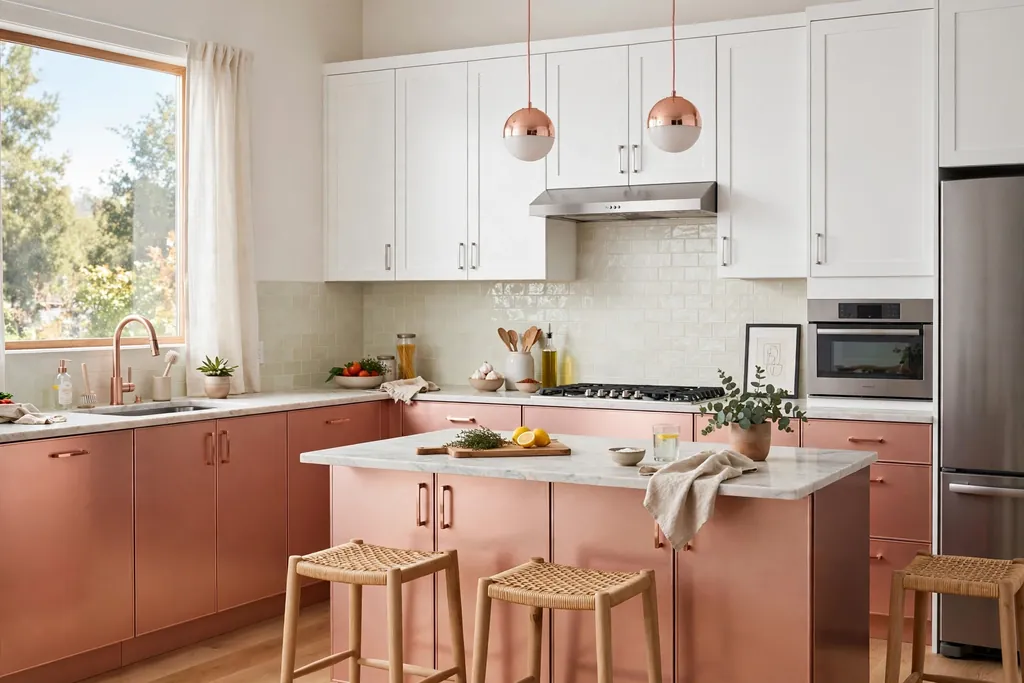
    2. Two Tone Rose Gold Lowers and White Uppers

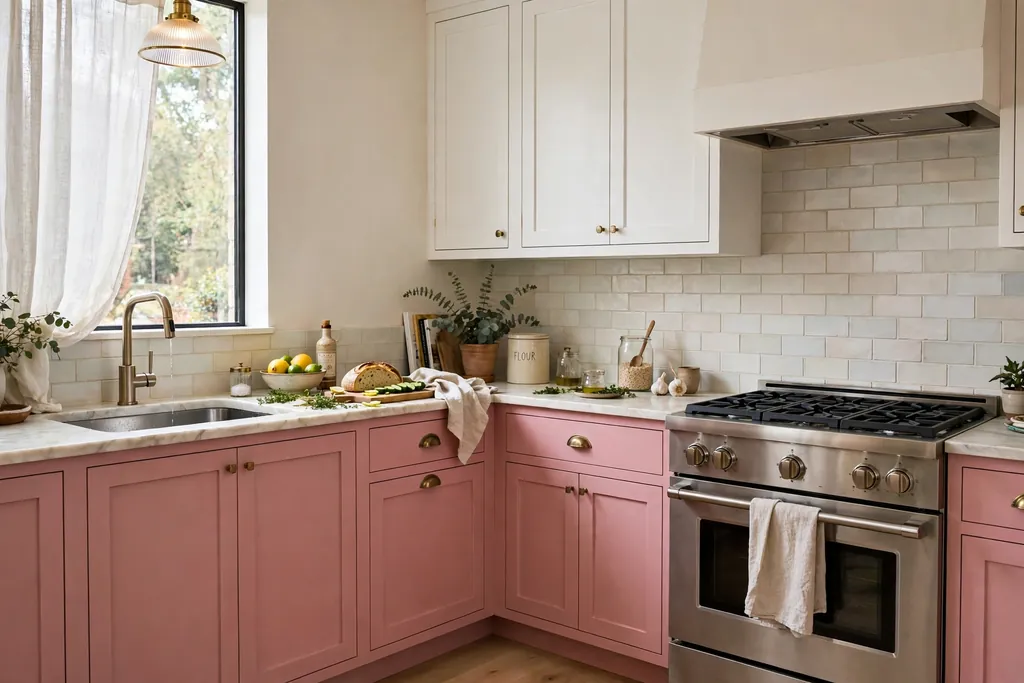
    Kitchen with rose gold lower cabinets, white upper cabinets, and a pale backsplash.

    Use rose gold on the lower cabinets and white on the uppers for a lighter take on a rose gold kitchen. The white uppers keep the eye moving up and make a small kitchen feel taller, while the rose gold base grounds the room. This split also makes repainting easier later, since only half the cabinets need a new color.

    Pair the scheme with a pale backsplash and a wood or white counter. A rose gold or black handle on the lower cabinets ties the two tones together. Keep the wall color plain so the two cabinet colors can do the work. For help choosing the right undertone for the rest of the room, see these ideas for colors for your kitchen cabinets.

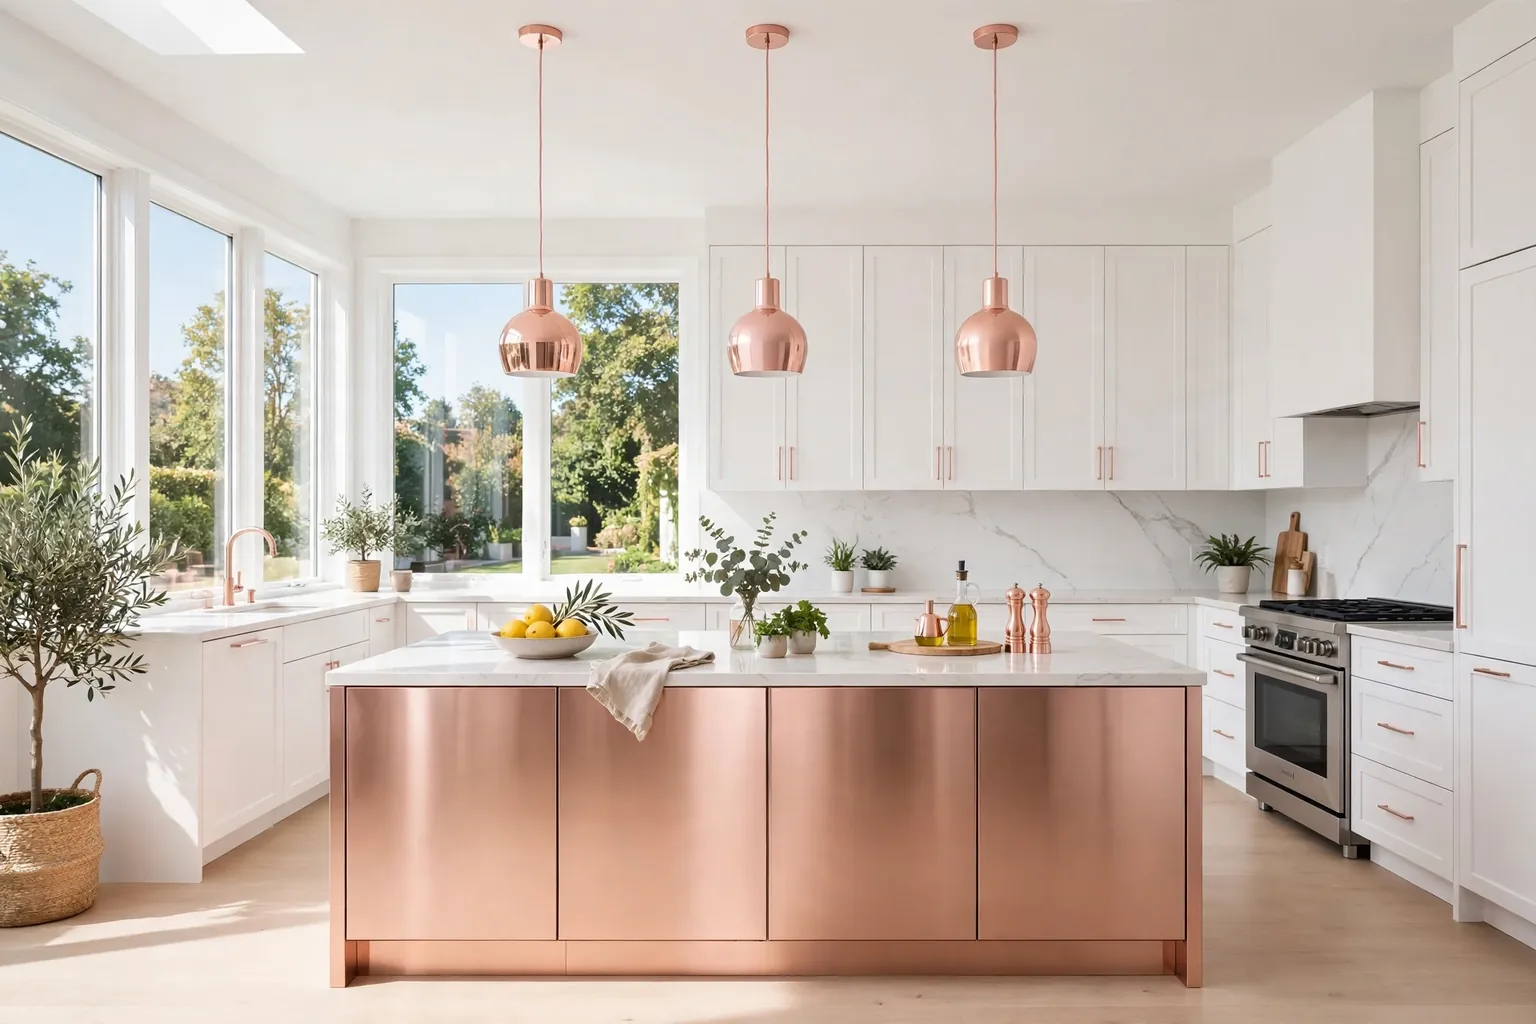
    3. Rose Gold Island in a White Kitchen

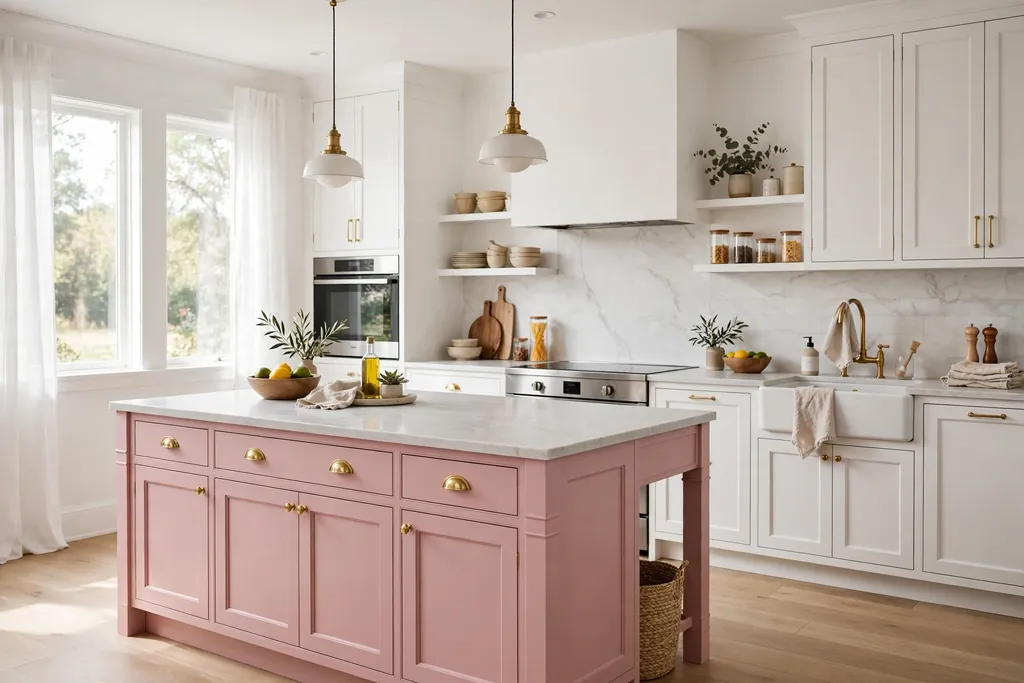
    Rose gold kitchen island with a pale counter in a white kitchen.

    Keep the main cabinets white or wood, and paint only the island in a rose gold tone. The island becomes a clear focal point, and the rest of the kitchen stays neutral, which makes the change lower risk and easier to reverse. A soft rose gold island suits a white kitchen, while a deeper tone suits a kitchen with dark wood floors.

    Repeat the island tone once more, in stools, a rug, or a vase, so it looks planned rather than random. Choose a hard wearing counter for the island, since it takes the most daily use. This is a good first step if you like rose gold but are not ready for rose gold cabinets everywhere.

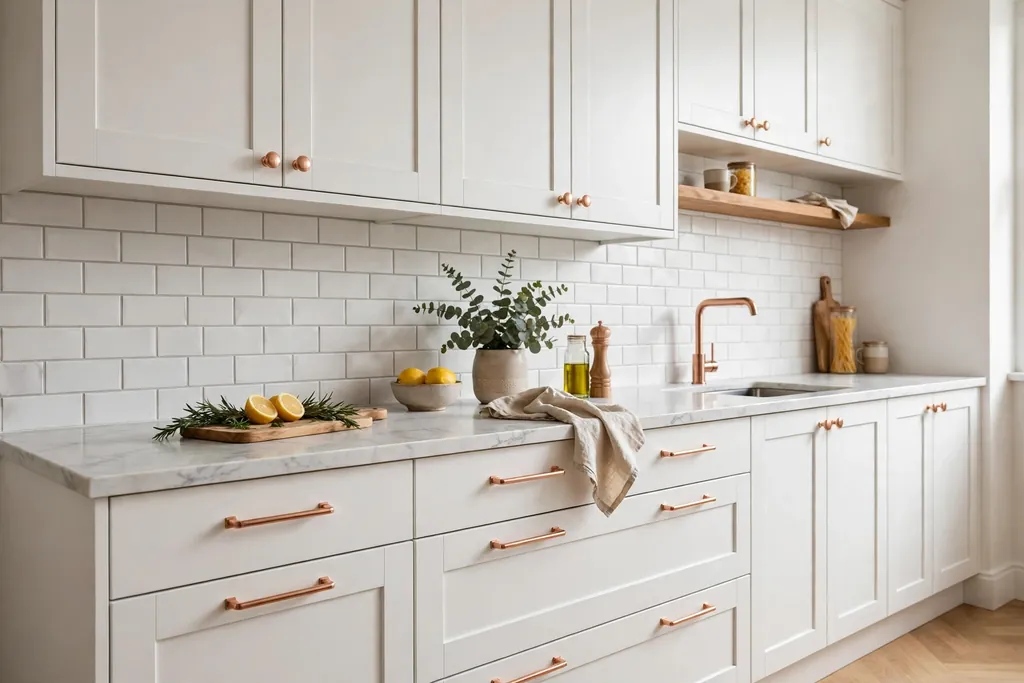
    4. Rose Gold Hardware Swap on Plain Cabinets

    White kitchen cabinets with rose gold knobs and drawer pulls.

    Swap cabinet knobs and drawer pulls for rose gold versions for a small, reversible change. Rose gold hardware suits white, cream, or pale wood cabinets, and it lets you test the finish before painting. This is a good weekend job, and it costs far less than new cabinets.

    Keep all the hardware in the same rose gold tone and finish, so the change looks planned. Save the old hardware in a labelled bag in case you want to swap it back. Check that new pulls match your existing screw spacing, and wipe them often near the stove, since kitchen grease dulls metal.

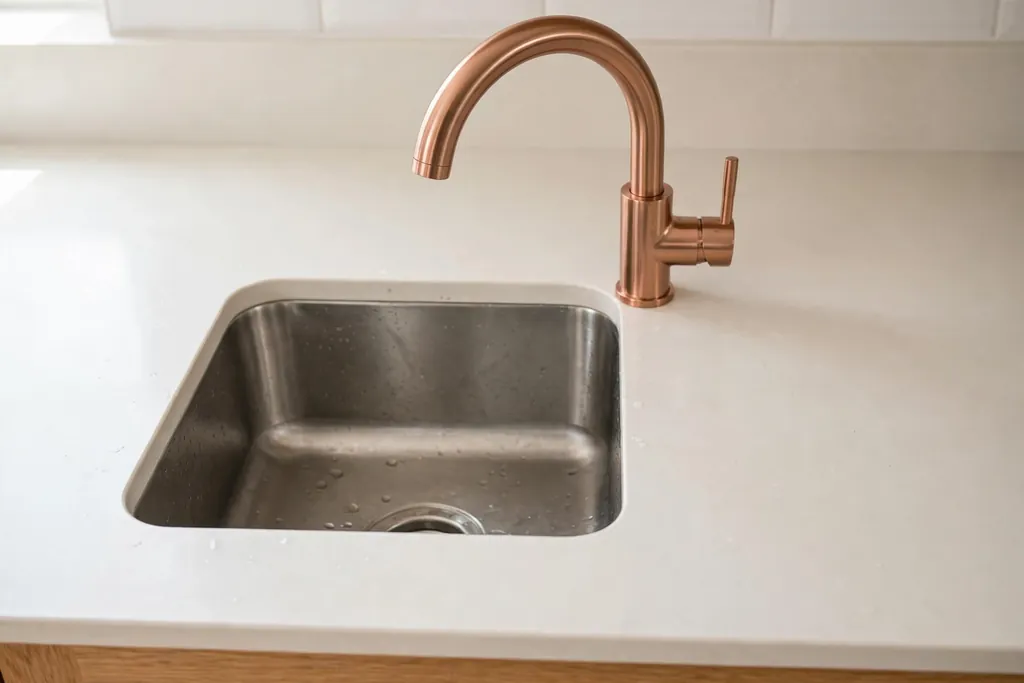
    5. Rose Gold Tap as a Quiet Focal Point

    Kitchen sink with a rose gold tap and a plain counter.

    Fit a rose gold tap at the sink for color at the heart of the work zone. A rose gold tap suits a white or cream kitchen, and it pairs well with a matching soap dispenser or a single rose gold knob nearby. The tap is visible from across the room, so it acts as a decor piece as well as a working fitting.

    Keep the counter around the sink plain, and choose a tap finish that matches your cabinet handles. Check that a new tap fits your existing sink holes, and turn off the water before changing a tap. Dry the tap after use if your water leaves marks, so the finish stays even.

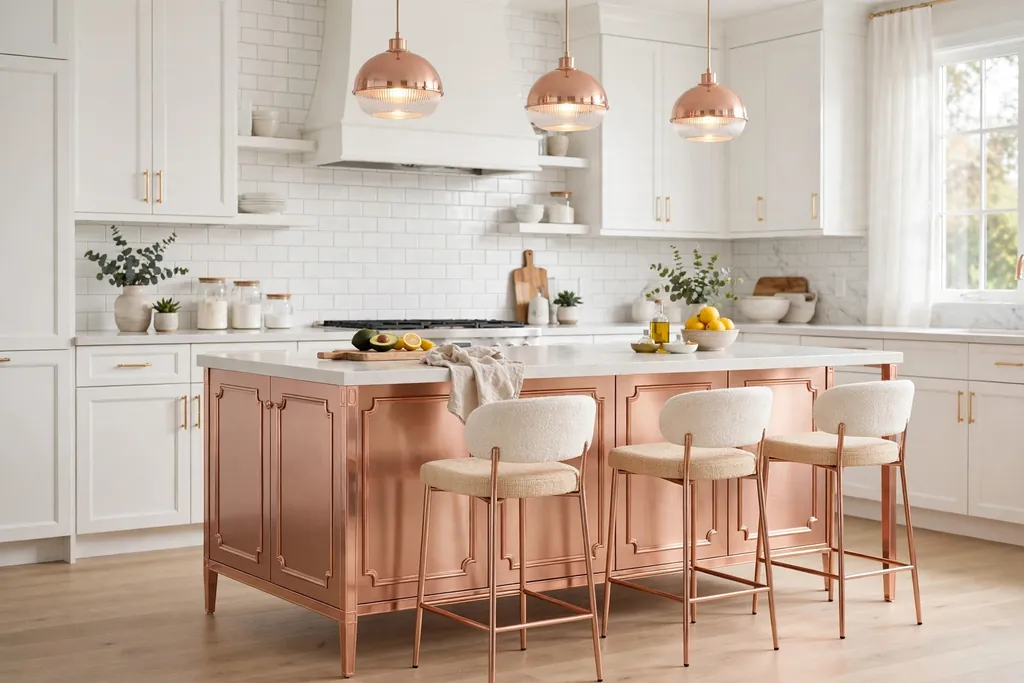
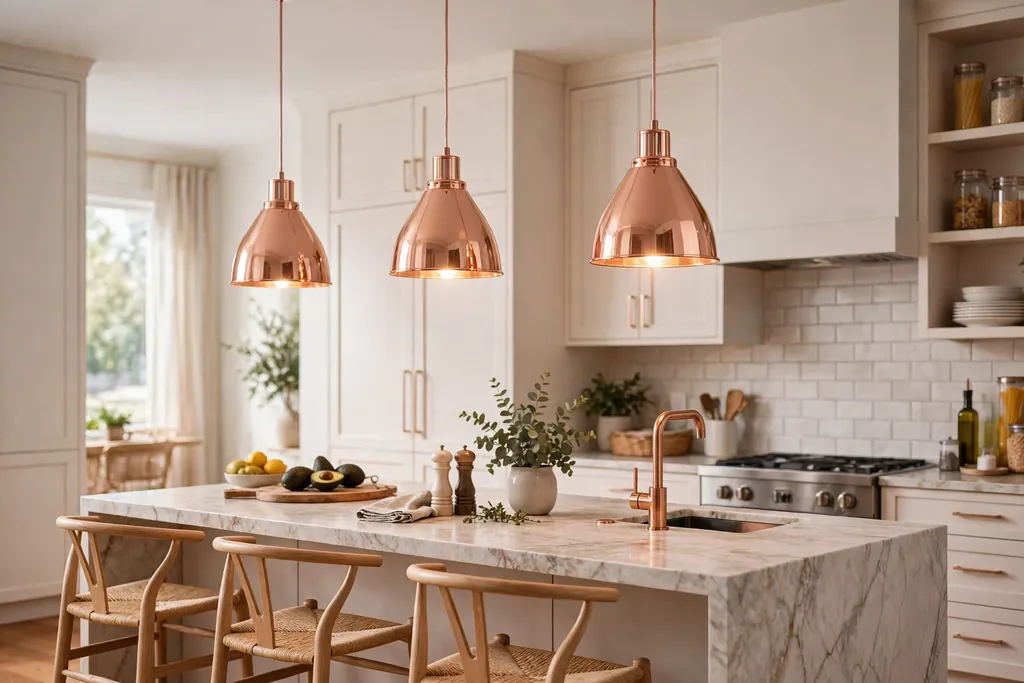
    6. Rose Gold Pendant Lights Over the Island

    Rose gold pendant lights hanging over a kitchen island.

    Hang two or three rose gold pendant lights over the island for warm light and a clear metal accent at eye level. Pendants work well in a row, spaced evenly, with the lowest point well above head height and clear of steam from the hob. A slim dome or cone shade in rose gold suits most kitchens, while a glass shade shows the bulb and softens the metal.

    Match the pendant finish to the tap or handles, and keep the rest of the ceiling lights plain. Use warm white bulbs so the rose gold reads warm in the evening, not cold. Dust the shades often, since kitchen pendants collect grease film over time.

    7. Rose Gold Open Shelves with White Dishes

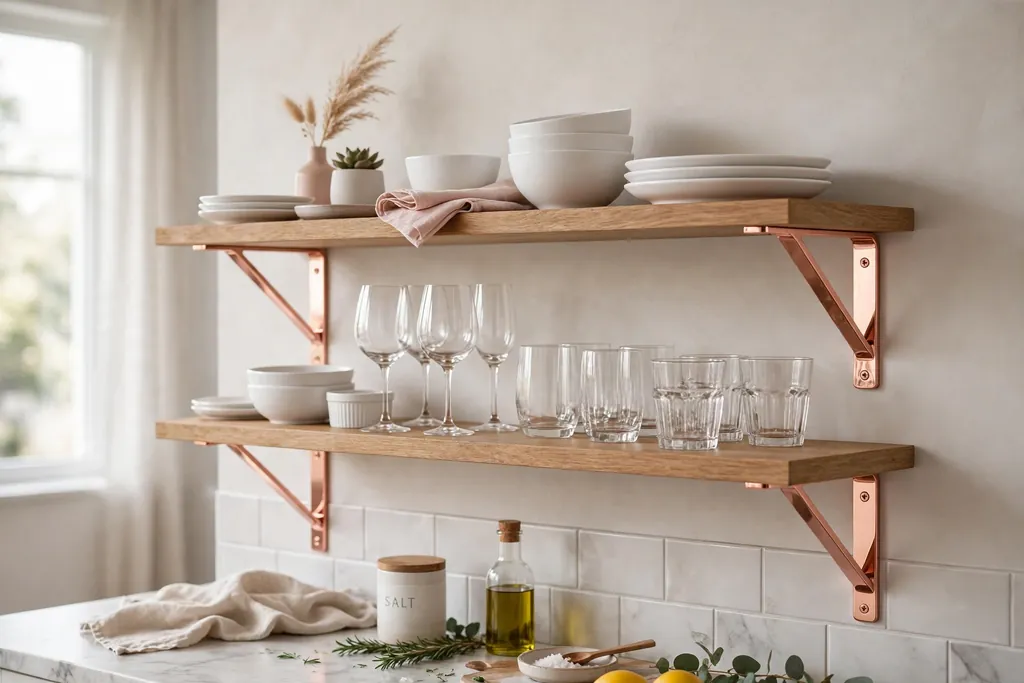
    Open kitchen shelves with rose gold brackets holding white dishes and glasses.

    Paint open shelves in a rose gold tone, or fit rose gold brackets under wood shelves, and display white dishes, clear glasses, and wood boards against them. The metal frames the display and adds color without painting a single cabinet. This suits a kitchen with one blank wall or a short run above a counter.

    Keep the shelf items to daily pieces you actually use, and leave breathing room between groups so shelves read as tidy, not crowded. Dust open shelves weekly, since open storage collects cooking film. Put heavy stacks low, and keep shelves clear of direct stove steam.

    8. Rose Gold Metallic Tile Backsplash

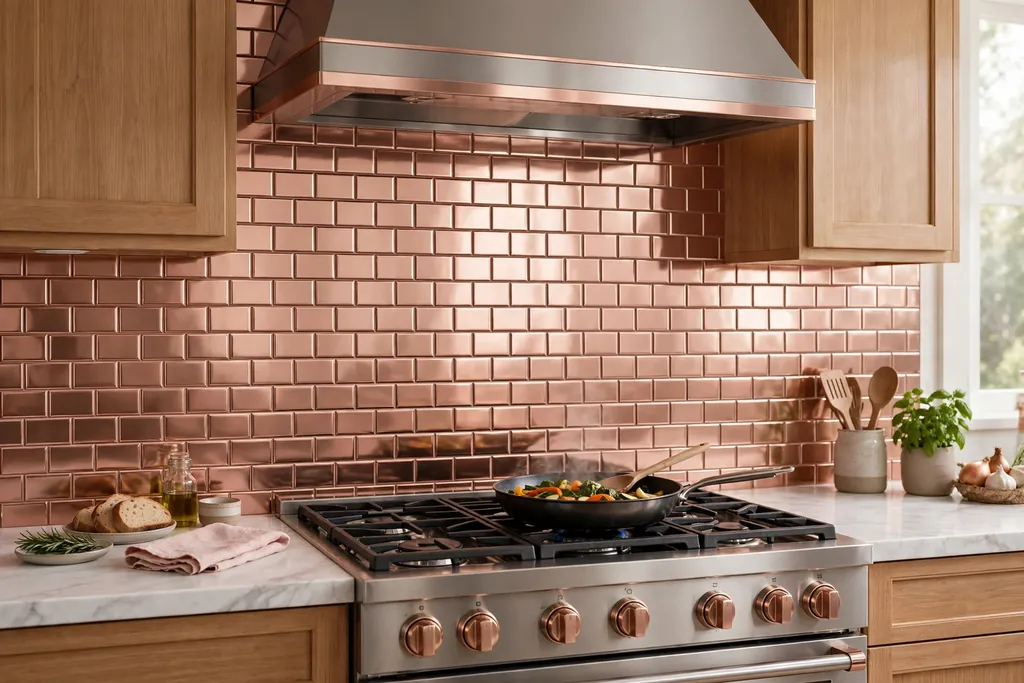
    Rose gold metallic tile backsplash behind a kitchen cooker.

    Lay rose gold metallic tiles as a backsplash for a classic shape in a fresh finish. A pale rose gold tile with a matching grout feels soft, while a deeper metallic tile feels bolder. Subway or square tiles suit most kitchens because the shape is familiar and the size works around sockets and windows.

    Pair rose gold tile with white cabinets and a plain counter, so the tile is the main color note. Order a few spare tiles for future repairs, and seal grout in the splash zone behind the sink and cooker. Check a tile sample under kitchen lights at night as well as in daylight, since metallic finishes shift a lot between lights.

    9. Rose Gold Range Hood Trim

    Kitchen range hood with rose gold trim above a cooker.

    Add rose gold trim, straps, or a thin frame to a plain range hood for a focal point on the cooking wall. The hood shape stays simple, such as a straight chimney or a boxed canopy, while the rose gold trim links it to the cabinets or island below. This works well when the rest of the wall is quiet, with plain tile and pale cabinets, so the trim carries the color.

    Choose a washable finish, since hood surfaces collect grease film, and keep decorative trim clear of the heat zone. If the hood sits over a range, check that any added panels can be wiped clean and do not trap heat. For a softer version, use a thin rose gold strip only, rather than a full metal hood.

    10. Rose Gold Bar Stools at the Island

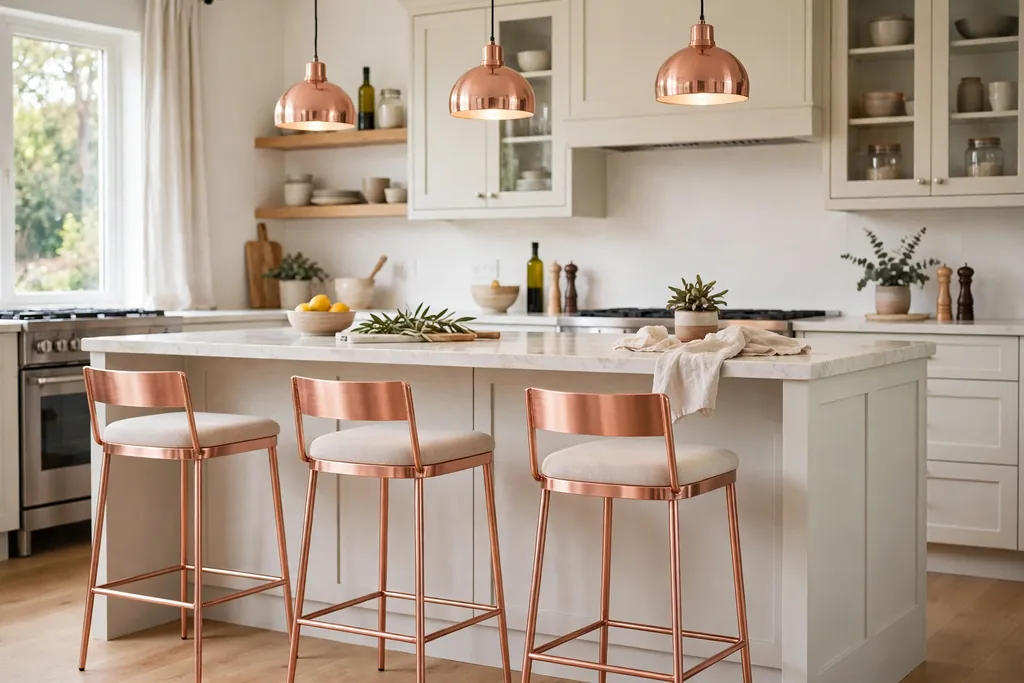
    Rose gold bar stools at a kitchen island with a pale counter.

    Add rose gold bar stools at the island for a seating change that also carries the metal through the room. A rose gold frame with a cream, wood, or pale grey seat suits most kitchens, and the stools are easy to move when you need floor space. Choose stools that slide fully under the island overhang, so the walkway stays clear.

    Keep the stool count to the island length, usually two for a short island and three for a long one, and leave room between seats. Wipe metal frames often, since stool legs pick up floor dust and cooking splashes. If the stools are the only rose gold in the room, add one small match, such as a tray or a vase, so they do not look isolated.

    11. Rose Gold Dining Chairs in a Breakfast Nook

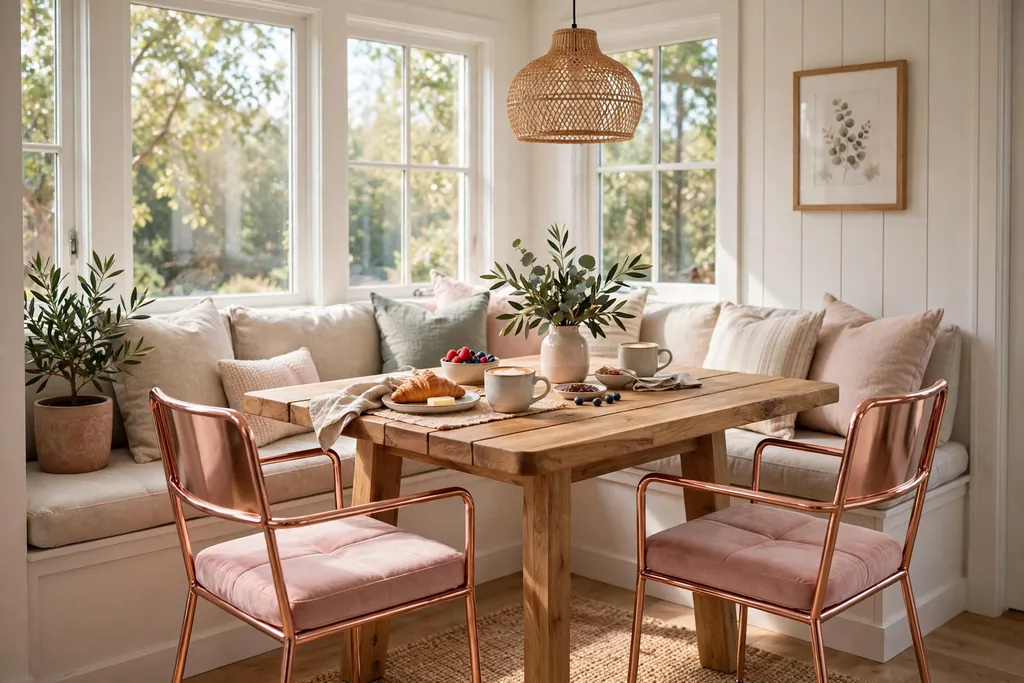
    Breakfast nook with rose gold dining chairs and a wood table.

    Use rose gold dining chairs, or plain chairs with rose gold legs, in a breakfast nook for a seating area that feels dressed without new cabinets. A set of four chairs in a soft metal finish suits a small table, and it pairs well with a wood tabletop and cream cushions. This is a good way to bring rose gold into an open plan kitchen where the eating area stays in view.

    Keep chair cushions washable, since kitchen chairs take daily spills, and check that metal legs have floor protectors so they do not scratch wood or tile. If the chairs feel too shiny on their own, add a plain runner on the table to calm the metal. Keep one chair spare for guests rather than crowding the nook.

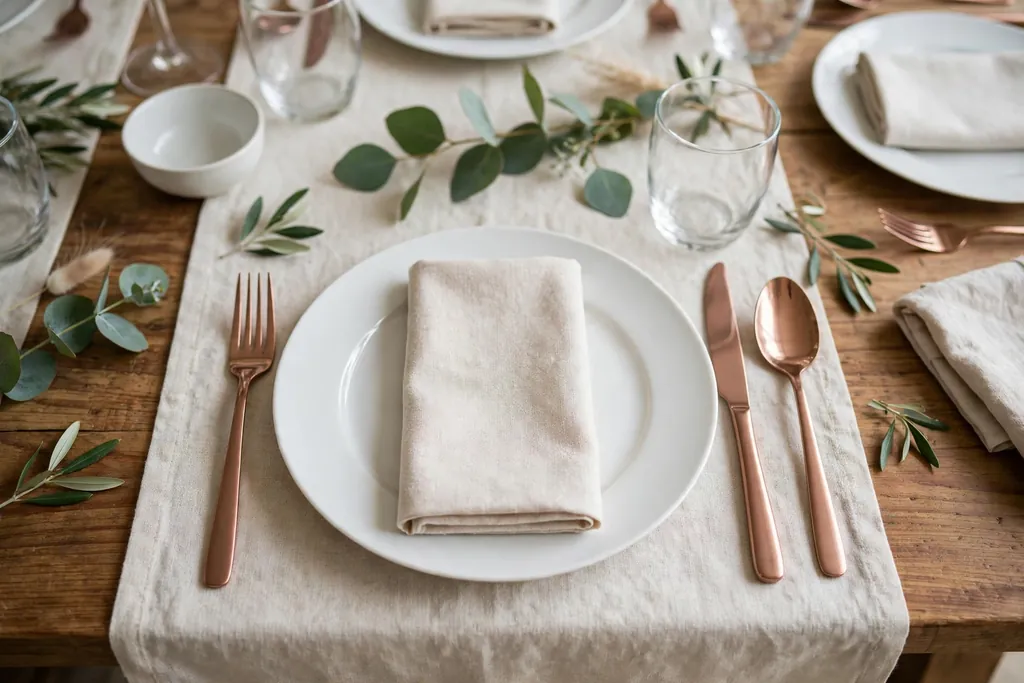
    12. Rose Gold Cutlery and Tableware

    Table set with rose gold cutlery, white plates, and plain napkins.

    Set the table with rose gold cutlery, plus a few rose gold rimmed glasses or bowls, for a table change that costs little and stores easily. Rose gold cutlery suits white plates and plain linen napkins, and it works for daily meals as well as for guests. Keep the rest of the table plain so the metal stands out.

    Wash rose gold cutlery by hand if the maker advises it, and dry it at once to avoid water marks. Store it apart from steel cutlery so the finish does not scratch. If you use rose gold cutlery daily, buy a set with spare pieces, since small items go missing in busy kitchens.

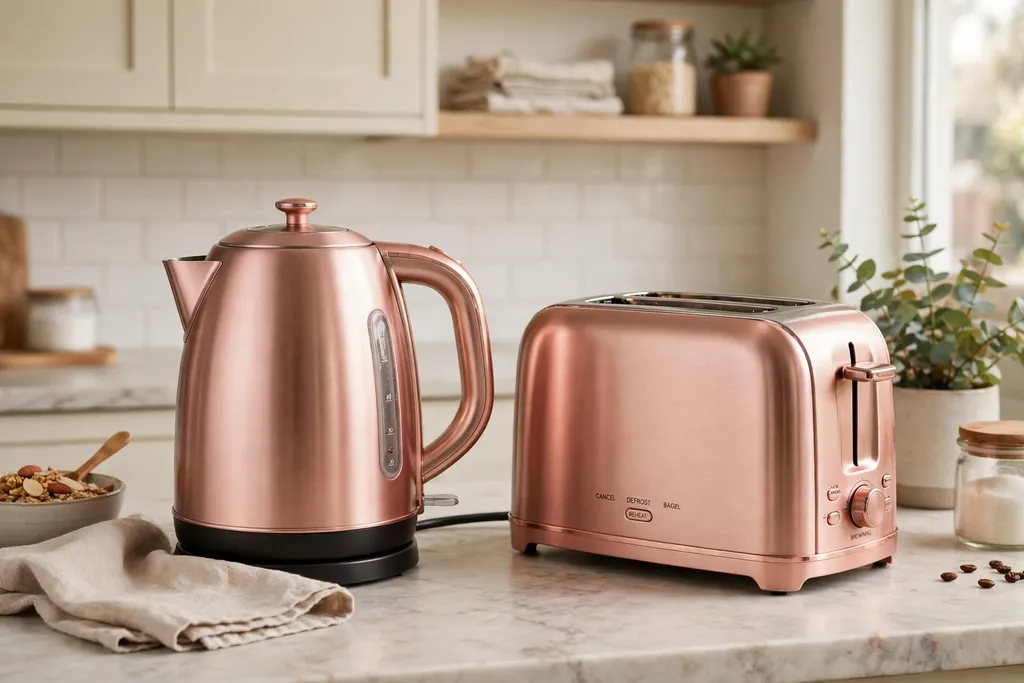
    13. Rose Gold Kettle and Toaster Pair

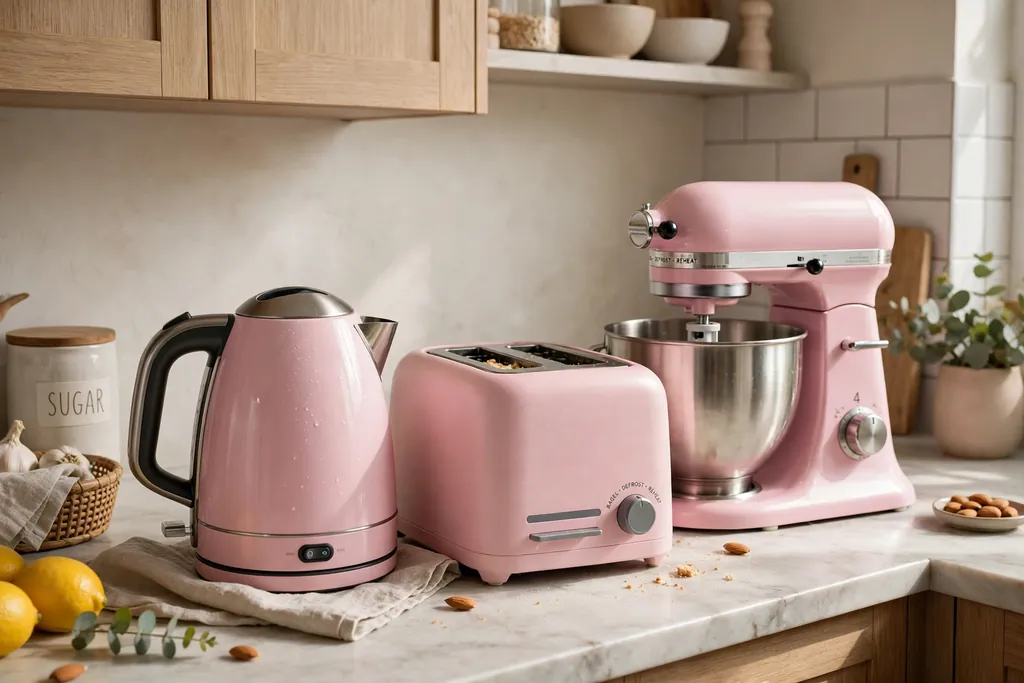
    Rose gold kettle and toaster pair on a kitchen counter.

    Place a rose gold kettle and toaster together on one stretch of counter for a matched small appliance pair. The pair adds color in one clear spot, and it suits a kitchen where a full remodel is not planned. Keep the pair near a socket, with the cord tucked behind, and leave the work run beside the stove clear.

    Wipe the kettle and toaster weekly, since small appliances collect grease film near cooking areas. Keep them away from the sink splash zone, and unplug the toaster when it is not in use. If only one appliance fits the budget, start with the kettle, since it is used and seen more often.

    14. Rose Gold Farmhouse Sink with Matching Tap

    Rose gold farmhouse sink with a matching rose gold tap.

    Fit a rose gold farmhouse sink, with its deep bowl and front panel on show, for color at the heart of the work zone. A pale rose gold sink suits a white or cream kitchen, and it pairs well with a matching rose gold tap. The front panel is visible from across the room, so it acts as a decor piece as well as a sink.

    Keep the counter around the sink plain, and choose a tap finish that matches the sink tone. A farmhouse sink needs a cabinet made to fit it, so check sizes before ordering. Clean the sink with a soft cloth and mild cleaner to protect the finish, and avoid harsh pads that can scratch metal.

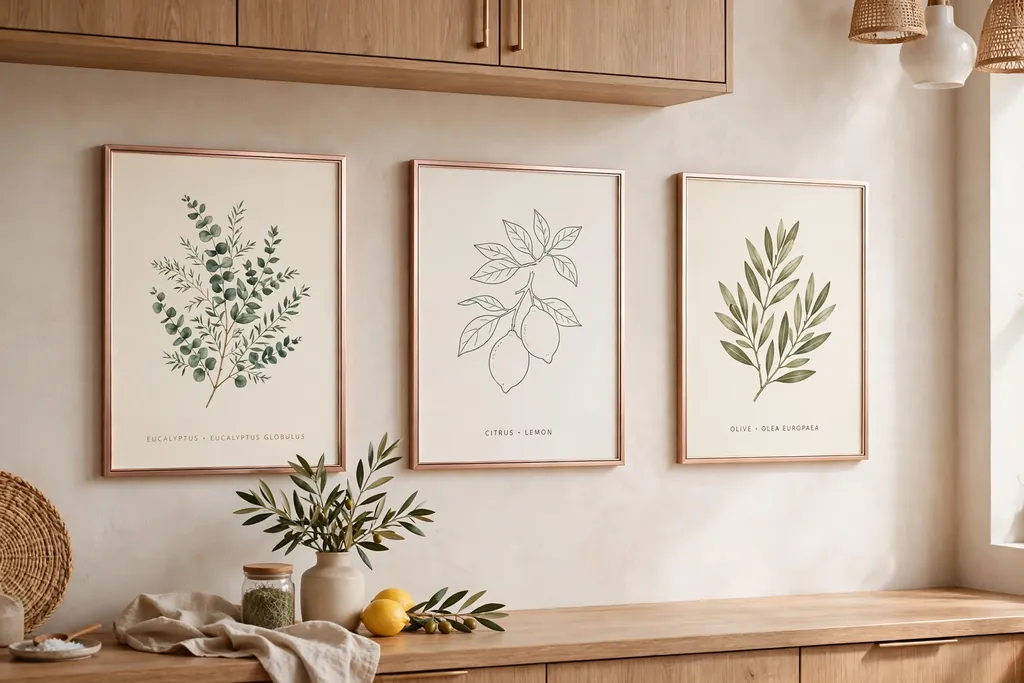
    15. Rose Gold Framed Prints on a Plain Wall

    Kitchen wall with prints in slim rose gold frames.

    Hang two or three prints in slim rose gold frames on a plain kitchen wall for a wall change that needs no building work. Simple food prints, botanical prints, or plain abstract shapes in soft pink and cream suit the metal frames, and the frames link to taps and handles elsewhere in the room. Keep the frames at eye level and evenly spaced.

    Use fixings rated for the frame weight, and check that frames sit clear of steam from the hob and splashes from the sink. If the wall is small, one large framed print works better than three small ones. Swap the prints by season if you want a change without new frames.

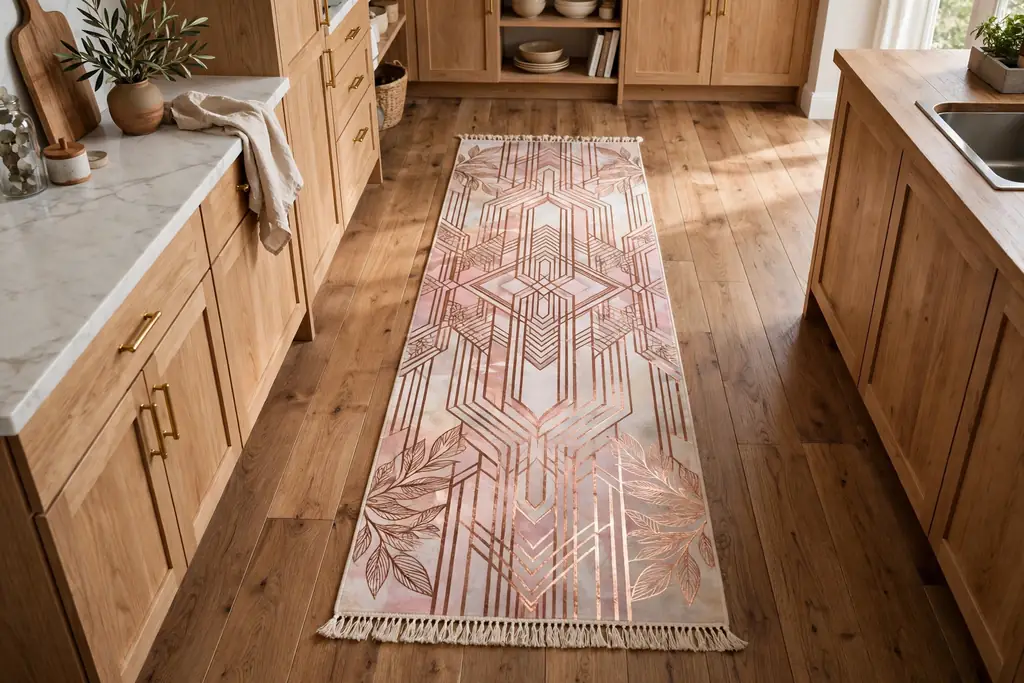
    16. Rose Gold Runner on a Wood Floor

    Runner with a rose gold pattern on a wood kitchen floor.

    Lay a runner with a rose gold pattern, or a plain blush runner with a rose gold border, along the sink run or in front of the stove. A runner softens hard floors, warms up early mornings, and defines the work zone without any fixed change, which suits renters well. Measure the run first and leave space for cabinet doors and the dishwasher to open fully.

    Use a thin rug pad on smooth floors to stop slipping while you carry hot dishes. Choose a low pile you can shake out daily and wash when cooking spills build up. Keep the runner clear of the oven door swing, and pick a washable fabric so the pink tone stays fresh.

    17. Rose Gold Herb Pots on the Windowsill

    Herb pots in a rose gold tray on a kitchen windowsill.

    Line up small herb pots with rose gold rims, or plain pots in a rose gold tray, on the kitchen windowsill. The plants get strong light and stay within reach while you cook, and the metal tray ties the sill to the rest of the room. Use pots of a similar size and material, such as plain white ceramic, so the row looks calm rather than collected at random.

    Set the pots on a narrow tray or saucers to protect the sill from water marks. Choose herbs based on the light your window actually gets, and keep the sill clear of the faucet splash zone where possible. For more ways to dress the window without blocking light, see these kitchen window decor ideas.

    18. Rose Gold Coffee Station on a Tray

    Coffee station with mugs and a pot grouped on a rose gold tray.

    Group your morning coffee items on one rose gold tray, or a wood tray with rose gold handles, on a small section of counter. Mugs on hooks or a stand, a jar of coffee, and the pot you use daily stay grouped, and the tray keeps small items from spreading. A defined station feels dressed when you add a rose gold spoon jar or a small plant beside it.

    Keep the tray away from the sink splash zone and the stove, and wipe it often, since drink areas gather drips. Lift the whole tray aside in one move when you need the counter for prep. If the counter is short, shrink the station to a mug stand and one jar on a small tray.

    19. Glass Front Cabinets with Rose Gold Frames

    Glass front kitchen cabinets with rose gold frames and white dishes inside.

    Paint the frames of glass front cabinets in rose gold, and keep the doors and cabinet bodies white or wood. When the doors close, you get a soft metal outline around glasses and plates, which is more subtle than rose gold cabinet doors. This idea suits a kitchen that already has glass fronts, or one cabinet you can change as a test.

    Use white or clear dishes inside so the frame shows, and keep the display simple with one or two stacks per shelf. If the rose gold feels too strong, paint only the outer frame and leave the inner shelves white. This is a low cost way to try rose gold in a rented or recently fitted kitchen.

    20. Rose Gold Chandelier in the Dining Area

    Rose gold chandelier over a kitchen dining table.

    Hang a rose gold chandelier, or a cluster of small rose gold pendants, over the kitchen dining table for a dining change that also warms the whole open plan room. A slim ring or a small multi arm chandelier in rose gold suits a table for four to six, and it pairs well with a wood table and cream chairs. Keep the lowest point well above the table so people can see each other across it.

    Use warm white bulbs, and put the light on a dimmer if your wiring allows it, so evening meals feel calm. Dust the metal often, since dining lights collect dust from the whole room. If the dining area is small, a single rose gold pendant over the table gives the same note with less visual weight.

    21. Rose Gold Utensil Crock and Rail

    Rose gold utensil crock with wooden spoons on a kitchen counter.

    Set a rose gold utensil crock on the counter, or fit a rose gold rail with hooks beside the hob, for tools you reach for daily. Wooden spoons, spatulas, and ladles in a metal crock add color to the work zone, and a rail keeps tools off the counter. This suits a kitchen where drawer space is short and everyday tools need to stay in reach.

    Keep the crock to the tools you use weekly, and store the rest in a drawer, so the counter stays calm. Wipe the crock and rail weekly, since they sit near cooking steam and grease. Check that hooks hold the tool weight without slipping, and keep handles clear of burners.

    22. Rose Gold Table Centerpiece with Flameless Candles

    Kitchen table centerpiece with a rose gold tray and flameless candles.

    Build a low centerpiece on the kitchen table with a rose gold tray, a small vase, and flameless candles in rose gold holders. Low pieces let people see each other across the table and leave room for serving dishes at meals. Keep everyday settings simple, with plain napkins in a warm tone doing most of the seasonal work.

    Use flameless candles in a kitchen, since real flames near table linen and dried stems are a risk, and keep the tray clear of the hob. Lift the centerpiece off in one move when the table is needed for homework, baking, or board games. Change the vase stems by season to keep the same tray fresh through the year.

    23. Rose Gold Tea Towels and Oven Mitt Set

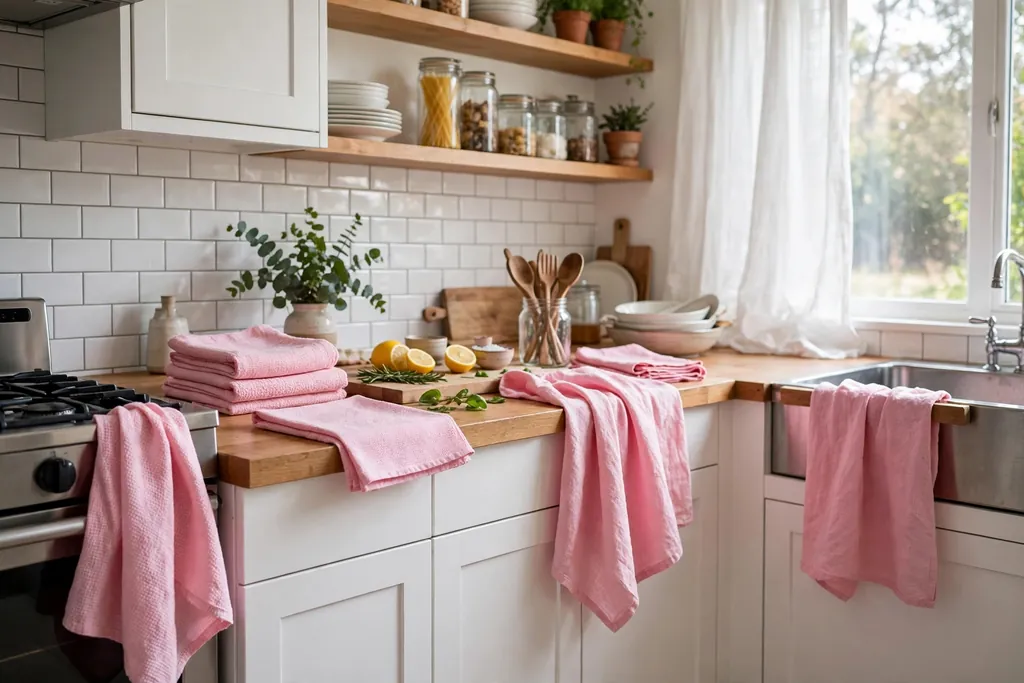
    Blush and cream tea towels hanging on an oven handle in a kitchen.

    Swap everyday tea towels for linen or cotton towels in blush, cream, or a soft rose gold pattern, and add a matching oven mitt. Towels are the fastest rose gold change in a kitchen because they move through the room all day and wash easily. Hang them where they are used most: the oven handle, a hook by the sink, or the dishwasher bar.

    Keep two sets in rotation so a wet or stained set never stays on display. Store the folded spare set in a drawer, not on the counter. Keep towel ends well clear of burners, and never leave a towel draped where it can slip toward a hot pan.

    24. Rose Gold Splashback Panel Behind the Cooker

    Rose gold metal splashback panel behind a kitchen cooker.

    Fit a single rose gold metal splashback panel behind the cooker, rather than tiling the whole wall, for a bold metal note in one clear place. A brushed rose gold panel suits a white or grey kitchen, and it pairs well with a matching tap or handles. The panel is easy to wipe after cooking, which matters in the splash zone.

    Measure the cooker width first, and leave a clear gap between the panel and any heat source as advised by the cooker maker. Seal the panel edges so steam and grease do not get behind it. If a full panel feels too strong, use a narrower panel behind the hob only, with plain tile on the rest of the wall.

    25. Rose Gold Bar Cart for Drinks and Glassware

    Rose gold bar cart with glassware in a kitchen corner.

    Roll a rose gold bar cart into a kitchen corner or beside the dining table for drinks, glassware, and a small tray. A cart with two tiers and a rail suits a kitchen where counter space is short, since it adds storage without fixed cabinets. Keep the top tier for glasses and a jug, and the lower tier for bottles and spare linens.

    Lock the wheels when the cart is in use, and keep it clear of the main cooking path so doors and drawers can open fully. Wipe the metal frame often, since carts collect dust in corners. If the cart is used for daily coffee or tea, keep mugs on it instead of bottles, so it earns its place every morning.

    26. Rose Gold Finishing Touches in a Rental Kitchen

    Kitchen counter with small removable rose gold touches, a tray, vase, and soap dispenser.

    Finish a rental kitchen with small, removable rose gold touches: a tray, a vase, a soap dispenser, a small clock, and a single framed print, all in the same soft metal tone. These pieces sit on existing surfaces and leave with you, so no landlord approval is needed for fixed work. Group them in twos and threes, with one cluster per surface at most, so the room stays calm.

    Hang nothing with fixed screws if your lease forbids it, and use removable hooks or freestanding pieces instead. Keep rose gold away from the stove and sink splash zone where possible, and wipe small metal pieces weekly. When you move, pack the set together in one box, so the next kitchen gets the same scheme in one short job.

    Conclusion

    A rose gold kitchen works best when the metal has a clear job and a calm background. Start with the tap, handles, or island lighting, since those are the pieces you see and touch most, then repeat the same finish in seating, tile, or a tray. White, wood, cream, and soft grey keep rose gold warm rather than shiny, and plain work surfaces keep cooking easy. Small changes like towels, a kettle pair, and a coffee tray let you test the finish before a larger change, and they suit renters as well as owners. For a cooler balance to the warm metal, see these grey kitchen ideas for cabinets, counters, and islands that sit well beside rose gold.

    Save this list on Pinterest for your next free hour in the kitchen, and work through it in order: hardware and tap first, then lighting and seating, then one tile or panel change, and finally the small table and tray touches.

    FAQs

    How do I use rose gold in a kitchen without making it look too pink?

    Use rose gold as a metal, not as a paint color across the whole room. Keep cabinets, walls, and counters in white, cream, wood, or soft grey, and let rose gold appear in the tap, handles, lighting, and one or two small pieces. Repeat the same finish at least three times, so it reads as a plan rather than a single pink object. If the room starts to feel too pink, swap one rose gold piece for a plain wood or white piece and leave the metal to the fittings you touch most.

    What colors pair best with rose gold in a kitchen?

    White, cream, warm wood, pale marble, soft grey, and muted blush pair best with rose gold, because they let the warm metal stand out without competing with it. Avoid adding a second strong metal in large amounts, such as bright yellow gold or shiny chrome on every fitting, since two metals can fight each other. Use one other metal only in small amounts, such as black handles on a few drawers, and keep the main palette to three colors plus the metal.

    Is rose gold hard to keep clean in a kitchen?

    Rose gold needs the same care as other kitchen metals, with a little extra care for water marks. Wipe taps, handles, and small appliances with a soft damp cloth each week, dry them at once if your water leaves marks, and avoid harsh pads that can scratch the finish. Near the stove, wipe grease film often, since it dulls metal over time. Choose washable finishes for taps and handles, and keep fabric items such as towels washable, so the scheme stays fresh with routine cleaning.

    Can renters add rose gold to a kitchen without fixed changes?

    Yes. Renters can cover most of this list with no permanent work at all. Knobs and pulls swap back, towels and a runner sit on existing surfaces, a kettle pair and a coffee tray move with you, and a bar cart adds storage without cabinets. Hang framed prints with removable fixings if your lease allows them, and check your lease before fixing any shelf, rail, or panel. Keep the old hardware in a labelled bag, so the kitchen returns to its original state at the end of the tenancy.

    Does rose gold suit a small kitchen?

    Yes, if you keep it to a few well placed pieces. In a small kitchen, change the tap or handles, add one pendant light or a set of stools, and style one spot only, such as the windowsill tray or a single shelf. Skip a full rose gold cabinet repaint and a large metal splashback, and let a runner or towels carry the warm tone instead. A short list keeps the room easy to cook in, and each rose gold piece you do use gets noticed instead of competing with five others.

    How do I test a rose gold finish before committing to cabinets or tile?

    Order or borrow a sample in the exact finish you plan to use, and place it beside your floor, counter, and cabinet color in the kitchen itself. Check it in morning daylight, afternoon light, and evening light under your usual bulbs, since metallic finishes shift a lot between lights. Live with the sample for a few days, and check it beside the tap and handles you already own. If the sample looks too pink in one light and too copper in another, choose a softer, brushed finish, which tends to read more evenly through the day.


  • 22 White Kitchen Cabinet Ideas for a Welcoming, Lived-In Look

    22 White Kitchen Cabinet Ideas for a Welcoming, Lived-In Look

    Sheet No.: 79
    Brand: Dwell Ovell (dwellovell.com)
    Author: Clara Bennett
    Parent keyword: White Kitchen Cabinet Ideas
    Keyphrase: white kitchen cabinet ideas
    Slug: white-kitchen-cabinet-ideas
    Categories: Kitchen & Dining (primary: Kitchen & Dining)
    Publish slot: Sept 17, 2026, 4:00pm America/New_York
    Status: Draft file only (do not publish)

    A. SEO Brief

    Intent: Help readers use white kitchen cabinets in a way that feels warm and lived in, not cold or showroom perfect. Readers want practical ideas for cabinet styles, storage, hardware, seating and styling that work in real kitchens, with tips they can copy without a full remodel.

    Primary keyphrase: white kitchen cabinet ideas
    Secondary terms: white shaker kitchen cabinets, white kitchen cabinets with wood island, glass front kitchen cabinets, white kitchen storage ideas, white cabinets with brass hardware, white kitchen pantry ideas, cottage kitchen cabinets

    Sheet title: “8 White Kitchen Cabinet Ideas for a Welcoming, Lived-In Look”
    Count note: Sheet count is 8, which is 10 or fewer. Every Dwell Ovell post must have more than 10 ideas, so the count was raised from 8 to 22. The final title is “22 White Kitchen Cabinet Ideas for a Welcoming, Lived-In Look” and the article delivers 22 distinct numbered ideas, numbered continuously 1 to 22.

    Article title / H1: 22 White Kitchen Cabinet Ideas for a Welcoming, Lived-In Look
    SEO title (51 characters): 22 White Kitchen Cabinet Ideas for a Welcoming Look
    Meta description (149 characters): Discover 22 white kitchen cabinet ideas, from Shaker doors and glass fronts to pantry walls and cozy seating, with tips for a warm, lived-in kitchen.
    Slug: white-kitchen-cabinet-ideas

    Internal links used (verified live dwellovell.com URLs only, checked with curl before writing):
    – https://dwellovell.com/how-to-style-open-shelves/ (open shelves styling)
    – https://dwellovell.com/colors-for-your-kitchen-cabinets/ (cabinet colors)
    – https://dwellovell.com/kitchen-window-decor-ideas/ (window decor)
    – https://dwellovell.com/corner-kitchen-cabinet-ideas/ (corner cabinets)
    – https://dwellovell.com/kitchen-wall-storage-ideas/ (kitchen wall storage)
    – https://dwellovell.com/everyday-dining-table-decor/ (dining table decor)
    – https://dwellovell.com/kitchen-balcony-ideas/ (small kitchen and balcony seating ideas)

    Research limits: No live competitor research or search volume checks were claimed for this draft. No prices, products, measurements, statistics or brand endorsements are stated. Tips are general decorating guidance. All internal links above were verified to return HTTP 200 before writing.

    B. Complete Article

    22 White Kitchen Cabinet Ideas for a Welcoming, Lived-In Look

    White cabinets have stayed popular for a simple reason: they keep a kitchen bright, they pair with almost any counter and floor, and they leave room for wood, color and everyday life to show. The risk is a kitchen that looks neat but feels cold. The fix is rarely more white. It is texture, warm hardware, open storage, good lighting and places to sit, cook and gather. These 22 white kitchen cabinet ideas cover door styles, storage, seating and small styling choices, so you can plan a full kitchen or refresh the cabinets you already have.

    Key Takeaways

    • Pair white cabinets with warm wood, brass or black hardware, and natural textures so the room feels lived in, not clinical.
    • Mix closed cabinets with one open element, such as glass fronts, open shelves or a plate rack, for balance and easy access.
    • Plan storage by task: deep drawers for pots, a tall pantry for dry goods, and a dedicated spot for coffee or baking gear.
    • Use lighting inside and under cabinets to soften white doors in the evening.
    • Keep one or two lived-in touches on show, such as boards, bowls and herbs, and keep work surfaces clear for cooking.
    • Test white paint and hardware samples in your own daylight and evening light before committing to a full run.

    1. Classic White Shaker Cabinets All Over

    Kitchen with classic white Shaker cabinets on every wall and a pale counter.

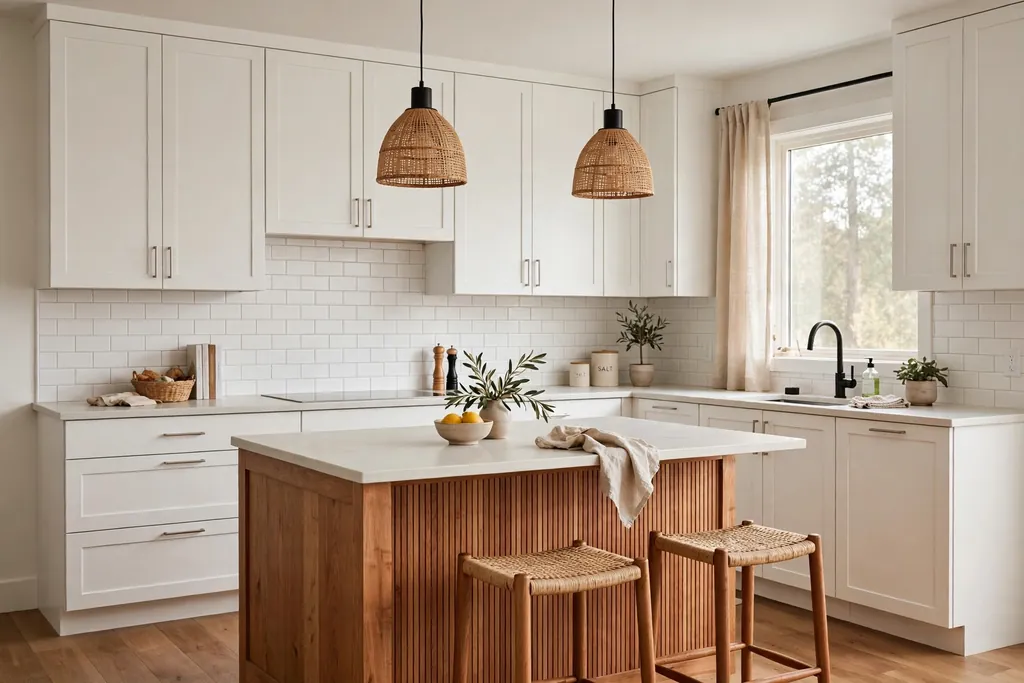
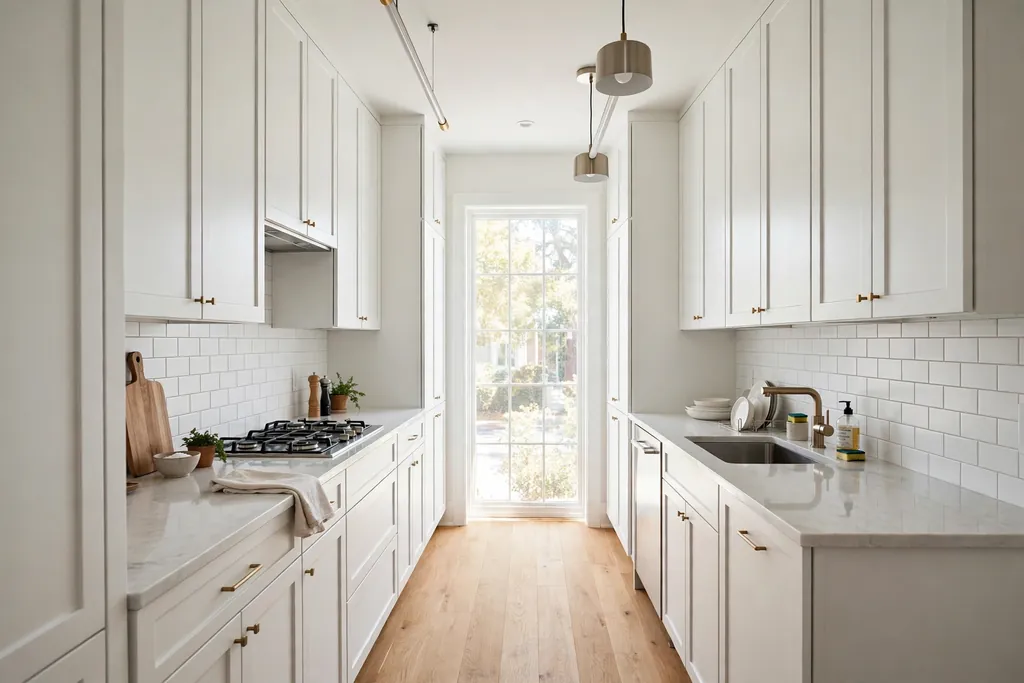
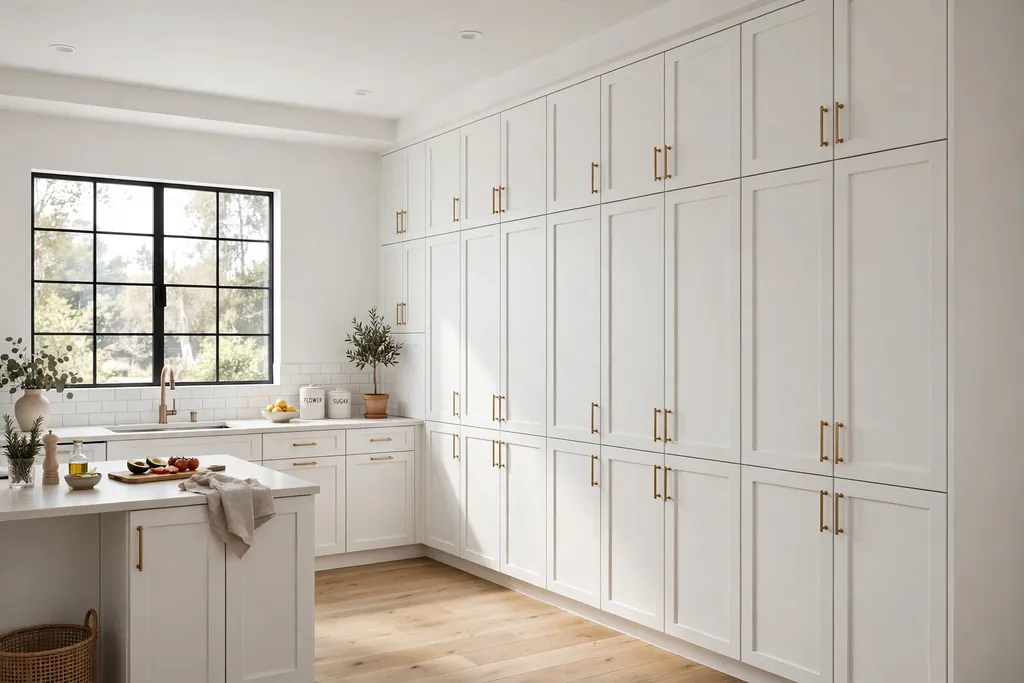
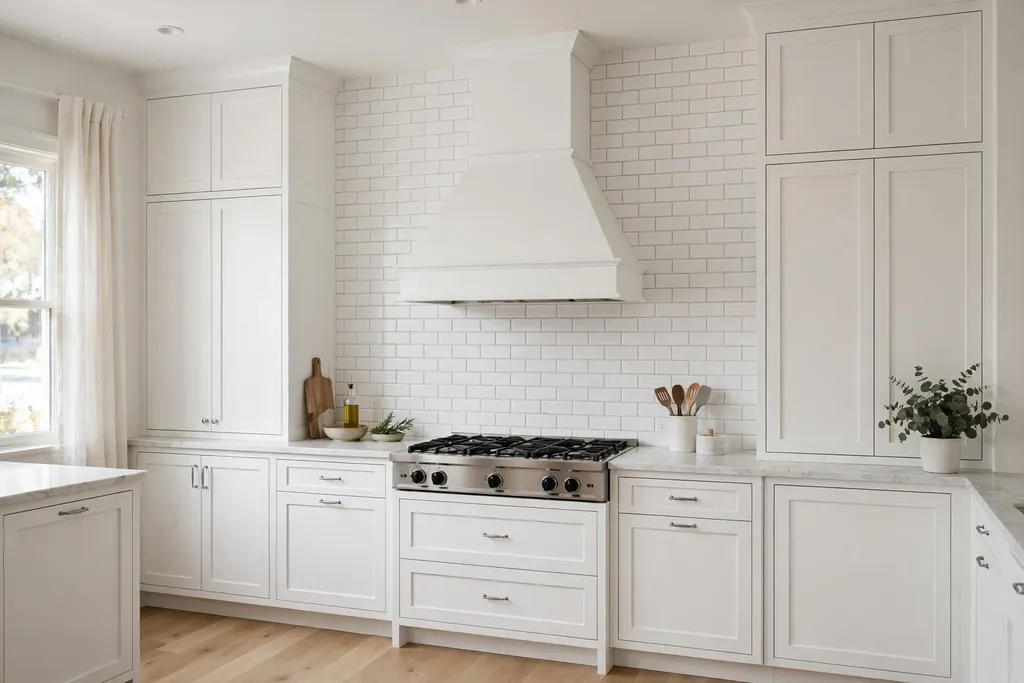
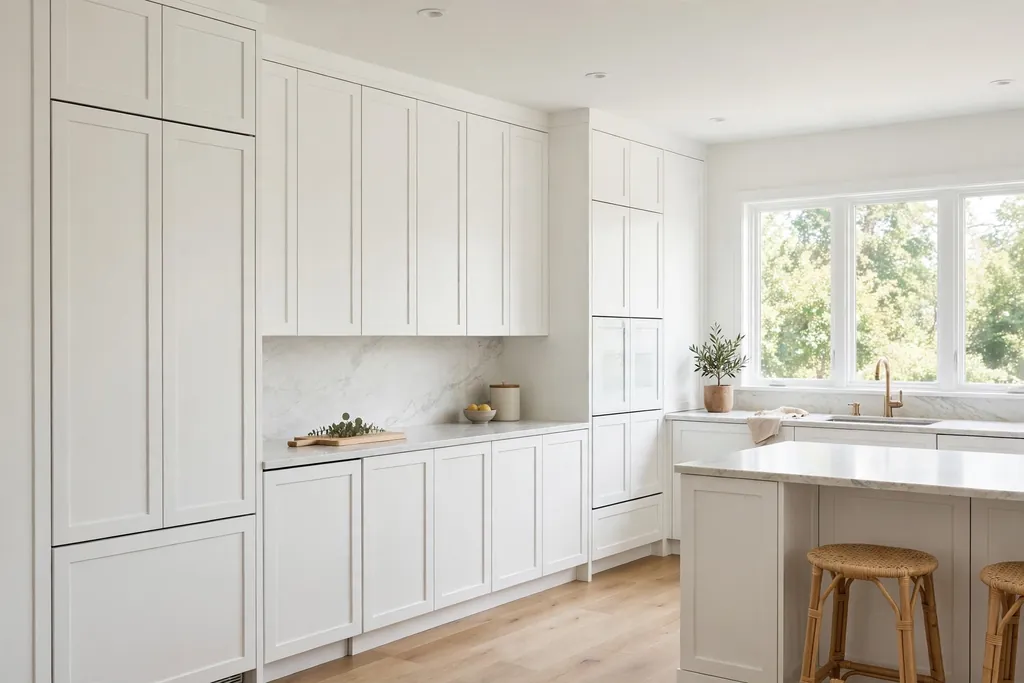
    Start with the most reliable version: white Shaker cabinets on every wall, with a plain counter and a simple backsplash. The recessed panel adds just enough detail to avoid a flat look, while the white keeps a small or dark kitchen feeling open. This suits almost any home, and it gives you a calm base for wood floors, a colored rug or brass taps.

    Keep the wall color warm rather than stark, such as a soft cream or pale greige, so the cabinets read as warm white. Choose a counter in white, pale grey or light wood, and repeat one warm material, like oak stools or a wood board, in two spots. The result is a kitchen that feels clean, but still warm enough to linger in.

    2. White Cabinets with a Wood Island Base

    Kitchen with white wall cabinets and a warm wood island base.

    Keep the wall cabinets white and build the island base in warm wood for a clear contrast that feels like furniture, not a fitted block. The wood grounds the room, hides scuffs better than white paint at kick height, and pairs well with white uppers and a pale counter. This two-tone split is also easier to live with than two cabinet colors on every wall.

    Repeat the island wood once more, in open shelves, a stool seat or a cutting board, so the island looks planned. Keep the island counter plain and hard wearing, since it takes daily chopping, homework and coffee cups. If you already have white cabinets, a new wood island base or a wood clad panel can give a similar effect without repainting everything.

    3. Glass Front White Uppers

    White kitchen cabinets with glass fronts displaying white dishes and clear glasses.

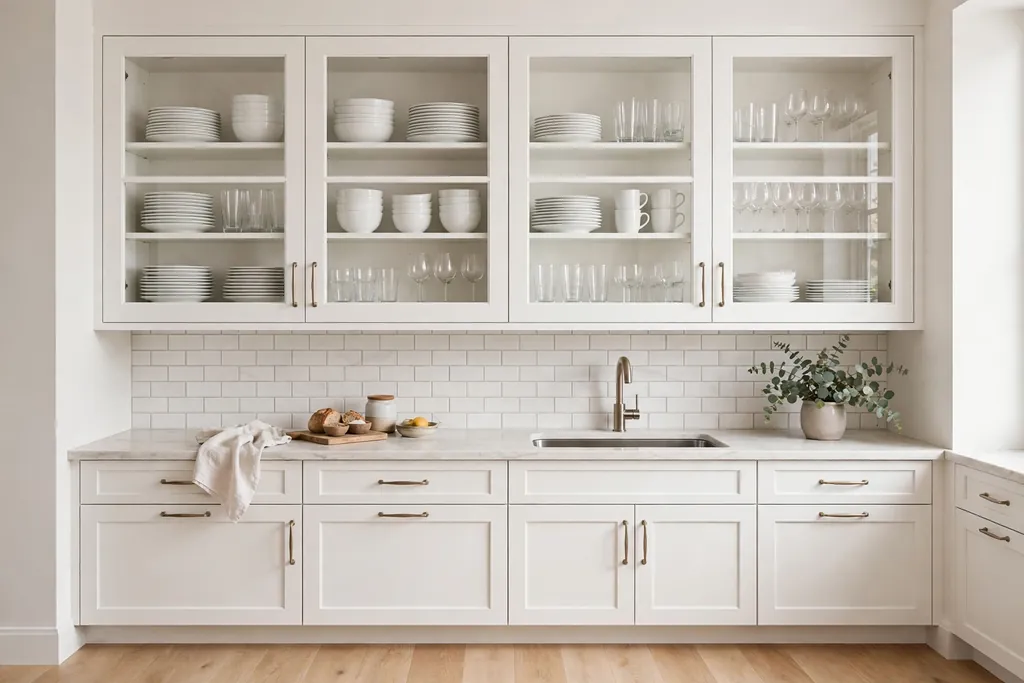
    Swap a few white upper doors for glass fronts, and display white dishes, clear glasses and a few wood boards behind them. Glass breaks up a long run of white doors, adds depth, and makes everyday pieces easy to find. It suits a kitchen with one straight run, where two or three glass doors are enough to change the whole wall.

    Keep the display simple, with one stack per shelf and space between groups, so the cabinets read as tidy. Put daily dishes at easy reach and pretty but rarely used pieces higher up. If glass feels too exposed, use reeded or frosted glass on one cabinet for a softer version of the same idea.

    4. White Cabinets Mixed with Open Shelves

    White kitchen cabinets beside open wood shelves with mugs and bowls.

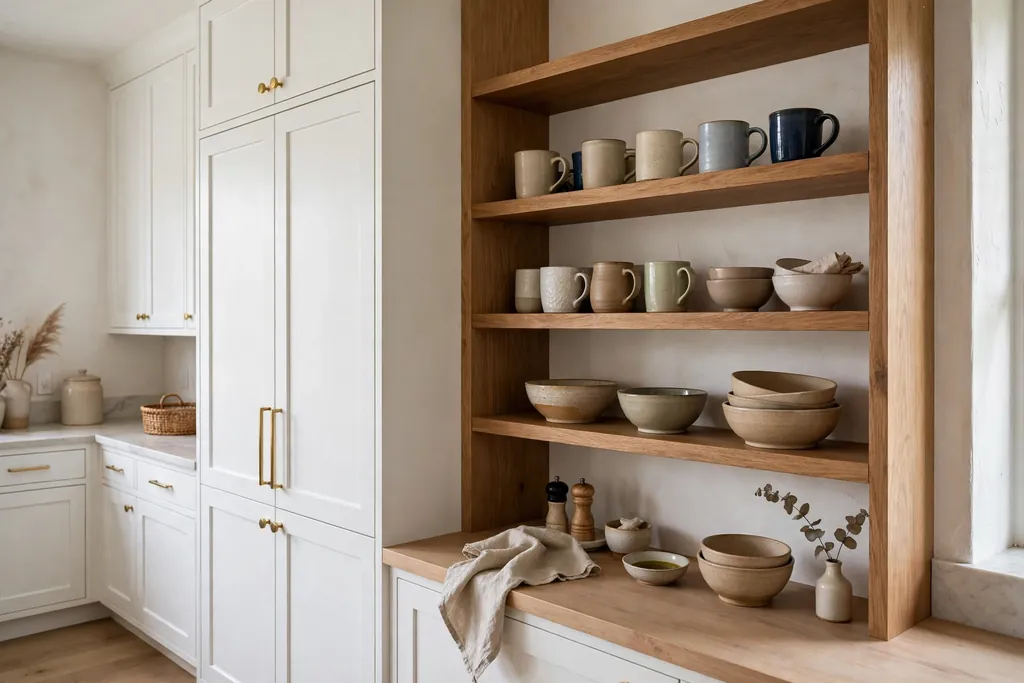
    Replace one short run of white uppers with open wood shelves, and keep the rest of the cabinets closed. The shelves give you a spot for daily mugs, bowls and plants, while the closed cabinets hide the less pretty storage. This mix is practical in a small kitchen, where a full wall of uppers can feel heavy.

    Our guide to how to style open shelves shows how to leave breathing room between groups so shelves read as calm, not crowded. Keep shelf items to pieces you use weekly, and dust them often, since open storage collects cooking film. Put the shelves near the sink or cooker, where daily dishes are most useful.

    5. White Beadboard Cabinets for a Cottage Feel

    Cottage kitchen with white beadboard cabinets and a farmhouse sink.

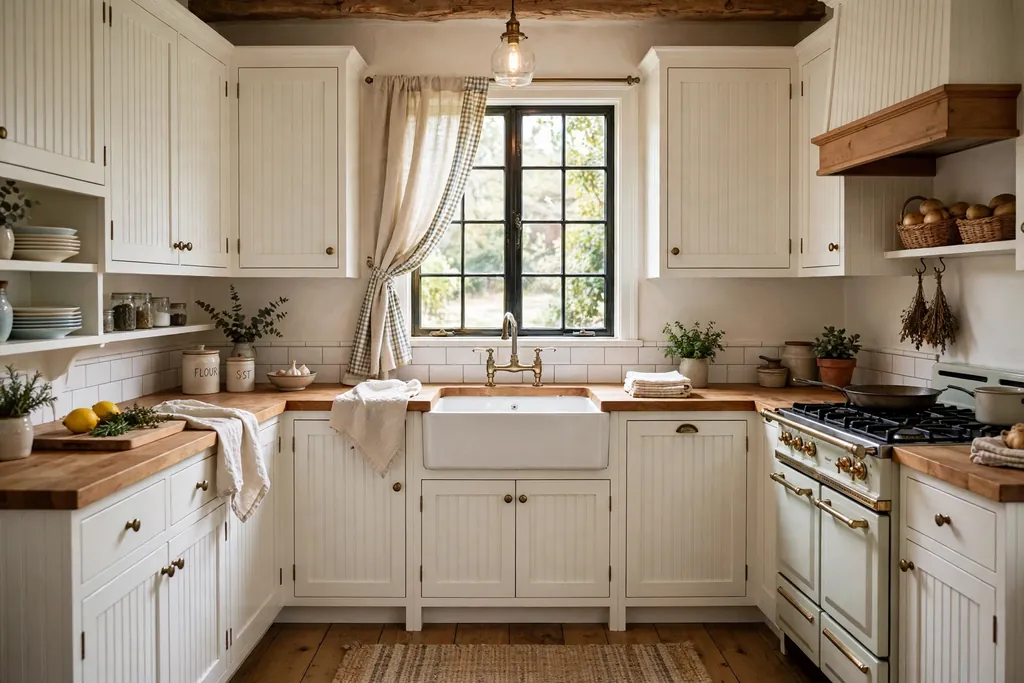
    Choose beadboard door fronts for a cottage kitchen, with narrow vertical grooves that add texture without color. Beadboard suits a farmhouse or coastal home, and it pairs well with a farmhouse sink, wood counters and woven baskets. The texture stops white from looking flat, even in a kitchen with little natural pattern elsewhere.

    Keep counters and backsplash plain, so the beadboard can carry the detail. Wipe the grooves with a damp cloth, since crumbs and dust settle in the lines. If full beadboard doors feel like too much, use them on the island or on one pantry wall, and keep the rest of the cabinets in plain Shaker style.

    6. White Cabinets with a Dark Countertop

    Kitchen with white cabinets and a dark charcoal countertop.

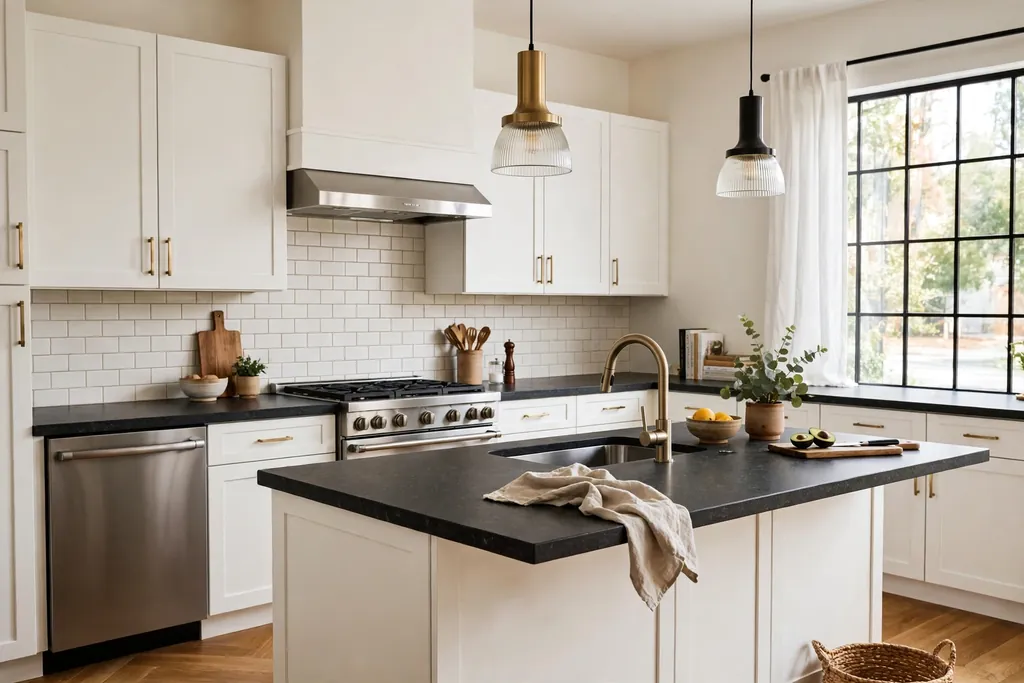
    Pair white cabinets with a dark countertop, such as charcoal, deep grey or a dark stone look, for a clear contrast that anchors the room. The dark surface makes white doors look brighter, hides stains better than a pale counter, and suits a kitchen with wood floors or black hardware. This pairing works in both classic and simple modern kitchens.

    Keep the backsplash pale, in white tile or a light plaster tone, so the dark counter does not make the room feel heavy. Wipe the counter after cooking, since dust and crumbs show more on dark surfaces. A dark counter also helps a white kitchen feel grounded in a large, open plan space.

    7. White Cabinets with a Marble Look Backsplash

    White kitchen cabinets with a marble look backsplash and brass taps.

    Use a marble look backsplash, with soft grey veining on a white base, behind white cabinets for a quiet, classic backdrop. The veining adds movement without a new color, and it pairs well with brass taps, wood stools and pale counters. This suits a kitchen where you want the cabinets to feel calm and the wall to add gentle interest.

    Keep the counter plain, so the backsplash pattern stays clear. Seal grout in the splash zone behind the sink and cooker, and wipe splashes promptly. If a full marble look slab is out of reach, large marble look tiles give a similar effect with more grout lines to clean.

    8. White Cabinets with Brass Knobs and Pulls

    White kitchen cabinets with brass knobs and cup pulls.

    Warm white cabinets with brass knobs, cup pulls and a matching tap for an instant lift. Brass softens white, suits wood floors and cream walls, and works with both Shaker and beadboard doors. This is one of the easiest cabinet updates, since hardware swaps need no painting and no building work.

    Keep all the brass in the same finish, so knobs, pulls and the tap read as one set. Save the old hardware in a labelled bag if you rent or may want to swap back. For more cabinet color and finish pairings, see our guide to colors for your kitchen cabinets. Wipe brass with a soft cloth to keep the finish even.

    9. White Cabinets with Matte Black Hardware

    White kitchen cabinets with matte black handles and a black tap.

    Use matte black handles, hinges and a black tap against white cabinets for a sharper, modern farmhouse edge. Black outlines each door, adds contrast without color, and pairs well with dark counters, wood stools and a black framed window. This suits a kitchen that needs definition, such as a large white room that feels washed out.

    Repeat black once or twice more, in a light fitting, a stool frame or a rug border, so the hardware does not look isolated. Keep the rest of the room pale, so black stays an accent rather than a theme. Matte black shows fingerprints less than polished black, which helps on doors used many times a day.

    10. White Cabinets Around a Farmhouse Sink

    White cabinets around a farmhouse sink under a kitchen window.

    Build the sink wall around a deep farmhouse sink, with white cabinets on either side and the sink front on show. The sink becomes a focal point, the deep bowl suits large pots and baking trays, and the white cabinets keep the wall calm. This suits a kitchen with a window over the sink, where daylight makes the white and the sink front glow.

    Choose a tap finish that matches your cabinet hardware, and keep the counter around the sink plain for wiping. A farmhouse sink needs a cabinet made to fit it, so check sizes before ordering. Clean the sink with a soft cloth and mild cleaner, and keep a wood board or a drying rack nearby for daily use.

    11. White Tall Pantry Wall

    Tall white pantry cabinets with baskets and jars for dry goods.

    Dedicate one wall to tall white pantry cabinets, floor to ceiling, for dry goods, small appliances and cleaning gear in one place. A pantry wall keeps the rest of the kitchen free of tall units, so the cooking wall can stay low and open. It also makes shopping and meal planning easier, since everything is visible at a glance.

    Fit the pantry with adjustable shelves, a few baskets for loose items, and labels on the front of each shelf zone. Keep heavy items at waist height and light items up high. Put the pantry near the fridge or the main prep counter, so ingredients travel a short distance to the cooker.

    12. White Cabinets with a Built-In Coffee Station

    White cabinet coffee station with a coffee machine, mugs and jars.

    Turn one white cabinet run into a coffee station, with an appliance garage or a niche for the machine, mugs on hooks or a shelf, and jars for beans and sugar. Keeping coffee gear in one spot frees the main counter for cooking, and it gives mornings a clear routine. This suits a kitchen with a short run of cabinets near the dining table or a window.

    Keep the station near a power point, and leave a heat safe surface for the machine. Store mugs you use daily at hand height, and keep spare filters and beans in a closed drawer below. Wipe the station each morning, since coffee splashes show quickly on white doors.

    13. White Cabinets on a Window Wall with No Uppers

    White base cabinets below a wide kitchen window with no upper cabinets.

    Leave the window wall free of upper cabinets, and run white base cabinets below the sill for a bright, open sink or prep wall. Without uppers, daylight reaches deeper into the room, the window becomes the focal point, and the kitchen feels larger. This suits a kitchen with a wide window or a garden view worth keeping clear.

    For more window ideas, see our guide to kitchen window decor ideas. Use the sill for one plant and a small soap dish, and keep the rest clear so light stays unblocked. Add open shelves on the side walls if you need the storage that uppers would have given, rather than blocking the window.

    14. White Cabinets with Under Cabinet and Interior Lighting

    White kitchen cabinets with warm under cabinet lighting in the evening.

    Add warm under cabinet lighting and, where you have glass fronts, a small light inside the cabinet for a softer evening kitchen. Light removes shadows from white doors, makes prep safer, and lets the kitchen glow after dark instead of looking flat. This is a small change with a large effect on how lived in the room feels.

    Use warm white bulbs, not cool daylight bulbs, so white paint reads as warm. Put prep lighting on a separate switch from ceiling lights, so you can light only the work zone in the evening. Keep cords and drivers hidden behind a cabinet pelmet or inside a cabinet, and wipe the light strip cover when you clean the backsplash.

    15. White Cabinets with Deep Drawers and Pull-Out Storage

    White kitchen cabinets with deep drawers and dividers for pots and trays.

    Replace low cupboards with deep drawers and pull-out racks for pots, pans, baking trays and dry goods, so nothing hides at the back of a dark cabinet. Deep drawers are easier on the back, they show everything at a glance, and they suit a lived-in kitchen where cooking happens daily. This is a function change, not a color change, and it makes white cabinets work harder.

    Fit drawer dividers for lids, trays and utensils, and a pull-out rack for oils near the cooker. Keep heavy pots in the lowest drawer, and label the inside of one drawer for baking gear if several people cook. Our guide to kitchen wall storage ideas has more ideas for keeping daily tools within reach.

    16. White Cabinets with a Custom Range Hood Cover

    White cabinet panelled range hood cover over a kitchen cooker.

    Cover the range hood in white cabinet panels, so it reads as part of the cabinet run rather than a steel box. A panelled hood cover suits a classic kitchen, it softens the cooking wall, and it lets the cooker and backsplash take the focus. This works best when the hood cover matches the door style and paint of the cabinets around it.

    Keep the hood cover easy to wipe, since cooking steam rises straight to it. Choose a simple panel, not a fussy shape, so grease does not collect in grooves. Check the hood maker guidance for clearance and venting before boxing it in, and keep the filter reachable for cleaning.

    17. White Cabinets with a Peninsula and Seating

    White cabinet peninsula with stools tucked under the counter.

    Add a peninsula to a white cabinet run, with stools on the outside, for casual seating that keeps the cook company. A peninsula defines the kitchen in an open plan room, gives extra prep space, and creates a natural spot for coffee, homework and chatting. It suits a kitchen without room for a full island.

    Leave enough knee room under the overhang, and choose stools that tuck fully under the counter when not in use. Keep the peninsula counter clear except for one small item, such as a fruit bowl, so it stays useful for prep. For table styling that pairs with peninsula seating, see our guide to everyday dining table decor.

    18. White Cabinets Paired with a Freestanding Hutch

    Freestanding white hutch beside built-in white kitchen cabinets.

    Place a freestanding white or wood hutch beside built-in white cabinets for display, extra storage and a furniture feel. A hutch breaks up a fitted wall, gives you a spot for cookbooks, bowls and glasses, and can move with you if you change homes. This suits a kitchen diner, where the hutch can sit on the dining side of the room.

    Keep the hutch display simple, with daily pieces low and pretty pieces high. Match the hutch paint or wood to one other item in the room, such as the island base or the table, so it looks planned. Anchor a tall hutch to the wall for safety, and keep its top clear except for one plant or a stack of books.

    19. White Cabinets with a Patterned Tile Backsplash

    White kitchen cabinets with a patterned tile backsplash behind a cooker.

    Pair plain white cabinets with a patterned tile backsplash, such as a soft floral, star or geometric print in muted tones, for pattern where it is easy to clean. Pattern on one wall, usually behind the cooker, adds character without needing colored cabinets. The white cabinets keep the pattern from overwhelming the room.

    Pick one tone from the tile to repeat in a towel, a rug or a vase, and keep counters plain. Patterned tile can date faster than plain tile, so choose a pattern you like for its shape as well as its color. Ask your tiler about sealing, since some patterned tiles need extra care in the splash zone.

    20. White Cabinets Refreshed by Repainting Only

    Freshly repainted warm white kitchen cabinets with paint supplies nearby.

    Repaint existing cabinets in a warm white, rather than replacing them, for the lowest cost and lowest waste refresh. A good clean, sand, prime and two coats of cabinet paint can make tired doors look new, and it keeps the layout you already know. This suits a kitchen with solid cabinet boxes and doors in good shape.

    Test the new white beside your counter and floor in daylight and evening light, since whites shift a lot. Remove doors and hardware before painting, label each door, and let coats dry fully before refitting. Touch up chips promptly, and keep a small labelled pot of the paint for future repairs.

    21. White Cabinets Styled with Boards, Bowls and Herbs

    White kitchen cabinets styled with wood boards, a fruit bowl and herb pots.

    Style the tops and open spots of white cabinets with lived-in pieces: wood boards leaning on the backsplash, a bowl of fruit, a herb pot by the window and a stack of everyday bowls on a shelf. These small, useful items stop white cabinets from looking like a display, and they make the kitchen feel used in a good way.

    Keep styling to a few well placed pieces, not every surface. One board, one bowl and one plant is enough for most counters. For small space seating that pairs with a lived-in kitchen, see our ideas for kitchen balcony ideas. Rotate the fruit bowl and herbs with the seasons, and keep work surfaces clear for cooking.

    22. White Cabinets with a Kitchen Entry Storage Run

    White kitchen cabinets with a bench seat and hooks near a kitchen door.

    Use white cabinets near the kitchen door for entry storage: a bench seat, hooks for bags and aprons, and closed cabinets for shoes, cleaning gear and school bags. An entry run keeps clutter out of the cooking zone, and it gives the kitchen a welcoming arrival spot. This suits a kitchen with a back door or a hallway entrance.

    Keep the bench clear except for one cushion, and put a basket under it for shoes. Hang hooks at two heights, for adults and children, and keep cleaning gear in a closed cabinet away from food storage. Our guide to corner kitchen cabinet ideas has more ideas for making awkward corners work hard for storage.

    Conclusion

    White cabinets work best when they have warmth, texture and a clear job in the room. Start with the idea that fits your kitchen and your budget, whether that is brass hardware, a pantry wall, a wood island base or a simple repaint, and live with it before adding more changes. Test whites in your own light, mix closed storage with one open element, and keep a few lived-in touches on show while work surfaces stay clear for cooking. With that balance, white cabinets can feel bright and welcoming for years, not just on the day they are fitted. Save this list for your next kitchen refresh, and pick the white cabinet idea you want to try first.

    FAQs

    What white paint shade works best for kitchen cabinets?

    A warm white, rather than a stark blue white, works best in most kitchens, since it pairs with wood, cream walls and brass hardware. Test samples beside your counter and floor in daylight and evening light, since white shifts a lot under different bulbs. If your kitchen is north facing or dark, a slightly warmer white will feel less cold than a pure white.

    Do white kitchen cabinets show dirt and marks easily?

    White cabinets show splashes and fingerprints more than mid tone wood, but they are easy to wipe with a soft damp cloth and mild cleaner. Wipe the splash zone behind the sink and cooker often, and touch up chips promptly so marks do not spread. Matte and satin finishes hide small marks better than high gloss, which shows every smudge.

    What countertop goes best with white kitchen cabinets?

    Pale counters in white, cream or light grey keep a white kitchen calm, while wood counters add warmth and dark counters add contrast. A marble look counter or backsplash adds gentle pattern without a new color. Choose a hard wearing surface for the main prep zone, and keep the counter plain so the cabinets stay the focus.

    What hardware suits white kitchen cabinets?

    Brass warms white cabinets and suits classic and cottage kitchens, while matte black adds a sharper, modern farmhouse edge. Brushed nickel and chrome are quiet options that suit a simple modern kitchen. Keep all hardware in the same finish, so knobs, pulls and taps read as one set, and save old hardware if you may want to swap back.

    Can I keep white cabinets looking lived in, not clinical?

    Yes, by adding warm wood, natural textures, open storage and a few useful items on show, such as boards, bowls and herbs. Warm under cabinet lighting also softens white doors in the evening. Keep styling to a few pieces, and keep work surfaces clear for cooking, so the kitchen feels used but not crowded.

    Are white kitchen cabinets a good choice for a small kitchen?

    Yes, white cabinets reflect light and make a small kitchen feel larger, especially with no uppers on a window wall, glass fronts or open shelves in one spot. Pair white with a pale backsplash, good lighting and warm wood accents, so the room feels open and welcoming. Avoid a very dark counter on every surface in a tiny kitchen, since it can shrink the feel of the room.

  • 22 Black Kitchen Cabinet Ideas for a More Polished Space

    22 Black Kitchen Cabinet Ideas for a More Polished Space

    Black cabinets give a kitchen instant depth, but the finish, layout, and lighting decide whether the room feels calm or heavy. This list of 22 black kitchen cabinet ideas covers matte and gloss doors, two-tone layouts, glass fronts, open shelving, pantry walls, and lighting plans, so you can pick an approach that fits your room size and light. Each idea names the counters, hardware, and backsplash that suit it, plus one care note from daily use. Test a large sample door in your own light before you commit, because black reads very differently in a bright room and a dim one.

    Key Takeaways

    • Finish changes everything. Matte black hides fingerprints better than gloss, while gloss bounces light around a small or dim kitchen.
    • Pair black cabinets with pale counters, a light backsplash, or pale uppers so the room stays easy to work in.
    • Lighting is part of the design, not an afterthought. Under-cabinet lights, pendants, and toe-kick lights keep a dark kitchen practical.
    • Two-tone layouts and a black island give you the depth of black without covering every wall in a dark color.
    • Test a large sample door beside your floor and counters in morning and evening light before ordering paint or cabinets.
    • Matte black shows dust and flour, and gloss shows smudges, so pick the finish whose upkeep you will actually keep up with.

    1. Matte Black Shaker Cabinets

    Kitchen with matte black shaker cabinets, brass knobs, and white subway tile.

    Matte black shaker doors are the most forgiving way into black cabinets. The simple framed panel suits older homes and new builds alike, and the flat finish softens the look so the room does not feel stark. Pair them with white subway tile, pale stone counters, and brass knobs for warmth, or with black bar pulls for a quieter look. Matte paint hides fingerprints better than gloss, but it shows dust and flour, so wipe the doors near your prep area once a week with a damp cloth.

    2. High-Gloss Handleless Cabinets

    Modern kitchen with high-gloss black handleless cabinets and pale counters.

    High-gloss flat-front cabinets with push-to-open doors give a clean, modern kitchen with no visible hardware to break up the run. The shine reflects light, which helps a small or north-facing room, and the flat fronts are quick to wipe down. Pair gloss black with pale gray counters, a simple white backsplash, and integrated appliances so nothing interrupts the smooth surfaces. Gloss shows smudges and fingerprints more than matte, so keep a microfiber cloth handy near the fridge and dishwasher.

    3. Black Lower Cabinets With Pale Uppers

    Kitchen with black lower cabinets, pale upper cabinets, and a light counter.

    If a full black kitchen feels too heavy, keep black on the lower cabinets and use pale uppers, such as warm white or pale oak. The dark base grounds the room and hides scuffs from feet, pets, and the vacuum, while the pale uppers keep the wall feeling light. Use one counter material across both runs and repeat the black in a small detail, such as bar stools or a range hood trim, so the split looks planned. This layout suits smaller kitchens well, because the eye reads the pale upper wall first.

    4. A Black Island in a Pale Kitchen

    Kitchen with a black island, pale counter, and pale perimeter cabinets.

    A black island gives you the drama of black cabinets without repainting the whole room. The island becomes the work zone and the gathering spot, and a pale perimeter keeps the walls light. Choose a pale counter for the island so chopping, homework, and serving stay visible, and add seating on one side if space allows. Repeat the black once more in the room, in pendant lights or stool frames, so the island does not look like a lone dark block. For more ways to carry a dark accent through a room, see these black and gold kitchen ideas.

    5. Black Cabinets With Butcher Block Counters

    Kitchen with black cabinets, butcher block counters, and a farmhouse sink.

    Warm wood counters take the edge off black cabinets and suit a relaxed, lived-in kitchen. Butcher block pairs well with matte black shaker doors, a farmhouse sink, and black or brass hardware, and it gives a warm surface for rolling dough and serving boards. Wood counters need more care than stone: oil them on a regular schedule, wipe up water promptly, and use boards for cutting. Keep the backsplash simple, such as white tile, so the wood and the black stay the focus of the room.

    6. Black Cabinets With White Marble Counters

    Kitchen with black cabinets, white marble counters, and brass hardware.

    White marble, or a marble-look stone, is the classic partner for black cabinets, because the pale veined surface keeps the contrast crisp. Use it on counters and carry it up the wall as a backsplash for a calm, continuous look, and add brass or polished nickel hardware to warm the pairing. Marble marks and etches more easily than quartz, so seal it, wipe up acidic spills quickly, and use trivets under hot pans. If upkeep worries you, a marble-look quartz gives a similar look with less care.

    7. Black Glass-Front Display Cabinets

    Kitchen with black glass-front cabinets displaying white dishes.

    Glass-front black uppers turn storage into display and break up a long run of solid doors. Use them for everyday glassware, white dishes, or a small collection, and keep the inside tidy, because glass shows everything. Clear glass suits a collected look, while reeded or frosted glass hides clutter and still lets light through. Add a small light inside each cabinet so the contents glow in the evening. Keep the rest of the uppers solid so the display stays a feature rather than a demand to curate every shelf.

    8. Black Cabinets Mixed With Open Wood Shelving

    Kitchen with black cabinets and open wood shelves holding dishes.

    Replacing some uppers with open wood shelves lightens a black kitchen and gives a spot for daily dishes, plants, and cookbooks. The wood warms the black, and the open shelves make a small kitchen feel less boxed in. Keep shelves to one or two runs, style them loosely, and leave breathing room between groups so they do not look crowded. Open shelves collect dust and cooking grease, so put everyday items there and keep rarely used pieces behind closed doors. For styling help, see how to style open shelves.

    9. Black Farmhouse Cabinets With an Apron Sink

    Black farmhouse kitchen with a white apron sink and wood accents.

    A black farmhouse kitchen pairs matte black cabinets with a white apron-front sink, beadboard details, and warm wood accents. The white sink breaks up the dark run and gives a practical, deep basin for large pots and baking trays. Add a wood counter or wood shelf, a simple bridge faucet, and black hardware to hold the scheme together. Farmhouse style suits a room with some natural texture, such as a wood floor or a brick chimney breast, which stops the black from feeling flat. Wipe the sink surround often, because water marks show on black paint near the tap.

    10. Black Cabinets in a Galley Kitchen

    Galley kitchen with black cabinets on one side and pale cabinets opposite.

    A galley kitchen can carry black cabinets if you plan the light carefully. Use black on one run only, keep the opposite run pale, and add a pale counter, a light backsplash, and bright under-cabinet lighting on both sides. A mirrored or glossy backsplash on one wall bounces light down the narrow room, and a pale floor keeps the passage feeling open. Avoid dark counters here, because a dark floor, dark cabinets, and dark counters together will close the space in. Keep the passage clear of stools and bins so the galley stays easy to move through.

    11. Black Cabinets With a Patterned Tile Backsplash

    Kitchen with black cabinets and a patterned tile backsplash.

    A patterned tile backsplash gives a black kitchen a focal wall without adding another cabinet color. Black and white geometric tiles suit a modern room, while hand-painted style tiles suit a softer, collected kitchen. Keep the pattern to the main cooking wall or the sink wall, and use plain tile elsewhere, so the pattern reads as a feature rather than noise. Patterned tile hides splashes well, but grout lines need a scrub now and then, so choose a grout color that will not show every mark. Pale counters keep the tile as the star.

    12. A Statement Range Hood Wall

    Kitchen with black cabinets and a statement black range hood.

    Build the kitchen around a black range hood wall, with black cabinets flanking a bold hood in black metal, brass-trimmed black, or plaster painted to match. The hood becomes the focal point, so keep the surrounding cabinets simple and the hardware quiet. A pale stone backsplash behind the range keeps the cooking zone readable and easy to clean. Check the hood size against your range before ordering, and plan ducting early, because a statement hood is hard to resize later. This idea suits a room with a long, uninterrupted cooking wall.

    13. Black Cabinets With a Herb and Plant Wall

    Kitchen with black cabinets, potted herbs, and plants by a window.

    Plants soften black cabinets more than any other accessory. A row of herbs on a sunny windowsill, trailing plants on top of tall cabinets, or a small wall-mounted herb rail adds green life against the dark doors. Choose herbs you cook with, such as basil, parsley, and mint, and keep them near the prep area so they get used. Plants need light and watering, so place them where you will see them daily and use pots with drainage. If your kitchen window is small, a single large plant on the floor beside the cabinet run can do the same job. For window ideas, see these kitchen window decor ideas.

    14. Layered Lighting for Black Cabinets

    Black kitchen cabinets lit by under-cabinet lights and pendants in the evening.

    Lighting decides whether black cabinets feel moody or simply dark. Plan three layers: under-cabinet strips for food prep, pendants over an island or table for evening light, and toe-kick strips that wash the floor and make the cabinets appear to float. Warm white bulbs suit black cabinets better than cold blue light, which can make the paint look gray. Put the layers on separate dimmers so you can brighten the room for cooking and soften it for dinner. Check the lighting at night before finalizing paint, because black changes the most after dark.

    15. Floor-to-Ceiling Black Cabinets in a Small Kitchen

    Small kitchen with floor-to-ceiling black cabinets and a pale counter.

    In a small kitchen, taking black cabinets all the way to the ceiling removes the dusty gap above the uppers and adds a full extra row of storage. Use the top row for rarely used items, such as holiday dishes and large serving platters, and keep daily items at waist and eye level. Add a slim step stool stored in a tall cabinet so the top row stays reachable. Pale counters and a light floor stop the tall dark wall from closing the room in. Keep the door fronts flat and the hardware minimal so the tall run reads as one calm wall.

    16. A Black Pantry Wall

    Wall of tall black pantry cabinets in a kitchen.

    A full wall of tall black cabinets makes a pantry that hides food, small appliances, and cleaning supplies behind closed doors. Plan a mix inside: deep drawers for heavy items, pull-out shelves for cans and jars, and one tall section for a vacuum or broom. Label the inside of doors or use clear bins so the pantry stays usable rather than a dark cupboard of forgotten food. A pantry wall suits a kitchen with a spare wall near the fridge, and it frees the main cooking run from tall, bulky storage. Keep a pale counter nearby for unpacking shopping bags.

    17. Black Cabinets With a Breakfast Nook

    Kitchen with black cabinets and a breakfast nook with a banquette.

    Pair black cabinets with a breakfast nook and the kitchen gains a soft, social corner that balances the dark cabinetry. A built-in banquette in pale wood or cream upholstery, a small round table, and a pendant light make a spot for morning coffee and homework. Repeat the black in the table base or the pendant so the nook ties back to the cabinets. Banquette seating also adds storage underneath for table linens and board games. Keep the nook cushions washable, because a breakfast spot earns crumbs faster than any other seat in the house.

    18. Industrial Black Cabinets With Concrete and Steel

    Industrial kitchen with black cabinets, concrete counters, and steel shelving.

    An industrial kitchen pairs flat-front black cabinets with concrete-look counters, steel shelving, and exposed hardware. The mix of matte black, gray concrete, and brushed steel feels honest and hard-wearing, and it suits a loft or a modern extension. Concrete-look counters need sealing and prompt wipe-ups, like real stone, so check the care routine before ordering. Add warm wood in one place, such as stools or a chopping board, so the room does not feel cold. Keep the layout simple and the surfaces clear, because industrial style depends on strong lines.

    19. Fluted and Reeded Black Cabinet Fronts

    Kitchen island with black fluted cabinet fronts.

    Fluted or reeded door fronts add texture to black cabinets without adding color. The vertical grooves catch light and shadow, so the doors look richer than flat black paint, and they suit both modern and classic rooms. Use fluted fronts on an island or a single run as a feature, and keep the remaining cabinets flat so the texture stays special. Dust can settle in the grooves, so a soft brush or a vacuum brush attachment helps at cleaning time. Pair fluted fronts with simple hardware, because busy handles fight the texture.

    20. A Beverage Station Built Into Black Cabinetry

    Beverage station built into black cabinets with cups and a coffee maker.

    A beverage station turns a stretch of black cabinets into a coffee bar, tea station, or wine nook. Plan a counter section with a small sink or a water source nearby, open or glass-front uppers for cups and glasses, and drawers for pods, filters, and accessories. A wine fridge or a beverage cooler can sit under the counter if you entertain often. Keep the station away from the main cooking triangle so morning coffee does not block dinner prep. Wipe the counter often, because coffee and wine marks show quickly on a dark surface near a pale counter edge.

    21. Black Cabinets Balanced With Warm Wood Floors

    Kitchen with black cabinets and warm wood floors.

    Warm wood floors are the simplest way to keep a black kitchen feeling welcoming. Oak or warm-toned wood underfoot adds color and texture that black cabinets lack on their own, and it ties in with wood counters, shelves, or stools. Choose a floor finish that can handle kitchen spills and mop up water promptly near the sink and dishwasher. If a full wood floor is not practical, a large washable runner in a warm tone gives a similar lift and protects the floor in the busiest stretch. Keep rugs flat and low pile so chairs and feet move freely.

    22. Pull-Out Organization Inside Black Cabinets

    Open black kitchen cabinet with pull-out organizers and dividers.

    The inside of black cabinets matters as much as the doors, because dark interiors can swallow small items. Fit pull-out drawers, corner carousels, spice pull-outs beside the range, and deep drawer dividers for pots and lids. Light interiors or a light shelf liner help you see contents at a glance, and full-extension runners let you reach the back without crouching. Plan the inserts before ordering cabinets, because retrofitting drawers into fixed shelves costs more later. For tight corners, a well-planned carousel or blind-corner pull-out beats a deep, dark cupboard. For more cabinet layout ideas, see these corner kitchen cabinet ideas.

    Conclusion

    Black cabinets work when the finish, the counters, and the lighting are chosen together rather than one at a time. Start with the layout that fits your room: a black island or black lowers for a small or dim kitchen, a full black run for a bright room with pale counters. Then pick a finish you can live with, matte for a softer look and easier fingerprint care, or gloss for light and a modern edge. Add pale counters, warm wood, or plants to balance the dark doors, and plan layered lighting before you order. If you are choosing between cabinet colors overall, these colors for your kitchen cabinets put black beside the paler options. Save this list on Pinterest while you gather sample doors, and compare your finalists in your own light before you commit.

    FAQs

    Do black kitchen cabinets make a kitchen look smaller?

    Black cabinets can make a dim, small kitchen feel heavier, but they do not have to. Pale counters, a light backsplash, good under-cabinet lighting, and keeping black to lowers or an island will hold the balance. A well-lit dark kitchen feels larger than a dim pale one, and a large window makes a full run of black cabinets much easier to carry.

    Are matte or gloss black cabinets easier to keep clean?

    Matte black hides fingerprints and smudges better than gloss, but it shows dust, flour, and water marks. Gloss wipes clean easily and reflects light, but every fingerprint shows. Pick the finish whose upkeep suits you: matte if you dislike wiping handles daily, gloss if you prefer a quick wipe that leaves a clean shine. Either way, a washable paint finish and a soft cloth make daily care simple.

    What counter color works best with black cabinets?

    Pale counters work best in most kitchens, because they keep food prep visible and stop the room from feeling dark. White marble, pale quartz, and butcher block are the most common partners. Dark counters can work in a large, bright kitchen with a light backsplash, but in a small room they add a second dark layer that closes the space in.

    What hardware suits black kitchen cabinets?

    Brass and gold hardware warms black cabinets and suits classic and farmhouse rooms. Black hardware gives a quiet, modern look but can disappear against the doors, so choose a shape with enough size to grip. Polished nickel and chrome suit a crisp, modern kitchen. Whichever metal you pick, use it consistently across the room, including taps and light fittings, for a finished look.

    Can I mix black cabinets with another cabinet color?

    Yes. The most common mix is black lowers with pale uppers, or a black island with a pale perimeter. Pick the second color from a warm or cool family that matches your floor and counters, and repeat the black somewhere small, such as stools, pendants, or a hood trim, so the split looks planned. Avoid adding a third cabinet color, which can make the room feel unsettled.

    How do I test a black cabinet color before committing?

    Order or paint a large sample door, not a small chip, and move it around the kitchen. Check it in morning light, midday light, and under your evening bulbs, and hold it beside the floor, counters, and appliances it will live with. Black looks stronger across a full run of cabinets than on a single door, so if you are torn between a soft black and a true black, test both at full door size before ordering.


  • 34 White Kitchen Ideas for a Relaxed, Pulled-Together Home

    34 White Kitchen Ideas for a Relaxed, Pulled-Together Home

    A white kitchen earns its reputation for a simple reason: it stays bright on a grey morning, it suits almost any house style, and it gives you room to change the details later without starting over. The risk is a room that feels flat or hard to live in, with every surface the same shade and nothing to soften it. These 34 white kitchen ideas solve that problem one choice at a time, from cabinet style and counter material to lighting, storage, and seating. Pick the ideas that fit your layout and budget, keep one or two warm materials in the mix, and let the white do the quiet work of holding the room together.

    Key Takeaways

    • Mix your whites on purpose. A warm white on cabinets, a cooler white on walls, and a natural stone counter keep the room from looking flat.
    • Add one or two warm materials, such as wood, brass, or rattan, so a white kitchen feels relaxed rather than clinical.
    • Choose cabinet style first, since it sets the tone for hardware, backsplash, and lighting choices that follow.
    • Plan storage before decoration. A pantry wall, a plate rack, and a clear counter plan matter more than a new accessory.
    • Layer the light: daylight, under-cabinet task light, and pendants over an island or table, so white surfaces glow at night as well as by day.
    • Keep counters clear by giving coffee, baking, and prep each a home, so the white surfaces stay easy to wipe and pleasant to use.

    1. Start With Classic White Shaker Cabinets

    A white kitchen with classic Shaker cabinets, cup pulls, and a pale stone counter.

    White Shaker cabinets are the safest starting point for a relaxed kitchen, because their simple recessed panel suits farmhouse, cottage, and modern homes alike. The frame gives the cabinets shape without fussy detail, so the room reads as calm and finished rather than plain. Pair them with a soft white paint that has a warm undertone, and keep the walls a shade lighter or darker so the cabinets stand out gently.

    Choose cup pulls or simple knobs in a finish you already use elsewhere in the house, such as brushed nickel or aged brass, and repeat that finish on the faucet. Shaker cabinets also take well to a mix of closed storage below and open or glass fronts above, which stops a long run of white doors from feeling heavy. If you are repainting existing cabinets, test the white beside your counter and floor first, since white shifts a lot under kitchen lighting.

    2. Try Flat-Front Handleless White Cabinets

    A modern white kitchen with flat-front handleless cabinets and a wood island top.

    Flat-front handleless cabinets give a white kitchen a clean, modern feel, with long lines and no hardware to break up the surface. This suits a contemporary home or a small kitchen where visual clutter makes the room feel busy. Push-to-open doors or a routed finger pull under each door front keep the look smooth while still being easy to use every day.

    Because there is no hardware to add warmth, bring it in another way: a wood island top, a stone counter with visible veining, or open timber shelving on one wall. Keep the wall color close to the cabinet color so the room reads as one calm block, and add texture through a woven blind or linen curtains. Handleless fronts show fingerprints less than gloss doors, but a matte finish is the most forgiving choice for a busy family kitchen.

    3. Add Charm With White Beadboard Cabinets

    A cottage white kitchen with beadboard cabinet doors and a ceramic sink.

    Beadboard cabinets bring a cottage feel to a white kitchen, with narrow vertical grooves that catch light and add texture to flat doors. They suit a farmhouse or coastal home, and they work well on an island or a pantry wall even when the rest of the kitchen uses plainer doors. Paint the beadboard the same white as the other cabinets so the texture, not a color change, does the work.

    Beadboard is also a good choice for a kitchen with plain walls, since it gives the eye something to rest on without pattern or color. Keep counters simple, such as butcher block or a pale stone, and add a vintage style faucet or a ceramic sink to complete the cottage look. Wipe the grooves with a soft cloth during a normal clean, since crumbs and dust settle in the channels more than on a flat door.

    4. Use Glass-Front White Cabinets for Display

    A white kitchen with glass-front upper cabinets showing white dishes and glassware.

    Glass-front upper cabinets break up a wall of white doors and give you a place to show the pieces you actually use, such as white dishes, glassware, and wooden bowls. They make a kitchen feel lighter, because the eye sees through the cabinet rather than stopping at a solid door. Use them on one run of cabinets, or on either side of a window or range, rather than everywhere, so the display stays calm.

    Keep what you show to a small set of matching or related pieces, and leave some space on each shelf so the cabinet does not look crowded. Clear glass shows everything, so it suits tidy households; reeded or seeded glass softens the view and hides a less perfect shelf. Add a small light inside the cabinet if you want the display to glow in the evening, and keep the items you reach for daily on lower shelves.

    5. Swap Upper Cabinets for White Open Shelving

    A white kitchen with open shelves holding dishes and mugs above a sink.

    Replacing some upper cabinets with open shelving makes a white kitchen feel taller and more open, especially in a small room or above a sink. Two or three shelves in white or pale wood hold everyday dishes, mugs, and bowls within easy reach, and they stop the wall from feeling like a solid block of doors. This idea works best when you keep the shelves to items you use often, so nothing sits long enough to gather dust.

    Anchor the shelves with a simple bracket or a wood board that matches the counter, and style each shelf with a mix of stacked plates, a jug, and one small plant. Keep the rest of the kitchen storage closed, so the open shelves are a feature rather than a necessity. If dust is a worry, use open shelving for one short run only, and keep the remaining uppers closed for items you use less often.

    6. Pair White Cabinets With Butcher Block Counters

    A white kitchen with warm butcher block counters and black hardware.

    Butcher block counters warm up white cabinets at once, adding a honey toned wood surface that softens the whole room. The wood works well in farmhouse, cottage, and Scandinavian style kitchens, and it pairs with black, brass, or nickel hardware. A butcher block counter is also pleasant to work on, since it is warm to the touch and easy on dishes and glasses.

    Use butcher block on an island or a single run of counter, rather than everywhere, if you want to limit care. Oil the surface on a regular schedule, wipe spills promptly, and use a board for cutting so the counter keeps an even look. Near the sink, a stone or quartz section avoids constant water contact on wood. The mix of white cabinets and one wood counter is often enough to make a white kitchen feel relaxed without adding color elsewhere.

    7. Choose Marble Counters for a Classic White Kitchen

    A white kitchen with marble counters showing soft grey veining and brass hardware.

    Marble counters are the classic partner for white cabinets, with soft grey veining that adds movement to an otherwise plain surface. The stone suits traditional and elegant kitchens, and it looks at home with Shaker cabinets, brass hardware, and a subway tile backsplash. Choose a slab with gentle veining if you want a calm look, or a bolder vein pattern if the counter is meant to be the main feature of the room.

    Marble needs more care than quartz, so seal it as advised by the supplier, wipe acidic spills quickly, and use trivets under hot pans. If you love the look but cook daily with citrus, tomato, and wine, consider marble on an island used for serving and a harder wearing surface on the main prep run. The contrast between white cabinets and a veined stone counter is one of the simplest ways to make a white kitchen feel finished.

    8. Build a White Waterfall Island in Quartz

    A white kitchen with a quartz waterfall island and wood stools.

    A waterfall island wraps the counter material down both sides of the island, giving a white kitchen a clear focal point and a very clean outline. Quartz suits this treatment well, since it is consistent in color, hard wearing, and easy to wipe. The solid ends make the island read as a piece of furniture rather than a workbench, which suits an open plan room where the kitchen faces the living area.

    Keep the island front simple, with no handles or panels competing with the stone, and choose a quartz with soft veining or a plain white finish. Add seating on one side only, so the waterfall ends stay visible, and pick stools in wood or rattan to warm the stone. A waterfall island costs more than a standard island, so measure the room first and leave enough walkway space on every side before you commit to the size.

    9. Add Contrast With Black Hardware on White Cabinets

    White kitchen cabinets with matte black bar pulls and a black faucet.

    Black hardware is the quickest way to give white cabinets definition, since each knob and pull draws a clear line against the white door. Matte black bar pulls suit a modern kitchen, while small black knobs suit a traditional one. The contrast also helps in a large kitchen, where an all white run of cabinets can blur into one pale mass.

    Repeat the black in one or two other places, such as the faucet, a pendant light, or a stool frame, so the hardware looks planned rather than added alone. Keep the rest of the room soft, with wood or stone counters and a pale backsplash, so the black stays an accent. If you are updating existing cabinets, swapping hardware is a low cost change that you can test on one drawer bank before you buy pulls for the whole kitchen.

    10. Warm White Cabinets With Brass Hardware

    White kitchen cabinets with brass cup pulls and knobs and a brass faucet.

    Brass hardware warms white cabinets in a way that black cannot, adding a soft golden glow that suits traditional, farmhouse, and transitional kitchens. Unlacquered brass deepens in tone over time, while lacquered brass keeps a steady shine, so choose the finish that fits how much change you want to live with. Cup pulls on drawers and knobs on doors are a classic pairing that still looks current.

    Match the brass to the faucet and to any pendant or shelf brackets, so the metal reads as one thread through the room. If brass feels too yellow beside your white, pick a brushed or aged brass rather than a bright polished one. For a broader look at how cabinet color and finish work together, see these kitchen cabinet colors. Brass also pairs well with marble counters and wood floors, both of which keep a white kitchen from feeling cold.

    11. Fit a Farmhouse Kitchen With an Apron-Front Sink

    A farmhouse white kitchen with a deep apron-front ceramic sink.

    An apron-front sink, with its deep basin and exposed front panel, is the centerpiece of a farmhouse white kitchen. The sink sits proud of the cabinet front, so it reads as a feature rather than a fitting, and its depth handles large pots and baking trays with ease. Pair it with white Shaker or beadboard cabinets, a simple bridge faucet, and a wood or stone counter for a room that feels practical and welcoming.

    Choose a fireclay or ceramic sink for a classic look, and check the cabinet size before you order, since apron sinks need a purpose built base unit. Keep the area around the sink clear, with a dish rack or a folded linen cloth nearby, and let the sink do the talking rather than adding a busy backsplash behind it. A single large basin suits most cooks better than a split basin in a farmhouse kitchen.

    12. Add a Second Prep Sink for a Working Kitchen

    A white kitchen island with a small second prep sink and a cutting board.

    A second prep sink turns a white kitchen into a room where two people can cook without getting in each other’s way. Place it on the island or on a secondary run, near the fridge or the chopping area, so one person can rinse vegetables while the other works at the main sink. The prep sink also keeps drinks, ice, and salad prep away from dirty dishes at the main sink.

    Keep the prep sink small, with a simple faucet and a cutting board that fits over the bowl, so it does not eat into counter space. Plumb it during a renovation if you can, since adding water later costs more. In a white kitchen, a matching white or stainless sink keeps the extra fitting quiet, and the gain in daily ease is worth more than the extra cleaning of one more basin.

    13. Keep It Simple With a White Subway Tile Backsplash

    A white kitchen with a subway tile backsplash and gloss tiles.

    A white subway tile backsplash is the most reliable choice for a white kitchen, because it adds pattern through its brick shape without adding color. Laid in a running bond, the tiles give the wall a gentle rhythm, and the grout lines add just enough detail to stop the wall from looking blank. Gloss tiles bounce light around the room, which helps a kitchen with a small window.

    Vary the look by changing the grout: white grout for a seamless wall, or a soft grey grout to show the tile pattern more clearly. Try a stacked or herringbone layout on one wall if you want more interest without a new material. Subway tile is also easy to wipe after cooking, and a single broken tile can be replaced without redoing the whole wall, which makes it a practical long term choice.

    14. Add Texture With a Zellige Tile Backsplash

    A white kitchen with a textured handmade zellige tile backsplash in pale cream.

    Zellige tiles bring handmade texture to a white kitchen, with slight variations in tone and surface that catch light in a way flat tiles cannot. Each tile differs a little from the next, so the backsplash reads as crafted rather than factory perfect. In a soft white or pale cream, zellige adds depth without color, which suits a relaxed kitchen that still wants character.

    Use zellige on the backsplash only, and keep counters and cabinets plain, so the texture stays the focus. The uneven glaze means grout lines look softer, and the wall feels warmer than a gloss subway tile wall. Order extra tiles, since handmade batches vary and a few spares help if a tile chips later. Wipe the surface with a soft cloth, and seal the grout to keep cooking splashes from staining it.

    15. Run a Full-Height Stone Slab Backsplash

    A white kitchen with a full-height stone slab backsplash behind the hob.

    A full-height stone slab backsplash carries the counter material all the way up the wall to the underside of the upper cabinets, or to the ceiling in a kitchen without uppers. The result is a calm, seamless wall with one continuous vein pattern, and no grout lines to clean. This suits a modern white kitchen, or a traditional one where the stone is the main feature and everything else stays quiet.

    Choose the slab at the same time as the counter, so the veining matches or flows sensibly from one surface to the other. Keep open shelving minimal on a slab wall, since brackets and plates break the clean line. A slab backsplash costs more than tile, so use it on the main cooking wall and a simpler tile on a secondary wall if the budget needs it. The payoff is a wall that wipes clean in one pass.

    16. Ground a White Kitchen With Patterned Floor Tiles

    A white kitchen with patterned black and white floor tiles.

    Patterned floor tiles give a white kitchen a firm base, so the pale cabinets and counters do not float in the room. A black and white pattern, a soft grey geometric, or a muted encaustic style tile adds interest underfoot without touching the walls. The floor becomes the one patterned surface in the room, which keeps the rest of the kitchen calm.

    Keep the pattern scale in proportion to the room: a large pattern suits a big open kitchen, while a small pattern suits a narrow galley. Choose a matte finish for grip, and a grout color close to the tile so the pattern reads clearly. Patterned floors also hide crumbs and marks better than a plain pale floor, which is a real advantage in a kitchen used every day.

    17. Warm White Cabinets With Wood Floors

    A white kitchen with warm oak wood floors and white cabinets.

    Wood floors are the simplest way to warm a white kitchen, since the natural grain and honey tones soften every white surface around them. Oak, in a natural or pale finish, suits almost any white kitchen, from farmhouse to modern, and it links the kitchen to adjoining rooms with the same floor. A wood floor also feels warm underfoot in the morning, which matters in a room you use barefoot.

    Protect the floor near the sink and dishwasher with a runner or a mat, and wipe spills promptly so water does not sit on the boards. If the kitchen opens to a living area, run the same wood through both rooms so the white kitchen reads as part of the home, not a separate block. Keep rugs simple, in natural fibers, so the wood stays the warm note in the room.

    18. Top a White Island With a Wood Counter

    A white kitchen island with a thick wood counter top and rattan stools.

    A wood-topped island in a white kitchen gives you a warm work surface and a natural gathering point in one piece. The island top can be butcher block, a thick oak slab, or reclaimed boards, depending on the style of the room. Wood suits seating, since it is warm to lean on and forgiving if a glass is set down hard, and it contrasts gently with white cabinet fronts.

    Use the wood top on the island only, and keep the perimeter counters in stone or quartz, so each surface does the job it suits best. Oil the island top regularly, and keep a board handy for chopping so the top keeps an even patina. Pair the wood with stools in a matching tone, or in rattan for a lighter look, and add a simple pendant above to mark the island as the social center of the kitchen.

    19. Plan a Large Central Island With Seating

    A large white kitchen island with seating for four and pendant lights.

    A large central island with seating turns a white kitchen into a room for cooking, homework, and conversation at the same time. The island gives you extra counter space, storage on the working side, and a comfortable overhang for stools on the living side. In an open plan home, it also marks the edge of the kitchen without a wall.

    Allow at least a comfortable knee space under the overhang, and leave clear walkways around the island so two people can pass. Choose stools that tuck under the counter when not in use, and keep the island front free of fussy panels so the room stays calm. A large island suits a room with enough floor space; in a smaller kitchen, a narrower island or a peninsula gives most of the same benefit without crowding the room.

    20. Design a White Galley Kitchen for Light

    A bright white galley kitchen with two parallel runs of cabinets and a window at the end.

    A galley kitchen, with two parallel runs of cabinets, can feel bright and easy in white, because the pale surfaces bounce light down the narrow room. Keep the upper cabinets white and the counters light, and use the end wall for a window, open shelves, or a pale backsplash that draws the eye through the space. Good lighting matters more here than in a wide kitchen, so plan it from the start.

    Put the sink and hob on opposite runs where the layout allows, so the work triangle stays short and safe. Use pull-out storage and tall units at one end to keep the runs clear, and avoid a dark floor that would cut the room in half. A white galley kitchen rewards discipline: keep only daily items on the counter, store the rest behind closed doors, and the narrow room will feel calm rather than cramped.

    21. Shape a White L-Shaped Kitchen With a Breakfast Corner

    A white L-shaped kitchen with a small round breakfast table and two chairs in a corner.

    An L-shaped layout leaves one corner of a white kitchen free, which is the ideal place for a small breakfast table and two chairs. The table gives the kitchen a place to sit without a full island, and it suits a room where the main seating is elsewhere in the house. Morning light in the corner makes it a pleasant spot for coffee, and the table can double as extra prep space when you cook for a crowd.

    Choose a round table if the corner is tight, since it leaves more room to move around than a square one. Keep the table and chairs in wood or painted white to match the kitchen, and add a simple pendant or a wall light above. Store breakfast items, such as cereals and mugs, in a nearby cabinet or on a small shelf, so the corner works as a self contained breakfast zone.

    22. Build a Banquette Into a White Kitchen

    A white kitchen with a built-in banquette bench and a pedestal table by a window.

    A built-in banquette turns an awkward corner or a bay window into the most used seat in a white kitchen. The bench, fixed to the wall, saves the space that chair legs and pushing back would need, and the base can hide storage for table linens, board games, or rarely used pans. A banquette suits families, since children can slide in beside each other, and it makes a kitchen feel like a room for lingering, not just cooking.

    Upholster the bench in a wipeable fabric in a soft neutral, and add cushions in a pattern that links to the rest of the house. Pair it with a pedestal table, which leaves leg room free, and keep the wall above the bench simple, with one picture or a small shelf. If the banquette sits under a window, the daylight will make it the brightest seat in the kitchen, which is exactly where people want to sit.

    23. Carve Out a Coffee Station Nook

    A white kitchen coffee station nook with a machine, mugs on a shelf, and jars.

    A coffee station nook gathers the machine, mugs, beans, and spoons in one small area, so the main counter stays clear for cooking. A shallow cabinet, a tray on the counter, or a dedicated shelf near a power point is all you need. In a white kitchen, the nook looks best when the mugs and jars are kept to a small, matching set, so the station reads as tidy rather than cluttered.

    Place the station away from the hob and the main sink, near the breakfast table or the seating area if you can. Add a small shelf above for mugs, and keep filters, sugar, and spoons in a drawer or a jar below. A coffee nook also works well in a pantry or a larder cabinet with doors that close, so the machine and supplies disappear when the kitchen needs to look calm for guests.

    24. Fit a Tall Pantry Wall in a White Kitchen

    A white kitchen with a tall floor to ceiling pantry wall of cabinets.

    A tall pantry wall, with floor to ceiling cabinets on one run, gives a white kitchen serious storage without a separate pantry room. Deep shelves hold dry goods, small appliances, and baking trays, and pull-out racks make the back of each shelf easy to reach. Because the cabinets match the rest of the kitchen in white, the pantry wall reads as part of the room, not as a storage block.

    Plan the interior before you fit the doors: shallow shelves for jars, a tall section for a vacuum cleaner or a mop, and one shelf at counter height for a small appliance you use daily. Label jars and use clear containers so you can see what you have. A pantry wall works best on a wall without a window, where it can run full height, and it frees the rest of the kitchen from cluttered counters and overfilled wall cabinets.

    25. Hang a Plate Rack for Everyday Dishes

    A white kitchen wall with a wooden plate rack holding white plates.

    A plate rack, mounted on the wall or built into a cabinet, keeps everyday dishes visible, easy to grab, and quick to put away. In a white kitchen, a rack of white or cream plates adds a quiet pattern to the wall, and it suits farmhouse and cottage styles especially well. A rack above the sink or near the dishwasher shortens the walk from washing up to storage.

    Choose a rack sized for the plates you actually use, and leave a little space between plates so they dry and lift out without chipping. A wooden rack warms a white wall, while a painted white rack blends in for a calmer look. Keep the rack to one or two rows, and store serving dishes and rarely used pieces elsewhere, so the rack stays a working tool rather than a display that needs dusting.

    26. Add Under-Cabinet Lighting to White Counters

    A white kitchen counter lit by warm under-cabinet lighting in the evening.

    Under-cabinet lighting changes how a white kitchen works at night, because it lights the counter where you chop and read recipes, without lighting the whole room harshly. Warm white LED strips, fitted to the underside of upper cabinets, make white counters glow and show the true color of food. The light also bounces off a pale backsplash, so the kitchen feels bright even when the main ceiling light is off.

    Fit the strips toward the front of the cabinet underside, so the light falls on the counter rather than the wall, and hide the strip itself behind a small lip or pelmet. Choose a dimmable fitting if you can, so you can lower the light for an evening meal. Under-cabinet lighting is a small cost in a renovation, but it is one of the most noticed improvements in daily use, since it removes shadows exactly where you work.

    27. Hang Pendants Over a White Island

    A white kitchen island with three pendant lights hanging above it.

    Pendant lights over an island mark the island as the center of a white kitchen and add a warm pool of light where people gather. Two or three pendants, spaced evenly, suit most islands; one large pendant suits a small island or a peninsula. Glass pendants keep the view across the room open, while metal or rattan shades add texture and a stronger shape.

    Hang the pendants low enough to light the island surface, but high enough that you can see across the island to the person opposite. A warm bulb tone, rather than a cool daylight bulb, keeps white surfaces from looking stark in the evening. Match the pendant finish to the cabinet hardware or the faucet, so the lighting feels linked to the rest of the kitchen, and put the pendants on a dimmer for flexible evening light.

    28. Make a White Range Hood the Focal Point

    A white kitchen with a white chimney range hood as the focal point of the cooking wall.

    A white range hood, whether plaster, painted wood, or a simple canopy in the same white as the cabinets, can be the quiet focal point of a white kitchen. The hood draws the eye to the cooking wall, and its shape gives the room a sense of structure. A chimney style hood suits a traditional kitchen, while a slim, boxy hood suits a modern one.

    Keep the wall around the hood simple, with a plain backsplash or a single shelf, so the hood shape stands out. Check the extraction rate and ducting before you choose a style, since a beautiful hood that does not clear steam and cooking smells is a poor trade. If a full chimney hood is too much, a white canopy hood over a range, paired with open shelving on either side, gives a similar focal point with less bulk.

    29. Hide Appliances Behind Panel-Ready Fronts

    A white kitchen with panel-ready appliances hidden behind matching cabinet fronts.

    Panel-ready appliances, fitted with door fronts that match the white cabinets, make a white kitchen look like a single piece of furniture. The dishwasher and fridge disappear into the cabinet run, so the room stays calm and unbroken. This suits an open plan kitchen especially well, since there are no stainless fronts to catch the eye from the living area.

    Plan panel-ready appliances early in a renovation, since the panels, hinges, and ventilation need to fit the appliance model you choose. Keep one appliance visible if you prefer, such as a range in a contrasting finish, so the kitchen does not feel too uniform. Panel fronts need the same care as cabinet doors, so wipe them with the same cloth and cleaner you use on the cabinets, and the whole run will age evenly.

    30. Grow Herbs at the Kitchen Window

    A white kitchen window above a sink with small pots of herbs on the sill.

    A windowsill herb garden brings life to a white kitchen without adding color to the cabinets or walls. Small pots of basil, mint, parsley, and chives on the sill above the sink are within reach while you cook, and the green leaves soften the hard lines of the window frame. Herbs also scent the room gently when you brush past them, which suits a kitchen used all day.

    Use matching pots in white, terracotta, or stone, and a tray underneath to catch water, so the sill stays clean. Give herbs the brightest window you have, and water little and often rather than flooding the pots. For more window ideas, from sill styling to light and privacy, see these kitchen window decor ideas. Rotate the pots weekly so each plant grows evenly, and replace any herb that grows leggy with a fresh plant from a nursery.

    31. Use a Rolling Island Cart in a Small White Kitchen

    A small white kitchen with a rolling island cart with a wood top.

    A rolling island cart gives a small white kitchen extra counter space, storage, and a serving trolley in one piece, without the commitment of a fixed island. The cart can sit against a wall when not needed, roll to the center for prep, and move to the dining area for serving. A white or wood cart with a butcher block top blends into a white kitchen, and the open shelf below holds bowls, cookbooks, or a basket of vegetables.

    Choose a cart with lockable castors, so it stays steady while you chop, and check the height against your existing counters so it works as a real prep surface. A cart with a towel rail or a hook for utensils adds function without bulk. In a rental or a small kitchen, a rolling cart is often the most practical island of all, since it can leave with you when you move.

    32. Set Up a Dedicated Baking Station

    A white kitchen baking station with a mixer, glass jars of flour, and baking trays.

    A baking station gathers flour, sugar, baking trays, a mixer, and measuring tools in one area of a white kitchen, so baking does not spread across every counter. A section of counter near the oven, with a mixer on a lift shelf or a sturdy stand, and jars of dry goods above or below, is all you need. The station keeps the rest of the kitchen clear, which matters when baking fills the room with flour.

    Use a marble or stone offcut as a pastry surface if you have one, since cool stone suits rolling dough. Store trays upright in a narrow divider, and keep measuring cups and spoons in a drawer directly below the work surface. In a white kitchen, glass jars with simple labels keep the baking station looking tidy, and a wood board under the mixer protects the counter from vibration and marks.

    33. Layer Natural Textures to Soften White

    A white kitchen layered with linen, rattan stools, wood boards, and ceramic bowls.

    Natural textures are what stop a white kitchen from feeling cold: linen curtains, rattan stools, a wood chopping board, ceramic bowls, and a woven runner each add a soft or rough surface that the eye can rest on. None of these items changes the color scheme, yet together they make the room feel lived in and warm. Texture matters most in an all white room, where there is little color to create interest.

    Add texture in layers, starting with the largest surfaces: a wood island top or floor, then seating in rattan or woven fiber, then small items such as linen tea towels and ceramic jars. Keep the palette to white, cream, wood, and one soft neutral, so the textures work together rather than competing. Replace one texture at a time when you want a change, such as swapping a runner for a new weave, and the kitchen will feel fresh without a repaint.

    34. Mix Vintage Pieces Into a White Kitchen

    A white kitchen with a vintage wood table used as an island and mismatched chairs.

    Vintage pieces, such as an old wood table used as an island, a set of mismatched chairs, or a secondhand dresser used for storage, give a white kitchen a history that new cabinets alone cannot. The worn wood and older shapes contrast gently with crisp white doors, and the room feels collected over time rather than bought in one order. This idea suits farmhouse, cottage, and eclectic kitchens best.

    Choose one or two vintage pieces, not a room full, so the kitchen still feels clean and easy to use. Check that a vintage table is steady and at a workable height before you use it as an island, and seal or oil the wood if it will hold food or drinks. Pair the vintage piece with simple white walls and plain counters, so it stands out as a feature. A vintage find also keeps a white kitchen personal, since no two pieces are exactly alike.

    Conclusion

    A relaxed white kitchen is not about using one perfect shade of white. It is about pairing white cabinets with warm materials, clear storage, and light that works morning and evening. Start with the cabinet style that suits your house, add one warm counter or floor, and give each daily job, from coffee to baking, a place of its own. The ideas here work on their own or together, so pick a few that fit your room and your budget, and let the rest wait for a later refresh. Save the ideas you love, test paint and materials beside your own light, and build a white kitchen that stays calm, practical, and pleasant to spend time in.

    FAQs

    Will a white kitchen show every mark and stain?

    White surfaces show crumbs, spills, and fingerprints more than dark ones, but they also show you where to clean, so marks rarely sit long enough to stain. Wipe counters daily with a soft cloth, clean cabinet fronts weekly, and choose a wipeable paint finish on doors near the hob and sink. A matte or satin finish hides small marks better than high gloss, and a patterned floor or a wood island top breaks up large white areas where marks would show most.

    What countertop works best with white cabinets?

    The best countertop depends on how you cook. Quartz is hard wearing, easy to wipe, and needs little care, which suits a busy family kitchen. Marble looks classic with white cabinets but needs sealing and prompt cleaning after acidic spills. Butcher block warms the room and suits an island or a single run, while a pale stone slab gives a seamless, elegant wall and counter. Many kitchens mix two surfaces, such as stone on the main run and wood on the island, to get the best of both.
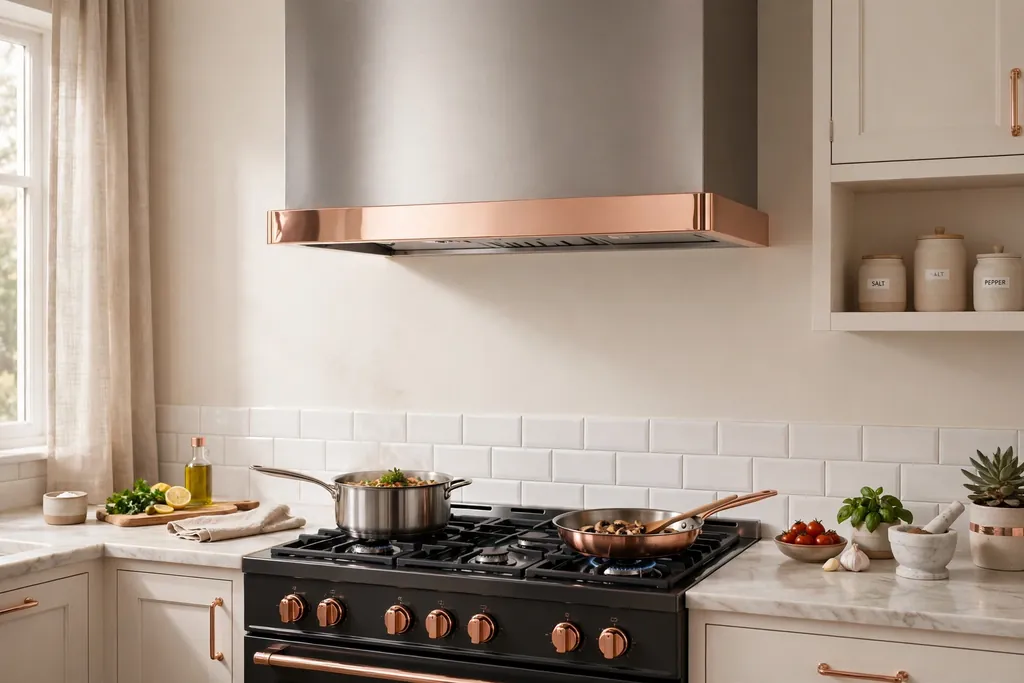
    How do I keep a white kitchen from feeling cold?

    Add warmth through materials, not color. Wood floors or a wood island top, brass hardware, rattan seating, linen curtains, and ceramic dishes all soften white surfaces. Layer the lighting too, with warm under-cabinet light and pendants over the island, so the room glows in the evening. A plant or a bowl of fruit on the counter adds a living note, and a woven runner underfoot keeps the floor from feeling bare.

    What hardware suits white kitchen cabinets?

    Black hardware gives white cabinets clear definition and suits modern and farmhouse kitchens alike. Brass hardware warms the room and suits traditional and transitional styles. Nickel or chrome hardware keeps the look cool and quiet, which suits a contemporary kitchen. Choose one main finish and repeat it on the faucet and light fittings, and test the hardware against your white in both daylight and evening light, since metal tones shift with the light.

    Are white cabinets hard to keep clean?

    White cabinets need regular wiping, but they are not hard to keep clean if the finish suits the kitchen. A satin or semi-gloss paint wipes more easily than flat paint, and a soft cloth with mild soapy water handles most daily marks. Keep a cloth near the sink for quick wipes after cooking, and clean around handles and hinges monthly, where grease collects. Avoid harsh scouring pads, which can dull the paint over time.

    Can a small kitchen work in white?

    Yes, white is one of the best choices for a small kitchen, because pale surfaces reflect light and make the room feel larger. Keep upper cabinets white, use open shelving sparingly, and choose a light counter and backsplash so the room reads as one bright space. Add storage that uses the full height of the wall, a rolling cart for extra counter space, and good under-cabinet lighting, so the small room works hard without feeling crowded.

  • 16 Kitchen Backsplash Ideas That Bring Practical Style Home

    16 Kitchen Backsplash Ideas That Bring Practical Style Home

    A backsplash has a hard job. It sits behind the sink and the stove, catches splashes and steam, and still has to look right with the cabinets, counters, and floor. The best kitchen backsplash ideas balance those two jobs, so the surface is easy to wipe and the pattern or material adds something real to the room. These 16 ideas cover tile, stone, wood, metal, and renter friendly options, with notes on cleaning, grout, and where each one works best. Before you choose, hold a sample against your counter in daylight and check how it looks when it is wet, since a backsplash spends much of its life damp.

    Key Takeaways

    • Pick the backsplash after the counter and cabinets, not before, so the new surface links to materials already in the room.
    • In a busy cooking zone, favor smooth, sealed surfaces with few grout lines, since they wipe clean faster after frying and simmering.
    • Test a sample wet and dry, in daylight and evening light, before you order enough tile for the full wall.
    • Use one strong backsplash idea at a time. A bold pattern, a veined slab, or a bright color each make a clear point on their own.
    • Keep grout in mind from the start. Dark grout hides stains on a subway tile wall, while pale grout on a patterned tile needs sealing and regular cleaning.

    1. Classic White Subway Tile With Dark Grout

    Kitchen wall with white subway tile and dark grout behind a stove

    White subway tile is a kitchen staple because it is bright, simple, and easy to match with almost any cabinet color. Laid in a running brick pattern, it gives the wall a steady rhythm without a loud pattern. Dark grout changes the look completely: it outlines each tile, hides cooking stains, and suits kitchens where the stove gets heavy daily use.

    Use a standard 3 by 6 inch tile for a familiar look, or a slightly longer tile if you want fewer grout lines. Seal the grout after it cures, and wipe the wall after frying so grease does not settle into the joints. This idea suits a white or wood kitchen best, since the crisp tile and dark lines keep a plain scheme from looking flat. For help planning the wall around a window, see these kitchen window decor ideas.

    2. Full Height Marble Slab Behind the Range

    Kitchen range wall with full height white marble slab backsplash and brass hood

    A full height marble slab runs from the counter to the underside of the range hood or cabinets in one unbroken piece, with no grout lines to clean. The natural veining becomes the main feature of the cooking wall, so the rest of the kitchen can stay plain. This is a good choice behind a range, where splashes land in one concentrated area and a smooth stone surface wipes clean in one pass.

    Choose a slab with veining you like at full size, since a small sample will not show how the pattern moves across the wall. Seal the marble and reseal it on the schedule the supplier suggests, because marble can stain from tomato, wine, and oil. Keep the counters in a quiet stone or a solid color so the veined wall stays the focus. A slab costs more than tile, so measure carefully and order the piece only after the range and hood positions are fixed.

    3. Handmade Zellige Tiles in Soft Green

    Kitchen wall with handmade soft green zellige tiles and white cabinets

    Zellige tiles are handmade, so each tile has slight differences in color, thickness, and surface shine. In a soft green, those differences read as gentle movement across the wall rather than a flat block of color. The glazed surface wipes clean, which makes zellige a practical pick as well as a pretty one, and the small size suits both a full wall and a short backsplash strip.

    Lay the tiles close together with a narrow grout joint so the handmade edges stay visible. Expect some tiles to arrive darker or lighter than others, and mix tiles from several boxes before fixing so no one patch looks uneven. Pair soft green zellige with white cabinets and a wood counter, or with pale oak and brass taps, for a calm kitchen that still has texture. Avoid a busy counter pattern here, since the tile already carries plenty of detail.

    4. Painted Beadboard Panels for a Cottage Kitchen

    Cottage kitchen with white painted beadboard panel backsplash and farmhouse sink

    Beadboard panels give a kitchen a cottage feel through vertical grooves that add texture without a tile pattern. Painted in white or a pale cream, beadboard suits a kitchen with shaker cabinets, a farmhouse sink, and wood details. It is also one of the simpler backsplashes to fit, since panels cover a large area quickly and paint can be refreshed later without removing tile.

    Use beadboard made for kitchens, or seal standard panels well, and paint with a washable kitchen paint so splashes wipe off. Pay attention to the joints behind the sink and stove, since water can sit in the grooves if the seal fails. Caulk the edges where the panels meet the counter and the cabinets. This idea works best in a kitchen where cooking is moderate and the wall does not face constant steam, and it pairs well with open shelving above.

    5. Sealed Exposed Brick for Warmth and Texture

    Rustic kitchen with sealed exposed brick backsplash and wood cabinets

    Exposed brick brings warmth and a rough texture that tile cannot match, and it suits kitchens with wood beams, iron details, or a rustic range. The brick itself is not wipe clean, so sealing is the step that makes this idea practical. A good masonry sealer fills the pores, keeps grease from soaking in, and lets you wipe the surface with a damp cloth.

    Check the brick condition before you start, and repair loose mortar first. Apply the sealer in thin coats and test it behind the stove, where heat and grease are strongest. Keep the rest of the kitchen simple, with plain cabinets and a solid counter, so the brick stays the main texture. If the brick is uneven or damaged, a thin brick veneer gives the same look with a flatter, easier to seal surface.

    6. Herringbone Marble Mosaic for a Quiet Pattern

    Kitchen wall with herringbone marble mosaic backsplash and pale cabinets

    Herringbone is a zigzag layout that turns small marble pieces into a clear pattern without a strong color. It suits a kitchen where you want movement on the wall but not a bold print, and it works with white, grey, or wood cabinets. The marble pieces are usually sold on mesh sheets, which keeps the pattern even and speeds up fitting.

    Use a pale grout so the pattern reads as one calm surface rather than a grid of lines, and seal both the marble and the grout. Because herringbone has many joints, wipe the wall after cooking and avoid letting acidic splashes sit on the stone. This layout suits a full wall behind a range, or a shorter strip between counter and cabinets, and it pairs well with a plain counter that does not compete with the zigzag.

    7. Large Format Porcelain Panels With Almost No Joints

    Modern kitchen with large format porcelain panel backsplash and flat front cabinets

    Large format porcelain panels cover a wall in a few big pieces, so the backsplash has very few grout lines and a calm, modern look. Many panels copy marble, concrete, or stone, which gives you the look of a slab with a lighter, stain resistant surface. Porcelain resists heat and stains, so it is a strong pick behind a range and around a sink.

    Fitting needs care, since large panels are heavy and break if they flex. Measure the wall exactly, including outlets and the hood, and let a skilled fitter cut and fix the panels. Choose a panel tone that matches the counter rather than matching it exactly, so the two surfaces sit together without looking like a failed match. This idea suits a modern kitchen with flat front cabinets, where the lack of joints keeps the whole wall quiet.

    8. Peel and Stick Tiles for Renters and Quick Updates

    Renter kitchen with peel and stick subway style tile backsplash above a counter

    Peel and stick tiles are thin panels with an adhesive back, made to look like subway tile, mosaic, or stone. They suit renters and anyone who wants a fast update without grout, dust, or a tiler. Most types wipe clean with a damp cloth, and many can be removed later with heat and care, which makes them a low risk way to test a look.

    Clean and dry the wall first, and press each panel firmly from the center outward so no air sits behind it. Avoid placing peel and stick tiles directly behind a gas hob where heat is intense, and check the maker guidance for your stove type. Plan the layout from the center of the wall so cut pieces at the edges look even. If you like the look after a few months, you can keep the panels or use them as a trial before a fixed tile job.

    9. Stainless Steel Sheet Behind the Range

    Kitchen range wall with brushed stainless steel sheet backsplash

    A stainless steel sheet behind the range is built for the hardest working part of the kitchen. It resists heat, wipes clean after frying, and has no grout lines at all. The brushed finish suits a kitchen with steel appliances, and it keeps a professional cooking zone looking tidy with very little effort.

    Fix the sheet with a small gap at the edges for expansion, and use a soft cloth with warm soapy water for cleaning, since harsh pads scratch the brushed surface. Fingerprints show on steel, so wipe in the direction of the grain and dry the sheet after cleaning. Keep the rest of the backsplash in tile or another quiet material, and reserve the steel for the range wall only, where its practical strength matters most.

    10. Glass Mosaic Tiles in Sea Tones

    Bright kitchen with glass mosaic tiles in pale blue and soft green above a counter

    Glass mosaic tiles catch light and add a soft shine that suits a kitchen with limited daylight. In sea tones of pale blue, aqua, and soft green, the small tiles read as calm color rather than a loud pattern, especially when mixed in one mesh sheet. Glass is non porous, so it wipes clean and resists stains from cooking splashes.

    Use a white adhesive behind pale glass tiles, since a grey adhesive can dull the color from behind. Keep the grout pale and seal it, and avoid harsh abrasive pads that can scratch the glass surface. This idea suits a coastal or light filled kitchen, and it pairs well with white cabinets and a pale counter. For a quieter version, use the mosaic as a single stripe above the counter, with plain tile below and above it.

    11. Terracotta Square Tiles for a Warm Rustic Wall

    Warm kitchen with square terracotta tile backsplash and wood cabinets

    Terracotta tiles bring an earthy, handmade warmth that suits kitchens with wood cabinets, cream walls, and natural fibers. The square shape keeps the layout simple, while the color variation from tile to tile gives the wall depth. Terracotta is porous, so sealing before and after grouting is essential, and it turns this rustic material into a usable kitchen surface.

    Choose a matte sealer if you want to keep the natural clay look, and test the sealer on one tile first. Expect the color to deepen slightly after sealing, and check it beside your counter before you seal the whole wall. Pair terracotta with a plain stone or wood counter, since a patterned counter plus a varied tile wall can look busy. This idea suits a kitchen that already uses warm tones, and it looks best with brass or black taps.

    12. Horizontal Shiplap Boards for a Relaxed Look

    Relaxed kitchen with horizontal white shiplap board backsplash and wood counter

    Horizontal shiplap boards run across the wall in long lines, which can make a narrow kitchen feel wider. Painted white or in a pale color, shiplap suits a relaxed kitchen with wood counters and simple cabinets. Unlike beadboard, which runs vertically, shiplap gives a calmer, more horizontal rhythm that suits a long counter run.

    Use boards made for damp areas, or seal and paint standard boards with washable kitchen paint. Caulk the gaps at the counter and at the ends, and wipe the boards after cooking so grease does not sit in the joints. This idea works best where the stove has a good hood, since steam and grease reach the wall less directly. Keep the shelves and cabinets plain so the board lines stay the main detail on the wall.

    13. Penny Round Mosaic for a Playful Small Scale Pattern

    Kitchen sink wall with white penny round mosaic tile backsplash

    Penny round tiles are small circles on a mesh sheet, and they give a backsplash a playful, dotted pattern at a small scale. In white, they read as a quiet texture; in a soft color, they add a gentle point of interest without a large print. The round shape suits a kitchen with curved details, such as an arched window or rounded cabinet handles.

    Use a grout color close to the tile color for a calm look, or a contrasting grout if you want each circle to stand out. Because the tiles are small, there are many grout joints, so seal the grout and wipe the wall after cooking. Penny rounds suit a sink wall well, where the small scale looks neat around taps and outlets. Pair them with a plain counter, since the dotted pattern already gives the wall plenty of movement.

    14. Patterned Encaustic Cement Tiles as a Feature Panel

    Kitchen range wall with patterned encaustic cement tile feature panel framed by plain tile

    Patterned encaustic tiles use bold geometric or floral designs pressed into cement, and they work best as a feature panel rather than a full kitchen wall. A panel behind the range, framed by plain tile on each side, gives the kitchen a clear focal point while keeping the rest of the wall easy to clean. The pattern also suits kitchens with plain cabinets, where one strong panel can carry the whole scheme.

    Seal cement tiles before grouting and again after, since cement absorbs stains fast. Keep the panel size modest, often the width of the range plus a small margin, so the pattern does not overwhelm a small kitchen. Repeat one color from the tile in a tea towel, a rug, or a small accessory, and keep the counters plain. This idea suits a kitchen with a simple layout, where the feature panel has room to be seen from across the room.

    15. Antiqued Mirror Panels to Bounce Light

    Small kitchen with antiqued mirror panel backsplash reflecting daylight

    Antiqued mirror panels reflect light and make a small or dark kitchen feel larger, while the mottled finish hides splashes better than a clear mirror. The aged spots give the wall a soft, vintage character that suits kitchens with brass details, glass cabinets, and pale wood. Mirror also pairs well with a window wall, since it doubles the daylight in the room.

    Fix mirror panels with a suitable adhesive and support, and clean them with a soft cloth and glass cleaner, avoiding abrasive pads. Keep mirror to one wall, often the sink wall or a short run, rather than the full kitchen, so the reflections stay calm. For ideas on cabinet colors that sit well with a reflective wall, see these colors for your kitchen cabinets. Avoid mirror directly behind a range, where heat and grease make cleaning a constant job.

    16. Pressed Metal Tin Tiles for Vintage Character

    Vintage kitchen with white pressed metal tin tile backsplash and simple cabinets

    Pressed metal tiles, often called tin tiles, carry a raised pattern stamped into thin metal sheets. Painted white, they suit a vintage kitchen with simple cabinets and a farmhouse sink; left in a metal finish, they suit a kitchen with industrial details. The pattern adds texture without color, and the metal surface wipes clean with a damp cloth.

    Fix the tiles to a flat backing board first, then fix the board to the wall, so the thin metal stays flat and even. Paint the tiles after fitting if you want a single color, and seal the edges near the sink so water cannot sit behind the metal. This idea suits a kitchen where you want texture at low cost, and it pairs well with plain counters and simple hardware. For storage ideas that keep a patterned wall visible, see these kitchen wall storage ideas and these corner kitchen cabinet ideas.

    Conclusion

    The right backsplash is the one that survives your cooking and still pleases you when you walk into the kitchen each morning. Start with the counter and cabinets you already have, then pick a material that cleans well in the spots that get splashed most. Order a sample, test it wet, and check the grout or sealant it needs before you buy for the full wall. A simple tile laid well will serve you better than a bold material that stains or needs constant care.

    Save this list on Pinterest before your next kitchen update, and work through it one idea at a time: material first, then layout and grout, then the spots behind the range and sink where practical strength matters most.

    FAQs

    What is the easiest kitchen backsplash to clean?

    A smooth surface with few joints is easiest to clean, such as a marble or porcelain slab, a stainless steel sheet, or large format porcelain panels. Tile with small joints needs more wiping, and porous materials such as brick, terracotta, and cement tile need sealing first. Whatever material you choose, wipe splashes soon after cooking so grease and acidic foods do not set into grout or stone.

    How high should a kitchen backsplash be?

    A standard backsplash runs from the counter to the underside of the wall cabinets, usually about 18 inches high. A full height backsplash runs to the ceiling or to the range hood, and it suits a range wall or a kitchen with no upper cabinets. Measure your cabinet height before you order tile, since the gap between counter and cabinets varies from kitchen to kitchen.

    Can I put a backsplash over existing tile?

    In many cases yes, if the existing tile is sound, flat, and firmly fixed. Clean and roughen the old surface so the new adhesive grips, and check that outlets and trim still sit correctly with the extra thickness. Peel and stick tiles are often used over old tile for a fast update. If the old tile is loose, cracked, or uneven, remove it first so the new backsplash has a sound base.

    What backsplash works best for a white kitchen?

    A white kitchen can take almost any backsplash, so the choice depends on the look you want. White subway tile with dark grout keeps the room crisp, soft green zellige adds gentle color, and a veined marble slab adds a natural feature. Avoid a backsplash that matches the cabinets exactly in white, since the wall can disappear. Pick a material with a different texture, such as handmade tile or stone veining, so the wall still reads as its own surface.

    Is a backsplash needed behind a stove?

    A backsplash behind a stove is strongly recommended, since that wall takes the most heat, grease, and food splashes. A heat resistant, wipe clean surface such as tile, stone, porcelain, or stainless steel protects the wall and makes cleaning far easier. Check the heat guidance for peel and stick tiles, wood, and mirror before using them behind a stove, since not every material suits that spot.

    How do I choose a grout color for a backsplash?

    Match the grout to the tile for a calm, unified wall, or use a contrasting grout to outline the tile shape, as with white subway tile and dark grout. Pale grout shows stains more readily, so seal it and wipe it after cooking. Dark grout hides stains but can make a small tile pattern look busy. Test grout on a few spare tiles beside your counter before you grout the full wall.

  • 26 Kitchen Nook Ideas to Inspire Your Next Room Refresh

    26 Kitchen Nook Ideas to Inspire Your Next Room Refresh

    Sheet No.: 68
    Brand: Dwell Ovell (dwellovell.com)
    Author: Clara Bennett
    Parent keyword: Kitchen Nook Ideas
    Keyphrase: kitchen nook ideas
    Slug: kitchen-nook-ideas
    Categories: Kitchen & Dining (primary: Kitchen & Dining)
    Publish slot: Sept 16, 2026, 3:00pm America/New_York
    Status: Draft file only (do not publish)

    A kitchen nook is a small eating spot tucked into a corner, a bay window, or the end of a counter, and it can change how a kitchen feels day to day. It gives breakfast a set place, gives children a spot for homework while dinner cooks, and gives guests a seat that does not block the cook. The best nook fits the corner you already have, rather than forcing a large table into a small room. These 26 kitchen nook ideas cover benches, tables, seating mixes, storage, light, and simple styling, so you can pick the layout that suits your space, your budget, and the way your household actually eats.

    Key Takeaways

    • Measure the corner first, including wall length, window position, and how far chairs or a bench must pull out to sit down.
    • A built-in bench saves floor space and adds storage, while freestanding chairs are easier to move and replace.
    • Round tables suit tight corners, because they leave more passing room than a square table of the same size.
    • Keep the nook easy to clean, with washable cushion covers, a wipeable table top, and a clear route to the kitchen.
    • Use one light source over the table, plus daylight from the window, so the nook works for morning coffee and evening meals.
    • Repeat one material or color from the kitchen, such as wood, linen, or black metal, so the nook reads as part of the room.

    1. L-Shaped Banquette with Under-Seat Storage

    Kitchen corner with an L-shaped banquette bench, cushions and a wood table.

    Build a bench into two walls of a corner, with a rectangular or square table in front of it and one or two chairs on the open side. The L shape seats three or four people in a footprint that a table with four chairs would crowd. Lift-up bench seats hide placemats, board games, tablecloths, and rarely used serving dishes, which keeps the nook tidy without a separate cupboard.

    Choose firm foam cushions with removable, washable covers, since a bench seat gets daily use. Leave a small gap between the bench back and the wall if you plan to tuck a cushion behind it, and keep the table narrow enough that the person in the middle of the bench can slide out without moving the whole table.

    2. Bay Window Seat Nook

    Kitchen bay window seat nook with cushions and a small round table.

    Turn a bay window into the nook itself, with a seat fitted across the bay and a small round or oval table in front of it. Daylight does most of the work here, and the view gives the seat a purpose beyond eating. This layout suits a kitchen with a projecting window, where a standard table would block the light or sit awkwardly in front of the glass.

    Keep the seat cushion in a fabric that tolerates sun, and add a thin back cushion rather than a deep pile of pillows that eats into sitting room. A low shelf or a narrow ledge along the bay holds a book or a phone, and a single pendant or wall light keeps the seat usable after dark.

    3. Round Pedestal Table in a Tight Corner

    Small kitchen corner with a round pedestal table and two chairs.

    Place a round pedestal table in a corner that is too small for a four-legged table and four chairs. One central leg means no one straddles a table leg, and chairs tuck fully under the top when the nook is not in use. A 30 to 36 inch top seats two comfortably and three at a pinch, which is enough for most weekday breakfasts.

    Pair the table with two light chairs that are easy to pull out, and keep the wall behind the table clear so chairs can push back. If the corner also holds a radiator or a vent, leave clearance around it and choose a table top that tolerates warmth without warping.

    4. Bench on One Side, Chairs on the Other

    Kitchen nook with a bench on one side of the table and chairs on the other side.

    Put a simple bench along the wall and two freestanding chairs opposite it, with a rectangular table between them. The bench side seats children close together or two adults without a gap, while the chair side stays flexible for guests who need more room or a chair with arms. This mix also lets you move one chair away when the nook needs to double as a work spot.

    Match the bench height to the chairs so everyone sits at the same table height, and add a cushion to the bench for comfort. Keep the bench shorter than the table by a few inches at each end, so people can get in and out from the ends as well as the front.

    5. Counter-Height Breakfast Nook

    Kitchen counter end used as a breakfast nook with counter stools.

    Use the end of a kitchen counter or a short raised bar as the nook, with two or three counter stools tucked under it. This layout suits a kitchen with no spare corner, because the eating spot borrows space the counter already uses. It works best for quick meals, coffee, and homework, rather than long family dinners that need elbow room and a full table setting.

    Pick stools with a footrest and a seat height that leaves room for knees under the counter overhang. If the counter is also a prep surface, keep a tray or a runner on the eating end so plates and school books stay clear of chopping and cooking mess.

    6. Two-Person Bistro Nook

    Small kitchen corner with a bistro table and two chairs set for coffee.

    Set a small bistro table and two chairs in a sunny corner for a nook made for two. A bistro set takes very little floor space, folds or stacks in many cases, and gives a couple or a parent and child a set place to eat without opening up a large table. It also suits a kitchen in a small apartment, where a full dining table would dominate the room.

    Choose a table top that wipes clean and chairs that stack or fold, so the corner can clear for cleaning or for a larger gathering. A small rug under the set marks the nook as its own spot, but keep the rug flat and low pile so chair legs do not catch on it.

    7. Farmhouse Trestle Table Nook

    Farmhouse kitchen nook with a trestle table and wood benches.

    Use a trestle table with a thick wood top and two end benches or a bench and chairs for a nook with a relaxed, farmhouse feel. The trestle base leaves leg room open, unlike four corner legs, and the wood top tolerates daily meals, homework, and craft projects. This layout suits a larger kitchen corner or an open kitchen diner where the nook can hold six people.

    Seal the wood top so spills wipe off, and use placemats for hot dishes. If the benches are long, add a cushion runner rather than loose cushions that slide off, and keep one end of the table clear so someone can sit down without climbing over a bench.

    8. U-Shaped Family Banquette

    Kitchen corner with a U-shaped banquette bench around a table.

    Wrap a bench around three sides of a table for a U-shaped nook that seats five or six people in a compact corner. The U shape works well for a family that eats together daily, because everyone faces inward and passes dishes across a short distance. It needs a corner with enough wall on two sides, plus room to slide into the middle seat from one open end.

    Make the table top easy to lift or slide if you can, since the middle seat is hardest to reach. Keep the bench depth shallow enough that adults can sit upright without feeling wedged, and use a durable, wipeable cushion fabric on the seat, with softer covers only on the back cushions.

    9. Reading Nook with Bookshelf Ends

    Kitchen banquette nook with bookshelves holding cookbooks at the ends.

    Add bookshelves at one or both ends of a banquette nook, so the eating spot doubles as a reading corner. Cookbooks live within reach of the cook, while novels and school books have a set home instead of piling on the table. This idea suits a household that lingers at the table after eating, with coffee, homework, or a puzzle.

    For shelf styling that stays tidy rather than crowded, see our guide to how to style open shelves. Keep heavy books low, leave breathing room between groups, and keep the shelf nearest the table clear of small items that could fall onto plates. A small reading light on the shelf end helps in the evening.

    10. Fold-Down Wall Table Nook

    Tiny kitchen nook with a fold-down wall table and folding chairs.

    Fix a fold-down table to the wall of a tiny kitchen, with two folding chairs stored flat nearby. When the table is down, it seats two for a meal; when it is up, the floor clears for cooking and cleaning. This is one of the most practical nook options for a studio or a galley kitchen, where a permanent table would block the main walkway.

    Fix the table into wall studs, not plasterboard alone, and check that it locks flat when folded up. Keep the chairs light enough to hang on wall hooks, and store placemats and a small vase in a wall pocket or a nearby drawer so setting the table takes a minute, not a search.

    11. Plant-Filled Garden Nook

    Kitchen nook beside a bright window with potted plants and herbs on the sill.

    Place the nook beside the brightest window and fill the sill, a nearby shelf, and one floor pot with plants, so the eating spot feels like a garden corner inside the kitchen. Herbs on the sill stay within reach while you cook, and leafy plants soften hard kitchen surfaces. This layout suits a kitchen that looks onto a garden, since the indoor plants link the nook to the view outside.

    Keep plants off the table itself, except for one small pot that lifts away for cleaning, so plates have full room. Water plants over the sink, not at the table, and choose pots with saucers to protect wood and paint. If you also have outdoor seating, our guide to kitchen balcony ideas shows how to plan a small eating spot outside the kitchen door as well.

    12. Pendant-Lit Evening Nook

    Kitchen nook table lit by pendant lights in the evening.

    Hang one or two pendant lights low over the nook table, so the spot works as well in the evening as it does in daylight. A pendant marks the table as a set place, even in an open plan kitchen, and warm white bulbs make evening meals feel calm. This idea suits a nook without a window, or a corner that turns dark early in winter.

    Hang the pendant high enough to see across the table, and keep the cord length even if you hang two. Use a dimmer if your wiring allows it, so the same light suits homework, dinner, and a late coffee. Keep the shade clear of steam from the cooker, and wipe it often, since kitchen air leaves a film on glass and metal.

    13. Retro Diner Booth Nook

    Kitchen diner booth nook with two facing benches and a fixed table.

    Build two facing benches with a fixed table between them for a diner booth nook. The booth seats four in a narrow space, because benches need less pull-out room than chairs, and the fixed table keeps the layout from drifting into the walkway. Vinyl or wipeable fabric suits a booth, since it wipes after sticky meals and holds its shape.

    Keep the table top narrow enough that people can pass dishes across it, and add a small shelf or a wall hook at each end for bags. A booth suits a long, narrow kitchen corner better than a square one, so measure the bench length against the wall before you commit to the build.

    14. Patterned Cushion Statement Nook

    Kitchen nook bench with patterned cushions and a plain wood table.

    Keep the table, bench, and chairs plain, and let patterned cushions carry the color and pattern in the nook. Stripes, checks, or a bold floral on the bench cushions give the corner a clear identity without repainting or buying new furniture. This is a low cost refresh, and it suits a renter or anyone who likes to change the look by season.

    Use one pattern in two or three cushions, plus one plain cushion in a color picked from the pattern, so the mix reads as planned rather than random. Choose removable covers you can wash, and keep a spare set so the nook still looks dressed while one set is in the wash.

    15. Island-Adjacent Overflow Nook

    Small kitchen nook table with chairs placed just beyond a kitchen island.

    Place a small table and two chairs just beyond the kitchen island, so the island handles prep and the nook handles eating. Guests can sit in the nook with a drink while the cook works at the island, without crowding the work zone. This layout suits an open plan kitchen where a full dining table would sit too far from the action.

    Leave a clear walkway between the island and the nook table, wide enough to carry a hot dish safely. Keep the nook table lower than the island counter, so the two surfaces read as separate jobs, and match one material, such as wood or black metal, across both pieces.

    16. Nook with a Serving Ledge

    Kitchen nook with a narrow serving ledge behind the bench holding dishes.

    Add a narrow serving ledge or sideboard along the wall behind the bench, at a height just above the bench back, for serving dishes, a water jug, and extra plates. The ledge keeps the table clear during a meal, because serving dishes move off the table but stay within reach. It also gives the nook a finished, built-in look without a full wall of cabinets.

    Keep the ledge shallow, so it does not push the bench too far from the wall, and fix it firmly if it holds heavy dishes. Use it for items you use at the table only, not as general kitchen storage, or it will fill up and stop serving its purpose.

    17. Rustic Reclaimed Wood Nook

    Rustic kitchen nook with a reclaimed wood table and bench.

    Build the nook table and bench from reclaimed or rough-sawn wood, with visible grain and a matte finish, for a rustic corner that suits a farmhouse or cottage kitchen. The wood adds warmth against plain cabinets and tile, and small marks from daily use blend into the finish rather than standing out. This idea suits a household that uses the table hard, for meals, homework, and projects.

    Sand the top smooth enough that plates sit flat and crumbs wipe away, even if the edges keep a rustic profile. Seal the wood against spills, and pair it with plain chairs or a simple bench so the wood, not a mix of styles, leads the look.

    18. Light Scandinavian Nook

    Light Scandinavian kitchen nook with pale wood furniture and linen cushions.

    Use pale wood, white walls, and simple linen cushions for a light, calm nook with very little visual clutter. A light wood table, two simple chairs, and a bench with a plain cushion keep the corner bright, which suits a small or north-facing kitchen. The restraint also makes the nook easy to clean and easy to change with one new cushion or a plant.

    Keep the palette to pale wood plus white and one soft accent, such as sage, grey, or pale blue, so the nook stays calm. Avoid filling the walls around it, and leave one clear surface, such as the table top when not in use, so the corner does not collect clutter.

    19. Cafe Curtain Window Nook

    Kitchen nook window with cafe curtains covering the lower half of the glass.

    Hang cafe curtains on the lower half of the nook window for privacy at seated height, while the upper glass stays open for daylight. Cafe curtains suit a nook window that faces a street or a close neighbor, because they screen the table without darkening the corner. A plain linen or a simple check both work, depending on the rest of the kitchen.

    For more window treatments that suit a kitchen seating spot, see our guide to kitchen window decor ideas. Choose washable fabric, hang the rod at mid window height, and keep the hem above the sill so it does not sit in water or brush against the table. Keep the curtain clear of any heat source.

    20. Homework and Work Nook with Task Light

    Kitchen nook set for homework with a task light, books and a laptop.

    Set the nook up for homework and laptop work as well as meals, with a task light, a power outlet nearby, and a wipeable table top. Children can do school work where an adult can see them while cooking, and adults can answer emails over coffee without moving to another room. This dual use suits a household where the kitchen table is the busiest desk in the house.

    Keep school supplies in one basket or drawer by the nook, so the table clears fast for dinner. Use a task light with a warm bulb for evening work, and keep cords off the walkway with a small cable clip on the table leg or wall. Agree a clear-up time, so work does not spread across the table at mealtimes.

    21. Expandable Table Nook

    Kitchen nook with an expandable table extended for extra guests.

    Choose a table with a drop leaf, a butterfly leaf, or a pull-out extension, so the nook seats two on weekdays and four or six when guests come. The table stays small for daily use, which keeps the corner open, and grows only when it needs to. This is a practical middle ground between a tiny bistro table and a large permanent dining table.

    Test the extension before you buy, and check that the extra leaf stores inside the table or flat nearby. When the table grows, add folding chairs from another room rather than buying chairs that crowd the corner every day. Keep the floor around the nook clear, so the larger table still has room to pull chairs out.

    22. Hearth-Warm Nook by the Kitchen Fireplace

    Kitchen nook beside a fireplace with a cushioned bench and a small table.

    Place the nook beside a kitchen fireplace or a wood stove, where the warmth makes the corner the most used seat in cold months. A bench with thick cushions and a small table near the hearth gives the nook a reason to be used beyond meals, for reading and quiet coffee. This layout suits a larger kitchen or a kitchen with a fireplace on one wall.

    Keep all fabric, cushions, and paper well clear of the fire, and follow the stove or fireplace guidance for clearances. Use a hearth rug that tolerates heat and ash, and keep the table top clear of candles or items that could fall toward the fire. Choose a wipeable cushion fabric, since a hearth corner collects dust.

    23. Coastal Rattan Nook

    Coastal kitchen nook with rattan chairs, a light wood table and linen cushions.

    Use rattan or wicker chairs, a light wood table, and white or sandy linen cushions for a coastal nook that feels relaxed and bright. Rattan suits a kitchen with plenty of daylight and a view, and it pairs well with white cabinets, pale floors, and plants. The texture adds interest without a strong color, so the nook stays calm.

    Check that rattan chairs fit under the table and support daily use, since some decorative rattan is light. Keep the cushions washable, and avoid placing rattan right beside the cooker, where steam and grease will mark it. One coastal touch, such as a woven pendant or a striped cushion, is enough alongside plain pieces.

    24. Dark Panelled Nook

    Dark panelled kitchen nook with a wood table and warm lighting.

    Line the nook walls with dark wood panelling or deep green or navy paint, with a wood table and warm lighting, for a cozy corner that feels separate from a bright kitchen. Dark walls suit a nook with a window, since daylight keeps the corner from feeling closed in, and the contrast makes the seating spot feel intentional. This idea suits a household that wants a snug evening spot for dinner and conversation.

    Balance the dark walls with a light table top or light cushions, so plates and food stay visible. Use warm white bulbs, and add a mirror or a light picture frame if the corner feels too dark in the day. Keep the panelling wipeable, since a nook wall near a table takes splashes.

    25. Kid-Friendly Wipe-Clean Nook

    Kid-friendly kitchen nook with a wipeable table, bench seating and art supplies.

    Design the nook for children first, with a wipeable table top, vinyl or coated fabric cushions, and a bench that hides art supplies and placemats. A bench seat means children sit close together without chairs tipping, and a table at the right height lets them eat, draw, and do homework without climbing. This layout suits a family kitchen where the nook takes daily spills and sticky hands.

    Keep a small cleaning caddy in the bench storage, with cloths and a spray suitable for the table surface, so spills clear fast. Use placemats that wipe clean, and keep one drawer or basket for crayons and paper, so art supplies have a set home and do not spread across the kitchen.

    26. Seasonal Dressing Nook

    Kitchen nook dressed with a seasonal table runner and a low centerpiece.

    Keep the nook furniture plain all year, and change only the linens, cushions, and table centerpiece by season. A light linen runner and green stems suit spring, while a plaid runner and a small candle group suit winter, and the change takes minutes. This idea suits anyone who likes a fresh look without buying new furniture or repainting.

    Store seasonal nook items in one labelled box in the bench or a nearby cupboard, so the swap stays simple. For table styling that works across seasons, see our guide to everyday dining table decor. Keep the centerpiece low, so people can see across the table, and keep it clear of the cooking zone.

    Conclusion

    A good kitchen nook starts with the corner you have, not the table you wish you had. Measure first, pick a layout that leaves room to sit down and stand up, and choose seating you can clean and live with daily. A bench with storage, a round table in a tight corner, or a simple bistro set can all work, as long as the light, the table height, and the walkway around it suit the way your household eats. Start with one change, such as a bench cushion, a pendant light, or a washable runner, and let the nook earn its place before you add more. Save this list for your next room refresh, and pick the nook idea you want to try first.

    FAQs

    How much space does a kitchen nook need?

    A small nook for two needs a corner roughly the size of a bistro table plus room to pull chairs out, while a banquette nook needs enough wall length for the bench plus a table and a walkway on the open side. Measure the wall, the table size, and the pull-out room before you buy, and leave a clear path to the kitchen work zone. If the corner is very tight, a fold-down table or a round pedestal table usually fits better than a rectangular table with four chairs.

    Is a banquette or a table with chairs better for a small kitchen?

    A banquette usually wins in a small kitchen, because a bench against the wall needs less pull-out room than chairs on both sides, and under-seat storage replaces a separate cupboard. Chairs win if you need flexibility, such as moving seats to another room or seating guests with different needs. A mix, with a bench on the wall side and chairs on the open side, gives you most of the space saving plus some flexibility.

    What table shape works best in a kitchen nook?

    A round table suits a tight or square corner, because it leaves more passing room and no one sits at a sharp corner. A rectangular table suits a long banquette or a family nook, because it seats more people along a bench. An oval table is a useful middle ground in a bay window, where it follows the curve of the seat. Match the shape to the corner, not just to the style you like.

    How do I make a kitchen nook comfortable for long meals?

    Use firm foam cushions with a seat depth that supports the thighs, a table height that lets elbows rest without hunching, and a light over the table that does not glare. Add a back cushion on a bench, since a hard wall gets uncomfortable fast, and keep the table top clear enough for plates, glasses, and elbows. A rug underfoot and a throw on the bench help in cold months, but keep both washable.

    Can I add a kitchen nook to a rented home?

    Yes, if you use freestanding pieces: a small table, two chairs, a bench that does not fix to the wall, and cushions you can take with you. A fold-down table needs wall fixings, so check your lease before fitting one, and a built-in banquette is usually an owner project. Cafe curtains on a tension rod, a rug, and a pendant that plugs in rather than hardwires are renter friendly ways to mark the nook without permanent changes.

    How do I keep a kitchen nook from collecting clutter?

    Give everything in the nook a set home: school supplies in one basket, placemats in the bench, and mail in another room, not on the nook table. Clear the table after each meal, and run a short reset each evening, with chairs pushed in and the centerpiece back in place. If the nook doubles as a work spot, use a single tray for work items, so they lift off the table in one move when dinner is ready.

    A. SEO Brief

    Intent: Help readers plan a kitchen nook that fits their corner, budget, and daily routine, whether they want a built-in banquette, a tiny bistro set, or a flexible table and chairs mix. Readers want layout guidance they can measure and copy, plus practical notes on seating, storage, light, and cleaning.

    Primary keyphrase: kitchen nook ideas
    Secondary terms: kitchen breakfast nook, banquette seating, kitchen corner seating, small kitchen nook, bay window nook, kitchen nook table, built-in kitchen bench

    Sheet title: “26 Kitchen Nook Ideas to Inspire Your Next Room Refresh”
    Count note: Sheet count is 26, which is above 10, so the count is kept exactly at 26. The article delivers 26 distinct numbered ideas, numbered continuously 1 to 26.

    Article title / H1: 26 Kitchen Nook Ideas to Inspire Your Next Room Refresh
    SEO title (55 characters): 26 Kitchen Nook Ideas to Inspire Your Next Room Refresh
    Meta description (see 68-meta.json for final character count): Discover 26 kitchen nook ideas, from L-shaped banquettes and bay window seats to tiny bistro corners, with tips on seating, storage, light and layout.
    Slug: kitchen-nook-ideas

    Internal links used (verified live dwellovell.com URLs only, fetched 2026-10-24):
    – https://dwellovell.com/how-to-style-open-shelves/ (open shelves styling)
    – https://dwellovell.com/kitchen-balcony-ideas/ (small kitchen and balcony seating ideas)
    – https://dwellovell.com/kitchen-window-decor-ideas/ (window decor)
    – https://dwellovell.com/everyday-dining-table-decor/ (dining table decor)

    Research limits: No live competitor research or search volume checks were claimed for this draft. No prices, products, measurements beyond general size guidance, statistics or brand endorsements are stated. Tips are general decorating guidance. All internal links above were fetched live and returned article pages.

  • 22 Kitchen Chair Ideas to Make Any Room Feel Cozier

    22 Kitchen Chair Ideas to Make Any Room Feel Cozier

    Sheet No.: 67
    Brand: Dwell Ovell (dwellovell.com)
    Author: Clara Bennett
    Parent keyword: Kitchen Chair Ideas
    Keyphrase: kitchen chair ideas
    Slug: kitchen-chair-ideas
    Categories: Kitchen & Dining (primary: Kitchen & Dining)
    Publish slot: Sept 16, 2026, 2:00pm America/New_York
    Status: Draft file only (do not publish)

    A. SEO Brief

    Intent: Help readers choose kitchen chairs that feel warm and welcoming, whether they need everyday dining chairs, island stools, or one cozy seat in a nook. Readers want ideas they can picture at their own table, with practical notes on comfort, cleaning, size, and pairing chairs with a table they already own.

    Primary keyphrase: kitchen chair ideas
    Secondary terms: kitchen dining chairs, kitchen island stools, counter height chairs, wooden kitchen chairs, upholstered kitchen chairs, rattan kitchen chairs, cozy kitchen seating, breakfast nook chairs

    Sheet title: “6 Kitchen Chair Ideas to Make Any Room Feel Cozier”
    Count note: Sheet count is 6, which is below the required minimum of more than 10 ideas, so the count is RAISED from 6 to 22. The article delivers 22 distinct numbered ideas, numbered continuously 1 to 22, and the title is retitled to match: “22 Kitchen Chair Ideas to Make Any Room Feel Cozier”.

    Article title / H1: 22 Kitchen Chair Ideas to Make Any Room Feel Cozier
    SEO title (51 characters): 22 Kitchen Chair Ideas to Make Any Room Feel Cozier
    Meta description (155 characters): Discover 22 kitchen chair ideas, from Windsor and rattan chairs to cushioned stools and cozy nooks, with simple tips to pick the right seat for your table.
    Slug: kitchen-chair-ideas

    Internal links used (verified live dwellovell.com URLs only):
    – https://dwellovell.com/everyday-dining-table-decor/ (everyday dining table decor)
    – https://dwellovell.com/kitchen-balcony-ideas/ (kitchen balcony seating ideas)
    – https://dwellovell.com/kitchen-window-decor-ideas/ (kitchen window decor)
    – https://dwellovell.com/colors-for-your-kitchen-cabinets/ (cabinet colors)

    Research limits: No live competitor research or search volume checks were claimed for this draft. No prices, products, measurements in inches or centimetres, statistics or brand endorsements are stated. Tips are general decorating guidance. All internal links above were fetched and verified live on dwellovell.com before drafting.

    B. Complete Article

    22 Kitchen Chair Ideas to Make Any Room Feel Cozier

    A kitchen chair does more than fill a place at the table. It sets how long people linger over breakfast, how easy it is to pull up an extra seat, and how warm the room feels when you walk in. The right chair balances comfort, size, and care, so it suits daily meals as well as slow weekend mornings. These 22 kitchen chair ideas cover wood, metal, rattan, upholstery, stools, benches, and nook seating, so you can match a chair to your table, your floor space, and the way your household actually eats.

    Key Takeaways

    • Measure table height and floor space first, then choose a chair or stool height that leaves comfortable leg room.
    • Pick a seat material for real life: wipe clean surfaces for messy cooks, washable covers for family tables, and soft upholstery for long lingering meals.
    • Repeat one material or color from the room, such as wood, black metal, or rattan, so mixed chairs still look planned.
    • Keep at least one flexible seat, such as a folding chair or a stool that tucks away, for guests and busy mornings.
    • Test comfort before you commit: sit for a full meal, check back support, and make sure the chair slides in and out easily.
    • Pair cozy chairs with a calm table setting, so the seating, not clutter, is what draws people in.

    1. Classic Wood Chairs with Woven Rush Seats

    Wood kitchen chairs with woven rush seats around a wood dining table.

    A solid wood chair with a woven rush seat is a steady everyday choice for a kitchen table. The wood frame feels warm and sturdy, while the woven seat adds texture and a little give, so the chair stays comfortable for a family meal. This style suits farmhouse, cottage, and simple traditional kitchens, and it pairs well with a wood or painted table.

    Keep the finish in the same family as your table, or choose a slightly darker wood for contrast. Rush seats need gentle care: brush off crumbs, wipe with a lightly damp cloth, and keep them out of standing water. If a seat wears, many rush seats can be rewoven, which makes this a chair worth keeping for years.

    2. Upholstered Linen Dining Chairs

    Upholstered linen dining chairs with padded seats at a kitchen table.

    Padded chairs in plain linen make a kitchen table feel softer and more inviting, especially for long dinners. The padding supports your back and legs, while linen keeps the look relaxed rather than formal. Choose a neutral tone, such as oatmeal, sage, or soft grey, so the chairs work with changing table linens through the seasons.

    Look for removable covers or a stain resistant finish if your table hosts children or frequent cooking. A simple slipcover you can wash at home keeps linen practical in a kitchen. Pair upholstered chairs with a plain wood table and keep the table setting simple, so the soft seats stay the cozy focus of the room.

    3. Windsor Chairs Around a Round Table

    Windsor chairs with spindle backs around a round kitchen table.

    Windsor chairs, with their spindle backs and shaped wood seats, bring a calm, classic feel to a kitchen. Around a round table, their curved backs soften the shape of the room and make it easy to pull chairs in close. This pairing suits small eat in kitchens, where a round table already saves floor space.

    Choose Windsor chairs in painted white or cream for a light cottage look, or in natural wood for a warmer room. Because the chairs are fairly light, they are easy to move for cleaning or for an extra guest. Keep the table top plain and add one low centerpiece, so the spindle backs can be seen clearly from across the room.

    4. Cross Back Farmhouse Chairs

    Cross back farmhouse chairs beside a long wood kitchen table.

    Cross back chairs, with an X shape on the backrest, give a farmhouse table a clear, unfussy character. The open back keeps the room feeling light, while the wood frame stays strong enough for daily use. They work well with a long rectangular table, where a row of matching cross backs looks tidy and welcoming.

    Pair them with a wood bench on one side if you want flexible seating for children, or use cross backs all round for a more formal farmhouse look. A seat cushion in a washable cotton adds comfort without hiding the chair shape. Wipe the frame after meals, since open backs show dust less but still collect cooking film over time.

    5. Bentwood Bistro Chairs

    Bentwood bistro chairs with curved backs at a small kitchen table.

    Bentwood bistro chairs, with curved wood and a woven or wood seat, add a cafe feel to a small kitchen corner. Their light frame and curved back make them easy to move, and they suit a bistro table, a small round table, or a breakfast bar. This is a good pick for a kitchen that doubles as a morning coffee spot.

    Choose a natural bentwood finish for warmth, or a painted finish in black or cream to match your cabinets. Because bistro chairs are compact, they work in tight corners where a full dining chair would crowd the walkway. Add a thin seat pad for longer sits, and keep the table setting to one cup and a small vase, in true cafe style.

    6. Metal Tolix Style Chairs

    Metal industrial chairs with a plain frame at a kitchen table.

    Metal chairs in a simple industrial style bring a sturdy, easy clean seat to a busy kitchen. The metal frame wipes clean in seconds, stacks for storage, and stands up to daily use, which suits households that cook often. A plain metal chair also adds contrast in a kitchen with lots of wood and soft textiles.

    Pick a color that repeats elsewhere in the room, such as black to match handles, or cream to match cabinets. For cabinet color pairings, see our guide to colors for your kitchen cabinets. Metal seats can feel hard and cold, so add a thin cushion for long meals, and use felt pads on the feet to protect wood or tile floors.

    7. Counter Stools with Backs at the Island

    Counter stools with low backs and footrests at a kitchen island.

    Counter stools with a low back give island seating real support, so people can sit for breakfast without perching. The back makes the stool feel like a proper chair, while the counter height keeps the cook and the sitter at a comfortable talking level. This suits a kitchen island used for meals, homework, and coffee as well as prep.

    Choose stools with a footrest, since feet need support at counter height, and check that the stool slides fully under the island overhang when not in use. Wood stools warm a white island, while metal stools suit a modern kitchen. Keep the island surface clear of clutter, so the stools read as a welcoming place to sit.

    8. Backless Stools That Tuck Fully Away

    Backless counter stools tucked fully under a kitchen island.

    Backless counter stools are the neat solution when floor space is tight. Without a back, they slide fully under an island or a peninsula, leaving the walkway clear and the kitchen looking tidy between meals. This is a strong choice for a galley kitchen or an open plan room where the island faces the living area.

    Pick a stool with a comfortable seat depth and a footrest, since there is no back to lean on. Wood, metal, or woven seats all work, as long as the stool height matches your counter. Store one extra backless stool nearby, stacked or tucked in a corner, so guests can join without dragging a dining chair across the room.

    9. Swivel Bar Stools for a Social Kitchen

    Swivel bar stools with padded seats at a long kitchen island.

    Swivel bar stools let sitters turn toward the cook, the table, or the garden view without moving the whole stool. That small turn makes a kitchen feel social, since people can chat while they cook and eat. Swivel stools suit a long island or a raised bar counter where the same seat serves several jobs during the day.

    Look for a swivel base that turns smoothly and locks or settles back to center, so the stool does not spin freely when someone stands up. A padded seat and a footrest help for longer sits. Keep the number of stools to what the island truly fits, with elbow room between each seat, rather than crowding the counter.

    10. Leather Dining Chairs for Easy Wiping

    Leather dining chairs in warm tan around a wood kitchen table.

    Leather dining chairs, in a warm tan or deep brown, give a kitchen table a settled, grown up feel and wipe clean after spills. Unlike fabric, leather does not hold crumbs in a weave, which makes it practical for a table used for every meal. It suits a kitchen with wood floors, a stone counter, and simple metal details.

    Choose a leather tone already present in the room, such as a tan that matches wood or a dark brown that matches a floor. Condition the leather as advised by the maker, and keep chairs out of strong direct sun, which can dry and fade the surface. Pair leather chairs with a plain table runner and simple dishes, so the chairs add warmth without making the room feel heavy.

    11. Rattan and Cane Chairs

    Rattan chairs with cane woven backs at a bright kitchen table.

    Rattan and cane chairs bring a light, natural texture to a kitchen, and they suit bright rooms with plants and wood. The open cane weave keeps the chair looking airy, while the frame stays strong enough for daily meals. This style works well in a kitchen with a garden view, a breakfast nook, or a relaxed coastal feel.

    Keep cane out of constant steam and splashes, so place these chairs at a dining table rather than right beside the stove. Dust the weave with a soft brush and wipe the frame with a damp cloth. Pair rattan chairs with a light wood table and linen napkins, and repeat the natural material once more, in a basket or a pendant shade, for a linked look.

    12. Clear Acrylic Chairs That Disappear

    Clear acrylic chairs around a kitchen table in a bright room.

    Clear acrylic chairs, often called ghost chairs, are useful when a kitchen feels crowded. Because you can see through them, they take up less visual space than a solid chair, which helps a small room or a table set against a feature wall. They suit modern kitchens and rooms where the table, rug, or wall color should stay the focus.

    Acrylic chairs wipe clean and resist spills, but they can show fingerprints and scratches, so wipe them with a soft cloth and avoid harsh scouring pads. Add a thin cushion if you plan long meals, and use felt pads to stop the legs marking floors. One pair of clear chairs mixed with wood chairs can lighten a heavy table without a full set change.

    13. Folding Chairs for Flexible Guests

    Wood folding chairs set around a kitchen table for extra guests.

    Good folding chairs are the backup every kitchen needs for guests, holidays, and homework sessions. Modern folding chairs in wood or metal look far better than old plastic versions, and they store flat against a wall or in a cupboard. Keep two or four on hand, so an extra place at the table takes a minute, not a furniture hunt.

    Choose folding chairs with a comfortable seat and a sturdy lock, and test them before guests arrive. Wood folding chairs suit a farmhouse table, while slim metal ones suit a modern room. When not in use, hang them on wall hooks inside a pantry door or store them behind a tall cabinet, so they stay clean and easy to reach.

    14. A Bench on One Side, Chairs on the Other

    Kitchen table with a wood bench on one side and chairs on the other.

    Pairing a bench on one side of the table with chairs on the other gives a kitchen flexible, family friendly seating. Children can slide along a bench, adults can take a chair with a back, and the bench tucks under the table when the room needs floor space. This mix suits a long table in a kitchen diner or a breakfast nook.

    Match the bench to the table in wood tone or paint color, and keep the chairs in a style that shares one detail, such as the same wood or the same cushion fabric. Add a long bench cushion for comfort, with a washable cover. For ideas on dressing the table itself, see our guide to everyday dining table decor.

    15. Ladder Back Chairs with Woven Seats

    Ladder back chairs with slatted backs and woven seats at a kitchen table.

    Ladder back chairs, with two or three horizontal slats on the back, are a simple country classic for a kitchen table. The slatted back is easy to wipe, light to move, and comfortable enough for daily meals, especially with a woven or rush seat. They suit a cottage kitchen, a farmhouse table, and a room with other plain wood furniture.

    Choose a painted finish for a fresh cottage look, or a stained wood finish to show the grain. A thin seat pad in a plain fabric adds comfort for longer meals without hiding the chair shape. Because ladder backs are slim, they fit well in a narrow dining corner where a wide upholstered chair would crowd the table.

    16. Wishbone Chairs for a Scandinavian Feel

    Wishbone chairs with curved top rails at a pale kitchen table.

    Wishbone chairs, with a curved top rail and a woven paper cord seat, bring a light Scandinavian feel to a kitchen table. The Y shaped back support gives the chair its name and its clean shape, while the woven seat adds warmth and texture. They suit a pale kitchen with white walls, light wood, and simple tableware.

    Keep the table setting calm, with plain plates and a single small vase, so the chair shape stays visible. Woven cord seats need gentle cleaning with a soft brush and a lightly damp cloth, and they should not sit in standing water. Wishbone chairs are light to move, which makes them easy to pull up to a counter or a desk when extra seating is needed.

    17. Velvet Host Chairs at the Table Ends

    Velvet host chairs at the ends of a long kitchen dining table.

    Place two velvet chairs at the ends of a long table to mark the host seats and add a soft, cozy note to the room. The velvet texture and taller back make the ends feel special, while simpler chairs along the sides keep the table practical for daily use. This mix works well for a kitchen diner used for both family meals and gatherings.

    Choose a velvet color that repeats in the room, such as a green picked up from plants, or a warm rust that matches wood tones. Keep velvet away from the stove and the sink splash zone, and brush it lightly to remove crumbs. A velvet host chair is best as an accent, not a full set, so the room stays easy to clean.

    18. Mismatched Vintage Chairs, Unified by Paint

    Mismatched vintage chairs painted cream around a kitchen table.

    A set of mismatched vintage chairs, painted in one color, gives a kitchen table character without looking random. The shared paint ties different chair shapes together, while the varied backs and legs keep the table interesting. This is a good way to build seating slowly, one charity shop or market find at a time.

    Pick a paint color that suits your cabinets, such as cream, sage, or soft grey, and use a washable finish for kitchen use. Check each chair for a sturdy frame and tight joints before painting, and keep seat heights close, so diners sit at a similar level. Add matching seat pads in one fabric to link the chairs further.

    19. Chairs with Tied Seat Cushions

    Wood kitchen chairs with tied seat cushions at a dining table.

    Tied seat cushions are a small change that makes hard wood chairs far more comfortable and easy to refresh. The ties keep the cushion in place, the pad softens the seat for long meals, and a new cushion color can change the room for a season. This suits any wood chair, from Windsor to ladder back, and it is easy to try before buying new chairs.

    Choose a washable cotton or a wipe clean fabric, and keep a spare set of covers so one set can wash while the other is in use. Tie the cushions firmly but not so tight that the fabric pulls, and check the ties often, since loose ties can slip. A plain cushion color keeps the table calm, while a checked or striped cushion adds a cottage note.

    20. Weather Ready Chairs by the Garden Door

    Weather ready chairs beside a kitchen door opening to a garden.

    If your kitchen opens to a garden or a balcony, keep a pair of weather ready chairs near the door for indoor outdoor living. These chairs move outside for morning coffee and back in for extra table seating, so they need a frame that tolerates damp and sun. Metal, sealed wood, or woven synthetic frames all work, as long as cushions come indoors after use.

    Our guide to kitchen balcony ideas shows how folding and stackable seating keeps a small outdoor space usable. Choose chairs that stack or fold, so they store neatly by the door, and wipe the feet before bringing them inside. A washable outdoor cushion in a color from the kitchen links the two spaces.

    21. Wipe Clean Chairs for a Family Table

    Wipe clean family kitchen chairs with a child sized chair at the table.

    A family kitchen table needs chairs that handle spills, sticky hands, and daily wiping without fuss. Smooth wood, metal, or wipe clean vinyl seats are the practical picks, since crumbs and spills lift off in seconds. Choose chairs with no deep crevices where food can hide, and a finish that tolerates a damp cloth every day.

    Keep the chair design simple, with a sturdy frame that children can pull in and out safely, and felt pads to protect floors. A booster seat or a child sized chair at the same table helps younger children join family meals at a comfortable height. For the table setting around them, keep centerpieces low and sturdy, so a bump does not topple the decor.

    22. One Armchair in a Kitchen Reading Corner

    Single cozy armchair in a kitchen corner beside a window.

    A single comfortable armchair in a kitchen corner turns an unused spot into a cozy reading and waiting seat. Place it near a window, with a small side table for a cup and a book, so the corner becomes a place to sit while something cooks or while family finishes a meal. This suits a larger kitchen, a kitchen diner, or a nook beside a pantry wall.

    Choose an armchair in a washable fabric, since kitchen air carries cooking smells and steam, and keep it clear of the stove and the main walkway. A chair near the window pairs well with simple window dressing, as in our guide to kitchen window decor ideas. Add a small lamp or a throw for evening use, and keep the chair facing into the room, so the sitter stays part of the kitchen.

    Conclusion

    Cozy kitchen seating starts with how you live, not with a matching set. A wood chair with a woven seat, a cushioned stool at the island, or one armchair by the window can each make a kitchen feel warmer, as long as the seat fits the table, the room, and the people who use it. Measure first, choose materials you can care for, and keep one flexible seat for guests. Then build slowly: start with the chairs you sit on every day, add a bench or a host chair when the room needs it, and let the table become a place people want to linger. Save this list before your next kitchen refresh, and pick the chair idea you want to try first.

    FAQs

    What height chair should I choose for a kitchen table?

    Match the chair to the table, not to a fixed rule. Sit on the chair at the table and check that your thighs sit level, your feet rest flat on the floor, and your elbows clear the table edge comfortably. If you are buying online, compare the seat height with your table height and leave a comfortable gap for legs. Test one chair at your own table before ordering a full set.

    How many chairs fit around a kitchen table?

    Allow elbow room for each sitter, so chairs do not bump when people sit down or reach for dishes. A long table usually fits fewer chairs comfortably than its length suggests, once you leave space at the ends and room to pull each chair out. Measure the table, mark a place per chair with tape on the floor, and sit in each spot to check walkways stay clear.

    Are upholstered chairs practical in a kitchen?

    Yes, if you choose the right fabric and care plan. Removable, washable covers make linen and cotton chairs practical for family tables, while leather wipes clean after spills. Keep upholstered chairs away from the stove splash zone, and keep a spare cover or a quick cleaning routine for accidents. For a very busy cooking area, put upholstered chairs at the dining end and wipe clean chairs near prep zones.

    Can I mix different kitchen chairs at one table?

    Yes, and mixing often looks warmer than a full matching set. Keep one link between the chairs, such as the same wood tone, the same paint color, or the same cushion fabric, so the mix looks planned. Keep seat heights close, so diners sit at a similar level, and repeat the link in one more spot in the room, such as a bench cushion or a pendant shade.

    What is the best kitchen chair for a small kitchen?

    A slim, light chair that tucks under the table or a backless stool that slides under an island usually works best in a small kitchen. Clear acrylic chairs, folding chairs, and slim ladder back chairs all save visual and floor space. Avoid wide armchairs and deep upholstered chairs in a tight room, since they block walkways and make the table hard to use.

    How do I keep kitchen chairs clean and cozy over time?

    Wipe frames weekly with a damp cloth, wash cushion covers on a regular cycle, and check joints, ties, and felt pads every few months. Keep chairs out of strong direct sun and standing water, and move cushions indoors after outdoor use. A small repair habit, such as tightening a loose screw or replacing a worn pad, keeps cozy chairs comfortable for years.

  • 31 Grey Kitchen Ideas for Homes of Every Size

    31 Grey Kitchen Ideas for Homes of Every Size

    Grey works in kitchens because it can be pale and quiet, warm and earthy, or dark and dramatic, all while staying easy to pair with wood, stone, and metal. The trick is to pick the right shade for your light and room size, then balance it with one warm material and one clear contrast. These 31 grey kitchen ideas cover cabinets, counters, islands, storage, lighting, and small rental friendly changes, so you can use grey on one wall, one run of cabinets, or across the whole room. Start with the change that fixes your biggest problem, test a large sample in daylight and evening light, and keep at least one light surface so the room stays easy to work in.

    Key Takeaways

    • Match the grey to your light: pale and warm greys suit small or north facing rooms, while charcoal and slate suit bright, larger kitchens.
    • Balance every grey with a contrast: white counters, warm wood, brass, or a light floor keep the room from feeling flat or cold.
    • Put the strongest grey where it earns its place, such as an island or a single cabinet run, and keep the rest of the room calmer.
    • Repeat one metal finish and one wood tone through the room so separate grey pieces read as one planned scheme.
    • Test a large painted sample beside your floor, counter, and appliances before you commit, since grey shifts a lot between daylight and evening light.

    1. Use Pale Grey Shaker Cabinets in a Small Kitchen

    Small kitchen with pale grey shaker cabinets, white counters, and a white tile backsplash.

    Pale grey shaker cabinets give a small kitchen order and calm without the upkeep of bright white. The framed door adds shape, while the soft grey hides light dust better than white and still reflects enough light to keep a compact room feeling open. Pair the cabinets with white or pale stone counters and a simple white tile backsplash, so the grey reads as the main color and the rest of the room stays quiet.

    Keep handles simple, such as slim bars in brushed nickel or matte black, and keep wall color in a warm white so the grey does not turn cold. If you are choosing between grey shades, the undertone guide in these ideas for colors for your kitchen cabinets helps you spot whether a sample leans blue, green, or warm. Wipe doors near the stove weekly, since pale paint shows cooking splashes.

    2. Put Charcoal on the Base Cabinets and Pale Grey Above

    Kitchen with charcoal base cabinets, pale grey upper cabinets, and a light counter between them.

    Charcoal base cabinets with pale grey uppers give a kitchen depth at floor level and lightness at eye level, which suits rooms that feel top heavy with full height cabinets. The dark lower run grounds the room and hides scuffs near the floor, while the pale uppers keep the wall from closing in. A light counter between the two tones makes the split read as deliberate rather than unfinished.

    Use the same handle style on both runs, in one metal, so the two colors link. Keep the backsplash pale and simple, and add under cabinet lighting so the charcoal run does not cast a shadow over the counter. This split also works well in a family kitchen, where the lower cabinets take the most wear from feet, pets, and cleaning.

    3. Choose Warm Greige Cabinets With a Wood Counter

    Kitchen with warm greige cabinets, a wood countertop, and brass handles.

    Greige, a blend of grey and beige, warms a grey kitchen without leaving the neutral family. It suits rooms with warm wood floors, cream tiles, or brass hardware, because the beige in the mix links to those tones. A wood counter on top adds a second warm layer and stops the room from feeling cool or flat, especially in a kitchen with limited daylight.

    Oil or seal the wood counter near the sink and stove, and wipe spills promptly so the surface stays even. Keep the backsplash simple, such as a plain cream or pale grey tile, so the greige and wood carry the room. Greige shifts tone through the day, looking greyer in morning light and warmer at night, so test a large sample in both lights before ordering.

    4. Go Handleless With Flat Front Grey Cabinets

    Modern kitchen with flat front grey cabinets, a pale counter, and wood shelves.

    Flat front grey cabinets with push to open doors or slim recessed pulls give a modern kitchen a clean, quiet wall of color. Without knobs breaking the surface, the grey itself becomes the feature, which suits open plan rooms where the kitchen stays in view from the living area. A mid grey works best here, since very pale flat fronts can look blank and very dark ones can look heavy across a full wall.

    Keep one texture in the room to stop the flat fronts from feeling cold, such as a wood floor, a stone counter, or open wood shelves. Clean the fronts with a soft cloth, since fingerprints show more on flat doors than on framed ones. If small children use the kitchen, check that push to open doors stay shut firmly and that heavy items sit in drawers, not high cabinets.

    5. Make a Grey Island the Working Center

    Large kitchen with a slate grey island, counter stools, and a light stone top.

    A grey island gives a large or open plan kitchen a clear working center and a place to gather, without repainting every cabinet. Paint the island one shade deeper than the surrounding cabinets, such as slate grey beside pale grey runs, so it reads as a feature and not as a leftover piece. Add seating on one side and storage on the working side, so the island earns its floor space twice over.

    Keep the island top in a light, easy to clean material, such as pale quartz or white stone, so prep work stays visible against the dark base. Leave a clear walkway on the cooking side, and choose stools that slide fully under the overhang. If your room is small, a narrow island on wheels can give the same prep and seating benefit and roll away when you need the floor back.

    6. Paint the Range Hood Grey as a Focal Point

    Kitchen cooking wall with a grey painted range hood above a range and pale cabinets.

    A grey painted range hood turns the cooking wall into a focal point without changing every cabinet. The hood shape stays simple, such as a straight chimney or a boxed canopy, while the grey paint links it to the cabinets or island below. This works well when the rest of the wall is quiet, with plain tile and pale cabinets, so the hood carries the color.

    Choose a washable paint finish, since hood surfaces collect grease film, and keep decorative trim clear of the heat zone. If the hood sits over a range, check that any added panels or straps can be wiped clean and do not trap heat. For a softer version, paint the hood the same pale grey as the uppers and add a darker grey tile behind the range instead.

    7. Run a Grey Subway Tile Backsplash the Full Height

    Kitchen with a grey subway tile backsplash, grey cabinets, and a pale counter.

    Grey subway tile run from counter to cabinet gives a kitchen a tidy, classic wall that ties grey cabinets to a pale counter. The brick pattern adds rhythm without a bold pattern, and the grout lines give the wall texture that plain paint lacks. A light to mid grey tile suits most kitchens, while a darker grout keeps the pattern visible and hides everyday marks.

    Seal grout behind the range and sink, where splashes and steam reach it first. Keep the tile height even across the run, and stop it at a clear line, such as the underside of the cabinets or a shelf, rather than fading out mid wall. If the room is small, a glossy grey tile reflects more light than a matte one, which helps a compact kitchen feel brighter.

    8. Lay Grey Herringbone Tile on the Floor

    Kitchen with grey herringbone floor tiles, pale grey cabinets, and a white counter.

    Grey herringbone floor tile gives a kitchen pattern at ground level, where it adds interest without competing with cabinets or counters. The angled layout draws the eye across the room, which helps a long or narrow kitchen feel wider, and the grey tone links to cabinets, counters, or a grey island. Choose a mid grey tile with a non slip finish, since kitchen floors see water and grease.

    Keep the rest of the floor scheme simple, with plain walls and a single rug or runner if you want warmth. Grout color matters here: a grout close to the tile tone keeps the floor calm, while a contrasting grout makes the herringbone pattern louder. Clean grout lines regularly near the sink and stove, where spills land first, and check that the tile suits underfloor heating if you have it.

    9. Add a Waterfall Edge to a Grey Quartz Island

    Kitchen island with a grey veined quartz top running down the side to the floor.

    A waterfall edge, where the counter material runs down the side of the island to the floor, gives a grey quartz island a finished, furniture like look. The continuous surface shows off the stone pattern and hides the island base, which suits an open plan kitchen where the island end stays in view. A grey veined quartz on a white or pale base links the island to grey cabinets without matching them exactly.

    Keep the island top clear apart from one tray or bowl, so the stone stays visible, and wipe spills promptly on light quartz near the sink side. A waterfall end also protects the island side from kicks and scuffs, which matters in a family kitchen. If a full waterfall edge is too much, use it on one end only, facing the living area, and keep the working side plain.

    10. Style Grey Open Shelves With White Dishes

    Grey open kitchen shelves holding white plates and clear glasses beside a sink.

    Grey open shelves, painted or stained in a soft grey, give a kitchen display space that feels calmer than bright white shelves and warmer than black ones. White plates, bowls, and clear glasses stand out against the grey back, so everyday dishes become the decoration. Use shelves on one short run only, such as beside the sink or window, and keep the rest of the storage closed, so the display stays easy to dust.

    Group dishes by type, leave space at each end of the shelf, and put heavy stacks low. For grouping, height, and breathing room, the same rules in this guide to how to style open shelves work well on grey shelves too. Keep shelves clear of direct stove steam, and store food and cleaning items in closed cabinets nearby, so the open run stays tidy.

    11. Build a Floor to Ceiling Grey Pantry Wall

    Floor to ceiling grey pantry wall with closed cabinets and one open shelf niche.

    A floor to ceiling pantry wall in grey gives a kitchen a large amount of closed storage that reads as one calm panel rather than a row of mismatched cupboards. Use the same grey and the same handle style across the whole wall, and keep the top section for rarely used items, daily food at hand height, and heavy items low. This wall suits a large kitchen, or a small one where a separate pantry room is not possible.

    Add one open niche in the pantry wall, such as a shallow shelf for cookbooks or a coffee station, so the tall run does not feel like a blank wall. Keep the pantry wall clear of the main cooking path, so doors can open without blocking the stove or sink. Label the inside of doors or shelf fronts if more than one person cooks, so items return to the same spot.

    12. Add Grey Panelled Walls for a Cottage Feel

    Kitchen dining wall with grey painted panelling, white trim, and a wood table.

    Grey painted panelling, such as beadboard or simple shaker style panels, adds texture to a kitchen wall without a strong color. The vertical lines draw the eye up, which helps a low ceiling feel taller, and the painted boards wipe clean more easily than plain plaster near a walkway or dining nook. A soft grey panel with white trim above keeps the look light, while a deeper grey panel suits a larger room with good daylight.

    Stop the panelling at a clear height, such as chair rail height on a dining wall, or run it full height on one feature wall only. Seal the paint well at the base, since mops and spills reach that low strip first. This idea pairs well with a wood table and simple chairs, where the panel texture gives the eating area a finished feel without new furniture.

    13. Paint the Window Frame Grey and Style the Sill

    Kitchen window with a grey painted frame, pale walls, and herb pots on the sill.

    A grey painted window frame gives a kitchen window a clear outline and links it to grey cabinets, counters, or a grey island. The frame color works best when the wall stays pale, so the grey reads as a deliberate border rather than a dark patch. Keep the sill useful, with one or two items such as herb pots, a small tray, or a bud vase, and leave most of the glass clear for daylight.

    Choose a washable paint for the frame, since the window over a sink collects splashes, and keep fabric treatments clear of the stove if the window sits near it. For more ways to dress the window without blocking light, see these kitchen window decor ideas. If the window is small, a pale grey frame keeps the outline soft, while a charcoal frame suits a large window in a bright room.

    14. Swap Hardware to Brass on Grey Cabinets

    Grey kitchen cabinets with brushed brass bar pulls, knobs, and a matching tap.

    Brass hardware is the fastest way to warm a grey kitchen, since it changes the look of every door without repainting a single cabinet. Brushed brass bars on drawers and knobs on doors repeat a warm metal through the room, and the contrast against grey, pale or dark, keeps the cabinets from feeling flat. This swap suits renters and owners alike, because the old handles can go back on later.

    Use one brass finish across the whole kitchen, and repeat it at least twice more, such as on the tap or a pendant light, so the hardware reads as a set. For ideas on pairing gold tones with dark cabinets, see these black and gold kitchen ideas. Wipe brass pulls often near the stove, since kitchen grease dulls metal, and keep the original screws and handles in a labelled bag.

    15. Choose a Grey Concrete Look Counter

    Modern kitchen with a grey concrete look counter, grey cabinets, and black hardware.

    A grey concrete look counter gives a kitchen an industrial, matte surface that pairs well with grey cabinets, wood shelves, and black hardware. The cloudy grey tone hides light marks better than bright white, and the matte finish keeps reflections low under pendant light. Concrete look quartz or porcelain gives a similar read with simpler care than poured concrete, which needs sealing and prompt cleanup of acidic spills.

    Keep the backsplash simple, such as a plain pale tile, so the counter texture stays the feature. Use boards and trivets for hot pans and acidic foods, and wipe the counter as part of your usual clean. This counter suits a modern or industrial kitchen best, where the grey tone can run through cabinets, floor, and island without extra pattern competing for attention.

    16. Fit Panel Ready Appliances in Matching Grey

    Kitchen with a fridge and dishwasher hidden behind matching grey cabinet panels.

    Panel ready appliances, fitted with grey door panels that match the cabinets, give a kitchen a smooth, unbroken wall of color. The fridge and dishwasher disappear into the cabinet run, which suits a small kitchen, where a stainless appliance can dominate, and an open plan room, where the kitchen stays in view. Keep one appliance visible, such as the range, so the room still reads as a working kitchen.

    Check panel weight and handle fixing before ordering, since appliance doors need panels that fit the maker guidance. Keep a spare panel or touch up paint from the same batch, because a marked panel stands out on a flat grey run. If full panel ready appliances are too much, start with the dishwasher only, which is the easiest panel to fit and the one most often in view.

    17. Build a Grey Banquette in a Kitchen Nook

    Kitchen nook with a grey banquette bench, cushions, and a small wood table.

    A grey banquette, a built in bench with cushions, turns a kitchen corner into a dining spot that seats more people than separate chairs. The bench fits tight against the wall, so a small table can sit close, and the base can hold drawers or a lift up seat for table linens and rarely used serving dishes. A grey cushion fabric, in a washable material, links the nook to grey cabinets without repainting the room.

    Add a firm cushion and a few back cushions, since a flat bench gets uncomfortable fast, and keep the table size modest so people can slide in and out without moving it. This nook works best at the open end of a kitchen, where a table does not block the cooking path. A grey banquette under a window makes a small eating spot feel like a planned room.

    18. Add a Grey Peninsula Breakfast Bar

    Short grey peninsula breakfast bar with two stools at the open end of a kitchen.

    A short grey peninsula counter at the open end of a kitchen creates a breakfast bar and a clear edge between kitchen and living space, without the floor area a freestanding island needs. Two stools are usually enough, and the kitchen side can hold drawers or open shelving for daily items. Paint the peninsula the same grey as the island or base cabinets, so it reads as part of the kitchen, not as a separate piece.

    Keep the overhang deep enough for knees, and choose stools that slide fully under the counter so the walkway stays clear. Keep the bar top clear except for a small tray or plant, so it can switch between eating, prep, and a landing spot for shopping bags. A peninsula also gives guests a place to sit without standing in the cooking path.

    19. Use Grey Glass Front Cabinets for Display

    Grey glass front kitchen cabinets holding white plates and glasses on one run.

    Grey glass front cabinets lighten a kitchen because they break up a long run of solid doors and let light reach the back of the shelf. Use them on one run only, such as the run beside the sink, and keep everyday plates and glasses inside so the display looks honest rather than staged. Clear glass suits a simple kitchen, while fluted or reeded glass hides mixed items a little better.

    Paint the cabinet frame the same grey as the surrounding cabinets, so the glass run links to the room, and keep the inside neat, with one or two tones of dishes and a gap between groups. Store food, cleaning supplies, and mismatched items in closed cabinets nearby. If you want the display without the dusting, use glass on upper cabinets only, where items stay cleaner than at counter level.

    20. Set a Grey Composite Sink Into a Pale Counter

    Pale kitchen counter with a grey composite sink and a brushed nickel tap.

    A grey composite sink set into a pale counter gives the sink run a quiet focal point and a practical bowl that hides light marks better than white. The grey tone links to grey cabinets or a grey island, while the pale counter around it keeps the area bright for washing and prep. Choose a single large bowl where possible, so roasting pans and baking trays fit without a divided sink getting in the way.

    Fit a tap in a matching metal, such as brushed nickel or matte black, and keep a small caddy for soap and brushes so the rim stays clear. Wipe the bowl dry after heavy use in hard water areas, since pale limescale shows on dark sinks. A grey sink also suits a kitchen with a grey tile backsplash, where the sink, tile, and cabinets form one calm grey zone.

    21. Hang Grey Pendant Lights Over the Island

    Grey pendant lights hanging over a kitchen island with a light stone top.

    Grey pendant lights over an island or peninsula repeat the grey palette at ceiling height and give the room a clear layer of task light. A matte grey dome or drum shade suits a modern kitchen, while a grey enamel shade with a white interior suits a cottage or farmhouse room. Hang two or three pendants at the same height, spaced so the light pools overlap on the counter, and fit warm bulbs you can dim for evening use.

    Keep the bottom of each shade clear of head height when someone stands at the island, and match the pendant metal trim to your cabinet hardware where possible. In a small kitchen, one larger grey pendant centered on the island gives the same effect with less visual clutter. At night, pendant light alone can make a grey kitchen feel calm and finished, without the harsh glare of a single ceiling light.

    22. Lay a Grey Patterned Runner at the Sink and Range

    Grey patterned runner rug laid on a kitchen floor in front of grey cabinets.

    A grey patterned runner down the middle of the kitchen floor adds pattern and warmth to a floor that would otherwise read as plain, while staying inside the grey palette. Choose a flat weave or low pile rug that lies flat, so it does not catch feet or chair legs, and pick a washable material, since kitchen floors see spills. A grey pattern with one warm accent, such as a wood tone or brass thread, links the floor to the rest of the room.

    Measure the walkway first, and leave a clear strip of floor on each side of the runner, so the room still feels wide enough to pass through. Use a non slip pad underneath, and shake the rug out often, since crumbs collect in the middle of a busy kitchen. If the runner sits near the sink, choose a shorter rug that stops clear of the wet zone.

    23. Paint One Grey Accent Wall With Simple Art

    Kitchen dining area with a mid grey accent wall, simple framed art, and a wood table.

    One grey accent wall, painted in a mid to deep grey, gives a kitchen a clear backdrop for simple art, open shelves, or a dining table, without repainting every wall. The accent wall works best on the wall you see first from the door, or behind a dining nook, where it frames the seating area. Keep the other walls pale, and hang art in a simple frame with a light mat, so the grey wall does not feel heavy.

    Choose a washable paint finish for the accent wall if it sits near the cooking zone, and test the shade in evening light, since grey walls shift tone under warm bulbs. One accent wall also suits a rental, where a single wall is easier to repaint later than a full room. If the room is small, use a pale grey accent wall rather than charcoal, so the room keeps its light.

    24. Warm a Grey Kitchen With Wood Beams and Shelves

    Grey kitchen with warm wood ceiling beams, wood open shelves, and pale counters.

    Wood beams across the ceiling, or wood open shelves on a grey wall, add warmth to a grey kitchen and stop the palette from feeling cold. The wood tone, such as pale oak or warm walnut, gives the eye a natural material beside the painted grey, and it links to a wood floor, a wood counter section, or wooden stools. Use wood in one or two places only, so it reads as a warm thread, not as a second scheme.

    Fix beams securely to ceiling joists, and seal the wood against steam and grease, especially above the stove run. For shelves, keep the wood tone the same as the beams or floor, and style them with a few daily items, not a full collection. Keep the ceiling itself light, so beams read as a warm detail rather than a dark lid over the room.

    25. Add Green Plants Against a Grey Backdrop

    Grey kitchen with green plants in terracotta and white pots beside grey cabinets.

    Green plants stand out clearly against grey cabinets, grey tile, or a grey wall, which makes them an easy way to soften a neutral kitchen. A large potted plant in a corner, a row of herbs on the sill, or a trailing plant on top of a cabinet all add life and shape without a new color scheme. Choose plants that suit your light, and use pots in one or two materials, such as terracotta, white ceramic, or black metal, so the group looks planned.

    Water little and often, and set pots on trays or saucers to protect counters and sills from water marks. Keep plants clear of the stove and oven vent, where heat and steam damage leaves fast. If natural light is weak, keep only hardy plants in the kitchen and move tender ones to a brighter spot for part of the week. A single strong plant often works better than many small ones crowded on a counter.

    26. Tuck a Grey Utility Zone Into the Kitchen

    Tall grey utility cabinet with closed doors beside a kitchen sink run.

    A grey utility zone, such as a tall cabinet for a washer, cleaning supplies, and a laundry basket, keeps practical items inside the kitchen without a separate room. Paint the utility cabinets the same grey as the main run, so the zone blends in, and add a door that closes fully, so noise and clutter stay hidden. Inside, use hooks for mops, a shelf for detergents, and a pull out basket for laundry, so the narrow space stays usable.

    Keep the utility zone near the sink or back door where possible, so plumbing and outdoor access stay short. Vent the space if a washer or dryer sits inside, and keep cleaning products out of reach of children. A grey utility wall also works in a small flat, where one tall cabinet can hold the washer, iron, and cleaning kit that would otherwise sit in view.

    27. Create a Grey Coffee Station Niche

    Grey coffee station niche with a coffee machine, cups, and closed jars on a shelf.

    A grey coffee station niche, set into a pantry wall, a hutch, or a short counter run, gives morning coffee a fixed home and keeps machines off the main prep counter. Paint the niche the same grey as the cabinets, add a shelf for cups and jars, and keep the machine, kettle, and daily cups together in one spot. A small tray under the machine catches drips and makes cleaning fast.

    Keep the niche near a power point and away from the main cooking path, so one person can make coffee while another cooks. Store coffee, filters, and sugar in closed jars on the shelf, and wipe the shelf weekly, since coffee dust settles fast. If counter space is tight, a wall mounted shelf above a narrow counter can hold cups and jars without taking prep space.

    28. Paint a Grey Chalkboard Wall for Family Notes

    Kitchen wall with a dark grey chalkboard panel, a menu list, and a small chalk cup.

    A grey chalkboard wall, or a framed chalkboard panel in dark grey, gives shopping lists, menus, and notes a fixed place, which keeps paper off the fridge and counter. Hang the panel near the kitchen entry or beside the pantry, with chalk or chalk markers in a small cup hung alongside. A weekly menu at the top and a running shopping list below covers most family needs, and the dark grey panel adds character to a plain wall.
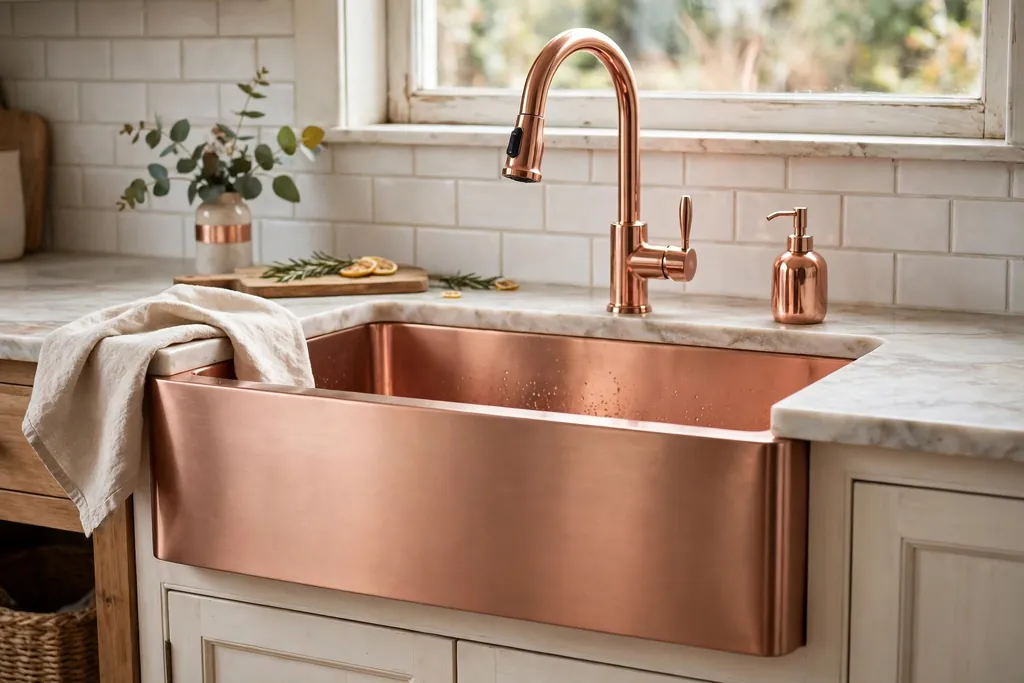
    Wipe the board clean each week so old items do not linger and get bought twice. Keep the board away from the stove splash zone, and use a damp cloth rather than a dry eraser to avoid chalk dust settling on food. A magnetic chalkboard adds a second use, holding recipes and school notes with magnets, without needing a separate noticeboard.

    29. Zone an Open Plan Room With Grey Tones

    Open plan room with a grey kitchen island marking the cooking area beside a living space.

    In an open plan room, grey tones can zone the kitchen without a wall, by keeping the kitchen in one grey family and the living area in a lighter or warmer neutral. Use a deeper grey for the island or base cabinets, a paler grey for the uppers, and a grey rug or runner to mark the kitchen edge. The shared grey thread links the zones, while the change in shade or material shows where cooking ends and sitting begins.

    Repeat one material across the zones, such as the same wood floor or the same brass finish, so the room still feels like one space. Keep the kitchen side tidy, since it stays in view, with closed storage for clutter and open shelves only for neat daily items. A peninsula or island in grey also acts as a clear boundary, giving guests a place to sit on the living side without standing in the cooking path.

    30. Brighten a Small Grey Galley With a Glass Splashback

    Small grey galley kitchen with a pale grey glass splashback, pale cabinets, and under cabinet lighting.

    A grey glass splashback, in a pale or mid grey, bounces light back into a small galley kitchen and makes the room feel wider than a matte tile wall. The smooth glass surface also wipes clean fast behind the range and sink, where splashes land most. Pair the glass with pale grey cabinets and a light counter, so the room keeps one calm grey family and the reflection does the work of opening the space.

    Keep the glass clear of clutter, since it reflects whatever sits in front of it, and wipe it during your usual kitchen clean. Do not place a glass splashback where it reflects a bin or a crowded shelf, since it will double that view. In a galley kitchen, a glass splashback on the range wall, plus under cabinet lighting, gives a small grey room light from two directions without new windows.

    31. Refresh a Rental Kitchen With Removable Grey Pieces

    Rental kitchen with removable grey backsplash tiles, a grey runner, and grey seat cushions.

    Removable grey pieces give a rental kitchen a grey scheme without paint or fitted changes. Peel and stick grey tiles on the backsplash, a grey runner on the floor, grey seat cushions, and grey open shelf styling can all come down later, leaving the original kitchen intact. Start with the backsplash, since it covers a large area and changes the room fast, then add one or two smaller grey touches, such as a grey tray, grey towels, or grey jars.

    Check that peel and stick tiles suit your wall surface and remove cleanly, and test one tile in a hidden spot first. Keep the grey family consistent, with one main grey and one accent, so removable pieces look planned rather than collected at random. When you move out, remove the pieces in reverse order, clean any residue with a gentle cleaner, and keep the original fittings in a labelled bag for the landlord check.

    Conclusion

    A grey kitchen works when the shade fits the light, the balance fits the room, and one warm material keeps the palette from feeling cold. Start with a large sample, pick one strong grey feature, such as an island, a cabinet run, or a backsplash, and keep the rest of the room calmer with pale counters and simple hardware. Small rooms suit pale and warm greys with light surfaces, while larger, brighter rooms can carry charcoal, slate, and deeper grey walls. With one repeated metal, one wood tone, and storage that fits your daily cooking, a grey kitchen can feel calm, practical, and personal in a home of any size.

    FAQs

    What grey shade suits a small kitchen best?

    A pale grey, or a warm greige, suits a small kitchen best, because it reflects light and hides dust better than white, without closing the room in. Pair it with white or pale stone counters, a light backsplash, and warm white walls, so the grey reads as color rather than shadow. Test a large sample in daylight and evening light, since grey shifts tone a lot, and avoid charcoal on every cabinet in a small, low light room.

    How do I stop a grey kitchen from feeling cold?

    Add one warm material and one warm metal, such as wood counters or shelves with brass hardware, and keep the light warm rather than cool white. A wood floor, a wooden stool, or a woven runner adds texture that grey alone lacks, while under cabinet lighting and pendant lights with warm bulbs keep the room inviting at night. If the room still feels cold, swap one grey element, such as a backsplash or a rug, for a warm cream or wood tone.

    Can I mix grey cabinets with wood counters?

    Yes, wood counters pair well with grey cabinets, especially greige or mid grey, because the wood adds warmth and a natural pattern beside the painted surface. Keep the wood tone consistent through the room, such as the same oak on counters, shelves, and stools, and seal the wood near the sink and stove. A wood counter section between sink and stove works well as a prep zone, even if the rest of the counter stays in stone or quartz.

    What countertop colors work with grey cabinets?

    Pale stone, white quartz, and marble look counters suit most grey cabinets, because they keep the room bright and make the grey read clearly. A grey concrete look counter suits a modern or industrial kitchen, while a warm wood counter suits a greige or cottage grey scheme. Avoid a counter in a second strong color, since it competes with the grey, and test a counter sample beside your cabinet sample in both daylight and evening light before ordering.

    Is a grey kitchen still a good choice for resale?

    Grey remains a safe, neutral choice for resale, because buyers can picture their own furniture and accessories against it, and it pairs with most floor and appliance colors. Pale and mid greys suit the widest range of buyers, while very dark greys suit bright, larger kitchens better. Keep the scheme simple, with one main grey, pale counters, and standard hardware, so a buyer sees a clean, finished kitchen rather than a strong personal style to undo.

    How do I choose between grey and greige cabinets?

    Choose grey if your room has cool light, stainless appliances, and a modern or coastal feel, since cool grey links to those tones. Choose greige if your room has warm wood floors, cream tiles, or brass hardware, since the beige in greige links to warm materials. Lay both samples beside your floor and counter, and check them in morning, midday, and evening light, because the difference between grey and greige shows most clearly beside your actual materials, not on a paint chip alone.

  • 12 Retro Kitchen Ideas for a Warm, Inviting Home

    12 Retro Kitchen Ideas for a Warm, Inviting Home

    Retro style works in a kitchen when it feels warm and lived in, not staged. The best retro rooms borrow a few clear details from the 1950s and 1960s, such as pastel paint, chrome, a patterned floor, or a bold fridge, and leave the rest of the room practical for daily cooking. You do not need a full remodel to get the effect. One strong feature, repeated in small places, is usually enough. These 12 retro kitchen ideas cover appliances, cabinets, floors, counters, lighting, and seating, so you can start with a weekend change or build toward a larger refresh.

    Key Takeaways

    • Pick one main retro feature, such as a range, a fridge, or a checkerboard floor, and keep the rest of the kitchen calm so that feature has room to stand out.
    • Use pastel paint in one place, on cabinets or an island, rather than on every surface, so the color stays warm instead of sugary.
    • Repeat one metal, chrome in most retro rooms, across hardware, lighting, and stool legs so the details read as a set.
    • Pair bold pattern with plain counters and walls, because a patterned floor or backsplash needs quiet surfaces beside it.
    • Keep retro seating practical: vinyl wipes clean, swivel stools need clear floor space, and a nook table needs room to pull chairs out.
    • Test paint and tile samples in daylight and evening light before you commit, since pastel and cream tones shift a lot between the two.

    1. A 1950s-Style Range Cooker as the Focal Point

    Cream 1950s-style range cooker with chrome trim in a plain retro kitchen.

    A range cooker in cream, mint, or soft red gives a retro kitchen an instant center. The rounded edges, chunky knobs, and chrome trim read as retro at once, while the wide top and large oven stay useful for family cooking. Place the range on the main cooking wall, with a plain backsplash behind it, so the cooker itself is the feature and the wall does not compete with it.

    Check the width, fuel type, and clearance your kitchen allows before you order, and confirm that a gas model can be fitted safely in your home. Keep the counters on either side clear for hot pans, and use simple hardware elsewhere so the range keeps its place as the one bold appliance in the room.

    2. Pastel Cabinets in Mint or Butter Yellow

    Retro kitchen with mint pastel cabinets, white counters, and chrome hardware.

    Pastel cabinets are the gentlest way into retro style. Mint green suits a kitchen with white counters and warm wood, while butter yellow suits a room that gets less daylight and needs a lift. Paint the full run in one pastel, or paint only the lower cabinets pastel and keep the uppers white, if a full pastel run feels like too much. These colors for your kitchen cabinets compare warm and cool cabinet shades side by side, which helps when you are choosing between mint, butter yellow, and cream.

    Use a washable satin or semi gloss finish, because kitchen doors near the stove need regular wiping. Keep the backsplash plain and the hardware chrome, so the pastel reads as a calm color rather than a theme. Order one painted door sample first and check it beside your floor and counter in morning and evening light.

    3. A Black and White Checkerboard Floor

    Bright retro kitchen with a black and white checkerboard tile floor and cream cabinets.

    A black and white checkerboard floor is the most recognizable retro kitchen pattern, and it works because it is simple. Large square tiles give a calm, graphic base, while smaller tiles suit a small kitchen where a large pattern could feel busy. Lay the pattern straight, not on the diagonal, for a classic diner look, and keep the grout a mid grey so the squares stay crisp without harsh white lines.

    This floor pairs well with pastel cabinets, chrome stools, and a white counter, because the floor already carries the pattern. Use a tile that handles water near the sink, and keep a spare box from the same batch for repairs. A patterned rug is not needed on top of this floor, since the tiles are already doing that job.

    4. A Retro Fridge in a Bold Color

    Bold red retro fridge with rounded corners and a chrome handle beside cream cabinets.

    A retro fridge with rounded corners and a chrome handle can carry a whole kitchen scheme on its own. Cream is the safest choice, because it sits quietly beside most cabinets, while red, mint, or butter yellow makes the fridge a clear feature. Place it at the end of a cabinet run, where it reads as a freestanding piece, rather than squeezed between tall units that hide its shape.

    Check the size, door swing, and energy rating before you buy, and measure the delivery route through doors and hallways, since retro fridges are often deeper than flat front models. Keep the rest of the appliances simple, so the fridge is the one shaped appliance in the room. A plain counter and simple hardware nearby will keep the focus where you want it.

    5. A Diner-Style Breakfast Nook With a Vinyl Bench

    Diner-style breakfast nook with a red vinyl bench seat and a chrome pedestal table by a window.

    A diner nook turns an empty kitchen corner into the most used seat in the house. Build or buy a bench in wipe clean vinyl, pair it with a round chrome pedestal table, and add two chairs on the open side so the table is easy to get in and out of. A bench with storage underneath holds table linens and board games, which keeps the corner tidy. For window layers in a nook like this, these kitchen window decor ideas cover cafe curtains, shades, and other options for a sink or seating window.

    Choose vinyl in one solid color, such as red, teal, or cream, and repeat that color in one other place, such as a cushion or a dish towel, so the nook links to the room. Keep the table small enough that chairs can pull out fully, and hang a simple pendant above the table for evening meals.

    6. Speckled Laminate Counters With a Rounded Edge

    Retro kitchen with speckled laminate counters with a rounded edge and plain cabinets.

    Laminate counters were a staple of mid century kitchens, and a speckled or boomerang pattern in cream, grey, or pale green gives that period feel at a modest cost. Choose a pattern with small speckles rather than a large print, so the counter reads as a calm surface from a distance and only shows its retro detail up close. A rounded front edge softens the look and suits simple cabinet doors.

    Laminate wipes clean and handles everyday prep well, but it needs care near heat: use trivets for hot pans and boards for cutting, and wipe spills promptly at the seams. Pair a patterned laminate with plain cabinets and a plain backsplash, so the counter pattern is the one busy surface in the room.

    7. Globe Pendants and a Sputnik-Style Light

    Round glass globe pendant lights with chrome fittings over a retro kitchen island.

    Retro lighting is easy to spot: round glass globes, a brass or chrome frame, and warm bulbs that glow rather than glare. Hang two or three globe pendants in a line over an island or a breakfast bar, spaced evenly, with the bottom of each shade above head height when you stand at the counter. A sputnik-style ceiling light, with arms radiating from a center ball, suits a dining corner or the center of a small kitchen.
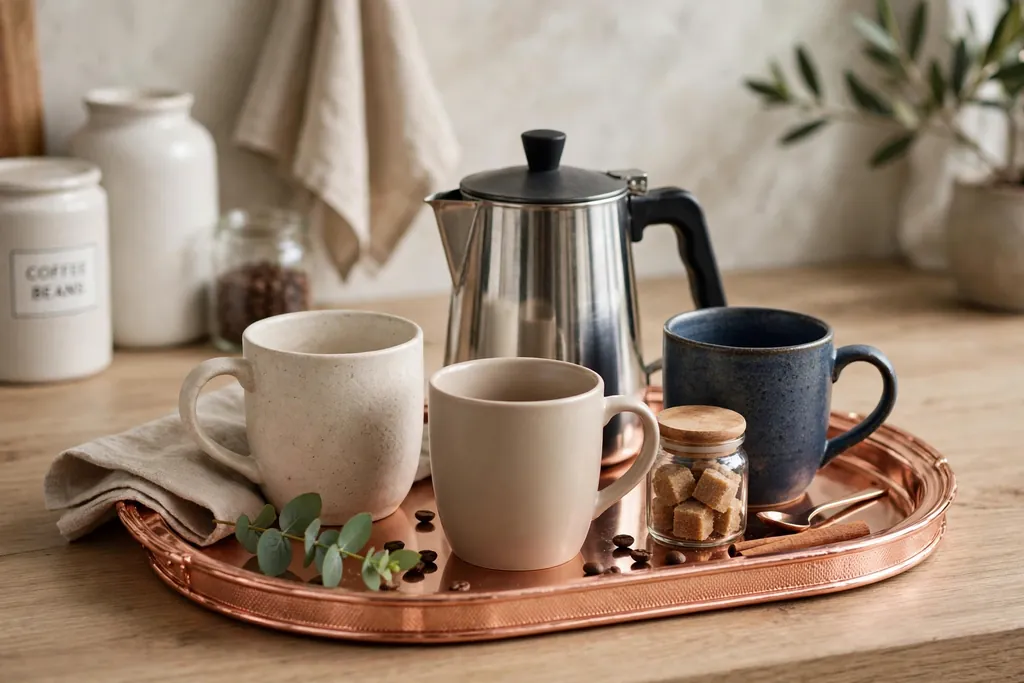
    Use warm white bulbs and a dimmer, so the same lights work for morning prep and for evening meals. Match the light metal to your hardware, chrome in most retro rooms, so the fittings read as a set. Keep the shades simple, because the shape itself is already a strong retro detail.

    8. Open Shelves for Vintage Dishware and Glassware

    Open kitchen shelves with white and cream vintage dishware and colored glassware.

    Open shelves give vintage dishware a place to be seen and used, instead of hidden in a cupboard. Fit one or two shelves beside a window or above a short counter run, and keep them to one color family, such as white, cream, and pale green, with a few colored glass pieces for accent. Stacked plates, plain bowls, and clear glasses read as retro when they are simple shapes in solid colors.

    Keep shelf items to the pieces you use most, and leave clear gaps between groups so the display stays calm. Dust shelves weekly, since open storage collects cooking film faster than closed cabinets. Put rarely used pieces in closed storage, and keep the shelves away from the stove, where steam and grease settle fastest.

    9. A Geometric Tile Backsplash in a Retro Pattern

    Geometric patterned tile backsplash in cream, mint, and charcoal behind a stove.

    A geometric backsplash adds retro pattern at eye level, where you see it most while cooking. Starburst, diamond, or small hexagon tiles in two or three colors, such as cream, mint, and charcoal, give a period feel without a large print. Use the pattern behind the stove or across the full backsplash, and keep the cabinets and counters plain so the tile has room to stand out.

    Choose a grout color close to the main tile shade for a soft result, or a slightly darker grout if you want the pattern to read more clearly. Seal the grout in the stove zone, where splashes are most likely, and keep a spare box of tiles from the same batch for future repairs. Run the tile to the underside of the upper cabinets so the band is continuous.

    10. Chrome Hardware and Cup Pulls on Simple Cabinets

    Close view of chrome cup pulls and round knobs on simple cream kitchen cabinets.

    Chrome hardware is the small detail that ties a retro kitchen together. Bar pulls on drawers, cup pulls on wide drawers, and round knobs on doors all suit simple shaker or flat front cabinets, and chrome suits pastel paint, cream, and warm wood alike. Measure your existing hole spacing before ordering, since cup pulls come in fixed widths, and buy one sample first to check the chrome tone against your faucet. Similar period hardware appears in these traditional kitchen ideas, where cup pulls and knobs give a settled, classic feel.

    Repeat chrome in just two or three places, such as handles, faucet, and one light fitting, and keep other metals out of the main view. Wipe chrome with a soft cloth and avoid harsh pads, which can dull the finish. If your appliances are stainless steel, that is fine, because steel reads as a working material rather than a competing metal.

    11. A Wood Breakfast Bar With Swivel Stools

    Warm wood breakfast bar with chrome swivel stools with vinyl seats.

    A breakfast bar in warm wood gives a retro kitchen a casual eating spot without a full dining table. Use a peninsula or a raised counter at the end of an island, with a wood top that overhangs enough for knees, and add two or three swivel stools with chrome legs and vinyl seats. The wood top warms the room, while the chrome and vinyl keep the retro link clear.

    Leave clear floor space behind the stools, at least enough to swivel and step off comfortably, and keep the walkway behind the bar clear of bins and pet bowls. Choose stool seats in one color that repeats a color already in the room, such as the fridge, the nook bench, or a dish towel. A wood bar also suits a kitchen where the main table sits in another room, because it gives children and guests a place to sit while you cook.

    12. A Bold Patterned Runner Rug for Warmth Underfoot

    Bold patterned runner rug on a tile floor in front of retro kitchen cabinets.

    A patterned runner rug is the lowest effort retro change in this list, and it works well in a rented kitchen because nothing is fixed. Choose a runner in a bold retro pattern, such as a geometric print or a striped border, in colors already used in the room, and lay it in front of the main counter run or the sink. The rug adds warmth underfoot, softens a hard tile floor, and gives a plain kitchen a clear retro note.

    Pick a flat weave rug that lies flat and can be washed, because kitchen rugs need regular cleaning, and use a non slip pad underneath so it does not slide on tile. Keep the rug clear of the stove zone, where heat and splashes make fabric impractical, and choose a length that stops short of doorways so it does not catch on doors.

    Conclusion

    Retro style works best when you choose one strong feature and let the rest of the room stay practical. Start with a range, a fridge, a checkerboard floor, or a pastel cabinet run, then repeat chrome, one pastel, and one pattern in small places. Keep counters plain beside a patterned floor or backsplash, test paint and tile samples in your own light, and make sure seating, lighting, and storage all work for daily cooking, not just for looks. With those basics in place, a retro kitchen feels warm and inviting, and it still works as a busy family room.

    Save this list on Pinterest before your next kitchen refresh, and try one idea first: a hardware swap, a runner rug, or a painted island, then live with it for a week before you change the next surface.

    FAQs

    What is the cheapest way to get a retro kitchen look?

    Start with the small, removable changes: chrome hardware, a patterned runner rug, open shelves with simple dishware, and a vinyl bench cushion or stool seats. These changes cost far less than a new range or fridge, and most can be undone if you change your mind. Paint is the next step up in cost and effort, and it gives a larger result than accessories alone, so paint one cabinet run or an island before you commit to a full kitchen repaint.

    Does a retro fridge use more energy than a modern fridge?

    It depends on the model, not on the retro shape alone. A new retro-style fridge built to current standards can be efficient, while a genuine old fridge is often far less efficient and may need repairs. Check the energy rating label and the yearly running cost for the exact model you are considering, and compare it with a standard modern fridge of the same size. If you buy a genuine vintage fridge, have it checked by a qualified technician before you rely on it for daily food storage.

    How do I mix retro details with a modern kitchen?

    Keep the modern layout and appliances, and add retro details in a limited set: one pastel color, chrome hardware, and one pattern, such as a checkerboard floor or a geometric backsplash. Leave the cabinet shapes, counters, and lighting modern in the rest of the room, so the retro pieces read as accents rather than a full theme. If the room starts to feel busy, remove one patterned item before you add another.

    Will a checkerboard floor make a small kitchen look smaller?

    A checkerboard floor can make a small kitchen feel busy if the tiles are very small or the contrast is very harsh, but it does not have to shrink the room. Use medium tiles, keep the walls and uppers light, and leave the floor as clear as possible, with no rug on top of the pattern. A straight lay, rather than a diagonal lay, also keeps the pattern calmer in a small room, and a mid grey grout softens the contrast between black and white.

    Can I add retro style to a rented kitchen?

    Yes. A patterned runner rug, chrome hardware that you keep the originals for, open shelves fitted with removable fixings where your lease allows, vintage dishware, and a retro style small appliance all add retro character with no permanent change. Keep the original hardware and a record of the original colors, so you can restore the kitchen when you move out. Avoid painting cabinets or fitting a new range or fridge in a rental unless your landlord agrees in writing.

    What colors work best in a retro kitchen?

    Mint, butter yellow, cream, soft red, and teal are the classic retro cabinet and appliance colors, and they all work best beside white counters, warm wood, and chrome. Pick one main color and one accent, and keep the rest of the room in cream, white, or pale grey, so the retro colors have room to stand out. Test samples in daylight and evening light, because pastel tones shift a lot under kitchen lighting, and check the sample beside your floor before you order paint for a full run.


  • 32 Pink Kitchen Ideas That Feel Both Cozy and Current

    32 Pink Kitchen Ideas That Feel Both Cozy and Current

    Sheet No.: 60
    Brand: Dwell Ovell (dwellovell.com)
    Author: Clara Bennett
    Parent keyword: Pink Kitchen Ideas
    Keyphrase: pink kitchen ideas
    Slug: pink-kitchen-ideas
    Categories: Kitchen & Dining (primary: Kitchen & Dining)
    Publish slot: Sept 15, 2026, 5:00pm America/New_York
    Status: Draft file only (do not publish)

    A. SEO Brief

    Intent: Help readers add pink to a kitchen in a way that feels warm and current, whether they want a full cabinet repaint or one small change. Readers are looking for ideas they can picture and copy, with practical tips on pairing pink with wood, white, brass and marble.

    Primary keyphrase: pink kitchen ideas
    Secondary terms: blush pink kitchen, pink kitchen cabinets, pink kitchen decor, dusty rose kitchen, pink tile backsplash, pink kitchen island, pink kitchen accessories

    Sheet title: “32 Pink Kitchen Ideas That Feel Both Cozy and Current”
    Count note: Sheet count is 32, which is above 10, so the count is kept exactly at 32. The article delivers 32 distinct numbered ideas, numbered continuously 1 to 32.

    Article title / H1: 32 Pink Kitchen Ideas That Feel Both Cozy and Current
    SEO title (53 characters): 32 Pink Kitchen Ideas That Feel Both Cozy and Current
    Meta description (156 characters): Discover 32 pink kitchen ideas, from blush cabinets and patterned tile to retro fridges and cozy nooks, with simple tips to add pink without a full remodel.
    Slug: pink-kitchen-ideas

    Internal links used (verified live dwellovell.com URLs only):
    – https://dwellovell.com/how-to-style-open-shelves/ (open shelves styling)
    – https://dwellovell.com/colors-for-your-kitchen-cabinets/ (cabinet colors)
    – https://dwellovell.com/kitchen-window-decor-ideas/ (window decor)
    – https://dwellovell.com/corner-kitchen-cabinet-ideas/ (corner cabinets)
    – https://dwellovell.com/fall-kitchen-decor-ideas/ (seasonal kitchen decor)
    – https://dwellovell.com/everyday-dining-table-decor/ (dining table decor)
    – https://dwellovell.com/kitchen-balcony-ideas/ (small kitchen and balcony seating ideas)

    Research limits: No live competitor research or search volume checks were claimed for this draft. No prices, products, measurements, statistics or brand endorsements are stated. Tips are general decorating guidance. All internal links above are from the verified list supplied for this post.

    B. Complete Article

    32 Pink Kitchen Ideas That Feel Both Cozy and Current

    Pink in a kitchen can be soft and calm, or bold and cheerful, depending on the shade and where you use it. A pale blush works like a warm neutral next to white and wood, while a deeper rose adds character to cabinets, tile or a single appliance. The trick is to give pink a clear job in the room, then balance it with plain surfaces so the space still feels easy to cook in. These 32 pink kitchen ideas cover cabinets, tile, floors, seating, lighting and small finishing touches, so you can start with one change or build a full pink scheme over time.

    Key Takeaways

    • Start with one pink anchor, such as cabinets, an island or a tile backsplash, and keep the rest of the room calm.
    • Pale blush and dusty rose pair well with white, warm wood, brass and pale marble.
    • Test a pink paint or tile sample in daylight and evening light before you commit to a large area.
    • Small changes like stools, curtains, linens and tableware let you try pink without repainting.
    • Repeat the same pink in two or three spots, rather than using many different pinks, for a pulled together look.
    • Keep work surfaces plain and easy to clean, so pink stays a decor choice and not a cleaning burden.

    1. Soft Blush Shaker Cabinets

    Kitchen with soft blush pink shaker cabinets, white counters and a wood floor.

    Paint all of your cabinets in a soft blush pink for a kitchen that feels warm without shouting. Shaker doors keep the look simple, and white walls, a pale counter and wood floors stop the pink from feeling heavy. This suits a kitchen with good daylight, where the blush reads as a warm neutral rather than a bright color.

    Keep handles simple in brass or brushed nickel, and choose a counter in white or pale grey so the cabinets stay the focus. If you worry about commitment, paint one run of cabinets first and live with it for a week before painting the rest.

    2. Two Tone Pink Lowers and White Uppers

    Kitchen with pink lower cabinets, white upper cabinets and a pale backsplash.

    Use pink on the lower cabinets and white on the uppers for a lighter take on a pink kitchen. The white uppers keep the eye moving up and make a small kitchen feel taller, while the pink base grounds the room. This split also makes repainting easier later, since only half the cabinets need a new color.

    Pair the scheme with a pale backsplash and a wood or white counter. A brass or black handle on the pink lowers ties the two tones together. Keep the wall color plain so the two cabinet colors can do the work.
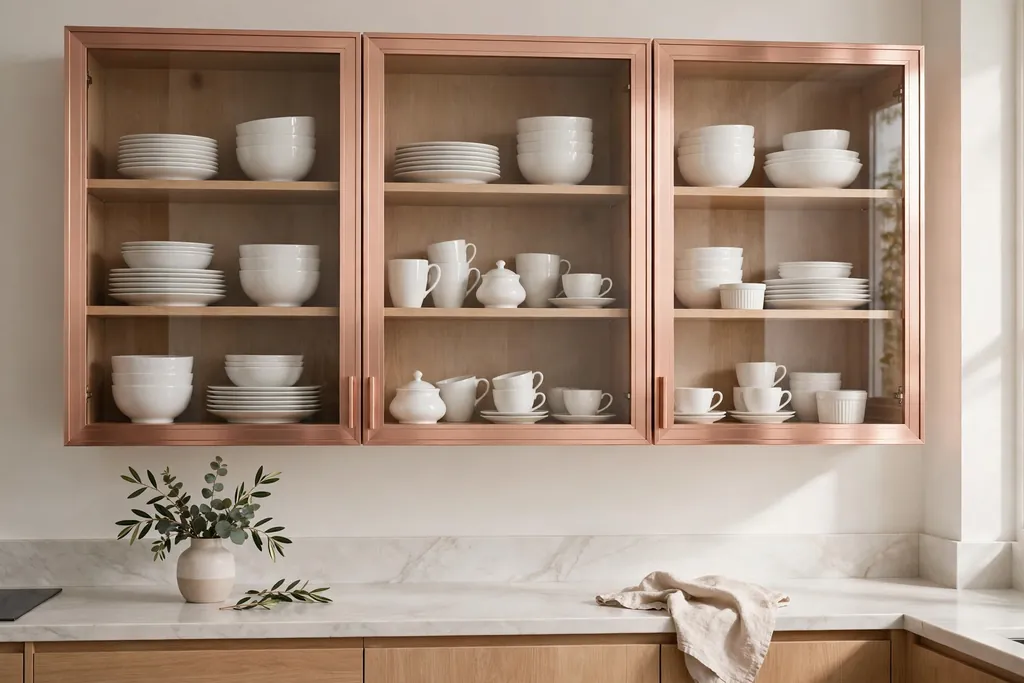
    3. Dusty Rose Cabinets with Brass Hardware

    Dusty rose kitchen cabinets with brass knobs and cream walls.

    Choose a dusty rose, a muted pink with a touch of grey, for cabinets that feel grown up and calm. Brass knobs and cup pulls warm the rose and suit both classic and simple modern kitchens. This shade works well with cream walls, marble look counters and oak floors.

    Avoid pairing dusty rose with too many other strong colors. Let brass, cream and wood carry the rest of the room, and add green from a plant or a herb pot for a fresh contrast. Wipe painted cabinets with a soft damp cloth to keep the finish looking even.

    4. Pink Island in a Neutral Kitchen

    Pink kitchen island with a pale counter in a white kitchen.

    Keep the main cabinets white or wood, and paint only the island pink. The island becomes a clear focal point, and the rest of the kitchen stays neutral, which makes the change lower risk and easier to reverse. A blush or rose island suits a white kitchen, while a deeper pink suits a kitchen with dark wood floors.

    Repeat the island pink once more, in stools, a rug or a vase, so it looks planned rather than random. Choose a hard wearing counter for the island, since it takes the most daily use. This is a good first step if you like pink but are not ready for pink cabinets everywhere.

    5. Pink Upper Cabinets Only

    Small kitchen with pink upper cabinets and white lower cabinets.

    In a small kitchen, try pink on the upper cabinets and keep the lowers white, wood or grey. Pink at eye level adds warmth where you see it most, while darker or plain lowers keep the floor area calm. This works well in a galley kitchen, where a full pink scheme might feel close.

    Use open space or a plain backsplash below the pink uppers so the color reads clearly. Keep dishes inside closed uppers tidy, or use glass fronts on one or two doors for a display spot. A pale pink here feels light, so avoid a very deep shade in a small, dark kitchen.

    6. Pink Open Shelves with White Dishes

    Pink open kitchen shelves holding white dishes and clear glasses.

    Paint open shelves pink, or back them with pink boards, and display white dishes, clear glasses and wood boards against them. The pink frames the display and adds color without painting a single cabinet. This suits a kitchen with one blank wall or a short run above a counter.
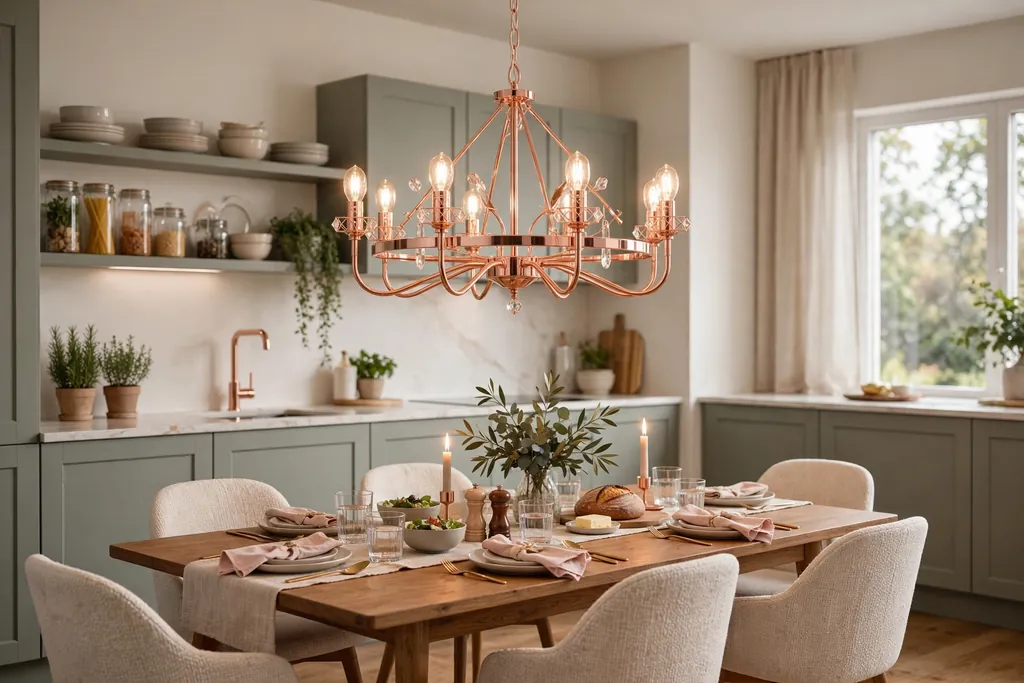
    Our guide to how to style open shelves shows how to leave breathing room between groups so shelves read as tidy, not crowded. Keep the shelf items to daily pieces you actually use, and dust the shelves weekly since open storage collects cooking film.

    7. Glass Front Cabinets with Pink Interiors

    Glass front kitchen cabinets with pink painted interiors and white dishes.

    Paint the inside of glass front cabinets pink, and keep the doors and frames white or wood. When the doors close, you get a soft wash of pink behind glasses and plates, which is more subtle than pink cabinet doors. This idea suits a kitchen that already has glass fronts, or one cabinet you can change as a test.

    Use white or clear dishes inside so the pink shows, and keep the display simple with one or two stacks per shelf. If the pink feels too strong, paint only the back panel and leave the sides white. This is a low cost way to try pink in a rented or recently fitted kitchen.

    8. Pink Subway Tile Backsplash

    Kitchen with a pink subway tile backsplash and white cabinets.

    Lay pink subway tiles as a backsplash for a classic shape in a fresh color. A pale pink tile with white grout feels soft, while a deeper pink with matching grout feels bolder. Subway tiles suit most kitchens because the shape is familiar and the size works around sockets and windows.

    Pair pink subway tile with white cabinets and a plain counter, so the tile is the main color note. Order a few spare tiles for future repairs, and seal grout in the splash zone behind the sink and cooker. A pink tile sample looks different under kitchen lights, so check it at night as well as in daylight.

    9. Pink Patterned Tile Backsplash

    Patterned pink tile backsplash behind a kitchen cooker.

    Choose a patterned tile with pink in the design, such as a floral, star or geometric print, for a backsplash with more detail. Patterned tile works best on one wall, usually behind the cooker or sink, with plain tile or paint on the other walls. The pattern adds interest without needing pink cabinets.

    Keep counters and cabinet fronts plain, and pick one pink from the tile to repeat in a towel or a small accessory. Patterned tile can date faster than plain tile, so choose a pattern you like for its shape as well as its color. Ask your tiler about sealing, since some patterned tiles need extra care.

    10. Pink Veined Marble Look Counters

    Kitchen counter with soft pink veining on a white base and white cabinets.

    Use a counter with soft pink veining on a white or cream base for pink that reads as stone, not paint. This suits a kitchen where you want pink to feel quiet and high end, and it pairs well with white cabinets, brass taps and wood stools. The veining gives movement without a solid block of color.

    Keep the backsplash plain, in white tile or a pale plaster tone, so the counter pattern stays clear. Wipe spills promptly, as with any pale stone look surface, and use boards for chopping and hot pans. If a full stone counter is out of reach, a marble look laminate with pink veining gives a similar effect.

    11. Pink Terrazzo Counters

    Kitchen with a pink speckled terrazzo counter and pale wood cabinets.

    Pick a terrazzo counter with pink chips mixed with white, grey and cream for a speckled surface that hides crumbs well. Terrazzo suits a modern kitchen, and the pink chips tie in with a pink stool, rug or vase elsewhere in the room. It also pairs well with pale wood and matte black taps.

    Because terrazzo has many tones, choose cabinet and wall colors from the lightest tones in the mix. Keep the backsplash simple, since the counter already has plenty of detail. Seal the surface as advised by the supplier, and use coasters under strongly colored drinks.

    12. Pink and White Checkerboard Floor

    Kitchen with a pink and white checkerboard floor and white cabinets.

    Lay a pink and white checkerboard floor for a retro kitchen floor that sets the tone for the whole room. The floor pattern works with white cabinets, a pink appliance or pink stools, and it suits a kitchen with a simple layout where the floor can be seen. A pale pink keeps the look soft, while a stronger pink feels more playful.

    Keep walls and cabinets plain so the floor can lead. Use a rug runner in a plain tone over the checkerboard in the main work zone if the pattern feels busy underfoot. Choose a floor finish suited to kitchens, with grip and easy cleaning, and keep spare tiles for repairs.

    13. Pink Range Cooker as a Focal Point

    Pink range cooker in a kitchen with white cabinets.

    Make a pink range cooker the center of the kitchen, with plain cabinets and a simple backsplash around it. A cream, blush or rose cooker adds color in one strong piece, and it suits a farmhouse or retro style kitchen. The cooker draws the eye, so the rest of the room can stay calm and practical.

    Match one small item to the cooker, such as a kettle or a tea towel, and keep the other appliances in steel or white. Check the cooker color in person if possible, since pink finishes vary a lot between makers. Keep the wall behind the cooker easy to clean, with tile or a wipeable panel.

    14. Pink Retro Fridge

    Pink retro fridge with chrome details in a white kitchen.

    Add a pink retro fridge for instant character, with curved edges and chrome details that suit a vintage or playful kitchen. A soft pink fridge works with white cabinets and wood floors, while a brighter pink suits a kitchen that already has bold accents. The fridge becomes a talking point without any building work.

    Let the fridge be the only large pink appliance, and keep other appliances in neutral tones. Measure doorways and the fridge space carefully, since retro models vary in size. Leave ventilation space around the fridge as advised in its manual, and keep the top clear or use it for one light item only.

    15. Pink Farmhouse Sink

    Pink farmhouse sink with a brass tap in a cream kitchen.

    Fit a pink farmhouse sink, with its deep bowl and front panel on show, for color at the heart of the work zone. A pale pink sink suits a white or cream kitchen, and it pairs well with brass or chrome taps. The front panel is visible from across the room, so it acts as a decor piece as well as a sink.

    Keep the counter around the sink plain, and choose a tap finish that matches your cabinet handles. A farmhouse sink needs a cabinet made to fit it, so check sizes before ordering. Clean the sink with a soft cloth and mild cleaner to protect the finish.

    16. Pink Faucet and Hardware Swap

    White kitchen cabinets with pink knobs and a pink tap.

    Swap taps, cabinet knobs and drawer pulls for pink versions for a small, reversible change. Pink hardware suits white, cream or pale wood cabinets, and it lets you test pink before painting. This is a good weekend job, and it costs far less than new cabinets.

    Keep all the hardware in the same pink and finish, so the change looks planned. Save the old hardware in a labelled bag in case you want to swap it back. Check that new taps fit your existing sink holes, and turn off the water before changing a tap.

    17. Pink Pendant Lights over the Island

    Pink pendant lights hanging over a kitchen island.

    Hang pink pendant lights over an island or table for color at eye level that also lights the work surface. Pink glass, enamel or metal shades suit a white or wood kitchen, and they look best in a row of two or three over a long island. The shade color glows softly when lit, which adds warmth in the evening.

    Hang pendants high enough to see under them while standing, and keep the cord length even across the row. Pair pink pendants with plain stools or a plain counter, so the lights stay the focus. Use warm white bulbs for a cozy evening light, and dimmers if your wiring allows them.

    18. Pink Bar Stools at the Island

    Pink bar stools tucked under a kitchen island.

    Choose pink bar stools, in velvet, leather look or painted wood, for seating that adds color without changing the kitchen itself. Stools are easy to move, swap or recover, so they are a low risk way to try pink. A blush stool suits a white island, while a deeper pink suits a wood or grey island.

    Pick a stool height that fits your counter, with room to tuck stools under the overhang. If the stools have fabric seats, choose a wipeable fabric for a kitchen. Keep the stool count to the space you have, with room to sit and stand without bumping neighbours.

    19. Pink Dining Chairs around the Table

    Pink dining chairs around a wood kitchen table.

    Use pink dining chairs around a wood or white kitchen table for a dining zone that feels welcoming. Upholstered chairs add softness, while painted wood chairs are easier to wipe after meals. This idea suits a kitchen diner, where the table is part of daily life.

    Mix pink chairs with two plain chairs at the ends of the table if a full set feels like too much pink. For more table styling ideas, see our guide to everyday dining table decor. Keep chair cushions in a washable fabric, and check that chairs fit under the table when pushed in.

    20. Pink Banquette Nook

    Kitchen corner banquette with pink cushions and a wood table.

    Build or dress a banquette nook with pink cushions and a plain table for a cozy eating corner. A banquette uses a corner well, gives storage under the seat, and makes a small kitchen feel like it has a dining room. Pink cushions, with plain walls and a wood table, keep the nook soft rather than loud.

    Use firm foam cushions with removable, washable covers, since a nook seat gets daily use. Add one or two plain cushions in cream or grey to break up the pink. Keep the table size modest, so people can slide in and out without moving the table each time.

    21. Pink Painted Kitchen Table

    Pink painted kitchen table with white chairs.

    Paint a wood kitchen table pink, and keep the chairs white, wood or a mix of both. A painted table is a clear pink statement, but it is only one piece of furniture, so it is easier to repaint later than cabinets. This suits a farmhouse table, a round pedestal table or a second hand table you want to refresh.

    Sand and prime the table first for a finish that lasts, and use a paint suited to furniture that gets wiped daily. Protect the top with placemats and coasters, and touch up chips promptly. A pale pink table suits a bright kitchen, while a deeper pink suits a kitchen with dark floors.

    22. Pink Cafe Curtains at the Window

    Kitchen window with pink cafe curtains over the sink.

    Hang pink cafe curtains on the lower half of a kitchen window for privacy, soft color and light. Cafe curtains suit a kitchen window over a sink, since they cover the lower glass while leaving the top open for daylight. A gingham, stripe or plain pink fabric all work, depending on your style.

    For more window ideas, see our guide to kitchen window decor ideas. Choose a washable fabric, since kitchen curtains collect steam and cooking smells. Hang the curtain rod at mid window height, and keep the curtain clear of taps and the hob.

    23. Pink Wall Paint with White Cabinets

    Kitchen with pale pink walls and white cabinets.

    Paint the kitchen walls pink and keep the cabinets white for a scheme that is easy to change later. Wall paint is the lowest commitment way to add a large area of pink, and it suits renters who can repaint, as well as owners testing a shade. A pale blush on the walls feels warm, while a mid pink needs good light.

    Test paint samples on two walls, since light changes across the room. Keep the ceiling white and the trim white or cream for a clean edge. If the pink feels strong, paint only one wall pink and keep the rest in a warm white.

    24. Pink Wallpaper Accent Wall

    Kitchen dining wall with pink floral wallpaper.

    Paper one wall in a pink wallpaper, with a floral, stripe or small scale print, for pattern as well as color. An accent wall behind a table or on a dining wall suits this idea, while work walls stay in paint or tile for easy cleaning. Wallpaper adds texture that paint alone cannot give.

    Choose a washable wallpaper for a kitchen, and avoid papering the wall directly behind the hob or sink. Keep the other walls plain, and pick a pink from the paper to repeat in a cushion or vase. If you rent, look for a removable wallpaper made for kitchens, and test a small piece first.

    25. Pink Tile Clad Island Front

    Kitchen island with a front clad in small pink tiles.

    Clad the front of your island in pink tiles, while the counter and cabinets stay plain. Tile on the island front adds color and texture where it is seen from the living space, and it is easier to clean than a painted panel in a busy walkway. Small pink tiles, in square or kit kat shapes, suit this use.

    Use grout in a tone close to the tile so the front reads as a block of pink, or white grout for a clearer tile pattern. Keep stools plain so the tiled front stays the focus. This idea pairs well with a white counter and wood or brass stool legs.

    26. Pink Pantry Door

    Pink pantry door in a kitchen with white cabinets.

    Paint a pantry door pink, or fit a pink door to a pantry cupboard, for a single bold note in a plain kitchen. A pantry door is a good test spot, since it is one door, not a full run of cabinets. This works well for a corner pantry, a tall larder cupboard or a door to a utility nook.

    Our guide to corner kitchen cabinet ideas has more ideas for making corner storage work hard. Match the pantry door handle to your other cabinet hardware, and keep the wall around the door plain. A pink pantry door also helps guests find storage without asking.

    27. Pink Window Seat Cushion

    Kitchen window seat with a thick pink cushion.

    Add a pink cushion to a kitchen window seat, with plain walls and a wood seat base, for a soft spot to sit with a coffee. A window seat suits a kitchen with a bay or a wide sill, and it gives extra seating without a new chair. The cushion is easy to change, so you can try pink here with little risk.

    Choose a thick cushion with a washable cover, and add a small plain throw for cooler mornings. Keep the window seat clear of clutter, with one plant or a small stack of books at one end. If the seat is near a radiator, check that the cushion fabric suits the heat.

    28. Pink Rug Runner in the Work Zone

    Pink rug runner along a kitchen counter.
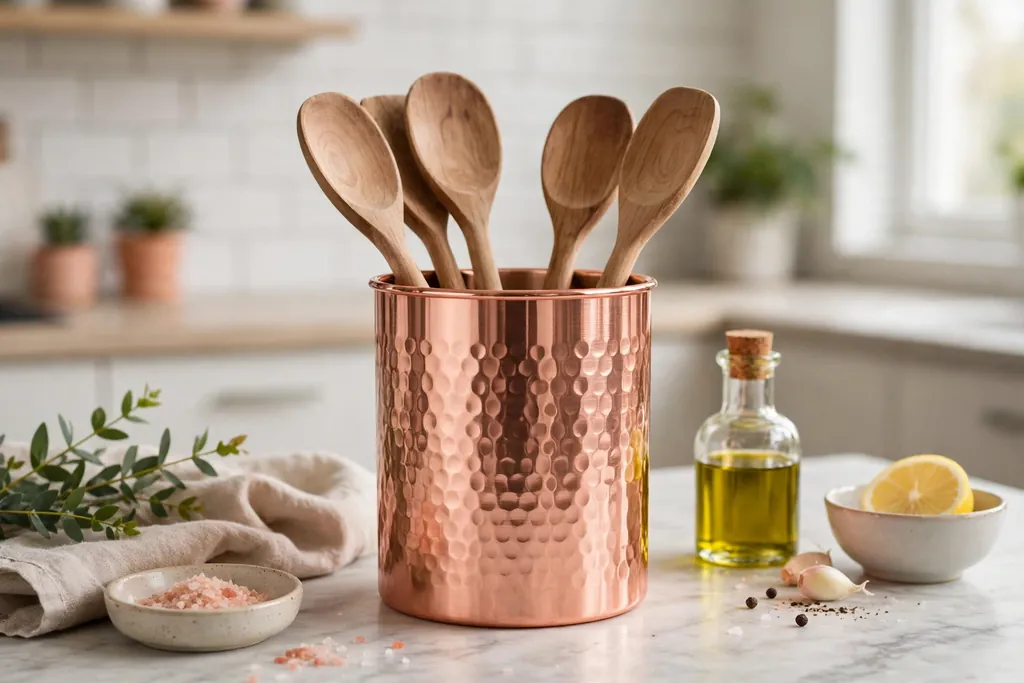
    Lay a pink rug runner along the main work zone, between the counter and the island or sink, for color underfoot and warmth on a hard floor. A runner defines the cooking path and adds softness in a kitchen with tile or wood floors. Choose a flat weave or low pile rug that is easy to clean.

    Pick a washable rug, or a rug you can shake out and spot clean, since kitchen rugs take spills. Keep the runner clear of the hob and oven door swing, and use a non slip pad under it. A patterned pink runner hides marks better than a plain pale one.

    29. Pink Small Appliances Cluster

    Pink kettle, toaster and stand mixer grouped on a kitchen counter.
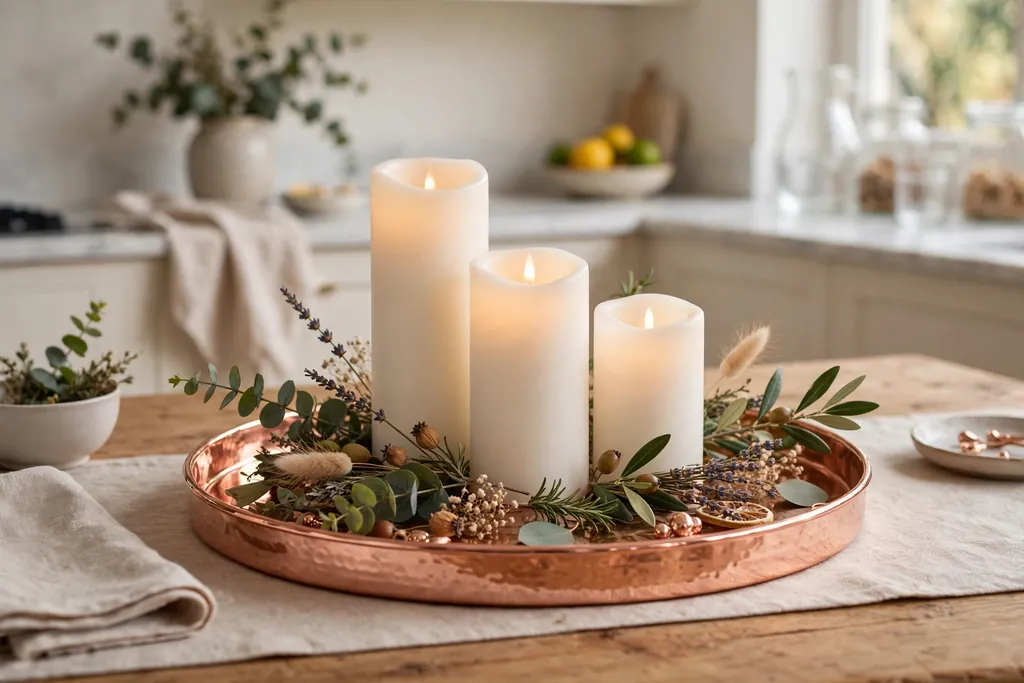
    Group pink small appliances, such as a kettle, toaster and stand mixer, on one counter zone for a cheerful corner that is easy to change. This suits a kitchen where you want pink as an accent, not a main color. Keep the appliances in the same pink family, rather than mixing pale and bright pinks.

    Keep the cluster to one counter area, with the rest of the counters clear for prep. Store appliances you rarely use in a cabinet, so the pink group stays tidy. Wipe appliances after use, since pink finishes show splashes, and keep cords tidy with a small tray or hook.

    30. Pink Tableware on Display

    Pink plates, bowls and mugs displayed on kitchen shelves.

    Display pink tableware, such as plates, bowls and mugs, on open shelves or in a glass cabinet for color you can use daily. Pink dishes suit a white or cream kitchen, and they make an ordinary meal feel more dressed up. This is a good idea if you want pink that changes with the seasons, since you can swap dishes in and out.

    Keep the display to one or two shelves, with white pieces mixed in so the pink does not overwhelm the shelf. Stack plates by size, and keep daily mugs at easy reach. If you collect pink glassware, display it away from direct sun to protect the color.

    31. Pink Kitchen Linens and Textiles

    Pink tea towels and cloth napkins in a bright kitchen.

    Use pink linens, such as tea towels, an oven mitt, a tablecloth and cloth napkins, for the easiest pink change of all. Linens are cheap, washable and easy to swap, so they suit renters, small budgets and seasonal refreshes. A set of pink tea towels alone can shift a white kitchen toward pink.

    Choose linens in one pink tone, and keep the rest of the textiles plain. For seasonal styling that pairs with pink, see our guide to fall kitchen decor ideas. Wash new linens before first use, and keep a spare set so the kitchen still looks dressed while one set is in the wash.

    32. Pink Pots, Prints and Finishing Touches

    Kitchen counter with pink plant pots, a framed pink print and a pink vase.

    Finish a pink kitchen with small touches: pink plant pots for herbs, framed pink prints on the wall, and a pink vase on the counter or table. These small pieces tie a larger pink scheme together, or add a hint of pink to a neutral kitchen. They are also the easiest items to move if you change your mind.

    Keep finishing touches to a few well placed pieces, rather than pink on every surface. A herb pot by the window, one framed print and one vase is enough for most kitchens. For small space seating that pairs with a nook like this, see our ideas for kitchen balcony ideas. Group small items in odd numbers, and leave clear counter space for cooking.

    Conclusion

    Pink works in a kitchen when it has a clear role and a calm background. Start with the idea that fits your budget and your nerve, whether that is a pink stool, a painted island or a full run of blush cabinets, and live with it before adding more pink. Test shades in your own light, repeat one pink in two or three spots, and keep work surfaces plain and easy to clean. With that balance, pink can feel both cozy and current, and it can grow with your kitchen over time. Save this list for your next kitchen refresh, and pick the pink idea you want to try first.

    FAQs

    What pink shade works best in a kitchen?

    A pale blush or dusty rose works best in most kitchens, since both read as warm neutrals next to white, wood and brass. Deeper pinks suit a single focal piece, such as an island, a fridge or a cooker, rather than every cabinet. Test samples in daylight and evening light, since pink shifts a lot under different bulbs.

    Can pink cabinets work in a small kitchen?

    Yes, if you keep the pink pale and balance it with white uppers, a plain backsplash and good light. Pink lowers with white uppers, or pink uppers with plain lowers, both keep a small kitchen feeling open. Avoid a very deep pink on all cabinets in a small, dark kitchen, since it can make the room feel smaller.
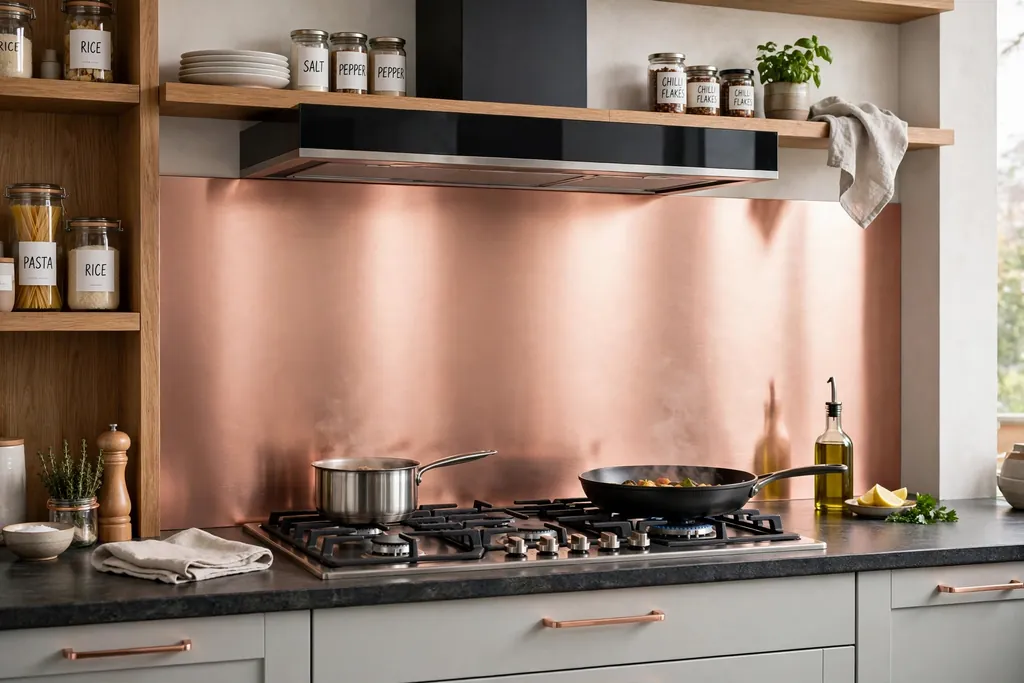
    What colors go with a pink kitchen?

    White, cream, pale grey, warm wood and brass all pair well with pink. Green from plants or herbs adds a fresh contrast, while black hardware gives a pink kitchen a sharper edge. Keep the palette to pink plus two or three neutrals, so the room stays calm. For cabinet color pairings, see our guide to colors for your kitchen cabinets.

    Is pink hard to keep clean in a kitchen?

    Pink painted cabinets and tiles clean much like white ones, with a soft damp cloth and mild cleaner. Pale pink shows splashes more than a dark color, so wipe the splash zone behind the sink and cooker often. Washable rugs, cushion covers and linens make pink textiles easy to care for, and a speckled counter hides crumbs well.
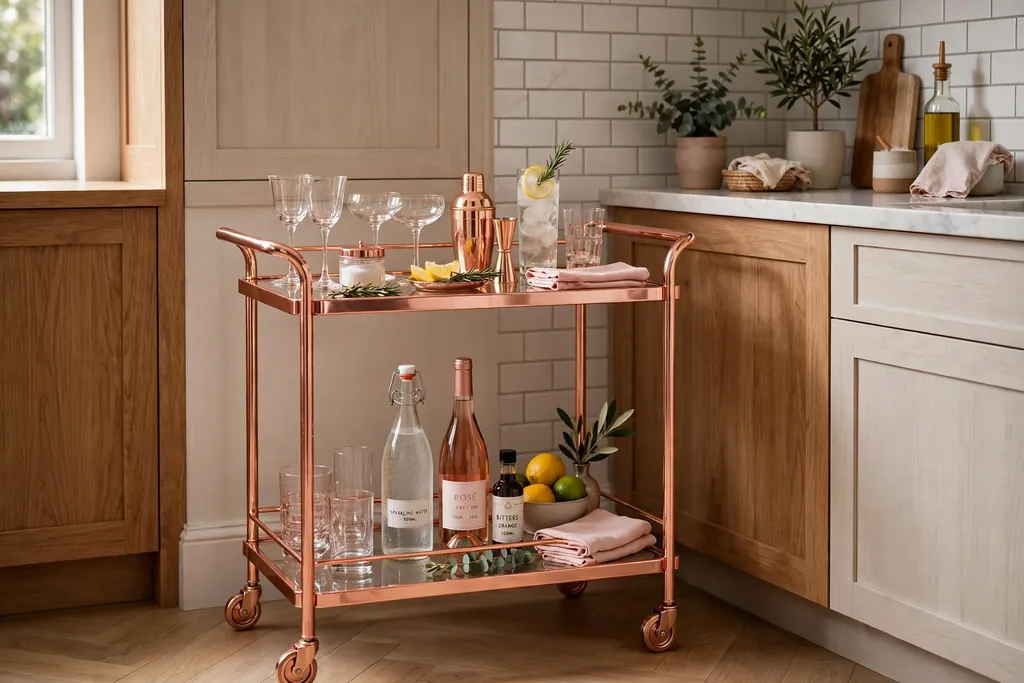
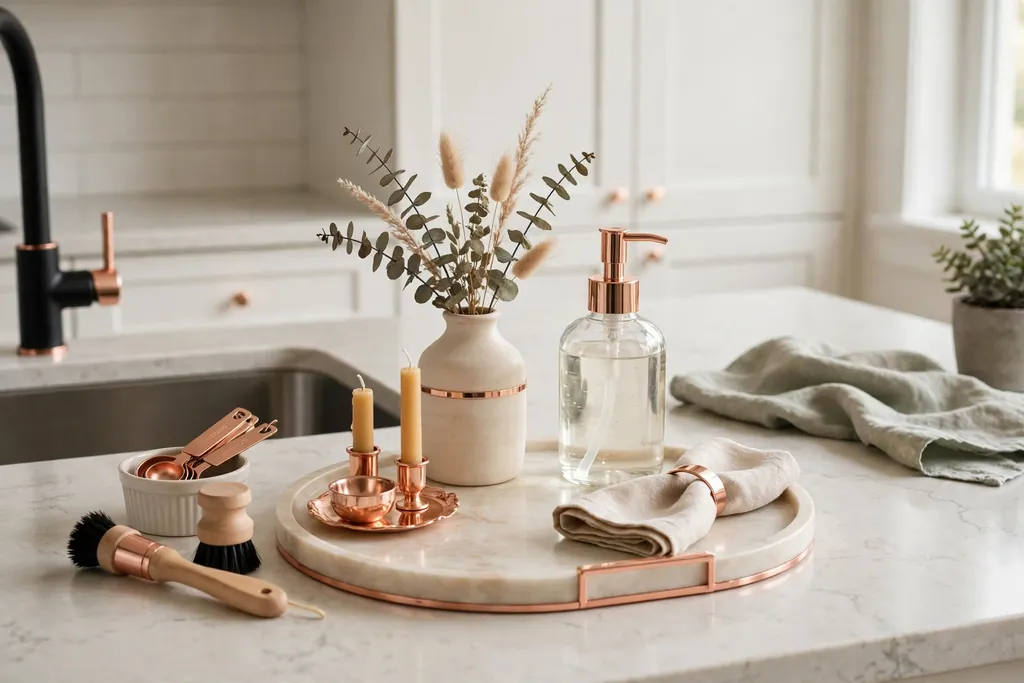
    How can I add pink to a rented kitchen?

    Use stools, curtains, rugs, linens, tableware, small appliances and plant pots, all of which move with you. Removable wallpaper on one wall and pink hardware, with the old hardware saved, are also low risk options. Check your lease before painting walls or cabinets, and keep the original finishes so you can restore them when you move out.

    Will a pink kitchen date quickly?

    A pale, muted pink ages better than a very bright pink, since it reads as a warm neutral. Classic shapes, such as shaker cabinets, subway tile and a farmhouse sink, also help a pink kitchen last longer. If you worry about dating, put pink in changeable items like stools, linens and dishes, and keep cabinets and tile in tones you can live with for years.