Author: Clara Bennett

  • 11 Mid Century Modern Kitchen Ideas to Make Your Next Refresh Easier

    11 Mid Century Modern Kitchen Ideas to Make Your Next Refresh Easier

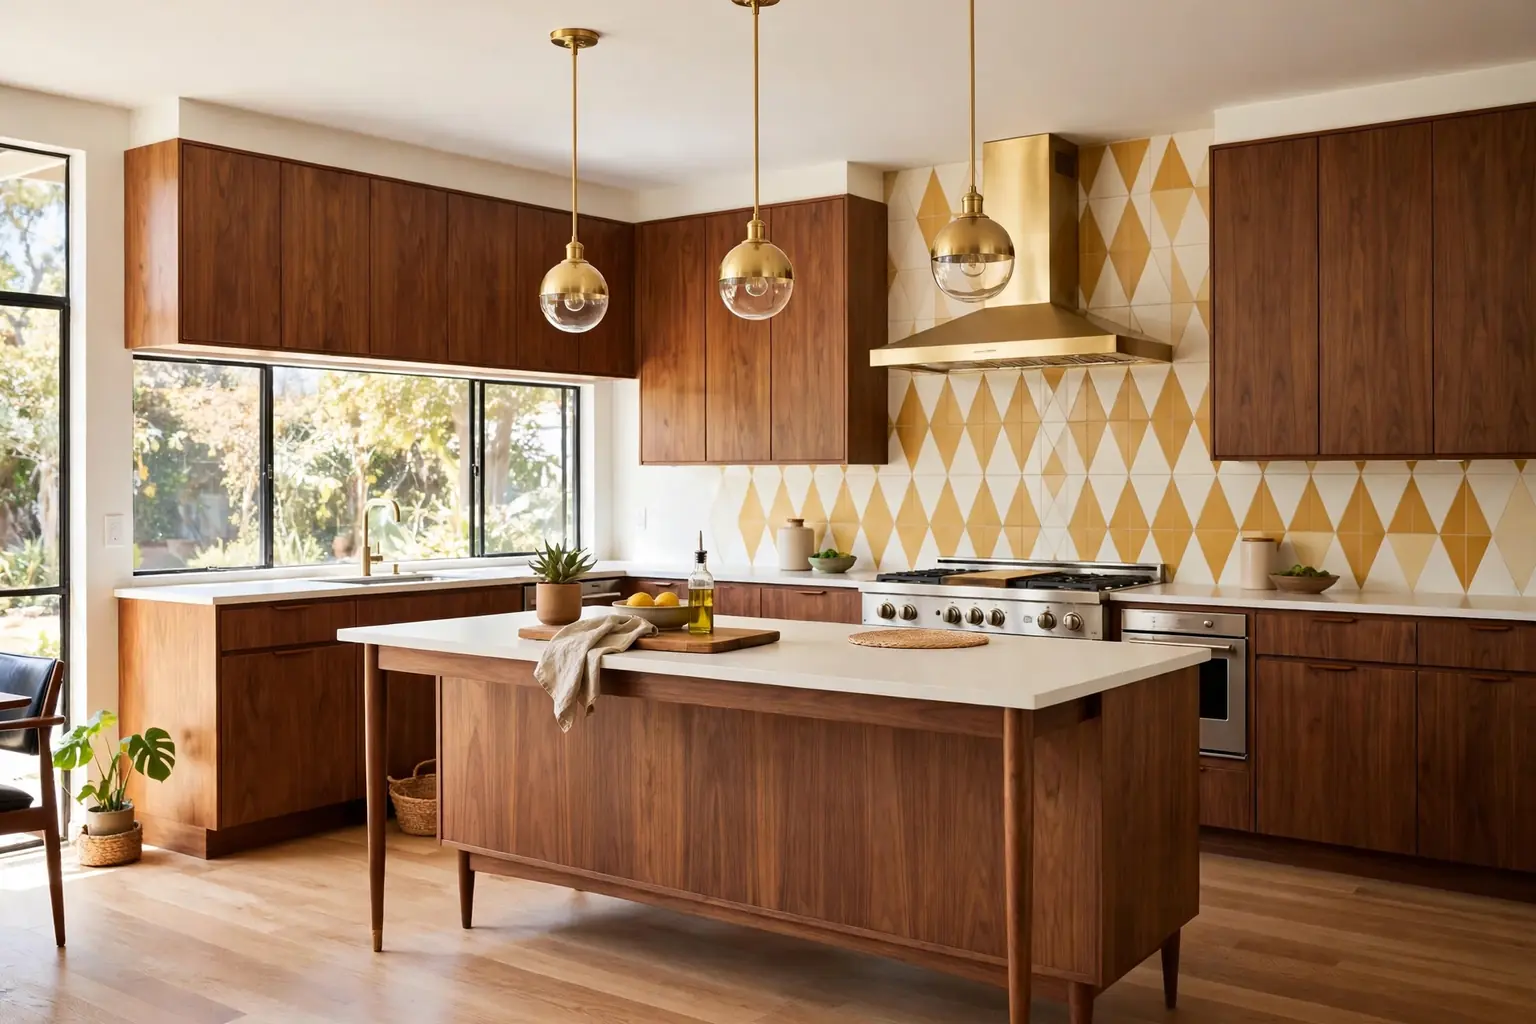
    Mid century modern kitchens are easy to recognize: flat cabinet fronts, warm wood, clean lines, and one or two bold details that keep the room from feeling plain. The style came from the 1950s and 1960s, when kitchens opened up, storage got simpler, and color showed up in small, confident doses. These 11 mid century modern kitchen ideas use that same mix, with cabinets, counters, tile, lighting, and seating that suit daily cooking. Start with the change that fixes your biggest frustration, such as dark cabinets or poor light, and add the next idea only when the first one feels settled. For a pared back take on the same clean lines, these minimalist modern kitchen ideas show how flat fronts and a limited palette work in a newer style.

    Key Takeaways

    • Let warm wood lead: walnut or teak tones on cabinets, an island, or open shelves set the period feel at once.
    • Keep lines clean: flat fronts, slim hardware, and plain counters keep the room calm so one bold detail can stand out.
    • Use color in one place: a painted island, a tile band, or seat cushions give the retro note without covering every surface.
    • Repeat one metal finish, such as brass, across hardware and lighting so the details read as a set.
    • Mix old and new where it helps: modern appliances and good task lighting keep a period look practical for daily cooking.
    • Measure before you buy: cabinet runs, island clearance, and pendant height decide whether a mid century piece fits the room.

    1. Flat-Front Walnut Cabinets
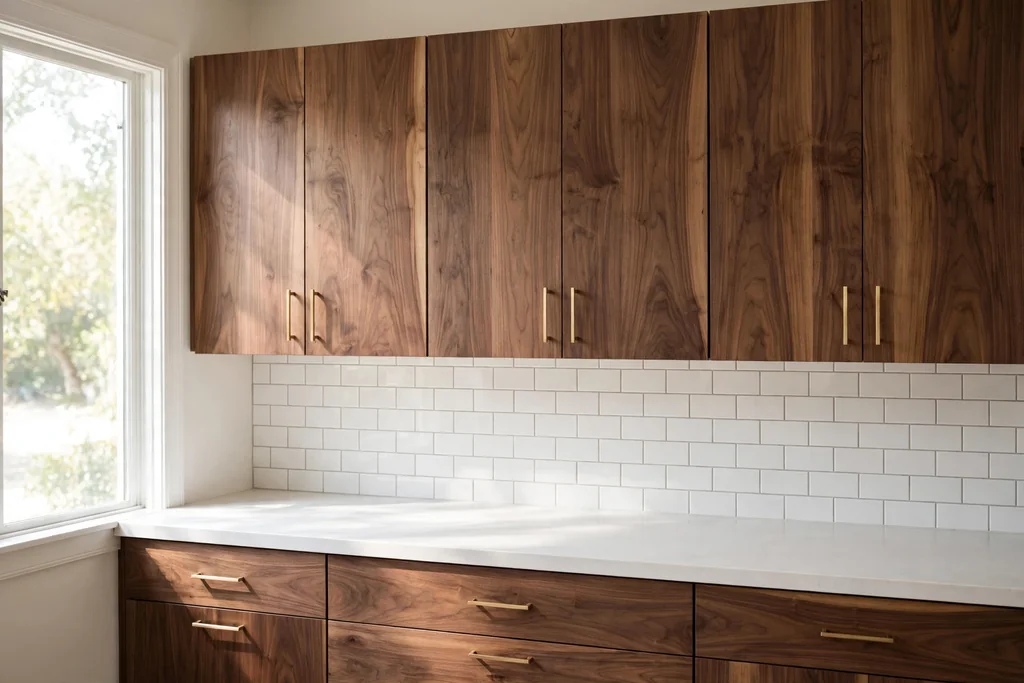
    Flat-front walnut kitchen cabinets with slim brass pulls and a plain white counter.

    Start with flat-front cabinets in walnut for the clearest mid century base a kitchen can have. With no raised panels or heavy trim, the cabinet run reads as one warm, calm surface, and the wood grain itself becomes the detail. Walnut suits white counters, cream walls, and brass hardware, and it warms a room that might otherwise feel cold.

    Keep the finish matte or satin, since high gloss fights the soft, natural feel of the style. Pair walnut lowers with a plain counter and a simple backsplash, so no single surface competes with the wood. If new cabinets are out of reach, refinishing sound doors in a walnut stain or a warm wood veneer gives much of the same effect. Test the stain beside your floor and counter first, since wood tones shift a lot between daylight and evening light.

    2. A Two-Tone Cabinet Run with White Uppers
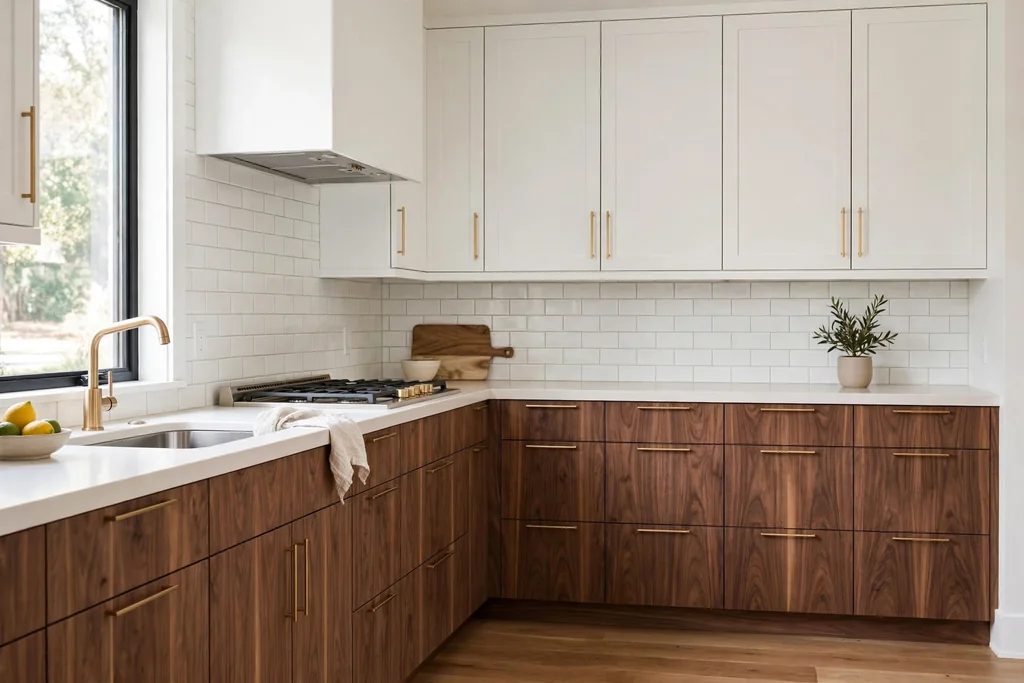
    Kitchen with walnut lower cabinets and white upper cabinets with brass hardware.

    Pair walnut lower cabinets with white upper cabinets to lighten a kitchen that feels heavy. The dark wood grounds the room at counter level, where you see it most while cooking, while the white uppers lift the wall and bounce light around the space. This split also lets you keep the period wood without committing every cabinet to a dark tone.

    Use the same hardware on both runs, such as slim brass bar pulls, so the two tones read as one planned kitchen rather than two separate ones. Keep the counter plain and the backsplash simple, so the two-tone split stays the main feature. This approach suits a smaller kitchen well, since the white uppers keep the wall from closing in while the wood below still gives warmth.

    3. A Walnut Island with Tapered Legs
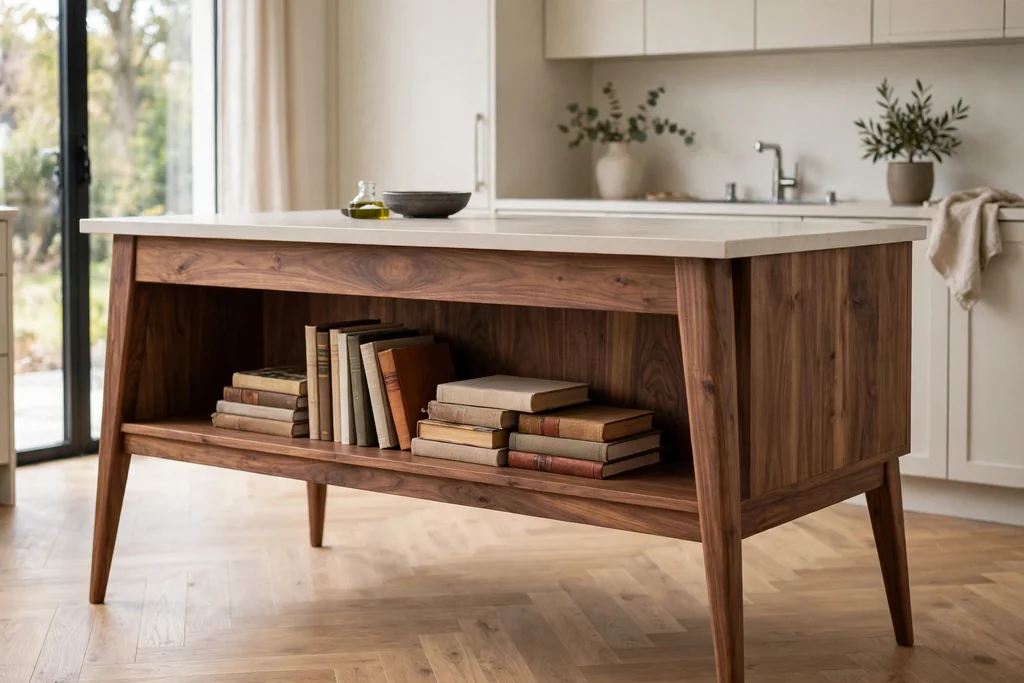
    Walnut kitchen island with tapered legs and an open shelf holding cookbooks.

    Give the island furniture legs, tapered and slightly angled, instead of a solid panel base. Mid century furniture stood on slim legs, and that same detail makes a kitchen island feel lighter and more like a table than a block. A walnut island top with an open shelf below also gives a handy spot for cookbooks, baskets, or large bowls.

    Leave enough clearance around the island for comfortable walking and for pulling a stool out, and keep the shelf to a few items you use often so it stays tidy. Pair the island with simple stools in wood or a dark metal frame, and keep the island front free of extra panels or trim. The legs do the period work, so the rest of the island can stay plain.

    4. Speckled Laminate Counters with a Clean Edge
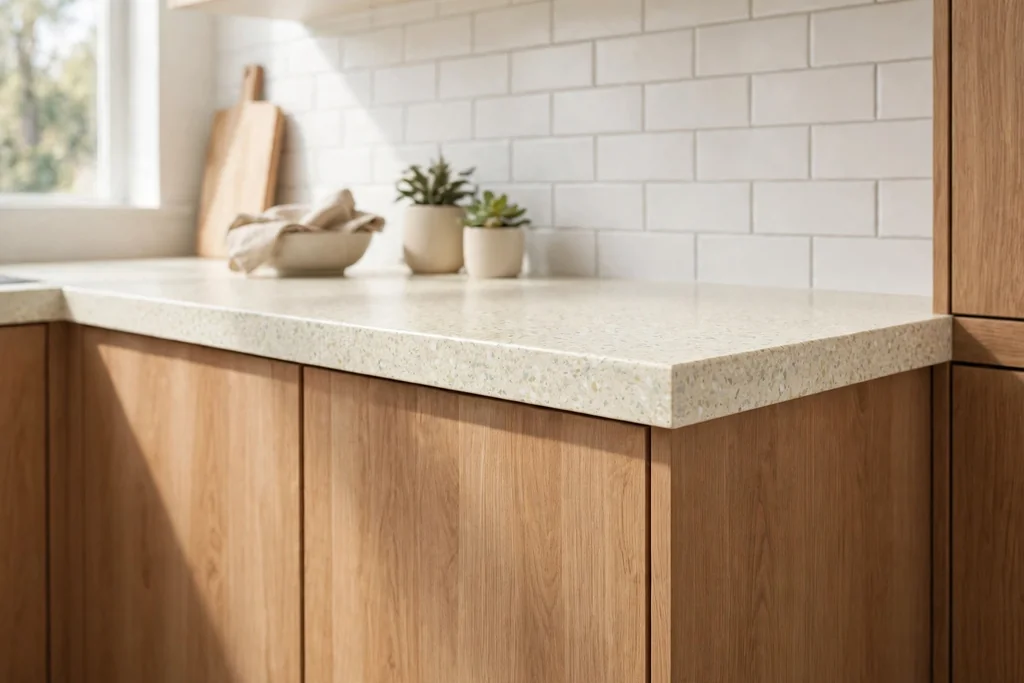
    Speckled cream laminate kitchen counter with a clean edge beside flat-front cabinets.

    Choose a speckled laminate counter in cream, warm grey, or pale green for a period surface at a modest cost. Small speckles read as a calm surface from a distance and only show their retro detail up close, which suits flat-front cabinets and plain walls. A straight, clean front edge keeps the look crisp, while a softly rounded edge suits a more relaxed room.

    Laminate wipes clean and handles everyday prep well, but it needs care near heat: use trivets for hot pans and boards for cutting, and wipe spills promptly at the seams. Pair a speckled counter with plain cabinets and a simple backsplash, so the counter pattern is the one busy surface in the room. Similar period counters appear in these retro kitchen ideas, where laminate and chrome give the same 1950s and 1960s feel.

    5. A Geometric Tile Backsplash in Warm Tones
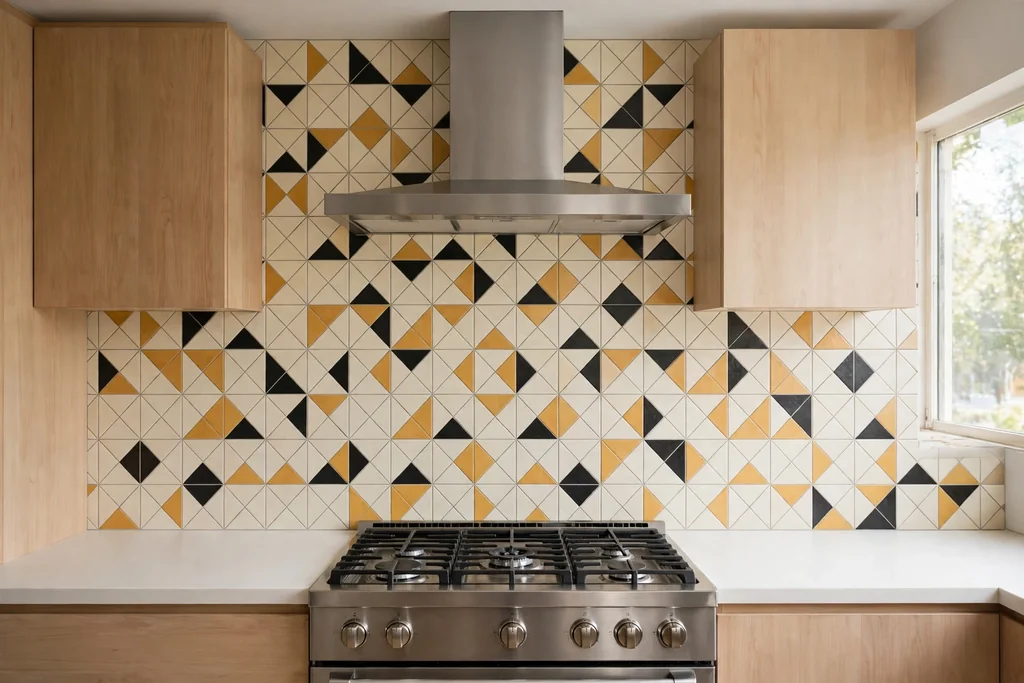
    Geometric tile backsplash in cream, mustard, and charcoal behind a kitchen stove.

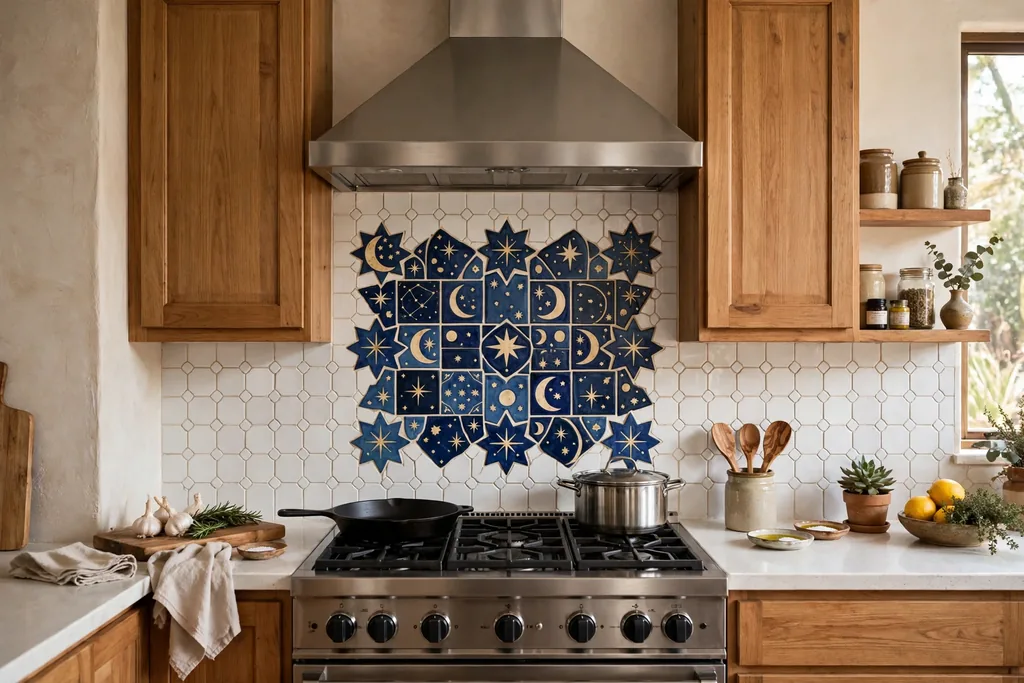
    Run a geometric tile backsplash in two or three warm tones, such as cream, mustard, and charcoal, for pattern at eye level. Starburst, diamond, or small hexagon tiles give a clear mid century feel without a large print, and the band draws the eye along the cooking wall. Use the pattern behind the stove or across the full backsplash, and keep the cabinets and counters plain so the tile has room to stand out.

    Choose a grout color close to the main tile shade for a soft result, or a slightly darker grout if you want the pattern to read more clearly. Seal the grout in the stove zone, where splashes are most likely, and keep a spare box of tiles from the same batch for future repairs. Run the tile to the underside of the upper cabinets so the band is continuous.

    6. Open Walnut Shelves for Simple Dishware
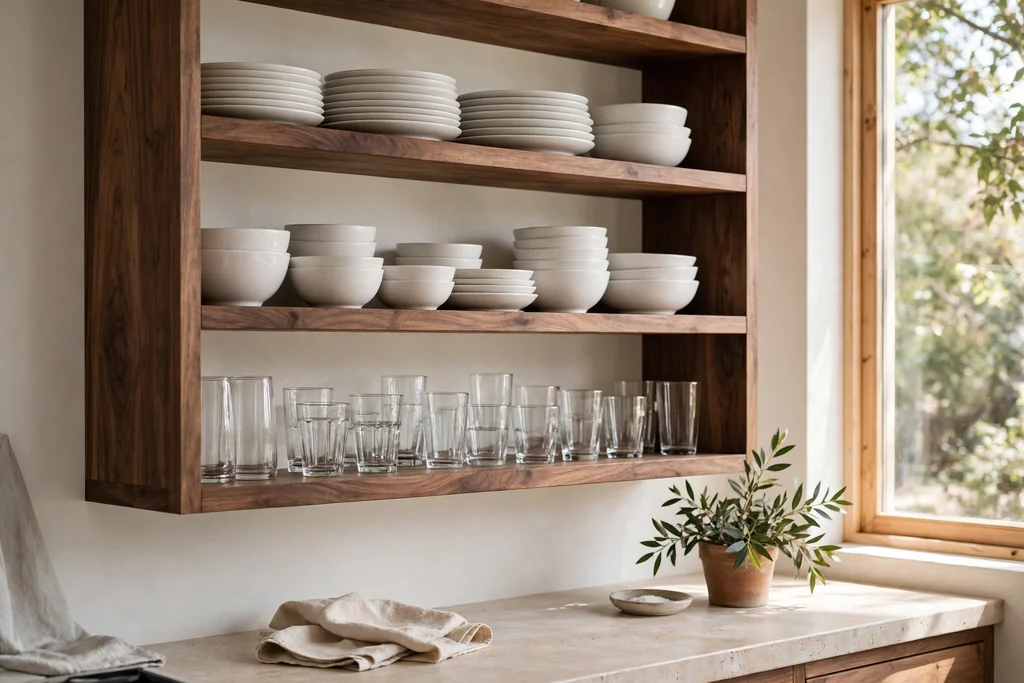
    Open walnut kitchen shelves holding white plates, plain bowls, and clear glasses.

    Fit one or two open walnut shelves beside a window or above a short counter run, and style them with simple dishware in solid colors. Stacked white plates, plain bowls, and clear glasses read as mid century when the shapes are simple and the colors are few. The wood shelf links to walnut cabinets elsewhere in the room, so the display feels planned rather than added on.

    Limit the shelf to pieces you use weekly, in one or two colors, and leave at least a third of the shelf empty. Group plates in one stack and glasses in a short row, and keep heavier items low. Dust shelves weekly, since open storage collects cooking film faster than closed cabinets, and keep the shelves away from the stove, where steam and grease settle fastest.

    7. Sputnik and Globe Pendants Over the Island
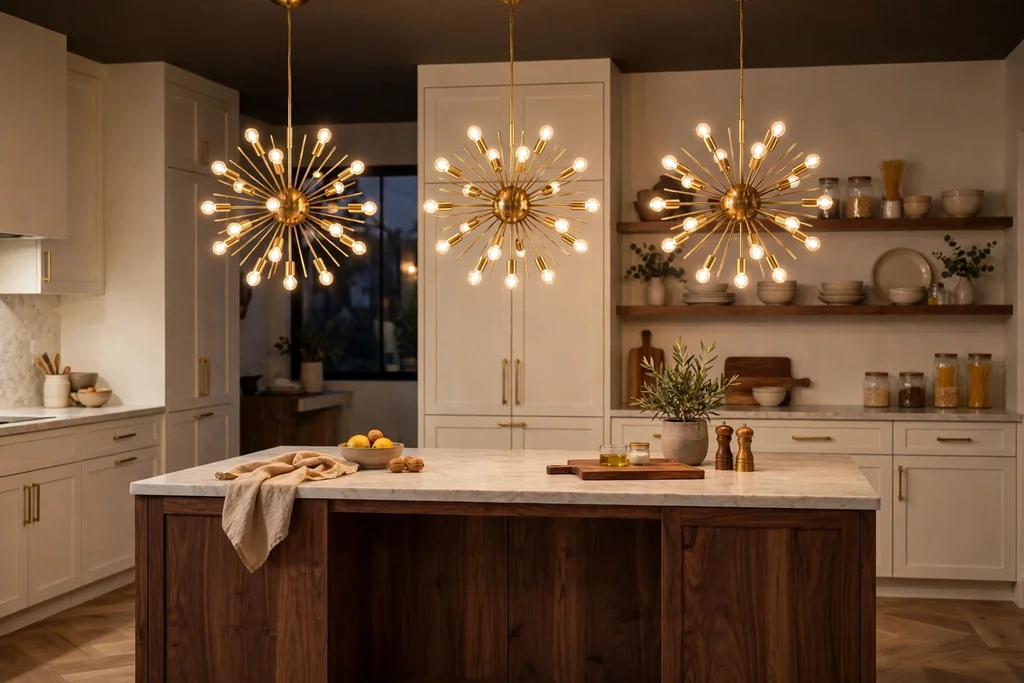
    Sputnik style pendant lights with brass frames hanging over a kitchen island.

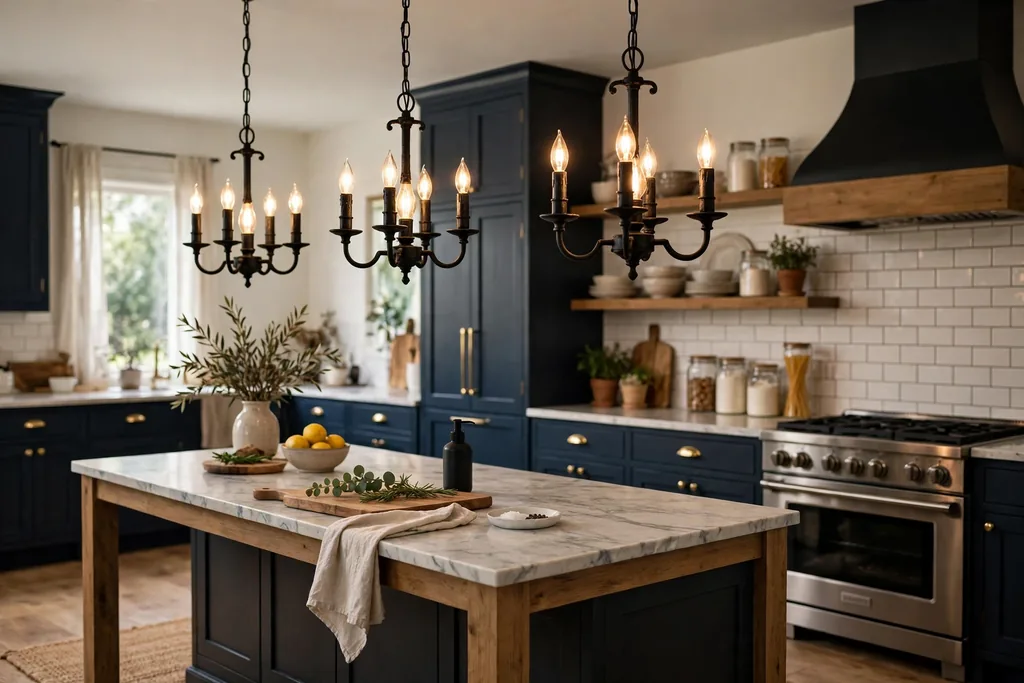
    Hang globe pendants or a sputnik-style light over the island for the most recognizable mid century lighting in a kitchen. Round glass globes with a brass or dark metal frame glow softly rather than glaring, while a sputnik fitting, with arms radiating from a center ball, suits the center of a small kitchen or a dining corner. Hang two or three globes in a line over the island, spaced evenly, with the bottom of each shade above head height when you stand at the counter.

    Use warm white bulbs and a dimmer, so the same lights work for morning prep and for evening meals. Match the light metal to your hardware, brass in most mid century rooms, so the fittings read as a set. Keep the shades simple, because the shape itself is already a strong period detail.

    8. Slim Brass Bar Pulls on Every Door
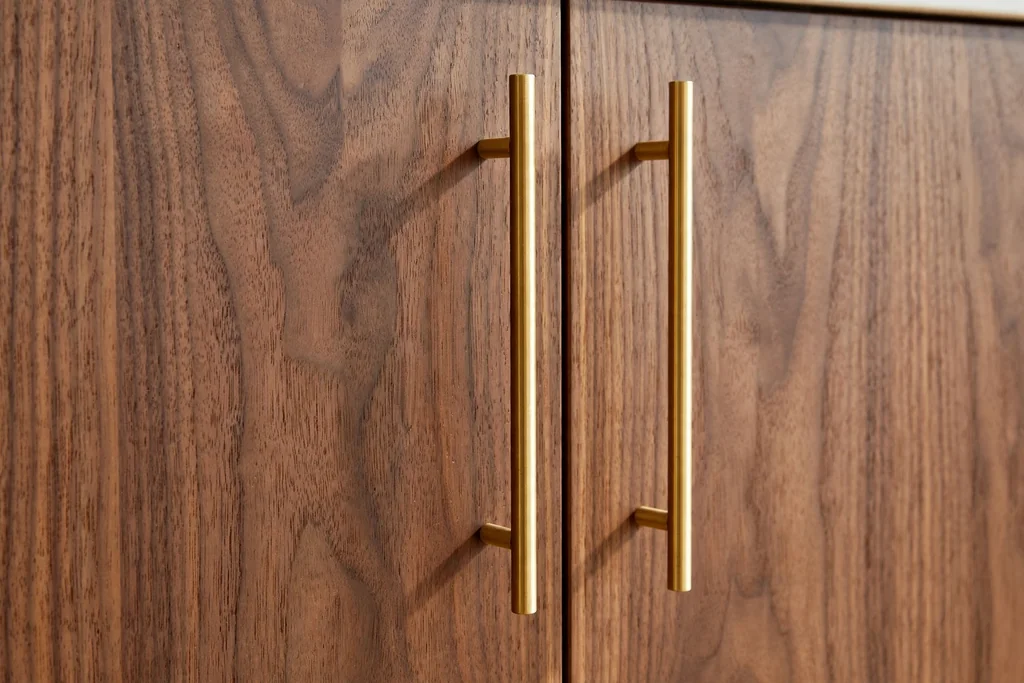
    Slim brass bar pulls on flat-front walnut kitchen cabinet doors.

    Swap busy hardware for slim brass bar pulls on drawers and doors for a small change with a large effect. Brass warms walnut and white cabinets alike, and the slim bar shape suits flat fronts far better than ornate knobs. Measure your existing hole spacing before ordering, since bar pulls come in fixed widths, and buy one sample first to check the brass tone against your faucet.

    Repeat brass in just two or three places, such as handles, faucet, and one light fitting, and keep other metals out of the main view. Wipe brass with a soft cloth and avoid harsh pads, which can dull the finish. If your appliances are stainless steel, that is fine, because steel reads as a working material rather than a competing metal.

    9. One Bold Accent Color on the Island
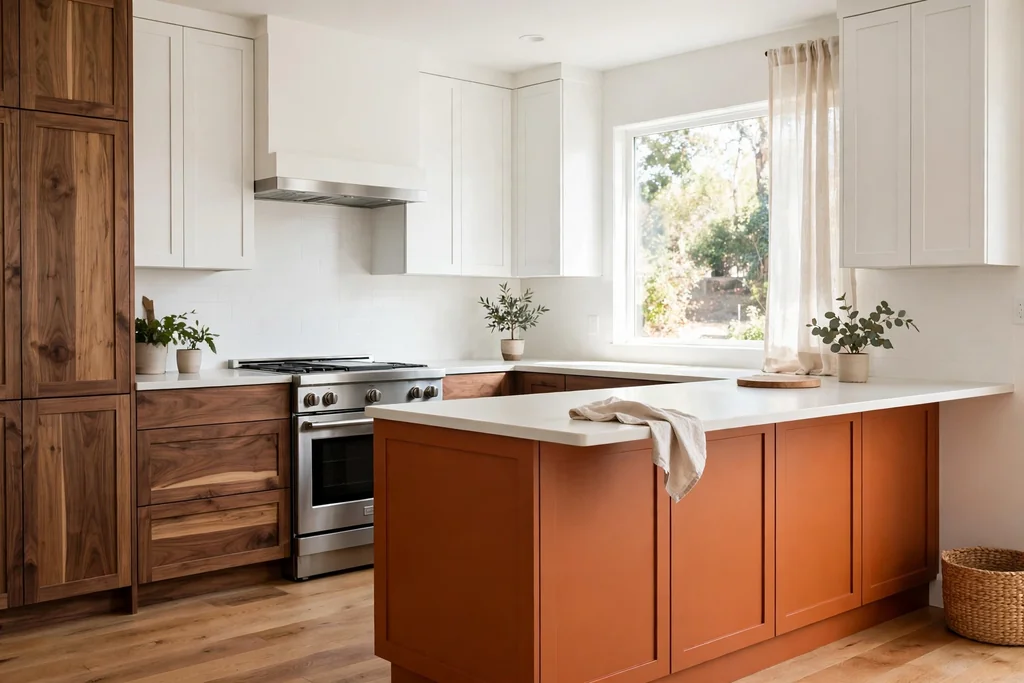
    Kitchen with a burnt orange painted island beside walnut and white cabinets.

    Paint the island in one bold accent color, such as burnt orange, mustard, or deep teal, and keep the rest of the kitchen calm. A single painted island gives the retro note in one clear place, and it is far easier to change later than a full cabinet repaint. The bold color works best against walnut or white cabinets, plain counters, and a simple floor.

    Repeat the island color in just one other small place, such as seat cushions, a dish towel, or a vase, so the island links to the room instead of sitting alone. Test the paint beside your floor and counter in daylight and evening light before you commit, since strong colors shift a lot between the two. If a painted island feels too bold, try the same color on stools or a single cabinet run first.

    10. A Built-In Breakfast Nook with a Tulip Table
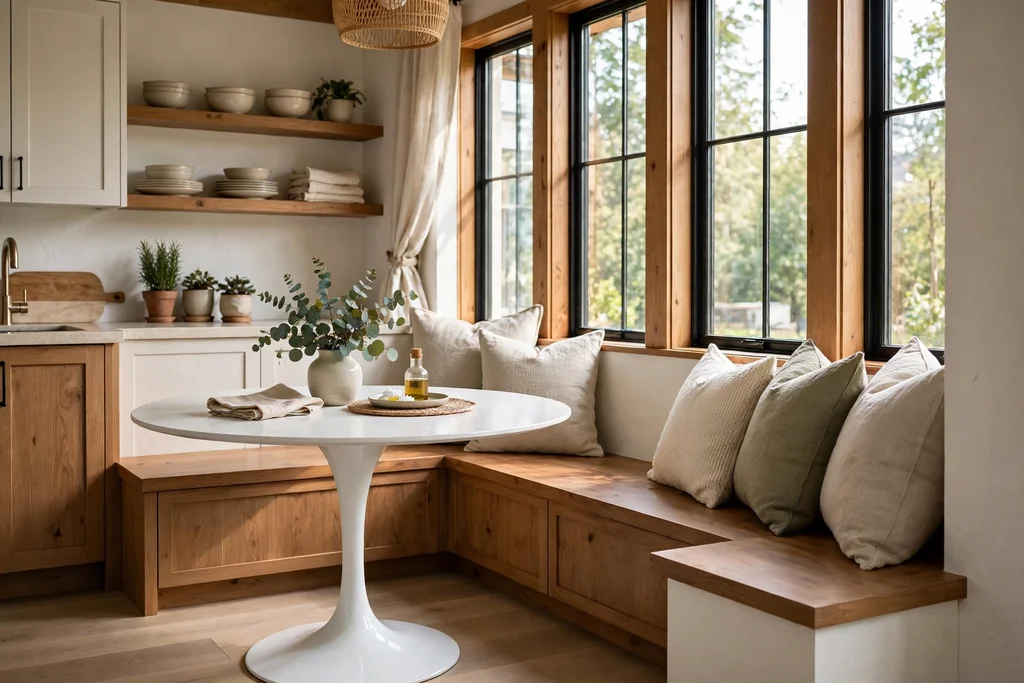
    Kitchen breakfast nook with a built-in bench seat and a round tulip table.

    Turn an empty kitchen corner into a built-in breakfast nook with a bench seat and a round tulip table. The bench, in walnut or painted to match the cabinets, uses the corner well and holds storage underneath for table linens and board games. A tulip table, with one center pedestal instead of four legs, makes it easy to slide in and out of the bench, which matters in a tight corner.

    Keep the table small enough that chairs on the open side can pull out fully, and hang a simple pendant above the table for evening meals. Choose bench cushions in one solid color that repeats a color already in the room, such as the island accent or a tile tone, so the nook links to the kitchen. A nook like this also suits a kitchen where the main table sits in another room, because it gives family and guests a place to sit while you cook.

    11. A Freestanding Walnut Credenza for Kitchen Storage
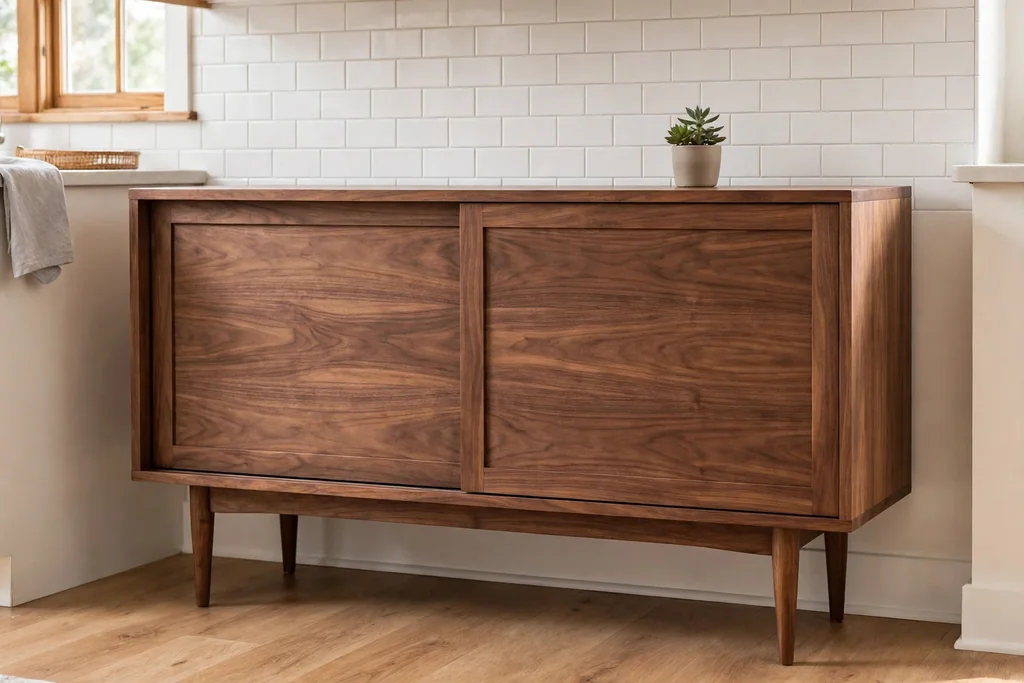
    Freestanding walnut credenza with sliding doors against a kitchen wall.

    Add a freestanding walnut credenza against one wall for storage that looks like furniture rather than more cabinets. Mid century kitchens often mixed fitted cabinets with separate pieces, and a credenza with sliding doors or slim drawers holds table linens, baking trays, or small appliances without a full cabinet run. The wood tone links to walnut cabinets, while the legs and slim profile keep it from feeling heavy.

    Measure the wall and the door swing before you buy, since a credenza is deep and needs clear space in front. Fix tall or top-heavy pieces to the wall if the household includes children, and keep the top clear except for a bowl or a small plant, so it stays a useful surface rather than a display shelf. A credenza also gives a small kitchen extra storage without new cabinet work, and it pairs well with the open shelves in Idea 6.

    Conclusion

    A mid century modern kitchen works best when warm wood, clean lines, and one or two bold details share the room. Flat-front walnut cabinets, a tapered leg island, and slim brass hardware set the period base, while a geometric tile band, a painted island, or a sputnik light gives the room its character. Keep counters plain beside a patterned backsplash, test wood stains and paint colors in your own light, and make sure seating, lighting, and storage all work for daily cooking, not just for looks. With those basics in place, the kitchen feels warm and collected, and it still works as a busy family room.

    Save this list on Pinterest before your next kitchen refresh, and try one idea first: a hardware swap, an open shelf, or a painted island, then live with it for a week before you change the next surface. For more period kitchen details, the linked retro and vintage guides above pair well with this list.

    FAQs

    What defines a mid century modern kitchen?

    A mid century modern kitchen is defined by flat-front cabinets, warm wood tones such as walnut or teak, clean lines, slim hardware, and one or two bold details, such as geometric tile or a sputnik light. The style comes from the 1950s and 1960s, when kitchens opened up and storage got simpler. Keep the palette limited, with wood, white or cream, and one accent color, so the room reads as calm rather than busy.

    What wood is best for mid century kitchen cabinets?

    Walnut is the classic choice, with a rich brown tone and visible grain that suits flat fronts well. Teak is another period option, warmer and more golden, while oak works when you want a lighter wood tone. Choose a matte or satin finish, and test the stain beside your floor and counter in daylight and evening light, since wood tones shift a lot between the two.

    Can I get a mid century look without replacing my cabinets?

    Yes. Refinish or paint sound doors in a walnut stain or a warm wood tone, swap hardware for slim brass bar pulls, add open walnut shelves, and change the lighting to globe or sputnik pendants. A painted island in burnt orange or mustard, a geometric tile backsplash, and simple seating can refresh the room with no cabinet replacement. Start with hardware and lighting, which are the fastest changes.

    How do I mix mid century details with modern appliances?

    Keep the modern layout and appliances, and add mid century details in a limited set: walnut or wood tones, brass hardware, and one pattern, such as geometric tile. Leave the cabinet shapes, counters, and lighting modern in the rest of the room only if you want a softer mix, or go fully flat-front for a stronger period feel. If the room starts to feel busy, remove one patterned item before you add another. These vintage kitchen ideas show a similar mix of old details and practical new pieces.

    What colors work in a mid century modern kitchen?

    A warm base works best: walnut wood, white or cream cabinets, and plain counters, plus one bold accent such as burnt orange, mustard, avocado green, or deep teal. Use the accent in one place, such as the island, seat cushions, or a tile band, and repeat it once in a small item. Strong color on every surface will fight the calm look, so keep the largest surfaces quiet.

    Will a mid century kitchen suit a small kitchen?

    Yes, and it often suits a small kitchen well, because flat fronts, slim hardware, and light upper cabinets keep the walls from feeling busy. Use a two-tone cabinet run with white uppers, a tapered leg island or a small tulip table nook, and one open shelf instead of a full cabinet run. Keep the floor plain beside a patterned backsplash, and choose globe pendants that light the room without hanging low over walkways.
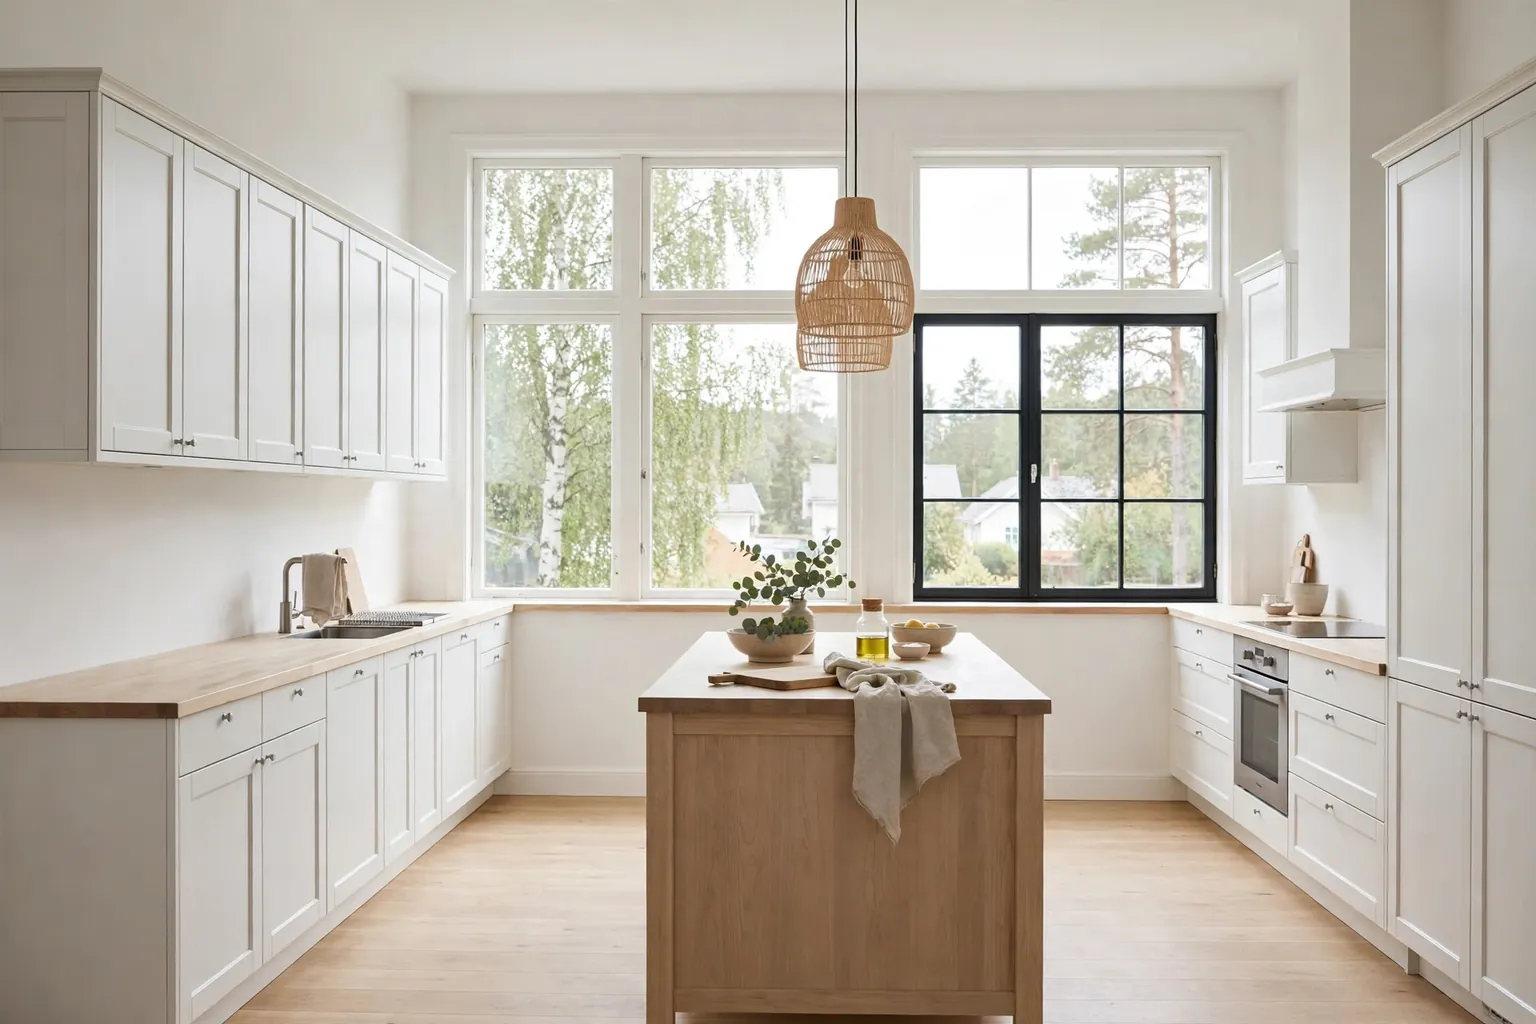
  • 26 Swedish Kitchen Ideas for a More Polished Space

    26 Swedish Kitchen Ideas for a More Polished Space

    A Swedish kitchen starts with light. White walls, pale wood, and clear counters do most of the work, while small details in blue, black, or natural linen give the room its character. Nothing needs to be grand or costly. A painted cabinet run, a wood counter, a linen curtain, or a well placed plant can shift a plain kitchen toward the calm, polished look Swedish rooms are known for. These 26 Swedish kitchen ideas cover cabinets, counters, tile, seating, windows, storage, and small finishing touches, so you can start with one change or build a full scheme over time. Begin with the change that fixes your biggest problem, test paint and tile samples in daylight and evening light, and keep work surfaces clear so cooking stays easy.

    Key Takeaways

    • Start with light: white or pale walls, a pale floor, and clear glass let daylight carry the room.
    • Pair white cabinets with one warm material, such as pale oak or birch, so the kitchen feels calm rather than cold.
    • Repeat one accent, such as muted blue, black hardware, or striped linen, in two or three places for a planned look.
    • Keep work surfaces plain and easy to clean, and store everyday items in closed cabinets or glass jars.
    • Test paint, tile, and wood samples beside your floor and counter in daylight and evening light before a large change.
    • Small, removable changes like curtains, towels, plants, and a fika tray suit renters and small budgets.

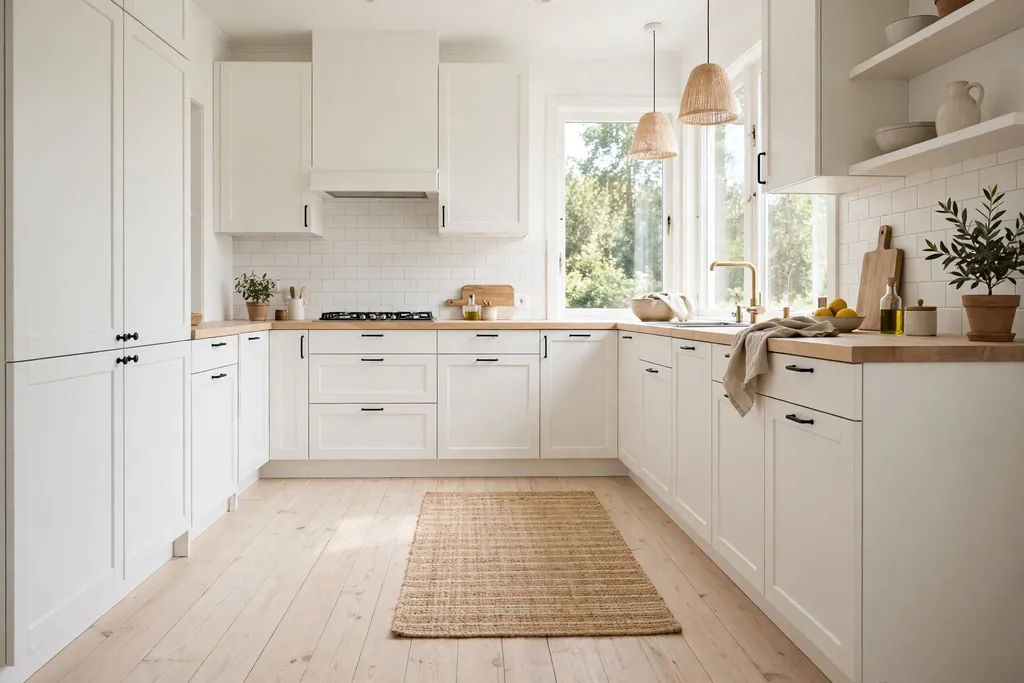
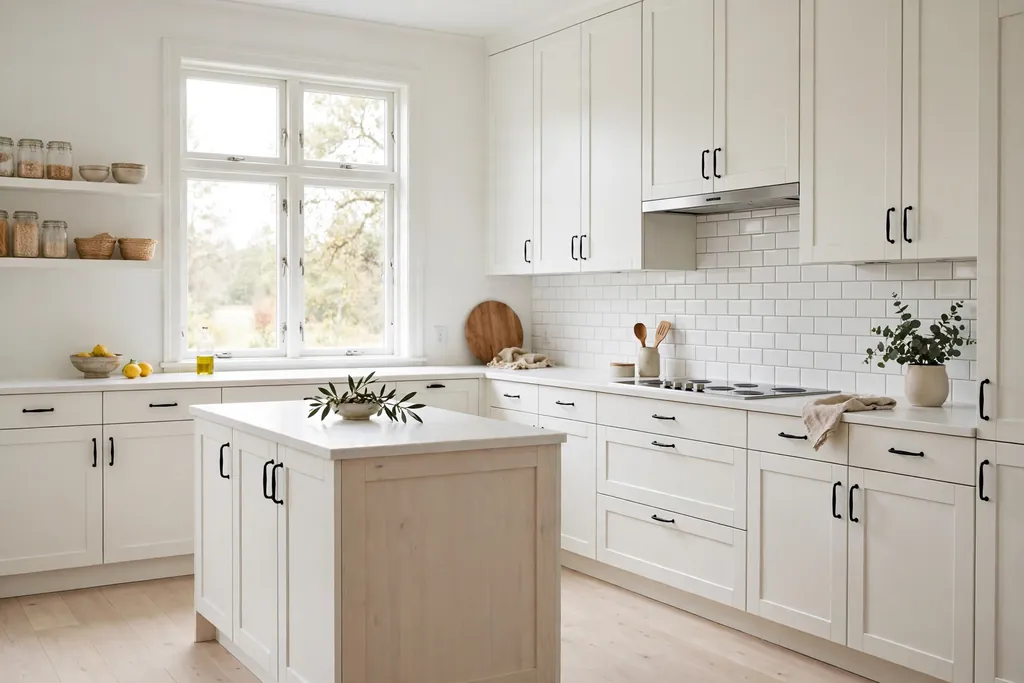
    1. White Shaker Cabinets with Pale Wood Floors

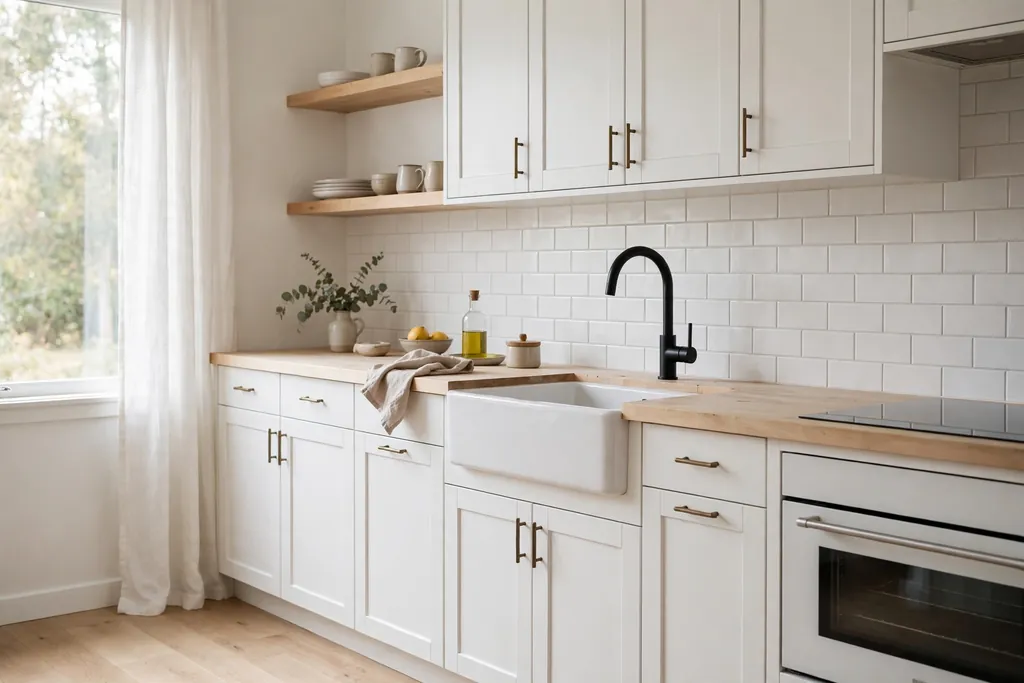
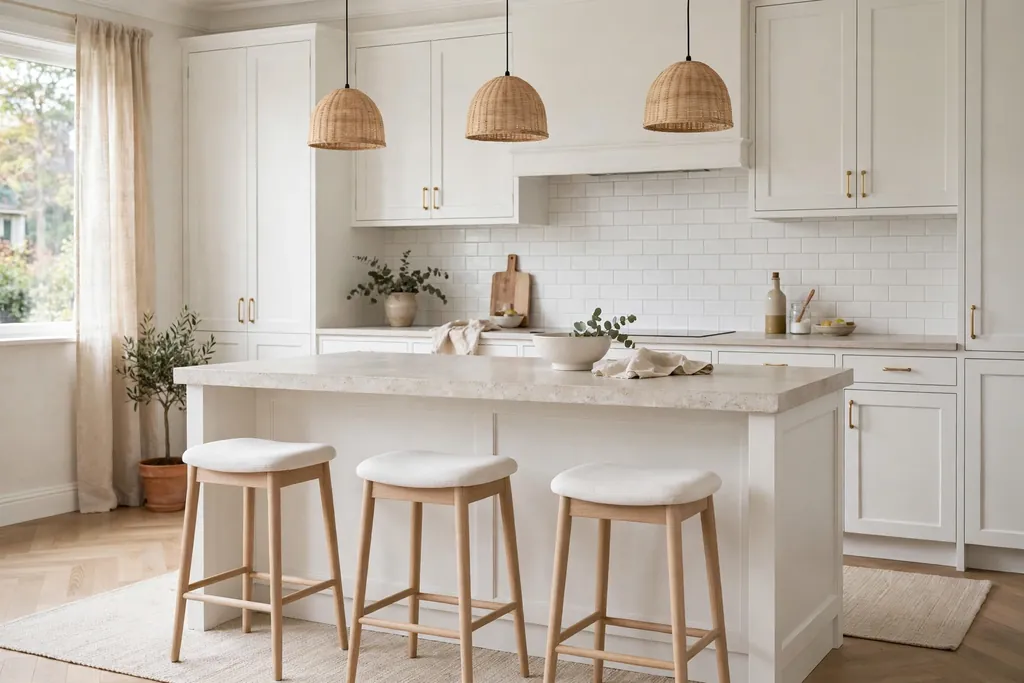
    Swedish kitchen with white shaker cabinets

    Paint shaker cabinets white for a kitchen that feels bright and orderly without looking bare. Shaker doors add simple shape, and a pale wood floor warms the white so the room feels lived in rather than clinical. This suits kitchens with good daylight, where white reads as fresh rather than stark.

    Keep handles simple in black or brushed steel, and choose a counter in pale wood or white stone so the cabinets stay the focus. If you worry about upkeep, paint one run first and live with it for a week before painting the rest. Wipe doors near the stove each week, since white shows cooking splashes.

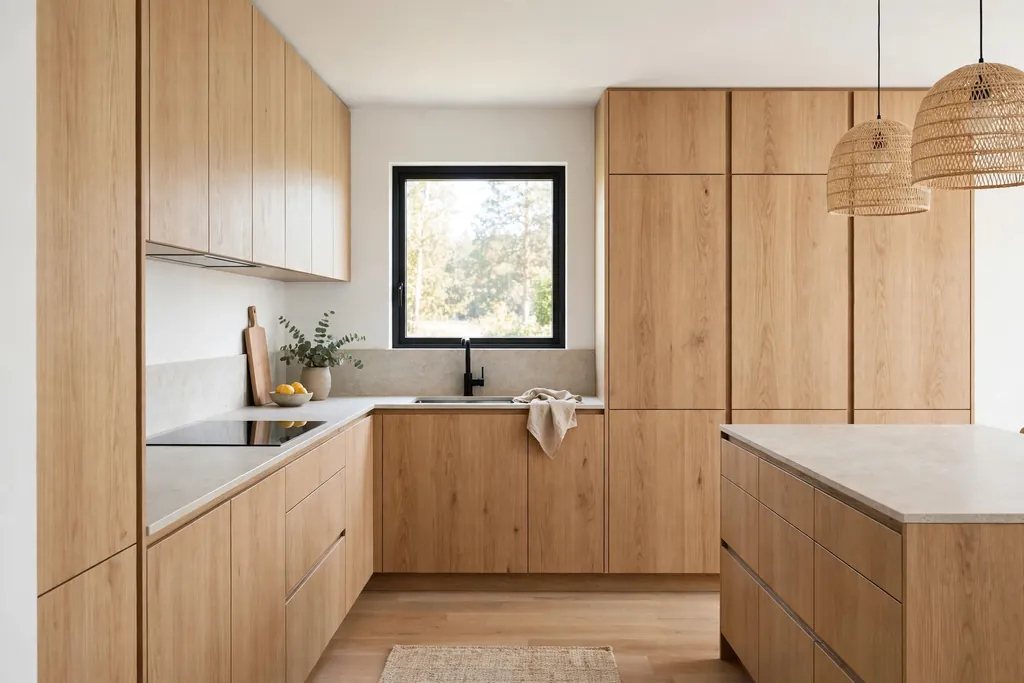
    2. Light Oak Flat Front Cabinets

    Swedish kitchen with light oak flat front cabinets and a pale stone counter.

    Choose light oak flat front cabinets for a modern Swedish kitchen with a quiet wall of wood. Without framed doors breaking the surface, the grain itself becomes the feature, which suits open plan rooms where the kitchen stays in view. A pale oak keeps the room bright, while a deeper oak suits a larger kitchen with strong daylight.

    Keep one texture in the room to stop flat fronts from feeling flat, such as a stone counter or a woven runner. Clean the fronts with a soft cloth, since fingerprints show more on flat doors than on framed ones. For help choosing the right undertone for the rest of the room, see these ideas for colors for your kitchen cabinets.

    3. Two Tone White Uppers and Wood Lowers

    Swedish kitchen with white upper cabinets

    Use white on the upper cabinets and light wood on the lowers for a lighter take on a wood kitchen. The white uppers keep the eye moving up and make a small kitchen feel taller, while the wood base grounds the room. This split also makes repainting easier later, since only half the cabinets need a new color.

    Pair the scheme with a pale backsplash and a white or wood counter. A black or steel handle on the lower cabinets ties the two tones together. Keep the wall color plain so the two cabinet materials can do the work.

    4. Muted Swedish Blue Island

    Swedish kitchen with a muted blue island

    Paint only the island in a muted Swedish blue for color in one clear place. The blue reads as calm rather than bold, and it pairs well with white cabinets, pale wood stools, and a light counter. A blue island suits a white kitchen that feels too plain, and it is easier to repaint later than a full set of cabinets.

    Repeat the blue once more, in a rug, a vase, or a tea towel, so it looks planned rather than random. Choose a hard wearing counter for the island, since it takes the most daily use. Keep the rest of the room neutral, so the island stays the single color note.

    5. Open Light Wood Shelves with White Dishes

    Swedish kitchen with open light wood shelves holding white plates and clear glasses.

    Fit open light wood shelves on one wall and display white plates, bowls, and clear glasses against them. The wood warms the wall and adds display space without painting a single cabinet. This suits a kitchen with one blank wall or a short run above a counter.

    Keep the shelf items to daily pieces you actually use, and leave breathing room between groups so shelves read as tidy, not crowded. Our guide to how to style open shelves shows how to group by type and height. Dust open shelves weekly, since open storage collects cooking film.

    6. White Subway Tile Backsplash

    Swedish kitchen with a white subway tile backsplash

    Lay white subway tiles as a backsplash for a classic shape that suits almost any Swedish kitchen. A white tile with a pale grout feels soft and calm, while a white tile with a darker grout makes the brick pattern clearer. Subway tiles suit most kitchens because the shape is familiar and the size works around sockets and windows.

    Pair white tile with white cabinets and a pale wood counter, so the wall stays quiet. Order a few spare tiles for future repairs, and seal grout in the splash zone behind the sink and cooker. Check a tile sample under kitchen lights at night as well as in daylight, since white tiles shift tone between lights.

    7. Pale Butcher Block Counters

    Swedish kitchen with a pale butcher block wood counter

    Use a pale butcher block counter for warmth at hand level in a white kitchen. Light wood counters suit white cabinets, black handles, and white tile, and they give a work surface that feels softer than stone. This is a good choice for a kitchen where the counter is the main warm material in the room.

    Oil or seal the wood near the sink and stove, and wipe spills promptly so the surface stays even. Use boards for chopping and hot pans, and keep the backsplash simple so the wood grain stays clear. If a full wood counter is out of reach, use wood on the island only, with a pale stone counter on the main runs.

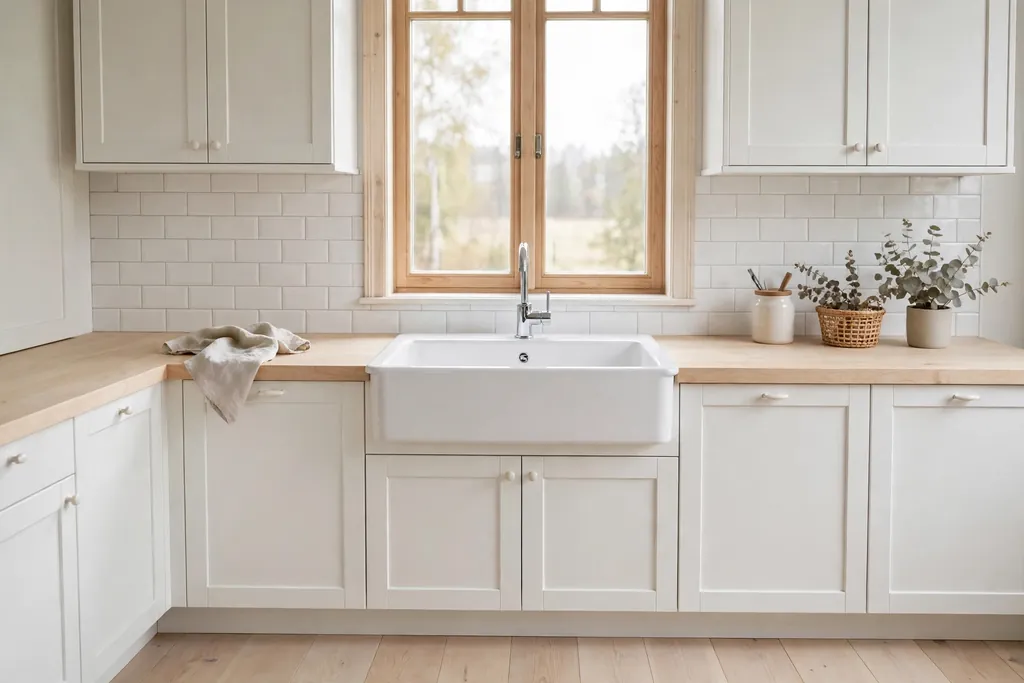
    8. White Ceramic Farmhouse Sink

    Swedish kitchen with a white ceramic farmhouse sink

    Fit a white ceramic farmhouse sink, with its deep bowl and front panel on show, for a practical sink that also suits a Swedish kitchen. A white sink suits white or wood cabinets, and it pairs well with a simple chrome or steel tap. The front panel is visible from across the room, so it acts as a decor piece as well as a sink.

    Keep the counter around the sink plain, and choose a tap finish that matches your cabinet handles. A farmhouse sink needs a cabinet made to fit it, so check sizes before ordering. Clean the sink with a soft cloth and mild cleaner to protect the glaze, and avoid harsh pads that can dull it.

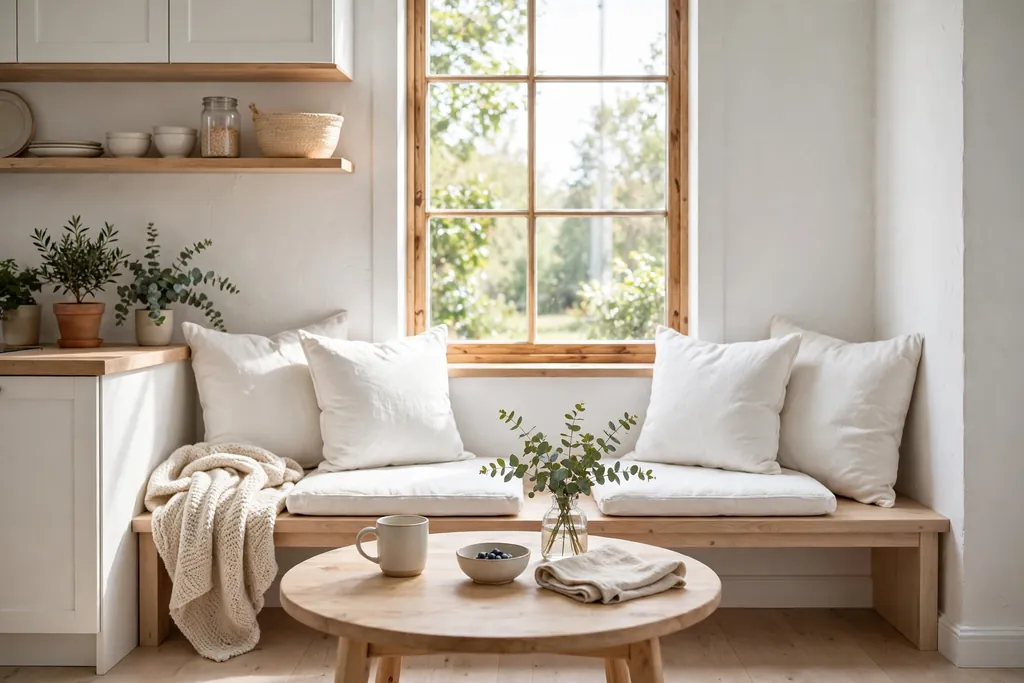
    9. Light Wood Breakfast Nook Bench

    Swedish kitchen breakfast nook with a light wood bench

    Build or buy a light wood bench for a breakfast nook, with white cushions and a small wood table beside a bright window. A bench seats more people than chairs in the same footprint, and it suits a small kitchen where a full dining table would crowd the room. This is a good way to add seating that stays in view from the kitchen.

    Keep cushions washable, since kitchen seating takes daily spills, and add storage under the bench lid if your bench allows it. Keep the table small enough to slide in and out, and leave room to walk past the bench without turning sideways. A plain runner or a single vase keeps the nook calm.

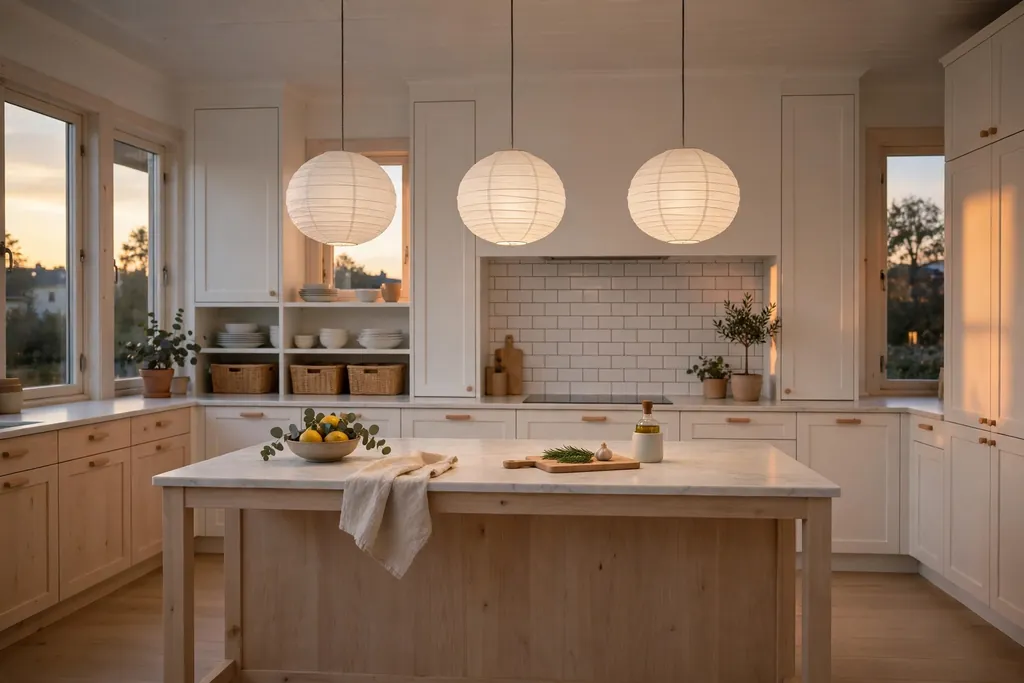
    10. White Paper Pendants Over the Island

    Swedish kitchen island with white paper pendant lights above it.

    Hang two or three white paper pendants over the island for soft light and a clear Swedish note at eye level. Pendants work well in a row, spaced evenly, with the lowest point well above head height and clear of steam from the hob. A round paper shade suits most kitchens, while a slim drum shade suits a longer island.

    Match the pendant cord to the room, in white or black, and keep the rest of the ceiling lights plain. Use warm white bulbs so the paper glows warm in the evening, not cold. Dust the shades often, since kitchen pendants collect grease film over time.

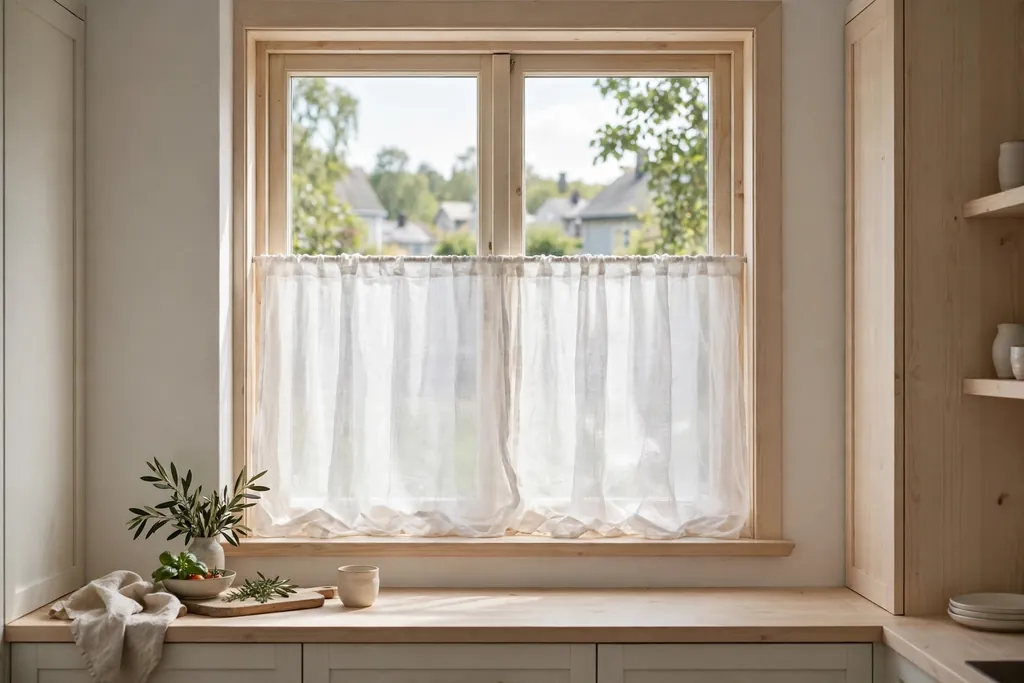
    11. Sheer Linen Cafe Curtains

    Swedish kitchen window with sheer white linen cafe curtains on the lower half.

    Hang sheer linen cafe curtains on the lower half of the window for privacy at counter height while the top half stays open for daylight. Linen suits a Swedish kitchen because it softens the glass without a formal drape, and a plain natural color hides light splashes better than bright white. Hang the panels on a slim tension rod inside the frame if you rent, or on a small fixed rod if you own.

    Keep the hem just above the sill so fabric does not sit in water near the sink. Choose washable fabric, because kitchen curtains pick up grease film over time and need a regular wash. Keep fabric well clear of the stove and open flames.

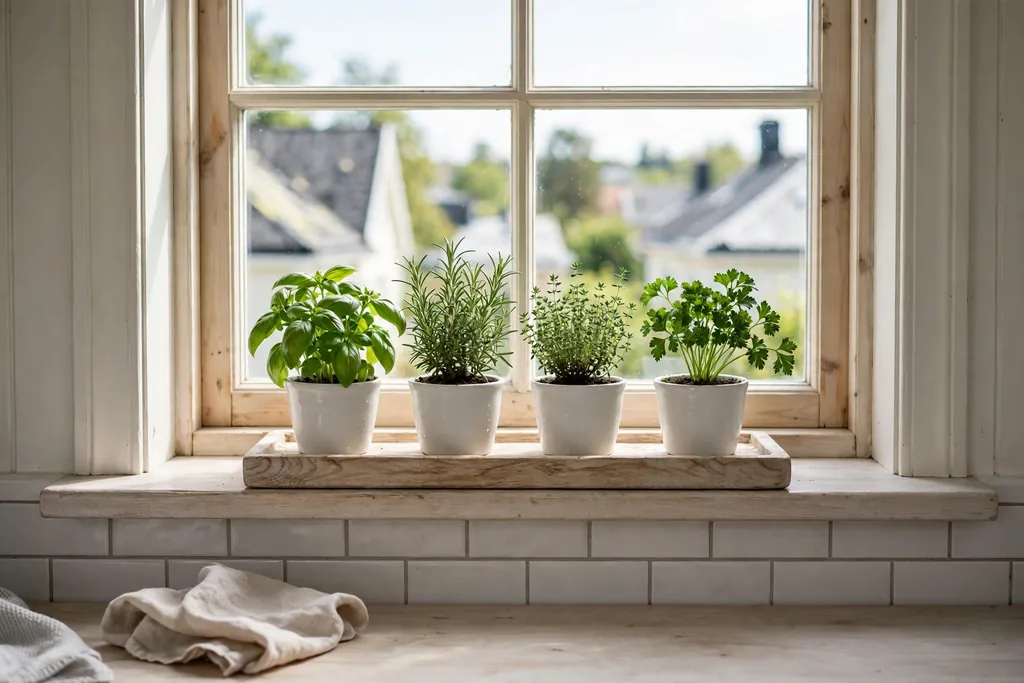
    12. Herb Pots on the Windowsill

    Swedish kitchen windowsill with small herb pots in white ceramic pots.

    Line up small herb pots in white ceramic on the kitchen windowsill. The plants get strong light and stay within reach while you cook, and the white pots tie the sill to the rest of the room. Use pots of a similar size and material, so the row looks calm rather than collected at random.

    Set the pots on a narrow tray or saucers to protect the sill from water marks. Choose herbs based on the light your window actually gets, and keep the sill clear of the faucet splash zone where possible. For more ways to dress the window without blocking light, see these kitchen window decor ideas.

    13. Pale Wood Plank Flooring

    Bright Swedish kitchen with pale wood plank flooring and white cabinets.

    Lay pale wood plank flooring, or refresh an existing pale floor, for a kitchen floor that lifts the whole room. Light wood suits white cabinets, pale counters, and black or steel handles, and it makes a small kitchen feel larger than a dark floor would. A pale floor also links the kitchen to adjoining rooms in an open plan home.

    Use a finish suited to kitchens, with easy cleaning and grip, and keep spare boards for repairs. Choose a low pile runner in a plain tone over the floor in the main work zone if the wood feels cold underfoot. Wipe spills promptly near the sink and stove, since water marks show on light wood.

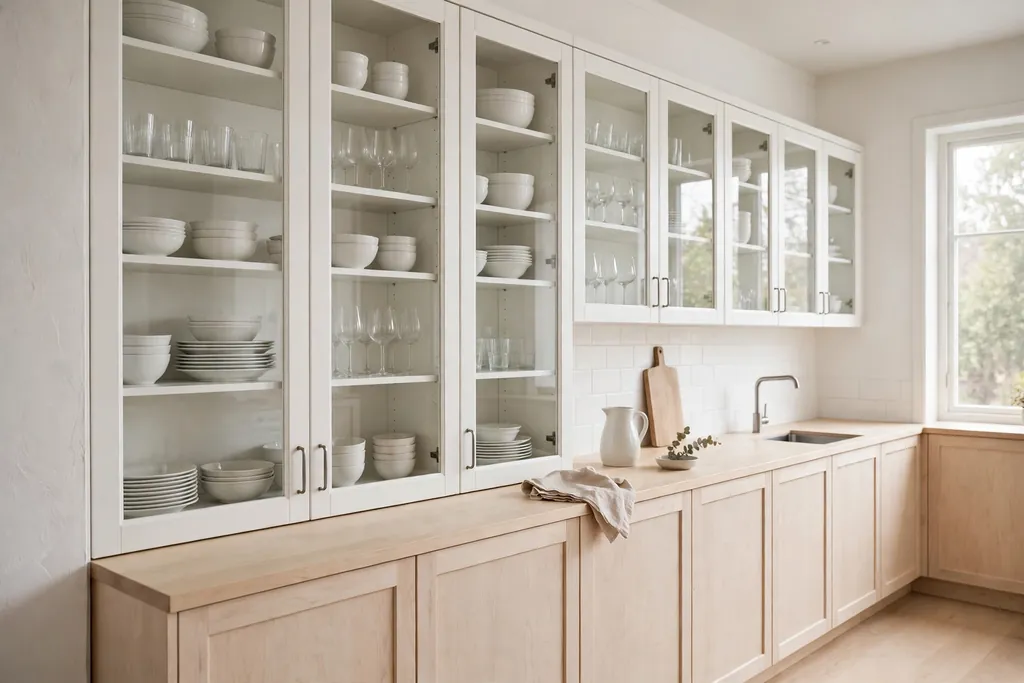
    14. White Glass Front Cabinets

    Swedish kitchen with white glass front cabinets displaying white dishes and clear glasses.

    Paint the frames of glass front cabinets white, and keep the doors and cabinet bodies white or pale wood. When the doors close, you get a clear view of white dishes and glasses, which suits a Swedish kitchen because the display stays light. This idea suits a kitchen that already has glass fronts, or one cabinet you can change as a test.

    Use white or clear dishes inside so the display stays calm, and keep the display simple with one or two stacks per shelf. If the glass feels too open, use glass on one cabinet only, with closed doors on the rest. This is a low cost way to add display space in a rented or recently fitted kitchen.

    15. Simple Black or Wood Hardware

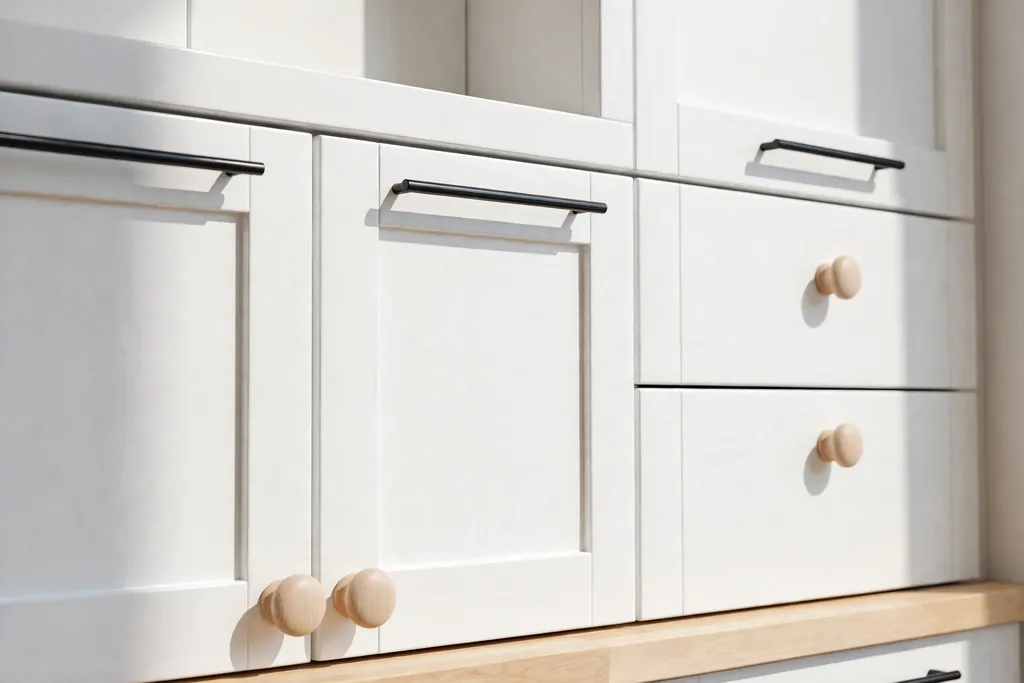
    White Swedish kitchen cabinets with slim black bar handles and pale wood knobs.

    Swap cabinet knobs and drawer pulls for slim black bars or pale wood knobs for a small, reversible change. Simple hardware suits white, cream, or pale wood cabinets, and it lets you set the tone of the room without painting. This is a good weekend job, and it costs far less than new cabinets.

    Keep all the hardware in the same finish and style, so the change looks planned. Save the old hardware in a labelled bag in case you want to swap it back. Check that new pulls match your existing screw spacing, and wipe them often near the stove, since kitchen grease dulls metal and wood.

    16. Pale Stone Island with Wood Stools

    Swedish kitchen island with a pale stone top and light wood stools.

    Keep the main cabinets white or wood, and add an island with a pale stone top and light wood stools. The island becomes a clear working center and a place to gather, without repainting every cabinet. A pale stone top keeps prep work visible, and wood stools add warmth at seating height.

    Choose stools that slide fully under the island overhang, so the walkway stays clear. Keep the stool count to the island length, usually two for a short island and three for a long one, and leave room between seats. Wipe the stone top promptly after prep, and keep the island top clear apart from one tray or bowl.

    17. Light Wood Dining Table with White Chairs

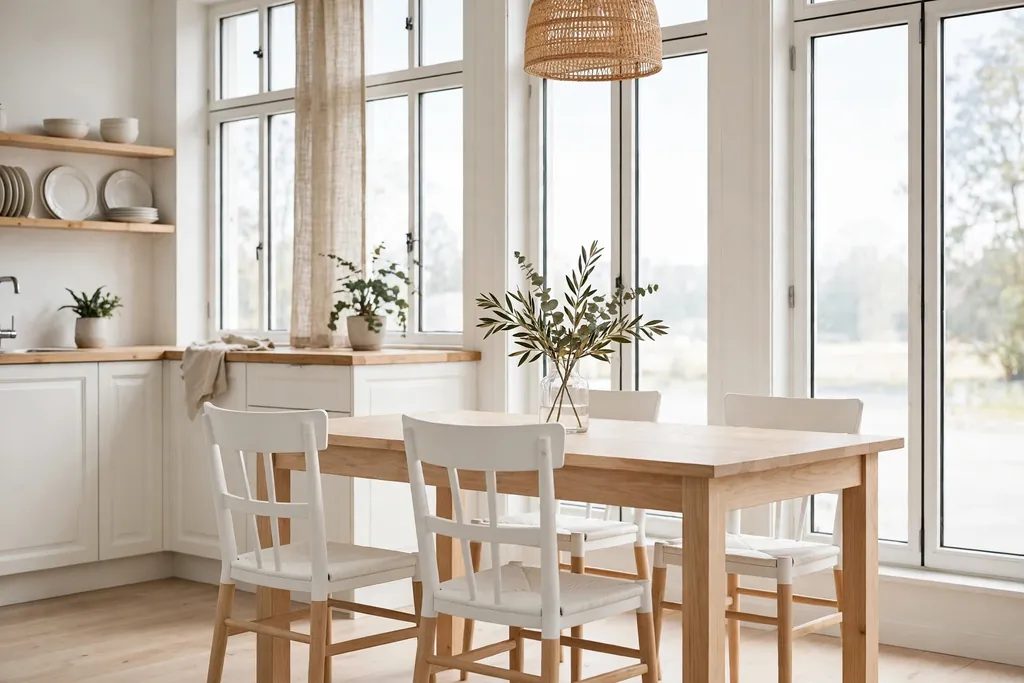
    Swedish kitchen dining area with a light wood table and white chairs.

    Use a light wood dining table with white chairs in the kitchen dining area for a seating area that feels bright without new cabinets. A simple wood tabletop suits a small table for four, and it pairs well with white chairs and a plain runner. This is a good way to bring Swedish style into an open plan kitchen where the eating area stays in view.

    Keep chair cushions washable, since kitchen chairs take daily spills, and check that chair legs have floor protectors so they do not scratch pale wood or tile. If the table feels too plain on its own, add a single vase or a low candle lantern. Keep one chair spare for guests rather than crowding the table.

    18. Blue and White Striped Linens

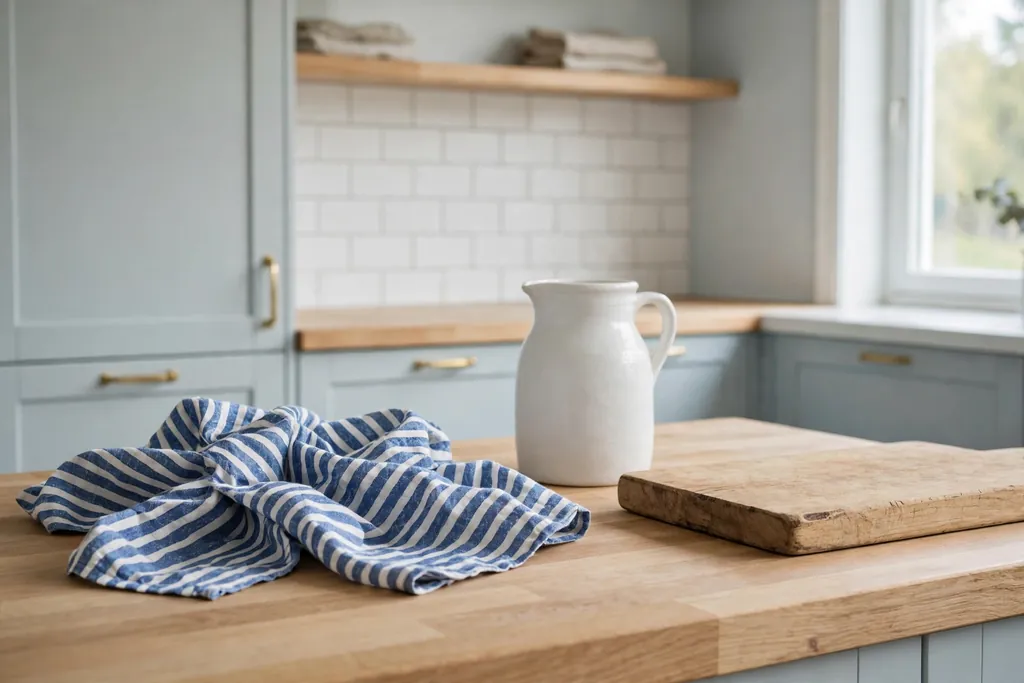
    Swedish kitchen counter with blue and white striped linen tea towels and a white jug.

    Swap everyday tea towels for linen or cotton towels in blue and white stripes, and add a matching runner on the table or counter. Striped linens are the fastest Swedish change in a kitchen because they move through the room all day and wash easily. Hang them where they are used most: the oven handle, a hook by the sink, or the dishwasher bar.

    Keep two sets in rotation so a wet or stained set never stays on display. Store the folded spare set in a drawer, not on the counter. Keep towel ends well clear of burners, and never leave a towel draped where it can slip toward a hot pan.

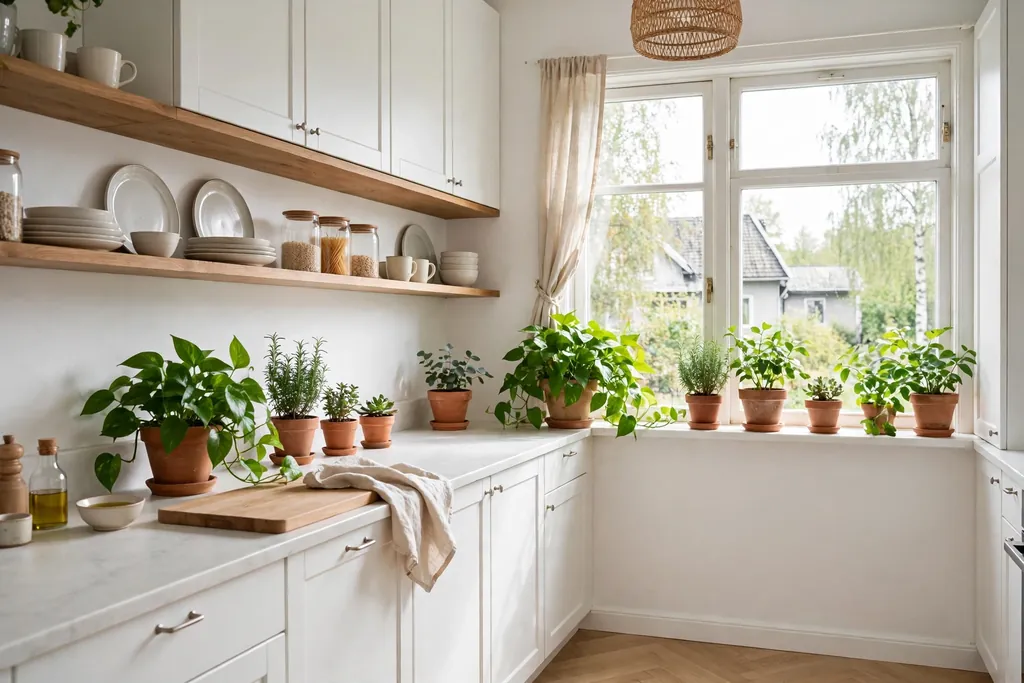
    19. Potted Greenery Through the Kitchen

    Bright Swedish kitchen with potted green plants on a windowsill and shelves.

    Add potted green plants through the kitchen, on the windowsill, on open shelves, and on top of tall cabinets where light reaches them. Greenery softens white walls and pale wood, and it gives a Swedish kitchen its fresh, lived in feel. This suits a kitchen with at least one bright window, where plants can thrive without extra lights.

    Choose plants based on the light each spot actually gets, and keep pots on trays or saucers to protect wood and paint from water marks. Keep plants clear of direct stove steam and the sink splash zone where possible. Water on a set day each week, and wipe leaves when dust builds up.

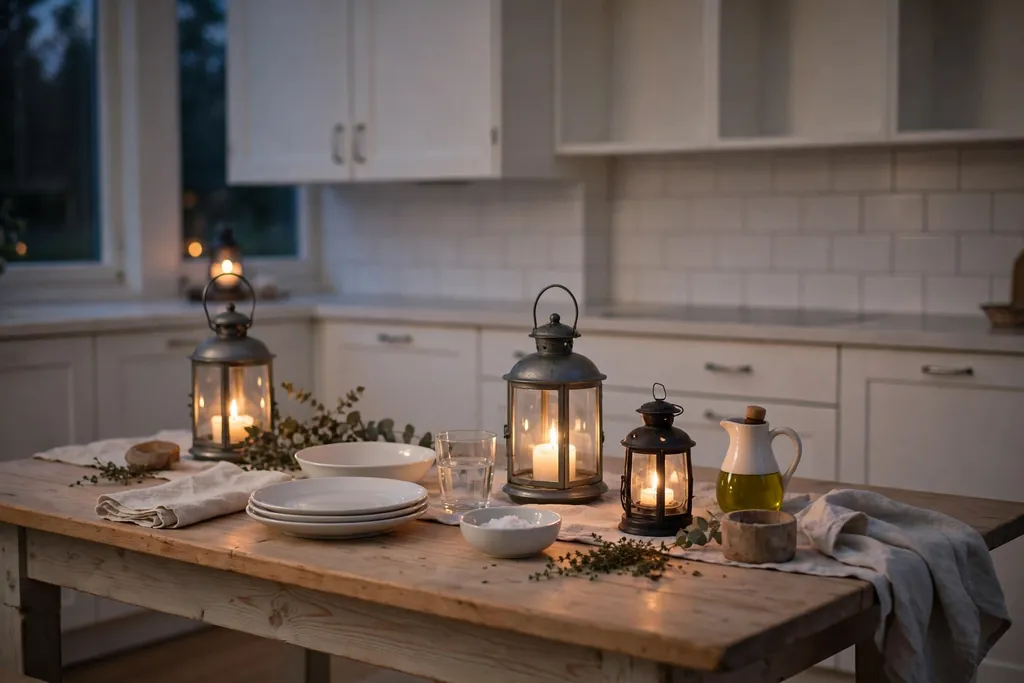
    20. Candle Lanterns for Evening Light

    Swedish kitchen table in the evening with candle lanterns and warm light.

    Set candle lanterns on the kitchen table and windowsill for soft evening light, a long standing Swedish habit for dark winter evenings. Lanterns suit a white kitchen because the glass and metal add a warm glow without a strong color. Use flameless candles in a kitchen, since real flames near table linen and dried stems are a risk.

    Keep lanterns clear of the hob and the sink splash zone, and lift them off the table in one move when the table is needed for prep or homework. Change the lantern placement by season, with one on the table in winter and one on the sill in summer. Keep spare batteries or candles in a drawer so the evening light never runs out.

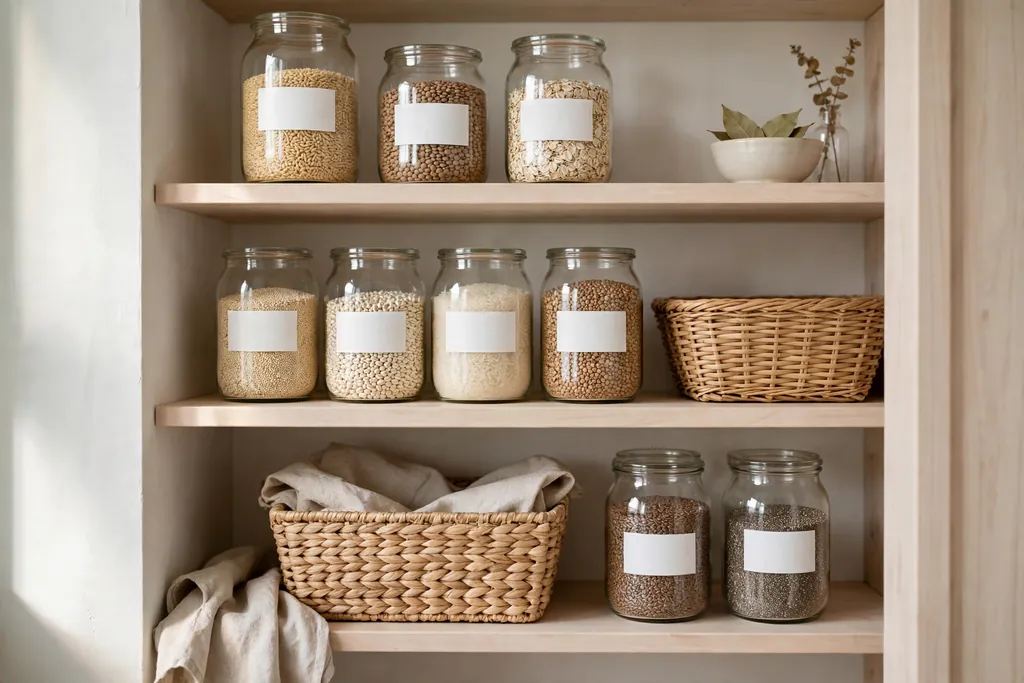
    21. Glass Jars and Woven Baskets for Pantry Storage

    Swedish kitchen pantry shelf with clear glass jars of grains and a woven basket.

    Store dry food in clear glass jars on light wood shelves, and use woven baskets for bread, onions, and small items that do not need a jar. Glass jars let you see what you have at a glance, and baskets add natural texture that suits a Swedish kitchen. This suits a kitchen where closed pantry space is short and everyday food needs to stay in reach.

    Keep the jars to the foods you use weekly, and store the rest in closed cabinets, so the shelves stay calm. Label the jars if more than one person cooks, so items return to the same spot. Wipe jars and baskets weekly, since open storage collects cooking film, and check basket bases for crumbs.

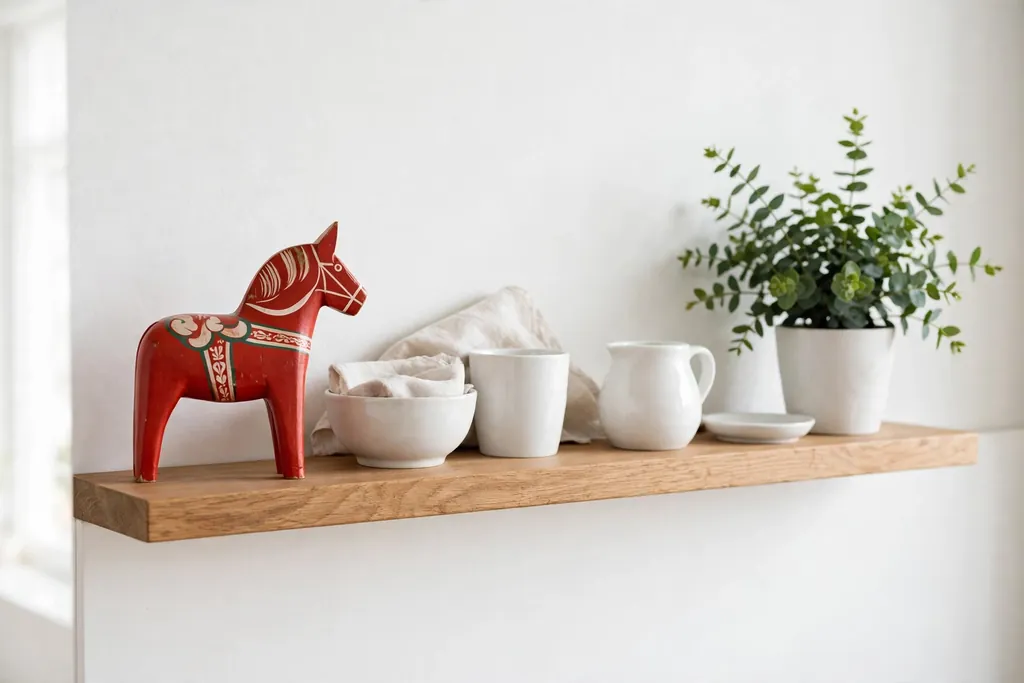
    22. One Small Swedish Folk Accent

    Swedish kitchen shelf with a small red painted wooden horse

    Add one small Swedish folk accent, such as a small red painted wooden horse on a shelf, a folk patterned cushion, or a single blue and white print in a wood frame. One accent gives the room a clear Swedish note, while a whole shelf of folk pieces can feel like a theme display. This suits a kitchen that already has white and wood in place, where one strong color can stand out.

    Keep the accent in the same red or blue family as your other small touches, such as striped linens or a blue island, so it links to the room. Place it where it is seen but not in the work zone, such as a shelf end or a wall above the dining table. If the accent feels too strong on its own, pair it with a plain white vase beside it.

    23. Blue and White Patterned Tile Backsplash

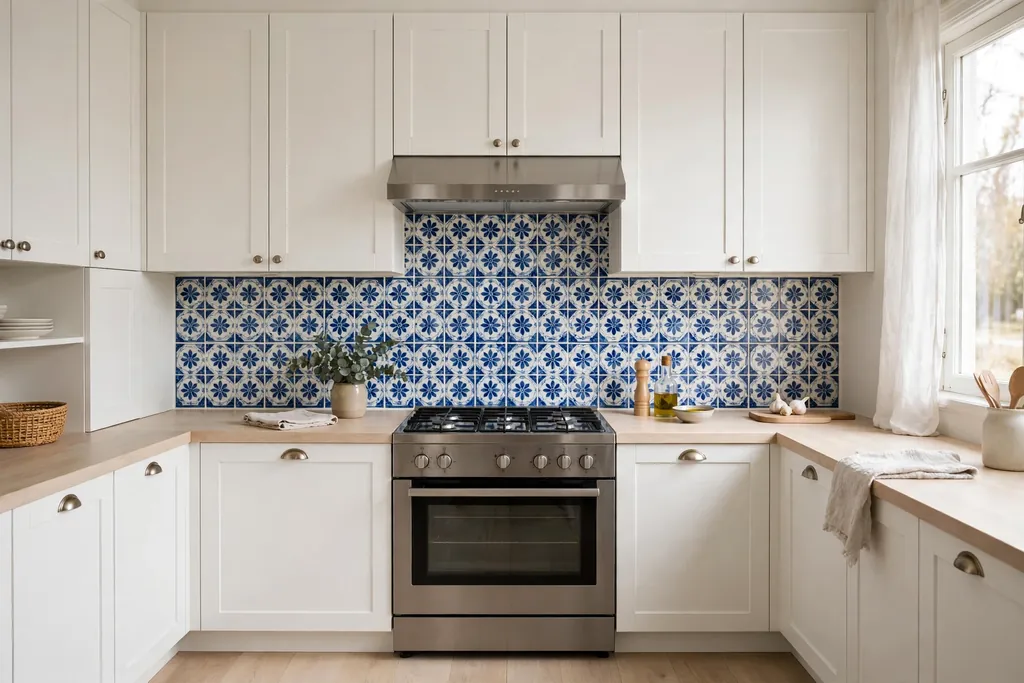
    Swedish kitchen with a blue and white patterned tile backsplash behind a cooker.

    Choose a patterned tile with blue and white in the design, such as a simple geometric or floral print, for a backsplash with more detail than plain white tile. Patterned tile works best on one wall, usually behind the cooker or sink, with plain tile or paint on the other walls. The pattern adds interest without needing blue cabinets.

    Keep counters and cabinet fronts plain, and pick one blue from the tile to repeat in a towel or a small accessory. Patterned tile can date faster than plain tile, so choose a pattern you like for its shape as well as its color. Ask your tiler about sealing, since some patterned tiles need extra care, and order spare tiles for repairs.

    24. A Fika Corner on the Counter

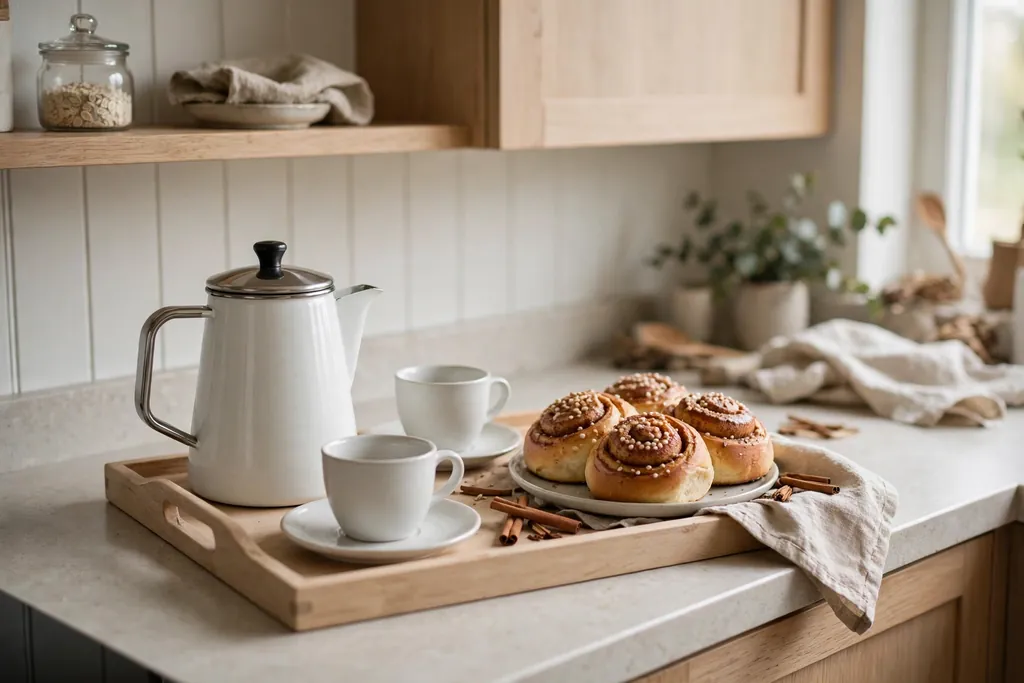
    Swedish kitchen coffee corner with a white pot

    Group your coffee items on one light wood tray on a small section of counter, with a white pot, two cups, and a plate for buns or biscuits. A fika corner, the Swedish coffee break, gives the kitchen a daily ritual spot, and the tray keeps small items from spreading. A defined corner feels dressed when you add a small plant or a striped towel beside it.

    Keep the tray away from the sink splash zone and the stove, and wipe it often, since drink areas gather drips. Lift the whole tray aside in one move when you need the counter for prep. If the counter is short, shrink the corner to a mug stand and one jar on a small tray.

    25. Wall Mounted Drop Leaf Table for a Small Kitchen

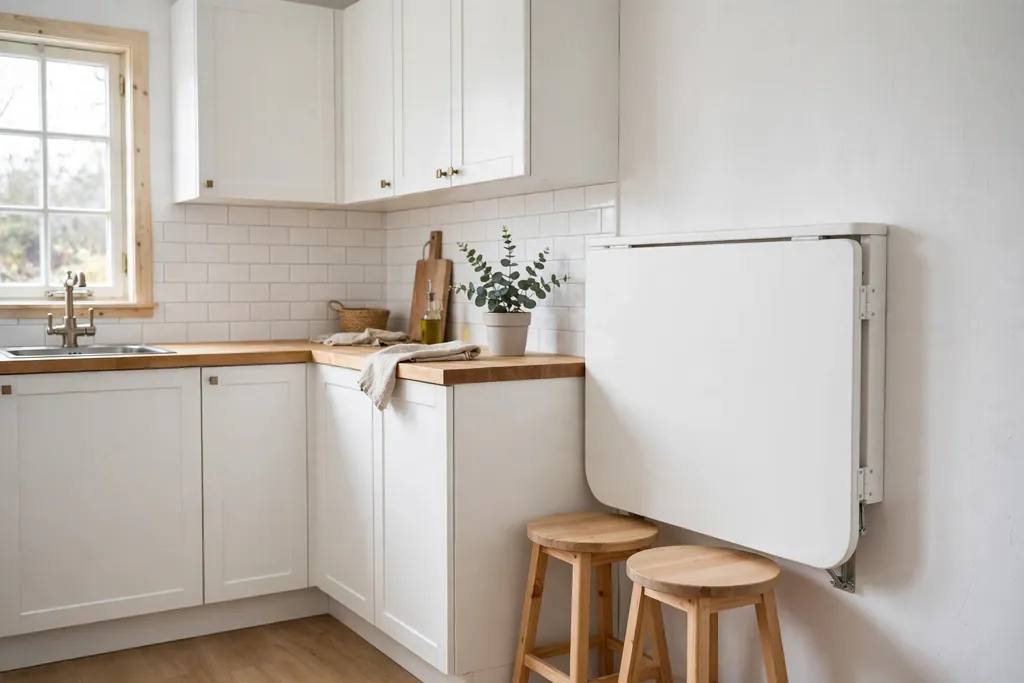
    Small Swedish kitchen with a wall mounted drop leaf table and light wood stools.

    Fit a wall mounted drop leaf table in a small kitchen for a table that folds up when you need the floor back. A white or pale wood leaf suits a Swedish kitchen, and two light stools beside it give seating without a fixed table. This is a good choice for a galley kitchen or a studio kitchen, where a full table would block the walkway.

    Fix the table securely into wall studs, and check that it holds the weight of plates and cups without sagging. Keep the leaf folded up when it is not in use, and store the stools against the wall. Wipe the leaf after meals, since a small table takes daily use in a small room.

    26. Removable Swedish Touches in a Rental Kitchen

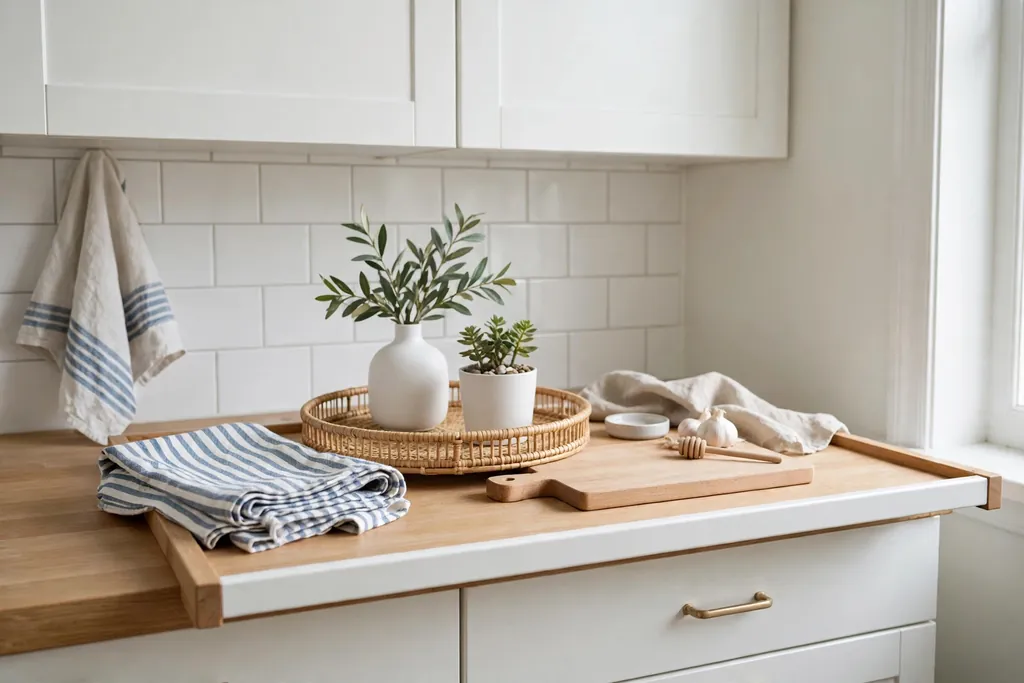
    Swedish kitchen counter with removable white and wood touches

    Finish a rental kitchen with small, removable Swedish touches: a tray, a white vase, a small plant, striped towels, and a single framed print, all in white, pale wood, and muted blue. These pieces sit on existing surfaces and leave with you, so no landlord approval is needed for fixed work. Group them in twos and threes, with one cluster per surface at most, so the room stays calm.

    Hang nothing with fixed screws if your lease forbids it, and use removable hooks or freestanding pieces instead. Keep wood and linen away from the stove and sink splash zone where possible, and wipe small pieces weekly. When you move, pack the set together in one box, so the next kitchen gets the same scheme in one short job.

    Conclusion

    A Swedish kitchen works best when light has a clear job and a calm background. Start with white cabinets or pale wood, since those are the surfaces you see most, then repeat one accent in seating, tile, or linens. White, pale oak, and muted blue keep the room bright rather than cold, and plain work surfaces keep cooking easy. Small changes like curtains, towels, plants, and a fika tray let you test the style before a larger change, and they suit renters as well as owners. For a cooler balance to the warm wood, see these grey kitchen ideas for cabinets, counters, and islands that sit well beside a Swedish scheme.

    Save this list on Pinterest for your next free hour in the kitchen, and work through it in order: cabinets and counters first, then tile and lighting, then seating and windows, and finally the small table and tray touches.

    FAQs

    What makes a kitchen Swedish rather than just white?

    A Swedish kitchen pairs white with pale wood, natural linen, and simple shapes, rather than using white on its own. Light wood floors or counters, sheer curtains, plants, and one muted accent such as blue or black give the room warmth and character. Keep patterns simple, keep work surfaces clear, and let daylight do most of the work. If the room feels cold, add wood or greenery before adding color.

    What colors pair best with a Swedish kitchen?

    White, pale oak, birch, cream, and muted blue pair best with a Swedish kitchen, because they keep the room bright without competing with each other. Black hardware, steel taps, and natural linen add contrast in small amounts. Avoid adding many strong colors at once, since a Swedish scheme relies on one accent repeated in a few places. Use one other color only in small amounts, such as red in a single folk accent, and keep the main palette to three colors plus wood.

    Does a Swedish kitchen suit a small or dark kitchen?

    Yes, if you keep it to light surfaces and a few well placed pieces. In a small or dark kitchen, use white cabinets, a pale floor, sheer curtains, and one light wood element, and skip a dark island or a large patterned tile wall. A drop leaf table, open shelves on one wall only, and a single plant group keep the room easy to cook in. Test a large painted sample in your actual light, since white and pale wood shift tone between daylight and evening light.

    How do I keep a white Swedish kitchen clean?

    White kitchens need the same care as other pale kitchens, with a little extra care near the stove and sink. Wipe cabinet doors, taps, and handles with a soft damp cloth each week, and wipe spills on wood counters promptly so marks do not set. Choose washable paint and fabric for cabinets and curtains, and keep tea towels and runners washable, so the scheme stays fresh with routine cleaning. Glass jars and open shelves need a weekly dust, since open storage collects cooking film.

    Can renters create a Swedish kitchen without fixed changes?

    Yes. Renters can cover most of this list with no permanent work at all. Curtains on a tension rod, striped towels, a fika tray, plants, a drop leaf table on removable fixings where allowed, and a bench or stools all move with you. Hang framed prints with removable fixings if your lease allows them, and check your lease before fixing any shelf, rail, or table. Keep the old hardware in a labelled bag, so the kitchen returns to its original state at the end of the tenancy.

    How do I test a Swedish paint or tile sample before committing?

    Order or borrow a sample in the exact finish you plan to use, and place it beside your floor, counter, and cabinet color in the kitchen itself. Check it in morning daylight, afternoon light, and evening light under your usual bulbs, since white, blue, and wood tones shift a lot between lights. Live with the sample for a few days, and check it beside the tap and handles you already own. If the sample looks too cold in one light and too warm in another, choose a softer, warmer white or a paler wood, which tends to read more evenly through the day.


  • 22 Scandinavian Kitchen Design Ideas That Balance Style and Comfort

    22 Scandinavian Kitchen Design Ideas That Balance Style and Comfort

    A Scandinavian kitchen works when it feels bright in the morning and calm in the evening. Pale cabinets, light wood, and clear counters give the room its airy base, while soft textiles, warm light, and one or two natural materials keep it comfortable for daily cooking and long breakfasts. These 22 Scandinavian kitchen design ideas cover cabinets, counters, light, storage, seating, and small finishing touches, so you can pick the changes that fit your layout and budget. Start with the change that fixes your biggest daily frustration, such as a dark corner or a crowded counter. For a pale starting point that pairs well with wood, see these white kitchen ideas.

    Key Takeaways

    • Keep the base pale: white or soft grey cabinets, pale wood, and one light counter material, repeated through the room.
    • Add warmth with wood, linen, wool, and rattan, rather than with strong color or busy pattern.
    • Give every daily item a closed home, and keep counters mostly clear, so the room stays calm between meals.
    • Layer the light: daylight first, then under-cabinet task light, then warm pendants for evenings.
    • Repeat one metal finish and one wood tone, so mixed pieces still read as one planned room.
    • Start small if you rent or plan a larger change later: textiles, stools, a tray, and lighting shift the feel fast.

    1. White Flat-Front Cabinets with Light Oak Accents

    Scandinavian kitchen with white flat-front cabinets and light oak accents.

    White flat-front cabinets give a Scandinavian kitchen its clean base, with long, quiet lines and no raised panels to catch the eye. The flat fronts suit both small and large kitchens, since they read as one calm surface, and a matte or satin finish shows fewer marks than gloss in a busy cooking space. Keep the white warm rather than icy, so the room feels soft in evening light.

    Add light oak where hands and eyes land most: open shelf boards, a drawer front on the island, or a wood trim along the toe kick. The oak warms the white at once and links the cabinets to wood floors, stools, and boards elsewhere. Test the white beside your floor and counter in daylight and evening light first, since white shifts a lot under kitchen lighting.

    2. A Pale Wood Island with Simple Seating

    Pale wood kitchen island with slim stools and a clear top.

    A pale wood island anchors a Scandinavian kitchen as both a work surface and a gathering spot. Oak or ash keeps the island light in tone, so it does not darken an open plan room, and a plain slab or butcher block top feels warm to the touch for casual meals. Keep the island front simple, with flat panels and no extra trim, so the wood itself carries the look.

    Leave a clear overhang on the seating side, and choose slim stools in wood or with a dark metal frame that slide fully underneath. Two or three stools are enough for most islands, and they keep the walkway clear when the island is used for prep. Keep the island top mostly clear apart from one tray or a small vase, so it can shift from cooking to eating without a full tidy first.

    3. Open Pale Wood Shelves for White Ceramics

    Open pale wood shelves holding white ceramics in a kitchen.

    One or two runs of open pale wood shelves replace a block of upper cabinets with a lighter wall, and they suit a kitchen where daily dishes deserve an easy home. White plates, bowls, and mugs read as a calm group against pale wood, and the shelves stop a long cabinet run from feeling heavy. This works best on one wall or beside a window, rather than on every wall at once.

    Limit each shelf to items you use weekly, in white and one wood tone, and leave at least a third of each shelf empty. Stack plates in one group, stand bowls in a short row, and add one small plant at the end. Dust the shelves weekly, since open storage near cooking collects a light film faster than closed cabinets, and keep the remaining storage closed for items you use less often.

    4. A Handmade Cream Tile Backsplash

    Kitchen with a handmade cream tile backsplash behind the cooker.

    A handmade cream tile backsplash adds texture to a pale kitchen without adding strong color. Slight differences in tone and glaze catch light in a way flat tiles cannot, so the wall reads as crafted rather than factory perfect, and cream keeps the room warm where a bright white tile can feel cold. Use the tile on the backsplash only, and keep counters and cabinets plain, so the texture stays the focus.

    Order extra tiles, since handmade batches vary and a few spares help if a tile chips later. Seal the grout to keep cooking splashes from staining it, and wipe the surface with a soft cloth during a normal clean. If you want more pattern, lay the tiles in a stacked or herringbone layout on one wall, and keep the rest of the backsplash simple.

    5. Light Wood Floors with Soft White Walls

    Scandinavian kitchen with light wood floors and soft white walls.

    Light wood floors set the warm base of a Scandinavian kitchen, even when the cabinets stay white. Oak or ash boards in a pale, matte finish reflect daylight across the room and link the kitchen to adjoining rooms, which helps an open plan space feel like one room rather than two. Keep the wall color a soft white, close to the cabinet color, so floors, walls, and cabinets form one calm block.

    Protect the floor near the sink and cooker with a flat, washable runner, and wipe spills promptly so water does not sit on the wood. If a full wood floor is not practical, use wood-look planks in the same pale tone on the kitchen floor and real wood on stools, boards, and shelves, so the tone still repeats through the room. Keep rugs low pile, so chair and stool legs move freely.

    6. One Dark Anchor in Black Metal

    Pale Scandinavian kitchen with a black tap and black handles.

    A single dark anchor stops a pale Scandinavian kitchen from looking washed out, and black metal is the simplest way to add it. A black tap, black bar pulls, or dark stool frames give the eye a place to land, and the contrast makes white cabinets and pale wood look crisper. This is the smallest change on this list, and often the most effective.

    Repeat the black finish in just two places, such as the tap and the stool frames, and keep everything else pale. Avoid adding dark cabinets, dark counters, and dark floors at the same time, since that turns a pale kitchen into a dark one. If you rent, dark stools and a dark tray give the same anchor with no fixed change, and they can move with you.

    7. A Cozy Breakfast Nook with Linen Cushions

    Kitchen breakfast nook with a wood table and linen cushions by a window.

    A breakfast nook gives a Scandinavian kitchen its comfortable side: a set place for slow mornings that does not need a full dining room. A simple bench along the wall, a small wood table, and linen cushions in white, oatmeal, or soft grey make the corner inviting, while the bench can hide placemats and table linens underneath. This suits a corner by a window best, where daylight does much of the work.

    Choose cushion covers you can remove and wash, since a breakfast seat gets daily use, and keep the table top wipeable for coffee and homework alike. For more nook layouts, from banquettes to bay window seats, see these kitchen nook ideas. Keep the nook to one material link with the kitchen, such as the same wood as the island, so it reads as part of the room.

    8. Glass-Front Cabinets for Everyday Display

    White kitchen with glass-front cabinets showing white dishes.

    Glass-front upper cabinets break up a wall of white doors and give everyday dishes a calm display home. Clear glass suits tidy households and shows white dishes, glassware, and wood boards at a glance, while reeded glass softens the view and hides a less perfect shelf. Use glass fronts on one run, or on either side of a window or range, rather than everywhere, so the display stays calm.

    Keep what you show to a small set of matching or related pieces, and leave space on each shelf so the cabinet does not look crowded. Put daily items on lower shelves, where they are easy to reach, and add a small light inside the cabinet if you want the display to glow in the evening. If glass feels too exposed, use one glass door beside plain doors on the same run.

    9. A Butcher Block Section on the Counter

    Kitchen counter section with a warm butcher block top.

    A butcher block section gives a Scandinavian kitchen a warm work surface without replacing the whole counter. Use it on the island, on one run of counter, or as a thick board that stays in place for prep, and keep the rest of the counter in a pale stone or plain laminate. Wood suits pale cabinets and cream tile, and it softens a kitchen that has a lot of stone or steel.

    Oil the wood on a regular schedule, wipe spills promptly, and use boards for cutting so the surface keeps an even look. Near the sink, a stone section avoids constant water contact on wood, so the wood stays in good shape longer. The mix of white cabinets and one wood counter is often enough to make a pale kitchen feel relaxed without adding color elsewhere.

    10. Panel-Ready Appliances Behind Cabinet Fronts

    Scandinavian kitchen with appliances hidden behind cabinet fronts.

    Panel-ready appliances, or tall units that hide the fridge and dishwasher, give a Scandinavian kitchen long cabinet lines with no steel breaks. When the fridge and dishwasher wear the same fronts as the cabinets, the room reads as furniture rather than a row of machines, which suits an open plan kitchen most, where the kitchen faces the living area. Keep the oven and hob visible if you cook often, since a hidden oven can be less handy.

    Check ventilation and door clearance with the maker guidance before ordering panels, since integrated appliances need exact fitting. Hide the largest items first, and put the effort into the fridge and dishwasher before smaller appliances. For a pared back approach to the whole room, these minimalist modern kitchen ideas share the same flat-front, clear-counter logic.

    11. A Large Window with Sheer Linen Curtains

    Bright kitchen window with sheer linen curtains.

    Daylight is the main light source in a Scandinavian kitchen, so treat the window as a design feature, not an afterthought. A large window, kept mostly clear, lets daylight reach pale cabinets and wood floors, and sheer linen curtains soften the light without blocking it. Hang the curtains high and wide, so the window looks larger and the fabric clears the counter.

    Keep the sill to one or two items, such as a small plant or a soap tray, so light stays unblocked and the sill stays easy to wipe. Choose a plain linen in white or oatmeal, and keep fabric well clear of the hob and open flames. If privacy is a concern, add a simple roller blind inside the frame for evenings, and leave the linen in place for daytime softness.

    12. Layered Warm Lighting with Simple Pendants

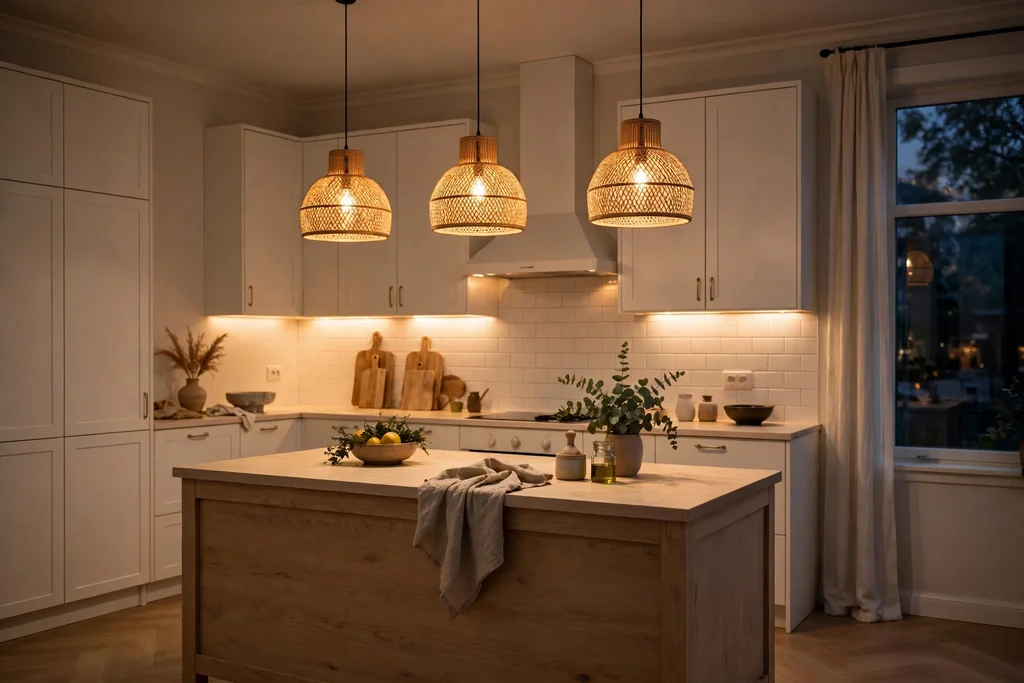
    Scandinavian kitchen in the evening with warm pendant lighting.

    Layered warm lighting keeps a Scandinavian kitchen comfortable after dark, when daylight fades. Under-cabinet light does the real work for prep, while two or three simple pendants over the island or table give evening meals a soft focus, and a dimmable ceiling run covers the room as a whole. One fixture style, repeated, keeps the ceiling quiet and the room calm.

    Fit under-cabinet lights toward the front of the cabinet, so light falls on the counter rather than on the wall, and choose warm white bulbs so food and wood tones look natural. Hang pendants high enough to see across the table, and keep the lowest point well above the counter. Wipe shades often, since kitchen air leaves a light film on glass and metal over time.

    13. Herbs and Greenery on the Windowsill

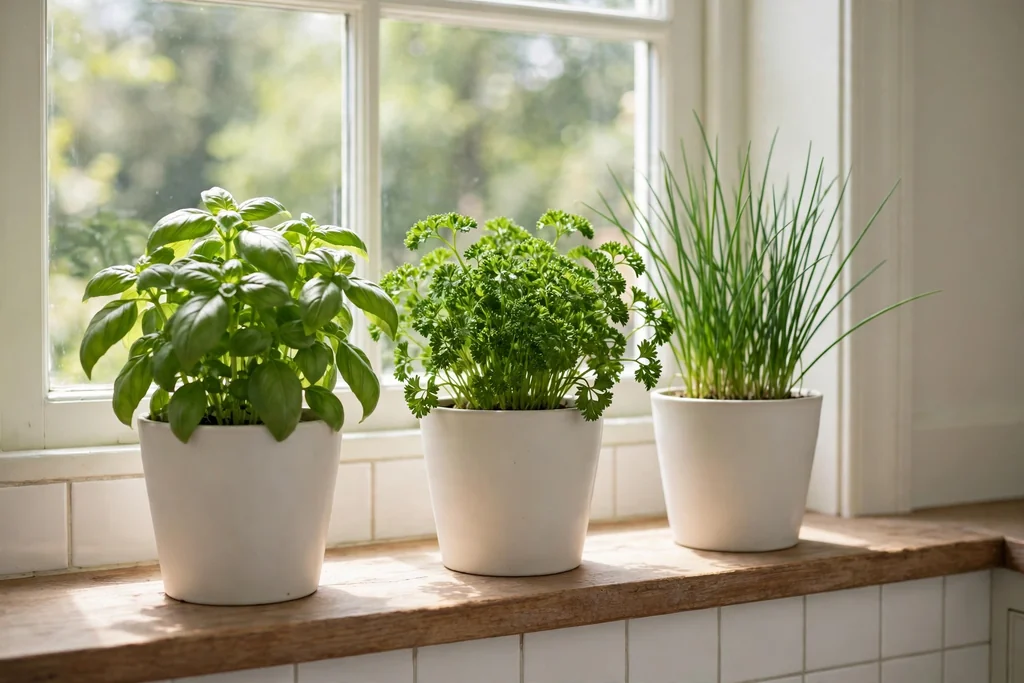
    Kitchen windowsill with potted herbs and green plants.

    Herbs and greenery bring the natural side of Scandinavian design into the kitchen in the simplest way: a few pots on the windowsill, within reach while you cook. Basil, parsley, and chives stay useful daily, while a trailing plant or a small olive tree in a floor pot softens hard surfaces and links the kitchen to the view outside. Keep pots in plain ceramic, terracotta, or wood, so the plants, not the pots, carry the color.

    Water plants over the sink, not at the table, and choose pots with saucers to protect wood and paint. Keep plants off the main prep counter, except for one small pot that lifts away for cleaning, so work surfaces stay clear. If the windowsill is narrow, use one long trough or a wall rail with hanging pots above the sink instead.

    14. Woven Textures in Rattan, Linen, and Baskets

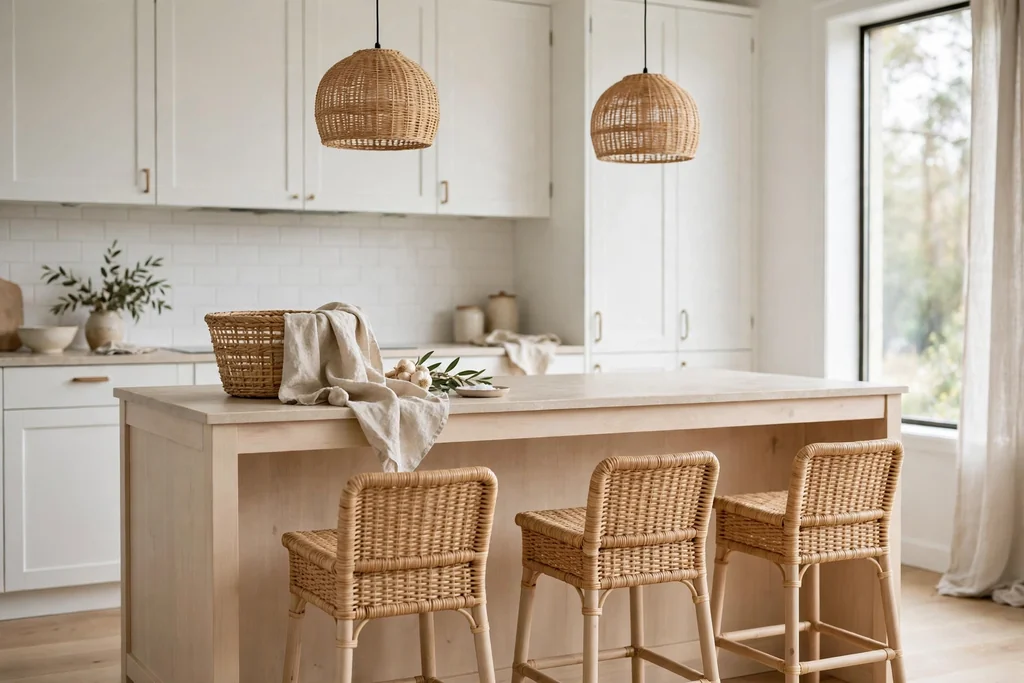
    Scandinavian kitchen with rattan stools and woven textures.

    Woven textures stop a pale kitchen from feeling flat, and they add warmth without color. Rattan stool seats, a linen runner, woven baskets for bread or produce, and a seagrass tray each add a natural pattern that the eye can rest on. Use two or three woven items in the room, rather than one of everything, so the texture reads as a thread, not a theme.

    Keep baskets for items you use often, such as bread, onions, or cloths, and label or sort them by use so they stay tidy. Wipe rattan and seagrass with a dry cloth, and keep woven items clear of the sink splash zone, since damp softens natural fibers over time. A woven pendant shade over the table repeats the same texture at eye level, if the room needs one more warm note.

    15. A Tall Pantry Wall with Deep Drawers

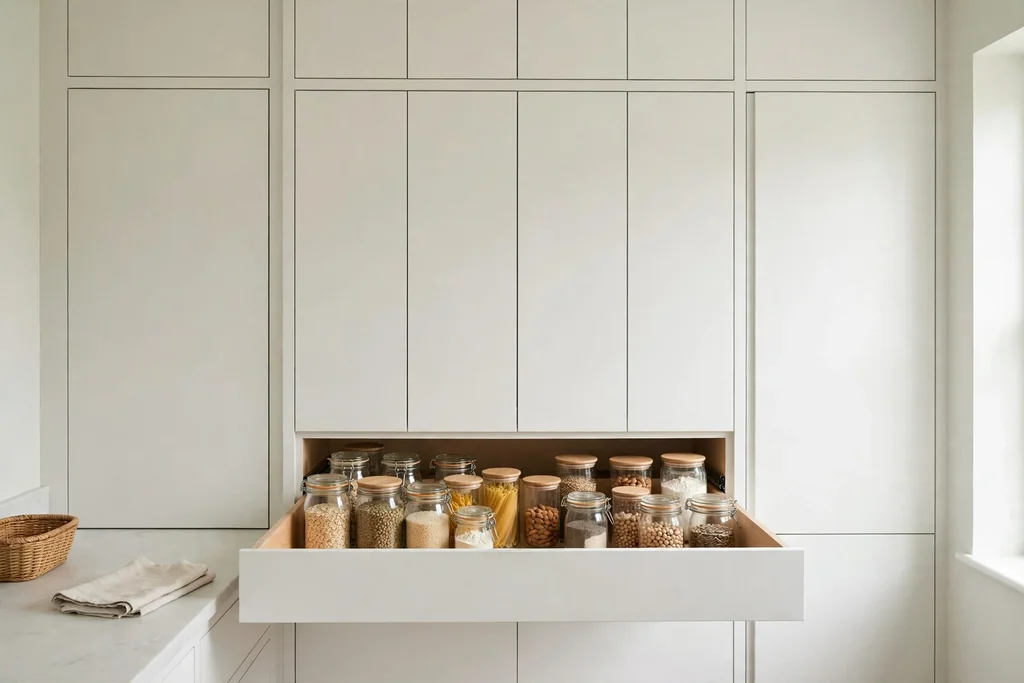
    Tall white pantry wall with a deep drawer open showing storage.

    A tall pantry wall gives a Scandinavian kitchen its calm surface: food, pans, and small appliances all live behind closed doors, so the main counter runs stay free. Deep drawers beat high shelves for heavy items, since you can see and reach the back without unloading the front, and pull-out shelves inside a tall unit keep breakfast items and cooking staples in clear zones. Keep the pantry fronts flush with the rest of the cabinets, so the wall reads as one calm block.

    Plan the pantry by zone: breakfast items near the top, cooking staples at counter height, and heavy pans low. Use clear bins or labels inside the drawers only if they help you find things faster, and leave one drawer partly empty for new items. A pantry wall works best when it sits on one wall, leaving the window wall and the island free for light and seating.

    16. A Soft Sage Island in a Pale Room

    Pale kitchen with a soft sage green island and white cabinets.

    A soft sage island adds gentle color to a Scandinavian kitchen without breaking its calm. Keep the main cabinets white, and paint only the island in sage, so the island becomes a clear focal point and the rest of the room stays pale, which makes the change lower risk and easier to reverse. Sage pairs well with pale wood, cream tile, and black or brass hardware, and it hides scuffs better than a white island base.

    Repeat the sage once more, in a small way, such as a linen towel, a vase, or a plant pot, so the island color looks planned rather than random. Choose a hard wearing paint for the island base, since it takes kicks, bags, and stool legs, and test the sage beside your floor and counter in daylight and evening light before you commit to the full island.

    17. Clear Counters with a Single Tray Rule

    Clear Scandinavian kitchen counter with one small tray.

    Clear counters are what make a Scandinavian kitchen feel calm between meals, and a single tray rule keeps them that way. One small tray for daily cooking items near the hob, plus a second tray for coffee items, is enough for most kitchens, and the tray keeps daily tools grouped, so the counter still looks clear even when you are cooking. Everything else lives behind a door.

    Work through one counter run at a time, and give each item you remove a real home: a drawer, a cabinet shelf, or a wall rail. If an item has no home, it will drift back to the counter within a week, so fix the storage first and the styling second. Wipe the tray when you wipe the counter, and keep the tray size small, since a large tray invites extra items to join it.

    18. A Long Wood Table for Kitchen Dining

    Long pale wood dining table with a bench and chairs in a kitchen.

    A long wood table in or beside the kitchen gives a Scandinavian home its gathering place, with room for family meals, homework, and guests without a separate dining room. A plain oak or ash top, with simple legs and no ornate detail, suits the style, and a bench on one side seats children close together while chairs on the other side stay flexible for guests. Keep the table top sealed, so spills wipe off, and use placemats for hot dishes.

    Leave clear walkway space on every side, wide enough to carry a hot dish safely, and keep one end of the table clear so someone can sit down without climbing over a bench. A single pendant or a simple linen runner marks the table as a set place, even in an open plan room, and the wood top links the dining spot to the island and shelves in the same tone.

    19. A Simple Sink with a Wood Board and Rail

    Simple kitchen sink with a plain tap and a wood board.

    A simple sink setup suits a Scandinavian kitchen better than a busy sink wall: one undermount or inset sink, a plain tap in black or brushed steel, and a wood board that fits over part of the bowl. The board adds prep space in a small kitchen and keeps the sink area tidy, while a wall rail above or beside the sink holds a dish brush, a cloth, and a soap bottle in one small group. Keep the counter around the sink plain, so the tap reads as a feature rather than one item among many.

    Choose a single large basin if you wash large pots and trays often, since it suits most cooks better than a split basin. Dry the tap after use if your water leaves marks, so the finish stays even, and keep a folded linen cloth nearby for drying hands and wiping the counter. If you change the tap, check that it fits your existing sink holes first.

    20. A Light Galley Layout for a Small Kitchen

    Small light galley kitchen with white cabinets and pale wood floors.

    A light galley layout makes a small Scandinavian kitchen feel larger, because two parallel runs in white and pale wood keep sight lines clear from end to end. Keep one run for cooking and the other for the sink and storage, with a clear walkway between them, and use the end wall for a window, a tall pantry, or a small table that folds away. Flat-front cabinets and a plain backsplash keep the narrow room from feeling busy.

    Use height well: tall units at one end, open shelves only on a short run, and light colors on every large surface. Keep the floor the same pale wood through the galley, so the room reads as one length rather than two halves, and add under-cabinet light on both runs, since a narrow kitchen needs task light more than a wide one. For low cost ways to refresh a small kitchen first, see these kitchen ideas on a budget.

    21. Wool Runners and Linen Towels as Soft Layers

    Scandinavian kitchen with a flat wool runner and linen towels.

    Wool runners and linen towels are the soft layers that make a pale kitchen comfortable underfoot and at hand. A flat wool runner along the main work run warms a wood floor, marks the cooking zone, and softens sound in a hard-surfaced room, while linen towels in white, oatmeal, or soft grey add a touch of texture at the oven and sink. Keep both in plain colors, so they add warmth without pattern competing with tile or wood.

    Choose a runner that lies flat and stays put, with a low pile so stool and drawer movement stays easy, and wash the towels in matching sets so the kitchen reads as planned. Keep the runner clear of the cooker splash zone, and hang towels on a rail or hook where they dry between uses, rather than draped over the oven door. Swap the runner by season if you like a change, and keep one spare set ready.

    22. A Quiet Finishing Layer of Candles, Ceramics, and Boards

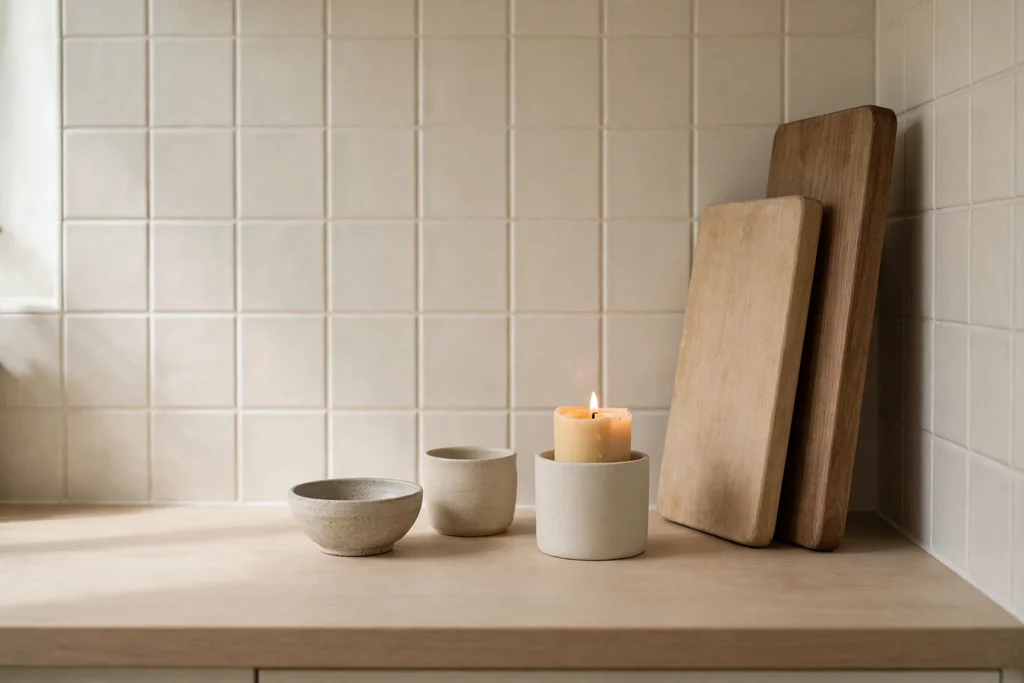
    Kitchen counter with a candle, ceramics, and wood boards.

    A quiet finishing layer is what makes a Scandinavian kitchen feel lived in rather than staged: a candle in a plain holder, a small group of ceramics, and wood boards leaning against the backsplash. Keep the group to three items at most on any one surface, and leave the rest of the counter clear, so the details can be seen. This finishing layer suits the end of a refresh, once cabinets, light, and storage are settled, not the start.

    Use items you already cook with, such as a favorite board, a stoneware jug, and a candle you light at dinner, so the display stays honest and useful. Move the group aside in one move when you need the surface for prep, and wipe it weekly. If a surface starts to collect clutter again, remove one item at a time until the room feels calm, and keep the candle clear of curtains, towels, and the hob.

    Conclusion

    A Scandinavian kitchen that balances style and comfort comes down to a few calm choices repeated well: pale cabinets, one light wood tone, closed storage for daily items, and soft layered light. Start with the base, such as white flat-front cabinets or a pale wood island, add one warm texture and one dark anchor, and keep counters mostly clear so the details you chose can be seen. Small moves, such as linen curtains, a tray rule, or a wool runner, let you test the look before a larger change, and they suit renters as well as owners.

    Save this list for your next free weekend in the kitchen, and work through it in order: cabinets and light first, then storage and counters, then seating and textiles, and finally the small candle, ceramic, and board touches. For more pale kitchen and seating ideas to pair with this list, the linked guides above cover white cabinets, pared back layouts, and nooks that sit well beside calm neutrals.

    FAQs

    What defines a Scandinavian kitchen?

    A Scandinavian kitchen pairs pale color with natural materials and simple forms: white or soft grey cabinets, light wood floors or island tops, plain counters, and clear surfaces. Warmth comes from wood, linen, wool, and soft light, rather than from strong color or ornate detail, and storage stays mostly closed, so the room feels calm and easy to use.

    How do I keep a Scandinavian kitchen from feeling cold or bare?

    Mix your whites on purpose, and add one or two warm materials, such as pale wood, linen, or rattan. A wood island top, a warm white cabinet color, soft under-cabinet light, a wool runner, and one plant are usually enough to warm a pale room. Keep the largest surfaces calm, and put warmth in items you touch and see daily, such as stools, a tray, and a towel.

    What colors work best in a Scandinavian kitchen?

    A pale base works best, such as warm white, soft grey, or pale stone, with one warm wood tone and one quiet accent, such as soft sage or black metal. Keep the palette to two main colors plus wood, and repeat those colors in cabinets, counters, and seating. Strong color can still work as a small accent, such as a linen towel or a plant pot, but a full wall of strong color will fight the calm look.

    Can I create a Scandinavian kitchen without a full remodel?

    Yes. Clear the counters to one tray per zone, add sheer linen at the window, swap busy hardware for slim black or wood pulls, change the lighting to warm under-cabinet and dimmable pendants, and add a wood tray, slim stools, and a wool runner. A single open shelf and a group of white ceramics can refresh a wall with no cabinet work, and textiles shift the feel fastest of all.

    What is the best cabinet style for a Scandinavian kitchen?

    Flat-front cabinets in a matte or satin finish are the most reliable choice, in warm white or soft grey, with light oak accents on shelves or the island. They suit small and large kitchens alike, and they pair with plain counters and simple backsplashes. If you want a little detail, use a Shaker door in the same pale color on a pantry wall only, and keep the main runs flat.

    How should I light a Scandinavian kitchen?

    Layer three sources: daylight from a mostly clear window first, under-cabinet task light for prep second, and warm pendants over the island or table for evenings third. Choose warm white bulbs, fit under-cabinet lights toward the front of the cabinet, and use a dimmer on the main lights if you can, so the kitchen can shift from cooking bright to evening soft.


  • 18 Kitchen Flooring Ideas for a Relaxed, Pulled-Together Home

    18 Kitchen Flooring Ideas for a Relaxed, Pulled-Together Home

    A kitchen floor takes more daily use than any other floor in the house. It meets wet feet, dropped pans, muddy shoes, and chair legs, and it stays in view from the doorway, the table, and the living room beyond. The right floor makes the whole kitchen feel settled, while the wrong one can fight with cabinets and counters no matter how tidy the rest of the room is. These 18 kitchen flooring ideas cover wood, tile, stone, concrete, and softer options, so you can match a floor to the way you actually cook, clean, and gather. Start with the cabinets and counters you already have, order samples you can stand on in your own light, and keep the rest of the room calm so the floor can do its job. If your cabinets are white, these white kitchen ideas show how pale cabinetry pairs with warm wood, stone, and patterned tile floors.

    Key Takeaways

    • Choose the floor for how you cook and clean first, and let color and pattern follow, since a kitchen floor must handle water, grease, and dropped items every day.
    • Order samples and test them beside your cabinets, counters, and wall color in daylight and evening light before you commit to a full floor.
    • Keep the rest of the room plain when the floor carries pattern, and use a patterned floor to add interest when cabinets and counters are plain.
    • Wood warms a kitchen, tile and stone handle water best, and softer floors like cork and vinyl plank suit households that want comfort underfoot.
    • Repeat one tone from the floor elsewhere, such as in a wood counter, a stool, or a rug, so the floor reads as part of the room rather than a separate layer.
    • Ask about sealing, grout care, and spare pieces before fitting, since kitchen floors need repairs and cleaning plans from the start.

    1. Warm Oak Plank Wood Floor

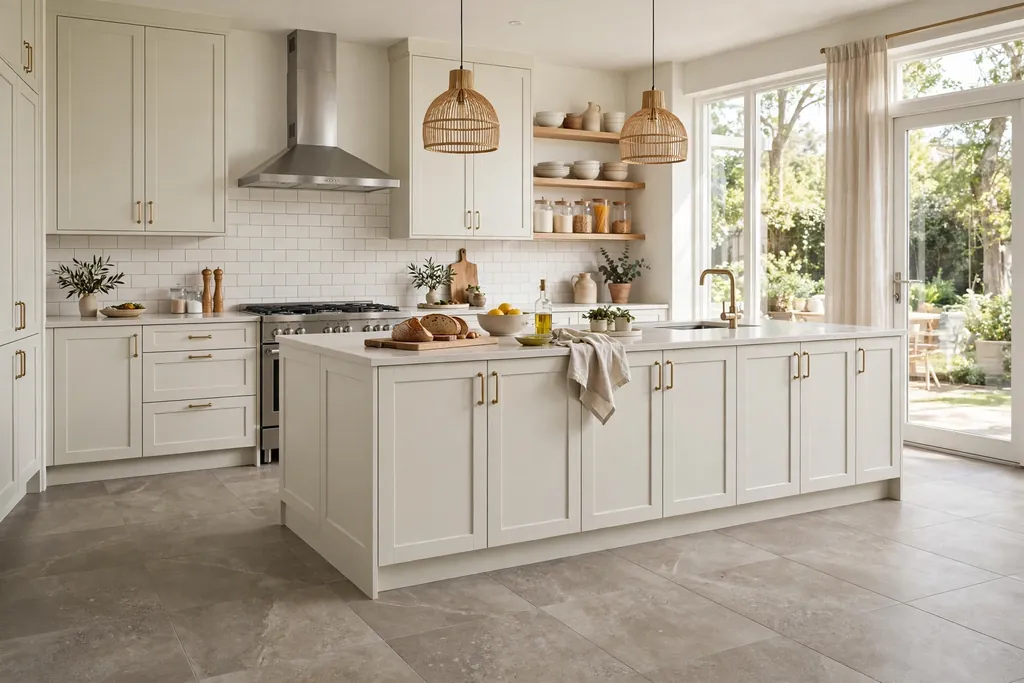
    Kitchen with warm oak plank wood flooring, white cabinets, and a pale stone counter.

    Lay wide oak planks in a warm, mid tone for a kitchen floor that feels relaxed and familiar. Oak suits white, cream, sage, and navy cabinets alike, and its grain adds movement without a busy pattern. A matte or satin finish keeps the floor from looking glossy under kitchen lights, and it hides small marks better than a high shine finish.

    Keep counters simple in pale stone or wood so the oak stays the warm note in the room. Use felt pads on chair legs, wipe spills promptly, and place a mat at the sink and the back door where water lands most. If you have a dog, a mid tone oak with visible grain hides scratches better than a very pale or very dark floor.

    2. Herringbone Wood Floor

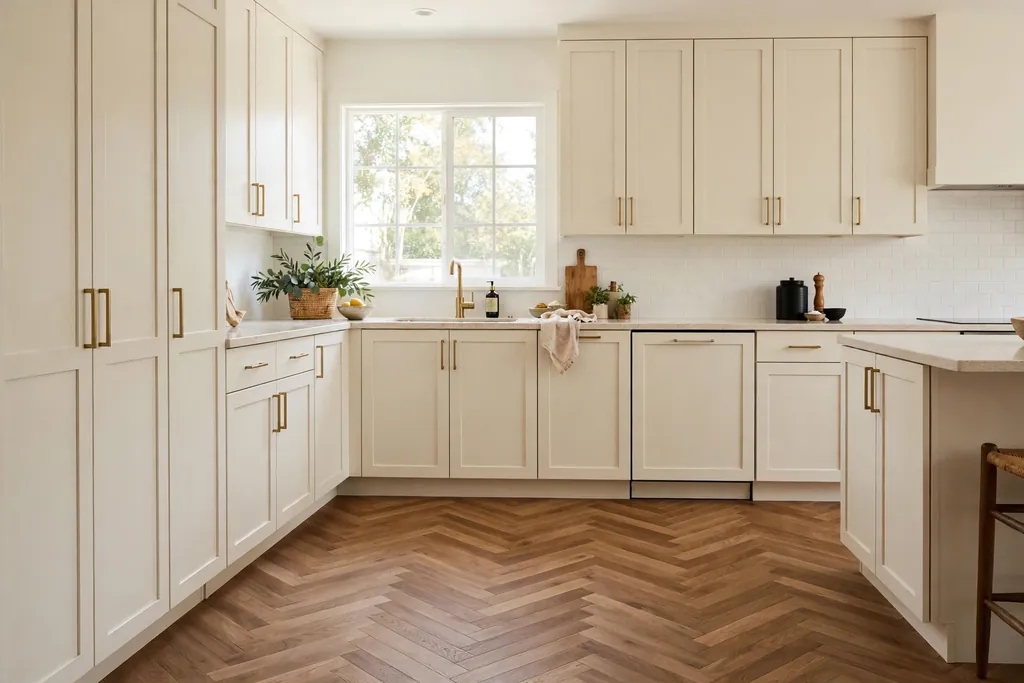
    Kitchen floor laid in a herringbone wood pattern with plain cream cabinets.

    Lay wood in a herringbone pattern for a floor with clear structure and a sense of craft. The zigzag layout draws the eye along the room and suits both classic kitchens and modern rooms with plain cabinets. Herringbone works best where the floor can be seen in a good stretch, such as an open plan kitchen or a room with an island that does not cover the whole floor.

    Keep the wood tone calm, since the pattern already gives plenty of interest, and pair it with plain cabinets and a simple backsplash. Herringbone fitting takes more time and more cuts than straight planks, so ask your fitter about waste and cost before you order. Use a rug runner in a plain tone in the main work run if you want to soften the pattern underfoot.

    3. Pale Whitewashed Wide Planks

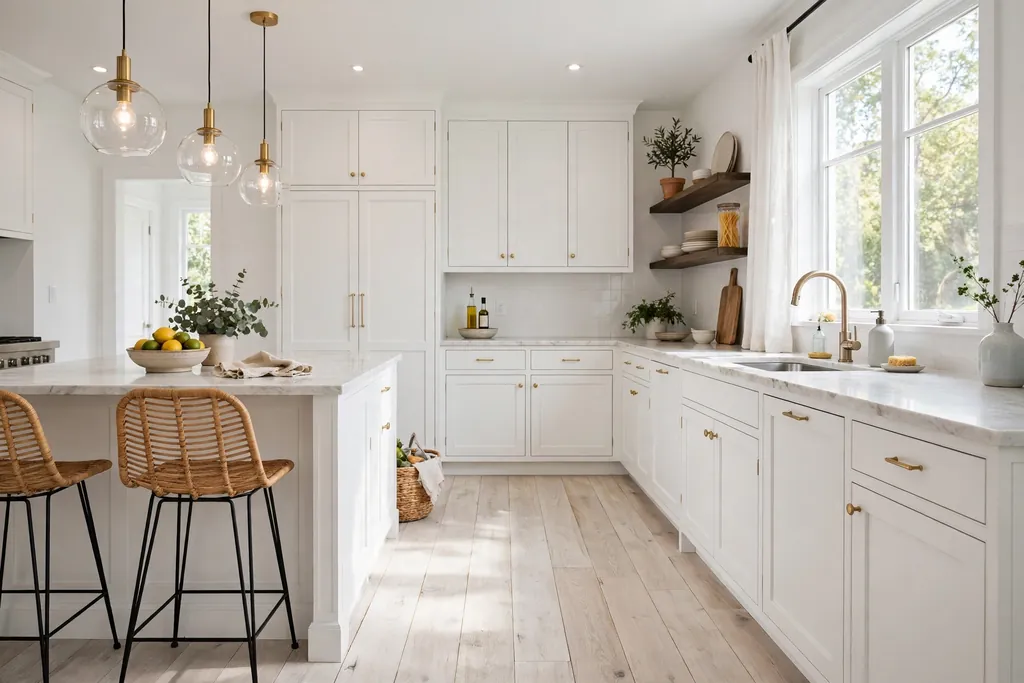
    Bright kitchen with pale whitewashed wide plank flooring and white cabinets.

    Choose wide planks in a pale, whitewashed finish for a kitchen that needs light. The pale wood lifts a north facing room or a kitchen with small windows, and it pairs well with white cabinets, pale stone, and linen tones. Wide planks keep the floor calm, since fewer joints mean fewer lines across the room.

    Balance the pale floor with one warm material, such as a wood island top, oak stools, or brass handles, so the room does not feel washed out. Pale floors show crumbs and dirt more readily than mid tones, so a quick daily sweep matters. Choose a finish made for kitchens, and wipe water at once, since pale wood shows water marks if puddles sit.

    4. Dark Walnut Wood Floor

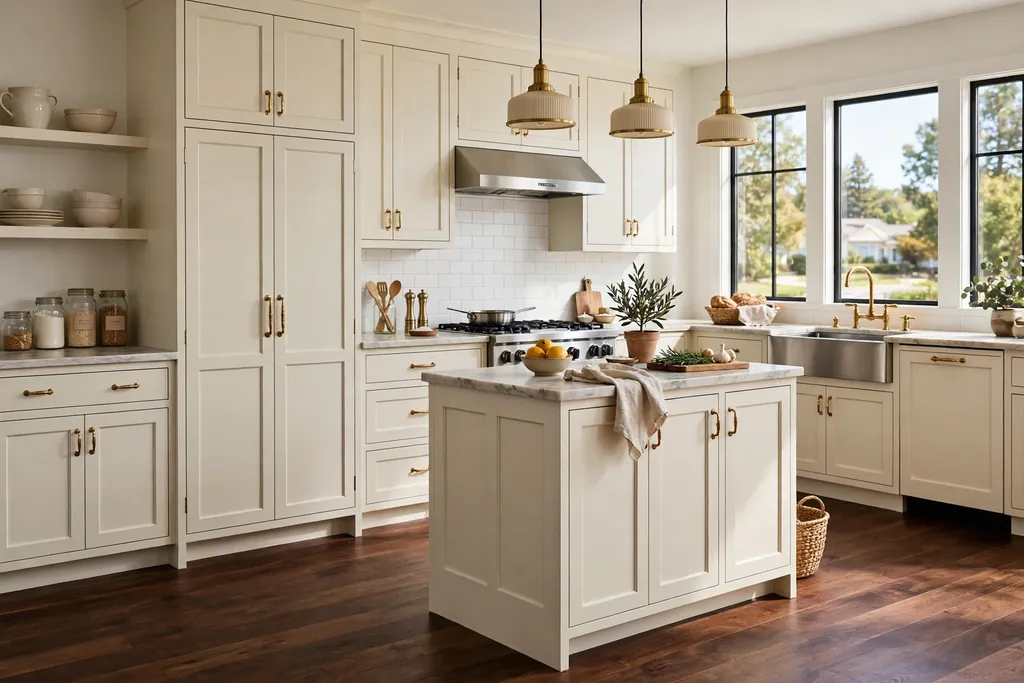
    Kitchen with a dark walnut wood floor, cream cabinets, and brass hardware.

    Lay dark walnut planks for a kitchen floor with depth and a grounded feel. Walnut suits cream cabinets, brass hardware, and marble look counters, and it makes a large kitchen feel more intimate. The dark tone also anchors a room with tall ceilings or a lot of white on the walls.

    Pair walnut with pale counters and light walls so the room stays bright, and add warm light under cabinets to keep the floor from reading black at night. Dark floors show dust, crumbs, and pet hair more than mid tones, so plan on regular sweeping. Use mats at entrances and felt pads under furniture to protect the finish where chairs move daily.

    5. Large-Format Stone-Look Porcelain Tile

    Kitchen with large-format stone-look porcelain floor tiles and pale cabinets.

    Use large-format porcelain tiles with a stone look for a kitchen floor that handles water with ease. Large tiles mean fewer grout lines, so the floor reads as calm and is quicker to mop. Stone-look porcelain gives the texture of limestone or sandstone without the sealing and staining worries of real stone.

    Choose a mid tone stone color, such as warm grey or pale beige, so crumbs do not stand out as they would on very pale or very dark tile. Pick a tile with some grip underfoot, since kitchen floors get wet, and match the grout to the tile tone for a seamless look. Keep spare tiles from the same batch for future repairs, since tile shades vary between batches.

    6. Terracotta Tile Floor

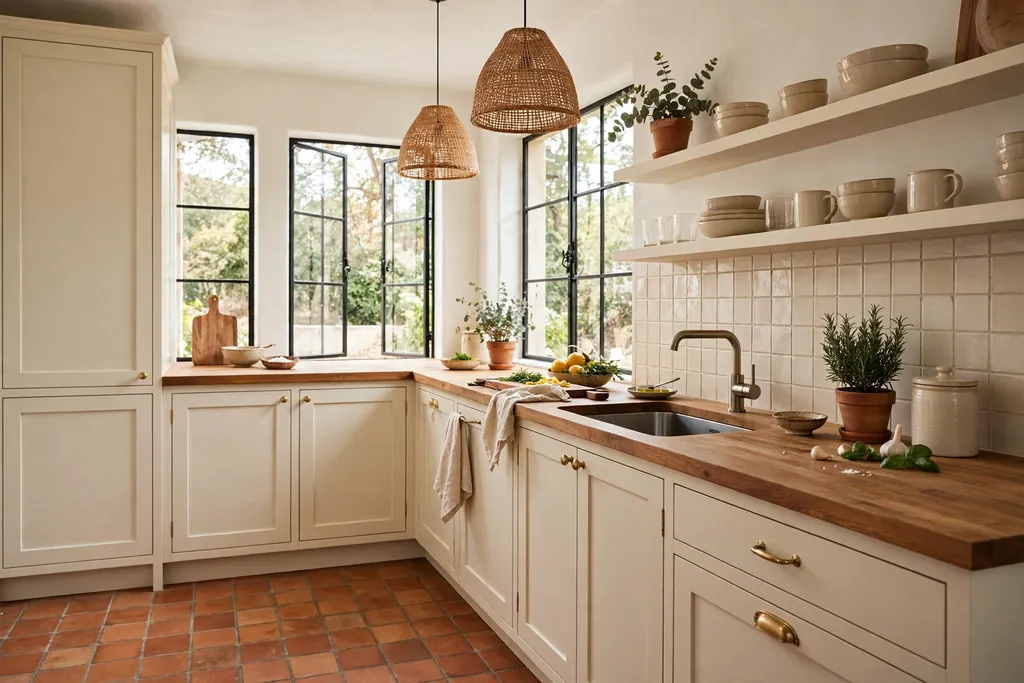
    Kitchen with a warm terracotta tile floor, cream cabinets, and a wood counter.

    Lay terracotta tiles for a kitchen floor with warmth, texture, and a Mediterranean feel. The earthy red brown tone suits cream cabinets, wood counters, and black hardware, and it warms up a kitchen with white walls. Terracotta tiles vary slightly from tile to tile, which gives the floor a handmade, lived-in character.

    Seal terracotta as advised by the supplier, since unsealed tiles stain from oil and tomato spills. Pair the floor with plain cabinets and a simple backsplash so the tile color leads. A terracotta floor suits a kitchen with good daylight, where the warm tone glows, and it pairs well with plants and woven baskets for a relaxed finish.

    7. Classic Black and White Checkerboard Tile

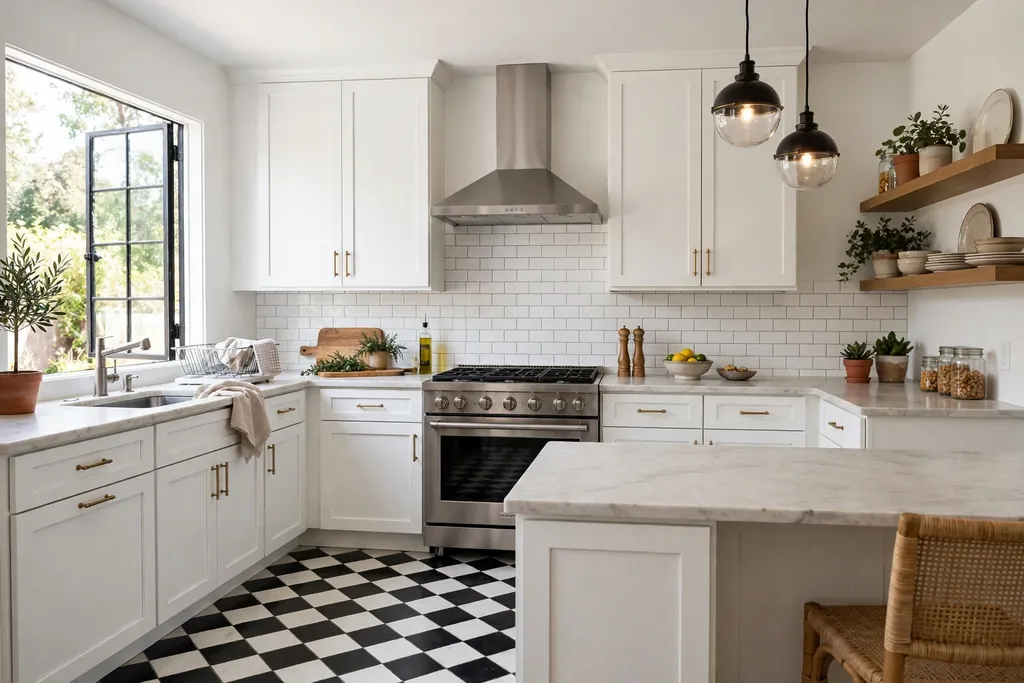
    Kitchen with a black and white checkerboard tile floor and white cabinets.

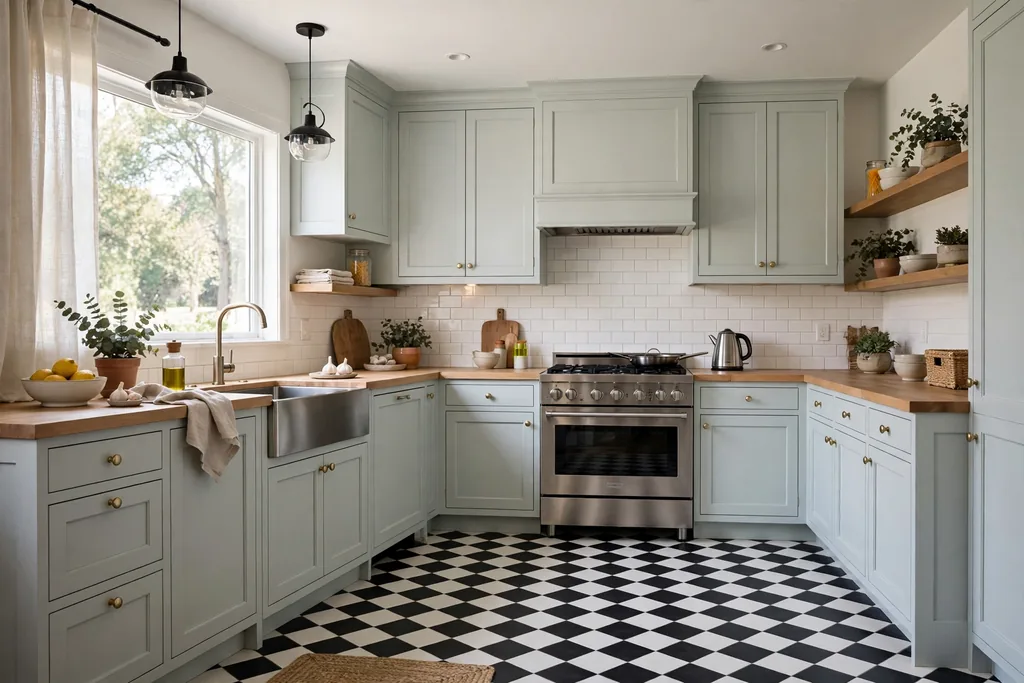
    Lay black and white checkerboard tile for a kitchen floor with a clear, graphic pattern. The checkerboard suits farmhouse, retro, and classic kitchens, and it sets the tone for the whole room at once. Small squares feel busy and vintage, while larger squares feel calmer and more modern, so choose the tile size to match the room.

    Keep walls and cabinets plain, in white, cream, or pale wood, so the floor can lead without competition. Use a plain rug runner in the main work zone if the pattern feels busy underfoot. Choose a tile finish suited to kitchens, with grip and easy cleaning, and keep spare tiles for repairs, since a cracked tile in a checkerboard stands out.

    8. Patterned Cement Tile Floor

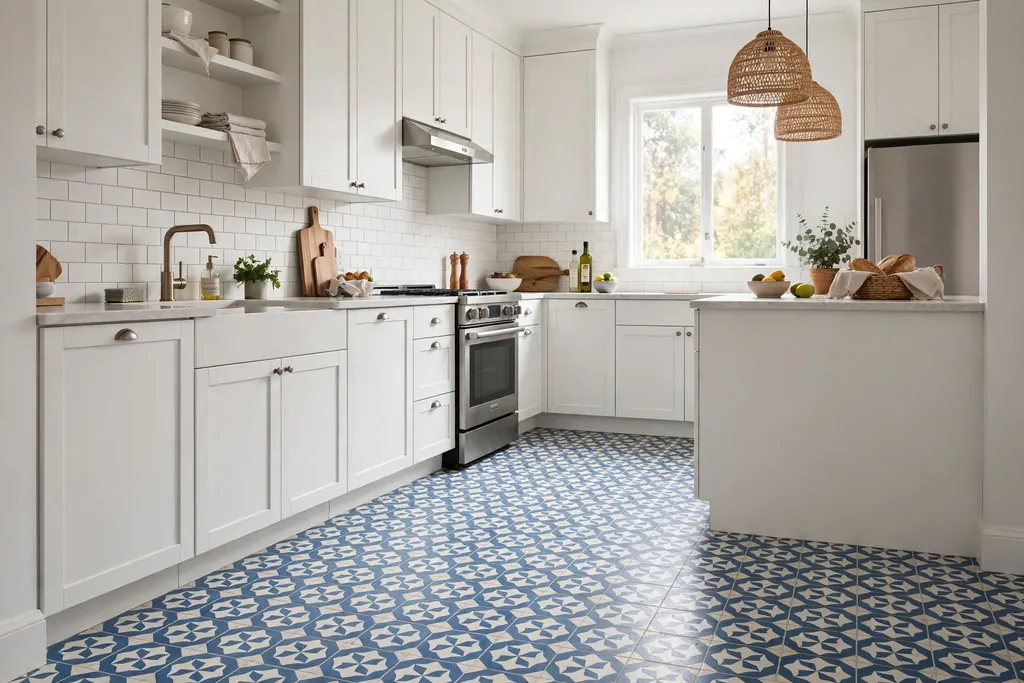
    Kitchen with a patterned cement tile floor and plain white cabinets.

    Choose patterned cement tiles for a kitchen floor that acts as the room’s main decoration. A floral, star, or geometric pattern in two or three colors adds interest without new cabinets or wall color, and it suits a kitchen with plain white or wood cabinets. Patterned tile works best across the whole floor rather than in a small patch, so the pattern reads as a plan.

    Pick one color from the tile to repeat in a towel, a stool cushion, or a vase, and keep counters and backsplash plain. Cement tiles need sealing and gentle cleaning, so check the maker’s care advice before fitting. Order a few spare tiles, since patterned tiles can be hard to match later if a tile chips.

    9. Natural Slate Stone Floor

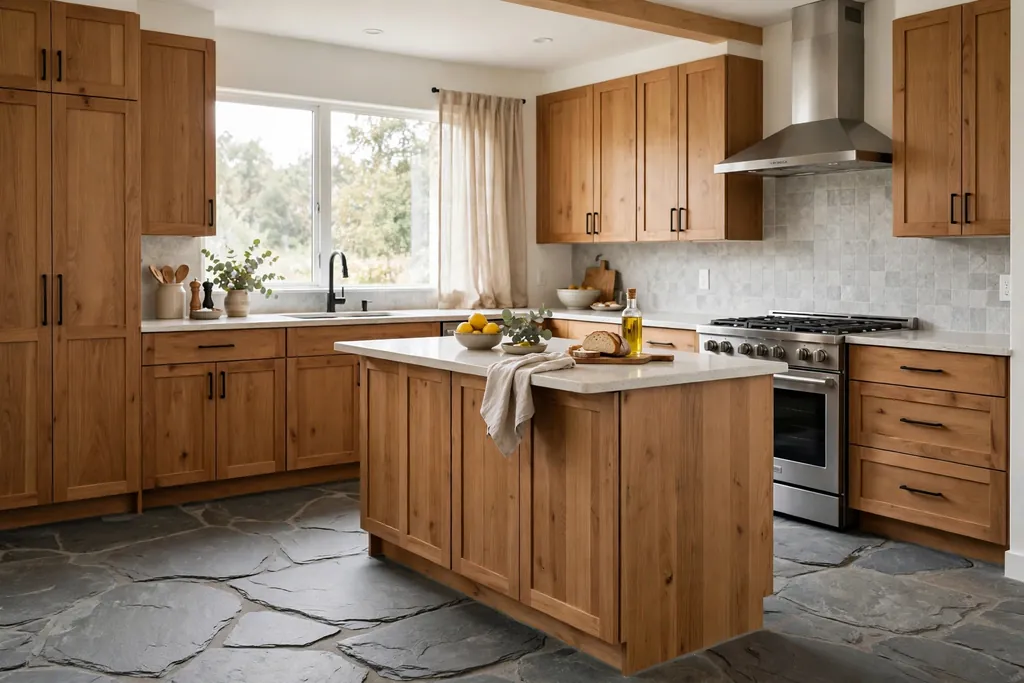
    Kitchen with a natural slate stone floor and wood cabinets.

    Lay natural slate for a kitchen floor with texture, variation, and a rugged, honest feel. Slate comes in greys, greens, and rust tones, and no two tiles look exactly alike, which gives the floor depth. It suits farmhouse kitchens, cottages, and rooms with wood beams or stone walls.

    Seal slate to resist stains, and choose a finish with enough grip for a wet kitchen floor. Slate feels cool underfoot, so pair it with warm wood cabinets or a wood island top, and add a rug in the seating area for comfort. Because slate tones vary, mix tiles from several boxes as you lay them so no one patch of color stands out.

    10. Marble-Look Porcelain Tile

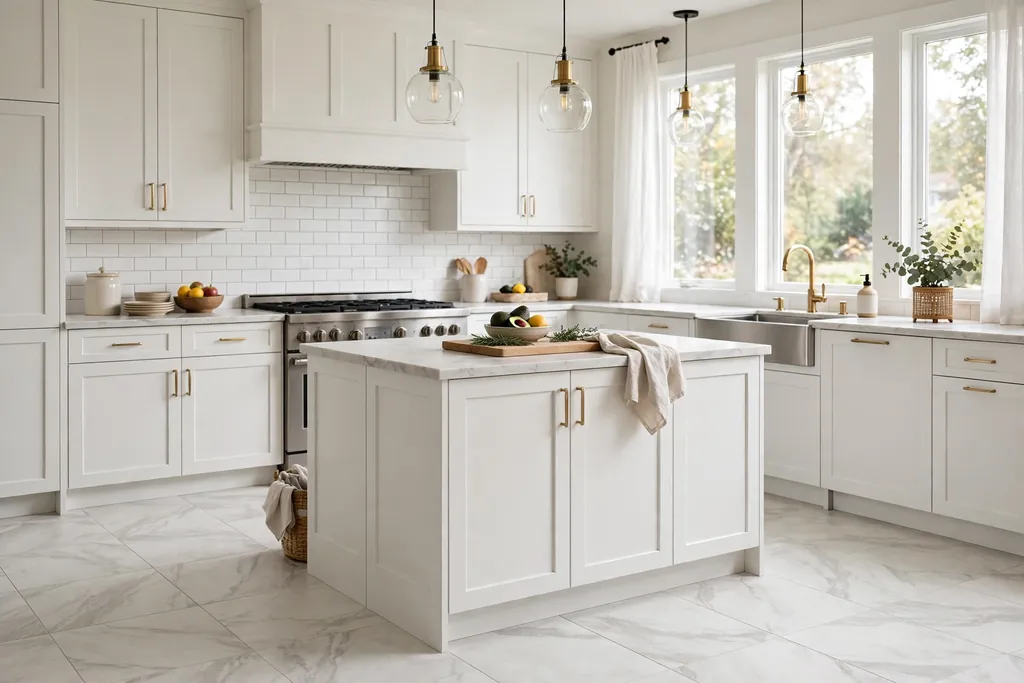
    Kitchen with pale marble-look porcelain floor tiles and white cabinets.

    Use marble-look porcelain tile for a kitchen floor with pale stone veining and the easy care of porcelain. The soft grey veins add movement to a plain kitchen, and the pale base keeps the room bright. This suits white, cream, and pale grey cabinets, and it pairs well with brass hardware and a simple white backsplash.

    Keep the rest of the room plain so the veining stays the main detail, and choose a matte or lightly textured finish for grip. Unlike real marble, porcelain resists stains from lemon, tomato, and wine, which makes it a practical pick for a busy cooking kitchen. Lay large tiles with narrow grout joints for a calm, stone slab feel.

    11. Warm Brick Floor

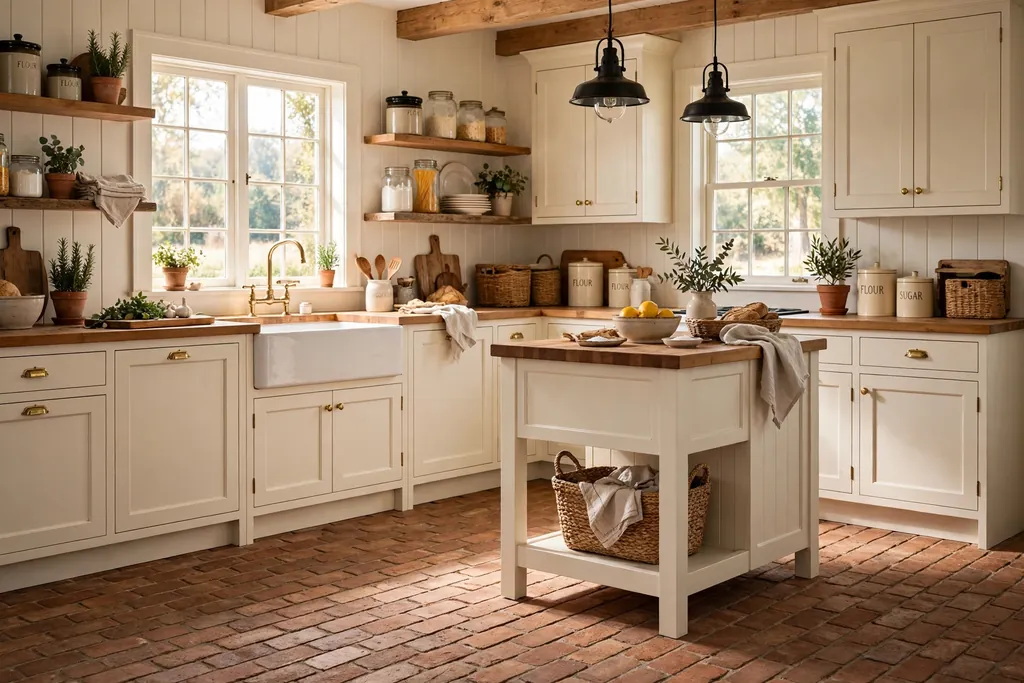
    Farmhouse kitchen with a warm brick paver floor and cream cabinets.

    Lay brick pavers for a kitchen floor with warmth, texture, and a farmhouse character. Brick suits cream cabinets, wood counters, and black hardware, and it gives an older house a floor that feels original to the building. The rough surface and warm red brown tone soften a kitchen with a lot of white or steel.

    Seal brick to resist grease and water, and choose a paver made for interior floors rather than an outdoor brick. Brick floors are hard underfoot, so add a cushioned mat at the sink and stove where you stand longest. Keep the grout or mortar joints clean with a stiff brush, since cooking grease settles into rough joints over time.

    12. Polished Concrete Floor

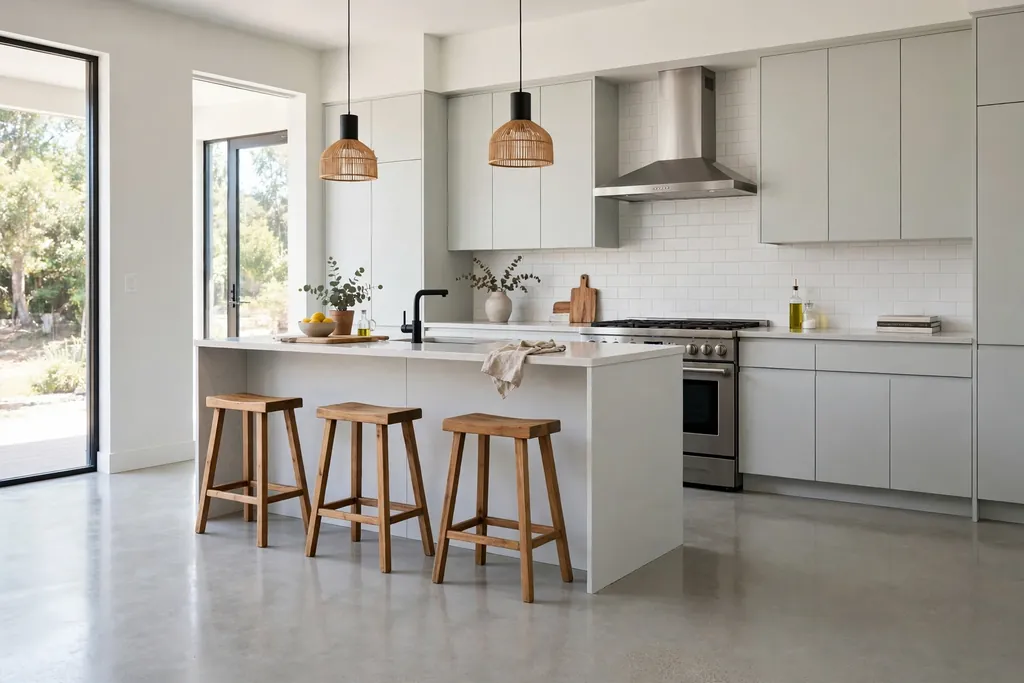
    Modern kitchen with a smooth polished concrete floor and plain cabinets.

    Choose polished concrete for a kitchen floor with a smooth, modern, and hard wearing surface. Concrete suits open plan kitchens, industrial rooms, and homes with plain cabinets, since the floor stays quiet and lets furniture and food take the focus. A light grey or warm grey polish keeps the room bright, while a darker stain adds drama.

    Seal concrete as advised, and wipe spills promptly, since even sealed concrete can mark from strong colors if left sitting. Concrete feels hard and cool, so add warmth with wood stools, a wood table, and a rug in the seating zone. Rugs with a non slip backing stop slipping on a smooth polished floor, which matters when carrying hot dishes.

    13. Terrazzo Floor

    Kitchen with a speckled terrazzo floor and pale modern cabinets.

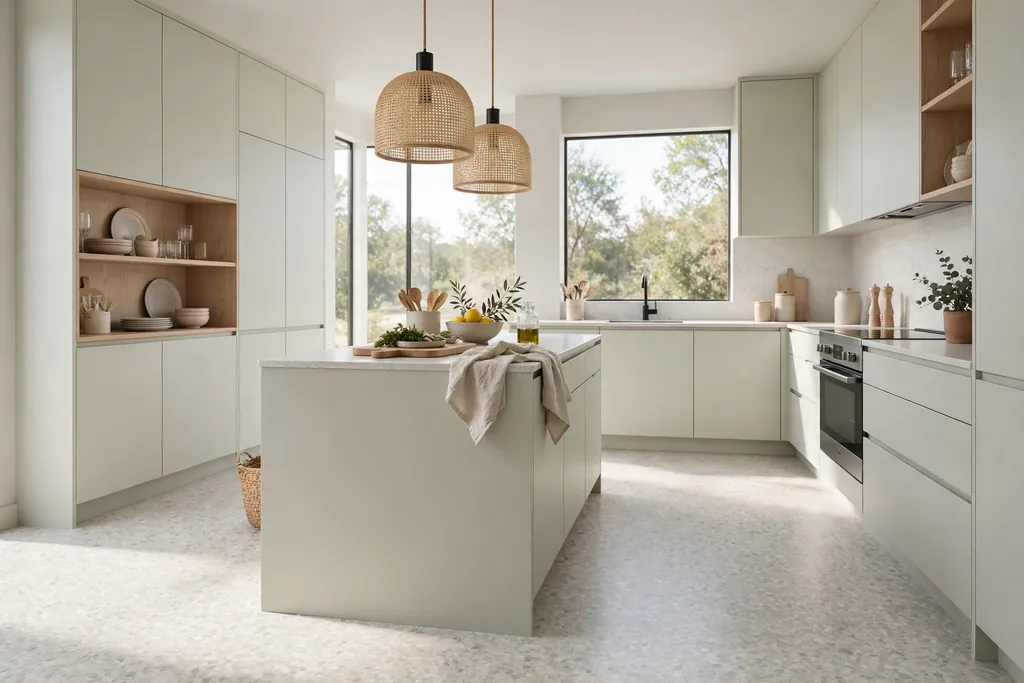
    Lay terrazzo for a kitchen floor with speckled color and a surface that hides crumbs well. Terrazzo mixes chips of stone, glass, or marble in a cement or resin base, so each floor has its own mix of tones. A pale base with warm grey, cream, and soft pink chips suits a modern kitchen, while a darker base suits a bolder room.

    Choose cabinet and wall colors from the lightest tones in the terrazzo mix, so the room stays calm. Keep the backsplash simple, since the floor already has plenty of detail. Seal the surface as advised by the supplier, and use felt pads under chairs, since terrazzo is hard and chair legs can mark a polished finish over time.

    14. Soft Cork Floor

    Kitchen with a warm honey toned cork floor and wood cabinets.

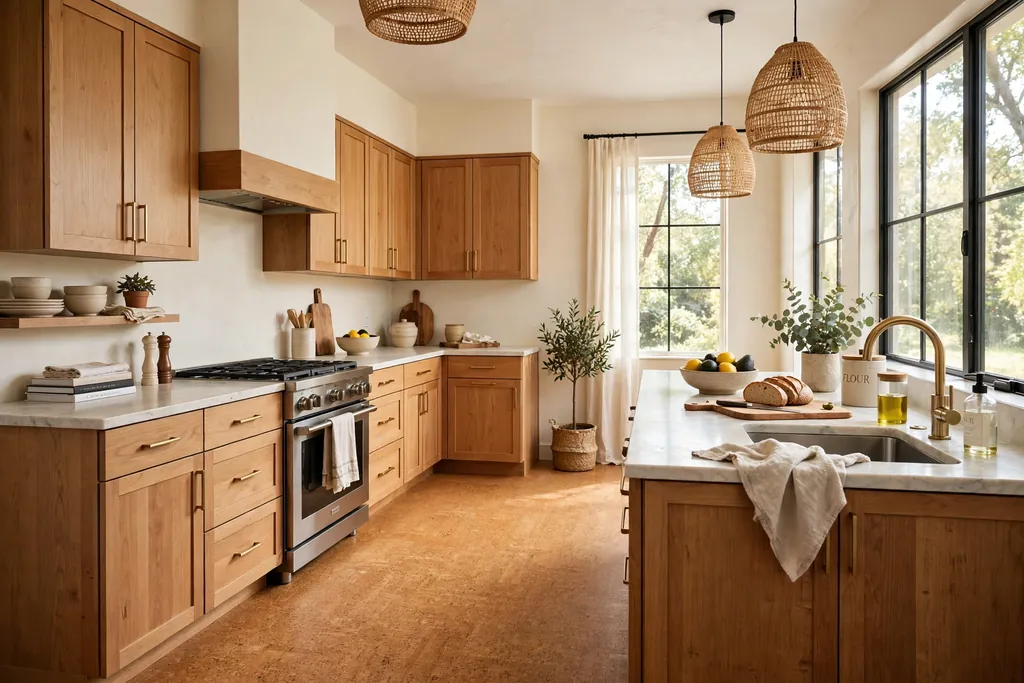
    Choose cork for a kitchen floor that feels warm, quiet, and kind to feet and dropped dishes. Cork gives slightly underfoot, which suits cooks who stand for long stretches, and it muffles sound in an open plan home. Natural cork tones range from pale honey to warm brown, and they pair well with wood cabinets and cream walls.

    Seal cork for kitchen use, and wipe water at once, since standing water is the main risk for cork floors. Use mats at the sink and dishwasher, and choose a cork tile or plank with a wear layer made for kitchens. Cork suits a household that wants comfort first and does not mind a floor with a softer, more natural look than tile or stone.

    15. Wood-Look Luxury Vinyl Plank

    Kitchen with wood-look luxury vinyl plank flooring and sage cabinets.

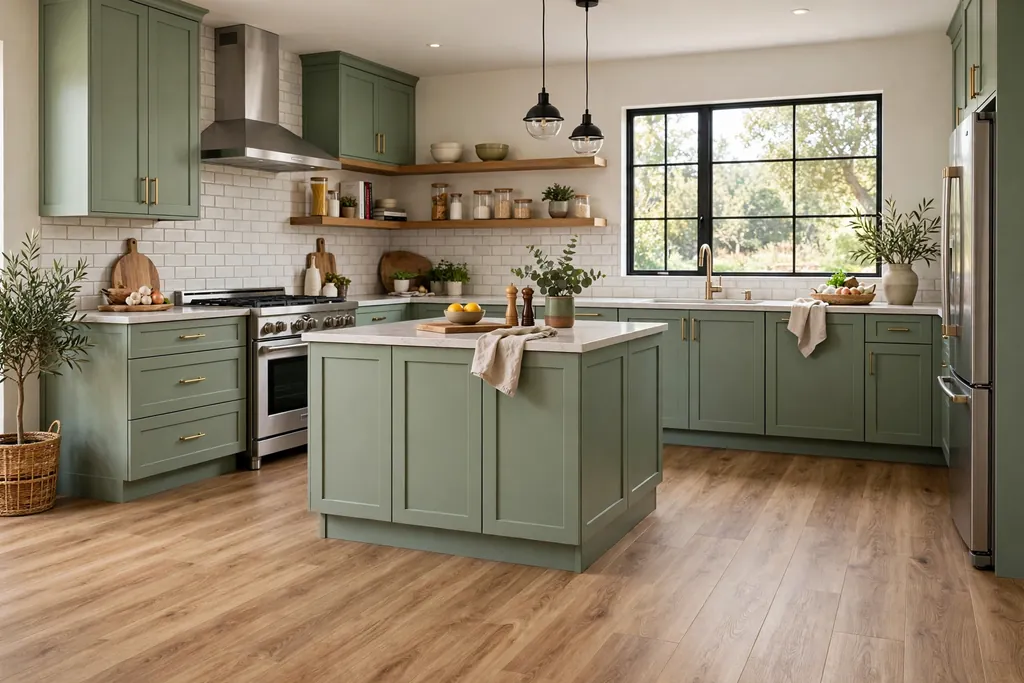
    Lay wood-look luxury vinyl plank for a kitchen floor that looks like wood and handles water like vinyl. The planks come in oak, walnut, and pale wood tones, and they suit renters and households with pets, since the surface resists scratches and spills. Vinyl plank also works well over an existing floor, which can keep fitting simpler.

    Choose a plank with a realistic grain and a matte finish, and check the wear layer before buying, since thicker wear layers last longer in a busy kitchen. Pair vinyl plank with cabinets in a tone that matches the wood look, and for help choosing that cabinet color, see these colors for your kitchen cabinets. Use a non slip rug pad under runners, and keep spare planks for repairs.

    16. Painted Floorboards

    Cottage kitchen with painted cream floorboards and white cabinets.

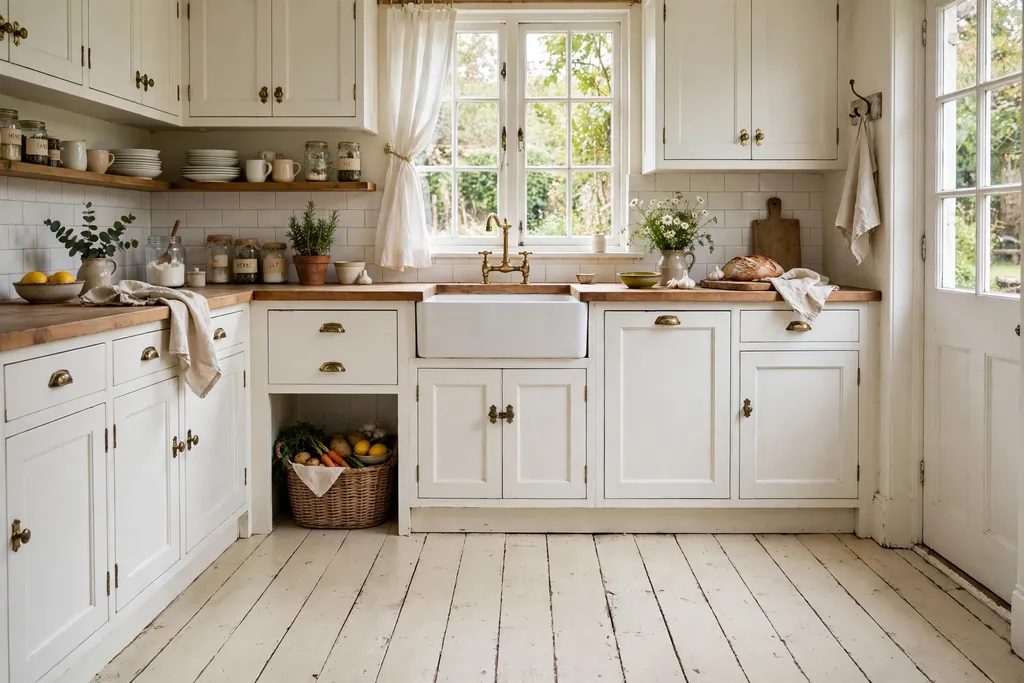
    Paint existing floorboards for a kitchen floor with a fresh color and a low cost change. White or cream paint lifts a dark kitchen, while a soft grey or sage paint adds color without new material. Painted boards suit cottages, farmhouses, and older homes where the boards are sound but tired.

    Sand and prime the boards first, and use a floor paint made for high traffic areas, since ordinary wall paint wears quickly under chairs and feet. Keep a small pot of the same paint for touch ups, and use a rug runner in the main work run to slow wear. Painted floors show scuffs over time, so treat touch ups as part of the look rather than a flaw.

    17. Penny Round Mosaic Tile

    Small kitchen with a penny round mosaic tile floor and plain cabinets.

    Use penny round mosaic tile for a kitchen floor with small scale texture and a vintage feel. The small round tiles suit a kitchen nook, a pantry floor, or a small galley kitchen, where a large tile pattern would feel too bold. A single color, such as soft grey or cream, keeps the floor calm, while a mix of two tones adds gentle movement.

    Grout lines are many on a mosaic floor, so seal the grout and plan on regular cleaning in the splash zone. Pair mosaic tile with plain cabinets and a simple counter, so the small pattern does not compete with a busy backsplash. Order spare sheets from the same batch, since mosaic shades vary and a repair sheet should match.

    18. Sheet Linoleum in a Plain Warm Tone

    Kitchen with a plain warm honey toned sheet linoleum floor and white cabinets.

    Lay sheet linoleum in a plain warm tone for a kitchen floor that is seamless, soft underfoot, and easy to clean. Sheet linoleum has almost no joints, so water has few places to sit, and it suits a small kitchen or a rental where a practical floor matters most. Warm tones such as honey, warm grey, or soft terracotta keep the room relaxed without a pattern.

    Keep cabinets and counters plain so the floor reads as a quiet background, and add color through a rug, stools, or tableware that you can change easily. Linoleum needs a smooth, clean subfloor for a good finish, so ask your fitter to check the base before laying. Use felt pads on furniture and avoid dragging heavy appliances across the sheet.

    Conclusion

    A relaxed kitchen floor starts with honest choices about water, cleaning, and daily wear, then adds color and pattern in a way the rest of the room can support. Wood warms the room, tile and stone handle spills best, concrete and terrazzo suit modern rooms, and cork, vinyl plank, and linoleum keep comfort and easy care in focus. Test samples beside your cabinets and counters, ask about sealing and spares, and repeat one floor tone elsewhere so the room feels pulled together. Save this list on Pinterest for your next kitchen refresh, and start with the floor you stand on most: the run between the sink, the stove, and the fridge.

    FAQs

    What is the best flooring for a busy kitchen?

    The best floor for a busy kitchen is one that handles water, grease, and dropped items with little fuss. Porcelain tile, stone-look porcelain, luxury vinyl plank, and sealed concrete all clean easily and resist stains. Wood and cork can work well too, if you wipe spills promptly and use mats at the sink and dishwasher. Choose the material that fits your cleaning habits as much as your style, since a floor you dread cleaning will never feel relaxed.

    Is wood flooring practical in a kitchen?

    Yes, wood works in a kitchen if you choose a finish made for the room and keep water from sitting on it. Wipe spills at once, use mats at the sink and back door, and add felt pads to chair legs. A mid tone oak with visible grain hides small marks better than very pale or very dark wood. If water damage worries you, wood-look vinyl plank gives a similar look with stronger water resistance.

    How do I choose a kitchen floor color?

    Start with your cabinets and counters, since those are harder to change than a rug or a stool. A warm wood floor suits white, cream, and sage cabinets, while a pale stone floor suits dark cabinets and keeps the room bright. Order samples and check them in daylight and evening light beside your cabinets, since floor colors shift a lot between lights. If you plan to change cabinets later, a mid tone neutral floor is the safest long term choice.

    Does a patterned kitchen floor suit a small kitchen?

    Yes, if the pattern stays calm and the rest of the room stays plain. A checkerboard in large squares, a soft patterned cement tile, or a single color mosaic can add character to a small kitchen without crowding it. Keep cabinets, counters, and backsplash plain, and use a plain rug runner in the main work run to calm the pattern underfoot. Avoid mixing a patterned floor with a patterned backsplash, since two strong patterns compete in a small room.

    What kitchen flooring is easiest to clean?

    Porcelain tile, sheet linoleum, and luxury vinyl plank are among the easiest kitchen floors to clean, since their surfaces wipe clean and resist most stains. Large-format tile has fewer grout lines to scrub, and sheet linoleum has almost no joints at all. Natural stone, cement tile, and brick need sealing and more care with grout, while wood and cork need prompt wiping of spills. Whatever you choose, a daily sweep and a weekly mop keep most kitchen floors in good shape.

    Can renters change a kitchen floor without a full remodel?

    Yes. Renters can use peel and stick vinyl tiles, a large washable rug, or a runner over an existing floor to change the look with no fixed work. Luxury vinyl plank in a click fit system also suits some rentals, but check your lease and get written permission before fitting anything fixed. Keep the original floor in good shape underneath, save any spare pieces, and choose a change you can remove cleanly at the end of the tenancy.


  • 31 Witchy Kitchen Aesthetic Ideas That Bring Practical Style Home

    31 Witchy Kitchen Aesthetic Ideas That Bring Practical Style Home

    A witchy kitchen is less about costumes and more about mood: dark cabinets, warm wood, dried herbs, brass details, and soft evening light. The look suits everyday cooking when each moody detail also earns its place, whether it stores something, adds light, or keeps a work surface clear. These 31 witchy kitchen aesthetic ideas cover cabinets, shelves, herbs, lighting, and table settings, so you can pick one change, live with it, and add another only if the room still feels calm and easy to cook in. For dark kitchen styling that also helps small rooms work harder, these gothic kitchen ideas pair well with the ideas below.

    Key Takeaways

    • Pick a small set of witchy details, such as black, brass, moons, and dried herbs, and repeat them so the room looks planned.
    • Keep at least one light surface, such as a pale counter, a light wall, or a bright window, so dark colors do not close the room in.
    • Give every decorative group a job: jars hold herbs, trays hold candles, and baskets hold linens or pantry goods.
    • Use flameless candles and battery lights near towels, paper, and dried plants, and keep real flames away from cooking areas.
    • Store daily items where you can reach them, and put purely decorative pieces higher or behind glass.
    • Change textiles and small details first, since towels, runners, and jars give a big shift without new cabinets.

    1. Matte Black Base Cabinets with Brass Pulls

    Kitchen with matte black base cabinets, brass cup pulls, and a pale countertop.

    Matte black base cabinets give a witchy kitchen a clear anchor without changing the layout. Keep the upper cabinets pale, or leave one stretch of wall light, so the dark lower half does not make the room feel low. Brass cup pulls soften the black and make the cabinets easy to open with wet or floury hands.

    Paint only after cleaning and lightly sanding the doors, and use a paint made for cabinets so the finish stands up to daily use. Try one door first and check it in daylight and evening light. If black on every base cabinet feels heavy, paint the island or one run only and keep the rest pale.

    2. Deep Green Cabinets with Butcher Block Counters

    Kitchen with deep green cabinets and a warm butcher block countertop.

    Deep green cabinets bring a forest note to the kitchen, and warm butcher block counters keep the green from feeling cold. This pairing suits cooks who want the moody look but still want a warm, natural work surface for chopping and rolling dough.

    Keep the counters oiled and use boards for cutting, since wood marks easily. Pair the green with black hardware or brass knobs, and keep the backsplash plain so the cabinet color stays the main detail. If full cabinet painting feels like too much, paint one run or the island in green and leave the rest in a pale neutral.

    3. A Plum Island as the Room Anchor

    Kitchen with a plum island, pale cabinets, and a wood countertop.

    A plum or aubergine island can anchor a witchy kitchen while the surrounding cabinets stay quiet. The island becomes the piece people notice first, and it gives you a clear spot for prep, serving, and gathering without painting the whole room dark.

    Keep the island top in wood or a pale stone so the plum reads as a color accent rather than a dark block. Add a shelf below for baskets, and keep the walkway around the island clear. If plum feels bold, test a painted board leaned against the island for a week before you commit to the color.

    4. Open Shelves for Jars and Everyday Dishes

    Open kitchen shelves with glass jars, dark mugs, and bowls.

    Open shelves put witchy kitchen pieces on show: glass jars, dark mugs, bowls, and a few dried stems. They also use wall space that a closed cabinet would make feel heavy, and they keep daily dishes where you can reach them.

    Keep each shelf to one or two groups, such as bowls on one shelf and mugs on another, and leave a gap at each end. The spacing advice in our guide on how to style open shelves helps keep a full shelf looking calm. Fix shelves into studs, keep heavy stacks low, and limit open shelves to one wall so the room still has closed storage for messier items.

    5. Labeled Apothecary Jars for Herbs and Dry Goods

    Labeled glass apothecary jars filled with dried herbs and dry goods on a shelf.

    Clear apothecary jars with simple labels turn pantry storage into a witchy display. Use them for dried herbs, teas, rice, beans, and baking goods, so the jars look good and you can see at a glance what needs restocking.

    Choose jars with tight lids, and keep them away from the stove, where steam and heat shorten the life of dried herbs. Label the front of each jar, and put daily herbs at hand height and rarely used goods higher. Decant only what fits, and keep the rest in its original bag in a closed cupboard until the jar empties.

    6. A Hanging Herb Drying Rack Near a Window

    Herb bundles hanging upside down on a rack near a kitchen window.

    A small hanging rack for drying herbs adds a practical witchy touch and gives you herbs for cooking all winter. Hang bundles of rosemary, thyme, mint, or oregano upside down in a dry spot with air moving around them, away from direct stove steam.

    Tie bundles loosely with twine, and leave space between them so air can reach each stem. Check bundles weekly, and crumble dried leaves into labeled jars once they feel crisp. Keep the rack clear of the stove and out of the main walkway, so no one brushes against falling leaves while carrying a hot pan.

    7. Potted Herbs in Dark Pots on the Windowsill

    Potted herbs in black pots lined along a kitchen windowsill.

    Move everyday herbs such as parsley, chives, mint, and basil into black, charcoal, or deep green pots and line them along the windowsill. The dark pots supply the witchy note while the herbs keep earning their place in daily cooking.

    Check each pot has drainage or an inner pot so roots do not sit in water. Keep the sill arrangement low and narrow so the window still opens and the sink area below stays easy to clean. Snip herbs from the top of each plant, and rotate pots weekly so growth stays even.

    8. Crescent Moon Cabinet Knobs and Drawer Pulls

    Kitchen drawers with crescent moon knobs in brass.

    Crescent moon knobs on a few cabinets or drawers add a witchy detail at hand level, where you notice it every day. Use them on one run, such as the island drawers or the pantry doors, rather than on every cabinet, so the moons stay special.

    Match the finish to your other hardware, such as brass or matte black, so the knobs link to the rest of the room. Check the size and grip before buying a full set, since small decorative knobs can be awkward on heavy drawers. Keep the remaining knobs plain, and let the moons carry the theme on their own.

    9. Moon Phase Wall Art Above a Counter or Table

    Moon phase wall art in a black frame above a kitchen counter.

    A moon phase print or a small row of moon plaques above a counter or table gives the kitchen a clear witchy focal point without taking any work space. Choose one piece, in a black frame, and hang it where you see it while cooking or eating.

    Keep the wall around the art plain, so the moon phases stand out, and hang the piece at eye level. If you rent, lean a framed print on a shelf instead of hanging it. Pair the moons with one other moon detail, such as the knobs in Idea 8, and keep the rest of the wall quiet.

    10. A Star and Moon Backsplash Accent

    Kitchen backsplash accent with star and moon tiles behind a stove.

    A small star and moon tile accent behind the stove or sink turns a plain cooking wall into a focal point, and it needs only a small area of tile. Mark the shape on the wall first, tile inside it, and keep the rest of the backsplash plain so the motif reads clearly.

    Use tiles that wipe clean and a grout sealer near the stove, since this wall sees steam and splashes. If full tiling feels like too much work, a peel-and-stick star and moon panel on one section gives a similar effect and can be removed later. Keep the panel width close to the stove or sink width, so it frames the zone rather than spreading across the whole wall.

    11. Black and White Checkerboard Floor

    Kitchen with a black and white checkerboard tile floor and pale cabinets.

    A black and white checkerboard floor adds a classic pattern underfoot and helps a witchy kitchen feel planned rather than plain. Small tiles suit a compact room, since large tiles can make the pattern feel out of scale.

    Use tiles that suit a kitchen floor, with grout sealed against spills, and keep a spare box of tiles for repairs. If new tiling is too much work, peel-and-stick checkerboard tiles on a sound existing floor give a similar look and can be removed later. Keep the walls and cabinets quiet, so the floor carries the pattern on its own.

    12. Candle-Style Pendant Lights Over the Island or Table

    Kitchen island with black iron candle-style pendant lights and warm bulbs.

    Pendant lights shaped like candle holders give evening light a witchy feel without real flames near curtains or paper. Use warm bulbs on a dimmer, and hang two small pendants over an island or one over a small table, rather than a large fitting that crowds a low ceiling.

    Choose a simple iron or black metal fitting so the light, not the shade, does the work. If you cook under the pendants, add under-cabinet light for the work surface, since candle-style bulbs alone are too dim for safe chopping. Keep spare bulbs in a drawer, since warm candle-style bulbs can be harder to find than standard bulbs.

    13. Flameless Candle Cluster on a Heat-Safe Tray

    Flameless candles in different heights grouped on a tray on a kitchen counter.

    Group two or three flameless candles in different heights on a tray on the island or a side counter, away from the stove. You get a warm evening glow while you cook or clear up, with no live flame near towels, paper, or dried plants.

    Set a timer if the candles offer one, and replace batteries before a gathering. Keep the tray clear of the sink splash zone, and move the whole tray in one motion when you need the counter for prep. A tray also stops wax-free candles from drifting across the counter into cooking zones.

    14. Wrought Iron Pot Rail with Cast Iron Pans

    Black wrought iron rail with hooks holding cast iron pans beside a stove.

    A wrought iron rail with hooks frees a whole cabinet shelf and puts pans where you grab them while cooking. Fix the rail into studs, hang the heaviest pan nearest a bracket, and leave space between pans so you can lift one off without knocking the next.

    Keep lids in a separate spot, since lids hung with pans tangle. This idea suits a wall beside the stove or a short stretch above a counter, but keep pans clear of the main walkway so no one brushes against a handle. Wipe the rail often, since steam leaves a film on iron near a stove.

    15. A Black Dutch Oven Left on the Stove as a Working Display

    Black Dutch oven on a stove in a moody kitchen.

    A black Dutch oven or a dark stockpot left on the stove works as a witchy centerpiece and as real cookware. Choose one heavy pot you use weekly for soups, stews, and braises, and keep its lid nearby so the pot stays ready for cooking rather than gathering dust.

    Wipe the outside after cooking, and keep the pot clear of the burners you use daily if it blocks a burner you need. If the stove is small, store the pot on a shelf by the stove instead, and bring it out for cooking days. One dark pot is enough; a row of unused pots quickly turns a work surface into storage.

    16. A Mortar and Pestle Station for Spices

    Mortar and pestle on a small board with spice jars on a kitchen counter.

    A mortar and pestle station gives the kitchen a hands-on witchy corner and a real tool for grinding spices, herbs, and garlic. Set the mortar on a small board or tray with two or three spice jars, so grinding stays in one spot and crumbs do not spread across the counter.

    Choose a heavy mortar that stays still while you grind, and keep it away from the counter edge. Rinse and dry it after use, since damp spice residue stains stone. If you grind spices weekly, keep the station out on the counter; if you grind rarely, store it in a cupboard and bring the tray out for cooking sessions.

    17. A Tea Station on One Tray

    Tea station tray with dark mugs, a tea jar, and a honey pot near a kettle.

    Set up one tray near the kettle with mugs, a small jar for tea, a honey pot, and a folded towel. A defined station keeps morning and evening drinks in one spot and stops supplies spreading across the counter, and it suits the witchy look when the mugs are dark and the jars are labeled.

    Restock the tray during your weekly shop so it never turns into clutter. Guests can help themselves without opening every cabinet, and the tray lifts off in one motion when you need the counter for prep. Keep the tray away from the stove, and wash mugs back to the tray after use so the station stays complete.

    18. A Small Display Shelf for Polished Stones and Found Objects

    Small kitchen shelf with polished stones, a shell, and a framed picture.

    A single small shelf for polished stones, a shell, a pinecone, and one or two small framed pictures adds a personal, collected feel to a witchy kitchen. Keep the shelf small and the group to a handful of pieces, so it reads as a display rather than clutter.

    Put the shelf away from steam and splashes, such as on a side wall or above a table, and dust it weekly, since kitchen grease settles on open surfaces. Choose objects you already own or find on walks, rather than buying a full set at once, so the shelf grows slowly and feels personal.

    19. A Dried Botanical Garland Along a Shelf Edge

    Dried orange slice and cinnamon garland along a kitchen shelf edge.

    Run a garland of dried orange slices, cinnamon sticks, and dried herbs along the front edge of a shelf or across the top of a window frame. The garland adds scent and color without taking counter space, and it suits the witchy palette of warm browns, rust, and deep green.

    Fix it with removable hooks or small clips, and keep it well clear of the stove, steam, and open flames, since dried plants and heat do not mix. A single run is enough; more than one can make a working kitchen feel busy. Replace pieces that fade or shed, and store the garland flat in a box between seasons.

    20. One Black Cat Accent, Used Sparingly

    Small black cat figure on a kitchen shelf beside jars.

    One black cat accent, such as a small figure on a shelf or a simple silhouette print in a frame, gives a witchy kitchen a playful note. Keep it to one piece, so the kitchen still feels like a place to cook rather than a themed display.

    Place the figure on a shelf away from steam, or hang the print where it is seen from the table. If you already have a cat print elsewhere in the home, skip this idea and use the shelf space for jars or cookbooks instead. The seasonal dark-kitchen styling in these Halloween kitchen decor ideas shows how one dark accent can carry a room without crowding it.

    21. Vintage Cookbooks and Old Books on a Shelf

    Shelf of vintage cookbooks with cloth covers in a kitchen.

    A shelf of old cookbooks, with cloth covers and worn spines, gives a witchy kitchen the look of a well-used recipe library. Stand books upright in one group, and keep the cookbooks you actually use at hand height, with purely decorative old books higher.

    Use a bookend to stop the row from toppling, and keep books away from the stove and sink, where steam and splashes damage covers. If a book is fragile, lay it flat on top of the row rather than pulling it in and out daily. A few books are enough; a full wall of books belongs in a library, not above a work counter.

    22. A Dark Stone-Look Countertop with Pale Veining

    Kitchen with a dark stone-look countertop with pale veining and black cabinets.

    A dark grey countertop with pale veining gives a witchy kitchen a solid work surface that still shows crumbs and spills less than a plain black top. The pale lines break up the dark surface and link it to a light sink, light dishes, or a pale wall.

    Wipe the top daily and use boards for cutting, since dark surfaces show scratches in bright light. Pair the top with one warm detail, such as wood boards or brass handles, so the kitchen does not feel cold. If a full new countertop is out of reach, a dark stone-look worktop cover on one run gives a similar look for less work.

    23. Amber and Smoked Glassware for Evening Meals

    Amber and smoked drinking glasses on a wooden kitchen table.

    Set out amber, smoked, or simple black stemmed glassware for evening meals. Colored glass catches low light and makes an ordinary weekday dinner feel special without any extra objects on the table.

    Keep everyday clear glasses for mornings if the darker glass feels heavy in daylight. Wash colored glass by hand if the maker advises it, and store it where it will not chip against heavier mugs. One set of six is enough; you do not need a full cabinet change to get the effect.

    24. A Matte Black Faucet with Matching Hardware

    Kitchen sink with a matte black faucet, black knobs, and a pale counter.

    A matte black faucet, with matching knobs and pulls, is a low-cost way to link dark cabinets, an iron rail, and a black hood into one scheme. Swap the faucet and hardware together, so the finishes match, and keep the sink and counter pale so the black details stand out.

    This change needs no new cabinets and takes an afternoon for most kitchens. Check the faucet fits your sink holes before buying, and keep the old hardware in a bag in case you move and want to refit it. Wipe the black finish with a soft cloth, since hard water marks show on matte black.

    25. An Arched Mirror or Arched Cabinet Detail

    Tall arched mirror in a black frame above a kitchen side counter.

    A tall arched mirror over a side counter, or arched trim on one or two cabinet doors, brings a soft gothic shape into the kitchen at eye level. The arch shape reads as witchy and old-world even when the rest of the room is plain and modern.

    Choose one arch detail, not both, so the shape stays special. Fix a mirror with fixings rated for its weight, and keep it clear of the faucet swing if it hangs near the sink. For cabinet doors, keep the arch shape the same on each door so the run looks planned.

    26. Botanical Prints in Black Frames

    Botanical herb prints in black frames hung in a row on a kitchen wall.

    Botanical prints of herbs, mushrooms, and leaves in thin black frames suit a witchy kitchen and link the herb jars and dried plants into one story. Hang two or three prints in a row on a side wall, or lean one large print on a shelf.

    Keep the frames the same color and the spacing even, so the group looks planned. Hang prints away from the stove, where steam and grease mark glass, and use prints of plants you actually grow or cook with, so the wall feels personal rather than generic.

    27. A Cozy Breakfast Nook with Dark Cushions

    Cozy kitchen breakfast nook with dark cushions, a wood table, and a candle tray.

    A small breakfast nook with dark cushions, a wood table, and a flameless candle on the table gives the witchy kitchen a place to sit and linger. Choose washable cushion covers in charcoal, plum, or deep green, and keep the table clear except for the candle tray.

    Add a basket under the bench or beside the table for placemats and napkins, so the nook stays tidy. If the nook is small, one bench and two chairs suit it better than a full set, and a cushion on the bench alone still gives the dark, cozy feel.

    28. Woven Baskets for Pantry and Linen Storage

    Woven baskets on kitchen pantry shelves holding linens and pantry goods.

    Woven baskets on pantry shelves, on top of cabinets, or under a bench hide linens, placemats, and pantry overflow while adding warm texture to a dark kitchen. Label each basket on the front, so you can find things without pulling every basket out.

    Choose baskets that fit the shelf with room to slide in and out, and keep heavy pantry goods low. Wash or wipe baskets seasonally, since kitchen dust settles in woven fibers. One basket per shelf is enough; a row of empty baskets quickly becomes clutter.

    29. A Chalkboard Menu Board for Weekly Meals

    Small chalkboard menu board leaning on a kitchen counter with a weekly menu.

    Lean a small chalkboard or letter board on the counter against the backsplash, or hang it on a side wall, with the weekly menu, a shopping list, or a simple moon drawing. It is a practical piece the family can use for lists and notes all year; only the message changes with the season.

    Keep chalk dust away from open food by placing the board near the door or fridge rather than beside the stove. Wipe it fully clean at the end of each week, and keep chalk in a small pot beside the board so it does not roll across the counter.

    30. A Simmer Pot Ingredients Jar by the Stove

    Labeled jar of simmer pot ingredients with dried orange slices and cinnamon by a stove.

    Keep a labeled jar of simmer pot ingredients, such as dried orange slices, cinnamon sticks, cloves, and star anise, on a shelf by the stove. When you want a warm scent while you cook, simmer a spoonful in water on the stove while you are in the room, and never leave the pot unattended.

    Keep the jar sealed and away from direct heat, and refill it from a larger pantry store. If anyone at home dislikes fragrance, skip the simmer pot and use the jar as a display piece only; fresh air from an open window works just as well. Keep scent light so it does not fight with food smells.

    31. A Witchy Table Setting for Gatherings

    Kitchen table set with black linen, brass candle holders, and dried stems in a dark vase.

    For a gathering, set the table with black or charcoal linen, brass candle holders with flameless candles, and a low centerpiece of dried stems in a dark vase. The setting feels witchy and special, but every piece is reusable and the table stays clear enough for serving dishes.

    Keep the centerpiece low so guests can see each other across the table, and build it on a tray so the whole setting lifts off in one motion before serving. Use plain plates and clear water glasses, so the dark linen and brass carry the theme without a full tableware change. After the meal, fold the linen back into the basket from Idea 28, so the setting stores as one set.

    Conclusion

    A witchy kitchen works when mood and cooking share the room. Start with one change, such as black cabinets, open shelves, or a tea tray, and add moon details, herbs, and candlelight only where they also store something, add light, or keep a surface clear. Keep one light surface in the room, use flameless light near towels and dried plants, and let daily items stay within reach. Work through this list in order: color first, then storage, then herbs, then light, then the table, and adjust after a week of real cooking. For more dark-kitchen styling, the gothic kitchen ideas and Halloween kitchen decor ideas guides pair well with the ideas above, and the shelf spacing in our guide on how to style open shelves helps keep every display calm.

    Keep this list handy for your next free hour at home, and build your witchy kitchen one shelf, one jar, and one candle at a time.

    FAQs

    What is a witchy kitchen aesthetic?

    A witchy kitchen aesthetic uses dark colors, natural materials, and old-world details, such as black cabinets, brass hardware, dried herbs, moon motifs, and candlelight, to give a kitchen a moody, collected feel. The look stays practical when each detail also has a job: jars store herbs, trays hold candles, and shelves hold daily dishes. Start with a small set of details and repeat them, rather than filling every surface at once.

    How do I make a witchy kitchen without painting all my cabinets?

    Change textiles and small details first: dark dish towels, a runner, labeled jars, a tea tray, moon knobs on one run, and a print or two on a side wall. These changes give a big visual shift without new cabinets. If you want a larger change later, paint one run or the island only, and keep the rest pale so the room stays bright enough to cook in.

    How do I keep a dark kitchen bright enough for cooking?

    Keep at least one light surface, such as a pale counter, a light wall, or a bright window, and layer your light: bright under-cabinet light for chopping, plus softer candle-style or lamp light for evenings. A mirror on a side wall can bounce window light around the room. Dark cabinets on the lower half with pale uppers also keep the room from feeling low and closed in.

    Are real candles safe in a witchy kitchen?

    Real candles and cooking are a risky mix, since towels, paper, dried plants, and curtains sit close to work surfaces in most kitchens. Flameless candles and battery lights give the same warm glow with no flame near those materials. If you use real candles, keep them on a heat-safe tray, well clear of the stove, towels, and dried plants, and never leave them burning in an empty room.

    What herbs work best for a witchy kitchen display?

    Use herbs you actually cook with, such as rosemary, thyme, mint, oregano, parsley, and basil, so the display earns its place. Keep fresh herbs in dark pots on the windowsill, dried bundles on a hanging rack away from stove steam, and crumbled dried leaves in labeled jars. Herbs kept near heat and steam lose flavor faster, so store jars away from the stove.

    How can renters get a witchy kitchen look without permanent changes?

    Use removable and freestanding pieces: peel-and-stick tile accents, a stained glass style film on part of a window, dark towels and linens, labeled jars, a tray-based tea station, freestanding shelves, and framed prints leaned on shelves. Removable hooks hold garlands and tea towels without new fixings. Keep the larger pieces portable, so the look moves with you.

    How do I stop a witchy kitchen from looking cluttered?

    Give every group a container and a limit: one tray for candles, one shelf for jars, one basket per pantry shelf, and one accent piece per wall. Leave gaps between groups on open shelves, and put daily items at hand height and decorative pieces higher. Step back across the room after each change, and remove one item if a shelf or counter looks crowded.


  • 12 Strawberry Kitchen Decor Ideas for a Fresh Take on Your Home

    12 Strawberry Kitchen Decor Ideas for a Fresh Take on Your Home

    Strawberries bring a clear red, a touch of green, and a summer feeling to a kitchen, but the theme works best with a limit. A strawberry print on every surface can feel busy, while one strong strawberry note, repeated in two or three smaller spots, reads as a plan. These 12 strawberry kitchen decor ideas cover cabinets, tile, windows, seating, walls, and small afternoon changes. Start with the spot you see most, test the red beside your floor and counters in daylight and evening light, and keep work surfaces plain so cooking stays easy. If you like a softer warm color first, these pink kitchen ideas show how blush cabinets pair with white, wood, and brass.

    Key Takeaways

    • Use one strawberry red through the room, and repeat it in at least two or three places, such as cabinets, curtains, and a towel, so it reads as a plan.
    • Pair strawberry red with white, warm wood, cream, pale stone, or soft green, and keep other strong colors to a minimum.
    • Test a strawberry paint, tile, or fabric sample beside your floor, counter, and cabinet color in daylight and evening light before a large change.
    • Put the fruit theme where hands and eyes land most: cabinets, tile, the window, seating, and the table, rather than on every surface.
    • Choose washable, wipeable finishes near the stove and sink, since kitchen surfaces pick up grease and water marks.
    • Small changes like knobs, towels, tableware, and a fruit bowl let renters try the theme with no fixed work.

    1. Strawberry Red Shaker Cabinets

    Kitchen with strawberry red shaker cabinets, white counters, and a wood floor.

    Paint shaker cabinets in a strawberry red for a kitchen that feels fresh and cheerful without shouting. Shaker doors keep the shape simple, and white walls, a pale counter, and a wood floor stop the red from feeling heavy. This suits a kitchen with good daylight, where the red reads as a warm fruit color rather than a bright warning color.

    Keep handles simple in brass or matte black, and choose a counter in white or pale grey so the cabinets stay the focus. If you worry about commitment, paint one run of cabinets first and live with it for a week before painting the rest. Wipe doors near the stove each week, since dark red paint shows pale dust and cooking splashes.

    2. Strawberry Print Tile Backsplash

    Strawberry print tile backsplash behind a kitchen cooker with white cabinets.

    Lay tiles printed with strawberries, leaves, and small white flowers as a backsplash for a fruit theme in a classic tile shape. A white tile with a scattered strawberry print feels light, while a tile with a larger fruit pattern feels bolder. Subway or square tiles suit most kitchens because the shape is familiar and the size works around sockets and windows.

    Pair strawberry tile with white cabinets and a plain counter, so the tile is the main color note. Order a few spare tiles for future repairs, and seal grout in the splash zone behind the sink and cooker. Check a tile sample under kitchen lights at night as well as in daylight, since red glazes shift a lot between lights.

    3. Strawberry Cafe Curtains at the Window

    Kitchen window with strawberry print cafe curtains above a sink.

    Hang strawberry print cafe curtains on the lower half of the kitchen window for privacy at counter height while the top half stays open for daylight. A small strawberry print on white or cream cotton suits a kitchen, and a washable fabric matters, since kitchen curtains pick up grease film over time. Hang the panels on a slim tension rod inside the frame if you rent, or on a small fixed rod if you own.

    Keep the hem just above the sill so fabric does not sit in water near the sink, and keep curtains well clear of the stove. Add one plain plant or a small tray on the sill, so the strawberry print stays the main window color. For more ways to dress the window without blocking light, see these kitchen window decor ideas.

    4. Open Shelves with Strawberry Dishes and Glassware

    Open kitchen shelves holding strawberry patterned dishes and red rimmed glasses.

    Paint open shelves white or pale wood, and display strawberry patterned plates, bowls, and red rimmed glasses against them. The dishes carry the fruit theme, while the shelves stay plain, so you can swap the theme later without repainting. This suits a kitchen with one blank wall or a short run above a counter.

    Keep the shelf items to daily pieces you actually use, and leave breathing room between groups so shelves read as tidy, not crowded. Dust open shelves weekly, since open storage collects cooking film. Put heavy stacks low, and keep shelves clear of direct stove steam.

    5. Strawberry Island in a Neutral Kitchen

    Strawberry red kitchen island with a pale counter in a white kitchen.

    Keep the main cabinets white or wood, and paint only the island strawberry red. The island becomes a clear focal point, and the rest of the kitchen stays neutral, which makes the change lower risk and easier to reverse. A strawberry red island suits a white kitchen, while a deeper berry red suits a kitchen with dark wood floors.

    Repeat the island red once more, in stools, a rug, or a vase, so it looks planned rather than random. Choose a hard wearing counter for the island, since it takes the most daily use. This is a good first step if you like strawberry red but are not ready for red cabinets everywhere.

    6. Breakfast Nook with Strawberry Cushions

    Breakfast nook with strawberry print cushions and a bowl of strawberries on a wood table.

    Use strawberry print cushions on a breakfast nook bench, plus a bowl of fresh strawberries or a small strawberry plant as the table centerpiece, for a seating area that feels dressed without new cabinets. A bench with red and white cushions suits a small table, and it pairs well with a wood tabletop and cream chairs. This is a good way to bring the theme into an open plan kitchen where the eating area stays in view.

    Keep cushion covers washable, since kitchen seating takes daily spills, and choose a firm foam that holds its shape on a bench. If the cushions feel too strong on their own, add a plain cream runner on the table to calm the print. Keep one chair spare for guests rather than crowding the nook.

    7. Strawberry Wallpaper on One Accent Wall

    Kitchen accent wall with strawberry print wallpaper behind a dining table.

    Paper one accent wall, usually the wall behind a table or a short run of cabinets, in a strawberry print wallpaper. A small strawberry repeat on a cream background feels fresh, while a large fruit print feels bolder and suits a bigger wall. One wall keeps the theme clear and makes future changes simple, since only that wall needs new paper.

    Keep the other walls plain, and repeat the red once in a towel or a small accessory so the wall does not look isolated. Choose a wipeable or washable wallpaper for a kitchen, and keep paper clear of the stove splash zone and the sink. If you rent, use a peel and stick paper made for kitchens, and test a corner first.

    8. Strawberry Shaped Knobs and Pulls

    White kitchen cabinets with strawberry shaped knobs and red drawer pulls.

    Swap cabinet knobs for strawberry shaped knobs, or plain red knobs with green leaf details, for a small, reversible change with a clear fruit shape. Strawberry knobs suit white, cream, or pale wood cabinets, and they let you test the theme before painting. This is a good weekend job, and it costs far less than new cabinets.

    Keep all the knobs in the same style and size, so the change looks planned, and mix in plain red pulls on drawers if full fruit knobs feel too much. Save the old hardware in a labelled bag in case you want to swap it back. Check that new knobs match your existing screw spacing, and wipe them often near the stove, since kitchen grease dulls paint.

    9. Strawberry Tea Towels, Apron, and Oven Mitt Set

    Strawberry print tea towels hanging on an oven handle with a matching apron nearby.

    Swap everyday tea towels for strawberry print towels, and add a matching apron and oven mitt, for the fastest strawberry change in a kitchen. Towels move through the room all day, and they wash easily, so the theme stays fresh with routine laundry. Hang them where they are used most: the oven handle, a hook by the sink, or the dishwasher bar.

    Keep two sets in rotation so a wet or stained set never stays on display. Store the folded spare set in a drawer, not on the counter. Keep towel ends well clear of burners, and never leave a towel draped where it can slip toward a hot pan.

    10. Strawberry Table Setting for Gatherings

    Table set with strawberry patterned plates, red rimmed glasses, and a white runner.

    Set the table with strawberry patterned plates, red rimmed glasses, and a plain white or red runner for a gathering table that still works for daily meals. Strawberry tableware suits white plates, plain linen napkins, and a wood table, and it works for a summer lunch as well as for guests. Keep the rest of the table plain so the fruit print stands out.

    Use a low bowl of strawberries or a small vase of green leaves as the centerpiece, so guests can see each other across the table. Wash printed plates and glasses by hand if the maker advises it, and store them apart from heavy stacks so the print does not scratch. If you set the table daily, keep one everyday set and one guest set, so the special pieces stay in good shape.

    11. Strawberry Countertop Display Station

    Kitchen counter station with a tiered stand of strawberries, jam jars, and a red utensil crock.

    Group strawberry items on one stretch of counter as a display and prep station: a tiered stand with strawberries, a jar of strawberry jam, a small cutting board, and a red utensil crock. The group adds color in one clear spot, and it suits a kitchen where a full remodel is not planned. Keep the group near the fridge, with the prep board within reach, and leave the work run beside the stove clear.

    Lift the whole group aside in one move when you need the counter for baking, and keep fresh fruit in the fridge until you need it, so the display stays tidy. Wipe the stand and crock weekly, since counter groups collect grease film near cooking areas. If the counter is short, shrink the station to a jam jar and one small bowl on a tray.

    12. Strawberry Runner Along the Sink Run

    Runner with a strawberry print on a wood kitchen floor along the sink run.

    Lay a runner with a strawberry print, or a plain red runner with a small strawberry border, along the sink run or in front of the stove. A runner softens hard floors, warms up early mornings, and defines the work zone without any fixed change, which suits renters well. Measure the run first and leave space for cabinet doors and the dishwasher to open fully.

    Use a thin rug pad on smooth floors to stop slipping while you carry hot dishes. Choose a low pile you can shake out daily and wash when cooking spills build up. Keep the runner clear of the oven door swing, and pick a washable fabric so the red print stays fresh.

    Conclusion

    A strawberry kitchen works best when the fruit theme has a clear job and a calm background. Start with the cabinets, island, or tile, since those are the pieces you see most, then repeat the same red in curtains, cushions, or a table setting. White, wood, cream, and soft green keep strawberry red fresh rather than loud, and plain work surfaces keep cooking easy. Small changes like knobs, towels, and a countertop station let you test the theme before a larger change, and they suit renters as well as owners. For a deeper red that sits well beside strawberry prints, see these red kitchen decor ideas for cabinets, islands, and seating.

    Save this list on Pinterest for your next free hour in the kitchen, and work through it in order: cabinets or island first, then tile and the window, then seating and walls, and finally the small table and counter touches.

    FAQs

    How do I use strawberry decor in a kitchen without making it look childish?

    Use strawberry red as a planned accent, not as a print on every surface. Keep cabinets, walls, and counters in white, cream, wood, or soft green in most of the room, and let the fruit theme appear in the cabinets or tile, plus one or two smaller spots such as curtains or cushions. Repeat the same red at least twice, so it reads as a plan rather than a single novelty object. If the room starts to feel too playful, swap one printed piece for a plain red or white piece and leave the fruit shape to the knobs, towels, or tableware.

    What colors pair best with strawberry red in a kitchen?

    White, cream, warm wood, pale stone, soft green, and matte black pair best with strawberry red, because they let the fresh fruit color stand out without competing with it. Avoid adding a second strong color in large amounts, such as bright yellow or bold blue on every surface, since two strong colors can fight each other. Use one other accent only in small amounts, such as green from herb pots or leaves in the print, and keep the main palette to three colors plus the red.

    Is strawberry print hard to keep clean in a kitchen?

    Strawberry print needs the same care as other kitchen colors, with a little extra care for pale dust and water marks on red surfaces. Wipe cabinets, knobs, and small items with a soft damp cloth each week, dry them at once if your water leaves marks, and avoid harsh pads that can scratch paint or print. Near the stove, wipe grease film often, since it dulls paint over time. Choose washable fabrics for curtains, cushions, towels, and runners, so the scheme stays fresh with routine laundry.

    Can renters add strawberry decor to a kitchen without fixed changes?

    Yes. Renters can cover most of this list with no permanent work at all. Knobs swap back, curtains hang on a tension rod, peel and stick wallpaper peels off, towels and a runner sit on existing surfaces, and a countertop station moves with you. Check your lease before fixing any shelf or paper, and keep the old hardware in a labelled bag, so the kitchen returns to its original state at the end of the tenancy.

    Does strawberry decor suit a small kitchen?

    Yes, if you keep it to a few well placed pieces. In a small kitchen, change the knobs, add one curtain or a set of cushions, and style one spot only, such as a shelf or a countertop station. Skip a full strawberry cabinet repaint and a large print wall if the room is dark, and let a towel or a runner carry the fruit tone instead. A short list keeps the room easy to cook in, and each strawberry piece you do use gets noticed instead of competing with five others.

    How do I test a strawberry red paint or tile before committing?

    Order or borrow a sample in the exact shade you plan to use, and place it beside your floor, counter, and cabinet color in the kitchen itself. Check it in morning daylight, afternoon light, and evening light under your usual bulbs, since red shades shift a lot between lights. Live with the sample for a few days, and check it beside the knobs and towels you already own. If the sample looks too bright in one light and too dark in another, choose a deeper, muted strawberry red, which tends to read more evenly through the day.


  • 27 Dark Exterior House Color Schemes to Refresh Your Home’s Look

    27 Dark Exterior House Color Schemes to Refresh Your Home’s Look

    A dark exterior can make a house look grounded, calm, and confident, but only when the shade, trim, and materials work together. The same charcoal can look sharp on one house and flat on the next, depending on light, roof color, and the plants beside it. These 27 dark exterior house color schemes cover siding, brick, stone, wood, and stucco, plus the trim, door, roof, and lighting choices that keep each one from feeling heavy. Start with your house style and your light, test large samples, and pick the scheme that suits both.

    Key Takeaways

    • Test a dark shade on a large board in morning, midday, and evening light before painting a whole wall, since dark colors shift more than pale ones.
    • Give every dark scheme a lighter partner: white or cream trim, warm wood, pale stone, or bright planting, so the house keeps clear edges.
    • Match the dark shade to the house style: charcoal and black suit modern and farmhouse forms, navy and forest green suit colonial and craftsman forms.
    • Repeat the accent once more, in hardware, a door, or a light fixture, so the scheme looks planned rather than accidental.
    • Keep the roof in the plan: a dark house with a dark roof needs warm wood or pale stone to break up the mass.
    • Use warm light and layered planting at the entry, since dark walls absorb light and can make a porch feel dim.

    1. Charcoal Horizontal Siding with Crisp White Trim

    House with charcoal horizontal siding and crisp white window trim.

    Charcoal horizontal siding with white trim is the most reliable dark scheme, because the contrast draws the eye to the shape of the house rather than to one flat dark wall. Paint or clad the siding in a soft charcoal with a grey base, then keep window frames, corner boards, and fascia in bright white. The white lines give the dark walls a clear outline, which matters most on a plain, boxy house.

    Keep the door and porch simple so the contrast does the work. A black door with white trim reads as part of the scheme, while a wood door adds warmth if the house faces north and needs softening. Check the charcoal against the roof in daylight: a charcoal that leans blue can clash with a brown roof, while a neutral charcoal sits well with grey, black, and brown roofs alike.

    2. Matte Black Modern Farmhouse with Timber Beams

    Matte black modern farmhouse with natural timber porch posts and beams.

    A matte black modern farmhouse works because timber beams and porch posts break the black into readable sections. Use matte or satin black siding, then add natural wood at the gable peaks, the porch posts, and the beam ends. The wood warms the black and stops a large farmhouse from reading as one solid block.

    Keep windows large and frames black, so the glass reads as part of the dark wall rather than as a hole in it. Add a wood front door or wood planters to repeat the timber note at ground level. A matte finish hides small marks better than gloss on a large wall, but it also shows dust on a dry, dusty road, so plan on a wash down each season.

    3. Deep Navy Colonial with Brass Details

    Deep navy colonial house with white shutters and brass lanterns.

    Deep navy suits a colonial house because the symmetrical form and divided windows give the dark color structure to sit on. Paint the siding navy, keep shutters and trim white, and add brass in the door hardware, the lanterns, and the house numbers. Brass warms the cool navy and gives the entry a clear focal point after dark.

    Use a navy with a grey base rather than a bright blue, so the house reads as dark and calm from the street. For more door color ideas in this family, see these blue front door colors. Keep the roof grey or black, since a brown roof can pull navy toward purple in warm evening light. A white door frame helps the entry stand out against the navy wall.

    4. Forest Green Craftsman with a Stone Base

    Forest green craftsman house with a stone foundation and cream trim.

    Forest green craftsman siding pairs naturally with a stone base, because both materials come from the same woodland palette. Paint the siding a deep, muted green, keep the trim cream, and let a stone foundation or stone porch piers ground the house. The stone adds texture at ground level, where a flat green wall would otherwise meet the lawn without a break.

    Repeat the stone once more, in a chimney, a low garden wall, or stone steps, so the base does not look like an afterthought. Wood brackets and exposed rafter tails in a warm stain suit this scheme and keep the green from feeling flat. Forest green needs decent daylight, so on a heavily shaded lot, pick a green one step lighter than the sample you first like.

    5. Espresso Brown with Cream Trim and Terracotta Pots

    Espresso brown house with cream trim and terracotta pots at the entry.

    Espresso brown is a warm dark scheme, closer to chocolate than to black, and it suits houses with warm brick, stone, or wood nearby. Pair espresso siding with cream trim, which softens the brown without the stark edge that bright white gives. Terracotta pots at the entry repeat the warm tone at ground level and add a handmade texture beside the painted wall.

    Keep the door in a warm wood stain or a deep cream, since a black door can make espresso read muddy. A brown roof suits this scheme better than a grey one, and warm brass or bronze hardware fits the palette. In a hot, sunny climate, note that dark brown walls absorb heat, so check insulation and ventilation before committing to the darkest espresso.

    6. Slate Grey Minimalist with Black Window Frames

    Minimalist slate grey house with black framed windows.

    Slate grey with black window frames suits a minimalist house because the palette stays quiet and the lines stay clean. Use a mid to dark slate grey on flat siding or render, keep the trim minimal, and set black framed windows flush in the wall. The black frames read as thin graphic lines, which suits a house with few decorative details.

    Avoid adding shutters, brackets, or mixed trim colors here, since extra detail fights the minimal form. A single wood accent, such as a cedar entry panel or a wood bench, stops the grey and black from feeling cold. Slate grey shifts with light, looking bluer on a bright day and greyer at dusk, so test it on the wall that faces the street.

    7. Dark Teal Coastal Cottage with a White Porch

    Dark teal coastal cottage with a white porch rail and white trim.

    Dark teal gives a coastal cottage color without the brightness of a pale beach palette. Paint the siding a deep teal with a green base, keep the porch rails, posts, and window trim white, and let the white porch read as a bright frame around the darker walls. The contrast keeps the cottage cheerful even with a dark main color.

    Use a teal that holds its green in shade, since a blue leaning teal can turn nearly navy on a cloudy day. A white or pale grey roof, a wood deck, and pale planters suit this scheme. Keep the door white or a soft cream, and add one brass lantern, so the entry has a warm note against the cool teal and white.

    8. Black Painted Brick with a Warm Cedar Door

    Black painted brick house with a warm cedar front door.

    Painting brick black changes a traditional house fast, because the brick texture stays visible while the color turns modern. Use a matte black masonry paint, keep the mortar lines subtle, and set a warm cedar door against the black wall. The cedar is the single warm note, and it draws the eye straight to the entry.

    Keep window frames white or black depending on the house: white frames give a classic black and white house, black frames give a moodier, more modern one. Check the brick condition first, since painted brick needs sound mortar and a breathable paint suited to masonry. A pale stone path or light steps help, since a black house with a dark path can lose its entry at dusk.

    9. Charcoal Board-and-Batten for Vertical Rhythm

    Charcoal board-and-batten house with vertical siding lines.

    Charcoal board-and-batten siding adds vertical rhythm to a house that would otherwise read as one wide dark slab. The narrow battens cast thin shadows down the wall, which gives the charcoal depth and movement through the day. This suits tall, narrow houses, gable ends, and modern additions where horizontal siding would look flat.

    Paint battens and boards the same charcoal, so the rhythm comes from shadow rather than from a second color. Keep trim white or pale grey, and keep the roof simple, since a busy roofline fights the vertical lines. Board-and-batten also suits a partial application: use it on a gable or an entry projection, with horizontal siding elsewhere, to mark the entry without darkening the whole house.

    10. Midnight Blue with Copper Gutters and Lanterns

    Midnight blue house with copper gutters and entry lanterns.

    Midnight blue with copper details is a dark scheme built on metal rather than on trim color. Paint the siding a near black blue, keep the trim white or pale grey, and add copper in the gutters, downspouts, and entry lanterns. New copper shines bright, then weathers to a soft brown, so the accent changes with the house over time.

    Use copper sparingly: gutters and one or two lanterns are enough, since copper on every fixture can look busy. A grey or black roof suits midnight blue, and a wood door adds warmth beside the cool metal. Check the blue at dusk before committing, since midnight blue reads as pure black in low light, which some owners want and others do not.

    11. Dark Olive with Limestone Trim

    Dark olive house with pale limestone window sills and stone steps.

    Dark olive with limestone trim suits a house with traditional bones, because the earthy green and pale stone feel settled rather than new. Paint the siding a muted olive with a brown base, and use limestone or pale stone for window sills, the door surround, and the steps. The stone gives the olive a light edge without the sharpness of white paint.

    Keep the roof brown or grey, and use bronze or black hardware, since bright brass can look too crisp against olive. Olive can turn muddy beside cool grey stone or a grey roof, so test the pair on site. A cream door or cream trim on the porch keeps the entry bright, which matters because olive absorbs light like other dark shades.

    12. Graphite Stucco with an Arched Entry

    Graphite stucco house with an arched entry and terracotta roof tiles.

    Graphite stucco gives a Mediterranean or Spanish style house a dark, modern update without losing its soft, rounded form. Use a dark graphite render on the main walls, keep the arched entry in the same graphite or a shade lighter, and add terracotta roof tiles above. The warm roof tiles stop the graphite from feeling cold, which is the main risk with dark stucco.

    Keep window frames dark bronze or black, and use a wood door with iron details to suit the arch. Stucco shows texture well in a dark color, so a fine, even render reads better than a heavily textured one, which can catch shadows unevenly. Pale gravel or light stone at the entry gives the dark walls a bright base.

    13. Black Cedar Shingles with White Window Frames

    Black cedar shingle cottage with white window frames.

    Black cedar shingles suit a cottage or shingle style house because the small shingle pattern breaks the black into texture. Stain the shingles near black, keep window frames and trim white, and let the white frames read as a grid across the dark wall. The texture keeps the house from looking flat, which is the main risk with a large black wall.

    Use a stain rather than a solid paint where the shingle grain should stay visible, and expect the stain to weather over time. A white door or a wood door both work here, while a black door can disappear into the wall. Keep the roof dark grey or black, and add pale planting at the base, since dark shingles against dark soil can hide the bottom of the house.

    14. Dark Walnut Cladding with a Glass Entry

    Contemporary house with dark walnut cladding and a glass entry door.

    Dark walnut wood cladding with a glass entry suits a contemporary house because the wood grain and the glass give the dark color two different surfaces to play against. Clad the main walls in dark walnut boards, keep the joints tight and horizontal, and set a full glass entry door or sidelights beside the wood. The glass reflects light and sky, so the dark wall never reads as a solid block.

    Protect the cladding with an exterior oil or stain suited to the wood, and plan on regular care, since dark wood shows weathering faster than painted siding. Keep other materials quiet: black metal, pale stone, and plain concrete suit walnut, while bright trim fights it. A pale stone path leading to the glass entry helps visitors find the door at night.

    15. Charcoal Siding Paired with a Red Brick Chimney

    Charcoal sided house with a natural red brick chimney.

    Charcoal siding with a red brick chimney works because the brick gives the dark house a warm, original feature to anchor it. Keep the chimney in its natural red brick, paint the siding charcoal, and use white or cream trim to separate the two. The brick reads as a vertical warm stripe against the dark walls, which suits a house where the chimney sits on the front or side face.

    Repeat the brick once more at ground level, in a brick path, brick steps, or a low brick planter, so the chimney does not stand alone. A brown or grey roof suits both materials, and a wood door echoes the warmth of the brick. If the brick is painted already, stripping it back is a large job, so this scheme suits houses where the brick is still bare.

    16. Dark Stone Veneer on the Lower Story

    Two story house with dark stone veneer on the lower story.

    Dark stone veneer on the lower story grounds a two story house, because the heavy material sits where a house naturally needs weight. Use dark grey or charcoal stone on the ground floor, keep the upper story in a dark siding or render a shade lighter, and separate the two with a simple trim board. The stone adds texture and shadow at the level people see up close.

    Keep the stone color in the same family as the siding, so the house reads as one scheme rather than two separate houses stacked together. A wood door and wood porch posts warm the stone, while black hardware keeps the look tidy. Stone veneer needs a proper base and drainage detail, so this is a scheme to plan with a builder rather than as a paint only change.

    17. Dark Grey Siding Under a Black Standing-Seam Roof

    Dark grey house with a black standing-seam metal roof.

    Dark grey siding under a black standing-seam metal roof suits a modern or barn style house because the roof lines become part of the color scheme. Use a mid dark grey on the walls, keep the roof black with visible seams running down the slope, and keep trim black or dark grey. The roof and walls read as one dark form, with the seams giving the roof its detail.

    Break the dark mass with wood at the entry, a pale stone terrace, or large windows that reflect the sky. A black roof absorbs heat, so check attic ventilation and insulation before choosing this scheme in a hot climate. Keep gutters black to match the roof, and use warm porch light so the entry does not disappear under the dark roofline at night.

    18. A Deep Green Front Door as the Focal Point

    Dark grey house with a deep green front door and white trim.

    A deep green front door on dark grey siding makes the entry the focal point without repainting the whole house. Paint the siding a soft dark grey, keep trim white or pale grey, and paint the door a deep, muted green with a satin finish. The green reads as a deliberate color note against the neutral grey, and it suits houses where a full green exterior would feel like too much.

    Repeat the green once, in a planter glaze, a wreath, or a bench cushion, so the door does not look random. Brass or black hardware both suit deep green, while chrome can look too cold beside it. For more ways to use a strong door color against a dark house, see these blue front door colors, which cover how hardware and trim change a dark entry.

    19. Charcoal Siding with a Warm Wood Slat Screen

    Charcoal house wall beside a warm wood slat screen.

    A warm wood slat screen beside charcoal siding adds privacy and warmth in one move. Use vertical or horizontal wood slats to screen a porch, a side yard, or a bin area, and set them against a charcoal wall. The slats cast striped shadows on the dark wall, and the wood tone gives the eye a warm place to rest.

    Keep the slats in a natural cedar or warm stain, and space them evenly, since uneven gaps show clearly against a dark background. Use the same wood for the front door or planters to tie the screen to the entry. A slat screen also softens a long, flat charcoal wall without adding a second paint color, which keeps the scheme simple.

    20. Dark Walls with a White Pergola and Pale Porch Ceiling

    Dark walled house with a white pergola and pale porch ceiling.

    A white pergola and a pale porch ceiling lift a dark house at the exact place people gather. Paint the walls charcoal or deep navy, build the pergola in white, and paint the porch ceiling a pale blue grey or warm white. The white overhead structure frames the entry and reflects light down onto the porch, so the dark walls do not make the seating area feel dim.

    Keep porch furniture in pale wood or light cushions to repeat the bright note at seating height. A white pergola needs regular cleaning, since dark walls make dirt on white paint more visible by contrast. This scheme suits a house with a deep porch, where the ceiling is large enough to matter, rather than a shallow stoop.

    21. Tonal Layering: Black Trim on Dark Grey Walls

    Dark grey house with near black window frames and trim.

    Tonal layering uses black trim on dark grey walls, so the house reads as shades of one color rather than as dark against white. Paint the walls a mid dark grey, use near black for window frames, fascia, and gutters, and keep the door black or dark wood. The subtle contrast gives the house depth without the sharp outline that white trim creates.

    This scheme needs good light to work, since the trim contrast is quiet and can disappear on a shaded facade. Add one warm material, such as wood or brass, so the grey and black do not feel cold. For help pairing dark tones with lighter partners inside and out, see these wall color combinations, which show how one strong color needs a calmer partner beside it.

    22. Dark Exterior with Brass Numbers and Warm Path Lights

    Dark house entry at dusk with brass house numbers and warm path lights.

    Brass numbers and warm path lights are small details that make a dark exterior readable after dark. Paint the walls charcoal, navy, or forest green, then mount large brass house numbers beside the door and set warm path lights along the walk. The brass catches daylight, and the warm lights outline the path at night, so visitors can find the entry on a dark facade.

    Keep the light color warm, around the tone of a household lamp, since cool white light can make dark walls look cold and flat. Space path lights evenly and keep them low, so they light the walk rather than glaring into eyes. Repeat brass once more, in a lantern or door handle, so the numbers do not sit alone.

    23. Two-Tone Dark: Charcoal Above, Black Below

    Two story house with charcoal siding above and black siding below.

    A two-tone dark scheme splits the house by height: charcoal on the upper story, black on the lower story, with a trim board between them. The darker base grounds the house, while the slightly lighter upper story keeps the roofline from feeling heavy. This suits a two story house with a clear floor line, such as a band board or a change in siding.

    Keep the split at a real architectural line, not at a random height, so it looks built in rather than painted on. Use the same trim color on both stories to tie them together, and keep the door in wood or a lighter tone so the entry stands out from the black base. Test both shades together on one corner, since two dark shades can merge into one at a distance.

    24. Dark Walls Softened by Layered Evergreen Planting

    Dark house front with layered evergreen shrubs and pale gravel beds.

    Layered evergreen planting softens a dark house because green foliage against a dark wall reads as texture rather than as more color. Plant a tall evergreen hedge or small trees at the back of the bed, mid height shrubs in front, and low grasses or ground cover at the edge. The layers break up the flat dark wall and give the house a planted frame through winter as well as summer.

    Choose plants that suit the light and soil on that side of the house, and leave space between the plants and the wall for air and care. Pale gravel or light stone mulch brightens the bed and stops dark soil from merging with the dark wall. Keep plants clear of gutters and vents, and prune the layer nearest the wall so it does not hold damp against the siding.

    25. A Warm Lighting Plan for Dark Exteriors

    Dark house exterior at dusk with warm wall lanterns and uplights.

    A warm lighting plan is a scheme in its own right, because light decides how a dark house looks for half the year. Use wall lanterns beside the door, uplights at the base of the walls, and one light over the garage or porch, all in a warm tone. Uplights wash the dark siding with light and show its texture, while door lanterns mark the entry.

    Put the lights on a timer or a dusk sensor, so the house is lit as daylight fades rather than only when someone remembers. Avoid a single bright floodlight, which flattens dark walls and creates harsh shadows. Keep fixtures in one finish, such as black or bronze, so the lighting hardware does not add a second color story to the scheme.

    26. Dark Garage Doors that Blend with the House

    Dark house front with garage doors painted to match the siding.

    Dark garage doors that match the house siding stop a large garage from dominating the front of the house. Paint or clad the garage doors in the same charcoal, black, or dark grey as the walls, keep the trim around them minimal, and use black hardware. The garage then reads as part of the house, rather than as a separate pale block.

    Add wood or brass at the entry door nearby, so the front of the house still has a focal point once the garage blends in. Keep the driveway in a mid tone, such as grey concrete or pale gravel, since a black driveway beside black doors can lose the edge of the house. This scheme suits a house where the garage faces the street and takes up a large share of the facade.

    27. Dark Scheme for a Small House with Light Gables and Steps

    Small dark sided house with light gables and pale stone steps.

    A small house can carry a dark scheme when the gables and steps stay light. Paint the main walls charcoal or deep green, keep the gable ends, window trim, and porch steps in white or pale stone, and let those light areas frame the dark walls. The light gables draw the eye up, which keeps a small house from feeling squat under a dark color.

    Keep the door in a warm wood or a clear color, such as deep red or brass toned hardware, so the entry is easy to find on a small facade. Use pale planting and a light path to brighten the base, and avoid darkening the roof as well, since a dark roof plus dark walls plus a small footprint can feel heavy. This scheme works best when at least one third of the front face stays light.

    Conclusion

    A dark exterior works when the shade suits the house, the trim gives it edges, and one warm partner keeps it welcoming. Start with the house style and the light on your street, test two or three large samples through a full day, and choose the scheme where the trim, door, and roof all have clear jobs. Small choices, such as brass hardware, warm path lights, or layered evergreens, often matter more than picking the darkest shade on the card. Save this list on Pinterest, narrow it to three schemes, and test those three on your own walls before you commit to one.

    FAQs

    Will a dark exterior make my house look smaller?

    A dark color can make a large, plain house look more grounded, but on a small house it can feel heavy if the roof, trim, and ground are dark too. Keep gables, trim, steps, or the porch ceiling light, and use pale planting and a light path, so the dark walls have bright edges. Testing a large sample on the front wall will show whether your house reads as grounded or as smaller.

    Do dark exteriors fade faster than light colors?

    Dark paints absorb more sun and heat, so they can fade and show chalking sooner than pale colors, especially on south and west walls. A quality exterior paint, a satin or matte finish suited to the surface, and a wash down each season will slow that wear. Plan on checking south facing walls first, since they take the most sun.

    What trim color works best with a dark house?

    White trim gives the sharpest outline and suits charcoal, navy, and black houses. Cream trim softens warm dark shades, such as espresso and olive, while black trim gives a quiet, tonal look on dark grey walls. Pick the trim that matches the undertone of the main color: bright white with cool dark shades, warm cream with warm dark shades.

    Should the roof match a dark exterior?

    The roof does not need to match, but it needs to sit in the same warm or cool family as the walls. A grey or black roof suits charcoal, navy, and slate schemes, while a brown roof suits espresso, olive, and forest green schemes. If the roof is terracotta, a graphite or dark olive wall often works better than a blue leaning charcoal.

    Can I paint brick, stucco, or wood siding dark?

    Yes, with the right product for each surface: masonry paint for brick, a render suited coating for stucco, and exterior paint or stain for wood siding. Check the surface condition first, since dark paint will not hide cracked mortar, peeling render, or rotted boards. Bare brick and stucco need a primer suited to the material, and wood needs a clean, dry surface before painting.

    How do I keep a dark entry welcoming at night?

    Use warm light at more than one height: lanterns beside the door, path lights along the walk, and one uplight on the wall or planting. Warm bulbs suit dark walls better than cool white bulbs, which can make the entry look cold. Brass hardware, a wood door, and pale steps also help visitors find the entry after dark.


  • 22 Mediterranean Coffee Table Styling Ideas for Any Home

    22 Mediterranean Coffee Table Styling Ideas for Any Home

    A Mediterranean coffee table feels sun warmed and easy, even in a room far from the sea. Terracotta, olive wood, woven fiber, blue glazed ceramic, and brass do most of the work, while lemons, olive branches, and herbs add life that costs little. The best tables here look gathered over time, not bought in one matching set, and they still leave room for a cup of coffee. These 22 Mediterranean coffee table styling ideas cover trays, books, candles, plants, and table bases, so you can start with one tray and build from there.

    Key Takeaways

    • Start with one anchor, such as a terracotta tray or a woven runner, so the table reads as one arrangement instead of scattered objects.
    • Repeat the Mediterranean palette in small doses: warm terracotta, soft blue and white, natural wood, and brass, rather than adding a new color with every piece.
    • Mix heights and textures: a tall branch, a low bowl, a rough woven base, and a smooth ceramic piece keep the eye moving across the table.
    • Keep one part of the table clear for daily use, so the styling survives real life with cups, books, and remote controls.
    • Use natural and edible details, such as lemons, herbs, and figs, to refresh the table by season without buying new decor.
    • Group in odd numbers and vary the scale, so a vignette looks collected rather than lined up in a row.

    1. Anchor the Table With a Terracotta Tray

    Wood coffee table with a large terracotta tray holding a candle, a small vase, and a book.

    Set a large terracotta tray in the center of the table and build the rest of the styling inside it. The tray gathers candles, a small vase, and a book into one clear zone, and its warm clay color sets the Mediterranean tone at once. A round tray suits a round table, while a long rectangular tray suits a long table and leaves space at each end for cups.

    Choose a tray with a low rim so items stay visible from the sofa, and keep the heaviest piece, such as a ceramic bowl, in the middle so the tray stays balanced when you lift it. A terracotta tray also warms a plain neutral sofa group, and if your sofa needs its own refresh, see these grey couch living room ideas. Wipe the tray after use, since terracotta shows water rings more than glazed ceramic.

    2. Stand Olive Branches in a Tall Glass Vase

    Tall glass vase with olive branches at one end of a wood coffee table.

    Place two or three olive branches in a tall, plain glass vase at one end of the table. The silvery green leaves and slim stems give height without blocking the view across the room, and olive branches read as Mediterranean at once, even in a modern living room. Fresh branches last well in water, and good faux branches suit a table that gets bumped often.

    Trim the stems at an angle and change the water every few days to keep fresh branches looking crisp. Keep the vase narrow enough that the branches stay upright, and skip a second tall piece beside it, since one tall accent is enough on most tables. If the branches shed, a quick shake outside keeps leaves off the tabletop.

    3. Stack Linen Bound Art and Travel Books

    Stack of linen bound books in cream, sand, and soft blue on a coffee table.

    Stack two or three linen bound books on the table, largest at the bottom, with covers in cream, sand, or soft blue. Books add height for a small object on top, such as a candle or a shell dish, and their subject, art, travel, or cooking, gives guests something to open. A stack also fills a wide table without needing a large single object.

    Turn the top book slightly, rather than lining the spines up exactly, so the stack looks placed rather than shelved. Keep the stack to three books or fewer on a small table, so it does not crowd out cups. Choose books you actually like, since a stack people open gets more use than a stack kept only for show.

    4. Pair Wrought Iron Lanterns With Candles

    Pair of wrought iron lanterns with pillar candles on a coffee table.

    Set a pair of wrought iron lanterns on the table, one taller than the other, with a pillar candle inside each. The dark iron frames the warm candle glow and suits both rustic wood tables and plainer modern ones. Lanterns also protect the flame from drafts near a door or window, which matters on a table close to an opening.

    Use plain white or cream candles so the iron stays the detail, and keep the lanterns clear of books, throws, and paper. Never leave a lit candle in an empty room, and use battery candles inside the lanterns if the table sits near curtains or small hands. Wipe iron lanterns now and then, since dark metal shows dust in bright light.

    5. Center a Blue and White Ceramic Bowl

    Blue and white ceramic bowl in the center of a coffee table.

    Place a blue and white ceramic bowl in the center of the table, empty or holding a few figs, and let it be the main color note. Blue and white pottery recalls Mediterranean tile and coastal ceramics, and one strong bowl anchors a table that might otherwise drift into too many small pieces. A wide, low bowl suits most tables better than a tall, narrow vase.

    Keep the rest of the table quieter while the bowl leads, with plain books or a single candle beside it rather than a second patterned piece. If the bowl holds fruit, wash it before refilling and keep the fruit to a single layer so the pattern stays visible. A bowl with a small foot also lifts the pattern off the tabletop, which helps on a dark wood surface.

    6. Lay a Woven Seagrass Runner Lengthwise

    Woven seagrass runner lengthwise down the center of a wood coffee table.

    Lay a woven seagrass or jute runner lengthwise down the center of the table, under the tray and books. The runner adds a natural woven layer that softens a hard tabletop and keeps small pieces from sliding when the table is bumped. Its pale straw tone also ties the table to rattan chairs, baskets, and other woven pieces in the room.

    Cut or fold the runner so it stops a few inches short of each table end, rather than hanging over the edge, since a table runner is not a floor runner. Shake it outside now and then, and blot spills at once, since natural fiber stains if left wet. If your table already has a glass top, a runner under the tray still adds warmth without hiding the table itself.

    7. Fill a Shallow Bowl With Lemons

    Shallow bowl filled with fresh lemons on a coffee table.

    Fill a shallow wood or ceramic bowl with fresh lemons and set it where the light catches the yellow. Lemons are the quickest Mediterranean table accent: cheap, bright, and easy to replace, and their color lifts a table of terracotta and wood without a painted object. A bowl of lemons also suits a table that needs a low centerpiece, since it does not block conversation.

    Use six to eight lemons for a medium bowl, and turn them so the skin, not a cut face, shows upward. Replace any lemon that softens, and wash the bowl before refilling. In cooler months, swap lemons for oranges or figs to keep the same idea with a seasonal color, and keep the bowl in the same spot so the table layout stays settled.

    8. Serve Drinks on a Mosaic Tile Tray

    Mosaic tile tray in blue, white, and sand holding glasses on a coffee table.

    Use a small tray topped with mosaic tiles, in blue, white, and sand, as the drinks tray on the table. The tile top handles wet glasses better than wood or fabric, and its pattern gives the table a Mediterranean courtyard feel. A mosaic tray also works as a second anchor on a long table, holding glasses while the main tray holds candles and books.

    Choose a tray with a rim high enough to stop a glass sliding off, and wipe the grout lines after use so spills do not stain them. Keep the tray near the sofa edge where guests can reach it, rather than in the center behind the main vignette. If you cannot find a tile tray, a plain ceramic tile set on a wood board gives a similar hard, wipeable surface.

    9. Add a Driftwood Sculpture

    Driftwood sculpture at one end of a coffee table in a bright living room.

    Place a single piece of driftwood, or a small carved wood sculpture, at one end of the table as a natural focal point. Weathered wood brings a coastal Mediterranean note and a rough texture that contrasts with smooth ceramics and glass. One piece is enough, since driftwood has a strong shape that can crowd a table if paired with another large natural object.

    Check the piece for loose bark and sharp edges before placing it near soft furnishings, and keep it dry and clear of candle flames. A small sculpture also works on top of the book stack, where it gains height without taking extra table space. If driftwood feels too coastal for your room, a smooth olive wood carving gives the same natural note in a warmer tone.

    10. Cluster Brass Candlesticks at Varied Heights

    Three brass candlesticks at varied heights with cream tapers on a coffee table.

    Group three brass candlesticks of different heights at one corner of the table, with plain cream taper candles. Brass adds a warm metallic note that suits terracotta and blue ceramic, and varied heights keep the group from looking like a matched set. Place the tallest candlestick at the back, so the group reads as a small cluster from the sofa.

    Use drip free tapers or small candle cups to protect the tabletop, and keep the candlesticks clear of branches, books, and throws. Polish brass only as often as you like the shine; unpolished brass with a soft patina suits a rustic Mediterranean table just as well. Keep the group together when you clear the table, so it stays one vignette rather than three scattered pieces.

    11. Pot Rosemary and Lavender in Small Terracotta Pots

    Small terracotta pots with rosemary and lavender on a coffee table.

    Set two small terracotta pots on the table, one with rosemary and one with lavender, in place of a cut flower arrangement. Potted herbs last far longer than cut stems, they scent the room lightly when brushed, and they suit a kitchen led living room where herbs are also useful. Terracotta pots match the tray and bowl palette without adding a new color.

    Use pots with drainage holes and a small saucer under each, so water does not mark the tabletop. Give the herbs the brightest spot in the room when the table is not in use, and trim them often so they stay compact rather than leggy. If fresh herbs struggle indoors, a single potted olive sapling in a terracotta pot gives a similar Mediterranean plant note with less care.

    12. Arrange Shells and Coral in a Low Dish

    Low dish with shells and coral on a coffee table.

    Arrange a few shells and a small piece of coral in a low, wide dish on the table, with space between each piece. Shells and coral give a coastal Mediterranean accent that suits a bright room, a seaside home, or a table that already holds blue ceramics. A low dish keeps the arrangement flat and easy to see, and it stops small pieces from rolling across the table.

    Pick shells in cream, sand, and soft pink rather than dyed colors, so the dish stays natural, and dust the pieces now and then with a dry cloth. Keep the dish on the side of the table away from drinks, since shells chip if knocked by a glass. If real coral is hard to find, a carved stone or ceramic coral shape gives the same coastal form without a fragile piece.

    13. Fill a Hand Painted Pitcher With Dried Lavender

    Hand painted ceramic pitcher with dried lavender stems on a coffee table.

    Stand a hand painted ceramic pitcher on the table and fill it with dried lavender stems, or dried wheat if lavender feels too floral. The pitcher itself is the decoration, with its painted pattern doing the work, while the dried stems add height and a soft scent. Dried stems suit a table that gets little daylight, since they need no water and do not wilt.

    Keep the pitcher to one side of the table, with its handle turned so it does not snag a sleeve, and replace dried stems once they shed heavily. A pitcher also works as a water jug for guests when it is not holding stems, so keep a second use in mind before buying a purely decorative piece. Wipe painted ceramic gently, since strong scrubbing can wear a hand painted glaze over time.

    14. Stow Throws and Magazines in a Basket Beneath

    Woven basket under a coffee table holding a folded throw and magazines.

    Slide a low woven basket under the coffee table, holding a folded throw and a few magazines, so the tabletop stays clear. The basket adds a second woven layer below the table and gives the styling a practical job: everything guests might want is close, but off the surface. A basket also suits a table with a lower shelf, where it keeps that shelf tidy.

    Choose a basket that fits the space under the table with room to slide out easily, and keep it to one throw and three or four magazines, so it does not overflow. A basket with handles is easier to carry to the laundry or to tidy before guests arrive. If the table has no space beneath, a basket beside the sofa leg gives the same storage without crowding the tabletop.

    15. Lift a Vase on a Marble Slab Riser

    Small marble slab riser with a vase on top, on a coffee table.

    Set a small marble or stone slab on the table and place a vase or candle on top of it, lifting one piece above the rest. The riser adds a second level to a flat tabletop, so the eye moves up and down instead of across a single plane. Marble also gives a cool, smooth contrast to rough terracotta and woven fiber, which is a classic Mediterranean material mix.

    Keep the slab small, no wider than the object it holds plus a small margin, so it reads as a pedestal rather than a second tabletop. Use felt pads under the slab to protect a wood table, and keep the lifted piece light, since a heavy vase on a raised slab can tip if the table is bumped. A wood board or a stack of books can serve as a riser if marble feels too formal.

    16. Ground the Table With a Patterned Rug Underneath

    Patterned kilim rug under a coffee table and sofa in a Mediterranean living room.

    Place a patterned rug under the whole seating group, so the coffee table sits on pattern rather than on bare floor. A rug with a Mediterranean pattern, such as a faded kilim, a tile motif, or a simple geometric repeat, frames the table from below and ties the sofa, chairs, and table into one zone. The rug then carries the pattern, which frees the tabletop to stay simpler.

    Size the rug so the front legs of the sofa and chairs rest on it, with the coffee table fully inside its edges. For more help with size and placement, see these living room rug ideas. Keep the tabletop calmer when the rug is busy, with plain books and one ceramic piece, so the two patterns do not compete. A low pile rug suits a coffee table best, since chair legs slide over it more easily.

    17. Cover a Small Vignette With a Glass Cloche

    Glass cloche over a small candle and shell vignette on a coffee table.

    Place a glass cloche over a small vignette on the table, such as a single candle, a shell, or a tiny potted herb. The cloche turns an ordinary object into a display piece, protects it from dust and bumps, and adds a glassy highlight among terracotta and wood. A cloche also keeps a candle flame sheltered, which helps on a table near a draft.

    Choose a cloche tall enough that the object inside does not touch the glass, and set it on a small plate or board so it can be lifted as one piece. Keep the cloche away from the table edge, since glass breaks if knocked to the floor. One cloche is enough on most tables; a second cloche beside it can look like a shop display rather than a lived in room.

    18. Drape a Wooden Bead Garland Over the Book Stack

    Wooden bead garland draped over a stack of books on a coffee table.

    Drape a wooden bead garland across the book stack, letting one end fall over the side of the books. Beads in natural wood or whitewashed wood add a soft, tactile line that breaks up the straight edges of books and trays, and they suit a Mediterranean table because they echo olive wood and prayer bead craft. The garland is a small, cheap accent that changes a plain stack at once.

    Keep the garland to one strand, and let it rest in a loose curve rather than wrapping it tightly around the books. Move it aside when you take a book from the stack, and keep it clear of candle flames, since wood beads can scorch. A tassel at the end of the garland adds a finished detail, but a plain strand suits a simpler table just as well.

    19. Group Terracotta Votives in Threes

    Three small terracotta votive holders with tea lights on a coffee table.

    Group three small terracotta votive holders together on the table, with a tea light in each, at one end away from the main tray. Terracotta votives give a softer, earthier candlelight than brass or iron, and a group of three reads as one deliberate arrangement rather than scattered singles. Their low height also suits a table where taller candles would block the view.

    Use a small plate or tray under the votives to catch wax, and keep them clear of books, runners, and dried stems. Light all three together for evening use, or light just one when the table is used for reading, so the group works at more than one brightness. Replace tea lights before they burn down fully, since a spent tea light in a terracotta cup is harder to remove once the wax sets.

    20. Set an Olive Wood Board for Sharing

    Olive wood board with olives, figs, and crackers on a coffee table.

    Keep an olive wood board on the table, styled with a small bowl of olives, a few figs, and a short stack of crackers when guests arrive, and left plain with a single small bowl the rest of the time. The board turns the coffee table into a sharing table, which suits Mediterranean hosting, and olive wood grain is handsome enough to stay out even when empty. A board also protects the tabletop from plates and glasses.

    Choose a board sized to the table, with room for cups beside it, and oil the wood as its maker advises so it does not dry out. Wash and dry the board after food use, and never leave it soaking, since olive wood can crack if it stays wet. If the board is used daily, keep a second plain board for food, so the styled board stays free of knife marks.

    21. Cluster Blue and Green Glass Bottles

    Cluster of blue and green glass bottles at one corner of a coffee table.

    Cluster three glass bottles in blue and green, of different heights, at one corner of the table, empty or holding a single stem each. Colored glass catches daylight and lamplight, and the blue and green tones recall Mediterranean sea glass and old apothecary bottles. Bottles are also a low cost accent, since interesting shapes turn up in thrift shops and markets.

    Keep the tallest bottle at the back of the group and the shortest at the front, so each bottle stays visible from the sofa. Rinse bottles before use if they hold stems, and dust them often, since colored glass shows fingerprints in bright light. If the group feels fragile near children or pets, use one sturdy bottle instead of three thin ones, and keep it away from the table edge.

    22. Leave One Third of the Table Clear

    Coffee table with styling kept to two thirds and one third left clear beside a sofa.

    Leave about one third of the tabletop empty, on the side nearest the sofa, for cups, a book in use, and everyday items. A styled table that leaves no working space gets cleared in frustration, while a table with a planned empty zone stays styled because daily life has somewhere to go. The empty zone also gives the eye a rest between the tray, the books, and the candles.

    Mark the clear zone by keeping the tray, books, and bottles to the far two thirds of the table, and resist filling the near third with one more small object. If the table is small, keep the styling to a single tray and leave the rest clear, rather than shrinking every idea to fit. A clear zone is what makes the other 21 ideas livable, not just photogenic.

    Conclusion

    A Mediterranean coffee table does not need a matching set or a large budget. Start with a terracotta tray or a woven runner, add one tall piece such as olive branches, one color note such as a blue ceramic bowl, and one warm light source such as brass candlesticks or terracotta votives. Keep a third of the table clear, let lemons, herbs, and figs refresh the look by season, and let the table change as you use it. Try one idea this weekend, such as a bowl of lemons or a stack of books with a bead garland, live with it for a week, and add the next layer only when the table asks for it. If an idea here helped your living room, save this post to your Mediterranean decor board on Pinterest so you can find it when you are ready for the next change.

    Frequently Asked Questions

    What colors work best for a Mediterranean coffee table?

    Warm terracotta, sand, and natural wood form the base, with blue and white ceramics as the main color accent and brass for warmth. Keep the palette to three or four tones, so the table reads as Mediterranean rather than multicolored. A bowl of lemons or a green plant adds a fresh note without adding a new paint color to the scheme.

    How do I style a Mediterranean coffee table without it looking cluttered?

    Start with one anchor, such as a tray or runner, group objects in odd numbers, and leave about one third of the table clear. Vary the heights, so a tall branch, a low bowl, and a flat book stack do not compete, and remove one piece if the table feels crowded. A clear zone for cups keeps the styling in place during daily use.

    Can I use Mediterranean coffee table styling in a small living room?

    Yes, if you scale the ideas down: one tray instead of two anchors, a single vase of olive branches instead of a bottle cluster, and a low bowl instead of a tall arrangement. A patterned rug under the table can carry the Mediterranean pattern, which frees the small tabletop to stay simple. Keep the styling to the far side of the table and leave the near side clear for use.

    What is the best tray for a Mediterranean coffee table?

    A terracotta tray suits most tables, since its warm clay color sets the tone and its low rim keeps items visible. A mosaic tile tray is the better pick if the table holds drinks often, since tile handles wet glasses well. Choose a tray that fits the table with space left at each end, and keep the heaviest piece in the center so the tray stays balanced.

    How do I keep fresh lemons, herbs, and branches looking good on the table?

    Change the water for olive branches every few days and trim the stems at an angle, replace any lemon that softens, and give potted rosemary and lavender the brightest spot in the room when the table is not in use. Dried lavender, shells, and ceramic pieces need only a dust, so mix one or two fresh items with longer lasting pieces rather than styling the whole table with fresh material.

    Do Mediterranean coffee tables suit a modern living room?

    Yes, because the materials, terracotta, olive wood, woven fiber, blue ceramic, and brass, work with plain modern furniture as well as with rustic pieces. Keep the shapes simple, such as a plain glass vase, a low ceramic bowl, and a straight edged tray, and let one or two Mediterranean pieces lead rather than filling the table with themed objects. A modern room needs fewer pieces, not different ones.


  • 22 Round Coffee Table Styling Ideas to Make Any Room Feel Cozier

    22 Round Coffee Table Styling Ideas to Make Any Room Feel Cozier

    A round coffee table has no corners to fight over, which makes it easy to style and easy to live with. The curve softens a seating group, leaves clear walking space, and gives every seat a fair share of the surface. The challenge is scale: too much on a round top looks crowded fast, while too little can look bare. These 22 round coffee table styling ideas cover trays, books, candles, plants, storage, and setups for coffee, games, reading, and work. Start with one anchor, leave room for a mug, and let the rest support that first choice. For help grounding the whole seating group, see these living room rug ideas.

    Key Takeaways

    • Start with one anchor, such as a tray, a vase, or a book stack, and keep the rest of the table in support of it.
    • On a round top, group items in odd numbers and vary their heights, so the eye moves around the curve instead of stopping at one flat row.
    • Leave at least one clear spot for a mug, a book, or a phone, or the table will look good but feel unusable.
    • Match the size of the styling to the size of the table: a small table needs one small group, while a large table can hold two groups with space between them.
    • Use the lower shelf or the space under the table for storage, so blankets and magazines do not need to live on top.
    • Change one small accent by season, such as flowers or a candle color, to refresh the table without restyling it from scratch.

    1. Anchor the Table With a Wood Tray

    Round wood coffee table with a wood tray holding a small vase, a candle, and a book.

    A wood tray is the simplest anchor for a round coffee table, because it turns a loose group of objects into one clear arrangement. Choose a round or oval tray that covers about a third of the tabletop, and set it slightly off center so the curve of the tray echoes the curve of the table. Place a small vase, a candle, and one book inside the tray, and leave the rest of the table clear for daily use.

    The tray also makes cleaning easy: lift the whole group at once, wipe the table, and set it back down. A tray with low sides works best, since tall sides can hide small items and make the group look boxed in. If your table is dark wood, try a lighter tray in oak or rattan for contrast, and if the table is pale, a walnut tray adds warmth.

    2. Use One Sculptural Vase With Tall Branches

    Round coffee table with one tall sculptural vase holding long branches.

    One tall vase with a few branches gives a round table height without filling the surface. This suits a room where the table sits in open space, since the branches draw the eye up and keep the table from looking low and flat. Choose branches that are about one and a half times the height of the vase, and keep the number small, three to five stems, so the shape stays open.

    A sculptural vase in ceramic, stone, or textured glass works as the piece itself, so the branches do not need to be elaborate. Dried branches, eucalyptus, or a few long stems from the garden all work, and they need no water if you choose dried stems. Keep the vase toward the back of the table, away from the seat where people reach most, so it is admired rather than bumped.

    3. Stack Books and Top Them With a Small Object

    Round coffee table with a stack of large books topped with a small sculpture.

    A stack of two or three large books is a classic coffee table base, and a small object on top stops the stack from looking like a pile waiting to be shelved. Choose books with covers you like looking at, in sizes that step down as the stack rises, and place the largest book at the bottom. A small stone, a brass bird, or a short candle on top gives the stack a finished point.

    Keep the stack to one side of the table rather than the center, so the other side stays free for mugs. The top book should be one people can actually open, not a fragile display piece, since a coffee table book earns its place by being read. Rotate the top book when you finish it, and the whole table feels refreshed with no new purchase.

    4. Group Candles at Three Heights

    Round coffee table with three candles at different heights grouped on a tray.

    Candles grouped at three heights suit a round table well, because the different levels follow the curve and keep the group from looking like a straight line. Use pillar candles on a flat tray, or mix one tall pillar, one medium jar candle, and one short votive, and keep them close enough to read as one group. In the evening, the low light makes the whole seating group feel warmer.

    Safety matters more than symmetry here. Keep candles away from the table edge, away from curtains and throws, and never leave them burning in an empty room. Flameless candles give a similar glow in a home with children or pets, and they let you keep the group out all day. Wipe wax drips promptly, since wax can mark wood and stone tops.

    5. Set a Low Wide Bowl as a Catchall

    Round coffee table with a low wide ceramic bowl holding remote controls.

    A low, wide bowl gives small daily items a home, which is the difference between a styled table and a cluttered one. Use the bowl for remote controls, keys, or a pair of reading glasses, and choose a bowl wide enough that items sit inside it rather than spilling over the rim. Ceramic, wood, or stone all work, and a shallow bowl keeps the tabletop visible around it.

    This idea suits a family room best, where the table must hold real life as well as decor. Empty the bowl once a week, and return anything that does not belong there to its proper place, or the catchall becomes a junk drawer in plain sight. One bowl is enough; a second bowl on the same table usually ends up holding the same kind of clutter twice.

    6. Make a Trailing Plant the Centerpiece

    Round coffee table with a trailing plant in a ceramic pot, leaves spilling over the edge.

    A trailing plant softens a round table in a way no hard object can, since the leaves spill over the edge and break the hard circle of the tabletop. Choose a plant that trails gently, such as pothos or string of hearts, in a pot that fits the table without dominating it. Place a saucer or a cork mat under the pot to protect the table from water marks.

    Check the light before you commit: most trailing houseplants need bright indirect light, not a dark corner or harsh midday sun. Water over a sink, let the pot drain, and then return it to the table, so the tabletop never sits in a puddle. Trim the trails when they reach the floor or start to tangle with chair legs, and use the cuttings to start new plants elsewhere in the room.

    7. Store Blankets and Magazines in a Basket Below

    Round coffee table with a woven basket of folded throws on its lower shelf.

    If your round table has a lower shelf or open space underneath, a basket there is the easiest storage upgrade in this list. A woven basket holds folded throws and a few magazines out of sight, while keeping them within reach for an evening on the sofa. Choose a basket that slides under the table without sticking out past the tabletop edge.

    This keeps the tabletop free for the styling you actually see, which matters most on a small round table. Fold throws neatly rather than stuffing them in, since a tidy basket reads as part of the styling and a stuffed one reads as clutter. If the table has no shelf, a flat basket beside the table leg does the same job without crowding the walkway.

    8. Style Two Tiers: Top and Lower Shelf

    Two tier round coffee table with a vase on top and books on the lower shelf.

    A two tier round table gives you two surfaces to style, and the trick is to treat them as one arrangement, not two separate ones. Keep the top light and open, with a tray or a vase, and use the lower shelf for heavier, quieter items, such as a stack of books or a lidded box. The heavier items below ground the table, while the lighter items above keep it feeling open.

    Repeat one material or color between the tiers, such as wood on both levels or the same book color, so the two levels look linked. Avoid filling both tiers to the edge; the eye needs empty space on a lower shelf just as it does on top. Dust the lower shelf when you dust the top, since books and boxes there collect dust out of sight.

    9. Set the Table for Coffee

    Round coffee table set for coffee with a small pot, two mugs, and a sugar bowl on a tray.

    A coffee setup turns a round table into a small serving station, which suits a household that hosts morning coffee or an afternoon break. Group a small coffee pot or French press, two mugs, and a tiny sugar bowl on a tray, and keep the tray to one side so guests can still set down a plate. A linen napkin under the tray protects the tabletop from heat and drips.

    This setup works best when it is assembled for the occasion and cleared after, rather than left out all week, since a full coffee set takes up the whole table. Keep the mugs in a matching or close pair, and skip extra pieces such as a large milk jug unless you actually use them. When the coffee is done, the tray lifts away and the table returns to its everyday styling in seconds.

    10. Keep a Game Night Setup Ready

    Round coffee table with a board game, coasters, and a small snack bowl ready for game night.

    A round table suits board games and card games well, because every player can reach the center without stretching across a corner. Keep a lidded box or a basket under the table with one or two favorite games, a set of coasters, and a small bowl for snacks, so game night starts without a hunt through a closet. On the tabletop itself, keep only a small candle or a plant, which can move aside in seconds.

    Choose games that fit the table: a compact card game or a small board suits a round top better than a large board that overhangs the edge. Coasters matter here, since drinks sit close to the game and a ring mark on a board or a card is hard to undo. After the game, return the pieces to the box at once, or the table stays a game table until the next tidy up.

    11. Build a Reading Nook Around the Table

    Round coffee table beside an armchair with an open book, glasses, and a mug.

    A round table beside a comfortable chair makes a natural reading spot, and the styling can support that use instead of fighting it. Keep one open book or a small stack of books to one side, a pair of reading glasses in a small dish, and a bookmark tucked into the current book. A small lamp on a nearby side table, rather than on the coffee table itself, gives light without taking up surface space.

    This setup suits a quiet corner of the living room, where the chair, the table, and the lamp form one small zone. Keep the book stack to books you are actually reading, and move finished books back to a shelf, so the stack stays inviting rather than becoming a pile. If the chair faces a window, the table also holds a mug during a morning read, which is reason enough to keep one side clear.

    12. Leave One Side Clear for Work

    Round coffee table with decor grouped on one half and a laptop and notebook on the other half.

    A round table can double as a laptop spot, but only if the styling leaves room for it. Keep all decor grouped on one half of the table, such as a tray with a vase and a candle, and leave the other half empty for a laptop, a notebook, and a pen. A small pen cup or a shallow dish on the decor side keeps pens from rolling across the table.

    This split layout works well in a small living room, where one table must serve both relaxing and working, as shown in these small living room dining room combo ideas. When work ends, close the laptop and the table returns to a living room table, with no rearrangement needed. Keep charging cables in a small basket below the table, so they do not snake across the styled half.

    13. Place a Symmetrical Pair of Candlesticks

    Round coffee table with a matching pair of brass candlesticks and a small bowl between them.

    A matching pair of candlesticks brings a formal, balanced feel to a round table, which suits a traditional living room or a room with a fireplace as its focus. Place the two candlesticks a short distance apart, with a small bowl or a short stack of books between them, so the pair frames a center rather than standing alone. Matching candlesticks in brass, wood, or ceramic all work, and the pair should match in height.

    Symmetry can feel stiff if it is too exact, so let the center piece break the pattern slightly, with a plant or a book that is a different shape. Keep the candlesticks away from the table edge and from anything flammable, and use dripless candles to protect the tabletop. In a room with a grey sofa, brass candlesticks add a warm note, as shown in these grey couch living room ideas.

    14. Try an Off Center Cluster

    Round coffee table with an off center cluster of a tall vase, a book stack, and a short candle.

    An off center cluster suits a modern room, where a centered arrangement can feel too formal. Group three items of different heights, such as a tall vase, a medium book stack, and a short candle, on one side of the table, and leave the rest of the surface empty. The empty space is part of the design: it gives the eye a place to rest and gives hands a place to set a mug.

    This layout works best on a medium or large round table, where the empty side is clearly a choice rather than a gap. Stand back and check the cluster from the main seat and from the doorway, since an off center group should look planned from both angles. If the cluster looks like it slid to one side by accident, pull it a little further off center and add a small item, so the intention is clear.

    15. Pair a Marble Top With Brass Accents

    Round marble coffee table with small brass candle holders and one book.

    A marble top already carries a lot of visual interest, so brass accents should be few and small: a brass tray edge, a brass candle holder, or a small brass bowl. The warm metal against cool stone is the whole point, and adding more metals, such as chrome or black iron, can make the pairing feel busy. Keep the rest of the styling plain, with one book or one plant, so the stone and brass lead.

    Marble needs simple care: wipe spills promptly, use coasters under mugs and glasses, and avoid placing citrus or vinegar directly on the stone. A felt pad under a brass tray stops the metal from scratching the marble when the tray moves. This material pairing suits a room with pale walls and a light sofa, where the table itself is the main detail in the seating group.

    16. Layer Rattan and Woven Texture

    Round coffee table with a rattan tray, a woven placemat, and a small vase.

    Rattan and woven texture warm up a round table without adding color, which suits a relaxed or coastal style room. Use a woven placemat under a vase or a tray, a rattan tray instead of a wood one, and a small woven basket below the table for throws. The texture does the work, so the objects themselves can stay simple and pale.

    Keep the woven pieces to two or three, since a table covered in weave can look like a basket rather than a table. A woven placemat also protects the tabletop from a hot mug or a vase ring, which is a practical bonus. Shake out or vacuum woven pieces outdoors now and then, since weave traps dust and crumbs more than a smooth tray does.

    17. Scale Down for a Small Round Table

    Small round coffee table with a single small vase and a clear surface.

    A small round table, under about 24 inches across, needs only one small group, not a full arrangement. Choose a single vase with a short stem, or a small stack of two books with a candle on top, and leave the rest of the surface clear. Every item on a small table is close to the edge, so a single group in the center is safer and calmer than several small groups competing for space.

    Measure the table before buying a tray, since a tray that fits a large table can cover a small one completely. A small table also needs a clear walkway around it, so keep the styling low enough that it does not block sight lines across the room. If the table feels bare with one group, add a patterned rug underneath, which gives the area interest without adding items to the tabletop.

    18. Swap One Accent With the Seasons

    Round coffee table with a tray, books, and a small vase of autumn leaves.

    A seasonal swap keeps a round table fresh with almost no effort: keep the same tray, books, and candle holders all year, and change only one accent. In spring, that accent might be a small vase of fresh flowers; in autumn, a bowl of pinecones or a candle in a warmer color; in winter, a sprig of evergreen in the same vase. The base stays the same, so the table never needs a full restyle.

    Store the seasonal accents together in one small box, so the swap takes minutes rather than a shopping trip. Choose accents that suit your climate and your household: fresh flowers need water and light, while dried stems and pinecones need only dusting. This idea pairs well with a neutral base, since a calm tray and plain books accept a new accent without clashing.

    19. Layer Neutral Textures Without Strong Color

    Round coffee table layered with a linen placemat, a wood tray, a stone bowl, and a ceramic vase in neutral tones.

    A neutral scheme layers linen, wood, stone, and ceramic in cream, oatmeal, grey, and pale wood, with no single strong color. On a round table, that might mean a linen placemat, a wood tray, a stone bowl, and a ceramic vase, each in a quiet tone. The interest comes from the different surfaces, not from color, so the table feels calm even when it holds several pieces.

    This approach suits a room that already has color elsewhere, such as in art or cushions, since the table then rests the eye rather than competing. Vary the textures clearly: if everything is smooth and pale, the group can look flat, so include one rough texture, such as woven linen or unglazed ceramic. Keep one piece slightly darker, such as a walnut tray, to anchor the pale group.

    20. Display a Small Travel Collection

    Round coffee table with a tray holding a small stone, a framed photo, and a handmade bowl.

    A round table is a good place for a small, personal collection, because guests see it up close from every seat. Choose three or four pieces that mean something to you, such as a small stone from a trip, a framed photo, and a handmade bowl, and group them on a tray so they read as a collection rather than random objects. The tray boundary tells visitors that these pieces belong together.

    Edit hard: a collection of three pieces with space around each one looks cared for, while ten pieces crowded together look like a shelf that ran out of room. Dust the pieces when you dust the table, and move anything fragile to a higher shelf if children or pets use the room. Rotate one piece now and then, so the display stays personal without growing larger.

    21. Style for a Family Room With Soft, Safe Pieces

    Round coffee table with a fabric basket of soft toys, a wooden bowl, and a sturdy potted plant.

    A family room table needs styling that survives daily life: soft edges, unbreakable materials, and nothing precious at toddler height. Use a fabric basket on the table for soft toys or crayons, a wooden bowl instead of glass, and a washable placemat under a small plant in a sturdy pot. Keep candles flameless, and keep small pieces out of reach of very young children.

    This is not a lesser version of styling; it is styling for the room as it is actually used. A low basket of books that children can reach encourages reading, and a clear side of the table still leaves room for snacks and homework. Check the table for wobble before styling it, since a stable table is safer for everyone, and keep the floor around it clear so children can move without tripping.

    22. Add Evening Glow With a Lantern

    Round coffee table with a glass lantern glowing in the evening beside a small book.

    A lantern on a round table gives evening light at a low height, which makes a seating group feel cozy after dark. Choose a lantern with glass sides and a metal or wood frame, sized so it does not block conversation across the table, and place it slightly off center with a small book or a plant beside it. A flameless candle inside gives steady light with no flame near books or throws.

    This idea suits a room used most in the evening, where a single ceiling light can feel harsh. Pair the lantern with a floor lamp or a side lamp, so the room has light at more than one height and no single harsh source. In the daytime, the lantern still works as a decorative object, especially if its frame matches another metal in the room, such as a brass tray edge or a black table leg.

    Conclusion

    A round coffee table looks best when the styling fits the table, not when it copies a photo of a different table. Start with one anchor, add height and texture in small steps, and leave room for the life that happens around the table: coffee, books, games, and conversation. The ideas here give you a starting point for every size and style, from a single vase on a small table to a two tier setup with storage below. Pick one idea, try it for a week, and adjust what does not work. A table that is easy to use will stay styled far longer than a table that only looks good in a photo. For a softer sofa pairing to go with the warm, layered looks here, see these grey couch living room ideas.

    FAQs

    How many items should I put on a round coffee table?

    Three to five items, grouped as one or two clusters, suit most round tables. A small table needs only one group of two or three items, while a large table can hold two groups with clear space between them. Count a tray and its contents as one group, not as separate items, and leave at least one clear spot for a mug or a book.

    What size tray fits a round coffee table?

    A tray that covers about a third of the tabletop is a good starting point. Measure the table diameter first, then choose a tray about a third of that width, so the tray anchors the styling without covering the whole surface. A round or oval tray echoes the table shape best, and low sides keep small items visible.

    Should the centerpiece sit in the center of a round table?

    Not always. A centered piece suits a formal room and a small table, while an off center cluster suits a modern room and a larger table. Either way, the group should look planned from the main seat and from the doorway. If the table is used for coffee or games, keep the centerpiece to one side so the working area stays clear.

    How do I style a round coffee table in a small living room?

    Keep it to one small group, keep the height low, and use the space below the table for storage. A single vase, a small book stack, or a tiny tray is enough, and a patterned rug underneath adds interest without adding items to the tabletop. Leave a clear walkway around the table, since a small room feels crowded fast when the table styling spills into the path.

    Can I mix materials on a round coffee table?

    Yes, if you keep the mix to two or three materials, such as wood, ceramic, and brass, or rattan, stone, and linen. One material should lead, with the others in support, so the group reads as planned rather than random. Avoid adding a fourth strong material, such as a second metal, unless it appears in only one very small piece.

    How often should I change coffee table styling?

    Change one accent with the seasons, and restyle fully only when the table stops working for daily life. A seasonal flower, candle color, or small bowl keeps the table fresh with little effort, while the tray, books, and main vase can stay the same all year. If items keep getting moved aside for coffee or work, that is a sign the styling needs fewer pieces, not new ones.


  • 32 Irish Coffee Table Styling Ideas to Make Every Corner Count

    32 Irish Coffee Table Styling Ideas to Make Every Corner Count

    An Irish coffee table looks best when it feels collected over time, not bought in one trip. A stack of well loved books, a tray that keeps small pieces together, a candle for evening light, and one piece with a story behind it are usually enough. These 32 Irish coffee table styling ideas cover wood, marble, linen, crystal, and coastal finds, plus layouts for small tables, family rooms, and quiet reading corners. Start with the table you have, leave room for a cup of tea, and build from there. The rug under the table sets the zone first, so the sizing advice in these living room rug ideas is worth a quick read before you arrange anything.

    Key Takeaways

    • Start with a tray or a book stack to anchor the display, then add one taller piece and one low piece for varied heights.
    • Leave at least one clear corner of the table for cups, so the display stays useful every day.
    • Repeat one material, such as wood, marble, or brass, in two places to make mixed pieces look planned.
    • Use odd numbers in small groups, usually three pieces, and leave breathing space between groups.
    • Pick pieces you can lift in one hand for dusting, and keep fragile crystal or candles away from table edges in busy family rooms.
    • Change one seasonal piece, such as flowers or a candle color, instead of restyling the whole table four times a year.

    1. Rule of Three with Irish Pottery

    Three pieces of Irish pottery in different heights on a wood coffee table.

    Group three pieces of Irish pottery in different heights: a tall vase, a medium jug, and a small bowl. The odd number keeps the eye moving, and the shared clay or glaze links pieces that were bought years apart. This suits a plain wood table, where pottery adds color without a busy pattern.

    Keep the tallest piece at the back or at one end, so it does not block conversation across the table. Use the small bowl for keys or loose change if the table sits near the door, or leave it empty as a quiet shape. Wipe pottery with a damp cloth and keep unglazed bases on a felt pad to protect the table top.

    2. Stack of Irish Literature

    Stack of books by Irish writers on a coffee table beside a sofa.

    Stack three or four books by Irish writers, largest at the bottom, with the top book open or closed flat. A mix of poetry, a novel, and a book on Irish history or landscape gives guests something to pick up and gives the table a clear point of interest. This is a simple start for a reader, since the books are already in the house.

    Turn the spines to face the sofa, not the wall, so titles read easily from where people sit. Add a small paperweight or a flat stone on top to stop pages flipping near an open window. Rotate the top book when you finish it, so the stack stays current and personal.

    3. Connemara Marble Tray

    Green Connemara marble tray on a coffee table holding a candle and a small plant.

    Set a Connemara marble tray in soft green tones at the center of the table, and use it to hold a candle, a small plant, and a coaster stack. The tray corrals small pieces into one tidy zone, which matters on a table that also holds remotes and reading glasses. Marble feels cool and solid, so it grounds lighter pieces such as linen and dried flowers.

    Choose a tray size that leaves a clear margin on all sides, roughly a hand width, so the table does not look covered. Wipe marble with a soft damp cloth and dry it at once, since tea rings show on polished stone. If a marble tray is out of budget, a green glazed ceramic tray gives a similar color story at a lower cost.

    4. Celtic Knot Table Runner

    Coffee table with a Celtic knot border runner and low styling pieces.

    Lay a narrow runner with a Celtic knot border down the middle of a long rectangular table, then style only on top of the runner. The pattern draws the eye along the table and gives a plain wood top a clear Irish note without painting or changing the furniture. This works well on a table that otherwise looks bare between uses.

    Keep the runner shorter than the table by a clear margin at each end, so the wood still shows. Style with low pieces only, since a tall vase on a patterned runner can look top heavy. Wash the runner following its label, and lift it for a shake outside once a week if the room sees daily use.

    5. Aran Knit Coasters and a Folded Throw

    Basket of cream Aran knit coasters on a coffee table near a sofa.

    Place a set of cream Aran knit coasters in a small basket on the table, with a folded knit throw draped over one sofa arm nearby. The knit texture repeats the cable pattern of a classic Aran sweater, and it softens a hard table top. Coasters in a basket stay tidy, while loose coasters tend to drift to every corner of the room.

    Use coasters under every hot cup, since knit alone will not protect wood from heat and damp. Wash the coasters when they start to look tired, and keep a spare set in the basket so a stained one can be swapped out at once. This idea pairs well with a plain wood table and pale walls.

    6. Green Glass Vase with Fresh Stems

    Green glass vase with fresh stems at one end of a coffee table.

    Put a green glass vase with three to five fresh stems at one end of the table, where it catches light from the window. Green glass suits Irish styling without needing a shamrock motif, and fresh stems add life that dried flowers cannot match. Choose stems that suit the season, such as daffodils in spring or leafy branches in autumn.

    Trim stems at an angle and change the water every two days to keep the display fresh. Keep the vase height below eye level when seated, so conversation across the table stays easy. If fresh flowers are hard to keep, a green glass vase with a single quality faux stem still gives the same color note.

    7. Crystal Bowl as a Catch All

    Cut crystal bowl on a coffee table holding small everyday items.

    Set a cut crystal bowl at the center of the table for small everyday pieces: a pair of reading glasses, a lip balm, or a few wrapped sweets for guests. Crystal catches lamplight in the evening, and a bowl with a job stays on the table instead of being moved aside. This suits a formal living room, where a purely decorative piece can feel out of place.

    Keep the bowl shallow and wide rather than deep, so items inside stay visible and easy to reach. Wash crystal by hand and dry it with a soft cloth to avoid water marks. In a home with small children, place the bowl toward the middle of the table, well away from the edge.

    8. Bare Bog Oak Table with One Low Bowl

    Dark bog oak coffee table with a single low wooden bowl at its center.

    Let a dark bog oak or stained Irish oak table speak for itself, with only one low wooden bowl at its center. The grain and dark tone carry the whole look, so extra pieces would compete rather than help. This minimalist approach suits a room that already has patterned cushions or art, where the table needs to stay calm.

    Use the bowl for a few pinecones, a small plant, or nothing at all, and keep the rest of the surface clear for cups and books in use. Oil the wood following the maker guidance, and use coasters for hot drinks to protect the finish. Dust with a dry cloth, since polish can build up on dark wood over time.

    9. Potted Shamrock Plant

    Small potted shamrock plant in a terracotta pot on a coffee table.

    Place a small potted shamrock plant in a plain terracotta pot on a saucer at one corner of the table. A living plant brings a direct Irish note, and the small scale suits even a tiny coffee table. Terracotta warms the green leaves and suits a cottage style room better than a shiny glazed pot.

    Give the plant bright indirect light and water only when the top of the soil feels dry, since shamrock dislikes sitting in water. Turn the pot a quarter turn each week so growth stays even. Move the plant to a windowsill if the table gets little daylight, and swap in a small trailing ivy for the same effect.

    10. Embroidered Irish Linen Runner

    Coffee table dressed with an embroidered cream Irish linen runner.

    Dress the table with an embroidered Irish linen runner in cream, with a simple floral or knot motif along the edges. Linen softens a hard table top and protects it from scratches, while the embroidery adds craft detail that reads up close rather than shouting across the room. This suits a table used for tea with guests.

    Iron the runner on a low setting and store it rolled, not folded, to avoid hard crease lines across the motif. Style with a plain tray on top, so cups and candles do not snag the embroidery. Keep the runner away from a table edge where a child or pet could pull it down.

    11. Turf Scented Candle in a Lantern

    Glass lantern with a candle at the center of a coffee table in the evening.

    Put a turf scented candle inside a simple glass lantern at the center of the table for evening light. The lantern protects the flame from drafts, and the warm scent suits a cozy Irish living room in the colder months. A lantern also raises the candle above the table surface, which makes it easier to see across the room.

    Never leave a lit candle unattended, and keep the lantern clear of curtains, books, and the throw on the sofa arm. Trim the wick before each lighting to keep the flame steady. When the candle is not lit, the lantern still works as a glass display piece with a small plant inside.

    12. Claddagh Dish for Small Treasures

    Small Claddagh dish on a coffee table beside a book stack.

    Use a small Claddagh dish, with its hands, heart, and crown motif, to hold rings, coins, or a single keepsake on the table. A dish with a clear job keeps small items from scattering, and the Claddagh symbol adds meaning for a family with Irish roots or a love of Irish craft. This works best as one small piece in a larger group, not as the only display.

    Place the dish near the sofa edge, where it is easy to reach when you sit down. Keep it shallow so items inside stay visible, and empty it once a week so it does not become a junk dish. Pair it with a plain book stack, so the detailed motif has a calm background.

    13. Framed Vintage Map of Ireland

    Small framed vintage map of Ireland leaning against books on a coffee table.

    Lean a small framed vintage map of Ireland against a book stack on the table, facing the sofa. A map adds a talking point and a sense of place, and leaning it, rather than hanging it, lets you change it with the seasons. This suits a reader or a traveler, since the map invites a closer look.

    Choose a frame size that fits the table without blocking the view across it, and lean it at a slight angle against a stable stack of two or three books. Keep the glass clean, since fingerprints show fast on a small frame. If wall space is free, a larger map on the wall pairs well with a smaller table display.

    14. Irish Breakfast Tea Service

    Irish tea service on a tray on a coffee table with two cups and a teapot.

    Arrange a small Irish breakfast tea service on a tray: a teapot, two cups, and a sugar bowl, ready for an afternoon cup. A tea tray turns the coffee table into a serving spot, and it looks intentional even when the tea is finished, since the pieces are grouped. This suits a household that drinks tea daily, where the set earns its place.

    Keep the tray near the sofa edge for easy pouring, and use a tea towel folded under the tray to catch drips and protect the table. Wash the set by hand if it is fine china, and store spare cups in a cupboard so the table holds only the daily set. Add a small plate of biscuits only when guests arrive, so the display stays tidy.

    15. Coffee Corner with Irish Mugs

    Coffee corner on a coffee table with pottery mugs and a French press on a tray.

    Create a coffee corner at one end of the table with a small tray holding two or three Irish pottery mugs, a French press or pour over set, and a jar of coffee beans. A coffee corner makes the table useful first thing in the morning, and the pottery mugs add color and craft. This suits a household where coffee, not tea, starts the day.

    Keep the coffee jar sealed and out of direct sun, and wipe the tray after each use to stop rings. Use mugs in one color family, such as cream and sage, so the group looks planned. When the table is needed for a meal or a game, lift the whole tray away in one move.

    16. Woven Basket for Remotes and Magazines

    Low woven seagrass basket on a coffee table holding a magazine and remotes.

    Tuck a low woven seagrass basket on the table or on the shelf below it for remotes, a magazine, and a notebook. A basket hides the everyday clutter that ruins a styled table, while still keeping everything within reach. Natural weave suits Irish cottage styling and warms a modern glass or metal table.

    Choose a basket that fits the table with room to spare, and keep only daily items inside, moving the rest to a drawer. Line the basket with a cloth if it holds pens, so ink does not mark the weave. Empty the basket once a week and return anything that no longer belongs there.

    17. Brass Candlesticks in a Pair

    Pair of brass candlesticks on a coffee table flanking a small book stack.

    Place a pair of brass candlesticks at one end of the table, flanking a small book stack or a low plant. Matching pairs give symmetry, which calms a room with a lot of pattern elsewhere, and brass warms the green and cream tones common in Irish styling. Use taper candles in cream or soft green for a quiet look.

    Keep the candlesticks stable on a flat surface, and never light them near curtains or a low shelf. Polish brass only when it dulls, since frequent polishing wears the finish. If one candlestick tips easily, use a felt pad under its base or swap the pair for a single heavier candle holder.

    18. Coastal Finds from an Irish Shore

    Shallow wooden bowl with pebbles, driftwood, and sea glass on a coffee table.

    Group a few coastal finds, such as smooth pebbles, a piece of driftwood, and sea glass in a shallow wooden bowl, for an Irish seaside note. This suits a coastal cottage or a room with pale blue and sandy tones, where the natural pieces link the table to the landscape outside. Keep the group small, so it reads as a collection, not a beach haul.

    Wash and dry natural finds before bringing them inside, and check driftwood for rough edges that could scratch the table. Place the bowl on a linen mat to protect the surface. Rotate one piece with the seasons, such as a shell in summer, to keep the display fresh without buying anything new.

    19. Silver Framed Family Photo

    Silver framed family photo on a coffee table beside a small plant.

    Stand a silver framed family photo on the table, angled toward the main seat, beside a small plant or a candle. A personal photo makes the table feel like home rather than a showroom, and silver suits both dark wood and pale painted tables. This works best with one photo, not a row of frames that crowds the surface.

    Choose a photo with a clear subject and a simple frame, so it reads from sofa distance. Keep the glass clean and the frame upright, using a book as a support if the stand is weak. Swap the photo once or twice a year, so the display reflects the family now, not only years past.

    20. Autumn Harvest Display

    Wooden bowl with conkers and dried leaves on a coffee table in autumn.

    Style the table for autumn with a wooden bowl of conkers, dried leaves in a small vase, and a candle in a warm amber tone. The harvest theme suits Irish countryside styling, and it uses free natural pieces that change with the season. This is a short term display, so it can be bolder than a year round arrangement.

    Replace leaves before they crumble, and keep dried material away from a lit candle. Use a tray under the bowl to catch leaf fragments. When autumn passes, keep the wooden bowl and swap the leaves for winter greenery, so the base pieces work all year.

    21. Christmas Greens and Red Berries

    Coffee table with fresh greenery, red berries, and candles in glass holders.

    For Christmas, lay a short garland of fresh greenery along the table center, with red berries, pinecones, and a pair of candles in glass holders. The green and red pairing reads festive without needing a full tree on the table, and the low garland leaves room for cups at each end. This suits a living room that already has a tree elsewhere.

    Keep greenery away from lit candles, and use battery candles if the garland sits close to a flame. Mist the greenery lightly to keep it fresh, and remove it before it dries out. Store the glass holders with the Christmas decorations, so the table returns to its normal styling in January.

    22. Spring Daffodils in a Jug

    Jug of fresh daffodils at the center of a coffee table in spring.

    Put a jug of fresh daffodils at the center of the table in spring, with a plain linen cloth underneath. Daffodils are a bright, simple Irish spring flower, and a jug feels more cottage than a formal vase. The yellow lifts a room after a dark winter, and the display needs only one piece to work.

    Change the water daily and trim stems as they soften, since daffodils release sap that can affect other flowers in the same jug. Keep the jug low enough to see across the table. When daffodils finish, swap in tulips or fresh leafy branches in the same jug for the same effect.

    23. Single Statement Bowl

    Large statement bowl alone on a coffee table with clear space around it.

    Style the table with one large statement bowl and nothing else, apart from space for cups. A wide ceramic, wood, or marble bowl in a strong shape gives the table a focal point, and the empty space around it makes the room feel calm. This suits a small table, where several small pieces would look cluttered.

    Choose a bowl wide enough to hold its own against the table size, roughly a third of the table width, and keep its color in the room palette. Leave the bowl empty, or fill it with one kind of fruit, such as lemons, for a simple color note. Wipe the bowl weekly, since a single piece shows dust fast.

    24. Symmetrical Layout for a Formal Room

    Symmetrical coffee table layout with matching book stacks and candles at both ends.

    Mirror the table layout on both ends: a book stack and a candle on the left, the same on the right, with a low tray in the middle. Symmetry suits a formal living room with matching sofas or chairs, where a balanced table echoes the room layout. This also makes tidying simple, since each side has a clear job.

    Measure the table first, so both sides have equal space and the middle tray stays centered. Use matching candles and similar sized books, but let the book titles differ, so the symmetry does not look staged. If the room is casual, soften the symmetry by using different plants on each side instead of identical pieces.

    25. Tiered Stand Display

    Two tier cake stand on a coffee table holding a small plant and a candle.

    Use a two tier cake stand on the table to hold small pieces at two heights: a tiny plant and a candle on the top tier, coasters and a small dish below. A tiered stand adds height without a tall vase, and it keeps small pieces grouped on a small table. This suits a tea table, where the stand can also serve cakes when guests visit.

    Keep the stand stable and centered, and do not overload the top tier, since a heavy top makes it tip. Use the stand for display only between visits, and clear it for serving when guests arrive. Wash the stand by hand if it is ceramic, and dry the tiers before restacking.

    26. Chess Set as a Living Display

    Chess set mid game on a coffee table beside a small strategy book.

    Leave a chess set out on the table, mid game or set for a new game, with a small book on chess strategy beside it. A chess set is both decoration and an invitation to play, and it suits a family room where the table is used every evening. The board adds pattern, while the pieces add height and detail.

    Choose a board size that leaves room for cups at one end, and keep spare pieces in a small pouch under the table. Dust the pieces weekly, since they are handled often. If chess is not your game, a set of draughts or a card game box gives the same lived in effect.

    27. Trailing Ivy in a Hanging Pot

    Trailing ivy in a small pot at the corner of a coffee table with stems over the edge.

    Place a trailing ivy in a small pot at one corner of the table, letting the stems trail over the table edge toward the floor. Ivy is hardy, green all year, and strongly linked to Irish cottage gardens, so it gives a lasting plant note without flowers. The trailing shape softens a square table edge.

    Water only when the soil feels dry, and trim stems that reach the floor, so they do not trip anyone. Keep the pot on a saucer to protect the table, and turn the pot weekly for even growth. If ivy grows too fast, swap it for a slower trailing plant, such as a string of hearts, in the same pot.

    28. Layered Heights with Books, Tray, and Candle

    Coffee table styled in layered heights with books, a tray, and a tall vase.

    Build the display in three heights: a book stack as the low base, a tray at mid height holding a candle and a small dish, and a tall vase or candlestick at the back. Layered heights stop the table from looking flat, and each layer has a clear role. This is the most reliable formula for a rectangular table.

    Start with the tallest piece at the back, then work forward to the lowest, checking the view from the sofa at each step. Keep the total height below eye level when seated, so the display does not block the television or conversation. Step back and remove one piece if the table looks crowded, since three layers are enough.

    29. Deep Green and Brass Evening Look

    Evening coffee table with deep green books, brass candlesticks, and candlelight.

    Style the table for evening with deep green books, brass candlesticks, and a dark wood tray, lit by a single candle. The deep green and brass pairing feels rich and suits a room with dark walls or a fireplace, where lighter styling would wash out. This is a mood first layout, best for a room used mainly in the evening.

    Keep the candle in a glass holder, and add a small lamp nearby if the room needs more light for reading. Use matte green book covers rather than shiny ones, so lamplight does not glare. Balance the dark pieces with a cream coaster set, so the table does not look too heavy in daylight.

    30. Bright Cottage Look in Cream and Pale Green

    Bright cottage coffee table with cream linen, a pale green vase, and a white jug.

    Use cream linen, a pale green vase, and a white ceramic jug to style a bright cottage table. The pale palette suits a small room or a room with limited daylight, where dark wood and deep green would feel heavy. White and pale green also suit a coastal cottage, where the table should feel fresh rather than formal.

    Keep the palette to two main colors plus wood, so the pale scheme stays calm. Add one green plant for a living note, and use washable linen, since cream shows marks fast. This look pairs well with a pale sofa, and the cushion and sofa pairing advice in these grey couch living room ideas helps keep the soft palette grounded.

    31. Rustic Farmhouse with Chunky Wood and Jute

    Rustic farmhouse coffee table with a jute mat, a wooden crate, and mason jars with wildflowers.

    Style a chunky farmhouse table with a jute mat, a wooden crate holding magazines, and mason jars with wildflowers. The rough textures suit a rustic Irish farmhouse, and the crate keeps magazines tidy while the jars add a soft floral note. This is a practical layout for a busy family room.

    Use jars with a wide stable base, so they do not tip when the table is bumped, and change wildflower water every two days. Keep the jute mat flat and free of curled edges, which can catch a cup. If wildflowers are out of season, use dried grasses in the same jars for a similar rustic effect.

    32. Modern Irish Look with One Sculptural Piece

    Modern coffee table with a neutral tray and one sculptural ceramic piece.

    Finish with a modern Irish look: a clean lined table, a neutral tray, and one sculptural piece, such as a curved ceramic form or a carved stone, with the rest of the surface clear. The single piece gives the table character, while the empty space keeps the modern room calm. This suits a new build or a room with minimal furniture.

    Choose a sculptural piece with an Irish craft link, such as a ceramic form from a local maker, and place it off center, not dead in the middle, for a more natural look. Keep the tray for daily items, such as a remote and a coaster, so the table stays useful. Dust the sculpture weekly, since a single piece draws the eye and shows dust fast.

    Conclusion

    An Irish coffee table does not need a theme in every corner. It needs a tray or a book stack to hold the display together, one piece with height, one piece with a story, and enough clear space for a cup of tea. Start with the formula that fits your table size, then add one Irish craft piece, such as marble, linen, pottery, or crystal, and live with it for a week before adding more. For small rooms, the storage and layout ideas in these cozy apartment living room ideas help a styled table share space with daily life. Change one seasonal piece when the year turns, keep fragile pieces away from table edges, and let the table stay useful first and decorative second.

    Save this list for your next quiet afternoon at home, and style the table one group at a time: tray first, books second, then a candle or a plant to finish.

    FAQs

    What is the simplest way to style an Irish coffee table?

    Start with three pieces: a tray or a book stack, one taller piece such as a vase or candlestick, and one low piece such as a small plant or dish. Leave one corner clear for cups. This formula works on almost any table size, and you can swap the Irish craft piece, such as a marble tray or a pottery jug, to change the mood without restyling the whole table.

    How do I style a small coffee table without crowding it?

    Use one group only, such as a small tray with a candle and a coaster stack, and keep the rest of the surface clear. Choose low pieces that sit below eye level when seated, and use the shelf below the table, if it has one, for books and magazines. Remove one piece for every new piece you add, so the table keeps its clear space for cups.

    What Irish pieces work best on a coffee table?

    Connemara marble trays, Irish pottery, linen runners, cut crystal bowls, and Celtic knot details all work well, since they add craft and color without needing a full theme. Pick one or two Irish pieces, not five, and let plain wood, glass, and plants fill the rest of the table. A single strong piece with a story behind it usually looks better than a shelf of themed souvenirs.

    How do I keep a styled coffee table practical for daily use?

    Give every daily item a home: a tray for remotes, a basket for coasters, and a clear corner for cups. Use pieces you can lift in one hand for dusting, and keep fragile crystal and lit candles away from table edges. When the table is needed for a game or a meal, lift the tray away in one move, then put it back after, so styling never blocks daily life.

    Can I mix Irish styling with a modern living room?

    Yes. Keep the room palette neutral, use a clean lined table, and add one Irish craft piece, such as a sculptural ceramic form or a marble tray, as the focal point. Avoid mixing several themed motifs at once, since a shamrock plant, a Celtic runner, and a Claddagh dish together can look busy in a modern room. One strong piece plus plain materials keeps the modern look intact.

    How often should I change my coffee table styling?

    Change one piece with the seasons, such as flowers in spring, harvest pieces in autumn, and greenery at Christmas, and leave the base pieces, such as the tray and book stack, in place all year. A full restyle once or twice a year is enough for most homes. If the table starts to collect clutter, a quick weekly reset, returning each piece to its group, keeps it looking styled without a full rethink.


  • 13 Italian Coffee Table Styling Ideas for Homes of Every Size

    13 Italian Coffee Table Styling Ideas for Homes of Every Size

    Italian styling is less about buying a whole new room and more about choosing a few warm, well made pieces and giving them room to breathe. A travertine top, a glass vase, a stack of art books, or a bowl of lemons can set the tone, while the rest of the table stays calm and useful. These 13 Italian coffee table styling ideas cover stone, glass, wood, books, candles, and serving pieces, for a small apartment, a family room, or a formal living room. Start with the piece you already love, group items in odd numbers, and leave clear space for a cup or a book. For the floor under the table, see these living room rug ideas.

    Key Takeaways

    • Group items in threes or fives, and vary the heights, so the table looks collected rather than lined up in a row.
    • Pick one hero piece, such as a Murano vase or a travertine bowl, and keep the rest smaller and quieter.
    • Use a tray to hold small items together, which keeps the table tidy and leaves room for daily use.
    • Repeat one material from the room, such as walnut, brass, or terracotta, so the table belongs with the sofa and the floor.
    • Leave at least one third of the table clear, so it stays useful for drinks, books, and conversation.
    • Change one small layer by season, such as olive branches in spring or candles in winter, instead of restyling the whole table.

    1. Start With a Travertine Table and a Low Stone Bowl

    Travertine coffee table with a low stone bowl, a small book stack, and a candle.

    A travertine coffee table brings Italian warmth at once, with its soft cream tones and natural pitting. Keep the styling low and simple, so the stone stays the focus: a shallow stone bowl, one small stack of books, and a single candle. The low profile suits a room with a low sofa, since nothing blocks the view across the table to the person opposite.

    Place the bowl slightly off center and the books beside it, not in a straight line down the middle. A bowl in a matching stone, or in a darker marble, adds contrast without a new color. Wipe the stone with a soft cloth and use coasters under glasses, since travertine can mark if drinks sit on it for a long time.

    2. Let One Murano Glass Vase Carry the Table

    Living room coffee table with a single tall amber Murano glass vase.

    One Murano glass vase, in amber, cobalt, or soft green, can carry a whole coffee table. The hand blown glass catches light through the day, and its curves soften a rectangular table. This suits a room that already has pattern elsewhere, since the vase adds color and shape without needing more pieces around it.

    Choose a vase tall enough to read from the sofa, but not so tall that it blocks conversation. Leave it empty for a sculptural look, or add two or three simple stems, such as eucalyptus or dried grasses. Keep the rest of the table clear, apart from a single book or a small dish, so the vase keeps its place as the clear focal point.

    3. Stack Italian Art Books With a Small Sculpture on Top

    Coffee table with a stack of Italian art books topped by a small sculpture.

    A stack of two or three large art books, on Italian painting, architecture, or design, gives a coffee table instant character and a place to rest a cup. Choose books with covers you like looking at, since the top cover becomes part of the display. This suits readers and hosts, since guests can pick a book up and browse it.

    Set a small sculpture, a paperweight, or a tiny ceramic figure on top of the stack to finish it. Keep the stack to one side of the table, so the other side stays free for drinks. Turn the books so their spines face the sofa, and swap the top book when you finish reading it, which keeps the table feeling current.

    4. Add Olive Branches in a Terracotta Pot

    Coffee table with olive branches in a terracotta pot beside a linen sofa.

    Olive branches in a simple terracotta pot bring a calm, Mediterranean note to a coffee table, without flowers that need frequent changing. The silvery green leaves suit warm wood, cream walls, and stone tops, and the pot adds an earthy tone that pairs well with linen sofas. This is a good choice for a room that needs life but not bright color.

    Use a pot that is wider than it is tall, so it sits steady on the table and does not block the view. Trim the branches so they rise just above seated eye level, and change the water or replace the stems when they dry out. If you prefer a lasting version, use good quality faux olive branches and dust them often, so they keep a soft, matte look.

    5. Set an Espresso Tray for Guests

    Coffee table with a brass tray holding espresso cups, a sugar bowl, and spoons.

    An espresso tray turns a coffee table into a welcoming serving station, in the Italian habit of offering a small coffee to a guest. Use a round brass or wood tray, with two or three small cups, a sugar bowl, and a tiny spoon holder. The tray keeps cups together, protects the table top, and makes clearing up quick after a visit.

    Place the tray near the end of the table closest to the main seat, so it is easy to reach. Keep it small enough that it leaves room for a book or a vase beside it. When guests are not expected, keep one cup and a small jar on the tray, so it still looks dressed without looking set for a party that is not happening.

    6. Group Brass Candlesticks for Evening Light

    Coffee table with three brass candlesticks in different heights beside a sofa.

    Three brass candlesticks in different heights give a coffee table a warm evening glow and a clear Italian note. Brass suits travertine, walnut, and dark marble, and it pairs well with cream sofas and wood floors. This grouping works best as a corner arrangement, leaving the center of the table free for daytime use.

    Place the tallest candlestick at the back and the shorter ones in front, so each flame is visible from the sofa. Use unscented candles if you serve food nearby, and keep the candlesticks clear of books, throws, and curtains. A small brass tray under the group catches wax and ties the three pieces together as one display.

    7. Place a Bowl of Lemons on a Marble Top

    Marble coffee table with a wide bowl of fresh lemons in a bright living room.

    A bowl of fresh lemons on a white or grey marble coffee table is a simple Amalfi note that adds color, scent, and shape in one move. The yellow lifts a neutral room, and the round fruit softens the hard lines of a stone top. This suits a bright room with white walls, where the lemons become the main accent.

    Choose a wide, shallow bowl in ceramic, glass, or wood, and fill it with lemons that are similar in size, so the group looks neat. Replace the fruit as it ages, and keep the bowl to one side of the table, so it does not crowd a vase or a book stack. In winter, when fresh lemons are less common at home, use good faux lemons and wash them often.

    8. Corral Everyday Items in a Leather Tray

    Coffee table with a tan leather tray holding a remote, glasses, and a small dish.

    A leather tray is the practical answer to a coffee table that must hold remotes, reading glasses, and a phone charger. The tray draws a clear boundary, so small items look grouped rather than scattered, and it adds a warm, Italian leather note to a modern room. Tan leather suits wood and cream, while dark brown suits charcoal sofas and black metal frames.

    Choose a tray with low sides, so items are easy to lift out, and a size that covers about a third of the table. Inside, add a small dish for keys or coins, and keep the count low, since a tray that is full to the brim stops looking tidy. Move the whole tray to one side when you need the table for a board game or a meal.

    9. Use the Shelf Below for Baskets and Throws

    Coffee table with a lower shelf holding a woven basket, a folded throw, and books.

    If your coffee table has a lower shelf, use it as a second styling layer, not as a dumping ground. A woven basket for magazines, a folded throw, and one or two books keep the lower shelf useful and calm. This frees the table top for a vase or a tray, and it suits family rooms, where blankets and magazines need a home close to the sofa.

    Keep the lower shelf to three items at most, and match the basket to the room, such as seagrass for a light room or dark rattan for a warmer one. Fold the throw neatly, with its edge showing, and place books flat, not upright, so they do not slide. For help sizing the rug under a table with a lower shelf, see these living room rug ideas.

    10. Keep a Small Table Clear With One Statement Piece

    Small living room with a compact coffee table holding one ceramic vase and clear space.

    A small coffee table needs a different rule: one statement piece and clear space, not a full grouping. A single ceramic vase, a carved wood bowl, or a small marble sculpture gives a tiny table character, while the rest of the surface stays free for a cup and a phone. This suits apartments and small living rooms, where a crowded table makes the whole room feel tight.

    Pick a piece that is in proportion to the table, so it does not look oversized or lost. A piece about one third of the table width is a useful guide. If the table is round, place the piece slightly off center, and keep the floor around it clear, so the room keeps an open walking route past the sofa.

    11. Bring Amalfi Light With White, Blue, and Driftwood Tones

    Bright coastal living room coffee table with white ceramic, blue glass, and driftwood tones.

    An Amalfi style table uses a light palette: white ceramic, soft blue glass, and pale driftwood tones, with plenty of clear space. A white bowl, a blue glass bottle, and a small wood tray give a coastal Italian feel without a themed collection of shells. This suits bright rooms, white sofas, and homes near the coast, or rooms that want a holiday feeling at home.

    Keep the palette to three tones, and let the blue appear only in one or two pieces, so it stays fresh rather than busy. A linen runner under the display can soften a glass top, but keep it short, so it does not cover the whole table. Change the blue glass for a clear vase in winter, if you want the same table to feel calmer in colder months.

    12. Go Tuscan With Wood, Terracotta, and Dried Herbs

    Rustic Tuscan living room coffee table with wood, a terracotta jug, and dried herbs.

    A Tuscan style table leans on warm, rustic materials: a thick wood top, a terracotta jug, dried herbs, and a linen cloth. The mix feels handmade and lived in, and it suits rooms with wood beams, warm walls, and leather sofas. Unlike the light Amalfi look, this table welcomes texture, such as rough wood grain, unglazed clay, and dried stems.

    Place a terracotta jug with dried lavender or wheat at one end, a wood board with a small cheese knife or a candle at the other, and a folded linen cloth under one piece. Keep the herbs away from open flames, and dust dried stems often, since they gather dust in a busy room. This is a good choice for a room used for long, relaxed evenings.

    13. Style a Formal Room With a Symmetrical Pair of Vases

    Formal living room coffee table with a matching pair of vases and a low central bowl.

    A formal living room suits symmetry: a pair of matching vases, one at each end of the table, with a low central bowl between them. The repeated shape gives the table order, and the central bowl keeps it from looking like two separate displays. This suits a long rectangular table, a pair of matching sofas, and a room with a fireplace or a large piece of art as its focus.

    Choose vases in porcelain, glass, or glazed ceramic, in a tone that repeats elsewhere in the room, such as cream, sage, or navy. Keep the vases the same height, and the central bowl lower, so the eye moves across the table without a tall block in the middle. For sofa colors that pair well with a formal table, see these grey couch living room ideas.

    Conclusion

    Italian coffee table styling works best when one strong piece leads and the rest of the table stays calm and useful. Start with the table top itself, then add a tray, a vase, or a book stack that repeats a material already in the room. Leave clear space for daily life, change one small layer by season, and let the table look collected over time, not dressed in a single shopping trip.

    Save this list on Pinterest before you start, and work through it one idea at a time: a tray and a vase first for a quick refresh, then books and candles, then a stone bowl or a pair of vases when you find pieces you truly like. A table styled this way will suit a small apartment, a family room, and a formal living room alike, since the same rules of height, grouping, and clear space apply at every size.

    FAQs

    How many items should I put on a coffee table?

    Three to five items usually look best, grouped as one hero piece plus two or three smaller pieces. More than that can make the table hard to use, while one item alone can look bare on a large table. Use a tray to group small items, and leave at least one third of the surface clear for cups and books.

    What is the best coffee table top for Italian styling?

    Travertine, marble, and warm walnut are the most useful Italian choices. Travertine adds soft, natural texture, marble adds a cool, formal surface, and walnut adds warmth for a Tuscan or rustic room. Pick the top that matches your sofa and floor, then keep the styling simple, so the material itself stays visible.

    How do I style a coffee table in a small living room?

    Use one statement piece and clear space, rather than a full grouping. A single vase, bowl, or sculpture, plus a small tray for daily items, keeps a small table useful. Choose a piece about one third of the table width, keep the floor around the table clear, and use the lower shelf, if there is one, for a basket and a throw.

    Can I mix Italian styling with a modern sofa?

    Yes, and the mix often works well, since Italian pieces such as travertine, brass, and Murano glass suit clean modern lines. Keep the palette tight, repeat one material from the sofa or the floor, and avoid too many themed pieces at once. One Italian hero piece plus a simple tray usually links a modern sofa to the Italian look without a clash.

    How do I keep a styled coffee table practical for daily use?

    Use a tray for small items, so you can lift the whole group in one move when you need the table. Keep one third of the surface clear, place drinks on coasters, and avoid tall pieces in the middle of the table. A lower shelf for baskets and throws also helps, since it stores everyday items close at hand without crowding the top.

    What colors work best for an Italian coffee table display?

    Warm neutrals work best: cream, terracotta, olive green, brass, and walnut, with one accent such as cobalt blue, lemon yellow, or sage. Keep the accent to one or two pieces, and let the rest stay neutral, so the table feels warm rather than busy. In a bright coastal room, white and soft blue can replace the warmer tones.


  • 28 Scottish Coffee Table Styling Ideas for a Warm, Inviting Home

    28 Scottish Coffee Table Styling Ideas for a Warm, Inviting Home

    A coffee table in a Scottish living room should feel warm, useful, and easy to live with. Tartan, wool, oak, and stone bring that feel without needing a full room change, and they pair well with plain sofas and wood floors. The trick is to give the table one clear centre, keep daily items in a tray or box, and leave space for mugs, books, and feet up at the end of the day. These 28 Scottish coffee table styling ideas cover runners, trays, flowers, candles, books, and seasonal swaps, so you can pick a look that fits your table size, your household, and the way you use the room. If the floor under the table still needs work, these living room rug ideas help you size a rug so the sofa, chairs, and table sit as one group.

    Key Takeaways

    • Start with one centre: a tray, a runner, or a vase, then add only two or three smaller pieces around it.
    • Repeat one Scottish material or pattern, such as muted tartan, oak, or wool, in at least two places so the table looks planned.
    • Keep daily items corralled in a tray or a lidded box, and leave at least a third of the table clear for mugs and books.
    • Use low, sturdy pieces near the table edge and taller stems only at the centre, so sight lines across the sofa stay open.
    • Choose washable, wipeable surfaces for tea, shortbread, and everyday use, and keep fragile pieces away from busy walkways.
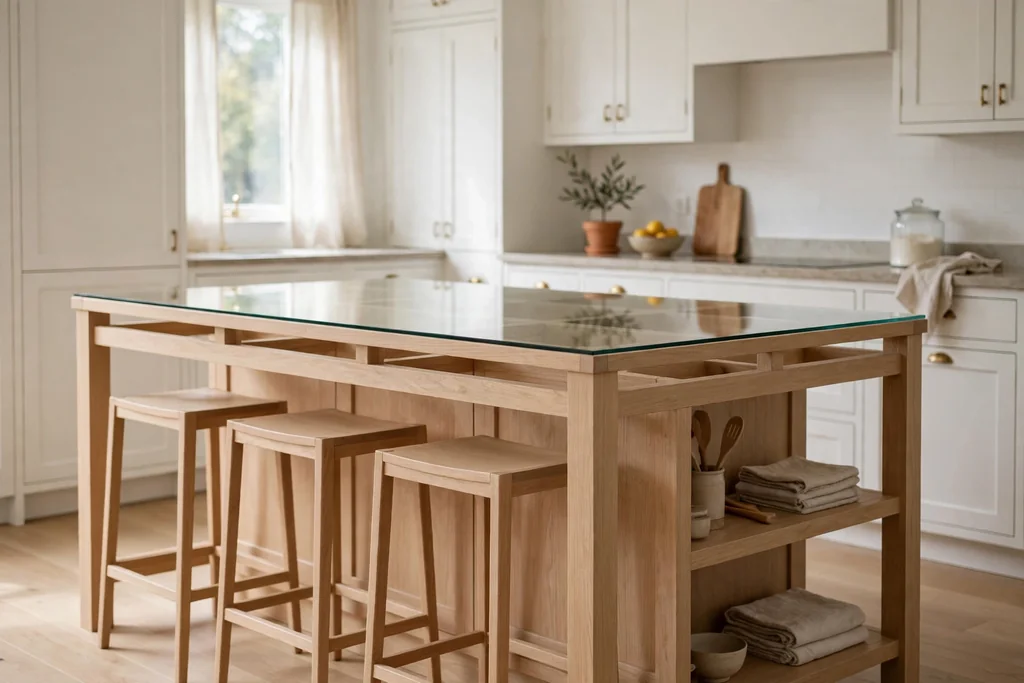
    • Swap stems and throws by season instead of restyling the whole table, and store the spare set in the basket under the table.

    1. Lay a Muted Tartan Runner Down the Centre

    Wood coffee table with a muted tartan runner down the centre and a low vase

    Lay a muted tartan runner down the centre of a rectangular coffee table to set a Scottish base in one move. Choose a muted green, navy, or brown tartan rather than a bright red, so the pattern sits calmly beside a plain sofa. The runner should leave bare table at both ends for mugs and books.

    Centre a tray or a low vase on the runner, and keep the ends clear. A runner also protects a wood top from mug rings. Shake it out weekly, and wash it as the maker advises, since a table runner picks up crumbs and tea drips fast.

    2. Corral Daily Items on an Oak Tray

    Oak tray on a coffee table holding a candle, remotes, and a small plant

    Set a rectangular oak tray in the centre of the table and group remotes, a candle, and a small plant inside it. The tray gives loose items a clear edge, so the table reads as tidy even on a busy day. Oak suits a Scottish room because its warm grain pairs with wool, tartan, and stone.

    Keep the tray to one layer of items, with nothing stacked on top of anything else. Lift the whole tray off in one move when you need the full table for a board game or a large puzzle. Wipe the tray often, since it catches most of the table dust and drips.

    3. Stand Thistle Stems in a Stone Vase

    Stone vase with thistle stems on a coffee table in a living room

    Stand three or five thistle stems in a short stone or grey ceramic vase for a centrepiece that is clearly Scottish and easy to keep. Thistles have a strong shape, so a small number is enough, and a heavy vase stops the arrangement from tipping when someone reaches across the table.

    Trim the stems so the flower heads sit just above seated eye level from the sofa, or lower if the vase sits near a television sight line. Use dried thistles if fresh stems are hard to find, and dust them gently. Keep the vase at the centre, with mugs and books kept to the sides.

    4. Fill a Shallow Bowl With Heather Sprigs

    Shallow bowl filled with heather sprigs on a coffee table

    Fill a shallow stone or wood bowl with short heather sprigs for a low, soft centrepiece that never blocks conversation. Heather suits a low bowl because its small flowers read as texture rather than as a tall bouquet, and the low height keeps the table open for daily use.

    Cut sprigs to a similar length, pack them loosely, and add a little water only if the sprigs are fresh and the bowl is watertight. Place the bowl on a coaster or a small mat to protect the table. Replace sprigs when they dry out, and keep the bowl away from the table edge where sleeves can catch it.

    5. Stack Highland Books for Height and Colour

    Stack of Highland books on a coffee table beside a mug

    Stack two or three books about the Highlands, Scottish walks, or Scottish history, largest at the bottom, to give the table height and a reading choice. A book stack adds colour through its spines and gives guests something to pick up, which suits a room used for long evenings by the fire.

    Turn the top book so its cover faces up, and keep the stack to three books at most so it does not topple. Put a small object, such as a stone or a candle, on top only if the stack is stable. Choose books you actually like, since a stack of unread display books looks staged.

    6. Cluster Pewter Candle Holders at One End

    Three pewter candle holders of different heights on a coffee table

    Group three pewter candle holders of different heights at one end of the table for evening light that feels old fashioned and calm. Pewter suits a Scottish room because its soft grey tone sits well beside oak, wool, and stone, and it does not shout against a tartan runner.

    Use flameless candles if children or pets use the room, and real candles only where they sit clear of throws, books, and sleeves. Keep matches or a lighter in the tray nearby, and trim wicks before lighting. Never leave lit candles unattended, and keep the cluster away from the table edge.

    7. Fold a Wool Throw Over One Corner

    Folded wool throw laid over one corner of a coffee table

    Fold a wool throw in half, then in half again, and lay it over one corner of the table or across one end. The folded throw adds softness and warmth at once, and it stays within reach for cold evenings without covering the whole table. A plain grey, oatmeal, or muted green wool works best beside tartan.

    Keep the throw folded neatly, with its edges lined up, so it reads as a styled layer rather than as laundry left out. Shake it out and refold it when you tidy the room. If the throw is thick, use it on a larger table only, since a small table can look buried under heavy wool.

    8. Set Tweed Coasters Beside Everyday Mugs

    Tweed coasters stacked beside mugs on a coffee table

    Set a small stack of tweed or wool felt coasters beside the usual mug spot, with one coaster out for each regular seat. Coasters protect a wood or oak table from rings, and a tweed cover adds a Scottish textile note without a large piece of fabric. This idea suits a table used for tea every day.

    Keep the coaster stack in a small holder or tied with twine, so it does not slide apart. Wipe or brush coasters when tea drips dry on them. If the table is glass or stone, use felt backed coasters so they grip and do not scratch the surface.

    9. Serve Tea and Shortbread From a Small Tray

    Tea tray with a teapot, mugs, and shortbread on a coffee table

    Set a small tray with a teapot, two mugs, and a plate of shortbread for afternoon tea at the coffee table. The tray turns an everyday tea break into a small occasion, and it keeps cups, crumbs, and spoons in one place. A wood or tartan lined tray suits the Scottish theme and is easy to carry from the kitchen.

    Keep the tray to tea items only, and clear it after tea so the table is free for the evening. Use a tray with raised edges so mugs do not slide off when the tray is carried. If the table is small, serve tea for two only, and keep the main table surface clear beside the tray.

    10. Display a Whisky Decanter for Evening Sitting

    Whisky decanter and two glasses on a small tray on a coffee table

    Place a whisky decanter and two small glasses on a stone coaster or a small silver tray at one end of the table for evening sitting. The decanter adds a warm amber note and a clear Scottish link, and the tray keeps glasses from sliding on a wood top. This suits a room used mainly by adults in the evening.

    Keep the decanter capped and the glasses upside down or covered when not in use, so dust stays out. Move the display to a high shelf if children visit, since glass and spirits do not belong at child height. Wipe the tray after use, since drink drips mark wood fast.

    11. Keep Remotes in a Small Stone Dish

    Small stone dish holding remotes on a coffee table corner

    Set a small stone, slate, or ceramic dish near one corner of the table for remotes, keys, and a phone charger lead. A dish stops small daily items from spreading across the table, and a heavy stone dish stays put when someone grabs a remote in a hurry. Choose a dish wide enough for two remotes side by side.

    Empty the dish each evening, and return items that belong elsewhere, such as keys or mail, to their proper place. Keep the dish shallow, so items are easy to see and grab. If the table is small, use the dish in place of a tray, not as well as one, to avoid crowding.

    12. Slide a Woven Basket Under the Table

    Woven basket slid under a coffee table holding folded throws

    Slide a low woven basket under the coffee table for spare throws, magazines, and seasonal stems. Under table storage uses space that often goes to waste, and a basket keeps spare items out of sight while still close at hand. A seagrass or willow basket suits a Scottish room beside oak and wool.

    Measure the gap under the table before buying, and leave room to slide the basket out without lifting the table. Keep the basket to one category, such as throws only, so it does not become a general dumping place. Shake out the basket monthly, since dust gathers under low furniture.

    13. Lean a Small Highland Print Against a Book Stack

    Small framed Highland print leaning against books on a coffee table

    Lean a small framed Highland print against a book stack or a wall behind the table for art at table height. A leaning print suits a coffee table because it adds a picture without a nail in the wall, and it can move with the seasons. Choose a landscape print in muted greens and greys.

    Lean the frame at a slight angle, with its bottom edge secure on the table, and keep it clear of mugs and candles. Use a small frame only, since a large frame can topple and can block the television. If the table sits in a walkway, skip a leaning frame and hang the print on the wall instead.

    14. Light the Table With a Small Lantern

    Small metal lantern with a candle on a coffee table centre

    Set a small metal or glass lantern with a flameless candle inside at the centre of the table for soft light that also acts as a centrepiece. A lantern suits a Scottish fireside room because its enclosed shape echoes an old cottage lamp, and the glass protects the flame from draughts near a door.

    Keep the lantern low and centred, with books and mugs kept to the sides. Use a flameless candle for safety if the room is busy, and check that the lantern door closes fully. Wipe the glass often, since fingerprints show fast on a lantern in lamplight.

    15. Cover Pine Cones With a Glass Cloche

    Glass cloche covering pine cones on a wood slice on a coffee table

    Place three or four pine cones on a wood slice or a small plate, then cover them with a glass cloche for a woodland centrepiece that stays dust free. A cloche adds height and a finished look without a tall vase, and pine cones bring a Highland forest note to the table in any season.

    Keep the cloche base flat and stable, and lift it by its knob, not by its glass sides. Dust the glass weekly, since a cloche shows every mark. If the table is used by small children, place the cloche at the centre, well back from the edge, or skip glass and use an open bowl instead.

    16. Hide Clutter in a Tartan Lidded Box

    Tartan covered lidded box on a coffee table beside a candle

    Set a tartan covered lidded box on the table for chargers, batteries, and small items that spoil a styled look. A lidded box hides clutter in one move, and the tartan cover keeps the Scottish theme going even when the box is closed. Choose a box that fits the table scale, not a large storage chest.

    Label the inside lid or keep a short list of what lives in the box, so items can be found fast. Empty the box monthly, since hidden boxes fill up fast. Keep the box at one end of the table, with the centre left for a vase, a tray, or a book stack.

    17. Layer a Sheepskin Pad Under the Tray

    Sheepskin pad under a tray on a coffee table

    Lay a small sheepskin or wool pad under the tray to add soft texture beneath hard objects. The pad softens the look of oak, stone, and pewter, and it protects a wood table from a heavy tray. A cream or natural sheepskin suits a muted tartan scheme and a plain sofa.

    Cut or fold the pad so it sits just larger than the tray, with a small border showing all round. Shake the pad out weekly, and brush it lightly to keep the pile even. Keep the pad away from tea drips, and use a coaster under any mug that sits on the pad itself.

    18. Serve Snacks From a Carved Wooden Bowl

    Carved wooden bowl with snacks on a coffee table

    Set a carved wooden bowl on the table for nuts, crisps, or dried fruit when guests visit. A carved bowl adds a hand made, Highland craft note, and it is easy to carry to and from the kitchen. Choose a bowl with a flat base so it sits steady on the table.

    Line the bowl with a small cloth napkin for dry snacks, and wash the bowl as the maker advises. Keep the bowl empty between visits, so it does not collect crumbs all week. If the bowl is deep, fill it only halfway, so guests can reach snacks without tipping it.

    19. Build a Winter Fireside Centrepiece

    Winter coffee table centrepiece with a tartan runner, pine branches, and candles

    Build a winter centrepiece from a tartan runner, a pine branch garland laid flat, and a cluster of flameless candles in the middle. This full seasonal scene suits cold months, when the table sits near a fire and the room is used for long evenings. Pine gives scent and shape, tartan gives colour, and candles give evening light.

    Keep pine branches flat and trimmed, with no branch hanging over the table edge. Check branches weekly and replace them when needles drop. Keep candles clear of dry pine, and use flameless candles if real flames would sit close to branches. Clear the scene after winter, and store the runner and candles for next year.

    20. Put Spring Daffodils in a Stoneware Jug

    Stoneware jug with daffodils on a coffee table in spring light

    Put a bunch of daffodils in a stoneware jug for a spring coffee table that feels fresh after winter. Daffodils are a cheerful Scottish spring flower, and a stoneware jug keeps the look simple and sturdy beside oak and wool. Choose a jug with a wide base so it does not tip.

    Fill the jug only halfway with water, trim stems at an angle, and change the water every two days. Keep the jug at the centre, away from the table edge, and wipe drips at once, since stoneware can mark a wood top. Replace daffodils when heads droop, and compost the old stems.
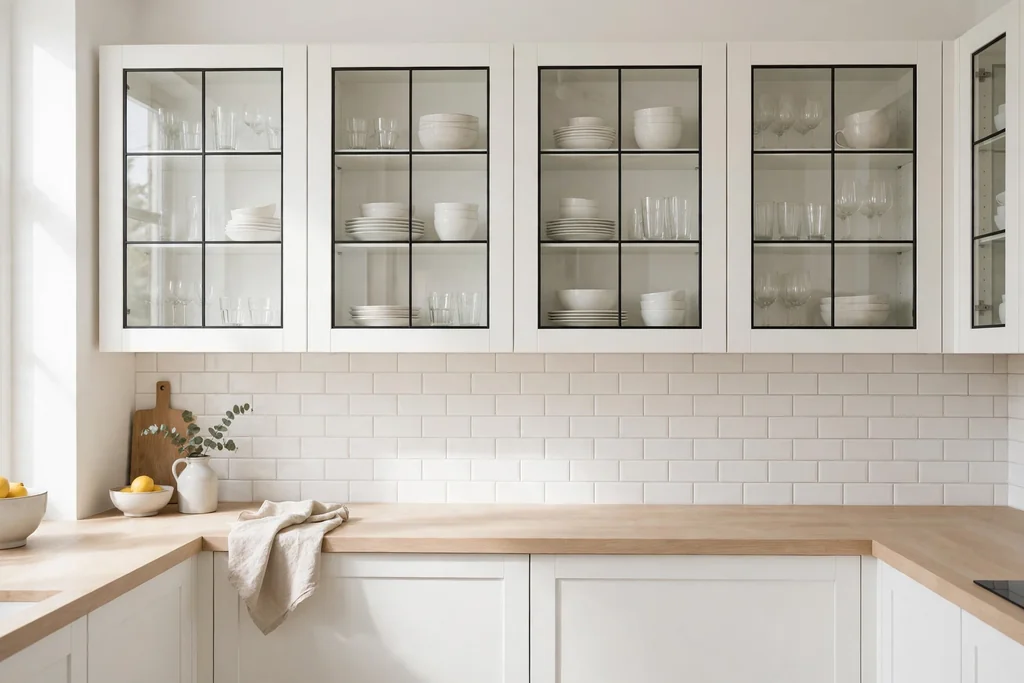
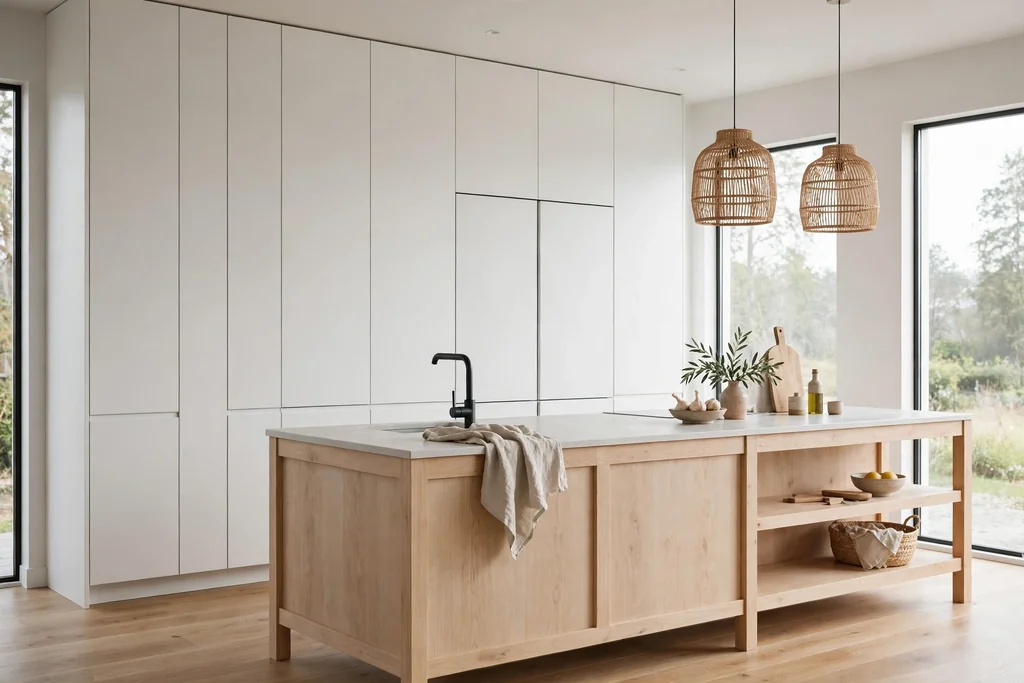
    21. Fill an Open Bowl With Acorns and Pine Cones
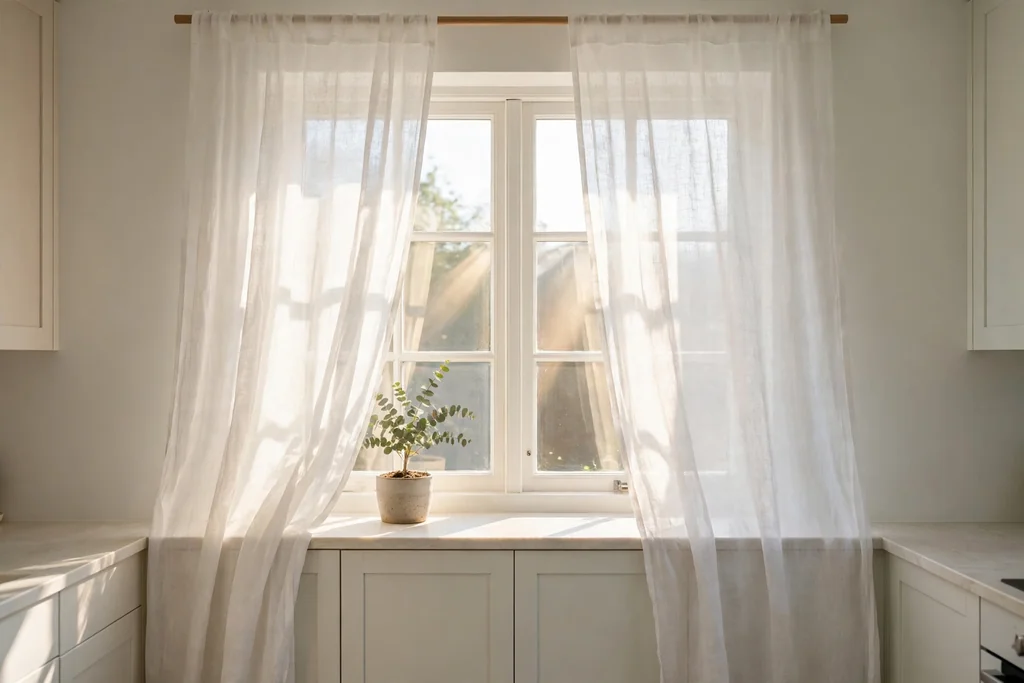
    Open wood bowl filled with acorns and pine cones on a coffee table

    Fill an open wood bowl with acorns and pine cones for an autumn centrepiece that differs from a covered cloche by being touchable and easy to refill. Guests can pick up a cone and put it back, which suits a relaxed family room. An open bowl also shows the shapes and colours of autumn clearly.

    Choose cones and acorns of a similar size, and fill the bowl loosely so it does not look packed. Dust the bowl contents monthly, and replace any cone that sheds heavily. Keep the bowl at the centre, with mugs kept to the sides, so sleeves do not knock cones onto the floor.

    22. Set a Game Night Tray With Boards and Snacks

    Coffee table set for game night with a board game, snack bowl, and mugs

    Set a game night tray with a card game or a small board game, a snack bowl, and two mugs for an evening at the coffee table. A game tray turns the table into a shared activity space, and it keeps game pieces, snacks, and drinks in one zone. A tartan lined tray suits the theme and is easy to clear.

    Choose games with few small pieces if the table is small, and keep the snack bowl away from the game board. Clear the tray after the game, so the table returns to its daily look. Store the game in the under table basket, so the next game night starts fast.

    23. Make a Reading Corner With Glasses and a Bookmark

    Coffee table reading corner with a book, reading glasses, and a bookmark

    Set a reading corner at one end of the table with a current book, reading glasses in a small case, and a bookmark on top. This functional corner differs from a display book stack because every item is in daily use, and it marks the table as a reading spot as well as a display. A small candle beside the book adds evening light.

    Keep the reading corner to one seat’s reach, so it does not spread across the table. Return glasses to their case when not in use, so lenses stay clean. If two people read in the room, mirror the corner at the other end with a second book and glasses case.

    24. Keep a Work Tray With Notebook and Pen Pot

    Work tray on a coffee table with a notebook, pen pot, and phone stand

    Set a work tray with a notebook, a pen pot, and a phone stand for short spells of writing or planning at the coffee table. A work tray keeps paper and pens from spreading, and it lifts off in one move when work ends. A plain oak or leather tray suits a Scottish room without adding a new pattern.
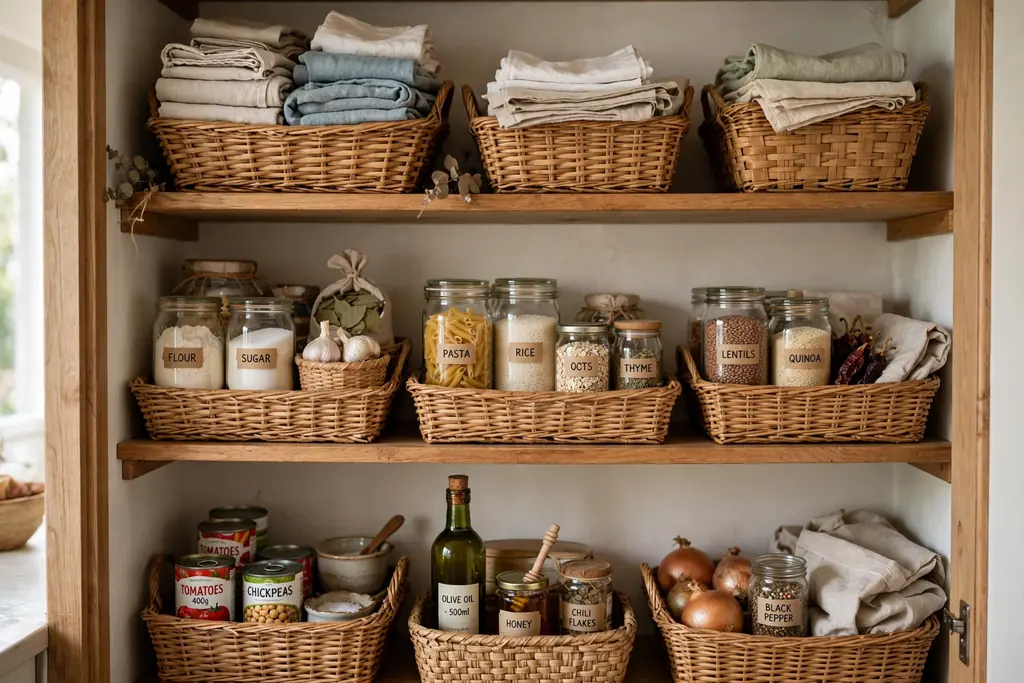
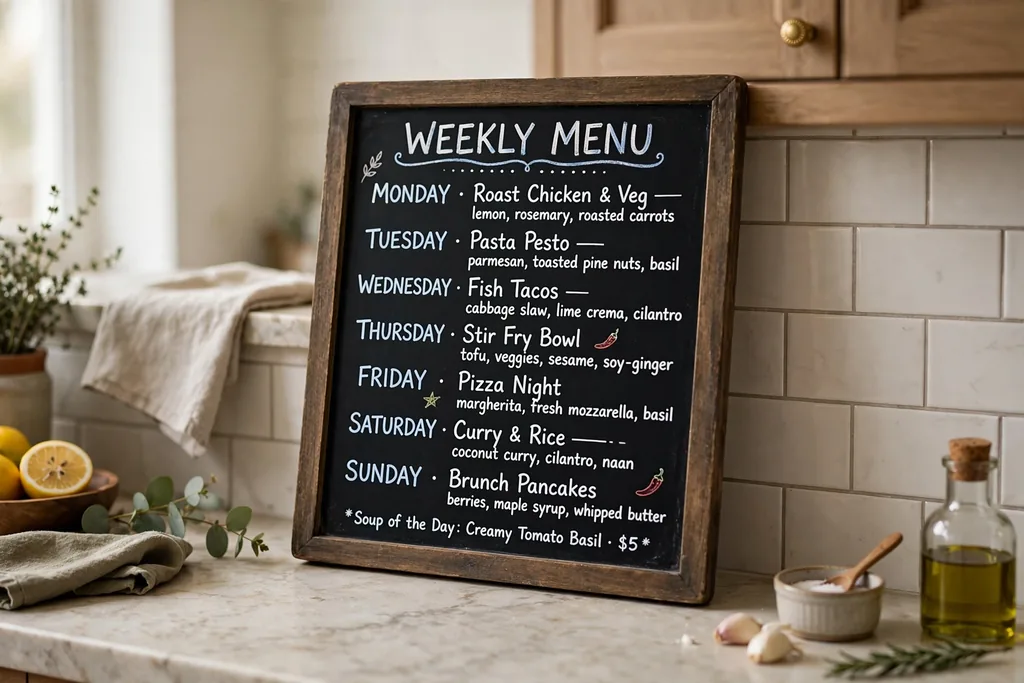
    Keep the work tray to writing items only, and clear it at the end of each work spell, so the table returns to a living room look. Use a pen pot with a heavy base, so pens do not roll onto the floor. If laptop work is common, use a larger tray with a flat base, and keep cables in the tartan box.

    25. Flank a Book Stack With Matching Candle Holders

    Book stack flanked by two matching candle holders on a coffee table

    Place two matching candle holders, one on each side of a book stack, for a formal, balanced look. Symmetry suits a larger rectangular table and a room with a fireplace or a large sofa, where a balanced centre reads as calm. Matching holders in pewter, brass, or wood keep the look simple.

    Space the holders evenly from the stack, and keep their heights equal, so the balance is clear. Use flameless candles for safety, and keep the holders clear of throws and books. If the table is small, skip symmetry and use a single candle cluster instead, since a balanced trio needs room to breathe.

    26. Style a Low, Unbreakable Table for Pets and Children

    Low coffee table styled with a woven tray, wood bowl, and washable fabric for a family room

    Style a table for pets and children with low, unbreakable pieces only: a woven tray, a wool coaster set, a soft fabric runner, and a wood bowl. Nothing glass, nothing sharp, and nothing that tips easily, so the table stays safe when a dog tail or a small hand sweeps across it. This idea suits a busy family room.

    Keep the centre low and centred, with no tall vase or lantern near the edge. Use washable fabrics, and wipe the tray after meals and play. Store fragile pieces, such as a decanter or a cloche, on a high shelf, and bring them out only for adult evenings.

    27. Style a Small Round Table With One Statement Piece

    Small round coffee table with a single stone vase of thistles as the only centrepiece

    Style a small round table with one statement piece only, such as a single stone vase with thistles, a carved bowl, or a small lantern. One piece suits a round table because a round top has no corners to fill, and a single object keeps the table usable for mugs and a book. This idea suits a small living room or a reading chair corner.

    Centre the piece exactly, and leave the rest of the top clear. Choose a piece with a strong shape or texture, since it must carry the whole look alone. If the room feels bare, add a small rug under the table instead of adding more objects to the top, since floor pattern fills the space without crowding the table. For more small room plans, see these small living room dining room combo ideas.

    28. Run a Seasonal Swap System on One Tray

    Coffee table tray with seasonal stems and a spare runner and bowl beside it for swapping

    Run a seasonal swap system on one tray: keep the same oak tray and candle holders all year, and swap only the stems, runner, and small bowl each season. Spring daffodils give way to summer heather, autumn cones, and winter pine, while the tray stays put. This system saves time and money, since only small items change.

    Store spare stems, runners, and bowls in the under table basket, labelled by season, so a swap takes ten minutes. Photograph each seasonal version once, so you can repeat a look you liked. Clear the tray fully before each swap, wipe it, and then build the new season from the centre out. For a calm sofa to pair with any season, see these grey couch living room ideas.

    Conclusion

    A Scottish coffee table works best when one clear centre leads, daily items stay corralled, and soft materials do most of the talking. Start with a runner or a tray, add tartan, wool, oak, or stone in two places, and leave room for mugs, books, and conversation. Low pieces near the edge and taller stems at the centre keep sight lines open, while a basket under the table holds spare throws and seasonal stems. Swap small items by season, keep fragile pieces for quiet evenings, and let the table change with the household, not against it.

    Save this list on Pinterest for your next free hour in the living room, and work through it in order: base layer first, then tray and centrepiece, then candles and books, and finally the seasonal swaps and family friendly changes.

    FAQs

    How do I style a Scottish coffee table without making it look themed or crowded?

    Start with one Scottish note, such as a muted tartan runner or an oak tray, and keep the rest plain. Use one pattern and one or two materials, such as wool and oak, and leave at least a third of the table clear. Add pieces one at a time, and step back after each addition to check sight lines from the sofa. If the table looks busy, remove the smallest item first, since small clutter builds up fastest.

    What is the best centrepiece for a Scottish coffee table?

    A low centrepiece works best for daily use: a stone vase with thistles, a shallow bowl of heather, or an oak tray with a candle cluster. Low pieces keep conversation open across the sofa, and they leave room for mugs and books at the sides. Tall vases suit a large table or a formal room, but they block sight lines on a standard coffee table. Choose a centrepiece that fits your table size, and keep it centred.

    How much should I leave clear on a coffee table?

    Leave at least a third of the table clear, and more if the table is small or used for meals, games, or work. A clear zone gives mugs a safe place, books room to open, and hands space to reach without knocking a vase. Use a tray to group small items, and keep the clear zone at the table ends or along one long side, where seated people reach most easily. If every spot is filled, remove one group of items and store it under the table.

    How do I keep a styled coffee table tidy with children or pets?

    Use low, heavy, unbreakable pieces, such as a woven tray, a wood bowl, and washable fabric, and keep glass, tall vases, and lit candles off the table. Store fragile pieces on a high shelf for adult evenings only. Wipe the tray after meals and play, and keep a basket under the table for quick tidying. A table that is easy to clear will stay tidy, since tidying takes seconds rather than a full restyle.

    Can I use tartan on a coffee table in a modern living room?

    Yes, if the tartan is muted and used in a small dose. A muted green or navy runner, a tartan box lid, or a tartan lined tray adds a Scottish note without turning a modern room into a themed room. Pair tartan with plain furniture, a plain rug, and simple materials such as oak and stone, and keep other patterns to a minimum. One tartan piece is enough in a modern room, so let it be the single pattern on the table.

    How often should I change coffee table styling by season?

    Change small items four times a year, or twice a year if that suits your routine better. Swap stems, the runner, and the small bowl, while keeping the same tray and candle holders all year. Store spare seasonal items in a labelled basket under the table, so each swap takes only a few minutes. A seasonal swap keeps the room feeling fresh without a full restyle, and it gives you a reason to clear and wipe the table regularly.