Author: Clara Bennett

  • 27 Bedroom Storage Ideas for a Stylish Room That Works

    27 Bedroom Storage Ideas for a Stylish Room That Works

    A bedroom should help you rest, not remind you of clutter every time you walk in. The best storage does two jobs at once: it keeps daily items close, and it keeps surfaces clear enough for the room to feel calm. These 27 bedroom storage ideas cover beds, closets, walls, corners and small pieces you can add without a remodel, so you can start with the spot that causes the most mess. Pick one idea, live with it for a week, then add another only if the room still needs it.

    Key Takeaways

    • Start with the biggest clutter point, usually clothes, bedding or shoes, and give it one clear home before adding more storage.
    • Keep daily items at easy reach, seasonal items higher, and rarely used pieces out of the main bedroom flow.
    • Mix closed storage for visual calm with a small amount of open storage for items you use every day.
    • Measure the bed, closet and door swings before you buy, since a piece that blocks a path creates a new problem.
    • Label bins and keep one empty basket or drawer, so new items have a place instead of landing on a chair.
    • Repeat one material or color across storage pieces, so the room looks planned rather than patched together.

    1. Rolling Drawers Under the Bed
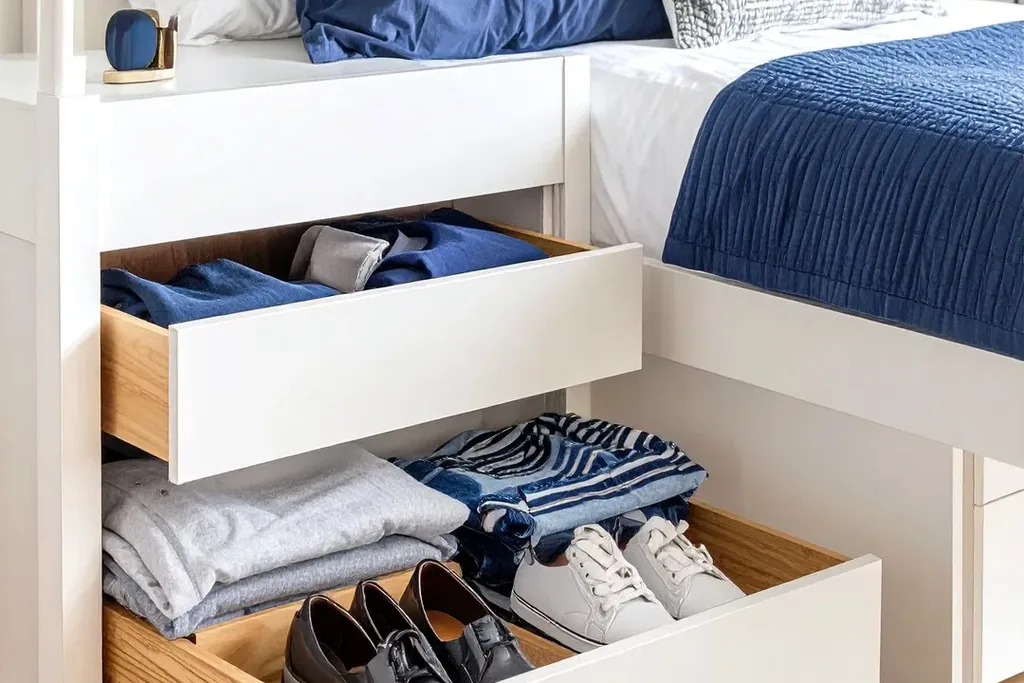
    Rolling storage drawers under a bed holding folded bedding and shoes.

    Rolling drawers use the space under the bed that otherwise collects dust and stray items. Choose low drawers with wheels and handles, and sort them by use, such as spare bedding in one, shoes in another, and off season clothes in a third. Measure the clearance under the bed frame first, and leave a small gap so drawers roll out without catching the rug.

    Keep a bed skirt or a low valance if you want the drawers hidden, or choose matching drawer fronts for a tidy look. For a fabric version of the same hideaway idea, see these plaid bedroom ideas for a bed skirt that covers under bed boxes. Pull each drawer out fully once a month, and remove anything you have not used in a season.

    2. A Storage Bed With a Lift Up Base

    Storage bed with a lift up base open, showing folded blankets inside.

    A storage bed lifts the whole mattress base on gas struts, giving you one large compartment for bulky items such as spare duvets, winter blankets and suitcases. This suits a room with no spare closet, since the storage is hidden and takes no floor space. Choose a base that lifts with one hand and stays up safely while you load it.

    Store heavy items at the sides and lighter bedding in the middle, so the base closes evenly. Use flat bags or thin boxes inside, rather than loose piles, so you can find one item without emptying the whole base. Check the lift mechanism once a year, and keep the area around the bed clear so the base opens fully.

    3. Closed Nightstands With a Drawer and a Shelf
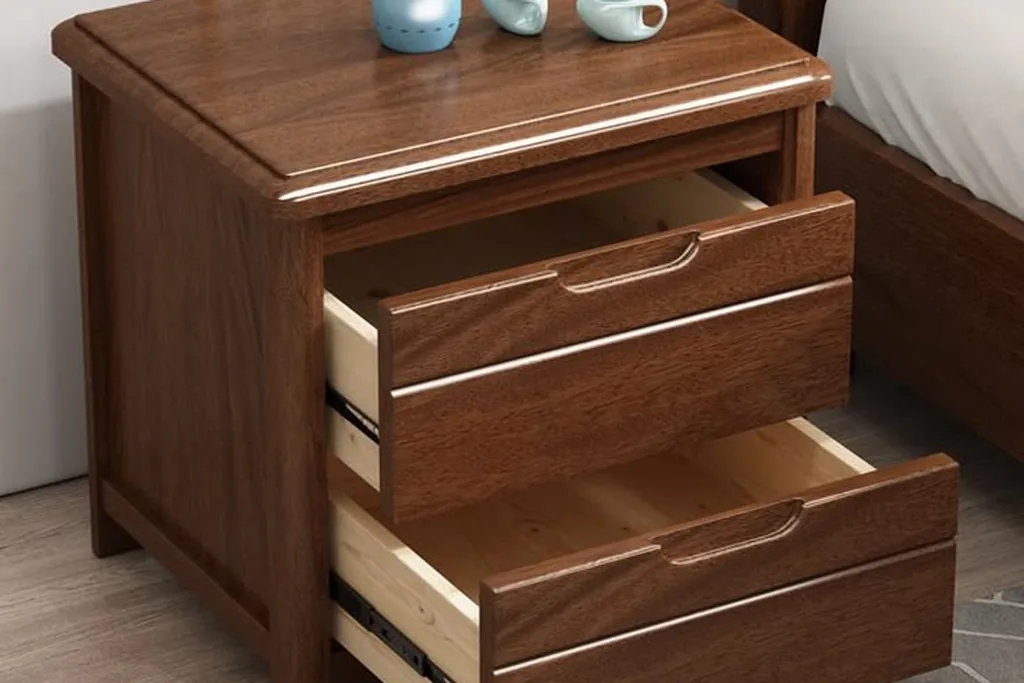
    Bedroom nightstand with a closed drawer and a lower shelf holding a book.

    A nightstand with a closed drawer hides chargers, notebooks and small personal items, while a lower shelf holds a book or a basket. Clear tops calm the room at night, since the bed area is the last view before sleep. This approach matches the closed storage idea in these hygge bedroom ideas, where tidy surfaces help a room feel restful.

    Keep only daily items in the drawer, and move anything you reach for less than once a week elsewhere. A small tray on top holds a glass of water and glasses, and stops small items from spreading. If two people share the room, give each side the same nightstand, so neither side becomes the dumping ground.

    4. A Double Dresser as the Room Anchor
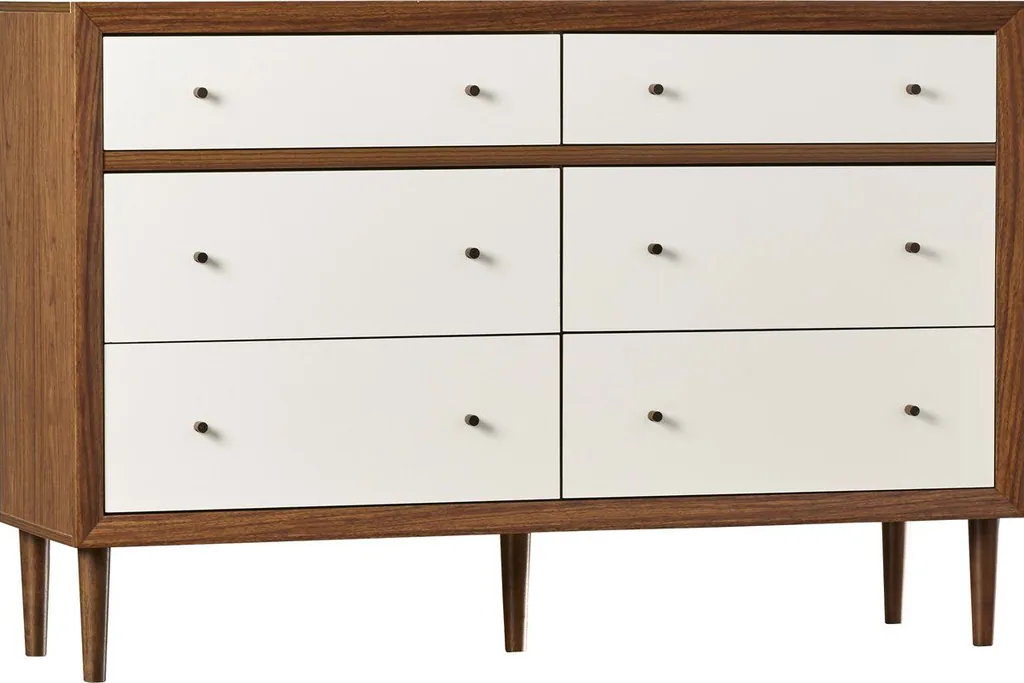
    Wide double dresser with drawers, a lamp and a tray on top.

    A wide, low dresser gives folded clothes, underwear and accessories a home, and its top can hold a mirror, a lamp or a small tray. Place it on the longest clear wall, away from the door swing, so drawers open fully. Sort drawers by person or by type, such as tops in one, bottoms in another, and sleepwear in a third.

    Use drawer dividers inside, so folded stacks stay upright and do not collapse into a pile. Keep the dresser top to three groups at most: light, a tray, and one decor piece. If the dresser feels heavy in a small room, choose one with legs, since visible floor beneath it makes the piece look lighter.

    5. Floor to Ceiling Built In Wardrobes
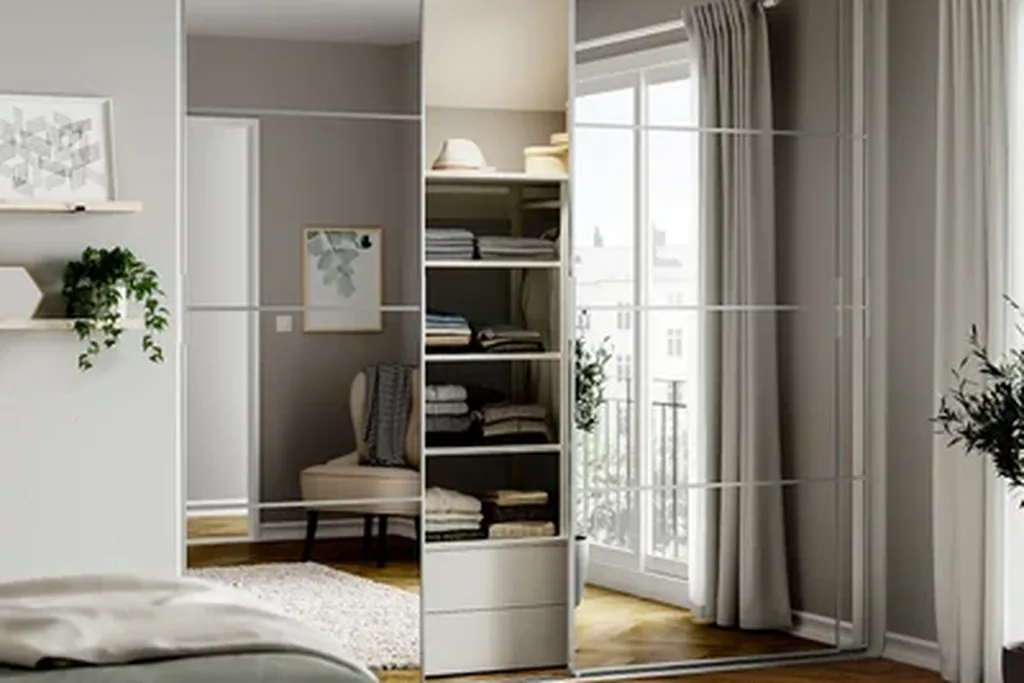
    Floor to ceiling built in wardrobe with sliding doors in a bright bedroom.

    Built in wardrobes use the full wall height, so clothes, shoes and bags fit in one place instead of spreading across chairs and floors. Plan the inside before the doors: hanging space for long and short clothes, shelves for folded items, and a high shelf for bags or seasonal boxes. Sliding doors suit a tight room, since they need no swing space.

    Keep the wardrobe color close to the wall color, so a large unit does not dominate the room. Add a light inside if the wardrobe is deep, so the back of each shelf stays usable. Leave one shelf partly empty at the start, so new clothes have a place without pushing older items onto the bed.

    6. A Closet System With Double Hanging

    Bedroom closet with double hanging rails and folded clothes on shelves.

    A closet system with two hanging rails doubles the space for shirts, trousers and jackets, with a shelf above for folded items. Measure your longest hanging items first, so the lower rail still clears shoes or boxes below. Use matching hangers, since mixed hangers waste width and make the closet look crowded.

    Add shelf dividers on the top shelf, so stacks of jumpers and jeans stay separate. Keep a small step stool nearby if the top shelf is high, so you actually use it instead of piling items on the floor. Review the closet each season, and move out anything you did not wear, so the double rails stay useful.

    7. Over Door Hooks for Robes and Bags
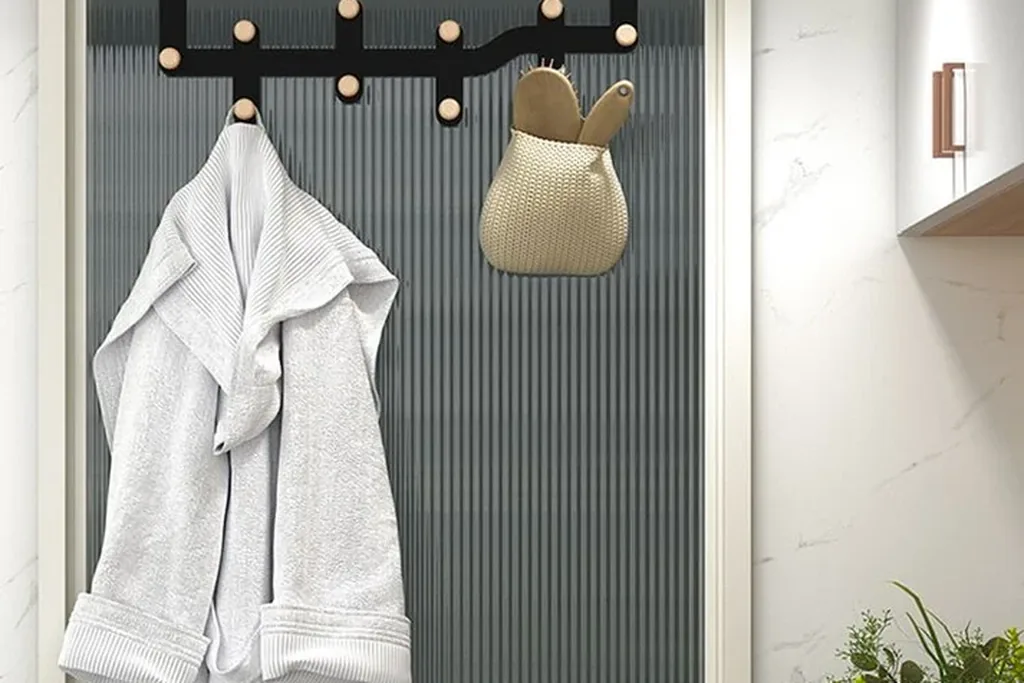
    Over door hooks on a bedroom door holding a robe and a bag.

    Over door hooks turn the back of the bedroom door into storage for a robe, a bag and tomorrow’s outfit, with no drilling and no floor space used. Choose hooks with a flat profile, so the door still closes fully and does not mark the frame. Limit the hooks to items you use daily, since an overloaded door is hard to open and looks messy.

    Hang the heaviest bag lowest, and keep the top hook for a light robe or scarf. If the door is used often, choose hooks with a soft backing to protect the door surface. This is a good renter friendly first step, and it frees a chair that may have been doing the same job badly.

    8. A Door Mounted Shoe Organizer
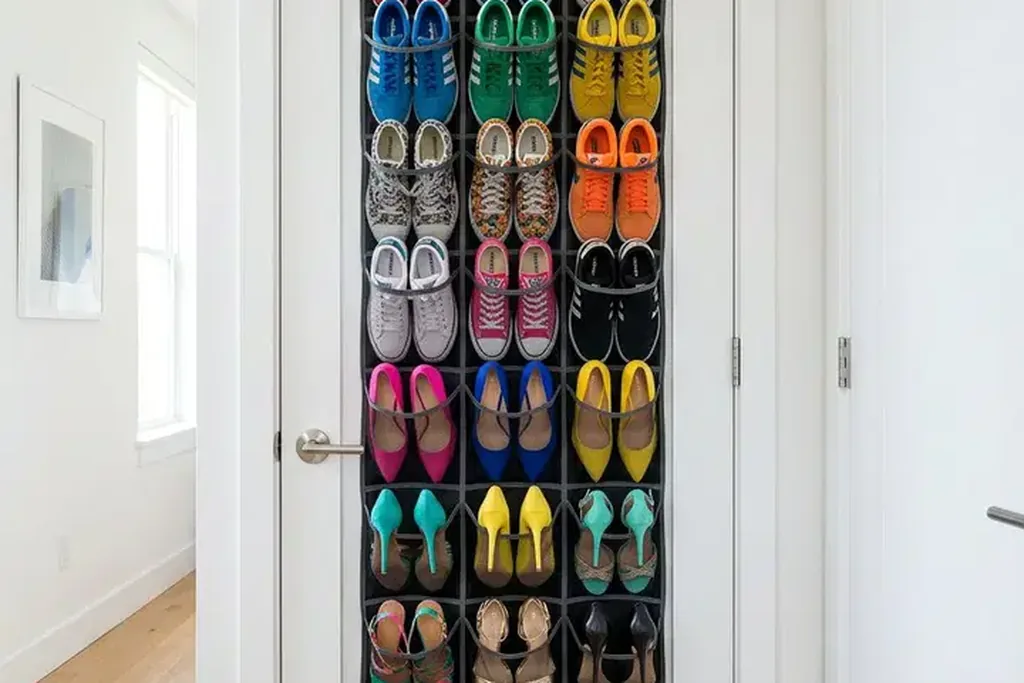
    Door mounted shoe organizer with pairs of shoes stored in pockets.

    A shoe organizer that hangs over the door or on the inside of a closet door holds pairs upright and visible, instead of stacked in a pile by the wall. Clear pockets suit shoes you wear often, since you can see each pair at a glance, while fabric pockets suit a calmer look. Sort by use, such as daily shoes at eye level and occasion shoes higher.

    Keep heavy boots out of a hanging organizer, since weight can pull it off the door, and store boots on the floor instead. Wipe shoes before putting them away, so dirt does not build up in the pockets. One organizer per person is usually enough, and a second one often signals that it is time to pass on unworn pairs.

    9. Floating Shelves Above the Bed
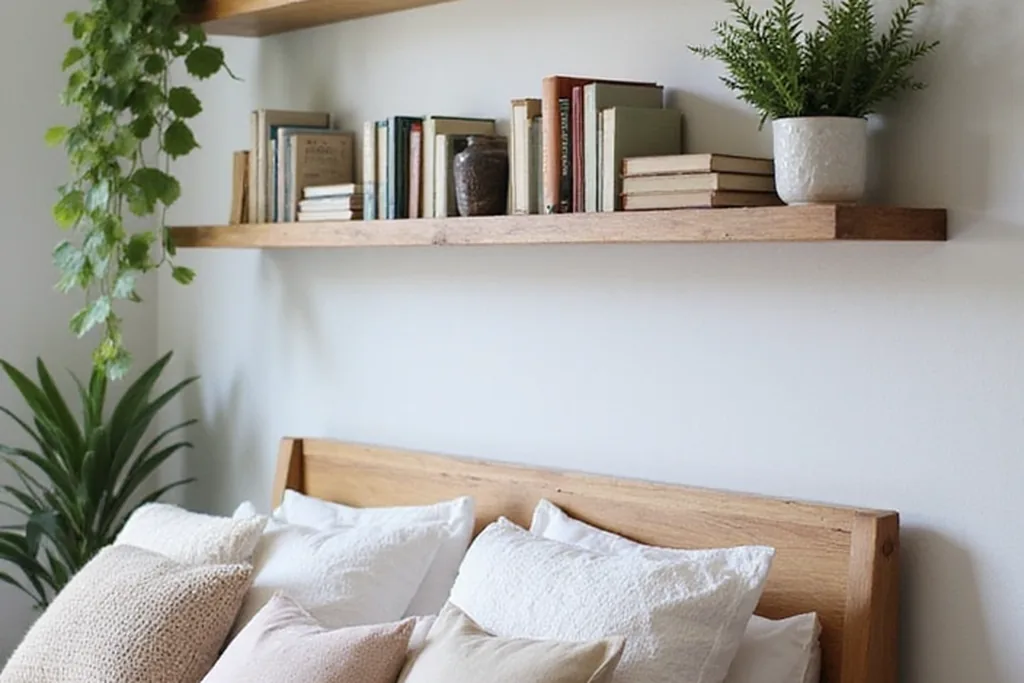
    Floating shelves above a bed holding books and a small plant.

    Floating shelves above the bed hold books, a small plant and a framed print, and they use wall space that a headboard leaves empty. Mount them at a height where you can reach a book while sitting up, but where pillows do not knock items off. Fix shelves into studs or with fixings rated for the load, and keep the weight light.

    Limit each shelf to one group of items, such as books on one and a plant and a photo on another, so the wall reads as display rather than storage overflow. Leave one shelf partly empty, since a full shelf above a bed can feel heavy. Dust the shelves weekly, since items above a bed collect lint fast.

    10. A Storage Headboard With Shelves and a Ledge
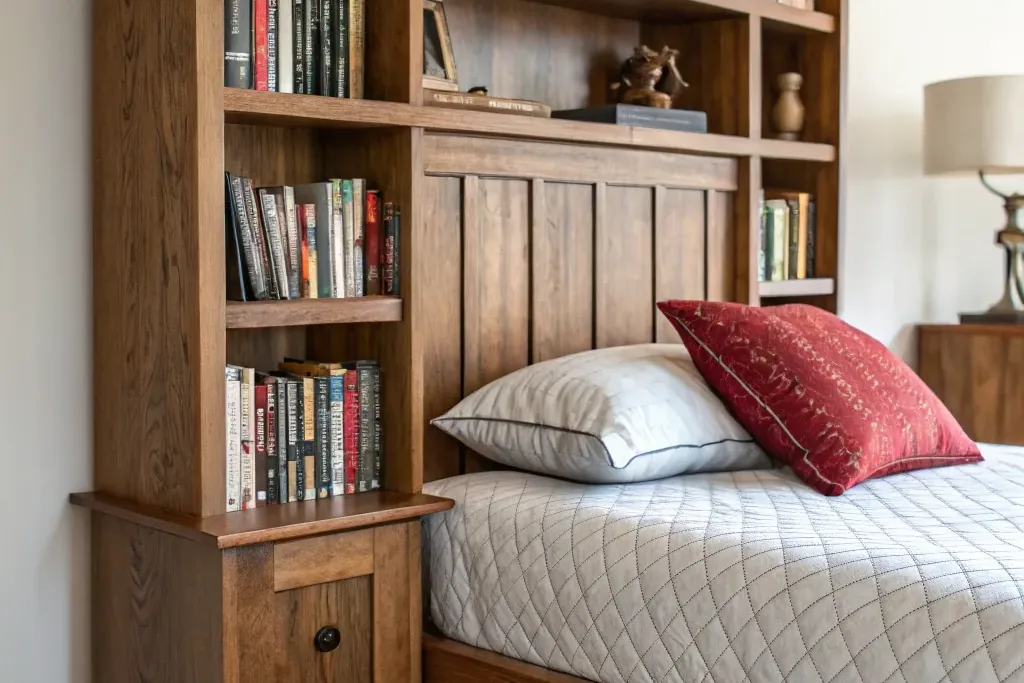
    Bedroom headboard with built in shelves holding books and a lamp.

    A headboard with built in shelves or a deep ledge gives books, a phone and a glass of water a home without a nightstand on each side. This suits a small room, since the headboard uses wall space rather than floor space. Choose a headboard with a ledge deep enough for a book, but not so deep that pillows push items off the back.

    Keep the shelf to evening items only, and move daytime clutter elsewhere, so the bed area stays calm at night. Wipe the ledge weekly, and avoid placing a lamp with a hot shade close to books or fabric. If you already have a headboard you like, a narrow shelf fixed just above it gives a similar result with less change.

    11. A Storage Bench at the Foot of the Bed
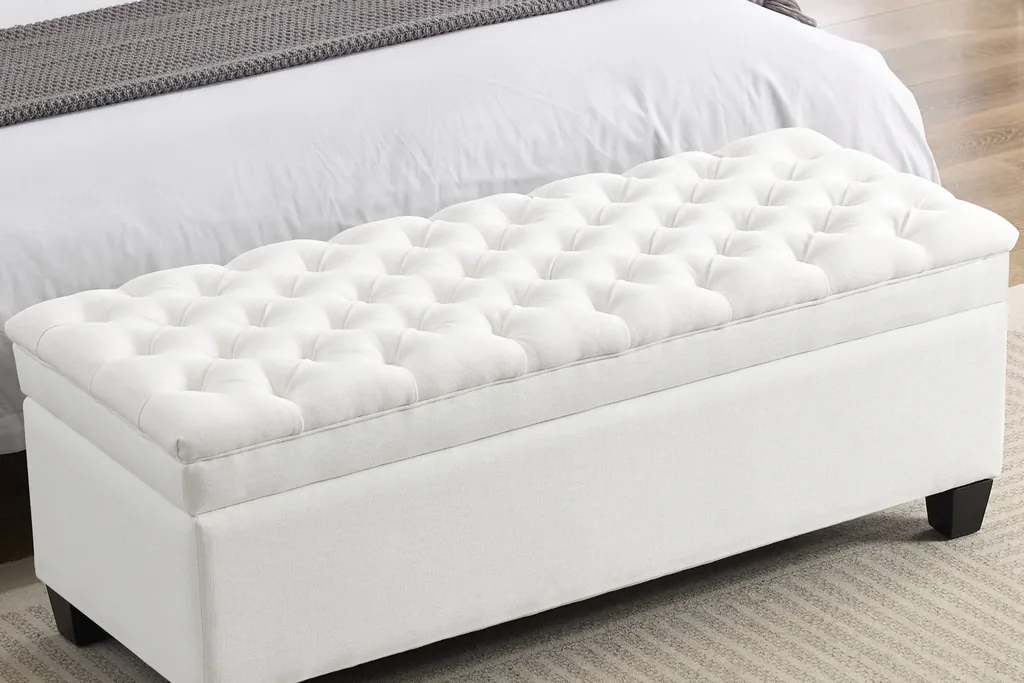
    Storage bench at the foot of a bed with a folded throw on top.

    A bench at the foot of the bed gives you a seat for dressing, a place to lay out tomorrow’s clothes, and hidden storage for spare blankets inside. Choose a bench that leaves walking space at the sides, and measure the gap to the opposite wall before you buy. A firm lid matters, since a soft lid sags when you sit on it.

    Store only light, soft items inside, such as throws and spare pillowcases, so the bench stays easy to open. Fold one throw over the bench top for a finished look, and keep the rest of the top clear. In a short room, a narrow bench or a single ottoman does the same job in less depth.

    12. A Storage Ottoman by the Window or Chair
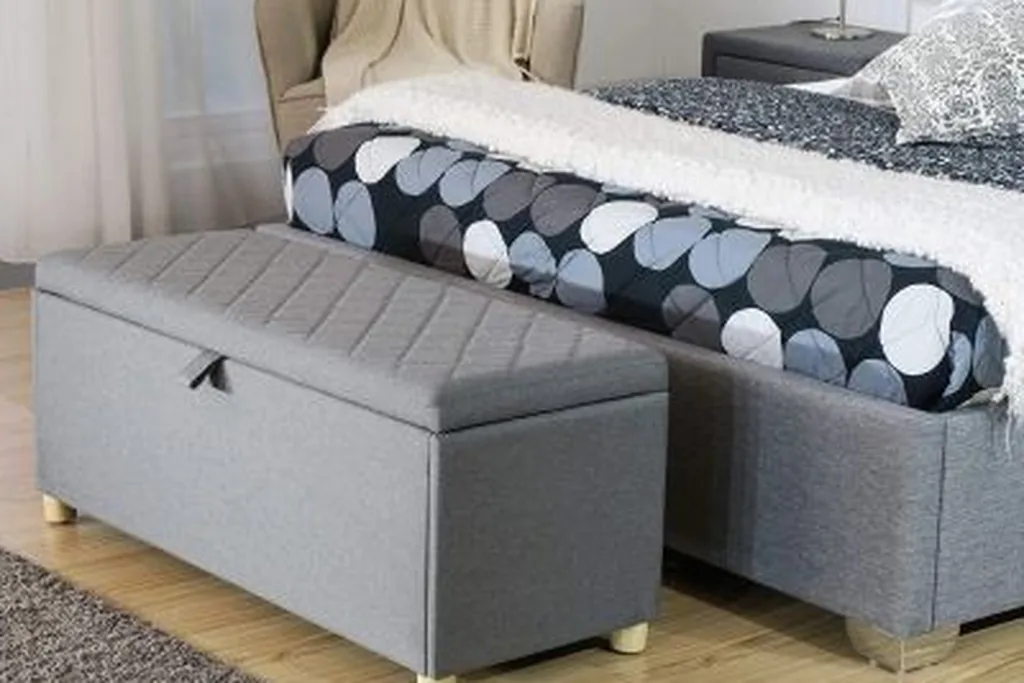
    Storage ottoman beside a bedroom chair, open to show a folded throw.

    A storage ottoman works as a footrest, an extra seat and a blanket box in one small piece. Place it beside a reading chair or under a window, where it can hold a throw, a book and a pair of slippers. Choose a lid that lifts fully and a lining you can wipe clean, since ottomans collect dust and pet hair.

    Keep the inside to items you use weekly, so the ottoman does not become a second closet. If the ottoman sits in a walkway, choose a round shape, since corners catch shins at night. A matching ottoman and bench in the same fabric can tie a room together, but one of each is enough for most bedrooms.

    13. Matching Baskets on Open Shelves
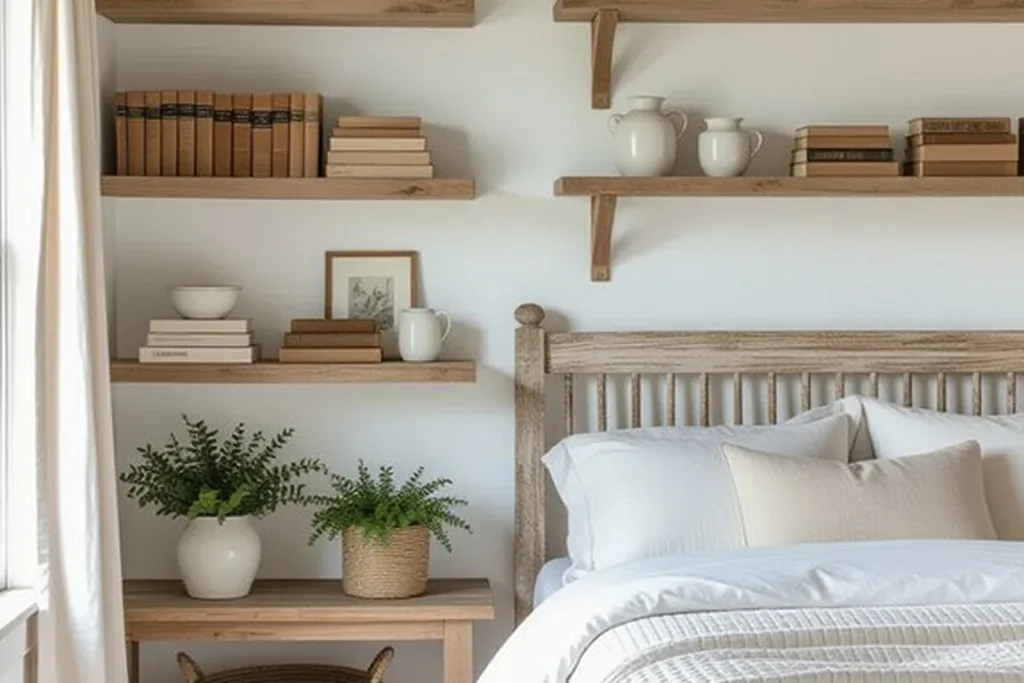
    Matching woven baskets on open bedroom shelves holding folded items.

    Matching baskets turn open shelves into closed storage without doors. Use baskets of one material, such as woven seagrass or cotton, in two sizes at most, and label the front of each one. Sort by type, such as scarves in one, belts in another, and spare chargers in a third, so you can pull out one basket instead of searching a shelf.

    Keep baskets light enough to lift with one hand, and store heavy books or files elsewhere. Line baskets with fabric if they hold small items that slip through the weave. Replace a basket when the weave frays, since a damaged basket snags clothes. Open shelves with baskets suit a room that needs soft texture as well as order.

    14. A Rolling Cart for the Bedside or Vanity
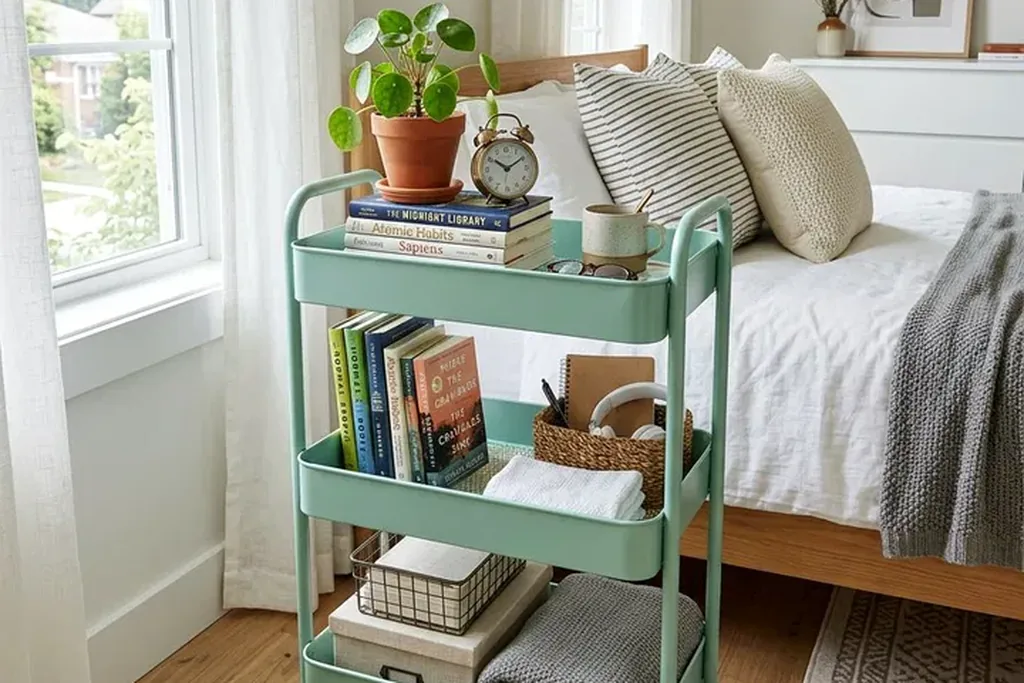
    Slim rolling cart beside a bed holding books and skincare items.

    A slim rolling cart with two or three tiers fits beside the bed or a vanity, and moves where you need it. Use the top tier for daily items, the middle for books or skincare, and the lowest for spare supplies. Choose a cart with a small footprint and wheels that lock, so it does not drift at night.

    Keep the cart to items for one routine, such as bedtime reading or morning skincare, rather than general overflow. Wipe the tiers weekly, since carts near a bed collect dust and hair products. In a shared room, one cart per person stops the shared nightstand from filling up.

    15. A Freestanding Wardrobe for Rooms Without a Closet
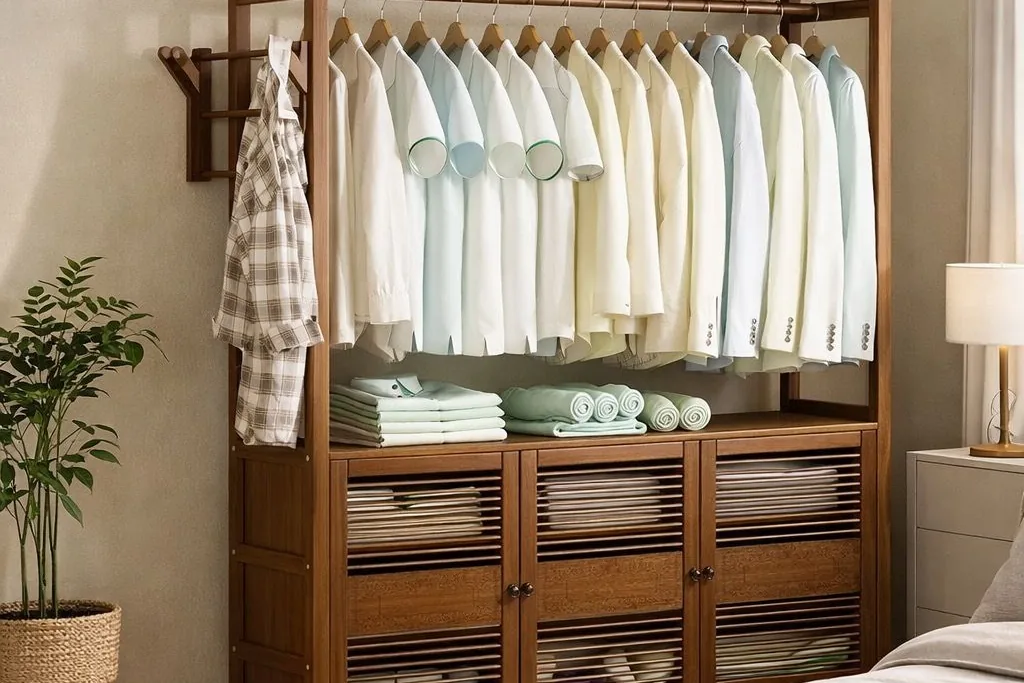
    Freestanding wardrobe with hanging clothes, shelves and closed doors.

    A freestanding wardrobe gives a room without a built in closet a full hanging and shelf system in one piece. Choose a wardrobe with both hanging space and shelves, so folded items do not end up on top of hanging clothes. Place it against the longest wall, and leave room for doors to open fully.

    Use the top of the wardrobe for one flat storage box only, and keep the rest clear, so dusting stays simple. Add a small light or a mirror on the inside of a door if the room lacks both. A wardrobe with legs and a pale finish looks lighter in a small room than a dark unit that reaches the floor.

    16. Corner Shelves for an Unused Corner
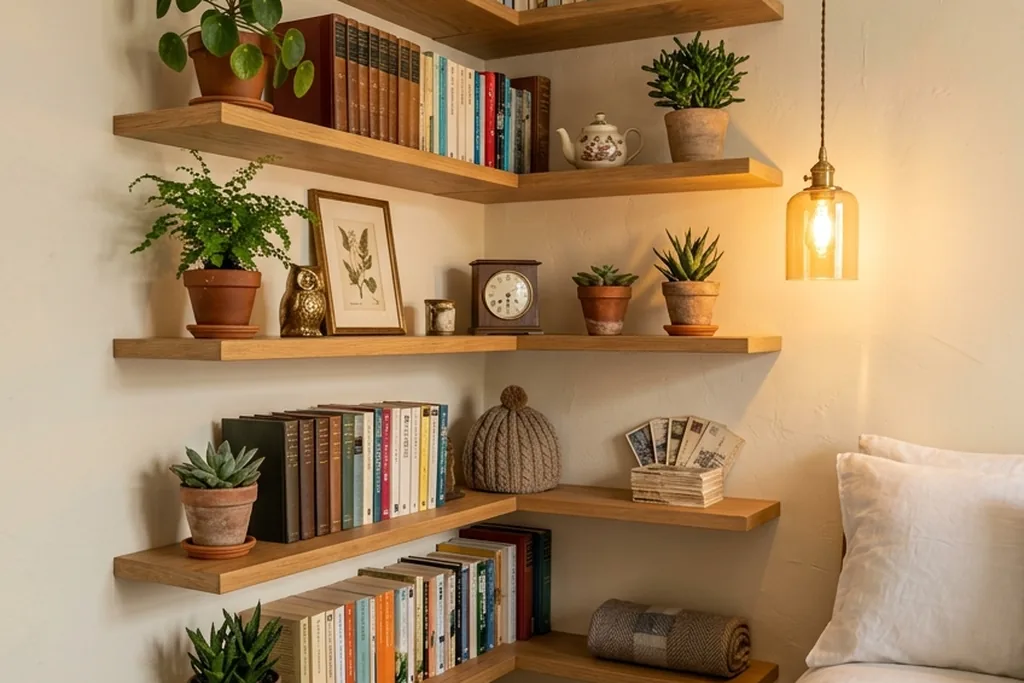
    Corner shelves in a bedroom holding books, a plant and a small box.

    Corner shelves use a corner that a bed, dresser or door leaves awkward, and they suit books, plants and small boxes. Choose shelves that wrap the corner or a single triangular unit, and keep the items light, since corner fixings can be hard to reach. Mount the lowest shelf at a height where you can lift items off without stretching over furniture.

    Group items by use, such as books and a lamp on one shelf, and a plant and a photo on another. Leave the top shelf for items you reach for rarely, and keep the bottom shelf for daily pieces. Corner shelves work best when they hold a small, clear group, rather than becoming a second dresser top.

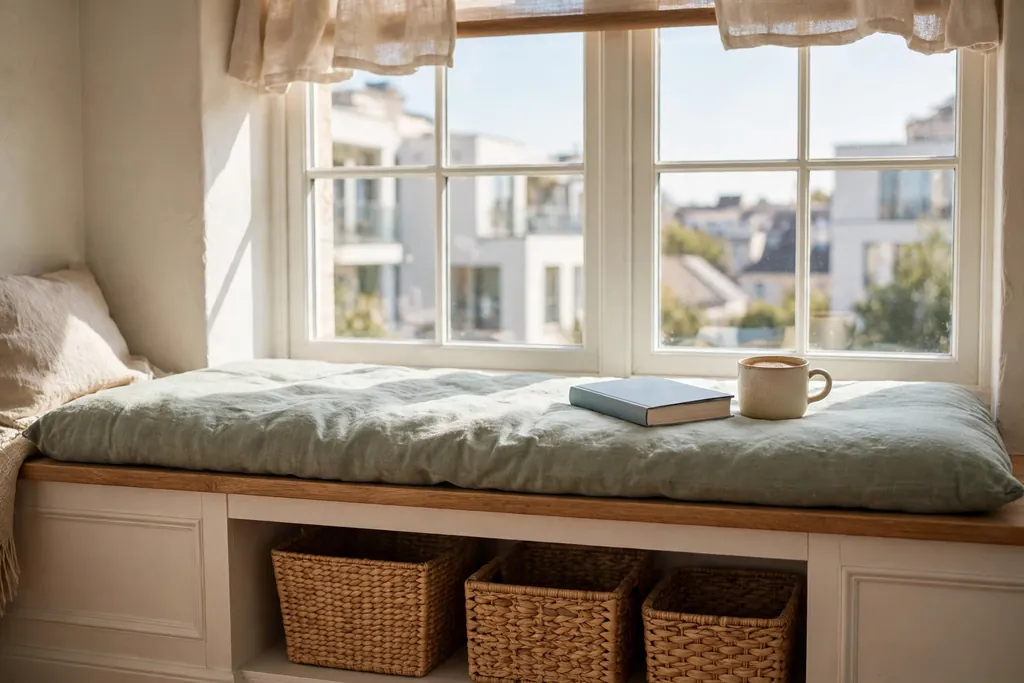
    17. A Window Seat With Storage Beneath
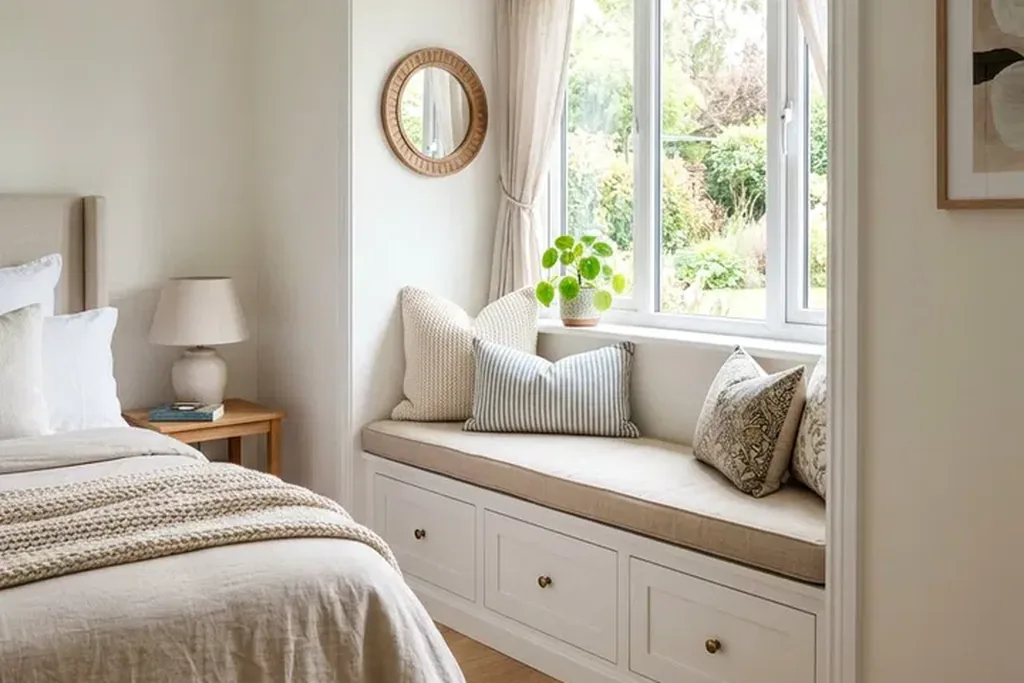
    Bedroom window seat with storage drawers beneath and a cushion on top.

    A window seat with drawers or a lift up lid under the cushion gives a reading spot and a blanket store in one built piece. Use the seat for spare bedding, books and out of season throws, and keep the cushion in a washable cover, since window seats collect sun and dust. Choose a seat depth that lets you sit with your back against the wall comfortably.

    Keep the window area clear of heavy items, so you can open the window and clean the glass. A small shelf or a wall hook beside the seat holds a book and a cup, so the seat top stays free for sitting. If a built seat is not possible, a low storage bench under the window gives most of the same benefit.

    18. Drawer Dividers for Dresser Drawers
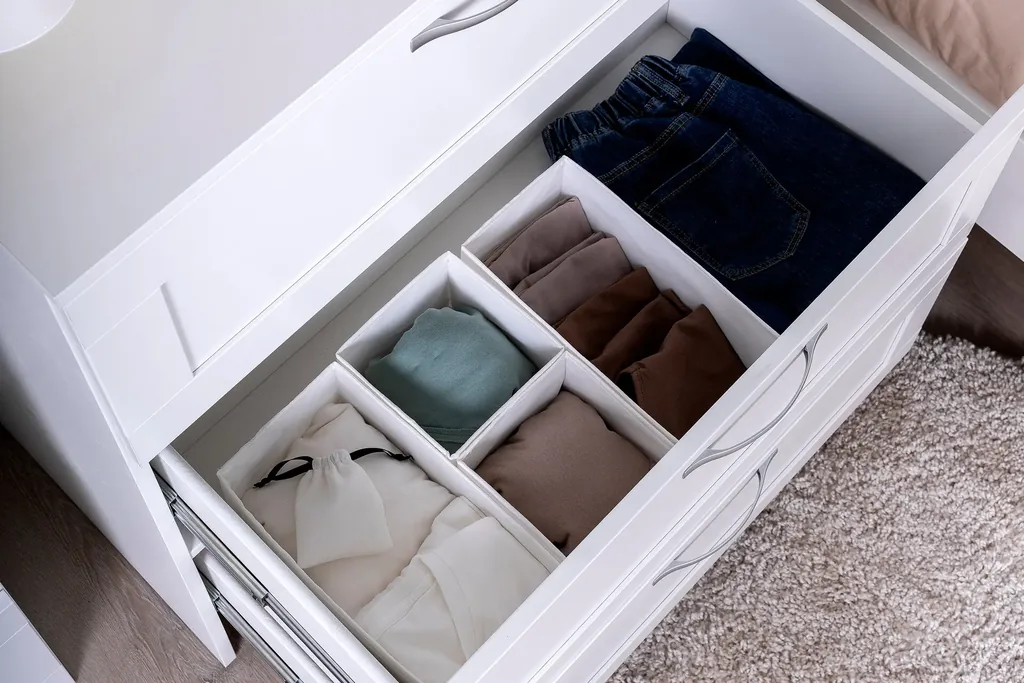
    Dresser drawer with dividers holding folded clothes filed upright.

    Drawer dividers stop folded clothes from collapsing into one mixed pile, and they make a dresser work much harder without new furniture. Use adjustable dividers or small boxes inside each drawer, and sort by type and color, so you can see each stack at a glance. Fold clothes upright, like files, so you can pull one item without disturbing the rest.

    Keep one divider section empty in each drawer, so laundry has a place to go back to. Remove dividers once a season and wipe the drawer base, since dust builds up under boxes. Dividers suit shallow drawers best, and deep drawers may need stacked boxes instead, so items at the bottom stay reachable.

    19. A Wall Mounted Jewelry Cabinet With a Mirror
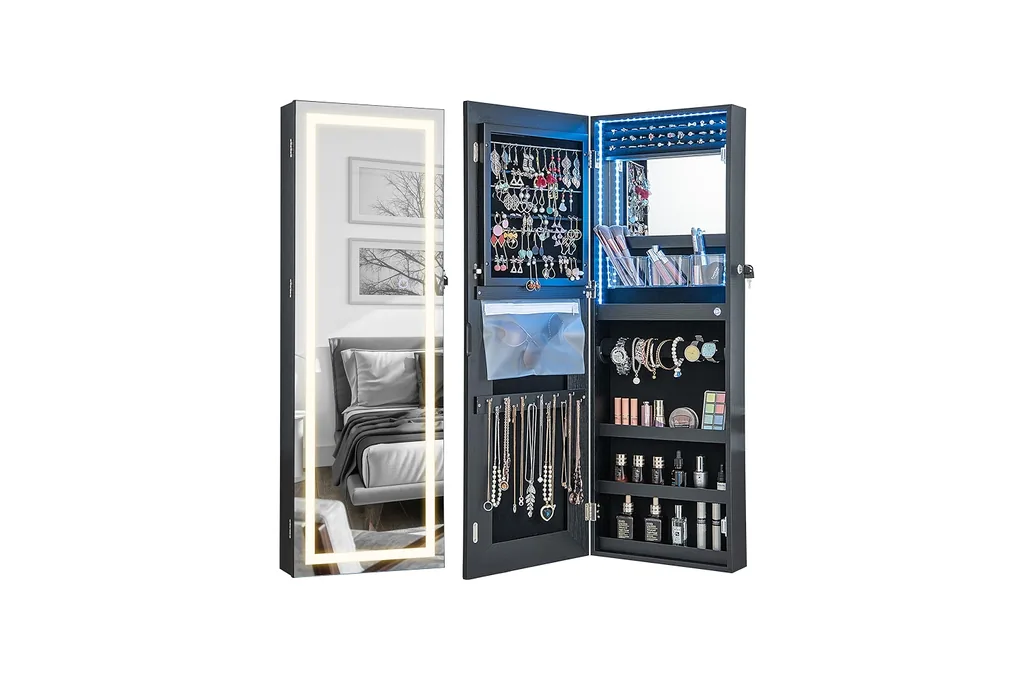
    Wall mounted jewelry cabinet with a mirror, open to show necklaces on hooks.

    A jewelry cabinet that hangs on the wall and opens to reveal hooks, rings and small shelves keeps necklaces untangled and earrings paired, while the front works as a full length mirror. Mount it at a height where you can see the full mirror, and fix it into studs, since a loaded cabinet is heavy. Sort by type, with necklaces on hooks, rings in small slots, and watches on a lined shelf.

    Keep the cabinet closed when not in use, so dust stays out and the room looks calm. Wipe the mirror weekly, and check the hinges once a year. This piece suits a dressing area or the wall beside a wardrobe, where you already stand to finish getting ready.

    20. A Blanket Chest at the Foot of the Bed
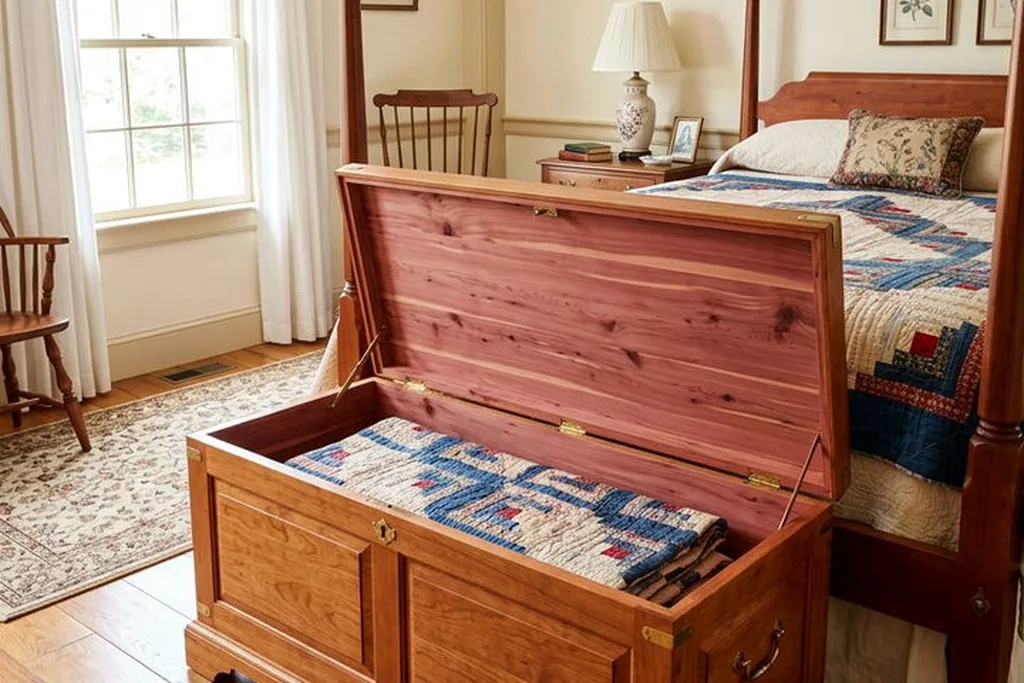
    Blanket chest at the foot of a bed, open to show folded quilts inside.

    A blanket chest, often called a trunk, holds spare quilts, winter blankets and guest bedding in one large, lidded box. Choose a chest with a lid that stays open safely, and line the inside with clean cotton, so wool and quilts stay fresh. Place it at the foot of the bed or under a window, where it can also serve as a seat with a folded throw on top.

    Rotate the contents each season, and store the current season’s spare blanket on top for easy reach. Keep the chest away from radiators and damp walls, since stored bedding picks up smells fast. A cedar lined chest helps with moths, but air the contents a few times a year even so.

    21. Labelled Bins on High Closet Shelves
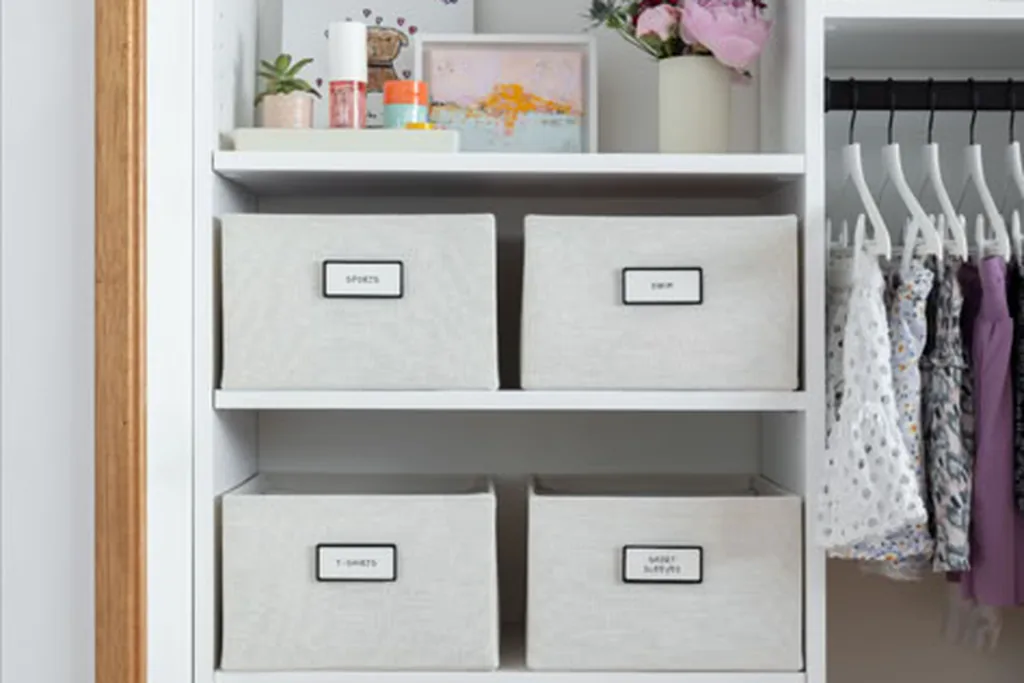
    Labelled storage bins on a high closet shelf holding seasonal clothes.

    Labelled bins on the high shelf of a closet turn a hard to reach shelf into usable storage for seasonal clothes, bags and spare linens. Choose bins with handles and a label on the front edge, so you can read the contents from below without pulling each bin down. Sort by season or by person, and keep a simple list inside the closet door of what each bin holds.

    Use bins of one size, so they stack neatly and do not slide. Keep the heaviest bin lowest, and never stack bins above a safe reaching height. Review the bins each season, and move the current season’s bin to an easier shelf, so the high shelf holds only what you need rarely.

    22. A Bedside Pocket Organizer That Hangs From the Bed
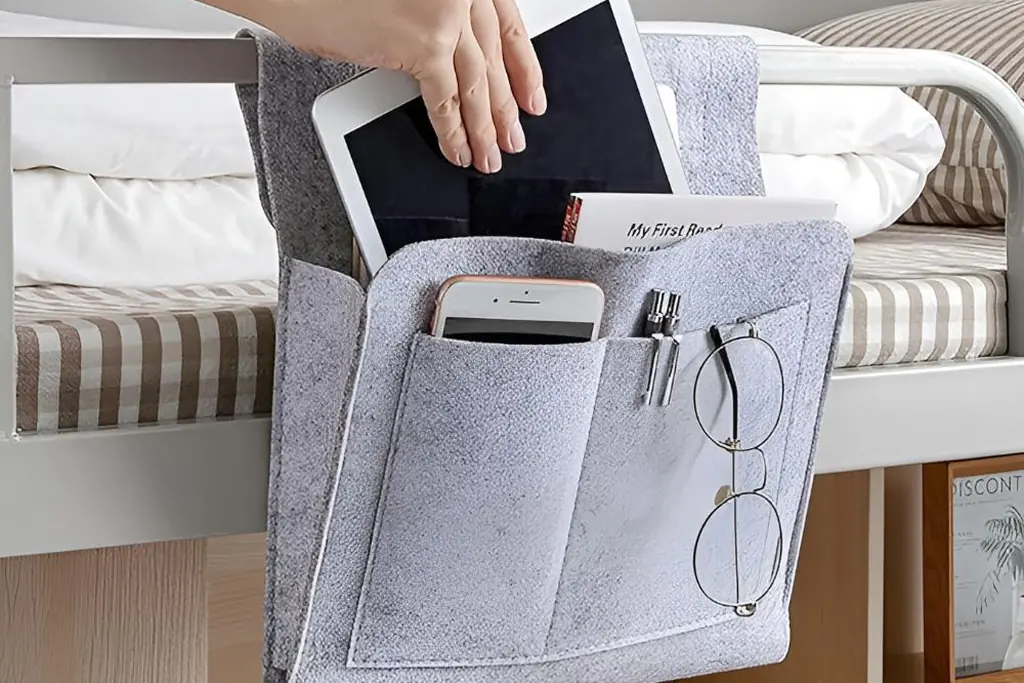
    Bedside pocket organizer hanging from a bed, holding a book, phone and glasses.

    A bedside pocket organizer hangs over the side of the bed frame or tucks under the mattress, with pockets for a phone, a book, glasses and a charger. This suits a room with no space for a nightstand, or a bed pushed against a wall. Choose an organizer with a flat, stable flap, so it does not slip when you pull a book out at night.

    Keep the pockets to evening items only, and move work papers and larger items elsewhere, so the organizer stays slim. Wash the organizer regularly, since fabric near a bed collects lint. If you share the bed, use one organizer per side, so neither person has to reach across the other.

    23. A Tall Narrow Cabinet Between the Bed and the Wall
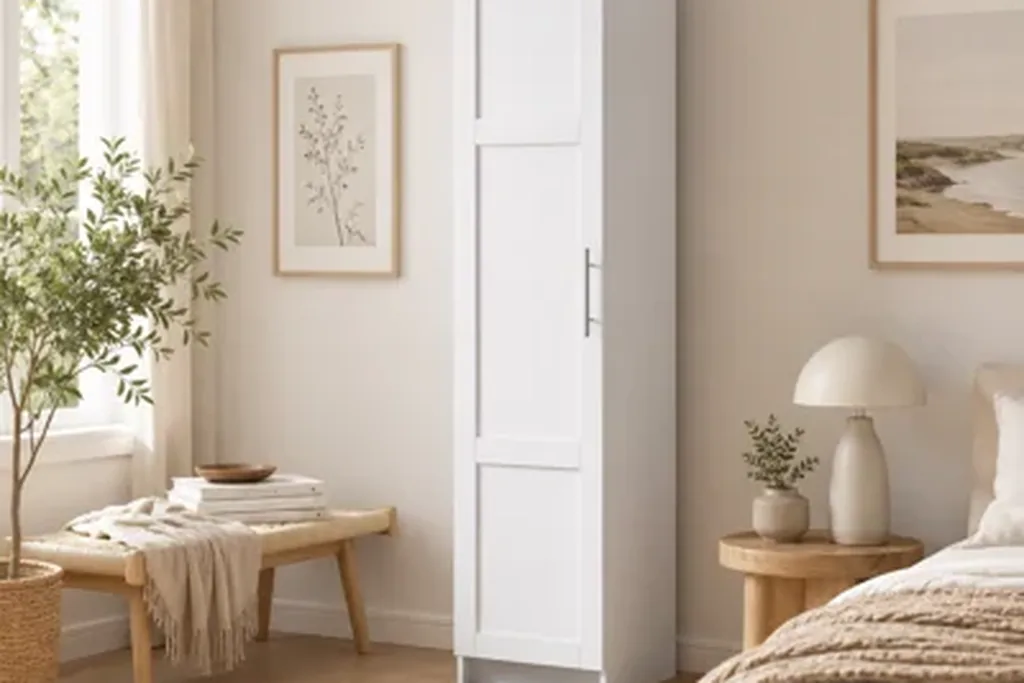
    Tall narrow cabinet with closed doors between a bed and a bedroom wall.

    A tall, narrow cabinet fits a gap that is too small for a dresser, such as the space between the bed and a wall or beside a wardrobe. Use it for folded clothes, books or skincare, with doors to keep the contents out of sight. Measure the gap carefully, including skirting boards, so the cabinet slides in without scraping the wall.

    Keep the top of the cabinet clear or use it for one light item, such as a small plant, so the tall piece does not feel top heavy. Anchor a tall cabinet to the wall, since narrow pieces can tip when a drawer opens. This is a useful fix for a room with an awkward leftover gap after larger furniture is placed.

    24. A Shoe Cabinet by the Bedroom Door
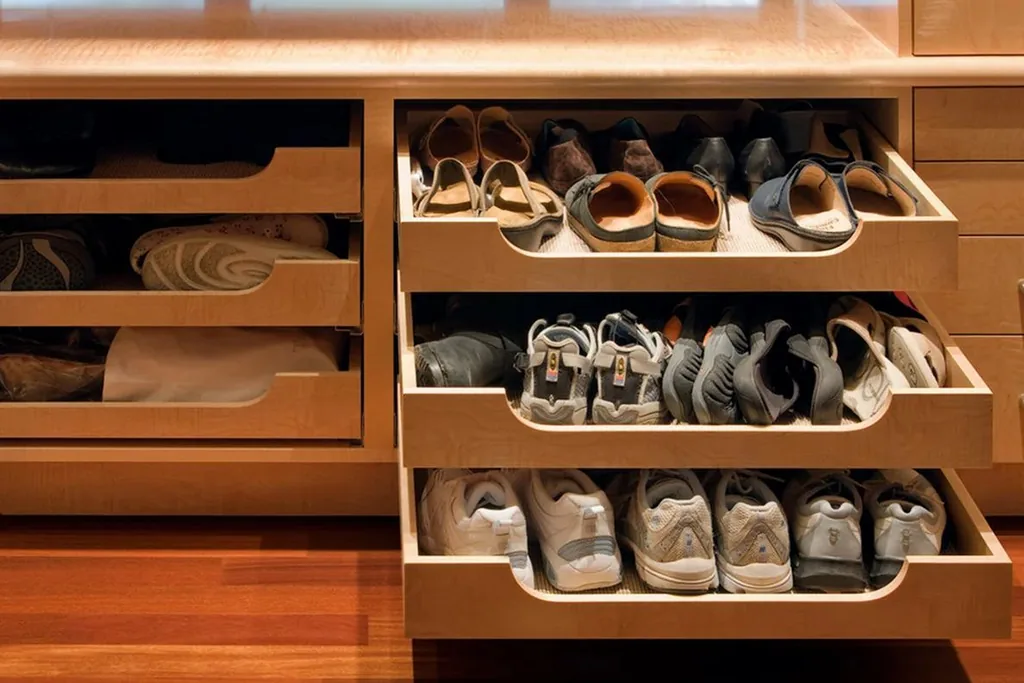
    Shoe cabinet by a bedroom door with drawers holding pairs of shoes.

    A shoe cabinet with tilt out drawers or shelves by the bedroom door keeps shoes paired, off the floor and out of the closet. Choose a cabinet deep enough for your largest pair, and sort by person or by use, such as daily shoes in the top drawer and less worn pairs below. Wipe shoes before storing them, so the cabinet stays clean inside.

    Keep the top of the cabinet clear for keys or a small tray, and avoid piling bags on top, since that turns the cabinet into a shelf. Air the cabinet weekly by opening the drawers for a few minutes, especially in a warm room. One cabinet near the door often works better than shoe storage spread across the closet, the floor and the hallway.

    25. Seasonal Rotation Bins on Top of the Wardrobe
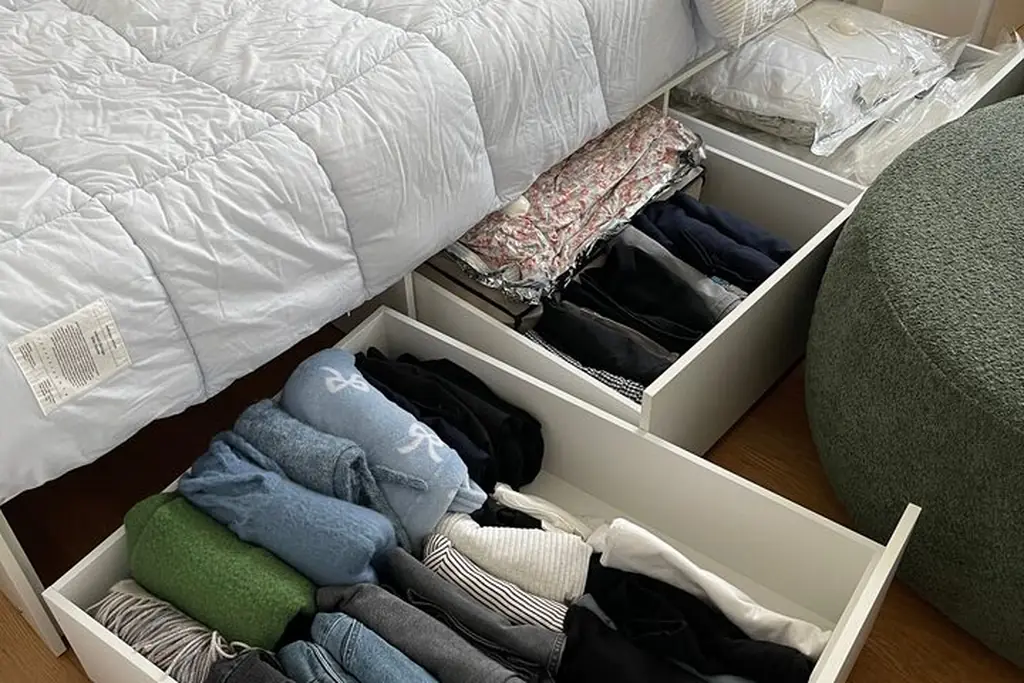
    Flat labelled storage bins on top of a wardrobe holding out of season items.

    Bins on top of a wardrobe hold out of season clothes, spare bedding and holiday items, and they use space that is otherwise wasted. Choose flat, lidded bins with handles, and label each one on the side you can see from the floor. Keep the bins to a height you can lift safely, and use a step stool rather than standing on a chair.

    Rotate the bins at the start of each season, swapping the current season’s clothes into the closet and moving the last season’s clothes up top. Keep a short list of bin contents on your phone, so you do not buy a duplicate. Dust the bins monthly, since the top of a wardrobe collects dust fast.

    26. A Vanity With Drawers for Getting Ready
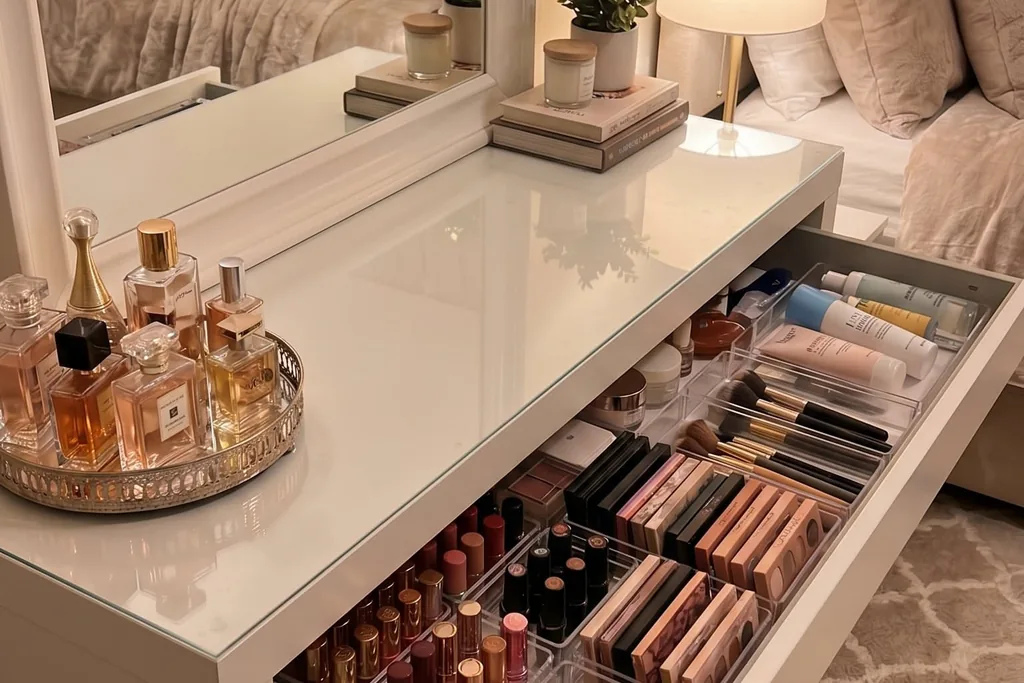
    Bedroom vanity with drawers, a mirror and trays holding skincare items.

    A vanity with drawers gives skincare, makeup, hair tools and jewelry a single home, instead of spreading them across the dresser and the bathroom. Choose a vanity with shallow top drawers for small items and one deeper drawer for tools, and add small trays inside, so brushes and bottles stay upright. Place the vanity near natural light if you can, since that helps with morning routines.

    Keep the vanity top to daily items only, and store refills and less used tools in a drawer or a nearby bin. Coil cords neatly and keep heat tools away from fabric, since a hot tool can mark a drawer lining. Wipe the vanity top weekly, since powders and sprays leave a film that builds up fast.

    27. A Peg Rail Along One Bedroom Wall
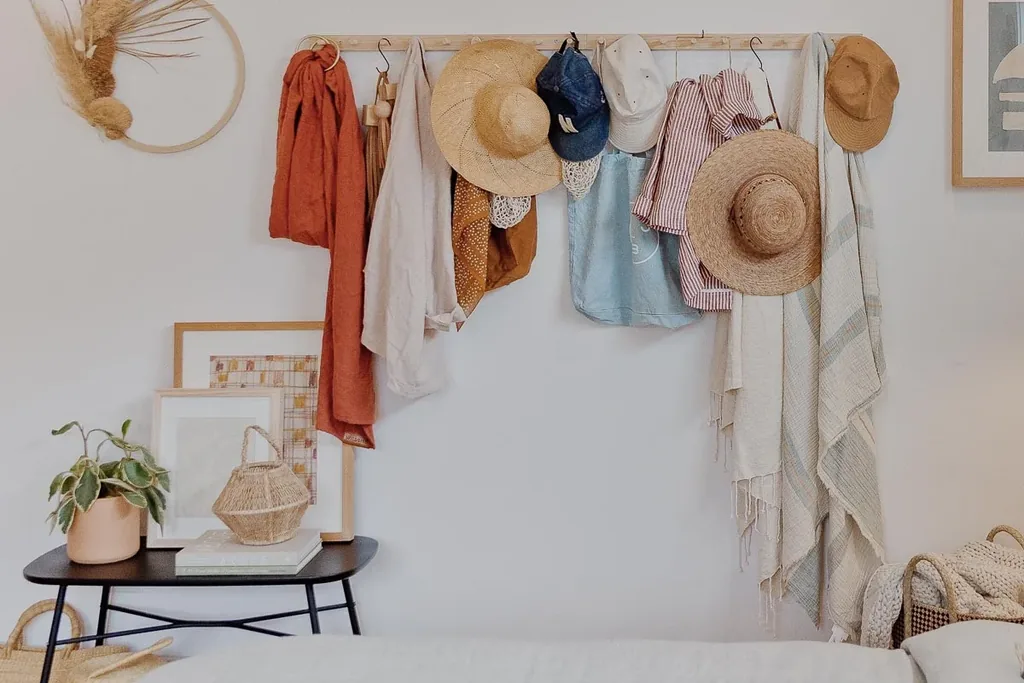
    Wooden peg rail on a bedroom wall holding hats, scarves and a bag.

    A peg rail along one wall holds hats, bags, scarves and tomorrow’s outfit on a row of wooden pegs, and it takes no floor space. Fix the rail into studs, and space the pegs wide enough for a coat or a bag to hang without covering the next peg. This suits a wall near the door or beside the wardrobe, where you naturally pause before leaving.

    Limit the rail to items you use weekly, and move rarely worn coats back to the closet, so the rail stays useful rather than crowded. Keep the rail at a height where you can reach each peg without stretching, and keep the floor below it clear, so bags do not rest on furniture. A peg rail also gives children a clear, low place for their own bag and coat.

    Conclusion

    Bedroom storage works best when each item has one clear home and the room still leaves space to move and rest. Start with the idea that solves your biggest daily frustration, whether that is clothes, shoes, bedding or small accessories, and live with it for a week before adding the next change. Keep daily pieces low and visible, move seasonal items higher, and check fixings and labels once a season so shelves, rails and bins stay safe and useful. With a few well placed pieces, a plain bedroom can carry a surprising share of the storage load and still feel calm and stylish. Save this list for your next bedroom refresh, and pick the storage idea you want to try first.

    FAQs

    What is the best bedroom storage for a small room?

    Use the bed, the walls and the door before adding floor furniture. Under bed drawers, a storage bed, floating shelves, over door hooks and a peg rail all add storage without taking floor space. Keep daily items at easy reach, move seasonal items higher, and choose one closed piece, such as a dresser or wardrobe, so the room does not fill with open piles.

    How do I store clothes without a closet?

    Use a freestanding wardrobe for hanging clothes, a double dresser for folded items, and a storage bench or ottoman for spare bedding. Add a peg rail for bags and tomorrow’s outfit, and use under bed drawers for off season clothes. Keep the pieces to one material or color family, so a room without a built in closet still looks planned.

    What should I keep in bedroom storage, and what should go elsewhere?

    Keep sleep, dressing and morning routine items in the bedroom, such as clothes, shoes, bedding and accessories. Move files, cleaning supplies, bulk shopping and hobby gear elsewhere, since they fill bedroom storage fast and are rarely needed at night. If a bedroom bin holds items you have not used in a year, move it out during your next seasonal review.

    How can renters add bedroom storage without drilling?

    Use rolling under bed drawers, a storage bench, a freestanding wardrobe, baskets, a rolling cart and over door hooks, none of which need drilling. A bedside pocket organizer and a leaning shelf can also help, as long as the shelf is stable. Check your lease before fixing shelves or rails, and keep original fittings so you can restore the room when you move out.

    How do I keep bedroom storage from looking cluttered?

    Use closed storage for most items, and limit open shelves to one or two groups per shelf. Repeat one material, such as wood or woven baskets, and label bins so each one has a clear job. Leave gaps between groups and one empty shelf or drawer, since a storage system with no spare room fills up and starts to spill onto surfaces.

    How often should I review bedroom storage?

    Do a short review each season, when you swap bedding and clothes. Empty one drawer, shelf or bin at a time, remove items you did not use, and move seasonal pieces to higher or top of wardrobe storage. A full review once a year, including the space under the bed and the top of the wardrobe, stops forgotten boxes from building up unnoticed.
  • 22 Solo Apartment Ideas to Make Living Alone Feel Like Home

    22 Solo Apartment Ideas to Make Living Alone Feel Like Home

    Sheet No.: 62
    Brand: Dwell Ovell (dwellovell.com)
    Author: Clara Bennett
    Parent keyword: Living Alone Vibes Apartment
    Keyphrase: living alone vibes apartment
    Slug: living-alone-vibes-apartment
    Categories: Small Spaces (primary: Small Spaces)
    Publish slot: Sept 16, 2026, 9:00am America/New_York
    Status: Draft file only (do not publish)

    A. SEO Brief

    Intent: Help a person living alone shape a small apartment that feels settled, comfortable and personal, with practical ideas for daily routines, hosting and renter friendly changes.

    Primary keyphrase: living alone vibes apartment
    Secondary terms: solo apartment ideas, living alone apartment decor, small apartment for one person, cozy solo living, renter friendly apartment ideas, apartment routines for one

    Sheet title: “7 Ways to Make a Solo Apartment Feel Like Home for More Style”
    Count note: Sheet count is 7, which is below the required minimum of more than 10 ideas, so the count is RAISED to 22. The article delivers 22 distinct numbered ideas, numbered continuously 1 to 22, and the title is retitled to match the delivered count.

    Article title / H1: 22 Solo Apartment Ideas to Make Living Alone Feel Like Home
    SEO title (59 characters): 22 Solo Apartment Ideas to Make Living Alone Feel Like Home
    Meta description (155 characters): Discover 22 solo apartment ideas for living alone, from a calm base and cozy corners to hosting and simple routines that make a small space feel like home.
    Slug: living-alone-vibes-apartment

    Internal links used (verified live dwellovell.com URLs only):
    – https://dwellovell.com/studio-apartment-decorating-ideas/ (studio apartment decorating ideas)
    – https://dwellovell.com/cozy-apartment-living-room-ideas/ (cozy apartment living room ideas)
    – https://dwellovell.com/post-grad-apartment-ideas/ (post grad apartment ideas)
    – https://dwellovell.com/college-apartment-decor-ideas/ (college apartment decor ideas)

    Research limits: No live competitor research or search volume checks were claimed for this draft. No prices, products, measurements, statistics or brand endorsements are stated. Tips are general decorating guidance. All internal links above were fetched and verified live on dwellovell.com for this post.

    B. Complete Article

    22 Solo Apartment Ideas to Make Living Alone Feel Like Home

    Living alone gives you full say over your space, and that freedom can feel both exciting and a little empty at first. A solo apartment feels like home when it supports your real days: slow mornings, work, cooking for one, rest, and the occasional evening with friends. These 22 solo apartment ideas cover layout, comfort, storage, light and small rituals, so you can shape a place that suits one person well, without filling every corner or spending on a full redo.

    Key Takeaways

    • Start with a calm base, then add color and texture in items you can move or swap.
    • Give everyday routines a home: mornings, work, cooking, rest and tidying each deserve a spot.
    • Choose furniture and storage that do two jobs, so a small apartment stays open and easy to use.
    • Layer light, textiles and plants for warmth, rather than relying on one ceiling light or one bold change.
    • Keep hosting simple, with a table that seats a few friends and a guest setup kept in one basket.
    • Pick renter friendly options first, and check your lease before drilling, mounting or painting.

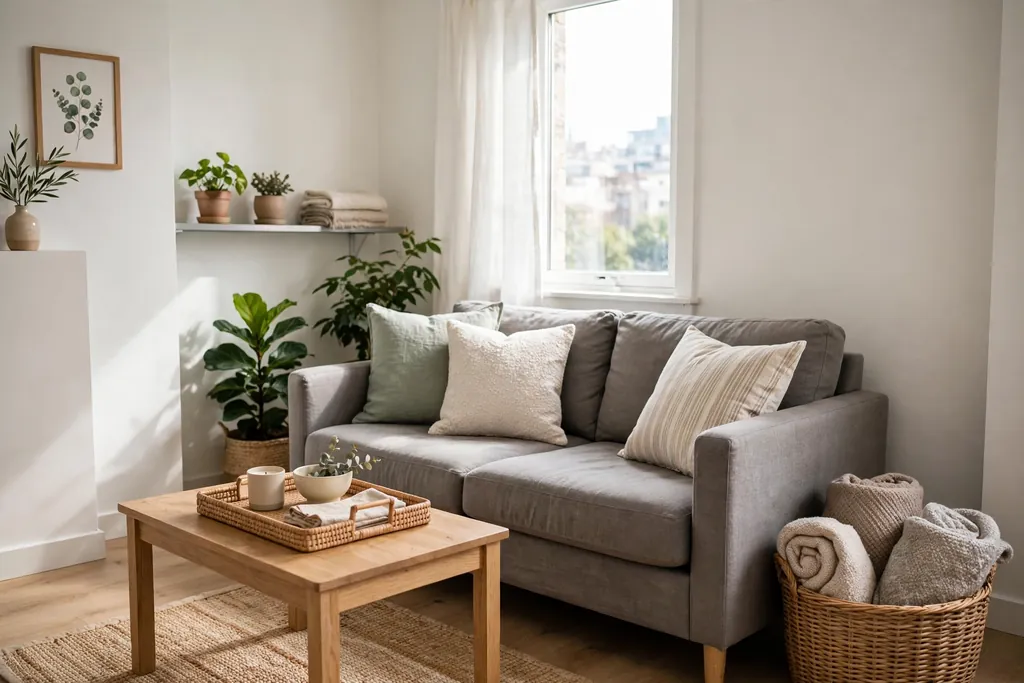
    1. Start With a Calm Base You Can Keep

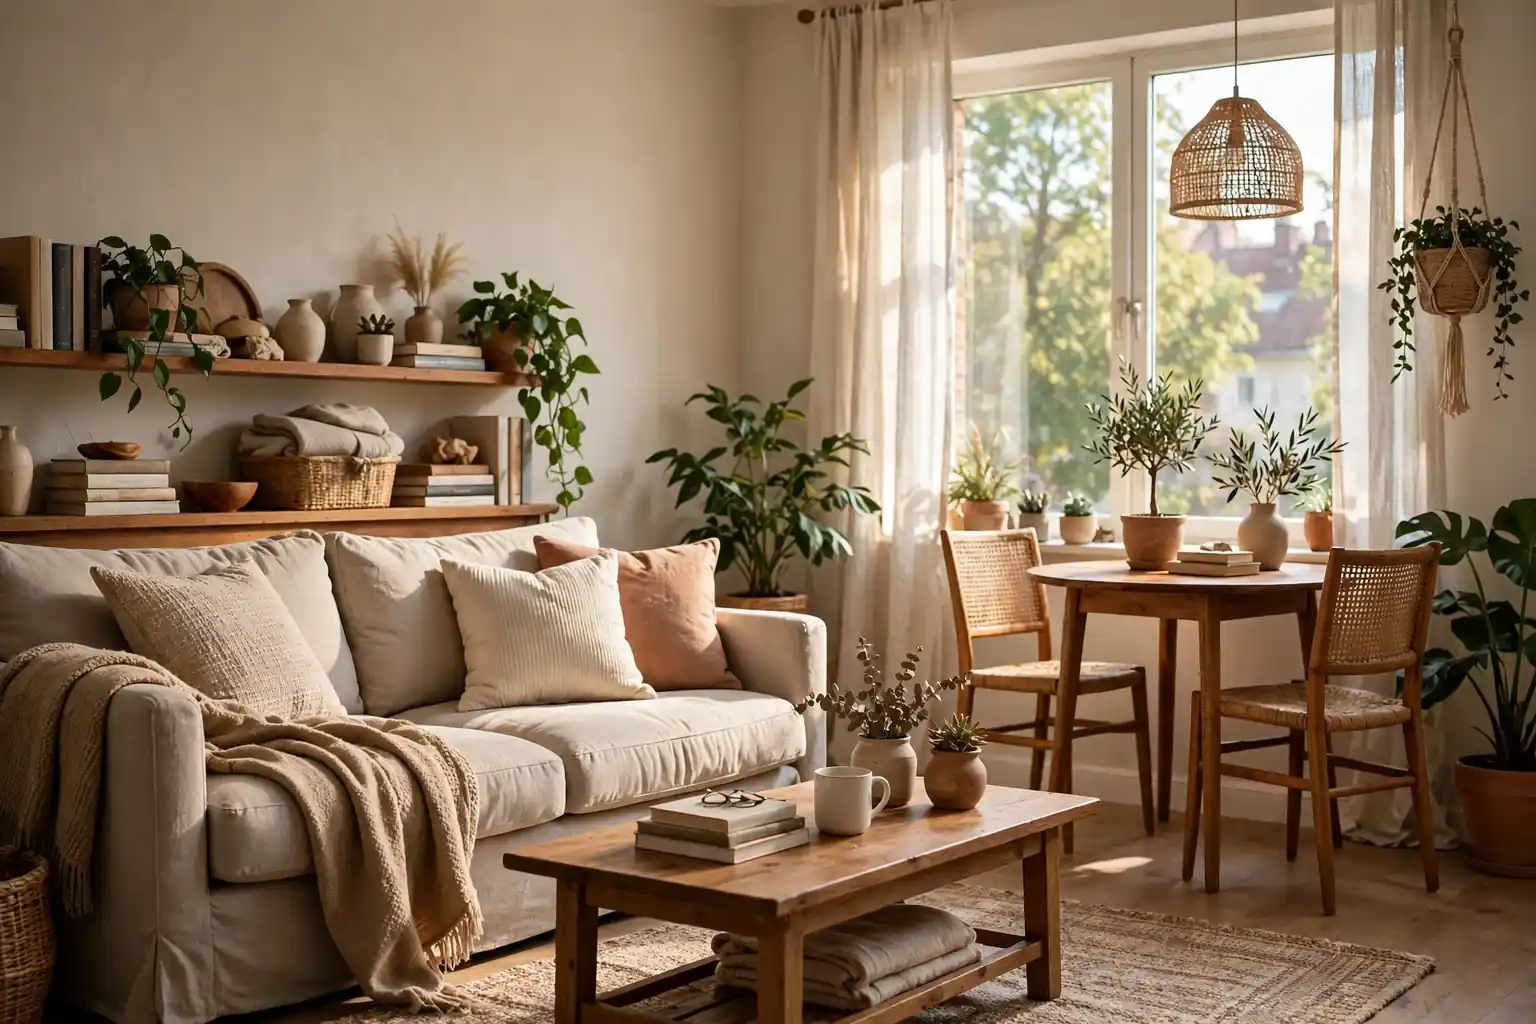
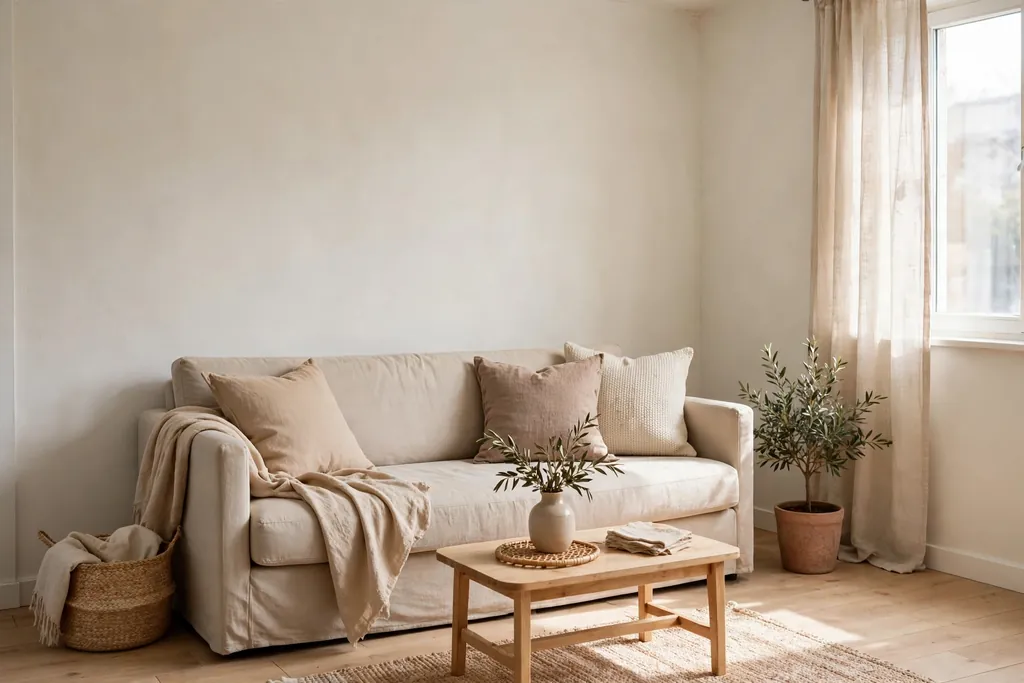
    Small apartment living room with a calm warm neutral base, plain sofa and light wood floor.

    Choose plain bedding, a plain sofa cover or sofa in a neutral tone, and plain curtains, then add color through a throw, cushions and art you can swap later. A calm base keeps the room steady when you add a desk, a bookshelf or a secondhand chair in a different finish, and it makes later choices easier because large pieces already agree with each other.

    The base also saves money over time. When the large pieces are neutral, you do not need to replace them to change the mood of the room. Try one accent color in two or three small places, such as a cushion, a vase and a framed print, and leave the rest quiet so the room reads as settled rather than busy.

    2. Build a Morning Station for Slow Starts

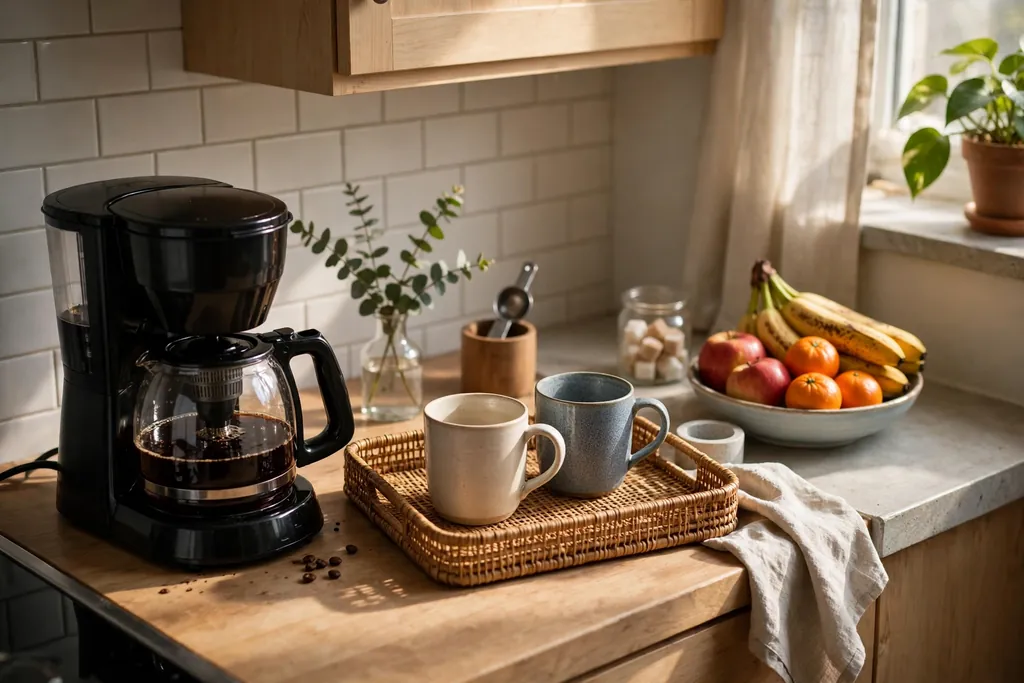
    Small apartment kitchen counter morning coffee station with a coffee maker, mugs and a fruit bowl.

    A morning station groups everything you reach for at the start of the day in one spot: a kettle or coffee maker, mugs, tea or coffee, a small bowl for fruit, and a tray for breakfast items. Put it on one short stretch of counter, near the sink but clear of the main cooking area, so mornings stay calm even when you are short on time.

    Keep the station to daily items only. Store backup supplies in a cabinet and refill the station once a week, and use a small tray under the coffee maker to catch drips and keep the counter tidy. A hook or rail nearby holds a towel within reach, and the ritual of making a drink in the same spot each day helps the apartment feel like yours from the first hour.

    3. Carve Out a Reading Corner by the Window

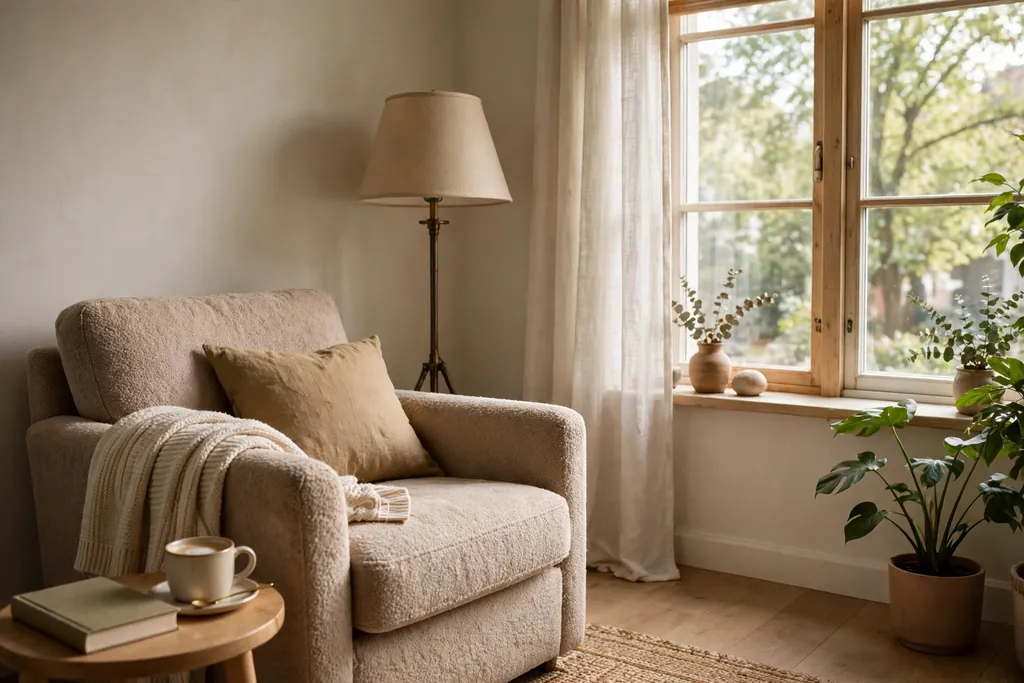
    Cozy apartment reading corner by a window with an armchair, floor lamp and side table with a book.

    A reading corner needs only three things: a comfortable chair, light aimed at the page, and a surface for a drink and a book. The window end of a living room is a natural spot, since it offers daylight and a view during the day, and a chair angled slightly toward the room keeps the corner feeling part of the living space rather than cut off from it.

    Add a floor lamp behind the chair shoulder for evening reading, and a small basket beside the chair for the current book and a throw. The seating guidance in these cozy apartment living room ideas applies here too: give each regular seat its own light and a reachable surface instead of filling every gap with furniture.

    4. Make the Bed a Proper Retreat

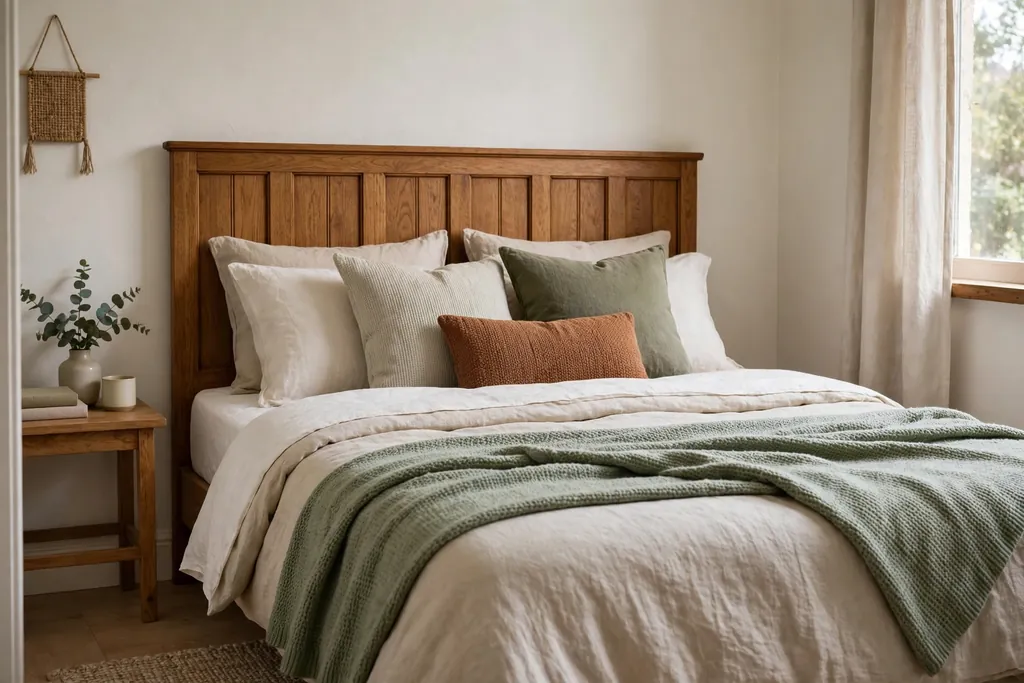
    Neatly made bed in a small apartment bedroom with layered bedding, a throw and a wooden headboard.

    A bed frame lifts the mattress off the floor, gives under bed storage a clean edge, and makes the bedroom feel finished. Add a headboard if space allows, even a simple padded or wood panel, so sitting up to read is comfortable, and choose washable bedding in a solid color, with a lighter layer for warm nights and a warmer layer for cold ones.

    Make the bed each morning. It takes a couple of minutes and it sets the tone for the rest of the room, which matters more when you live alone because no one else will reset the space for you. Keep sleeping pillows separate from daytime cushions, and store extra bedding in one labeled bin, so the bed never doubles as a storage pile.

    5. Give the Door a Landing Zone

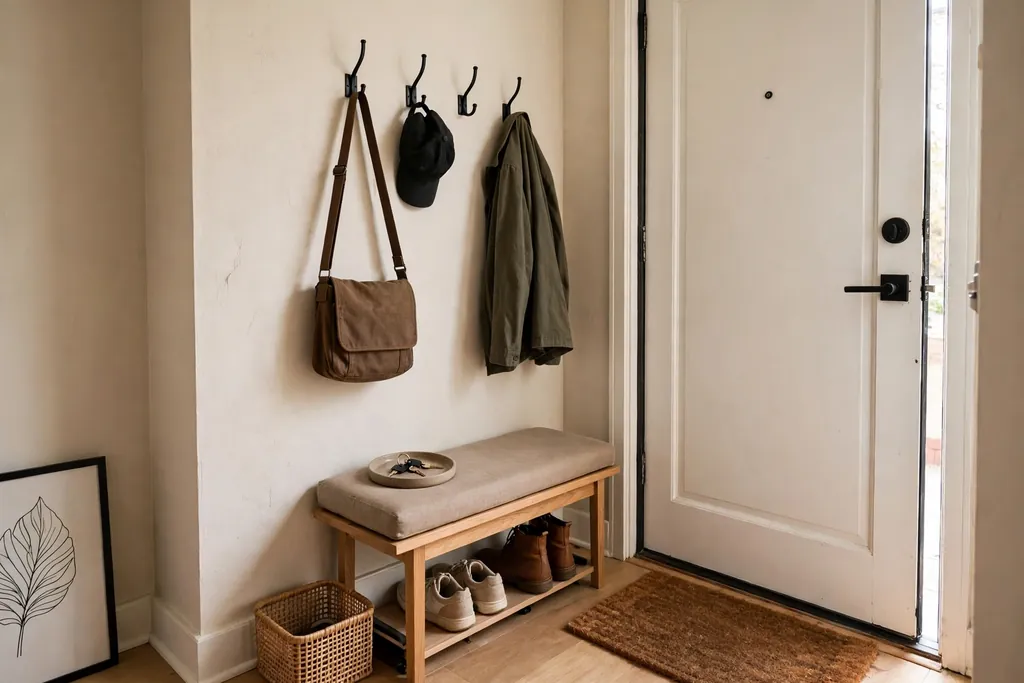
    Small apartment entry landing zone with wall hooks, a tray for keys, a bench and a shoe mat.

    A landing zone by the door stops bags, keys and coats from landing on the sofa or the kitchen counter. Fit a row of hooks, a small tray for keys and a wallet, and a mat or tray for shoes, and if there is no hallway, a narrow bench or a wall shelf beside the door does the same job.

    Give each item a fixed home and keep the zone to what fits there. When the hooks are full, something needs to go to its proper place, and a small mirror above the tray gives a last check before leaving, which helps on rushed mornings. Coming home to a clear entry makes the whole apartment feel calmer at the end of the day.

    6. Set a Table for One, Properly

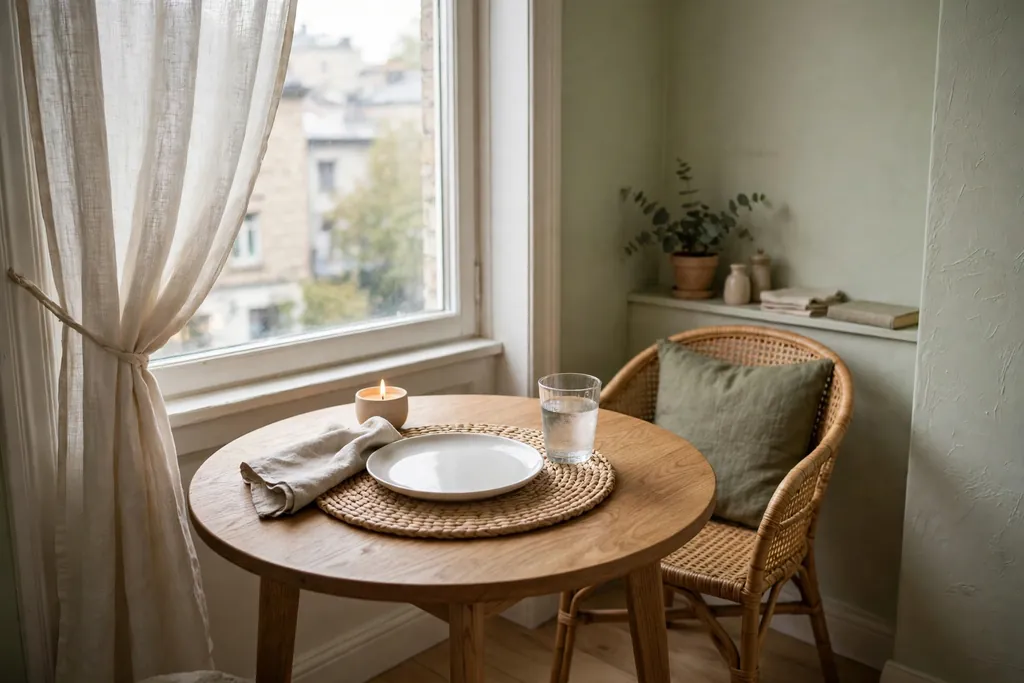
    Small apartment dining nook with a round table set for one person by a window.

    Eating alone does not have to mean eating standing up or over the sink. Set a small table with a placemat, a real plate, a glass and, if you like, a candle, and sit down for the meal even on ordinary weeknights. A table set with care turns a solo dinner into a pause in the day rather than a task to finish.

    Keep the setup simple enough to repeat daily. Store placemats and napkins in one nearby drawer or basket, so setting the table does not become a search through cupboards, and keep the centerpiece low and moveable so the table can switch to work or a puzzle after the meal. For table styling that stays usable day to day, the ideas in these post grad apartment ideas show how one table can serve meals, work and guests.

    7. Create a Cooking Zone for One Person

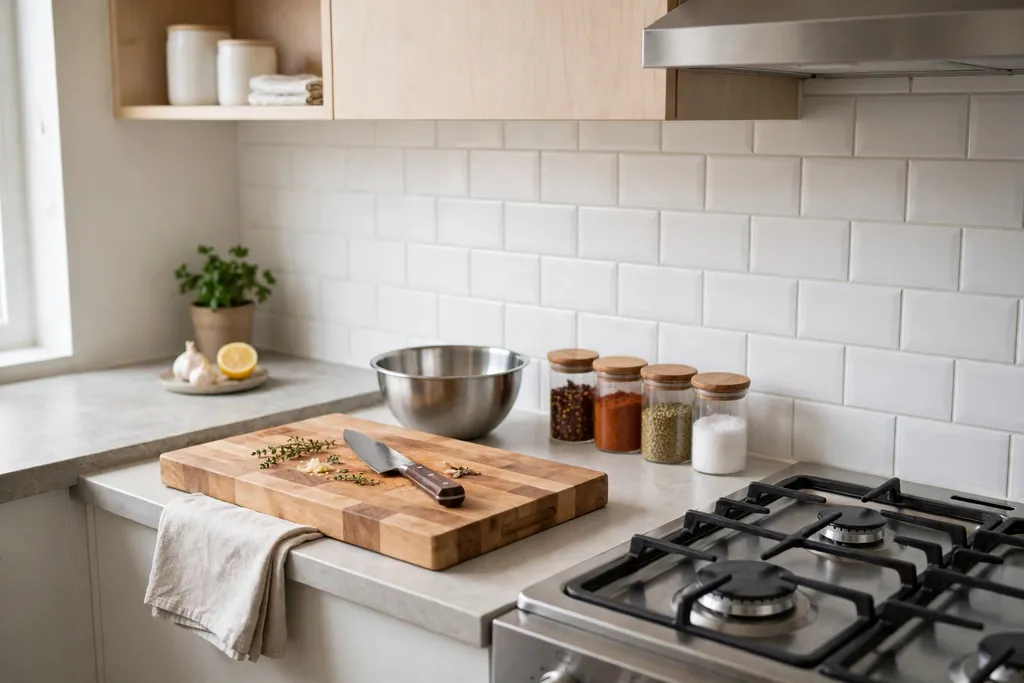
    Small apartment kitchen prep zone with a cutting board, knife, mixing bowl and spice jars near the stove.

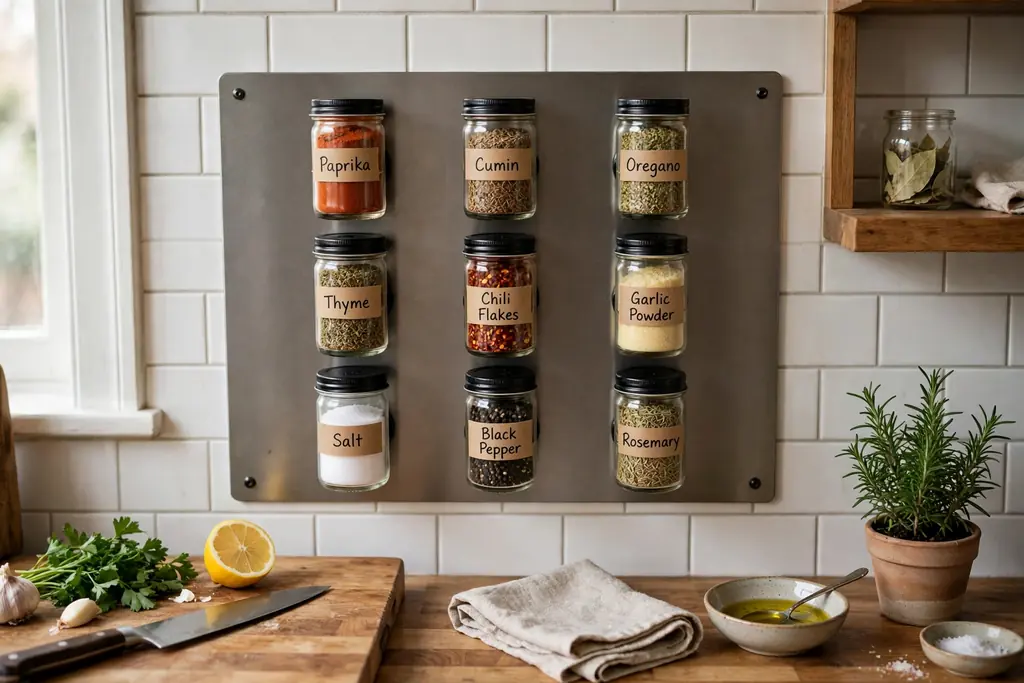
    Cooking for one works best with a clear prep zone, not just a stove. Clear one counter section, keep a cutting board, a sharp knife and a mixing bowl there, and store oils and everyday spices within one step of the stove, so weeknight cooking takes less hunting for tools and feels doable after work.

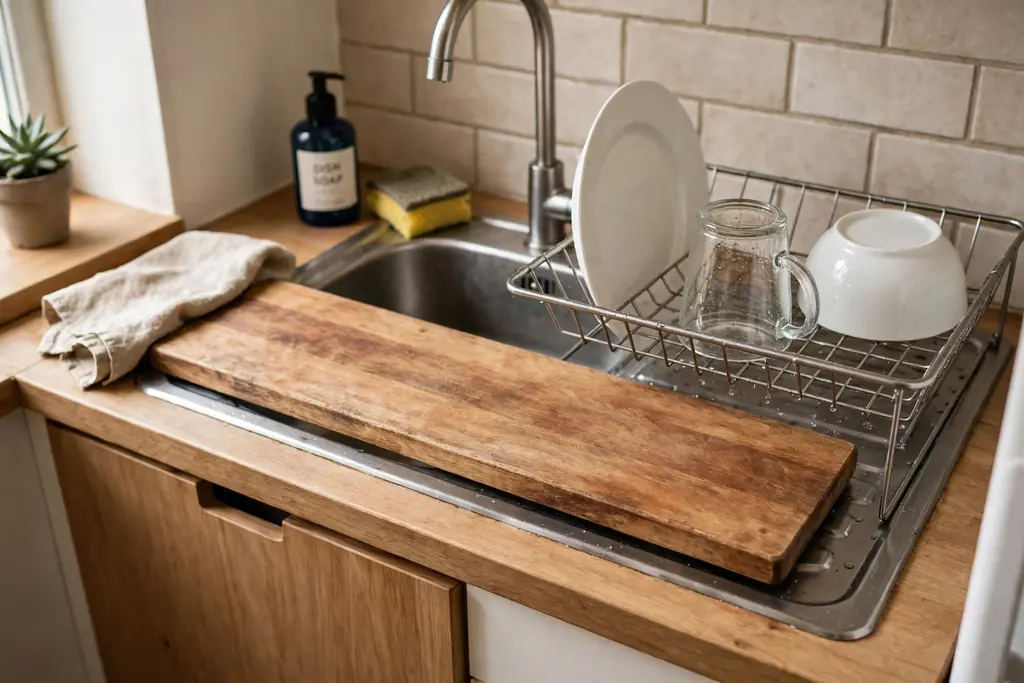
    If counter space is short, a sturdy board over the sink or a small rolling cart parked beside the counter can add prep room. Cook a little extra when you have time, and store the rest in labeled containers for the next day, so solo cooking feels planned rather than improvised. Clean as you cook and return tools to the same spot, so the next meal starts from a clear counter.

    8. Give Work a Corner That Closes Away

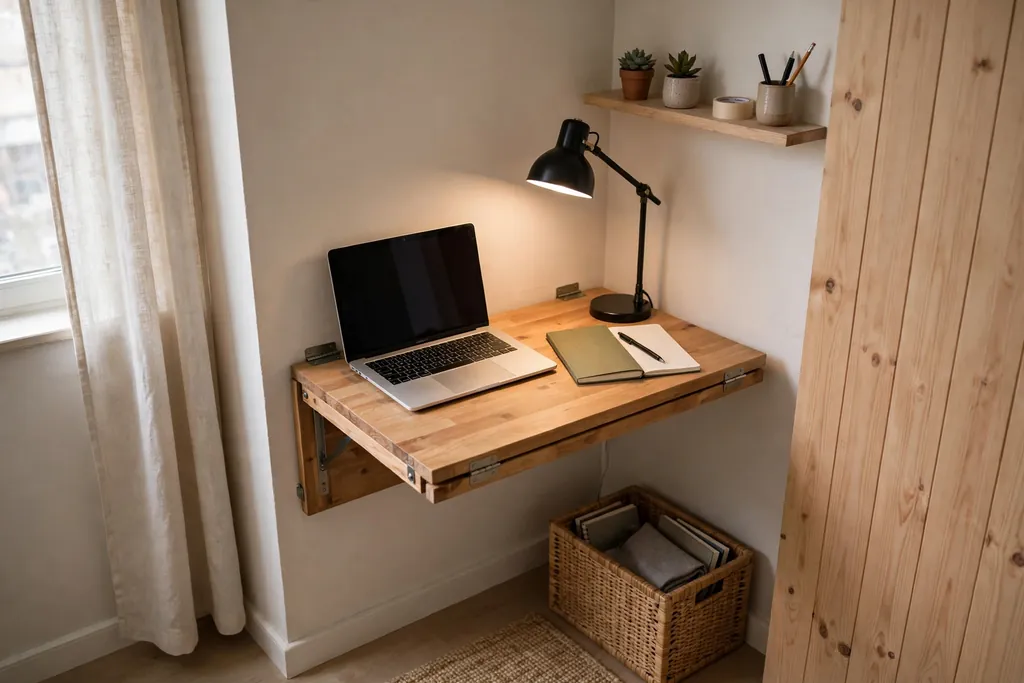
    Small apartment work corner with a fold down wall desk, laptop and task lamp.

    A work corner needs a boundary, even if it is only a desk against one wall and a lamp that switches off at the end of the day. Face the desk away from the bed if you can, keep work papers in one tray or drawer, and put the laptop charger in a fixed spot so cables do not spread across the room.

    A fold down desk is a good fit here, since it folds flat against the wall when you finish and leaves the room free for relaxing in the evening. At day end, close the laptop, clear the desk top and switch the task lamp off, which signals that work is done. That small closing ritual matters most when you live alone, because the room has to shift from office to home without anyone else marking the change.

    9. Hang a Gallery Wall That Tells Your Story

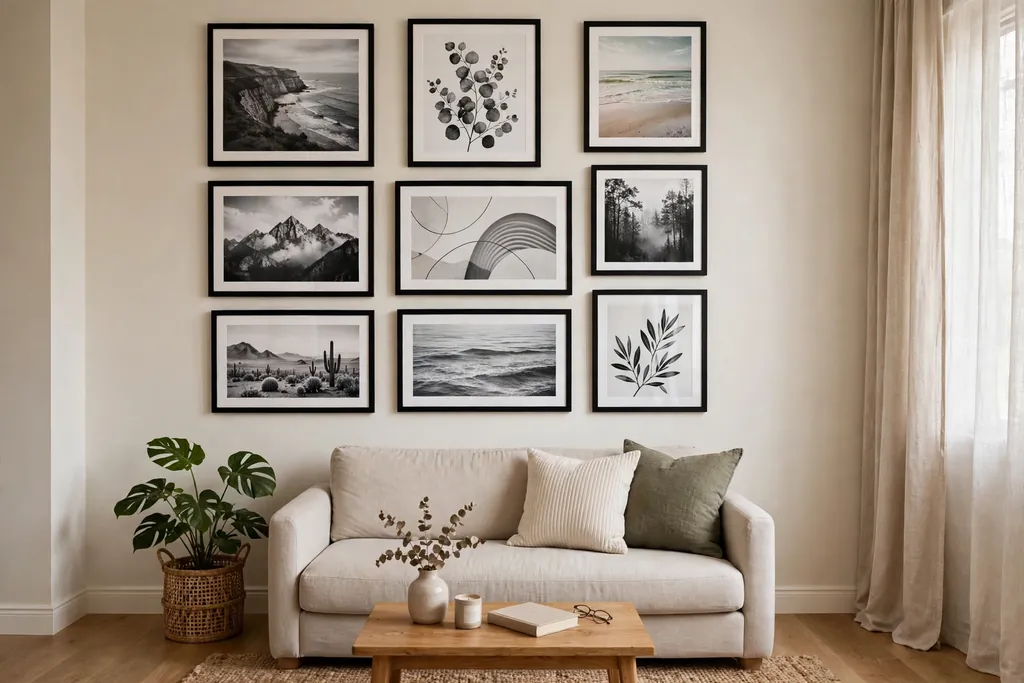
    Apartment living room gallery wall of framed prints in matching black frames above a small sofa.

    A gallery wall pulls a plain rental wall together, and adhesive strips or picture ledges keep it deposit friendly. Start on the floor: lay out frames in one row or a loose grid, leave even gaps, and photograph the layout before anything goes up. Mix frame sizes but keep one finish, such as black or light wood, so prints, photos and posters look like a set rather than a random collection.

    Choose pieces that mean something to you, such as travel photos, prints from a favorite artist, or photos of people you love, rather than filling frames for the sake of it. Use strips rated for the weight of each frame, press firmly, and wait the time stated on the pack before hanging. Swap one print each season if you like change, rather than rehanging the whole wall.

    10. Grow Plants at Three Heights

    Apartment living room with houseplants at three heights by a window.

    Plants bring life to a solo apartment, and placing them at three heights keeps them from crowding a single surface. A tall floor plant fills an empty corner, trailing plants on a shelf soften a storage wall, and a small potted plant on a table or windowsill adds green at eye level when you sit down.

    Match each plant to the light it will actually get, since bright direct light by a window suits different plants than a dim corner, so check the plant label before buying. Group plants that need similar watering together, use saucers under pots on wood floors, and start with three or four plants rather than a dozen so care stays manageable. Watering them on the same day each week can become a quiet, steady ritual in a home you keep alone.

    11. Layer Light for Evenings at Home

    Small apartment living room in the evening lit by warm light from a floor lamp and a table lamp.

    A single ceiling light flattens a small room and makes it feel harsh in the evening. Three levels of light work better: ambient light from a ceiling fixture or a tall floor lamp, task light from a table lamp or reading lamp where you sit, and a low glow from a small lamp on a shelf or a candle style light on a side table.

    Put the brightest light where you need to see, such as beside the reading chair, and keep the overall level soft in the evening. Dimmable bulbs or smart plugs let you shift from a bright daytime room to a calm evening one without rewiring anything, which matters in a rental where electrical changes are limited. Switch off the harsh overhead light after dinner and let the lamps set a calmer mood for the night.

    12. Add a Scent Ritual for Coming Home

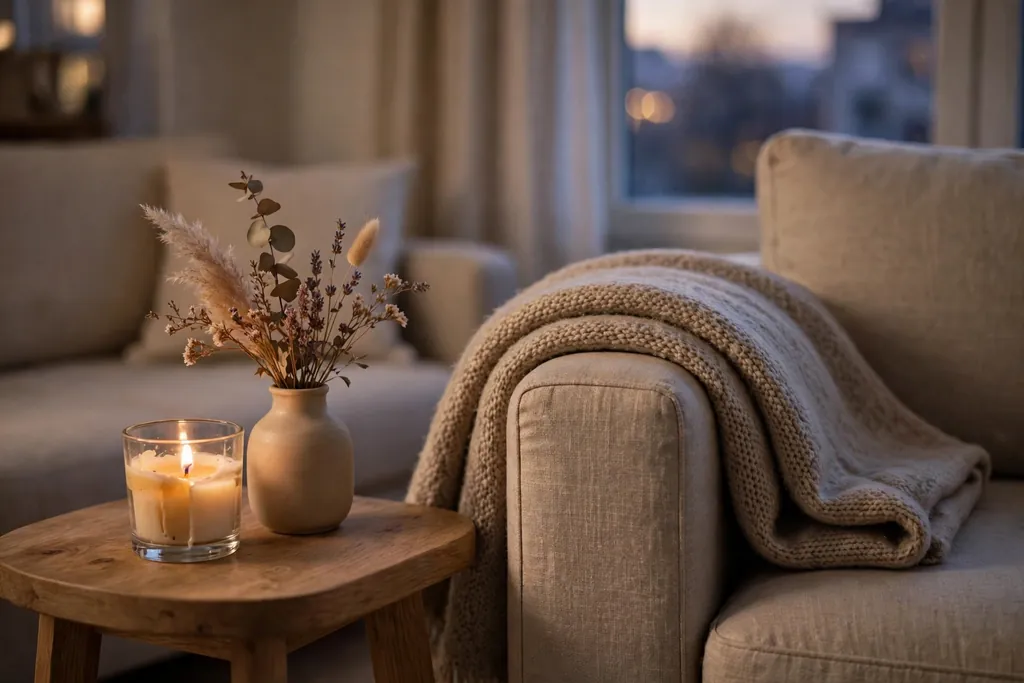
    Apartment side table with a lit candle, dried flowers and a folded throw in soft evening light.

    Scent is one of the fastest ways to make a rented room feel like yours. Choose one scent for the entry or living room, such as a candle, a diffuser or a linen spray, and use it at the same point in your day, for example when you come home or while you cook dinner. Over time, that scent becomes tied to being home.

    Keep it simple and safe: place candles away from curtains, bedding and plants, never leave a flame burning when you leave the flat, and choose a scent strength that suits a small room rather than a large one. If you share walls with neighbors, a gentle scent is kinder than a strong one. One consistent scent beats several competing ones, and it costs little compared with new furniture.

    13. Keep a Hosting Table Ready for Friends

    Small apartment dining table set for four friends with simple plates and glasses.

    Living alone does not mean living without guests. A table that seats four turns takeout into a dinner with friends, and a round pedestal table suits a tight corner because chairs tuck in and no one bumps a corner leg. A small rectangular table suits a longer wall and can double as a second work surface on busy days.

    Keep a simple hosting kit in one place: placemats, napkins, a few extra glasses and a low centerpiece that can move aside. Store it together so inviting friends does not start with a hunt through cupboards, and keep the centerpiece low so people can talk across the table. A solo apartment that can welcome a few friends easily feels larger and warmer than one set up only for one person.

    14. Upgrade the Bathroom With a Shelf and Matching Set

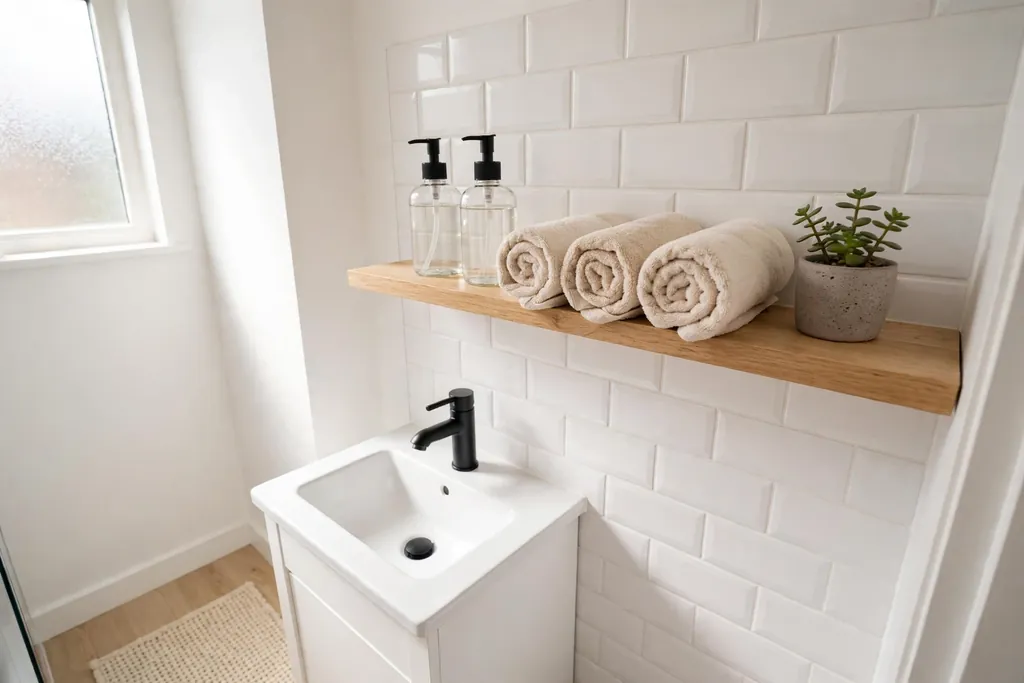
    Tidy small apartment bathroom with a wall shelf, matching soap dispensers and rolled towels.

    A bathroom upgrade does not need a remodel. Add one shelf above the toilet or beside the mirror for daily items, replace mismatched bottles with matching dispensers for soap and lotion, and use matching towels in one color. A small tray on the counter holds items you use each morning and keeps the rest in a cabinet.

    Keep the shelf to daily items and check weight limits and fixings before mounting anything above a sink or toilet. A washable bath mat and a hook for a robe or towel also cut clutter, and a small plant that suits humidity adds a soft touch. The result is a bathroom that feels cared for, even in a basic rental, and a morning routine that starts in a tidy room.

    15. Make a Hobby Corner That Packs Away

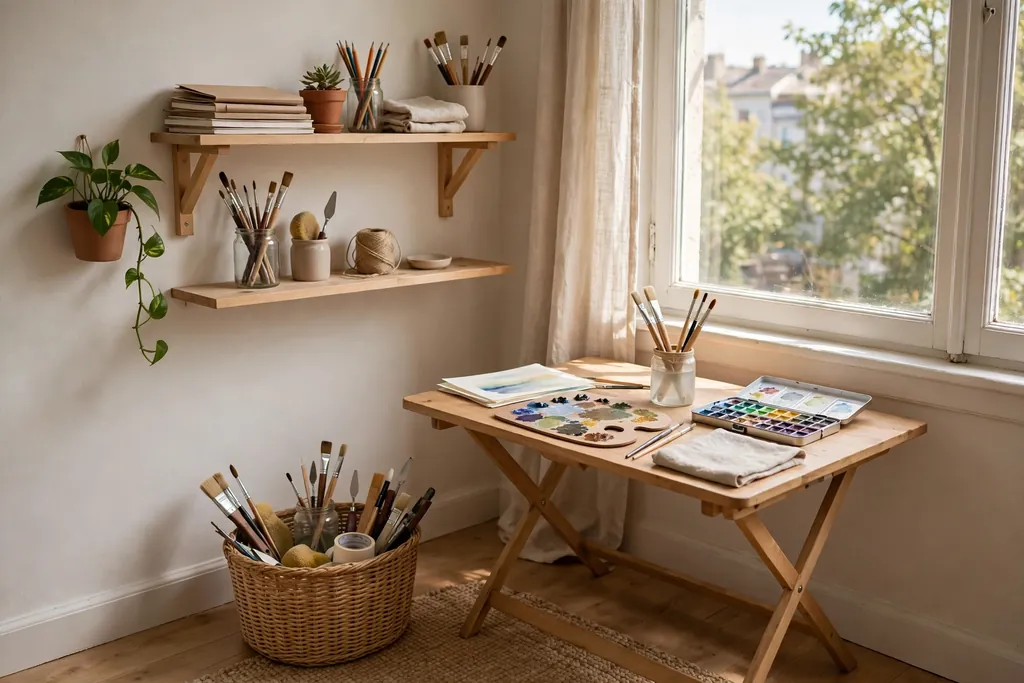
    Small apartment hobby corner near a window with a folding table and painting supplies in a basket.

    A hobby corner keeps a pastime visible enough to use but tidy enough to live with. Choose a spot near light and storage, such as a shelf unit with one basket for supplies and a folding table that can be set up and put away. Label the basket so supplies return to the same place after each session.

    This works for painting, sewing, photography, reading or music practice. Keep the setup time under five minutes, or the hobby will stay packed away, and if the hobby needs a larger surface, use the dining table for the session and clear it fully afterward, so the room returns to normal use. A hobby corner gives solo evenings a focus beyond a screen, and a reason to look forward to time at home.

    16. Set Up a Laundry System That Runs Itself

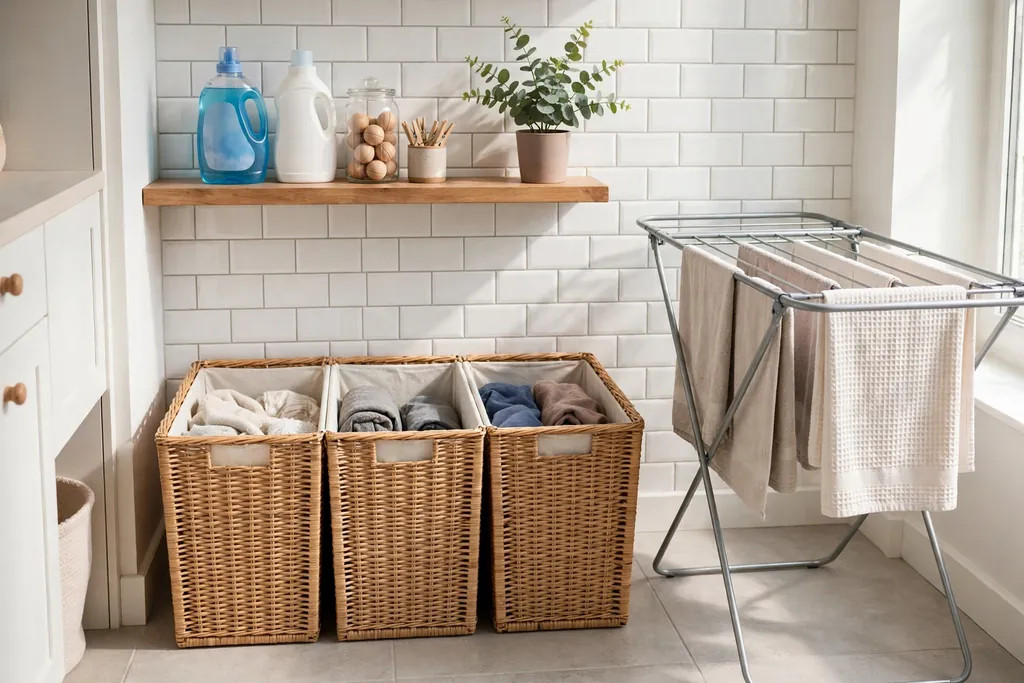
    Apartment laundry corner with divided hampers, detergent on a shelf and a folding drying rack.

    A laundry system saves time every week. Keep a divided hamper or two labeled baskets, one for darks and one for lights, near the bedroom or bathroom, store detergent and stain remover in one spot, and hang a small rail or hooks for clothes that air dry. A folding drying rack that stores flat behind a door suits a small flat well.

    For work clothes, add a steamer or a small ironing board that folds flat. Iron or steam the next day’s outfit the night before, and put clean clothes away the same day they are washed, so laundry never becomes a chair pile by midweek. A system like this keeps a solo apartment feeling managed, even in a busy week.

    17. Tame the Closet With Labeled Bins

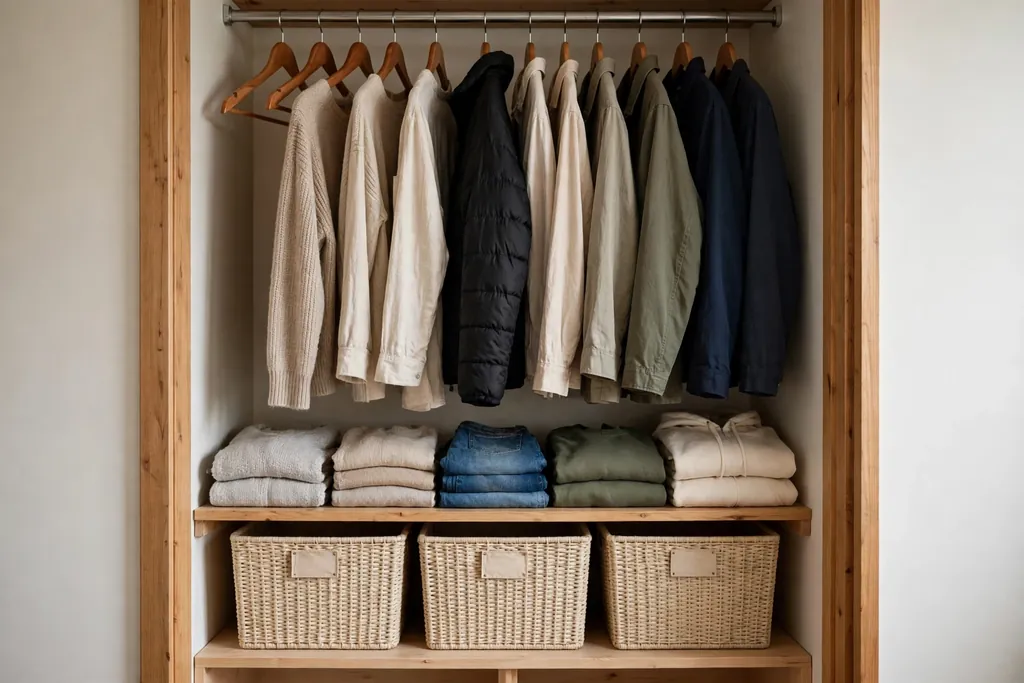
    Organized small apartment closet with matching hangers, folded items and labeled storage bins.

    Small closets fail when everything is tossed on one shelf and nobody knows what belongs where, and that is just as true for one person as for a shared flat. Give each category a labeled bin or a color coded box for accessories, chargers and seasonal items, and keep shared household items, such as cleaning supplies, in one clearly marked bin.

    Measure the closet before buying bins, and leave one empty bin for donations or items waiting to go elsewhere. A hanging shelf organizer works well for folded clothes in a closet with no drawers, and a quick reset once a week keeps even the best bin system from drifting. When everything has a home, tidying becomes putting things back rather than deciding where they belong.

    18. Build a Window Seat for Quiet Breaks

    Apartment window seat bench with a cushion, a book and baskets underneath beside a bright window.

    A window seat turns an otherwise empty stretch of wall into a reading spot, a dining bench, or a place to sit while you put on shoes, and the space underneath can hold shoes, bags or spare bedding. Build it from a low bench or a pair of sturdy cabinets topped with a cushion, rather than a fixed structure, if you rent.

    A cushion in a washable cover keeps the seat practical beside a window that may collect condensation or dust. Add a small shelf or a wall hook nearby for a book, a phone or a cup, so the seat works as a complete spot rather than a bare bench, and keep the cushion firm enough to sit on for an hour. Use the spot for a short break, not as extra storage, or it will fill with boxes fast.

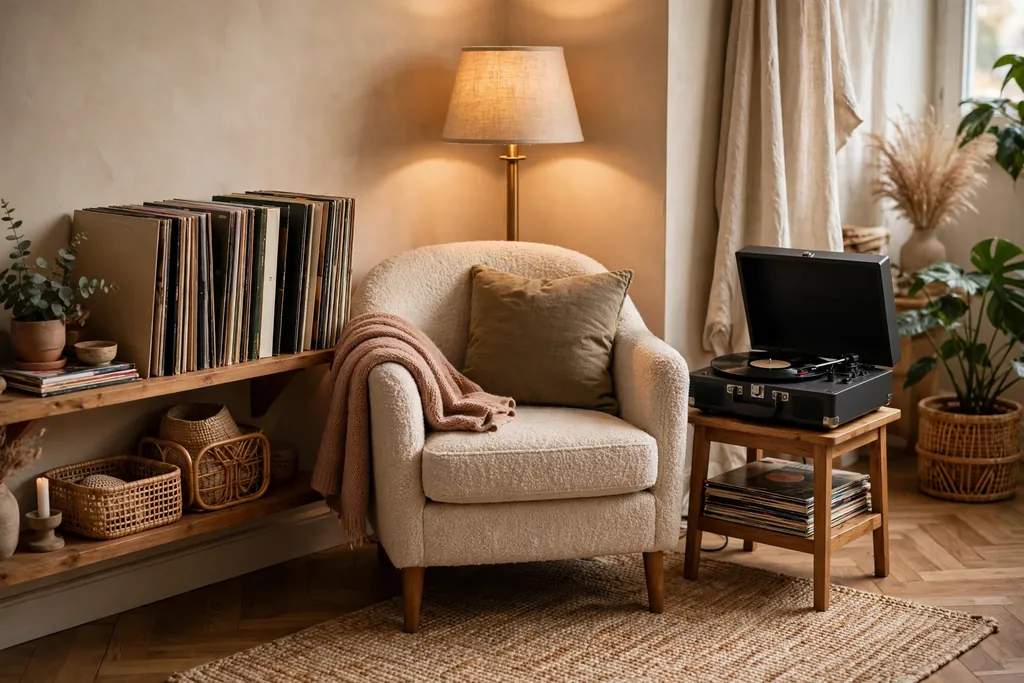
    19. Create a Listening Corner for Music and Quiet

    Cozy apartment listening corner with a chair, a record player on a small stand and records on a shelf.

    A listening corner gives solo evenings a sound of their own. Place a comfortable chair, a small stand for a record player or speaker, and a shelf for records or books near a lamp, and keep the setup to what you actually use. The corner becomes a place to sit with music, a podcast or silence, without a screen in front of you.

    Keep cables tidy with a small basket or clip, and place the speaker where it sounds best in the room rather than pushed into a corner by default. If you play music late, keep the volume low enough for neighbors, and use headphones for late night listening. A corner set aside for listening makes time alone feel chosen rather than empty.

    20. Keep a Weekly Reset Ritual

    Tidy small apartment living room after a weekly reset with a clear coffee table and a basket for throws.

    A solo apartment stays calm with a short weekly reset, not a long deep clean. Pick one day and one hour, walk the room with a basket, and return anything that has drifted out of place: throws folded, remotes in their tray, papers filed, and surfaces wiped. A ten minute reset each evening plus a longer weekly pass keeps the room calm without a big effort.

    Pair the reset with something pleasant, such as music or a favorite drink after the work is done, so the habit sticks. The zoning approach in these studio apartment decorating ideas helps here too: when every activity has a zone, the reset is simply returning items to their zones. A home that resets easily is a home that stays welcoming, even when the week has been busy.

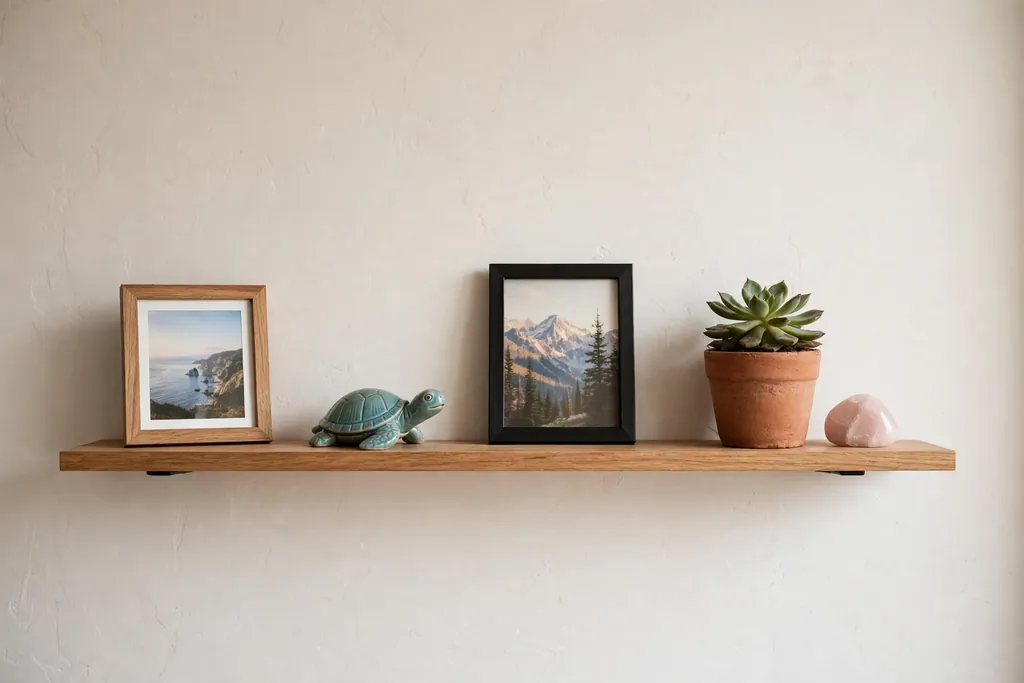
    21. Style One Memory Shelf, Not a Whole Wall of Clutter

    Apartment wall shelf with personal keepsakes, framed photos, a travel souvenir and a small plant.

    A memory shelf lets you show the objects that matter most without turning every surface into a display. Choose one shelf, pick five to seven items, such as a travel souvenir, a framed photo, a gift from a friend and a small plant, and leave space between them so each item can be seen.

    Rotate the shelf with the seasons or after a trip, swapping one or two items rather than rebuilding the whole display. Keep fragile items away from door swings and high traffic edges, and dust the shelf during your weekly reset. One shelf done with care says more about the person who lives there than a crowded room full of objects, and it gives guests something real to ask about.

    22. Keep a Guest Ready Basket in One Place

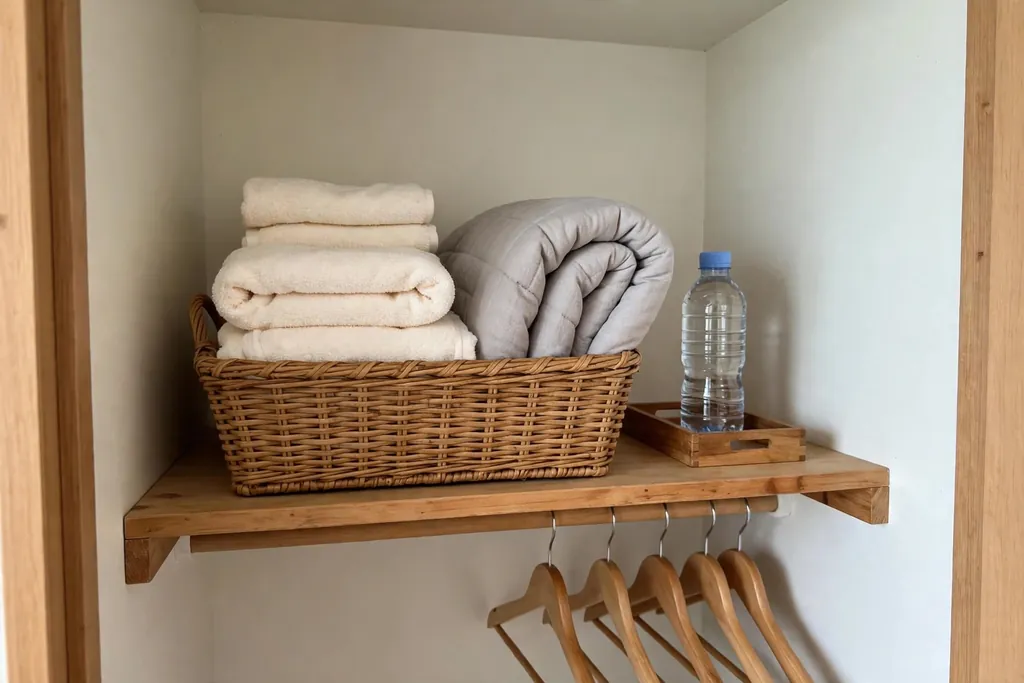
    Small apartment closet shelf with a guest ready basket holding clean towels and spare bedding.

    A guest ready setup means you can host an overnight guest without a scramble. Keep clean spare bedding, a towel, a spare toothbrush set and a phone charger in one basket or bin in a closet, and when a guest stays, add a small tray with water and a lamp near the sofa bed or spare mattress.

    Check the basket once a season, wash the bedding, and replace anything used, so it is always ready. For more ideas on setting up a small apartment for guests and daily life, see these college apartment decor ideas. A home that can welcome someone at short notice feels generous and settled, and it reminds you that living alone and living well with others go together.

    Conclusion

    A solo apartment feels like home when it fits the life you actually live in it. Start with a calm base and clear zones, add light, textiles and plants for warmth, and build small rituals for mornings, work, meals and rest. Keep hosting simple, keep storage honest, and let one or two personal touches, such as a gallery wall or a memory shelf, carry the character of the room. Try one or two ideas this weekend, live with them for a week, and adjust before adding more. Save this list for your next apartment refresh, and pick the solo apartment idea you want to try first.

    FAQs

    How do I make a solo apartment feel less empty?

    Start with the senses and the routines, not with more furniture. Layer light at more than one level, add textiles you can touch, place plants at different heights, and give mornings and evenings a small ritual, such as a morning drink in the same spot or a lamp switched on after dinner. A room that sounds, smells and feels lived in will feel fuller than a room that is simply filled with objects.

    What should I buy first when moving into a solo apartment?

    Buy for sleep, seating, light and storage first: a proper bed and bedding, one comfortable chair or sofa, lamps at two levels, and a way to store clothes and everyday items out of sight. Decorative pieces come after the daily basics work, since a pretty room that sleeps badly or has nowhere to put things will not feel like home for long.

    How can I host friends in a small solo apartment?

    Keep a table that seats four, a few extra glasses and plates stored together, and a low centerpiece that moves aside easily. Cook one simple shared dish or order takeout, and keep the hosting kit in one place so inviting friends does not start with a hunt through cupboards. Guests remember warmth and a clear place to sit more than a large menu or a perfect room.

    Is it worth decorating a rented solo apartment?

    Yes, if you choose changes you can take with you or remove cleanly. Rugs, curtains, cushions, art on adhesive strips, freestanding shelves and plants all change a room without damage, and they move to your next place. Check your lease before painting or drilling, photograph walls before you hang anything, and keep original fixtures so you can restore the room when you move out.

    How do I keep a solo apartment tidy without spending hours cleaning?

    Give every category a home, use baskets and trays to group small items, and run a short weekly reset plus a ten minute evening tidy. When work, cooking, laundry and hobbies each have a zone, tidying is just returning items to their zones. Remove one item for every new decorative piece you add, so the room stays comfortable instead of crowded.

    How do I make a solo apartment feel personal on a small budget?

    Use what you already own and what costs little: photos in matching frames, one accent color repeated in cushions and a vase, plants grown from cuttings, and a memory shelf with a few meaningful objects. Secondhand furniture in a calm base color also fits well, since a plain sofa cover or a coat of paint on a small table can tie mixed finds together. Personal does not mean expensive; it means chosen.

  • 22 Bedroom Curtain Ideas to Refresh Your Space

    22 Bedroom Curtain Ideas to Refresh Your Space

    Sheet No.: 61
    Brand: Dwell Ovell (dwellovell.com)
    Author: Clara Bennett
    Parent keyword: Bedroom Curtain Ideas
    Keyphrase: bedroom curtain ideas
    Slug: bedroom-curtain-ideas
    Categories: Bedroom (primary: Bedroom)
    Publish slot: Sept 16, 2026, 8:00am America/New_York
    Status: Draft file only (do not publish)

    A. SEO Brief

    Intent: Help readers choose and hang bedroom curtains that suit their light, privacy, room size and budget. Readers want ideas they can picture and copy, with practical tips on fabric, length, hanging height and lining.

    Primary keyphrase: bedroom curtain ideas
    Secondary terms: sheer bedroom curtains, blackout bedroom curtains, velvet bedroom drapes, cafe curtains, Roman shades bedroom, linen curtains, bedroom window treatments

    Sheet title: “22 Bedroom Curtain Ideas to Refresh Your Space”
    Count note: Sheet count is 22, which is above 10, so the count is kept exactly at 22. The article delivers 22 distinct numbered ideas, numbered continuously 1 to 22.

    Article title / H1: 22 Bedroom Curtain Ideas to Refresh Your Space
    SEO title (51 characters): 22 Bedroom Curtain Ideas to Refresh Your Space Fast
    Meta description (160 characters): Discover 22 bedroom curtain ideas, from sheer linen and velvet drapes to cafe curtains, Roman shades and blackout layers, with simple hanging tips for any room.
    Slug: bedroom-curtain-ideas

    Internal links used (verified live dwellovell.com URLs only):
    – https://dwellovell.com/plaid-bedroom-ideas/ (plaid bedroom ideas)
    – https://dwellovell.com/hygge-bedroom-ideas/ (hygge bedroom ideas)
    – https://dwellovell.com/winter-bedroom-ideas/ (winter bedroom ideas)
    – https://dwellovell.com/fall-bedroom-decor-ideas/ (fall bedroom decor ideas)

    Research limits: No live competitor research or search volume checks were claimed for this draft. No prices, products, measurements, statistics or brand endorsements are stated. Tips are general decorating guidance. All internal links above were fetched live from dwellovell.com during drafting.

    B. Complete Article

    22 Bedroom Curtain Ideas to Refresh Your Space

    Curtains do more than cover a bedroom window. They soften light, add privacy, frame the view and bring color and texture into a room that is often kept plain for sleep. A sheer panel can make a small room feel lighter, while a lined drape can make a large room feel settled at night. The right choice depends on how much light you want in the morning, how dark you need the room at night, and how much wall space you have around the window. These 22 bedroom curtain ideas cover fabrics, hanging styles, linings and small room solutions, so you can start with one window or plan a full room refresh.

    Key Takeaways

    • Start with light and privacy: decide how much morning light and night darkness you need before you pick a fabric.
    • Hang curtains high and wide when you can, so the window looks larger and panels do not block daylight when open.
    • Pair a sheer layer with a heavier layer for a window that works in both daytime and nighttime.
    • Match curtain weight to the room: light linen for airy rooms, velvet or lined drapes for cold or dark rooms.
    • Repeat the curtain color once more in bedding or a cushion, so the window treatment looks planned.
    • Choose washable fabric for bedrooms that get dust, pets or open windows, and check care labels before you buy.

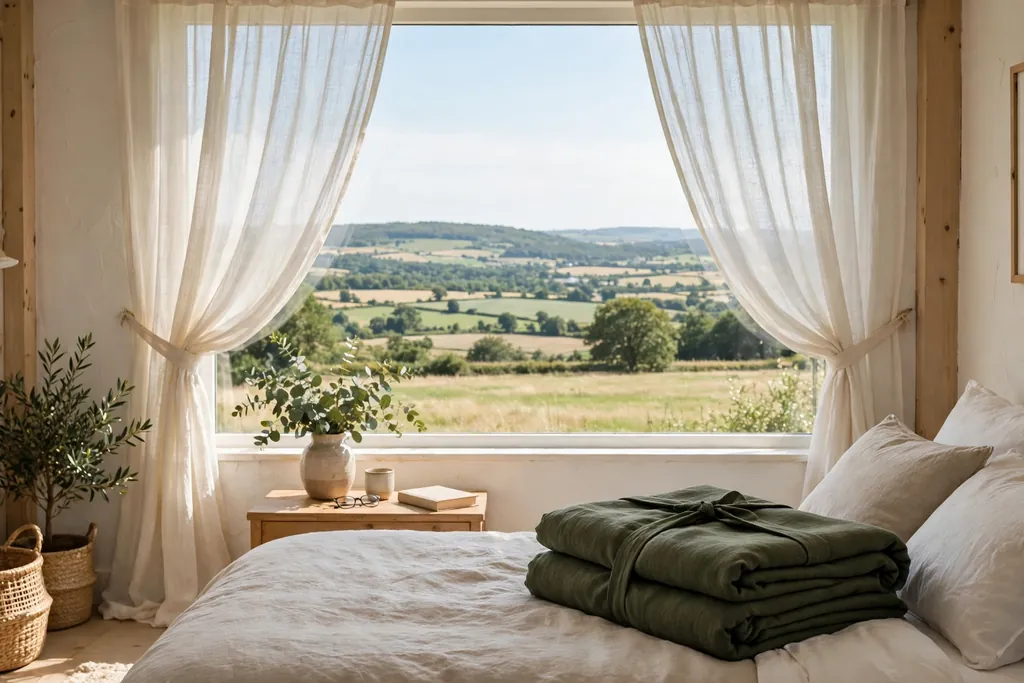
    1. Sheer White Linen Panels

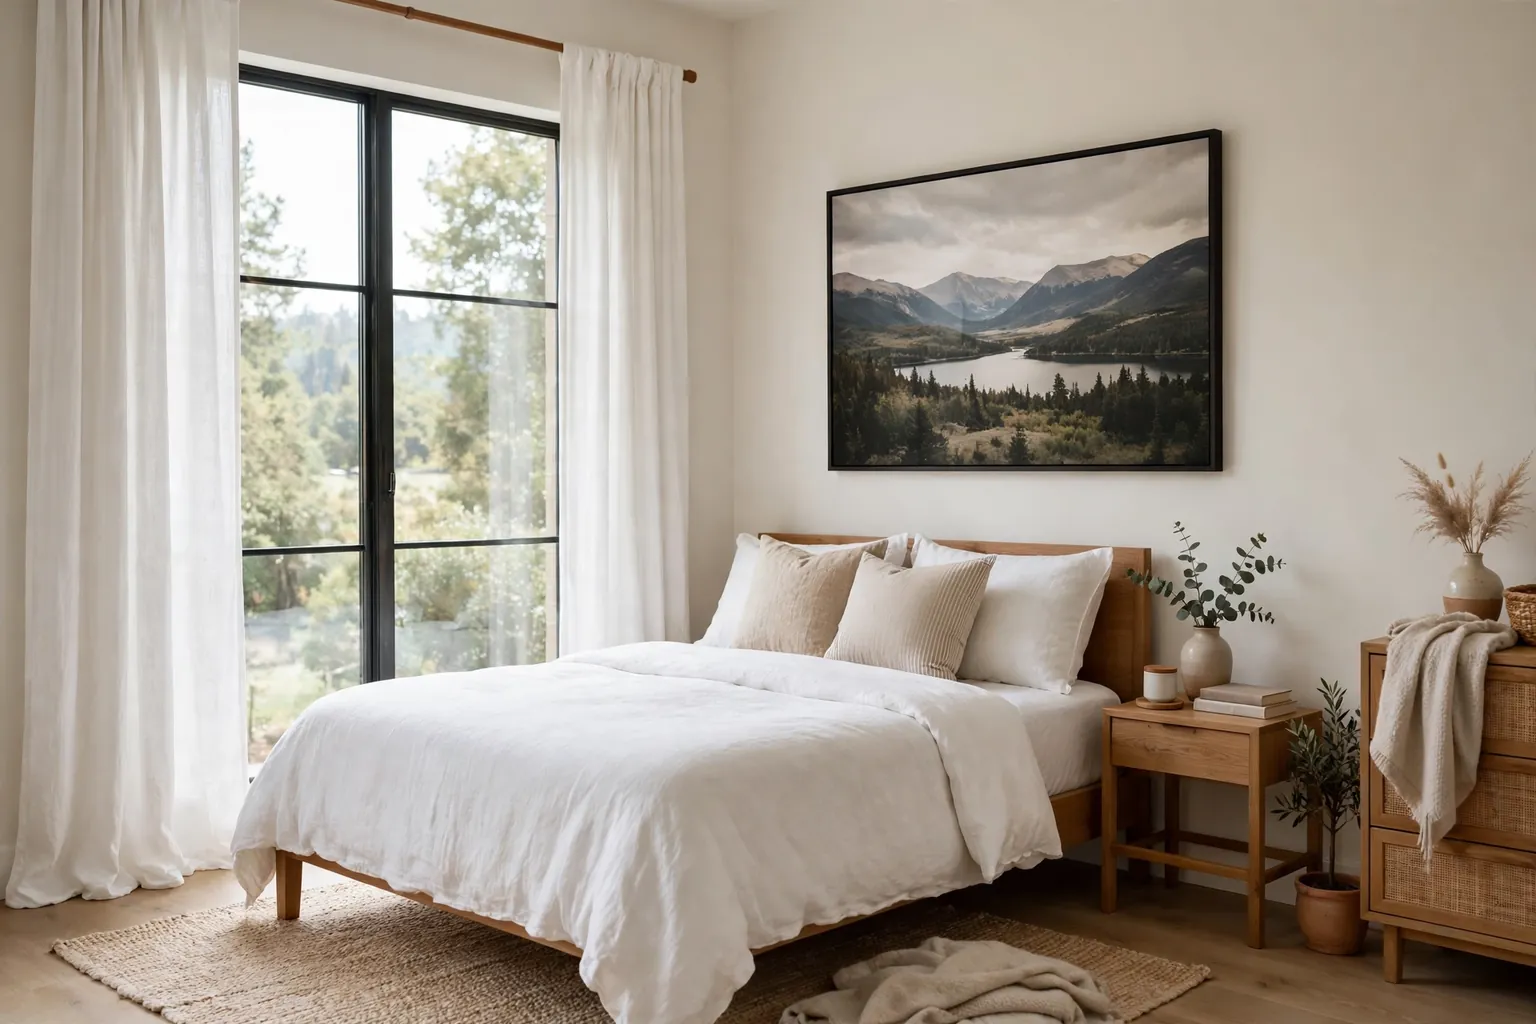
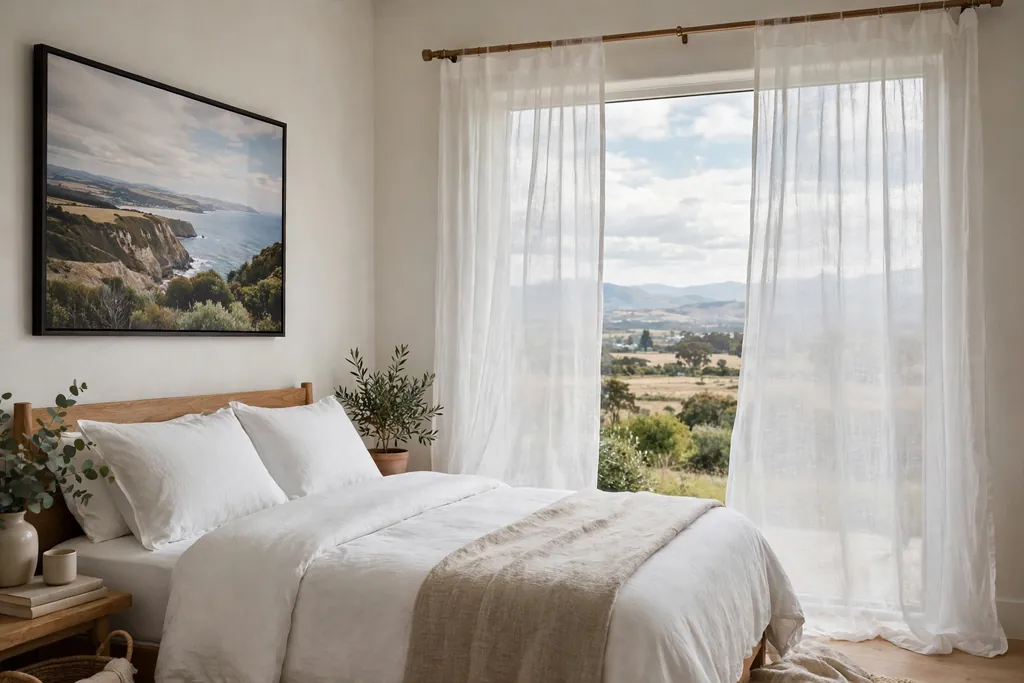
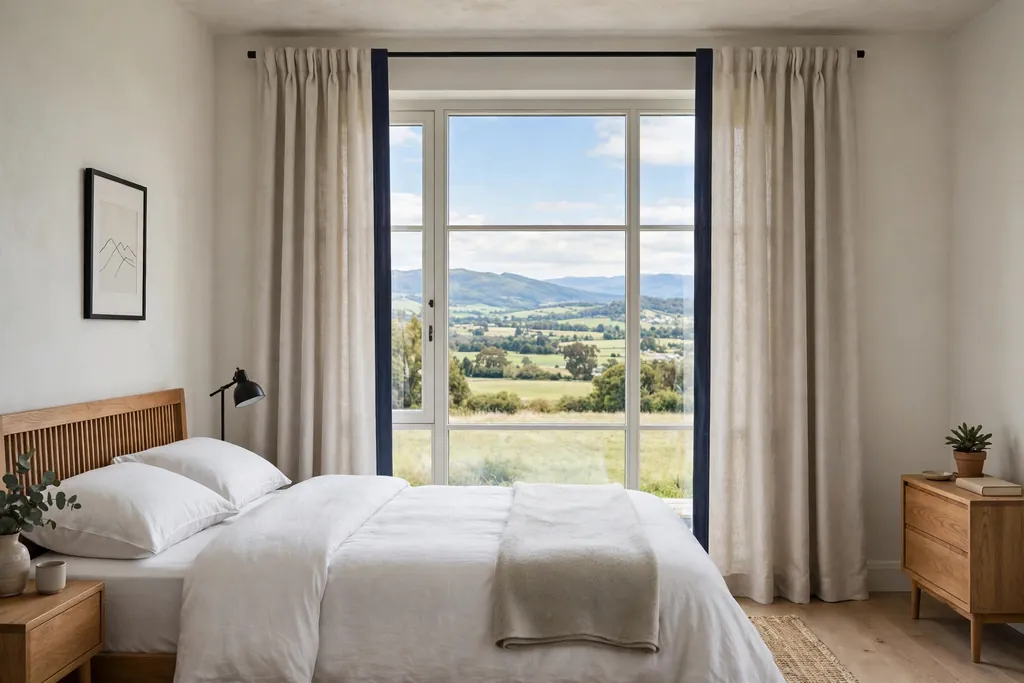
    Bedroom window with sheer white linen curtain panels in soft daylight.

    Hang sheer white linen panels for soft daylight that still gives daytime privacy. The loose weave lets light through in a gentle wash, so a north facing or small bedroom feels brighter, while the view from outside is blurred. This suits a bedroom where you wake with the light and do not need full darkness.

    Use a simple rod and let the panels fall to just above the floor, so they move a little with air from the window. Keep the rest of the window plain, with no heavy valance, so the sheer can do its work. Wash the panels often, since sheer linen shows dust more than a heavier fabric.

    2. Floor Length Velvet Drapes

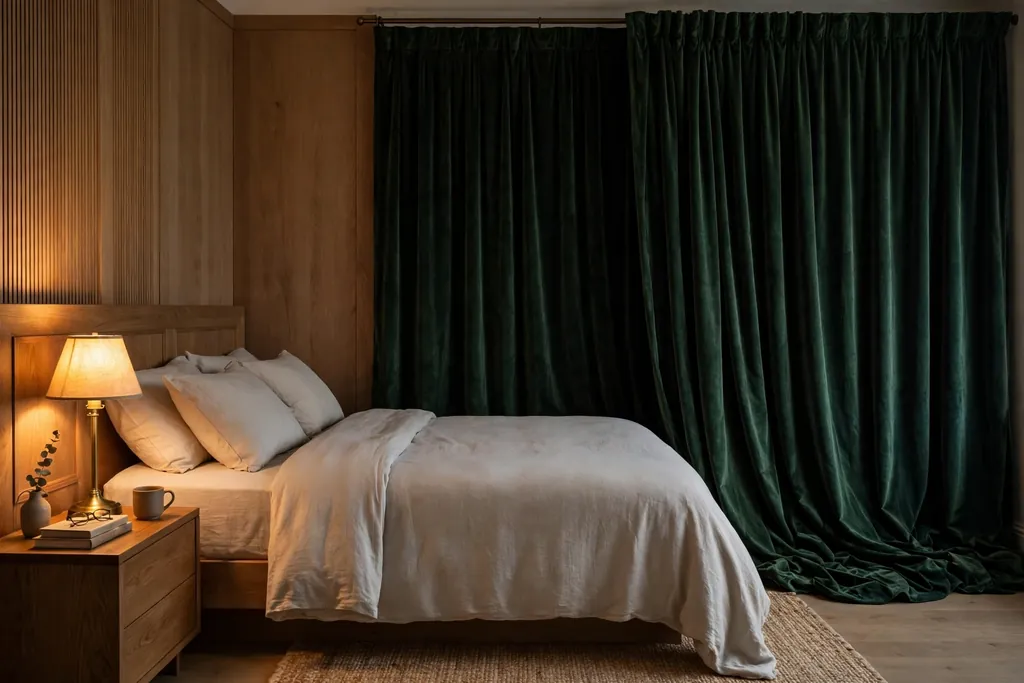
    Bedroom with deep toned velvet drapes falling to the floor beside a bed.

    Choose floor length velvet drapes in a deep, muted tone for a bedroom that needs warmth and a quieter feel at night. Velvet hangs in full folds and blocks more light than cotton, which helps the room feel settled in the evening. This suits a large bedroom, a tall window or a room with plain bedding that needs one rich texture.

    Hang the drapes from a sturdy rod, since velvet is heavy, and let them brush the floor rather than pool, so they stay clean and easy to vacuum around. Keep the wall color plain and the bedding mostly solid, so the velvet reads as a clear focal point. Check that the rod brackets suit your wall type before you hang a heavy pair.

    3. Layered Sheer and Blackout Panels

    Bedroom window with a sheer panel layered under blackout curtain panels.

    Layer a sheer panel closest to the glass with a blackout panel on the outside for a window that works all day. Open the blackout panels in the morning for soft light through the sheer, then close them at night for darkness and privacy. This pair suits a bedroom on a busy street, where daytime privacy and nighttime darkness both matter.

    Use a double rod, or a rod plus a track, so each layer moves on its own. Keep the sheer in white or cream and choose the blackout panel in a color from your bedding, so the layers look linked when closed. This approach is also the basis of the layered curtain idea in these hygge bedroom ideas, where soft light and a calm room come first.

    4. Cafe Curtains for the Lower Half

    Bedroom window with cafe curtains covering the lower half of the glass.

    Hang cafe curtains across the lower half of a bedroom window for privacy without losing top light. The rod sits at mid window height, so you can see sky and daylight above the fabric while the lower glass stays covered. This suits a ground floor bedroom, a window facing a path, or a small window over a dresser.

    Choose a washable cotton in a plain tone, a stripe or a small check, and keep the length just below the sill. A cafe curtain also works well above a bedside table, where a full length panel would bunch behind furniture. Leave the top of the window clear, and use a light fabric so the room does not feel closed in.

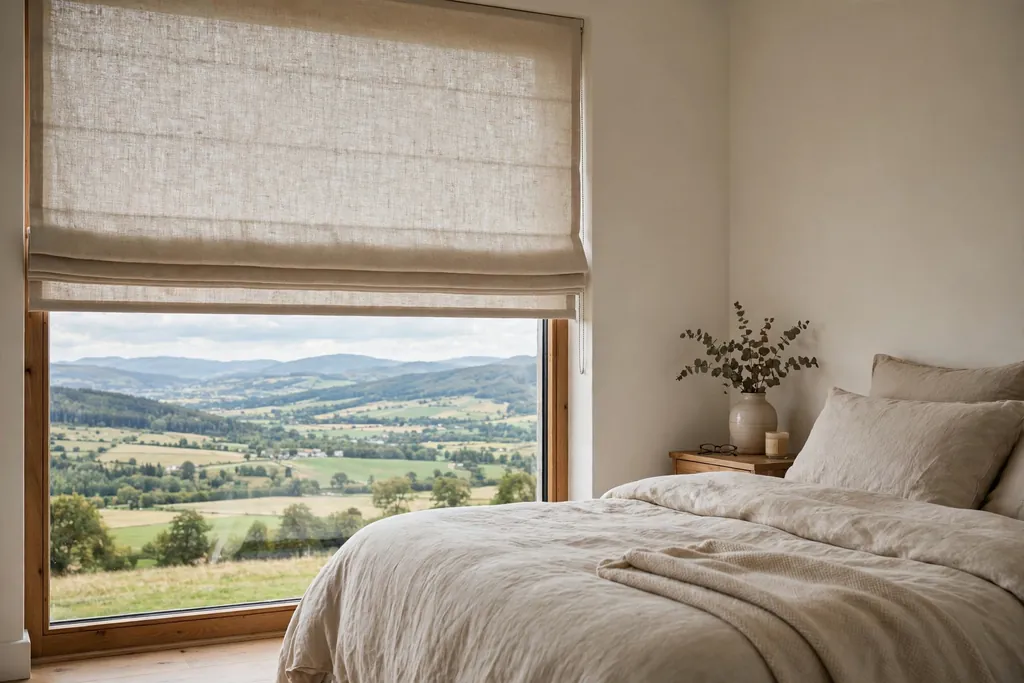
    5. Flat Linen Roman Shades

    Bedroom window with a flat linen Roman shade lowered over the glass.

    Fit flat linen Roman shades for a tailored window treatment that takes no floor space. When lowered, the shade gives a flat panel of fabric; when raised, it folds into neat horizontal pleats. This suits a bedroom where a bed, desk or radiator sits close to the window, and full curtains would get in the way.

    Choose a plain linen in a warm white, grey or soft green, and add a blackout lining if you need darkness for sleep. Measure the inside of the frame carefully if you mount inside, or cover the full frame if you mount outside for better light control. Keep the cord or chain tidy, and use child safe fittings in a family bedroom.

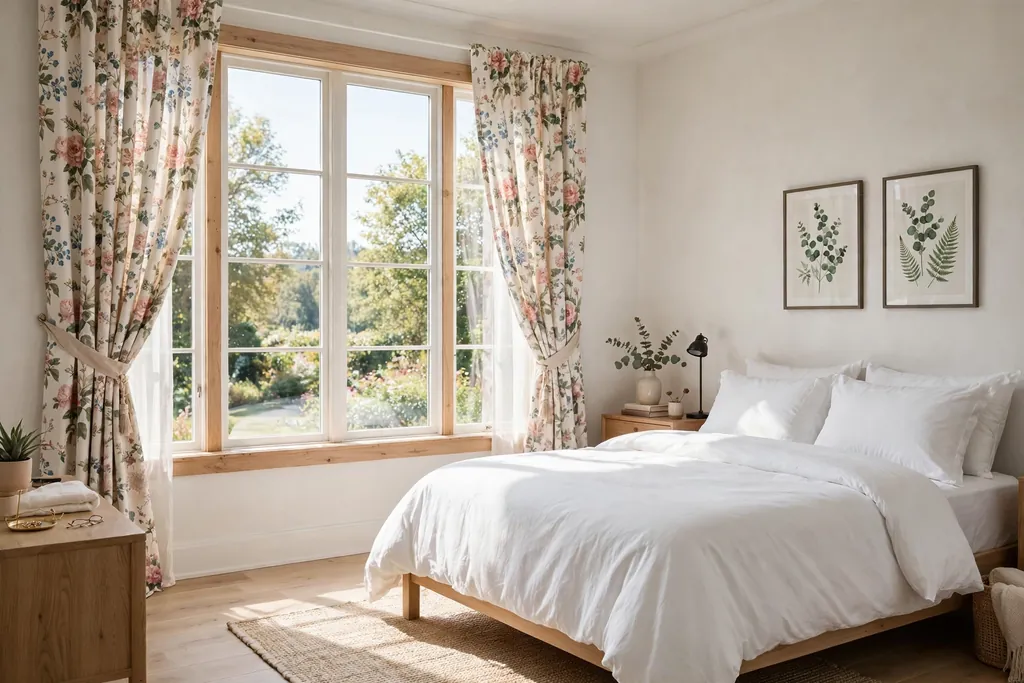
    6. Floral Print Curtains

    Bedroom with floral print curtains at the window and plain white bedding.

    Use floral print curtains to bring pattern to a plain bedroom wall. A medium scale floral in two or three colors adds interest without needing patterned bedding, and it suits a bedroom with white walls and solid furniture. Pick a print that shares one color with your bedding or rug, so the pattern links to the rest of the room.

    Keep bedding mostly plain when the curtains are patterned, and repeat one floral color in a single cushion. A busy floral on both curtains and bedding can make a small room feel crowded. For a calmer result, choose a floral with plenty of background space between blooms, rather than a dense, all over print.

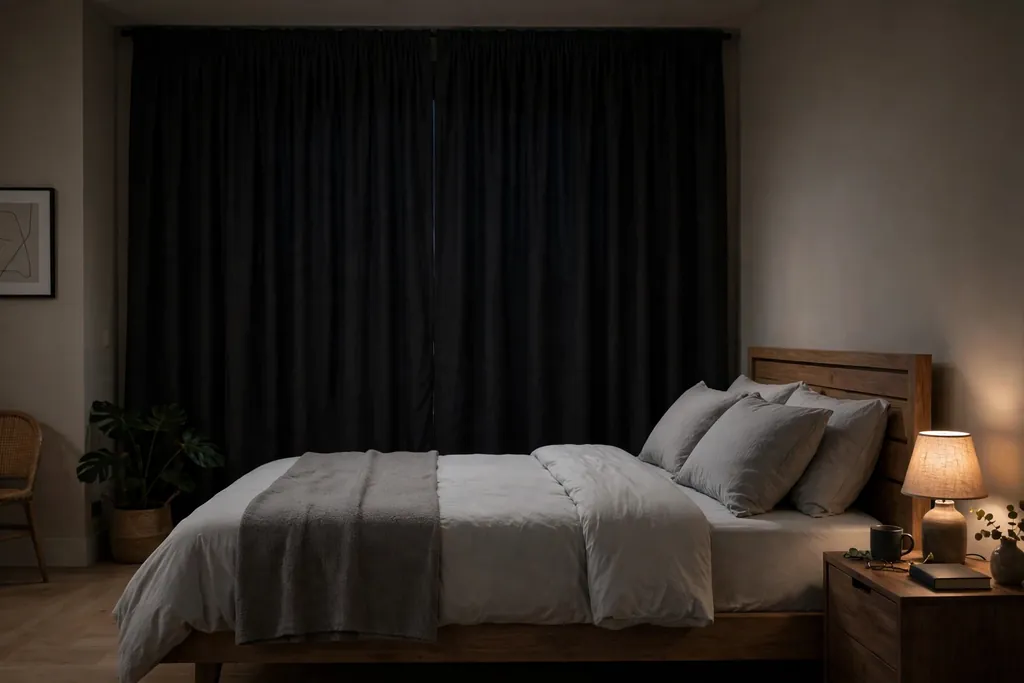
    7. Blackout Curtains for Darker Sleep

    Bedroom with closed blackout curtains keeping the room dark at night.

    Hang blackout curtains when you need a dark room for sleep, shift work or a bright street outside. Blackout fabric, or a blackout lining behind a face fabric, blocks most incoming light and also helps soften street sound a little. This suits a bedroom with a streetlight nearby, a light sleeper, or a room used for daytime rest.

    Close the panels fully at night and check for light gaps at the sides, since a narrow gap can still wake you. Hang the rod wide enough that the panels cover the frame plus a few inches on each side. Keep the fabric in a color you like in daylight too, since blackout curtains are often closed only at night but seen open during the day.

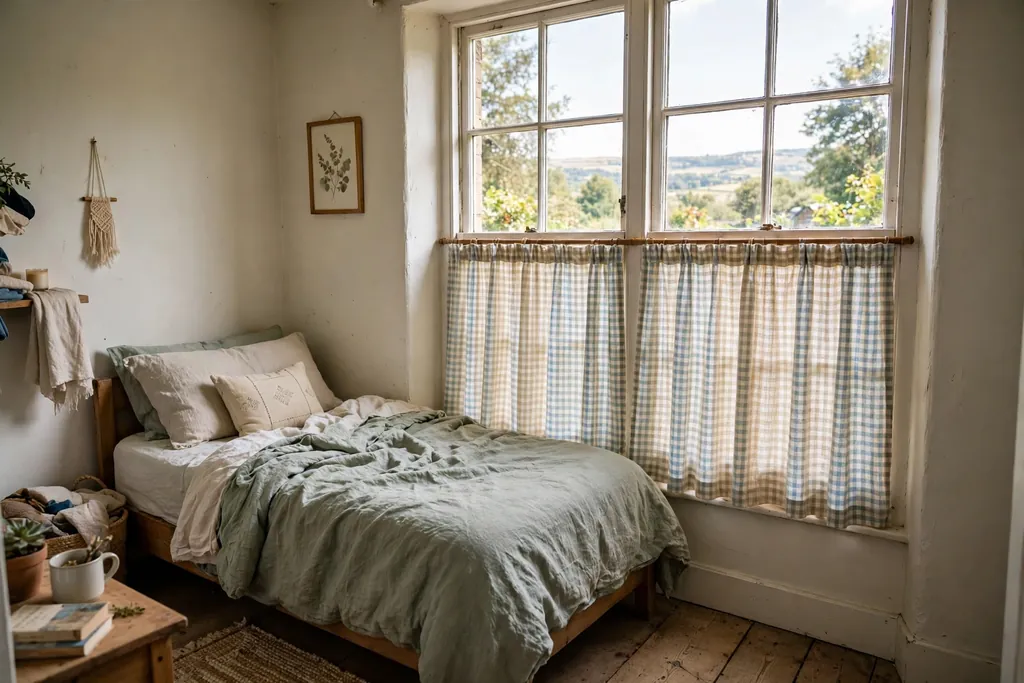
    8. Gingham Curtains for a Cottage Bedroom

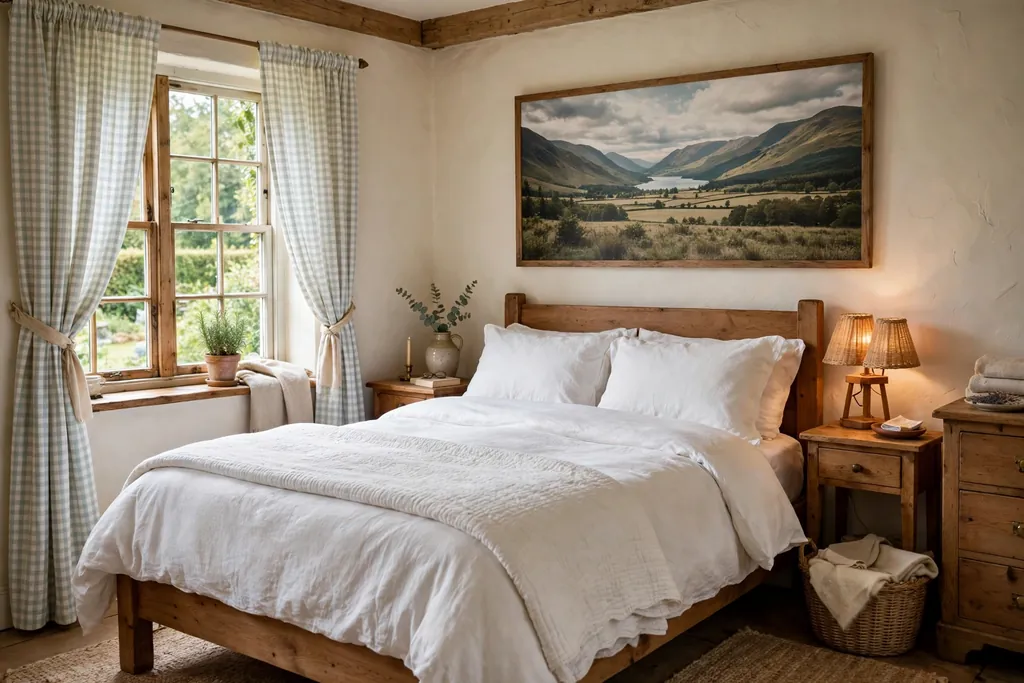
    Cottage bedroom with pale gingham curtains at the window.

    Choose gingham curtains for a light, cottage feel in a bedroom with wood furniture and simple bedding. The even check reads as fresh and informal, and it suits a small bedroom, a guest room or a country style room. A pale blue, sage or soft grey gingham keeps the look calm, while a red gingham feels bolder.

    Pair gingham curtains with white bedding and one solid cushion in a color from the check. Avoid adding a second strong pattern nearby, since gingham already gives the window plenty of detail. For more ways to use checks in a bedroom, from bedding to window treatments, see these plaid bedroom ideas.

    9. Vertical Stripe Curtains to Add Height

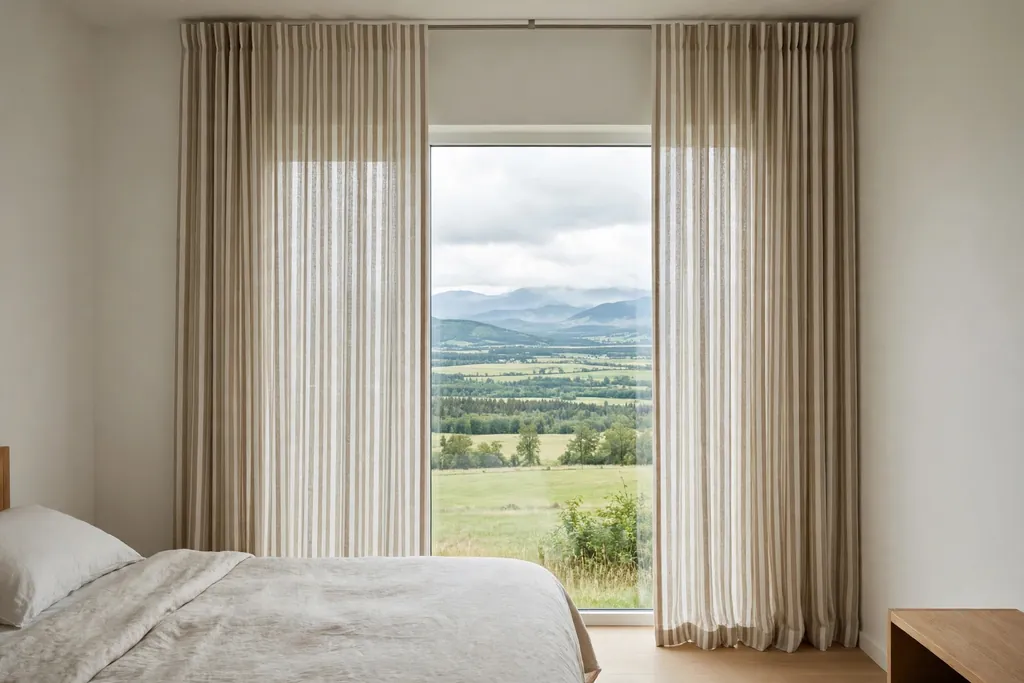
    Bedroom window with vertical stripe curtains hung high and falling to the floor.

    Hang vertical stripe curtains to make a bedroom window look taller. The eye follows the stripes upward, which helps in a room with a low ceiling or a short window. This suits a bedroom where the window feels small for the wall, or where you want a formal touch without a heavy fabric.

    Choose stripes in two close tones, such as cream and soft grey, rather than high contrast stripes, so the effect stays calm. Hang the rod near the ceiling and let the panels fall to the floor, so the full stripe length shows. Keep the rest of the room plain, since stripes already add a clear direction to the wall.

    10. Tie Top Cotton Curtains

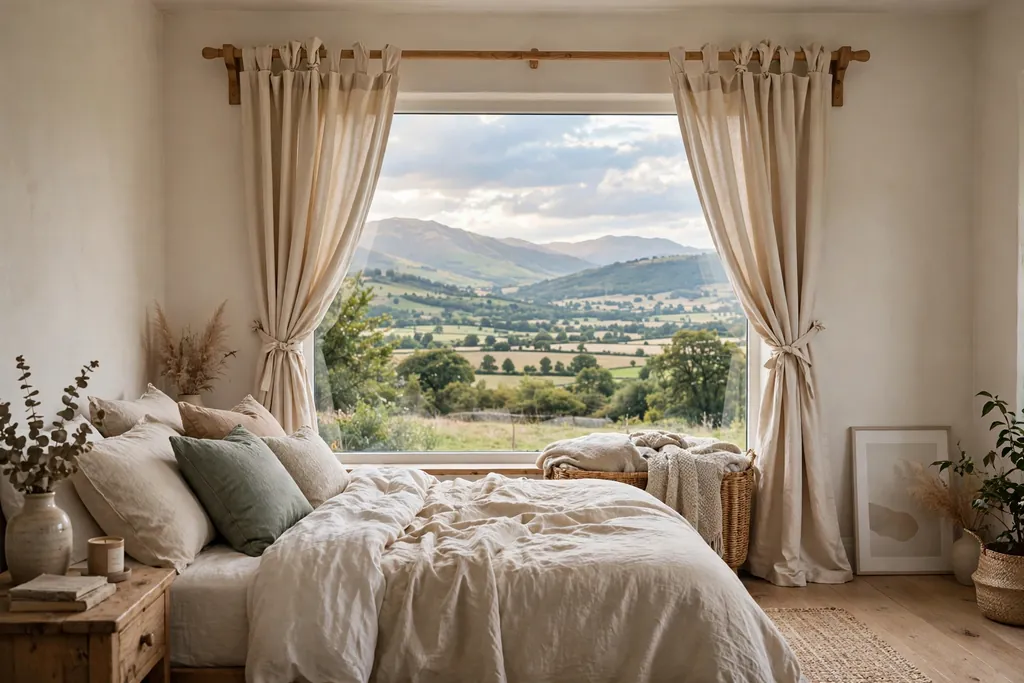
    Relaxed bedroom with tie top cotton curtains on a wooden rod.

    Use tie top cotton curtains for a relaxed, informal bedroom window. Fabric ties loop over the rod instead of rings or hooks, which gives a soft, handmade look and suits a guest room, a cottage bedroom or a room with a wooden rod. Cotton is light, washable and easy to change by season.

    Space the ties evenly so the panel hangs in gentle folds, and keep the fabric light enough that the ties hold without slipping. This style works best on a window you open and close less often, since ties slide less smoothly than rings. For a bedroom you dress daily, pair tie tops with a sheer panel on a separate rod for light control.

    11. Grommet Curtains for Easy Sliding

    Wide bedroom window with grommet curtains in even folds on a rod.

    Choose grommet curtains when you want panels that slide open and closed with one pull. Metal rings set into the top of each panel run along the rod, so the fabric folds into even waves and moves smoothly. This suits a bedroom window you open every morning, a sliding door to a balcony, or a wide window with heavy panels.

    Pick a rod that matches the grommet finish, and keep the panel width generous so the waves look full when closed. Grommet curtains suit plain, striped or lightly textured fabric, since the ring detail already gives the top a finished look. Avoid a very stiff fabric, which can make the waves look rigid instead of soft.

    12. Pleated Silk Look Drapes

    Tall bedroom window with pleated silk look drapes in a muted tone.

    Hang pleated silk look drapes for a formal bedroom with a tall window and classic furniture. Pinch pleats at the top give a tailored, even fold that holds its shape, and a soft sheen in the fabric catches lamplight in the evening. This suits a main bedroom where the window is a feature, and where you want the treatment to look finished even when open.

    Use a sturdy rod and pleat hooks, and let the drapes stack to the sides of the window when open so daylight still enters. Keep the color muted, such as champagne, dusty blue or soft grey, so the sheen does not dominate the room. Dry clean these drapes as advised on the label, since the pleats hold their shape better with care.

    13. Woven Wood Shades with Side Panels

    Bedroom window with a woven wood shade and plain linen side panels.

    Pair woven wood shades with simple side curtain panels for texture at the window and softness at the edges. The shades, in bamboo or a grass weave, filter light and add a natural tone, while the side panels frame the window and can be closed for privacy at night. This suits a bedroom with wood furniture, plants or a warm neutral palette.

    Mount the shades inside the frame for a clean fit, and hang the side panels just outside the frame so they do not block the shade when it is lowered. Keep the side panels in a plain linen that matches the lightest tone in the weave. Dust the shades with a soft brush, since woven textures collect dust in the gaps.

    14. Curtains Hung High and Wide

    Bedroom window with curtains hung high and wide, stacked clear of the glass.

    Hang the curtain rod close to the ceiling and wider than the window frame to make a bedroom window look larger. When open, the panels stack on the wall, not over the glass, so more daylight enters. When closed, they cover the full frame with no light gaps at the edges. This suits almost any bedroom, and it costs nothing beyond a longer rod.

    Measure the rod so it extends well past each side of the frame, and set it high enough that the panels fall to the floor. This trick works best with plain or lightly patterned fabric, since the larger panel area shows more of the print. If your ceiling is low, set the rod just below the cornice rather than on it, so the brackets sit firmly.

    15. Ceiling Mounted Track Curtains

    Bedroom bay window with curtains on a ceiling mounted track.

    Use a ceiling mounted track for curtains around a bay window, a corner window or a bed nook. A track bends around angles that a straight rod cannot follow, and it sits close to the ceiling for a clean line. This suits a bay window bedroom, a window that wraps a corner, or a sleeping nook you want to close off at night.

    Choose a track with smooth gliders, and hang panels that stack neatly at one end when open. For a bay, use one continuous track rather than three short rods, so the curtains move in one motion. Keep the fabric light to medium weight, since very heavy drapes can strain a ceiling track if the fixings are not rated for the load.

    16. Full Wall Curtains Behind the Bed

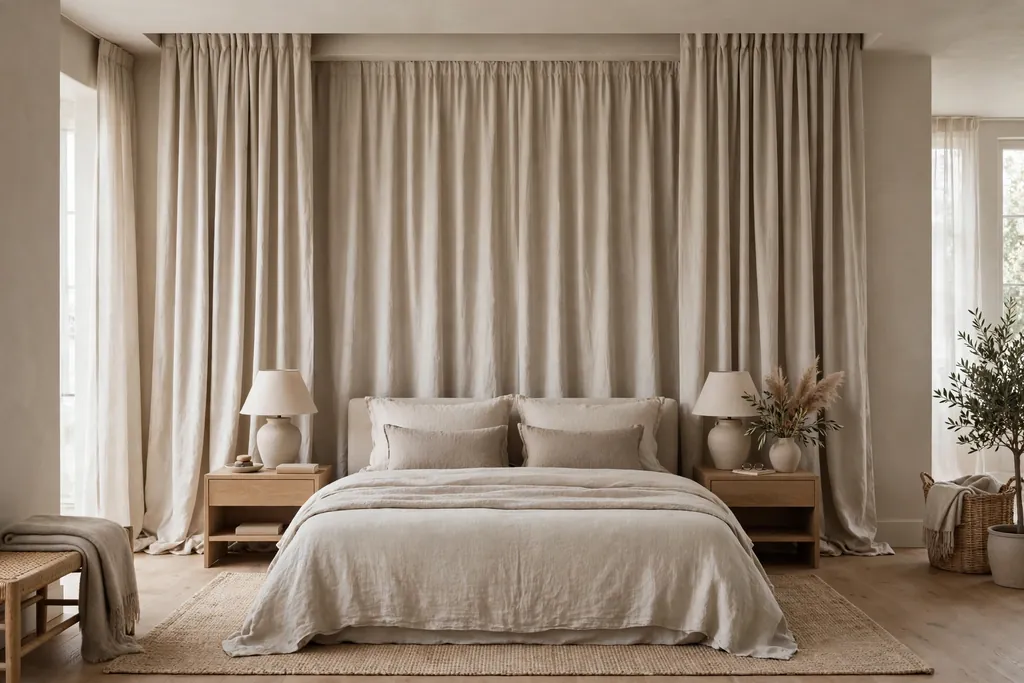
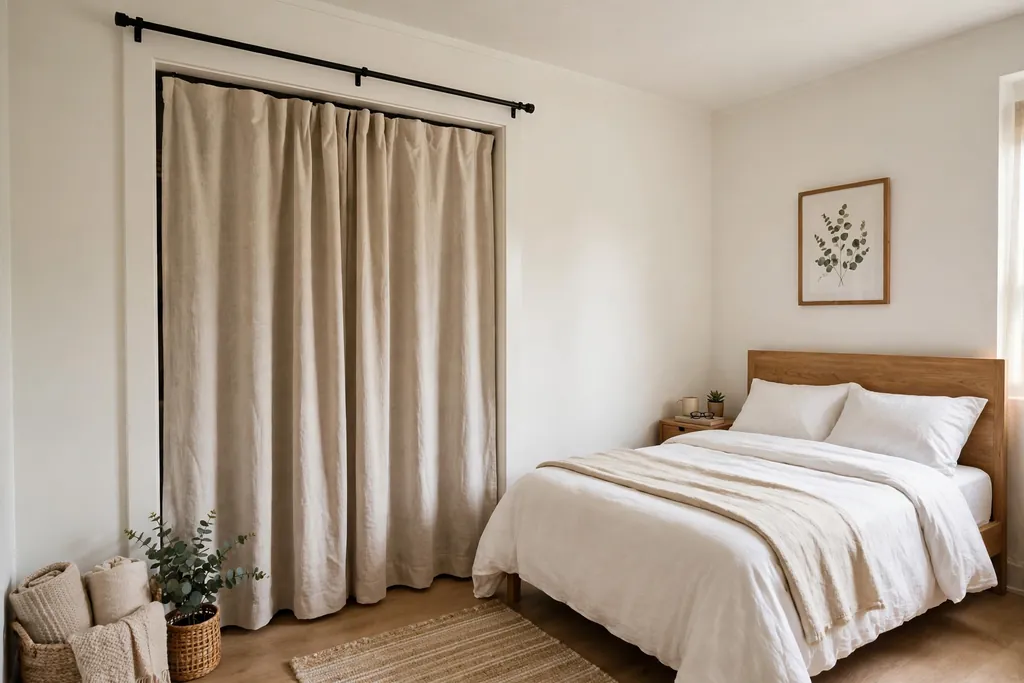
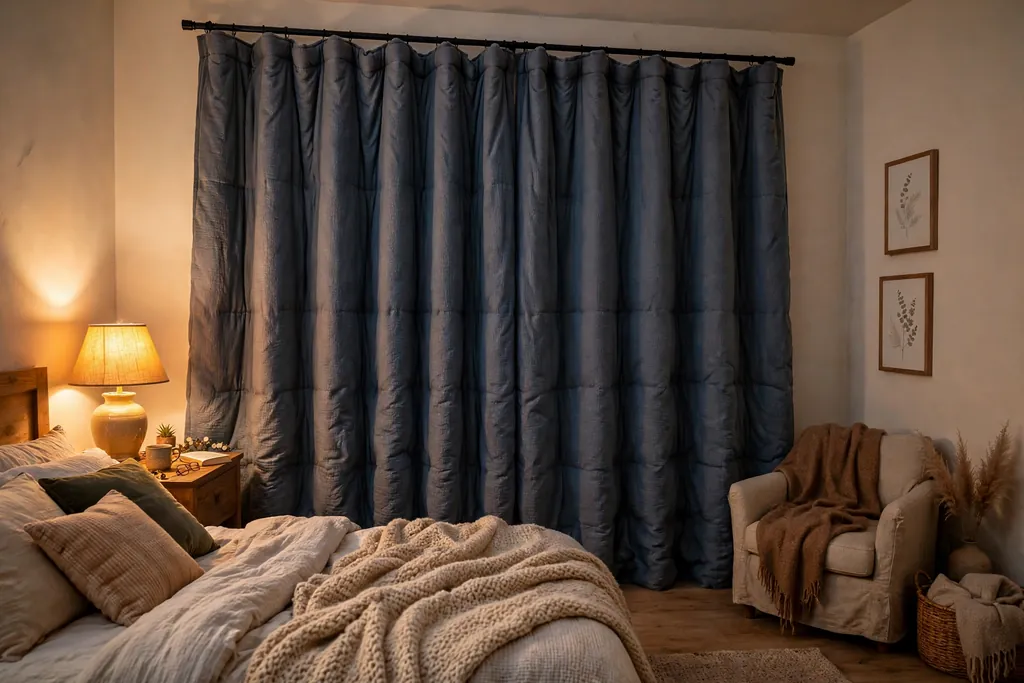
    Bedroom with full wall curtains hanging behind the bed from ceiling to floor.

    Hang full wall curtains behind the bed for a bedroom where the headboard wall needs softness and drama. Panels run across the whole wall, from ceiling to floor, and the bed sits in front of them, so the wall reads as fabric rather than paint. This suits a bedroom with a plain wall, a rental where you cannot paint, or a room that needs sound softening.

    Use a ceiling track or a long rod, and choose a fabric in a calm tone that works with your bedding, since it covers a large area. Keep the panels closed and even behind the bed, and leave the bed a few inches clear of the fabric so bedding does not catch. This idea also hides an uneven wall or a set of built in wardrobes behind a soft front.

    17. Curtains Instead of Closet Doors

    Bedroom closet opening covered by hanging curtain panels.

    Hang curtains in place of closet doors for a small bedroom where swinging doors take up floor space. A tension rod or a ceiling track holds the panels, which slide aside for full access to the closet. This suits a rental, a narrow bedroom or a closet with doors that no longer run well.

    Choose a medium weight cotton that hangs straight and covers the opening fully, with enough fullness that the panels meet without gaps. Match the curtain color to the wall or the bedding, so the closet reads as part of the room rather than a separate feature. Keep the original doors stored safely if you rent, so you can refit them later.

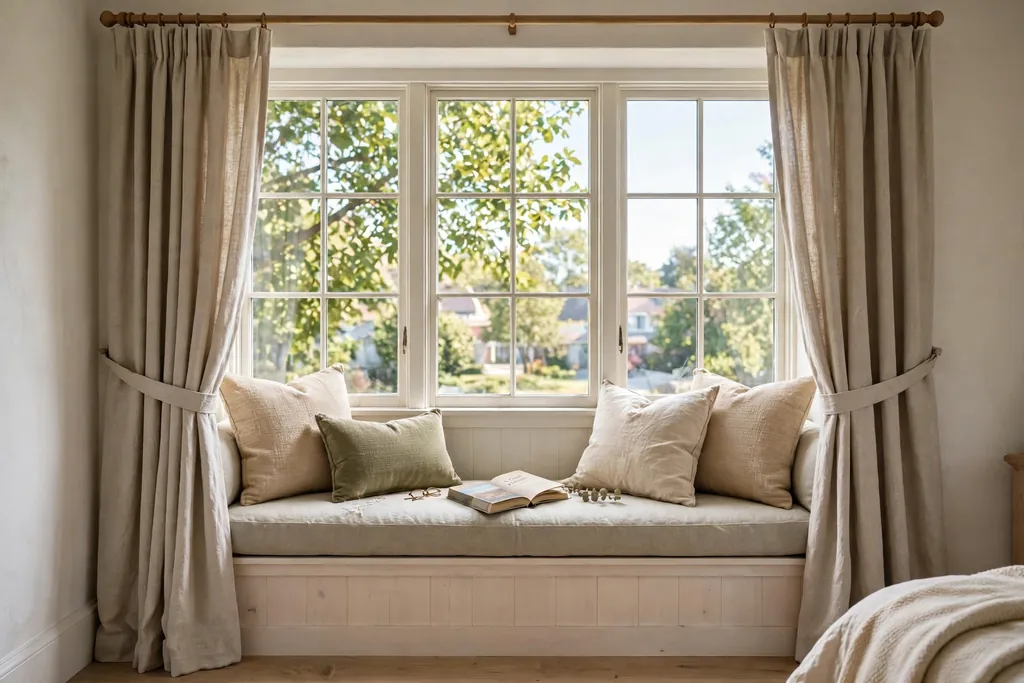
    18. Curtains Framing a Window Seat

    Bedroom window seat framed by side curtain panels with cushions.

    Frame a window seat with curtains on each side for a cozy reading spot that still gets daylight. Side panels, hung from a rod above the seat, soften the corners and make the seat feel like a small room within the room. This suits a bedroom with a bay window, a wide sill or a built in seat under the window.

    Hang the panels so they fall beside the seat, not across it, and keep them clear of the cushion. Use a washable fabric, since a seat area gets daily use and dust. Add a cushion in a color from the curtains, and keep the seat clear of clutter so it stays an invitation to sit, not a storage pile.

    19. Two Curtain Sets for Summer and Winter

    Bedroom window with light summer curtains and a folded heavier curtain set nearby.

    Keep two curtain sets, one light for summer and one heavy for winter, and swap them with the seasons. Light linen or cotton sheers suit warm months, when you want air and light, while lined or velvet panels suit cold months, when you want warmth and darkness. This suits a bedroom with changing light and temperature across the year, and it gives you a fresh look twice a year.

    Store the off season set washed, dry and folded in a labelled bag, so the swap takes minutes. The same seasonal swap idea works for bedding and throws, as shown in these fall bedroom decor ideas, where one textile change shifts the whole room. Keep the rod and hardware the same for both sets, so only the panels change.

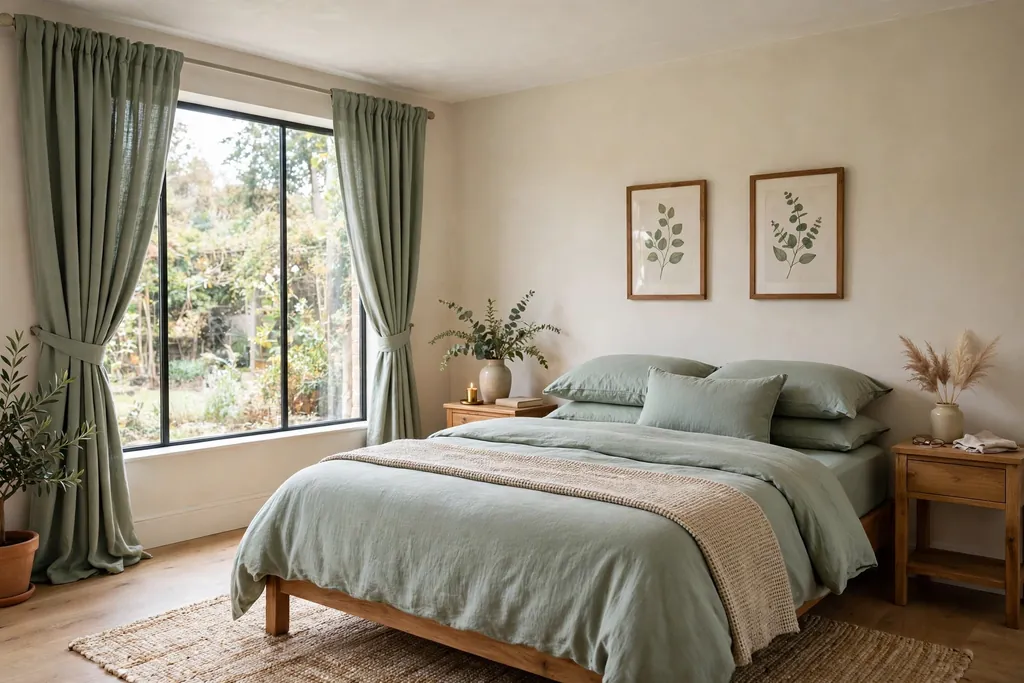
    20. Curtains Matched to Your Bedding

    Bedroom curtains in a color matched to the bedding and a cushion on the bed.

    Match your curtains to one color in your bedding for a room that looks pulled together without a full redecorate. Pick the secondary color in a duvet, quilt or cushion, rather than the main bedding color, so the curtains link to the bed without copying it. This suits a bedroom where the bed is already the focus, and the window needs to support it rather than compete.

    Repeat that color once more in a small item, such as a throw or a vase, so the link reads as planned. If you change bedding often, choose curtains in a neutral that works with several bedding sets, and use cushion covers to carry the accent color instead. Test the curtain fabric next to the bedding in daylight and lamplight before you commit.

    21. Curtains with a Contrast Trim

    Plain bedroom curtains with a contrast trim along the inner edge.

    Add a contrast trim, such as a border tape, a pom pom edge or a band of plain fabric along the leading edge, to plain curtains for a finished detail. The trim gives a simple panel a custom look, and it suits a bedroom where you want one small design note at the window. A trim in a bedding color ties the window to the bed without a patterned curtain.

    Keep the trim to one edge, usually the inner edge that shows when the curtains are closed, so the detail stays clear. Sew or iron on the trim before hanging, and check that it hangs straight when the panel is closed. Avoid a trim that is heavier than the curtain fabric, since it can pull the panel out of shape.

    22. Thermal Lined Curtains for Drafty Windows

    Bedroom window with thermal lined curtains closed in the evening.

    Choose thermal lined curtains for a bedroom window that feels cold or drafty in winter. A thermal lining adds a layer behind the face fabric, which helps the room feel warmer at night and gives extra darkness as well. This suits an older home, a single glazed window or a bedroom that cools quickly after sunset.

    Hang the panels so they meet in the middle without a gap, and let them fall to the floor or just below the sill, so cold air is less likely to slip behind them. Close them at dusk and open them in the morning for daylight and fresh air. For more winter window ideas, including lined curtains and draft control, see these winter bedroom ideas. Keep the lining clear of radiators and heaters, and follow the care label, since lined curtains are heavier to wash.

    Conclusion

    A bedroom curtain refresh starts with two questions: how much light do you want, and how much privacy do you need. Answer those first, then pick a fabric and a hanging style that fits your window, your budget and how often you open and close the panels. A sheer layer for daytime, a heavier layer for night, a rod hung high and wide, and one color repeated in the bedding will carry most bedrooms well. Start with the window you see first in the morning, live with the change for a week, and then decide if the other windows need the same treatment. Save this list for your next bedroom refresh, and pick the curtain idea you want to try first.

    FAQs

    What length should bedroom curtains be?

    In most bedrooms, curtains look best when they fall to just above the floor or brush the floor lightly. That length makes the window look taller and keeps the panels clear of dust on the floor. For a window over a radiator, a desk or a bedside table, a sill length or just below sill length panel is more practical, since a floor length panel would bunch behind furniture or block heat.

    Are sheer or blackout curtains better for a bedroom?

    It depends on your light needs. Sheers suit a bedroom where you like waking with daylight and need only daytime privacy, while blackout curtains suit a bedroom where you need darkness for sleep or a streetlight shines in at night. Many bedrooms use both: a sheer layer for the day and a blackout layer for the night, so you do not have to choose one or the other.

    How high and wide should I hang bedroom curtains?

    Hang the rod close to the ceiling and wider than the window frame, so open panels stack on the wall rather than over the glass. That trick makes the window look larger and lets in more daylight. For a standard window, a rod that extends well past each side of the frame and panels that fall to the floor will give the full effect, as long as the brackets suit your wall type.

    What curtain fabric is easiest to care for in a bedroom?

    Washable cotton and polyester blends are usually the easiest to care for, since they can be machine washed and hung to dry. Linen looks soft and natural but creases more and may need gentler washing. Velvet and silk look drapes need more care and are best dry cleaned as advised on the label. Check the care label before you buy, and choose a washable fabric if the bedroom gets dust, pets or open windows.

    Can renters hang bedroom curtains without drilling?

    Yes, in many cases. Tension rods fit inside a window frame with no fixings, adhesive hooks can hold light panels on smooth surfaces, and a ceiling track may suit a room where wall drilling is not allowed, if your lease permits it. Keep the original hardware and blinds so you can restore the window when you move out, and check your lease before fitting anything that leaves marks.

    How do I stop light gaps at the sides of bedroom curtains?

    Use a rod that extends past the frame, choose panels with enough fullness to meet in the middle, and add a blackout lining if the face fabric lets light through. A wraparound rod, which curves back to the wall at each end, also helps close side gaps. Check the window at night with the room light off, so you can see exactly where light still enters, and adjust the rod or panel width to cover those spots.

  • 32 Pink Kitchen Ideas That Feel Both Cozy and Current

    32 Pink Kitchen Ideas That Feel Both Cozy and Current

    Sheet No.: 60
    Brand: Dwell Ovell (dwellovell.com)
    Author: Clara Bennett
    Parent keyword: Pink Kitchen Ideas
    Keyphrase: pink kitchen ideas
    Slug: pink-kitchen-ideas
    Categories: Kitchen & Dining (primary: Kitchen & Dining)
    Publish slot: Sept 15, 2026, 5:00pm America/New_York
    Status: Draft file only (do not publish)

    A. SEO Brief

    Intent: Help readers add pink to a kitchen in a way that feels warm and current, whether they want a full cabinet repaint or one small change. Readers are looking for ideas they can picture and copy, with practical tips on pairing pink with wood, white, brass and marble.

    Primary keyphrase: pink kitchen ideas
    Secondary terms: blush pink kitchen, pink kitchen cabinets, pink kitchen decor, dusty rose kitchen, pink tile backsplash, pink kitchen island, pink kitchen accessories

    Sheet title: “32 Pink Kitchen Ideas That Feel Both Cozy and Current”
    Count note: Sheet count is 32, which is above 10, so the count is kept exactly at 32. The article delivers 32 distinct numbered ideas, numbered continuously 1 to 32.

    Article title / H1: 32 Pink Kitchen Ideas That Feel Both Cozy and Current
    SEO title (53 characters): 32 Pink Kitchen Ideas That Feel Both Cozy and Current
    Meta description (156 characters): Discover 32 pink kitchen ideas, from blush cabinets and patterned tile to retro fridges and cozy nooks, with simple tips to add pink without a full remodel.
    Slug: pink-kitchen-ideas

    Internal links used (verified live dwellovell.com URLs only):
    – https://dwellovell.com/how-to-style-open-shelves/ (open shelves styling)
    – https://dwellovell.com/colors-for-your-kitchen-cabinets/ (cabinet colors)
    – https://dwellovell.com/kitchen-window-decor-ideas/ (window decor)
    – https://dwellovell.com/corner-kitchen-cabinet-ideas/ (corner cabinets)
    – https://dwellovell.com/fall-kitchen-decor-ideas/ (seasonal kitchen decor)
    – https://dwellovell.com/everyday-dining-table-decor/ (dining table decor)
    – https://dwellovell.com/kitchen-balcony-ideas/ (small kitchen and balcony seating ideas)

    Research limits: No live competitor research or search volume checks were claimed for this draft. No prices, products, measurements, statistics or brand endorsements are stated. Tips are general decorating guidance. All internal links above are from the verified list supplied for this post.

    B. Complete Article

    32 Pink Kitchen Ideas That Feel Both Cozy and Current

    Pink in a kitchen can be soft and calm, or bold and cheerful, depending on the shade and where you use it. A pale blush works like a warm neutral next to white and wood, while a deeper rose adds character to cabinets, tile or a single appliance. The trick is to give pink a clear job in the room, then balance it with plain surfaces so the space still feels easy to cook in. These 32 pink kitchen ideas cover cabinets, tile, floors, seating, lighting and small finishing touches, so you can start with one change or build a full pink scheme over time.

    Key Takeaways

    • Start with one pink anchor, such as cabinets, an island or a tile backsplash, and keep the rest of the room calm.
    • Pale blush and dusty rose pair well with white, warm wood, brass and pale marble.
    • Test a pink paint or tile sample in daylight and evening light before you commit to a large area.
    • Small changes like stools, curtains, linens and tableware let you try pink without repainting.
    • Repeat the same pink in two or three spots, rather than using many different pinks, for a pulled together look.
    • Keep work surfaces plain and easy to clean, so pink stays a decor choice and not a cleaning burden.

    1. Soft Blush Shaker Cabinets

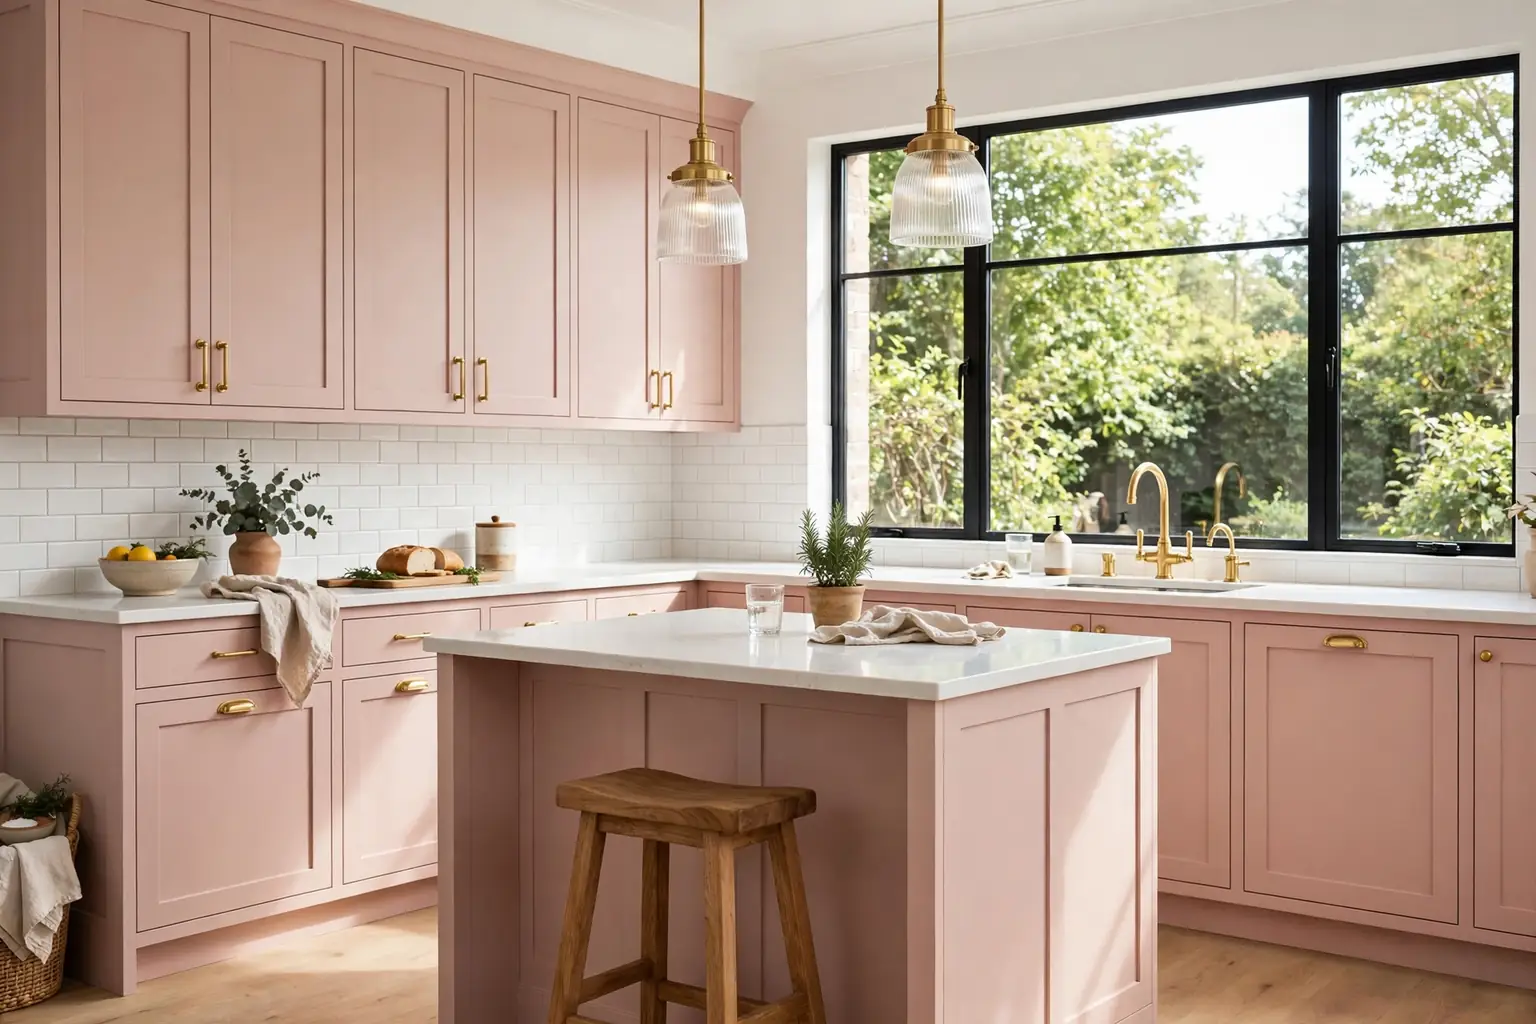
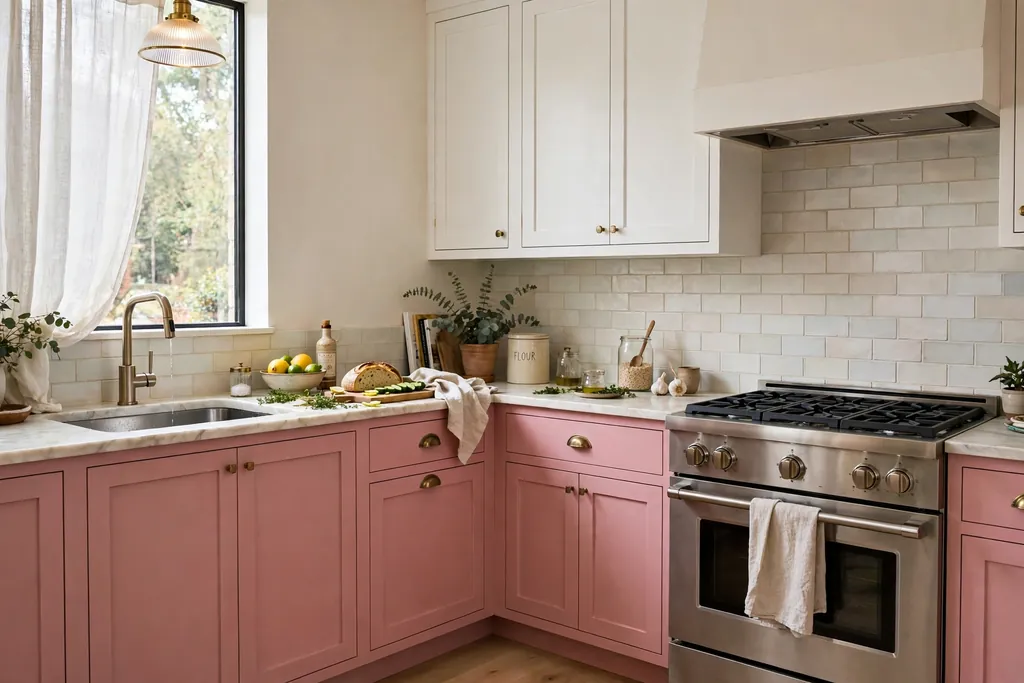
    Kitchen with soft blush pink shaker cabinets, white counters and a wood floor.

    Paint all of your cabinets in a soft blush pink for a kitchen that feels warm without shouting. Shaker doors keep the look simple, and white walls, a pale counter and wood floors stop the pink from feeling heavy. This suits a kitchen with good daylight, where the blush reads as a warm neutral rather than a bright color.

    Keep handles simple in brass or brushed nickel, and choose a counter in white or pale grey so the cabinets stay the focus. If you worry about commitment, paint one run of cabinets first and live with it for a week before painting the rest.

    2. Two Tone Pink Lowers and White Uppers

    Kitchen with pink lower cabinets, white upper cabinets and a pale backsplash.

    Use pink on the lower cabinets and white on the uppers for a lighter take on a pink kitchen. The white uppers keep the eye moving up and make a small kitchen feel taller, while the pink base grounds the room. This split also makes repainting easier later, since only half the cabinets need a new color.

    Pair the scheme with a pale backsplash and a wood or white counter. A brass or black handle on the pink lowers ties the two tones together. Keep the wall color plain so the two cabinet colors can do the work.

    3. Dusty Rose Cabinets with Brass Hardware

    Dusty rose kitchen cabinets with brass knobs and cream walls.

    Choose a dusty rose, a muted pink with a touch of grey, for cabinets that feel grown up and calm. Brass knobs and cup pulls warm the rose and suit both classic and simple modern kitchens. This shade works well with cream walls, marble look counters and oak floors.

    Avoid pairing dusty rose with too many other strong colors. Let brass, cream and wood carry the rest of the room, and add green from a plant or a herb pot for a fresh contrast. Wipe painted cabinets with a soft damp cloth to keep the finish looking even.

    4. Pink Island in a Neutral Kitchen

    Pink kitchen island with a pale counter in a white kitchen.

    Keep the main cabinets white or wood, and paint only the island pink. The island becomes a clear focal point, and the rest of the kitchen stays neutral, which makes the change lower risk and easier to reverse. A blush or rose island suits a white kitchen, while a deeper pink suits a kitchen with dark wood floors.

    Repeat the island pink once more, in stools, a rug or a vase, so it looks planned rather than random. Choose a hard wearing counter for the island, since it takes the most daily use. This is a good first step if you like pink but are not ready for pink cabinets everywhere.

    5. Pink Upper Cabinets Only

    Small kitchen with pink upper cabinets and white lower cabinets.

    In a small kitchen, try pink on the upper cabinets and keep the lowers white, wood or grey. Pink at eye level adds warmth where you see it most, while darker or plain lowers keep the floor area calm. This works well in a galley kitchen, where a full pink scheme might feel close.

    Use open space or a plain backsplash below the pink uppers so the color reads clearly. Keep dishes inside closed uppers tidy, or use glass fronts on one or two doors for a display spot. A pale pink here feels light, so avoid a very deep shade in a small, dark kitchen.

    6. Pink Open Shelves with White Dishes

    Pink open kitchen shelves holding white dishes and clear glasses.

    Paint open shelves pink, or back them with pink boards, and display white dishes, clear glasses and wood boards against them. The pink frames the display and adds color without painting a single cabinet. This suits a kitchen with one blank wall or a short run above a counter.

    Our guide to how to style open shelves shows how to leave breathing room between groups so shelves read as tidy, not crowded. Keep the shelf items to daily pieces you actually use, and dust the shelves weekly since open storage collects cooking film.

    7. Glass Front Cabinets with Pink Interiors

    Glass front kitchen cabinets with pink painted interiors and white dishes.

    Paint the inside of glass front cabinets pink, and keep the doors and frames white or wood. When the doors close, you get a soft wash of pink behind glasses and plates, which is more subtle than pink cabinet doors. This idea suits a kitchen that already has glass fronts, or one cabinet you can change as a test.

    Use white or clear dishes inside so the pink shows, and keep the display simple with one or two stacks per shelf. If the pink feels too strong, paint only the back panel and leave the sides white. This is a low cost way to try pink in a rented or recently fitted kitchen.

    8. Pink Subway Tile Backsplash

    Kitchen with a pink subway tile backsplash and white cabinets.

    Lay pink subway tiles as a backsplash for a classic shape in a fresh color. A pale pink tile with white grout feels soft, while a deeper pink with matching grout feels bolder. Subway tiles suit most kitchens because the shape is familiar and the size works around sockets and windows.

    Pair pink subway tile with white cabinets and a plain counter, so the tile is the main color note. Order a few spare tiles for future repairs, and seal grout in the splash zone behind the sink and cooker. A pink tile sample looks different under kitchen lights, so check it at night as well as in daylight.

    9. Pink Patterned Tile Backsplash

    Patterned pink tile backsplash behind a kitchen cooker.

    Choose a patterned tile with pink in the design, such as a floral, star or geometric print, for a backsplash with more detail. Patterned tile works best on one wall, usually behind the cooker or sink, with plain tile or paint on the other walls. The pattern adds interest without needing pink cabinets.

    Keep counters and cabinet fronts plain, and pick one pink from the tile to repeat in a towel or a small accessory. Patterned tile can date faster than plain tile, so choose a pattern you like for its shape as well as its color. Ask your tiler about sealing, since some patterned tiles need extra care.

    10. Pink Veined Marble Look Counters

    Kitchen counter with soft pink veining on a white base and white cabinets.

    Use a counter with soft pink veining on a white or cream base for pink that reads as stone, not paint. This suits a kitchen where you want pink to feel quiet and high end, and it pairs well with white cabinets, brass taps and wood stools. The veining gives movement without a solid block of color.

    Keep the backsplash plain, in white tile or a pale plaster tone, so the counter pattern stays clear. Wipe spills promptly, as with any pale stone look surface, and use boards for chopping and hot pans. If a full stone counter is out of reach, a marble look laminate with pink veining gives a similar effect.

    11. Pink Terrazzo Counters

    Kitchen with a pink speckled terrazzo counter and pale wood cabinets.

    Pick a terrazzo counter with pink chips mixed with white, grey and cream for a speckled surface that hides crumbs well. Terrazzo suits a modern kitchen, and the pink chips tie in with a pink stool, rug or vase elsewhere in the room. It also pairs well with pale wood and matte black taps.

    Because terrazzo has many tones, choose cabinet and wall colors from the lightest tones in the mix. Keep the backsplash simple, since the counter already has plenty of detail. Seal the surface as advised by the supplier, and use coasters under strongly colored drinks.

    12. Pink and White Checkerboard Floor

    Kitchen with a pink and white checkerboard floor and white cabinets.

    Lay a pink and white checkerboard floor for a retro kitchen floor that sets the tone for the whole room. The floor pattern works with white cabinets, a pink appliance or pink stools, and it suits a kitchen with a simple layout where the floor can be seen. A pale pink keeps the look soft, while a stronger pink feels more playful.

    Keep walls and cabinets plain so the floor can lead. Use a rug runner in a plain tone over the checkerboard in the main work zone if the pattern feels busy underfoot. Choose a floor finish suited to kitchens, with grip and easy cleaning, and keep spare tiles for repairs.

    13. Pink Range Cooker as a Focal Point

    Pink range cooker in a kitchen with white cabinets.

    Make a pink range cooker the center of the kitchen, with plain cabinets and a simple backsplash around it. A cream, blush or rose cooker adds color in one strong piece, and it suits a farmhouse or retro style kitchen. The cooker draws the eye, so the rest of the room can stay calm and practical.

    Match one small item to the cooker, such as a kettle or a tea towel, and keep the other appliances in steel or white. Check the cooker color in person if possible, since pink finishes vary a lot between makers. Keep the wall behind the cooker easy to clean, with tile or a wipeable panel.

    14. Pink Retro Fridge

    Pink retro fridge with chrome details in a white kitchen.

    Add a pink retro fridge for instant character, with curved edges and chrome details that suit a vintage or playful kitchen. A soft pink fridge works with white cabinets and wood floors, while a brighter pink suits a kitchen that already has bold accents. The fridge becomes a talking point without any building work.

    Let the fridge be the only large pink appliance, and keep other appliances in neutral tones. Measure doorways and the fridge space carefully, since retro models vary in size. Leave ventilation space around the fridge as advised in its manual, and keep the top clear or use it for one light item only.

    15. Pink Farmhouse Sink

    Pink farmhouse sink with a brass tap in a cream kitchen.

    Fit a pink farmhouse sink, with its deep bowl and front panel on show, for color at the heart of the work zone. A pale pink sink suits a white or cream kitchen, and it pairs well with brass or chrome taps. The front panel is visible from across the room, so it acts as a decor piece as well as a sink.

    Keep the counter around the sink plain, and choose a tap finish that matches your cabinet handles. A farmhouse sink needs a cabinet made to fit it, so check sizes before ordering. Clean the sink with a soft cloth and mild cleaner to protect the finish.

    16. Pink Faucet and Hardware Swap

    White kitchen cabinets with pink knobs and a pink tap.

    Swap taps, cabinet knobs and drawer pulls for pink versions for a small, reversible change. Pink hardware suits white, cream or pale wood cabinets, and it lets you test pink before painting. This is a good weekend job, and it costs far less than new cabinets.

    Keep all the hardware in the same pink and finish, so the change looks planned. Save the old hardware in a labelled bag in case you want to swap it back. Check that new taps fit your existing sink holes, and turn off the water before changing a tap.

    17. Pink Pendant Lights over the Island

    Pink pendant lights hanging over a kitchen island.

    Hang pink pendant lights over an island or table for color at eye level that also lights the work surface. Pink glass, enamel or metal shades suit a white or wood kitchen, and they look best in a row of two or three over a long island. The shade color glows softly when lit, which adds warmth in the evening.

    Hang pendants high enough to see under them while standing, and keep the cord length even across the row. Pair pink pendants with plain stools or a plain counter, so the lights stay the focus. Use warm white bulbs for a cozy evening light, and dimmers if your wiring allows them.

    18. Pink Bar Stools at the Island

    Pink bar stools tucked under a kitchen island.

    Choose pink bar stools, in velvet, leather look or painted wood, for seating that adds color without changing the kitchen itself. Stools are easy to move, swap or recover, so they are a low risk way to try pink. A blush stool suits a white island, while a deeper pink suits a wood or grey island.

    Pick a stool height that fits your counter, with room to tuck stools under the overhang. If the stools have fabric seats, choose a wipeable fabric for a kitchen. Keep the stool count to the space you have, with room to sit and stand without bumping neighbours.

    19. Pink Dining Chairs around the Table

    Pink dining chairs around a wood kitchen table.

    Use pink dining chairs around a wood or white kitchen table for a dining zone that feels welcoming. Upholstered chairs add softness, while painted wood chairs are easier to wipe after meals. This idea suits a kitchen diner, where the table is part of daily life.

    Mix pink chairs with two plain chairs at the ends of the table if a full set feels like too much pink. For more table styling ideas, see our guide to everyday dining table decor. Keep chair cushions in a washable fabric, and check that chairs fit under the table when pushed in.

    20. Pink Banquette Nook

    Kitchen corner banquette with pink cushions and a wood table.

    Build or dress a banquette nook with pink cushions and a plain table for a cozy eating corner. A banquette uses a corner well, gives storage under the seat, and makes a small kitchen feel like it has a dining room. Pink cushions, with plain walls and a wood table, keep the nook soft rather than loud.

    Use firm foam cushions with removable, washable covers, since a nook seat gets daily use. Add one or two plain cushions in cream or grey to break up the pink. Keep the table size modest, so people can slide in and out without moving the table each time.

    21. Pink Painted Kitchen Table

    Pink painted kitchen table with white chairs.

    Paint a wood kitchen table pink, and keep the chairs white, wood or a mix of both. A painted table is a clear pink statement, but it is only one piece of furniture, so it is easier to repaint later than cabinets. This suits a farmhouse table, a round pedestal table or a second hand table you want to refresh.

    Sand and prime the table first for a finish that lasts, and use a paint suited to furniture that gets wiped daily. Protect the top with placemats and coasters, and touch up chips promptly. A pale pink table suits a bright kitchen, while a deeper pink suits a kitchen with dark floors.

    22. Pink Cafe Curtains at the Window

    Kitchen window with pink cafe curtains over the sink.

    Hang pink cafe curtains on the lower half of a kitchen window for privacy, soft color and light. Cafe curtains suit a kitchen window over a sink, since they cover the lower glass while leaving the top open for daylight. A gingham, stripe or plain pink fabric all work, depending on your style.

    For more window ideas, see our guide to kitchen window decor ideas. Choose a washable fabric, since kitchen curtains collect steam and cooking smells. Hang the curtain rod at mid window height, and keep the curtain clear of taps and the hob.

    23. Pink Wall Paint with White Cabinets

    Kitchen with pale pink walls and white cabinets.

    Paint the kitchen walls pink and keep the cabinets white for a scheme that is easy to change later. Wall paint is the lowest commitment way to add a large area of pink, and it suits renters who can repaint, as well as owners testing a shade. A pale blush on the walls feels warm, while a mid pink needs good light.

    Test paint samples on two walls, since light changes across the room. Keep the ceiling white and the trim white or cream for a clean edge. If the pink feels strong, paint only one wall pink and keep the rest in a warm white.

    24. Pink Wallpaper Accent Wall

    Kitchen dining wall with pink floral wallpaper.

    Paper one wall in a pink wallpaper, with a floral, stripe or small scale print, for pattern as well as color. An accent wall behind a table or on a dining wall suits this idea, while work walls stay in paint or tile for easy cleaning. Wallpaper adds texture that paint alone cannot give.

    Choose a washable wallpaper for a kitchen, and avoid papering the wall directly behind the hob or sink. Keep the other walls plain, and pick a pink from the paper to repeat in a cushion or vase. If you rent, look for a removable wallpaper made for kitchens, and test a small piece first.

    25. Pink Tile Clad Island Front

    Kitchen island with a front clad in small pink tiles.

    Clad the front of your island in pink tiles, while the counter and cabinets stay plain. Tile on the island front adds color and texture where it is seen from the living space, and it is easier to clean than a painted panel in a busy walkway. Small pink tiles, in square or kit kat shapes, suit this use.

    Use grout in a tone close to the tile so the front reads as a block of pink, or white grout for a clearer tile pattern. Keep stools plain so the tiled front stays the focus. This idea pairs well with a white counter and wood or brass stool legs.

    26. Pink Pantry Door

    Pink pantry door in a kitchen with white cabinets.

    Paint a pantry door pink, or fit a pink door to a pantry cupboard, for a single bold note in a plain kitchen. A pantry door is a good test spot, since it is one door, not a full run of cabinets. This works well for a corner pantry, a tall larder cupboard or a door to a utility nook.

    Our guide to corner kitchen cabinet ideas has more ideas for making corner storage work hard. Match the pantry door handle to your other cabinet hardware, and keep the wall around the door plain. A pink pantry door also helps guests find storage without asking.

    27. Pink Window Seat Cushion

    Kitchen window seat with a thick pink cushion.

    Add a pink cushion to a kitchen window seat, with plain walls and a wood seat base, for a soft spot to sit with a coffee. A window seat suits a kitchen with a bay or a wide sill, and it gives extra seating without a new chair. The cushion is easy to change, so you can try pink here with little risk.

    Choose a thick cushion with a washable cover, and add a small plain throw for cooler mornings. Keep the window seat clear of clutter, with one plant or a small stack of books at one end. If the seat is near a radiator, check that the cushion fabric suits the heat.

    28. Pink Rug Runner in the Work Zone

    Pink rug runner along a kitchen counter.

    Lay a pink rug runner along the main work zone, between the counter and the island or sink, for color underfoot and warmth on a hard floor. A runner defines the cooking path and adds softness in a kitchen with tile or wood floors. Choose a flat weave or low pile rug that is easy to clean.

    Pick a washable rug, or a rug you can shake out and spot clean, since kitchen rugs take spills. Keep the runner clear of the hob and oven door swing, and use a non slip pad under it. A patterned pink runner hides marks better than a plain pale one.

    29. Pink Small Appliances Cluster

    Pink kettle, toaster and stand mixer grouped on a kitchen counter.

    Group pink small appliances, such as a kettle, toaster and stand mixer, on one counter zone for a cheerful corner that is easy to change. This suits a kitchen where you want pink as an accent, not a main color. Keep the appliances in the same pink family, rather than mixing pale and bright pinks.

    Keep the cluster to one counter area, with the rest of the counters clear for prep. Store appliances you rarely use in a cabinet, so the pink group stays tidy. Wipe appliances after use, since pink finishes show splashes, and keep cords tidy with a small tray or hook.

    30. Pink Tableware on Display

    Pink plates, bowls and mugs displayed on kitchen shelves.

    Display pink tableware, such as plates, bowls and mugs, on open shelves or in a glass cabinet for color you can use daily. Pink dishes suit a white or cream kitchen, and they make an ordinary meal feel more dressed up. This is a good idea if you want pink that changes with the seasons, since you can swap dishes in and out.

    Keep the display to one or two shelves, with white pieces mixed in so the pink does not overwhelm the shelf. Stack plates by size, and keep daily mugs at easy reach. If you collect pink glassware, display it away from direct sun to protect the color.

    31. Pink Kitchen Linens and Textiles

    Pink tea towels and cloth napkins in a bright kitchen.

    Use pink linens, such as tea towels, an oven mitt, a tablecloth and cloth napkins, for the easiest pink change of all. Linens are cheap, washable and easy to swap, so they suit renters, small budgets and seasonal refreshes. A set of pink tea towels alone can shift a white kitchen toward pink.

    Choose linens in one pink tone, and keep the rest of the textiles plain. For seasonal styling that pairs with pink, see our guide to fall kitchen decor ideas. Wash new linens before first use, and keep a spare set so the kitchen still looks dressed while one set is in the wash.

    32. Pink Pots, Prints and Finishing Touches

    Kitchen counter with pink plant pots, a framed pink print and a pink vase.

    Finish a pink kitchen with small touches: pink plant pots for herbs, framed pink prints on the wall, and a pink vase on the counter or table. These small pieces tie a larger pink scheme together, or add a hint of pink to a neutral kitchen. They are also the easiest items to move if you change your mind.

    Keep finishing touches to a few well placed pieces, rather than pink on every surface. A herb pot by the window, one framed print and one vase is enough for most kitchens. For small space seating that pairs with a nook like this, see our ideas for kitchen balcony ideas. Group small items in odd numbers, and leave clear counter space for cooking.

    Conclusion

    Pink works in a kitchen when it has a clear role and a calm background. Start with the idea that fits your budget and your nerve, whether that is a pink stool, a painted island or a full run of blush cabinets, and live with it before adding more pink. Test shades in your own light, repeat one pink in two or three spots, and keep work surfaces plain and easy to clean. With that balance, pink can feel both cozy and current, and it can grow with your kitchen over time. Save this list for your next kitchen refresh, and pick the pink idea you want to try first.

    FAQs

    What pink shade works best in a kitchen?

    A pale blush or dusty rose works best in most kitchens, since both read as warm neutrals next to white, wood and brass. Deeper pinks suit a single focal piece, such as an island, a fridge or a cooker, rather than every cabinet. Test samples in daylight and evening light, since pink shifts a lot under different bulbs.

    Can pink cabinets work in a small kitchen?

    Yes, if you keep the pink pale and balance it with white uppers, a plain backsplash and good light. Pink lowers with white uppers, or pink uppers with plain lowers, both keep a small kitchen feeling open. Avoid a very deep pink on all cabinets in a small, dark kitchen, since it can make the room feel smaller.

    What colors go with a pink kitchen?

    White, cream, pale grey, warm wood and brass all pair well with pink. Green from plants or herbs adds a fresh contrast, while black hardware gives a pink kitchen a sharper edge. Keep the palette to pink plus two or three neutrals, so the room stays calm. For cabinet color pairings, see our guide to colors for your kitchen cabinets.

    Is pink hard to keep clean in a kitchen?

    Pink painted cabinets and tiles clean much like white ones, with a soft damp cloth and mild cleaner. Pale pink shows splashes more than a dark color, so wipe the splash zone behind the sink and cooker often. Washable rugs, cushion covers and linens make pink textiles easy to care for, and a speckled counter hides crumbs well.

    How can I add pink to a rented kitchen?

    Use stools, curtains, rugs, linens, tableware, small appliances and plant pots, all of which move with you. Removable wallpaper on one wall and pink hardware, with the old hardware saved, are also low risk options. Check your lease before painting walls or cabinets, and keep the original finishes so you can restore them when you move out.

    Will a pink kitchen date quickly?

    A pale, muted pink ages better than a very bright pink, since it reads as a warm neutral. Classic shapes, such as shaker cabinets, subway tile and a farmhouse sink, also help a pink kitchen last longer. If you worry about dating, put pink in changeable items like stools, linens and dishes, and keep cabinets and tile in tones you can live with for years.

  • 13 Yellow Kitchen Ideas for a Welcoming, Lived-In Look

    13 Yellow Kitchen Ideas for a Welcoming, Lived-In Look

    Sheet No.: 59
    Brand: Dwell Ovell (dwellovell.com)
    Author: Clara Bennett
    Parent keyword: Yellow Kitchen Ideas
    Keyphrase: yellow kitchen ideas
    Slug: yellow-kitchen-ideas
    Categories: Kitchen & Dining (primary: Kitchen & Dining)
    Publish slot: Sept 15, 2026, 4:00pm America/New_York
    Status: Draft file only (do not publish)

    A. SEO Brief

    • Search intent: Informational and visual. Readers want yellow kitchen ideas they can picture in a real kitchen and copy in full or in part, from paint and cabinets to small accents.
    • Primary keyphrase: yellow kitchen ideas
    • Secondary terms: butter yellow cabinets, yellow tile backsplash, mustard yellow kitchen island, pale yellow kitchen walls, yellow kitchen accents, yellow kitchen decor
    • Sheet title: “13 Yellow Kitchen Ideas for a Welcoming, Lived-In Look”
    • Count note: Sheet count is 13, which is above 10, so 13 is kept exactly. The article delivers exactly 13 distinct ideas, numbered continuously 1 to 13.
    • Article title / H1: 13 Yellow Kitchen Ideas for a Welcoming, Lived-In Look
    • SEO title (54 characters): 13 Yellow Kitchen Ideas for a Welcoming, Lived-In Look
    • Meta description (157 characters): Discover 13 yellow kitchen ideas, from butter yellow cabinets and sunny tile backsplashes to mustard islands and small accents, for a warm, lived-in kitchen.
    • Slug: yellow-kitchen-ideas
    • Internal links used (verified live dwellovell.com URLs only):
    • https://dwellovell.com/colors-for-your-kitchen-cabinets/ (cabinet color choices, Idea 1)
    • https://dwellovell.com/kitchen-window-decor-ideas/ (window dressing, Idea 7)
    • https://dwellovell.com/how-to-style-open-shelves/ (open shelf styling, Idea 11)
    • https://dwellovell.com/everyday-dining-table-decor/ (dining nook table, Idea 8)
    • https://dwellovell.com/fall-kitchen-decor-ideas/ (seasonal yellow accents, Idea 13)
    • Research limits: No live competitor or search volume research was claimed for this draft. No prices, products, measurements, or statistics are stated. All tips are general decorating advice that a reader can adapt to their own kitchen size, light, and budget.

    B. Complete Article

    13 Yellow Kitchen Ideas for a Welcoming, Lived-In Look

    Yellow can warm a kitchen without taking it over. The trick is to pick one strong yellow moment, such as painted cabinets or a tile backsplash, and let the rest of the room stay calm with white, wood, and soft neutrals. A little yellow goes a long way in a room that already gets morning light, while a deeper mustard can add warmth to a kitchen that faces north or stays shaded. These 13 yellow kitchen ideas cover paint, cabinets, tile, seating, lighting, and small accents, so you can start with a weekend change or plan a larger refresh around one shade you love.

    Key Takeaways

    • Pick one main yellow feature, such as cabinets, a backsplash, or an island, and keep the other yellow notes smaller.
    • Test a yellow paint or tile sample in morning and evening light before you commit, since yellow shifts a lot with light.
    • Pair yellow with white, pale wood, and soft grey or cream so the room stays calm and easy to live with.
    • Use washable paint and easy to clean tile near the stove and sink, where splashes happen most.
    • Start small if you are unsure: stools, a rug, curtains, or tableware let you try yellow before painting anything.

    1. Butter Yellow Painted Cabinets

    Kitchen with butter yellow painted cabinets, white counters, and brass hardware.

    Butter yellow cabinets give a kitchen a soft, sunny feel without the boldness of a bright primary yellow. The pale shade works well with white counters, light wood floors, and simple hardware in brass or brushed nickel. It suits cottage, farmhouse, and traditional kitchens, and it can brighten a room that does not get much direct sun.

    Paint a sample door or a large board first, and live with it for a few days before painting the full set. Use a durable cabinet paint and a clear topcoat on doors near the stove and sink. If you want help choosing between shades, our guide to colors for your kitchen cabinets covers warm and cool options side by side. Keep wall color quiet, such as warm white, so the cabinets stay the star.

    2. Sunny Yellow Tile Backsplash

    Soft yellow subway tile backsplash behind a kitchen stove with white cabinets.

    A yellow tile backsplash adds color exactly where the eye lands while you cook, without repainting the whole room. Glossy subway tile in a soft yellow reflects light and wipes clean, while a handmade look tile with slight color variation feels more relaxed. This idea works well in a white or cream kitchen that needs one warm focal point.

    Choose a grout color close to the tile so the wall reads as one calm block, or pick a soft grey grout if you want the tile shape to show. Run the tile to the underside of the upper cabinets, and carry it behind the stove for a finished look. If your counters are patterned, keep the tile plain so the two surfaces do not compete.

    3. Mustard Lower Cabinets With White Uppers

    Kitchen with mustard lower cabinets, white upper cabinets, and a light wood counter.

    Two tone cabinets are a practical way to use a deeper yellow without darkening the room. Paint the lower cabinets mustard and keep the uppers white, so the strong color sits below eye level and the upper wall stays light. The contrast also helps define the work zone, especially in a long or galley kitchen.

    Match the mustard to a warm wood tone in the floor or a cutting board, and use simple dark or brass pulls so the hardware does not fight the color. Keep the counter light, such as white or pale wood, to balance the deep base color. This is a good middle step if full yellow cabinets feel like too much.

    4. Pale Yellow Walls With White Trim

    Kitchen with pale yellow walls, white trim, and white cabinets beside wood shelves.

    Pale yellow walls are the gentlest way into this color, and they suit renters and anyone who wants a change without repainting cabinets. A soft, creamy yellow on the walls warms white trim, white cabinets, and stainless appliances, and it looks good with wood shelves and woven baskets. It also works in a kitchen that opens to a living room, since the color reads as warm neutral from a distance.

    Paint one wall first if you are unsure, and check it at breakfast and in the evening, when artificial light can make yellow look stronger. Use an eggshell or satin finish so walls wipe clean near the table and the trash area. Keep curtains and rugs in cream, sage, or soft grey so the walls stay the main yellow note.

    5. A Yellow Range Cooker as the Focal Point

    Cream kitchen with a yellow range cooker as the focal point beside plain cabinets.

    A yellow range cooker turns an everyday appliance into the center of the kitchen. A soft cream yellow suits a classic kitchen, while a deeper mustard or ochre suits a rustic or farmhouse room. Because the cooker is a single large block of color, the rest of the kitchen can stay simple: plain cabinets, a quiet backsplash, and wood or stone counters.

    Plan the color with your cabinet hardware and tap finish in mind, so brass, black, or steel details repeat in small doses around the room. Keep the wall behind the cooker plain tile or a simple splashback, so the cooker shape stands out. If a new cooker is not in your plans, a yellow kettle, toaster, or stand mixer on the counter can give a smaller version of the same effect.

    6. Mustard Bar Stools at the Island

    Mustard bar stools with wood legs tucked under a white kitchen island.

    Bar stools are an easy way to add yellow at seating height, where it shows up in photos and daily life. Mustard stools with wood legs warm up a white island, and they pair well with wood counters and black or brass pendant lights. Choose a stool height that leaves enough leg room under the counter, and test one stool before buying a full set.

    Pick a wipe clean seat if the stools will be used for breakfast and homework, since kitchen seating takes spills. If your island is large, use three stools in the same shade for a calm row; if it is small, two stools keep the walkway clear. A cushion in a striped or plain mustard fabric can soften a metal or wood stool without repainting it.

    7. Yellow Curtains at the Kitchen Window

    Light yellow cafe curtains at a kitchen window above the sink in daylight.

    Yellow curtains frame the window and filter daylight into a warm glow, which suits a kitchen that feels cold in the morning. A light cotton curtain in lemon or butter yellow works for a cafe curtain that covers only the lower half of the window, leaving the top open for light. A full length panel in a soft yellow suits a kitchen with a door or a large window over the sink.

    Hang the rod a little above the window frame so the curtain does not block light when open, and choose a fabric that washes well. For more window ideas, see our guide to kitchen window decor ideas. If privacy matters, pair a sheer yellow panel with a plain blind so you can adjust light through the day.

    8. A Yellow Dining Nook With Cushioned Seating

    Kitchen dining nook with mustard bench cushions and a round wood table.

    A dining nook is a natural place for yellow, since it is a seating zone rather than a work zone. Mustard or ochre cushions on a built in bench, plus a yellow patterned cushion or two on chairs, make the corner feel inviting for long breakfasts. A round wood table and a simple pendant light keep the nook relaxed and easy to use.

    Choose cushion covers you can remove and wash, and mix one solid mustard cushion with one patterned cushion in yellow and cream. Keep the table dressing simple, such as a small vase and a bowl of lemons, so the table stays usable. For everyday table styling, our everyday dining table decor ideas show how to keep a table pretty without cluttering it.

    9. Yellow Pendant Lights Over the Island

    Yellow enamel pendant lights hanging in a row over a kitchen island.

    Yellow pendant lights add color from above, which is useful when you do not want to paint cabinets or walls. Enamel pendants in mustard or butter yellow, hung in a row over an island, draw the eye up and mark the island as the gathering spot. They work well with white cabinets, wood counters, and simple bar stools.

    Hang pendants high enough that you can see across the island while standing, and use warm bulbs so the yellow shade glows rather than glaring. Two pendants suit a short island, while three suit a longer one; keep the spacing even so the row looks planned. If you rent, a plug in pendant or a yellow shade swapped onto an existing fitting gives a similar look without rewiring.

    10. A Yellow Runner Rug in the Work Zone

    Mustard and cream runner rug on a kitchen floor in front of the counter.

    A runner rug in yellow adds warmth underfoot and color at floor level, where it does not compete with cabinets or counters. A flat weave runner in mustard, ochre, or a yellow and cream pattern suits the stretch between the counter and the island, or in front of the sink. It also softens a hard floor in a kitchen where you stand for long periods.

    Choose a low pile, washable rug so it does not catch on feet or trap spills, and add a non slip pad underneath. Keep the pattern simple if your backsplash is already patterned, and keep the rug narrow enough that cabinet doors and the dishwasher open freely. Shake it out weekly and wash it on a regular cycle so cooking splashes do not build up.

    11. Yellow Tableware on Open Shelves

    Open kitchen shelves holding mustard and cream bowls, yellow mugs, and plates.

    Open shelves give yellow tableware a job: it becomes decoration when it is not in use. Stack mustard and cream bowls, hang yellow mugs on hooks below a shelf, and stand a few yellow plates upright at the end of a row. This idea suits a kitchen with one or two open shelves, rather than a full wall of shelving, so the display stays calm.

    Group by color and use, such as everyday bowls together and serving pieces together, and leave empty space at the ends of each shelf. Our guide to how to style open shelves shows how to leave breathing room so a shelf reads as storage, not clutter. Keep the most used pieces at easy reach height, and store spare sets in a cabinet.

    12. A Painted Yellow Kitchen Island

    Mustard painted kitchen island with a wood counter and white cabinets around it.

    Painting only the island yellow gives you a bold focal point with less paint and less risk than painting every cabinet. A mustard or ochre island stands out against white perimeter cabinets, and it pairs well with a wood or white counter and brass or black hardware. The island is also a natural gathering spot, so the color welcomes people into the room.

    Sand and prime the island well, and use a durable paint that stands up to bumps from stools and bags. Repeat the island color once more in a small dose, such as a vase, a tea towel, or a stool cushion, so the island does not look isolated. Keep the rest of the kitchen quiet, with plain walls and a simple backsplash, so the island carries the color story.

    13. Small Yellow Accents You Can Swap by Season

    Neutral kitchen with a bowl of lemons, yellow tea towels, and yellow flowers on the counter.

    If you are not ready to paint, small yellow accents let you try the color for a season and change it later. A bowl of lemons, yellow tea towels, a mustard table runner, a small vase of yellow flowers, and a framed print can warm a neutral kitchen in minutes. These pieces are also easy to swap: keep them in spring and summer, then trade them for deeper tones in fall.

    For seasonal swaps, our fall kitchen decor ideas show how warm colors work as the year cools. Store off season accents in one labeled box so the swap takes minutes, not a full afternoon. This approach suits renters, small budgets, and anyone who likes to refresh a room often without a renovation.

    Conclusion

    Yellow works best in a kitchen when it has a clear job: one main feature, a few smaller repeats, and plenty of calm white, wood, and cream around it. Start with the idea that fits your budget and your comfort with color, whether that is a painted island, a tile backsplash, or a set of mustard stools. Test your shade in real light, keep work surfaces easy to clean, and live with the change for a few weeks before adding more yellow. With that slow approach, a yellow kitchen can feel warm, cheerful, and easy to live in for years, not just for a season. Save your favorite idea from this list for your next kitchen refresh.

    FAQs

    What shade of yellow works best in a kitchen?

    A soft butter or creamy yellow is the safest choice for large areas such as cabinets and walls, since it reads warm without glaring. Mustard and ochre work well in smaller doses, such as an island, stools, or a backsplash, where their depth adds warmth. Test samples in your own light, since a shade that looks pale in a shop can look much stronger at home.

    Does yellow make a small kitchen look bigger or smaller?

    Pale yellow can make a small kitchen feel brighter, especially with white trim and good light, because it reflects warmth without darkening the walls. Deep mustard on every wall or cabinet can make a small room feel closer, so use deep shades on one feature, such as lower cabinets or an island, and keep the rest light.

    What colors go well with a yellow kitchen?

    White, cream, pale wood, and soft grey are the easiest partners for yellow, since they calm the color and keep the room feeling fresh. Brass and black hardware add definition, while sage green, soft blue, or natural wood bring in a garden or farmhouse feel. Keep the palette to yellow plus two neutrals for the calmest result.

    Is yellow hard to keep clean in a kitchen?

    Yellow paint and tile are no harder to clean than white if you choose washable finishes, especially near the stove and sink. Gloss or satin paint wipes clean more easily than flat paint, and glazed tile with a grout close to the tile color hides marks well. Washable cushion covers, rugs, and curtains help for soft yellow pieces.

    Can I use yellow in a modern kitchen?

    Yes. In a modern kitchen, use yellow as a single accent: a painted island, a row of mustard stools, or yellow pendant lights against flat white cabinets and simple hardware. Keep lines clean, avoid too many patterns, and let one yellow shape stand out rather than spreading small yellow items across every surface.

    How do I try yellow without painting cabinets?

    Start with stools, a runner rug, curtains, tableware on open shelves, or small accents such as tea towels and a lemon bowl. These pieces cost less than painting, take minutes to change, and let you see how yellow feels in your light before you commit. If you love the look after a few weeks, move on to a larger step such as a backsplash or a painted island.


  • 28 Studio Kitchen Ideas for a Cozy Seasonal Update

    28 Studio Kitchen Ideas for a Cozy Seasonal Update

    A studio kitchen has to do a lot in a small footprint. It is often one wall of cabinets, one counter, and a table that also serves as a desk, all in view from the bed and the sofa. That closeness can feel cluttered, but it also means one small change has a big effect. These 28 studio kitchen ideas cover layout, storage, cooking zones, and cozy seasonal touches, so you can pick one fix for the spot that bothers you most, then add a warm seasonal layer on top. Start by clearing one counter, measure before you buy, and keep daily tools within easy reach.

    Key Takeaways

    • Plan the studio kitchen in zones for prep, cooking, washing, and eating, even if each zone is only a short stretch of counter.
    • Choose pieces that do two jobs, such as a fold-down table, a rolling cart, or stools that tuck away, so the floor stays clear.
    • Keep daily items open and visible, and move rarely used items higher, into a tall cabinet, or out of the kitchen area.
    • Use light colors, clear counters, and warm under-cabinet light to keep a small kitchen feeling open and calm.
    • Make the seasonal update small and easy to swap: towels, a rug, a fruit bowl, and one shelf display, changed in minutes.

    1. Plan a One-Wall Layout in Clear Zones

    Compact studio kitchen with a single wall of cabinets divided into clear cooking, prep and washing zones.

    Start with the layout you have and mark four zones along the wall: fridge and storage, prep, cooking, and washing. Keep the prep zone between the sink and the stove if you can, since that is where most chopping happens. Move anything that does not belong in a zone, such as mail or keys, to a hook or tray by the door. A clear zone plan stops the whole counter from becoming one mixed pile, and it shows which zone needs the next fix first.

    2. Add a Fold-Down Table on a Free Wall

    Small studio kitchen with a wooden fold-down wall table and stools tucked beneath, set for a simple meal.

    A fold-down table gives a studio kitchen a dining spot without giving up floor space all day. Fix it to a wall near the kitchen at table height, with sturdy brackets rated for the load, and fold it flat when you are done eating. Pair it with one or two stools that tuck under a counter, so the table area stays clear between meals. Keep a small tray for salt, a candle in a jar, and napkins nearby, so setting the table takes a minute.

    3. Use a Rolling Cart as a Movable Counter

    Wooden rolling cart used as extra counter space beside a stove in a small kitchen, with bowls and a cutting board on top.

    A rolling cart adds counter space exactly where you need it, then rolls aside when you need the floor back. Use it as a prep station beside the stove, a serving cart at dinner, or a coffee station in the morning. Choose a cart with a lock on at least two wheels, a lower shelf for bowls, and a top you can wipe clean. In a studio, a cart also works as a soft boundary between the kitchen and the living area, without blocking light.

    4. Create a Breakfast Bar at the End of the Counter

    Small studio kitchen counter end used as a breakfast bar with two stools, mugs and a fruit bowl.

    If the counter ends in open floor, add a short overhang or a narrow bar table at that end for breakfast and quick meals. Two stools at the end keep eating in the kitchen zone and leave the main table free for work or guests. Keep the bar clear except for a small tray with mugs and a fruit bowl, so it does not collect papers and keys. This setup suits a studio because it gives a place to eat without adding a full dining table.

    5. Choose Stackable Stools That Tuck Away

    Neat stack of wooden stools tucked under a small kitchen counter in a compact studio apartment.

    Stackable stools solve the studio seating problem: you need seats for guests, but you cannot leave four chairs out all week. Pick stools that stack neatly, fit under a counter overhang, or hang on wall hooks when not in use. Keep two out for daily use and stack the rest in a closet or on top of a tall cabinet. Light stools in wood or metal suit most kitchens, and a cushion tied on top adds comfort without bulk.

    6. Divide the Room With an Open Shelf Unit

    Low open shelf unit dividing a studio kitchen from a living area, with dishes on one side and books and a plant on the other.

    An open shelf unit set at right angles to the kitchen wall can mark the edge of the kitchen without closing off the studio. Use the kitchen side for dishes and cookbooks, and the living side for books and a plant, so both sides look planned. Keep the unit low enough to see over, and leave some shelves partly empty, so it reads as a divider, not a wall. Anchor it to the floor or wall if it is tall, and keep heavy items low for safety.

    7. Keep Daily Dishes on Open Shelves

    Open kitchen shelves with white plates, bowls and mugs neatly grouped above a small sink.

    Open shelves put daily plates, bowls, and mugs where you can see and grab them, which matters when cabinet space is tight. Use one or two shelves near the sink for the daily set only, and keep spares and party pieces in a closed cabinet. Group plates in one stack, bowls in another, and mugs in a row, with space at each end. Our guide to how to style open shelves shows how to leave breathing room so a shelf reads as storage, not clutter.

    8. Hang a Rail for Knives, Tools, and Pans

    Kitchen wall rail with hooks holding cooking tools and a magnetic knife strip beside a small stove.

    A wall rail with hooks frees a drawer and keeps cooking tools at hand. Hang a magnetic strip for knives on the same wall, away from the sink splash zone, and use S-hooks for a ladle, a spatula, and a small pan. Keep the rail near the stove but clear of burners, and hang only the tools you use weekly. Wipe the rail during your usual counter clean, since steam and grease settle on metal near the stove.

    9. Fit a Narrow Pull-Out Pantry Beside the Fridge

    Narrow pull-out pantry shelf beside a fridge in a small kitchen, filled with bottles, sauces and cans.

    A narrow pull-out pantry uses a gap as small as 15 centimetres beside the fridge or stove for oils, sauces, and cans. The full pull-out shelf lets you see everything at once, which stops duplicate buying and forgotten jars at the back. Group tall bottles at the back of each shelf and short jars at the front, and label the front edge if several people cook. Measure the gap twice, including the door swing and handle depth, before you order a unit.

    10. Use One Tall Cabinet for Bulk and Rarely Used Items

    Tall kitchen cabinet at the end of a small kitchen run, with labelled bins and baking trays inside.

    One tall cabinet at the end of the kitchen run can hold bulk packs, baking trays, a slow cooker, and seasonal pieces that do not fit daily shelves. Keep daily items at waist to eye level, bulk refills in the middle, and rarely used pieces up high, with a step stool kept nearby. Use bins inside the cabinet, one for baking, one for bulk dry goods, and one for party supplies, so a deep cabinet stays searchable. A tall cabinet also hides the visual bulk that makes a studio feel crowded.

    11. Store Baking Sheets Upright With Dividers

    Kitchen cabinet with baking sheets, cutting boards and cooling racks stored upright with dividers.

    Baking sheets, cutting boards, and cooling racks stored flat in a stack are noisy and hard to pull out in a small kitchen. Stand them upright in a cabinet with vertical dividers, sorted by size, so you can slide one out without moving the rest. Keep the heaviest tray at the outer end or in a lower slot, where it is easier to lift. Wipe trays before you return them, since grease on one tray transfers to its neighbours in a tight rack.

    12. Add an Over-Sink Board and Drying Rack

    Small kitchen sink with a wooden cutting board across it and a drying rack holding clean dishes.

    An over-sink cutting board and a rack that sits across the sink add work space without adding a counter. Use the board for chopping over the sink, which catches scraps, and the rack for drying a few dishes or rinsing vegetables. Choose a board and rack sized to your sink, with feet or edges that hold them steady. Put them away after use if the sink needs to stay clear, and dry them fully before storing so they do not mark the counter.

    13. Put Spices on a Magnetic Wall or Fridge Side

    Small magnetic spice jars labelled and arranged on a steel board on a kitchen wall near a prep counter.

    Magnetic spice jars on a steel board or on the side of the fridge keep spices at eye level and off the counter. Use jars of one size, labelled on the lid, grouped by use, such as everyday cooking, baking, and heat. Keep the board near the prep counter and away from stove heat, which dulls flavour. Refill from larger packs kept in the tall cabinet, and check dates twice a year. A board that holds 12 to 20 jars suits most studio cooks.

    14. Decant Dry Goods Into Clear Labelled Jars

    Kitchen shelf with clear labelled glass jars filled with rice, pasta, oats and lentils.

    Clear jars for rice, pasta, oats, flour, and lentils let you see stock at a glance, which helps shopping in a small kitchen with no pantry room. Use jars with tight lids, one size for most goods, and label each jar with its contents and the date it was filled. Keep the jars on one shelf, with daily goods at the front and baking goods behind them. Wash jars fully before refilling with a different food, and keep bulk packs in the tall cabinet, not on the counter.

    15. Add Under-Cabinet Light to Every Work Zone

    Small kitchen counter lit by warm under-cabinet lighting, with a cutting board and vegetables ready for prep.

    Under-cabinet light makes a small kitchen safer and calmer to cook in, because it lights the counter without lighting the whole studio. Use a slim battery or plug-in strip under each wall cabinet, focused on the prep and stove zones first. Warm white light suits a cozy kitchen, and a strip with a simple switch or remote avoids rewiring. Keep the light clear of steam and splashes, and wipe the strip when you clean the cabinets, since grease dulls the output over time.

    16. Cook on a Compact Two-Burner Induction Hob

    Compact two-burner induction hob in a small kitchen with one large pan and one small pan cooking.

    A compact two-burner induction hob suits a studio kitchen where a full range would crowd the counter and heat the whole room. Induction heats a pan fast and cools fast, which helps in a small space, and the flat top wipes clean and doubles as extra counter when it is off and cool. Keep one large pan and one small pan as your daily set, plus a lid that fits both. Check that your pans work with induction before you switch, since some older pans do not.

    17. Build a Sheet Pan and One Pot Cooking Station

    Small kitchen counter with a sheet pan of roasted vegetables, a deep pot with a lid, and oven mitts beside them.

    A sheet pan and one pot station keeps weeknight cooking simple in a small kitchen. Store one large sheet pan, one deep pot with a lid, and one oven-safe dish together, with a trivet and a pair of oven mitts beside them. Plan meals around these three pieces, such as roasted vegetables on the pan, soup in the pot, and a baked dish in the oven dish. Fewer pans mean less washing up, less storage, and a calmer counter after dinner.

    18. Grow Herbs on the Windowsill Above the Sink

    Kitchen windowsill above a sink with small potted herbs, basil, parsley and chives, in daylight.

    A windowsill herb garden puts fresh flavour within reach while you cook, and it suits a studio kitchen with one good window. Use small pots with drainage, a tray to catch water, and herbs you cook with most, such as basil, parsley, and chives. Snip little and often, rotate pots for even growth, and water only when the top of the soil feels dry. For more window ideas, see these kitchen window decor ideas, and keep pots clear of the window catch.

    19. Display Wood Cutting Boards on the Wall

    Wooden cutting boards of different sizes hanging on hooks on a kitchen wall above a prep counter.

    Wood cutting boards hung on a rail or a row of hooks add warmth and keep boards dry and visible. Sort boards by use, one for vegetables, one for bread, and one for cooked food, and hang them flat against the wall above the prep counter. Let boards dry fully before hanging, oil them as the maker directs, and sand any rough edge that could snag a cloth. A row of boards also softens a plain studio wall without adding a picture or a shelf.

    20. Fix a Small Pegboard for Tools and Notes

    Small framed pegboard on a kitchen wall holding measuring cups, scissors, a timer and a recipe card.

    A small pegboard on a free wall holds measuring cups, scissors, a timer, and a recipe card, all in a layout you can change. Paint or stain the board to match the kitchen, frame the edges, and plan the layout on the floor first, with heavy items low. Keep the board to five or six items at first, and add only when a clear gap remains, since a crowded board looks busy in a studio. Clip a shopping list to the board so it does not drift onto the counter.

    21. Layer Warm Light for Evenings in the Studio

    Cozy studio kitchen in the evening with warm pendant light over a small table and soft lamplight.

    A studio kitchen needs different light for cooking and for evenings, since the same room is also the living room. Keep bright under-cabinet light for prep, then switch to a warm pendant or a small lamp over the table for dinner. Battery candles in jars add a cozy glow on a shelf without an open flame near curtains or paper. Keep cords tidy and bulbs warm white, so the evening light feels calm rather than harsh after a day of cooking light.

    22. Swap Tea Towels, Rug, and Placemats for the Season

    Small kitchen with warm rust and cream tea towels, a small rug and placemats in fall colours.

    The fastest seasonal update in a studio kitchen is a swap of soft items you already wash often. Change tea towels, a small kitchen rug, and placemats to match the season, such as warm rust and cream for fall, or fresh green and white for spring. Store the out-of-season set in one labelled bin in the tall cabinet, so the swap takes minutes. Wash the rug often, since a small kitchen rug collects crumbs and spills, and keep the colour palette to two or three shades.

    23. Style a Fruit Bowl and Small Vase as the Centerpiece

    Kitchen counter centerpiece with a bowl of apples and a small vase of dried stems.

    A fruit bowl and a small vase give a studio kitchen a seasonal centerpiece that changes without new furniture. In fall, use apples or small pumpkins beside a vase of dried stems, and in spring, use lemons with fresh stems from the market. Keep the display to one bowl and one vase on the counter or bar, so it does not eat prep space. These fall kitchen decor ideas show how a simple bowl and vase can carry a seasonal scheme in a small room.

    24. Set a Cozy Breakfast Nook With Mugs and Placemats

    Cozy small breakfast nook in a studio kitchen with mugs on hooks, placemats and a small tray.

    A cozy breakfast nook in a studio can be as simple as a fold-down table, two placemats, and a mug shelf within reach. Hang daily mugs on hooks under a shelf, keep a small tray for sugar and spoons, and add a cloth placemat that wipes or washes easily. In the morning, the nook is ready without clearing work papers or cooking tools first. For table styling that works in a small space, see these everyday dining table decor ideas.

    25. Restyle One Open Shelf for Each Season

    Open kitchen shelf restyled for fall with a small vase, a stack of warm coloured bowls and a jar.

    Restyling one open shelf each season gives a cozy update without changing the whole kitchen. Swap three items only: a small vase, a stack of bowls in a seasonal colour, and a jar of dry goods or a candle in a jar. Keep daily dishes in place, so the shelf stays useful, and move the swapped items to the tall cabinet until next year. Photograph the shelf after each change if you want to repeat a layout you liked, and keep the shelf simple enough to dust in a minute.

    26. Plan a Small Thanksgiving Table in the Studio

    Small festive Thanksgiving table in a studio kitchen with simple placemats, a small vase and a rolling serving cart nearby.

    A studio Thanksgiving table works when you plan for the guest count, not for a full dining room. Use the fold-down table or the breakfast bar, add the rolling cart as a serving station, and keep hot dishes in the oven until serving time. Set places with simple placemats, one small vase, and candles in jars, and keep the sink clear for washing up between courses. These thanksgiving kitchen decor ideas help a small table feel festive without crowding the room.

    27. Add a Hot Drink Station for Cold Months

    Cozy hot drink station on a small kitchen shelf with mugs, tea jars, coffee and a kettle.

    A hot drink station gathers mugs, tea, coffee, cocoa, and a kettle or coffee maker on one shelf or cart, ready for cold mornings. Keep the station near a power point but clear of the sink splash zone, and store beans or tea in sealed jars on the shelf. Add a small basket for filters and spoons, and wipe the shelf often, since coffee grounds and cocoa dust scatter. In winter, add a jar of cinnamon sticks and a small stack of cozy mugs, then swap them out in spring.

    28. End Each Season With a One-Hour Kitchen Reset

    Tidy small studio kitchen after a seasonal reset, with clear counters, wiped shelves and a small seasonal display.

    A one-hour reset at the end of each season keeps a studio kitchen from slowly filling up. Set a timer and work in order: clear the counters, wipe shelves and the rail, check spice and jar dates, return rarely used items to the tall cabinet, and swap the seasonal towels and shelf display. Note one fix for next season, such as a new hook or a better bin, and add it to a shopping list. A short, regular reset beats a large clear-out, and it keeps the cozy seasonal update feeling fresh rather than cluttered. For winter warmth, these christmas kitchen island decor ideas and halloween kitchen decor ideas show how small seasonal pieces can work in a compact space, and the colors for your kitchen cabinets guide can help if a paint refresh is part of your next seasonal change.

    Conclusion

    A studio kitchen works best when every piece earns its place and the seasonal update stays small. Start with layout and storage, add light where you work, and finish with soft, swappable touches that make the room feel warm in any season. You do not need a larger kitchen to cook well or to host a small meal. You need clear zones, tools within reach, and a reset routine that keeps counters clear. Pick one idea from this list this week, live with it for a few days, and add the next change only when the first one feels natural.

    FAQs

    How do I plan a studio kitchen layout in a small space?

    Measure the wall, the door swing, and the floor space, then mark zones for storage, prep, cooking, and washing along the counter. Keep the prep zone between the sink and the stove, keep a clear path to the door, and choose fold-down or rolling pieces for eating and extra counter space. Test the layout for a week before buying fixed storage, since a small change in a studio affects the whole room.

    What storage works best in a studio kitchen?

    Open shelves for daily dishes, a rail for tools, a narrow pull-out pantry for bottles, and one tall cabinet for bulk and rarely used items cover most studio kitchens. Use clear labelled jars for dry goods, stand baking sheets upright, and keep daily items at waist to eye level. Avoid adding storage for items you rarely use, since every new shelf or bin takes space from cooking and eating.

    How can I make a small kitchen feel cozy without clutter?

    Use warm under-cabinet light, wood boards, a small rug, and one seasonal display, such as a fruit bowl and a vase, rather than many small decorations. Keep the colour palette to two or three shades, leave gaps on shelves, and clear the counter after each meal. A cozy kitchen feels warm because of light, wood, and soft textiles, not because every surface is filled.

    Can a studio kitchen host a holiday meal?

    Yes, if you plan for the guest count and use movable pieces. Use a fold-down table or breakfast bar for eating, a rolling cart as a serving station, and the oven to hold hot dishes until serving time. Keep the sink clear, wash up between courses, and set a simple table with placemats and one small centerpiece. Guests will remember the food and the welcome, not the size of the room.

    How often should I update seasonal decor in a studio kitchen?

    A small swap four times a year works well: change tea towels, a rug, placemats, and one shelf display at the start of each season. Store the out-of-season set in one labelled bin, so the swap takes minutes and nothing piles up. If a seasonal piece is still useful, such as a fruit bowl, keep it and change only what sits beside it.

    What is the cheapest way to refresh a studio kitchen?

    Start with a clear-out and a clean, then swap tea towels and a rug, add under-cabinet light, and restyle one open shelf. Paint is a larger step, so test a sample on one door first and check it in morning and evening light. Small, washable changes give the most visible result for the least cost, and they are easy to reverse if the look does not suit the room.


  • 22 Gothic Kitchen Ideas to Make Small Spaces Work Harder

    22 Gothic Kitchen Ideas to Make Small Spaces Work Harder

    A gothic kitchen does not need a large room or a castle budget. In a small kitchen, the look works best when you pick a few strong details, such as black cabinets, an arched shape, or iron hardware, and let pale counters and good light keep the room feeling open. These 22 gothic kitchen ideas focus on changes that also help a small space work harder, from storage that uses wall space to seating that tucks away. Start with one idea, live with it for a week, and add another only if the room still feels calm and easy to cook in.

    Key Takeaways

    • Pick two or three gothic details, such as black, arches, and iron, and repeat them. Repeating a small set keeps a small kitchen calm.
    • Keep at least one light surface, such as a pale counter, a light wall, or a bright window, so dark colors do not close the room in.
    • Use walls and vertical space for storage, so counters stay clear for cooking.
    • Choose pieces that do two jobs, such as a rolling island, a bench with storage, or a rail that holds pans.
    • Add warm light in layers, with under-cabinet light for work and candle-style light for evenings.

    1. Paint the Base Cabinets Matte Black and Add Brass Cup Pulls

    Small kitchen with matte black base cabinets, brass cup pulls, and a light wood countertop.

    Matte black base cabinets give a small kitchen a clear gothic anchor without changing the layout. Keep the upper cabinets pale, or leave one stretch of wall light, so the dark lower half does not make the room feel low. Brass cup pulls soften the black and make the cabinets easy to open with wet or floury hands.

    Paint only after cleaning and lightly sanding the doors, and use a paint made for cabinets so the finish stands up to daily use. Try one door first and check it in daylight and evening light. If black on every base cabinet feels heavy, paint the island or one run only and keep the rest pale.

    2. Use Pointed Arch Shapes on Upper Cabinet Doors

    Kitchen upper cabinets with pointed arch door panels in deep green-black, with one open arch niche.

    A pointed arch on an upper cabinet door brings the gothic shape into the room at eye level, where you notice it most. You can buy arch-front doors, add a thin applied arch trim to flat doors, or cut an arch niche into one open section. Keep the arch shape the same on each door so the run looks planned.

    This idea works well on a short run of cabinets, where one repeated shape has room to stand out. Pair arched doors with plain hardware and a plain backsplash, so the arch stays the main detail. In a very small kitchen, use arches on two or three doors rather than on every cabinet.

    3. Paint One Accent Wall Deep Charcoal

    Small kitchen with one dark charcoal accent wall, pale cabinets, and warm under-cabinet lighting.

    One deep charcoal wall adds drama for the cost of a tin of paint, and it works best on the wall you see first when you walk in. Keep the other walls pale, and add a light counter or light wood shelf on the dark wall so the eye has somewhere to rest. This contrast is what stops the room feeling like a box.

    Paint the wall behind open shelves or a small table rather than behind the stove, where grease and steam mark paint faster. Use a washable finish and keep a small amount of paint for touch-ups. If you rent, test a large painted board leaned against the wall first, so you can judge the color before you commit.

    4. Fit Black Open Shelves on Wrought Iron Brackets

    Black open kitchen shelves on wrought iron brackets holding white bowls, dark mugs, and glass jars.

    Black open shelves on iron brackets hold daily dishes where you can reach them, and they use wall space that a closed cabinet would make feel heavy. Keep each shelf to one or two groups, such as bowls on one shelf and mugs on another, and leave a gap at each end. Our guide to how to style open shelves shows how to leave that breathing room.

    Fix brackets into studs or with fixings rated for the load, and keep heavy stacks low. Limit open shelves to one wall in a small kitchen, so the room still has closed storage for items that look messy. Wipe the shelves weekly, since cooking grease settles on open surfaces.

    5. Create a Pointed Arch Tile Panel Behind the Stove

    Kitchen stove wall with a pointed arch tile panel in dark green tiles behind a black range.

    A pointed arch panel of dark green or black tile behind the stove turns a plain cooking wall into a focal point, and it needs only a small area of tile. Mark the arch shape on the wall first, tile inside the line, and keep the rest of the backsplash plain. The arch shape reads as gothic even when the tile color is quiet.

    Use tiles that wipe clean and a grout sealer near the stove, since this wall sees steam and splashes. Keep the arch width close to the stove width, so the panel frames the cooking zone rather than spreading across the whole wall. If full tiling feels like too much work, a painted arch outline with a small tiled panel inside gives a similar effect.

    6. Add Leaded Glass Inserts to Cabinet Doors

    Kitchen wall cabinets with leaded textured glass doors in a diamond pattern and dark frames.

    Leaded glass, with its diamond or grid pattern, softens a dark kitchen and hides the contents of a cabinet just enough to look tidy. You can fit real leaded panels, use textured glass, or apply a leaded-look film to existing glass doors. The pattern catches light and adds detail without a new color.

    Use leaded inserts on one or two upper cabinets, such as the pair beside the sink, and keep the rest of the doors solid. This keeps the pattern special and limits cleaning, since textured glass shows dust more than flat glass. Check that the doors still close well after the change, and keep fragile glass out of cabinets that children open often.

    7. Hang Pans From a Wrought Iron Rail

    Black wrought iron rail with hooks holding cast iron pans and copper pots above a small stove.

    A wrought iron rail with hooks frees a whole cabinet shelf and puts pans where you grab them while cooking. Fix the rail into studs, hang the heaviest pan nearest a bracket, and leave space between pans so you can lift one off without knocking the next. Keep lids in a separate spot, since lids hung with pans tangle.

    This idea suits a wall beside the stove or a short stretch above a counter, but keep pans clear of the main walkway so no one brushes against a handle. The same iron-and-black pairing in these black and gold kitchen ideas shows how dark metal can sit with warm brass without looking busy. Wipe the rail often, since steam leaves a film on iron near a stove.

    8. Hang Candle-Style Pendant Lights Over a Counter or Table

    Small kitchen island with black iron candle-style pendant lights and warm glowing bulbs.

    Pendant lights shaped like candle holders give evening light a gothic feel without real flames near curtains or paper. Use warm bulbs on a dimmer, and hang two small pendants over a counter or one over a small table, rather than a large fitting that crowds a low ceiling. Keep the pendants high enough that you can see across the table.

    Choose a simple iron or black metal fitting so the light, not the shade, does the work. If you cook under the pendants, add under-cabinet light for the work surface, since candle-style bulbs alone are too dim for safe chopping. Keep spare bulbs in a drawer, since warm candle-style bulbs can be harder to find than standard bulbs.

    9. Choose a Dark Stone-Look Countertop With Pale Veining

    Small kitchen with a dark grey stone countertop with pale veining, black cabinets, and a white sink.

    A dark grey countertop with pale veining gives a gothic kitchen a solid work surface that still shows crumbs and spills less than a plain black top. The pale lines break up the dark surface and link it to a light sink, light dishes, or a pale wall. Keep the counter depth standard, so a dark top does not eat into a small work area.

    Wipe the top daily and use boards for cutting, since dark surfaces show scratches in bright light. Pair the top with one warm detail, such as wood boards or brass handles, so the kitchen does not feel cold. If a full new countertop is out of reach, a dark stone-look worktop cover on one run gives a similar look for less work.

    10. Paint the Range Hood Black and Add an Arched Trim

    Small kitchen stove with a matte black range hood with pointed arch trim and a dark tile backsplash.

    A black range hood with a simple arched trim turns the stove wall into a focal point and ties the hood to arched doors or an arched tile panel elsewhere. Keep the trim to one arch line or a small cornice, so the hood still looks like a working appliance. Use heat-resistant paint made for the hood material, and never paint filters or fan parts.

    Check the hood height and venting before you paint, and clean off grease first so the paint holds. This idea works best when the rest of the stove wall stays plain, with no busy tile competing with the arch. For more seasonal dark-kitchen styling, these Halloween kitchen decor ideas show how to add dark accents without changing fixed features.

    11. Hang a Pointed Arch Mirror Over the Sink

    Kitchen sink wall with a tall pointed arch mirror in a black frame above the sink.

    A tall pointed arch mirror over the sink reflects window light back into a small kitchen and adds the gothic shape without taking any counter space. Choose a mirror sized to the sink wall, with a thin black frame, and hang it high enough that splashes do not spot it constantly. The mirror works best opposite or beside a window, where it has light to reflect.

    Fix the mirror with fixings rated for its weight, and keep it clear of the faucet swing. If a mirror over a sink feels odd, hang it on the wall you face while cooking, where it still bounces light around the room. Wipe it with a dry cloth after steamy cooking, so water marks do not build up.

    12. Use a Rolling Butcher Block Island That Tucks Away

    Dark wood butcher block island on black caster wheels in a compact kitchen, with a basket shelf below.

    A butcher block island on casters adds prep space when you need it and rolls to the wall when you do not, which is ideal for a small kitchen. Choose a size that leaves a clear walkway on both sides when it is in use, and lock the casters before chopping. A shelf below holds a basket for towels or a small set of bowls.

    Keep the top oiled and use it as a second prep zone, not as permanent storage for clutter. When guests come, roll it to the wall as a serving table, then roll it back for cooking. Measure doorways and the gap beside the fridge before you buy, so the island can actually move where you plan to store it.

    13. Lay a Black and White Checkerboard Floor in a Small Kitchen

    Small kitchen with a black and white checkerboard tile floor, pale cabinets, and black hardware.

    A black and white checkerboard floor adds a classic gothic pattern underfoot and helps a small kitchen feel planned rather than plain. Small tiles suit a compact room, since large tiles can make the pattern feel out of scale. Keep the walls and cabinets quiet, so the floor carries the pattern on its own.

    Use tiles that suit a kitchen floor, with grout sealed against spills, and keep a spare box of tiles for repairs. If new tiling is too much work, peel-and-stick checkerboard tiles on a sound existing floor give a similar look and can be removed later. Test one tile in daylight, since black tiles can look blue or brown under some lights.

    14. Pair Dark Cabinets With Black Leather and Iron Bar Stools

    Kitchen counter with two black leather and iron bar stools and a vase of dried stems.

    Black leather and iron bar stools suit a gothic counter and stand up to daily use better than fabric seats in a kitchen. Choose stools with a footrest, a back if the counter is used for meals, and a seat height that leaves room to slide in without hitting the counter edge. Two stools suit most small counters, and a third only if the counter is long enough.

    Wipe leather seats with a damp cloth and keep them away from direct stove heat. If leather feels too heavy, black metal stools with a wood seat give a similar look and are lighter to move. Store a stool under the counter overhang when it is not in use, so the walkway stays clear.

    15. Frame the Pantry With a Pointed Arch Opening

    Kitchen pantry cupboard with a pointed arch top frame and black door, with jars and baskets inside.

    A pantry with a pointed arch frame feels like a small gothic doorway, even when the pantry itself is just a cupboard. You can add arch trim around an existing pantry door, fit an arch-top door, or leave the pantry open with an arch frame and baskets inside. Keep the arch shape matching any arched cabinet doors nearby.

    Inside the pantry, use clear jars and one basket per shelf, so the open arch still looks tidy. If the pantry is in a corner, the ideas in our guide to corner kitchen cabinet ideas help you use the awkward space behind the arch. Label jars on the front, so you can find things without pulling every jar out.

    16. Add Stained Glass Color to the Kitchen Window

    Small kitchen window with deep red, purple, and amber stained glass style panels above a sink.

    Stained glass color on a kitchen window adds red, purple, and amber light to a dark kitchen without blocking daylight completely. A stained glass film is the simplest route: it sticks to the glass, peels off later, and costs far less than a real stained glass panel. Apply it to the upper half of the window first, so the lower half stays clear for looking out.

    Our guide to kitchen window decor ideas covers other ways to dress a kitchen window without losing light. Clean the glass well before applying film, smooth out bubbles from the center outward, and keep plants clear of the film edge so watering does not lift it. If you use real stained glass, hang it inside the window frame so it can be removed for cleaning.

    17. Swap to a Matte Black Faucet and Matching Hardware

    Kitchen sink with a matte black faucet, black cabinet knobs, and a white ceramic sink.

    A matte black faucet, with matching knobs and pulls, is a low-cost way to link dark cabinets, an iron rail, and a black hood into one scheme. Swap the faucet and hardware together, so the finishes match, and keep the sink and counter pale so the black details stand out. This change needs no new cabinets and takes an afternoon for most kitchens.

    Check that the faucet suits your sink holes and water pressure before you buy, and keep the old hardware in a bag in case you move. Black finishes show water marks, so wipe the faucet dry after use and avoid harsh cleaners that can dull the coating. If your water is hard, a black faucet near a window, where marks show less, is a safer spot.

    18. Store Dry Goods in Apothecary Jars on One Shelf

    Dark kitchen shelf with vintage apothecary glass jars with black lids holding dry goods.

    Apothecary jars with black lids turn rice, oats, tea, and dried herbs into a gothic display that also helps with shopping, since you can see levels at a glance. Use jars of one or two sizes, label each jar on the front, and keep them on one shelf rather than spreading them across the kitchen. This limit keeps the display calm and the shelf easy to clean.

    Refill jars from bulk packs kept in a cabinet, and wash a jar fully before filling it with a different food. Keep the shelf away from stove steam, which can soften dry goods, and check dates twice a year. A shelf of eight to twelve jars suits most small kitchens, and more than that starts to look like a shop display.

    19. Place One Tall Black Vase With Dried Stems on the Counter End

    Tall black ceramic vase with dried stems on the end of a small kitchen counter.

    One tall black vase with dried stems adds height and a gothic note to a counter end, without taking the work space in the middle. Choose dried stems that suit the vase height, keep the arrangement narrow so it does not block a walkway, and place it where it will not be knocked by a cabinet door. Pampas stems, dark foliage, and dried seed heads all hold their shape well.

    Keep dried stems away from the stove and any open flame, since dried plants catch fire easily. Dust the arrangement with a soft brush, and replace stems once they start to shed. If counter space is very tight, move the vase to a windowsill or the top of a tall cabinet, where it still adds height without using prep space.

    20. Hang Framed Black and White Architectural Prints

    Small kitchen wall with framed black and white architectural prints of gothic arches above a counter.

    Framed black and white prints of gothic arches, windows, or doorways add the style to a wall that cannot take shelves or tiles. Use thin black frames, two or three prints in a row, and hang them where steam will not reach, such as the wall beside a table or above a bench. Black and white keeps the prints calm next to dark cabinets.

    Hang prints at eye level and use fixings suited to the wall type, since framed glass is heavier than it looks. If you rent, use picture hanging strips rated for the frame weight, and check the weight limit before hanging glass. Swap prints seasonally if you like, but keep the frames the same, so the wall still reads as one planned group.

    21. Build a Breakfast Nook With Bench Storage in a Corner

    Tiny kitchen breakfast nook with a built-in storage bench, dark cushions, and a small round wood table.

    A corner breakfast nook with a bench turns dead corner space into seating and storage, which is a strong gain in a small kitchen. Build or buy a bench with lift-up seats or drawers below, add a small round table that seats two or three, and keep the bench cushions dark with a washable cover. The bench seats more people than chairs in the same footprint, since no chair legs take up floor space.

    Measure the corner carefully, and leave room to slide onto the bench without moving the table. Store rarely used items in the bench, such as tablecloths or a picnic set, and keep daily items in the kitchen itself. For table styling once the nook is built, see our ideas for everyday dining table decor.

    22. Set a Candelabra on the Table and Layer the Evening Light

    Small kitchen dining corner at dusk with a black iron candelabra with lit candles on a wood table.

    A black iron candelabra on the table, used with real candles for a meal or flameless candles for everyday evenings, gives a gothic dining corner its finishing detail. Keep the candelabra low enough to see across the table, place it on a heatproof mat, and never leave real candles burning in an empty room. Layer the light: dim the main light, use under-cabinet light in the kitchen, and let the table light stay warm and low.

    This idea works best as the last step, after the cabinets, shelves, and seating are set, since candlelight shows off dark finishes well. Store the candelabra in a cabinet when it is not in use, so the table stays clear for cooking prep. If you have children or pets, use flameless candles in the candelabra and keep real candles for adult-only meals.

    Conclusion

    A small gothic kitchen works when dark colors, arches, and iron are used with restraint and each change also helps the room work better. Start with the change that solves a daily problem, such as a rail for pans, a rolling island for prep space, or a bench that adds storage. Keep one light surface, repeat a small set of details, and add warm light in layers. With those limits in place, black cabinets, an arch tile panel, or a candelabra on the table can give a compact kitchen a clear gothic character without crowding it.

    FAQs

    How do I make a small kitchen look gothic without making it feel dark?

    Use dark colors on one area, such as base cabinets or one wall, and keep counters, upper cabinets, or a window wall light. Add warm light in layers, use a mirror or light floor to bounce light, and repeat only two or three gothic details. Step back to the doorway and check the room in daylight and evening light before adding more dark pieces.

    What is the cheapest way to try a gothic kitchen look?

    Paint is the cheapest route: one accent wall, painted base cabinets, or a black faucet and hardware swap can change the room for little cost. Stained glass film on a window, apothecary jars on one shelf, and a tall black vase with dried stems are also low-cost changes. Start with one change, live with it for a week, and add the next only if the room still feels calm.

    Can I use black cabinets in a very small kitchen?

    Yes, if you balance them with light. Keep upper cabinets pale or open, use a light countertop, and make sure the room has good task lighting for cooking. Matte black shows fewer fingerprints than gloss black, and brass or wood details keep the room from feeling cold. If the kitchen has no window, keep black to the base cabinets and one dark accent, not the whole room.

    How do I keep a gothic kitchen from looking like Halloween decor all year?

    Keep the gothic details architectural, such as arches, iron, leaded glass, and dark wood, rather than seasonal props. Use the style year round with plain dishes, wood boards, and plants, and save pumpkins, bats, and other seasonal items for autumn. A checkerboard floor, black cabinets, and brass hardware read as gothic in any season.

    Is a gothic kitchen hard to keep clean?

    Dark surfaces show dust, water marks, and crumbs more than pale ones, so wipe counters and faucets daily and shelves weekly. Choose washable paint, sealed grout, and a countertop that hides marks, such as dark stone with pale veining. Open shelves need more cleaning than closed cabinets, so limit open storage to one wall and keep the rest closed.

    What lighting works best in a dark gothic kitchen?

    Layer three types of light: bright under-cabinet light for cooking, a main ceiling light on a dimmer for general use, and warm low light, such as candle-style pendants or a candelabra, for evenings. Keep work areas bright for safety, even when the dining corner is dim. Warm bulbs suit dark cabinets better than cool white bulbs, which can make black look grey.

  • 23 Narrow Kitchen Ideas to Add Character to Your Space

    23 Narrow Kitchen Ideas to Add Character to Your Space

    A narrow kitchen can feel like a corridor, but it does not have to look like one. With the right color, storage, and seating choices, a galley layout can feel calm, useful, and full of personality. These 23 narrow kitchen ideas focus on changes that fit a tight room: slim storage, clear walkways, warm materials, and one or two strong details that draw the eye. Start with the change that fixes your biggest daily problem, measure the walkway before you add anything, and keep at least one clear path for cooking.

    Key Takeaways

    • Keep the main walkway clear first, then add character with color, wood, hardware, and lighting.
    • Put tall or closed storage on one side where possible, and leave the other side lighter with open shelves, a rail, or a clear wall.
    • Use the far end wall as the focal point, with paint, tile, beadboard, art, or a mirror, so the room feels finished rather than tunnel like.
    • Choose slim, pull out, fold down, and wall mounted pieces that work in a narrow footprint.
    • Repeat one warm material and one metal finish so the room looks planned, not crowded.

    1. Paint the Far End Wall a Deep, Warm Color

    Narrow kitchen with a deep green painted end wall and light cabinets along the long walls.

    Painting the wall at the far end of a narrow kitchen gives the room a clear focal point and stops the eye from running straight down a long corridor. A deep green, warm navy, or rich terracotta works well when the long walls stay light, since the contrast adds depth without closing the room in. Paint only that end wall at first, then live with it for a few days before deciding whether to repeat the color anywhere else.

    Use a washable paint finish, since the end wall often sits near the stove or sink. If you need help choosing a shade that sits well with cabinets and counters, see these ideas for colors for your kitchen cabinets. Keep trim and ceiling white or cream so the color reads as a deliberate panel, not as a dark box.

    2. Put Tall Storage on One Side Only

    Narrow kitchen with tall storage cabinets on one side only and a lighter open wall opposite.

    Tall cabinets on both sides of a narrow kitchen can feel like walls closing in. Instead, run tall storage down one side only, and keep the other side lower, with base cabinets and open wall space above. This keeps one side of the room feeling open while still giving you a full height home for food, cleaning supplies, and tall appliances.

    Place the fridge, pantry, and oven tower on the tall side where possible, so the other side stays clear for prep. Use the tall run for items you reach for less often at the top, and daily items at hand height. If the tall side faces the main entry, add a shallow open niche at the end so the first thing you see is not a blank cabinet door.

    3. Fit a Slim Pull Out Pantry Beside the Fridge

    Slim pull out pantry filled with jars and bottles beside a fridge in a narrow kitchen.

    The gap beside a fridge in a narrow kitchen is often wasted, yet it can hold a slim pull out pantry for oils, sauces, spices, and cans. Because the whole unit slides out, you can see every jar without reaching into a deep cupboard, which matters when the room has no space for a wide pantry cabinet. Measure the gap, the door swing, and the depth before ordering, and check that the unit clears skirting boards and handles.

    Group items by use, such as cooking oils together and baking items together, and put heavy jars low. Label the front edge of each shelf if more than one person cooks, so jars go back to the same spot. A pull out pantry also helps in a galley kitchen, where every centimeter of wall storage counts and a door that swings into the walkway would block the path.

    4. Add a Narrow Rolling Cart as a Movable Island

    Narrow rolling kitchen cart with a wood top and a lower shelf in a galley kitchen.

    A narrow rolling cart gives a galley kitchen extra prep space and storage without a fixed island blocking the walkway. Choose a cart that leaves a clear path on at least one side when it is in use, with lockable wheels so it stays put while you chop. A butcher block top adds warmth, while a shelf or drawer below holds oils, a knife block, or baking trays.

    When guests arrive or the floor needs cleaning, roll the cart to the end wall or beside the fridge. Keep only daily tools on the cart, so it stays useful rather than becoming another crowded surface. Measure the cart against your narrowest gap, including door frames, before you buy, since a cart that cannot move freely loses its main benefit.

    5. Use Glass Front Cabinets on One Run

    Glass front kitchen cabinets holding white plates and glasses in a narrow kitchen.

    Glass front cabinets lighten a narrow kitchen because they break up a long run of solid doors and let light reach the back of the shelf. Use them on one run only, such as the run beside the sink, and keep everyday plates and glasses inside so the display looks honest rather than staged. Clear glass suits a simple kitchen, while fluted or reeded glass hides mixed items a little better.

    Keep the inside of glass cabinets neat, with one or two tones of dishes and a gap between groups. Store food, cleaning supplies, and mismatched items in closed cabinets nearby. If you are unsure how to group dishes so a shelf looks calm, the same grouping rules in this guide to how to style open shelves work well inside glass cabinets too.

    6. Hang a Long Pot Rail Along One Wall

    Metal pot rail with hanging saucepans and utensils along a narrow kitchen wall.

    A steel or wood rail with hooks holds saucepans, a colander, and large utensils where you can reach them fast, and it frees a whole cabinet in a narrow kitchen. Mount the rail on the long wall at a height where the longest pan hangs clear of the counter, and leave space below so steam from the stove does not constantly coat the pans. Hooks that slide along the rail let you space pans by size.

    Hang the heaviest pan nearest a wall bracket, where the rail is strongest, and keep lids in a separate rack, since lids hung with pans tangle and clang. Wipe the rail weekly, because cooking grease settles on metal near the stove. In a very narrow room, a single rail above the backsplash adds storage without taking any floor space at all.

    7. Add Open Shelves Only at the Far End

    Open wood shelves holding plates and bowls at the far end of a narrow kitchen.

    Open shelves along the full length of a narrow kitchen can look busy and collect grease. Instead, put a short run of open shelves at the far end wall, where they act as a display and a useful store for daily dishes. This keeps the long walls calmer, while still giving you a spot for plates, bowls, and a small plant that softens the end of the room.

    Keep each shelf to one or two groups, with space left at each end, and put heavy stacks low. For grouping, height, and breathing room, see this guide to how to style open shelves. If the far end sits near the stove, keep the lowest shelf clear of direct steam, and use closed storage for anything that would mark quickly.

    8. Fit a Fold Down Table on the Long Wall

    Fold down wall table with two stools set for breakfast in a narrow kitchen.

    A fold down table fixed to a free stretch of long wall gives you a breakfast spot or extra prep surface that folds flat when you need the floor back. It suits one or two people, a quick coffee, or a homework spot, and it needs only stools that tuck under a counter or hang on wall hooks when not in use. Choose a size that seats two comfortably without blocking the walkway when it is down.

    Fix the table to studs or a solid wall, since it must hold plates, cups, and leaning elbows, and add a latch that holds it shut when folded. Store a small cutting board and a cloth in a basket beside it, so the surface is ready fast. Fold it up after meals, so the narrow room keeps its full width for cooking and passing through.

    9. Use Patterned Tile on One Backsplash Only

    Patterned tile backsplash behind a stove in a narrow kitchen with plain surrounding walls.

    Patterned tile adds character fast, but tiling every wall in a narrow kitchen can feel busy. Choose one backsplash run, often behind the stove or sink, and keep the rest of the walls plain. A single patterned band gives the room a handmade feel and a clear focal point, while plain paint or simple tile elsewhere keeps the space calm.

    Pick a pattern with one main color that already appears in the room, such as a cabinet tone or a rug color, so the tile links to the rest of the kitchen. For bold pattern ideas, these Mexican kitchen decor ideas show how strong tile can work without taking over a room. Seal grout near the stove, and keep the tile height even across the chosen run.

    10. Add Beadboard to the Lower Half of a Long Wall

    White beadboard panelling on the lower half of a long narrow kitchen wall.

    Beadboard on the lower half of a long wall adds texture and a cottage feel without painting the whole room a strong color. The vertical lines draw the eye up, which helps a low or narrow kitchen feel taller, and the painted boards wipe clean more easily than plain plaster near a walkway. Paint the beadboard the same color as the trim for a quiet look, or one shade deeper for a subtle panel effect.

    Stop the beadboard at a chair rail height, and keep the wall above it plain and light. This idea works well on the wall opposite the main cabinet run, where it can take scuffs from stools and feet. Seal the paint well at the base, since mops and spills reach that low strip first, and check that boards sit clear of radiators and vents.

    11. Run Under Cabinet Lighting the Full Length

    Warm under cabinet lighting over a counter in a narrow kitchen.

    Good light changes how a narrow kitchen feels, and under cabinet lighting the full length of the run removes the dark strip that makes a galley kitchen feel like a tunnel. A warm white strip under each upper cabinet lights the counter evenly, so prep feels safer and the room looks wider at night. Battery or plug in strips suit a rental, while wired strips suit a planned update.

    Keep the light color consistent across the whole run, and hide the strip behind a small lip so you see the glow, not the fitting. Add a separate brighter task light over the sink and stove, where detailed work happens. At night, under cabinet light alone can make a narrow kitchen feel calm and finished, without the harsh glare of a single ceiling light.

    12. Choose One Large Sink With a Board Cover

    Large single bowl kitchen sink with a wood cutting board cover in a narrow kitchen.

    One large single bowl sink suits a narrow kitchen better than a divided sink that fits neither a roasting pan nor a baking tray. Add a cutting board that sits over part of the sink, or a sliding colander and drying rack, so the sink doubles as extra counter when you are not washing up. This trick matters most in a galley kitchen with very little counter beside the sink.

    Choose a sink depth that suits your height, since a very deep bowl can strain your back during long washing sessions. Fit a tap with a pull out spray for rinsing the sink itself, and keep a small caddy for soap and brushes so the rim stays clear. Dry the board cover after use and store it upright, so it does not trap moisture on the counter.

    13. Add a Butcher Block Section to the Counter

    Butcher block counter section used for food prep between sink and stove in a narrow kitchen.

    A butcher block section in the middle of a long counter run adds warmth and a clear prep zone, without replacing the whole counter. Use it where you chop most often, such as between sink and stove, and keep the rest of the counter in a plain, easy to clean material. The wood tone breaks up a long run of stone or laminate and gives the narrow room a natural focal point.

    Oil the block regularly, and use a separate board for raw meat, so the counter section stays safe for vegetables and bread. Wipe spills promptly, and sand out small marks before they stain. If the block sits near the sink, keep a small gap or a sealed edge so standing water does not soak into the end grain.

    14. Build a Slim Banquette Along One Wall

    Slim built in banquette bench with cushions and a small table in a narrow kitchen.

    A built in bench along one wall turns a dead strip of a narrow kitchen into a dining spot that seats more people than separate chairs. The bench fits tight against the wall, so a small table can sit close, and the base can hold drawers or a lift up seat for table linens and rarely used serving dishes. This works best at the open end of a galley kitchen, where a table does not block the cooking path.

    Add a firm cushion in a washable fabric and a few back cushions, since a flat bench gets uncomfortable fast. Keep the table size modest so people can slide in and out without moving the whole table. For simple table styling that keeps a small spot looking cared for, see these ideas for everyday dining table decor. A banquette under a window makes a small nook feel like a planned room.

    15. Add a Small Peninsula Bar at the Open End

    Short peninsula breakfast bar with two stools at the open end of a narrow kitchen.

    A short peninsula counter at the open end of a narrow kitchen creates a breakfast bar and a clear edge between kitchen and living space, without the floor area a freestanding island needs. Two stools are usually enough, and the kitchen side can hold drawers or open shelving for daily items. This idea suits a galley kitchen that opens into a living room, where a full wall would block light.

    Keep the overhang deep enough for knees, and choose stools that slide fully under the counter so the walkway stays clear. Keep the bar top clear except for a small tray or plant, so it can switch between eating, prep, and a landing spot for shopping bags. A peninsula also gives guests a place to sit without standing in the cooking path.

    16. Paint a Chalkboard Panel Beside the Fridge

    Framed chalkboard panel with a handwritten menu beside a fridge in a narrow kitchen.

    A framed chalkboard panel beside the fridge gives shopping lists, menus, and notes a fixed place, which keeps paper off the fridge and counter in a narrow kitchen. Hang it near the kitchen entry or beside the pantry, with chalk or chalk markers in a small cup hung alongside. A weekly menu at the top and a running shopping list below covers most family needs, and the dark panel adds character to a plain wall.

    Wipe the board clean each week so old items do not linger and get bought twice. Keep the board away from the stove splash zone, and use a damp cloth rather than a dry eraser to avoid chalk dust settling on food. A magnetic chalkboard adds a second use, holding recipes and school notes with magnets, without needing a separate noticeboard.

    17. Lay a Vintage Style Runner Down the Middle

    Vintage style runner rug laid down the middle of a narrow kitchen floor.

    A runner rug down the middle of a narrow kitchen adds color, pattern, and warmth to a floor that would otherwise read as a plain corridor. Choose a flat weave or low pile rug that lies flat, so it does not catch feet or chair legs, and pick a washable material, since kitchen floors see spills. A vintage style pattern in muted tones adds character without demanding a full room redesign.

    Measure the walkway first, and leave a clear strip of floor on each side of the runner, so the room still feels wide enough to pass through. Use a non slip pad underneath, and shake the rug out often, since crumbs collect in the middle of a narrow room. If the runner sits near the sink, choose a shorter rug that stops clear of the wet zone.

    18. Repeat One Warm Metal for Hardware and Taps

    Brass cabinet pulls and a brass tap in a narrow kitchen with light cabinets.

    Repeating one warm metal, such as brass or aged bronze, for cabinet pulls, tap, and light fittings gives a narrow kitchen a finished, collected feel. The metal acts as a thread through the room, linking cabinets, sink, and lighting, even when the cabinets and counters are plain. This idea works best when other metals are kept to one or two finishes, so the warm metal stays the clear accent.

    Start with cabinet pulls, since they are easy to change and cover a long run, then match the tap finish when it next needs replacing. For ideas on pairing gold tones with dark cabinets, see these black and gold kitchen ideas. Wipe pulls often, since kitchen grease dulls metal near the stove, and avoid mixing shiny and matte versions of the same metal in one run.

    19. Mount a Wall Plate and Dish Rack Near the Sink

    Wall mounted dish rack holding plates beside a kitchen sink in a narrow kitchen.

    A wall mounted plate and dish rack gives washed plates a drying spot that does not cover the counter, which matters when counter space is already tight. Choose a rack with a drip tray, or mount it over the sink so water drains where it should. Stainless or coated wire suits a wet zone, and open sides let air move around the plates so they dry fully.

    Size the rack for your daily plate count, not for a full dinner party set, and keep it near the sink for a short carry. Empty it once dishes are dry, so the rack does not become permanent storage for a second set. If wall space is tight, a narrow rack for plates only still clears a useful patch of counter and keeps the sink area tidy.

    20. Add Exposed Wood Beams Across the Ceiling

    Exposed wood beams across the ceiling of a narrow kitchen with light walls.

    One or two wood beams across the ceiling add warmth and structure to a narrow kitchen, and they draw the eye up rather than down the length of the room. A single thick beam, or a pair of slimmer beams, suits kitchens with other wood details, such as open shelves or a butcher block counter. Boxed beams made from boards give a similar look with less weight than solid timber, and they can hide wiring for a pendant light.

    Fix beams securely to ceiling joists, since even a light beam must stay put, and keep them clear of tall cabinet doors and extractor vents. Seal the wood against steam and grease, especially above the stove run. Keep the ceiling itself light, so the beams read as a warm detail rather than a dark lid over a narrow room.

    21. Hang Herbs at the Kitchen Window

    Small potted herbs hanging on a rail at a bright kitchen window.

    A small hanging rail or shelf at the kitchen window puts fresh herbs at hand while you cook, and it turns the brightest spot in a narrow kitchen into a useful feature. Use small pots with drainage, a tray to catch water, and the best light your kitchen offers. Basil, parsley, mint, and chives suit small pots and frequent snipping, and they add green to a room that might otherwise feel plain.

    Water little and often, and check that no pot drips onto the sill or counter below. Label each pot, since young herbs can look alike, and rotate pots so growth stays even. For more ways to dress the window without blocking light, see these kitchen window decor ideas. If natural light is weak, keep only hardy herbs at the window and move tender plants to a brighter spot for part of the week.

    22. Add a Slim Spice Ledge Above the Backsplash

    Slim spice ledge above a kitchen backsplash holding oils, salt, and jars.

    A slim ledge fixed just above the backsplash holds the small items that otherwise crowd the counter edge: olive oil, vinegar, salt, and a small jar of wooden spoons. The ledge depth only needs to fit a bottle base, so it adds storage without blocking the work surface below. Keep the ledge clear of the hob so bottles stay away from direct heat, and limit it to daily items in matching or plain bottles.

    Add a raised lip or a small rail along the front so bottles do not slide when a cabinet door closes. Move bulk refills to a cabinet, and wipe the ledge during your usual counter clean, since oil mist lands there first. In a narrow kitchen, one slim ledge along the main prep run is more useful than a deep shelf that eats into the walkway.

    23. Put a Mirror Panel on the End Wall Above the Sink

    Framed mirror panel on an end wall above a sink in a narrow kitchen.

    A mirror panel on the end wall, above a sink or a small counter, bounces light back down a narrow kitchen and makes the room feel wider. This works best at the far end, where the mirror reflects the window or the main light, rather than a blank wall. Choose a simple framed mirror or a set of mirror tiles, and keep the frame in the same metal as your hardware so it links to the rest of the room.

    Keep the mirror clear of direct stove steam, which clouds the surface fast, and wipe it during your usual kitchen clean. Do not place a mirror where it reflects clutter, such as an open bin or a crowded shelf, since it will double that view. Paired with the end wall color in Idea 1, a mirror works as a second layer: color for warmth, reflection for light, without needing extra floor space.

    Conclusion

    A narrow kitchen does not need more width to feel full of character. It needs a clear walkway, one strong focal point at the far end, storage that fits the room, and a few warm details that repeat through the space. Start with the idea that fixes your biggest daily frustration, whether that is a dark corridor feel, a lack of prep space, or nowhere to sit, and live with it for a week before adding the next change. Keep daily pieces low and visible, move rarely used items higher or to the end wall, and check fixings once a year so rails, shelves, and fold down pieces stay safe. With a few well chosen changes, a plain galley kitchen can feel calm, useful, and personal.

    FAQs

    How do I make a narrow kitchen feel wider without moving walls?

    Keep the long walls light, use one darker color only at the far end, and add light at counter level with under cabinet lighting. Leave one side of the room lighter, with open shelves or a clear wall, and use a mirror at the end wall to bounce light back into the room. A clear walkway matters more than any single color, so measure before adding furniture.

    What layout works best for a narrow galley kitchen?

    A galley layout works best when the sink, stove, and fridge form a short, clear route with no island, bin, or stool blocking the paths between them. Put tall storage on one side only where possible, keep prep space between sink and stove clear, and add a rolling cart or fold down table only if it leaves a clear passing width. Walk the three routes yourself and note where you bump into a door or a chair.

    How much walkway space should I leave in a narrow kitchen?

    Leave enough room to pass comfortably and open cabinet doors and appliances without stepping sideways. As a general guide, keep the main path clear and test it with the largest item you move often, such as a laundry basket or a chair pulled out from a table. Measure the path with a cart, table, or peninsula in place, not just with the room empty, since furniture changes how the room actually feels.

    What colors suit a narrow kitchen best?

    Light, warm whites and pale tones suit the long walls, since they reflect light and keep the room feeling open. Use a deeper color only on the end wall, or as an accent on a single cabinet run, so the room gains depth without feeling closed in. Test a large painted sample in daylight and evening light before committing, since strong colors shift a lot between the two.

    How do I add seating to a narrow kitchen?

    A fold down table, a slim banquette along one wall, or a short peninsula bar at the open end all add seating without a full dining table. Choose stools or a bench that tuck fully under the counter or table, and keep the seating at the open end where possible, so guests do not stand in the cooking path. Two seats are usually enough in a narrow kitchen, and a small table beats a large one that blocks the walkway.

    What should I avoid in a narrow kitchen?

    Avoid tall cabinets on both sides, deep shelves that eat into the walkway, and a fixed island that leaves no passing room. Avoid patterned tile on every wall, heavy items on weak fixings, and storage above the hob that needs frequent reaching over hot pans. Keep paper, towels, and recipe cards away from burners, and put overflow items in closed storage rather than crowding every open shelf.

  • 33 Purple Kitchen Ideas to Make Your Next Refresh Easier

    33 Purple Kitchen Ideas to Make Your Next Refresh Easier

    Purple can be soft and calm in a kitchen, or deep and dramatic, depending on the shade and where you use it. A pale lavender suits a bright room with white cabinets, while plum and eggplant hold their own next to wood, brass, and stone. These 33 purple kitchen ideas cover paint, cabinets, tile, floors, lighting, seating, and small accents, so you can start with one change or plan a fuller refresh. Pick a shade you like living with, test it in daylight and evening light, and keep the rest of the room simple so the purple has room to work.

    Key Takeaways

    • Start with one purple decision, such as cabinets, an island, or a backsplash, and let the rest of the room stay quiet.
    • Test purple paint and tile samples in daylight and evening light, since purple shifts more than most colors between the two.
    • Pair pale purple with white, cream, and light wood, and pair deep purple with brass, walnut, and warm stone.
    • Keep purple to one or two large surfaces plus a few small accents, so the kitchen feels planned rather than crowded.
    • Use washable paint and sealed tile near the stove and sink, where steam, splashes, and grease land first.

    1. Paint the Cabinets Soft Lavender

    Kitchen with soft lavender cabinets

    Soft lavender cabinets suit a bright kitchen with white walls and a light counter. The color reads as a gentle tint rather than a strong statement, which makes it easier to live with every day. Use a durable cabinet paint in satin or semi gloss, and prime well so the color stays even across door fronts and drawer faces.

    Keep the hardware simple, with brushed nickel or white knobs, and let the counters stay pale. If you are unsure about a full set of cabinets, paint one run, such as the wall cabinets, and leave the base cabinets white until you know you like the color in all lights.

    2. Pair Plum Lower Cabinets With White Uppers

    Kitchen with plum lower cabinets

    Plum lower cabinets with white upper cabinets give a kitchen depth at the bottom and lightness at the top. The two tone split keeps a deep color from closing in the room, and it works well in kitchens with low ceilings or little natural light. The white uppers also make it easier to see inside the cabinets.

    Repeat the plum once more, in a stool cushion or a small rug, so the lower cabinets do not look isolated. Keep the backsplash plain, in white or pale gray, so the two cabinet colors stay the clear focus of the wall.

    3. Choose Deep Eggplant Cabinets With Brass Pulls

    Kitchen with deep eggplant cabinets

    Deep eggplant cabinets suit a larger kitchen or a room with strong daylight, where a dark color can sit without making the space feel small. Brass pulls and a brass faucet warm the dark tone and stop it looking flat. This pairing suits shaker cabinets, flat front cabinets, and rooms with wood floors.

    Balance the dark cabinets with a light counter and a pale backsplash, and add under cabinet lighting so the work surface stays bright. Our guide to colors for your kitchen cabinets can help you compare dark shades before you commit to one.

    4. Make a Purple Island the Focal Point

    White kitchen with a plum painted island

    A purple island works when the surrounding cabinets stay white, cream, or light wood. Paint the island base in plum or a mid violet, and keep the counter pale so the island reads as one clear feature. This is a good way to try purple without repainting the whole kitchen.

    Add two or three stools in a plain material, such as wood or black metal, and keep the island top clear apart from one bowl or a small plant. If the island also holds the sink or stove, choose a washable paint and seal the base well against splashes.

    5. Lay a Glossy Purple Subway Tile Backsplash

    Kitchen backsplash of glossy purple subway tiles above a pale counter.

    Glossy purple subway tiles bring color to the wall between the counter and the cabinets without changing the cabinetry. A mid violet or lilac glaze reflects light, which helps in a kitchen with one window or a dark corner. Lay the tiles in a straight stack for a calm look, or a running bond for a more classic feel.

    Use a pale grout to keep the tile pattern visible, or a matching grout for a smoother wall of color. Seal the grout near the stove, and wipe the tiles after cooking, since glossy tile shows steam marks and splashes clearly.

    6. Frame the Stove With a Purple Mosaic Surround

    Stove wall with a purple mosaic tile surround and a plain range hood.

    A purple mosaic surround behind the stove turns the cooking wall into a feature while the rest of the backsplash stays plain. Small mosaic tiles in mixed purple shades, from lilac to plum, add depth that a single flat color cannot. Keep the mosaic to the stove width, or just past it, so it reads as a framed panel.

    Choose a heat resistant tile and a grout sealer, and keep the pattern simple near the burners so grease is easy to wipe away. A plain range hood above the mosaic keeps the wall from getting busy, and one open shelf on each side can hold oils and spices.

    7. Paint the Walls Lavender and Keep Cabinets White

    Kitchen with lavender walls

    Lavender walls with white cabinets suit a kitchen that needs color but not a full cabinet repaint. The wall color is easy to change later, which makes it a low risk first step into purple. A pale lavender with a warm or cool undertone should be matched to your floor and counter, so test large samples before painting.

    Keep the trim and ceiling white, and use the same lavender in a small way elsewhere, such as a tea towel or a vase, so the walls do not stand alone. This idea pairs well with light wood floors and a plain white backsplash.

    8. Hang Grape Patterned Wallpaper on One Accent Wall

    Kitchen dining wall with grape patterned wallpaper and a plain table.

    Grape patterned wallpaper on one wall, such as the dining end of the kitchen or the wall behind a table, adds purple without paint or tile work. Choose a pattern with plenty of plain background so the grapes read as a motif, not a dense print, and keep the other walls plain.

    Use a washable wallpaper, or keep it clear of the stove and sink splash zones, where steam and grease shorten its life. Pair the paper with plain chairs and a simple table, and pick one purple from the pattern for a cushion or a table runner.

    9. Lay a Purple and White Checkerboard Floor

    Kitchen with a purple and white checkerboard tile floor and plain cabinets.

    A purple and white checkerboard floor suits a retro or cottage kitchen and adds color at ground level, where it does not compete with the cabinets. Use vinyl or porcelain tiles in a soft lilac and white for a gentle version, or a deeper plum and white for a stronger look. The checkerboard pattern needs a straight, even layout, so measure from the room center outward.

    Keep the cabinets and walls plain, since the floor already carries the pattern. A plain rug by the sink, in white or a solid purple, softens the hard tile and stops the pattern feeling cold underfoot.

    10. Mix Purple Cabinets With Warm Wood

    Kitchen with purple cabinets

    Purple cabinets with warm wood, such as walnut open shelves, a butcher block counter, or wood stools, suit a kitchen that should feel warm rather than cool. The wood softens violet and plum tones, and it stops a purple kitchen looking flat or formal. Use the wood in two or three places, not everywhere, so the balance stays clear.

    A walnut shelf above a purple cabinet run, a wood cutting board left on the counter, and wood stool seats are enough to set the pairing. Keep the metal finishes warm too, with brass or aged bronze, rather than mixing in cool chrome.

    11. Paint the Range Hood Purple

    Kitchen stove wall with a purple painted range hood and plain cabinets.

    A purple range hood gives the stove wall a single strong feature and leaves the cabinets free to stay neutral. This works best when the hood shape is simple, such as a straight chimney or a flat canopy, so the color carries the design rather than extra trim. Use a heat resistant, washable paint made for the hood material, and seal it against steam.

    Keep the backsplash plain and the nearby cabinets quiet, so the hood stays the focal point. This idea pairs well with the plain cabinet approach in our guide to colors for your kitchen cabinets, where one strong color sits against a calm background.

    12. Style Violet Open Shelves With White Dishes

    Violet open shelves holding white plates and bowls in a bright kitchen.

    Violet painted open shelves with white dishes give a kitchen color at eye level without repainting cabinets. The shelves themselves carry the purple, while the white plates and bowls keep the display light and easy to read. Limit each shelf to one or two groups, such as plates in one stack and bowls in another, with space left at each end.

    Our guide to how to style open shelves shows how to leave breathing room so shelves read as storage, not clutter. Keep the shelf brackets simple, and put heavier stacks on the lowest shelf, where they are easiest to lift.

    13. Display Purple Glassware and Dishes

    Glass cabinet with purple tumblers

    A collection of purple glassware, such as tumblers, a pitcher, and a few serving bowls, adds color to a glass front cabinet or an open shelf. Amethyst and lilac glass catch light well, so this idea suits a cabinet near a window or under a small light. Group the pieces by shade, with the deepest pieces at the back and the palest at the front.

    Keep the rest of the shelf plain, with white or clear pieces only, so the purple glass stands out. Wash and dry the glass fully before putting it back, since water marks show clearly on colored glass, and keep everyday glasses in a separate, easy to reach spot.

    14. Hang Purple Pendant Lights Over the Island

    Kitchen island with three purple pendant lights above a pale counter.

    Purple pendant lights, in glass, enamel, or fabric shades, add color above the island without changing any fixed surface. A set of two or three pendants in the same shade and size looks planned, while mixed shades can look scattered. Hang them at a height that lights the island top without blocking sight lines across the room.

    Choose a warm bulb so the purple shade glows rather than turning gray in the evening. If the pendants are the only purple in the room, add one small match, such as a dish towel or a plant pot, so the color feels linked to the rest of the kitchen.

    15. Add Plum Bar Stools at the Island

    Kitchen island with plum bar stools with wood legs.

    Plum bar stools suit a white or wood island and add a strong block of color at seating height. Choose a wipe clean seat, such as leather look vinyl or a treated fabric, since island stools take daily use and food spills. A stool with a footrest and a back suits longer sits, while a backless stool tucks fully under the island.

    Keep the stool legs simple, in wood or black metal, and avoid a second bright color in the same zone. Two stools suit a small island, while three or four suit a long island, with enough space between them for people to sit without bumping elbows.

    16. Build a Plum Banquette in a Breakfast Nook

    Kitchen breakfast nook with a plum upholstered banquette and a plain wood table.

    A plum banquette, with upholstered bench seating and a plain table, turns a kitchen corner into a dining nook that feels like a room of its own. The bench back can carry the deep color, while the seat cushions stay in a plain, washable fabric. Add storage under the bench seat for table linens or rarely used serving pieces.

    Keep the table top plain, in wood or white, and the chairs on the open side simple, so the banquette stays the focus. A small pendant or wall light over the table makes the nook usable in the evening, and a cushion in a lighter lilac softens the deep plum.

    17. Seat the Eat In Table With Purple Dining Chairs

    Kitchen table with purple dining chairs and a plain wood tabletop.

    Purple dining chairs at a kitchen table suit an eat in kitchen where the table is part of daily life. Choose one shade for all the chairs, rather than a mix, so the table group reads as a set. A wipe clean seat is practical here, since kitchen chairs see crumbs, spills, and daily use.

    Keep the table itself plain, in wood or white, and the table setting simple, so the chairs carry the color. For table styling that does not fight the chairs, see our guide to everyday dining table decor, which keeps the center simple and the table usable.

    18. Dress the Window With Lilac Roman Shades

    Kitchen window with lilac Roman shades above a sink.

    Lilac Roman shades soften a kitchen window and add purple at a height that catches daylight. A flat Roman shade in a plain lilac fabric suits a small window, while a relaxed fold suits a wider window over a sink. The shade should clear the faucet and any plants on the sill when it is lowered.

    Keep the rest of the window plain, with no heavy curtains, so the shade stays easy to use. For more window ideas, our guide to kitchen window decor ideas covers plants, shelves, and treatments that suit a working kitchen window.

    19. Lay a Purple Runner by the Sink and Stove

    Kitchen with a purple washable runner by the sink and pale cabinets.

    A purple runner by the sink or stove adds color and comfort underfoot in the busiest part of the kitchen. Choose a flat weave, washable runner in a solid plum or a simple purple pattern, and use a non slip pad underneath so it stays put on a hard floor. The runner should be long enough to cover the main standing spot, but short enough to clear cabinet doors and the dishwasher.

    Wash the runner often, since the sink zone collects water and food marks. If the runner is the only purple in the room, pick a shade that matches a towel or a small accessory nearby, so the color feels connected.

    20. Swap in Purple Cabinet Knobs and Pulls

    Close view of kitchen cabinets with purple ceramic knobs and pulls.

    Purple cabinet knobs and pulls, in ceramic, glass, or painted metal, are a small change with a clear effect, and they suit renters and anyone testing a shade. Swap the knobs on one cabinet run first, such as the island or the pantry, and live with them for a week before changing the rest. Keep the knob shape consistent across the kitchen, even if the shade varies slightly.

    This is also a useful way to add purple to a kitchen that already has a strong scheme, since hardware is easy to change back. Match the purple to one other small item, such as a towel or a vase, so the knobs do not look like an afterthought.

    21. Paint the Pantry Door Mauve

    Kitchen with a mauve painted pantry door and plain surrounding walls.

    A mauve pantry door adds a soft purple accent to a kitchen without touching the main cabinets. The door is a single, contained surface, so a mid mauve reads as a deliberate feature rather than a half finished paint job. Use the same durable paint as the cabinets, and paint the door frame in the same shade or in plain white for a framed look.

    Keep the surrounding wall plain, and add a simple knob in brass or black. This idea works well in a kitchen with a walk in pantry or a tall pantry cabinet, and it pairs with the storage planning in our guide to corner kitchen cabinet ideas.

    22. Let Purple Small Appliances Carry the Color

    Kitchen counter with a purple stand mixer and kettle beside white cabinets.

    A purple stand mixer, kettle, or toaster can carry the whole purple scheme in a neutral kitchen. Choose one hero appliance in a clear purple, such as plum or lilac, and keep the other small appliances in white, cream, or steel. Place the purple piece where it is used and seen, such as the mixer on the counter or the kettle by the stove.

    Store the appliance cord neatly and keep the counter around it clear, so the color stands out. This idea suits a kitchen that cannot be repainted, and it is easy to change if you later move to a different accent color.

    23. Choose a Countertop With Soft Purple Veining

    Kitchen counter with soft purple veining on a pale stone surface.

    A countertop with soft purple veining, in quartz or a similar engineered stone, adds purple in a subtle way that suits a calm, modern kitchen. The veining should be faint, with a white or pale gray base, so the counter reads as light from a distance and purple only up close. This keeps the work surface bright and practical.

    Pair the counter with plain white or pale cabinets and simple hardware, so the veining is the only pattern in the room. Wipe the counter after cooking, and avoid placing hot pans directly on it, following the care guidance for your counter material.

    24. Pair Purple With Gold Accents

    Kitchen with plum cabinets

    Purple and gold suit a kitchen that should feel warm and a little formal, such as a dining kitchen used for hosting. Use gold in small, repeated places: faucet, cabinet pulls, a mirror frame, and a light fixture, rather than one large gold surface. The gold should be a warm, muted finish, not a bright, shiny one, so it sits well with plum and eggplant.

    Keep the rest of the room simple, with plain counters and a pale backsplash, so the two colors stay the focus. For a bolder version of this pairing, see our guide to black and gold kitchen ideas, which shows how gold accents work against a dark background.

    25. Style Lavender Linens on Display

    Kitchen shelf with folded lavender dish towels and a hanging apron.

    Lavender dish towels, an apron hung on a hook, and a folded tablecloth on a shelf add purple in the softest, cheapest way. Linens are easy to swap by season, so lilac can sit alongside spring greens and then give way to deeper shades later in the year. Choose towels in a solid lilac or a simple stripe, and keep them clean and folded, since crumpled linens undo the effect.

    Hang one towel on the oven handle and keep the rest folded on a shelf, rather than draping towels over every handle. This idea suits a kitchen that already has a clear scheme and needs only a small lift of color.

    26. Grow Purple Herbs and Flowers on the Windowsill

    Kitchen windowsill with pots of lavender and purple basil in plain pots.

    Purple herbs and flowers on the kitchen windowsill, such as lavender in a pot, purple basil, and a small violet plant, add living purple that changes with the seasons. Use pots in one material, such as terracotta or white ceramic, so the plants, not the pots, carry the color. Place the pots where they get the best light your kitchen offers, often near a window, and use trays to catch water.

    Water little and often, and check that no pot drips onto the counter below. This idea also suits a kitchen with a balcony garden nearby, and our guide to kitchen balcony ideas covers growing space just outside the kitchen door.

    27. Display Purple Produce in a Bowl

    White bowl of eggplants

    A bowl of purple produce, such as eggplants, plums, grapes, and red onions, adds natural purple to a counter or island with no decorating work at all. Use a plain white or wood bowl, and keep the display small, with enough fruit to look full but not so much that pieces bruise or spoil. Rotate the produce as you cook with it, so the bowl stays fresh.

    Keep the bowl away from the stove, where heat shortens storage life, and wash the produce before eating it. This is a good short term way to test whether you like purple in the room before painting or tiling anything.

    28. Paint a Purple Chalkboard Menu Wall

    Kitchen wall with a chalkboard in a deep plum frame beside a pantry.

    A purple chalkboard wall, or a framed chalkboard painted in a deep plum frame, gives menus, shopping lists, and notes a fixed place in the kitchen. The chalkboard surface itself stays dark and writable, while the purple frame or surrounding painted panel carries the color. Hang it near the kitchen entry or beside the pantry, with chalk in a small cup hung alongside.

    Wipe the board clean each week so old items do not linger, and keep it away from the stove splash zone. This idea suits a family kitchen, where a shared list saves time, and it adds purple to a wall that would otherwise stay blank.

    29. Keep a Lilac and Cream Cottage Kitchen

    Cottage kitchen with lilac cabinets

    A lilac and cream cottage kitchen pairs pale lilac cabinets or walls with cream counters, a cream backsplash, and light wood details. The palette stays soft throughout, with no dark surfaces, which suits a small kitchen or a room with little daylight. Use beadboard or shaker cabinet fronts to set the cottage feel, and keep the hardware simple, in white ceramic or brushed nickel.

    Add one natural texture, such as a woven basket or a wood board, so the pale palette does not feel flat. Keep the window treatment light, with a plain lilac shade or a cream curtain, so daylight reaches the whole room.

    30. Choose a Plum Retro Refrigerator

    Kitchen with a plum retro refrigerator

    A plum retro refrigerator suits a kitchen with a vintage or playful feel, and it turns an appliance into the room’s feature. The curved shape and chrome details of a retro fridge suit a mid century or cottage kitchen, and the plum color pairs well with cream cabinets and a checkerboard floor. Measure door swing and clearance before buying, since retro fridges vary in size.

    Keep the surrounding cabinets plain, so the fridge stands out on its own, and repeat the plum once, in a small stool or a towel, so the color feels linked. This is a bigger purchase than paint or hardware, so check energy use and storage space before committing.

    31. Set a Purple Table Centerpiece for Gatherings

    Kitchen table with a low purple centerpiece of lavender and candles.

    A purple table centerpiece suits a kitchen table used for gatherings, from a simple bunch of lavender in a jar to a low bowl of purple candles and greenery. Keep the center low, so people can see across the table, and keep it narrow, so plates and glasses still fit. A single purple element, repeated in napkins or a runner, is enough.

    For seasonal versions, a purple accent can sit alongside autumn or holiday table settings without taking over. Our guides to thanksgiving kitchen decor ideas, christmas kitchen island decor ideas, halloween kitchen decor ideas, and fall kitchen decor ideas show how one accent color works within a seasonal table.

    32. Fit Frosted Purple Glass Cabinet Doors

    Kitchen upper cabinets with frosted purple glass doors beside a window.

    Frosted purple glass doors on upper cabinets add color while still hiding the contents inside. The frosted finish softens the purple and keeps the cabinet row calm, unlike clear glass, which shows every item. Use the glass doors on one cabinet run, such as the uppers beside the window, and keep the other cabinets solid.

    Add a small light inside one or two of the glass cabinets if you want the purple to glow in the evening, but keep the light warm and low. This idea suits a modern kitchen with flat front cabinets, where the glass adds texture without extra trim.

    33. Add Renter Friendly Purple Accents Only

    Rental kitchen with purple rug

    Renter friendly purple accents, such as a removable backsplash sticker, a purple rug, plum stools, lilac towels, and a purple mixer, add color with no paint, tile, or drilling. Start with the items you can take with you when you move, and keep the total to three or four purple pieces, so the kitchen feels styled rather than filled with single items.

    Check your lease before using any adhesive product, and test it in a hidden spot first. This approach also suits anyone who wants to try purple for a season before committing to cabinets or tile, and the same small accents can move to a new kitchen later.

    For a bolder cultural take on kitchen color, our guide to mexican kitchen decor ideas shows how strong color works with pattern and warm materials.

    Conclusion

    Purple works in a kitchen when it has a clear job: one large surface, such as cabinets or an island, plus a few small accents that repeat the shade. Start with the change you can live with longest, whether that is a painted island, a tile backsplash, or a set of plum stools, and test the shade in daylight and evening light before you commit. Keep the rest of the room simple, with plain counters, simple hardware, and one warm metal, so the purple reads as a choice rather than a collection of separate pieces. With that balance, a purple kitchen can feel calm in a pale lilac or rich in a deep plum, and it will still suit everyday cooking.

    FAQs

    What purple shade works best in a small kitchen?

    A pale lavender or lilac works best in a small kitchen, since light shades reflect more light and keep the room feeling open. Use the pale shade on cabinets or walls, and keep the counters, backsplash, and floor light as well. Save deep plum and eggplant for one accent, such as stools or a rug, so the small room does not feel closed in.

    Does purple go with wood cabinets?

    Yes, purple pairs well with warm wood, such as walnut, oak, and butcher block, which softens violet and plum tones. Use the wood in two or three places, such as open shelves, a counter, or stool seats, and keep the metal finishes warm, with brass or aged bronze. Avoid pairing purple with many different wood tones at once, since that can make the room look unsettled.

    How do I test a purple paint color before painting cabinets?

    Paint large samples on boards, not just on the wall, and move them around the kitchen through the day. Check the sample in daylight, in evening light, and next to your counter, floor, and backsplash, since purple shifts a lot between lights. Live with the sample for a few days before painting, and paint one door first if you want a final check.

    Can I add purple to a kitchen without painting anything?

    Yes, and it is easy to start small. Swap in purple knobs, add a plum rug or stools, hang lilac shades, display purple glassware, and use a purple small appliance as the main accent. These changes need no paint or tile work, and they can be removed or swapped later if you change your mind about the shade.

    What colors go with a purple kitchen?

    White, cream, pale gray, and light wood suit pale purple, while brass, walnut, warm stone, and muted gold suit deep purple. Keep the supporting palette to two or three colors, so the purple stays the focus. Avoid adding a second strong color, such as bright red or teal, in the same zone, since it will compete with the purple.

    How do I keep a purple kitchen from looking dated?

    Keep the shapes simple and the purple to one or two surfaces, rather than covering every cabinet, wall, and floor in the same shade. Choose a classic cabinet style, plain tile, and simple hardware, and let the purple be the only strong color in the room. Refresh small accents, such as towels and stools, when you want a change, instead of repainting the whole kitchen.

  • 14 Kitchen TV Wall Ideas for a More Polished Space

    14 Kitchen TV Wall Ideas for a More Polished Space

    A television in the kitchen can be handy for recipes, news and family shows, but a bare screen on a blank wall can look unfinished. The fix is to plan the wall around the screen, not just hang the TV and stop there. These 14 kitchen TV wall ideas cover flush mounts, wood slats, hidden panels, shelves and cabinet pairings, so you can match the setup to your layout, your seating and how often you watch. Pick the wall you face most while cooking or eating, check the viewing height and glare, and hide the cables before you call the job done.

    Key Takeaways

    • Mount the TV where you can watch it without craning your neck, and test the height from your usual cooking and seating spots before fixing the mount.
    • Hide cables in a channel, inside the wall where your wall type allows it, or behind a shelf or panel, so the wall reads as finished.
    • Give the screen a frame of shelves, panels, cabinets or art so it looks like part of the kitchen design rather than an add-on.
    • Keep the TV clear of direct stove heat, steam and sink splashes, and leave space for air to move around the back of the set.
    • If you watch rarely, choose a hidden or art-style setup; if you watch daily, choose a simple flush or swivel mount that is easy to adjust.

    1. Flush Mount Above a Low Sideboard

    Television flush mounted on a kitchen wall above a low sideboard with closed storage.

    A flush mount above a low sideboard is the simplest way to make a kitchen TV look planned. The sideboard gives the screen a base, hides media boxes and remotes in closed storage, and keeps the wall below the TV from looking empty. Choose a sideboard that is at least as wide as the TV so the screen does not overhang the furniture below it.

    Mount the TV so the middle of the screen sits close to eye level from your main seat. Run cables down behind the sideboard or through a cable channel painted to match the wall. Leave the top of the sideboard mostly clear, with just one small plant or a short stack of cookbooks at one end, so the screen stays the focus.

    2. Warm Wood Slat Accent Wall

    Television mounted on a vertical wood slat accent wall in a warm kitchen.

    Vertical wood slats turn a plain wall into a backdrop that suits a TV well. The slats add texture and warmth, break up a large blank wall, and help the dark screen blend in when it is switched off. Use slats in a warm wood tone that matches your floor or open shelving, and keep the slat spacing even across the full wall section.

    Fix the TV mount through the slats into studs or solid backing, since slats alone may not hold the weight. Hide cables behind the slats where the design allows it, or use a matching wood cable cover. Keep nearby decor simple, since the slat pattern already gives the wall plenty of interest.

    3. Recessed Niche With Shelves on Each Side

    Television set into a recessed kitchen wall niche with shelves on each side.

    A recessed niche sets the TV back into the wall so it sits almost flush with the surface around it. Shelves or shallow cabinets on each side of the niche balance the screen and give you a home for cookbooks, small plants and serving bowls. This setup works best on a wall with enough depth for a recess, and you should check for pipes and wires before cutting into any wall.

    Finish the inside of the niche in the same paint as the wall, or in a slightly darker tone to help the screen blend in. Keep the side shelves neat and leave some empty space, so the niche looks calm rather than crowded. A small light strip inside the niche can soften the edges in the evening, but keep it dim so it does not compete with the screen.

    4. TV Above Open Shelves

    Television mounted above open kitchen shelves holding dishes and cookbooks.

    Mounting the TV above a run of open shelves pairs the screen with useful storage. The shelves below can hold daily dishes, glasses or cookbooks, and the TV sits in the same visual zone as items you already use in the kitchen. Keep the shelves shorter than the TV width, or match the run to the screen width, so the arrangement looks balanced from across the room.

    Style the shelves with grouped items and clear gaps, as shown in our guide to how to style open shelves. Avoid placing fragile or tall items directly below the screen where they could be knocked while you adjust the TV. Keep the bottom shelf high enough that steam from the counter below does not reach the screen often.

    5. TV Hidden Behind Sliding Panels

    Kitchen television hidden behind closed sliding wood wall panels.

    Sliding panels let you hide the TV completely when it is not in use. Two wood or painted panels slide across the screen on a track, and when closed they read as wall paneling or cabinet fronts. This idea suits kitchens where the TV is used only for occasional shows or weekend cooking sessions, and where a dark screen would clash with the room the rest of the time.

    Choose panels that match your cabinets or wall color so the closed wall looks intentional. Make sure the track is fixed into studs and that the panels slide freely without catching on the TV mount or cables. Leave a small finger gap at the meeting point so you can open the panels easily, and test the full slide before you finish the trim.

    6. Swivel Mount in a Corner Nook

    Television on a swivel mount angled in a kitchen corner nook.

    A corner nook can be a smart TV spot in a kitchen with an L shaped layout, because one screen can serve both the prep counter and a small table. A swivel mount lets you angle the TV toward the cook in the morning and toward diners at mealtimes. Fix the mount into a stud on one corner wall, and choose a mount rated for your TV size and weight.

    Pair the nook with corner storage below, and see our corner kitchen cabinet ideas for ways to use the awkward space under the screen. Check glare from windows at different times of day, and our kitchen window decor ideas can help you plan window treatments that cut reflections. Keep the swivel range modest so cables are not pulled tight at either end of the turn.

    7. TV Set Into a Tiled Backsplash Wall

    Television mounted on a tiled kitchen wall above a counter.

    A tiled wall gives a kitchen TV a durable, easy to clean backdrop that ties the screen to the rest of the kitchen. Large format tiles or a simple subway pattern work well, since a busy tile pattern can fight with the moving picture. The tile also protects the wall behind the screen from splashes if the TV sits near a counter or sink run.

    Plan the tile layout around the mount before tiling, so the mount fixings land on solid backing and not on a grout line that could crack. Use a cable channel that matches the tile color, or run cables behind the wall if your wall type allows it. Keep the tile area a little wider than the TV on each side so the screen sits inside a clear tiled frame.

    8. Gallery Frame and Art Mode Display

    Television in a slim gallery frame displaying a calm art image on a kitchen wall.

    A slim gallery frame around the TV makes the screen read as framed art when it is not showing a show. Many TVs offer an art or photo mode that displays still images, so the wall looks like a picture gallery between programs. Choose a frame in wood, black or brass that matches other frames or hardware in your kitchen.

    Hang a small piece of real art or a print beside the framed TV to strengthen the gallery effect, and keep the frame depth shallow so it does not catch dust or block vents on the back of the set. Pick calm, simple images for art mode, since bright or busy pictures can distract while you cook. This idea works best for a TV that spends much of the day switched off or on a still image.

    9. TV Above a Breakfast Bar

    Television on the wall at the end of a kitchen breakfast bar with stools.

    A TV on the wall at the end of a breakfast bar gives diners a clear view without taking counter space. The bar seating faces the screen naturally, and the TV sits above the level of plates and glasses, so it stays clear of spills. This setup suits an open kitchen where the bar separates cooking from eating.

    Mount the screen at a height that works for seated viewers, not standing cooks, since the bar seats are the main audience here. Hide cables behind the bar panel or in a channel down to a nearby outlet, and keep the wall around the TV free of hanging items that could block the view from the end seats. A small shelf below the TV can hold remotes so they stay off the bar top.

    10. Pull Down Mount Above the Counter

    Television on a pull down mount lowered above a kitchen counter.

    A pull down mount lets a TV sit high on the wall, clear of the work surface, and drop down to a comfortable viewing height when you want to watch. This suits a kitchen where wall space is tight and the only free spot is above a counter or a tall cabinet run. Pull the screen down for a recipe video or a show, then push it back up when cooking is done.

    Check that the mount clears any shelf, window catch or cabinet door in its path, and that cables have enough slack for the full drop. Keep the area below the TV clear of tall items that could block the lowered screen. Test the mount with the TV attached before you rely on it daily, and tighten all joints so the screen stays level at its lowered height.

    11. TV Flanked by Glass Front Cabinets

    Television flanked by glass front kitchen cabinets holding dishes and glasses.

    Glass front cabinets on each side of the TV give the screen a built in, furniture-like feel. The cabinets store dishes and glasses behind glass, so the wall looks layered and useful rather than like a bare screen on plaster. Match the cabinet frames to your kitchen cabinets, and keep the glass sections the same height as the TV for a tidy line.

    Style the cabinets simply, with matching dish sets or a few clear glasses, so the contents do not compete with the picture. Put everyday dishes in the cabinet nearest the dishwasher or sink, and display pieces higher up or farther from daily reach. Leave a gap of a few inches between the cabinets and the screen so heat can escape and you can reach the TV controls.

    12. TV on a Shiplap Feature Wall

    Television mounted on a painted shiplap feature wall in a bright kitchen.

    Horizontal shiplap boards give a kitchen TV wall a relaxed, cottage feel and add just enough texture to make the screen look at home. Paint the shiplap white, cream or a soft sage to keep the kitchen bright, and run the boards across the full TV wall rather than stopping just behind the screen. A full wall of shiplap looks planned, while a small patch behind the TV can look like an afterthought.

    Fix the mount through the shiplap into studs, and use a paintable cable channel so wires blend with the boards. Keep the rest of the wall decor light, since shiplap already adds lines and shadow to the room. A single small wall light or a short shelf beside the TV is enough to finish the wall without crowding it.

    13. TV Integrated Into the Upper Cabinet Run

    Television built into an upper kitchen cabinet run with matching trim.

    Building the TV into the upper cabinet run makes it look like part of the kitchen itself. The screen sits between two cabinet sections, or in a cabinet sized opening, with matching trim around it. This idea suits a kitchen renovation or a cabinet refresh, since the opening needs to fit the TV size and leave room for air flow and cable access.

    Leave a removable back or access panel behind the TV so you can reach cables and the mount without removing cabinets. Match the trim to your cabinet doors, and keep the cabinet doors beside the TV free of handles that stick out toward the screen. If you plan to replace the TV later, size the opening for a common screen size rather than one exact model, so a new set still fits.

    14. Dark Painted Accent Wall With Soft Lighting

    Television on a dark painted kitchen accent wall with soft warm lighting.

    A dark painted accent wall helps a TV blend in, since the black screen edge disappears against a deep green, navy or charcoal wall. Soft wall lights or a picture light above the screen add warmth in the evening and stop the dark wall from feeling heavy. This idea suits a kitchen with good daylight or light cabinets, where one dark wall adds contrast without darkening the whole room.

    Pick a paint color that works with your cabinets, and see our colors for your kitchen cabinets for pairings that keep the room balanced. Paint the full wall, not just the area behind the TV, so the accent looks intentional. Keep lighting warm and dimmable, and angle lights at the wall rather than at the screen, so you avoid glare on the picture.
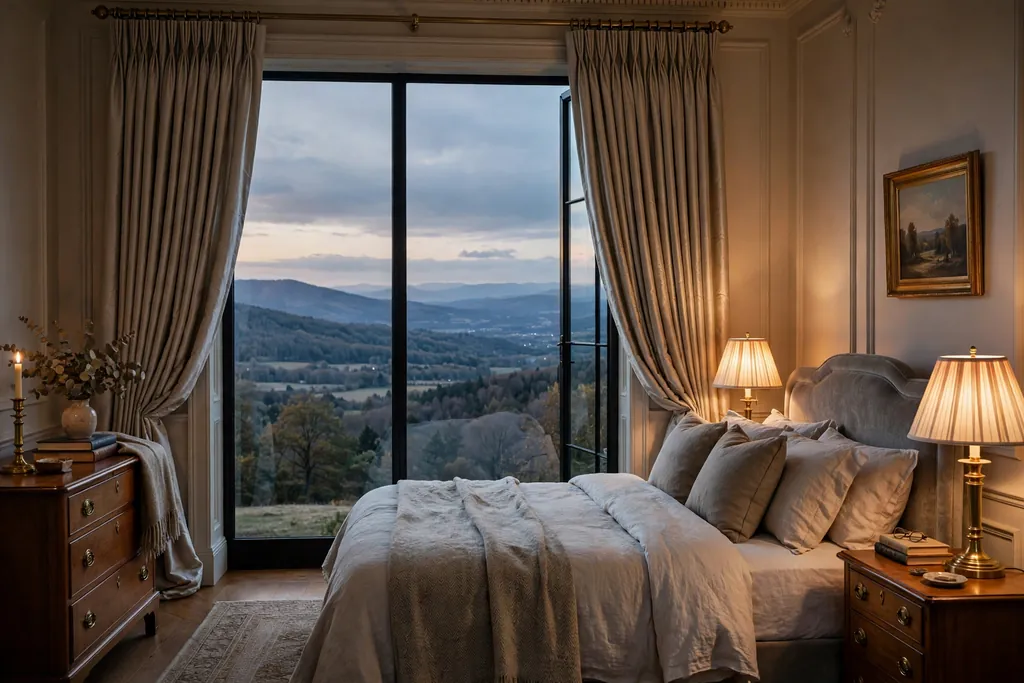
    Conclusion

    The best kitchen TV wall is the one that fits how you actually use the room. A flush mount suits daily viewing, a hidden panel suits occasional use, and shelves or cabinets suit a kitchen that needs storage as well as a screen. Measure your seating distance, check glare at different times of day, and hide the cables before you finish. For seasonal styling around the wall, our fall kitchen decor ideas show how small swaps can refresh the space without moving the TV. Save this list, pick one idea to start with, and live with the setup for a week before adding more decor around it.

    FAQs

    Where is the best place to put a TV in a kitchen?

    The best spot is the wall you face most while cooking or eating, with the screen at a comfortable height and clear of stove heat, steam and sink splashes. Test the view from your usual seats and from the main prep counter before fixing the mount, and check glare from windows in the morning and afternoon. A wall that serves both cooking and dining, such as a breakfast bar wall, often works better than a wall only one person faces.

    How high should a kitchen TV be mounted?

    Mount the TV so the middle of the screen sits near eye level from your main viewing seat, which usually means lower than people expect. If you watch mainly while standing at a counter, test the height while standing there too, and pick a middle ground if both spots matter. A tilt or swivel mount helps when one height cannot suit both seated and standing viewers.

    How do I hide TV cables on a kitchen wall?

    Use a paintable cable channel for a simple fix, run cables behind a shelf, panel or sideboard, or route them inside the wall if your wall type and local rules allow it. Keep cables away from heat sources and leave enough slack for a swivel or pull down mount to move fully. Label the cables at the outlet end so you can trace them later without pulling the TV off the wall.

    Can a TV go above a stove or near a sink?

    It is best to avoid placing a TV directly above a stove, where heat, steam and cooking grease can damage the set and make viewing uncomfortable. Near a sink, keep the TV clear of the main splash zone and choose a wall spot where water cannot reach the screen or the outlet. If space is tight, a side wall or a breakfast bar wall is usually a safer choice than a wall directly over heat or water.

    What size TV works best in a kitchen?

    A modest screen usually suits a kitchen better than a very large one, since viewing distance is short and a huge screen can dominate the wall. Measure the distance from your main seat to the wall, check that the TV fits its planned frame of shelves or cabinets, and leave space around it for air flow. If you are unsure, a smaller screen that fits the wall well looks more polished than a larger screen that crowds it.

    How do I stop a kitchen TV looking out of place?

    Give the screen a frame of shelves, panels, cabinets, tile or paint so it reads as part of the wall design. Hide the cables, keep the area around the TV tidy, and match the mount and trim to your kitchen finishes. When the TV is off, an art mode, a gallery frame or sliding panels can help the dark screen blend in instead of standing out.


  • 29 Vintage Kitchen Ideas That Balance Style and Comfort

    29 Vintage Kitchen Ideas That Balance Style and Comfort

    A vintage kitchen works when it feels collected over time, not staged in one shopping trip. Cream cabinets, a deep sink, worn wood, and a few pieces with age give the room warmth, while good lighting and clear worktops keep it easy to cook in. These 29 vintage kitchen ideas cover cabinets, sinks, floors, lighting, storage, and small details, so you can start with one change or build a full old style look room by room. Pick the idea that fixes your biggest frustration first, then add pieces slowly so the room keeps its balance.

    Key Takeaways

    • Start with one large anchor, such as cabinets, a sink, or the floor, before adding small vintage details.
    • Keep the palette calm: cream, soft white, warm wood, and one or two muted accent colors work better than many competing patterns.
    • Mix one or two true vintage pieces with simple new items, so the kitchen stays practical and easy to clean.
    • Repeat one material or finish, such as brass, wood, or enamel, across the room to tie old and new together.
    • Leave clear worktop space and good task lighting, since a vintage look should never make cooking harder.

    1. Cream Shaker Cabinets With Brass Cup Pulls

    Cream shaker kitchen cabinets with brass cup pulls and a wood countertop.

    Cream shaker cabinets are the easiest starting point for a vintage kitchen, because the flat panels and simple frames suit many older styles without looking fussy. A soft cream, rather than bright white, warms the room and hides small marks better. Pair the cabinets with brass cup pulls, which are easy to grip and add a warm metal note that suits wood counters and stone sinks.

    If your cabinets are sound, painting them cream and changing only the hardware can give the same effect for far less work than a replacement. Test the paint color on one door in daylight and evening light, since cream shifts a lot between the two. For more color direction, these colors for your kitchen cabinets show how muted shades sit with wood and brass.

    2. Apron Front Farmhouse Sink

    White apron front farmhouse sink with a brass bridge faucet in a cream kitchen.

    A deep apron front sink sits forward of the cabinet line, so you can stand close while washing large pots and baking trays. The exposed front panel becomes a feature in itself, and white fireclay or porcelain suits cream cabinets and wood counters well. A single large bowl is more useful for most cooks than two small bowls, since it fits roasting pans flat.

    Check the cabinet below before you choose, because an apron sink needs a special base cabinet and solid support for its weight. Fit a grid or mat in the base to protect the surface from heavy pans, and wipe the front panel when you clean the counters. A simple bridge faucet, covered in Idea 15, completes the look without extra fuss.

    3. Butcher Block Countertops

    Warm butcher block countertops with a chopping board and ceramic bowl in a vintage kitchen.

    Butcher block counters bring warmth and a workmanlike feel that stone alone cannot match, and they suit a vintage kitchen because they age with use. Maple and oak are common choices, and a matte oil finish keeps the surface soft to the eye and easy to repair with a light sand and fresh oil. Use butcher block for a full run of counter, or for one prep section beside the sink, if you want to test the look first.

    Keep the area near the sink well sealed, and wipe up standing water promptly, since wood and constant moisture do not mix well. Cut on a board rather than directly on the counter, and accept small marks as part of the patina. A wood counter also pairs well with the warm wood breakfast bar in Idea 27.

    4. Open Shelves for Vintage Dishes

    Open wood shelves holding white ironstone plates, bowls and vintage glassware.

    Open shelves let you show the pieces that make a vintage kitchen feel personal: ironstone plates, colored glass, old mixing bowls, and a few jugs. Choose one or two shelves near the sink or stove, and keep the daily dishes there so the display is used, not just looked at. Group plates in stacks, bowls together, and glasses in a single row, with space left at each end.

    This guide to how to style open shelves shows how to leave breathing room so shelves read as storage, not clutter. Keep heavy stacks low, limit each shelf to one or two groups, and move anything you have not used in months into a closed cabinet. A shelf that holds only what you reach for weekly stays tidy on its own.

    5. Retro Freestanding Range

    Cream retro freestanding range with chrome trim against a plain tiled kitchen wall.

    A freestanding range with rounded edges, chunky knobs, and a cream or soft mint finish can set the tone for the whole kitchen. It reads as a piece of furniture rather than a built in appliance, which is exactly what older kitchens did. Choose the width to match your cooking: a standard width suits most households, while a wider range suits cooks who use several pans at once.

    Before you buy, check the fuel type, the venting route, and the clearance your maker specifies around the range. A retro look does not mean old performance, so compare oven size, burner output, and cleaning features as you would for any range. Keep the wall behind it simple, with plain tile or beadboard, so the range stays the focal point.

    6. Black and White Checkerboard Floor

    Black and white checkerboard tile floor in a vintage kitchen with cream cabinets.

    A black and white checkerboard floor is one of the clearest vintage signals in a kitchen, and it works in small and large rooms alike. Large squares suit a bigger floor, while smaller squares suit a compact kitchen or a hallway run. The strong pattern grounds cream cabinets and wood counters, and it hides crumbs better than a plain pale floor.

    Use tile rather than a printed sheet if the floor sees heavy wear, and choose a grout color you can live with: light grout brightens the pattern, dark grout softens it. Seal the grout and keep a spare box of tiles for repairs. If a full checkerboard feels too bold, run it in the main walkway and use plain tile under the cabinets.

    7. Beadboard Backsplash

    Painted cream beadboard backsplash behind a vintage kitchen counter and sink.

    Beadboard gives a kitchen wall a lined, cottage texture that flat tile cannot match, and it suits the area between counter and upper cabinets well. Painted beadboard in cream or soft white brightens the work zone, while a natural wood finish warms a kitchen with pale cabinets. The vertical lines draw the eye up and make a low ceiling feel a little taller.

    Seal painted beadboard well, especially behind the sink and stove, where steam and splashes land daily. Use a wipeable paint finish so cooking grease comes off with a damp cloth. If you like the lined look but want tile near the stove, use beadboard on the remaining walls and tile only in the splash zone.

    8. Glass Front Upper Cabinets

    Glass front upper kitchen cabinets displaying white dishes and glasses.

    Glass front cabinets show a small, edited collection instead of hiding everything behind solid doors, which suits a vintage kitchen built around pretty dishes. Use glass on one run of uppers, or on a single cabinet beside the sink, and keep the rest solid for everyday clutter. Clear glass shows the most, while seeded or fluted glass softens the view and hides mismatched pieces.

    Keep what sits behind glass to one color family or one set of dishes, so the cabinet reads as a display rather than a crowded cupboard. Line the back of the cabinet in a pale color to bounce light, and add a small light inside if the shelf sits in a dark corner. This idea pairs naturally with the open shelves in Idea 4.

    9. Enamel Pendant Lights

    Green enamel pendant lights hanging over a vintage kitchen island with a wood countertop.

    Enamel pendant lights with a wide dome shade give focused light over an island, a table, or a sink, and their glossy finish suits a vintage kitchen. Green, cream, black, and soft red are classic enamel colors, and a single color repeated two or three times ties the room together. Hang the shades low enough to light the work surface, but high enough that they do not block sight lines across the room.

    Check the bulb type and brightness before fitting, since a pendant that looks right but lights poorly will frustrate daily cooking. Use warm white bulbs for a soft evening feel, and fit dimmers if you eat at the same table you prep on. Keep cords or rods straight and level, since uneven pendants are easy to spot.

    10. Pressed Tin Backsplash

    Pressed tin backsplash with a repeating pattern behind a vintage kitchen stove.

    Pressed tin panels bring a pattern and a soft metallic sheen to a kitchen wall, and they recall older kitchens where tin lined ceilings and walls. A simple repeating pattern suits a backsplash, while a bolder pattern suits a single feature wall. Painted tin in cream or pale sage reads softer than bare metal, and it wipes clean with a damp cloth.

    Fix tin panels over a flat, dry wall, and seal the edges near the sink so moisture cannot get behind them. Avoid tin directly behind a high heat burner unless your panel maker says it is safe there, and use tile for that strip instead. A pressed tin backsplash works well with the enamel pendants in Idea 9, since both add a little shine without glare.

    11. Freestanding Kitchen Hutch

    Painted cream freestanding kitchen hutch with plates and glasses on display.

    A freestanding hutch or dresser adds storage and display in one piece, and it suits a vintage kitchen because older kitchens often mixed fitted cabinets with separate furniture. Use the lower cupboard for table linens, baking trays, or small appliances, and the upper shelves for plates, glasses, and a few decorative pieces. A painted hutch in cream or muted green links to the cabinets without matching them exactly.

    Measure the wall and the door swing before you buy, since a hutch is deep and needs clear space in front. Fix tall pieces to the wall if the household includes children, and keep the top shelf for light items you reach for rarely. A hutch also gives a small kitchen extra storage without a full cabinet run.

    12. Rounded Retro Refrigerator

    Rounded pastel cream retro refrigerator with chrome handles in a vintage kitchen.

    A rounded retro refrigerator with chrome handles and a soft pastel or cream finish can carry the vintage theme on its own. The curved shape softens a wall of square cabinets, and a single door with a small freezer section suits smaller households. Larger retro style models with a full freezer suit families who need more cold storage, so check the interior layout, not just the outside shape.

    Measure doorways, turning space, and the gap beside the fridge before ordering, since retro models can be wider or deeper than they look. Check energy use and noise ratings too, since a pretty fridge that hums loudly will wear thin fast. Keep the wall around it plain, so the shape and color stay the feature.

    13. Hoosier Baking Cabinet

    Hoosier style baking cabinet with a work surface, flour bins and drawers.

    A Hoosier style baking cabinet is a tall, freestanding unit with a work surface, flour and sugar bins, spice racks, and shallow drawers, built for baking before fitted kitchens existed. It gives a vintage kitchen a real work station: measure and mix at the counter, reach flour from the bin below, and store baking trays in the drawers. Original pieces vary in condition, so check drawers, hinges, and the worktop before buying.
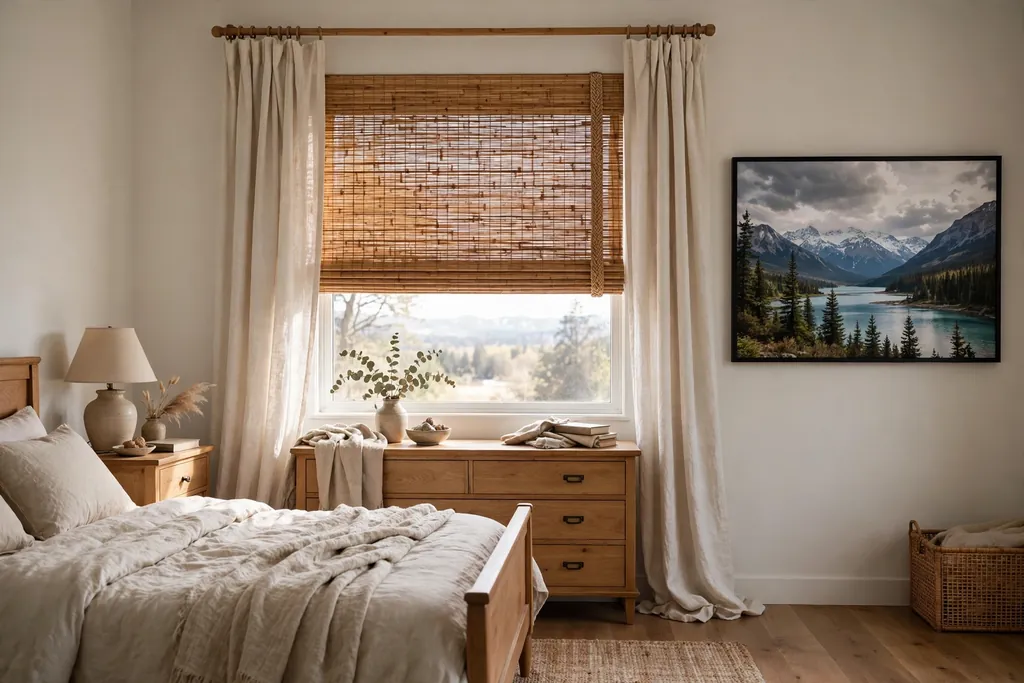
    If an original is hard to find, a reproduction cabinet gives the same layout with new fittings and a clean work surface. Place it near the oven, with a clear landing spot for hot trays beside it. Keep the top clear except for a mixing bowl and a small jar of utensils, so it stays a working surface rather than a display shelf.

    14. Sink Skirt Curtain

    Checked fabric curtain skirt under a farmhouse kitchen sink.

    A curtain under the sink, instead of a cabinet door, is a soft vintage detail that also hides cleaning supplies and pipes. Choose a washable cotton or linen fabric in a small check, stripe, or plain muted color, and hang it from a tension rod or small rail inside the cabinet opening. The fabric softens a hard run of cabinets and adds a cottage note for very little cost.

    Wash the curtain often, since the sink area sees splashes and steam, and keep a second curtain ready to swap in on laundry day. This idea suits a single sink cabinet rather than a full run of curtained cabinets, which can look busy. It also works well beside the beadboard in Idea 7, since both add texture without pattern overload.
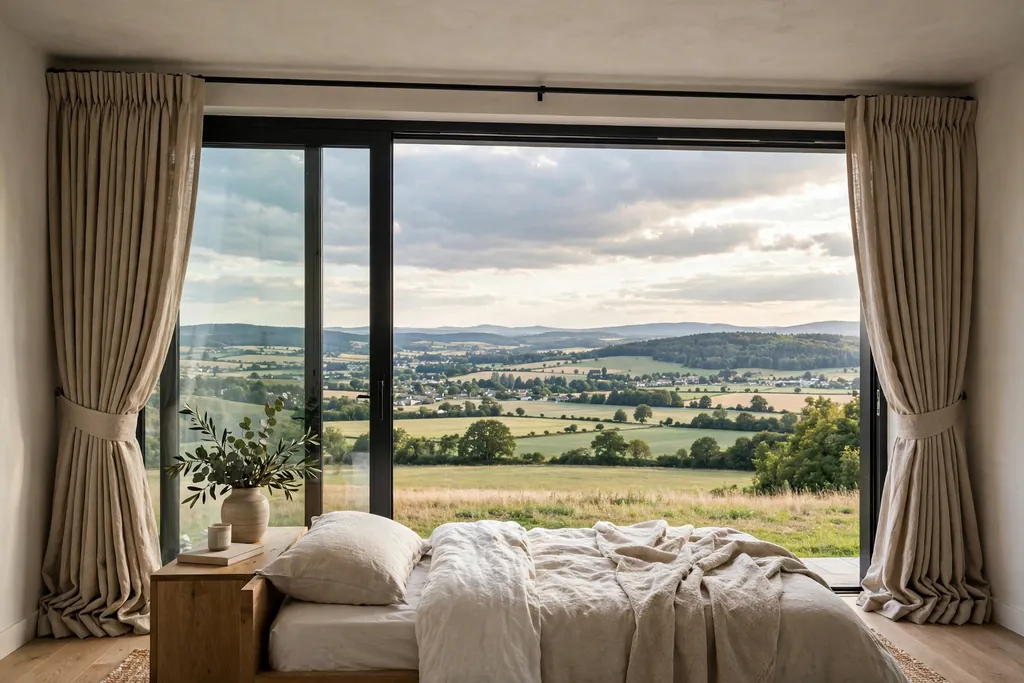
    15. Bridge Faucet With Cross Handles
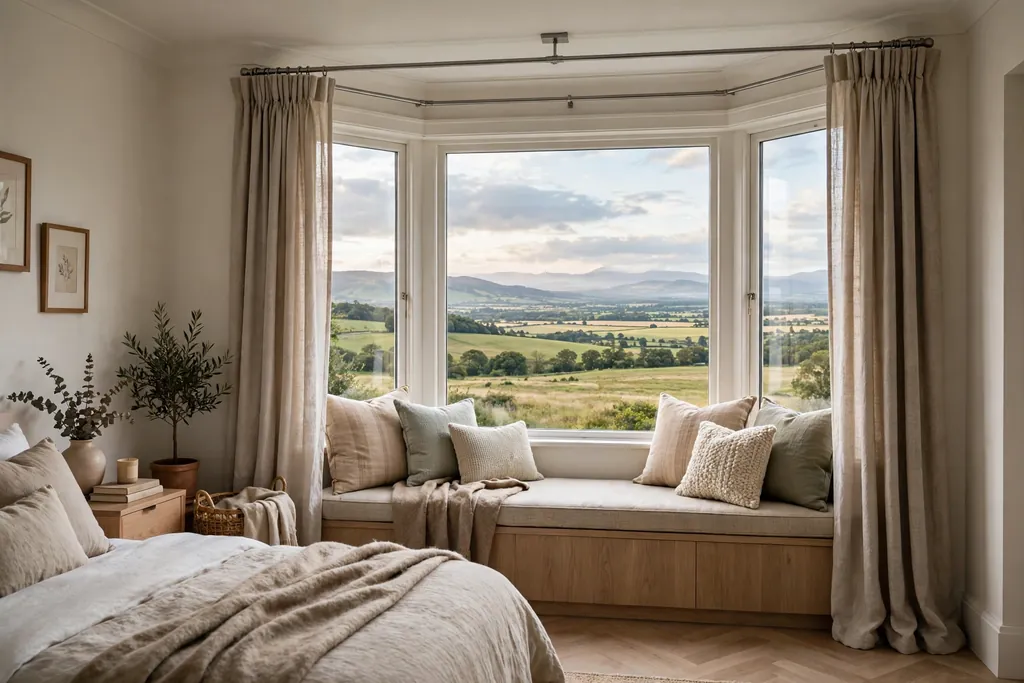
    Brass bridge faucet with cross handles over a white farmhouse kitchen sink.

    A bridge faucet joins the hot and cold taps with a horizontal bar above the sink, and cross handles give it a clear old style shape. The design suits an apron sink and a traditional kitchen, and the raised bar makes the faucet a feature rather than a background fitting. Choose a finish that matches your other hardware, such as polished nickel, brass, or chrome, so the sink area reads as one planned group.

    Check the hole spacing on your sink or counter before ordering, since bridge faucets need a specific spread. A single lever mixer is easier for one handed use, so a bridge faucet suits cooks who are happy to use two handles. Wipe the bar and handles dry after use, since water marks show fast on polished metal.

    16. Patterned Encaustic Floor Tiles

    Patterned encaustic floor tiles in muted floral colors in a vintage kitchen.

    Patterned encaustic style tiles give a vintage kitchen a floor with history, using floral, star, or geometric motifs in muted colors. Unlike the bold checkerboard in Idea 6, these tiles use softer tones and smaller repeats, so they suit a kitchen that already has patterned curtains or a busy backsplash. Use them across the full floor in a small kitchen, or as a rug style panel in front of the sink or range in a larger room.

    Keep the rest of the floor plain if you use a patterned panel, so the eye has one place to rest. Seal the tiles as your supplier directs, and choose a grout color close to the main tile tone to keep the pattern calm. A patterned floor pairs well with plain cream cabinets, since the floor carries the decoration and the cabinets stay quiet.

    17. Wrought Iron Pot Rack

    Wrought iron pot rack holding cast iron pans and copper pots in a vintage kitchen.

    A wrought iron pot rack hung from the ceiling or fixed to the wall keeps pans in sight and frees a full cabinet. The dark iron suits a vintage kitchen with wood beams, brick, or warm wood counters, and it gives the room a working kitchen feel. Hang the rack where pans can be lifted without bumping a light or a cabinet door, and keep the longest pan clear of head height.

    Fix the rack into ceiling joists or solid wall brackets, since a loaded rack is heavy, and test the hold before hanging every pan. Hang the most used pans at the outer edges for easy reach, and keep lids in a separate rack or drawer so they do not clang against the pans. Wipe the rack when you clean the stove, since cooking grease settles on iron near the range.

    18. Diner Style Breakfast Nook

    Diner style breakfast nook with bench seating and a small round table by a window.

    A breakfast nook with a bench seat, a small table, and a second bench or chairs gives a vintage kitchen a diner feel and a clear place for everyday meals. Built in bench seating uses a corner well, and storage under the bench seat holds table linens or rarely used trays. A round or oval table leaves more passing room than a square one in a tight corner.

    Add a cushion in a wipeable fabric and a small pendant or wall light above the table, so the nook works for homework and coffee as well as meals. Keep the table size modest, since a nook table that seats four comfortably is more useful than a large table that blocks the walkway. For table styling that works every day, see these everyday dining table decor ideas.

    19. Vintage Canisters and Bread Box

    Vintage enamel canisters and a bread box on a kitchen counter.

    A set of matching canisters for flour, sugar, coffee, and tea, plus a bread box, gives a counter a tidy vintage group without a renovation. Enamel, ceramic, or painted metal canisters in cream, sage, or soft red suit most vintage palettes, and labels keep the group practical. Keep the set to four or five pieces, and store bulk refills in a cabinet so the counter stays calm.

    Choose canisters with tight lids, and wash them fully before refilling with a different food. A bread box keeps bread fresh longer than a bag on the counter, and it hides the loaf from view, which helps a small counter look neat. Place the group near the prep zone, not beside the stove, where heat and steam shorten storage life.

    20. Enamelware and Stoneware Display

    White enamelware with blue rims and stoneware crocks on a wood shelf.

    White enamelware with a colored rim, plus a few stoneware crocks and jugs, gives a vintage kitchen an honest, everyday display. These pieces were made for daily use, so showing them on a shelf, a hutch top, or a rail keeps the look grounded. Group enamelware by rim color, and use stoneware crocks for utensils, so the display also does a job.
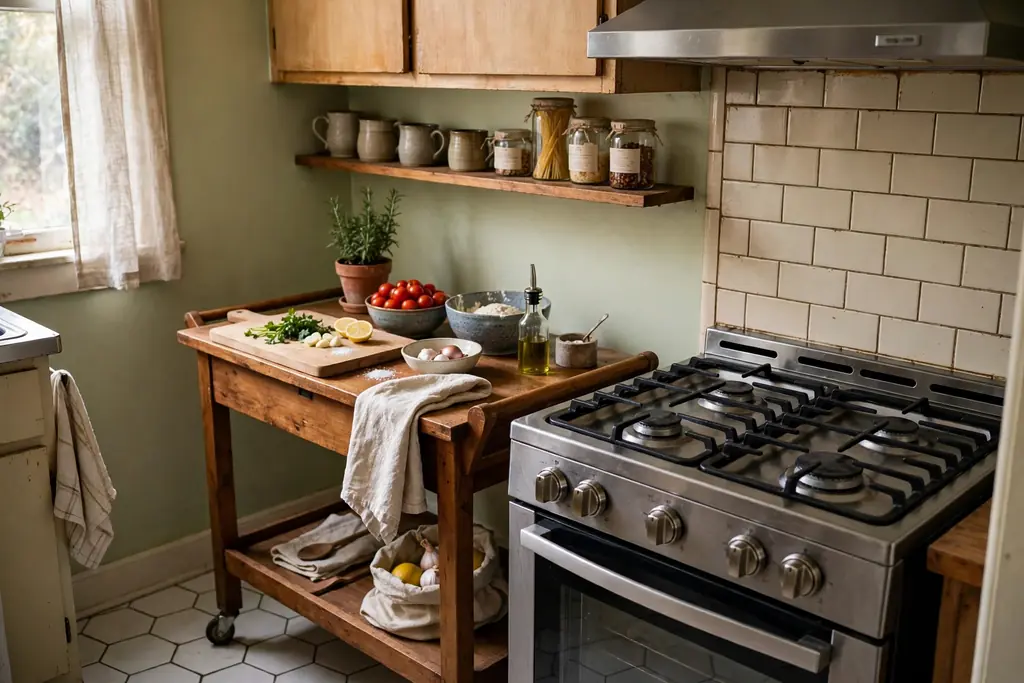
    Check old enamelware for chips inside before using it for food, and keep chipped pieces for dry storage or display only. Stoneware crocks are heavy, so place them low and stable, not on a high shelf edge. This display sits well beside the open shelves in Idea 4 and the hutch in Idea 11, as long as each spot holds only a few pieces.

    21. Antique Rug Runner

    Faded antique rug runner in muted reds and blues in front of a farmhouse kitchen sink.

    A flat weave rug runner in muted reds, blues, or faded floral tones softens a hard kitchen floor and adds a layer of age that new mats cannot match. Place it in front of the sink or along the main prep run, where it also cushions standing time. Choose a low pile rug that a chair or a step stool can cross without catching, and use a non slip pad underneath for safety.

    Keep the rug away from the stove splash zone, and shake it outside and vacuum it often, since kitchen rugs collect crumbs fast. If you worry about stains, use an antique look rug in a washable flat weave instead of a true antique, and save the older piece for a dining area. A runner in faded tones suits both the checkerboard floor in Idea 6 and plain wood floors.

    22. Cafe Curtains at the Window

    Gingham cafe curtains on a kitchen window above a farmhouse sink.

    Cafe curtains cover only the lower half of a window, so they give privacy while letting daylight in above. A small check, gingham, or plain linen curtain on a simple rod suits a vintage kitchen and softens a bare window without darkening the room. This is a good choice for a kitchen window that faces a street or a neighbor, where full privacy matters less than light.

    For more window ideas, these kitchen window decor ideas show how curtains, plants, and shelves can share one window. Hang the rod at the midpoint of the window or a little above it, and keep the fabric short enough to clear the sill. Wash the curtains often, since kitchen windows collect cooking film, and keep the fabric clear of the stove.

    23. Screen Door Pantry

    Vintage pantry with a mesh screen door showing jars and baskets on shelves inside.

    A pantry closed with a screen or mesh door, instead of a solid door, recalls older kitchens where air flow kept stored food cool. The mesh also gives a glimpse of jars and baskets inside, which suits a vintage kitchen built around visible storage. Use a screen door on a walk in pantry, a tall larder cupboard, or a small closet near the kitchen, and keep the frame painted to match the cabinets.

    Keep pantry shelves tidy, since the contents are partly visible, and group jars by type with labels facing out. A screen door also helps air move in a pantry that holds onions, garlic, and potatoes, which store better with ventilation. If dust is a concern, use a fine mesh and wipe the door and shelves during your weekly clean.

    24. Vintage Wall Clock and Framed Prints

    Large vintage wall clock with Roman numerals and framed prints on a kitchen wall.

    A large wall clock with Roman numerals or a simple enamel face gives a vintage kitchen a focal point above a doorway, a hutch, or a small wall. Pair it with one or two framed prints, such as old fruit labels, seed packets, or simple botanical art, rather than filling the wall with many small frames. One clock and two prints make a calm group; a full gallery wall can compete with cabinets and shelves.

    Hang the clock where it can be read from the stove and the table, since a kitchen clock is used while cooking. Keep frames at eye level and in similar wood or metal tones, so the group reads as planned. Avoid hanging prints directly above the stove, where steam and grease will mark the glass and frames over time.
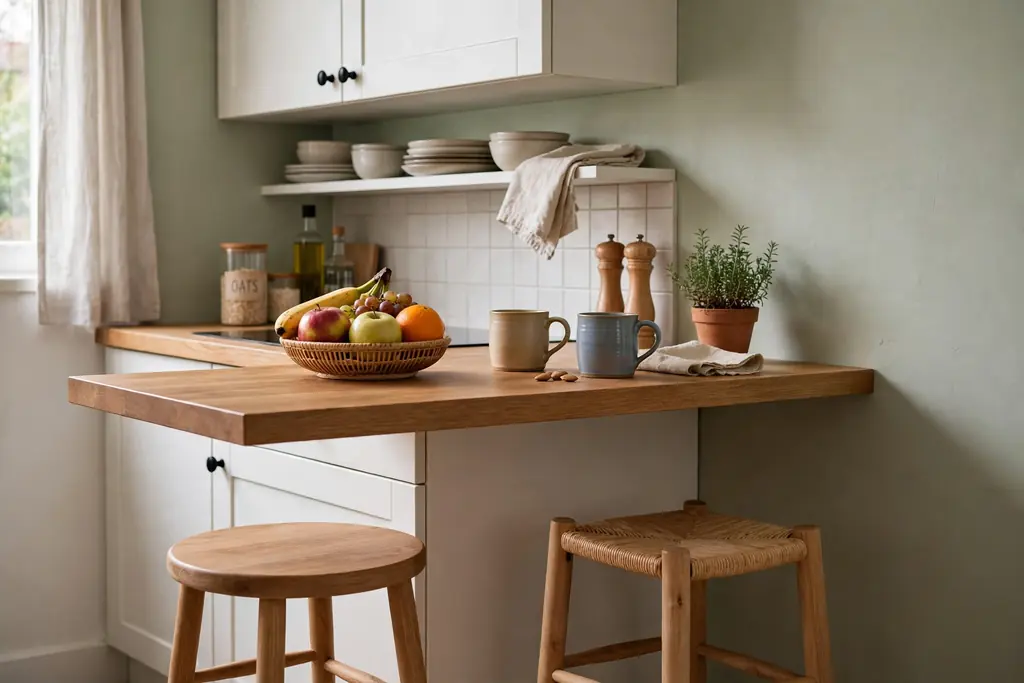
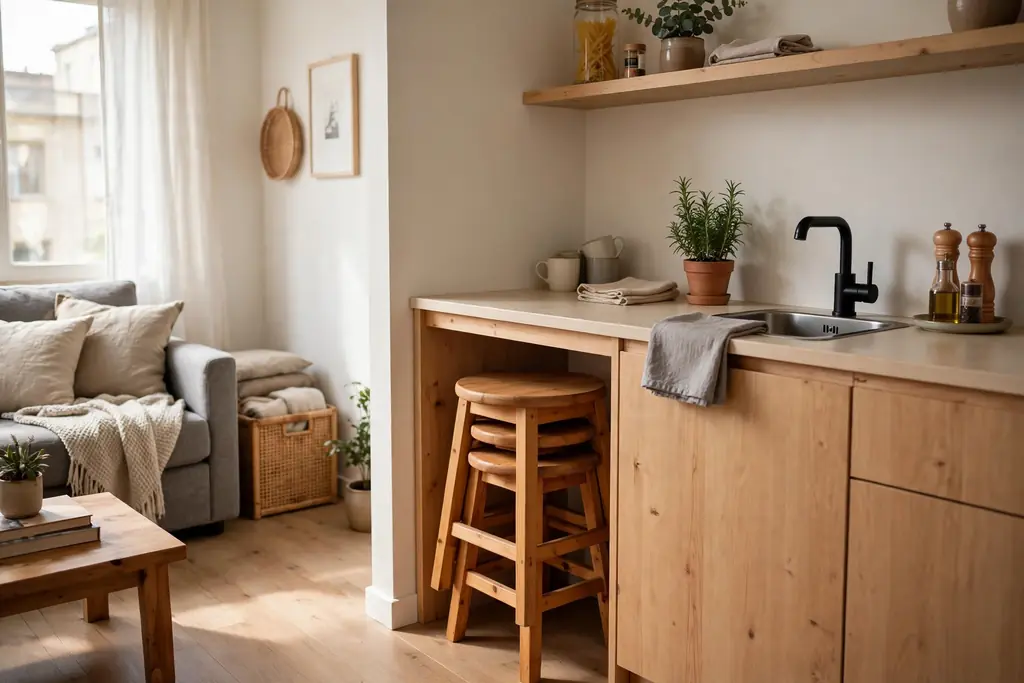
    25. Cast Iron Cookware on Show

    Black cast iron skillets and a Dutch oven hung on a rail near a kitchen stove.

    Cast iron skillets and Dutch ovens, hung on a rail or stacked on an open shelf, give a vintage kitchen a working display that also gets used daily. The dark, seasoned surface suits wood counters and iron racks, and a skillet that hangs by the stove is reached for more often than one buried in a cabinet. Keep one or two pieces on show, and store the rest in a cabinet, so the display stays useful rather than crowded.

    Dry cast iron fully after washing, and oil it lightly before storing, to protect the seasoning. Use a sturdy rail and hooks rated for the weight, since cast iron is heavy, and keep handles turned so they do not stick out into a walkway. This idea links well with the iron pot rack in Idea 17, but one of the two is enough in a small kitchen.

    26. Formica Table With Chrome Chairs

    Retro Formica topped table with chrome legged chairs in a vintage kitchen corner.

    A Formica topped table with chrome legged chairs gives a vintage kitchen a diner style eating spot that is tough, wipeable, and easy to live with. Boomerang, crackle, or plain speckled patterns in cream, grey, or soft pastel suit a retro room, and the smooth top wipes clean after meals. Chrome chairs with vinyl seats are practical for families, since spills wipe off and the seats can be recovered when they wear.

    Check the table size against your room before buying, since retro tables vary in shape and a round table suits a corner better than a rectangular one. Keep the chairs to the number you use daily, and store spares elsewhere, so the eating area stays open. A simple centerpiece, such as a small vase or a bowl of fruit, is enough on a patterned top.

    27. Warm Wood Breakfast Bar

    Warm thick wood breakfast bar with stools tucked underneath in a vintage kitchen.

    A warm wood breakfast bar, built from a thick slab or a simple plank counter on brackets, gives a vintage kitchen a casual eating and prep spot. It suits a kitchen with an open side, a pass through, or a long counter run, and it keeps the main worktop clear for cooking. Pair the bar with wood or metal stools that tuck fully underneath, so the walkway stays open when the bar is not in use.

    Seal the wood well, especially at the ends and around the sink end, and wipe spills promptly. Choose stools at the right height for the bar, with a footrest if the bar is high, since a stool without one is uncomfortable for a long sit. The wood tone should echo another wood element in the room, such as the butcher block in Idea 3 or a wood beam, so the bar looks linked to the kitchen.

    28. Vintage Touches for the Seasons

    Vintage kitchen dressed for fall with a plaid runner, warm towels and a bowl of apples.

    Small seasonal swaps let a vintage kitchen change through the year without changing its base look. In fall, add a bowl of apples, a plaid runner, and warm toned towels, as in these fall kitchen decor ideas. At Thanksgiving, a simple centerpiece and a few extra serving dishes suit the table, as shown in these Thanksgiving kitchen decor ideas. For Christmas, a garland on the island and a few vintage ornaments keep the room festive without clutter, as in these Christmas kitchen island decor ideas. At Halloween, a few old style pumpkins and black and orange towels add a seasonal note, as in these Halloween kitchen decor ideas.

    Keep the base kitchen the same and swap only three or four items per season: a runner, towels, a centerpiece, and one shelf display. Store seasonal pieces in one labelled box per season, so the swap takes minutes. This habit keeps a vintage kitchen feeling lived in and current, without a full redecoration four times a year.

    29. Hide Modern Appliances Behind Vintage Panels

    Cream kitchen with appliances hidden behind matching cabinet panels beside a retro range.

    A vintage kitchen does not have to give up a dishwasher, a modern oven, or a large fridge, since panels can hide them behind cabinet fronts. Dishwasher and fridge panels matched to the cabinets let the run of cream or wood fronts stay unbroken, while the appliances inside work as normal. This trick suits cooks who love the old look but want quiet, efficient machines and easy cleaning.

    Plan panel sizes and ventilation before ordering cabinets, since integrated appliances need specific gaps and access for filters and service. Keep one appliance visible if it earns its place, such as the retro range in Idea 5, and hide the rest. A kitchen that hides the dishwasher and shows the range gets the best of both: vintage character where you look, and modern function where you work.

    Conclusion

    A vintage kitchen is built in layers: a calm base of cream cabinets, warm wood, and simple hardware, then a few pieces with age, and finally small details that get used every day. Start with the anchor that matters most to you, whether that is a sink, a floor, or a range, and let the rest follow slowly. Keep worktops clear, lighting good, and modern function hidden where it helps, and the room will feel warm and comfortable rather than like a set. Pick one idea from this list this week, live with it, and add the next when the first feels like part of the kitchen.

    FAQs

    How do I get a vintage kitchen look without a full renovation?

    Start with paint and hardware: cream paint on sound cabinets, brass or nickel pulls, and a new faucet change the room fast. Add open shelves, a rug runner, cafe curtains, and a few vintage dishes for low cost impact. Save larger changes, such as a sink, floor, or range, for later, once the smaller details show you which vintage direction suits your home.

    What colors work best in a vintage kitchen?

    Cream, soft white, warm wood, sage green, dusty blue, and muted red are the most reliable vintage palette, with brass or nickel as the metal accent. Keep walls and cabinets in pale tones, then add color through a rug, curtains, canisters, or a retro fridge. One or two accent colors, repeated in small pieces across the room, keep the look calm instead of busy.

    Can a vintage kitchen still work for modern cooking?

    Yes, if you keep modern function behind the vintage look. Use a good range with modern oven features, hide the dishwasher behind a cabinet panel, and keep task lighting bright over counters and the sink. Store daily tools where they are reached easily, and let vintage pieces do the display work while modern appliances do the heavy work.

    Is a checkerboard floor too bold for a small kitchen?

    Not if the scale fits the room. Smaller squares suit a compact kitchen, and a checkerboard in the main walkway with plain tile elsewhere keeps the pattern from taking over. Pair it with plain cream cabinets and simple walls, so the floor is the one bold element. If you still worry, test the look with a large sample board on the floor for a week first.

    How do I mix vintage and modern pieces without clashing?

    Repeat one material or finish across old and new pieces, such as brass hardware on both a new cabinet and an old hutch, or wood tones that sit close together. Keep the palette limited, and let one piece be the clear vintage star, such as a retro fridge or a Hoosier cabinet, while the rest stays simple. Step back to the doorway and check the whole room, since that view shows clashes fastest.

    Where should I look for true vintage kitchen pieces?

    Check local salvage yards, antique shops, estate sales, and secondhand marketplaces for hutches, Hoosier cabinets, enamelware, and old hardware, and inspect each piece for damage, lead paint on very old painted items, and working hinges before buying. Measure doorways and the space at home first, since large vintage furniture is hard to return. If a true vintage piece is too worn for daily use, a good reproduction gives the same look with new fittings.


  • 22 Kitchen Archway Ideas for a Relaxed, Pulled-Together Home

    22 Kitchen Archway Ideas for a Relaxed, Pulled-Together Home

    An archway softens the line where a kitchen meets the next room. Where a square doorway can feel abrupt, a curve slows the eye, frames the view into the dining space and gives even a plain opening a finished look. These 22 kitchen archway ideas cover plaster, brick, timber, tile and painted finishes, plus arches that hold shelves, a pass-through counter or a small nook. Pick the finish that suits your cabinets and floors, check the width you have to work with, and start with one opening before you change the rest.

    Key Takeaways

    • Match the arch finish to something already in the room, such as cabinet paint, floor timber or a tile you love, so the opening feels planned rather than added on.
    • Check the opening width and head height before you commit to a shape: a wide, low arch suits an open plan wall, while a tall, narrow arch suits a hallway or galley entry.
    • Keep the curve simple if the kitchen is small. A clean plaster or painted arch reads calm, while heavy stone or deep timber suits a larger room.
    • Use the wall around the arch for storage, light or seating only when it does not block the walkway or crowd the work zones.
    • Before cutting or widening any wall, confirm whether it is load-bearing and where pipes and wires run, and get professional advice when in doubt.

    1. Smooth Plaster Arch

    Smooth white plaster archway between a kitchen and a dining room with plain cabinets.

    A smooth plaster arch is the quietest way to add a curve to a kitchen. The opening is shaped, plastered and painted the same colour as the surrounding wall, so the shape itself does the work and nothing competes with the cabinets or floor. It suits painted kitchens, rentals with permission for a modest change, and homes where the dining room beyond is the feature.

    Keep the curve gentle rather than a tight half circle, which can look fussy in a low ceiling room. A simple curved template, careful sanding and two coats of washable paint give a clean edge. Touch up scuffs at hand height once a year, since an arch at a walkway corner gets more knocks than a flat wall.

    2. Exposed Brick Arch

    Exposed brick archway at a kitchen entry with plain cabinets and a wood table beyond.

    An exposed brick arch brings warmth and texture to a kitchen entry, and it works well where brick already appears on a chimney breast or an exterior wall. The brick can be original, reclaimed or a thin brick slip fixed over a shaped opening, so the look is possible even when the wall behind is not brick at all.

    Seal the brick with a clear matte sealer so cooking grease and dust wipe off, and keep mortar joints neat and shallow rather than deeply raked, which traps crumbs. Pair brick with plain cabinets and a simple floor so the arch stays the focus. A brick arch also pairs well with dark hardware, as seen in our black and gold kitchen ideas.

    3. Timber Beam Arch

    Timber beam arch framing a kitchen opening beside wood shelves.

    A timber beam arch frames the opening with wood, either as a full timber surround or as a single beam across the springing point of the curve. It suits farmhouse, rustic and warm modern kitchens, and it ties the opening to wood floors, open shelves or a wood table in the next room.

    Choose a timber tone close to your floor or shelves rather than an exact match, which can look flat. If you are repainting cabinets at the same time, our guide to colors for your kitchen cabinets can help you pick a paint that sits well beside warm wood. Seal the timber against steam, and leave a small shadow gap behind the beam so seasonal movement does not crack the plaster.

    4. Painted Arch Accent

    Kitchen archway painted deep green against white walls and plain wood cabinets.

    Painting just the arch in a contrasting colour turns a plain opening into a feature without any building work. A deep green, navy or warm terracotta ring around the curve draws the eye through to the next room, and it costs little more than a small pot of paint and a steady hand with masking tape.

    Paint the inside face of the arch as well as the front edge, so the colour reads as a deliberate band rather than a stripe on one wall. Use the same paint finish as the wall, in a washable grade, and test the colour in both daylight and evening light. If the colour feels too strong, paint the arch in a deeper tone of the wall colour instead of a wholly different hue.

    5. Tiled Arch

    Terracotta tiled archway in a kitchen with plain cabinets.

    A tiled arch adds colour and pattern right where the eye pauses, and it is a practical choice because tile wipes clean near a cooking zone. Terracotta tiles give a warm Mediterranean feel, while glazed zellige style tiles add shine and slight variation from tile to tile. Small format tiles bend around a curve more easily than large slabs.

    Plan the tile layout from the centre of the arch outward so the pattern stays even on both sides, and use a flexible adhesive and grout rated for the curve. Keep the rest of the kitchen calm if the tile is patterned, or repeat one colour from the tile in a cushion or a rug. For more colour and pattern inspiration, see our Mexican kitchen decor ideas.

    6. Rustic Stone Arch

    Rustic stone archway at a cottage kitchen entry with light cabinets.

    A stone arch suits a kitchen with a country or cottage feel, especially where stone already appears on a fireplace or an exterior wall. Rough cut stone gives a solid, grounded look, while smoother cut stone reads more refined. Either way, the weight of the material means the arch should sit in a room with enough space to carry it.

    Use real stone only on a wall that can take the load, and use lightweight stone cladding where the wall cannot. Keep mortar joints consistent and brush off dust before sealing. Because stone is visually heavy, pair it with light cabinets and a plain floor, and avoid adding a second heavy feature, such as a large stone island, in the same sight line.

    7. Shiplap Plank Arch

    White shiplap plank archway in a bright kitchen.

    Shiplap planks wrapped around an arch give a relaxed, coastal or cottage feel without the weight of stone or brick. Horizontal planks follow the curve in short sections, or vertical boards can be cut to follow the arch line. Painted white or a soft neutral, shiplap keeps the opening light.

    Cut planks carefully around the curve and fill small joints with paintable filler before the final coat, since gaps show up in raking light. Use moisture resistant boards near the kitchen, and keep the plank direction consistent on both faces of the wall. This finish suits a kitchen that already uses panelling elsewhere, so the arch echoes a detail rather than introducing a new one.

    8. Arched Pass-Through Counter

    Arched pass-through counter between a kitchen and a dining room with stools.

    An arched pass-through turns a wall between kitchen and dining room into a serving hatch with a curved top. Dishes pass across a counter set into the opening, guests can sit on stools on the dining side, and the cook stays part of the conversation. The counter depth only needs to fit a plate and a glass.

    Keep the counter clear of the main prep zone so serving does not block cooking, and choose a counter material that wipes clean on both sides. A pass-through also makes holiday serving easier: set out sides on the counter and keep the table free for places. For table ideas to go with it, see our everyday dining table decor and our Thanksgiving kitchen decor ideas.

    9. Arch Wall With Built-In Shelves

    Kitchen archway with shallow built-in shelves holding plates, bowls and jars.

    Building shallow shelves into the wall beside an arch uses space that often goes to waste, and it keeps the arch itself clean. The shelves can hold daily dishes, a few cookbooks or a row of jars, and they frame the opening like a pair of bookends. Keep shelves shallow, about the depth of a dinner plate, so they do not narrow the walkway.

    Style the shelves with one group per shelf and space at the ends, as shown in our guide to how to style open shelves. Put heavy items low, daily items at easy reach and decorative pieces higher up. If the wall is not deep enough for built-in shelves, a slim wall shelf fixed beside the arch gives a similar effect with far less work.

    10. Arch Framing a Breakfast Nook

    Archway framing a breakfast nook with a bench seat and a round table.

    An arch that frames a breakfast nook makes a small eating corner feel like a room of its own, even when it shares the kitchen floor. The curve marks the edge of the nook, a bench and a small table fill it, and the rest of the kitchen stays open. This works well in a bay, a corner or the end of a long kitchen.

    Keep the nook table round or oval so chairs slide in under the arch without catching the curve. Choose bench cushions in a washable fabric, since a nook gets daily use, and add a small pendant or wall light inside the arch so the corner does not sit in shadow. For seasonal table changes in the nook, our fall kitchen decor ideas offer simple swaps that suit a small table.

    11. Arched French Doors

    Arched French doors with glass panes between a kitchen and a dining room.

    Arched French doors give a kitchen entry the softness of an arch with the option to close the room off. Glass panes keep light moving between rooms, cut cooking noise when closed, and let you see into the dining space from the kitchen. They suit a kitchen that opens onto a dining room or a garden room.

    Choose doors with a true arched top rather than a square door with an arch painted above it, so the curve reads as part of the door. Check the swing clearance on both sides before ordering, and fit soft close hinges if the doors will be used daily. Frosted or reeded glass is a good choice where you want light without a clear view of a busy kitchen.

    12. Wide Open-Plan Arch

    Wide open-plan archway between a kitchen and a living space.

    A wide open-plan arch replaces most of a dividing wall with one generous curve, keeping a sense of two rooms while light and conversation flow freely. It suits a kitchen and living space that are used together, and it avoids the fully open look that some homes find too exposed. The wide span also lets in more daylight from the next room.

    Because the span is wide, the wall above the arch needs proper structural support, so this is a job for a professional. Keep furniture clear of the opening on both sides, and use one floor finish running through the arch to make the two spaces feel connected. A wide arch also suits a long sight line, so keep the view through it tidy with closed storage on the kitchen side.

    13. Narrow Galley Arch

    Narrow archway at the end of a galley kitchen opening onto a dining room.

    A narrow arch at the end of a galley kitchen makes a tight space feel less like a corridor. The curve softens the far end, draws the eye to the next room and gives the galley a clear destination. Because the opening is narrow, the arch should stay simple, with a smooth or painted finish rather than heavy stone.

    Keep the walls beside a narrow arch free of deep cabinets or protruding handles, so the walkway stays comfortable. Paint the arch and the room beyond in a light colour to pull light down the galley, and avoid hanging a pendant in the arch itself, which would lower the headroom. A narrow arch works best when the room beyond is bright, so the view through it feels inviting.

    14. Arch Lit by Pendant Lights

    Kitchen archway lit by warm pendant lights with a dining table beyond.

    Hanging pendant lights through or just beyond an arch turns the opening into a focal point after dark. One pendant centred in the arch, or a pair hung in the room beyond, lights the threshold and marks the change from kitchen to dining space. The glow also softens the curve and makes the opening feel welcoming in the evening.

    Hang pendants high enough to clear heads in the walkway, and use warm bulbs that match the rest of the kitchen lighting. Keep the pendant simple if the arch finish is patterned, and choose a more decorative pendant only when the arch itself is plain. Dimmers are worth fitting, so the arch light can sit low during a meal and brighter while cooking or clearing up.

    15. Plant-Dressed Arch

    Kitchen archway dressed with a trailing plant and a floor pot.

    Trailing plants and a few pots at the base of an arch soften the curve with greenery, and they suit a kitchen that already grows herbs or keeps plants on a sill. A trailing plant hung high on one side of the arch, plus a floor pot on the other, frames the opening without blocking it. Keep plants clear of the walkway and away from the stove side of the wall.

    Choose plants that tolerate kitchen warmth and lower light, and water them over the sink so drips do not mark the floor or the arch paint. Rotate pots so growth stays even, and trim trailing stems before they reach head height in the walkway. If the arch leads outside, our kitchen balcony ideas show how greenery can carry the same relaxed feel beyond the door.

    16. Arch to a Hidden Pantry

    Archway leading to a kitchen pantry with labelled shelves and baskets.

    An arch that leads to a pantry turns storage into a feature instead of a plain door. The curve marks the pantry entry, shelves inside stay hidden from the main kitchen view, and the arch itself can be finished to match the kitchen. This suits a kitchen with a walk-in pantry or a deep cupboard off the main room.

    Keep the pantry entry wide enough for a basket or a tray to pass through, and fit a light inside the pantry that switches on when you step through the arch. Label pantry shelves so the space stays usable, and keep the floor inside the pantry level with the kitchen floor so nothing catches on a step. An arch entry also makes a pantry feel like a small room rather than a cupboard.

    17. Beadboard Panelled Arch

    Beadboard panelled wall around a white kitchen archway.

    Beadboard panels on the wall around an arch add a neat, cottage style detail that suits painted kitchens and older homes. The vertical bead lines draw the eye upward and make a low arch feel taller, while the panels themselves are light and easy to paint. Beadboard can cover the full wall around the arch or just a band framing the curve.

    Paint beadboard in the same colour as the arch or in a slightly deeper tone, and seal the joints so steam does not lift the boards. Keep the bead spacing even around the curve by cutting short sections rather than bending long boards. This finish pairs well with simple cabinets and a plain floor, since the bead detail already adds pattern to the wall.

    18. Black Steel Frame Arch

    Black steel frame archway in a modern kitchen with plain cabinets.

    A black steel frame around an arch gives a crisp, modern edge to a soft curve. The thin dark line defines the opening sharply, suits industrial and modern kitchens, and works with black taps, handles and light fittings already in the room. Steel can be a flat bar following the curve or a slim frame set into the plaster edge.

    Measure the curve carefully before ordering steel, since a frame made to the wrong radius will not sit flush. Fix it with concealed fixings and touch up any scratches with black metal paint. Keep the rest of the opening plain so the steel line stands out, and avoid pairing it with a second strong dark feature right beside the arch.

    19. Mosaic Border Arch

    Mosaic tile border following the curve of a kitchen archway.

    A mosaic border follows the arch curve with small tiles in a pattern or a single accent colour, giving a handcrafted feel without tiling the whole wall. The border can be one tile wide for a subtle edge, or several tiles wide for a bolder frame. This suits kitchens with a Mediterranean, Moroccan or eclectic style.

    Choose mosaic sheets on a mesh backing, which bend around a curve more easily than loose tiles. Plan the pattern so it meets evenly at the top of the arch, and use grout in a colour close to the tiles so the pattern reads clearly. Keep the wall colour plain around a mosaic border, since a patterned wall beside a patterned border will compete for attention.

    20. Arch With an Art Niche

    Kitchen archway with a small art niche holding a framed print.

    A small niche set into the wall beside or above an arch gives art or a single object a protected spot, and it turns a plain wall into a gallery moment. The niche can hold a small print, a vase or a piece of pottery, lit by a tiny picture light or by daylight from the next room. Keep the niche shallow so it does not weaken the wall around the arch.

    Choose one object that suits the scale of the niche, rather than crowding it with several small pieces. A single vase or a framed print with a plain mount reads calmer than a busy collection. If the arch leads to a dining room, pick art that suits both rooms, since the niche will be seen from either side.

    21. Stove Alcove Arch

    Archway framing a stove alcove with a tiled backsplash and a range hood.

    An arch inside the kitchen, framing the stove alcove, gives the cooking zone its own shape without building a separate room. The curve sits over the range, the backsplash fills the alcove, and the arch marks cooking as a distinct area within an open kitchen. This suits a kitchen with a wide range wall and enough width for a generous alcove.

    Use heat resistant finishes inside the alcove, such as tile or plaster rated for the zone, and keep the arch clear of the minimum clearance your range maker requires. Ventilation matters here: the arch must not block the range hood or its duct path. For ideas on fitting the hood into a feature wall, see our corner kitchen cabinet ideas for how storage can sit neatly beside a cooking zone, and keep the alcove free of towels, paper and other items that could catch heat.

    22. Kitchen Window Arch

    Archway framing a kitchen window over a sink with a plant on the sill.

    An arch framing a kitchen window softens the brightest spot in the room and ties the window to the rest of the kitchen. The curve can be a plaster arch around the window opening, a tiled border, or a painted arch on the wall around a plain window. It suits a sink window, a window over a breakfast nook, or a window at the end of a galley.

    Keep the window catch, hinges and any blinds clear of the arch finish, and choose a finish that tolerates condensation, such as tile or washable paint. A window arch looks best when the view beyond is kept simple, with a sill holding one or two items rather than a crowded row. For more window styling ideas, see our kitchen window decor ideas, and for a festive version of the same view, our Christmas kitchen island decor ideas show how a kitchen focal point can carry seasonal touches without clutter.

    Conclusion

    A kitchen archway works best when the finish suits the room and the opening stays easy to walk through. Start with one arch, in a finish you already like elsewhere in the home, and live with it before you change a second opening. Keep the curve simple in a small kitchen, give a wide arch proper structural support, and use the wall around it for light, storage or a small seating spot only when it does not crowd the work zones. With the right finish and a clear walkway, an arch can make a kitchen feel relaxed, connected and pulled together, and it gives the view into the next room a frame worth looking through. If you save one idea from this list, make it the one that fits your width, your cabinets and the way you actually move through the kitchen each day.

    FAQs

    Do I need planning permission or a professional to add a kitchen archway?

    It depends on the wall. A cosmetic arch finish on an existing opening is usually a decorating job, but cutting, widening or removing a wall can affect structure, wiring and plumbing. If the wall could be load-bearing, or you are unsure, ask a qualified professional to check it before work starts and follow local building rules for your area.

    What is the best arch shape for a small kitchen?

    A gentle, wide curve with a smooth or painted finish usually suits a small kitchen best, because it softens the opening without adding visual weight. Avoid heavy stone, deep timber or a tight half circle in a low room, since those finishes can make the space feel smaller. Keep the wall around the arch plain and the walkway clear.

    How wide should a kitchen archway be?

    There is no single right width, since it depends on the room and how the opening is used. A walk-through arch should feel comfortable for one person carrying a tray, and wider for a pass-through or an open plan opening. Measure your existing doorway, check furniture that must pass through, and keep at least a comfortable clearance on both sides of the walkway.

    Can I add an arch to a rented home?

    You can usually add a removable or cosmetic arch effect, such as a painted arch, a lightweight frame or a freestanding arch surround, with your landlord’s permission. Cutting or reshaping a wall is a structural change and normally needs written permission, and often is not allowed in a rental. Check your lease first, and keep the original finish easy to restore.

    What finish is easiest to clean around a kitchen arch?

    Smooth plaster painted in a washable grade, tile and sealed brick are among the easiest finishes to wipe clean near a cooking zone. Rough stone and unsealed timber trap grease and dust more easily, so they need sealing and more frequent wiping. Choose the finish based on how close the arch sits to the stove and how often you are willing to clean it.

    How do I stop an archway from looking dated?

    Keep the curve simple, the finish consistent with the rest of the kitchen, and the wall around it uncluttered. A plain plaster or painted arch with current cabinet colours tends to age better than a heavily patterned or ornate surround. Update the look over time with paint, lighting or plants around the arch, rather than rebuilding the opening itself.