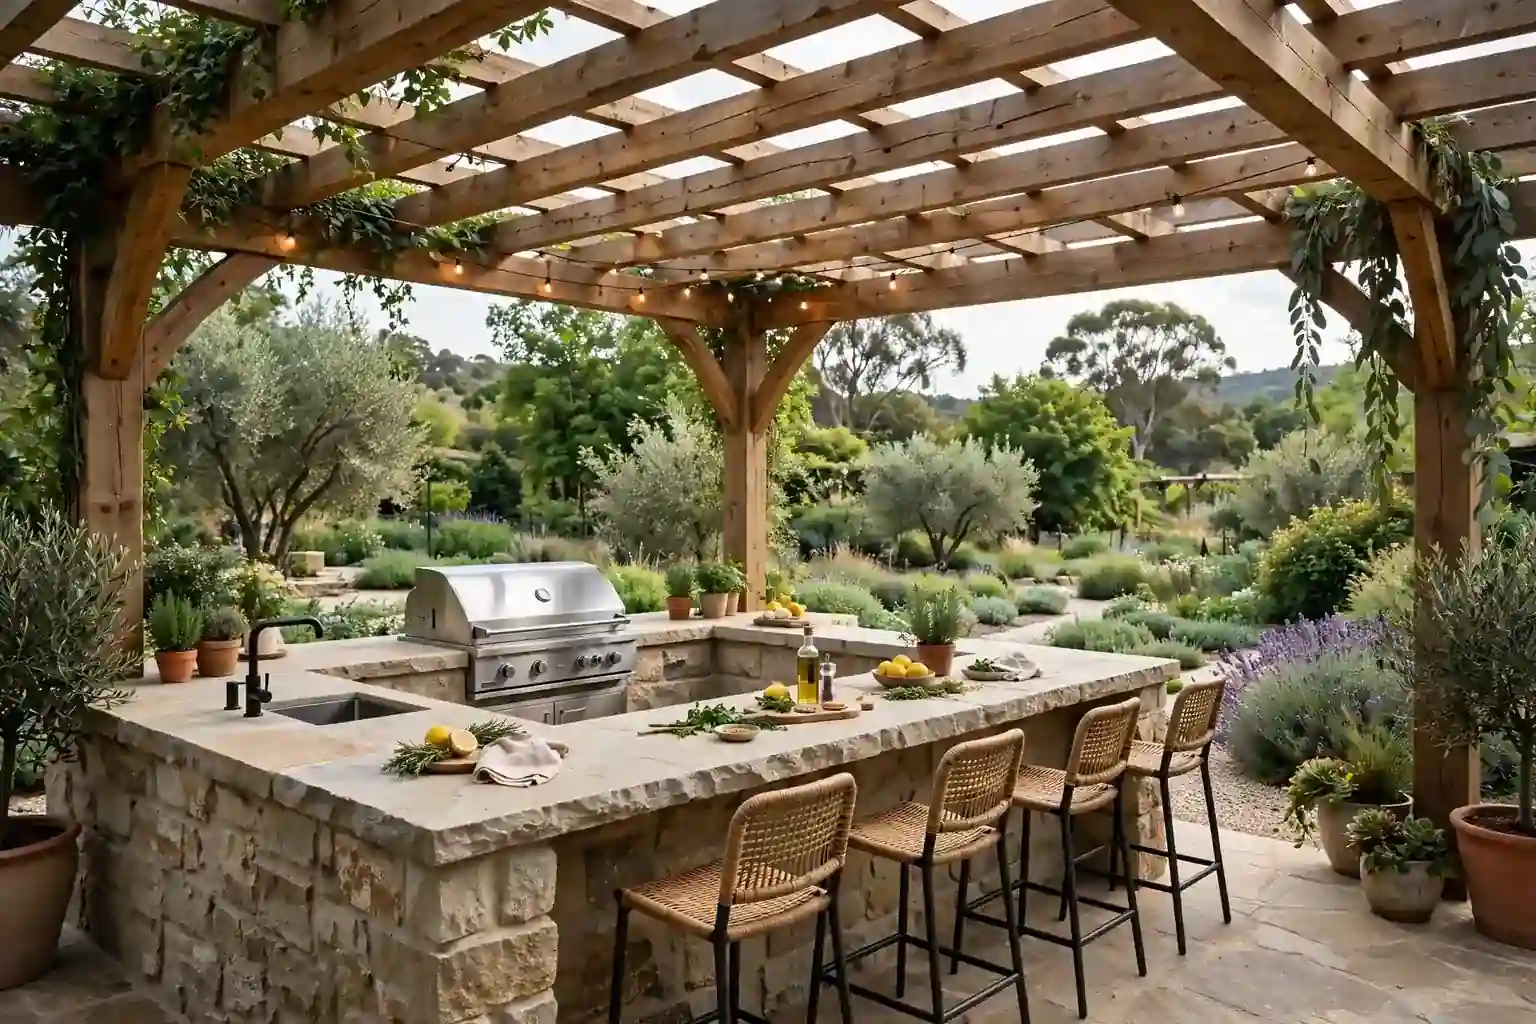
Author: Clara Bennett

  • 16 Covered Outdoor Kitchen Ideas That Bring Practical Style Home

    16 Covered Outdoor Kitchen Ideas That Bring Practical Style Home

    A covered outdoor kitchen lets you cook outside without watching the sky. Rain, strong sun, and falling leaves stay off the grill and the counters, so prep stays clean and guests can sit close to the cooking without crowding the house kitchen. The roof is the first decision, but it is not the only one. Layout, storage, light, and wind protection decide whether the space gets used once a summer or every week. The 16 ideas below cover pergolas, solid roofs, gazebos, louvered roofs, compact nooks, and full kitchens with seating, so you can match the cover to your yard, your budget, and how you cook.

    Key Takeaways

    • Pick the roof for your weather first: a solid roof suits rainy climates, a pergola suits mild sun, and a louvered roof suits yards that need both shade and light.
    • Keep the grill, prep counter, and sink or ice station in a short work triangle, so you are not carrying food across a wet patio.
    • Give the kitchen a floor that drains and wipes clean, such as stone, concrete, or composite decking, and slope it gently away from the house.
    • Plan power, water, and gas with a professional where required, and never run a gas line or fixed wiring as a do it yourself job.
    • Add storage that closes, so cushions, tools, and dry goods stay dry between cooks.
    • Add one light over the grill, one over the prep counter, and low light over seating, so evening cooking stays safe and calm.

    1. Timber Pergola Over an L Shaped Counter
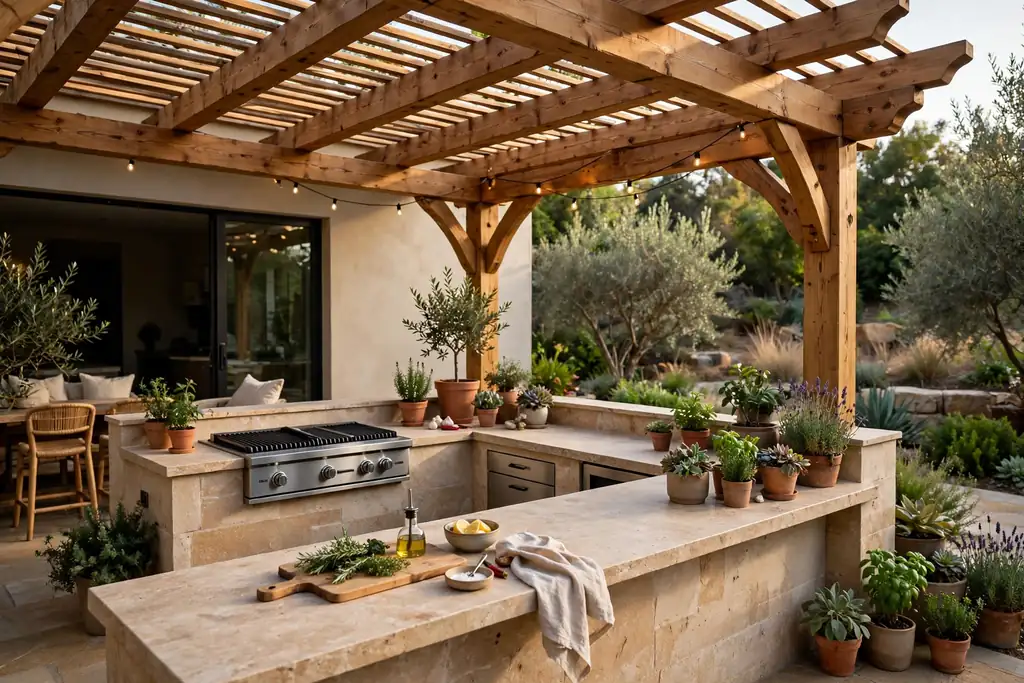
    Timber pergola over an L shaped outdoor kitchen counter with a grill and prep space.

    Build a timber pergola over an L shaped outdoor kitchen counter for shade that still lets air move. The L shape gives a grill run on one side and a prep run on the other, so two people can work without bumping elbows. Open slats soften midday sun, and climbing plants or a shade cloth can add cover in high summer without closing the space in.

    Set the pergola posts clear of the grill heat zone, and fix the frame firmly so wind does not rock it. A stone or concrete floor under the counter wipes clean after cooking, and a bin close to the prep run keeps scraps off the floor. This layout suits a flat patio beside the house, where the kitchen can borrow light and access from the back door.

    2. Solid Roof Extension from the House
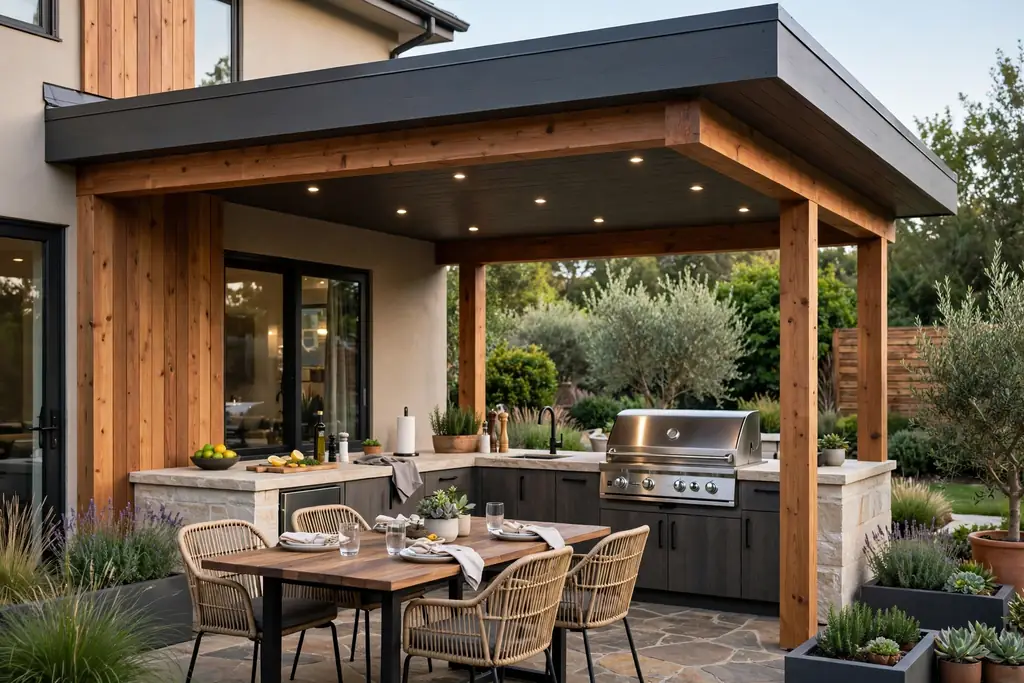
    Solid roof extension from a house over an outdoor kitchen counter and grill.

    Extend the house roof over the outdoor kitchen for the most reliable rain cover. A solid extension keeps the grill, counters, and seating dry in a downpour, and it links the indoor kitchen to the outdoor one in a short, level path. Match the roof material and trim to the house, so the extension reads as part of the home rather than an added shed.

    Check gutters and drainage before you build, since a new roof changes where rainwater falls. Keep the ceiling high enough for grill smoke to clear, and leave an open side for air flow rather than closing all four walls. For a floor that suits a fixed roof and heavy use, see these concrete patio ideas for finishes that resist heat, spills, and foot traffic.

    3. Freestanding Gazebo Kitchen in the Garden
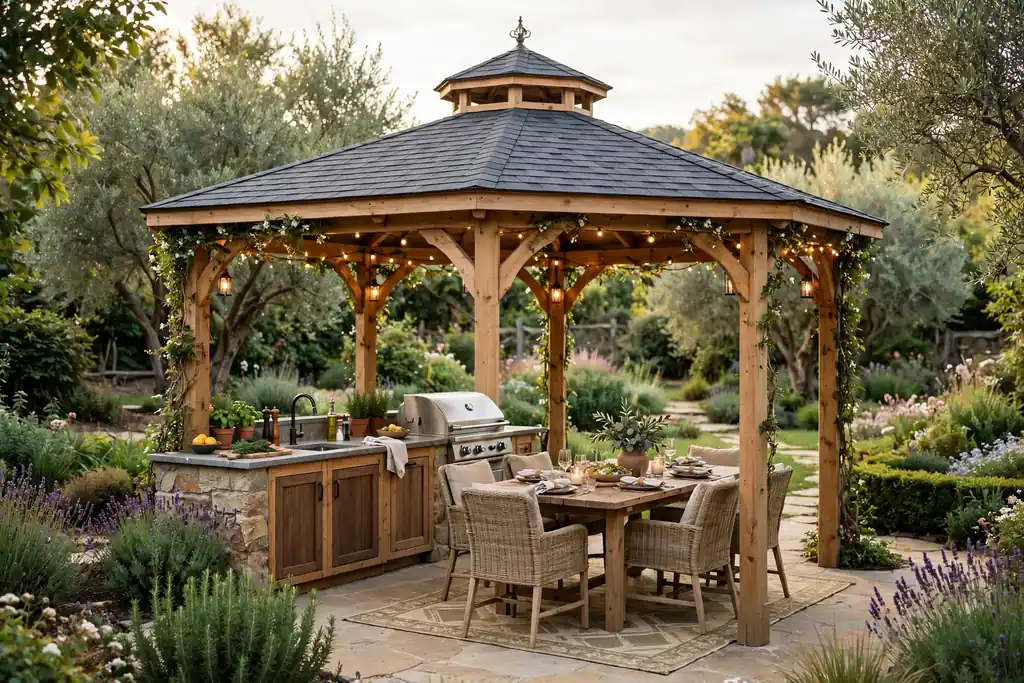
    Freestanding gazebo kitchen in a garden with a grill counter and dining table.

    Place a freestanding gazebo kitchen away from the house for a garden room with its own identity. A gazebo suits a larger yard, where the kitchen can sit near a lawn, a pool, or a view, and it gives guests a clear destination for an evening meal. A central grill counter, a round or rectangular table, and bench seating fit well under an octagonal or square roof.

    Plan the path from the house kitchen first, since carrying food a long way in rain or dark is tiring. Add a paved path, a light along the route, and a small trolley or tray station near the gazebo door. Keep the gazebo roof vented at the top, so smoke and heat can escape, and keep cushions in a closed box under a bench.

    4. Louvered Roof You Can Open and Close
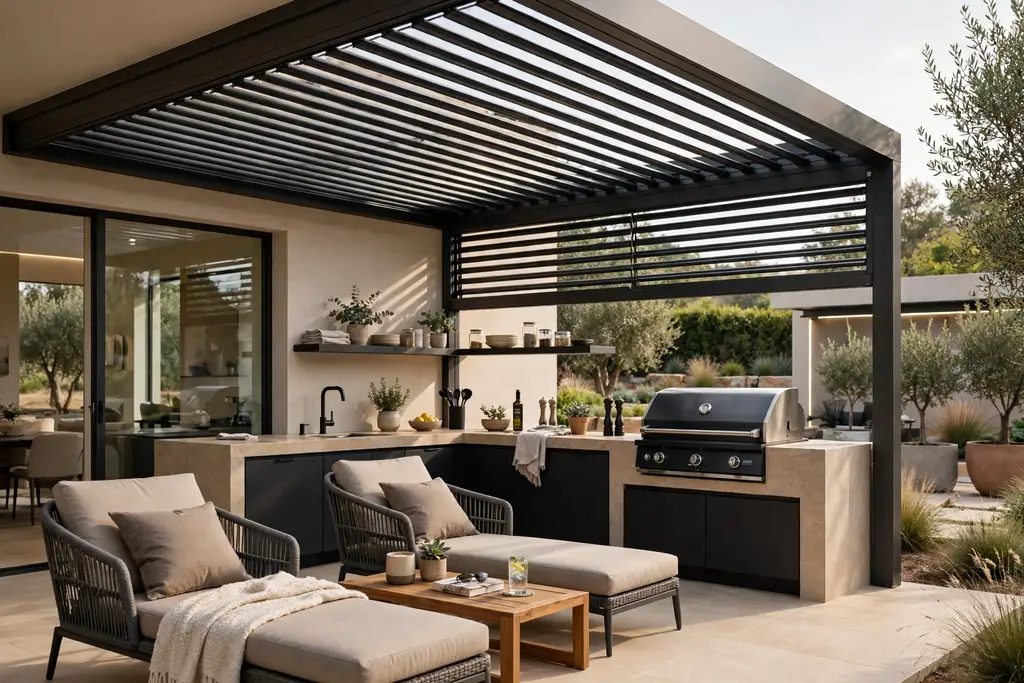
    Modern outdoor kitchen under an adjustable louvered roof with a grill counter.

    Fit a louvered roof over the outdoor kitchen for cover you can adjust through the day. Open the louvers for sun and air on a mild morning, close them for rain at lunch, and angle them for shade in late afternoon. This control suits yards that get both hot sun and sudden showers, and it suits cooks who want light over the prep counter without full glare.

    Choose a system rated for wind and rain, and check how water drains when the louvers close. Keep the controls simple, with a handle or motor you can reach without stepping over the grill. A louvered roof costs more than a fixed pergola, so pair it with a simple counter layout and let the roof do the work.

    5. Stone Pavilion with Solid Columns
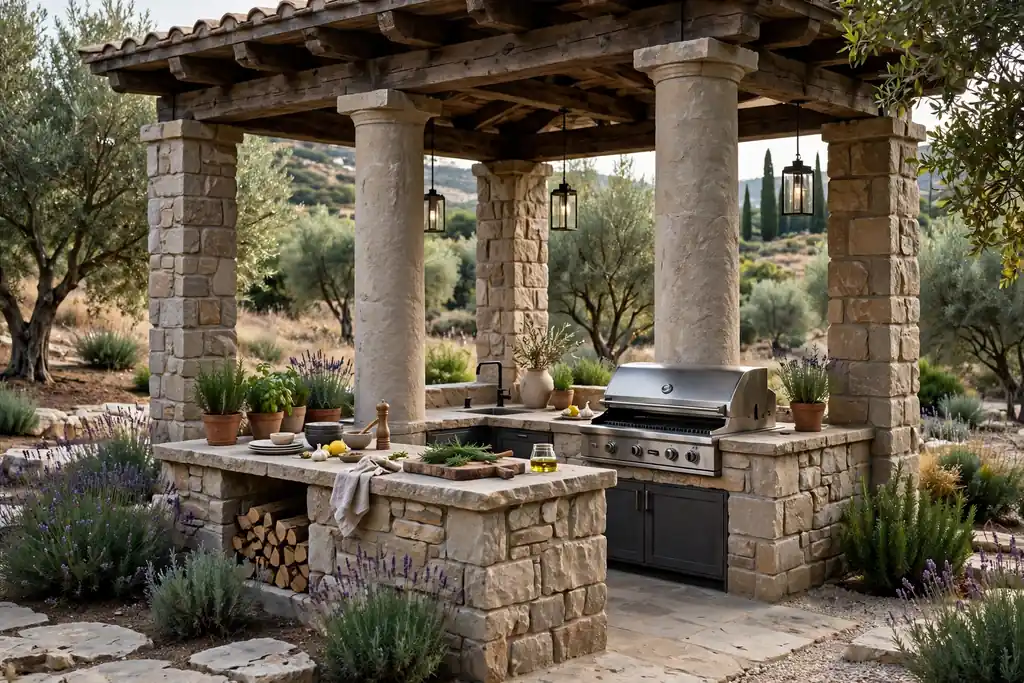
    Stone pavilion with columns over a built in outdoor kitchen counter and grill.

    Build a stone pavilion with solid columns for a covered kitchen that feels permanent and calm. Stone columns, a pitched roof, and a built in grill counter give the space weight and shelter from wind as well as rain. This style suits brick and stone houses, and it suits yards where the kitchen will be used through several seasons.

    A pavilion needs a firm footing and a level floor, so plan the base early and check local rules for structures near boundaries. Keep one side open to the garden view, and use the back wall for storage, a sink, and a fridge niche. Stone stays cool underfoot, so add a rug or wood stools at the seating end for warmth.

    6. Lean To Metal Roof Beside the House Wall
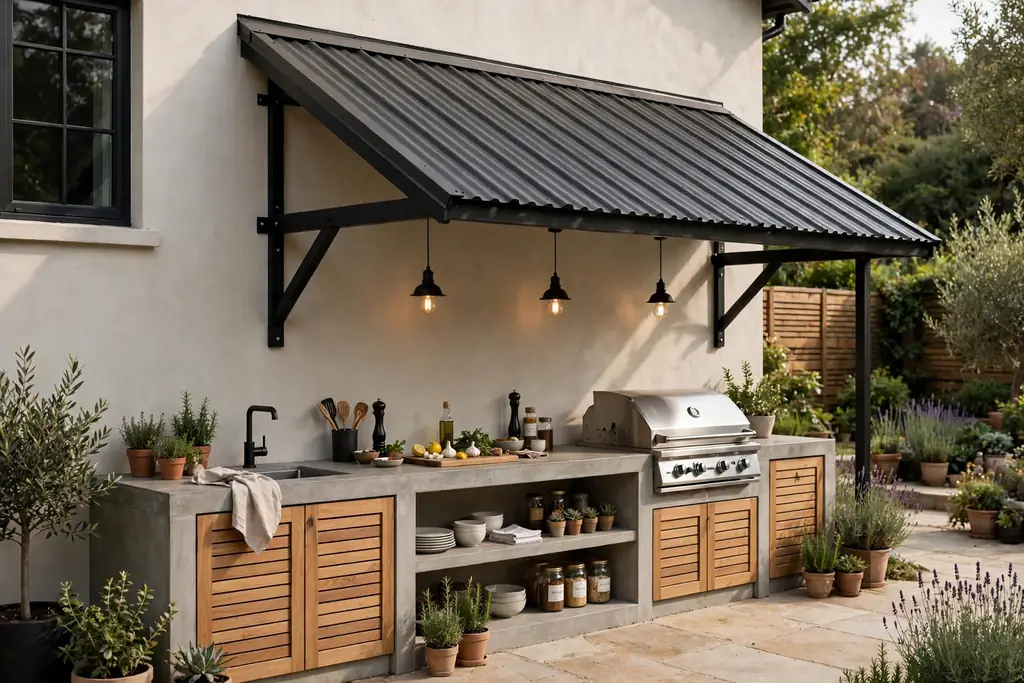
    Lean to metal roof beside a house wall over a straight outdoor kitchen counter.

    Fix a lean to metal roof to the house wall for a simple, budget friendly cover over a straight counter run. The roof slopes away from the wall, so rain runs off the front edge, and the house wall gives a back for shelves, hooks, and a backsplash. This layout suits narrow patios and side yards, where a freestanding structure would take too much space.

    Keep the grill at least clear of the wall and any overhang as the grill maker directs, and use heat resistant material on the wall behind the grill. A metal roof can be noisy in heavy rain, so add insulation or a ceiling layer if you plan to dine under it often. For low cost ways to finish the counters and storage around it, see these kitchen ideas on a budget for paint, hardware, and storage moves that cost little.

    7. Retractable Canopy Over a Counter Run
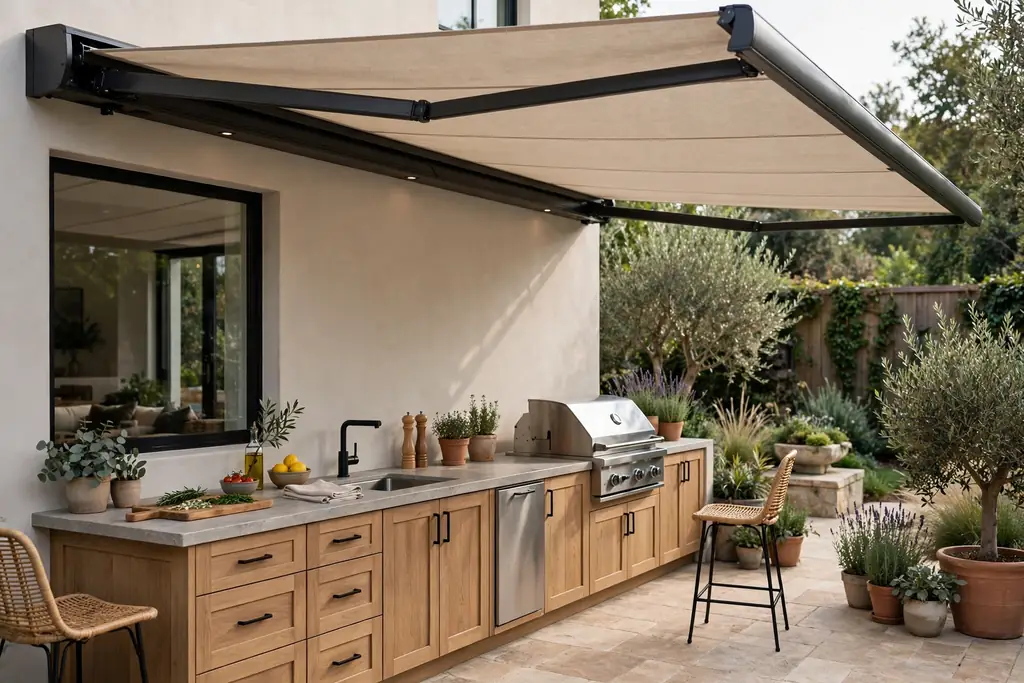
    Retractable canopy over a straight outdoor kitchen counter and grill on a patio.

    Use a retractable canopy over a straight counter run for cover you can pull out only when you need it. On a fair day the kitchen stays open to the sky, and on a hot or drizzly day the canopy rolls out over the grill and prep area. This suits renters and small patios, since the canopy fixes to the wall or to two posts and folds away in winter.

    Check the span before you buy, so the canopy covers the grill and the prep counter, not just the seating. Fix it firmly, since wind loads on fabric are higher than they look, and retract it in storms. Keep the fabric clean and dry before folding it away, so it does not stain or smell next season.

    8. Clear Polycarbonate Roof for Light and Rain Cover
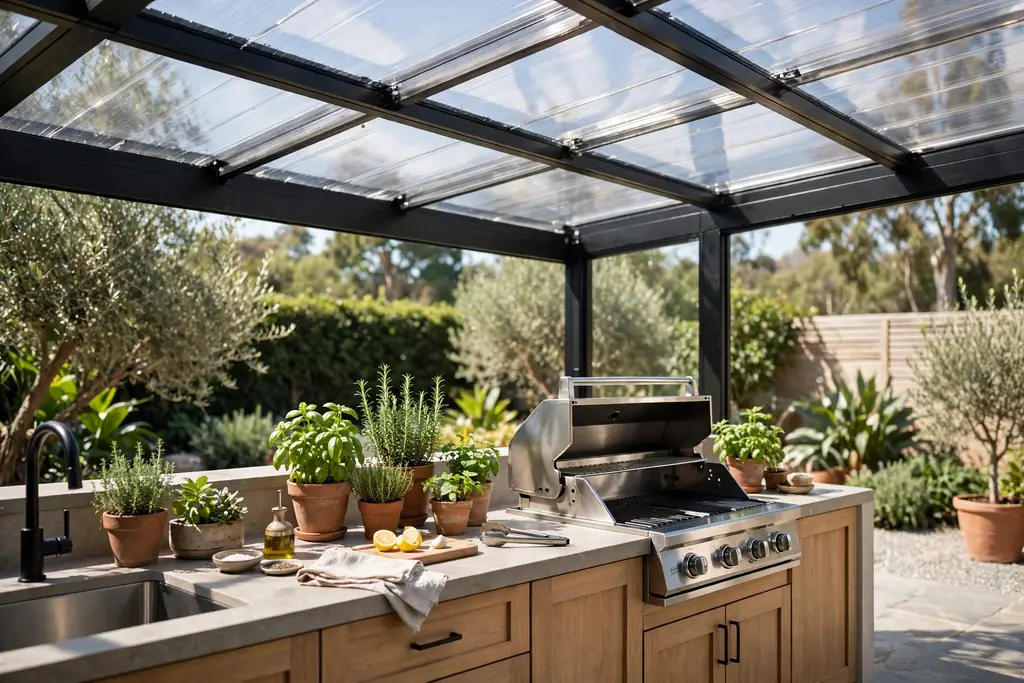
    Clear polycarbonate roof over a bright outdoor kitchen counter with a grill.

    Fit a clear polycarbonate roof over the outdoor kitchen for rain cover that still lets daylight through. The kitchen stays bright on a grey day, plants nearby still get light, and the roof reads as lighter than a solid metal or tile roof. This suits north facing patios and small yards, where a dark roof would make the space feel closed in.

    Choose panels rated for outdoor use and for hail where relevant, and check that they block enough ultraviolet light for comfort. Clear roofs show leaves and dirt, so plan a way to wash them safely from below or with a long handled brush. Add a shade blind or a shade cloth for the hottest weeks, since a clear roof can trap heat under it.

    9. Covered Kitchen with a Built In Pizza Oven
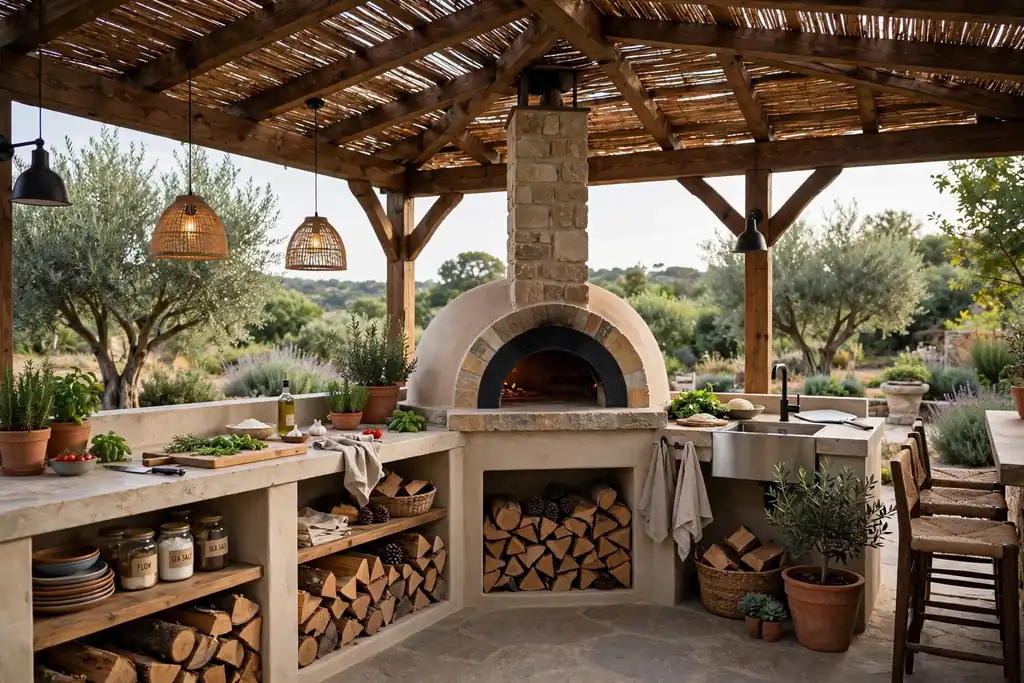
    Covered outdoor kitchen with a built in pizza oven, prep counter, and wood store.

    Add a built in pizza oven under the covered roof for a kitchen built around slow weekend cooking. The oven needs a solid base, a chimney that clears the roof, and a heat resistant wall behind it, so plan it as part of the structure rather than an afterthought. A prep counter beside the oven holds dough, toppings, and peels, and a wood store under the counter keeps fuel dry.

    Keep the oven clear of the dining seats, since the front stays hot, and give the cook a heat resistant surface for trays. A pizza oven suits a solid roof or a stone pavilion best, where the chimney can pass through a fixed structure safely. Have the flue and base checked by a professional, and keep a clear route for carrying hot trays to the table.

    10. Compact Covered Grill Nook for a Small Patio
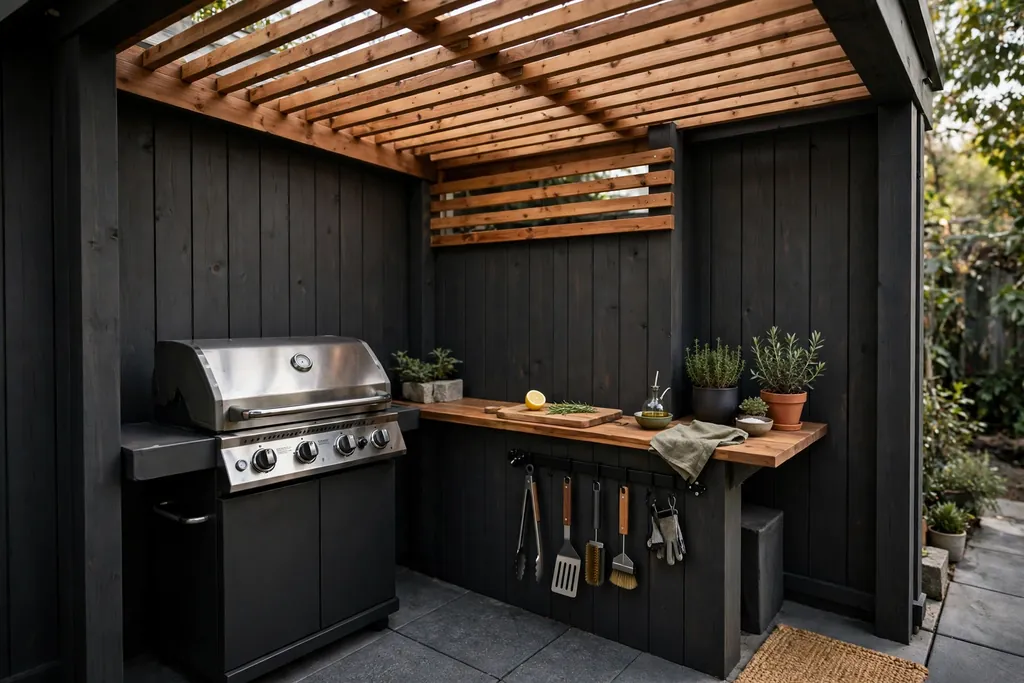
    Compact covered grill nook on a small patio with a grill and prep shelf.

    Create a compact covered grill nook for a small patio, with a grill, a narrow prep shelf, and a tool rail under one small roof. The nook uses a corner or a wall run, so the rest of the patio stays free for a table and chairs. A folding shelf, a wall mounted spice rail, and a slim bin keep the small footprint working hard.

    Measure the grill with its lid open before you fix the roof height, and leave air space around the grill as the maker directs. Keep the nook clear of hanging fabric and low plants, and store fuel and tools in a closed box beside it. This idea suits flats, townhouses, and small gardens where a full kitchen would crowd the patio.

    11. Covered Kitchen with Bar Seating at the Counter
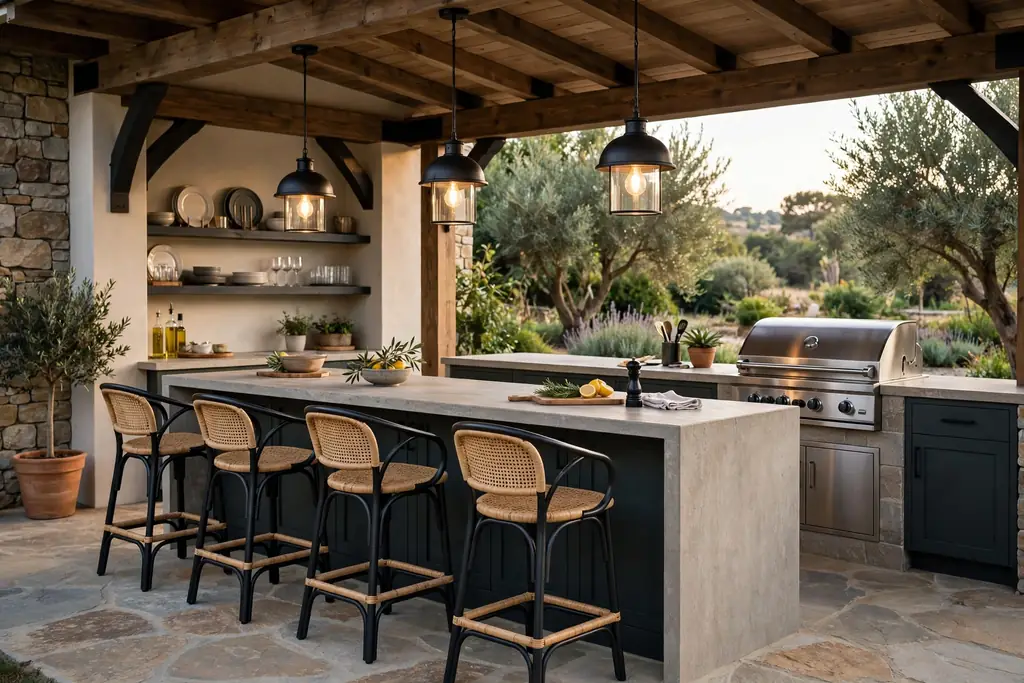
    Covered outdoor kitchen counter with bar stools, pendant lights, and a grill.

    Add bar seating to the covered kitchen counter so guests can sit with the cook instead of waiting at a separate table. A raised counter on the outer side of the kitchen run gives stools a clear place, and it keeps the work side free for prep. This layout suits social cooks, since conversation stays at the grill while food is plated.

    Leave enough leg room under the bar overhang, and choose stools that tuck fully under the counter when not in use. Keep the bar surface heat resistant near the grill end, and use the far end for drinks and plates. Low pendants over the bar give evening light without glare, and a foot rail adds comfort for long sits.

    12. Full Work Triangle with Sink and Storage Wall
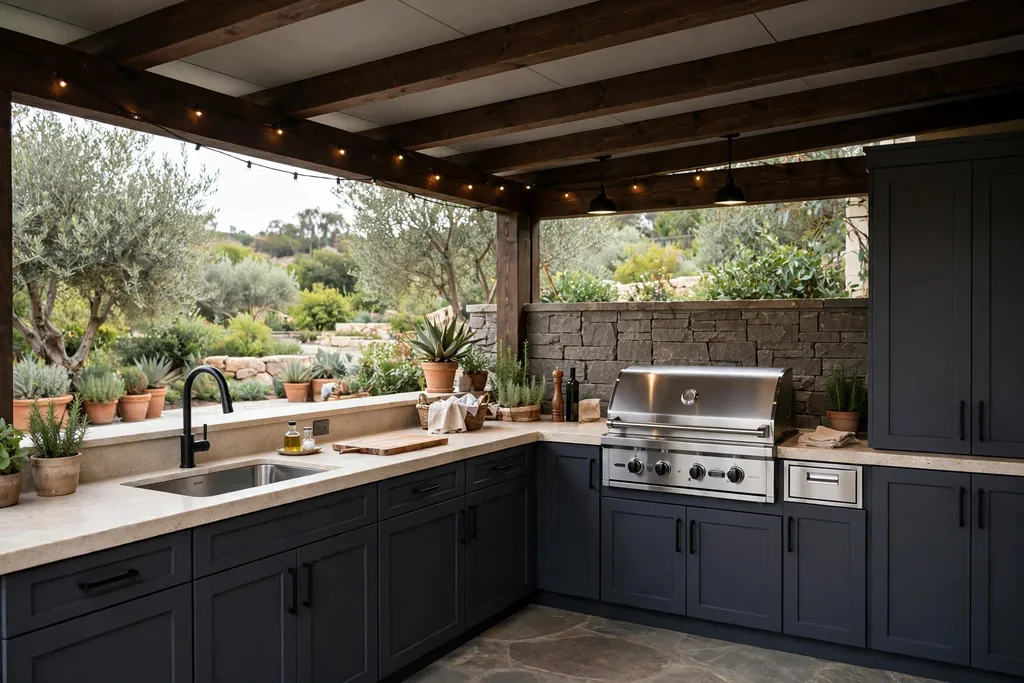
    Full covered outdoor kitchen with a grill, sink, and closed storage cabinets.

    Build a full work triangle under cover, with a grill, a sink or ice station, and a storage wall in a short loop. The sink lets you rinse vegetables and wash hands without going inside, and closed cabinets hold plates, tools, and dry goods. This layout suits households that cook outside often, since it cuts trips back to the house kitchen.

    Plan water supply and drainage with a professional, and winterize outdoor pipes where frost is a risk. Keep the sink clear of the grill heat, and use a counter material that resists water and heat. Label one cabinet for cleaning supplies and one for cooking tools, so guests can help without opening every door.

    13. Covered Kitchen with a Fireplace for Cool Evenings
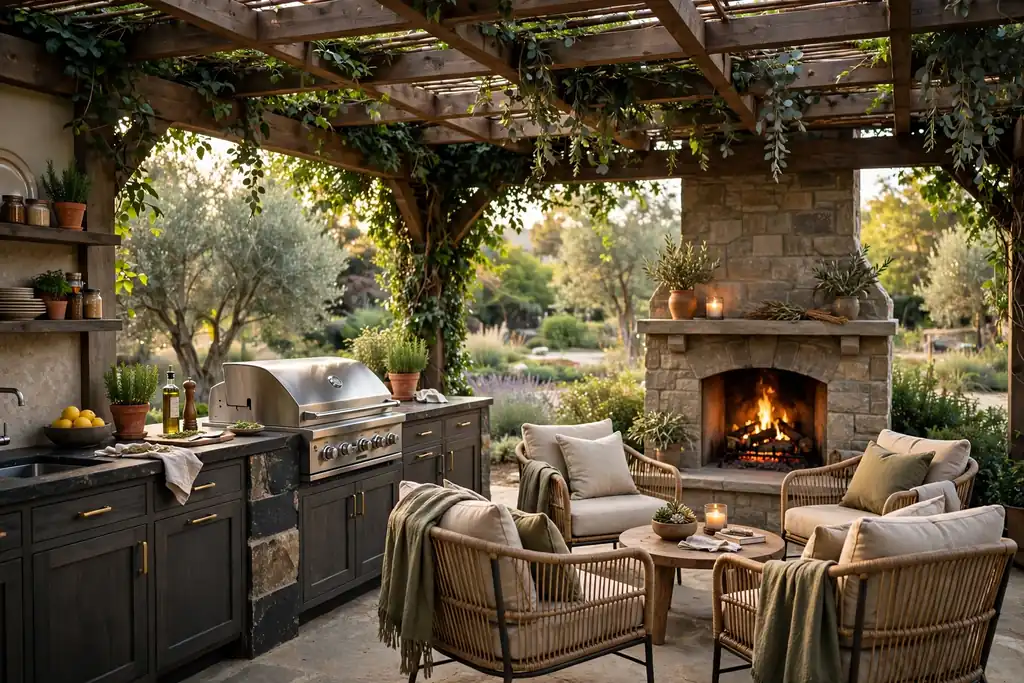
    Covered outdoor kitchen with a fireplace at the seating end and a grill counter.

    Add an outdoor fireplace or a rated heater wall to the covered kitchen for use on cool evenings. The fire gives warmth at the seating end, while the grill stays at the work end, so heat does not crowd the cook. A fireplace also gives the covered space a focal point in winter, when the grill may be used less often.

    Keep the fireplace clear of the roof structure as the maker directs, and use a chimney or flue that clears the roofline. Store firewood away from the fire and the grill, and keep a clear path for carrying food past the seating. For a deck floor under a covered kitchen and seating zone, see these ground level deck ideas for boards, borders, and drainage that suit a low outdoor room.

    14. Covered Kitchen with a Herb Wall and Planting
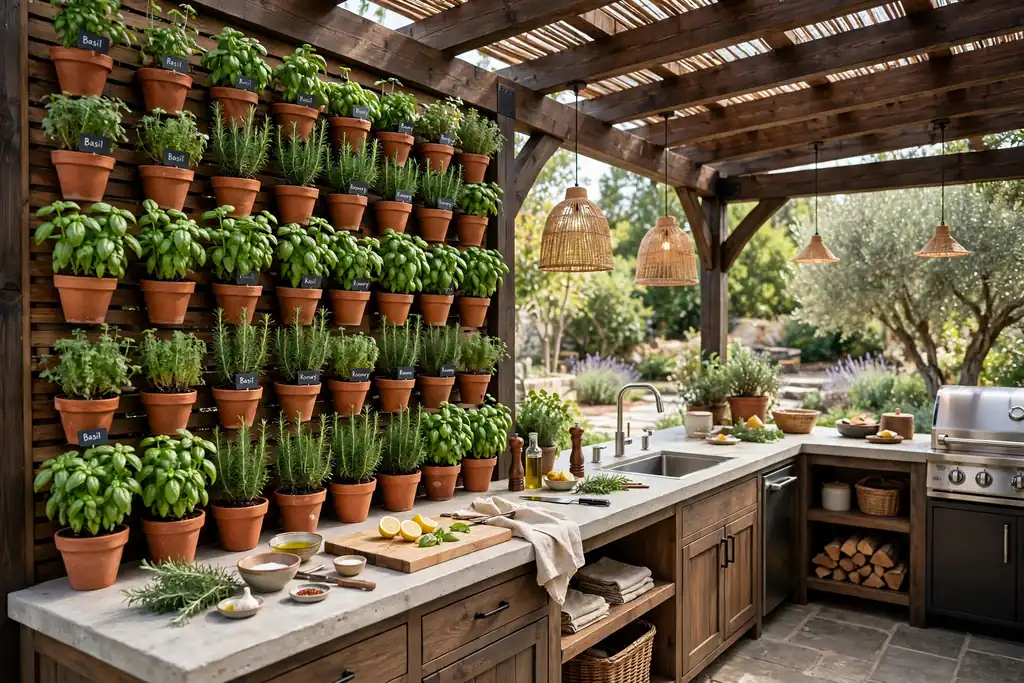
    Covered outdoor kitchen with a herb wall beside the prep counter.

    Fix a herb wall beside the covered kitchen so cooking herbs grow within arm’s reach of the prep counter. Pots on a wall frame, a narrow raised bed at the counter end, or planters on the roof posts all work, as long as the plants get sun and water without dripping onto food. Basil, mint, parsley, and rosemary suit most climates and get used often in outdoor cooking.

    Water the wall in the morning, so leaves dry before cooking, and keep soil and pots clear of the grill. Use separate pots for mint, which spreads fast, and label each pot for guests who help with prep. Planting softens the roof posts and the back wall, and it gives the kitchen a fresh scent even when the grill is cold.

    15. Covered Kitchen and Dining Table Under One Roof
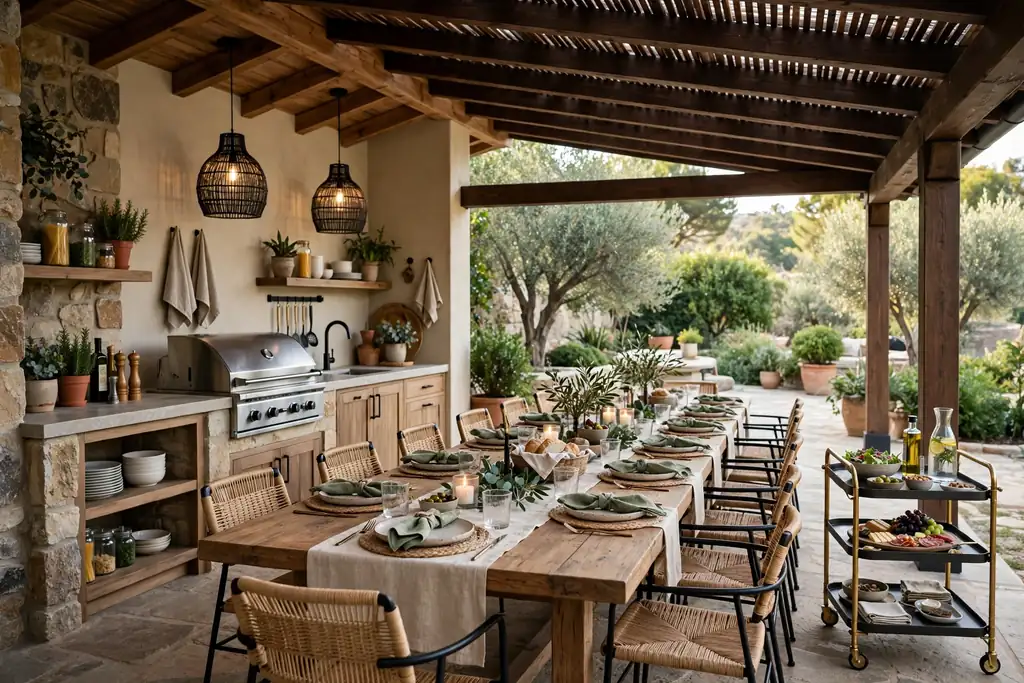
    Covered outdoor kitchen and long dining table under one roof.

    Put the dining table under the same roof as the kitchen, so food moves from grill to table in a few steps and rain never breaks up a meal. A long table beside the counter run suits family meals, while a round table suits smaller groups and keeps conversation close. Keep a clear serving lane between the counter and the table, so plates pass without crossing the grill zone.

    Size the roof to the table, not just the kitchen, so every chair sits under cover. A washable rug under the table marks the dining zone and catches crumbs, and a sideboard or trolley beside the table holds extra plates and drinks. This layout suits patios used for Sunday lunch and evening gatherings, where cooking and eating belong together.

    16. Covered Kitchen with Curtains and Wind Screens
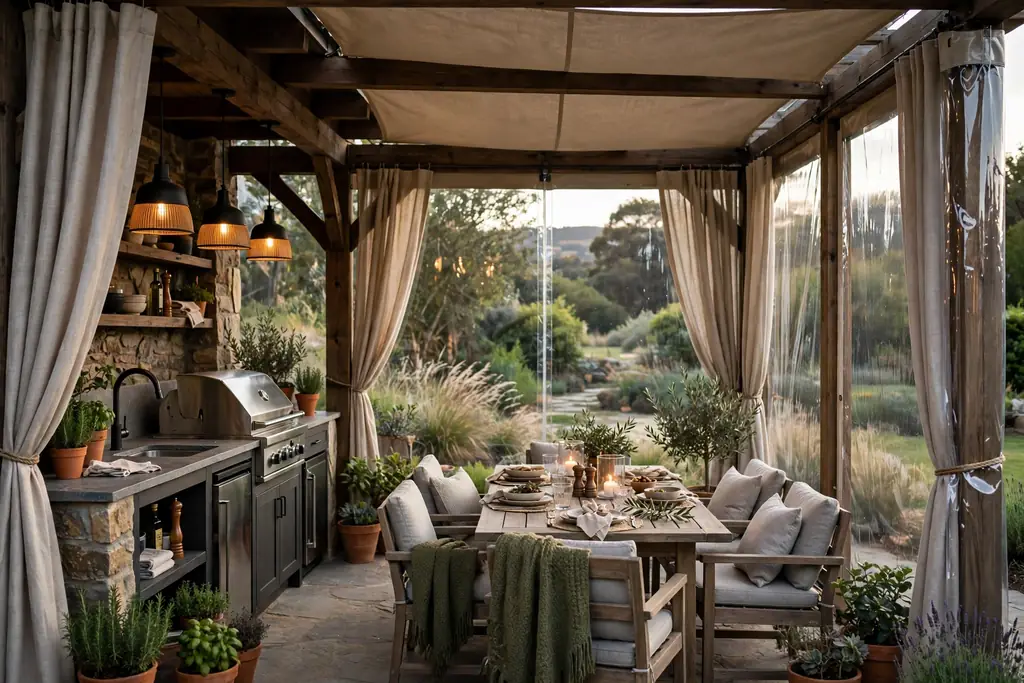
    Covered outdoor kitchen with outdoor curtains and wind screens around seating.

    Hang outdoor curtains or fit wind screens around the covered kitchen for shelter that can open and close with the weather. Curtains block wind, keep insects out in the evening, and give privacy from neighbors, while still rolling back for an open feel on a calm day. This suits exposed yards and patios near a road, where wind is the main reason the kitchen goes unused.

    Choose fabric rated for outdoor use, and fix it so it cannot blow into the grill. Keep curtains clear of heat, and tie them back when the grill is lit. Clear wind screens suit the grill end, where you need a view and air flow, while fabric suits the seating end, where warmth and privacy matter most.

    Conclusion

    A covered outdoor kitchen works best when the roof, the layout, and the daily routine fit together. Pick a roof that suits your rain and sun, keep the grill, prep, and storage in a short loop, and give seating its own clear zone under the same cover. Add light over the work areas, storage that closes, and one wind or insect screen if your yard needs it. Start with the cover and the counter run, then add the oven, the bar, or the dining table as the space earns it. Save the idea that fits your yard, and use it as the starting point for the roof height, the floor, and the path back to the house.

    FAQs

    What is the best roof for a covered outdoor kitchen?

    The best roof depends on your weather. A solid roof suits rainy climates, a pergola suits mild sun, a louvered roof suits mixed sun and rain, and a clear roof suits patios that need light. Pick the roof for the weather you cook in most, then match the counter layout to the shade and rain pattern it gives.

    How much space do I need for a covered outdoor kitchen?

    A compact grill nook can fit a small patio corner, while a full kitchen with seating needs a clear counter run plus room to stand, open cabinet doors, and pull out chairs. Measure the grill with its lid open, add a prep stretch beside it, and leave a clear walkway that does not cross the grill heat zone.

    Can I put a grill under a covered roof?

    Yes, with the right roof height, ventilation, and clearances. Keep the grill clear of walls, fabric, and low roofs as the grill maker directs, leave an open side for air flow, and make sure smoke can escape above the roof. Have gas and fixed electrical work done by a professional, and never use a grill rated for outdoor use only inside a closed room.

    Do covered outdoor kitchens need planning permission?

    Rules vary by location, size, height, and distance from boundaries, so check local rules before you build a fixed roof or pavilion. Small freestanding canopies and pergolas often face fewer rules than solid roof extensions, but a fixed structure near a boundary or a listed building may need approval. Check first, and keep the finished height and footprint in your notes.

    How do I keep a covered outdoor kitchen clean?

    Wipe counters after each cook, empty the bin, and brush the floor so grease and leaves do not build up. Store tools and dry goods in closed cabinets, clean the grill as its maker directs, and wash roof panels and curtains on a seasonal schedule. A hose point and a drain near the kitchen make cleanup far quicker.

    What lighting works best in a covered outdoor kitchen?

    Use bright task light over the grill and prep counter, softer light over bar and dining seats, and low light along paths and steps. Warm white light suits evening meals, while a brighter white over the grill helps you judge cooking. Use outdoor rated fittings, keep cables out of walkways, and add a dimmer or separate switches for work and dining light.
  • 30 Wooden Dish Drying Rack Ideas for a Stylish Kitchen

    30 Wooden Dish Drying Rack Ideas for a Stylish Kitchen

    A wooden dish drying rack warms up the sink area in a way that plastic and wire racks rarely do. It suits farmhouse kitchens, modern kitchens with wood accents, and small kitchens where the rack stays on show all day. These 30 wooden dish drying rack ideas cover countertop racks, wall-mounted racks, over-sink racks, and full drying stations, so you can pick a rack that fits your sink, your daily dish count, and how much counter you are willing to give up. Before you choose, measure the counter beside the sink, count the plates and bowls from a normal meal, and check where the water will drain.

    Key Takeaways

    • Size the rack to a normal meal, not a dinner party: a rack that holds your daily plates, bowls, and cups dries faster and stays tidier than an oversized one.
    • Give water somewhere to go, with a drip tray, a sloped base, or a spot over the sink, so the counter stays dry and the wood stays sound.
    • Match the wood to the kitchen: light bamboo suits pale kitchens, teak suits wet zones, and dark walnut suits kitchens with dark cabinets or wood floors.
    • Keep air moving around the dishes, with gaps between plates and space between the rack and the wall, so dishes dry fully instead of staying damp.
    • Wipe the rack dry and clean the tray often, and reseal or oil the wood when water starts to darken it, since damp wood wears out far faster than dry wood.
    • Put daily dishes within easy reach of the sink, and move rarely used pieces to a cabinet, so the rack works as a drying spot rather than a second storage shelf.

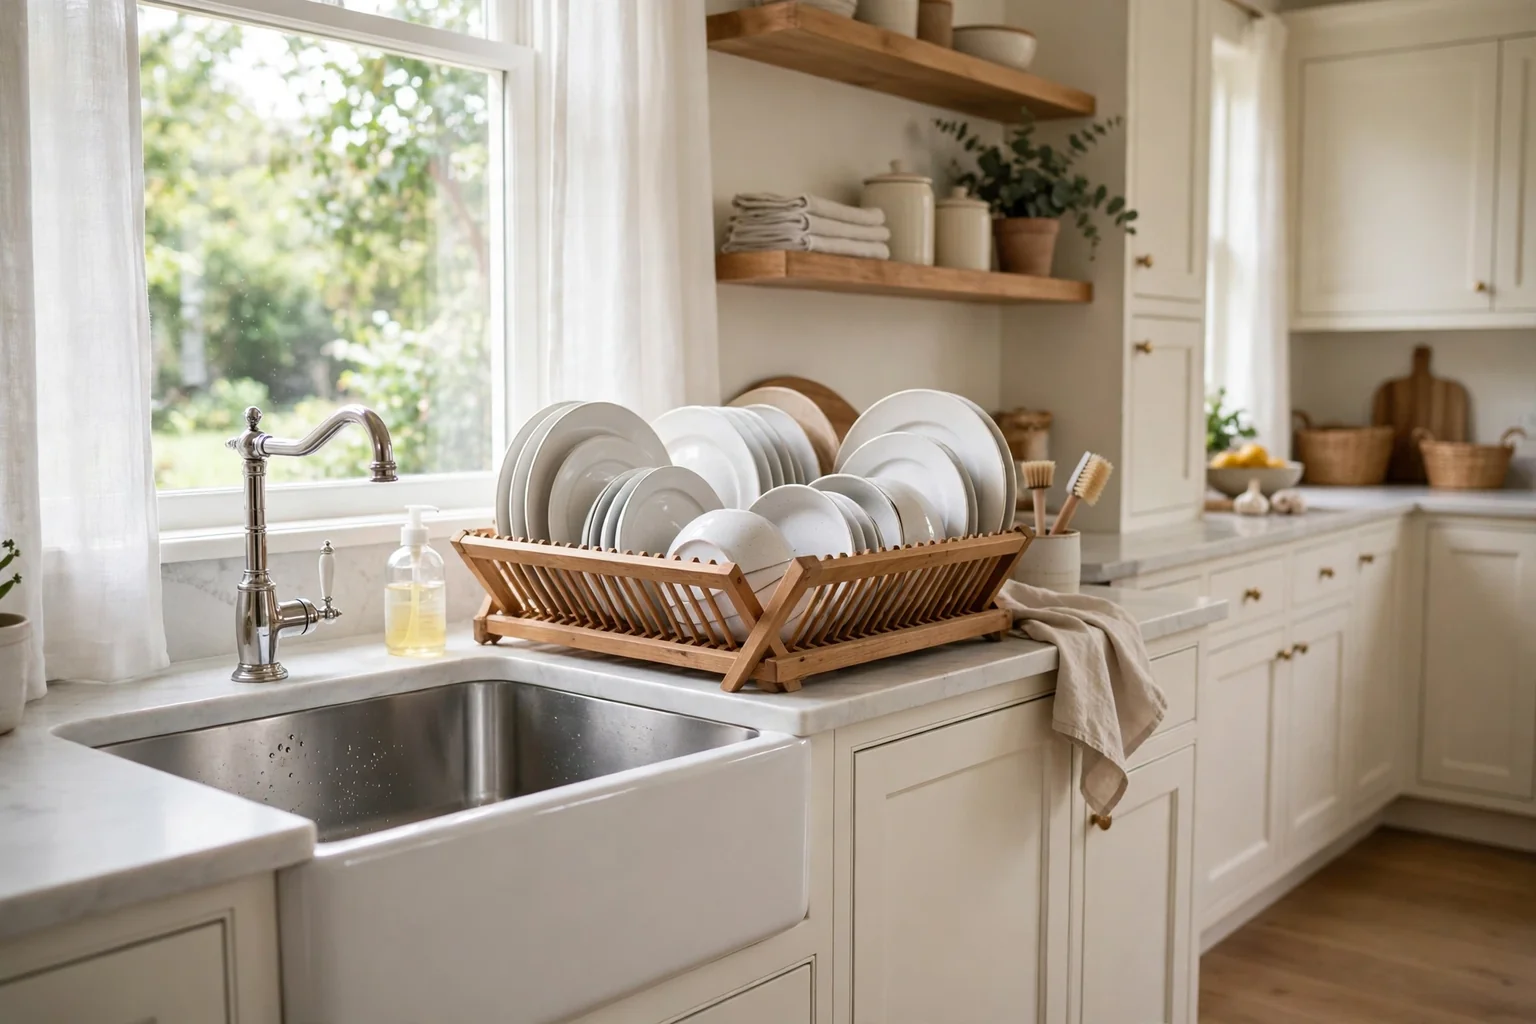
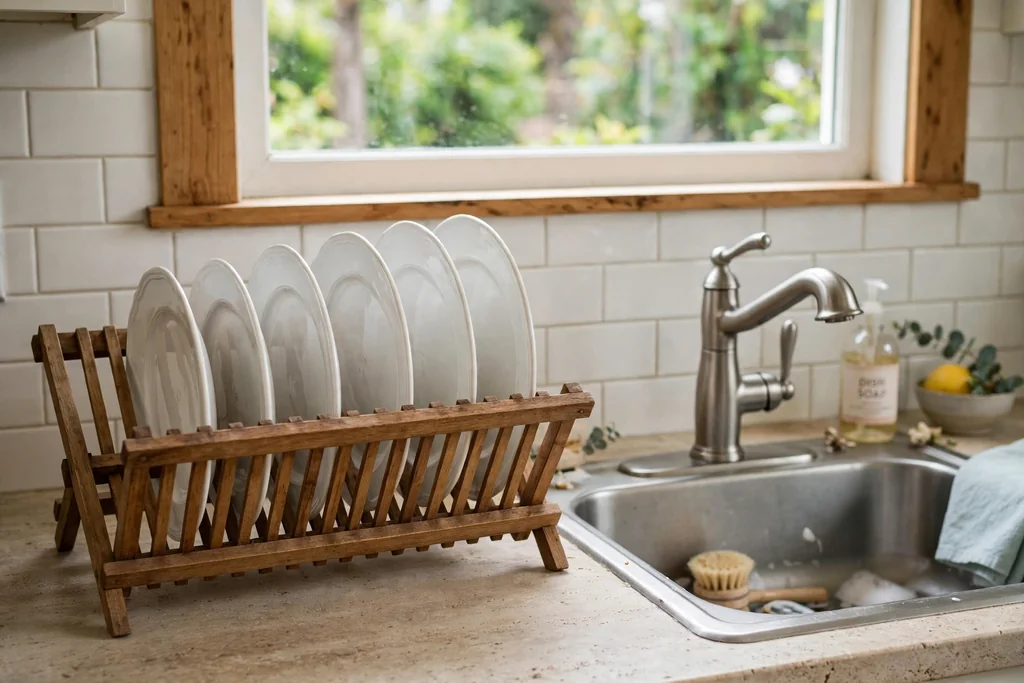
    1. Classic Slatted Countertop Rack Beside the Sink

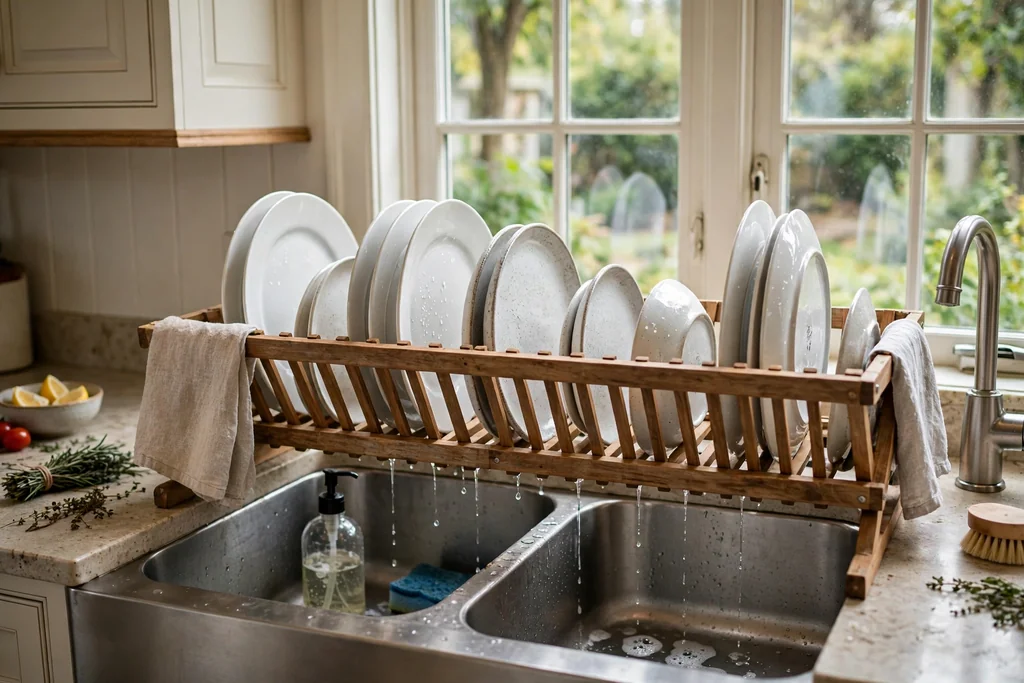
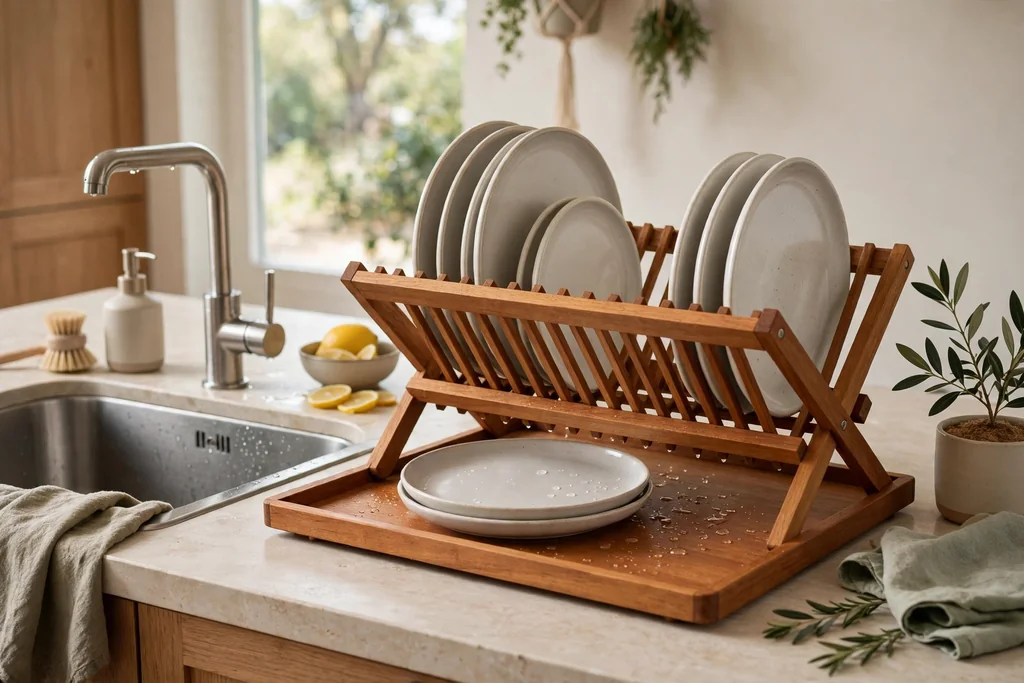
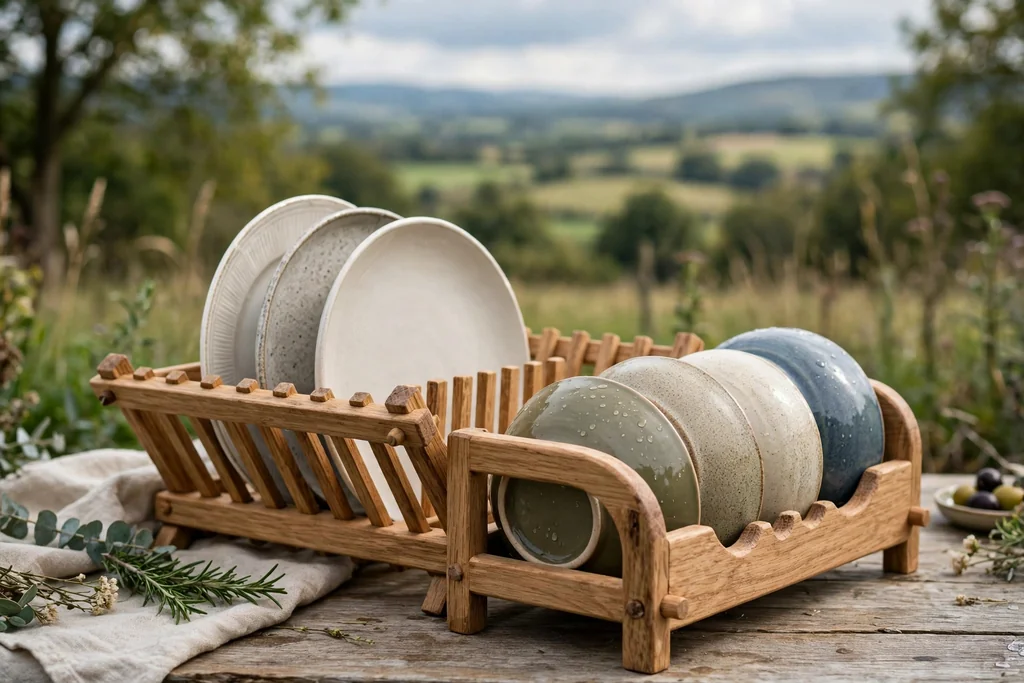
    Classic slatted wooden dish rack holding upright white plates beside a kitchen sink.

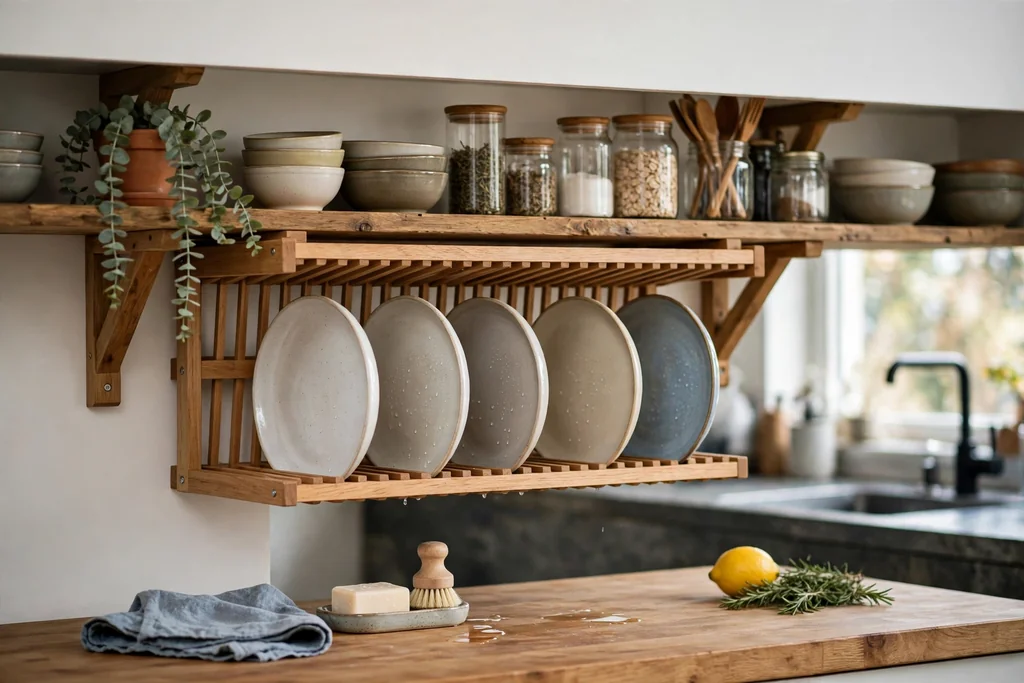
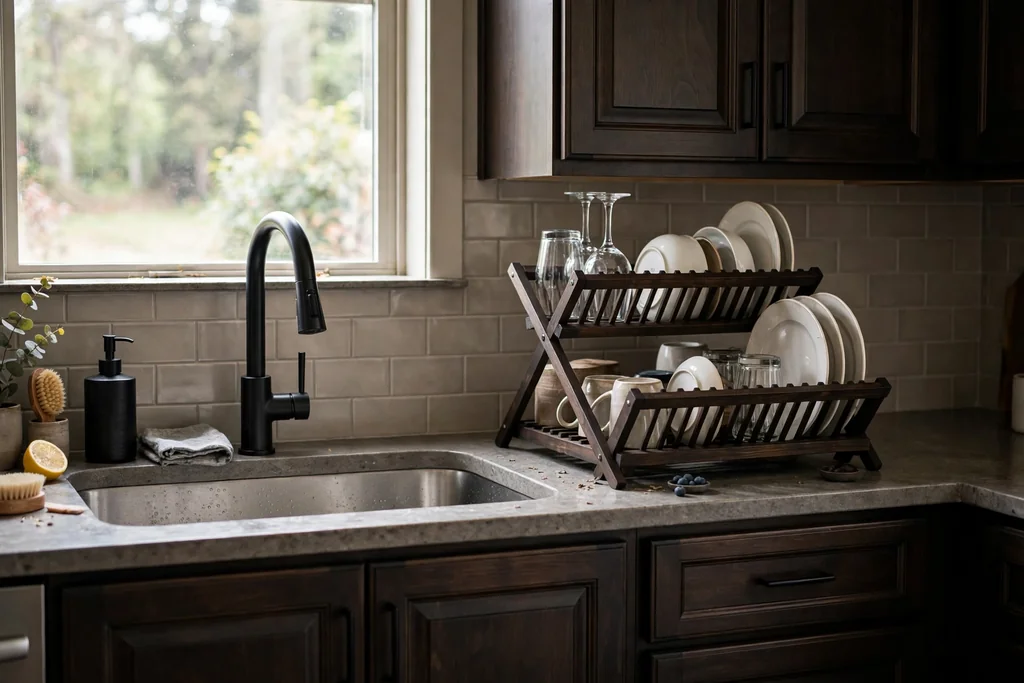
    A classic slatted rack is the simplest wooden dish rack, and often the best place to start. It sits on the counter beside the sink, with slats that hold plates upright and a flat section for bowls and cups. The open slats let air move under the dishes, which helps them dry without a cloth, and the wood adds warmth beside a steel sink or a stone counter.

    Choose a rack wide enough for your daily plates, with slats spaced so plates stand without leaning on each other. Place it on the side of the sink you naturally move toward when washing up, and leave a small gap between the rack and the wall so air can reach the back row. Wipe under the rack when you wipe the counter, since water collects there first.

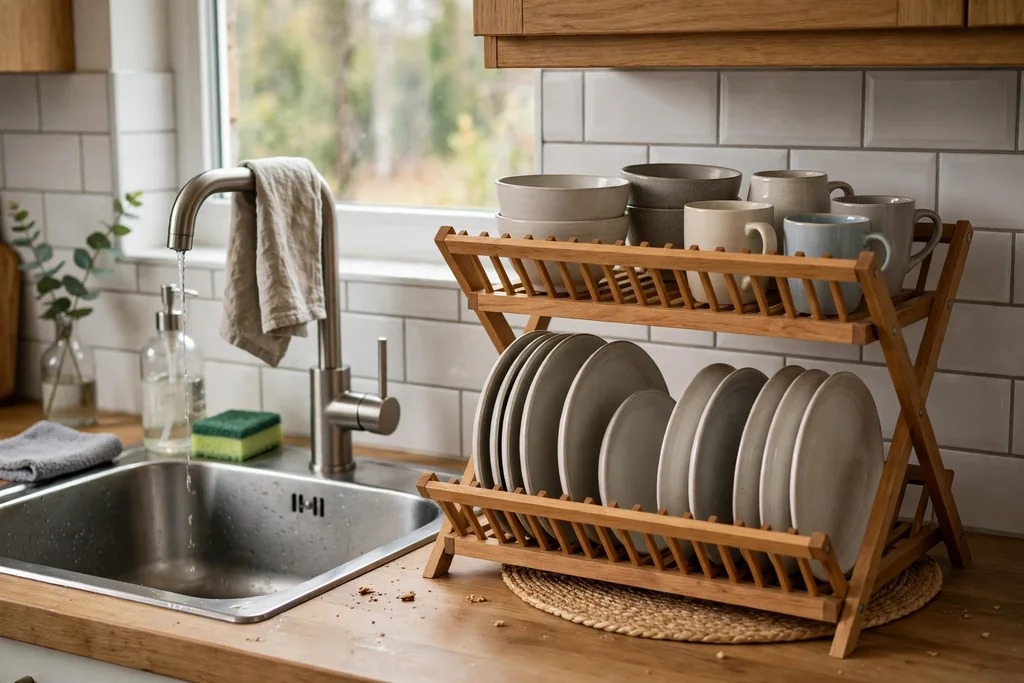
    2. Two Tier Rack for Plates and Bowls

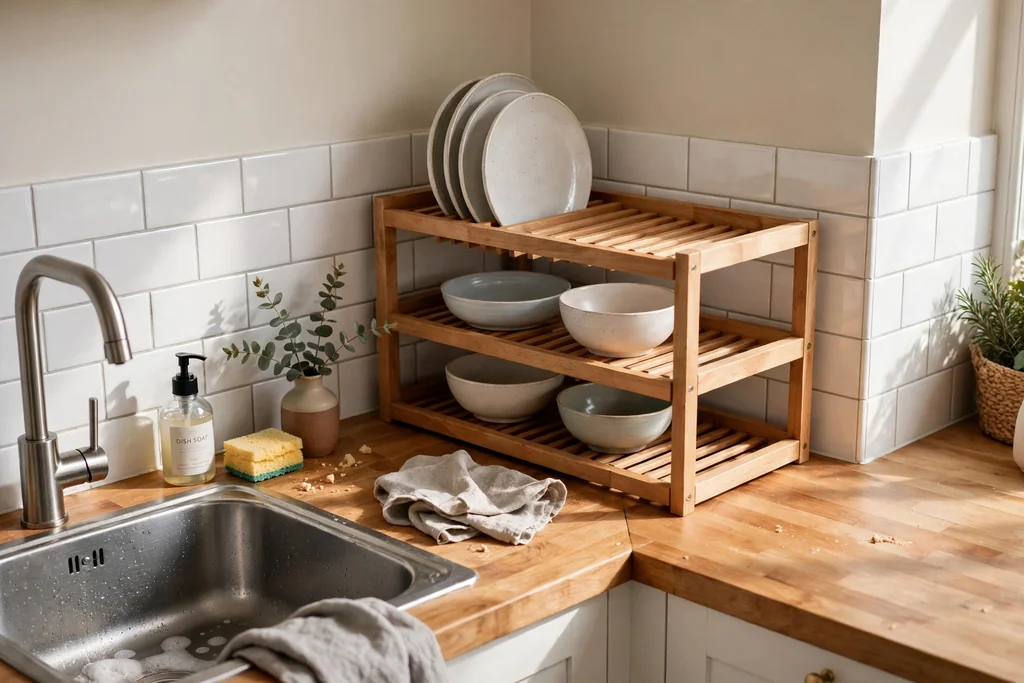
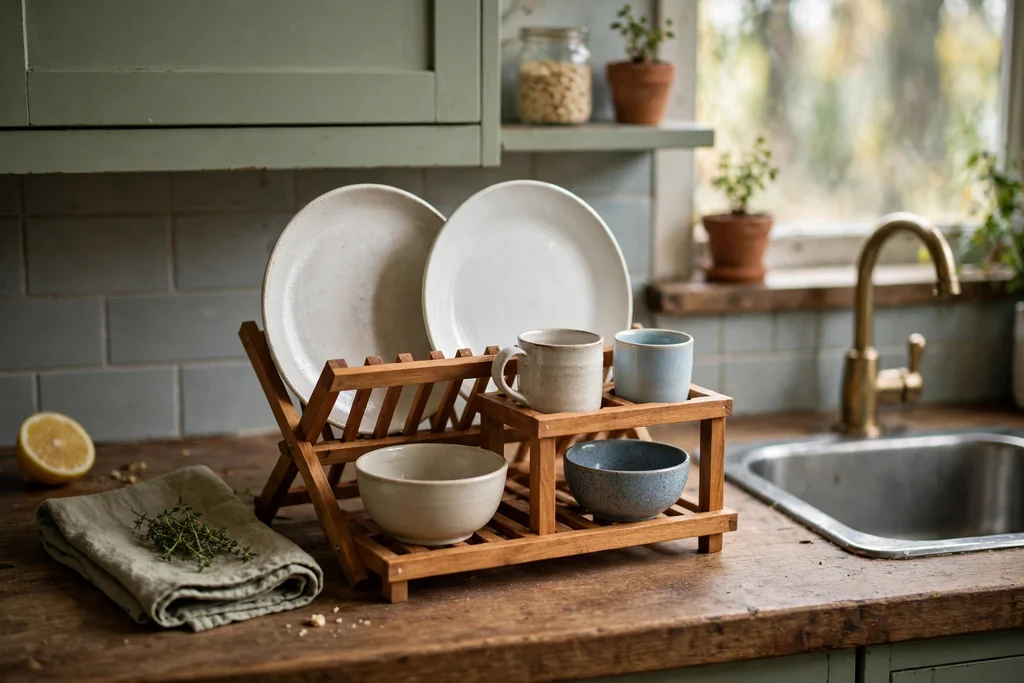
    Two-tier wooden dish rack with plates on the lower tier and bowls and cups above beside a sink.

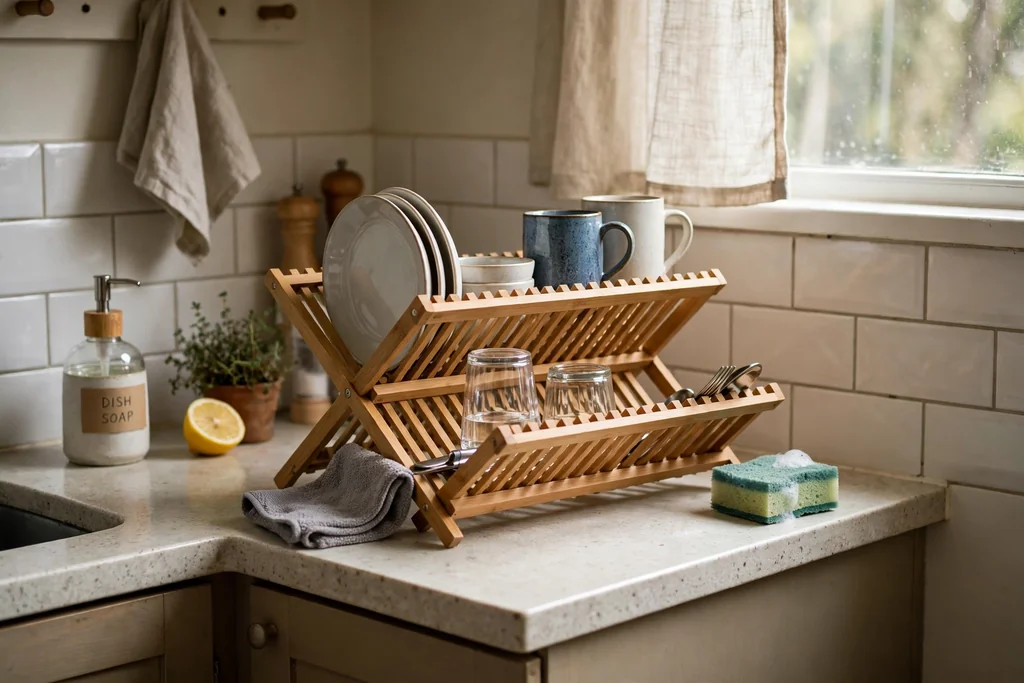
    A two-tier rack stacks drying space upward instead of outward, which suits a kitchen with a short counter run. Plates stand in the lower tier, while bowls, cups, and small items sit on the upper tier, and the whole rack takes up little more counter than a single-tier rack of the same width. The tiered shape also keeps bowls from shading plates, so both levels get air.

    Check the height between the tiers before you buy or build, since tall bowls and mugs need more clearance than flat plates. Load heavy plates low and light cups high, so the rack stays steady when you add a wet plate. If the upper tier sits near a window or a shelf, measure that clearance too, so tall items still fit.

    3. Wall Mounted Fold Down Rack

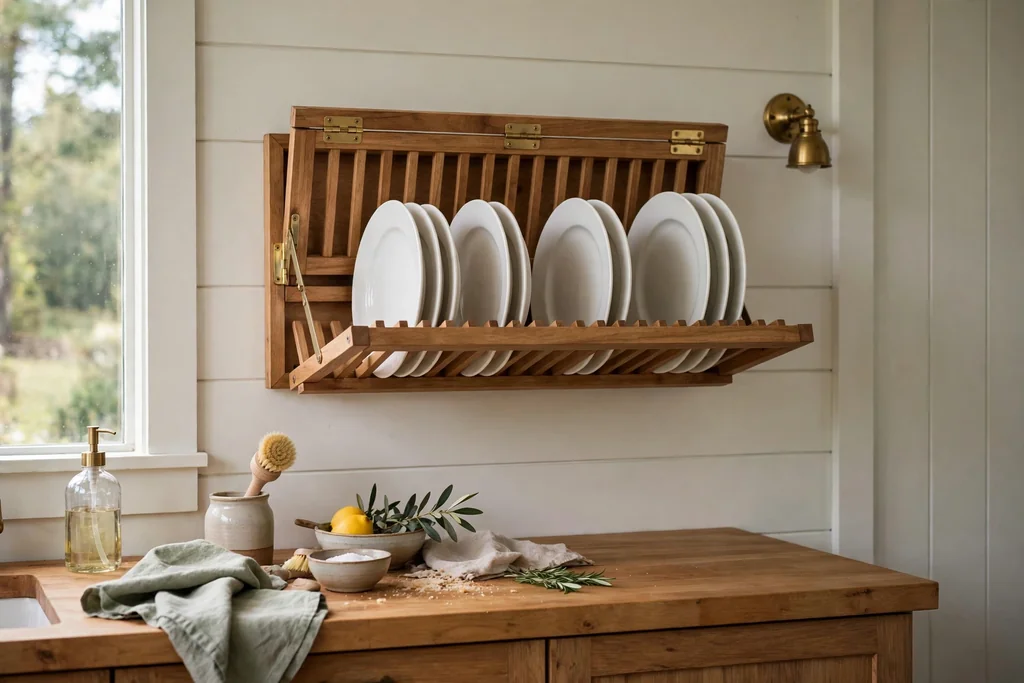
    Wall-mounted fold-down wooden dish rack open on a kitchen wall above a counter.

    A wall-mounted fold-down rack folds flat against the wall when it is not in use, then drops down to hold dishes after washing up. This suits a small kitchen where counter space matters more than anything else, since the rack takes no counter at all when folded away. When it is down, plates stand in slots along the frame, with a tray or a sloped board below to catch drips.

    Fix the rack into wall studs or with fixings rated for a full load of wet dishes, since wet plates are heavy. Mount it at a height where you can load plates without reaching overhead, and close to the sink so the carry is short. Fold it up once dishes are dry, so the wall stays clear and the rack does not become a permanent shelf.

    4. Over Sink Rack That Spans the Basin

    Wooden over-sink dish rack spanning a kitchen basin with plates drying above the sink.

    An over-sink rack rests across the sink itself, so water drips straight into the basin and never reaches the counter. The rack frame sits on the sink rim or on rails across the top, with plate slots running along its length and space for bowls at one end. This layout suits kitchens with very little free counter, and it keeps the drying dishes right where they were washed.

    Measure the sink width and rim shape before choosing, since the rack must sit level and steady on both sides. Keep one side of the sink clear if you need to rinse hands or fill a kettle while dishes dry. Dry the rack frame after use, since a frame that sits over a wet sink stays damp longer than a countertop rack.

    5. Corner Rack for a Tight Counter

    Corner wooden dish rack fitted into a kitchen counter corner beside a sink.

    A corner rack is shaped to fit into the corner where two counters meet, a spot that often holds nothing but a sponge bottle. The triangular or L-shaped frame uses that dead corner for plates and bowls, freeing the straight counter run for prep. Corner racks suit galley kitchens and kitchens where the sink sits near a corner.

    Place the rack so its open side faces the sink, making loading a short, straight move. Keep the plate rows shallow, since reaching into a deep corner for a heavy plate is awkward, and put daily plates at the front edge. Check that the rack does not block a cabinet door or a drawer below the corner, since a blocked drawer quickly becomes annoying.

    6. Light Bamboo Rack for Small Kitchens

    Light bamboo dish rack with plates and cups on a pale kitchen counter.

    Bamboo is light, pale, and quick to dry, which makes it a good match for small kitchens and pale cabinets. A bamboo rack feels less heavy on the counter than a thick hardwood rack, and its light tone pairs well with white tile, light counters, and plants. Bamboo racks also tend to cost less than teak or walnut, which suits a first rack or a rental kitchen.

    Bamboo still needs care near water, so wipe it dry after heavy use and keep it out of standing water. Choose a rack with sealed joints if you can, since water that sits in joints wears bamboo faster than water on a flat slat. If the bamboo starts to look dry or pale, a light coat of food-safe oil brings back its color.

    7. Teak Rack With a Matching Drip Tray

    Teak dish rack with a matching teak drip tray holding plates beside a sink.

    Teak handles water better than most woods, which is why it suits a rack that lives beside the sink all day. A teak rack with a matching teak drip tray looks like one piece, and the tray catches water that runs off plates and bowls. The tray also protects the counter from damp marks, which matters on wood or laminate counters.

    Empty and wipe the tray after each wash-up, since water left standing in a tray defeats the point of a good wood choice. Slide the tray out for cleaning, and check the corners, where water and soap film collect. If the teak darkens with use, that is normal for wet wood, and a light sand and oil coat restores a more even tone.

    8. Dark Walnut Rack for a Moody Kitchen

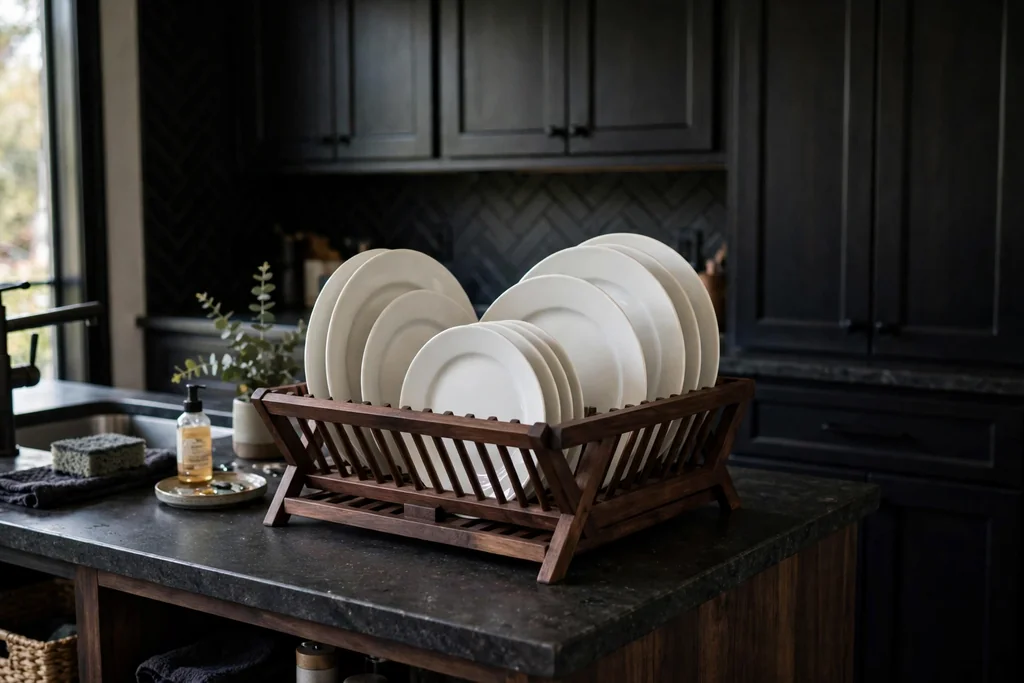
    Dark walnut dish rack with white plates in a kitchen with dark cabinets.

    Dark walnut gives a dish rack a furniture look, which suits kitchens with dark cabinets, dark wood floors, or black hardware. A walnut rack reads as part of the room rather than a utility item, so it can stay on show without clashing with the rest of the kitchen. The dark tone also hides tea and coffee marks better than pale wood.

    Seal walnut well before it goes beside the sink, since dark wood shows water marks clearly once the seal wears thin. Wipe spills promptly, and avoid leaving wet cast iron or dark-stained items on the rack, since they can mark the wood. Pair the rack with one other walnut item, such as a chopping board, so the dark tone looks planned rather than random.

    9. Rustic Reclaimed Wood Rack

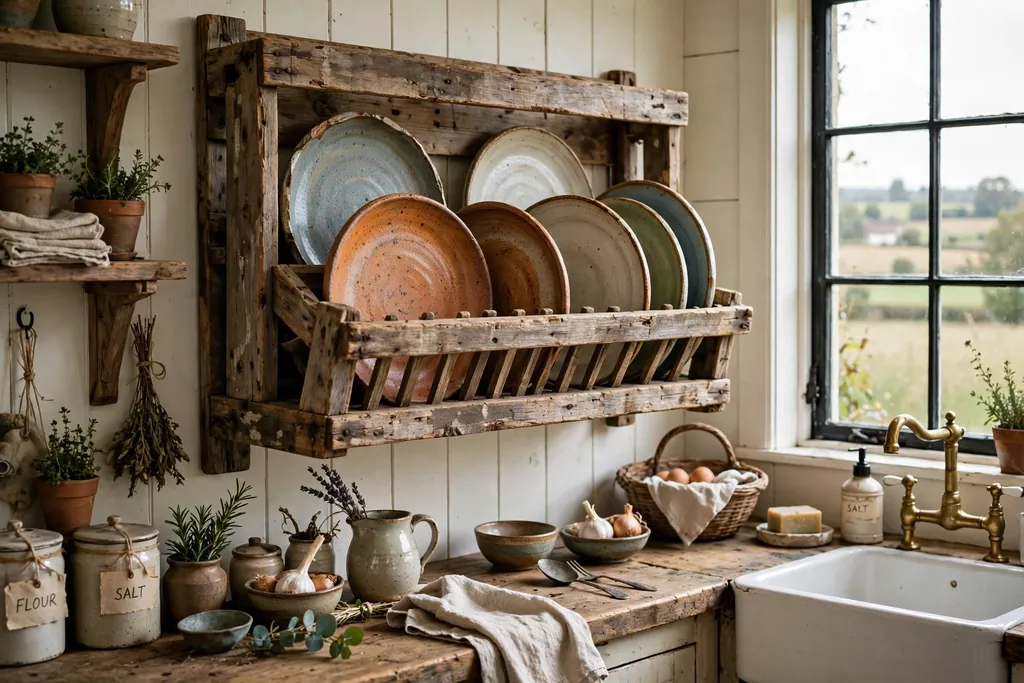
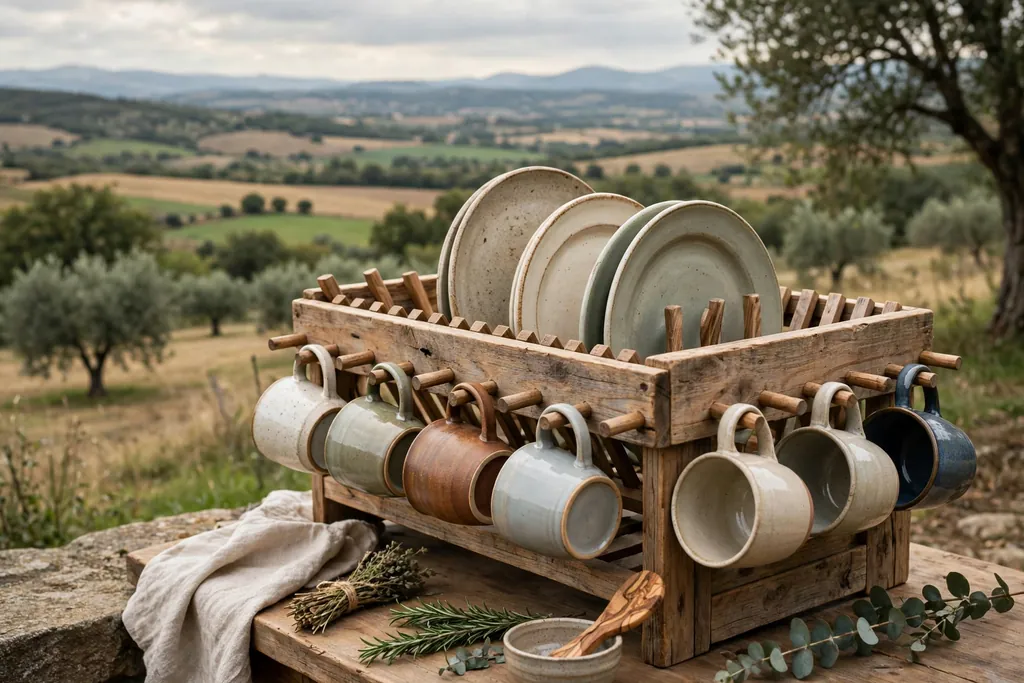
    Rustic reclaimed wood dish rack with handmade pottery plates in a farmhouse kitchen.

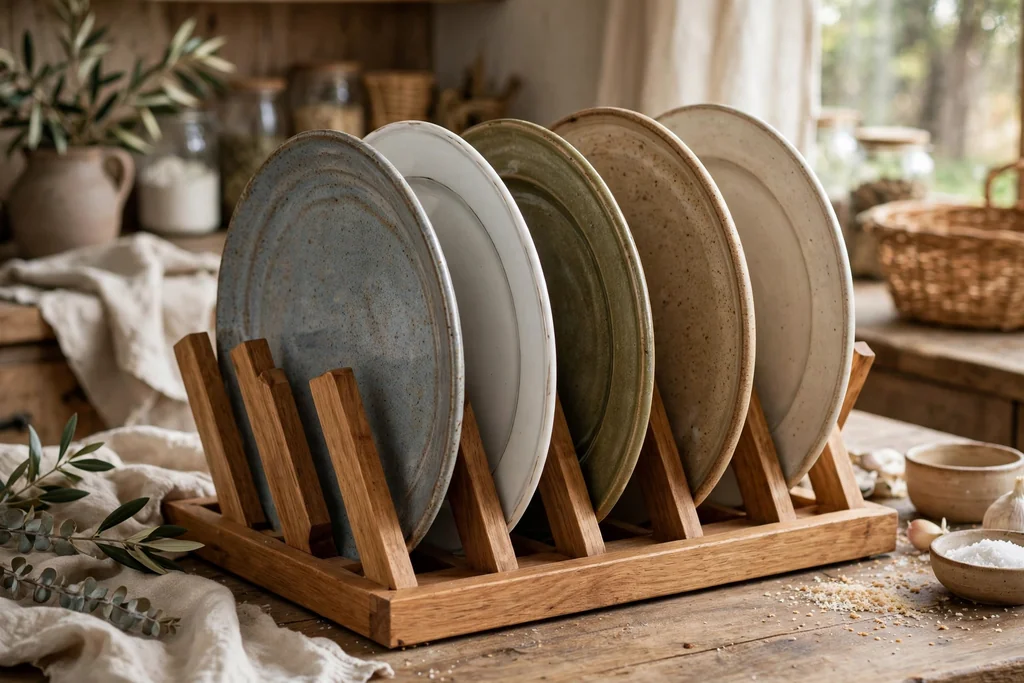
    A reclaimed wood rack brings grain, knots, and small marks that new wood does not have, which suits farmhouse and cottage kitchens. Each rack looks slightly different, since the wood carries its past use in its surface, and that variation pairs well with open shelves, stone counters, and handmade pottery. A rustic rack can also be a weekend build from salvaged boards.

    Check reclaimed boards for old nails, splits, and rough edges before they go near dishes, and sand every surface that touches plates or hands. Seal the wood with a food-safe finish, since old wood can be more open to water than new boards. Keep the rack away from constant standing water, since reclaimed boards may already carry small cracks where water can sit.

    10. Rack With a Built In Cutlery Cup

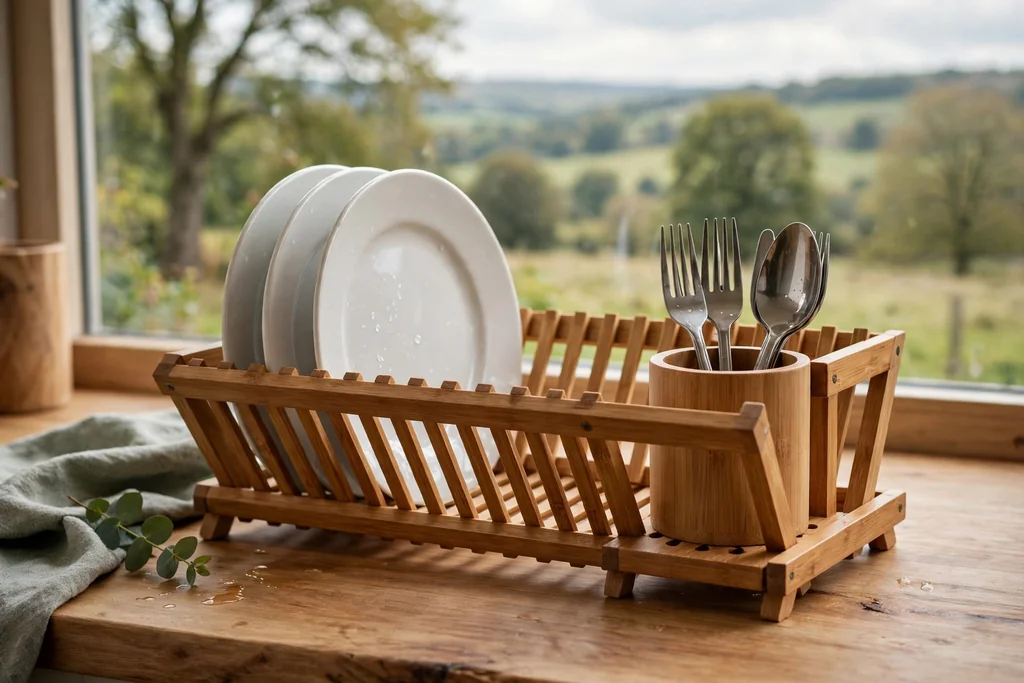
    Wooden dish rack with a built-in cutlery cup holding forks and spoons upright.

    A rack with a built-in cutlery cup keeps forks, knives, and spoons upright in one spot, instead of loose in a side compartment or balanced on a plate. The cup usually hangs on the end of the rack or sits in a slot at one corner, with holes or slots in the base so water drains out. This layout suits households where cutlery piles up beside the sink after every meal.

    Keep the cup near the sink edge, so drips fall where they can be wiped easily, and empty it once cutlery is dry, since damp cutlery left in a cup can spot. Choose a cup wide enough that handles do not jam together, and rinse it weekly, since food residue collects at the base. If the cup is removable, lift it out for a quick wash with the dishes.

    11. Rack With Plate Slots and a Bowl Cradle

    Wooden dish rack with plate slots and a bowl cradle holding upside-down bowls.

    A rack that pairs upright plate slots with a shallow bowl cradle handles the two shapes that cause most drying trouble. Plates stand in narrow slots, while bowls sit upside down in a cradle section with raised rails that hold them off the base, so air reaches inside each bowl. This split layout dries both shapes faster than a flat rack where bowls sit face down on a solid board.

    Load plates in the slots first, then set bowls in the cradle with space between them, since bowls stacked together trap water. Check the cradle width against your largest cereal bowl, since a cradle sized for small bowls leaves big bowls balanced on the rails. Wipe the cradle rails after use, since water pools along rails more than on open slats.

    12. Rack With a Slot for Chopping Boards

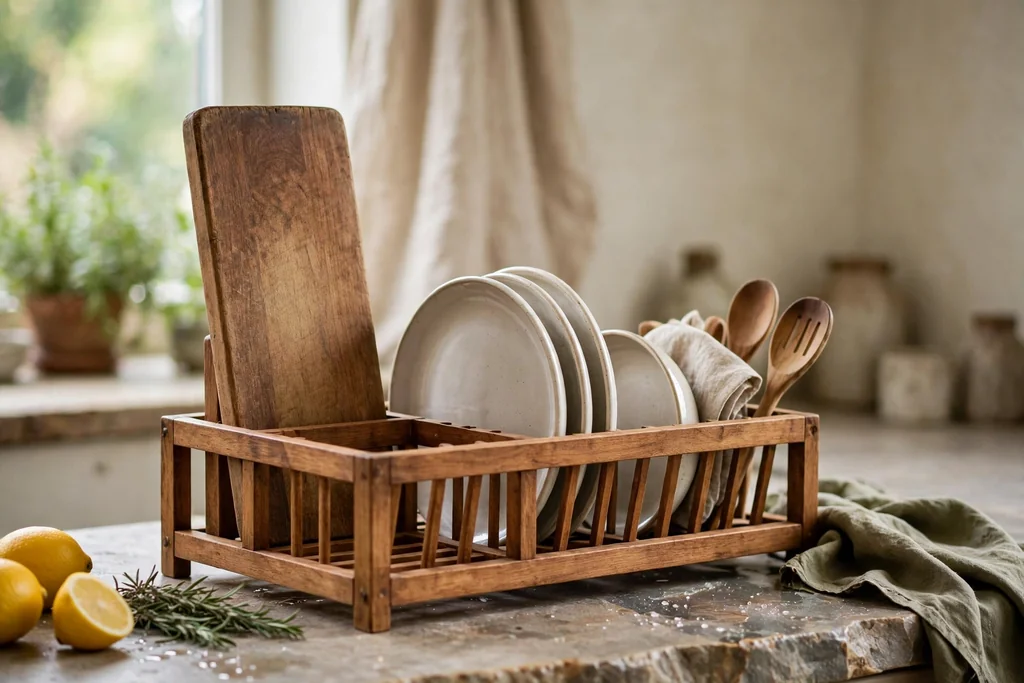
    Wooden dish rack with a tall slot holding a chopping board upright beside plates.

    A rack with a tall slot for chopping boards gives boards a drying spot beside the plates, instead of leaning against the backsplash or lying flat on a towel. The slot sits at one end of the rack or along the back, wide enough for a thick board, and the board stands upright so both faces get air. This layout suits kitchens where boards are washed daily and have no drawer tall enough to hold them.

    Keep the board slot at the end farthest from the tap, so splashes do not keep the board damp, and dry the slot base after use, since water runs down a standing board. Use the slot only for boards that fit without force, since a tight slot traps water against the board edge. If you own several boards, reserve the slot for the daily board and store the rest flat in a cabinet.

    13. Rack With Cup Hooks Underneath

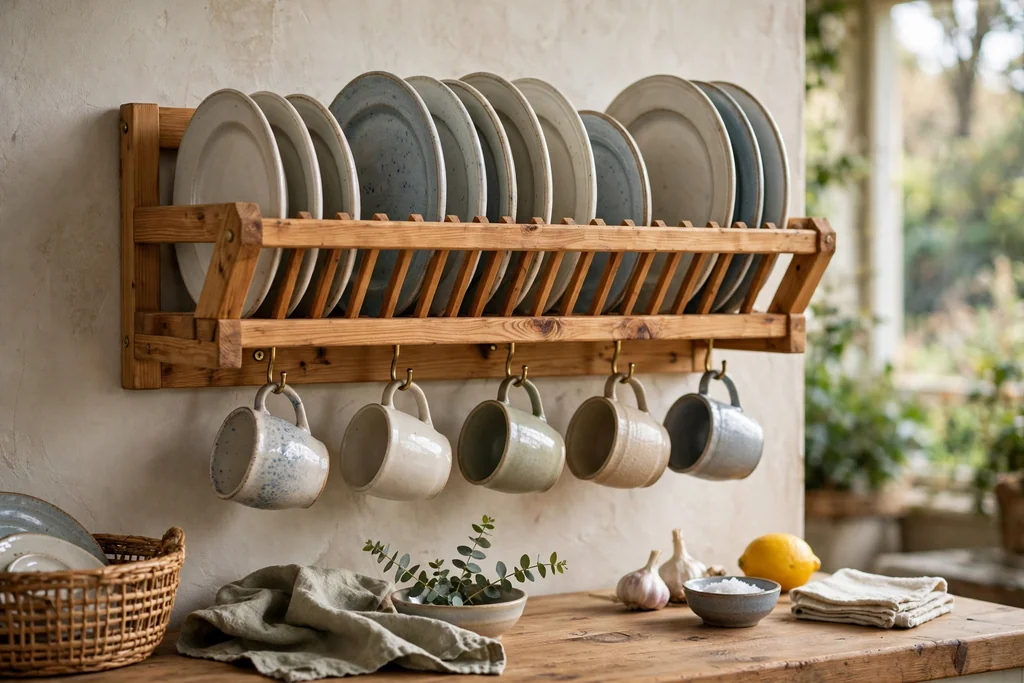
    Wooden dish rack with cups hanging from hooks underneath the frame.

    A rack with cup hooks underneath uses the space below the frame that usually goes to waste. Cups hang by their handles from hooks fixed under a raised rack or under a shelf-mounted frame, so they drip dry clear of the plates above. This layout suits kitchens with a strong mug habit, where cups otherwise fill the plate area and slow drying for everything else.

    Hang cups with the opening facing down or outward, so water drains out instead of pooling inside. Space the hooks wide enough that handles do not lock together, and keep the row to daily mugs, since a full row of spare mugs blocks air under the rack. Wipe the hooks after use, since steam and drips leave marks on wood hooks faster than on the flat frame.

    14. Pull Out Drawer Rack That Hides Away

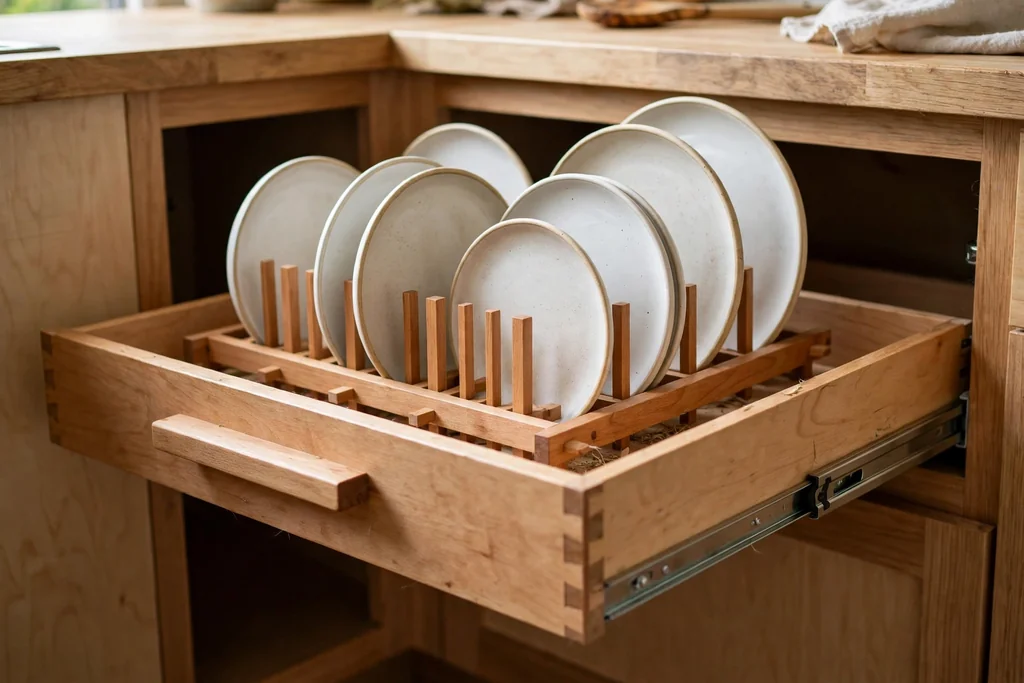
    Pull-out kitchen drawer with a wooden dish rack insert holding plates upright.

    A pull-out drawer rack fits inside a deep drawer beside the sink, so the drying dishes hide behind a drawer front when the drawer closes. The rack insert holds plates upright in slots, with a tray below to catch drips, and it slides out for loading and back in for drying. This layout suits kitchens where a rack on the counter feels like clutter, and it keeps the sink run clear for prep.

    Line the drawer base with a waterproof tray, and never close a drawer full of soaking dishes, since trapped damp air slows drying and can mark the drawer. Leave the drawer open a crack while dishes dry if the kitchen allows it, and empty the tray often. Measure the drawer depth and height before choosing an insert, since plate slots need clearance to stand a dinner plate upright.

    15. Windowsill Rack That Uses Sun and Air

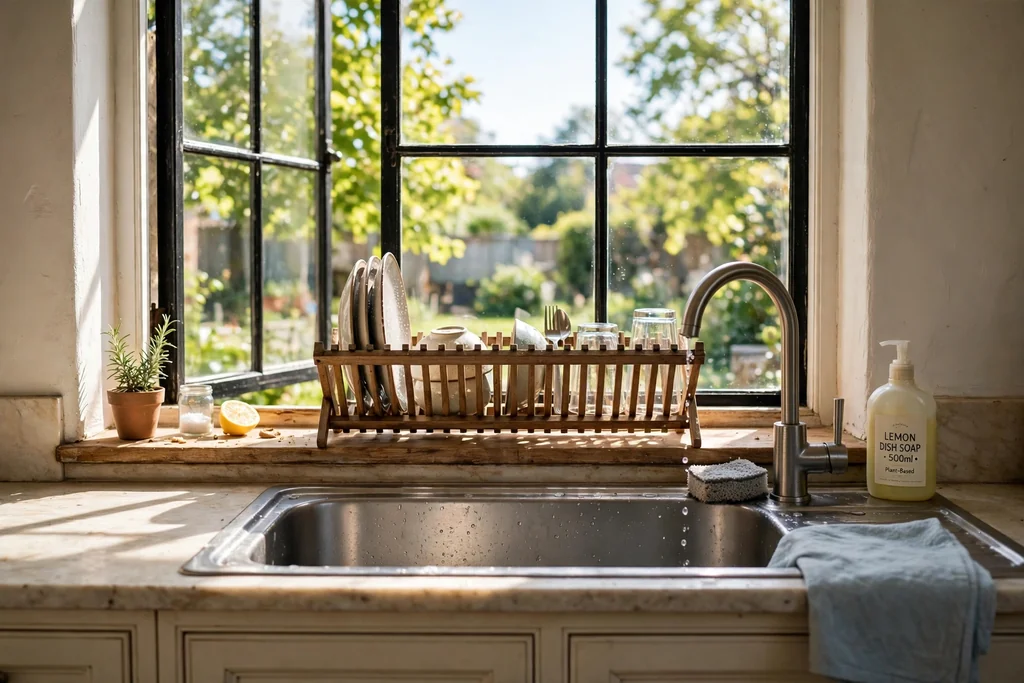
    Narrow wooden dish rack on a sunny kitchen windowsill above a sink.

    A windowsill rack sits on a deep sill above or beside the sink, where sun and moving air dry dishes faster than a shaded counter spot. The rack is usually narrow and low, sized to the sill, with a tray to protect the sill from drips. This layout suits kitchens with a wide sink window and a sill deep enough to hold a rack without crowding the window latch.

    Check the sill depth and the window opening before placing a rack there, since a rack that blocks the window catch or the latch quickly becomes a nuisance. Keep the rack to light items on a sill, such as cups and small bowls, and heavy plates on the counter below. For window styling that pairs with a sill rack, these above kitchen sink ideas cover light, privacy, and sill storage around the sink.

    16. Rack on a Drying Mat for Extra Protection

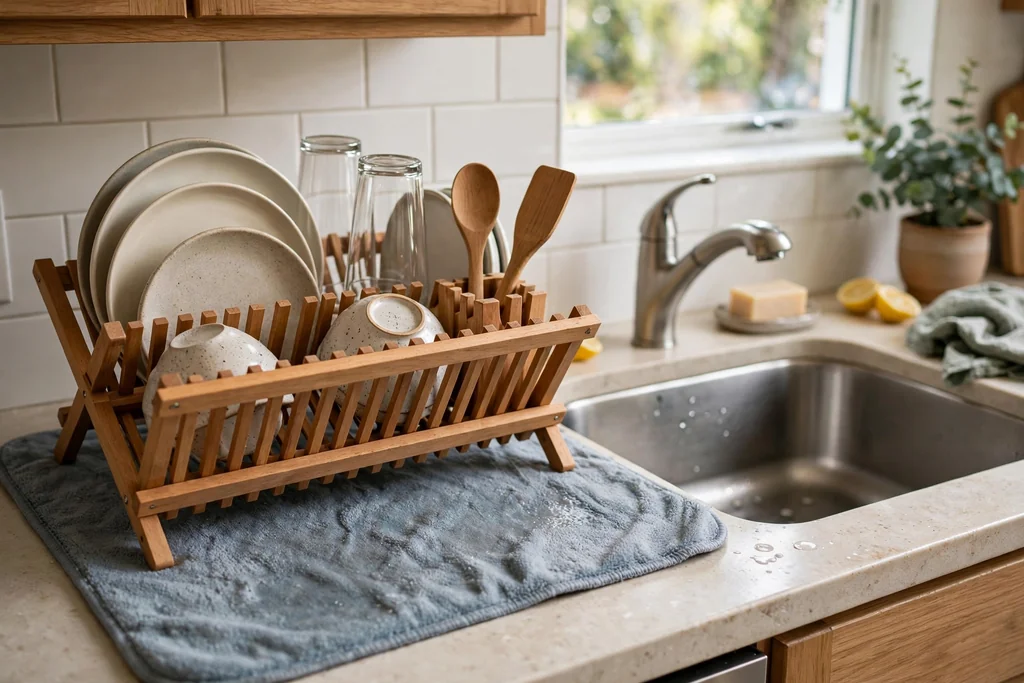
    Wooden dish rack set on a drying mat beside a kitchen sink.

    A rack set on a drying mat gains a soft, absorbent layer between the wood and the counter, which protects stone, wood, and laminate counters from damp marks. The mat catches drips that run past the rack slats, and it adds grip, so the rack stays put when you load a heavy plate. This pairing suits counters that mark easily, and renters who want to avoid water damage.

    Choose a mat slightly larger than the rack base, so drips land on the mat rather than on bare counter at the edges. Wash or hang the mat to dry between uses, since a damp mat under a wood rack keeps the rack base wet and can cause dark marks. Replace a mat once it stays damp or smells musty, since a worn mat protects neither the rack nor the counter.

    17. Compact Rack for One or Two People

    Compact wooden dish rack with a few plates, bowls, and cups in a small kitchen.

    A compact rack holds the dishes from one or two people, with room for a few plates, two or three bowls, and a handful of cups. It takes up a small patch of counter, which suits studio kitchens, small flats, and households where most cooking is for one or two. A compact rack also dries faster than a large rack, since fewer dishes mean more air per dish.

    Resist the urge to overload a compact rack after a bigger meal, since stacked plates dry slowly and can tip the light frame. Wash larger items, such as pots and baking trays, by hand and dry them on a towel instead, keeping the rack for daily dishes. Store the compact rack in a cabinet between uses if the counter is very tight, since its small size makes that easy.

    18. Wide Family Rack With Extra Plate Rows

    Wide wooden dish rack with extra plate rows full of family dishes beside a large sink.

    A wide family rack adds extra plate rows to handle the dishes from a full household meal, with space for dinner plates, side plates, bowls, and cups in one unit. The wide frame sits along the counter beside a large sink, and its plate rows run the full length, so no one has to stack plates to fit them in. This layout suits family kitchens where the rack fills up at every meal.

    Measure the full counter run before choosing a wide rack, and leave a clear stretch of counter beside it for prep, since a rack that eats the whole run slows cooking. Load plates evenly across the rows, so one end does not grow heavy and tip the frame. If the rack still fills up, add a second small rack for cups rather than stacking dishes in the main rows.

    19. Rack With Pegs for Mugs

    Wooden dish rack with mugs hanging from wooden pegs along the side.

    A rack with wooden pegs for mugs turns the side or the back of the frame into mug storage, with each mug hanging upside down on its own peg. The pegs keep mugs off the plate area, and hanging mugs dry faster than mugs left upright in a cup section. This layout suits kitchens where mugs outnumber plates, such as households with a strong tea or coffee routine.

    Space the pegs so mug handles clear each other, and keep the peg row to the mugs used daily, since spare mugs add weight and block air. Check the peg strength before hanging heavy stoneware mugs, since a thin peg can snap under a wet, heavy mug. Wipe the pegs after use, since drips run down a hanging mug onto the peg base.

    20. Rack Beside a Farmhouse Sink

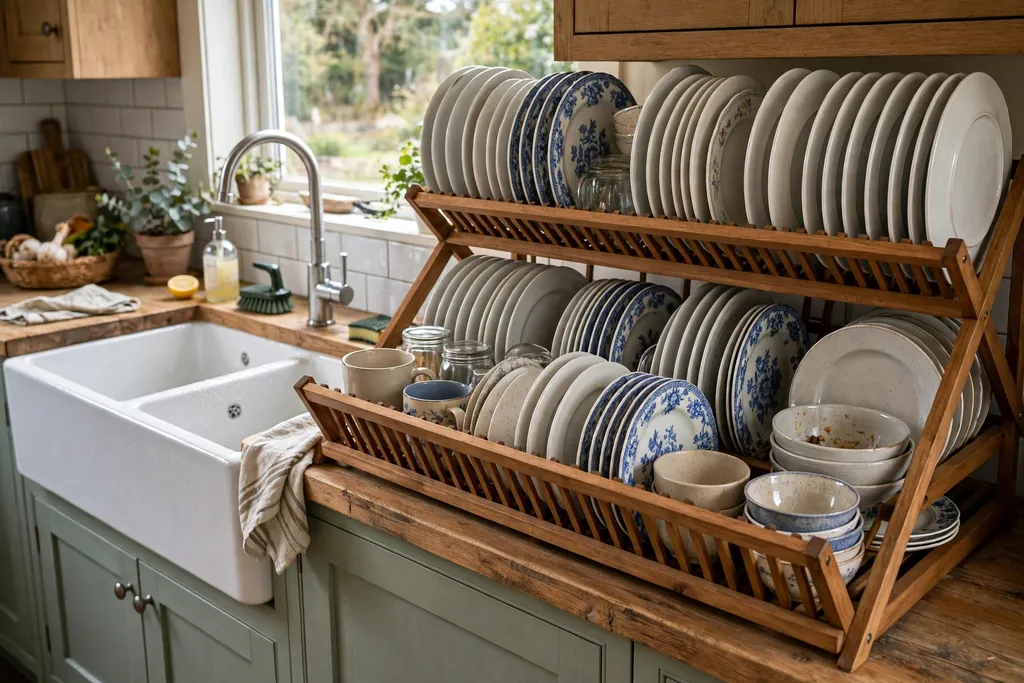
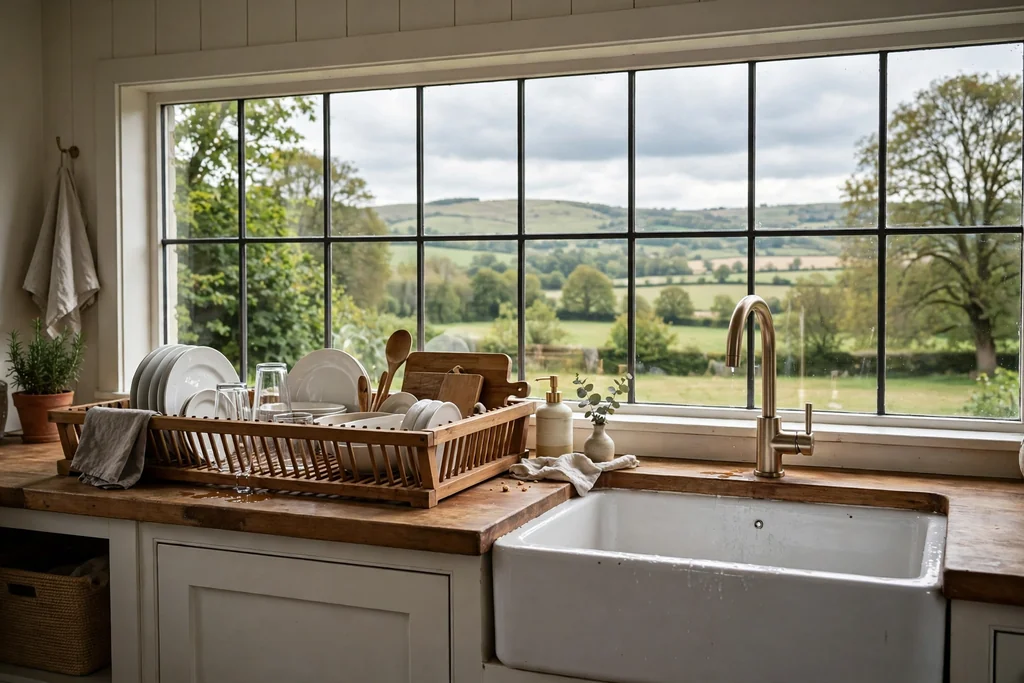
    Long low wooden dish rack beside a white farmhouse apron-front sink.

    A rack beside a farmhouse sink works with the wide, deep basin that defines this sink style, sitting on the counter to one side of the apron front. The rack is usually long and low, matching the sink width, so the carry from basin to rack is short and level. Farmhouse sinks suit wood racks well, since the apron front and the wood frame share a warm, handmade feel.

    Place the rack on the side you use for rinsing, and keep its height below the window sill or shelf above, so tall plates still clear. Use a tray under the rack, since farmhouse sinks splash more than inset sinks and the counter beside them stays wet longer. Pair the rack wood with the counter or the open shelves, so the sink run reads as one plan rather than a set of separate pieces.

    21. Rack on a Rolling Cart for a Flexible Drying Station

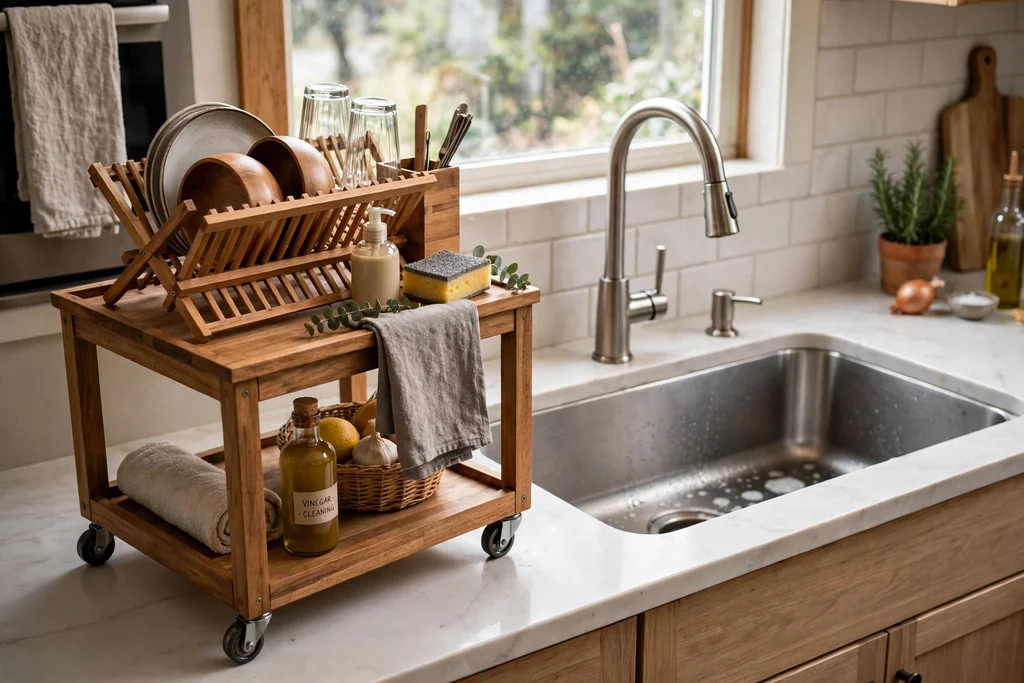
    Wooden dish rack on a small rolling cart beside a kitchen sink.

    A rack fixed to a small rolling cart turns dish drying into a station you can move, rolling it beside the sink for washing up and away to a sunny spot for drying. The cart base holds the rack, a tray, and often a lower shelf for towels or soap, so everything for the wash-up stays in one place. This layout suits kitchens with an awkward sink position, and households that like to clear the main counter for cooking.

    Lock the cart wheels before loading wet dishes, since a cart that rolls when you set down a plate can tip the rack. Keep the load low and even, with heavy plates on the rack and light items on the lower shelf, so the cart stays steady. Wipe the cart tray after use, and roll the cart clear of the cooking zone when it is not needed.

    22. Rack With a Removable Tray for Easy Cleaning

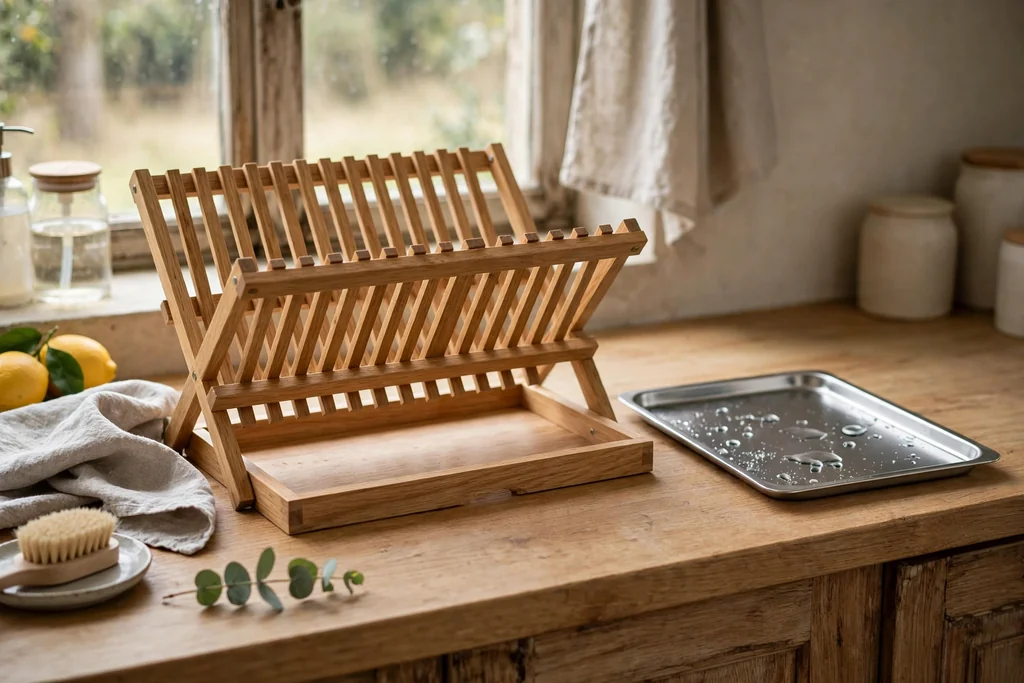
    Wooden dish rack with a removable drip tray lifted out beside the rack.

    A rack with a removable tray separates the drying frame from the drip tray, so the tray lifts out for a quick wash in the sink. Soap film, food residue, and water marks collect in a tray faster than on open slats, and a fixed tray is hard to clean in place. A removable tray solves that, and it also lets you empty standing water without lifting a rack full of dishes.

    Slide the tray out after each wash-up, rinse it, and dry it before sliding it back, since a wet tray left in place keeps the rack base damp. Check that the tray slides freely when the rack is loaded, since a tray that jams under weight is rarely used. Choose a tray with raised edges, so water stays in the tray instead of running onto the counter when you lift it out.

    23. Rack Mounted Under Open Shelving

    Wooden dish rack mounted under open kitchen shelving with plates drying below the shelf.

    A rack mounted under open shelving hangs below the lowest shelf, using the gap between shelf and counter that often holds nothing. The rack frame fixes to the shelf underside or to brackets below it, with plate slots facing forward, so dishes dry within reach of the shelf where they will be stored. This layout suits kitchens with open shelves near the sink, since it shortens the trip from drying to putting away.

    Check the clearance between shelf and counter before mounting, since plates need room to stand upright and be lifted out without hitting the shelf above. Fix the rack into solid shelf brackets or studs, since a full rack of wet plates is heavy for a shelf alone. For shelf layout and spacing help, these kitchen wall storage ideas cover open shelves, rails, and racks on kitchen walls.

    24. Portable Rack for Renters and Small Spaces

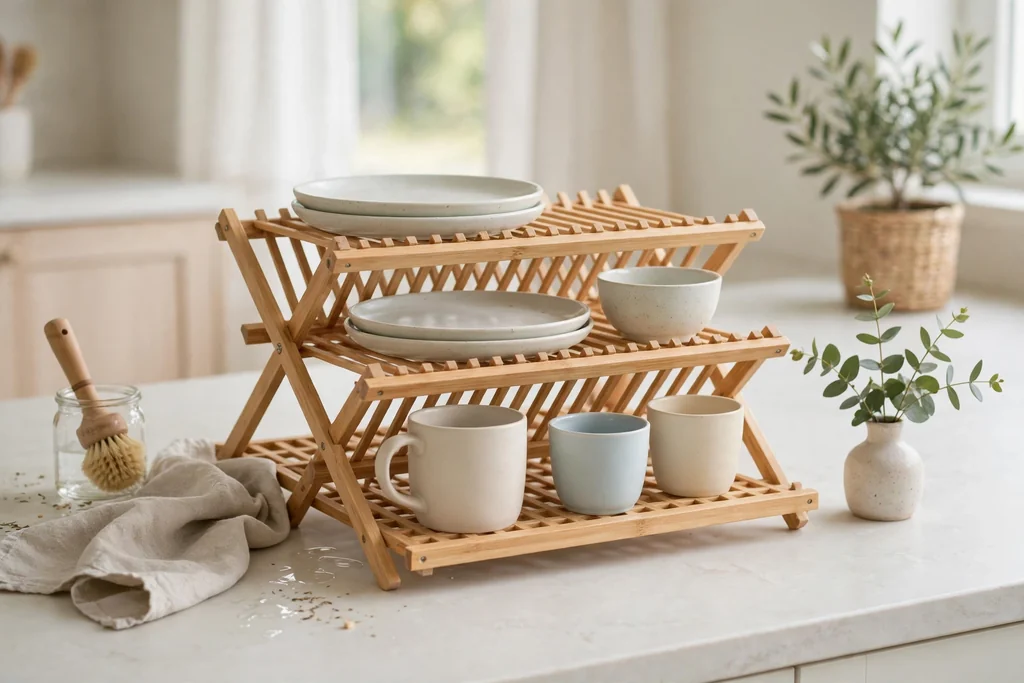
    Portable folding wooden dish rack set up on a small kitchen counter.

    A portable rack needs no fixings, no wall mounts, and no permanent spot, so it suits renters and anyone who moves often. The light frame folds flat or breaks down for storage, and it sets up on any clear counter in seconds. Portable racks suit small spaces because they can live in a cabinet between uses, leaving the counter fully clear for prep.

    Choose a portable rack with a stable base, since light folding frames can wobble under wet plates, and test it with a full load before relying on it daily. Keep the rack to daily dishes, and store it dry, since a folding rack left damp in a cabinet can develop marks at its joints. If the frame folds, check the hinges often, since hinges are the first part to loosen on a folding rack.

    25. Rack With Angled Dividers for Platters

    Wooden dish rack with angled dividers holding large platters upright.

    A rack with angled dividers holds large platters, baking trays, and serving boards upright at a slight tilt, instead of flat in a stack. The angled slots keep wide items from leaning on each other, and the tilt lets water run off toward the tray rather than pooling on a flat surface. This layout suits households that use platters often, for roasts, salads, and shared meals.

    Set the divider spacing to your widest platter, since a divider sized for dinner plates leaves a platter balanced on top of the slots. Load platters one per slot, and keep heavy stoneware platters near the center of the rack, where the frame is strongest. Dry the divider bases after use, since water runs down an angled platter and collects at the base of each slot.

    26. Rack With a Separate Glassware Section

    Wooden dish rack with a separate glassware section holding upside-down glasses.

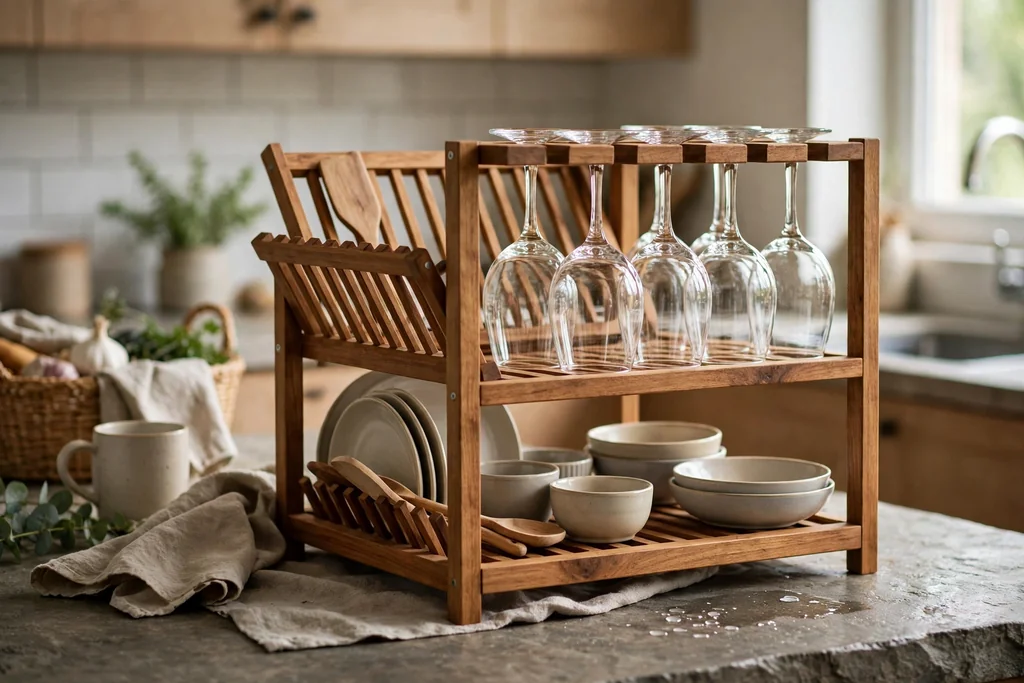
    A rack with a separate glassware section keeps wine glasses, tumblers, and jars apart from plates and bowls, so fragile items do not knock against heavy stoneware. The glassware section usually has wider slots or a flat rail area, where glasses sit upside down with space around each one. This layout suits households with a lot of glassware, and kitchens where broken glasses have been a problem.

    Place glasses in the section with space between them, since glasses that touch can chip when you add or remove a plate nearby. Keep the glassware section at the end farthest from the plate loading side, so heavy plates are not carried over fragile glasses. Dry the glassware section first when you put dishes away, since glasses left in a rack are easy to knock.

    27. Rack Stained to Match the Cabinets

    Wooden dish rack stained to match dark kitchen cabinets beside a sink.

    A rack stained to match the cabinets reads as part of the kitchen joinery rather than an add-on, which suits kitchens where the rack stays on show. The stain can match painted cabinets, wood cabinets, or the island base, and the match ties the sink area to the rest of the room. This idea works best when the cabinet color is a standard stain or paint shade that can be matched closely.

    Test the stain on a spare piece of the same wood first, since the same stain looks different on bamboo, teak, and walnut. Seal the stained rack with a water-resistant finish, since stain alone does not protect wood from sink water. If an exact match proves hard, choose a stain one shade darker than the cabinets, which reads as a deliberate accent rather than a near miss.

    28. Rack With Handles You Can Carry

    Wooden dish rack with handles at each end on a kitchen counter.

    A rack with handles at each end can be carried from sink to table, to a drying spot by the window, or into a cabinet for storage. The handles make a full rack easier to move without tipping plates, and they help when the sink area is needed for prep while dishes are still drying. This layout suits kitchens where the rack must move often, and households that dry dishes in a sunny spot away from the sink.

    Grip both handles when you lift a loaded rack, and keep the rack level, since a tilted rack slides plates toward one end. Check that the handles are fixed through the frame, not just glued to the surface, since a full rack of wet dishes is heavy. Choose handles that sit flush with the frame ends, so they do not catch on the tap or on cabinet doors.

    29. Rack With a Towel Rail at the Front

    Wooden dish rack with a tea towel hanging on a rail at the front.

    A rack with a towel rail at the front adds a bar along the front edge for a tea towel or a drying cloth, keeping the cloth within reach while you wash up. The rail holds the towel clear of the counter, so it dries between uses instead of sitting in a damp pile. This layout suits kitchens where the tea towel always ends up draped over the tap or lost behind the sink.

    Hang only a dry or lightly damp towel on the rail, and swap it for a fresh one often, since a towel that stays damp on a wood rail can mark the wood. Keep the rail clear of the plate slots, so the towel does not block loading or catch on plates. If the rail is removable, lift it off for cleaning when it collects soap film.

    30. Full Drying Station With Soap Dish and Sponge Holder

    Full wooden drying station with a dish rack, soap dish, and sponge holder beside a sink.

    A full drying station combines a wooden rack with a soap dish, a sponge holder, and sometimes a small brush cup, so everything for washing up sits in one unit beside the sink. The station keeps the sink edge tidy, since soap, sponge, and brush no longer spread across the counter, and it makes the wash-up routine faster, since each item has a fixed spot. This layout suits busy kitchens where the sink area collects clutter fast.

    Keep the soap dish drained, since soap sitting in water turns soft and messy, and rinse the sponge holder often, since it collects food residue. Place the station on the side of the sink you use least for rinsing, so it does not block the tap. For budget-friendly ways to refresh the whole sink run around a new station, these kitchen ideas on a budget cover paint, hardware, lighting, and storage fixes that cost little.

    Conclusion

    A good wooden dish drying rack starts with your sink, your dish count, and your counter, not with the wood alone. Measure the space beside the sink, count the dishes from a normal meal, and choose a rack that gives water somewhere to go and air room to move. Match the wood to the kitchen, whether that is light bamboo, water-friendly teak, or dark walnut, and keep the rack clean and dry between uses so the wood lasts. Start with one rack that fits daily life, and add a second piece, such as a mug peg row or a towel rail, only when the first rack stays tidy. Save the ideas that fit your kitchen size, your sink style, and how you like to wash up, and build a sink area that stays calm even on busy cooking days.

    FAQs

    What wood is best for a dish drying rack?

    Teak handles water best, since its natural oils resist damp, while bamboo is light, pale, and dries quickly, and walnut suits kitchens where a dark, furniture-like look matters. All three need a water-resistant seal and regular wiping dry, since no wood lasts long sitting in standing water. Choose teak for a rack that stays wet all day, bamboo for a light and low cost rack, and walnut when the look matters most.

    How do I stop a wooden dish rack from going mouldy?

    Keep air moving around the rack, wipe it dry after heavy use, and empty the drip tray after each wash-up, since mould grows where water sits still. Do not push the rack hard against the wall, since the back row then stays damp, and do not leave wet dishes in the rack for days. If dark spots appear, wash the rack, dry it fully in moving air, and reseal or oil the wood before it goes back beside the sink.

    What size wooden dish rack do I need?

    Size the rack to the dishes from a normal meal, not to a dinner party, and measure the counter beside the sink before choosing. A compact rack suits one or two people, a standard rack suits a small household, and a wide rack with extra plate rows suits a family. Leave a clear stretch of counter beside the rack for prep, since a rack that eats the whole run slows cooking.

    Can a wooden dish rack go over the sink?

    Yes, an over-sink rack that spans the basin works well, since water drips straight into the sink and never reaches the counter. Measure the sink width and rim shape first, so the rack sits level and steady on both sides, and keep one side of the sink clear for rinsing hands or filling a kettle. Dry the rack frame after use, since a frame over a wet sink stays damp longer than a countertop rack.

    How do I clean a wooden dish drying rack?

    Wipe the rack with a damp cloth and mild soap, rinse it, and dry it fully in moving air, then clean the drip tray on its own in the sink. Avoid soaking the rack for a long time, since soaking swells wood joints, and avoid harsh scouring pads, which strip the seal. Once the wood is dry, apply a light coat of food-safe oil if the surface looks pale or water starts to darken it.

    Is a wooden dish rack better than a plastic or metal rack?

    Wood suits kitchens where the rack stays on show, since it adds warmth and pairs well with wood counters, open shelves, and farmhouse sinks. Plastic racks are lighter and cheaper, and metal racks drain fast and resist stains, but neither gives the same warm look as wood. The best choice depends on your kitchen: pick wood for looks and warmth, metal for heavy daily use with little care, and plastic for a low cost rack in a rental.


  • 11 Black Kitchen Sink Ideas to Give Your Space a New Look

    11 Black Kitchen Sink Ideas to Give Your Space a New Look

    A black kitchen sink can anchor a kitchen without taking over the room. It reads as a clear focal point beside pale counters, and it sits quietly beside dark cabinets, so the same sink can suit a bright white kitchen and a moody green one. The choice that matters most is not the color alone. It is the sink shape, the way it is fitted, the faucet finish, and how much counter space you keep clear beside it. The 11 ideas below cover undermount, farmhouse, double bowl, workstation, island, and small kitchen sinks, with notes on cleaning and on pairings that keep the sink easy to live with every day.

    Key Takeaways

    • Pick the sink shape first: a single bowl suits large pans, a double bowl suits separate washing and rinsing, and a workstation sink adds prep space.
    • Pair a black sink with one contrasting surface, such as white quartz, light wood, or marble, so the sink stands out without darkening the whole kitchen.
    • Match the faucet finish to another detail in the room, such as cabinet handles or a light fixture, rather than adding a third metal.
    • Check the cabinet size under the sink before ordering, since farmhouse and workstation sinks need more width and depth than a standard inset sink.
    • Rinse and wipe a black sink after cooking, and dry hard water spots, to keep the finish even and to stop mineral marks from building up.
    • Keep one clear stretch of counter beside the sink for draining and prep, even in a small kitchen.

    1. Matte Black Undermount Sink with White Quartz Counters

    Matte black undermount sink in a white quartz countertop with a brass faucet and white cabinets.

    Fit a matte black undermount sink beneath a white quartz countertop for a clean edge with no rim to catch crumbs. The sink hangs below the counter, so you can wipe spills straight from the counter into the bowl. White quartz keeps the kitchen bright, while the dark bowl gives the work zone a clear boundary. This pairing suits a modern kitchen with flat front cabinets and a simple backsplash.

    Use a tall faucet in brass or chrome, and keep the counter clear except for a soap dispenser and a small board. A matte finish hides light water marks better than a high gloss finish, but it still shows limescale if water is left to dry on it. Wipe the bowl dry after the last wash of the day, and use a soft cloth rather than a scouring pad, which can dull the surface over time.

    2. Black Farmhouse Apron Front Sink in a Shaker Kitchen

    Black apron front farmhouse sink with cream shaker cabinets and wood countertops.

    Choose a black farmhouse sink with a wide apron front for a shaker kitchen where the sink is meant to be seen. The exposed front panel turns the sink into a feature, and the deep single bowl fits roasting trays and large pots that would not sit flat in a shallow sink. Cream or sage shaker cabinets, a wood countertop, and a bridge faucet keep the look calm and practical.

    Farmhouse sinks are heavier and wider than standard sinks, so check that the base cabinet can carry the weight and that the countertop is cut to fit the apron. Leave the front panel clear of tea towels draped over it, since a damp cloth left against the finish can leave marks. A drying mat beside the sink protects the wood counter from drips when you lift wet pans out of the deep bowl.

    3. Black Granite Composite Double Bowl Sink with Wood Counters

    Black granite composite double bowl sink with wood countertops and a colander of vegetables.

    Pick a black granite composite double bowl sink if you wash up by hand and like to keep washing and rinsing separate. One bowl can hold soapy water while the other stays clear for rinsing, which helps in a busy family kitchen. Warm wood counters soften the dark sink, and pale grey cabinets keep the room from feeling heavy.

    Granite composite is a hard, dense material that resists chips and scratches better than a thin steel bowl, but heavy cast iron pans can still mark it if dropped. Lift pans rather than sliding them across the base, and rinse the bowls after cooking with tomato or coffee, which can stain if left for hours. A sink grid in the larger bowl protects the base and gives dishes a flat surface to rest on.

    4. Black Sink Paired with Dark Green Cabinets

    Black sink with dark green cabinets, a brass faucet, and a white marble look backsplash.

    Pair a black sink with dark green cabinets for a kitchen with depth, where the sink blends in rather than standing out. The green and black sit close in tone, so the eye moves to the countertop, the faucet, and the backsplash instead. Brass handles and a white marble look backsplash give the room its contrast, and wood counters add warmth.

    This pairing needs good light, since two dark tones can make a north facing kitchen feel dim. Add under cabinet lighting over the sink and keep the ceiling and upper walls pale. If the room is small, use dark green on the lower cabinets only and a pale color above, so the sink still reads as part of a balanced room rather than a dark block.

    5. Black Single Sink for a Small Kitchen

    Small kitchen with a single black sink, open wood shelves, and white tiled walls.

    Use a compact black single sink in a small kitchen, where one bowl leaves more counter space than a double bowl. Open shelves above the sink hold plates and mugs within reach, and a white tiled wall keeps the corner bright. A folding dish rack, a soap bottle, and one plant on the sill are enough beside the sink, since every extra item takes counter space you need for prep.

    Measure the full width of the sink, including any draining board, before you buy, and check that the tap can reach the middle of the bowl. For more ways to keep a small kitchen working hard, see these kitchen ideas on a budget for storage and layout choices that cost little and save space. In a small room, a single lever faucet is easier to use with wet hands than separate hot and cold taps.

    6. Black Workstation Sink with a Sliding Board and Colander

    Black workstation sink with a sliding wood cutting board and a metal colander.

    Choose a black workstation sink if you prep food at the sink and want the board, colander, and bowl in one place. A ledge inside the sink holds a sliding wood board and a metal colander, so you can chop, rinse, and drain without carrying wet food across the counter. This setup suits a cook who uses the sink for vegetables, pasta, and salad prep as much as for washing up.

    Keep the accessories that came with the sink, since boards and colanders sized for other sinks may not sit flat on the ledge. Slide the board to one end when you need the full bowl for a large pot, and dry the board after use so it does not warp. A gooseneck faucet with a pull down spray reaches both ends of the long bowl and helps rinse food scraps toward the drain.

    7. Black Sink with a Brass Faucet and Marble Backsplash

    Black sink with a brass faucet, a white marble backsplash, and navy cabinets.

    Pair a black sink with a brass faucet and a white marble backsplash for a kitchen where the metal is the accent. The warm brass lifts the dark bowl, and the grey veining in the marble links the two tones without adding a new color. Navy or deep grey cabinets give the brass a dark backdrop, while a plain counter keeps the focus on the sink wall.

    Brass needs a little more care than chrome, since water spots show on a warm metal finish. Wipe the faucet dry after use, and avoid harsh cleaners that can strip the coating. If brass feels like a big step, start with the faucet and one other brass detail, such as a cabinet knob, and live with that pair before adding more. A matching soap dispenser in brass ties the sink zone together without extra clutter.

    8. Black Sink with Butcher Block in a Rustic Kitchen

    Black sink in a butcher block countertop in a rustic kitchen with wood shelves.

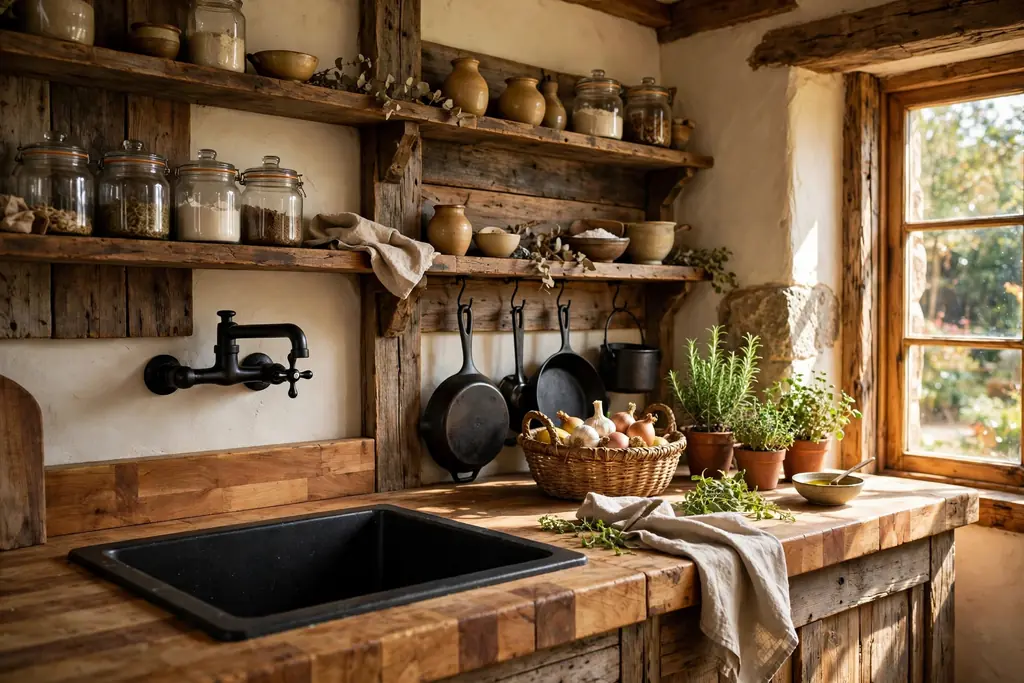
    Set a black sink into a thick butcher block countertop for a rustic kitchen with a warm, lived in feel. The dark bowl contrasts with the pale wood grain, and reclaimed wood shelves, a wall mounted faucet, and cast iron pans nearby complete the look. This pairing suits a kitchen where wood is already the main material, such as a farmhouse or a cabin style room.

    Wood counters need sealing around the sink, since water that sits on the joint can darken the wood and lift the finish. Oil the counter on a regular schedule, wipe up standing water at once, and use a tray under the soap bottle to stop rings. A black wall mounted faucet keeps the counter clear and makes it easier to fill tall pots, but it needs plumbing in the wall, so plan it before the backsplash goes up.

    9. All Black Monochrome Kitchen Sink

    Monochrome kitchen with black cabinets, a black sink, and a matte black faucet.

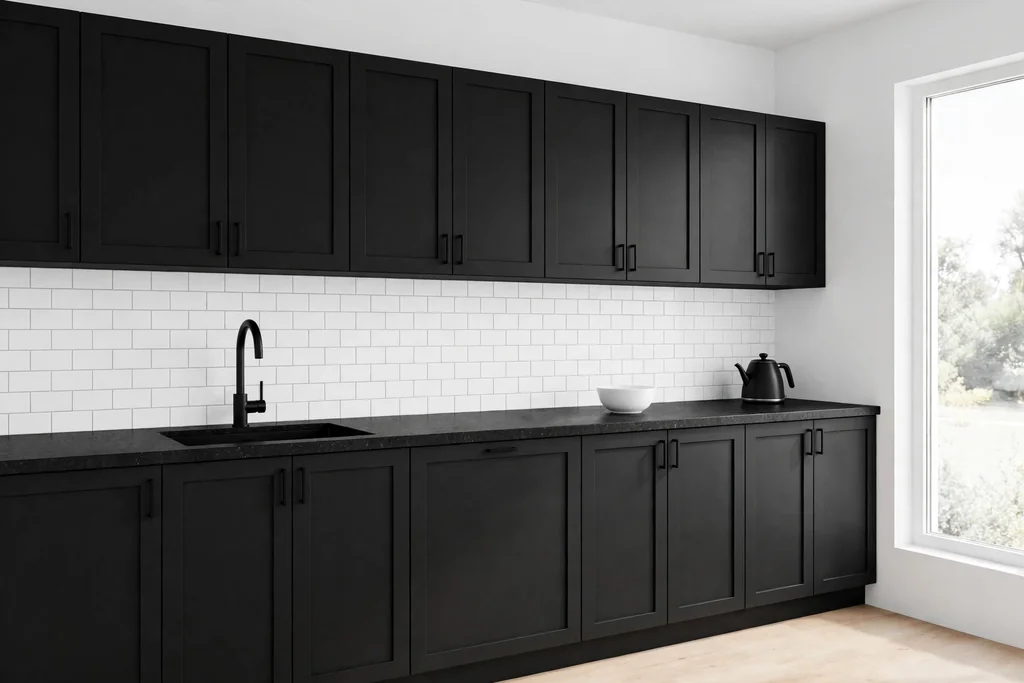
    Use a black sink in an all black kitchen for a monochrome look where texture, not color, does the work. Black cabinets, a black stone counter, and a matte black faucet form one quiet block, while white walls and a white tiled backsplash keep the room from closing in. A white bowl, a black kettle, and one plant are enough decoration, since the sink zone already has a strong identity.

    Monochrome kitchens show dust, crumbs, and water spots more clearly than mixed color rooms, so a quick daily wipe matters. Keep cleaning cloths in a drawer beside the sink so the wipe takes seconds rather than a search. For more guidance on using black as a main kitchen color, see these black kitchen cabinet ideas for cabinet finishes, handles, and lighting that work beside a dark sink.

    10. Black Sink Under a Window with a Garden View

    Black sink under a kitchen window with a garden view, white subway tiles, and wood counters.

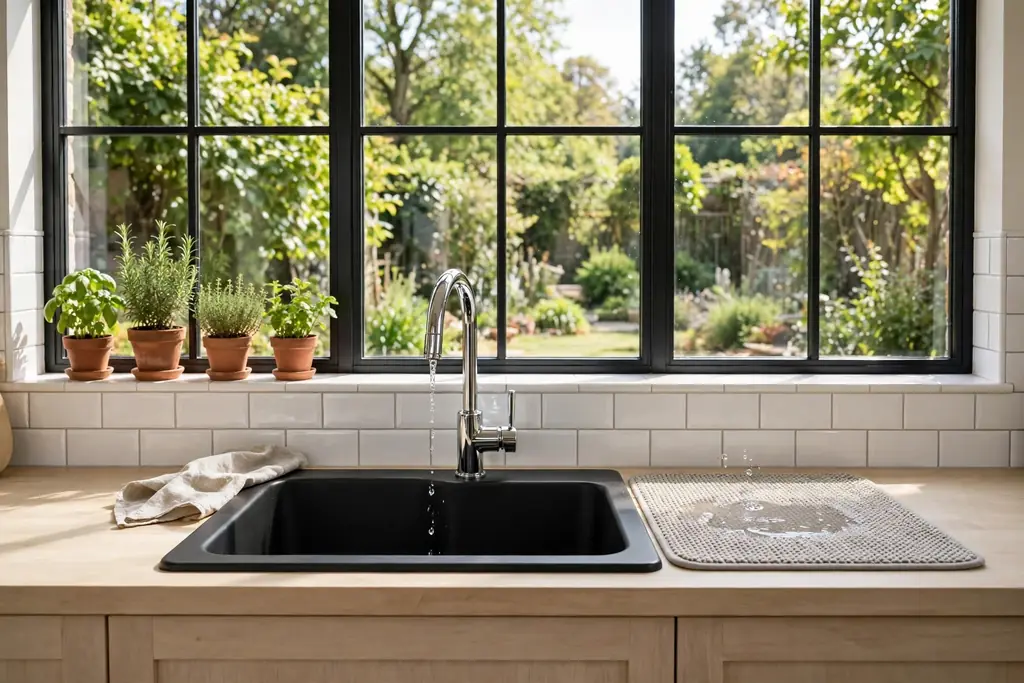
    Place a black sink under a window for a kitchen where washing up comes with daylight and a view. The dark bowl stands out against a white subway tile backsplash and pale wood counters, and herbs on the sill get light while staying within reach for cooking. A chrome faucet keeps the window wall simple, and a drying mat beside the sink catches drips without blocking the light.

    Check the window height before you fit a tall faucet, since a high arc can hit a low sill or block the window catch. A single lever faucet with a low profile, or a faucet that folds down, solves the problem in a tight spot. For more ideas on dressing the wall above a sink, see these above kitchen sink ideas for shelves, art, and lighting that suit a window wall. Keep the sill clear of tall jars that would block the view you placed the sink there to enjoy.

    11. Black Island Sink for Cooking and Gathering

    Kitchen island with a matte black sink, bar stools, and a fruit bowl.

    Fit a black sink into a kitchen island if you cook facing the room rather than facing a wall. The island sink lets one person wash vegetables while another sits at the island, and it keeps the main cooking zone free for chopping and plating. White cabinets, a dark wood floor, and a tall faucet give the island a clear work end and a clear seating end.

    Plan the plumbing early, since an island sink needs pipes run through the floor rather than through a wall. Keep the seating side of the island free of the sink splash zone, and leave at least a board width of counter between the sink and the nearest stool. A second small prep sink on the island can help in a large kitchen, but in most homes one well placed island sink, with a draining area beside it, is easier to keep clean.

    Conclusion

    A black kitchen sink works best when the rest of the kitchen gives it room to breathe. Pick a shape that fits how you cook, pair it with one contrasting counter or backsplash, and match the faucet to a detail already in the room. Keep the counter beside the sink clear, wipe the bowl dry after use, and check the cabinet size before you order. With those choices made, a black sink can suit a bright modern kitchen, a rustic wood kitchen, and a dark green kitchen alike. Save the idea that fits your room, and use it as the starting point for the faucet, counter, and cabinet colors around it.

    FAQs

    Do black kitchen sinks show water spots?

    Yes, black sinks can show water spots, especially in hard water areas. The marks are mineral deposits left when water dries on the surface. Rinse the bowl after use and wipe it dry with a soft cloth to keep the finish even. A matte finish hides light marks better than a gloss finish.

    Are black kitchen sinks hard to keep clean?

    No, a black sink needs the same basic care as any sink, with one extra step. Wash it with warm soapy water, rinse well, and dry it after the last use of the day. Avoid scouring pads and harsh bleach cleaners, which can dull or mark the finish over time.

    What countertop goes best with a black kitchen sink?

    White quartz, light wood, and white marble are all good partners, since each one contrasts with the dark bowl. White quartz suits a modern kitchen, wood suits a rustic kitchen, and marble suits a kitchen with brass details. Pick the counter that already suits your cabinets, rather than changing the whole room for the sink.

    Can a black sink work in a small kitchen?

    Yes, a compact single bowl black sink works well in a small kitchen. One bowl leaves more counter space than a double bowl, and a dark sink can anchor a small room without needing extra decoration. Keep the wall above the sink pale and the counter beside it clear, so the room still feels open.

    Does a black sink suit a farmhouse kitchen?

    Yes, a black apron front farmhouse sink is a natural fit for a farmhouse kitchen. The wide front panel, a deep bowl, and a wood countertop suit shaker cabinets and a bridge faucet. Check the weight and the cabinet width first, since farmhouse sinks need a stronger base cabinet than a standard sink.

    What faucet finish works with a black kitchen sink?

    Brass, chrome, matte black, and brushed nickel all work, depending on the room. Brass adds warmth, chrome adds brightness, matte black keeps the look quiet, and brushed nickel sits between the two. Match the faucet to another metal in the room, such as cabinet handles, so the sink zone has one clear metal story.


  • 26 Easy Kitchen Storage Ideas to Inspire Your Next Room Refresh

    26 Easy Kitchen Storage Ideas to Inspire Your Next Room Refresh

    A kitchen feels bigger the moment every item has a clear home. You do not need new cabinets or a full remodel to get there. A pull-out shelf, a labelled bin, or a rail for pans can clear a counter and cut the time you spend hunting for a lid or a spice jar. These 26 easy kitchen storage ideas cover cabinets, drawers, pantries, counters, and the fridge, so you can pick one change for a cluttered corner or work through several for a full room refresh. Start with the spot that slows you down most, measure before you buy any insert, and keep daily items where you can reach them without a step stool. For wall storage that pairs with these ideas, the kitchen wall storage ideas guide covers shelves, rails, and racks in more detail.

    Key Takeaways

    • Start with one clutter point, such as spices, pans, or food tubs, and give it a clear home before buying more storage.
    • Keep daily items between waist and eye level, and move rarely used pieces higher or into closed storage.
    • Use clear bins and labels in the pantry and fridge, so you can see stock levels without pulling everything out.
    • Bring items to you with pull-outs, turntables, and drawers, instead of reaching into deep, dark cabinets.
    • Leave one clear stretch of counter for prep, and give small appliances a home away from it.
    • Review each new system after two weeks, and move anything you never reach for to a less handy spot.

    1. Open Shelves for Everyday Dishes

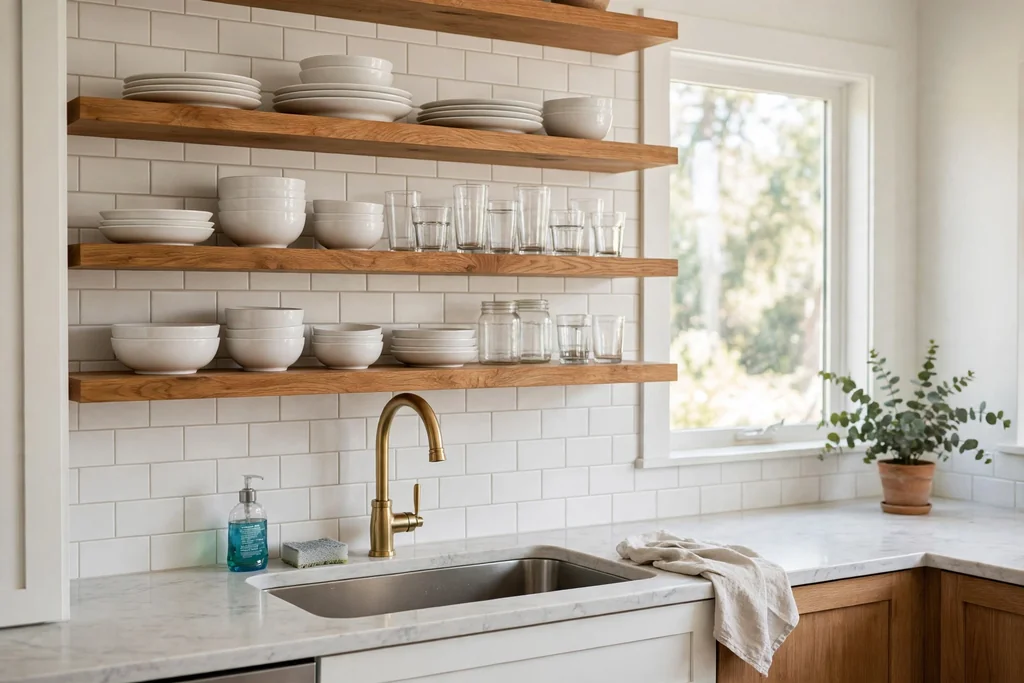
    Open wood shelves holding everyday white plates, bowls, and glasses near a kitchen sink.

    Put your most used plates, bowls, and glasses on two open wood shelves near the sink or dishwasher. This keeps the daily set in one visible place and shortens the trip from washing up to putting away. Choose shelves deep enough for dinner plates, and keep the run short so the display stays easy to manage and dust.

    Group plates in one stack, bowls in another, and glasses in a single row, with space left at each end. Keep heavy stacks low, and limit each shelf to one or two groups. Store rarely used serving pieces in a closed cabinet, so the open shelves hold only what you reach for daily.

    2. Slim Pull-Out Pantry Beside the Fridge

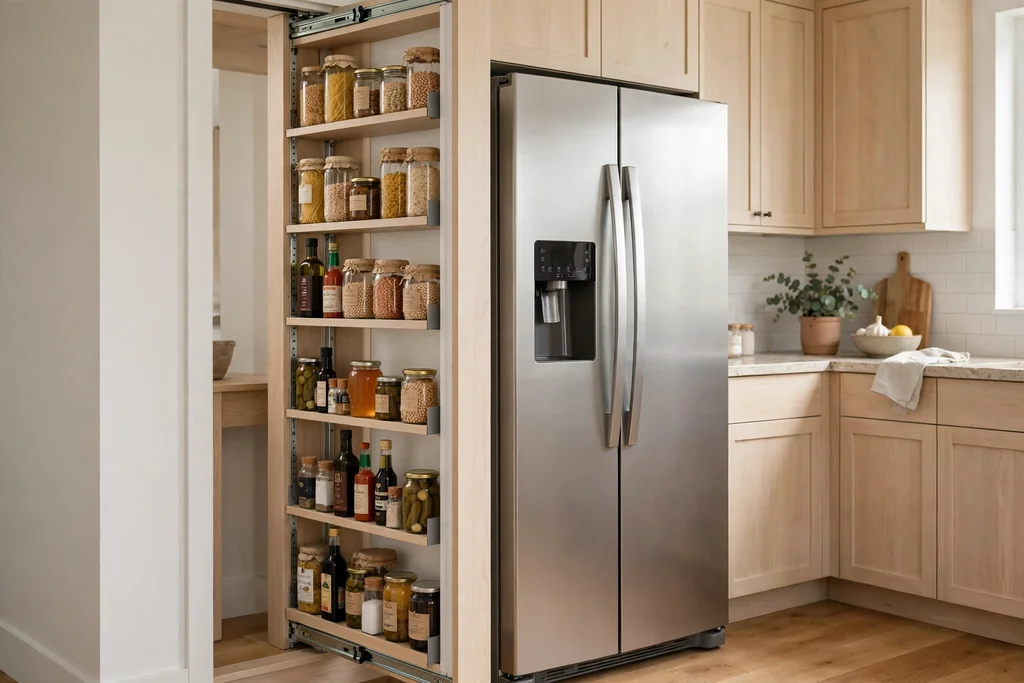
    Slim tall pull-out pantry slid open beside a fridge with jars and bottles on its shelves.

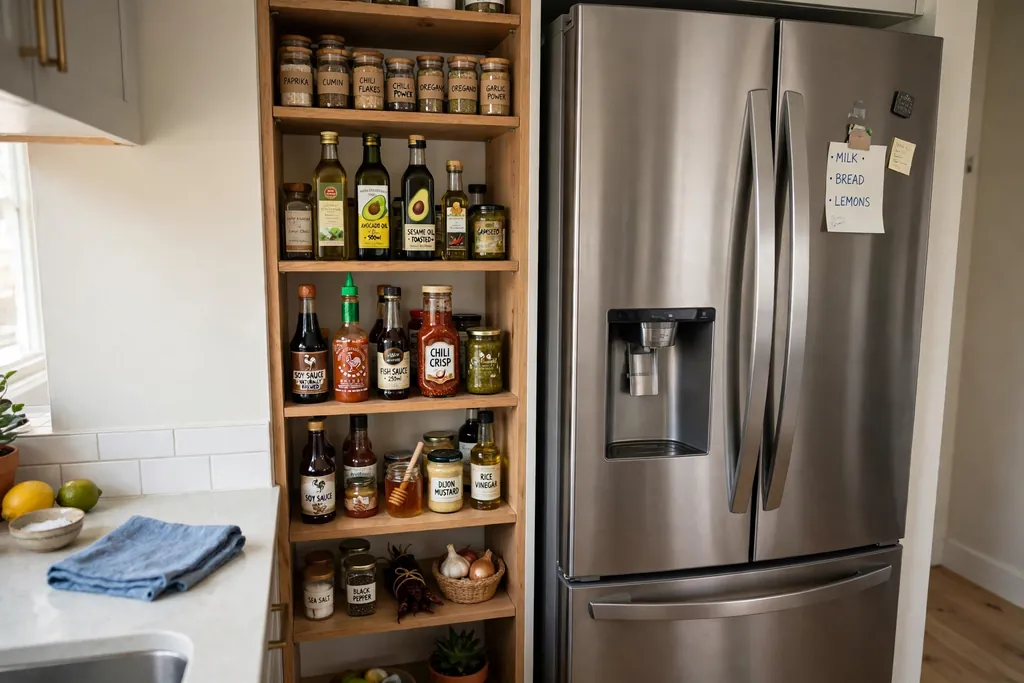
    The narrow gap beside a fridge or oven often holds nothing but a broom. A slim pull-out pantry turns that gap into tall, visible storage for oils, sauces, spices, and cans. Because the whole unit slides out, you can see every jar without reaching to the back of a deep cupboard.

    Measure the gap, the door swing, and the depth before ordering, and check that the unit clears skirting boards and handles. Group items by use, such as cooking oils together and baking items together, and put heavy jars low. This is one of the easiest ways to add pantry space without moving a wall.

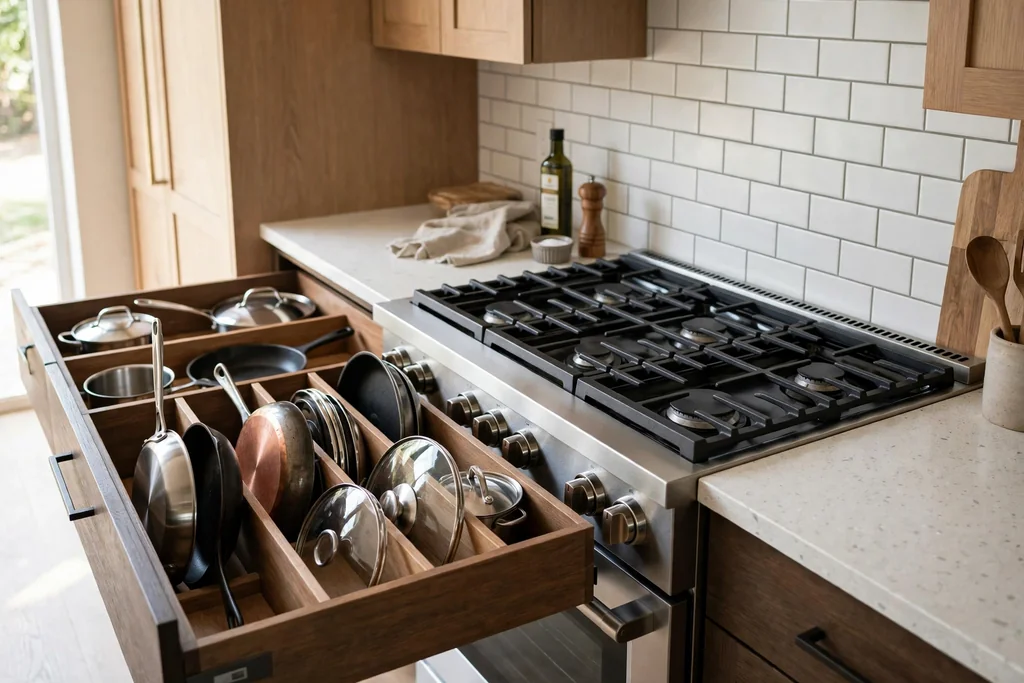
    3. Deep Pot Drawers with Dividers

    Deep kitchen drawers open beside a stove holding pots, pans, and lids in dividers.

    Deep drawers beat low cabinets for pots, pans, and mixing bowls, because you can see everything from above and lift items out without unstacking. Two or three deep drawers beside the stove can hold the pans you use most, with lids in a vertical divider in the same drawer or the one beside it.

    Use drawer dividers or peg boards to stop pans sliding when the drawer closes. Put the heaviest pans in the lowest drawer, and keep a lighter drawer for baking sheets and trays. If you are keeping some cabinets, convert only the run beside the stove first, where the change makes the biggest daily difference.

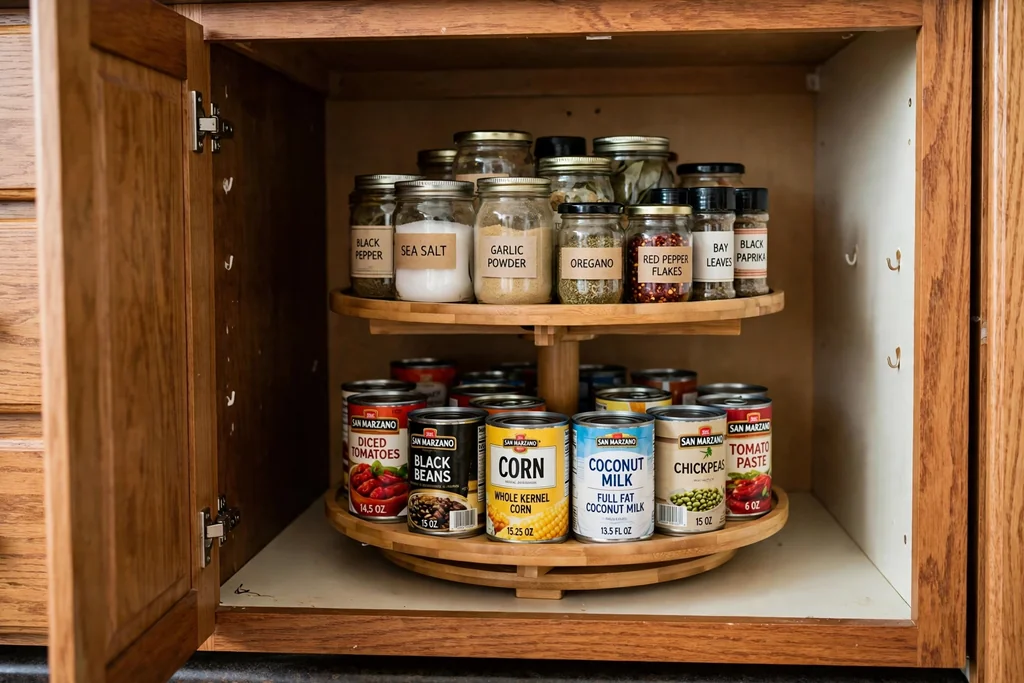
    4. Two-Tier Turntable in a Deep Cabinet

    Two-tier turntable inside an open deep kitchen cabinet holding cans and jars.

    A two-tier turntable spins the back of a deep cabinet around to the front, so cans, jars, and small appliances stop getting lost. Choose a diameter that clears the door opening and any hinges, and load heavier items on the lower tier. Round shelves leave small gaps at the edges, so keep tiny items in a bin on the shelf rather than loose.

    Group one category per turntable, such as sauces on one and baking items on another, and leave a finger gap around the edge so it spins freely. Wipe the shelf during your usual cabinet clean, since spills collect where the turntable meets the shelf.

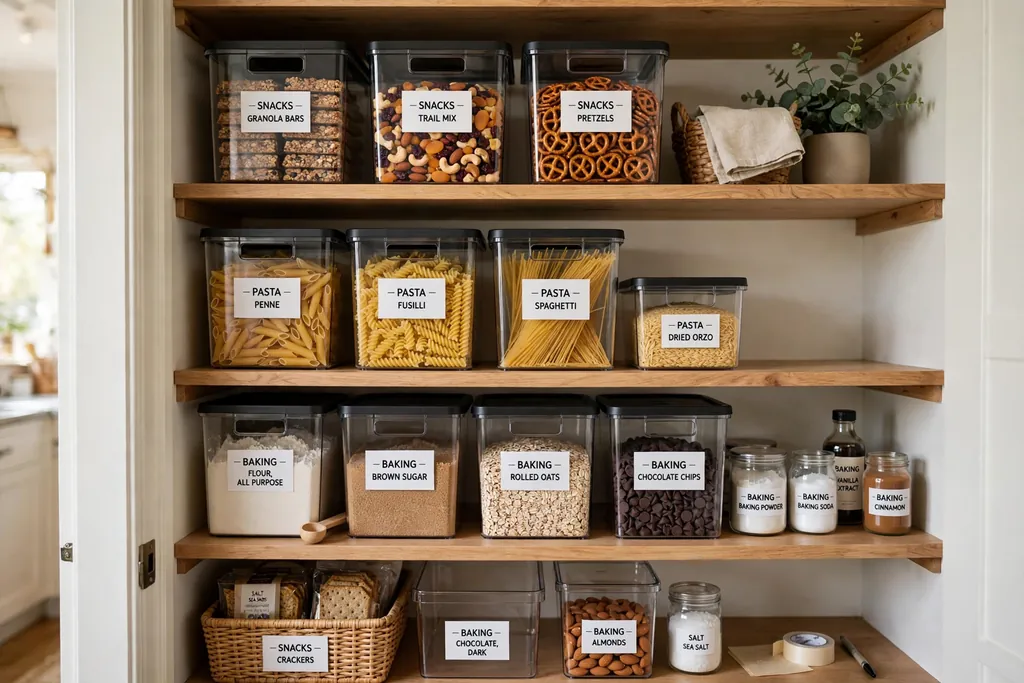
    5. Clear Labelled Bins in the Pantry

    Neat pantry shelves with clear labelled bins holding snacks, pasta, and baking supplies.

    Clear bins turn a mixed pantry shelf into rows you can read at a glance. Use one bin per group, such as snacks, pasta, baking, and breakfast, and label each bin on the front, not the top, so the label stays visible when bins sit on a high shelf. Clear sides let you see stock levels without pulling the bin out.

    Decant only the foods you buy often, and keep bulk refills in their store packs at the back of the shelf or in a separate bin. Check dates when you refill, and keep the bin size matched to the shelf depth, so nothing sticks out past the shelf edge.

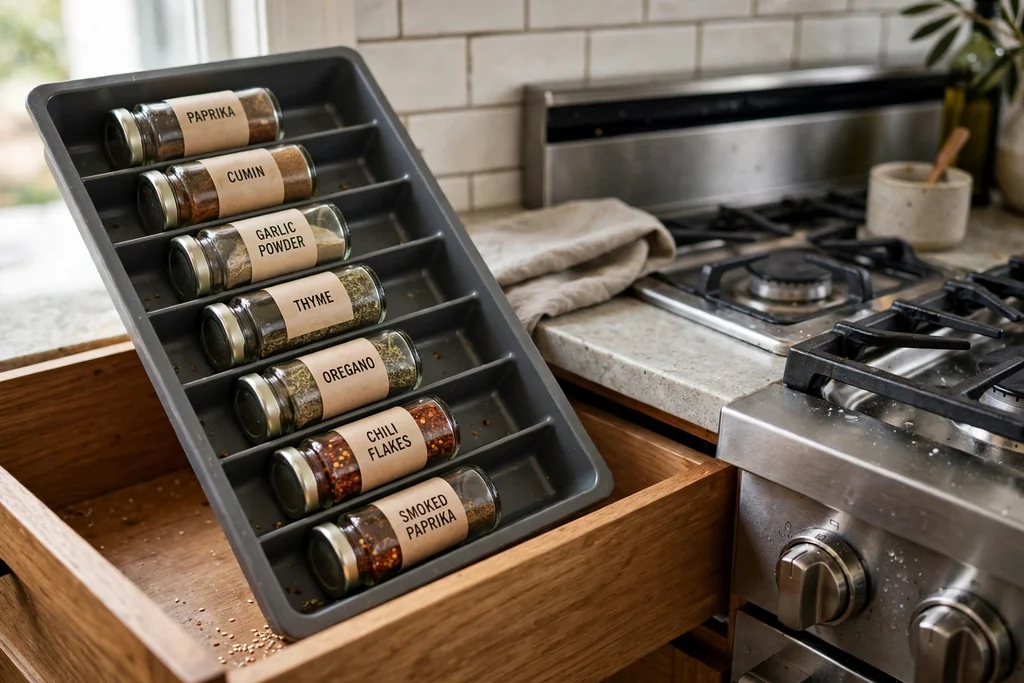
    6. Spice Jars in a Drawer Insert

    Open kitchen drawer with spice jars lying in a tilted insert with labels facing up.

    A tilted insert in a drawer lays spice jars out with labels facing up, so you can read every jar without lifting rows of bottles. This suits cooks who own more than a dozen spices and want them near the stove but out of sight. Choose an insert sized to your drawer, and use jars of one size so the rows sit level.

    Group spices by use, such as everyday cooking, baking, and heat, and keep the drawer beside the prep counter rather than above the stove. Refill jars from larger store packs kept in a cabinet, and check dates twice a year. A drawer that holds 12 to 20 jars suits most home cooks.

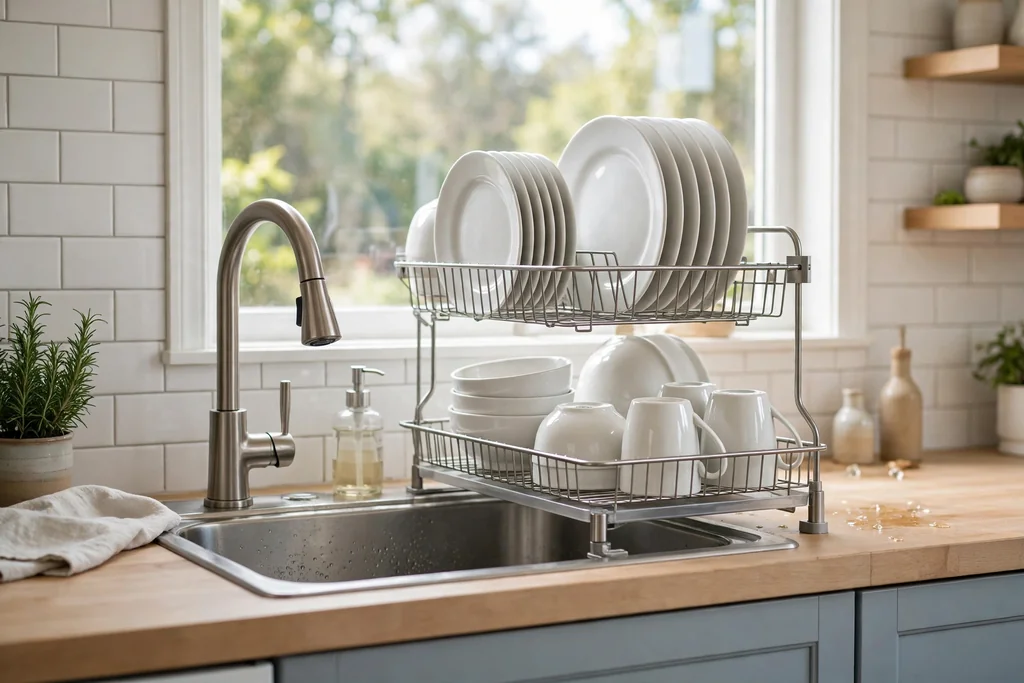
    7. Over-Sink Dish Rack

    Over-sink dish rack holding clean white plates, bowls, and cups above a kitchen sink.

    An over-sink dish rack gives washed plates a drying spot that does not cover the counter. Choose a rack with a drip tray or one that drains into the sink, and pick stainless or coated wire for a wet zone, with open sides so air moves around the plates. Size the rack for your daily plate count, not for a full dinner party set.

    Keep the rack near the sink for a short carry, and empty it once dishes are dry, so it does not become permanent storage for a second set. If space is tight, a narrow rack for plates only still clears a useful patch of counter.

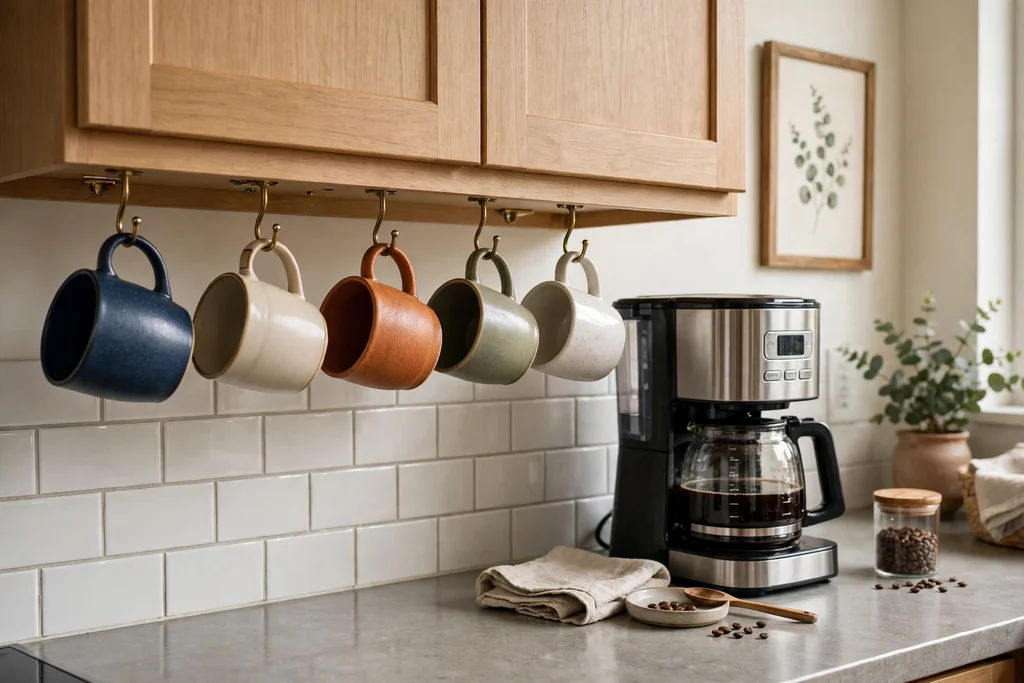
    8. Mug Hooks Under a Cabinet

    Coffee mugs hanging from hooks under a kitchen wall cabinet beside a coffee maker.

    A row of hooks under a shelf or wall cabinet gives every mug a home and stops mugs stacking in a cabinet. Space the hooks wide enough that handles do not lock together, and hang the daily mugs at easy reach height. A rail with removable hooks makes cleaning and rearranging simple.

    Keep the collection to the mugs you actually use, and store spares or souvenir mugs elsewhere. Hang mugs by their handles with the opening facing out, so they dry fully and are easy to spot. This idea works well on a short wall beside a coffee maker or kettle.

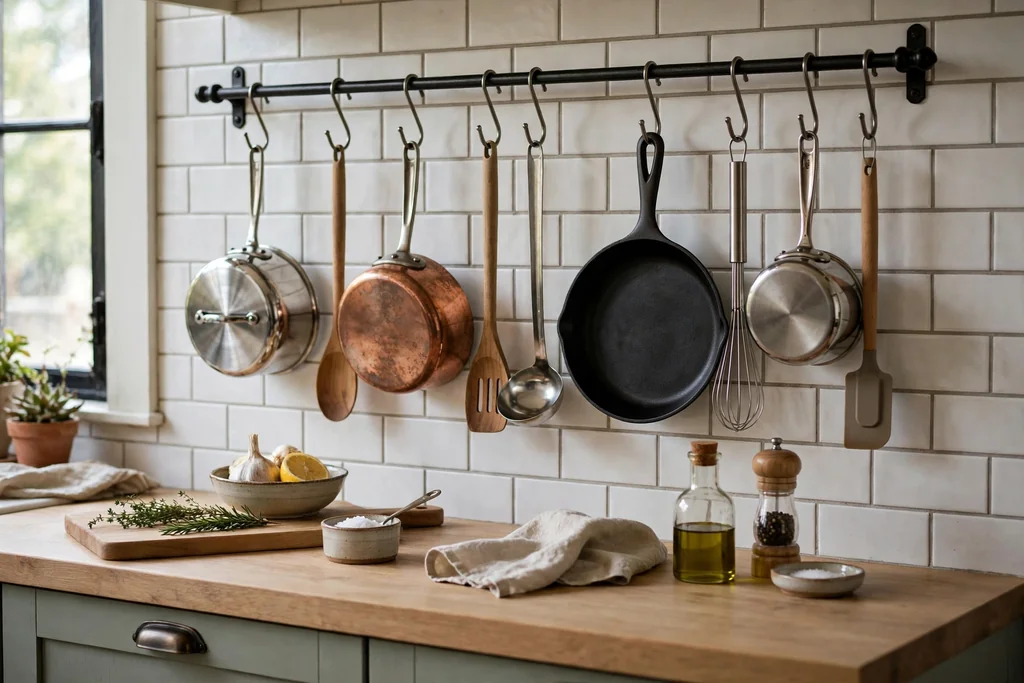
    9. Pot Rail with S-Hooks

    Kitchen wall pot rail with saucepans and utensils hanging on S-hooks above a counter.

    A steel or wood rail with S-hooks holds saucepans, a colander, and large utensils where you can reach them fast. Mount the rail below a shelf or on its own, with enough clearance below for the longest pan to hang without hitting the counter. Hooks that slide along the rail let you space pans by size.

    Hang the heaviest pan nearest a wall bracket, where the rail is strongest. Keep lids on a separate hook or in a rack, since lids hung with pans tangle and clang. Wipe the rail weekly, because steam and cooking grease settle on horizontal metal near the stove.

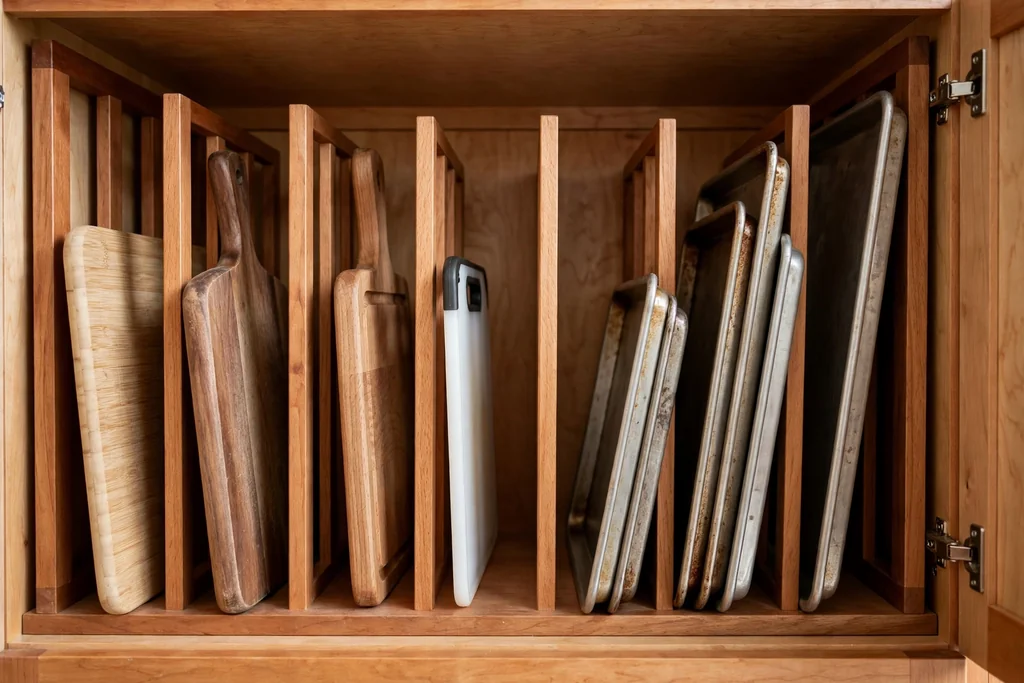
    10. Vertical Dividers for Trays and Boards

    Cutting boards and baking trays stored upright in vertical dividers inside a kitchen cabinet.

    Tall, flat items waste a cabinet when they lean in a pile. Fit vertical dividers in a base cabinet or the cabinet above the oven area so baking trays, cutting boards, and cooling racks slide in upright, one per slot. Measure your widest board before fixing divider spacing.

    This is one of the cheapest cabinet upgrades, because simple tension dividers and tray racks need no cabinet changes, and it keeps heavy boards from sliding when the door opens. Put the boards you use weekly at the front of the run, and seasonal trays at the back.

    11. Shelf Risers Inside Cabinets

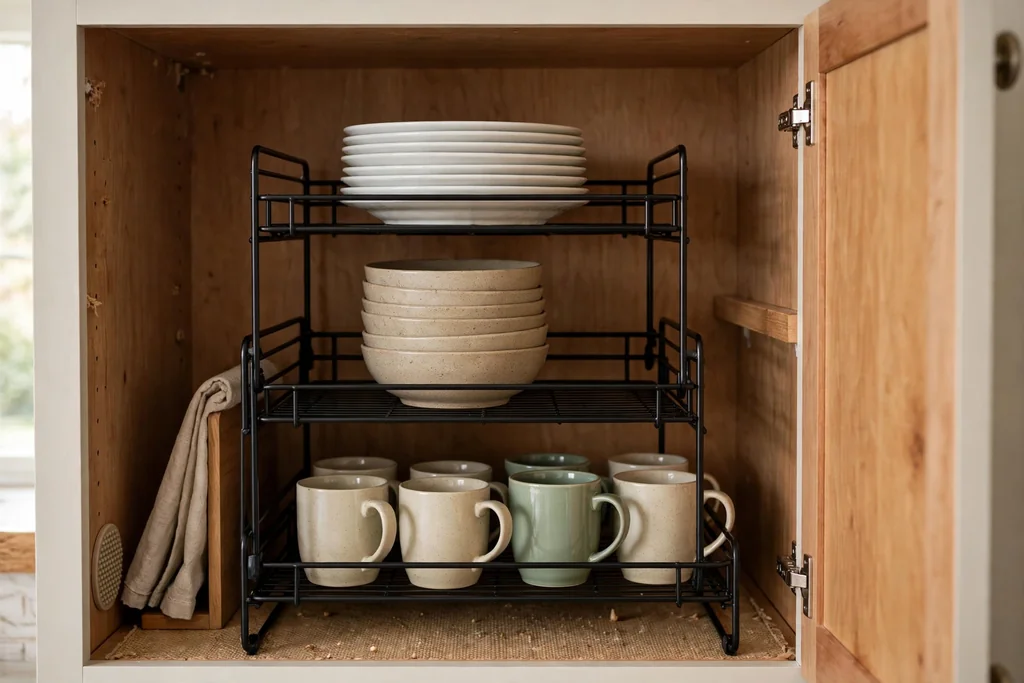
    Stackable shelf risers inside a kitchen cabinet holding plates, bowls, and mugs.

    A shelf riser adds a second level inside a cabinet, so mugs or bowls can stack in two rows instead of one tall pile. This works best in cabinets with wasted headroom above short items, such as mugs, small bowls, and spice jars. Choose a riser that leaves a finger gap at the front, so you can lift items out without tipping the row.

    Keep heavy items on the cabinet shelf itself, and lighter items on the riser. Avoid risers for tall bottles, since they need the full cabinet height. Two small risers side by side often work better than one wide riser, because each row stays easy to reach.

    12. Rack on the Inside of a Cabinet Door

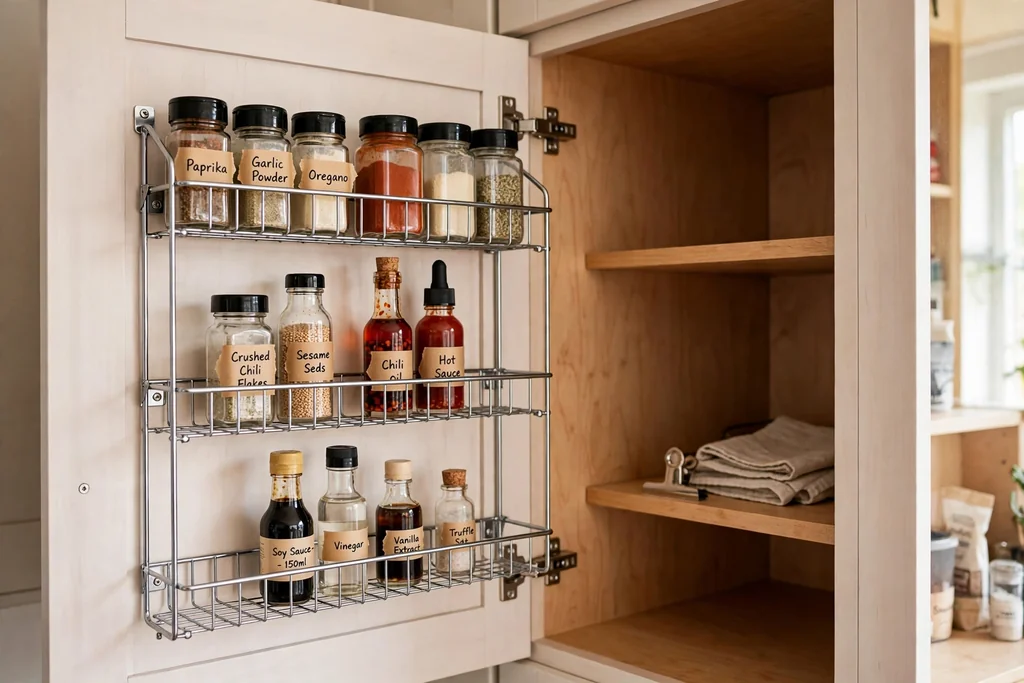
    Wire rack mounted on the inside of an open kitchen cabinet door holding spice jars.

    A wire rack fixed to the inside of a cabinet door turns dead door space into storage for spice jars, small bottles, or cleaning sprays. Check the door closes flat with the rack loaded, and fix the rack into the door frame, not just a thin panel. Keep the rack shallow, so items do not hit the shelf edges when the door swings shut.

    Use this spot for light items you grab often, such as spice jars near the stove or foil and wraps near the prep counter. Measure the clearance between the door and the nearest shelf before ordering, since depth varies between cabinet makers.

    13. Corner Turntable for a Blind Corner

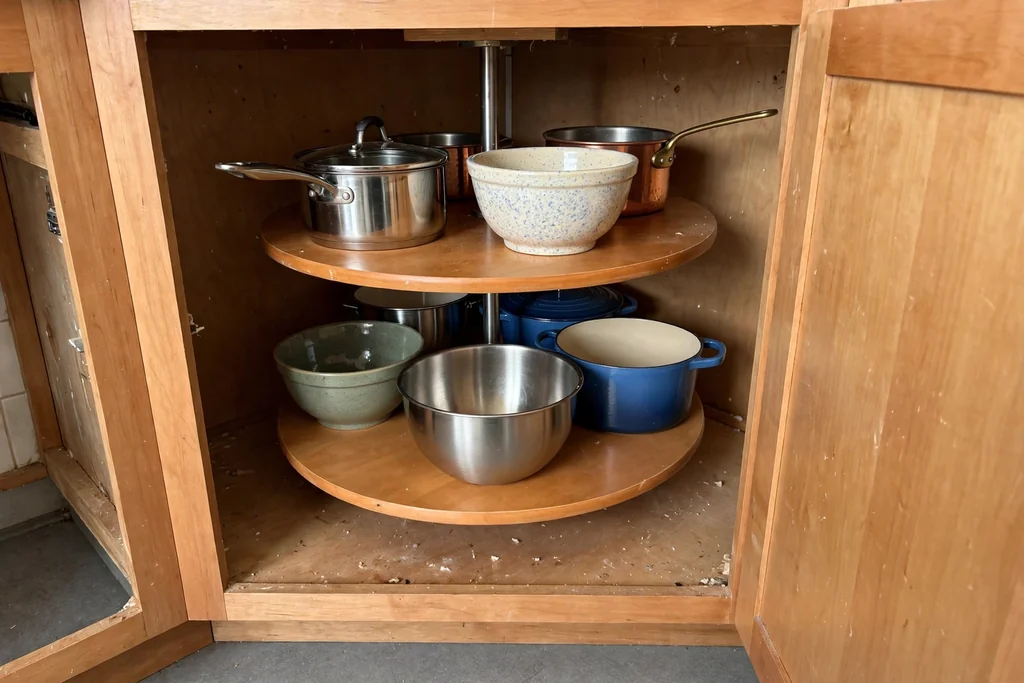
    Round two-tier turntable shelves inside an open corner base cabinet holding pots and bowls.

    Blind corner cabinets are deep, dark, and hard to use, so they often end up holding forgotten pans. A round two-tier turntable on a centre pole spins the corner contents out to you, and its cut-out shape lets the cabinet door close against it. Measure the cabinet depth and door swing before choosing a size.

    Load heavy pots on the lower tier and lighter bowls above, and keep tiny items in a bin on the shelf. For more corner cabinet options, including pull-outs and corner drawers, see these corner kitchen cabinet ideas. If a turntable will not fit your corner, a simple basket for the front section still improves access.

    14. Rolling Kitchen Cart

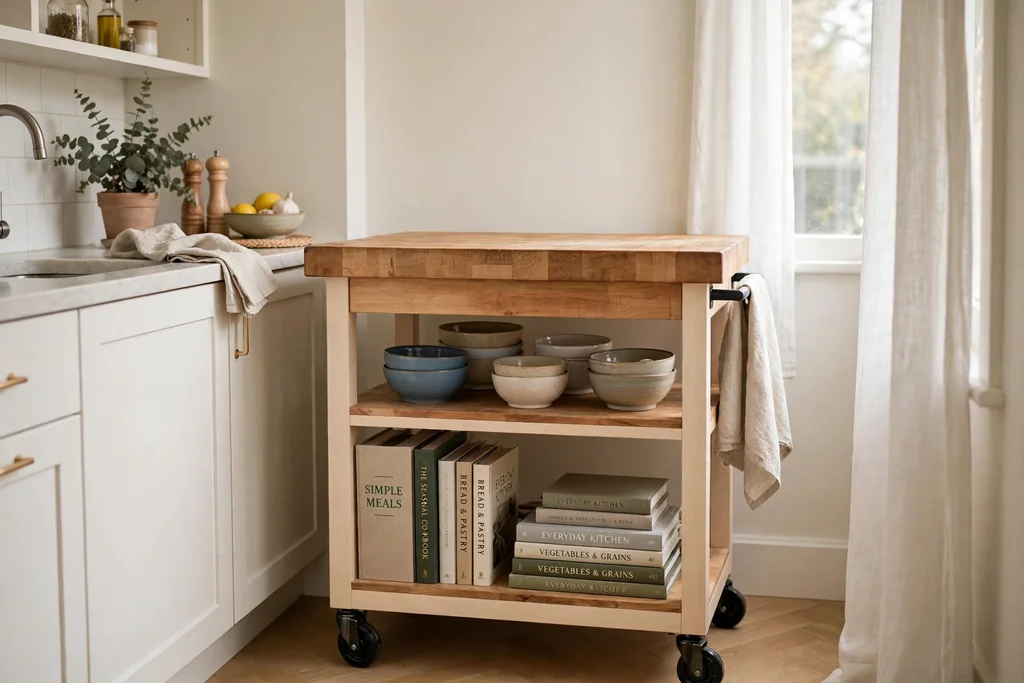
    Rolling kitchen island cart with a butcher block top and shelves below in a small kitchen.

    A rolling cart gives a small kitchen extra prep space and storage without a fixed block in the middle of the floor. Choose a cart with a solid top, a shelf or drawers below, and lockable casters so it stays put while you chop. When guests arrive or the floor needs cleaning, release the wheels and move it to the wall.

    Size the cart to your walkways, leaving clear space around it when in use. Keep only daily tools on the cart, such as a knife block, oils, and a chopping board, so it stays useful rather than becoming another crowded surface. A towel bar on the side adds a handy spot for a tea towel.

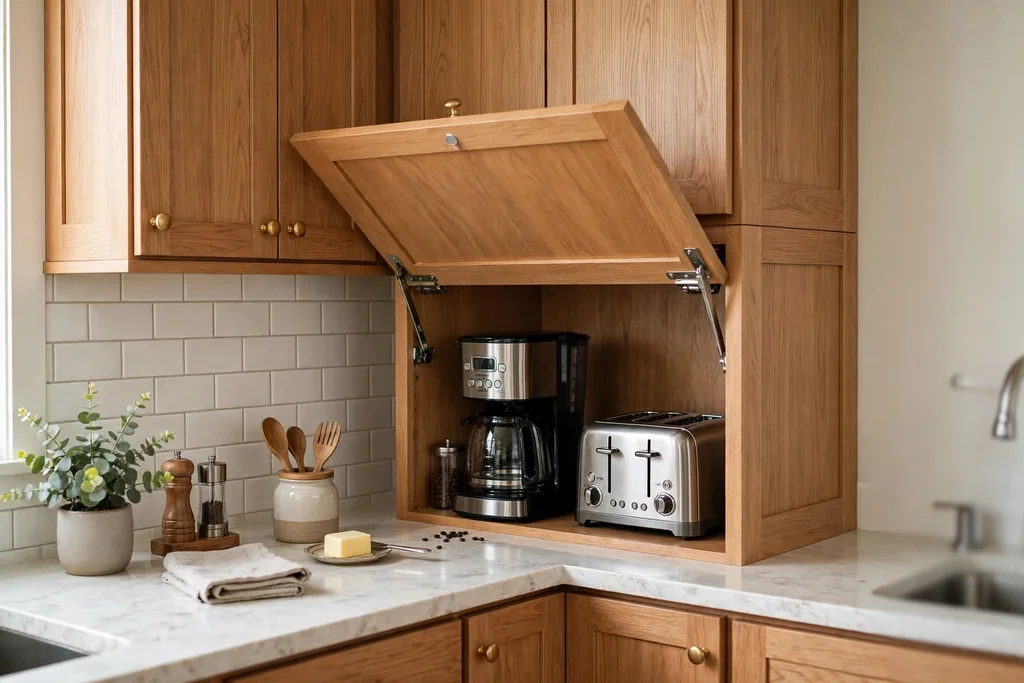
    15. Appliance Garage in the Counter Corner

    Counter corner appliance garage with a lift-up door open over a coffee maker and toaster.

    The counter corner under the upper cabinets is the natural home for an appliance garage: a section with a door that hides the toaster, blender, or coffee maker when they are not in use. Keep the items you use daily at the front, and leave air space around anything that gets hot. Plan a socket inside or just beside the garage so cords stay short.

    If a built-in version is too much work, a lidded box or a curtain panel gives a softer version of the same idea. Keep the counter in front clear, so hot dishes have a landing spot, and wipe the inside of the garage weekly, since crumbs collect where appliances sit.

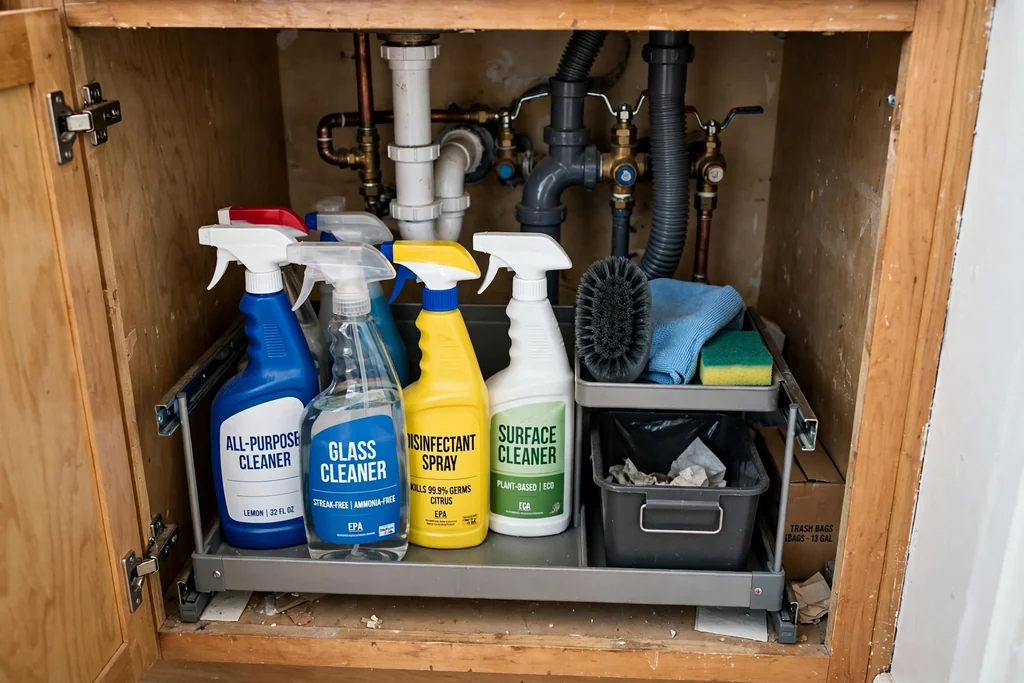
    16. Under-Sink Caddy and Tension Rod

    Under-sink kitchen cabinet with a pull-out caddy holding cleaning sprays and a small bin.

    The cabinet under the sink is awkward because pipes block the middle, but a pull-out caddy and a tension rod can still make it work. Hang spray bottles from the rod by their triggers, and keep sponges, cloths, and a small bin in the caddy below. This keeps cleaning supplies in one lift-out unit instead of loose bottles at the back.

    Line the cabinet floor with a waterproof tray, since small leaks and drips reach this spot first. Check for leaks when you pull the caddy out, and keep only sink-related items here, so the cabinet does not become a general store cupboard.

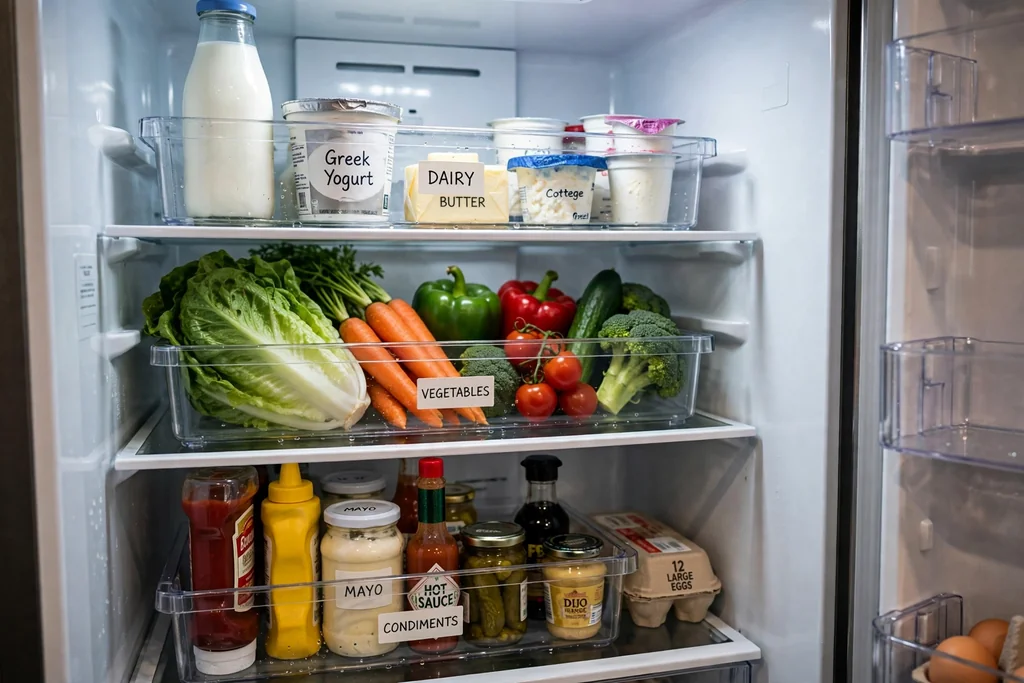
    17. Clear Bins in the Fridge

    Open fridge with clear bins organizing vegetables, dairy, and condiments on shelves.

    Clear bins in the fridge group small items that otherwise drift to the back of a shelf. Use one bin for dairy, one for condiments, and one for cut vegetables, and pull the whole bin out when you need something from the back. Clear sides let you see what is running low before you shop.

    Label bins only if more than one person uses the fridge, since labels help everyone put items back in the right spot. Wipe bins weekly, and keep raw meat in its own sealed container on the lowest shelf, away from ready-to-eat food, following usual food safety guidance.

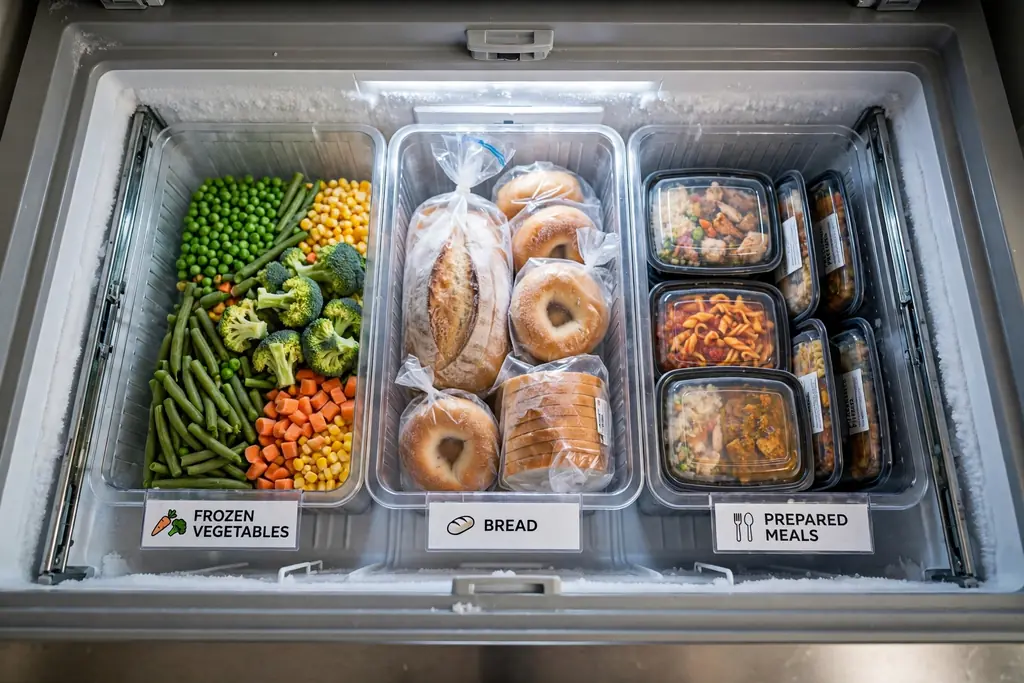
    18. Labelled Bins in the Freezer

    Open freezer drawer with labelled bins holding frozen vegetables, bread, and prepared meals.

    A freezer drawer without bins soon becomes a pile of bags you have to dig through. Labelled bins, one per group such as vegetables, bread, and prepared meals, keep the drawer in rows you can read at a glance. Freeze flat bags upright in a bin like files, so you can pull one out without lifting the whole stack.

    Label each bag with its contents and date before it goes in, and keep a short list on the freezer door of what is inside if your household shops in bulk. Use the oldest items first, and clear out anything past its best date when you restock.

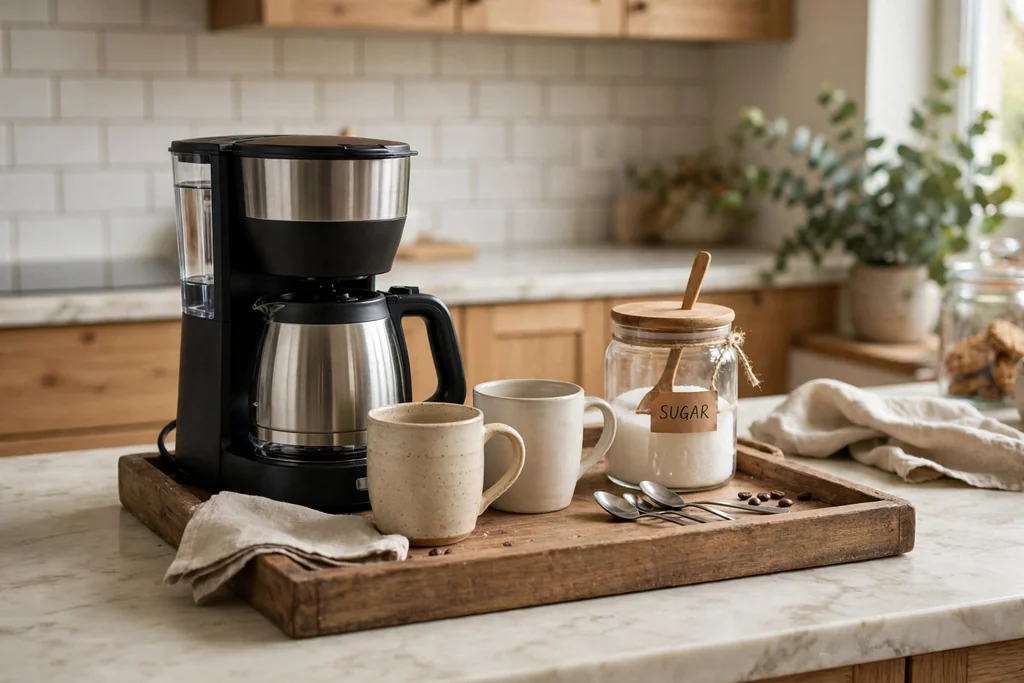
    19. Coffee Station on a Tray

    Kitchen coffee station on a wooden tray with a coffee maker, mugs, sugar jar, and spoons.

    A tray turns a scattered coffee corner into one tidy station. Put the coffee maker, mugs, sugar jar, and spoons on a single tray, so the whole station can move for cleaning and nothing spreads across the counter. Choose a tray with a raised edge, so small items do not slide off when you lift it.

    Keep only the coffee items you use daily on the tray, and store refills and spare filters in a cabinet nearby. If the station sits beside the kettle, leave space for a hot mug to land, and wipe the tray when you refill the sugar jar.

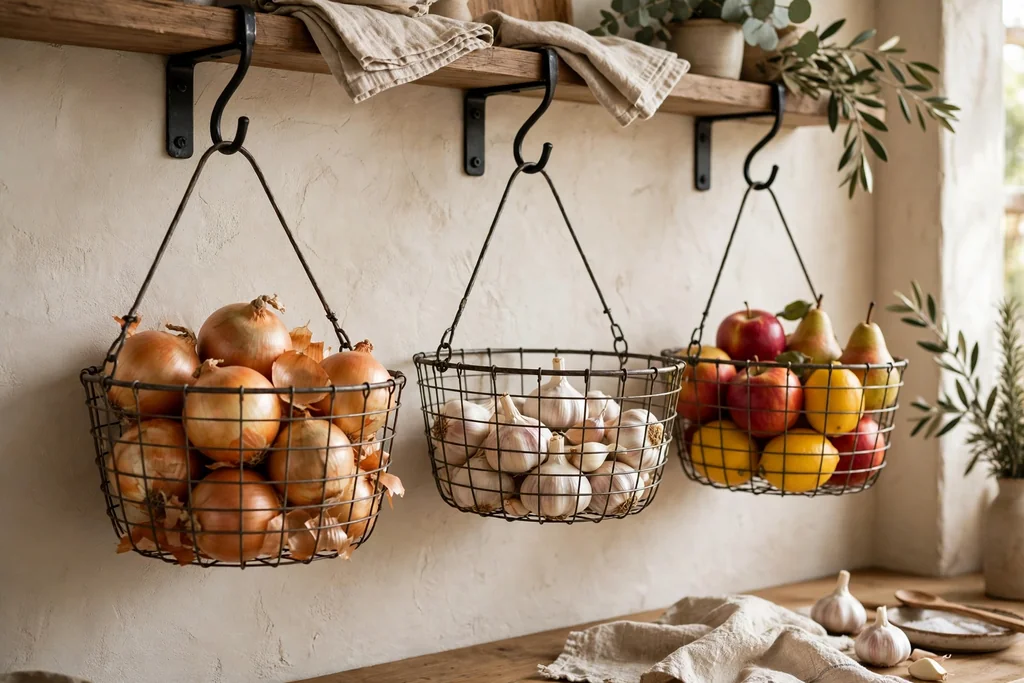
    20. Hanging Baskets for Produce

    Wire baskets hanging on kitchen wall hooks holding onions, garlic, and fruit.

    Wire or woven baskets hung on wall hooks hold onions, garlic, potatoes, and fruit where air can move around them. Airflow matters for onions and garlic, which spoil faster in a closed bag, and a basket keeps them out of a dark cabinet where they are forgotten. Use one basket per type so you can see stock levels at a glance.

    Hang baskets away from the stove and sink, where heat and steam shorten storage life. Line a basket with a cloth if small items slip through the weave, and check contents weekly, removing any soft pieces before they affect the rest. This idea suits kitchens short on pantry shelf space.

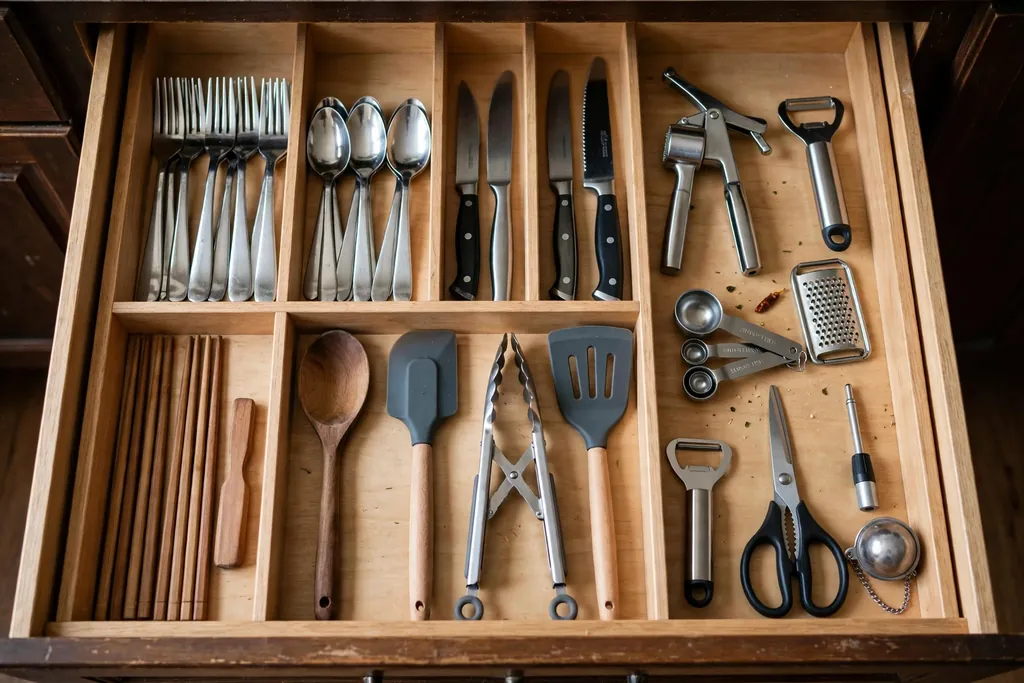
    21. Drawer Dividers for Cutlery and Gadgets

    Open kitchen drawer with wooden dividers organizing cutlery, cooking utensils, and gadgets.

    A drawer without dividers mixes cutlery, peelers, and clips into one tangle. Wooden or bamboo dividers split the drawer into sections for knives and forks, cooking tools, and small gadgets, so each item has a slot and the drawer closes without a rattle. Measure the drawer before buying, since dividers come in fixed widths and expandable versions.

    Put daily cutlery at the front of the drawer and rarely used gadgets at the back. Keep one small section empty for new items, and clear the drawer twice a year, moving anything you have not used in months to a less handy spot or out of the kitchen.

    22. Toe-Kick Drawer for Flat Items

    Shallow toe-kick drawer open under kitchen base cabinets holding baking sheets and placemats.

    The recessed space under base cabinets, called the toe kick, can hold shallow drawers for flat items such as baking sheets, placemats, table linens, and large serving trays. These drawers use space that is otherwise empty, and they keep flat items from piling up in a tall cupboard.

    Toe-kick drawers suit kitchens with a plinth that can be cut cleanly, and they work best for light items you reach for weekly rather than daily. Keep the drawer fronts flush with the plinth so they read as part of the cabinet base. Wipe the drawer bottoms often, since this low spot collects floor dust and cooking splashes.

    23. Over-Door Rack on the Pantry Door

    Over-door pantry rack on an open pantry door holding spice jars, cans, and small packets.

    An over-door rack hangs on the pantry door and adds wire baskets for spice jars, cans, and small packets without drilling. Check that the door still closes flat and that the hooks clear the door frame, and keep the load light, since a heavy rack strains hinges over time. Put the items you grab most often at eye level.

    This is a good fit for renters, since the rack lifts off when you move. Keep tall bottles in the pantry itself, and use the door rack for short jars and packets that fit the basket depth. Tighten the hooks if the rack starts to sway when the door moves.

    24. High Shelf Above the Doorway

    Single high shelf above a kitchen doorway holding large serving platters and baking trays.

    A single high shelf above a kitchen doorway holds large serving platters and baking trays that are too big for standard cabinets. Reserve this shelf for items you need a few times a year, so you are not climbing up daily, and keep a small, stable step stool nearby in a tall cabinet or pantry.

    Fix the shelf into studs or with fixings rated for the load, and add a small lip so platters do not slide off when the door closes. Keep the shelf line straight and flush with the door frame, since a stepped edge makes a low ceiling feel lower.

    25. Magnetic Knife Strip on the Wall

    Magnetic knife strip on a kitchen wall holding several kitchen knives above a counter.

    A magnetic strip frees a drawer and keeps knives visible, dry, and easy to grab. Mount it at a height where the handles are within reach but blades sit clear of small hands, and away from the main splash zone beside the sink. A wood or steel strip suits most kitchens and wipes clean quickly.

    Place the most used chef knife and a paring knife in the middle of the strip, with less used blades toward the ends. Wipe blades dry before returning them, since moisture dulls edges and can mark the strip. If wall space is short, a shorter strip for three knives still beats a crowded drawer.

    26. Countertop Caddy for Daily Tools

    Countertop utensil crock beside a stove holding wooden spoons, spatulas, and a whisk.

    A countertop crock beside the stove holds the tools you reach for every time you cook: wooden spoons, spatulas, a whisk, and tongs. Keeping them upright in one crock frees a drawer and shortens the time spent searching mid-recipe. Choose a crock wide enough that tools do not crowd each other, and heavy enough that it does not tip when you pull one tool out.

    Add a small tray beside the crock for oils and salt, so the daily cooking group sits in one spot. Keep the crock to tools you use weekly, and store single-use gadgets in a drawer, so the counter stays a work surface rather than a display shelf.

    Conclusion

    Easy kitchen storage is not about buying every organizer at once. It is about one clear home for each group you use daily, a way to reach the back of deep cabinets, and one clear counter for prep. Start with the idea that fixes your biggest daily friction, whether that is spices, pans, or pantry bins, and live with it for two weeks before adding the next change. Small, steady changes hold up better than a single big clear-out, because each new spot gets tested in real cooking. For small rooms, the layout and storage advice in these small kitchen remodel ideas and kitchen wall storage ideas pairs well with the ideas above.

    Keep this list handy for your next free hour at home, and refresh your kitchen one shelf, drawer, and bin at a time: a turntable today, a labelled bin this weekend, and a clear counter to cook on tonight.

    FAQs

    Where should I start with kitchen storage if I can only change one thing?

    Start with the spot that slows you down most, such as a spice drawer, a pan cabinet, or a pantry shelf. Pick the one change that fixes it, like a turntable, a drawer insert, or a set of clear bins, and use it for two weeks before buying anything else. One working system teaches you what you actually need, while a trolley full of organizers often just moves clutter into new boxes.

    How do I store spices so I can actually find them?

    Use one system for all your spices, either a drawer insert with labels facing up, a door rack, or a single shelf of matching jars. Group them by use, keep the set near the prep counter, and keep the count to the spices you use in a normal month. Store refills separately in a cabinet, and check dates twice a year.

    What is the best storage for deep kitchen cabinets?

    Bring the contents to you instead of reaching in. A two-tier turntable, a pull-out shelf, or a corner turntable all move the back of the cabinet to the front. Measure the door opening and cabinet depth first, load heavy items low, and group one category per shelf or pull-out, so nothing hides behind taller items.

    How can I keep kitchen counters clear?

    Give every daily item a home that is not the counter, and leave one clear stretch for prep. Small appliances can live in an appliance garage or a cabinet, mugs can hang on hooks, and cooking tools can sit in one crock by the stove. Keep only the items you use daily in view, and return each item to its home after cooking, so the counter resets each evening.

    How do I organize a small kitchen without a remodel?

    Use the space you already have: the inside of cabinet doors, the gap beside the fridge, the toe kick, and the wall above the doorway. A rolling cart, an over-door rack, and shelf risers all add storage without building work, and they move with you if you rent. Measure each spot first, and choose one change per week, so the kitchen stays usable while you improve it.

    How often should I review kitchen storage?

    Review pantry and fridge bins when you shop each week, and do a fuller review twice a year. Pull out anything past its date, move items you never reach for to a less handy spot, and check that labels still match the contents. A short review keeps bins, drawers, and turntables working, and stops a tidy system from slowly filling up again.


  • 22 Chic Rustic Kitchen Ideas to Make Any Room Feel Cozier

    22 Chic Rustic Kitchen Ideas to Make Any Room Feel Cozier

    A chic rustic kitchen pairs rough, natural materials with clean lines and a calm palette, so the room feels warm without feeling cluttered. Think pale plaster walls beside weathered wood, a farmhouse sink under a linen curtain, and warm metal hardware that catches the light. These 22 chic rustic kitchen ideas cover beams, shelves, sinks, counters, lighting, storage, and seating, so you can start with one change or build a full scheme. Pick wood as your main texture, add one warm metal, and keep counters mostly clear. The result is a kitchen that looks collected over time, yet still works hard every day.

    Key Takeaways

    • Start with one main wood tone, such as warm oak or weathered pine, and repeat it in two or three places so the room reads as planned.
    • Pair rough textures with smooth ones: raw wood beside painted cabinets, stone beside linen, and matte black beside warm brass.
    • Keep the palette calm: cream, warm white, soft grey, and one muted accent, such as sage green or dusty blue, used sparingly.
    • Choose one strong rustic feature per zone, such as beams on the ceiling or a stone hearth, and keep the surfaces around it quiet.
    • Use practical rustic pieces, such as open shelves, a pot rail, and woven baskets, so the decor also earns its place in daily cooking.

    1. Reclaimed Wood Ceiling Beams

    Rustic kitchen ceiling with dark reclaimed wood beams above cream cabinets and a wood island.

    Reclaimed wood beams give a kitchen instant rustic character, even before you change anything else. The rough grain and warm tone draw the eye up and add depth to a plain ceiling, and they pair well with white or cream cabinets. Use real reclaimed boards or hollow beam sleeves over existing joists, and check that the fixing suits the ceiling structure before you hang anything heavy.

    Keep the rest of the ceiling plain and the walls pale, so the beams stay the feature. If your ceiling is low, use slimmer beams in a lighter wood tone, or run them only across the cooking zone, so the room still feels open.

    2. Open Shelving With Handmade Pottery

    Open wood shelves in a rustic kitchen holding handmade pottery bowls, plates, and mugs.

    Open shelves turn everyday dishes into decor, and handmade pottery gives the display its rustic warmth. Replace one run of upper cabinets with two or three wood shelves, and stack plates, bowls, and mugs in small groups with space between them. The uneven glazes and shapes of handmade pieces keep the shelves from looking like a shop display.

    Keep one color family across the pottery, such as cream, stone, and soft grey, and leave gaps so each piece can breathe. Dust open shelves during your usual clean, since shelves near cooking gather film faster than closed cabinets.

    3. Farmhouse Apron Front Sink

    Farmhouse kitchen with a white apron front sink, brass faucet, and wood counters.

    A farmhouse apron front sink is the classic center of a chic rustic kitchen. The deep basin handles large pots and baking trays, and the exposed front panel adds a crafted detail to a plain cabinet run. Choose a fireclay or porcelain apron sink for a smooth, easy to clean finish, and check that your cabinet and counter support its weight.

    Pair the sink with a simple bridge faucet in brass or matte black, and keep the counter beside it clear for drying. A wooden dish rack or a folded linen towel on the edge softens the look without adding clutter.

    4. Butcher Block Island Top

    Kitchen island with a thick butcher block wood top, cream cabinets, and woven seat stools.

    A butcher block island top adds warmth to a kitchen full of stone and tile, and it doubles as a generous prep surface. The wood grain brings a natural pattern into the room, and small knife marks over time add to the rustic character rather than spoiling it. Oil the surface regularly with food safe oil, and wipe spills promptly so water does not sit on the wood.

    Pair the island top with painted base cabinets in cream or sage, and add two wooden stools with woven seats. Keep one end of the island clear for serving, so the top works for both cooking and casual meals.

    5. Weathered Wood Range Hood Cover

    Rustic kitchen range with a weathered wood hood cover above white subway tile.

    A weathered wood range hood cover turns a plain extractor into a rustic focal point. Boards in grey brown or warm oak, fitted as a chimney style cover, soften the hard lines of steel and tile around the range. Build the cover around a working hood insert, and leave the venting and clearance exactly as the hood maker specifies.

    Keep the backsplash below plain, such as white subway tile, so the wood cover stands out. If you rent, a freestanding wood shelf above the range gives a hint of the same look without changing the hood.

    6. White Shiplap Accent Wall

    Rustic kitchen wall with white shiplap boards beside open wood shelves and pottery.

    White shiplap on one kitchen wall adds texture without adding color, which suits a chic rustic scheme. The horizontal boards catch light and shadow, and the white keeps a small kitchen bright. Fit the boards on the wall you see most, such as the dining wall or the wall behind open shelves, and paint them in a washable white paint.

    Keep the other walls plain and the trim simple, so the shiplap reads as a feature rather than a pattern on every surface. For more wall ideas that pair with this look, see these kitchen wall decor ideas.

    7. Warm Brass and Copper Hardware

    Cream kitchen cabinets with warm brass knobs and a copper pot on the counter.

    Warm brass and copper hardware is a small change with a large effect in a rustic kitchen. Swap plain cabinet knobs and pulls for aged brass or hammered copper, and repeat the same metal on the faucet and light fittings. The warm tones sit well against wood and cream paint, and they age gracefully with use.

    Keep the hardware style consistent across the room, such as all cup pulls on drawers and all knobs on doors, so the mix of metals stays calm. Wipe brass and copper with a soft cloth, and let the finish darken gently if you prefer a softer, lived in look.

    8. Mason Jar Pendant Lights

    Kitchen island lit by mason jar pendant lights with warm glowing bulbs.

    Mason jar pendant lights add a farmhouse touch above an island or a dining table, with a soft glow that suits evening meals. Hang two or three jars at the same height over a straight island, or one larger jar fitting over a small table, and use warm white bulbs so the light stays gentle. Check that the cord and fitting are rated for the bulb you use.

    Keep the jars clear of steam from the range, and hang them high enough that they do not block the view across the island. If you want a neater look, use jars with a simple metal lid fitting rather than a fussy cage.

    9. Rustic Farm Table in the Kitchen

    Rustic farm table with a thick wood top and wooden chairs in a bright kitchen.

    A rustic farm table in the kitchen gives the room a gathering place that feels older than the rest of the house. A thick wood top on sturdy turned legs suits family meals, homework, and weekend baking, and it pairs well with both painted and wood cabinets. Choose a table that leaves at least three feet of walkway around it, so chairs can pull out without blocking the cooking zone.

    Pair the table with mismatched wooden chairs in the same tone family, and a simple linen runner down the center. Keep the tabletop mostly clear between meals, with just a small vase or a wooden bowl, so it stays ready for use.

    10. Woven Baskets for Produce Storage

    Open kitchen shelves with woven baskets holding produce and folded linens.

    Woven baskets give a rustic kitchen practical storage that looks good on open shelves and counters. Use one basket for onions, one for potatoes, and one for bread or linens, and label the base of each if they look alike. Baskets with handles slide out like drawers, which makes them a good fit for deep shelves and lower cabinets.

    Keep baskets off wet floors and away from direct sink splashes, since constant damp can damage natural fibers. For corner storage that works alongside open baskets, these corner kitchen cabinet ideas show pull-outs and turntables that bring items to you.

    11. Cast Iron Pot Rail

    Kitchen wall with a black cast iron pot rail holding hanging pans above a counter.

    A cast iron pot rail on a kitchen wall puts your most used pans within reach and adds a workshop feel to the room. Fix a sturdy rail with S hooks above a counter or beside the range, with enough clearance below for the longest pan to hang without hitting the counter. Hang the heaviest pan nearest a wall bracket, where the rail is strongest.

    Keep the rail to pans you use every week, and store rarely used pieces in a cabinet, so the wall stays calm rather than crowded. Wipe the rail during your usual clean, since steam and grease settle on metal near the stove.

    12. Terracotta Tile Backsplash

    Rustic kitchen backsplash in warm terracotta tiles above cream cabinets and wood counters.

    A terracotta tile backsplash brings warm, earthy color to a rustic kitchen without needing a bold paint. The handmade look tiles vary slightly in tone, which gives the wall depth, and they pair well with cream cabinets and wood counters. Seal the tiles and grout so cooking splashes wipe off easily, and choose a grout color close to the tile.

    Keep the rest of the cooking wall plain, so the terracotta stays the focus, and repeat the warm tone once more in a clay pot or a wooden bowl nearby. If you rent, terracotta look peel tiles give a similar warmth without changing the wall.

    13. Linen Curtains on Glass Front Cabinets

    Glass front kitchen cabinets with pale linen curtains inside the doors.

    Linen curtains inside glass front cabinets soften a kitchen and hide everyday clutter at the same time. Hang a short length of natural linen on a thin rod inside each glass door, so the dishes behind show as soft shapes rather than sharp detail. The fabric adds a cottage feel, and it is easy to wash and swap by season.

    Choose a pale, undyed linen, and keep the curtain short enough that it does not catch in the door. If you already have linen curtains, skip other fabric details nearby, and use wood or metal elsewhere instead.

    14. Wooden Ladder Towel Rail

    Wooden ladder towel rail leaning against a rustic kitchen wall holding tea towels.

    A wooden ladder towel rail leans against the wall and holds tea towels, aprons, and a small herb bunch without any drilling. Choose a ladder in the same wood tone as your shelves or island top, and set it beside the sink or the range where towels are most useful. The leaning shape adds height to a plain wall and suits narrow gaps between cabinets.

    Keep the ladder to two or three towels, so it reads as decor rather than a drying rack, and wipe the rungs often since steam reaches them. If floor space is tight, a wall mounted ladder rail gives the same look on a smaller footprint.

    15. Stone Hearth Around the Range

    Rustic kitchen range wall with a rough stone hearth and a wood shelf above.

    A stone hearth around the range gives a rustic kitchen a fireplace feel, even in a modern house. Rough stone or brick slips on the cooking wall, from counter to hood, add texture and a sense of age, and they cope well with heat and splashes. Use stone rated for kitchen use, and seal it so grease wipes off rather than soaking in.

    Keep the cabinets and counters on either side plain, so the stone stays the feature, and add a wood shelf above the hearth for a plant or a small clock. If full stone is too much work, a stone panel behind the range alone gives a similar focus.

    16. Clay Pot Herb Garden on the Windowsill

    Kitchen windowsill with clay pots holding green herbs beside a bright window.

    A clay pot herb garden on the windowsill links the kitchen to what you cook, and the terracotta pots add warm color beside a sink or a prep counter. Plant basil, rosemary, thyme, and mint in separate pots, so each herb gets the water it needs, and set them on a tray to catch drips. Good daylight is the key, so choose the brightest sill in the room.

    Snip herbs from the top of each plant, so the plants stay bushy, and rotate the pots weekly so growth stays even. Keep the pots clear of the faucet splash zone, and wipe the tray during your usual clean.

    17. Sliding Barn Door Pantry

    Rustic kitchen pantry with a sliding wood barn door on a black metal rail.

    A sliding barn door pantry hides food storage behind a rustic feature, and it saves the swing space a normal door needs. Fit a wood plank door on a black metal rail across a pantry opening or a shallow closet, and choose a door tone that matches your shelves or island top. The rail and rollers are part of the look, so keep them clean and simple.

    Check that the door has clear wall space to slide into, and that it does not block a light switch or a socket when open. If a full barn door is too large, a half height stable door gives a similar rustic feel on a smaller opening.

    18. Cutting Board Display Wall

    Kitchen wall display of wood cutting boards in pale beech, oak, and dark walnut.

    A cutting board display wall uses boards you already own as warm wood decor, sorted by size and shape on hooks or a rail. Hang boards of different woods, such as pale beech, mid oak, and dark walnut, with the largest board near the center and smaller boards around it. The wood tones warm a kitchen with white cabinets or pale tiles, and the boards stay dry and visible between uses.

    Use hooks that grip the hanging hole, or a small loop of cord through it, and let boards dry fully before hanging them flat against the wall. Keep the display near the prep counter, so a board is easy to lift down when you start cooking, and pair it with the wall ideas in these kitchen wall decor ideas.

    19. Lantern Centerpiece on the Island

    Kitchen island centerpiece with black metal lanterns on a wood tray with a small plant.

    A lantern centerpiece on the island adds a soft, candlelit glow that suits a rustic kitchen in the evening. Choose one large lantern, or a pair of smaller ones, in black metal or aged wood, and set them on a wooden tray with a small plant or a few pinecones beside them. Battery candles give the same glow without an open flame near cooking.

    Keep the lanterns at one end of the island, so the main prep area stays clear, and move them to the table for dinner when you want the glow closer to guests. Wipe the glass during your usual clean, since kitchen film dulls the light over time.

    20. Checked Textiles on Chairs and Table

    Rustic kitchen table with a sage checked table runner and matching seat cushions.

    Checked textiles, such as a gingham table runner and matching seat cushions, add a country feel to a rustic kitchen without changing any fixtures. Choose one check in a muted color, such as sage, dusty blue, or warm red, and repeat it on the runner and two or three cushions only. The repeat ties the dining zone to the rest of the room.

    Keep the rest of the table plain, with simple plates and wooden boards, so the check stays the pattern in the room. Wash the textiles regularly, since kitchen fabrics gather cooking smells faster than fabrics elsewhere in the house.

    21. Galvanized Metal Bins and Trays

    Rustic kitchen counter with galvanized metal bins and a tray holding oil bottles.

    Galvanized metal bins and trays add a farmhouse workshop note to a rustic kitchen, and they are useful for storage at the same time. Use a galvanized bin for utensils beside the range, a tray for oils and vinegars near the prep counter, and a larger bin for firewood or kindling if you have a stove. The matte grey metal sits calmly beside wood and cream paint.

    Keep galvanized pieces to two or three spots, so the metal does not take over the room, and dry them after washing to avoid water marks. If you prefer a softer look, pair one galvanized piece with a woven basket beside it.

    22. Breakfast Nook With a Built In Bench

    Cozy kitchen breakfast nook with a built in wood bench, thick cushions, and a wood table.

    A breakfast nook with a built in bench turns an awkward corner into the coziest seat in the house. Fit an L shaped bench into the corner, add thick cushions in a washable fabric, and pair it with a round or rectangular wood table and one or two chairs on the open side. The bench seats more people than chairs alone, and the base can hold storage for linens or rarely used pans.

    Keep the nook wall simple, with one framed print or a small shelf, so the bench and cushions stay the focus. Add a pendant light above the table, at a height that lights the table without blocking the view across the room.

    Conclusion

    A chic rustic kitchen works best when rough materials meet calm choices: one main wood tone, one warm metal, a quiet palette, and one strong feature per zone. Start with the change that will show up most in your room, such as beams, a farmhouse sink, or open shelves, then add one texture and one practical piece at a time. Save the ideas that fit your space, light, and budget, and build the scheme in stages so each step still feels like a finished room. The result is a kitchen that feels warm and collected, yet still easy to cook, clean, and gather in every day.

    FAQs

    What makes a kitchen chic rustic rather than just rustic?

    Chic rustic pairs rough, natural materials with clean lines and a calm palette. Rustic on its own can mean heavy wood, dark tones, and many patterns at once, while the chic version keeps one main wood tone, smooth painted cabinets, and quiet surfaces around each feature. The balance is the key: a reclaimed beam beside a plain white wall, or a farmhouse sink beside a simple brass faucet, reads as polished rather than rough.

    How do I keep a rustic kitchen from looking dark?

    Keep walls and ceilings pale, such as warm white or cream, and use wood in mid tones rather than dark stain. Add light through open shelves, a mirror or glass front cabinets, and warm white bulbs under cabinets. Limit dark wood to one feature, such as the island top or the beams, and keep floors in a pale or mid tone so the room stays bright.

    What colors work best in a chic rustic kitchen?

    Warm white, cream, soft grey, and pale sage form the core palette, with wood tones adding warmth and one muted accent, such as dusty blue or warm red, used sparingly. Start with cream cabinets and wood counters, then repeat the accent in textiles and one or two accessories. Keep deeper tones for small items, such as a checked runner or a clay pot, so the room does not feel heavy.

    Can I get a rustic look in a small kitchen?

    Yes, a rustic look suits a small kitchen well, because wood, linen, and warm metal add warmth without needing large features. Use one rustic detail, such as open shelves or a pot rail, rather than beams and stone together, and keep counters mostly clear. A ladder towel rail, woven baskets, and a checked runner give the feel in a small space without crowding the room.

    How do I care for wood surfaces in a rustic kitchen?

    Oil butcher block tops regularly with food safe oil, and wipe spills promptly so water does not sit on the wood. Dust beams and shelves during your usual clean, and keep wood clear of direct sink splashes and stove steam where you can. Sand small marks on a butcher block top lightly and re-oil, since the wood is meant to age and gain character with use.

    What lighting suits a chic rustic kitchen?

    Warm white light suits a rustic kitchen best, through a mix of pendant lights over the island, under cabinet strips for prep work, and a lantern or candle glow for evenings. Choose fittings in one warm metal, such as aged brass or matte black, and hang pendants high enough to keep the view across the island clear. Layer the lights, so you can use bright task light for cooking and softer light for meals.


  • 18 Kitchen Countertop Decor Ideas to Make Every Corner Count

    18 Kitchen Countertop Decor Ideas to Make Every Corner Count

    A kitchen counter has to hold daily cooking and still look cared for, and that balance is easier than it seems. The best countertop decor earns its place: a board you cook with, herbs you snip, jars you open every day, or a tray that keeps small items together. These 18 kitchen countertop decor ideas cover corners, sink runs, coffee spots, and clear stretches, so you can style one area or work through the whole room. Start by clearing each counter fully, then add back only what you use or truly like to look at. Leave at least one stretch of counter empty for prep, and group the rest in small clusters with space between them.

    Key Takeaways

    • Group decor in small clusters with clear space between them, so counters read as styled rather than crowded.
    • Choose items that also work: boards, herbs, canisters, jars, and utensils earn counter space more easily than pure ornaments.
    • Repeat one or two materials, such as wood, ceramic, or brass, so mixed items still look planned.
    • Keep the sink and stove runs light, and put taller or fuller displays on corners and quiet stretches instead.
    • Leave one clear stretch of counter empty for chopping, mixing, and serving, and protect it as prep space.

    1. Leaning Wooden Cutting Boards

    Wooden cutting boards in pale, mid, and dark tones leaned against a kitchen backsplash.

    Lean two or three wooden cutting boards against the backsplash in a quiet corner, with the largest board at the back and smaller boards in front. Mixed woods, such as pale beech, mid oak, and dark walnut, add warmth to white or pale tile, and the boards stay visible and dry between uses. This is one of the easiest countertop displays, since it uses boards you already own.

    Keep the boards clear of the stove splash zone, and wipe them after use so food marks do not stain the wood. If a board has deep cuts that are hard to clean, retire it from cooking and use it only as a display piece, or replace it. A small plant or a salt cellar in front of the boards finishes the corner without hiding the wood.

    2. Tiered Tray Vignette

    Two tier tray on a kitchen counter holding a small plant, a candle, and small jars.

    A two tier tray turns a small collection into one tidy display on a counter corner or beside the stove. Put a small plant or a candle on the top tier, and small jars, a salt cellar, or a tiny bowl on the lower tier, keeping the tallest item in the center so the tray reads as balanced. A tray in wood, metal, or ceramic can repeat a finish already in the room.

    Keep the tray to one theme, such as herbs and jars, or coffee extras, so it does not become a catch-all. Wipe the tray during a normal kitchen clean, since open trays near cooking gather film. If the tray starts to collect mail or keys, move those items elsewhere and return the tray to its display job.

    3. Matching Ceramic Canisters

    Matching white ceramic canisters with lids lined up on a kitchen counter.

    A set of matching ceramic canisters gives a counter a calm, planned look while holding flour, sugar, coffee, or tea within reach. Choose three canisters in the same shape and color, with lids that seal well, and line them up near the prep area or the coffee corner. Labels on the front help in a busy household, especially when two canisters hold similar looking contents.

    Keep the canisters away from direct stove steam, and wipe the lids after cooking so they stay clean. If counter space is tight, use two canisters only and store the rest of the set in a cabinet. A small wooden spoon laid across the lids adds a soft, lived in note.

    4. Potted Herb Row

    Row of potted basil, mint, and parsley in terracotta pots on a kitchen counter tray.

    A row of small potted herbs brings living green to the counter and puts fresh flavor within reach while you cook. Use three or four pots in the same material, such as plain terracotta or white ceramic, and choose herbs that suit your light, such as basil, mint, chives, or parsley. Set the pots on a narrow tray to catch water and protect the counter.

    Snip herbs as you need them, and rotate the pots weekly so growth stays even. Keep the row to one short stretch of counter, so it does not spread into prep space. If your counter gets little daylight, move the pots to a bright window for part of the day, or choose one hardy herb rather than a full row.

    5. Wooden Bowl of Citrus

    Wooden bowl filled with oranges and lemons on a bright kitchen counter.

    A wide wooden bowl filled with lemons, oranges, or limes adds natural color to a counter and keeps fruit where the household will actually eat it. The warm wood pairs well with stone, wood, and white counters, and the round fruit softens the straight lines of cabinets and appliances. Choose fruit in one color family for a calm look, or mix citrus for a brighter display.

    Refill the bowl as fruit is eaten, and remove any piece that starts to soften, so the display stays fresh. Keep the bowl on a corner or a side counter, clear of the sink splash zone, and wipe the bowl rim during a normal clean. For a quieter version, use a small bowl with just three or four lemons.

    6. Coffee Corner Station

    Kitchen coffee corner with a coffee machine, stacked mugs, and jars on a wooden tray.

    A coffee corner gathers the machine, mugs, and supplies on one tray or one short stretch of counter, so morning coffee stays tidy instead of spreading across the room. Put the machine at the back, mugs on hooks or in a small stack at one side, and sugar, spoons, and filters in a small jar or cup. A tray under the group catches drips and marks the corner as one zone.

    Keep the coffee corner near a socket and clear of the sink, and wipe the tray weekly since coffee splashes stain fast. If the household drinks tea as well, add one small tea tin to the same tray rather than starting a second station. Hang daily mugs on a small rail above the counter if the tray feels crowded.

    7. Cookbook on a Stand

    Open cookbook on a wooden stand on a kitchen counter beside a small plant.

    An open cookbook on a wooden or metal stand gives a counter a personal, lived in feel and keeps a favorite recipe in view while you cook. Choose a book with a cover that suits the room, open it to a recipe you use often, and set the stand on a side counter where it will not block prep space. A stand with a lip holds the pages open and keeps the book clear of spills.

    Keep the stand clear of the stove and sink splash zones, so steam and water do not damage the pages. If the book is a treasured copy, display a sturdy everyday cookbook instead and keep the treasured one on a shelf. Swap the open page by season, such as soups in cold months and salads in summer.

    8. Marble Slab With Oil and Vinegar

    Marble slab on a kitchen counter holding olive oil and vinegar bottles and a salt dish.

    A marble slab under oil and vinegar bottles turns everyday cooking bottles into a neat display and protects the counter from drips. Choose a slab large enough for two or three tall bottles plus a small salt dish, and set it near the stove or the prep area where the bottles are used most. The pale stone suits wood, brass, and black counters alike.

    Wipe the slab after cooking, since oil drips show on pale stone, and keep the bottles to the ones you use weekly so the slab does not fill up. If marble feels too heavy for your counter, a wooden board or a ceramic tray gives the same corralled look. Refill bottles over the sink to catch drips before they reach the slab.

    9. Glass Jars of Pasta and Grains

    Clear glass jars filled with pasta, rice, oats, and lentils on a kitchen counter.

    Clear glass jars filled with pasta, rice, oats, or lentils add color and shape to a counter while keeping dry goods visible and easy to grab. Use jars of the same style with tight lids, and fill them only as full as the household will use within a few weeks, so contents stay fresh. Line the jars along a backsplash or group three on a small tray.

    Label each jar on the base or the lid if two grains look alike, and keep the jars clear of direct sun, which can fade contents and warm the glass. If counter space is tight, keep one or two jars out and store the rest in a cabinet. A small scoop tied to one jar keeps serving tidy.

    10. Small Vase of Fresh Flowers

    Small glass vase with fresh white and green flowers on a kitchen counter corner.

    A small vase of fresh flowers or a few eucalyptus stems softens a kitchen counter in a way that no hard decor can match. Choose a vase that suits the room, such as clear glass, white ceramic, or a small bud vase, and keep the stems short enough that the arrangement does not block the view across the counter. One or two stems often look better than a large bouquet in a busy kitchen.

    Change the water every few days, and trim the stems when you refresh the vase, so flowers last longer. Keep the vase on a side counter or a corner, clear of the stove heat and the sink splash zone. If fresh flowers feel like too much upkeep, a small potted plant gives a similar soft note with less care.

    11. Lantern With a Candle

    Glass and metal lantern with a lit candle on a kitchen counter in warm evening light.
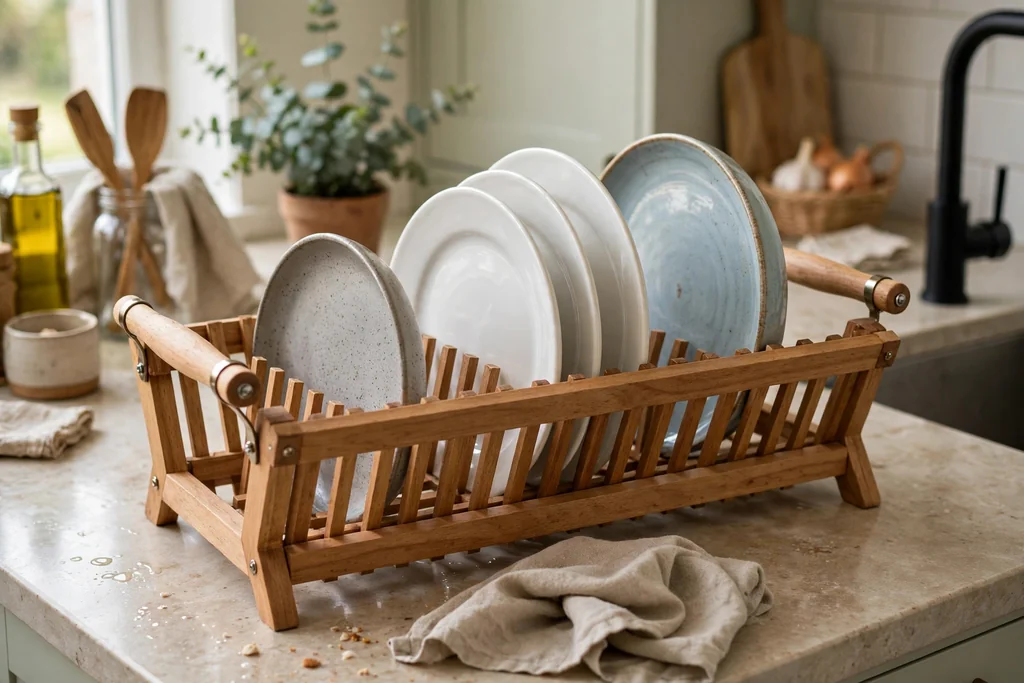
    A glass lantern with a candle inside adds a warm glow to a kitchen counter in the evening, when overhead lights can feel harsh. Choose a lantern in metal or wood with clear glass panels, and set it on a corner counter or beside the dining end of the kitchen, where it can be enjoyed from the table. A battery candle gives the same glow with no flame near curtains or paper.

    Keep a real candle lantern clear of the stove, tea towels, and anything that could catch, and never leave it burning unattended. Wipe the glass panels during a normal clean, since kitchen air leaves a light film on glass. If the counter is small, use one slim lantern rather than a group, so the display stays calm.

    12. Sink Side Tray for Soap and Brush

    Ceramic tray beside a kitchen sink holding a soap dispenser, dish brush, and sponge.

    A small tray beside the sink corrals the soap dispenser, a dish brush, and a sponge into one tidy group, instead of letting them spread along the backsplash. Choose a tray in ceramic, stone, or sealed wood with a raised edge, so drips stay on the tray and wipe off in one move. A tray that matches the soap dispenser looks planned, even in a busy sink run.

    Keep the tray to daily items only, and store spare bottles under the sink, so the group stays small. Empty and wipe the tray weekly, since standing water can mark the surface below. For more ways to style the sink run, these above kitchen sink ideas cover shelves, rails, and window treatments that pair with a tidy counter.

    13. Linen Lined Bread Basket

    Wicker bread basket lined with a linen cloth holding a loaf of bread on a counter.

    A bread basket lined with a linen cloth gives a counter a warm, bakery feel and keeps bread where the household can reach it at meals. Choose a basket in wicker, wood, or woven seagrass, and fold a clean cloth inside so the bread sits on fabric rather than bare weave. Set the basket on a side counter or near the dining end of the kitchen, where it can be carried to the table.

    Shake the cloth out after use, and wash it with the regular laundry, so crumbs do not build up. Keep the basket clear of the sink splash zone, and store spare loaves in a cabinet so the basket holds only the loaf in use. A small bread knife laid beside the basket completes the display.

    14. Spice Jars on a Riser

    Small wooden riser on a kitchen counter holding matching labeled spice jars.

    A small riser or stepped shelf lifts spice jars above the counter line, so labels stay readable and the group reads as one display. Use matching small jars with tight lids, and arrange them in one or two rows on the riser, with daily spices at the front and less used jars at the back. A wood or metal riser suits most counters and keeps jars off a damp surface.

    Keep the riser near the stove or prep area, but clear of direct steam, which can dull labels and spoil spices faster. Limit the riser to the spices you use weekly, and store the rest in a cabinet, so the display stays useful rather than crowded. Wipe the jars after cooking, since spice jars near the stove gather film.

    15. Cake Stand for Bakes and Fruit

    Cake stand on a kitchen counter holding a frosted cake under a glass dome.

    A cake stand raises a bake, a pile of muffins, or a small group of fruit above the counter, so the display feels special without taking much space. Choose a stand in glass, ceramic, or wood with a foot that suits the room, and set it on a corner counter or near the dining end of the kitchen, where guests can see it. A dome cover keeps bakes fresh and dust free between servings.

    Keep the stand to one item at a time, such as a cake or a bowl of fruit, so it does not become a second storage spot. Wash the plate after each use, and store the stand in a cabinet when it is empty, so the counter stays clear. For a quieter version, use a low wooden pedestal instead of a tall stand.

    16. Leaning Framed Print

    Framed botanical print leaned against a kitchen backsplash beside a small plant.

    A framed print leaned against the backsplash adds art to a counter without a nail or a shelf, and it can be swapped by season in seconds. Choose a print in a simple frame, such as a food market scene, a botanical drawing, or a plain landscape, and lean it on a side counter or a corner where it will not block prep space. A frame with glass or acrylic over the print wipes clean after cooking.

    Keep the print clear of the stove and sink splash zones, so steam does not warp the paper over time. Pair it with one small item in front, such as a salt cellar or a tiny plant, so the corner feels finished. For more wall and leaning art ideas, these kitchen wall decor ideas show gallery walls, ledges, and prints that work with counter displays.

    17. Crock of Everyday Utensils

    Ceramic crock on a kitchen counter holding wooden spoons, spatulas, and a whisk.

    A sturdy crock holding wooden spoons, spatulas, and whisks keeps daily tools within reach and adds a warm, working feel to a counter. Choose a crock in ceramic, stoneware, or copper that is tall enough to hold long tools without tipping, and set it beside the stove where the tools are used most. Keep the crock to tools you use weekly, so it does not fill with gadgets that belong in a drawer.

    Wipe the crock rim during a normal clean, and wash tools before returning them, so the group stays fresh. If the crock feels crowded, split the tools into two smaller crocks, one for cooking and one for baking, and keep the second on a side counter. A crock in a finish that repeats the tap or handles ties the display to the room.

    18. One Sculptural Object on a Clear Stretch

    Single stone bowl centered on a clear stretch of kitchen counter with empty space around it.

    A single sculptural object, such as a stone bowl, a ceramic vase, or a carved wooden piece, can carry a whole stretch of counter if the space around it stays clear. Set the object off center on a quiet run, with at least a foot of empty counter on each side, so the eye rests on it instead of sliding past a crowded row. This idea suits a counter that already holds plenty of daily items elsewhere in the room.

    Choose an object in a material already used in the kitchen, such as wood, stone, or ceramic, so it feels part of the room rather than a random ornament. Dust it during a normal clean, and resist adding small items beside it, since the clear space is what makes this idea work. If the object starts to collect keys or mail, move it to a shelf and return the counter to prep use.

    Conclusion

    A well styled kitchen counter is less about buying more decor and more about giving each item a clear job and a clear place. Start with one corner, such as the cutting boards, the herb row, or the coffee station, and build outward in small clusters, leaving prep space clear as you go. Repeat one or two materials, keep the sink and stove runs light, and let one quiet stretch stay empty. Save the ideas that fit your counter length, light, and cooking habits, and restyle in stages, so each change still leaves room to cook.

    FAQs

    How do I decorate kitchen counters without losing prep space?

    Clear each counter fully, then add decor back in small clusters on corners and quiet stretches only. Keep one stretch of counter, ideally near the stove or sink, completely clear for chopping and mixing. Use trays and risers to group small items, so a cluster takes less room than the same items spread out, and move any display that starts to block daily cooking.

    What should I put on kitchen counters for everyday use?

    Put out only what you use weekly: cutting boards, a utensil crock, canisters, spice jars, herbs, and a fruit bowl are strong everyday choices. These items look good and save cabinet trips, which is why they earn counter space more easily than pure ornaments. Keep spares and rarely used gadgets in cabinets, and keep the sink and stove runs to daily items only.

    How many items should go on a kitchen counter?

    Aim for one small cluster per counter run, with three to five items in each cluster and clear space between clusters. A long counter can hold two clusters, such as a coffee corner and a herb row, if a clear prep stretch remains between them. If a counter looks crowded from the doorway, remove one item from each cluster before adding anything new.

    How do I keep countertop decor clean in a busy kitchen?

    Choose wipeable materials near the stove and sink, such as ceramic, glass, sealed wood, and metal, and keep paper, raw wood, and loose fabric on quieter stretches. Wipe trays, jars, and canister lids during a normal kitchen clean, since cooking film settles on open displays fast. Keep displays clear of direct steam and splashes where possible, and wash cloth liners and vase water on a regular cycle.

    What is the best way to style a small kitchen counter?

    On a small counter, use one cluster only, such as leaning boards plus a small plant, or a tray with soap and a candle, and leave the rest clear. Choose vertical displays, such as a utensil crock or a tiered tray, which use less counter depth than a wide row of jars. Hang mugs on a rail and move spare canisters to a cabinet, so the small counter keeps its prep space.

    Can I mix wood, ceramic, and metal on kitchen counters?

    Yes, mixing wood, ceramic, and metal works well if one material leads and the others appear in small amounts. For example, use wood boards and a wood tray as the main material, ceramic canisters as the second, and one brass or black metal accent, such as a lantern or a crock. Repeat each material at least twice across the room, so the mix reads as planned rather than random.


  • 31 Open Shelving Pantry Kitchen Ideas for Homes of Every Size

    31 Open Shelving Pantry Kitchen Ideas for Homes of Every Size

    An open shelving pantry puts food where you can see it, which makes cooking faster and shopping easier. No more digging behind closed doors for the rice or buying a third jar of cumin because the first two were hidden. These 31 open shelving pantry kitchen ideas cover full pantry walls, walk-in pantries, corners, narrow gaps, small kitchens, and large family kitchens, so you can find a layout that fits your space. Start with the food you reach for daily, give it one clear shelf home, and keep closed storage nearby for the items that look better behind a door. For wider wall storage planning, these kitchen wall storage ideas pair well with the pantry layouts below.

    Key Takeaways

    • Start with daily food first: give everyday items one clear, reachable shelf before you style higher or deeper shelves.
    • Keep open shelves shallow enough to see every item, and store only one row deep where possible so nothing hides behind another jar.
    • Group food by use, such as breakfast, baking, cooking, and snacks, rather than by size or color alone.
    • Use matching jars and baskets for loose or mixed items, and leave one gap on each shelf so the pantry reads as calm, not crowded.
    • Fix heavy shelf runs into studs or with fixings rated for the load, and keep the heaviest jars low.

    1. Everyday Dish and Pantry Shelves Beside the Sink

    Open wood shelves beside a kitchen sink holding plates, bowls, and pantry jars.

    Put a short run of open shelves beside the sink for the plates, bowls, and pantry staples you use at every meal. This spot works because washing up, putting away, and cooking all happen within a few steps. Choose shelves deep enough for dinner plates, and keep the lowest shelf at a height you can reach without a step stool.

    Group plates in one stack, bowls in another, and daily jars in a single row at the end. Keep heavy stacks low, and leave space at each end so you can pull one item out without knocking its neighbors over. If the sink splashes, keep paper goods and open boxes off the lowest shelf.

    2. Floor to Ceiling Pantry Wall

    Floor to ceiling kitchen pantry wall with wood shelves holding jars, dishes, and baskets.

    A floor to ceiling pantry wall turns one blank kitchen wall into the main food store for the whole household. Paint the shelves the same color as nearby cabinets for a fitted look, or use natural wood for contrast against painted walls. Put heavy items, such as large flour bins and bulk packs, on the lowest shelves, daily food at middle height, and light items, such as baskets and spare linens, up high.

    This layout suits a wall beside the fridge or at the end of a galley kitchen, where a full wall unit will not block a walkway. Anchor the unit firmly, check that cabinet doors and drawers still open fully, and leave one shelf partly empty so a big shop has somewhere to go.

    3. Walk-In Pantry With Open Shelves on Three Walls

    Walk-in pantry with open shelves on three walls holding grouped food jars and baskets.

    A walk-in pantry with open shelves on three walls gives every food group its own zone without a single deep cabinet. Use one wall for breakfast and snacks, one for cooking staples, and one for baking and bulk items, so anyone in the household can find what they need. Keep the center clear for a step stool and a basket for items on their way back to the kitchen.

    Label each shelf run at eye level, and keep the most used wall nearest the door. This layout suits a spare closet or a small room beside the kitchen best, since it needs clear floor space to step inside and turn around. A single light inside the pantry matters more than decor here, because a dark corner hides food just as well as a closed door.

    4. Labeled Glass Jars on One Shelf Run

    Kitchen shelf run of labeled glass jars holding flour, rice, oats, and pasta.

    One shelf run of labeled glass jars turns loose staples into a pantry you can read at a glance. Decant flour, sugar, rice, oats, and pasta into jars of one or two sizes, and label each jar on the front with its name and date. Clear glass lets you see stock levels, so you know what needs refilling before you write a shopping list.

    Keep jars of the same size together, and put the jars you use most at eye level. Wash and dry jars fully before refilling, and keep a scoop in the jars you use daily. If glass feels risky in a busy family kitchen, use sturdy clear containers with the same clean shape instead.

    5. Wood Shelves With Woven Baskets

    Wood kitchen shelves with woven baskets holding snack bars and tea boxes.

    Wood shelves paired with woven baskets hide the mixed, small, or oddly shaped items that look untidy on open shelves. Use one basket per job, such as snack bars, sauce packets, or tea boxes, and set them on shelves where they are easy to reach. Keep baskets off damp surfaces and away from direct sink spray, since constant damp can damage natural fibers.

    Label the front of each basket if they look alike, and empty them once a month to return only what you actually use. Rolled linen napkins or a small plant on top of one basket adds a warm finish without taking food space.

    6. Corner Pantry Shelves in an L Shape

    L shaped corner pantry shelves in a kitchen holding jars and small baskets.

    L shaped corner shelves use the kitchen corner that often holds nothing but dust. Two or three shelves running around the corner can hold jars, small baskets, and everyday staples, freeing the main counter for prep. Choose shelves sized to the corner so they do not stick out past the counter edge below.

    Keep corner shelves light, since reaching into a deep corner for a heavy item is awkward. Put daily items near the front edge and lighter, less used items toward the back, and leave the lowest corner shelf clear if it sits above a small appliance. Corner shelves work best as a small addition to a pantry wall, not as the main food store.

    7. Narrow Pantry Shelves Beside the Fridge

    Narrow open pantry shelves beside a fridge holding oils, sauces, and spice jars.

    The narrow gap beside the fridge, the oven housing, or a tall cabinet can hold slim open shelves for oils, sauces, spices, and cans. Because the shelves are shallow, you can see every item without reaching to the back of a deep cupboard. Measure the gap carefully, including skirting boards and door handles, before you fit the shelves.

    Group items by use, such as cooking oils together and baking items together, and put heavy jars low. A shallow shelf also helps in a galley kitchen, where every centimeter of wall storage counts. Keep the shelf clear of the fridge door swing so bottles do not get knocked when the door opens.

    8. One Short Shelf Run for a Small Kitchen

    Short run of three open shelves in a small kitchen holding daily pantry staples.

    A single short run of two or three shelves can carry a whole small kitchen pantry if you choose the items with care. Pick the ten to fifteen staples you actually cook with, and give the rest of your food a home in a cabinet or a basket elsewhere. This restraint is the point: a short run stays neat because it cannot hold everything.

    Place the run near the prep counter but clear of steam from pots and the kettle. Use matching jars for loose items, and leave one gap on each shelf so the run reads as planned. If the run fills up, move the least used item out rather than adding a fourth crowded shelf.

    9. Open Shelves Above, Closed Cabinets Below

    Open kitchen shelves above closed cabinets holding dishes and pantry jars.

    Open shelves above and closed cabinets below give you the best of both pantry styles. Daily dishes, jars, and pretty staples live on the open shelves where they are easy to grab, while cleaning supplies, oddly shaped packs, and spare stock hide behind the cabinet doors below. The closed base also anchors the wall visually, so the open shelves do not look like they are floating.

    Keep the open run short, usually two or three shelves, so the display stays easy to manage and dust. Match the shelf finish to the cabinet color, or use natural wood for contrast, and keep the counter between them clear except for one or two daily items.

    10. Bright White Shelves for a Small Dark Kitchen

    Bright white open pantry shelves in a small kitchen holding white dishes and clear jars.

    White open shelves keep a small or dark kitchen feeling light, even when they hold a full pantry. The white reflects light from the window and ceiling, and it makes jar labels and dish colors easy to read. Paint the shelves and brackets the same white as the walls for a clean, built-in look.

    Keep the shelf styling simple: white dishes, clear jars, and one wood basket are enough. Avoid dark baskets or heavy rows of colored packs on white shelves, since they undo the brightness the white was meant to give. Wipe white shelves often, since kitchen grease settles on open surfaces faster than in closed cabinets.

    11. Warm Dark Wood Shelves in a Rustic Kitchen

    Dark wood pantry shelves in a rustic kitchen holding jars, white dishes, and baskets.

    Dark wood shelves bring warmth to a rustic kitchen and suit stone counters, cream cabinets, and cast iron details. The deep tone pairs well with clear jars, white dishes, and woven baskets, and it softens a room full of tile and steel. Choose a sealed finish made for kitchen humidity, and wipe spills promptly so the surface lasts.

    Keep the brackets simple, such as matte black metal, so the wood stays the focus. If the kitchen is small or dim, use dark wood for one shelf run only, and keep the other walls light so the room does not feel closed in.

    12. Black Metal and Wood Shelves for an Industrial Look

    Black metal and wood pantry shelves in a kitchen holding jars and cans.

    Black metal frames with wood boards give a pantry an industrial edge that suits brick walls, concrete counters, and steel appliances. The metal frame carries more weight than wood brackets alone, which helps when shelves hold rows of jars and cans. Check the weight rating of the frame before you load it, and fix it into studs.

    Keep the boards in one wood tone, and use matching jars or plain cans so the shelf reads as tidy rather than busy. One metal shelf run is usually enough; pairing it with plain painted walls keeps the industrial detail from taking over the kitchen.

    13. Cookbook Row Above the Pantry Shelves

    Cookbook row above kitchen pantry shelves holding cookbooks and food jars.

    A cookbook row above the pantry shelves keeps recipes where ingredients are close at hand. This works best in a walk-in pantry or on a pantry wall with a shelf run that is not already full to the ceiling. Use bookends or a small rail to stop books from falling when the pantry door closes, and keep the row at eye level or just above the food shelves.

    For more cookbook shelf layouts, these kitchen bookshelf ideas show how one strong row can carry a plain wall. Keep only the books you cook from often on the pantry row, and store the rest on a higher shelf or in another room, so the row stays easy to browse while you cook.

    14. Breakfast Station Shelves for Coffee and Tea

    Breakfast station shelves holding coffee, tea, mugs, and breakfast jars.

    Breakfast station shelves gather coffee, tea, mugs, and breakfast food in one spot, so mornings run with fewer trips around the kitchen. Put the coffee maker or kettle on the counter below, mugs on hooks or on the lowest shelf, and coffee, tea, and breakfast jars above. A small tray under the machine catches drips and keeps the counter tidy.

    Keep the station to one shelf run, and move spare stock to the main pantry so the breakfast shelves hold only what you use each morning. If more than one person makes breakfast, label the jars and keep each person’s mug in the same spot every day.

    15. Baking Zone Shelves Near the Oven

    Baking zone shelves near a kitchen oven holding flour jars, bowls, and baking trays.

    Baking zone shelves near the oven hold flour, sugar, baking powder, vanilla, mixing bowls, and baking trays in one place, so you can set up without crossing the kitchen. Keep the shelves clear of direct oven heat, and use sealed jars for flour and sugar so they stay fresh and free of kitchen dust. Stack mixing bowls by size, and stand baking trays upright in a rack at one end.

    Label the baking jars clearly, especially if two white powders look alike, and keep a small scoop in each jar. Move finished bakes off the shelves promptly, so the baking zone stays ready for the next session rather than filling up with cooling racks.

    16. Spice Shelves in One Tight Row

    Tight row of small matching labeled spice jars at eye level in a kitchen.

    Spice shelves work best as one tight row of small, matching jars at eye level, away from stove heat. Use jars of one size so the row looks tidy and the jars sit flat, and label each jar on the lid or side. Group spices by use, such as everyday cooking, baking, and heat, and keep the row near the prep counter rather than above the stove.

    Refill jars from larger store packs kept in a cabinet, and check dates twice a year. A row that holds twelve to twenty jars suits most home cooks. If the row grows past that, move the rarely used spices to a higher shelf and keep only the daily set at eye level.

    17. Canned Goods Shelves With Front-Facing Rows

    Pantry shelves with front-facing rows of canned goods with labels facing out.

    Canned goods stay easy to use when they sit in front-facing rows, one can deep, with labels facing out. Sort cans by type, such as tomatoes, beans, and soup, and keep the newest cans at the back so older cans get used first. A small shelf lip or rail stops cans from sliding forward when a nearby door closes.

    Keep the shelf height tight, just above the tallest can, so you fit more rows in the same wall space. Count cans before shopping, since a front-facing row makes stock levels plain to see. If cans pile up in two rows, move the spares to a closed cabinet and keep only the working row on display.

    18. Low Snack Shelf for Kids

    Low kitchen snack shelf at child height holding a basket of snacks.

    A low snack shelf at child height lets younger family members choose their own snacks without climbing or asking for help. Place it away from the stove and sharp tools, near a counter where snacks can be eaten with an adult nearby. Use sturdy, wipe clean shelves, and keep the snacks in one basket or a few small bins so small hands can pull one item out without toppling the row.

    Stock the shelf with a few approved snacks, and refill it once a day rather than filling it for the whole week. Rotate the snacks every few weeks, so the shelf stays inviting and the collection does not outgrow the space. This shelf also teaches children where food belongs, which keeps the rest of the pantry tidier.

    19. Pantry Shelves Above the Countertop

    Pantry shelves above a kitchen countertop holding daily jars and cooking oils.

    Pantry shelves above the countertop turn the wall over the work surface into daily food storage, with no extra floor space needed. Keep the lowest shelf within easy reach for daily jars and oils, and use higher shelves for serving pieces and less used staples. Leave a clear stretch of counter below, so the shelves help cooking instead of crowding it.

    Fix the shelves into studs, since a shelf of jars is heavier than a shelf of ornaments, and keep them clear of the sink splash zone. Wipe the shelf tops often, since kitchen dust settles on open surfaces, and keep one shelf partly empty so a new jar always has a place to go.

    20. Shelf-Lined Pantry Closet From a Spare Closet

    Shelf-lined pantry closet with open shelves holding jars and food baskets.

    A spare hall closet, coat closet, or underused utility closet near the kitchen can become a shelf-lined pantry with a few runs of open shelving. Remove the hanging rail, fit shelves from floor to near the ceiling, and keep the door open or replace it with a curtain so the shelves stay easy to reach. This conversion suits homes where the kitchen itself has no free wall.

    Keep heavy items low, daily food at middle height, and light spare stock up high, and add a battery light or a small wired light if the closet is dark. Because the closet is separate from the kitchen, label each shelf run so anyone fetching food can find it without opening every jar.

    21. Under-Stair Pantry Shelves

    Under-stair pantry shelves fitted to a sloping ceiling holding jars and bins.

    The space under the stairs, when it sits near the kitchen, can hold open pantry shelves fitted to the sloping ceiling. Use the tallest section for tall jars and bulk bins, and the lower sections for cans, baskets, and spare stock you reach for less often. Fit the shelves to the slope rather than forcing one straight run, so no space is wasted.

    Keep the walkway into the under-stair space clear, and add a light at the entrance so the lowest shelves stay visible. This spot suits spare stock and bulk items best, since the slope makes daily access a little awkward. Keep daily food in the kitchen itself, and use the under-stair shelves as the overflow store.

    22. Pantry Shelves in an Eat-In Dining Corner

    Pantry shelves in an eat-in dining corner holding breakfast food and serving dishes.

    Pantry shelves in an eat-in dining corner keep food close to the table, which suits homes where the kitchen and dining space share one room. Use a short shelf run on the dining wall for breakfast food, table linens in a basket, and a few serving dishes, so setting the table needs no trip to another room. Keep the shelves clear of the dining chairs, so no one bumps a jar when they sit down.

    Style this run a little more carefully than a kitchen pantry wall, since it faces the table: matching jars, one basket, and a small plant are enough. Keep cooking staples in the kitchen itself, and let the dining corner shelves hold only table-ready items.

    23. Two-Wall Shelves for a Galley Kitchen

    Galley kitchen with pantry shelves on two facing walls holding food and dishes.

    A galley kitchen suits pantry shelves on two facing walls, with one wall for daily food and the other for dishes and less used staples. Keep both runs short and shallow, so the walkway between them stays clear, and put the most used wall on the side you face while you cook. Shallow shelves matter here, because deep shelves on both sides would narrow the passage.

    Use the same shelf finish on both walls so the galley reads as one planned room, and keep the ends of each run clear of door swings. If the galley feels tight, use open shelves on one wall only, and keep closed cabinets on the other, so the room still feels balanced.

    24. Freestanding Pantry Shelving Unit for Renters

    Freestanding pantry shelving unit in a kitchen holding jars and baskets.

    A freestanding pantry shelving unit needs no drilling, which makes it the best open pantry option for renters and for kitchens where wall fixings are limited. Choose a unit with adjustable shelves, so jar heights can change as your food changes, and anchor it to the wall with a small strap if the household includes children or pets, since a tall unit can tip.

    Place it on a flat wall end or beside the fridge, where it does not block a walkway, and keep heavy items on the lowest shelf and light items up high. A wood unit warms a plain kitchen wall without a full renovation, and it can move with you when you move home.

    25. LED Lit Pantry Shelves

    Kitchen pantry shelves lit by warm LED strips under each shelf.

    LED strips under each pantry shelf put light exactly where jar labels are, instead of lighting only the middle of the room. This helps most in a walk-in pantry or a deep pantry wall, where upper shelves would otherwise sit in shadow. Choose warm white light for a comfortable kitchen glow, and fit the strips with a simple switch or a door sensor near the pantry entrance.

    Battery lights work as a trial, but wired lights give steadier light and no battery changes. Add a strip inside a glass front cabinet too, if you want dishes to show softly in the evening without a bright ceiling light. Keep the wiring neatly behind the shelves, and wipe the strips when you clean the shelves.
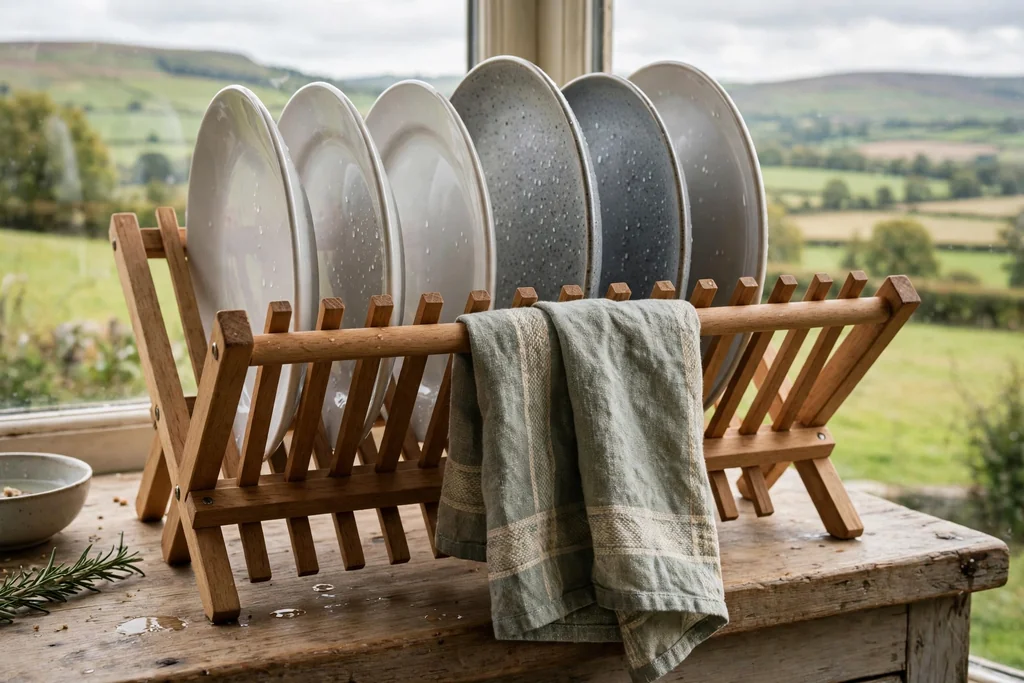
    26. Bulk Bin Shelves With Scoops

    Bulk bin pantry shelves holding large clear bins of flour, rice, and oats with scoops.

    Bulk bin shelves hold large, clear bins for flour, rice, oats, and other staples bought in bulk, with a scoop in each bin. Clear bins show stock levels at a glance, and a scoop keeps hands out of the food, which stays fresher. Label each bin with its contents and date, and keep the bins on the lowest sturdy shelf, since a full bin is heavy.

    Refill bins over a sink or a tray to catch spills, and wash and dry bins fully before refilling. If bulk buying is new to your household, start with two or three bins for the staples you use fastest, and add more only when the first bins earn their shelf space.

    27. Produce Shelves With Ventilated Baskets

    Produce pantry shelves with ventilated baskets holding onions, garlic, and potatoes.

    Produce shelves use ventilated wire or woven baskets so air can move around onions, garlic, potatoes, and fruit. Airflow matters for onions and garlic, which spoil faster in a closed bag, and a basket keeps them out of a dark cabinet where they are forgotten. Use one basket per type so you can see stock levels at a glance.

    Hang or set the baskets away from the stove and sink, where heat and steam shorten storage life. Line a basket with a cloth if small items slip through the weave, and check contents weekly, removing any soft pieces before they affect the rest. This idea suits kitchens short on pantry shelf space, since baskets stack neatly on one shelf run.

    28. Small Appliance Shelves Off the Counter

    Small appliance shelves in a kitchen holding a blender, mixer, and food processor.

    Small appliance shelves move the blender, food processor, stand mixer, and slow cooker off the counter and onto one sturdy shelf run, freeing the work surface for prep. Keep the shelf near a power outlet, and leave enough clearance above each appliance to lift it off without knocking the shelf above. Put the most used appliance at the front or at easy reach height.

    Keep the shelf depth generous, since appliances are deeper than jars, and fix it into studs, since a shelf of appliances is heavy. Store lids and attachments in a basket on the same shelf, so each appliance stays complete and ready to use.

    29. Chalk Label Strip Along the Shelf Edge

    Pantry shelf edge with a chalk label strip naming each food group.

    A chalk label strip along the front edge of each shelf gives every food group a clear name that you can change when the pantry changes. Use a narrow chalkboard strip, chalk labels on jars, or a painted chalk band on the shelf edge, and write the group name in plain letters. This helps most in a shared household, where more than one person puts food away.

    Wipe the strip clean when a group moves, and rewrite it rather than layering new labels over old ones, so the pantry stays easy to read. Keep the strip away from the stove splash zone, and use a damp cloth rather than a dry eraser to avoid chalk dust settling on food.

    30. Farmhouse Pantry Shelves With Beadboard Backing

    Farmhouse pantry shelves with beadboard backing holding jars and baskets.

    Beadboard backing behind open pantry shelves gives a farmhouse kitchen a finished, built-in look without new cabinets. Fix narrow beadboard panels to the wall first, then mount the shelves over them, so the boards show in the gaps between jars and baskets. Paint the beadboard the same color as the shelves for a calm look, or use a soft contrast color for the backing only.

    Keep the shelf styling simple when the backing has texture, so the pantry does not feel busy from every angle. A single row of matching jars and one basket per shelf suits beadboard better than a crowded mix of packs and boxes.

    31. Seasonal Rotation Shelf at the Top

    Top seasonal rotation pantry shelf holding labeled baskets of holiday baking supplies.

    A top seasonal rotation shelf holds holiday baking, summer preserving, and party food that you need a few times a year, not every week. Because it sits highest, it needs a step stool for access, so reserve it for items you reach for a few times a year, not for daily cooking. Add a small rail or basket edge to keep items in place, and label each basket by season.

    Rotate the shelf when the season changes: bring the current season down to easy reach, and move the last season up to the top. Measure the space above the shelf first, and fix it into studs, since it will carry a long row of baskets and boxes.

    Conclusion

    An open shelving pantry works best when the base stays simple and every item has one clear home. Shallow shelves, one row deep, grouped by use, and kept to the food you actually cook with give you a pantry that saves time every day, without needing a full remodel. Start with the change that will show up most in your kitchen, such as a labeled jar run, a short shelf above the counter, or a freestanding unit, then add one zone at a time. Save the ideas that fit your space, light, and household, and build the pantry in stages so each step still feels like a finished kitchen.

    FAQs

    How do I keep an open shelving pantry from looking cluttered?

    Limit each shelf to one food group, use matching jars and baskets for loose or mixed items, and leave one gap on each shelf so the run reads as calm. Keep only the food you use often on open shelves, and move spare stock, oddly shaped packs, and cleaning supplies into closed cabinets. Repeat one jar style and one basket style across the pantry, rather than mixing many colors and shapes.

    What shelf depth works best for a pantry?

    A depth of about 25 to 30 centimeters suits most pantry shelves, since it holds dinner plates and standard jars without letting items hide in a second row. Deeper shelves suit bulk bins and small appliances, but they need baskets or bins pulled forward so food at the back stays visible. Measure your tallest jar and widest bin before you fit shelves, and keep the depth the same across one run so the wall looks planned.

    How do I keep food fresh on open shelves?

    Use sealed jars and bins for flour, sugar, rice, oats, and other loose staples, and keep them away from stove heat and sink splashes. Check dates twice a year, refill jars from larger store packs kept in a cabinet, and keep produce in ventilated baskets away from heat and steam. Open shelves suit dry, sealed food best; keep anything that needs a cool, dark, or airtight store in a closed cabinet instead.

    Does an open shelving pantry suit a small kitchen?

    Yes, an open pantry suits a small kitchen well, because shallow shelves use wall space without taking floor space, and visible food means fewer duplicate buys. Start with one short run near the prep counter, choose only your daily staples for it, and keep the rest in a cabinet or a freestanding unit. Keep the walkway clear, skip deep shelves that jut into the room, and use light shelf colors if the kitchen is dark.

    How do I fix heavy pantry shelves safely?

    Fix heavy shelf runs into wall studs, or use wall fixings rated for the full loaded weight, and test the hold before loading shelves fully. Put the heaviest jars and bins low, keep the shelf span short between brackets, and check that brackets sit level before you load them. For a tall freestanding unit, add a small wall strap, and keep heavy items off the top shelves so the unit stays stable.

    How often should I clean open pantry shelves?

    Wipe shelf tops and jar fronts weekly during your usual kitchen clean, since kitchen grease and dust settle on open surfaces faster than in closed cabinets. Empty and wipe one shelf run each month, check dates and stock levels as you go, and return only what you actually use. Wash jars and bins fully before refilling, and replace any basket that stays damp or smells musty.


  • 12 White Oak Cabinet Kitchen Ideas for a Warm, Inviting Home

    12 White Oak Cabinet Kitchen Ideas for a Warm, Inviting Home

    White oak cabinets give a kitchen warmth without weight. The pale, even grain keeps the room bright, shows off natural wood character, and pairs with almost any counter, floor, or wall color. These 12 white oak cabinet kitchen ideas cover door styles, hardware, counters, two-tone layouts, small kitchens, and storage walls, so you can start with one change or plan a full kitchen around the wood. Pick one white oak tone, one contrast, and counters that stay calm, and the cabinets will carry the warmth.

    Key Takeaways

    • Pick one white oak tone and repeat it in at least two spots, such as the cabinets and an island, stools, or open shelves, so the room reads as planned.
    • Pair white oak with one contrast only, such as black hardware, brass handles, or a dark island, and keep the rest of the room calm.
    • Keep counters plain when the oak grain is strong, and let a patterned backsplash or floor carry detail instead.
    • Test a large wood sample beside your floor, counter, and wall color in daylight and evening light before ordering.
    • Protect white oak near the sink and stove: wipe splashes promptly, seal counters as advised, and use warm under-cabinet lighting in the evening, since pale wood can look grey under cool bulbs.

    1. Classic White Oak Shaker Cabinets

    Kitchen with white oak Shaker cabinets, a plain white counter, and a cream tile backsplash.

    White oak Shaker cabinets are the most reliable starting point for a warm kitchen. The recessed panel adds just enough detail to avoid a flat look, while the pale grain keeps the room bright and calm. This style suits almost any home, and it gives a steady base for stone counters, a patterned rug, or brass taps.

    Keep the wall color in a soft warm white, so the oak does not look yellow by contrast. Choose a counter in white stone or pale wood, and repeat one warm material, such as oak stools or a wood board, in two spots. Wipe doors near the stove each week, since pale wood shows cooking splashes. For a wider look at pale wood kitchens, see these kitchens with light wood cabinets.

    2. White Oak Flat-Panel Cabinets for a Modern Kitchen

    Modern kitchen with white oak flat-panel cabinets, pale grey counters, and black handles.

    Choose white oak on flat-panel doors for a calmer, more modern take on light wood. Flat fronts keep the wall quiet, which suits a kitchen with a veined counter or a patterned floor. White oak has a soft, even grain that reads as warm rather than busy, and it bridges stainless appliances and pale floors in the same room.

    Pair white oak cabinets with white or pale grey counters and black or brushed nickel handles for a clean result. Check a large sample in morning and evening light, since oak can read pink or yellow under different bulbs. A matte finish keeps the grain clear without glare on large door fronts.

    3. White Oak Island with White Perimeter Cabinets

    White kitchen with a white oak island base, wood stools, and a pale counter.

    Keep the main cabinets white or pale, and build the island base in white oak. The island becomes a clear focal point, and the rest of the kitchen stays light, which makes the change lower risk and easier to reverse. A pale oak island suits a white kitchen, while a slightly deeper oak tone suits a kitchen with dark wood floors.

    Repeat the island wood once more, in stools, a serving board, or a vase, so it looks planned rather than random. Choose a hard wearing counter for the island, since it takes the most daily use. This is a good first step if you like white oak but are not ready for wood cabinets everywhere.

    4. White Oak Cabinets with Black Hardware

    Kitchen with white oak cabinets, matte black handles, and a black tap.

    Use matte black handles, knobs, and a black tap against white oak cabinets for a sharper, modern edge. Black outlines each door, adds contrast without a new color, and pairs well with dark counters, wood stools, and a black framed window. This suits a white oak kitchen that needs definition, such as a large room where pale tones start to blur together.

    Repeat black once or twice more, in a light fitting, a stool frame, or a rug border, so the hardware does not look isolated. Keep the rest of the room pale, so black stays an accent rather than a theme. Matte black shows fingerprints less than polished black, which helps on doors used many times a day.

    5. White Oak Cabinets with Brass Handles

    Kitchen with white oak cabinets, brushed brass knobs, and cup pulls.

    Warm white oak cabinets with brushed brass knobs, cup pulls, and a matching tap for a soft lift. Brass warms pale oak, suits wood floors and cream walls, and works with both Shaker and flat-panel doors. This is one of the easiest cabinet updates, since hardware swaps need no painting and no building work.

    Keep all the brass in the same finish, so knobs, pulls, and the tap read as one set. Save the old hardware in a labelled bag if you rent or may want to swap it back. Wipe brass with a soft cloth to keep the finish even, and check that new pulls match your existing screw spacing before ordering.

    6. White Oak Cabinets with Butcher Block Counters

    Kitchen with white oak cabinets, butcher block counters, and cream tiles.

    Pair white oak cabinets with butcher block counters for a kitchen that feels warm from the first glance. The wood counter softens the cabinet doors, adds a work surface that suits chopping and baking, and pairs well with cream tiles and brass or black handles. This combination suits a cottage or farmhouse kitchen, and it also works in a simple modern room when the doors stay plain.

    Oil the butcher block on the schedule the maker suggests, and wipe it after wet jobs so water does not sit on the surface. Keep the backsplash plain, so the wood grain can carry the detail. Near the sink, a stone section avoids constant water contact on wood, so the counter stays in good shape longer.

    7. White Oak Cabinets with Marble-Look Counters

    Kitchen with white oak cabinets, white marble-look counters, and brass taps.

    Pair white oak cabinets with white marble counters, or a marble-look surface, for a quiet, classic backdrop. The pale stone with soft veining lifts the warm doors, and it pairs well with brass taps, wood stools, and a cream backsplash. This suits a kitchen where you want the cabinets to feel warm and the counter to add gentle movement.

    Keep the backsplash plain, so the counter pattern stays clear. Seal stone on the schedule the supplier suggests, and wipe splashes promptly, since marble can stain from tomato, wine, and oil. If a full stone counter is out of reach, use stone on the island only and a plain surface on the perimeter.

    8. White Oak Lower Cabinets with White Uppers

    Kitchen with white oak lower cabinets, white upper cabinets, and a pale backsplash.

    Use white oak on the lower cabinets and white on the uppers for a lighter take on a wood kitchen. The white uppers keep the eye moving up and make a small kitchen feel taller, while the wood base grounds the room and hides scuffs at kick height better than white. This split also makes a later change easier, since only half the cabinets need a new finish.

    Pair the scheme with a pale backsplash and a wood or white counter. A brass or black handle on the lower cabinets ties the two tones together. Keep the wall color plain so the two cabinet finishes can do the work, and repeat the wood once more, in a stool or a board, so the base tone does not look isolated.

    9. White Oak Cabinets in a Small Galley Kitchen

    Small galley kitchen with white oak cabinets, pale counters, and warm under-cabinet lighting.

    Use white oak on every cabinet in a small galley kitchen, and keep the counters and backsplash pale too. Light wood reflects more light than a mid brown, hides marks better than bright white, and keeps a narrow room feeling open without looking stark. This suits a galley kitchen or a kitchen with one small window.

    Leave one wall free of uppers if you can, so daylight reaches deeper into the room, and use warm under-cabinet lighting in the evening. Keep the floor in a light wood or pale tile, and avoid a dark counter, which can close the room in. Store rarely used items elsewhere so the small cabinets hold only daily gear.

    10. White Oak Cabinets with Glass Front Uppers

    Kitchen with white oak glass-front upper cabinets displaying white dishes and clear glasses.

    Swap a few white oak upper doors for glass fronts, and display white dishes, clear glasses, and a few wood boards behind them. Glass breaks up a long run of wood doors, adds depth, and makes everyday pieces easy to find. It suits a kitchen with one straight run, where two or three glass doors are enough to change the whole wall.

    Keep the display simple, with one stack per shelf and space between groups, so the cabinets read as tidy. Put daily dishes at easy reach and rarely used pieces higher up. If glass feels too exposed, use reeded or frosted glass on one cabinet for a softer version of the same idea.

    11. White Oak Cabinets Beside Matching Open Shelves

    Kitchen with white oak cabinets beside matching open wood shelves holding mugs and bowls.

    Replace one short run of white oak uppers with open wood shelves in the same tone, and keep the rest of the cabinets closed. The shelves give you a spot for daily mugs, bowls, and plants, while the closed cabinets hide the less pretty storage. This mix is practical in a small kitchen, where a full wall of uppers can feel heavy, and the matching wood keeps the wall calm.

    Keep shelf items to pieces you use weekly, and dust them often, since open storage collects cooking film. Put the shelves near the sink or cooker, where daily dishes are most useful. Leave breathing room between groups so shelves read as calm, not crowded, and put heavy stacks low.

    12. Floor-to-Ceiling White Oak Pantry Cabinets

    Floor-to-ceiling white oak pantry cabinets with baskets and jars for dry goods.

    Dedicate one wall to tall white oak pantry cabinets, floor to ceiling, for dry goods, small appliances, and cleaning gear in one place. A pantry wall keeps the rest of the kitchen free of tall units, so the cooking wall can stay low and open. It also makes shopping and meal planning easier, since everything is visible at a glance.

    Fit the pantry with adjustable shelves, a few baskets for loose items, and labels on the front of each shelf zone. Keep heavy items at waist height and light items up high. Put the pantry near the fridge or the main prep counter, so ingredients travel a short distance to the cooker. If a painted finish also appeals for contrast, these kitchen cabinet colors show how a warm painted tone pairs with wood.

    Conclusion

    A white oak kitchen works best when the wood stays the clear feature and everything around it stays calm. One oak tone, one contrast, and plain counters give you a room that feels warm in daylight and soft in the evening, without needing a full remodel. Start with the change that will show up most in your room, such as door style, hardware, or an island base, then add one texture and one accent at a time. Save the ideas that fit your space, light, and budget, and build the scheme in stages so each step still feels like a finished room.

    FAQs

    What makes white oak a good choice for kitchen cabinets?

    White oak has a pale, even grain that adds warmth without darkening the room, and it pairs with white, cream, grey, and dark counters. It suits Shaker and flat-panel doors, hides light marks better than bright white, and bridges stainless appliances and pale floors. Check a large sample in your own light before ordering, since oak can read pink or yellow under different bulbs.

    How do white oak cabinets differ from red oak cabinets?

    White oak has a cooler, more even grain and a pale brown tone, while red oak often shows a warmer, pinker cast with a stronger grain pattern. White oak also tends to take a pale, natural finish more evenly, which is why it suits calm, modern kitchens. If your floor or counter already leans pink, white oak is usually the safer match.

    What hardware finishes pair best with white oak cabinets?

    Matte black gives a sharp, modern edge, brushed brass adds soft warmth, and brushed nickel keeps the look quiet and neutral. Pick one finish and use it across knobs, pulls, and the tap, so the hardware reads as one set. Avoid mixing three metals in one kitchen, since pale wood shows clashing finishes clearly.

    What counters work best with white oak cabinets?

    White stone, marble-look surfaces, and pale wood counters all work well, since they keep the room light and let the oak grain stay the feature. Butcher block adds the most warmth, while white stone adds the most contrast. Keep the counter plain if the oak grain is strong, and save pattern for the backsplash or floor.

    How do I care for white oak cabinets in a busy kitchen?

    Wipe doors near the stove and sink each week with a soft, damp cloth, and dry them right away so water does not sit on the finish. Seal wood counters on the schedule the maker suggests, and wipe cooking splashes promptly. Avoid harsh cleaners on the cabinet finish, and check the care advice for your specific finish before using a new product.

    Can white oak cabinets work in a small kitchen?

    Yes, white oak suits a small kitchen well, because the pale wood reflects light and keeps a narrow room feeling open. Keep counters and the backsplash pale, leave one wall free of uppers if you can, and use warm under-cabinet lighting in the evening. Skip a dark counter in a tight galley, since it can close the room in.


  • 27 Kitchen Cabinet Handle Ideas for a Stylish Room That Works

    27 Kitchen Cabinet Handle Ideas for a Stylish Room That Works

    Cabinet handles are small, but you touch them every time you cook, and they set the tone for the whole kitchen. A brass knob warms a pale kitchen, a black bar pull sharpens a flat front door, and a cup pull makes a farmhouse drawer feel right. These 27 kitchen cabinet handle ideas cover knobs, pulls, cup pulls, loops, and handleless options, with a note on where each one works best and what to check before you drill. For a cabinet color to pair with your chosen finish, these beige kitchen cabinet ideas show how warm neutrals sit with brass, black, and nickel hardware. Measure your doors and drawers first, order one sample to test in your own light, and keep the finish consistent across the kitchen.

    Key Takeaways

    • Match the handle to the job: knobs suit doors that swing, pulls suit drawers that slide out with weight behind them.
    • Keep one finish consistent across the kitchen, and match it to the tap finish where possible, so the metals read as one plan.
    • Size matters more than style: a pull should span roughly one third of a wide drawer, and a knob should fit the hand without slipping.
    • Check screw spacing and door thickness before ordering, since bar pulls come in fixed centers and screws must not poke through the door.
    • Test one sample in daylight and evening light, and with wet hands, before you fit the whole kitchen.
    • Handles are the easiest kitchen update: swapping them needs no painting or building work, but a template keeps every fixing level.

    1. Round Brass Knobs on Shaker Doors

    Kitchen with Shaker cabinets fitted with small round brass knobs.

    Round brass knobs suit Shaker doors because the simple frame already gives the kitchen its detail, so the handle can stay small and warm. Brass works with white, cream, and pale wood cabinets, and it pairs well with a brass tap or brass light fittings. Choose a knob size that fits your hand, usually 1 to 1.25 inches across for standard doors, and keep the finish the same across the kitchen so knobs, pulls, and taps read as one set.

    Fit knobs at the corner of each door, on the side away from the hinge, and test the spot before drilling by holding a knob in place and opening the door fully. On a two door cabinet, place knobs on the outer corners so both doors open without your hands meeting in the middle. Wipe brass with a soft dry cloth, and check the screw length against your door thickness, since a screw that is too long will poke through the inside.

    2. Long Brass Bar Pulls for Wide Drawers

    Kitchen with wide drawers fitted with long brass bar pulls.

    Wide drawers need a pull long enough to grip with both hands and to spread the force across the drawer front. A long brass bar pull, often 8 to 12 inches between screw centers on a wide drawer, does that job and gives a calm, even line across a bank of drawers. Brass warms pale cabinets and suits wood counters, cream tiles, and stone counters alike.

    Measure the drawer width first, then pick a pull that spans roughly one third of the drawer front for balance. Check the screw spacing on the pull against your drawer before ordering, since bar pulls come in fixed centers. Fit pulls centered on the drawer front, level with each other, and use a template so a long bank of drawers stays even.

    3. Matte Black Bar Pulls on Pale Cabinets

    Kitchen with pale cabinets fitted with matte black bar pulls.

    Matte black bar pulls give pale cabinets a clear outline without adding a new color. The dark line helps you find the handle in a bright kitchen, and it ties in well with black taps, black stool frames, and black framed windows. On white or cream doors, black pulls suit both flat fronts and Shaker doors.

    Keep the black finish the same on every handle so the kitchen reads as one decision, and repeat black once more in the room, such as a light fitting, so the pulls do not sit alone. Matte black shows dust less than polished black, but it can fade into a dark door in dim light, so test a pull under your evening lighting before you commit. For a dark cabinet pairing, these navy blue kitchen cabinet ideas show how black hardware sits on a deep color.

    4. Brushed Nickel Cup Pulls for Farmhouse Drawers

    Farmhouse kitchen drawers fitted with brushed nickel cup pulls.

    Cup pulls, also called bin pulls, cup the fingers from below and suit farmhouse and cottage kitchens. Brushed nickel is a practical finish here: it is cooler than brass, hides light marks, and pairs with stainless appliances and chrome taps. Use cup pulls on drawers only, where the hand naturally lifts from below, rather than on doors.

    Fit each cup pull centered on the drawer front, with the open side facing down so fingers slide in easily. Cup pulls come in set widths, so measure your drawer and leave a comfortable margin on each side. On shallow drawers, a smaller cup pull looks better than a wide one, while deep drawers can carry a wider cup without looking lost.

    5. Leather Loop Pulls on Wood Cabinets

    Wood kitchen cabinets fitted with tan leather loop pulls.

    Leather loop pulls add softness to wood cabinets, which is useful in a kitchen where metal handles can feel cold or hard. A leather loop is a strap fixed at both ends, leaving a loop to grip, and it suits oak, walnut, and painted wood doors alike. Tan leather warms pale wood, while dark brown leather suits deeper wood tones.

    Choose a loop wide enough for two fingers and a strap thick enough to hold its shape after daily use. Fix the loop with screws through a small metal plate or washer on the inside so the leather does not tear at the fixing. Wipe leather with a damp cloth, and keep it away from the sink run, where constant water will stiffen and stain it.

    6. Turned Wood Knobs for a Warm Finish

    Painted kitchen cabinets fitted with turned wood knobs.

    Turned wood knobs, shaped on a lathe with a rounded profile, give a kitchen a furniture feel that metal cannot. They suit painted cabinets in cream, sage, and soft grey, and they are a natural match for wood cabinets, since the knob can match or contrast with the door wood. A wood knob is also warm to touch on a cold morning.

    Pick a knob shape with a clear grip ridge, not a smooth ball that slips in wet hands. Seal wood knobs well, especially near the sink and cooker, and reapply a clear finish when the surface starts to look dry. If you want the knob to match the door, order knobs from the same wood and finish as the cabinets, or paint them to match.

    7. Ceramic Knobs with a Hand Painted Look

    Kitchen cabinets fitted with small ceramic knobs in a soft pattern.

    Ceramic knobs bring pattern to a plain cabinet run without repainting a single door. A hand painted or glazed ceramic knob can carry a small flower, a stripe, or a solid color, and it suits cottage kitchens, vintage kitchens, and kitchens with open shelves of mixed dishes. Use ceramic knobs on doors rather than heavy drawers, where the fixing takes more strain.

    Keep the knob pattern restrained: one pattern repeated across the kitchen looks planned, while a different pattern on every door can look busy. Check that each knob has a sturdy metal screw insert, since a screw fixed only into ceramic can work loose. Wipe ceramic with a damp cloth, and keep a spare knob in case one chips.

    8. Clear Glass Knobs on Light Cabinets

    Light kitchen cabinets fitted with clear faceted glass knobs.

    Clear glass knobs suit light cabinets because they add a small sparkle without a strong color or metal line. A faceted glass knob catches daylight and suits vintage kitchens, glass front cabinets, and pale painted doors. Glass also pairs well with chrome and nickel, so it fits kitchens that already use cool metals.

    Choose a glass knob with a solid metal base and a screw that fits your door thickness, and test the grip, since smooth glass can slip in wet hands. Glass knobs show fingerprints, so wipe them when you wipe the doors. On a cabinet with glass fronts, a glass knob keeps the whole unit feeling light instead of adding a heavy metal detail.

    9. Slim Edge Pulls for Flat Front Doors

    Modern flat front kitchen cabinets with slim metal edge pulls.

    Slim edge pulls fix to the top or side edge of a flat front door, so only a thin metal lip shows. This suits modern kitchens where a long bar pull would break the clean line of the door, and it keeps the front almost flat while still giving fingers a clear grip point. Edge pulls work best on doors with a small gap behind the edge for fingers.

    Fit edge pulls along the full width of the opening edge or in a set length, and keep the position the same on every door so the kitchen looks even. Check the door thickness and the gap to the next door before ordering, since an edge pull that is too deep can catch. Edge pulls suit doors you open often, such as a pantry or a bin cabinet, because the grip is quick and natural.

    10. Handleless Routed Finger Pulls

    Handleless kitchen cabinets with a routed finger pull groove along the door edge.

    A routed finger pull is a groove cut into the top or side of the door itself, so there is no separate handle at all. This gives the cleanest possible front and suits handleless modern kitchens, small kitchens where handles would catch on clothing, and kitchens with a flat door style. The groove must be deep enough for fingertips but shallow enough not to weaken the door edge.

    Ask the cabinet maker to route the pull on the opening edge of each door, and test the depth with your own hand before the full run is made. Painted doors need the groove sealed and painted inside, or the raw edge will show and collect dirt. Routed pulls suit doors you can reach easily, but they are less helpful on very tall cabinets, where a separate pull gives a better grip.

    11. Recessed Flush Pulls for Tight Walkways

    Flat front kitchen cabinets with recessed flush pulls in a narrow walkway.

    Recessed flush pulls sit inside a cutout in the door, so nothing sticks out into the walkway. This matters in a galley kitchen, a narrow passage, or a kitchen where a protruding handle would catch a hip or an apron pocket. Flush pulls suit sliding doors, pocket doors, and flat front cabinets in tight spaces.

    Fit the pull flush with the door face and check that your fingers can grip the recessed cup without scraping a knuckle. A flush pull needs a clean cutout, so it is easier to order doors made for this pull than to cut into finished doors. Wipe inside the recess when you clean the doors, since dust settles in the cup.

    12. Ring Pulls on Pantry and Drawer Fronts

    Pantry cabinet door fitted with a brass ring pull.

    Ring pulls hang from a small plate and give a firm grip for a heavy pantry door or a deep drawer. The ring suits traditional kitchens, pantry cabinets, and furniture style pieces, and it adds a jewelry like detail to a plain door. Brass, iron, and nickel rings each change the mood, so match the ring metal to your taps and lights.

    Hang the ring so it rests flat against the door when not in use, and check that it does not swing into the next door when the cabinet closes. Ring pulls work best on doors with a clear swing path, since a ring needs room to hang. On a drawer, a ring pull suits a deep drawer that needs a strong pull, rather than a shallow drawer where a cup pull is easier.

    13. T Bar Pulls for a Clean Modern Line

    Modern kitchen cabinets fitted with slim T bar pulls.

    T bar pulls have a straight bar with a short stem at the center, giving a modern line that is lighter than a full bar pull. They suit flat front and slab doors, small kitchens where a long pull would dominate, and kitchens that mix modern doors with warm wood. The T shape also gives a clear grip point without a wide fixing footprint.

    Choose a bar length that suits the door width, usually 4 to 6 inches for a standard door, and fit the stem centered on the door edge or face as the design requires. Keep the finish consistent across the kitchen, and check that the bar does not spin, since a T bar fixed by one stem can loosen if the screw is not tight. Tighten and check T bars once a year in a busy kitchen.

    14. Extra Long Appliance Pulls for Tall Cabinets

    Tall kitchen pantry cabinets fitted with extra long vertical appliance pulls.

    Tall cabinets, pantry doors, and integrated fridge fronts need a pull long enough to open a heavy door without straining the fixing. An extra long appliance pull, often 12 to 18 inches, spreads the force and gives a grip at any height. This suits tall units, larder cabinets, and kitchens where one long handle line ties the whole wall together.

    Fit the pull vertically on a tall door, centered on the door width, and use through bolts or reinforced fixings for a heavy door. Check the pull length against the door height so the pull does not run past the door edge. A long pull also helps shorter users, since the grip runs over a wider height range than a small knob.

    15. Knobs on Doors with Pulls on Drawers

    Kitchen with round knobs on cabinet doors and bar pulls on drawers in the same finish.

    Using knobs on doors and pulls on drawers is the most common mixed handle plan, and it works because doors and drawers open in different ways. A knob suits a door that swings, while a pull suits a drawer that slides out with weight behind it. This split also keeps costs down, since knobs cost less than long pulls and you need fewer pulls overall.

    Keep the metal finish the same for knobs and pulls so the mix reads as one plan, not two separate choices. Place knobs at the door corner away from the hinge and pulls centered on each drawer, and use one template for the whole kitchen. If you change one finish later, change knobs and pulls together so the kitchen does not end up with mismatched metals.

    16. Mixed Metals Done in Two Zones

    Kitchen island with black handles beside a cooking run with brass handles.

    Mixed metals work when the kitchen is split into clear zones, such as brass on the cooking run and black on the island, rather than mixed door by door. Zoning gives each metal a job and a place, so the kitchen looks planned instead of random. This suits open plan kitchens, where the island is seen as furniture, and large kitchens with two distinct runs.

    Pick two finishes that share a tone, such as warm brass and warm bronze, or matte black and aged iron, and keep each zone consistent. Repeat each metal once more in its zone, in a tap, a light, or a stool frame, so the handle metal does not sit alone. Limit the mix to two finishes, since three or more metals in one kitchen quickly look unsettled.

    17. Oversized Pulls for Deep Pot Drawers

    Deep kitchen pot drawers fitted with oversized bar pulls.

    Deep pot drawers hold heavy pans, so they need a pull that can be gripped with a full hand and pulled straight out without twisting the drawer. An oversized pull, wider than the standard drawer pull, gives that grip and makes a wide drawer look sized to its job. This suits kitchens with wide pan drawers beside the cooker.

    Pick a pull that spans at least one third of the drawer width, and fix it with two screws into solid drawer front material, not just a thin panel. Test the pull with a loaded drawer before fitting the whole run, since a pull that feels fine on an empty drawer can feel weak when the drawer holds cast iron. Keep oversized pulls on deep drawers only, so standard drawers do not look undersized by comparison.

    18. Short Pulls for Small Upper Doors

    Small upper kitchen cabinets fitted with short bar pulls.

    Small upper doors, such as those over a fridge or on a short wall cabinet, look best with a short pull or a small knob that fits the door scale. A long pull on a small door overwhelms the door and can hit the ceiling or a pelmet when the door opens. A short pull keeps the door in proportion and is easy to grip at height.

    Fit short pulls at the lower corner of an upper door, on the side away from the hinge, so the hand reaches the handle without stretching. Keep the same finish as the rest of the kitchen, and use the same short pull on every small door for a calm result. If the door is very small, a knob may suit better than any pull, since it takes up less visual space.

    19. Backplate Handles for a Finished Look

    Traditional kitchen cabinet door fitted with a knob and a shaped metal backplate.

    A backplate handle pairs a knob or a pull with a flat plate behind it, which protects the door finish and gives a more finished look. Backplates suit traditional kitchens, painted doors that mark easily, and vintage style kitchens where the plate itself is part of the design. A shaped backplate can also cover an old screw hole when you change handles.

    Choose a backplate size that suits the door, not the largest plate available, and keep the plate finish matched to the knob or pull. Fit the plate flat against the door, with screws that do not pull the plate into soft paint. When you swap handles, a backplate lets you change the handle style without repainting, since the plate covers the old fixing marks.

    20. Copper Bin Pulls for a Warm Vintage Feel

    Farmhouse kitchen drawers fitted with warm copper bin pulls.

    Copper bin pulls bring a warm, aged metal to a kitchen without the shine of new brass. Copper suits farmhouse kitchens, kitchens with wood counters, and kitchens that use copper pans or a copper tap as an accent. A bin pull shape, cupped from below, is easy to grip on a drawer and hides the hand behind the cup.

    Copper changes color with use unless it is lacquered, so decide whether you want the bright finish or the darker aged look before you buy. Wipe unlacquered copper with a soft cloth, and keep it away from harsh cleaners that strip the finish unevenly. Pair copper pulls with one other copper detail, such as a tap or a pan rail, so the metal looks planned.

    21. Rope Pulls for a Coastal Kitchen

    Coastal kitchen cabinets fitted with rope loop pulls with metal ends.

    Rope pulls, made from cotton or hemp rope fixed with metal ends, suit coastal and relaxed kitchens where a hard metal handle would feel too formal. Rope adds texture, is soft to grip, and pairs well with pale wood, white cabinets, and woven baskets. This is a good choice for a holiday home kitchen or a beach style room.

    Choose rope thick enough to grip firmly and short enough not to sag, and fix the ends with metal ferrules screwed into the door. Rope needs more care than metal: keep it dry, wipe it when it gets dusty, and replace a loop that frays. Rope pulls suit doors and light drawers, not heavy pot drawers, where the rope would stretch over time.

    22. Acrylic Bar Pulls on Dark Cabinets

    Dark kitchen cabinets fitted with clear acrylic bar pulls.

    Acrylic bar pulls, clear and solid, suit dark cabinets because they add a grip without a strong metal line or a new color. On navy, charcoal, or black doors, a clear pull lets the cabinet color stay the focus, while still giving fingers a clear place to hold. Acrylic also suits kitchens with glass, chrome, and pale stone, where a heavy metal pull would feel too much.

    Pick an acrylic pull with solid metal fixings, since a pull fixed only into acrylic can crack under load. Wipe acrylic with a soft cloth and mild cleaner, and avoid abrasive pads that scratch the clear surface. Acrylic pulls suit doors and standard drawers, but for a heavy drawer, a metal pull gives a stronger fixing.

    23. Marble Knobs for a Soft Stone Accent

    Kitchen cabinets fitted with white marble knobs.

    Marble knobs add a small stone detail to a kitchen without a full stone counter or backsplash. A white or grey marble knob suits pale cabinets, marble look counters, and kitchens with a stone sink or a stone shelf. The stone feels cool to touch and gives each door a slightly different pattern, since no two marble pieces match exactly.

    Check the knob weight, since a stone knob is heavier than a wood or metal knob and needs a firm screw into solid door material. Seal marble knobs lightly to resist stains from cooking hands, and wipe them with a damp cloth. Use marble knobs on doors rather than heavy drawers, and repeat stone once more in the room, such as a board or a shelf, so the knobs do not sit alone.

    24. Latch Handles for a Cottage Pantry Door

    Cottage pantry door fitted with an iron latch handle.

    Latch handles, which lift and drop into a catch, suit cottage pantry doors, larder doors, and kitchens with a furniture style look. A latch gives a satisfying close and holds the door shut without a magnetic catch, which helps on a tall pantry door that can swing open. Iron, brass, and nickel latches each suit a different cottage style.

    Fit the latch at a comfortable hand height, usually at the side of the door away from the hinge, and check that the catch lines up when the door is closed. A latch needs a solid door edge for the catch, so it suits framed doors better than thin flat fronts. Oil the moving parts lightly once a year so the latch lifts smoothly and does not stick.

    25. Slim Vertical Pulls on Tall Narrow Doors

    Tall narrow kitchen cabinets fitted with slim vertical pulls.

    Tall narrow doors, such as a spice pull out or a narrow pantry unit, suit a slim vertical pull that runs with the door, not across it. A vertical pull gives a long grip on a narrow front and keeps the door looking tall rather than cut across by a horizontal bar. This suits kitchens with tall units beside the fridge or oven.

    Fit the vertical pull centered on the door width, with the grip at a height you can reach without stretching. Keep the pull slim so it does not overhang the narrow door edge, and use two fixings for a tall pull so it does not twist. On a bank of narrow doors, keep every vertical pull at the same height so the wall reads as one unit.

    26. Rounded Easy Grip Pulls for Every Age

    Kitchen drawers fitted with rounded easy grip bar pulls.

    Rounded easy grip pulls suit kitchens used by children, older family members, and anyone with reduced grip strength. A rounded bar with a clear space behind it lets the whole hand wrap around the pull, which is easier than pinching a small knob. This is a practical choice for a family kitchen, a rental, or a kitchen planned for long term use.

    Choose a pull with a diameter of at least 12 millimeters and a gap behind the bar that fits four fingers, and avoid sharp corners or pointed ends. Fit pulls at a height that suits the main users, and keep the same easy grip style on the most used doors and drawers, such as the cutlery drawer and the everyday plates cabinet. Test the pull with wet hands, since a kitchen handle is often used while cooking.

    27. Matching Handles and Tap Finish Across the Kitchen

    Kitchen with cabinet handles matched in finish to the tap and light fittings.

    Matching the handle finish to the tap finish is the simplest way to make a kitchen look planned, since the eye links metal details even when they are far apart. If the tap is brushed brass, brass handles tie the sink run to the rest of the kitchen, and if the tap is matte black, black handles do the same job. This works with any cabinet color, as long as the metal finish is truly the same, not just a similar name.

    Compare a handle sample beside the tap in daylight before ordering, since brass, gold, and bronze can look alike online and different in person. Keep the same finish on hinges if they show, on light fittings, and on the tap, but do not force a match on appliances, where the maker finish is fixed. For color pairings that work with your chosen metal, these colors for your kitchen cabinets show how each finish sits against pale, mid, and dark doors.

    Conclusion

    A good cabinet handle choice starts with how the door or drawer moves, not with the finish alone. Pick knobs for doors, pulls for drawers, and a longer pull for wide or heavy drawers, then keep the finish steady across the kitchen and matched to the tap where you can. Order one sample, check the screw spacing and the grip with wet hands, and fit the rest with a template so every handle sits level. Change the handles first when you want a fresh kitchen without a full remodel, since it is a small job with a daily payoff.

    FAQs

    Should kitchen cabinet handles all match?

    In most kitchens, yes, keep one finish across all handles so the room reads as one plan. You can mix knobs on doors with pulls on drawers, since that split follows how each unit opens, but keep the metal the same. If you want two finishes, split them by zone, such as one finish on the cooking run and one on the island, rather than mixing door by door.

    What size pull should I use on a kitchen drawer?

    As a guide, pick a pull that spans roughly one third of the drawer width, so a wide pot drawer needs a longer pull than a narrow cutlery drawer. Check the screw spacing of the pull you like, since bar pulls come in fixed centers, and measure the drawer before ordering. Test the pull on a loaded drawer, since a pull that feels fine empty can feel weak with heavy pans inside.

    Are knobs or pulls better for kitchen cabinets?

    Knobs suit doors that swing open, since one hand can turn and pull a light door easily, while pulls suit drawers that slide out with weight behind them. Many kitchens use both: knobs on doors and pulls on drawers, in the same finish. For a heavy pantry door or a wide drawer, a pull gives a stronger and more comfortable grip than a knob.

    How do I measure for new cabinet handles?

    Measure the distance between the existing screw holes, known as the screw spacing or center to center measurement, and match that number when you order bar pulls. For a new fit, measure the door or drawer width, mark the handle position with a template, and check the door thickness so the screws do not poke through the inside. Hold a sample handle in place and open the door fully before drilling.

    Can I mix brass and black handles in one kitchen?

    Yes, if you split the finishes by zone, such as brass on the main run and black on the island, and repeat each metal once more in its zone, in a tap, a light, or a stool frame. Keep the mix to two finishes, and keep each zone consistent. Mixing finishes door by door, with no pattern, tends to look random rather than planned.

    Do handleless cabinets work in a busy family kitchen?

    Handleless cabinets with a routed finger pull or a slim edge pull work well in a busy kitchen, since there is nothing to catch on clothing and the fronts wipe clean. They suit flat front doors best, and the groove must be deep enough for fingertips. On very tall cabinets or heavy drawers, a separate pull gives a better grip, so many family kitchens mix handleless doors with pulls on the most used drawers.


  • 22 Stylish Living Room Ideas for Small Apartment to Try Now

    22 Stylish Living Room Ideas for Small Apartment to Try Now

    A small apartment living room has to look good and work hard at the same time. It is where you relax, welcome friends, read, and often answer emails, and it has to do all of that without feeling crowded. The trick is not to buy more, but to choose pieces sized for the room, use the walls well, and give every zone a clear job. These 22 stylish living room ideas for a small apartment cover seating, storage, light, layout, and small changes that make a compact room feel calm and intentional. Start with the change that solves your biggest daily frustration, then add one idea at a time.

    Key Takeaways

    • Measure first, then choose apartment-size furniture that leaves clear walking routes on at least two sides of the seating group.
    • Let one rug and one seating group define the living zone, even in a studio, so the room reads as planned rather than as leftover space.
    • Use the walls for storage and light: tall shelving, a large mirror, and lamps at three levels do more than extra furniture on the floor.
    • Pick furniture that does two jobs, such as a storage ottoman, nesting tables, or a sofa bed, so one piece covers two needs.
    • Keep one calm base palette and repeat one accent color in three places, so a small room feels connected instead of busy.
    • Finish with a simple reset routine, since a small room shows clutter faster than a large one.

    1. Apartment-Size Loveseat With Slim Arms

    Small apartment living room with a compact loveseat with slim arms and raised legs.

    A loveseat or a compact two-seater often fits a small apartment living room better than a full three-seater sofa. Look for slim arms, raised legs, and a seat depth you can sit in without perching on the edge. Slim arms save several inches on each side, and raised legs let the floor show beneath the sofa, which makes the piece look lighter in the room.

    Measure the wall or the rug zone first, then mark the footprint on the floor with tape and walk around it. Check that doors and drawers still open, and that you can pass the sofa without turning sideways. A sofa that fits the room leaves space for a side table, a lamp, and a clear path, which matters more than one extra seat you rarely use.

    2. Floated Seating Group on One Rug

    Small apartment living room with a floated sofa on one rug, front legs on the rug, and a clear walkway.

    Pushing every piece against the walls often leaves an awkward empty middle and a room that feels like a corridor. Try pulling the sofa a few inches off the wall and setting the seating group on one rug, with the front legs of the sofa and chairs resting on it. The rug marks the living zone, the gap behind the sofa gives the room breathing space, and a slim console behind the sofa can hold books or a lamp.

    Tape the rug footprint on the floor before you move heavy pieces, and keep the main walking route clear. For rug size and placement advice, see these living room rug ideas. A rug that fits the seating group makes the whole room feel settled, even when the floor area is small.

    3. Round Coffee Table With No Sharp Corners

    Small apartment living room with a round pedestal coffee table and compact seating.

    A round coffee table suits a tight living room because it has no sharp corners to bump into on a narrow walking route. A pedestal base works well, since a single central leg leaves room for feet and for chairs pulled close on all sides. Choose a table just large enough for drinks and a book, rather than the largest table that fits.

    Place the table where you can reach it from the sofa without standing, and leave enough space to walk around it on at least one side. If the room is very tight, a small round table with a lower shelf gives you a second surface for books without adding another piece of furniture. Round shapes also soften a room full of straight lines from the sofa, the rug, and the television wall.

    4. Nesting Tables Instead of One Heavy Table

    Small apartment living room with nesting side tables beside a compact sofa.

    Nesting tables stack into a small footprint when you are alone and pull apart into two or three side tables when friends visit. That flexibility suits a room where the layout changes through the day, from work to rest to guests, without buying extra furniture for each use. Choose tables light enough to move with one hand, with stable legs that do not wobble on a rug.

    Keep the largest table beside the sofa and tuck the smaller ones under it or beside a chair, so they are close when needed and out of the way when not. Round tops are a good choice in tight walkways, since they have no sharp corners to catch a hip. One set of nesting tables can replace both a coffee table and a side table in a very small room.

    5. Tall Shelving Run on a Single Wall

    Small apartment living room with one tall shelving run on a single wall holding books and baskets.

    Floor space is scarce in an apartment, but wall space above head height is often empty. One tall bookcase or a run of shelves on a single wall can hold books, media, and everyday items without spreading storage across the room. Keep heavy items low, everyday items at hand height, and lighter display pieces up high, and anchor tall furniture to the wall following the maker instructions.

    Leave some open space on each shelf so the wall reads as storage with breathing room rather than a packed warehouse. One tall run usually works better than shelves on every wall, which can make a small room feel boxed in. Use closed boxes or baskets on the highest shelf so the top row looks tidy from below.

    6. Storage Ottoman That Works as Table and Seat

    Small apartment living room with a storage ottoman with a tray beside a compact sofa.

    A storage ottoman holds blankets and serves as a coffee table or an extra seat, so it earns its floor space twice. Choose a firm, flat top if you plan to set drinks on it, and add a tray to give glasses a stable surface. Check the lid action before you buy, since an ottoman that is hard to open will not get used for storage.

    Keep the ottoman close to the sofa, where blankets are actually needed, and store only the items you reach for often, such as throws and remote controls. When guests visit, move the ottoman to the side as an extra seat and use the nesting tables for drinks. One piece doing two jobs well beats two pieces that each do one job poorly and crowd the floor.

    7. Large Mirror Opposite the Window

    Small apartment living room with a large mirror opposite a bright window reflecting daylight.

    A large mirror placed opposite or beside a window reflects daylight deeper into the room and gives the eye a second view of the space, which makes a small room feel wider. Choose a mirror large enough to reflect something pleasant, such as the window view or a plant, rather than a blank wall or clutter. Check for glare at different times of day before settling on a final position.

    Fix mirrors with hardware suited to their weight, and size the mirror to about two thirds of the furniture below it. For mirror shapes, heights, and placement advice, see these mirror wall decor ideas. One large mirror usually works better than several small ones scattered across the room, since a single reflection reads as a clear focal point.

    8. Sheer Curtains Hung High and Wide

    Small apartment living room with sheer white curtains hung high and wide at a window.

    Hang sheer curtains at the window to soften daylight and give privacy without blocking light. Sheers suit a small apartment because they add softness without heavy fabric, dark color, or a busy pattern competing with the room. They also let you keep the window mostly uncovered during the day, which helps a small room feel open.
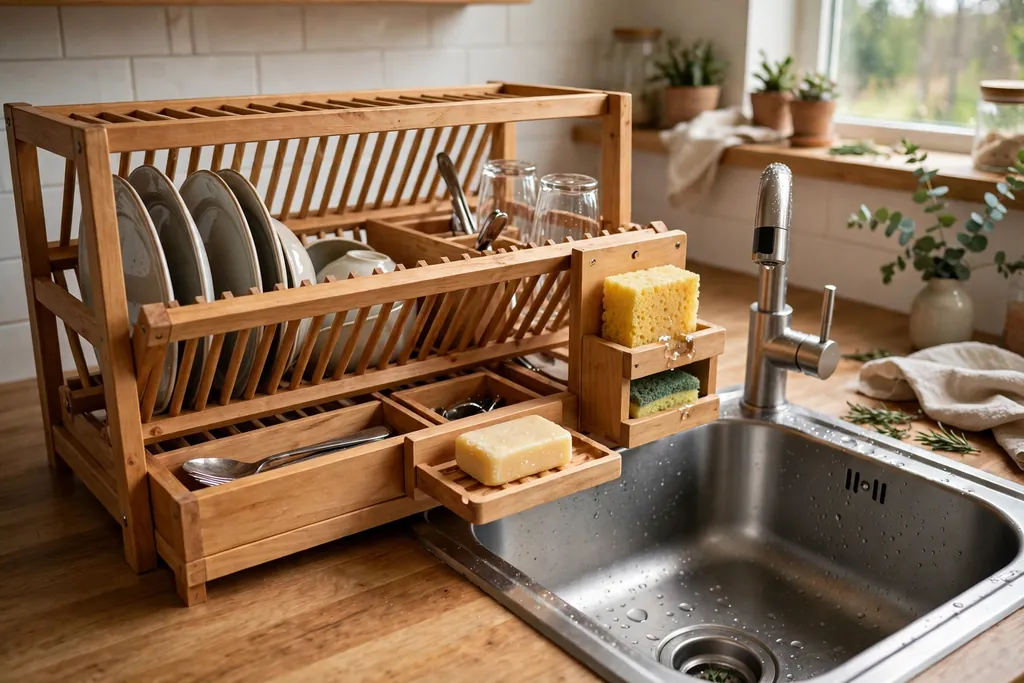
    Hang the curtain rod close to the ceiling and a little wider than the window, so the window looks taller and the curtains stack clear of the glass when open. Choose a washable fabric, since window curtains collect dust, and keep the same treatment on windows in one open room so the space reads as planned. If you need darkness for sleep in a studio, add a simple blind behind the sheer layer.

    9. Calm Neutral Base With Texture, Not Color Clutter

    Small apartment living room in a calm warm neutral palette with layered textures, throws, and cushions.

    A calm base makes a small room feel settled rather than busy. Warm white, soft oatmeal, or pale greige on the walls and the largest furniture gives you a background that suits almost any accent you add later. The interest comes from texture rather than from adding more color: a nubby throw over a smooth sofa, a woven basket beside a plain side table, linen cushions against cotton ones.

    Limit strong color to a small number of accents, and repeat those accents in more than one spot so the room feels connected. If you rent and cannot paint, the same effect comes from a large rug, curtains, and a sofa cover in warm neutrals. A calm base also makes it easier to change accent items later, since cushions, art, and a rug can change without repainting or replacing furniture.

    10. One Accent Color Repeated in Three Places

    Small apartment living room with one rust accent color repeated in cushions, a throw, and art.

    One accent color, repeated in three places, ties a small living room together without adding clutter. Pick a color already in the room, such as a rust cushion, a blue throw, or the tones in a rug, then repeat it in a small way in two more spots, such as a plant pot and a framed print. The repetition makes the color look deliberate, rather than like a single item added at random.

    Keep the rest of the room calm, so the accent color has room to stand out. Avoid adding a second strong color through art alone, since a new color with no echo in cushions or throws can make the wall feel detached from the seating group. If you tire of the accent, you can change three small items in an afternoon, which is far easier than changing a sofa or a rug.

    11. Light at Three Levels, Not One Ceiling Light

    Small apartment living room in the evening lit by a floor lamp, a table lamp, and a small shelf lamp.

    A single ceiling light flattens a small room and makes it feel harsh in the evening. Three levels of light work better: ambient light from a ceiling fixture or a tall floor lamp, task light from a table lamp or reading lamp where you sit, and a low glow from a small lamp on a shelf or a candle-style light on a side table. Put the brightest light where you need to see, such as beside the reading chair, and keep the overall level soft in the evening.

    Dimmable bulbs or smart plugs let you shift from a bright daytime room to a calm evening one without rewiring anything, which matters in a rental where electrical changes are limited. Place a floor lamp behind the sofa shoulder so light falls on the page, not into your eyes, and keep lamp bases small so they do not crowd the side table.

    12. Window Reading Corner With One Chair

    Small apartment living room window reading corner with one armchair, floor lamp, and side table.

    A reading corner needs only three things: a comfortable chair, light aimed at the page, and a surface for a drink and a book. The window end of a living room is a natural spot, since it offers daylight and a view during the day. Angle the chair slightly toward the room so the corner feels part of the living space rather than cut off from it.

    Add a floor lamp behind the chair shoulder for evening reading, and a small basket beside the chair to hold the current book and a throw. Give the chair its own light and a reachable surface, instead of filling every gap around it with furniture. A corner that holds one chair well is more useful than a corner crowded with pieces no one sits in.

    13. Open Bookcase Divider for a Studio

    Studio apartment living area divided from a sleeping area by an open bookcase.

    In a studio apartment, the living room and sleeping area share one open space, and a solid divider would cut the light and make both areas feel smaller. An open bookcase used as a room divider marks the boundary while letting light and air pass through, and it adds storage on both sides. Place books, baskets, and a few display pieces on the living side, and keep the bedroom side tidy so it does not become a second display wall.

    Anchor the shelf to the wall if your lease allows it, following the maker instructions, since a tall freestanding shelf can tip. If anchoring is not allowed, choose a low, wide unit instead of a tall narrow one, and keep heavy items on the lowest shelves. Leave a clear walking route around at least one end, so the division never feels like a wall.

    14. Fold-Down Desk That Closes Away

    Small apartment living corner with a wall-mounted fold-down desk open with a laptop.

    Working from the living room is easier when the work setup can disappear at the end of the day. A wall-mounted fold-down desk gives you a proper work surface that folds flat against the wall when you finish, leaving the room free for relaxing in the evening. Mount it at a comfortable writing height, fix it into wall studs or with fixings suited to your wall type, and keep a small shelf above it for a laptop, notebook, and charger.

    A chair that slides fully under a nearby table, or a folding chair hung on a hook, completes the corner without a permanent desk footprint. Close the desk at night as a small ritual that separates work time from rest time. For more small apartment zoning and work corner ideas, see these minimalist small apartment ideas.

    15. Picture Ledges for Art You Can Rotate

    Small apartment living room with picture ledges holding layered framed prints above a sofa.

    A narrow picture ledge lets you lean framed prints and small art against the wall instead of hanging each piece separately, which suits renters who want to limit holes and anyone who likes to change the display. Hang one or two ledges at eye level, overlap frames of different sizes, and lean the largest frame at the back. Rotating the art with the seasons or when you find a new print keeps the room feeling fresh without buying new furniture.

    Keep the ledge clear of the walkway and secure the frames so they cannot slide off, and leave one end of the ledge empty so the arrangement looks intentional rather than crowded. Picture ledges also let you test a gallery layout before you commit to hanging it properly, since you can move frames in seconds.

    16. Clear Furniture That Shows the Floor

    Small apartment living room with a glass-topped coffee table showing the rug and floor beneath.

    Clear furniture, such as a glass-topped coffee table or an acrylic side table, shows the rug and floor beneath it, so the center of the room looks less solid. In a small apartment, that see-through quality matters, since a solid block of wood or fabric in the middle of the room can make the floor area feel smaller than it is. Pair a glass top with a slim metal or wood frame, so the table still feels like furniture, not like a missing piece.

    Keep the surface underneath tidy, since a glass top shows everything below it, including the rug pattern and any storage underneath. Wipe glass regularly, since fingerprints show fast on a clear table. Use clear furniture for one or two pieces only, such as a coffee table and a side table, and keep the sofa and storage in solid materials so the room still feels grounded.

    17. Wall-Mounted Television and Slim Media Shelf

    Small apartment living room with a wall-mounted television and a slim media shelf.

    Mounting the television on the wall frees the floor space a media console would take, and it lets you choose a slim media shelf for only the items you actually use. Mount the television at a height where the center of the screen sits near eye level from your usual seat, not high above the sofa. Hide cables in a cord cover painted to match the wall, so the wall stays calm.

    Keep the media shelf to one low run, with closed storage for chargers and games if the shelf is open, so the television wall does not become a second display wall. If mounting is not allowed, a slim console on legs gives a similar result with far less bulk than a wide cabinet, since floor showing beneath it keeps the piece looking light.
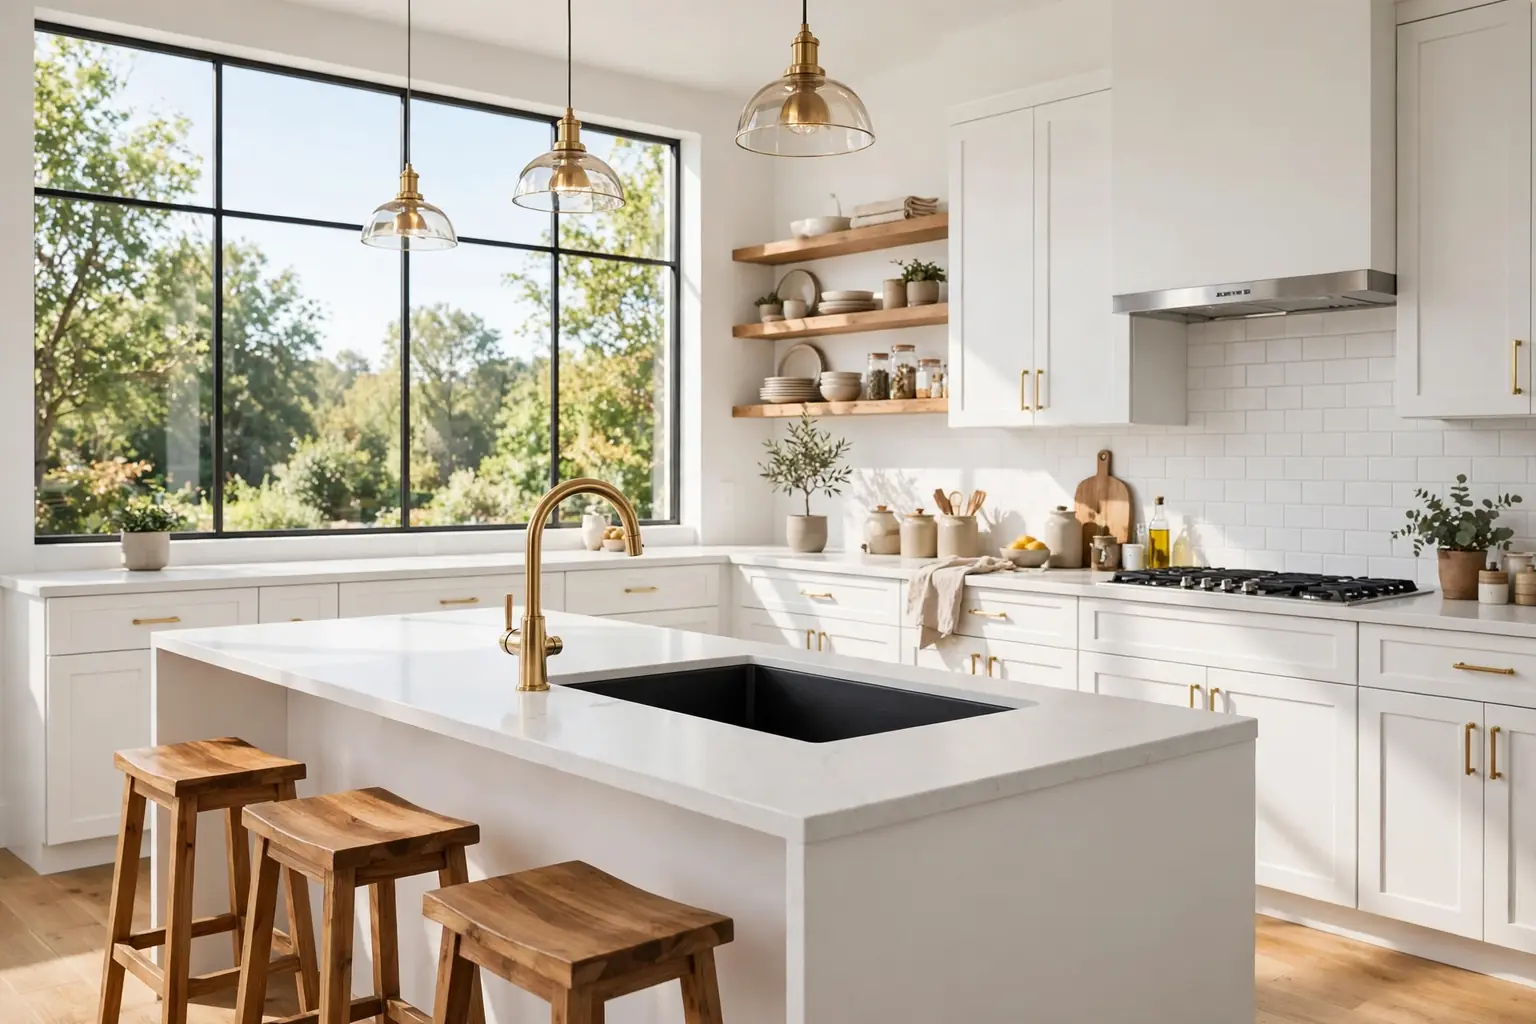
    18. Slim Console Behind the Sofa

    Small apartment living room with a slim console table behind a floated sofa holding a lamp and books.

    A slim console behind a floated sofa turns the gap behind the sofa into useful space, instead of a strip of wasted floor. Choose a console no deeper than the space allows, usually a narrow table or shelf unit, and use it for a lamp, books, and a charging spot. The console also gives the sofa a finished back view, which matters when the sofa is seen from the entry or the dining area.

    Keep the console top simple, with one lamp and one or two low items, so it does not become a shelf for clutter. A console with a lower shelf or a drawer adds storage for blankets or chargers without adding another piece of furniture. Measure the gap first, since a console that sticks out past the sofa arms will block the walking route.

    19. Landing Zone With Baskets and Trays

    Small apartment entry landing zone beside a living room with wall hooks, a dish, and baskets.

    A small living room stays calm only if clutter has somewhere to go. Give each category of everyday item a home: a basket for throws, a lidded box for remote controls and chargers, a tray on the coffee table to corral coasters and a candle. Near the door, a small landing zone with a hook for keys, a dish for small items, and a basket for bags stops clutter from migrating onto the sofa.

    Once a week, walk the room with a basket and return anything that has drifted out of place; a ten minute reset keeps the room calm without a deep clean. When everything has a home, tidying becomes putting things back rather than deciding where things belong. For more cozy small room storage ideas, see these cozy apartment living room ideas.

    20. Sofa Bed for Guests Without a Spare Room

    Small apartment living room with a sofa bed dressed as a sofa with firm cushions and folded bedding nearby.

    A sofa bed gives visitors a real place to sleep without a second bed taking up floor space all week. In a small apartment with no guest room, that one change can free a whole corner for a desk, a reading chair, or clear floor. Test the fold-out action before you buy, and check that the mattress is comfortable enough for a real night, not just for sitting.

    Store bedding close to the sofa, such as in the storage ottoman or a basket beside it, so changing the sofa over stays quick. Dress the sofa bed with firm cushions during the day so it reads as a sofa, not as a bed waiting to be used. A daybed with firm cushions along the wall gives a similar result in a studio, where the same piece must serve both sitting and sleeping.

    21. Plants at Three Heights

    Small apartment living room with plants at three heights, a tall floor plant, trailing shelf plants, and a table plant.

    Plants bring life to a small living room, and placing them at three heights keeps them from crowding a single surface. A tall floor plant fills an empty corner, trailing plants on a shelf soften the storage wall, and a small potted plant on the coffee table or windowsill adds green at eye level when you sit down. Match each plant to the light it will actually get, so check the plant label before buying.

    Group plants that need similar watering together, use saucers under pots on wood floors, and start with three or four plants rather than a dozen so care stays manageable. A tall plant in a corner also softens a hard corner without adding furniture, and a trailing plant on a high shelf draws the eye upward, which helps a low ceiling feel taller.

    22. One-In-One-Out Reset to Keep the Room Calm

    Small apartment living room kept calm with a tidy coffee table tray, folded throw, and baskets.

    A small room shows clutter faster than a large one, so a simple rule helps more than a large storage purchase. For every new decorative piece that comes into the living room, move one piece out, whether to another room, into closed storage, or out of the home. The rule keeps surfaces from filling up slowly, one item at a time, until the room feels crowded again.

    Pair the rule with a short weekly reset: return items to their homes, fold throws, clear the coffee table tray, and check the landing zone by the door. A ten minute reset once a week keeps the room calm without a deep clean, and it shows you quickly which storage spots are working and which ones need a basket or a tray instead. A room that stays calm is easier to enjoy, and easier to change, than a room that needs a full tidy before you can sit down.

    Conclusion

    A stylish small apartment living room is not about fitting more into the room. It is about choosing furniture that fits, storage that uses the walls, light at more than one level, and soft layers that invite you to stay. Start with the layout and one rug, add the storage and lighting ideas that solve your biggest daily frustrations, and finish with plants and textiles. Try one or two ideas this weekend, live with them for a week, and adjust before adding more. If an idea here helped your space, save this post to your apartment decorating board on Pinterest so you can find it when you are ready for the next change.

    FAQs

    What size sofa works best in a small apartment living room?

    Measure the wall or the rug zone first, then choose a sofa that leaves clear walking routes on at least two sides. A loveseat or a compact two-seater often fits better than a full three-seater, and a sofa with slim arms and raised legs takes up less visual space than a bulky low frame. Mark the footprint with tape on the floor and walk around it before ordering, including the space needed to open nearby doors and drawers.

    How can I make a small apartment living room look larger without renovating?

    Use light, mirrors, and floor space to your advantage. Hang a large mirror opposite a window, hang sheer curtains high and wide, choose furniture with raised legs or clear tops so the floor shows, and keep one calm base palette across the largest surfaces. Remove one bulky piece, such as a wide media console, and replace it with a wall-mounted television and a slim shelf, and the room will feel larger without any building work.

    What size rug should I choose for a small apartment living room?

    Choose a rug large enough for the front legs of the sofa and chairs to rest on it, since that links the seating into one group. In a very small room, a compact rug under the coffee table only can work, as long as it is larger than the table on all sides. Tape the rug size on the floor, walk around it, and check that doors and drawers still open freely before you buy.

    How can I add storage to a small apartment living room without renovating?

    Use the walls and the furniture you already have. A tall bookcase or shelf run stores a lot without using more floor space, a storage ottoman hides blankets, and baskets inside open shelving keep small items sorted. Wall-mounted shelves and a fold-down desk add function with only a few fixings, and both can usually be removed and patched when you move out. Check your lease and use fixings suited to your wall type.

    Can a small apartment living room hold a work area and a guest bed?

    Yes, if each job has a piece that does two things or folds away. A fold-down desk gives you a work surface that closes flat at night, a sofa bed gives guests a real bed without a spare room, and nesting tables give you extra surfaces only when friends visit. Keep the work corner and the sleeping setup in different zones, even if those zones are only marked by a rug and a shelf, so work and rest do not blend into one cluttered corner.

    How do I keep a small apartment living room from looking cluttered?

    Give every everyday item a home, such as a basket for throws, a tray for small items on the coffee table, and a landing zone by the door for keys and bags. Use closed storage for most items, keep only one or two display pieces per surface, and follow a one-in-one-out rule for new decorative pieces. A short weekly reset, returning drifted items to their homes, keeps the room calm without a deep clean.


  • 22 Fireplace Wall Ideas with Tv for Living Room to Refresh Your Space

    22 Fireplace Wall Ideas with Tv for Living Room to Refresh Your Space

    A fireplace wall with a TV above or beside it can be the hardest wall in the living room to get right, since two focal points have to share one space. The ideas below cover mantel mounts, recessed niches, full feature walls, built-in storage, and asymmetric layouts, so you can pick an arrangement that fits your wall size, your fireplace type, and how your seating faces the room. Before you mount anything, check the heat output above your fireplace, plan the cable route, and sit in your usual seat to test the viewing height.

    Key Takeaways

    • Mount the TV so its center sits close to eye level from your usual seat, and keep the gap between mantel and TV as small as heat rules allow, so you are not craning your neck.
    • Check heat before you mount: measure the wall temperature above the fireplace at full output, and follow the TV maker and fireplace maker clearance guidance.
    • Hide cables inside the wall, a cable channel painted to match, or a hollow mantel, rather than letting them hang beside the fireplace.
    • Size the TV to the wall and the fireplace, not to the largest screen available: the TV should relate to the mantel width and the seating distance.
    • Give the wall one clear lead: either the fireplace or the TV leads, and the other supports it, so the wall does not feel split in two.
    • Plan storage for boxes, consoles, and remotes in a cabinet or a low console, so the feature wall stays calm when the TV is off.

    1. Classic Mantel Mount With a Slim Frame

    TV mounted above a traditional living room mantel with a slim frame and low mantel styling.

    A TV mounted directly above a traditional mantel is the simplest fireplace wall layout, and it works best when the TV is close in width to the mantel below it. Choose a slim fixed mount, center the TV on the mantel, and keep the mantel styling low, with one or two small items at the ends, so the screen stays the clear focus when it is on.

    Check the heat first: run the fireplace at full output and feel the wall where the TV will sit, then confirm the clearance in both manuals. Route the power and HDMI cables down through the wall or behind a painted cable channel to the nearest outlet. A soundbar can sit on the mantel itself, but keep it clear of the fire opening and out of the direct heat path.

    2. Recessed Niche With the TV Set Flush

    TV set flush into a recessed wall niche above a modern fireplace.

    A recessed niche sets the TV into the wall above the fireplace, so the screen sits flush with the surrounding surface instead of jutting out. This layout suits a new build or a wall you are already opening up, since the recess needs framing depth and a clear route for cables and ventilation. The flush finish makes the wall read as one calm panel, even with a large screen.

    Leave ventilation gaps around the recess and an access point for cables, so you can reach the connections later without opening the wall again. Finish the recess edges neatly with trim or a shadow gap, and paint the inside the same color as the wall so the TV blends in when it is off. This idea suits rooms where a proud TV would crowd a walkway or catch glare from a side window.

    3. Full Stone Feature Wall With a Mounted TV

    Full height stone fireplace wall with a TV mounted above the fire opening.

    A full height stone wall gives the fireplace and TV a single strong backdrop, from floor to ceiling. Use natural stone, stone veneer, or stacked stone panels across the whole wall, mount the TV on a bracket fixed into the stone or its backing, and let the fireplace sit low in the center. The texture carries the wall when the TV is off, so the room never looks blank.

    Fixing into stone needs the right drill bit and anchor for the stone type, so mark the bracket holes carefully and drill once. Keep the mortar joints and stone edges tidy around the TV bracket and the fire opening, and choose a dark grout or seal if the stone is pale. A stone wall pairs well with wood beams, leather seating, and warm lamp light.
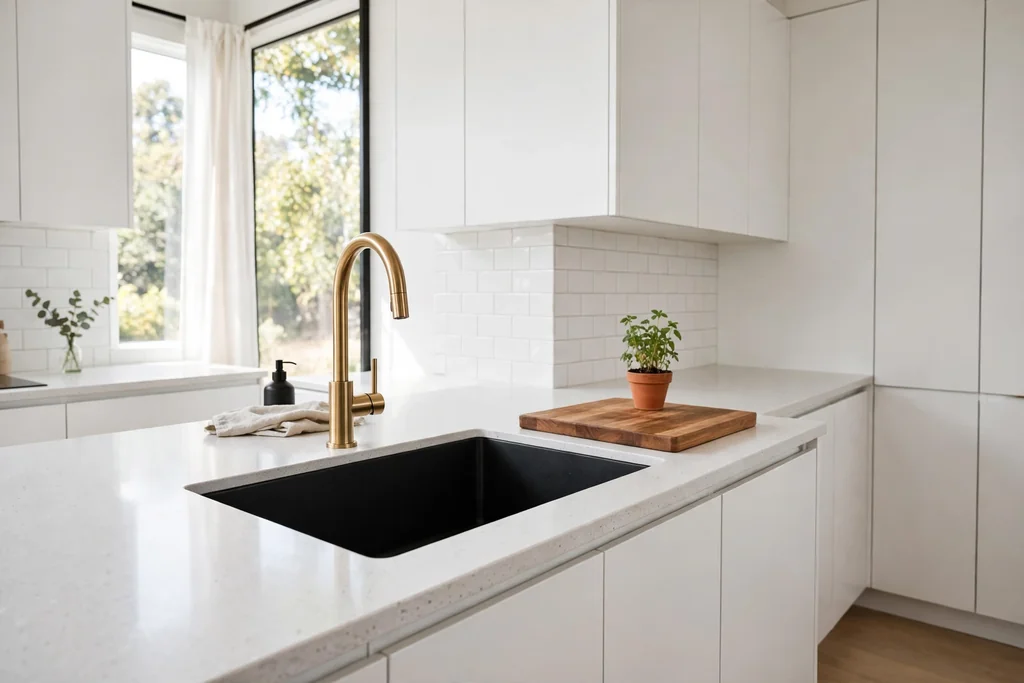
    4. Shiplap Wall With the TV Above the Fireplace

    White shiplap fireplace wall with a TV mounted above the fireplace.

    Shiplap boards give a fireplace wall a relaxed, coastal or farmhouse feel, and they make cable hiding easier than a solid masonry wall. Run the boards vertically for height or horizontally for width, mount the TV on a bracket fixed through the boards into studs, and paint the whole wall one pale color so the fireplace opening stands out.

    Mark the studs before you fix the bracket, since shiplap alone will not hold a TV. Leave a small gap or a removable board section behind the TV for cable access, and paint the cable channel the same color as the boards. This layout suits a white or soft grey room where the fireplace surround is simple and the seating is relaxed.

    5. Built-In Shelves Flanking Fireplace and TV

    Built-in shelves flanking a central fireplace and TV wall in a living room.

    Built-in shelves on both sides of the fireplace wall turn a TV wall into useful storage. Build or fit shelving units from floor to ceiling on each side, keep the fireplace and TV centered between them, and use the shelves for books, baskets, and a few decorative pieces. The symmetry frames the screen and stops the wall from feeling bare at the edges.

    Keep the shelf styling calm and leave some empty space on each shelf, so the display does not compete with the TV. Hide media boxes inside a closed cabinet section at the bottom of one unit, with a small hole for the remote signal or an extender. This layout suits a family room where books, games, and consoles need a home near the seating.

    6. Black Accent Wall for TV and Fireplace

    Black accent wall with a TV mounted above a glowing fireplace in the evening.

    A black or deep charcoal wall behind the fireplace and TV makes the screen blend in when it is off, which suits a room used mainly for evening viewing. Paint the whole feature wall one dark tone, including any trim, mount the TV flush, and let the fireplace glow stand out against the dark surface. The dark wall also hides cables and brackets better than a pale wall.

    Balance the dark wall with pale seating, a light rug, and warm lamps, so the room does not feel closed in. Keep the mantel styling simple, since dark walls show dust and clutter quickly. This idea works best on a wall with some daylight or good lamp light, rather than a windowless corner.

    7. Marble Slab Surround With a TV Above

    Marble slab fireplace surround with a TV mounted above it.

    A large marble slab surround gives a fireplace wall a clean, high end finish with very few joints. Use one slab or two book matched slabs around the fire opening, mount the TV above on a bracket fixed through the slab into solid backing, and keep the rest of the wall plain. The veining becomes the decoration, so the wall needs little else.

    Fixing through stone slab is a job for a fitter with the right tools, and the bracket must reach solid backing, not just the slab. Choose a slab with veining that does not clash with the TV frame, and seal the stone if the maker advises it. This layout suits a calm, modern room with plain seating and one or two quiet accessories.

    8. Brick Fireplace Wall With a TV Mounted On It

    Brick fireplace wall with a TV mounted above the mantel.

    A brick fireplace wall, painted or left natural, gives the TV a warm, textured backdrop that suits older homes. Mount the TV on a masonry rated bracket, center it over the fire opening, and keep the mantel styling simple, with wood, plants, or a single piece of art at one end. The brick texture stops the wall from looking flat when the screen is off.

    Drill into mortar joints rather than the brick face where possible, and use anchors rated for masonry and the TV weight. If the brick is painted, touch up the paint around the bracket so the fixings do not stand out. This idea suits a room with wood floors, a leather sofa, and a rug that pulls the brick tones together. For rug size and placement under a fireplace seating group, see these living room rug ideas.

    9. Asymmetric Layout With the TV to One Side

    Asymmetric living room wall with a fireplace at one end and a TV at the other.

    An asymmetric layout places the TV to one side of the fireplace instead of above it, which solves the neck strain problem of a high mantel mount. Put the fireplace at one end of the wall and the TV on a low console or wall bracket at the other end, then angle the seating slightly so both are in view. The wall feels relaxed rather than formal, and each focal point gets its own space.

    Balance the two sides with weight: if the fireplace side has a tall chimney breast, give the TV side a tall plant or a floor lamp. Keep the cable route short by placing the console near an outlet, and choose a TV size that matches the console width. This layout suits a long wall, an open plan room, or a household where some viewers prefer the fire and others prefer the screen.

    10. Floating Mantel Shelf Below a Wall Mounted TV

    Floating wood mantel shelf below a wall mounted TV above a fireplace.

    A floating mantel shelf below a wall mounted TV gives the fireplace wall a light, modern line without a full surround. Fix a chunky wood or stone shelf to the wall above the fire opening, mount the TV above it, and use the shelf for a soundbar, a candle, or one low plant. The open space below the shelf keeps the wall feeling airy.

    Fix the shelf into studs or masonry with brackets rated for its weight plus anything placed on it, and keep items on the shelf clear of the heat path. The shelf depth should suit the soundbar if one will sit there, with a little space behind for cables. This idea suits a small or modern room where a heavy surround would crowd the seating.

    11. Wood Slat Panel Wall Behind Fireplace and TV

    Vertical wood slat panel wall behind a fireplace and a mounted TV.

    Vertical wood slats behind the fireplace and TV add warmth and rhythm to a plain wall. Fit slats from floor to ceiling across the feature wall, or across a central panel, mount the TV on a bracket fixed through the slats into studs, and let the fireplace sit low in the panel. The gaps between slats hide cables and give the wall depth.

    Choose a slat wood that matches the floor or the furniture, and keep the finish matte so the wall does not shine under the TV light. Leave a removable slat or a gap behind the TV for cable access, and keep the slats clear of the fire opening by the clearance the fireplace maker states. This layout suits a warm modern room with wood furniture and soft lighting.
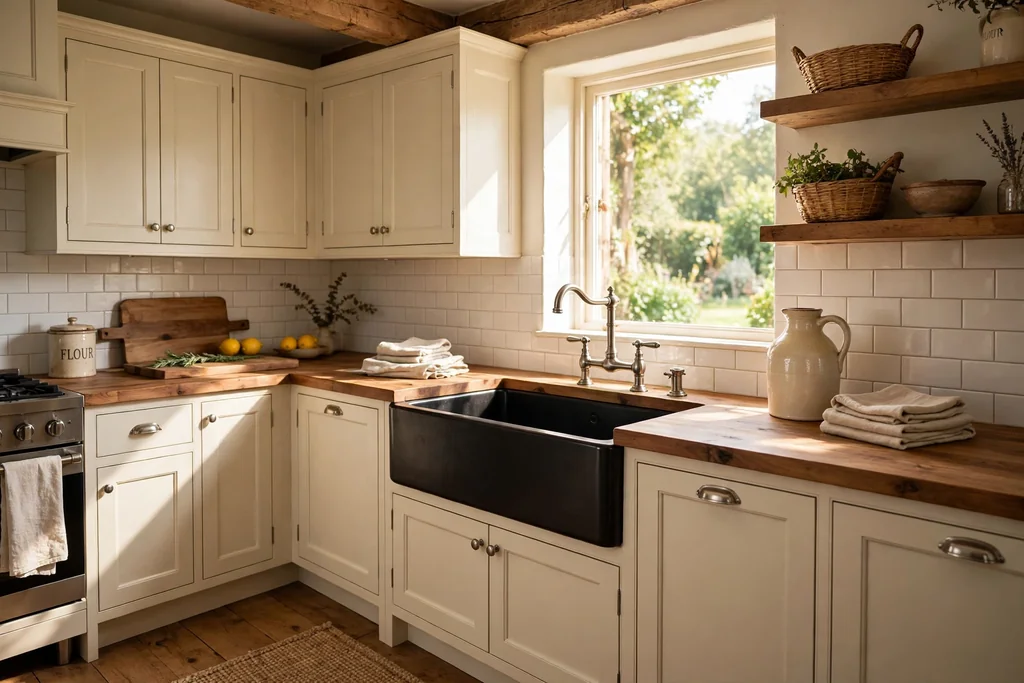
    12. Corner Fireplace Wall With an Angled TV

    Corner fireplace wall with a TV mounted at an angle above it.

    A corner fireplace wall places the fire at an angle across the room corner, with the TV mounted on the angled breast or on the adjoining wall. This layout frees up the long walls for seating and storage, and it suits a square room where a flat fireplace wall would force the sofa too close to the screen. Angle the seating to face the corner, with a rug anchoring the group.

    Check the viewing angle from each seat, since a corner TV is seen at an angle from the side chairs. Mount the TV on a full motion bracket if the angle needs adjusting, and route cables through the corner breast where possible. Keep the corner mantel styling minimal, since the angle already draws the eye.

    13. Electric Fireplace and TV Media Console Wall

    Electric fireplace set into a low media console with a TV mounted above.

    An electric fireplace set into a low media console, with the TV mounted above, gives a complete fireplace wall without a chimney. Choose a console wide enough for the TV, fit a linear electric fire into its center, and use the console drawers or doors for media boxes, consoles, and remotes. The whole wall can be fitted in a day, which suits renters and flat dwellers.

    Check the electric fire heat direction, since most blow heat forward or downward, which keeps the TV cooler than a wood fire. Keep a clear cable route from the console to the TV, and leave ventilation space around media boxes inside closed doors. This layout suits a bedroom style living room, a flat, or a room where a real flue is not possible.

    14. Tall Double Height Wall With a Linear Fireplace

    Tall double height living room wall with a linear fireplace and a TV above.

    A double height wall with a long linear fireplace low down and the TV above it suits a room with a tall ceiling and a large window wall. Keep the fireplace wide and low, mount the TV at a height that suits the main seating rather than the ceiling, and leave the upper wall plain or panelled so the eye is not pulled too high. The long fire line anchors the tall wall without forcing the TV up with it.

    Use a pull down TV mount if the only sensible position is high, so the screen can drop to eye level for viewing and rise again after. Keep the upper wall finish simple, since a busy finish high up will compete with the screen. This idea suits a new build or a converted space with a tall living wall.

    15. Gallery Wall Framing the TV and Fireplace

    Gallery wall of framed prints arranged around a TV above a fireplace.

    A gallery wall around the TV and fireplace softens the black screen when it is off and makes the wall feel like part of the room scheme. Hang framed prints, photos, and one small mirror around the TV, keeping even gaps and one shared frame finish, and leave the fireplace surround plain so the gallery does not crowd it. The TV becomes one rectangle among many, rather than a blank slab.

    Keep frames clear of the heat path above the fireplace, and use light frames that are easy to move for TV access. A gallery suits a room with collected art, a family photo collection, or a wall that feels empty beside a small TV. For mirror sizing and placement within a mixed gallery, the advice in these mirror wall decor ideas pairs well with a fireplace gallery wall.

    16. Hidden TV Behind a Sliding Panel Above the Fireplace

    Sliding wall panel hiding a TV above a living room fireplace.

    A sliding panel or a piece of art on a track hides the TV above the fireplace when it is not in use, so the wall reads as a fireplace wall first. Fit a panel, a framed print, or a pair of sliding doors on a track across the TV recess, and slide it aside for viewing. The fireplace stays the focus for conversation, and the screen appears only for films and shows.

    Choose a track rated for the panel weight and fit stops so the panel cannot slide into the heat path. Keep the panel finish close to the wall color or the art style of the room, so it does not look like a cover. This idea suits a formal living room, a room used mainly for reading and talking, or a household that prefers the TV out of sight.
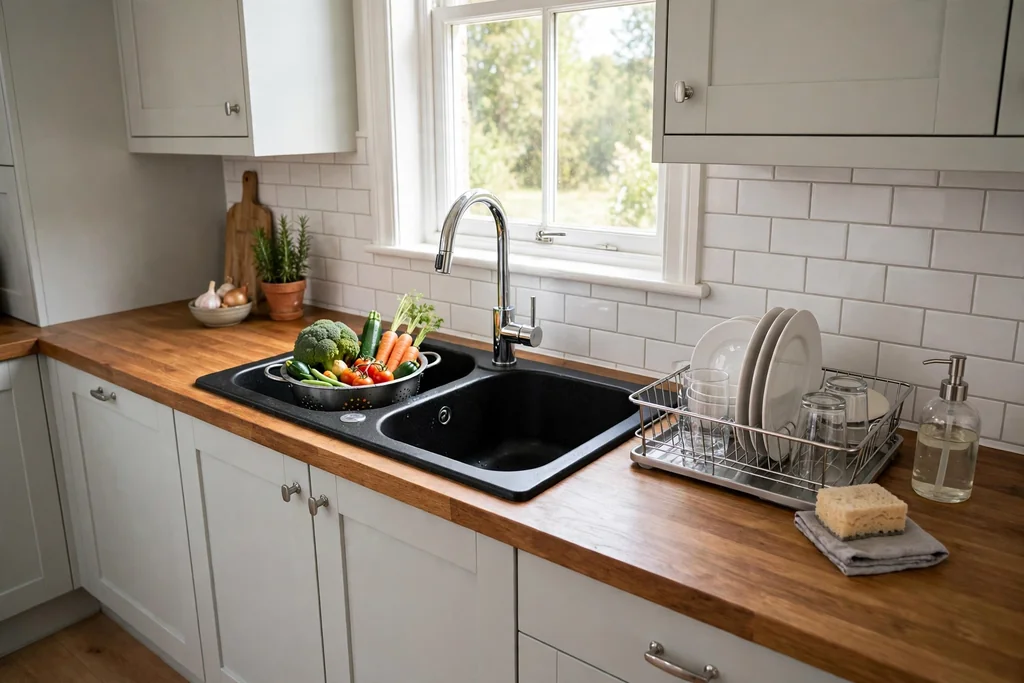
    17. White Minimalist Wall With a Frameless Electric Fire

    White minimalist fireplace wall with a frameless electric fire and a mounted TV.

    A white minimalist wall pairs a frameless electric fire with a wall mounted TV and almost no other decoration. Paint the wall, the surround, and any trim one white, fit a flush electric fire low in the wall, mount the TV above with hidden cables, and leave the mantel empty. The calm surface lets the fire glow and the screen carry the room.

    Keep the white clean with washable paint near the fire, and hide every cable inside the wall or a flush channel. A single low console or a bench below the fire gives the wall a base without adding clutter. This layout suits a small, bright room where a busy feature wall would feel crowded.

    18. Rustic Beam Mantel With a TV Above

    Thick rustic wood beam mantel with a TV mounted above a fireplace.

    A thick rustic wood beam as a mantel gives a fireplace wall warmth and a clear horizontal line for the TV above. Fix a reclaimed or new beam across the chimney breast, mount the TV above it on a bracket into the breast, and style the beam with one or two low items at the ends. The beam suits stone, brick, and plaster walls alike.

    Check the beam weight and fixings, since a solid beam is heavy, and keep it clear of the fire opening by the clearance the fireplace maker states. Seal the wood if it sits near a working fire, and avoid placing candles directly on the beam above the opening. This idea suits a cottage, a farmhouse, or a room with wood floors and soft furnishings.

    19. Concrete and Microcement Fireplace Wall

    Smooth concrete fireplace wall with a TV mounted above the fire opening.

    A concrete or microcement wall gives the fireplace and TV a smooth, industrial backdrop with subtle texture. Apply the finish across the whole feature wall, set the fire opening low and clean, and mount the TV on a bracket fixed into the solid wall behind. The plain surface suits a large TV, since nothing competes with the screen.

    Seal the finish as the maker advises, especially near a working fire, and keep the wall color mid toned rather than very dark, so the room does not feel cold. Pair the wall with wood, linen, and warm lamps to soften the hard surface. This layout suits a modern loft, a converted space, or a room with concrete floors.

    20. Full Cabinetry Wall With the TV Set In

    Fitted cabinetry wall with a TV and fireplace set into closed storage units.

    A full cabinetry wall sets the fireplace and TV into fitted units, with closed storage hiding every box and cable. Fit floor to ceiling cabinets across the wall, leave an open section for the TV and a lower opening for the fire, and use push to open doors so the wall reads as one calm panel when closed. The TV sits at eye level, not high above a mantel.

    Plan ventilation inside the cabinet sections that hold media boxes, and leave a service gap behind the TV section for cables. Keep one open shelf for a soundbar if one is used, and match the cabinet finish to the room, such as painted wood in a calm room or oak in a warm one. This idea suits a family room where storage matters as much as viewing.

    21. Arched Niche Fireplace Wall With a TV Above

    Arched niche fireplace wall with a TV mounted above the arch.

    An arched niche gives a fireplace wall a soft, classic shape that suits older homes and Mediterranean style rooms. Build or keep an arched opening for the fire, plaster the wall smooth, mount the TV above the arch on a flat section, and keep the surround plain so the arch shape leads. The curve softens the rectangle of the screen.

    Mount the TV on the flat wall above the arch, not on the curve itself, and center it on the arch below. Keep the arch finish simple, with limewash or plain plaster, so the shape is the feature. This layout suits a room with arched doorways, curved furniture, or a warm plaster finish elsewhere.

    22. Open Plan Divider Wall With Fireplace and TV

    Open plan divider wall with a fireplace and TV facing a living room seating group.

    A divider wall between the living area and another zone, such as a dining area, can hold the fireplace on one side and the TV on the other, or both on the living side with seating facing it. Build a partial height or full height partition, fit a see through or single sided fire, mount the TV on the living side, and arrange seating to face the divider. The wall defines the living zone without closing the room off.

    Check sight lines from the dining side, so the back of the TV does not face diners, and use a double sided fire if both sides should enjoy the glow. Route cables inside the partition and place media storage in the partition base. This layout suits an open plan flat or a large room split into living and dining zones.

    Conclusion

    A good fireplace wall with a TV starts with safety and viewing comfort, then style. Measure the heat, set the TV height from your usual seat, hide the cables, and give the wall one clear lead, whether that is the fire, the screen, or a calm panel that holds both. Pick one idea from this list that fits your fireplace type and your wall, and test the layout with painter tape and a cardboard screen outline before you drill. A wall planned this way will work for quiet evenings by the fire and for film nights alike, without forcing you to choose between the two.

    Save this list for your next living room refresh, and start with the checks that matter most: heat clearance, viewing height, and cable routes. Once those are settled, the finish, whether stone, shiplap, wood slats, or plain plaster, becomes the enjoyable part.

    FAQs

    How high should I mount a TV above a fireplace?

    Mount the TV so its center sits as close as possible to eye level from your usual seat, usually around 42 to 48 inches from the floor for a sofa seat, and keep the gap between mantel and TV small. If the mantel forces the TV high, use a pull down mount that lowers the screen for viewing, or choose an asymmetric layout with the TV beside the fireplace instead of above it. Test the height by sitting in your seat and looking at a taped outline before you fix the bracket.

    Will heat from the fireplace damage a TV?

    Heat can damage a TV if the wall above the fireplace gets too hot, so check before you mount. Run the fireplace at full output, measure the wall temperature where the TV will sit, and compare it with the limits in both the TV and fireplace manuals. A mantel that projects from the wall, a heat deflector, or an electric fire that blows heat forward can all reduce the temperature at the screen. If the wall stays hot, place the TV beside the fireplace rather than above it.

    How do I hide cables on a fireplace wall with a TV?

    Route cables inside the wall where the wall allows it, through a hollow mantel, or behind a cable channel painted to match the wall. Plan the route before you mount anything, and leave a small access point behind the TV so you can reach connections later. A low console or a closed cabinet below the TV gives cables a short, tidy path to media boxes and the nearest outlet.

    What size TV suits a fireplace wall?

    Choose a TV that relates to the mantel width and the seating distance, rather than the largest screen that fits the wall. As a guide, the TV width should sit comfortably within the mantel or chimney breast width, and the seating distance should suit the screen size for comfortable viewing. A TV much wider than the fireplace below it will dominate the wall, while a very small TV above a wide breast will look lost.

    Can I mount a TV on stone, brick, or shiplap?

    Yes, with the right fixings for each surface. Stone and brick need masonry rated anchors and a bracket fixed into solid material, while shiplap needs a bracket fixed through the boards into studs, since the boards alone will not hold a TV. Mark studs or solid points before drilling, use a bracket rated above the TV weight, and check that the fixings sit clear of the fire opening and any flue.

    Should the TV or the fireplace be the focal point?

    Give the wall one lead and let the other support it, so the wall does not feel split. If the fireplace is the lead, keep the TV modest, the surround strong, and the mantel styling simple. If the TV is the lead, keep the fireplace low and plain, and let the screen and seating arrangement set the room. In a room used mainly for conversation, the fireplace should lead; in a room used mainly for films, the TV can lead.


  • 32 Elegant Cream Living Room Ideas That Feel Both Cozy and Current

    32 Elegant Cream Living Room Ideas That Feel Both Cozy and Current

    Cream can look calm without looking cold, and current without looking stark. The trick is to mix warm cream tones with texture, wood, and soft contrast, so the room feels layered rather than flat. Use this list to pick one starting point, such as the sofa or the walls, then add two or three supporting ideas. Small changes, like new curtains or better lighting, can shift the whole room, while larger moves, like panelling or a new rug, set the tone for everything else.

    Key Takeaways

    • Start with a warm cream, not a cold white, and repeat it across walls, seating, and textiles.
    • Mix textures such as linen, boucle, velvet, leather, and wood so cream rooms do not look flat.
    • Add one warm metal, one wood tone, and one soft accent color to keep the scheme grounded.
    • Layer lighting with lamps and overhead light so the room works in daylight and in the evening.
    • Keep large pieces simple and let smaller pieces, such as trays, art, and cushions, carry the detail.

    1. Cream Walls With Warm White Trim

    Living room with warm cream walls, warm white trim, and a cream sofa.

    Paint the walls a warm cream and keep the trim in a slightly lighter warm white. The small shift in tone gives the room shape without a sharp contrast. Test paint in daylight and in lamplight before committing, since cream can read yellow or grey depending on the light. Keep ceilings in the same warm white family so the room feels calm from top to bottom.
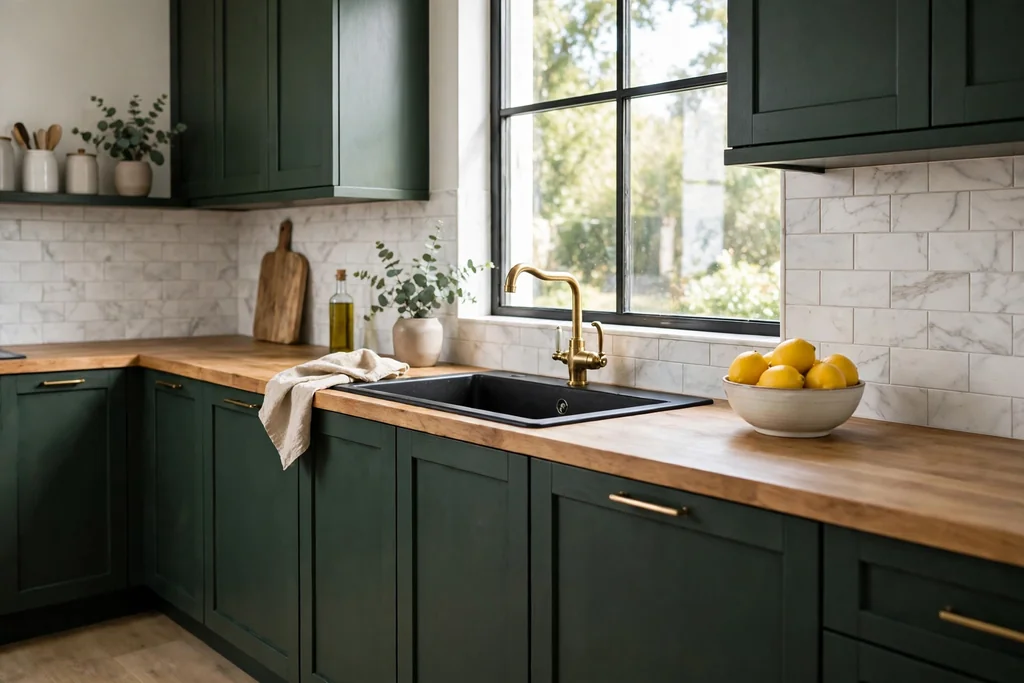
    2. A Cream Linen Sofa as the Anchor

    Cream linen sofa with cream cushions and a low coffee table in a living room.

    A cream linen sofa sets a relaxed, elegant base for the whole room. Linen has a natural texture that suits both casual and more formal rooms, and it pairs well with wood, brass, and woven details. Choose a removable cover if the sofa will get daily use, and keep a washable throw nearby for the seat cushions. Add cushions in two or three textures to stop the sofa looking plain.

    3. Cream Boucle Accent Chairs

    Two cream boucle accent chairs with a small side table between them in a bright living room.

    Boucle chairs add softness and a clear focal point beside a sofa or fireplace. Their nubby texture stands out against smooth linen and painted walls, which helps a cream room feel layered. Keep the chair frames simple, in wood or slim metal, so the fabric stays the focus. Place a small side table between a pair of chairs to make a natural conversation spot.

    4. Layered Cream Throws and Cushions

    Cream sofa layered with knit, linen, and velvet throws and cushions.

    Layer throws and cushions in cream, ivory, and pale oat to build warmth without adding color. Mix knit, linen, and velvet so each layer reads as a separate texture, even in a similar shade. Fold a throw over one sofa arm and drape another across the back, rather than covering the whole sofa. Swap one or two cushion covers by season to keep the look fresh with little effort.

    5. A Natural Oak Coffee Table

    Natural oak coffee table in front of a cream sofa, with a vase and books on top.

    A natural oak coffee table grounds a cream room with warmth and a clear wood grain. Oak works with cream because it adds depth without darkening the space. Choose a table with an open lower shelf if you need a place for books or baskets. Style the top with only three or four items, such as a vase, a stack of books, and a small tray, so the surface stays usable.

    6. A Cream Fireplace Surround

    Living room fireplace with a cream painted surround, candles, and a mirror above.

    Painting a fireplace surround cream can make an older fireplace feel lighter and more current. Keep the mantel simple and style it with a mirror, a pair of candles, or a small vase, rather than filling every inch. If the firebox is dark, a cream surround also helps the eye move across the room instead of stopping at the fireplace. Check that any paint used near heat is suitable for that surface before you start.

    7. Sheer Cream Curtains

    Tall windows dressed with sheer cream linen curtains in a bright cream living room.

    Sheer cream curtains soften daylight and give windows a finished look without blocking light. Hang the rod close to the ceiling and wide enough that the curtains clear the window when open, which makes the window look larger. Layer sheers with a heavier cream drape if you need privacy at night. Keep the fabric plain so the focus stays on the light and the view.
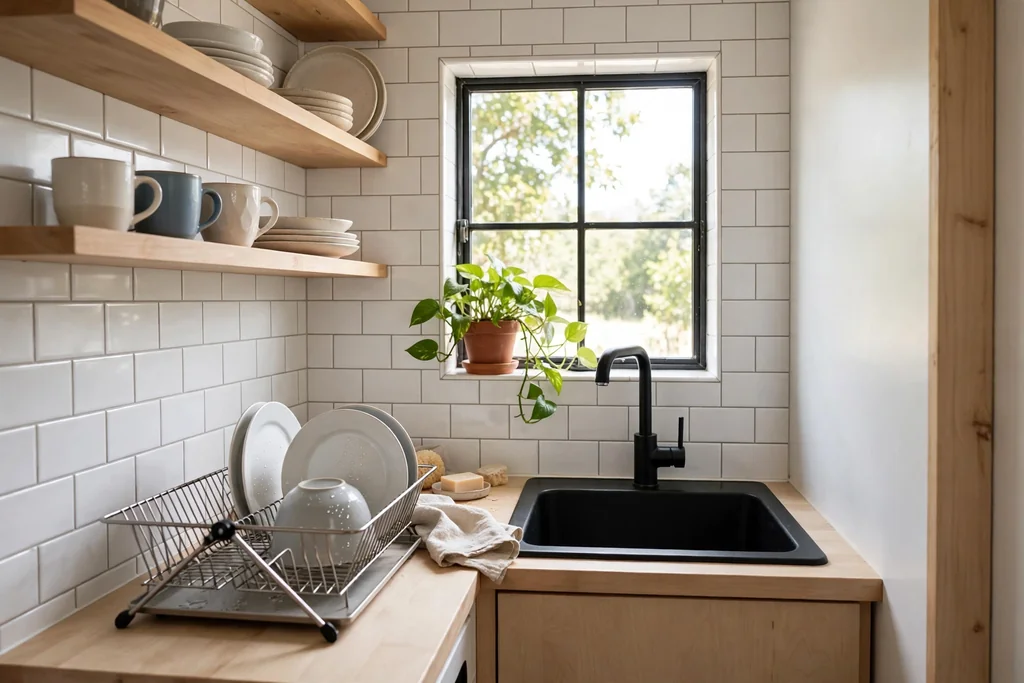
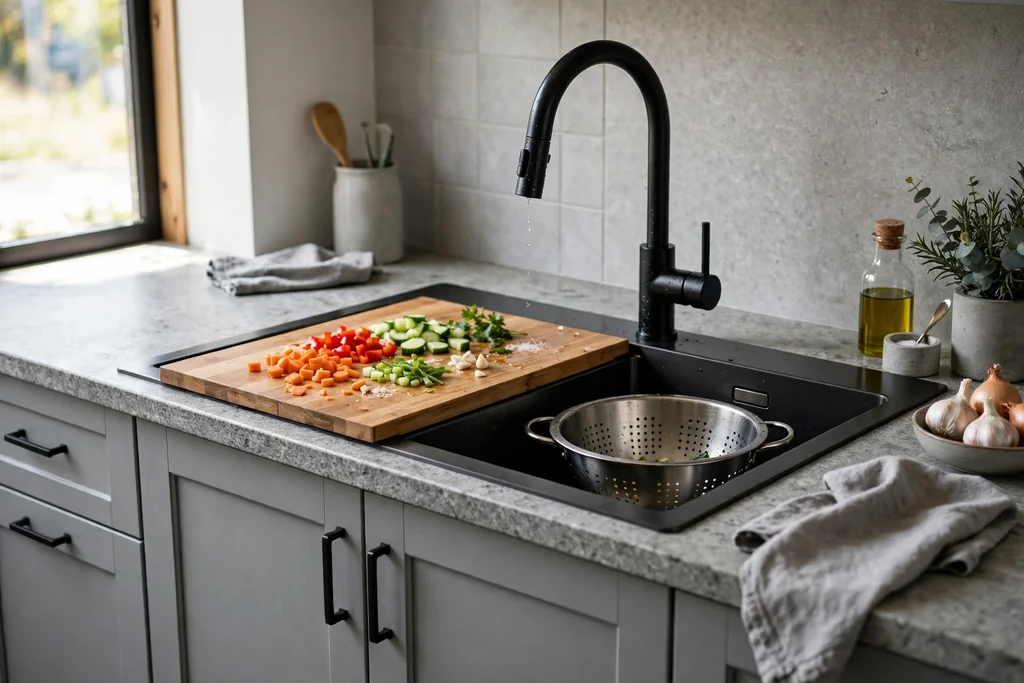
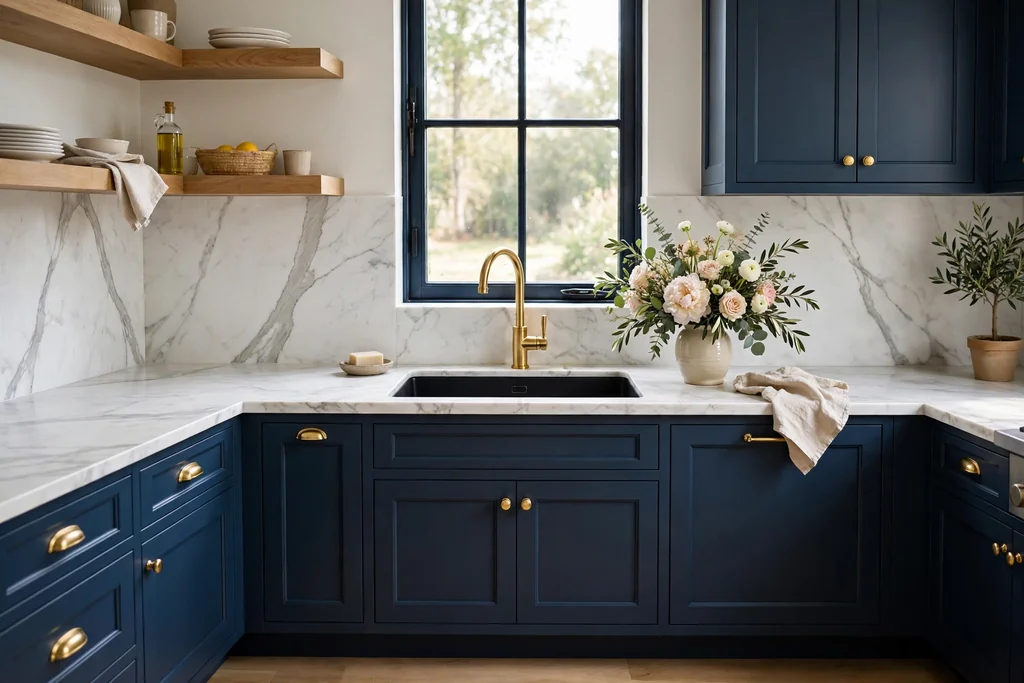
    8. A Large Cream Area Rug

    Large cream area rug on a wooden floor under a coffee table in a cream living room.

    A large cream rug ties the seating group together and softens a hard floor. Choose a rug big enough that the front legs of the sofa and chairs sit on it, which helps the group feel planned rather than scattered. A low pile rug is easier to clean in a busy room, while a thicker pile adds comfort underfoot. Add a rug pad underneath to stop slipping and to give extra cushioning.

    9. Brass Accents in a Cream Room

    Cream living room with brass accents, including a brass floor lamp, side table, and picture frames.

    Brass adds a warm glow that suits cream far better than a cold metal finish. Use it in small doses, such as a floor lamp, a side table, picture frames, or drawer pulls, rather than on every surface. Repeat the same brass tone two or three times so it looks planned. If you already have chrome or black details, keep brass to one area, such as lighting, to avoid a mixed metal look.

    10. Cream Built-In Shelves

    Cream built-in shelves beside a fireplace, styled with books, vases, and framed prints.

    Cream built-in shelves beside a fireplace or along a wall give storage without the visual weight of dark wood. Paint the shelves the same cream as the walls for a calm look, or use a slightly deeper cream to define them. Style shelves in groups, with books, vases, and framed prints, and leave some empty space so the display does not look crowded. Keep everyday items in baskets on lower shelves.

    11. Cream Paired With Sage Green

    Cream living room with sage green cushions, a sage green armchair, and plants.

    Sage green softens cream and adds a natural, garden feel to a living room. Use sage on cushions, one armchair, or plants, rather than repainting the whole room, if you want a low commitment change. The pairing works well with wood and woven textures, which keep it from feeling too pale. Add a deeper green plant or two to give the scheme a clear anchor.

    12. A Cream Velvet Sofa

    Cream velvet sofa with a gold side table and a cream rug in a living room.

    Cream velvet brings a soft sheen and a more formal feel than linen, which suits a room used mainly for relaxing and guests. Velvet catches light in a way that adds depth, even in a single color. Keep the rest of the room simple, with plain curtains and a light rug, so the sofa stays the focus. Brush or vacuum the fabric regularly to keep the pile even.

    13. A Cream-Framed Gallery Wall

    Gallery wall with cream and white picture frames above a cream sofa.

    A gallery wall in cream and white frames adds interest without breaking the calm palette. Mix print sizes and keep a consistent gap between frames for a tidy result. Lay the arrangement on the floor first to test the balance before hanging. Choose art with warm tones, such as landscapes, botanical prints, or line drawings, so the wall feels part of the room.

    14. A Cream Corner Sectional

    Large cream corner sectional sofa in a family living room with a coffee table and floor lamp.

    A cream corner sectional suits a family room where seating matters more than formality. It gives plenty of room for lounging and defines the seating area in an open plan space. Choose a sectional with a chaise on the side that gets the most use, and keep the coffee table within easy reach of all seats. Add a washable throw to the corner seat, which usually gets the most wear.

    15. A Cream Leather Armchair

    Cream leather armchair beside a fireplace with a reading lamp and side table.

    A cream leather armchair adds structure next to a softer sofa. Leather holds its shape well and wipes clean, which makes it a practical choice for a reading corner. Pair it with a small side table and a reading lamp, and add a folded throw for comfort. Keep leather out of direct sun where possible, since strong sun can dry and fade the finish over time.

    16. Layered Lighting for Evening

    Cream living room in the evening with table lamps, a floor lamp, and warm ceiling light.
    Cream rooms need layered lighting, since one overhead light can make the space feel flat at night. Combine a ceiling light with table lamps and a floor lamp, and use warm bulbs throughout for a consistent glow. Place lamps at different heights, such as a table lamp beside the sofa and a floor lamp in a corner, to spread light across the room. Put lamps on separate switches or dimmers if you can, so you can change the mood easily.

    17. Cream Wall Panelling

    Living room with cream painted wall panelling behind a sofa, with framed art.

    Cream wall panelling adds shape to plain walls and suits both classic and modern rooms. Paint the panelling the same cream as the wall for a subtle effect, or use a slightly deeper tone to make the panels stand out. Keep furniture simple in front of panelled walls, since the wall already carries detail. Panelling behind a sofa or along a hallway wall can give the room a finished feel without new furniture.

    18. Cream With Warm Wood Accents

    Cream living room with warm wood beams, wooden side tables, and a wooden floor.

    Warm wood accents, such as beams, side tables, and floorboards, stop a cream room from feeling too pale. Use one main wood tone and repeat it in two or three places, rather than mixing many wood finishes. A wooden tray, a wooden frame, and a wooden side table can be enough to ground the scheme. If the floor is already wood, echo that tone in smaller pieces for a calm, joined up look.

    19. A Slipcovered Cream Sofa

    Relaxed slipcovered cream sofa with loose covers in a casual bright living room.

    A slipcovered cream sofa suits a relaxed home where easy cleaning matters. Loose covers can be removed and washed, which makes cream a practical choice even with children or pets. Keep the cover neatly tucked and smooth the seat cushions after use so the sofa still looks cared for. Pair a slipcovered sofa with natural textures, such as cotton, rattan, and wood, for a casual but tidy room.

    20. A Round Cream Ottoman as a Coffee Table

    Round cream upholstered ottoman used as a coffee table, with a tray and books on top.

    A round cream ottoman works as a soft coffee table in a room where sharp corners are a concern, or where extra seating is useful. Place a firm tray on top to hold drinks and books, so the surface stays practical. Choose an ottoman with storage inside if you need a place for throws or magazines. A round shape also helps traffic flow in a smaller room, since it has no corners to walk around.

    21. A Cream Window Seat Reading Nook

    Cream window seat reading nook with cream cushions, a throw, and books.

    A cream window seat turns an unused window area into a reading nook. Add a thick cushion in cream, a few supportive cushions, and a throw for cooler days. Keep books in a basket or on a small shelf nearby, and add a wall light or a small lamp if you plan to read in the evening. A window seat also gives extra seating when guests visit, without adding another large chair.

    22. Cream With Terracotta Accents

    Cream living room with terracotta cushions, terracotta pots, and warm clay accents.

    Terracotta cushions, pots, and clay details add warmth to cream without making the room feel dark. Use terracotta in small amounts, such as two cushions and a planter, so it reads as an accent rather than a second main color. The pairing suits rooms with wood floors and natural light, and it works well with plants. Keep the rest of the palette cream and wood so the terracotta stays clear.

    23. A Cream Console and Media Unit

    Cream console and media unit under a wall-mounted television, styled with vases and books.

    A cream console and media unit keep a television wall calm and tidy. Choose a unit with closed storage for cables, remotes, and games, and keep only a few styled items on top. Hang the television at eye level from the sofa, and leave a small gap between the unit and the wall fittings for cables. Add a vase or a stack of books at one end so the unit looks styled rather than purely functional.

    24. Subtle Cream Textured Wallpaper

    Living room feature wall with subtle cream textured wallpaper behind a cream sofa.

    Subtle cream textured wallpaper adds depth to a feature wall without introducing a strong pattern. A grasscloth look, a fine stripe, or a soft geometric texture can all work, as long as the tone stays close to the rest of the room. Use it on one wall, such as behind the sofa, and keep the other walls plain. Check a large sample in the room first, since texture can look different in daylight and lamplight.

    25. Cream With Black Accents for Contrast

    Cream living room with black picture frames, a black floor lamp, and black coffee table details.

    A few black accents give a cream room a current edge and stop it looking too soft. Use black on picture frames, a floor lamp, lamp bases, or coffee table details, and keep the black pieces slim rather than bulky. Repeat black in two or three places so it looks planned, and keep the main furniture cream. This pairing works best when the room already has good daylight, which keeps the black from feeling heavy.

    26. A Cream Chaise Lounge

    Cream chaise lounge by a window in a living room, with a side table and reading lamp.

    A cream chaise lounge gives a living room a dedicated spot for reading or resting, without the size of a second sofa. Place it by a window or in a quiet corner, with a side table and a lamp within reach. Keep the chaise in a simple shape and a plain fabric so it blends with the sofa, rather than competing with it. Add one cushion and a light throw, and leave the rest of the surface clear.

    27. Cream Side Tables and Trays

    Cream side tables beside a sofa in a living room, styled with trays, a lamp, and a small vase.

    Cream side tables and trays help a living room feel finished and make seating more useful. Place a side table beside each main seat, at a height close to the sofa arm, so drinks and books are easy to reach. Use a tray on a coffee table or ottoman to group smaller items and to protect the surface. Keep table styling simple, with one lamp or vase and one or two books, so the tables stay usable.

    28. Plants and Greenery in a Cream Room

    Cream living room with green plants in cream pots.

    Plants add life and color to a cream room, and green suits cream in every season. Use cream pots to keep the look calm, and vary plant heights, with a tall plant in a corner and smaller plants on shelves or tables. Choose plants that suit the light in your room, and group them in odd numbers for a natural look. Wipe leaves now and then, since dust shows more clearly in a bright, pale room.

    29. A Gold-Framed Statement Mirror

    Gold-framed statement mirror above a cream console in an elegant cream living room.

    A large gold-framed mirror above a console or fireplace adds light and a clear focal point. The mirror reflects daylight across the room, which helps a cream scheme feel bright, and the gold frame ties in with brass details elsewhere. Hang the mirror at a height where it reflects the room, not just the ceiling, and keep the console below it simple. A round or arched mirror softens a room with many straight lines.

    30. Cream Storage Baskets for a Tidy Room

    Tidy cream living room with woven storage baskets beside a sofa.

    Woven storage baskets in cream and natural tones keep throws, magazines, and toys close at hand without looking cluttered. Place a large basket beside the sofa for throws, and smaller baskets on shelves for remotes and chargers. Choose baskets with lids for items you want hidden, and open baskets for throws you use every day. Label baskets only if the household needs it, since plain baskets usually look calmer.

    31. A Cream Living Room for a Small Space

    Small cream living room with a compact sofa and wall mirror.

    Cream works well in a small living room because it reflects light and makes walls feel less close. Choose a compact sofa, slim side tables, and a mirror to open up the room, and avoid bulky furniture that blocks walkways. Keep the rug light and the curtains sheer, and use wall shelves instead of a large bookcase where floor space is tight. One clear focal point, such as art or a mirror, keeps a small cream room from feeling empty.

    32. Cream With Soft Blush Pink Accents

    Cream living room with soft blush pink cushions and a vase.

    Soft blush pink cushions, a throw, or a vase add gentle warmth to cream without turning the room pink. Use blush in two or three small places, such as cushions and a single vase, and keep the main furniture cream. The pairing suits rooms with brass or gold details, which pick up the warmth in the pink. If blush starts to feel too sweet, add a wood or black detail to ground it.

    Conclusion

    An elegant cream living room does not need a full redesign. Pick a warm cream base, add texture through fabric and wood, and finish with a few well chosen accents in brass, green, terracotta, or black. Keep large pieces simple, layer the lighting, and leave room for the space to breathe. Save this list and return to it when you are ready to change one area at a time, starting with the change that will make the biggest difference in your room.

    FAQs

    How do I stop a cream living room looking flat?

    Mix textures and tones. Use linen, boucle, velvet, and wood in warm cream, ivory, and pale oat, and add one warm metal and one accent color. Texture gives the eye something to follow, even when the palette stays pale.

    What color goes best with a cream living room?

    Sage green, terracotta, soft blush pink, warm wood, brass, and black all work with cream. Choose one main accent and repeat it in two or three places, rather than adding many colors at once, to keep the room calm.

    Is a cream sofa practical for everyday use?

    Yes, if you choose the right fabric and cover. Removable, washable covers, leather, and performance fabrics all make cream easier to live with. Keep a throw on the most used seat and clean small marks promptly.

    Should cream walls be warm or cool?

    Warm cream usually suits a living room better, since it feels cozy in both daylight and lamplight. Cool cream can look grey in a north facing room, so test samples on each wall before painting.

    How do I light a cream living room in the evening?

    Layer the light. Use a ceiling light for general light, plus table lamps and a floor lamp with warm bulbs at different heights. Dimmers help you move from bright, practical light to a softer evening glow.

    Can cream work in a small living room?

    Yes. Cream reflects light and keeps walls feeling open, which helps a small room. Pair it with compact furniture, sheer curtains, a mirror, and light rugs, and avoid bulky pieces that block walkways.