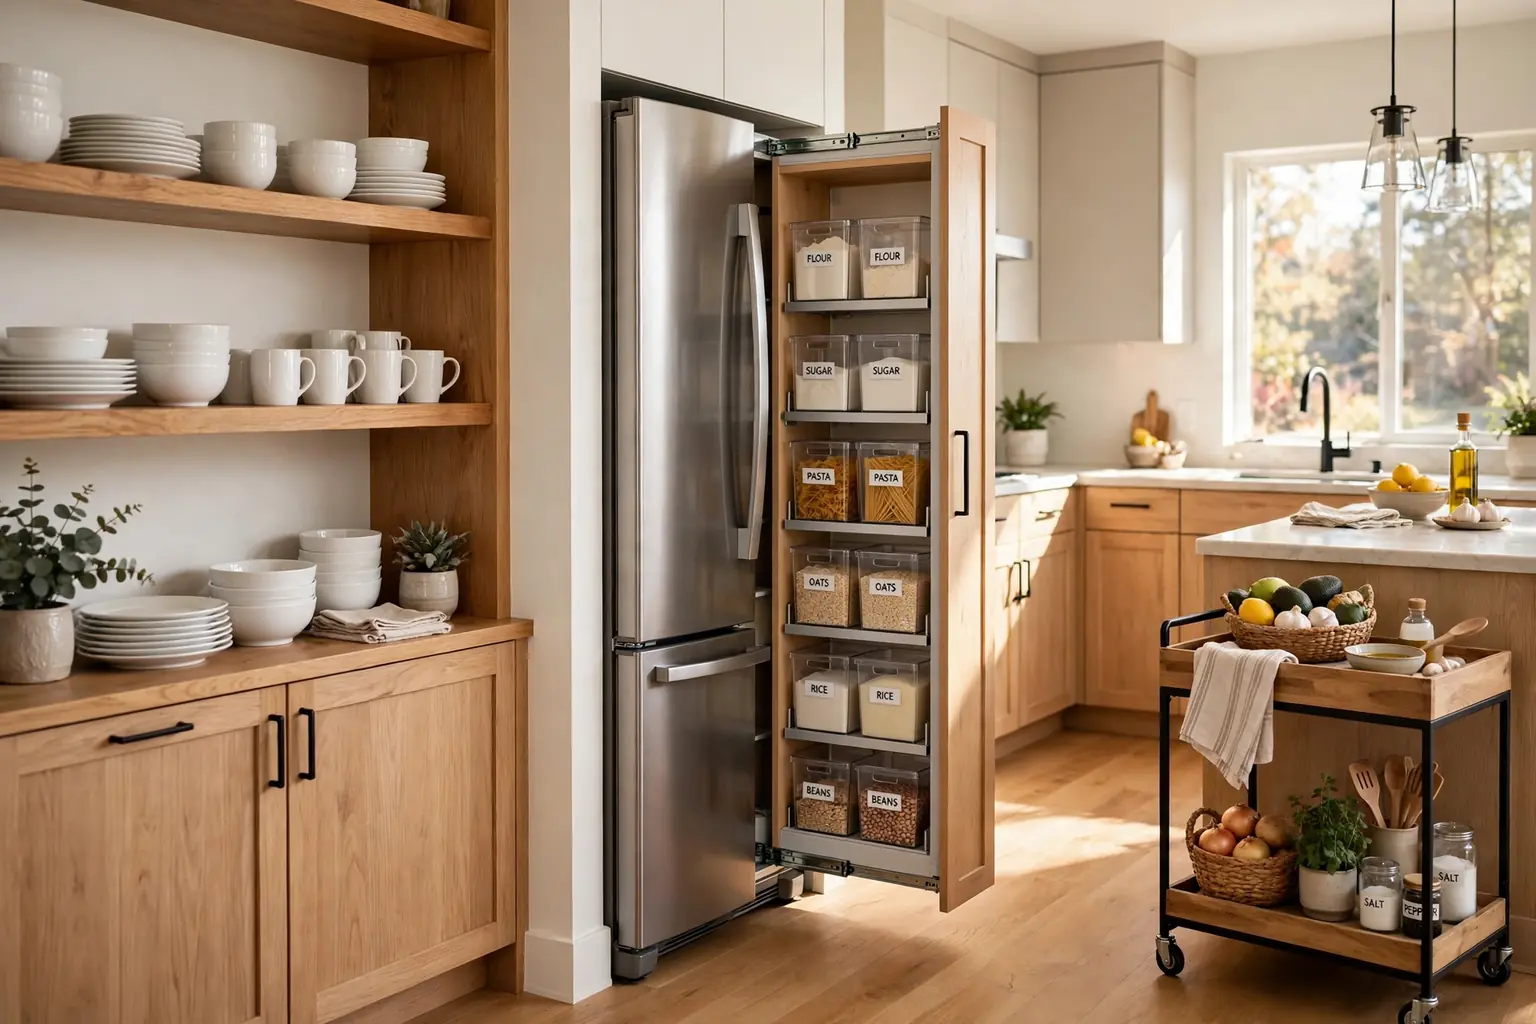
A kitchen feels bigger the moment every item has a clear home. You do not need new cabinets or a full remodel to get there. A pull-out shelf, a labelled bin, or a rail for pans can clear a counter and cut the time you spend hunting for a lid or a spice jar. These 26 easy kitchen storage ideas cover cabinets, drawers, pantries, counters, and the fridge, so you can pick one change for a cluttered corner or work through several for a full room refresh. Start with the spot that slows you down most, measure before you buy any insert, and keep daily items where you can reach them without a step stool. For wall storage that pairs with these ideas, the kitchen wall storage ideas guide covers shelves, rails, and racks in more detail.
Key Takeaways
- Start with one clutter point, such as spices, pans, or food tubs, and give it a clear home before buying more storage.
- Keep daily items between waist and eye level, and move rarely used pieces higher or into closed storage.
- Use clear bins and labels in the pantry and fridge, so you can see stock levels without pulling everything out.
- Bring items to you with pull-outs, turntables, and drawers, instead of reaching into deep, dark cabinets.
- Leave one clear stretch of counter for prep, and give small appliances a home away from it.
- Review each new system after two weeks, and move anything you never reach for to a less handy spot.
1. Open Shelves for Everyday Dishes
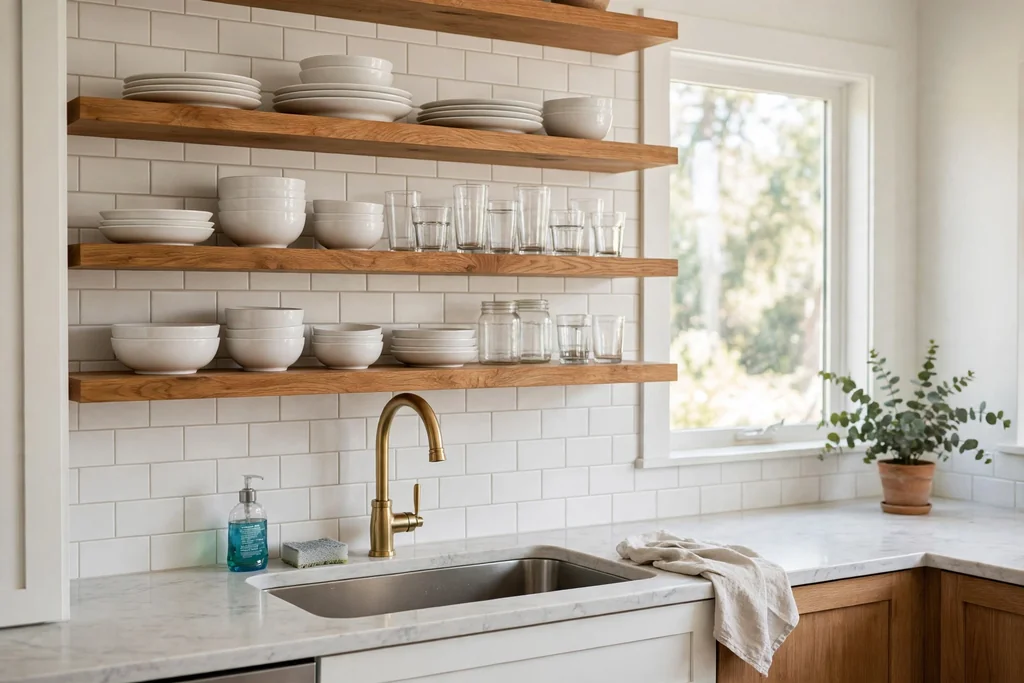
Put your most used plates, bowls, and glasses on two open wood shelves near the sink or dishwasher. This keeps the daily set in one visible place and shortens the trip from washing up to putting away. Choose shelves deep enough for dinner plates, and keep the run short so the display stays easy to manage and dust.
Group plates in one stack, bowls in another, and glasses in a single row, with space left at each end. Keep heavy stacks low, and limit each shelf to one or two groups. Store rarely used serving pieces in a closed cabinet, so the open shelves hold only what you reach for daily.
2. Slim Pull-Out Pantry Beside the Fridge
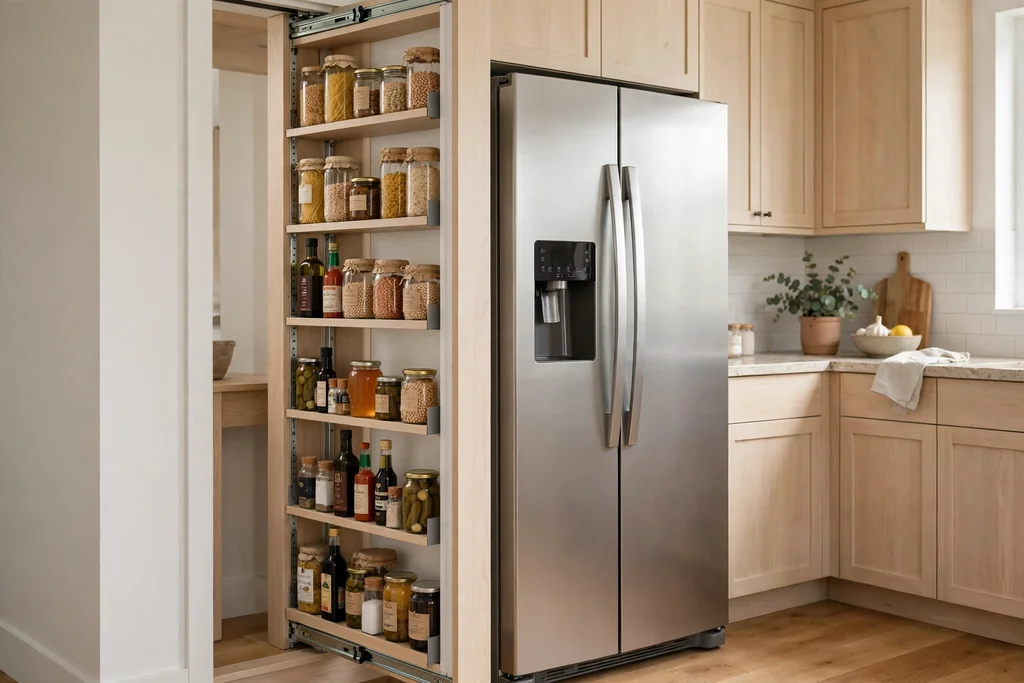
The narrow gap beside a fridge or oven often holds nothing but a broom. A slim pull-out pantry turns that gap into tall, visible storage for oils, sauces, spices, and cans. Because the whole unit slides out, you can see every jar without reaching to the back of a deep cupboard.
Measure the gap, the door swing, and the depth before ordering, and check that the unit clears skirting boards and handles. Group items by use, such as cooking oils together and baking items together, and put heavy jars low. This is one of the easiest ways to add pantry space without moving a wall.
3. Deep Pot Drawers with Dividers
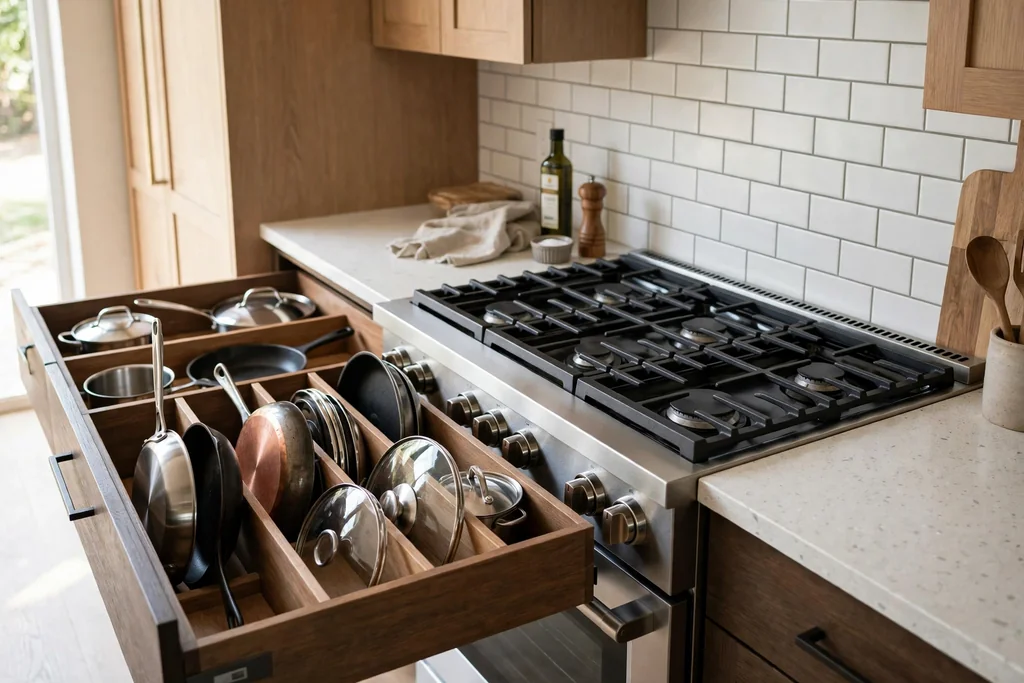
Deep drawers beat low cabinets for pots, pans, and mixing bowls, because you can see everything from above and lift items out without unstacking. Two or three deep drawers beside the stove can hold the pans you use most, with lids in a vertical divider in the same drawer or the one beside it.
Use drawer dividers or peg boards to stop pans sliding when the drawer closes. Put the heaviest pans in the lowest drawer, and keep a lighter drawer for baking sheets and trays. If you are keeping some cabinets, convert only the run beside the stove first, where the change makes the biggest daily difference.
4. Two-Tier Turntable in a Deep Cabinet
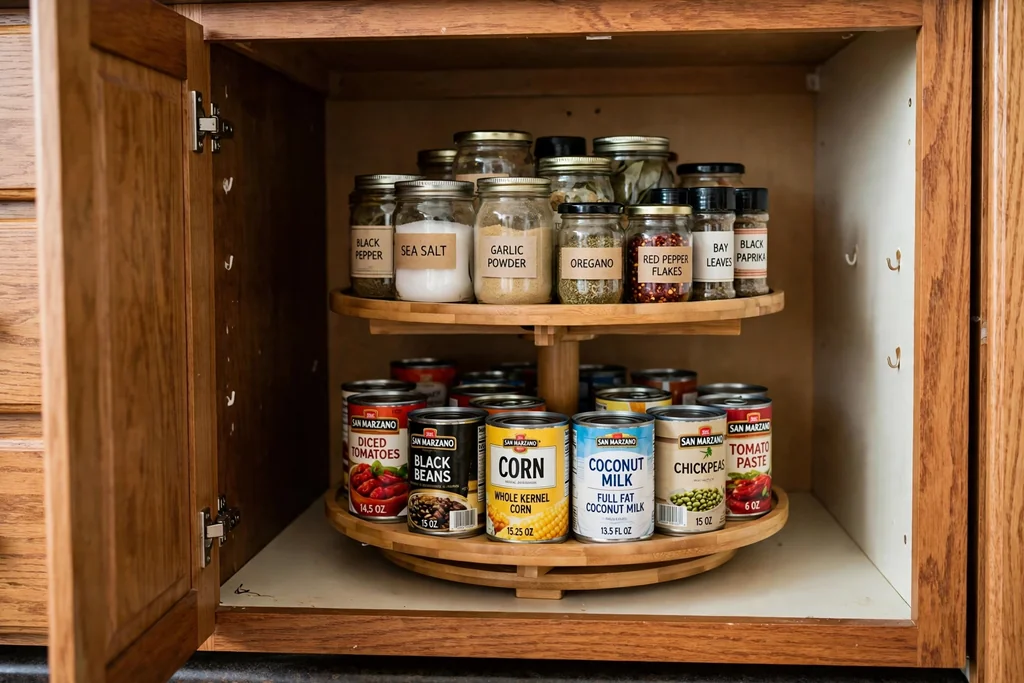
A two-tier turntable spins the back of a deep cabinet around to the front, so cans, jars, and small appliances stop getting lost. Choose a diameter that clears the door opening and any hinges, and load heavier items on the lower tier. Round shelves leave small gaps at the edges, so keep tiny items in a bin on the shelf rather than loose.
Group one category per turntable, such as sauces on one and baking items on another, and leave a finger gap around the edge so it spins freely. Wipe the shelf during your usual cabinet clean, since spills collect where the turntable meets the shelf.
5. Clear Labelled Bins in the Pantry
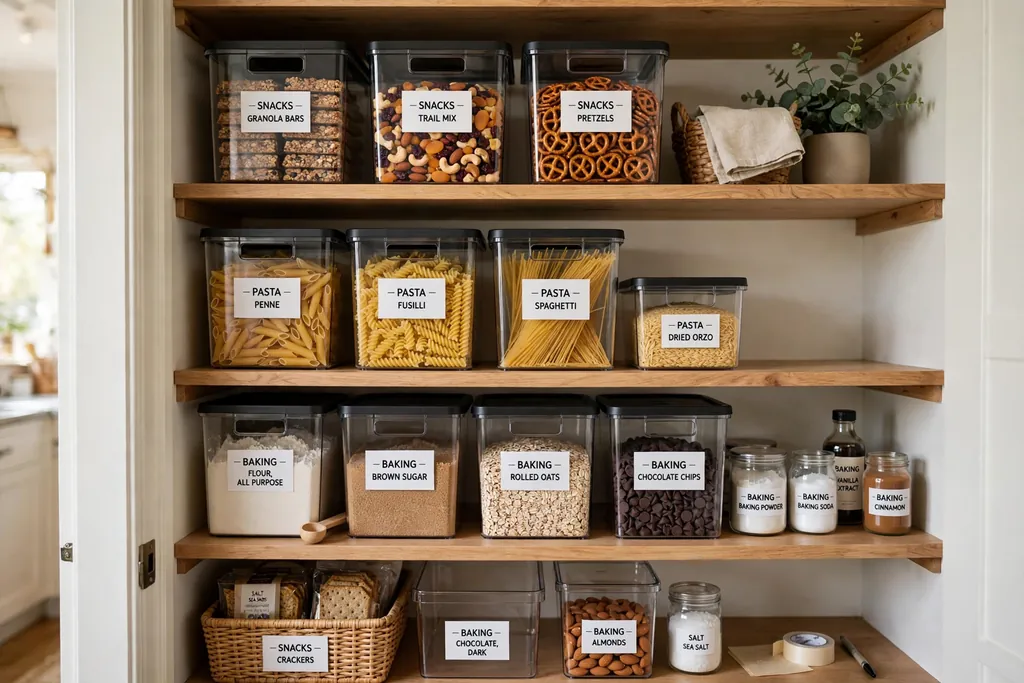
Clear bins turn a mixed pantry shelf into rows you can read at a glance. Use one bin per group, such as snacks, pasta, baking, and breakfast, and label each bin on the front, not the top, so the label stays visible when bins sit on a high shelf. Clear sides let you see stock levels without pulling the bin out.
Decant only the foods you buy often, and keep bulk refills in their store packs at the back of the shelf or in a separate bin. Check dates when you refill, and keep the bin size matched to the shelf depth, so nothing sticks out past the shelf edge.
6. Spice Jars in a Drawer Insert
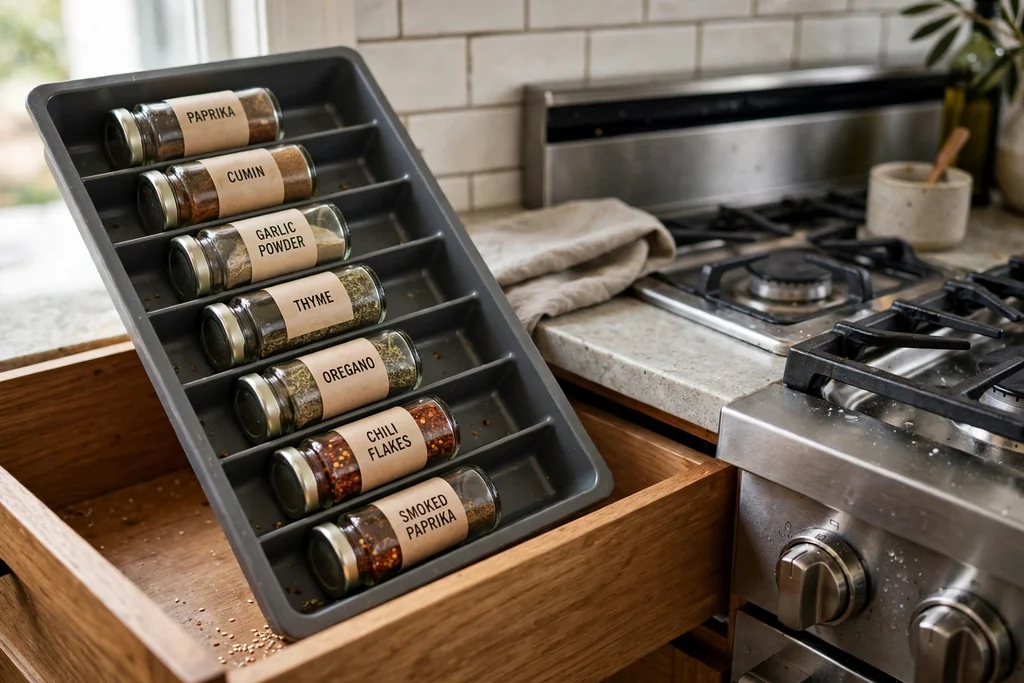
A tilted insert in a drawer lays spice jars out with labels facing up, so you can read every jar without lifting rows of bottles. This suits cooks who own more than a dozen spices and want them near the stove but out of sight. Choose an insert sized to your drawer, and use jars of one size so the rows sit level.
Group spices by use, such as everyday cooking, baking, and heat, and keep the drawer beside the prep counter rather than above the stove. Refill jars from larger store packs kept in a cabinet, and check dates twice a year. A drawer that holds 12 to 20 jars suits most home cooks.
7. Over-Sink Dish Rack
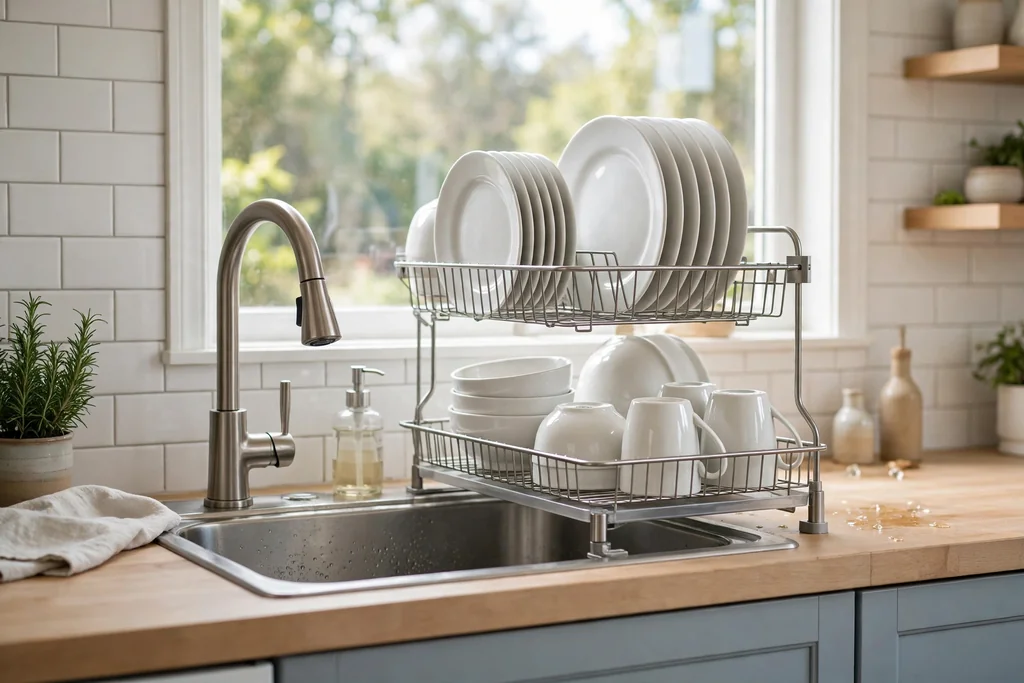
An over-sink dish rack gives washed plates a drying spot that does not cover the counter. Choose a rack with a drip tray or one that drains into the sink, and pick stainless or coated wire for a wet zone, with open sides so air moves around the plates. Size the rack for your daily plate count, not for a full dinner party set.
Keep the rack near the sink for a short carry, and empty it once dishes are dry, so it does not become permanent storage for a second set. If space is tight, a narrow rack for plates only still clears a useful patch of counter.
8. Mug Hooks Under a Cabinet
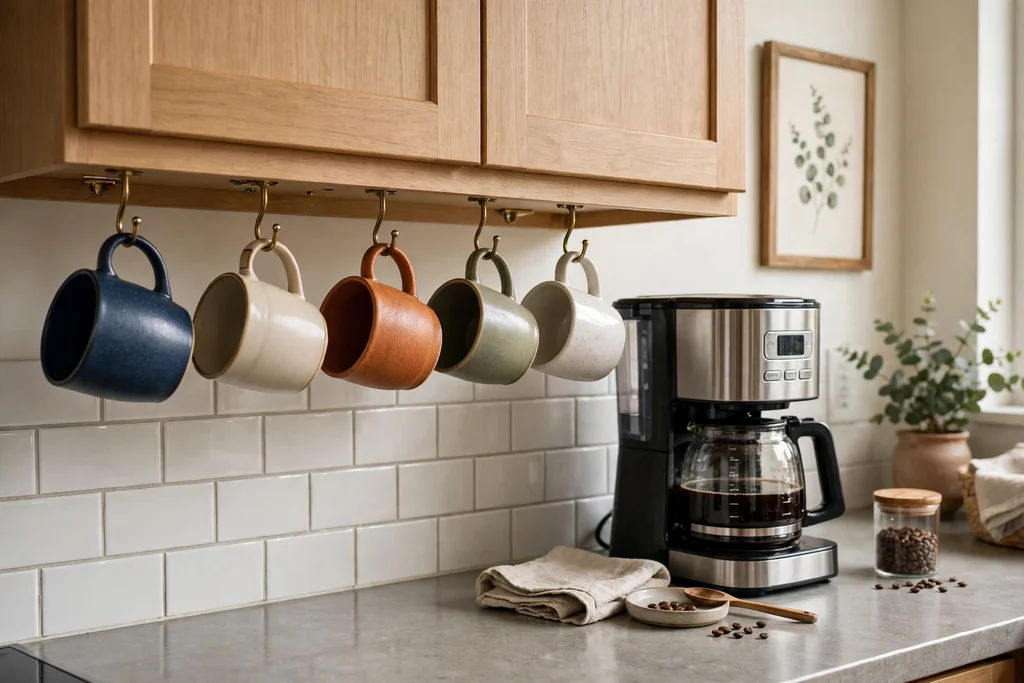
A row of hooks under a shelf or wall cabinet gives every mug a home and stops mugs stacking in a cabinet. Space the hooks wide enough that handles do not lock together, and hang the daily mugs at easy reach height. A rail with removable hooks makes cleaning and rearranging simple.
Keep the collection to the mugs you actually use, and store spares or souvenir mugs elsewhere. Hang mugs by their handles with the opening facing out, so they dry fully and are easy to spot. This idea works well on a short wall beside a coffee maker or kettle.
9. Pot Rail with S-Hooks
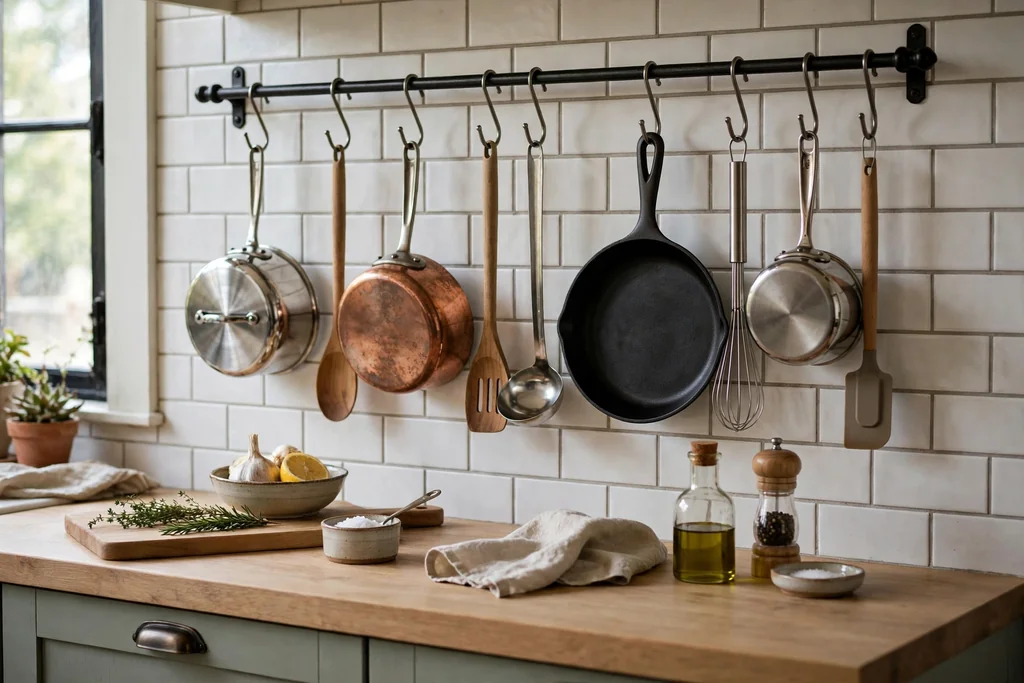
A steel or wood rail with S-hooks holds saucepans, a colander, and large utensils where you can reach them fast. Mount the rail below a shelf or on its own, with enough clearance below for the longest pan to hang without hitting the counter. Hooks that slide along the rail let you space pans by size.
Hang the heaviest pan nearest a wall bracket, where the rail is strongest. Keep lids on a separate hook or in a rack, since lids hung with pans tangle and clang. Wipe the rail weekly, because steam and cooking grease settle on horizontal metal near the stove.
10. Vertical Dividers for Trays and Boards
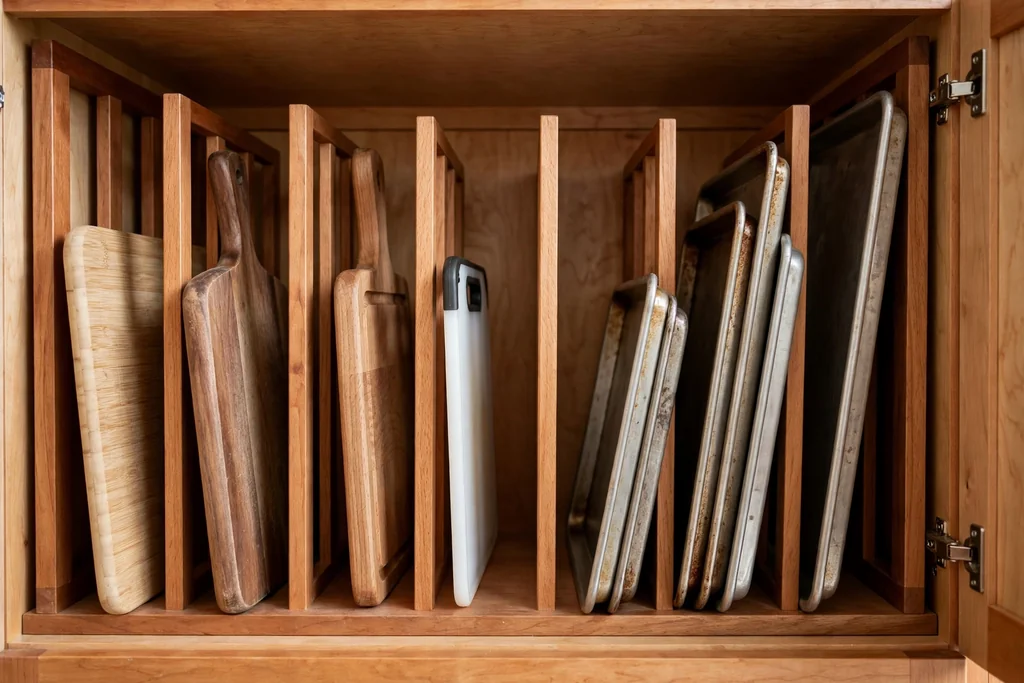
Tall, flat items waste a cabinet when they lean in a pile. Fit vertical dividers in a base cabinet or the cabinet above the oven area so baking trays, cutting boards, and cooling racks slide in upright, one per slot. Measure your widest board before fixing divider spacing.
This is one of the cheapest cabinet upgrades, because simple tension dividers and tray racks need no cabinet changes, and it keeps heavy boards from sliding when the door opens. Put the boards you use weekly at the front of the run, and seasonal trays at the back.
11. Shelf Risers Inside Cabinets
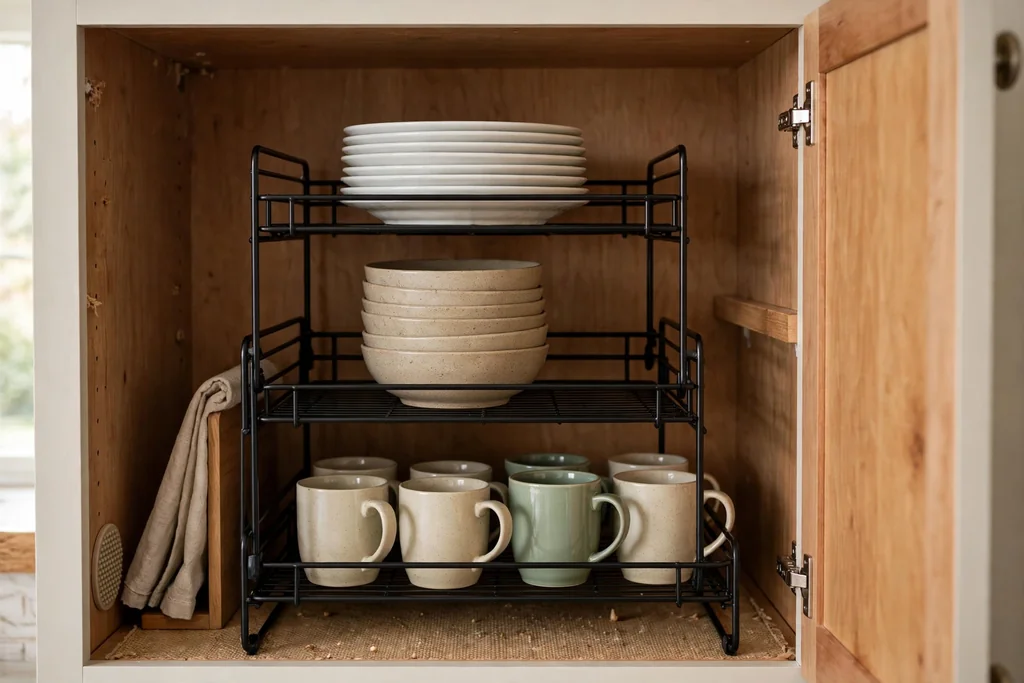
A shelf riser adds a second level inside a cabinet, so mugs or bowls can stack in two rows instead of one tall pile. This works best in cabinets with wasted headroom above short items, such as mugs, small bowls, and spice jars. Choose a riser that leaves a finger gap at the front, so you can lift items out without tipping the row.
Keep heavy items on the cabinet shelf itself, and lighter items on the riser. Avoid risers for tall bottles, since they need the full cabinet height. Two small risers side by side often work better than one wide riser, because each row stays easy to reach.
12. Rack on the Inside of a Cabinet Door
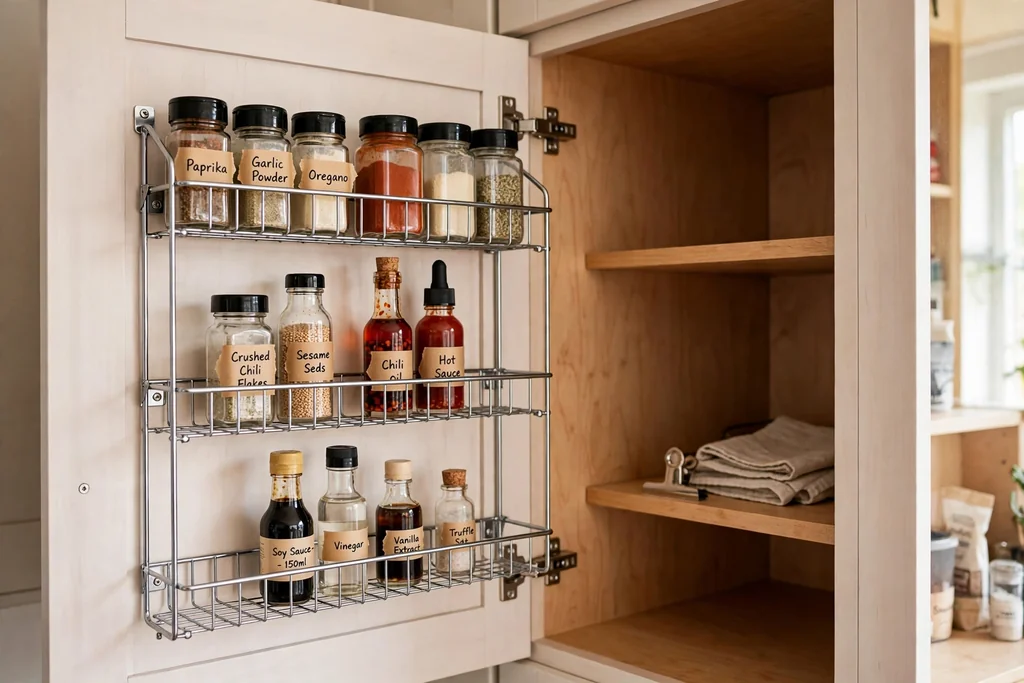
A wire rack fixed to the inside of a cabinet door turns dead door space into storage for spice jars, small bottles, or cleaning sprays. Check the door closes flat with the rack loaded, and fix the rack into the door frame, not just a thin panel. Keep the rack shallow, so items do not hit the shelf edges when the door swings shut.
Use this spot for light items you grab often, such as spice jars near the stove or foil and wraps near the prep counter. Measure the clearance between the door and the nearest shelf before ordering, since depth varies between cabinet makers.
13. Corner Turntable for a Blind Corner
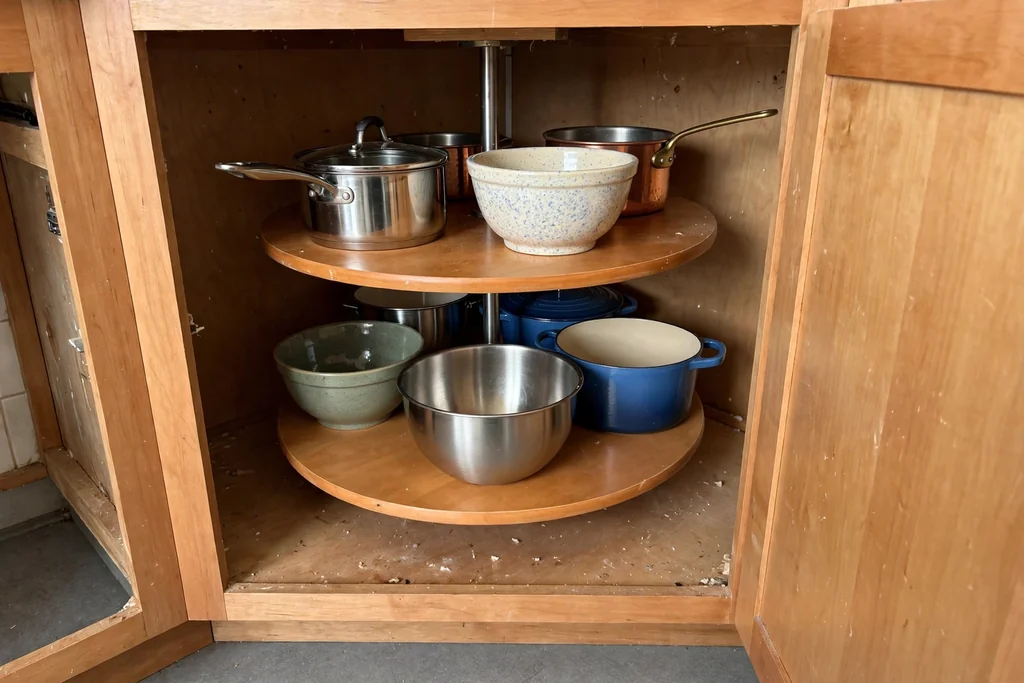
Blind corner cabinets are deep, dark, and hard to use, so they often end up holding forgotten pans. A round two-tier turntable on a centre pole spins the corner contents out to you, and its cut-out shape lets the cabinet door close against it. Measure the cabinet depth and door swing before choosing a size.
Load heavy pots on the lower tier and lighter bowls above, and keep tiny items in a bin on the shelf. For more corner cabinet options, including pull-outs and corner drawers, see these corner kitchen cabinet ideas. If a turntable will not fit your corner, a simple basket for the front section still improves access.
14. Rolling Kitchen Cart
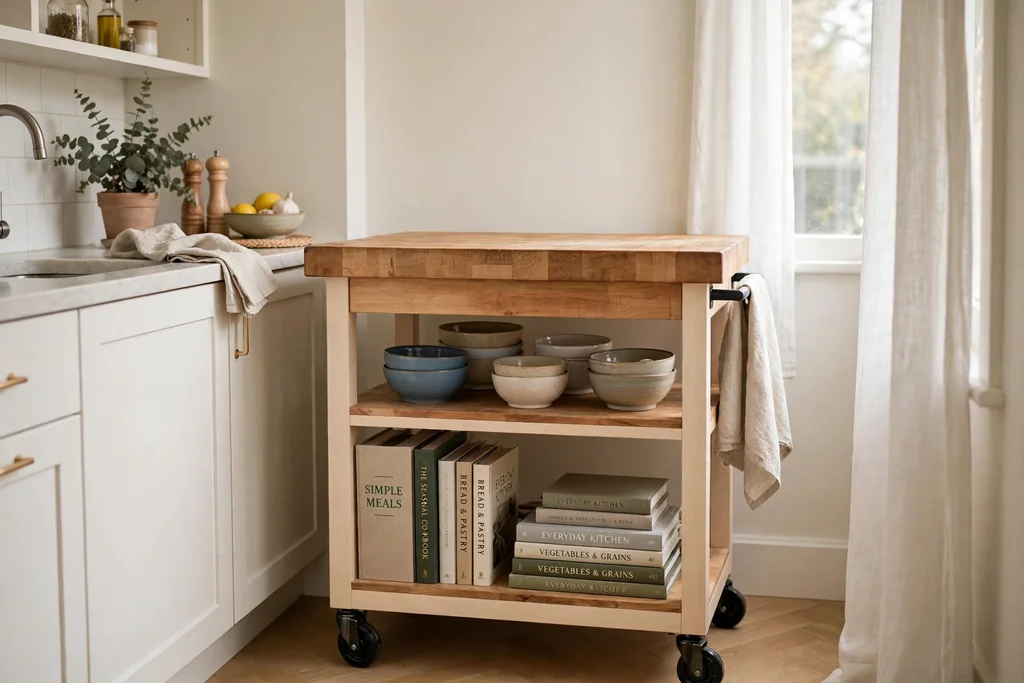
A rolling cart gives a small kitchen extra prep space and storage without a fixed block in the middle of the floor. Choose a cart with a solid top, a shelf or drawers below, and lockable casters so it stays put while you chop. When guests arrive or the floor needs cleaning, release the wheels and move it to the wall.
Size the cart to your walkways, leaving clear space around it when in use. Keep only daily tools on the cart, such as a knife block, oils, and a chopping board, so it stays useful rather than becoming another crowded surface. A towel bar on the side adds a handy spot for a tea towel.
15. Appliance Garage in the Counter Corner
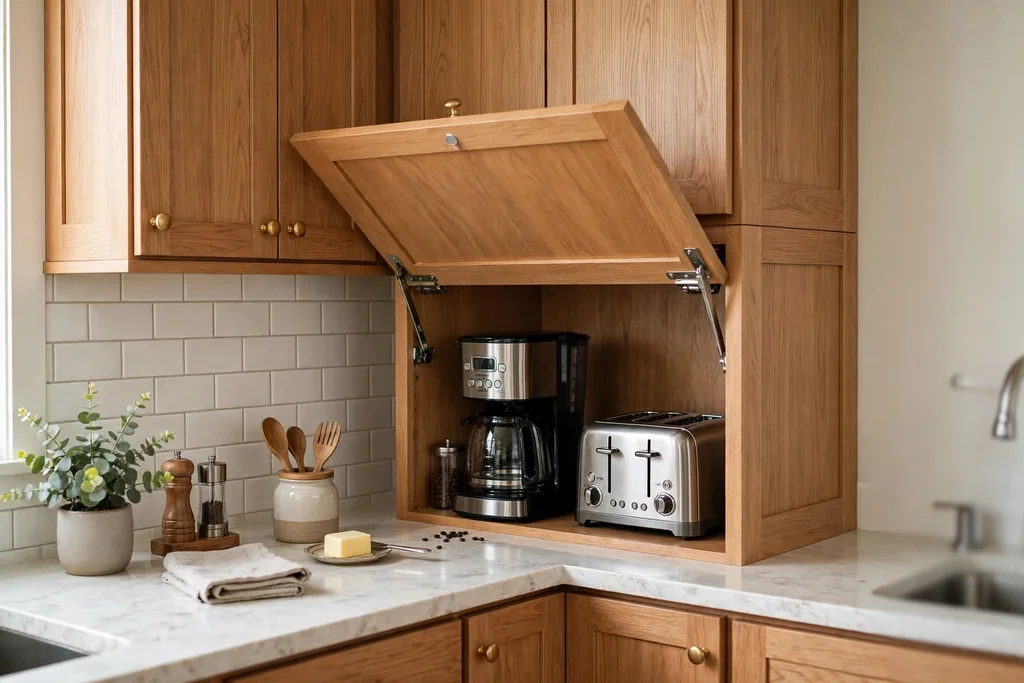
The counter corner under the upper cabinets is the natural home for an appliance garage: a section with a door that hides the toaster, blender, or coffee maker when they are not in use. Keep the items you use daily at the front, and leave air space around anything that gets hot. Plan a socket inside or just beside the garage so cords stay short.
If a built-in version is too much work, a lidded box or a curtain panel gives a softer version of the same idea. Keep the counter in front clear, so hot dishes have a landing spot, and wipe the inside of the garage weekly, since crumbs collect where appliances sit.
16. Under-Sink Caddy and Tension Rod
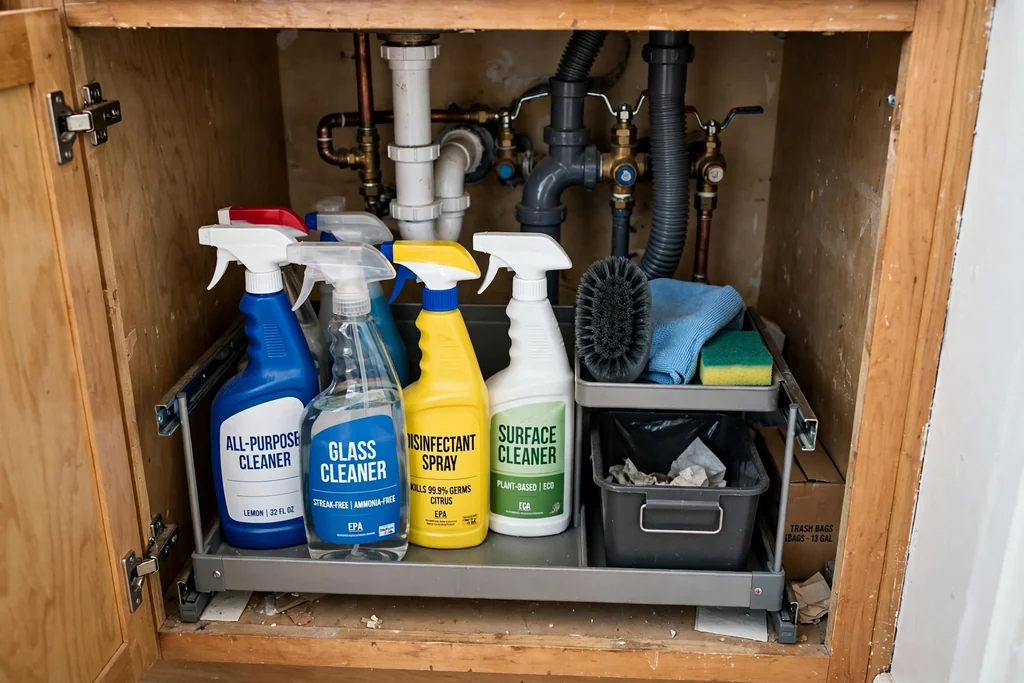
The cabinet under the sink is awkward because pipes block the middle, but a pull-out caddy and a tension rod can still make it work. Hang spray bottles from the rod by their triggers, and keep sponges, cloths, and a small bin in the caddy below. This keeps cleaning supplies in one lift-out unit instead of loose bottles at the back.
Line the cabinet floor with a waterproof tray, since small leaks and drips reach this spot first. Check for leaks when you pull the caddy out, and keep only sink-related items here, so the cabinet does not become a general store cupboard.
17. Clear Bins in the Fridge
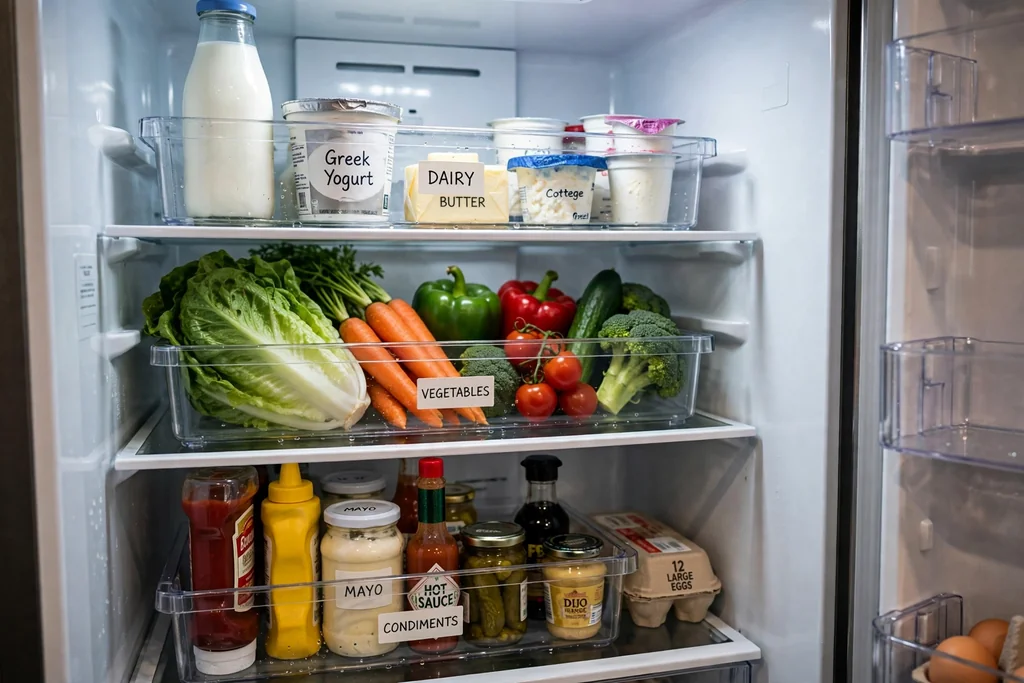
Clear bins in the fridge group small items that otherwise drift to the back of a shelf. Use one bin for dairy, one for condiments, and one for cut vegetables, and pull the whole bin out when you need something from the back. Clear sides let you see what is running low before you shop.
Label bins only if more than one person uses the fridge, since labels help everyone put items back in the right spot. Wipe bins weekly, and keep raw meat in its own sealed container on the lowest shelf, away from ready-to-eat food, following usual food safety guidance.
18. Labelled Bins in the Freezer
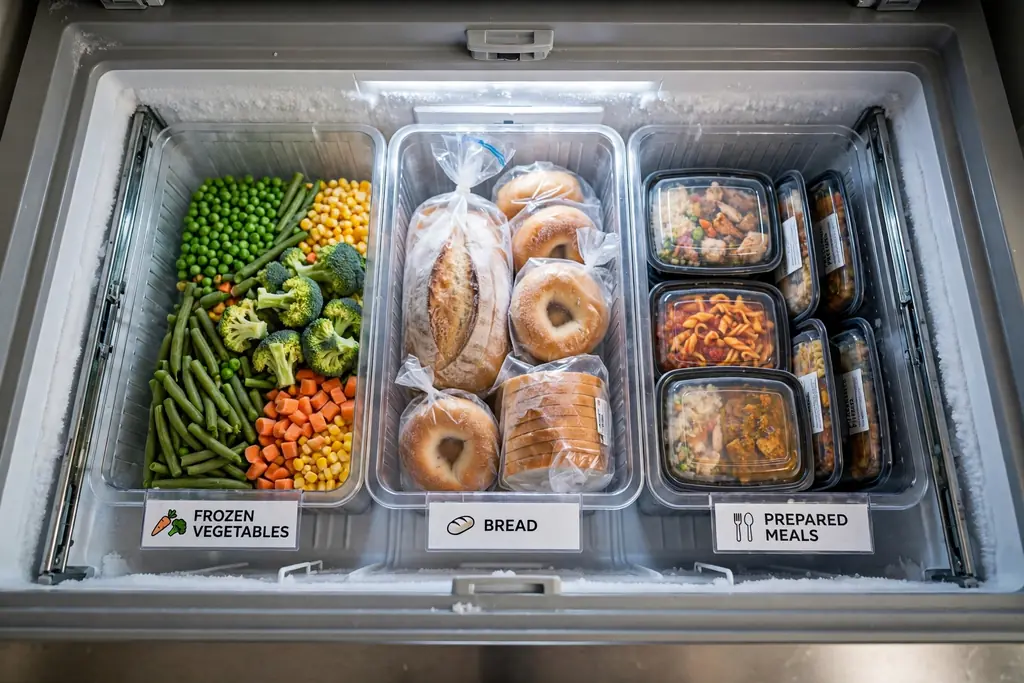
A freezer drawer without bins soon becomes a pile of bags you have to dig through. Labelled bins, one per group such as vegetables, bread, and prepared meals, keep the drawer in rows you can read at a glance. Freeze flat bags upright in a bin like files, so you can pull one out without lifting the whole stack.
Label each bag with its contents and date before it goes in, and keep a short list on the freezer door of what is inside if your household shops in bulk. Use the oldest items first, and clear out anything past its best date when you restock.
19. Coffee Station on a Tray
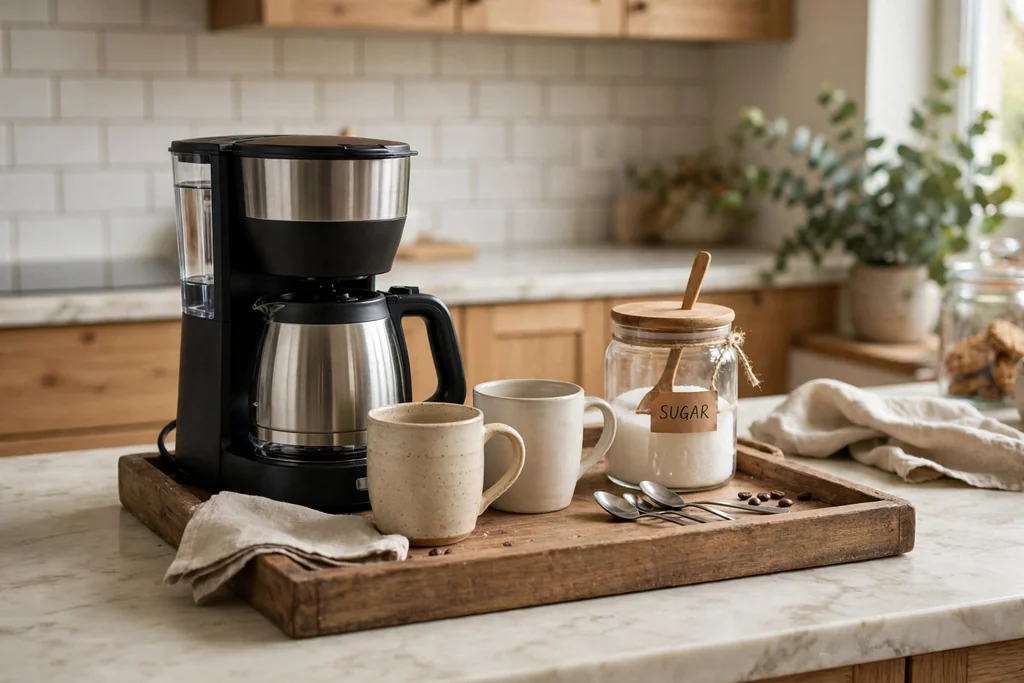
A tray turns a scattered coffee corner into one tidy station. Put the coffee maker, mugs, sugar jar, and spoons on a single tray, so the whole station can move for cleaning and nothing spreads across the counter. Choose a tray with a raised edge, so small items do not slide off when you lift it.
Keep only the coffee items you use daily on the tray, and store refills and spare filters in a cabinet nearby. If the station sits beside the kettle, leave space for a hot mug to land, and wipe the tray when you refill the sugar jar.
20. Hanging Baskets for Produce
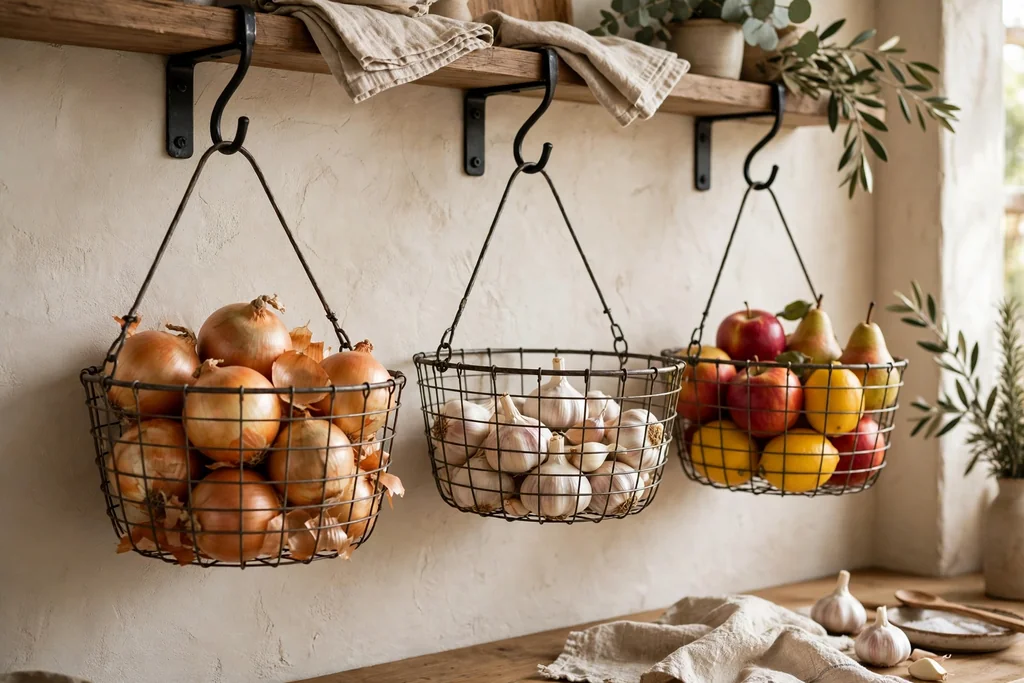
Wire or woven baskets hung on wall hooks hold onions, garlic, potatoes, and fruit where air can move around them. Airflow matters for onions and garlic, which spoil faster in a closed bag, and a basket keeps them out of a dark cabinet where they are forgotten. Use one basket per type so you can see stock levels at a glance.
Hang baskets away from the stove and sink, where heat and steam shorten storage life. Line a basket with a cloth if small items slip through the weave, and check contents weekly, removing any soft pieces before they affect the rest. This idea suits kitchens short on pantry shelf space.
21. Drawer Dividers for Cutlery and Gadgets
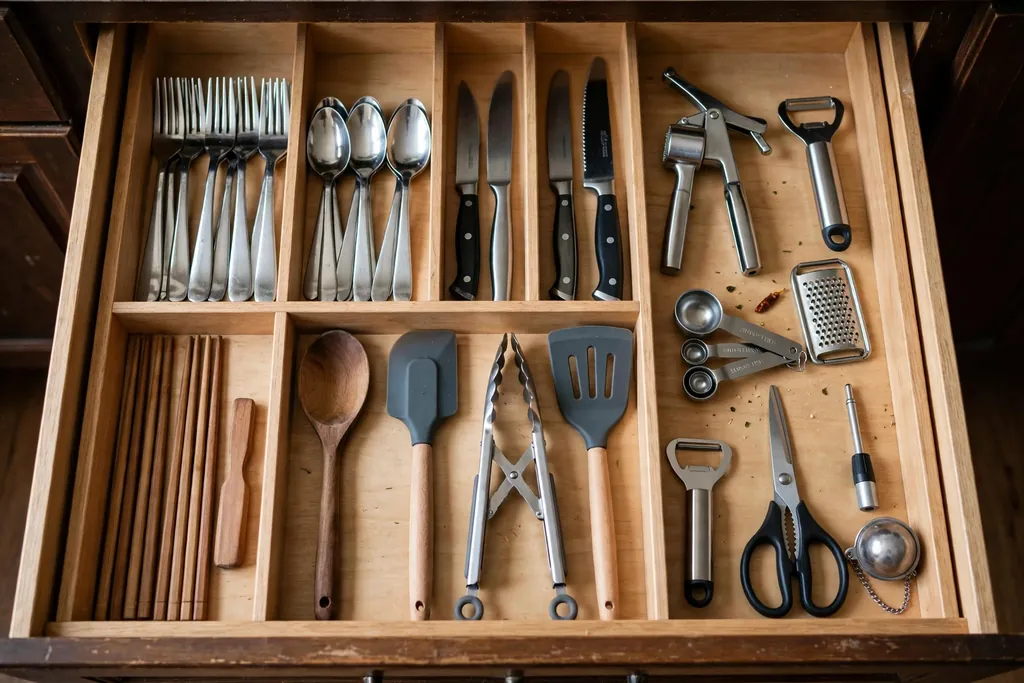
A drawer without dividers mixes cutlery, peelers, and clips into one tangle. Wooden or bamboo dividers split the drawer into sections for knives and forks, cooking tools, and small gadgets, so each item has a slot and the drawer closes without a rattle. Measure the drawer before buying, since dividers come in fixed widths and expandable versions.
Put daily cutlery at the front of the drawer and rarely used gadgets at the back. Keep one small section empty for new items, and clear the drawer twice a year, moving anything you have not used in months to a less handy spot or out of the kitchen.
22. Toe-Kick Drawer for Flat Items
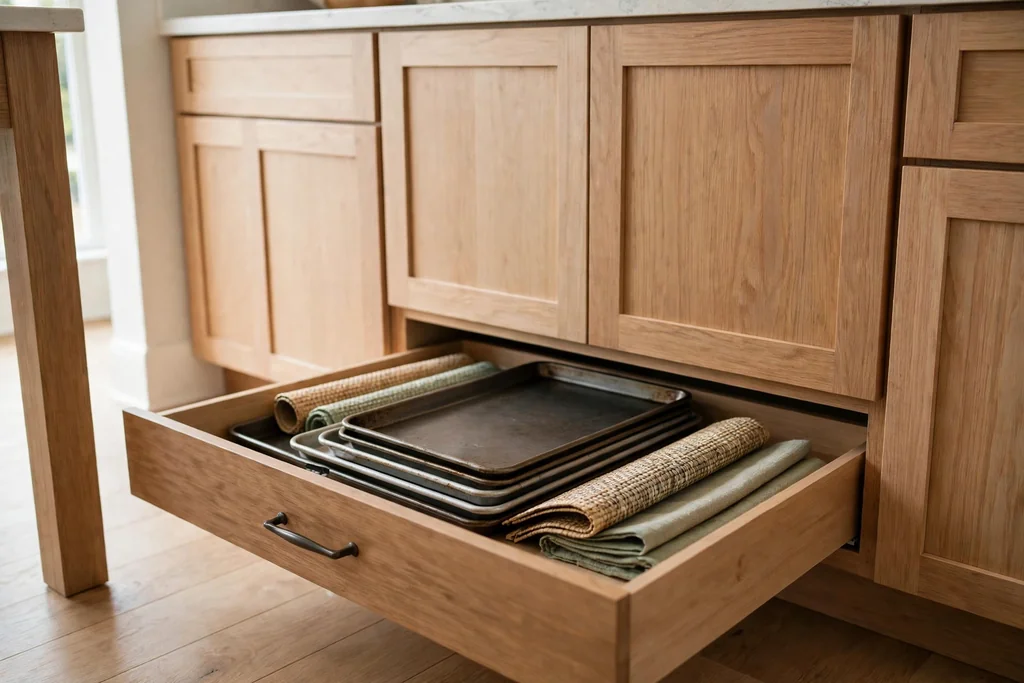
The recessed space under base cabinets, called the toe kick, can hold shallow drawers for flat items such as baking sheets, placemats, table linens, and large serving trays. These drawers use space that is otherwise empty, and they keep flat items from piling up in a tall cupboard.
Toe-kick drawers suit kitchens with a plinth that can be cut cleanly, and they work best for light items you reach for weekly rather than daily. Keep the drawer fronts flush with the plinth so they read as part of the cabinet base. Wipe the drawer bottoms often, since this low spot collects floor dust and cooking splashes.
23. Over-Door Rack on the Pantry Door
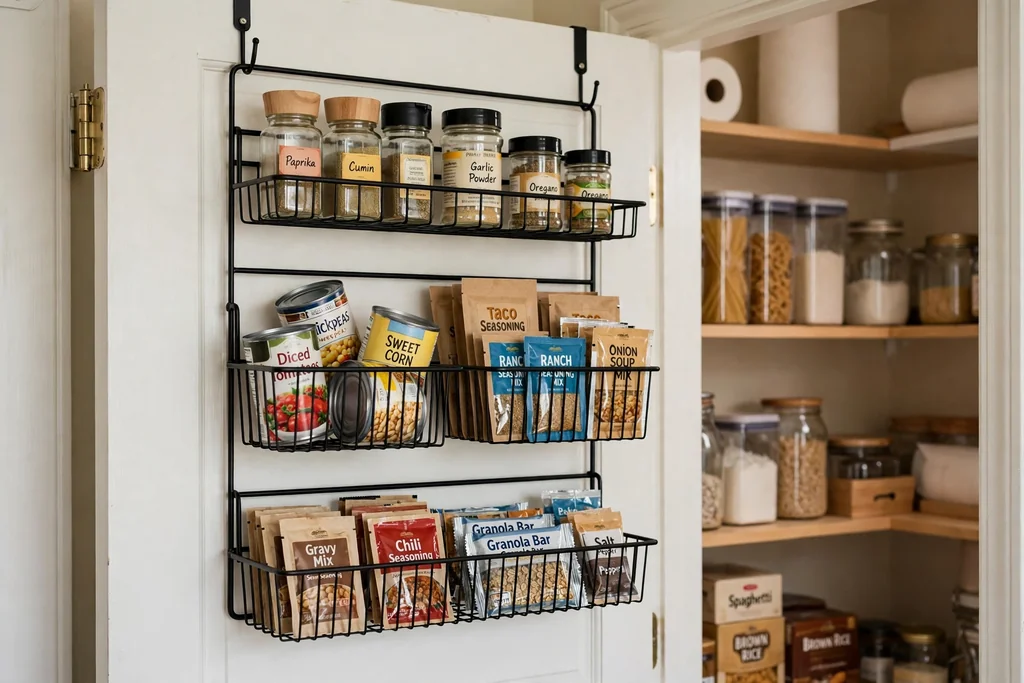
An over-door rack hangs on the pantry door and adds wire baskets for spice jars, cans, and small packets without drilling. Check that the door still closes flat and that the hooks clear the door frame, and keep the load light, since a heavy rack strains hinges over time. Put the items you grab most often at eye level.
This is a good fit for renters, since the rack lifts off when you move. Keep tall bottles in the pantry itself, and use the door rack for short jars and packets that fit the basket depth. Tighten the hooks if the rack starts to sway when the door moves.
24. High Shelf Above the Doorway
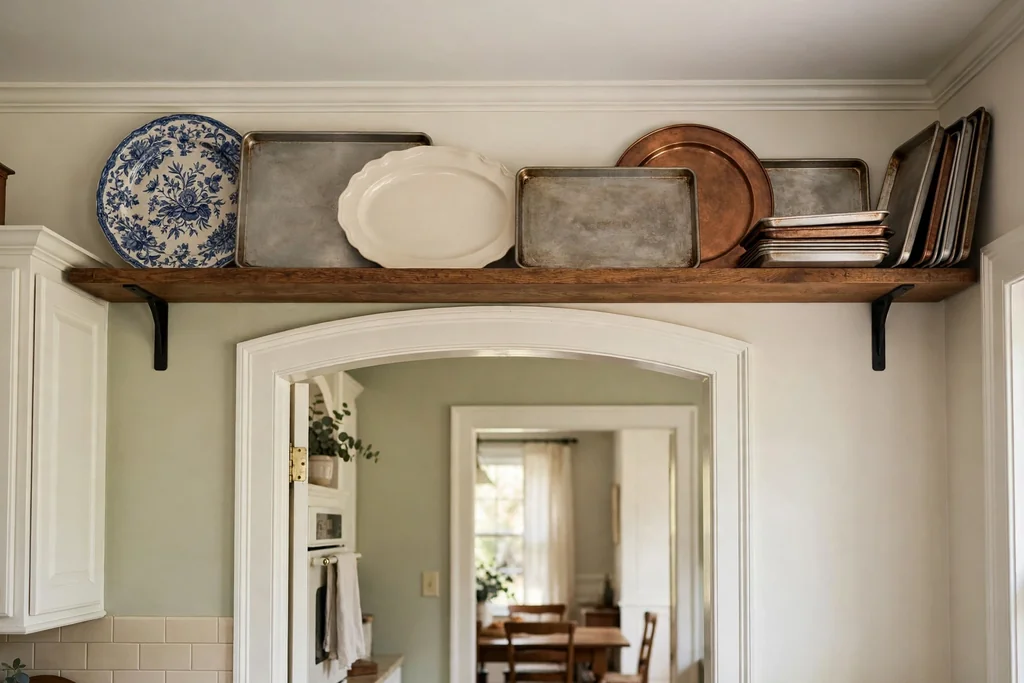
A single high shelf above a kitchen doorway holds large serving platters and baking trays that are too big for standard cabinets. Reserve this shelf for items you need a few times a year, so you are not climbing up daily, and keep a small, stable step stool nearby in a tall cabinet or pantry.
Fix the shelf into studs or with fixings rated for the load, and add a small lip so platters do not slide off when the door closes. Keep the shelf line straight and flush with the door frame, since a stepped edge makes a low ceiling feel lower.
25. Magnetic Knife Strip on the Wall
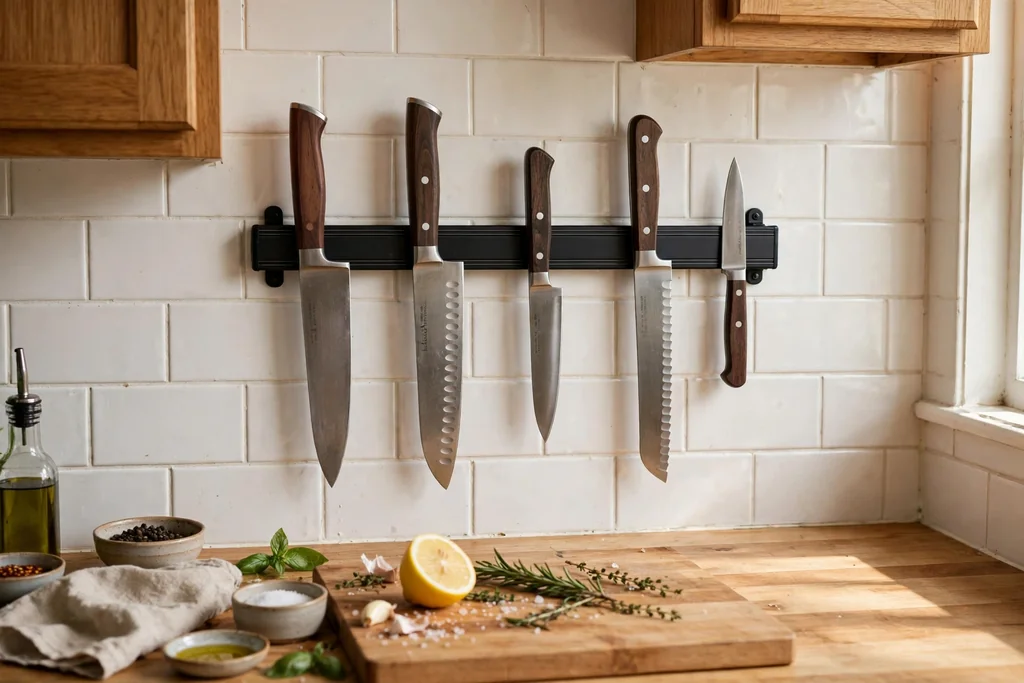
A magnetic strip frees a drawer and keeps knives visible, dry, and easy to grab. Mount it at a height where the handles are within reach but blades sit clear of small hands, and away from the main splash zone beside the sink. A wood or steel strip suits most kitchens and wipes clean quickly.
Place the most used chef knife and a paring knife in the middle of the strip, with less used blades toward the ends. Wipe blades dry before returning them, since moisture dulls edges and can mark the strip. If wall space is short, a shorter strip for three knives still beats a crowded drawer.
26. Countertop Caddy for Daily Tools
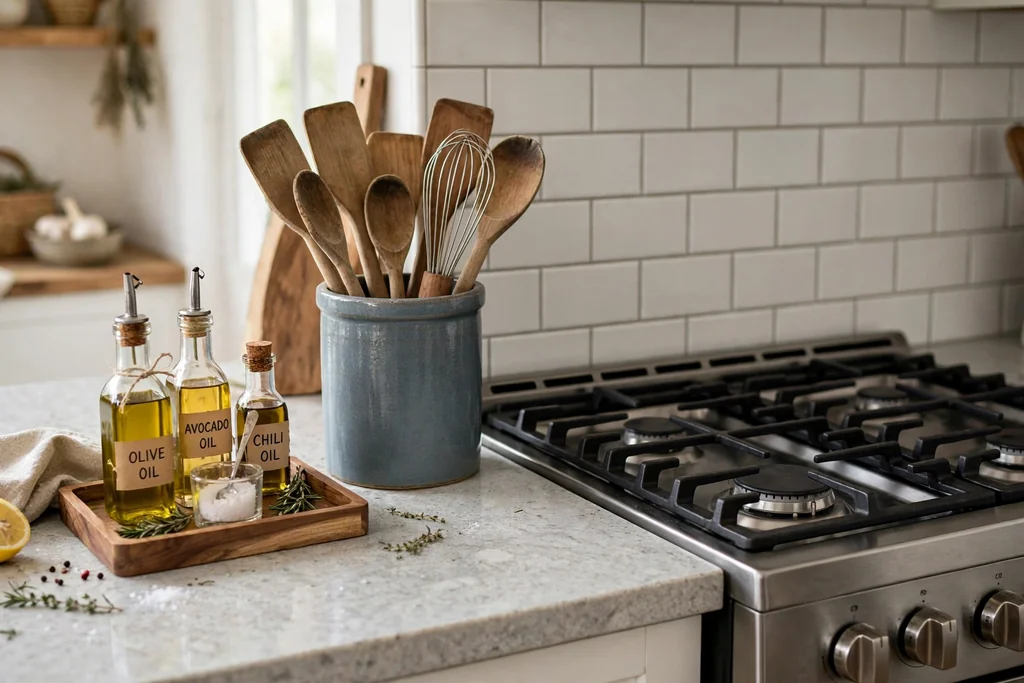
A countertop crock beside the stove holds the tools you reach for every time you cook: wooden spoons, spatulas, a whisk, and tongs. Keeping them upright in one crock frees a drawer and shortens the time spent searching mid-recipe. Choose a crock wide enough that tools do not crowd each other, and heavy enough that it does not tip when you pull one tool out.
Add a small tray beside the crock for oils and salt, so the daily cooking group sits in one spot. Keep the crock to tools you use weekly, and store single-use gadgets in a drawer, so the counter stays a work surface rather than a display shelf.
Conclusion
Easy kitchen storage is not about buying every organizer at once. It is about one clear home for each group you use daily, a way to reach the back of deep cabinets, and one clear counter for prep. Start with the idea that fixes your biggest daily friction, whether that is spices, pans, or pantry bins, and live with it for two weeks before adding the next change. Small, steady changes hold up better than a single big clear-out, because each new spot gets tested in real cooking. For small rooms, the layout and storage advice in these small kitchen remodel ideas and kitchen wall storage ideas pairs well with the ideas above.
Keep this list handy for your next free hour at home, and refresh your kitchen one shelf, drawer, and bin at a time: a turntable today, a labelled bin this weekend, and a clear counter to cook on tonight.
FAQs
Where should I start with kitchen storage if I can only change one thing?
Start with the spot that slows you down most, such as a spice drawer, a pan cabinet, or a pantry shelf. Pick the one change that fixes it, like a turntable, a drawer insert, or a set of clear bins, and use it for two weeks before buying anything else. One working system teaches you what you actually need, while a trolley full of organizers often just moves clutter into new boxes.
How do I store spices so I can actually find them?
Use one system for all your spices, either a drawer insert with labels facing up, a door rack, or a single shelf of matching jars. Group them by use, keep the set near the prep counter, and keep the count to the spices you use in a normal month. Store refills separately in a cabinet, and check dates twice a year.
What is the best storage for deep kitchen cabinets?
Bring the contents to you instead of reaching in. A two-tier turntable, a pull-out shelf, or a corner turntable all move the back of the cabinet to the front. Measure the door opening and cabinet depth first, load heavy items low, and group one category per shelf or pull-out, so nothing hides behind taller items.
How can I keep kitchen counters clear?
Give every daily item a home that is not the counter, and leave one clear stretch for prep. Small appliances can live in an appliance garage or a cabinet, mugs can hang on hooks, and cooking tools can sit in one crock by the stove. Keep only the items you use daily in view, and return each item to its home after cooking, so the counter resets each evening.
How do I organize a small kitchen without a remodel?
Use the space you already have: the inside of cabinet doors, the gap beside the fridge, the toe kick, and the wall above the doorway. A rolling cart, an over-door rack, and shelf risers all add storage without building work, and they move with you if you rent. Measure each spot first, and choose one change per week, so the kitchen stays usable while you improve it.
How often should I review kitchen storage?
Review pantry and fridge bins when you shop each week, and do a fuller review twice a year. Pull out anything past its date, move items you never reach for to a less handy spot, and check that labels still match the contents. A short review keeps bins, drawers, and turntables working, and stops a tidy system from slowly filling up again.