Category: DIY & Styling

Simple styling projects and affordable ways to refresh your home.

  • 22 Rooftop Garden Ideas That Feel Both Cozy and Current

    22 Rooftop Garden Ideas That Feel Both Cozy and Current

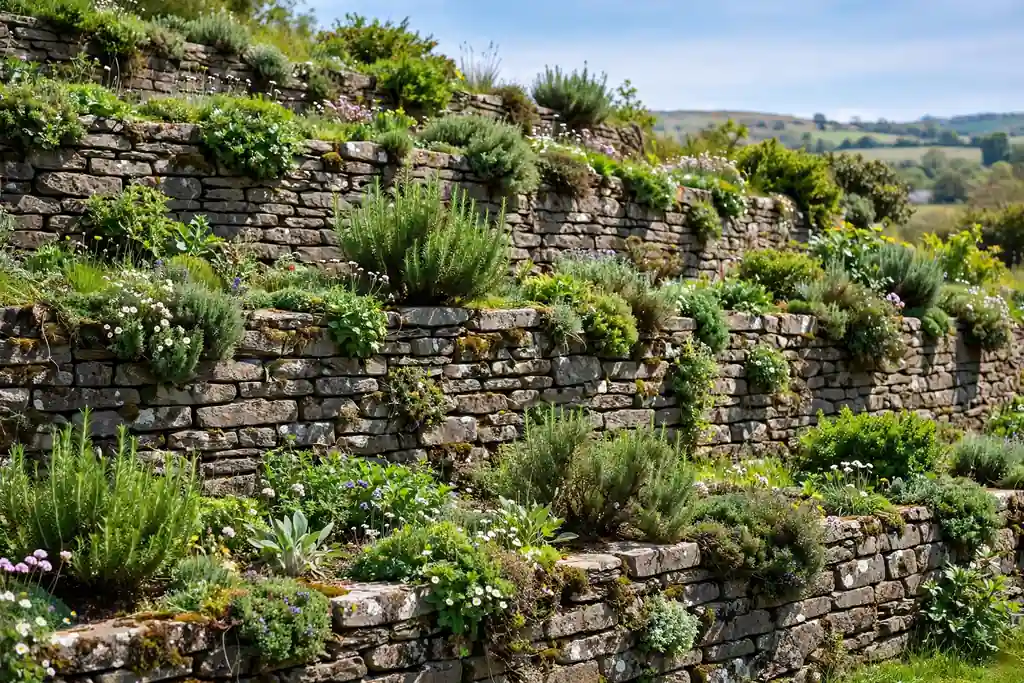
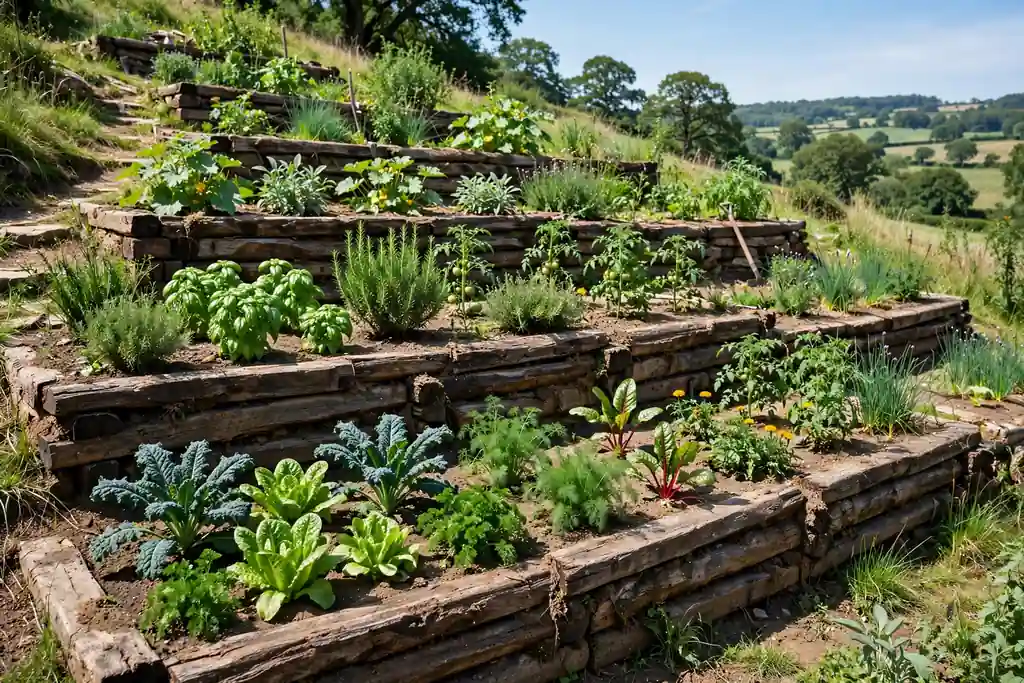
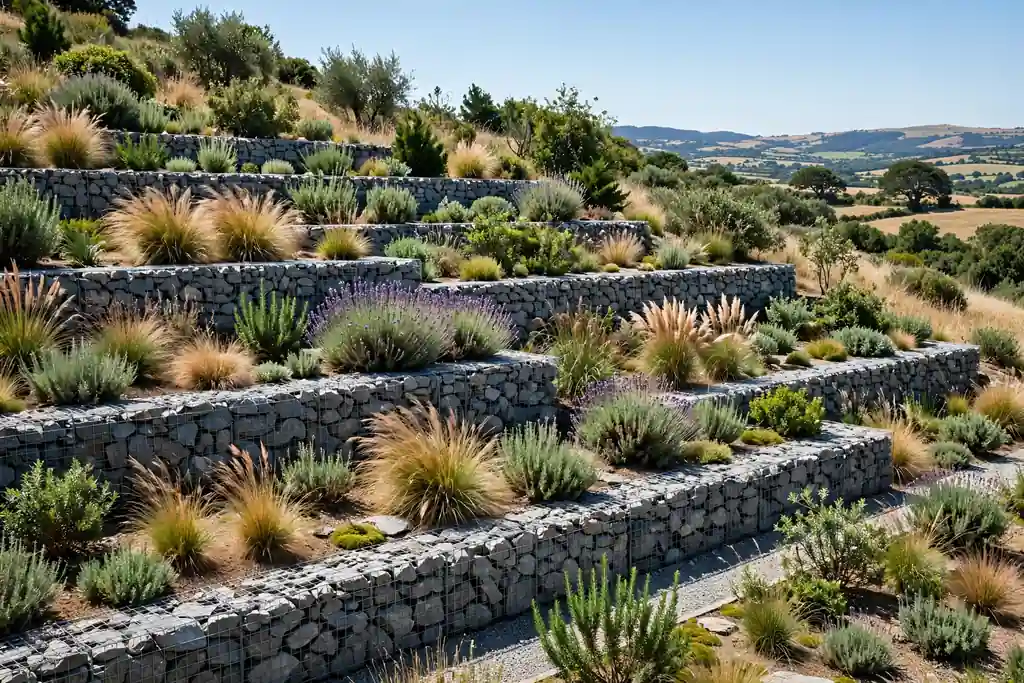
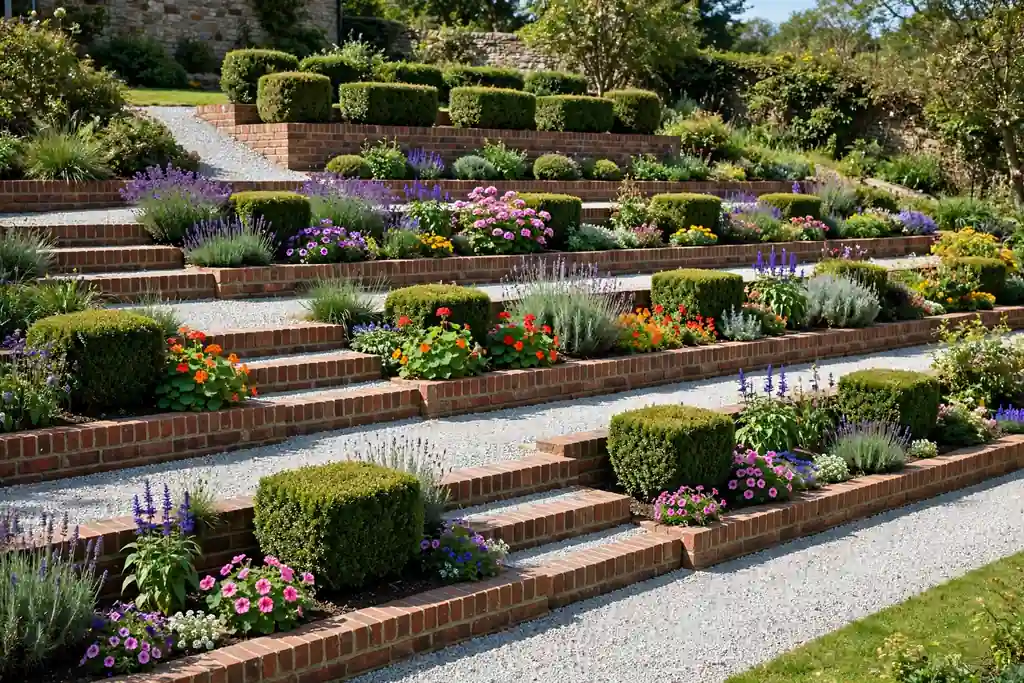
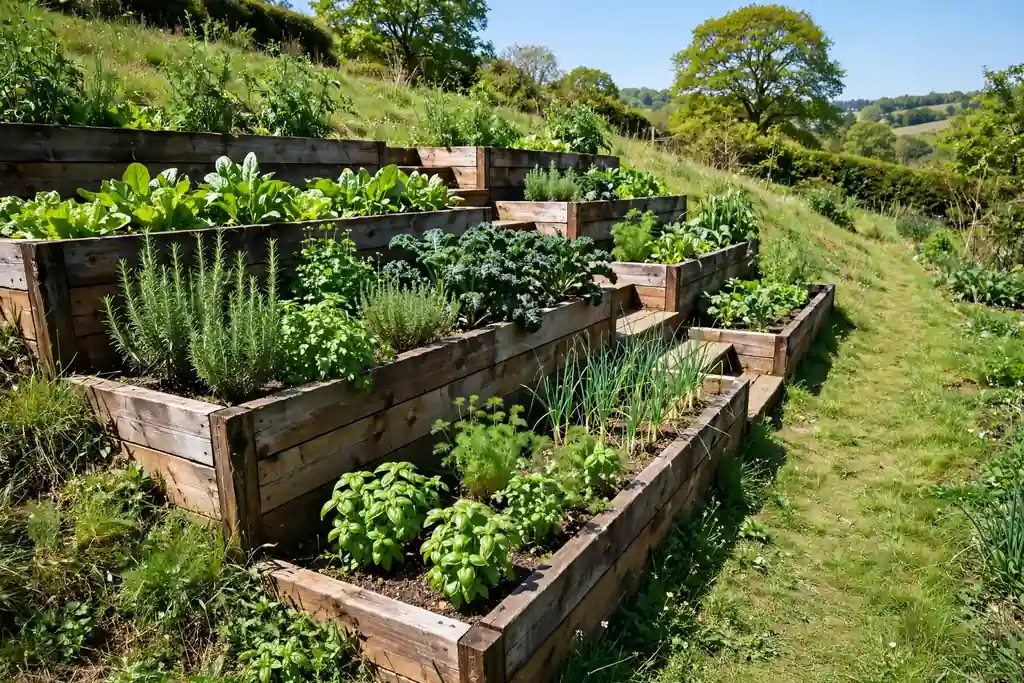
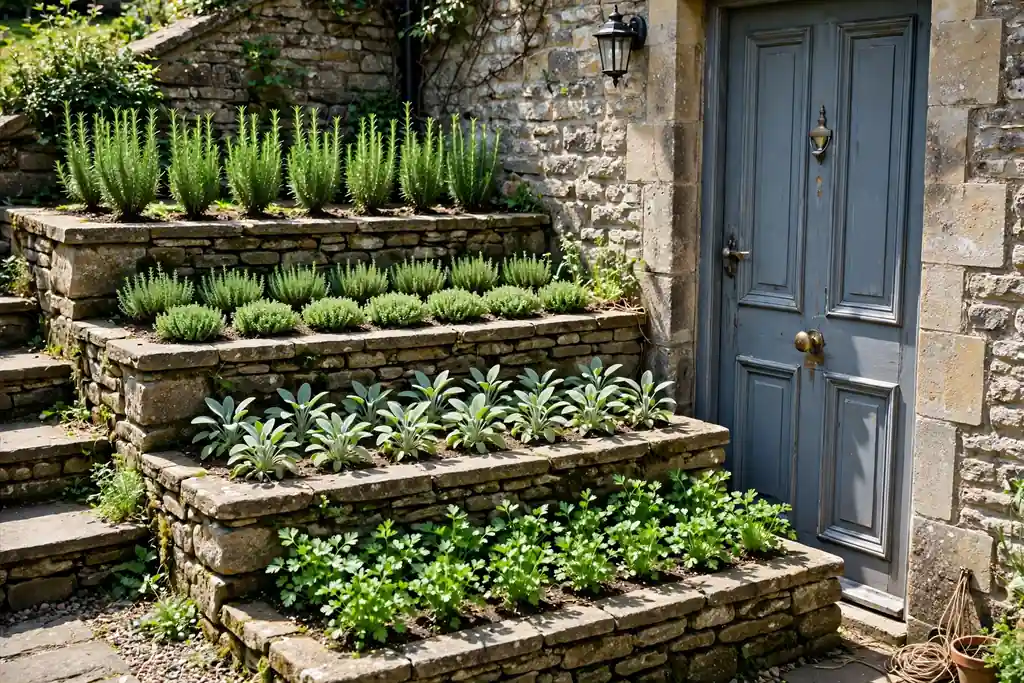
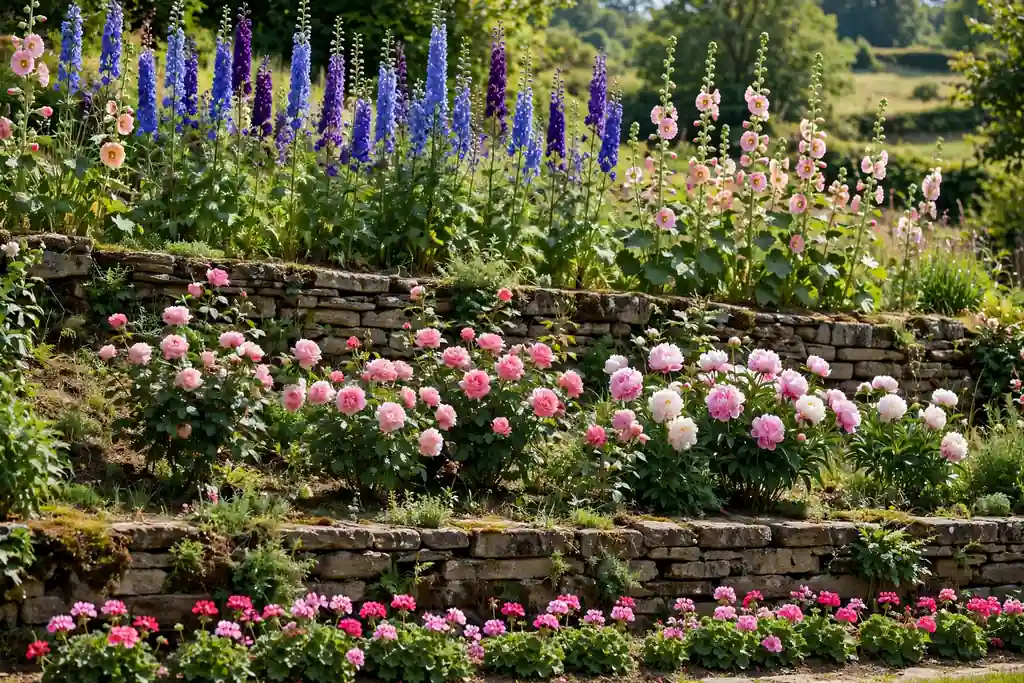
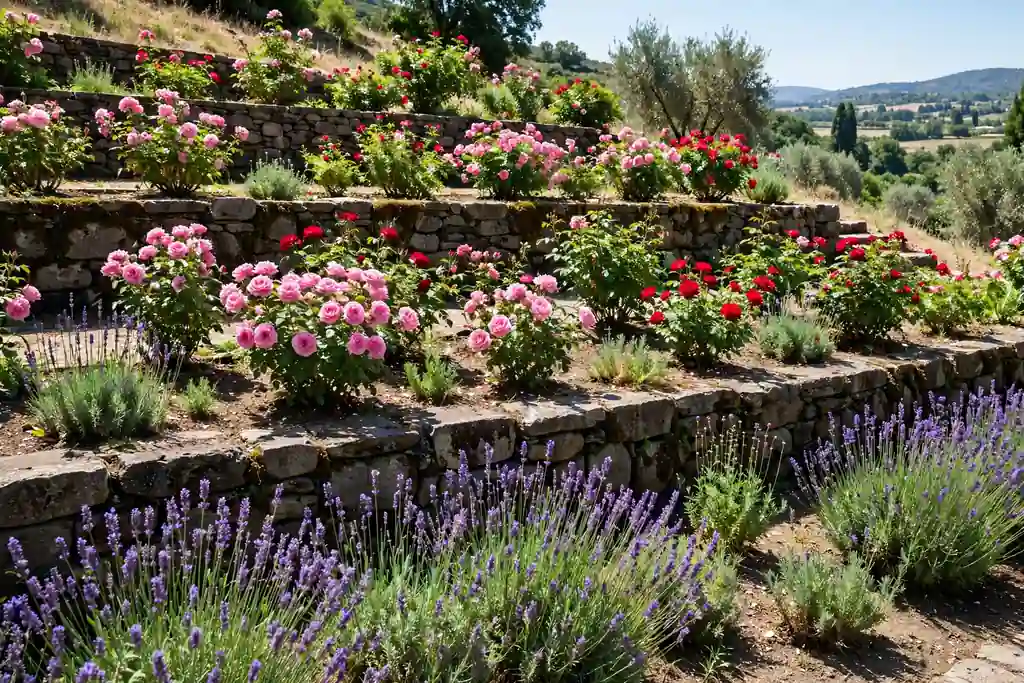
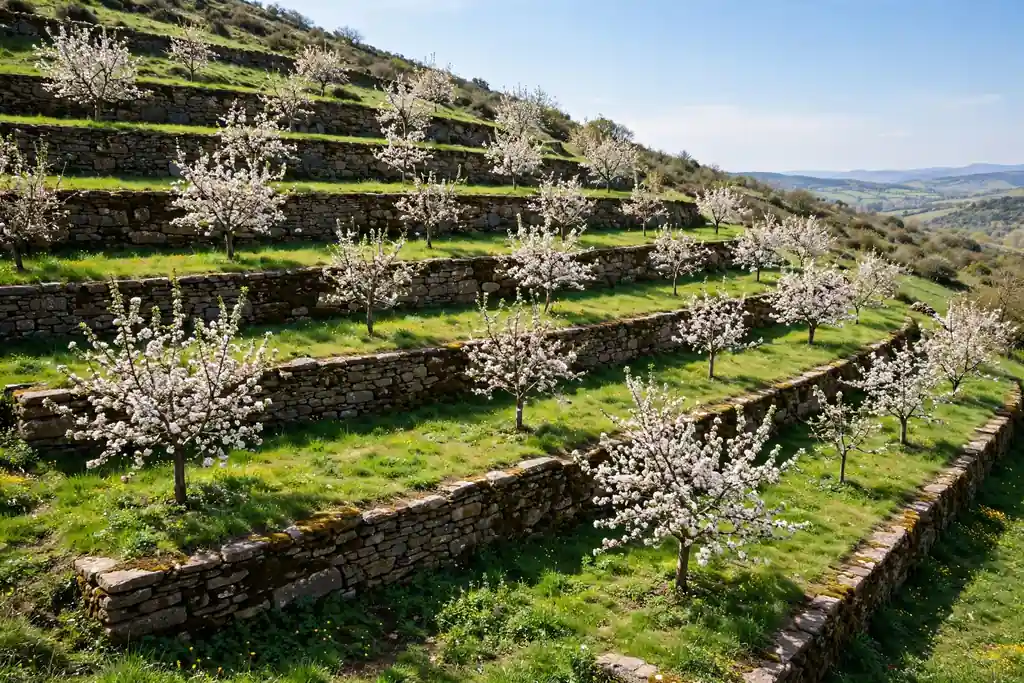
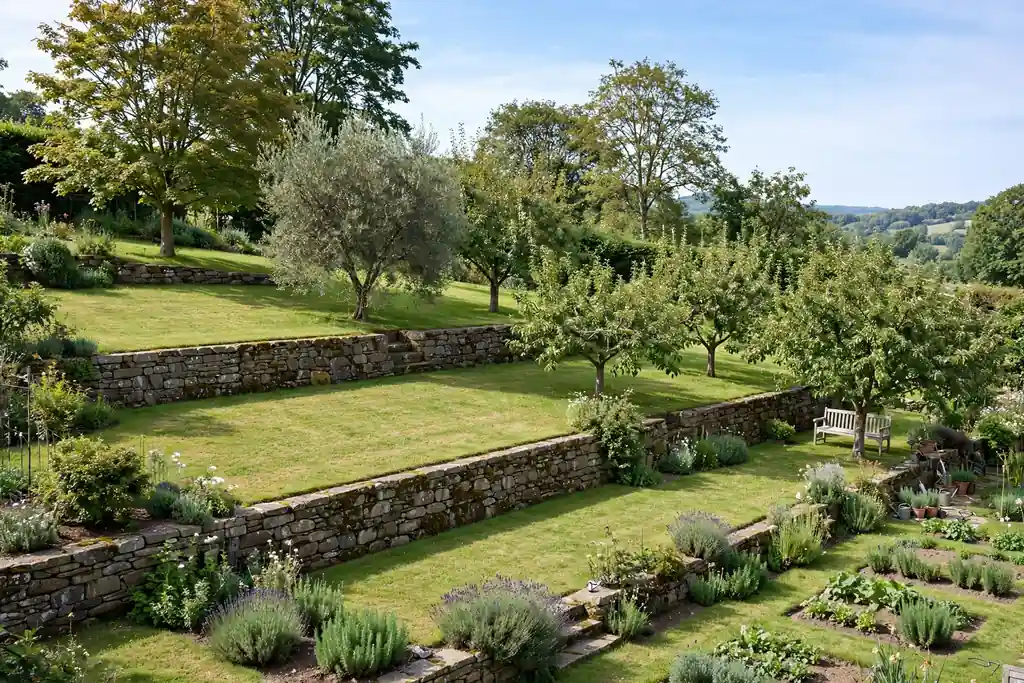
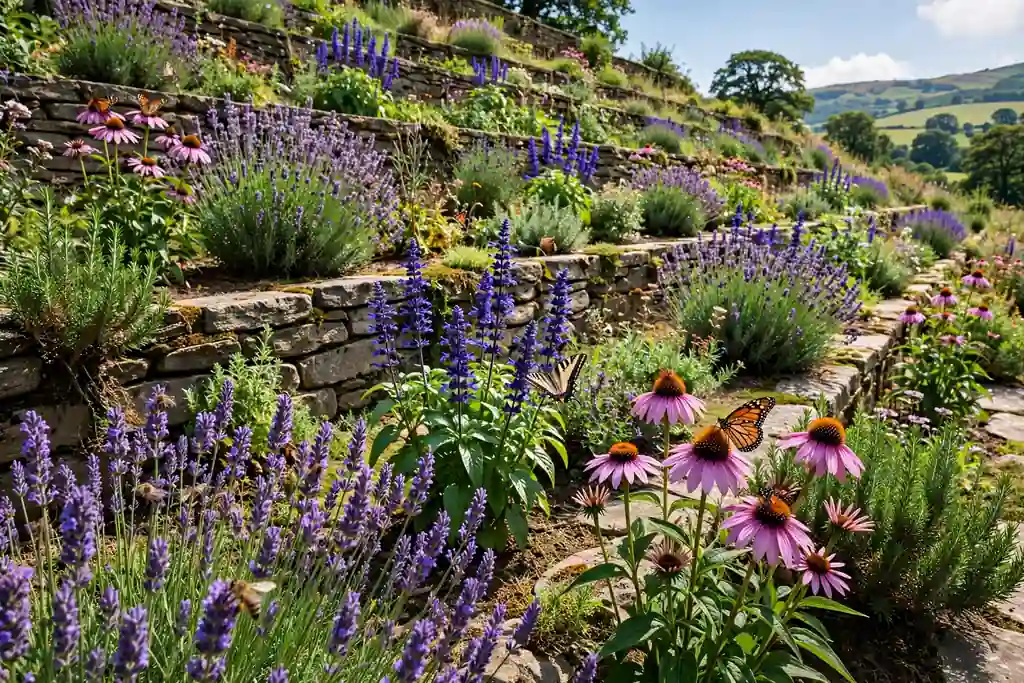
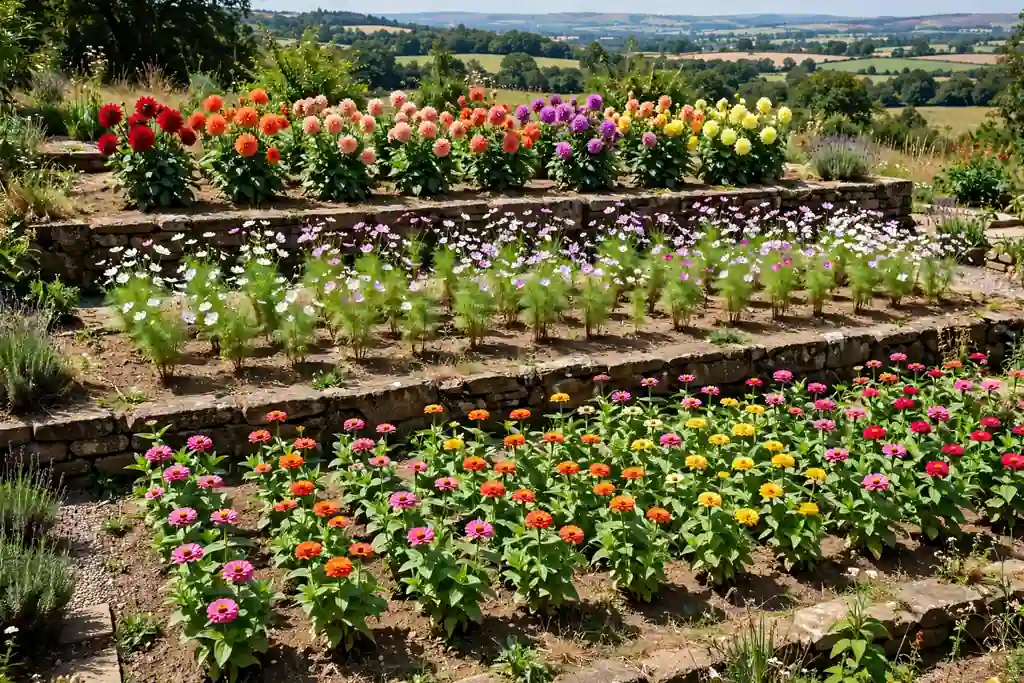
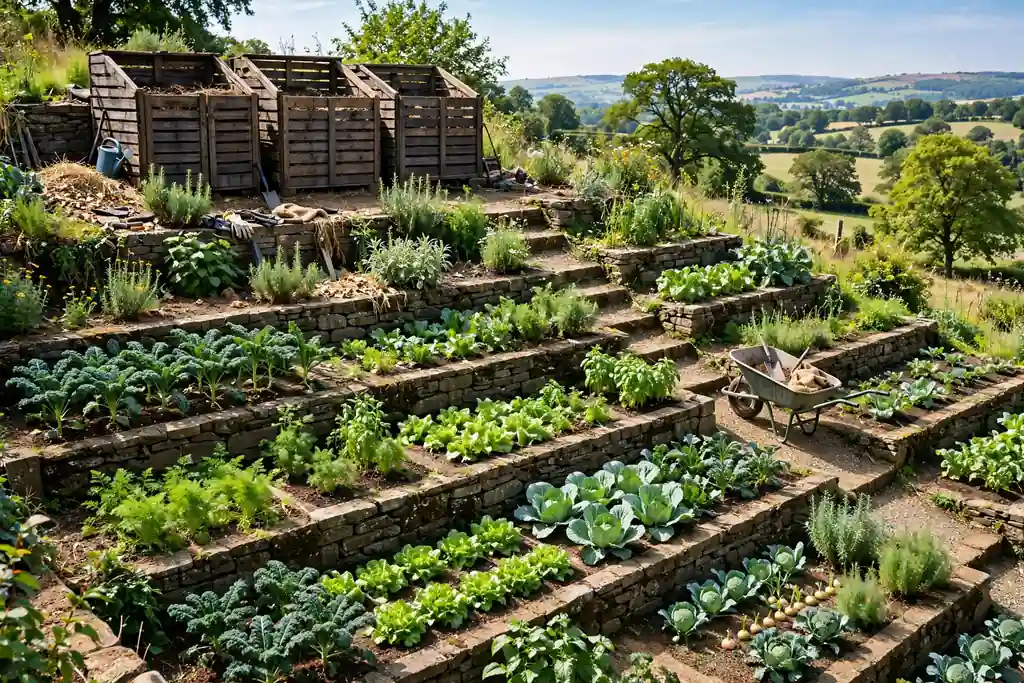
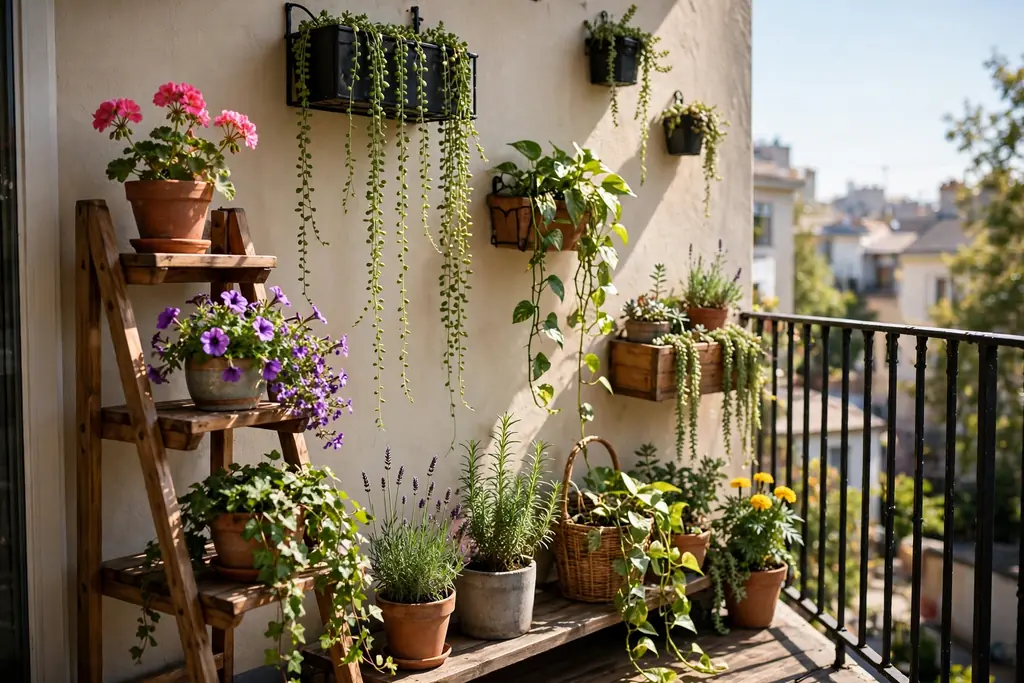
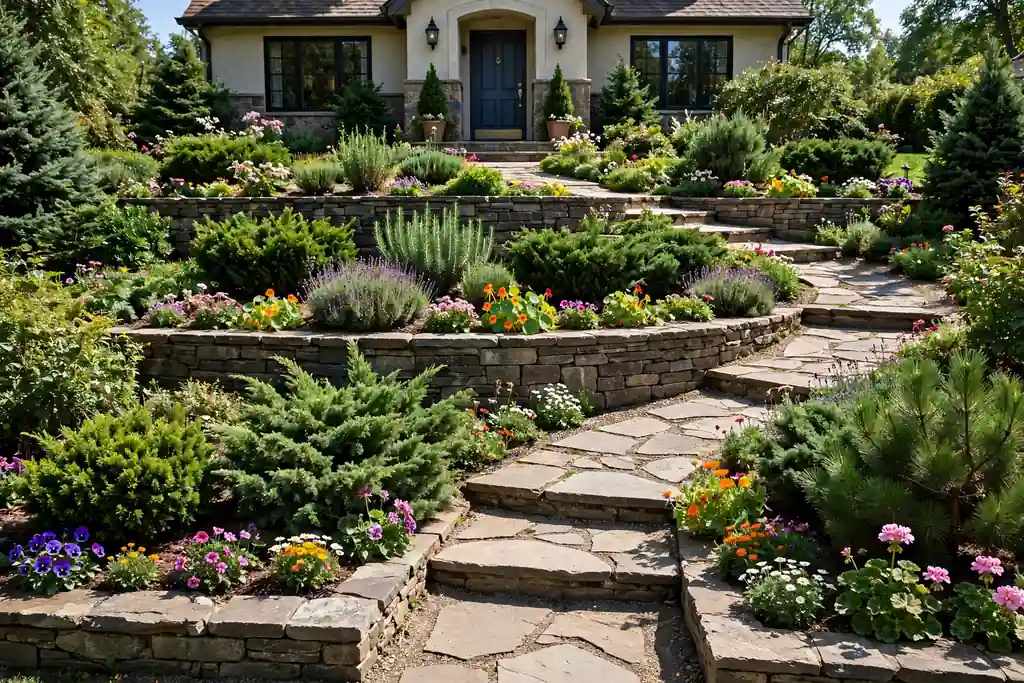
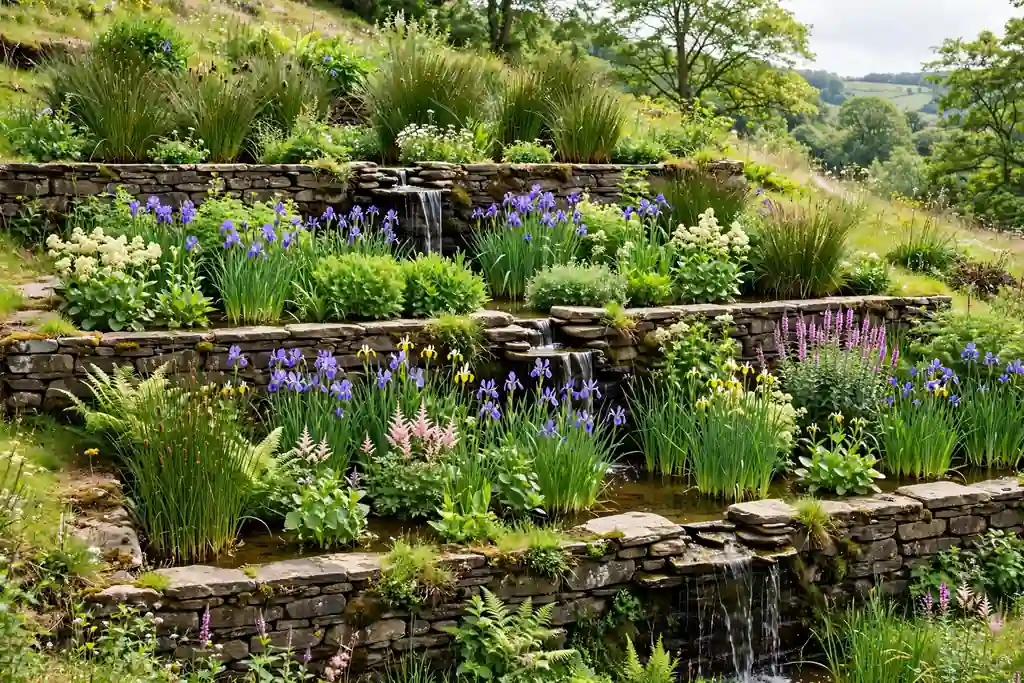
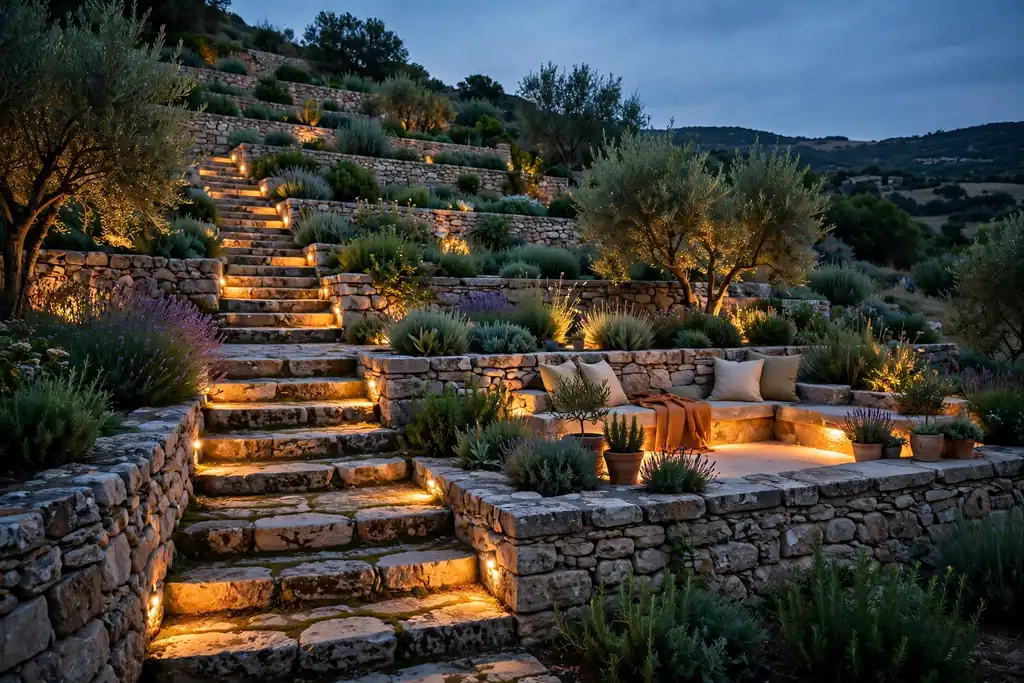
    A rooftop can feel like wasted space when it is only bare paving, a railing, and a view. With the right planting, a seat that invites you to stay, and shade for hot afternoons, that same roof can become the room you use most in warm weather. These 22 rooftop garden ideas cover planters, edible beds, privacy screens, dining spots, lighting, and storage, all chosen with roof realities in mind: wind, strong sun, drainage, and weight. Start with access, water, and one comfortable seat, then add planting around it. For ground level lessons on working with levels and structure, the ideas in these tiered garden ideas show how to give each level a clear job.

    Key Takeaways

    • Check the roof first: weight limits, drainage, access, wind, and building rules shape every choice before you buy a planter.
    • Use light containers, free draining soil mix, and plants that cope with wind and sun, and keep heavy items near load bearing walls where possible.
    • Give the roof zones: one for sitting, one for growing, and one for storage, so it feels like a garden, not a storage deck.
    • Add shade, a wind screen, and warm light early, since comfort decides whether you actually use the roof.
    • Keep paths clear, pots off drains, and a watering can or hose point within easy reach.
    • Choose a mix of evergreen structure and seasonal color, so the roof looks cared for in every season.

    1. Raised Beds Along the Parapet
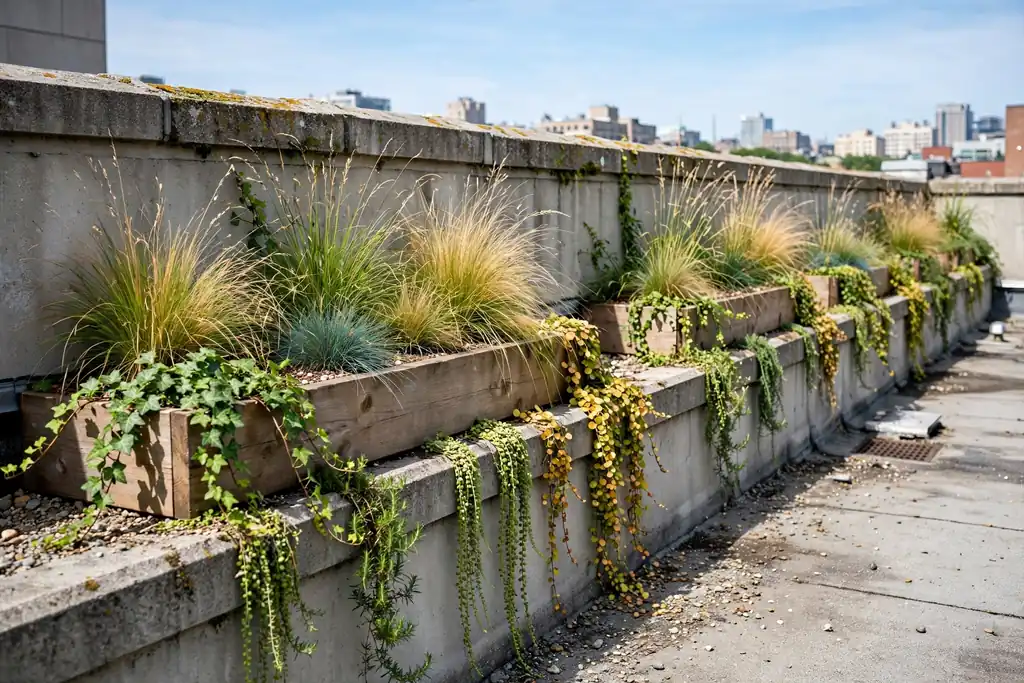
    Low raised beds along a rooftop parapet wall with grasses and trailing plants.

    Run low raised beds along the parapet wall to give the roof a planted edge and a clear border. Low beds keep the planting below the railing line, so the view stays open while the edge still reads as a garden. Choose beds made for roof use, with a light frame and good drainage holes, and fill them with a light, free draining mix rather than heavy garden soil.

    Plant wind tolerant shrubs, grasses, and trailing plants at the front, and keep taller plants toward corners where wind is less direct. Leave a gap behind each bed so you can reach the wall and keep drains clear. Water slowly, since roof beds dry out fast in sun and wind, and mulch the surface to hold moisture between waterings.

    2. Clusters of Lightweight Pots
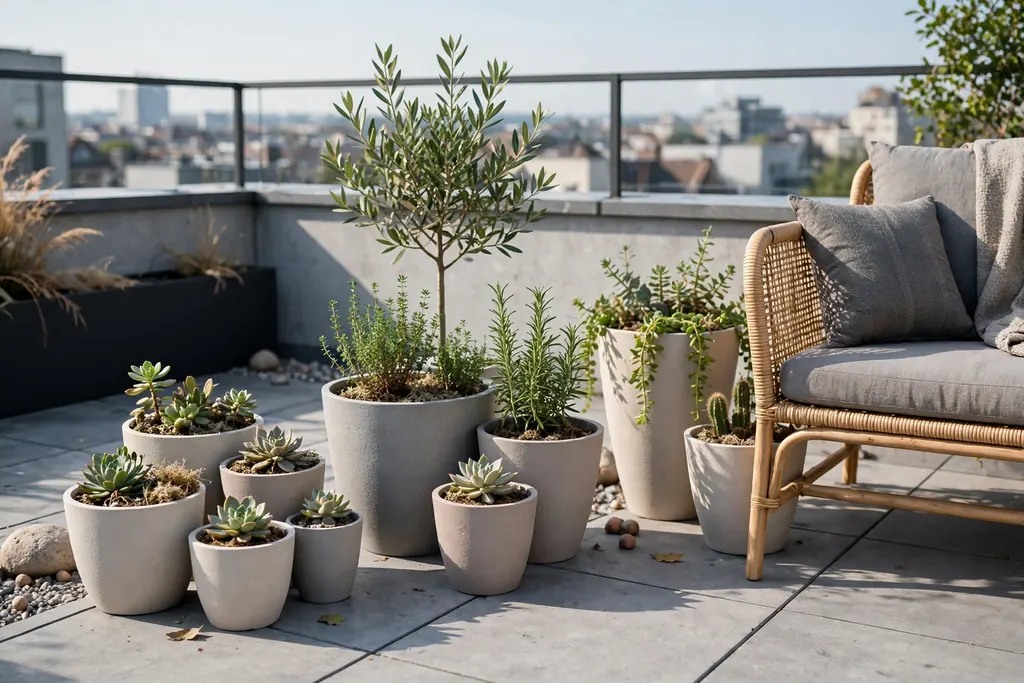
    Clusters of lightweight pots in different sizes on a rooftop terrace near a seat.

    Group lightweight pots in clusters of three or five near seats, steps, and doorways to make planting feel deliberate instead of scattered. Pots suit rented roofs and shared roofs, since you can move them, change them with the seasons, and take them with you. Use fiberglass, resin, or light metal pots, and raise them on feet so water drains freely and does not stain the roof surface.

    Mix one tall plant, one mid height plant, and one trailing plant in each cluster for a full look. Check the weight of a watered pot before you place a group, and spread heavy pots across the roof rather than loading one corner. Keep a saucer or tray under pots on paved roofs only if it does not block drainage.

    3. Living Wall Panels on a Sheltered Wall
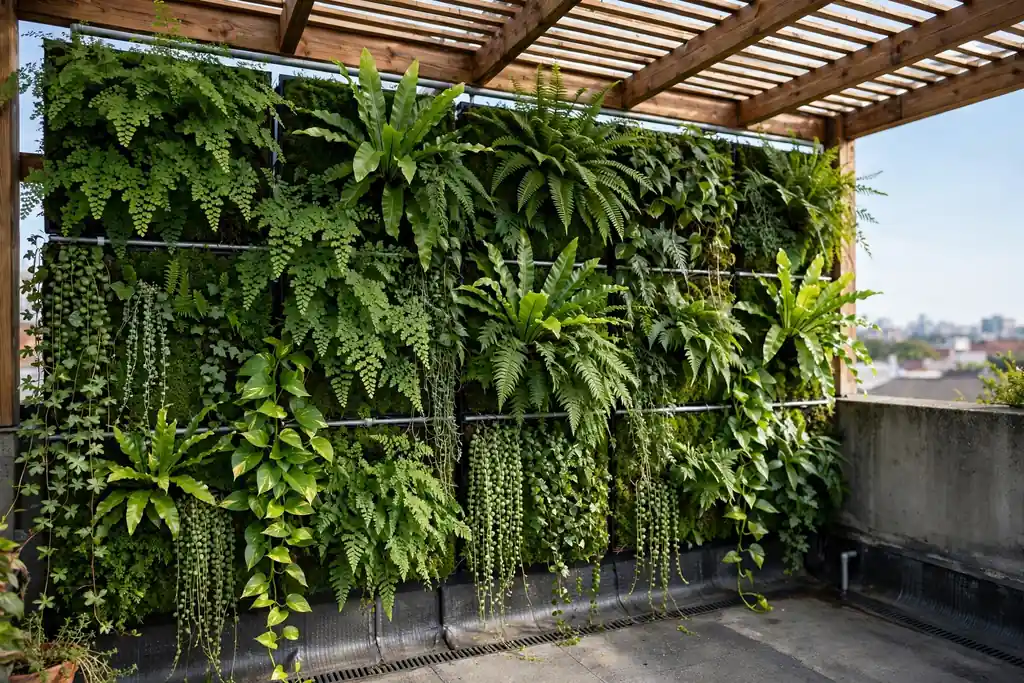
    Living wall panels with ferns and trailing plants on a sheltered rooftop wall.

    Fix living wall panels to a sheltered wall or a sturdy frame to grow a green wall without using floor space. This suits small roofs where every square foot counts, and it gives a plain wall color, scent, and texture at eye level. Choose panels with individual pockets or trays, so you can replace one plant without disturbing the rest.

    Plant ferns, trailing herbs, and small perennials that suit your light level, and water from the top so moisture reaches each pocket. Check the fixings and the weight of the panels when wet, since a planted wall is much heavier after watering. Keep panels away from vents and access hatches, and leave room to reach the plants for trimming.

    4. Pergola with Climbing Plants
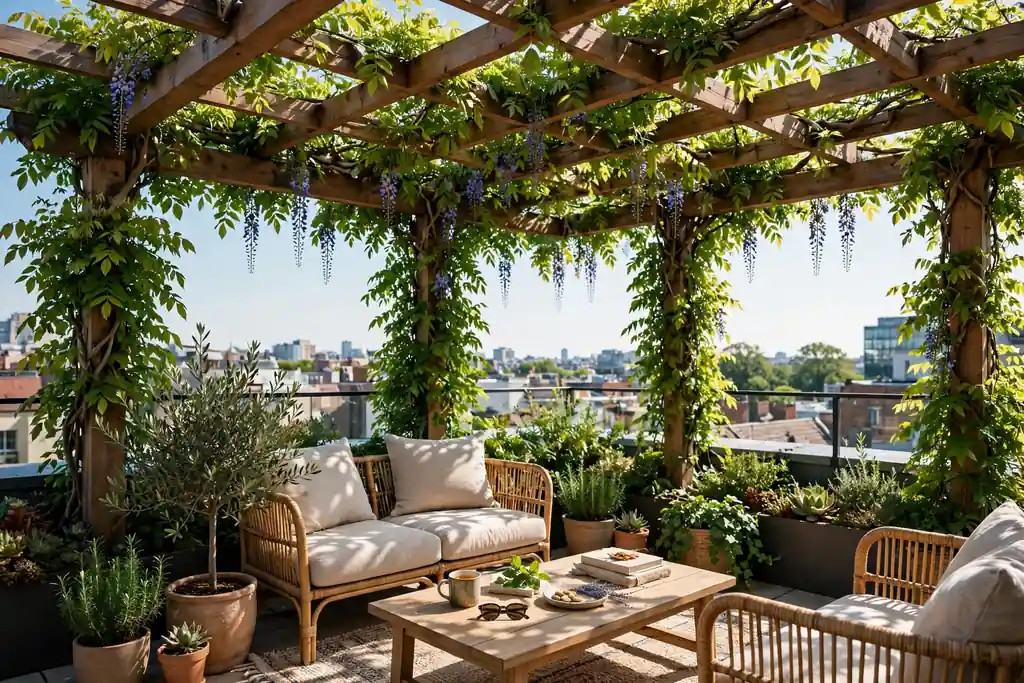
    Rooftop pergola with climbing plants over a seating area in daylight.

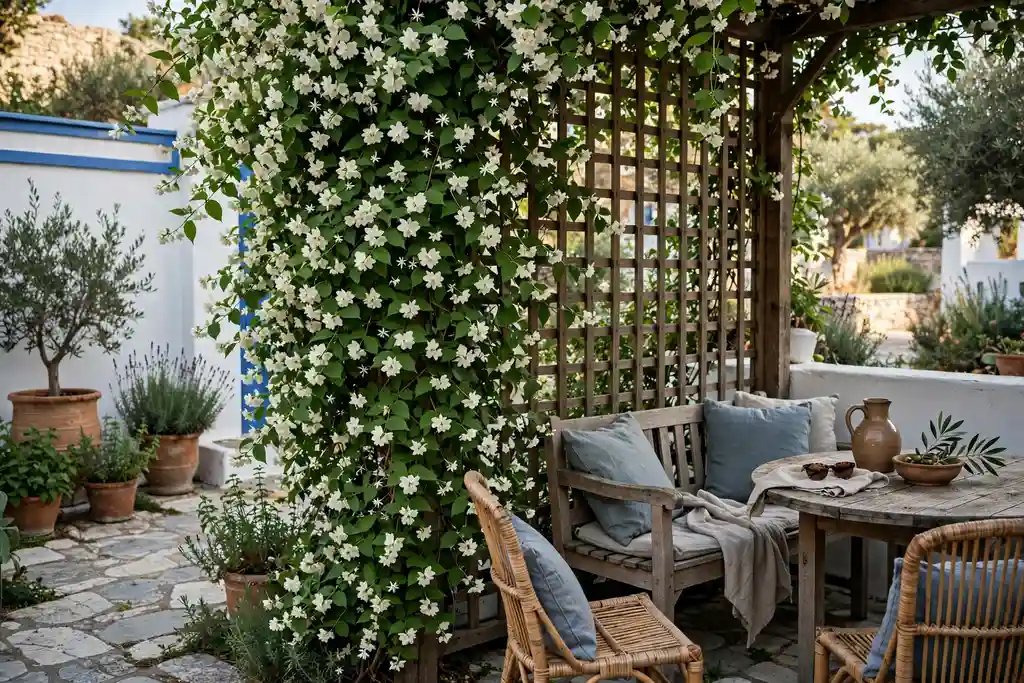
    Build or place a pergola over the main seating area and train climbers such as jasmine, clematis, or grape vine over the top. A pergola gives dappled shade, a sense of enclosure, and a frame for string lights, without closing the roof in. On a roof, choose a light frame that is fixed or weighted to suit wind, and check building rules before you fix anything to the structure.

    Train climbers along wires or a light trellis on top of the frame, and tie stems loosely as they grow. Prune after flowering as the plant type requires, and keep climbers clear of gutters and drains. A pergola also marks the sitting zone, which helps the rest of the roof feel organized around it.

    5. Lounge Sofa Corner with Soft Cushions
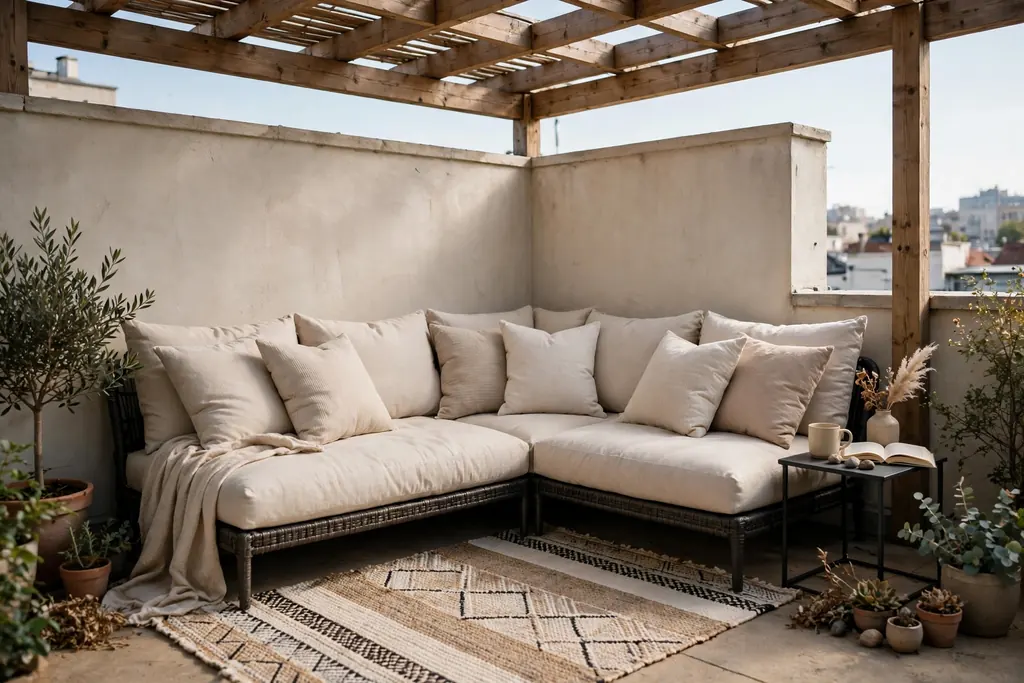
    Low outdoor sofa with soft cushions and a rug in a sheltered rooftop corner.

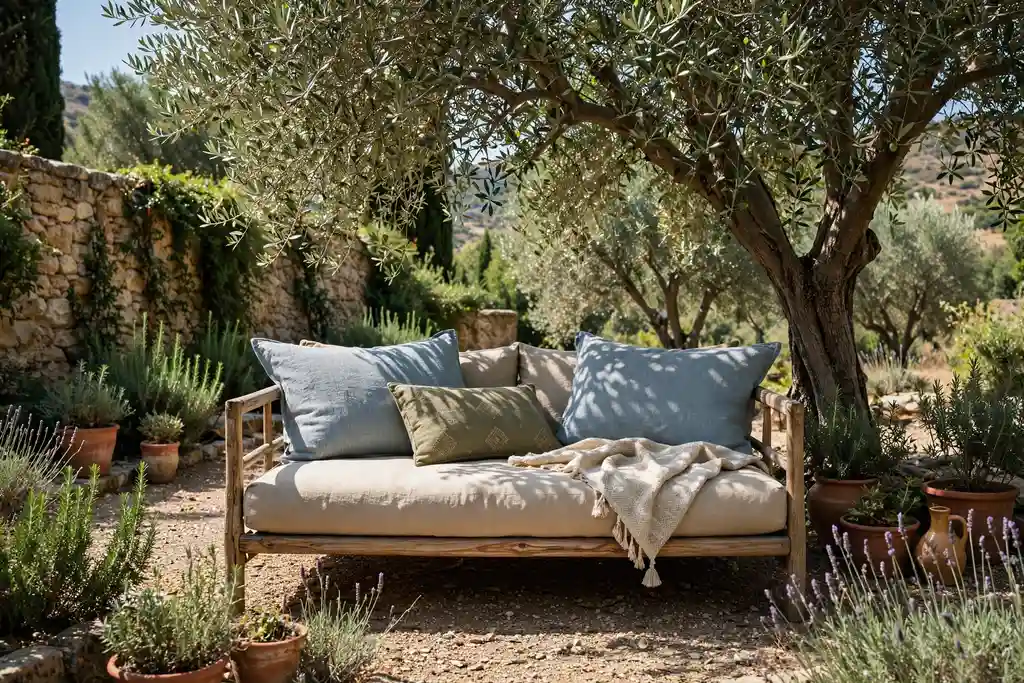
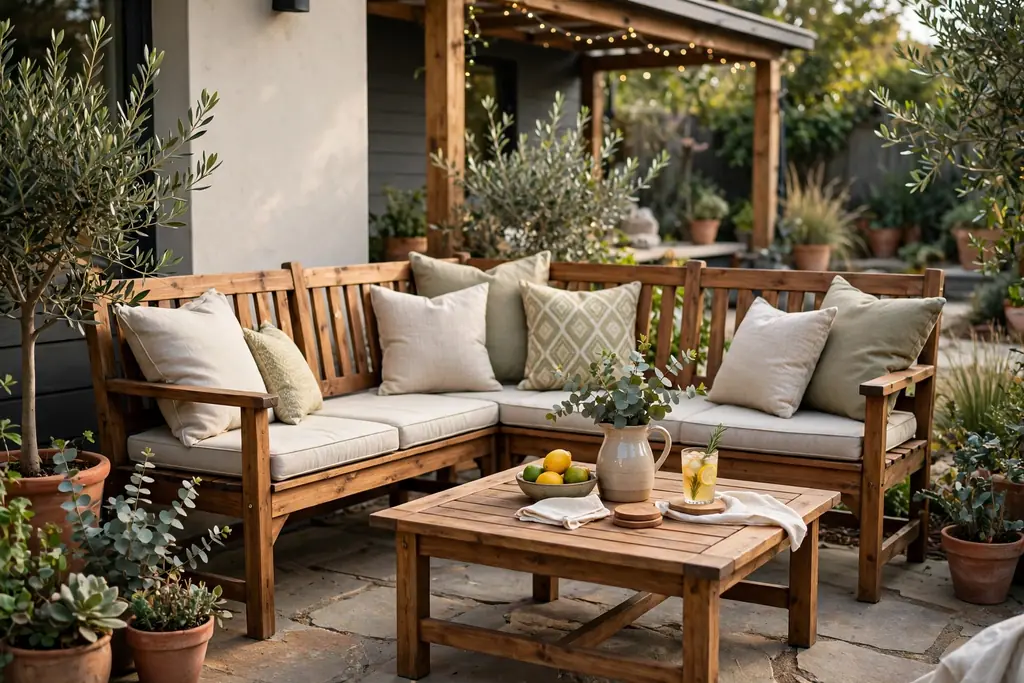
    Set a low outdoor sofa in a sheltered corner, with deep cushions, a throw, and a small side table, to make the roof a place for long sits rather than quick visits. A corner layout uses dead space well and faces the view, which is often the best part of a roof garden. Choose weather resistant cushions with removable covers, and store them in a dry box when rain is forecast.

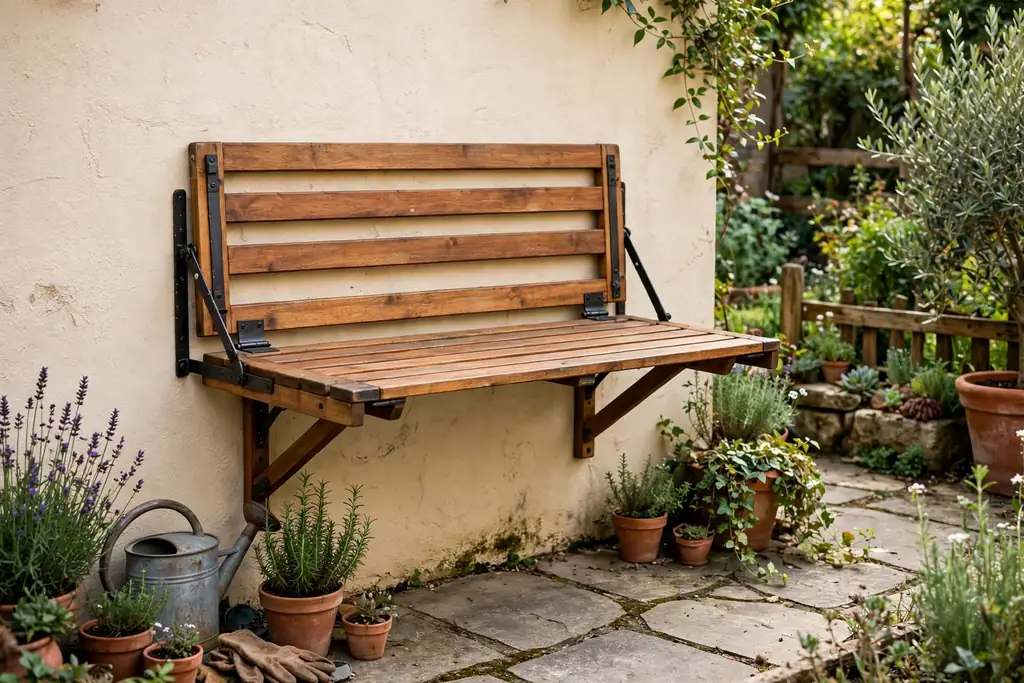
    Add a rug under the sofa to soften paving and define the zone. For seating ideas that work outdoors as well as in, these garden bench ideas show how to choose a spot first and match the seat to it. Keep the sofa away from the roof edge and leave a clear path behind it for access.

    6. Bistro Nook for Morning Coffee
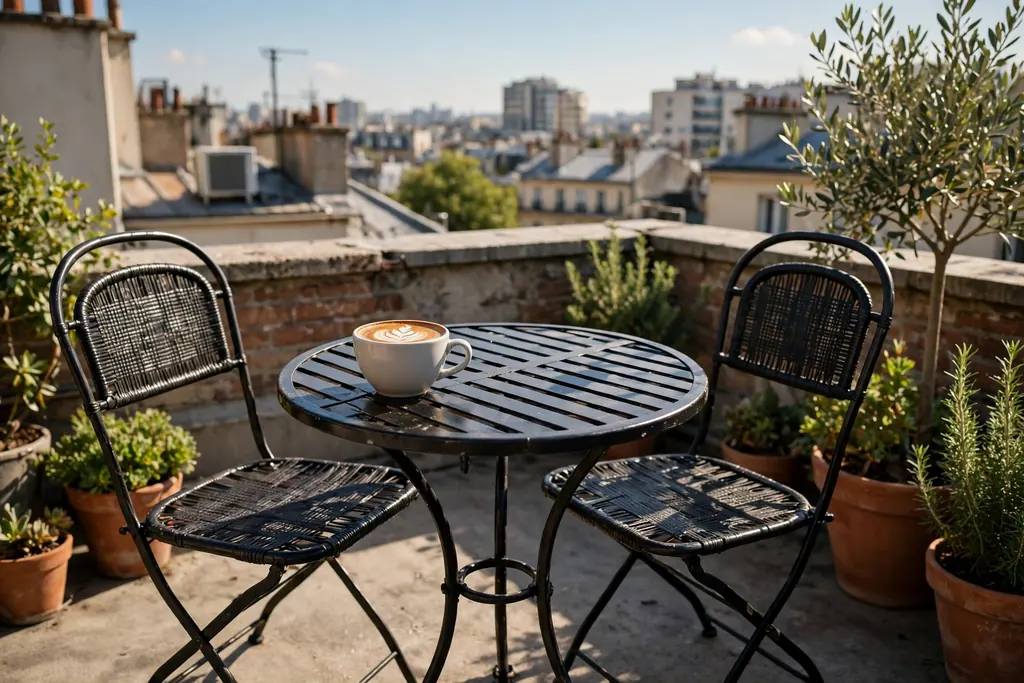
    Small bistro table and two chairs with a coffee cup on a sunny rooftop.

    Place a small bistro table and two chairs near the door or in a sunny morning spot for coffee, reading, and quiet starts to the day. A bistro set needs little space, folds away if needed, and still gives the roof a daily purpose. Choose a stable table that does not wobble on paving, and chairs that stack or fold for stormy days.

    Add one pot of herbs or flowers beside the table so the nook feels planted, not bare. A light cushion on each chair makes a short sit last longer. Site the nook where morning sun reaches it but wind is broken by a wall or screen, and keep the route from the door clear so you can carry cups safely.

    7. Hanging Chair in a Sheltered Spot
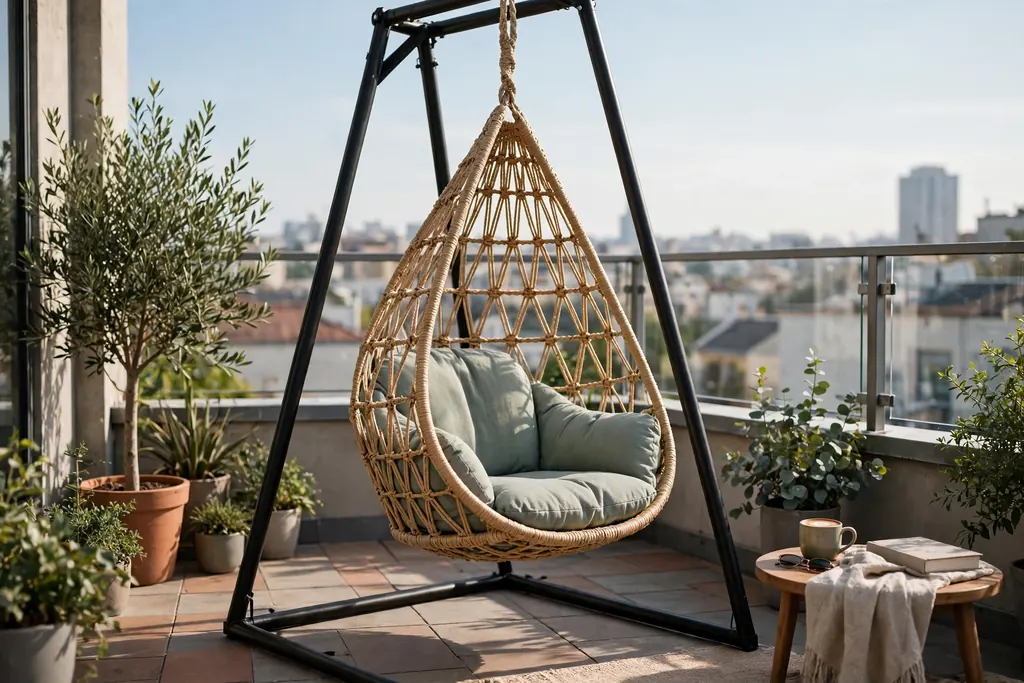
    Hanging chair on a freestanding frame with a cushion on a rooftop terrace.

    Hang a chair from a sturdy freestanding frame in a sheltered spot for a cozy reading seat that moves gently in the breeze. A hanging chair suits a roof because it takes little floor space and adds a soft, curved shape among straight planters and paving. Check the frame weight rating, set it on level ground, and keep a clear swing zone around it.

    Add a cushion and a small blanket for cooler evenings, and a side stool for a book and a drink. Avoid hanging a chair from a pergola or railing unless that structure is rated for the load, since a roof frame is not always built for swinging weight. Bring cushions inside in wet weather to keep them fresh.

    8. Dining Table for Rooftop Meals
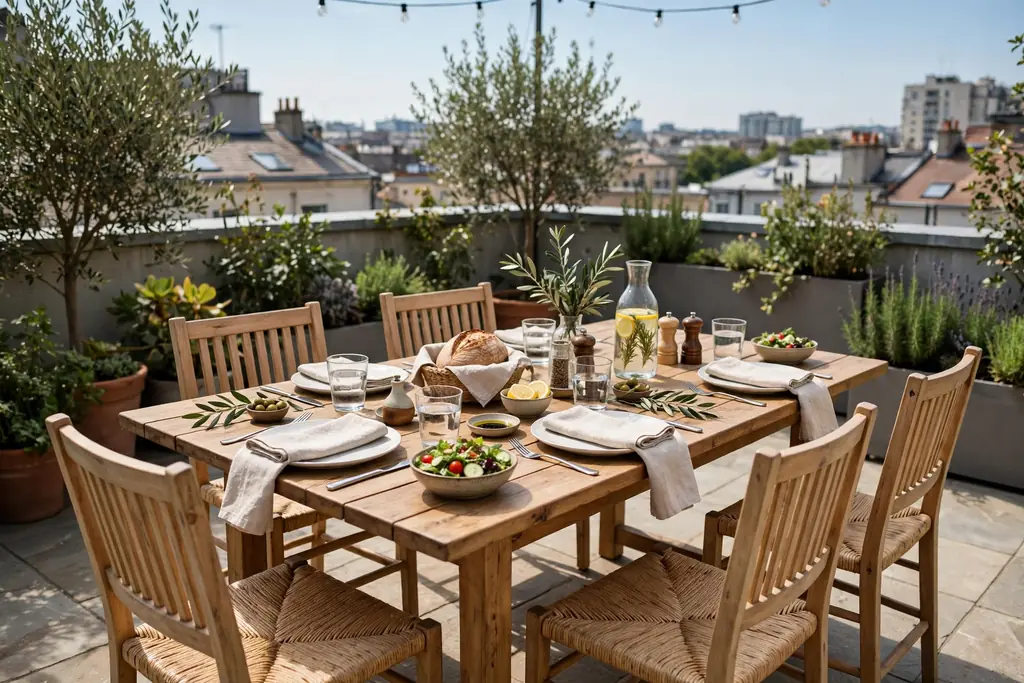
    Rooftop dining table with four chairs set for a meal outdoors.

    Set a dining table with four to six chairs in the flattest, least windy part of the roof for meals outside. Eating on a roof feels special, but it only works if plates stay put and chairs do not scrape on every gust. Choose a heavy enough table for wind, chairs that are easy to move, and a shade option for midday meals.

    Keep the table near the door or the cooking area if you can, so carrying food is short and safe. A tablecloth weight or a bare wood top avoids flapping fabric in wind. Add a centerpiece pot that is low enough to see across, and clear the table after meals so wind does not turn loose items into clutter.

    9. Fire Bowl Corner for Evenings
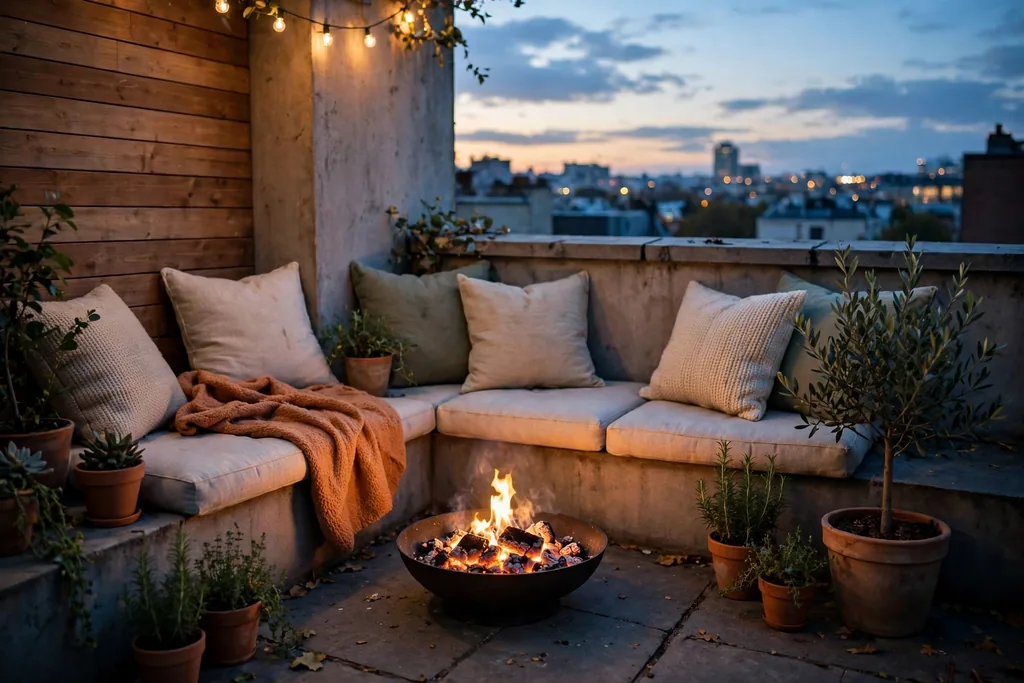
    Small fire bowl glowing in a rooftop seating corner at dusk.

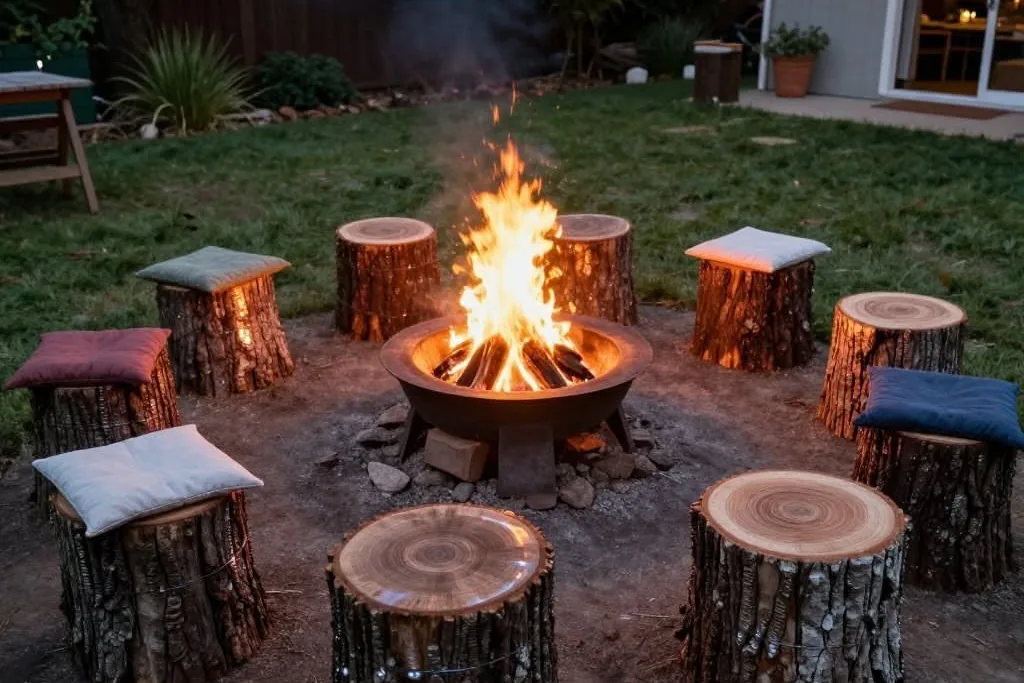
    Place a small fire bowl or tabletop flame feature in a seating corner for warmth and glow on cool evenings, only where building rules and local rules allow it. A fire feature makes a roof usable later in the year, and it gives evening gatherings a focal point. Check rules first, keep the feature away from planters, cushions, and overhanging climbers, and keep water or a fire blanket nearby.

    Use the feature only in calm weather, on a stable, heat resistant base, and never leave it lit unattended. If open flame is not allowed on your roof, a cluster of large lanterns with candles or battery lights gives a similar glow without the risk. Store fuel safely and away from the seating area.

    10. String Lights and Solar Lanterns
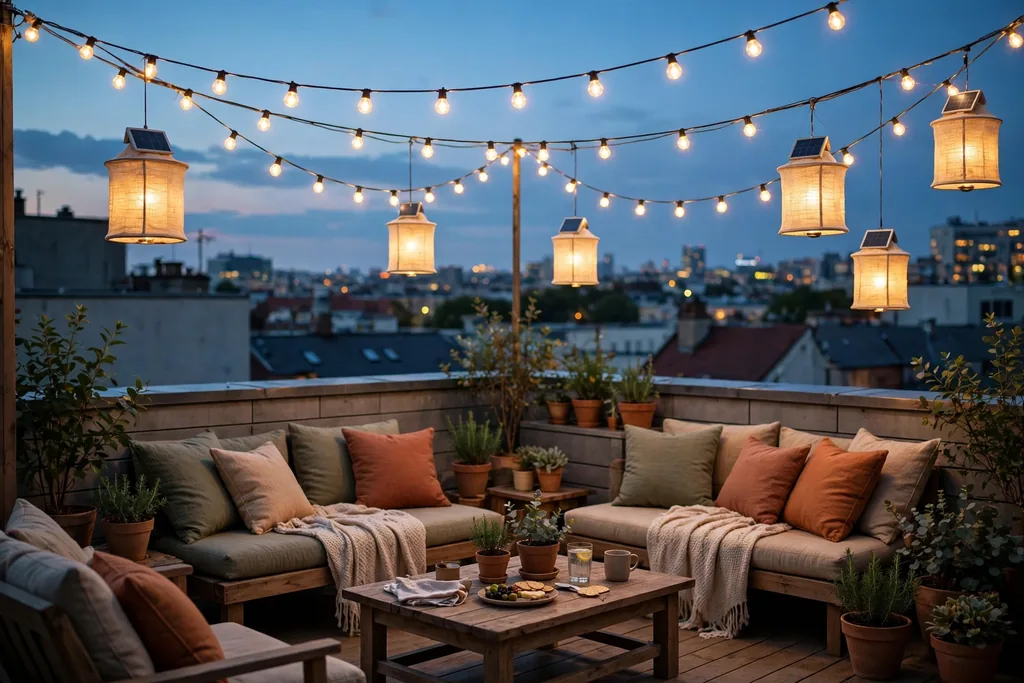
    Warm string lights and solar lanterns over a rooftop seating area at dusk.

    String warm white lights along a pergola, a railing, or a screen, and add solar lanterns along paths and near seats, to keep the roof usable after sunset. Light at roof level should be soft and low, so it feels cozy rather than harsh, and so it does not glare into neighboring windows. Solar lights suit roofs because they need no new wiring, but they need sun on their panels during the day.

    Place lanterns where they mark steps and edges, and keep cables out of walkways. Bring battery lights inside in winter if the maker advises it. Test the light level at dusk before guests arrive, and add one brighter task light near a cooking or reading spot if needed.

    11. Privacy Trellis Screens
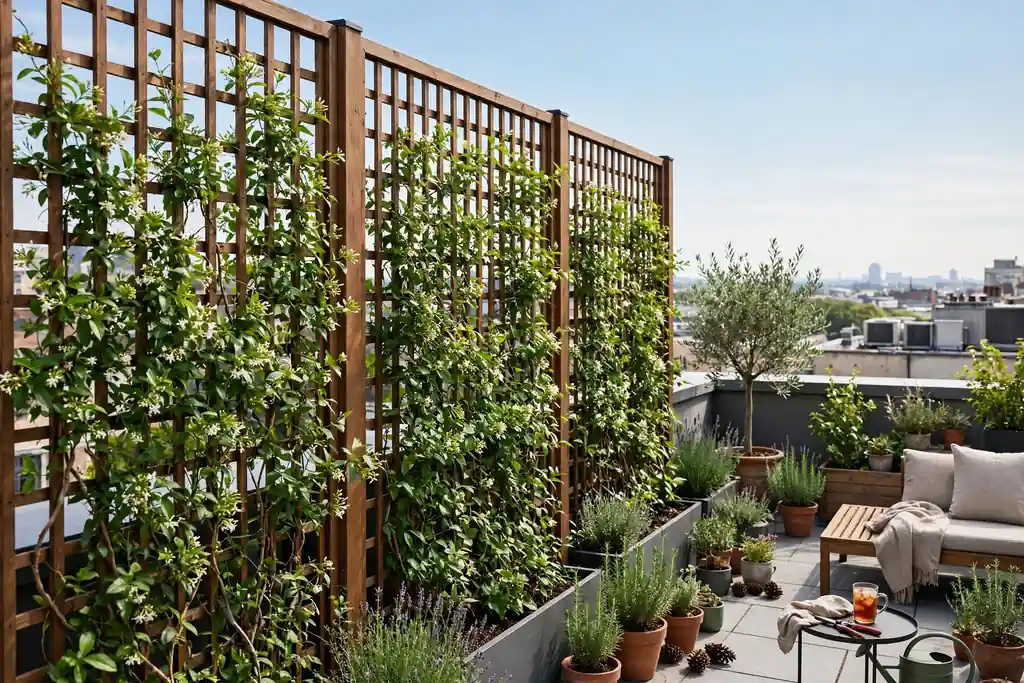
    Trellis privacy screens with climbers along one side of a rooftop garden.

    Stand trellis screens or slatted panels along one or two sides to cut wind and give privacy without building a solid wall. Screens suit city roofs where neighbors can see in, and they give climbers a place to grow. Choose panels that let some air through, since a solid screen catches more wind and puts more load on its fixings.

    Fix screens firmly or weight their bases, and check that they do not block fire escapes, access hatches, or ventilation. Plant climbers at the base for a green screen in summer, and keep the panels clear of drains. A screen on the windward side often makes the whole roof feel calmer, even before plants cover it.

    12. Herb Pots by the Cooking Spot
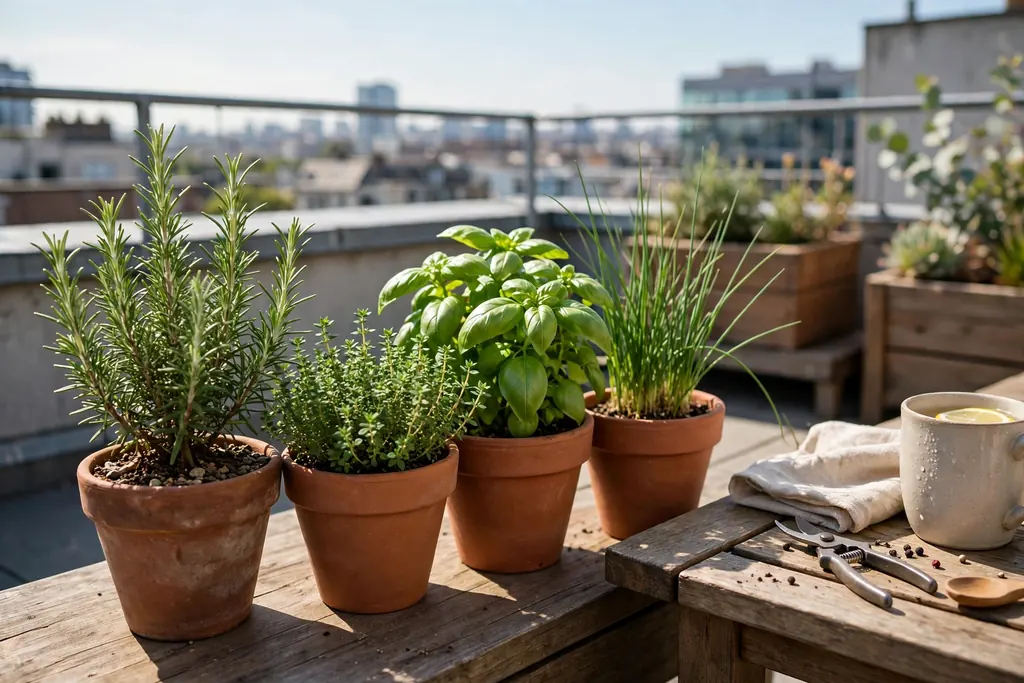
    Herb pots with rosemary, thyme, basil, and chives grouped near a rooftop table.

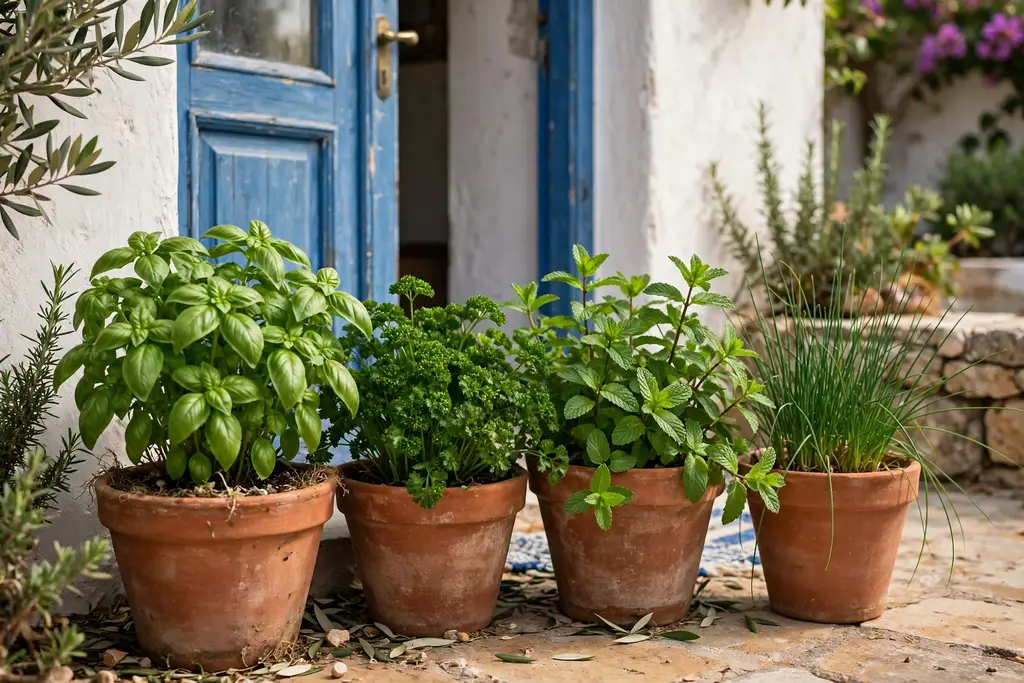
    Group herb pots near the dining table or the door for fresh leaves within a few steps of cooking. Herbs such as rosemary, thyme, basil, mint, and chives grow well in pots, and they add scent as well as flavor. Grow mint in its own pot, since it spreads fast and can take over a shared planter.

    Label herbs while they are young, water pots often in hot weather, and pick little and often to keep plants bushy. Keep the herb group on a tray or in a wooden crate so watering does not stain paving. In winter, move tender herbs to a sheltered corner or indoors, and replace annual herbs each spring.

    13. Vegetable Beds for a Small Harvest

    Rooftop vegetable beds with tomatoes, beans, and salad leaves in sun.

    Grow vegetables in raised beds or deep containers on the sunniest part of the roof for salads, tomatoes, beans, and peppers in season. Roof vegetables need sun, water, and wind shelter, and they reward daily visits, since you will water, pick, and check plants often. Start with one or two beds, and grow crops you eat weekly rather than filling every bed at once.

    Use a light soil mix, mulch to hold moisture, and water at the base in the morning or evening. Support tall crops with canes tied to a frame, and rotate crops between beds each year so the same family does not grow in the same soil season after season. Keep paths wide enough for a watering can and a harvest basket.

    14. Pollinator Flower Border
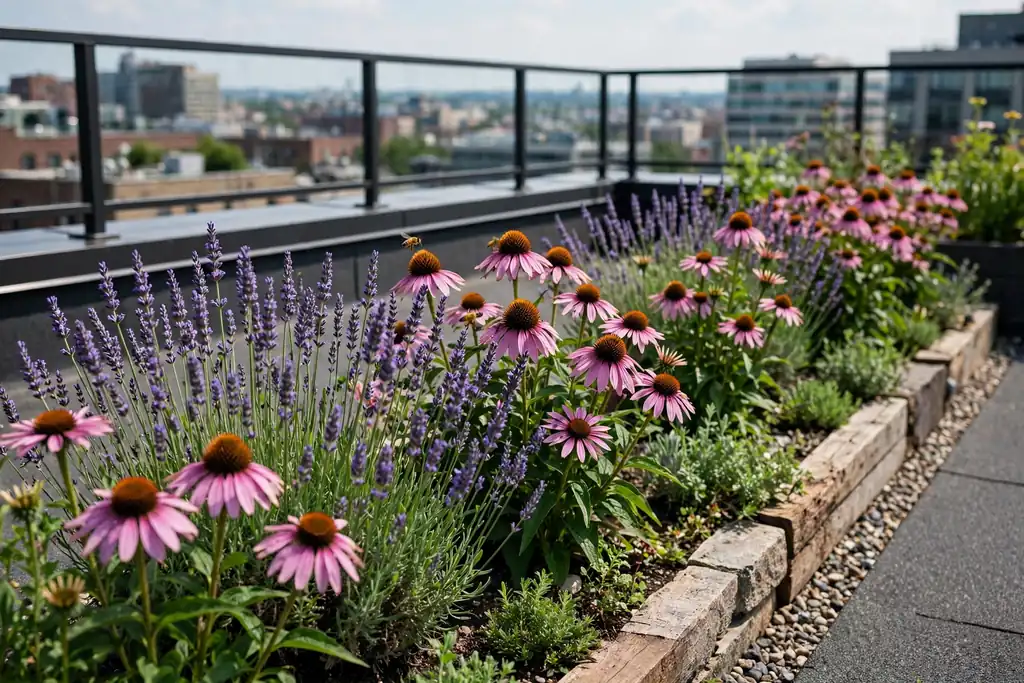
    Pollinator flower border with coneflowers, lavender, and bees on a rooftop.

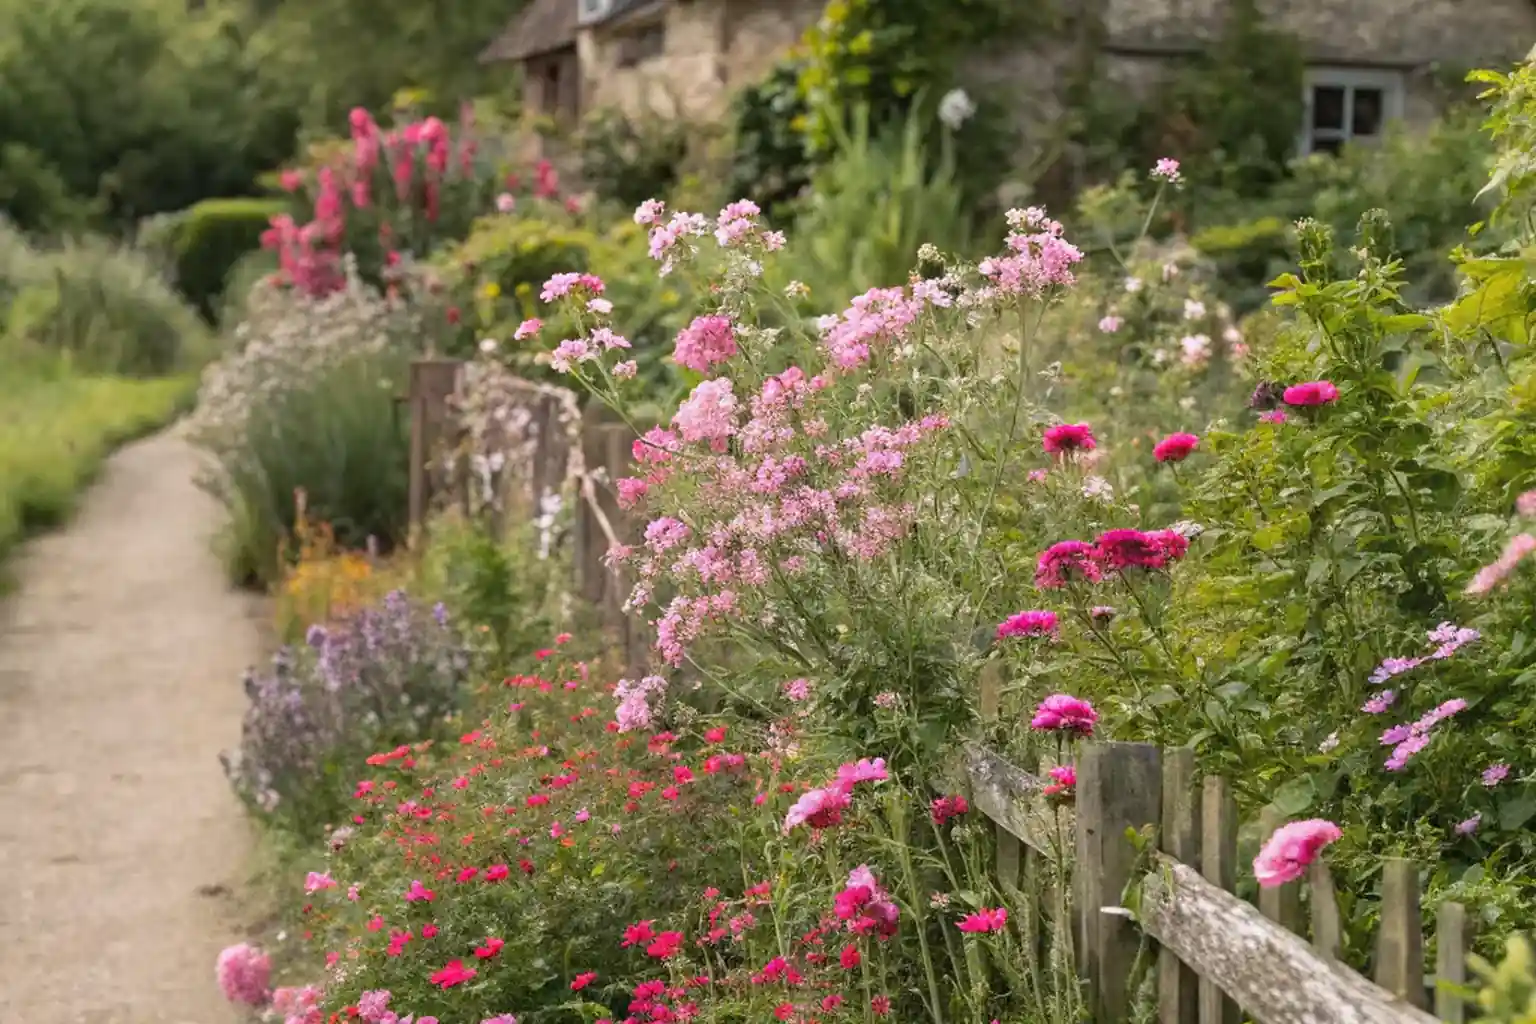
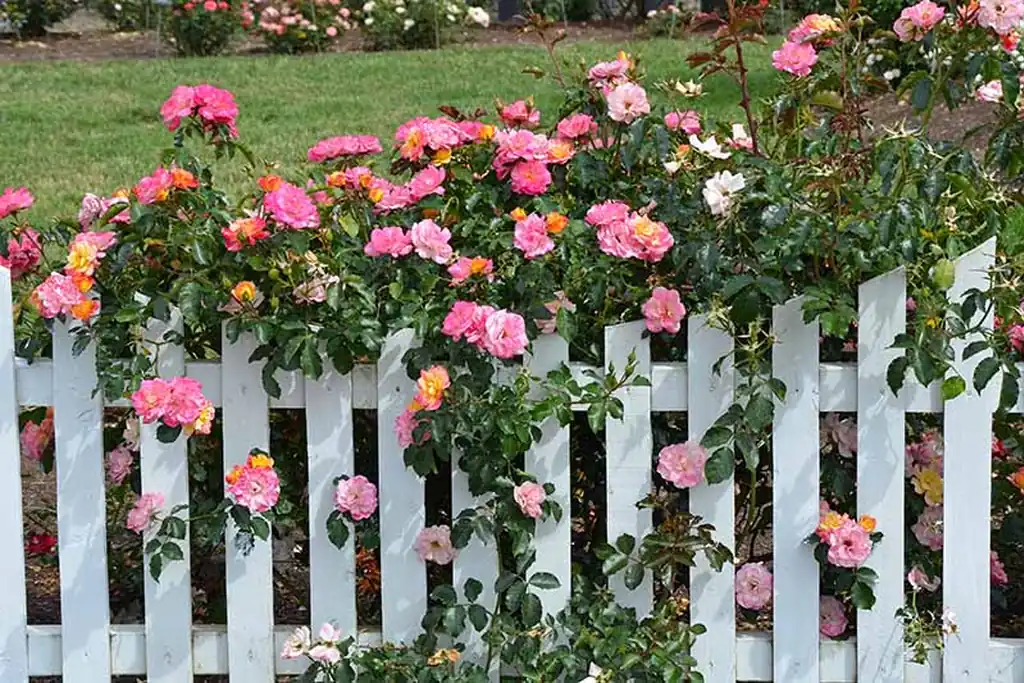
    Plant a flower border with coneflowers, salvias, lavender, and single open blooms to draw bees and butterflies to the roof. Pollinators visit roofs when flowers are grouped in drifts, not scattered as singles, so plant three or five of each type together. For color grouping ideas, these pink flower garden ideas show how drifts of one color read clearly from a distance.

    Choose plants that flower in different months, so food is available from spring to autumn. Avoid spraying open blooms, and leave some seed heads standing in autumn for birds. A pollinator border also adds color and scent near seating, which makes the roof feel alive in summer.

    15. Gravel Garden with Succulents and Grasses
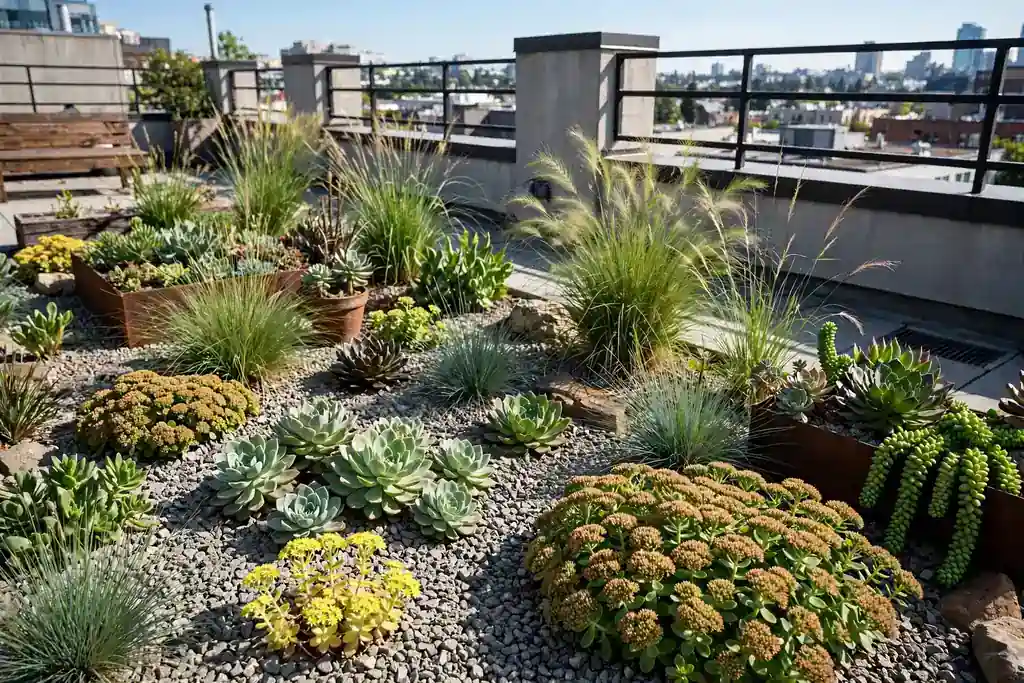
    Gravel garden with succulents, sedums, and ornamental grasses on a rooftop.

    Lay a gravel garden in a shallow, light tray or a defined bed for succulents, sedums, and ornamental grasses that cope with sun, wind, and dry soil. Gravel suits roofs because it drains fast, stays light, and needs little watering once plants settle. Use a shallow layer of gravel over a free draining mix, and keep the planting low and open so the stones stay visible.

    Choose succulents rated for your winter cold, since roof cold can be sharper than ground level cold. Top dress with gravel to keep plant crowns dry and suppress weeds. A gravel bed near a path gives a close view of small flowers and leaf shapes that would be lost in a large border.

    16. Soft Turf Patch for Barefoot Sitting
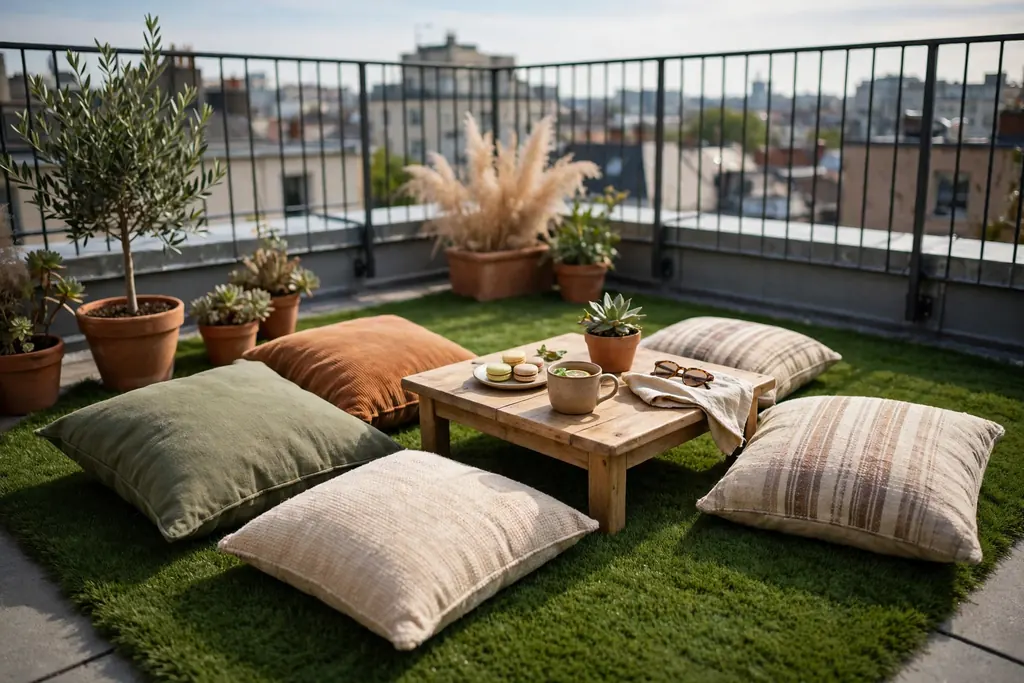
    Soft turf patch with floor cushions and a low table on a rooftop.

    Lay a patch of artificial turf or a large outdoor rug on a flat, dry part of the roof for barefoot sitting, play, and picnics. A soft patch breaks up hard paving and gives children and pets a comfortable spot, without the watering and mowing of real grass on a roof. Choose a turf or rug made for outdoor use, with drainage holes or a breathable backing.

    Keep the patch away from drains and door thresholds, and lift it now and then to clean beneath it. Add floor cushions and a low table on the patch for a casual lounge. If you use a rug, bring it inside during long wet spells so it dries fully and does not trap moisture on the roof surface.

    17. Small Water Bowl or Fountain

    Shallow water bowl with a small fountain in a sheltered rooftop corner.

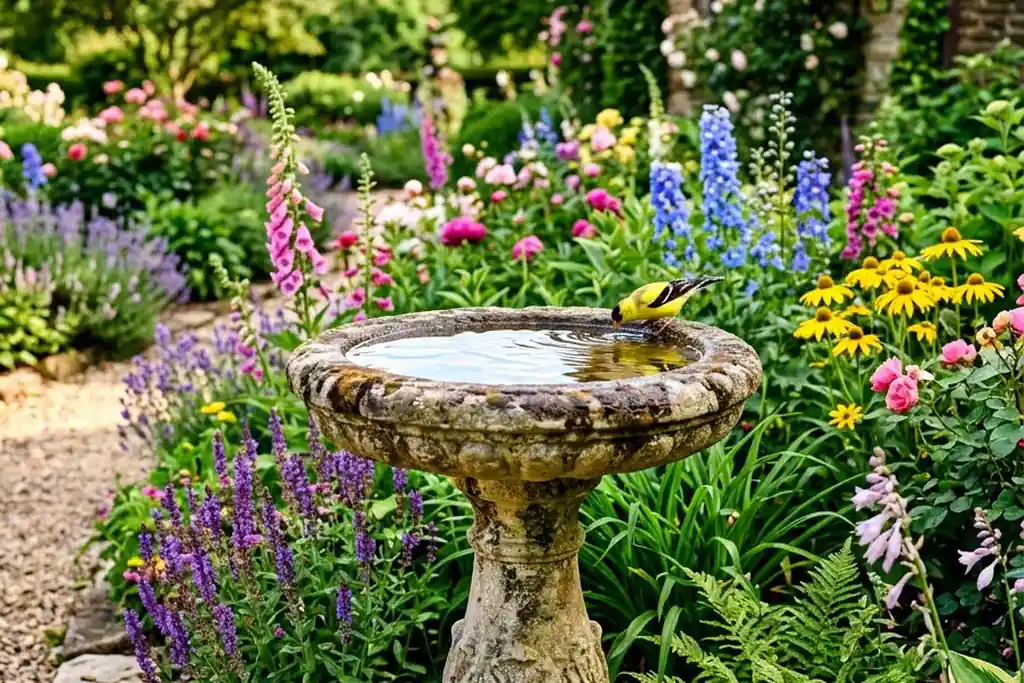
    Set a wide, shallow water bowl or a small solar fountain in a sheltered corner for sound, reflection, and birds. Moving water masks street noise, which makes a roof seating area feel more private, and a still bowl reflects sky and planting. Choose a light bowl, keep the water shallow, and place it where you can reach it for cleaning.

    Refresh the water often, especially in hot weather, and keep the bowl clear of fallen leaves. If mosquitoes are a problem in your area, a small solar fountain that keeps water moving helps. Keep the feature away from seating cushions and electrical items, and empty it before frost if the bowl could crack.

    18. Shade Sail Over the Seating Zone
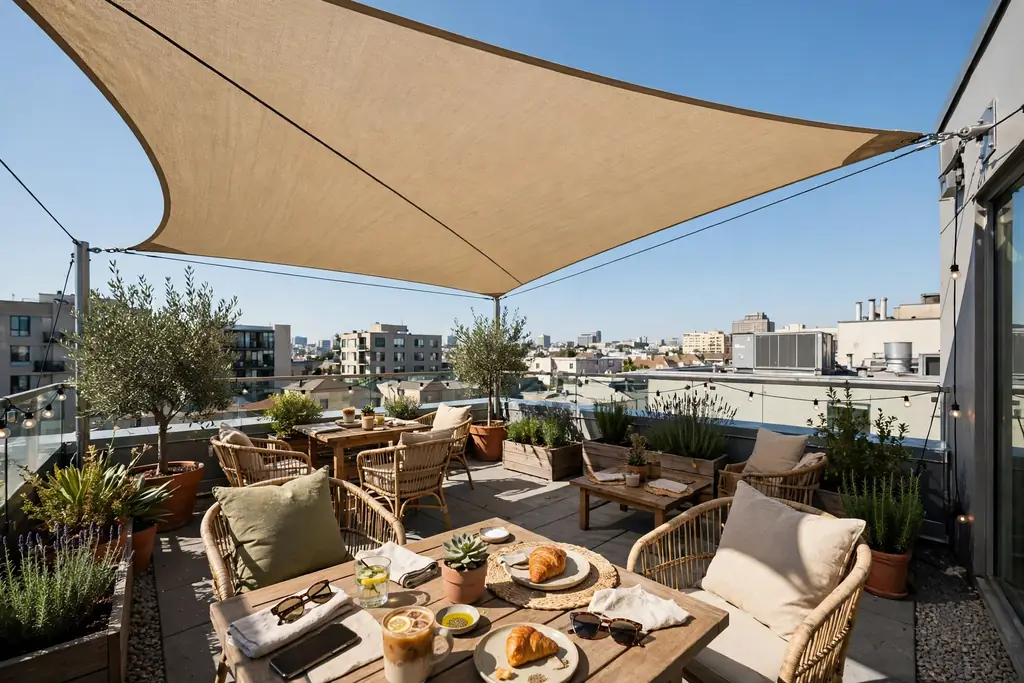
    Shade sail stretched over a rooftop seating zone on a sunny day.

    Stretch a shade sail over the seating zone for instant shade on hot roofs where a pergola would be too heavy or too fixed. A sail gives broad shade, moves with the breeze, and can be taken down in storms. Fix it to strong points rated for wind load, with a slight slope so rain runs off one side rather than pooling in the middle.

    Choose a light, breathable fabric in a warm neutral, and test the shade pattern at midday before you fix the final points. Keep the sail clear of fire features and climbing plants that could snag it. A sail plus a screen on the windward side often makes a hot, exposed roof comfortable for most of the day.

    19. Storage Bench That Hides Roof Gear
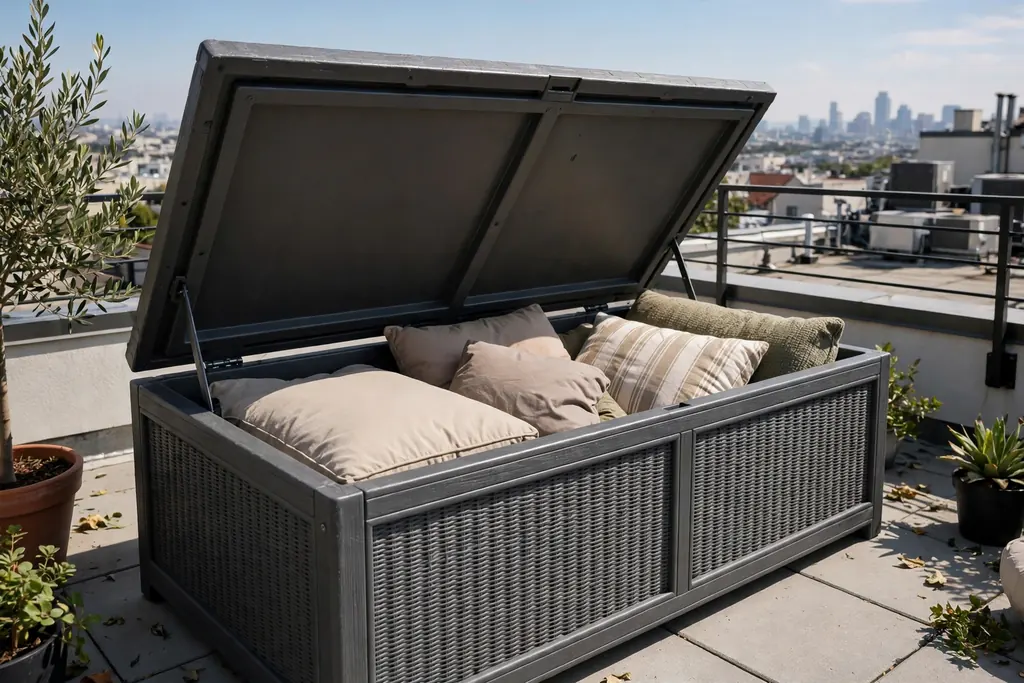
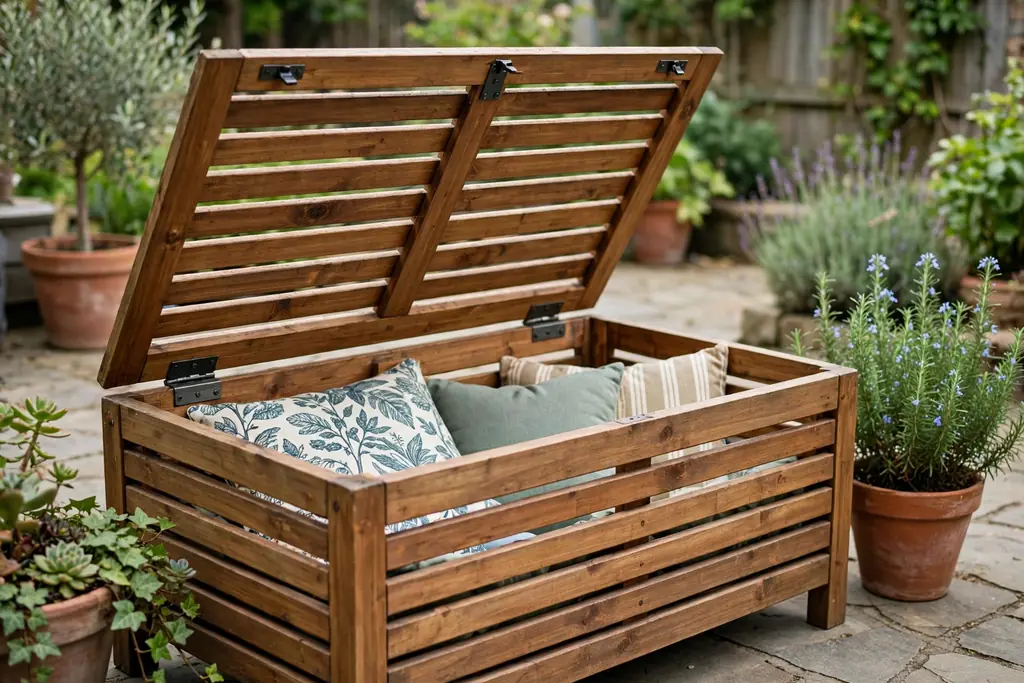
    Weatherproof storage bench with its lid open showing cushions on a rooftop.

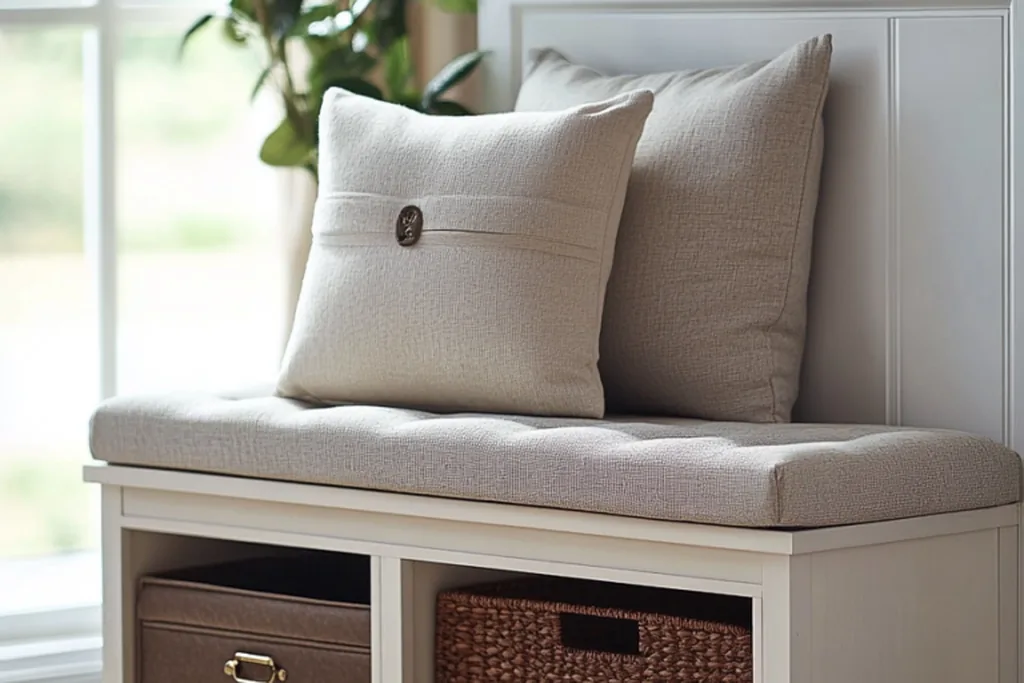
    Use a weatherproof storage bench near the door to hide cushions, watering cans, tools, and small pots, while adding an extra seat. Roof gear gathers fast, and a bench keeps it dry and out of sight without taking a whole storage cupboard. Choose a bench made for outdoor use, with a lid that closes fully to keep rain out.

    Keep heavy items at the bottom so the bench stays stable in wind, and leave clearance behind it so the lid opens fully. A storage bench beside the lounge corner means cushions are close at hand, so you are more likely to use the roof on a whim. Check the lid action before you rely on it, since a heavy lid with no stay can pinch fingers.

    20. Outdoor Rug and Floor Cushion Lounge
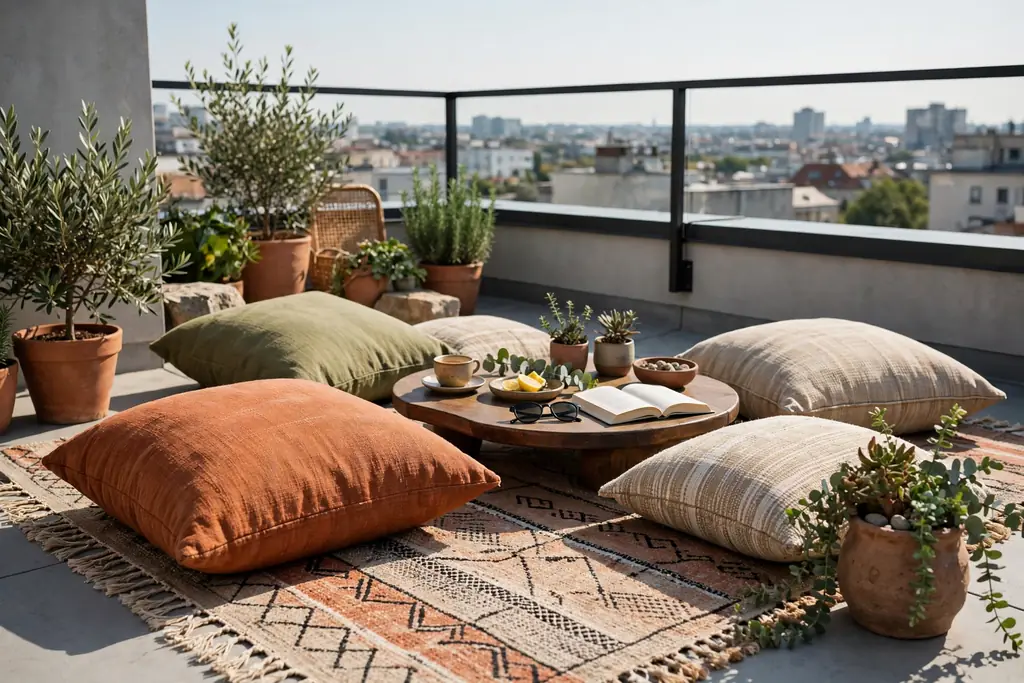
    Outdoor rug with floor cushions and a low table on a rooftop terrace.

    Lay a large outdoor rug and add floor cushions, a low table, and a basket for throws to make a relaxed lounge that can change shape for guests. Floor seating suits roofs because it is light, flexible, and easy to pack away in a storm. Choose a washable rug and cushions with removable covers, and keep the setup on a dry, level patch.

    Move the lounge to follow shade during the day, and stack cushions in the storage bench at night. Keep food and drinks on a low tray so cups do not tip on soft seating. This lounge pairs well with string lights in the evening, when low seating and warm light make a small roof feel like a room.

    21. Vine Arch Over the Roof Entry
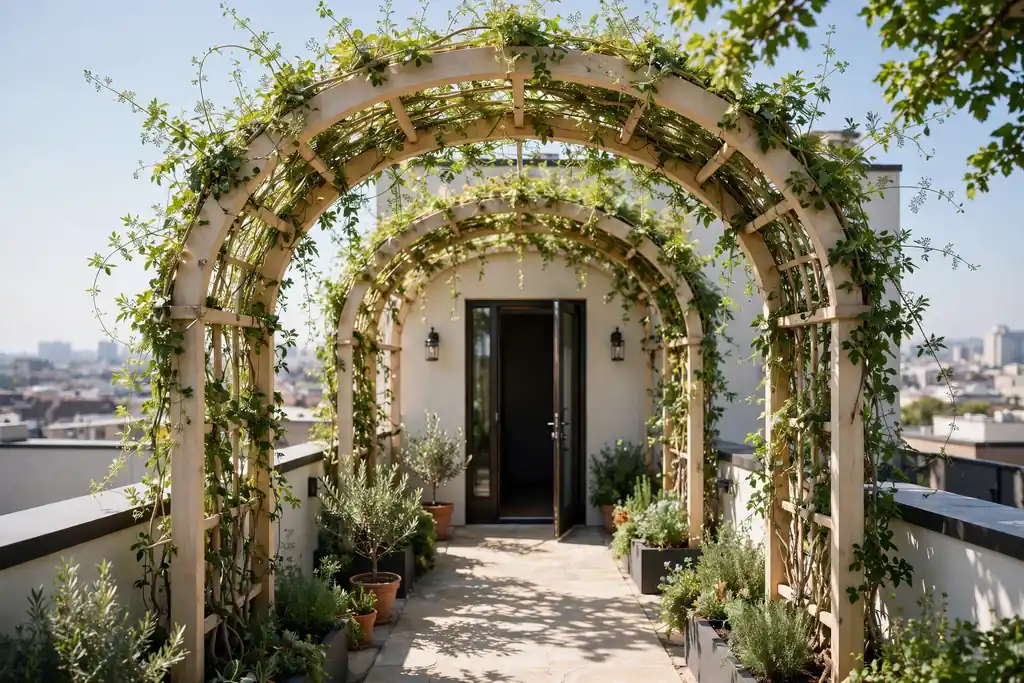
    Light vine arch with climbing plants over a rooftop entry path.

    Place a light arch over the steps or doorway onto the roof and train a vine or climbing rose over it to mark the entry. An arch turns the arrival onto the roof into a moment, and it frames the view beyond. Choose a light metal or wood arch that is fixed or weighted for wind, and keep the path beneath it clear and wide enough to walk through comfortably.

    Train climbers away from the walking line, so stems and thorns do not brush passers by, and prune after flowering as the plant type requires. A narrow arch fits a roof entry better than a wide one, since the arch already takes up visual space. Add one pot on each side to anchor the arch in planting.

    22. Four Season Backbone with Seasonal Pots
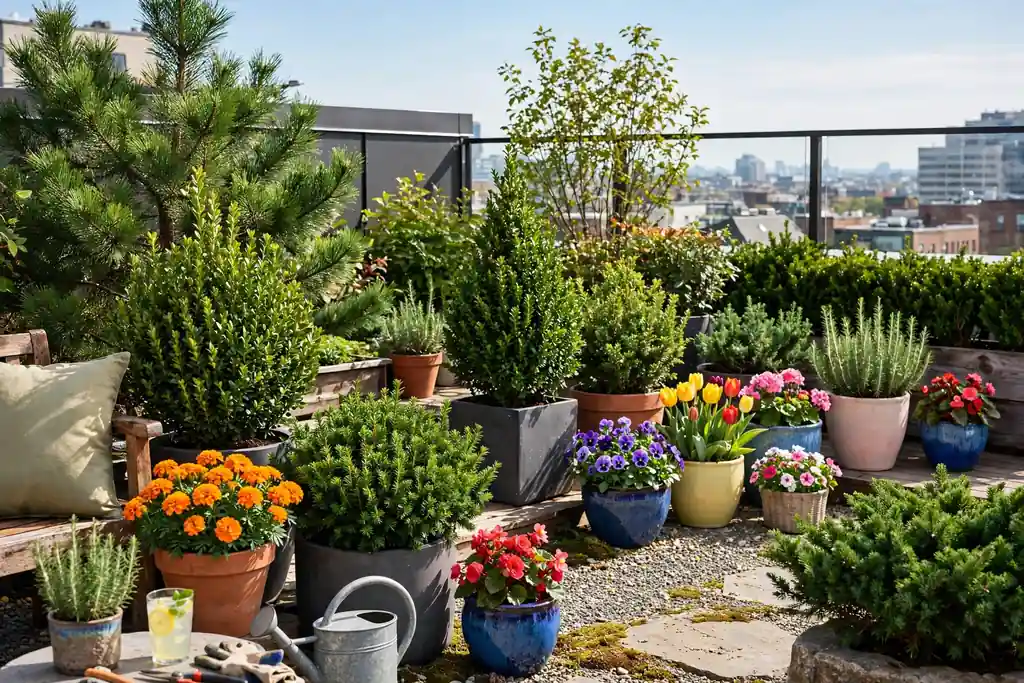
    Rooftop garden with evergreen shrubs and seasonal pots in color.

    Build the roof around evergreen shrubs, grasses, and small trees for year round structure, then swap seasonal pots in and out for color. Evergreens keep the roof from looking bare in winter, while seasonal pots let you change the mood without replanting beds. Choose evergreens that cope with wind and pots, such as boxwood, small pines, and hardy grasses, and check their mature size before planting.

    Refresh seasonal pots in spring with bulbs and annuals, in summer with flowering pots, and in autumn with grasses and late color. Keep one or two pots empty in reserve, so swaps are quick. This backbone plus seasonal change approach keeps a roof garden current without a full redesign each year.

    Conclusion

    A good rooftop garden starts with the roof itself, not the shopping list. Check weight, drainage, wind, and building rules, then choose one comfortable seat, one shade option, and planting that suits sun and wind. Add zones for sitting, growing, and storage, and keep paths, drains, and access clear. Pick one idea from this list, set it where you will actually sit, and add planting, light, and color only after that first seat feels right.

    Save this list on Pinterest before your next garden trip, and work through it one area at a time: structure first, then planting, then the comfort details that make the roof yours.

    FAQs

    What plants grow best in a rooftop garden?

    Wind tolerant, sun loving plants do best, such as grasses, lavender, sedums, succulents, rosemary, and hardy shrubs. Choose plants rated for your winter cold, since roofs can be colder and windier than ground level gardens. Group plants in drifts, water pots often, and use a light, free draining soil mix so roots do not sit wet after rain.

    How do I check if my roof can hold a garden?

    Check your building rules, lease, or management plan first, and ask a structural professional if you plan heavy planters, soil beds, water features, or a pergola. Keep heavy items near load bearing walls where possible, use light containers and soil mix, and spread weight across the roof. Never block drains, fire escapes, or access hatches with planters or furniture.

    How often do rooftop plants need watering?

    Rooftop pots often need watering daily in hot, windy weather, since wind and sun dry soil fast. Check soil with a finger before watering, water at the base in the morning or evening, and mulch the surface to hold moisture. Larger beds hold water longer than small pots, and self watering pots or a drip system can help if you are away for a few days.

    How can I make a rooftop garden private without a solid wall?

    Trellis screens, slatted panels, tall grasses, and climbers give privacy while letting air through, which matters in wind. A screen on the side neighbors see most often, plus planting at different heights, usually feels private without closing the roof in. Keep screens clear of fire escapes and vents, and fix them firmly for wind.

    Is a rooftop vegetable garden worth the effort?

    Yes, if you grow crops you eat often and you visit the roof daily. Salads, herbs, tomatoes, beans, and peppers suit sunny roofs, and pots or raised beds keep the work contained. Start with one or two beds, water little and often, and support tall crops. Daily picking and watering become part of the routine, which is why small roof harvests often succeed.

    What is the easiest rooftop garden idea to start with?

    Start with a cluster of lightweight pots, one comfortable seat, and a shade option. Pots can move, change with the seasons, and need no building work, while a seat and shade decide whether you use the roof at all. Once that setup works, add a screen, lights, or a raised bed one step at a time.



  • 24 Sunflower Garden Ideas for a Welcoming, Lived-In Look

    24 Sunflower Garden Ideas for a Welcoming, Lived-In Look

    Sunflowers do more than add height. They mark an entrance, screen a patio, feed bees and birds, and give you stems to cut through summer. These 24 sunflower garden ideas cover tall borders, small pots, vegetable beds, meadow patches, and seating corners, so there is a workable option for a large yard, a narrow side strip, or a rented patio. Start with the sunniest spot you have, since sunflowers need full sun to stand tall and flower well, then pick one structure, such as a border or a screen, and add pots or a cutting row around it.

    Key Takeaways

    • Give sunflowers full sun and room to grow: tall types need space and staking, while dwarf types suit pots and small beds.
    • Mix heights on purpose, with tall sunflowers at the back, mid height flowers in the middle, and low plants at the front.
    • Stagger sowing by two or three weeks for a longer run of blooms instead of one short peak.
    • Leave some seed heads standing in autumn for birds, and save a few heads for seed if you want the same plants next year.
    • Use pots, planters, and a single raised bed when ground space is limited or the garden is rented.

    1. Plant a Tall Sunflower Border Along a Fence

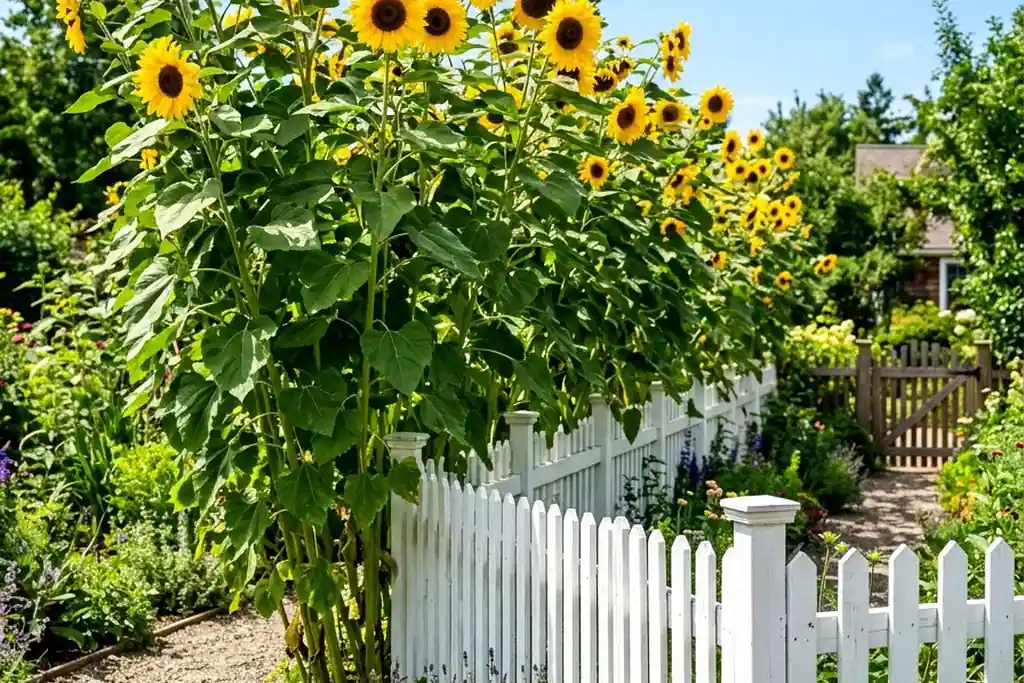
    Tall yellow sunflowers growing in a row along a wooden garden fence.

    A row of tall sunflowers along a fence is the simplest way to get height fast. Sow or plant in a single row about a foot from the fence, spacing plants according to the packet, and tie stems loosely to the fence or to stakes as they grow. The fence gives support in wind and a plain backdrop that shows the yellow heads clearly. Plant low flowers such as marigolds or nasturtiums in front so the bare lower stems are covered. In a windy garden, choose a sheltered fence run and water deeply rather than lightly, so roots grow down and hold the plants steady.

    2. Mix Sunflowers Into a Cottage Border

    Cottage garden border with tall sunflowers mixed with zinnias and cosmos.

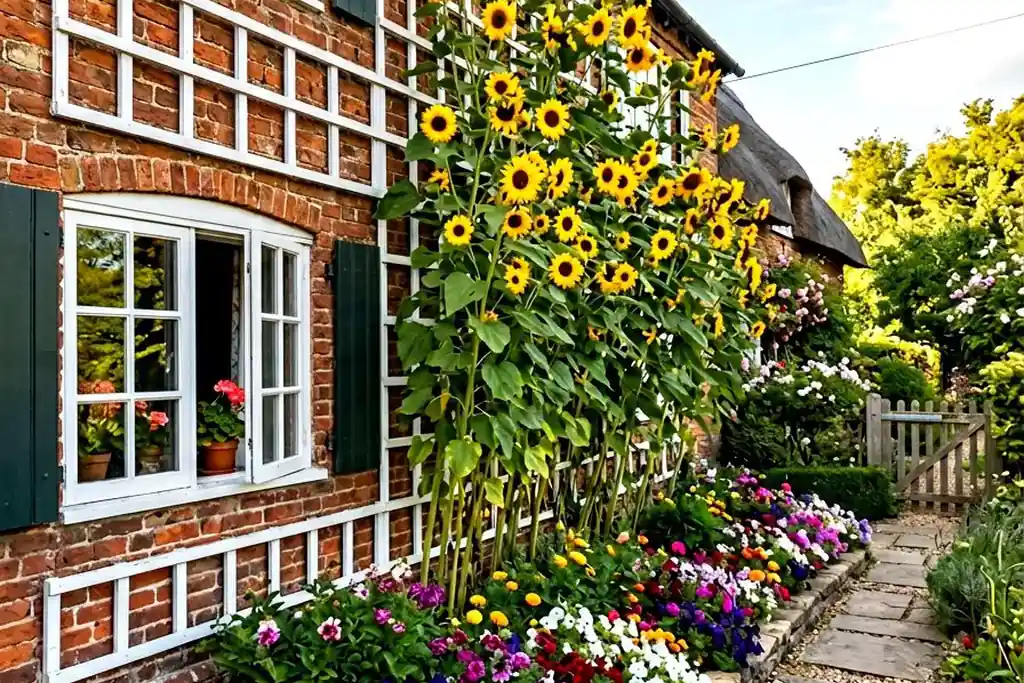
    Sunflowers sit naturally in a loose cottage border with zinnias, cosmos, and dahlias. Plant tall sunflowers toward the back, mid height zinnias and cosmos in the middle, and low edging plants at the front, and let the shapes overlap instead of lining everything up in strict rows. The mix gives color from early summer into autumn and keeps the bed looking full even before the sunflowers open. For color pairing ideas that work beside yellow, see these pink flower garden ideas, which show how a second strong color can sit beside a tall flower without crowding it.

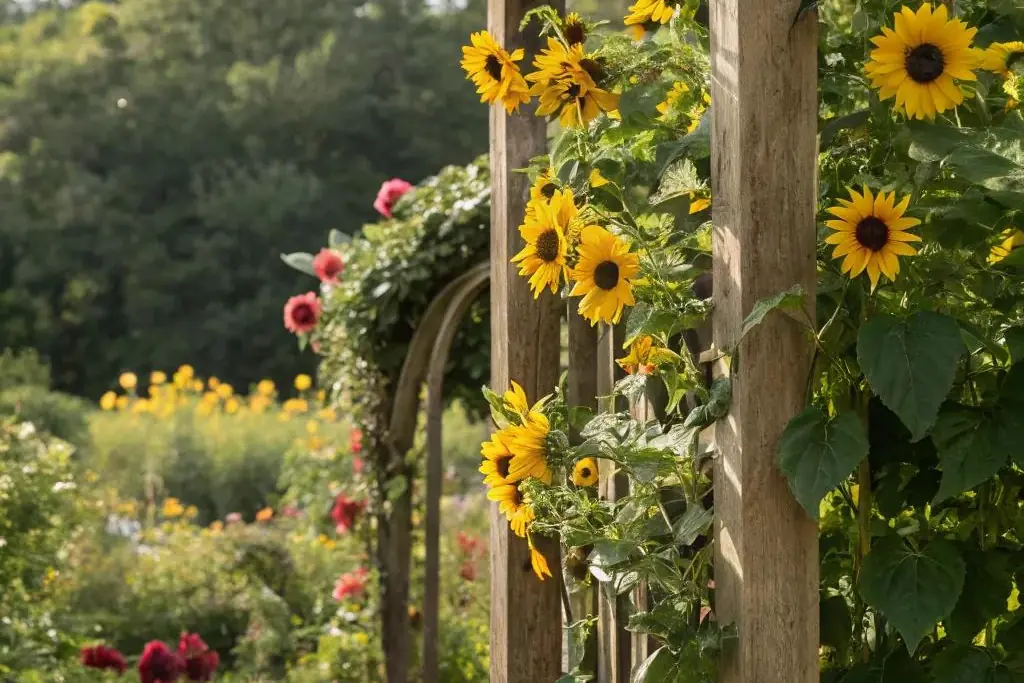
    3. Grow a Sunflower Arch Over a Garden Path

    Sunflowers growing over a garden arch above a path.

    Two rows of sunflowers trained over a simple arch or a pair of posts with a crossbar make a sunny tunnel over a path. Plant one row on each side of the path, tie the main stems to the supports as they grow, and guide side shoots across the top rather than letting them sprawl. The arch needs a wide, level path underneath and a support strong enough to carry wet, heavy heads in late summer. Keep the path clear by trimming leaves that hang at head height, and plant low flowers at the feet of the arch so the base looks finished.

    4. Grow Dwarf Sunflowers in Pots on the Steps

    Dwarf sunflowers in terracotta pots on sunny garden steps.

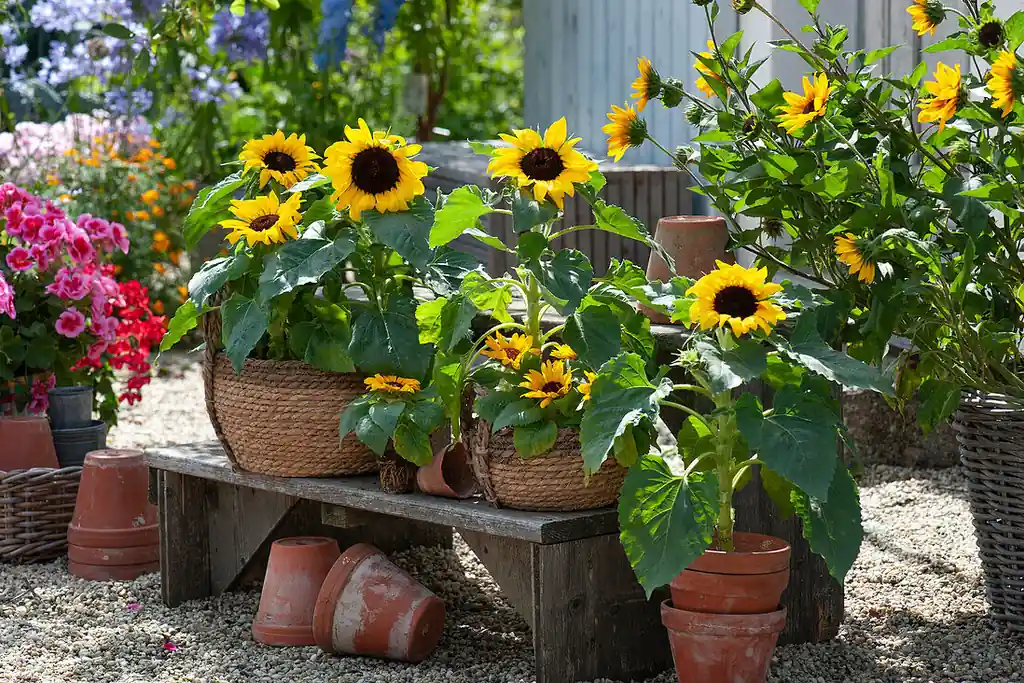
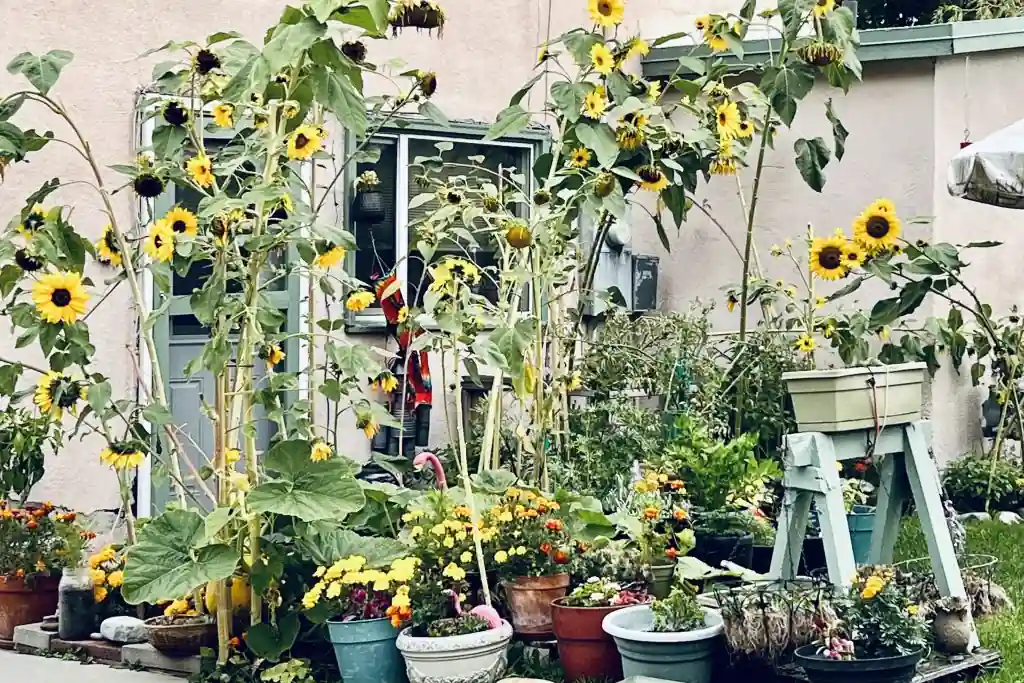
    Dwarf sunflowers are the answer when a tall border will not fit. Plant one dwarf plant per medium pot, or three in a large pot, in fresh potting mix with drainage holes, and set the pots on sunny steps, beside a door, or along a patio edge. Pots dry out faster than beds, so check the soil with a finger and water when the top feels dry. Group pots in odd numbers and in different heights for a fuller look than a single pot alone. Deadhead spent blooms to keep new flowers coming, and move pots to follow the sun if one spot turns shady.

    5. Keep a Cutting Row for Summer Bouquets

    Straight row of sunflowers grown for cutting in a garden bed.

    A cutting row is planted for picking, not for display, so space plants in straight rows you can walk beside and cut from. Sow a mix of tall and branching sunflower types so you get both single large heads and smaller stems for mixed bunches. Cut in the morning, strip the lower leaves, and stand stems in a bucket of water straight away. Picking often encourages branching types to make more buds. Keep this row apart from the display border, so cutting never leaves a gap in the bed you look at from the house.

    6. Use Sunflowers as a Summer Privacy Screen

    Dense row of tall sunflowers screening a patio seating area.

    A dense row of tall, branching sunflowers makes a living screen for one season. Plant two staggered rows in front of a patio, a seating area, or a neighbor facing window, and let the foliage fill in through summer. The screen works from about midsummer until the first hard frost, so it suits a summer seating spot rather than year round privacy. Stake the outer row well, since a screen catches more wind than a single row. When the season ends, cut the stems down and compost the foliage, saving any seed heads you want for birds or for next year.

    7. Frame a Front Path With a Sunflower Welcome Bed

    Sunflower bed beside a front garden path leading to a house door.

    A sunflower bed beside a front path greets visitors before they reach the door. Plant tall types at the back of the bed, away from the path, and shorter or dwarf types near the paving, so blooms do not lean over walkers or block the view of the house number. Keep the bed edged and the path clear, and repeat one or two sunflower varieties along the whole run so the planting reads as a plan. Water the bed well in dry spells, because a path bed dries out faster than a bed in open lawn.

    8. Grow Sunflowers Beside the Vegetable Garden

    Sunflowers growing beside rows of vegetables in a kitchen garden.

    Sunflowers earn their place beside vegetables by bringing in bees and other pollinating insects. Plant a row along the sunny edge of the vegetable bed, on the north side where tall stems will not shade low crops, and leave a clear path for harvesting. The tall plants also give light shade to leafy crops in hot afternoons. Watch for birds on ripening heads if you plan to harvest seed, and cover heads with a light cloth bag once petals fade if you want to keep the seed for yourself.

    9. Sow a Sunflower Meadow Patch

    Loose meadow patch with sunflowers among cosmos and wildflowers.

    A loose meadow patch mixes sunflowers with cosmos, cornflowers, and other annuals for a natural, unclipped look. Clear weeds from a sunny patch, rake the soil, and sow the mix thinly in spring after frost risk has passed. The first weeks can look sparse, so mark the patch edges with a mown strip or a simple stone edge to show it is planned. Let the patch stand into autumn so birds can use the seed heads, then cut it down once the season is over. This relaxed style also pairs well with the loose planting in these hippie garden ideas.

    10. Build a Sunflower Corner Around a Garden Bench

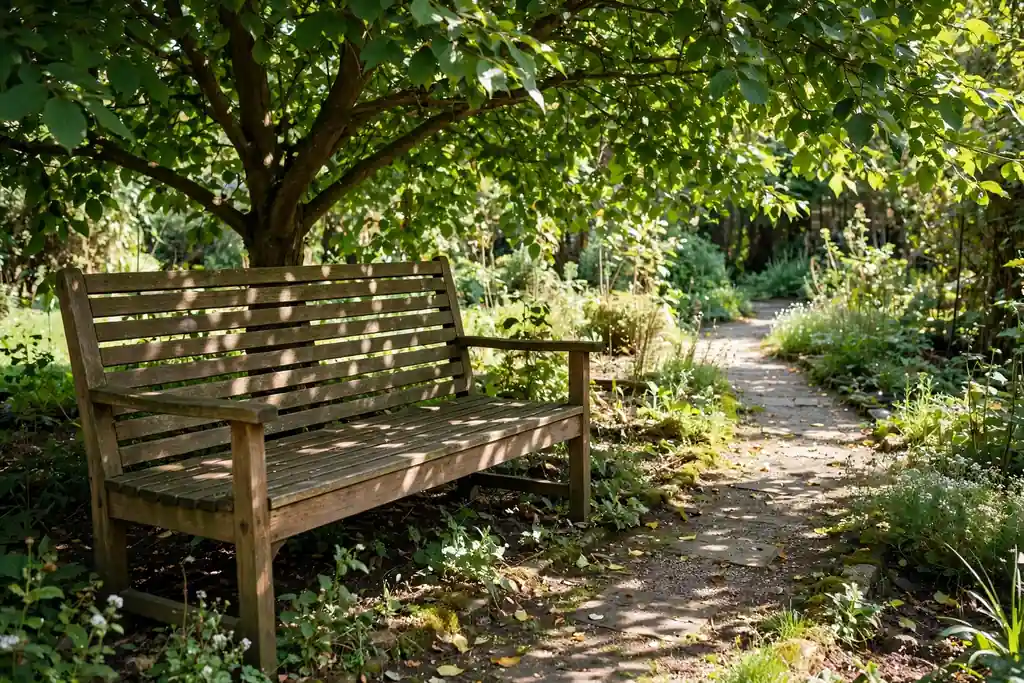
    Wooden garden bench surrounded by tall sunflowers.

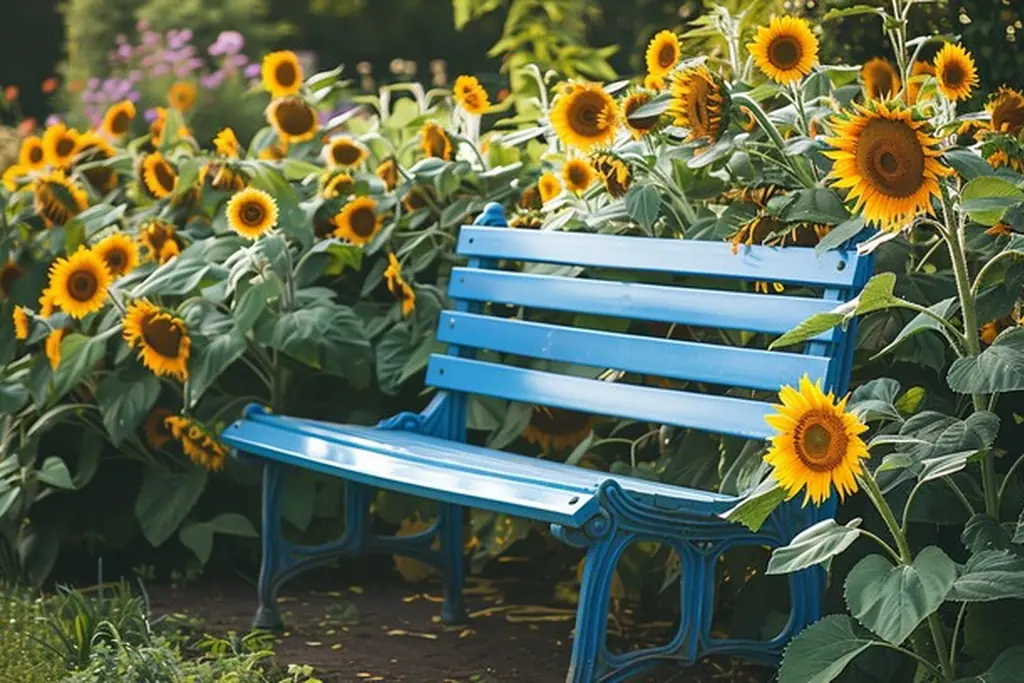
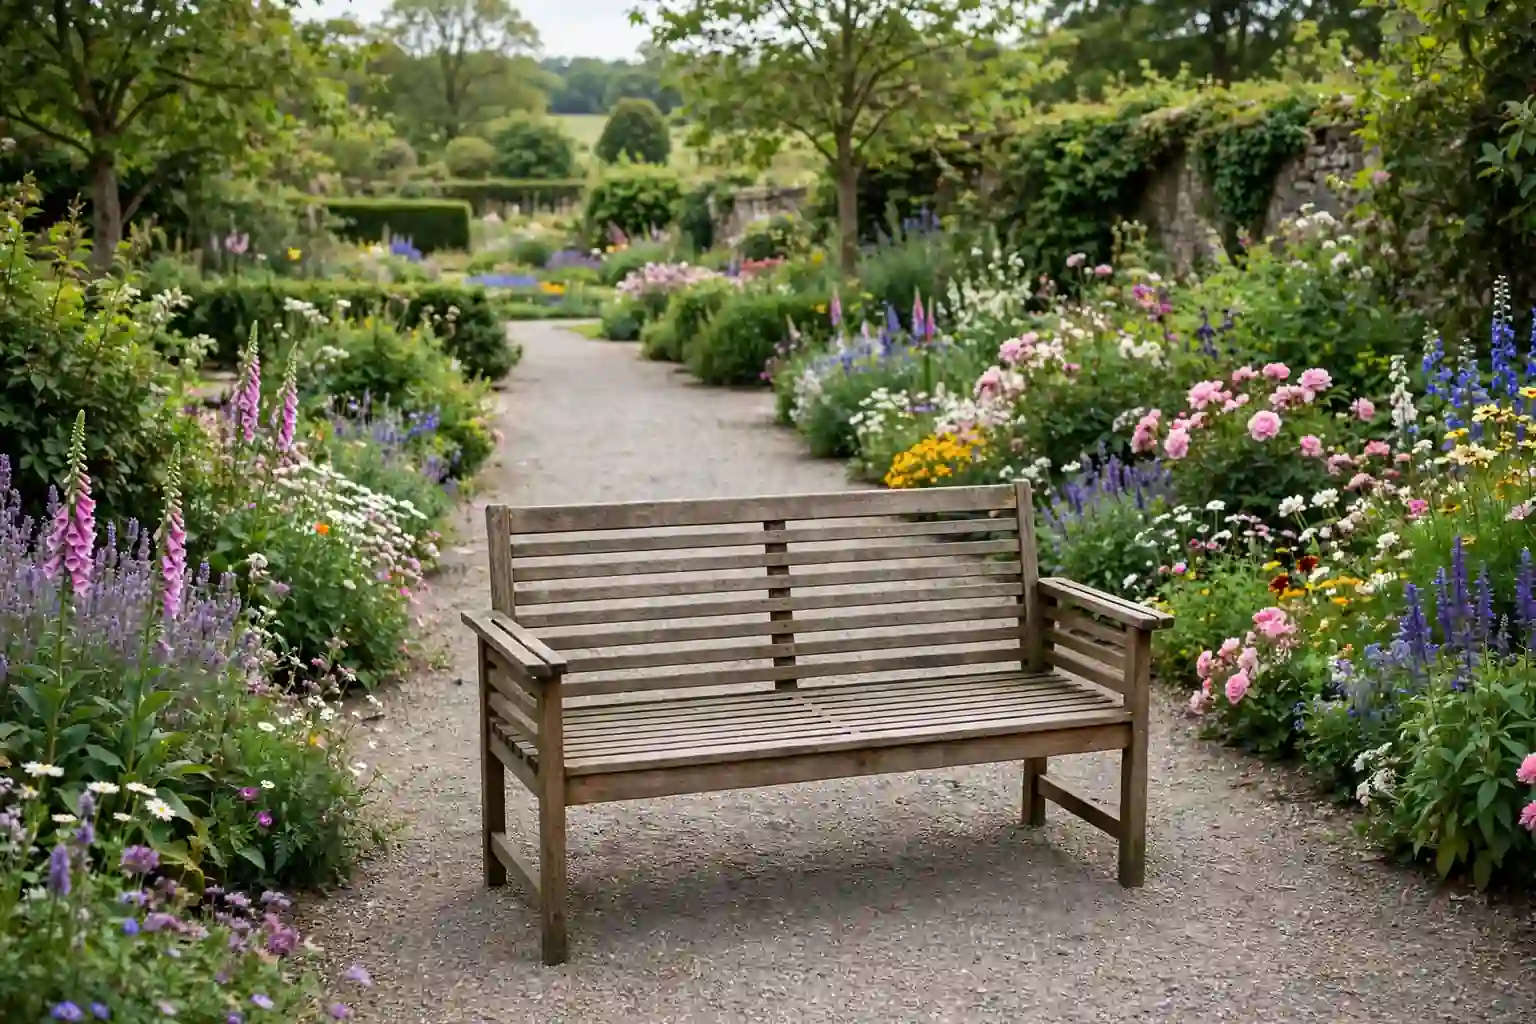
    Planting sunflowers around a bench turns a seat into a destination. Place tall sunflowers behind the bench for a backdrop, mid height flowers at the sides, and low plants at the front, leaving a clear step of paving at the bench feet. Scented flowers nearby, such as sweet peas or lavender in pots, add to the spot in the evening. For seat styles and placement that suit a small corner, see these garden bench ideas. Keep plants off the seat edges so the bench stays easy to sit on, and cut any stems that lean across the sitting space.

    11. Fill Balcony Planters With Dwarf Sunflowers

    Dwarf sunflowers in planters on a sunny balcony railing.

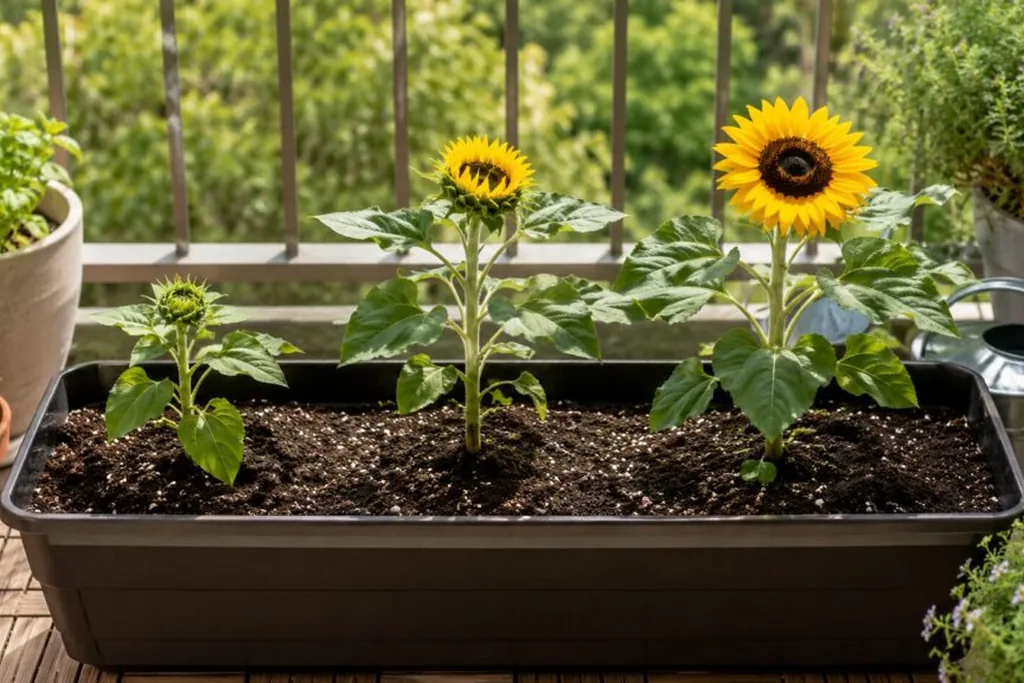
    A balcony or a railing planter can hold dwarf sunflowers if it gets at least six hours of sun. Use a deep planter with drainage, fresh potting mix, and one plant per small planter or two or three in a long trough, and fix the planter firmly so wind cannot move it. Water often in hot weather, since shallow planters dry out fast, and feed lightly through the season. Choose a compact, branching variety so one plant gives several heads rather than a single tall stem that topples in wind.

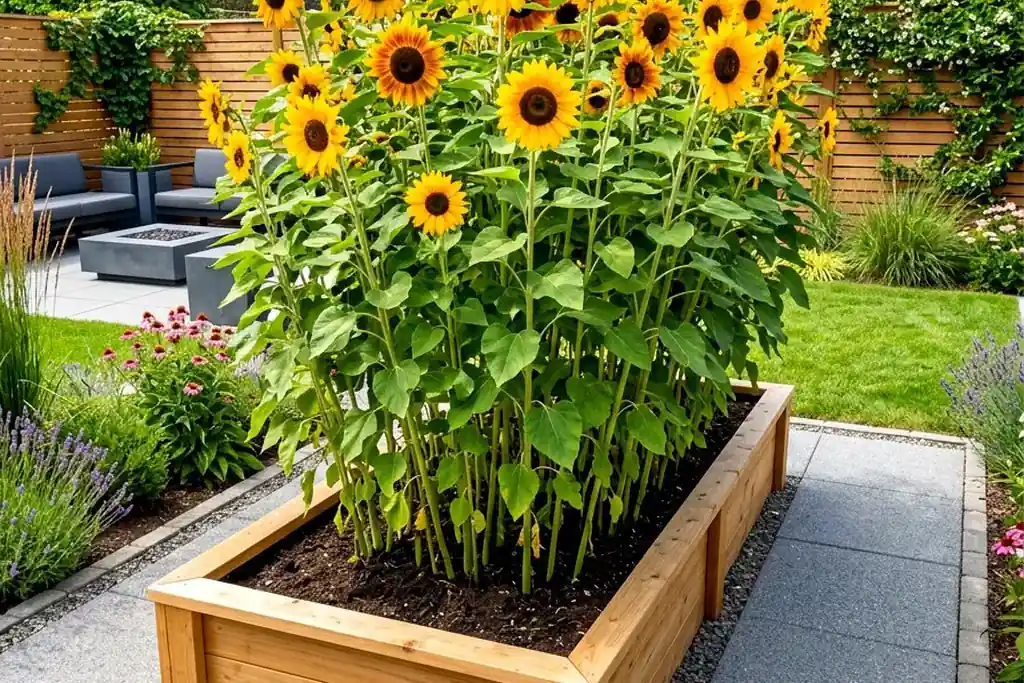
    12. Stack Heights in a Raised Bed Corner

    Raised garden bed with tall and dwarf sunflowers at different heights.

    A raised bed corner is a good place to stack sunflower heights in a small footprint. Plant one or two tall sunflowers at the back corner, branching mid height types beside them, and dwarf types or low flowers along the front edge. The raised bed warms up early, drains well, and keeps the planting contained and easy to reach from all sides. Fill the bed with a mix of garden soil and compost, water deeply after planting, and mulch the surface to hold moisture through dry weeks.

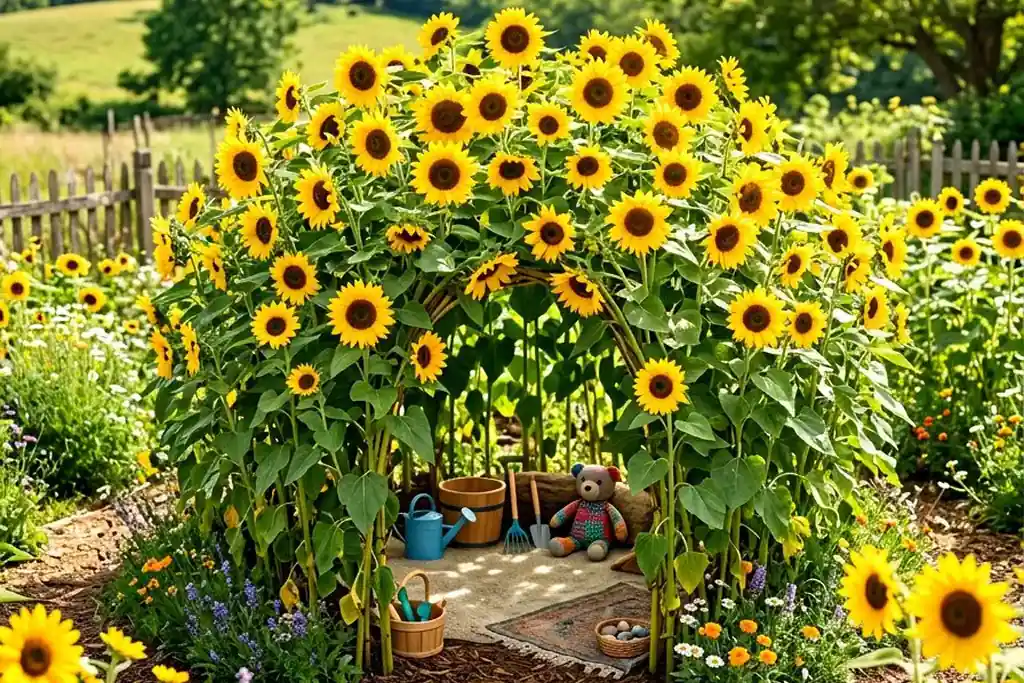
    13. Plant a Sunflower Circle for Children

    Circle of tall sunflowers forming a living den in a garden.

    A circle of tall sunflowers with a gap for a door makes a simple living den for children. Mark a circle about six to eight feet across, plant tall sunflowers around the edge, and leave one opening as the entrance. Inside, keep the ground clear or lay a flat stone or two for sitting. The circle needs full sun and regular water while plants establish. The den lasts one season, so sow it fresh each spring, and check the plants often for stems that lean into the entrance.

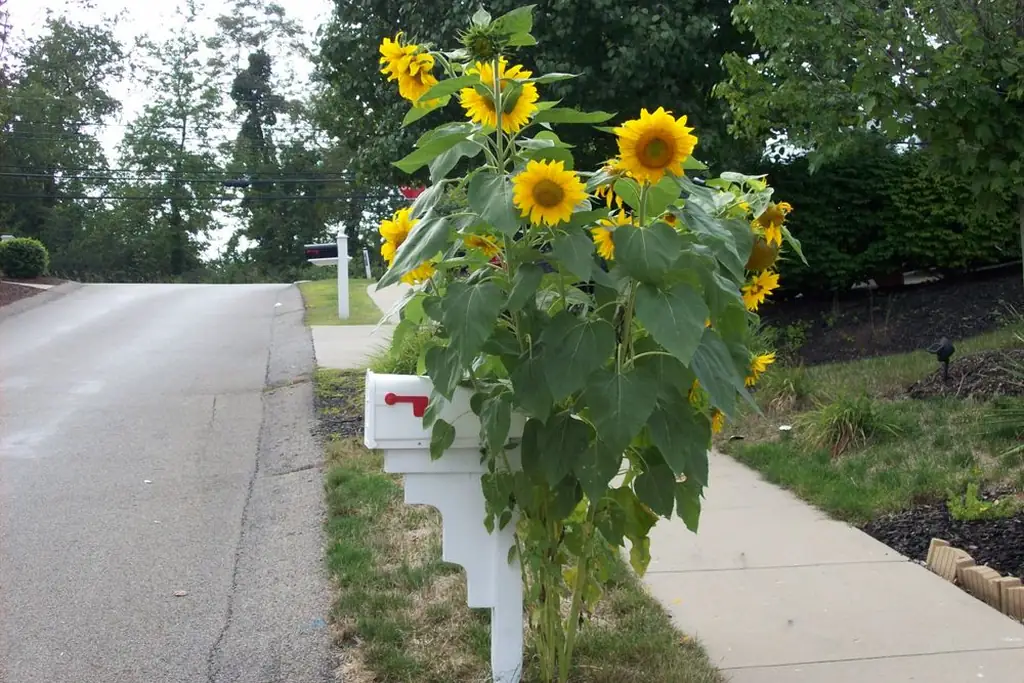
    14. Plant Sunflowers Around a Mailbox Post

    Sunflowers planted around a mailbox post at a garden entrance.

    A small group of sunflowers around a mailbox post gives a plain entrance a clear focal point. Plant dwarf or mid height types, not giant types, so blooms do not block the mailbox, the house number, or the view of the street. Keep plants clear of the box door and the path the mail carrier uses, and trim any stems that lean over the pavement. One or two pots beside the post can give the same effect where the ground is paved or the soil is poor.

    15. Use a Narrow Side Strip for a Single Sunflower Row

    Single row of sunflowers in a narrow side garden strip beside a fence.

    A narrow side strip between a house and a fence often gets wasted, but a single row of sunflowers can fill it well. Choose a variety matched to the strip width, plant in one row down the sunny side, and keep the path beside it clear for access. The strip warms up against a wall, which suits sunflowers, but it can also dry out fast, so mulch and water deeply. Pick a branching type if you want flowers along the whole row rather than one head per plant.

    16. Edge a Sunflower Bed With Herbs

    Sunflower bed edged with low green herbs at the front.

    Low herbs such as thyme, chives, and parsley make a useful edge for a sunflower bed. Plant the herbs along the front edge where you can reach them for cooking, and keep the tall sunflowers behind so they do not shade the herbs for most of the day. The herb edge also covers bare soil, cuts down on weeds, and gives the bed a tidy front line. Trim herbs often to keep them compact, and replace any that get leggy with fresh plants in the same spots.

    17. Train Sunflowers Against a Sunny Wall on a Trellis

    Sunflowers trained up a trellis against a sunny garden wall.

    A trellis fixed to a sunny wall lets sunflowers grow upward in a bed too small for a free standing row. Fix the trellis firmly, plant sunflowers at its base, and tie stems in loosely as they grow, guiding side shoots across the panel. The wall reflects heat, which sunflowers like, but the soil at a wall base can be dry, so water well and mulch the bed. Leave a small gap between trellis and wall for air to move, which helps keep leaves healthy.

    18. Leave Seed Heads Standing for Birds

    Birds feeding on a dried sunflower seed head in an autumn garden.

    Once petals fade, the seed heads are still useful. Leave several heads standing on their stems through autumn so birds can feed directly from them, and cut a few heads to hang from a branch or a feeder where you can watch the visitors. This is the lowest effort sunflower idea on the list, and it extends the value of the planting well past flowering. Cut the stems down only after the heads are empty and the stems turn brittle, and save a dry head indoors if you want seed for sowing next spring.

    19. Cut Sunflower Stems for the Table

    Cut sunflower stems in a tall vase on a table.

    A few cut sunflower stems can carry a table arrangement on their own. Cut stems in the morning when heads are just open, choose straight stems of different heights, and place them in a tall, heavy vase that will not tip. Strip leaves below the water line and change the water every two or three days. One large head in a jug suits a kitchen table, while a group of mixed heights works for a longer dining table. Keep arrangements away from ripening fruit bowls, since the gas from fruit can shorten the life of cut flowers.

    20. Add Evening Seating Among the Sunflowers

    Garden chairs beside a sunflower row in warm evening light.

    Sunflowers look their best in low evening light, so place a couple of chairs or a small table at the end of a sunflower row for summer evenings. Keep the seating on a firm, level surface, and leave a clear gap between chairs and stems so you can sit without brushing against leaves. A string of outdoor lights on a nearby fence or post extends the use of the spot after sunset, but keep lights clear of dry foliage in late summer. Move the chairs as the sunflowers grow so the seating stays in the open, not hidden inside the row.

    21. Plant Sunflowers Down a Sunny Slope

    Sunflowers planted in rows down a sunny garden slope.

    A sunny slope suits sunflowers because water drains away and the heads face the sun. Plant rows across the slope rather than straight up and down, so water soaks in instead of running off, and mulch each row to hold moisture. Tall types at the top of the slope and shorter types lower down keep the display even when seen from below. For stepped layouts that suit steeper ground, see these tiered garden ideas. Stake plants on exposed slopes, since wind moves faster across open ground.

    22. Fill a Fence Corner Where Two Beds Meet

    Group of sunflowers filling a corner where two garden fences meet.

    A fence corner where two beds meet is often left empty, but it is a strong spot for a group of sunflowers. Plant a cluster of tall and branching types in the corner itself, with lower flowers fanning out along both fence runs, so the corner reads as one planting rather than two separate beds. The corner gives shelter from wind on two sides, which helps tall stems stay upright. Keep a clear access path to the corner for watering and for cutting, so the group does not become hard to reach by midsummer.

    23. Frame the View From a Kitchen Window

    Potted sunflowers beside a sunny kitchen window.

    Plant sunflowers outside a kitchen window so the blooms are part of the daily view. Put tall types a little to one side of the window rather than straight in front of it, so they frame the glass without blocking light, and add dwarf types directly below the sill for color at eye level. The bed needs the same sun and water as any sunflower row, but its payoff is daily, since you see it while cooking and washing up. Keep the window side of the bed weeded and the glass clear, so the view stays the point of the planting.

    24. Group Containers by a Garden Gate

    Pots of sunflowers grouped beside a garden gate.

    A group of pots by a garden gate gives the entrance color without digging a new bed. Use large, heavy pots so tall or mid height sunflowers do not topple in wind, group three or five pots in different sizes, and mix one tall variety with dwarf types for varied heights. Water pots often in hot weather and feed lightly through the season. The group can be moved for a party, for mowing, or for winter storage, which makes it a flexible option for a rented garden or a gate that also needs clear access.

    Conclusion

    A sunflower garden does not need every idea on this list. Pick one structure, such as a fence border, a cutting row, or a privacy screen, then add two or three supporting pieces, such as dwarf pots by the door, a bench corner, and a meadow patch. Stagger sowing for a longer season, stake tall stems early, and leave some seed heads for birds when flowering ends. Work through the list one area at a time, starting with the sunniest spot you have, and the garden will look planned rather than planted at random.

    Save this list on Pinterest before your next seed order, and start with the spot you see most often each day.

    FAQs

    When should I sow sunflower seeds?

    Sow sunflower seeds in spring after the last frost, directly where they will grow or in pots under cover for an earlier start. In most gardens, sowing from mid spring into early summer gives flowers from midsummer into autumn. Check the packet for your variety, since sowing depth and spacing vary between dwarf and giant types, and stagger sowings by two or three weeks for a longer display.

    How much sun do sunflowers need?

    Sunflowers need full sun, meaning at least six hours of direct sun a day, to grow tall and flower well. In part shade they grow leggy, lean toward the light, and make fewer, smaller heads. If your garden is mostly shaded, use dwarf types in pots placed in the sunniest spot you have, and move the pots as the sun moves through the season.

    Do sunflowers need staking?

    Tall and giant types usually need staking, especially in windy gardens or rich soil that pushes fast, soft growth. Put stakes in at planting time or soon after, so you do not damage roots later, and tie stems loosely with soft twine. Dwarf and compact branching types in sheltered spots often stand on their own, but a short stake still helps once heavy heads open.

    Can I grow sunflowers in pots?

    Yes, if you pick the right variety and pot. Dwarf and compact types suit pots, while giant types need very large, heavy containers and still may topple. Use a pot with drainage holes, fresh potting mix, and regular watering, since pots dry out faster than beds. One plant per medium pot, or three in a large pot, gives the best balance of roots and flowers.

    How do I keep sunflowers flowering longer?

    Stagger sowing, deadhead spent blooms on branching types, and water deeply during dry spells. Branching varieties make new buds after cutting, so a cutting row often flowers longer than a row left untouched. Feed container plants lightly through the season, and replace tired annuals in pots with fresh plants if the display fades before autumn.

    Should I leave sunflower heads for birds or save the seed?

    You can do both. Leave several heads standing in the garden for birds through autumn, and cut one or two dry heads to store indoors for seed. To save seed, let a head dry fully on the plant, rub the seeds out once the back of the head turns brown, and store them in a dry, labelled envelope. Check local advice if you plan to eat saved seed, and keep stored seed away from damp.


  • 27 Dark Exterior House Color Schemes to Refresh Your Home’s Look

    27 Dark Exterior House Color Schemes to Refresh Your Home’s Look

    A dark exterior can make a house look grounded, calm, and confident, but only when the shade, trim, and materials work together. The same charcoal can look sharp on one house and flat on the next, depending on light, roof color, and the plants beside it. These 27 dark exterior house color schemes cover siding, brick, stone, wood, and stucco, plus the trim, door, roof, and lighting choices that keep each one from feeling heavy. Start with your house style and your light, test large samples, and pick the scheme that suits both.

    Key Takeaways

    • Test a dark shade on a large board in morning, midday, and evening light before painting a whole wall, since dark colors shift more than pale ones.
    • Give every dark scheme a lighter partner: white or cream trim, warm wood, pale stone, or bright planting, so the house keeps clear edges.
    • Match the dark shade to the house style: charcoal and black suit modern and farmhouse forms, navy and forest green suit colonial and craftsman forms.
    • Repeat the accent once more, in hardware, a door, or a light fixture, so the scheme looks planned rather than accidental.
    • Keep the roof in the plan: a dark house with a dark roof needs warm wood or pale stone to break up the mass.
    • Use warm light and layered planting at the entry, since dark walls absorb light and can make a porch feel dim.

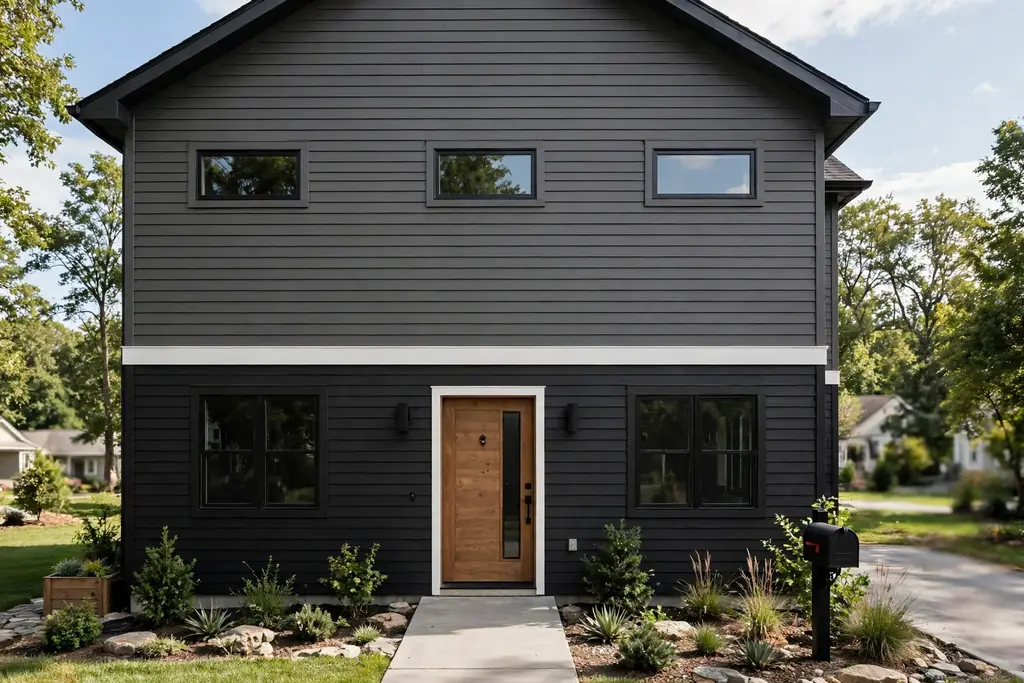
    1. Charcoal Horizontal Siding with Crisp White Trim

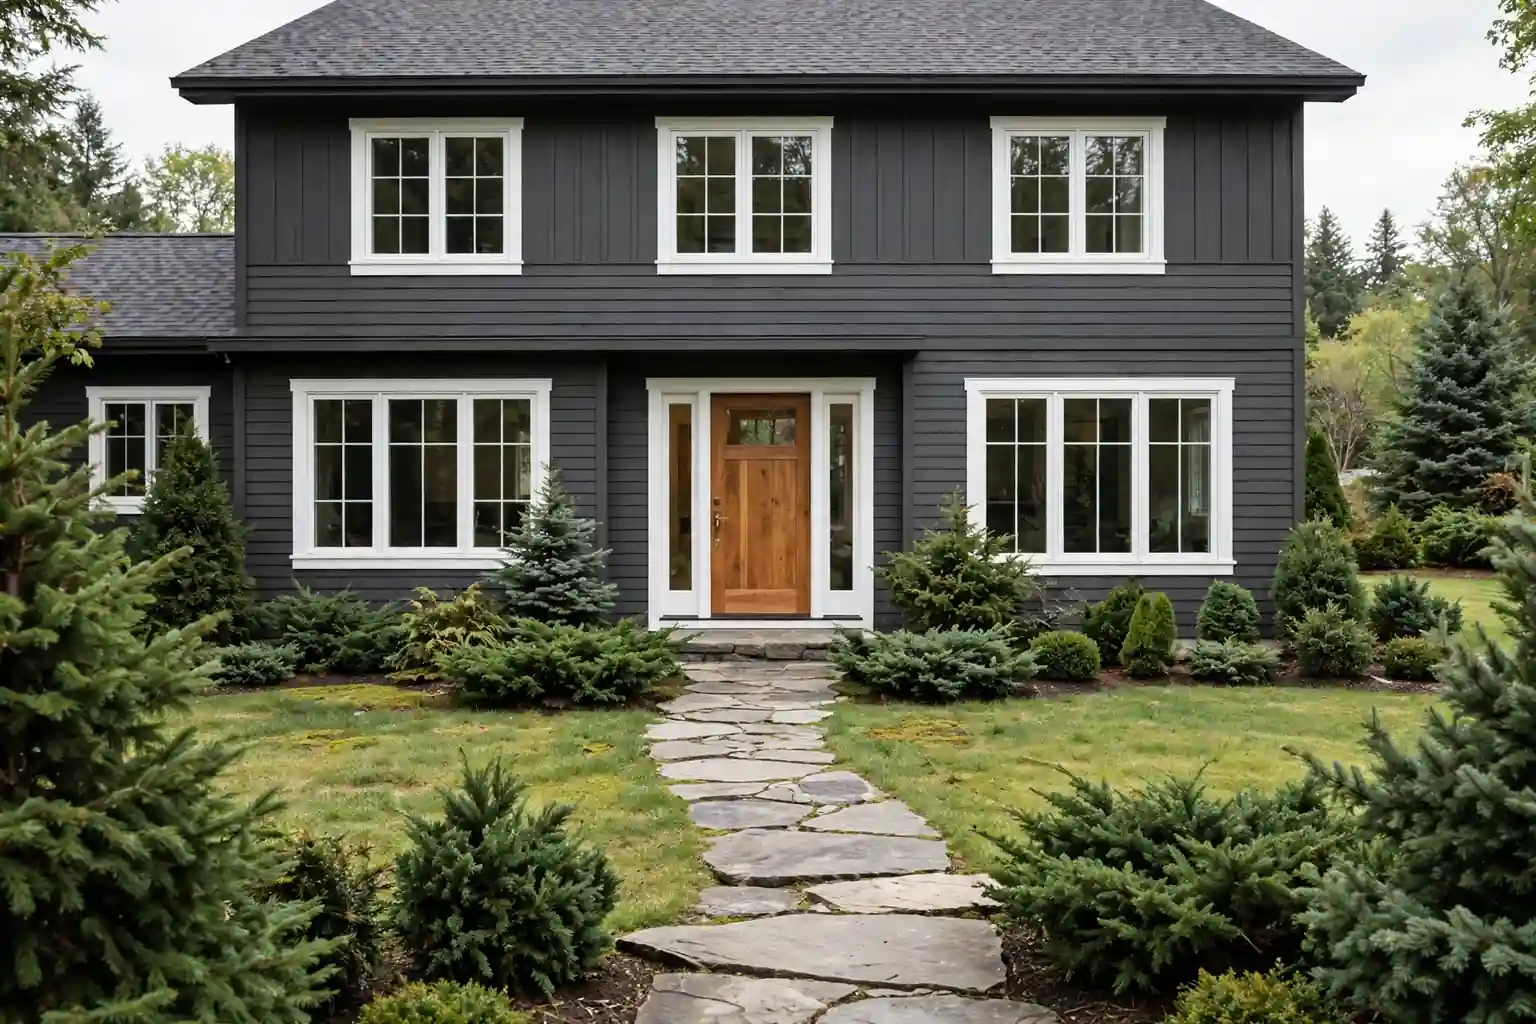
    House with charcoal horizontal siding and crisp white window trim.

    Charcoal horizontal siding with white trim is the most reliable dark scheme, because the contrast draws the eye to the shape of the house rather than to one flat dark wall. Paint or clad the siding in a soft charcoal with a grey base, then keep window frames, corner boards, and fascia in bright white. The white lines give the dark walls a clear outline, which matters most on a plain, boxy house.

    Keep the door and porch simple so the contrast does the work. A black door with white trim reads as part of the scheme, while a wood door adds warmth if the house faces north and needs softening. Check the charcoal against the roof in daylight: a charcoal that leans blue can clash with a brown roof, while a neutral charcoal sits well with grey, black, and brown roofs alike.

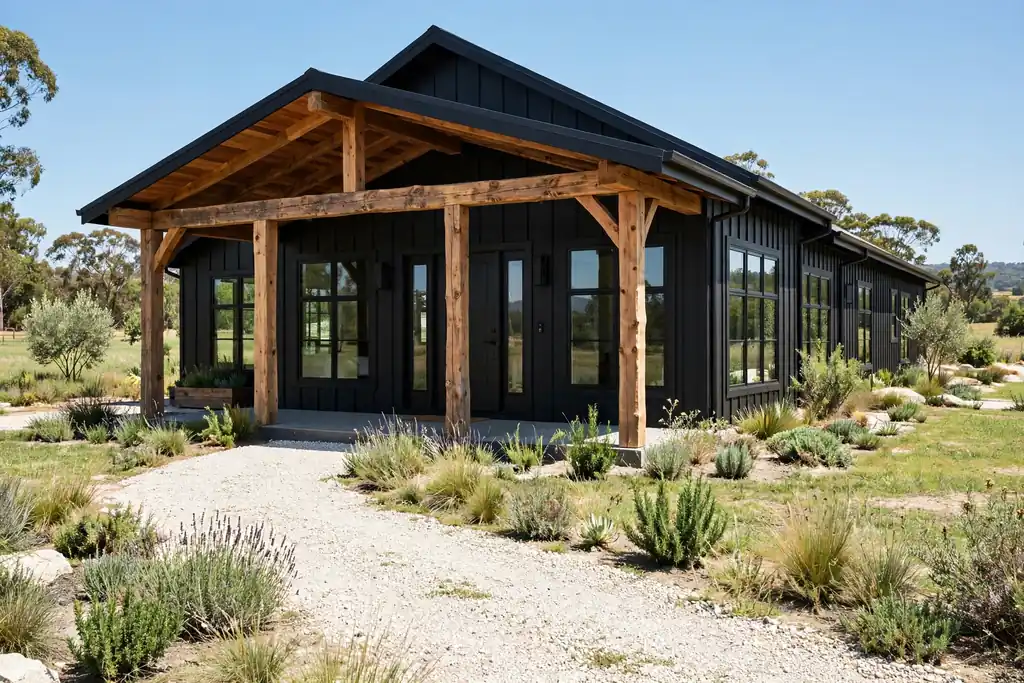
    2. Matte Black Modern Farmhouse with Timber Beams

    Matte black modern farmhouse with natural timber porch posts and beams.

    A matte black modern farmhouse works because timber beams and porch posts break the black into readable sections. Use matte or satin black siding, then add natural wood at the gable peaks, the porch posts, and the beam ends. The wood warms the black and stops a large farmhouse from reading as one solid block.

    Keep windows large and frames black, so the glass reads as part of the dark wall rather than as a hole in it. Add a wood front door or wood planters to repeat the timber note at ground level. A matte finish hides small marks better than gloss on a large wall, but it also shows dust on a dry, dusty road, so plan on a wash down each season.

    3. Deep Navy Colonial with Brass Details

    Deep navy colonial house with white shutters and brass lanterns.

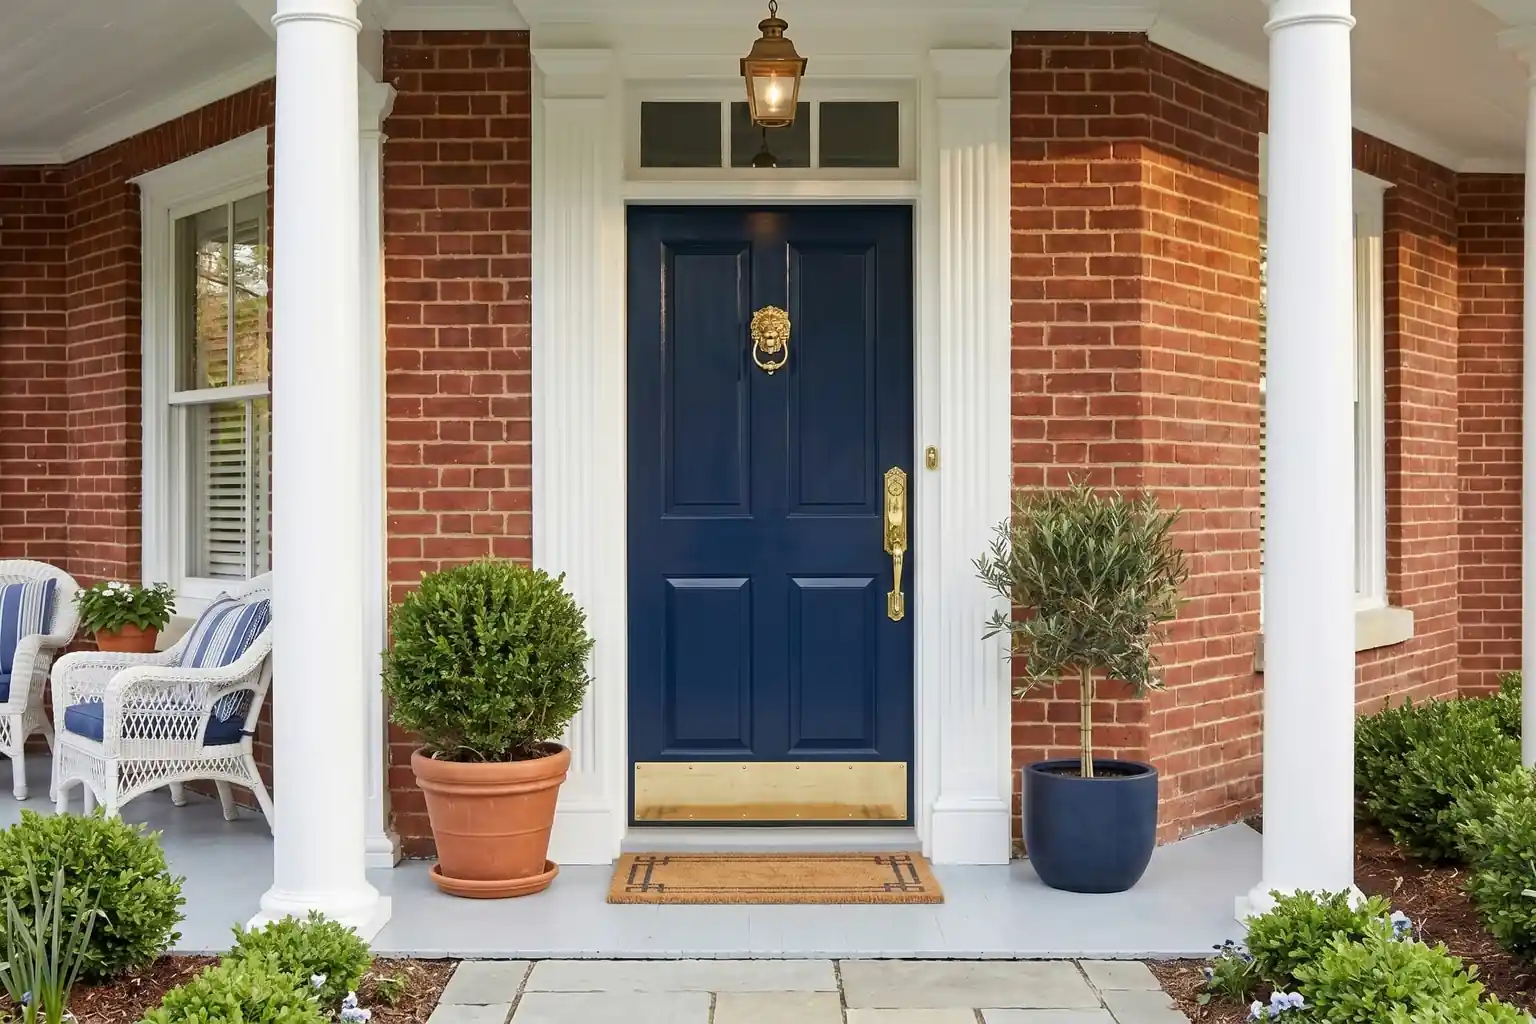
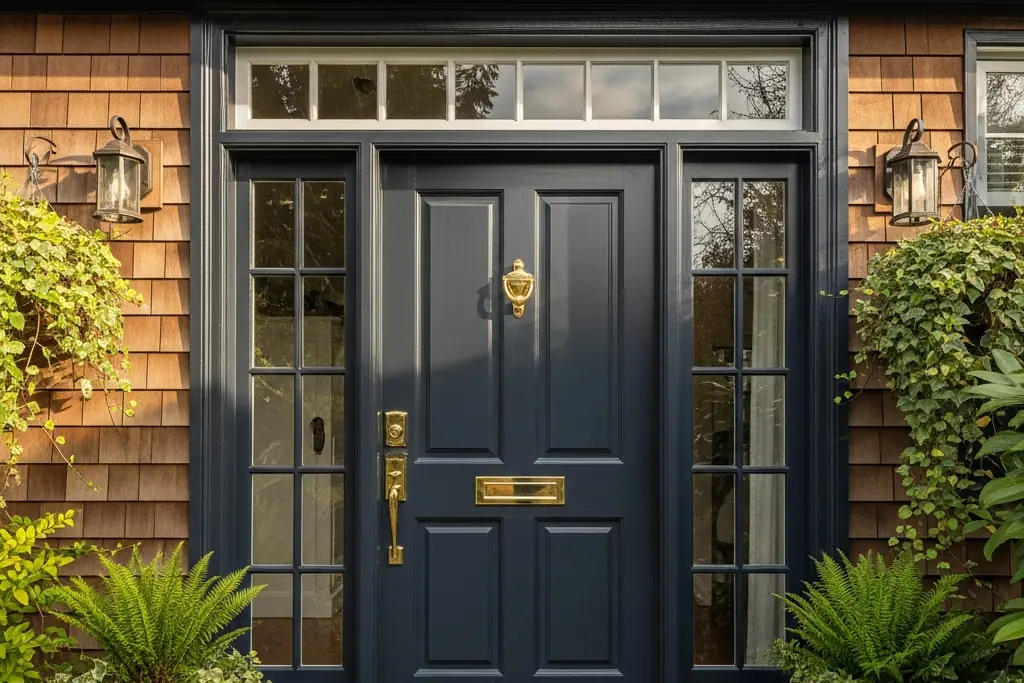
    Deep navy suits a colonial house because the symmetrical form and divided windows give the dark color structure to sit on. Paint the siding navy, keep shutters and trim white, and add brass in the door hardware, the lanterns, and the house numbers. Brass warms the cool navy and gives the entry a clear focal point after dark.

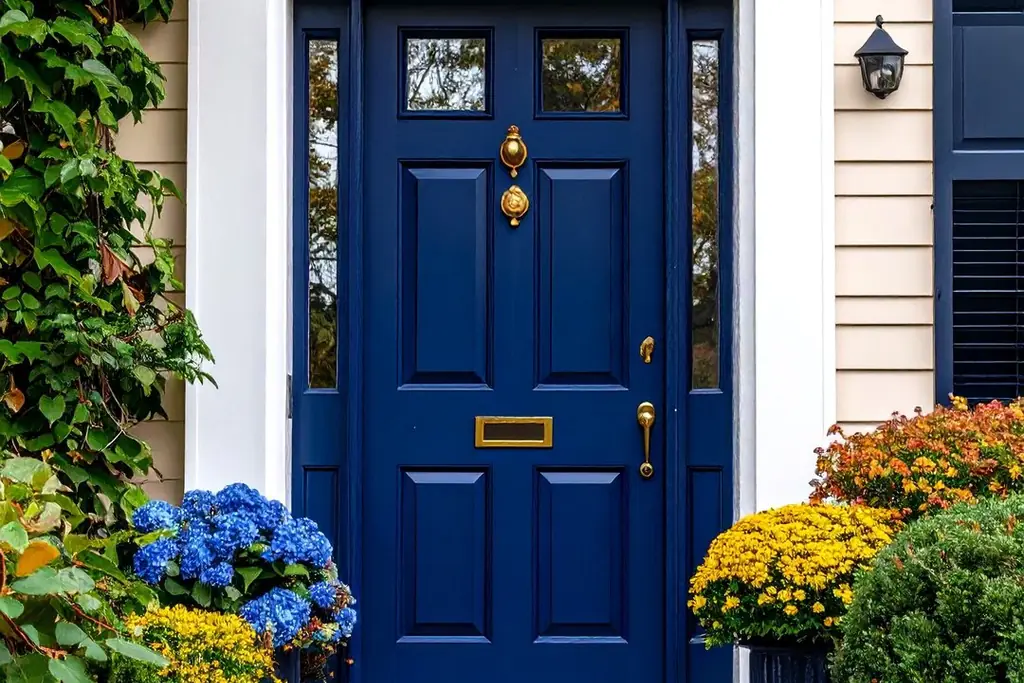
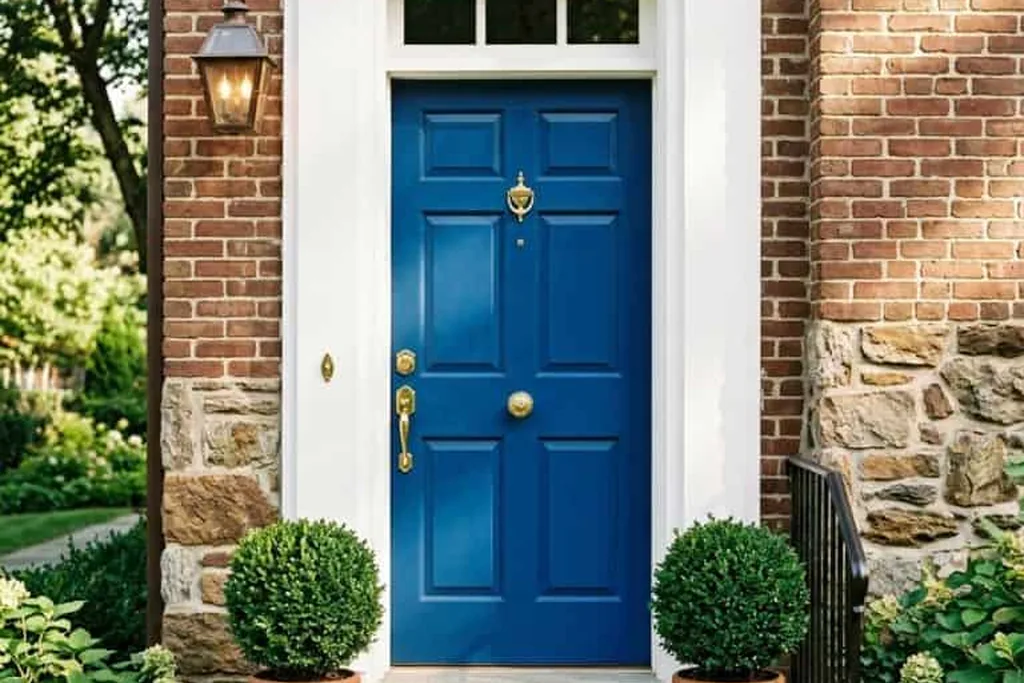
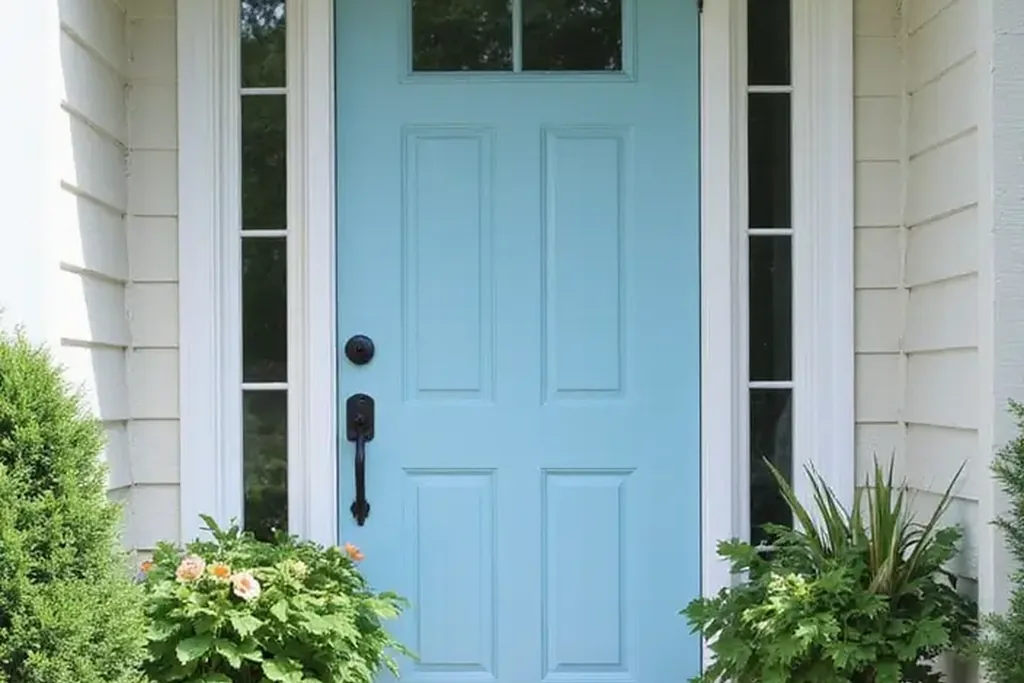
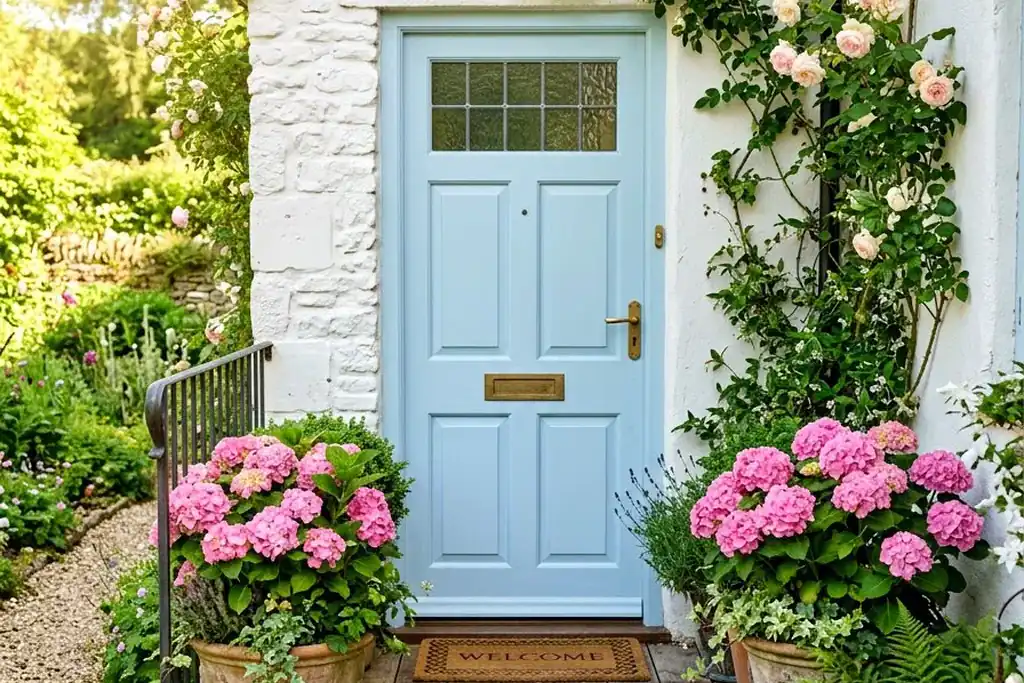
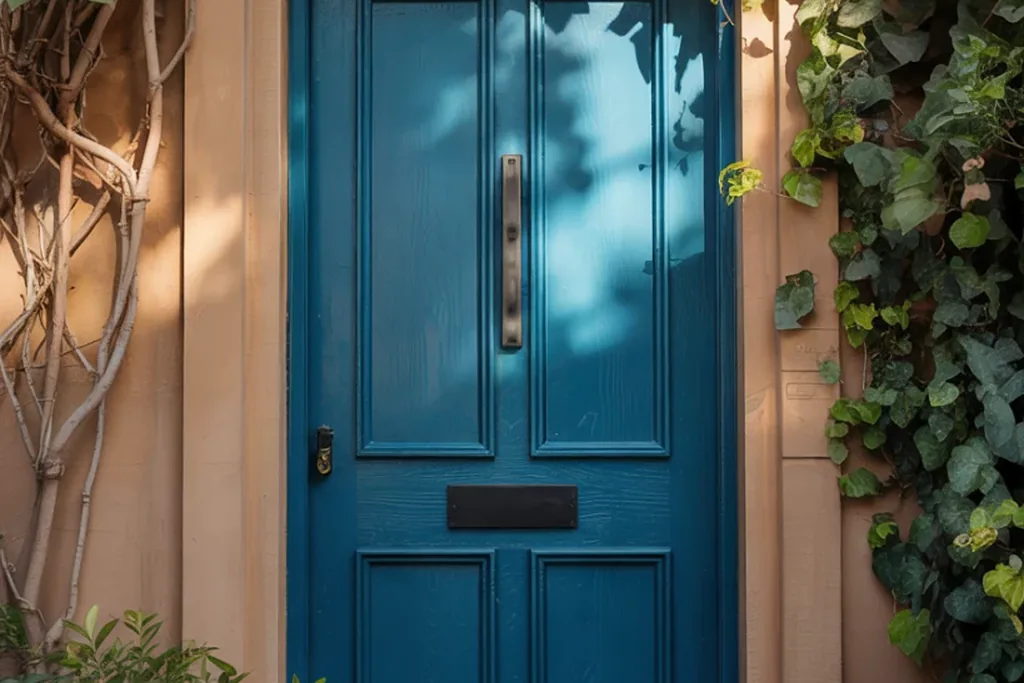
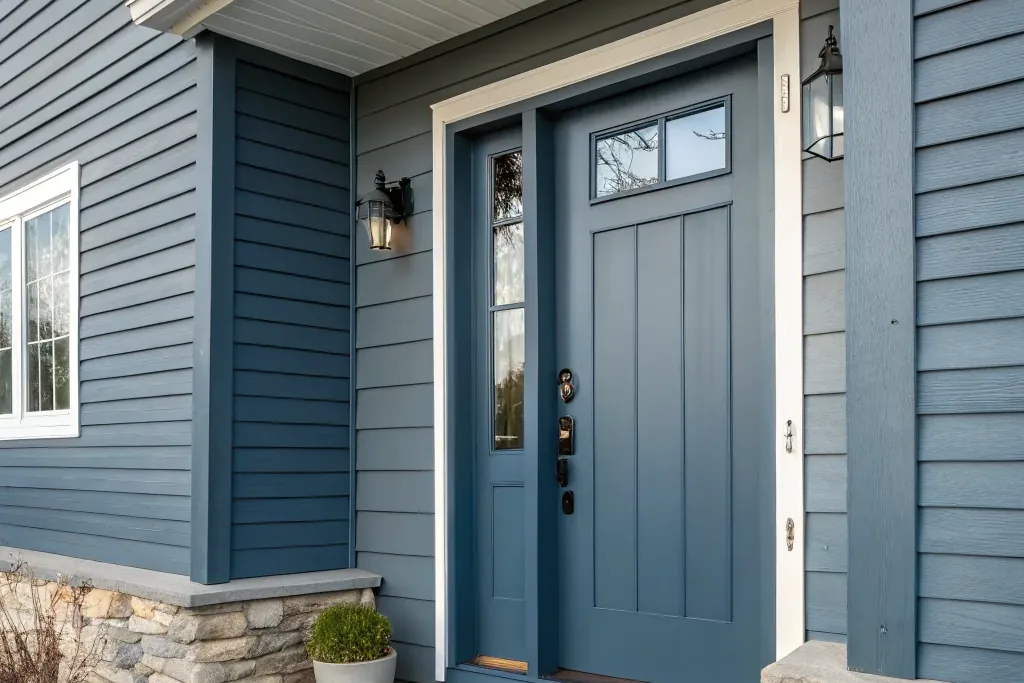
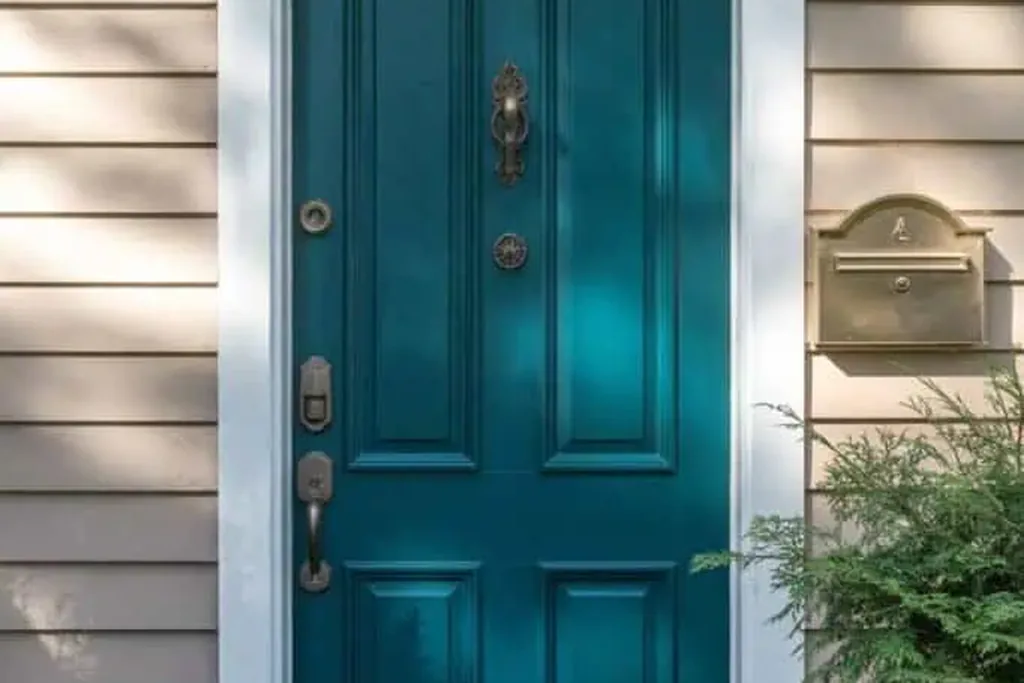
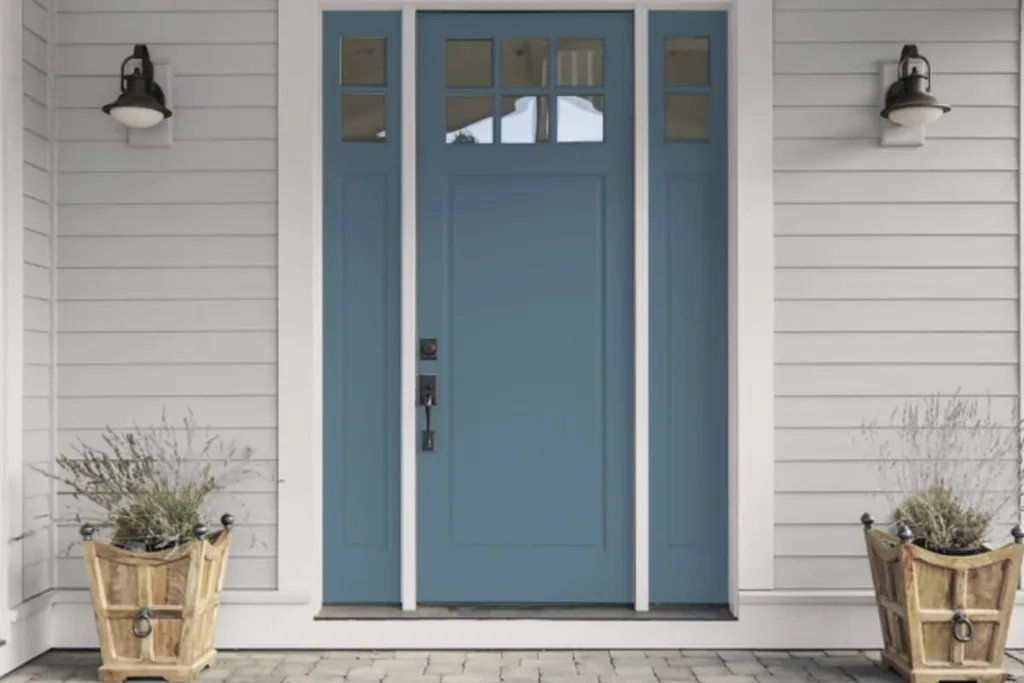
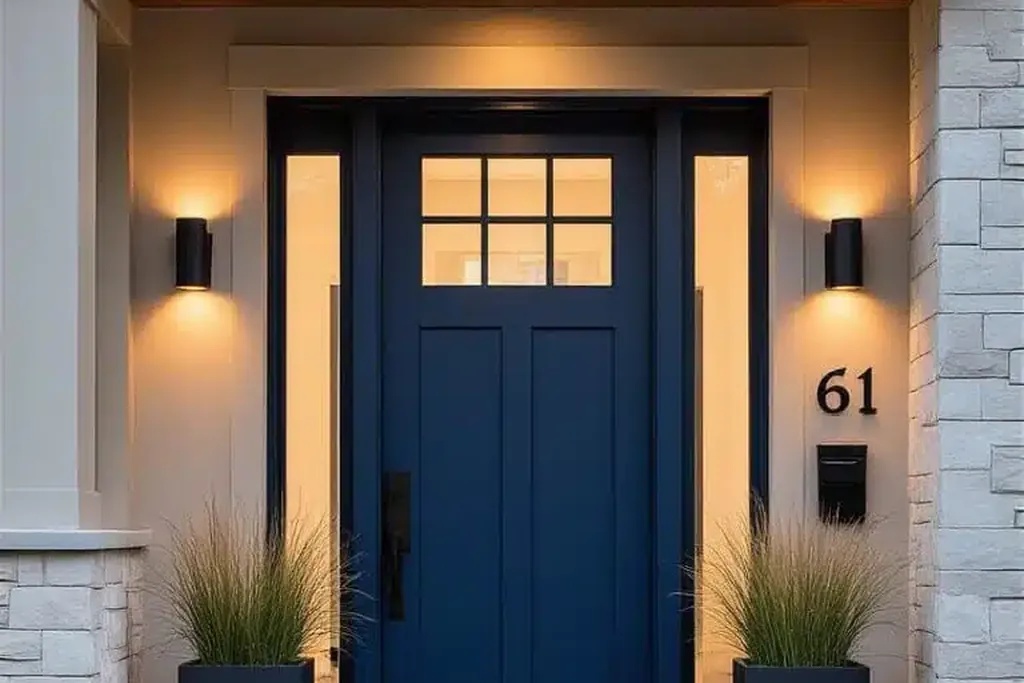
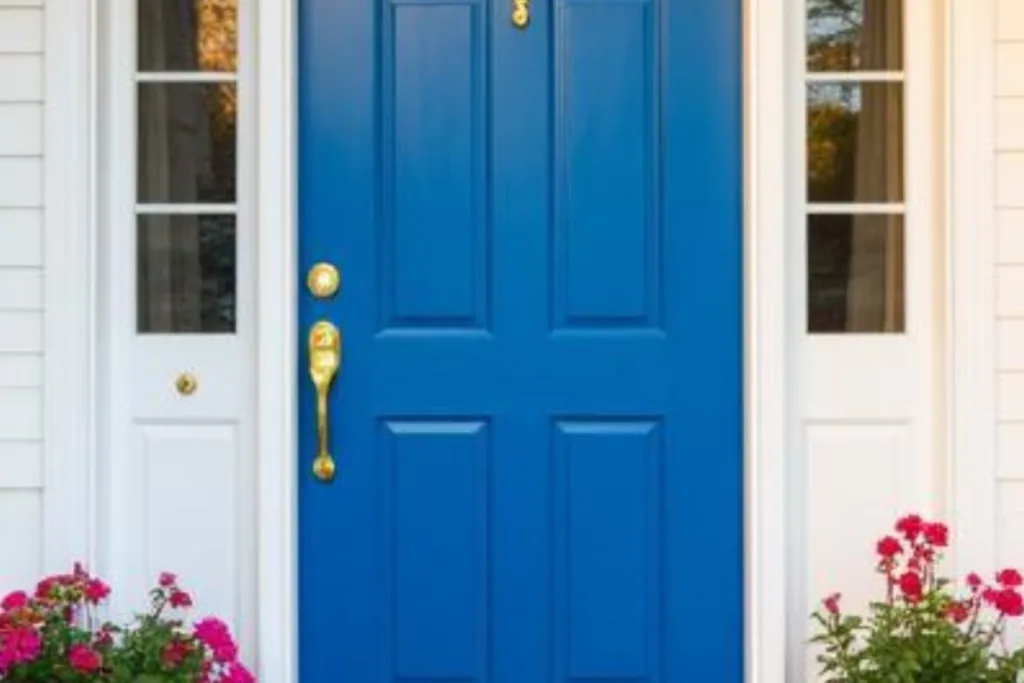
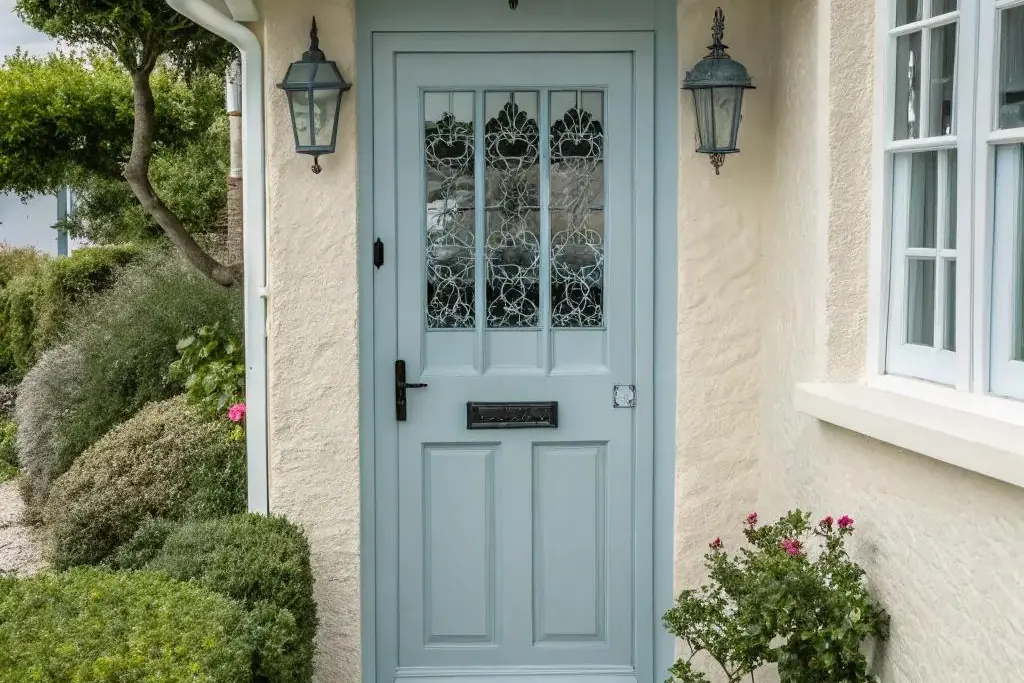
    Use a navy with a grey base rather than a bright blue, so the house reads as dark and calm from the street. For more door color ideas in this family, see these blue front door colors. Keep the roof grey or black, since a brown roof can pull navy toward purple in warm evening light. A white door frame helps the entry stand out against the navy wall.

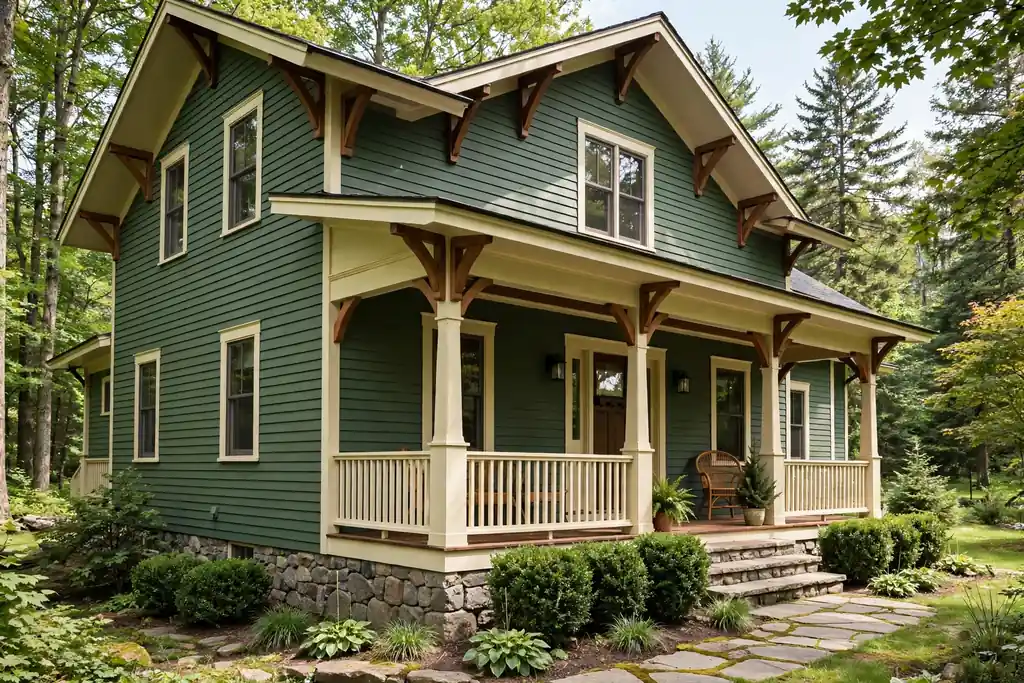
    4. Forest Green Craftsman with a Stone Base

    Forest green craftsman house with a stone foundation and cream trim.

    Forest green craftsman siding pairs naturally with a stone base, because both materials come from the same woodland palette. Paint the siding a deep, muted green, keep the trim cream, and let a stone foundation or stone porch piers ground the house. The stone adds texture at ground level, where a flat green wall would otherwise meet the lawn without a break.

    Repeat the stone once more, in a chimney, a low garden wall, or stone steps, so the base does not look like an afterthought. Wood brackets and exposed rafter tails in a warm stain suit this scheme and keep the green from feeling flat. Forest green needs decent daylight, so on a heavily shaded lot, pick a green one step lighter than the sample you first like.

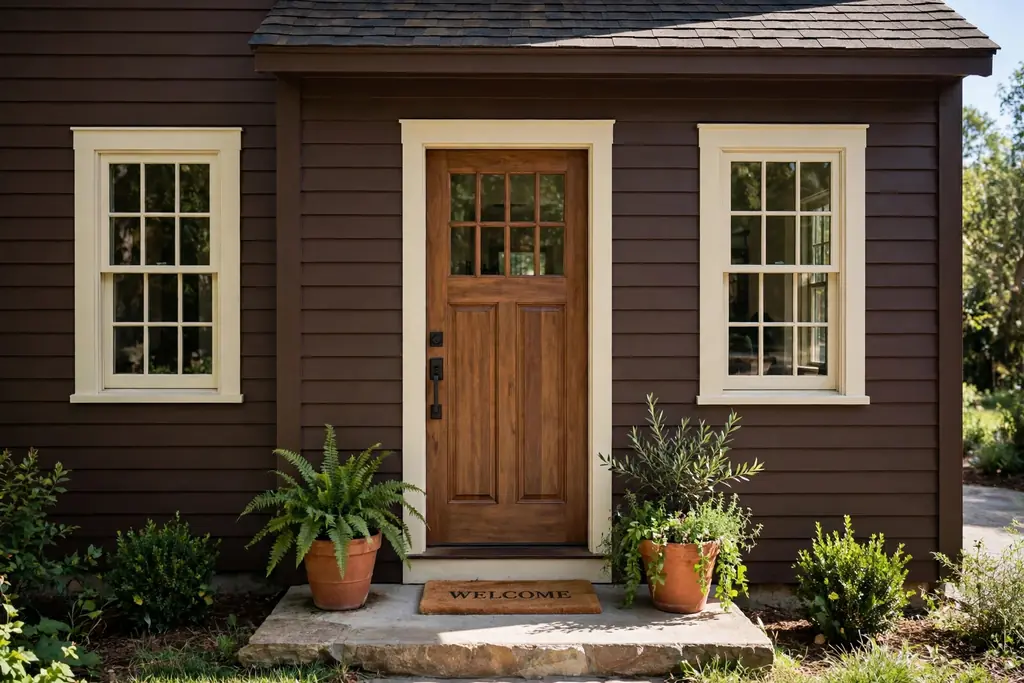
    5. Espresso Brown with Cream Trim and Terracotta Pots

    Espresso brown house with cream trim and terracotta pots at the entry.

    Espresso brown is a warm dark scheme, closer to chocolate than to black, and it suits houses with warm brick, stone, or wood nearby. Pair espresso siding with cream trim, which softens the brown without the stark edge that bright white gives. Terracotta pots at the entry repeat the warm tone at ground level and add a handmade texture beside the painted wall.

    Keep the door in a warm wood stain or a deep cream, since a black door can make espresso read muddy. A brown roof suits this scheme better than a grey one, and warm brass or bronze hardware fits the palette. In a hot, sunny climate, note that dark brown walls absorb heat, so check insulation and ventilation before committing to the darkest espresso.

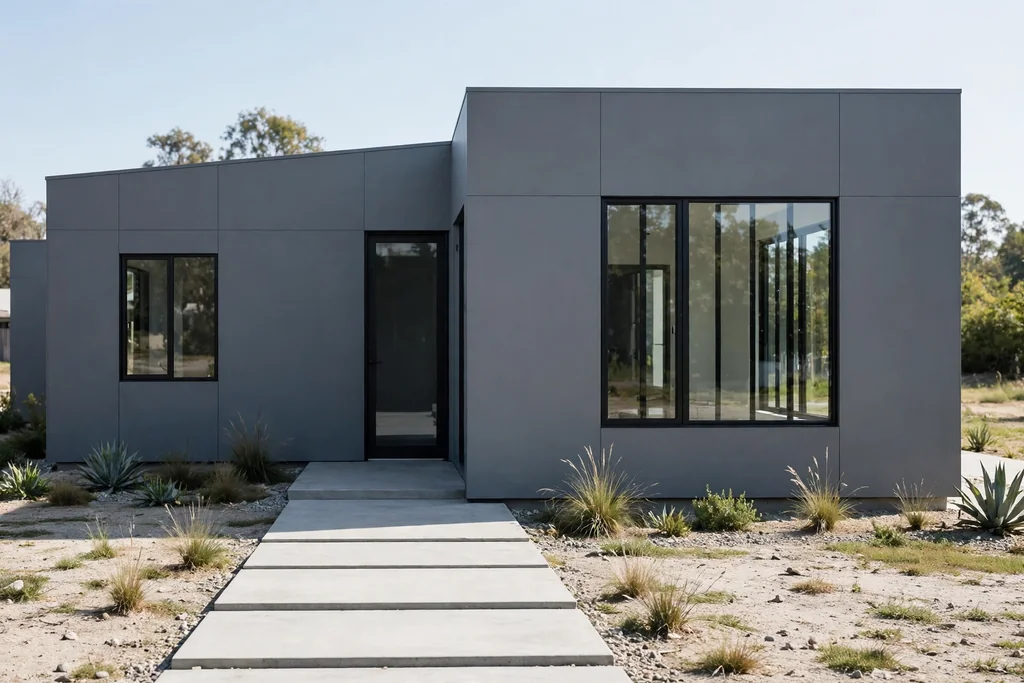
    6. Slate Grey Minimalist with Black Window Frames

    Minimalist slate grey house with black framed windows.

    Slate grey with black window frames suits a minimalist house because the palette stays quiet and the lines stay clean. Use a mid to dark slate grey on flat siding or render, keep the trim minimal, and set black framed windows flush in the wall. The black frames read as thin graphic lines, which suits a house with few decorative details.

    Avoid adding shutters, brackets, or mixed trim colors here, since extra detail fights the minimal form. A single wood accent, such as a cedar entry panel or a wood bench, stops the grey and black from feeling cold. Slate grey shifts with light, looking bluer on a bright day and greyer at dusk, so test it on the wall that faces the street.

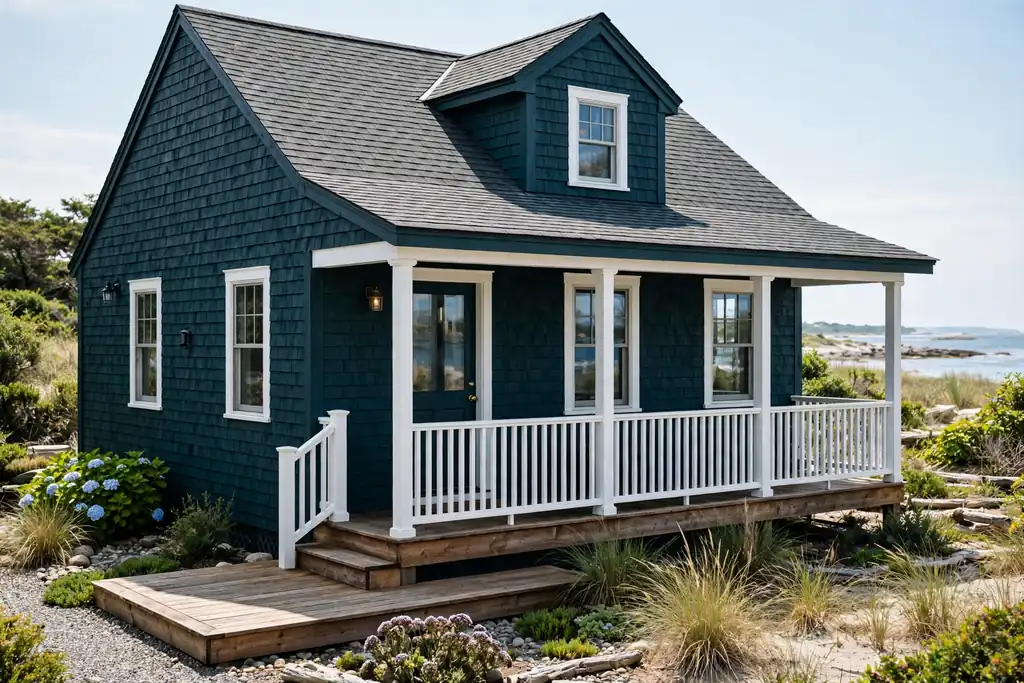
    7. Dark Teal Coastal Cottage with a White Porch

    Dark teal coastal cottage with a white porch rail and white trim.

    Dark teal gives a coastal cottage color without the brightness of a pale beach palette. Paint the siding a deep teal with a green base, keep the porch rails, posts, and window trim white, and let the white porch read as a bright frame around the darker walls. The contrast keeps the cottage cheerful even with a dark main color.

    Use a teal that holds its green in shade, since a blue leaning teal can turn nearly navy on a cloudy day. A white or pale grey roof, a wood deck, and pale planters suit this scheme. Keep the door white or a soft cream, and add one brass lantern, so the entry has a warm note against the cool teal and white.

    8. Black Painted Brick with a Warm Cedar Door

    Black painted brick house with a warm cedar front door.

    Painting brick black changes a traditional house fast, because the brick texture stays visible while the color turns modern. Use a matte black masonry paint, keep the mortar lines subtle, and set a warm cedar door against the black wall. The cedar is the single warm note, and it draws the eye straight to the entry.

    Keep window frames white or black depending on the house: white frames give a classic black and white house, black frames give a moodier, more modern one. Check the brick condition first, since painted brick needs sound mortar and a breathable paint suited to masonry. A pale stone path or light steps help, since a black house with a dark path can lose its entry at dusk.

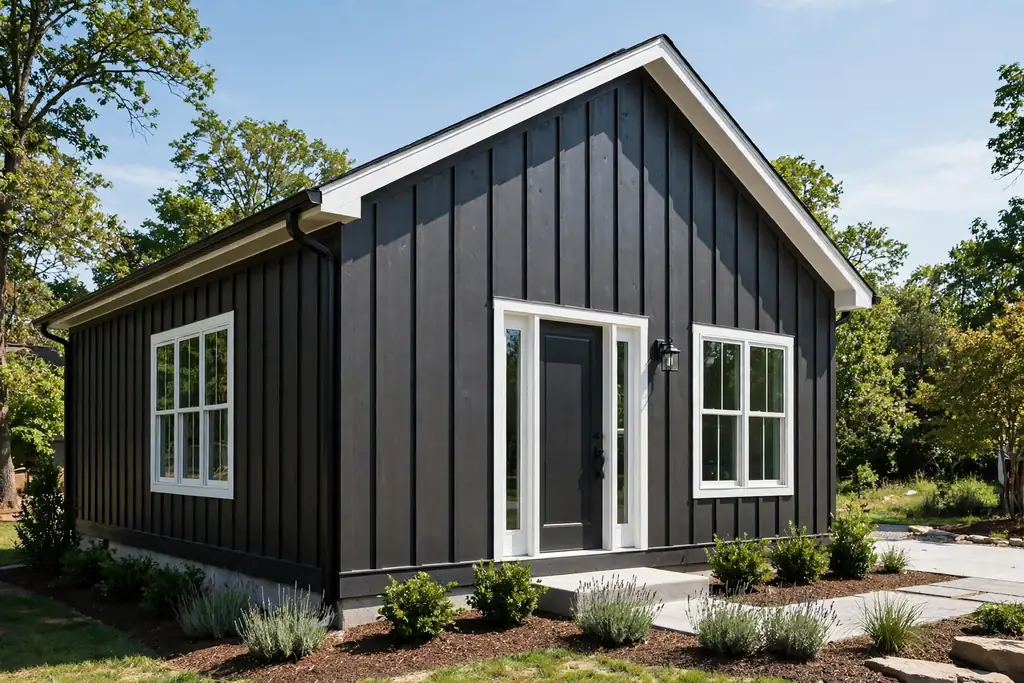
    9. Charcoal Board-and-Batten for Vertical Rhythm

    Charcoal board-and-batten house with vertical siding lines.

    Charcoal board-and-batten siding adds vertical rhythm to a house that would otherwise read as one wide dark slab. The narrow battens cast thin shadows down the wall, which gives the charcoal depth and movement through the day. This suits tall, narrow houses, gable ends, and modern additions where horizontal siding would look flat.

    Paint battens and boards the same charcoal, so the rhythm comes from shadow rather than from a second color. Keep trim white or pale grey, and keep the roof simple, since a busy roofline fights the vertical lines. Board-and-batten also suits a partial application: use it on a gable or an entry projection, with horizontal siding elsewhere, to mark the entry without darkening the whole house.

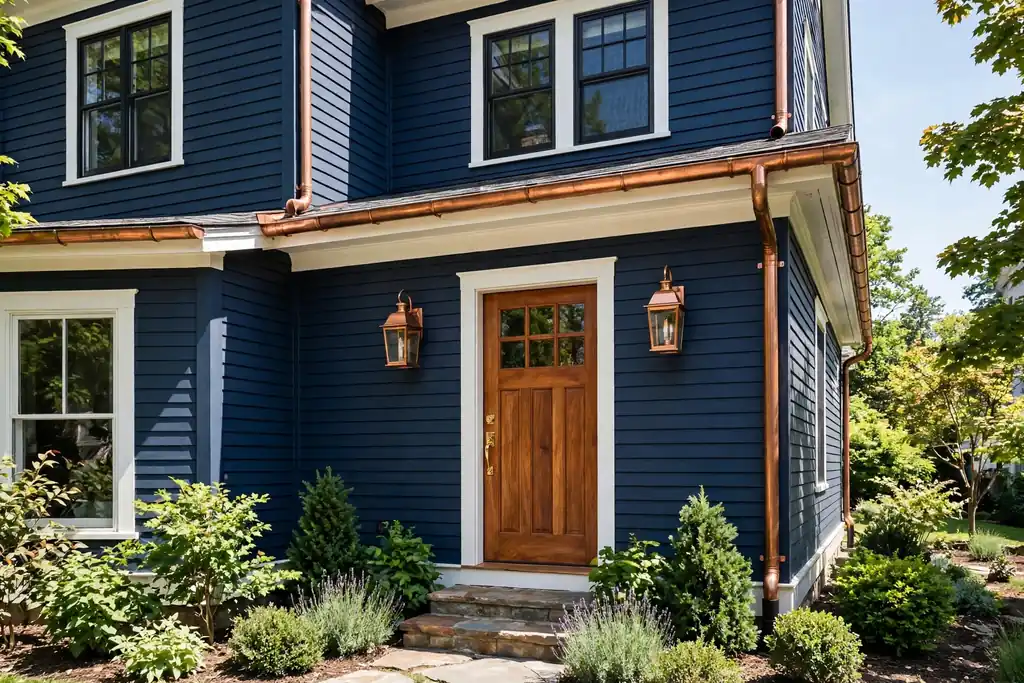
    10. Midnight Blue with Copper Gutters and Lanterns

    Midnight blue house with copper gutters and entry lanterns.

    Midnight blue with copper details is a dark scheme built on metal rather than on trim color. Paint the siding a near black blue, keep the trim white or pale grey, and add copper in the gutters, downspouts, and entry lanterns. New copper shines bright, then weathers to a soft brown, so the accent changes with the house over time.

    Use copper sparingly: gutters and one or two lanterns are enough, since copper on every fixture can look busy. A grey or black roof suits midnight blue, and a wood door adds warmth beside the cool metal. Check the blue at dusk before committing, since midnight blue reads as pure black in low light, which some owners want and others do not.

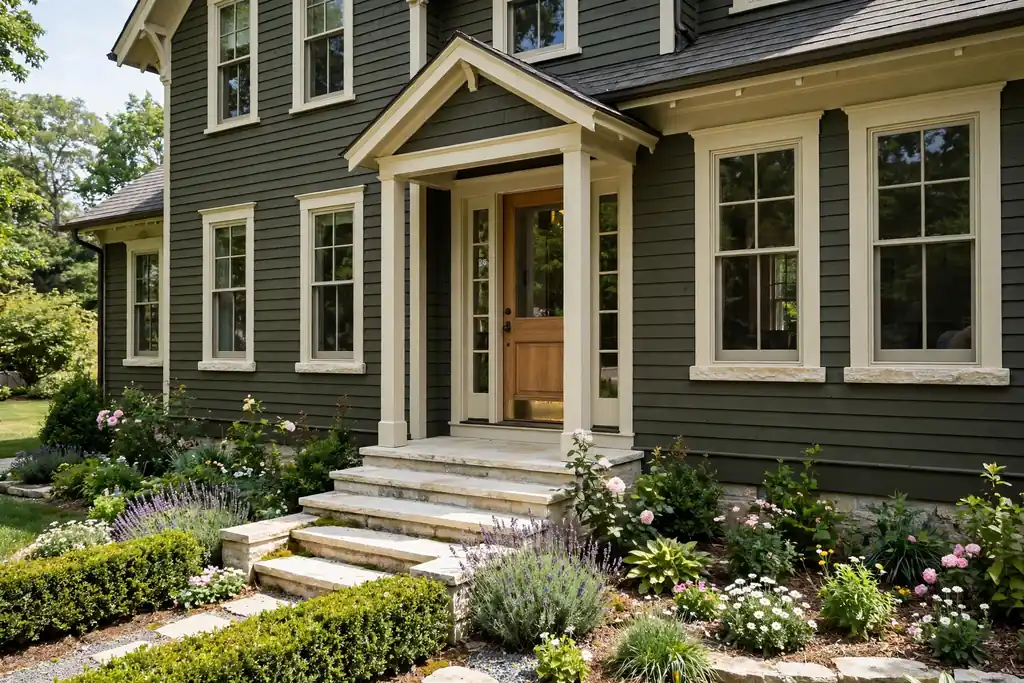
    11. Dark Olive with Limestone Trim

    Dark olive house with pale limestone window sills and stone steps.

    Dark olive with limestone trim suits a house with traditional bones, because the earthy green and pale stone feel settled rather than new. Paint the siding a muted olive with a brown base, and use limestone or pale stone for window sills, the door surround, and the steps. The stone gives the olive a light edge without the sharpness of white paint.

    Keep the roof brown or grey, and use bronze or black hardware, since bright brass can look too crisp against olive. Olive can turn muddy beside cool grey stone or a grey roof, so test the pair on site. A cream door or cream trim on the porch keeps the entry bright, which matters because olive absorbs light like other dark shades.

    12. Graphite Stucco with an Arched Entry

    Graphite stucco house with an arched entry and terracotta roof tiles.

    Graphite stucco gives a Mediterranean or Spanish style house a dark, modern update without losing its soft, rounded form. Use a dark graphite render on the main walls, keep the arched entry in the same graphite or a shade lighter, and add terracotta roof tiles above. The warm roof tiles stop the graphite from feeling cold, which is the main risk with dark stucco.

    Keep window frames dark bronze or black, and use a wood door with iron details to suit the arch. Stucco shows texture well in a dark color, so a fine, even render reads better than a heavily textured one, which can catch shadows unevenly. Pale gravel or light stone at the entry gives the dark walls a bright base.

    13. Black Cedar Shingles with White Window Frames

    Black cedar shingle cottage with white window frames.

    Black cedar shingles suit a cottage or shingle style house because the small shingle pattern breaks the black into texture. Stain the shingles near black, keep window frames and trim white, and let the white frames read as a grid across the dark wall. The texture keeps the house from looking flat, which is the main risk with a large black wall.

    Use a stain rather than a solid paint where the shingle grain should stay visible, and expect the stain to weather over time. A white door or a wood door both work here, while a black door can disappear into the wall. Keep the roof dark grey or black, and add pale planting at the base, since dark shingles against dark soil can hide the bottom of the house.

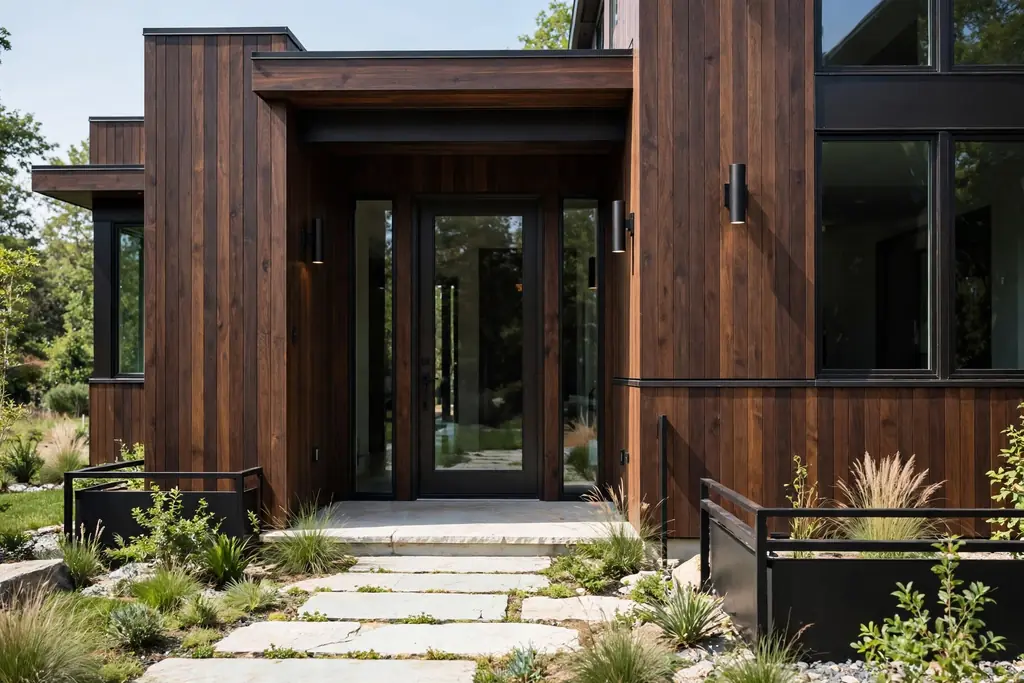
    14. Dark Walnut Cladding with a Glass Entry

    Contemporary house with dark walnut cladding and a glass entry door.

    Dark walnut wood cladding with a glass entry suits a contemporary house because the wood grain and the glass give the dark color two different surfaces to play against. Clad the main walls in dark walnut boards, keep the joints tight and horizontal, and set a full glass entry door or sidelights beside the wood. The glass reflects light and sky, so the dark wall never reads as a solid block.

    Protect the cladding with an exterior oil or stain suited to the wood, and plan on regular care, since dark wood shows weathering faster than painted siding. Keep other materials quiet: black metal, pale stone, and plain concrete suit walnut, while bright trim fights it. A pale stone path leading to the glass entry helps visitors find the door at night.

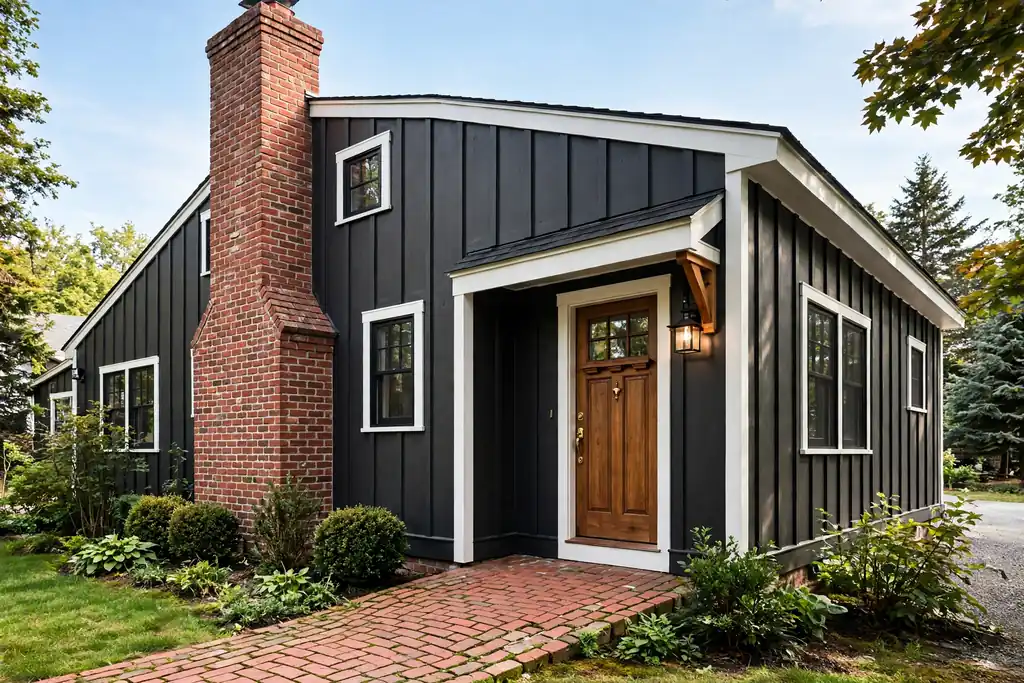
    15. Charcoal Siding Paired with a Red Brick Chimney

    Charcoal sided house with a natural red brick chimney.

    Charcoal siding with a red brick chimney works because the brick gives the dark house a warm, original feature to anchor it. Keep the chimney in its natural red brick, paint the siding charcoal, and use white or cream trim to separate the two. The brick reads as a vertical warm stripe against the dark walls, which suits a house where the chimney sits on the front or side face.

    Repeat the brick once more at ground level, in a brick path, brick steps, or a low brick planter, so the chimney does not stand alone. A brown or grey roof suits both materials, and a wood door echoes the warmth of the brick. If the brick is painted already, stripping it back is a large job, so this scheme suits houses where the brick is still bare.

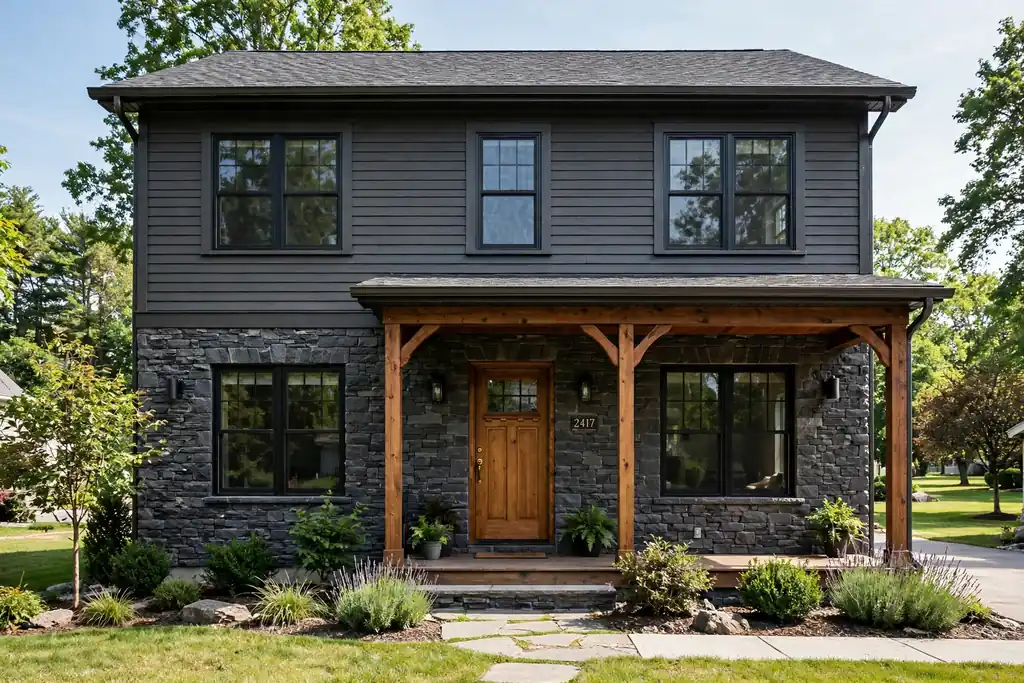
    16. Dark Stone Veneer on the Lower Story

    Two story house with dark stone veneer on the lower story.

    Dark stone veneer on the lower story grounds a two story house, because the heavy material sits where a house naturally needs weight. Use dark grey or charcoal stone on the ground floor, keep the upper story in a dark siding or render a shade lighter, and separate the two with a simple trim board. The stone adds texture and shadow at the level people see up close.

    Keep the stone color in the same family as the siding, so the house reads as one scheme rather than two separate houses stacked together. A wood door and wood porch posts warm the stone, while black hardware keeps the look tidy. Stone veneer needs a proper base and drainage detail, so this is a scheme to plan with a builder rather than as a paint only change.

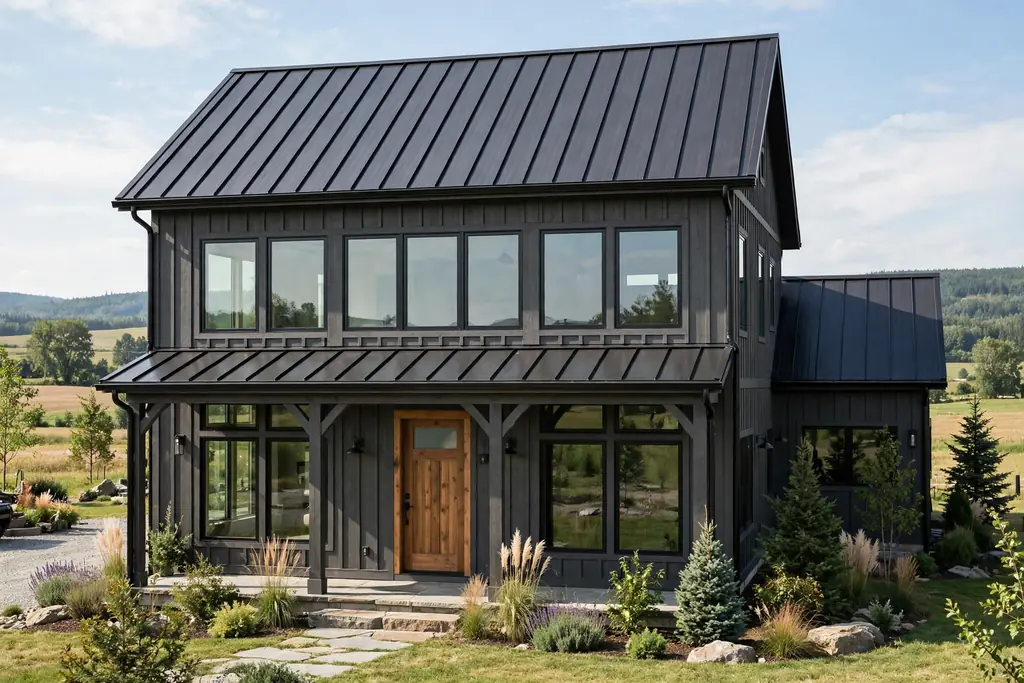
    17. Dark Grey Siding Under a Black Standing-Seam Roof

    Dark grey house with a black standing-seam metal roof.

    Dark grey siding under a black standing-seam metal roof suits a modern or barn style house because the roof lines become part of the color scheme. Use a mid dark grey on the walls, keep the roof black with visible seams running down the slope, and keep trim black or dark grey. The roof and walls read as one dark form, with the seams giving the roof its detail.

    Break the dark mass with wood at the entry, a pale stone terrace, or large windows that reflect the sky. A black roof absorbs heat, so check attic ventilation and insulation before choosing this scheme in a hot climate. Keep gutters black to match the roof, and use warm porch light so the entry does not disappear under the dark roofline at night.

    18. A Deep Green Front Door as the Focal Point

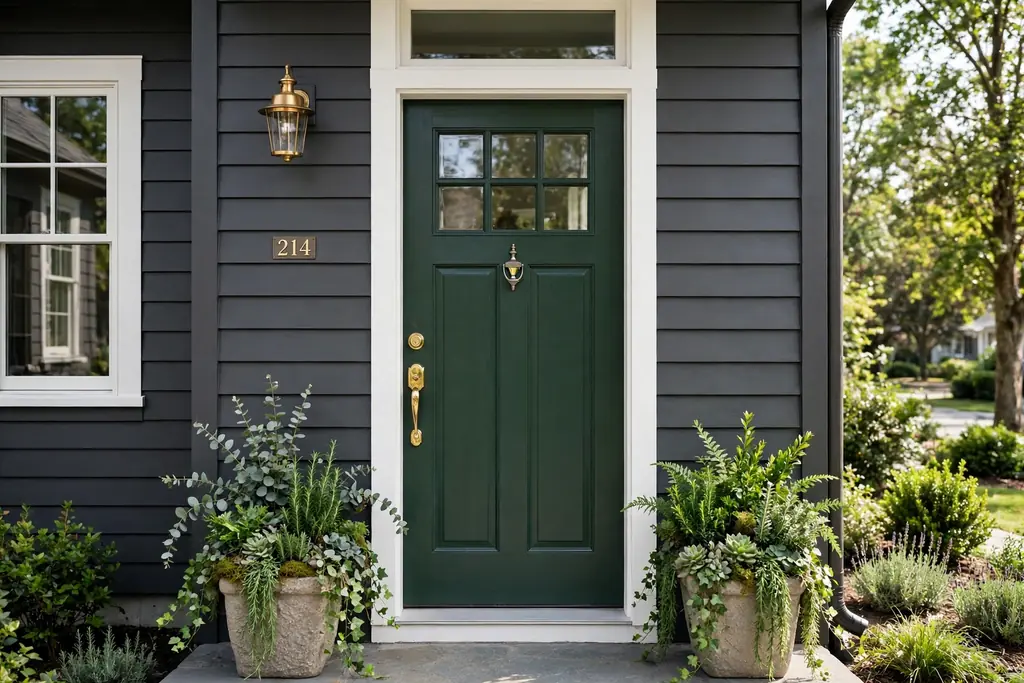
    Dark grey house with a deep green front door and white trim.

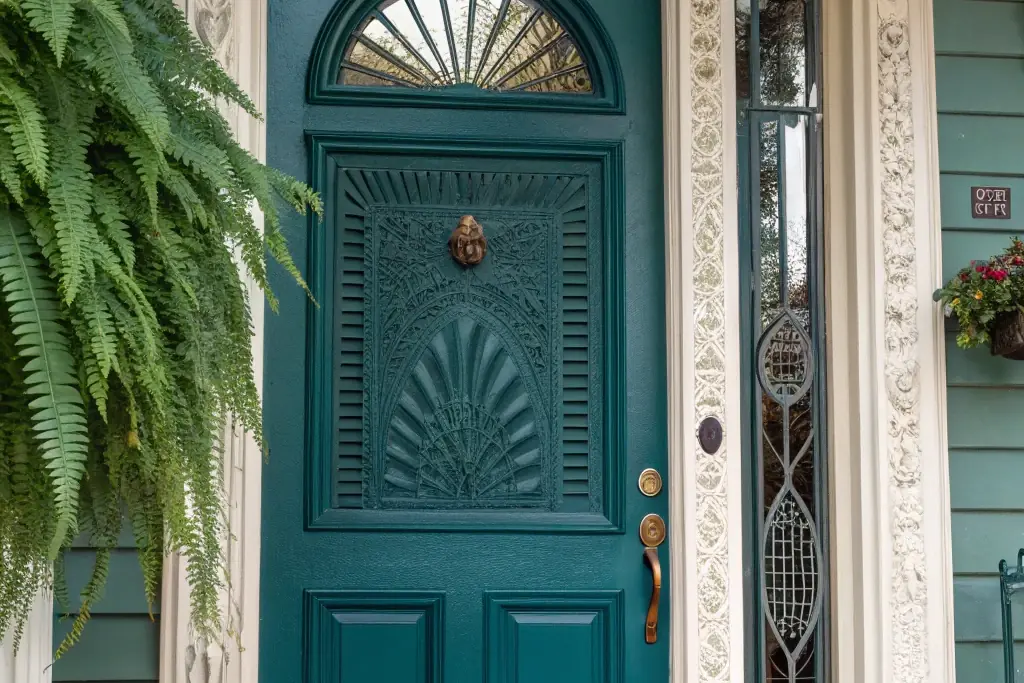
    A deep green front door on dark grey siding makes the entry the focal point without repainting the whole house. Paint the siding a soft dark grey, keep trim white or pale grey, and paint the door a deep, muted green with a satin finish. The green reads as a deliberate color note against the neutral grey, and it suits houses where a full green exterior would feel like too much.

    Repeat the green once, in a planter glaze, a wreath, or a bench cushion, so the door does not look random. Brass or black hardware both suit deep green, while chrome can look too cold beside it. For more ways to use a strong door color against a dark house, see these blue front door colors, which cover how hardware and trim change a dark entry.

    19. Charcoal Siding with a Warm Wood Slat Screen

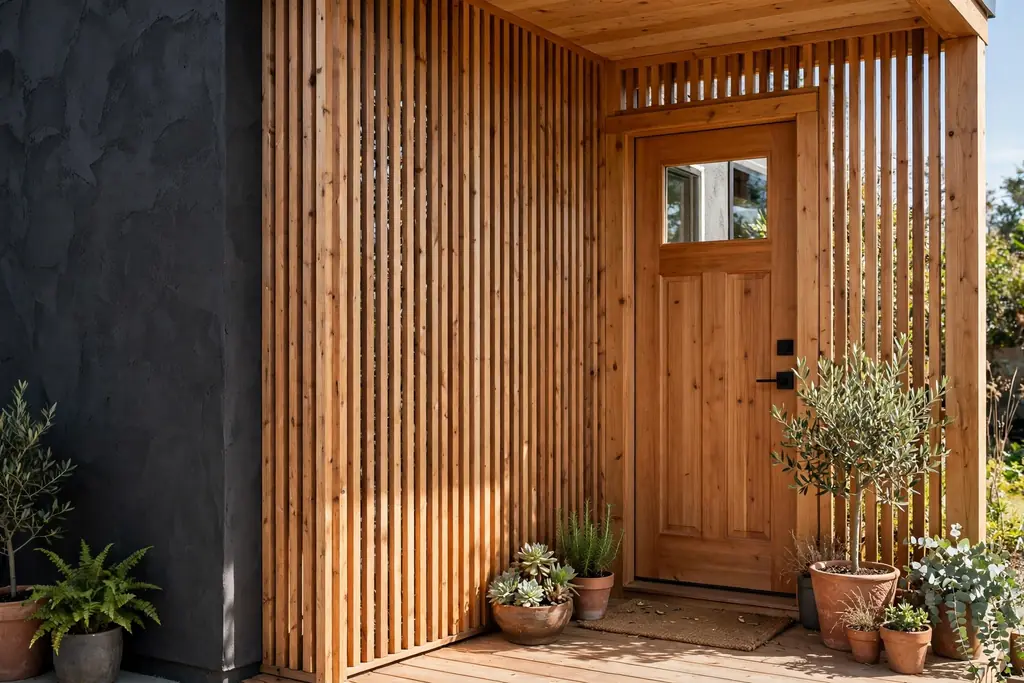
    Charcoal house wall beside a warm wood slat screen.

    A warm wood slat screen beside charcoal siding adds privacy and warmth in one move. Use vertical or horizontal wood slats to screen a porch, a side yard, or a bin area, and set them against a charcoal wall. The slats cast striped shadows on the dark wall, and the wood tone gives the eye a warm place to rest.

    Keep the slats in a natural cedar or warm stain, and space them evenly, since uneven gaps show clearly against a dark background. Use the same wood for the front door or planters to tie the screen to the entry. A slat screen also softens a long, flat charcoal wall without adding a second paint color, which keeps the scheme simple.

    20. Dark Walls with a White Pergola and Pale Porch Ceiling

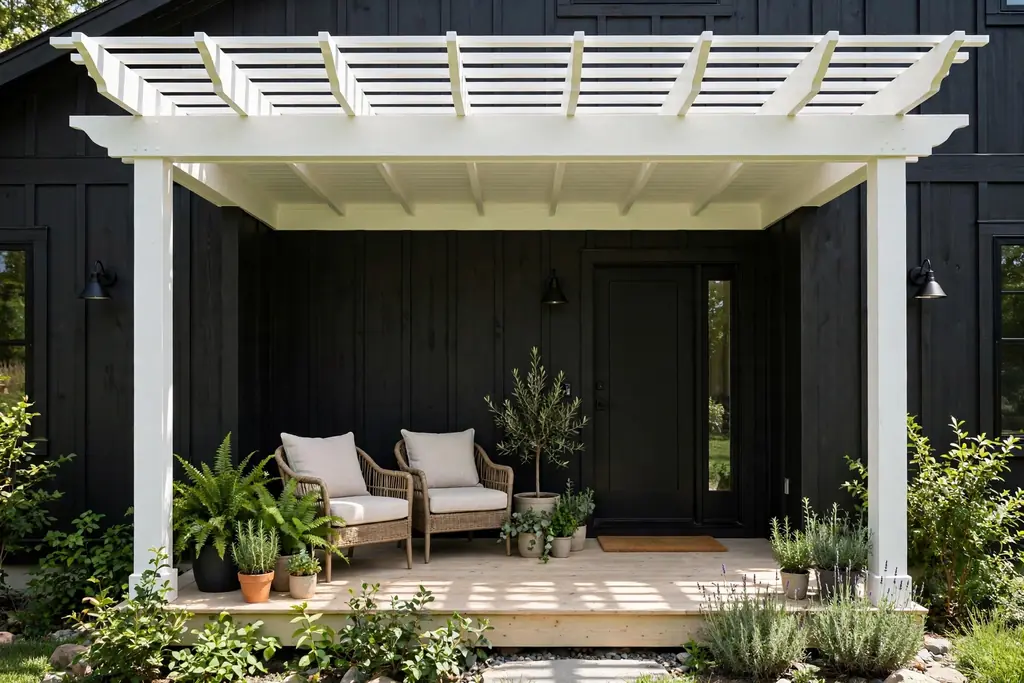
    Dark walled house with a white pergola and pale porch ceiling.

    A white pergola and a pale porch ceiling lift a dark house at the exact place people gather. Paint the walls charcoal or deep navy, build the pergola in white, and paint the porch ceiling a pale blue grey or warm white. The white overhead structure frames the entry and reflects light down onto the porch, so the dark walls do not make the seating area feel dim.

    Keep porch furniture in pale wood or light cushions to repeat the bright note at seating height. A white pergola needs regular cleaning, since dark walls make dirt on white paint more visible by contrast. This scheme suits a house with a deep porch, where the ceiling is large enough to matter, rather than a shallow stoop.

    21. Tonal Layering: Black Trim on Dark Grey Walls

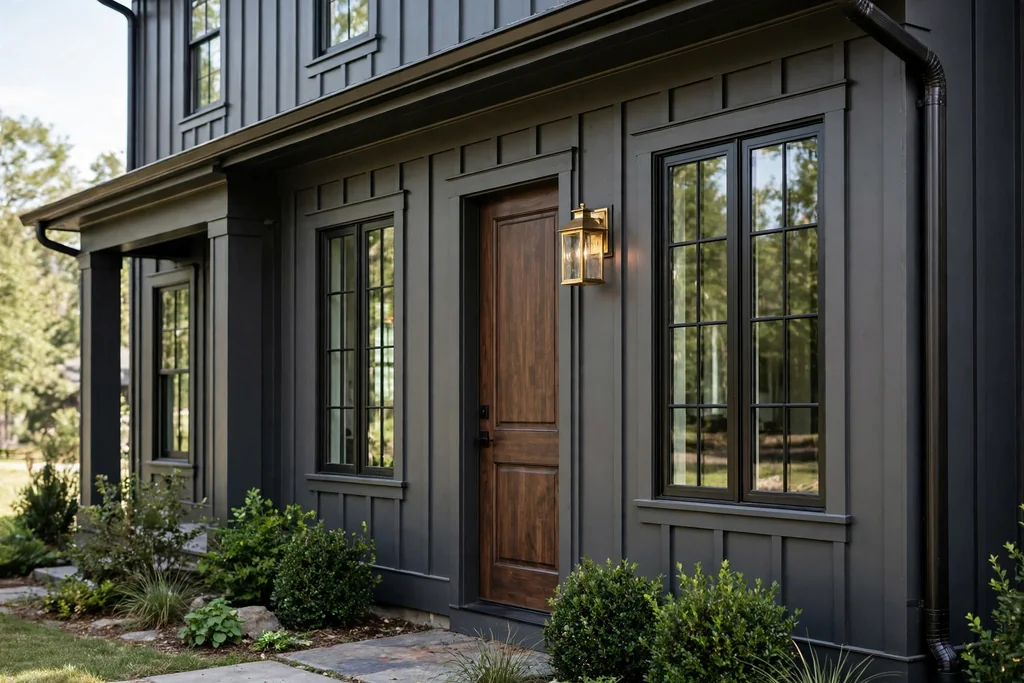
    Dark grey house with near black window frames and trim.

    Tonal layering uses black trim on dark grey walls, so the house reads as shades of one color rather than as dark against white. Paint the walls a mid dark grey, use near black for window frames, fascia, and gutters, and keep the door black or dark wood. The subtle contrast gives the house depth without the sharp outline that white trim creates.

    This scheme needs good light to work, since the trim contrast is quiet and can disappear on a shaded facade. Add one warm material, such as wood or brass, so the grey and black do not feel cold. For help pairing dark tones with lighter partners inside and out, see these wall color combinations, which show how one strong color needs a calmer partner beside it.

    22. Dark Exterior with Brass Numbers and Warm Path Lights

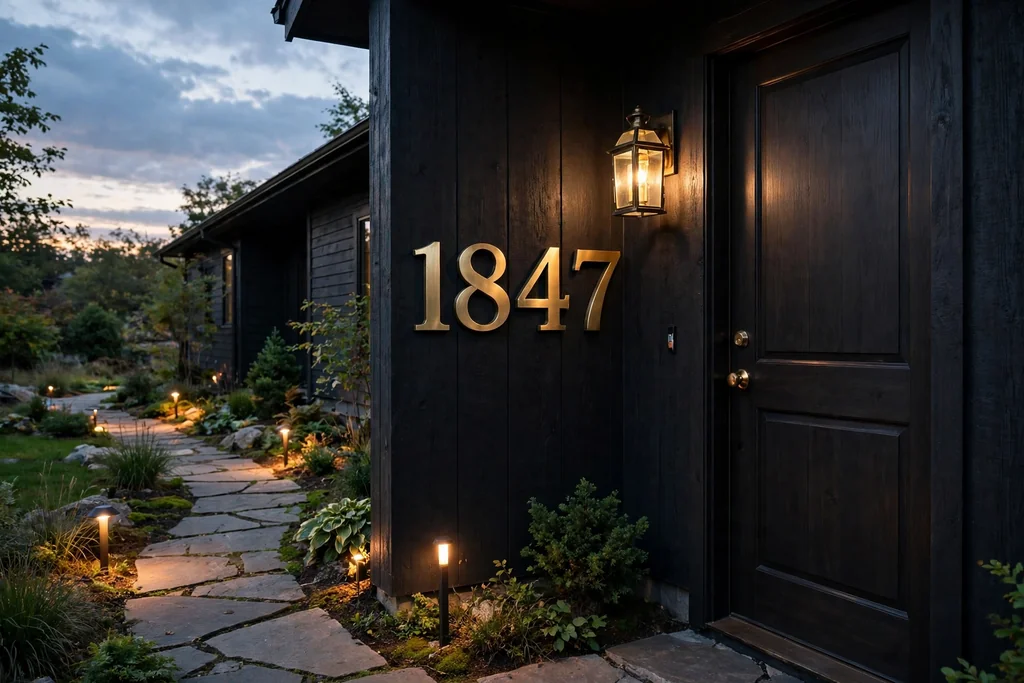
    Dark house entry at dusk with brass house numbers and warm path lights.

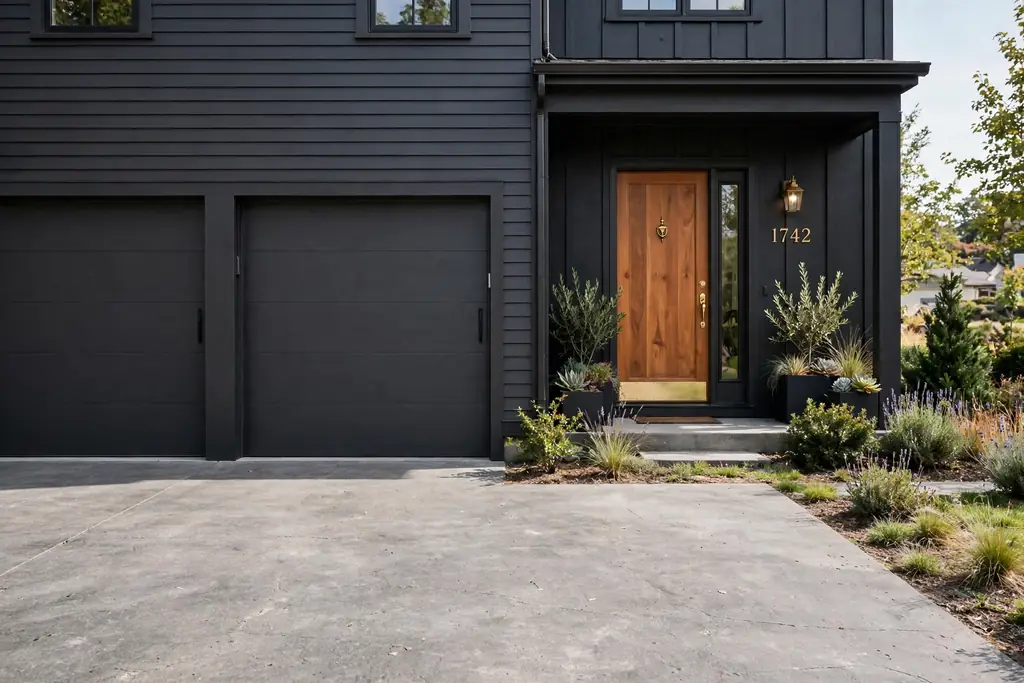
    Brass numbers and warm path lights are small details that make a dark exterior readable after dark. Paint the walls charcoal, navy, or forest green, then mount large brass house numbers beside the door and set warm path lights along the walk. The brass catches daylight, and the warm lights outline the path at night, so visitors can find the entry on a dark facade.

    Keep the light color warm, around the tone of a household lamp, since cool white light can make dark walls look cold and flat. Space path lights evenly and keep them low, so they light the walk rather than glaring into eyes. Repeat brass once more, in a lantern or door handle, so the numbers do not sit alone.

    23. Two-Tone Dark: Charcoal Above, Black Below

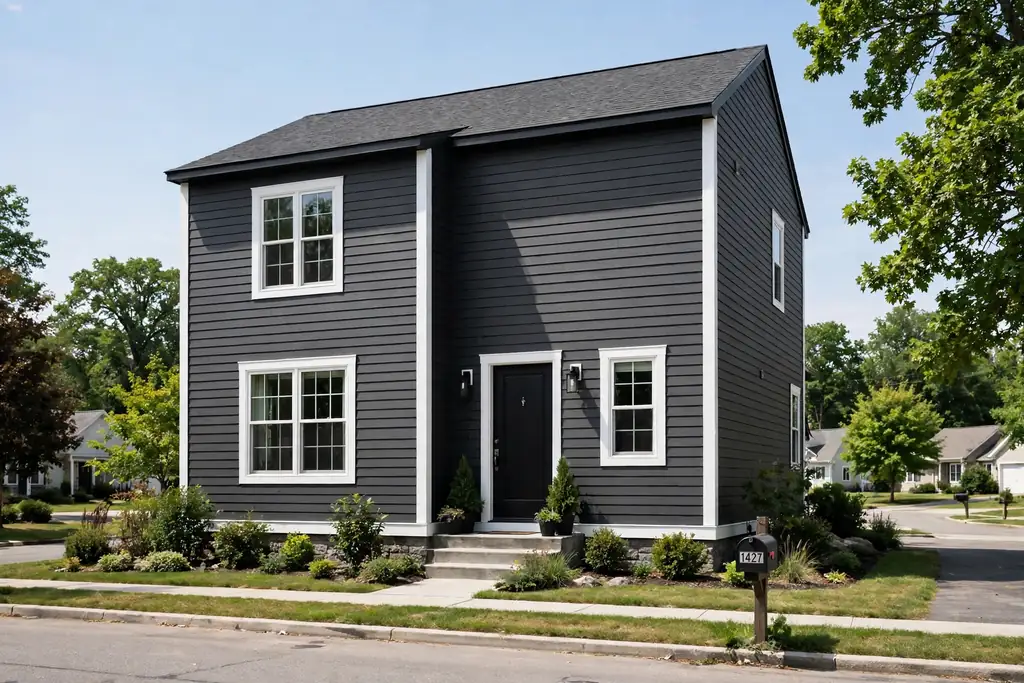
    Two story house with charcoal siding above and black siding below.

    A two-tone dark scheme splits the house by height: charcoal on the upper story, black on the lower story, with a trim board between them. The darker base grounds the house, while the slightly lighter upper story keeps the roofline from feeling heavy. This suits a two story house with a clear floor line, such as a band board or a change in siding.

    Keep the split at a real architectural line, not at a random height, so it looks built in rather than painted on. Use the same trim color on both stories to tie them together, and keep the door in wood or a lighter tone so the entry stands out from the black base. Test both shades together on one corner, since two dark shades can merge into one at a distance.

    24. Dark Walls Softened by Layered Evergreen Planting

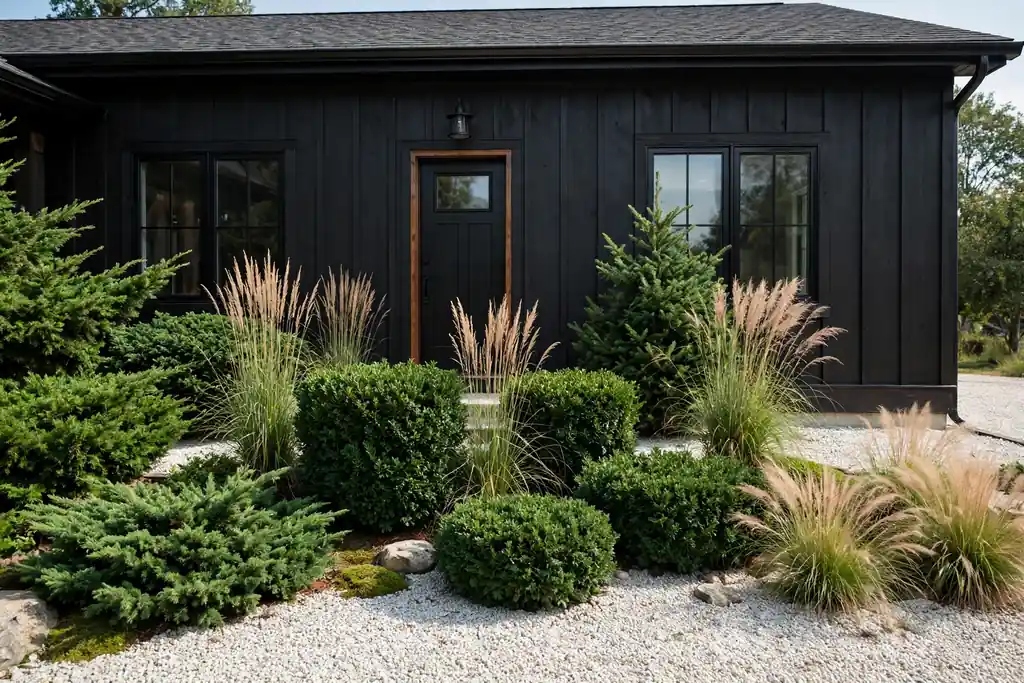
    Dark house front with layered evergreen shrubs and pale gravel beds.

    Layered evergreen planting softens a dark house because green foliage against a dark wall reads as texture rather than as more color. Plant a tall evergreen hedge or small trees at the back of the bed, mid height shrubs in front, and low grasses or ground cover at the edge. The layers break up the flat dark wall and give the house a planted frame through winter as well as summer.

    Choose plants that suit the light and soil on that side of the house, and leave space between the plants and the wall for air and care. Pale gravel or light stone mulch brightens the bed and stops dark soil from merging with the dark wall. Keep plants clear of gutters and vents, and prune the layer nearest the wall so it does not hold damp against the siding.

    25. A Warm Lighting Plan for Dark Exteriors

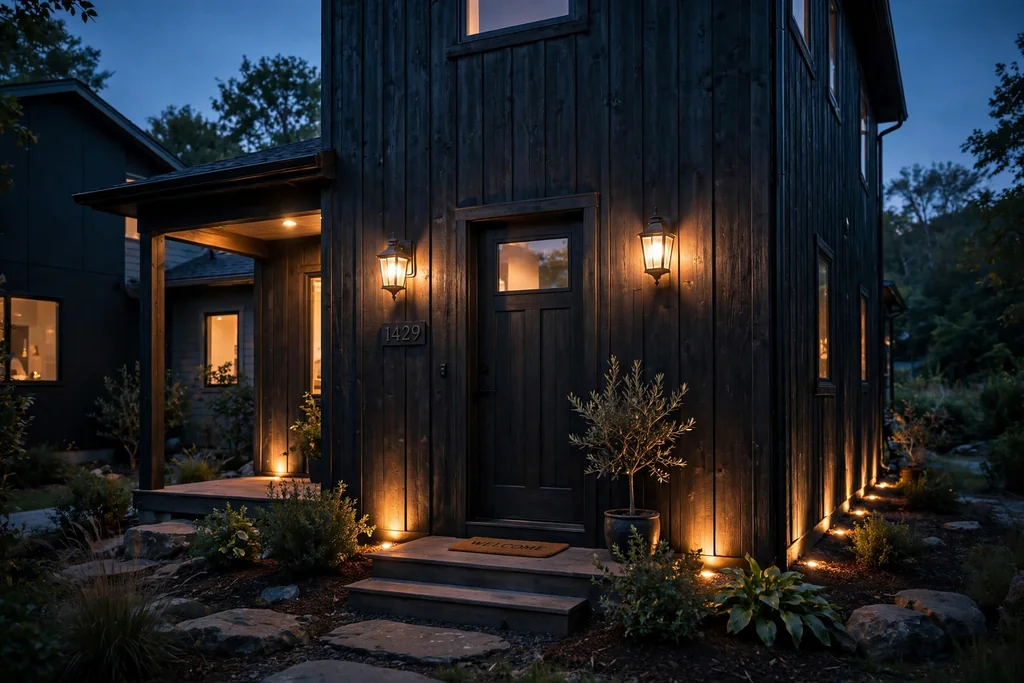
    Dark house exterior at dusk with warm wall lanterns and uplights.

    A warm lighting plan is a scheme in its own right, because light decides how a dark house looks for half the year. Use wall lanterns beside the door, uplights at the base of the walls, and one light over the garage or porch, all in a warm tone. Uplights wash the dark siding with light and show its texture, while door lanterns mark the entry.

    Put the lights on a timer or a dusk sensor, so the house is lit as daylight fades rather than only when someone remembers. Avoid a single bright floodlight, which flattens dark walls and creates harsh shadows. Keep fixtures in one finish, such as black or bronze, so the lighting hardware does not add a second color story to the scheme.

    26. Dark Garage Doors that Blend with the House

    Dark house front with garage doors painted to match the siding.

    Dark garage doors that match the house siding stop a large garage from dominating the front of the house. Paint or clad the garage doors in the same charcoal, black, or dark grey as the walls, keep the trim around them minimal, and use black hardware. The garage then reads as part of the house, rather than as a separate pale block.

    Add wood or brass at the entry door nearby, so the front of the house still has a focal point once the garage blends in. Keep the driveway in a mid tone, such as grey concrete or pale gravel, since a black driveway beside black doors can lose the edge of the house. This scheme suits a house where the garage faces the street and takes up a large share of the facade.

    27. Dark Scheme for a Small House with Light Gables and Steps

    Small dark sided house with light gables and pale stone steps.

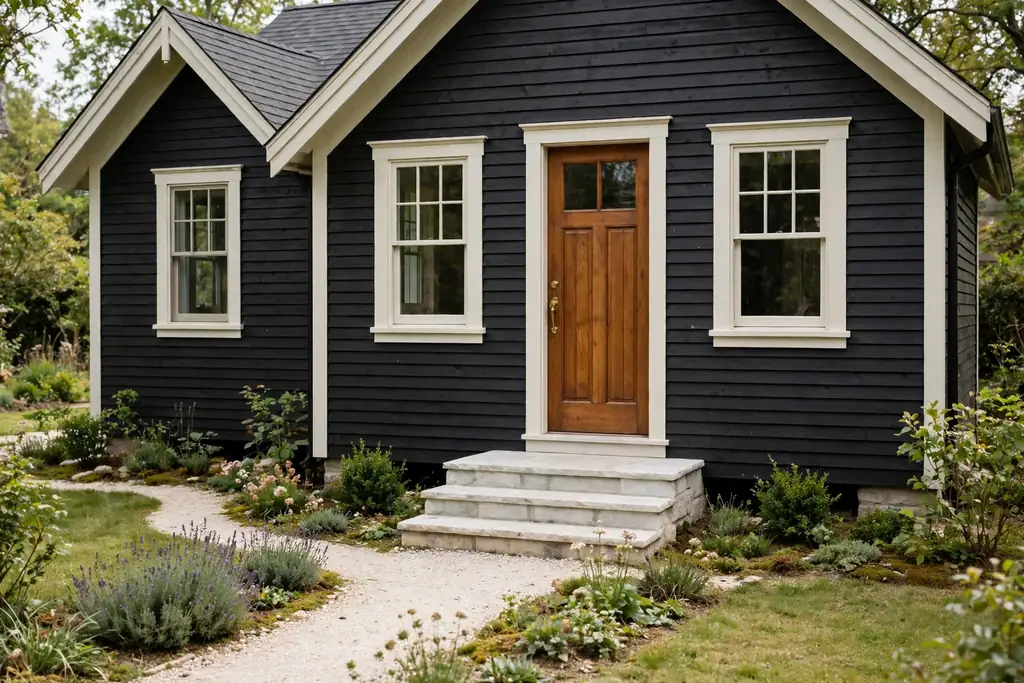
    A small house can carry a dark scheme when the gables and steps stay light. Paint the main walls charcoal or deep green, keep the gable ends, window trim, and porch steps in white or pale stone, and let those light areas frame the dark walls. The light gables draw the eye up, which keeps a small house from feeling squat under a dark color.

    Keep the door in a warm wood or a clear color, such as deep red or brass toned hardware, so the entry is easy to find on a small facade. Use pale planting and a light path to brighten the base, and avoid darkening the roof as well, since a dark roof plus dark walls plus a small footprint can feel heavy. This scheme works best when at least one third of the front face stays light.

    Conclusion

    A dark exterior works when the shade suits the house, the trim gives it edges, and one warm partner keeps it welcoming. Start with the house style and the light on your street, test two or three large samples through a full day, and choose the scheme where the trim, door, and roof all have clear jobs. Small choices, such as brass hardware, warm path lights, or layered evergreens, often matter more than picking the darkest shade on the card. Save this list on Pinterest, narrow it to three schemes, and test those three on your own walls before you commit to one.

    FAQs

    Will a dark exterior make my house look smaller?

    A dark color can make a large, plain house look more grounded, but on a small house it can feel heavy if the roof, trim, and ground are dark too. Keep gables, trim, steps, or the porch ceiling light, and use pale planting and a light path, so the dark walls have bright edges. Testing a large sample on the front wall will show whether your house reads as grounded or as smaller.

    Do dark exteriors fade faster than light colors?

    Dark paints absorb more sun and heat, so they can fade and show chalking sooner than pale colors, especially on south and west walls. A quality exterior paint, a satin or matte finish suited to the surface, and a wash down each season will slow that wear. Plan on checking south facing walls first, since they take the most sun.

    What trim color works best with a dark house?

    White trim gives the sharpest outline and suits charcoal, navy, and black houses. Cream trim softens warm dark shades, such as espresso and olive, while black trim gives a quiet, tonal look on dark grey walls. Pick the trim that matches the undertone of the main color: bright white with cool dark shades, warm cream with warm dark shades.

    Should the roof match a dark exterior?

    The roof does not need to match, but it needs to sit in the same warm or cool family as the walls. A grey or black roof suits charcoal, navy, and slate schemes, while a brown roof suits espresso, olive, and forest green schemes. If the roof is terracotta, a graphite or dark olive wall often works better than a blue leaning charcoal.

    Can I paint brick, stucco, or wood siding dark?

    Yes, with the right product for each surface: masonry paint for brick, a render suited coating for stucco, and exterior paint or stain for wood siding. Check the surface condition first, since dark paint will not hide cracked mortar, peeling render, or rotted boards. Bare brick and stucco need a primer suited to the material, and wood needs a clean, dry surface before painting.

    How do I keep a dark entry welcoming at night?

    Use warm light at more than one height: lanterns beside the door, path lights along the walk, and one uplight on the wall or planting. Warm bulbs suit dark walls better than cool white bulbs, which can make the entry look cold. Brass hardware, a wood door, and pale steps also help visitors find the entry after dark.


  • 33 Home Gym Ideas for a Welcoming, Lived-In Look

    33 Home Gym Ideas for a Welcoming, Lived-In Look

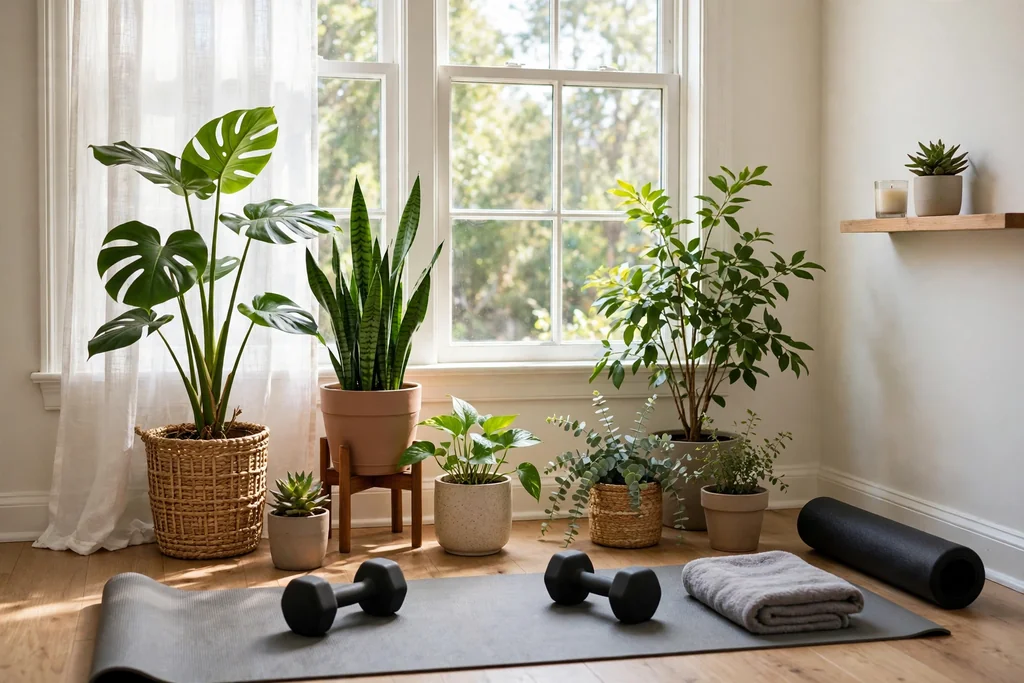
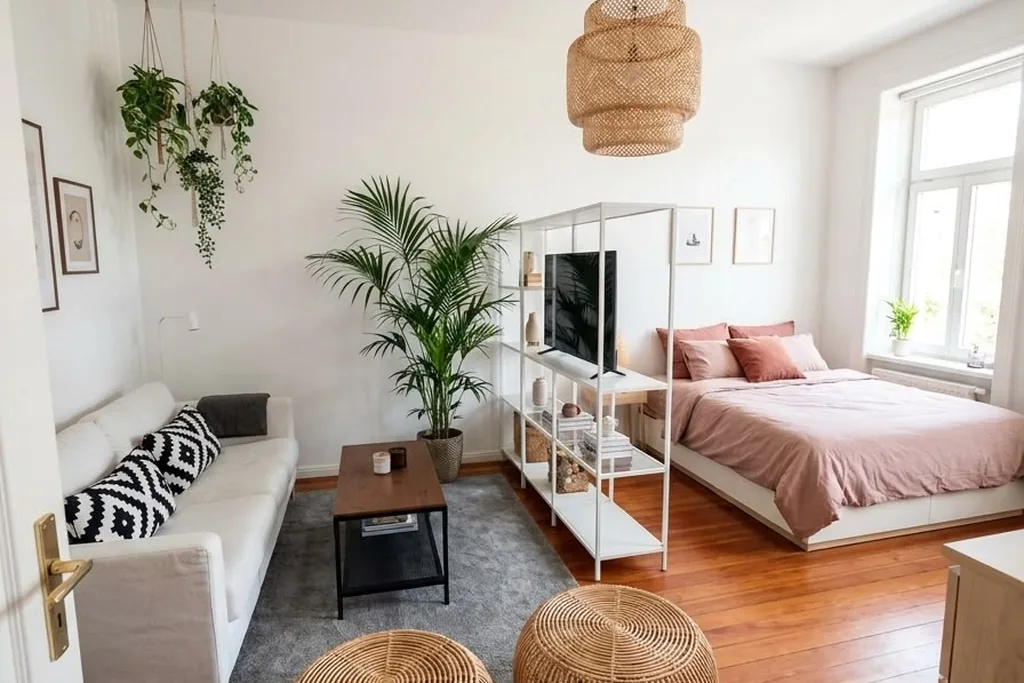
    A home gym works best when it feels like part of your home, not a spare room full of equipment you avoid. Warm light, a soft rug, a plant, and a chair you actually sit in can make the difference between a corner you use daily and one you walk past. These 33 home gym ideas cover small corners, spare rooms, garages, and basements, plus storage, lighting, and small comforts that keep workouts simple. Start with the space you have and the equipment you will truly use. For small rooms, the zoning advice in these studio apartment decorating ideas helps a gym corner share space with living or sleeping areas.

    Key Takeaways

    • Start with one clear zone, even if it is only a mat and a rug, and keep the walking route into it clear.
    • Choose equipment you will use at least three times a week before buying anything large or fixed.
    • Put small gear in closed storage and keep only daily items visible, so the room still feels like home.
    • Layer light: daylight or a bright lamp for workouts, plus a softer lamp for stretching and cool downs.
    • Use warm materials such as wood, cotton, wool, and plants to soften rubber, metal, and plastic.
    • Leave space to stretch, sit, and store a towel and water, since comfort is what brings you back tomorrow.

    1. Quiet Corner Nook with a Rug

    Quiet home gym corner with a large rug, a rolled mat, and a small shelf.

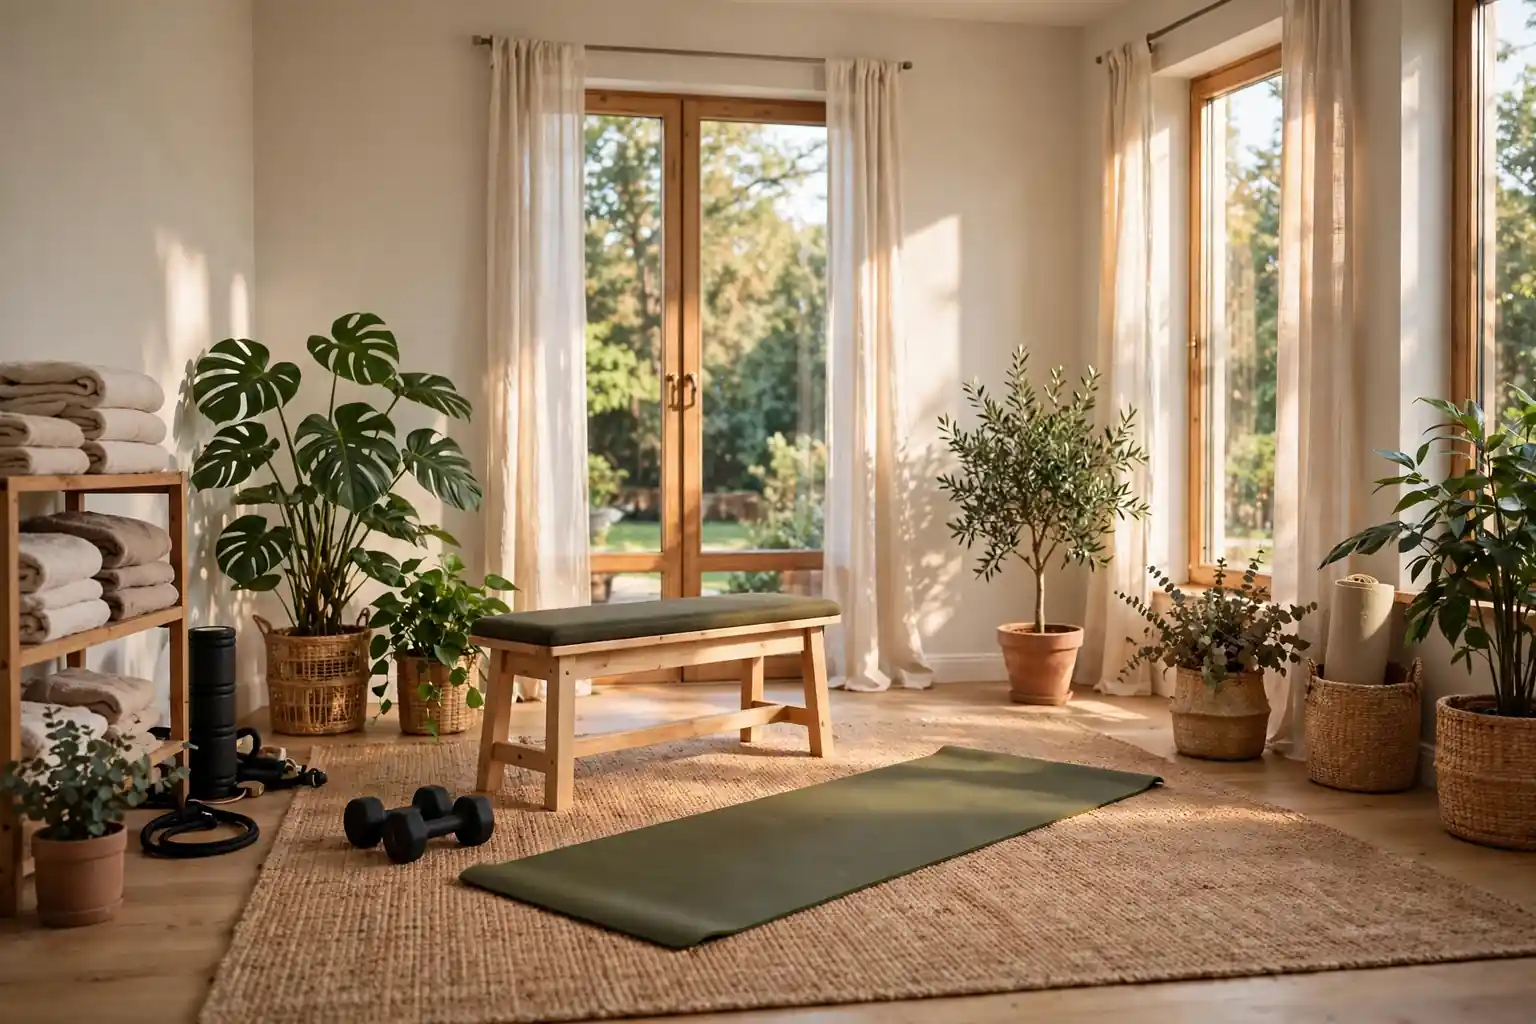
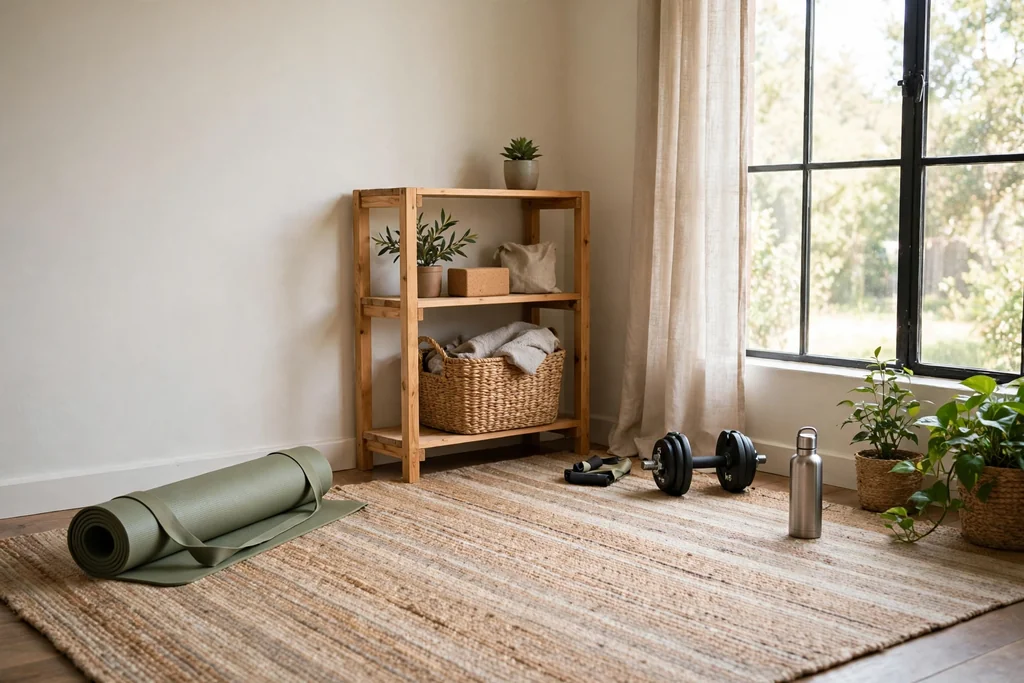
    Claim one quiet corner with a large rug, a mat, and a small shelf, and treat it as your gym even if the rest of the room stays as it is. The rug marks the zone, cushions your feet, and makes the corner feel like a room within a room. This suits renters and small homes, since nothing needs to be fixed to the wall.

    Keep the corner near a window or a lamp if you can, and add a basket for bands, a towel, and a water bottle. Roll the mat out only when you train, and fold it away if the corner also serves guests. A rug with a low pile is easier to clean and safer under a mat than a thick shag rug.

    2. Spare Bedroom Turned Full Gym Room

    Spare bedroom turned into a gym room with a bench, rack, and clear floor space.

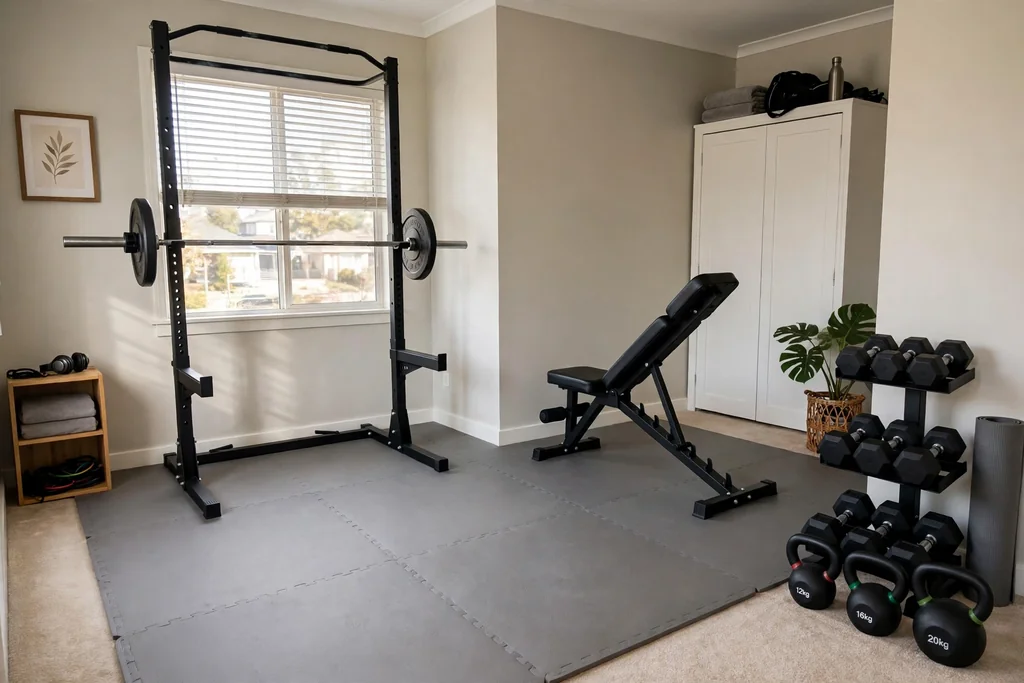
    Turn a spare bedroom into a full gym room by clearing the bed and giving each type of training its own wall: cardio by the window, strength along one wall, and stretching in the clear middle. A spare room lets you leave equipment out, which removes the setup step that often stops a workout before it starts.

    Keep a chair and a small table in the room too, so it still feels lived in rather than bare. Use the closet for gear storage, with bins on shelves for small items. If guests still need the room sometimes, choose foldable equipment and a foldaway bed, so the room can change roles in an evening.

    3. Garage Corner with Rubber Flooring

    Garage gym corner with rubber floor tiles, a rack, and a fan.

    Set up a gym corner in the garage with interlocking rubber tiles over the concrete floor. Rubber protects the floor, softens dropped weights, and gives grip for shoes, which matters more in a garage than in a carpeted room. Start with one corner, not the whole garage, so parking and storage still work.

    Add a fan for summer, a small heater for cold mornings if your garage allows it, and bright overhead light, since garages are often dim. Keep gear on a rack or shelf off the floor, away from damp and dust. A rug on top of the rubber near the stretching area adds warmth under bare feet.

    4. Basement Zone with Bright Lighting

    Bright basement gym zone with pale walls, ceiling lights, and a mirror.

    Make a basement gym zone feel welcoming with bright, even lighting first, since low ceilings and small windows can make a basement feel closed in. Use two or three light sources, such as ceiling lights plus a floor lamp, and paint the walls a pale warm white so light bounces around the room.

    Keep the layout open in the middle for floor work, with equipment along the walls. A dehumidifier helps in damp basements, and a rug over the cold floor makes stretching far more pleasant. Add a mirror on one wall, since it helps with form and makes the space feel larger.

    5. Living Room Gym Behind a Curtain

    Living room gym corner hidden behind a soft neutral curtain.

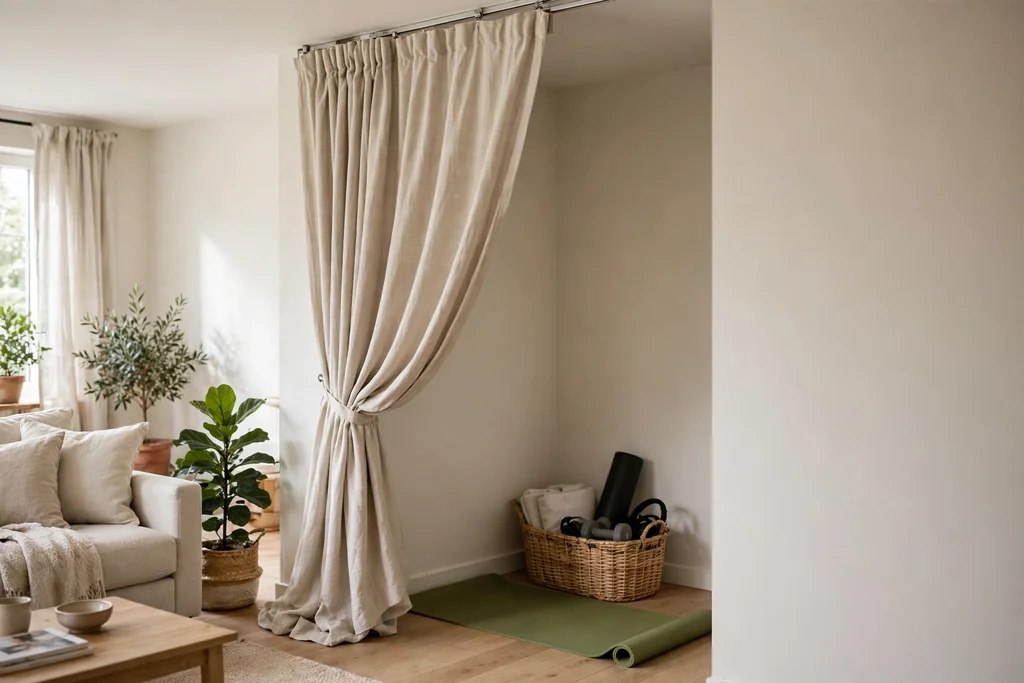
    Hide a living room gym behind a ceiling track curtain, so you can close it away when guests visit and open it in seconds for a workout. The curtain works like a soft wall, and it suits a corner with a mat, bands, and a few dumbbells that would otherwise sit in view all day.

    Choose a washable curtain in a warm neutral that matches the room, and extend the track past the gym zone so the curtain stacks neatly to one side. Keep the gym gear in a basket or on a low shelf behind the curtain, so closing it truly tidies the room. This is a good fit for the divider ideas in these cozy apartment living room ideas.

    6. Fold Away Wall Gym in a Small Room

    Small room with a fold away wall gym unit and a rolled mat beside it.

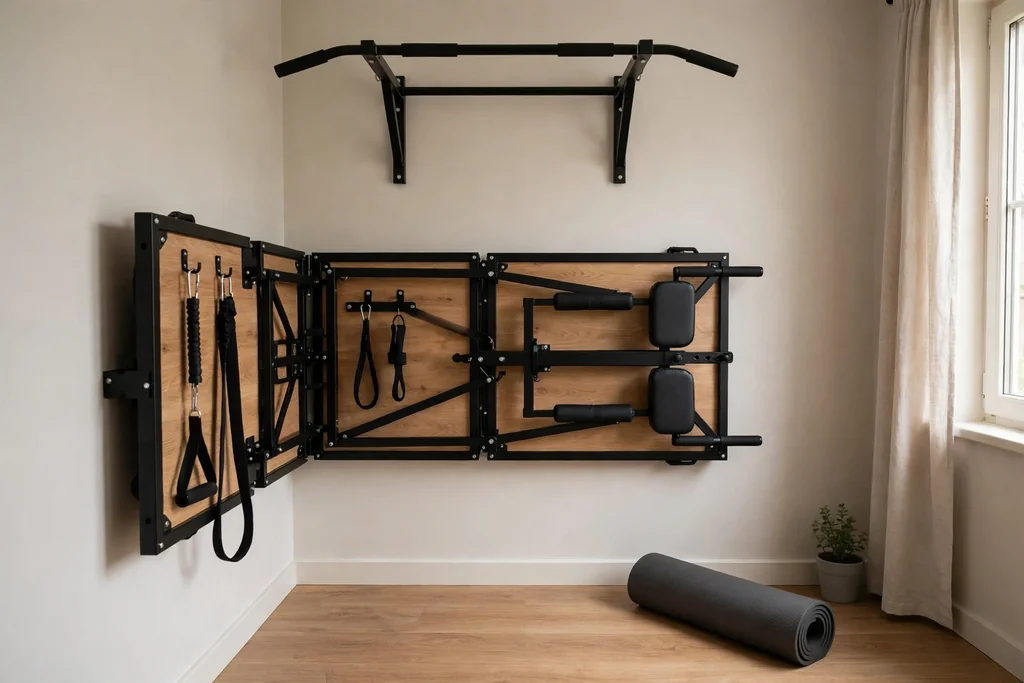
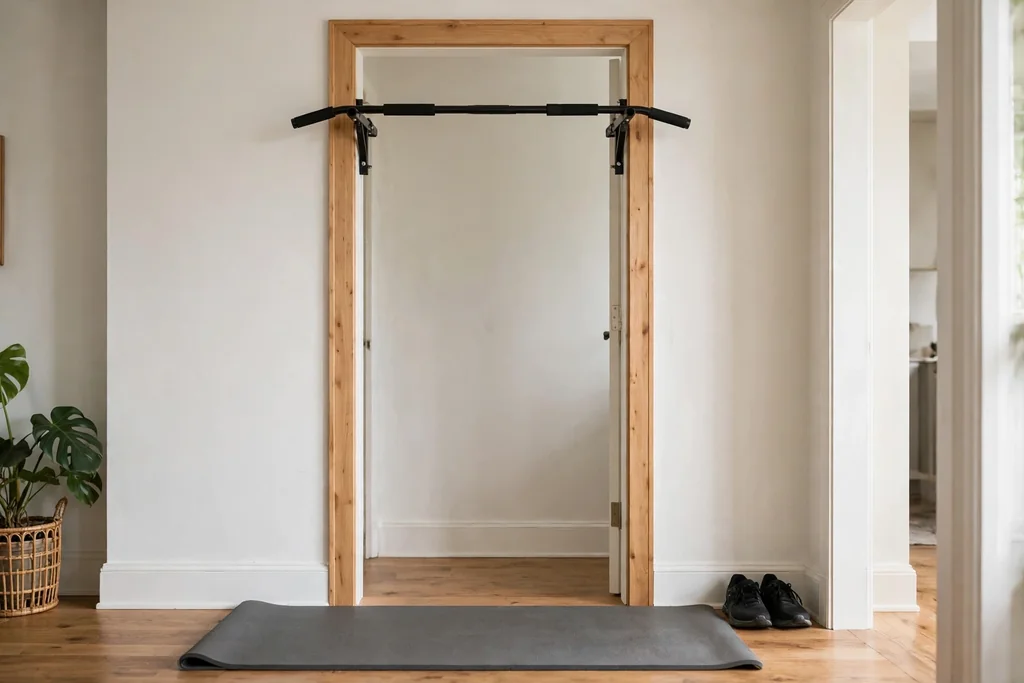
    Use a fold away wall unit with a pull up bar, dip bars, or a fold down bench that folds flat when not in use. Wall gyms suit small rooms because the floor stays free for the rest of the day, and the workout zone appears only when you need it.

    Fix the unit into studs or with fixings rated for your wall type, and follow the maker instructions closely, since these units carry body weight. Keep a mat rolled beside the unit and a small hook for bands, so setup takes under a minute. If wall fixing is not allowed, a freestanding rack gives a similar result with more floor space used.

    7. Dumbbell Rack Beside a Window

    Compact dumbbell rack beside a bright window in a home gym.

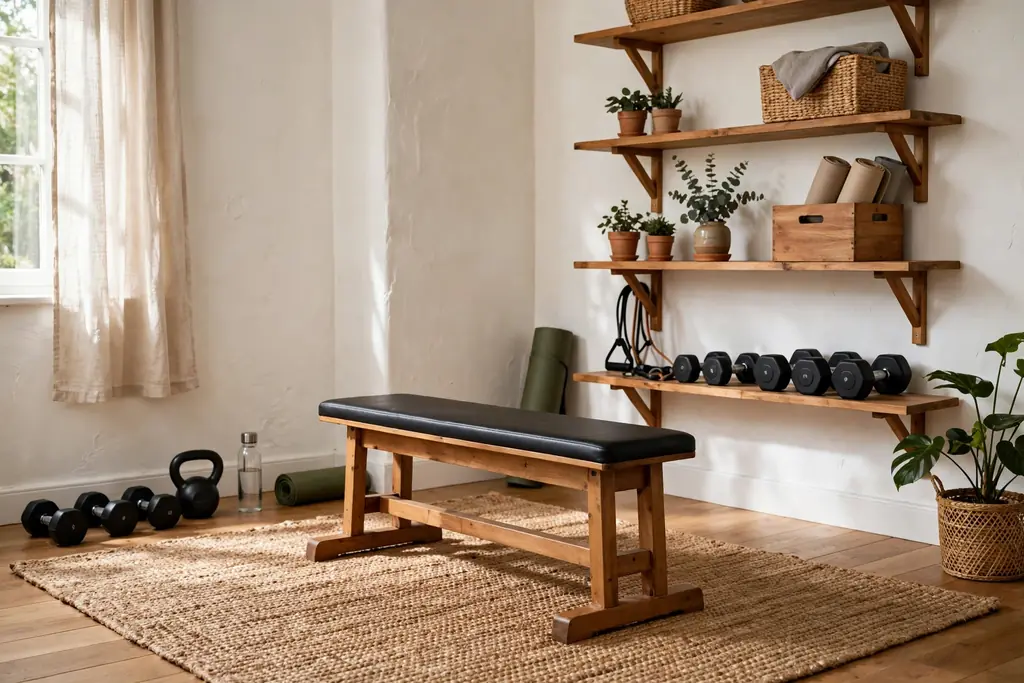
    Place a compact dumbbell rack beside a window, where daylight makes the weights easy to see and the corner feels pleasant rather than gloomy. A tiered rack keeps pairs in order by weight, so you are not hunting through a pile on the floor before each set.

    Choose a rack sized to the weights you own now, with room for one heavier pair as you progress. Keep the floor under the rack clear and use a rubber mat beneath it to protect wood or tile. Wipe handles weekly, since hand sweat builds up on metal and rubber grips.

    8. Yoga and Stretching Corner

    Yoga corner with a mat, bolster, blocks, and a basket by a window.

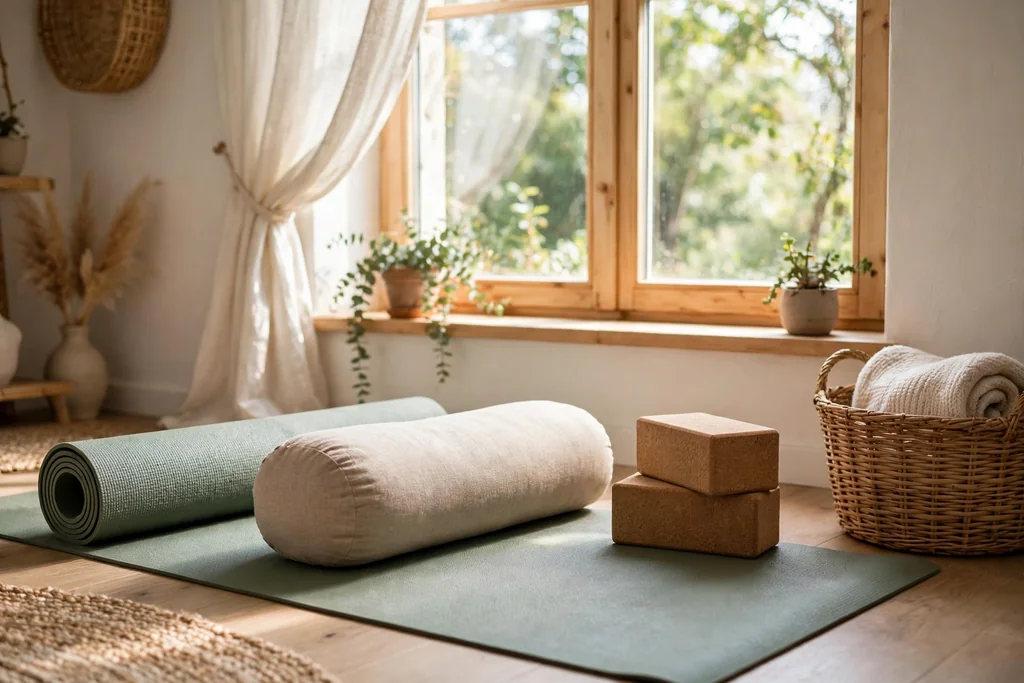
    Build a yoga and stretching corner with a good mat, a bolster or firm cushions, blocks, and a strap, all stored in one basket or on a low shelf. A dedicated stretching corner invites short daily sessions, not only long workouts, which is where flexibility gains actually come from.

    Place the corner where you can see out of a window or toward a calm wall, and keep the floor clear of clutter so you can move freely. A soft lamp for evening stretching helps the body wind down, and a washable mat cover keeps the setup fresh. Keep the props you use weekly within reach, and store extras elsewhere.

    9. Cardio Corner with a Bike or Treadmill

    Cardio corner with an exercise bike, a mat beneath it, and a small fan.

    Give cardio its own corner with one machine, a mat beneath it, and a small fan, rather than squeezing a machine into a walkway. One machine you enjoy beats three you avoid, and a clear corner makes it easier to step on and start.

    Face the machine toward a window, a television, or a bookshelf, since a blank wall gets dull fast. Keep a towel on the handlebar hook and a bottle on a small stool nearby, so you do not stop mid session to fetch them. Leave space around the machine for safe mounting and dismounting, following the maker guidance.

    10. Strength Station with a Bench and Rack

    Strength station with an adjustable bench, rack, and plates on pegs.

    Set up a strength station with an adjustable bench and a squat rack or sturdy stand along one wall, with weight plates stored on pegs or a low rack. Keeping the heavy gear in one station stops plates from spreading across the room, and it gives lifting a clear, safe footprint.

    Check the ceiling height before buying a rack, and leave room to step back from the bench. A rubber floor under the station protects the floor and gives grip. Keep a notebook or phone stand nearby for tracking sets, and tidy plates back onto the rack after each session, so the next workout starts clean.

    11. Resistance Band Wall Station

    Wall station with resistance bands hung on hooks in order.

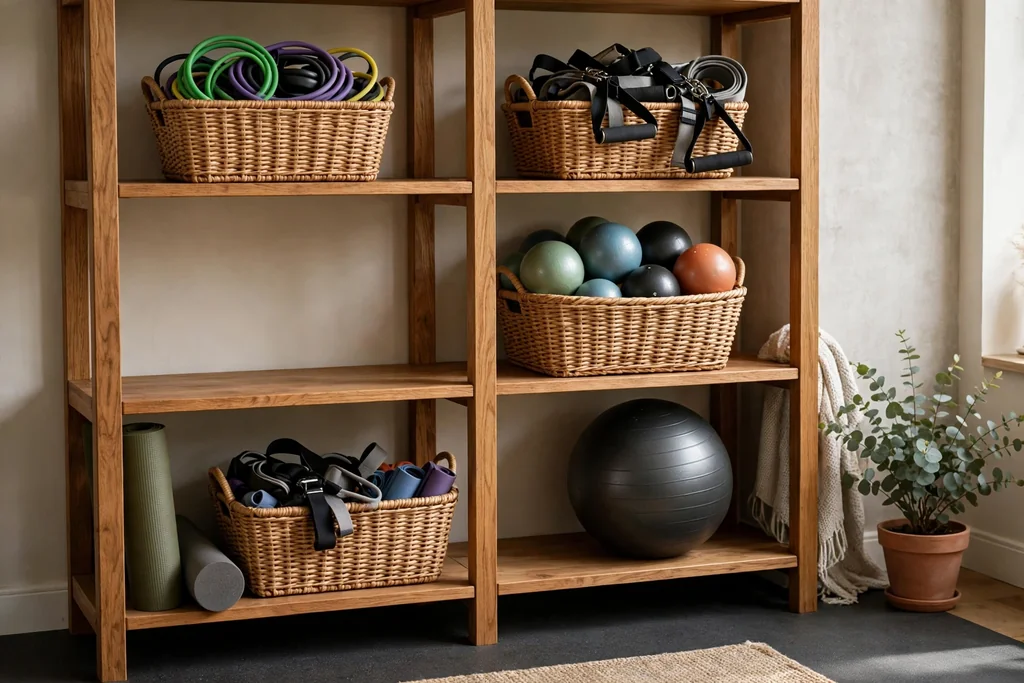
    Fix a resistance band anchor to a wall or door frame mount, with bands hung on hooks in order of resistance, for a strength setup that takes almost no floor space. Bands suit small rooms, travel style training at home, and warm ups before heavier work, and they store in a drawer when not in use.

    Label each band by resistance if the colors are hard to tell apart, and check bands for nicks before use, replacing any that look worn. Keep the anchor at a height that suits both high and low pulls, or use two anchors if your wall allows it. A mat beneath the station gives you a clear spot to stand.

    12. Kettlebell Corner on a Mat

    Kettlebell corner on a thick mat with kettlebells sorted by weight.

    Keep kettlebells in one corner on a thick mat, sorted by weight with the heaviest at the back, so you can grab one safely without bending over a pile. A kettlebell corner suits swings, carries, and squats, and it needs only a small square of floor if the ceiling is clear above.

    Choose a mat that grips the floor and stays flat, since kettlebells roll on thin mats. Keep the swing path clear of furniture and breakables, and store a towel nearby for grip. If you train barefoot, a rubber mat is kinder to feet than bare concrete or tile.

    13. Pilates and Mat Workout Zone

    Pilates mat zone with a thick mat, small ball, ring, and foam roller.

    Make a Pilates and mat workout zone with a thick mat, a small ball, a ring, and a foam roller, grouped on a low shelf or in a wide basket. Mat work needs floor space more than equipment, so keep this zone clear and wide rather than filling it with machines.

    A pale rug under the mat softens hard floors and marks the zone in a shared room. Keep a wall nearby for balance work, and a small mirror if you want to check alignment. Wipe the mat after each session, and air it out now and then, since mat gear picks up sweat fast.

    14. Boxing Corner with a Freestanding Bag

    Boxing corner with a freestanding bag, gloves on hooks, and a mat.

    Set up a boxing corner with a freestanding bag, hand wraps, and gloves hung on wall hooks, for cardio and stress relief in a small footprint. A freestanding bag suits homes better than a hanging bag for most people, since it needs no ceiling fixing and can move to a corner when not in use.

    Place the bag on a mat to stop it sliding, and leave a full step of space around it for footwork. Keep wraps and gloves on hooks so they air out between sessions, and wipe the bag surface weekly. If noise matters to neighbors below, train on a thick mat and avoid late night sessions.

    15. Pull Up Bar in a Doorway

    Doorway pull up bar fitted in a home doorway with a mat below.

    Fit a doorway pull up bar for a simple strength tool that uses no floor space at all. Doorway bars suit apartments and small homes, and they let you add a few reps through the day, not only during a planned workout.

    Check that your door frame suits the bar type you choose, and follow the maker weight guidance. Keep a small step nearby if you need help reaching the bar, and remove the bar when guests need the doorway clear. Pair the bar with bands for assisted reps while you build strength.

    16. Mirror Wall for Form Checks

    Home gym wall with a large mirror, a mat, and dumbbells.

    Add a large mirror, or a row of mirror panels, on one gym wall, so you can check form during squats, lunges, and stretches. A mirror also bounces light around the room and makes a small gym feel larger, which helps a spare room or basement feel less closed in.

    Fix mirrors with hardware suited to their weight, or lean a large mirror securely against the wall if hanging is not allowed. Check what the mirror reflects before fixing it, aiming it toward a window or a calm wall rather than clutter. Clean the mirror weekly, since gym mirrors show dust and fingerprints fast.

    17. Open Shelving for Small Gear

    Open gym shelves with baskets holding bands, balls, and straps.

    Use open shelves on one gym wall for small gear such as bands, balls, straps, and hand grips, grouped in baskets by type. Open shelves keep gear visible, so you reach for it instead of forgetting it in a closed box, and they use wall space that would otherwise sit empty.

    Keep heavy items low and light items up high, and leave one shelf partly empty so the wall does not look crowded. Label baskets if several people share the gym, and anchor tall shelving to the wall following the maker instructions. The basket grouping method in these bedroom storage ideas works just as well for gym gear.

    18. Rolling Cart for Workout Gear

    Rolling cart with tiers holding a towel, bands, and a foam roller.

    Keep workout gear on a rolling cart with two or three tiers, so the gym can move to the living room, the patio, or a spare room as needed. The top tier can hold a towel, bottle, and phone, the middle tier bands and small weights, and the lowest tier a mat or foam roller.

    Choose a cart with locking wheels, so it stays put during a workout, and a small footprint that fits through doorways. Keep the cart to one routine at a time, such as stretching or strength, rather than loading it with everything you own. Wipe the tiers weekly, since gym carts collect dust and sweat.

    19. Wood and Warm Neutral Palette

    Home gym with a wood bench, warm white walls, and a natural rug.

    Use wood and warm neutrals for the gym room: a wood bench, a warm white wall, a natural rug, and wood shelving, to soften black rubber and metal. A warm palette makes the room feel like part of the home, and it invites you in on cold mornings when a bare concrete gym would not.

    Keep the largest surfaces calm, such as walls and floors, and add color in small items like a towel, a plant pot, or a framed print. If you rent and cannot paint, a large rug, curtains, and wood furniture give the same warmth with no fixed change. Avoid painting every wall a strong color, since it can make a small gym feel busy.

    20. Plants and Natural Light

    Home gym corner with plants at different heights beside a bright window.

    Add plants and natural light to the gym corner, with a tall plant in one corner, a trailing plant on a shelf, and a small pot near the window. Plants soften hard equipment, clean up the look of a rubber floor, and make the room feel lived in rather than clinical.

    Match each plant to the light it will actually get, and use saucers under pots on wood floors. Keep plants clear of the swing path for kettlebells and the space around a treadmill, so leaves do not get knocked. Start with three or four hardy plants, and add more only once watering stays manageable.

    21. Workout Tracker on a Chalkboard or Whiteboard

    Home gym wall with a whiteboard workout tracker and markers in a tray.

    Hang a chalkboard or whiteboard in the gym for tracking workouts, writing the week plan, and noting small wins. Seeing the plan on the wall removes the daily decision of what to do, and crossing off sessions gives a simple sense of progress.

    Keep the board at eye level near the main training spot, with markers or chalk in a small tray beneath it. Update it once a week, not daily, so it stays a plan rather than a chore. If several people share the gym, give each person a column, so plans do not get mixed up.

    22. Television or Tablet Workout Station

    Home gym with a television at eye level, a mat, and a small shelf.

    Mount a television or a tablet holder at eye level for follow along workouts, with a small shelf beneath it for a remote and a charger. A screen station suits cardio, dance, yoga, and guided strength sessions, and it gives a small gym a clear focal point beyond the equipment.

    Set the screen height so you can see it from a mat and from standing, and keep cables tidy with clips or a cable cover. Use a stand rather than a wall mount if you rent, and keep the volume at a level that suits others in the home. Store the tablet on the shelf after sessions, so it does not sit on the floor.

    23. Speaker and Music Corner

    Home gym shelf with a small speaker and a phone stand beside it.

    Place a small speaker on a shelf in the gym, with a phone stand nearby, so music or a podcast starts with one tap. Music helps many people start a workout on low energy days, and a dedicated speaker beats balancing a phone on a windowsill.

    Keep the speaker off the floor and away from sweat and water bottles, and keep the volume fair to others in the home, especially early in the morning. A small shelf at hand height works well, with a charger cable clipped beside it. If you share walls with neighbors, keep bass low and use headphones for late sessions.

    24. Recovery Corner with a Foam Roller

    Recovery corner with a foam roller, massage ball, strap, and soft mat.

    Make a recovery corner with a foam roller, a massage ball, a stretching strap, and a soft mat, placed where you can sit after training without moving furniture. Recovery gear is easy to skip when it lives in a closet, and a visible corner makes a five minute cool down part of the routine.

    Add a low stool or cushion to sit on, and keep the corner near a wall for supported stretches. Wipe rollers and balls after use, and replace a roller once it loses its shape. A small basket keeps the recovery tools together, so they do not drift around the room.

    25. Towel and Water Station

    Towel and water station with folded towels, a bottle, and a small stool.

    Set up a towel and water station on a small stool, shelf, or wall rail near the gym entrance, with clean towels folded, a bottle, and a small bin for used towels. A station stops mid workout trips to the bathroom, and it makes the gym feel cared for rather than improvised.

    Keep the station stocked once a week, with two towels per person if the gym is shared. Use a washable basket for used towels, and empty it after each training day. If space is tight, a single wall hook for a towel and a shelf for a bottle gives most of the same benefit.

    26. Shoe and Boot Tray by the Door

    Shoe tray by a gym door holding training shoes and a small bench.

    Place a shoe tray by the gym door for training shoes, so outdoor dirt stays out of the workout zone and shoes have one clear home. A tray also stops shoes from piling by the door, which is a common clutter point in garage and basement gyms.

    Choose a tray with a lip to catch mud and water, and wipe it weekly. Keep only training shoes on the tray, and store other shoes elsewhere, so the tray does not become general storage. If the gym shares an entry with the home, a small bench beside the tray gives a place to sit while changing shoes.

    27. Family Friendly Shared Gym Corner

    Shared family gym corner with a rack, light bands, and small mats.

    Build a shared gym corner that works for the whole household, with adult gear on a rack, lighter bands and a small mat for younger users, and clear rules about tidying up. A shared corner works when each person has a basket or shelf, so gear does not mix and small items do not go missing.

    Keep heavy weights out of reach of small children, and store them on a low rack with plates secured. Add a simple wall chart for shared sessions, such as family stretching on weekends, so the gym feels like a shared room rather than one person’s project. Tidy the corner together after shared sessions, so it stays welcoming for the next person.

    28. Renter Friendly No Drill Setup

    Renter friendly gym with freestanding rack, rolling cart, and rug.

    Build a renter friendly gym with no drilling at all: a freestanding rack, a doorway pull up bar, a rolling cart, baskets, and a rug, all of which move with you. Renters often skip a home gym because they assume it needs fixed equipment, but most daily training needs no wall fixing.

    Use removable hooks for bands and towels, and lean a mirror securely against the wall instead of hanging it. Keep the old room layout in mind, so the gym packs into a few boxes at moving time. Check your lease before any fixing, and keep receipts for freestanding gear, so the setup stays simple to move.

    29. Budget Starter Kit on One Shelf

    Single shelf with a mat, dumbbells, bands, a skipping rope, and a towel.

    Start with a budget starter kit on one shelf: a mat, two sets of dumbbells, a set of bands, a skipping rope, and a towel. One shelf of gear covers strength, cardio, and stretching, and it lets you learn what you enjoy before spending on larger machines.

    Buy the mat first, since floor comfort affects every session, then add weights in pairs as you progress. Keep the shelf near the training spot, not in a distant closet, so setup takes seconds. Review the kit after a month, and add only the item that would remove a real limit in your current routine.

    30. Morning Light Workout Nook

    Morning light workout nook beside a bright window with a mat and plant.

    Place the workout nook where morning light lands, such as beside an east facing window, so early sessions feel bright and alert. Morning light helps many people wake up, and a bright nook is more inviting at 6 am than a dark basement corner.

    Keep the window clear of tall equipment, so light reaches the mat, and use a light curtain for privacy rather than a heavy blind that blocks daylight. In winter, add a bright lamp on a timer near the nook, so the space still feels bright on dark mornings. A plant on the windowsill adds green to the first view of the day.

    31. Evening Wind Down Stretching Space

    Evening stretching space with a soft lamp, thick mat, blanket, and cushion.

    Make an evening stretching space with a soft lamp, a thick mat, a blanket, and a cushion, for gentle movement after work. Evening sessions work best when the light is low and the pace is slow, which is the opposite of a bright morning cardio corner, so keep the two moods separate if you can.

    Use the same corner as the morning nook if space is tight, and change the mood with a lamp and a blanket rather than moving furniture. Keep screens off during evening stretching, or dim them, so the body winds down. A short ten minute routine done often beats a long routine done rarely.

    32. Balcony or Patio Extension for Fresh Air

    Balcony workout spot with a mat, bands, and a basket in fresh air.

    Extend the gym to a balcony or patio in good weather, with a mat, bands, and a bottle carried out in a basket, so workouts get fresh air without a permanent outdoor setup. Outdoor sessions suit yoga, bodyweight work, and stretching, and they break the routine of training in the same room daily.

    Keep outdoor gear simple and portable, and bring it back inside after each session, since rain and sun damage mats and bands. Check the balcony floor for grip, and avoid heavy weights outdoors unless the surface suits them. A small outdoor rug marks the spot and keeps feet off hot or cold paving.

    33. Lived-In Finish with a Chair, Throw, and Prints

    Home gym with a comfortable chair, folded throw, basket, and framed prints.

    Finish the gym with lived-in touches: a comfortable chair for resting between sets, a throw folded over it, a basket for magazines or a book, and framed prints on the wall. These touches turn a bare equipment room into a room you enjoy being in, which is the point of a home gym.

    Choose a chair with a washable cover, since gym rooms collect sweat and dust, and keep the throw in a basket when you train, so it stays clean. Hang prints at eye level, away from swing paths and sweat zones. The goal is a room that looks used and loved, not a showroom: a book left open, a plant watered, a towel folded ready for tomorrow.

    Conclusion

    A welcoming home gym is not about owning the most equipment. It is about one clear zone, gear you actually use, storage that keeps the room calm, and warm touches that make you want to step in. Start with a rug and a mat, add the equipment for the training you enjoy, and finish with light, plants, and a place to sit and recover. Work through this list in order: zone first, then equipment, then storage, then comfort, and adjust after a week of real use. For small rooms, the zoning and storage ideas in these studio apartment decorating ideas and bedroom storage ideas pair well with the gym corners above.

    Keep this list handy for your next free hour at home, and build your gym one corner at a time: a mat today, a rack this weekend, and a chair and a plant to finish the room.

    FAQs

    How much space do I need for a home gym?

    Most people need only a mat sized area to start, roughly enough room to lie down with arms out and stand with a step in each direction. A corner with a mat, a rack, and a basket covers strength, stretching, and band work. Larger machines need their own footprint plus safe space around them, so measure the machine and the clearance the maker advises before buying. Start small, and add machines only when you have a clear spot for them.

    What is the best home gym setup for a small apartment?

    Use a corner zone with a mat, bands, a set of dumbbells, and a doorway pull up bar, all stored on a rolling cart or in baskets. Fold away and freestanding gear suits apartments better than fixed racks, since the floor stays free for the rest of the day. A curtain or an open shelf can mark the gym zone without blocking light, and a mirror on one wall helps with form in a tight space.

    How do I make a home gym feel welcoming instead of bare?

    Add warm materials and everyday comforts: a wood bench, a natural rug, plants, a soft lamp for stretching, and a chair with a throw. Keep small gear in baskets and closed storage, so only daily items stay visible, and hang a print or two at eye level. A towel and water station, plus a place to sit and recover, makes the room feel cared for, which is what brings you back daily.

    How can renters build a home gym without drilling?

    Choose freestanding and portable gear: a freestanding rack, a doorway pull up bar, a rolling cart, baskets, and a rug. Use removable hooks for bands and towels, and lean a mirror securely against the wall rather than hanging it. Check your lease before any fixing, and keep the setup to pieces that pack into a few boxes, so moving stays simple.

    What home gym equipment should beginners buy first?

    Start with a good mat, a set of light dumbbells, a set of resistance bands, and a towel. That kit covers strength, stretching, and light cardio, and it fits on one shelf. Add a foam roller next for recovery, then a bench or a kettlebell once you know which training you enjoy most. Avoid buying a large machine first, since it takes the most space and money before you know if you will use it daily.

    How do I keep a home gym tidy when it shares a room?

    Give every item a home: a rack for weights, baskets for small gear, a cart for daily items, and a tray for shoes. Put gear back after each session, and keep a weekly ten minute reset to return anything that drifted out of place. Close a curtain or fold away the mat if the room serves guests, and keep only daily items visible, so the shared room still feels like home.


  • 14 Wall Color Combinations for a Pulled-Together Room

    14 Wall Color Combinations for a Pulled-Together Room

    A wall color combination works when the two colors have clear jobs: one sets the mood, the other gives the eye somewhere to rest. Most rooms go wrong not from a bad color, but from two colors fighting for attention, or from a strong shade with nothing calm beside it. The pairs below each name where the colors go, which trim suits them, and what kind of light they need. Test a large painted sample on the wall before you buy a full can. For a sense of how one strong neutral behaves across a whole room, these grey kitchen ideas show grey paired with white, wood, and warm metal in the same careful way.

    Key Takeaways

    • Give each color a job: one main wall color, one supporting color, and white or wood trim to separate them.
    • Put the stronger color on one wall, or on the lower half of the walls, and keep the rest of the room calmer.
    • Match the pair to your light: warm pairs suit north facing or dim rooms, while cooler pairs suit bright, sunny rooms.
    • Repeat the accent color once more, in cushions, art, or a rug, so the wall color looks planned rather than random.
    • Paint a large sample on two walls and check it in morning light, midday light, and evening lamplight before committing.
    • Keep ceilings and trim in a simple white or cream unless the pair is designed to wrap the whole room.

    1. Warm White Walls With One Navy Accent Wall

    Living room with warm white walls and one deep navy accent wall behind a pale sofa.

    Paint three walls warm white and one wall deep navy for a room with a clear focal point and no dark corners. The navy wall suits the wall behind a sofa or a bed, where furniture already breaks up the surface. Warm white keeps the other walls bright, so the room still feels open even with one dark wall in it.

    Use white or cream trim and a pale rug so the navy reads as a backdrop, not a cave. Add the navy once more in a cushion or a throw, and keep the rest of the soft furnishings in warm neutrals. If the room is small or dim, pick a navy with a touch of warmth rather than a cold, inky blue, and keep the ceiling white.

    2. Greige on Every Wall With Bright White Trim

    Room with greige walls, bright white trim, and warm wood furniture.

    Paint all four walls greige, a blend of grey and beige, and let bright white trim, doors, and ceilings do the crisp work. This is the calmest pair on the list, and it suits a room where furniture, art, or a view should lead. Greige shifts through the day, looking greyer in morning light and warmer at night, which keeps a plain room from feeling flat.

    Keep floors and large furniture in warm wood or cream so the greige does not turn cold. Add contrast with black or dark wood frames and one deep toned cushion, since an all neutral room needs at least one darker note. This pair suits renters and cautious painters too, because it works with almost any sofa color.

    3. Sage Green and Cream in a Bedroom

    Bedroom with soft sage green walls, cream bedding, and light oak bedside tables.

    Pair soft sage green walls with cream bedding, curtains, and trim for a bedroom that feels calm without feeling washed out. Sage sits between green and grey, so it reads as a color in daylight and as a soft neutral in the evening. Cream keeps it gentle, while white would make the green look colder by comparison.

    Use wood in a light oak tone for bedside tables and frames, and add one deeper green plant or cushion for depth. Keep patterns quiet, such as a plain linen duvet with a single striped throw, so the wall color stays the main note. Sage suits a bedroom with modest daylight, since it does not need strong sun to look clear.

    4. Terracotta Feature Wall With Warm White Around It

    Living room with one terracotta feature wall, warm white side walls, and wood floors.

    Paint one wall terracotta, a warm clay tone between orange and brown, and keep the other walls warm white. This pair brings warmth fast, and it suits a living room or dining room with wood floors and woven textures. The terracotta wall works best behind a sofa, a sideboard, or a fireplace, where it frames furniture rather than standing empty.

    Balance the warmth with cream linen, rattan or light wood, and black or bronze details for contrast. Avoid pairing terracotta with pink toned floors or counters, since the two warm tones can clash. Test the terracotta in evening light too, because warm wall colors deepen a lot under lamps.

    5. Charcoal Lower Walls With Pale Grey Uppers

    Dining room with charcoal lower walls, pale grey upper walls, and a white chair rail.

    Split the walls at chair rail height: charcoal below, pale grey above, with a white rail between them. This color blocking gives a room depth at floor level and lightness at eye level, which suits a dining room or a hallway where the lower walls take scuffs. The white rail makes the split look deliberate rather than unfinished.

    Keep furniture and art above the rail simple, and choose a pale rug so the charcoal does not darken the floor area. This pair needs decent light, so add a mirror or a light toned curtain if the room is dim. Wipe the charcoal section with a washable finish, since the lower wall is the part hands, bags, and pets reach most.

    6. Blush Pink and Soft Grey in a Bedroom

    Bedroom with blush pink walls, soft grey bedding, and brass lamps.

    Combine blush pink walls with soft grey bedding, curtains, and upholstery for a bedroom that feels gentle and grown up rather than sweet. Blush reads as a warm neutral when the grey beside it is soft and cool, and the grey stops the pink from feeling too bright. This pair suits a bedroom with good daylight, where blush stays clear instead of turning peach.

    Keep wood tones light, use brass or brushed nickel for lamps and handles, and add white for the ceiling and trim. If blush feels like a big step, paint one wall blush and the rest soft grey first, then extend the pink later if you like it. For more ways to use pink as a main color, see these pink kitchen ideas for blush paired with white, wood, and brass.

    7. Deep Teal Walls With Warm White and Wood

    Living room with deep teal walls, warm white trim, and mid wood furniture.

    Paint the walls deep teal and set warm white trim, a pale ceiling, and mid wood furniture against them. Teal sits between blue and green, so it feels rich without the heaviness of navy, and the wood warms it up. This pair suits a living room or study with good daylight, where the teal stays clear rather than reading as near black.

    Use warm white, not bright white, for trim and curtains, since a cold white can make teal look harsh. Add one warm metal, such as brass in a lamp or frame, and keep the rug in a pale, plain tone so the floor reflects light back up. In a small room, use teal on two walls only and warm white on the rest.

    8. Olive Green and Cream With Black Details

    Dining room with olive green walls, cream trim, and black framed art.

    Pair olive green walls, an earthy green with a yellow brown base, with cream trim and black details in frames, handles, and lamp bases. Olive suits a room with warm wood floors and terracotta or clay accents, and the black details stop the earthy tones from looking muddy. Cream keeps the scheme light, while white would fight the warmth of the olive.

    Keep patterns simple and natural, such as linen, wood grain, and woven baskets, and add one plant for a fresher green note. Olive can look murky beside cool grey floors, so test it against your flooring first. This pair suits a dining room or a living room where you want color that still feels grounded.

    9. Butter Yellow and White for a Sunny Room

    Sunny kitchen diner with butter yellow walls, white trim, and light wood floors.

    Paint the walls butter yellow, a soft creamy yellow, and pair them with white trim, white curtains, and light wood floors. This pair cheers up a room with limited daylight without shouting, and it suits a kitchen diner or a small living room where you want warmth. The key is restraint: pick a yellow one step paler than the chip you first like, since color looks stronger across four walls.

    Keep counters, shelves, and large furniture in white or pale wood so the yellow leads. Add one deeper note, such as a dark wood frame or a green plant, so the room does not feel washed out. Butter yellow can clash with warm orange wood floors, so check samples together before you commit.

    10. Dusty Blue and White With Natural Wood

    Bedroom with dusty blue walls, white trim, and natural wood furniture.

    Combine dusty blue walls, a muted blue with a grey cast, with white trim and natural wood furniture for a calm, coastal feeling room. Dusty blue suits a bedroom or living room with decent daylight, where the color stays clear instead of turning grey. White keeps it fresh, and wood stops it from feeling cold.

    Use cream or white bedding and curtains, simple black or iron details, and one woven texture such as a jute rug or a rattan basket. Keep strong colors elsewhere limited, because dusty blue can clash with warm orange toned floors; a pale rug can soften that contrast. This is a forgiving pair for a first time accent color, since dusty blue reads as a soft neutral in low light.

    11. Warm Taupe and Chocolate Brown Layers

    Living room with warm taupe walls, a chocolate brown sofa, and cream cushions.

    Layer warm taupe walls with chocolate brown in a headboard, a sofa, or a wood stain for a room built on depth rather than contrast. Taupe, a deeper neutral with a brown grey base, feels calm and grounded, while the chocolate note gives the room weight. This pair suits a larger room, where the deeper tones have space to breathe.

    Keep the ceiling and trim pale, and add cream linen and one brass or aged bronze detail so the browns do not go flat. Because taupe absorbs light, plan good lamps and a pale rug, and keep the backs of shelves and the insides of bookcases light. This pair suits a bedroom or a living room where you want warmth without a bright color.

    12. Black and White With One Warm Wood Tone

    Modern living room with one matte black wall, bright white walls, and warm wood shelves.

    Paint one wall matte black, keep the rest bright white, and bring in one warm wood tone in floors, shelves, or a table. The black wall gives a room a sharp focal point, while the white walls and the wood stop it from feeling stark. This pair suits a modern living room or a study, especially behind a sofa, a desk, or a media unit.

    Use a matte or satin black rather than gloss, so reflections do not fight the wall, and keep art on the black wall simple and large. Add warm white bulbs in the evening, since cool light can make black walls feel cold. For help choosing the right undertone for the rest of the room, see these ideas for colors for your kitchen cabinets, which cover how warm and cool tones behave beside wood and white.

    13. Soft Lilac Grey and White for a Gentle Color

    Bedroom with soft lilac grey walls, white trim, and white bedding.

    Paint the walls a soft lilac grey, a pale purple grey, and pair them with white trim, white bedding, and silver or chrome details. This pair adds color to a bedroom or a small sitting room without the boldness of a true purple, and it reads as lavender in daylight and as soft grey in the evening. White keeps it light, while cream would warm it too much and blur the lilac note.

    Keep furniture in pale wood or white, and add one deeper purple or plum cushion for depth. Avoid pairing lilac grey with strong yellow or orange, since the two can fight; stick to white, silver, and pale wood. This pair suits a room where you want a hint of color that still works with most bedding and art you already own.

    14. Match the Pair to the Light in the Room

    Room corner with large painted sample boards in warm and cool tones against a pale wall.

    Use the room’s direction as the deciding factor: warm pairs for north facing or dim rooms, cooler pairs for bright south facing rooms. A north facing room gets cool, flat light, so a warm white with terracotta, taupe, or butter yellow will read warmer there than it does on the chip. A bright south facing room can carry cooler pairs, such as dusty blue and white or sage and cream, without them turning cold.

    Test this by painting two large sample boards, one for each color, and moving them around the room through the day. Check them beside the floor, the sofa fabric, and the trim, since wall color is judged against those surfaces, not on its own. This step costs little and prevents the most common regret: a pair that looked right in the shop and wrong at home.

    Conclusion

    A pulled together room rarely comes from one bold wall color alone. It comes from a pair with clear jobs, trim that separates the colors cleanly, and one repeated accent that ties the walls to the furniture. Start with the pair that suits your light, paint large samples, and put the stronger color where it earns its place: one wall, the lower half, or the wall behind the main piece of furniture. Once the walls sit right, the rest of the room gets easier, because cushions, art, and rugs only need to echo a color that is already there.

    Save this list on Pinterest for your next painting weekend, and work through it in order: pick the pair for your light first, test samples second, then paint the accent wall before the supporting walls, so you can stop and adjust if the balance feels off.

    FAQs

    How do I pick a wall color combination for a small room?

    Start with a pale main color, such as warm white, greige, or pale sage, and put the stronger color on one wall only. Keep the ceiling white and the trim pale, and repeat the accent color once in soft furnishings. A single dark wall in a small room works when the other walls stay light and the floor is pale or mid toned.

    Should the two wall colors be from the same color family?

    Not always. Pairs from the same family, such as taupe and chocolate brown, feel calm and layered. Pairs from different families, such as terracotta and warm white or navy and warm white, feel bolder because one color is clearly the accent. The rule that matters is contrast in depth: one color should be clearly lighter than the other.

    What trim color works with most wall color combinations?

    White or warm white trim works with nearly every pair on this list, because it gives a clean edge between wall colors and furniture. Use bright white with cool pairs, such as dusty blue and white, and warm white with warm pairs, such as terracotta or taupe, so the trim does not fight the walls.

    How do I test a wall color combination before painting the whole room?

    Paint two large sample boards, at least two feet square, one for each color, and move them around the room for a few days. Check them in morning light, midday light, and evening lamplight, and hold them beside the floor, sofa fabric, and trim. A small chip is not enough, since color looks much stronger across a full wall.

    Can I use two strong wall colors in one room?

    Yes, if one of them is limited to a single wall or a lower wall section, and the other is balanced with pale trim, a light ceiling, and plain furniture. Two strong colors across all four walls usually fight each other, so give the stronger color a clear boundary, such as a chair rail, a corner, or one feature wall.

    Do wall color combinations need to match the floor?

    They need to sit well beside the floor, not match it exactly. Warm floors suit warm wall pairs, such as terracotta, taupe, and butter yellow, while cool grey floors suit cooler pairs, such as sage, dusty blue, and greige. When in doubt, hold a sample beside the floor in daylight and check whether the undertones agree.


  • 33 Greek Garden Ideas That Balance Style and Comfort

    33 Greek Garden Ideas That Balance Style and Comfort

    A Greek garden works because it keeps things simple: white walls that bounce light, stone and gravel underfoot, a few plants that cope with sun and dry soil, and one shaded place to sit. These 33 Greek garden ideas cover courtyards, balconies, side yards, and larger plots, so you can start with a single pot by the door or plan a full terrace around an olive tree. Pick the structure first, then the plants that suit your sun, wind, and watering routine, and repeat one or two materials so the whole space feels settled rather than busy.

    Key Takeaways

    • Start with structure: a wall, a pergola, a path, or a seating spot, then add plants around it.
    • Use a small palette: white, warm stone, terracotta, blue, and green carry the Greek look without clutter.
    • Choose sun and drought tolerant plants, such as olive, lavender, rosemary, thyme, and agave, for dry, sunny spots.
    • Gravel, pebbles, and stone keep beds tidy and cut down on watering and mowing.
    • Pots make the style possible on a balcony or rented patio, where beds are not an option.
    • Plan shade and scent for evenings: a vine, a fig, jasmine, and simple lighting extend the hours you use the garden.

    1. Build a Bougainvillea Courtyard in Blue and White

    Bougainvillea with pink flowers over whitewashed courtyard walls beside a blue door

    A whitewashed courtyard wall with magenta bougainvillea and a blue painted door gives the Greek look in one clear picture. Train the vine on wires or a trellis fixed to the wall, and prune after flowering to keep it off paths and gutters. Bougainvillea needs full sun and free draining soil, and it flowers best when it is not overwatered. In cold areas, grow it in a large pot and move it under cover for winter, so you keep the color without risking the plant.

    2. Place One Potted Olive Tree on a Sunny Terrace

    Olive tree in a large terracotta pot on a sunny stone terrace

    A single olive tree in a wide terracotta pot anchors a terrace without needing a bed. Choose a pot with drainage holes, use a gritty, free draining mix, and water deeply, then let the top of the mix dry before watering again. Olives need full sun and air movement, and they suit a sheltered corner away from cold wind. Prune lightly to keep an open shape, and underplant with thyme or small stones for a finished surface that also keeps weeds down.

    3. Plant a Lavender and Rosemary Gravel Garden

    Lavender and rosemary planted in a gravel garden bed

    Lavender and rosemary thrive in sun, poor soil, and gravel, which is why they suit a Greek style bed so well. Spread gravel over a weed membrane, plant in groups of three or five, and leave space for air to move between plants. Trim lavender lightly after flowering and rosemary after growth starts in spring, but avoid cutting into old bare wood. This bed needs little water once settled, and bees visit both plants through summer, so site it where you can enjoy the scent from a path or seat.

    4. Grow a Grapevine Over a Pergola for Living Shade

    Grapevine growing over a wooden pergola casting dappled shade

    A grapevine pergola gives shade that changes with the season: leaves in summer, open sky in winter after leaf fall. Build the pergola from sturdy posts and beams, run wires along the top, and train one or two main stems along the beams, tying in side shoots as they grow. Prune in winter to keep fruiting wood near the frame. Site the pergola over a path or seating area, not over a roof drain, and leave headroom so the vine can be pruned from below with a step ladder.

    5. Frame a Blue Door With Terracotta Geranium Pots

    Terracotta pots of red geraniums beside a blue painted door

    Geraniums in terracotta pots frame a blue painted door with color from late spring until frost. Use pots in two or three sizes, all in the same warm clay tone, and keep the planting simple so the door color stays the focus. Terracotta dries fast, so check the soil before watering and use a saucer on painted steps. Deadhead faded blooms as you pass, and move tender geraniums indoors before the first hard frost if your winters are cold.

    6. Let Creeping Thyme Fill the Joints of Stone Steps

    Stone garden steps with creeping thyme growing between the joints

    Creeping thyme between stone steps softens hard edges and releases scent when brushed by feet. Set the stones with wide joints, fill them with gritty soil, and plant small thyme plugs so they knit together over one or two seasons. Thyme needs sun and drainage, and it copes with light foot traffic once established. Keep the path clear of fallen leaves in autumn so the plants do not rot, and trim lightly after flowering to keep the mat dense.

    7. Underplant an Olive Grove Corner With Wildflowers

    Olive trees with a wildflower strip flowering beneath them

    If you have room for more than one olive, underplanting the ground with wildflowers turns a plain grove into a garden. Sow a mix suited to dry, sunny soil, or plant drifts of poppies, cornflowers, and grasses, and leave a clear circle of bare soil or mulch around each trunk. Mow or cut the meadow once, late in the season, after seed has set. This idea suits a larger yard best, since it needs sun and space for the trees to spread, but even two olives with a wildflower strip between them give the same effect on a smaller scale.

    8. Set a Small Courtyard Fountain Among Pots

    Small courtyard fountain against a whitewashed wall surrounded by terracotta pots

    A small wall or freestanding fountain gives a courtyard sound, movement, and a cool focal point. Place it against a whitewashed wall, surround the base with terracotta pots of different heights, and keep the pump access clear for cleaning. Top up the water in hot weather, clean the basin regularly to stop algae, and drain or cover the fountain before hard frost if it is not frost proof. If plumbing is a problem, a solar pump in a shallow bowl gives a similar trickle without a mains connection.

    9. Lay a Pebble Mosaic Path in White and Grey

    Pebble mosaic path in white and grey stones in a courtyard

    A pebble mosaic path, with white stones set in a simple pattern against grey, adds craft to a garden without new planting. Lay the pattern on a firm mortar bed, keep the design simple, such as a border, a star, or a wave, and grout the gaps so the surface stays safe to walk on. Pebble paths suit courtyards and entrances best, where they are seen up close. Check the finished surface for loose stones before regular use, and sweep it clear of soil so weeds do not take hold in the joints.

    10. Grow a Greek Herb Bed With Oregano, Thyme, and Sage

    Raised herb bed with oregano thyme sage and rosemary

    A raised herb bed near the kitchen is the most useful Greek garden idea for everyday cooking. Plant Greek oregano, thyme, sage, and rosemary in full sun and free draining soil, and keep mint in its own pot, since it spreads fast. Harvest little and often, snipping stems in the morning, and replace woody plants every few years when they stop producing fresh growth. A stone or terracotta edging keeps the bed tidy and stops soil washing onto paths in heavy rain.

    11. Grow a Lemon Tree in a Large Terracotta Pot

    Lemon tree with yellow fruit in a large terracotta pot on a patio

    A lemon tree in a large pot gives blossom scent, glossy leaves, and fruit on a patio or balcony. Choose the sunniest sheltered spot, use a pot with drainage and a free draining mix, and water deeply, then let the top dry before watering again. Feed during the growing season following the product label, and move the pot indoors or wrap it if your winters are cold. For more small space growing ideas, see these kitchen balcony ideas, which cover pots, watering, and sun on a small footprint.

    12. Train Bougainvillea Over an Arch on a Walkway

    Bougainvillea arch with pink flowers over a garden walkway

    An arch covered in bougainvillea marks a change of space, such as the step from a street path into a courtyard. Unlike a wall vine, an arch frames the view ahead, so keep the opening clear and prune side shoots that hang into the walkway. Fix the arch firmly, since a mature vine is heavy, and plant on the sunny side so flowers face the path. In cold climates, use a hardier climber on the arch and keep bougainvillea in pots nearby, so the structure still reads as Greek without winter losses.

    13. Set a Long Table Under Pergola Shade for Outdoor Meals

    Long wooden table set for a meal under pergola shade

    A long wooden table under pergola shade is the social heart of a Greek garden, even when the pergola itself is simple. Keep the table in the shade for lunch, use a plain linen cloth and terracotta plates, and leave room to pull chairs out without hitting posts or pots. A low centerpiece of herbs in a shallow bowl is more practical than tall flowers, since guests can see each other across it. Store cushions indoors overnight, and sweep leaves from the table area so the space is ready without a long tidy up.

    14. Whitewash a Bench Nook Into a Sunny Wall

    Wooden bench with a blue cushion against a whitewashed garden wall

    A bench built into a whitewashed wall, or a simple wooden bench placed against one, creates a resting spot that feels part of the garden. Add a thin cushion in a blue or natural linen tone, a small side pot, and a shade plant overhead if the wall faces south. Whitewash reflects light and heat, so the nook stays bright, but it also shows dirt, so plan to refresh the wash each year. Keep the bench clear of trailing vines at head height so the seat stays easy to use.

    15. Plant Sedum and Small Herbs in a Dry Stone Wall

    Dry stone wall with sedum and small herbs growing in its gaps

    A dry stone wall, built without mortar, has gaps that suit sedum, small thyme, and houseleeks. Pack gritty soil into the gaps as you build, or tuck plants into existing crevices, and water only until they root. These plants need almost no soil and cope with heat reflected from stone. Check the wall each spring for loose stones, and avoid planting anything with strong roots that could push the wall apart. This idea also works on a low retaining wall, where the planting softens the change in level.

    16. Use Whitewashed Planters for Agave and Sculptural Plants

    Agave plant in a whitewashed planter against a pale garden wall

    Whitewashed pots and planters make agave, aloe, and other sculptural plants stand out against a pale wall. Use one large agave as a focal point, rather than a row of small ones, and pair it with a low gravel surface so the shape reads clearly. Agave needs sharp drainage and full sun, and it should not sit in wet soil over winter. Wear gloves when handling spiky leaves, and site the planter where children and pets will not brush against it.

    17. Plan a Wind Tolerant Seaside Balcony Garden

    Wind tolerant plants in heavy terracotta pots on a seaside balcony

    A Greek island look suits a windy balcony, but the planting must cope with wind and salt. Choose tough plants such as rosemary, lavender, oleander in a pot where it is legal and safe, and ornamental grasses, and fix pots so they cannot blow over. Use heavy terracotta or stone pots, shelter the most tender plants behind a screen, and water more often than a ground bed, since pots dry fast in wind. Keep the palette to white, blue, and green, and let one climbing plant soften the railing rather than covering it.

    18. Make a Fig Tree the Center of a Reading Corner

    Fig tree shading a chair and small table in a garden corner

    A fig tree gives broad leaves, deep summer shade, and fruit, and it suits a quiet corner with a chair and a small table. Plant it in the ground where space allows, or in a large pot to limit its size, and prune to keep an open shape with room to sit beneath. Figs need sun and warmth to ripen, and they fruit best on a sheltered wall. Fallen fruit can stain paving, so site the chair slightly to one side, not directly under the heaviest branches.

    19. Plant Jasmine Where You Sit in the Evening

    White jasmine flowers near a seating area in a garden at evening light

    Jasmine planted near an evening seat gives scent when the air cools, which is when a Greek garden is used most. Plant it at the base of a wall or post near the seat, tie stems in as they grow, and prune after flowering to keep it tidy. Jasmine needs sun for the best flowers, but its roots prefer cool, moist soil, so mulch the base and water in dry spells. Keep stems off walkways and door handles, and choose a variety suited to your winter cold, since tenderness varies between types.

    20. Fill Window Boxes Under Blue Shutters

    Window boxes with flowers under blue painted shutters on a whitewashed wall

    Window boxes under blue shutters repeat the Greek color scheme at eye level and work on a house with no garden at all. Use a box with drainage, fill it with free draining mix, and combine trailing geraniums or verbena with upright herbs such as rosemary for a mix of color and use. Boxes dry fast in sun and wind, so water daily in hot weather and feed lightly through the season. Fix brackets firmly to the wall, and check the weight of a watered box before planting, since soil and water are heavier than they look.

    21. Keep a Sunny Courtyard Vegetable Patch With Tomatoes and Basil

    Courtyard vegetable patch with tomatoes and basil in a raised bed

    A small courtyard vegetable patch with tomatoes, basil, peppers, and courgettes fits the Greek garden well, since these crops love sun and heat. Grow them in a raised bed or large pots against a sunny wall, stake tomatoes early, and water the soil, not the leaves, to reduce disease. Pick basil leaves regularly to keep plants bushy, and harvest tomatoes as they color so the plant keeps producing. Keep the patch close to the kitchen door, so picking for a meal takes a minute rather than a trip across the yard.

    22. Build a Rock Garden With Santolina and Ornamental Grasses

    Rock garden with santolina ornamental grasses and large stones

    A rock garden with santolina, grasses, and low thyme suits a dry slope or a sunny corner where lawn struggles. Place large stones first, then smaller ones, and plant in the gaps with gritty soil, leaving open gravel between groups so each plant keeps its shape. Santolina gives silver foliage and yellow summer flowers, while grasses add movement in wind. Water only while plants settle, and weed the gravel in the first season until the planting fills out.

    23. Use a Terracotta Amphora as a Planter Focal Point

    Tall terracotta amphora planter at the end of a garden path

    A tall terracotta amphora, planted or left empty as sculpture, gives a courtyard a clear focal point. Place it where a path turns or at the end of a view, on a firm, level base, and plant it with a single trailing plant, such as ivy or trailing rosemary, so the shape stays visible. If the amphora is old or fragile, use it as a decorative piece and plant beside it instead, to avoid water damage. One strong piece works better than several competing ornaments in a small space.

    24. Line a Whitewashed Stairway With Pots

    Whitewashed stairway lined with terracotta pots of plants

    A whitewashed stairway lined with pots turns a plain route into a garden feature. Place one pot on each wide step, or alternate sides on narrow steps, and keep the walking line clear so the route stays safe. Use the same pot color and a mix of heights, with trailing plants at the top and upright plants lower down. Water carefully so steps do not become slippery, and move pots aside in icy weather if the steps are used daily.

    25. Plant a Pomegranate Tree in a Sunny Corner

    Pomegranate tree with orange red flowers in a sunny garden corner

    A pomegranate tree gives orange red flowers, glossy leaves, and autumn fruit in a sunny corner. Plant it against a warm wall or in a large pot, in free draining soil, and prune lightly to keep a clear trunk and open crown. Pomegranates need a long, hot summer to ripen fruit, so in cooler areas grow them mainly for flowers and foliage, and enjoy fruit in good years. Water deeply in dry spells while fruit is forming, and mulch the base to hold moisture.

    26. Grow an Oleander Hedge for Privacy and Summer Color

    Oleander hedge with pink flowers along a garden boundary

    Oleander makes a fast, dense hedge with pink, white, or red flowers through summer, and it copes with heat and dry soil. Plant a row in full sun, space plants according to the label, and trim after flowering to keep the hedge dense. Note that all parts of oleander are toxic if eaten, so site it away from areas where children or pets chew plants, and wear gloves when pruning. In cold areas, grow oleander in large pots and move it under cover for winter.

    27. Frame a View With a Row of Cypress Trees

    Row of slim cypress trees framing a view over a Mediterranean garden

    A row of slim cypress trees frames a view, marks a boundary, or lines a drive without taking much ground space. Plant them in a straight line or a gentle curve, in full sun and free draining soil, and water well in the first season. Cypress grows tall and narrow, so check the mature height before planting near a house or overhead wires. Trim lightly if needed to keep a tidy shape, but avoid cutting into old wood, since cypress does not always regrow from bare stems.

    28. Sow a Wildflower Strip Along a Sunny Wall

    Wildflower strip flowering along a sunny garden wall

    A wildflower strip along a sunny wall brings color and pollinators to a space that might otherwise stay bare. Choose a mix suited to dry soil and your region, sow on bare, raked ground, and leave a mown or gravel edge so the strip reads as a planned bed. Cut once late in the season, after seed has set, and leave the cuttings for a few days so seed drops before you clear them. This strip also softens a long wall and links a formal courtyard to a looser, more natural area.

    29. Create a Dry Corner With Succulents and Cactus

    Succulents and cactus in a gravel dry corner garden

    A dry corner with succulents, cactus, and agave suits the hottest, driest part of a garden, where other plants struggle. Use a raised bed or large pots with very free draining, gritty mix, and top the surface with gravel to keep stems dry. Water sparingly, only when the mix is dry, and protect tender types from frost with a cover or by moving pots indoors. Keep spiky plants away from paths used by children, and use one or two large specimens rather than a crowded collection, so each shape can be seen.

    30. Keep Kitchen Herb Pots by the Back Door

    Kitchen herb pots of basil parsley mint and chives grouped by a back door

    Herb pots by the back door are different from a herb bed: they are for daily picking, not for a display. Group pots of basil, parsley, mint, oregano, and chives within a step of the door, keep mint in its own pot, and label the pots if several herbs look alike when young. Water pots in the morning so leaves dry before evening, and pick little and often to keep plants bushy. This setup also works on a small patio or balcony, where a bed is not possible, and it pairs well with the container ideas in these kitchen balcony ideas.

    31. Screen a Seating Area With a Jasmine Trellis

    Jasmine growing over a trellis screen beside a seating area

    A jasmine trellis screen gives privacy and scent at the same time, which makes it more useful than a plain fence panel. Fix a sturdy trellis to posts, plant jasmine at the base, and tie stems in horizontally as well as vertically, so the screen fills evenly. Unlike the evening seat in Idea 19, this screen is built to block a view, so site it between the seat and the neighboring garden or street, and leave a gap at the base for air and watering. Prune after flowering to keep the screen from getting top heavy.

    32. Place a Daybed Under Olive Shade for Afternoon Rest

    Daybed with cushions in the shade of an olive tree

    A daybed under an olive tree, or under a pergola planted with vine, gives a shaded place to rest in the heat of the afternoon. Use a simple wooden or metal frame with a washable mattress and cushions, and keep it off the ground on a stone or gravel base so it stays dry. Site it where it catches a breeze, not in a still corner, and store cushions indoors when rain is forecast. This idea suits a larger garden best, but a small lounger under a potted olive gives a similar rest spot on a terrace.

    33. Add a Shallow Stone Water Bowl With Floating Flowers

    Shallow stone bowl of water with floating flowers in a courtyard

    A shallow stone water bowl, filled with water and a few floating flowers or leaves, gives a courtyard a calm water feature without a pump or plumbing. Place the bowl on a firm base where it can be seen from a seat, top up the water in hot weather, and change it regularly to keep it clear. Unlike a fountain, a bowl is silent, so it suits a reading corner or a small courtyard where sound would echo. Empty the bowl before hard frost, and keep it out of the main walking line so it cannot be knocked over.

    Conclusion

    A Greek garden does not need every idea on this list. Pick one structure, such as a pergola, a courtyard wall, or a stone path, then add two or three supporting pieces, such as pots by the door, a herb bed, and a shaded seat. Keep the palette to white, stone, terracotta, and blue, and choose plants that cope with your sun, wind, and winters, rather than plants that need constant care. Work through one area at a time, starting with the spot you see and use most, and let the garden settle into its simple, calm character.

    Save this list on Pinterest before your next nursery trip, and start with the easiest win for your space: a pot, a path, or a seat in the shade.

    FAQs

    What plants suit a Greek garden in a cold climate?

    Olive, lemon, bougainvillea, and oleander are tender, so in cold areas grow them in pots and move them under cover for winter, or enjoy them as summer plants. Hardy choices for the same look include lavender, rosemary in a sheltered spot, thyme, santolina, sedum, and ornamental grasses, which cope with colder winters in many regions. Check the plant label for your zone, and site tender pots against a warm wall to give them the best chance.

    How do I get the Greek look in a small garden or on a balcony?

    Start with pots, not beds. One olive or lemon in a large terracotta pot, a pair of geranium pots by the door, and a herb pot group give the color and scent in a small footprint. Add a white or pale wall color, a gravel or stone surface, and one blue detail, such as a pot, a cushion, or a painted chair. For layout ideas on a small outdoor space, see these kitchen balcony ideas, which cover zones, pots, and shade.

    What is the easiest Greek garden idea to start with?

    Pots by the door are the fastest start, followed by a gravel herb bed and a thyme path. All three can be finished in a weekend, need no building work, and can be moved or changed later. A pergola, a fountain, or a stone path takes more time and planning, so save those for a second stage, once you know which parts of the garden you use most.

    How much water does a Greek garden need?

    Less than a lawn or a lush border, but not none. New plants need regular water in their first season until roots establish. After that, olives, lavender, rosemary, thyme, and agave cope with dry spells, while pots, window boxes, and vegetable patches still need regular watering, since containers dry fast. Water the soil in the morning, mulch beds with gravel or stone, and group plants with similar water needs together.

    Can I mix Greek style with other garden styles?

    Yes, if you keep one palette and one structure. A Greek courtyard with white walls and terracotta pots can sit beside a flower border, as long as the colors stay close and the planting does not fight the structure. For ideas on mixing flower color into a calm bed, see these pink flower garden ideas, which show how to group color in drifts rather than scattering single plants.

    Do Greek gardens work in shade?

    Partly. A whitewashed wall brightens a shaded corner, and pots, stone, and gravel work in shade as well as sun. Most classic Greek plants, such as olive, lavender, and bougainvillea, need full sun to flower well, so in shade choose ferns, hostas in pots, jasmine in light shade, and shade tolerant herbs such as mint and parsley. Site seating in the brightest part of a shaded garden, and use pale surfaces to make the most of the light you have.


  • 14 Garden Bench Ideas for a Relaxed, Pulled-Together Home

    14 Garden Bench Ideas for a Relaxed, Pulled-Together Home

    A garden bench is the simplest way to make a garden feel lived in. It gives you a place to pause with a cup of tea, watch the light move across the beds, and enjoy the planting you have worked hard to grow. The right bench also shapes how a garden looks, marking a path end, a quiet corner, or a view worth stopping for. These 14 garden bench ideas cover wood, stone, and metal seats, benches with storage and planters, and seats made for small, shady, or sloping gardens. Pick the spot first, then match the bench to it, and keep the path to it clear and dry.

    Key Takeaways

    • Choose the spot before the bench: light, view, shade, and a dry path matter more than the bench style alone.
    • Match the material to the place: wood suits soft planting, stone suits a formal focal point, and metal suits a narrow cottage path.
    • Give every bench a job: a reading seat, a potting rest, a tea spot, or storage, so it gets used rather than admired from the house.
    • Leave room to sit and stand comfortably, with firm footing underfoot and plants kept clear of the seat edges.
    • Add one comfort detail, such as a cushion, a side table, or scented planting nearby, and keep the rest simple.

    1. Wooden Slatted Bench Under a Tree

    Wooden slatted garden bench under a leafy tree with dappled light on a garden path

    A wooden slatted bench under a tree is the classic garden seat for a reason. The slats shed rain, the wood warms in the sun, and the canopy gives dappled shade on hot days. Place the bench so it faces the best view from that spot, not just the trunk, and leave a clear step of paving or gravel at the feet so the ground stays usable after rain.

    Choose a hardwood or a treated softwood suited to outdoor use, and check the seat height and depth before you buy, because a bench that is too low or too deep gets used less. Oil or seal the wood as the maker directs, and sweep leaves from the slats so damp debris does not sit on the surface through winter.

    2. Stone Bench as a Lasting Focal Point

    Stone garden bench at the end of a straight garden path framed by low planting

    A stone bench works best as a deliberate focal point at the end of a path, across a lawn, or at the center of a formal bed. Its weight and stillness give a garden structure even in winter, when planting is bare. Because stone stays cool, it suits a sunny spot where a wooden seat would heat up, and it needs little care beyond an occasional wash.

    Set a stone bench on a level, firm base so it does not rock or sink, and think about how it will be delivered and placed, since stone pieces are heavy and awkward to move later. Keep the planting around it low at the front so the seat stays easy to reach, and add a folded blanket or a thin cushion if you plan to sit there for a long stretch.

    3. Bench With Planters at Each End

    Wooden garden bench with a planter box at each end filled with colorful flowers

    A bench with a planter at each end turns a simple seat into a framed garden feature. The planters mark the bench as a destination, soften its ends, and let you change the display with the seasons without replanting a whole bed. This design suits a patio edge, a front garden, or the end of a straight path where a plain bench might look lost.

    Plant each side with the same mix so the pair reads as one design, and keep trailing plants trimmed back from the seat. For planting that pairs well with a seat, these pink flower garden ideas show how to group color in drifts rather than scattering single plants. Check drainage in the planters, and water them more often than beds, since containers dry out fast in sun and wind.

    4. Storage Bench With a Lift Up Seat

    Wooden garden storage bench on a patio with the lift-up seat open showing cushions inside

    A storage bench earns its place by hiding the clutter that usually gathers near a back door: cushions, small tools, watering cans, and children’s garden toys. The lift up seat keeps those items dry and close at hand, while the bench itself still works as everyday seating for two people. This is the most practical bench for a small patio or a busy family garden.

    Check the lid action before you buy, since a heavy lid with no stay can be awkward and can pinch fingers. Look for a bench made for outdoor use, with a lid that closes fully to keep rain out, and keep heavy items at the bottom so the box stays stable. Leave a little clearance behind the bench so the lid can open fully without hitting a wall or fence.

    5. Circular Bench Around a Tree Trunk

    Circular wooden bench wrapping around a mature tree trunk on a lawn

    A circular bench around a tree trunk makes use of a spot that is often wasted: the shaded ring under a mature tree. It seats several people at once, faces outward in every direction, and gives children and adults a natural gathering place. Because the bench wraps the trunk, it also protects the roots from foot traffic directly at the base.

    Leave a clear gap between the bench and the trunk so the tree can grow and air can move, and build or buy the bench in sections that can be adjusted or removed as the trunk thickens. Keep the seat height even all the way around, and choose a design with gaps or slats so fallen leaves do not pile up on the seat. This bench works best under a tree with a clean, straight trunk and a canopy high enough to sit under comfortably.

    6. Bench and Side Table for Morning Tea

    Garden bench beside a small round side table with a teacup and a book in a sunny garden

    Pairing a bench with a small side table turns a seat into a morning routine. The table holds a cup, a book, and glasses, so you stay longer and use the bench more often. A low, stable table that matches the bench height matters more than a matching set, and a single table is usually enough for a two person bench.

    Place the table on the side of your dominant hand if you sit there alone, or at one end if two people share the bench. The same practical thinking used in these fireplace seating ideas applies outdoors: give each seat a reachable surface, and keep the route past the bench clear. Choose a table heavy enough not to blow over, and bring cushions inside during wet spells.

    7. Bench Under a Rose Arch

    Wooden garden bench under a metal arch covered in climbing roses

    A bench under a rose arch creates a sheltered, scented pause on a garden walk. The arch frames the seat, gives climbing roses or jasmine something to grow over, and makes an ordinary stretch of path feel like a destination. This idea suits a long border, a walk between two garden rooms, or a path that needs a stopping point halfway along.

    Site the arch where the bench will get morning or evening light rather than deep shade all day, and anchor the arch firmly so it does not lean as the planting grows heavier. Train climbers away from the seat itself so thorns and stems do not brush sitters, and prune after flowering as the plant type requires. A narrow bench fits this spot better than a wide one, because the arch already takes up visual space.

    8. Bench Against a Wall or Fence With a Trellis

    Garden bench against a garden wall with a trellis and climbing greenery behind it

    A bench against a wall or fence with a trellis behind it is a good answer for a garden with no room for a freestanding feature. The wall gives back support, the trellis adds height and greenery without taking bed space, and the whole arrangement stays tidy against one boundary. This suits narrow side gardens, courtyard gardens, and the sunny side of a house.

    Fix the trellis with a gap behind it so air can move and the fence can dry, and choose climbers that suit the light on that wall. Keep the bench a hand span away from the wall so cushions do not trap damp against the surface. A light colored wall reflects light onto the seat, while a dark fence makes green foliage stand out, so pick the backdrop that suits the planting you plan to grow.

    9. Rustic Log Bench for a Woodland Edge

    Rustic halved log bench at the edge of a woodland garden with ferns nearby

    A rustic log bench suits a woodland edge, a wild corner, or a garden with a natural, informal feel. Made from a halved log on short legs or a thick slab on stump supports, it sits low and blends with bark, ferns, and leaf litter in a way a painted bench never will. It is a good choice where a formal seat would look out of place.

    Check that the log is stable, dry, and free from soft rot before you use it, and set it on flat stones or gravel so the base stays out of standing water. Sand the top lightly to remove splinters, and accept that a log bench will weather and change color over time. That weathering is part of its appeal, but if the seat becomes rough or uneven, sand it again or replace the top piece.

    10. Cast Iron Bench for a Cottage Path

    Cast iron and wood garden bench beside a cottage garden path with roses

    A cast iron bench with wooden slats brings a cottage garden feel to a path, a front garden, or a rose bed. The iron ends give it a decorative shape, the wooden seat keeps it comfortable, and the whole piece is heavy enough to stay put in wind. It suits a spot you pass every day, because its detail rewards a closer look.

    Check the ironwork for rust each spring, and touch up paint where it has chipped so moisture does not take hold. Because the bench is heavy, decide its final position before you set it down, and place it on paving or gravel rather than soft soil where the feet can sink. If the path is narrow, measure the bench depth carefully so walkers can still pass without stepping onto the planting.

    11. Bench at the Edge of a Vegetable or Cutting Garden

    Plain wooden bench at the edge of vegetable beds with a basket of cuttings beside it

    A bench at the edge of a vegetable or cutting garden is a working seat, not just a pretty one. It gives you a place to rest between tasks, sort a basket of cuttings, or plan the next row while you look at what is growing. Placing it at the edge, rather than in the middle of the beds, keeps it out of the way of wheelbarrows and watering.

    Choose a bench that can handle a bit of soil and water, such as a plain wooden or metal seat that wipes clean, and keep it in a spot with some shade for midday breaks. A small hook or a crate beside it holds twine, snips, and gloves so tools do not end up on the seat. If the garden is large, one bench near the main path is more useful than two benches tucked into far corners.

    12. Bench Beside a Pond or Water Feature

    Wooden garden bench set back from a small garden pond with water plants

    A bench beside a pond or a small water feature is made for quiet watching: birds, dragonflies, and the movement of water. The sound of water makes even a short sit feel restful, and the bench gives the feature a viewing point instead of leaving it as something you only glance at from the house. Place the bench back from the water edge, with a clear, dry footing, so the seat stays safe and comfortable.

    Face the bench slightly across the water rather than straight at it, so the view includes planting on both sides. Avoid placing the bench where overhanging trees drop heavy debris into the water, and keep the seat clear of wet leaves, which can make wood slippery. In a garden used by small children, make sure the pond itself has the safety measures your household needs, since the bench will draw people toward the water.

    13. Wall Mounted Fold Down Bench for a Small Garden

    Fold-down wooden bench mounted on a patio wall in a small garden

    A wall mounted fold down bench is the best seat for a garden where floor space is the limiting factor. It folds flat against a wall or fence when not in use, leaving a balcony, a tiny patio, or a narrow side passage completely clear. Folded down, it gives one or two people a proper seat, which is far more useful than a chair that has to be carried out and stored each time.

    Fix the bench to a solid wall or a strong fence post, following the maker’s fixings and weight limit, and test the fold mechanism before you rely on it. Keep the area below the bench clear so it can fold down fully, and choose a seat depth that still leaves room to stand in front of it. A small fold down shelf beside it, or a hook for a bag, makes the tiny seating area work harder without adding floor furniture.

    14. Corner L Shaped Bench for a Patio

    L-shaped wooden corner bench on a patio with a table and outdoor cushions

    A corner L shaped bench turns a dead patio corner into the main seating area. By following two walls, it seats more people than a straight bench of the same length, leaves the center of the patio open, and pairs naturally with a table in the angle. This design suits patios used for meals, evening drinks, or family gatherings.

    Measure the corner carefully, including any drain covers, steps, or door swings, before you build or order the bench. The same measured approach in these small living room layout ideas helps here: tape the footprint on the ground, walk the route past it, and check that everyone can get in and out without climbing over the table. Use outdoor cushions that can be stored quickly, and leave one end of the bench open so people do not feel trapped in the corner.

    Conclusion

    A good garden bench starts with the spot, not the catalogue. Walk the garden at different times of day, notice where the light falls, where you naturally pause, and where a dry path already exists, then choose the bench that fits that place. One well placed seat, used every day, will do more for a garden than several benches scattered where nobody stops. Pick one idea from this list, set it where you will actually sit, and add planting, a cushion, or a table only after the seat itself feels right.

    Save this list on Pinterest before your next garden trip, and work through it one area at a time: spot first, then material, then the comfort detail that makes the bench yours.

    FAQs

    What is the best material for a garden bench?

    There is no single best material, because the right choice depends on the spot. Wood is warm, comfortable, and suits most planting. Stone is lasting and suits a formal focal point, but it stays cool and is heavy to move. Metal with wooden slats suits a cottage path and is sturdy, but the ironwork needs rust checks. Choose the material that suits the weather, the footing, and how long you plan to sit there.

    How high and deep should a garden bench seat be?

    Most adults find a seat height of about 45 centimeters and a seat depth of about 40 to 45 centimeters comfortable, but bodies differ, so test a bench before you buy when you can. A seat that is too low is hard to get up from, and a seat that is too deep leaves shorter sitters without back support. If the bench has no back, a slightly shallower seat often feels better, since sitters can place their feet firmly on the ground.

    Where is the best place to put a garden bench?

    Put a bench where you already pause: at a path end, beside a view, under shade in summer, or near scented planting. Check the light at different times of day, keep the footing firm and dry, and leave room to sit and stand without stepping into a bed. A bench facing a fence or a blank wall gets used less than one facing planting, water, or a view, even if the view is simply a favorite border.

    How do I keep a wooden garden bench in good condition?

    Keep the bench clear of standing water and damp debris, and clean it with water and a stiff brush when it looks grubby. Oil or seal it as the maker directs, usually once a year, and store cushions indoors during wet spells. Check joints and fixings each spring, tighten anything loose, and sand rough patches before they become splinters. A bench under cover in winter will last longer than one left fully exposed.

    Can I put a bench in a very small garden?

    Yes, and a small garden often benefits most from a seat, because it gives you a reason to step outside. Use a wall mounted fold down bench, a narrow bench against a fence, or a short two person bench at a path end. Keep the rest of the area clear, choose a bench that does not block a door or a route, and add planting vertically with a trellis rather than taking up floor space with large pots.

    Should a garden bench face the sun or the shade?

    It depends on when you use it. A bench in morning sun suits breakfast and early reading, while a bench in afternoon shade suits hot summer days. If you only have one bench, dappled shade under a tree or an arch is often the best compromise, since it stays usable for more of the day. You can also move cushions and a small table to adjust comfort, but you cannot move a heavy fixed bench once it is set.


  • 29 Tiered Garden Ideas That Bring Practical Style Home

    29 Tiered Garden Ideas That Bring Practical Style Home

    A slope does not have to mean washed out soil and a lawn that is hard to mow. Tiered gardens turn that slope into a series of flat, usable levels, each with its own job, whether that job is growing vegetables, holding a seat in the sun, or simply keeping rainwater where it can soak in. These 29 tiered garden ideas cover stone walls, timber beds, water, seating, and planting plans for large slopes and small yards alike. Start with the level you use most, keep each terrace wide enough to work on, and build from the bottom up so every level has solid support.

    Key Takeaways

    • Build tiers from the bottom up so each level supports the one above it.
    • Make every terrace wide enough to stand on, plant in, and reach across without stretching.
    • Give each level a clear job, such as food, flowers, seating, or drainage, instead of filling every level the same way.
    • Plan water first: level beds, drainage behind walls, and a path for heavy rain to leave safely.
    • Use steps, landings, and handholds on steep slopes so every level stays easy and safe to reach.
    • Small yards can tier too, with stacked planters, stepped beds, and pots on sturdy steps.

    1. Build Stone Retaining Wall Terraces

    Terraced garden levels held by dry stone retaining walls with green plants and small flowers along the wall tops

    Dry stone or mortared stone walls are the classic way to hold a terraced slope, and they suit gardens where you want the structure itself to look good all year. Start at the lowest level, dig a firm footing, and lean the wall slightly back into the bank so the weight of the soil presses it into place rather than pushing it out. Leave gaps or a drainage pipe behind the wall so water can escape instead of building up pressure after heavy rain.

    Stone also gives planting pockets of its own. Low wall plants such as creeping thyme, aubrieta, and small sedums can root in the gaps near the top of a dry stone wall, softening the hard edge without weakening it. Keep tall walls, generally anything above knee height, in the hands of a professional, and check local rules before you build, since height limits and drainage rules vary.

    2. Use Timber Sleepers for Warm, Simple Steps

    Terraced garden built with stacked wooden timber sleepers forming stepped soil beds with vegetables and herbs

    Timber sleepers give a softer, warmer look than stone and are easier for a confident home gardener to handle on low terraces. Stack sleepers horizontally to form the front of each level, pin them with stakes driven into the ground behind, and backfill with soil in layers, firming each layer as you go. Two or three sleepers high is a comfortable height for a single terrace; higher walls need stronger posts and proper drainage.

    Timber suits vegetable beds, herb tiers, and informal cottage gardens, and it weathers to a grey tone that sits well beside lawn and gravel. Choose treated timber rated for ground contact, keep soil from sitting directly against a house wall or fence, and plan to replace the lowest sleeper first, since it stays dampest. If sleepers are new, let rain wash them before planting edibles right against them, and check the treatment label for food growing use.

    3. Try Gabion Walls for a Sturdy, Open Look

    Modern terraced garden slope with gabion walls of wire cages filled with grey stones and grasses on each level

    Gabion walls are wire cages filled with stone, and they make strong, free draining terraces with a modern, open texture. Because water passes straight through the gaps between stones, gabions cope well with wet slopes where a solid wall would need careful drainage pipes. Fill the cages in layers, packing the face stones neatly so the front looks tidy, and use smaller stone in the middle so the cage stays full and firm.

    Gabions suit contemporary gardens, drive edges, and slopes where stone is already part of the local landscape. They also make useful seating: a wide, flat topped gabion at the end of a terrace doubles as a bench base with a timber top. Wear gloves when handling cut wire, cap sharp ends, and keep the cages level as you build, since a tilted cage is hard to correct once it is full of stone.

    4. Edge Terraces With Brick for a Tidy Finish

    Tidy terraced front garden with low brick edging along each level gravel paths and colorful flowers

    Brick edging gives terraces a clean, finished line that works well near a house, a path, or a formal front garden. Lay bricks on edge or flat along the front of each level, set on a shallow concrete or compacted gravel footing so frost does not lift them out of line. A single brick course suits a gentle step of a few inches, while two or three courses can hold a low bed edge.

    Brick pairs well with gravel paths and clipped hedging, and reclaimed bricks add warmth and variation to a new garden. Keep the top of the edging level along each run, and leave small gaps or a drain point at the lowest corner so water does not pool on the terrace behind the bricks. For a softer look, plant low edging plants such as lavender or thrift just behind the brick line so flowers spill slightly over the edge.

    5. Step Wooden Raised Beds Down a Slope

    Wooden raised beds stepping down a garden slope like a staircase planted with green vegetables and herbs

    Instead of one tall retaining wall, step a series of wooden raised beds down the slope like a staircase, with a path or grass strip between each bed. Each bed stays at a comfortable working height, the soil stays level inside each box, and you can reach the middle of every bed from the path beside it. Make the beds no wider than you can reach across from one side, usually about four feet, and leave paths wide enough for a wheelbarrow.

    Stepped beds suit a slope that is too steep for a single lawn but not steep enough to need engineering. Put the beds you visit daily, such as salad leaves, nearest the house, and beds you visit weekly further down. Number the beds or keep a simple sketch of what is planted where, so crop rotation is easy to track from year to year.

    6. Plant a Terraced Herb Garden by the Kitchen Door

    Small terraced herb garden beside a house door with stone tiers planted with rosemary thyme sage and parsley

    A small terraced herb garden near the kitchen door puts fresh leaves within a few steps of cooking, and tiers keep each herb in the soil it likes best. Put Mediterranean herbs such as rosemary, thyme, and sage on the highest, sunniest, best drained level, and moisture loving herbs such as mint, parsley, and chives lower down where water settles. Grow mint in its own pot sunk into the bed so it does not spread into its neighbors.

    Keep the paths between herb tiers clear and flat, and add a small flat stone or paver as a standing spot for picking. Label the herbs while they are young, since many look alike before they flower. For ideas on keeping the kitchen side of this garden tidy, see these tips on how to style open shelves, which use the same group by use habit that works for herb tiers.

    7. Grow a Terraced Vegetable Garden by Level

    Terraced vegetable garden on a slope with each level planted with different crops in neat rows

    Terraced vegetables work best when each level has a different job in the growing year. Use the sunniest top terrace for heat loving crops such as tomatoes and peppers in summer, the middle levels for beans, peas, and brassicas, and the lowest level for salads and root crops that prefer cooler, moister soil. Rotate crops between levels each year so the same family does not grow in the same soil season after season.

    Level beds also make watering fairer, since water no longer runs straight downhill past the plants. Water the top terrace slowly so it soaks in rather than spilling over the edge, and mulch the surface to hold moisture. A simple cold frame or cloche on one level extends the season for salads, and a shared thanksgiving kitchen decor harvest display is an easy reward for a well planned vegetable terrace.

    8. Layer a Terraced Flower Border by Height

    Terraced flower border on a slope with tall flowers on top roses in the middle and low geraniums at the front

    A terraced flower border lets you use height as a design tool instead of fighting it. Put tall flowers such as delphiniums, hollyhocks, and sunflowers on the top level where they catch the light, medium flowers such as roses, peonies, and salvias in the middle, and low edging plants such as geraniums and catmint at the front of the lowest level. Seen from below, the whole slope reads as one full border rather than a set of thin strips.

    Repeat one or two colors on every level to tie the tiers together. For a pink-led scheme, the planting ideas in these pink flower garden ideas show how drifts of one color, rather than single plants, make the color read clearly. Leave a narrow access strip behind the tallest level so you can stake, deadhead, and cut back without stepping on the plants in front.

    9. Give Roses Their Own Terraced Bed

    Sunny terraced rose bed with pink and red shrub roses in bloom and lavender planted in front

    Roses suit a dedicated terrace because they like sun, air, and soil that does not stay wet, all of which a raised level provides. Plant shrub or climbing roses along the back of the top terrace, where air moves freely and morning sun dries the leaves early, and keep shorter companion plants such as lavender or catmint in front to cover bare stems. Space the bushes by the label, not by how they look in the pot, since a crowded rose bed invites disease.

    Feed and mulch in spring, prune by rose type in late winter or early spring, and water at the base rather than over the leaves. A terraced rose bed near a seat means you can enjoy the scent without walking the whole garden, and a few cut stems brought indoors work well with everyday dining table decor for a simple, seasonal centerpiece.

    10. Make a Terraced Rock Garden for Sun and Drainage

    Terraced rock garden on a sunny slope with large grey stones small alpine flowers and creeping thyme

    A rock garden is a natural fit for a terraced slope, because alpine plants want sharp drainage and sun, and stones hold heat and shelter small plants. Build each level with a mix of large feature stones and smaller rocks, burying at least a third of each large stone so it looks settled rather than perched. Fill behind the stones with gritty, free draining soil, and plant alpines, small sedums, and creeping thyme in the pockets between rocks.

    Keep the planting low and open so the stones stay visible, and avoid rich compost that holds water around alpine roots. A rock terrace near a path gives you a close up view of small flowers that would be lost in a big border. Top dress with gravel to keep the crowns dry, suppress weeds, and show off the stone colors in dry weather.

    11. Run a Cascading Water Feature Down the Tiers

    Small cascading water feature running down terraced garden levels with stone basins ferns and flowers

    Water moving down a series of small falls turns a slope into a feature instead of a problem, and each tier can hold a shallow basin that spills into the next. A small pump recirculates the water from the lowest basin back to the top, so the feature uses the same water again and again. Keep the basins shallow, level, and easy to reach for cleaning leaves and algae, and site the pump where you can reach it without climbing.

    A rill, a line of small stone basins, or a chain of terracotta pots with water trickling between them all suit different garden styles. In a family garden, keep the water shallow and the edges rounded, and add a simple on and off control near the house so the feature runs when you are there to enjoy it. Moving water also masks street noise, which makes a terraced seating area nearby feel more private.

    12. Plant a Terraced Orchard on a Sunny Slope

    Terraced orchard on a sunny slope with small fruit trees in blossom on level grass terraces

    A sunny slope is a good place for fruit, because cold air drains downhill away from blossom, and each terrace gives a tree its own level patch of soil. Plant small or dwarf fruit trees, one or two per terrace, with enough space for their mature spread and for a ladder or picking step beside each tree. Fan trained or espaliered trees against a low wall on a terrace take even less room and are easy to prune and pick.

    Underplant the trees with low herbs or wildflowers that suit the soil, and keep grass or mulch clear of the trunks. Choose varieties suited to your area and ripening in different months so the harvest spreads across the season. A terraced orchard needs the same yearly care as any fruit tree, pruning, feeding, and pest checks, but the level ground makes every one of those jobs easier.

    13. Cut Grass Terraces for Play and Mowing

    Wide grass terraces cut into a gentle garden slope with flat lawn levels and low stone edges

    Not every tier needs a wall. Wide, gently sloped grass terraces give children and pets flat places to play and make mowing safer, since you mow across each level rather than up and down a steep bank. Shape each grass level with a slight fall toward the back so rain soaks in instead of running over the edge, and keep the step between levels low enough to walk up comfortably.

    Grass terraces suit family gardens where planting beds would be trampled, and they pair well with a single planted terrace near the house for color. Edge the grass levels with a mowing strip of pavers or a low stone line so the mower can finish each edge cleanly. If a level is too steep to mow safely, widen it or add a planted terrace instead, since a slope you dread mowing will soon look untidy.

    14. Set Seating Into a Terraced Patio

    Terraced patio seating area built into a garden slope with a low stone wall bench cushions and potted plants

    Building seating into the terrace itself saves space and makes the levels feel like outdoor rooms. A wide, flat topped retaining wall at sitting height becomes a bench along one side of a patio level, and a sunken level ringed by a low wall gives a sheltered corner out of the wind. Add loose cushions and a small table rather than fixed furniture, so the space can change from morning coffee to evening meals.

    Place the seating terrace where it catches sun at the time you use it most, and leave a clear, level route from the house so carrying food and drinks is easy. For layout ideas that work outdoors as well as in, these fireplace seating ideas show how grouping seats around a focal point makes a space feel welcoming. Keep the wall top wide enough to sit on comfortably, about the depth of a seat cushion, and round or cap sharp edges.

    15. Link Levels With Gravel Paths and Landings

    Gravel garden path with stone steps and flat landings linking terraced garden levels with flowers beside it

    Paths are what make a terraced garden usable, and gravel is a forgiving surface for linking levels. Lay a compacted gravel path with a solid edging, and add a flat landing at the top and bottom of every flight of steps so you can pause, turn, and set down a watering can or trug. Keep each step rise low and even, since one taller step is the one people trip on.

    Gravel drains well, suits most garden styles, and can be topped up easily when it thins. Use larger gravel on slopes so it does not wash downhill, and add a strip of pavers or stepping stones where the path meets a lawn or bed. Light colored gravel brightens a shaded slope, while warm toned gravel suits brick and timber terraces. Sweep leaves off the path in autumn so wet leaves do not make the surface slippery.

    16. Stack Containers on Steps for a Small Yard

    Terracotta containers with colorful flowers stacked on outdoor garden steps large pots below and small pots above

    A small yard with even a short flight of steps can hold a tiered garden made of containers. Place large pots at the bottom of the steps, medium pots on the middle steps, and small pots at the top, so each plant gets light and the display reads as one stepped arrangement. Use the same pot material and two or three flower colors across all the steps to keep the display calm rather than busy.

    Containers need more watering than beds, so group plants with similar water needs and check pots daily in hot weather. Heavy pots stay at the bottom for stability, and saucers protect steps and paving from stains. This idea also suits renters, since the whole garden can move. For more small space planting ideas, see these kitchen balcony ideas, which use the same stack and group habits on a balcony scale.

    17. Grow Strawberries on Tiered Levels

    Strawberry plants growing on terraced garden levels with red strawberries hanging over wooden bed edges

    Strawberries are made for tiers: each level gives the plants sun, drainage, and air, and the fruit hangs over the edge of the bed where it is easy to pick and less likely to rot on wet soil. Plant one row of strawberries along the front edge of each terrace, with the crowns at soil level and straw or a mat beneath the fruit to keep it clean. Space plants by the label so air moves between them and disease has less chance to spread.

    Use a different variety on each level, such as an early, a midseason, and a late type, to stretch the harvest across weeks. Net the plants when fruit starts to color if birds visit your garden, and renew the bed every few years, since strawberry yields fall as plants age. A strawberry terrace near a path means children and guests can pick as they pass, which is often the point of growing them.

    18. Build a Dry, Sunny Terraced Succulent Garden

    Dry sunny terraced succulent garden with low stone levels agaves sedums and lavender on gravel

    Succulents and drought tolerant plants suit the hottest, driest terrace, where other plants struggle and watering is a chore. Build low, wide levels with gritty soil and plenty of gravel, and plant sedums, sempervivums, agaves in mild areas, and lavender at the back where it can grow taller. Space the plants so each rosette and mound has room to spread, and leave gravel visible between them as part of the design.

    A dry terrace needs very little feeding and almost no mowing, which makes it a good choice for a slope far from the house or a front garden you want to keep simple. Avoid planting succulents in a dip where water collects, since wet roots in winter kill more succulents than cold alone. Top dress with gravel each spring to refresh the look and keep weeds down.

    19. Plant a Shaded Terraced Fern Garden

    Shaded terraced fern garden on a woodland slope with lush green ferns and hostas on stone edged level beds

    Shady slopes often stay damp and awkward, but ferns, hostas, and other shade lovers turn that damp shade into an asset. Terrace the slope into wide, level beds, enrich the soil with leaf mold or compost, and plant ferns at the back of each level, hostas in the middle, and low ground cover such as sweet woodruff or creeping Jenny at the front edge. The layers of green give the shade garden depth even when little is in flower.

    Keep the soil evenly moist in the first season while plants settle, and mulch each spring to hold moisture and feed the soil. Avoid planting ferns where foot traffic crosses the bed, since their fronds break easily. A shaded terrace near a seating area stays cool on hot days, and the sound of water from a small rill, as in Idea 11, suits this quiet corner well.

    20. Design a Terraced Pollinator Garden

    Terraced pollinator garden on a slope with lavender coneflowers and salvia in bloom visited by bees and butterflies

    A terraced pollinator garden uses each level to offer a different food source across the season. Plant early flowers such as crocus and pulmonaria on the lowest, most sheltered level, summer flowers such as lavender, coneflower, and salvia in the middle, and late flowers such as aster and sedum on the top level where they catch autumn sun. Bees and butterflies then find food from spring to autumn without leaving the slope.

    Choose single, open flowers over double types where possible, since open flowers give insects easier access to nectar and pollen. Leave a few bare patches of soil on a sunny level for ground nesting bees, and avoid spraying the whole slope at once if you need to treat a pest. Let some seed heads stand over winter for birds, then cut back in spring. A pollinator terrace near a vegetable garden, as in Idea 7, also helps crops set fruit.

    21. Keep a Terraced Cutting Garden for the House

    Terraced cutting garden with neat rows of zinnias cosmos and dahlias in bright colors on a sunny level bed

    A cutting terrace grows flowers for picking, so the display borders stay tidy while you still bring color indoors. Plant rows of zinnias, cosmos, sweet peas, and dahlias on one sunny level, spaced for picking rather than for looks, and cut in the morning into a bucket of water. Because this bed is for cutting, you can pick hard without worrying about gaps in a display, and the plants respond by making more buds.

    Keep the cutting terrace near a path and a tap, since you will visit it often with a bucket and secateurs. A few stems from this level dress a table with no need to buy flowers, and the same simple styling works for fall living room decor ideas, where a small vase of garden flowers suits the season. Re-sow fast annuals such as cosmos if gaps appear by midsummer, and leave a few stems to set seed for next year.

    22. Add Compost Access to a Terraced Kitchen Garden

    Wooden compost bins at the top of a terraced kitchen garden with stepped vegetable beds below and a wheelbarrow on the path

    A terraced kitchen garden works better when compost can reach every level without a long carry uphill. Place the compost heap or bins at the top of the slope, with a path or chute that lets you barrow compost downhill to each bed, since gravity helps on the way down and the empty barrow is easy to push back up. Alternatively, put a small compost bin on the widest terrace, near the beds it feeds most.

    Keep kitchen waste, leaves, and grass clippings in separate bays if space allows, and turn the heap when you pass it with a fork. A tidy compost corner also keeps the kitchen garden looking cared for, which matters when the beds sit near the house. For the kitchen side of the harvest, the seasonal ideas in thanksgiving kitchen decor ideas show how home grown produce can dress a table without extra shopping.

    23. Hold a Steep Bank With Ground Cover Tiers

    Steep garden bank planted in wide tiers of low green ground cover with stone edging

    On a bank too steep for beds, low ground cover planted in wide tiers holds soil, cuts weeding, and looks cared for without constant work. Shape the bank into two or three broad, gently sloped levels, and plant each with a tough ground cover suited to the light, such as creeping juniper or vinca in sun, and ivy or pachysandra in shade. Plant closely so the cover knits together quickly and leaves little bare soil for weeds.

    Water the new planting well in the first season, and mulch between plants until the cover closes. Avoid planting ground cover right up to a path edge where it will spill and need constant trimming; leave a narrow mowing or gravel strip instead. Once established, a ground cover bank needs only an annual trim and a check for weeds, which makes it a good choice for a slope you see but rarely walk on.

    24. Tier a Balcony or Tiny Yard With Planters

    Small balcony garden with tiered plant stands and wall planters at different heights holding potted flowers and trailing plants

    A balcony or tiny yard can tier without any building work, using a stepped plant stand, a ladder shelf, or wall mounted planters at different heights. Put the largest, heaviest planters on the floor, medium pots on the stand, and trailing plants at the top so they spill down and soften the structure. Check the weight limit of a balcony before adding soil filled planters, and use lightweight pots and compost where weight matters.

    Small space tiering follows the same rule as a big slope: each level needs light, drainage, and a way to reach every plant for watering. Group plants by water need, and keep a watering can or small hose nearby so the top level does not get skipped. For layout habits that suit a compact space, these small living room layout ideas use the same group by use and leave clear paths approach that keeps a tiny garden usable.

    25. Shape a Terraced Front Yard for Curb Appeal

    Terraced front yard with low stone levels evergreen shrubs and seasonal flowers beside a clear path to the front door

    A front yard slope is the first thing visitors see, so terraces there should look tidy from the street as well as from the house. Use two or three low, even levels with a clear path to the door, and plant each level in a simple scheme, such as evergreen shrubs at the back and seasonal color at the front. Repeat the same edging material and one or two plant colors across all levels so the front reads as one design.

    Keep plants below window height near the house, and leave the path and steps clear of overhanging growth. A terraced front yard also helps with parking and bin access, since level areas give bins and bikes a stable place to stand. Choose plants that need little trimming near the path, and add a low light at each step so the entrance stays safe after dark, a habit that links to the lighting plan in Idea 29.

    26. Edge a Woodland Garden in Gentle Tiers

    Gentle woodland garden slope with soft low tiers edged by logs and stone ferns shade shrubs and spring bulbs in drifts

    A woodland garden on a gentle slope suits soft, low tiers rather than formal walls. Use logs, low stone lines, or simple grass banks to mark each level, and plant shade tolerant shrubs, ferns, and spring bulbs in drifts that follow the natural shape of the ground. Keep the tiers wide and the edges informal, so the garden still feels like woodland rather than a built structure.

    Leave fallen leaves in place on woodland tiers where they do no harm, since they feed the soil and shelter insects. Clear leaves only from paths and steps. Plant spring bulbs such as snowdrops and bluebells in drifts on the upper levels, where they catch light before the tree canopy fills in, and let them naturalize over the years. A woodland terrace needs patience, since the planting improves as trees and shrubs settle, but the result is a quiet garden that largely looks after itself.

    27. Plant a Terraced Mediterranean Garden

    Terraced Mediterranean garden on a sunny slope with lavender rows rosemary terracotta pots and pale gravel levels

    A sunny, dry slope is the right place for a Mediterranean terrace, with lavender, rosemary, olive trees in pots, and santolina arranged on gravel levels. Use pale stone or terracotta for walls and pots, and gravel rather than lawn between levels, since gravel suits the dry look and needs no mowing. Plant in drifts, with lavender along the front edge where its scent meets the path, and taller rosemary or a small olive behind.

    Mediterranean plants need sun and drainage above all else, so keep them out of damp dips and give each level a gritty soil mix. In cold areas, grow olives and tender herbs in pots that move under cover for winter, while hardy lavender and rosemary stay in the ground. A Mediterranean terrace near a seating level, as in Idea 14, gives a warm, scented corner for summer evenings.

    28. Slow Rain With a Terraced Rain Garden

    Terraced rain garden with shallow planted basins on each level rushes irises and moisture loving perennials

    A terraced rain garden turns heavy rain from a problem into a resource by slowing water as it moves downhill. Shape each level as a shallow, level basin planted with moisture tolerant plants, and let water spill gently from one basin to the next through a stone lined overflow point. The soil and plants filter the water, and much of it soaks in instead of running onto paths or drains.

    Site a rain garden away from house foundations and septic systems, and size the basins for the roof or slope area that drains into them. Plant rushes, irises, and moisture loving perennials in the lowest, wettest spots, and drier tolerant plants on the higher edges. Check the basins after heavy rain in the first year, and clear any silt from the overflow points so water keeps moving slowly rather than ponding in one place.

    29. Light Terraces for Evening Use

    Terraced garden in the evening with warm low lights along stone steps and a seating terrace under a dusk sky

    Lighting is what turns terraced levels from a daytime garden into an evening space. Put a low light at the top and bottom of every flight of steps, a soft wash of light on the seating terrace, and small lights along the path edges so each change of level is visible after dark. Solar lights suit most gardens, but wired low voltage lights give a steadier glow on steps you use every night.

    Keep the light warm and low, aimed down at paths and plants rather than up into neighbors windows or the sky. Light the plants you like best, such as a small tree or a stone wall, and leave darker corners for a calm, natural feel. Check the lights from the house and from the path after installation, since a light that looks fine in daylight can glare badly at night. For the indoor side of evening light, the warm schemes in fall living room decor ideas use the same low, warm approach that works outdoors.

    Conclusion

    Tiered gardens work when each level earns its place. A stone wall that holds soil, a vegetable bed at a comfortable height, a seating terrace in evening sun, and a rain garden that slows water all do a job, and together they turn a slope from a chore into the most interesting part of the garden. Start small, with the level you use most, and add tiers as time and budget allow. Measure twice, build from the bottom up, and keep paths, drainage, and light in the plan from the start. Then plant each level for its sun, soil, and water, and let the garden grow into its shape season by season. Save this post to Pinterest to keep the ideas handy when your slope project begins.

    FAQs

    How do I start a tiered garden on a slope?

    Start by walking the slope after rain to see where water runs and pools, then sketch the levels on paper, working from the bottom up. Mark the path, the steps, and the widest, flattest spot for the first terrace, and build that one level before adding more. A single well built terrace teaches you how your soil, drainage, and plants behave, and it is easier to extend a good first level than to fix several rushed ones.

    How high can each terrace be?

    For a home built terrace, keep each level between one and three feet high, with the wall or edge no taller than you can comfortably step onto and work from. Lower terraces are easier to build, safer to use, and simpler to drain. Taller walls need proper footings, drainage, and often professional advice, and local rules may limit wall height, so check before you plan a tall structure.

    What is the best material for a terraced garden wall?

    There is no single best material; the choice depends on your slope, budget, and garden style. Stone suits a long lasting, natural look and drains well, timber is warmer and easier to handle for low beds, gabions cope with wet slopes, and brick gives a tidy finish near a house. Match the material to the job: use the strongest option where the bank is steepest or wettest, and simpler edging where the slope is gentle.

    How do I stop soil washing off a terraced slope?

    Keep each bed level, mulch the surface, and plant ground cover or dense planting quickly after building, since bare soil washes fastest. Add drainage behind walls so water does not build up pressure, and give heavy rain a safe overflow route from one level to the next, as in a rain garden. Avoid working the soil when it is very wet, since that breaks its structure and makes erosion worse.

    Can I build a tiered garden in a small yard?

    Yes. A small yard can tier with stepped raised beds, a plant stand, wall planters, and pots on sturdy steps, without any retaining wall at all. The same rules apply at a small scale: each level needs light, drainage, and a way to reach every plant. Start with one stepped bed or a set of containers on steps, and add levels only where they stay easy to water and reach.

    Do terraced gardens need more watering than flat gardens?

    Terraces can need more watering at the top, since water drains downhill, and less at the bottom, where water collects. Water the top levels slowly so the water soaks in rather than spilling over, mulch every bed to hold moisture, and group plants by water need on each level. A drip line or soaker hose on the upper levels gives even watering with less waste, and a rain garden level at the bottom puts spare water to use.


  • 22 Garden Studio Ideas for a Fresh Take on Your Home

    22 Garden Studio Ideas for a Fresh Take on Your Home

    A garden studio gives you a room of your own without adding onto the house. It can hold a desk for focused work, a table for art or crafts, or one good chair for reading at the end of the garden. These garden studio ideas start with siting and layout, then cover daylight, insulation, power, storage, and simple styling. Choose the ideas that match the way you plan to use the space, start with the shell and the work surface, and check your local permit rules before you order a building or begin any groundwork.

    Key Takeaways

    • Decide the studio’s one main job first, because an office, an art table, and a reading room each need a different layout.
    • Site the building for useful light, a short and dry path from the house, and a safe, properly installed power supply.
    • Plan daylight first, then add blinds, a fan, and simple heating so the room works in every season.
    • Store things by zone: open shelves and a pegboard at the worktop, a rolling cart between zones, and closed storage for clutter.
    • Finish with garden-friendly colour outside, a lit path, and one welcome detail at the door so the studio feels part of the home.

    1. Give the Studio One Clear Job First

    Garden studio interior set up as one dedicated office with a desk, chair, and shelving.

    Decide whether the studio is mainly an office, an art or craft room, a music practice space, or a reading retreat before you choose furniture. One clear job keeps the building size, the budget, and the layout under control, because each use needs a different main piece: a desk, a large work table, or a comfortable chair. You can still add one secondary use later, such as a reading chair in an office, but let the main job set the window position, the storage, and where the power points go.

    2. Choose a Spot With Light and a Short Path

    Stone path leading through planting to a small garden studio door.

    Place the studio where it gets useful daylight without sitting in deep shade all day, and keep the walk from the house short enough for wet or dark evenings. Avoid the lowest, wettest corner of the garden, and leave space around the building for gutters, ventilation, and future repairs. Rules for garden buildings vary by area, so check your local permit office before you build. The UK Planning Portal guide to outbuildings shows the kind of siting, size, and height points that rule sets usually cover.

    3. Face the Work Seat Toward the Garden

    Corner desk under windows looking out over a green garden.

    Set the desk or work chair so you look out over planting rather than at a fence or a blank wall. The view is the main advantage of a garden studio, and it makes a small room feel wider. Side light from the left or right usually works better than a window directly behind a screen, which can cause glare and reflections. If the only outlook faces a neighbour, raise the sill, use planting as a screen, or turn the desk at an angle so the view stays green but private.

    4. Plan the Layout in Zones

    Small studio space divided into work and rest zones with shelving.

    Divide the floor into a work zone, a storage zone, and a rest zone, even if each one is only a few feet wide. Keep the door swing and the route between zones completely clear, because a small building feels crowded fast when boxes collect in the walkway. The same thinking used in these small living room layout ideas scales down well: give the main activity the best light, push storage to the edges, and let one corner stay soft. Tape the zones on the ground before you buy furniture to test the fit.

    5. Add a Small Deck or a Firm Entry at the Door

    Small garden studio with a low deck and steps at its entrance.

    A small deck, a paved slab area, or a short run of stepping stones outside the door keeps mud off the studio floor and gives you a dry place to pause with a cup or a bag. Level the surface so a chair can sit outside on fine days, and keep the threshold step low and even. Firm footing matters more than size here. If a deck is too much work, a single row of wide pavers from the garden path to the door does the same job for less effort.

    6. Insulate the Shell for Year Round Use

    Timber studio interior with insulated walls, seating, and a small stove.

    Insulation in the walls, roof, and floor is what turns a garden building from a summer room into a space you can use in January. Small buildings heat up and cool down quickly, so add draught sealing around the door and windows as well. Choose materials and finishes that suit a small, sometimes damp building, and leave an air gap where the system needs one. If you plan to fit a heater near insulated walls, follow the heater maker’s clearances and your local building rules rather than guessing at safe distances.

    7. Use Wide Windows or Glass Doors for Daylight

    Garden studio with wide glass doors opened onto a small deck.

    One wide run of glass usually lights a small studio better than several small windows, and glass doors make the room feel joined to the garden. Put the largest glazing on the side that gets light without the harshest midday sun if you can. Keep at least one solid wall for shelves, a pinboard, or tall storage, because a room glazed on every side leaves nowhere to store anything. In an existing shed conversion, one new window opening on the garden side is often enough to change the whole feel of the space.

    8. Fit Blinds or Curtains for Glare and Privacy

    White blinds filtering bright sunlight at a studio window.

    Daylight needs control as well as quantity. Simple roller blinds, venetian blinds, or a light curtain let you cut screen glare in the afternoon and close the room off at night so it does not feel exposed. Pale fabrics keep the room bright when they are drawn against strong sun. Fit blinds inside the window reveal so they do not eat into the small floor plan, and choose cordless styles or fit a cord safety device if children use the garden.

    9. Keep Heating and Cooling Small and Simple

    Ceiling fan fitted to the wood panelled ceiling of a small studio.

    A compact room does not need a large system. A ceiling or desk fan moves air on warm days, opening windows give a through breeze, and a small heater sized to the room takes the edge off cold mornings. Place any heater on a firm, level surface with clear space around it, and never leave it running unattended. Thick curtains or blinds closed at dusk also help hold warmth in winter. If the studio still feels too hot in summer, outdoor shade from a small tree or a sail on the sunny side works better than stronger cooling.

    10. Set Up Power and Internet at the Desk

    Compact desk setup with a laptop and a brass desk lamp.

    Plan the desk position around a proper power supply rather than a long extension lead trailed across the garden. A fixed outdoor supply should be installed and checked by a qualified electrician, with sockets where the desk, lamp, and chargers actually sit. Test the home wifi signal inside the finished building before you rely on it, because insulation and foil-backed boards can weaken it. If the signal is weak, a booster inside the house or a data cable run in with the power supply gives a steadier connection for calls and uploads.

    11. Choose Flooring That Handles Garden Shoes

    Studio room with a wood floor, a rug, and woven floor cushions.

    Pick a hard, washable floor such as vinyl, sealed boards, or painted concrete for the main area, because studio floors collect soil, paint, and plant debris. Add one removable rug under the desk or chair for comfort and quieter sound, and shake or wash it often. A boot tray and a stiff brush by the door stop most of the mud at the threshold. Avoid deep pile carpet in a working studio, since it traps grit and is hard to clean in a small space with no spare room.

    12. Run a Worktop Along the Window Wall

    Long work table placed under wide windows in a bright studio.

    A single long worktop under the window gives you the deepest, best lit surface in the room for a desk, sewing, painting, or potting. Keep the space below it open for legs and a rolling cart, and fix the top securely so it does not flex when you lean on it. A plain slab door or a length of kitchen worktop can serve well here. Leave the ends clear rather than filling every inch, because one empty stretch of surface is what keeps daily projects manageable.

    13. Put Open Shelves Above the Worktop

    Open wood shelves mounted above a white studio desk.

    Open shelves above the work surface keep everyday tools, jars, and books in sight and within reach without using floor space. Keep heavy items on the lowest shelf, group small supplies in trays or boxes, and leave a little empty space so the wall does not feel packed. The grouping approach in this guide on how to style open shelves helps a working shelf stay tidy instead of turning into storage creep. Two shelves are usually enough for a studio worktop.

    14. Add a Rolling Cart for Tools and Supplies

    Rolling cart loaded with craft supplies beside a sewing desk.

    A rolling cart works as moving storage between the worktop, the door, and a rest corner. Load it with the supplies for one activity, such as paints, hand tools, or seed trays, then park it under the worktop or beside the desk when you finish. Carts suit shared studios because each person or project can have its own load that wheels away. Choose a cart with at least one locking wheel so it stays put on a slightly sloped floor, and check its height against the underside of your worktop before you buy.

    15. Hide Clutter in a Storage Bench or Slim Cabinet

    Storage bench with baskets and cushions beside a studio window.

    Closed storage keeps a small studio calm. A storage bench under a window holds cushions, blankets, or bulky supplies and gives you a second seat, while a slim cabinet on the solid wall swallows files, chargers, and cleaning items. Baskets inside open cubbies keep the contents sorted without labels everywhere. Measure the door width before ordering any cabinet, because garden studio doors are often narrower than house doors and large furniture may not go through.

    16. Hang a Pegboard for Daily Tools

    Pegboard wall holding colorful craft tools above a workbench.

    A pegboard above the worktop or inside the door puts daily tools where you can see and grab them: scissors, tape, brushes, hand tools, or headphones. Outline the layout loosely, hang the most used items at hand height, and leave spare hooks so the board can change as your work does. Keep sharp or heavy tools on secure hooks and out of reach of young children. If wall space is tight, a half-height pegboard strip under a shelf still holds the essentials without covering the whole wall.

    17. Blend the Building Into the Garden With Colour

    Green painted garden studio set among flower borders and trees.

    Painting the exterior in a colour drawn from the garden helps a new building settle in quickly. Deep green, soft black, warm grey, or natural timber stain all sit well behind planting, while a pale colour suits a small, shaded garden that needs the light. Repeat the colour on the door or trim of the house if you want a stronger link between the two. Test a painted board outdoors in sun and shade first, because exterior colours look lighter in full daylight than they do on a sample card indoors.

    18. Create a Reading Corner With One Good Chair

    Armchair and floor lamp forming a reading corner by cabin windows.

    Every studio benefits from one seat that is not the work chair. A single armchair with a cushion, a small side table, and a lamp in the corner away from the door makes a place to read, plan, or take a break between tasks. Arranging one seat around a small focal point, as in these fireplace seating ideas, works outdoors too: angle the chair toward the window view so the garden becomes the feature. Keep the route to the desk clear so the corner stays a retreat rather than an obstacle.

    19. Add Plants That Suit the Light You Have

    Potted plants gathered on a sunny studio windowsill.

    Match plants to the light each part of the studio actually gets instead of filling every surface with pots. Sun lovers belong on the bright sill, while ferns and other shade tolerant plants suit the wall away from the glass. Group two or three pots together for a fuller look, and keep one watering can in the studio so care becomes part of your arrival routine. In a work studio, keep plants off the main worktop and use the sill, a high shelf, or the floor beside the chair instead.

    20. Light the Path From the House

    Garden path picked out with small lights at dusk.

    A few low lights along the route from the house make evening trips to the studio safer and more inviting. Space lights to mark changes of level, steps, and the studio threshold rather than lighting every inch of path. Warm white light is easier on the eyes at night and keeps the garden feeling calm. Solar lights are the simplest option where wiring is difficult, but place them where they still catch sun in winter. Whatever you choose, keep the fittings low so the light falls on the ground, not into your eyes.

    21. Use One Wall for Art, Boards, and Work in Progress

    Art studio wall covered with framed pictures above work tables.

    Give the solid wall a job: a pinboard for plans and references, a rail for work in progress, or a simple gallery of finished pieces. One organised display wall keeps inspiration visible without spreading paper across the worktop. Use frames or boards in a similar tone so the mix looks planned, and rotate pieces as projects change. In an art studio this wall can hold drying or finished work; in an office it works better as one board plus one or two framed prints, so calls still look tidy on screen.

    22. Finish the Door With a Welcome Detail

    Welcome mat on a wood deck outside a studio door.

    A small detail at the door makes the studio feel finished every time you arrive. A sturdy mat, a hook rail just inside for a coat and bag, and a boot tray below it handle most of what you carry in. Outside, one pot by the door or a simple wreath in season links the building to the house porch. Keep this area strict: if the mat and hooks stay clear, the whole studio tends to stay tidier. It is a small idea, but it is the one you will notice first and last each day.

    Conclusion

    A good garden studio is planned like a small room, not filled like a shed. Give it one clear job, a sensible spot with light and a short path, and a shell that stays comfortable through the seasons. Then build the inside around a window worktop, shelves, a pegboard, and closed storage, and finish with garden colour, a lit path, and a welcome at the door. Start with the ideas that fix comfort and layout first, and the studio will feel like a fresh part of the home rather than an extra building at the end of the garden.

    Save this list on Pinterest for your next garden weekend, and work through it in order: job and spot first, then shell and light, then storage and styling.

    FAQs

    How big should a garden studio be?

    Size it from the job, not from the largest building that fits. A desk, a chair, and shelves work in a compact footprint, while a craft or art studio needs room for a wide table and storage for materials in progress. Lay out your furniture measurements on the lawn with tape or chairs before you order, and leave space for the door swing and a clear walkway. A slightly smaller building that is well organised usually feels better than a larger one filled with overflow from the house.

    Do I need permission for a garden studio?

    It depends on where you live and on the size, height, position, and planned use of the building. Many areas allow small garden buildings under set conditions, while sleeping in the building, running a business with visitors, or building close to a boundary can bring extra rules. Check with your local planning or permit office before you order or start groundwork, and keep their answer with your paperwork. This article gives design ideas only and cannot confirm the rules for your address.

    Can I use a garden studio all year round?

    Yes, if the building is planned for it. Insulation in the walls, roof, and floor, draught sealing at the door, and a small heater sized to the room cover most cold weather needs. In summer, blinds, opening windows, and a fan keep the air moving, and outdoor shade on the sunniest side helps more than people expect. Very hot or cold climates may need stronger systems, so treat the studio like a small room of the house rather than a storage shed when you plan the build.

    How do I get internet in a garden studio?

    Start by testing your home wifi inside the finished building, because distance, walls, and foil-backed insulation can weaken the signal. If it drops, a wifi booster placed in the house near the garden wall may be enough for browsing and email. For steady video calls, a data cable run in at the same time as a proper power supply is the more reliable option, and both should be installed or checked by a qualified electrician. Avoid trailing ordinary indoor extension leads across the garden as a long term solution.

    What is the difference between a garden studio and a shed?

    A shed is built mainly for storage, with thin walls, small windows, and no insulation. A garden studio is built as a room for people, with insulation, larger windows or glass doors, a finished interior, and a proper power supply, so it stays comfortable for hours of work or rest. You can convert a sound shed toward studio use by adding insulation, better glazing, and safe power, but the structure and roof must be in good condition first. If the base building leaks or flexes, fixing that comes before any styling.

    How can I keep a small garden studio tidy?

    Work in zones and give everything a home in one of them: current tools on the pegboard or cart, daily supplies on the open shelves, and everything else in closed storage. Keep the worktop rule of one empty stretch, return the cart to its parking spot when you finish, and do a two minute reset of the door area before you lock up. Studios get untidy when house overflow moves in, so keep a firm rule that items with no role in the studio’s main job stay in the house.


  • 24 Hippie Garden Ideas to Give Your Space a New Look

    24 Hippie Garden Ideas to Give Your Space a New Look

    A hippie garden is relaxed, colorful, and built by hand rather than bought as a matching set. These hippie garden ideas mix loose planting, salvaged furniture, painted details, and places to sit on the ground or swing in a hammock. Start with one bed or one corner, use plants you already like, and add handmade pieces as you find them. The aim is a garden that looks lived in and personal, not a formal layout that needs constant trimming to stay tidy.

    Key Takeaways

    • Plant loosely: wildflowers, herbs, and sunflowers give the relaxed look faster than clipped shapes.
    • Reuse what you have: pallets, ladders, old chairs, and reclaimed wood become seating, stands, and beds.
    • Add color by hand with painted pots, painted stones, bunting, and a fence mural.
    • Plan for evenings outside with hammocks, floor cushions, string lights, and a small fire circle.
    • Leave room for wildlife and practical corners, such as a bird bath, a pond bowl, and a screened compost spot.

    1. Let a Wildflower Patch Grow Freely

    Informal wildflower patch with mixed colorful blooms beside a lawn.

    Choose one sunny patch and let it grow loose instead of edging it into a formal bed. Sow a mixed wildflower seed blend suited to your area, rake the soil first, and water while seeds settle in. Leave the patch mostly alone once plants are up, apart from pulling any weed you know is a problem in your region. The mix of heights and colors is the point. If a whole patch feels too wild, start with a one meter strip along a fence and widen it next season.

    2. Mix Herbs Into the Flower Beds

    Garden bed mixing herbs and flowering plants along a sunny border.

    Plant herbs such as rosemary, sage, thyme, and lavender between flowers instead of keeping a separate herb bed. The grey green leaves and small flowers blend well with loose planting, and you can pick leaves on your way past. Put taller herbs toward the back so they do not shade low flowers. Herbs that spread, such as mint, are better in a pot sunk into the bed, because their roots can take over a small border in one or two seasons.

    3. Plant in Painted, Mismatched Pots

    Row of hand painted terracotta pots with flowers in bright colors.

    Collect plain terracotta or secondhand pots and paint them in different colors and simple patterns, such as stripes, dots, or suns. Group the pots in clusters of three or five near a door, steps, or seating corner rather than spacing them in a line. Use outdoor paint and leave the inside unpainted so soil can breathe. Check each pot has a drainage hole before planting. One painted pot looks lost, so repeat at least one color across the group to link them.

    4. Build a Raised Bed From Reclaimed Wood

    Raised garden bed built from weathered wood, filled with leafy vegetables.

    Use old boards, pallet wood that is safe for garden use, or leftover decking to build one low raised bed for vegetables or cut flowers. Fill it with a mix of topsoil and compost, and keep the bed narrow enough that you can reach the middle from both sides without stepping on the soil. A raised bed gives loose planting a clear boundary, which keeps the relaxed style from reading as untidy. Line the inside of the wood with landscape fabric if you want the boards to last longer.

    5. Hang a Row of Macrame Plant Hangers

    Macrame hangers holding potted plants in a row under a covered edge.

    Hang trailing plants in macrame hangers along a porch edge, a pergola beam, or a sturdy branch. Use pots with drainage and a small saucer where drips would stain a surface below. Groups of three hangers at slightly different heights look better than a single row at one level. Choose plants that trail, such as pothos in a sheltered spot or trailing petunias in sun. If you do not knot macrame yourself, woven or rope hangers give the same soft look.

    6. Grow a Sunflower Screen Along the Fence

    Tall sunflowers growing in a line along a garden fence.

    Plant sunflowers in a line along a fence or at the back of a bed to make a living screen by mid summer. Sow seeds after the last frost in your area, spacing them so each plant has room for a thick stem. The flowers give height, late color, and seeds that birds will visit. Tie tall stems loosely to the fence if your garden is windy. For help matching plant choices to your climate, check the USDA Plant Hardiness Zone Map before you buy seeds.

    7. Lay a Winding Stepping Stone Path

    Winding stepping stone path crossing a lawn between planted beds.

    Set flat stones in a gentle curve through the lawn or between beds instead of a straight, paved path. Sink each stone so its top sits level with the ground, and leave grass or low ground cover to grow between them. A curve slows the walk through the garden and shows off each bed as you pass. Space the stones at a comfortable stride and test them barefoot before the soil settles. Avoid loose gravel on the main route if you walk outside at night.

    8. Paint Flat Stones With Simple Motifs

    Flat stones painted with simple colorful patterns set among plants.

    Gather smooth, flat stones and paint them with simple motifs: suns, moons, flowers, insects, or short words. Place them at bed edges, beside the path, or tucked at the base of a plant where they show as small surprises. Seal outdoor paint with a clear exterior coat if you want the colors to last through rain. This is a good project for using leftover paint from the pot painting in Idea 3. Keep the designs simple, because detailed art fades and chips faster outdoors.

    9. Edge Beds With Logs, Bricks, or Stones

    Flower bed edged with short upright logs in a rustic border.

    Give loose beds a clear edge with short log rounds, salvaged bricks, or collected stones laid in a single line. The edge stops mulch and soil from washing onto the lawn and makes mowing easier. Use whatever material you can gather in one consistent run per bed, and switch material on the next bed if you run short. Push each piece slightly into the soil so the line stays put. Replace or reset pieces after winter, when frost can lift them out of place.

    10. Build a Low Pallet Seating Corner

    Low pallet seating with cushions and a throw in a garden corner.

    Stack or join clean pallets to make a low platform sofa in a shaded corner, then cover it with outdoor cushions and a washable throw. Check pallet wood for stamps and damage before use, sand rough edges, and raise the base slightly so air can move under it. Add a small side table or crate for drinks. This corner becomes the center of the garden, so place it where you can see the best planting. Bring cushions inside during long wet spells to stop mildew.

    11. Hang a Hammock Between Two Trees or Posts

    Striped hammock strung between two trees above a garden lawn.

    A hammock is the simplest seat in a hippie garden. Hang it between two strong trees with wide straps that protect the bark, or between two posts set firmly in the ground if your garden has no trees. Leave a clear fall zone underneath, free of stones, pots, and the fire pit. Test the height so you can get in and out without the fabric touching the ground when loaded. Store the hammock dry in winter so the fabric lasts more than one season.

    12. Spread Floor Cushions and a Blanket on the Lawn

    Blanket and floor cushions spread on a lawn for outdoor lounging.

    For a flexible hangout, lay a washable blanket or woven rug on the lawn and add large floor cushions. This setup seats a group without furniture, moves easily to follow the shade, and packs away in minutes. Choose a dry patch of lawn and shake the blanket out before guests sit down. The same layered textiles used indoors in these cozy living room ideas work outside on a dry day. Keep food and drinks on a low tray so cups do not tip on soft ground.

    13. String Fabric Bunting Across the Garden

    Colorful fabric bunting strung across a garden seating area.

    Cut triangles from scrap fabric, old shirts, or remnant cloth and sew or tie them along a length of cord. String the bunting between trees, posts, or the edges of a porch so it crosses above seating rather than over a path where it could catch on heads. Mixed patterns and faded colors suit this style better than one new matching set. Take bunting down before storms, because wet fabric grows heavy and can pull its fixings loose.

    14. Hang Woven Pieces in a Sheltered Spot

    Woven dream catcher hanging from a branch in a garden.

    Hang a dream catcher, a small woven wall hanging, or a macrame piece from a branch or under a covered edge where rain reaches it less often. Natural fibers soften outside, so choose pieces you are happy to replace after a season or two, or bring them in during wet months. Keep hangings clear of the fire pit and any candles. One or two woven pieces are enough. More than that on every tree starts to look cluttered instead of relaxed.

    15. Lay a Pebble Mandala on Bare Ground

    Circular pebble mandala laid out on the ground in a garden.

    Clear a small circle of ground and lay pebbles, shells, and short sticks in rings or a simple spiral. A mandala gives a calm focus point in a bed or at the center of a seating circle, and it costs nothing if you gather the pieces. Rake and rebuild it when weeds grow through. Photograph a design you like before you clear it, so you can repeat it next season. Keep the circle small, about the width of a chair seat, so it stays quick to maintain.

    16. Use an Old Ladder as a Plant Stand

    Old wooden ladder holding potted plants on its steps.

    Stand a wooden step ladder in a bed or against a fence and set pots on its steps. The steps give plants different heights, which makes a small collection look fuller. Secure the ladder so it cannot tip, especially on soft soil, and put the heaviest pots on the lowest step. A ladder that is no longer safe to climb is fine for plants, but check the joints hold weight evenly. Paint it or leave the worn wood as it is, both suit the style.

    17. Turn a Broken Chair Into a Planter

    Old chair with flowers planted through its seat in a garden.

    Take a chair with a worn or broken seat, remove the seat base, and set a pot or lined basket into the frame so flowers spill over the edges. Place the chair in a bed or beside the path as a small surprise. Choose trailing plants so the shape of the chair stays visible. Wooden chairs weather quickly outside, so treat this as a one or two season piece, or keep it under a covered edge. Metal chairs last longer but can rust onto paving, so stand them on stones.

    18. Add Wind Chimes Near the Seating Corner

    Wind chimes hanging from a branch above a garden path.

    Hang one set of wind chimes where a light breeze reaches them, near the seating corner or hammock. Shell, bamboo, and metal chimes each give a different sound, so listen before you buy if you can. Keep chimes away from a neighbor’s bedroom window if your garden is close to other homes, and take them down in high winds. One set is enough for a small garden. The sound should sit in the background while you talk or read, not carry across the whole yard.

    19. Add a Small Pond or Water Bowl

    Small garden pond edged with stones and water plants.

    Set a wide, watertight bowl, a half barrel, or a small preformed pond into a shady corner and fill it with water and one or two water plants. A still water surface reflects the sky and draws birds and insects to drink. Add stones that slope into the water so small animals can climb out. If mosquitoes are a problem in your area, use a small solar fountain to keep the water moving, and refresh bowl water often. Keep deep water features fenced or covered if young children visit.

    20. Light the Garden With Solar Lanterns and String Lights

    Warm string lights glowing over a garden seating area at dusk.

    As the light fades, solar lanterns along the path and a string of warm lights over the seating corner keep the garden usable into the evening. Place solar panels where they get full sun during the day, and coil spare cable so it does not cross walkways. Warm white bulbs suit this style better than colored or flashing sets. Bring battery string lights inside in winter if the maker advises it. Check the path stays visible from the door to the seating area before guests arrive.

    21. Paint a Simple Mural on the Garden Fence

    Garden fence painted with a simple floral mural.

    Use one fence panel as a canvas for a simple painted design: a large sun, flowers, a rainbow arc, or repeated leaves. Sketch the shapes in chalk first and use exterior paint in a few colors. A mural makes a plain fence part of the planting, and it gives the garden color in winter when beds are bare. If you rent, paint a loose board or a large piece of exterior fabric instead and fix it to the fence with removable ties. Keep the design bold and simple, because fine detail is hard to see across a garden.

    22. Set a Bird Bath Among the Flowers

    Bird bath standing among flowers in a planted garden bed.

    Place a bird bath or a shallow dish on a stand in view of your seating, near shrubs where birds can perch. Fill it with clean water a few centimeters deep and refresh it often, especially in hot weather. Watching birds visit becomes part of the daily rhythm of the garden. Scrub the bath weekly to keep algae down. In freezing weather, empty a ceramic bath so ice does not crack it, or use a dish you can bring inside at night.

    23. Hide the Compost Corner Behind a Screen

    Wooden compost bin tucked into a screened garden corner.

    Compost suits this style of garden, but the bin does not need to be the view. Screen the corner with a short length of woven fencing, a panel of bamboo, or a row of tall plants, and keep a clear path for carrying kitchen scraps and garden waste. Leave space to turn the pile and to lift the bin lid fully. Decorative touches from these simple cozy fall decor ideas can help the screen blend with the rest of the yard in autumn. Keep the bin away from seating, because a working compost pile can draw flies in hot weather.

    24. Finish With a Fire Pit Circle and Log Seats

    Fire pit ringed with log seats in a backyard clearing.

    End the garden with a simple fire circle: a metal fire pit or a ring of stones on bare ground, with log sections or stumps as seats. Keep the circle clear of overhanging branches, dry plants, and the bunting and hangings from earlier ideas, and check local rules on outdoor fires before you light one. Keep water nearby and let the fire burn out fully before you go inside. A fire pit gives the garden a center for cool evenings and makes the seating, cushions, and lights around it feel planned.

    Conclusion

    A hippie garden grows by small additions: a loose wildflower patch, a painted pot cluster, a place to sit low, and light for the evening. Pick two ideas from this list to start, one planting idea and one seating or handmade idea, and live with them for a few weeks before you add more. Keep edges clear, keep paths safe, and let the planting stay a little loose. That balance is what makes the garden feel relaxed rather than neglected.

    Save this list on Pinterest before your next garden weekend, and pin the ideas you plan to try first so your shopping and seed lists stay in one place.

    FAQs

    What makes a garden a hippie garden?

    A hippie garden is relaxed, colorful, and largely handmade. Planting is loose rather than clipped, furniture and planters are often salvaged or painted, and there are places to sit on the ground, swing, or gather around a fire. Natural materials such as wood, stone, cotton, and clay appear more than plastic or formal paving. The garden also tends to leave room for wildlife, with flowers for pollinators, water for birds, and a compost corner. It is a style built over time from found and made pieces, not a kit you install in one weekend.

    How can I start a hippie garden on a small budget?

    Start with seeds, cuttings, and what you already own. Sow a wildflower patch and sunflowers from seed, paint pots and stones you have, and build seating from clean pallets or a blanket and cushions on the lawn. Ask friends for plant divisions and spare pots before you buy anything. Add one handmade piece at a time, such as bunting from scrap fabric or a pebble mandala from gathered stones. Most of the look comes from loose planting and color, and both of those can be free.

    Do hippie garden ideas work in a small yard or rental?

    Yes. Use pots, hangers, and a ladder stand so nothing is fixed to the ground, and choose a blanket and cushions instead of built seating. Paint a board or fabric panel rather than the fence itself, and keep decals and hangings on removable fixings. Check your lease before you dig beds, light fires, or fix anything to walls or fences. A small yard suits this style well, because a few clustered pieces fill it quickly. Keep paths and doors clear so the space stays easy to use.

    How do I keep a relaxed garden from looking messy?

    Keep the frame tidy and let the planting be loose. Clear edges on beds, a defined path, and one swept seating area give the garden structure, while flowers and herbs can grow freely inside those lines. Group small items, such as pots and painted stones, in clusters instead of spreading them everywhere. Put tools, hoses, and the compost bin behind a screen. A short weekly tidy of paths and edges is usually enough to keep the relaxed look on the right side of cared for.

    What plants suit a hippie garden best?

    Choose plants that look natural in loose groups and cope with a little neglect: wildflower mixes, sunflowers, lavender, sage, rosemary, thyme, cosmos, and trailing plants for hangers and chairs. Pick varieties that suit your sun, soil, and climate zone rather than copying a list from a different region. Include some plants that flower at different times so the garden has color across the season. Leave seed heads standing in autumn where you can, because birds feed on them and the shapes look good in low light.

    Is a fire pit safe in a garden with fabric and hangings?

    It can be, if you plan the layout first. Place the fire pit on bare ground or a non flammable base, keep it well clear of bunting, hangings, cushions, and dry plants, and check local rules before lighting a fire. Keep water or a suitable extinguisher within reach, never leave the fire alone, and let it die down fully before going inside. On windy nights, skip the fire and use lanterns and string lights instead. If your garden is very small, a fire bowl may not fit safely at all, and a cluster of lanterns is the better center.


  • 34 Blue Front Door Colors to Refresh Your Home’s Look

    34 Blue Front Door Colors to Refresh Your Home’s Look

    Blue is one of the most flexible front door colors because it runs from near black navy to pale sky, and each depth suits a different house. These 34 blue front door colors are organized by shade family, with the undertone, the house styles each one flatters, and the hardware finish that pairs well with it. Read the undertone notes first, since a blue that leans green behaves very differently from one that leans gray. Then narrow your list to three shades and test them on the door before you commit to a full repaint.

    Key Takeaways

    • Start with undertone: green leaning blues feel fresh and coastal, gray leaning blues feel calm and classic, and clear blues feel bold and modern.
    • Dark blues such as navy, midnight, and indigo act almost like neutrals and suit brick, stone, and white siding.
    • Light blues work best on shaded or north facing entries, where deep shades can read almost black.
    • Hardware is part of the color choice: brass warms a cool blue, black sharpens it, and nickel keeps it quiet.
    • Always test two or three sample shades on the actual door and check them morning, noon, and evening before painting.

    1. Classic Navy

    Front door painted classic navy blue on a house with light siding.

    Classic navy is a deep, slightly gray leaning blue that reads almost neutral from the street. It suits colonial, craftsman, and traditional brick homes, and it holds up well against white or cream siding. Pair it with polished brass or antique brass hardware, which warms the cool depth and keeps the entry from feeling flat. Choose a satin or semi gloss finish so the color keeps its richness in flat midday light.

    2. Midnight Blue

    Front door painted deep midnight blue on a house exterior.

    Midnight blue is darker than navy, with a soft black undertone that makes it read nearly black in shade and clearly blue in sun. It fits modern farmhouse and contemporary homes with pale siding or light stone. Use bright nickel or chrome hardware for a crisp line against the dark panel. Because midnight can hide detail, it works best on doors with simple panels or full glass that catches the light.

    3. Royal Sapphire

    Front door painted vivid royal sapphire blue on a house exterior.

    Royal sapphire is a saturated, clear blue with no gray in it, so it stays vivid even on a shaded porch. It suits stucco, Mediterranean inspired, and white painted brick homes that can carry a strong color note. Keep hardware simple in brushed nickel so the door stays the single bold element. This shade shows brush marks more than muted blues, so spray or use a high quality brush and level the coats carefully.

    4. Cobalt Blue

    Front door painted bright cobalt blue on a house exterior.

    Cobalt is a bright, slightly violet leaning blue that feels energetic and modern. It works on mid century homes, plain ranch facades, and cottages that need one strong accent against quiet siding. Matte black hardware sharpens cobalt and keeps the look graphic rather than playful. Balance the door with a plain wreath and restrained porch decor, because the color already does most of the work at the entry.

    5. Cornflower Blue

    Front door painted soft cornflower blue on a cottage style house.

    Cornflower is a clear mid tone blue with a soft violet hint, lighter than sapphire and calmer than cobalt. It is a natural fit for cottages, cape cod homes, and houses with flower filled front beds. Antique brass or oil rubbed bronze hardware adds a little age so the color feels settled rather than new. Cornflower fades gracefully, but a quality exterior paint still matters on a south facing door.

    6. Powder Blue

    Front door painted pale powder blue on a house exterior.

    Powder blue is a pale, slightly gray tint that feels clean and quiet at the entry. It suits coastal homes, pale brick, and gray siding where a strong door color would fight the facade. Polished nickel or chrome hardware keeps the palette cool and light. Powder blue shows dirt and scuffs faster than deeper shades, so plan on a wipe down each season and expect the kick plate area to need touch ups first.

    7. Pale Sky Blue

    Front door painted pale sky blue on a light colored house.

    Pale sky blue is the lightest clear blue on this list, with almost no gray, so it reads fresh in bright sun. It belongs on beach cottages, small bungalows, and homes with white trim and light landscaping. White or satin nickel hardware keeps the whole entry airy. On a very sunny facade this shade can wash out to near white, so test it one step deeper than the swatch you first pick.

    8. Robin’s Egg Blue

    Front door painted robin's egg blue with a blue green tint.

    Robin’s egg blue is a soft blue green tint, warmer and greener than sky blue. It suits southern porches, Victorian homes with detailed trim, and cottages with brick paths. Aged brass or unlacquered brass hardware deepens its vintage feel. Because it leans green, hold it against your siding in daylight: next to yellow toned stone it can look greener than the sample card suggests.

    9. Teal Blue

    Front door painted rich teal blue on a house exterior.

    Teal sits halfway between blue and green, rich and saturated without going dark. It pairs well with warm wood siding, red brick, and desert or southwestern style homes. Copper or oil rubbed bronze hardware picks up the warmth in the brick and timber around it. Teal is a forgiving mid depth shade that hides dust well, which makes it practical for doors on busy streets.

    10. Peacock Blue

    Front door painted deep peacock blue green on a house exterior.

    Peacock blue is a deep blue green with a jewel tone intensity, darker and moodier than teal. It suits eclectic, Victorian, and arts and crafts homes, especially with dark trim or stained wood around the entry. Gold toned or antique brass hardware underlines its richness. Keep the porch palette simple beside it: one planter pair and a plain mat let the door carry the color story.

    11. Slate Blue

    Front door painted muted slate blue on a house exterior.

    Slate blue is a gray heavy mid tone that reads calm and tailored from the street. It is one of the safest blues for stone houses, gray siding, and traditional suburban facades because it borrows color from the masonry. Matte black or pewter hardware fits its muted character. Slate can look flat on an overcast day, so a semi gloss finish helps it keep a little life and sheen.

    12. Steel Blue

    Front door painted cool steel blue on a house exterior.

    Steel blue is a cool, medium gray blue with a faint metallic feel, deeper than slate and cleaner in tone. It suits industrial, modern, and minimalist homes with concrete, black window frames, or pale stucco. Stainless or brushed nickel hardware continues the cool, precise line. Avoid warm brass here unless the house has other warm notes, since the mix can make the steel tone look unintentionally green.

    13. Denim Blue

    Front door painted casual denim blue on a house exterior.

    Denim blue is a dusty mid blue that mimics worn indigo fabric: casual, slightly faded, and easy to live with. It fits farmhouse, ranch, and relaxed suburban homes, especially with white board and batten siding. Black hardware gives it a tidy outline, while a natural wood bench or planters echo its informal feel. Denim hides scuffs well and suits households that want color without formality.

    14. Indigo

    Front door painted deep indigo blue on a house exterior.

    Indigo is a deep blue with a clear violet undertone, sitting between navy and purple. It suits shingle style homes, arts and crafts facades, and houses with dark roofs where a straight navy might disappear. Antique brass hardware warms the violet edge and keeps it welcoming. Check indigo at dusk before committing: in low light the purple note strengthens, which some owners love and others find too much.

    15. Periwinkle

    Front door painted light periwinkle blue on a house exterior.

    Periwinkle is a light blue violet, softer than cornflower and a little playful. It works on cottages, small colonials, and homes with lavender or purple toned flower beds nearby. Satin nickel hardware keeps it fresh, and white trim gives it the contrast it needs to read as a deliberate color. Periwinkle can look sweet on the wrong house, so it pairs best with simple architecture and tidy landscaping.

    16. Dusty Blue

    Front door painted muted dusty blue on a house exterior.

    Dusty blue is a muted mid tone with a gray veil over it, the faded look of old painted wood. It suits French country, cottage, and older homes where a bright new color would feel out of place. Oil rubbed bronze or aged pewter hardware matches its softness. Dusty blue blends quietly with gray roofs and weathered stone, so add contrast at the entry with a light colored mat or pale planters.

    17. French Blue

    Front door painted clean French blue on a house exterior.

    French blue is a clean mid tone with a balanced undertone, neither green nor gray, inspired by painted shutters in French villages. It suits provincial, cottage, and traditional homes with cream or warm white siding. Polished brass hardware is the classic partner and lifts the color on cloudy days. French blue also works as a repeat color on shutters, which ties a plain facade together without more contrast.

    18. Aegean Blue

    Front door painted clear Aegean blue on a house exterior.

    Aegean blue is a clear sea blue, greener than French blue and brighter than teal, recalling Mediterranean doors against whitewash. It suits stucco, coastal, and Spanish inspired homes with white or sand colored walls. Keep hardware in brushed nickel or weather resistant brass. This shade looks best with sun on it; on a permanently shaded entry it can turn somber, so test it through a full day first.

    19. Turquoise

    Front door painted bright turquoise on a house exterior.

    Turquoise is a bright blue green, lighter and fresher than teal, with a cheerful retro character. It suits mid century homes, adobe and southwestern facades, and beach houses with pale siding. Simple black or white hardware keeps it from tipping into theme territory. Turquoise is a strong personality color: sample it on the full door rather than a small board, because the area of color changes how bold it feels.

    20. Aqua Blue

    Front door painted pale aqua blue on a coastal style house.

    Aqua is a pale, clear blue green tint, the lightest of the green leaning blues here. It belongs on coastal cottages, small porches, and homes with white trim and shell or gravel paths. Chrome or satin nickel hardware keeps the effect clean and breezy. Like other pale tints, aqua shows marks easily, so a washable semi gloss paint and a door mat that actually gets used will help it stay fresh.

    21. Blue Gray

    Front door painted soft blue gray on a house exterior.

    Blue gray is the most neutral option on this list, a gray first with a clear blue cast behind it. It suits almost any house style, especially gray stone, weathered shingles, and homes where the door should whisper rather than shout. Matte black hardware gives it structure, and a black mailbox or light fixture nearby completes the restrained palette. If you plan to sell soon, this is one of the safest shades to choose.

    22. Cadet Blue

    Front door painted medium cadet blue gray on a house exterior.

    Cadet blue is a medium gray blue, a step deeper than blue gray and traditionally used on uniforms, so it reads tidy and composed. It suits colonial revival, cape cod, and brick homes with white trim. Pewter or brushed nickel hardware fits its even tempered tone. Cadet is a good middle path for owners who find navy too dark and powder blue too pale for their facade.

    23. Wedgwood Blue

    Front door painted chalky Wedgwood blue on a house exterior.

    Wedgwood blue is a soft, chalky mid light blue with a powdery gray finish, named for the classic pottery it resembles. It suits English cottage, Georgian, and traditional homes with cream trim and climbing plants. Antique brass hardware and a brass mail slot continue the heritage feel. The chalky quality mutes glare on sunny porches, but choose a durable exterior formula since matte looking finishes can mark more easily.

    24. Delft Blue

    Front door painted clear delft blue with a white frame.

    Delft blue is a clear, medium china blue, brighter than Wedgwood and cleaner than French blue, echoing Dutch tilework. It suits Dutch colonial, cottage, and white sided homes, and it looks especially crisp with a white door frame. Polished nickel hardware keeps the blue and white scheme sharp. Delft rewards neat edges, so mask the frame carefully and keep the trim repainted white to hold the contrast.

    25. Colonial Blue

    Front door painted muted colonial blue on a traditional house.

    Colonial blue is a muted, gray softened mid blue based on historic American paint tones, deeper than dusty blue but never bright. It suits colonial revival, saltbox, and older brick homes where authenticity matters. Black iron or oil rubbed bronze hardware matches its period character. Colonial blue pairs naturally with a brass or copper lantern beside the door, and with natural wreaths through the seasons.

    26. Charcoal Blue

    Front door painted near black charcoal blue on a house exterior.

    Charcoal blue is the darkest shade here, a blue black that reads as soft black from a distance and reveals its blue only up close or in sunlight. It suits modern and transitional homes, dark siding, and entries framed in black. Choose hardware in black for a seamless look, or brass if you want one clear point of contrast. On a north facing door it can read pure black, so confirm that is the effect you want.

    27. Cerulean Blue

    Front door painted bright cerulean blue on a house exterior.

    Cerulean is a bright, clear sky leaning blue, deeper than sky tint and cleaner than cornflower. It suits contemporary homes, plain facades that need one optimistic note, and coastal houses with white railings. Brushed stainless or chrome hardware keeps the mood crisp. Cerulean can feel exposed on a house with no other color, so echo it once more in a planter glaze or house numbers to settle it.

    28. Ice Blue

    Front door painted very pale ice blue on a house exterior.

    Ice blue is a very pale blue with a cool gray base, almost white but with a definite chill of color. It suits Scandinavian inspired, modern, and minimalist homes with pale render or light wood cladding. Matte black hardware gives ice blue the contrast it needs to register as a color at all. On bright white siding it may disappear, so it works better against light gray, stone, or natural timber.

    29. Blue Green

    Front door painted mid tone blue green on a house exterior.

    Blue green in its mid tone form is greener than teal is blue, a lagoon shade with real depth. It suits tropical, coastal, and eclectic homes, and it looks at home beside lush planting and warm wood. Weathered brass or copper hardware suits the organic feel. Keep nearby greens in mind when testing: against blue toned foliage it reads green, and against yellow greens it reads bluer.

    30. Petrol Blue

    Front door painted dark petrol blue green on a house exterior.

    Petrol blue is a dark blue green, deep and slightly inky, the moody end of the teal family. It suits Victorian terraces, modern townhouses, and homes with black or charcoal trim. Antique brass hardware glows against it and is the classic city pairing. Petrol is dramatic on a small entry, so keep the step and porch tidy and let lighting do the decorating after dark.

    31. Smoky Blue

    Front door painted hazy smoky blue on a house exterior.

    Smoky blue is a hazy mid tone, grayed like slate but softer and a touch warmer. It suits transitional homes, gray brick, and facades with mixed materials where a clear blue would clash. Pewter or satin nickel hardware respects its quiet tone. Smoky blue is a good choice beside busy stonework, because it calms the wall around the door instead of competing with the pattern in the masonry.

    32. Marine Gray Blue

    Front door painted marine gray blue on a house exterior.

    Marine gray blue is a desaturated deep blue, the color of a calm sea under cloud, grayer than navy and softer than indigo. It suits coastal traditional, shingle, and craftsman homes, especially with weathered wood or gray shingles nearby. Oil rubbed bronze hardware adds warmth without shine. This shade changes gently through the day, from gray at dawn to clearly blue by afternoon, which many owners count as its charm.

    33. Primary Blue

    Front door painted bold primary blue on a house exterior.

    Primary blue is a pure, saturated mid blue with no gray, green, or violet lean: the boldest straightforward blue you can choose. It suits modern homes, plain white facades, and playful cottages where the door is meant to be the landmark of the street. Gloss black or white hardware keeps the statement clean. Use a high gloss finish if you want the full graphic effect, and keep the porch styling minimal.

    34. Chambray Blue

    Front door painted soft chambray blue on a house exterior.

    Chambray blue is a light, heathered looking blue with a soft gray white mix, like the woven fabric it is named for. It suits relaxed cottages, farmhouse entries, and homes with pale stone or limewashed brick. Brushed nickel or weathered zinc toned hardware fits its easy character. Chambray is gentle enough for a door in full sun, and it pairs well with natural linen colored wreaths and unglazed clay planters.

    Conclusion

    The right blue front door color comes down to three checks: the undertone against your siding, the depth against your light, and the hardware against both. Dark blues such as navy, indigo, and petrol give a calm, classic entry on almost any house. Mid tones like French blue, slate, and denim are the flexible middle ground, and pale blues from powder to ice suit bright, coastal, and cottage facades. For seasonal balance around the entry, the same restraint used in these fall living room decor ideas works outdoors too: one strong color, natural texture, and clear surfaces. Pick three finalists, paint large samples, and live with them for a day before you decide.

    Save this list on Pinterest before you buy paint, and pin the shades closest to your house style so you can compare them side by side at the store.

    FAQs

    How do I choose between navy and a lighter blue for my front door?

    Start with the light your entry gets. A shaded or north facing door makes every color look darker, so a mid blue there can read like navy, while a sunny facade can support true navy without going black. Then check your siding: navy gives strong contrast on white and cream, while lighter blues sit better on gray or mid tone siding where navy may look heavy. Paint both on sample boards and view them at the door morning and evening.

    What hardware finish works with most blue front doors?

    Brass is the most flexible partner for blue because its warmth balances both cool gray blues and green leaning teals. Black hardware is the second safe choice and suits modern, farmhouse, and graphic color schemes. Nickel and chrome fit cool, pale, and contemporary blues best. Whichever finish you pick, repeat it on the handle, hinges if visible, and any mail slot or house numbers so the entry reads as one set. General finish guidance is also covered on the Benjamin Moore front door color page.

    Should a blue front door match blue shutters or trim?

    It does not need to match exactly, and an exact match can look flat. A better approach is to keep the door one or two steps deeper than blue shutters, or to let the door be the only blue and keep shutters and trim neutral. If you repeat the color, use the same undertone family: a teal door with gray blue shutters will fight, while a navy door with slate shutters sits comfortably together.

    What paint finish is best for a front door?

    A satin or semi gloss exterior paint is the usual choice because it resists weather, wipes clean, and shows the door panels with a soft sheen. High gloss gives the most formal, reflective result and suits bold shades like primary blue or cobalt, but it shows every dent and brush mark, so the door surface must be smooth. Avoid flat finishes outdoors, since they mark easily and are harder to wash.

    How can I test a blue shade before painting the whole door?

    Buy small sample pots of two or three finalists and paint large boards, or paint one panel section of the door itself if you plan to repaint anyway. Live with the samples for at least a full day and check them in morning shade, midday sun, and evening light. Blue shifts more than most colors: gray blues can go flat in dull weather, and green leaning blues can look turquoise in strong sun.

    Do blue front doors work with red brick houses?

    Yes, brick is one of the best partners for blue because the orange red of brick and the blue of the door sit opposite each other and make both look richer. Navy, slate, teal, and colonial blue are the most reliable choices with red brick. Avoid very pale blues unless the brick is also pale, since a light door can look washed out against strong brick. Brass or black hardware both work; let the mortar color guide you, with warm gray mortar favoring brass.

    Can I use a blue front door color on a house with a blue roof or blue siding?

    Yes, but separate the shades clearly. If the siding is blue, choose a door at least two steps darker or lighter, and consider a different undertone so the two blues do not blur together. A white or pale door frame helps draw a line between them. With a blue gray roof, most mid and dark door blues work, since the roof reads as a neutral from the street.


  • 18 Pink Flower Garden Ideas to Bring More Personality Home

    18 Pink Flower Garden Ideas to Bring More Personality Home

    Pink flowers can carry a whole garden when you place them with a plan instead of scattering them one plant at a time. These 18 pink flower garden ideas range from a single window box to a rose border, a hydrangea hedge, and a small flowering cherry, so there is an option for a large yard, a narrow side bed, or a rented patio. Start with the spot you see most often, group plants in threes or drifts rather than singles, and repeat the same pink in two or three places so the garden reads as one design.
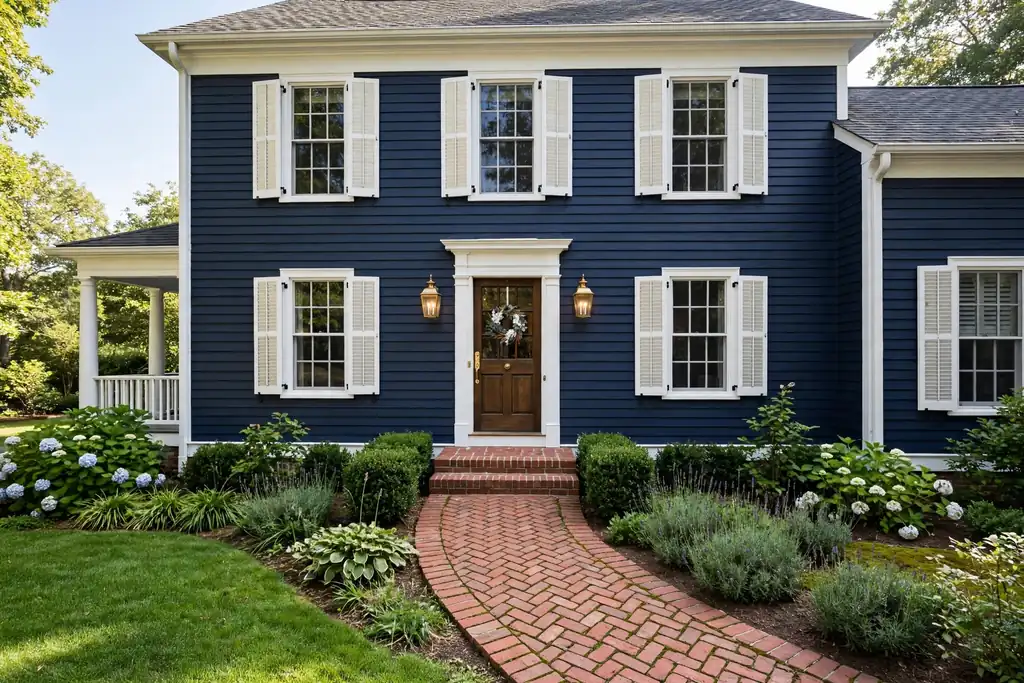
    Key Takeaways

    • Plant pink in groups and drifts, not single plants, so the color reads clearly from the house and the street.
    • Spread the season: tulips and phlox in spring, roses and peonies in early summer, coneflowers and dahlias later on.
    • Use pots, window boxes, and hanging baskets when bed space is limited or the garden is rented.
    • Soften strong pink by pairing it with white flowers and green foliage.
    • Check the plant label for sun, spacing, and your growing zone before you buy.

    1. Line a Front Path With Pink Petunias

    Wide bed of pink and magenta petunias edging a curved garden path

    A low ribbon of pink petunias along a front path gives color from late spring until frost and takes very little space. Plant a single row about a hand span from the path edge, or a double row in a wider bed, and keep the variety the same along the whole run so the line looks deliberate. Trailing petunia types spill softly over paving, while compact types stay neater near a door. Water at the base, pinch off faded blooms when you pass, and replace the row each year, since petunias are grown as annuals in most gardens.

    2. Grow a Pink Rose Border Along a Fence

    Pink roses climbing over a white picket fence

    Pink shrub roses planted along a fence give height, repeat flowers, and a clear backdrop for shorter plants in front. Space the bushes according to the label, mulch the soil to hold moisture, and prune in late winter or early spring following the guidance for your rose type. A plain wood or white painted fence shows the color well. Before you buy, check flowering times and disease resistance for your area using a reference such as the RHS plant pages. If a full border is too much, three bushes grouped at a corner give a similar effect.

    3. Plant Pink Tulips in Drifts for Spring

    Pink and coral tulips flowering in a spring bed

    Tulips look best planted in loose drifts of nine or more bulbs of one variety rather than in straight single rows. Set bulbs in autumn, pointed end up, at about three times their own depth, in soil that drains freely so they do not rot over winter. Mix an early and a late pink variety to stretch the display, and let the foliage die back naturally after flowering so the bulbs feed for next year. In small beds, plant pink tulips between later perennials so their leaves hide the fading tulip foliage.

    4. Build a Low Hedge From Pink Hydrangeas

    Hydrangea hedge with pink, lilac and blue flower heads along a garden path

    A short row of hydrangeas makes a soft hedge that flowers for weeks in summer and needs no clipping to stay tidy. Choose a compact bigleaf or panicle type, plant the row where it gets morning sun and some afternoon shade in hot areas, and keep the soil evenly moist in the first season. Note that on bigleaf hydrangeas, soil acidity can shift flowers between pink and blue, so if you want to keep them pink, follow the label advice for your soil. Leave the faded heads on over winter for structure, then tidy in spring.

    5. Give Pink Peonies a Sunny Focal Spot

    Pink peonies in full bloom in a garden border

    One group of pink peonies can anchor a whole border in late spring. Plant the roots in autumn or early spring with the buds just below the soil surface, since planting too deep is a common reason peonies fail to flower. Give them full sun, room for air to move around the leaves, and a support ring before the heavy blooms open. Peonies resent being moved, so choose the spot with care and expect the clump to improve each year. Ant activity on the buds is normal and does not need treatment.

    6. Add Pink Coneflowers for Bees and Butterflies

    Pink coneflowers with a bee on the central cone

    Pink coneflowers flower for a long stretch of summer and are visited steadily by bees and butterflies. Plant them in groups of three or five in full sun and well drained soil, and water only while they settle in, because established plants cope with dry spells better than many border flowers. Leave some seed heads standing in autumn for birds and winter shape, then cut the stems down in spring. Divide crowded clumps every few years to keep them flowering well. Coneflowers also hold up in a vase, so they pair well with the cutting bed in Idea 15.

    7. Keep Color Going With Pink Dahlias

    Pink dahlias flowering in a late summer border

    Dahlias fill the gap from midsummer until the first frost, when many pink perennials are finished. Start tubers in pots under cover or plant them out after frost risk has passed, in a sunny bed with rich soil. Stake tall types early, before the stems get heavy, and pick or deadhead often to keep new buds coming. A row of pink dahlias along a fence or at the back of a border gives a strong late show. In cold areas the tubers are usually lifted and stored dry over winter, so check the advice for your zone.

    8. Fill Window Boxes With Pink Annuals

    White window box filled with pink flowers and trailing greenery on a house wall

    A window box is the fastest pink flower garden idea to finish, and it works where there is no bed at all. Use a box with drainage holes, fill it with fresh potting mix, and combine one upright pink flower, such as geraniums, with a trailing one, such as trailing petunias or verbena, so the box looks full from the street. Boxes dry out quickly in sun and wind, so expect to water daily in hot weather. Feed lightly through the season, swap tired plants out as needed, and refresh the whole box each spring.

    9. Mix Hollyhocks and Foxgloves for a Cottage Border

    Tall hollyhocks and foxgloves in a cottage garden border

    Tall spires give a pink garden height and a relaxed cottage feel. Sow or plant hollyhocks and foxgloves toward the back of a border, with lower pink flowers such as hardy geraniums in front to cover their base. Both plants often self seed, so once they settle you may get new plants each year without buying more, though the colors can shift over time. Stake hollyhocks in windy gardens, and note that foxgloves are biennial, flowering in their second year. Keep foxgloves away from areas where toddlers or pets might eat the leaves, as the plant is toxic if eaten.
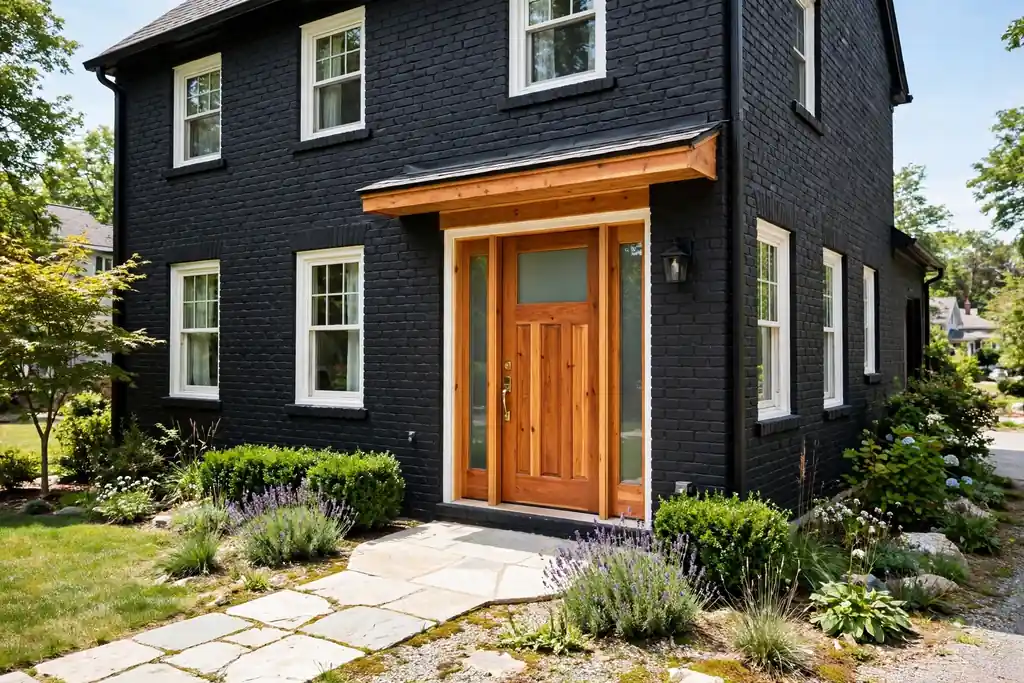
    10. Plant One Small Pink Flowering Cherry Tree

    Pink cherry blossom branches against a blue sky

    A single small flowering cherry gives a short, memorable burst of pink blossom in spring and a clear focal point for the rest of the year. Choose a variety sized for your space, since mature spread varies a lot between types, and plant it where falling petals will not be a problem, such as over lawn rather than over a car or a pond. Water well through the first dry season while the roots establish. Underplant the tree with spring bulbs or creeping phlox so the ground below it earns its place after the blossom ends.

    11. Group Pink Geraniums in Terracotta Pots

    Pink geraniums growing in terracotta pots against a garden fence

    Pots let you place pink exactly where a bed is missing: on steps, beside a door, or along a sunny wall. Group three terracotta pots of pink geraniums in different sizes for a fuller look than one large pot alone. Terracotta dries out faster than plastic, so check the soil with a finger before watering, and choose a pot with a drainage hole plus a saucer on paving. Move the group as the season changes to follow the sun or to frame an entrance. In mild areas geraniums can be overwintered indoors on a bright sill.
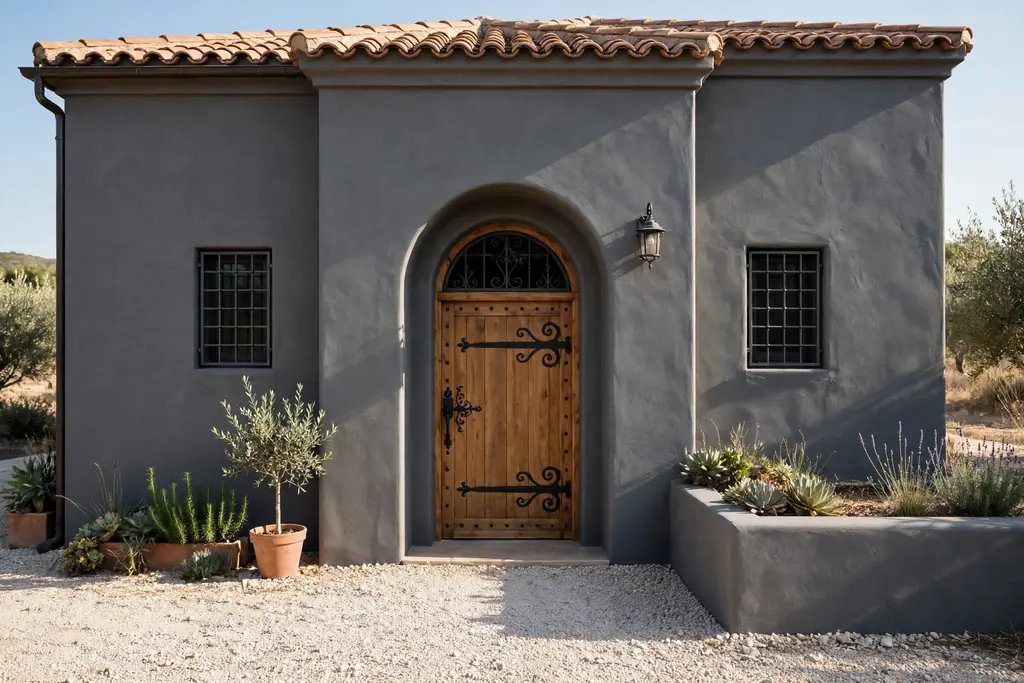
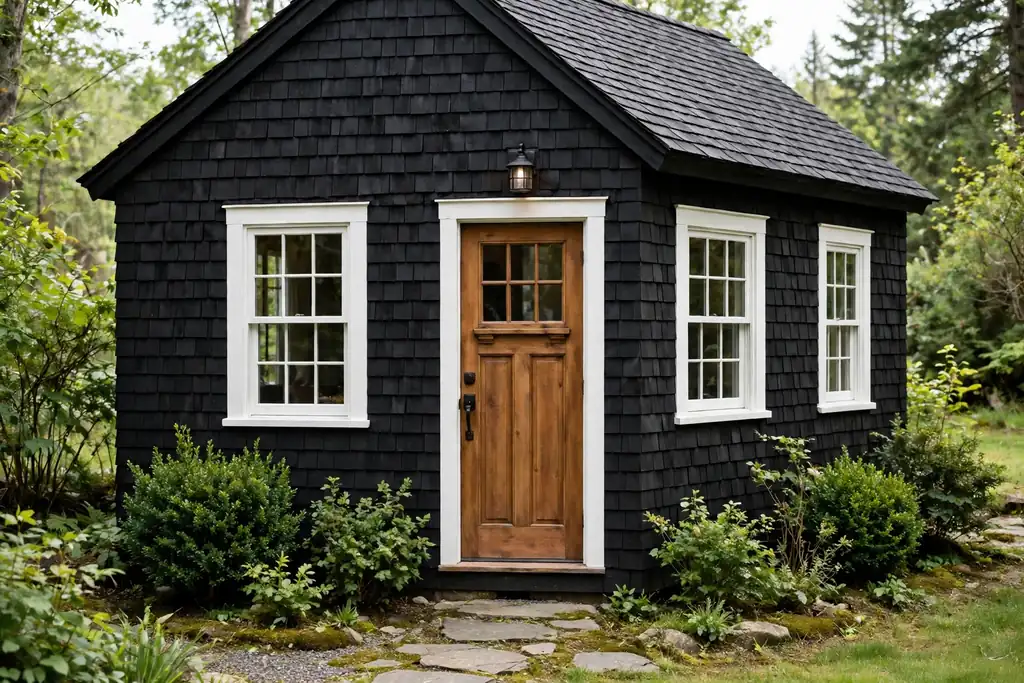
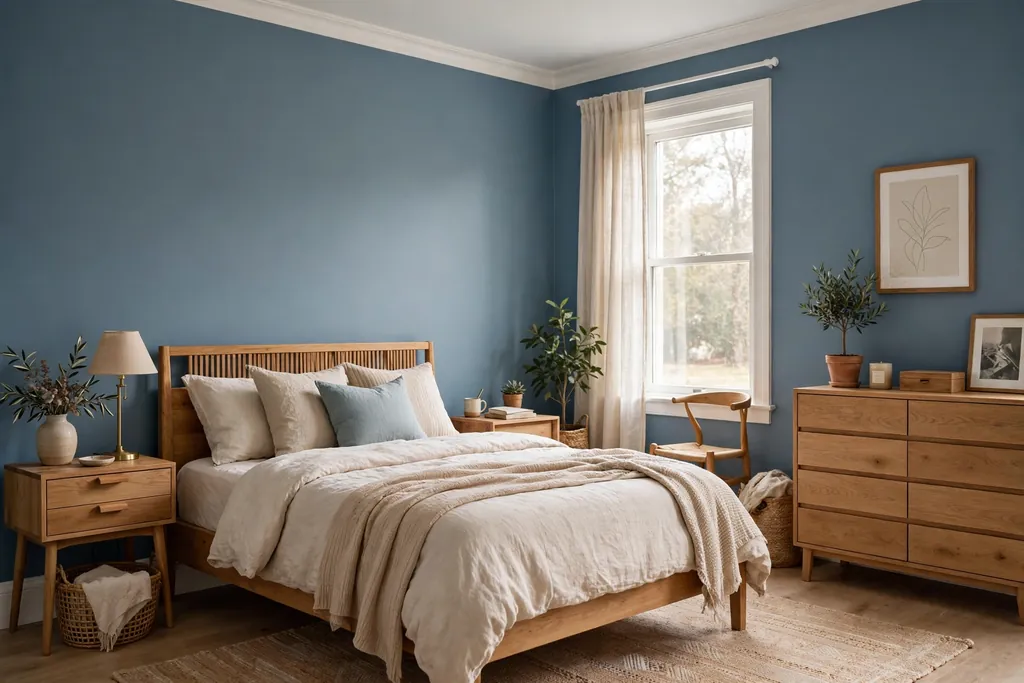
    12. Pair Pink Blooms With White for a Calmer Bed

    Curved flower bed of pink and white blooms edging a green lawn

    If a full pink bed feels like too much color, mix pink with white in roughly equal amounts. White roses, white cosmos, or white foxgloves between pink clumps rest the eye and make the pink look clearer rather than weaker. Keep the foliage mostly green and avoid adding a third strong color, so the bed stays calm. This pairing suits front gardens seen from the street and beds outside windows, where you look at the planting every day. Repeat the same pink and white pairing in a pot or box nearby to link the spaces.

    13. Carpet a Sunny Slope With Creeping Phlox

    Pink creeping phlox spilling over rocks in a rock garden

    Creeping phlox covers banks, rock garden edges, and the front of borders with a mat of pink flowers in spring. Plant small divisions about a hand span apart on a sunny, well drained slope, water them through the first season, and they will knit together and spill over stones and edging. The evergreen mat also helps hold soil on a bank and leaves less room for weeds. Trim lightly after flowering to keep the mat dense. Where the slope is shaded or damp, choose a different ground cover, because phlox sulks without sun and drainage.

    14. Train Sweet Peas Up a Trellis or Obelisk

    Pink and purple sweet peas climbing garden supports

    Sweet peas bring pink flowers and scent to a small footprint by growing upward. Sow seeds in pots or directly in the ground in spring, and give the seedlings a trellis, obelisk, or netting to climb from the start. Tie young stems in loosely as they grow, water at the base, and pick the flowers every few days, because regular picking is what keeps more buds coming. A wigwam of canes in a large pot works on a patio if you have no bed. Stop picking late in the season if you want to save seed for next year.

    15. Set Aside a Small Pink Cutting Bed

    Hands cutting fresh flowers with snips in a cutting garden

    A narrow cutting bed, even a single row along a fence, keeps the display borders tidy while giving you pink flowers for the house. Grow rows of pink zinnias, cosmos, dahlias, and coneflowers spaced for picking rather than for looks, and cut in the morning into a bucket of water. Bringing your own pink stems indoors is an easy way to refresh everyday dining table decor without buying flowers. Keep the bed watered and fed more than the display borders, and re-sow fast annuals such as cosmos if gaps appear by midsummer.

    16. Sow a Pink Wildflower Patch

    Wildflower patch with pink cornflowers and mixed summer blooms

    A small wildflower patch is the lowest effort way to get a loose, natural spread of pink. Choose a seed mix with pink cornflowers, cosmos, and poppies suited to your region, clear the patch of weeds first, and sow thinly on bare, raked soil in spring or autumn as the packet directs. The first year can look patchy while perennials establish, so set expectations and leave the patch uncut until late in the season to let plants self seed. Keep the patch away from formal beds if you prefer tidy edges, and add a simple mown or gravel edge so it reads as a choice, not neglect.

    17. Surround a Garden Bench With Pink Planting

    Wooden garden bench in front of pink flowering shrubs

    Planting pink flowers around a bench turns a seat into a destination and gives the color a purpose. Place low pink plants such as hardy geraniums and creeping phlox at the front, taller roses or hollyhocks behind the seat, and leave a clear step or two of paving at the bench feet. Scented pink roses or sweet peas nearby make the spot more inviting in the evening. For layout ideas for the seating itself, see these fireplace seating ideas, which translate well to a garden corner. Keep plants off the seat edges so the bench stays easy to use.

    18. Hang Baskets of Pink Flowers by the Door

    Hanging baskets of pink flowers under a porch roof

    Hanging baskets put pink flowers at eye level and finish an entrance faster than any bed change. Line a basket, fill it with potting mix, and plant pink trailing petunias, fuchsias, or geraniums around one upright center plant. Hang the basket on a bracket rated for the weight of a watered basket, which is heavier than most people expect. Baskets dry out fast, so check them daily in summer and water until it runs from the base. Deadhead weekly and feed lightly, and bring baskets under cover if a hard frost is forecast early or late in the season.

    Conclusion

    A pink garden does not need every idea on this list. Pick one structure, such as a rose border, a hydrangea row, or a flowering cherry, then add two or three supporting pieces, such as pots by the door, a window box, and phlox at the front of the bed. Spread the flowering across spring, summer, and late season so the color does not arrive and leave in one month. When you bring cut pink stems inside, they link the garden to calmer indoor spaces, such as the rooms in these fall living room decor ideas.

    Save this list on Pinterest before your next nursery trip, and work through it one area at a time: structure first, then seasonal fill, then pots and baskets.

    FAQs

    What are the easiest pink flowers for beginners?

    Petunias, geraniums, and zinnias are forgiving choices. They flower for a long season, cope with basic care, and show quickly whether a spot suits them. Start them in pots or a window box if you are unsure, because you can move the container to better light. Coneflowers and creeping phlox are easy perennials once established, needing little beyond water in their first season and a tidy up once a year.

    How do I keep pink flowers blooming across the whole season?

    Plan by season rather than by plant alone. Tulips, phlox, and cherry blossom cover spring. Roses, peonies, and hydrangeas carry early and mid summer. Coneflowers, dahlias, and repeat annuals such as petunias and zinnias finish the year. Deadhead spent flowers where the label advises it, water during long dry spells, and feed container plants regularly, because pots run out of food faster than beds.

    Which pink flowers grow well in part shade?

    Hydrangeas are the most useful pink flower for part shade, and fuchsias in baskets also do well out of full sun. Foxgloves cope with light shade at the edge of trees. Most of the other ideas on this list, including roses, peonies, dahlias, and phlox, flower best with at least half a day of sun. If your garden is mostly shade, use pink in pots that you can place in the sunniest spots you have.

    Can I use these ideas in a small garden or a rental?

    Yes. Ideas 8, 11, 14, and 18 use window boxes, pots, a cane wigwam, and hanging baskets, none of which change the ground. A single flowering cherry in a large pot or one hydrangea in a half barrel gives structure without planting in the soil. Keep receipts for brackets and check your lease before fixing anything to walls or fences, and group containers so the space still looks planned rather than crowded.

    Do pink flowers attract bees and butterflies?

    Many do. Coneflowers, sweet peas, and wildflower mixes with cornflowers are all visited by pollinating insects through the season. Single, open flowers are easier for insects to use than very double blooms, so if wildlife matters to you, mix some single flowered varieties in with the doubles. Avoid spraying open flowers with insecticide, and leave some seed heads standing in autumn for birds.

    When should I plant pink perennials and bulbs?

    Plant tulip bulbs in autumn, at about three times their own depth, so they flower the following spring. Peonies and most hardy perennials go in during autumn or spring while the soil is workable. Dahlias wait until after the last frost in cold areas. Annuals such as petunias and zinnias go out after frost risk has passed. Always follow the label or packet for your own zone, because dates shift a lot between regions.