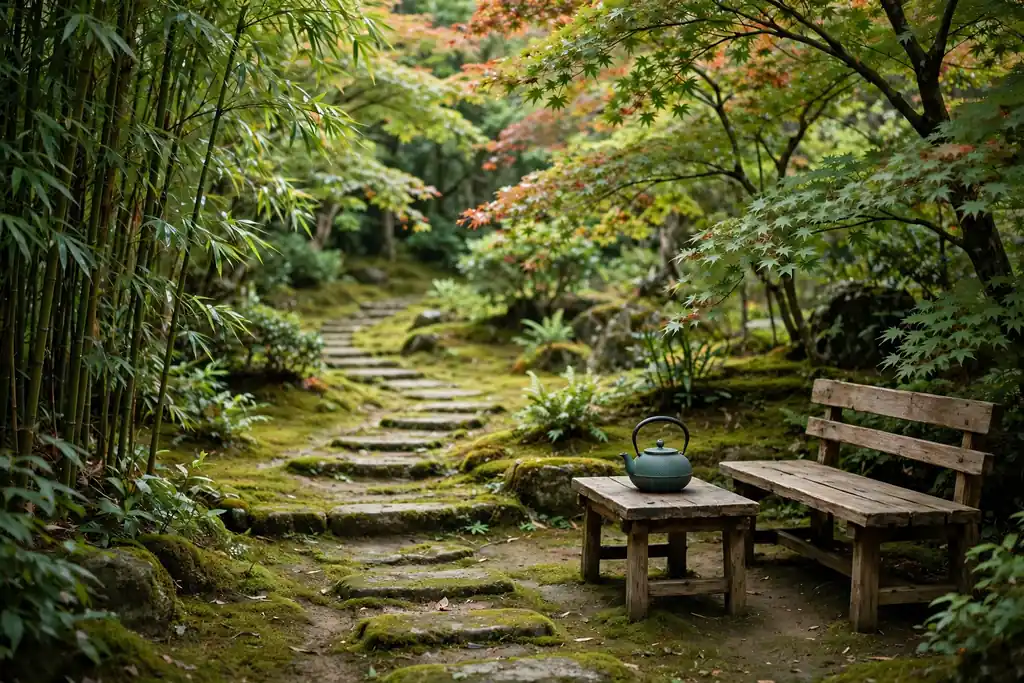
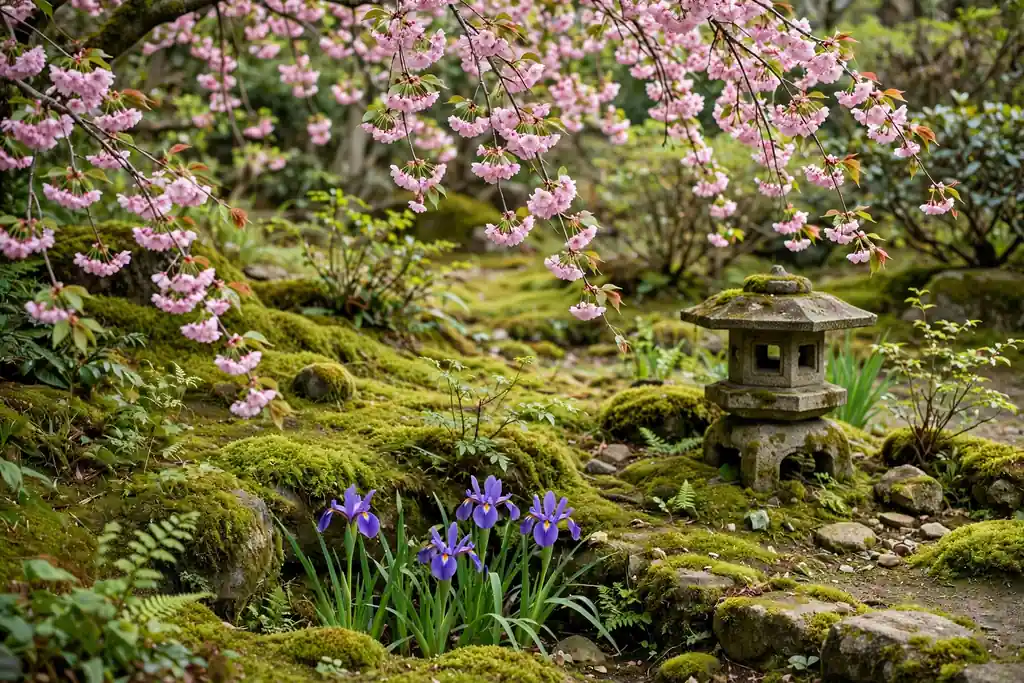
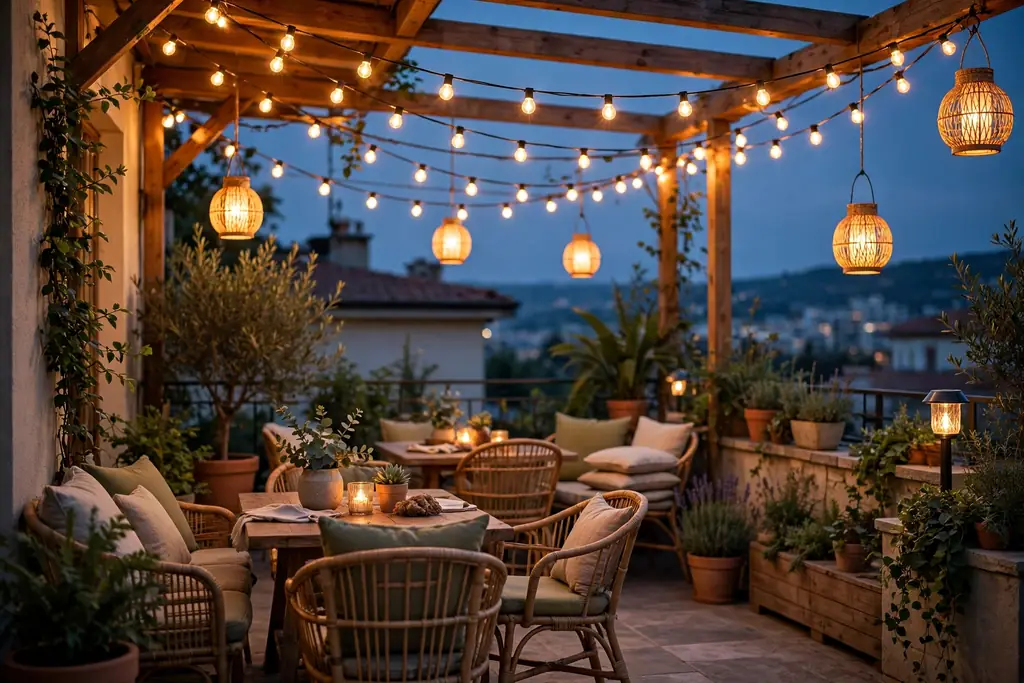
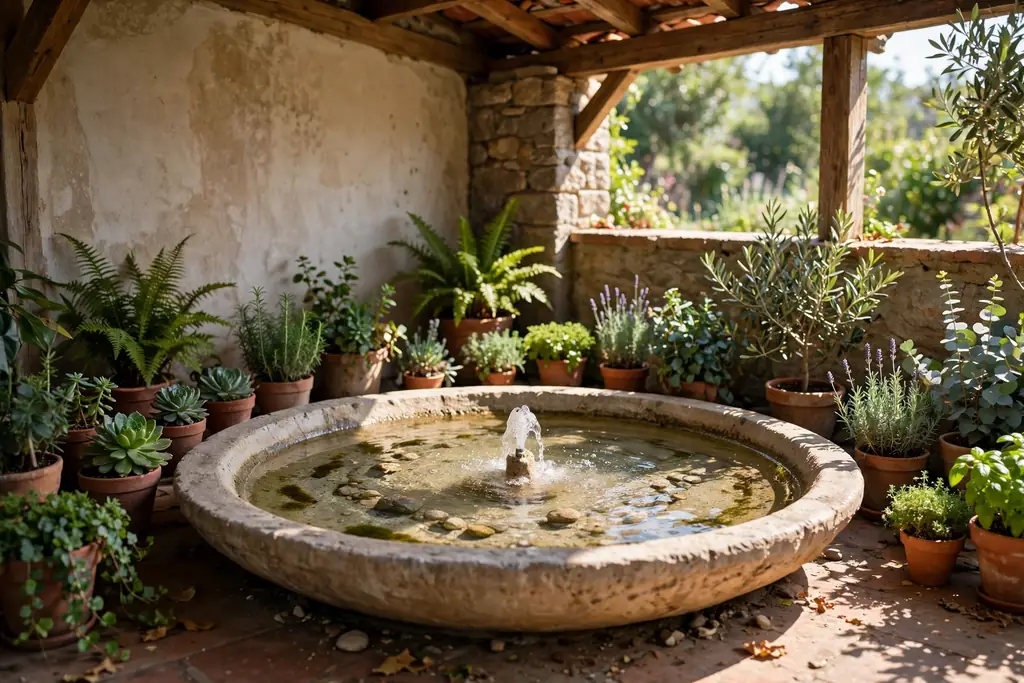
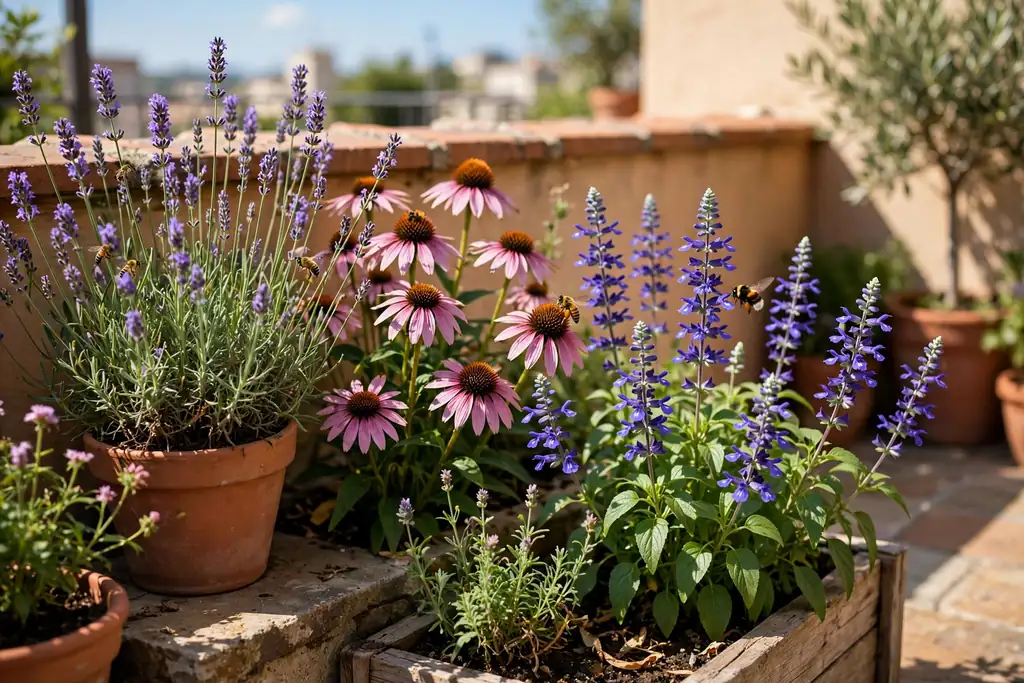
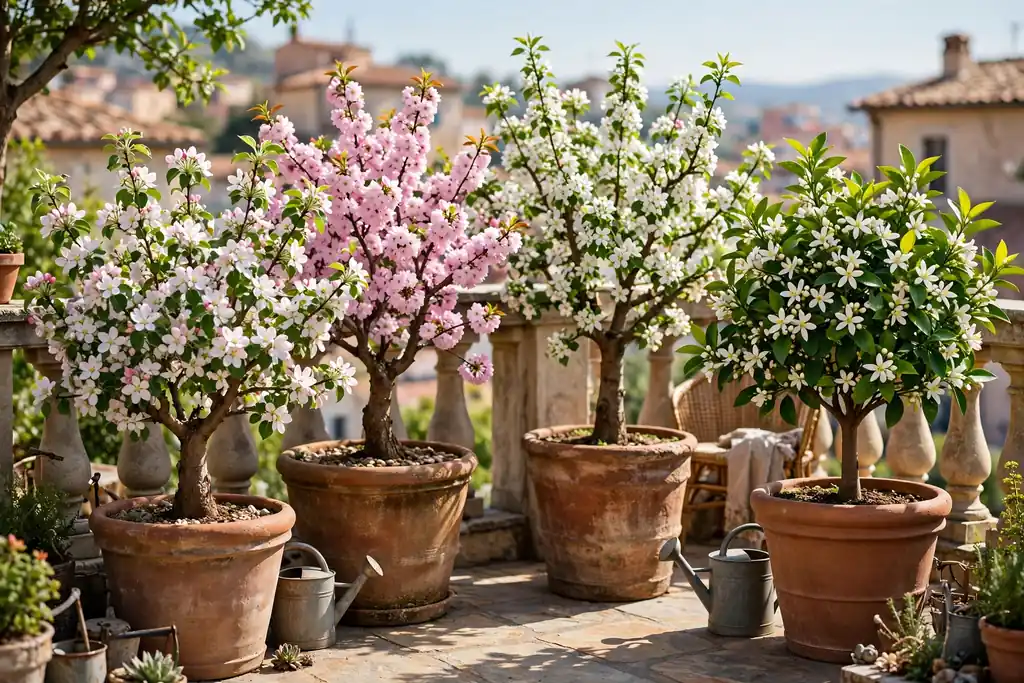
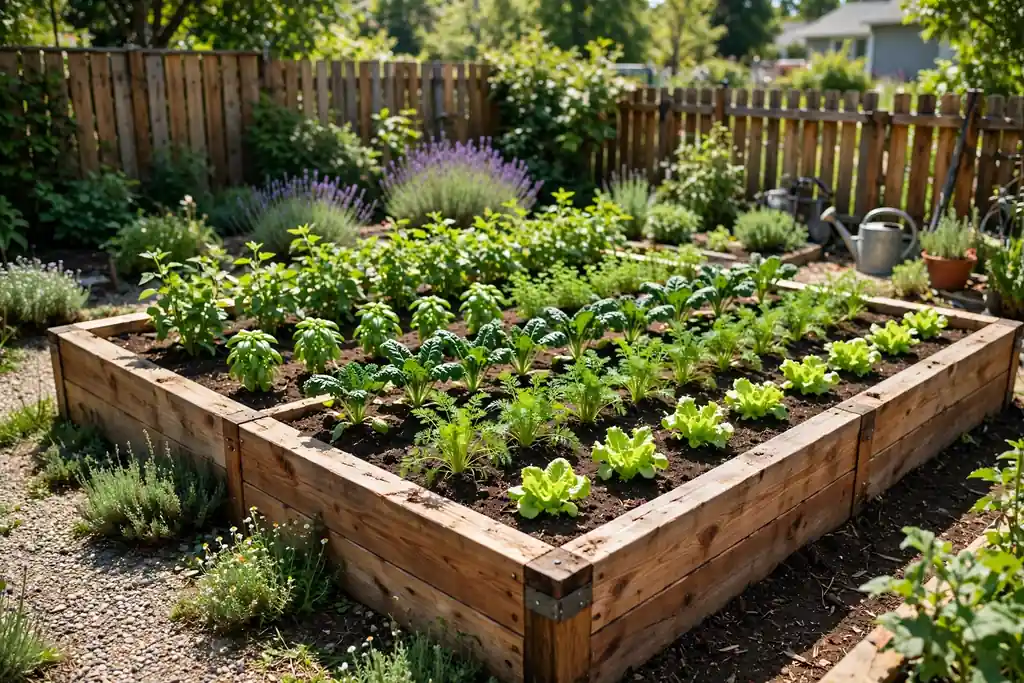
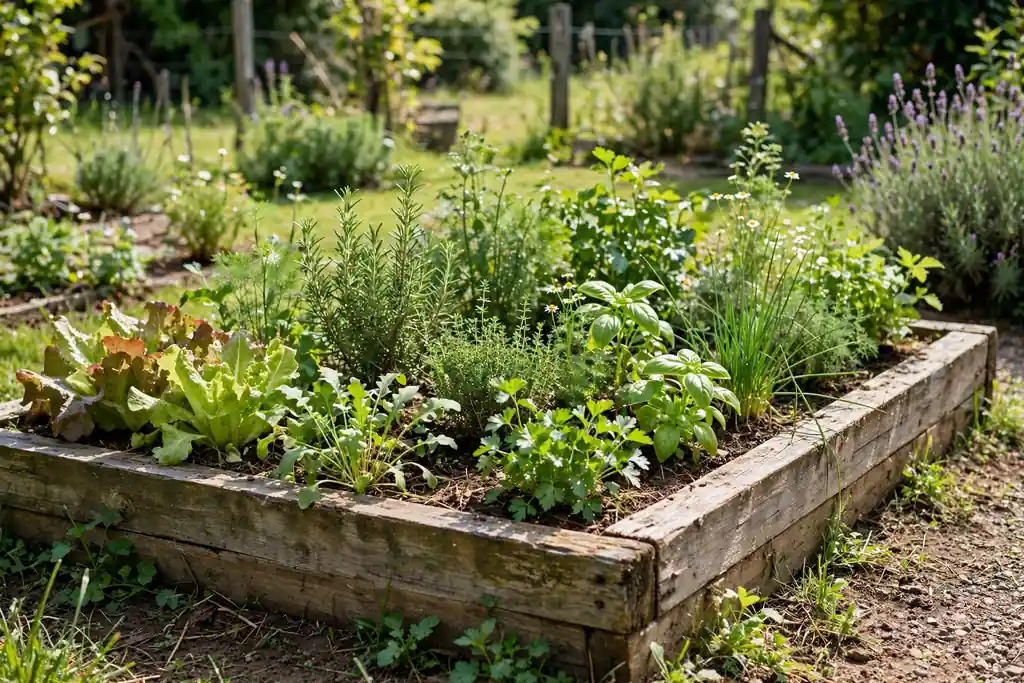
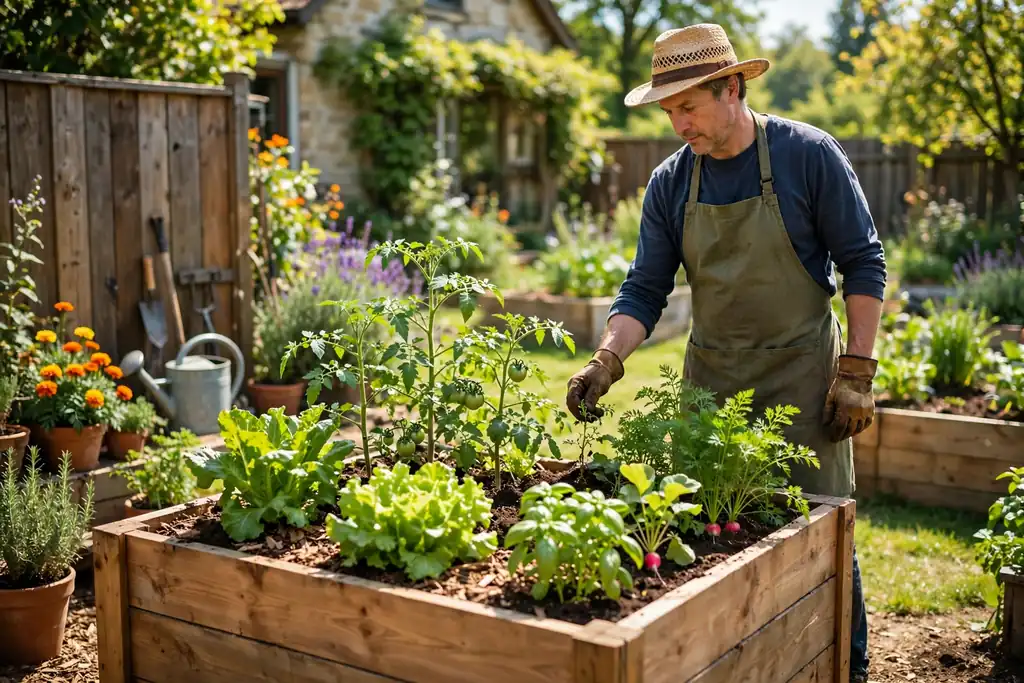
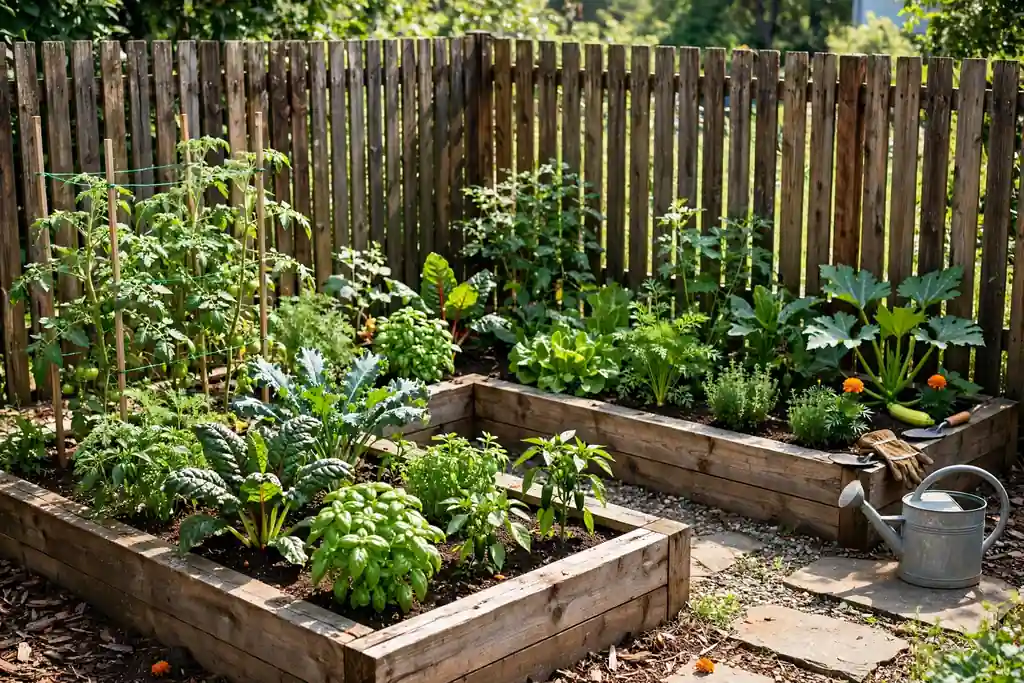
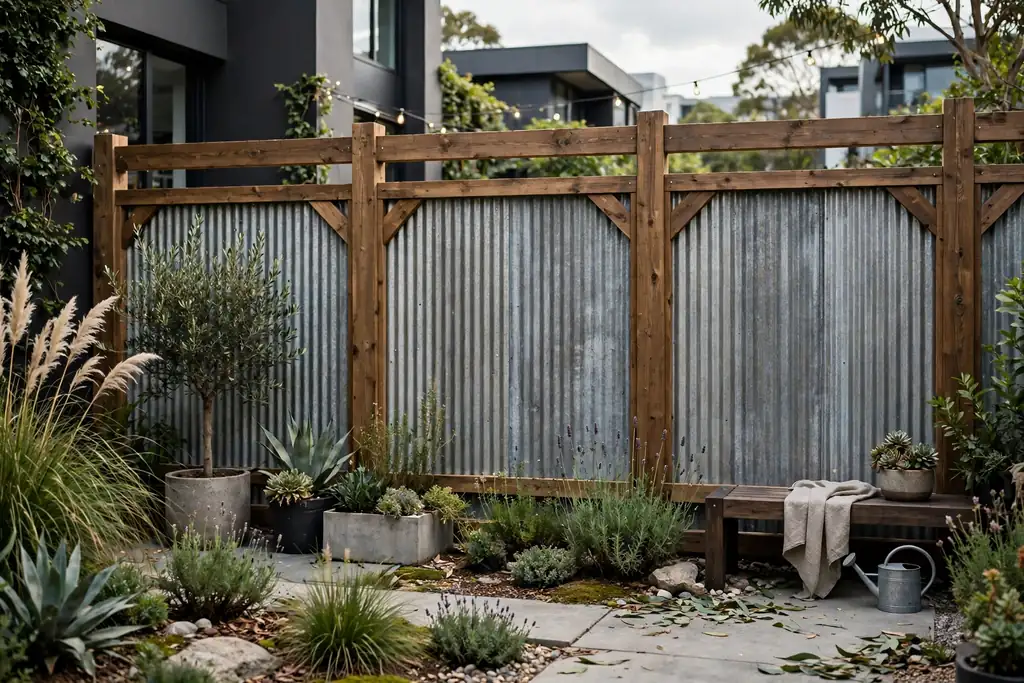
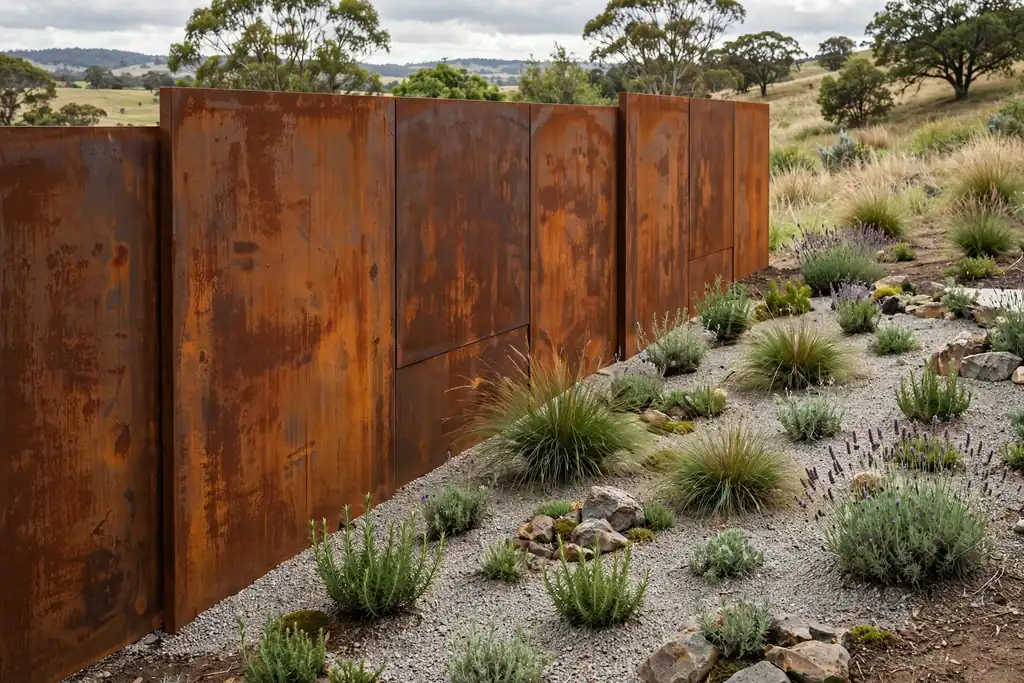
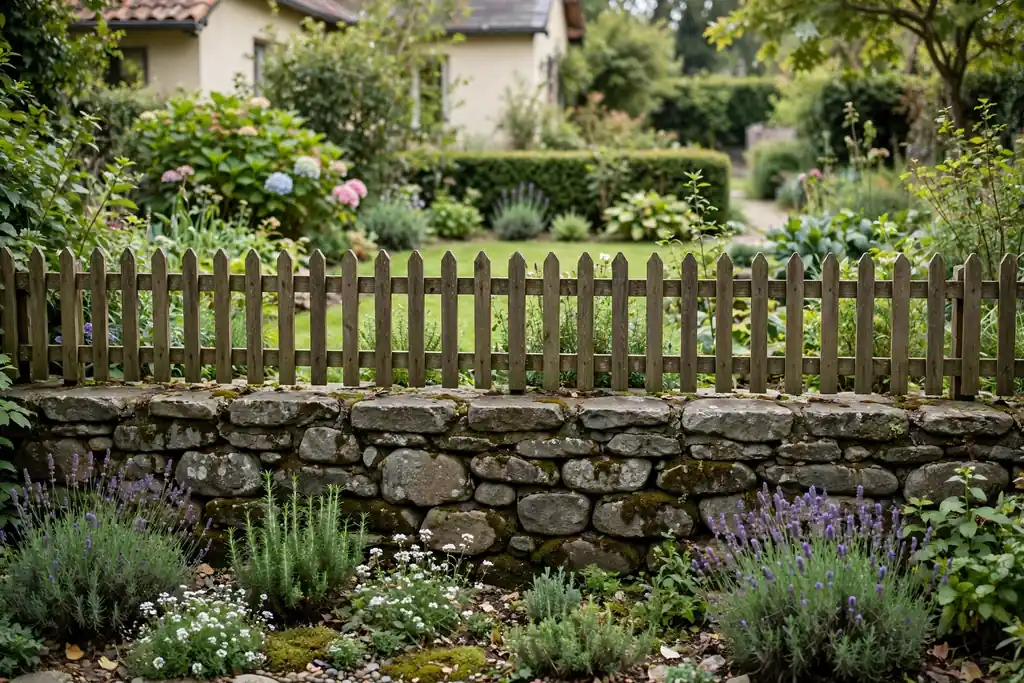
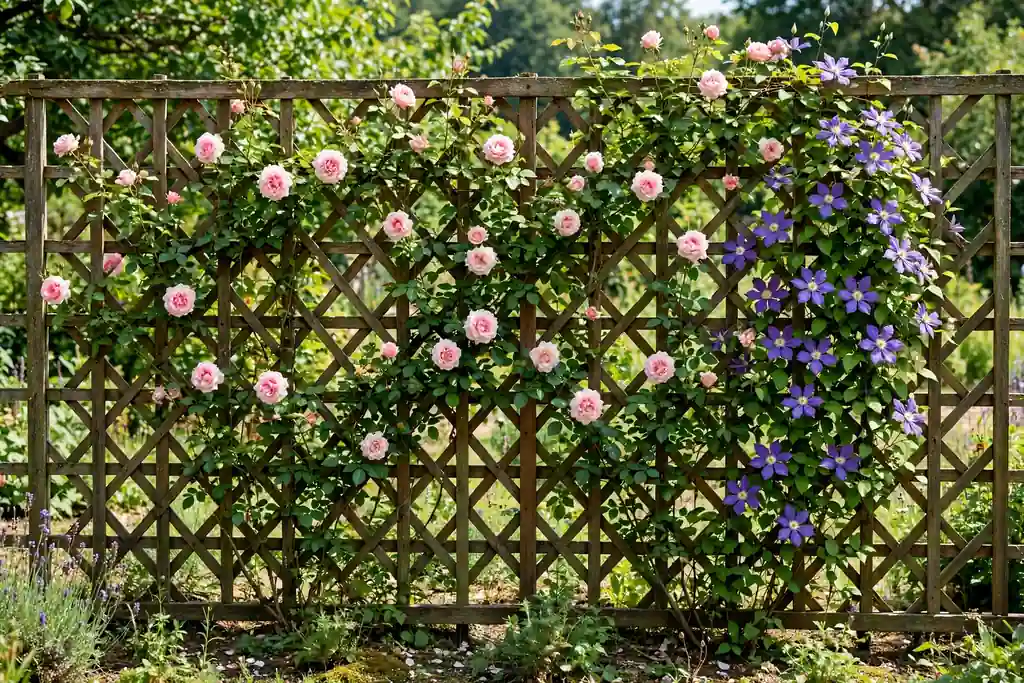
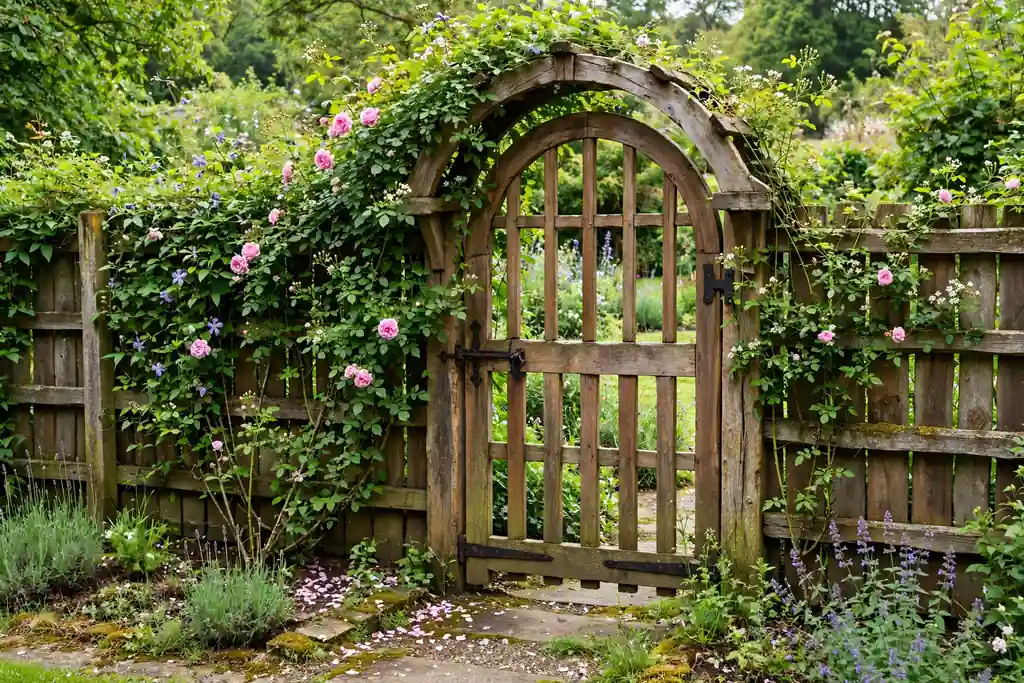
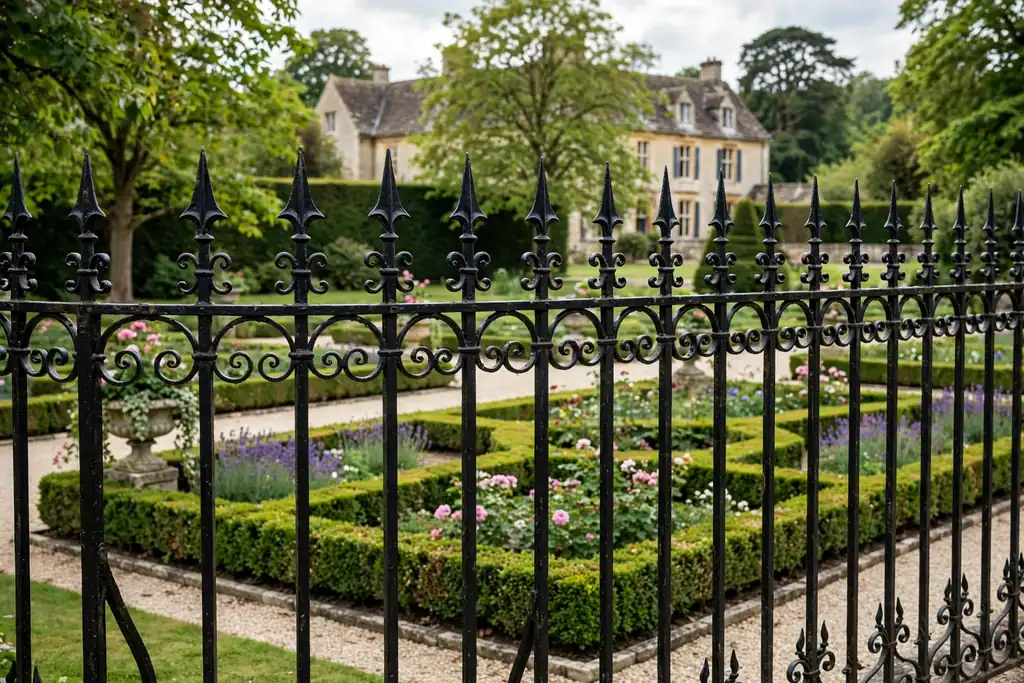
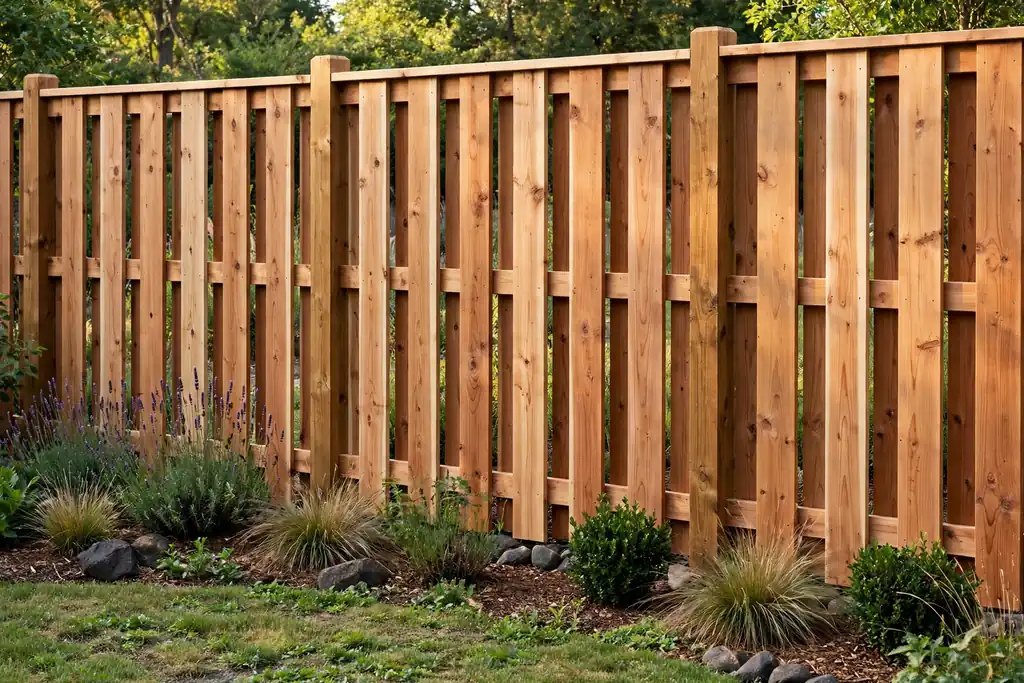
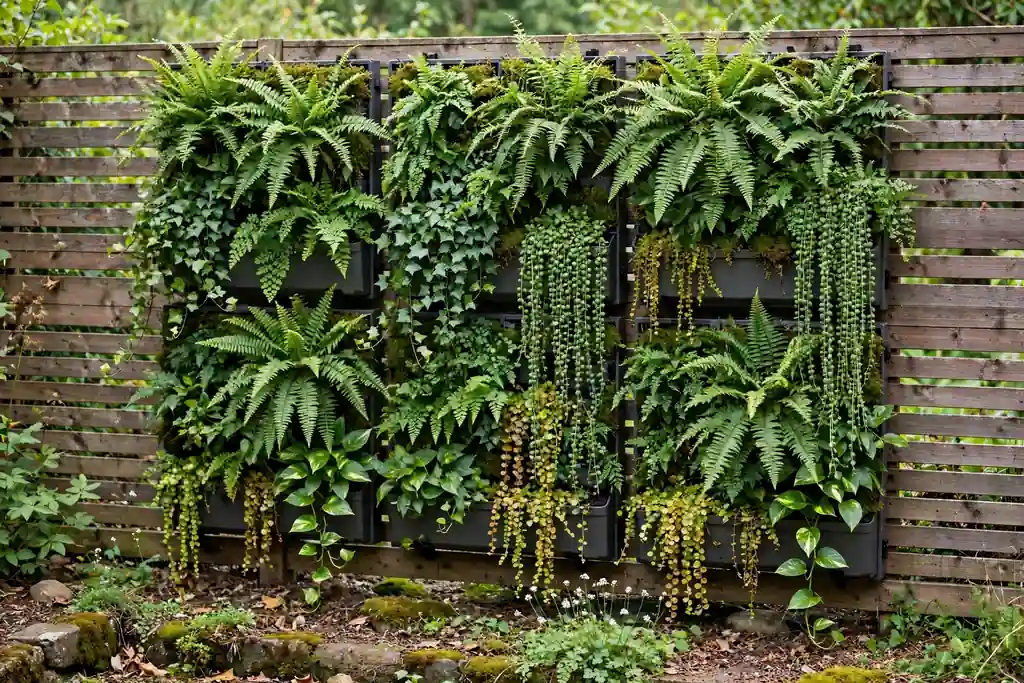
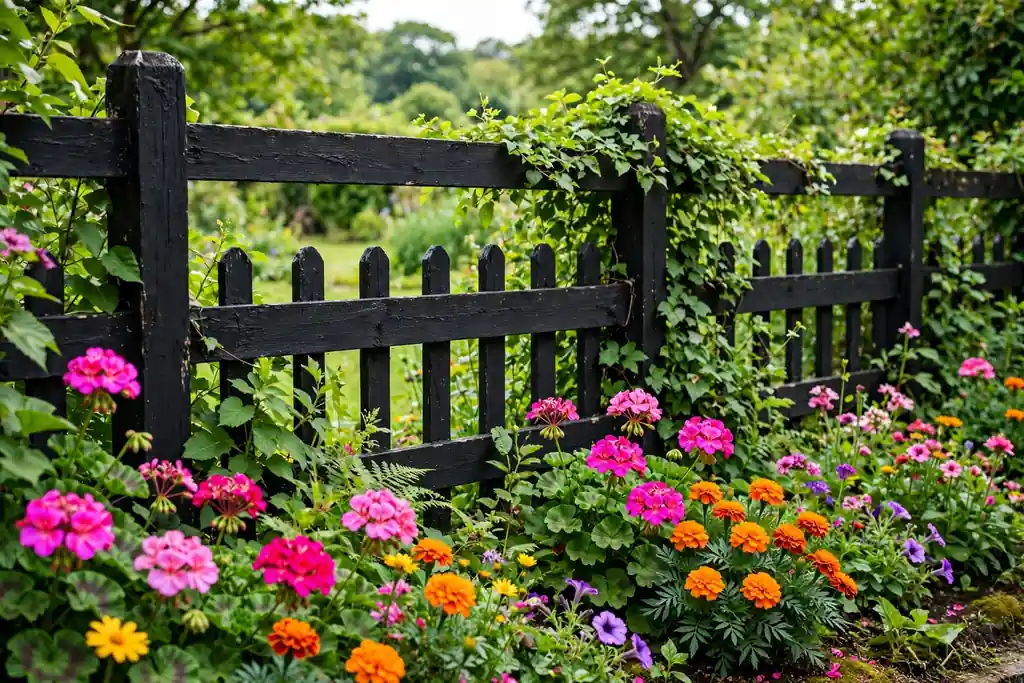
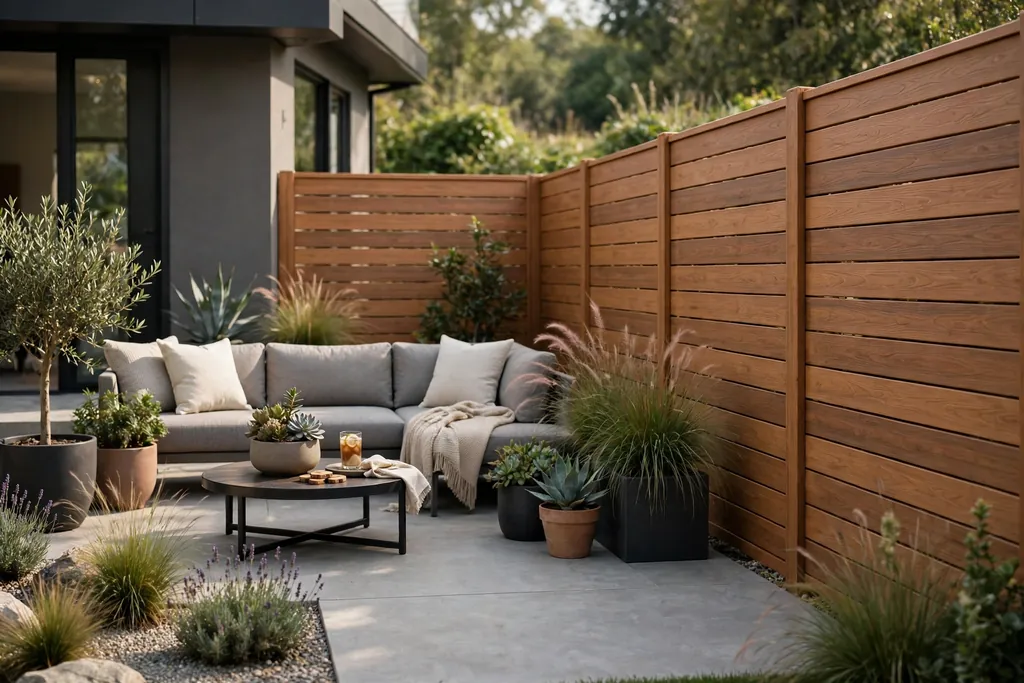
A Japanese garden works because it keeps things simple: a few natural materials, one clear focal point, and open space that lets each plant and stone be seen. Gravel, moss, bamboo, and water do most of the work, while a maple or a pruned pine gives the garden its shape through the seasons. These 12 Japanese garden ideas cover dry gravel gardens, paths, fences, water features, and quiet seating spots, so you can start with one corner or plan a whole yard. Pick the structure first, then the plants that suit your sun, shade, and watering routine, and repeat one or two materials so the space feels settled rather than busy.
Key Takeaways
Start with structure: a path, a focal stone, a water feature, or a seating spot, then add plants around it.
Use a small palette: gravel, stone, bamboo, moss, and green foliage carry the Japanese look without clutter.
Give every feature a job: a lantern marks a turn, a basin sits by a path, and a bench faces the best view.
Repeat one or two materials through the garden so separate areas read as one design.
Choose plants for your light and climate, and check the label for sun, spacing, and your growing zone before you buy.
Leave open space: a Japanese garden needs empty gravel or moss as much as it needs planting.
1. Rake a Gravel Dry Garden
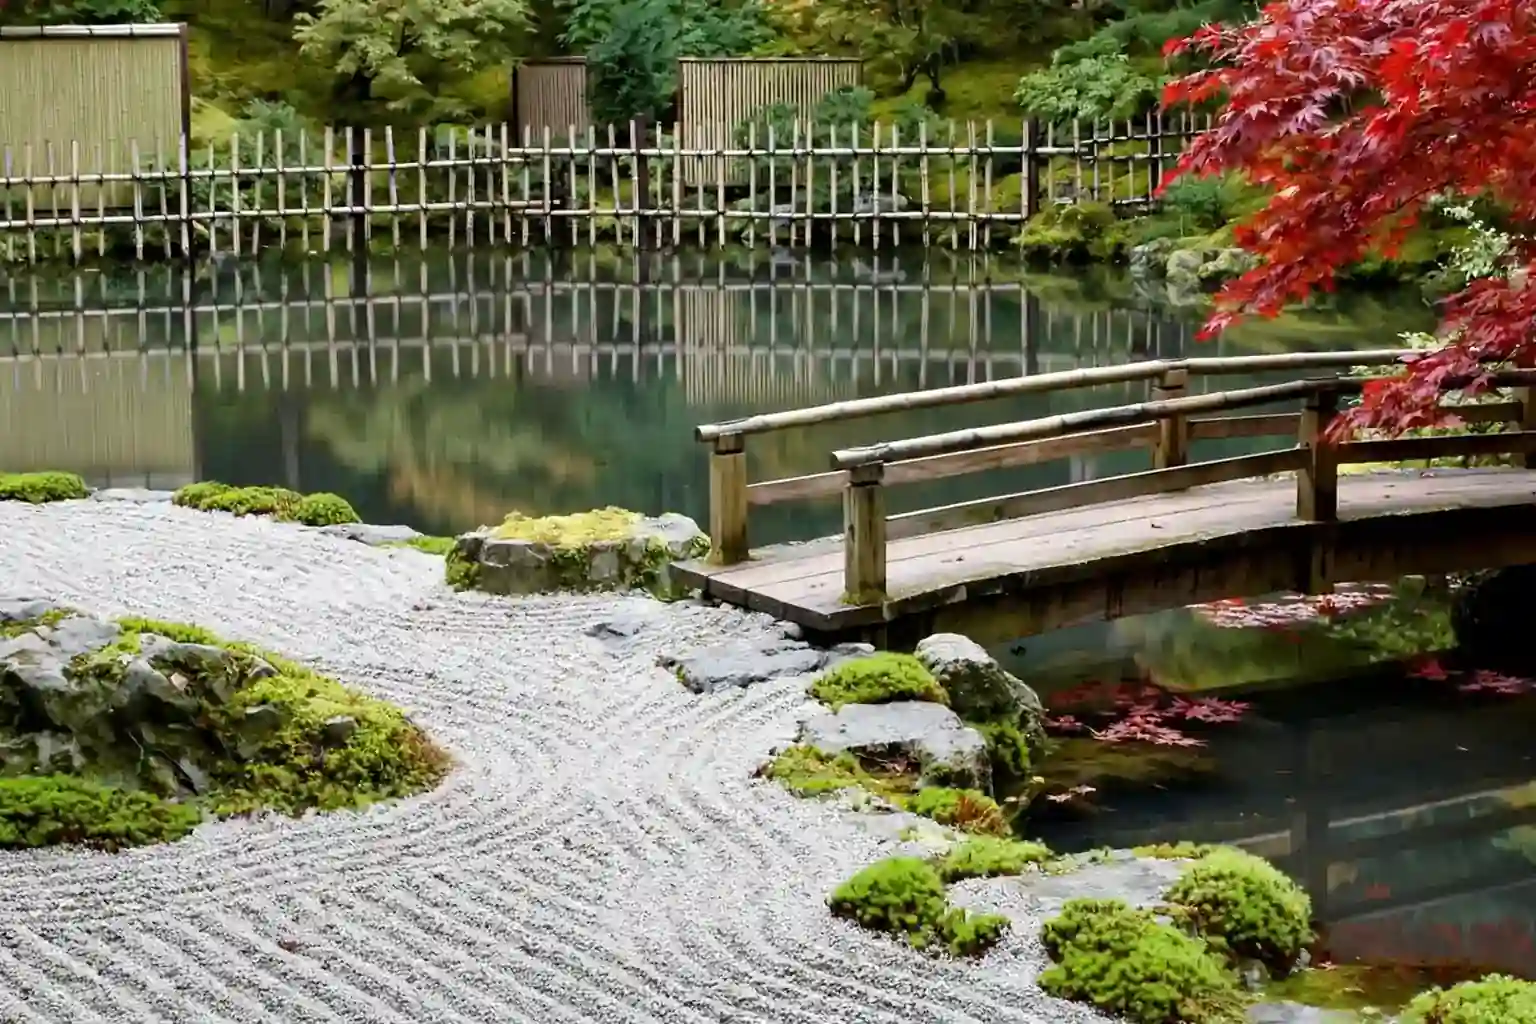
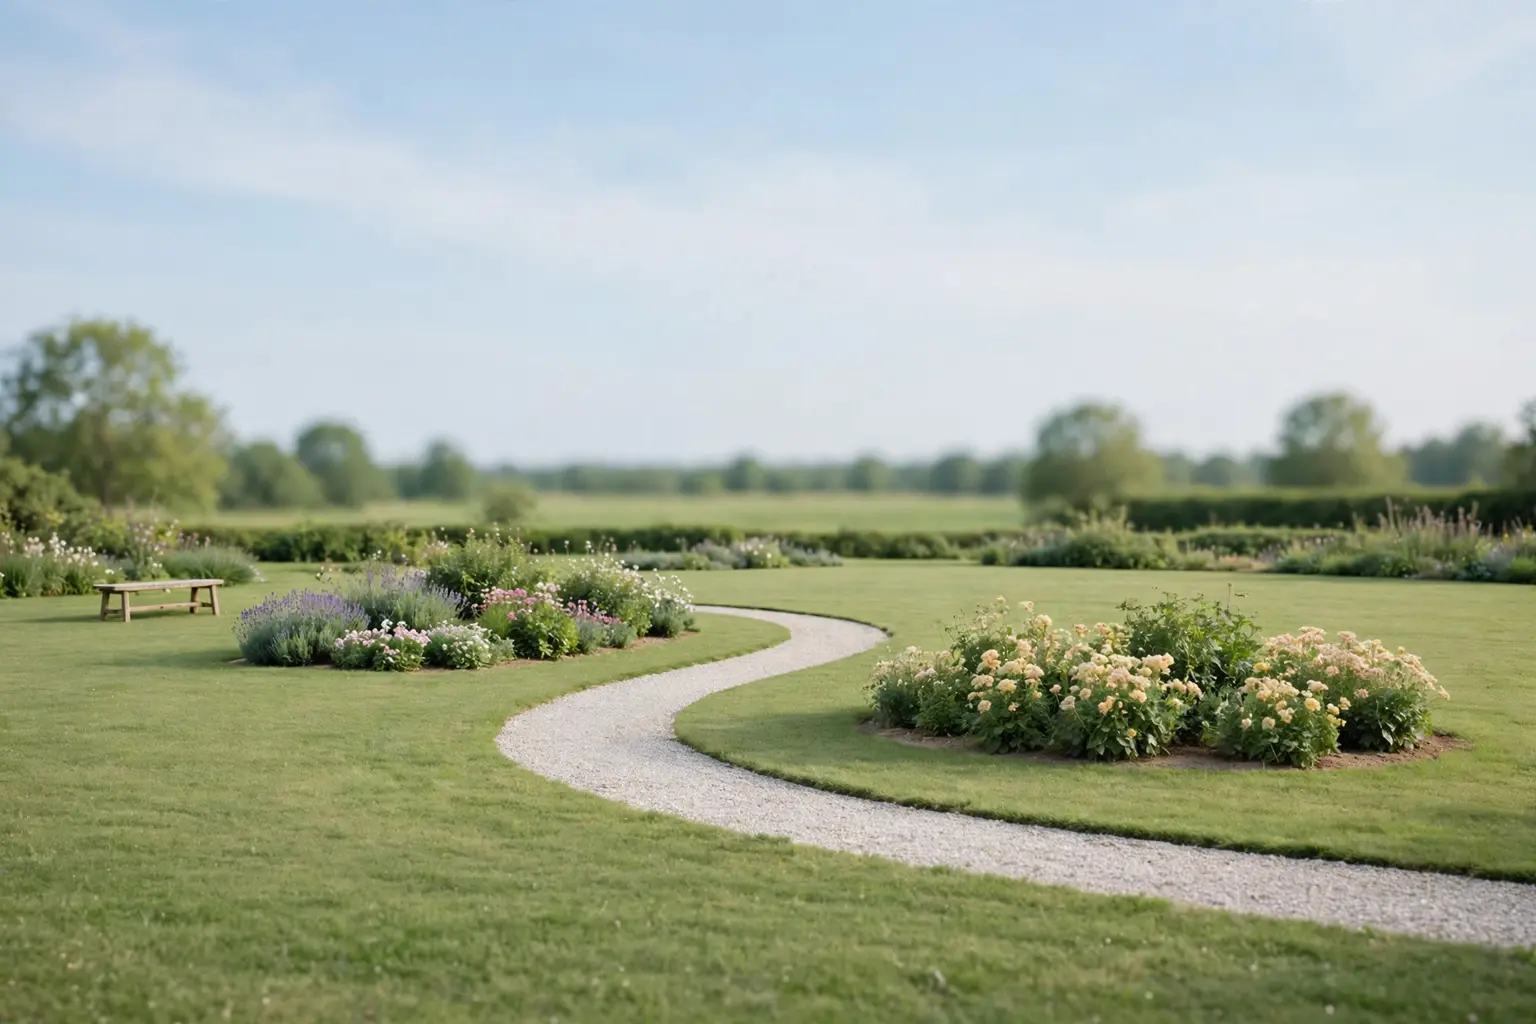
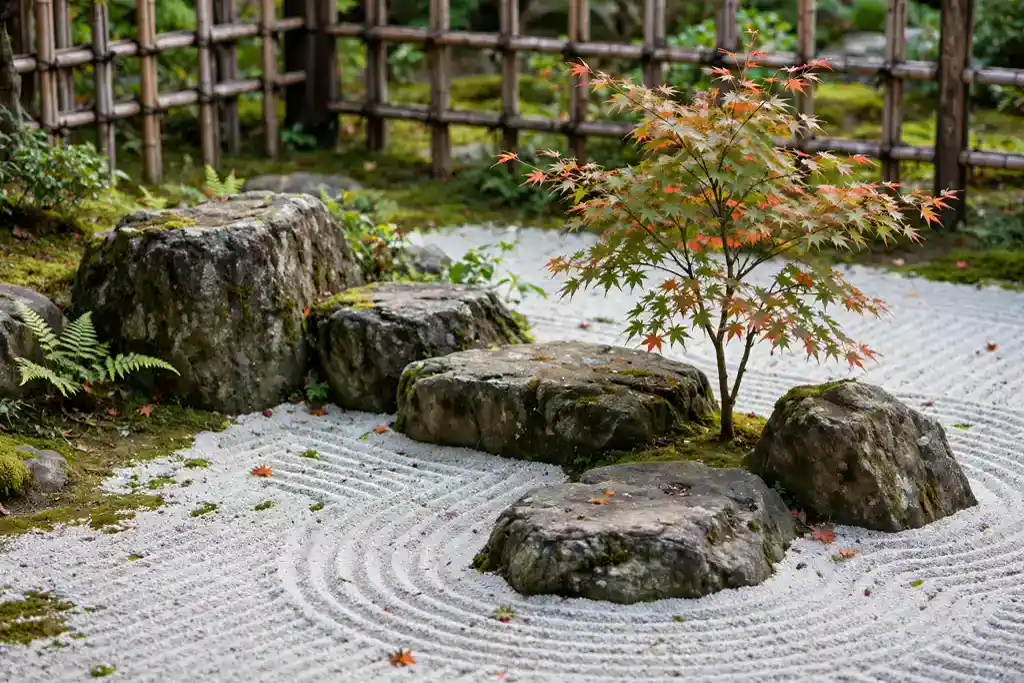
A raked gravel bed is the simplest Japanese garden to build, and it suits a small front yard, a side passage, or a courtyard where lawn struggles. Spread pale gravel over a weed membrane, set three or five rocks of different sizes as a group, and rake curved lines around them. The pattern gives the bed movement even when nothing is in flower, and the gravel keeps weeds down and drainage open.
Rake the lines again after rain or wind, which takes only a few minutes and keeps the bed looking cared for. Keep the rock group off center, with one tall stone, one low stone, and one reclining stone, so the arrangement reads as natural rather than lined up. Add one low plant, such as a small pine or a clump of mondo grass, at the edge, and leave the rest of the gravel clear.
2. Place Stone Lanterns as Focal Points
A stone lantern marks a turn in a path, the edge of a pond, or the end of a view, and it gives a garden structure in winter when planting is bare. Choose one lantern as the main focal point, and use smaller ones only where a second marker is truly needed, since too many lanterns crowd a small space. Set the lantern on a firm, level base of gravel or a flat stone so it does not lean or sink.
Look for a lantern with a simple shape that suits the scale of your garden: a tall lantern suits a wide lawn edge, while a short lantern suits a path or a moss bed. Keep planting low around the base so the shape stays visible, and wash the stone once a year to clear algae. At night, a small light inside or beside the lantern gives a soft glow without lighting the whole yard.
3. Add a Bamboo Water Feature
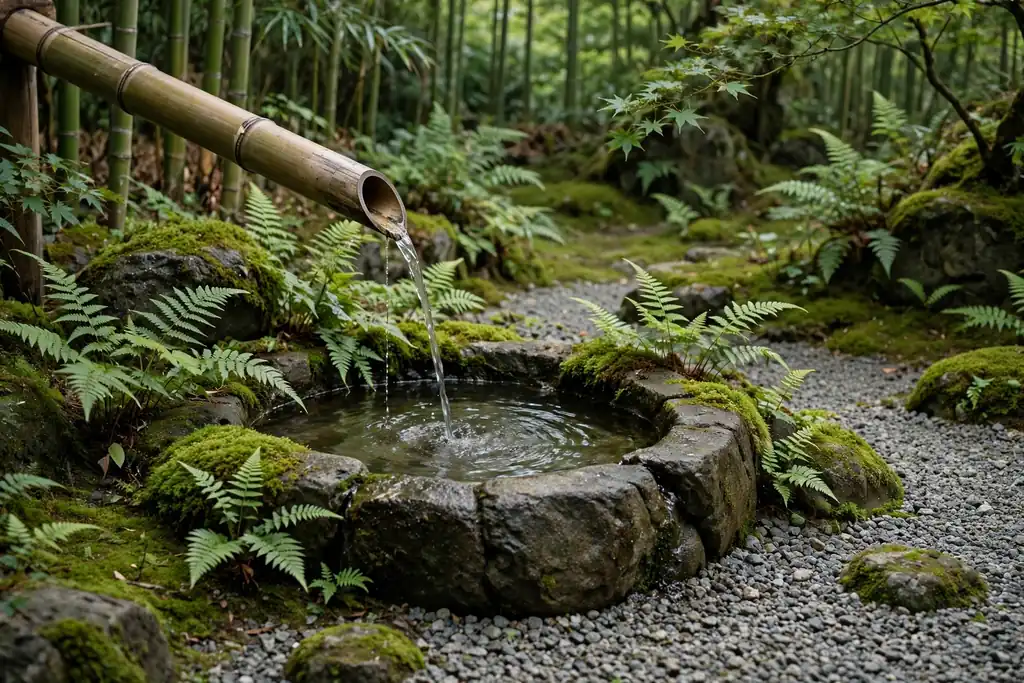
A bamboo water feature brings sound and movement to a quiet corner, and it needs only a small pump, a basin, and a water supply. A bamboo pipe that tips and fills, known as a shishi-odoshi, gives a soft knock as it empties, while a steady bamboo spout gives a constant trickle. Both suit a shaded corner near a seat, where the sound can be heard from the house.
Set the basin on level ground, keep the pump access clear for cleaning, and top up the water in hot weather. Clean the basin regularly to stop algae, and drain the feature before hard frost if the pump and basin are not frost proof. If plumbing is a problem, a solar pump in a shallow bowl gives a similar trickle without a mains connection.
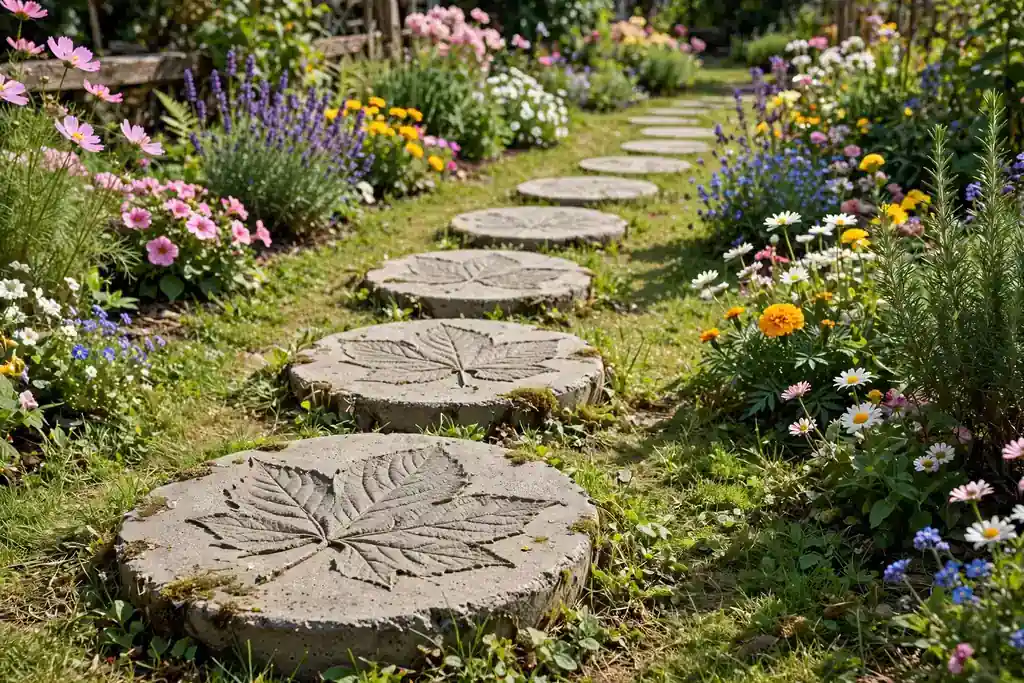
4. Lay a Stepping Stone Path
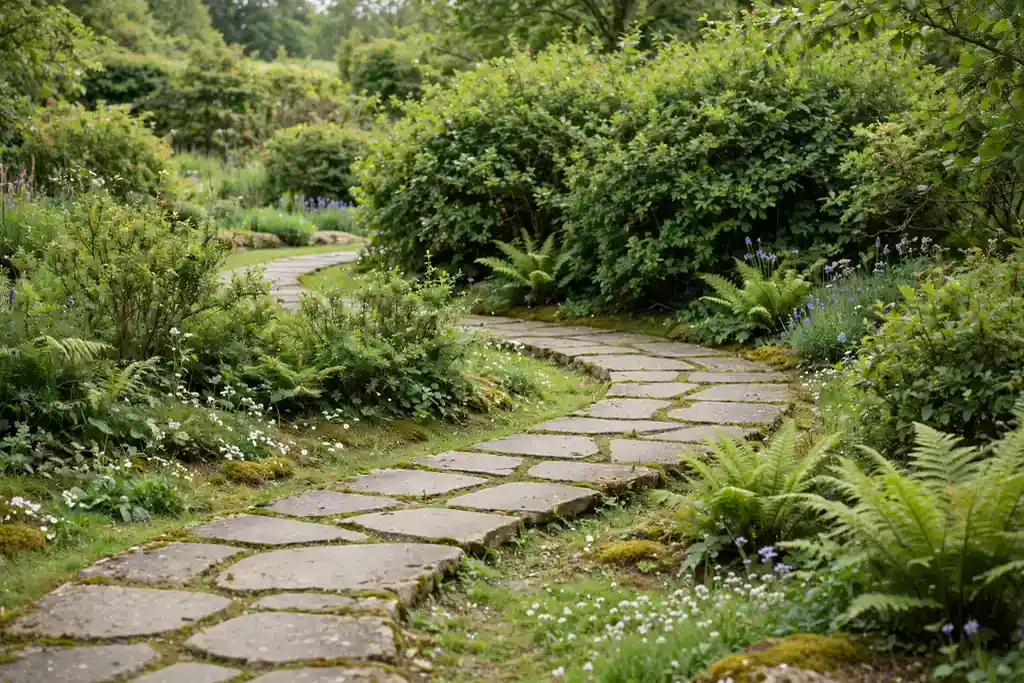
A stepping stone path slows the walk through a garden and turns a plain route into part of the design. Lay large, flat stones with a comfortable stride between them, set into moss, gravel, or low ground cover, and keep the tops level so the path is safe in wet weather. The path should curve gently rather than run straight, so each step reveals a new view.
Choose stones in one tone, such as grey or warm sandstone, and keep the gaps even so the path reads as a plan. Walk the route yourself before fixing the stones, and adjust any stone that wobbles or sits too high. Keep plants trimmed back from the path edges so walkers do not brush wet foliage, and sweep leaves off the stones in autumn so they stay safe underfoot.
5. Plant a Japanese Maple as a Focal Tree
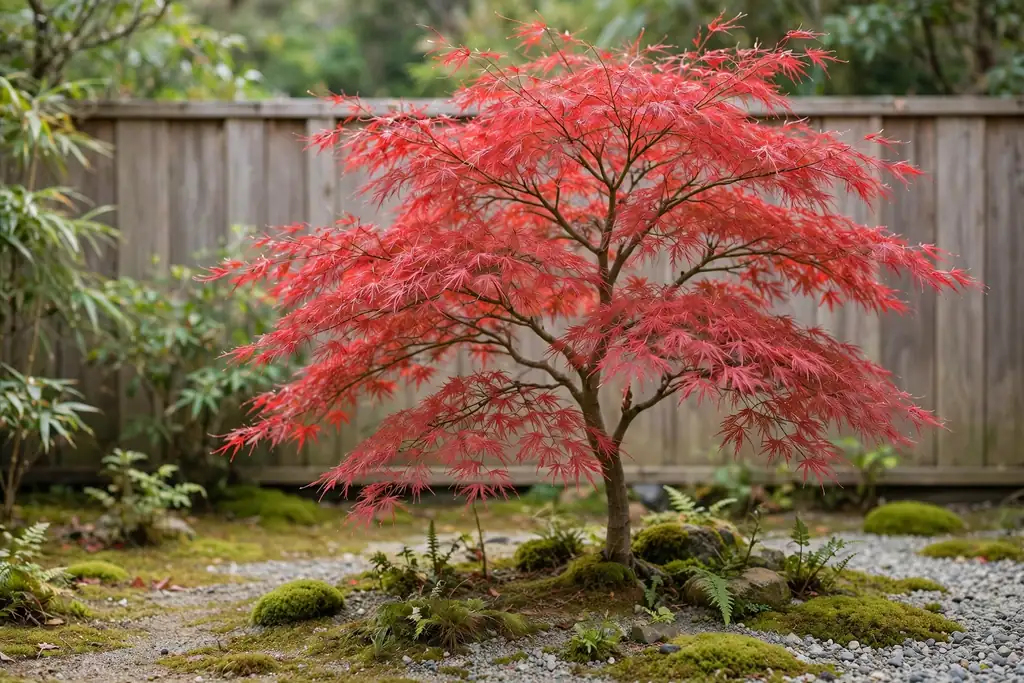
A Japanese maple gives a garden its seasonal color: fresh green or red leaves in spring, full shade in summer, and strong autumn color before leaf fall. Plant one maple as the main focal point, where it can be seen from a window or a seat, and give it room to spread, since a cramped maple loses its shape. Maples suit a sheltered spot with morning sun and afternoon shade in hot areas, and soil that drains freely.
Water well through the first dry season while the roots establish, and mulch the base to hold moisture. Prune lightly in late summer or winter to remove crossing branches and keep an open shape, but avoid heavy cutting, which spoils the natural form. Underplant with moss or low ferns so the ground below earns its place after leaf fall.
6. Grow a Moss Carpet
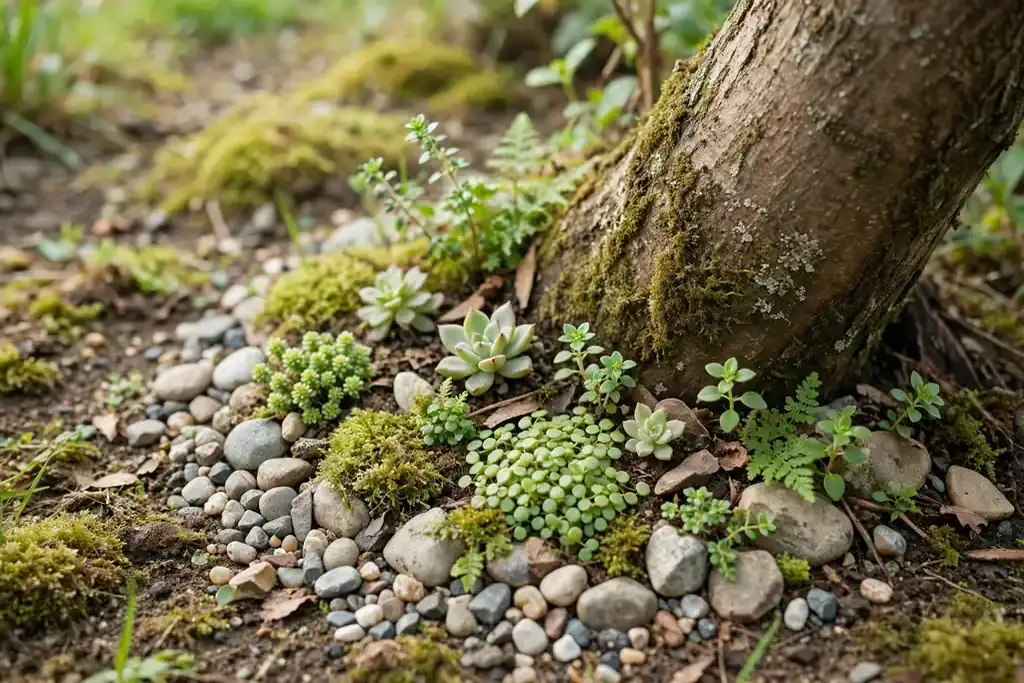
A moss carpet gives a shaded garden a soft, green floor that needs no mowing and stays green through winter. Moss suits damp, shaded spots where lawn struggles, such as under trees or on the north side of a house. Clear weeds from the area, press moss pieces or moss fragments onto bare, moist soil, and water them until they root and knit together.
Keep foot traffic light while the moss settles, and use stepping stones on the main route so the carpet is not worn thin. Moss needs moisture, so water in dry spells and keep fallen leaves cleared in autumn, since a thick leaf layer can smother it. If your garden is sunny and dry, choose gravel or ground cover plants instead, because moss will struggle without shade and damp soil.
7. Build a Small Wooden Bridge
A small wooden bridge over a pond, a dry gravel stream, or a low boggy patch gives a garden a crossing point and a view worth stopping for. Build the bridge from weather resistant wood, with a gentle arch and a handrail if the span is wide or the drop is more than a step. Keep the deck boards close together and level, and fix the ends on firm footings so the bridge does not rock.
Site the bridge where the view from the middle is the best in the garden, such as across water toward a maple or a stone group. The same practical thinking used in these garden bench ideas applies here: give the crossing a reason, such as a seat or a focal point on the far side, so people use it rather than walk around it. Oil or seal the wood as the maker directs, and check the fixings each spring.
8. Screen the Space With a Bamboo Fence
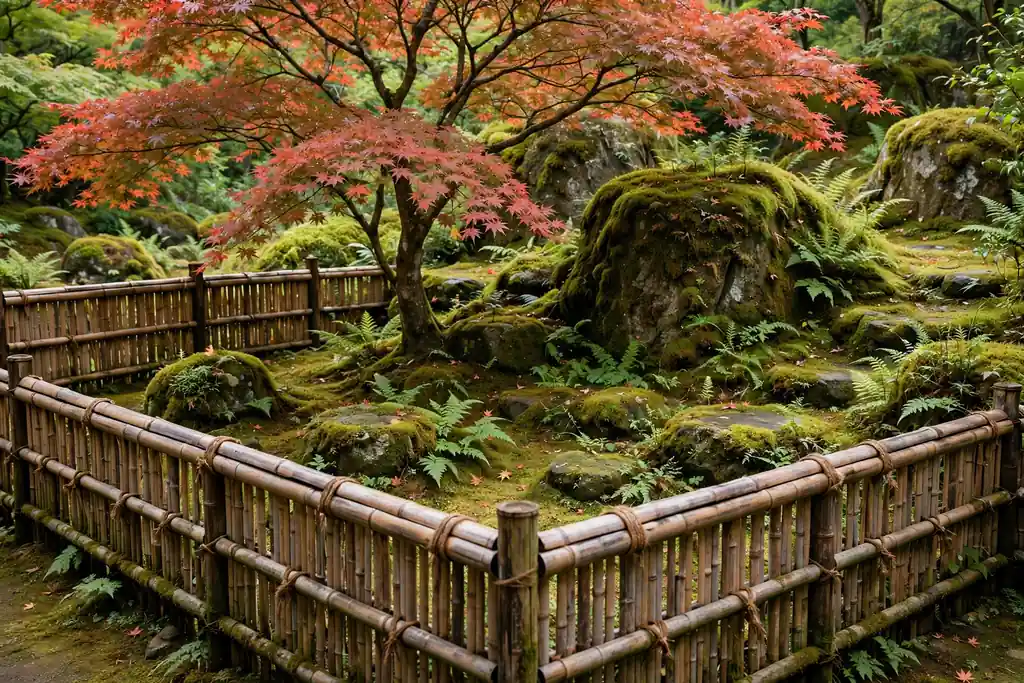
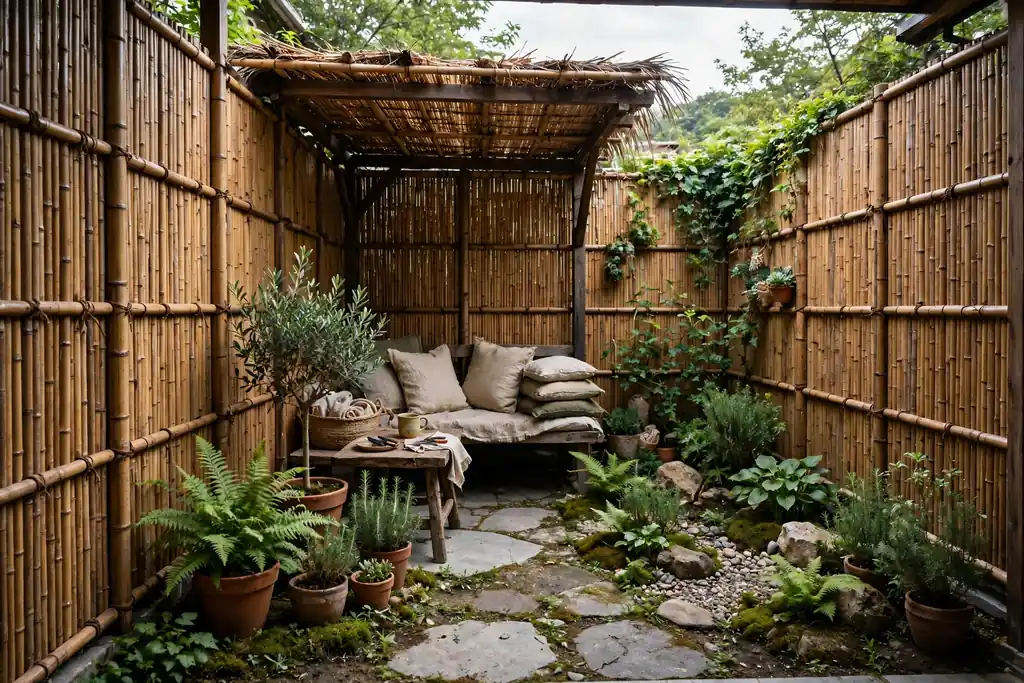
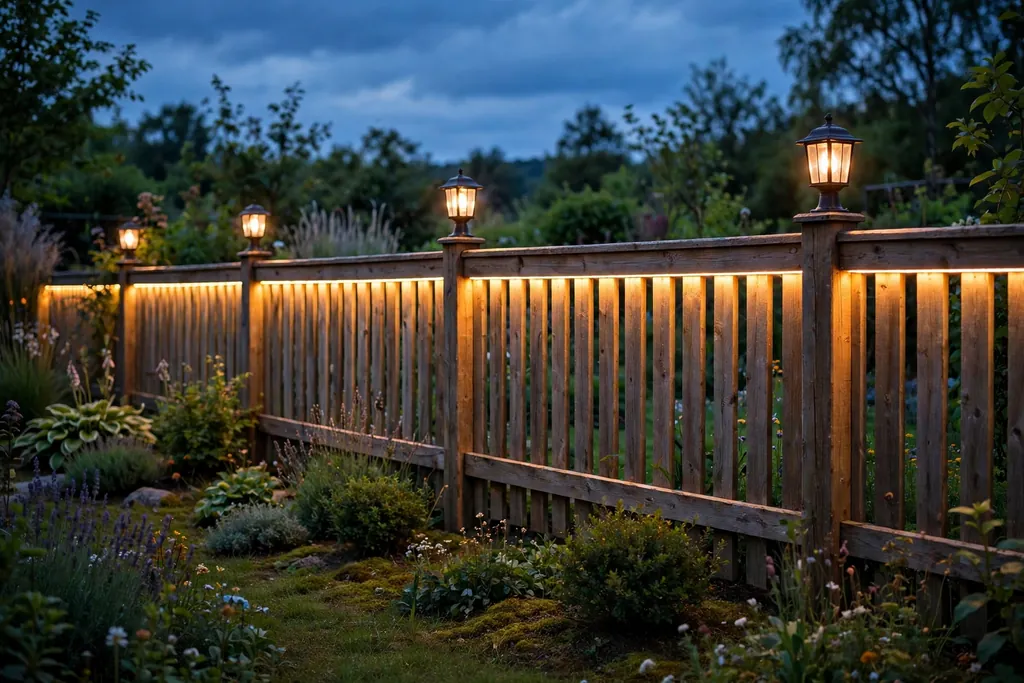
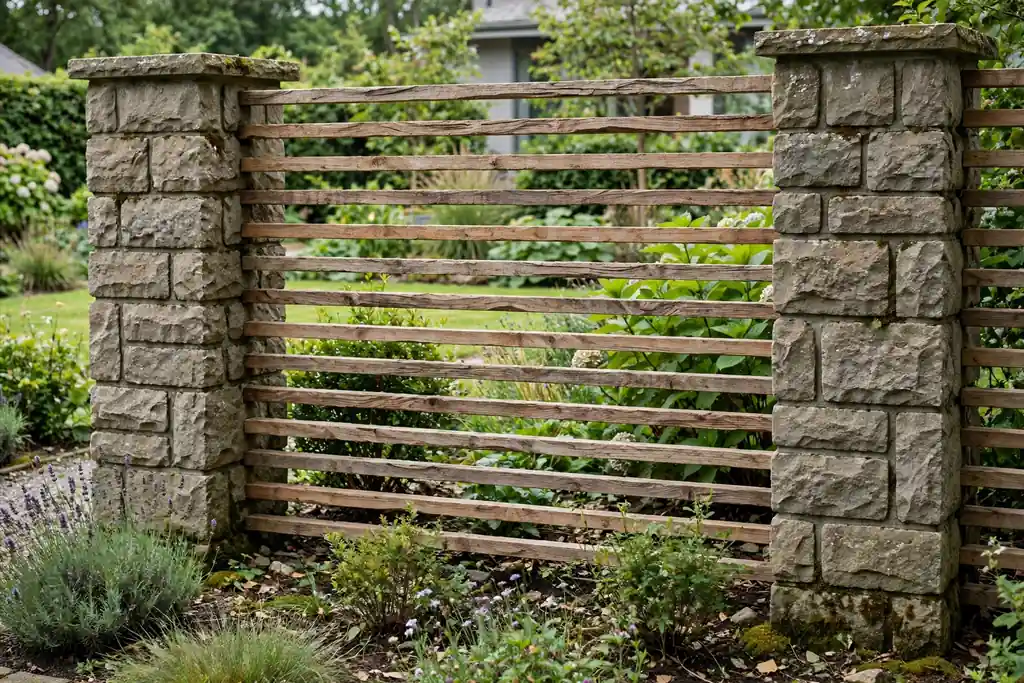
A bamboo fence gives privacy, hides a plain wall or a neighbor’s view, and sets the tone for the whole garden in one step. Fix bamboo poles or ready made bamboo panels to sturdy posts, with a small gap at the base for air movement so the fence dries after rain. A fence about head height screens a seating area without shutting out light, while a taller fence suits a boundary that needs full cover.
Keep the fence line straight and the posts level, since a leaning bamboo fence is hard to ignore. Treat cut ends and check the ties each year, replacing any pole that has split or softened. Plant low ferns or moss at the base to soften the line, and keep climbing plants off the fence unless you want the bamboo hidden, since the fence itself is part of the look.
9. Shape a Cloud Pruned Pine
A cloud pruned pine, with its foliage clipped into rounded pads, gives a Japanese garden a sculptural tree that holds its shape all year. Start with a young pine that has a clear trunk and several branches, and clip each branch tip into a soft, rounded pad, leaving open space between pads so the branch structure shows. This pruning, called niwaki, takes patience, but a little work each year keeps the shape tidy.
Clip in late spring or early summer, after new growth has hardened, and step back often to check the shape from the viewing point. Remove dead or crossing shoots as you go, and avoid cutting into bare old wood, which may not regrow. A cloud pruned pine suits a gravel bed or a moss garden, where its shape can be seen clearly against open ground.
10. Set a Stone Water Basin by the Path
A stone water basin beside a path or near a seating spot gives a garden a quiet water note without a pump or a pond. Choose a basin with a simple carved shape, set it on a firm base of gravel or flat stones, and keep a bamboo ladle or a small dipper nearby for the traditional hand washing ritual. The basin suits a spot where visitors pause, such as a path junction or the edge of a tea nook.
Top up the water as it evaporates, clean the basin to stop algae, and drain it before hard frost if the stone could crack. Plant moss or small ferns around the base to settle the basin into the garden, and keep the area around it clear so the water stays clean. If a full pond is too much work, a basin gives the same calm water detail on a small scale.
11. Make a Tea Garden Seating Nook
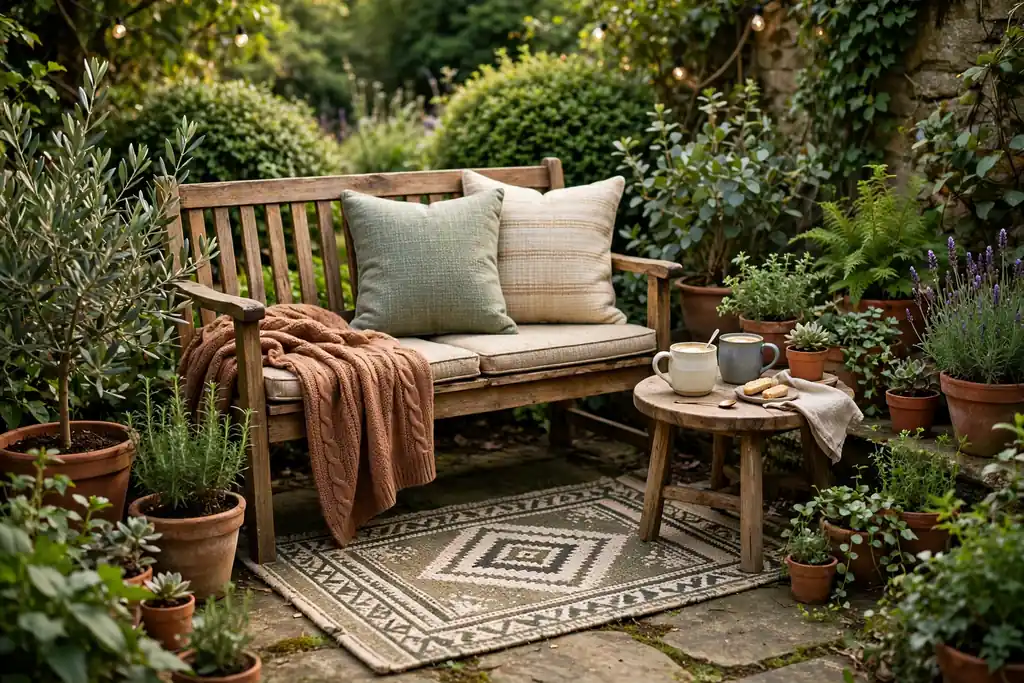
A tea garden seating nook is a small, sheltered seat placed for quiet sitting, not for meals or large gatherings. Choose a spot with shade, a view of water or a maple, and a dry path to it, then set a simple wooden bench or a pair of low seats on gravel or flat stones. Keep the nook small: one seat, one side surface for a cup, and planting close enough to feel enclosed without blocking the view.
For layout ideas for the seating itself, see these garden bench ideas, which cover spot, material, and footing for outdoor seats. Add scented planting nearby, such as jasmine or a small pine, and keep the path to the nook clear and dry so the seat gets used in all seasons. Bring cushions inside during wet spells, and sweep leaves from the seat so it is ready without a long tidy up.
12. Plan Planting for Four Seasons
A Japanese garden earns its place when it looks good in every season, not only in spring. Plan by season rather than by plant alone: cherry blossom and fresh maple leaves in spring, iris and lush moss in summer, maple color and ornamental grasses in autumn, and pine, bamboo, and stone in winter. This spread means the garden never has a bare month, and each season gives a reason to step outside.
For color that pairs with the spring and summer planting, these pink flower garden ideas show how to group flowers in drifts rather than scattering single plants. Keep the structure, such as paths, fences, and stone, in place all year, and let the planting change around it. Check each plant label for sun, spacing, and your growing zone, and leave room for plants to reach their mature size.
Conclusion
A Japanese garden does not need every idea on this list. Pick one structure, such as a gravel bed, a stepping stone path, or a water feature, then add two or three supporting pieces, such as a stone lantern, a maple, and a moss carpet. Keep the material palette small, leave open space between features, and let the garden settle over a season before adding more. One well placed feature, seen every day from a window or a seat, will do more for a garden than several features crowded where nobody stops. For a related example of structure first planting, see these Greek garden ideas, which use stone, gravel, and a few strong plants in a similar calm way.
Save this list on Pinterest before your next nursery trip, and work through it one area at a time: structure first, then water and paths, then the planting that suits your light and climate.
FAQs
What is the easiest Japanese garden idea to start with?
A raked gravel bed or a stepping stone path is the easiest place to start. Both need only gravel or stones, a weed membrane, and a few hours of work, and neither needs plumbing or power. Start with one small area you see every day, such as a side passage or a corner by the door, and add a stone lantern or a maple only after the gravel or path feels settled.
How much space do I need for a Japanese garden?
A Japanese garden works in a space as small as a courtyard or a balcony corner, as long as you scale the features to fit. A gravel bed with three rocks, a bamboo water feature in a pot, and a moss patch can fit a tiny plot, while a pond, a bridge, and a maple need a larger yard. Choose one focal feature for a small space, and leave open gravel or moss around it so the area does not feel crowded.
Which plants suit a Japanese garden in a cold climate?
Pines, bamboo in a pot or a hardy variety, moss, ferns, and Japanese maples suit many cold climates, but tenderness varies between types, so check the label for your growing zone. In very cold areas, grow tender plants such as Japanese iris in a sheltered spot, and drain water features before hard frost. Stone, gravel, and fences give the garden structure in winter when planting is bare.
How do I keep a raked gravel garden tidy?
Rake the gravel lines again after rain or wind, which takes only a few minutes, and pull weeds as soon as they appear so they do not root through the membrane. Top up the gravel every year or two where it has thinned, and keep leaves cleared in autumn so they do not rot into the surface. A gravel bed needs far less work than a lawn, but a short weekly tidy keeps it looking deliberate.
Can I build a Japanese garden on a budget?
Yes, if you start with the cheapest structure first. Gravel, stepping stones, and a bamboo fence cost less than a pond or a bridge, and a small maple or a moss patch can be added later. Use local stone where possible, keep the feature count low, and repeat one material, such as gravel or bamboo, so a small number of pieces still reads as a full design.
Do Japanese gardens need a pond?
No, a pond is not required. A bamboo water feature, a stone water basin, or a dry gravel stream gives the same calm water note on a smaller scale and with less upkeep. A pond suits a larger garden with room for a pump, a liner, and safe edging, but a basin or a bamboo spout fits a courtyard and still brings sound and movement to the space.
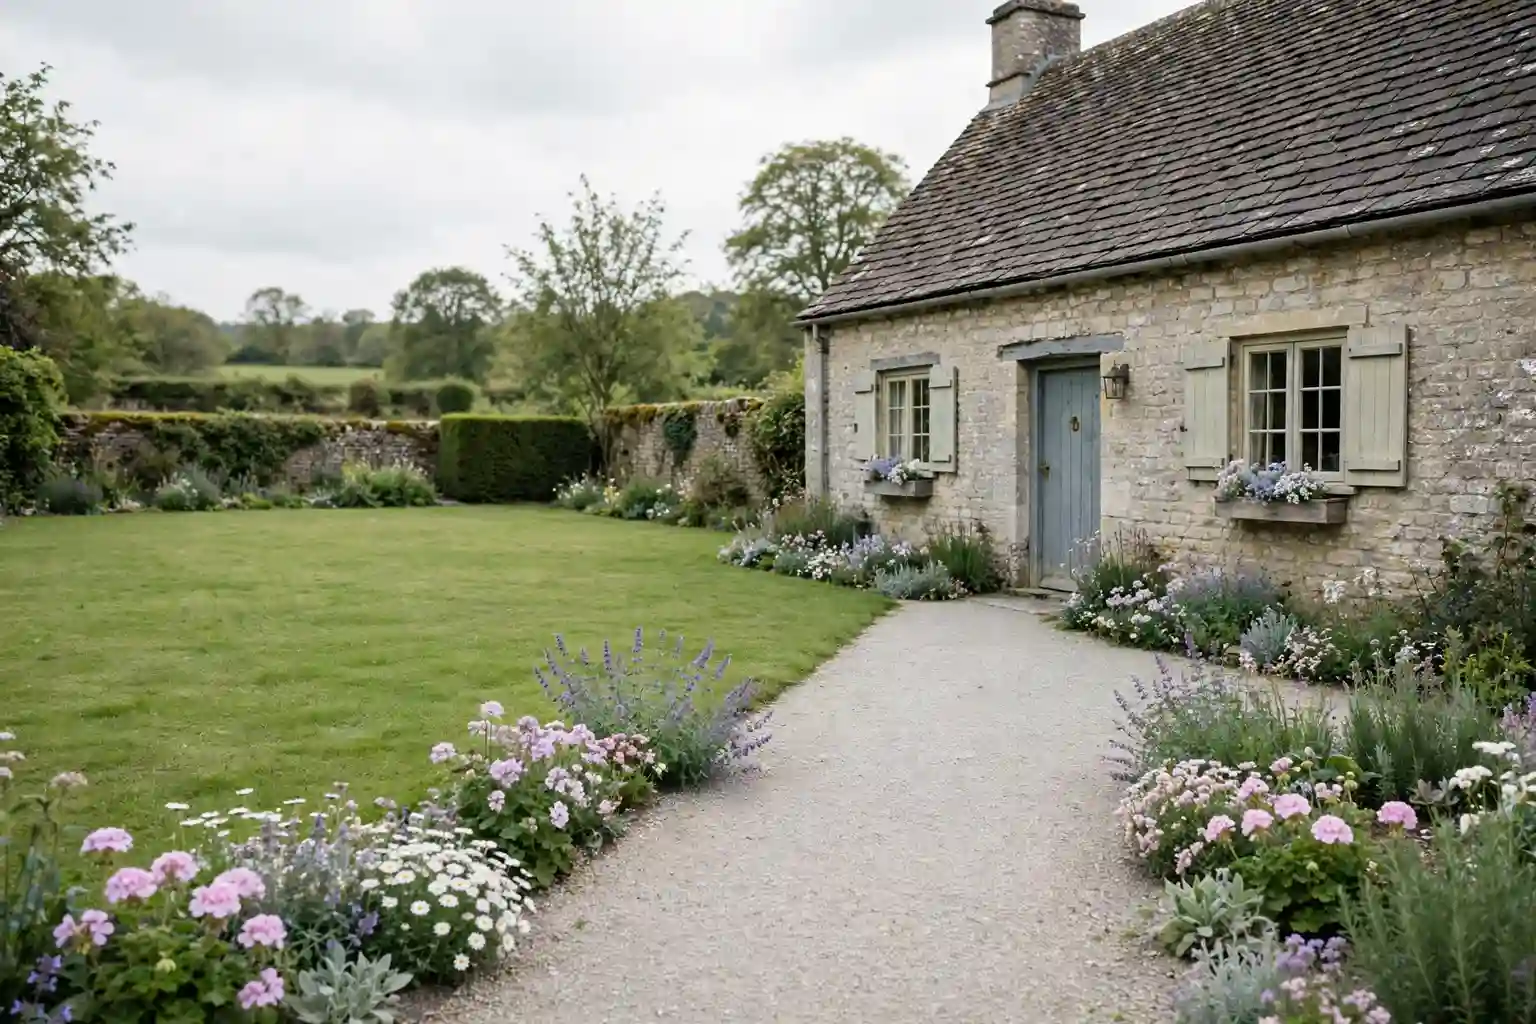
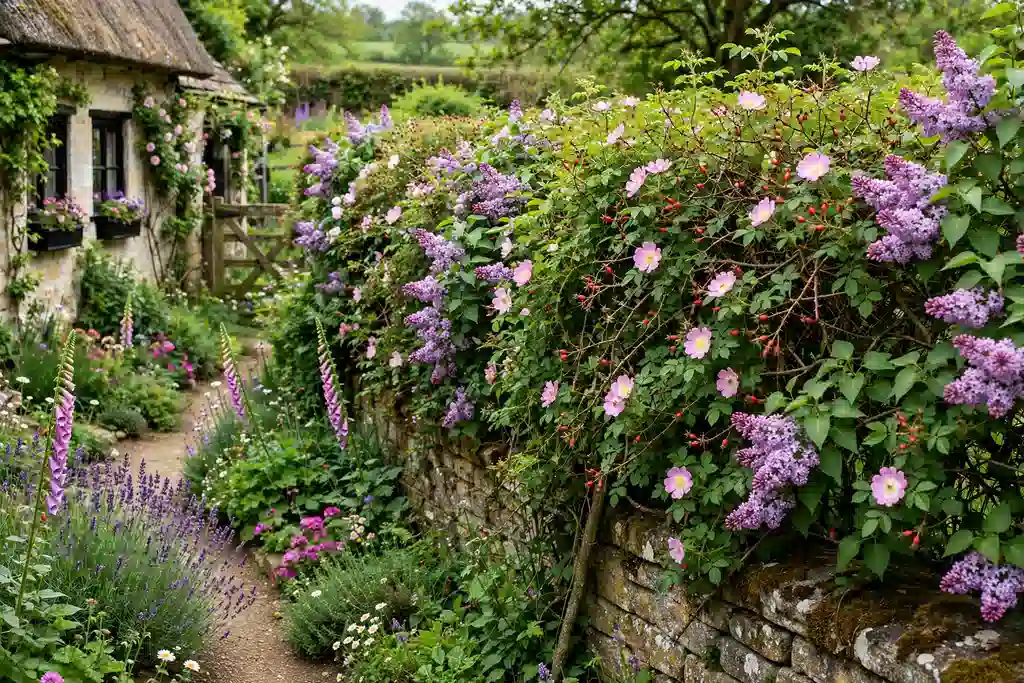
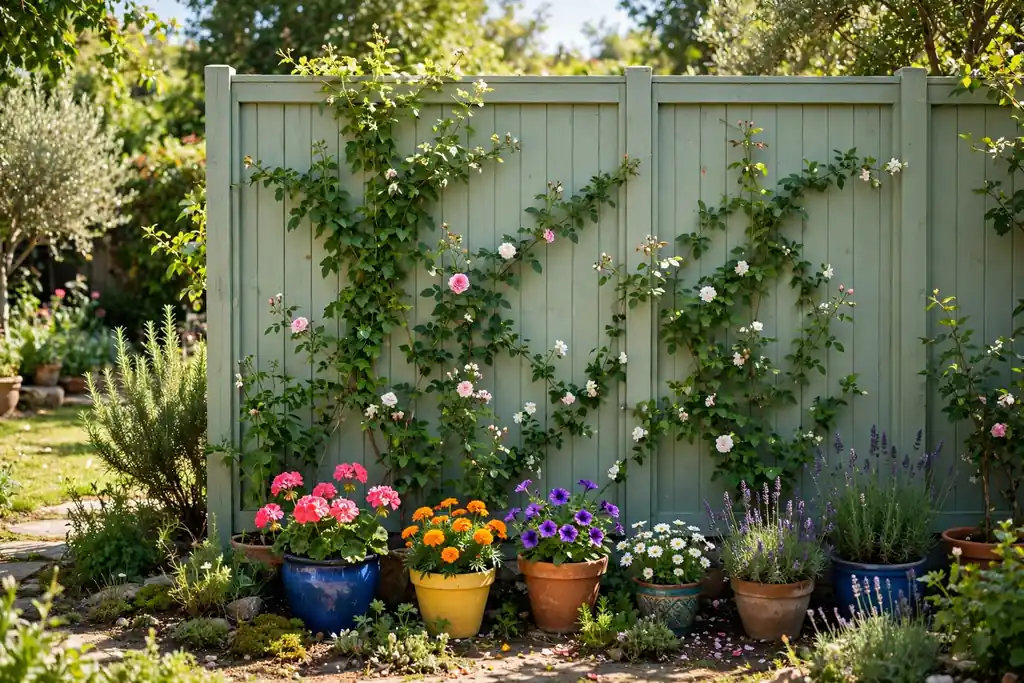
An English cottage garden looks full, soft, and a little untidy in the best way, because plants spill over paths, climb walls, and fill every border. The look comes from layering rather than from buying more plants: tall flowers at the back, roses and perennials in the middle, and low edging plants at the front, with structure from a path, a fence, and one or two seats. These 27 ways to create an English cottage garden cover borders, roses, paths, walls, scent, fruit, and wildlife, so you can start with one bed and add the rest over time.
Key Takeaways
Layer every border by height, with tall plants at the back, medium plants in the middle, and low plants at the front.
Give the garden structure first: a path, an edge, a fence or hedge, and a seat, then fill the beds with planting.
Plant in groups and drifts, not single plants, so color and shape read clearly from the house and the street.
Repeat a small palette of colors and materials, such as soft pink, white, stone, brick, and wood, through the whole garden.
Add scent near paths and seats, with roses, lavender, sweet peas, and jasmine where you will brush past them.
Plan for every season: spring bulbs, summer roses, late flowers, and evergreen shape for winter.
1. Layer a Cottage Border by Height
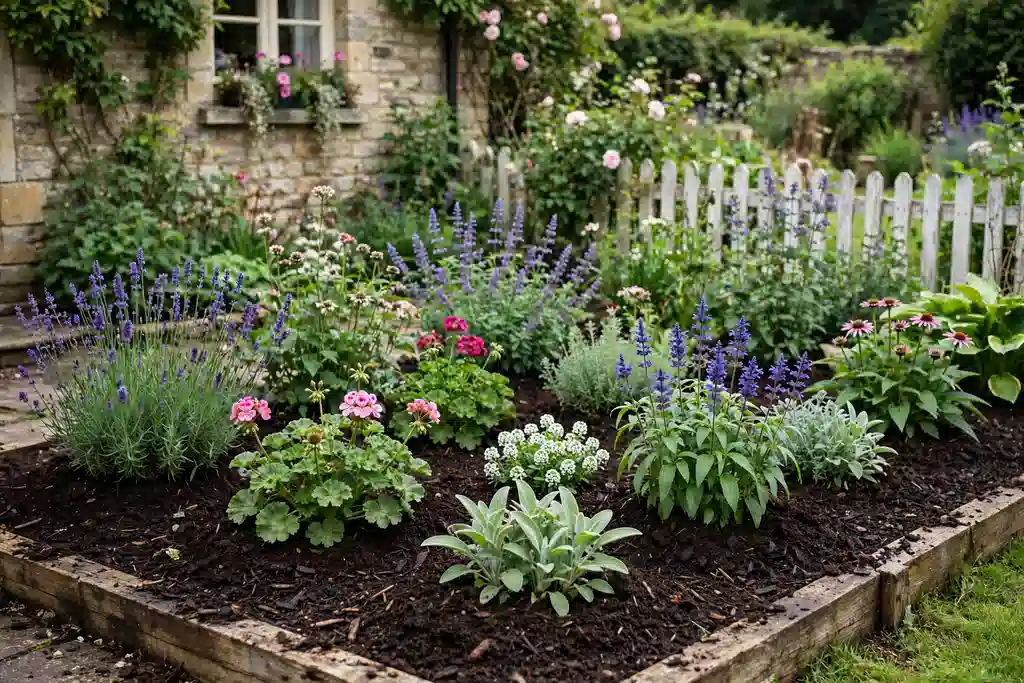
A layered border is the base of a cottage garden. Put tall plants at the back, medium plants in the middle, and low edging plants at the front, so the border reads as one deep planting rather than a row of single plants. Tall hollyhocks, delphiniums, and foxgloves go at the back, roses, peonies, and salvias sit in the middle, and hardy geraniums, catmint, and thyme edge the front.
Repeat one or two colors through the layers to tie the border together, and leave a narrow access strip behind the tallest plants so you can stake, deadhead, and cut back without stepping on the plants in front. For color led planting, the ideas in these pink flower garden ideas show how drifts of one color make a border read clearly.
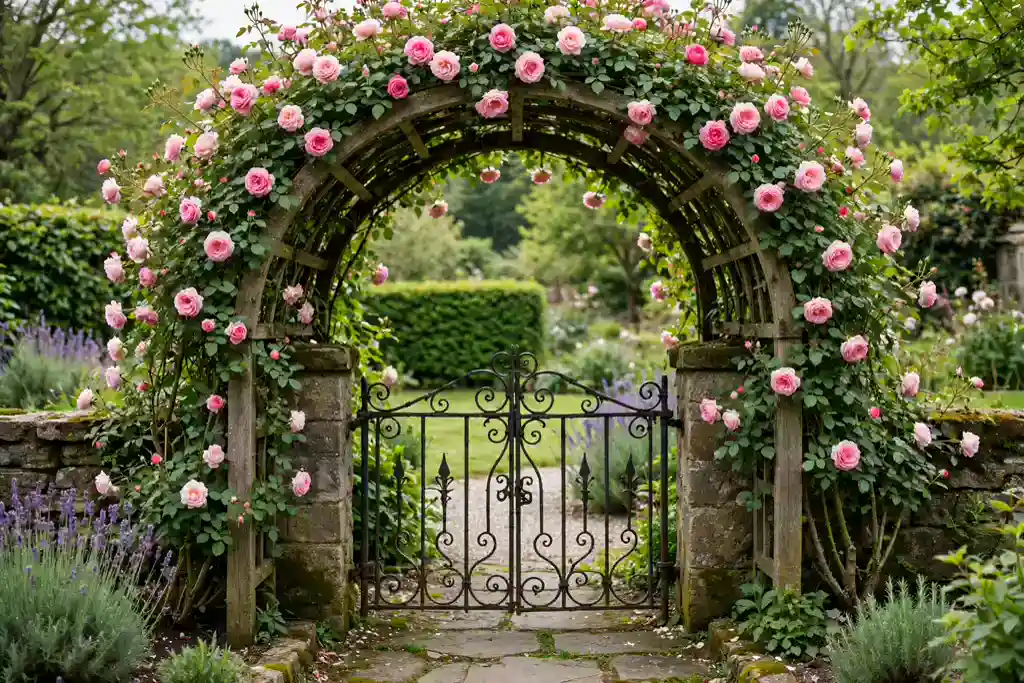
2. Grow Climbing Roses Over an Arch
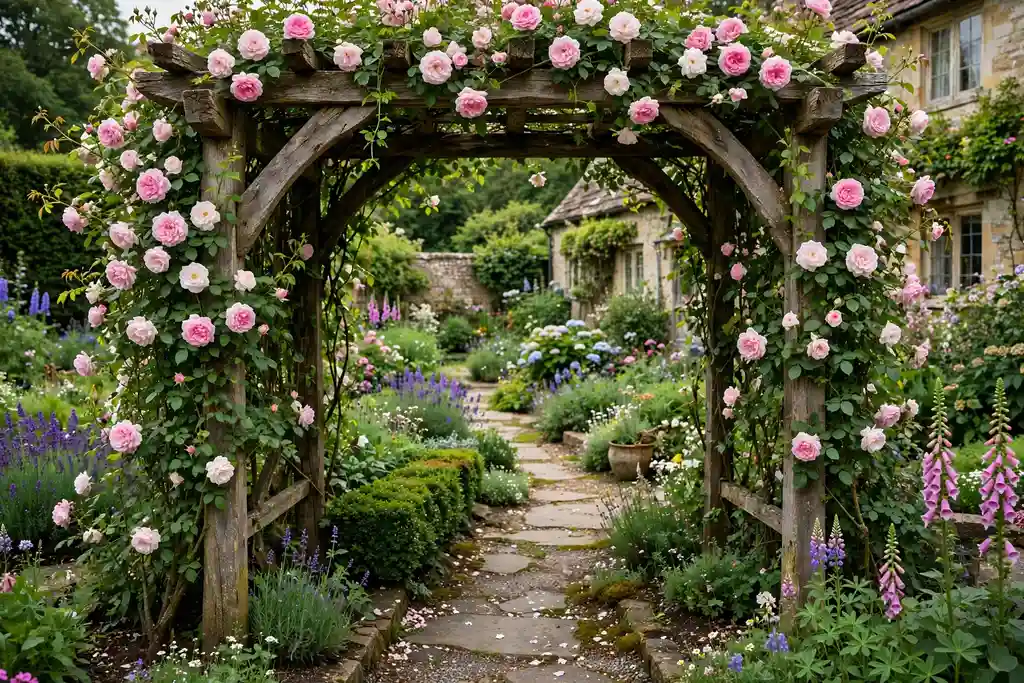
A rose arch over a path turns an ordinary walk into a garden moment. Fix a sturdy arch to firm footings, and train one climbing rose up each side so the stems meet at the top. Repeat flowering roses give flowers and scent through summer, while the arch itself gives structure in winter when the planting is bare.
Tie stems loosely to the frame as they grow, and prune after flowering as the rose type requires. Keep the path beneath the arch clear and level, and train stems away from the walking line so thorns do not brush visitors. A narrow arch suits a small garden better than a wide one, since the roses already take up visual space.
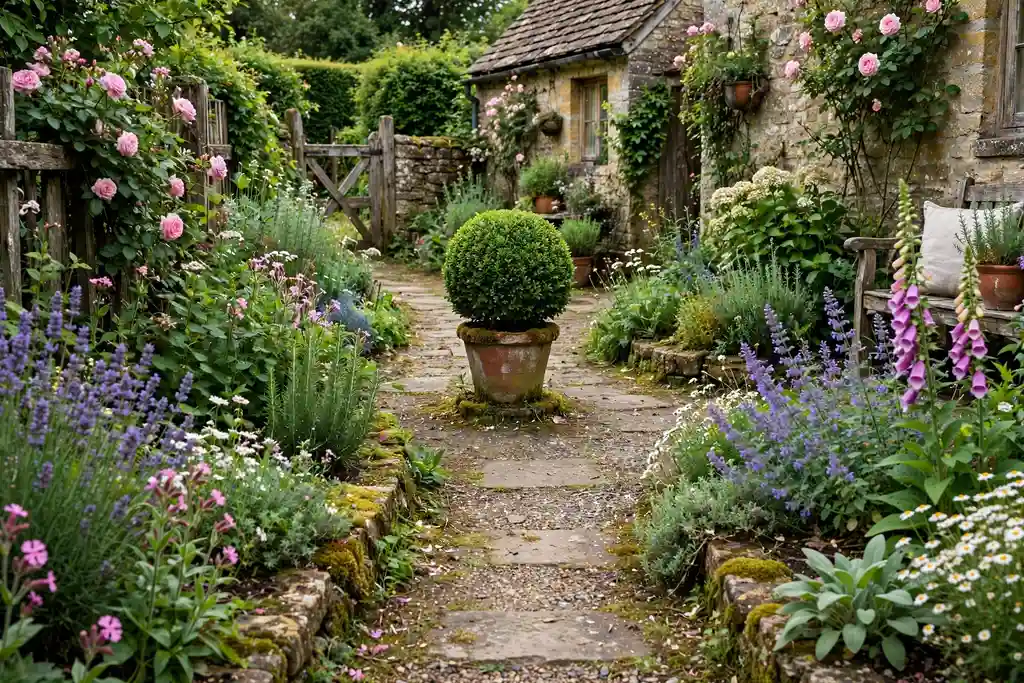
3. Lay a Winding Gravel Path
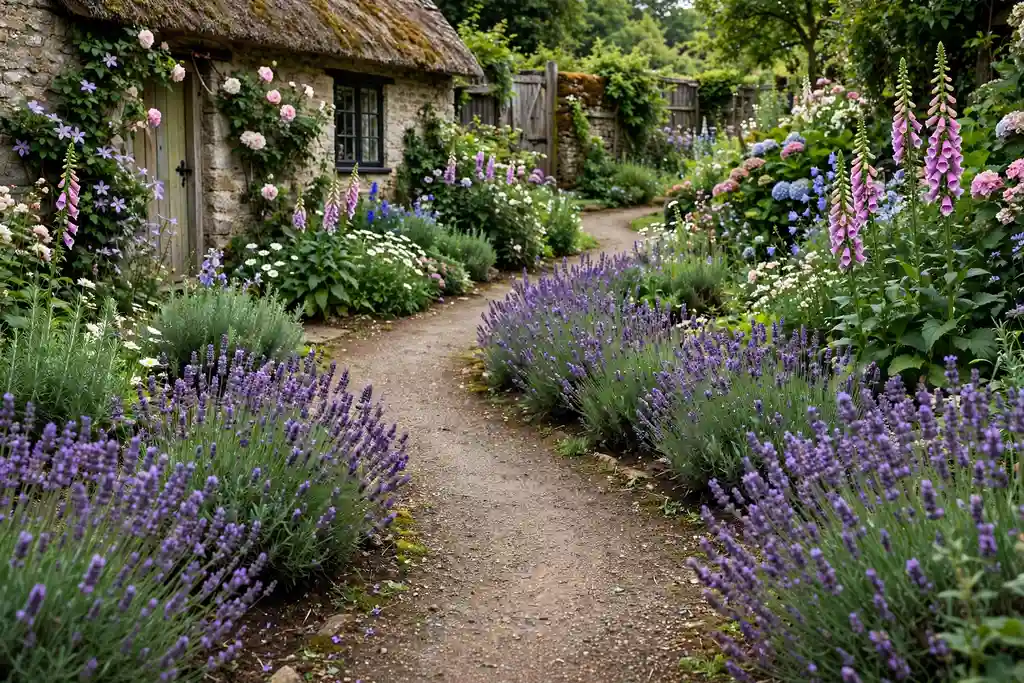
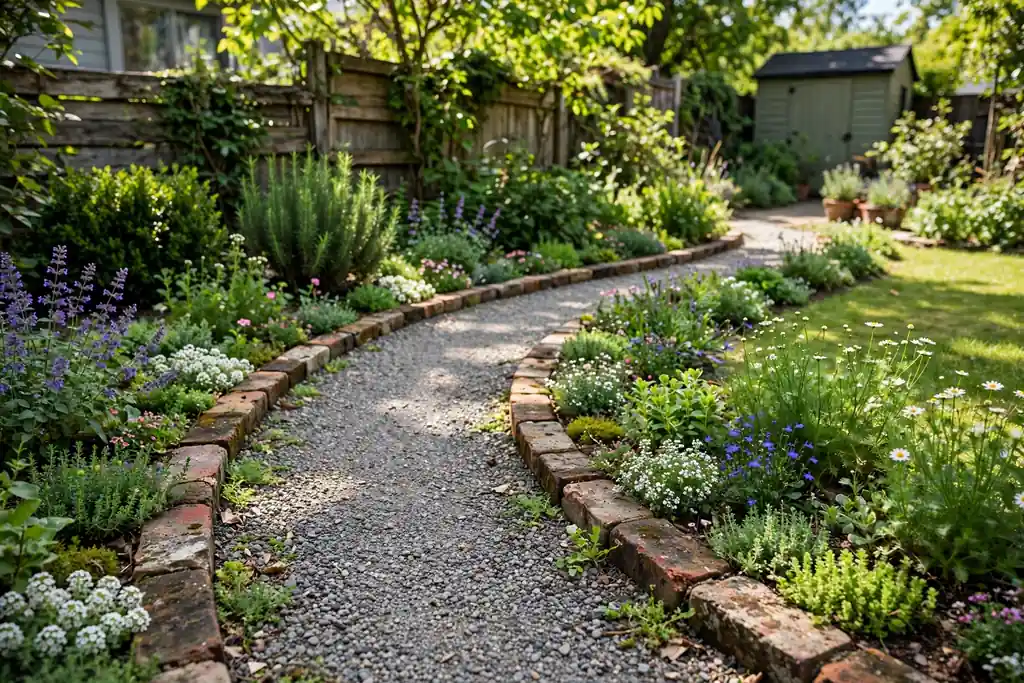
A winding gravel path suits a cottage garden better than a straight paved walk, because the eye follows the bend instead of stopping at a hard line. Lay the path on a shallow base of compacted gravel, edge it with stone or brick to keep the gravel in place, and let low plants spill slightly over the edge.
Make the path lead somewhere worth reaching, such as a bench, a gate, or a sunny corner, and keep it wide enough to walk comfortably with a watering can. Rake it level after heavy rain, and plant lavender or thyme along the edges for scent. Avoid a curve so tight that it feels awkward to walk.
4. Edge Beds With Stone or Brick
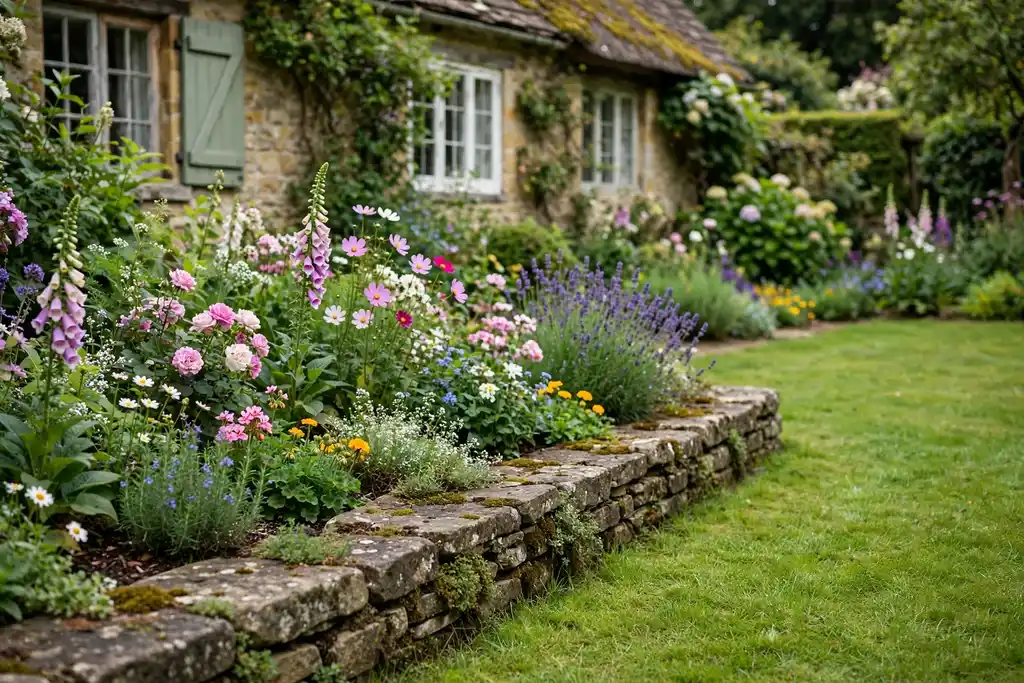
Stone or brick edging gives cottage beds a finished line that keeps soil and mulch in place. Lay flat stones, cobbles, or reclaimed bricks along the bed edge, set firmly on a shallow gravel footing so frost does not lift them out of line. The edge also gives the lawn or path a clean cut.
Choose a material already used elsewhere in the garden, such as a wall or a path, so the materials repeat. Keep the top of the edging level along each run, and plant low edging plants such as thyme or sedum just behind the stone so the edge softens without hiding it.
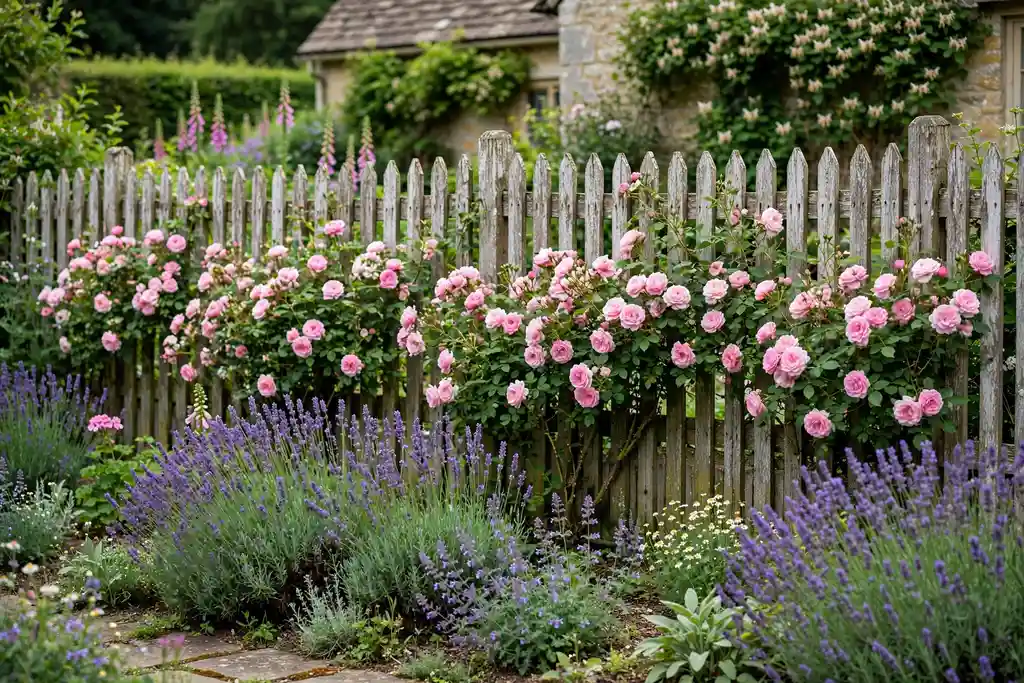
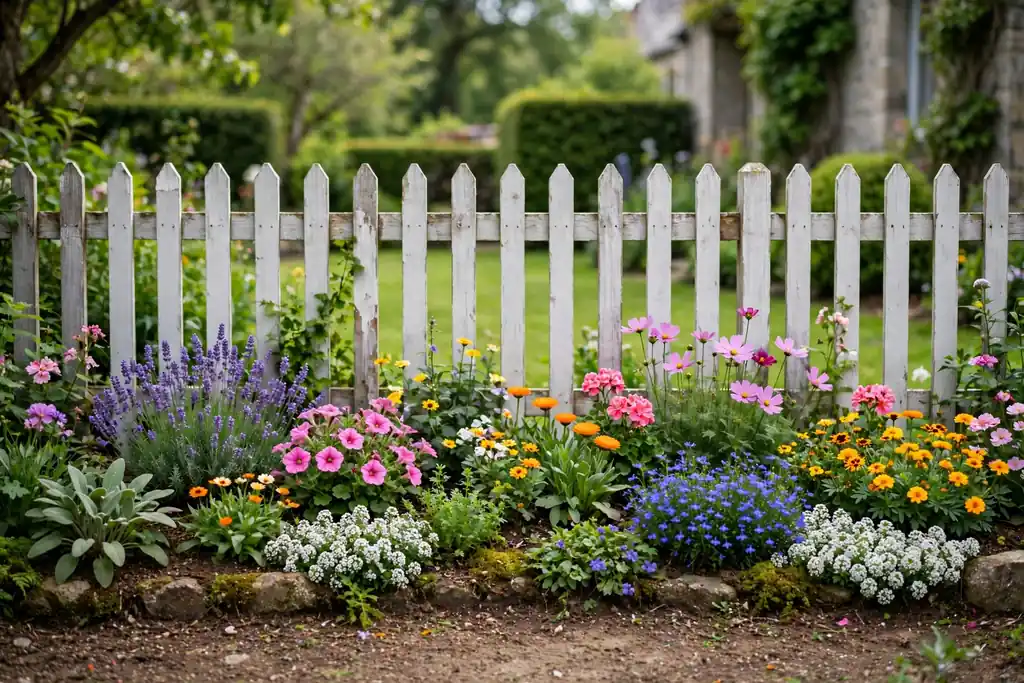
5. Build a White Picket Fence and Gate
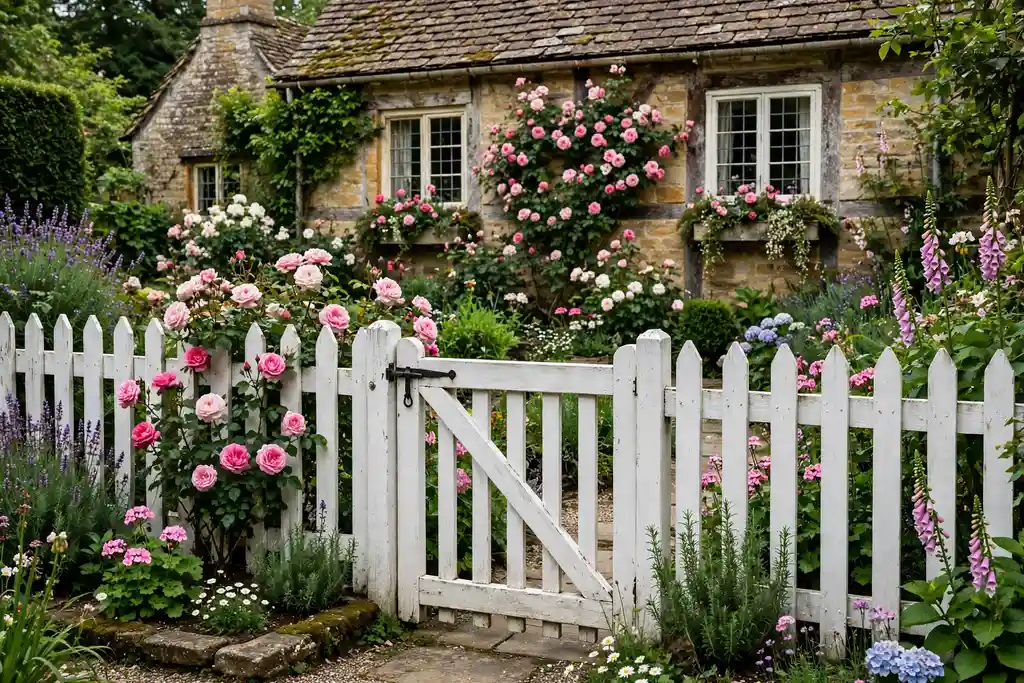
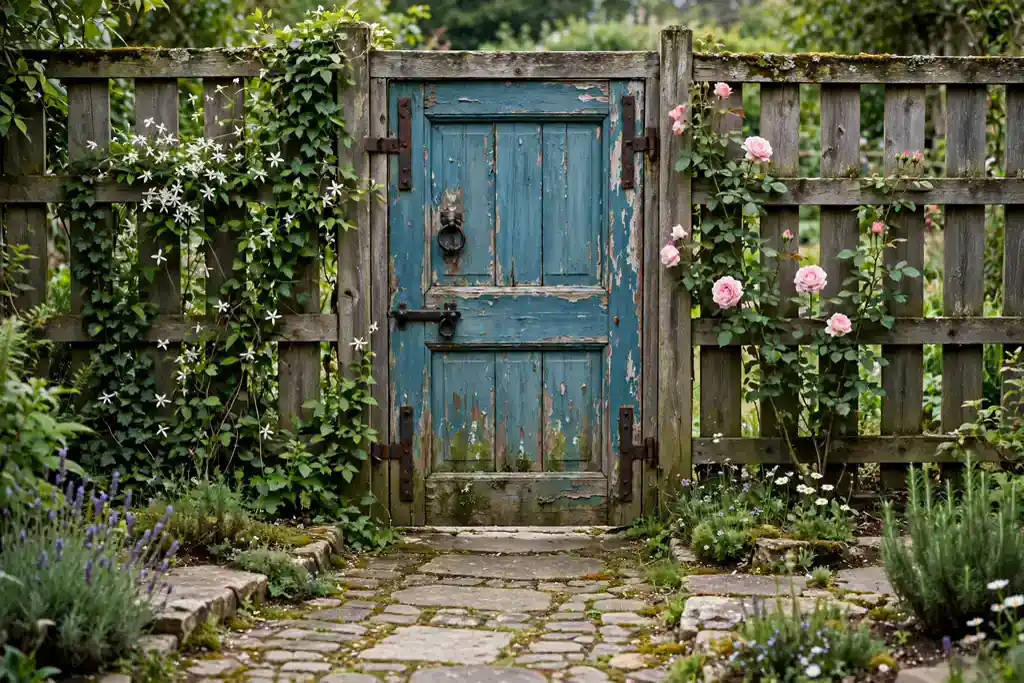
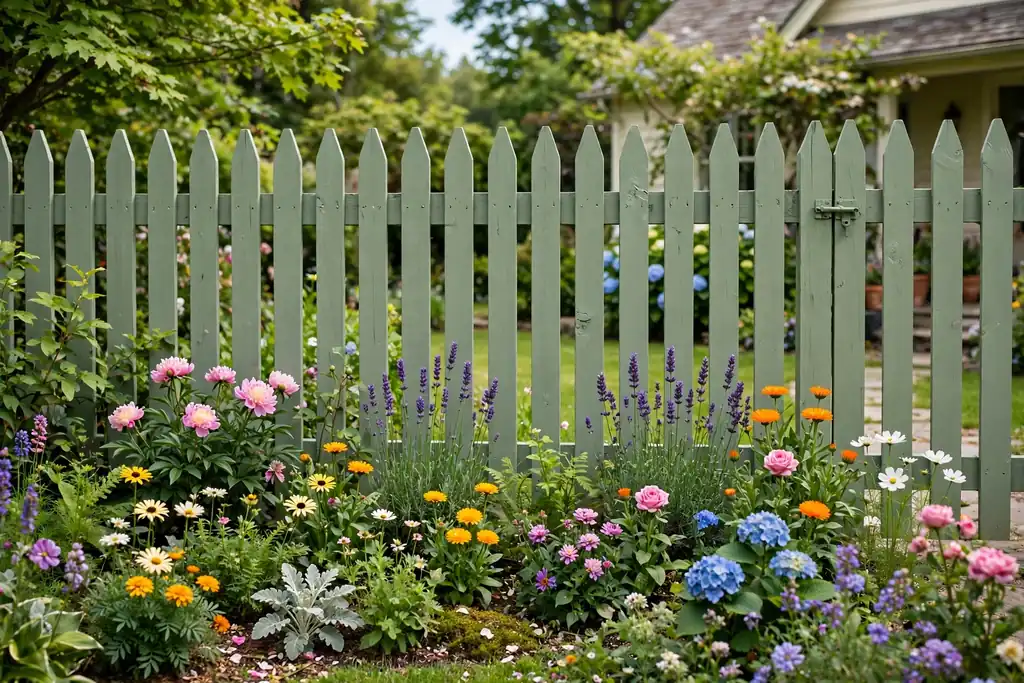
A low white picket fence frames a cottage front garden and marks the boundary without shutting the garden off from the street. Keep the fence low enough to see the planting over it, and pair it with a simple wooden gate that opens onto the path to the door.
Paint or treat the wood as the maker directs, and check the gate hinges each spring so the gate still closes cleanly. Plant roses, hollyhocks, or lavender just inside the fence so flowers show through the pickets, and keep the path to the gate clear of overhanging stems.
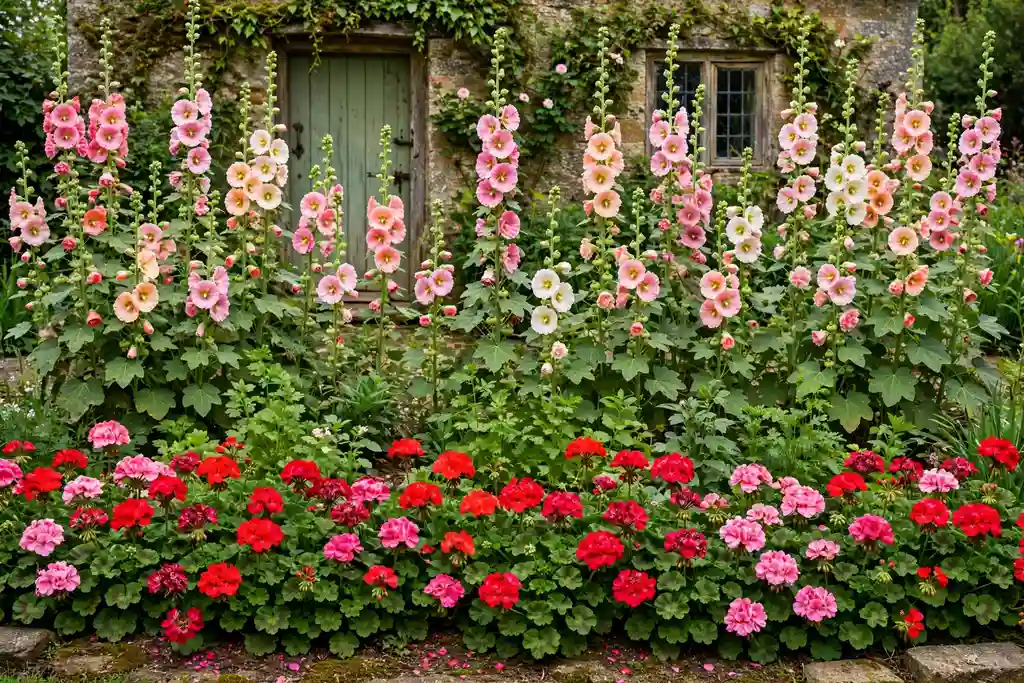
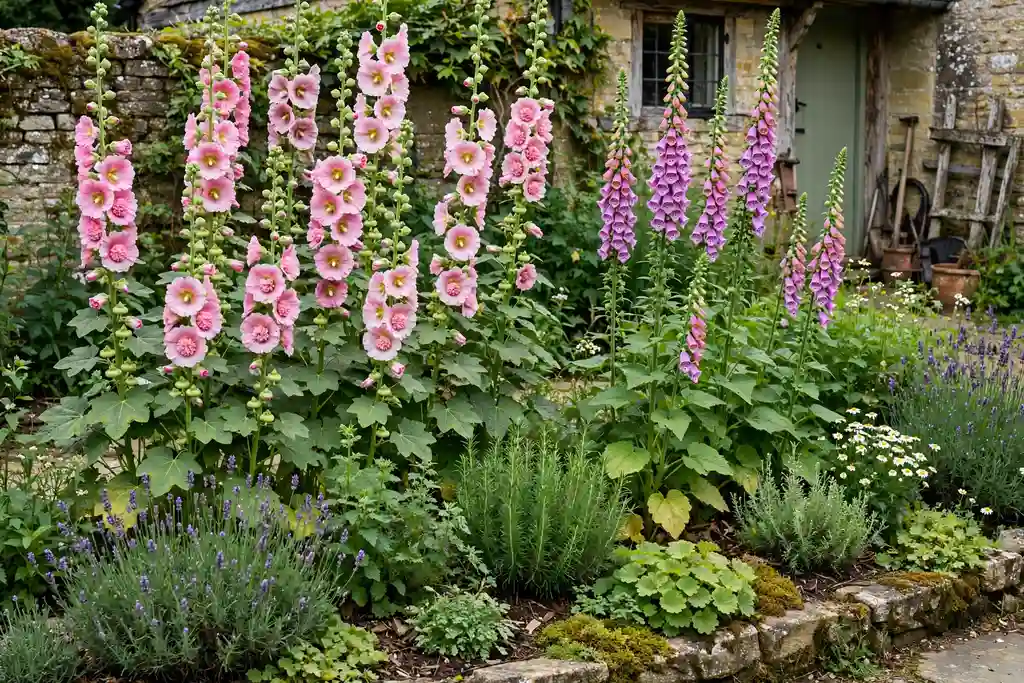
6. Plant Hollyhocks and Foxgloves for Height
Tall spires give a cottage border its classic height. Plant hollyhocks and foxgloves toward the back of a border, with lower flowers such as hardy geraniums in front to cover their base. Both plants often self seed, so once they settle you may get new plants each year without buying more, though colors can shift over time.
Stake hollyhocks in windy gardens, and note that foxgloves are biennial, flowering in their second year. Keep foxgloves away from areas where toddlers or pets might eat the leaves, as the plant is toxic if eaten. Sow a new batch each year so there is always a flowering generation coming.
7. Grow a Shrub Rose Border
Shrub roses give a cottage garden repeat flowers, scent, and a clear backbone through summer. Plant them in groups along a fence or at the back of a border, spacing bushes by the label rather than by how they look in the pot, since a crowded rose bed invites disease.
Feed and mulch in spring, prune by rose type in late winter or early spring, and water at the base rather than over the leaves. Keep shorter companions such as lavender or catmint in front to cover bare stems, and deadhead spent blooms where the rose type benefits from it.
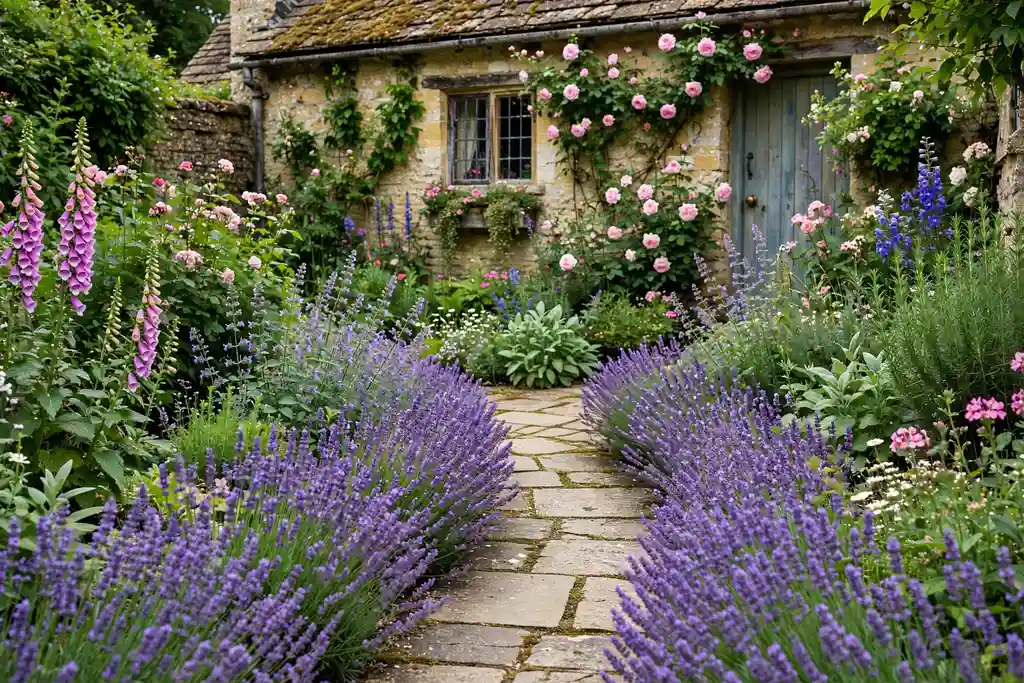
8. Edge a Walk With Lavender
A lavender edged walk gives scent every time you brush past it, and it puts a soft grey green line along the path. Plant lavender in full sun and free draining soil, in a single row about a hand span from the path edge, and keep the variety the same along the whole run so the line looks deliberate.
Trim lightly after flowering to keep plants bushy, and replace plants that turn woody in the center after a few years. Lavender suits dry, sunny spots best, so in damp or shaded soil choose catmint or hardy geraniums for the same edging job.
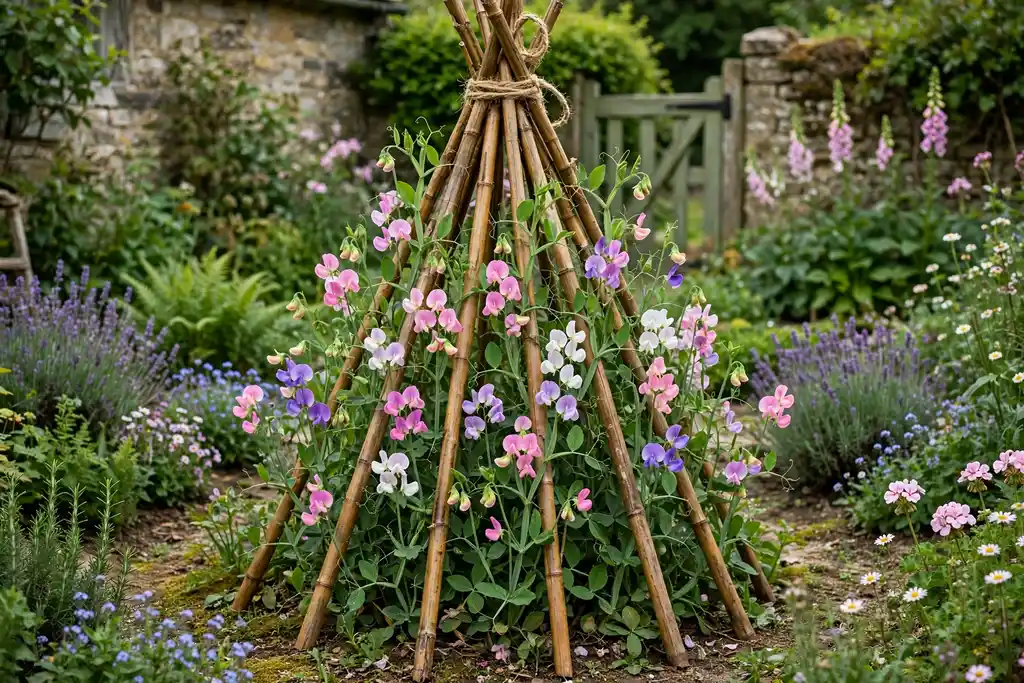
9. Build a Sweet Pea Wigwam
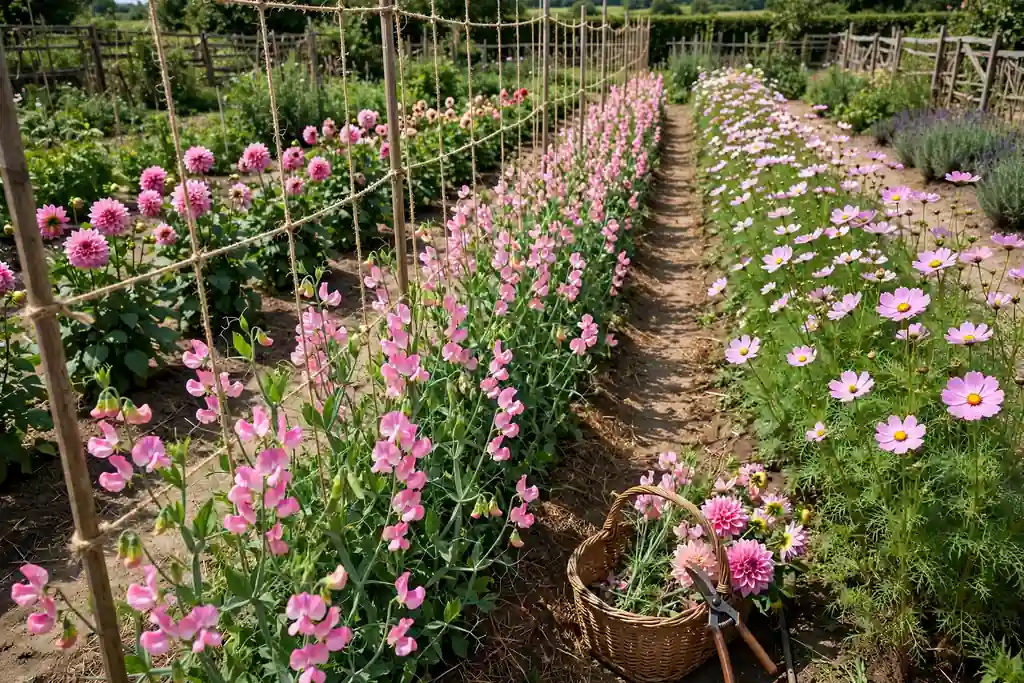
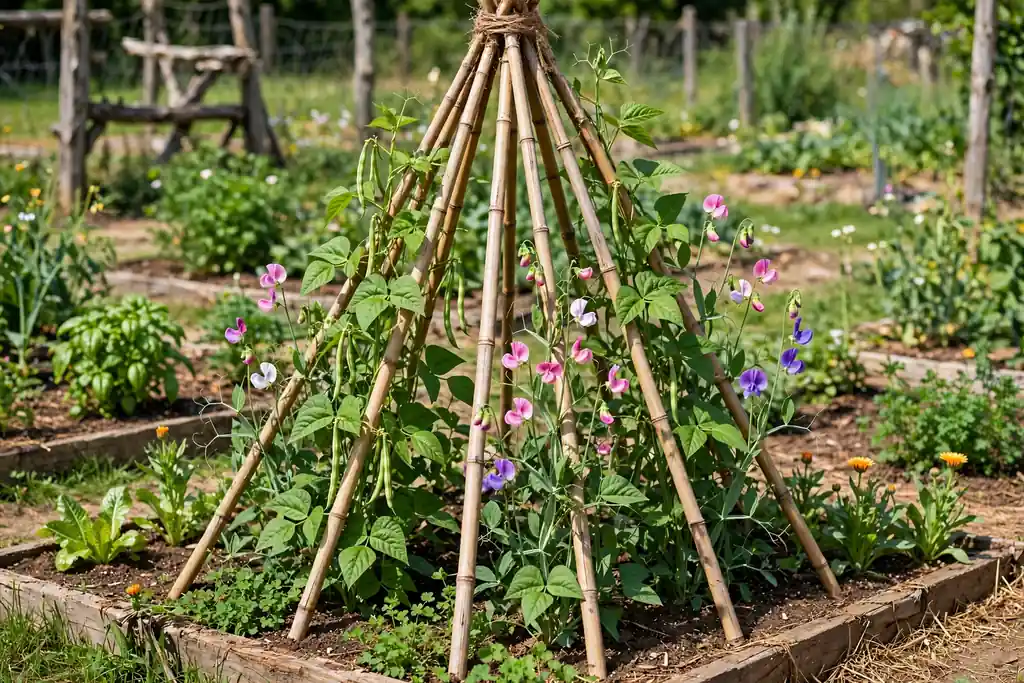
Sweet peas bring flowers and scent to a small footprint by growing upward. Build a wigwam from tall canes tied at the top, or use an obelisk in a large pot, and sow sweet peas in pots or directly in the ground in spring. Tie young stems in loosely as they grow, and water at the base.
Pick the flowers every few days, because regular picking is what keeps more buds coming. A wigwam in a border or a large pot works on a patio if you have no bed, and a group of three wigwams in a row makes a simple screen for a vegetable or cutting area.
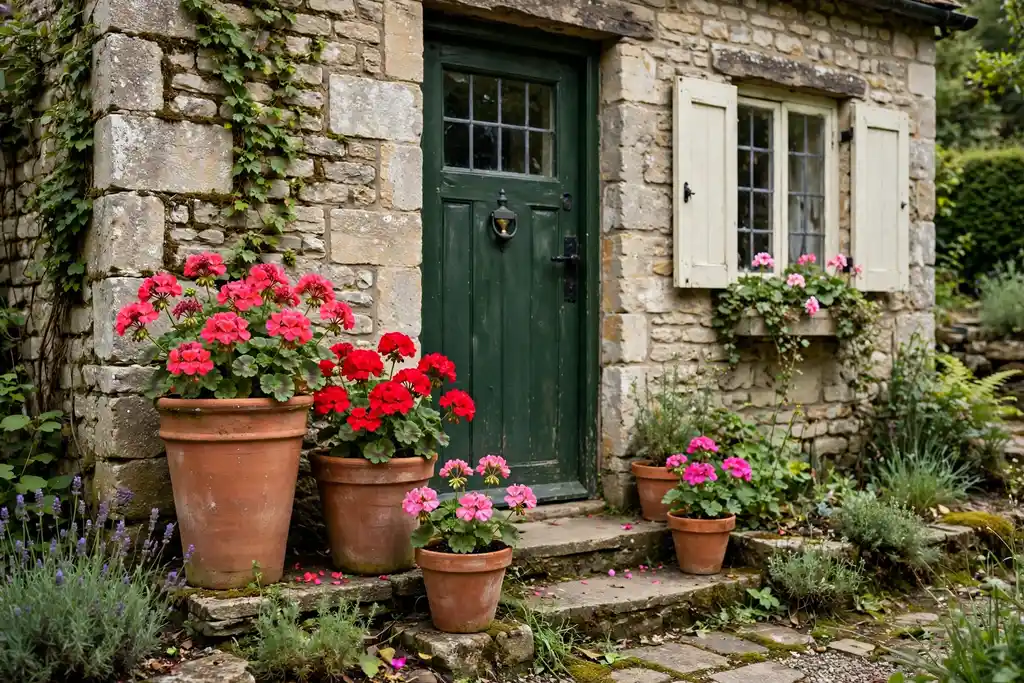
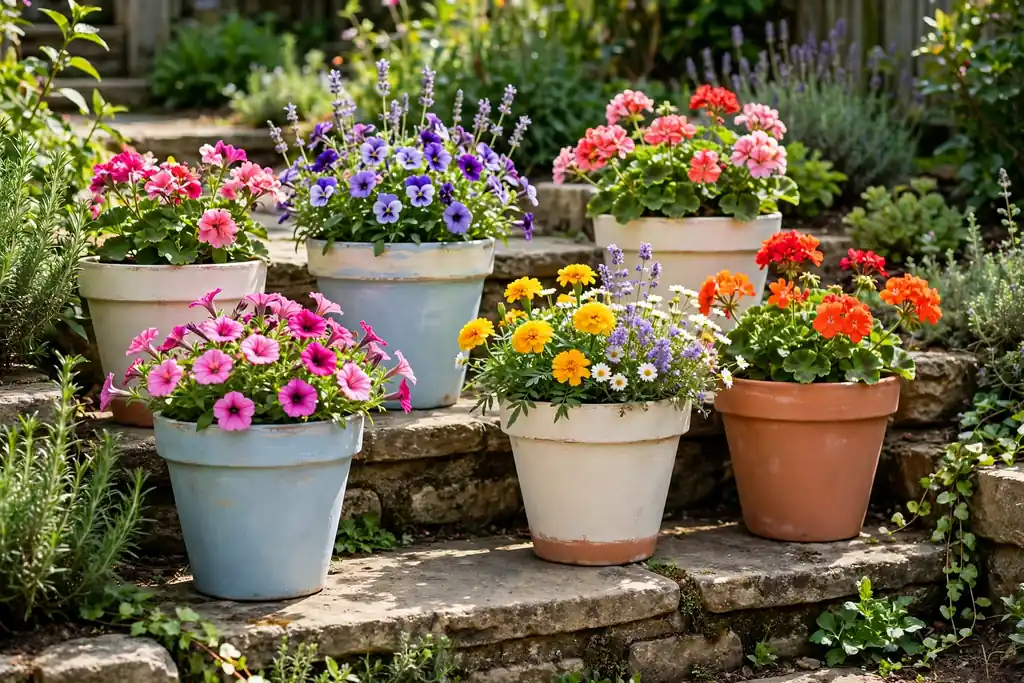
10. Group Terracotta Pots by the Door
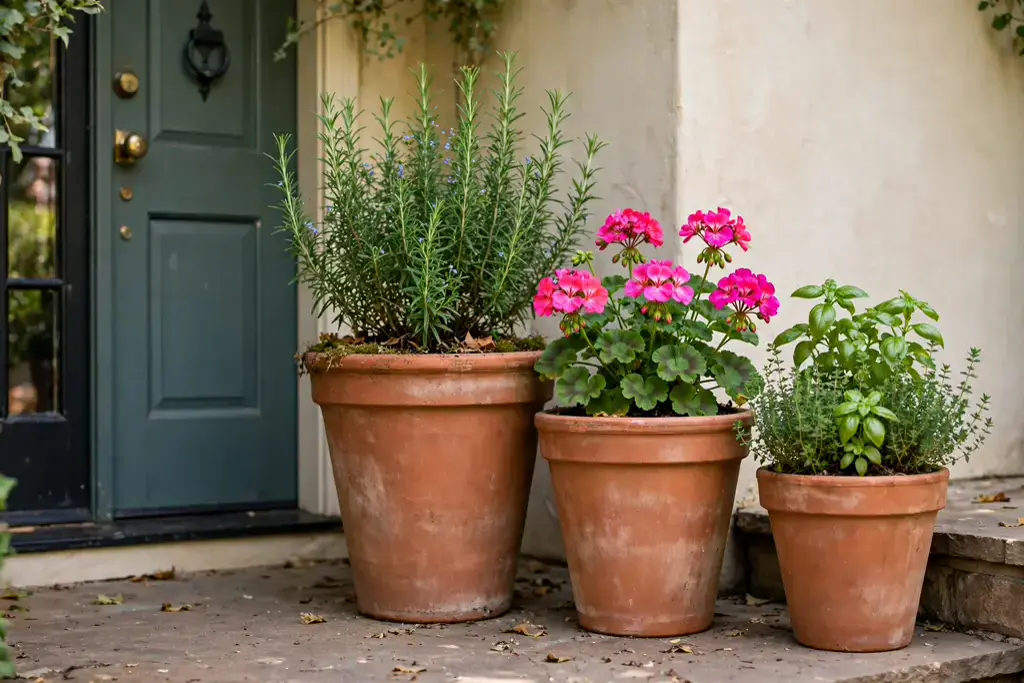
Terracotta pots by the door give a cottage garden a welcoming entrance without replanting a whole bed. Use three pots of different heights with the same plant family, such as geraniums, herbs, or small shrubs, so the group reads as one display. Terracotta warms in the sun and suits cottage planting.
Choose pots with drainage holes, raise them on feet so water drains freely, and check the soil with a finger before watering, since terracotta dries out faster than plastic. Plant the tallest pot at the back or center, depending on the view, and move the group to follow the sun or to frame the entrance as the seasons change.
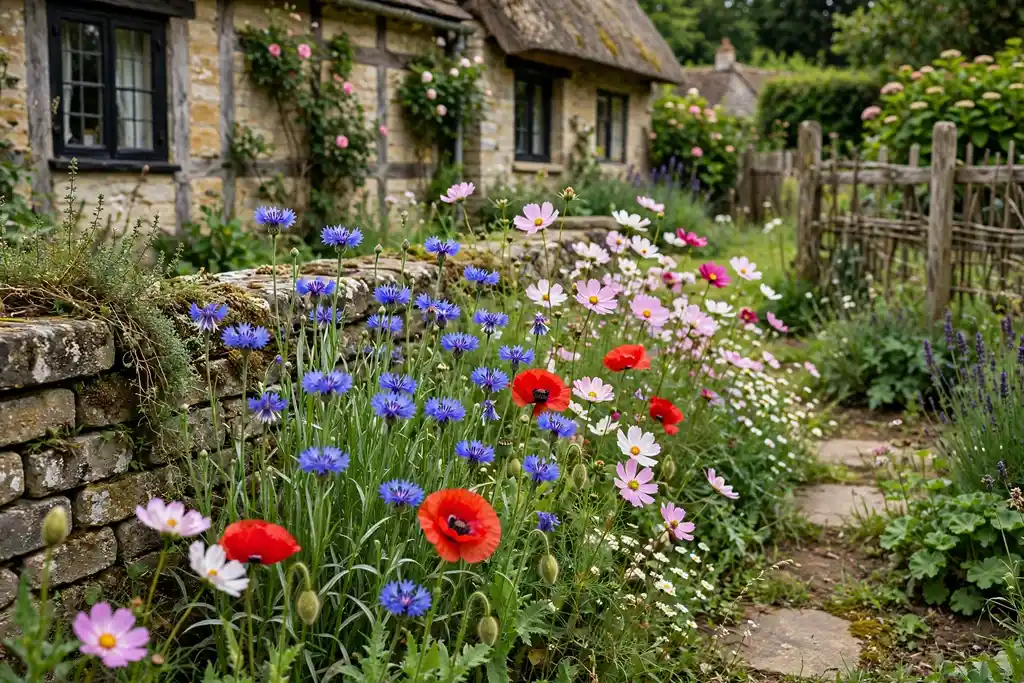
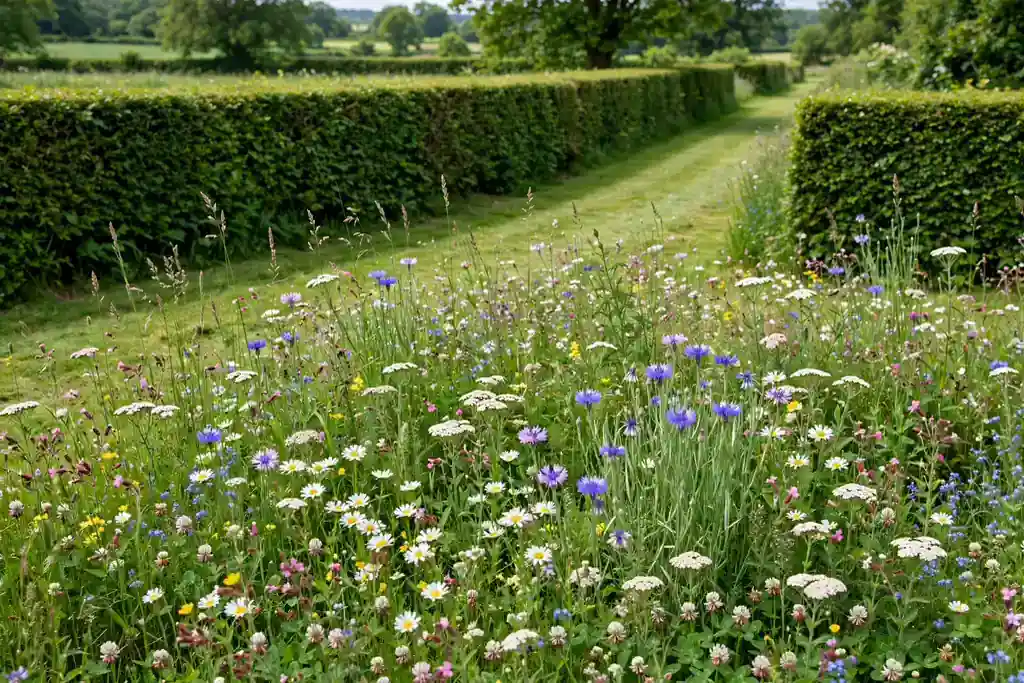
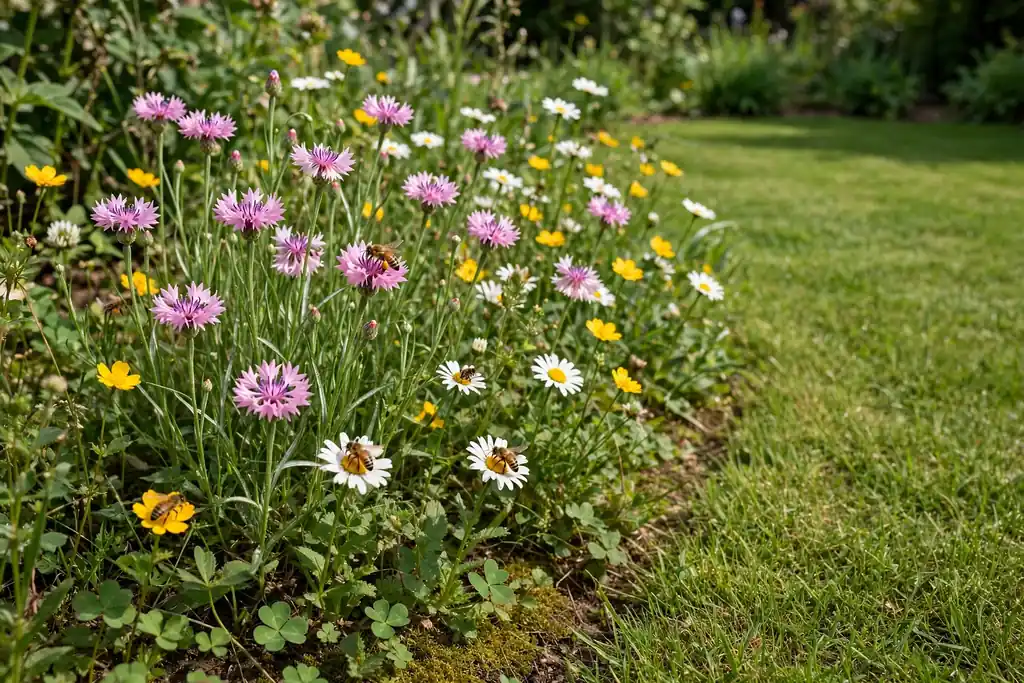
11. Sow a Wildflower Strip for Pollinators
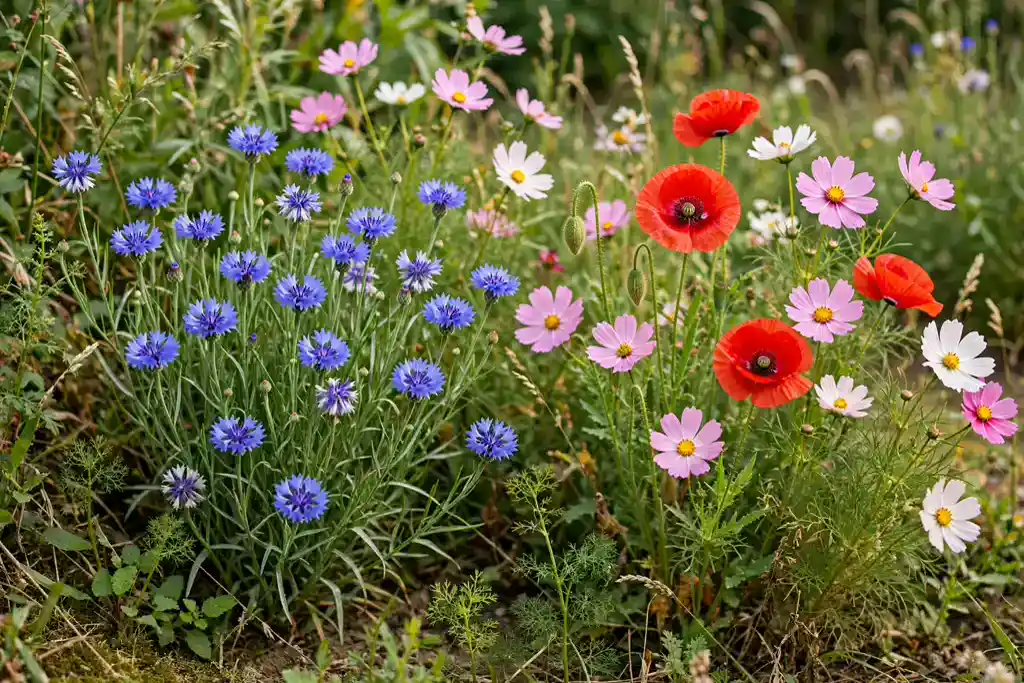
A wildflower strip brings a loose, natural look to a cottage garden and feeds bees and butterflies through summer. Clear a patch of weeds, sow a seed mix suited to your soil and region on bare, raked soil, and add a simple mown or gravel edge so the strip reads as a choice rather than neglect.
The first year can look patchy while perennials establish, so leave the strip uncut until late in the season to let plants self seed. Keep the strip away from formal beds if you prefer tidy edges, and sow thinly, since crowded seedlings compete and flower less well. Cornflowers, poppies, and cosmos give color across summer.
12. Clip Boxwood Topiary for Year Round Shape
Clipped boxwood gives a cottage garden shape that holds all year, even when flowers are finished. A ball, cone, or low hedge in boxwood suits a pot by the door, the end of a path, or the edge of a border, and a clean, simple shape reads better than a fussy one.
Clip little and often through the growing season, using sharp shears, and feed and water the plant well after clipping. Place topiary where it has room to be seen from all sides, and keep the ground beneath it clear of clutter. If boxwood blight is a problem in your area, choose yew or another alternative and check local advice before buying.
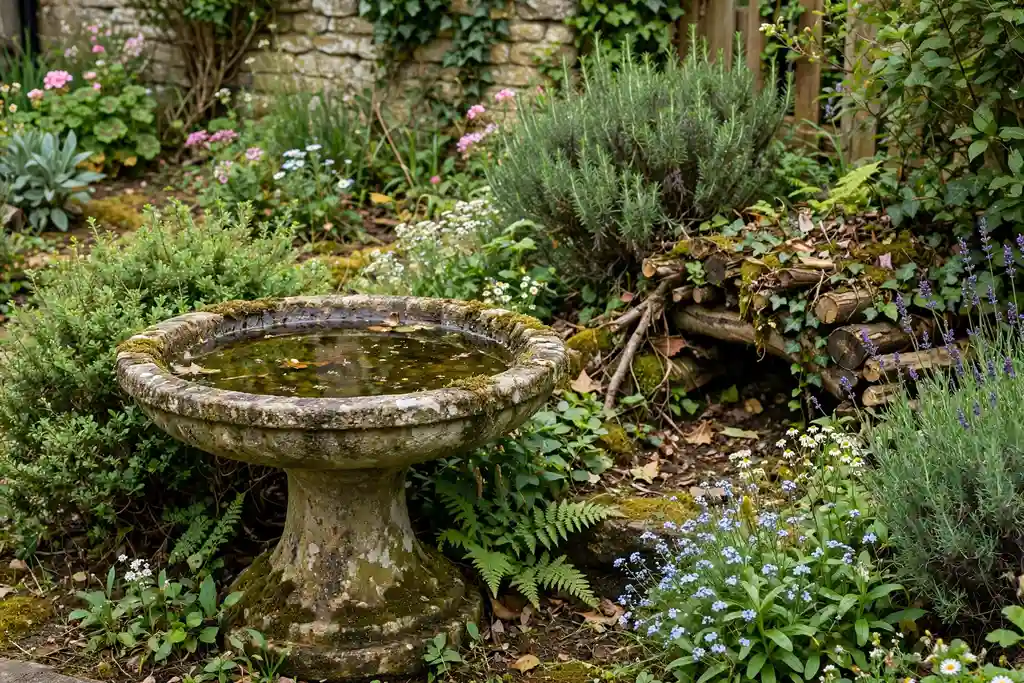
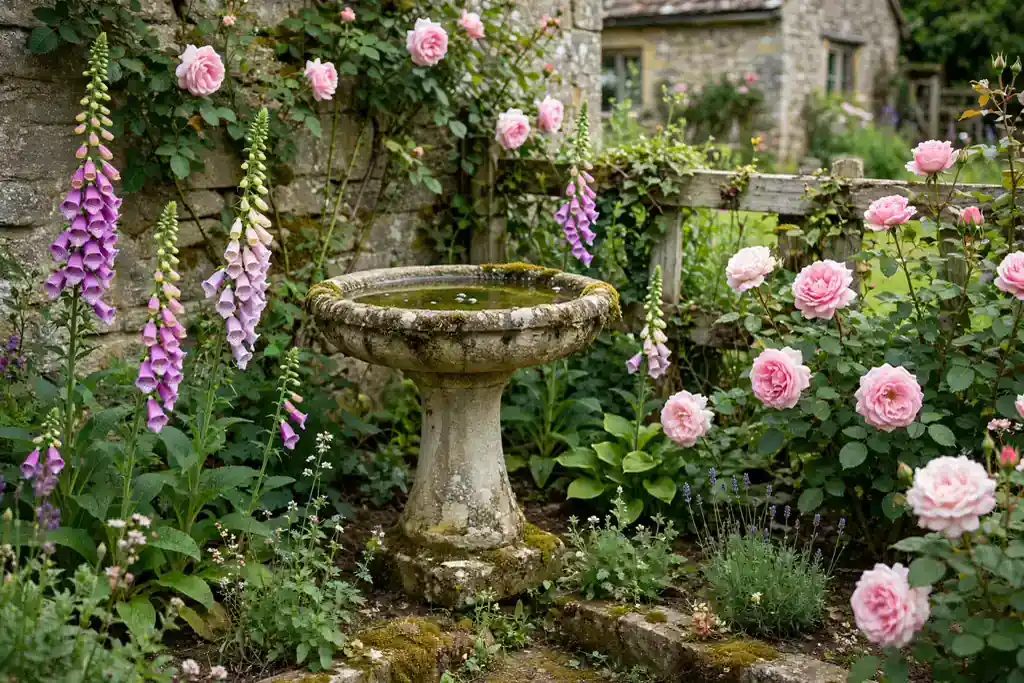
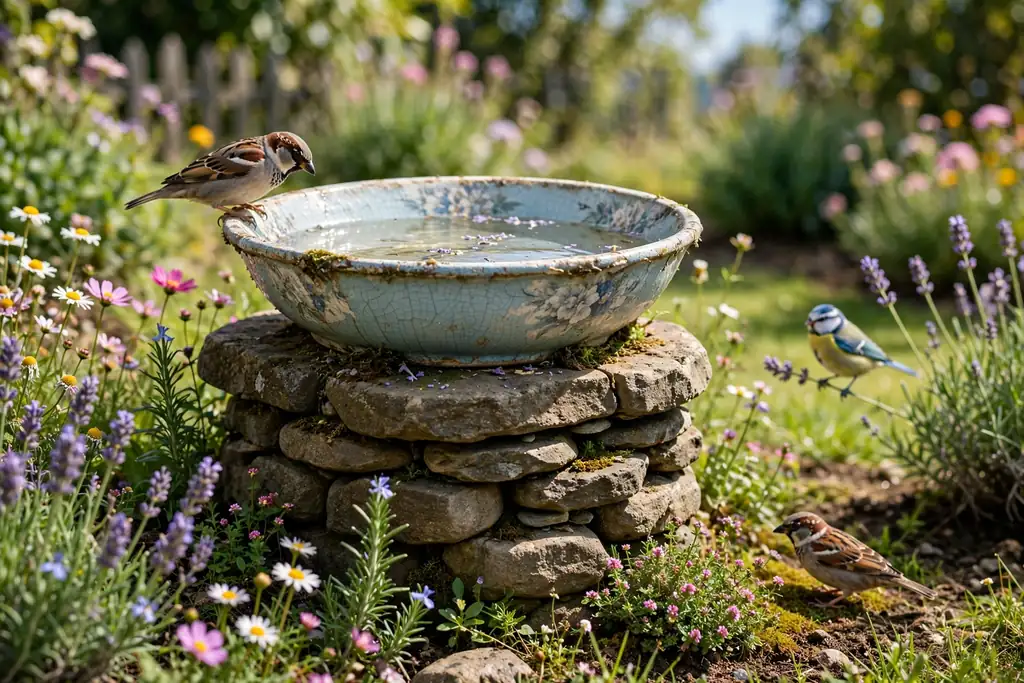
13. Set a Bird Bath in a Wildlife Corner
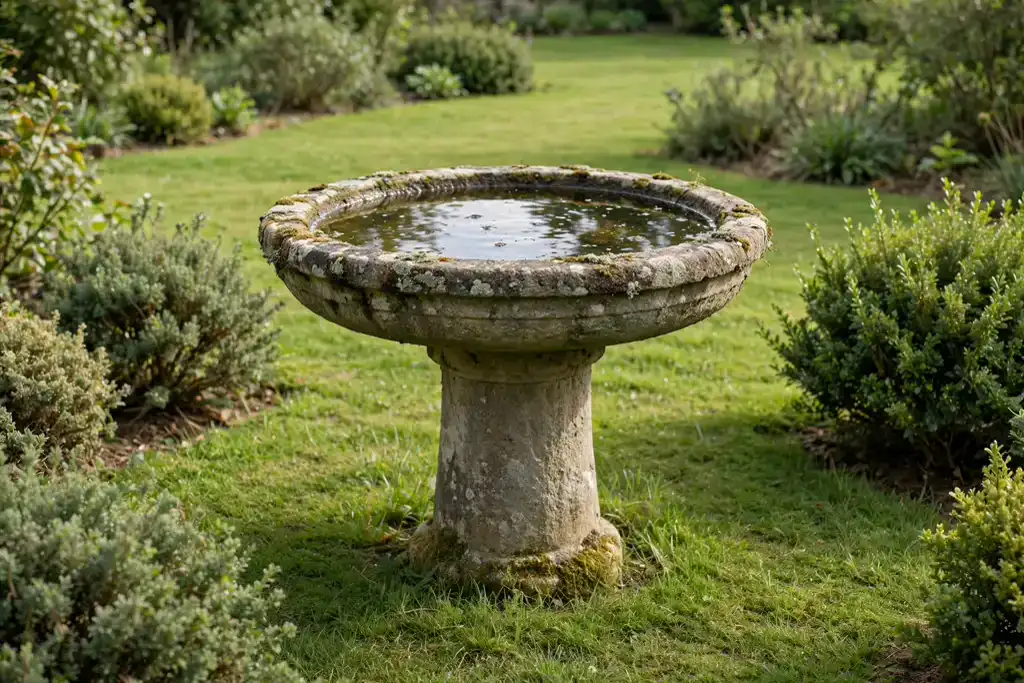
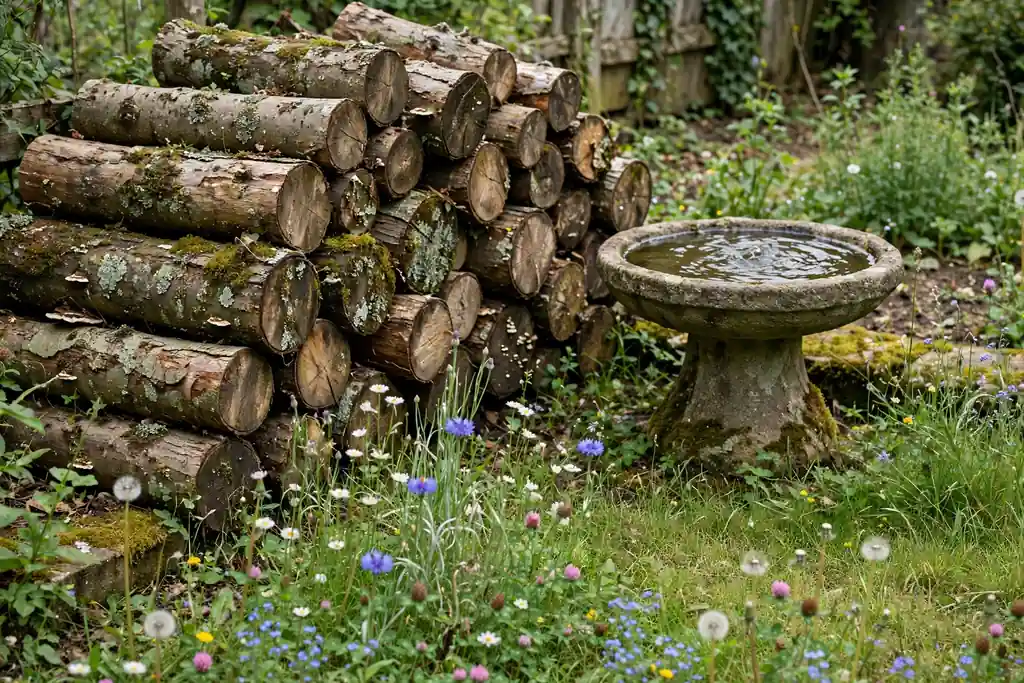
A bird bath adds wildlife and gentle life to a cottage garden. Place the bath on a level, firm base near shrubs or a tree, but with open space around it so birds can see cats approaching. Keep the water shallow, with a sloping edge or a stone in the middle so small birds can stand safely.
Change the water every few days, scrub the basin to stop algae, and keep the bath full in hot weather and in winter when natural water freezes. Site the bath where you can see it from a window or a seat, and avoid placing it under a feeder, since falling seed fouls the water quickly.
14. Dig a Small Wildlife Pond
A small pond, even one made from a sunk container, brings frogs, dragonflies, and birds to a cottage garden. Dig a shallow basin with sloping sides so wildlife can climb out, line it, and add native water plants and a flat stone at the edge for access. Keep the water shallow and the edges rounded in a family garden.
Site the pond where it gets some sun but not all day heat, and keep it clear of heavy leaf fall from overhanging trees. Add no fish to a tiny wildlife pond, since fish eat tadpoles, and let the planting settle before judging the look. A bench nearby turns the pond into a viewing point.
15. Place a Wooden Bench in the Border
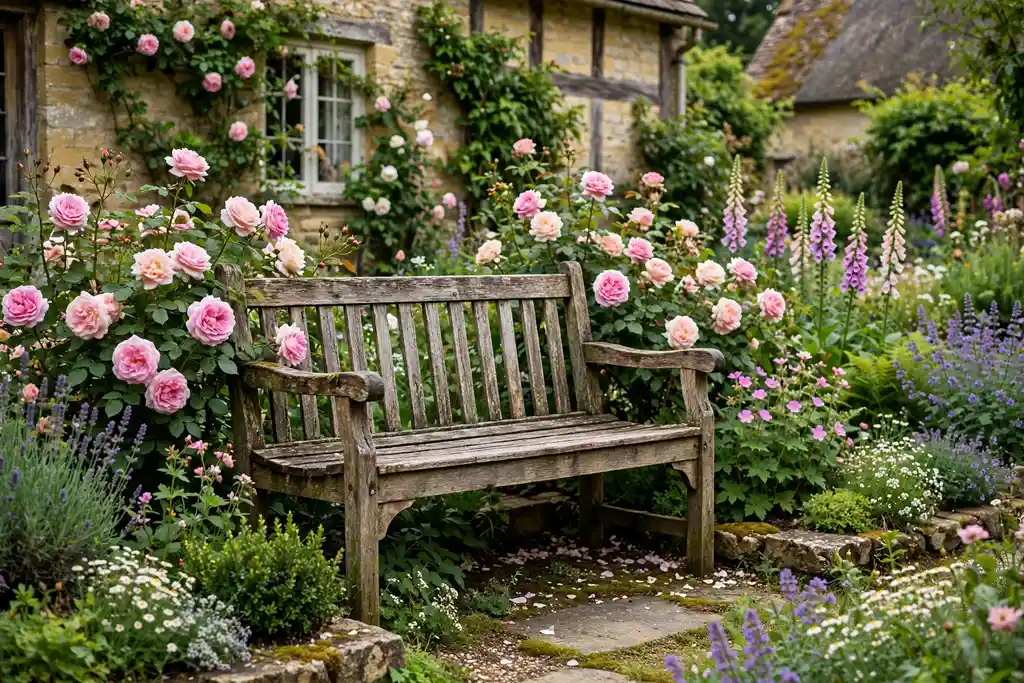
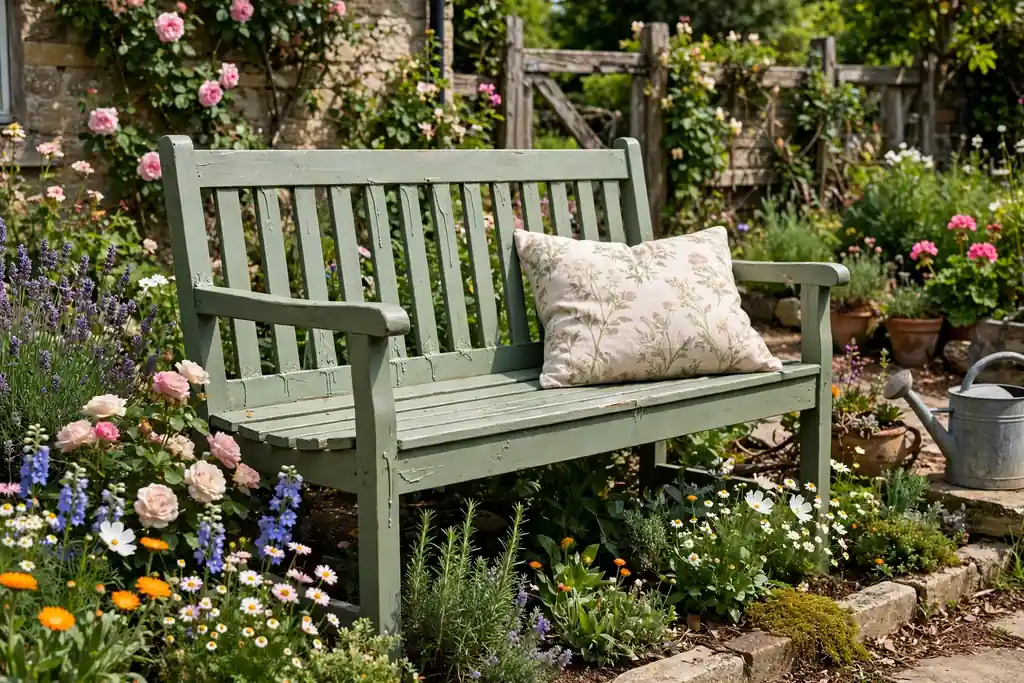
A wooden bench in the border turns a garden walk into a place to pause. Choose the spot before the bench: light at the time you will sit, a view worth looking at, and a dry path matter more than the bench style alone. A simple wooden bench suits soft cottage planting, while a stone bench suits a formal focal point.
Add one comfort detail, such as a cushion or a small table for a cup and a book, and keep plants clear of the seat edges so the bench stays easy to use. For layout ideas for the seating itself, see these garden bench ideas, which show how to choose a spot first and match the seat to it.
16. Train Espalier Fruit on a Sunny Wall
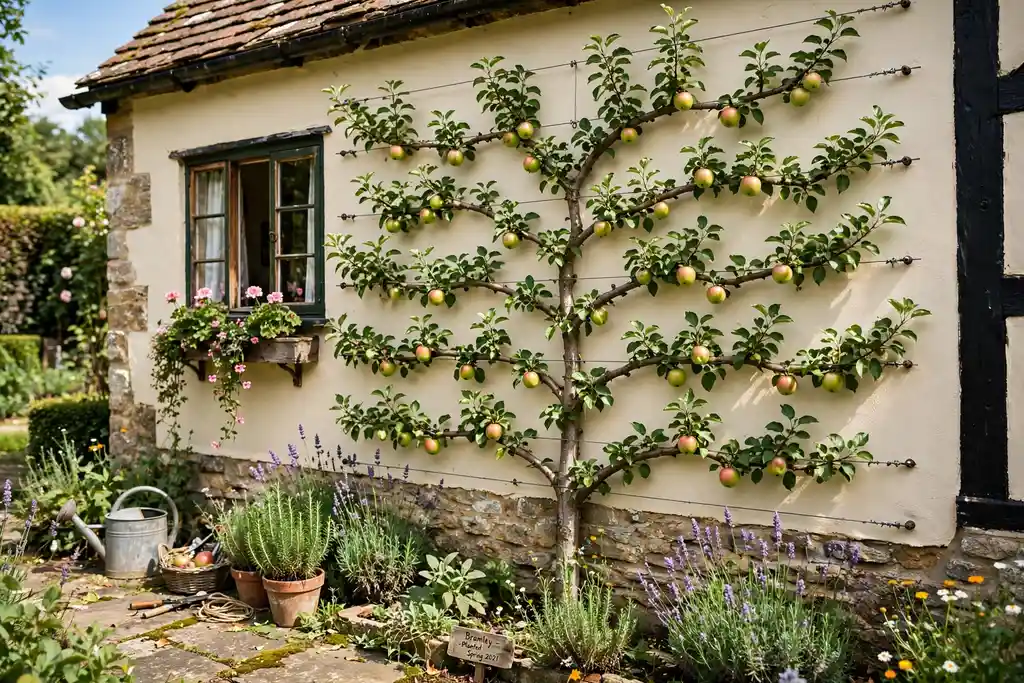
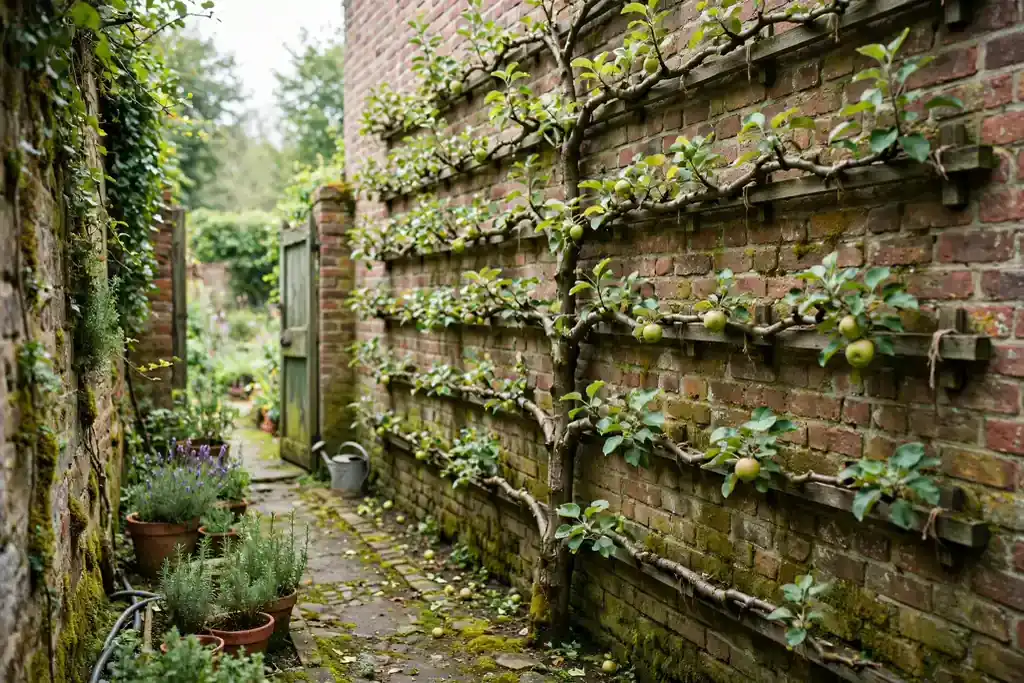
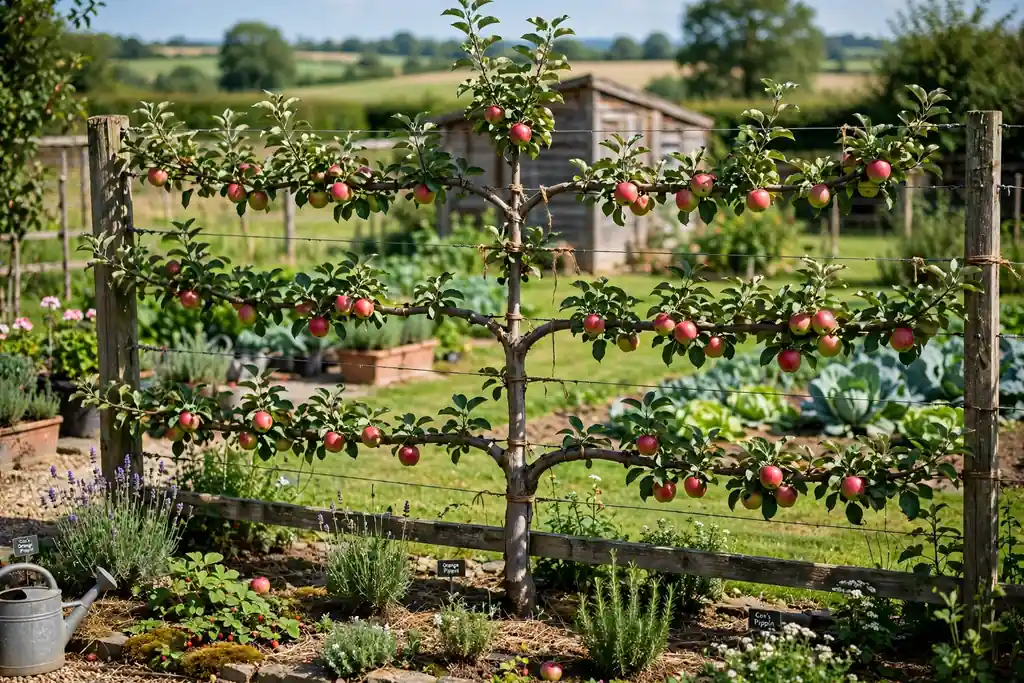
Espalier fruit trees give a cottage garden fruit without taking bed space, because the tree grows flat against a wall or fence. Fix horizontal wires to a sunny wall, and train an apple or pear tree along them, pruning in summer to keep the shape flat and open.
Choose a variety suited to your area, and keep grass or mulch clear of the trunk. Underplant the wall with low herbs or spring bulbs so the ground below it earns its place, and pick fruit as it ripens rather than leaving it to fall. Fan trained trees against a low wall work the same way in a smaller space.
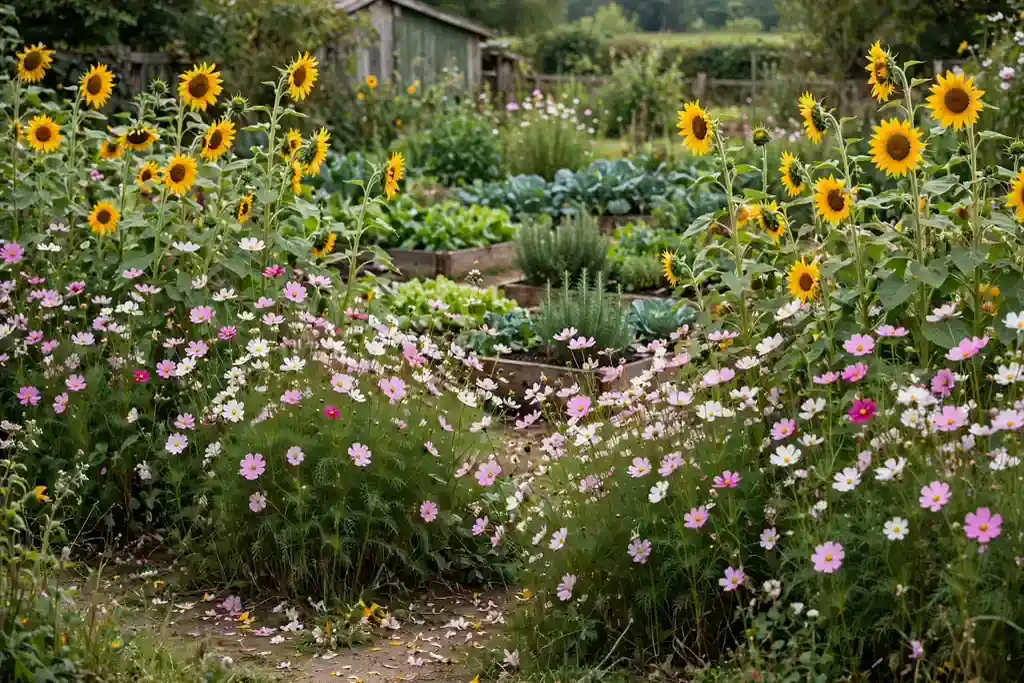
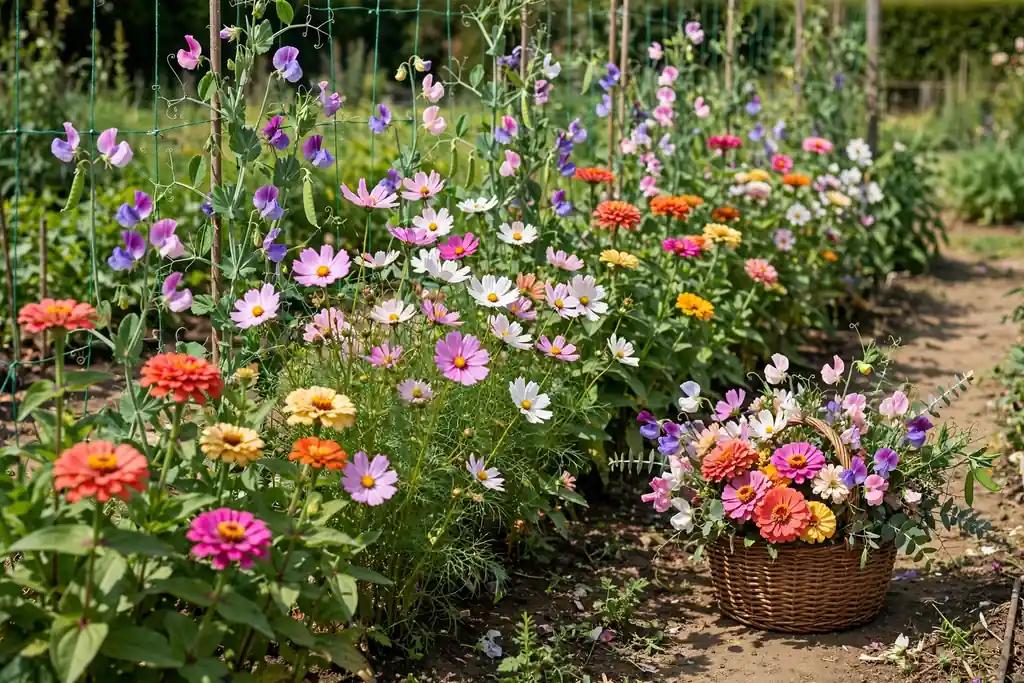
17. Set Aside a Cutting Garden Row
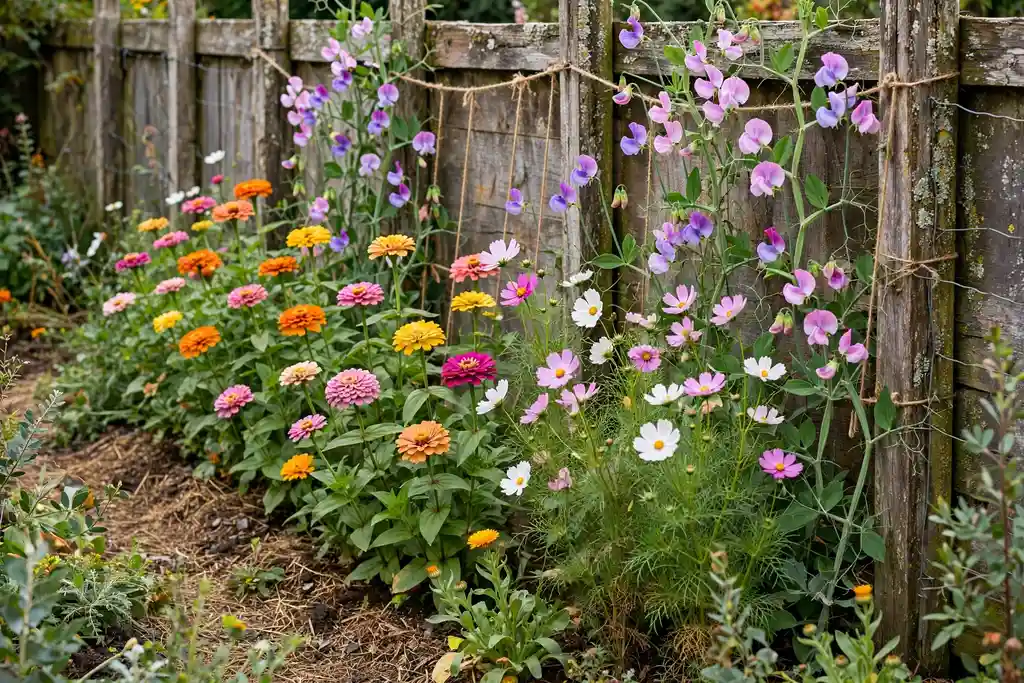
A narrow cutting row, even a single row along a fence, keeps display borders tidy while giving you flowers for the house. Grow rows of zinnias, cosmos, dahlias, and sweet peas spaced for picking rather than for looks, and cut in the morning into a bucket of water.
Keep the cutting row watered and fed more than the display borders, and re-sow fast annuals such as cosmos if gaps appear by midsummer. Bringing your own stems indoors links the garden to the house, and a cutting row means you never have to strip a display border bare for a vase.
18. Layer Spring Bulbs in Drifts
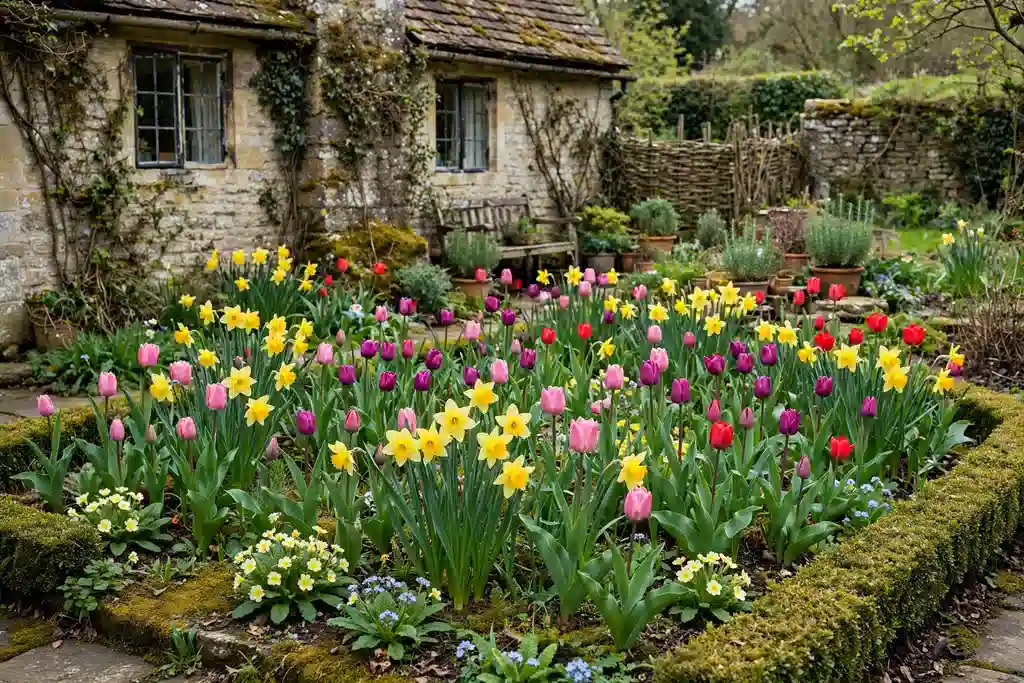
Spring bulbs give a cottage garden its first color, and they look best planted in loose drifts rather than in straight single rows. Set tulips, daffodils, and crocus in autumn, pointed end up, at about three times their own depth, in soil that drains freely so they do not rot over winter.
Mix an early and a late variety to stretch the display, and let the foliage die back naturally after flowering so the bulbs feed for next year. In small beds, plant bulbs between later perennials so their leaves hide the fading bulb foliage. A drift of nine or more bulbs of one variety reads far better than singles.
19. Plant Peony and Geranium Drifts
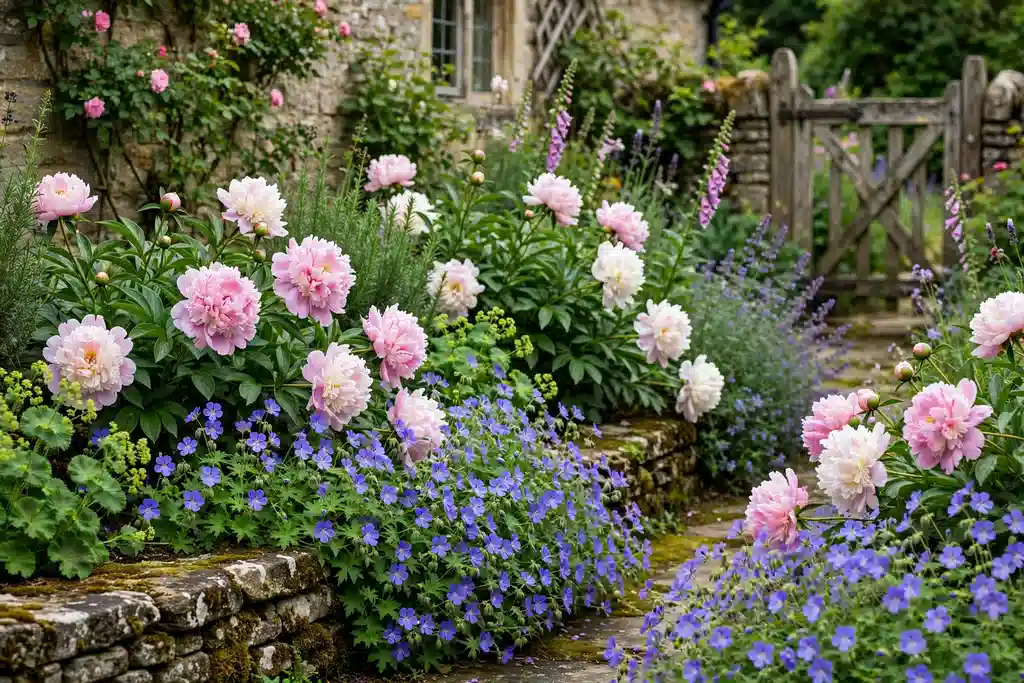
Peonies and hardy geraniums are cottage garden workhorses: peonies give a short, rich show in late spring, and geraniums carry the border through summer. Plant peony roots in autumn or early spring with the buds just below the soil surface, since planting too deep is a common reason peonies fail to flower.
Give peonies full sun, room for air to move around the leaves, and a support ring before the heavy blooms open. Plant hardy geraniums in groups of three or five around them to cover bare ground and to link the border, and deadhead geraniums lightly to encourage a second flush.
20. Keep Late Color With Dahlias and Asters
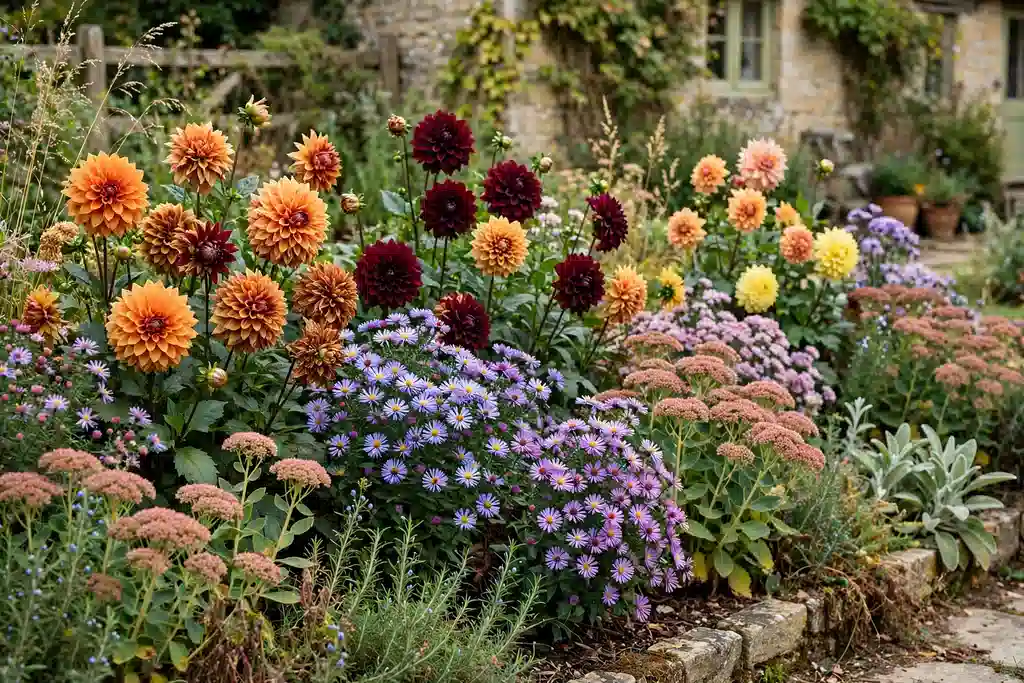
Dahlias and asters fill the gap from midsummer until the first frost, when many cottage perennials are finished. Start dahlia tubers in pots under cover or plant them out after frost risk has passed, in a sunny bed with rich soil, and stake tall types early, before the stems get heavy.
Pick or deadhead dahlias often to keep new buds coming, and plant asters nearby for late color that bees still visit. In cold areas dahlia tubers are usually lifted and stored dry over winter, so check the advice for your zone. A row of dahlias along a fence gives a strong late show.
21. Add Evergreen Shape for Winter
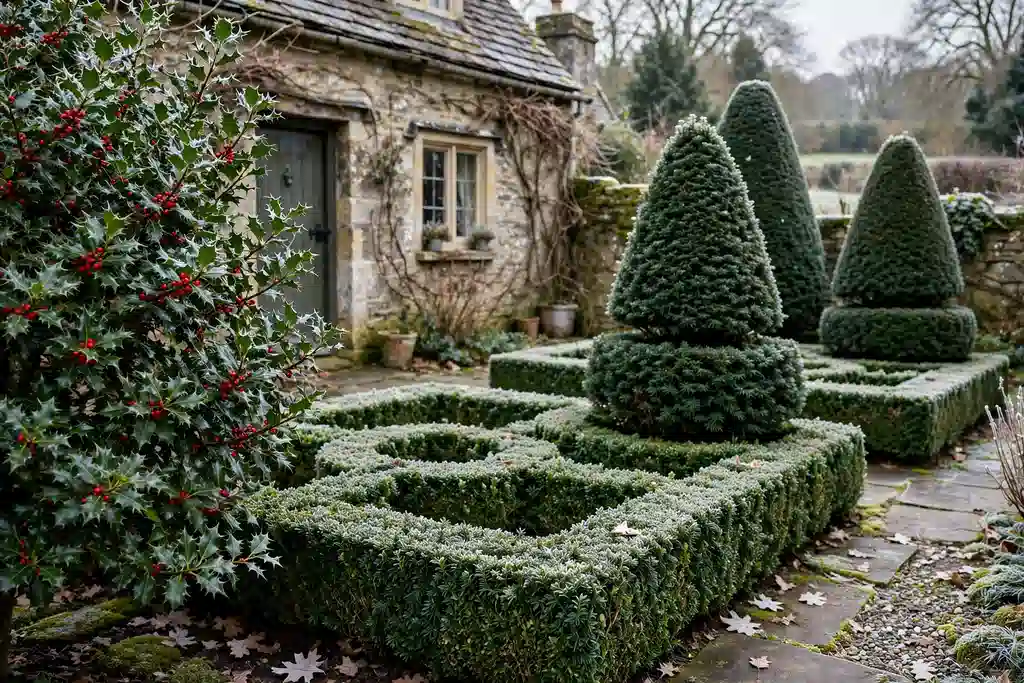
A cottage garden needs evergreen shape for winter, when flowers are gone. Plant holly, yew, boxwood, and ivy for structure, and keep a few evergreen shrubs near the house and along the path so the garden still reads as cared for in January.
Use evergreens as a backdrop for spring bulbs and summer roses, rather than as a separate formal area, so the winter shape and the summer color belong to the same garden. Trim hedges and topiary in late spring or summer as the plant type requires, and leave seed heads standing in autumn for birds and winter shape.
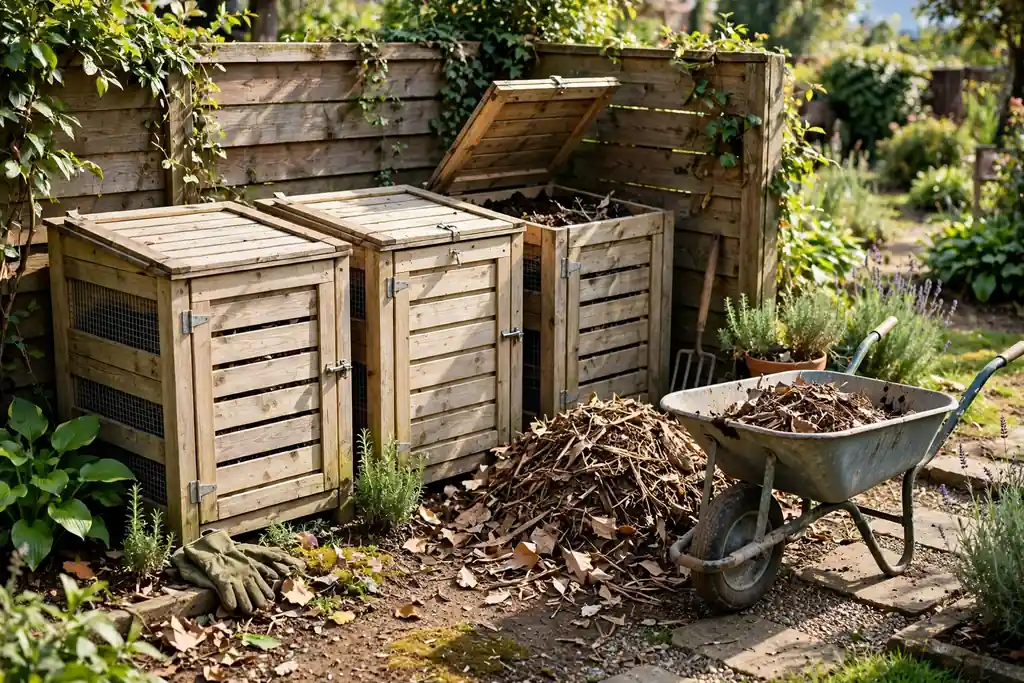
22. Feed the Soil With Compost and Mulch
Cottage gardens look full because the soil is fed, not because plants are forced. Spread garden compost over beds in autumn or spring, and mulch the surface with bark, leaf mold, or compost to hold moisture, suppress weeds, and feed the soil as it breaks down.
Keep mulch clear of plant stems and tree trunks so damp does not sit against them, and water beds well before mulching in dry weather. A simple compost heap at the back of the garden turns prunings and kitchen waste into the feed the borders need, and it costs nothing beyond a little space.
23. Grow Clematis and Jasmine on the House Wall
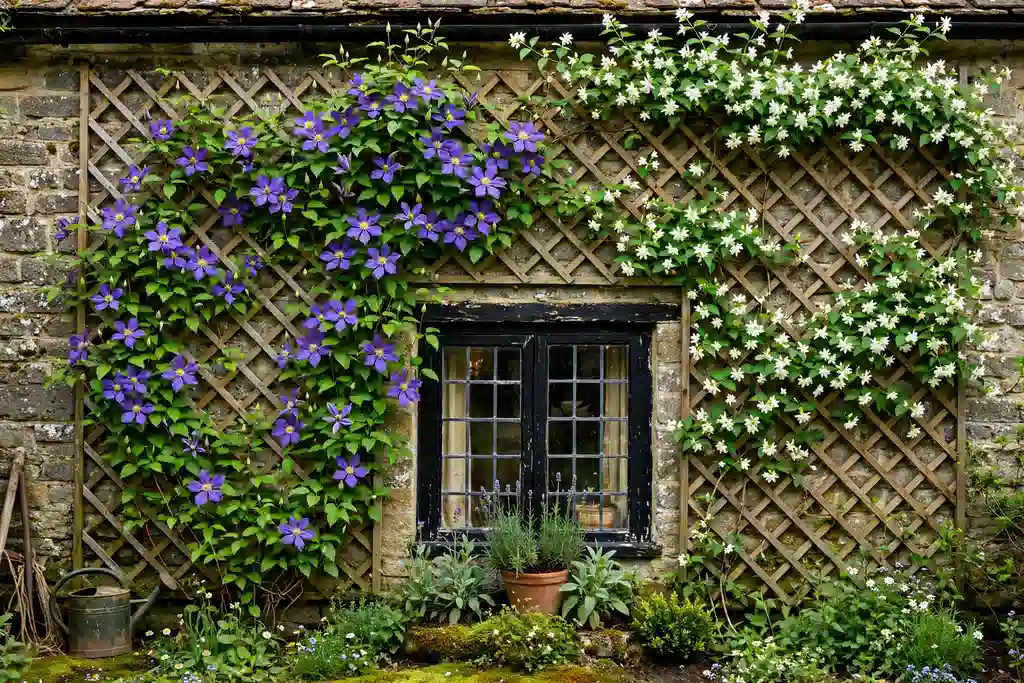
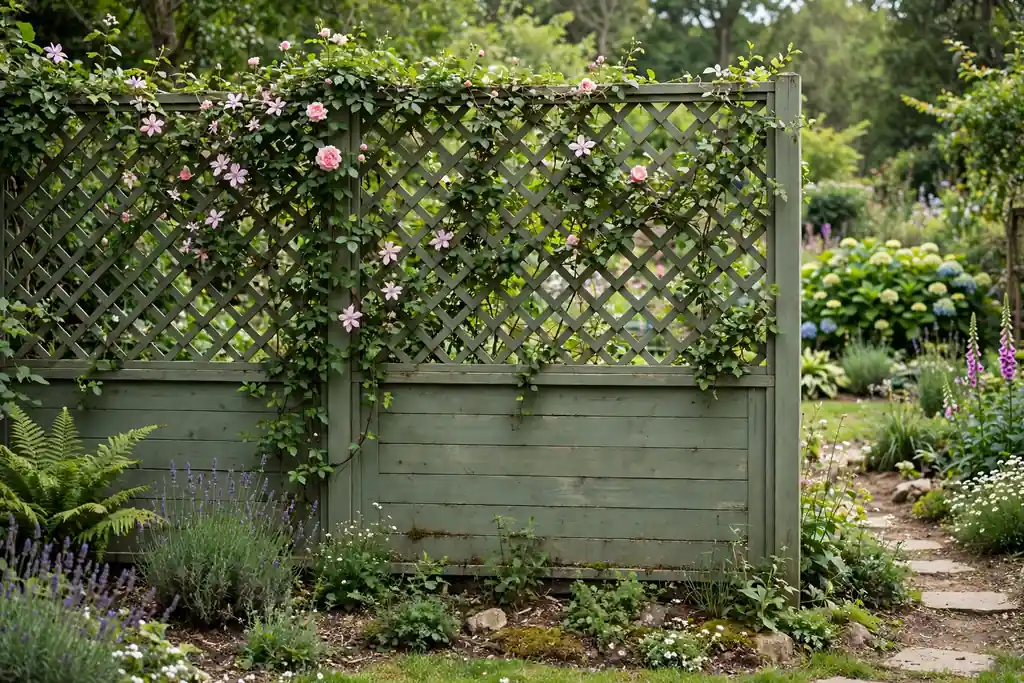
Clematis and jasmine soften a house wall and bring flowers and scent close to windows and doors. Fix a trellis with a gap behind it so air can move and the wall can dry, and train one climber up each section so the planting covers the wall without blocking gutters or windows.
Choose clematis types by pruning group, and prune as the label directs, since cutting at the wrong time can remove a season of flowers. Grow jasmine where you will smell it in the evening, near a door or a seat, and tie stems loosely to the trellis as they grow.
24. Fill Window Boxes and Hanging Baskets
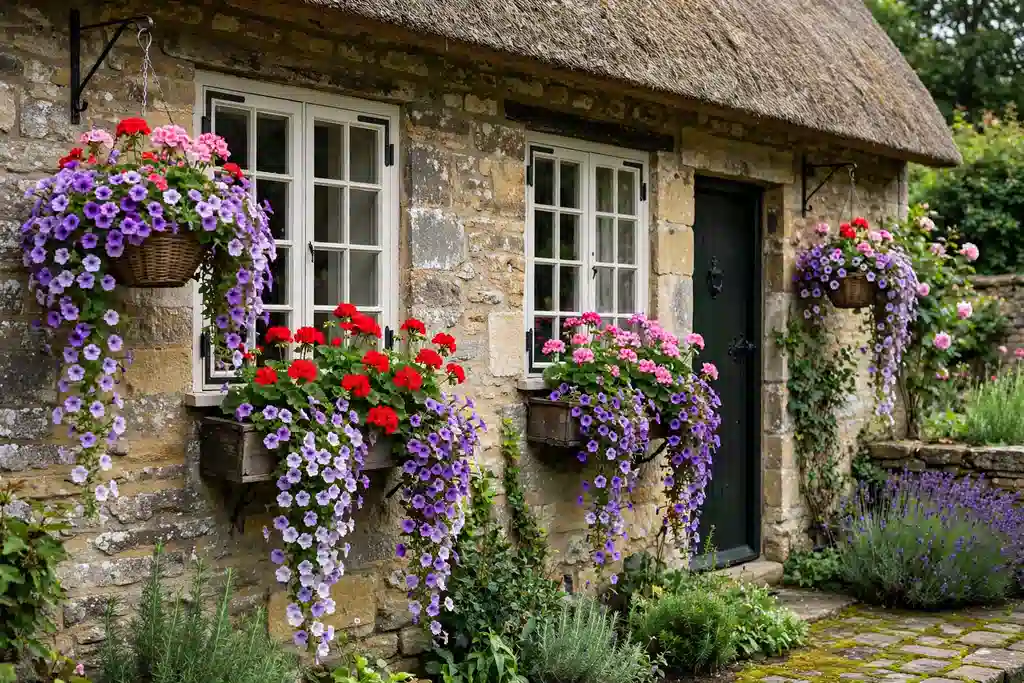
Window boxes and hanging baskets put cottage flowers at eye level and finish an entrance faster than any bed change. Use a box or basket with drainage holes, fill it with fresh potting mix, and combine one upright flower, such as geraniums, with a trailing one, such as trailing petunias or verbena, so the display looks full from the street.
Boxes and baskets dry out quickly in sun and wind, so expect to water daily in hot weather. Feed lightly through the season, swap tired plants out as needed, and refresh the whole display each spring. Hang baskets on brackets rated for the weight of a watered basket, which is heavier than most people expect.
25. Make a Small Gravel Seating Nook
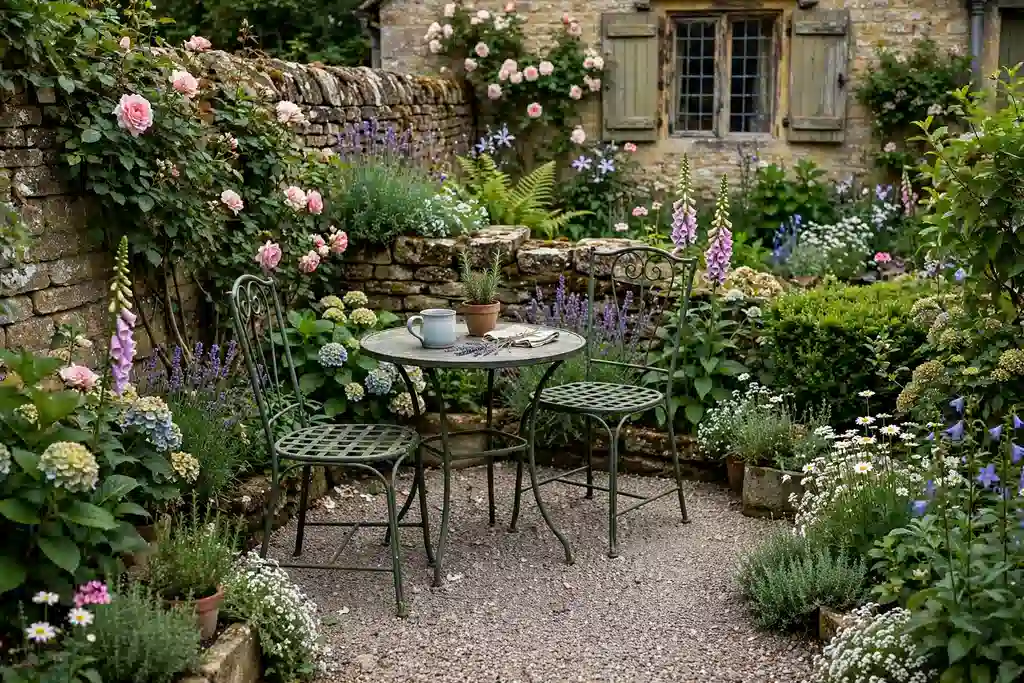
A small gravel nook with a table and two chairs turns an unused corner into a daily habit. Lay a level gravel pad on a firm base, edge it with stone or brick, and place the seats where they catch morning or evening light rather than deep shade all day.
Add one scented plant nearby, such as a rose or jasmine, and keep the rest simple: a small table, a cushion, and a clear path from the house. For ideas on working with levels and structure around a seating area, the ideas in these tiered garden ideas show how to give each level a clear job.
26. Plant a Mixed Flowering Hedge
A mixed flowering hedge makes a softer boundary than a fence, and it feeds birds and pollinators through the year. Plant a row of hawthorn, hazel, wild rose, and lilac, spacing plants by the label, and let the hedge grow a little wider than a clipped formal hedge so flowers and berries have room.
Trim after flowering as each plant type requires, and leave some berries standing in autumn for birds. A mixed hedge suits a cottage garden boundary better than a single species hedge, since it gives flowers in spring, leaf cover in summer, and berries and color in autumn.
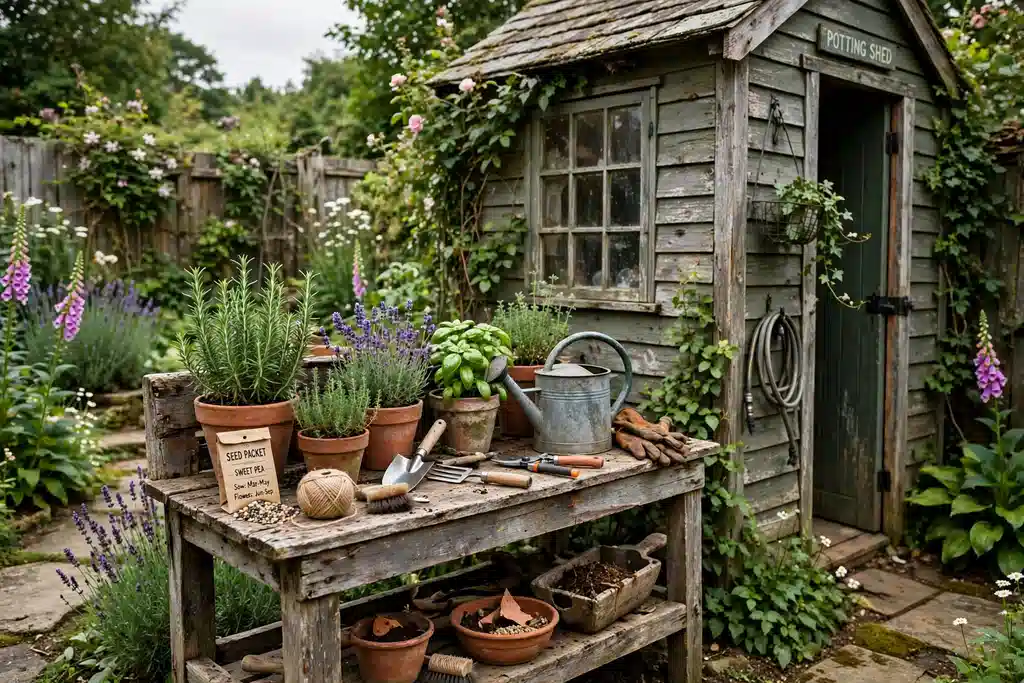
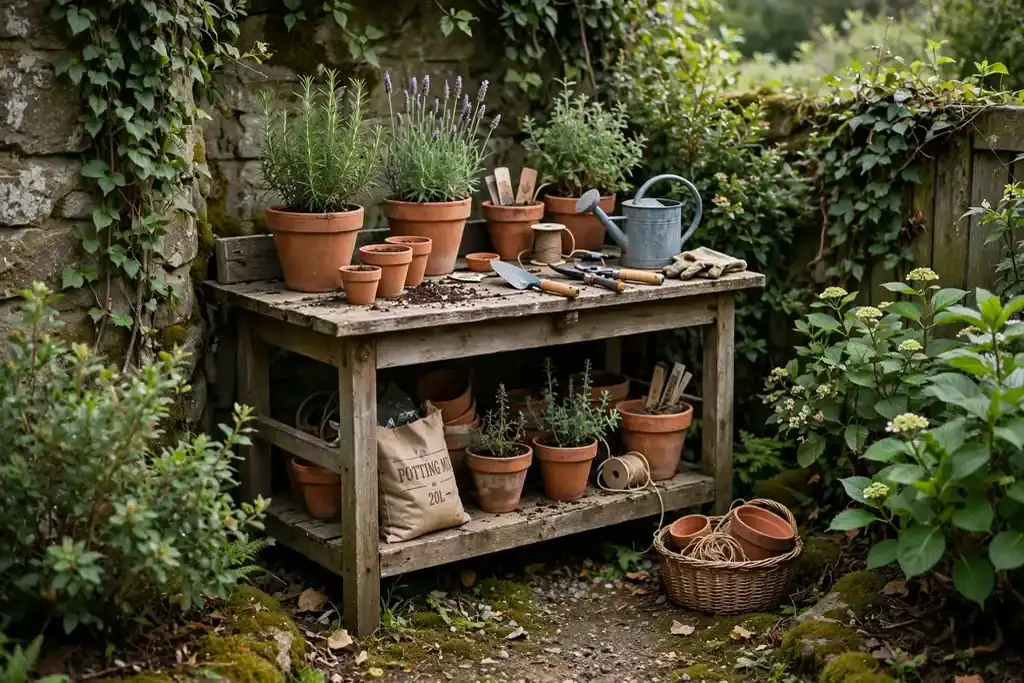
27. Add a Rustic Potting Bench by the Shed
A rustic potting bench by the shed turns garden work into part of the cottage garden, not a chore hidden away. Build or buy a simple wooden bench with a shelf below for pots and a hook for twine and snips, and place it where it catches light and stays dry under a shed overhang or a simple roof.
Keep the bench surface clear enough to pot on, store soil in a covered bin nearby, and sweep the area after potting so the corner stays tidy. A potting bench near the beds means seedlings, cuttings, and tools are close at hand, and a few pots of herbs on the bench keep the work area looking planted.
Conclusion
An English cottage garden does not need every idea on this list. Pick one structure first, such as a layered border, a rose arch, or a gravel path, then add two or three supporting pieces, such as pots by the door, a bench, and a scented walk. Repeat one or two colors and materials through the garden, plant in groups rather than singles, and keep one seat comfortable and easy to reach. Spread interest across the seasons, so the garden looks cared for in winter as well as in summer. When you add scent, fruit, and wildlife, the garden becomes a place you use every day, not just a view from the window.
Save this list on Pinterest before your next nursery trip, and work through it one area at a time: structure first, then planting, then the small details that make the garden yours.
FAQs
How do I start an English cottage garden from scratch?
Start with structure: a path, bed edges, and one seat, then plant one layered border by height. Choose plants that suit your sun, soil, and zone, plant in groups of three or five, and add roses, scent, and a second border the following season. A cottage garden improves each year as plants settle and self seed.
What are the easiest cottage garden plants for beginners?
Hardy geraniums, catmint, lavender, roses, hollyhocks, and foxgloves are forgiving choices. They flower for a long season or return reliably, cope with basic care, and show quickly whether a spot suits them. Start them in a sunny border with compost rich soil, and add bulbs in autumn for spring color.
How do I keep a cottage garden from looking messy?
Give the garden structure: clear paths, tidy edges, one clipped hedge or topiary, and a mown or gravel edge to wildflower areas. The planting itself can stay loose and full, but the edges, paths, and seats should stay tidy. Deadhead spent flowers where the label advises it, and cut back overgrown plants after flowering.
Can I create a cottage garden in a small space?
Yes. Use vertical space with a rose arch, an obelisk, and wall climbers, group pots by the door, and plant one layered border instead of several thin beds. A small gravel seating nook, a window box, and a wildflower pot give the cottage look without needing a large yard.
Which plants give scent in a cottage garden?
Roses, lavender, sweet peas, jasmine, and lilac give the classic cottage scent. Place them near paths, seats, and doors where you will brush past them, and choose repeat flowering roses and night scented jasmine for evening use. Scent carries best in still air and warm sun, so shelter scented plants from strong wind where you can.
How do I plan a cottage garden for all four seasons?
Plan by season: bulbs for spring, roses and peonies for summer, dahlias and asters for late color, and evergreen holly, yew, and boxwood for winter shape. Add fruit for autumn, seed heads for birds in winter, and seasonal pots by the door to refresh the entrance through the year.
A garden looks aesthetic when every part has a reason to be there: a path that leads somewhere, planting that fills a bed without crowding it, and a seat placed where the light is good. Small, deliberate choices, such as a curved path, a repeated pot, or one strong focal point, can change how the space reads from the house. These 22 aesthetic garden ideas cover paths, borders, structure, water, scent, and evening light. Start with the structure you see every day, then add planting around it. For lessons on working with levels and structure, the ideas in these tiered garden ideas show how to give each level a clear job.
Key Takeaways
Start with structure first: paths, edges, one focal point, and a seat, then fill in with planting.
Repeat one or two materials, such as stone, wood, or terracotta, so the garden reads as one design.
Plant in groups and drifts, not single plants, so color and shape show clearly from a distance.
Give the garden something for every season: evergreen shape, spring bulbs, summer flowers, and autumn color.
Keep paths clear, edges tidy, and one seat comfortable, since use matters more than decoration.
Add scent and sound, such as herbs by a path or moving water, for a garden that feels good as well as looks good.
1. Curve a Gravel Path Through Soft Planting
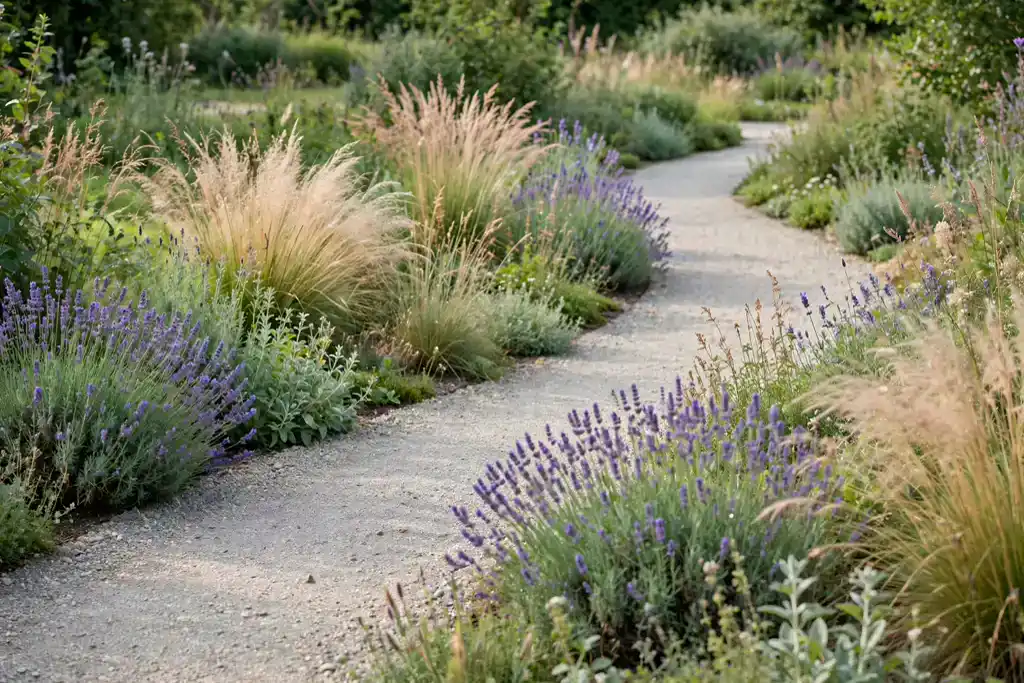
A curved gravel path softens a garden at once, because the eye follows the bend instead of stopping at a straight line. Lay the path on a shallow base of compacted gravel, edge it with stone or steel strips to keep the gravel in place, and let low plants spill slightly over the edge. The curve works best when it leads to something worth reaching, such as a bench, a tree, or a sunny corner.
Keep the path wide enough for two people to walk side by side where space allows, and rake it level after heavy rain. Plant lavender, catmint, or low grasses along the edges for scent and movement. Avoid a curve that is so tight it feels awkward to walk, and keep the surface firm enough for a wheelbarrow and for wet weather.
2. Layer a Cottage Flower Border by Height
A cottage border looks full because it is layered: tall plants at the back, medium plants in the middle, and low edging plants at the front. Put hollyhocks, delphiniums, or tall roses at the back, peonies, salvias, and hardy geraniums in the middle, and catmint, thyme, or low geraniums at the front. Seen from the lawn, the whole border reads as one deep planting rather than a row of single plants.
Repeat one or two colors through the layers to tie the border together. For a pink led scheme, the planting ideas in these pink flower garden ideas show how drifts of one color, rather than single plants, make the color read clearly. Leave a narrow access strip behind the tallest plants so you can stake, deadhead, and cut back without stepping on the plants in front.
3. Clip One Sculptural Topiary Focal Point
One clipped topiary gives a garden a focal point that holds all year, even when flowers are finished. A cone, ball, or spiral in boxwood, yew, or privet suits a pot by the door, the end of a path, or the center of a small bed. Choose a plant that clips well and suits your climate, and keep the shape simple, since a clean shape reads better than a fussy one.
Clip little and often through the growing season, using sharp shears, and feed and water the plant well after clipping. Place the topiary where it has room to be seen from all sides, and keep the ground beneath it clear of clutter. If boxwood blight is a problem in your area, choose yew or another alternative and check local advice before buying.
4. Edge Beds With Natural Stone
Natural stone edging gives beds a finished line that suits both cottage and modern gardens. Lay flat stones, cobbles, or a low dry stone line along the bed edge, set firmly on a shallow gravel footing so frost does not lift them out of line. Stone also keeps mulch and soil in the bed and gives the lawn edge a clean cut.
Choose stone that matches stone already in the garden, such as a wall or a path, so the materials repeat. Keep the top of the edging level along each run, and leave small gaps at the lowest corner so water does not pool behind the line. Plant low edging plants such as thyme or sedum just behind the stone so the edge softens without hiding the stone itself.
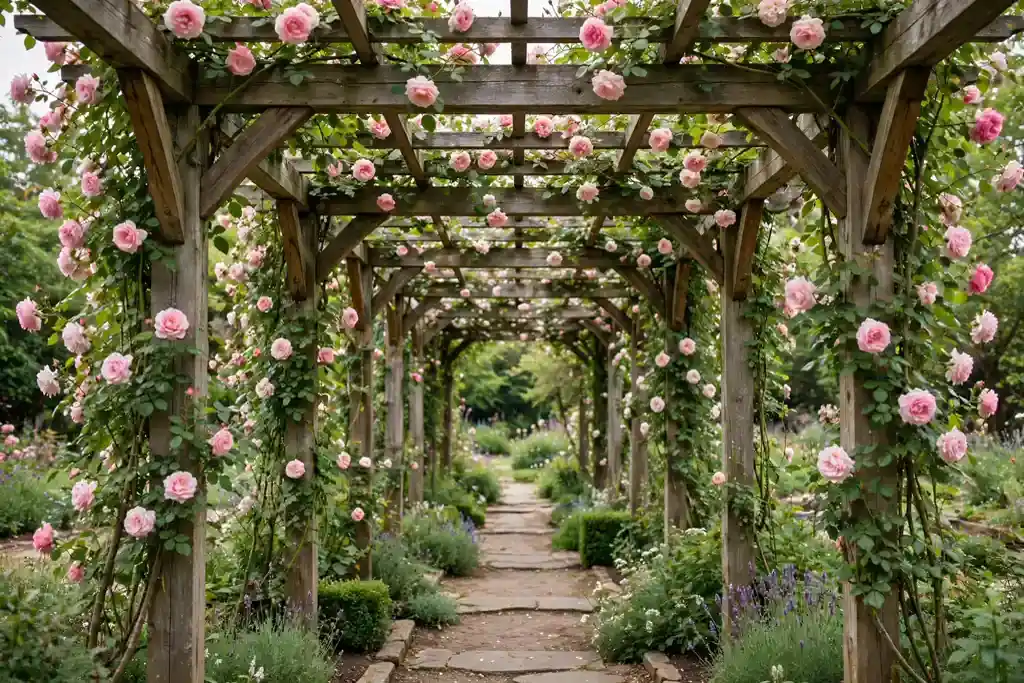
5. Grow Climbing Roses Over a Wooden Pergola
A wooden pergola with climbing roses turns a seating area or a walk into a garden room with scent and shade. Build or buy a sturdy frame, anchor it firmly, and train one or two repeat flowering climbers along the top and sides. Roses give flowers and scent in summer, while the frame itself gives structure in winter.
Tie stems loosely to wires or the frame as they grow, and prune after flowering as the rose type requires. Keep climbers clear of gutters and drains, and site the pergola where it catches morning or evening light rather than deep shade all day. A simple timber frame suits most gardens better than an ornate one, since the roses provide the detail.
6. Hang a Garden Mirror on a Sheltered Wall
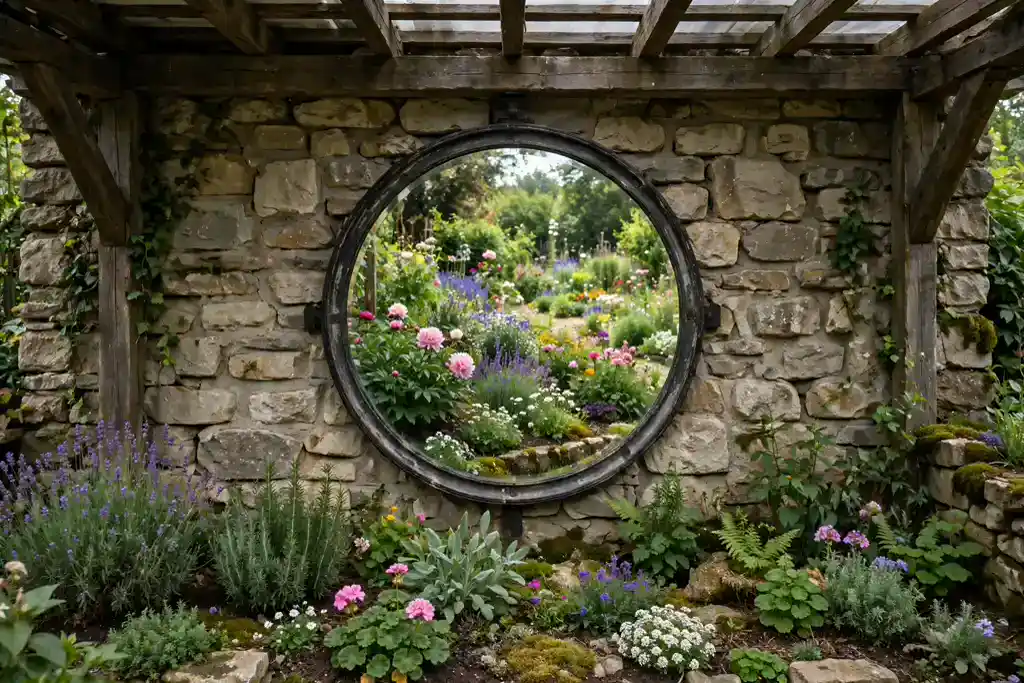
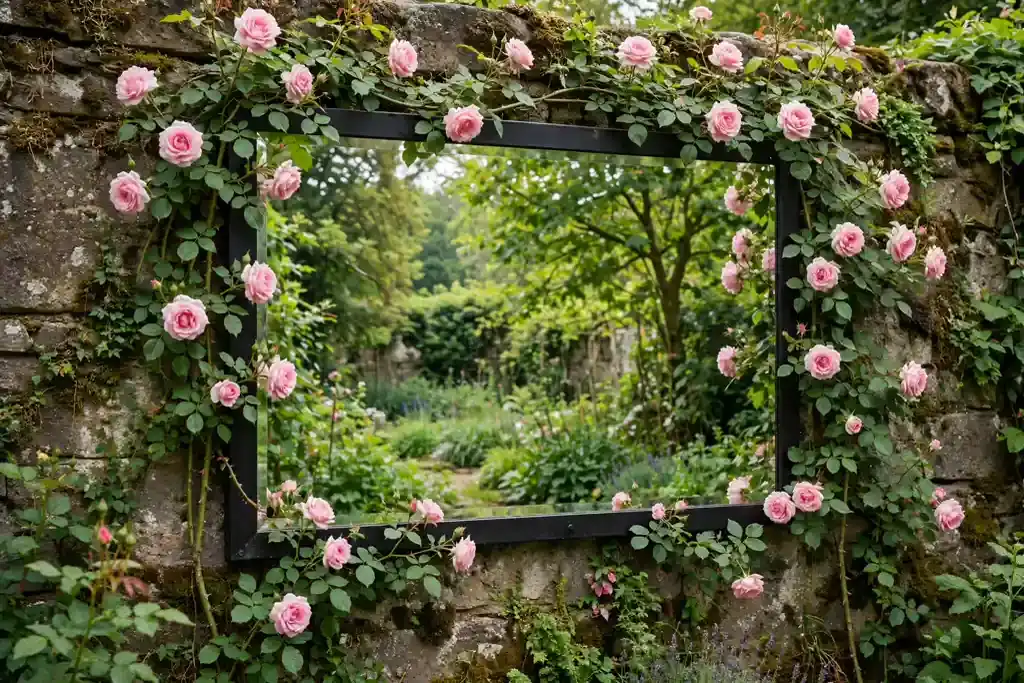
A garden mirror on a sheltered wall makes a small garden feel larger, because it reflects planting and light back into the space. Fix an outdoor rated mirror to a wall or fence in a spot that reflects a planted bed rather than a blank fence or a neighbor window. A round or arched mirror suits most walls, and a simple frame in wood or metal keeps the look calm.
Fix the mirror firmly, since a falling mirror is heavy and sharp, and check the fixings after storms. Keep the glass clean and place plants in front of it at a distance, so birds are less likely to fly toward the reflection. Avoid placing a mirror where it throws strong reflected sun onto seating or into a house window.
7. Sow a Loose Wildflower Corner
A wildflower corner brings a loose, natural look to a garden with little upkeep once it is established. Clear a patch of weeds, sow a seed mix suited to your soil and region on bare, raked soil, and add a simple mown or gravel edge so the patch reads as a choice rather than neglect. Cornflowers, poppies, cosmos, and oxeye daisies give color across summer.
The first year can look patchy while perennials establish, so set expectations and leave the patch uncut until late in the season to let plants self seed. Keep the patch away from formal beds if you prefer tidy edges, and sow thinly, since crowded seedlings compete and flower less well. Water only while seedlings establish, then let the patch largely look after itself.
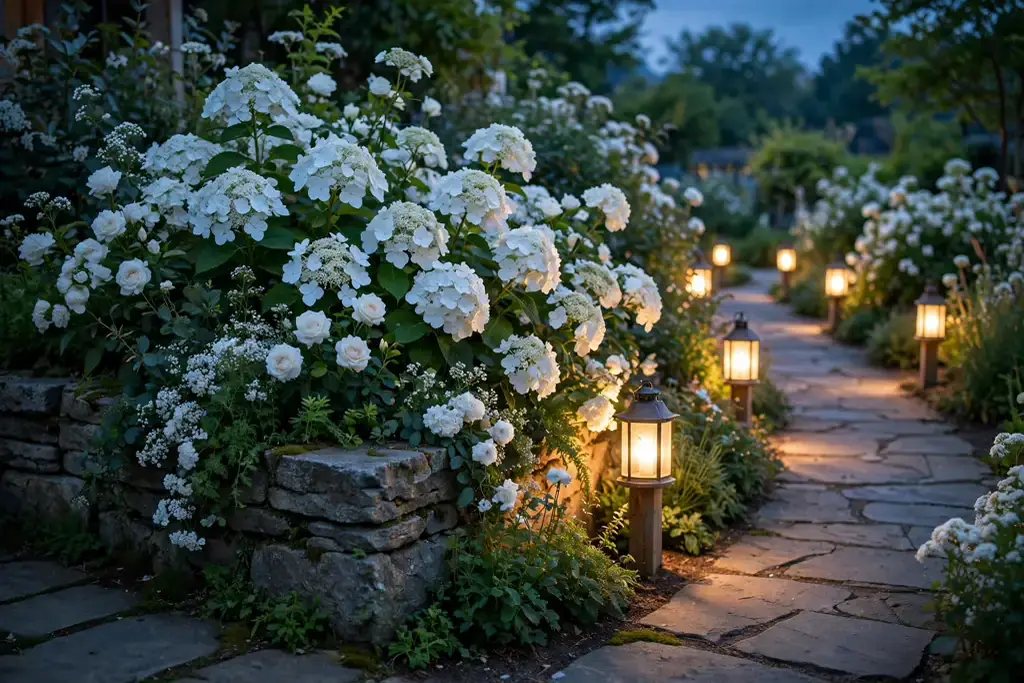
8. Plant a White and Green Moon Garden
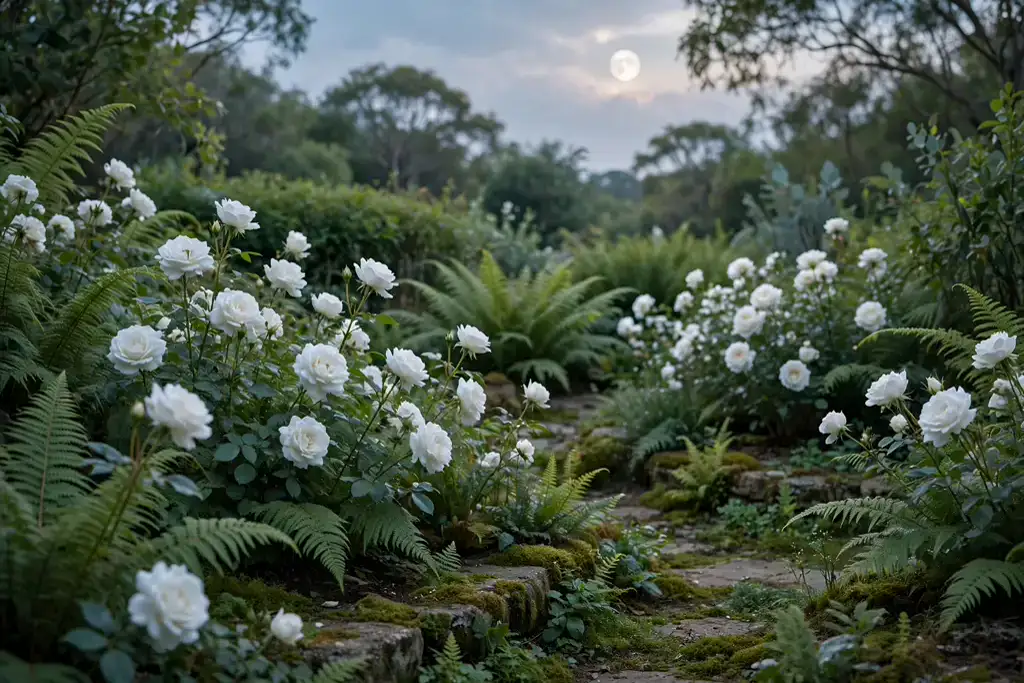
A white and green garden glows in the evening, because white flowers and pale foliage catch the last light. Plant white roses, white foxgloves, white cosmos, and night scented stock with green ferns, hostas, and grasses for contrast. The palette stays calm in daylight and comes alive at dusk, which suits a garden used for evening meals or quiet sits.
Site the moon garden near a seat or a path you use in the evening, and add pale gravel or light stone to lift the light level further. Keep the foliage mostly green and avoid adding a strong third color, so the bed stays restful. Include at least one scented plant, such as jasmine or night scented stock, since scent carries well in still evening air.
9. Group Terracotta Pots in Threes
Terracotta pots grouped in threes give instant structure to a door, a step, or a patio corner. Use three pots of different heights with the same plant family, such as herbs, geraniums, or small shrubs, so the group reads as one display. Terracotta warms in the sun and suits both cottage and Mediterranean planting, and the group can move with the seasons.
Choose pots with drainage holes, raise them on feet so water drains freely, and check the soil with a finger before watering, since terracotta dries out faster than plastic. Plant the tallest pot at the back or center, depending on the view, and keep trailing plants trimmed back from paths. In cold areas, move tender plants indoors before hard frost.
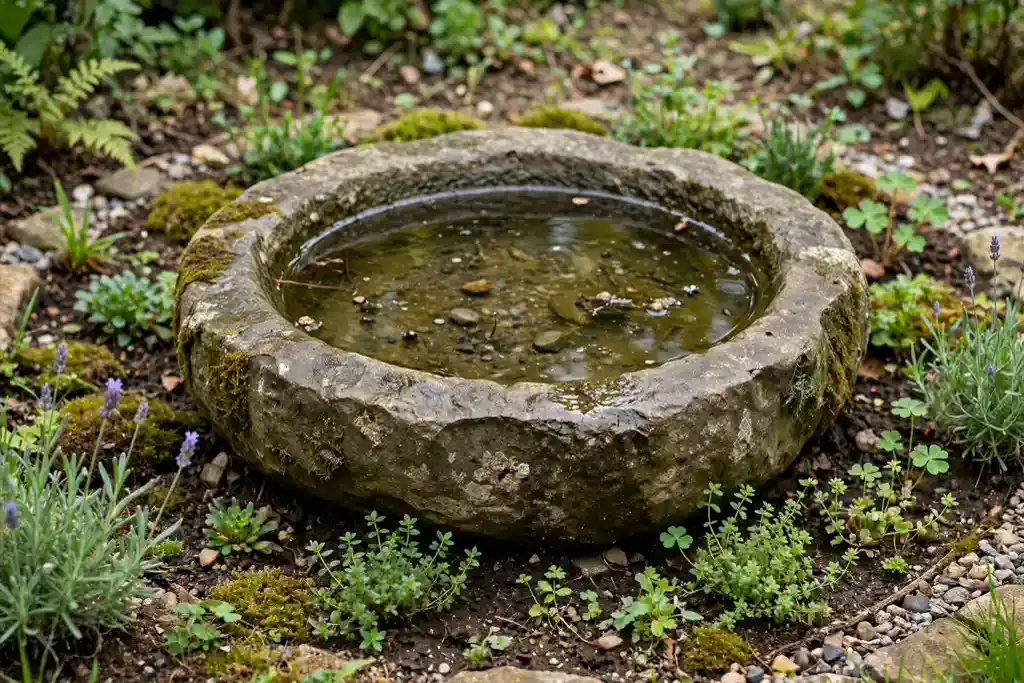
10. Set a Stone Water Bowl as a Centerpiece
A shallow stone water bowl makes a calm centerpiece for a small bed, a patio, or a path crossing. The still surface reflects sky and planting, and the bowl itself gives weight and shape even when the garden is quiet. Set the bowl on a level, firm base, fill it with rainwater where possible, and keep the water shallow enough to clean easily.
Change the water regularly to stop algae and mosquitoes, and add a few floating leaves or a single water plant only if the bowl is deep enough. In a garden used by small children, keep the bowl shallow and the edges rounded, and place it where it is seen but not tripped over. A bowl near a seat also gives birds a drinking spot, which adds life to the garden.
11. Frame an Entry With an Arched Trellis
An arched trellis over a garden entry turns an ordinary gate into a moment of arrival. Fix a sturdy arch to firm footings, and grow one climber, such as a rose, clematis, or jasmine, up each side so the planting meets at the top. The arch frames the view beyond it and gives the entry a clear sense of place.
Anchor the arch firmly so it does not lean as the planting grows heavier, and train stems away from the walking line so thorns and stems do not brush visitors. Prune after flowering as the plant type requires, and keep the path beneath the arch clear and level. A narrow arch suits a small garden better than a wide one, since the planting already takes up visual space.
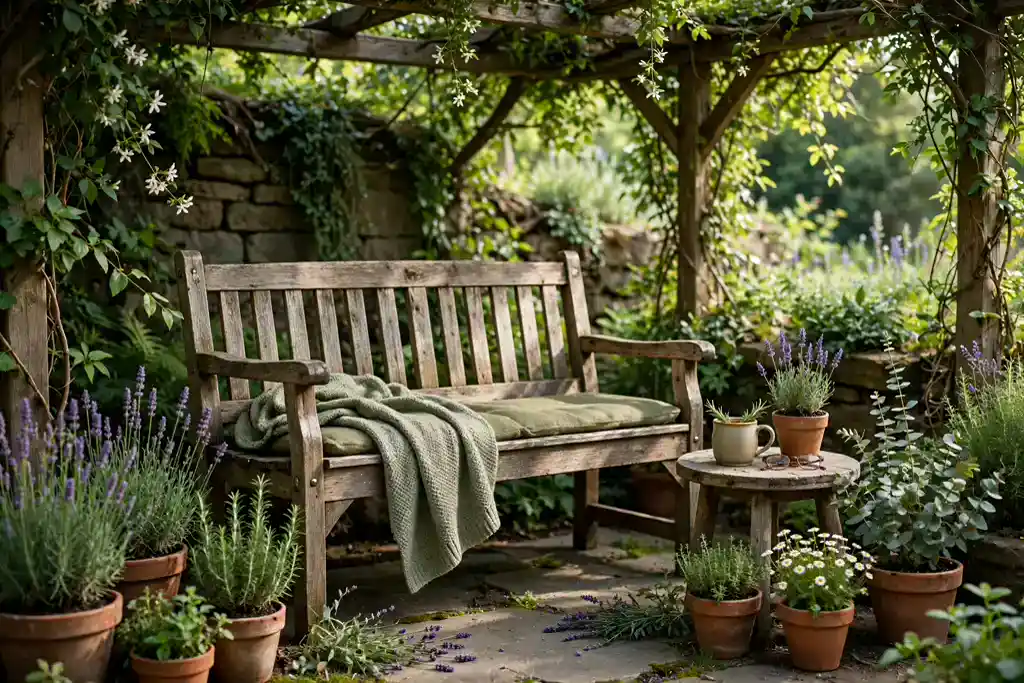
12. Make a Shaded Reading Nook With a Bench
A bench in a shaded corner, with a small side table and scented planting nearby, turns an unused corner into a daily habit. Choose the spot before the bench: light at the time you will sit, a view worth looking at, and a dry path matter more than the bench style alone. A simple wooden bench suits soft planting, while a stone bench suits a formal focal point.
Add one comfort detail, such as a cushion or a small table for a cup and a book, and keep the rest simple. For layout ideas for the seating itself, see these garden bench ideas, which show how to choose a spot first and match the seat to it. Keep plants clear of the seat edges so the bench stays easy to use, and leave room to stand up comfortably.
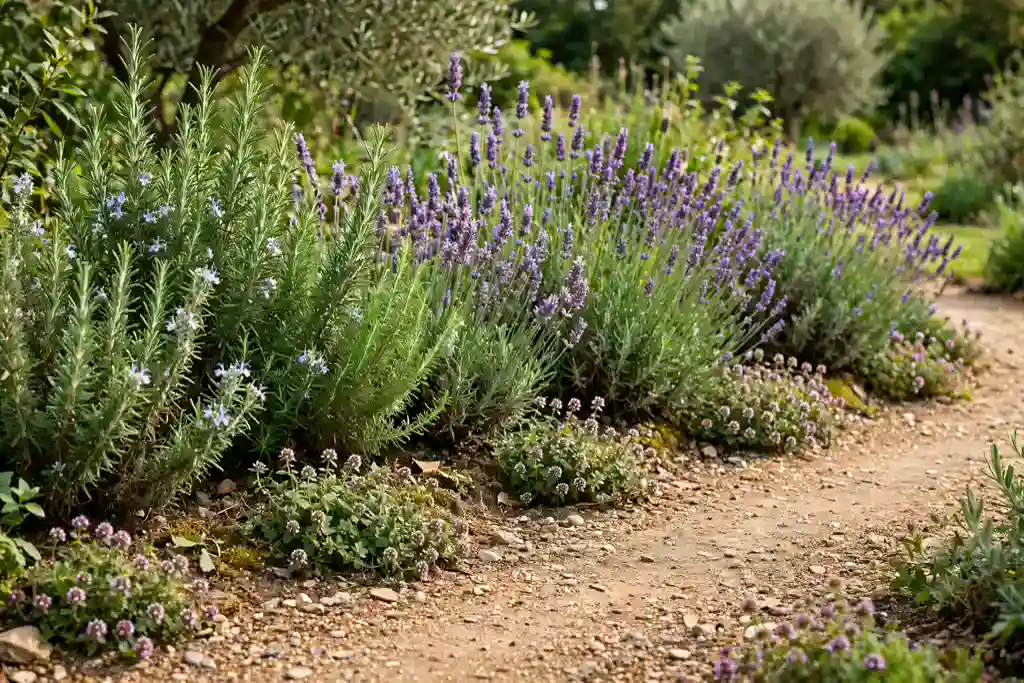
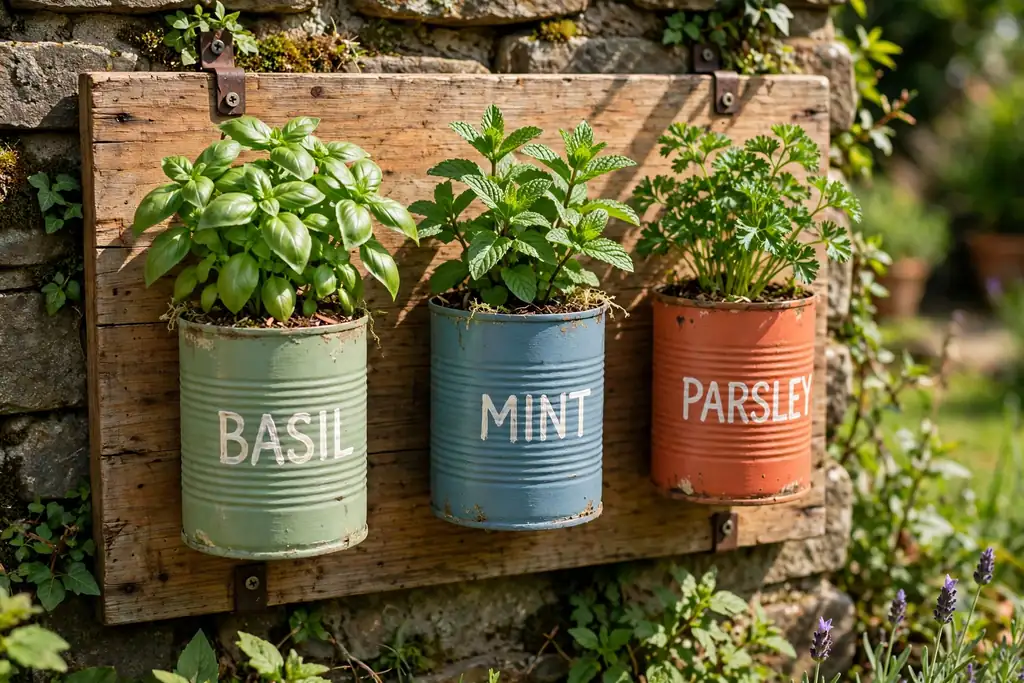
13. Plant a Scented Herb Border Beside the Path
A herb border beside a path gives scent every time you brush past it, and it puts fresh leaves within reach of the kitchen. Plant rosemary, lavender, thyme, and sage in full sun and free draining soil, with chives and parsley where the soil stays a little moister. Grow mint in its own pot sunk into the bed, since it spreads fast and can take over its neighbors.
Label herbs while they are young, water them often in hot weather, and pick little and often to keep plants bushy. Edge the border with low stone or brick so soil stays off the path, and keep the path itself clear for walking. In winter, move tender herbs to a sheltered corner or indoors, and replace annual herbs each spring.
14. Build Layered Raised Beds for Mixed Planting
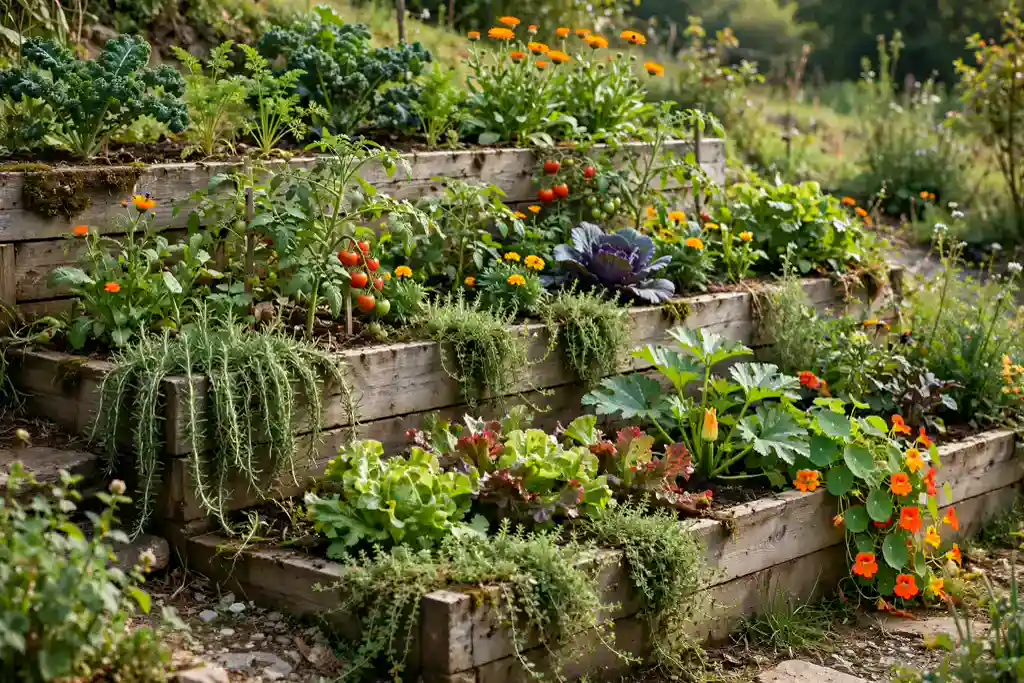
Raised beds with mixed planting give a garden structure and make growing easier on backs and on heavy soil. Build beds no wider than you can reach across from one side, fill them with good soil mixed with compost, and plant each bed in layers: tall plants at the back, flowers and vegetables in the middle, and trailing herbs or flowers at the front. The layers make each bed look full from every angle.
Keep paths between beds wide enough for a wheelbarrow, and leave one bed for cutting flowers so display beds stay tidy. Water raised beds more often than ground beds, since they dry out faster, and mulch the surface to hold moisture. Rotate crops between beds each year so the same family does not grow in the same soil season after season.
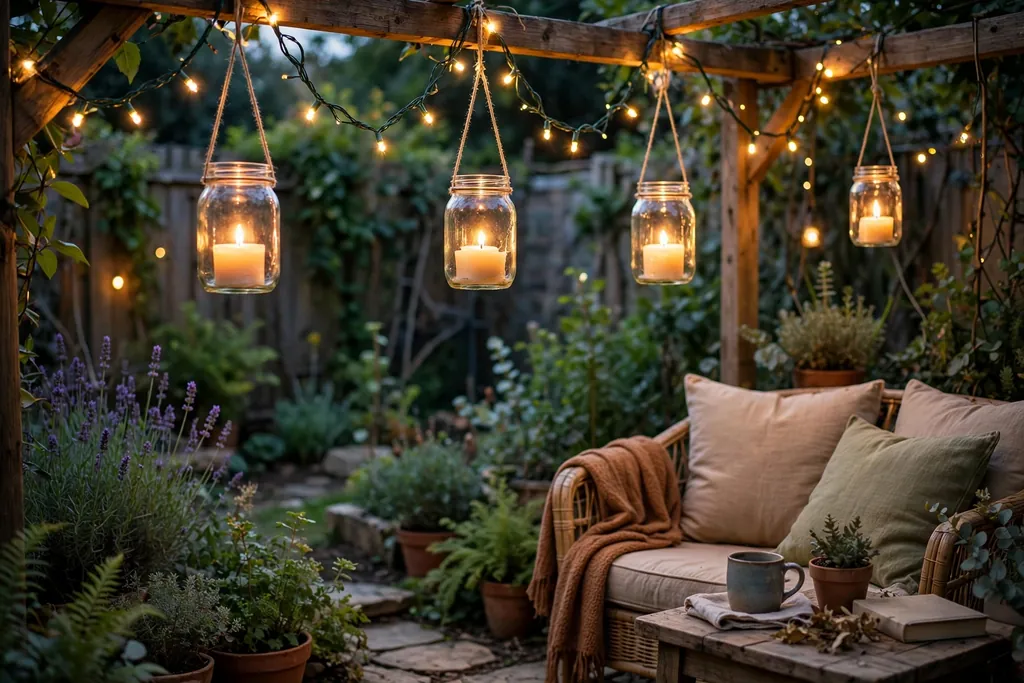
15. String Warm Lights for Evening Gardens
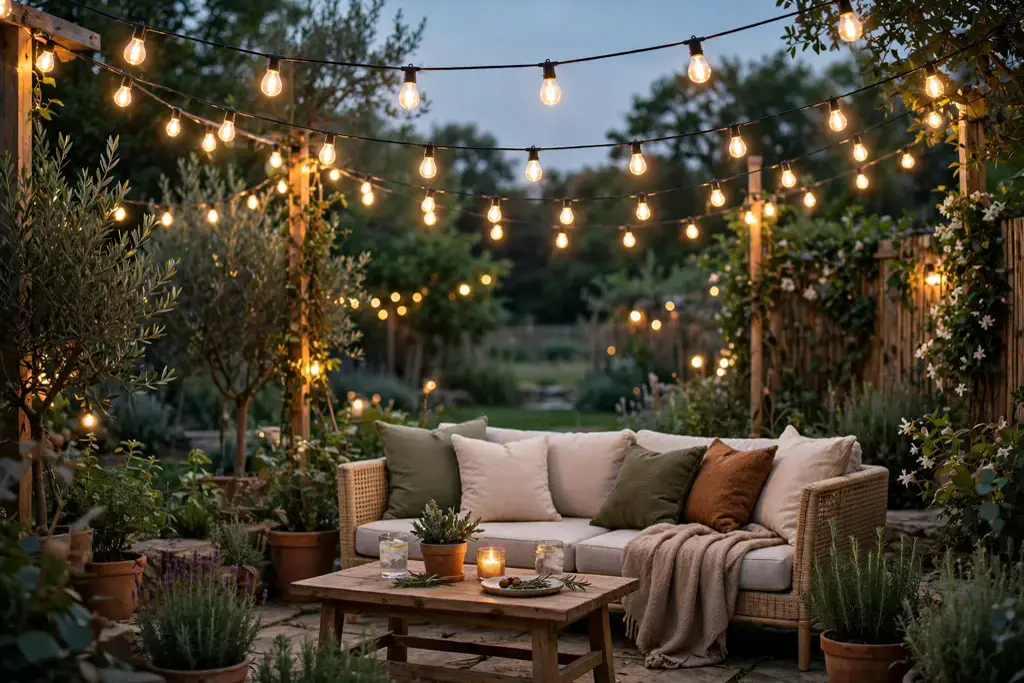
Warm string lights along a pergola, a fence, or a tree branch keep a garden usable after sunset and make evening sits feel inviting. Choose warm white lights, hang them high enough to walk under, and keep cables out of walkways. Solar lights suit gardens with no outdoor power, but they need sun on their panels during the day.
Add lanterns along paths and near seats to mark steps and edges, and keep the light level soft and low so it feels cozy rather than harsh. Test the light at dusk before guests arrive, and add one brighter task light near a reading or cooking spot if needed. Bring battery lights inside in winter if the maker advises it.
16. Plant Single Color Drifts for a Calm Look
Planting one color in drifts, rather than scattering many colors, gives a bed a calm, designed look. Choose a color that suits your house and light, such as soft blue, warm pink, or pale yellow, and plant groups of three or five of the same flower across the bed. The repeated color links separate parts of the garden and makes the planting read clearly from the house.
Pair the main color with white flowers and green foliage to rest the eye, and avoid adding a third strong color. Spread flowering across the season by mixing spring bulbs, summer perennials, and late annuals in the same color family. Deadhead spent flowers where the label advises it, so new buds keep coming.
17. Shape a Gravel and Stone Corner in a Japanese Style
A gravel and stone corner in a Japanese style gives a garden a quiet, contemplative spot with very little planting to maintain. Rake pale gravel into gentle patterns around a few large feature stones, add one maple, pine, or bamboo in a pot or bed, and keep the rest of the corner simple. The stones give weight and shape, while the gravel gives a calm, open surface.
Bury at least a third of each large stone so it looks settled rather than perched, and keep the planting low and open so the stones stay visible. Rake the gravel after rain or wind, and add a single stone lantern or water basin only if it suits the scale of the corner. This style suits a small, shaded, or awkward corner where a full flower border would struggle.
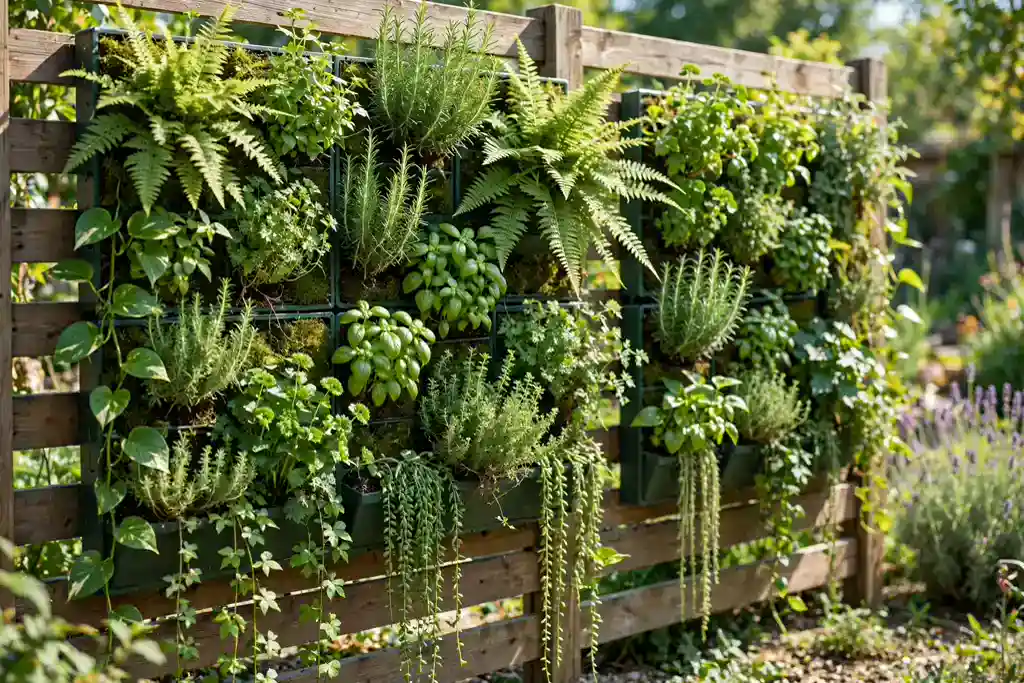
18. Grow a Living Wall on a Sunny Fence
A living wall on a fence grows a green wall without using bed space, which suits small gardens and courtyards. Fix panels with individual pockets or trays to a sturdy fence, so you can replace one plant without disturbing the rest. Plant ferns and trailing plants in shade, and herbs, strawberries, and small perennials in sun, to suit the light on that fence.
Water from the top so moisture reaches each pocket, and check the fixings and the weight of the panels when wet, since a planted wall is much heavier after watering. Keep panels away from vents and access points, and leave room to reach the plants for trimming. Feed container plants regularly, because pockets run out of food faster than beds.
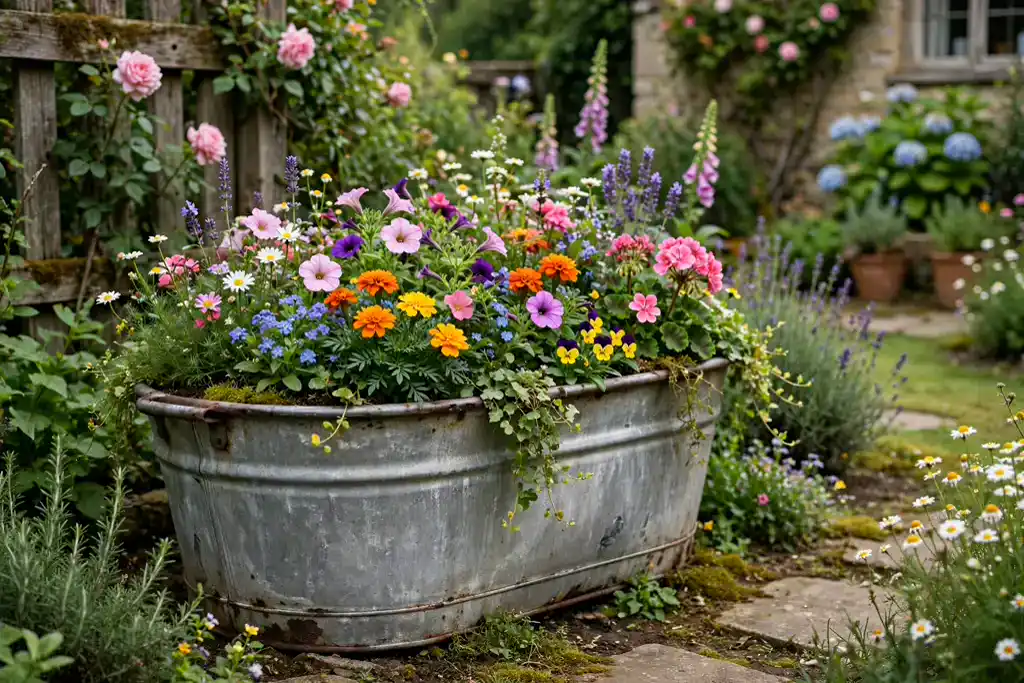
19. Turn Vintage Pieces Into Planters
Vintage pieces used as planters, such as an old sink, a wooden crate, a metal tub, or a wheelbarrow, give a garden character that new pots cannot match. Choose pieces that are sturdy, add drainage holes where possible, and line wood or metal with a waterproof layer so soil does not rot or rust the piece from inside. One vintage planter as a feature works better than several scattered pieces.
Plant the piece with a mix that suits its depth: shallow pieces suit succulents and herbs, deeper pieces suit shrubs and small trees. Keep the planter where it can drain freely and where its weight will not damage paving. Check old painted pieces for lead paint before planting edibles in them, and use them for flowers only if you are unsure.
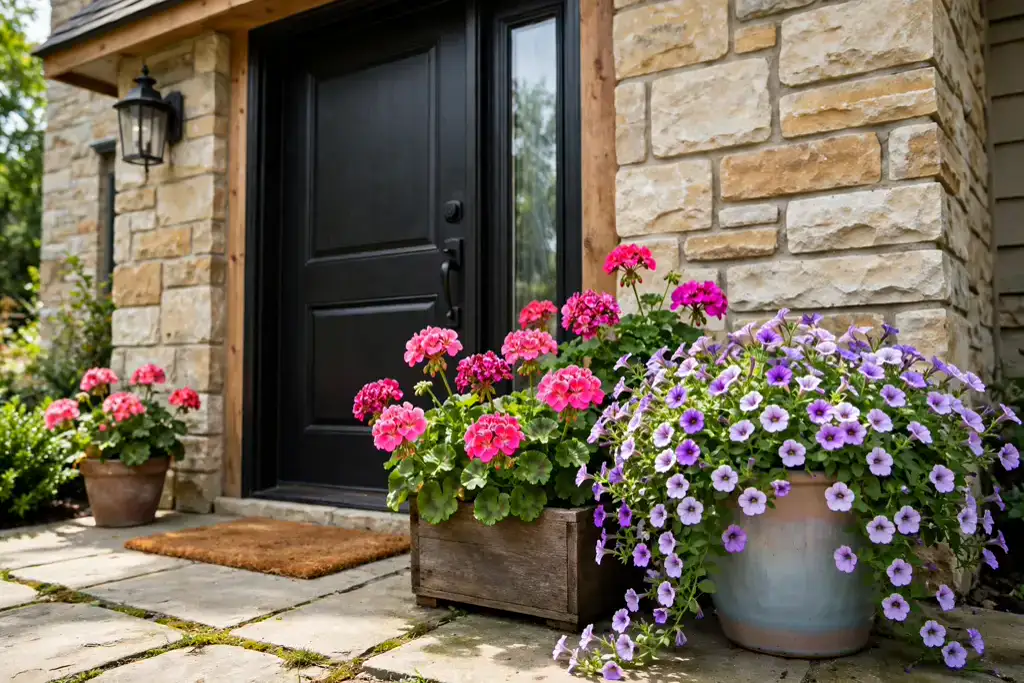
20. Rotate Seasonal Containers by the Door
Seasonal containers by the door give a garden a fresh look four times a year without replanting a whole bed. Plant spring bulbs and primulas in spring, geraniums and trailing petunias in summer, asters and ornamental grasses in autumn, and evergreen shrubs with winter berries in winter. Swap the whole container or just the top planting, depending on the season.
Use one upright plant, one mid height plant, and one trailing plant in each container for a full look, and keep the container style the same through the year so the display reads as one design. Water containers daily in hot weather, feed lightly through the season, and refresh the soil each spring. Move the containers to follow the sun or to frame an entrance as the seasons change.
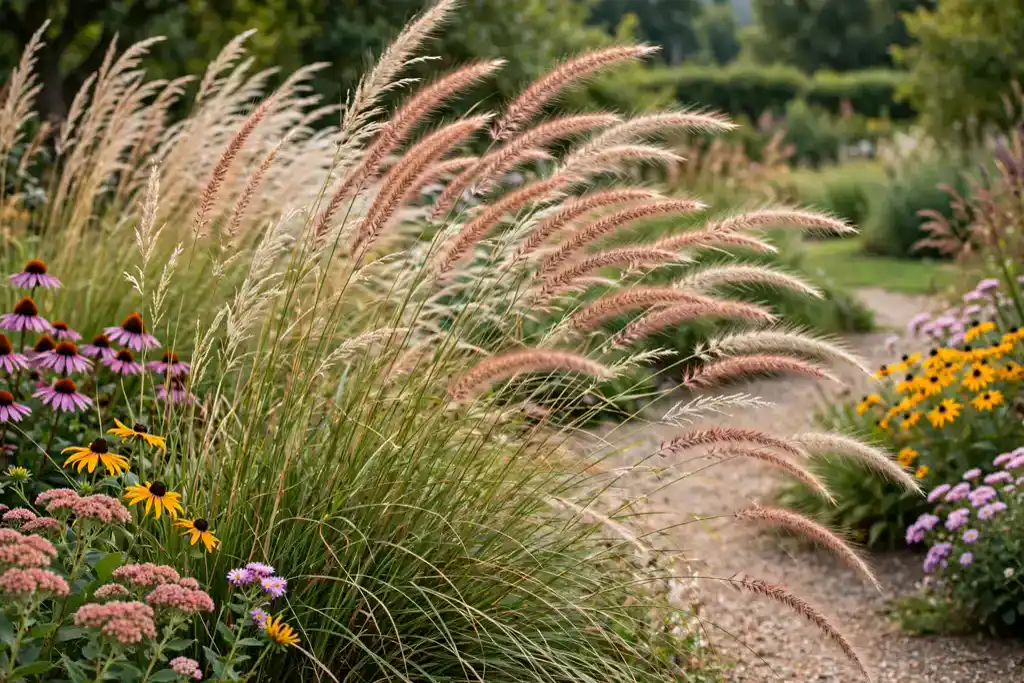
21. Let Ornamental Grasses Bring Movement
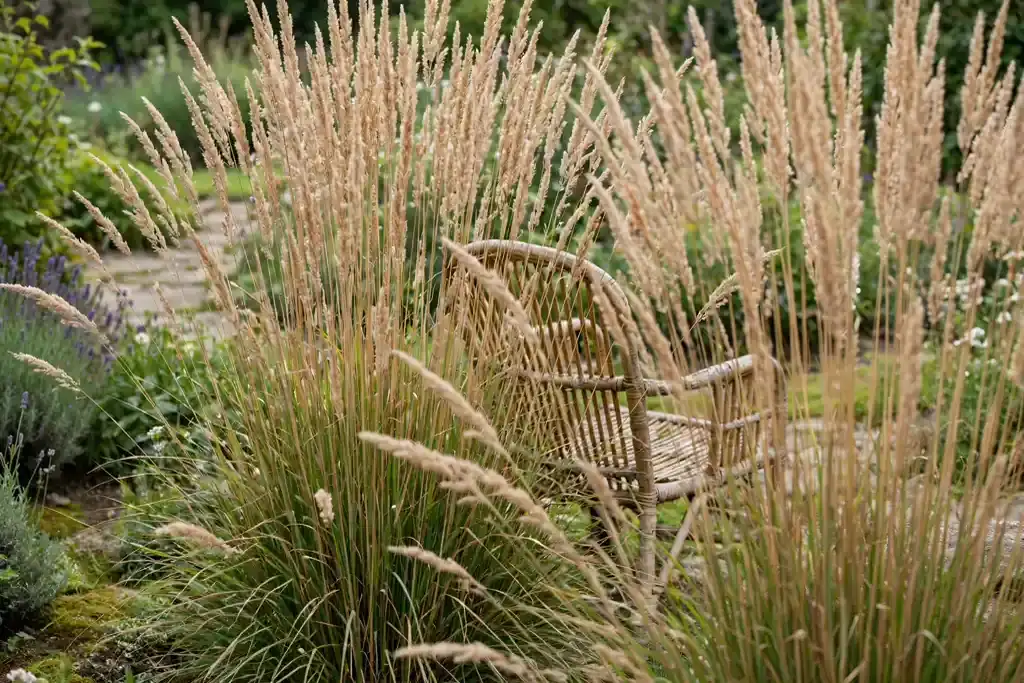
Ornamental grasses bring movement and sound to a garden, because their seed heads sway in the lightest breeze. Plant miscanthus, fountain grass, or feather reed grass in groups along paths, at the back of borders, or in large pots, where wind can reach them. Grasses also give winter structure, since many hold their shape and color long after flowers are finished.
Choose grasses sized for the space, since mature spread varies a lot between types, and cut them back in late winter or early spring before new growth starts. Pair grasses with late flowers such as asters or sedums for autumn color, and keep them away from paths where tall seed heads might block the way. In small gardens, one large grass in a pot gives the same movement without taking bed space.
22. Add a Bird Bath for Wildlife and Sound
A bird bath adds wildlife and gentle sound to a garden, and it gives birds a drinking and bathing spot close to cover. Place the bath on a level, firm base near shrubs or a tree, but with open space around it so birds can see cats approaching. Keep the water shallow, with a sloping edge or a stone in the middle so small birds can stand safely.
Change the water every few days, scrub the basin to stop algae, and keep the bath full in hot weather and in winter when natural water freezes. Site the bath where you can see it from a window or a seat, so the visitors become part of the garden. Avoid placing the bath under a feeder, since falling seed fouls the water quickly.
Conclusion
An aesthetic garden does not need every idea on this list. Pick one structure first, such as a curved path, a pergola, or a stone edge, then add two or three supporting pieces, such as pots by the door, a scented border, and warm evening lights. Repeat one or two materials through the garden, plant in groups rather than singles, and keep one seat comfortable and easy to reach. Spread interest across the seasons, so the garden looks cared for in winter as well as in summer. When you add scent and sound, the garden becomes a place you use every day, not just a view from the window.
Save this list on Pinterest before your next garden trip, and work through it one area at a time: structure first, then planting, then the small details that make the garden yours.
FAQs
What is the easiest way to make a garden look aesthetic?
Start with structure: a clear path, tidy edges, and one focal point, such as a topiary, a water bowl, or a bench. Then repeat one or two materials, such as stone or terracotta, and plant in groups rather than singles. These changes cost little and change how the whole garden reads, before you spend on larger features.
How do I make a small garden look aesthetic?
Use vertical space and reflection: a living wall, an arched trellis, and a garden mirror all add interest without taking bed space. Group pots in threes, keep one seat comfortable, and choose a single color drift so the small space reads as one design rather than a collection of separate pieces.
Which garden style is easiest to maintain?
A gravel and stone corner, a wildflower corner, and a grass led border are among the lowest upkeep options, since they need little watering or feeding once established. Raised beds with mixed planting are also easy to care for, because the soil is contained and weeds are easy to spot. Avoid high maintenance features, such as a large lawn or a complex water feature, if time is short.
How can I make my garden look good in every season?
Plan by season: evergreen shrubs and topiary for winter shape, bulbs for spring, roses and grasses for summer, and asters and seed heads for autumn. Seasonal containers by the door let you refresh the entrance four times a year, and a moon garden with white flowers gives evening interest in summer.
Do I need a large budget for an aesthetic garden?
No. The most effective ideas on this list, such as a curved gravel path, grouped terracotta pots, a scented herb border, and string lights, cost far less than a full redesign. Spend first on structure and on one comfortable seat, then add planting over time as budget allows, and reuse vintage pieces as planters where you can.
How do I choose plants for an aesthetic garden?
Check the plant label for sun, soil, spacing, and your growing zone before you buy, and choose plants that suit the spot rather than forcing a favorite plant into the wrong place. Plant in groups of three or five, repeat the same plant in two or three places to link the garden, and include a mix of evergreen structure and seasonal color so the bed never looks bare.
An Italian garden is less about strict formality and more about warmth: sun on stone, the scent of herbs by a path, a shady seat, and a table set for a long meal. These 22 Italian garden ideas cover courtyards, small patios, slopes, and larger yards, so you can start with a single terracotta pot by the door or plan a full terrace around an olive tree. Pick the structure first, then the plants that suit your sun, soil, and watering routine, and repeat one or two materials, such as terracotta and warm stone, so the whole space feels settled rather than busy.
Key Takeaways
Start with structure: a wall, a pergola, a path, or a seating spot, then add plants around it.
Use a small palette: warm terracotta, cream and ochre walls, grey green olive leaves, and deep green cypress carry the Italian look without clutter.
Choose sun loving plants that cope with dry soil, such as olive, lavender, rosemary, thyme, citrus in pots, and agave, for sunny spots.
Stone, gravel, and terracotta keep beds tidy and cut down on watering and mowing.
Pots make the style possible on a balcony or rented patio, where beds are not an option.
Plan shade and scent for evenings: a vine, a fig, jasmine, and simple lighting stretch the hours you use the garden.
1. Cluster Terracotta Pots in a Sunny Courtyard
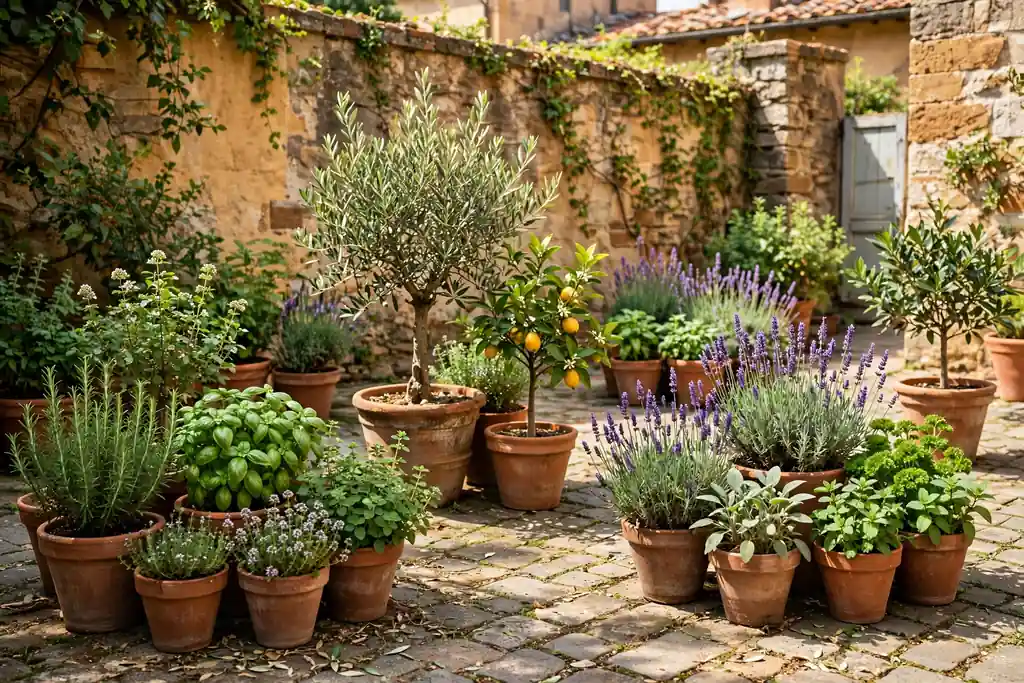
Group terracotta pots in clusters of three or five near a door, steps, or seating corner to give a courtyard instant Italian character. Use pots in two or three sizes, all in the same warm clay tone, and plant each with a simple mix so the group reads as one design rather than a jumble. Terracotta dries fast, so check the soil before watering and use saucers on painted steps.
Mix one tall plant, such as a small olive or bay, with mid height herbs and one trailing plant per large pot for a full look. Keep the heaviest pots near walls or on level paving, and leave a clear path through the cluster. For layout lessons on giving each level and cluster a clear job, the ideas in these tiered garden ideas show how structure comes before planting.
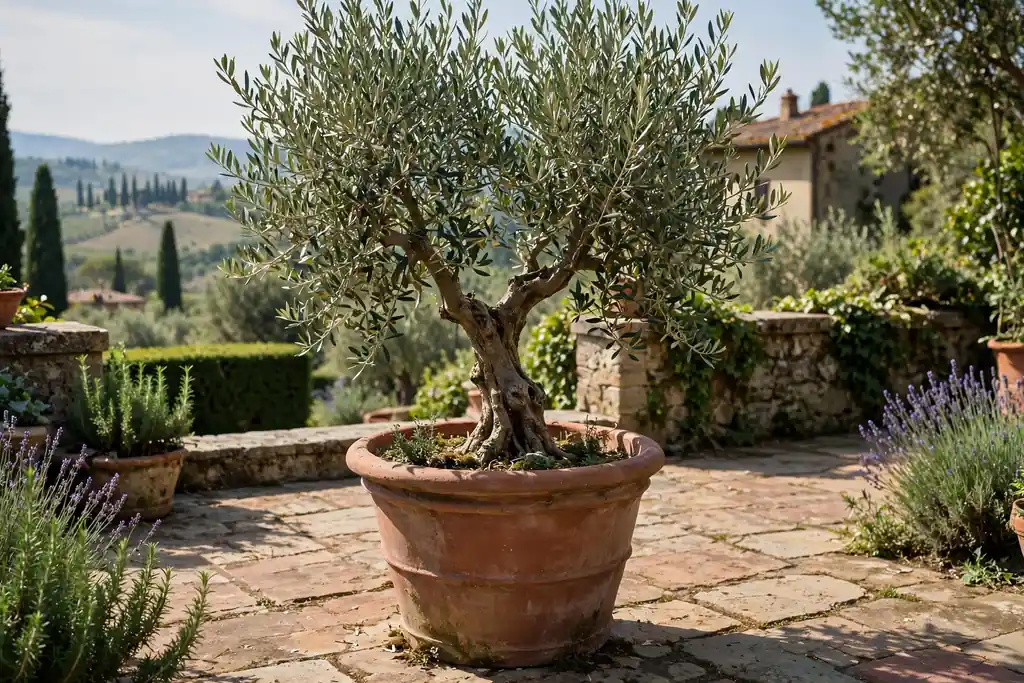
2. Make One Olive Tree the Focal Point
Plant a single olive tree in the ground or in a wide terracotta pot to anchor a terrace without needing a bed. Choose a pot with drainage holes, use a gritty, free draining mix, and water deeply, then let the top of the mix dry before watering again. Olives need full sun and air movement, and they suit a sheltered corner away from cold wind.
Prune lightly to keep an open shape, and underplant with thyme or small stones for a finished surface that also keeps weeds down. In cold areas, keep the olive in a pot and move it under cover for winter, so you keep the silvery leaves without risking the tree. One olive, well placed, does more for the look than a row of small plants.
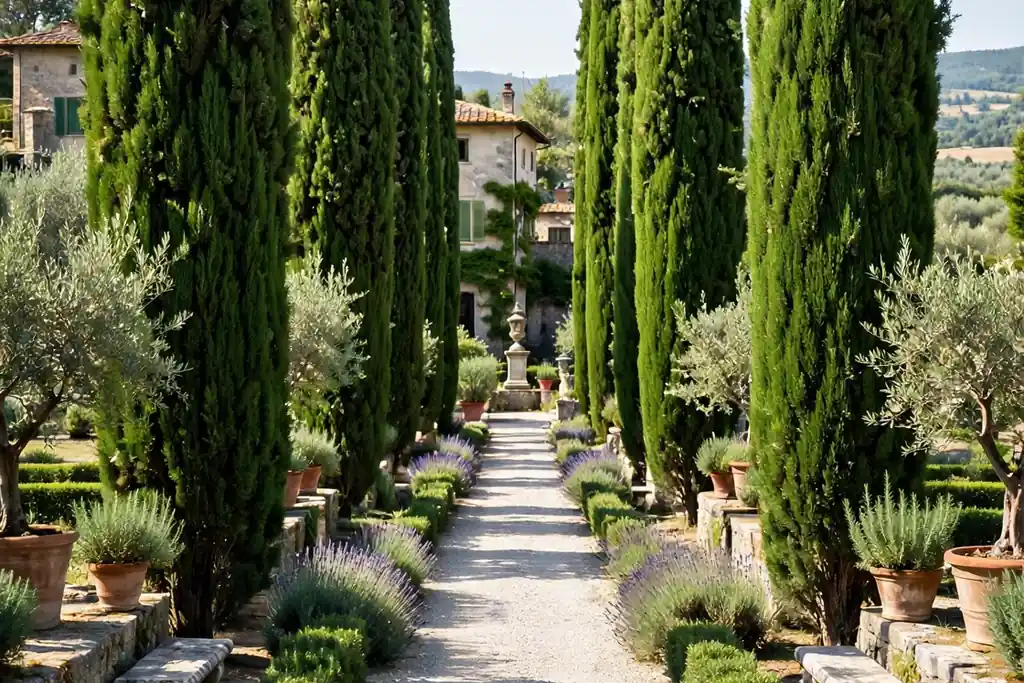
3. Line a Path With Tall Cypress Trees
Plant a row of tall, narrow cypress trees along a straight path or drive to frame the view and give the garden a classic Italian line. Space the trees by the label, not by how they look in the pot, since a crowded row soon loses its clean shape. Cypress suits sunny, well drained soil and needs little pruning if the variety is naturally narrow.
Keep the path surface simple, such as gravel or large stone slabs, so the dark green line stays the focus. Underplant only at the ends of the row, where low lavender or rosemary softens the base without breaking the line. Check the mature height before planting near wires or a boundary, and keep the trees clear of gutters and drains.
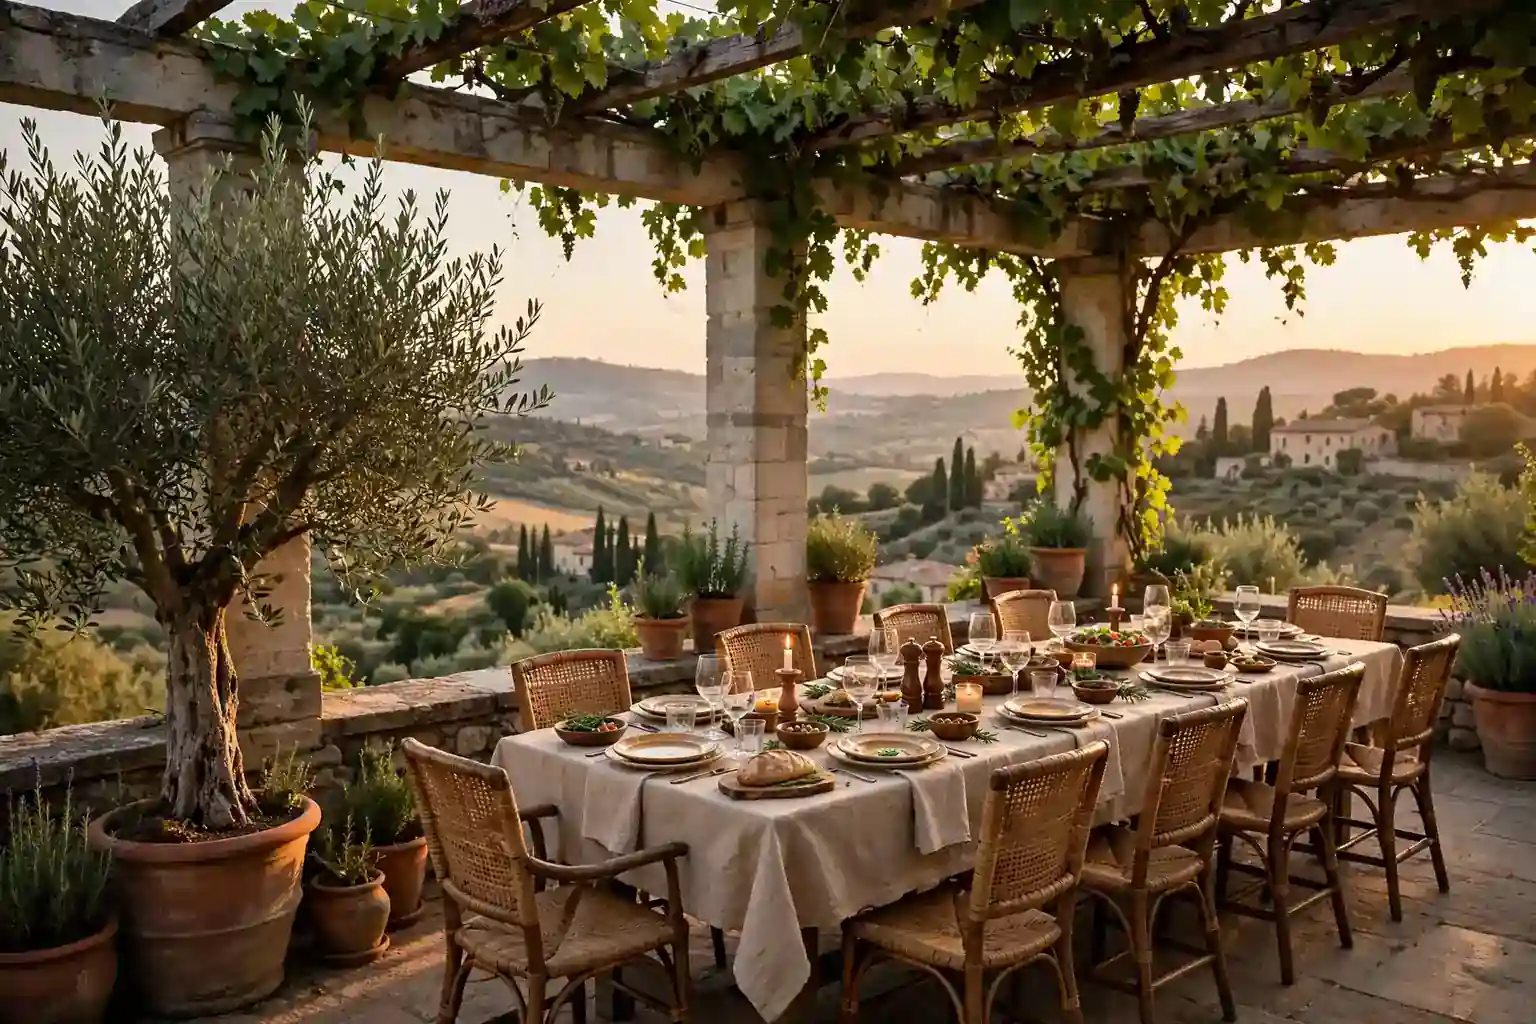
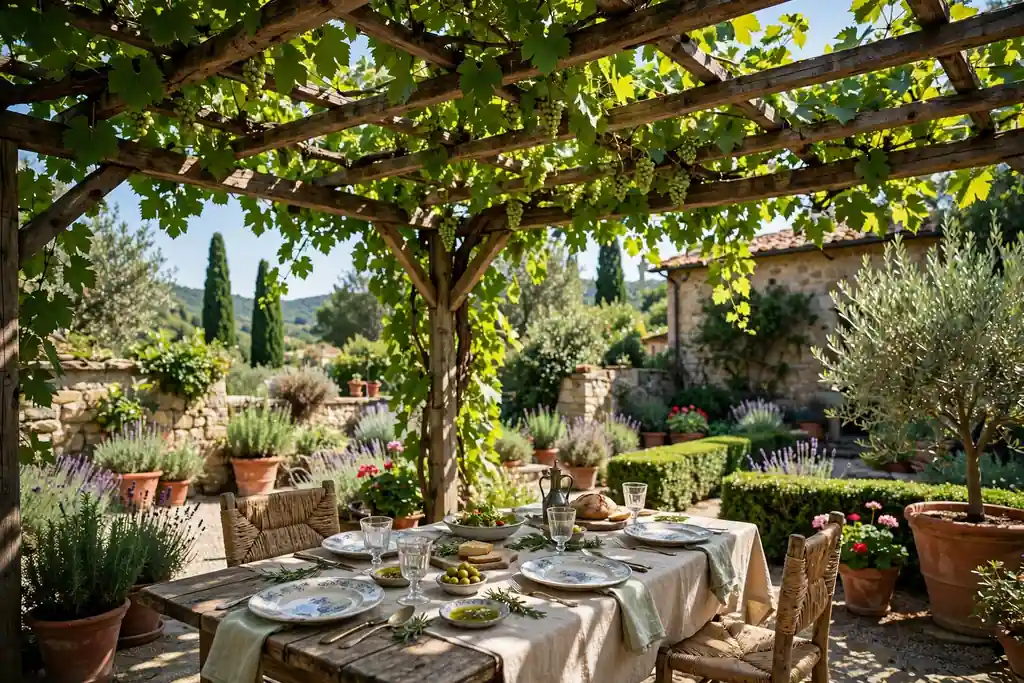
4. Grow a Grapevine Over a Pergola for Dining Shade
Build a pergola over the main dining area and train a grapevine over the top for shade that changes with the season: leaves in summer, open sky in winter after leaf fall. Build the pergola from sturdy posts and beams, run wires along the top, and train one or two main stems along the beams, tying in side shoots as they grow.
Prune in winter to keep fruiting wood near the frame, and leave headroom so the vine can be pruned from below with a step ladder. Site the pergola over a table, not over a roof drain, and keep the ground beneath level for chairs. A grapevine pergola also marks the dining zone, which helps the rest of the garden feel organized around it.
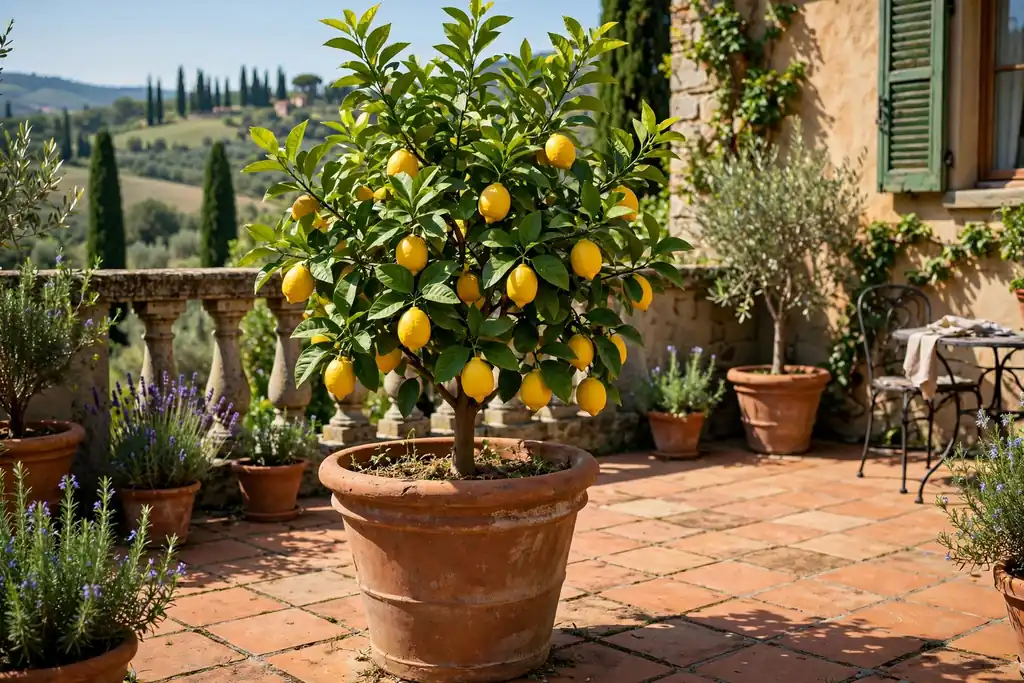
5. Grow a Lemon Tree in a Large Terracotta Pot
Grow a lemon tree in a large pot for blossom scent, glossy leaves, and fruit on a patio or balcony. Choose the sunniest sheltered spot, use a pot with drainage and a free draining mix, and water deeply, then let the top dry before watering again. Feed during the growing season following the product label.
Move the pot indoors or wrap it if your winters are cold, since lemons are tender. Pick fruit as it colors so the tree keeps producing, and prune lightly to keep an open shape you can reach around. A lemon in a pot also works as a pair flanking a door, where the scent greets everyone who arrives.
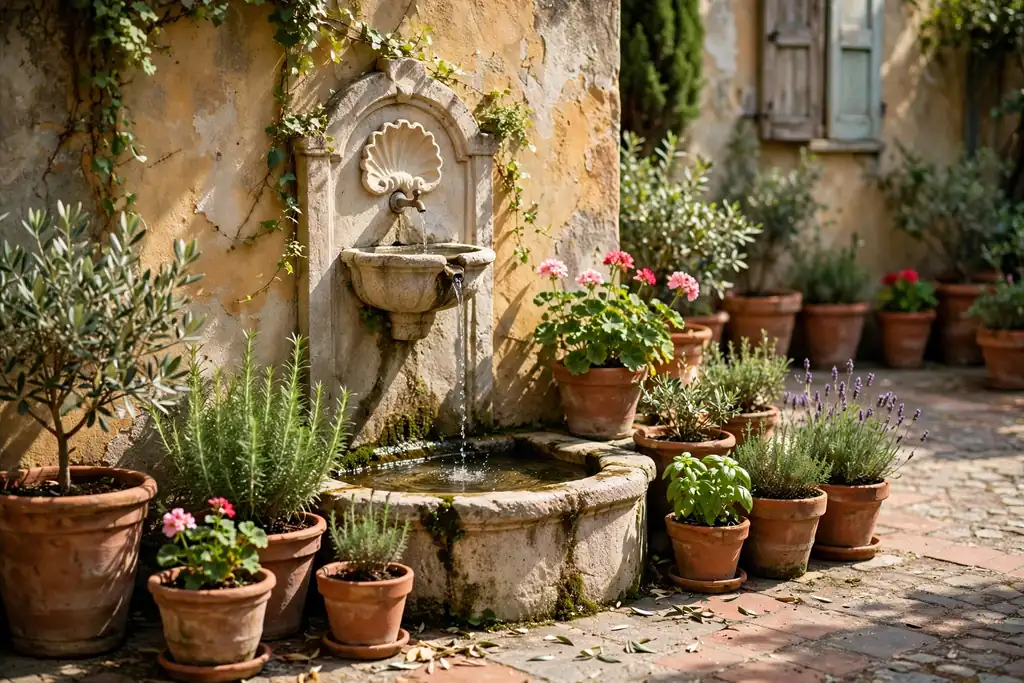
6. Set a Wall Fountain in a Courtyard
Fix a small wall fountain to a courtyard wall, or set a freestanding fountain against it, for sound, movement, and a cool focal point. Place it where you can reach the pump for cleaning, surround the base with terracotta pots of different heights, and keep the basin shallow enough to clean easily. Top up the water in hot weather, and drain or cover the fountain before hard frost if it is not frost proof.
If plumbing is a problem, a solar pump in a shallow bowl gives a similar trickle without a mains connection. Keep the fountain away from seating cushions and electrical items, and refresh the water often so it stays clear. Even a small fountain changes how a courtyard feels on a hot day.
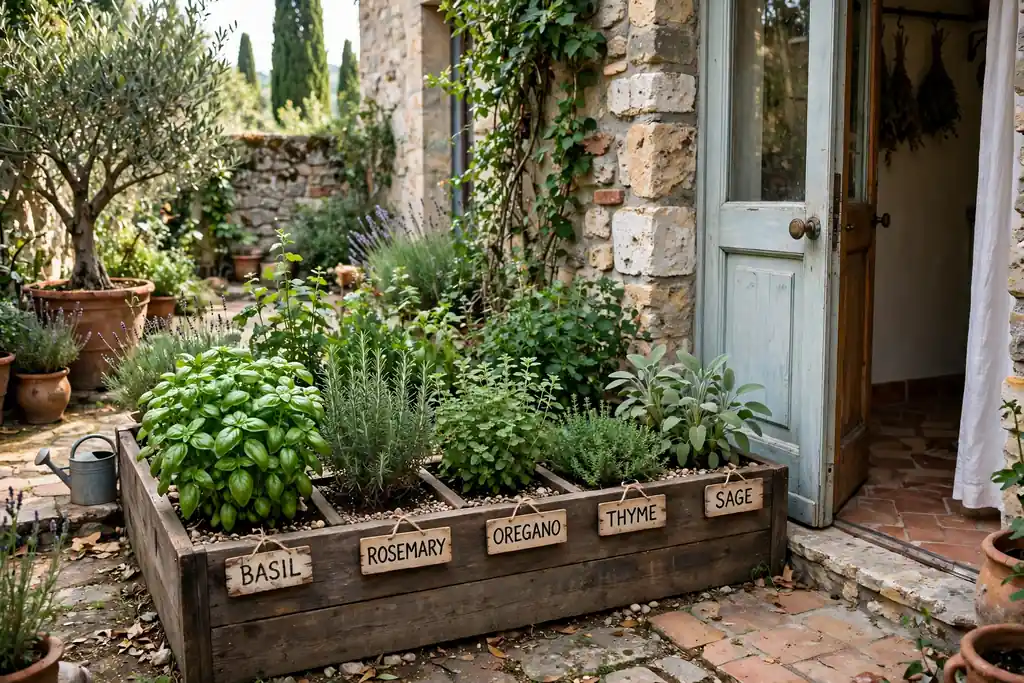
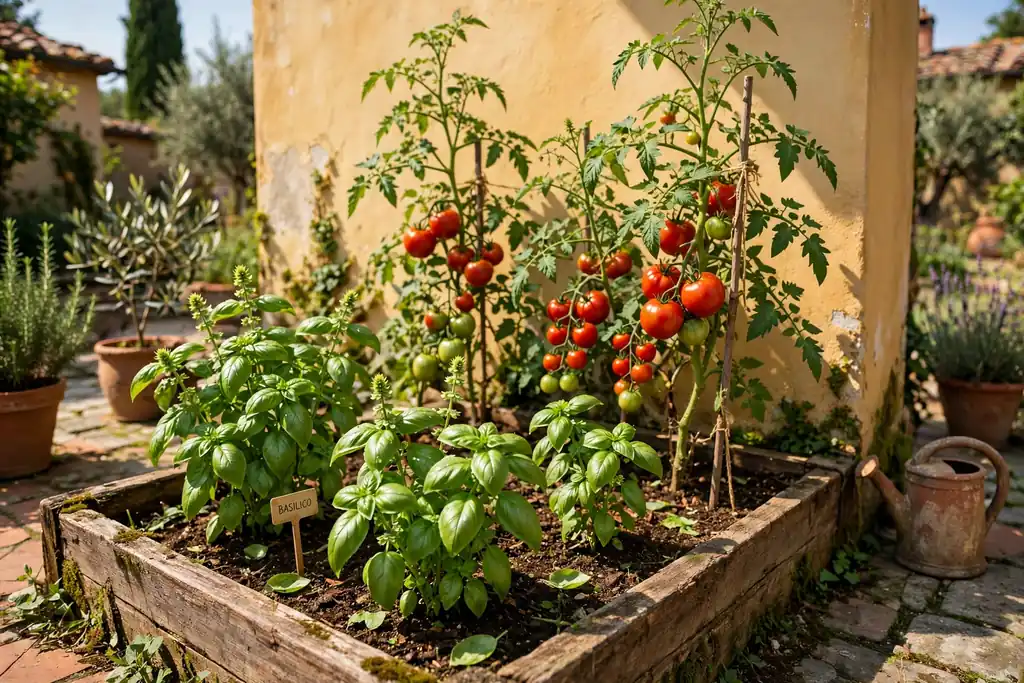
7. Plant a Kitchen Herb Bed With Basil, Rosemary, and Oregano
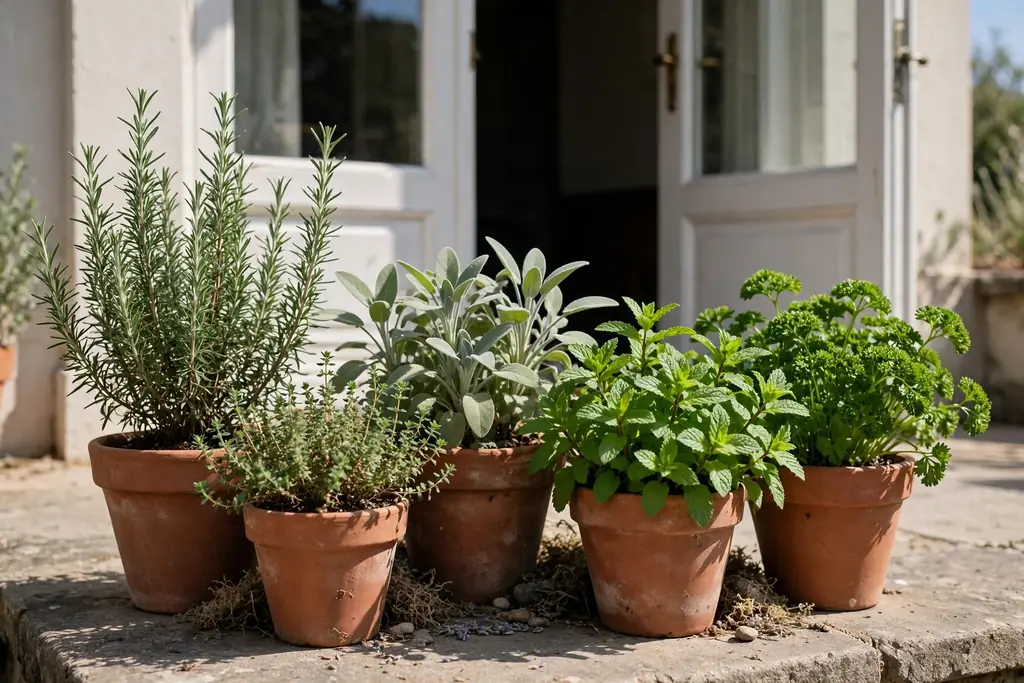
Plant a raised herb bed near the kitchen door for everyday cooking, with basil, rosemary, oregano, thyme, and sage in full sun and free draining soil. Keep mint in its own pot, since it spreads fast and can take over a shared bed. Harvest little and often, snipping stems in the morning, and replace woody plants every few years when they stop producing fresh growth.
A stone or terracotta edging keeps the bed tidy and stops soil washing onto paths in heavy rain. Label herbs while they are young, since many look alike before they flower. For a looser, mixed planting style that still suits herbs, these hippie garden ideas show how herbs can sit happily among flowers rather than in a separate bed.
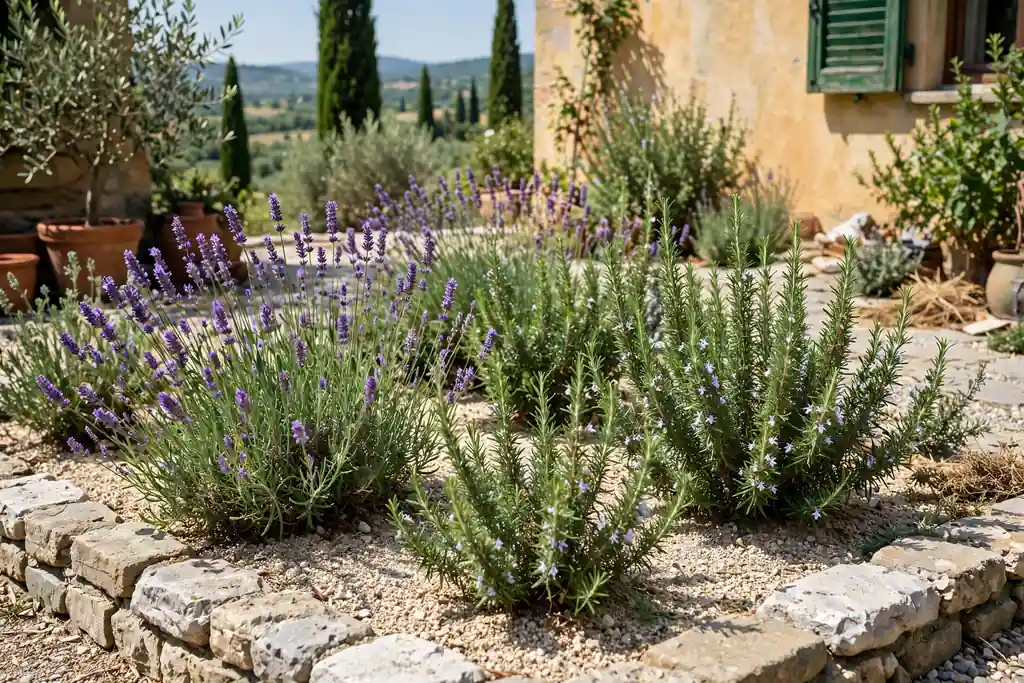
8. Lay a Lavender Gravel Garden
Spread gravel over a weed membrane and plant lavender, rosemary, and santolina in groups of three or five for a dry, scented Italian bed. Gravel suits sunny spots because it drains fast, stays tidy, and needs little watering once plants settle. Use a shallow layer of gravel over a free draining mix, and keep the planting open so the stones stay visible.
Trim lavender lightly after flowering and rosemary after growth starts in spring, but avoid cutting into old bare wood. Bees visit both plants through summer, so site the bed where you can enjoy the scent from a path or seat. Top dress with gravel each spring to keep plant crowns dry and suppress weeds.
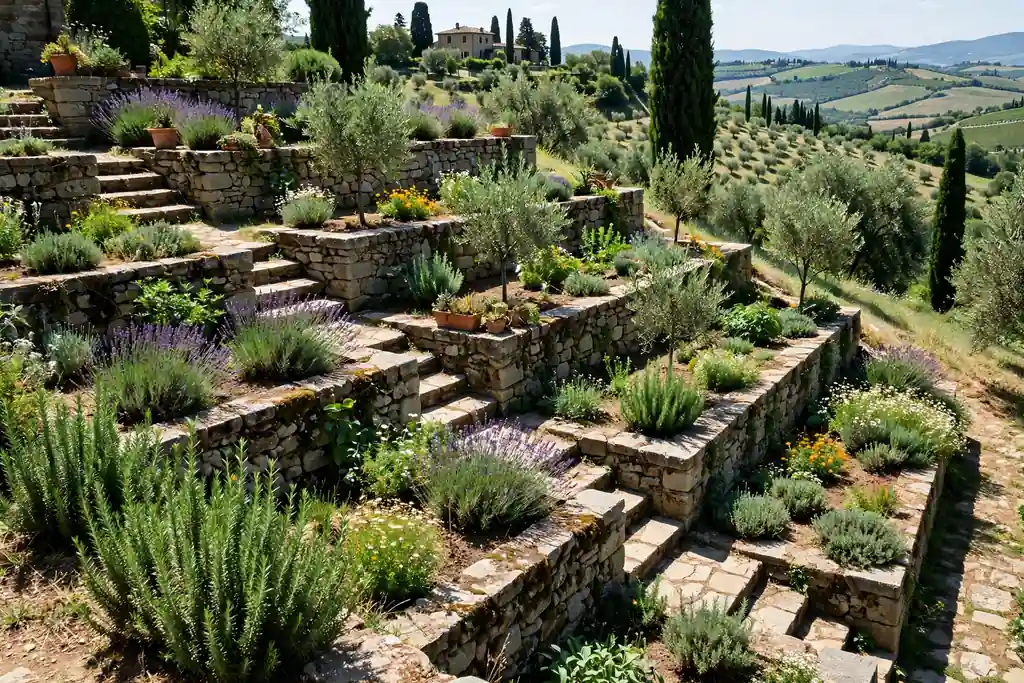
9. Terrace a Slope With Stone Beds
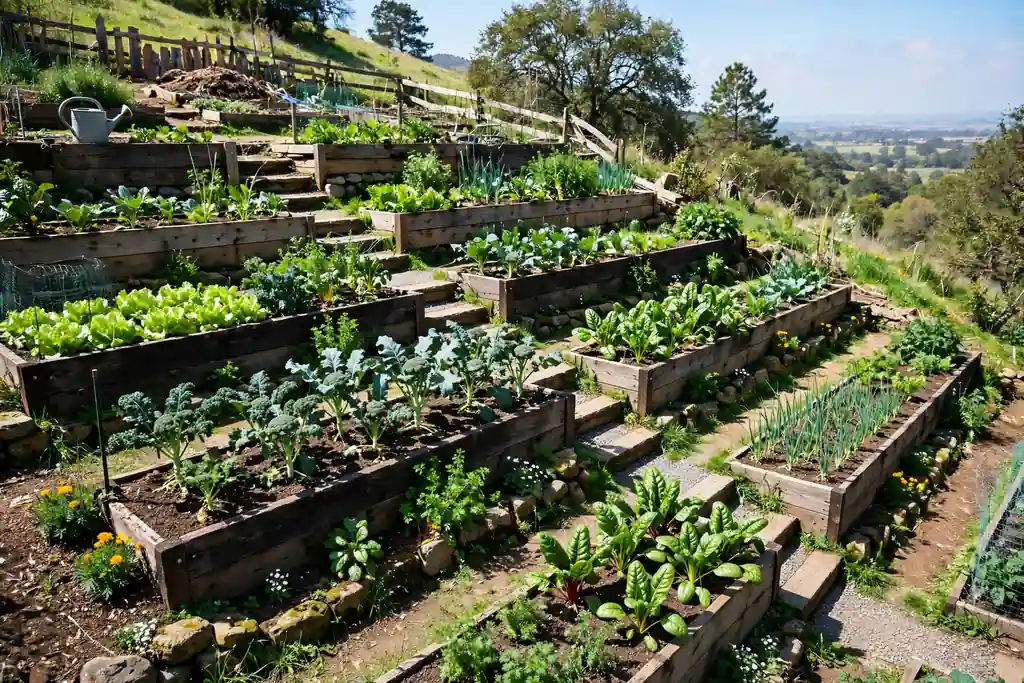
Step a series of stone edged beds down a slope like a staircase, with a path or grass strip between each bed, to give a hillside garden the terraced look of an Italian hillside. Each bed stays at a comfortable working height, the soil stays level inside each box, and you can reach the middle of every bed from the path beside it. Start at the lowest level and build upward so every level has solid support.
Make the beds no wider than you can reach across from one side, and leave paths wide enough for a wheelbarrow. Put the beds you visit daily, such as salad leaves and herbs, nearest the house, and beds you visit weekly further down. Keep a narrow access strip behind the tallest level so you can weed and cut back without stepping on the plants in front.
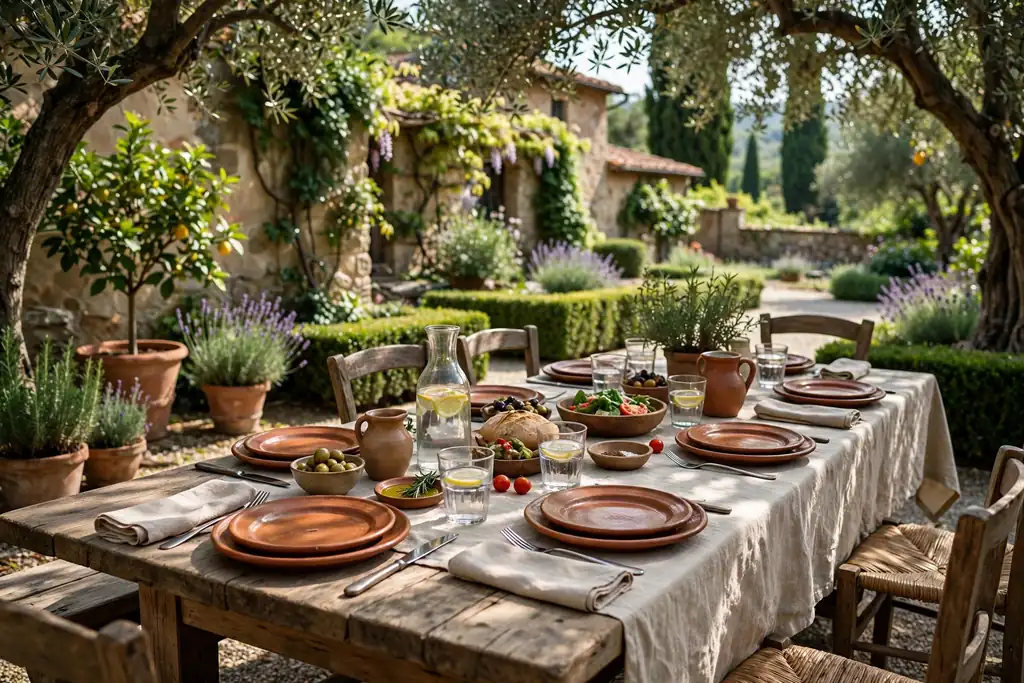
10. Set a Long Table for Outdoor Meals
Set a long wooden table with chairs in the flattest, least windy part of the garden for meals outside, under a pergola or a tree where possible. Keep the table in the shade for lunch, use a plain linen cloth and terracotta or cream plates, and leave room to pull chairs out without hitting posts or pots. A low centerpiece of herbs in a shallow bowl is more practical than tall flowers, since guests can see each other across it.
Store cushions indoors overnight, and sweep leaves from the table area so the space is ready without a long tidy up. Keep the table near the door or the cooking area if you can, so carrying food is short and safe. A long table is the social heart of an Italian garden, even when the table itself is simple.
11. Train Jasmine Over an Arch on a Walkway
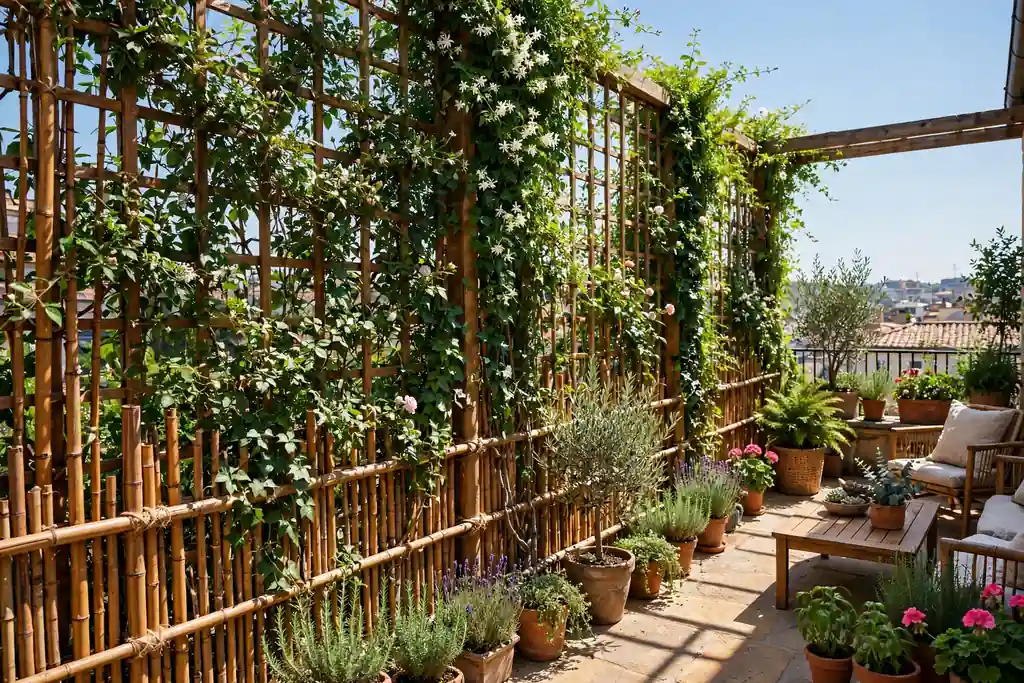
Place a light metal or wood arch over a garden walkway and train jasmine over it for scent at the step from one garden area into another. Unlike a wall vine, an arch frames the view ahead, so keep the opening clear and prune side shoots that hang into the walkway. Fix the arch firmly, since a mature vine is heavy, and plant on the sunny side so flowers face the path.
Plant jasmine at the base of each post, tie stems in as they grow, and prune after flowering to keep it tidy. Jasmine needs sun for the best flowers, but its roots prefer cool, moist soil, so mulch the base and water in dry spells. Choose a variety suited to your winter cold, since tenderness varies between types.
12. Clip Boxwood Into a Simple Parterre
Clip boxwood into low, simple shapes, such as squares or circles, to make a formal parterre bed near the house or around a fountain. Fill each shape with gravel, lavender, or seasonal flowers, and keep the boxwood trimmed to a neat edge so the pattern reads clearly from above and from the path. Boxwood suits sun or light shade and needs soil that does not stay wet.
Trim lightly two or three times in the growing season, and feed and mulch in spring. Keep the pattern simple: one or two shapes repeated beat a complex design that is hard to keep tidy. A parterre near a seat gives a formal anchor, while the rest of the garden can stay looser around it.
13. Grow an Orto Vegetable Patch With Tomatoes and Basil
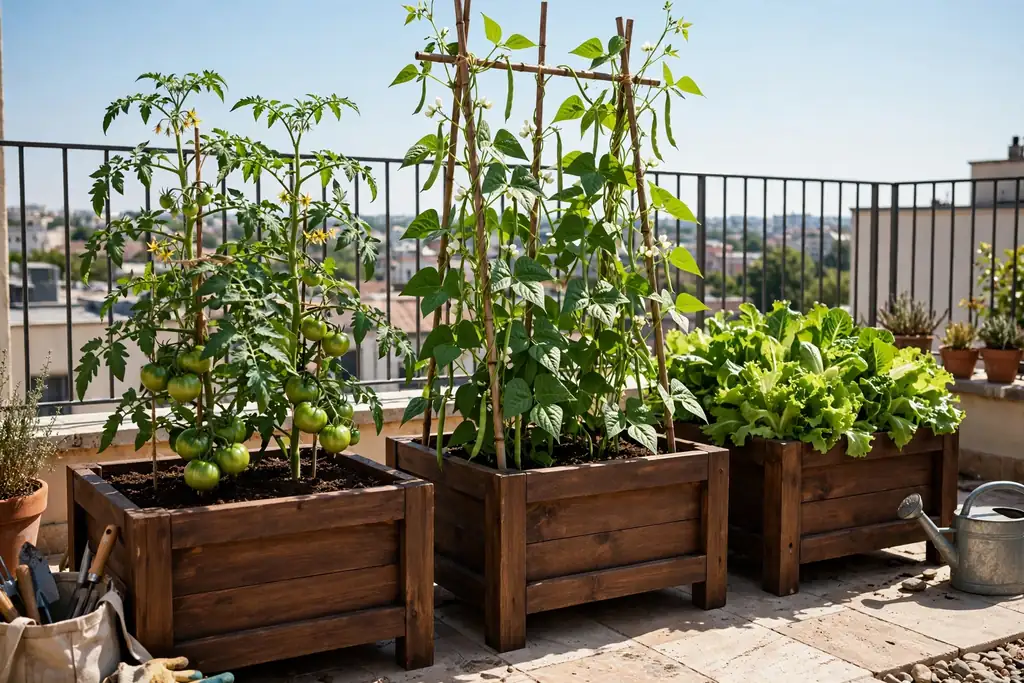
Grow a small vegetable patch, an orto, with tomatoes, basil, peppers, and courgettes in a raised bed or large pots against a sunny wall. Stake tomatoes early, water the soil, not the leaves, to reduce disease, and pick basil leaves regularly to keep plants bushy. Harvest tomatoes as they color so the plant keeps producing.
Keep the patch close to the kitchen door, so picking for a meal takes a minute rather than a trip across the yard. Rotate crops between beds each year so the same family does not grow in the same soil season after season. Underplant the edges with parsley and chives, which suit the same sun and watering routine.
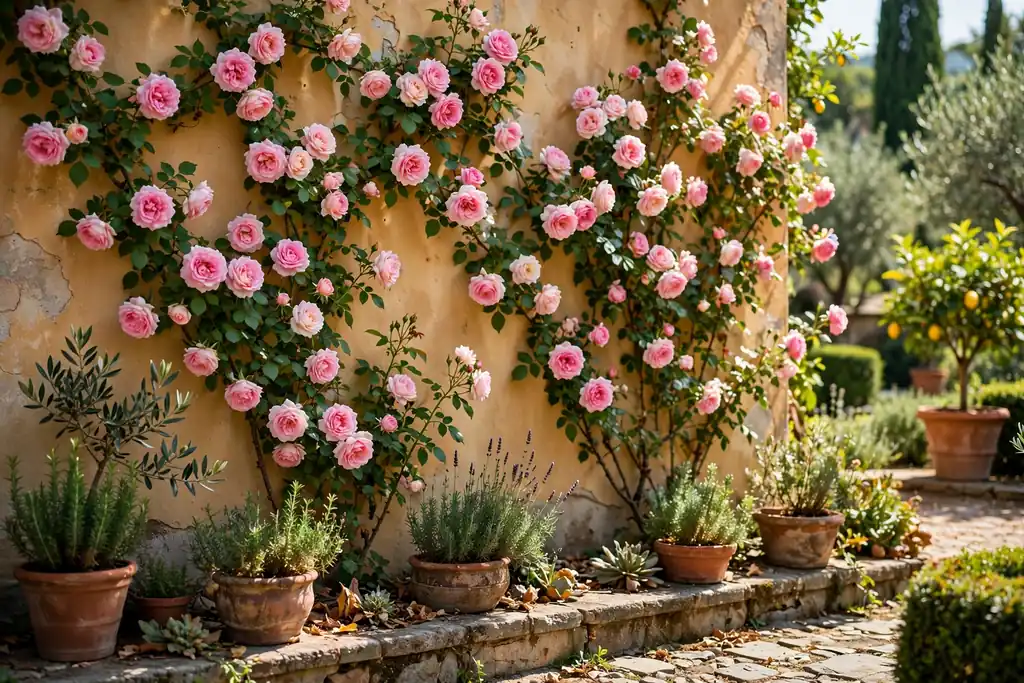
14. Grow Climbing Roses on a Warm Sunny Wall
Train climbing roses along wires on a warm, sunny wall for color and scent from late spring into autumn. Fix horizontal wires to the wall with a gap behind them so air can move, and tie stems in as they grow, fanning them out rather than letting them bunch at one point. Space the plants by the label, since a crowded rose wall invites disease.
Feed and mulch in spring, prune by rose type in late winter or early spring, and water at the base rather than over the leaves. Keep shorter companion plants such as lavender or catmint in front to cover bare stems. For a Mediterranean neighbor with the same warm wall logic, these Greek garden ideas show how white walls, stone, and sun loving plants work together.
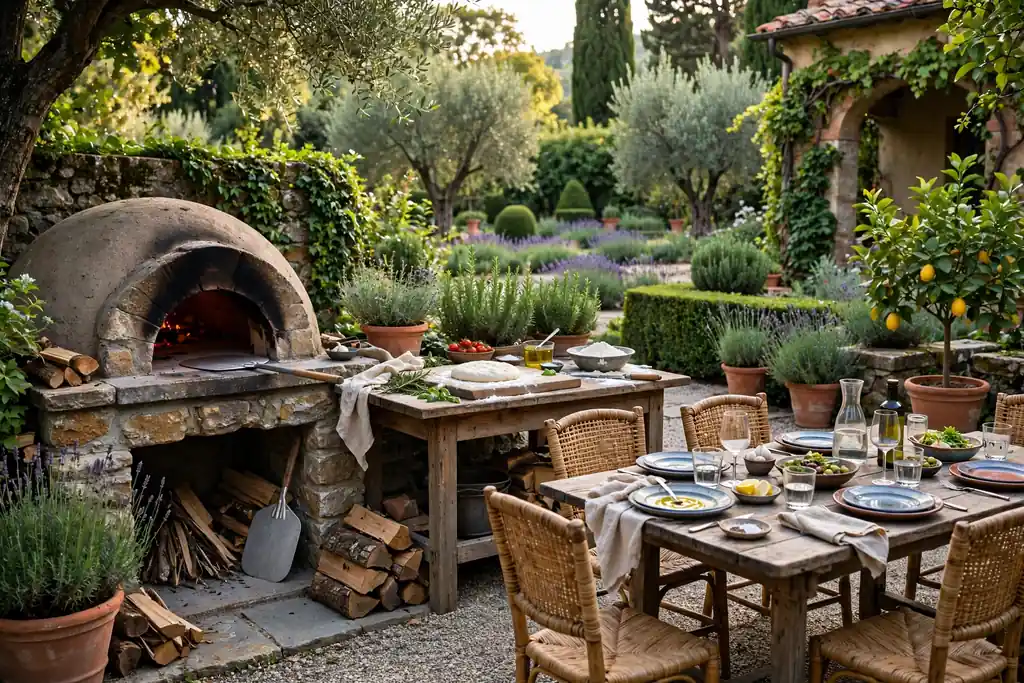
15. Build an Outdoor Cooking Corner With a Pizza Oven
Set aside a cooking corner near the dining table for a pizza oven or a small outdoor grill, on a level, heat resistant base away from plants, cushions, and overhanging climbers. Keep a work surface beside the oven for dough and toppings, a stack of dry wood or fuel in a covered store nearby, and a clear route from the kitchen so carrying trays is safe.
Use the oven only in calm weather, keep water nearby, and never leave it lit unattended. If a full oven is not practical, a grill plus a prep table gives the same outdoor cooking habit on a smaller footprint. Store tools and covers in a dry box beside the corner so the area is ready to use without a long setup.
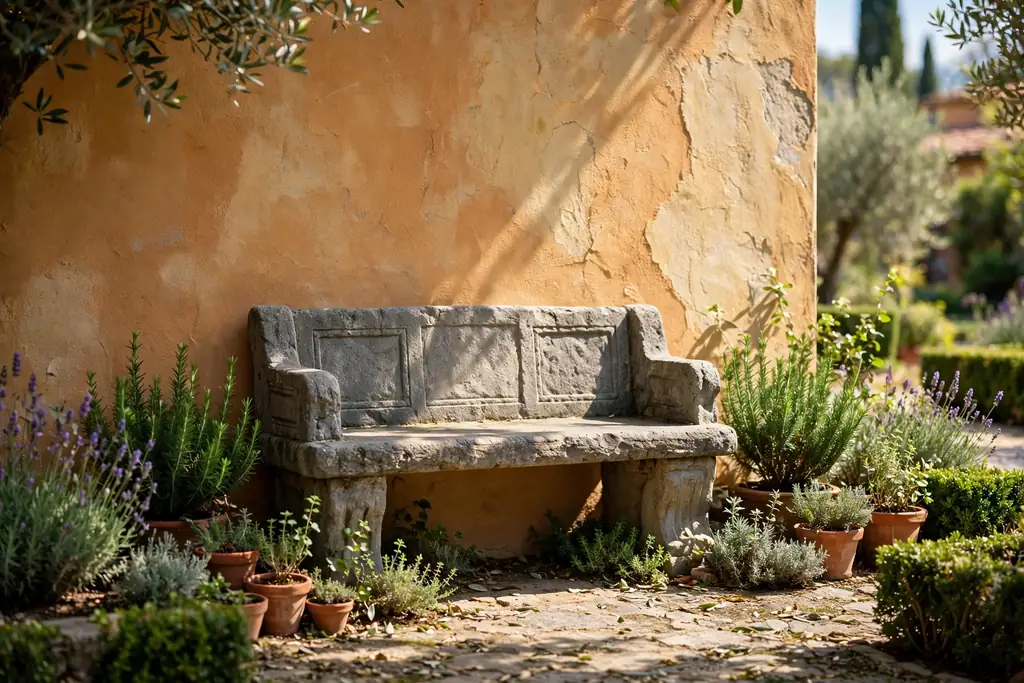
16. Tuck a Stone Bench Into a Sunny Nook
Set a stone bench in a sunny nook, at the end of a path or against a warm wall, as a quiet focal point for the garden. Stone stays cool in sun, needs little care beyond an occasional wash, and gives the garden structure even in winter when planting is bare. Set the bench on a level, firm base so it does not rock or sink, and think about delivery and placement first, since stone pieces are heavy and awkward to move later.
Keep the planting around it low at the front so the seat stays easy to reach, and add a folded blanket or a thin cushion if you plan to sit there for a long stretch. For more seat placement ideas, these garden bench ideas show how to choose the spot first and match the seat to it.
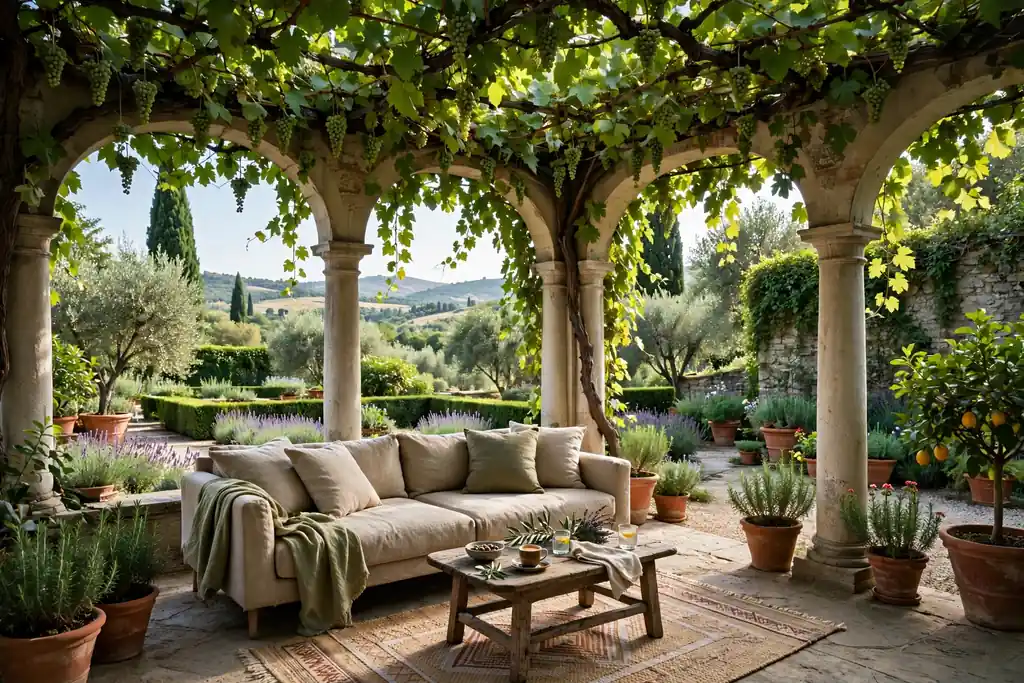
17. Shade a Loggia Lounge With Vines
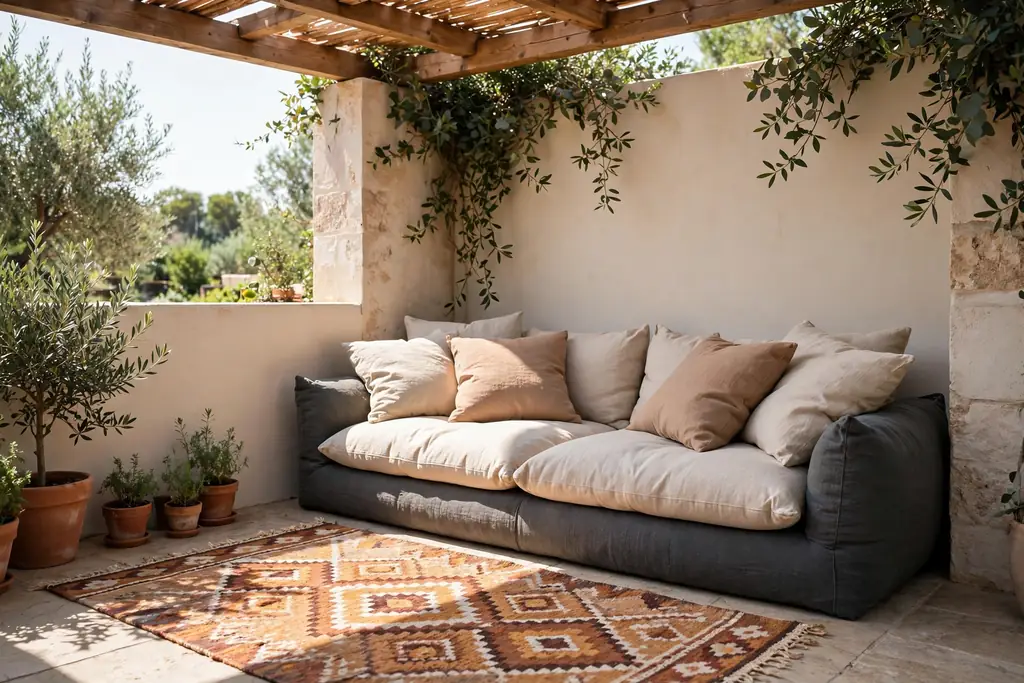
Turn a covered loggia, porch, or deep veranda into a lounge by training vines over its open sides and furnishing it with a low sofa, a rug, and a small table. The roof gives shade and rain cover, while the vines soften the edges and cool the air. Choose weather resistant cushions with removable covers, and store them in a dry box when rain is forecast.
Add a rug under the sofa to soften paving and define the zone, and keep one side open to the garden view so the loggia feels connected to the planting rather than shut off from it. Site a lantern or a small side table within reach of the sofa, and keep the route from the house clear so the loggia gets used daily, not only for guests.
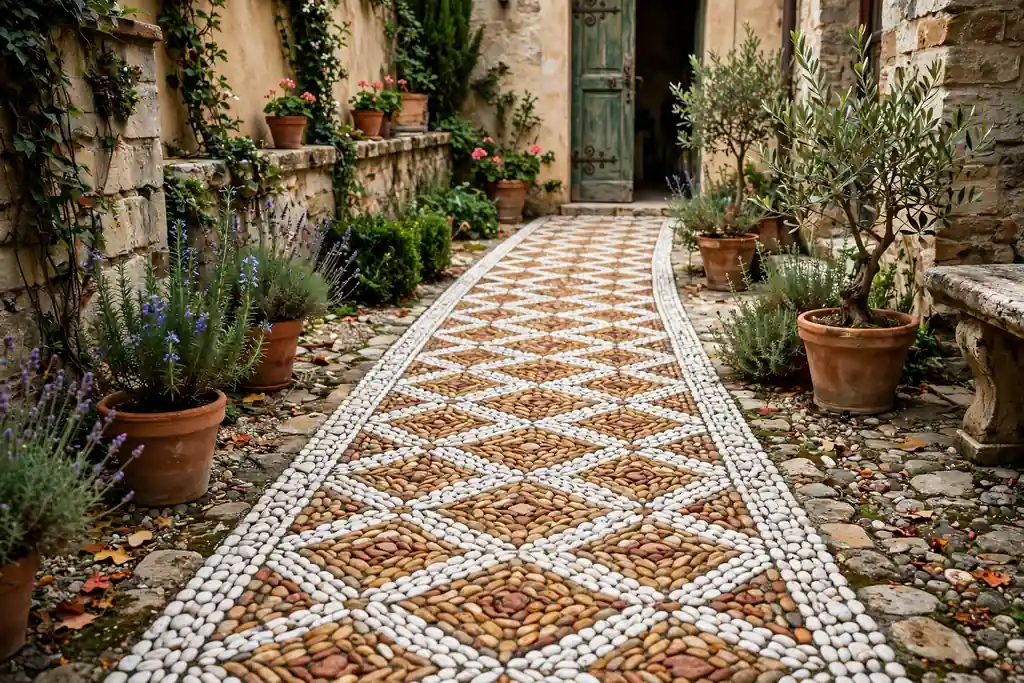
18. Lay a Pebble Mosaic Path
Lay a pebble mosaic path, with white and warm stones set in a simple pattern against grey, to add craft to a courtyard or entrance. Lay the pattern on a firm mortar bed, keep the design simple, such as a border, a star, or a wave, and grout the gaps so the surface stays safe to walk on. Pebble paths suit courtyards and entrances best, where they are seen up close.
Check the finished surface for loose stones before regular use, and sweep it clear of soil so weeds do not take hold in the joints. Keep the mosaic to one path or one courtyard panel rather than every path in the garden, so it stays a feature rather than a trip hazard across the whole yard.
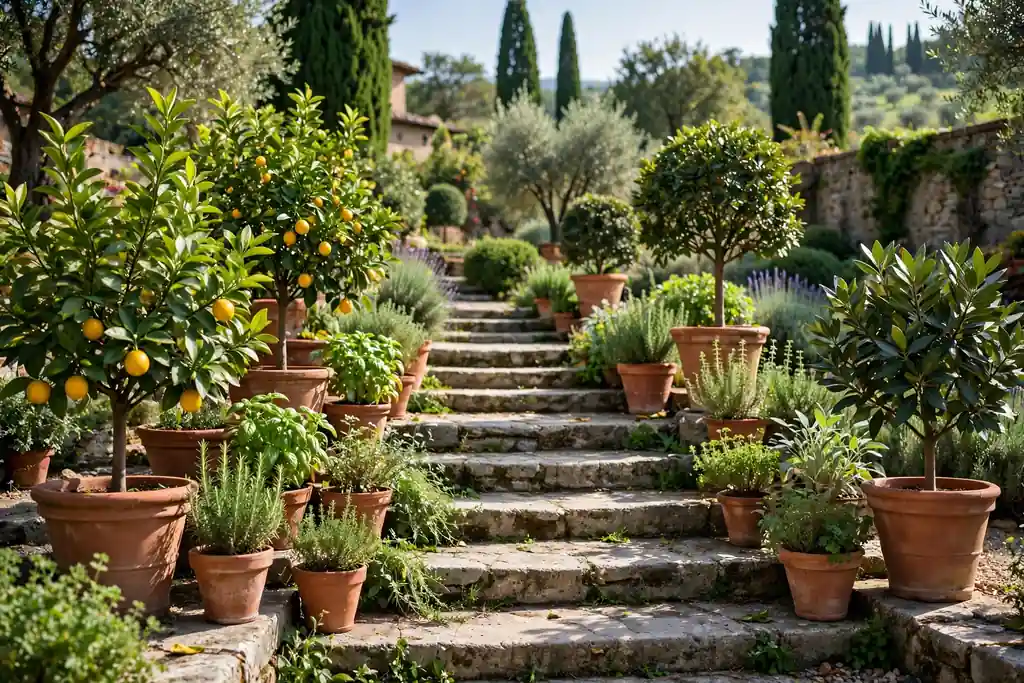
19. Line Steps With Potted Citrus and Herbs
Line garden steps with potted citrus, bay, and herbs in matching terracotta pots to turn a plain stair into a planted feature. Use pots in two sizes, with the largest at the bottom of the steps and smaller pots higher up, and keep every pot clear of the walking line so the steps stay safe. Citrus and bay suit this spot because they hold their shape and scent the air as you pass.
Water pots often in hot weather, since small pots dry fast, and move tender citrus under cover before the first hard frost. Add one trailing plant, such as trailing rosemary, at the top step to soften the edge. Keep the step surface dry and free of fallen leaves, since wet steps and pots together can be slippery.
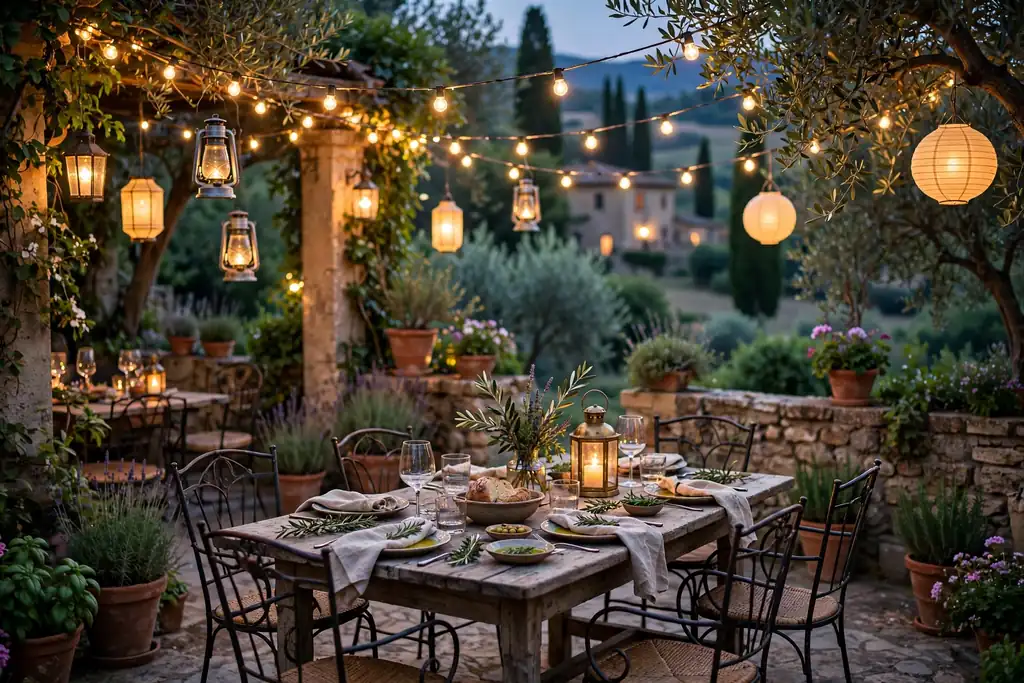
20. Light Evenings With Lanterns and String Lights
String warm white lights along a pergola, a wall, or a vine arch, and add lanterns along paths and near seats, to keep the garden usable after sunset. Light should be soft and low, so it feels warm rather than harsh, and so it does not glare into neighboring windows. Solar lanterns suit garden paths because they need no new wiring, but they need sun on their panels during the day.
Place lanterns where they mark steps and edges, and keep cables out of walkways. Bring battery lights inside in winter if the maker advises it. Test the light level at dusk before guests arrive, and add one brighter task light near a cooking or reading spot if needed.
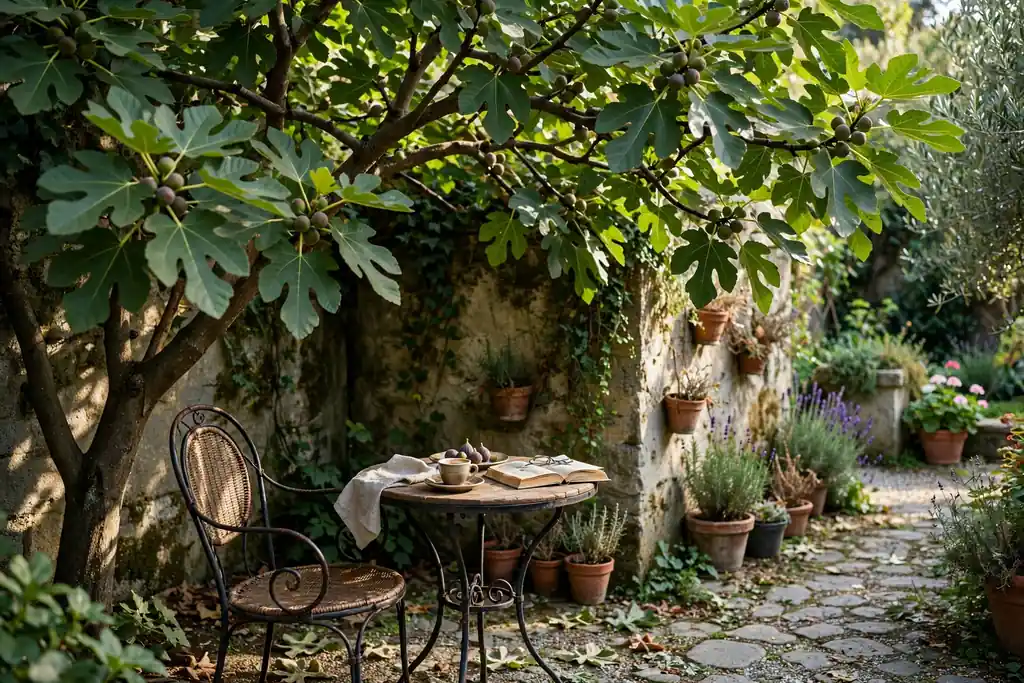
21. Make a Fig Tree the Center of a Reading Corner
Plant a fig tree in a quiet corner with a chair and a small table for a shaded reading spot with broad leaves, deep summer shade, and fruit. Plant it in the ground where space allows, or in a large pot to limit its size, and prune to keep an open shape with room to sit beneath. Figs need sun and warmth to ripen, and they fruit best on a sheltered wall.
Fallen fruit can stain paving, so site the chair slightly to one side, not directly under the heaviest branches. Keep a small side table within reach for a book and a drink, and sweep fallen leaves from the seat area so the corner stays inviting through summer.
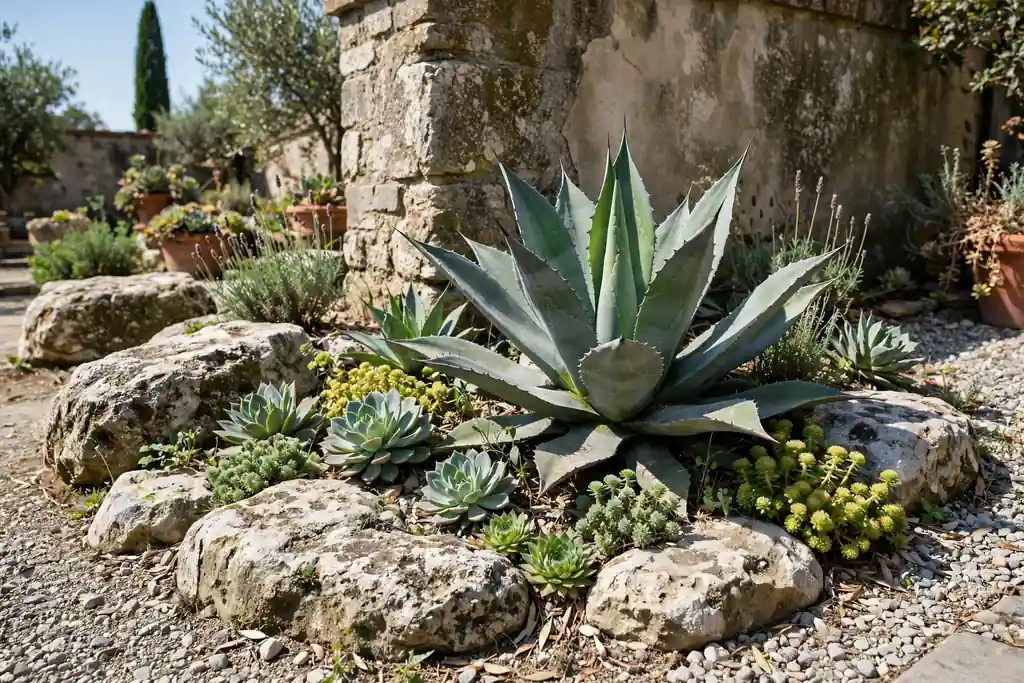
22. Plant an Agave and Succulent Dry Corner
Plant agave, aloe, and other sculptural succulents in a dry, sunny corner with gravel and large stones for a low water Italian look. Use one large agave as a focal point, rather than a row of small ones, and pair it with a low gravel surface so the shape reads clearly. Agave needs sharp drainage and full sun, and it should not sit in wet soil over winter.
Wear gloves when handling spiky leaves, and site the planter where children and pets will not brush against it. Top dress with gravel to keep plant crowns dry and suppress weeds, and water only while plants settle. A dry corner near a path gives a close view of leaf shapes that would be lost in a large border.
Conclusion
A good Italian garden starts with warmth, structure, and one place to sit, not a long shopping list. Choose a sunny wall or terrace, add stone or gravel underfoot, plant an olive, a lemon, or a vine for shade and scent, and set a table where you will actually eat outside. Add herbs by the kitchen door, water for sound, and warm light for evenings, and keep paths, steps, and drains clear. Pick one idea from this list, set it where you will actually use it, and add planting, shade, and color only after that first seat feels right.
Save this list on Pinterest before your next garden trip, and work through it one area at a time: structure first, then planting, then the comfort details that make the garden yours.
FAQs
What plants define an Italian garden?
Olive, cypress, citrus in pots, lavender, rosemary, thyme, sage, jasmine, grapevine, and fig are the plants most often linked with Italian gardens. They share a need for sun, air, and free draining soil, and they give scent, shade, and structure through the year. In cold areas, grow tender plants such as lemon and olive in pots so they can move under cover for winter.
Can I make an Italian garden on a small patio or balcony?
Yes. Start with terracotta pots, one olive or lemon in a large pot, herbs by the door, and a vine on a trellis or arch. Gravel in a shallow tray, a small wall fountain with a solar pump, and string lights add the look without beds or building work. Keep the palette to terracotta, warm stone, and green, and leave a clear path so the small space still feels easy to use.
Do Italian gardens need a lot of water?
No, once settled, many Italian garden plants prefer dry soil and suffer if they stay wet. Water new plants until they root, then water deeply and less often, letting the top of the soil dry between waterings. Pots dry faster than beds, so check pot soil often in hot weather, and use gravel mulch to hold moisture and keep plant crowns dry.
How do I keep terracotta pots from cracking in winter?
Empty tender plants or move pots under cover before hard frost, since wet soil expands when it freezes and can crack clay. Raise pots on feet so water drains freely, use a free draining mix, and avoid saucers that hold water through winter. If a pot must stay outside, wrap it and keep the soil only lightly moist through cold spells.
What is the easiest Italian garden idea to start with?
A cluster of terracotta pots by the door is the easiest start. Choose three or five pots in one clay tone, plant herbs and one taller plant such as bay or a small olive, and add gravel on the surface for a finished look. It needs no building work, it can move with the seasons, and it gives scent and color from the first day.
How can I add shade to an Italian garden without building a pergola?
A vine trained over an arch, a fig or olive tree in a large pot, a shade sail over a seating zone, or a loggia with vines on its open sides all give shade without a full pergola build. Place shade over the seat you use most, at the time of day you use it, and keep the shade clear of drains, wires, and walkways. A movable shade option also lets you follow the sun through the seasons.
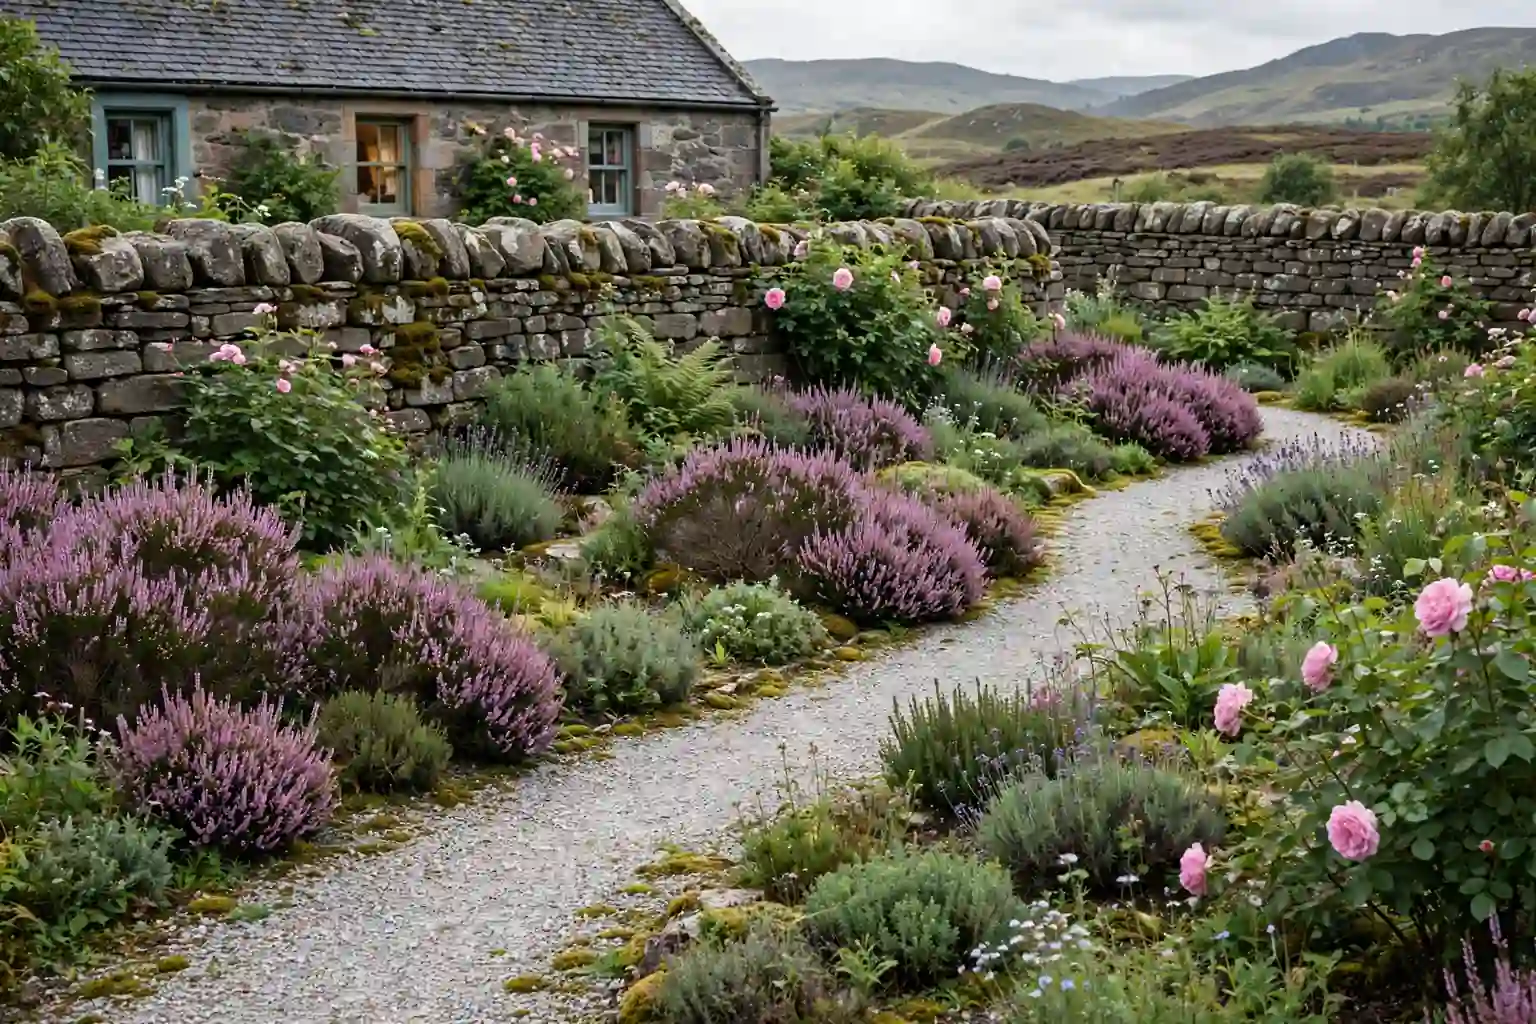
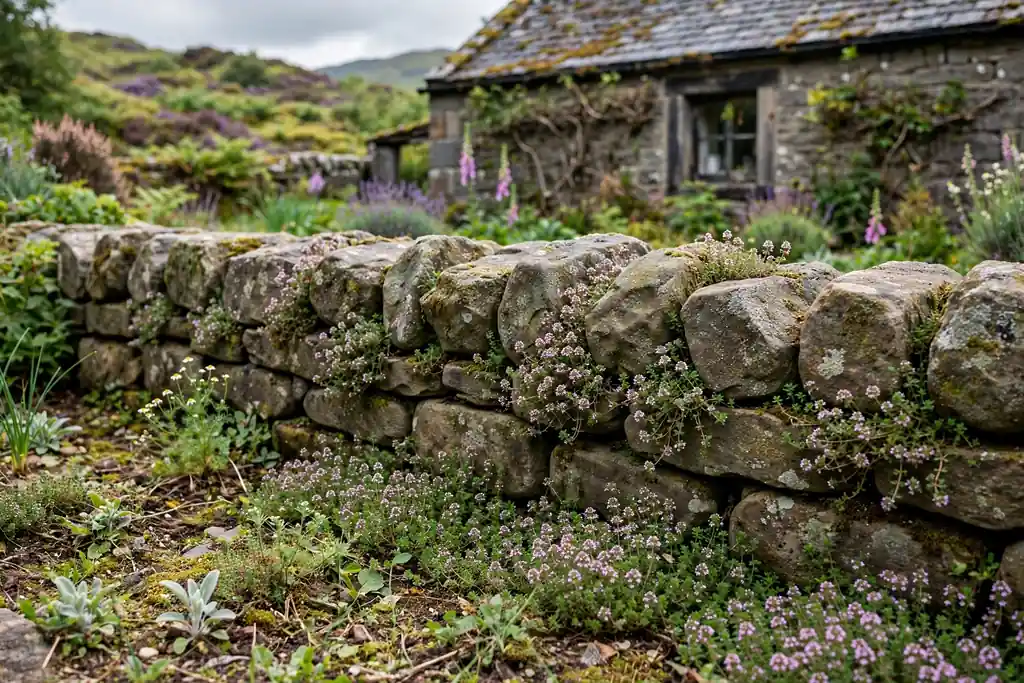
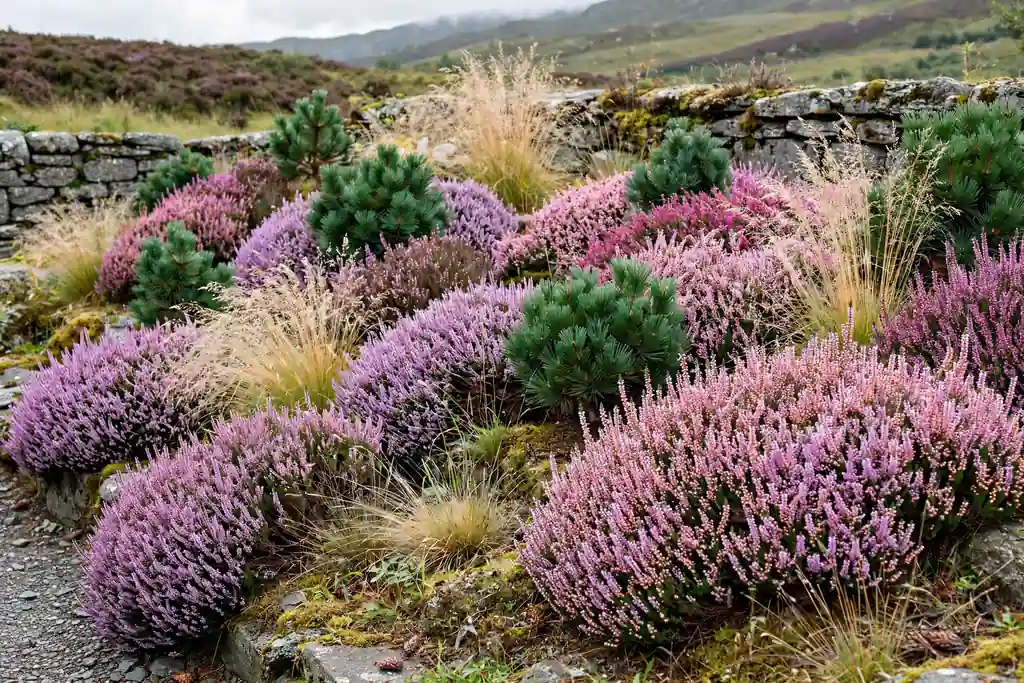
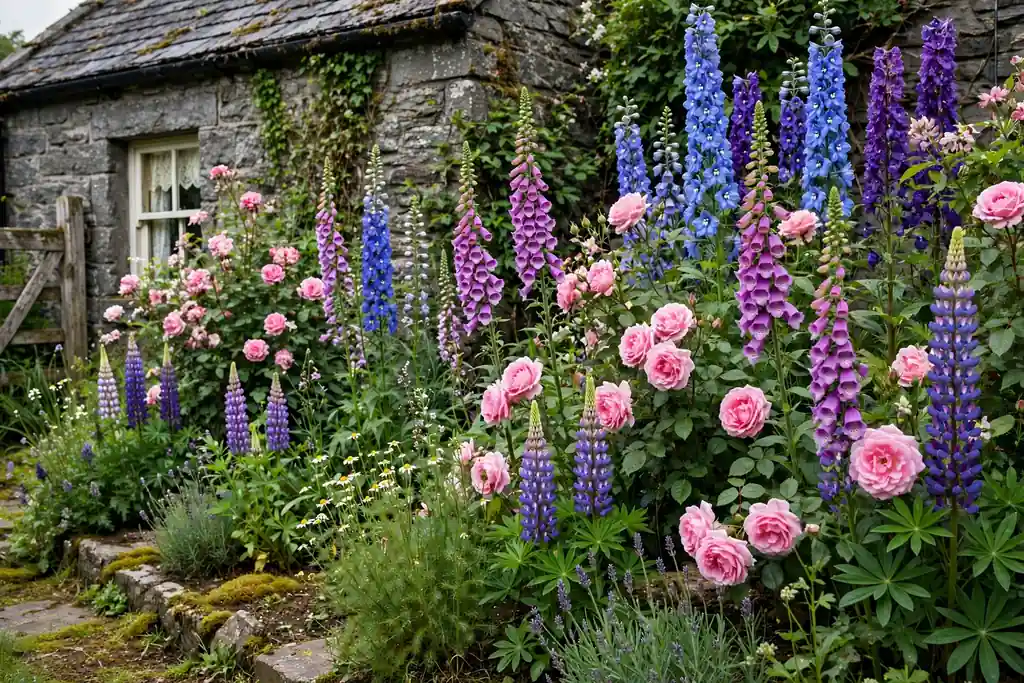
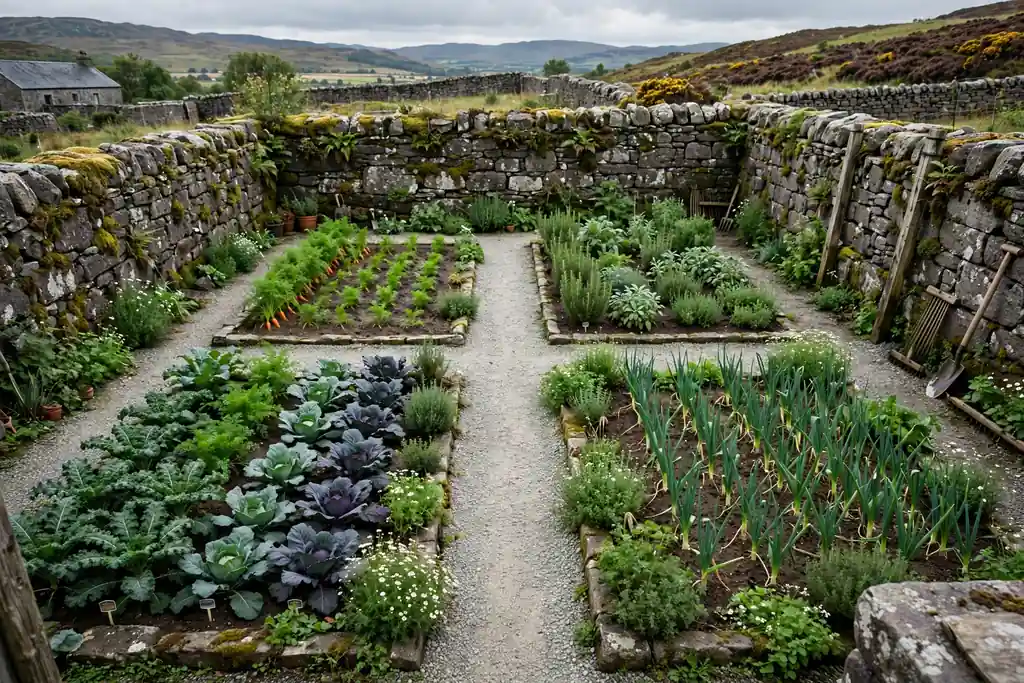
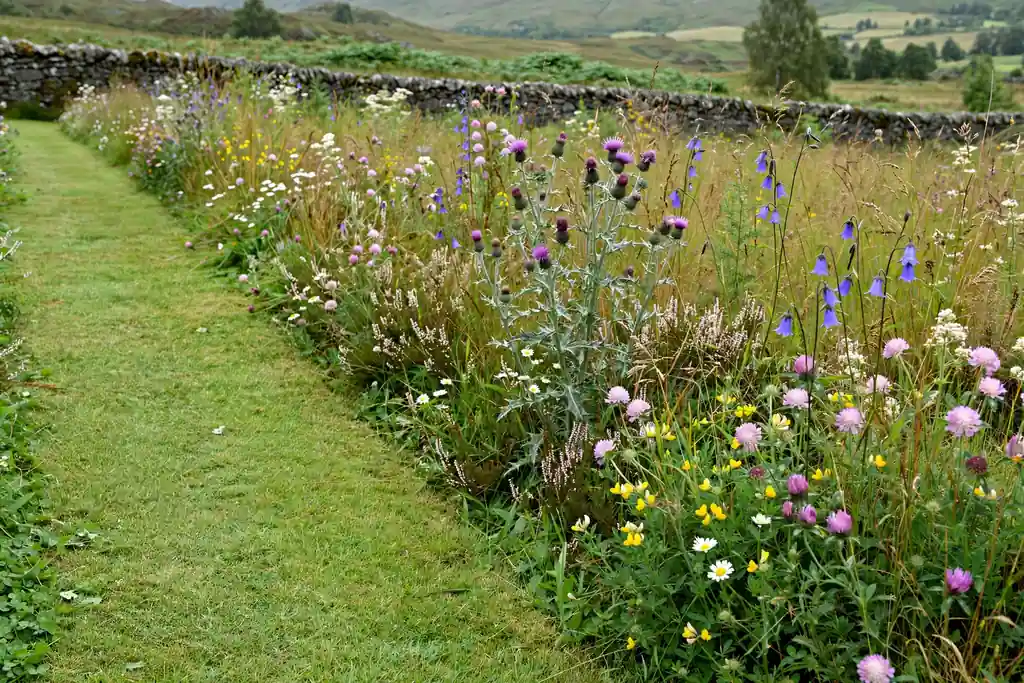
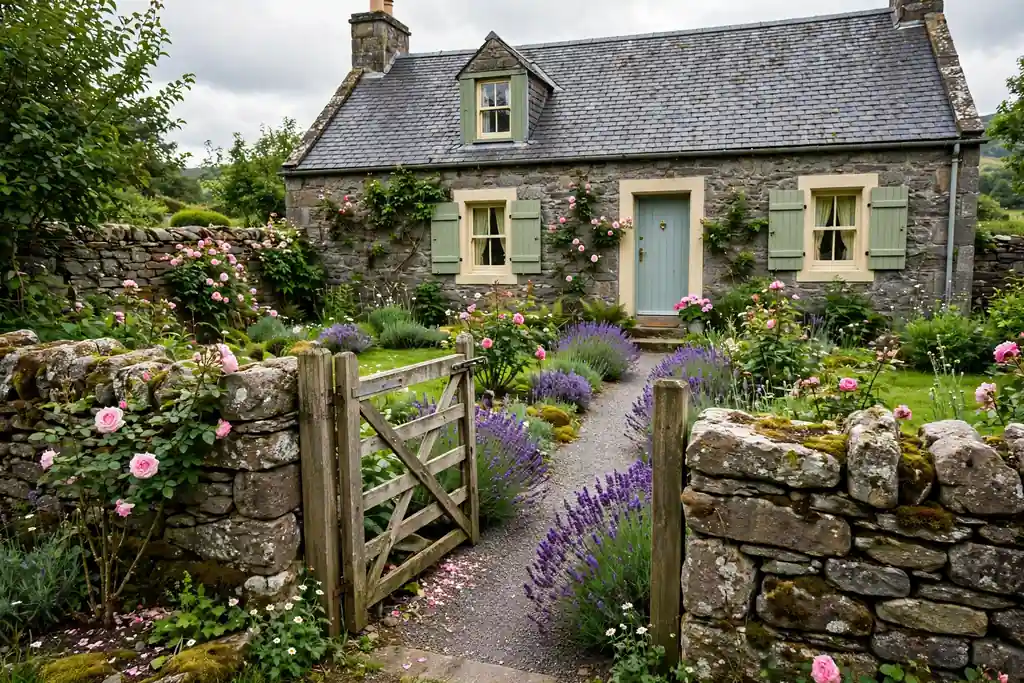
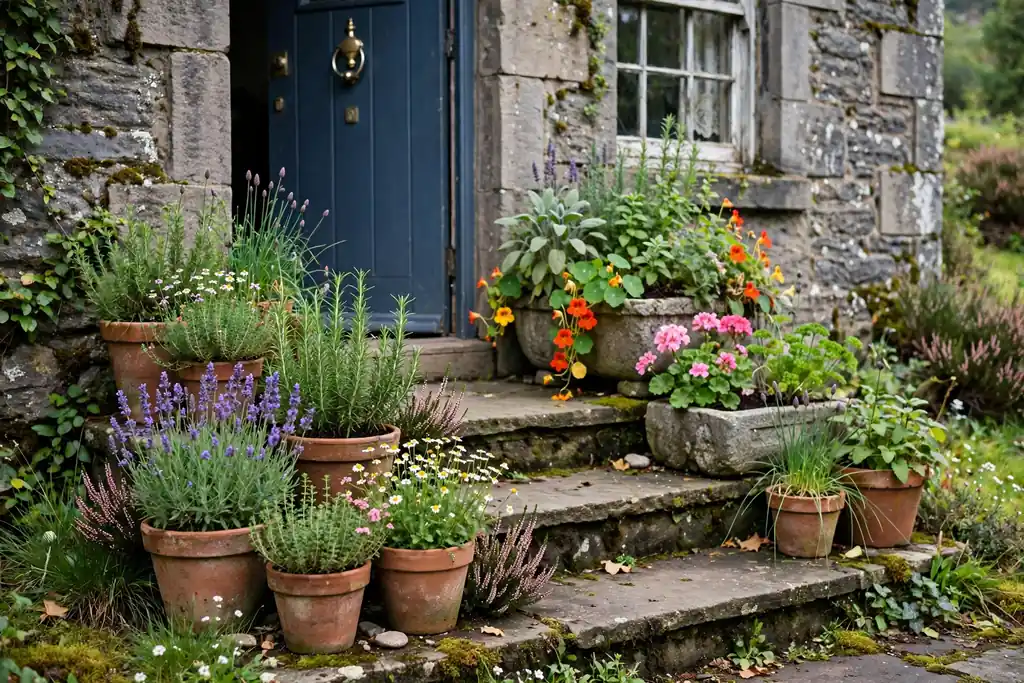
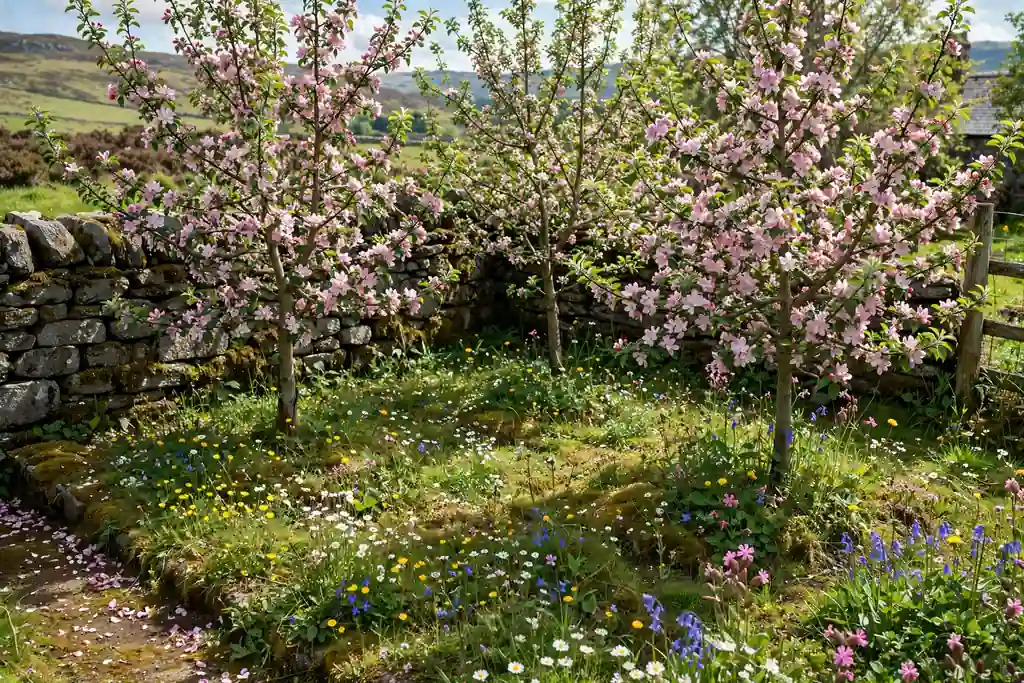
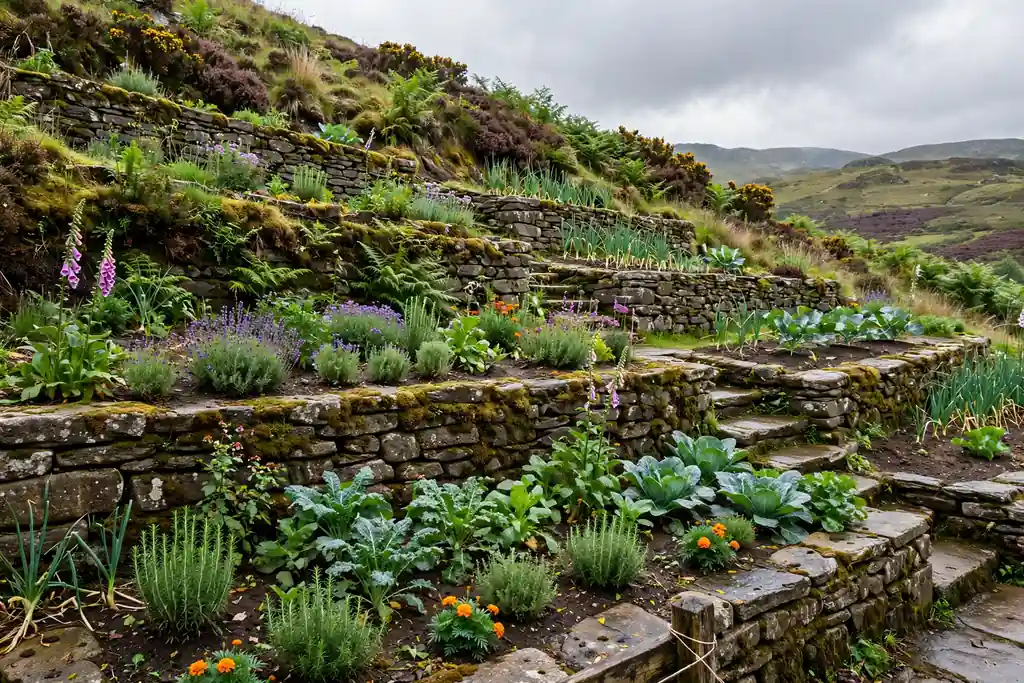
A Scottish garden has to earn its keep in rain, wind, and short summers, and that is exactly what makes it so rewarding. Stone walls, heather, ferns, and hardy roses suit the climate rather than fighting it, and a garden built around them looks settled in every season. These 32 Scottish garden ideas cover cottage borders, walled kitchen gardens, coastal plots, slopes, and small spaces, so you can start with one bed or one path and build from there. Pick the ideas that match your soil, your light, and the time you have each week, and let the garden grow into itself.
Key Takeaways
Start with structure first: walls, paths, and shelter, then fill in with planting that suits your soil and exposure.
Choose plants that cope with rain and wind, such as heather, ferns, roses, and hardy herbs, rather than plants that need constant protection.
Use local stone, slate, and gravel so the garden looks rooted in its place and weathers well.
Give wet corners a job with a rain garden or pond instead of fighting drainage every year.
Keep one sheltered seat, even in a small garden, so the space is used in all but the worst weather.
Plan for winter too, with evergreens, berries, bark, and a clear path, so the garden still looks cared for in January.
1. Edge Beds With a Dry Stone Wall
Build low dry stone walls around beds or along a boundary for a boundary that looks right in a Scottish garden and needs no mortar. Stack local stone with a slight inward lean, fill the core with smaller stones, and cap the top with flat coping stones laid on edge or flat. A wall up to knee height is a good first project, while taller walls belong with an experienced waller.
Plant the gaps near the top with creeping thyme, aubrieta, or small sedums, which root into the crevices and soften the hard edge. Keep soil from piling against the wall face, and leave the base clear so rain can drain away. Over time the stone weathers and mosses settle in, which only improves the look.
2. Plant a Heather and Heath Bed
Plant a heather bed for colour that lasts through autumn and winter, when many gardens go quiet. Mix summer flowering heathers with winter flowering heaths, and add a few dwarf conifers or grasses for height and shape between the low mounds. Heather needs acid, free draining soil, so dig in ericaceous compost and grit if your soil is heavy or lime rich.
Keep the bed in sun where possible, and trim lightly after flowering to keep the plants compact. A heather bed suits a bank, a front garden, or a sunny corner that is too poor for fussier plants. For a softer indoor echo of the same palette, see these Scottish bedroom ideas.
3. Grow a Cottage Border of Roses and Foxgloves
Grow a cottage border packed with roses, foxgloves, lupins, and delphiniums for the classic Scottish cottage look. Plant tall foxgloves and delphiniums at the back, shrub roses in the middle, and low geraniums and catmint at the front, so the border reads as one full planting rather than separate rows. Repeat one or two colours through the border to tie it together.
Stake tall stems early, before wind bends them, and deadhead roses and lupins to keep flowers coming. Foxgloves self seed freely, so leave a few seed heads each year and pull seedlings that land in paths. This border suits a sunny wall or a front garden where it can be seen from the house.
4. Build a Walled Kitchen Garden
Build a walled kitchen garden, even a small one, with beds for salads, herbs, and soft fruit inside low walls or hedging. Walls shelter crops from wind, hold daytime warmth, and give you somewhere to train fruit or hang tools. Divide the space into four simple beds so you can rotate crops year by year without a complicated plan.
Keep the paths wide enough for a wheelbarrow, and put the beds you pick from daily nearest the gate. A cold frame in one corner extends the salad season well into autumn. If your garden slopes, the terracing advice in these tiered garden ideas helps you level beds that would otherwise wash out in heavy rain.
5. Sow a Wildflower Meadow Strip
Sow a wildflower meadow strip along a fence, a bank, or the far end of the lawn for colour with very little upkeep. Choose a Scottish native seed mix suited to your soil, and sow onto bare, low fertility soil, since rich soil favours grass over flowers. Cut the strip once in late summer, after seed has set, and remove the cuttings so fertility stays low.
A meadow strip suits gardens where a full lawn feels like a chore, and it brings bees and butterflies in from the first summer. Leave a mown path through or beside the strip so you can walk among the flowers without trampling them. Avoid sowing under trees, where shade and leaf litter will thin the flowers out.
6. Make a Rain Garden for Wet Corners
Make a rain garden in the corner where water always gathers, with moisture loving plants such as irises, astilbe, ligularia, and ferns. Shape a shallow hollow, fill it with a mix of soil and gravel so water soaks away slowly, and direct a downpipe or path runoff into it rather than onto the lawn. The plants drink the water and the hollow stops the rest of the garden turning to mud.
Keep the centre open and the edges planted densely, so the hollow reads as a planted bed rather than a puddle. Check after heavy rain in the first year, and adjust the inflow if water stands for more than a day or two. A rain garden suits clay soils and low spots that no amount of lawn care will fix.
7. Shelter a Coastal Garden With Windbreak Hedging
Shelter a coastal garden with windbreak hedging before you plant anything delicate, since salt wind will scorch soft leaves in a single storm. Plant a double row of tough hedging such as escallonia, griselinia, or hawthorn, with the tallest row on the windward side, and let it establish for a season or two before adding tender plants behind it. A hedge with small gaps filters wind better than a solid wall, which only sends gusts over the top.
Behind the hedge, use salt tolerant plants such as thrift, sea holly, and hardy grasses, and keep seating in the lee of the hedge. Wash salt off furniture and pots after storms, and check ties on young trees each spring. Coastal shelter is the single change that makes the rest of a seaside garden possible.
8. Build a Highland Rock Garden
Build a rock garden on a sunny bank or slope with large feature stones and small alpine plants that want sharp drainage. Bury at least a third of each large stone so it looks settled rather than perched, and fill behind the stones with gritty soil mixed with gravel. Plant alpines, small sedums, and creeping thyme in the pockets between rocks, keeping the planting low so the stones stay visible.
Top dress with gravel to keep plant crowns dry and to show off the stone colours in dry weather. Avoid rich compost, which holds water around alpine roots and rots them in winter. A rock garden near a path gives you a close view of small flowers that would be lost in a big border.
9. Plant a Woodland Shade Garden of Ferns
Plant a woodland shade garden under trees or on a north facing wall with ferns, hostas, and spring bulbs for a garden that thrives without sun. Use a mix of fern heights, from low hardy ferns at the front to taller royal ferns at the back, and add snowdrops and bluebells for spring colour before the canopy closes. Mulch with leaf mould each autumn to feed the soil and hold moisture.
Keep paths through the shade garden clear of fallen leaves in wet months, since wet leaves on stone get slippery. This garden suits the damp, shaded corners that frustrate sun loving plants, and it looks good from the first year, since ferns unfurl early and stay green late. Water new ferns well in their first dry spell, even in shade.
10. Keep a Herb Garden by the Kitchen Door
Keep a herb garden by the kitchen door with thyme, rosemary, sage, parsley, and chives in one sunny, sheltered bed or a set of pots. Put Mediterranean herbs such as rosemary and thyme in the sunniest, best drained spot, and moisture lovers such as parsley and chives where water settles. Grow mint in its own pot sunk into the bed so it does not spread into its neighbours.
Pick little and often, which keeps plants bushy and gives you fresh leaves for cooking all summer. Cut herbs back lightly in spring, and replace woody rosemary plants every few years rather than trying to revive a bare stem. A kitchen door herb bed is the most used part of many Scottish gardens, so keep its path clear and level.
11. Raise Beds in Stone and Slate
Raise beds in stone or slate for vegetables and flowers that need better drainage than your soil gives. Stone raised beds hold warmth, keep soil level on a slope, and look far more settled than timber boxes in a Scottish garden. Build them no wider than you can reach across from one side, and leave paths wide enough for a wheelbarrow between beds.
Fill the beds with a mix of topsoil and compost, and mulch the surface to hold moisture in dry spells. Raised beds suit older gardeners and small gardens alike, since they cut down on bending and on weeding. Keep one bed for salads near the house, so picking takes a minute rather than a walk to the far end.
12. Lay a Gravel Garden of Grasses and Thrift
Lay a gravel garden in a sunny, free draining spot with ornamental grasses, thrift, lavender, and sedums planted through a gravel mulch. Dig out weeds, lay a weed membrane if needed, spread a thick gravel layer, and plant through slits in the membrane. Gravel keeps crowns dry, suppresses weeds, and suits gardens where watering is limited or soil is thin.
Choose grasses that move in the wind, such as miscanthus and festuca, and mix in low mounds of thyme and sedum for ground cover. A gravel garden suits a front garden, a sunny side passage, or the strip beside a drive, where a lawn would struggle. Top up the gravel every couple of years as it settles into the soil.
13. Dig a Wildlife Pond With a Stone Edge
Dig a wildlife pond with a shallow stone edge, so birds can drink, frogs can climb out, and newts have shelter. Shape the pond with a shallow shelf around the edge and a deeper centre, line it well, and edge it with flat stones that sit level with the water. Plant native oxygenators and marginal plants such as marsh marigold and water iris, and leave one side open for access.
Avoid fish in a small wildlife pond, since they eat tadpoles and stir up the water. Keep the pond clear of fallen leaves in autumn with a net for a few weeks, and top up with rainwater rather than tap water where possible. A pond brings more wildlife into a Scottish garden than almost any other single feature.
14. Net a Soft Fruit Cage
Net a soft fruit cage for raspberries, gooseberries, redcurrants, and blackcurrants, so birds do not take the crop before you do. Build a simple frame from timber or metal poles, cover it with bird netting, and leave a door tall enough to walk through with a picking basket. Plant raspberries along one side where canes can be tied to wires, and bush fruit in the middle where you can reach all round.
Prune by fruit type each winter, mulch in spring, and water in dry spells while fruit swells. A fruit cage suits a sunny corner of a kitchen garden, and the harvest, eaten fresh or frozen for winter, repays the building effort in the first full year. Check the netting each spring for holes before fruit ripens.
15. Train Climbing Roses on a Stone Wall
Train climbing roses on a stone wall or trellis for height, scent, and colour that no freestanding shrub gives. Fix horizontal wires to the wall, tie stems in a fan shape, and prune to keep new growth coming from low down rather than only at the top. Choose repeat flowering varieties for a longer season, and underplant with lavender or catmint to cover bare lower stems.
Feed and mulch in spring, water at the base in dry spells, and deadhead through summer to keep flowers coming. A climbing rose suits a house wall, a garden wall, or a sturdy arch, and it turns a plain stone face into the main feature of the garden. Check ties each year, since stems thicken and tight ties can cut into them.
16. Clip a Small Boxwood Parterre
Clip a small boxwood parterre near the house for a formal note in an otherwise loose Scottish garden. Lay out a simple pattern of squares or a cross in low box hedging, fill the beds with lavender, roses, or seasonal bedding, and keep the paths between them in gravel. A parterre suits a flat, sunny spot by a door or a window, where its pattern can be seen from above as well as from the path.
Clip twice a year, in late spring and late summer, and feed after clipping to keep growth dense. Watch for box blight and box moth, and remove affected leaves promptly, since a small parterre is easier to check than a long hedge. If box worries you, use yew or holly cut low for a similar formal outline.
17. Grow a Vegetable Patch of Kale and Potatoes
Grow a vegetable patch of kale, potatoes, leeks, and carrots, the crops that suit Scottish soil and weather best. Rotate beds each year so the same family does not grow in the same soil season after season, and dig in compost each autumn to feed the soil for spring. Plant potatoes in rows you can earth up easily, and kale where it can stand through winter for picking in cold months.
Net brassicas against cabbage white butterflies, and water carrots evenly so roots do not split. A vegetable patch does not need to be large: two or three beds give a family regular picking through summer and autumn. Keep a simple sketch of what grew where, so rotation stays easy to track from year to year.
18. Plant a Cutting Garden for the House
Plant a cutting garden in a sunny bed with sweet peas, cosmos, dahlias, and zinnias, grown in rows for picking rather than for display. Grow in straight rows with paths between them, stake sweet peas and dahlias early, and pick often, since cutting keeps flowers coming. A cutting bed suits a corner of a kitchen garden or the far end of a lawn, where rows look workmanlike rather than out of place.
Bring cut stems indoors the same day, strip lower leaves, and change vase water every couple of days to keep bunches fresh. For a softer indoor echo of the garden palette, see these Scottish living room ideas. Grow one or two scented flowers, such as sweet peas or stocks, in every cutting bed, since scent is what makes a home bunch feel special.
19. Make a Stone Bench and Fire Bowl Nook
Make a sheltered nook with a stone bench and a fire bowl, so the garden can be used on cool evenings as well as warm days. Site the nook out of the prevailing wind, with its back to a wall or hedge, and lay a level gravel or stone base under the bench and bowl. Keep the fire bowl clear of overhanging branches and soft furnishings, and follow the maker guidance for safe use.
Add a small side table for mugs, a basket for blankets, and a lantern for light, so the nook works without a trip back indoors for every comfort. A fire nook suits a corner that catches evening sun, and it gives a small garden a clear destination, which makes the whole space feel larger and more used.
20. Lay a Whinstone and Slate Chip Path
Lay a path of whinstone or slate chips for a surface that suits Scottish stone, drains freely, and stays firm underfoot. Dig out the route, lay a compacted base, edge it with stone or timber, and spread chips to a depth that covers the base without shifting underfoot. A chip path suits a kitchen garden, a woodland walk, or a route to a seat, where a paved path would look too formal.
Top up chips each spring where they have thinned, and weed the edges before weeds seed into the gravel. Keep the path wide enough for a wheelbarrow on working routes, and narrower on walks where a single person strolls. A good path is what turns a garden from a view into a place you actually walk through daily.
21. Leave a Wildlife Corner With a Log Pile
Leave a wildlife corner with a log pile, a bird bath, and a patch of unmown grass, and let it stay a little untidy on purpose. Stack logs in a shady corner for beetles and fungi, keep the bird bath topped up with fresh water, and leave one grass patch uncut until late summer for insects and seed eating birds. This corner suits the far end of a garden, where a wilder look does not fight with tidy beds near the house.
Add a few bee friendly plants nearby, such as foxgloves, comfrey, and single flowered roses, so pollinators have food from spring to autumn. Avoid pesticides in and around the wildlife corner, and check the bird bath in freezing weather, breaking ice so birds can drink. A wildlife corner costs almost nothing and brings the garden alive.
22. Frame a Front Garden With a Low Wall and Gate
Frame a front garden with a low stone wall and a simple gate for a boundary that looks welcoming rather than closed off. Keep the wall low enough to see over, so the garden still connects with the street, and choose a gate wide enough for a wheelbarrow and a pram. Plant the front beds with tough, low plants such as lavender, geraniums, and dwarf roses, which cope with street dust and need little care.
Keep the path to the door clear and level, with a light by the gate for dark evenings. A front garden with a low wall suits cottages and town houses alike, and it gives the house a finished edge that a bare lawn does not. Sweep leaves off the path in autumn, since wet leaves on stone get slippery fast.
23. Grow Containers on Patio Steps
Grow containers on patio steps and beside a door for a Scottish garden in a small space or a yard with no soil. Use large, frost proof pots, fill them with free draining compost, and plant with a mix of herbs, trailing lobelia, and dwarf shrubs that cope with wind on an exposed step. Group pots in odd numbers and vary their heights, so the display reads as one planting rather than a row of single pots.
Water pots in dry spells, since pots dry out faster than beds even in Scotland, and feed every couple of weeks in summer. Move tender pots to a sheltered wall in winter, and raise pots on feet so rain drains freely. Containers suit renters too, since the whole garden can move in a day.
24. Cultivate a Moss Garden in Deep Shade
Cultivate a moss garden in deep shade where grass thins and few plants thrive, and let moss be the planting rather than the problem. Keep the area damp and free of fallen leaves, press moss patches into bare soil, and add ferns and small hostas for height among the soft green carpet. Moss suits a north facing wall, a shaded corner, or the ground under a large tree, where it stays green all year with almost no care.
Avoid walking on the moss daily, since it compacts, and keep a stepping stone route through it for access. A moss garden pairs well with a stone lantern or a simple bench, and it turns the hardest corner of a Scottish garden into one of its quietest pleasures. Water in long dry spells to keep the moss soft and green.
25. Plant an Orchard Corner of Apples and Plums
Plant an orchard corner with two or three small apple or plum trees, chosen for varieties that ripen in a Scottish climate. Plant on dwarf or semi dwarf rootstocks so trees stay pickable without a tall ladder, and space them for their mature spread, not for how they look in the pot. Underplant with low wildflowers or herbs, and keep grass or mulch clear of the trunks.
Prune each winter, feed in spring, and thin fruit in early summer so the remaining apples size up well. Choose varieties that ripen in different months so the harvest spreads across late summer and autumn. An orchard corner suits a sunny, sheltered lawn edge, and a single well chosen tree gives more fruit than three crowded ones.
26. Terrace a Slope With Stone and Steps
Terrace a slope with stone walls and steps, turning a bank that is hard to mow into a series of flat, usable levels. Build from the bottom up, so each level supports the one above, and make every terrace wide enough to stand on and reach across. Put vegetables or herbs on the sunniest level, flowers in the middle, and seating on the level nearest the house.
Add steps with a handhold on steep slopes, and leave drainage behind each wall so heavy rain does not push it out. For the full method, from wall building to planting each level, see these tiered garden ideas. Terraces suit Scottish hillside gardens well, since they hold soil, slow water, and give every plant a level bed.
27. Plan a Winter Interest Garden
Plan a winter interest garden with evergreens, berries, coloured bark, and early bulbs, so the garden still looks cared for in January. Use holly and yew for green structure, rowan and cotoneaster for berries, and birch or willow for bark colour against grey skies. Add snowdrops and winter aconites at path edges, where they can be seen from the house on short days.
Keep one path clear and gritted in frost, and leave seed heads standing through winter for birds and for frost patterns on cold mornings. A winter garden suits every Scottish garden, since winter is long, and it costs little extra if you choose winter plants when planting new beds in spring. Cut back spent stems in late winter, before spring growth starts.
28. Extend the Season With Cold Frames
Extend the season with cold frames on allotment style beds, giving salads and young plants shelter from wind and late frost. Site frames in sun, facing south where possible, and fill them with free draining compost for seedlings and cuttings. Harden plants off by opening the lids wider each day before moving them outside, so they do not wilt in the first wind.
Use one frame for salads through winter, one for hardening off spring seedlings, and one for cuttings, so each frame has a clear job. Close lids at dusk in frost, and water sparingly in winter, since cold wet compost rots seedlings faster than cold alone. Cold frames suit Scottish gardens well, since they add weeks to both ends of the growing season for very little cost.
29. Build a Woodland Play Corner
Build a woodland play corner with log seats, a simple den frame, and a patch of bark, so children have a garden space of their own. Site it under trees or in a sheltered corner, away from ponds and vegetable beds, and use rounded logs and bark for soft landings. Keep the corner simple: a den frame, a few logs to sit on, and room to dig, which children use far more than fixed play equipment.
Check logs each spring for rot and sharp edges, and keep the corner visible from the house so play stays supervised. A play corner suits family gardens where a full lawn would be trampled, and it can grow back into a fern garden later, when children outgrow it, with very little replanting.
30. Line a Path With Lavender
Line a path with lavender for scent, colour, and bees, in the sunniest, best drained spot in the garden. Plant lavender in a single row or a double row along a path edge, spacing plants by the label so they form a continuous hedge without crowding. Lavender needs sun and sharp drainage, so dig in grit on heavy soil and avoid planting it in a wet hollow.
Trim lightly after flowering and again in spring, cutting back to green growth rather than into old wood, to keep plants compact. A lavender path suits a front garden, a kitchen garden edge, or the route to a seat, where brushing past releases scent. Replace plants that grow woody after several years, since young lavender flowers far better.
31. Dine Under a Pergola of Climbing Plants
Dine under a pergola of climbing plants, with roses, honeysuckle, or clematis trained over a timber frame above a table and chairs. Site the pergola where it catches evening sun, and build it sturdy enough to carry mature climbers, which grow heavy in wet years. Train stems along the top beams, and prune each year to keep growth from shading the table completely.
Add a gravel or stone base under the table, a lantern for evenings, and pots of herbs nearby for cooking. A pergola suits a patio near the house, and it gives outdoor meals shelter from light rain and low sun without closing the garden in. Check fixings each spring, since wind loads on a leafy pergola are higher than on a bare frame.
32. Work From a Greenhouse Potting Corner
Work from a greenhouse potting corner with a bench, a sink or bucket, and shelves for seed trays, so sowing and potting have a home of their own. Site the greenhouse in sun, sheltered from the prevailing wind, and keep one bench clear for daily work rather than filling every surface with stored pots. A small heater or a fleece roll extends sowing into early spring, when nights are still cold.
Keep tools, labels, and twine in one box by the bench, and wash trays before reuse to cut down on disease. A greenhouse suits Scottish gardens well, since it gives tender plants a start and salads a home through winter. Even a small lean to greenhouse against a south wall gives most of the benefit for a fraction of the space.
Conclusion
A good Scottish garden starts with shelter, stone, and plants that suit the weather, then grows more personal year by year. Begin with one wall, one path, or one bed from this list, and let the next idea follow once the first is settled. The gardens that last are rarely finished in one season; they are the ones where each change suits the soil, the wind, and the way you actually use the space. Save this list, pick your first three ideas, and work through them in order: structure first, planting second, and a sheltered seat somewhere in between, so the garden is ready to enjoy long before it is complete.
FAQs
What plants grow best in a Scottish garden?
Heather, ferns, roses, foxgloves, hostas, hardy herbs, and native wildflowers grow well in most Scottish gardens, since they cope with rain, wind, and cool summers. Choose plants suited to your soil and exposure first, and add tender plants only behind shelter, such as a wall or a windbreak hedge. Local nurseries stock varieties proven in Scottish conditions, which is a safer guide than a catalogue photo alone.
How do I deal with a wet, boggy Scottish garden?
Give wet ground a planted job rather than fighting it: a rain garden, a pond, or a bog bed with irises, astilbe, and ferns turns standing water into a feature. Improve drainage only where it is practical, such as a French drain along a path, and avoid raising beds on waterlogged ground without a drainage route. Check where water stands after heavy rain before planting, since that tells you more than any soil test alone.
What is the best windbreak for a Scottish coastal garden?
A double row of tough hedging, such as escallonia, griselinia, or hawthorn, makes the best coastal windbreak, since a hedge with small gaps filters wind rather than sending gusts over the top. Let the hedge establish for a season or two before planting tender plants behind it, and keep salt tolerant plants, such as thrift and sea holly, nearest the sea. Check ties and stakes each spring after winter storms.
Can I grow lavender in Scotland?
Yes, lavender grows well in Scotland in a sunny, free draining spot, such as a south facing path edge or a raised bed with grit dug into the soil. It fails mainly in wet, heavy soil and in deep shade, so avoid hollows where water stands in winter. Trim after flowering and again in spring, and replace woody plants after several years, since young lavender flowers far better than old, bare stems.
How do I make a small Scottish garden feel larger?
Use one clear path, one sheltered seat, and a few large pots rather than many small ones, so the eye has somewhere to rest. Keep boundaries green with hedging or climbers instead of bare fences, and repeat one or two colours through the planting to tie the space together. A mirror is rarely needed outdoors; a seat with a view into the garden, plus a tall plant in the far corner, draws the eye across the whole plot.
When should I start a Scottish garden?
Start structural work, such as walls, paths, and terraces, in autumn or early spring, when soil is workable and plants are dormant. Sow hardy annuals and plant bare root trees and hedging in autumn, plant most perennials in spring, and sow wildflower seed in late summer or autumn for flowers the following year. Keep a simple notebook of what you planted and where, so each season builds on the last instead of starting over.
A garden party works best when guests have somewhere comfortable to sit, something pretty to look at, and food and drink within easy reach. You do not need a large garden or a big budget to get that feeling. A long table, a few lights, cushions from inside the house, and flowers cut from your own beds can turn an ordinary lawn into a place people want to stay. These 13 garden party ideas cover tables, seating, light, food, and plans for children and rain, so you can pick the pieces that fit your space and your guest list.
Key Takeaways
Pick one gathering spot first, then build the party around it with seating, light, and a food or drink station nearby.
Use light in layers: string lights overhead, candles or jars at table height, and a lit path so guests feel welcome after dark.
Repeat one flower or color in three places, such as the table, the entrance, and a seating corner, so the garden reads as one planned party.
Keep food and drink simple and reachable: one main table, one drink station, and food that holds well outdoors.
Plan for shade, seating for every guest, and a rain backup before invitations go out.
Bring garden cuttings indoors if rain moves the party inside, so the cozy feeling follows the guests.
1. Set One Long Table Under String Lights
A single long table makes a garden party feel shared in a way that scattered small tables rarely do. Guests talk across the table, pass dishes along, and stay in one sociable group. Hang string lights above the table in gentle swags from trees, a fence, or poles set in planters, and keep the drop high enough that no one ducks under a bulb. Use a plain cloth or a runner so plates and glasses stay steady, and leave the center low with small jars of garden flowers rather than tall arrangements that block faces. A long table also suits a narrow garden, where one straight run fits better than a round table and chairs pushed against beds.
2. Drape a Pergola or Canopy With Soft Fabric
Draped fabric turns a plain pergola, gazebo, or simple pole frame into a party room without walls. Hang lengths of light cotton or voile from the top frame, let them fall at the corners, and tie them back during the day so air still moves. The fabric softens harsh sun, gives the table a ceiling, and makes evening light from string lights glow more warmly. Choose a pale color that suits the garden, such as white, cream, or soft sage, and fasten the fabric firmly so a breeze lifts it gently instead of pulling it loose. Take the fabric down after the party if rain is forecast, since wet cloth sags and takes a long time to dry.
3. Lay Out a Low Picnic With Floor Cushions
A low picnic table, or boards laid across sturdy crates, with floor cushions and rugs, gives a garden party a relaxed, informal feel that suits younger guests and small gardens. Lay a large outdoor rug or layered blankets on flat, dry ground, set cushions around the low table, and keep the menu to food that is easy to eat at low height, such as sandwiches, salads in jars, and fruit. Add a few back cushions against a wall, fence, or bench for guests who prefer support, and keep a couple of regular chairs nearby so no one has to sit on the ground if they would rather not. This setup packs away fast, which makes it a good choice for a first garden party.
4. Open a Pick Your Own Flower Bar
A flower bar lets guests make their own small bouquet to take home, which doubles as both an activity and a party favor. Set a table with buckets of garden flowers and greenery, clean snips, jars or paper wraps, and twine, and show one finished example so guests know where to start. Keep stems in water until they are picked, group flowers by color in separate buckets, and include plenty of foliage so even a small bunch looks full. For flower choices that hold up well in a vase, these pink flower garden ideas show how drifts of one color give a clear, generous look. Tidy the table partway through the party so late guests still find fresh stems.
5. Host a Tea Party With Mismatched Vintage Cups
A tea party is one of the easiest garden party formats, because the food can be made ahead and the table can be set the night before. Use mismatched cups and saucers from charity shops, family cupboards, or your own shelves, and mix them with one plain teapot and a cake stand so the table looks collected rather than random. Serve finger sandwiches, scones with jam, and one simple cake, and offer both tea and a cold drink so guests have a choice in warm weather. Place the tea table in shade, keep milk in a cool jug, and set out a small plate for used teaspoons so the table stays tidy as the afternoon goes on.
6. Gather Around a Fire Pit as Evening Falls
A fire pit gives an evening garden party a natural center once the sun drops and the air cools. Arrange seating in a circle or a loose U shape around the pit, with enough room to walk behind chairs and to tend the fire safely. Keep blankets folded on a nearby bench for guests who feel cold, and set drinks and small snacks on a side table so no one has to balance a plate near the flames. Check local rules and wind direction before lighting, keep the fire small and supervised, and have water or a bucket of sand close at hand. A fire pit evening works well as a second act after a table meal, when guests move to a quieter corner of the garden.
7. Build a Lemonade and Herb Drink Station
A self serve drink station frees the host from pouring all afternoon and gives guests something to gather around. Set a sturdy table in shade with a large dispenser of lemonade, a jug of water, glasses, ice in a covered bucket, and small bowls of mint, basil, lemon slices, and berries for guests to add to their own glass. Label the drinks clearly, keep a cloth nearby for spills, and put the station where guests can reach it without crossing the main seating area. Herbs from your own garden cost little and make plain drinks feel considered. For a station that also serves the kitchen side of the party, keep the table close to the back door so refills are quick.
8. Make a Cozy Seating Nook With an Outdoor Rug
A seating nook gives guests who want a quieter chat a place away from the main table. Lay an outdoor rug on a flat corner of lawn or patio, add a bench or two armchairs, and finish with weatherproof cushions, a throw, and a small side table for cups. A rug matters more than it seems: it marks the nook as a room, keeps feet off damp grass, and ties mismatched chairs together. If you need seating ideas for the nook itself, these garden bench ideas cover wood, stone, and metal seats for small and sloping gardens. Place the nook where it catches late sun or evening shade, depending on when your party runs, and keep the path to it clear.
9. Serve a Garden to Table Sharing Menu
A sharing menu suits a garden party because guests help themselves, food stays on the table longer, and the host spends less time in the kitchen. Build the menu around what is in season: a big salad with herbs, bread, a cold roast or a bean dish, roasted vegetables, and fruit for dessert. Serve food on large platters rather than individual plates, keep serving spoons with each dish, and cover food with a light cloth or mesh cover between servings to keep insects off. Put the food table in shade, set it slightly apart from the seating table so guests can move freely, and keep hot food and cold food on separate ends of the table.
10. Line the Path With Candle Jars and Lanterns
Light at ground level makes a garden feel welcoming after dark and helps guests find their way safely. Place jam jars with tea lights, or battery lanterns if children or pets are around, along the path from the gate or back door to the party area, spacing them evenly and setting each jar on a flat stone or saucer. Add larger lanterns at the entrance and beside seating, and keep flames away from fabric drapes, dry leaves, and low branches. Battery candles suit windy gardens and parties with small children, while real candles give a warmer glow in a sheltered spot. Light the path before guests arrive so the first walk into the garden already feels like part of the party.
11. Set Up a Garden Craft Corner for Children
A craft corner keeps children busy and gives adults a longer, calmer party. Set a small table in shade with paper, crayons, flower pressing supplies, or pots and soil for planting a seedling to take home, and cover the table with a wipeable cloth. Keep activities simple enough that children can start without help, and put the corner near the main seating so parents can watch easily. A planting activity suits a garden party well, because children leave with something growing, and it uses the same soil and small pots many gardeners already have. Tidy the table once during the party so new arrivals still find clean supplies.
12. Keep a Rain Plan That Brings the Garden Indoors
A rain plan is what turns a cancelled party into a cozy indoor gathering, and it is worth setting up before invitations go out. Decide in advance which room will host the party, clear one table for food and one corner for seating, and cut garden flowers, foliage, and herbs the morning of the party to dress the table and the windowsills. Move string lights to a window or a mantel, lay the outdoor rug over the floor if it is clean and dry, and keep the same menu, since food planned for outdoors usually serves indoors just as well. Tell guests in the invitation that the party moves inside if it rains, so no one arrives unsure. The garden feeling comes from the flowers, the light, and the shared table, not from the weather.
13. Frame Photos With a Simple Flower Arch
A flower arch at the garden entrance, or behind the main table, gives guests a natural photo spot and marks the party area clearly. Build the arch from a simple metal or willow frame, or use an existing garden arch, and dress it with greenery first, then clusters of flowers at the top corners and partway down each side. Keep the center clear so faces show in photos, and avoid heavy arrangements that pull the frame sideways. Fresh flowers suit a one day party, while good quality faux greenery with a few fresh stems suits a party that is set up the day before. For gardens with slopes or levels to work around, these tiered garden ideas show how to place a feature so it suits the ground it stands on. Step back and check the arch from the angle guests will photograph before the party starts.
Conclusion
A cozy garden party comes from a few careful choices, not from buying a new set of everything. Pick one gathering spot, add light at two heights, give every guest a comfortable seat and a drink within reach, and keep the food simple enough that you can enjoy it too. Add one activity, such as a flower bar or a craft corner, and one backup plan for rain, and the party will feel considered without feeling fussy. Start with the idea that fits your garden today, whether that is a long table under lights or a quiet nook with a rug, and build from there next time.
Save this list on Pinterest before your next garden gathering, and work through it one area at a time: seating first, then light, then the food and drink station.
FAQs
How far ahead should I plan a garden party?
Start two to three weeks ahead for a simple party: send invitations, check seating and shade, and plan the menu. Set up heavy items such as tables, lights, and a canopy the day before, and leave flowers, food, and candles for the day itself so everything looks fresh. For a larger guest list, allow an extra week to borrow chairs or a canopy.
What if my garden is very small?
Use one idea well rather than several at once. A low picnic on rugs, a small table under string lights, or a single seating nook can all work in a small garden. Keep furniture to one table and one seating group, use vertical light and wall planters instead of floor decorations, and limit the guest list so everyone has room to sit and move.
How do I keep food safe outdoors?
Keep food in the shade, serve it in smaller batches and refill often, and cover dishes between servings. Cold food should not sit out for hours in warm weather, so bring platters inside to chill and return them refreshed. Keep drinks iced, keep raw and cooked foods apart, and clear plates promptly once guests finish eating.
What lighting works best for an evening garden party?
Use light at two heights: string lights or a canopy overhead, and candles or lanterns at table and path level. Overhead light lets guests see faces and food, while low light makes the space feel warm. Battery candles suit windy gardens and parties with children, while real candles suit sheltered spots. Light the path first so guests arrive safely.
Can I host a garden party on a budget?
Yes. Use cushions and blankets from inside the house, cut flowers from your own garden, and serve a sharing menu with seasonal food. Borrow a long table or extra chairs from friends, use jam jars as candle holders, and choose one strong feature, such as string lights or a flower bar, rather than buying decorations for every corner.
What should I do if it rains on the day?
Move the party indoors using the same menu, flowers, and lights, as described in Idea 12. Tell guests in advance that rain moves the party inside, cut garden flowers that morning, and set one table for food and one corner for seating. Guests usually enjoy an indoor gathering just as much when the plan is clear and the table still looks like a party.
A secret garden does not need a large plot or a stone wall. It needs a sense of arrival, a place that is partly hidden, and a reason to step in and stay a while. A curving path, a tall hedge, a rose arch, or a seat tucked behind shrubs can give even a small yard that feeling. These 28 secret garden ideas cover entrances, paths, planting, seating, water, and light, so you can start with one corner and build from there. Pick the idea that fits your light, your soil, and the way you like to spend time outside.
Key Takeaways
Start with one hidden corner, not the whole yard, and finish it before moving on.
Use height first: hedges, arches, climbers, and tall grasses create privacy faster than low planting alone.
Keep the destination partly out of sight, so the path itself feels like a discovery.
Choose plants that suit your light and soil, and mix evergreen structure with seasonal flowers.
Add one comfortable seat and one small detail, such as a lantern or a bird bath, to make the corner feel finished.
Leave room to move and to tend plants, since a secret garden still needs regular care.
1. Rose Arch Entrance
Frame the way into your garden with a sturdy arch covered in climbing roses, so visitors pass under flowers before they see what lies beyond. The arch marks a clear threshold, and it turns an ordinary gate or path opening into a moment of arrival. Choose a repeat flowering rose for color through the season, and tie new stems sideways along the arch to encourage more blooms.
Fix the arch firmly into the ground, since a rose covered frame catches wind. Prune lightly after the first flush of flowers, and feed in spring with a rose feed suited to your soil. If your path is narrow, keep the arch wide enough to walk through without brushing thorns, and trim side shoots that reach into the walkway.
2. Living Willow Tunnel
Weave a tunnel from living willow rods for a green passage that children and adults both enjoy walking through. Plant rods in two parallel lines in autumn or winter, bend the tops together, and tie them to form an arch. Willow roots quickly in damp soil, so the tunnel fills in within a season or two.
Weave new shoots into the frame each winter, and cut back any stems that block the path. This idea suits a longer garden, but a short three metre tunnel can work in a modest yard. Keep the ground beneath clear with bark mulch, and check that willow does not shade a vegetable patch or a neighbour boundary you need to keep clear.
3. Walled Corner Nook with a Bench
Turn a walled corner into a reading nook with a simple wooden bench, a cushion, and planting that softens the brick or stone around it. Walls hold warmth and shelter the seat from wind, which makes the corner usable on cooler days. A bench that faces into the garden, rather than out toward the house, feels more private.
Add pots at either end of the bench for seasonal color, and a small side table for a book and a drink. Paint or oil the bench each year, and check the wall for loose mortar before fixing a trellis to it. If the corner is damp, choose a bench with feet that lift the wood off the ground.
4. Curving Stepping Stone Path
Lay a curving path of flat stepping stones that disappears behind shrubs, so walkers cannot see the end from the start. The curve slows the walk and builds curiosity, which is the heart of a secret garden. Space the stones at a natural walking stride, and set them level so they are safe in wet weather.
Use stone, reclaimed slabs, or gravel edged boards to suit your budget and style. Plant low ground cover such as creeping thyme between stones, and keep the path wide enough for a wheelbarrow during maintenance. Edge the path with small plants that brush the legs lightly, not thorny shrubs that catch clothing.
5. Moon Gate in a Hedge
Cut a round opening, a moon gate, through a tall hedge or build one from timber and climbers, for a classic secret garden entrance. The circular frame draws the eye and frames the view beyond like a picture. It works best in a hedge at least two metres tall, where the opening feels like a doorway rather than a hole.
Keep the opening wide enough to pass through comfortably, and trim the hedge around it twice a year so the circle keeps its shape. Plant a fragrant climber such as jasmine near the gate, so the scent greets visitors as they step through. If you build with timber, treat it against rot and check fixings each spring.
6. Scented Jasmine Arbor Seat
Build a small arbor over a seat and cover it with jasmine, so the corner smells sweet on warm evenings. The arbor gives shade and a sense of enclosure, while the scent makes the seat a destination in its own right. Choose a seat with a back and arms for long sits, and place it where it catches evening sun if you can.
Train jasmine stems along the arbor roof and tie them in as they grow, rather than letting them tangle. Prune after flowering to keep the roof open enough for light. In cold areas, choose a hardy jasmine variety and plant it against a sheltered wall, or grow it in a large pot you can move under cover in winter.
7. Fern Grotto in Deep Shade
Fill a shaded corner under trees with ferns, mossy stones, and a small seat, for a cool grotto that feels far from the rest of the garden. Ferns thrive where lawn and sun loving flowers struggle, so shade becomes an asset here. Layer ferns of different heights, from low hart’s tongue to tall ostrich fern, for a lush, layered look.
Keep the soil moist with leaf mulch, and water in dry spells, since ferns suffer quickly when they dry out. Add a few large stones for structure, and a simple stone or wood seat that suits the damp setting. Avoid planting ferns where they will be trampled, and clear fallen leaves gently so you do not damage new fronds.
8. Reading Chair Behind Tall Grasses
Hide a single comfortable chair behind a screen of tall ornamental grasses, so it feels like a private room with a view of the sky. Grasses move in the wind and rustle softly, which adds sound to the sense of seclusion. Miscanthus and tall feather reed grass both give height without needing a wall or fence.
Plant grasses in a loose curve around the chair, leaving a gap to walk in, and cut them back in late winter before new growth starts. Choose a chair that can stay outside, such as teak or powder coated metal, and add a weatherproof cushion you can bring in at night. Keep the grass clumps divided every few years so they stay vigorous.
9. Reclaimed Door as a Garden Gate
Set an old wooden door into a fence or hedge as a garden gate, and paint it a color that stands out against the green around it. A real door feels more like an entrance to another place than a plain garden gate, and it invites curiosity about what lies behind it. Look for a solid door in good condition, and hang it on strong posts with outdoor hinges.
Sand and paint the door with exterior paint, and seal the bottom edge against damp. Add a simple latch and a small handle, and plant climbers on the fence beside it so the door sits within greenery. Check the door each year for rot at the base, and keep the path on both sides clear so it opens freely.
10. Sunken Round Lawn Nook
Dig a shallow circular hollow, or use a natural dip, and ring it with low hedging or tall planting for a sunken nook that feels sheltered from every side. Sitting slightly below the surrounding garden changes the view and blocks wind, which makes the space feel calm and separate. A round shape suits a bench, a fire bowl, or a small table and chairs.
Keep the hollow shallow, no more than a couple of steps down, and make sure rainwater drains away rather than pooling. Use stone or brick edging for the steps, and plant the rim with lavender or low shrubs for scent. This idea needs more work than most, so plan the dig carefully and keep the spoil for raised beds elsewhere.
11. Mirror on a Garden Wall
Fix a weatherproof mirror to a wall or fence at the end of a path, framed with climbers, to make a small garden feel deeper than it is. The mirror reflects planting and sky, so the corner seems to continue beyond the wall. It works best where it reflects greenery, not the house or a neighbour window.
Choose an outdoor mirror or an acrylic mirror made for outside use, and angle it slightly downward so it reflects plants rather than glare. Frame it with a trellis and a climbing rose or ivy, leaving the glass clear. Clean it a few times a year, and check the fixing after storms, since mirrors are heavy and wind can loosen them.
12. Herb Spiral Behind Shrubs
Build a small stone herb spiral tucked behind shrubs, so cooks must step around planting to find it. The spiral rises in tiers, which gives each herb the sun and drainage it prefers, with rosemary and thyme at the dry top and parsley and chives lower down. It turns a useful patch into a hidden feature.
Stack stones without mortar for a natural look, and fill with free draining soil mixed with grit. Plant the spiral in spring, and label herbs with small stone or wood markers if you like. Keep mint in a pot sunk into the spiral, since it spreads fast and will take over the lower tiers if left free.
13. Mossy Stone Steps to a Lower Terrace
Build a short flight of wide stone steps down to a lower terrace, with moss and low plants softening the edges, for a garden that reveals itself in levels. Steps slow the walk and mark a change of place, which is exactly what a secret garden needs. Wide, shallow steps feel safer and more relaxed than steep ones.
Set each step level and firm, with gravel or soil joints for drainage. Plant small ferns or creeping thyme in the joints, and keep the steps clear of fallen leaves in autumn. Add a handrail or a low wall if the drop is more than a few steps, and light the steps with small solar lights for evening use.
14. Hidden Pond in a Fern Corner
Tuck a small pond or a large water bowl into a fern corner, where the sound of water and the sight of reflections reward visitors who find it. Even a shallow bowl with a small solar pump gives movement and attracts birds, which adds life to a quiet corner. Keep the water feature small enough to maintain easily.
Site it where it gets some light but not all day sun, which encourages algae. Add a few water plants such as miniature water lilies, and a flat stone at the edge where birds can drink. Clean the bowl regularly, top up water in dry weather, and keep the area safe for small children with a shallow depth and a secure edge.
15. Hammock Behind a Shrub Screen
Hang a hammock between two trees or sturdy posts behind a screen of shrubs, for a lazy corner that stays out of sight from the house. The screen gives privacy, while the trees give shade and a gentle sway. This is one of the simplest secret garden ideas, since it needs little more than a strong fixing and a comfortable hammock.
Check that trees or posts can carry the weight safely, and use wide tree straps rather than screws that damage bark. Keep the ground beneath clear of sharp stones, and add a small basket for a book and sunscreen. Take the hammock in during winter, and check ropes and fabric each spring before first use.
16. Rose Covered Pergola Walkway
Run a pergola along a path and cover it with climbing roses, so the walk itself becomes a tunnel of flowers and scent. Unlike a single arch, a pergola walkway gives a longer journey, with light filtering through leaves overhead. It suits a straight or gently curving path between two parts of the garden.
Build the pergola from sturdy timber posts and cross beams, and plant one rose at each post for even cover. Tie stems along the beams, and prune in winter to keep the walkway clear of thorns at head height. Add a bench halfway along if the walkway is long, so walkers can pause under the roses.
17. Potting Bench Nook
Tuck a potting bench into a sheltered corner, screened by shrubs and shaded by a small roof, for a working nook that feels like a secret room. A bench with a shelf below and hooks above keeps tools, pots, and twine in one place, and it gives you a reason to visit the quiet corner often. This idea suits gardeners who like to pot up seedlings away from the main beds.
Choose a bench at a comfortable working height, and add a small bin for compost and a bucket for water. Keep the roof simple, such as a lean to against a fence, so rain does not soak the work surface. Tidy tools back onto hooks after use, since a tidy bench stays inviting and a cluttered one quickly feels like a shed corner.
18. Wildflower Meadow Patch
Leave a patch of lawn behind a hedge to grow as a wildflower meadow, mown only once or twice a year, for a corner that changes with the seasons. Wildflowers bring bees and butterflies, and the tall grasses hide a seat or a path within them. This idea needs less weekly work than a lawn, but it does need a yearly cut and clear.
Sow a mix suited to your soil, or plant plugs of oxeye daisy, knapweed, and red clover into existing grass. Cut in late summer after seeds have set, and remove the cuttings so the soil stays poor enough for flowers to compete with grass. Keep a mown path through the meadow, so you can walk in without trampling flowers.
19. Moonlight Garden of White Flowers
Plant a corner with white and pale flowers that glow in evening light, plus night scented stock and jasmine, for a garden that comes alive after dark. White flowers reflect moonlight and lamp light, so the corner stays visible and inviting at dusk. This idea suits a seat near the house, where you can enjoy it on summer evenings.
Mix white roses, white phlox, and pale lilies with silver foliage plants such as artemisia for contrast in daylight too. Add a few lanterns or solar lights along the path, and keep the planting near the seat so scent reaches you. Deadhead regularly to keep flowers coming, and cut back spent stems in autumn.
20. Kitchen Garden Disguised by Flowers
Hide a small vegetable patch behind a flower border, so visitors see color first and only find beans, herbs, and salad leaves when they step behind it. Tall flowers such as sunflowers and cosmos screen the beds, while the vegetables stay in sun and easy reach for picking. This keeps a productive garden looking ornamental from the main path.
Plant the flower screen on the side facing the house, and keep the vegetable beds in neat rows behind it. Rotate crops each year, and mulch paths with bark so the hidden patch stays tidy. Pick regularly, since a productive patch that is left to go to seed quickly loses its charm.
21. Cottage Corner with a Bird Bath
Make a cottage style corner with a stone bird bath, roses, foxgloves, and a low picket edge, for a spot that feels like a storybook garden in miniature. Birds visiting the bath add movement and sound, and the planting around it gives the corner a soft, full look. This idea works well in a small front or side garden.
Keep the bird bath water fresh, and scrub it weekly to stop algae building up. Plant foxgloves and hollyhocks at the back, with lavender and geraniums at the front, for layers of height. Choose a bird bath with a wide, shallow bowl, and site it where cats cannot hide close by in dense shrubs.
22. Green Curtain of Climbing Vines
Grow a curtain of climbing vines over a simple frame or wires, so a seating area gains a living wall that moves with the breeze. Clematis, honeysuckle, and annual sweet peas all work on wires, and mixing two climbers gives flowers across a longer season. The curtain screens the seat without the heaviness of a fence.
Fix wires firmly to posts or a wall, and space them about 30 centimetres apart for stems to grip. Prune each climber to its own needs, and check wires yearly for sagging under weight. Keep the base of the vines mulched and watered in dry weather, since climbers at a wall or fence often sit in a rain shadow.
23. Bamboo Screen Path
Plant a clump forming bamboo along one side of a path, for a tall, rustling screen that hides the garden beyond. Bamboo grows fast and stays green through winter, so the path feels enclosed all year. Clump forming types are safer than running types, which spread far beyond where you plant them.
Give bamboo a large planting hole with rich soil, and water well in the first year until it settles. Contain it with a root barrier if you plant near a boundary, and thin old canes each spring to keep the screen fresh. Keep the path clear of fallen leaves, and cut back any canes that lean over the walkway.
24. Tiny Fairy Corner with Miniature Plants
Create a tiny corner with miniature plants, small stones, and a few simple ornaments, tucked at the base of a tree or beside a path. The small scale invites a closer look, and it gives children a garden of their own within the larger garden. Keep the ornaments simple and weatherproof, so the corner still looks like a garden, not a toy shelf.
Use small ferns, miniature hostas, and creeping thyme for planting, and add a tiny path of pebbles. Water gently, since small plants dry out fast in sun, and site the corner in light shade if you can. Tidy fallen leaves by hand, and replace any ornament that breaks before it looks neglected.
25. Gravel Courtyard Behind a Gate
Turn the space behind a side gate into a small gravel courtyard with a bench, pots, and a climbing plant on the wall, for a hidden outdoor room. Gravel drains well, needs little mowing, and crunches underfoot, which adds to the sense of arrival. This idea suits narrow side gardens that otherwise go unused.
Lay a weed membrane and a level gravel layer, and edge it with stone or timber so gravel stays in place. Group pots of different heights in corners, and add a wall mounted lantern for evening use. Rake the gravel occasionally, and top it up yearly where foot traffic wears it thin.
26. Espalier Fruit Wall in a Side Passage
Train an apple or pear tree flat against a wall in a side passage, so a narrow space gains fruit, flowers, and structure without blocking the walkway. Espalier trees are pruned to horizontal tiers, which makes them easy to pick and to care for in a tight space. Spring blossom and autumn fruit give the passage two seasons of interest.
Fix horizontal wires to the wall, and tie new shoots to them as they grow, pruning in summer to keep the tiers clear. Choose a variety suited to your climate and a rootstock that keeps the tree compact. Water in dry spells, and thin fruit in early summer so the remaining fruit grows to a good size.
27. Wall Pocket Garden on a Back Wall
Cover a plain back wall with pockets, small pots, and a trellis of trailing plants, for a vertical garden that hides a dull surface. Wall pockets suit herbs, strawberries, and trailing flowers, and they bring planting to eye level in a small yard. This idea works where ground space is tight but wall space is free.
Fix pockets or a trellis firmly to the wall, and use a free draining compost mix so roots do not sit wet. Water little and often, since wall plantings dry out faster than ground beds, and feed during the growing season. Check fixings yearly, and replace any pocket that holds water or shows mould.
28. Spring Bulb Surprise Corner
Plant a quiet corner thickly with spring bulbs, so it bursts into color just when the rest of the garden is waking up. Layers of snowdrops, crocus, daffodils, and tulips give weeks of flowers from one planting, and the corner feels like a surprise each year. Plant bulbs in autumn, in drifts rather than rows, for a natural look.
Let bulb foliage die back naturally after flowering, since the leaves feed next year bulbs. Mark the corner with a small stone or label, so you do not dig bulbs up by accident. Add a seat nearby if you can, since a bulb corner deserves a pause, and underplant with ferns that fill the space once bulbs fade.
Conclusion
A secret garden is less about size and more about how a space unfolds. One arch, one curving path, or one seat behind tall grasses can give a yard a hidden heart, and each idea in this list can stand alone or join with others over time. Start with the corner you pass most often, add height and a seat, and let planting fill in around it. The best secret gardens grow slowly, with a new discovery each season, and they reward the gardener who takes time to sit in them.
FAQs
1. What makes a garden feel like a secret garden?
A secret garden feels hidden because the destination is partly out of sight. Height from hedges, arches, or climbers, a curving path, and a seat tucked behind planting all help. You do not need walls or a large plot, only a sense of arrival and a place that is not visible at first glance.
2. How do I make a secret garden in a small yard?
Start with one corner and use vertical planting to create privacy without taking floor space. A trellis with climbers, a tall grass screen, or a mirror on a wall can all work in a small yard. Choose one seat and one path, and keep the rest simple so the corner feels calm rather than crowded.
3. What plants are best for a secret garden?
Choose plants that suit your light and soil first, then mix evergreen structure with seasonal color. Climbers such as roses, jasmine, and clematis cover arches and walls, while ferns suit shade and grasses suit sun. Scented plants near a seat, such as lavender and jasmine, make the corner more inviting.
4. How much does a secret garden cost to create?
Cost depends on how much structure you add. A grass screen, a hammock, and a gravel path can be low cost, while a pergola, stone steps, or a walled nook cost more. Start with planting and one seat, then add timber or stone features over time as budget allows, rather than building everything at once.
5. How do I keep a secret garden private without a tall fence?
Layer planting at different heights to block sightlines without a solid fence. Tall shrubs and grasses at the boundary, climbers on a trellis, and a hedge that you trim twice a year all give privacy while keeping the garden green. A curving path also helps, since it stops visitors seeing the whole garden from one spot.
6. What maintenance does a secret garden need?
A secret garden needs the same care as any garden, plus regular trimming of screens and climbers so paths stay clear. Water new planting well in the first year, prune climbers after flowering, and cut grasses back in late winter. A yearly tidy of the seat, path, and any water feature keeps the hidden corner feeling cared for rather than overgrown.
A terrace is often the hardest working outdoor space a home has, yet it is easy to leave it as bare paving and a couple of pots. With planting at different heights, one comfortable seat, and shade for the hottest part of the day, that same terrace can become a place to eat, read, and grow food. These 22 terrace garden ideas cover raised beds, containers, privacy, dining, lighting, and edible growing, chosen for small and large terraces alike. Start with the spot you use most, add one seat and one planted area, then build outward. For homes with a slope to work with, the ideas in these tiered garden ideas show how to give each level a clear job.
Key Takeaways
Plan zones first: one for sitting, one for growing, and one for storage, so the terrace feels like a garden, not a paved yard with pots.
Use containers and raised beds to control soil, drainage, and weight, and keep heavy pots near walls or on solid ground where possible.
Layer planting at three heights, ground level, mid height pots, and climbers or hanging baskets, so even a small terrace looks full.
Add shade and a wind screen early, since comfort decides whether you actually use the terrace.
Put herbs and salad leaves near the door, and crops you visit weekly further away.
Mix evergreen structure with seasonal color, so the terrace looks cared for in every season.
1. Raised Beds Along the Terrace Edge
Run low raised beds along the edge of the terrace to give it a planted border and a clear boundary. Low beds keep the planting at a comfortable working height and stop the terrace from feeling like an empty slab. Choose a light frame suited to your terrace, timber or metal, with drainage holes, and fill it with a free draining mix rather than heavy garden soil.
Plant shrubs or grasses at the back, mid height flowers in the middle, and trailing plants at the front so the edge reads as one full border. Leave a gap behind each bed where you need to reach a wall or a drain. Water slowly in hot weather, since raised beds dry out faster than ground beds, and mulch the surface to hold moisture between waterings.
2. Container Clusters in Mixed Sizes
Group containers in clusters of three or five near seats, steps, and doorways to make planting feel deliberate instead of scattered. Containers suit every terrace size, since you can move them, change them with the seasons, and start small. Use pots in different sizes and materials, and raise them on feet so water drains freely and does not stain the paving.
Mix one tall plant, one mid height plant, and one trailing plant in each cluster for a full look. Keep the largest pots near walls or corners where they will not be knocked over in wind, and spread heavy pots across the terrace rather than loading one spot. Check the weight of a watered pot before you place a group on a raised terrace.
3. Vertical Garden Wall on a Sheltered Wall
Fix living wall panels or a trellis grid to a sheltered wall to grow upward without using floor space. This suits small terraces where every square foot counts, and it gives a plain wall color, scent, and texture at eye level. Choose panels with individual pockets or trays, so you can replace one plant without disturbing the rest.
Plant ferns and trailing plants for shade, and herbs or small flowers for sun, matching each pocket to the light it gets. Water a living wall little and often, since pockets dry out fast, and check the fixings each season, since a planted wall gets heavier when wet. Keep the wall clear of drains and door frames so maintenance stays easy.
4. Pergola With Climbers for Shade
Build or buy a pergola over the seating zone and train climbers over it for shade that grows better each year. A pergola frames the sitting area, marks it as the main outdoor room, and cools the terrace on hot afternoons without blocking all light. Choose a sturdy frame fixed to solid ground or a wall, and plant one or two climbers at its feet.
Jasmine, honeysuckle, and climbing roses suit a sunny pergola, while ivy or Virginia creeper suit shade. Train stems along the beams and tie them in as they grow, pruning after flowering as the plant type requires. Keep climbers trimmed back from gutters and roofs, and add a retractable shade cloth under the beams for the hottest weeks.
5. Outdoor Dining Set for Terrace Meals
Place a dining table and chairs on the flattest, most sheltered part of the terrace to make outdoor meals a habit rather than an event. A table near the kitchen door keeps carrying food easy, and a spot with evening sun stretches meals into the night. Choose a table size that leaves room to pull chairs out and walk past, and pick chairs that stack or fold if the terrace is small.
Add a washable tablecloth or a set of placemats, a small centerpiece pot, and a light you can use after dark. Store cushions nearby in a dry box so the set is ready without a trip indoors. Sweep the dining zone often, since crumbs and fallen leaves gather fast under a table.
6. Lounge Corner With Weatherproof Seating
Set a low outdoor sofa or a pair of lounge chairs in a sheltered corner to make the terrace a place for long sits, not just passing through. A lounge corner works best facing the best view or the most planting, with a side table within reach for a drink and a book. Choose weatherproof frames and cushions rated for outdoor use, and bring cushions inside during long wet spells.
Add a rug under the seats to mark the zone and soften the paving, and keep a throw nearby for cool evenings. Leave one open side so people can join without climbing over furniture. For seat ideas that pair well with planting, see these garden bench ideas for wood, stone, and metal options.
7. Herb Garden Near the Door
Grow herbs in pots or a small raised bed right by the door you use most, so fresh leaves are a few steps from cooking. Put sun loving herbs such as rosemary, thyme, and sage in the sunniest, best drained pots, and moisture loving herbs such as mint, parsley, and chives where water settles. Grow mint in its own pot so it does not spread into its neighbors.
Label herbs while they are young, since many look alike before they flower. Snip little and often to keep plants bushy, and water pots more often than beds, since containers dry out fast in sun and wind. A small flat stone or paver as a standing spot keeps picking easy after rain.
8. Vegetable Beds in Deep Containers
Grow vegetables in deep containers or raised beds on the terrace when ground space is short. Deep pots suit tomatoes, beans, carrots, and salad leaves, and they let you control soil and watering plant by plant. Use containers at least a foot deep for most crops, with drainage holes and a free draining mix.
Put heat loving crops such as tomatoes and peppers in the sunniest spot, and salads and root crops where it is cooler. Feed container crops through the season, since watering washes nutrients out faster than in ground beds. Rotate crops between containers each year so the same family does not grow in the same soil season after season.
9. Privacy Screens With Bamboo and Trellis
Add bamboo screens or trellis panels along the exposed side of the terrace to cut views and wind without building a wall. Screens give the terrace a room like feel and let you sit out without feeling watched. Fix panels to solid posts or a wall, and leave a gap behind trellis so air can move and the fence can dry.
Grow climbers up the trellis for a living screen, choosing plants that suit the light on that side. Keep screens below any local height limit, and check that they do not shade a neighbor’s garden more than agreed. A screen on just one side is often enough, since it blocks the main view while keeping the terrace open to sun.
10. Shade Sail Over the Seating Zone
Stretch a shade sail over the seating zone for fast, adjustable shade on a sunny terrace. A sail cools the seats, protects cushions from harsh sun, and suits terraces where a pergola would be too heavy or too costly. Fix each corner to a wall bracket or a sturdy post, and angle the sail so rain runs off one edge rather than pooling in the middle.
Choose a breathable fabric rated for outdoor use, and take the sail down in strong winds or storms. A sail in a light color reflects heat, while a darker color gives deeper shade, so pick the tone that suits how hot your terrace gets. Pair the sail with a wind screen on the breezy side for the most comfortable seat.
11. String Lights and Lanterns for Evenings
Hang string lights and set out solar lanterns to stretch terrace season into the evening. Warm light makes a small terrace feel welcoming after dark, and it costs little to run. Drape strings along a pergola, a wall, or a wire, keeping them clear of walkways and climbers that need pruning.
Use solar lanterns on tables and steps for light at ground level, and a battery lantern near the seat for reading. Check that lights are rated for outdoor use, and bring delicate lanterns inside in storms. Keep the light soft and low, so the terrace feels calm rather than lit like a work site.
12. Small Water Feature for Sound and Calm
Add a small water feature, such as a shallow bowl with a pump or a wall mounted spout, to bring sound and movement to the terrace. Moving water masks street noise and makes a seating area nearby feel more private. Keep the feature shallow, level, and easy to reach for cleaning leaves and algae.
Site the pump where you can reach it without climbing, and add a simple on and off control near the house so the feature runs when you are there to enjoy it. In a family garden, keep water shallow and edges rounded. Top up in hot weather, since small features lose water fast to evaporation.
13. Pollinator Planting With Flowers
Plant a pollinator corner with flowers that feed bees and butterflies through the seasons. Choose open flowers such as lavender, coneflowers, salvias, and single dahlias, and plant them in drifts rather than single plants so pollinators find them easily. A sunny, sheltered corner near the seating area lets you watch visitors without disturbing them.
Avoid spraying open flowers, and leave some seed heads standing into autumn for birds. Add a shallow dish of water with stones for insects to land on, and keep it topped up in dry weather. A pollinator corner also gives the terrace color from spring to autumn with little extra work.
14. Fruit Trees in Large Pots
Grow dwarf fruit trees in large pots on the terrace for blossom in spring and fruit in summer without needing an orchard. Apples, pears, figs, and citrus all suit containers when grown on dwarfing rootstocks. Use the largest pot you can manage, with drainage holes and a free draining mix, and stake the tree until it is established.
Water pots deeply and regularly, since container trees dry out fast, and feed through the growing season as the label directs. Prune in the dormant season to keep the tree compact, and move pots to a sheltered spot in hard frost if the variety needs it. One or two trees give a real harvest and a strong focal point.
15. Reading Nook With a Bench and Cushions
Tuck a bench, a cushion, and a small side table into a quiet corner to make a reading nook on the terrace. A nook works best facing planting rather than the house, with morning or evening light and a screen or tall pots behind it for shelter. Choose a bench with a back rest if you plan long sits, and keep a waterproof cushion box nearby.
Add a hook or a small shelf for a book and glasses, and plant scented flowers nearby so the corner smells as good as it looks. Keep the path to the nook clear and dry, since a seat you have to wade to will go unused. A nook needs little space, which makes it a good fit for a small terrace.
16. Family Planting Patch for Kids
Set aside one bed or a few large pots as a family planting patch where children can sow, water, and pick. Quick crops such as radishes, peas, strawberries, and sunflowers give fast results and keep young gardeners interested. Give each child a small labeled row or pot of their own, and keep tools small and easy to hold.
Keep the patch near the seating area so adults can watch while they sit, and keep paths wide enough for small feet and a watering can. Avoid thorny or toxic plants in this patch, and keep water shallow and safe. A patch that children helped plant is one they will want to visit every day.
17. Storage Bench for Tools and Cushions
Place a weatherproof storage bench on the terrace to hide the clutter that usually gathers near a back door: cushions, small tools, watering cans, and garden toys. The lift up seat keeps those items dry and close at hand, while the bench itself still works as everyday seating. This is the most practical bench for a small terrace or a busy family garden.
Check the lid action before you buy, since a heavy lid with no stay can be awkward and can pinch fingers. Look for a bench made for outdoor use, with a lid that closes fully to keep rain out, and keep heavy items at the bottom so the box stays stable. Leave clearance behind the bench so the lid can open fully without hitting a wall or fence.
18. Railing Planters and Hanging Baskets
Fix planters to the terrace railing and hang baskets from brackets to add planting without using floor space. Railing planters suit herbs, trailing flowers, and small salads, while hanging baskets suit trailing petunias, fuchsias, and strawberries. Choose planters with secure brackets and drainage, and check the railing can carry the weight of a watered planter.
Water railing planters and baskets more often than ground beds, since they dry out fast in wind and sun. Keep trailing plants trimmed back from walkways and seats, and bring baskets inside in hard frost if the plants are tender. A row of matching planters along a railing gives a tidy, finished edge.
19. Seasonal Color Pots You Rotate
Keep a set of seasonal color pots that you rotate through the year, so the terrace always has something in flower. Plant spring bulbs and primulas for early color, summer bedding and dahlias for high summer, and pansies and ornamental kale for autumn and winter. Swapping pots is easier than replanting beds, and it lets you try new color schemes each season.
Keep a few empty pots ready so the swap takes minutes, and compost spent plants rather than letting them linger. Repeat one or two colors across the pots to tie the display together, and put the brightest pots near the door or the seat where you see them most. A small store of spare pots makes rotation a habit.
20. Fire Bowl Gathering Corner
Set a small fire bowl or chiminea in a sheltered corner to make the terrace usable on cool evenings. A fire corner draws people together, gives light and warmth, and stretches terrace season well past summer. Place it on a heatproof surface, clear of climbers, sails, and overhanging branches, and keep a bucket of sand or water nearby.
Check local rules and building rules before you buy, since open flames are restricted on some terraces. Use dry fuel as the maker directs, and never leave a fire unattended. Pair the fire bowl with low, movable seats so the corner can change from a quiet evening for two to a gathering for friends.
21. Morning Coffee Spot With an Outdoor Rug
Lay an outdoor rug, add two chairs and a small table, and you have a morning coffee spot that costs little and gets used daily. A rug marks the zone, softens paving underfoot, and makes a bare corner feel like a room. Place the spot where it catches morning sun, and keep the table small enough to leave room to stand and sit comfortably.
Choose a rug rated for outdoor use that dries fast after rain, and shake it out weekly so soil does not build up underneath. Add one pot of scented planting beside the chairs, and keep a hook for a bag or a hat nearby. A coffee spot used every morning will do more for a terrace than a large set used once a month.
22. Watering and Compost Station
Set up a small watering and compost station on the terrace to make daily plant care easy. A station needs a watering can or a hose point, a small compost caddy for clippings and kitchen peelings, and a tidy store for twine, snips, and gloves. Keeping these together saves trips indoors and means watering actually happens.
Site the station near the beds you water most, but out of the main view, behind a screen or a tall pot group. Keep the compost caddy lidded and emptied often so it does not smell, and rinse watering cans after feeding so residue does not build up. A station that is easy to reach turns plant care from a chore into a quick daily round.
Conclusion
A good terrace garden starts with how you use the space, not with how many pots you can fit on it. Pick the zone you will use most, give it a seat, shade, and planting at more than one height, then add the next idea only when the first one feels right. Small terraces suit containers, walls, and screens, while larger terraces can add beds, a dining set, and a fire corner, but the same rule holds for both: one well used corner beats a terrace full of features nobody visits. Save this list on Pinterest, choose one idea for this weekend, and let the terrace grow around the way you actually live outdoors.
FAQs
What is the cheapest way to start a terrace garden?
Start with container clusters and one seat. Pots in mixed sizes, a bag of free draining mix, and plants suited to your light cost far less than built beds or a pergola, and you can move them as you learn what grows well. Add a trellis screen or a shade sail next, since comfort and privacy make the terrace usable, then build beds or a pergola when you know which zones you use most.
How do I keep terrace pots from drying out?
Water deeply until water runs from the drainage holes, then mulch the surface with bark or gravel to slow evaporation. Group pots together so they shade each other, use larger pots where possible since they hold moisture longer, and check pots daily in hot wind. A watering station near the beds, as in idea 22, makes this daily check a quick habit rather than a chore.
What plants suit a windy terrace?
Choose tough, flexible plants that bend rather than break: ornamental grasses, lavender, rosemary, sedums, and low shrubs cope well with wind. Avoid tall, top heavy pots on exposed edges, and use a trellis screen or bamboo to break the wind before it hits the planting. Keep climbers tied in firmly, and check fixings after storms.
Can I grow vegetables on a small terrace?
Yes, if you pick compact varieties and deep containers. Salad leaves, herbs, radishes, peas, and dwarf tomatoes all suit pots, and a sunny wall can carry beans or cucumbers on a trellis. Start with two or three crops you actually eat, water and feed them regularly, and add more containers only when the first ones are thriving.
How do I add privacy to a terrace without blocking light?
Use trellis panels with climbers, bamboo screens, or tall pots with grasses on the exposed side only. Open trellis blocks views while letting light and air through, and climbers soften the screen without making it solid. Leave the sunny side open, and keep screens below any local height limit so the terrace stays bright.
Do I need permission to build beds or a pergola on a terrace?
Rules vary by home, landlord, and local area, especially for raised terraces, shared buildings, and listed homes. Check weight limits, drainage rules, and any lease or building rules before adding heavy planters, water, or a fire feature. For larger structures such as a pergola or a retaining wall, check local planning rules and ask a professional when the structure carries weight or changes drainage.
A small balcony can feel like a ledge with a chair, or it can feel like a garden room. The difference is rarely size. It is how the floor, the railing, and the wall each carry part of the work. When planters sit on the rail, herbs grow by the door, and one seat faces the light, even a narrow balcony gains color, scent, and a reason to step outside each day. These 23 small balcony garden ideas cover railing planters, vertical planting, edible pots, privacy screens, seating, and evening light, all chosen for tight spaces and light containers. Start with sun, wind, and one comfortable seat, then add planting around them.
Key Takeaways
Use the railing, wall, and ceiling as planting space, so the floor stays clear for sitting and moving.
Choose light containers with drainage, and keep heavy pots low and near the wall, within the balcony weight limit.
Match plants to sun and wind: sunny balconies suit herbs, tomatoes, and succulents, while shady balconies suit ferns and shade tolerant flowers.
Give the balcony zones: one for growing, one for sitting, and one small spot for tools and watering, so it feels organized.
Add a wind screen, warm light, and a soft seat early, since comfort decides whether you use the balcony daily.
Water little and often in containers, and check soil with a finger before watering, since pots dry out fast in sun and wind.
1. Railing Planters for Instant Color
Fix planters along the balcony railing to add color at eye level without using floor space. Railing planters suit narrow balconies because they sit where the rail already is, and they put flowers where you see them from inside as well as outside. Choose planters made to fit your rail width, and secure them with brackets or straps so wind cannot lift them.
Plant trailing petunias, lobelia, or trailing herbs at the front, with upright geraniums or marigolds behind them for shape. Check that the planter has drainage holes, and place a drip tray only if it will not spill onto the balcony below. Water slowly until water runs from the base, since shallow rail planters dry out faster than large pots.
2. Living Wall Pockets on a Blank Wall
Cover a blank balcony wall with pocket planters to grow a green wall without giving up floor space. Pocket panels suit renters when they hang from hooks or a freestanding frame, and they give a plain wall texture, scent, and color at eye level. Choose panels with separate pockets, so you can replace one plant without disturbing the rest.
Plant ferns, trailing pothos, small herbs, and shade tolerant flowers to suit your light level, and water from the top so each pocket gets moisture. Check the weight of the panel when wet, and keep it away from vents and door hinges. Trim trailing stems often, so the wall stays neat and the walkway stays clear.
3. Tiered Ladder Shelf for Pots of Every Size
Lean a tiered ladder shelf against the wall to hold pots on several levels in one narrow footprint. A ladder shelf suits small balconies because it uses height, not floor area, and it lets you group sun loving plants at the top and shade tolerant plants lower down. Choose a weather resistant shelf with a stable base, and anchor it to the wall if wind is strong.
Place heavy pots on the lowest shelf and light pots higher up, so the shelf stays steady. Mix one tall plant, a few mid height plants, and trailing plants at the edges for a full look. Leave the bottom shelf for watering cans or a small tool box, so the shelf works as storage as well as display.
4. Hanging Baskets from Hooks and the Ceiling
Hang baskets from ceiling hooks or a sturdy overhead rail to add flowers above head height. Hanging baskets suit tiny balconies because they use air space, and they draw the eye upward, which makes the balcony feel taller. Use light baskets with a strong hook rated for a wet basket, and hang them where you will not bump your head.
Plant trailing fuchsia, bacopa, or trailing lobelia in sun or part shade, and line the basket with a liner that holds soil but still drains. Water hanging baskets more often than floor pots, since wind dries them quickly, and turn them weekly so growth stays even on all sides.
5. Herb Rail Box by the Door
Put a narrow herb box on the railing nearest the door, so cooking herbs are within reach when you cook. A herb rail box suits small balconies because it turns the rail into a kitchen garden, and fresh leaves taste best picked just before use. Plant basil, mint, chives, and parsley in separate sections, since mint spreads fast and can crowd its neighbors.
Give herbs at least four hours of sun where possible, and pinch basil tips often to keep plants bushy. Water when the top inch of soil feels dry, and snip leaves in the morning for the best flavor. Keep a small pair of scissors by the door, so picking herbs becomes part of cooking, not a chore.
6. Cherry Tomato Pots in the Sunniest Corner
Grow cherry tomatoes in deep pots in the sunniest corner of the balcony for a crop that suits containers well. Cherry types fruit steadily through summer, and a single healthy plant can give salads and snacks for weeks. Choose a pot at least 30 centimeters wide, with drainage holes and a stake or small cage for support.
Plant one tomato per pot in rich potting mix, and water at the base so leaves stay dry. Feed with a balanced liquid feed as the plant label directs once fruit sets. Tie stems loosely to the support as they grow, and pick fruit when fully colored for the sweetest taste.
7. Trellis Privacy Screen with Climbers
Fix a light trellis to the railing or wall and train climbers over it to soften views and cut wind. A trellis screen suits balconies overlooked by neighbors, since leaves fill the frame through summer while still letting air pass. Choose a trellis that fits the space and can be tied firmly to the rail, so it does not sway in gusts.
Train jasmine, sweet pea, or climbing beans along wires or the trellis bars, and tie stems loosely as they grow. Prune after flowering as the plant type requires, and keep climbers clear of drains and door tracks. A planted screen also gives birds and pollinators a place to visit without taking floor space.
8. Fold-Away Bistro Set for Coffee Mornings
Set a folding bistro table and two chairs in a sunny morning spot for coffee, reading, and quiet starts to the day. A fold-away set suits small balconies because it folds flat against the wall when you need room for watering or cleaning. Choose a stable table that does not wobble on decking tiles, and chairs that fold with one hand.
Add one pot of herbs or flowers beside the table so the nook feels planted, not bare. A light cushion on each chair makes a short sit last longer. Site the set where morning sun reaches it but wind is broken by a wall or screen, and keep the route from the door clear so you can carry cups safely.
9. Floor Cushion Lounge Corner
Make a low lounge corner with an outdoor rug, floor cushions, and a small side table for relaxed evenings. Floor cushions suit small balconies because they stack away when not in use, and they sit lower than chairs, which keeps the space feeling open. Choose weather resistant cushions with removable covers, and store them in a dry box when rain is forecast.
Place the rug to define the sitting zone, and add a low table for drinks and a book. Keep the corner away from the railing edge, and leave a clear path to the door. A soft throw over one cushion adds warmth on cool evenings and makes the corner inviting at a glance.
10. String Lights and Lanterns for Warm Evenings
Hang string lights along the railing or wall, and add a lantern or two on the table, to make the balcony usable after dark. Warm light suits small balconies because it softens hard edges and makes plants glow, without needing wiring work. Choose solar or battery lights rated for outdoor use, and hang them where they will not tangle with plants.
Drape lights loosely rather than pulling them tight, so wind does not strain the wire. Add a lantern with a candle style light on the table for a focal glow at sitting height. Switch lights on at dusk and off at bedtime, and store battery packs out of rain between uses.
11. Self-Watering Pots for Busy Weeks
Use self-watering pots for plants that suffer when watering is missed, such as herbs, salad leaves, and flowers in sun. A reservoir at the base lets soil draw up water as it dries, which keeps moisture steadier than a quick daily splash. This suits balconies where the owner travels or works long days.
Fill the reservoir as the pot instructions direct, and still check soil moisture weekly, since a reservoir can run dry in hot wind. Use self-watering pots for thirsty plants first, and keep succulents in plain pots with sharp drainage instead. Clean the reservoir at season end to stop algae and stale water.
12. Sunny Succulent Corner
Group succulents and sedums in a sunny, dry corner for planting that needs little water and keeps its shape. Succulents suit hot, windy balconies because their thick leaves store water, and their neat rosettes look tidy in small pots. Use a gritty, free draining mix, and pots with large drainage holes.
Mix echeveria, jade plant, and trailing sedum in shallow bowls and small pots, and raise pots on feet so water drains freely. Water only when soil is dry through, and move tender types indoors or under cover before frost. A gravel top layer keeps soil in place in wind and finishes the corner neatly.
13. Shady Fern Corner for North Facing Balconies
Fill a shady corner with ferns, hostas in pots, and shade tolerant flowers for a lush look where sun is scarce. North facing balconies suit ferns because they prefer cool, damp shade, and their fronds add soft texture against hard walls. Choose pots that hold moisture, and group plants close together to raise humidity around the leaves.
Plant maidenhair fern, Boston fern, and small hostas in rich, moist potting mix, and water before soil dries out fully. Add impatiens or begonias for color in the same shade. Mist leaves on dry days, and trim brown fronds at the base to keep the corner fresh.
14. Pollinator Pots with Lavender and Herbs
Plant pots of lavender, salvia, and flowering herbs to invite bees and butterflies onto the balcony. Pollinator pots suit small spaces because a few well chosen plants can feed insects all summer, and they also give scent and color for people. Place pots in sun, where flowers open fully and insects can find them easily.
Mix lavender, borage, and chives in separate pots, since each flowers at a slightly different time. Avoid spraying insecticides on these pots, and let some herbs flower rather than cutting every stem. Leave a shallow dish of water with pebbles nearby, so insects can drink without drowning.
15. Salad Trough for Cut and Come Again Leaves
Grow salad leaves in a long, shallow trough for a steady supply of greens steps from the kitchen. A trough suits narrow balconies because it fits along a wall or rail, and cut and come again leaves regrow after picking. Sow lettuce, rocket, spinach, and mixed leaves in rows, and thin seedlings so leaves have room to grow.
Water gently so seeds stay in place, and pick outer leaves first to keep plants producing. Sow a fresh row every two to three weeks through the growing season for a continuous supply. Shade the trough on very hot days, since salad leaves bolt fast in strong heat.
16. Cascading Flower Rail in Summer Color
Let trailing flowers cascade over the railing for a curtain of color that softens the balcony edge. Cascading plants suit balconies because they hang outward, so they add drama without taking floor space. Plant trailing geraniums, petunias, or calibrachoa in rail planters, and feed weekly as the plant label directs through summer.
Deadhead faded flowers often to keep new buds coming, and water rail planters daily in hot weather. Mix two colors that sit well together, such as pink and white, rather than many competing shades. At season end, clear spent plants and refresh the soil before replanting.
17. Strawberry Hanging Planters
Grow strawberries in hanging planters or stacked strawberry pots for fruit that suits small spaces and small hands. Strawberries fruit well in containers, and their runners trail prettily over pot edges. Choose everbearing types for fruit across the season, and hang planters in sun with good air flow.
Water hanging strawberry pots often, since they dry out fast, and feed with a balanced liquid feed once fruit sets. Pick berries when fully red and soft, and net plants if birds take fruit before you do. After fruiting, trim runners you do not need, and protect pots from hard frost in winter.
18. Storage Bench Seat with Planters on Top
Use a weatherproof storage bench as a seat, with small planters on top or beside it, to solve seating and storage in one piece. A storage bench suits small balconies because it hides cushions, watering cans, and tools, while still giving a place to sit. Choose a bench sized to the wall, with a lid that opens fully without hitting plants.
Keep heavy items low inside the bench, and light cushions on top for easy access. Place a trailing plant at one end of the bench, so it softens the box shape without blocking the lid. Wipe the bench dry after rain, and check hinges yearly so the lid stays safe to open.
19. Slatted Wind Screen with Planters at the Base
Add a slatted wind screen along the windy side, with planters at its base, to filter wind without blocking light. Slats suit balconies better than solid screens, since they slow wind rather than forcing it over the top in gusts. Fix the screen firmly to the railing or wall, and check building rules before fixing anything to the structure.
Plant wind tolerant grasses, lavender, or small shrubs in pots at the base, so the screen reads as part of the garden. Keep the screen height below the railing line where rules require it, and leave a gap for access to drains. A screen also gives climbers a frame if you add wires later.
20. Mini Greenhouse Shelf for Seedlings and Tender Plants
Use a small greenhouse shelf with a clear cover to start seedlings and protect tender plants in spring and autumn. A mini greenhouse suits balconies because it fits against a wall, and it warms seedlings on cool nights without taking a full corner. Choose a shelf with a roll up cover, so you can vent it on warm days.
Place seed trays on upper shelves and tender pots below, and open the cover daily to stop damp and mold. Water seedlings from below where possible, and harden plants off by opening the cover longer each day before moving them outside. Anchor the greenhouse in wind, since a light frame can topple when the cover catches air.
21. Dwarf Citrus or Olive Pot as a Focal Plant
Grow a dwarf citrus tree or a small olive in a large pot as a single focal plant for the balcony. One strong plant suits small spaces because it gives height and structure without a crowd of pots, and its scent or silver leaves add character year round. Choose a pot with drainage and a light, free draining mix, and place it where it gets the most sun.
Water when the top soil feels dry, and feed as the plant label directs in the growing season. Move citrus indoors or under cover before frost, and prune lightly to keep the shape compact. A single focal pot also anchors the seating zone, so the rest of the balcony feels arranged around it.
22. Seasonal Swap Pots for Year Round Color
Keep a few swap pots that change with the season, so the balcony never sits bare between plantings. Spring bulbs, summer flowers, autumn grasses, and winter evergreens each take a turn in the same pots, which suits small balconies with little storage. Choose pots you can lift when full, and keep spare plants in a small tray by the door.
Plant bulbs in autumn for spring color, then replace them with summer bedding once flowers fade. Add ornamental grasses and heathers in autumn, and evergreen shrubs with winter berries for the cold months. Refresh the top soil at each swap, and compost spent plants rather than leaving them to crowd the pots.
23. Scented Evening Corner with Night Flowers
Plant a scented corner near the seat with night scented stock, jasmine, and scented geraniums for evenings outdoors. Scent suits small balconies because fragrance fills a tight space quickly, and evening flowers release their strongest scent after dark. Place scented pots close to the seat and away from strong wind, so fragrance lingers.
Water scented plants well in summer, and deadhead stock often to keep flowers coming. Add a lantern nearby, so the corner feels like a destination at dusk, not just a row of pots. On cool nights, a throw on the seat lets you stay longer and enjoy the scent.
Conclusion
A small balcony garden works best when every surface earns its place. Railing planters add color, wall pockets and shelves add height, edible pots add a daily harvest, and a seat with warm light gives you a reason to use it all. Start with sun, wind, and weight limits, choose plants that suit those conditions, and add one idea at a time rather than filling the balcony in a single weekend. Before long, the narrow space by the door can become the warmest room in the home, one you step into morning and evening. Save the ideas that fit your light and space, and revisit them as the seasons change.
FAQs
How do I start a small balcony garden with no experience?
Start with sun and wind. Note how many hours of direct sun the balcony gets, and whether wind funnels along it. Then choose three or four plants that suit those conditions, in light pots with drainage, plus one seat. Water when the top inch of soil feels dry, and add more pots only once the first plants are growing well.
What plants grow best on a small balcony?
Herbs such as basil, mint, and chives, cherry tomatoes, salad leaves, strawberries, lavender, geraniums, and succulents all suit containers. On shady balconies, choose ferns, hostas, impatiens, and begonias instead. Match the plant to your sun level first, since a sun loving plant in shade will stay weak no matter how often you water it.
How do I keep balcony pots from getting too heavy?
Use light pots made from resin, fiberglass, or light metal, and a light potting mix rather than garden soil. Keep large pots low and near the wall, spread weight across the balcony, and check your building weight limit before adding stone pots or large trees. Raise pots on feet so water drains, and empty saucers after watering.
How often should I water balcony plants?
Check soil with a finger every day or two in summer. Water when the top inch feels dry, and water slowly until water runs from the drainage holes. Hanging baskets and rail planters dry out fastest, while shade pots hold moisture longer. In winter, water far less, and only when soil is dry, since cold, wet soil harms roots.
How can I add privacy to a small balcony garden?
Use a trellis with climbers, a slatted wind screen, or tall pots of grasses and bamboo along the overlooked side. Leaves filter views while letting air pass, which suits balconies better than solid screens that catch wind. Keep screens below any height limit in your building rules, and fix them firmly so they do not sway.
Can I grow vegetables on a tiny balcony?
Yes, if the balcony gets sun. Cherry tomatoes, peppers, salad leaves, herbs, strawberries, and dwarf beans all grow in pots. Choose compact types bred for containers, give each plant its own pot with drainage, and feed once fruit or leaves are growing well. Even a single sunny rail box of herbs counts as a start, and you can add more crops as you learn what grows best.
A raised garden bed gives you better soil, clearer edges, and a garden you can work without kneeling on wet ground. It also lets you garden where the soil is poor, the yard slopes, or the only sunny spot is a patio. These 33 raised garden bed ideas cover wood, metal, stone, and block beds, tall and low heights, kitchen gardens, flower beds, and beds built for shade, small spaces, and easy watering. Pick a sunny spot, keep a path beside every bed, and start with one bed you can fill and tend well. For sloping ground, the stepped approach in these tiered garden ideas pairs well with the raised beds below.
Key Takeaways
Keep beds narrow enough to reach the middle from one side, usually about four feet wide or less.
Put sun loving vegetables and flowers in the sunniest spot, and leafy greens where light is softer.
Fill beds with a mix of topsoil and compost, and top up the level each spring as the mix settles.
Leave a clear path beside every bed for a wheelbarrow, a watering can, and comfortable standing room.
Match the material to the spot: wood warms a cottage garden, metal suits a neat modern yard, and stone suits a formal edge.
Plan water before you plant, with mulch, a nearby tap, or a simple drip line for dry spells.
1. Classic Cedar Rectangular Bed
A plain cedar rectangle is the most useful raised bed to start with, and it suits almost any yard. Cedar resists rot better than untreated softwood, and a simple box with corner posts holds its shape for years. Build it about four feet wide so you can reach the middle from either side, and keep the length to what fits your path and your watering routine.
Fill the bed in layers, with coarse material at the base for drainage, then a mix of topsoil and compost. Plant one crop family per row at first, so watering and feeding stay simple. A cedar bed needs little care beyond an occasional check of screws and a top up of compost each spring.
2. Low Wide Bed for Easy Reach
A low bed, about six to eight inches high, gives you the soil benefits of a raised bed without a tall wall to build or fill. It suits flat ground with fair soil already, and it is easy to step over and work from all sides. Keep the edges low and neat with timber, stone, or a simple board, and mark the bed clearly so lawn mowing stays outside it.
Low beds dry out faster than deep beds in hot weather, so mulch the surface well and water at the base. They suit herbs, salads, and shallow rooted flowers, while deep rooted vegetables do better in a taller bed. A low bed is also a gentle first project for a new gardener.
3. Tall Waist High Bed for Comfort
A waist high bed, roughly two to three feet tall, lets you garden standing up, which helps backs, knees, and anyone who finds kneeling hard. The height also keeps soil warmer in spring and keeps many ground pests at a distance. Build the walls strong, with solid corner posts and cross braces, since a tall bed holds a heavy weight of wet soil.
Fill the lower part with coarse, bulky material such as branches or straw, then topsoil and compost on top, so the bed costs less to fill and drains well. Keep a path all the way around, and check that the bed does not shade a smaller bed behind it. Tall beds need more water, so mulch thickly.
4. L Shaped Corner Bed
An L shaped bed turns an awkward yard corner into useful growing space, wrapping around a fence, a shed, or a patio edge. The two arms give you more planting room than a single straight bed in the same corner, and the inner corner makes a handy spot for a compost bucket or a watering can. Keep each arm no wider than you can reach, and leave the inside corner open enough to stand in.
Plant taller crops at the back of each arm, where they will not shade the rest, and keep low salads and herbs near the front edge. An L shape also frames a small seating spot in the corner, which makes the garden feel planned rather than filled in.
5. U Shaped Kitchen Garden Bed
A U shaped bed gives you a large growing area with a path into the middle, so every plant stays within reach. It suits a kitchen garden where you visit daily for salads, herbs, and beans, and it keeps the working area compact. Build the three sides at the same height, and keep the inner path wide enough to kneel or place a small stool.
Use the back of the U for tall crops such as peas or tomatoes, and the front edges for herbs and cut and come again salads. A U shape also suits a family garden, since children can work one arm while an adult works another, without anyone stepping on the soil.
6. Stepped Tiered Beds on a Slope
Stepped beds turn a slope into a series of level growing boxes, each with its own flat soil and easy access. Build from the lowest bed upward, so each bed has firm support, and leave a path or grass strip between beds for a wheelbarrow. Each bed stays at a comfortable working height, even though the ground drops away beside it.
Put daily crops such as salads nearest the house, and beds you visit weekly further down the slope. The stepped layout also slows rainwater, since each level holds water instead of letting it run straight downhill. For more slope layouts, see these tiered garden ideas.
7. Keyhole Bed With a Compost Center
A keyhole bed is a round raised bed with a notch cut into one side, like a keyhole, so you can reach the center from the path. At the center sits an open compost basket, and kitchen scraps and water added there feed the soil around it. The shape suits a small yard, since one round bed holds a surprising amount of planting in a compact footprint.
Build the wall from stone, block, or timber, and keep the notch wide enough to stand in comfortably. Add water through the compost basket, so moisture spreads outward to the roots. Turn the basket contents now and then, and avoid meat or cooked food scraps, which attract pests.
8. Square Foot Grid Bed
A square foot bed divides a four foot square box into sixteen one foot squares, with one crop type per square, spaced by the plant label. The grid makes planning simple, stops overplanting, and helps a beginner see at a glance what is growing where. Mark the grid with string, thin battens, or a simple frame laid on the soil surface.
Plant fast crops such as radishes and salads in squares you can replant through the season, and give large plants such as tomatoes a full square each. Water the whole bed evenly, and keep a small notebook of what each square holds, so rotation next year is easy. A grid bed is a calm, tidy way to start vegetable growing.
9. Herb Spiral Raised Bed
A herb spiral is a raised bed that winds upward in a spiral, giving you dry, sunny soil at the top and moist, shaded soil at the base. That range suits herbs with different needs in one small structure: rosemary and thyme at the sunny top, parsley and chives lower down, and mint in its own pot sunk at the base so it does not spread.
Build the spiral from stone, brick, or timber, and fill it with free draining soil mixed with grit. Place it near the kitchen door, since herbs earn their place by being picked often. Keep the path around the spiral clear, and label young herbs, since many look alike before they flower.
10. Trellis Backed Vegetable Bed
A bed with a trellis fixed along the back edge grows upward as well as outward, which suits peas, beans, cucumbers, and small squash. The trellis keeps fruit off wet soil, improves air flow, and frees bed space for low crops in front. Fix the trellis firmly into the bed frame or into posts behind it, so it does not lean once plants grow heavy.
Face the trellis to catch sun without shading the rest of the bed, and tie stems in loosely as they grow. Keep the front of the bed for salads, carrots, and herbs, which enjoy the light and the shelter the trellis gives on windy days. At season end, clear old stems and check the fixings before replanting.
11. Cutting Flower Bed in Rows
A cutting bed grows flowers for the house in straight rows spaced for picking, rather than for display from a path. Rows of zinnias, cosmos, dahlias, and sweet peas, cut in the morning into a bucket of water, keep display borders tidy and give you fresh stems all summer. Keep the bed near a path and a tap, since you will visit it often with snips and a bucket.
Feed and water a cutting bed more than a display border, and re-sow fast annuals if gaps appear by midsummer. For color planning that carries into the house, the drifts in these pink flower garden ideas show how one color repeated in groups reads clearly. Leave some stems to set seed for next year if you like.
12. Pollinator Bed With Native Flowers
A pollinator bed plants flowers that bees, butterflies, and other helpful insects visit through the season, with blooms from spring to late summer. Choose plants suited to your area and soil, group each type in drifts of three or more, and include some flat topped flowers that insects can land on easily. Avoid spraying the bed, and leave some stems standing over winter for shelter.
Site the bed in sun, near other planting rather than alone in a corner, so insects find it easily. Add a shallow dish of water with pebbles for landing spots, and cut back only in spring, after overwintering insects have moved on. A pollinator bed also brings color and movement close to a seating spot.
13. Strawberry Bed With Side Pockets
A strawberry bed with planting pockets in its sides grows fruit at several levels, which suits a small yard where ground space is tight. Plants in the pockets trail over the edge, keeping fruit off wet soil, while plants on top fill the center. Build the bed from timber, block, or a stacked planter with firm pockets, and fill it with rich, free draining soil.
Water pockets more often than the top, since they dry out fast in sun and wind. Net the bed when fruit ripens if birds visit, and mulch with straw to keep berries clean. After fruiting, trim old leaves and runners, keeping the strongest runners to fill gaps next year.
14. Galvanized Metal Trough Bed
A galvanized metal trough, or a bed built from corrugated metal panels, gives a clean, modern look and lasts for many years without rotting. Metal warms soil early in spring, which suits early salads and herbs, but it can overheat in very hot sun, so mulch well and water deeply. Drill drainage holes in the base if the trough has a solid floor, and raise it slightly on feet or bricks so water can escape.
Metal beds suit a neat yard, a patio edge, or a contemporary front garden. Line the inside with a breathable barrier if you plan to grow edibles and want to limit soil contact with the metal, and check the edges for sharp spots before planting. Keep the bed level, since a tilted trough shows at once.
15. Brick Edged Raised Bed
A brick edged bed gives a formal, lasting edge that suits a front garden, a path side, or a house wall. Lay bricks on a shallow footing of compacted gravel or concrete, keep the top level along each run, and leave a drain point at the lowest corner so water does not pool behind the bricks. A single course suits a low bed, while two or three courses hold a deeper bed.
Brick pairs well with gravel paths and clipped hedging, and reclaimed bricks add warmth to a new garden. Plant low edging plants such as lavender or thrift just behind the brick line, so flowers spill slightly over the edge without hiding it. Check the footing after frost, and reset any bricks that lift.
16. Stone Walled Raised Bed
A stone walled bed gives a garden structure that looks good all year, even when planting is bare. Dry stone walls suit informal gardens, while mortared stone suits a formal edge near a house or patio. Build on a firm footing, lean the wall slightly back into the bed, and leave drainage gaps so water can escape instead of building up pressure behind the wall.
Stone also gives planting pockets of its own: low plants such as creeping thyme and small sedums can root in gaps near the top, softening the hard edge. Keep tall stone walls in professional hands, and check local rules before you build, since height and drainage rules vary. A stone bed holds heat, which suits Mediterranean herbs.
17. Cinder Block Bed With Cap Pockets
A cinder block bed stacks hollow blocks into a sturdy rectangle, and the hollow cores become small planting pockets along the top edge. The blocks are heavy and stable, need no timber treatment, and suit a long, straight vegetable bed. Lay the first course level on compacted gravel, stack the next course with joints offset, and cap the top with flat pavers if you want a smooth seat or shelf.
Plant herbs, strawberries, or small flowers in the block pockets, and keep the main bed for vegetables. Block beds hold heat, so water well in summer, and check that the blocks are rated for outdoor use. A block bed is a practical choice where timber rots fast in damp ground.
18. Pallet Collar Bed
Pallet collars are hinged wooden frames that stack to make a raised bed at whatever height you choose, and they suit renters and trial gardens since they come apart easily. Stack one collar for a low bed, or two or three for a deeper bed, on level ground, and line the inside with a breathable barrier to hold soil. Fill with topsoil and compost, and plant as you would any timber bed.
Check that the collars are clean and untreated with harmful chemicals before growing food in them, and look for a heat treatment mark rather than a chemical one. Pallet collars weather fast, so expect to replace the lowest collar first. Their low cost makes them a good way to test a bed position before building a lasting version.
19. Woven Willow Wattle Bed
A wattle bed weaves willow or hazel rods between upright stakes to form a low, rounded wall, giving a soft, cottage garden look. The woven wall holds soil, drains freely, and suits flower beds, herb beds, and informal vegetable plots. Drive stakes firmly into the ground, weave rods in and out, and keep the weave tight near the base where soil pressure is greatest.
Wattle beds last a few seasons before the rods weather, so treat them as a living, replaceable edge rather than a permanent wall. Plant trailing flowers at the edge to soften the weave, and keep the bed narrow enough to reach across. A wattle bed suits a garden where a hard timber or metal edge would look too formal.
20. Corrugated Metal Bed With a Timber Frame
A corrugated metal bed framed with timber combines the clean lines of metal with the warmth and strength of wood. The timber frame holds the panels rigid, caps sharp edges, and gives you a place to sit or set down tools. Build the frame from sturdy corner posts and top rails, fix the panels inside the frame, and keep the bed level on compacted ground.
This bed suits a modern yard that still wants a natural touch, and it lasts longer than an all timber bed. Mulch well, since metal walls warm soil fast, and water deeply in hot spells. The timber top rail also makes a handy shelf for a watering can, snips, and seed packets while you work.
21. Bench Edged Bed With a Wide Cap
A bed with a wide, flat cap around its top edge doubles as a seat, a shelf, and a working ledge, which makes it one of the most used beds in a garden. The cap, made from timber, stone, or pavers, gives you a place to sit while you weed, set down a basket, or rest a cup of tea. Build the wall strong enough to take sitting weight, and keep the cap wide enough to sit on comfortably.
Place a bench edged bed where you already pause, such as beside a path or near a sunny corner, and keep the planting in front low so the seat stays easy to use. For seating layout ideas that suit a garden corner, see these garden bench ideas. Add a cushion for long sessions, and bring it inside in wet weather.
22. Cold Frame Bed With a Lift Up Lid
A cold frame bed adds a glazed or clear plastic lid to a low raised bed, warming the soil early and protecting young plants from frost and wind. The lid lifts or slides open on warm days, so plants do not overheat, and closes at night or in a cold snap. Build the bed with a sloping lid facing the sun, and hinge it so one person can open it easily.
Use a cold frame bed for early salads, hardening off seedlings, and overwintering tender plants. Vent daily in mild weather, water sparingly since the lid cuts rain, and prop the lid open a crack on sunny winter days to stop damp building up. A cold frame bed extends your growing season at both ends.
23. Hoop House Bed With a Tunnel Cover
A hoop house bed fits curved hoops over a raised bed, covered with clear plastic or insect netting, to form a low tunnel. The cover warms the soil, keeps out many pests, and shields crops from heavy rain and hail. Fix hoops firmly into the bed frame or into ground sleeves, and weight or clip the cover edges so wind cannot lift it.
Use plastic for warmth early in the season, and swap to netting in summer to keep out cabbage pests while letting rain through. Open the ends on warm days for air flow, and close them at night in a cold snap. A hoop house bed suits salads, brassicas, and any crop that suffers from cold wind or pest damage.
24. Wicking Bed That Waters From Below
A wicking bed holds a water reservoir under the soil, with a wick or a soil column drawing water upward to the roots. The bed waters itself from below for days at a time, which suits busy gardeners, hot yards, and containers on a patio where daily watering is hard. Build the reservoir from a lined base with an overflow pipe at the right level, so excess water escapes instead of drowning roots.
Fill the bed with a soil mix that wicks well, such as a compost rich mix, and top up the reservoir through a fill pipe. Check the water level weekly, and flush the reservoir now and then to stop salts building up. Wicking beds suit leafy greens, herbs, and tomatoes, and they use less water than surface watering in dry weather.
25. Tabletop Bed on Legs for a Patio
A tabletop bed stands on legs at waist height, with a shallow soil tray on top, and suits a patio, a balcony, or a gardener who cannot bend. The shallow depth suits salads, herbs, radishes, and strawberries, while deep rooted vegetables do better in a ground bed. Build the legs strong and level, add a drainage layer and holes, and place a tray or gravel beneath to catch drips on paving.
Keep a tabletop bed near a tap, since shallow soil dries fast, and mulch the surface to hold moisture. The height also keeps many slugs at bay, though you should still check leaf undersides. A tabletop bed lets you garden in a space with no soil at all, such as a paved yard.
26. Portable Bed on Casters
A portable bed on strong casters moves with the sun, the season, or a change of home, which suits renters and small patios. Build a compact bed on a sturdy base, fit locking casters rated for the full weight of wet soil, and keep the bed small enough to move safely on level paving. Lock the casters before you work the bed, and move it slowly with two people if it is heavy.
Use a portable bed for herbs, salads, and flowers you want near the kitchen door in summer and in a sheltered spot in winter. Check the casters each spring, and keep the bed on firm, level ground, since a loaded bed can tip on a slope. A portable bed is a flexible way to test sun and shade before committing to a fixed bed.
27. Tiered Pyramid Stacked Bed
A pyramid bed stacks smaller boxes on top of larger ones, forming steps that catch sun on every level. The shape suits strawberries, herbs, and flowers, and it makes a focal point in a small garden or on a patio. Build the largest box first, fill it, then set the next box centered on top, repeating until the pyramid reaches a comfortable height.
Plant trailing crops at the edges of each level, where they can spill down, and upright crops near the center. Water the top level first, since water runs down to lower levels, and check lower levels for dry spots in hot weather. A pyramid bed uses vertical space well, but keep the top level within easy reach for watering and picking.
28. Circular Round Bed
A round bed makes a clear focal point in a lawn or at a path junction, and it suits a single feature plant, a herb collection, or a small flower display. Build the wall from timber segments, stone, or flexible metal edging, and keep the diameter small enough to reach the center from the edge, usually about four feet or less. A round bed with a path around it is easy to work from every side.
Plant tall or upright plants in the center, with lower plants ringing the edge, so the bed reads as a dome of color. A round bed also suits a tree circle, where shade tolerant plants grow under light canopy, though you should keep soil away from the trunk itself. Add a small feature, such as a sundial or a pot, at the center if you like.
29. Narrow Fence Line Bed
A narrow bed along a fence turns a strip of ground that is often wasted into a productive border. Keep the bed about two feet wide, so you can reach every plant from the path in front, and use the fence itself for climbing plants, hanging pots, or a trellis. A fence line bed suits raspberries, beans, sweet peas, and shade tolerant herbs on a north facing fence.
Check the fence footing before you build, and leave a small gap between the bed wall and the fence so air can move and the fence can dry. Water the bed well, since fences block rain on one side, and mulch to hold moisture. A narrow bed along a fence also screens an unattractive boundary with planting.
30. Arch Bed Pair With a Walk Through Gap
A pair of raised beds with an arch between them creates a walk through feature, with climbing plants overhead and productive beds on either side. Build two matching beds facing each other across a path, fix an arch firmly into the ground or into the bed frames, and train beans, peas, or flowering climbers over it. The arch gives shade, scent, and a clear garden entrance in one structure.
Keep the path between the beds wide enough for a wheelbarrow, and keep the arch high enough to walk under without ducking. Tie climbers in as they grow, and clear the path of fallen leaves so it stays safe. An arch bed pair suits a kitchen garden entrance or a path between two garden rooms.
31. Drip Irrigated Bed for Dry Summers
A bed fitted with drip lines or soaker hoses waters slowly at soil level, cutting evaporation and keeping leaves dry, which helps prevent many leaf diseases. Lay the main line along the bed, run drip lines beside each row, and cover them with mulch so they stay cool and hidden. Connect the system to a timer if you travel, and check emitters at the start of each season for blockages.
Drip beds suit vegetables, roses, and any planting that needs steady water in a dry summer. Water early in the morning, and check soil moisture with a finger before adding more, since drip systems can overwater if left running too long. A drip bed also frees you from daily watering, so the garden stays cared for in a heatwave.
32. Shade Cloth Bed for Leafy Greens
A bed fitted with a simple shade cloth frame gives leafy greens, salads, and herbs relief from harsh midday sun, which stops them bolting and turning bitter. Build a light frame over the bed from timber or pipe, drape shade cloth rated for about 30 to 50 percent shade, and fix it so wind cannot lift it. The frame can also carry insect netting in pest season.
Use a shade bed for lettuce, spinach, chard, and parsley in hot yards, and remove the cloth in cooler months when light is welcome. Water the bed well, since shade cloth cuts rain slightly, and keep air moving under the cloth so damp does not build up. A shade bed extends the salad season through the hottest weeks.
33. Small Starter Bed for Children
A small starter bed, about three feet square and low enough for a child to reach across, gives a young gardener a patch of their own. Let the child choose a few fast, forgiving crops, such as radishes, salads, sunflowers, and strawberries, and keep the bed close to the house so watering and checking become part of the day. Use light tools sized for small hands, and keep the path beside the bed clear.
Plant a few flowers among the vegetables to attract bees and to give quick color while slower crops grow. Label each row with a painted stake, and celebrate the first picking, however small. A starter bed teaches where food comes from, and it often turns a reluctant eater into a keen picker.
Conclusion
A good raised bed starts with the spot, the reach, and the water, not with the material alone. Choose a sunny, level place with a clear path, build a bed you can reach across without stepping on the soil, and fill it with soil you can keep moist and fed. One well placed bed, planted with crops you actually eat or flowers you actually pick, will do more for your garden than several beds scattered where nobody tends them. Pick one idea from this list, build it where you will use it daily, and add a second bed only after the first one feels easy to keep.
Save this list on Pinterest before your next garden trip, and work through it one area at a time: spot first, then height and material, then the planting that suits that bed best.
FAQs
How deep should a raised garden bed be?
Most raised beds work well at 12 to 18 inches deep for vegetables and flowers, with taller beds of 24 to 36 inches suiting gardeners who prefer to work standing up. Shallow beds suit salads and herbs, while carrots, parsnips, and other deep rooted crops need at least 12 inches of loose soil. If the bed sits on poor soil or paving, go deeper, and always leave drainage holes or a free draining base so roots do not sit in water.
What is the best soil mix for a raised bed?
A mix of topsoil and compost, roughly in equal parts, suits most raised beds, with a little grit added for heavy clay areas or for Mediterranean herbs. Fill the bed, water it well, and let it settle for a few days before planting, then top up the level. Feed the bed each spring with fresh compost, and mulch the surface to hold moisture and feed soil life through the season.
Do raised beds need a bottom?
A raised bed on soil usually needs no solid bottom, and an open base lets roots reach deeper soil and worms move in. Line the base with cardboard or newspaper to suppress weeds at first, and add hardware cloth underneath if burrowing pests are a problem in your area. A bed on paving needs a base with drainage holes, a gravel layer, and a tray or gravel beneath to catch drips.
How often should I water a raised bed?
Raised beds dry out faster than ground level beds, so check soil moisture with a finger every day or two in warm weather, and water deeply at the base when the top inch feels dry. Mulch, drip lines, and wicking beds all cut watering frequency, while shallow and metal beds need more frequent checks. Water in the morning where possible, so leaves dry before night and slugs find less damp shelter.
What can I grow in a small raised bed?
A small bed suits salads, herbs, radishes, spring onions, strawberries, and bush beans, all of which crop well in a compact space. Add a trellis for peas or cucumbers to use vertical space, and plant fast crops between slower ones so the bed stays full. Avoid large spreading plants such as pumpkins in a small bed, unless you train them out over a path or a fence.
How do I stop slugs in a raised bed?
Tall, smooth sided beds help, since slugs climb less readily than on ground level beds, but you should still check leaf undersides and bed edges in the evening. Keep the area around the bed clear of debris, water in the morning rather than at night, and use barriers such as copper tape or a gravel strip where they suit your garden. Pick off slugs by hand on damp evenings, and protect young seedlings with covers until they grow tough enough to cope.
A garden with personality does not need a large budget. It needs a few clear choices, repeated with care: one color you love, one place to sit, and planting that fills the space you actually use. These 14 garden ideas on a budget use paint, pallets, seeds, cuttings, and secondhand finds to add color and character step by step. Start with the spot you see most from the house, pick one idea that fits your time and tools, and let the rest grow from there. For color that reads clearly from the path, the planting groups in these pink flower garden ideas show how drifts of one color work better than single plants scattered about.
Key Takeaways
Start with one area, not the whole garden, and repeat one color or material so the result looks planned.
Reuse first: pallets, tins, bricks, and secondhand furniture cost little and suit a garden that changes over time.
Seeds, cuttings, and swaps fill beds for far less than buying full grown plants, if you allow a season for them to settle.
Paint is the fastest budget change for pots, fences, and old furniture, and it ties mixed pieces together.
Keep paths, light, and one comfortable seat in the plan, since those decide whether you use the garden daily.
Feed the soil with compost and mulch, so cheap plants grow well instead of struggling in poor soil.
1. Painted Pallet Planters on a Fence
Fix a cleaned pallet to a sturdy fence and turn its slats into planting pockets for herbs, trailing flowers, and small salads. Pallets are often free from local shops and markets, and one pallet gives several planting rows without taking any ground space. Check the pallet for stamps or marks that show it is safe for garden use, sand rough edges, and line each pocket with landscape fabric so soil stays in place while water drains out.
Paint the pallet in one color that suits your fence, then plant the top row with upright herbs and the lower rows with trailing plants that soften the wood. Water pallet planters often, since shallow soil dries fast in sun and wind. For a similar stacked approach on a slope, these tiered garden ideas show how giving each level a clear job keeps planting tidy.
2. Cuttings and Seed Swaps for Free Plants
Grow new plants from cuttings and swap seeds and spare plants with neighbors, friends, and local gardening groups. Many herbs, geraniums, fuchsias, and houseplants root in water or damp compost, and one healthy parent plant can give several new plants in a season. Label each cutting with the plant name and date, keep the compost damp but not wet, and move rooted cuttings into small pots before they outgrow their jar.
Seed swaps work the same way for annual flowers and vegetables. Sow a little more than you need, pot up the spares, and trade them for plants you do not yet grow. This idea takes patience, since cuttings and seedlings need weeks to establish, but it fills beds with plants you already know suit your garden.
3. Gravel Path With Reclaimed Brick Edging
Lay a gravel path edged with reclaimed bricks to give the garden structure for the price of gravel, fabric, and a little digging. Mark the route you already walk, dig a shallow trench, lay weed suppressing fabric, and spread gravel in a thin, even layer. Set bricks on edge along each side, level as you go, so the path edge stays firm and the gravel stays where it belongs.
A clear path makes the whole garden feel cared for, even before the beds are full. It also keeps feet dry after rain and gives a neat line for planting to follow. Rake the gravel level each spring, top it up where it thins, and pull weeds that root in the edges before they spread into the beds.
4. Painted Pots in One Color Story
Paint plain terracotta pots in one color story, such as sage green, cream, and soft blue, to make mixed pots look like a set. Use outdoor paint made for pots, clean and dry each pot first, and leave the inside unpainted above the soil line if the paint maker advises it. Group pots in threes or fives by doors, steps, and path corners, with one tall plant, one mid height plant, and one trailing plant in each group.
One color story does more for a small garden than many scattered colors, since the eye reads the groups as one design. Keep drainage holes clear, raise pots on feet so water runs away, and repaint chipped pots at the end of the season so the set stays fresh for another year.
5. Bamboo Cane Wigwams for Climbers
Build wigwams from bamboo canes for beans, sweet peas, and other climbers, and you get height, flowers, and food from a handful of canes and some twine. Push six to eight canes into the soil in a circle, tie them together at the top, and wind twine around the frame in rings so young stems have something to grip. Plant one climber at the base of each cane and water well until roots settle.
Wigwams suit small beds and large pots, and they can move to a new spot each year as part of crop rotation. Tie stems in loosely as they grow, pick beans and sweet pea flowers often to keep more coming, and take the canes down, dry them, and store them under cover for next season.
6. Secondhand Bench With Fresh Paint
Find a secondhand wooden bench, sand it back, and paint it in a color that suits your planting, and you get a garden seat with character for far less than a new one. Check the joints and legs before you buy, since a wobbly frame costs more time than it saves. Sand rough spots, fill small cracks with exterior filler, and apply primer and outdoor paint as the maker directs, letting each coat dry fully.
Place the bench where you will actually sit, facing a view or a bed you love, with firm footing underfoot and a path to reach it in wet weather. For help choosing the spot before the seat, these garden bench ideas cover light, view, and shade in a practical order. Add one cushion and a small side table, and the bench becomes a daily habit rather than an ornament.
7. Jar Lanterns and Solar String Lights
Hang jar lanterns and solar string lights to make evenings in the garden feel welcoming without wiring or a large spend. Use clean glass jars with wire handles, a battery candle or tealight inside, and hang them from hooks, branches, or a simple line. Add one set of solar string lights along a fence, trellis, or seating area, placed where the solar panel gets sun during the day.
Warm, low light suits a garden better than one bright bulb, since it lets planting and seating stay the focus. Keep flames away from dry planting and cushions, bring jars inside in high wind, and check solar lights after dull weeks, since they charge more slowly without direct sun. Light the seating area first, then add lanterns along the path.
8. Tin Can Herb Wall by the Door
Turn clean tin cans into a herb wall by the back door, so fresh leaves sit within a few steps of cooking. Punch drainage holes in the base of each can, paint the outside in your chosen color, and fix the cans to a wooden board or directly to a fence with screws through the back. Fill with potting mix and plant basil, parsley, chives, thyme, and mint, keeping mint in its own can since it spreads fast.
Water small cans often in hot weather, feed lightly through the season, and pick little and often to keep plants bushy. Label each can while plants are young, since many herbs look alike before they grow. At the end of the season, empty tired annual herbs, refresh the compost, and replant for the next round.
9. Wildflower Patch Instead of More Lawn
Sow a wildflower patch in place of a strip of lawn to add color, scent, and pollinators with one packet of seed and a little preparation. Clear the chosen area of grass and weeds, rake the soil to a fine tilth, and sow thinly as the packet directs, in spring or autumn for your mix. Water gently until seedlings establish, then leave the patch mostly alone, since wildflowers prefer poor soil to rich, fed soil.
A wildflower patch suits a sunny corner, a bank, or the far end of a garden where a formal bed would need more care. Edge it with a mown strip or gravel so it reads as a choice, not neglect, and cut it down late in the season after plants have set seed. Expect the first year to look patchy while perennials settle, and the second year to fill out.
10. Compost Corner That Feeds the Beds
Set up a compost corner with one or two simple bins, and you turn kitchen peelings, leaves, and garden trimmings into free soil food for every bed. Site the bins on bare soil in a corner with easy access, layer green material such as peelings and grass with brown material such as leaves, straw, and torn cardboard, and keep the heap damp like a wrung out sponge. Turn it with a fork every few weeks to let air in and speed the process.
Finished compost smells earthy and looks dark and crumbly, and it works as a mulch or a soil improver in spring. Do not compost cooked food, meat, or diseased plants in a home heap, and keep the bins tidy with a lid or cover so the corner looks cared for. Good compost is the quiet reason cheap plants often outgrow expensive ones.
11. Painted Fence Panels for Instant Color
Paint fence panels in a soft, garden friendly color to change the whole garden backdrop in a weekend. Clean the fence first, brush off algae and loose paint, and apply exterior fence paint on a dry day, working panel by panel so drips do not dry in streaks. A sage green, warm cream, or soft grey backdrop makes green foliage stand out and helps pots and furniture look like part of one design.
Paint only the panels you see most from the house if time is short, and leave the rest for a later weekend. Keep paint off planting by covering beds with an old sheet while you work, and check with neighbors before painting a shared fence, since boundary rules and shared costs vary. One painted run often makes the rest of the garden feel brighter by contrast.
12. Handmade Stepping Stones in the Grass
Make stepping stones from a simple concrete mix in old cake tins, trays, or a shallow box mould, and lay them as a path through grass or a bed. Press a leaf, a shell, or a few small pebbles into the top of each stone before it sets, for a personal pattern that suits your garden. Let the stones cure fully, then set them level in the grass with soil packed around each edge so a mower passes over them safely.
Space the stones at a natural walking stride, and test the route by walking it before you fix them in place. Handmade stones cost little, suit curved routes that straight paving cannot follow, and give children a path they helped make. Lift and relevel any stone that rocks, since a stable path is the point of the whole idea.
13. Upcycled Bird Bath as a Focal Point
Make a bird bath from an upcycled ceramic bowl, an old sink, or a shallow dish set on a stone or brick pedestal, and you get a focal point that brings birds into the garden. Choose a shallow bowl, no deeper than a few inches at the center, with a rough edge birds can grip, and set it level where you can see it from the house but away from dense shrubs where cats hide. Fill it with fresh water and top it up in hot weather.
Clean the bowl weekly with a brush and fresh water, and empty it in hard frost if the material could crack. A bird bath suits a path end, a bed corner, or the center of a small lawn, where it gives the eye somewhere to rest. Birds visit most when water is shallow, clean, and in a spot with a clear view around it.
14. Cutting Row for Flowers Indoors
Set aside one narrow row, even along a fence, as a cutting garden, and you get flowers for the house all season without cutting into your display beds. Sow or plant zinnias, cosmos, sweet peas, and dahlias in rows spaced for picking rather than for looks, and cut stems in the morning into a bucket of water. Pick often, since regular cutting keeps new buds coming and stops plants from running to seed too soon.
Keep the cutting row watered and fed more than the display borders, and re-sow fast annuals such as cosmos if gaps appear by midsummer. A cutting row suits a sunny strip that would otherwise sit empty, and the flowers you bring inside link the garden to the rooms you live in. One row, picked weekly, often gives more stems than a whole bed cut only once.
Conclusion
A budget garden with personality comes from a few decisions made well, not from buying everything at once. Pick one color, one seat, and one planting idea from this list, set them where you will see and use them every day, and add the next idea only when the first one feels settled. Seeds, paint, reuse, and compost do most of the work over time, and the garden will look more like yours with each season that passes.
Save this list on Pinterest before your next garden trip, and work through it one area at a time: structure first, then planting, then the comfort details that make the garden yours.
FAQs
What is the cheapest way to start a garden with personality?
Start with paint, seeds, and one seat. Paint pots or a secondhand bench in one color, sow a wildflower patch or a cutting row, and place the seat where you will use it daily. Those three changes cost little and give the garden color, a focal point, and a reason to spend time outside, which matters more than filling every bed at once.
How can I garden on a budget with no experience?
Begin with easy plants and one small area. Herbs in tins, wildflowers from seed, and pot groups need only sun, water, and regular checks, and they show quickly whether a spot suits them. Ask neighbors for cuttings, read the plant label for sun and spacing, and add one new idea at a time instead of changing the whole garden in a weekend.
Do budget garden ideas last, or will they look cheap?
They last when the basics are sound: firm paths, level stones, weatherproof paint, and healthy soil. Cheap plants in good compost often outgrow expensive plants in poor soil, and a well painted secondhand bench looks better than a new bench placed where nobody sits. Reuse looks intentional when one color or material repeats, and care, such as deadheading and repainting, keeps it that way.
How do I keep a budget garden looking tidy?
Give every area a clear edge: a mown strip around a wildflower patch, brick edging along a gravel path, and pots grouped rather than scattered. Keep paths clear, compost tidy, and one area finished before starting the next. A garden with a few finished areas and one work in progress looks cared for, while many half finished projects do not.
What should I spend money on first in a budget garden?
Spend first on soil, compost, and a comfortable seat, since those affect everything else. Good soil helps cheap plants thrive, and a seat decides whether you use the garden. Save on plants through seeds, cuttings, and swaps, and on structure through paint, pallets, and secondhand finds, until you know which areas earn a larger spend.
Can I make a small or rented garden feel personal on a budget?
Yes, because most of these ideas move with you or leave little trace. Pots, pallet planters, tin herb walls, jar lanterns, and a painted secondhand bench all lift out or come with you, and a wildflower patch or cutting row can be sown in a single season. Focus on containers, color, and light, and avoid fixed changes to fences or soil until you know the rules for your home.
A fence does more than mark where your garden ends. It frames the view from the house, gives plants something to grow against, and decides how private a seating spot feels. The right fence can make a small garden feel settled and a large garden feel cared for, while the wrong one can block light, trap wind, or look out of place beside the house. These 29 garden fence ideas cover wood, metal, stone, bamboo, and living planting, for front gardens, back gardens, slopes, and small plots. Start with the job the fence must do, privacy, safety, a pet boundary, or a simple frame for planting, then pick a material and height that fits that job and your upkeep habits.
Key Takeaways
Start with the job: privacy, a boundary, wind shelter, or a frame for plants, and let that job set the height and style.
Check the boundary line, local height rules, and any shared fence agreements before you dig a post hole.
Match the fence to the house: a cottage suits pickets and willow, a modern home suits horizontal slats and metal panels.
Leave gaps for air and light where wind is strong, since a solid fence in an exposed spot takes more force than a slatted one.
Plan planting with the fence, not after it, so climbers, hedges, and pots have room to grow without crowding paths.
Budget for posts and fixings, not just panels, since strong posts and good drainage at the base decide how long a fence lasts.
1. Classic Vertical Board Fence
A vertical board fence is the workhorse of back gardens, and it suits almost any house style. Boards fixed upright to horizontal rails give full privacy, block a view of a busy road, and make a plain backdrop for planting. Choose close boards for privacy, or leave a small gap between boards if you want some air to pass through on a windy site.
Set posts in concrete or on gravel footings, keep the bottom board clear of soil, and use treated timber rated for outdoor use. A vertical board fence is easy to repair, since one damaged board can be replaced without taking down a whole panel. Paint or stain it in a color that suits the house, and re-coat it on the schedule the product label gives.
2. Horizontal Slat Fence for a Modern Look
Horizontal slats give a garden a calm, current feel, with long lines that make a narrow garden look wider. Slats fixed to upright posts, with small gaps between them, let light and air through while still screening the view at sitting height. This style suits modern homes, patios, and gardens with clean planting and gravel paths.
Use boards of even width and keep the gaps consistent, since uneven gaps show up quickly on a long run. A darker stain makes the fence recede behind planting, while a pale wash keeps a small garden bright. Fix slats with stainless fixings to avoid rust stains, and plan a cap rail on top to protect the end grain from rain.
3. White Picket Fence for a Front Garden
A white picket fence suits a front garden, a cottage, and any home where a friendly, open boundary matters more than full privacy. Short pickets with pointed or rounded tops mark the edge of the garden without hiding the planting behind them, and they frame a path to the front door. Keep the height low, usually around waist height, so the house still reads clearly from the street.
Paint pickets white or a soft cream, and check the paint each spring, since chips show up on white timber. Space pickets evenly and keep the gate in the same style, so the whole front reads as one design. Plant low flowers or a short hedge behind the pickets for color that does not hide the fence itself.
4. Lattice Top Fence for Light and Height
A lattice top adds height to a solid fence without making it feel like a wall. A solid lower section gives privacy at sitting height, while an open lattice section above lets light through and gives climbers a place to grow. This suits gardens where a taller fence is needed for privacy but a full height solid fence would feel heavy.
Train jasmine, clematis, or a light rose through the lattice, and prune it so it does not pull the lattice out of shape. Check local height rules before adding a lattice top, since the total height counts in many areas. A lattice top also suits a fence beside a patio, where extra height blocks a view from a neighboring window.
5. Living Hedge as a Fence
A hedge can do the job of a fence while adding scent, flowers, and food for birds. Evergreen hedges such as yew, privet, or holly give year round screening, while a mixed native hedge gives seasonal color and wildlife value. A hedge suits a garden where a hard fence would look harsh, and where you have room for roots and trimming.
Plant a hedge in a prepared trench with good soil, water it well in its first two years, and trim it little and often to keep it dense. A hedge takes longer to reach full height than a built fence, so use a temporary mesh fence inside the line if you need a boundary right away. Keep the hedge clear of paths and gates so it does not block access as it grows.
6. Woven Willow Hurdle Fence
Woven willow hurdles give a garden a soft, rustic edge that suits cottage gardens, vegetable plots, and informal borders. Willow rods woven between uprights make a light, flexible panel that breaks wind without blocking it fully, which helps in exposed gardens. Hurdles are light to handle, so they suit a fence you may want to move or replace as the garden changes.
Fix hurdles to sturdy posts, since willow alone will not hold up in strong wind. Willow weathers to a soft grey, and a hurdle usually lasts several years before it needs replacing, so treat it as a medium term fence rather than a permanent one. Use hurdles to screen a compost area, edge a vegetable garden, or divide a large garden into smaller rooms.
7. Bamboo Fence Panels
Bamboo panels give quick privacy with a warm, natural look that suits tropical planting, Asian inspired gardens, and sheltered courtyards. Rolled bamboo or framed bamboo panels fix to posts and screen a view in a day, which makes them a good choice for a rented home or a garden that needs a fast change. Bamboo suits a small garden because its fine texture does not feel heavy.
Fix panels to a frame rather than tying them to a single rail, and keep the bottom clear of standing water, since bamboo rots when it stays wet. In a windy spot, use bamboo as a screen inside a stronger frame, not as the only structure. Pair bamboo with ferns, grasses, and a stone path for a calm, planted feel.
8. Corrugated Metal Fence
Corrugated metal panels give a strong, low upkeep fence with an industrial edge that suits modern homes and urban gardens. Metal panels need little painting, resist rot, and give full privacy from day one. Use them in a frame of timber or steel posts so the edges stay safe and the panels stay flat in wind.
Choose a color coated panel if you want a softer look, or a plain galvanized finish for a workshop style garden. Keep metal clear of soil at the base to slow rust, and add a timber cap rail to finish the top edge. A corrugated fence also makes a good backdrop for bold planting, since its simple lines do not compete with leaves and flowers.
9. Corten Steel Fence
Corten steel, also called weathering steel, forms a rust colored surface that protects the steel beneath it. It suits modern gardens, gravel planting, and homes with brick or stone, where its warm orange brown tone echoes autumn leaves and clay pots. Corten panels give full privacy and need no paint, which keeps upkeep low once the surface has settled.
Allow the steel to weather before planting close beside it, since rust runoff can stain paving in the first months. Use a gravel strip or a stone edging at the base to catch runoff and protect paths. Fix panels to strong posts, and keep the design simple, since the material itself is the feature.
10. Low Stone Wall with a Fence Above
A low stone wall topped with a short fence gives a garden structure at ground level and privacy above, without a tall, heavy wall. Stone suits a front garden, a sloping site, and any home where a solid base already exists. Build the wall to a comfortable sitting or planting height, then fix a timber or metal fence to posts set into the wall or behind it.
Keep the wall footing below frost level where frost is a risk, and leave drainage gaps so water does not build up behind the stone. Plant low shrubs or trailing plants at the base to soften the stone, and use the wall top as a seat or a shelf for pots. For a dedicated seat beside a boundary, these garden bench ideas show how to pick the spot first and match the seat to it. This combination also suits a garden on a slope, where the wall levels the ground and the fence follows the top line.
11. Trellis Fence for Climbing Plants
A trellis fence is a frame for planting first and a boundary second. Open trellis panels let light through, give roses, clematis, jasmine, and sweet peas a place to climb, and turn a plain boundary into a green wall in summer. This suits a garden where you want privacy in the growing season but light in winter, when climbers are bare.
Fix trellis to posts with a gap behind it so air can move and the fence can dry. Choose a trellis with a mesh size that suits the climber, small mesh for sweet peas, larger mesh for roses. Tie stems loosely as they grow, prune after flowering as the plant type requires, and keep climbers clear of gates and locks.
12. Espalier Fruit Tree Fence
Espalier fruit trees trained along wires or a frame make a living fence that also gives fruit. Apples and pears trained flat against a wire fence suit a sunny boundary, a vegetable garden edge, and a small garden where a tree would take too much room. The flat shape keeps the trees easy to prune, pick, and spray, and it looks neat all year.
Set posts at regular intervals, run wires at the heights you plan to train branches to, and plant one tree per bay. Prune in summer to keep the shape flat and open, and thin fruit so branches do not break under weight. An espalier fence needs sun and good air flow, so avoid a shaded, damp boundary for fruit trees.
13. Gabion Fence Wall
Gabion baskets filled with stone make a strong, free draining fence that suits modern gardens, drive edges, and slopes. Wire baskets packed with stone give full privacy, block sound better than a thin panel, and need little upkeep once filled. Gabions suit a garden where stone is already part of the local landscape, or where a solid wall would need heavy footings.
Fill baskets in layers, packing the face stones neatly so the front looks tidy, and use smaller stone in the middle so the basket stays full. Cap the top with a flat stone or timber board for a finished edge, and wear gloves when handling cut wire. Keep gabions level as you build, since a tilted basket is hard to correct once it is full of stone.
14. Angled Louver Fence for Privacy and Air
Angled louver boards let air pass through a fence while blocking a direct view, which makes them a smart choice for a windy garden or a patio that needs privacy without still air. Boards fixed at an angle, like a vent, screen the view from ground level and from a neighboring window, while still letting a breeze through. This suits a seating area, a hot courtyard, and a fence beside a path where air flow matters.
Keep the angle and spacing even across the run, since the effect depends on consistency. A louver fence works well in timber or metal, and a darker finish makes the angled boards read as one calm surface. Check the view from both sides before fixing boards, since the angle that blocks a view from one side may open it from the other.
15. Painted Picket Fence in Color
A picket fence does not have to be white. Sage green, soft blue, warm grey, or a muted terracotta can tie a fence to the house color, the front door, or the planting beside it. A colored picket fence suits a front garden that needs personality without a tall, closed boundary, and it photographs well from the street.
Test the color on one picket in daylight before painting the whole run, since colors look darker on a large area than on a sample card. Use exterior paint made for timber, prepare the wood well, and keep a small pot of the same paint for touch ups. Repeat the color once more in the garden, on a gate, a bench, or pots, so the fence feels part of the whole design.
16. Rustic Split Rail Fence
A split rail fence suits a country garden, a large plot, and any boundary where marking the edge matters more than blocking the view. Rough timber rails fixed between posts give an open, informal line that fits meadows, orchards, and vegetable gardens. Split rail fences are quick to build, use simple materials, and leave room for planting to grow through and over them.
Space posts evenly, keep rails level, and use two or three rails per bay depending on the height you need. A split rail fence will not contain small pets or give privacy, so pair it with a hedge or wire mesh if you need either. Let the timber weather naturally, or oil it lightly to slow greying if you prefer a warmer tone.
17. Wood Frame with Wire Mesh
A timber frame filled with wire mesh gives a strong, see through fence that suits vegetable gardens, dog runs, and gardens where a view matters. The frame gives structure and a finished look, while the mesh keeps pets in and rabbits out without blocking light or a view of the landscape beyond. This suits a garden on a slope or at the edge of open land, where a solid fence would hide the view.
Choose mesh with a gauge and opening size that suits the job, smaller openings for small pets, larger openings where you only need a boundary. Fix mesh tightly to the frame and bury the bottom edge or add a board at the base to stop animals digging under it. Paint or stain the frame to match other timber in the garden, and keep climbers off the mesh if you need the fence to stay see through.
18. Reclaimed Wood Fence
A fence built from reclaimed boards, old doors, or salvaged timber gives a garden character that new timber cannot match. Varied boards, weathered colors, and old nail marks suit a cottage garden, a creative plot, and any garden where a one of a kind boundary is the point. Reclaimed wood also keeps usable timber out of waste, which suits a garden built with reuse in mind.
Check reclaimed boards for rot, old paint, and protruding nails before use, and avoid timber that may have been treated with chemicals you do not want near planting or pets. Mix board widths in a planned pattern rather than at random, so the fence looks deliberate rather than patched. Seal the timber as needed, and plan to replace individual boards as they age, since reclaimed boards will not all last the same time.
19. Fence with Built In Planters
A fence with planters built into its face or top turns a boundary into a growing space. Planter boxes fixed to a fence suit a small garden, a patio, and a rental where beds are limited, since they use vertical space that would otherwise sit empty. Grow herbs, trailing flowers, strawberries, or small salads in fence planters, and change the planting with the seasons.
Fix planters to posts, not just to panels, so the weight of wet soil does not pull the fence out of shape. Line planters, add drainage holes, and water them more often than beds, since small planters dry out fast. Keep planters clear of gates and locks, and avoid planting that will grow into a neighbor’s side without agreement.
20. Arched Gate as a Garden Feature
A gate can be the best part of a fence, not just a gap in it. An arched top, a decorative frame, or a gate painted a bold color turns an entry into a feature and gives visitors a clear signal to come in. This suits a front garden, a path between garden rooms, and any fence where the gate is the first thing people see.
Build the gate frame to match the fence, hang it on strong posts with good hinges, and keep the latch easy to use with one hand. Plant climbers on the posts beside the gate, but keep stems clear of hinges and the latch. A gate that swings freely, closes cleanly, and matches the fence makes the whole boundary feel well made.
21. Decorative Iron Fence
A decorative iron fence suits a formal front garden, a period home, and any boundary where you want to see through the fence rather than hide behind it. Iron railings with finials, scrolls, or a simple spear top give a garden a finished, classic edge, and they last for decades with basic care. Iron suits a front garden because it marks the boundary clearly while keeping the house and planting visible from the street.
Set iron panels on a low wall or on stone piers for a formal look, and paint them in black, dark green, or a color that matches the house trim. Check for rust each spring and touch up paint where it has chipped, since rust spreads fast once it starts. Keep planting clear of the railings so leaves do not trap damp against the metal.
22. Shadowbox Privacy Fence
A shadowbox fence, also called a board on board fence, fixes boards on both sides of the rails with a small overlap, so the fence looks finished from either side. This suits a shared boundary, since both neighbors see a neat face, and it gives privacy while still letting some air through the overlaps. A shadowbox fence also hides the rails, which gives it a cleaner look than a standard panel fence.
Use boards of even width and keep the overlap consistent, since gaps show up on a shadowbox fence. A shadowbox fence uses more timber than a single sided fence, so budget for the extra boards and for strong posts that can carry the weight. Stain both sides, or agree a finish with a neighbor if the fence is shared, so both faces weather evenly.
23. Living Wall Panels on a Fence
Living wall panels fixed to a fence turn a plain boundary into a planted wall without taking bed space. Panels with pockets or trays suit a small garden, a courtyard, and a fence beside a patio, where every square foot counts. Grow ferns, trailing herbs, small perennials, and seasonal flowers in the panels for color and scent at eye level.
Fix panels to posts and rails that can carry the weight of wet soil, and water from the top so moisture reaches each pocket. Choose plants that suit the light on that fence, sun lovers on a south facing fence, ferns and shade plants on a north facing one. Keep panels away from gates and locks, and leave room to reach plants for trimming and replacing.
24. Fence with Integrated Lighting
Lights fixed to a fence turn a boundary into a guide after dark and make a garden usable in the evening. Small solar lights on post caps, a light strip under a cap rail, or low wall lights on fence pillars mark paths, gates, and steps without harsh glare. This suits a garden used for evening meals, a path to a back gate, and a front garden where a lit entry feels welcoming.
Use warm white light and keep lights low, so they mark the garden rather than flooding it. Solar lights need sun on their panels during the day, so avoid a fully shaded fence for solar fittings. Keep cables out of walkways, and check that lights do not shine into neighboring windows, since a fence light that glares at a neighbor soon becomes a problem.
25. Horizontal Fence Between Stone Pillars
Stone pillars with horizontal timber slats between them give a fence a solid, built feel that suits a front garden, a drive entry, and a modern home with stone details. Pillars mark each bay, give the fence a rhythm, and make a long run feel planned rather than endless. Stone also anchors the fence visually, so the timber between pillars looks lighter by contrast.
Build pillars on proper footings and keep them level, since a leaning pillar shows up at once. Use a cap stone on each pillar to protect it from rain, and fix slats to metal brackets set into the pillars or to posts hidden behind them. Repeat the stone once more in the garden, on a path edge or a low wall, so the pillars feel part of the whole design.
26. Stepped Fence for a Slope
A fence on a slope can step down in panels or follow the slope in a smooth rake, and the choice changes how the garden looks. Stepped panels suit a steep slope, since each panel stays level and the fence reads as a staircase, while a raked fence suits a gentle slope, since it follows the ground without gaps underneath. Both suit gardens where a level fence would leave a gap at the low end or bury boards at the high end.
For stepped panels, set each post to the height of its panel and fill small gaps under panels with a gravel board or planting. For a raked fence, use boards that can run at an angle or panels made for sloping ground. On a steep slope, these tiered garden ideas show how to work with levels in the garden as a whole, so the fence and the planting suit each other.
27. Low Front Fence with a Planting Border
A low fence with a planting border in front of it suits a front garden where you want a boundary that still shows off flowers. A short picket, rail, or metal fence at knee height, with a border of shrubs and perennials in front, gives structure in winter and color in summer. The fence marks the edge, while the planting does the visual work.
Keep the border narrow enough to reach from the path for weeding, and choose plants that will not grow over the fence and block the gate. Repeat one or two plants along the run for a calm look, rather than planting a different flower in every gap. A low fence also suits a garden where a tall fence would hide the house or block light to a front room.
28. Black Painted Fence to Make Planting Pop
Painting a fence black, or a very dark green, makes green leaves and bright flowers stand out against it, and it makes the fence itself recede into shade. This suits a garden with strong planting, a shaded boundary, and any fence that you want to notice less, not more. Black also suits a modern garden, where a dark backdrop gives planting a gallery feel.
Use exterior paint made for the fence material, prepare the surface well, and expect to touch up scuffs, since dark paint shows marks. A black fence can feel hot in full sun, so avoid dark paint on a fence beside a seating area in a very hot climate, or plant in front of it to shade the surface. Keep the planting in front simple and bold, so it reads clearly against the dark boards.
29. Composite Fence for Low Upkeep
A composite fence, made from recycled wood fiber and plastic, gives the look of timber with far less upkeep. Composite boards resist rot, do not need painting, and keep their color longer than stained timber, which suits a busy household, a rental, and any garden where yearly painting is unlikely. Composite suits a modern garden, a patio boundary, and a fence that must look tidy with little care.
Fix composite boards to the system the maker specifies, since composite expands and contracts with temperature and needs room to move. Use matching posts and caps from the same system for a finished look, and clean the boards with water as the maker directs. A composite fence costs more up front than basic timber, so weigh that cost against the years of painting and repairs it saves.
Conclusion
The best garden fence is the one that fits the job, the house, and the amount of care you will actually give it. A low picket suits a friendly front garden, a solid board fence suits a private back garden, and a living hedge or trellis suits a garden where planting matters most. Walk the boundary, check the rules and the ground, and pick one idea from this list to start with, then add planting, a gate detail, or lighting once the fence itself feels right. A fence built well, with strong posts and room for plants to grow, will frame your garden for years. Save this list on Pinterest before your next garden project, and work through it one boundary at a time.
FAQs
How high should a garden fence be?
It depends on the job and local rules. A front garden fence is often kept low, around waist height, so the house stays visible from the street. A back garden privacy fence is often around 6 feet, but height limits vary by location and by whether the fence faces a road, a neighbor, or open land. Check local rules and any shared fence agreements before you build, and talk to a neighbor if the fence will change their light or view.
What is the cheapest garden fence idea?
A split rail fence, a wire mesh fence on timber posts, and a simple vertical board fence are usually among the lowest cost options, since they use simple materials and few fixings. Cost depends on length, height, timber prices in your area, and whether you build it yourself or hire help. A living hedge can be low cost to plant, but it takes years to reach full height, so factor in the wait as well as the price.
Which garden fence gives the most privacy?
A close board fence, a shadowbox fence, a solid metal panel fence, and a dense evergreen hedge give the most privacy, since they block a direct view at sitting and standing height. For full privacy, check for gaps at gates, at the base, and where the fence meets a wall or a slope, since a small gap can undo a tall fence. A lattice top adds height, but it only gives privacy once climbers cover it.
How long does a wooden garden fence last?
A wooden fence built with treated timber, strong posts, and good drainage at the base often lasts 15 to 20 years, with boards replaced as needed along the way. Posts usually fail first, especially where they sit in wet soil, so keep soil and mulch clear of post bases and use post protectors or gravel footings where the maker advises them. Regular staining or painting, and prompt repair of damaged boards, will add years to a timber fence.
Can I put a fence on a slope?
Yes, and you have two main choices. A stepped fence keeps each panel level and steps down the slope, which suits a steep slope and gives a tidy, stair like line. A raked fence follows the slope in one smooth line, which suits a gentle slope and leaves no gap under the fence. For a garden with a steep slope, work out the levels for the whole garden first, since paths, steps, and planting also need to suit the slope.
Do I need permission to build a garden fence?
Rules vary by location, fence height, and whether the fence faces a public road or a shared boundary. In many areas, a back garden fence below a set height needs no formal permission, while a taller fence, a fence beside a road, or a fence in a protected area may need approval. Check local planning rules, property lines, and any homeowners association rules before you build, and keep a record of what you checked.