Author: Sophie Hayes

  • 25 Baby Shower Decoration Ideas for a Beautiful Home Celebration

    25 Baby Shower Decoration Ideas for a Beautiful Home Celebration

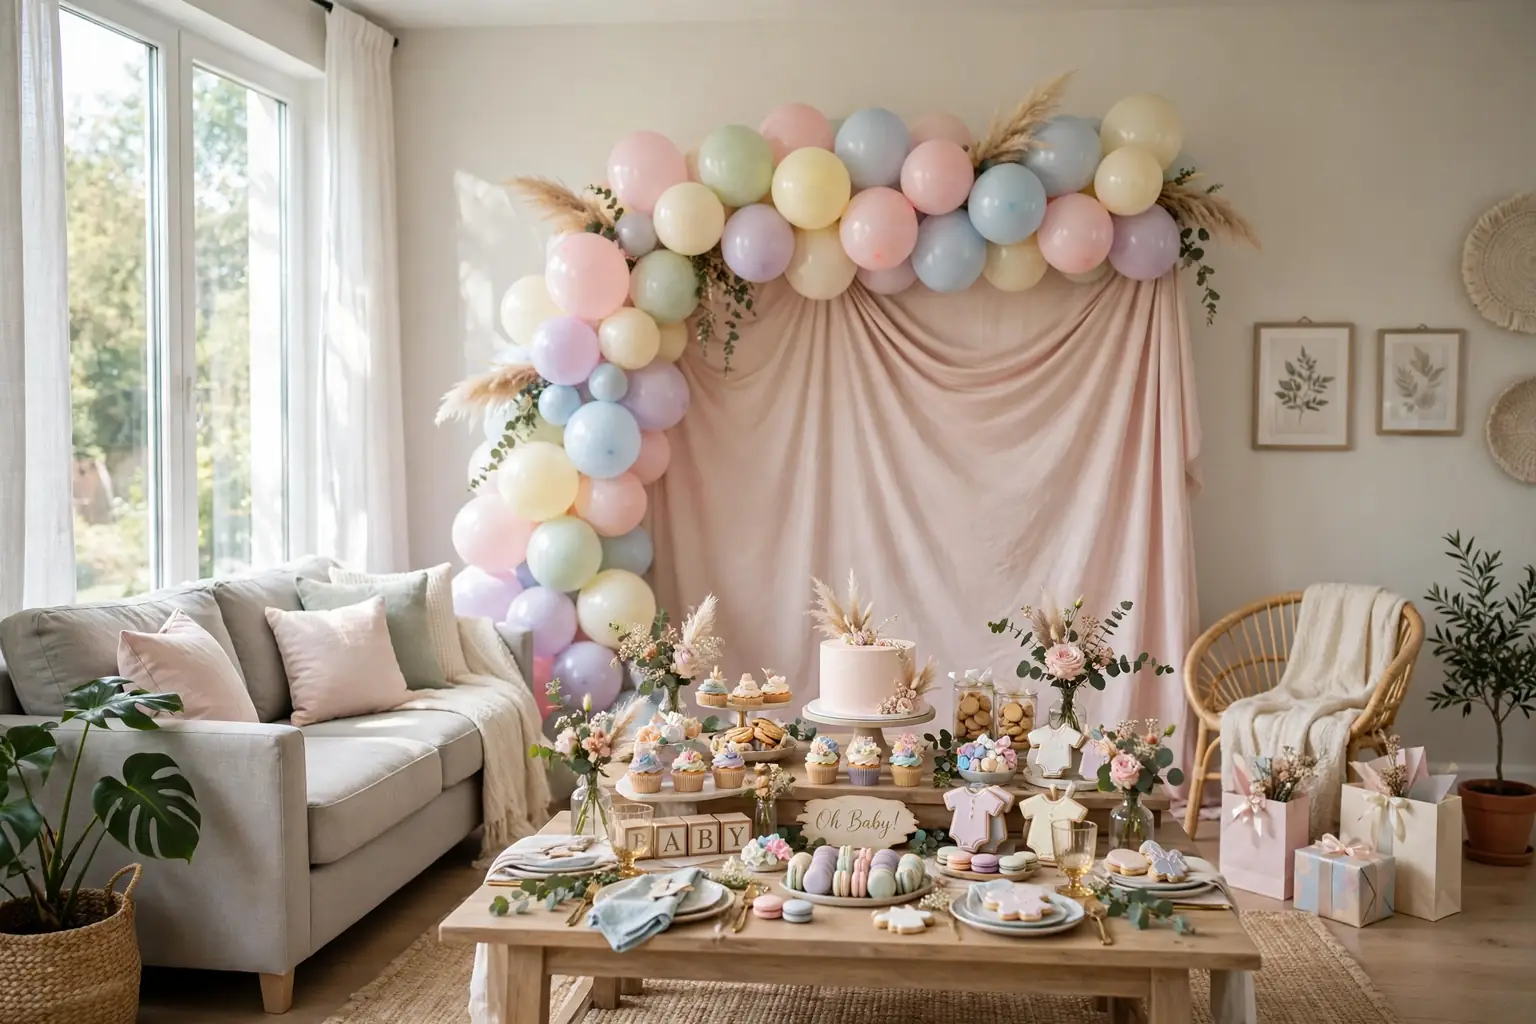
    Baby shower decoration ideas for a home celebration work best when you pick one soft palette, one clear focal point, and simple pieces guests can enjoy without crowding the room. Start with balloons or a backdrop, add a low table centerpiece, and finish with a dessert table, a gift spot, and small personal touches that welcome the guest of honor.

    The 25 ideas below suit a living room, a dining room, or a combined open plan space, and most of them use pieces you can set up the day before. Pick a palette first, such as blush and cream, sage and white, or soft blue and cream, then repeat it in balloons, table linen, and flowers. The same low centerpiece rule that keeps a spring tablescape easy to talk across applies here, and the soft layers in these cozy room decorating ideas show how warm light and texture can make a party room feel calm rather than busy.

    Key Takeaways

    • Pick one palette of two or three soft colors and repeat each color at least twice, in balloons, linen, and flowers.
    • Give the room one focal point, such as a balloon arch or a backdrop, and keep the rest of the decor simple around it.
    • Keep table centerpieces low and narrow, so guests can see each other and serving dishes still fit.
    • Group decor by zone: entry, main table, dessert table, gift table, and one photo or games corner.
    • Use battery candles near balloons, paper, and fabric, and keep real flames clear of all decor.
    • Choose pieces that lift off in one move after the party, such as a backdrop panel, a tray centerpiece, and boxed favors.

    1. Pastel Balloon Arch at the Entry
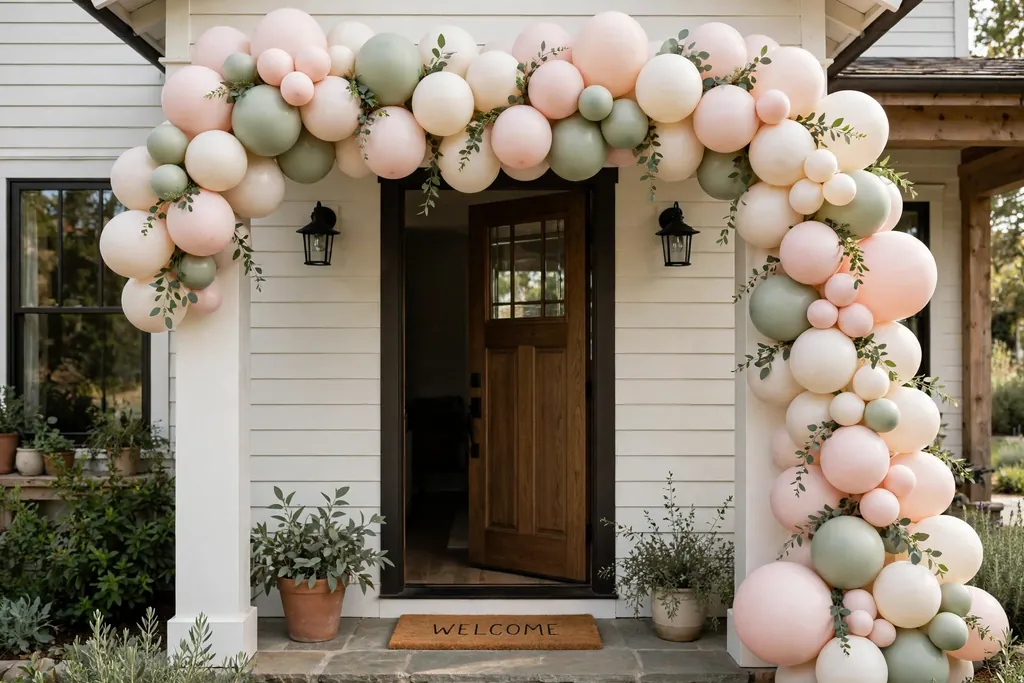
    Pastel balloon arch in blush, cream, and sage over a home entry doorway.

    A pastel balloon arch at the entry tells guests they have arrived at a celebration before they see the main room. Build the arch over a doorway or along one wall, using balloons in your palette, such as blush, cream, and soft sage, with a few larger balloons mixed among smaller ones for shape. Anchor both ends with weights or ties to furniture that will not move during the party.

    Keep the arch clear of the walking path and away from ceiling fans, light fixtures, and open flames. If the arch sits near a door that guests use often, leave the center open and wide, so no one brushes balloons on the way in. Deflate and sort balloons after the party, and keep any uninflated balloons out of reach of small children.

    2. Soft Fabric Backdrop Behind the Main Table
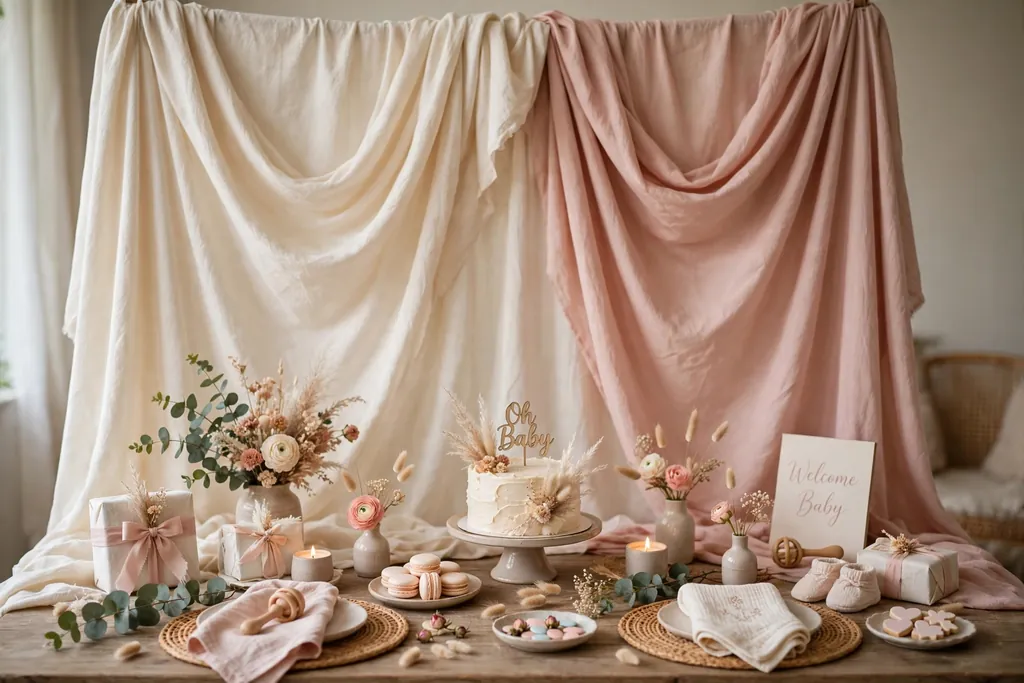
    Soft cream and blush fabric backdrop hanging behind a decorated baby shower table.

    A soft fabric backdrop behind the main table gives photos a clean background and marks the guest of honor seat. Hang lengths of muslin, linen, or tulle from a stand or a curtain rod, in cream or a pale palette color, with gentle folds rather than a flat sheet. Layer two tones, such as cream over blush, for depth without pattern.

    Secure the stand so it cannot tip, and keep the fabric clear of candles and food. Weight the base with sandbags or heavy books hidden behind a plant if the stand feels light. After the party, the same fabric can serve as a tablecloth or a curtain panel at home, so it earns a second use.

    3. Baby Block Stacks as Table Markers

    Wooden baby blocks stacked to spell BABY on a baby shower table with small flowers.

    Wooden or cardboard baby blocks stacked to spell a word, such as BABY, make a playful centerpiece that guests notice at once. Set one stack at the center of each table, or one large stack on the main table, with small flowers or greenery tucked beside the base. Keep the stack low, with three or four blocks high at most, so sightlines stay open.

    Use blocks that sit flat and stable, and keep them clear of drinks, since a spill can mark painted blocks. If small children attend, use large, lightweight blocks that cannot be a choking risk, and set the stack on a tray so it lifts off in one move when food is served.

    4. Diaper Cake Display on the Dessert Table
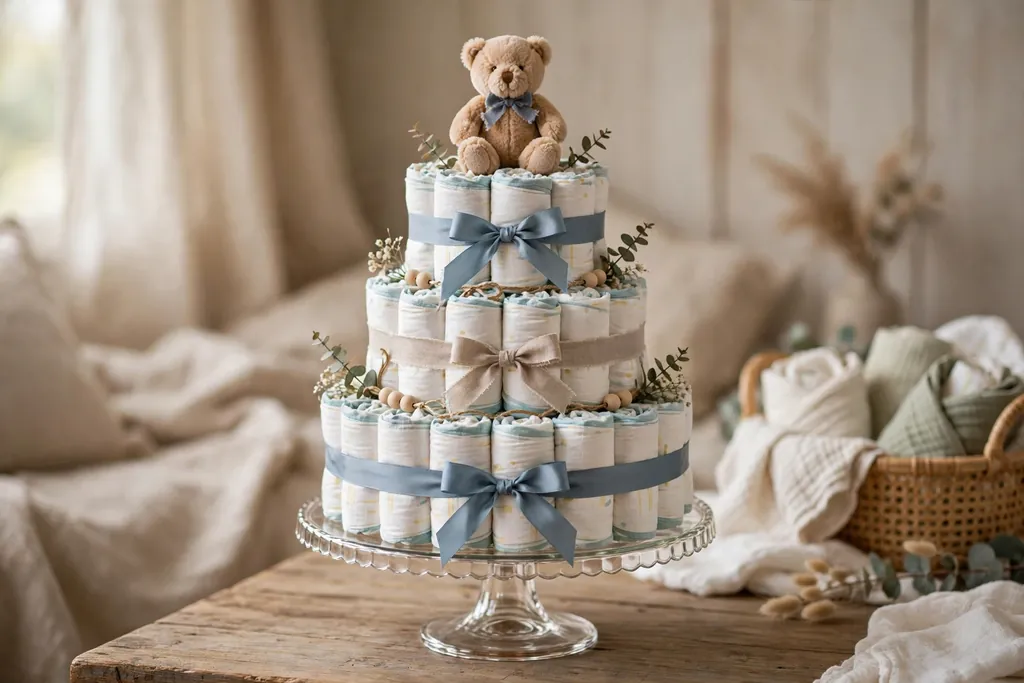
    Tiered diaper cake with ribbon and a small plush topper displayed on a cake stand.

    A diaper cake, made from rolled diapers arranged in tiers and tied with ribbon, works as both decor and a useful gift. Set it on a cake stand at one end of the dessert table, with a small topper, such as a plush toy or a paper flower, and a ribbon in your palette around each tier. Keep it clear of food plates, so guests do not mistake it for cake.

    Build the cake on a firm base board, and wrap the finished tiers lightly if the party is outdoors or in a warm room. After the party, the guest of honor can take the diapers home as they are, so avoid gluing anything to the diapers themselves. Use ribbon and pins only, and check that no small pins stay loose in the diapers.

    5. Low Floral Bowls for the Main Table
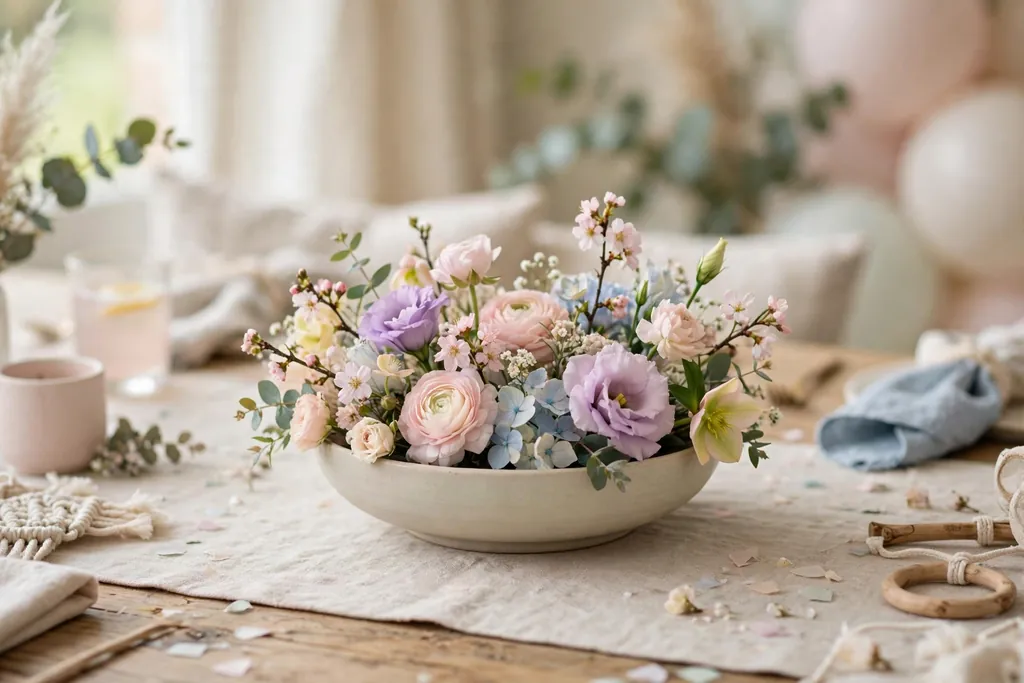
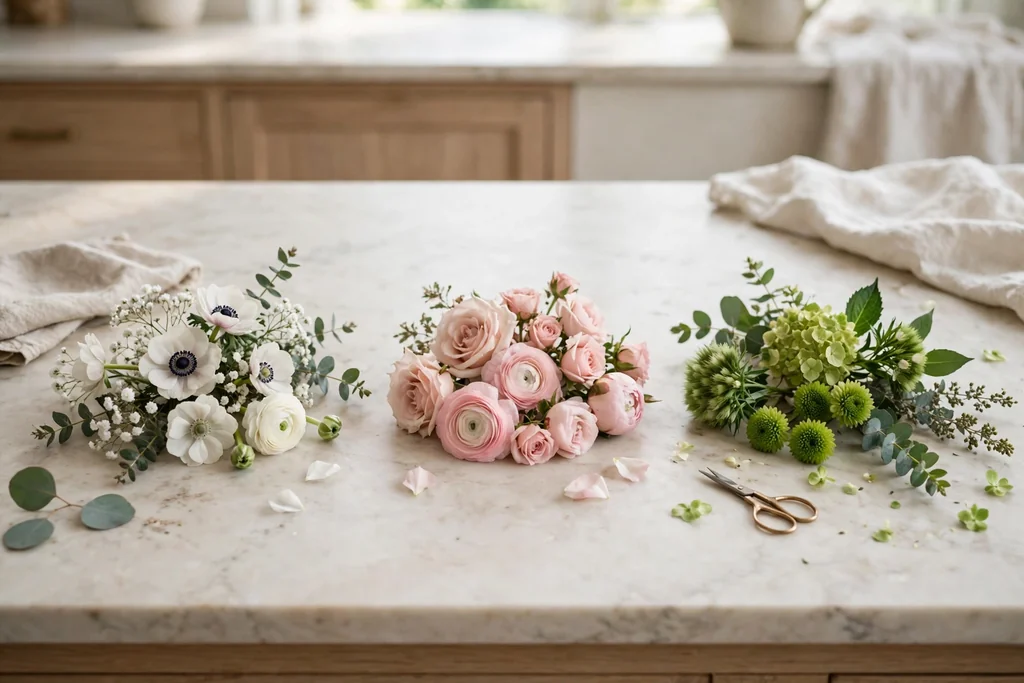
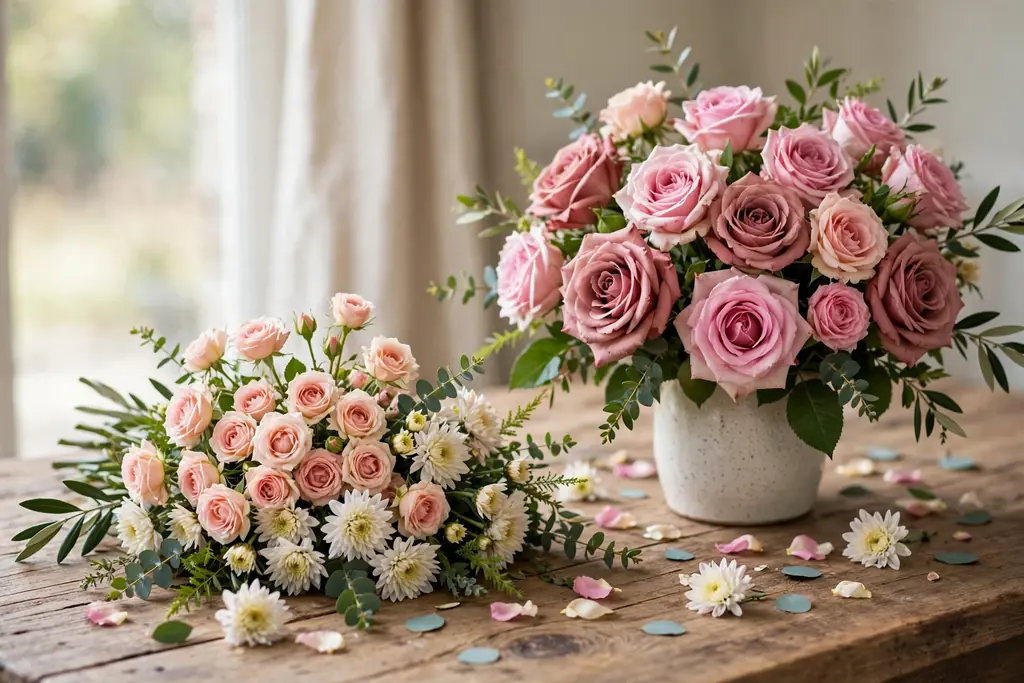
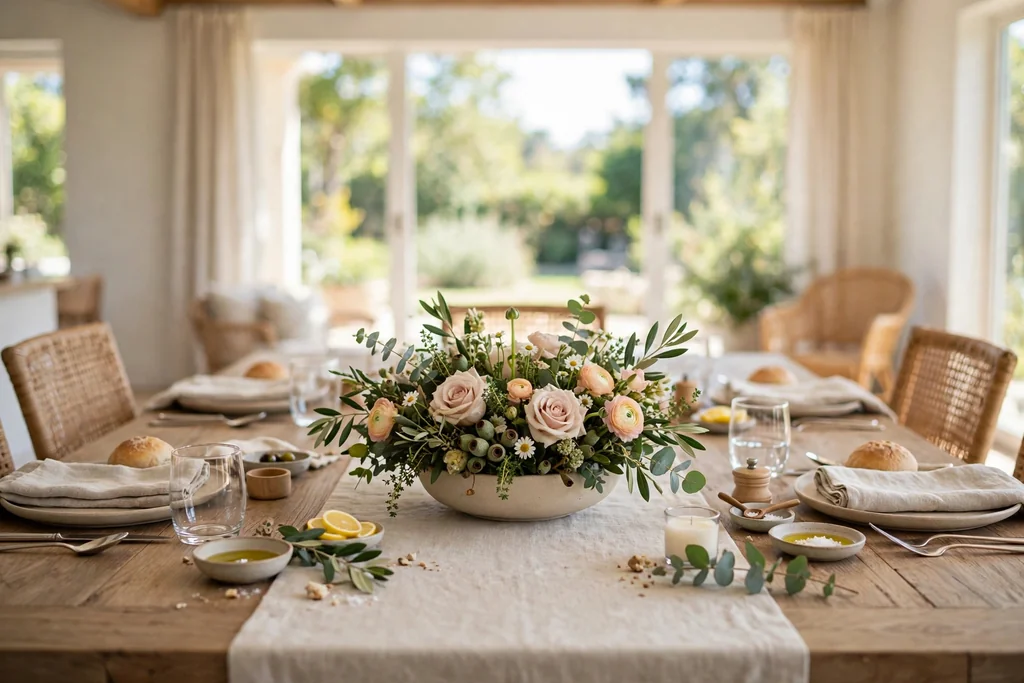
    Low wide bowl of short stemmed pastel flowers as a baby shower table centerpiece.

    Low floral bowls keep the table pretty without blocking conversation. Fill wide, shallow bowls with short stemmed flowers in your palette, such as roses, ranunculus, or carnations, with a few green leaves between blooms, and set one bowl at the center of each table. The low, round shape suits both round and long tables.

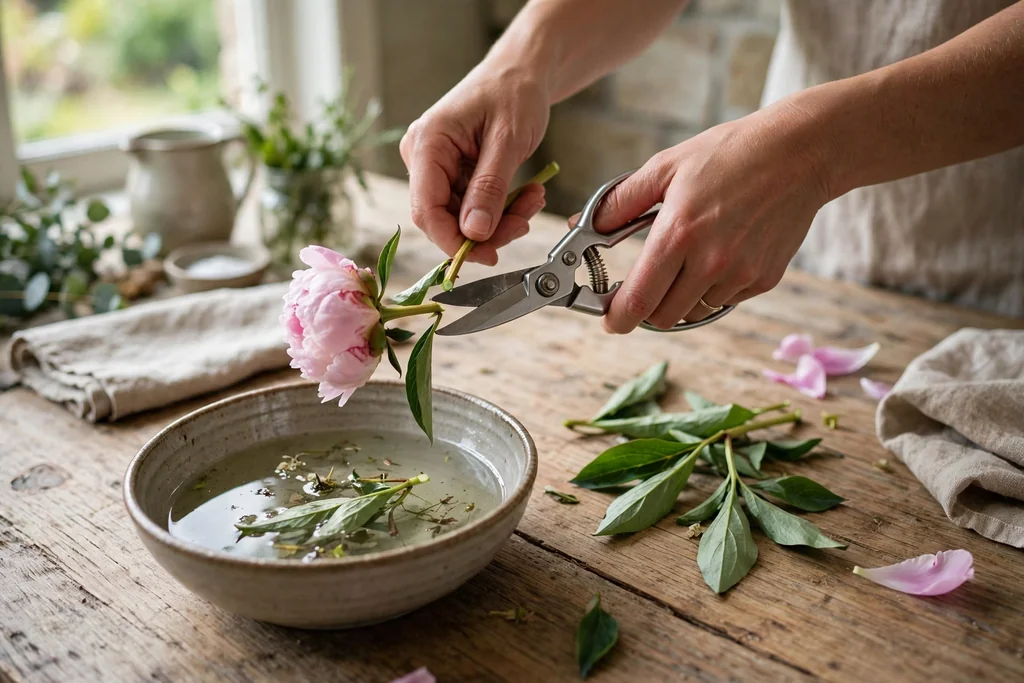
    Change the water the morning of the party, and trim stems at an angle so blooms stay fresh through the day. Keep pollen heavy blooms clear of food plates, and set each bowl on a small mat if the table marks easily. If fresh flowers are out of budget, use good quality faux blooms in the same low bowls.

    6. Pastel Table Settings with a Simple Runner
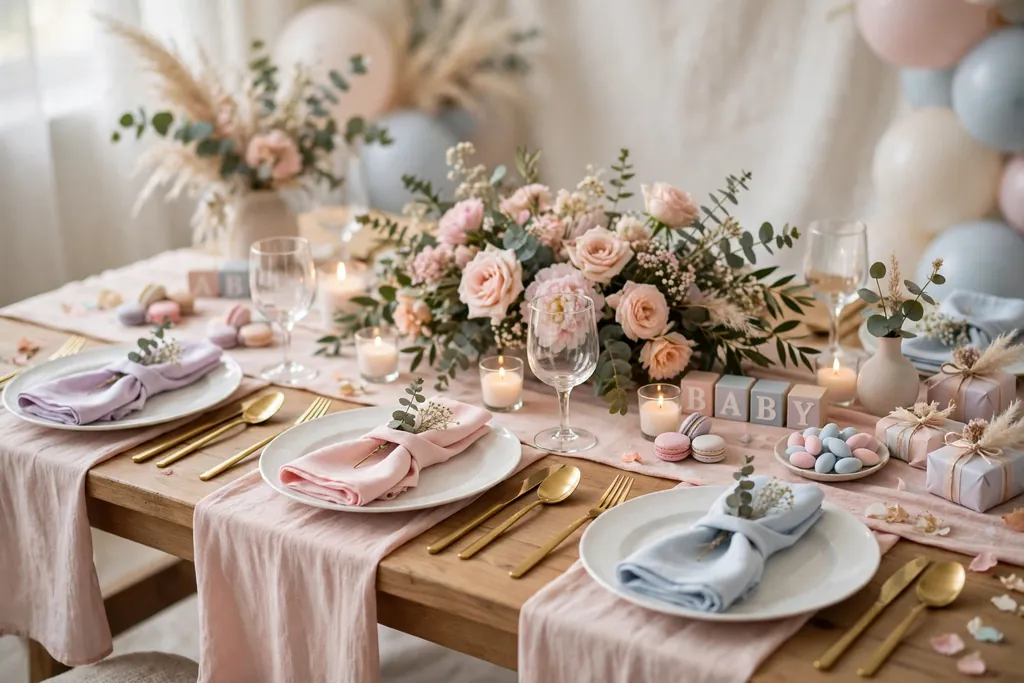
    Pastel baby shower table setting with a blush runner, white plates, and folded napkins.

    Pastel table settings start with a plain runner in blush, sage, or cream, then white plates, clear glasses, and folded napkins in one palette color. The runner carries most of the color, so plates and glasses can stay plain and easy to use. Add one small detail at each place, such as a sprig of greenery on the napkin, to tie places together.

    Iron or steam the runner before the party, since creases show more on pale linen than on patterned cloth. Keep the runner narrow enough that plates sit flat on the table, not on the fabric edge. The same low, calm approach used for valentine table decorations works here, with pastel shades in place of red and pink.

    7. Ribbon Bows on Dining Chairs
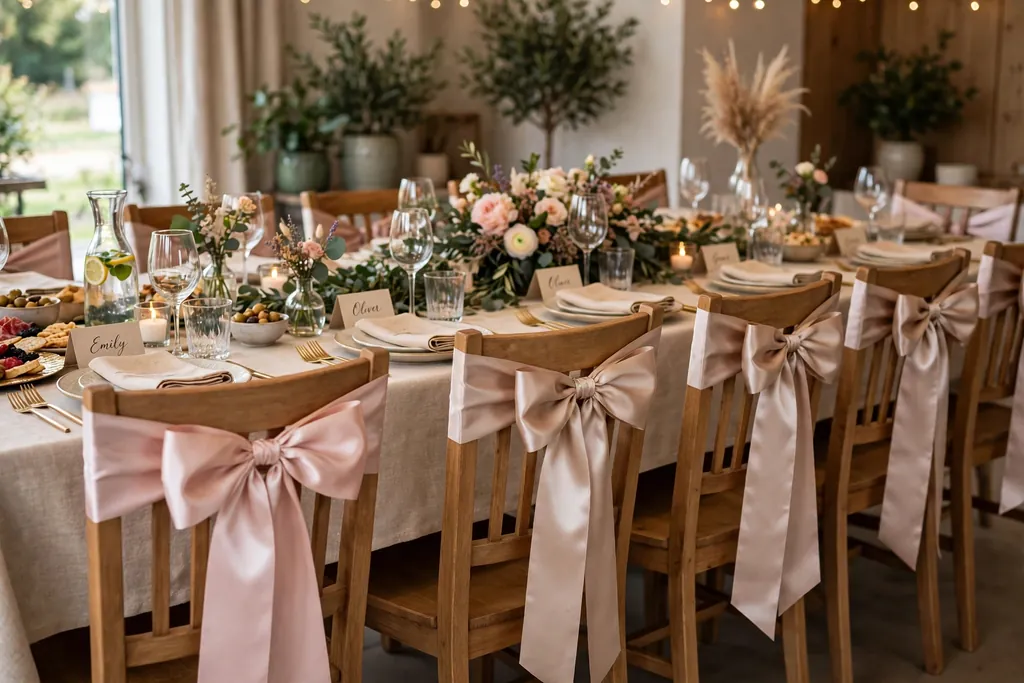
    Dining chairs with wide satin ribbon bows tied on the back rails at a party table.

    Ribbon bows tied to dining chairs add color behind each guest without taking up table space. Tie a wide satin or grosgrain ribbon around the top rail of each chair, finishing in a simple bow, in one palette color or in two alternating colors. The bows suit a table that is already full, since they use no surface at all.

    Cut ribbons to the same length, and tie each bow the same way, so chairs look matched from across the room. Use a simple knot under the bow to keep it from slipping, and keep ribbon ends clear of chair legs and walkways. Remove ribbons before washing chair covers, and store them flat so they do not crease.

    8. Dessert Table with a Tiered Cake Stand
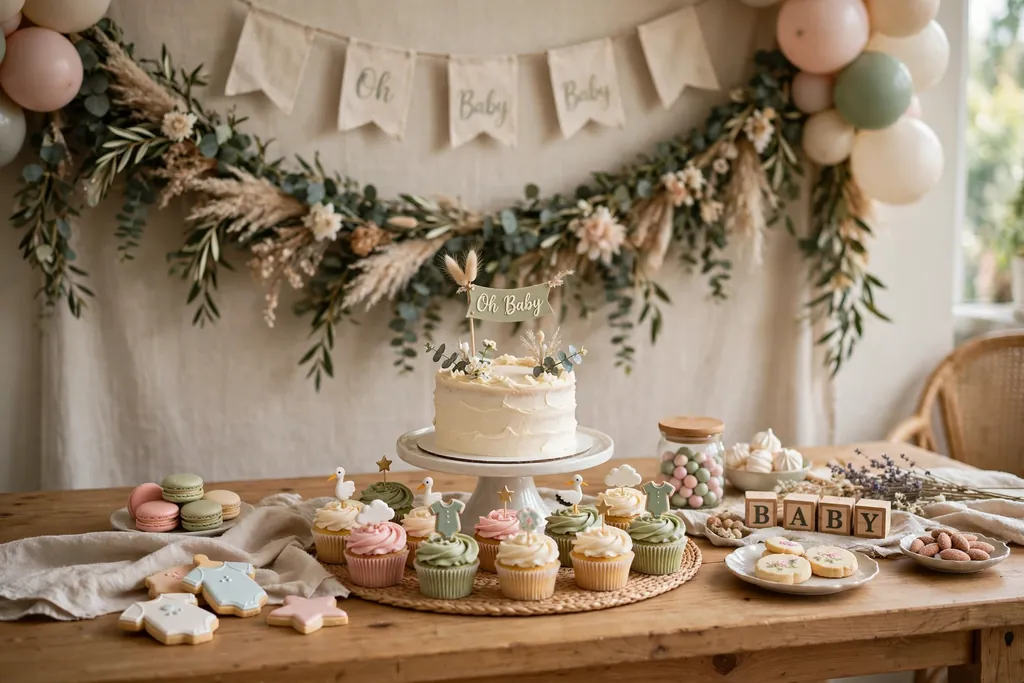
    Dessert table with a tiered cake stand, cupcakes, and a garland backdrop.

    A dessert table with a tiered cake stand gives the party a clear sweet focal point. Set the main cake or cupcakes on a stand at the center of a side table, with smaller plates of cookies or fruit around it, and a backdrop or garland behind the table to frame it. Keep heavier items on the lowest tier, and lighter treats above.

    Leave room at the front of the table for plates and serving tools, and keep the table clear of the main walking path, so guests can queue without blocking seats. Cover treats until serving time, and wipe the stand after use. If the table holds food only, set flower decor beside it rather than among the food tiers.

    9. Onesie Clothesline Garland
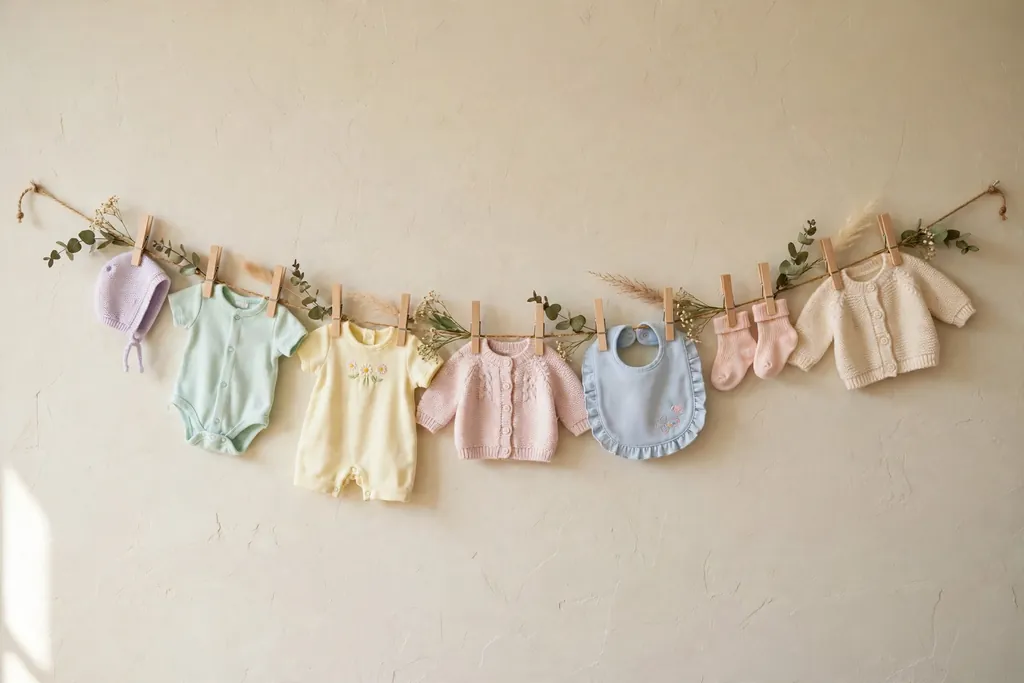
    Small pastel baby clothes clipped on a twine clothesline garland across a wall.

    A onesie clothesline garland strings small baby clothes on twine across a wall, a mantel, or a window, clipped with small pegs. Use plain or pastel onesies, bibs, and socks in your palette, spaced evenly along the line, with one or two small paper stars or hearts between items. The line reads as decor during the party and as a useful gift after it.

    Hang the line high enough that guests do not brush it with their heads, and secure both ends so it does not sag onto food or candles. Wash new clothes before hanging them, and keep the line clear of heat sources. After the party, fold the clothes into a gift box for the guest of honor.

    10. Photo Memory Table
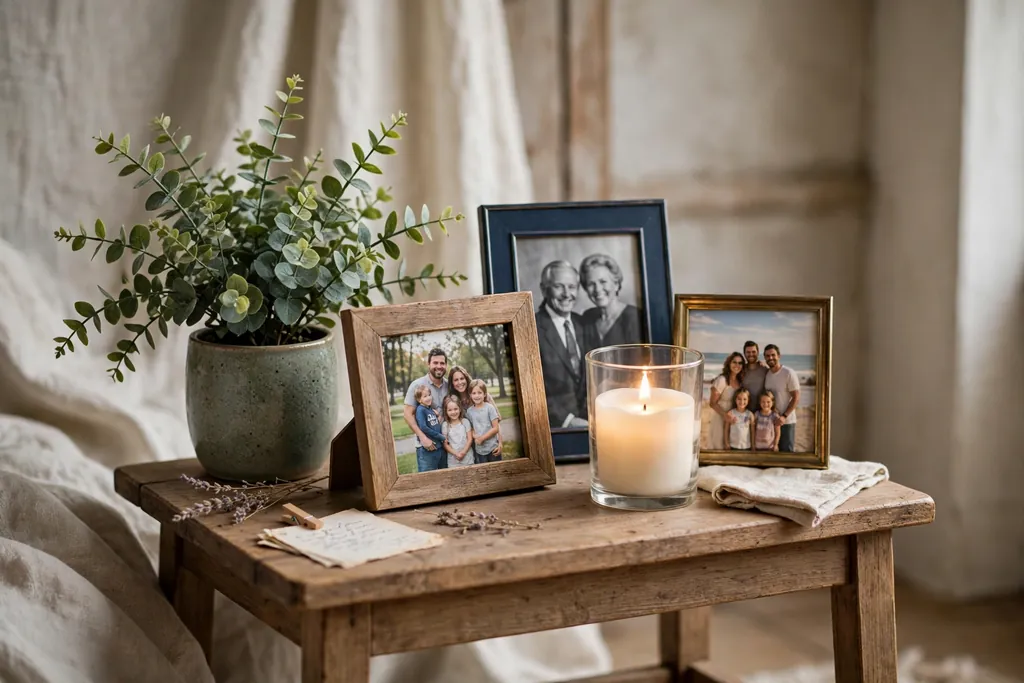
    Small memory table with framed family photos, a plant, and a battery candle.

    A photo memory table gives guests something to look at while they settle in. Set a small table near the entry with framed photos of the parents, a few ultrasound prints if the family wishes to share them, and one or two keepsakes, such as a first pair of shoes. Keep frames at varied heights, with a small plant or candle beside them, so the table looks styled rather than crowded.

    Label nothing that the family would rather keep private, and ask before printing any photo that includes other people. Keep the table clear of drinks, since a spill can damage prints, and set it where guests can step aside to look without blocking the entry. Battery candles suit this table, since paper prints sit close by.

    11. Gift Table with a Basket and a Card Box

    Gift table with a large basket of wrapped gifts and a decorated card box.

    A gift table with a basket and a card box keeps presents tidy and gives guests a clear place to leave them. Set a sturdy table near the entry, with a large basket or crate for wrapped gifts, a decorated box with a slot for cards, and a small sign that names the table. Keep the table against a wall, so gifts do not block a walkway.

    Empty the card box into a safe spot partway through a long party, so it does not overflow. Keep the gift table away from the dessert table, so food and gifts do not mix, and leave a chair beside it for a helper who can watch larger gifts. After the party, the same basket can hold baby supplies at home.

    12. Wishes for Baby Card Station
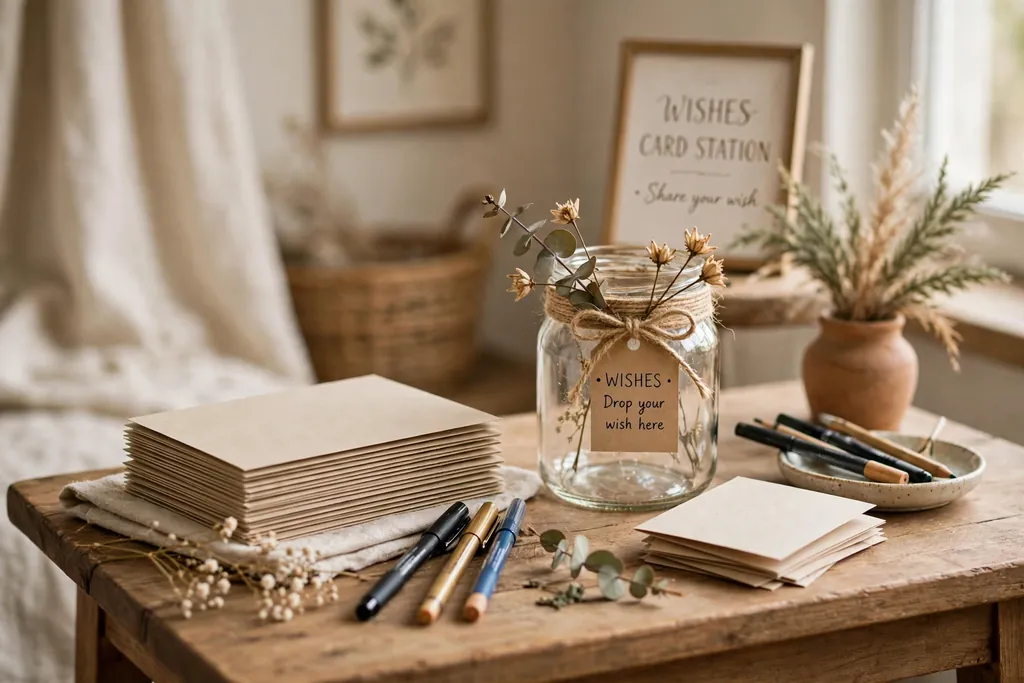
    Wishes card station with blank cards, pens, and a decorated jar on a side table.

    A wishes card station invites guests to write a short note for the baby, which the family can keep. Set out small blank cards, pens, and a decorated jar or box on a side table, with a short sign that explains the idea in one line. Use cards in your palette, with a simple border or a small star print, so the station matches the room.

    Keep pens that write smoothly and do not bleed through thin card, and test one card before the party. Set the station away from drinks, so cards stay clean, and leave a few spare cards for guests who want to write more than one note. After the party, tie the cards with ribbon and store them with the baby book.

    13. Hanging Clouds and Stars from the Ceiling
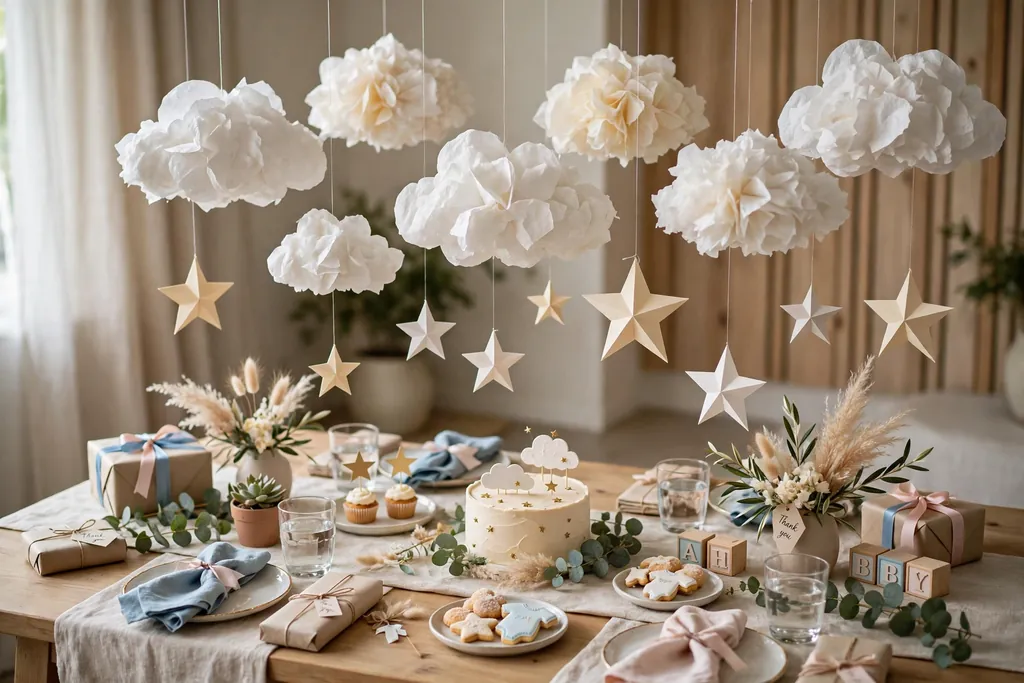
    Paper clouds and stars hanging from clear thread above a baby shower table.

    Hanging paper clouds and stars from the ceiling adds a gentle night sky note above the party, without taking up floor or table space. Cut or buy clouds in white and stars in cream and gold, hang them from clear thread at varied heights over the main table or a corner, and keep the group small enough that light still reaches the table. The shapes suit a neutral palette as well as a pastel one.

    Hang shapes clear of ceiling fans, light bulbs, and open flames, and keep the lowest shape above head height. Use light paper, so a falling shape cannot hurt anyone, and secure each thread with a small hook or tape that leaves no mark. Take the shapes down the same day, since paper creases if left hanging in damp air.

    14. Teddy Bear Display in a Reading Corner

    Plush teddy bears arranged in an armchair with a folded baby blanket.

    A teddy bear display in a reading corner gives the room a soft, welcoming focal point for photos. Set one large plush bear in an armchair, with two or three smaller bears beside it, a folded baby blanket over the chair arm, and a small stack of picture books on a side table. Keep the corner clear of walkways, so guests can step in for a photo without blocking seats.

    Use bears that are clean and in good shape, and keep them clear of food and drinks. If the bears are gifts, tag them so they go home with the right family, and keep one bear out of the display if it holds special meaning and should stay clean. After the party, the bears can move to the nursery.

    15. Place Cards and Small Favors at Each Seat
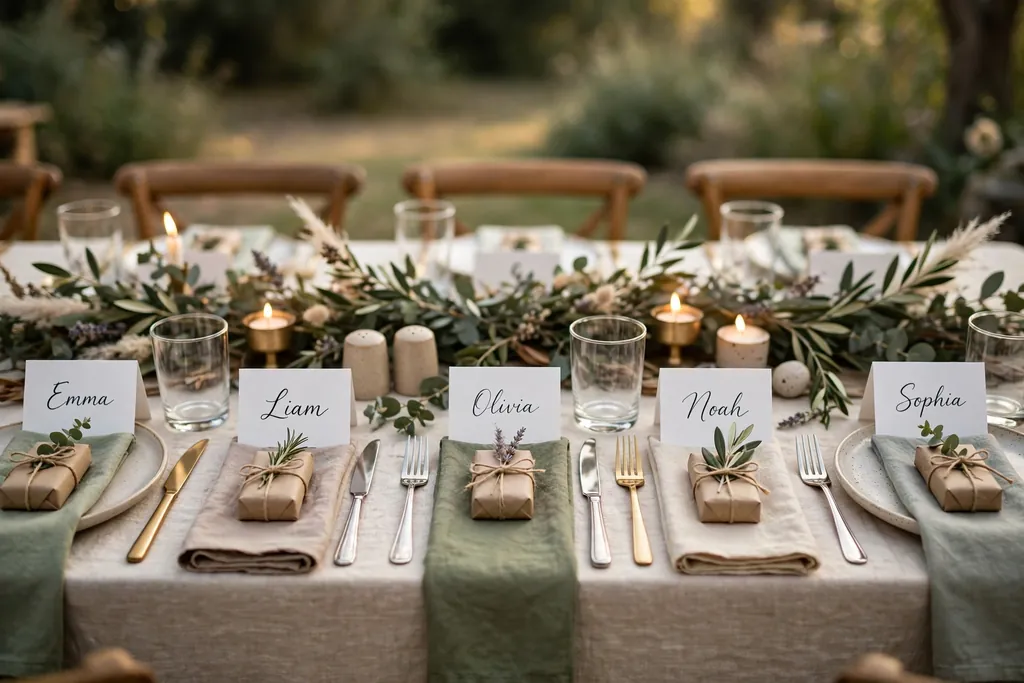
    Place cards with guest names and small wrapped favors set at a party table.

    Place cards and small favors at each seat help guests settle in and give them a keepsake to take home. Set one small card with the guest name at each place, leaning against the glass or laid on the napkin, with a small favor beside it, such as a wrapped cookie, a small candle, or a packet of flower seeds. Keep favors small enough to sit beside a plate without crowding the glass.

    Write names in clear, large lettering, and check the seating list before the party, so no guest finds a missing card. If a guest has a food allergy, choose a non food favor for that place, or label food favors clearly. Guests can take favors home in a small bag set by the door, so nothing is left behind.

    16. Drink Station with Labeled Jars and a Punch Bowl

    Drink station with labeled glass jars, a punch bowl, and glasses on a tray.

    A drink station with labeled jars and a punch bowl keeps guests served without crowding the main table. Set a side table with a large punch bowl or drink dispenser, two or three labeled jars for water, juice, and a sparkling drink, and a tray of glasses beside them. Label each jar in clear handwriting, and note any drink that contains common allergens.

    Keep the station near the main room but clear of the entry, so guests can refill without blocking arrivals. Set glasses on a tray with a lip, so a spill stays contained, and refill jars before they run empty. After the party, wash jars and labels off, and store the dispenser clean and dry.

    17. Decorated Games Corner
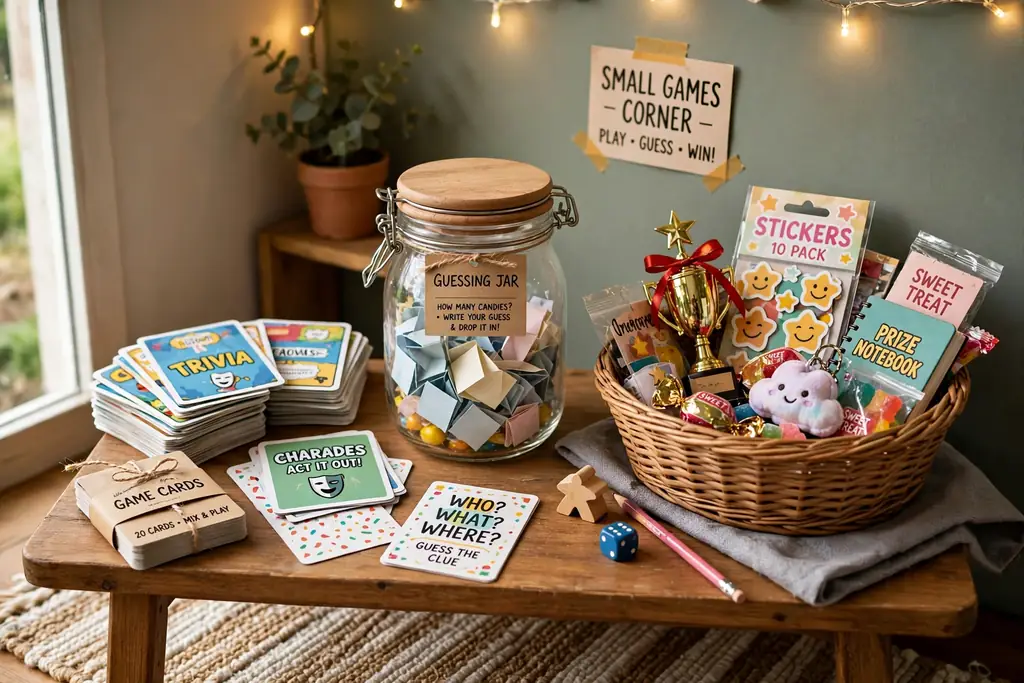
    Small games corner table with game cards, a guessing jar, and a prize basket.

    A decorated games corner gives guests a place to play without moving the main table decor. Set a small table with game cards, a guessing game jar, and a prize basket, dressed with a runner in your palette, a small balloon bunch, and a framed sign that names the game. Keep the table near seating, so guests can join a game without leaving the party.

    Choose games that need no loud equipment and no mess, such as a baby name quiz or a guess the item jar, and keep game pieces large enough to handle with ease. Set a small bin beside the table for used cards, so the corner stays tidy. After the party, pack game cards flat for reuse at a future gathering.

    18. Floral Hoop Wreath on the Wall
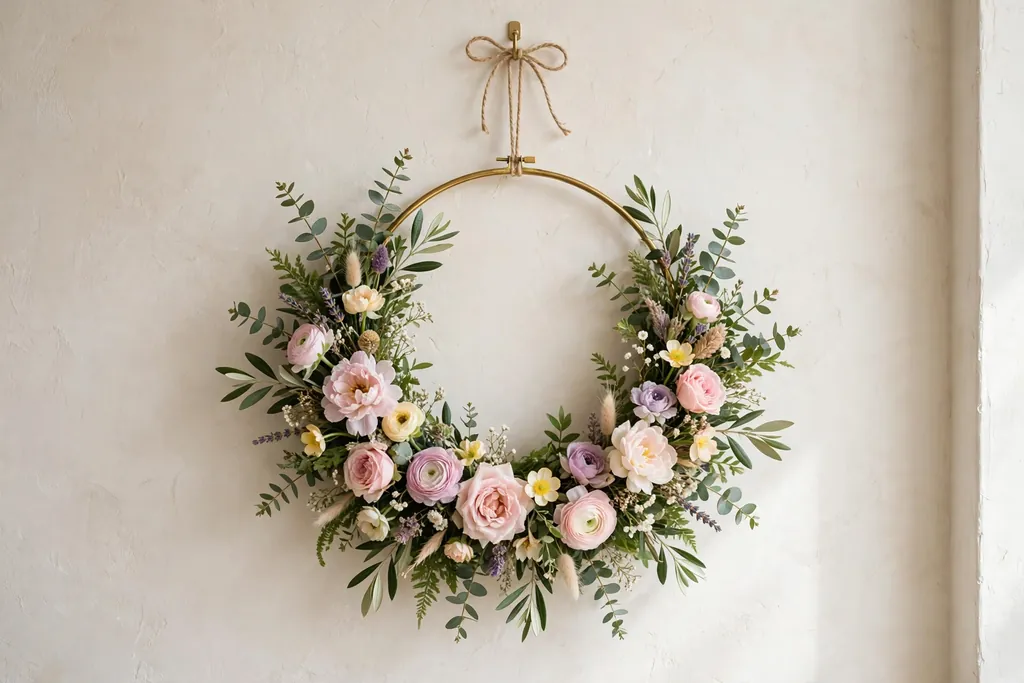
    Floral hoop wreath with greenery and pastel flowers hanging on a wall.

    A floral hoop wreath on the wall makes a simple, pretty focal point that suits a small room. Wrap a metal or wood hoop with greenery, add a cluster of flowers in your palette on one side, and hang it at eye level over a console or beside the backdrop. The open center keeps the wall feeling light, unlike a full wreath.

    Hang the hoop from a secure hook rated for its weight, and keep it clear of candles and heat. If fresh flowers wilt fast in a warm room, use faux blooms on the hoop and save fresh flowers for the table. After the party, the hoop can hang in the nursery or over a door at home.

    19. Pastel Pom-Pom Garland Across a Mantel
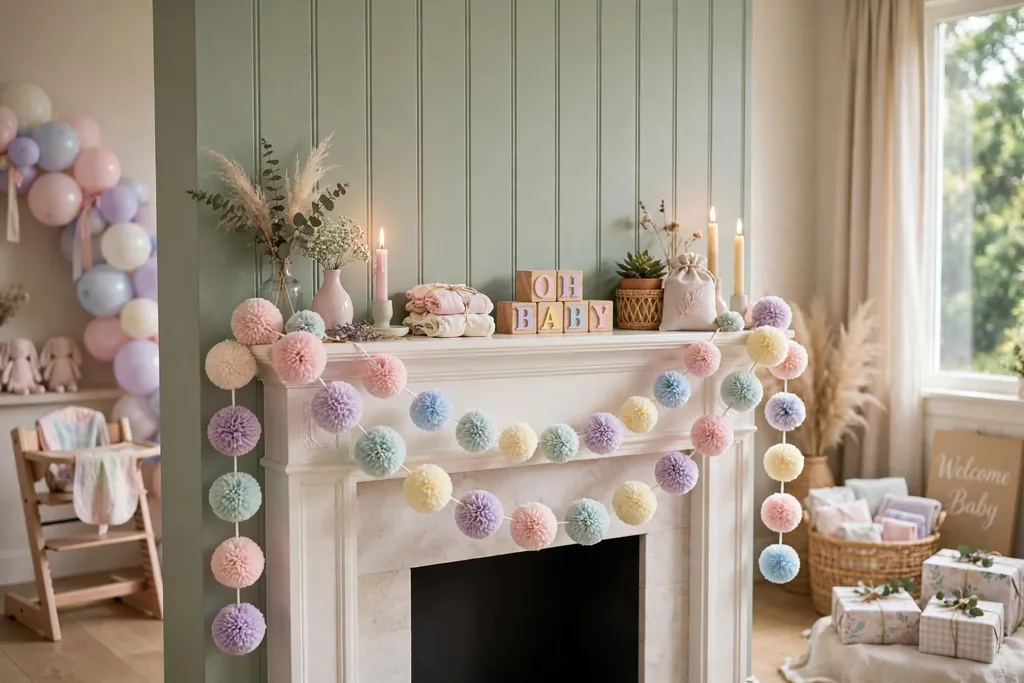
    Pastel pom-pom garland draped across a mantel in a baby shower room.

    A pastel pom-pom garland across a mantel or window adds soft color at eye level without a large structure. String tissue or wool pom-poms in your palette along twine, spaced evenly, and drape the garland along the mantel edge or across a window frame. Use two sizes of pom-poms for shape, with larger ones at the center and smaller ones at the ends.

    Secure both ends so the garland does not slide when doors open, and keep it clear of candles and heat, since tissue pom-poms catch fire easily. Use wool pom-poms near any flame, or battery candles only near tissue garlands. Fold the garland flat after the party for reuse.

    20. Candle Cluster with Greenery on a Tray
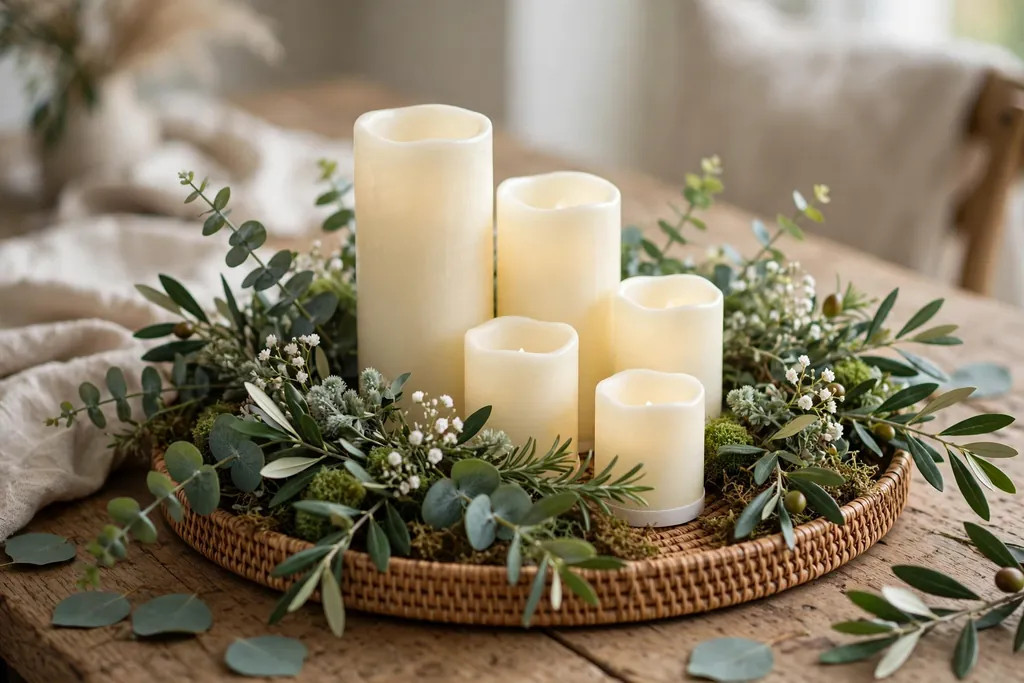
    Battery candle cluster with greenery on a round tray as a table centerpiece.

    A candle cluster with greenery on a tray gives the table warm light in one contained group. Set three or four battery candles of two heights on a round tray, with a few short green leaves or small flowers tucked between holders, and place the tray at the center of a side table or at one end of the main table. The tray keeps the group together, so it lifts off in one move when food is served.

    Use battery candles near balloons, paper, and fabric, and keep real flames clear of all decor if you use them, never leaving them burning unattended. Mix heights, with one taller candle at the back and shorter ones at the front, but keep the total group low enough to see across. Wipe the tray after use, and store candles with batteries removed.

    21. Decorated Chair for the Guest of Honor
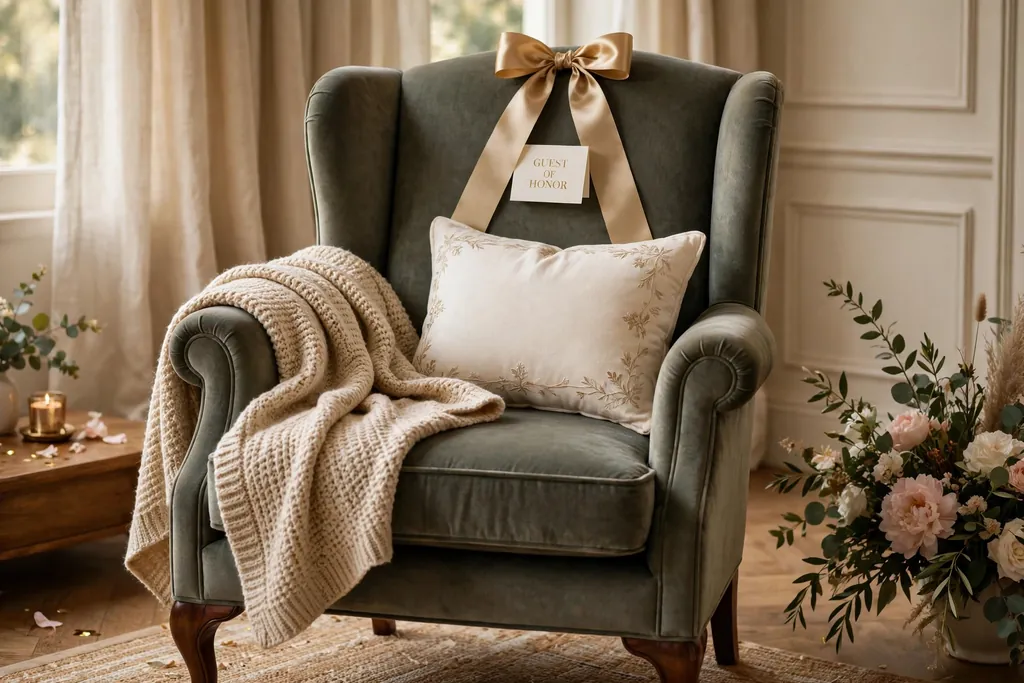
    Decorated armchair for a guest of honor with a throw, cushion, and ribbon bow.

    A decorated chair for the guest of honor marks her seat clearly and gives photos a clear focus. Dress one armchair with a soft throw, a cushion in your palette, a ribbon bow on the back, and a small balloon bunch tied to one arm, set where she can see the room and reach a side table for a drink. Keep the chair comfortable first, with decor that does not poke or slip when she sits down.

    Tie balloons loosely, so they can be moved aside if they block her view, and keep the chair clear of the main walking path. Add a footstool if the chair sits low, and keep a glass of water within reach. After the party, remove ribbons and balloons, and leave the throw and cushion for everyday use.

    22. Book Stack Centerpieces
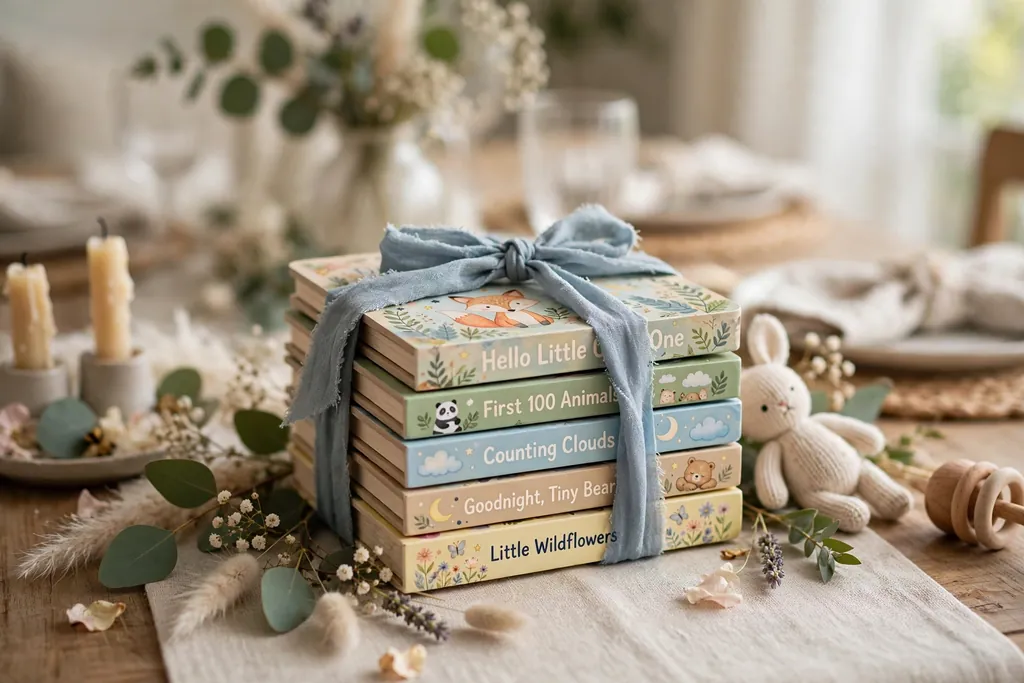
    Stack of small children's books tied with ribbon as a baby shower table centerpiece.

    Book stack centerpieces use small stacks of picture books or classic children’s books as a table focus, tied with ribbon in your palette. Set one stack of three or four books at the center of each table, with a small vase of flowers or a tiny plush toy beside it, and keep the stack low, so guests can see across it. The books suit a shower where guests bring a book in place of a card.

    Choose books with clean covers and no torn pages, and keep them clear of drinks, since a spill can damage paper. If the books are gifts, tag each stack so it goes home with the family, and keep one stack as decor only if the books should stay clean. After the party, the books can move to a nursery shelf.

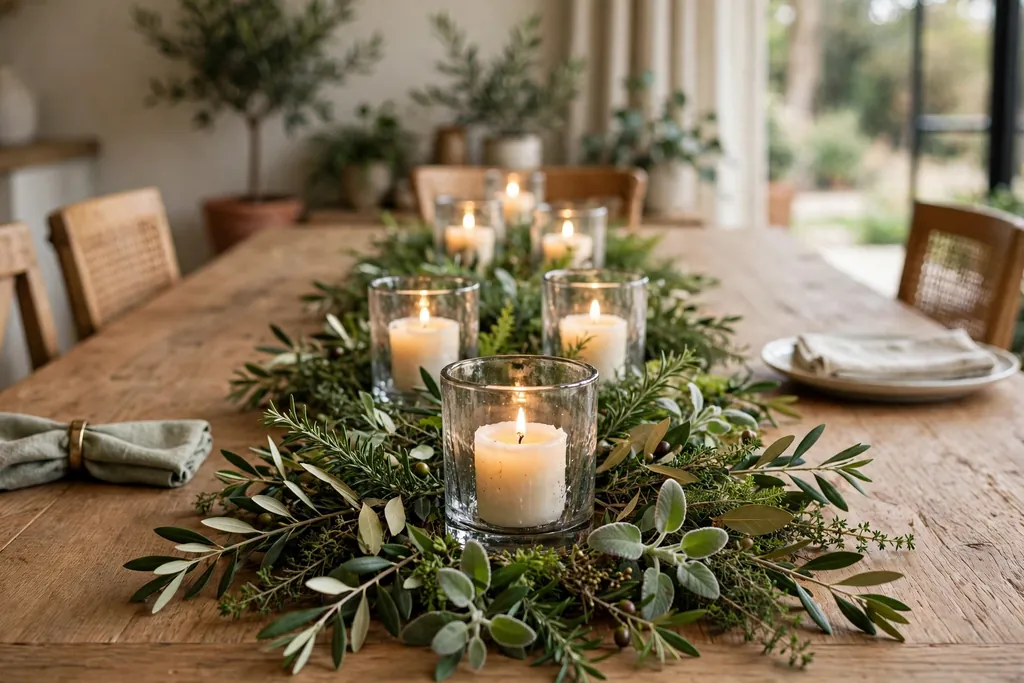
    23. Sage and White Greenery Tablescape
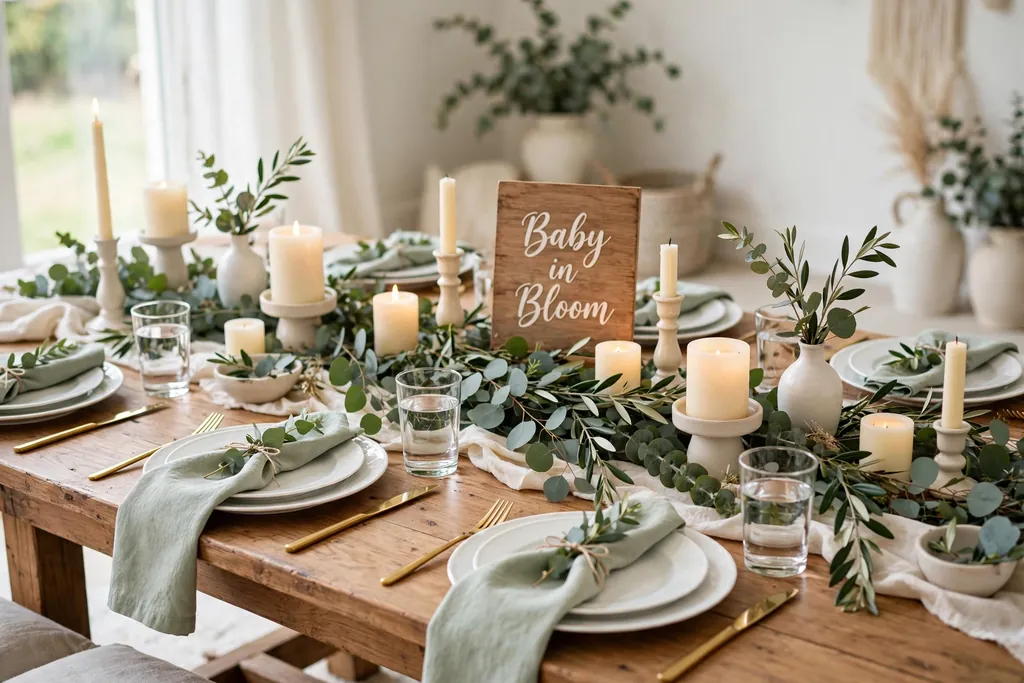
    Sage and white baby shower tablescape with a eucalyptus runner, white plates, and cream candles.

    A sage and white greenery tablescape suits a neutral baby shower, where green leaves carry the color instead of pink or blue. Lay a white cloth, set white plates and clear glasses, then add a eucalyptus or olive leaf runner down the center, with small white blooms and cream candles between leaves. The green and white pairing feels calm and fresh, and it suits any season.

    Keep the runner narrow, so plates sit flat, and trim leaves short, so they do not brush food. Use faux greenery if fresh leaves wilt fast in a warm room, and wipe leaves clean before setting them out. The same green and white restraint used in a spring tablescape works here, with eucalyptus in place of spring flowers.

    24. Ribbon Curtain Across a Doorway
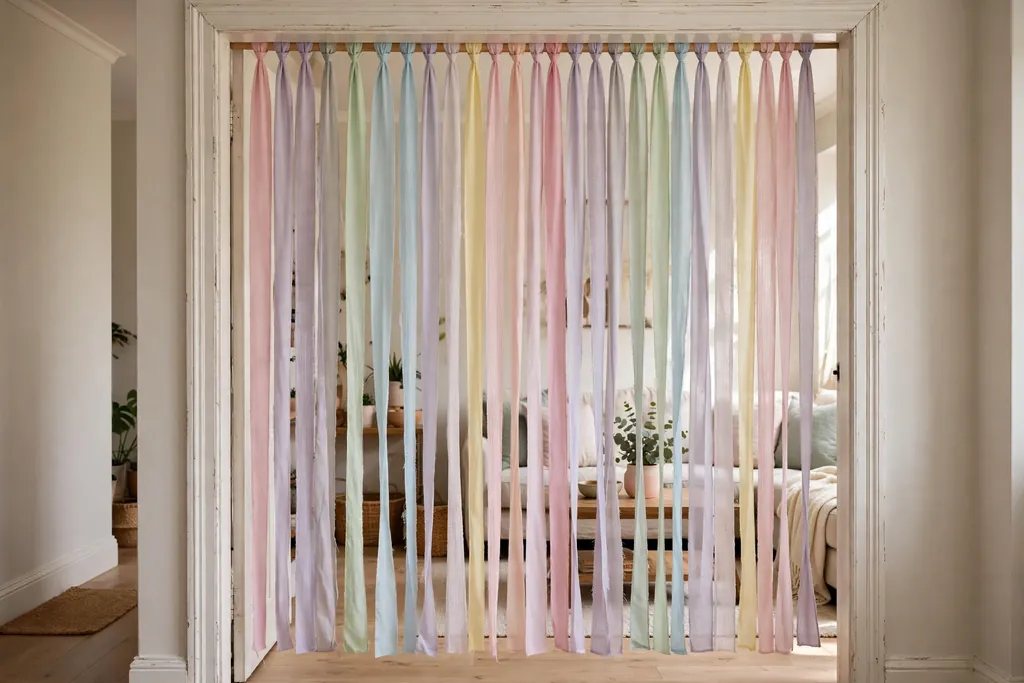
    Ribbon curtain in pastel shades hanging across a home doorway.

    A ribbon curtain across a doorway marks the party room clearly and adds movement as guests walk through. Hang lengths of ribbon in your palette from a tension rod or a curtain wire, spaced closely enough to read as a curtain, but loosely enough that guests can pass through with ease. Use two or three ribbon widths for texture, with satin and grosgrain mixed.

    Hang the curtain high enough that it does not catch on heads or bags, and keep it clear of candles and heat. Secure the rod so it cannot fall, and test the doorway width before the party, so guests with a pram or a wheelchair can pass with ease. After the party, roll the ribbons for reuse at a future celebration.

    25. Framed Menu and Signage Boards
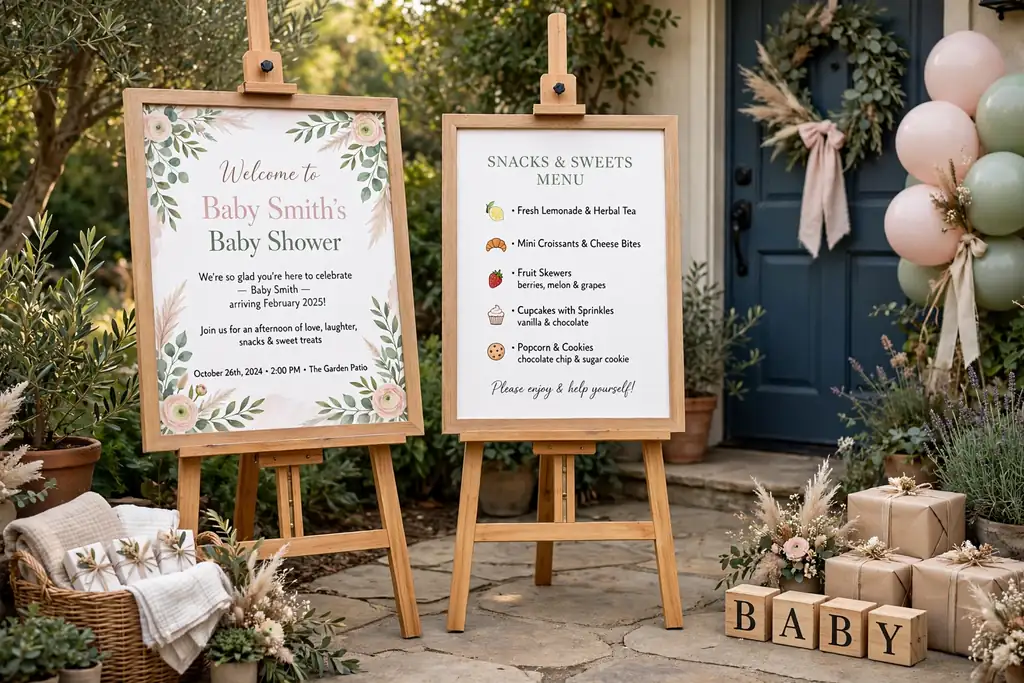
    Framed welcome and menu boards standing on easels at a baby shower entry.

    Framed menu and signage boards give guests clear guidance and add a styled detail to the dessert table and the entry. Set one framed board at the entry with a welcome line, one at the dessert table with a short menu, and one at the games corner with simple instructions, all in the same frame style and handwriting or print. Keep each board short, with large lettering guests can read from a few steps away.

    Use frames that stand stable on a table or an easel, and keep boards clear of food and drinks. Print boards on card stock rather than thin paper, so they stand straight and last through the party. After the party, the family can keep the welcome board as a keepsake, with a photo of the party beside it.

    Conclusion

    A beautiful home baby shower does not need a large budget or a full room redesign. Pick one soft palette, one focal point, and low, simple table decor, then group the rest by zone: entry, main table, dessert table, gift table, and one corner for photos or games. Start with the arch or backdrop and the main table, add the dessert and gift tables next, and finish with small personal touches, such as place cards, wishes cards, and favors, so guests feel welcomed from the door to the last goodbye.

    FAQs

    What is the easiest baby shower decoration idea for a small home?

    The easiest baby shower decoration idea for a small home is a pastel balloon bunch, a fabric backdrop on one wall, and a low floral bowl on the main table. These three pieces mark the celebration clearly, need no large furniture moves, and leave the room usable for seating and serving.

    How do I choose a color palette for baby shower decorations?

    Choose a baby shower color palette by picking two or three soft colors you already like, such as blush and cream, sage and white, or soft blue and cream, and repeating each color at least twice across balloons, linen, and flowers. A neutral palette of sage, white, and cream suits guests who prefer no pink or blue theme.

    How far in advance should I set up baby shower decorations?

    Set up baby shower decorations the day before the party where possible, starting with the backdrop, balloon arch, and table linen, and leaving fresh flowers, food tables, and balloons that lose air for the morning of the party. A day before setup leaves time to fix a sagging garland or a missing ribbon before guests arrive.

    What decorations work best for a baby shower on a small budget?

    Baby shower decorations on a small budget work best when you use paper garlands, a fabric backdrop, ribbon chair bows, and one low floral bowl per table, rather than large hired pieces. These pieces cost little, use materials you can reuse, and still give the room a clear focal point and a finished table.

    How do I decorate a baby shower table without blocking conversation?

    Decorate a baby shower table without blocking conversation by keeping the centerpiece low and narrow, such as a shallow floral bowl, a book stack, or a candle tray, and leaving empty space at each place for plates and glasses. Keep tall pieces, such as balloon arches and backdrops, on walls or at the entry, not in the center of the table.

    Can I reuse baby shower decorations after the party?

    You can reuse many baby shower decorations after the party, such as fabric backdrops, ribbon, frames, baskets, and faux flowers, by packing them flat and clean on the same day. Fresh flowers, balloons, and paper garlands last a shorter time, so keep those for the party itself, and save the sturdy pieces for a future gathering or for nursery decor.
  • 17 DIY Placemat Ideas to Personalize Your Dining Table

    17 DIY Placemat Ideas to Personalize Your Dining Table

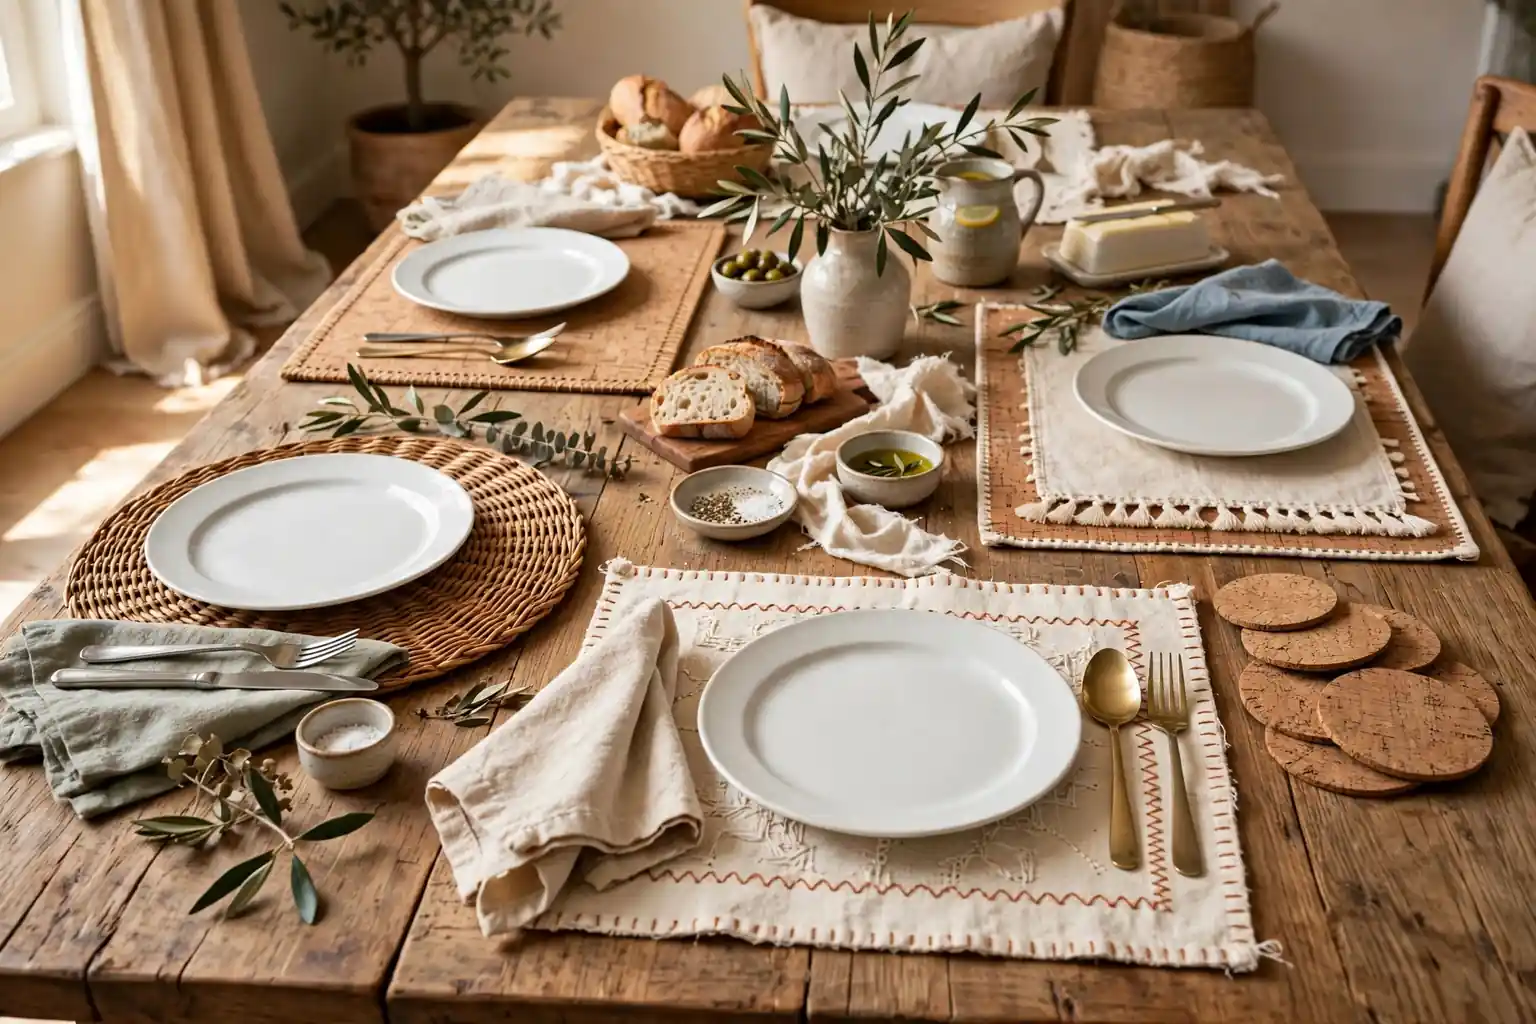
    To make DIY placemats, pick a material that suits your table, cut it to about 12 by 18 inches, finish the edges, and use the same size at every place. Fabric, cork, rope, leather, and paper all work, and most projects need only basic tools and one test piece before you make a full set.

    A placemat frames each plate, protects the table, and sets the color story for the whole setting, so it is one of the easiest ways to change how a dining table looks. You do not need a new dinner set or a full room refresh to get a different feel at dinner. Start with the table you already own, the plates you use most, and one material you enjoy working with, then make one test placemat before you cut fabric or board for a full set. The 17 ideas below cover sewn, no-sew, woven, printed, and upcycled projects, so you can pick a weekend project or a quick evening make. For seasonal table styling, see the fall table decor ideas and spring tablescapes on Dwell Ovell.

    Key Takeaways

    • Measure your largest dinner plate first, then choose a placemat at least 2 inches wider than the plate on each side, so cutlery and a glass fit without crowding the next place.
    • Make one test placemat before a full set, and check that it lies flat, holds a plate steady, and washes or wipes clean the way you need it to.
    • Match the material to the meal: washable cotton and oilcloth suit everyday family meals, while linen, leather, and embroidered styles suit slower, special dinners.
    • Pair a patterned placemat with plain plates, and a plain placemat with patterned or colored dishes, so one layer leads at each place.
    • Repeat one color or texture from the placemats in one other detail, such as napkins or a centerpiece, so the table looks planned rather than crowded.
    • Store placemats flat or rolled, never folded hard across a printed, painted, or stitched design, so they keep their shape for the next meal.

    1. Simple Sewn Cotton Placemats with Mitered Corners

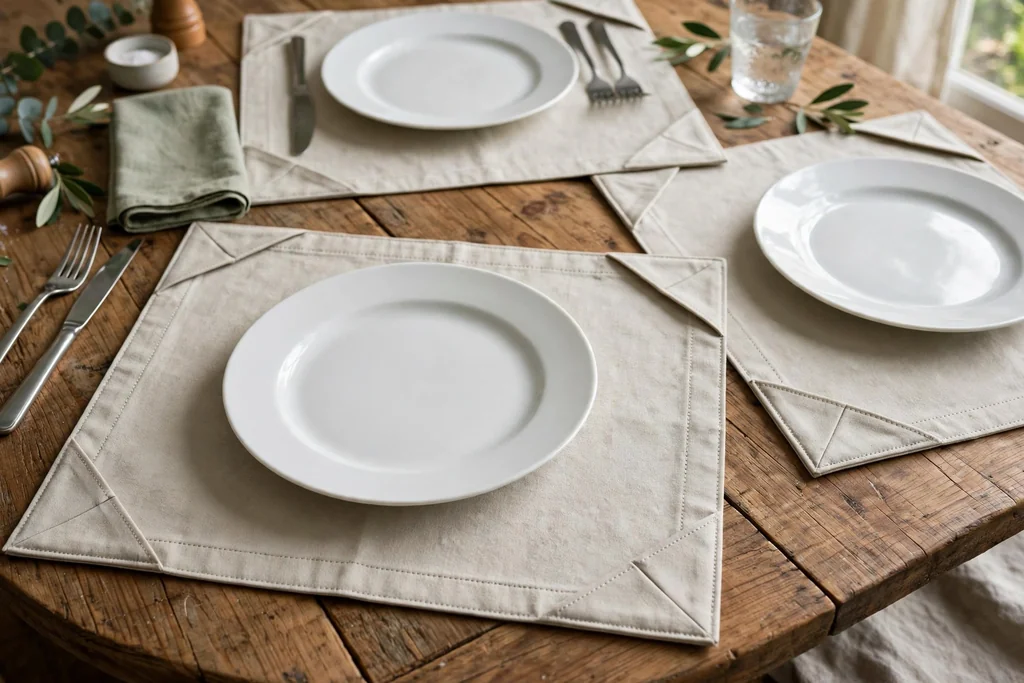
    Sewn cotton placemats with mitered corners under white plates on a wood table.

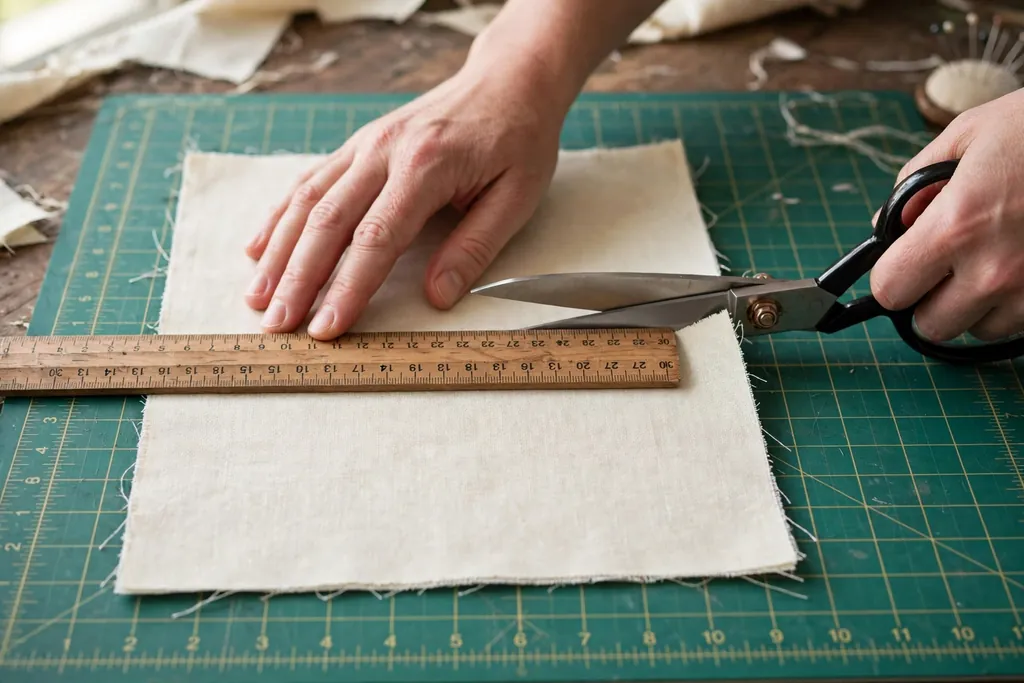
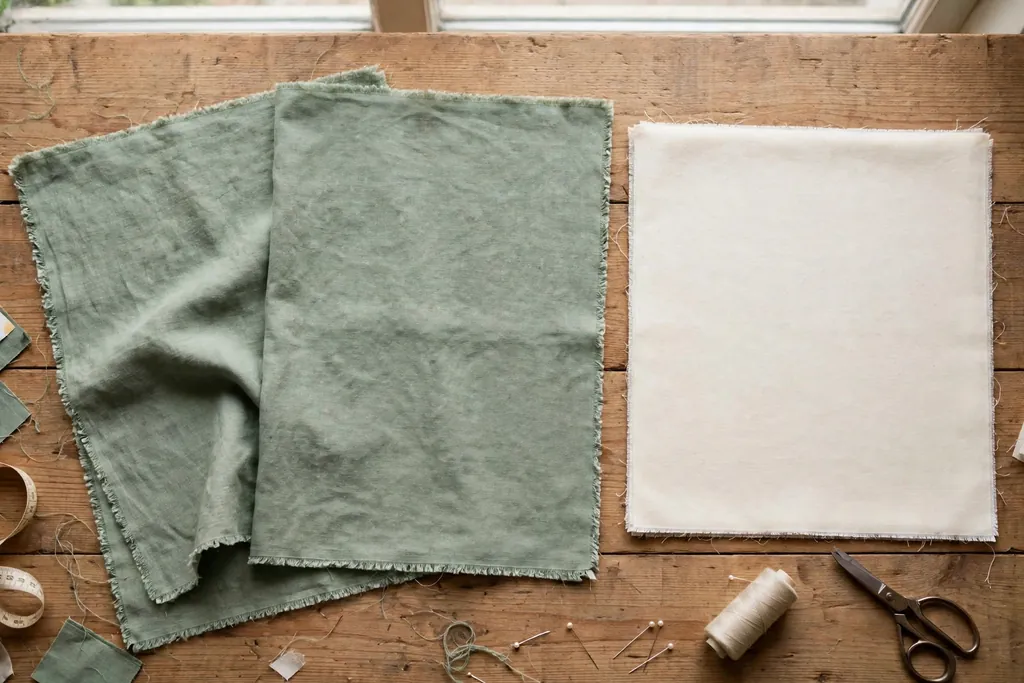
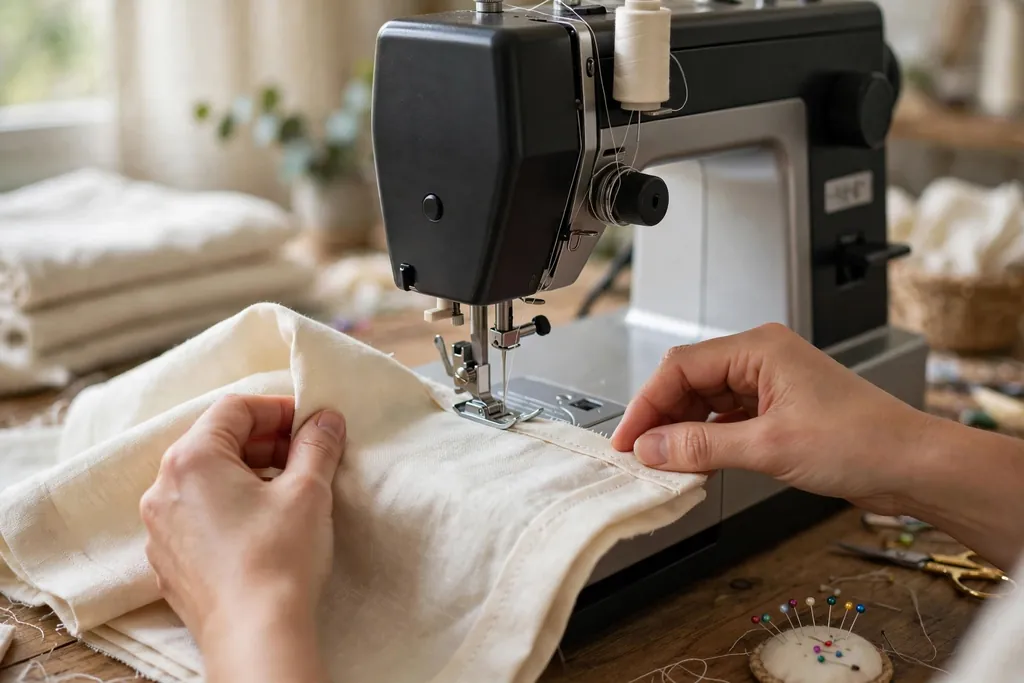
    Cut cotton fabric into rectangles of about 12 by 18 inches, with a matching backing piece for each one, and sew around the edges with a mitered corner so each corner lies flat and square. Press the seams as you go, turn the placemat right side out through a small gap, and topstitch close to the edge to close the gap and add a neat finish. A plain cotton or a small print both work, and a solid backing keeps the placemat from looking unfinished when it shifts on the table.

    This is a good first sewing project because the shape is simple and mistakes are easy to fix before you sew a full set. Wash and press the fabric before cutting, since cotton can shrink, and cut all pieces at the same time so the set matches. Use the same thread color throughout, and test the topstitch on a scrap piece first, so the stitch length looks even on the finished placemats.

    2. No-Sew Fabric Placemats with Iron-On Hem Tape

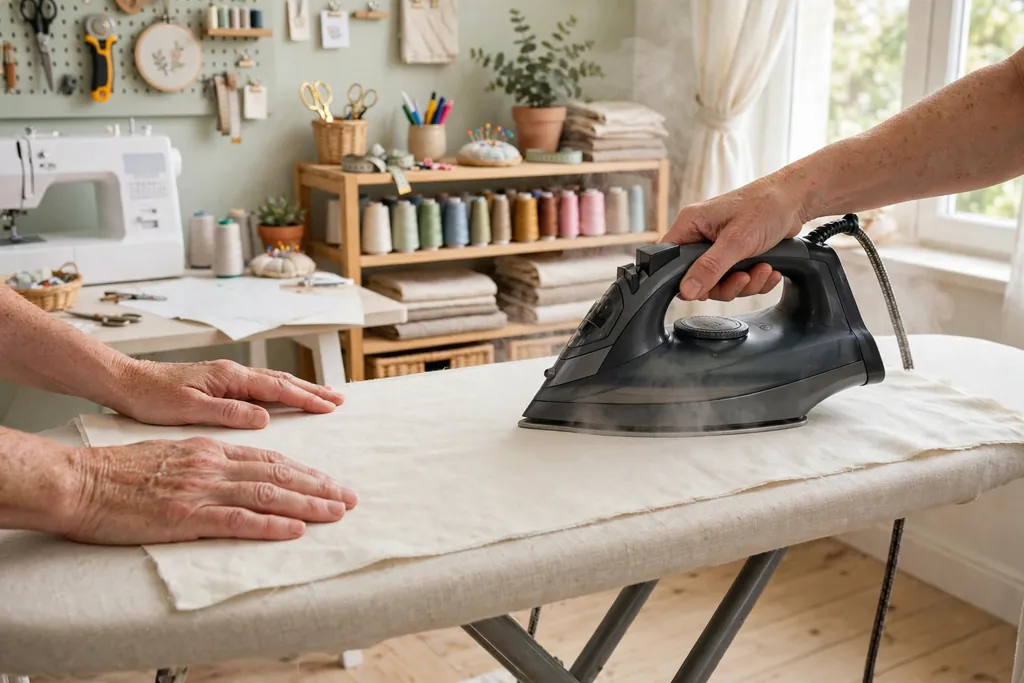
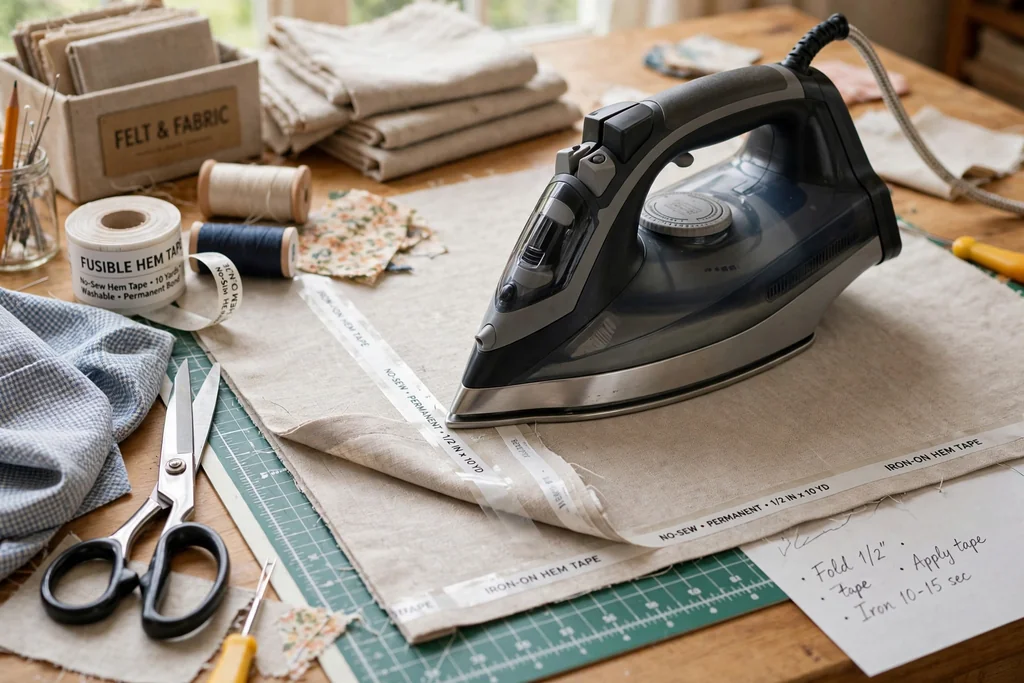
    No-sew fabric placemat being pressed with an iron and hem tape.

    Lay a rectangle of cotton or linen face down, fold each edge in twice to hide the raw edge, and press iron-on hem tape inside each fold to hold it in place. Work one edge at a time, following the heat and time guidance on the hem tape pack, and let each edge cool before you move the placemat, so the bond sets fully. A firm press with the iron matters more than speed, and a pressing cloth protects delicate fabric from shine marks.

    No-sew placemats suit a renter, a quick refresh before guests arrive, or anyone who does not own a sewing machine. Choose a medium weight fabric that holds a fold, since very thin fabric can ripple and very heavy fabric can resist the tape. Wash these placemats gently and check the hems after the first wash, since a loose corner can be re-pressed before it becomes a larger problem.

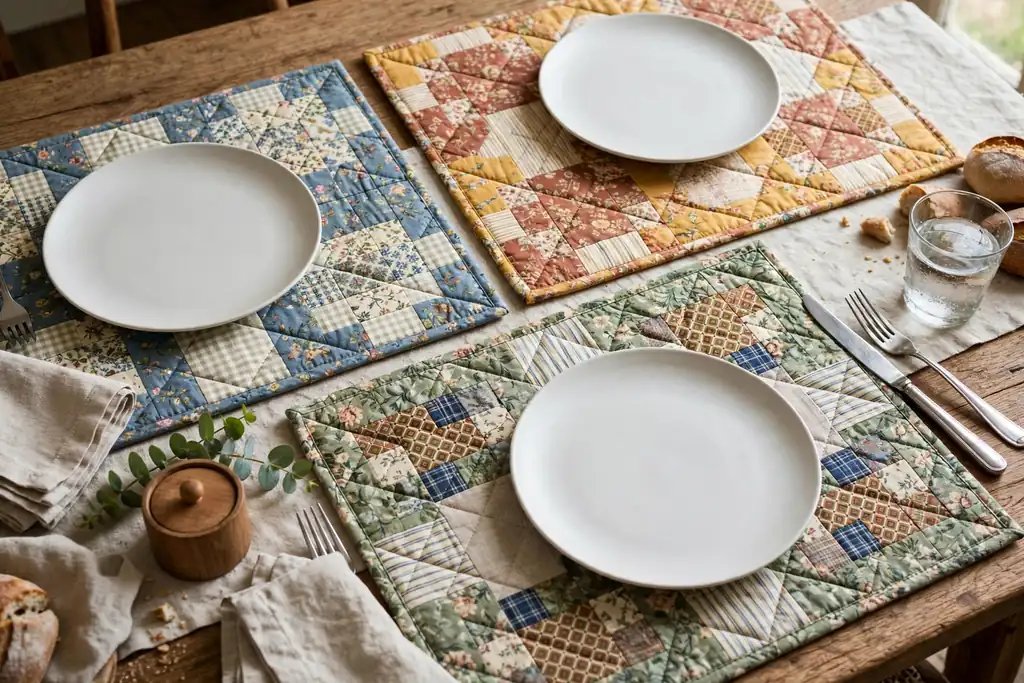
    3. Quilted Patchwork Placemats from Fabric Scraps

    Quilted patchwork placemats in mixed prints under plain plates.

    Sew small fabric squares into a patchwork top, add a thin batting layer and a backing fabric, then quilt through all three layers with straight lines or a simple grid. Bind the edges with a folded fabric strip, pressed and stitched in place, so the layers stay together through washing. The padding gives a soft base under plates and mutes sound on a hard table, which suits a busy family meal.

    Patchwork placemats work well when you already have a scrap box, since each placemat can mix prints that share one color. Keep the pieces in a similar weight, press each seam open or to one side in the same way, and square up each placemat before binding, so the set sits evenly at the table. Use plain plates with a patchwork set, since the placemat already carries the pattern at each place.

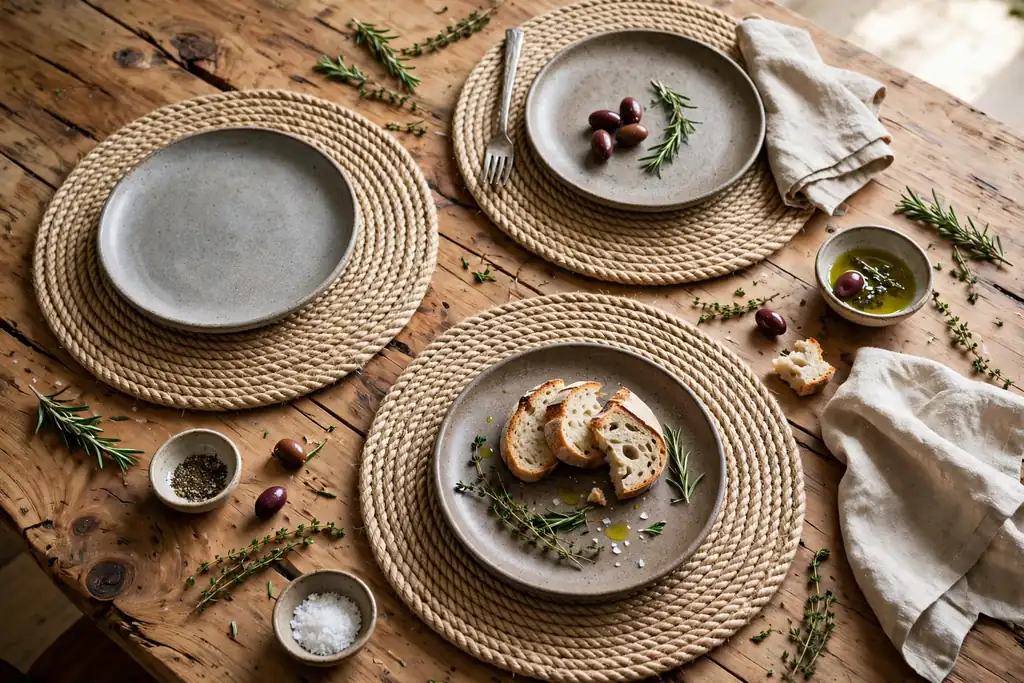
    4. Coiled Rope Placemats for a Natural Table

    Round coiled rope placemats under stoneware plates on a wood table.

    Wind thick cotton rope into a flat coil, stitching each round to the last with a sewing machine or by hand, until the mat reaches the size you need. Start with a tight center coil, keep the tension even so the mat stays flat, and finish the outer end by tucking it under and stitching it down firmly. A round or oval shape both suit this method, and a natural rope color pairs well with wood tables and plain stoneware.

    Rope placemats add texture without pattern, so they suit tables that already have patterned plates or colored glass. Check that the finished mat sits level, since an uneven coil can rock a plate, and trim any loose fibers after the first use. Spot clean rope mats and let them dry flat, since a wet rope mat can curl at the edges if it dries folded or hung up.

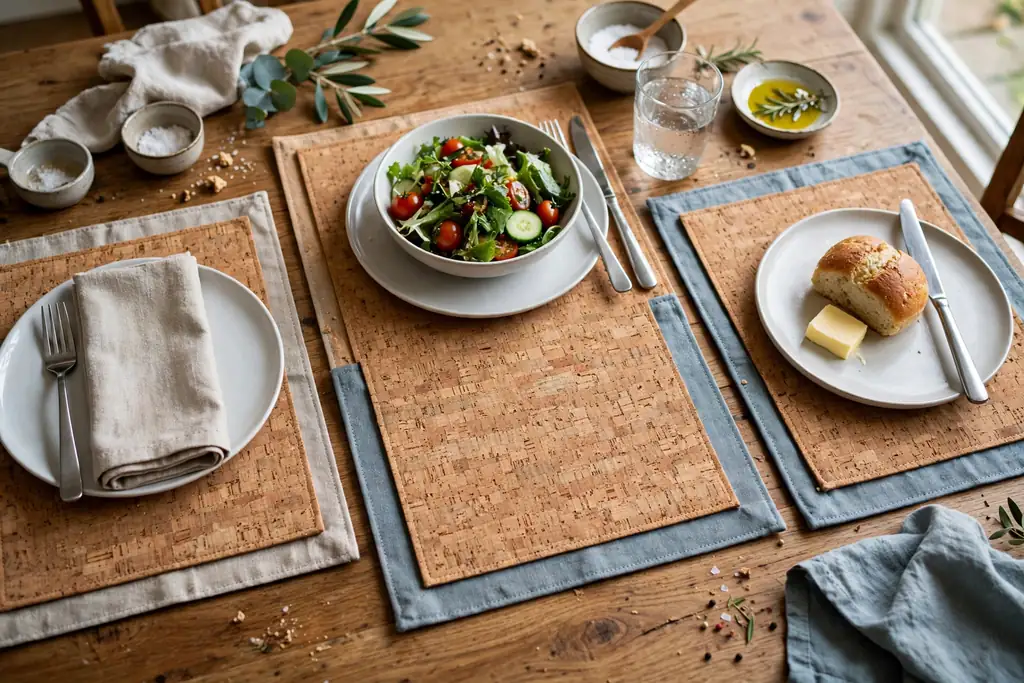
    5. Cork Placemats with a Fabric Backing

    Cork placemats with fabric backing under plates on a dining table.

    Cut cork sheet or thin cork tiles into rectangles, then glue a fabric backing to the underside so the mat grips the table and protects it from scratches. Seal the cork top with a clear sealant made for cork, following the drying time on the pack, and let the mats dry flat before you use them. Cork gives a warm, natural surface that wipes clean, and the fabric backing stops the mat from sliding on a polished table.

    This project suits a table that sees hot plates and mugs, since cork handles heat better than many fabrics, but it still needs care with very hot dishes straight from the oven. Keep the cork layer thin enough to cut cleanly with a sharp craft knife and a straight edge, and sand the cut edges lightly so they feel smooth. If a corner lifts, re-glue it and press it flat under a heavy book overnight.

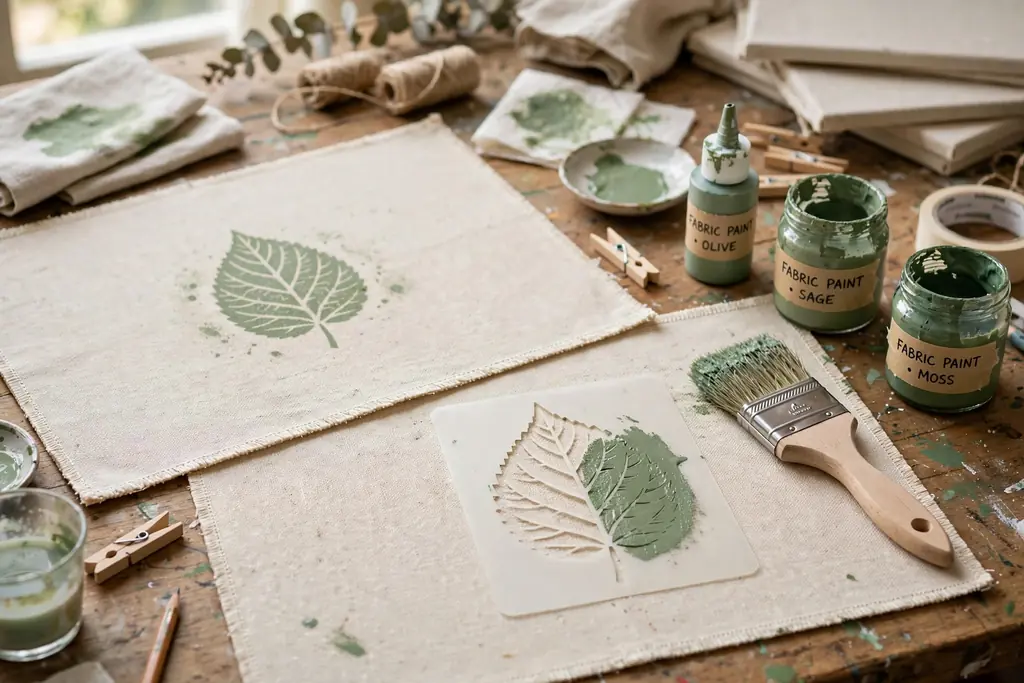
    6. Stenciled Canvas Placemats in One Color

    Stenciled canvas placemats with a leaf motif beside paint supplies.

    Cut heavy cotton canvas into rectangles, hem or bind the edges, then stencil a single motif, such as a leaf, a stripe, or a simple border, in one paint color made for fabric. Tape the stencil flat, dab paint on with a stencil brush rather than brushing back and forth, and lift the stencil straight up so the edges stay crisp. Let the paint dry fully, then heat set it if the paint maker advises that step, so the design survives washing.

    One color keeps a stenciled set calm and easy to repeat at every place, and a single motif repeated in the same spot gives a matched set without a complex design. Test the stencil on scrap canvas first, since canvas texture can change how paint sits, and keep the motif clear of the area where the plate sits, so the design stays visible during the meal. Wash stenciled placemats gently and avoid harsh scrubbing on the painted area.

    7. Hand-Stamped Cotton Placemats with Fabric Paint

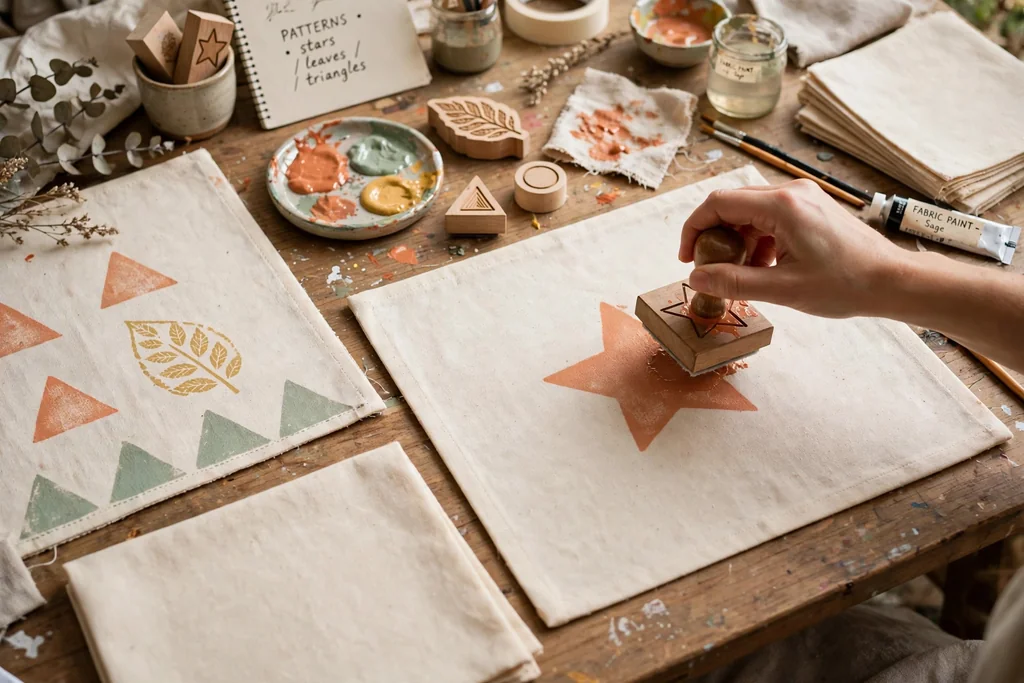
    Cotton placemats being hand stamped with fabric paint shapes.

    Stamp simple shapes onto plain cotton placemats with fabric paint, using a carved potato stamp, a foam shape, or a bought stamp. Load the stamp lightly, press it straight down without rocking it, and lift it cleanly, then space the shapes evenly across the mat, leaving the center clear for the plate. Let the paint dry fully and heat set it if the paint maker advises that step, before you wash or use the mats.

    Hand stamping suits a family project, since each person can stamp their own place, and it suits a themed table where one repeated shape carries the whole idea. Keep to one or two paint colors for a tidy result, and test the stamp on scrap fabric first, so the shapes print cleanly and at the right size. For a related handmade table idea, see the hand stamped placemats in the Valentine’s Day placemat ideas on Dwell Ovell.

    8. Embroidered Linen Placemats with a Simple Border

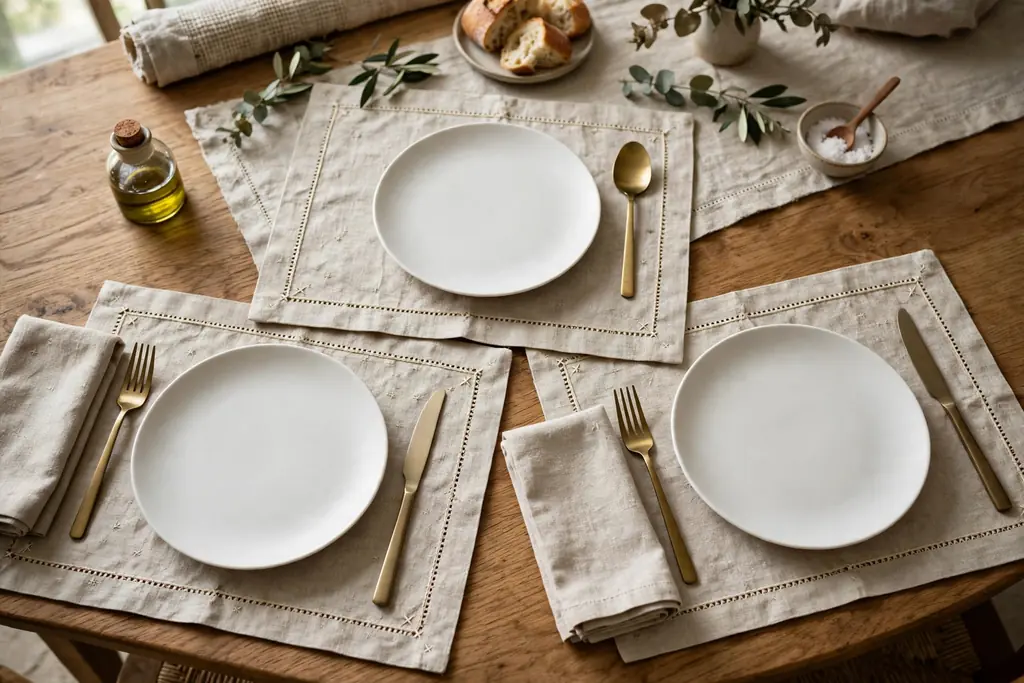
    Embroidered linen placemats with a stitched border under plain plates.

    Choose plain linen placemats or hemmed linen rectangles, then stitch a simple border, such as a running stitch, a stem stitch line, or a small repeated motif, near the edge of each mat. Mark the border lightly with a washable fabric marker, work the same design at every place, and press the finished mats from the back so the stitches sit neatly. A single thread color, such as cream on natural linen or navy on white, keeps the set calm.

    Embroidered placemats suit a slower dinner where the table is viewed up close and fabric texture matters, and they pair well with plain plates and clear glasses. Keep the stitching clear of the plate area, so plates sit level, and keep the design simple enough to repeat evenly across a full set. Wash linen placemats gently, press them while slightly damp, and store them flat so the stitched border does not crease.

    9. Macrame Placemats with Knotted Cotton Cord

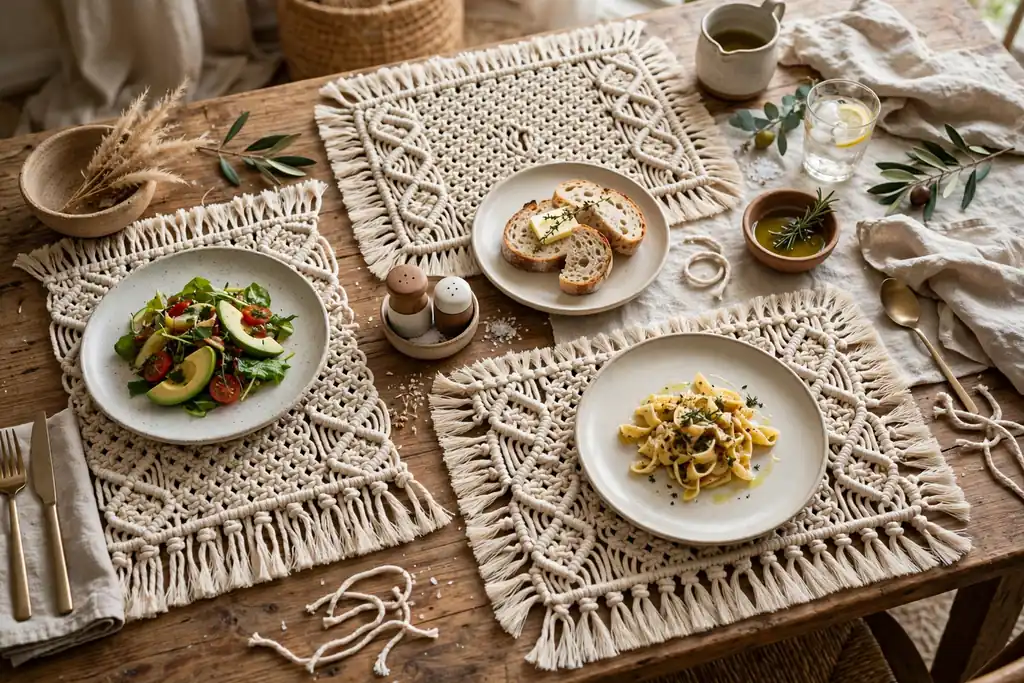
    Macrame placemats in knotted cotton cord under plates.

    Knot cotton cord into a flat macrame panel using square knots and simple fringe-free edges, working from a top cord down to the finished length. Keep the knots even and the tension steady, since loose knots make a wavy edge and tight knots can pull the panel narrow. Finish the sides with a clean row of knots and trim any cord ends close, so the mat lies flat under a plate.

    Macrame placemats suit a relaxed, natural dining room with wood, rattan, or woven chairs, and they read as a crafted piece rather than a plain mat. Use a cord thickness that still lets a plate sit steady, since very chunky cord can rock a plate, and test one mat with your largest plate before you knot a full set. Shake macrame mats outside after meals and spot clean spills promptly, since cord can hold crumbs in the knots.

    10. Wipe-Clean Oilcloth Placemats for Everyday Meals

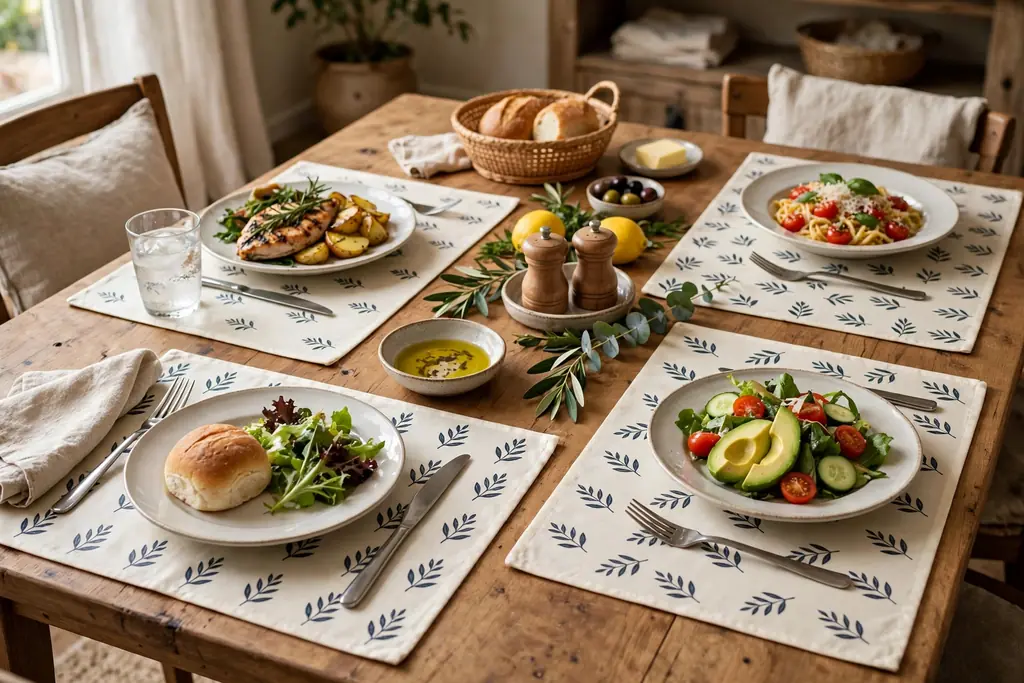
    Wipe-clean oilcloth placemats in a simple print under plates.

    Cut oilcloth or vinyl coated fabric into rectangles, seal or bind the edges so the layers do not peel, and wipe the mats clean after meals instead of washing them. A simple straight cut works when the material is thick enough to hold its shape, while a bound edge gives a softer finish and suits a thinner oilcloth. Choose a print that suits your kitchen, and keep the same size at every place so the table looks even.

    Oilcloth placemats suit everyday family meals, tables with young children, and outdoor dining, since spills wipe off and the mats dry fast. Avoid placing very hot dishes directly on vinyl, and keep sharp knives off the surface, since cuts show on coated fabric. Store oilcloth mats flat or rolled with the print facing out, since a hard fold can leave a lasting crease in the coating.

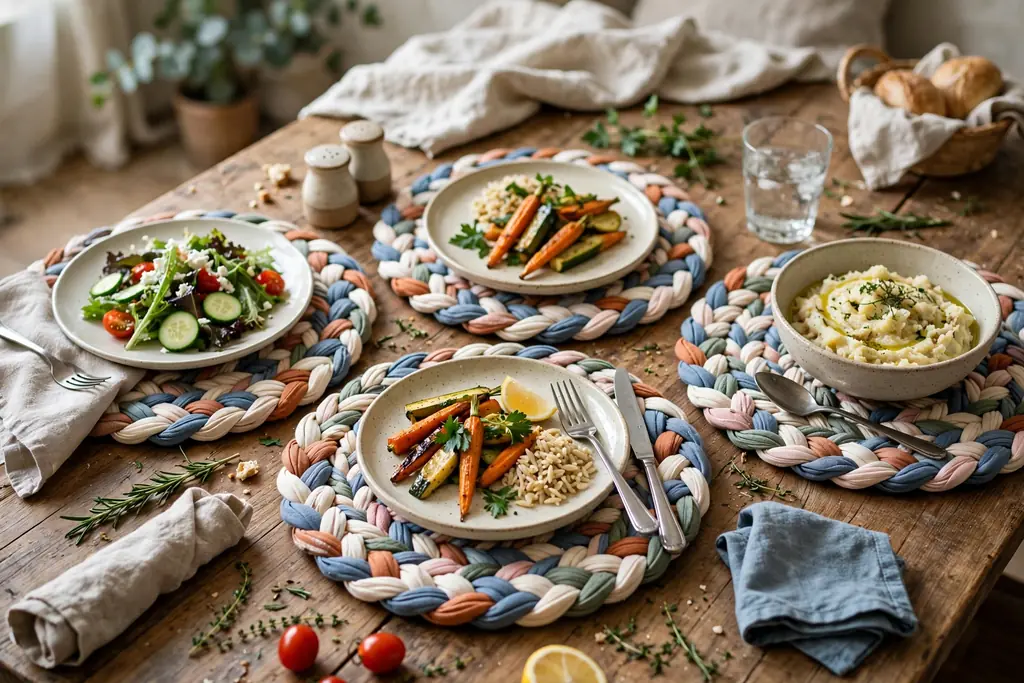
    11. Round Braided Rag Placemats from Fabric Scraps

    Round braided rag placemats in mixed cotton strips under plates.

    Braid three long fabric strips together, coil the braid into a round mat, and stitch each round to the last so the mat holds its shape. Use strips of similar weight, such as old cotton shirts or sheets, and join new strips with a small overlap so the braid stays even. A round mat suits a round table or a breakfast nook, and a mix of prints in one color family keeps the set from looking random.

    Braided rag placemats use up fabric that would otherwise go to waste, and the thick braid protects a wood table from plates and mugs. Press the finished mat under a heavy book overnight if it curls after coiling, and check that it lies flat before you make the rest of the set. Wash rag mats gently and dry them flat, since a thick braid takes longer to dry than a single layer of cotton.

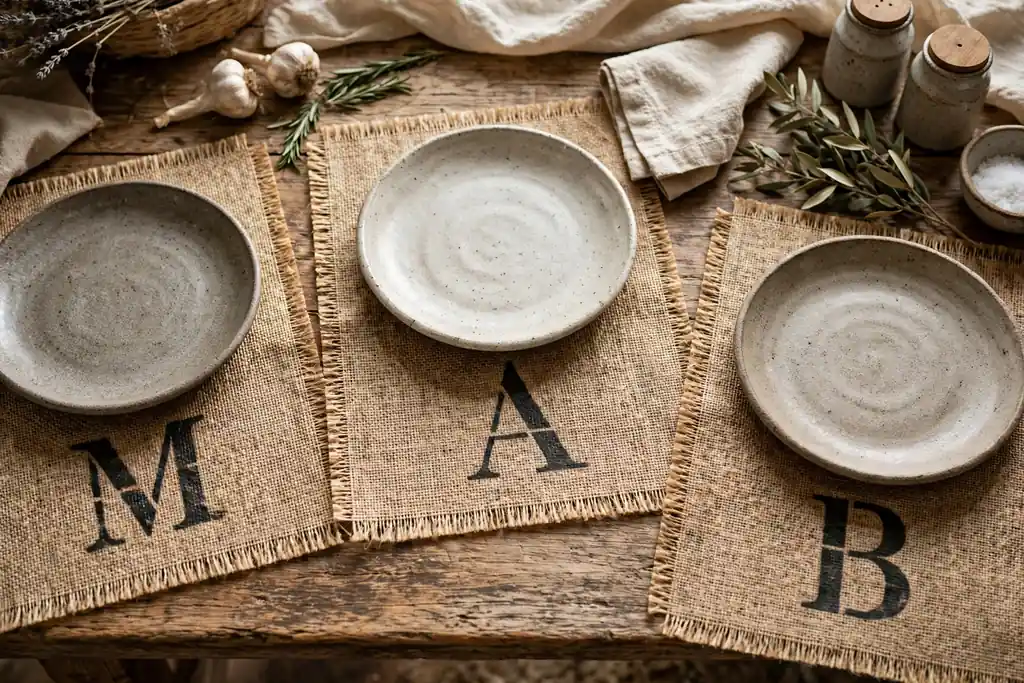
    12. Burlap Placemats with a Stenciled Monogram

    Burlap placemats with a stenciled monogram under stoneware plates.

    Cut burlap into rectangles, bind or hem the edges to stop fraying, and stencil one letter or a simple word at one corner in a contrasting fabric paint. Burlap sheds fibers, so shake each mat outside before use, press it flat, and keep the stenciled area clear of the plate so the letter stays visible. A plain stoneware plate and a simple napkin suit burlap well, since the coarse texture already carries the rustic note.

    Monogrammed burlap placemats suit a farmhouse table, a gathering where each guest has a marked place, or a host who wants a personal detail without a full new setting. Use a bold stencil font that reads from across the table, and test the paint on scrap burlap first, since the open weave can let paint bleed. Layer a small white napkin on top of each placemat to soften the look, and avoid lace or velvet nearby, which would clash with the rustic tone.

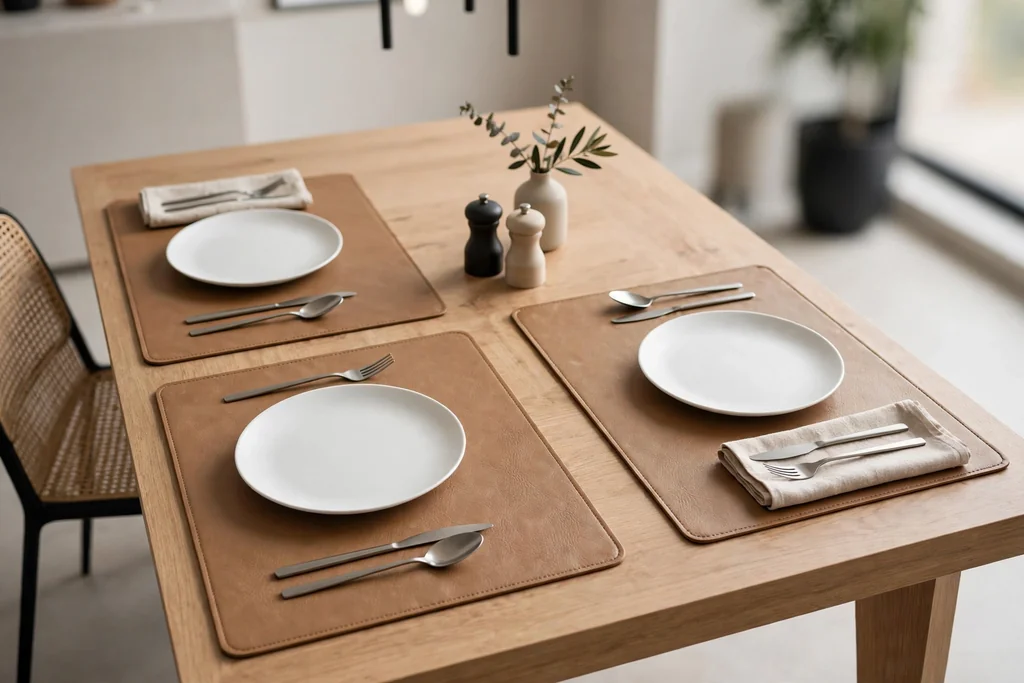
    13. Faux Leather Placemats Cut to a Clean Shape

    Faux leather placemats in a clean cut shape under plain plates.

    Cut faux leather into rectangles, ovals, or rounded corner shapes with a sharp rotary cutter and a straight edge, then finish the edges with edge paint or a simple topstitch. Faux leather needs no hemming, since it does not fray, so the cut edge itself becomes the finish, and a clean, steady cut matters more than any extra trim. Choose a color that repeats in one other detail on the table, such as napkins or candle holders, so the set feels planned.

    Faux leather placemats suit a modern dining room and an evening meal, since the smooth surface wipes clean and pairs well with plain plates and simple cutlery. Keep the mats away from very hot dishes and open flames, and wipe them with a soft cloth after meals rather than soaking them. Store faux leather mats flat, since a fold can leave a crease that shows on the smooth surface.

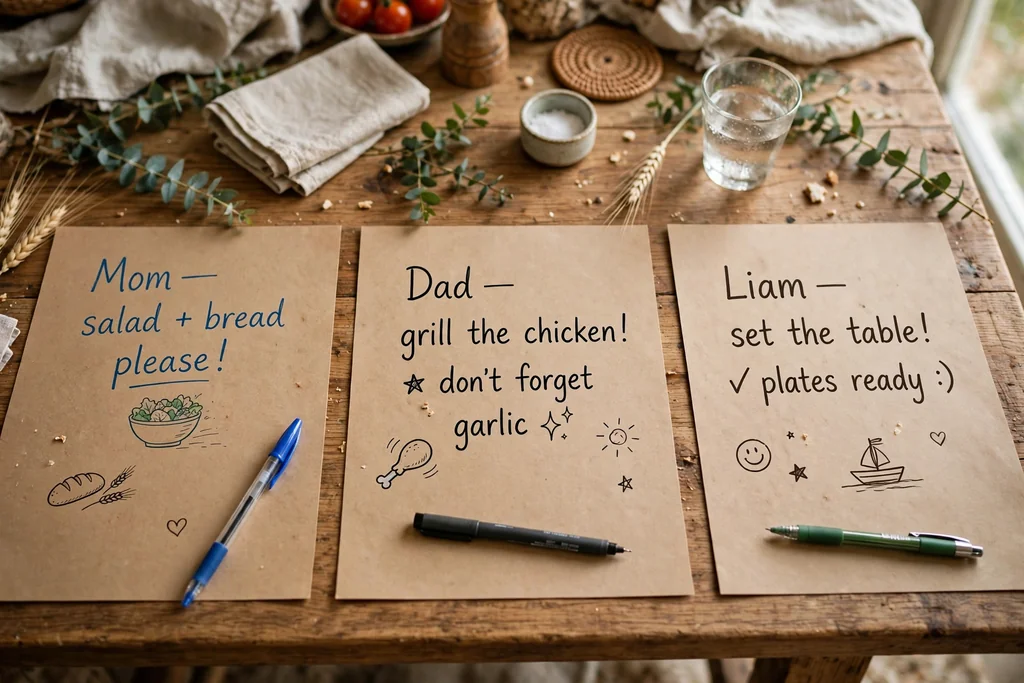
    14. Kraft Paper Placemats Guests Can Write On

    Kraft paper placemats with handwritten notes beside pens.

    Cut kraft paper into placemat sized rectangles, or tear sheets from a kraft paper roll, and set out pens or crayons so guests can write names, notes, or small drawings on their own mat. The paper protects the table, and the personal notes become part of the decoration, which suits a casual family dinner, a gathering with children, or a relaxed celebration where formality would feel out of place. Use plain plates so the writing shows.

    Paper placemats are single use, so they suit occasions rather than everyday meals, and they cost little to make for a large group. Keep the pens simple and non bleeding, so ink does not soak through to the table, and place a plain underlayer on a light wood table if you worry about marks. Recycle or compost the paper after the meal where local rules allow it.

    15. Pressed Flower Placemats Sealed Under Clear Vinyl

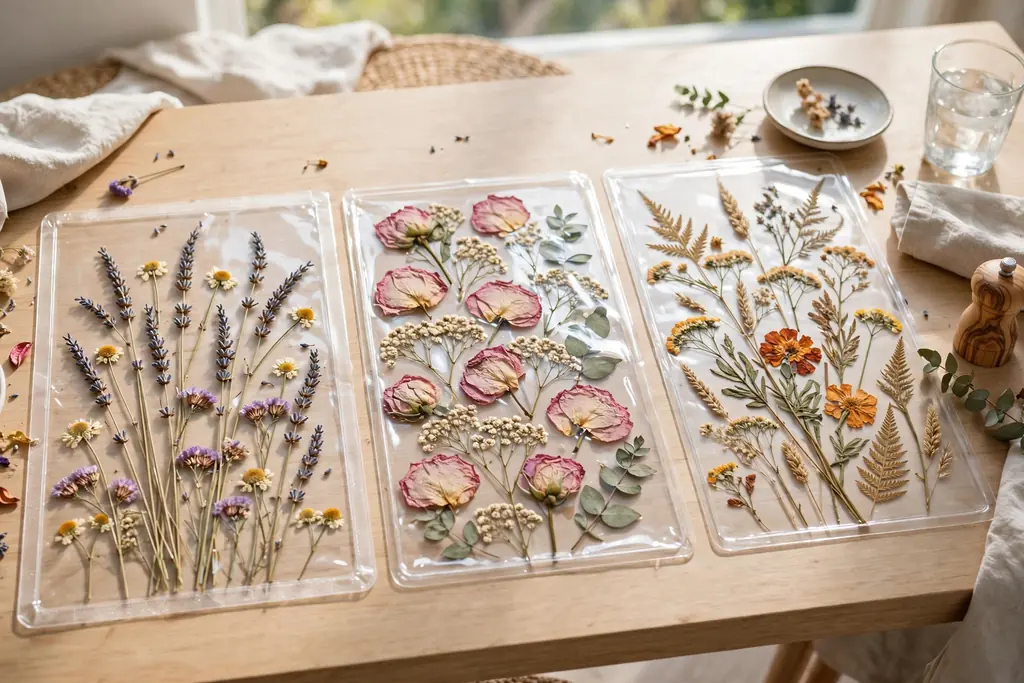
    Pressed flower placemats sealed under clear vinyl on a bright table.

    Arrange dried, pressed flowers and leaves on a fabric or paper base, cover the arrangement with clear vinyl, and stitch or seal the edges so the flowers stay flat and protected. Press the flowers fully before you start, since damp stems can mark the base, and keep the arrangement clear of the plate area, so the flowers stay visible during the meal. A clear cover lets the botanical shapes show while keeping the surface wipe clean.

    Pressed flower placemats suit a spring or summer table, a brunch, or a garden room, where the floral detail ties the table to the season. Use flowers that press flat, such as small ferns, daisies, or leaves, rather than thick blooms that will not sit level under vinyl. Store these mats flat and out of direct sun, since strong sun can fade dried flowers over time, and wipe the vinyl gently rather than scrubbing it.

    16. Denim Placemats Upcycled from Old Jeans

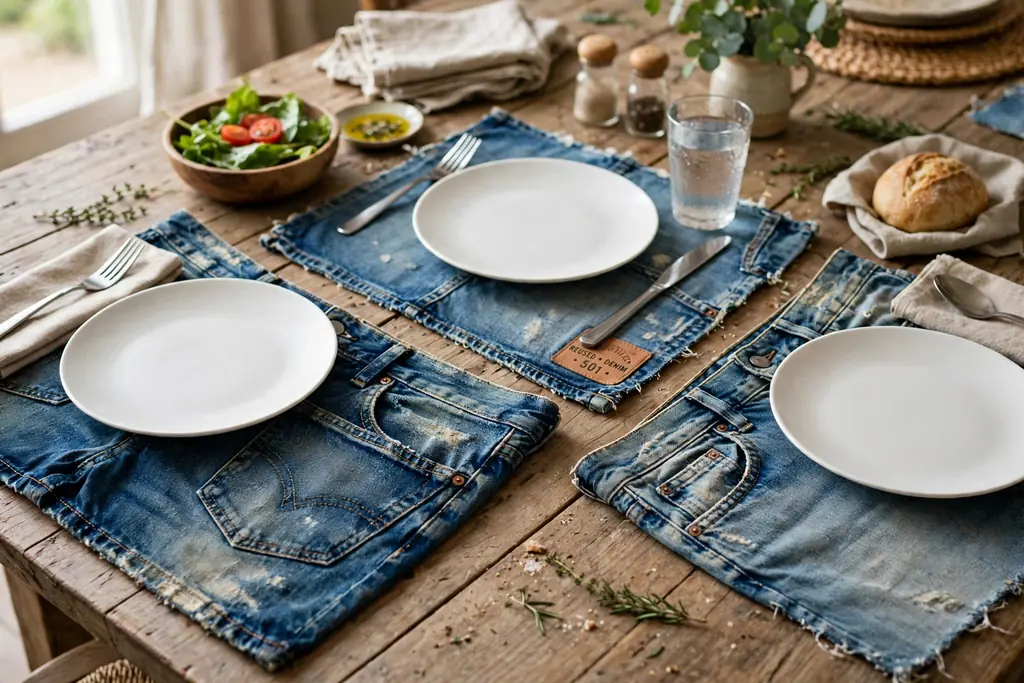
    Denim placemats made from old jeans under plain plates.

    Cut the legs of old jeans into flat panels, join panels with a straight seam or a topstitched overlap, and hem or fringe the edges to finish each mat. Denim is sturdy, washes well, and suits a casual table, and details such as a pocket or a seam can become a feature if you plan where they sit, clear of the plate area. Wash the jeans before cutting, so the panels shrink before you sew them, not after.

    Denim placemats suit a family kitchen, a casual dinner with friends, or a home where durability matters more than a formal look. Mix light and dark denim in one set only if the tones share a similar wash, so the table does not look patchy, and pair denim mats with plain plates and simple glasses. If a pocket sits at a place, use it for a napkin or cutlery only when it lies flat, since a bulky pocket can tilt a plate.

    17. Placemats with a Sewn Cutlery Pocket

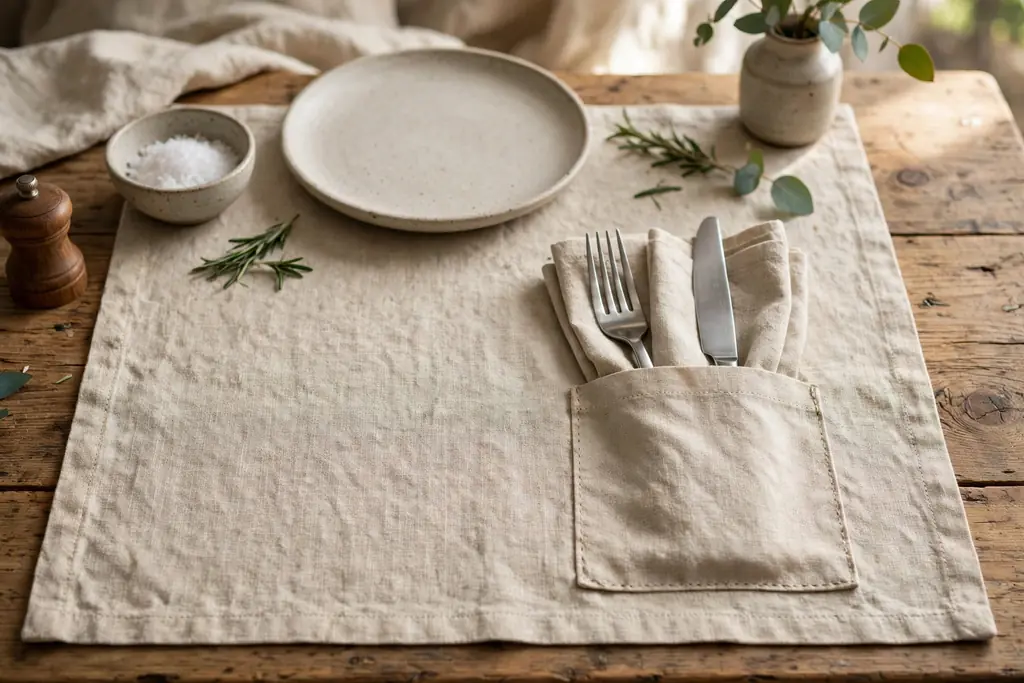
    Placemat with a sewn cutlery pocket holding cutlery and a napkin.

    Sew a basic placemat in cotton or linen, then add a flat pocket on one side, sized to hold a knife, fork, and napkin, stitched on three sides and open at the top. Place the pocket at the right or left edge, matching how each guest sits, and keep the pocket shallow enough that cutlery handles do not slide out when the mat is lifted. Topstitch the pocket edges for strength, since this part gets the most pulling during meals.

    A cutlery pocket turns the placemat into a complete place setting, which suits a buffet, an outdoor meal, or a table where space is tight and a separate cutlery roll would crowd the setting. Make the pocket from the same fabric or a contrast print, and test it with your actual cutlery before you sew a full set, since long handled cutlery needs a deeper pocket than short handled sets. Wash pocket placemats with the pockets open and dry them flat, so the pocket does not hold damp fabric against the mat.

    Conclusion

    DIY placemats work best when you start with one test piece, a size that fits your plates, and a material that matches how you actually use your table. A sewn cotton set suits everyday meals, a wipe-clean oilcloth set suits busy family tables, and a stitched, stamped, or pressed flower set suits a slower dinner where detail gets noticed. Pick one idea from this list, make a single placemat, and check how it looks and feels at your table before you commit to a full set. With that test done, the rest of the set is a repeat of a project you already know works. For more table ideas from Dwell Ovell, browse the home page for home decor guides.

    FAQs

    What size should DIY placemats be?

    DIY placemats should be about 12 by 18 inches for a standard dinner place, so a dinner plate fits in the center with room for cutlery on either side. Check your largest plate first, then choose a placemat at least 2 inches wider than the plate on each side, so the setting does not look cramped. For a small table or a breakfast nook, a slightly smaller mat can work, as long as the plate and cutlery still fit without crowding the next place.

    What is the easiest DIY placemat to make with no sewing?

    No-sew fabric placemats with iron-on hem tape are the easiest option, since you only need fabric, hem tape, and an iron, with no sewing machine or hand stitching. Cut the fabric to size, fold each edge in twice, press the tape inside each fold, and let each edge cool before you move the mat. Oilcloth placemats are another simple no-sew option, since the coated fabric holds its shape with a straight cut and wipes clean after meals.

    Which material is best for washable DIY placemats?

    Cotton is best for washable DIY placemats, since it washes well, presses neatly, and suits everyday family meals. Wash and press cotton before cutting, so shrinkage happens before you sew, and use a medium weight fabric that holds its shape at the table. Oilcloth and vinyl coated fabric are better when you want a wipe-clean surface rather than a machine wash, since they dry fast and suit tables with young children.

    How do I stop DIY placemats from sliding on the table?

    You stop DIY placemats from sliding by adding a fabric backing, a thin non slip mat, or a small piece of shelf liner under each placemat, or by choosing a material with a textured back, such as cork. Test the grip before the meal, especially on a polished wood or glass table, and avoid loose cloth layers that can shift when plates are set down. A placemat that grips well also helps plates stay steady during the meal.

    Can I make placemats from old clothes or fabric scraps?

    Yes, you can make placemats from old clothes or fabric scraps, and quilted patchwork, braided rag, and denim placemats are all built for that purpose. Use pieces of similar weight, wash them before cutting so shrinkage happens early, and press each seam so the finished mat lies flat. Keep the prints in one color family for a matched set, and pair a busy scrap placemat with plain plates, so the pattern does not compete with patterned dishes.

    How many placemats should I make for a full set?

    You should make one placemat per guest, plus one or two spares, so a dinner for six needs eight placemats in total. Count the places at the table, not the chairs in the room, and make the spares in the same design, so a spill does not leave one place looking different from the rest. A test placemat counts as one spare when it matches the set, which gives you a useful backup from the first project.

  • How to Create a Terracotta Herb Pot Display for Your Kitchen or Patio

    How to Create a Terracotta Herb Pot Display for Your Kitchen or Patio

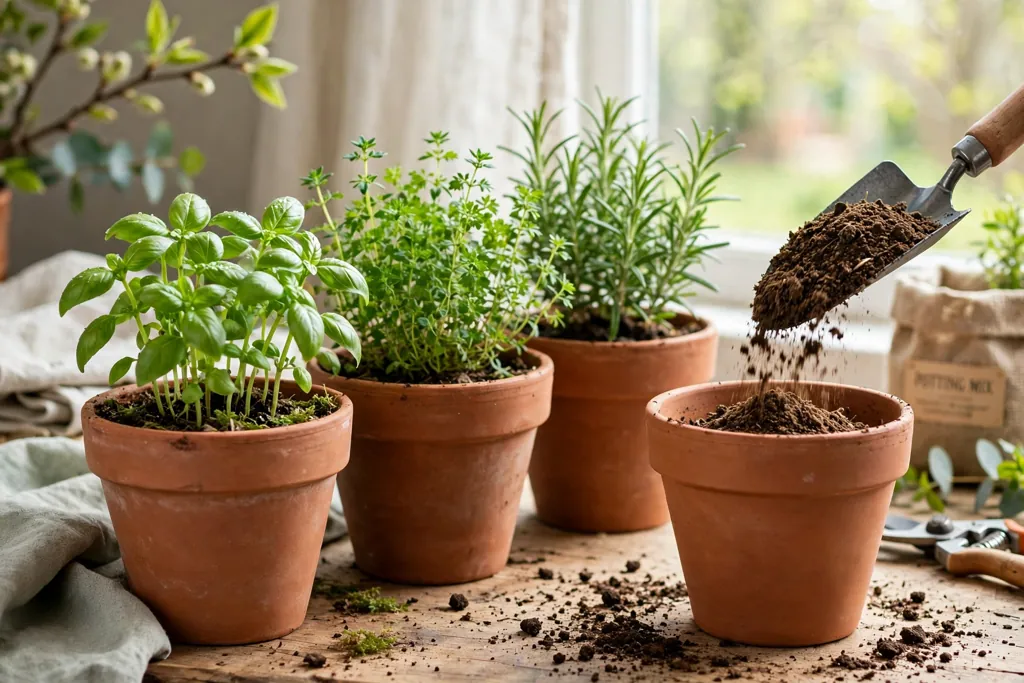
    To create a terracotta herb pot display, choose a sunny spot, pick pots with drainage holes, and plant one herb per pot in a free draining soil mix. Group the pots by height and water needs, label each herb, and place the display where you can reach it easily for cooking and care.

    Terracotta suits herbs well because the porous clay lets excess water move out through the pot wall, which helps soil dry between waterings. That same quality means pots dry faster than plastic pots, so a display needs a steady watering check, especially in sun or wind. This guide walks through the whole process in order, from picking a spot and herbs to planting, arranging, and keeping the display in good shape through the seasons.

    Key Takeaways

    • Pick a spot with at least four to six hours of direct sun for most common kitchen herbs, and check the light at different times of day before you plant.
    • Use terracotta pots with drainage holes, one herb per pot, so plants with different water needs do not share the same soil.
    • Use a free draining soil mix and water only when the top inch of soil feels dry, since herbs suffer more from wet roots than from a short dry spell.
    • Group pots by height, with taller herbs at the back and trailing herbs at the front, so every plant gets light and air.
    • Label each pot at planting time, because young herbs can look alike before they grow their full leaves and scent.
    • Check water, light, and growth weekly, and prune little and often to keep plants bushy and useful for cooking.

    Supplies You May Need

    • Terracotta pots in two or three sizes, each with at least one drainage hole
    • Saucers or trays to catch water under indoor pots, and a tray or stand for a patio group
    • A free draining potting mix, plus coarse grit or perlite if your mix holds a lot of water
    • Small stones or broken pot pieces to cover drainage holes without blocking them
    • Herb plants or seeds, such as basil, parsley, chives, mint, rosemary, thyme, and oregano
    • Plant labels and a waterproof marker, or small wooden markers
    • A watering can with a fine rose, and a small trowel
    • Pruning snips or clean kitchen scissors
    • A tray, crate, shelf, or plant stand to group the pots into a display
    • Gloves, if you prefer them for potting work

    1. Choose a Sunny Spot You Can Reach Every Day

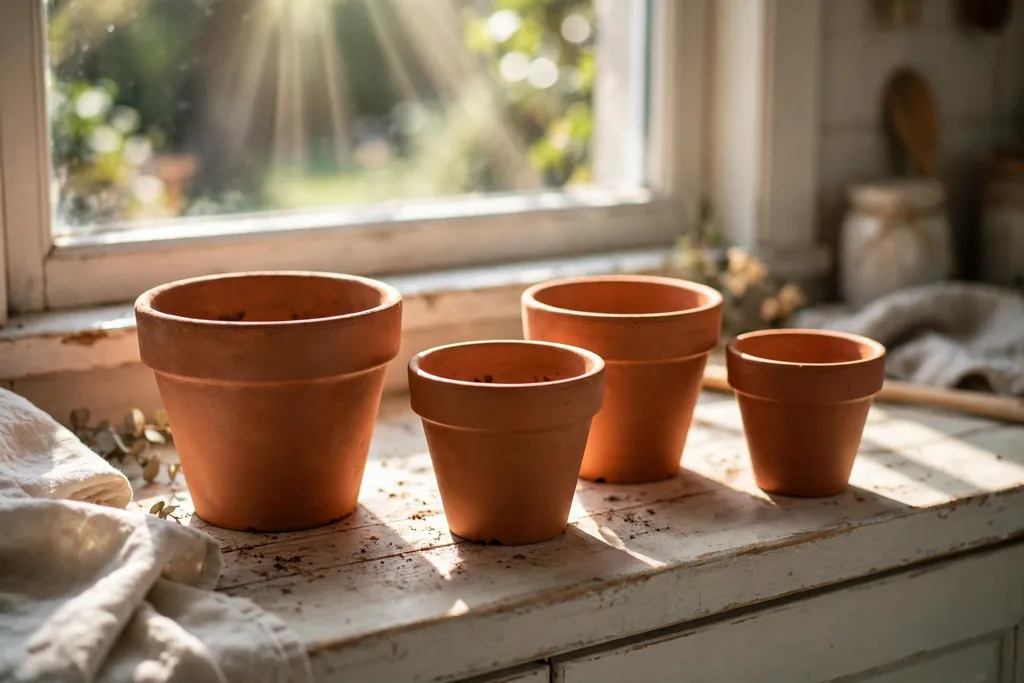
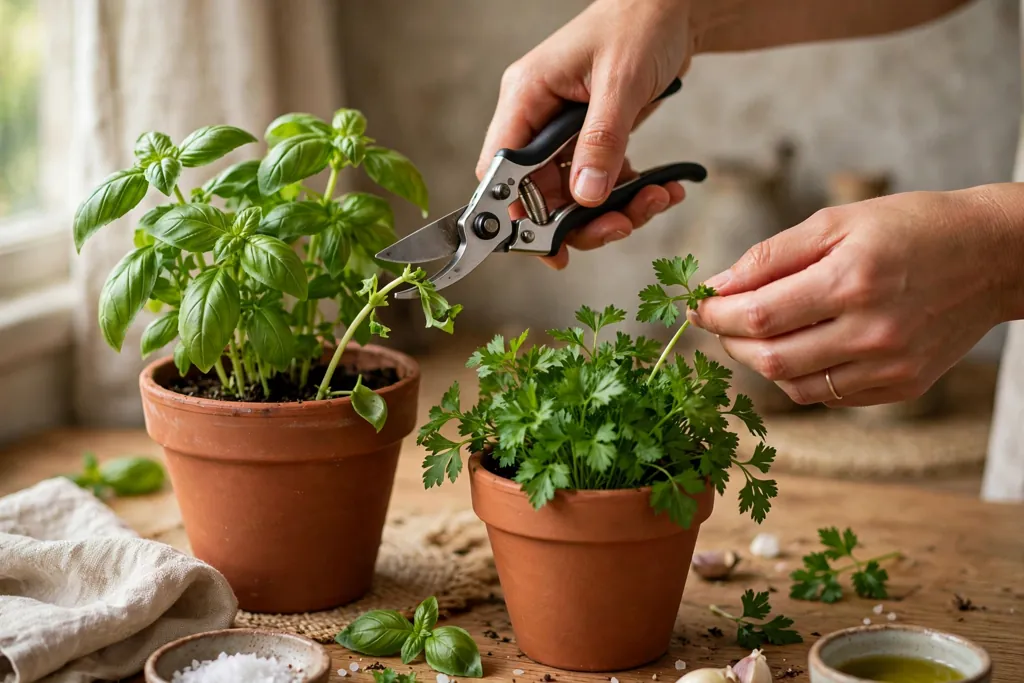
    Sunny kitchen windowsill with empty terracotta pots ready for herbs.

    Start with light, because light decides which herbs will thrive and where the display will work best. Most kitchen herbs, including basil, rosemary, thyme, and oregano, need at least four to six hours of direct sun each day. A south facing kitchen windowsill, a bright counter near a window, or a patio spot that gets morning and midday sun all fit that need. Watch the spot through a day before you commit, since a place that looks bright at noon can sit in shade by mid afternoon.

    Reach matters as much as light. You will water, snip, and check these plants often, so place the display where you pass it daily, close to the kitchen door for a patio group or near your cooking counter indoors. Avoid spots right beside a heat vent, a hot stove, or a door that slams in wind, since sudden heat and strong drafts dry terracotta pots fast. If your only sunny spot is small, plan a compact group of three to five pots rather than a large display that crowds the space.

    2. Pick Herbs That Suit Your Cooking and Your Spot

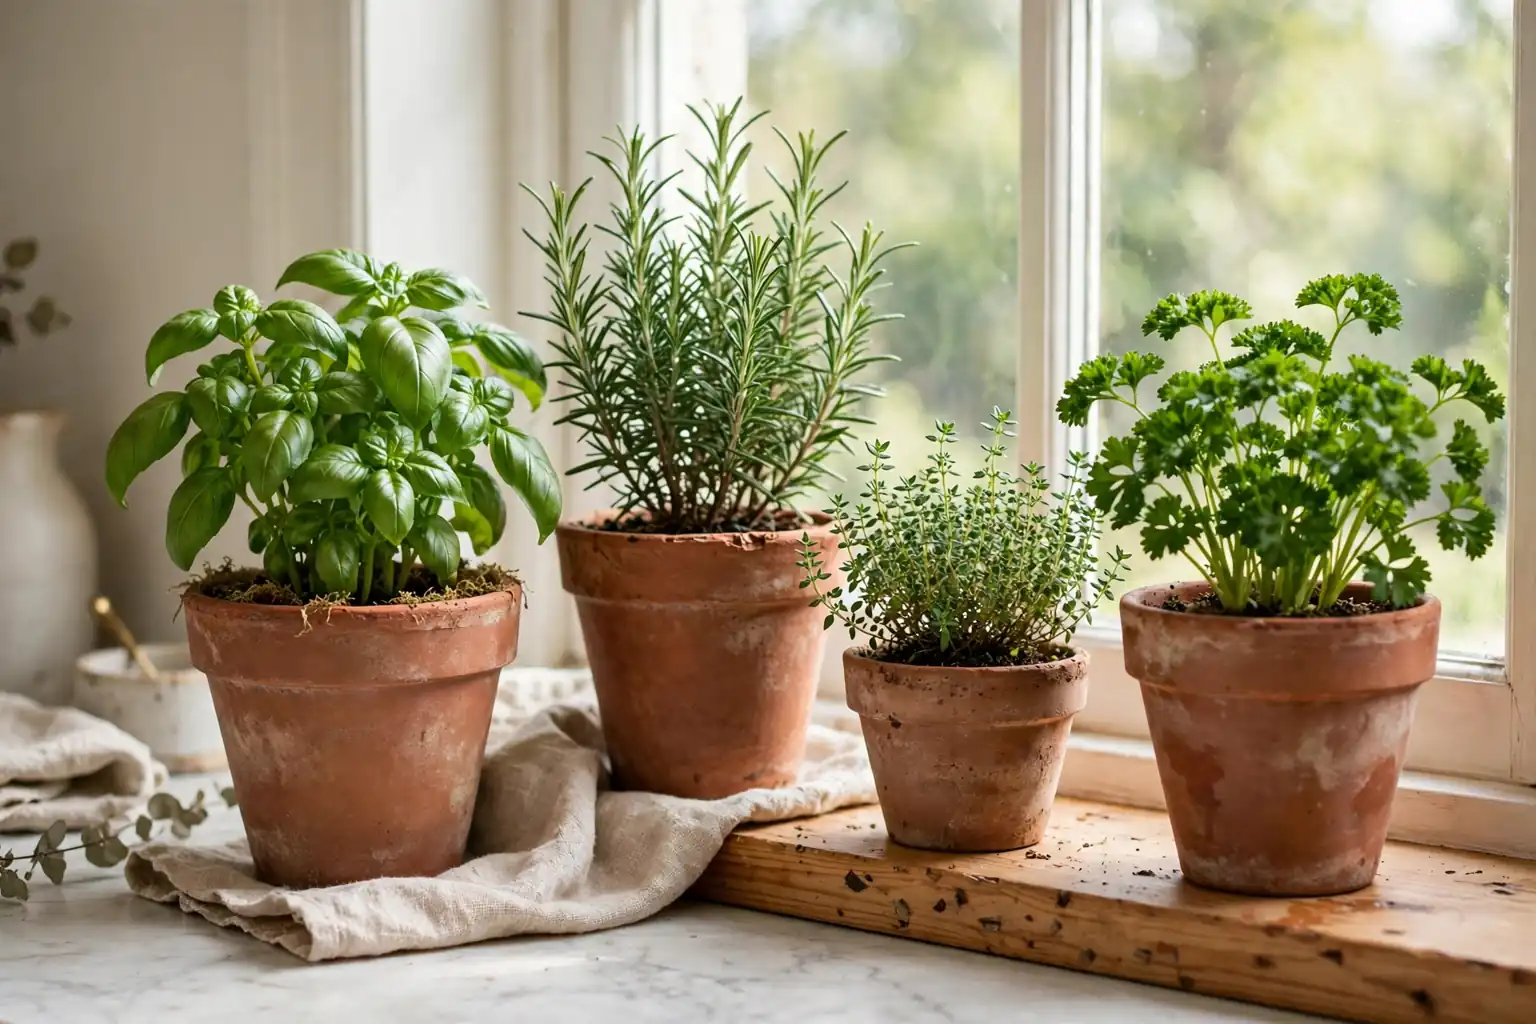
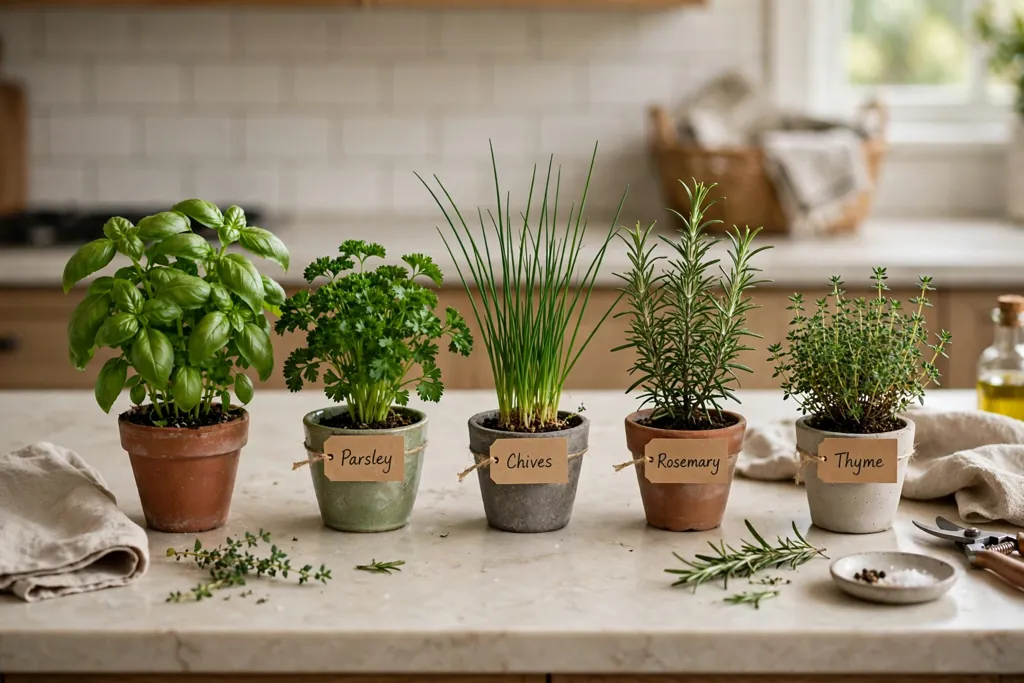
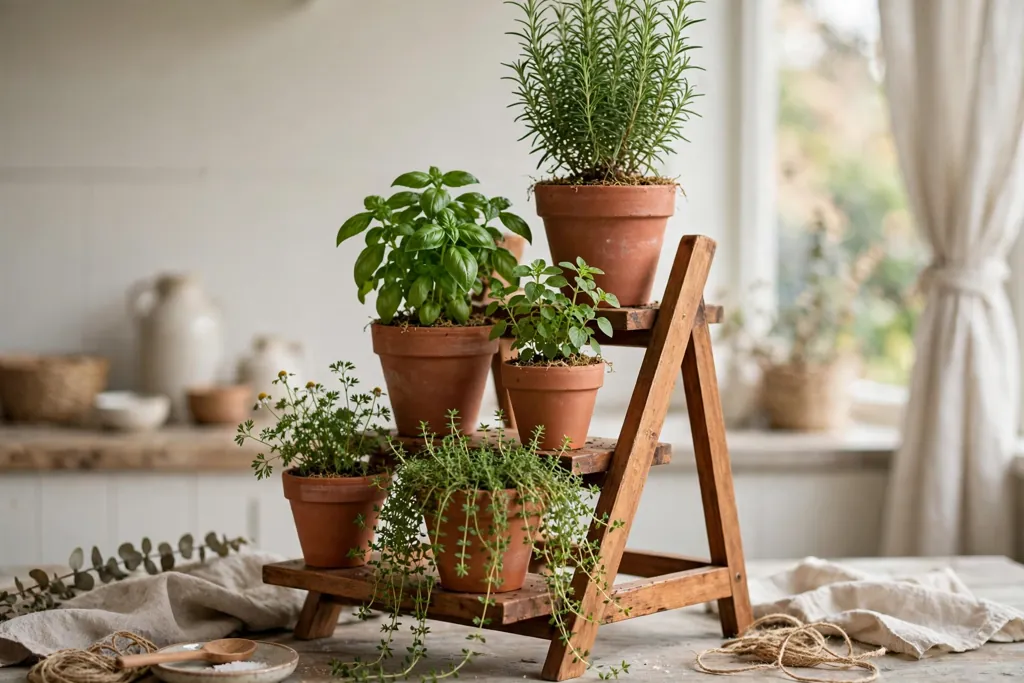
    Fresh herb plants including basil, parsley, chives, rosemary, and thyme on a counter.

    Choose herbs you actually cook with, so the display earns its place and gets used. Basil, parsley, and chives suit frequent kitchen use, while rosemary, thyme, and oregano suit roasts, soups, and salads and cope well with drier soil. Mint is useful but grows fast and spreads, so it always needs its own pot, never a shared container. If you are new to herbs, start with four or five reliable kinds and add more once you know how they grow in your spot.

    Match each herb to the light and water your spot offers. Mediterranean herbs such as rosemary, thyme, and oregano prefer sun and soil that dries out between waterings, while parsley and chives prefer steadier moisture and cope with a little less sun. Basil likes warmth and regular water, and it suffers in cold drafts, so keep it indoors or in a sheltered patio spot until nights stay warm. Grouping herbs by these needs later, at the arranging stage, is much easier when you plan the groups now.

    3. Choose Terracotta Pots With Drainage and Room to Grow

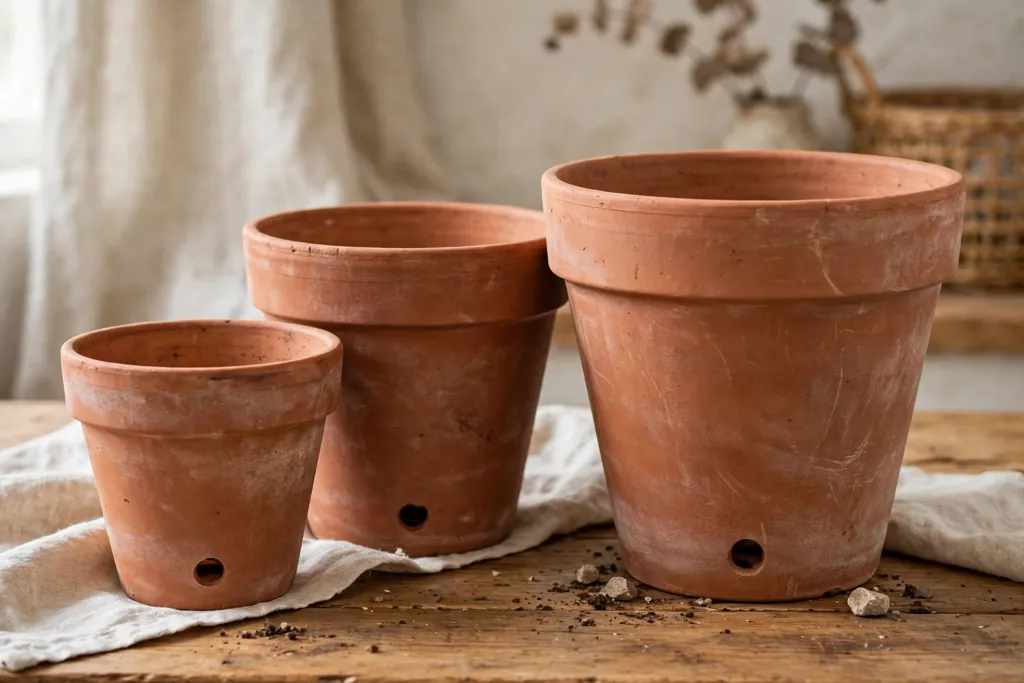
    Terracotta pots in small, medium, and large sizes grouped on a table.

    Pick pots with at least one drainage hole in the base, since herbs in pots without drainage soon sit in wet soil and their roots rot. Standard round terracotta pots work well, and a mix of sizes adds shape to the display: small pots for chives and thyme, medium pots for basil and parsley, and a larger pot for rosemary, which grows into a woody shrub over time. Check that each pot sits level and does not rock, and that a saucer fits under it without blocking the drainage hole.

    Soak new terracotta pots in water for a few hours before planting, or at least wet them well, because dry clay pulls moisture straight out of fresh potting mix. If you reuse old pots, scrub them clean and rinse them, since old soil and salts can carry pests or disease to new plants. Avoid pots with cracks through the base or a glazed inside that stops the clay from breathing, and keep pot sizes close enough that the group still reads as one display rather than a random collection.

    4. Gather Trays, Stands, and Labels Before You Plant

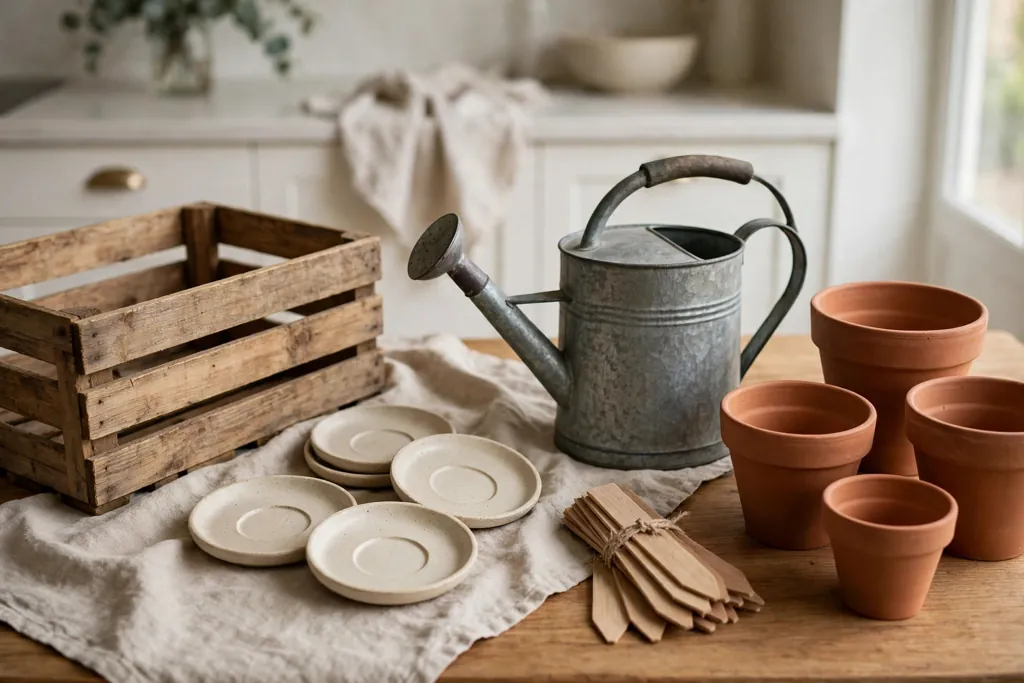
    Saucers, a wooden crate, plant labels, and a watering can beside terracotta pots.

    Set out everything you need before you open the soil bag, so planting stays quick and tidy. You need saucers for indoor pots, a tray or stand for the group, labels for each herb, and a watering can filled and left to reach room temperature. A shallow tray under a kitchen group protects counters and lets you move the whole display for cleaning. Outdoors, a wooden crate, a tiered stand, or a low bench lifts pots off cold or wet ground and improves air flow around them.

    Prepare labels at this stage, not after planting, when soil on your hands makes writing hard. Write each herb name clearly on a label or marker, and add the planting date if you like to track growth. Keep a few spare labels, since markers fade outdoors and pots sometimes move. Having the display base ready also helps you judge spacing: set the empty pots on the tray or stand and check that each pot has room for its plant to spread without crowding its neighbors.

    5. Prepare Drainage So Water Can Leave the Pot

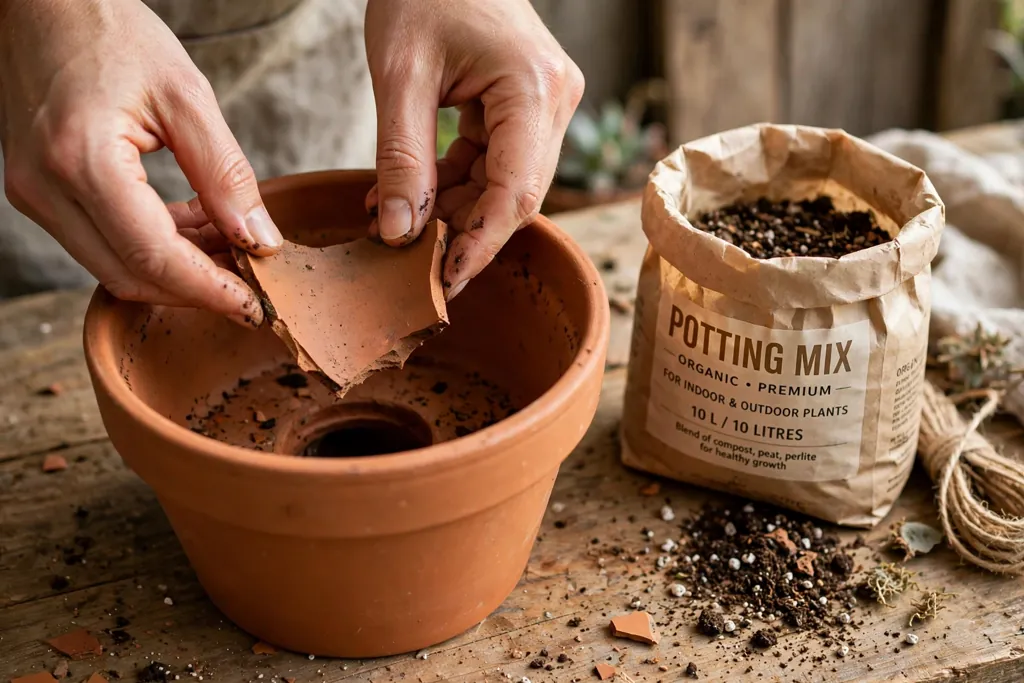
    Placing a broken pot piece over the drainage hole of a terracotta pot.

    Good drainage starts at the base of the pot. Place a small piece of broken pot or a flat stone loosely over each drainage hole, so soil does not wash out while water still flows through. Do not fill the bottom of the pot with a deep layer of gravel, since that layer can trap water just above it and leave roots sitting wet. A single cover over the hole is enough, with the potting mix doing the rest of the drainage work.

    Use a free draining potting mix, not heavy garden soil, which compacts in pots and holds too much water. A general potting mix with added coarse grit or perlite drains better and keeps air around the roots. Mix it in a bucket or tray before filling, and moisten it lightly so it holds together when squeezed but breaks apart easily. Dry potting mix can repel water at first, so damp mix gives new roots a better start and helps water spread evenly at the first watering.

    6. Fill the Pots and Set the Planting Depth

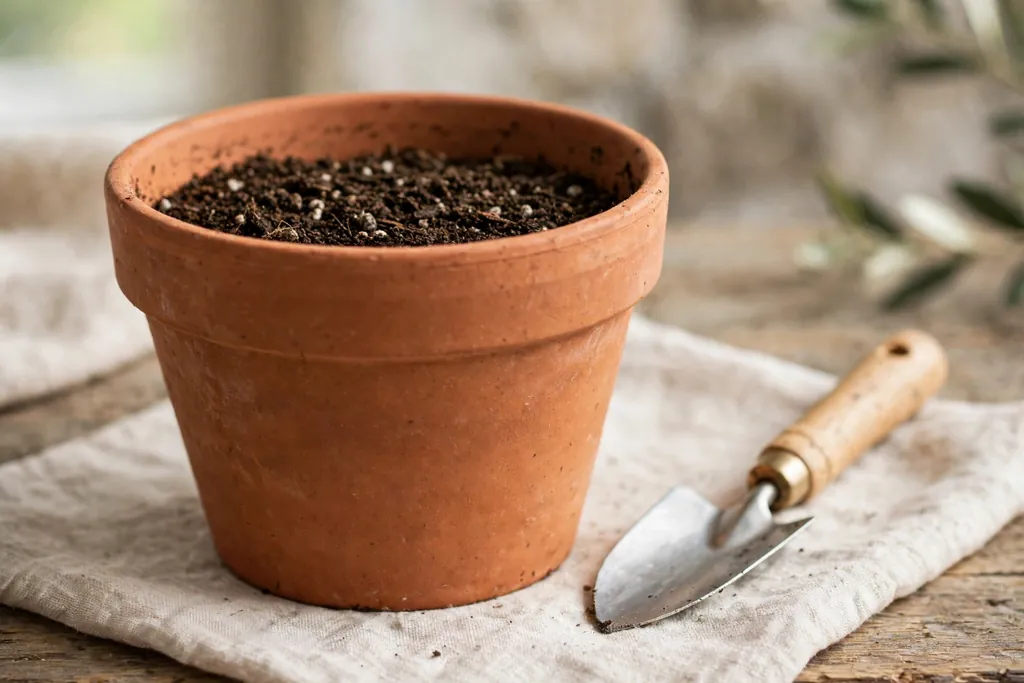
    Terracotta pot filled with damp potting mix below the rim.

    Fill each pot with damp potting mix to about an inch below the rim, leaving room for watering without soil spilling over the edge. Press the mix down gently with your fingers to remove large air pockets, but do not pack it hard, since compacted mix drains poorly and roots struggle to spread. Check the depth against the herb plant: the top of its root ball should sit level with the soil surface, not buried deep and not perched high above it.

    If you plant from seed, follow the depth on the seed packet as a guide, and sow only a few seeds per pot, thinning to the strongest seedling later. Seeds need steady moisture until they sprout, so cover the pot loosely or check it daily and mist when the surface dries. For bought plants, tease out any roots that circle tightly around the root ball, since loosened roots grow outward into the new mix faster. Set the plant in the center of the pot, fill around it, and firm the mix lightly.

    7. Plant One Herb Per Pot and Water It In Well

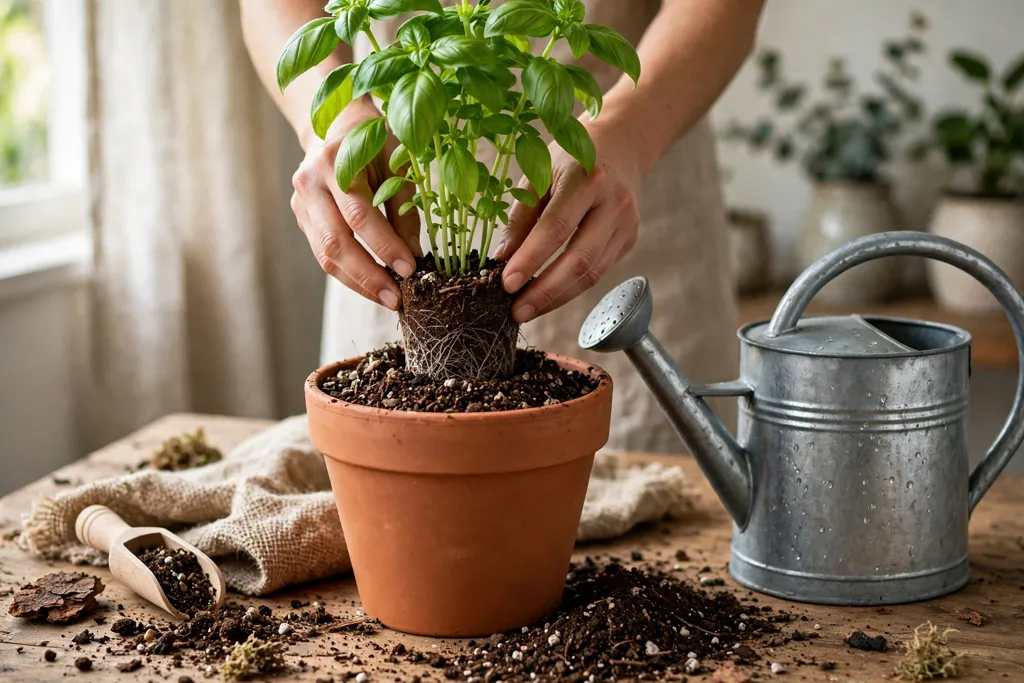
    Planting a basil plant into a terracotta pot.

    Plant one herb per pot, even when small plants make a shared pot tempting. Herbs grow at different speeds, and a fast grower such as mint or basil soon shades a slower neighbor, while different water needs mean one plant stays too wet or too dry. A single herb per pot also lets you move a plant that struggles, replace one that fails, and harvest without disturbing its neighbors. For a fuller look, use more pots, not fuller pots.

    Water each pot well right after planting, until water runs from the drainage hole, then let the pot drain fully before you place it on a saucer or tray. This first watering settles the mix around the roots and shows you whether drainage works. Empty saucers after watering so pots do not stand in water, and check indoor pots again after half an hour, since terracotta can keep draining for a while. A plant that wilts in the first day often needs shade and water, not more soil, so move it out of harsh midday sun until it settles.

    8. Label Every Pot While the Herbs Are Young

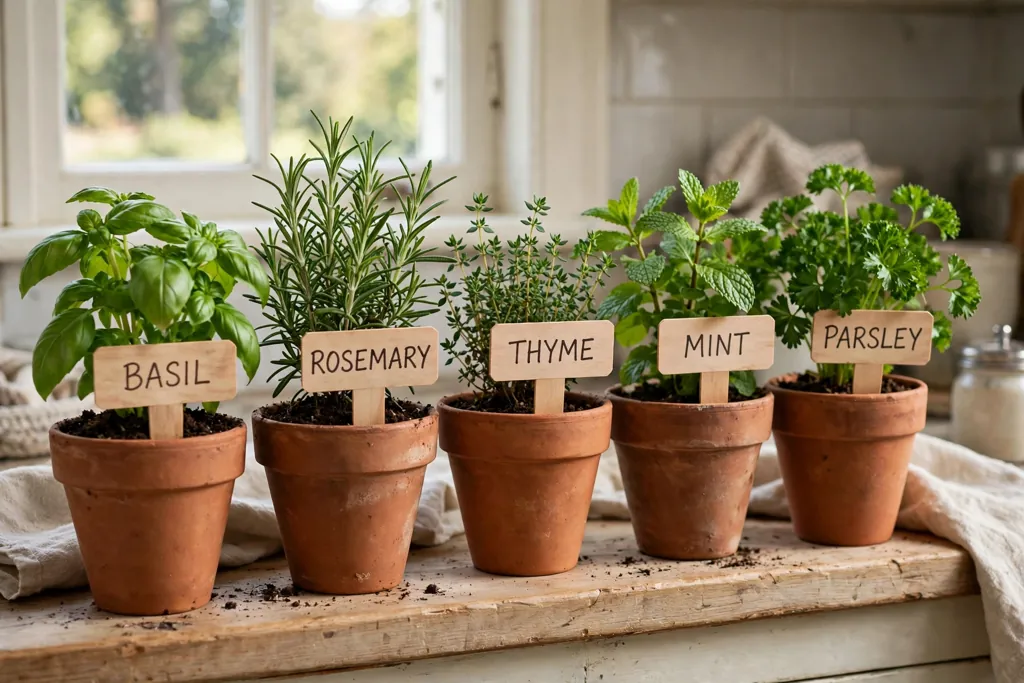
    Wooden plant labels in terracotta herb pots facing outward.

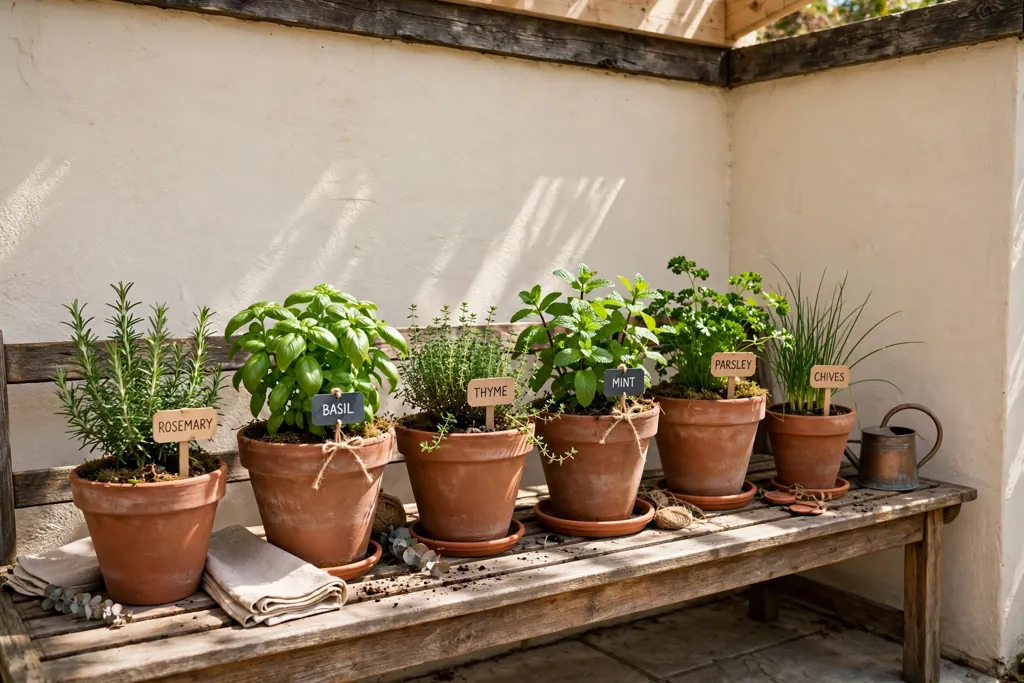
    Push a label into each pot at planting time, near the edge so it does not crowd the plant or block watering. Young basil, oregano, and mint seedlings can look much alike, and labels stop you from snipping the wrong herb for a recipe. Place labels on the same side of each pot, facing outward, so you can read the whole display at a glance from your usual cooking or patio spot.

    Use labels that survive your setting: wooden markers suit a sheltered kitchen, while plastic or metal markers last longer outdoors in rain and sun. Rewrite faded labels promptly, and add a note for herbs with special needs, such as mint in its own pot or rosemary that prefers drier soil, if that helps you remember the care each plant needs. Labels also help guests and family members harvest the right herb, which keeps the display useful for the whole household.

    9. Arrange the Display by Height and Water Needs

    Terracotta herb pots arranged by height on a tiered stand.

    Arrange the pots as a group, not as a row of equal pots, so the display looks planned and every plant gets light. Put taller herbs such as rosemary and basil toward the back or the center of a stand, medium herbs such as parsley in the middle, and low or trailing herbs such as thyme and oregano at the front or the edges. On a tiered stand, place sun lovers on the top tier and herbs that cope with a little shade lower down, and leave a small gap between pots for air to move.

    Group by water needs as well as height, so watering stays simple: keep rosemary, thyme, and oregano together where soil can dry out, and keep parsley, chives, and basil together where you check moisture more often. Step back and look at the group from the side you see most often, then adjust any pot that hides behind a taller neighbor. A display that looks good from the kitchen door or the patio chair is the one you will enjoy and keep up.

    10. Place the Kitchen Display for Light and Easy Snipping

    Terracotta herb pots on a kitchen windowsill near a cooking counter.

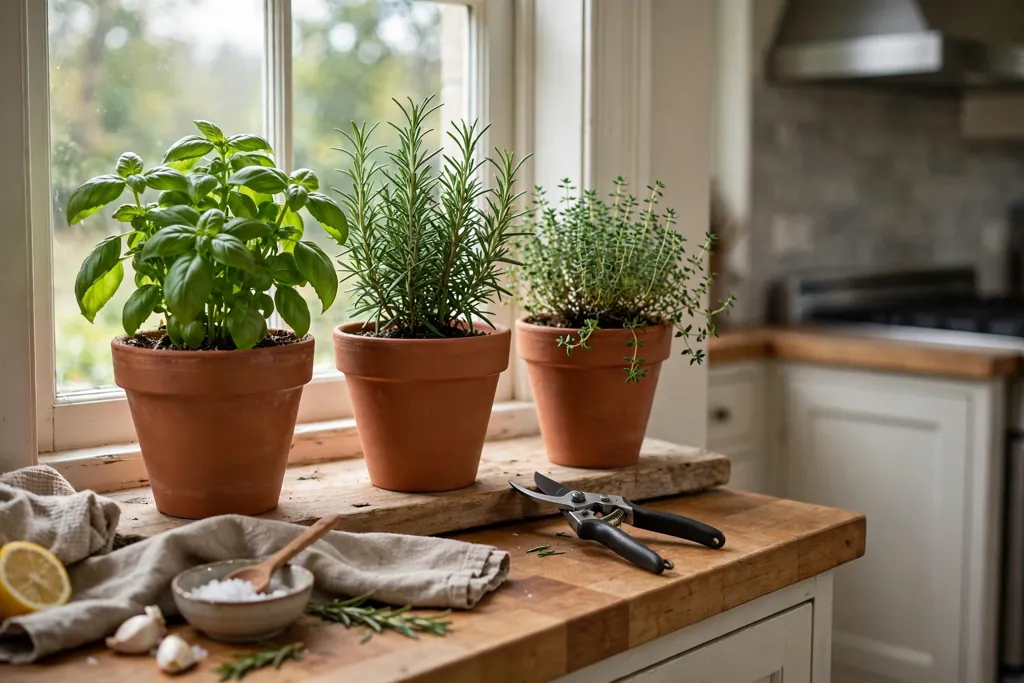
    In the kitchen, place the display on a windowsill, a shelf by a window, or a counter that gets direct sun for part of the day. Keep pots close to where you cook, so snipping a handful of basil or parsley becomes part of meal prep rather than a trip to another room. Turn each pot a quarter turn every few days, since herbs lean toward the window and turning keeps growth even and full on all sides.

    Protect the surface under the pots with saucers or a tray, and wipe up spills promptly, since terracotta can leave damp marks on wood. Keep pots away from the stove, where heat and steam dry soil fast and can scorch leaves, and away from a sink splash zone that keeps soil constantly wet. If winter light drops, move the display to your brightest window and cut back on watering, since plants grow slowly in low light and wet soil causes more harm than a dry spell.

    11. Place the Patio Display for Sun, Shelter, and Drainage

    Terracotta herb pots on a sunny patio bench against a wall.

    On a patio, choose a spot with sun for most of the day and some shelter from strong wind, which dries terracotta pots fast and can topple light pots. A spot against a wall or near a rail often gives both sun and shelter, and a bench, crate, or stand lifts pots off the ground so water drains away instead of pooling under them. Check that rain can run off the surface under the pots, and move pots off a spot where water puddles after storms.

    Outdoor pots dry faster than indoor pots, so check soil daily in hot weather and water early in the day, when less water evaporates and leaves dry before night. Bring tender herbs such as basil indoors or into shelter when nights turn cold, and move the whole display if a storm brings heavy wind. In a small patio, a vertical stand or a wall mounted shelf keeps the display compact while still giving each pot sun and air.

    12. Water by Checking the Soil, Not by a Fixed Schedule

    Checking soil moisture with a finger in a terracotta herb pot.

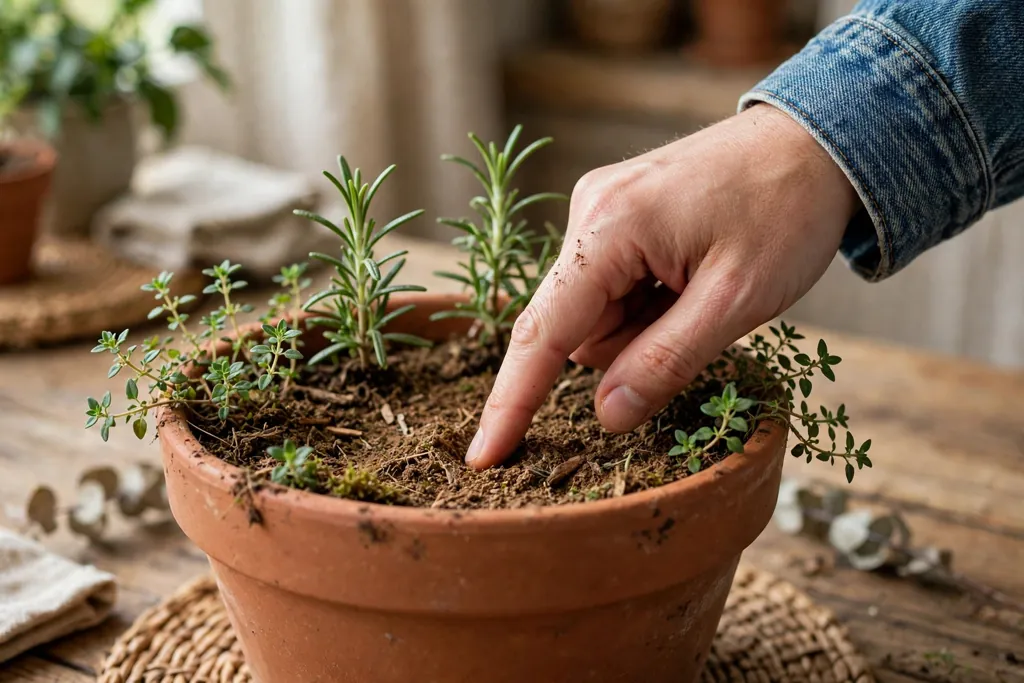
    Water herbs when the top inch of soil feels dry to your finger, not on a fixed day each week, since sun, wind, pot size, and plant growth change how fast soil dries. Push your finger into the mix: if the top inch feels dry, water slowly until water runs from the drainage hole, then empty the saucer. If the mix still feels damp, wait and check again the next day. Terracotta pots dry from the outside as well as the top, so a pot that looks dry on the surface may still hold moisture deeper down.

    Water at the soil level, not over the leaves, to reduce disease and keep foliage dry. Morning watering suits most herbs, giving leaves time to dry and roots time to take up water before the heat of the day. In winter, water far less, since growth slows and pots dry slowly indoors. Watch for signs of trouble: yellow leaves and soft stems often point to too much water, while dry, crisp leaf edges and wilting that lifts after watering point to too little.

    13. Feed Lightly, Prune Often, and Harvest for Cooking

    Snipping fresh basil and parsley from terracotta pots for cooking.

    Feed herbs lightly, since too much fertilizer produces soft, weak growth with less flavor. A half strength liquid plant food once every four to six weeks during active growth is enough for most potted herbs, and many herbs need no feed at all in winter when growth slows. Skip feeding a newly planted herb for the first few weeks, while roots settle, and always water first so fertilizer does not sit on dry roots.

    Prune little and often to keep plants bushy and productive. Pinch the top few inches of basil and mint regularly, snip parsley stems from the outside of the plant, and trim rosemary and thyme lightly after a flush of growth. Harvest in the morning when leaves hold the most scent, using clean snips, and never take more than about a third of a plant at once. Regular snipping stops herbs from growing tall and bare at the base, and it keeps fresh growth coming for cooking through the season.

    14. Refresh the Display Through the Seasons

    Refreshed terracotta herb pot display in spring light with new growth.

    Refresh the display as seasons change, so it stays useful rather than tired. In spring, replace any herb that did not survive winter, top up pots where soil has settled, and move tender herbs outside only after cold nights pass. In summer, check water daily, prune fast growers, and harvest often to stop plants from flowering too early, since flowering can change flavor in herbs such as basil. Remove spent stems promptly and keep pots spaced for air in humid weather.

    In autumn, bring tender herbs indoors before frost, cut back woody herbs lightly, and reduce watering as growth slows. In winter, keep the display in your brightest spot, water sparingly, and accept slower growth until spring returns. Every year or two, repot herbs that have outgrown their pots into the next size up with fresh mix, and replace cracked or salt stained pots. A display refreshed this way can last for years, with the same terracotta pots holding new herbs each season.

    Conclusion

    A terracotta herb pot display works best when the basics stay simple: a sunny spot, pots with drainage, one herb per pot, and soil that dries between waterings. Arrange the group by height and water needs, label each pot, and place it where you can reach it for cooking and care. With light feeding, regular pruning, and a seasonal refresh, the display gives you fresh herbs close at hand in the kitchen or on the patio. Start with a few herbs you cook with often, learn how they grow in your spot, and add more pots as your confidence grows. For more ideas from Dwell Ovell, browse the home page for home decor guides.

    FAQs

    How many hours of sun do terracotta herb pots need?

    Most kitchen herbs need at least four to six hours of direct sun each day, so place the display on a sunny windowsill or a patio spot that gets morning and midday sun. Herbs such as parsley and chives cope with a little less sun, while rosemary, thyme, and oregano do best in full sun. If your spot gets less light, choose shade tolerant herbs and expect slower growth.

    Why do terracotta pots dry out faster than plastic pots?

    Terracotta is porous, so water moves through the clay wall and evaporates from the outside of the pot as well as from the soil surface. This helps soil dry between waterings and reduces the risk of wet roots, but it means you must check soil moisture more often, especially in sun or wind. Soaking new pots before planting and watering at soil level help keep moisture even.

    Should I plant more than one herb in a terracotta pot?

    Plant one herb per pot, because herbs grow at different speeds and need different amounts of water, so a shared pot often leaves one plant too wet or too dry. Mint in particular spreads fast and should always have its own pot. Use more pots for a fuller display, grouped by height and water needs, rather than crowding several herbs into one container.

    How often should I water herbs in terracotta pots?

    Water when the top inch of soil feels dry to your finger, then water slowly until water runs from the drainage hole and empty the saucer. In hot or windy weather this may mean daily checks outdoors, while indoor pots in winter may need water only once a week or less. Always check the soil first, since a fixed schedule ignores changes in sun, wind, and growth.

    Which herbs grow best in terracotta pots?

    Basil, parsley, chives, mint, rosemary, thyme, and oregano all grow well in terracotta pots with drainage holes and free draining soil. Mediterranean herbs such as rosemary, thyme, and oregano prefer sun and drier soil, while parsley and chives prefer steadier moisture. Start with herbs you cook with often, and keep mint in its own pot so it does not crowd its neighbors.

    What do I do with terracotta herb pots in winter?

    Bring tender herbs such as basil indoors before frost, move the display to your brightest window, and water sparingly while growth slows. Hardy herbs such as rosemary, thyme, and chives may survive a mild winter outdoors in a sheltered spot, but pots can crack in hard frost, so move them to shelter or wrap the pots when a hard freeze is forecast. In spring, replace any herb that did not survive and refresh the soil.

  • How to Choose a Wood Furniture Stain for Your Decor

    How to Choose a Wood Furniture Stain for Your Decor

    To choose a wood furniture stain, match the tone to your room, check whether the wood is warm or cool, test two or three samples on a hidden spot, and pick a stain type that suits the piece and how it will be used. Then prepare the surface, apply thin coats, and seal the result.

    That short answer covers the whole process, and the steps below slow it down so each choice is easy to make. A stain does two jobs at once: it adds color, and it lets the grain show through. That is why the same stain can look different on two pieces, and why a sample test matters more than a color name on a can. Work through the steps in order, test before you commit, and give each coat time to dry. For rooms where warm wood sets the tone, see these farmhouse decor ideas and these living room color schemes.

    Key Takeaways

    • Match the stain tone to the room first, then to the wood, so the finished piece sits well with floors, walls, and other furniture.
    • Warm woods and warm rooms suit warm stain tones, while cool rooms suit cooler, greyer stain tones.
    • Always test two or three samples on a hidden spot or a scrap of the same wood before staining the whole piece.
    • Oil based, water based, and gel stains behave differently, so pick the type that fits the piece and your experience.
    • Prepare the surface well, since stain shows sanding marks, glue spots, and old finish that paint would hide.
    • Apply thin coats, wipe off the excess, and let each coat dry fully before judging the color.
    • Seal stained furniture with a clear topcoat, especially pieces that get daily use such as tables and chairs.
    • Work in a ventilated area, wear protective gear, and check old finishes for lead before sanding.

    Materials and Supplies

    • Wood furniture stain in the tested shade, plus a clear topcoat for sealing
    • Sample stain pots or small cans for testing, in two or three candidate shades
    • A scrap piece of the same wood, or a hidden spot on the piece, for testing
    • Sandpaper in a few grits, such as coarse for stripping and fine for smoothing
    • A tack cloth or a clean, lint free cloth for removing sanding dust
    • Clean cotton rags or a foam brush for applying stain, as directed on the product
    • A natural bristle brush or foam brush for the topcoat, as directed on the product
    • Painter tape, for protecting parts you do not want stained
    • Gloves, eye protection, and a dust mask or respirator, as suited to the task
    • Drop cloths, to protect the floor and nearby surfaces
    • A screwdriver, for removing knobs, hinges, and other hardware before staining
    • A lead test kit, if the piece has an old finish of unknown age

    1. Identify the Wood and Its Current Finish

    Person examining the grain and finish of a bare wood chair in a workshop.

    Start by finding out what wood you have and what is already on it. Look at the grain, the color, and the weight of the piece. Open grained woods such as oak show a strong pattern, while close grained woods such as maple look smoother and take stain more evenly. Pine and other soft woods soak up stain unevenly, which matters when you pick a stain type later.

    Check the current finish next. Run a hand over the surface and look for shine, flaking, or worn patches. A glossy, sealed surface will resist new stain, while bare or worn wood will soak it up fast. If the piece is painted, the paint must come off before stain can work, since stain needs bare wood to show grain. If you are unsure about the wood type, a sample test on a hidden spot will still tell you more than a guess.

    Note any repairs, glue spots, or filler on the surface. Stain colors filler and glue differently from bare wood, and those spots often show up darker or lighter than the rest. Plan to sand or work around them, and keep your expectations realistic for a piece with heavy repairs.

    2. Decide the Look You Want for the Room

    Wood dresser with a medium stain tone beside a bed with neutral bedding.

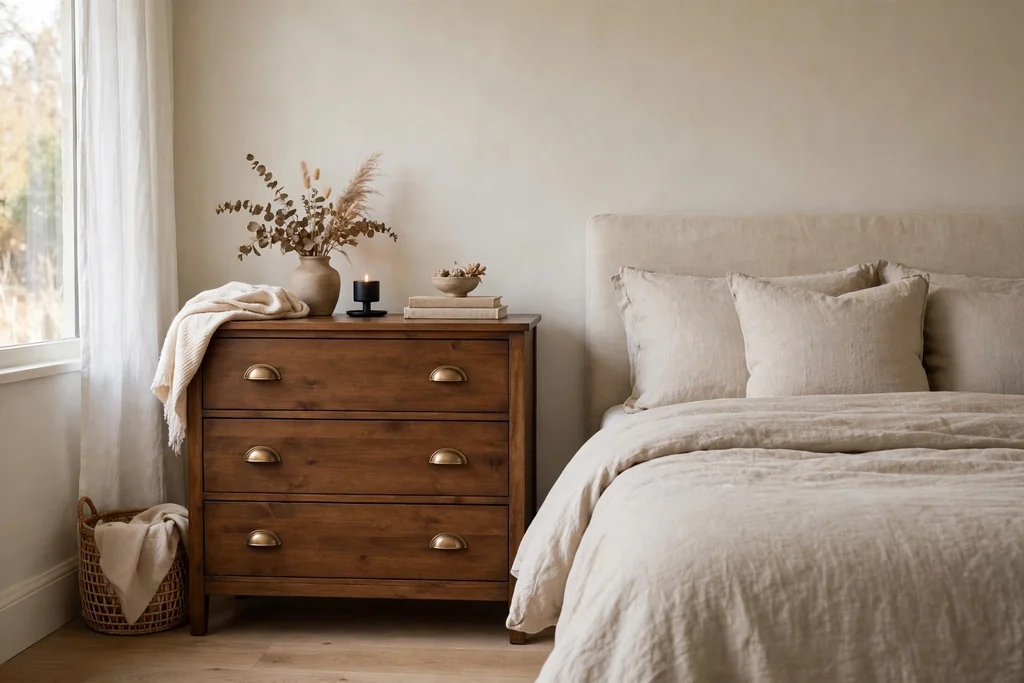
    Before you pick a shade, decide what job the piece will do in the room. A dining table that anchors a room can carry a deeper tone, while a small side table may look better in a lighter tone that blends in. A bedroom dresser should sit calmly beside bedding and curtains, while a living room console can echo the tone of the floor or the coffee table.

    Look at the largest wood surfaces already in the room, such as floors, beams, or a dining table. Stained furniture does not need to match those tones exactly, and in fact an exact match can look flat. Aim for tones in the same warm or cool family, with one clear step lighter or darker, so the piece relates to the room without disappearing into it. For ideas on keeping wood tones in one family across a room, see these living room color schemes.

    Also think about light. A room with strong daylight will make a stain look lighter and warmer than the same stain in a dim hallway. Check your samples in the room where the piece will live, in both daylight and evening light, before you make a final choice.

    3. Learn the Main Stain Types

    Three cans of wood stain types on a workbench beside a wood board.

    Stains for furniture generally fall into three types, and each suits different pieces. Oil based stains soak in slowly, which gives you more working time to wipe and even out the color. That longer open time helps on larger pieces such as tabletops, but it also means longer drying times and stronger fumes, so ventilation matters more.

    Water based stains dry faster, have lower odor, and clean up with water. They can raise the grain of the wood slightly, which may call for a light sanding between coats. They suit smaller pieces and indoor work where drying time matters, and they work well when you want a lighter, less amber tone.

    Gel stains sit more on the surface than they soak in, which makes them useful on woods that stain unevenly and on pieces where stripping the old finish fully is not practical. They are thicker, so they can be easier to control on vertical surfaces such as chair legs and cabinet doors. Read the directions on the product you buy, since drying times and application methods differ by type.

    4. Choose Warm, Cool, or Neutral Tones

    Wood sample boards in warm, cool, and neutral stain tones on a table.

    Stain tones fall into warm, cool, and neutral families, and the family matters as much as the depth of color. Warm tones carry red, orange, or golden notes, and they suit rooms with warm white walls, brass details, and honey toned floors. Cool tones carry grey, ashen, or slightly blue notes, and they suit rooms with cool greys, silver details, and pale floors.

    Neutral tones sit between the two, with brown notes that read neither strongly warm nor strongly cool. They are a safe choice when a room mixes warm and cool elements, or when you plan to move the piece between rooms later. If you are unsure, hold your sample boards against the floor, the wall, and the largest nearby furniture piece, and pick the family that looks settled beside all three.

    Avoid choosing a tone only because you like it on its own. A warm walnut tone can clash with a cool grey room, and a grey washed tone can look cold beside honey oak floors. The room test in step 5 will catch this before the whole piece is stained.

    5. Pick a Depth: Light, Medium, or Dark

    Wood sample boards in light, medium, and dark stain shades in a row.

    Depth means how dark the stain looks, and it changes the feel of a piece more than most people expect. Light stains keep a room feeling open and show the most grain detail, which suits small rooms and pale decor. They also show wear and marks more readily on pieces that get heavy daily use.
    Medium stains are the most forgiving choice for most furniture. They add clear color and richness, hide minor wear, and still let grain show through. If you are staining your first piece, a medium tone is a sensible place to start, since it is easier to judge and easier to live with than a very dark finish.

    Dark stains give a piece weight and a formal feel, and they can pull together mixed woods by evening out their color differences. They also show dust and scratches more clearly, and they darken a room if used on many large pieces at once. Use dark tones on one anchor piece at a time, and check the sample in the room before committing.

    6. Set Up Safely and Check Old Finishes for Lead

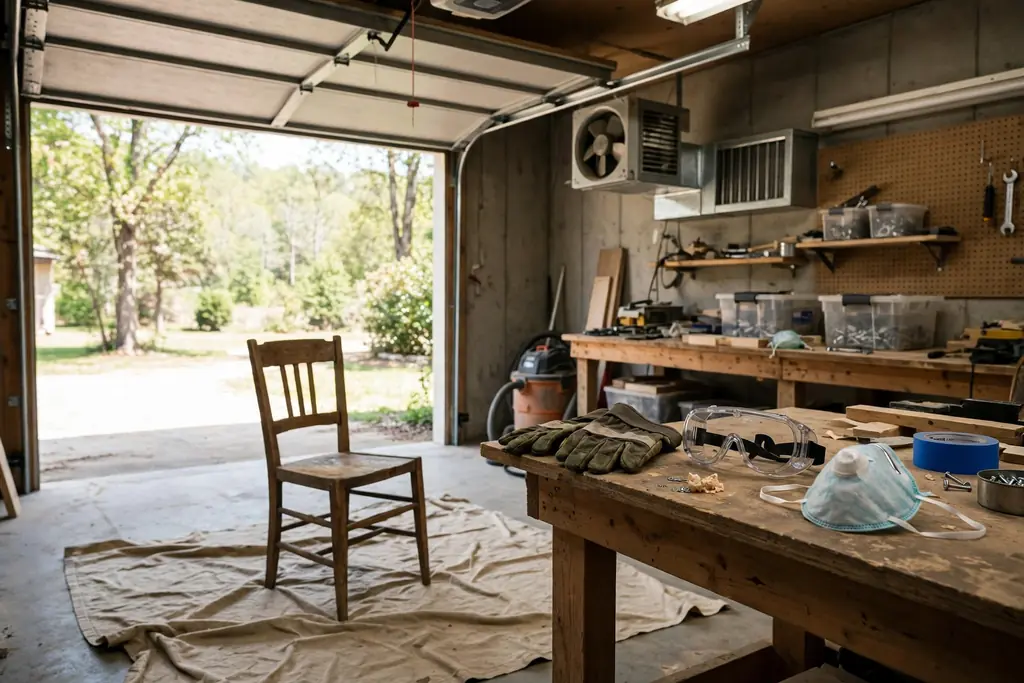
    Ventilated garage workspace with a wood chair on a drop cloth and protective gear on a bench.

    Set up your workspace before you open any stain. Work in a ventilated area, such as a garage with the door open, a covered outdoor space, or a room with windows open and air moving through. Keep the space clear of open flames and heaters, since stain and its rags can be flammable. Lay drop cloths under the piece and keep rags flat or in a safe container as directed on the product, never bunched up in a pile.

    Wear protective gear for the whole job: gloves to keep stain off your skin, eye protection when sanding, and a dust mask or respirator when sanding or working with strong fumes. Change gloves if they tear, and wash your hands after handling stain, even if you wore gloves.

    If the piece has an old finish and you do not know its age, check for lead before sanding. Older painted or varnished finishes can contain lead, and sanding lead paint creates dust that is hazardous to breathe. Use a lead test kit as directed, and if the test is positive, do not sand the piece yourself. Seek advice on safe removal or choose a different piece. This check costs little time and prevents a serious health risk.

    7. Test Samples on a Hidden Spot or Scrap Wood

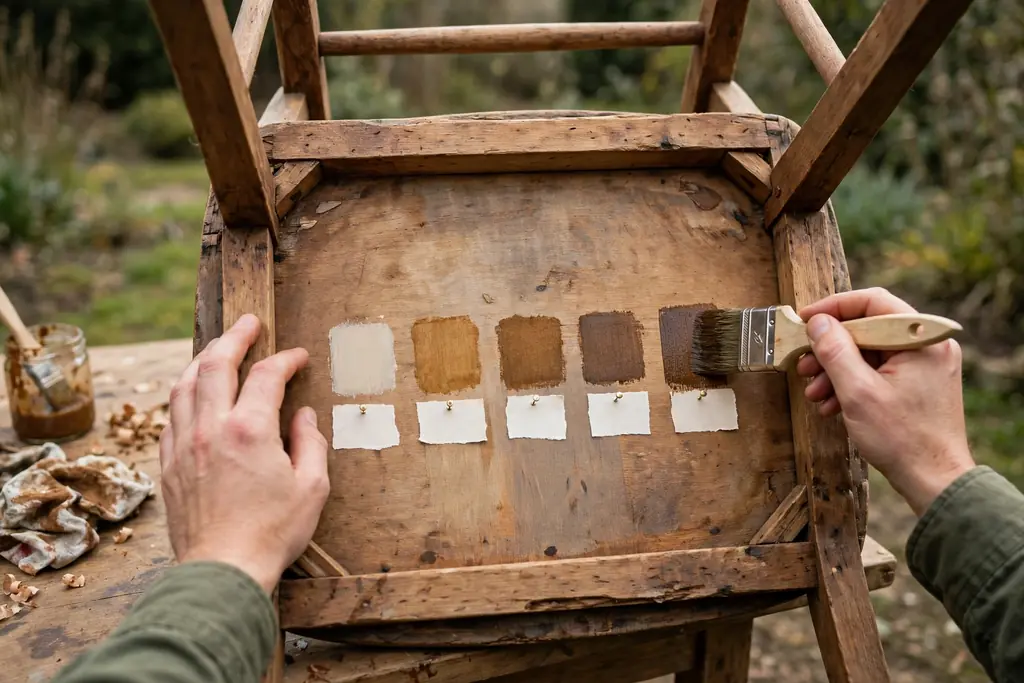
    Hands brushing stain samples onto the underside of a wood chair seat.

    Testing is the step that saves the most regret. Apply your two or three candidate shades to a hidden spot, such as the back of a leg, the inside of a drawer front, or the underside of the piece. If no hidden spot exists, test on a scrap piece of the same wood, sanded the same way as the furniture.

    Apply each sample the same way you plan to stain the piece, with the same number of coats, and let each sample dry fully. Stain looks much darker when wet, so judge the color only after it dries, and after a clear topcoat sample if you plan to seal it, since topcoat can deepen the tone slightly. Label each sample with the shade name and the number of coats, so you do not mix them up.

    Live with the samples for a day if you can. Check them in daylight and in evening light, beside the floor and the wall, and from across the room. The shade that looks right in all three checks is the one to use, even if it was not your first pick in the shop.

    8. Prepare the Surface: Clean, Sand, and Remove Dust

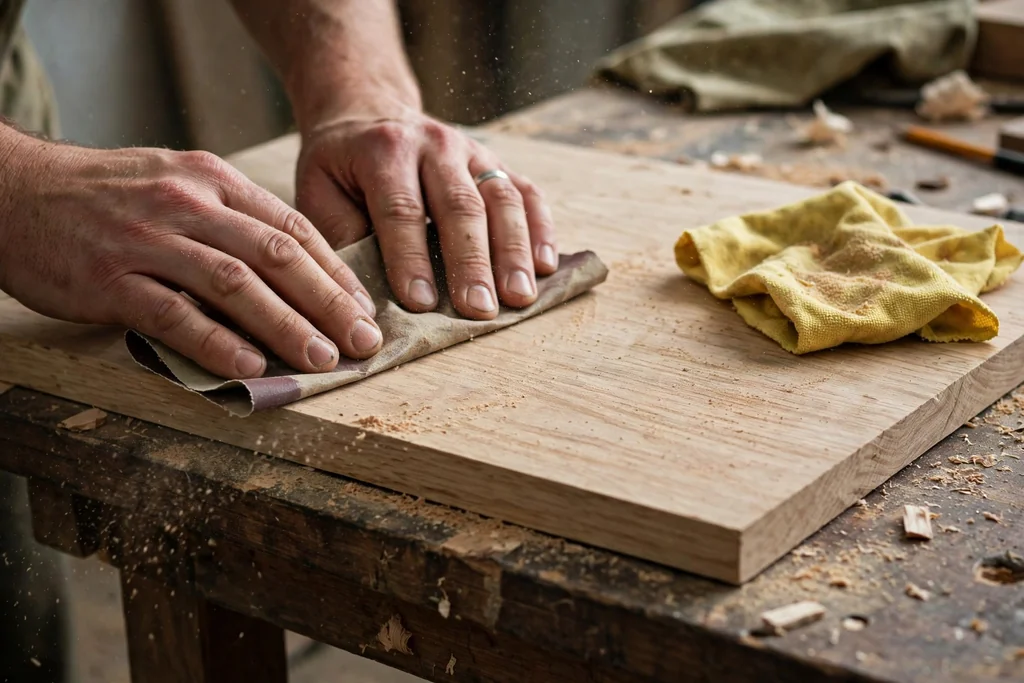
    Hands sanding a wood tabletop with the grain in a workshop.

    Good preparation decides how even the stain looks. Remove all hardware, including knobs, hinges, and pulls, and set the screws aside in a labeled bag so refitting is simple. Clean the piece with a damp cloth to remove dust and grease, and let it dry fully before sanding.

    Sand with the grain, never across it, starting with a coarser grit to remove the old finish or rough spots, then moving to finer grits to smooth the surface. Cross grain scratches show up clearly under stain, so keep your strokes along the grain and check your work in raking light. Sand edges and corners lightly, since they wear through fast and will take stain darker if over sanded.

    After sanding, remove every trace of dust. Wipe the piece with a tack cloth, then with a clean, slightly damp cloth, and let it dry. Dust left on the surface can block stain and leave pale spots, so this step is worth doing twice on large flat areas such as tabletops.

    9. Use Wood Conditioner on Soft or Porous Woods

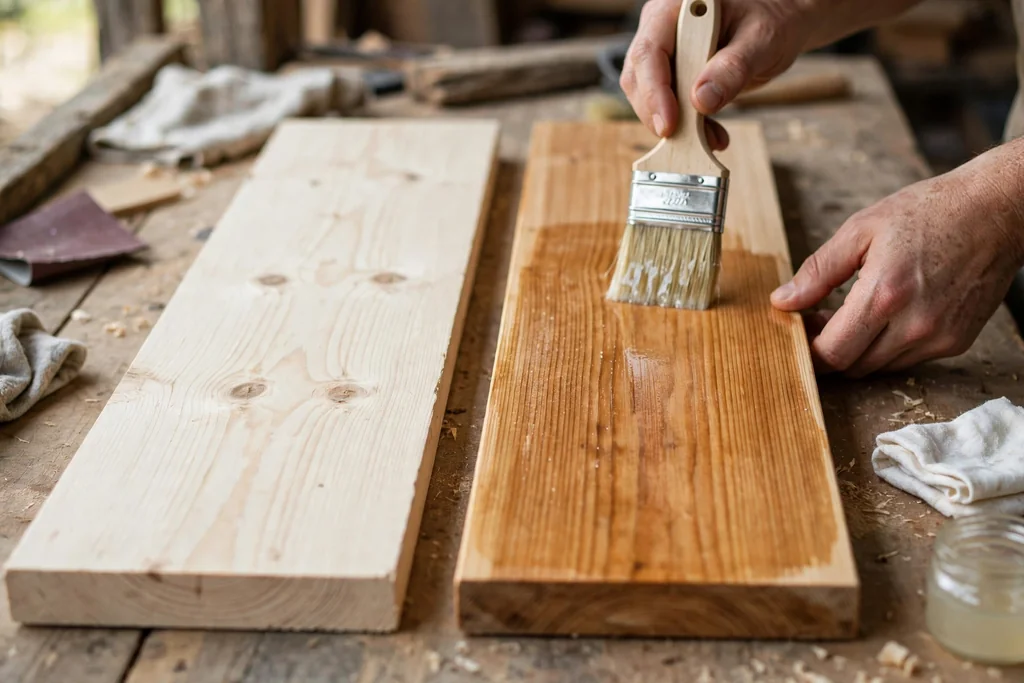
    Hands brushing wood conditioner onto a pale pine board in a workshop.

    Some woods soak up stain unevenly, leaving dark blotches beside pale patches. Pine, fir, and other soft woods are the usual cases, as are some close grained woods with uneven density. A pre stain wood conditioner helps even out absorption, so the stain goes on more uniformly.

    Apply conditioner as directed on the product, usually with a brush or cloth, and let it sit for the stated time before staining. Stain soon after the conditioner window opens, since waiting too long can reduce its effect. Conditioner does not change the final color much on its own, but it does change how evenly the stain takes, so judge the color after the stain coat, not after the conditioner.

    If your test samples on scrap wood already look even without conditioner, you may skip it. If the samples look blotchy, conditioner is worth trying on a fresh sample before you stain the whole piece. Test both ways on scrap wood when you have time, since the comparison shows the difference clearly.

    10. Apply the First Coat Evenly and Wipe Off the Excess

    Hands wiping excess stain off a wood tabletop with a cotton rag.

    Stir the stain well before you start, since the color pigments settle at the bottom of the can. Apply a thin, even coat with a clean rag, a foam brush, or a bristle brush, working with the grain and covering one section at a time. Work on flat surfaces first, then legs and edges, so drips on vertical parts can be caught while the stain is still wet.

    Let the stain sit for the time stated on the product, usually a few minutes, then wipe off the excess with a clean rag, again working with the grain. Wiping is what sets the final color: stain left sitting on the surface dries darker and stickier, while wiped stain leaves a thinner, more even tone. Use a fresh section of rag often, so you are wiping off excess rather than moving it around.

    Check the piece in good light after wiping. Look for puddles in corners and carvings, dry patches where the rag took too much off, and lap marks where two sections meet. Fix these now, while the coat is still workable, rather than after it dries.

    11. Let It Dry, Judge the Color, and Add a Second Coat If Needed

    Stained wood tabletop drying in a ventilated workshop beside a sample board.

    Let the first coat dry fully before you judge it or add another coat. Drying times vary by stain type, temperature, and humidity, so follow the directions on the product and allow extra time in cold or damp weather. A coat that feels dry to a light touch may still be soft underneath, and a second coat applied too soon can lift the first.

    Once dry, check the color in the room where the piece will live, in daylight and in evening light. If the tone is right but a little light, a second thin coat will deepen it. Apply the second coat the same way as the first, wipe off the excess, and let it dry fully again. Two thin coats almost always look better than one thick coat, which can hide grain and dry unevenly.

    If the color is too dark after the first coat, do not try to lighten it by sanding patches, since that creates uneven spots. A light overall sanding and a fresh thin coat is a better fix, or accept the darker tone and move to sealing. Note the number of coats you used, so touch ups later match.

    12. Seal With a Clear Topcoat

    Hands brushing a clear topcoat onto a stained wood tabletop in a workshop.

    Stain adds color, but it does not protect the surface on its own. Seal the piece with a clear topcoat, such as polyurethane, in a sheen that suits the room: matte or satin for a soft look, semi gloss for pieces that need wiping often. Apply the topcoat in thin, even coats with a clean brush, working with the grain and avoiding puddles.

    Let each topcoat dry fully, then sand very lightly with fine sandpaper to smooth any dust nibs, wipe off the dust, and apply the next coat. Two or three thin topcoats give better protection than one thick coat, especially on tabletops, chair seats, and other surfaces that get daily use. Follow the drying and recoat times on the product, since they differ by type.

    Check the sheen in the room before the final coat. A topcoat can deepen the stain tone slightly and add shine, so the finished piece may look a little different from the unstained sample. That is normal, and it is another reason to seal your test sample in step 7 before making a final shade choice.

    13. Refit Hardware, Cure, and Place the Piece in the Room

    Person refitting a knob onto a finished stained wood dresser in a bedroom.

    Once the final topcoat is dry, refit the hardware using the labeled screws from step 8. Tighten screws gently, since over tightening can crack a fresh finish around the screw holes. If you replaced knobs or pulls, check that the new hardware suits the stain tone and the room, and that it sits flat against the surface.

    Let the piece cure before heavy use. Drying and curing are different: a finish can feel dry while it is still soft underneath, and placing hot dishes, heavy books, or damp items on it too soon can mark it. Follow the curing time on the topcoat product, and keep the piece in a ventilated spot during that time.

    Place the piece in its room and live with it for a few days before judging the result. Check it beside the floor, the wall, and the nearby furniture, in daylight and in evening light. Small differences from your sample are normal, since grain varies across a single piece. For woven texture that pairs well with warm stained wood, see these rattan decor ideas.

    14. Maintain the Finish and Touch Up Wear

    Hands dusting a finished stained wood side table with a soft cloth in a living room.

    Stained and sealed furniture needs only simple care to last well. Dust with a soft, dry cloth, and wipe spills promptly with a slightly damp cloth, then dry the surface. Avoid harsh cleaners and abrasive pads, which can dull the topcoat and wear through to the stain. Use coasters under hot or wet items on tabletops, and felt pads under objects that sit in one spot for a long time.

    When wear appears, usually on edges, chair arms, and table rims, touch it up early rather than waiting for bare wood to show. Lightly sand only the worn spot with fine sandpaper, wipe off the dust, dab on a small amount of matching stain, let it dry, and seal the spot with a thin topcoat. Feather the edges of the touch up so it blends into the surrounding finish.

    If the whole topcoat looks dull or scratched after years of use, a fresh topcoat over a cleaned and lightly sanded surface can renew the piece without a full strip and restain. That is one of the practical benefits of sealing well in the first place: the stain stays protected, and only the clear coat needs renewing.

    Conclusion

    Choosing a wood furniture stain comes down to a steady order: know the wood and its finish, pick a tone family that suits the room, choose a light, medium, or dark depth, and test samples on a hidden spot before you commit. Set up in a ventilated area with protective gear, check old finishes for lead before sanding, prepare the surface well, apply thin coats, and seal the result with a clear topcoat. With that routine, a stained piece shows its grain, sits well in the room, and stands up to daily use.

    FAQs

    How do I choose a wood furniture stain color?

    Choose a wood furniture stain color by matching the tone family to your room first, then picking a depth that suits the piece. Warm rooms suit warm tones, cool rooms suit cooler tones, and neutral tones suit mixed rooms. Test two or three samples on a hidden spot, check them in daylight and evening light, and pick the shade that looks settled beside your floor and walls.

    Should I use oil based or water based wood stain on furniture?

    Use oil based stain when you want a longer working time on a large piece and can ventilate well, since it dries slowly and has stronger fumes. Use water based stain when you want faster drying, lower odor, and easier cleanup, and when a lighter, less amber tone suits the room. Gel stain suits uneven woods and vertical surfaces, since it sits more on the surface than it soaks in.

    Do I need to test wood stain before staining furniture?

    Yes, test wood stain on a hidden spot or a scrap of the same wood before staining the whole piece. Stain looks darker when wet and varies by wood type, so a sample is the only reliable way to judge the final color. Apply the sample the same way you plan to stain the piece, let it dry fully, and seal a test patch if you plan to seal the furniture.

    How do I stop wood stain from looking blotchy?

    Stop wood stain from looking blotchy by sanding evenly with the grain, removing all dust, and using a pre stain wood conditioner on soft or porous woods such as pine. Apply thin coats, wipe off the excess evenly, and work one section at a time so no area dries before it is wiped. Testing on scrap wood first shows whether conditioner helps for your piece.

    Do I need to seal stained wood furniture?

    Yes, seal stained wood furniture with a clear topcoat, since stain alone does not protect the surface from spills, scratches, and daily wear. Apply two or three thin topcoats, sanding lightly between coats, and let the finish cure before heavy use. Tabletops, chair seats, and other high use surfaces need sealing most, while low use decorative pieces can use fewer coats.

    How do I fix a wood stain that came out too dark?

    Fix a wood stain that came out too dark by first checking whether the sealed finish softens the look once it is fully dry and in the room, since wet stain always looks darker. If it is still too dark, lightly sand the whole surface evenly and apply a fresh thin coat in a lighter shade, or strip and restain for a full correction. Avoid sanding only patches, since that creates uneven spots that show through the next coat.


  • Custom Slipcovers: What to Measure and Consider Before Ordering

    Custom Slipcovers: What to Measure and Consider Before Ordering

    Before ordering custom slipcovers, measure the overall width, depth, and height of each piece, then measure seats, backs, arms, and cushions separately, and note curves, loose parts, and floor clearance. Share those numbers with fabric, fit, and care choices, so the maker can shape a cover that fits your furniture, not a generic size.

    A custom slipcover is only as good as the information sent with the order. A ready made cover is made for a size range, so small differences in arm shape or cushion depth matter less. A custom cover is cut for one piece, so a missed measurement, an unnoted curve, or a cushion counted as one piece when it is really two can change the fit. Work through this guide in order, from deciding what the cover must do to a final recheck, and keep one clear record for each piece of furniture.

    Key Takeaways

    • Measure each piece separately, even when two chairs look alike, since small differences change a custom fit.
    • Record overall width, depth, and height first, then seats, backs, arms, cushions, skirt length, and floor clearance.
    • Photograph and sketch the piece, and note curves, slopes, tufting, loose cushions, reclining parts, and removable legs.
    • Choose fabric for daily use, washing, pets, children, and sunlight, not only for color.
    • Decide fit details before ordering, including snug or relaxed fit, separate cushion covers, zippers, ties, piping, and skirt style.
    • Recheck every number, confirm the order details in writing, and keep a copy of the measurements for future orders or repairs.

    Supplies You May Need

    • A flexible measuring tape for curves and a rigid tape for straight overall dimensions
    • A notebook or printed measurement sheet, with one page per piece of furniture
    • A pencil, a phone camera for clear front, side, back, and detail photos, and a small level or straight edge if the piece has a sloping back
    • Masking tape or small paper labels to mark left and right, front and back, and cushion positions while measuring
    • Fabric swatches, or a note of the room colors, rug, curtains, and wall color, for color checking in daylight and evening light

    1. Decide What the Slipcover Must Do

    Notebook with slipcover job notes beside a family sofa.

    Decide what the slipcover must do before measuring, because the job shapes the fabric and fit choices that follow. A cover meant to protect a sofa from pets and children needs washable fabric and a secure fit that stays in place when someone sits down. A cover meant to change the look of a tired chair can allow a softer drape and a lighter fabric, if daily wear is low. A cover for a room with strong sun needs fabric and color choices that suit that light and use.

    Write down the main job in one sentence, then list the secondary jobs, such as hiding worn upholstery, adding a seasonal color, or making a mismatched set look like a set. Note who uses the piece, how often, and whether it is a main seat or an occasional chair. That list will guide the fabric discussion in step 9 and the fit discussion in step 11, and it will help you spot a choice that looks good in a swatch but fails in daily use.

    2. Identify the Piece and Its Shape

    Armchair with rolled arms and loose cushions in a living room.

    Identify the piece and its shape in plain terms, since a maker cannot cut a good cover from a furniture name alone. Note whether it is a sofa, loveseat, armchair, recliner, chaise, sectional section, dining chair, or ottoman, and whether it has rolled arms, track arms, sloped arms, or no arms at all. Note the back shape too, such as a straight back, a curved back, a camel back, a wing back, or a low back, and whether the back cushions are loose, attached, or part of a single bench cushion.

    Check the base as well. Note whether the piece has a skirt, exposed legs, a plinth base, or a reclining footrest, and whether any part moves, folds, or comes off. Count the seat cushions, back cushions, and any bolster or lumbar cushions separately. A clear shape description, paired with photos from step 3, reduces the chance that a maker assumes a standard shape your piece does not have.

    3. Gather Tools and Set Up One Record Per Piece

    Measuring tapes, notebook, and camera laid out beside a sofa.

    Gather the measuring tools and set up one record per piece before taking a single number. Use a flexible tape for curves, arm rolls, and seat fronts, and a rigid tape for overall width and height, since a flexible tape can sag on a long straight run. Keep a notebook or printed sheet for each piece, with space for overall dimensions, seat and back dimensions, arm dimensions, cushion dimensions, and notes on shape, legs, and moving parts.

    Photograph the piece from the front, each side, and the back, plus close views of the arms, back, cushions, skirt, and legs, before you start measuring. Photos taken with cushions in place, and again with cushions removed if they lift out, show a maker how the frame sits under the cover. Label the photos and the measurement sheet with the same piece name, such as living room sofa or bedroom armchair, so nothing is mixed up when several pieces are ordered together.

    4. Measure Overall Width, Depth, and Height

    Measuring tape stretched across the full width of a sofa.

    Measure the overall width, depth, and height first, since these three numbers frame every other measurement. For width, measure from the outermost point of one arm to the outermost point of the other arm, at the widest point, and note whether that point is at the arm top, the arm front, or the base. For depth, measure from the front edge of the seat, or the front of the arm if it sticks out further, straight back to the rearmost point of the back.

    For height, measure from the floor to the highest point of the back, with the piece standing on its normal floor surface and any casters or glides in place. Measure twice, and write down the unit used, such as inches, on every line of the record. If the piece sits on a rug, note that too, since rug thickness can change the height and the skirt length in step 7. Keep these overall numbers at the top of the record, so they are easy to find when checking the order.

    5. Measure the Seat, Back, and Arms Separately

    Measuring tape on a sofa seat between the arms.

    Measure the seat, back, and arms separately, since overall dimensions alone do not describe how a cover must bend around each part. For the seat, measure the width between the arms, the depth from the front edge to the back cushion or back frame, and the height from the floor to the top of the seat cushion. For the back, measure the width between the arms, the height from the seat surface to the top of the back, and the depth of the back at its thickest point.

    For each arm, measure the height from the floor to the top of the arm, the width across the top of the arm, and the length from the front of the arm to the back of the arm. Note whether the arm front is flat, rolled, or sloped, and whether the arm top is flat or rounded. These separate numbers let a maker shape the cover around the arms and back, rather than draping one flat panel over a piece with very different parts.

    6. Measure Each Cushion on Its Own

    Loose sofa cushions laid out in a row with labels and a tape measure.

    Measure each cushion on its own, since cushions that look alike often differ by a small amount, and a custom cover cut for one cushion may not fit its neighbor. For each seat cushion, measure the width, depth, and thickness at the thickest point, and note whether the front edge is square, rounded, or waterfall style, where the fabric curves over the front. For each back cushion, measure the width, height, and thickness, and note whether the top is square, rounded, or shaped to the back frame.

    Number or label each cushion on the record, such as left seat, center seat, and right seat when viewed from the front, and mark the same labels on the cushions themselves with removable tape if they will be sent or photographed separately. Note whether a cushion is reversible, whether it has a zipper, and whether it is filled in a way that keeps its shape or flattens with use. If the slipcover will have separate cushion covers, these numbers are the ones the maker will cut from, so recheck them in step 14.

    7. Measure Skirt Length, Legs, and Floor Clearance

    Measuring tape from a sofa seat frame down to the floor beside sofa legs.

    Measure skirt length, legs, and floor clearance, since the bottom of a slipcover is where a good fit is most visible. If the cover will have a skirt, measure from the seat frame or the chosen skirt starting point down to the floor, at the front, sides, and back, since floors are not always level and the piece may sit higher at one end. Decide how the skirt should finish: to the floor, just above the floor, or short enough to show the legs, and write that choice down.

    For the legs, measure the height from the floor to the bottom of the frame, the leg shape, and whether the legs unscrew or stay fixed. Note the clearance under the piece and whether the cover must leave room for a reclining footrest, a swivel base, or casters to move. A skirt measured only at the front can hang unevenly at the back, so check all four sides before sending the order.

    8. Note Curves, Slopes, Tufting, and Moving Parts

    Flexible tape following the curve of a sofa back and rolled arm.

    Note curves, slopes, tufting, and moving parts, since these are the details most often missed in a first set of measurements. Use the flexible tape to follow a curved back, a rolled arm, or a sloped seat front, and write down both the straight line distance and the curved distance if they differ. Note any slope in the back, any dip in the seat, and any place where the frame narrows or widens from front to back.

    List every moving or removable part, including reclining backs, pull out footrests, swivel bases, folding arms, removable headrests, and loose bolster cushions, and note whether the cover must move with that part or sit clear of it. Note tufting, buttons, piping, nailhead trim, or a seam that the cover must sit over, since a tight cover over deep tufting will read differently from a loose cover over a smooth frame. Photos of these details, taken in step 3, are worth more than a short note alone.

    9. Choose Fabric for Daily Use, Washing, and Light

    Fabric swatches in different weights and weaves on a sofa seat.

    Choose fabric for daily use, washing, and light, not only for how a swatch looks in your hand. Think about who sits on the piece, how often it is used, whether pets or children use it, and whether food and drink are common nearby. A fabric that can be removed and washed on a routine that suits your home will last longer in daily use than a fabric that needs special handling, however good it looks on day one. Check the care instructions for the finished cover, not only for the fabric in general, since construction and linings can change how it should be washed.

    Consider sunlight and room conditions too. A piece in strong direct sun, near a radiator, or in a damp room will age fabric differently from a piece in a shaded, dry room. Ask the maker what fabric weights and weaves suit your use, and whether a tighter weave, a heavier weight, or a fabric with some stretch will hold its shape better on your piece. Avoid choosing on color alone at this stage: settle the practical fabric family first, then narrow color in step 10.

    10. Choose Color and Pattern and Check Swatches in the Room

    Neutral fabric swatches held against a sofa beside a rug and curtains.

    Choose color and pattern after the practical fabric choice, and check swatches in the room, not only under shop lighting. Hold each swatch against the sofa frame, beside the rug, curtains, and wall color, and view it in daylight and again in evening lamplight. A color that looks calm in a small swatch can read much stronger across a whole sofa, and a pattern that looks small on a swatch can dominate a large seat. For help matching the new cover to the rest of the room, see these living room color schemes.

    Think about scale and repeat. A large pattern suits a large sofa and a plain room, while a small pattern or a plain fabric suits a small chair or a room that already has patterned curtains or a patterned rug. Note the direction of the pattern, if it has one, and whether it must line up across seat and back cushions. If the room changes with the seasons, a neutral cover with seasonal pillows and throws may be more flexible than a strongly seasonal cover color, as shown in these fall living room decor ideas.

    11. Decide Fit Details Before Ordering

    Snug slipcover being smoothed over a sofa arm beside a relaxed chair cover.

    Decide fit details before ordering, since a custom cover can be cut snug, relaxed, or somewhere between, and each choice changes how it looks and sits. A snug fit follows the frame closely and shows the furniture shape, but it needs accurate measurements and may be harder to remove for washing. A relaxed fit drapes more loosely, hides small frame irregularities, and is easier to fit, but it can bag at the seat if the fabric is light. State which fit you want for the body, the arms, and the cushions separately, since one piece may need a snug seat and a relaxed skirt.

    Decide the construction details as well: separate cushion covers or one piece cover, zippers or ties for removal, piping along seams or a plain seam, a skirt or a tailored base, and how the cover should close at the back. Note whether ties, zippers, or elastic should be hidden, and whether the cover must stay in place without slipping when someone sits down. These choices are hard to change after cutting, so write them on the order record, not only in a phone call.

    12. Decide Care, Removal, and Everyday Use

    Slipcover section being removed from a sofa cushion for washing.

    Decide care, removal, and everyday use before ordering, so the finished cover fits your routine as well as your furniture. Ask how the cover comes off, whether it comes off in one piece or in sections, and whether cushion covers come off separately. Note whether the cover can be washed at home, how it should be dried, and whether it should be refitted while slightly damp to smooth wrinkles, following the care instructions given for that cover.

    Plan for daily use too. Note whether the piece is used every day, whether pets sleep on it, and whether the cover will be removed often for washing. If removal will be frequent, a cover with clear closures and separate cushion covers will be easier to live with than a single tight cover. Keep a note of the care routine with the measurement record, so anyone else in the home can follow the same routine and the cover is not washed on a setting that harms it.

    13. Confirm the Order Details in Writing

    Written order sheet with sofa measurements and fabric notes beside a sofa.

    Confirm the order details in writing before the maker starts cutting, since a written record protects both sides if a number is misread. Send the measurement record, the photos, the fabric choice, the color and pattern choice, and the fit and care choices together, and ask the maker to confirm each item back to you. Check that the confirmation lists the correct piece, the correct number of cushions, the correct skirt length, and the correct closures, and query anything that does not match your record.

    Ask what the maker needs if a measurement is unclear, and send a new photo or a remeasured number rather than guessing. Note any questions the maker asks about curves, moving parts, or leg clearance, and answer them with a measurement or a photo, not with a general description. Keep the confirmed order, the measurement record, and the photos together, so a later question about fit can be checked against what was actually ordered.

    14. Recheck, Label, and Send a Complete Order Pack

    Complete order pack with measurement sheet, photos, and fabric swatches on a table.

    Recheck, label, and send a complete order pack as the last step, not as an afterthought. Remeasure the overall width, depth, and height, and at least one cushion, a second time, and have another person check the numbers if one is available, since a second pair of eyes often catches a transposed digit. Check that left and right labels match the view from the front, that cushion labels match the cushions themselves, and that skirt measurements were taken at all four sides.

    Assemble the pack in order: a cover page with the piece name and the main job from step 1, the measurement record, the shape notes from step 8, the fabric, color, and fit choices from steps 9 to 11, the care notes from step 12, and the confirmed order details from step 13, plus the photos. Send the pack as one complete set, keep a copy for yourself, and note the date sent. A complete, rechecked pack is the best way to get a custom slipcover that fits on the first delivery.

    Conclusion

    Custom slipcovers reward careful preparation. Measure each piece separately, from overall dimensions down to cushions, skirt, and floor clearance, and record curves, slopes, tufting, and moving parts that a flat size range would miss. Choose fabric for daily use and washing, check color in the room, decide fit and care details before cutting, and confirm the order in writing. Recheck the numbers and send one complete pack, and the cover you receive is far more likely to fit the furniture you actually own. For more ideas from Dwell Ovell, browse the home page for home decor guides.

    FAQs

    How do I measure for custom slipcovers?

    Measure the overall width, depth, and height first, then measure the seat, back, and arms separately, and measure each cushion on its own. Add skirt length, leg height, and floor clearance, note curves, slopes, tufting, and moving parts, and photograph the piece from the front, sides, and back, so the maker has a complete record for that one piece.

    What measurements does a custom slipcover maker need most?

    A custom slipcover maker needs overall width, depth, and height, seat width and depth, back height and width, arm height, width, and length, and the width, depth, and thickness of each cushion. Skirt length, leg details, floor clearance, and notes on curves, reclining parts, and loose cushions complete the set, since those details shape how the cover is cut.

    Should I measure a sofa with the cushions on or off?

    Measure a sofa both ways when the cushions lift out: with cushions in place for the overall look and seat height, and with cushions removed for the frame width, seat depth, and back shape underneath. Record both sets clearly on the same sheet, and label each cushion, so the maker can tell which numbers describe the frame and which describe the cushion.

    What is the difference between custom slipcovers and ready made slipcovers?

    Custom slipcovers are cut for one specific piece from its own measurements, shape notes, and fit choices, while ready made slipcovers are made for a size range and a general furniture shape. Custom covers usually fit curves, unusual arms, and separate cushions more closely, but they depend on accurate measurements, while ready made covers are easier to return if the size range does not suit the piece.

    How do I choose fabric for custom slipcovers?

    Choose fabric for custom slipcovers by daily use first: how often the piece is used, whether pets or children use it, whether it can be removed and washed on a routine you will follow, and whether it sits in strong sun. Settle the practical fabric family, weight, and weave with the maker, then choose color and pattern by checking swatches in the room in daylight and evening light.

    Can custom slipcovers fit a recliner or a sectional?

    Custom slipcovers can be made for recliners and sectional sections, but they need extra notes on moving parts, since a reclining back, a pull out footrest, or a sectional corner changes how the cover must be cut. Measure each sectional section separately, note which parts move and whether the cover must move with them, and photograph the piece in both its upright and reclined positions when that applies.

  • How to Choose Sectional Slipcovers for a Better Fit

    How to Choose Sectional Slipcovers for a Better Fit

    To choose sectional slipcovers for a better fit, measure each section separately, confirm the chaise side and corner layout, then match the cover style and fabric to how the sofa is used daily. A cover made for your exact shape, with separate pieces for the chaise and corner, fits more neatly than a one-size cover stretched across the whole sofa.

    A sectional is harder to cover than a standard sofa because it turns a corner, changes depth at the chaise, and often has sections of different lengths. A cover that fits the longest side can still bag at the corner or pull short on the chaise. This guide works in the order that prevents those problems: identify the shape, measure each part, decide how many pieces the cover should have, then choose fabric, fit style, and care. For living room textile ideas that pair well with a cover refresh, see these fall living room decor ideas.

    Key Takeaways

    • Identify the sectional shape first: L shape, U shape, chaise on the left or right, and whether sections can move apart.
    • Measure each section separately, including length, depth, back height, arm height and width, and seat cushion size.
    • Choose separate cover pieces for the main sofa, the corner, and the chaise when the listing or pattern offers them.
    • Match fabric to daily use: washable and sturdy fabrics suit homes with children or pets, while softer fabrics suit light use rooms.
    • Check the fit style, closures, and care steps before buying, since a cover that cannot be washed easily will not stay fresh.
    • Fit the cover from the corner outward, tuck and smooth each section, then sit down and adjust before deciding it fits.

    Supplies You May Need

    • A flexible measuring tape for lengths, depths, and curved or angled sections
    • A notepad or phone to record each measurement with a simple sketch of the sectional
    • A photo of the sectional from the front and from each end, showing the chaise side
    • The sofa manual or listing, if available, for the model name and section layout
    • A step stool for measuring back height on a tall sectional
    • Clean hands and a lint roller, so the new cover is not marked during the first fitting

    1. Identify Your Sectional Shape and Layout

    Sketch of an L shaped sectional layout showing the chaise side.

    Start by naming the shape in plain terms: an L shape with a chaise on the left or right, an L shape with a corner sofa seat, a U shape with two chaises, or a modular sectional made of separate seats that can move. Stand in front of the sofa and note which side the chaise sits on from the seated position, since listings often describe it from the front view and the two views can read as opposites.

    Check whether the sections join together, slide apart, or sit as one fixed frame. A modular sectional needs a cover plan for each movable piece, while a fixed frame needs a cover that can turn the corner in one run or in joined pieces. Note any recliner seats, sleeper sections, storage chaises, or console sections as well, since a plain cover cannot sit neatly over a moving or opening part without a cut or a gap.

    2. Measure Every Section, Not Just the Overall Width

    Measuring tape along one section of a sectional sofa with a notepad nearby.

    Measure each section on its own, rather than trusting one overall width for the whole sofa. Record the length of each straight run from the outside of one arm to the corner, then from the corner to the outside of the far arm. For the chaise, record its full length from the back to the front edge, plus its width and the depth of the main seat beside it.

    Add the back height from floor to top of back, the arm height and arm width, the seat depth from front edge to back cushion, and the height from floor to seat. Measure each seat cushion separately too, since cushion widths on a sectional often differ near the corner. Write each number next to its part on your sketch, and measure twice before comparing covers, because a single wrong number can send the whole choice off track.

    3. Map the Chaise Orientation and Corner Position

    Sectional corner and chaise join showing the corner seat shape.

    Confirm the chaise side by sitting on the main sofa and pointing to the side where your legs stretch out. That seated view is the one most cover listings mean when they say left facing or right facing chaise, but wording varies, so always compare the listing diagram with your sketch rather than trusting the label alone. Note whether the chaise is a long single cushion, a shorter lounge seat, or a full chaise with its own back section.

    Look closely at the corner: a square corner seat, a curved corner, or a wedge corner each need a different cover shape. A square corner cover will wrinkle on a curved corner, and a flat corner piece will pull on a wedge. Measure the corner seat width and depth, and note whether the corner back is higher, lower, or angled compared with the straight sections. This corner check is the step most often skipped, and it is where a poor fit usually shows first.

    4. Decide Between One Piece and Separate Cover Pieces

    Separate slipcover pieces laid out beside a sectional sofa.

    Choose between a single cover that stretches over the whole sectional and a set of separate pieces for each section. A single piece can work on a simple, fixed L shape with even arms and no moving parts, and it has fewer seams to line up. It is harder to fit on a modular sectional, a U shape, or a sectional with a chaise, since one piece must stretch in several directions at once.

    Separate pieces, one for the sofa section, one for the corner, and one for the chaise, usually give a neater result on a sectional with different section lengths or a chaise. Each piece can be pulled, tucked, and adjusted on its own, and one piece can be washed without removing the rest. When a set is offered, check that it includes a piece for every part of your sectional, including the corner, and that the chaise piece matches your chaise length and side.

    5. Match the Fabric to Daily Use

    Fabric swatches in cotton, linen, and velvet on a sectional seat cushion.

    Let daily use set the fabric choice. A sectional used every evening by a family, with children or pets, needs a fabric that can be washed often and that resists snagging and staining in normal use. A sectional in a guest room or a formal sitting room can use a softer, lighter fabric, since it is sat on less often and washed less often. Think about sun as well: a sectional near a large window will fade faster, so a color that can handle some fading is a safer pick there.

    Feel the fabric type in general terms before deciding: cotton blends and polyester blends are common for washable covers, while linen looks relaxed but creases more, and velvet looks soft but shows pressure marks where people sit. Avoid choosing on color alone. A color you love in a fabric that cannot be washed, or that snags on pet claws, will not stay looking good for long, no matter how well it fits on day one.

    6. Choose a Fit Style: Stretch, Loose, or Tailored

    Sectionals showing stretch, loose, and tailored slipcover fit styles.

    Fit style changes how the cover sits and how much adjusting it needs. Stretch covers use elastic fabric to hug the frame and cushions, and they suit sectionals with standard shapes and even cushions. They are forgiving on small measurement differences, but they can pull tight across a deep chaise or a thick arm if the size range is wrong for that part.

    Loose covers drape over the frame with a softer, relaxed look, similar to a slipcovered sofa in a farmhouse room. For that relaxed style in context, see these farmhouse decor ideas for the living room, where washed linen covers sit loosely over the sofa frame. Loose covers need more tucking and smoothing, and they suit rooms where a casual look is welcome. Tailored covers are cut closer to the sofa shape, with seams that follow the arms and back, and they give the neatest look but need the most accurate measurements. Pick the style that matches both your sofa shape and how much adjusting you are willing to do after washing.

    7. Check Cushion, Back, and Arm Coverage

    Seat cushion cover being fitted onto a sectional cushion.

    Decide whether you want the cover to sit over the frame only, or over the cushions as well. Some covers wrap the whole sofa and leave the original cushions inside, while others include separate cushion covers that must be fitted one by one. Separate cushion covers look neater and let you wash one stained cushion cover on its own, but they add fitting time and need cushion measurements that match, not just sofa measurements.

    Check the back and arms too. A cover that ends at the seat will leave the back and arms exposed, which may be fine if those parts are in good shape, but it will not hide worn arms. A full cover should reach over the back, down to the floor or to the skirt line, and around each arm without pulling the seat cover out of place. If the arm shape is rolled, track style, or pillow top, confirm the cover pattern suits that arm shape, since a flat arm cover will not sit well on a thick rolled arm.

    8. Compare Closures, Tucks, and Staying Power

    Hands tucking slipcover fabric beside a sectional seat cushion.

    Look at how the cover stays in place: elastic hems, ties, straps under the sofa, hook and loop fasteners, or foam tucking tools that push fabric into the gaps beside cushions. Elastic hems are simple and suit light use, while ties and straps under the frame hold better on a sofa that is used daily and shifted often. Foam tucking pieces, sometimes called grippers, help keep seat fabric from riding up, but they work only where there is a real gap to tuck into.

    Read the fitting notes for the cover before buying, and check whether the chaise and corner pieces have their own fastenings or share one long hem. A chaise piece with no fastening of its own will creep forward every time someone stretches out on it. Also check whether the cover can be removed section by section for washing, since a cover that must come off all at once is harder to live with on a large sectional.

    9. Test Color and Pattern Against the Room

    Fabric swatches held against a rug and curtain beside a sectional.

    Choose a color that works with the room, not just with the sofa. Hold the color swatch, if one is available, next to the rug, curtains, wall color, and largest piece of art in daylight and in evening light. A neutral cover in cream, grey, beige, or soft green is easy to live with and easy to pair with pillows and throws, while a strong color or pattern will set the tone for the whole room and needs the rest of the room to stay calmer.

    Pattern needs the same care. A small, even pattern hides minor wrinkles better than a plain fabric, which shows every fold. A large pattern, on the other hand, can look broken at the corner and chaise seams, since the pattern will not line up across separate pieces. If you want pattern, prefer a small scale print or a textured plain fabric, and keep pillows and throws in plainer colors so the sectional does not compete with everything around it.

    10. Check Washing, Drying, and Everyday Care

    Slipcover piece drying on a rack beside a sectional sofa.

    Read the care steps before buying, not after the first spill. Confirm whether the cover can be machine washed, what water temperature it needs, whether it can be tumble dried or must be line dried, and whether it needs to be fitted back onto the sofa while slightly damp to stretch into shape. A cover that needs dry cleaning, or that shrinks noticeably in a hot wash, will be costly and awkward to keep clean on a sectional used daily.

    Plan for repeat washing as well. If the cover set has separate pieces, you can wash the most used seat covers more often and the back pieces less often. Keep a spare set of the most worn piece, such as the chaise cover, if the listing offers single replacements, so the sofa is not bare on wash day. Note the drying time too: a large sectional set can take a full day to dry, so wash on a day when the sofa can stay uncovered.

    11. Fit the Cover From the Corner Outward

    Hands smoothing a slipcover over a sectional corner.

    Fit the cover starting at the corner, then work outward along each section, rather than starting at one end and pulling toward the corner. Drape the corner piece first and line up its seams with the corner seat edges, then fit the chaise piece, then the main sofa pieces. This order keeps the corner, the hardest part, from being pulled out of shape by fabric already fixed at the ends.

    Smooth each piece as you go: pull the fabric over the back, settle it over the arms, tuck it into the gaps beside and behind the cushions, and smooth wrinkles toward the nearest seam. Fit cushion covers separately if the set includes them, and put each cushion back in its own place, since cushions near the corner are often a different size. Step back after each section and check the seams from the front before moving on, because a seam that is off at the corner will stay off down the whole run.

    12. Sit Down, Check the Fit, and Fix Common Problems

    Person sitting on a slipcovered sectional chaise checking the cover fit.

    Finish by sitting in each seat, including the corner and the chaise, and checking the fit in use. The cover should stay in place when you sit, lean back, and stand up, without riding up on the seat or pulling off the arms. Check the back for fabric that pools behind the cushions, the arms for fabric that slips forward, and the chaise for a cover that creeps toward the front edge. Adjust tucks and fastenings one section at a time, rather than pulling the whole cover tighter, since one tight section often creates a wrinkle in the next.

    Fix the most common problems directly: if the seat fabric rides up, add or reset the tucking pieces and tighten the under sofa straps; if the corner wrinkles, refit the corner piece first and let the side pieces follow it; if the chaise cover creeps, check its own fastening and confirm the chaise piece is on the correct side; if one section looks baggy, check its measurements against the listing size range, since a baggy section often means the wrong size piece, not a bad fabric. Live with the cover for a few days and adjust once more after the first few sits, since fabric settles after it has been sat on.

    Conclusion

    Choosing sectional slipcovers for a better fit starts with the sofa itself: name the shape, measure each section, and map the chaise side and corner before looking at fabric or color. Separate pieces for the corner and chaise, a fit style that suits the frame, and a fabric that can be washed as often as daily life requires will do more for the result than a single overall width measurement ever can. Fit from the corner outward, check the cover by sitting in every seat, and adjust one section at a time until it stays in place. For more ideas from Dwell Ovell, browse the home page for home decor guides.

    FAQs

    How do I measure a sectional for a slipcover?

    Measure each section separately, including the length of each straight run, the chaise length and width, the seat depth, the back height, and the arm height and width. Record each number next to its part on a simple sketch, and measure twice, since one wrong number can lead to a cover that fits one side and bags or pulls on the other.

    How do I know if my chaise is left facing or right facing?

    Sit on the main sofa and note which side your legs stretch out on, since that seated view is what most listings mean by left facing or right facing chaise. Always compare the listing diagram with your own sketch as well, because some listings describe the chaise from the front view, which reads as the opposite side.

    Should I choose a one piece or a multi piece sectional slipcover?

    Choose separate pieces for the sofa, corner, and chaise on most sectionals, since each piece can be fitted, tucked, and washed on its own and the corner is easier to get right. A single piece can work on a simple, fixed L shape with even arms and no moving parts, but it is harder to fit neatly on a modular sectional, a U shape, or a chaise sectional.

    What is the best fabric for a sectional slipcover used every day?

    A washable cotton blend or polyester blend suits a sectional used every day, since it can be washed often and holds up to regular sitting, while a softer fabric suits a room used less often. Choose based on washing, snagging, and fading in your home, rather than on color alone, and read the care steps before buying.

    Why does my sectional slipcover wrinkle at the corner?

    The corner wrinkles when the corner piece is fitted last, when the corner shape is curved or wedge shaped but the cover is cut square, or when one side piece pulls the corner fabric out of line. Refit the corner piece first, line its seams up with the corner seat edges, and then let the side pieces follow it, adjusting tucks one section at a time.

    How do I keep a sectional slipcover from slipping off?

    Use the cover’s own fastenings, such as elastic hems, ties, or straps under the frame, and push tucking pieces into the gaps beside and behind the cushions to hold the seat fabric down. Check the chaise piece separately, since it creeps most, sit in each seat after fitting, and adjust one section at a time until the cover stays in place when you sit and stand.

  • How to Make Pillow Covers for an Affordable Decor Update

    How to Make Pillow Covers for an Affordable Decor Update

    To make a pillow cover, measure your insert and add one inch for seam allowances, then cut one front panel and two overlapping back panels from washed fabric. Sew the panels right sides together, turn the cover right side out, press it, and slip the insert inside through the envelope opening. The project takes under an hour for a cover.

    A new pillow cover is one of the simplest ways to change how a sofa, bed, or chair looks, since the insert stays the same and only the fabric changes. Envelope covers need no zipper, no buttons, and no advanced sewing, so they suit a first sewing project as well as a quick seasonal refresh. Once you can sew one envelope cover, you can repeat the same steps in different fabrics for every room, and swap covers whenever you want a new color or texture.

    Key Takeaways

    • Measure the insert first, and cut the cover to the insert size plus one inch for seam allowances on each side.
    • Wash, dry, and press fabric before cutting, so the finished cover does not shrink after its first wash.
    • An envelope back uses two overlapping panels, so the cover closes without a zipper.
    • Sew with the panels right sides together, trim the corners, then turn and press the cover before inserting the form.
    • A cover one or two inches smaller than its insert looks fuller, so cut slightly small for a plump pillow.
    • Wash finished covers with similar colors, and store off-season covers clean, dry, and folded flat.

    Supplies You May Need

    • A pillow insert in the size you want to cover
    • Fabric, such as cotton, linen, or a cotton blend, enough for one front panel and two back panels
    • A measuring tape and a clear ruler or yardstick
    • Fabric scissors or a rotary cutter and cutting mat
    • Straight pins or sewing clips
    • A sewing machine and thread to match the fabric
    • An iron and ironing board
    • Fabric marking chalk or a washable fabric pencil
    • A seam ripper for fixing mistakes
    • A zipper, only if you choose the zipper variation in step 12
    • Piping cord and bias tape, only if you choose the piping variation in step 7

    1. Measure Your Pillow Insert

    Hands measuring a square pillow insert with a tape measure on a table.

    Measure the insert across the middle, from seam to seam, in both directions, and write down both numbers. A standard square insert might measure 18 inches, 20 inches, or 22 inches, while a lumbar insert is longer in one direction than the other. Measure the actual insert, not an old cover, since old covers stretch and give a wrong size.

    For a full, plump pillow, cut the finished cover one or two inches smaller than the insert, so the insert fills the cover firmly. A cover cut to the exact insert size looks softer and flatter, which suits a bed pillow used for sleeping. Decide which look you want before you cut, since the cutting size follows from this choice.

    2. Choose Fabric for the Cover

    Folded cotton and linen fabric in cream, sage, and rust stacked on a table.

    Choose a medium weight woven fabric, such as cotton, linen, or a cotton blend, for a first pillow cover. These fabrics cut cleanly, hold a crease under the iron, and feed evenly through a sewing machine. Light fabrics such as voile need a lining to hold their shape, while very heavy fabrics such as thick upholstery cloth are hard to turn at the corners.

    Think about where the pillow will live. A sofa pillow used every day needs a washable fabric, while a bedroom accent pillow can use a more delicate cloth. For color and pattern ideas before you buy fabric, see these fall pillow covers for warm, layered combinations you can echo in your own fabric choice. Buy a little extra fabric, so a cutting mistake does not end the project.

    3. Wash, Dry, and Press the Fabric

    Hands ironing washed cotton fabric flat on an ironing board.

    Wash the fabric the way you plan to wash the finished cover, then dry it fully before cutting. Cotton and linen can shrink on the first wash, and a cover cut from unwashed fabric may end up too tight for its insert after laundering. If the fabric care label says dry clean only, skip the wash and press it with steam instead.

    Press the dry fabric flat with an iron, working out wrinkles and folds from the bolt. A flat, smooth length of fabric cuts more accurately than wrinkled cloth, and pressed edges mark more clearly. Fold the fabric in half only after pressing, if your cutting plan needs a fold, and check that the fold lies straight.

    4. Cut the Front Panel

    Hands cutting a square fabric panel with scissors and a ruler on a cutting mat.

    Cut one front panel as a square or rectangle equal to the finished cover size plus one inch in each direction for seam allowances. For example, an 18 inch finished cover needs a 19 inch cut panel, since a half inch seam allowance on each side adds one inch in total. Mark the measurements with chalk or a washable pencil, and use a ruler to keep the lines straight.

    Cut along the marked lines with sharp scissors or a rotary cutter, keeping the fabric flat on the table as you cut. A clean, straight cut matters, since a crooked panel shows in the finished corners. Set the front panel aside with the right side facing up, so you can tell it apart from the back panels later.

    5. Cut the Back Panels for an Envelope Closure

    Two overlapping rectangular fabric back panels beside a square front panel.

    Cut two back panels, each the same width as the front panel, and each a little more than half the height of the front panel. For a 19 inch cut front panel, cut each back panel 19 inches wide and about 12 inches tall, so the two panels overlap by about 5 inches when laid over the front panel. The overlap is what keeps the insert inside without a zipper.

    Lay the two back panels over the front panel, right sides down, to check the overlap before you sew anything. The panels should meet and overlap in the middle, with no gap showing the insert. If the overlap is less than 4 inches, cut the back panels a little taller, since a small overlap can gap open on a full pillow.

    6. Hem the Back Panel Openings

    Sewing machine hemming the edge of a fabric panel.

    Hem the edge of each back panel that will sit at the envelope opening, which is the inner edge of each panel where they overlap. Fold that edge over by half an inch, then fold it over again by half an inch, and press the fold flat. The double fold hides the raw edge inside the hem, so it will not fray in the wash.

    Sew along the folded hem close to the inner fold, using a straight stitch, and backstitch a few stitches at each end so the hem does not unravel. Press the hemmed edge again after sewing, so it lies flat. Both back panels now have one neat finished edge, and those two edges will form the opening of the finished cover.

    7. Add Piping or Trim for a Finished Edge

    Hands pinning piping cord along the edge of a square fabric panel.

    This step is optional, and you can skip it for a plain cover. If you want piping, pin the piping cord along the edge of the front panel, right side up, with the cord facing inward and the raw edge of the piping tape lined up with the raw edge of the panel. Clip the piping at the corners so it turns cleanly, and pin it in place all the way around.

    Baste the piping to the front panel with a long straight stitch, close to the cord, before you pin the back panels on. Basting holds the piping steady, so it does not shift while you sew the main seam. If you prefer pom pom trim or a flat braid, pin it the same way, with the decorative edge facing inward, so it shows at the seam once the cover is turned.

    8. Pin the Panels Right Sides Together

    Hands pinning fabric panels right sides together with sewing clips.

    Lay the front panel right side up on the table, with piping in place if you added it. Lay the two back panels on top, right sides down, with their hemmed edges overlapping in the middle and their outer edges lined up with the front panel edges. The stack should now be front panel on the bottom and two back panels on top, with all outer edges matching.

    Pin or clip all four outer edges, placing pins at right angles to the edge every few inches. Pay close attention to the corners, and make sure no layer has shifted or folded under. A well pinned stack sews evenly, while a loose stack can pucker or leave one layer longer than the rest.

    9. Sew the Seams

    Sewing machine stitching around the edge of layered pillow cover panels.

    Sew around all four outer edges with a half inch seam allowance, using a straight stitch, and backstitch at the start and end of the seam. Sew slowly around the corners, and pivot the needle at each corner so the stitch line turns squarely. If you added piping, sew just inside the basting line, so the stitches sit close to the cord without crossing it.

    Check the seam as you sew, and stop if the fabric starts to pucker or a layer slips out from under the presser foot. A seam ripper fixes a short bad section faster than finishing the whole cover and finding the fault later. When all four edges are sewn, the cover is a closed pouch with an envelope opening at the back.

    10. Trim the Corners and Turn the Cover

    Hands turning a sewn pillow cover right side out and pushing out a corner.

    Trim each corner diagonally, cutting close to the stitch line without cutting through the stitches. Trimming removes bulk, so the corners turn into neat points instead of rounded lumps. If the fabric frays easily, trim with pinking shears, or finish the seam edges with a zigzag stitch before turning.

    Reach through the envelope opening and turn the cover right side out, pushing each corner out gently with a blunt tool such as a chopstick or a closed pen. Do not push hard enough to poke through the stitching. Press the finished cover flat with an iron, turning the seam edges out neatly, so the cover looks crisp before the insert goes in.

    11. Insert the Pillow Form and Check the Fit

    Hands slipping a pillow insert into the envelope opening of a finished cover.

    Push the insert through the envelope opening, working it into the corners so it fills the cover evenly. Fluff the pillow by hand, and check that the corners are full and the envelope overlap still closes at the back. A cover cut one or two inches smaller than the insert should look plump, with firm corners and no flat spots.

    If the cover looks loose, take the insert out and sew a new seam a little inside the first seam on one or two sides, then trim and turn the cover again. If the cover is too tight, the insert will bunch and the envelope overlap may gap, which means the next cover needs a larger cut size. Note the size that worked, so repeat covers in the same fabric come out right the first time.

    12. Sew a Zipper Closure Instead

    Hands sewing a zipper into a pillow cover back panel with a sewing machine.

    If you prefer a zipper closure, change the back before sewing the cover together. Cut one back panel the same size as the front panel, instead of two envelope panels, and cut it in half across the middle to make two pieces. Sew the zipper between those two pieces, right sides together, with the zipper teeth facing down toward the fabric, then press the seam open.

    Once the zipper back is ready, treat it as a single back panel and follow steps 8 to 11: pin it to the front panel right sides together, sew around all four edges, trim the corners, turn the cover, and insert the form through the open zipper. A zipper closure gives a tailored look and suits covers that will be removed and washed often, since the opening closes fully.

    13. Fix Common Fit and Sewing Problems

    Hands adjusting a pillow cover corner with a seam ripper and pins nearby.

    If the seams pucker, the stitch length may be too short for the fabric, or the thread tension may be too tight, so test a scrap piece and adjust one setting at a time. If the cover twists after turning, one layer likely shifted during pinning, so unpick the worst side, repin with more clips, and sew it again. A twisted cover often comes from a single shifted edge, not from the whole pattern.

    If the envelope opening gaps open on the finished pillow, the back panel overlap was too small, so cut taller back panels on the next cover. If the corners look rounded, trim closer to the stitch line next time, and push the corners out more firmly when turning. Keep a short note of each fix with the fabric type, since the same fabric usually needs the same settings again.

    14. Wash and Store Your Pillow Covers

    Folded clean pillow covers stacked neatly on a shelf.

    Wash finished covers with similar colors on the cycle the fabric care label allows, and close zippers or turn envelope covers inside out before washing. This protects piping, trim, and printed patterns from rubbing against other items. Dry covers on a low setting or on a line, then press them lightly if the fabric needs it, and insert the forms only when the covers are fully dry.

    Store off-season covers clean, dry, and folded flat, with tissue between embroidered or trimmed covers so the detail does not catch on other fabric. A closed box or bag keeps dust out, and a dry spot away from direct sun keeps colors from fading. For seasonal styling ideas once your covers are ready, see these Easter pillow covers for a soft pastel palette you can sew for spring.

    Conclusion

    Making pillow covers starts with measuring the insert, washing and pressing the fabric, and cutting one front panel plus two overlapping back panels for an envelope closure. Hem the back openings, pin the panels right sides together, sew a half inch seam, trim the corners, and turn and press the cover before slipping the insert inside. A zipper back or a piped edge can change the finish without changing the basic steps, and a quick fit check catches a loose or tight cover before it reaches the sofa. With one cover sewn, repeat covers in new fabrics take under an hour each, and a whole room can change with a set of fresh covers.

    FAQs

    How much fabric do I need to make a pillow cover?

    You need enough fabric for one front panel and two back panels, each cut to the finished cover size plus one inch for seam allowances, with the back panels each a little more than half the cover height. For an 18 inch square cover, about half a yard of 44 inch wide fabric is usually enough for one cover, though a large print or a directional pattern may need more so the design sits straight. Buy a little extra on a first project, so a cutting mistake does not end the sewing session.

    What is the easiest pillow cover to sew for a beginner?

    An envelope pillow cover is the easiest type for a beginner, since it closes with two overlapping back panels and needs no zipper, buttons, or hand sewing. The whole cover uses straight seams, and the only new skills are hemming a straight edge and turning corners neatly. Most beginners finish a first envelope cover in under an hour once the fabric is washed and cut.

    Should a pillow cover be smaller than the insert?

    Yes, a pillow cover cut one or two inches smaller than its insert looks fuller and more plump, since the insert fills the cover firmly and the corners stay full. A cover cut to the exact insert size looks softer and flatter, which suits a bed pillow used for sleeping. Measure the insert first, then choose the smaller cut size for sofa and chair pillows you want to look full.

    Do I need a sewing machine to make pillow covers?

    No, you can sew a pillow cover by hand with a backstitch, though it takes longer than machine sewing and the seams need small, even stitches to hold up in the wash. A sewing machine gives faster, stronger seams, and it handles piping and zipper variations more neatly. For a first cover, hand sewing works well on cotton or linen, while thicker fabrics are easier on a machine.

    How do I sew a pillow cover with a zipper?

    Cut one back panel the same size as the front panel, cut it in half across the middle, and sew a zipper between the two halves with the teeth facing down toward the fabric. Press the seam open, then pin the zipper back to the front panel right sides together and sew around all four edges as you would for an envelope cover. Trim the corners, turn the cover, and insert the form through the open zipper.

    How do I wash handmade pillow covers?

    Wash handmade pillow covers with similar colors on the cycle the fabric care label allows, turning envelope covers inside out and closing zippers before washing. Dry them on a low setting or on a line, press lightly if the fabric needs it, and put the inserts back only when the covers are fully dry. Wash fabric before cutting on the first project, so the finished cover does not shrink after its first wash.

  • How to Arrange Throw Pillows on a Sofa for a Balanced Look

    How to Arrange Throw Pillows on a Sofa for a Balanced Look

    To arrange throw pillows on a sofa for a balanced look, anchor the largest pillows at each end, layer medium pillows in front of them, and finish with one smaller accent or lumbar pillow near the center. Repeat one or two colors, mix textures, and leave enough seat space so the sofa stays comfortable to sit on.

    A sofa can look crowded with too many pillows, or bare with too few, even when the colors are right. The fix is usually order, not more pillows. This guide works in the order that matters: clear the sofa, set a palette, choose a count that fits the sofa size, layer from large to small, and then check comfort from a normal sitting position. For seasonal textile ideas that pair well with a pillow refresh, see these fall living room decor ideas.

    Key Takeaways

    • Start with an empty sofa and measure its width, seat depth, and arm height before choosing pillows.
    • Anchor the largest pillows at the ends, layer medium pillows in front, and finish with a small accent near the center.
    • Repeat one or two colors across the sofa and the room so the arrangement looks planned, not random.
    • Mix textures and limit strong patterns to one or two pillows, with plainer pillows beside them.
    • Leave enough open seat space for people to sit without moving a pile of pillows first.
    • Fluff, angle, and step back to check balance, then sit down and adjust for comfort.

    Supplies You May Need

    • A measuring tape for sofa width, seat depth, and arm height
    • Throw pillows in at least two sizes, plus one small accent or lumbar pillow if the sofa is wide enough
    • Pillow inserts that are about 2 inches larger than the covers, if you use removable covers
    • One or two pillow covers in a plain color that already appears in the room
    • A throw blanket in a color or texture that matches at least one pillow
    • A basket or nearby chair to hold spare pillows while you try arrangements
    • A phone camera, useful for checking balance in a photo from across the room

    1. Clear the Sofa and Measure It First

    Empty sofa being measured with a tape measure, with pillows set aside in a basket.

    Remove every pillow, throw, and stray item from the sofa, and note the sofa width from outside arm to outside arm, the seat depth, and the height of the back and arms. A three seat sofa, a loveseat, and a long sectional each need a different count, and guessing that count is how sofas end up either crowded or bare.

    Stand back and look at the empty sofa with the rug, curtains, and wall color in view. Note the colors already in the room, since pillows should link to at least one of them. Measure any pillow you already own as well, and set aside pillows that are flat, stained, or far too small for the sofa, since they will weaken the arrangement even if their color is right.

    2. Set a Simple Color Palette

    Throw pillows in cream, sage, and rust laid out to test a color palette on a sofa.

    Choose two or three colors for the whole arrangement: one main neutral, one or two accents, and a repeat of a color already in the room, such as a rug, curtain, or piece of art. A small palette keeps a mix of patterns and textures from looking busy, and it makes it easy to swap one pillow later without starting over.

    Repeat each accent color at least twice on the sofa, for example once on the left and once on the right, or once on a pillow and once on a throw. Avoid giving every pillow a different strong color, since the eye then has no resting place. If the sofa itself is patterned, use plainer pillows in one or two colors drawn from that pattern, so the pillows calm the sofa rather than compete with it.

    3. Decide How Many Pillows the Sofa Needs

    Three seat sofa with five throw pillows and clear open seat space.

    Let the sofa size set the count. A loveseat usually looks balanced with three or four pillows, a standard three seat sofa with five or six, and a long sofa or sectional with six to eight, counting both sides together. Fewer pillows suit a sofa used every day for sitting and napping, while more pillows suit a sofa that is mainly for looking at and light sitting.

    Count seats, not just width, since a deep sofa can hold more pillows without crowding the sitter. As a check, once pillows are in place, a person should be able to sit in each main seat without first moving more than one pillow. If sitting requires clearing a pile, remove one pillow from each end and try again, even if the sofa looks a little less full at first.

    4. Choose a Mix of Sizes and Shapes

    Large, medium, and lumbar throw pillows grouped by size on a sofa.

    Use at least two sizes in one arrangement, such as large square pillows at the back and medium squares or a lumbar pillow in front. Common pairings include 22 inch squares at the ends with 20 inch squares in front, or 20 inch squares with a long lumbar pillow across the middle. The size step between layers is what gives the arrangement depth.

    Add one shape change only if the sofa is wide enough, such as a single round pillow or one lumbar pillow near the center. Too many shapes at once can look scattered, so keep the rest of the pillows square. Check each pillow against the sofa back height as well: a pillow that towers above the back or sinks below the seat cushion will look out of scale, even in a good color.

    5. Anchor Each End With the Largest Pillows

    Large throw pillows anchored upright at each end of a sofa.

    Place the largest pillows first, one at each end of the sofa, standing upright against the arms or slightly angled toward the center. These anchor pillows set the height and the outer shape of the arrangement, and every later pillow sits in front of them, not beside them in a flat row.

    Angle each anchor pillow a little, with its outer corner tucked near the arm and its inner corner turned toward the middle of the sofa. This slight turn keeps the ends from looking stiff and flat, and it leaves a clear pocket in front of each anchor for the next layer. If the sofa has a chaise or corner section, anchor that end in the same way, then work toward the main seating area.

    6. Layer Medium Pillows in Front of the Anchors

    Medium throw pillows layered in front of larger pillows on a sofa.

    Set one medium pillow in front of each anchor pillow, slightly lower and slightly closer to the center. This second layer adds color and pattern where the eye naturally lands, and it softens the straight line of the sofa back without hiding the anchor pillows behind it.

    Keep the medium pillows a little more upright than flat, and pull them forward just enough that their tops sit below the tops of the anchors. If a medium pillow keeps sliding forward, it may be too small for the seat depth, or the insert may be too soft. A firmer insert, or a cover one size smaller than the insert, helps a pillow hold its shape and stay in place.

    7. Finish the Center With One Small Accent

    Small lumbar accent pillow centered on a sofa in front of larger pillows.

    Add one small accent near the center of a three seat sofa, such as a lumbar pillow, a small square, or a round pillow, placed in front of the middle seat back. On a loveseat, skip the center accent or use a single small pillow only if two seats still have clear sitting space. On a sectional, use the center accent at the corner or at the join between sections, where it marks the turn.

    Keep the center pillow the smallest in the group, and give it the strongest pattern or color if you want a focal point. A single bold center pillow works because the larger pillows around it are calmer. If the center pillow is also large and bold, the middle of the sofa will look heavy and the ends will seem to disappear.

    8. Mix Textures and Limit Strong Patterns

    Sofa pillows mixing linen, velvet, and knit textures with one striped pillow.

    Pair smooth, nubby, and soft textures in one arrangement, such as linen beside velvet, cotton beside knit, or a woven cover beside a plain one. Texture adds interest without adding color, which is useful when the palette is small. Run a hand over each pillow in the group: if every pillow feels the same, swap one for a different weave.

    Limit strong patterns to one or two pillows, and place a plain pillow next to each patterned one so the pattern has room to show. A stripe, a check, or a floral can each work, but two strong patterns side by side tend to fight. For a calm farmhouse style base to compare against, see these farmhouse decor ideas for the living room, where plain linen and one checked pattern carry most of the look.

    9. Choose a Balanced Style: Symmetrical or Casual

    Sofa with a mirrored pillow arrangement on both sides seen from a doorway.

    Decide whether the sofa should read as symmetrical or casual, and then keep that choice on both sides. A symmetrical arrangement mirrors the left and right sides: same sizes, same colors in the same order, with one center pillow. It suits a formal living room, a pair of matching lamps, or a centered piece of art above the sofa.

    A casual arrangement keeps the same sizes and colors but changes the order or the pattern on one side, for example a stripe on the left and a plain pillow on the right. Casual still needs balance: if one side has a dark pillow, the other side needs a dark pillow or a throw in a similar weight, or the sofa will look heavier on one side. Whichever style you choose, check it from the doorway, since that is the view most visitors see first.

    10. Fluff, Angle, and Set Each Pillow by Hand

    Hands fluffing a square throw pillow on a sofa.

    Fluff each pillow by holding opposite corners and pushing air into the center, then set it back in place and smooth the front face. Pull the top corners slightly forward and let the bottom edge sit against the seat cushion, so the pillow leans back at a slight angle rather than lying flat or standing stiffly upright.

    For a soft, lived in crease down the middle of a square pillow, press the top center in with the side of your hand after fluffing. This is optional, and it works best on soft, down style inserts rather than firm foam. Avoid creasing every pillow in the same way, since identical creases can look staged. Two or three gently shaped pillows among plainer ones is enough.

    11. Balance the Pillows With a Throw and Nearby Decor

    Sofa with layered throw pillows and a folded throw over one arm.

    Drape a throw over one arm, fold it across the back at one end, or fold it in thirds and lay it across a seat cushion that is not the main sitting spot. The throw should share at least one color or texture with the pillows, so the sofa reads as one group rather than as pillows plus an unrelated blanket.

    Check the wall above the sofa and the coffee table in front of it as well. If the art is large and bold, keep the pillows a little calmer; if the wall is plain, the pillows can carry more pattern. Move any item that blocks the pillow arrangement from the doorway view, such as a tall plant directly in front of one end, so the balance you set can actually be seen.

    12. Step Back, Sit Down, and Adjust for Comfort

    Person sitting comfortably on a sofa with layered throw pillows.

    Step back to the doorway and look at the whole sofa, then take a photo from across the room and check it. A photo often shows an uneven side or a color that stands out too much, even when the sofa looks fine up close. Shift one pillow at a time, rather than rebuilding the whole arrangement, until both sides feel equal in height, color weight, and pattern strength.

    Then sit in each main seat and check comfort. You should be able to lean back without a pillow pressing into your neck at an odd angle, and you should not need to move more than one pillow to sit down. If a pillow is in the way, move it to the end, swap it for a smaller one, or remove it. A balanced look that no one can sit against will not stay balanced for long.

    Conclusion

    A balanced sofa pillow arrangement starts with an empty sofa and a small palette, then builds from large anchor pillows at the ends, through medium layers, to one small center accent. Repeat colors, mix textures, limit strong patterns, and keep the style the same on both sides. Finish by fluffing each pillow, adding a throw that shares a color, and sitting down to check comfort. Adjust one pillow at a time until the sofa looks even from the doorway and feels good to sit on. For more ideas from Dwell Ovell, browse the home page for home decor guides.

    FAQs

    How many throw pillows should I put on a sofa?

    A loveseat usually looks balanced with three or four pillows, a standard three seat sofa with five or six, and a long sofa or sectional with six to eight in total. Choose the lower end of the range if the sofa is used daily for sitting and napping, and check that each main seat can be used without moving more than one pillow first.

    What size throw pillows work best on a standard sofa?

    Large 22 inch square pillows work well as anchors at the ends of a standard sofa, with 20 inch squares layered in front and a lumbar or small square as a center accent. The key is a clear size step between layers, so each pillow stays visible, and a pillow height that sits well against the sofa back rather than towering above it or sinking below the seat.

    How do I arrange throw pillows so they look balanced but not stiff?

    Anchor the largest pillows at the ends, layer medium pillows in front, and finish with one small center accent, then angle each pillow slightly toward the middle instead of lining them up in a flat row. Keep the same sizes and color weights on both sides, even in a casual arrangement, and fluff each pillow by hand so the group looks soft rather than rigid.

    Should throw pillows match the sofa or contrast with it?

    Throw pillows should link to the room, not necessarily match the sofa exactly, so repeat one or two colors from the rug, curtains, or art, and use plainer pillows if the sofa itself is patterned. A small palette with one main neutral and one or two accents keeps the arrangement calm, while one bold pillow can act as a focal point if the pillows around it are calmer.

    How do I mix patterns on sofa pillows without clashing?

    Limit strong patterns to one or two pillows, place a plain pillow next to each patterned one, and keep all patterns within the same two or three colors. Mix textures as well, such as linen beside velvet or cotton beside knit, since texture adds interest without adding another pattern or color that could compete.

    How can I keep throw pillows from sliding or going flat?

    Use a firmer insert, or a cover one size smaller than the insert, so the pillow holds its shape and stays upright against the sofa back. Fluff pillows by holding opposite corners and pushing air into the center, set the bottom edge against the seat cushion at a slight lean, and rotate and refluff pillows regularly so the fill does not settle on one side.

  • How to Make Beautiful Flower Arrangements with Trader Joe’s Flowers

    How to Make Beautiful Flower Arrangements with Trader Joe’s Flowers

    Buy one bunch of focal flowers, one bunch of supporting blooms, and filler or greenery, then trim the stems at an angle, strip leaves below the waterline, and build the arrangement in layers: greenery first, focal blooms next, then supporting blooms and filler to close gaps. Check the shape from all sides before it goes on the table.

    Grocery store bunches make good arrangements because they are sold in clear groups: one bunch of large blooms, one bunch of smaller blooms, and one bunch of greenery or filler. The work is not finding rare flowers. It is choosing bunches that work together, trimming them well, and placing them in an order that gives the arrangement a clear shape. This guide walks through that order, one step at a time, so a first arrangement looks planned rather than crowded.

    One note before you start: Trader Joe’s is mentioned here only as a place many readers buy flower bunches. This guide is not affiliated with or endorsed by the company, and no prices or store claims are made. The steps work with bunches from any grocery store or flower shop. For seasonal arrangement ideas to pair with these steps, see these fall flower arrangements.

    Key Takeaways

    • Buy in three groups: focal blooms, supporting blooms, and filler or greenery, and keep the palette to two or three colors.
    • Measure the spot first, since a dining table needs a low arrangement and a console can take height.
    • Trim stems at an angle, strip leaves below the waterline, and change the water every two days.
    • Build in layers: greenery base, focal blooms at varied heights, then supporting blooms and filler to close gaps.
    • Check the shape from every side and from a seated view before the arrangement goes in its final spot.
    • Save leftover stems for small bud vases instead of crowding them into the main arrangement.
    • Keep fresh arrangements out of direct sun and away from heat vents and ripening fruit.

    Materials and Supplies

    • Three bunches of flowers: one focal bunch, one supporting bunch, and one filler or greenery bunch
    • A clean vase or container that holds water, sized for the spot where the arrangement will sit
    • Sharp scissors or stem snips
    • Clean, cool water
    • A tape measure, to check the height of the spot and the finished arrangement
    • A small tray or mat, to protect the table under the vase
    • A trash bowl or bag, for trimmed leaves and stem ends
    • Optional: floral tape or a small grid of tape across a wide vase mouth, to hold stems in place

    1. Measure the Spot and Choose a Container Size

    Empty glass vase on a dining table in its final spot with a tape measure beside it under a mirror.

    Start with the spot, not the flowers. A dining table arrangement should stay low enough that guests can see each other across it, usually with the tallest bloom below eye level when seated. A console, sideboard, or entryway table can take a taller arrangement, since no one sits across from it. A windowsill or bedside table needs only a small vase with a few stems.

    Measure the height available above the surface, including any mirror, shelf, or light fixture overhead. Then choose a vase that leaves room for the flowers to rise above its rim without crowding that space. A vase that is too large for a small bunch looks empty, and a vase that is too small for a large bunch looks strained and can tip.

    Set the empty vase in the spot before you buy or arrange anything. This one check prevents the most common mistake: an arrangement that is finished, then found to be too tall for the table or too wide for the shelf it was meant for.

    2. Set a Palette of Two or Three Colors

    Three groups of white, blush, and green flowers laid out on a kitchen counter as a color palette plan.

    Pick two or three colors before you shop, and let every bunch fit inside that palette. A simple plan, such as white and green, blush and cream, or rust and gold, keeps mixed bunches looking like one arrangement instead of a pile of unrelated flowers. The vase and the table setting count as part of the palette too, so a strong vase color pairs best with a quiet flower palette, and a quiet vase lets a bolder palette lead.

    Shop with the palette written down, even if it is only a note on your phone. Grocery displays make it easy to add one more color that looks good alone but breaks the plan at home. If a bunch you love falls outside the palette, save it for a second, smaller arrangement rather than forcing it into the first one.

    Seasonal palettes are an easy starting point. Spring suits pale pinks, whites, and greens. Summer suits bright mixed colors with plenty of green. Autumn suits rust, gold, burgundy, and cream, as in these Thanksgiving flower arrangements. Winter suits white, deep red, and dark green.

    3. Shop for Focal Flowers First

    Hands holding a bunch of large roses in store wrap, checking firm petals and sturdy stems.

    Focal flowers are the large, eye catching blooms that the arrangement is built around: roses, peonies, sunflowers, dahlias, or lilies, depending on the season. Buy these first, since they set the color, the scale, and the number of supporting stems you will need. One bunch of focal blooms is usually enough for a single table arrangement, and two bunches suit a large console display.

    Check each bunch before it goes in the cart. Look for firm petals, tight buds that are just starting to open, and stems that feel sturdy rather than soft or bent. Skip bunches with brown petal edges, drooping heads, or leaves that are already yellow, since those blooms will fade first and shorten the life of the whole arrangement.

    Ask yourself where the focal blooms will sit in the vase. Large blooms need room around them to open, so a focal bunch with very wide heads needs a vase with a mouth wide enough to hold them without crushing. Keep the receipt or note the variety, so you can buy the same focal flower again when a mix works well.

    4. Add Supporting Blooms in a Second Layer

    Small spray roses and chrysanthemums beside a larger rose bouquet on a table.

    Supporting blooms are smaller flowers that fill out the arrangement around the focal blooms: spray roses, carnations, chrysanthemums, ranunculus, or lisianthus. Choose one supporting type in a color from your palette, ideally a shade lighter or darker than the focal blooms, so the two layers read as related but distinct. One bunch is usually enough for a table arrangement.

    Supporting blooms do two jobs. They fill the space between focal blooms so the arrangement looks full from the side, and they soften the outline where a large bloom alone would look too round or too flat. Place them slightly lower than the tallest focal blooms, so the focal blooms stay the highest points and the eye still lands on them first.

    If you are unsure how much support a bunch needs, buy one supporting bunch and one filler bunch, then build the arrangement and see what is left. It is easier to add a second small bunch later than to thin out an arrangement that was overfilled from the start.

    5. Add Filler Flowers and Greenery

    Bunches of eucalyptus, baby's breath, and small berries laid out on a wooden table.

    Filler flowers and greenery close the gaps and give the arrangement its outline. Good fillers include baby’s breath, waxflower, limonium, and small berries, while eucalyptus, ruscus, and fern fronds work as greenery. Choose one filler and one greenery, or one bunch that combines both, and keep both inside the palette.

    Greenery should frame the blooms, not hide them. Long greenery stems set the outer shape of the arrangement, and short filler sprigs sit between blooms to soften hard edges. Too much greenery makes an arrangement look like a leafy bush with flowers stuck in it, so start with fewer stems than you think you need and add more only where a gap shows.

    Greenery also helps the arrangement last. Sturdy greenery holds its shape as blooms open and settle, so the arrangement keeps its outline even after a few focal blooms are removed. Keep a few spare greenery stems in water, so you can replace a wilted sprig without rebuilding the whole display.

    6. Prep Every Stem Before Arranging

    Hands trimming a flower stem at an angle over a bowl with stripped leaves beside scissors.

    Prep is the step most beginners skip, and it is the step that most affects how long the arrangement lasts. Work over a trash bowl, and handle one bunch at a time. Strip off every leaf that would sit below the waterline, since submerged leaves cloud the water and shorten bloom life. Remove damaged outer petals gently, but leave healthy guard petals in place until the bloom opens.

    Trim each stem at an angle with sharp scissors or snips, cutting off about half an inch. An angled cut gives the stem more surface to drink from than a flat cut, and sharp tools keep the stem end clean instead of crushed. Recut stems that have been out of water for a while, since a dry stem end seals over and drinks poorly.

    Sort the trimmed stems into three groups on the table: focal blooms, supporting blooms, and filler with greenery. Sorting before arranging keeps you from hunting through a mixed pile mid build, and it shows at once whether one group is short. If a group looks thin, that is the time to plan a second small arrangement from leftovers, not to crowd the main vase.

    7. Build the Base with Greenery

    Glass vase filled with greenery stems angled outward forming a loose base shape on a kitchen table.

    Fill the clean vase with cool water, then start with greenery, not flowers. Place the longest greenery stems first, angling them outward to set the outer shape and the finished height of the arrangement. Turn the vase as you work, so the greenery spreads evenly instead of leaning to one side.

    Add shorter greenery stems next, filling in the middle of the shape without packing it tight. The base should look like a loose frame with clear spaces where blooms will sit, not a dense ball of leaves. If the vase mouth is wide and stems keep falling outward, lay a grid of floral tape across the mouth first, and thread stems through the grid to hold them in place.

    Step back and look at the greenery base from the distance it will be seen from. A dining table base is seen from a seat nearby, while a console base is seen from across the room. Adjust any stem that sticks out past the planned outline now, while the vase is still light and easy to turn.

    8. Place Focal Blooms at Varied Heights

    Hands placing large roses at varied heights into a greenery base in a glass vase.

    Set the focal blooms into the greenery base one at a time, starting with the tallest stem in the center or slightly off center. Place the next focal blooms a little lower and a little outward, so the heights vary instead of forming a flat top. Odd numbers of focal blooms, such as three or five, usually read more naturally than an even row.

    Give each focal bloom room to open. If two large blooms touch, one will crush the other as it opens, and both will fade faster. Leave a small gap between focal blooms, and plan to fill those gaps with supporting blooms in the next step, rather than pushing focal blooms together for fullness.

    Turn the vase a quarter turn after every two or three focal blooms, and check the shape from the back as well as the front. An arrangement that looks full from one side and empty from the other usually has its focal blooms grouped too tightly on the front. Move one bloom to the thin side now, while the arrangement is still easy to adjust.

    9. Fill Gaps with Supporting Blooms and Filler

    Hands tucking small supporting blooms and filler sprigs into gaps between large roses in a vase.

    Add supporting blooms into the gaps between focal blooms, keeping them slightly lower than the focal blooms so the focal layer stays on top. Work around the vase in turns, adding one supporting stem, stepping back, and adding the next, instead of filling one side completely before starting the other. This keeps the arrangement balanced as it fills out.

    Tuck filler sprigs last, into any small gaps where vase, tape, or stem ends still show. Filler should sit between blooms and at the outer edges, softening the outline without covering focal blooms. Pull out any filler stem that hides a focal bloom, and move it to a gap at the side where it can add texture without blocking the main flowers.

    Stop when the arrangement looks full from every side but you can still see individual blooms. Overfilling is the most common beginner mistake, and it makes stems compete for water and air. If stems are left over, set them aside for bud vases, as described in step 14, rather than forcing them into a finished arrangement.

    10. Check the Shape from Every Side and Adjust

    Person turning a finished flower arrangement on a dining table checking its shape from a seated view.

    Lift the finished arrangement to its spot, or set it on a table at the same height, and check it the way guests will see it. Sit down if it is a dining table arrangement, and check sightlines across it. Stand at the room door if it is a console arrangement, and check it from across the room. Look for one side that is heavier than the other, a stem that sticks out past the outline, or a gap where the vase shows through.

    Turn the vase slowly and fix one issue at a time. Trim a stem that is too long, rather than bending it. Move a supporting bloom into a gap, rather than adding a new stem. Remove a filler sprig that blocks a focal bloom, rather than adding more blooms around it. Small moves at this stage make a bigger difference than adding more flowers.

    Leave the arrangement for an hour, then check it again. Fresh stems settle as they drink, and a shape that looked full at first can open out or lean as stems relax. Top up the water, trim any stem that droops below the line you want, and add one filler stem where a new gap appears.

    11. Style a Low Version for a Dining Table

    Low bowl flower arrangement on a dining table set for a meal with clear sightlines across the table.

    A dining table version of this arrangement should stay low, narrow, and easy to see across. Use a low bowl, a short cylinder, or a trio of small vases instead of one tall vase, and keep the tallest bloom below eye level when guests are seated. Leave clear space at each place for plates, glasses, and serving dishes, and keep the arrangement narrow enough that it does not crowd the table edges.

    Build the low version with the same layer order, but trim stems shorter and use fewer focal blooms. Three focal blooms with supporting blooms and filler can carry a small table, while a long table suits a repeated trio of small arrangements spaced down the center, each built the same way. For more table styling ideas, see these Valentine centerpieces, which use the same low, narrow logic for a different season.

    Keep candles, if you use them, in holders and clear of blooms and greenery, and use flameless candles near dried material or paper decor. When the meal ends, lift the arrangement off in one move if it sits on a tray or board, so clearing the table stays simple.
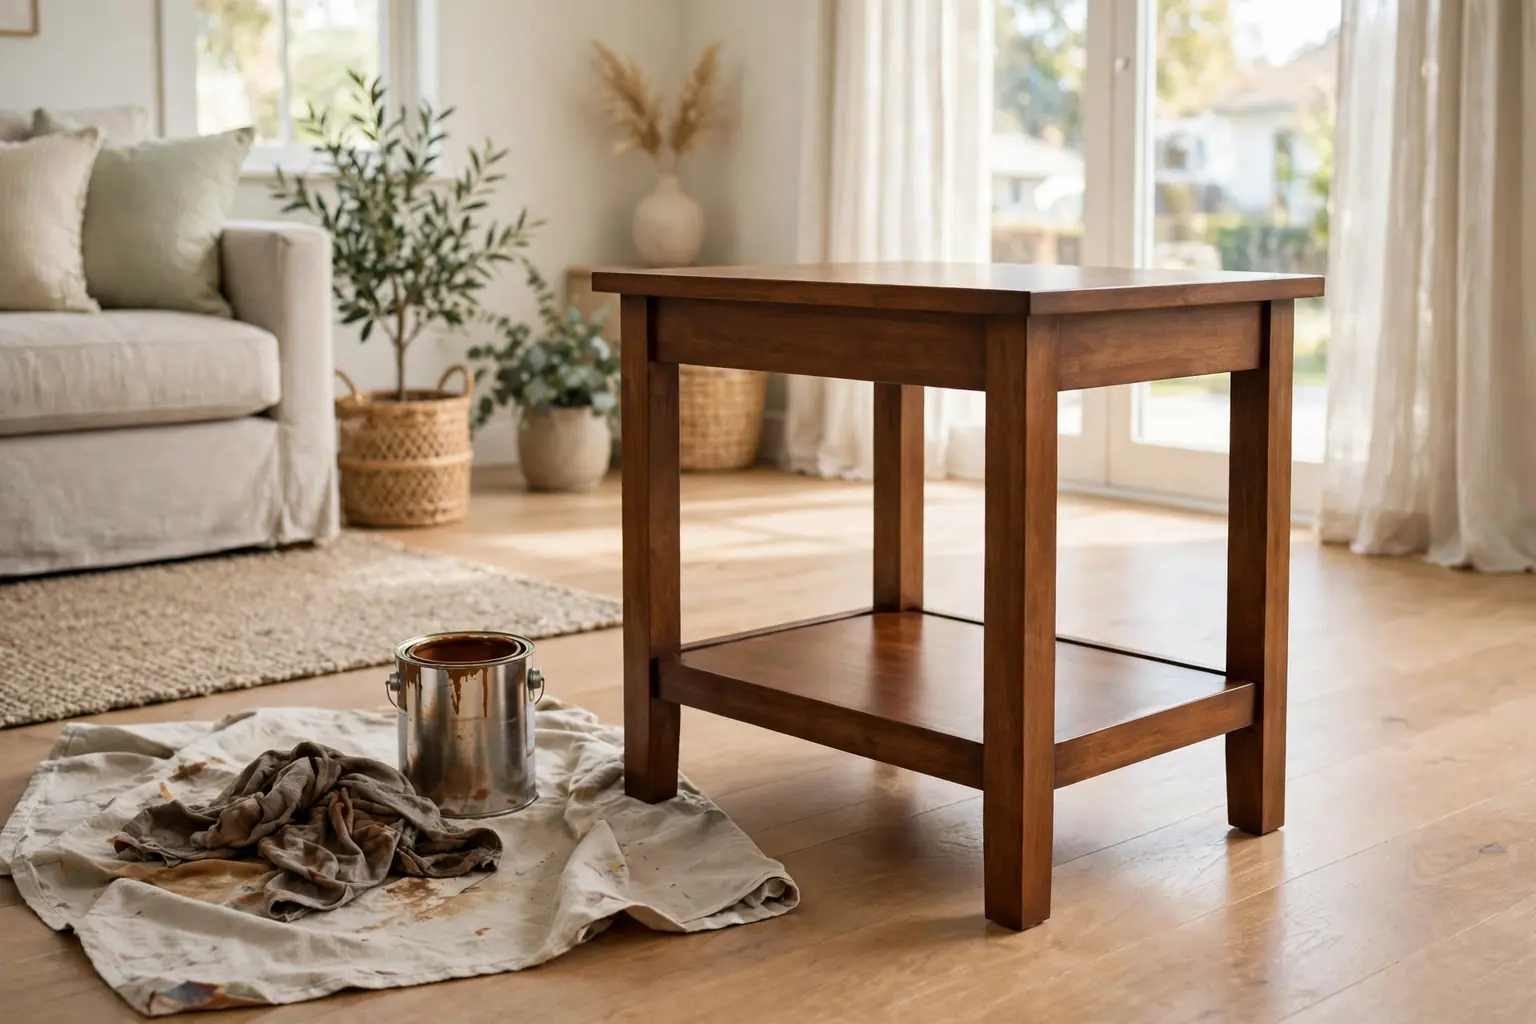
    12. Style a Tall Version for a Console or Entryway

    Tall flower arrangement in a heavy ceramic vase on an entryway console beside a tray and lamp.

    A console or entryway version can go taller and fuller, since no one sits across from it. Use a tall cylinder, a heavy ceramic vase, or a pitcher, and let greenery and a few tall stems set a height that frames the surface without crowding a mirror or artwork above it. Keep at least a hand width of clear space above the tallest stem.

    Weight matters more in a tall arrangement. A heavy vase holds top heavy blooms steady, and a vase that sits near a door or a walkway should be sturdy enough to take a bump from bags and keys. Set the vase at one end of the console when the surface also holds a tray or a lamp, so the display frames the surface instead of filling it.

    Tall arrangements suit stems left over from a low table build, since longer stems that would crowd a dining table work well here. Mix the same palette across both spots, and the entryway and the table will read as one plan, even though the two arrangements are different heights.

    13. Keep the Arrangement Fresh Day by Day

    Hands changing the water in a glass flower vase at a kitchen sink with freshly trimmed stems beside it.

    Fresh arrangements last longer with a short daily routine. Change the water every two days, recutting about half an inch off each stem end at an angle before returning it to clean water. Remove spent blooms promptly, so they do not stain nearby petals or cloud the water, and strip any leaf that slips below the waterline.

    Keep the arrangement in a cool spot out of direct sun, away from heat vents, radiators, and ripening fruit, which gives off gas that speeds fading. If the room is warm, move the arrangement to a cooler room overnight. Top up the water daily for heavy drinkers such as sunflowers and roses, since a vase that runs dry for even a few hours shortens the life of the whole bunch.

    When focal blooms fade but greenery and filler still look good, replace only the faded blooms. Buy one small bunch of fresh focal blooms, trim them, and set them into the existing base. This refresh costs less than a full rebuild and keeps the arrangement going for a second week of use.

    14. Reuse Leftover Stems in Small Bud Vases

    Three small bud vases with single leftover flower stems grouped on a sunny windowsill.

    Leftover stems are not waste. A single rose, a short spray of supporting blooms, or a sprig of greenery each make a small display in a bud vase, a jam jar, or a teacup. Group two or three bud vases on a windowsill, a bathroom shelf, or a bedside table, and one bunch of flowers can serve three or four spots in the house.

    Keep bud vase stems short, so the bloom sits just above the rim, and change their water every two days, since small containers run dry fast. Use the same palette across the bud vases, so they read as a set rather than a random collection of spares. If a stem is too short for a bud vase, lay it flat in a shallow bowl of water as a floating bloom for a day.

    This step also teaches what to buy next time. Note which leftover stems lasted longest in bud vases, and which focal blooms opened best. That note, kept on your phone, makes the next shopping trip faster, since you will know which bunches gave you both a main arrangement and a few small extras.

    Conclusion

    Making flower arrangements from grocery store bunches comes down to a steady order: measure the spot, set a small palette, buy focal blooms first, then supporting blooms and filler, prep every stem, and build in layers from greenery to focal blooms to filler. Check the shape from every side, keep table versions low and console versions tall and steady, and refresh the water and stems every couple of days. With that order, a few bunches become an arrangement that looks planned, lasts well, and leaves enough stems for small bud vases around the house.

    FAQs

    How many bunches do I need for one flower arrangement?

    One bunch each of focal blooms, supporting blooms, and filler or greenery is enough for most table arrangements. Buy a second focal bunch only for a large console display or a very long table, and save leftover stems for bud vases instead of crowding them into the main vase.

    What are focal, supporting, and filler flowers?

    Focal flowers are the large blooms the arrangement is built around, such as roses, peonies, or sunflowers. Supporting blooms are smaller flowers that fill out the shape around them, such as spray roses or chrysanthemums. Filler flowers and greenery, such as baby’s breath or eucalyptus, close small gaps and set the outer outline.

    How do I trim stems so cut flowers last longer?

    Trim about half an inch off each stem end at an angle with sharp scissors or snips, and strip off every leaf that would sit below the waterline. Change the water every two days, recut the stems each time, and keep the arrangement out of direct sun and away from heat vents and ripening fruit.

    How tall should a dining table flower arrangement be?

    Keep the tallest bloom below eye level when guests are seated, so people can see and talk across the table. Use a low bowl, a short cylinder, or a trio of small vases for a dining table, and save tall vases for consoles, sideboards, and entryways where no one sits across from them.

    Can I mix flowers from different stores in one arrangement?

    Yes, as long as every bunch fits the same two or three color palette and the stem lengths work together. Mix focal blooms from one shop with supporting blooms and greenery from another, prep all stems the same way, and build in the same layer order, and the finished arrangement will read as one plan.

    Do I need floral foam to make a flower arrangement?

    No, most home arrangements do not need floral foam. A clean vase of water, a greenery base, and a simple tape grid across a wide vase mouth will hold stems in place. Foam suits only arrangements in containers that cannot hold water, or shapes that need stems fixed at exact angles, and it must be kept wet for fresh flowers.


  • 17 Large Flower Arrangement Ideas for Tables and Entryways

    17 Large Flower Arrangement Ideas for Tables and Entryways

    Large flower arrangements work best when the container, height, and placement match the spot: keep dining table displays low and wide so guests can see across, and give entryway displays height in a heavy, stable vase. Build around one focal bloom, add supporting stems at varied heights, and keep the palette to two or three colors for a planned look.

    A large arrangement earns its size by filling a space that a small bouquet cannot. A wide console, a long dining table, or an empty entry corner all swallow a single bunch, while a full display with varied heights and a clear shape holds the eye from across the room. The ideas below cover both jobs: table displays that stay useful during a meal, and entryway displays that greet people at the door. For seasonal flower ideas to pair with these layouts, see these fall flower arrangements and these Thanksgiving flower arrangements.
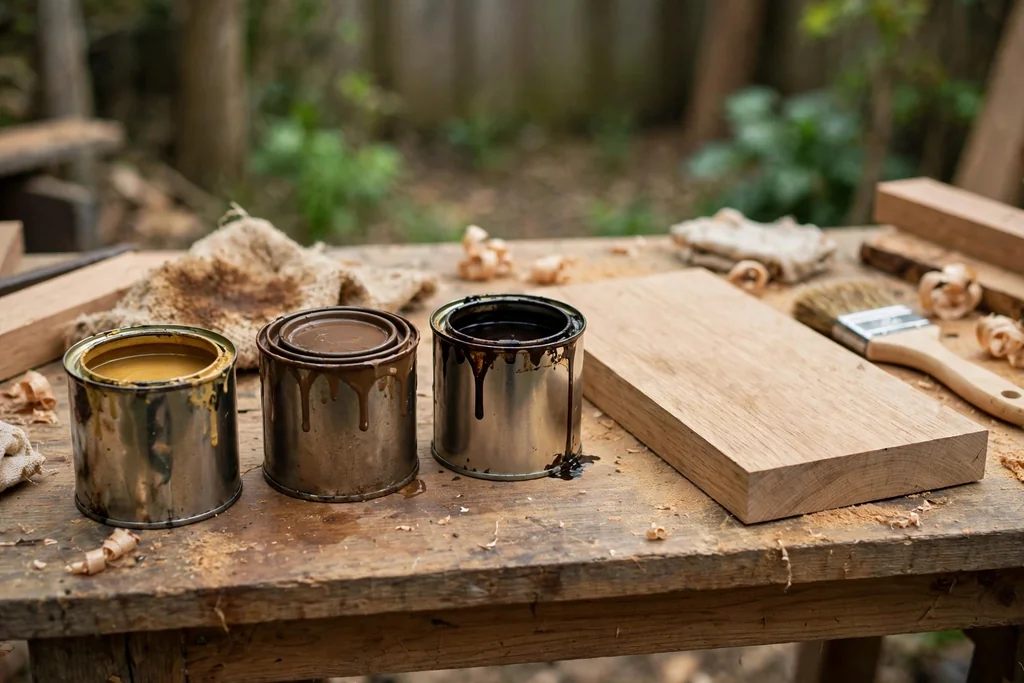
    Key Takeaways

    • Match height to the spot: low and wide for dining tables, tall and grounded for entryways.
    • Use a heavy, stable container for tall or wide arrangements, and set it on a tray or mat where water could mark the surface.
    • Build around one focal bloom, add supporting blooms at varied heights, and finish with filler greens or branches.
    • Keep the palette to two or three colors so a large display reads as one plan rather than a crowded mix.
    • Check sightlines from a seat at the table and from the room door before you settle an arrangement.
    • Give a large arrangement room to breathe: clear space around the container matters as much as the flowers in it.
    • Fresh stems need water checks every two days; dried stems suit entryways that are rarely tended.

    1. Low Wide Compote Bowl Centerpiece

    Low wide compote bowl with roses, dahlias, and greenery as a dining table centerpiece.

    A low, wide compote bowl is the most useful large centerpiece for a dining table. The foot lifts the blooms just enough to read as a display, while the wide bowl holds plenty of stems without rising above eye level when seated. Fill it with a ring of greenery first, then set focal blooms such as roses, dahlias, or peonies in the center, and tuck smaller blooms around the edge so the shape stays round and full from every seat.

    Keep the tallest stem below the seated eye line, and leave clear space at each place for plates and glasses. A compote bowl suits a round or square table best, since its round shape echoes the table. Check the water level before a meal, since a wide bowl holds a shallow pool that runs low faster than a tall vase.

    2. Tall Floor Vase with Branches for the Entryway

    Tall heavy floor vase with long branches and berry stems in an entryway corner beside a door.
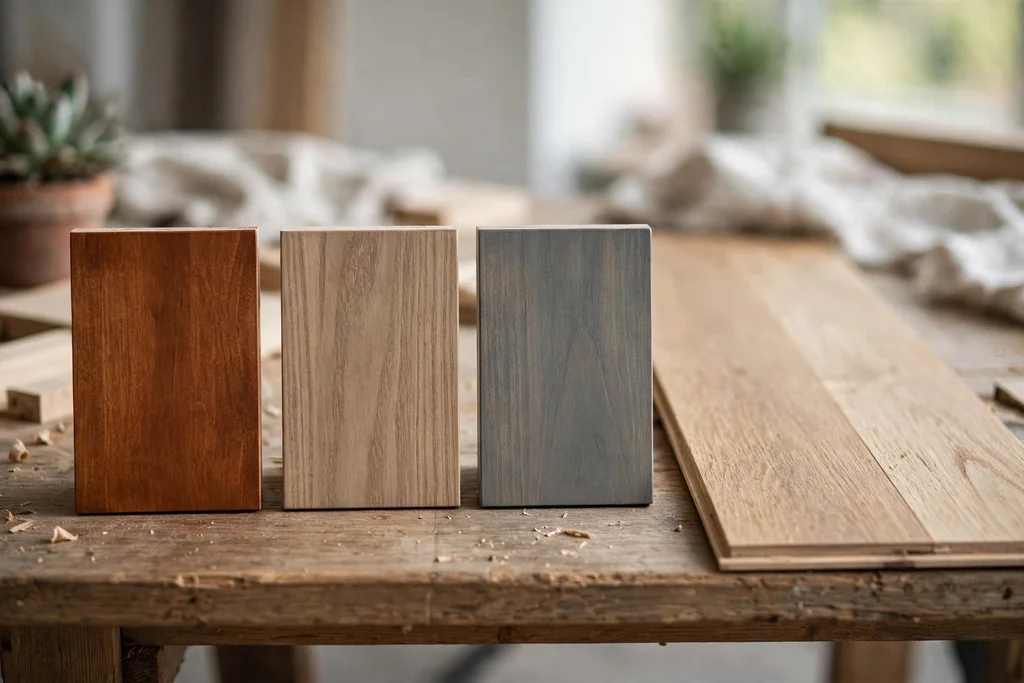
    A tall floor vase with branches gives an entryway height without the weight and water needs of a huge bouquet. Place five to seven tall branches, such as birch, willow, or eucalyptus, in a heavy floor vase, and add a few stems of berries or dried grasses for color near the top. The branches draw the eye upward and fill a bare corner beside a door or bench.
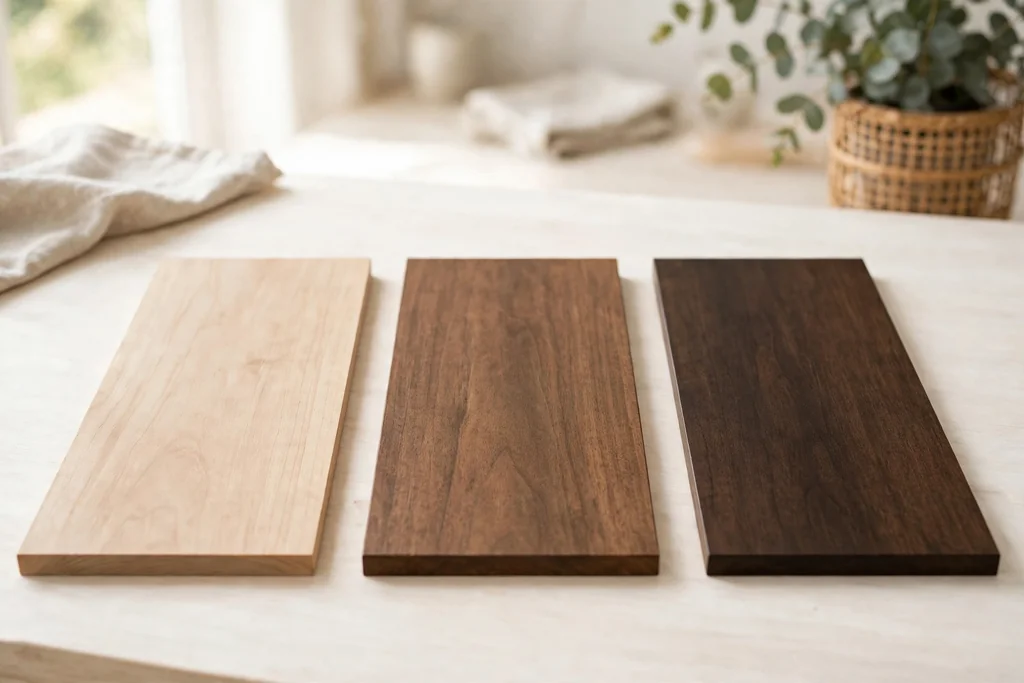
    The vase must be heavy enough that the branches cannot tip it when someone brushes past with a bag or a coat. Set it against a wall or in a corner rather than in the walking path, and trim branches so at least a hand width of clear space remains below the ceiling. Swap branches as they dry and drop leaves.

    3. Ceramic Urn on a Console Table

    Large ceramic urn with a domed flower arrangement on a console table under a mirror.

    A large ceramic urn suits a console table in an entryway or living room because its solid shape anchors the surface. Choose an urn with a mouth wide enough for a full bunch, and build a domed shape: tall stems in the center, medium stems around them, and trailing greenery at the edge to soften the rim. The ceramic hides stems and water, so the blooms lead and the mechanics stay out of sight.

    An urn also adds weight, which helps a console display survive bumps from keys and bags. Place the urn at one end of the console or in the center under a mirror, and leave room beside it for a tray or a small lamp. Wipe the outside dry after watering, since a wet urn can mark a wood console.

    4. Long Low Trough for a Rectangular Table

    Long low wooden trough with short flower stems down the center of a rectangular dining table.

    A long, low trough runs down the center of a rectangular table and keeps a large display from blocking conversation. Line a wooden or metal trough with small jars of water, then fill each jar with short stems so the whole trough reads as one continuous arrangement. Use one flower type repeated along the trough for a calm look, or repeat a small mixed bunch at intervals for a fuller effect.

    Leave clear space at each end of the trough for serving dishes, and keep every stem below seated eye level. A trough suits a long table better than a single round bowl, since it follows the table shape and leaves room for plates on both sides. Lift the trough off in one move when you need the full surface for serving.

    5. Three Matching Large Vases Down a Long Table

    Three matching large vases with the same flower mix spaced down a long dining table.

    Three matching large vases repeat one arrangement along a long table instead of building one very wide centerpiece. Fill each vase with the same mix, such as roses, greenery, and one filler, and space the vases evenly down the center, with room between them for serving dishes and candles. The repeat gives a long table rhythm and lets guests see across between the vases.

    This layout works for a table where a single huge display would crowd the food. Use vases of the same shape and color so the three read as one plan, and keep each vase narrow enough that plates still fit on both sides. When the meal ends, the vases can move to other rooms as separate displays.

    6. Raised Pedestal Arrangement for an Entry Table

    Raised pedestal vase with a full rounded flower arrangement on an entry table.

    A raised pedestal arrangement lifts a large display above an entry table, which suits a table that already holds a tray, a lamp, or a stack of books. Set a footed stand or a tall, narrow pedestal vase on the table, and build a full, rounded shape on top, with blooms facing outward on all sides. The height makes the display visible from the door, even when the table surface is busy.

    Check the total height against the mirror or artwork above the table, and leave clear space below it so the pedestal does not crowd the frame. A pedestal display needs a stable base, since the raised weight can tip more easily than a low bowl. Keep it near the wall side of the table, away from the path where coats and bags swing.

    7. Large Clear Glass Cylinder with Layered Stems

    Large clear glass cylinder with layered flower stems on a modern console table.

    A large clear glass cylinder suits a modern table or console because the glass shows the stems and water as part of the display. Layer the stems by length: tall stems at the back, medium stems in the middle, and short blooms at the front, so the arrangement reads clearly through the glass from the side. Use one or two flower types in a limited palette, since the clear glass adds visual detail of its own.

    Clear glass needs clean water and wiped sides to stay neat, since cloudy water shows at once. Change the water every two days and trim stems at an angle each time. Set the cylinder on a tray or mat, and keep it out of direct sun, which warms the water and shortens bloom life.

    8. Woven Basket Arrangement Beside an Entryway Bench

    Large woven basket with full blooms and greenery beside an entryway bench.

    A large woven basket arrangement softens an entryway bench and gives a big display a relaxed, gathered feel. Line a wide basket with a waterproof tray, set a jar of water inside, and arrange full blooms such as dahlias or chrysanthemums with filler greens, letting a few stems spill over the basket edge. The basket shape suits a bench, a hearth side, or a hallway corner where a formal vase would feel stiff.

    Check the water level often, since a basket hides the jar from view. Keep the basket low enough to see over from a standing position, and place a tray under it to catch dropped petals. When the fresh blooms fade, keep the basket and refill it with dried stems for a no-water version.

    9. All-White Massed Hydrangea Bowl for a Formal Table

    Low wide bowl packed with white hydrangea heads on a formal dining table.

    A massed hydrangea bowl uses one flower type in large numbers for a formal table display. Fill a low, wide bowl with hydrangea heads packed close together, so the surface reads as one cloud of white, and add only a little greenery at the base to hide the stems. The single-flower massing gives a large display a calm, formal look that suits white plates, linen napkins, and a dressed up meal.

    Hydrangeas drink heavily, so check the water daily and mist the heads lightly if the room is dry. Keep the bowl low enough to see across the table, and set it on a charger or tray to protect the tablecloth. Replace any head that browns promptly, since one faded head stands out in a single-color display.

    10. Asymmetric Garden-Style Arrangement for a Round Table

    Asymmetric garden-style flower arrangement with varied stem lengths on a round dining table.

    An asymmetric garden-style arrangement suits a round table, where a display is seen from all sides and a strict dome can look stiff. Build the shape with varied stem lengths and a relaxed outline: a tall focal stem leaning slightly to one side, supporting blooms at mixed heights, and trailing greenery that falls over the rim on one side only. The uneven shape keeps the eye moving around the table.

    Use a plain ceramic or stoneware container so the loose shape, not the vase, carries the interest. Turn the arrangement as you build it, checking the shape from each seat, and trim any stem that blocks a view across the table. This style suits a casual gathering, where a formal centerpiece would feel too rigid.

    11. Large Arrangement with Fruit and Branch Accents for a Console

    Large console flower arrangement with branch accents and decorative fruit at the base.

    A large console arrangement with fruit and branch accents adds texture and a seasonal feel to an entryway or sideboard. Build a full base of blooms and greenery in a wide vase or urn, then tuck in a few branches with berries and two or three firm decorative fruits, such as small apples or lemons, placed where they can be seen but not hidden inside the blooms. The fruit gives the display weight at the base and a color link to the room.

    Use decorative fruit only, and keep it separate from fruit that will be eaten, since it sits against wet stems and foliage. Anchor the branches so they cannot slip, and check the fruit often, removing any piece that softens. This arrangement suits a sideboard or buffet, where guests walk past it, better than a dining table, where fruit takes up serving space.

    12. Dried Large Arrangement for a Low-Care Entryway

    Large dried flower arrangement with hydrangea heads, grasses, and strawflowers in an entryway.

    A large dried arrangement suits an entryway that is rarely tended, such as a guest room hall or a high shelf above a console. Combine dried hydrangea heads, grasses, wheat, and strawflowers in a dry vase with no water, building height with tall grasses at the back and full heads at the front. Dried stems hold their shape for months, so the display needs no watering and no stem trimming.

    Keep dried arrangements out of damp rooms and away from open flames and strong heat, since dry material is flammable and damp air softens it. Dust the stems gently with a soft brush or a cool hair dryer now and then. When the season changes, store the arrangement in a box to protect it, and reuse the stems next year.

    13. Stone Planter Arrangement for a Wide Entry Hall

    Large stone planter with a wide full flower arrangement in a wide entry hall.

    A large stone or concrete planter suits a wide entry hall, where a light vase would look lost against the scale of the space. Set a heavy planter on the floor or on a low stand, fill it with a wide, full arrangement of blooms and tall greenery, and let the shape spread outward to match the width of the hall. The weight and rough texture of stone ground the display and suit a hall with tile or wood floors.

    A stone planter needs a waterproof liner or an inner jar, since stone can be porous and heavy to move once filled. Place it where it cannot be bumped by a door swing, and leave a clear walking path beside it. Water in place and empty any tray under the liner so the floor stays dry.

    14. Paired Large Vases Flanking a Mirror

    Two matching large vases with the same flower mix flanking a mirror above a console.

    Paired large vases flanking a mirror frame an entryway console and give the wall a balanced, finished look. Place one large vase on each side of the console, fill both with the same flower mix and a similar height, and keep the mirror or artwork above clear between them. The pair reads as one display and makes a narrow console feel wider and more planned.

    Match the two vases in shape and color, and build both arrangements to a similar height and fullness, so neither side looks heavier than the other. Leave room in the center of the console for a tray or a small lamp, and check the pair from the room door, where the symmetry first shows. This layout suits a console under a mirror better than a dining table, where a pair would crowd the center.

    15. Tall Centerpiece with Low Satellite Posies

    Tall centerpiece flower arrangement with small low posies in bud vases on a large dining table.

    A tall centerpiece with low satellite posies gives a large table both height and table-level detail. Build one tall, full arrangement in the center of the table, then place small posies in bud vases or short jars at intervals around it, using the same flowers in smaller numbers. The tall center draws the eye, while the low posies fill the table without blocking views.

    This layout works best on a large round or long table, where the center arrangement alone would leave the ends bare. Keep the satellites low, below seated eye level, and leave clear space at each place setting. Guests can take a posy home at the end of a gathering, which makes the layout do double duty as a small favor.

    16. Large Kitchen Island Arrangement Seen from All Sides

    Large rounded flower arrangement in a wide stable container on a kitchen island.

    A large kitchen island arrangement must look full from every side, since an island is walked around rather than sat across from. Build a rounded shape in a wide, stable container, with focal blooms spread around the whole arrangement, not grouped on one face, and trailing greenery at the edge all the way around. Turn the container as you build it, and check the shape from each side of the island.

    Keep the height low enough that cooks can see across the island while working, and leave clear counter space on at least one side for prep and serving. A heavy container matters here, since an island gets bumped often. Set the arrangement on a tray so it can slide aside in one move when the full counter is needed.

    17. Large Corner Arrangement that Anchors an Entryway

    Large tall flower arrangement in an entryway corner angled toward the room beside a bench.

    A large corner arrangement anchors an entryway where a bare corner meets two walls and a plain console would leave the space empty. Place a tall, wide container in the corner itself, angled so the fullest face points into the room, and build a shape that spreads toward both walls: tall stems at the back near the corner, medium blooms in the middle, and lower stems spilling forward. The corner gives the arrangement support on two sides and keeps it out of the walking path.

    Trim stems so the tallest point leaves clear space below the ceiling, and keep the front of the display low enough to see over from the door. A corner arrangement suits a hall with no console, or a corner beside a bench where a table would crowd the path. Check it from the front door, where guests first see it, and shift a stem if one side looks heavier than the other.

    Conclusion

    Large flower arrangements work when the container, height, and placement fit the spot. Keep dining table displays low and wide, give entryway displays height in a heavy, stable vase, and build around one focal bloom with supporting stems at varied heights. Choose a layout from the ideas above that matches your table shape and your entryway, test it from the views people will actually have, and keep fresh stems watered and dried stems dusted. A large display built this way fills a room without crowding it, and it holds its shape from the door to the table.

    FAQs

    How large should a flower arrangement be for a dining table?

    Start with the table size: a large dining table suits a display about one third of the table length, kept low enough to see across when seated. A low, wide bowl or a long trough usually fits better than one tall vase, since it fills the center without blocking conversation or crowding plates.

    What container is best for a large flower arrangement?

    Use a heavy, stable container that matches the display: a low compote bowl or trough for a table, and a tall urn, floor vase, or stone planter for an entryway. The container should hold enough water for fresh stems, or hold a jar inside, and it should sit on a tray or mat where water could mark the surface.

    How do I keep a large arrangement from looking crowded?

    Limit the palette to two or three colors, build around one focal bloom, and leave space between stems so each bloom can be seen. Step back and check the shape from the distance it will usually be seen, then remove or trim any stem that makes one side look heavier than the other.

    Can I use a large flower arrangement in a small entryway?

    Yes, but choose height over width in a small entryway, so the display fills the vertical space without blocking the path. A tall, narrow vase with branches against a wall works better than a wide bowl, and a corner placement keeps the arrangement out of the way of coats and bags.

    How often should I change the water in a large fresh arrangement?

    Change the water every two days, trim stems at an angle each time, and remove leaves below the waterline. Wide, shallow containers run low faster than tall vases, so check the water level daily for low bowls and troughs, and top it up before a meal or a gathering.

    Do large dried arrangements last longer than fresh ones?

    Yes, dried arrangements last for months with no water, which makes them a good choice for entryways that are rarely tended. Keep them out of damp rooms and away from open flames, dust them gently now and then, and store them in a box between seasons to protect the stems.


  • 19 Ways to Decorate with Candlesticks Around Your Home

    19 Ways to Decorate with Candlesticks Around Your Home

    Decorating with candlesticks works best when you group them in odd numbers, vary the heights, and keep flames clear of curtains, greenery, and paper. Use one main group per surface, match the holder material to the room, and let the candles add height and warm light without blocking views or crowding plates.

    Start with the candlesticks you already own, then add one idea at a time to a mantel, a table, a shelf, or a nightstand. Check that each holder sits level, that tapers fit snugly, and that the group leaves room for everyday use. For seasonal table versions of these groups, see the fall table decor guide, and for a holiday table with candle groups, browse the Christmas table setting ideas.

    Key Takeaways

    • Group candlesticks in odd numbers and vary the heights, so the group looks balanced from across the room.
    • Use one main candlestick group per surface, and keep the rest of that surface simple.
    • Match the holder material to the room: brass for warmth, glass for light rooms, wood for rustic rooms, and black metal for modern rooms.
    • Keep flames clear of curtains, dried greenery, paper, and fabric, and use flameless candles near children, pets, or dried material.
    • Check that holders sit level, tapers fit snugly, and candles stay clear of shelves, mirrors, and wall art above them.
    • Start with pieces you already own, then add one new height, material, or tray to complete a group.

    1. Brass Tapers in a Row on the Mantel

    Brass candlesticks in a row on a mantel with cream taper candles.

    Set three or five brass candlesticks in a row along the mantel, with the tallest in the middle and shorter ones at the sides, and use cream tapers in each. The brass adds a warm metal note that suits a living room fireplace, and the row gives the mantel a clear focal point without a large arrangement. Keep the group centered, so it reads as one display rather than scattered pieces.

    Check the height of the tapers against the mirror or art above the mantel, and leave a clear gap between the flame and anything hanging above. Use a small tray or drip plates under the holders if wax drips are a concern, and trim wicks before lighting. For a mantel near curtains, use flameless tapers in the same brass holders for the same look without a flame.

    2. Low Trio as a Dining Table Centerpiece

    Three candlesticks of different heights as a low dining table centerpiece.

    Set three candlesticks of different heights in a row or a small triangle at the center of the dining table, with short tapers or pillar candles in each. The trio adds height and glow to evening meals, while staying low enough for guests to see across the table. Keep the rest of the centerpiece simple, such as a plain runner or a few small sprigs at the base.

    Center the trio, leave room for serving dishes on both sides, and set the tallest holder in the middle of a long table or at the back of a round table. Check that tapers fit snugly, so candles do not lean over plates, and use a tray under the group to catch wax and to lift the whole centerpiece off in one move. For a table with children, use flameless candles in the same holders.

    3. Matching Pair on an Entryway Console

    Matching pair of tall candlesticks on an entryway console with a mirror between them.

    Set a matching pair of tall candlesticks at the ends of an entryway console, with a mirror, a framed print, or a small bowl between them. The pair frames the console, gives guests a warm welcome at the door, and adds height to a narrow surface without crowding it. Use tapers in a color that repeats one color from the entryway rug or wall art.

    Keep the pair the same height and material, so the console looks planned, and leave the middle clear for keys, mail, or a small dish. If the console sits under a mirror, check that the candles do not reflect glare into the walkway, and keep flames clear of any hanging coats or scarves. Use flameless tapers here if the entryway is busy or if candles will burn while you are out of the room.

    4. Hurricane Holders on a Kitchen Windowsill

    Candlesticks inside clear hurricane glass holders on a kitchen windowsill.

    Set candlesticks inside clear hurricane glass holders along a kitchen windowsill, with pillar candles or short tapers inside. The glass shields the flame from drafts near the window, catches wax, and gives the sill a soft glow in the evening. This idea suits a kitchen with a wide sill and a view, since the glass keeps the display tidy and easy to wipe clean.

    Space the holders evenly, keep them clear of curtains and blinds, and choose holders wide enough that the candle does not touch the glass. Wash the glass before use, since fingerprints show more on clear glass than on colored holders. Use battery pillar candles inside closed hurricanes, since a real flame needs air, and never set a lit candle close to a curtain hem.

    5. Single Candlestick on a Bedroom Nightstand

    Single slim candlestick on a bedroom nightstand beside a book.

    Set one slim candlestick on a bedroom nightstand, beside a small clock, a book, or a glass of water, with a taper in a soft cream or pale color. A single holder adds a calm, quiet note to the bedroom, and it suits a small nightstand where a large group would crowd the lamp and the book. Keep the holder close to the back of the nightstand, so it stays clear of bedding.

    Choose a holder with a wide, stable base, since nightstands get bumped in the dark, and keep the flame clear of bedding, curtains, and paper. For most bedrooms, a flameless taper gives the same soft glow with less risk, and it can stay on through the evening without worry. Dust the holder often, since bedroom surfaces collect dust near lamps and books.

    6. Pillar Candlesticks on a Bathroom Tray

    Pillar candlesticks on a small tray on a bathroom counter.

    Set two or three pillar candlesticks on a small tray on a bathroom counter or a stool beside the bath, with short pillar candles in each. The tray keeps the group contained, protects the counter from wax, and gives a plain bathroom a calm, spa-like note. Use white or cream pillars, so the group suits towels and tiles in any color.

    Keep the tray clear of water splashes, towels, and lotions, and set it where it will not be knocked when you reach for the tap. Use flameless pillar candles in a bathroom used by children, and keep real flames clear of towels and shower curtains. Wipe the tray after use, since steam and water spots show on metal and wood trays.

    7. Mixed Heights on a Coffee Table Tray

    Candlesticks of three heights on a tray on a coffee table.

    Set candlesticks of three different heights on a round or rectangular tray on a coffee table, with tapers or short pillars in each. The tray groups the candles into one display, protects the table from wax, and lets you lift the whole group off when you need space for drinks or books. Vary the heights by at least a few inches, so each candle shows clearly.

    Keep the tray to one side of the coffee table, leaving the other side free for everyday use, and keep the tallest candle below eye level when you are seated. Use flameless candles on a coffee table used by children or pets, and keep the group clear of magazines and fabric coasters. Choose a tray material that suits the room, such as wood for a rustic room or metal for a modern room.

    8. Staggered Group on a Bookshelf

    Three candlesticks at staggered heights on a bookshelf between books.

    Set three candlesticks at staggered heights on one bookshelf, between books, a small plant, and a framed photo. The staggered heights break up a long row of books, add warm light to a reading corner, and give the shelf a lived-in look without a large display. Use holders in one material, such as brass or black metal, so the group reads as one unit.

    Leave a clear gap above each candle, since shelf boards sit close overhead, and keep flames clear of book spines and paper. For most bookshelves, flameless tapers are the safer choice, since they give the same glow without heat near paper. Dust the shelf often, and move the group to a lower shelf if the top shelf sits close to the ceiling.

    9. Hearth Cluster Beside the Fireplace

    Cluster of pillar candlesticks on a stone hearth beside a fireplace.

    Set a cluster of candlesticks on the hearth beside the fireplace, with pillar candles of different heights in sturdy holders. The cluster adds glow to the fireplace area when the fire is not lit, and it suits a living room where the hearth is wide enough to hold a group safely. Use holders with wide bases, so they sit steady on stone or tile.

    Keep the cluster clear of the firebox opening, and never light candles on the hearth while a fire is burning, since heat and drafts can affect the flames. Use flameless pillar candles here for most of the year, so the hearth stays lit without added heat. Wipe stone or tile under the holders, since wax and soot collect near a fireplace.

    10. Row of Candlesticks Along a Window Ledge

    Row of candlesticks along a wide window ledge with cream taper candles.

    Set a row of candlesticks of the same material along a wide window ledge, with tapers in a single color, such as cream or white. The row catches evening light, frames the window, and adds height to a ledge that often stays empty. This idea suits a living room or dining room with a deep ledge and a view worth framing.

    Space the holders evenly, keep them clear of curtains and blinds, and check that each holder sits level on the ledge. Use flameless tapers on a ledge near curtains or in a room where candles will burn while you are in another room. Clean the ledge before setting the row out, since dust shows on a bare ledge, and keep the row short enough to leave room at the ends.

    11. Candlesticks on a Hallway Chest

    Two candlesticks on a hallway chest beside a small bowl.

    Set two or three candlesticks on a hallway chest or a narrow side table, with a small bowl, a stack of books, or a framed photo beside them. The group gives a hallway a warm focal point, and it suits a chest that otherwise holds only keys and mail. Use holders in a material that matches the chest hardware, such as brass with brass pulls or black metal with dark wood.

    Keep the group to one end of the chest, so the rest of the surface stays free for everyday items, and keep flames clear of coats, scarves, and paper mail. For a busy hallway, flameless candles give the same welcome glow without a flame near passing coats. Wipe the chest top often, since hallways collect dust near the front door.

    12. Candlesticks in Hurricanes on a Covered Porch

    Candlesticks inside hurricane glass holders on a covered porch table.

    Set candlesticks inside hurricane glass holders on a covered porch table or bench, with pillar candles inside. The glass shields the flame from wind, catches wax, and gives a porch a soft evening glow. This idea suits a covered porch or a sheltered patio, where the group stays dry and out of strong wind.

    Use sturdy holders with wide bases, since porch surfaces can be uneven, and keep the group clear of cushions, throws, and dried leaves. Use flameless candles on a porch used by children or in windy weather, and bring real candles inside when rain or strong wind is expected. Wipe the glass after outdoor use, since dust and pollen collect on porch surfaces.

    13. Autumn Tray with Wood Holders and Pumpkins

    Wood candlesticks on a wood tray with small pumpkins and pillar candles.

    Set wood candlesticks on a wood tray on a dining table or a sideboard, with small pumpkins, a few dried leaves, and pillar candles in the holders. The wood and autumn shapes give a warm seasonal note, and the tray keeps the group contained and easy to move. Use cream or rust pillars, so the group suits a fall palette without a large arrangement.

    Keep dried leaves and pumpkins clear of any real flame, and use flameless candles when dried material sits close to the holders. Set the tray in the center of a long table or at one end of a sideboard, leaving room for serving dishes. Shake the tray outside after the season, since dried leaves crumble and wood trays collect dust.

    14. Holiday Group with Red and Green Tapers

    Brass candlesticks with red and cream tapers and pine sprigs on a mantel.

    Set brass or gold candlesticks on a mantel or a dining table for the holidays, with red, green, or cream tapers in each, and a few pine sprigs at the base. The holiday colors give a clear seasonal note, and the brass suits both a mantel display and a holiday table. Keep the group low on a dining table, so guests can see across it.

    Keep pine sprigs clear of real flames, and use flameless tapers when greenery sits close to the holders. For a mantel group, vary the heights, with the tallest in the middle, and keep the group centered under the mirror or art above. Store holiday tapers flat after the season, so they do not bend in storage.

    15. Spring Pastel Tapers with Fresh Flowers

    White candlesticks with pastel tapers and a small vase of fresh flowers.

    Set white or glass candlesticks on a dining table or a sideboard in spring, with pastel tapers in soft pink, pale yellow, or light green, and a small vase of fresh flowers beside them. The pastel candles and fresh flowers give a light spring note, and the group suits a bright room with pale walls. Keep the flowers in a separate vase, so water stays clear of the candle holders.

    Trim flower stems often, change the water, and keep fresh flowers clear of flames. Use tapers in one pastel color for a calm table, or mix two pastels for a livelier group, and repeat one pastel in napkins or a runner. For a spring gathering, set the group on a tray, so it lifts off in one move when serving starts.

    16. Black Metal Candlesticks in a Modern Room

    Black metal candlesticks of different heights with white tapers on a console.

    Set black metal candlesticks of different heights on a console, a sideboard, or a mantel in a modern room, with white or cream tapers in each. The black metal gives a clean, simple note that suits plain walls, pale wood, and minimal furniture, and the white tapers keep the group bright. Use three holders, with the tallest in the middle, for a balanced group.

    Keep the rest of the surface simple, such as one bowl or one framed print, so the black holders stand out clearly. Check that the holders sit level on smooth surfaces, and use felt pads under metal bases to guard against marks. For a modern room with children or pets, flameless white tapers give the same clean look without a flame.

    17. Crystal and Glass Holders on a Sideboard

    Crystal candlesticks with white tapers on a sideboard in a bright dining room.

    Set crystal or clear glass candlesticks on a sideboard or a dining room buffet, with white tapers in each, and a small bowl or a framed photo beside them. The glass catches light from windows and lamps, and it suits a bright dining room or a formal sideboard. Use holders of two heights, so the group has shape without blocking a mirror above.

    Wipe glass holders before a gathering, since fingerprints show more on clear glass than on metal or wood, and check that tapers fit snugly in glass cups. Keep the group clear of serving dishes, so the sideboard still works for meals, and use flameless tapers if the sideboard sits near curtains. Store glass holders where they will not chip, such as wrapped in cloth in a sturdy box.

    18. Rustic Wood Candlesticks on a Farmhouse Table

    Chunky wood candlesticks with cream pillar candles on a farmhouse dining table.

    Set chunky wood candlesticks on a farmhouse dining table or a kitchen table, with cream pillar candles in each, and a simple linen runner under the group. The wood suits a rustic room, pairs well with cream napkins and plain plates, and gives a long table a warm, sturdy centerpiece. Use two or three holders, with the tallest in the middle.

    Choose holders with flat, sanded bases, so they sit level on a wood table, and wipe them clean after meals, since wood can mark if left damp. Keep the group low enough to see across the table, and set it on a runner or a tray to catch wax. For everyday farmhouse meals, use flameless pillars in the same wood holders for the same warm look.

    19. Painted Candlesticks as a Small Space Accent

    Painted sage candlesticks on a small shelf beside a small plant.

    Paint plain wood candlesticks in a color that matches your room, such as cream, sage, or soft blue, and set one or two on a small shelf, a stool, or a narrow windowsill. The painted finish gives old or plain holders a fresh look, and a single painted holder suits a small space where a large group would crowd the surface. Use tapers in a matching or neutral color, so the painted holder stays the focus.

    Sand and prime the holders before painting, let each coat dry fully, and seal the finish if the holders will sit near a window or a bathroom. Keep the painted group small, with one or two holders, and pair it with a small plant or a book, rather than a large display. For a rented home, painted holders are an easy change, since they cost little and move with you.

    Conclusion

    Candlesticks work in almost every room when you keep the group simple, vary the heights, and match the holder material to the room. Start with one surface, such as a mantel, a dining table, or a nightstand, and build a group of three holders in one material. Keep flames clear of curtains, greenery, and paper, and switch to flameless candles where a real flame would sit too close to fabric or dried material. With those basics in place, you can repeat the same idea in other rooms, changing only the holder material, the candle color, or the season, and each room will still feel balanced and calm.

    Frequently Asked Questions

    How many candlesticks should I group together?

    Group candlesticks in odd numbers, such as one, three, or five, since odd groups look more balanced than even groups on most surfaces. Use three as a starting point for a mantel, a dining table, or a coffee table tray, and vary the heights, so each candle shows clearly.

    What is the safest way to use candlesticks at home?

    The safest way is to set holders on a level, stable surface, keep flames clear of curtains, greenery, paper, and fabric, and never leave a lit candle burning unattended. Use flameless candles near children, pets, dried material, or curtains, and trim wicks before lighting real candles, so flames stay steady and short.

    What candle size fits a standard candlestick holder?

    Most standard candlestick holders take a taper candle with a base close to seven eighths of an inch wide, but holder sizes vary, so measure the cup before buying candles. If a taper wobbles, wrap the base with a small strip of foil or use a holder adapter, so the candle sits snug and upright.

    How do I stop candlesticks from looking cluttered?

    Keep one main candlestick group per surface, use holders in one material, and leave empty space around the group, so it reads as one display. Remove extra small items from that surface, keep the candle colors to one or two, and vary only the heights, rather than mixing many materials and colors at once.

    Can I use candlesticks outdoors?

    You can use candlesticks outdoors on a covered porch or a sheltered patio, inside hurricane glass holders that shield the flame from wind. Use sturdy holders with wide bases, keep the group clear of cushions and dried leaves, and bring real candles inside in rain or strong wind, or use flameless candles instead.

    How do I clean wax from candlesticks?

    To clean wax from candlesticks, let the wax harden fully, then lift it off gently with a soft cloth or a plastic scraper, and wipe the holder with warm, soapy water. For brass holders, dry them at once after washing, so water spots do not form, and for wood holders, wipe them dry rather than soaking them.


  • 23 Affordable Centerpiece Ideas for a Beautiful Table on a Budget

    23 Affordable Centerpiece Ideas for a Beautiful Table on a Budget

    Affordable centerpieces work best when you start with pieces you already own, such as jars, trays, candles, and plain vases, then add one low-cost natural layer like greenery, fruit, or single stems. Keep the group low, narrow, and easy to lift off, so guests can talk across the table and serving dishes still fit.

    Start with the table you already set: everyday plates, clear glasses, and a plain cloth or runner. Then add one centerpiece group, not three, and test the full setting before guests arrive. Leave room for serving dishes, keep flames in holders and clear of paper and fabric, and use battery candles near children, paper, or dried material. Many of these ideas use items from the kitchen, the garden, or a drawer, so the table can change for the next meal without a new purchase.

    Key Takeaways

    • Keep the centerpiece low and narrow, so guests can see each other and serving dishes still fit.
    • Start with what you own: jars, trays, boards, candles, and plain vases carry most of these ideas.
    • Use one main centerpiece group per table, and repeat one small palette at least twice for a finished look.
    • Choose one low-cost natural layer, such as greenery, fruit, single stems, or stones, rather than several competing layers.
    • Keep flames in holders, clear of paper, fabric, and dried material, and use battery candles near children or paper.
    • Pick ideas that lift off in one move, so clearing the table stays quick after the meal.

    1. Mason Jar Candles on a Wood Board

    Mason jars with short candles and stones in the bottom set on a long wood board down the center of a dining table.

    Set three mason jars on a long wood board down the center of the table, each holding a short candle in a holder or a battery candle, with a few stones in the bottom of each jar to weight it. The board keeps the group contained as one centerpiece, and it lifts off in one move when the table needs to clear. This idea suits everyday dinners as well as larger gatherings, because the jars and board are plain and easy to reuse.

    Use jars of the same size for a matched look, or mix two sizes with the tallest jar in the middle. Wipe the glass before the meal, since fingerprints show more on clear glass in candlelight. For a table with children, use battery candles only, and keep real flames in proper holders on a stable surface, never left burning unattended.

    2. Single Stem Bud Vases in a Row

    Small bud vases each holding one short flower stem in a row down the center of a dining table.

    Set four or five small bud vases in a row down the center of the table, each holding one short stem, such as a rose, a carnation, or a sprig of greenery. One stem per vase keeps the flower cost low, while the row still reads as a full centerpiece. This idea suits a small table, a dinner for two, or a long table where a row can run the full length.

    Use vases of the same shape for a matched row, or mix clear glass shapes in one height range. Trim each stem so the flower sits just above the vase rim, and change the water before guests arrive. If one stem wilts, swap that single stem rather than rebuilding the whole row.

    3. Citrus Bowl for Everyday Meals

    Wide shallow bowl filled with lemons, limes, and oranges with green leaves as a centerpiece on a dining table.

    Fill a wide, shallow bowl with lemons, limes, and a few oranges, and set it in the center of the table as a centerpiece you can also cook with later. The fruit gives clear color and shape, and the bowl takes up only one spot, leaving the rest of the table free for plates and serving dishes. Add a few green leaves between the fruit to break up the round shapes.

    Check the fruit before the meal and move any soft piece to the kitchen, since one spoiling lemon can mark the rest. Keep the bowl low and wide rather than tall, so it does not block sightlines. At the end of the meal, the bowl can move to the counter, which makes clearing the table a single step.

    4. Potted Herb Row You Can Cook With

    Small terracotta pots of basil, mint, rosemary, and thyme grouped down the center of a dining table.

    Group three or four small pots of basil, mint, rosemary, and thyme down the center of the table, so the centerpiece smells good, looks green, and can be snipped for cooking. Herb pots last far longer than cut flowers in a warm room, and they move back to a windowsill or garden bed after the meal. Use pots in one material, such as terracotta or white ceramic, so the group reads as one display.

    Water the herbs before the meal and set each pot on a small saucer, so the table stays dry. Keep pots small enough to see over, and trim tall stems before guests arrive. Keep mint in its own pot, since mint can crowd out other herbs in a shared planter.

    5. Floating Candles in a Wide Bowl

    Wide shallow glass bowl of water with floating candles and scattered petals on a round dining table.

    Fill a wide, shallow glass bowl with water, float two or three small floating candles on the surface, and scatter a few fresh petals or leaves around them. The water reflects the candlelight, and the bowl stays low, so this centerpiece suits a round table or a dinner for two. It needs no flowers at all, which keeps the cost down for an evening meal.

    Set the bowl on a tray or mat, since water can splash when the bowl is moved, and fill it only three quarters full to leave room for the candles. Use floating candles made for water, not ordinary tea lights, and keep petals clear of the flames. At the end of the evening, lift the candles out first, then carry the bowl to the sink.

    6. Garden Greenery Runner

    Low runner of garden greenery with short candles in heavy holders down the center of a long dining table.

    Lay a low runner of greenery down the center of the table, using clippings from the garden, such as eucalyptus, olive branches, or plain green leaves, then set short candles in heavy holders along it at uneven intervals. The greenery gives color along the whole table without height, and the heavy holders stay put. This idea suits a long table, where one long centerpiece reads better than several small groups.

    Trim the runner so it stays inside the table edges and does not brush plates or glasses. Keep real flames clear of the leaves, and use battery candles if the runner will sit near fabric or dry material. Shake the branches outside before laying them out, and remove any shedding leaves before the meal.

    7. Painted Tin Cans with Garden Flowers

    Painted tin cans in white filled with short garden flowers set down the center of a casual dining table.

    Clean three tin cans, paint them in one color such as white, sage, or terracotta, and fill each with short stems of garden flowers, then set the cans down the center of the table. This idea costs little, reuses cans you already own, and suits a casual family meal or a backyard lunch brought indoors. Use cans of the same size for a matched group, and smooth any sharp rim before use.

    Add a few stones to the bottom of each can to weight it, and trim stems so the flowers sit just above the rim. Change the water if the flowers will stay out for more than a day, and remove any stem that wilts. For a table that needs to clear fast, set the cans on a tray, so the group lifts off in one move.

    8. Paper Bag Luminaries with Battery Candles

    Plain paper bags folded down with battery candles glowing inside set down the center of a dining table in the evening.

    Fold down the top of three plain paper bags, set a battery candle inside each one, and place the bags down the center of the table for a soft evening glow. The bags cost little, store flat, and suit a casual evening meal, because the light through the paper looks warm without a large arrangement. Use plain bags in one size, and keep the folded edge even across all three.

    Use battery candles only in paper bags, never a real flame, and keep the bags clear of the stove, heaters, and serving dishes that give off heat. Switch the candles on before guests sit down, and keep spare batteries nearby if the gathering will run late. For a daytime meal, leave the lights off and let the plain bags and a few leaves beside them carry the look.

    9. Stacked Books with a Candle and a Small Plant

    Stack of books topped with a small potted plant and a short candle in a holder on a small dining table.

    Stack two or three books on the table, top the stack with a small potted plant or a short candle in a holder, and set the stack in the center of a small table or at one end of a long table. The books add height without a tall vase, and the stack uses items already on a shelf. This idea suits a reading room table, a small dining table, or a side table set for two.

    Leave at least half the table surface clear for plates and glasses, and choose books with plain covers in colors that match the table. Set a small plate or coaster under the candle holder, so wax or water does not mark the top book. Rotate the books by color when the season changes, and keep the plant small enough to see over.

    10. Fruit and Candle Tray

    Tray with apples and lemons on one side and short candles in holders on the other side down the center of a dining table.

    Set a tray down the center of the table, fill one side with apples, pears, or lemons, and place two or three short candles in holders on the other side of the tray. The tray keeps the group contained, the fruit gives color, and the candles give evening light, all in one low group. This idea suits autumn and winter tables, when fruit bowls already sit in the kitchen.

    Use a tray with a raised edge, so fruit does not roll when plates are set down. Keep candles in holders, clear of the fruit stems and any paper, and use battery candles near children. Check the fruit before the meal, and move any soft piece to the kitchen. At the end of the meal, the tray lifts off in one move, and the fruit goes back to the kitchen.

    11. Painted Glass Bottles as Candle Holders

    Painted glass bottles used as candle holders with taper candles down the center of a rustic dining table.

    Clean three glass bottles, paint them in one color or leave them clear, and use them as candle holders with taper candles fitted snugly, or set short candles beside them on a tray. Bottles you already own give height and color without buying new vases, and the group stays narrow enough to see across. This idea suits a rustic table, a casual dinner, or a gathering where matching vases would cost more than the meal allows.

    Check that each bottle sits level and that tapers fit snugly, so candles do not lean or drip onto the table. Use a tray under the bottles if wax drips are a concern, and trim wicks before lighting. For a table with children, use flameless tapers in the same bottles for the same shape without a flame.

    12. Terracotta Pots with Seasonal Flowers

    Terracotta pots of seasonal flowers grouped down the center of a dining table.

    Group three terracotta pots of seasonal flowers down the center of the table, so the centerpiece brings real garden color at a low cost. Terracotta suits white, cream, and wood tables, and the pots can move back outside or to a windowsill after the meal, where the plants keep growing. Use pots in one size for a matched group, or one larger pot with two smaller ones.

    Water the plants before the meal and set each pot on a saucer, so the table stays dry and soil does not mark the cloth. Trim spent blooms before guests arrive, and keep pots clear of elbows and serving dishes. If blooms drop petals, shake the pots outside before bringing them in, and sweep the table after the meal.

    13. Pebble and Candle Bowl

    Wide shallow bowl of smooth pebbles with short candles in glass holders on a dining table.

    Fill a wide, shallow bowl with smooth pebbles or river stones, and set two or three short candles in glass holders among the stones, so the centerpiece stays heavy, low, and steady. The stones weight the bowl, and the candles give evening light without a tall arrangement that could topple. This idea suits a neutral table, where natural shapes and candlelight carry the look.

    Use stones large enough to stay put, and keep candles in holders, clear of any fabric or paper. Wipe stones clean before setting them out, since dust shows on smooth stone in daylight. For a table with young children, use battery candles in the same holders for the same look without a flame.

    14. Scrap Fabric Runner Down the Center

    Plain linen fabric runner down the center of a dining table with a low jar centerpiece on top.

    Lay a length of fabric you already own down the center of the table, such as a plain linen cloth, a cotton scarf, or a remnant in one calm color, and set one low group on top, such as jars, a bowl, or a small plant. The fabric gives the table a finished base without buying a new runner, and it washes easily after the meal. This idea suits tables where the cloth or runner carries most of the color.

    Lay the fabric so it hangs evenly at both ends or sits flat inside the table edges, then center the group on it. Keep the fabric flat under plates if it runs wide, or keep it narrow so plates sit on the bare table. Iron or smooth the fabric before a gathering, since creases show more on a plain length than under a patterned cloth.

    15. Pinecones and Candles on a Plain Runner

    Plain runner with a light scatter of pinecones and short candles in glass holders on a dining table.

    Scatter a small number of pinecones along a plain runner, then set two or three short candles in glass holders among them, so the table gains a woodland note without a large arrangement. This idea suits a neutral table in autumn and winter, where the natural shapes and candlelight carry the season. It costs little if pinecones come from the garden, and the runner keeps the group tidy.

    Use pinecones sparingly, about a handful along a long table, and keep them clear of plates and food. Clean gathered pinecones fully and check them for insects before bringing them inside, and keep them clear of real flames. If small pieces worry you with young children at the table, use larger pinecones only.

    16. Sand and Shell Tray for a Coastal Table

    Shallow tray with sand, shells, driftwood, and a short candle in a glass holder on a dining table.

    Fill a shallow tray with a thin layer of sand, add two or three shells, a small piece of driftwood, and one short candle in a glass holder, for a coastal note that suits a bright dining room or a summer table. The tray keeps the sand contained, and the small group leaves plenty of room for plates and drinks. Keep shell accents to a small number, so the table still looks tidy.

    Wash and dry shells and driftwood before setting them out, and check driftwood for rough edges that could snag a cloth. Use shells large enough to see but small enough to leave room for serving dishes. For everyday meals, use the tray with sand and one shell alone, so clearing the table stays quick.

    17. Teacups with Single Blooms

    Small teacups each holding one short flower stem in a row down the center of a dining table.

    Set three or four small teacups down the center of the table, each holding one short flower stem in water, with a small candle in a holder between every second cup. This idea suits a small table or an afternoon tea style meal, because each cup is a small focal point rather than one large arrangement. Teacups from a cupboard cost nothing extra, and single stems keep flower costs low.

    Use teacups of the same pattern for a matched row, or mix patterns in the same color family for a collected look. Keep each stem trimmed so the flower sits just above the cup rim, and top up the water before guests arrive, since teacups hold little. For a longer table, add more cups, but keep the spacing even so the row reads as one centerpiece.

    18. Lantern with Fairy Lights

    Lantern with battery fairy lights inside and scattered leaves around its base on a dining table.

    Set one or two lanterns in the center of the table, with battery fairy lights coiled inside, and scatter a small number of leaves or petals around their bases. The lanterns give a warm, steady glow, and they lift off the table in one move when serving needs the full surface. This idea suits evening meals, because the light carries the table without flowers or a large arrangement.

    Choose lanterns short enough to see over when guests are seated, and use battery lights only inside closed or narrow lanterns. Keep leaves and petals clear of any real flame, and set the lanterns on a tray or runner to protect the table and keep petals contained. For a daytime meal, leave the lights off and let the lantern shape carry the look.

    19. Bare Branches in a Tall Vase

    Bare branches standing in a heavy vase as a centerpiece on a dining table.

    Stand a few bare branches in a heavy vase, trimmed so they clear light fixtures and stay narrow, not wide, and set the vase in the center of the table or at one end of a long table. Branches from the garden cost nothing, give height without blocking conversation, since guests can see between slim branches, and suit a plain table in any season. Add a ribbon tied at the vase neck if you want one small color note.

    Choose a heavy vase that will not tip, and trim branches so they do not brush serving dishes passing down the table. Shake the branches outside before bringing them in, and remove any loose bark before the meal. For a softer look, add two or three short stems of greenery at the base, but keep the total group narrow.

    20. Tiered Stand with Fruit and Candles

    Two tier stand with small fruit, candles in holders, and leaves at the end of a dining table.

    Set a two tier stand at one end of the table or on a sideboard, and fill it with small fruit, candles in holders, and a few leaves, so the table gains height without blocking the center. A tiered stand also works for serving, with small bites on the tiers at a buffet style meal, but keep the decor version separate from food if the stand will hold both uses at different times.

    Keep the stand stable and clear of the main serving path, and put heavier items on the bottom tier. If the stand will hold food, use it for food only, and set the decor version on a separate stand or tray. Wipe the tiers after use, since candle wax and leaf dust collect in the rims.

    21. Mirrored Tray with Candles and Petals

    Pillar candles of different heights on a mirrored tray with scattered petals on a dining table.

    Set three pillar candles of different heights on a round or rectangular mirrored tray, then scatter a small number of fresh petals around their bases. The mirror reflects the candlelight, so the centerpiece glows without a large flower arrangement, and the tray lifts off in one move when the table needs to clear. This idea suits an evening meal, a dinner for two, or a small gathering table.

    Use candles in glass holders or on heat-safe plates, and keep petals clear of the flames. Choose unscented candles if food will be served close by, since strong scent can compete with the meal. For a table with children, use flameless pillar candles in the same tray for the same glow without a flame.

    22. Woven Basket with Gourds and Leaves

    Low woven basket filled with small gourds, leaves, and a short candle in a holder on a dining table.

    Set a low woven basket in the center of the table, fill it with small gourds, a few leaves, and one short candle in a holder at one side, for a seasonal centerpiece that costs little and moves off the table in one piece. The basket keeps the group contained, and the gourds give clear seasonal color without a flower arrangement. This idea suits autumn tables, harvest meals, and everyday dinners in the cooler months.

    Line the basket with a cloth if the weave is rough, so it does not snag the tablecloth. Keep the candle in a holder, clear of the leaves and the basket edge, and use a battery candle if the basket is dry or near fabric. Move the basket to a sideboard after the meal, and the table clears in a single step.

    23. Cake Stand with Candles and Greenery

    Cake stand with short candles in holders and short greenery sprigs around their bases on a dining table.

    Set a cake stand in the center of the table, place a few short candles in holders on the plate, and tuck short sprigs of greenery around their bases, so a serving piece you already own becomes the centerpiece. The raised plate gives the group a clear shape without height that blocks sightlines, and the greenery softens the edges. This idea suits a small table, a dessert table, or a dinner where a low, neat group works best.

    Keep the stand stable, center it so plates still fit on both sides, and set it on a mat if the base could mark the table. Keep greenery clear of real flames, and use battery candles if the sprigs sit close to the holders. After the meal, the stand goes back to the kitchen, and the greenery can be composted.

    Conclusion

    Affordable centerpieces do not need a large arrangement or new dishes. One low group, a small palette repeated at least twice, and pieces you already own will carry most tables, from a weeknight dinner to a larger gathering. Pick the ideas that fit your table size, your season, and your daily routine, and keep serving space in mind first. For more table ideas in another season, see fall table decor ideas, and for centerpieces made for one occasion, see Valentine centerpieces. Save this list for your next meal, and work through it one idea at a time.

    FAQs

    What is the cheapest way to make a table centerpiece?

    Start with pieces you already own, such as jars, a tray, a board, or a plain vase, then add one low-cost natural layer like garden greenery, fruit from the kitchen, or single stems. That combination gives a finished centerpiece without buying a full new set, and most of the pieces can be reused for the next meal.

    How do I keep a budget centerpiece looking finished rather than plain?

    Use one main group, not several small groups, and repeat one small palette at least twice, such as white and green, or cream and wood. Keep the group low and narrow, wipe glass and trays before the meal, and leave empty space at each place, since a tidy table reads as planned even when the pieces are simple.

    What height should an affordable centerpiece be?

    Keep the centerpiece below eye level when guests are seated, so people can talk across the table without leaning around it. A low group of jars, a shallow bowl, or a short tray works best, with the tallest piece in the middle and shorter pieces at the sides. If a centerpiece blocks sightlines, move it to the table ends or swap it for a lower group.

    Can I use real candles in a budget centerpiece?

    Yes, but keep real candles in glass holders on a stable surface, clear of paper, fabric, dried leaves, and greenery, and never leave them burning unattended. Use battery candles inside paper bags, near children, or near dried material, and use a tray under candle groups so wax does not mark the table. Put candles out fully at the end of the meal.

    How do I make a centerpiece for a small table on a budget?

    Choose one vase, one bowl, or one lantern, and let the rest of the table stay plain. A single stem in a teacup, a small bowl of citrus, or one lantern with battery lights gives a small table a focal point without crowding plates and glasses. Keep the piece low, center it, and leave room for serving dishes at the table ends.

    How do I store budget centerpieces after a meal?

    Wash jars, vases, trays, and pots, dry them fully, and store them together in one box, so next setup is a single short job. Move live herb and flower pots to a windowsill or outside, compost spent flowers and leaves, return fruit to the kitchen, and store candles with their lids on. Keeping the set together makes the next meal easier to lay out.