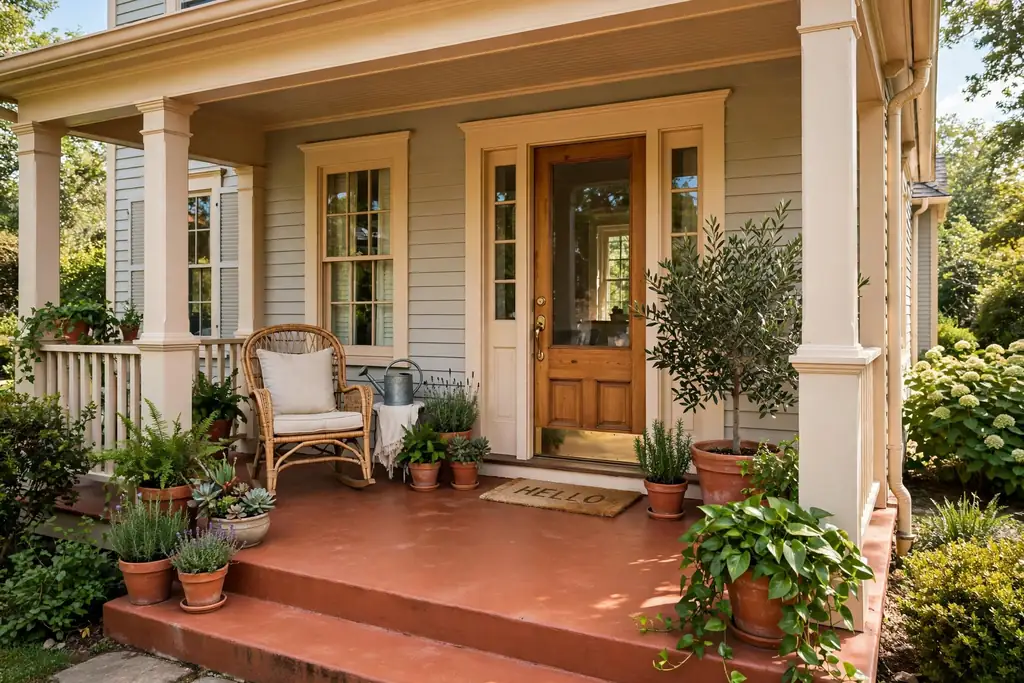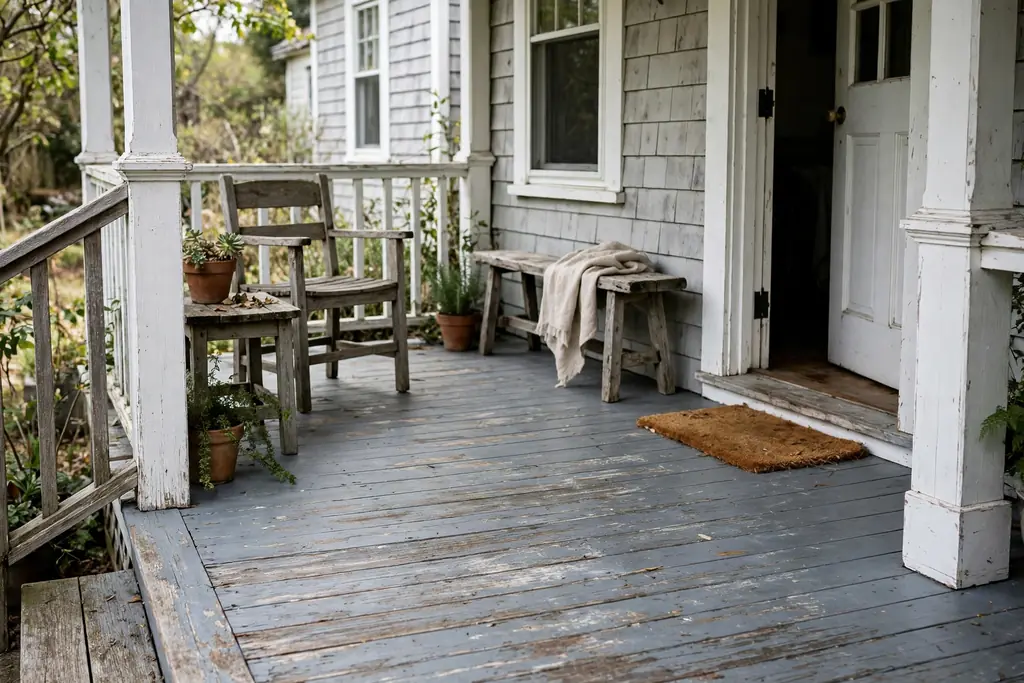
Author: Clara Bennett

  • 19 Elegant Table Setting Ideas Using Simple Details

    19 Elegant Table Setting Ideas Using Simple Details

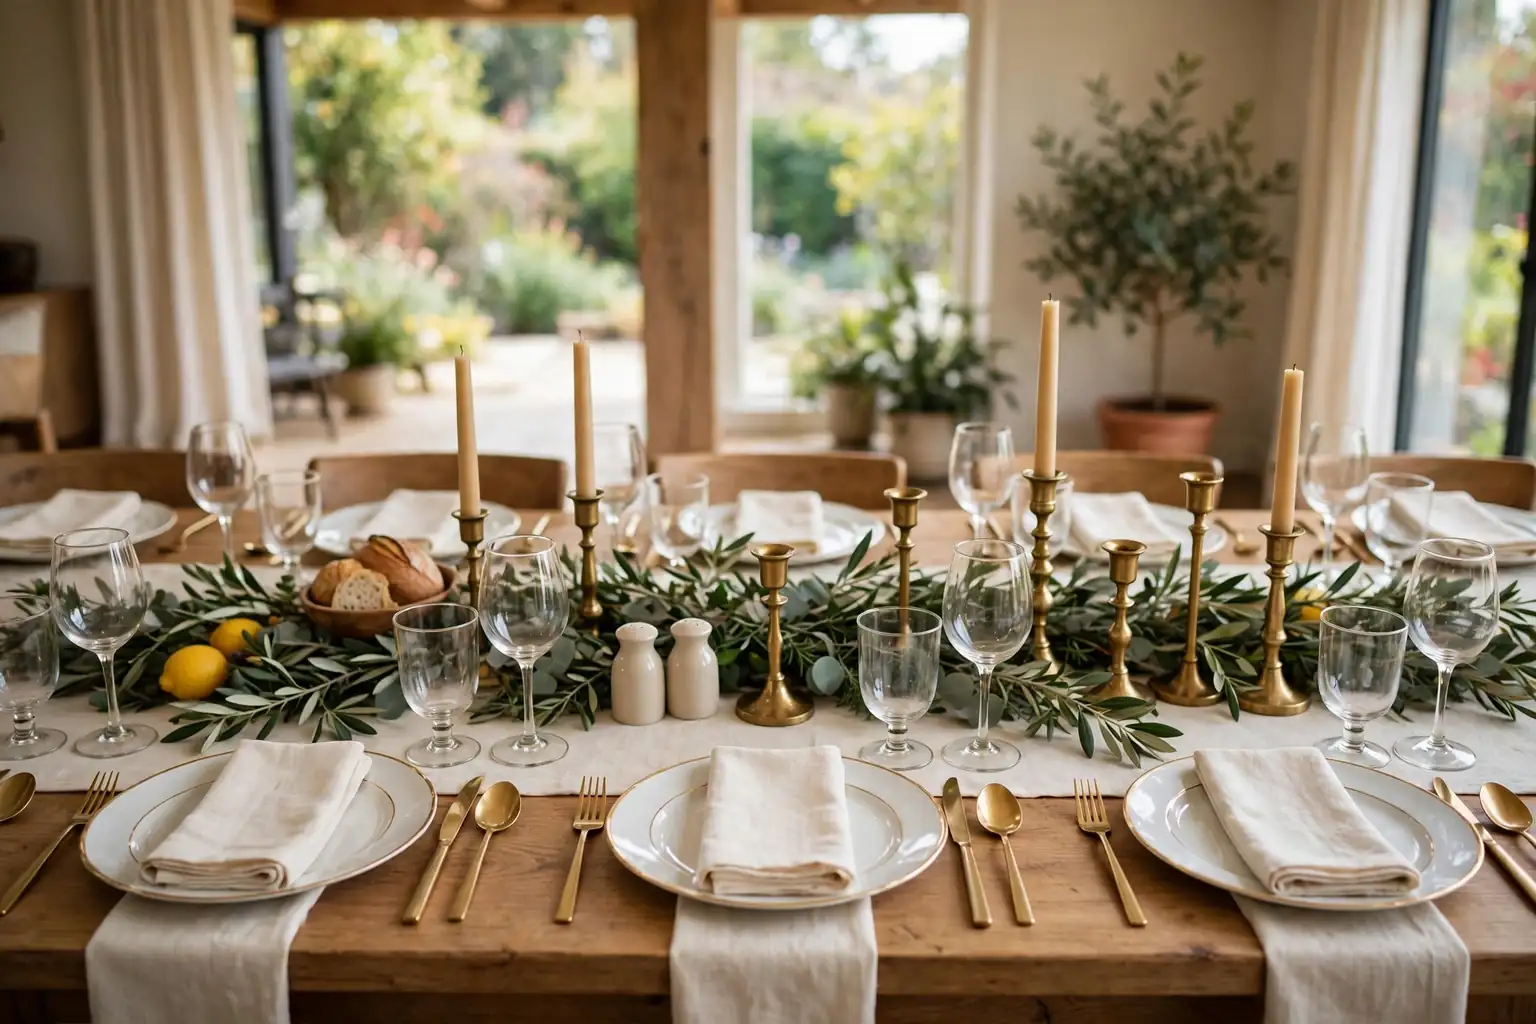
    An elegant table setting uses one calm palette, plain plates, matching cutlery, a folded linen napkin, and one low centerpiece, so the table looks refined without extra decor. Start with pieces you already own, repeat one accent at each place, keep the centerpiece below eye level, and leave room for serving dishes and conversation.

    Start with the base you already own, such as white plates, plain glasses, and linen or cotton napkins, then add one simple layer at a time. Keep the centerpiece low and narrow, set one clear accent at each place, and repeat the same accent at every seat, so the table reads as calm and planned. For a warmer seasonal version of these settings, see the fall table decor guide, and for a holiday version, browse the Christmas table setting ideas.

    Key Takeaways

    • Pick one calm palette first, then repeat it in napkins, candles, and one centerpiece accent.
    • Keep the centerpiece low and narrow, so guests can see across the table and serving dishes still fit.
    • Start with plates, glasses, and napkins you already own, then add one or two refined layers.
    • Set one clear accent at each place, such as a fold, a sprig, a ribbon, or a place card, and keep the rest simple.
    • Use candlelight with care: keep flames clear of fabric, paper, and greenery, and use flameless candles near children or dried material.
    • Leave empty space at each place for elbows, glasses, and serving dishes, and test the full setting before guests arrive.

    1. Gold Rimmed White Plates
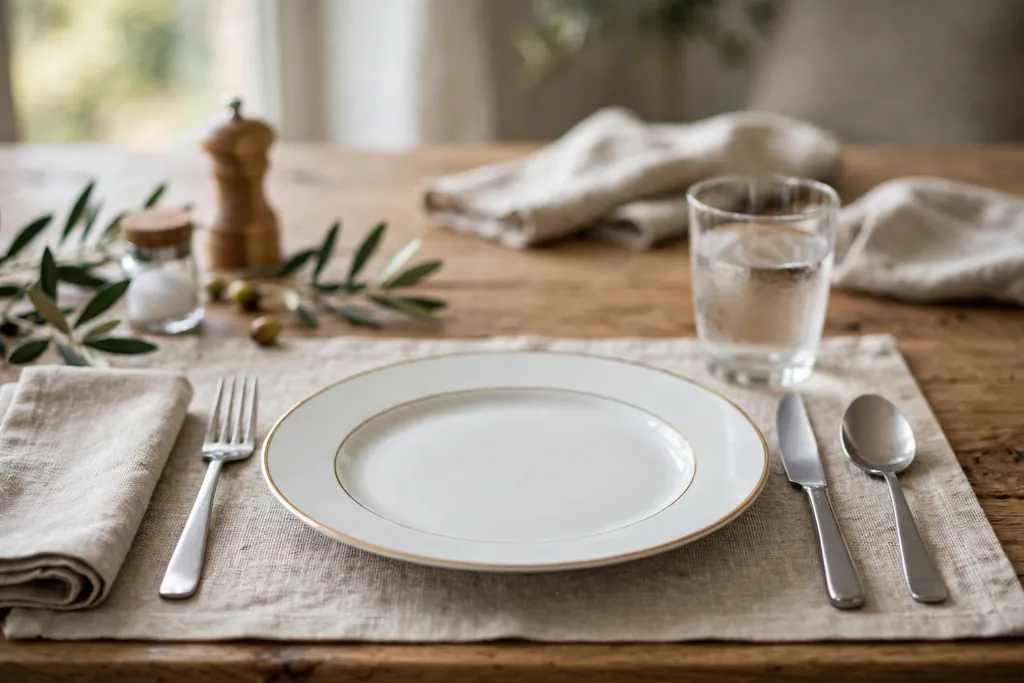
    Place setting with white plates with thin gold rims, plain cutlery, and a clear glass.

    Set white plates with a thin gold rim at each place, with plain cutlery and a clear glass, and keep the rest of the table plain. The gold rim gives a classic, refined note at once, and it works with a cream runner, a bare wood table, or a white tablecloth. Keep gold to the plate rim and one other small piece, such as a candle holder, so the table stays calm rather than busy.

    Polish the rims before the meal, since fingerprints show more on metal trim than on plain ceramic. Pair gold rimmed plates with cream or ivory napkins, and avoid a second strong pattern on the runner or placemat. If gold rimmed plates feel too formal for everyday meals, use them only for a dinner with guests and keep everyday settings plain.

    2. Simple Linen Napkin Fold
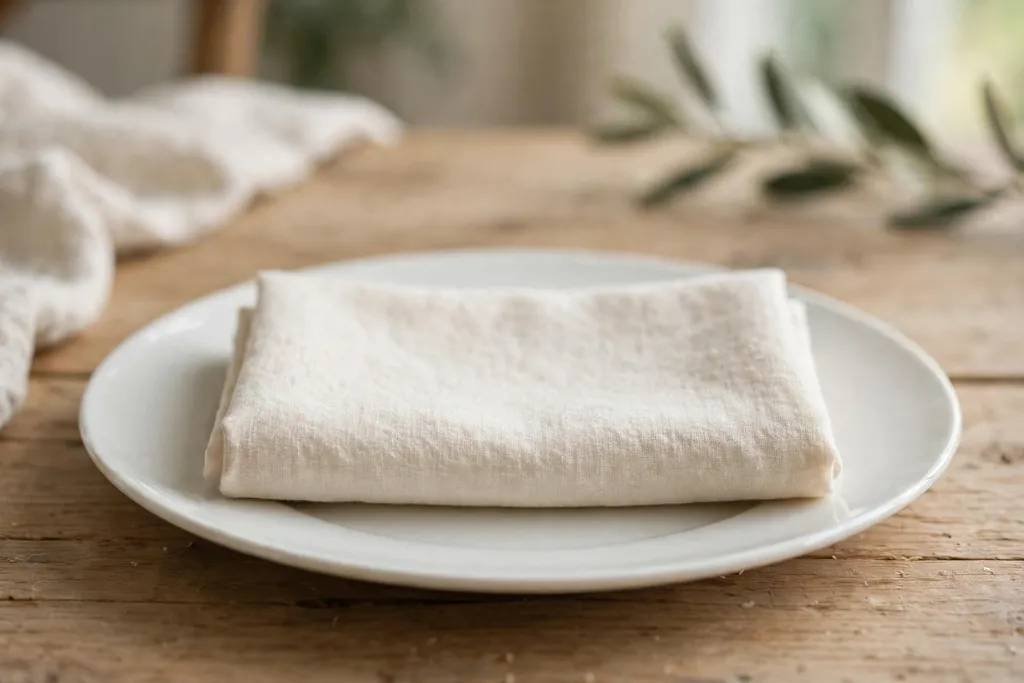
    Cream linen napkin folded in a simple rectangle on a white plate.

    Fold each linen napkin in a simple rectangle, lay it on the plate or to the left of the fork, and keep the same fold at every place. The plain fold looks neat and refined, and it suits a formal dinner as well as a quiet weeknight meal, since it adds no bulk and no extra pieces. Iron linen napkins before folding, so the edges sit flat and the fold holds its shape.

    Choose napkins in cream, ivory, or soft white for the calmest look, and keep cutlery and glasses plain, so the napkin texture carries the detail. For everyday meals, use cotton napkins in the same fold and skip ironing. If a napkin still creases, fold it once more into a narrow rectangle and lay it under the fork, where the fold stays hidden until the meal starts.

    3. Single Herb Sprig on the Napkin

    Folded napkin with a single short rosemary sprig laid across it beside a plate.

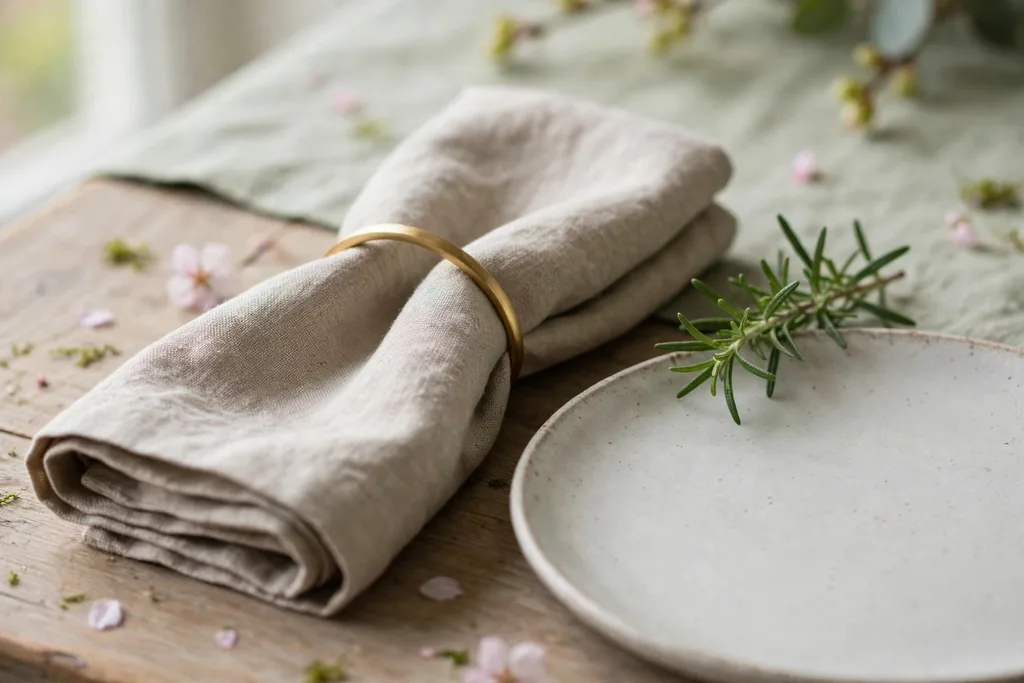
    Lay one short herb sprig, such as rosemary, thyme, or bay, across each folded napkin, with the stem pointing toward the plate edge. The single sprig adds scent and a fresh green note with no vase and no extra cost, and it suits a dinner with guests as well as a family meal. Keep the sprig short, so it does not brush the plate or fall into food.

    Use the same herb at every place, so the table looks matched, and trim stems to the same length before setting them out. For a gathering, add a small place card under the sprig, so the napkin doubles as a place marker. Remove the sprig before washing napkins, and use fresh herbs from the kitchen or garden where you have them.

    4. Brass Taper Candles in a Row
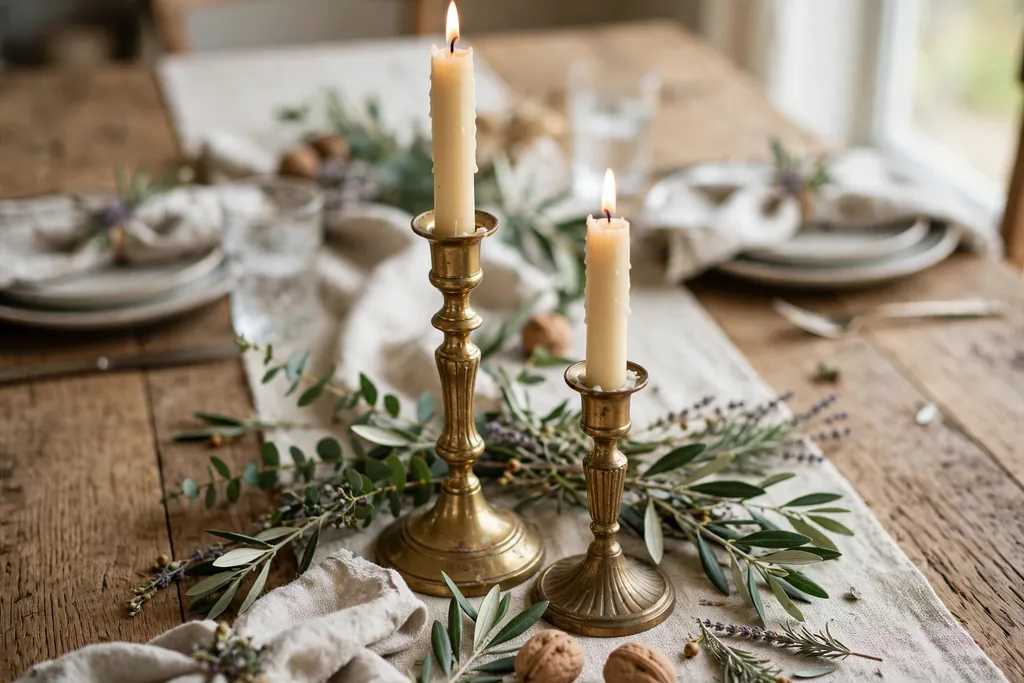
    Dining table center with brass candlesticks of two heights holding cream taper candles.

    Set brass candlesticks of two heights down the center of the table, with cream taper candles in each, and keep the rest of the centerpiece simple, such as a plain runner or a few short sprigs at the base. Brass adds a warm metal note that suits both everyday dinners and larger gatherings, and it works with cream, white, green, and gold palettes.

    Check that candlesticks sit level and that tapers fit snugly, so candles do not lean or drip onto the table. Use a tray or small plates under the candlesticks if wax drips are a concern, and trim wicks before lighting. For a table with children, use flameless tapers in the same brass holders for the same look without a flame.

    5. Clear Stemware and Plain Glasses

    Place setting with clear water and wine glasses above the knife beside a white plate.

    Set one clear water glass and, where the meal calls for it, one clear wine glass at each place, above the knife and in a straight line. Clear glass keeps the table light and open, and it lets the plates, napkins, and centerpiece carry the color, rather than competing with patterned glass. Use the same glass shape at every place, so the table reads as matched.

    Polish glasses before the meal, since water spots show more on clear glass than on colored glass. Keep glasses short enough to see over when guests are seated, and set them above the knife, so they do not crowd the plate. For everyday meals, use one glass per place and skip the second glass, so the table stays simple and easy to clear.

    6. Slim Metal Chargers Under Plates

    White dinner plate centered on a slim gold charger with plain cutlery.

    Set one slim metal charger, in gold or silver, under each dinner plate, with the plate centered on top and cutlery in its usual spots. The charger adds a thin, refined frame around each plate, and it suits a dinner with guests without a new dinner set. Keep the charger color to one metal only, and repeat that metal in one other piece, such as cutlery or a candle holder.

    Choose chargers with a flat top, so plates sit level and glasses do not wobble. Wipe chargers clean after meals and store them flat, since thin metal can bend if stacked carelessly. If chargers vary in size, put the largest ones at the ends of the table, where the difference looks planned rather than uneven.

    7. Handwritten Place Cards
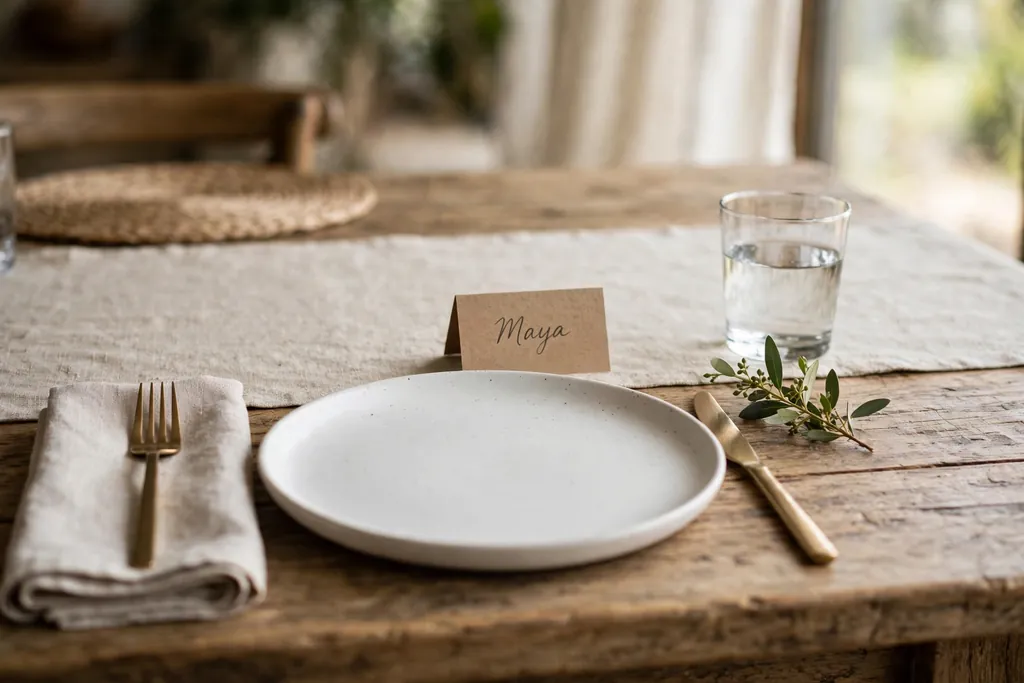
    Place setting with a small handwritten place card and a short green sprig beside the plate.

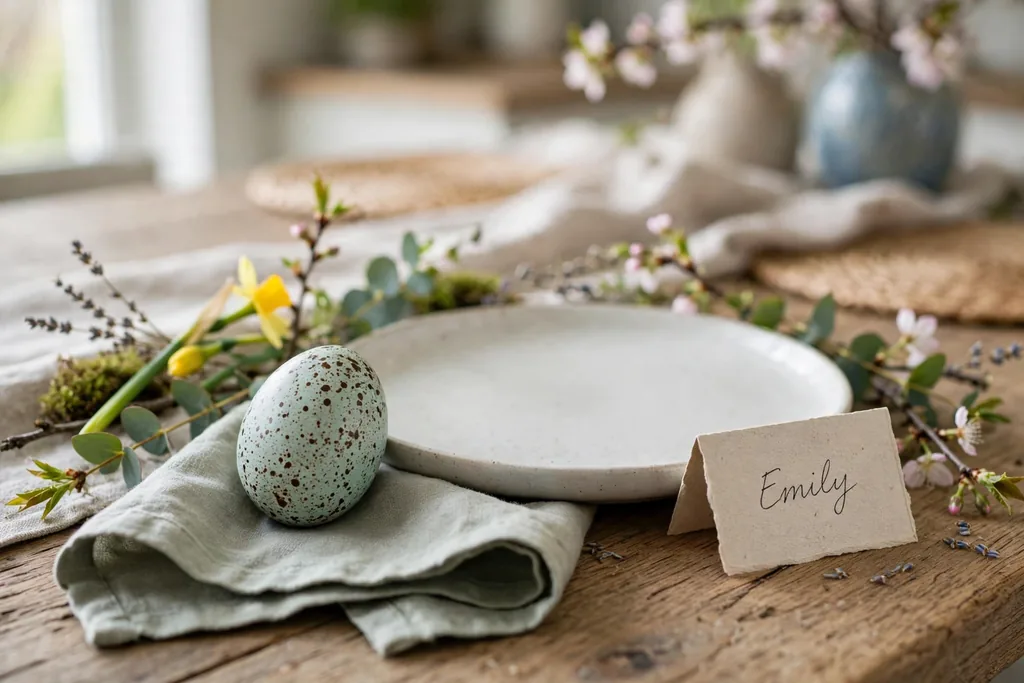
    Set one small place card at each place, with the guest name written in clear, large lettering, and lay a short sprig beside the card or tucked under a napkin fold. Place cards mark each seat, help guests settle in, and double as a small keepsake, and they work for a family dinner as well as a larger gathering. Choose cards small enough to sit beside a plate without crowding the glass.

    Write names before setting the table, so cards are ready when plates go down, and keep the note short, since a long note will be read once and then set aside. For everyday meals, skip the names and use the sprig alone as a simple place marker. For a large group, seat guests with mixed interests near each other, so conversation flows.

    8. One Stem in a Small Bud Vase
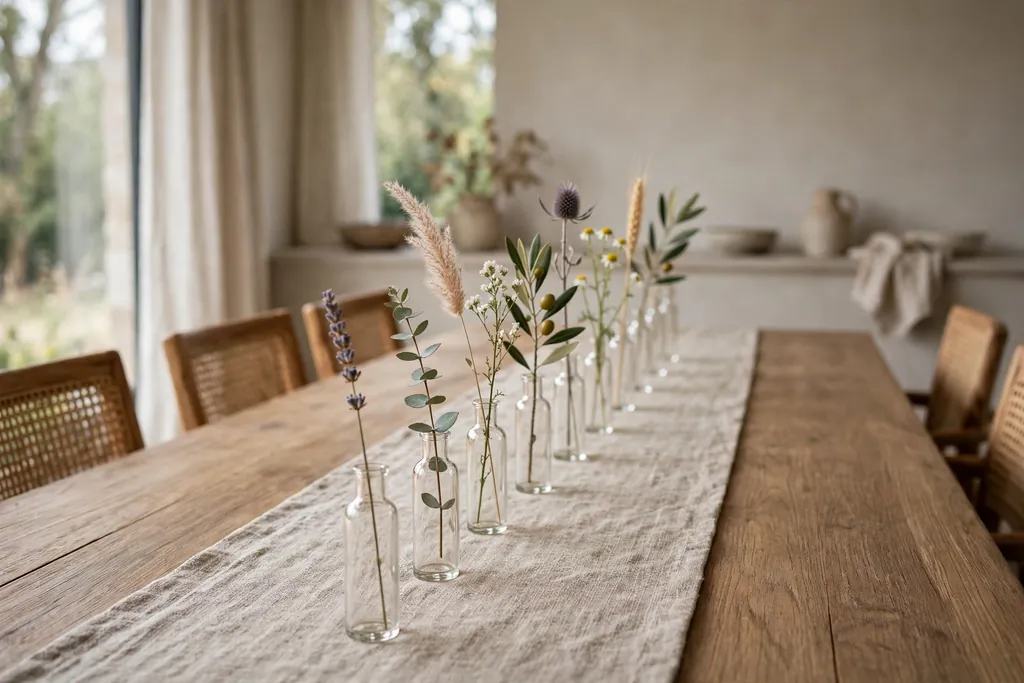
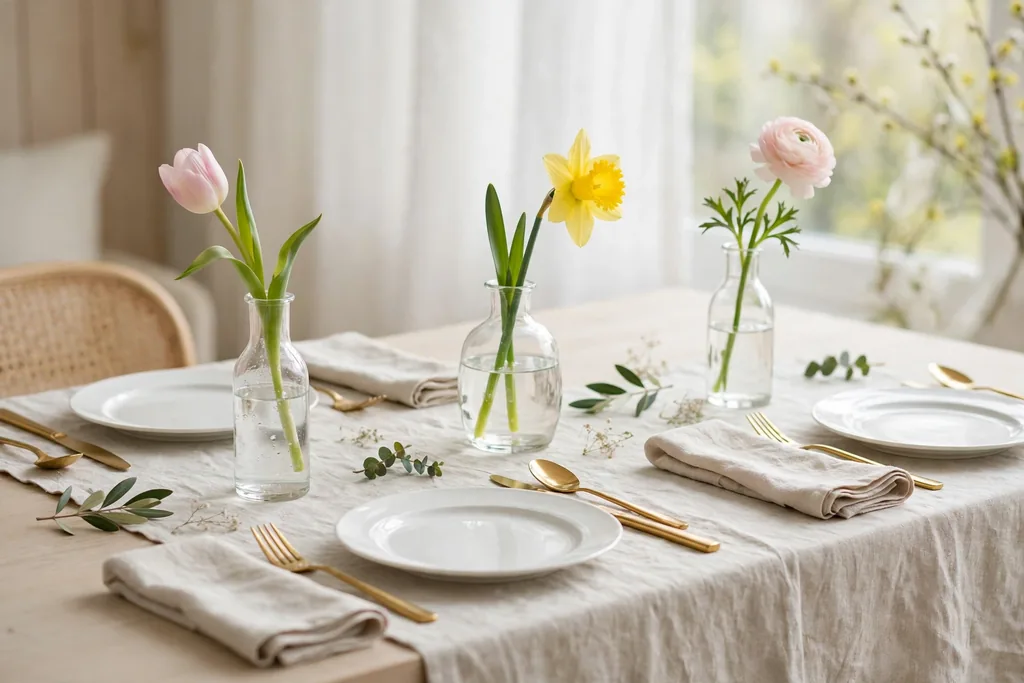
    Row of small bud vases with single stems down the center of a dining table.

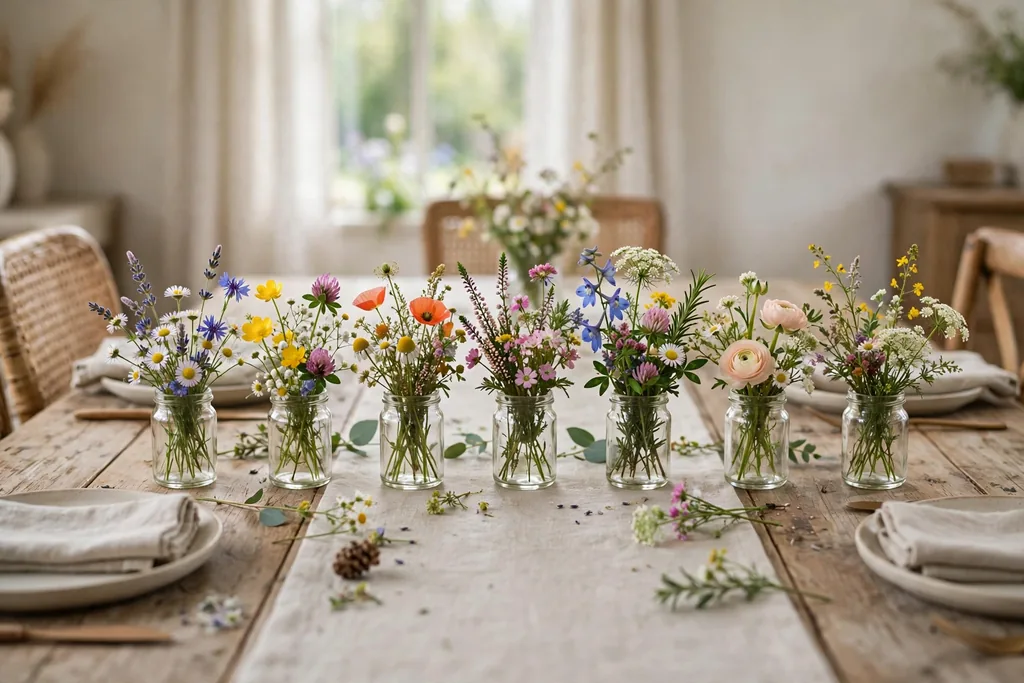
    Set a row of small bud vases down the center of the table, each holding one stem, such as a rose, a ranunculus, or a sprig of herbs. The single stems give a light, fresh centerpiece that leaves sightlines open, and they suit a small table as well as a long one, since you can add or remove vases to fit the length. Use the same vase shape at every spot, so the row reads as one centerpiece.

    Keep the vases low and the stems short, so guests can see across the table. Fill vases with fresh water before the meal and trim stems at an angle, so they drink well. For everyday meals, use one vase with one stem at the center and skip the full row.

    9. Neutral Linen Runner
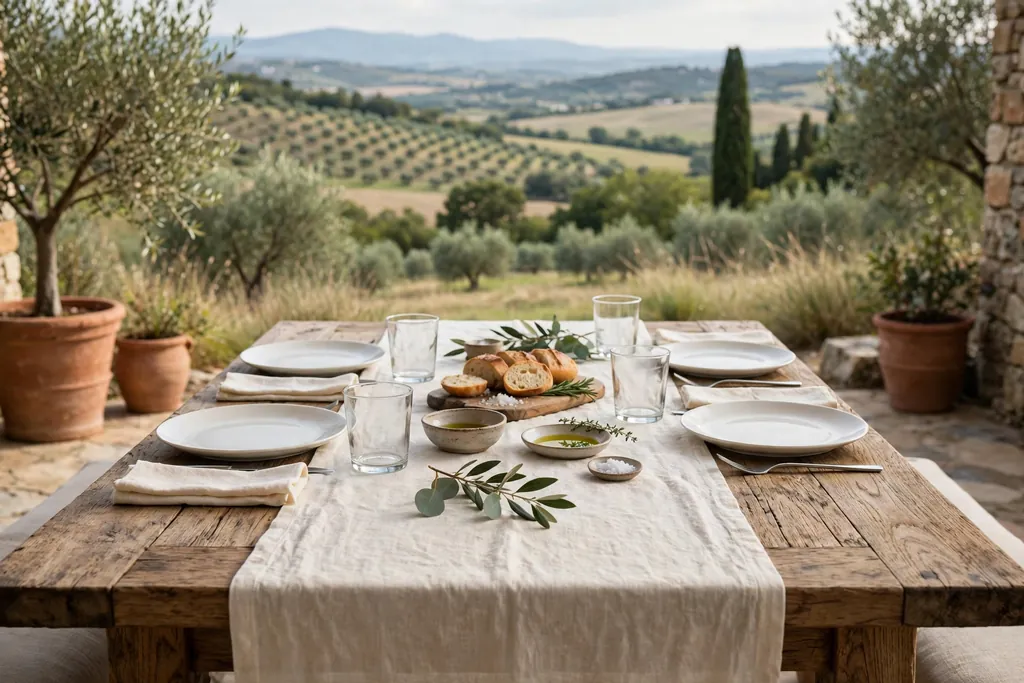
    Dining table with a cream linen runner, plain white plates, and simple glasses.

    Lay a neutral linen runner, in cream, ivory, or soft grey, down the center of the table, then set plain plates, glasses, and napkins at each place on either side of it. The runner adds texture along the whole table without covering it, and it suits both everyday meals and larger gatherings. Choose a solid color for a busy table, and let the runner hang evenly at both ends.

    Smooth the runner flat and center it, so it does not slide when plates are set down. If the runner is thick, use it alone and skip a tablecloth, so plates sit level. Wash and iron the runner before a gathering, since creases show more on a bare table than under a patterned cloth.

    10. Low Greenery Sprig Runner

    Dining table with a low greenery sprig runner and short candles in holders.

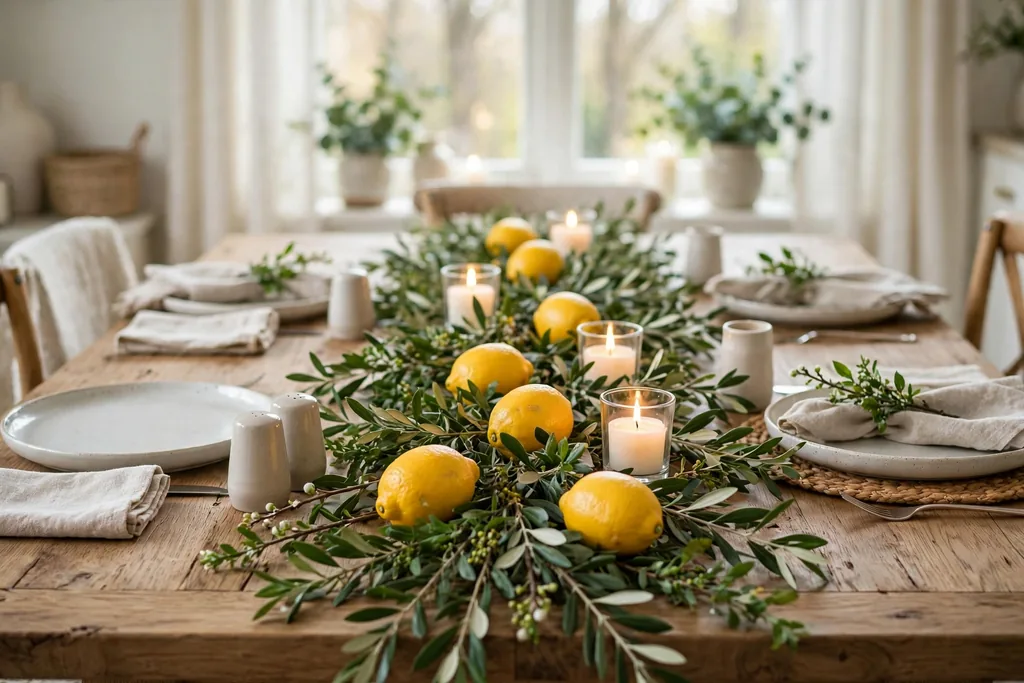
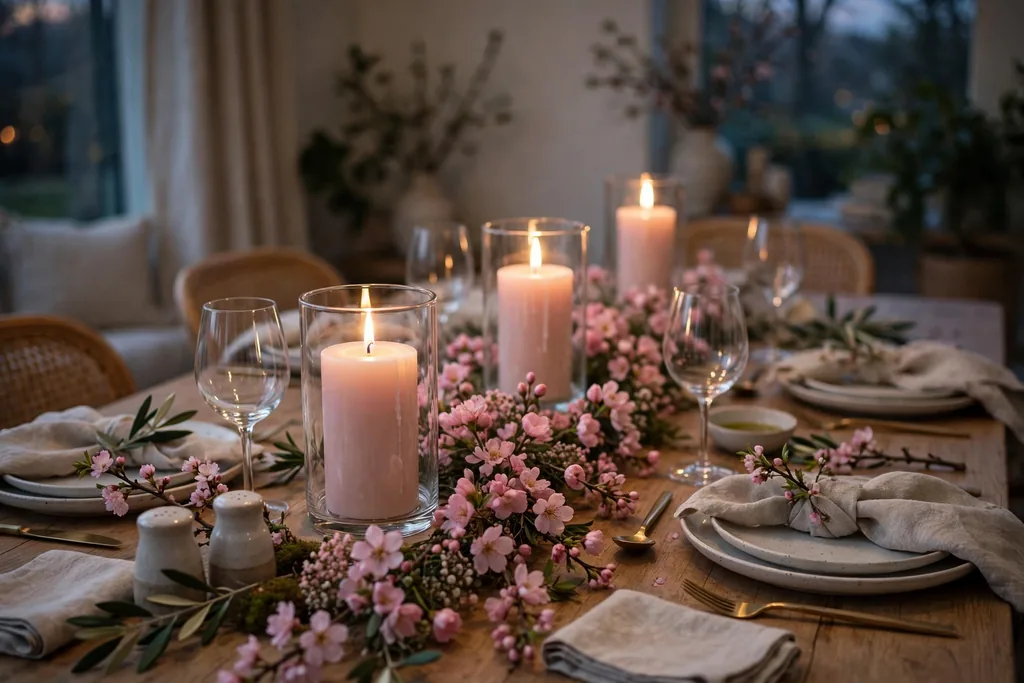
    Lay a loose runner of short greenery sprigs, such as eucalyptus, olive, or cedar, down the center of the table, then set short candles in holders along it at uneven intervals. The greenery carries color along the whole table without adding height, and it suits a long dining table for a gathering. Trim the stems so they stay inside the table edges and do not brush plates or glasses.

    Secure the runner so it does not slide when plates are set down, and keep real flames clear of dry leaves. Use flameless candles if the runner will sit near curtains or if children will be at the table. Shake fresh stems outdoors before laying them out, and check them daily, since fresh greenery dries and sheds over the week.

    11. Candle Cluster on a Small Tray
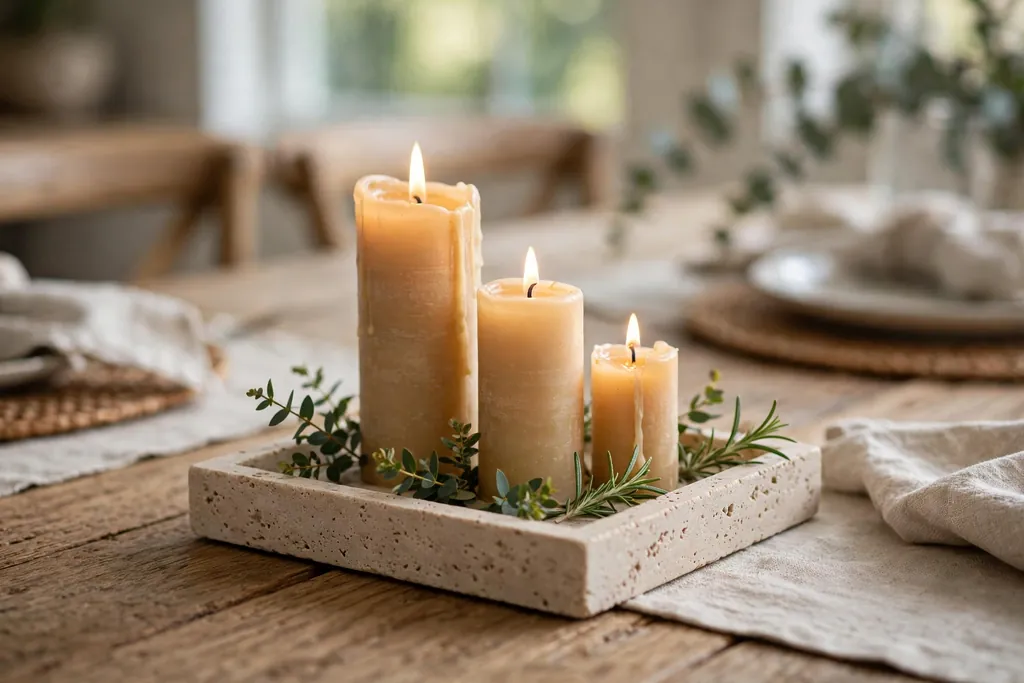
    Small tray with candles of different heights and short sprigs at the center of a dining table.

    Group candles of different heights on a small tray at the center of the table, with a few short sprigs tucked between the holders. The tray keeps the group contained, so it reads as one centerpiece, and it lifts off in one move when serving needs the full surface. Choose a tray short enough to see over when guests are seated, and keep the candle group low and narrow.

    Place the tray on a runner or a mat to protect the table, and use battery candles inside closed or narrow holders, since a real flame needs air and a safe holder. Wipe the tray before the meal, since dust shows more on a flat surface than on a patterned cloth. For a small table, use one candle group only and skip a second cluster at the ends.

    12. Cream on Cream Layered Places
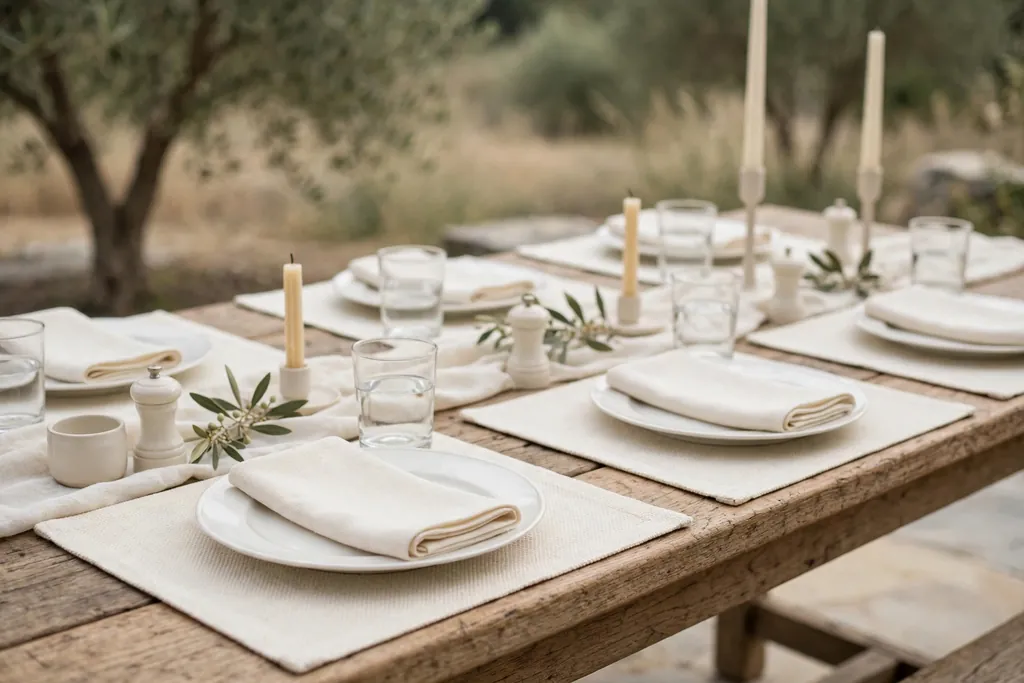
    Cream on cream place settings with white plates, cream placemats, and cream napkins.

    Set white plates on cream placemats, add cream napkins folded in a simple rectangle, and keep the centerpiece to white candles and one pale green sprig at each place. The layered creams suit a bright dining room and a calm mood, and they pair well with glass, pale wood, and silver cutlery. Add one soft accent, such as a single green sprig, so the table does not look flat.

    Use clear glasses so the cream shows through, and keep the candle group low enough to see across. Iron cream napkins before the meal, since creases show more on pale cloth than on color. If the table will hold children, use flameless candles in the same holders for the same glow without a flame.

    13. Velvet Ribbon Napkin Tie
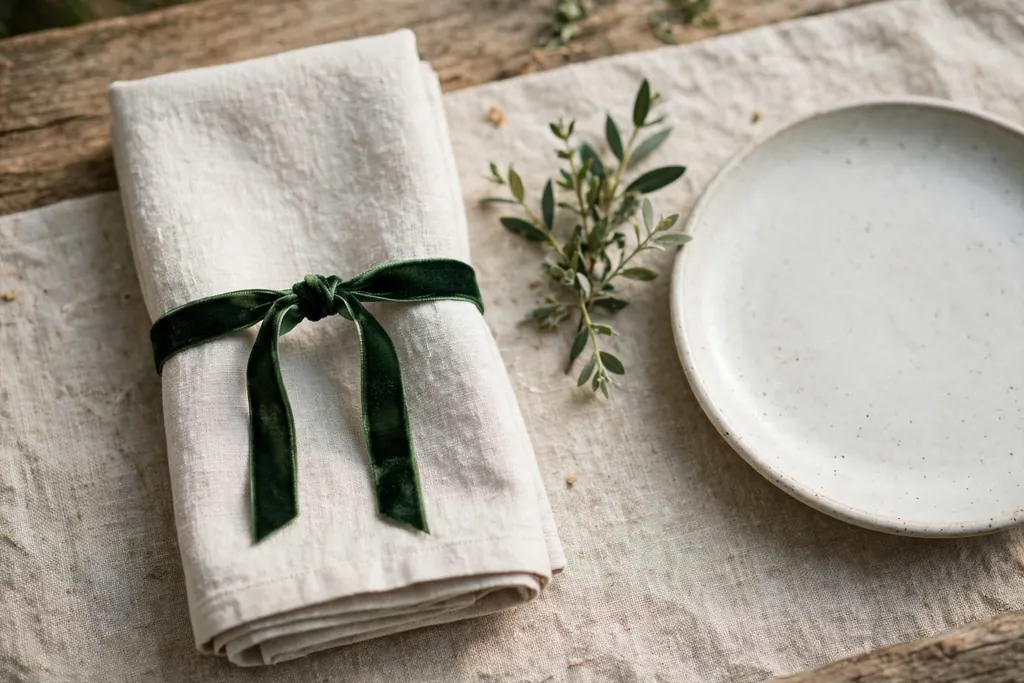
    Folded napkin tied with narrow deep green velvet ribbon and a small greenery sprig.

    Tie each folded napkin with a narrow velvet ribbon in deep green, burgundy, or navy, and tuck a small sprig of greenery under the ribbon knot. The velvet tie adds a soft, dressy detail without a new dinner set, and it suits a formal meal as well as a small gathering. Keep the ribbon narrow, so it does not bulk up the napkin fold.

    Fold napkins first, wrap the ribbon around the middle, and tie a simple knot rather than a large bow, so the napkin still lies flat. Trim ribbon ends at an angle and tuck the sprig under the knot so it stays put. Save ribbon pieces after the meal, since velvet ribbon stores flat and can be used again.

    14. Layered Dinner and Salad Plates
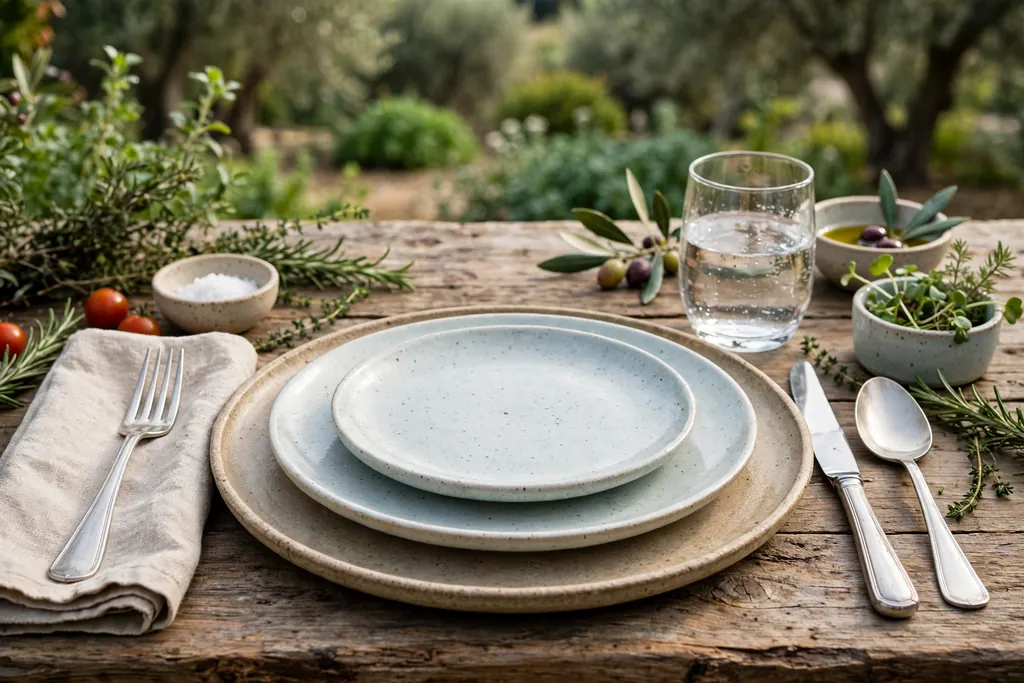
    Layered dinner plate with a smaller salad plate centered on top at a place setting.

    Set a dinner plate at each place, with a smaller salad plate centered on top, and keep cutlery in its usual spots, with forks on the left and knives on the right. The layered plates give a classic, restaurant style look, and they suit a dinner with guests where a first course will be served. Use plain plates in the same color family, so the layers read as one setting rather than two competing patterns.

    Clear the salad plate with the first course, so the dinner plate stays clean for the main course. Keep glasses and napkins plain, so the layered plates stay the main detail. For everyday meals, skip the second plate and use the dinner plate alone, so the table stays simple and easy to clear.

    15. Short Menu Card at Each Place

    Place setting with a small printed menu card leaning against a clear glass.

    Set one small menu card at each place, listing the courses in short lines, with the card leaning against a glass or lying flat above the plate. A menu card adds a refined, restaurant style touch, and it helps guests with dietary needs see what is coming, without asking during the meal. Keep the card small, with large, clear lettering and only the course names, so it does not crowd the place.

    Write or print cards before setting the table, and use the same card design at every place. For a simple meal, list two or three courses only, and skip a long description. For a gathering, add a short welcome line at the top, and keep the rest of the table plain, so the menu card stays the one printed detail.

    16. Citrus Bowl as a Low Centerpiece
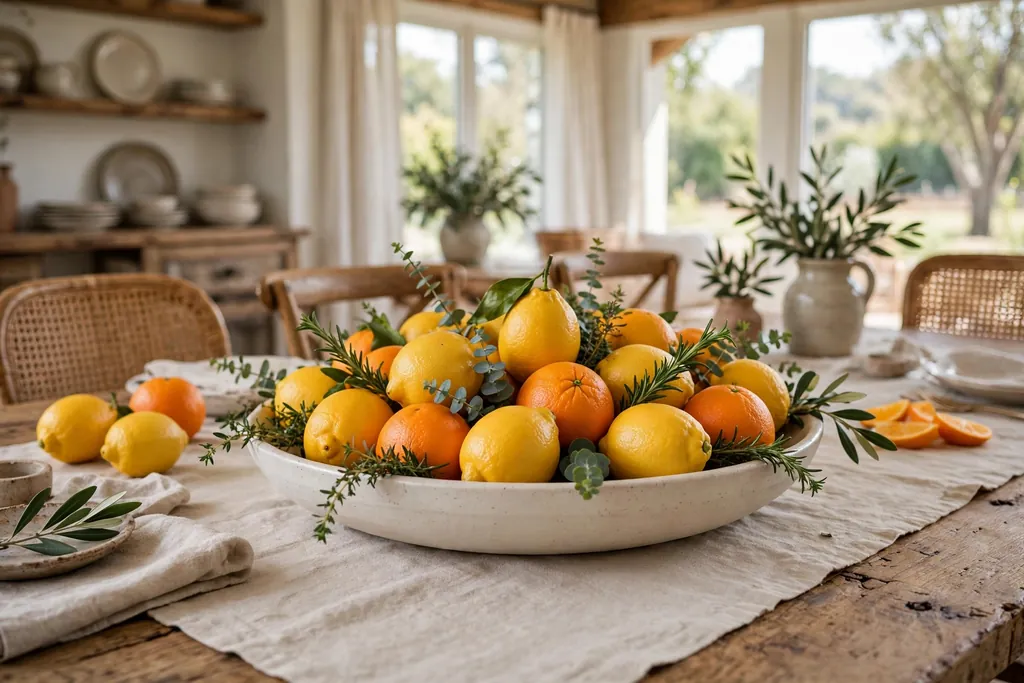
    Wide shallow bowl of lemons and oranges with short greenery sprigs as a centerpiece.

    Fill a wide, shallow bowl with lemons, oranges, or limes, plus a few short greenery sprigs, and set it in the center of the table. The fruit gives real color and shape, and the bowl takes up only one spot, leaving the rest of the table free for plates and serving dishes. Keep the bowl low and wide rather than tall, so it does not block sightlines.

    Check the fruit on the day of the meal and move any soft piece to the kitchen, since one spoiling piece can mark the rest. For a calmer winter version of this idea, with white linens and a single metallic accent, see the winter table decor guide. At the end of the meal, the bowl can move to the counter, which makes clearing the table a single step.

    17. Dark Chargers with Gold Cutlery for Evening

    Evening place setting with a dark charger, white plate, and gold cutlery.

    Set dark chargers, in black or deep charcoal, under white plates, add gold cutlery and gold napkin rings, and keep the centerpiece to dark candle holders with cream candles. The dark and gold pairing suits an evening meal and a formal room, and it lets a single pale accent, such as a sprig at each place, stand out clearly.

    Use clear glasses so the gold shows through, and keep the candle group low enough to see across. Polish gold pieces before the meal, since fingerprints show more on metal than on wood. If dark plates feel too dark for a daytime meal, use dark chargers with white plates instead, so the table stays bright while keeping the evening palette.

    18. Bare Wood Table with One Linen Accent
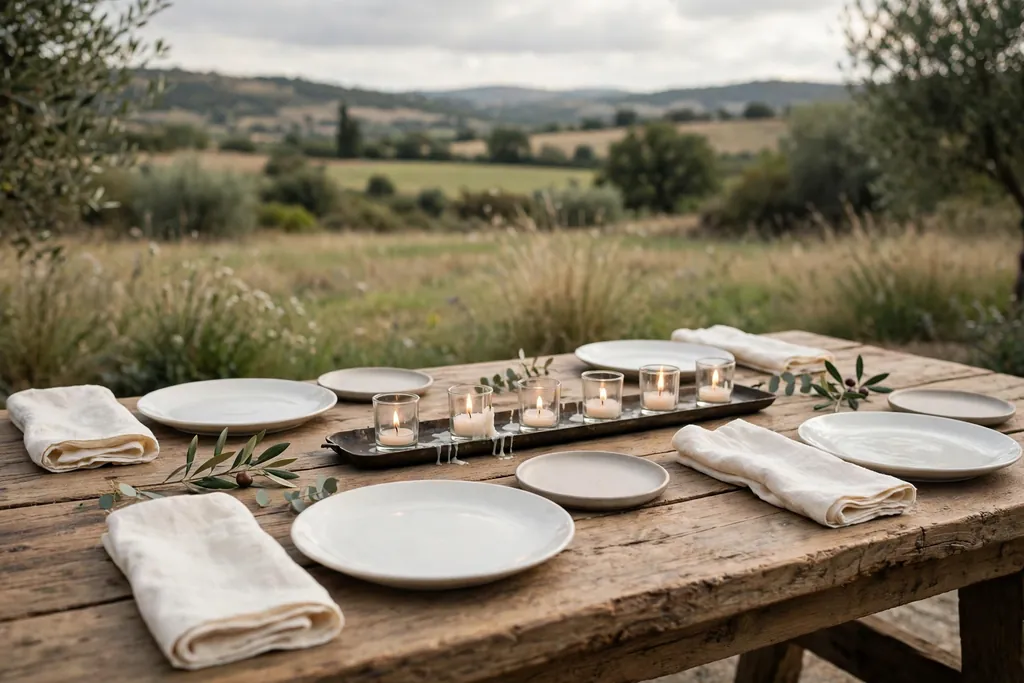
    Bare wood dining table with cream linen napkins, plain plates, and a low candle tray.

    Leave a wood table bare, with no runner or cloth, and let the grain do the work, then set folded linen napkins in cream or soft white at each place, with simple cutlery and plain plates. This approach suits a farmhouse or rustic dining room, and it keeps the table easy to wipe after everyday meals, while the linen keeps the setting refined.

    Use placemats under plates if the wood marks easily, and keep the centerpiece to one low group, such as a tray with candles, so the wood still shows. Fold napkins the same way at every place for a tidy look, and iron linen napkins before a gathering, since creases show more on bare wood than under a patterned cloth.

    19. Simple Setting for Two
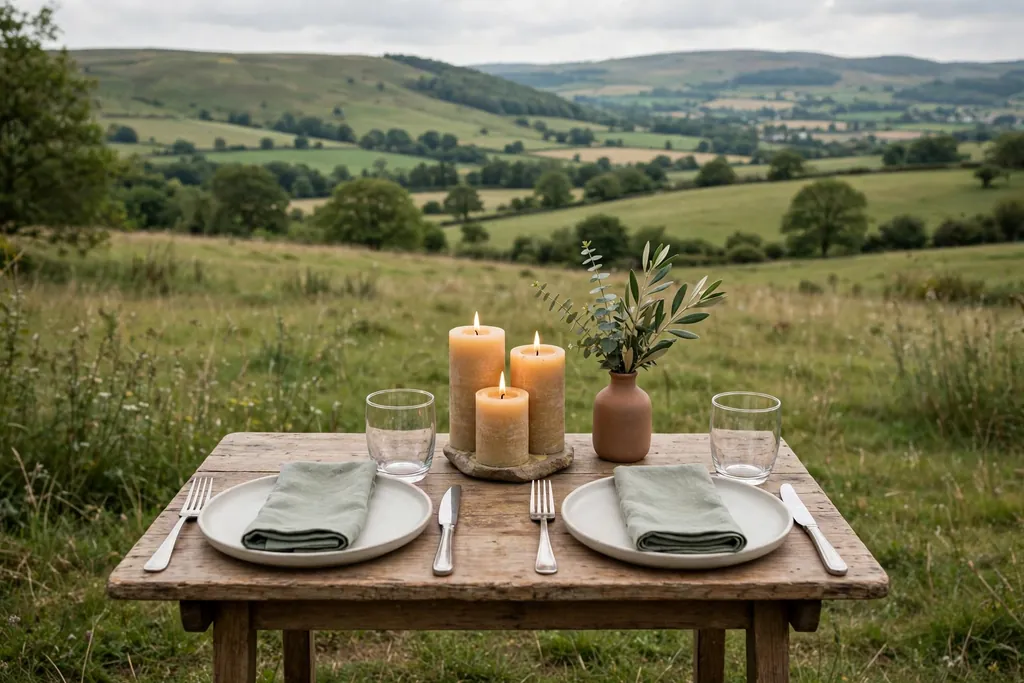
    Small table for two with matching settings, one candle group, and a small vase of sprigs.

    Set two places opposite each other, with matching plates, glasses, and folded napkins, and one low candle group and a small vase of sprigs between them. The small group keeps conversation easy, since nothing tall blocks the view, and the candlelight makes an ordinary weeknight meal feel special. Keep the rest of the table clear, with just plates, glasses, and cutlery, so a small table does not feel crowded.

    Use a short runner or two placemats to frame the places, and add a second candle only if the table is long enough. Clear the centerpiece in one move after the meal, and keep one sprig at each place as the single shared accent. This setting works for everyday meals as well as a quiet dinner for two, with no extra pieces needed.

    Conclusion

    An elegant table does not need a new dinner set or a large budget. Start with the plates, glasses, and napkins you already own, pick one calm palette, keep the centerpiece low, and set one clear accent at each place. Everyday meals stay simple with a folded napkin and a single sprig, and dinners with guests gain a runner, chargers, candles, and place cards on the same base. Try one idea from this list at your next meal, keep what works for your table, and change only one layer at a time until the setting feels like yours.

    Frequently Asked Questions

    What makes a table setting look elegant?

    An elegant table setting uses one calm palette, plain plates, matching cutlery, a folded napkin, and one low centerpiece, with one repeated accent at each place. Keep the centerpiece below eye level, leave room for serving dishes, and avoid several competing patterns, so the table reads as calm and planned rather than busy.

    How do I set an elegant table without buying new dishes?

    Use what you already own and change one layer: add a neutral runner, fold napkins a new way, tie napkins with ribbon, add candles and a sprig at each place, or set a low fruit bowl as the centerpiece. White plates with gold rims, cream on cream layers, and a single herb sprig all change the look of a table with no new dinner set.

    What colors work best for an elegant table setting?

    Cream, ivory, white, soft grey, pale green, and warm wood work well for an elegant table, with one metal accent in gold, silver, or brass. Pick one accent color plus white and wood, and repeat the accent at least twice, such as napkins plus a candle holder, so the table looks planned rather than random.

    How do I keep a centerpiece low enough for conversation?

    Keep the centerpiece under seated eye level, use a tray or board to group candles and greenery in one low cluster, and place tall pieces, such as branches, at the ends of a long table or on a sideboard. A row of bud vases, a low fruit bowl, or a small candle cluster all leave sightlines open across the table.

    What is the best elegant setting for a small table?

    The best small table setting uses one placemat per place, compact plates, short glasses, and a single centerpiece, such as one small vase or one candle group. Skip chargers and runners on a very small table, fold napkins flat, and set extra dishes on a sideboard so the table stays free for eating.

    How do I set an elegant table for guests with place cards?

    Write each guest name in clear, large lettering on a small card, set one card at each place beside the plate or tucked under a napkin fold, and add a short sprig for a finished look. Place cards mark each seat, help guests settle in, and work for family dinners as well as larger gatherings.
  • 23 Sunroom Decorating Ideas for a Bright and Comfortable Room

    23 Sunroom Decorating Ideas for a Bright and Comfortable Room

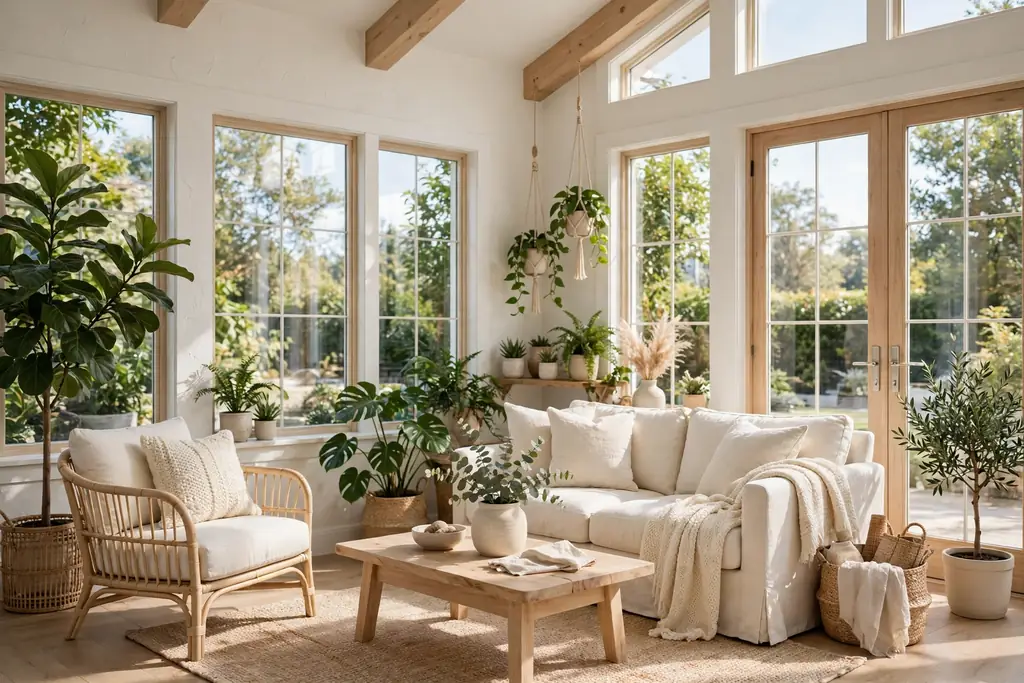
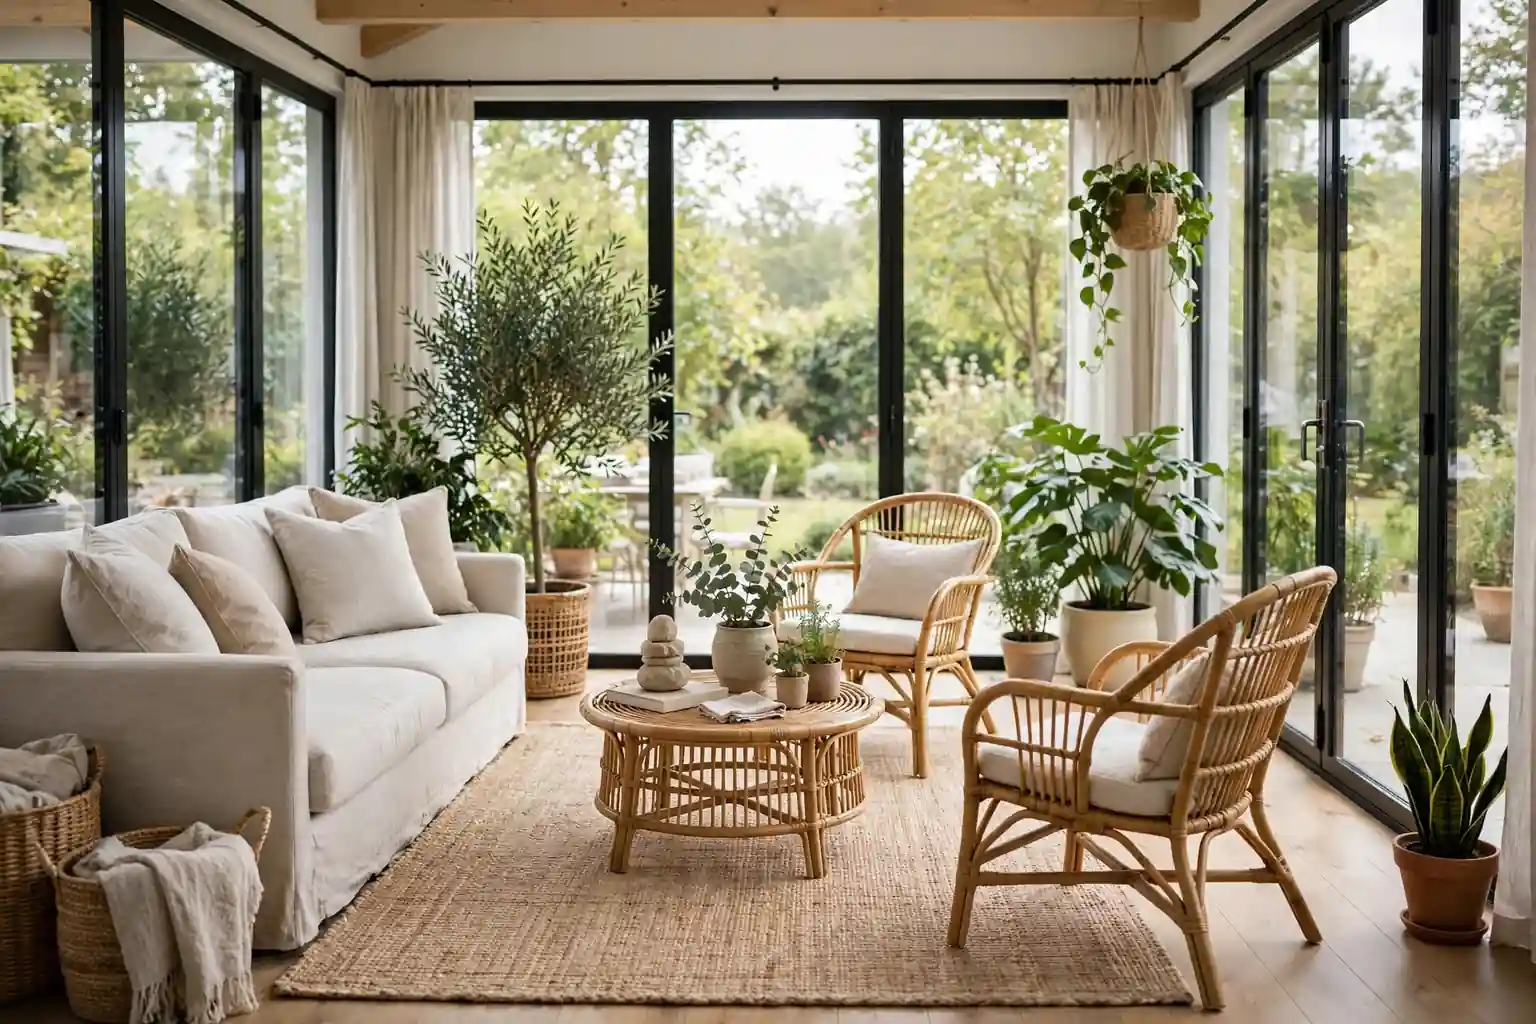
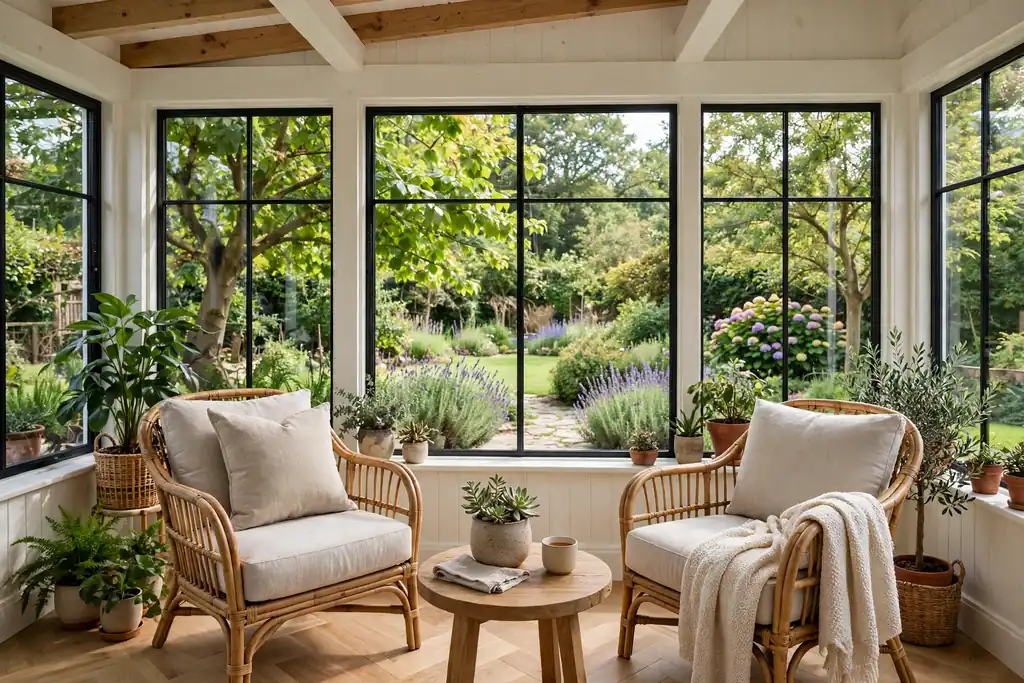
    Sunroom decorating ideas work best when you start with light, washable fabrics, seating that faces the view, and shade you can adjust through the day. Add plants that suit bright light, a rug to ground the seating, and low evening light, then repeat one calm palette so the glass room feels bright, comfortable, and easy to use all year.

    A sunroom is a room with a lot of glass and a lot of sun, so comfort depends on practical choices as much as on color. Fabrics fade, plants dry out, and seats that face a wall waste the best feature in the room. The 23 ideas below start with layout and light, then cover seating, plants, storage, and seasonal changes, so you can pick one change or work through the room in order. The same calm base that works in a farmhouse living room works here too, with lighter fabrics and more attention to sun and shade.

    Key Takeaways

    • Face seating toward the view or toward each other, and leave clear paths to doors and windows.
    • Choose light, washable fabrics and fade resistant cushions, since sunroom fabric gets strong daily sun.
    • Add shade in layers: sheers for soft light, plus blinds or shades you can lower at midday.
    • Group plants by light and water needs, and keep pots on trays so water does not mark floors or tables.
    • Ground the seating with one rug, repeat one calm palette at least twice, and leave some glass clear.
    • Plan for evening use with low lamps or lanterns, and for seasonal change with throws and cushion covers you can swap.

    1. Face the Seating Toward the View

    Sunroom seating facing large windows with a garden view and a small table between chairs.

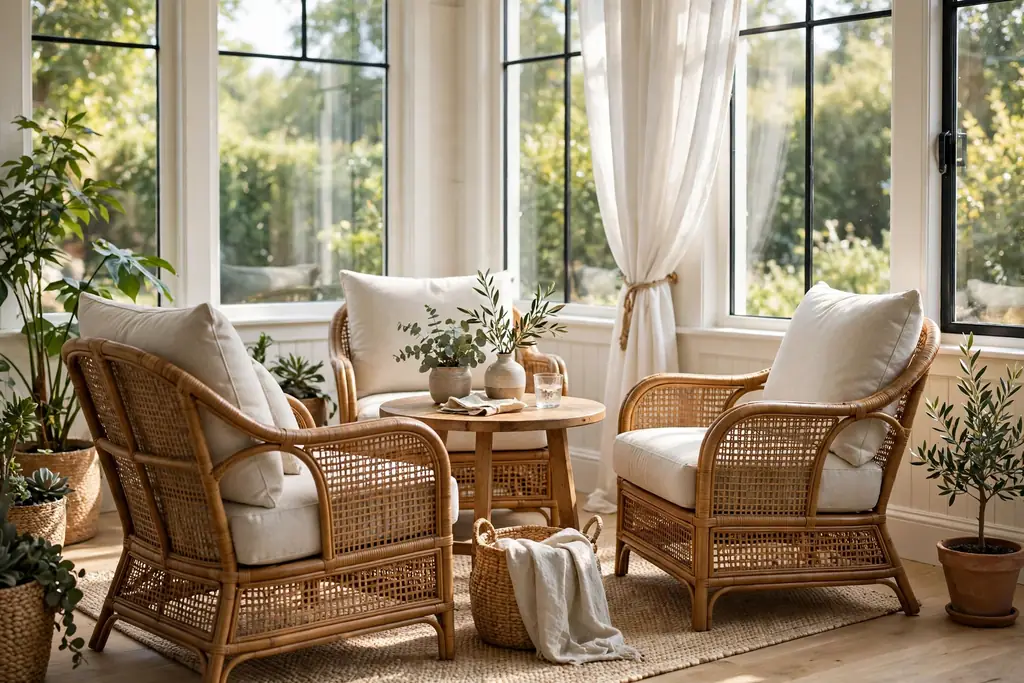
    Set the sofa or main chairs so they face the largest window or the best garden view, with a small table between them for cups and books. This layout uses the reason the room exists, and it keeps conversation natural when two people sit facing each other across the table.

    Leave a clear path to each door, and keep tall furniture clear of the main window wall, so the view stays open from the seats. If the room is long, place seating at the garden end and a smaller table or reading chair at the house end, so each zone has its own use.

    2. Slipcovered Sofa in Light Linen

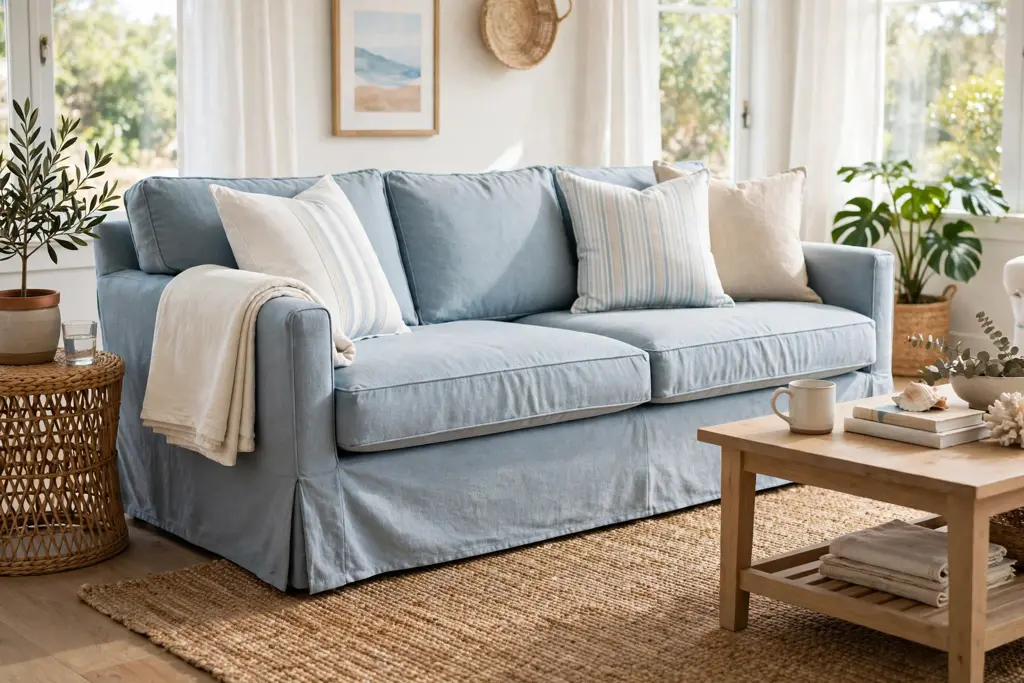
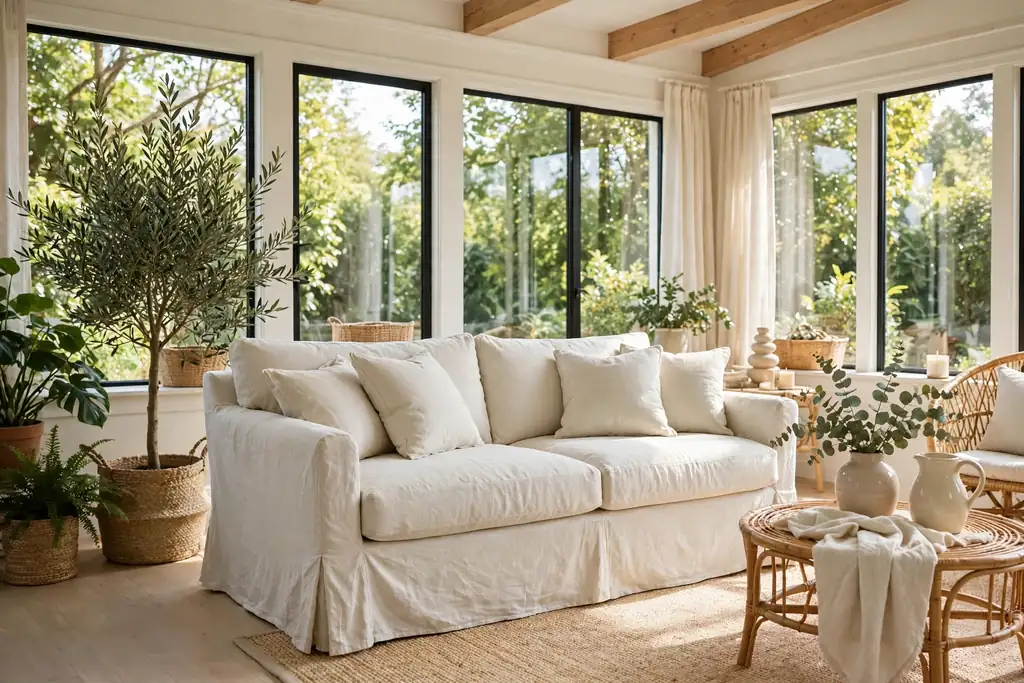
    Light cream linen slipcovered sofa in a bright sunroom with pale cushions.

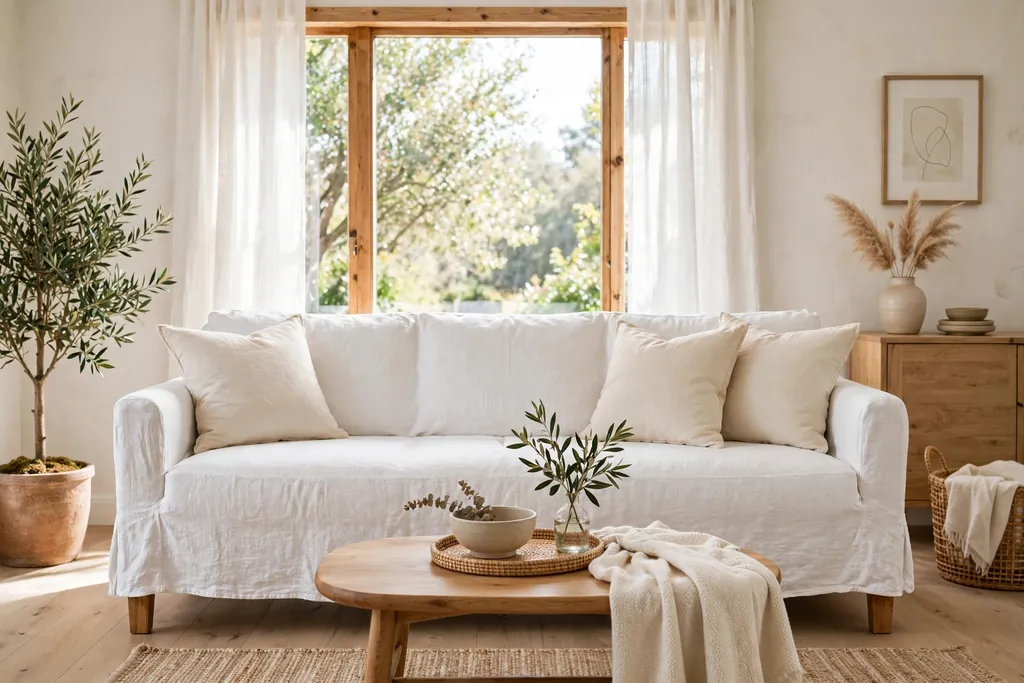
    Choose a slipcovered sofa in white, cream, or pale grey linen, so the main seat stays light in a bright room and the cover can be washed. The relaxed linen look suits a sunroom, and a spare cover lets you keep the sofa fresh through summer dust and garden use.

    Pair the sofa with wood or rattan legs showing below the skirt, so the soft seat has a solid base. Keep cushion covers in the same light family, and add one accent color through pillows only, so the sofa does not compete with the view outside.

    3. Rattan Armchairs for Casual Seating

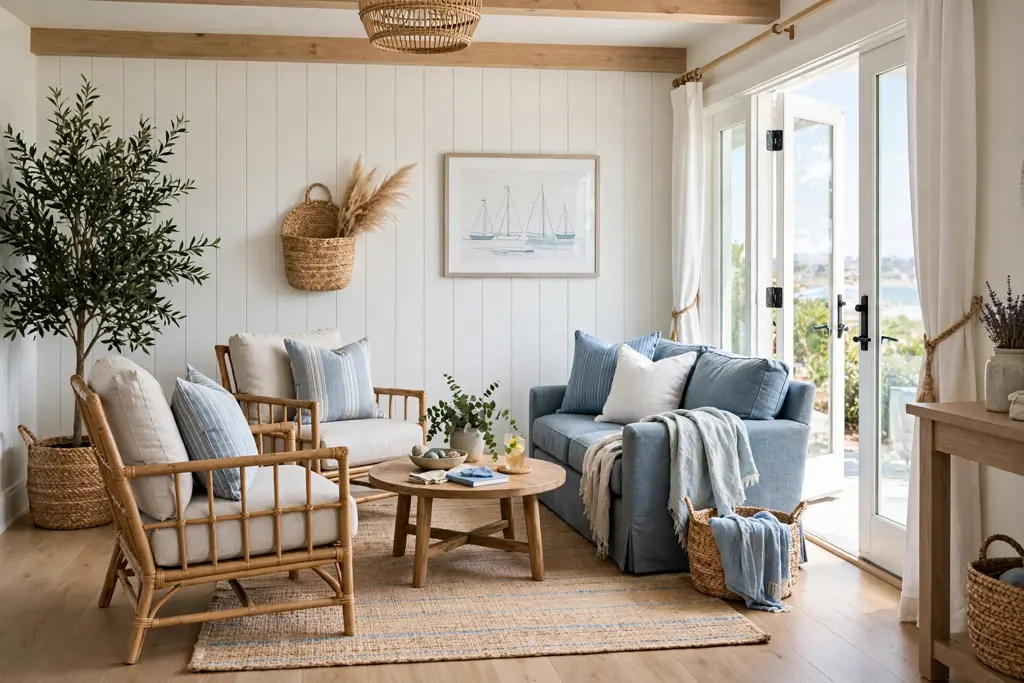
    Rattan armchairs with thick pale cushions angled around a small table in a sunroom.

    Add one or two rattan armchairs with thick seat cushions, placed at an angle to the sofa so the group feels open rather than boxed in. Rattan is light to move, which helps when you want to shift a chair into sun or shade, and its woven texture suits a glass room.

    Choose cushions with removable, washable covers in a pale neutral, and add a small side table beside each chair for a drink. Check that chair legs sit level on the floor, and use small felt pads under the feet so rattan does not mark wood or tile.

    4. Sheer Linen Curtains for Soft Light

    Sheer white linen curtains on tall sunroom windows filtering soft daylight.

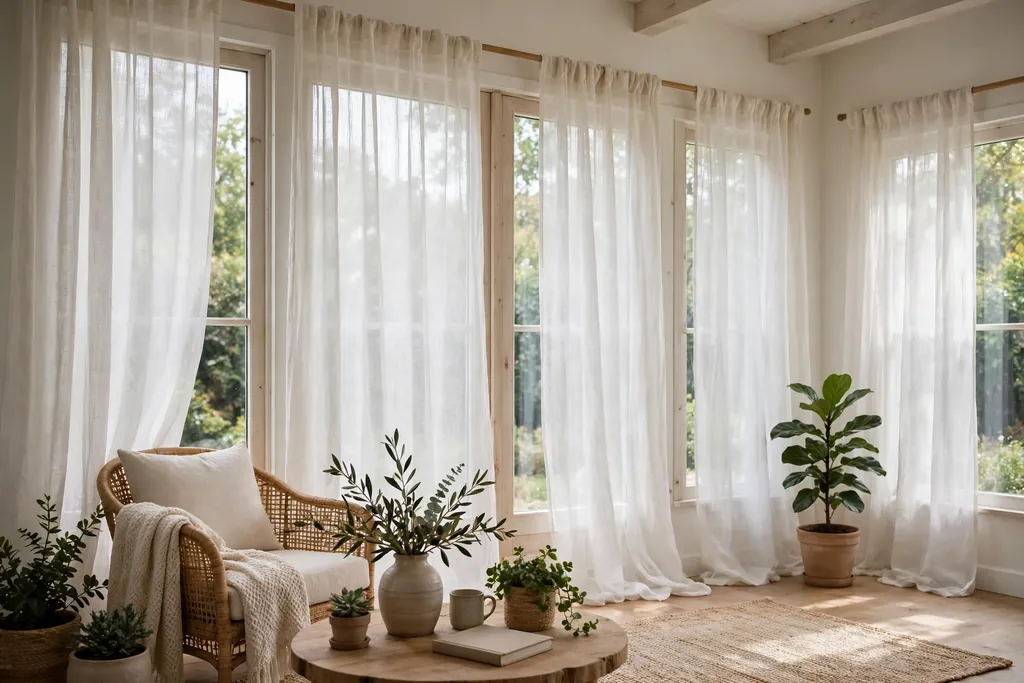
    Hang sheer linen curtains on a rod close to the ceiling and wider than each window, so the panels can stack clear of the glass when you want full light. Sheers soften glare without blocking the view, and they give the room a finished edge in the evening.

    Use curtain rings with clips for a relaxed gathered look, and let the panels fall to the floor with a small break rather than pooling, so they stay clean. Wash sheers on a gentle cycle and hang them damp to reduce creases, and keep the color close to the wall color for a calm frame.

    5. Bamboo Shades for Midday Shade

    Bamboo woven shades lowered halfway over sunroom windows at midday.

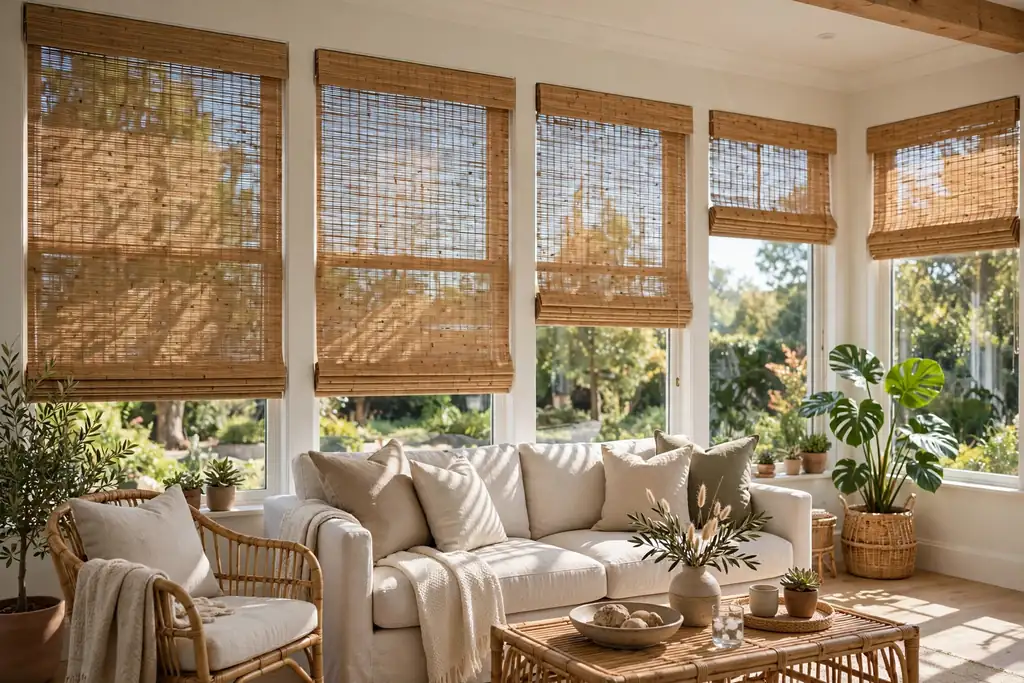
    Add bamboo or woven wood shades inside the window frames, so you can lower them at midday when the sun is strongest and raise them fully in the morning and late afternoon. The natural woven texture adds warmth beside linen and rattan, and the shades roll up small when not needed.

    Measure each window before ordering, since sunroom windows often vary in width, and choose a cordless or looped control that keeps cords clear of children and pets. Dust the shades with a dry cloth, and lower them on the sunniest side first, rather than closing the whole room.

    6. Natural Fiber Rug to Ground the Seating

    Natural jute rug under a coffee table and sofa legs in a bright sunroom.

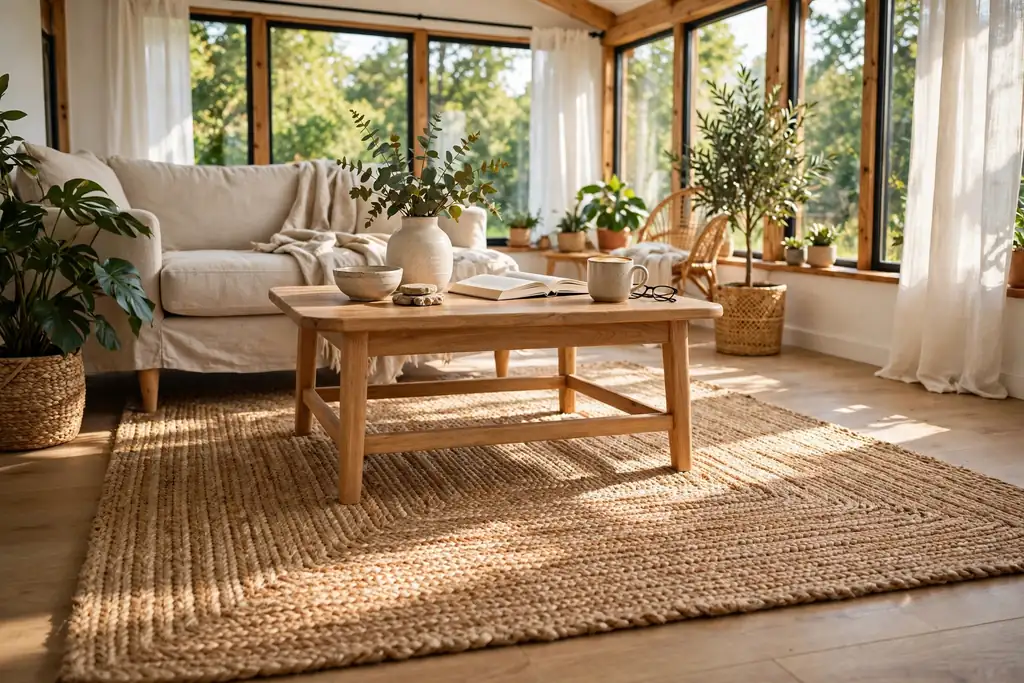
    Lay a natural fiber rug, such as jute or sisal, under the coffee table and front legs of the seating, so the group reads as one zone on a hard floor. The woven texture adds warmth underfoot, and a neutral rug lets cushions and plants carry the color.

    Choose a rug pad under the rug so it does not slide on tile or wood, and vacuum both sides of the rug edge weekly, since sunroom floors gather dust and pollen. In a small sunroom, one rug in the seating zone is enough, since a second rug can crowd the floor.

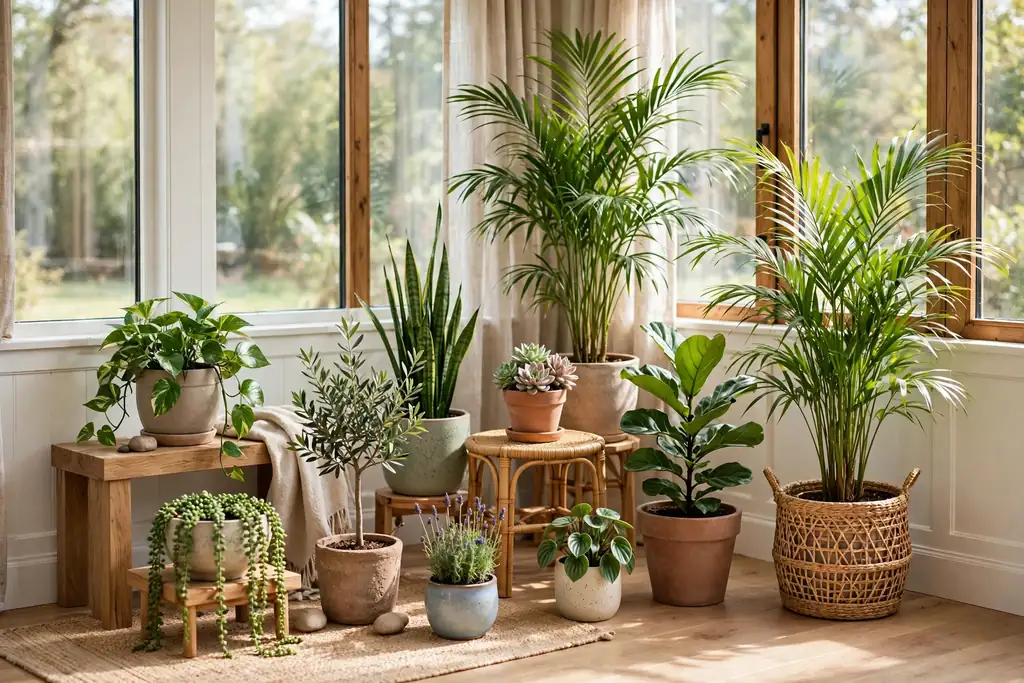
    7. Grouped Potted Plants for Bright Light

    Group of potted plants in varied heights on the floor and low stands in a sunroom.

    Group potted plants in threes on the floor and on low stands, mixing one tall plant, one medium plant, and one trailing plant, so the group has height and shape. Sunrooms suit plants that like bright light, but check each plant label for its light needs before placing it in direct sun.

    Set each pot on a saucer or tray, and water plants over the tray so spills do not mark the floor. Rotate pots a quarter turn each week so growth stays even, and move any plant that scorches or wilts to a spot with softer light for a few days.

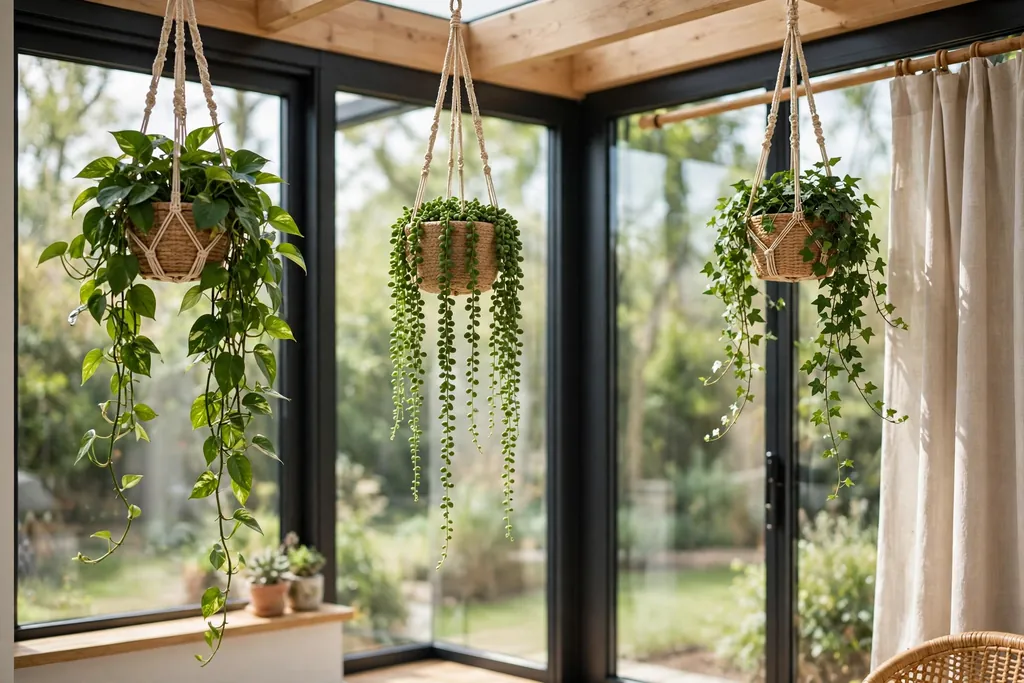
    8. Hanging Planters Near the Glass

    Hanging planters with trailing plants near sunroom glass, clear of the main view.

    Hang one or two planters from ceiling hooks near, but not against, the glass, using trailing plants that can hang down without blocking the view. Hanging planters use vertical space well in a small sunroom, and they keep floor space clear for seating.

    Use hooks rated for the weight of a watered pot, and hang planters where you can reach them easily for watering. Water over a tray or take the planter down to water it, so drips do not fall on seats or the floor below.

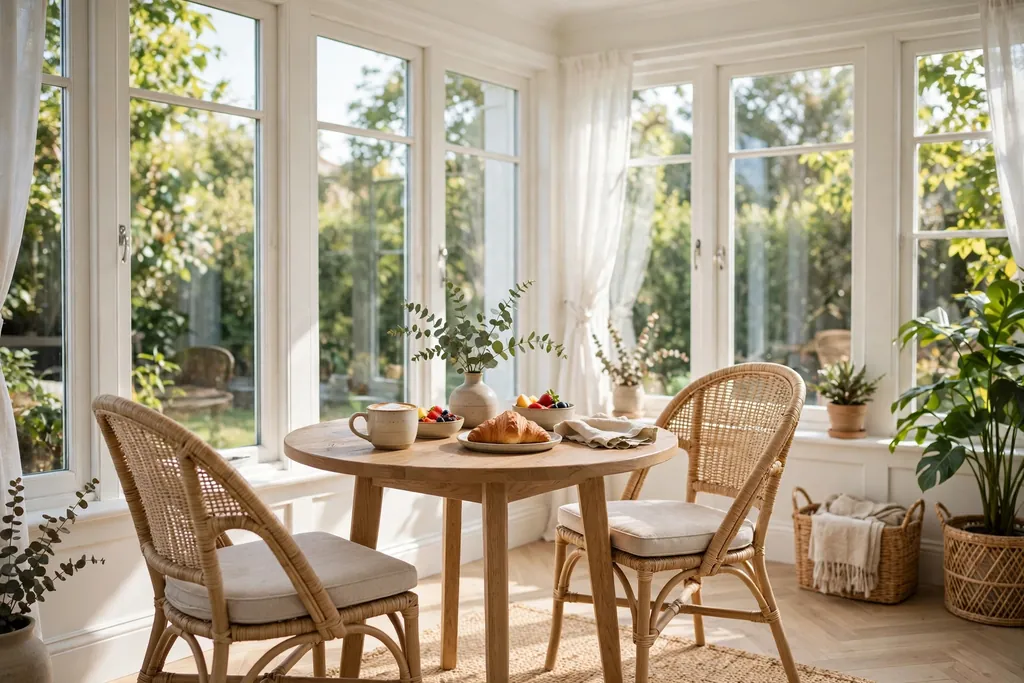
    9. Small Breakfast Table by the Windows

    Small round breakfast table with two chairs by bright sunroom windows.

    Set a small round table with two chairs by the brightest window, so the sunroom works as a breakfast spot as well as a sitting room. A round table fits a corner or a window bay better than a square table, and two chairs leave room to move around it.

    Use a wipe clean top or a washable cloth, since breakfast tables see daily use and spills. Keep the centerpiece low, such as a small vase or a single candle in a holder, so the table stays usable and the view stays clear across it.

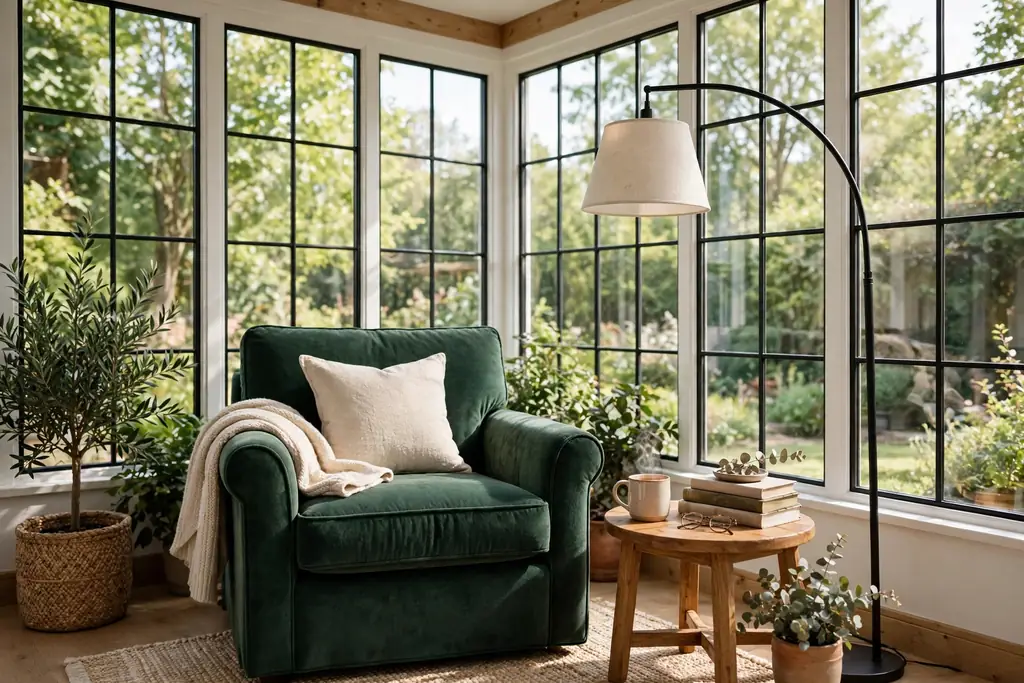
    10. Reading Nook with an Armchair and Lamp

    Reading nook with a deep armchair, side table, and floor lamp in a sunroom corner.

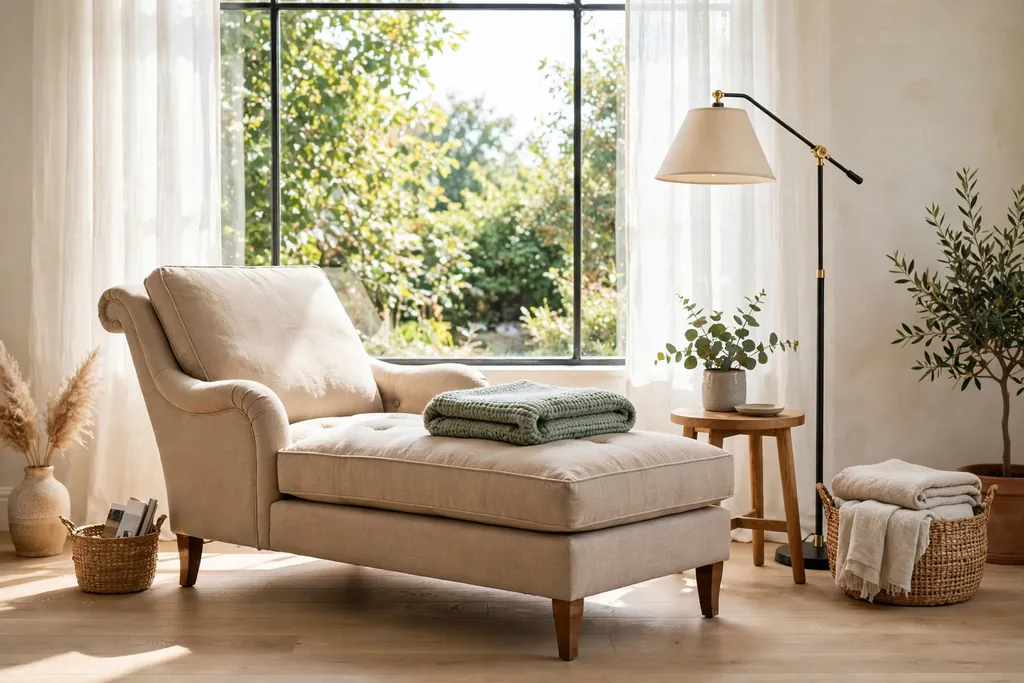
    Place one deep armchair in a corner with a small side table and a floor lamp at chair height, so the sunroom has a defined place to read that is not the main sofa. Add a cushion for back support and a throw folded over the chair arm, ready for cooler evenings.

    Keep the chair clear so it stays an invitation rather than a pile for clothes or bags. In a tight room, a floor cushion beside a low shelf works instead, with the same small lamp beside it, and the same calm palette as the rest of the room.

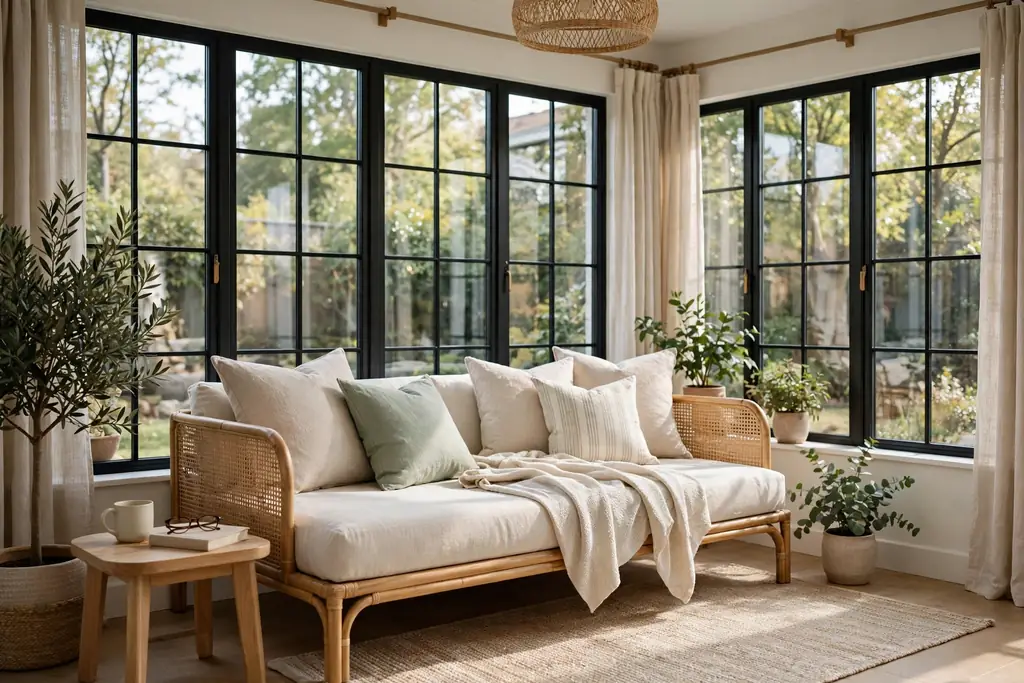
    11. Daybed or Chaise for Afternoon Lounging

    Daybed with a light throw and washable pillows along a sunroom window wall.

    Add a daybed or a chaise lounge along one window wall, dressed with a firm mattress pad, a flat sheet, and two or three pillows in washable covers. A daybed gives the sunroom a place to nap or stretch out, and it can serve as extra seating when guests visit.

    Keep a light throw folded at one end, and place a small table or stool at the side for a book and a drink. If the daybed sits in direct sun, use a shade or sheer panel above it at midday, so the seat stays comfortable and fabric fades more slowly.

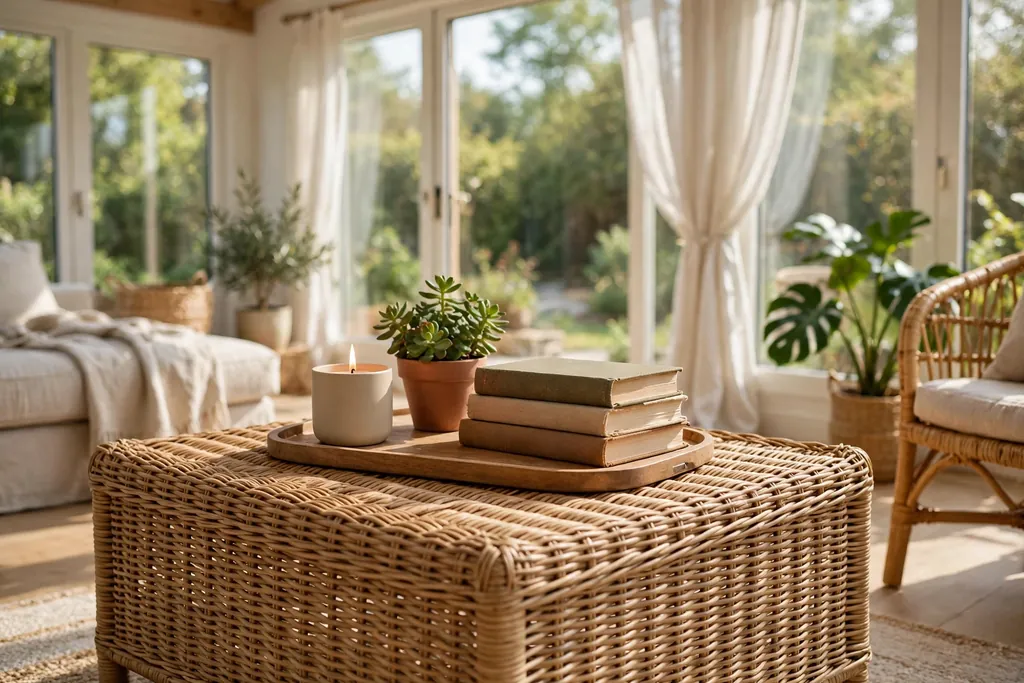
    12. Wicker Coffee Table with a Tray

    Wicker coffee table with a tray holding a candle, small plant, and books in a sunroom.

    Use a low wicker or rattan coffee table in the center of the seating group, with a wood or metal tray on top to group a candle, a small plant, and a stack of books. The tray keeps small items contained, and the whole tray lifts off in one move when you need the table clear.

    Leave clear space on the table for cups, since a coffee table must work as well as look good. Wipe the wicker with a dry cloth for dust and a damp cloth for spills, and keep the tray small enough that cups still fit beside it.

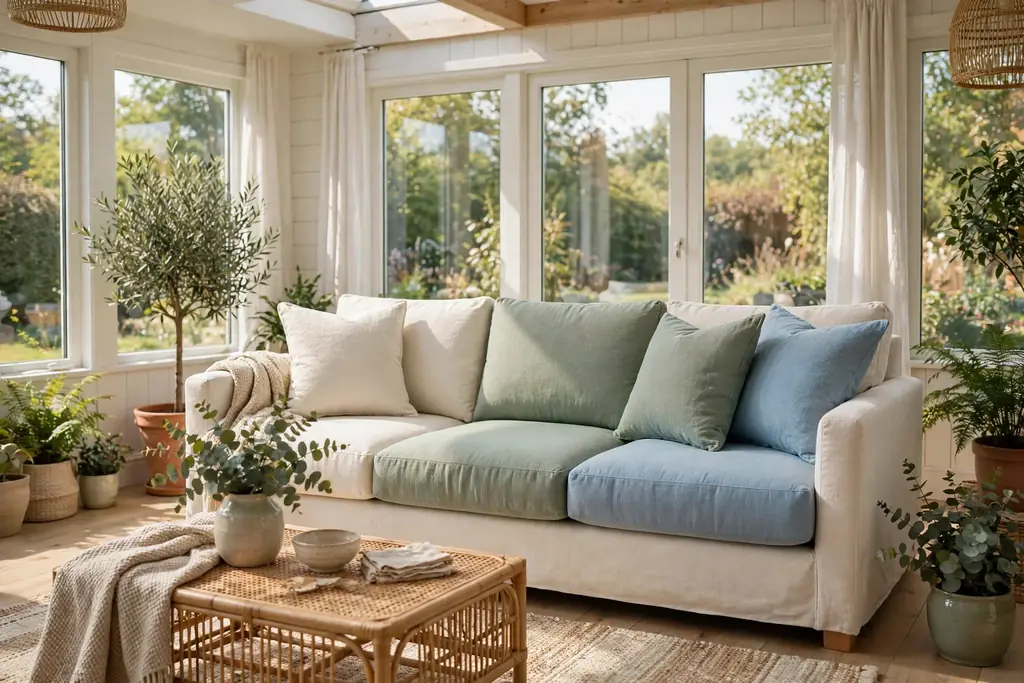
    13. Washable Cushion Covers in One Palette

    Sofa with washable cushion covers in cream, sage, and soft blue in a sunroom.

    Swap cushion covers to a small palette, such as cream, sage, and soft blue, using plain, knit, and one subtle pattern, and repeat one of those colors somewhere else in the room. Washable zip covers make seasonal and practical changes simple, since covers wash and store flat.

    Keep the number of cushions to what fits without a pile on the floor when someone sits down. If the sofa is already patterned, use plain covers in one color only, so the room stays calm and the view stays the main feature.

    14. Light Wall Palette of White and Cream

    Sunroom with white and cream walls, light furniture, and green plants in daylight.

    Paint the solid walls white, cream, or a very pale warm grey, so the room reflects daylight and the window frames, plants, and furniture stand out. A light wall color also makes a small sunroom feel larger, since dark walls can close in a glass room.

    Test the paint beside your floor and cushion colors in daylight and evening light, since white shifts a lot under warm bulbs. Keep trim in the same light family, and let one accent color come through textiles and plants rather than a bold wall.

    15. Coastal Blue and White Accents

    Sunroom with blue and white accents, a striped pillow, and a blue ceramic vase.

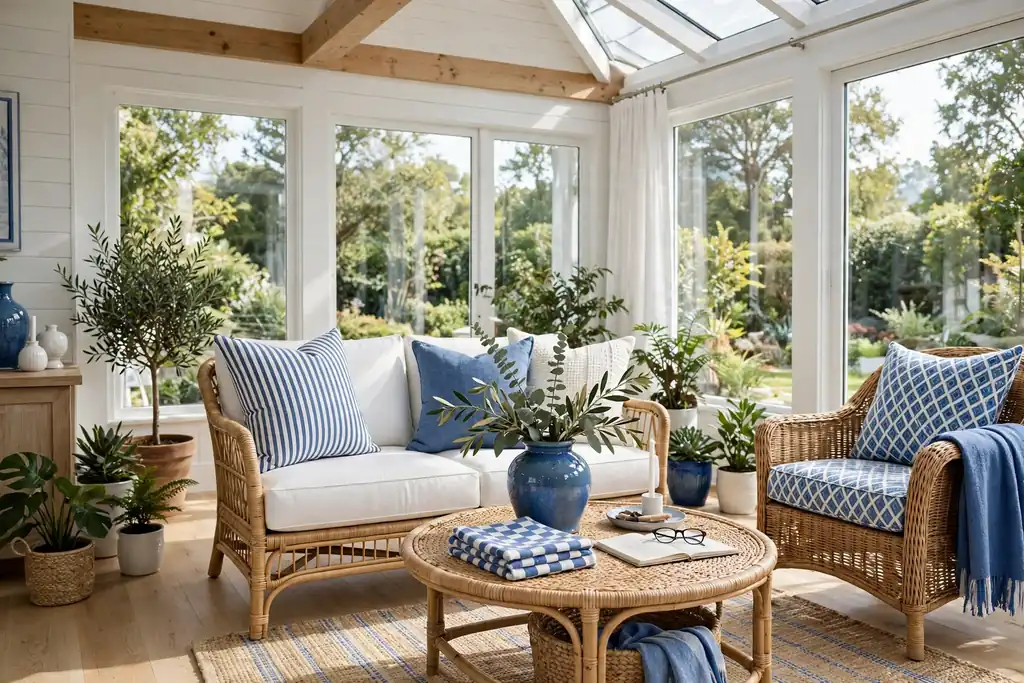
    Add coastal blue and white accents through two or three pieces only, such as a striped pillow, a blue ceramic vase, and a white throw, so the room gains a fresh seaside note without a full theme. Blue suits sunrooms because it links to sky and garden tones outside.

    Keep the blue to one shade family, such as soft navy or pale sky blue, and repeat it in at least two places so it looks planned. If the room already has a strong accent color, use blue sparingly, in one or two spots only, so the palette does not split.

    16. Botanical Prints on the Solid Wall

    Framed botanical prints hung in a row on a solid sunroom wall above a bench.

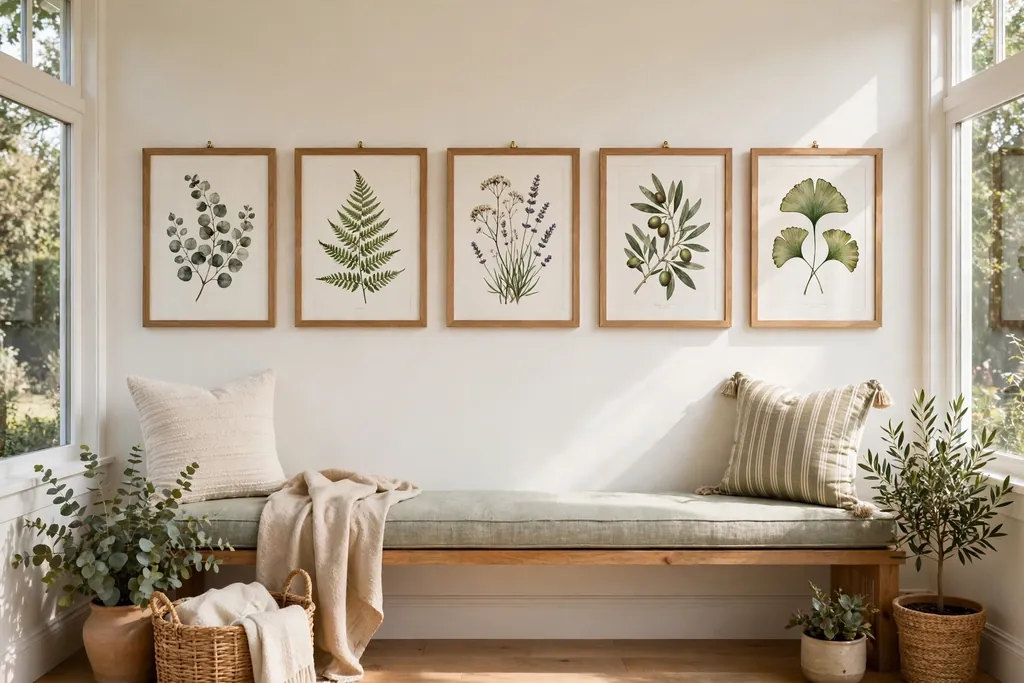
    Hang two or three framed botanical prints on the one solid wall, at eye level from the seats, using the same frame color and similar print sizes for a calm group. Botanical prints suit a sunroom because they link the indoor plants to the garden outside.

    Hang prints with fixings rated for their weight, and keep glass frames secure, since sunroom walls can get warm in direct sun. Avoid hanging prints on glass or in direct sun if the print will fade, and choose one wall for art so the window walls stay clear.

    17. Lanterns and Low Lamps for Evenings

    Sunroom in the evening with lanterns and low lamps giving warm light beside seating.

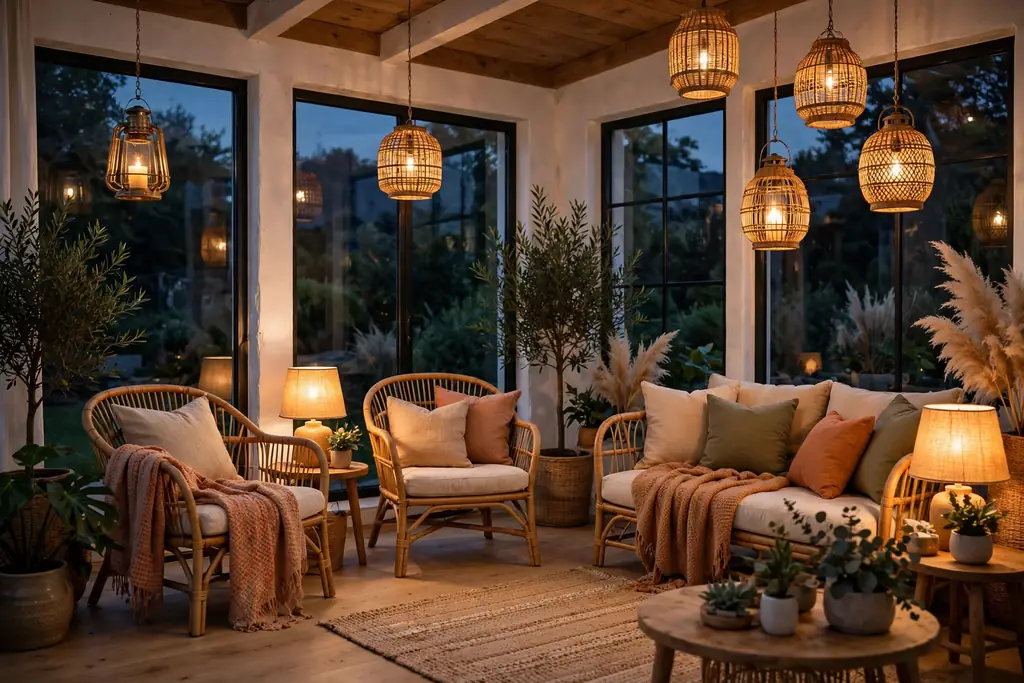
    Set lanterns with battery candles on the coffee table and side tables, and add table lamps with linen shades at seating height, so the sunroom works after dark without harsh overhead light. Low, warm light makes cream, wood, and plant tones look richer in the evening.

    Use battery candles inside lanterns near fabric or dried stems, and keep real flames in holders, clear of curtains and throws, and never left burning unattended. Put lamps at both ends of the seating area so no one sits in shadow, and keep switches within reach of the sofa.

    18. Ceiling Fan for Air Movement

    Sunroom ceiling fan with light wood blades centered over a seating group.

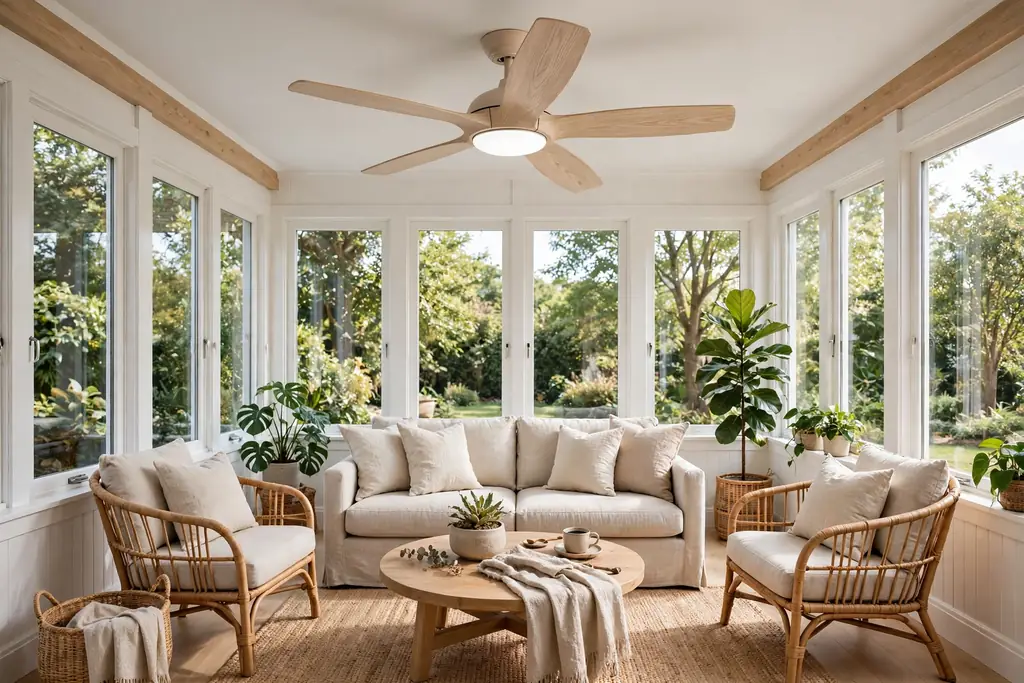
    Fit a ceiling fan with light wood blades and a simple light kit, centered over the seating group, so warm air moves on still summer days and the room stays usable without closing the windows. A fan also helps on mild days when you want air movement but no draft from an open door.

    Choose a fan size suited to the room, and set the blades high enough to clear heads and tall plants. Dust the blades often, since sunroom dust shows on light blades, and use the fan on a low setting first, so papers and light throws do not blow around.

    19. Baskets and a Storage Bench for Clutter

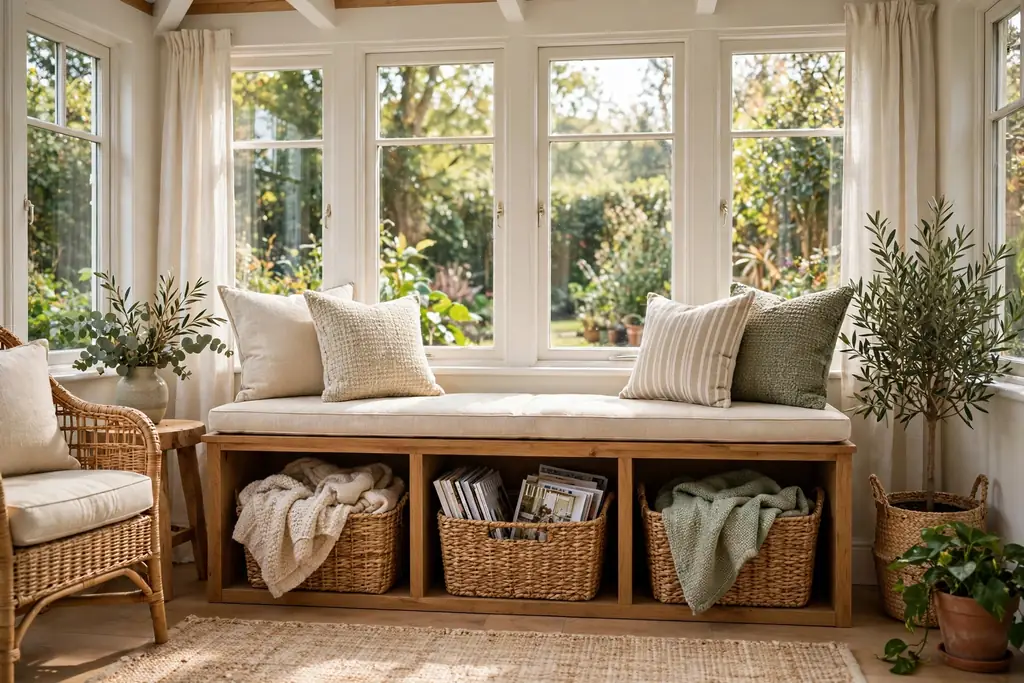
    Storage bench with woven baskets holding throws and magazines in a sunroom.

    Place a storage bench under a window or against the solid wall, with woven baskets inside or beneath it for throws, magazines, and garden tools. Baskets keep daily clutter out of sight while the bench top stays clear for a plant, a tray, or extra seating.

    Label baskets only if the household needs it, and keep one basket empty for quick tidy ups before guests arrive. Shake baskets outside monthly, since woven fibers gather dust, and replace a basket when the weave starts to fray at the rim.

    20. Seasonal Cushion and Throw Swap

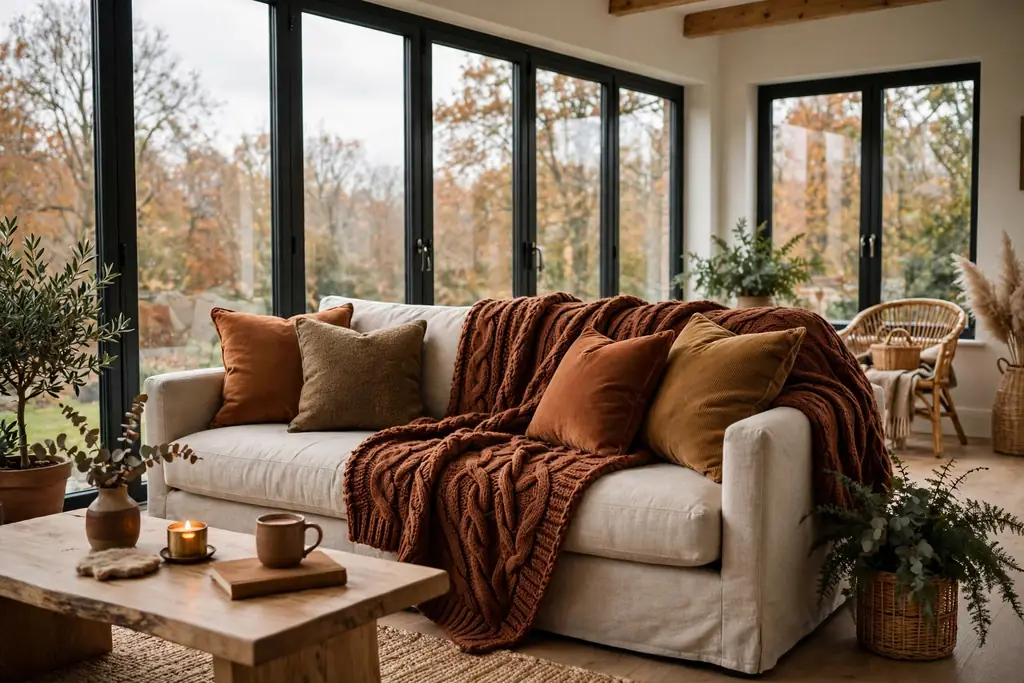
    Sunroom sofa with a heavier knit throw and warmer cushion covers for cooler months.

    Plan a simple seasonal swap: light cotton throws and pale cushion covers for summer, and heavier knit throws and warmer covers for cooler months, stored in one labeled basket or bag. The same approach works in a fall living room, with warmer colors and thicker fabrics for the cooler season.

    Swap one layer at a time, starting with throws, then cushion covers, so the room changes without a full restyle. Wash the outgoing covers before storing them, and store them dry and flat, so the next swap takes minutes rather than a wash day.

    21. Small Coffee Cart by the Door

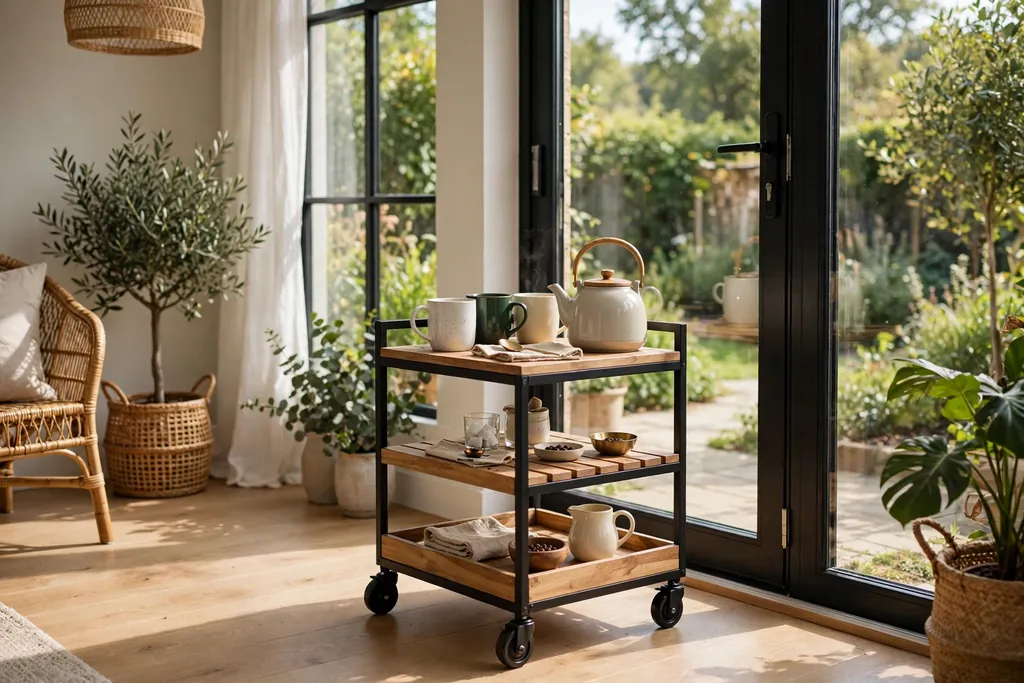
    Small rolling coffee cart with mugs and a teapot near a sunroom door.

    Set a small rolling cart near the sunroom door with mugs, a small teapot or coffee pot, and a jar for spoons, so drinks stay in the sunroom and trips to the kitchen drop. A cart works well in a sunroom used for morning coffee or afternoon tea.

    Keep the cart stable and clear of the main walkway, and put heavier items on the bottom shelf. Wipe the cart after use, and move it aside when the room needs extra floor space for guests, since a cart on wheels is easy to shift.

    22. Windowsill Herbs in Matching Pots

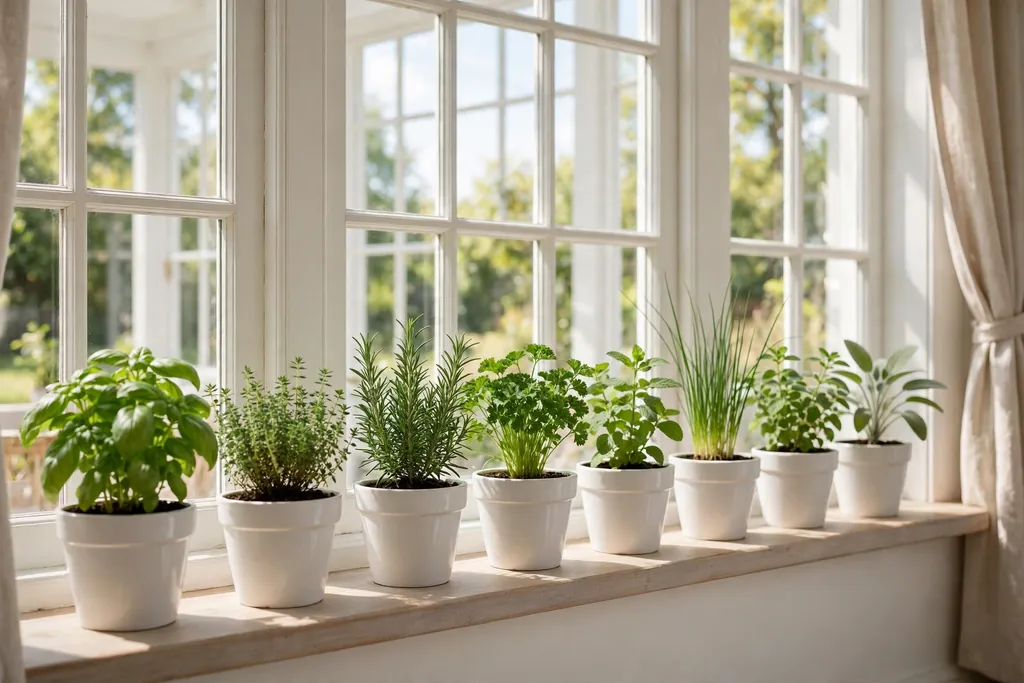
    Small herb pots in matching white pots lined along a sunny sunroom windowsill.

    Line the sunniest windowsill with small herb pots in matching terracotta or white pots, such as basil, mint, and parsley, so the sill works as a small kitchen garden. Herbs suit a sunroom sill because they get bright light and stay within reach for cooking.

    Water herbs lightly and set each pot on a small saucer, so damp soil does not mark the sill. Trim herbs often for cooking, which also keeps them bushy, and move any herb that wilts in strong midday sun to a slightly shaded spot on the same sill.

    23. Entry Bench with Hooks and a Mat

    Low entry bench with wall hooks and a washable mat just inside a sunroom door.

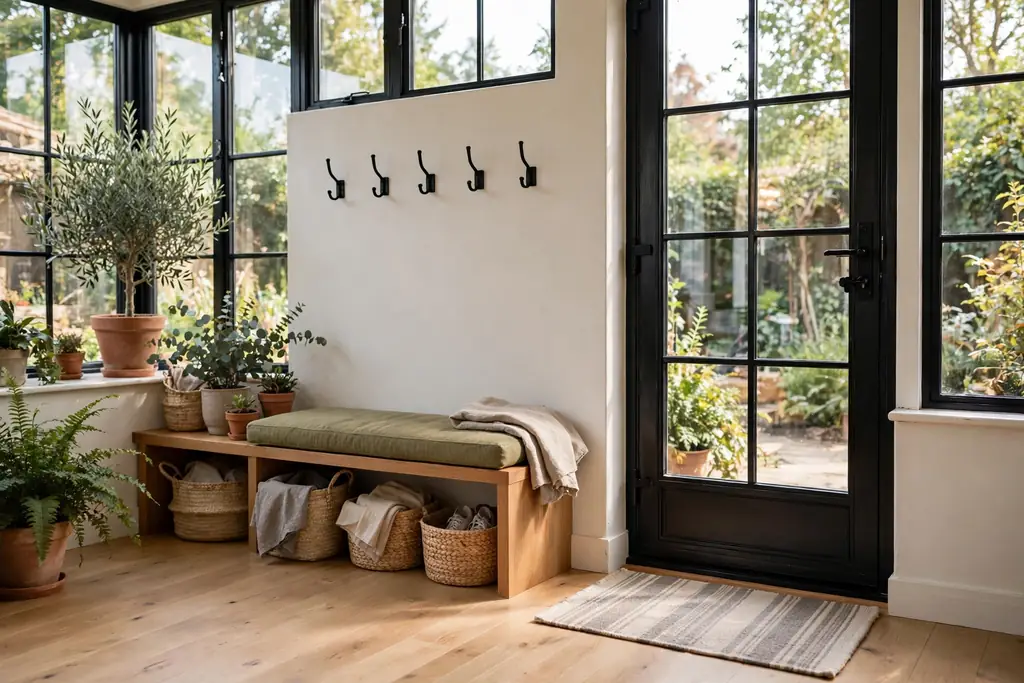
    Place a low bench just inside the sunroom door, with wall hooks above it for hats and light jackets, and a washable mat under it for shoes. This entry zone keeps garden shoes and outdoor gear from spreading into the seating area, and it gives guests a clear place to settle.

    Keep the bench top mostly clear, with one small tray for keys or sunglasses, so it stays usable as a seat. Shake the mat outside weekly, and wipe the bench after wet days, since sunroom entries see mud and pollen from the garden.

    Conclusion

    A bright sunroom works best when layout, light, and fabric choices come first. Face seating toward the view, layer sheers with shades you can adjust, choose washable fabrics, and group plants by their light needs. Then add one rug, one calm palette, and low evening light, and swap throws and cushion covers as the seasons change. Start with the one idea that fixes your biggest daily problem, whether that is glare, seating, or storage, and add the next idea only when the first one feels settled.

    FAQs

    How do you decorate a sunroom on a small budget?

    Start with textiles, plants, and shade, since cushion covers, a rug, sheers, and grouped pots change a sunroom for less than new furniture. Use pieces you already own first, such as a side table, a lamp, and baskets, then add one larger piece, like a rug or a chair, only when you know the layout works.

    What furniture works best in a sunroom?

    Light, movable furniture works best, such as a slipcovered sofa, rattan chairs, a wicker coffee table, and a small side table for each seat. Choose washable cushion covers and fade resistant fabric where possible, and keep pieces low enough that they do not block windows or the view.

    How do you keep a sunroom from getting too hot?

    Use shade in layers, with sheer curtains for soft light and bamboo shades or blinds you can lower at midday, and open windows or run a ceiling fan for air movement. Keep dark fabrics and heavy rugs to a minimum in the sunniest spots, since they hold heat, and move heat sensitive plants out of direct midday sun.

    What plants are good for a sunroom?

    Plants that suit bright light work well, but the right plant depends on how much direct sun your room gets and how often you water. Check each plant label for light and water needs, group plants with similar needs together, and start with a few pots so you can learn what thrives before filling every sill and corner.

    How do you make a small sunroom feel larger?

    Keep walls light, leave some glass clear, and use one rug, one palette, and low furniture that does not block windows. Choose a round table, hanging planters, and a storage bench that serves two uses, and avoid filling every wall and corner, since open floor and clear glass make a small room feel larger.

    Can a sunroom be used all year?

    Yes, a sunroom can be used all year if it has shade for summer, a heat source or warm throws for cooler months, and fabrics and plants suited to changing light. Add low evening light for dark winter afternoons, swap cushion covers and throws by season, and check windows and doors for drafts before the coldest months.


  • 17 Painted Porch Floor Ideas to Refresh Your Entrance

    17 Painted Porch Floor Ideas to Refresh Your Entrance

    Painted porch floors refresh an entrance by adding color, pattern, and a clean finish to worn wood or concrete, and the best choice depends on your house color, porch size, and how much upkeep you accept. Solid colors suit small porches, while checkerboard, stripes, and stencils suit larger floors with room for pattern to breathe.

    The 17 ideas below cover solid colors, classic patterns, stencils, and two tone schemes, so you can pick one that fits your porch size and your house style. Start with the floor color, then add the door, planters, and seating around it, since the floor sets the tone for the whole entrance. The same layered approach that works for a fall front porch applies here: one strong floor choice, repeated in small touches, reads as one plan rather than a collection of separate pieces.

    Key Takeaways

    • Pick the floor color first, then repeat it in small touches, such as the door, planters, or cushions, so the entrance reads as one plan.
    • Solid colors suit small porches, while bold patterns, such as checkerboard and wide stripes, need a larger floor to breathe.
    • Clean, sand, and prime the floor before painting, and use paint rated for floors and outdoor use, so the finish lasts through foot traffic and weather.
    • Test a color in daylight and at dusk before painting the whole floor, since porch light changes how a color looks.
    • Keep the walking path clear of decor, and add a mat at the door to protect the painted finish from grit and wet shoes.
    • Touch up high traffic areas, such as the steps and the threshold, once a season, so small chips do not spread.

    1. Classic White Porch Floor

    Front porch with a classic white painted wood floor, white trim, and a dark front door.

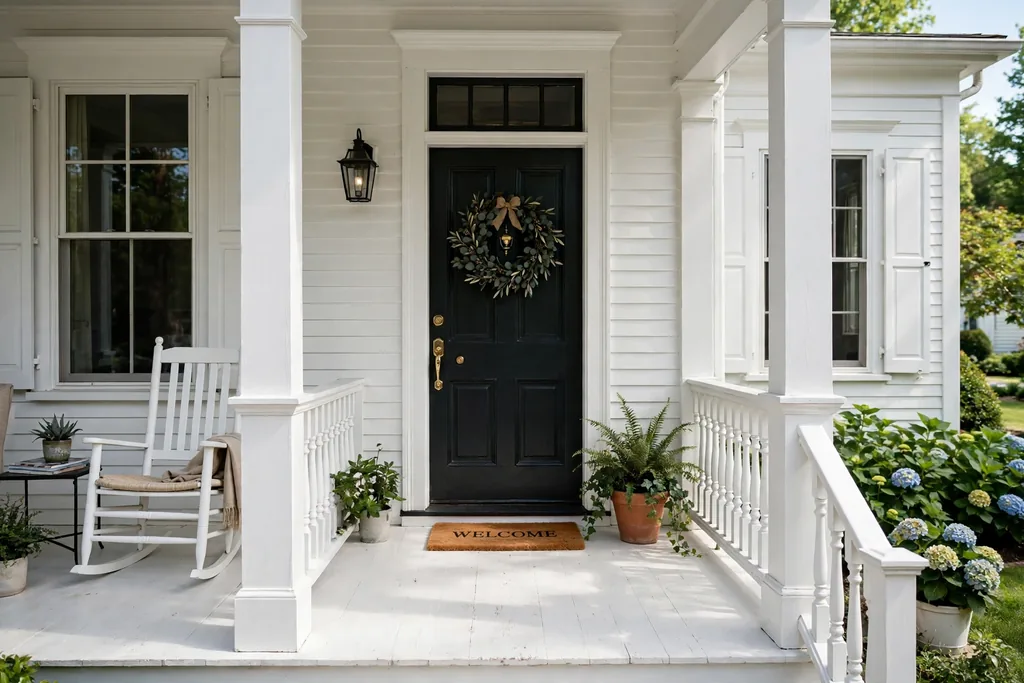
    A classic white porch floor brightens a shaded entrance and makes the whole porch feel clean and open. Paint the boards in a warm white, not a cold blue white, so the floor suits wood siding, brick, and painted trim alike. White works best on covered porches, where it stays cleaner longer.

    Clean the boards well before painting, and fill gaps and nail holes so the finish looks smooth. Two thin coats give a more even result than one thick coat, and a floor rated topcoat helps the white resist scuffs. Pair a white floor with a dark door or dark planters for contrast, and sweep it weekly, since dust shows fast on white.

    2. Soft Sage Green Boards

    Front porch with soft sage green painted floor boards, cream trim, and terracotta pots.

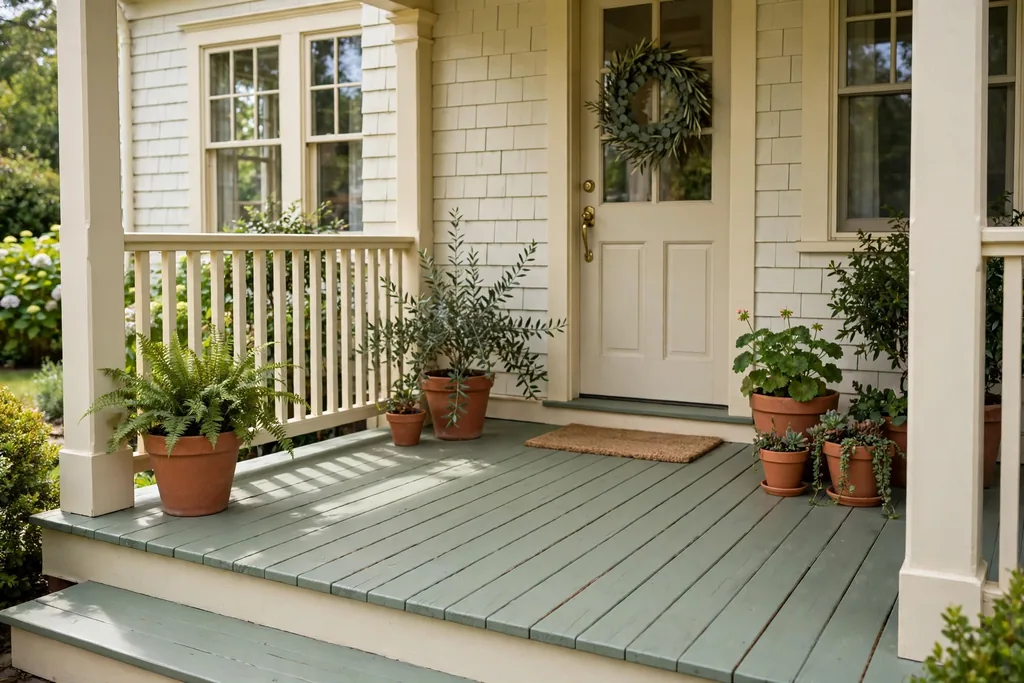
    Soft sage green boards give a porch a calm, garden linked color that suits cream trim and natural wood. Paint each board in the same sage tone, with the grain still faintly visible, so the floor reads as painted wood rather than a flat slab. Sage suits houses with green yards and muted siding.

    Test the sage in daylight, since some greens turn grey in shade and yellow in sun. Keep the door and trim in cream or warm white, so the green stays the main color. Sage pairs well with terracotta pots and plain wood chairs, and it hides dust better than white or pale grey.

    3. Black and White Checkerboard

    Wide front porch with a black and white checkerboard painted floor and a plain front door.

    A black and white checkerboard floor is the boldest classic porch pattern, and it suits a wide porch with a plain door and simple furniture. Paint the squares in equal sizes, sized to the porch so the pattern ends in full squares at the edges where possible. Large squares suit large porches, while smaller squares suit a narrow porch.

    Mark the grid with chalk lines and tape before painting, and paint the lighter color first, then the darker color. Check the grid from the street, since a crooked line shows at once in a checkerboard. Keep furniture and planters simple, since the floor already carries the pattern, and use a dark mat at the door to ground the scheme.

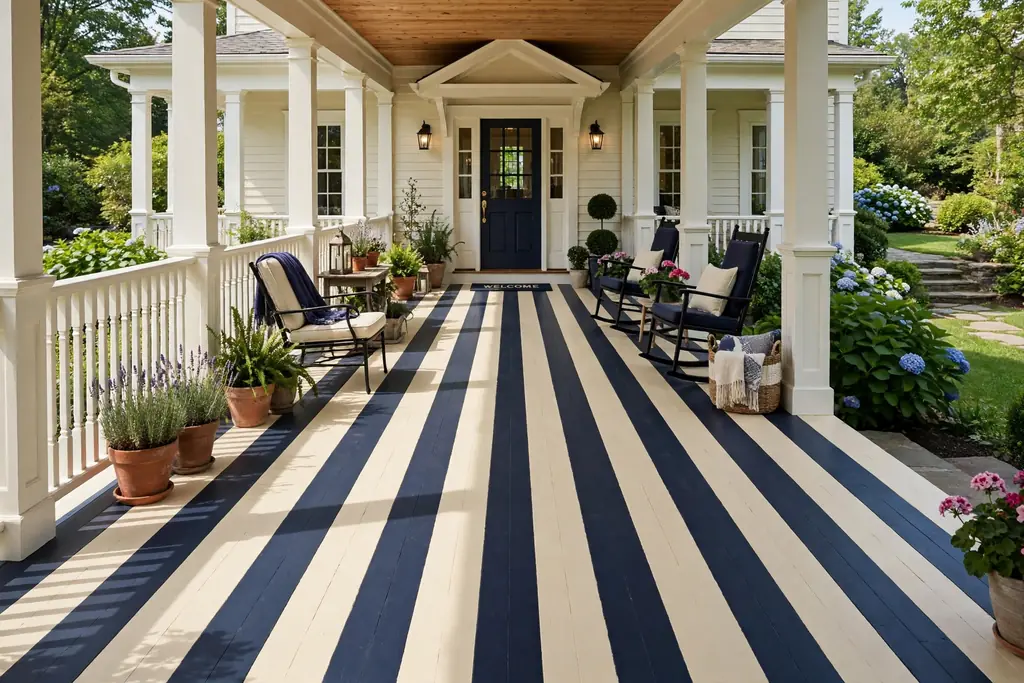
    4. Wide Navy and White Stripes

    Front porch with wide navy and white striped painted floor boards leading to the front door.

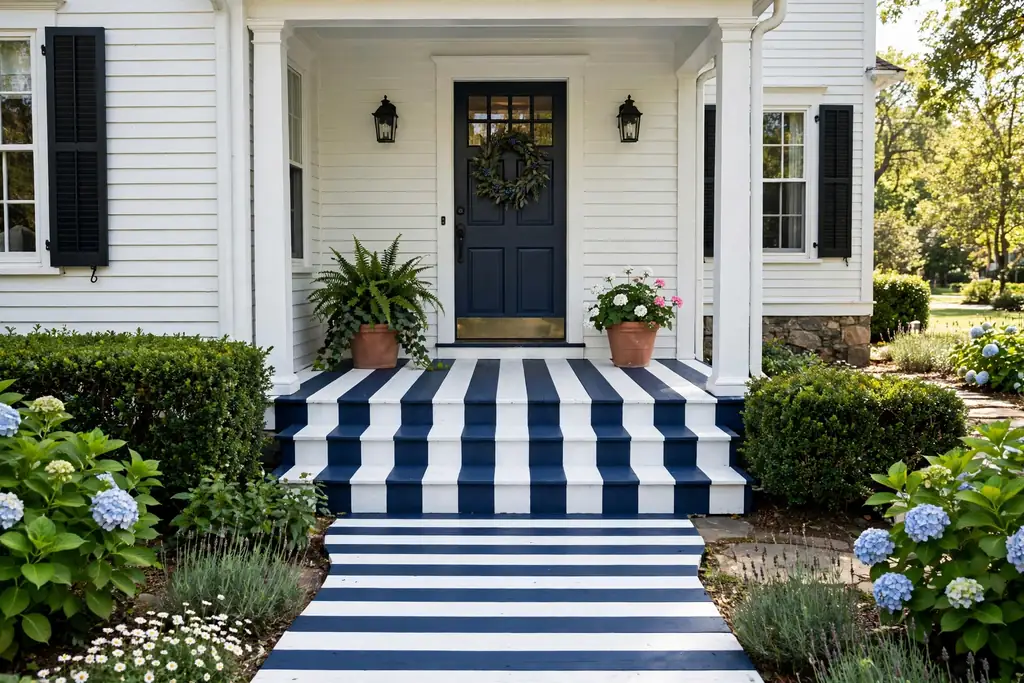
    Wide navy and white stripes run along the porch boards and draw the eye toward the door. Paint stripes across the width of the porch, in bands of equal width, so the pattern feels calm rather than busy. Navy suits white houses, grey siding, and coastal style homes.

    Tape each stripe carefully and press the tape edges down, so paint does not bleed under the tape. Paint the white bands first, let them dry fully, then tape and paint the navy bands. A striped floor pairs well with plain cushions and a simple wreath, and it suits a porch where the door is already a strong color.

    5. Warm Terracotta Solid Color

    Front porch with a warm terracotta painted floor, warm white trim, and green plants.

    A warm terracotta floor brings sun baked color to a porch and suits brick houses, stucco walls, and wood siding. Paint the whole floor in one terracotta tone, and keep the trim in warm white, so the color reads as warm rather than loud. Terracotta suits porches that get strong sun, where cooler colors can look washed out.

    Choose a terracotta with a brown base rather than an orange base, so it sits calmly next to plants and wood. Terracotta hides dust and leaf marks better than pale colors, which helps on an open porch. Pair it with cream planters and dark green plants for a garden feel.

    6. Weathered Grey Wash

    Older wood porch with a weathered grey wash painted floor showing wood grain and simple wood furniture.

    A weathered grey wash lets wood grain show through a thin coat of grey paint, for a soft, aged look. Brush on a thinned grey coat, wipe off the excess, and repeat until the tone is even, rather than painting a solid opaque layer. This suits older wood porches where a solid coat would hide character.

    A grey wash works best on wood in fair shape, since it does not hide cracks or stains the way a solid coat can. Seal the wash with a clear outdoor floor finish, so rain and foot traffic do not wear it away fast. Pair a grey wash floor with white trim and simple wood furniture for a quiet, coastal feel.

    7. Faux Tile Squares with a Stencil

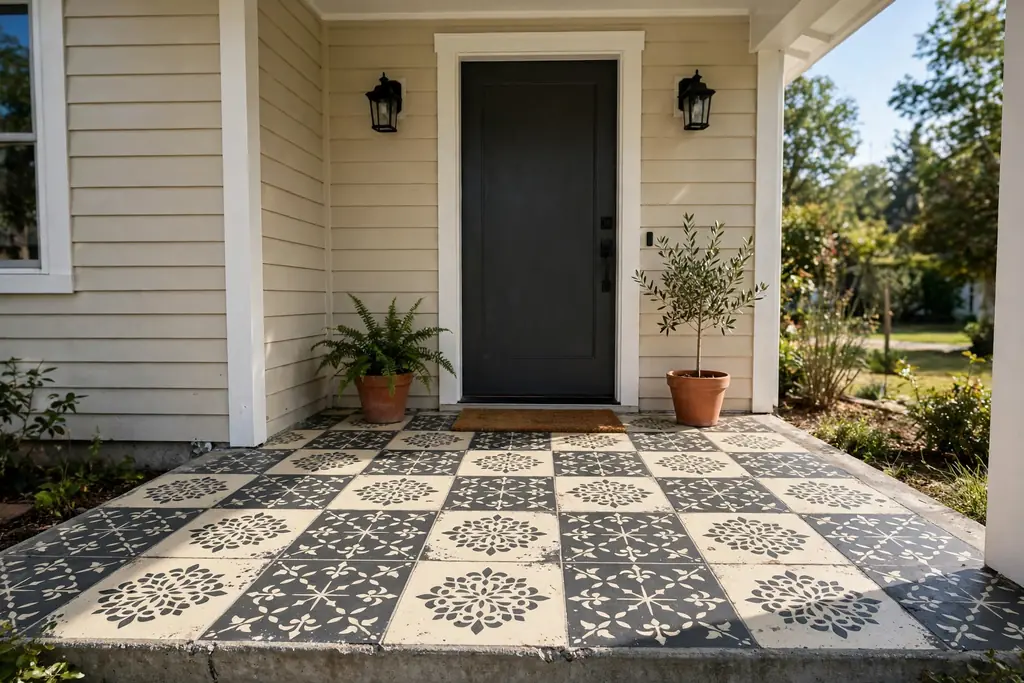
    Concrete porch with cream and charcoal faux tile squares painted with a stencil.

    A stencil that mimics tile squares gives a wood or concrete porch the look of tile without the cost or weight of real tile. Choose a square stencil with a simple pattern, in two colors, such as cream and charcoal, and repeat it in a grid across the floor. This suits concrete porches especially well, where the flat surface takes a stencil cleanly.

    Start in the center of the porch and work outward, so the pattern stays centered at the door. Use a dense foam roller and very little paint per pass, so the stencil edges stay crisp. Seal the finished floor with a clear topcoat, since stenciled paint wears faster than a solid coat under foot traffic.

    8. Herringbone Painted Pattern

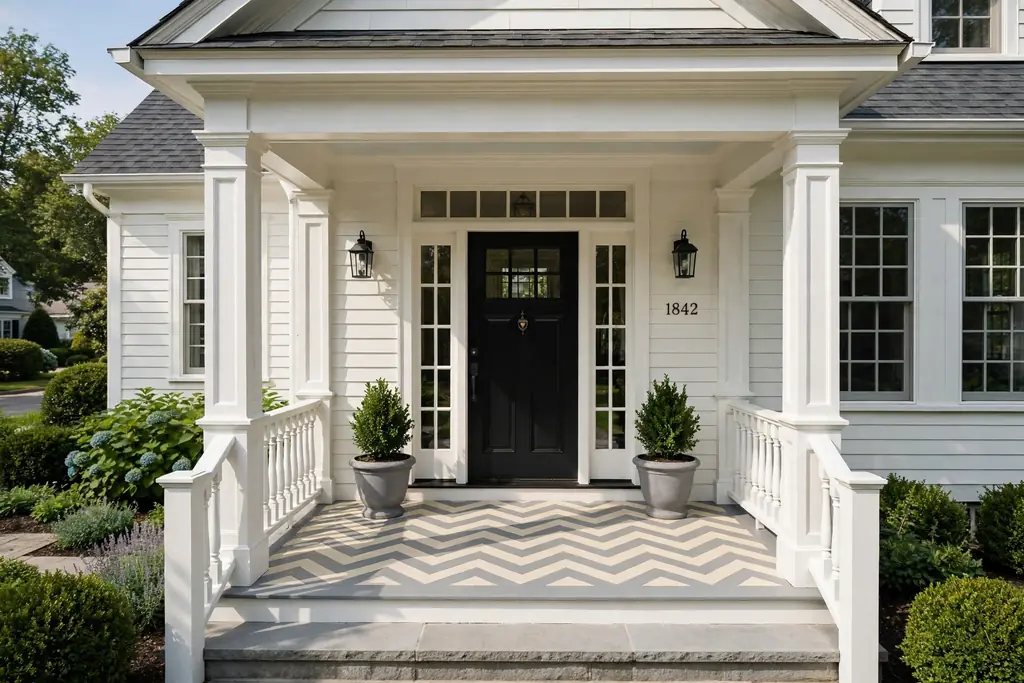
    Formal front porch with a herringbone painted pattern in cream and soft grey.

    A herringbone pattern paints short boards or rectangles in a zigzag layout, for a tailored floor that suits a formal entrance. Paint the rectangles in two tones, such as cream and soft grey, or in one color with a darker grout style line between each piece. Herringbone suits a rectangular porch where the pattern can run in full rows.

    Plan the layout on paper first, and mark the center lines on the floor before taping, since herringbone goes wrong fast without a guide. Keep the rest of the porch plain, with one pair of planters and a simple mat, so the floor stays the focus. This pattern takes more time than stripes or solids, so it suits a porch you plan to keep for years.

    9. Haint Blue Porch Floor

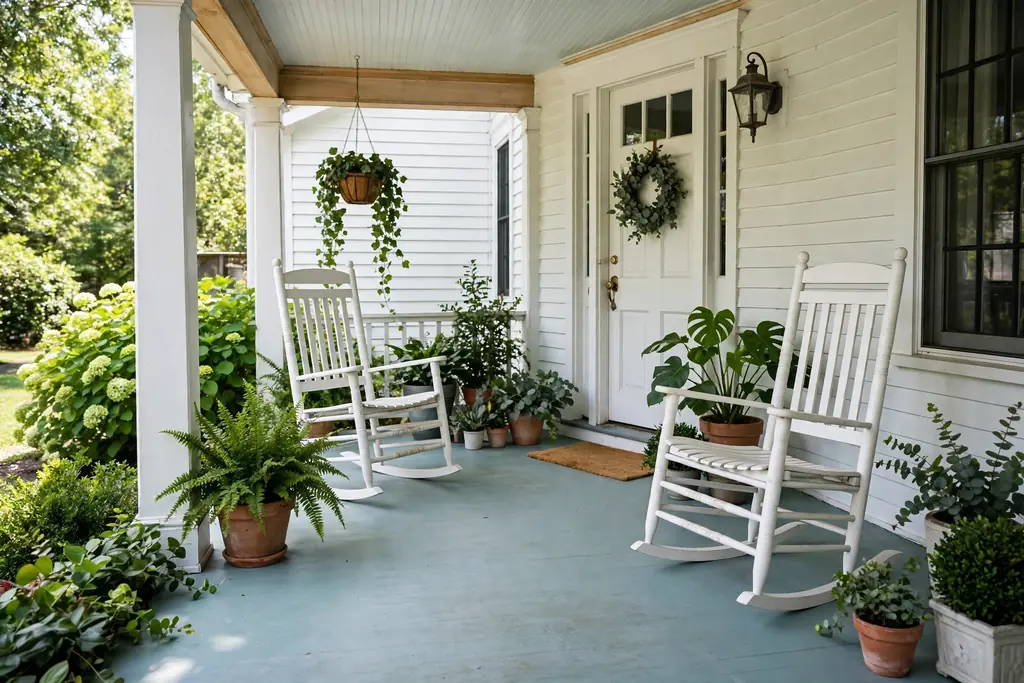
    Front porch with a pale blue green haint blue painted floor, white rocking chairs, and green plants.

    Haint blue, a soft blue green with a long history on Southern porches, gives an entrance a calm, sky linked color. Paint the floor in a pale blue green, and keep the ceiling and trim in white or the same blue, for a porch that feels light even in shade. Haint blue suits white houses, brick houses, and homes with deep porch roofs.

    Test the blue on a board in place, since porch shade can make it look grey, and sun can make it look bright. Pair it with white rocking chairs and green plants, and keep the door in a contrasting color, such as dark green or black, so the entrance still has a focal point.

    10. Brick Red Porch Floor

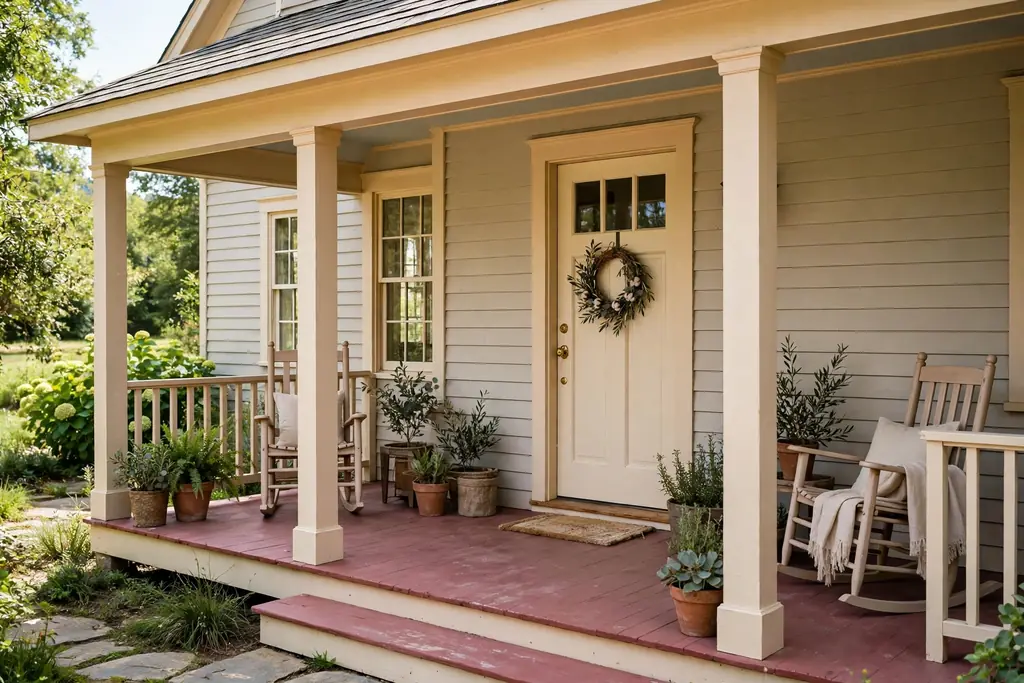
    Farmhouse porch with a muted brick red painted floor, warm white trim, and a cream front door.

    A brick red floor ties a porch to a brick house, a brick path, or red toned siding, and it grounds the entrance with a warm, earthy color. Paint the floor in a muted brick red, not a bright post box red, so it reads as a natural tone next to plants and wood. Brick red suits farmhouse and cottage style homes.

    Brick red hides dirt well, which helps on porches near gardens and gravel paths. Keep the trim in warm white and the door in cream, black, or dark green, so the red does not compete with the door color. A brick red floor pairs well with terracotta pots and dark wood furniture.

    11. Painted Border Frame

    Front porch with a pale floor and a dark charcoal painted border frame around the edge.

    A painted border frames the porch floor with a contrasting edge, for a finished look without painting the whole floor a new color. Paint the main floor in a pale tone, then paint a border band, about the width of one board, around the edge in a darker tone, such as charcoal or navy. This suits porches where the floor is in good shape but looks plain.

    Measure the border from the edge inward and tape both sides of the band, so the lines stay straight at the corners. Miter the corners by taping at a diagonal, or square them off for a simpler look. A border pairs well with a plain mat at the door and planters set inside the border line.

    12. Painted Rug at the Door

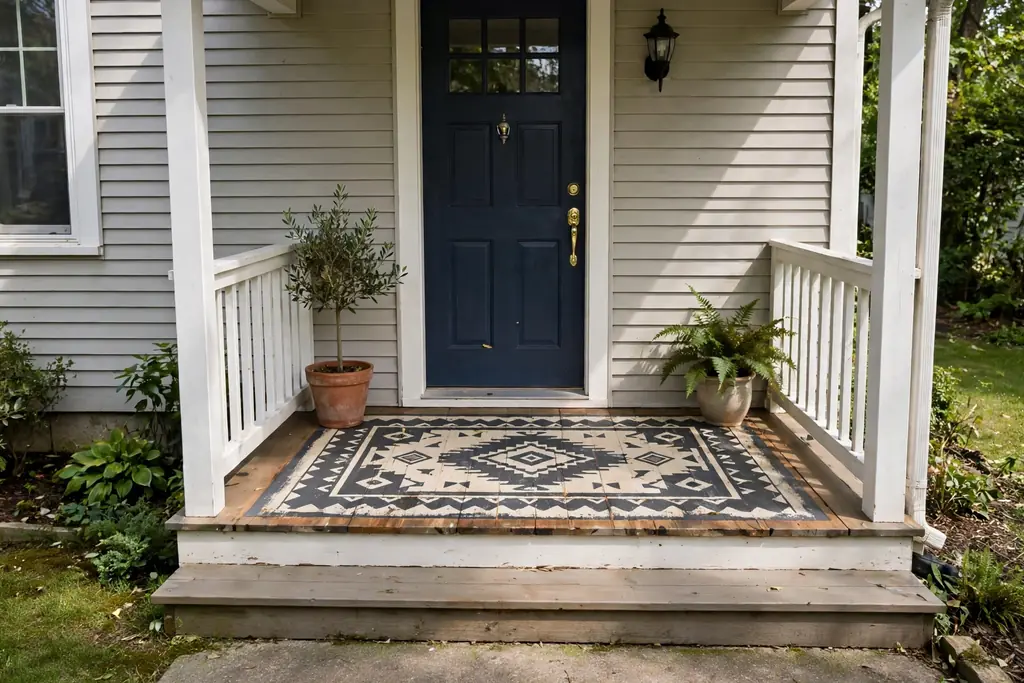
    Small front porch with a painted rug rectangle in charcoal and cream on the floor at the door.

    A painted rug is a flat rectangle painted on the floor at the door, in a pattern such as stripes or a simple border, that never needs shaking out. Paint the rectangle in a color that contrasts with the main floor, such as charcoal on cream, or cream on sage, and add a thin border line inside the edge. This suits small porches where a real rug would bunch or blow away.

    Size the painted rug to the door, about as wide as the door plus a small margin on each side, and long enough for two steps. Keep the pattern simple, since a busy painted rug competes with the door itself. A painted rug also gives a useful landing zone for shoes and parcels, and it can be repainted when the pattern wears.

    13. Two Tone Floor and Steps

    Front porch with a cream painted floor and darker charcoal painted steps leading to the door.

    A two tone scheme paints the porch floor one color and the steps a second color, for a clear, layered entrance. Try a pale floor with darker steps, such as cream boards with charcoal steps, or a sage floor with white steps, so the change of level reads clearly. This suits porches with three or more steps, where the steps are a visible part of the entrance.

    Paint the steps with extra care at the edges, since step edges wear fastest, and add a non slip additive to the step paint if the porch gets wet. Keep the handrail and trim in one of the two colors, so the scheme stays to two tones plus white. A two tone floor also helps guests see the steps at dusk.

    14. Diamond Lattice Stencil

    Front porch with a navy diamond lattice stencil painted on a cream floor.

    A diamond lattice stencil paints a repeating diamond grid across the floor, for a pattern that feels dressier than stripes but calmer than checkerboard. Choose a stencil with open diamonds in one accent color over a pale base, such as navy diamonds on cream, or charcoal diamonds on soft grey. This suits a porch with plain furniture and a simple door.

    Align the stencil rows with chalk lines, and check the first row from the door before continuing, since a drift in the first row repeats across the floor. Use a light hand with the roller, and lift the stencil straight up to avoid smudging. Seal the floor well, since the fine lines of a lattice wear faster than broad bands of color.

    15. Dark Charcoal Modern Floor

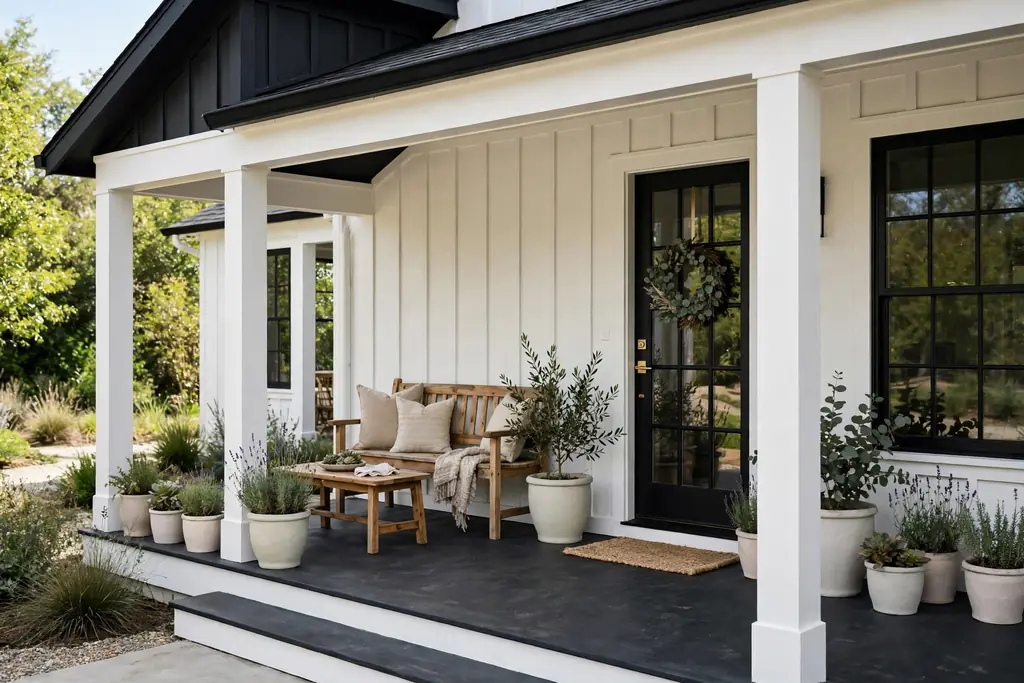
    Modern farmhouse porch with a dark charcoal painted floor, white trim, and pale planters.

    A dark charcoal floor gives a porch a modern, grounded look and makes white trim, light doors, and green plants stand out. Paint the whole floor in a flat charcoal tone, and keep the walls and trim pale, so the porch does not feel dark. Charcoal suits modern farmhouse homes and houses with black window frames or black doors.

    Charcoal shows dust and pollen more than mid tones, so sweep it often, and expect to touch up scuffs near the door. Pair it with pale planters, a light mat, and wood furniture, so the porch keeps a warm note. A charcoal floor also suits a porch with strong sun, where pale floors can glare.

    16. Soft Butter Yellow Floor

    Cottage porch with a soft butter yellow painted floor, warm white trim, and white chairs.

    A soft butter yellow floor adds a gentle, sunny note to a porch without the boldness of a bright yellow. Paint the boards in a pale, creamy yellow, and keep the trim in warm white, so the color reads as soft rather than loud. Butter yellow suits cottage style homes, white siding, and porches that face north and need warmth.

    Test the yellow in shade, since it can look cream on a bright day and mustard in deep shade. Pair it with white chairs, green plants, and a door in sage or navy for contrast. Butter yellow hides light dust better than white, but shows dark soil marks, so keep a mat at the door.

    17. Alternating Accent Boards

    Long front porch with alternating navy accent boards on a cream painted floor.

    Alternating accent boards paint every third or fourth board in an accent color, with the rest in a neutral tone, for a subtle rhythm across the floor. Try navy accent boards on a cream floor, or terracotta accent boards on a warm grey floor, keeping the accent boards evenly spaced. This suits a porch where a full pattern would feel too busy, but a solid color feels too plain.

    Count the boards and mark the accent boards before painting, so the spacing stays even across the whole floor. Paint the neutral boards first, then the accent boards, and keep the door and planters in the neutral tone, so the accent color stays a rhythm rather than a theme. This idea also suits a long porch, where the repeated accent boards lead the eye to the door.

    Conclusion

    Painted porch floors work best when the color or pattern fits the house, the porch size, and the amount of upkeep you accept. Start with one idea from this list, test the color in place, and prep the floor well before you paint, since prep decides how long the finish lasts. A solid color is the safest first step, while checkerboard, stripes, and stencils reward a larger porch and a steadier hand. Whichever idea you pick, keep the door, planters, and seating calm, so the floor can carry the entrance, and touch up the high traffic spots once a season. For a seasonal take on the same entrance, the farmhouse fall palette of rust, cream, and olive pairs well with most of these floor colors.

    FAQs

    What paint should I use for a painted porch floor?

    Use paint rated for floors and outdoor use, with a primer suited to your floor material, wood or concrete, and a clear topcoat if the paint maker advises one. Floor rated paint resists scuffs and foot traffic better than wall paint, and outdoor rated paint handles rain and sun. Check the label for porch, deck, or concrete floor use before you buy, and follow the drying times between coats.

    How do I prepare a porch floor before painting?

    Prepare a porch floor by sweeping it clean, washing off dirt and mildew, sanding rough or peeling spots, and filling cracks and nail holes, then priming bare wood or bare concrete. Let the floor dry fully before priming, since trapped damp lifts paint. On a previously painted floor, sand glossy areas lightly so the new coat grips, and remove any loose paint first.

    Do painted porch floors last, and how do I keep them looking good?

    Painted porch floors last well on covered porches with good prep, and less long on open porches in harsh weather, but most last a few seasons before they need touch ups. Sweep weekly, keep a mat at the door to catch grit, and touch up chips at the threshold and step edges once a season. Repaint the whole floor when wear covers large areas rather than small spots.

    What is the best painted porch floor color for a small porch?

    The best painted porch floor color for a small porch is a pale solid, such as warm white, soft sage, or pale grey, since pale colors make a small floor feel open. Keep the pattern simple, with a border or a painted rug rather than a bold checkerboard, and repeat the floor color in one small touch, such as a planter or a cushion, so the small porch reads as planned.

    Can I paint a concrete porch floor?

    You can paint a concrete porch floor with concrete rated floor paint, after cleaning the surface, etching or priming it as the paint label directs, and letting it dry fully. Concrete takes stencils well, since the flat surface gives crisp edges, and solid colors look smooth on concrete. Avoid painting concrete that stays damp, since damp lifts paint, and use a non slip additive on steps.

    How do I choose between a solid color and a pattern for my porch floor?

    Choose a solid color if your porch is small, your door is already bold, or you want a quick refresh, and choose a pattern, such as checkerboard, stripes, or a stencil, if your porch is large and the rest of the entrance is plain. Patterns need a larger floor to breathe and more prep time, while solids suit a first painting project and hide small flaws better.


  • 17 Craft Storage Cabinet Ideas to Keep Supplies Within Reach

    17 Craft Storage Cabinet Ideas to Keep Supplies Within Reach

    A craft storage cabinet works best when it groups supplies by use, keeps tools at hand level, and hides bulky stock behind closed doors. The 17 ideas below cover tall cabinets, armoires, wall units, and rolling carts with labeled bins, pull out trays, and clear fronts, so paper, paint, fabric, and small tools stay sorted and easy to reach.

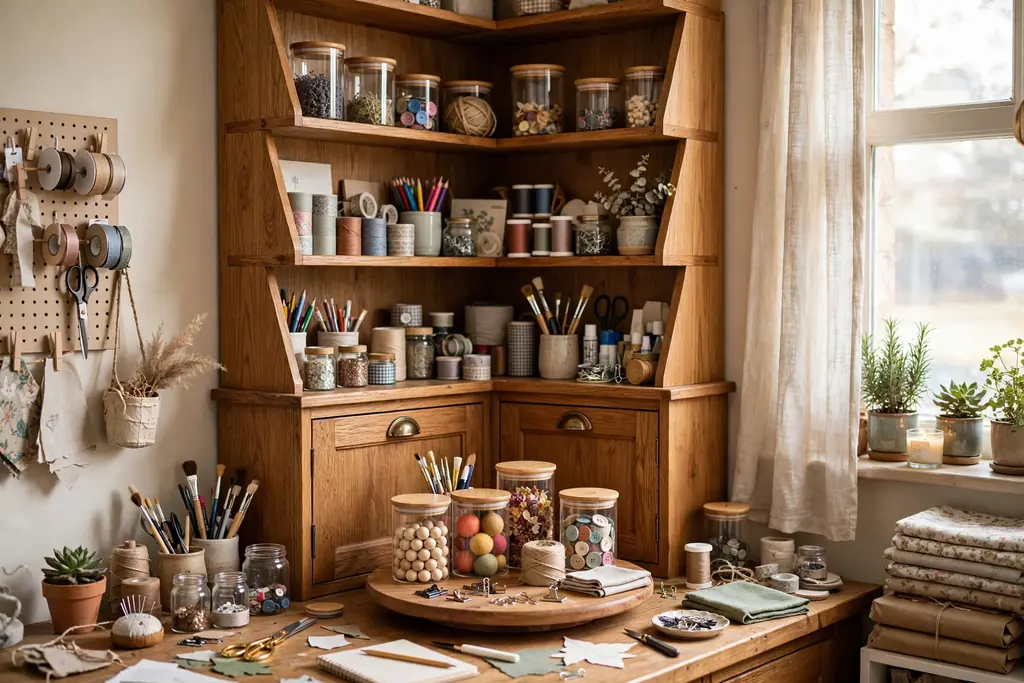
    Start by sorting supplies into groups you actually use together, such as paper and card making, paint and brushes, sewing, and small parts. Give each group one shelf, bin, or drawer, and label it in plain words. The same grouping rule that keeps bedroom storage usable applies here: what you reach for weekly stays at hand level, and backup stock goes higher or lower. Measure your tallest items first, from paper pads to paint bottles, so shelf heights fit the supplies instead of forcing supplies to fit the shelves.

    Key Takeaways

    • Group supplies by use, not by color alone, so each project pulls from one shelf or bin.
    • Keep weekly tools at hand level and move backup stock to higher or lower shelves.
    • Label every bin, drawer, and shelf in plain words, and keep the label facing out.
    • Use clear fronts or open bins for small items you need to spot fast, and closed doors to hide bulky stock.
    • Measure tall items before buying or building, so paper, rolls, and bottles fit without bending or tipping.
    • Leave one empty shelf or tray for works in progress, so new projects do not spill onto the work table.

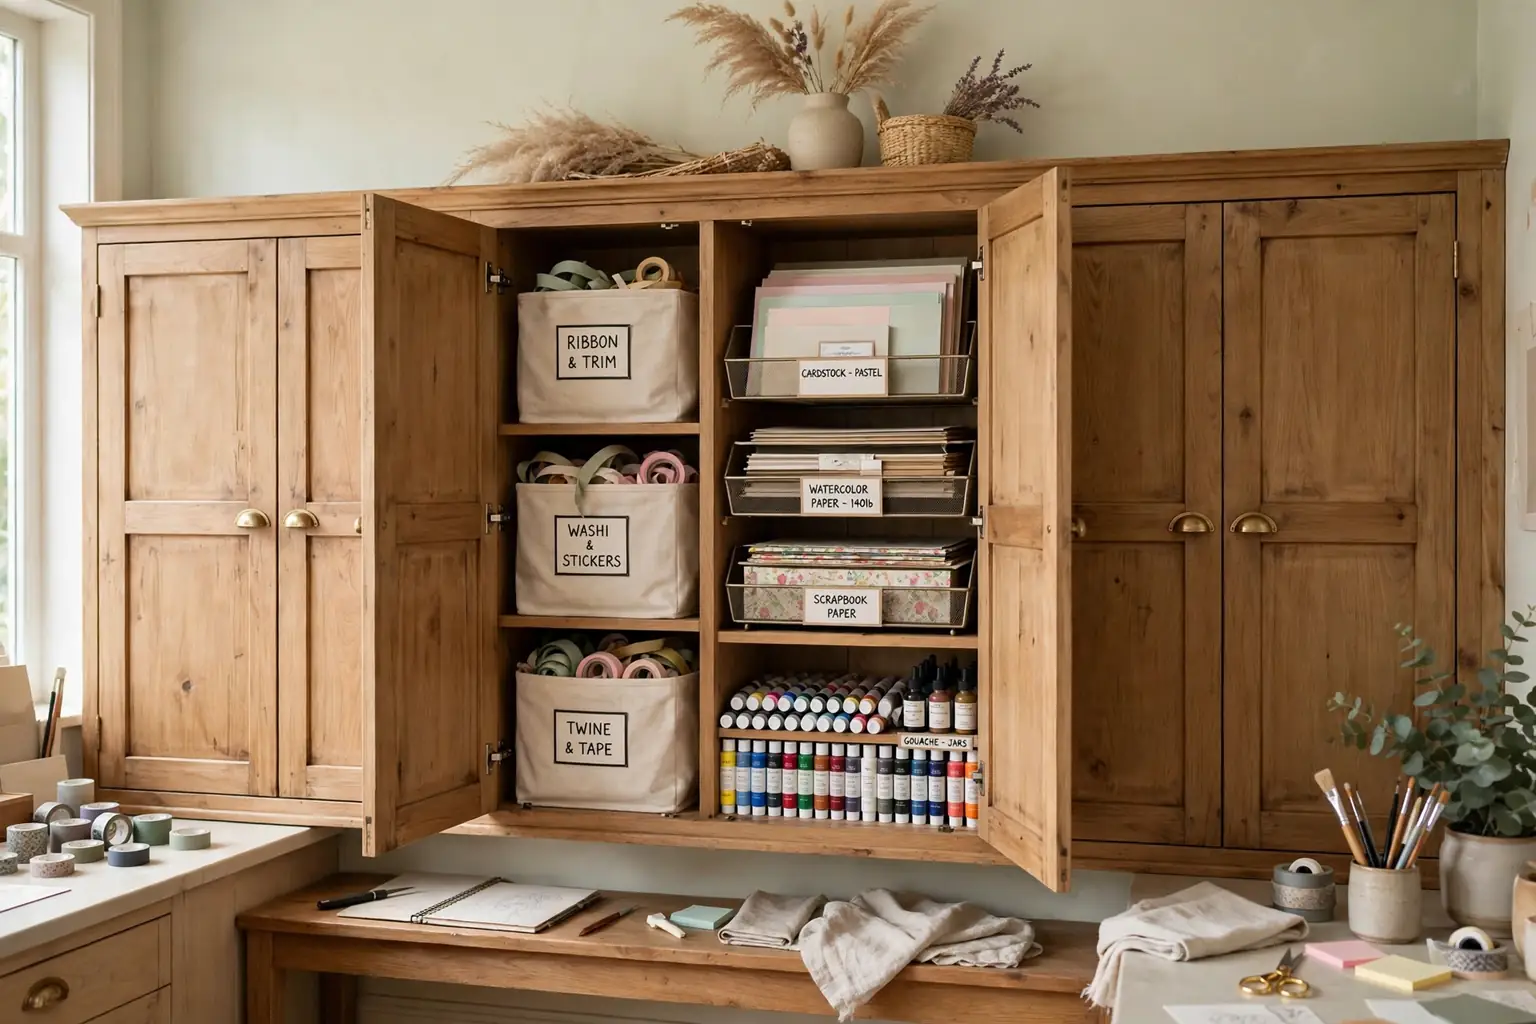
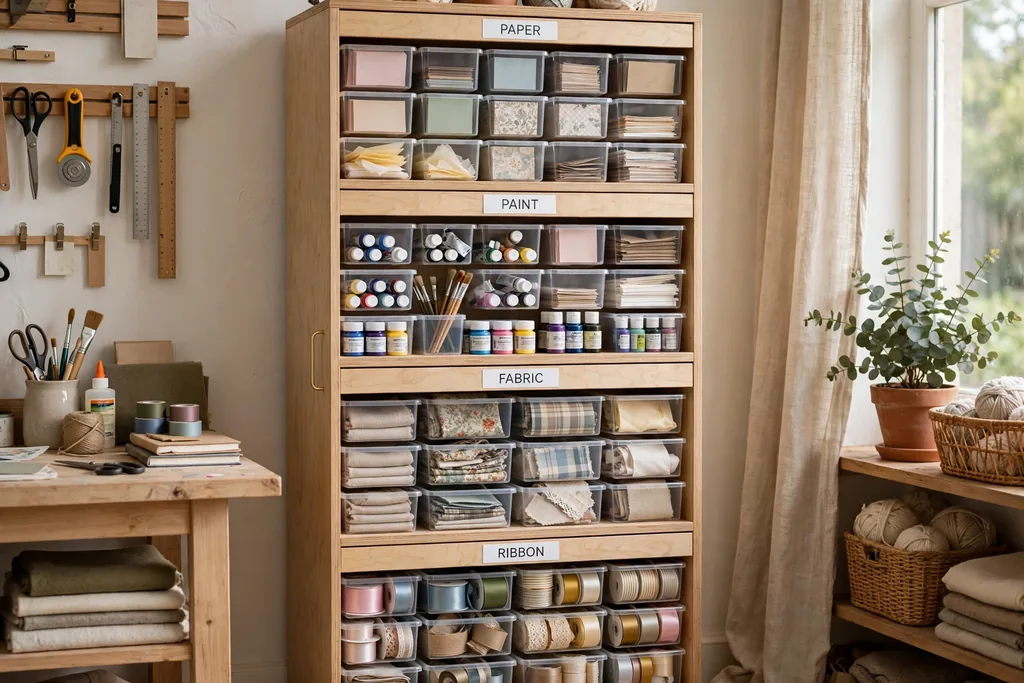
    1. Tall Cabinet with Labeled Bins

    Tall craft cabinet with uniform labeled bins for paper paint fabric and ribbon

    Use a tall cabinet with one labeled bin per supply group, such as paper, paint, fabric scraps, and ribbon, stacked from floor to eye level. Uniform bins keep the cabinet tidy even when the contents differ, and a label on each bin front means you can pull the right one without opening three others first.

    Keep heavy bins low and light bins high, and leave a small gap at the top of each bin so you can lift it out by its handle. If a bin holds small loose items, add a smaller box inside it, so beads or buttons do not slide to the bottom and mix with larger supplies.

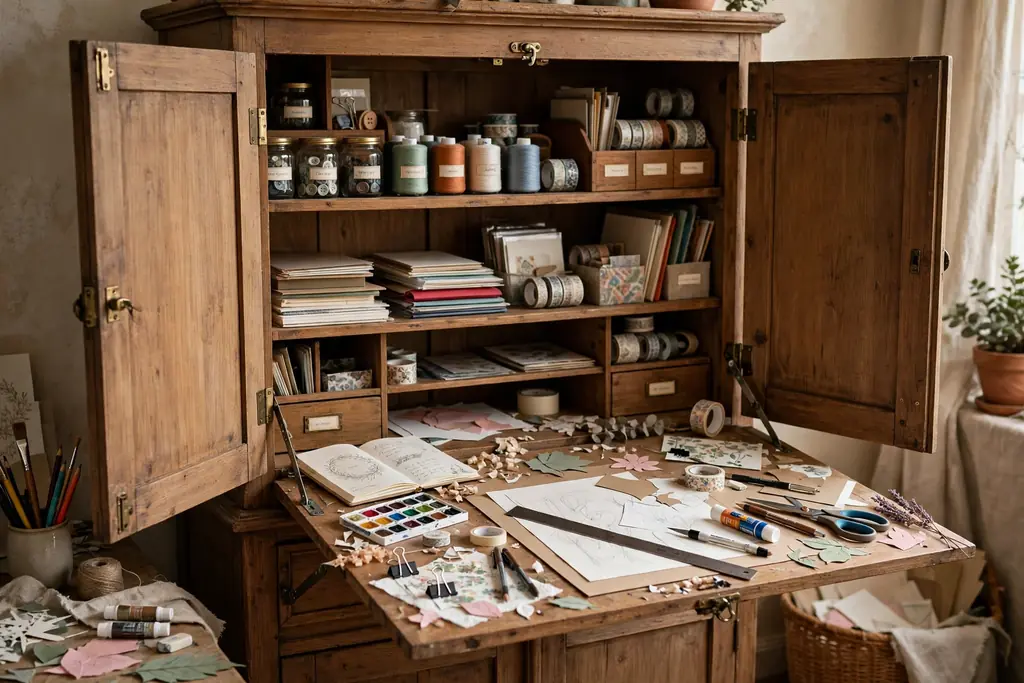
    2. Armoire with a Fold Down Work Table

    Armoire craft cabinet with a fold down work table paper and tools set out for use

    Turn a freestanding armoire into a craft cabinet with a fold down table fixed at sitting height inside the doors. When the table folds down, you gain a work surface; when it folds up, tools, paper, and small bins stay stored behind closed doors, and the room looks like a normal living space again.

    Fix a small lip or rail along the table edge so pens and scissors do not roll off while you work. Keep only the tools for the current project on the fold down surface, and return the rest to the shelves above, so the table can fold away without a clear out first.

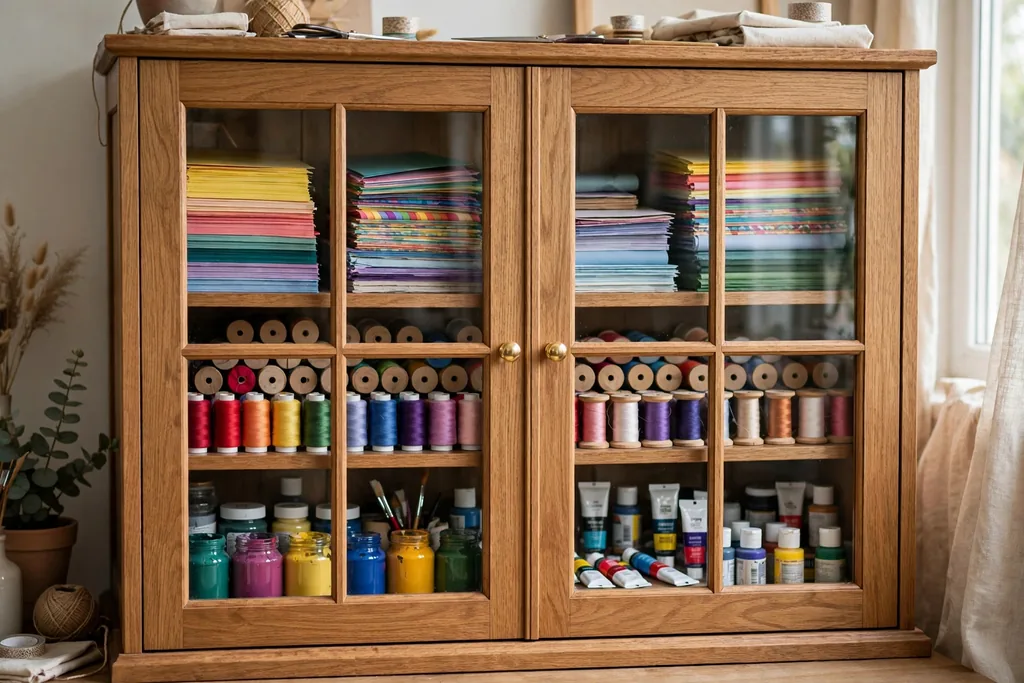
    3. Cabinet with Clear Front Doors

    Craft cabinet with clear glass doors showing colorful paper thread and paint inside

    Choose a cabinet with clear glass or clear acrylic doors so you can see paper colors, thread, and paint at a glance without opening every door. Clear fronts suit supplies you pick by color, since you can compare shades through the door before you start a project.

    Wipe the doors often, since dust and fingerprints show more on clear fronts than on solid wood. If the cabinet sits in bright sun, keep light sensitive items, such as photos and dyed fabric, in solid bins inside, so the clear doors do not expose them to fading light.

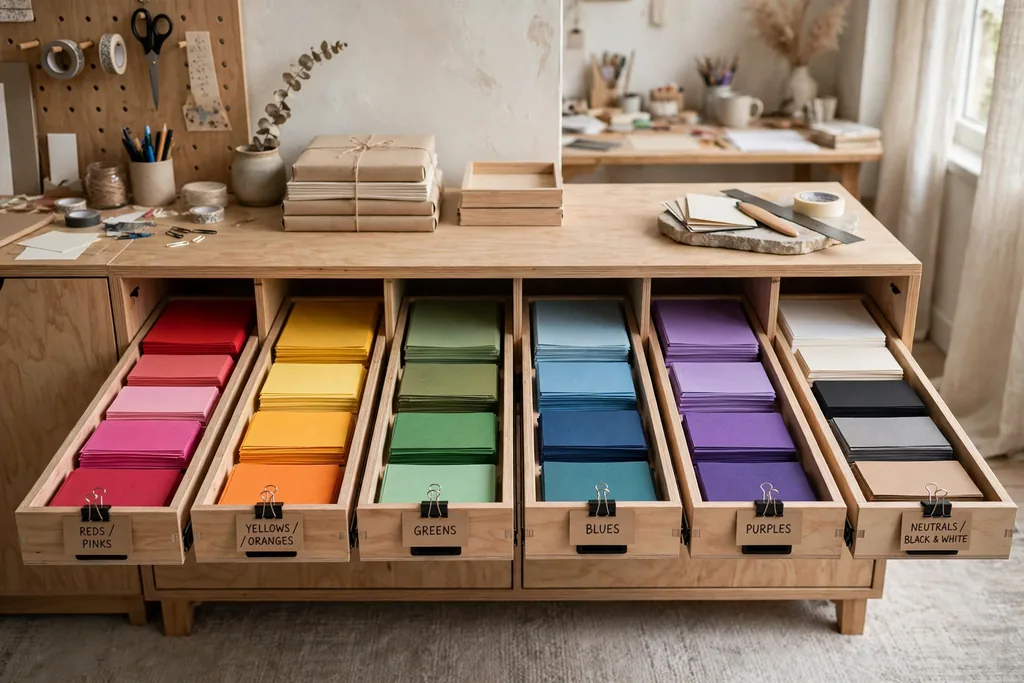
    4. Pull Out Tray Cabinet for Paper and Cardstock

    Cabinet with shallow pull out trays holding flat paper and cardstock in color groups

    Fit a cabinet with shallow pull out trays, one tray per paper size or color family, so sheets slide out flat instead of bending when you lift them from a stack. Shallow trays stop the common problem of a tall paper pile tipping over when you pull a sheet from the middle.

    Label each tray edge with the paper size and weight, and keep a sheet of scrap paper on top of each stack for test cuts. Store specialty paper, such as foil or vellum, in its own tray at the back, since it tears or creases more easily than plain cardstock.

    5. Paint Cabinet with Upright Bottle Rows

    Cabinet with short shelves holding paint bottles standing upright in color rows

    Set up a cabinet with short shelves spaced to fit paint bottles standing upright, with one row per color family and labels facing out. Upright storage keeps caps sealed and paint ready to use, and short shelf spacing stops bottles from tipping into a tall, hard to reach stack.

    Keep a small tray on one shelf for open bottles in current use, so wet caps do not mark the shelf. Check caps each month and wipe dried paint from threads, since a stuck cap can crack a bottle when forced. Store fabric paint apart from wall or craft paint, so the wrong paint does not end up on the wrong surface.

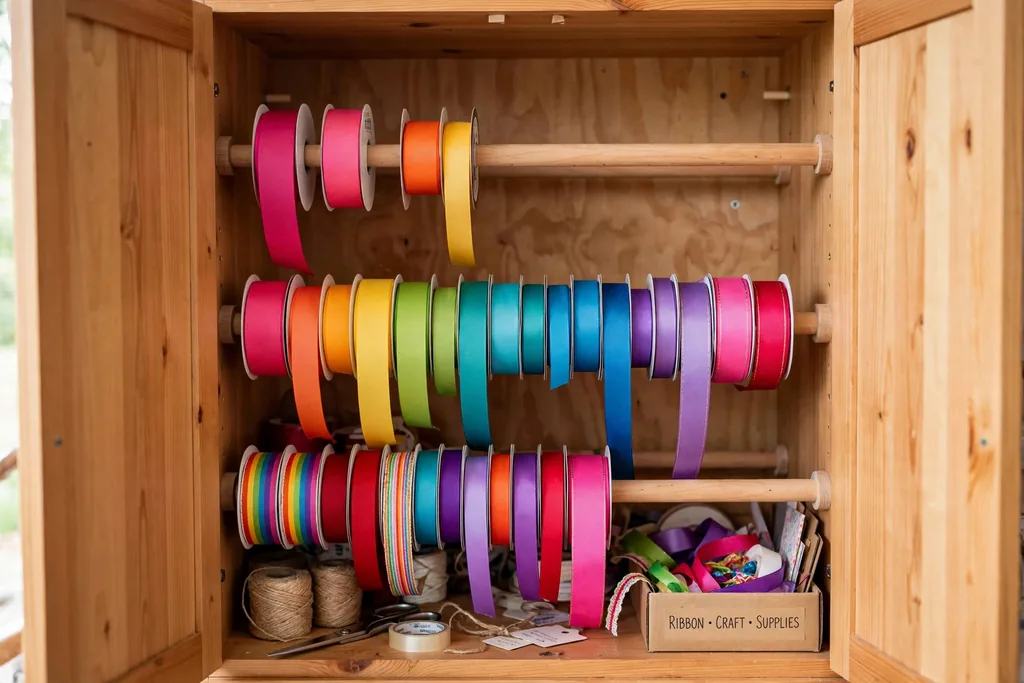
    6. Ribbon and Roll Cabinet with Dowel Rods

    Cabinet interior with dowel rods holding ribbon rolls in bright colors

    Mount dowel rods across the inside of a cabinet door or along a shallow cabinet section, and thread ribbon rolls onto the rods so each roll unwinds without leaving the cabinet. This setup keeps ribbon visible by color and stops rolls from unraveling inside a drawer.

    Cut each ribbon end at an angle after use and tuck it back through the rod gap, so the next pull starts clean. Keep wide rolls on the lowest rod and narrow rolls above, since wide rolls are heavier and easier to handle low. If a roll runs out, slide a new one on from the rod end without removing the rest.

    7. Fabric Cabinet with Cubbies and Folded Bolts

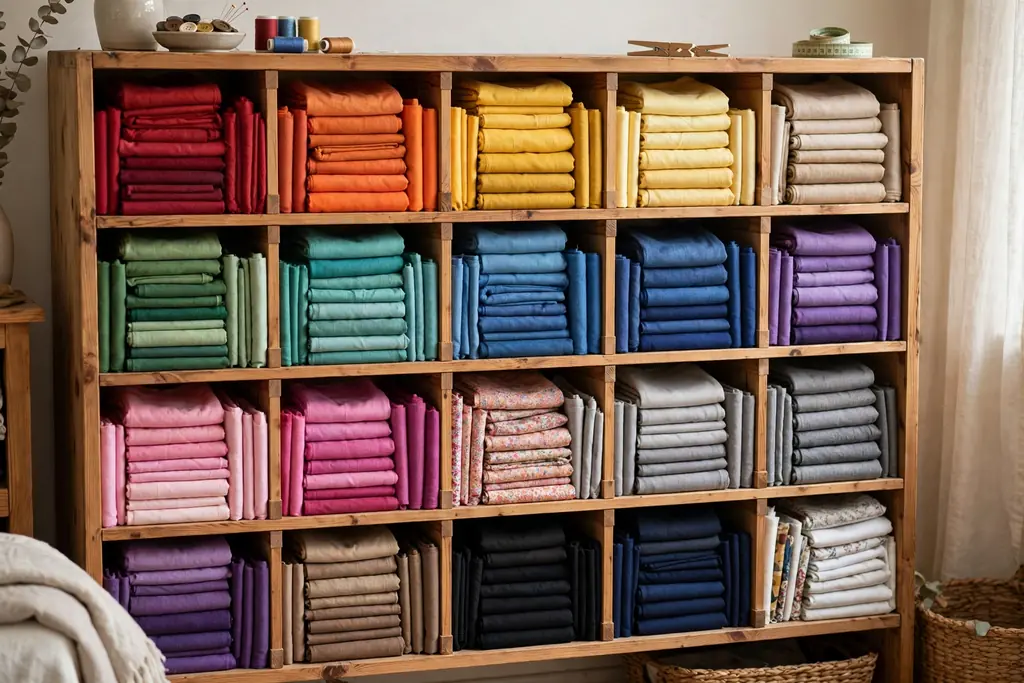
    Cabinet with cubbies holding folded fabric bundles sorted by color

    Divide a cabinet into cubbies sized for folded fabric, with one cubby per color family or fabric type, such as cotton, felt, and linen. Folding fabric to the same width keeps the cubbies neat, and you can see at a glance which colors are running low before you start cutting.

    Fold fabric around a stiff card to keep edges straight, and stand the bundles upright like files where the cubby allows it. Keep delicate fabrics, such as silk, in a closed bin on a higher shelf, away from rough fabrics that could snag them. Air the cabinet now and then, since stored fabric can pick up a musty smell in a closed space.

    8. Small Parts Cabinet with Tiny Drawers

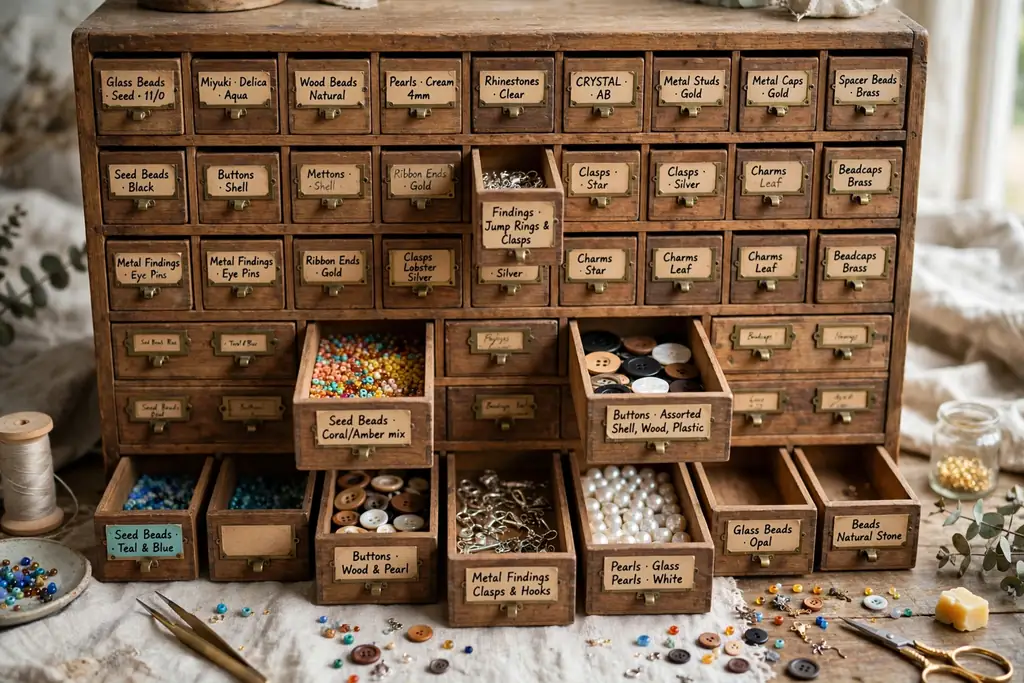
    Cabinet with rows of tiny labeled drawers holding beads buttons and small findings

    Use a cabinet fitted with rows of tiny drawers for beads, buttons, eyelets, sequins, and findings, with one drawer per item type and a label on each drawer front. Tiny drawers stop small parts from mixing in one large box, and they let you carry a single drawer to the table instead of the whole cabinet.

    Line each drawer with a small piece of felt or paper so tiny parts do not rattle or slip under the drawer divider. Keep a spare empty drawer for new findings, and sort it once a month, since small parts multiply fast and an unlabeled drawer soon becomes a mixed drawer again.

    9. Rolling Cabinet for a Shared Table

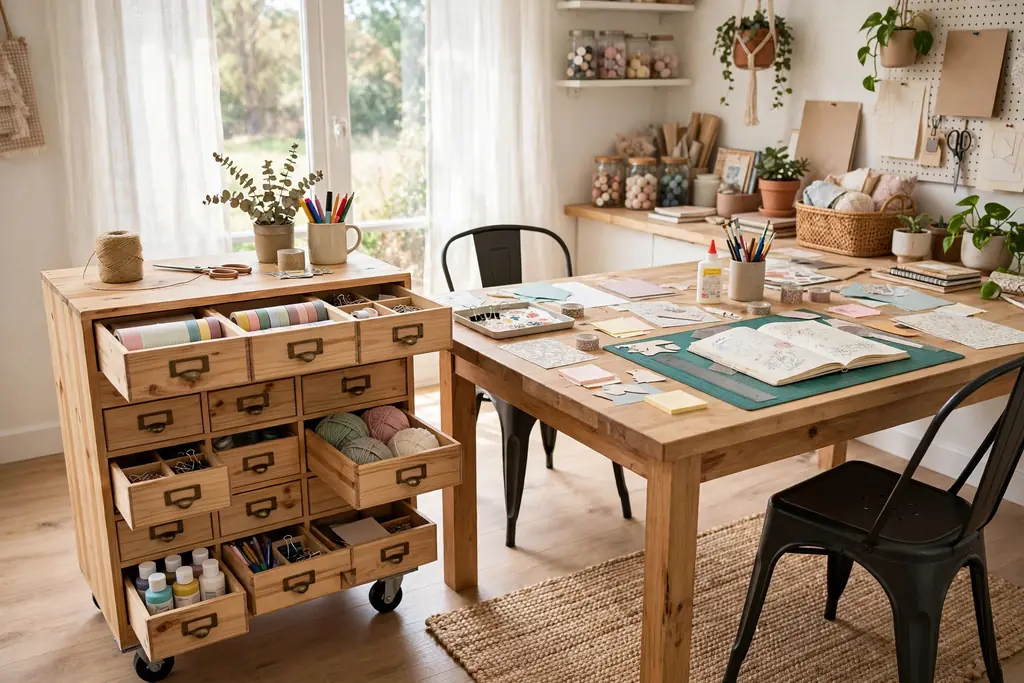
    Rolling craft cabinet with drawers beside a shared table in a bright room

    Pick a rolling cabinet with drawers and a flat top that slides under or beside a shared table, so craft supplies can move to the work spot and roll away when the table is needed for meals or homework. Casters with brakes keep the cabinet still while you work and let it move when the room changes use.

    Lock the casters before opening heavy drawers, since a rolling cabinet can shift when a full drawer slides out. Keep the top clear except for the current project, and store tools for that project in the top drawer, so setup takes minutes rather than a full unpack.

    10. Wall Mounted Cabinet Above a Desk

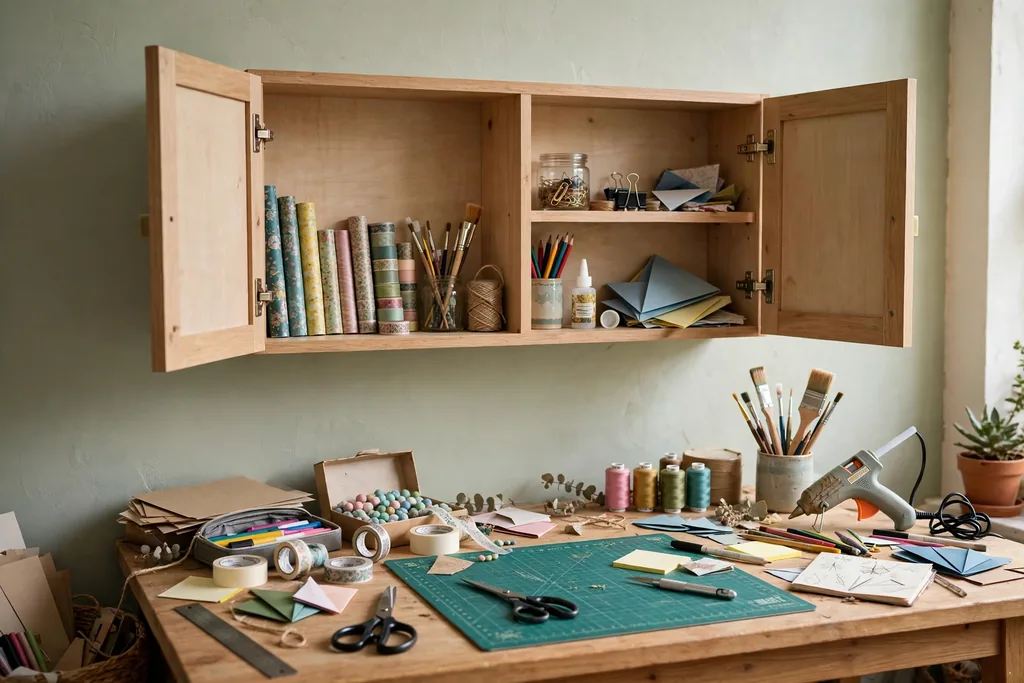
    Shallow wall mounted cabinet with open doors above a desk with craft tools

    Mount a shallow wall cabinet above a desk, with doors that open upward or outward, to store tools and small supplies without taking desk space. Wall mounting suits a small room, since it uses wall height that a floor cabinet cannot, and it keeps supplies at eye level while you sit and work.

    Check the wall fixings for the cabinet weight when full, not empty, since paper and paint add weight fast. Keep daily tools in the lowest wall section and backup stock higher, so you do not need a step stool for a pair of scissors. Leave the desk surface clear under the cabinet for the project in hand.

    11. Corner Cabinet for an Awkward Nook

    Corner craft cabinet with angled shelves and a turntable holding jars and supplies

    Fit a corner cabinet, with angled shelves or a rotating turntable inside, into a nook that a standard cabinet would waste. Corner cabinets suit rooms with an unused corner near a window or door, and a turntable shelf brings back items to the front without reaching deep into a dark corner.

    Measure the door swing before fitting, since a corner cabinet door can hit a nearby wall or desk. Keep large flat items, such as cutting mats, on the lowest shelf, and small jars on the turntable above, so nothing hides behind a taller item at the back.

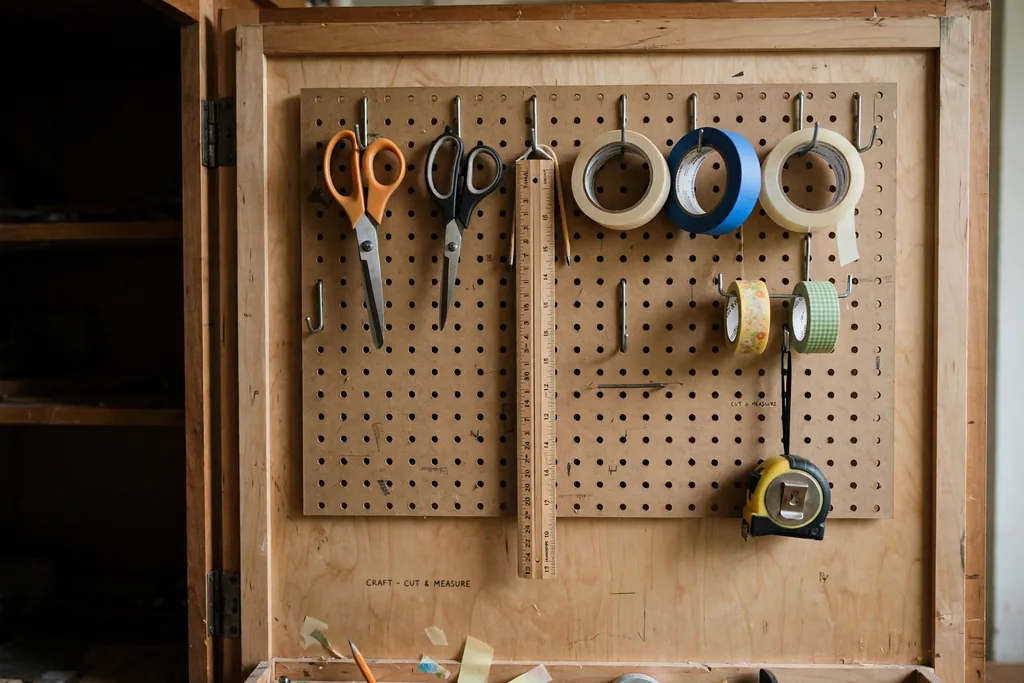
    12. Cabinet with a Pegboard Door Interior

    Craft cabinet door interior with a pegboard holding scissors rulers and tape on hooks

    Fix a pegboard panel to the inside of a cabinet door and hang scissors, rulers, cutters, and tape on hooks, so tools hang in plain sight when the door opens and stay hidden when it closes. Door storage uses space that shelves waste, and it keeps sharp tools off the work table between uses.

    Use short hooks for heavy tools and longer hooks for rolls of tape, and keep sharp edges pointing down or covered. Test the door weight after loading it, since a heavy pegboard door can pull hinges loose over time. Tighten hinge screws each season if the door starts to sag.

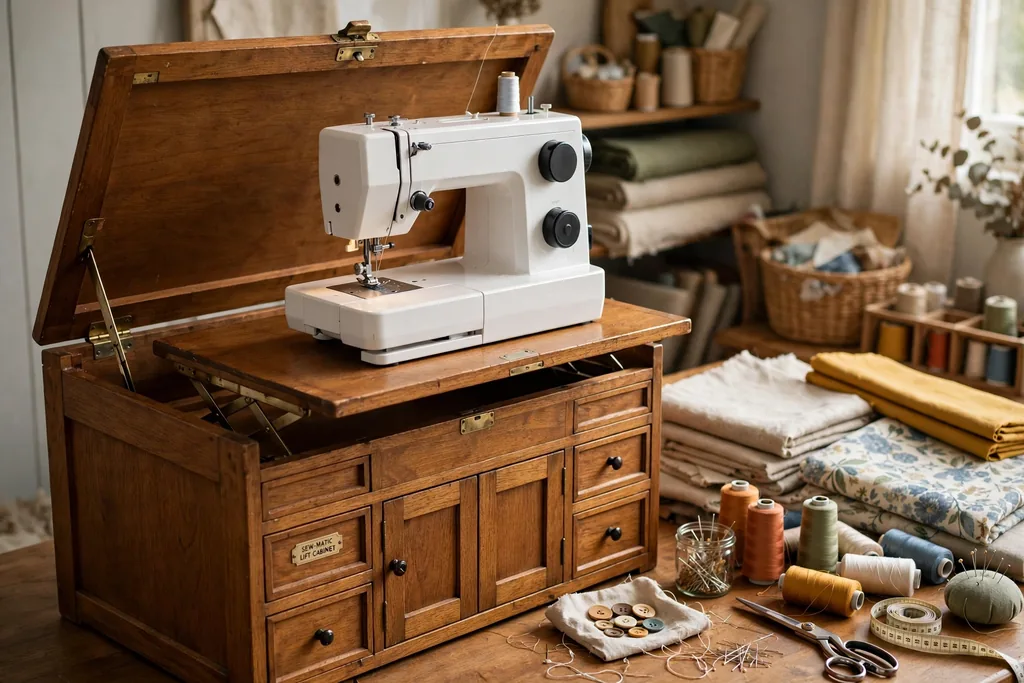
    13. Sewing Cabinet with a Machine Lift

    Sewing cabinet with a machine lift raised to table height beside fabric and thread

    Choose a sewing cabinet with a machine lift shelf that raises the sewing machine to table height for use and lowers it for storage under a closed lid. A lift keeps the machine dust free between sessions and frees the table top for cutting and pinning when the machine is down.

    Keep bobbins, needles, and presser feet in a shallow drawer beside the lift, so machine parts stay with the machine. Cover the machine when the lid is open for a long session, since dust settles on an open machine fast. Oil and clean the machine as its manual directs, and keep the manual in the same drawer as the feet.

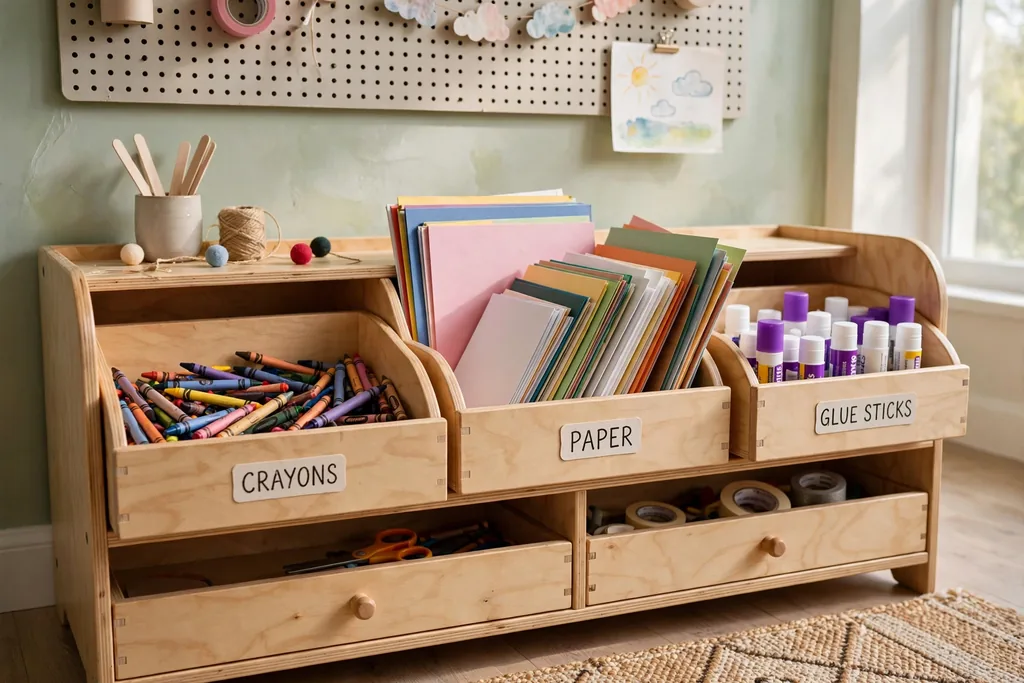
    14. Kids Craft Cabinet with Low Open Bins

    Low kids craft cabinet with open bins of crayons paper and glue sticks at child height

    Set up a low cabinet with open bins at child height for crayons, paper, glue sticks, and safety scissors, and closed storage above for paint, glitter, and sharp tools. Low open bins let children pick supplies on their own and put them back in the right bin, while adult only supplies stay out of reach above.

    Label bins with pictures as well as words for younger children, and keep one bin empty for finished work waiting to go home or on display. Wipe bins often, since glue and crayon marks build up fast, and check the low bins weekly for dried out markers or broken crayons to remove.

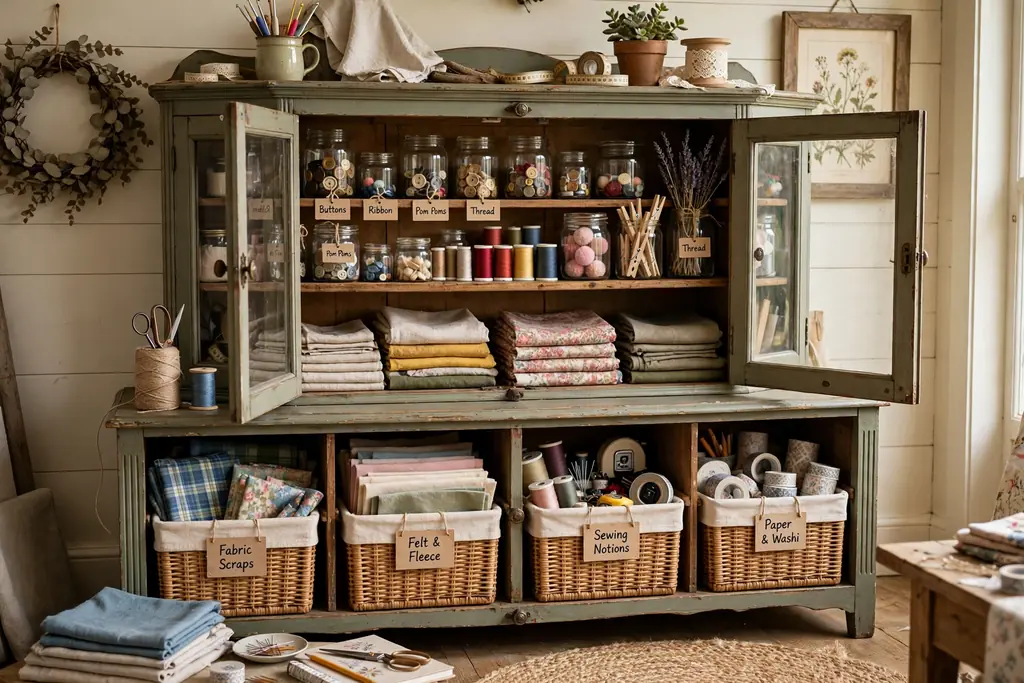
    15. Vintage Hutch Converted to a Craft Cabinet

    Vintage hutch converted to a craft cabinet with bins jars and folded fabric

    Convert a vintage hutch or dresser into a craft cabinet by adding shelf dividers, small bins, and a coat of paint that suits the room. A hutch gives deep drawers for fabric and tall upper shelves for jars, and it looks like furniture rather than storage, which suits a living room or bedroom corner.

    Check old drawers for smooth runners before loading them, since a sticking drawer will spill small supplies. Line drawers with paper to protect both the wood and the supplies, and keep heavy items in the lowest drawers. The same furniture first approach that suits small storage ideas for small spaces works here: pick the piece for the room first, then fit the storage inside it.

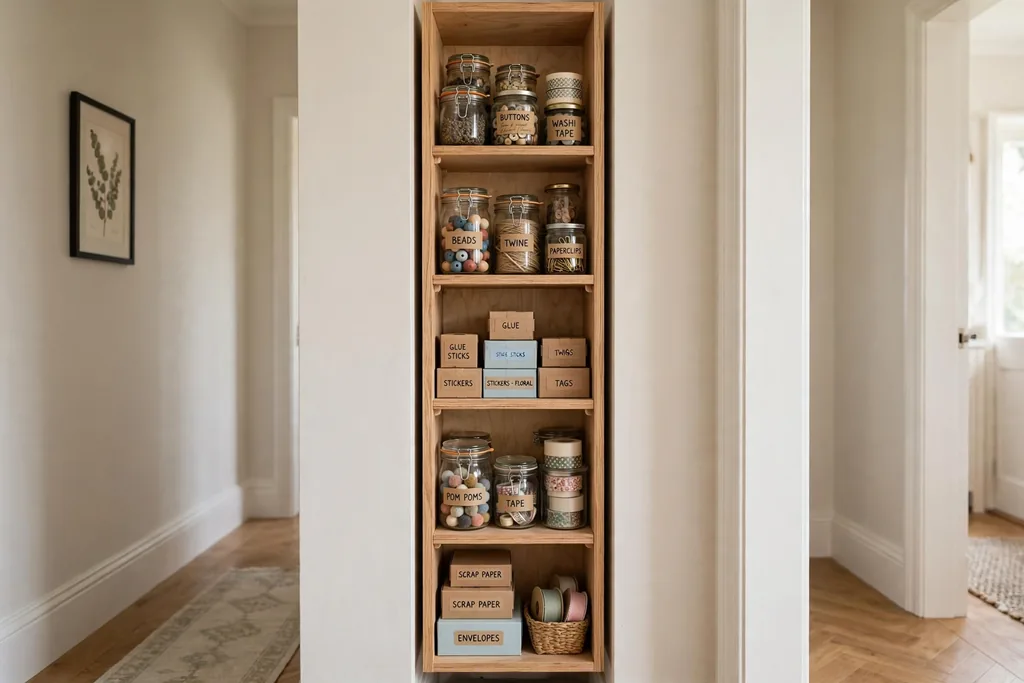
    16. Narrow Hall Cabinet for a Small Room

    Narrow tall craft cabinet in a hallway nook with shallow shelves of jars and boxes

    Use a narrow, tall cabinet in a hallway, landing, or beside a door, with shallow shelves that hold one row of jars or boxes each. Narrow cabinets fit where a deep cabinet would block a walkway, and shallow shelves stop items from hiding behind a front row.

    Keep the most used supplies at waist to eye level and seasonal stock at the top, since a narrow cabinet is easy to knock when reaching high. Fix the cabinet to the wall, since tall narrow pieces tip more easily than wide ones. Leave the floor in front clear, so the door opens fully without moving shoes or bags.

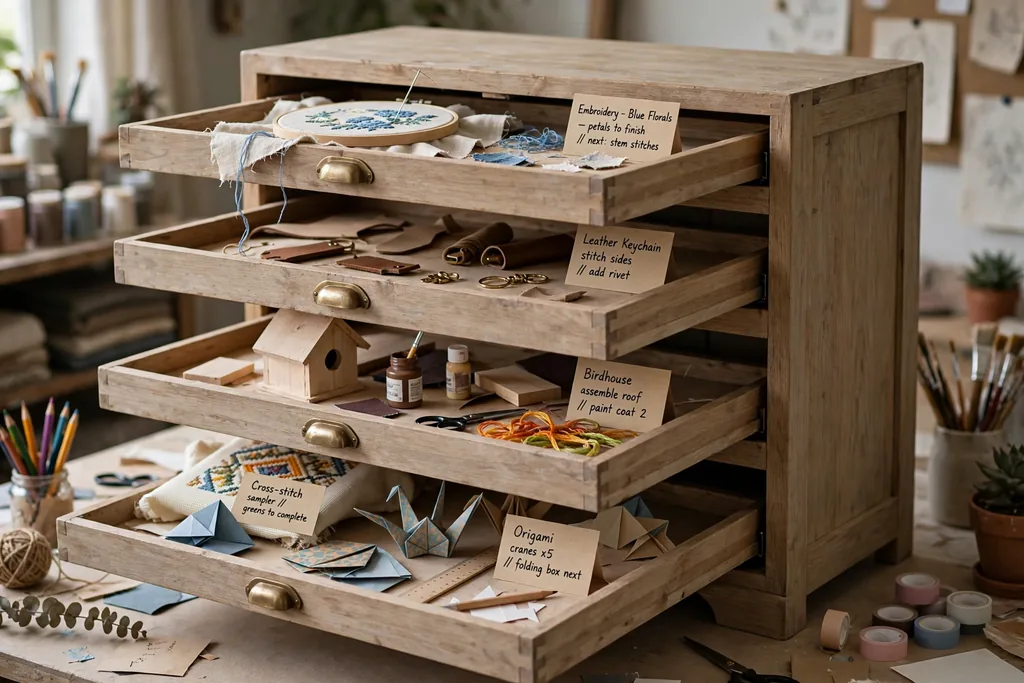
    17. Cabinet with Sliding Trays for Works in Progress

    Cabinet with sliding trays holding unfinished craft projects with small note cards

    Reserve one cabinet section for sliding trays, one tray per unfinished project, with a small card on each tray noting the next step. Sliding trays keep half finished work flat and dust free, and they stop a project from taking over the table while you wait for glue to dry or a part to arrive.

    Stack trays with a small gap between them so air moves and wet paint does not stick to the tray above. Date each project card, so the oldest project gets finished first instead of sitting at the back. When a project finishes, wipe the tray clean before it takes the next one, so old scraps do not mix into new work.

    Conclusion

    A good craft storage cabinet does not need to hold every supply you own. It needs to hold the supplies you use, in groups that make sense, at heights you can reach, with labels you can read at a glance. Start with one idea from this list that fits your room and your largest supply group, then add bins, trays, or a door pegboard as the system settles. Keep one tray free for works in progress, and review the cabinet each season, so backup stock does not crowd out the tools you reach for weekly. For seasonal stock that only comes out once a year, the same closed door rule in Christmas decoration storage applies: label the bin, store it high or low, and keep daily tools in the prime middle shelves.

    FAQs

    What is the best craft storage cabinet for a small room?

    The best craft storage cabinet for a small room is a narrow tall cabinet or a wall mounted cabinet, since both use height instead of floor space and keep supplies at eye level. Pick shallow shelves so items do not hide behind a front row, fix a tall cabinet to the wall, and keep weekly tools at waist to eye level.

    How should I organize a craft storage cabinet?

    Organize a craft storage cabinet by grouping supplies by use, such as paper, paint, sewing, and small parts, and giving each group one shelf, bin, or drawer with a plain word label. Keep weekly tools at hand level, move backup stock higher or lower, and leave one empty tray for works in progress.

    What size craft storage cabinet do I need?

    The size you need depends on your tallest and widest supplies, so measure paper pads, paint bottles, fabric bolts, and rolls before you buy or build. Allow shelf heights that fit those items standing upright, add a few centimeters of clearance for lifting bins out, and choose a cabinet depth that lets you reach the back without moving the front row.

    How do I store paint in a craft cabinet?

    Store paint in a craft cabinet standing upright on short shelves, with one row per color family and caps facing out for easy checking. Keep open bottles on a small tray to catch drips, wipe cap threads often so caps do not stick, and store fabric paint apart from other craft paint.

    Can a craft storage cabinet also serve as a work table?

    Yes, a craft storage cabinet can serve as a work table if it has a fold down table, a machine lift, or a flat rolling top at sitting height. Keep only the current project on that surface, store the rest behind doors or in drawers, and lock casters or fold the table away when the room needs to change use.

    How do I keep a craft cabinet tidy over time?

    Keep a craft cabinet tidy by labeling every bin and drawer, returning each supply to its group after a session, and reviewing the cabinet each season. Remove dried out markers, broken tools, and duplicate supplies during that review, and move backup stock out of prime middle shelves so weekly tools stay easy to reach.


  • How to Choose a Farmhouse Sink for Your Kitchen

    How to Choose a Farmhouse Sink for Your Kitchen

    To choose a farmhouse sink, measure your base cabinet first, then pick a material, bowl layout, and depth that suit how you cook and clean each day. Match the apron style and finish to your kitchen, check faucet and drain placement, and confirm the cabinet can support the sink before you buy.

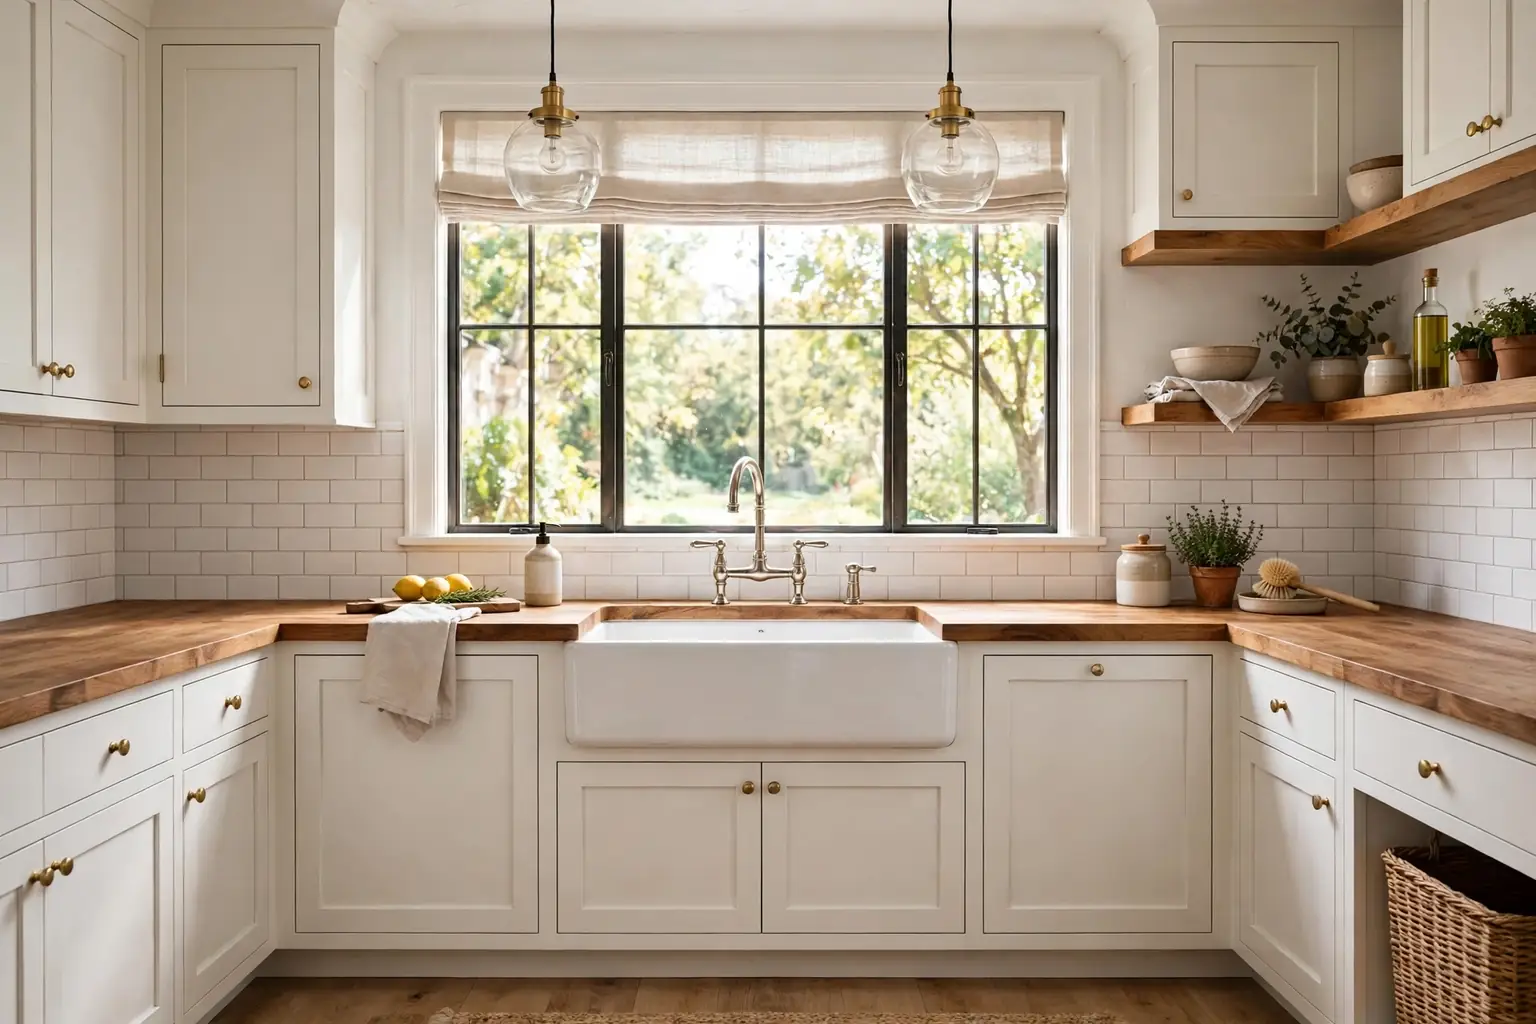
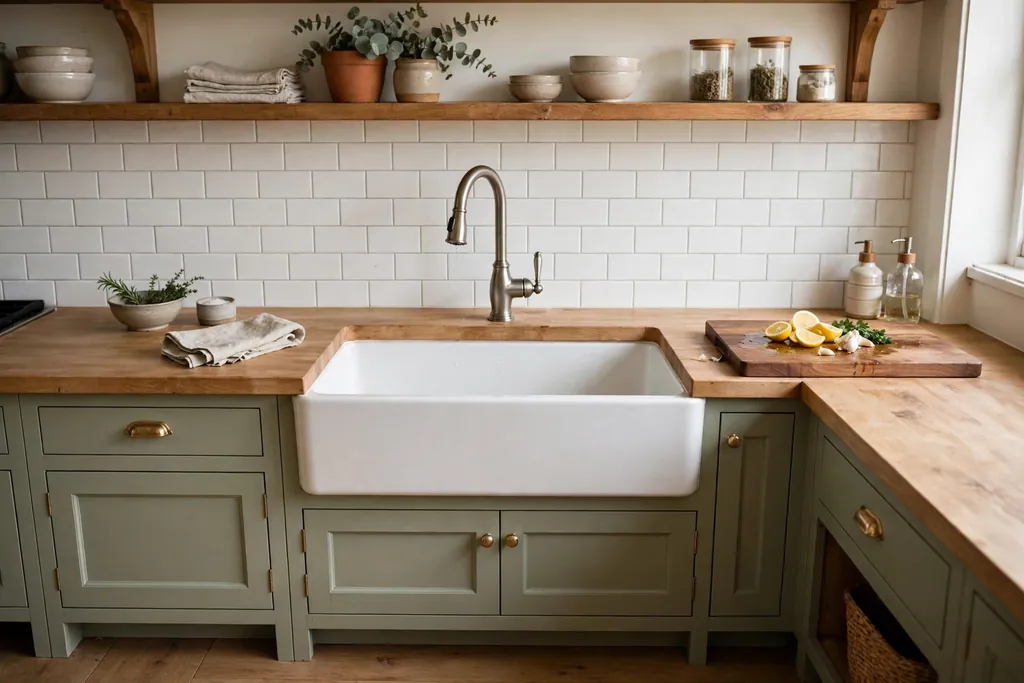
    A farmhouse sink, also called an apron front sink, shows its front panel below the countertop instead of hiding it behind a cabinet door. That exposed front is part of its look, but it also changes how the sink fits, how it is supported, and how far you reach when you wash dishes. This guide works through those choices in order, so you can narrow the options to a sink that fits your cabinet, suits your cooking habits, and works with your faucet and plumbing.

    Key Takeaways

    • Measure the base cabinet inside width, depth, and height before you shop, since the cabinet sets the largest sink you can fit.
    • Choose the material for how you cook and clean, not only for looks, and weigh weight, care, and repair options.
    • Pick a single or double bowl based on how you wash large pots, rinse produce, and use a drying rack.
    • Check apron style, faucet holes, drain placement, and disposal fit early, since those details are hard to change after installation.
    • Confirm support, countertop cuts, and plumbing clearances with your installer before you order.

    What to Check Before You Buy

    • Tape measure and a notebook or phone notes for cabinet, countertop, and plumbing measurements
    • The inside width, depth, and height of the sink base cabinet
    • The position of drain pipes, water lines, and any garbage disposal
    • The faucet style you plan to use and how many holes your countertop or sink deck allows
    • The countertop material and whether it needs a new cut for an apron front
    • A note of large items you wash often, such as sheet pans, stockpots, and cutting boards

    1. Start With Your Cabinet and Measure First

    Measuring the inside of an open kitchen sink cabinet with a tape measure.

    Open the sink base cabinet and measure the inside width from side panel to side panel, the inside depth from front to back, and the clear height under the countertop. Note the position of the drain pipe, water lines, and any disposal, and check whether the cabinet has a center support or a drawer that the new sink would block. These measurements set the real limits for your sink, even if a larger model looks right in a showroom.

    Write the measurements down and keep them with you when you compare sinks. A farmhouse sink needs room for its apron front at the front of the cabinet, and the cabinet may need a front panel cut or a modified frame. If the cabinet is narrow, a smaller sink with a well planned layout will serve you better than a large sink that forces awkward plumbing or a weak support frame.

    2. Choose the Right Sink Size for Your Kitchen

    Farmhouse sink in a kitchen with counter space on both sides.

    Sink size should follow both your cabinet and your daily use. A wide sink gives room for large pans and baking sheets, while a smaller sink leaves more counter space on either side for prep and drying. Think about the longest item you wash by hand most weeks, and check that it can lie flat or tilt comfortably in the bowl you are considering.

    Also think about reach and counter space. A very wide sink can push the faucet farther back and leave less room for a cutting board or a drying rack beside it. In a small kitchen, a moderate sink with a useful layout often works better than the largest sink that fits. Balance bowl room against the counter space you need for everyday cooking.

    3. Pick a Depth That Suits Daily Use

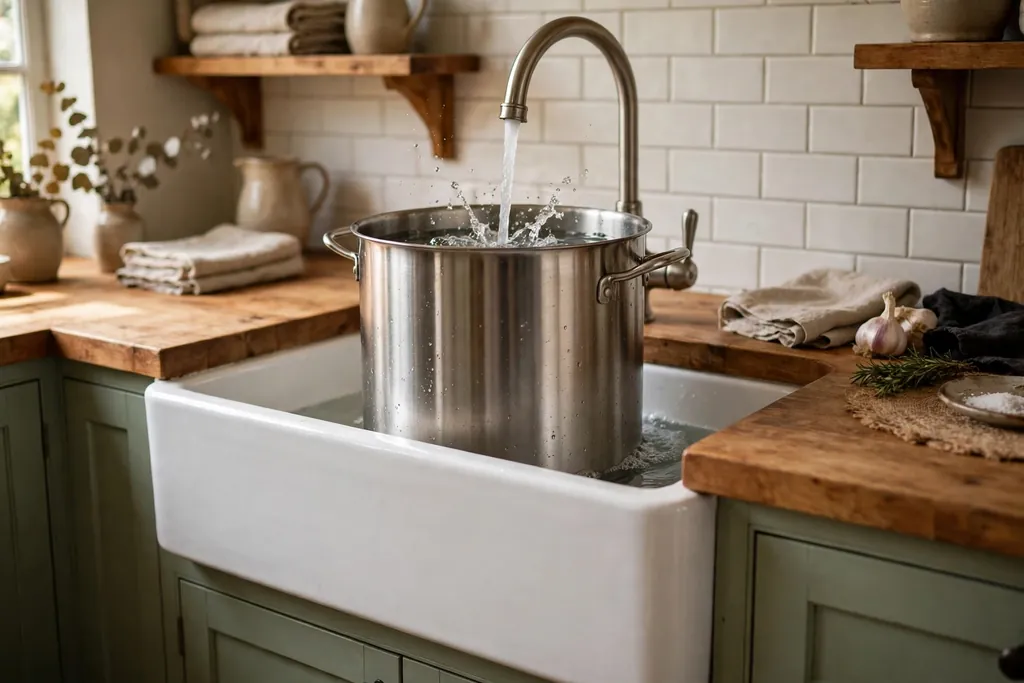
    Deep farmhouse sink holding a tall stockpot under a running faucet.

    Farmhouse sinks are often deeper than standard sinks, which helps with tall pots and stacked dishes. Depth also affects how far you bend to reach the bottom of the bowl, so the best depth depends on who uses the sink most and for how long at a time. If you wash large pots by hand every day, extra depth can help. If you mainly rinse cups and small items, a shallower bowl may feel easier to use.

    Check the clear space under the sink as well, since a deeper bowl leaves less room for plumbing, a disposal, and storage. Measure from the bottom of the bowl to the cabinet floor in your plan, and make sure the drain can still slope correctly to the wall pipe. A sink that fits the cabinet but leaves no room for a disposal or a filter may cause problems later.

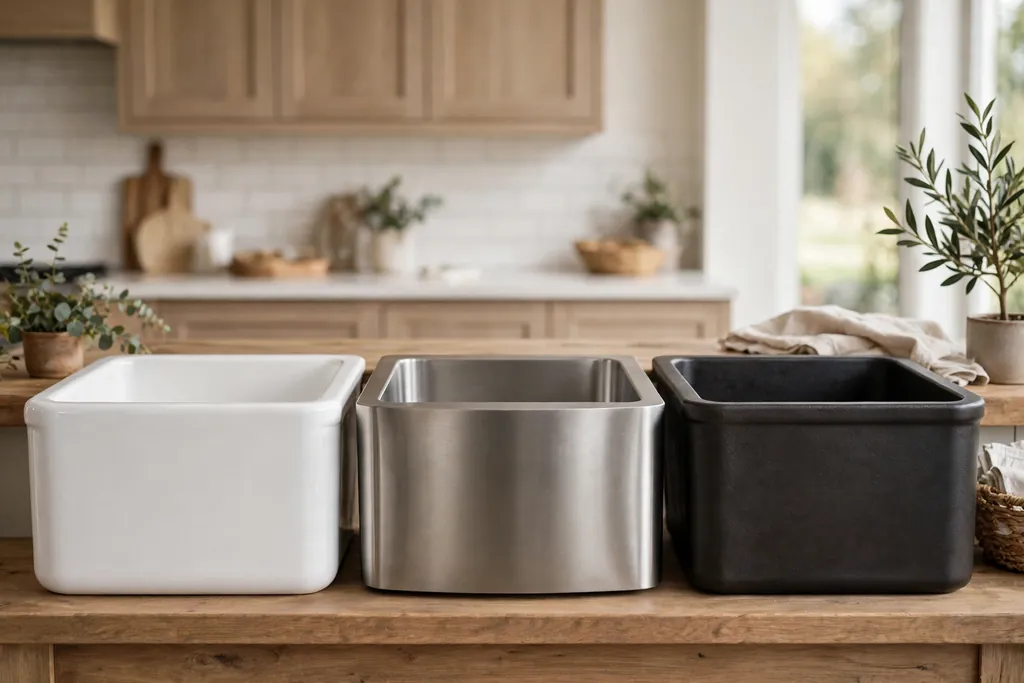
    4. Compare Fireclay, Stainless Steel, and Cast Iron

    Farmhouse sink samples in white fireclay, stainless steel, and dark cast iron finishes.

    Fireclay, stainless steel, and cast iron are the most common farmhouse sink materials, and each has a different feel and care routine. Fireclay gives a smooth, bright surface and a classic look, and it is usually heavy, so it needs solid cabinet support. Stainless steel is lighter, resists many stains, and suits a wide range of kitchen styles, but it can show water marks and scratches over time. Cast iron with an enamel coating gives a deep, glossy finish and a solid feel, and it is also heavy and needs careful support.

    Think about how you use the sink before you pick a material. If you drop heavy pans often, ask how each material handles chips and marks, and whether small marks can be touched up. If you want a quieter sink, check whether the model includes sound dampening pads or a coating on the underside. Choose the material that fits your care habits as well as your kitchen style.

    5. Consider Copper, Granite Composite, and Other Materials

    Copper farmhouse sink and matte granite composite farmhouse sink in kitchen displays.

    Copper gives a warm, handcrafted look and changes in tone over time, which suits some kitchens and not others. If you like copper, check how it is finished and what cleaning routine the maker suggests, since harsh cleaners can change its surface. Granite composite sinks are made from a mix of stone and resin, give a matte finish, and come in a range of neutral colors that suit many countertops.

    Other materials, such as stone or concrete style sinks, can give a distinctive look, but they may need sealing or special care. For any less common material, ask about weight, cleaning, heat tolerance, and how chips or stains are handled. A material that looks right in a photo should also suit the cleaning products and cooking habits in your kitchen.

    6. Decide Between a Single Bowl and a Double Bowl

    Single bowl farmhouse sink with a sheet pan beside a double bowl farmhouse sink.

    A single bowl gives one large, open space for washing big pots, sheet pans, and roasting trays without a divider in the way. It suits cooks who wash large items by hand, soak baking sheets, or use a dish rack inside the sink. A single bowl can also make rinsing produce and filling large pots simpler, since nothing blocks the space.

    A double bowl splits the sink into two areas, so you can wash in one side and rinse or stack in the other. It suits kitchens where two people work at the sink, or where you like to keep dirty dishes apart from clean ones. Check the size of each bowl, not only the total width, since a double bowl with two small sides may not fit a large pan. If you use a disposal, check which bowl the drain and disposal will sit under.

    7. Choose an Apron Front Style That Fits Your Kitchen

    Apron front sink fronts in flat, fluted, and curved styles.

    The apron is the exposed front panel of the sink, and its shape sets much of the sink’s character. A flat apron gives a clean, simple line that suits many kitchens. A fluted or paneled apron adds detail and suits a more traditional room. A curved or sloped apron softens the front and can feel less formal. Look at the apron in person if you can, since photos can flatten its shape and depth.

    Also check how the apron meets the countertop and the cabinet. Some aprons sit flush with the cabinet front, while others project slightly forward. The projection affects how close you stand to the sink and how water drips from the front edge. Choose an apron that fits the style of your cabinets and countertop, and confirm the cabinet front can be cut or adapted to fit it cleanly.

    8. Match the Sink Finish to Your Kitchen Style

    Kitchen sinks in white, steel, dark, and copper finishes with hardware samples.

    Finish covers color and surface texture, from bright white enamel to brushed steel, dark composite, and warm copper tones. A white sink can brighten a kitchen and suit painted cabinets, while a steel sink can blend with appliances and a modern countertop. A dark sink can anchor a light kitchen, but it may show water spots more clearly, so think about how often you wipe the sink dry.

    Match the sink finish to the faucet finish and the cabinet hardware, but do not feel you must match every metal exactly. Mixed finishes can work when they share a similar tone, such as warm metals together or cool metals together. Hold a sample near your countertop and cabinet color in daylight if you can, since kitchen lighting can change how a finish looks at home.

    9. Plan the Faucet and Hole Layout

    Bridge faucet over a farmhouse sink with a soap dispenser and sprayer.

    Farmhouse sinks do not always include faucet holes, so check where your faucet will sit. Some kitchens mount the faucet on the countertop behind the sink, some use a wall mounted faucet, and some use a bridge faucet with separate hot and cold handles. Each option needs a different hole layout and a different amount of space behind the sink.

    Count the holes you need for the faucet, a sprayer, a soap dispenser, or a filtered water tap, and confirm the countertop or sink deck can hold them. Check the faucet height and reach against the bowl size, so the water stream lands in the center of the bowl and does not splash over the apron. If you plan a tall pot filler style faucet, check the clearance above the sink and any window or shelf behind it.

    10. Check Drain Placement and Garbage Disposal Fit

    Underside of a farmhouse sink showing a rear drain, pipes, and a garbage disposal.

    Drain placement affects how the sink drains and how much room is left under it. A rear drain leaves more usable space in the bowl and more room under the sink for a disposal or storage. A center drain can suit a double bowl, with one drain per side, but it may reduce the clear space under the middle of the sink. Check the drain position against your existing wall pipe before you order.

    If you use a garbage disposal, confirm that it fits under the bowl you plan to use it with, and that the drain height still allows a correct slope to the wall pipe. A deeper sink can lower the drain outlet, which may leave too little fall for the pipe. Measure the disposal height and the wall pipe height, and discuss any needed plumbing change with your installer before you commit to a sink depth.

    11. Understand Installation Types and Support Needs

    Farmhouse sink supported by wooden rails inside an open kitchen cabinet.

    Farmhouse sinks are commonly installed as undermount sinks, where the sink rim sits below the countertop, or as flush mount sinks, where the rim sits level with the countertop. The choice affects the countertop cut, the seal around the sink, and how easy it is to wipe crumbs into the bowl. Ask your installer which method suits your countertop material, since some materials cut and seal more easily than others.

    Support is just as important as the cut. Heavy sinks need a sturdy frame or support rails inside the cabinet, not only a seal to the countertop. Ask how the sink will be supported, how the weight will be spread across the cabinet sides, and whether the cabinet frame needs reinforcement. A well supported sink stays level and keeps its seal, while a sink held only by sealant can shift over time.

    12. Plan for Accessories That Make Daily Use Easier

    Farmhouse sink fitted with a bottom grid, cutting board, and drying rack.

    Accessories can change how useful a farmhouse sink feels day to day. A bottom grid protects the bowl surface and keeps dishes off the drain. A cutting board that sits over the sink adds prep space in a small kitchen. A colander insert, a drying rack, and a sink caddy can help with rinsing and drying without taking counter space. Check which accessories are made to fit the exact sink model you are considering, since a grid or board made for another size may not sit level.

    Think about storage for accessories when they are not in use, and about cleaning them. A grid needs regular cleaning under its bars, and a wooden board needs drying after use. Choose accessories that solve a real daily task, such as rinsing produce or drying pans, rather than adding pieces that will sit unused in a cabinet.

    13. Set a Practical Budget and Check What It Covers

    Kitchen planning notebook with sink measurements on a countertop near a farmhouse sink.

    Set a budget that covers the sink, the faucet if it is new, installation, countertop work, and any plumbing changes, not only the sink itself. Apron front installation can involve cabinet work, a new countertop cut, support framing, and plumbing adjustments, and those costs vary with the kitchen. Ask for a written scope that lists each item, so you can compare quotes fairly.

    Also check what is included with the sink, such as a grid, a drain assembly, or a mounting kit, and what you need to buy separately. A sink that seems lower in cost may need extra parts, while a higher cost sink may include a grid and drain. Compare the full cost of each option, and keep a small reserve for surprises found inside the cabinet during installation.

    14. Care for Your Farmhouse Sink Day to Day

    Wiping a clean farmhouse sink dry with a soft cloth in a bright kitchen.

    Daily care keeps a farmhouse sink looking good and working well. Rinse the bowl after use, wipe up standing water around the apron and faucet base, and dry the surface if your water leaves spots. Use cleaners suited to your sink material, and avoid harsh abrasives on enamel, copper, and composite surfaces unless the maker suggests them. A soft cloth and a mild cleaner suit most daily cleaning.

    Check the seal where the sink meets the countertop from time to time, and look for leaks under the cabinet after installation and after any plumbing work. Clean the drain and disposal as suggested by their makers, and keep heavy items from sitting in the sink for long periods. Simple, regular care protects the finish and the seal, and it keeps the sink a pleasant part of daily kitchen work.

    Conclusion

    Choosing a farmhouse sink starts with your cabinet measurements, then moves to size, depth, material, bowl layout, and apron style. Faucet holes, drain placement, disposal fit, support, and the full cost of installation all matter as much as the look of the sink. Work through the sections in order, write down your measurements, and confirm the details with your installer before you order. For more ideas from Dwell Ovell, browse the home page for home decor guides.

    FAQs

    What size farmhouse sink do I need for my kitchen?

    The size you need depends on your base cabinet inside width and on the large items you wash most often, so measure the cabinet first and check that your longest pan fits the bowl. A moderate sink often works better than the largest sink that fits, since it leaves more counter space for prep and drying.

    What is the best material for a farmhouse sink?

    The best material depends on how you cook and clean, since fireclay gives a classic bright surface, stainless steel is lighter and suits many styles, cast iron gives a deep glossy finish, and copper and granite composite give warmer or matte looks. Choose the material whose weight, care routine, and repair options fit your kitchen, rather than choosing on looks alone.

    Should I choose a single bowl or double bowl farmhouse sink?

    Choose a single bowl if you wash large pots, sheet pans, and roasting trays by hand and want one open space without a divider. Choose a double bowl if you like to wash in one side and rinse or stack in the other, or if two people often work at the sink, and check that each bowl is large enough for your pans.

    Do farmhouse sinks need special cabinet support?

    Yes, farmhouse sinks often need a sturdy support frame or rails inside the cabinet, especially heavy fireclay and cast iron models, since the sink should not rest on sealant alone. Ask your installer how the weight will be spread across the cabinet sides and whether the cabinet frame needs reinforcement before you order.

    Can a farmhouse sink fit in an existing kitchen cabinet?

    A farmhouse sink can fit an existing cabinet in some kitchens, but the cabinet front usually needs a cut or a modified frame for the apron, and the countertop may need a new cut as well. Measure the cabinet inside width, depth, and height, check the plumbing and disposal fit, and discuss the cabinet work with your installer before you buy.

    How do I clean and care for a farmhouse sink?

    Rinse the bowl after use, wipe up standing water around the apron and faucet base, and use a mild cleaner suited to your sink material with a soft cloth. Avoid harsh abrasives on enamel, copper, and composite surfaces unless the maker suggests them, and check the countertop seal and under cabinet plumbing from time to time for leaks.

  • 21 Kitchen Island Ideas for Better Storage, Seating, and Style

    21 Kitchen Island Ideas for Better Storage, Seating, and Style

    The best kitchen island balances storage, seating, and work space in one unit. Choose deep drawers for heavy pots, a clear prep run beside the sink or cooktop, and an overhang of about 12 inches for knees at the seating side, then match the island size to the walkways around it, so two people can move without crowding.

    Start with the job the island must do most days, not the look alone. A busy cooking household needs drawers, a prep sink, and a clear landing spot for hot pans, while a household that eats at the island needs comfortable stools, a wipe clean top, and room for plates and elbows. For seasonal styling once the island is in place, see kitchen island Christmas decor for low displays that keep the middle clear, and for a calm pale kitchen around a new island, see white kitchen ideas.

    Key Takeaways

    • Plan storage first: deep drawers for pots, a pantry pull-out for dry goods, and a clear spot for trash and recycling.
    • Keep one prep run clear at all times, even when the island also holds seating, a sink, or a display.
    • Leave knee room at the seating side, and choose stools that slide fully under the overhang when not in use.
    • Match the island length to the room: a long island suits an open plan room, while a slim or rolling island suits a small kitchen.
    • Repeat one or two finishes from the rest of the kitchen, so the island reads as part of the room, not as a separate piece.
    • Test the layout before you commit: tape the island outline on the floor, then walk the routes to the stove, sink, and fridge.

    1. Deep Drawer Banks for Pots and Pans

    Kitchen island drawer bank pulled open showing stacked pots and pans with dividers.

    Replace deep base cabinets with full extension drawer banks on the working side of the island, so pots, pans, and lids slide out to you instead of hiding at the back of a dark cabinet. Use wide, deep drawers for stockpots and baking trays, and a shallower top drawer for utensils, wraps, and small tools, so each drawer holds one kind of item.

    Keep the heaviest drawers low and near the stove run, and add dividers or a lid rack inside one drawer so lids do not slide around. Label nothing on the outside; the drawer order itself becomes the system once everyone in the household learns that pans live in the first bank and baking trays in the second.

    2. Pull-Out Pantry Tower at the Island End

    Tall narrow pull-out pantry tower at the end of a kitchen island holding jars and dry goods.

    Add a tall, narrow pull-out pantry tower at one end of the island, with shelves that roll out as a single unit, so oils, sauces, grains, and canned goods stay visible and easy to reach. This idea suits kitchens without a full pantry wall, since the tower adds a large amount of storage in a small footprint.

    Sort the shelves by use, with everyday cooking items at hand height and baking or rarely used items higher or lower. Keep heavy jars low, and wipe the shelves when you restock, so spills do not build up behind closed doors.

    3. Open Shelving for Everyday Dishes

    Open shelves on the seating side of a kitchen island holding white dishes and bowls.

    Use open shelves on the seating side or one end of the island for the dishes, bowls, and glasses you reach for daily, so setting the table starts at the island itself. Open shelving also breaks up a long run of closed doors, and it lets a wood or painted island show a little color through the dishes.

    Keep the shelf contents to a small, matching set, and leave space between groups so the shelves read as calm, not crowded. Store fragile or rarely used pieces in closed cabinets instead, and dust the open shelves during a normal weekly clean.

    4. Built-In Microwave Drawer Below the Counter

    Kitchen island with a microwave drawer below the counter beside a clear landing spot.

    Fit a microwave drawer into the island base, below the counter and away from the main prep run, so the counter stays clear and the microwave sits at a safe, reachable height. This placement frees wall and upper cabinet space, and it keeps a bulky appliance out of sight in an open plan kitchen.

    Place the drawer near the fridge or the serving side, where reheating and plating happen, rather than in the middle of the chopping zone. Check the drawer size against the island depth before ordering, and keep the area above it clear for a landing spot when food comes out hot.

    5. Prep Sink Island for Two Cooks

    Kitchen island with a small prep sink, cutting board, and rinsed vegetables.

    Put a small prep sink in the island, near the fridge and the chopping area, so one cook can rinse vegetables while another works at the main sink. A prep sink also gives the island a clear work zone, which helps when two people cook together or when guests help with a meal.

    Keep the prep sink small, with a simple faucet and a cutting board that fits over the bowl, so it does not eat into counter space. Plan a drying spot beside it, such as a folded linen cloth or a small rack, and keep the main sink free for washing up.

    6. Cooktop Island with a Downdraft Vent

    Kitchen island with a cooktop and downdraft vent, cook facing the room.

    Place the cooktop in the island, with a downdraft vent that rises beside the burners or pulls steam down through the unit, so the cook faces the room instead of a wall. This layout suits open plan kitchens, where the cook wants to talk with family or guests while cooking.

    Keep the counter on both sides of the cooktop clear for pans, boards, and serving dishes, and keep seating away from the hot zone. Check the vent maker’s instructions for ducting and clearance before choosing this layout, since a cooktop island needs more planning than a plain prep island.

    7. Breakfast Bar Overhang with Counter Stools

    Kitchen island breakfast bar overhang with counter stools tucked underneath.

    Add a counter overhang on one long side of the island, with backless or low back stools that tuck fully underneath, to make a breakfast bar for quick meals, homework, and coffee. The overhang turns the island into the household gathering spot without needing a separate table.

    Choose stools at the right height for the counter, with a footrest that suits the people who will use them most, and keep the seating run clear of drawers that open into leg room. For everyday meals, set the table at the island itself, with placemats and a small centerpiece that lifts away when prep work starts.

    8. Two-Level Island for Prep and Dining

    Two-level kitchen island with a lower prep counter and a raised seating side.

    Build the island at two heights, with a standard work height on the cooking side and a raised bar height on the seating side, so the dining side hides prep clutter from the living area. The raised side also gives seated guests a clear sight line across the room, while the cook keeps a full work surface.

    Use the raised section for serving and eating only, and keep hot pans, boards, and raw ingredients on the lower work side. Choose a counter material that wipes clean on both levels, since the raised side will see drinks, plates, and homework as well as meals.

    9. Waterfall Countertop Island

    Kitchen island with a waterfall countertop wrapping down both ends.

    Wrap the counter material down both ends of the island, in a waterfall edge, so the island reads as one solid block and the side panels stay protected from kicks and scuffs. A waterfall edge suits stone and quartz counters, and it gives a plain island a finished look without extra decoration.

    Keep the island front simple, with no handles or panels competing with the stone, and put seating on one side only, so the waterfall ends stay visible. Measure the room first, and leave enough walkway space on every side, since a waterfall island looks best with breathing room around it.

    10. Warm Butcher Block Island Top

    Kitchen island with a warm butcher block top and wood stools.

    Top the island with butcher block, in a warm wood tone, to soften a kitchen full of painted cabinets and stone counters, and to give a work surface that feels pleasant to touch. Butcher block suits farmhouse, cottage, and Scandinavian style kitchens, and it pairs well with black, brass, or nickel hardware.

    Use butcher block on the island alone, rather than on every counter, if you want to limit care, and oil the surface on the schedule the supplier advises. Near a sink, use a stone section instead, since constant water contact wears wood faster than a dry prep run.

    11. Rolling Island for a Small Kitchen

    Small rolling kitchen island on locking casters in a compact kitchen.

    Choose a rolling island on sturdy locking casters for a small kitchen, so the extra counter moves where it is needed and parks against a wall when it is not. A rolling island adds prep space, a little storage, and a serving cart in one piece, without a fixed build.

    Lock the casters before chopping or placing hot pans on top, and keep the island light enough to move with one hand when it holds only everyday items. Store the heaviest items in fixed cabinets, and use the rolling island for boards, bowls, and a small set of tools.

    12. Slim Island for a Narrow Galley Kitchen

    Slim kitchen island in a narrow galley kitchen with a clear walkway beside it.

    Fit a slim island, narrower than a standard island, into a galley kitchen, with shallow drawers on one side and a clear walkway on the other, so a small room still gains a work surface. A slim island works when the room has room for one comfortable aisle on each side, even if those aisles are narrower than in a large kitchen.

    Keep the slim island free of a sink or cooktop, since plumbing and heat need more depth, and use it for prep, landing space, and seating for one or two people at most. For seasonal counter styling that keeps a small kitchen workable, see fall kitchen decor for surfaces that stay clear for cooking.

    13. L-Shaped Island That Defines the Room

    L-shaped kitchen island with a prep arm and a seating arm in an open plan room.

    Shape the island as an L, with one arm for prep and one arm for seating, to define the kitchen zone inside an open plan room without building a wall. The L shape gives two work faces and a natural corner for a cook to stand, while the seating arm faces the living area.

    Place the seating arm where guests can sit without blocking the route between the stove, sink, and fridge, and keep the corner itself for a large board or a serving tray. An L-shaped island suits a larger room best, since the shape needs floor space on both arms.

    14. Beverage Fridge and Glass Storage Island

    Kitchen island with a beverage fridge and glass storage drawer at the seating end.

    Fit a small beverage fridge into the island base, with glass storage in a drawer or cabinet beside it, so drinks stay cold and glasses stay close at hand for serving. This idea suits households that host often, and it keeps drink traffic away from the main cooking zone.

    Place the beverage side near the seating end, where guests can help themselves without crossing the prep run, and keep the fridge door swing clear of stools. Wipe the glass storage drawer often, since drink spills and condensation gather there faster than in a dry goods drawer.

    15. Island Homework and Charging Station

    Kitchen island end set up as a homework station with books and a charging drawer.

    Set aside one end of the island as a homework and charging station, with a shallow drawer for chargers and cables, a small shelf for books, and a wipe clean top for writing. This setup keeps schoolwork and laptops in the room where adults are already working, without spreading cables across the main prep run.

    Use a power strip inside a ventilated drawer or cabinet, following the maker’s instructions, and keep liquids away from the charging spot. When dinner starts, clear the station into its drawer in one move, so the island returns to a full work and serving surface.

    16. Island with a Built-In Bookshelf End

    Kitchen island end panel with a built-in bookshelf holding cookbooks.

    Build a bookshelf into one end panel of the island, for cookbooks, a small plant, and a few everyday reference books, so the end of the island becomes useful instead of blank. A bookshelf end suits islands that face a living area or entry, since guests see it as they walk in.

    Keep the bookshelf shallow, so books do not stick out past the panel, and store only books you use often, with heavier volumes low. Dust the shelf during a normal clean, and keep the top shelf clear, so the island end does not collect clutter.

    17. Island with Hidden Trash and Recycling Pull-Outs

    Kitchen island with hidden trash and recycling pull-out bins near the prep area.

    Hide trash and recycling pull-outs inside the island, near the prep sink or chopping area, so scraps go straight into a bin without crossing the kitchen. Two bins, one for trash and one for recycling, keep sorting simple, and a lid or closed front keeps the island looking tidy.

    Line the bins and wipe them when you take out the trash, and keep a small compost caddy beside them only if the household uses one daily. Place the pull-outs where the cook stands most, not at the seating end, so guests never sit beside an open bin.

    18. Island with a Herb Rail and Cutting Station

    Kitchen island back edge with a herb rail, small herb pots, and a cutting board station.

    Add a herb rail or a shallow planter strip along the back edge of the island, with a cutting board station beside it, so fresh herbs sit within arm’s reach while you chop. This idea suits cooks who use herbs daily, and it keeps small pots off the main counter.

    Keep the herb rail low and narrow, so it does not block sight lines across the island, and water the herbs over the sink, not over the counter. If live herbs do not suit the light in your kitchen, use the same rail for a knife strip, a towel bar, and a small jar of cooking tools instead.

    19. Bench Seating on One Side of the Island

    Long kitchen island with low bench seating on one side for family meals.

    Pair the island with a low bench on one side, instead of individual stools, so children, friends, and family can slide in together for casual meals. Bench seating suits a long island in a family kitchen, and it tucks neatly under the overhang when the meal is over.

    Choose a bench with a wipe clean seat and a small cushion that washes well, since island benches see daily use. Keep the bench length a little shorter than the island, so people can step around the ends without squeezing past the bench.

    20. Curved Island for Easier Movement

    Curved kitchen island with a rounded seating side and stools along the curve.

    Choose a curved island, with a rounded end or a gentle bow along the seating side, to soften a large kitchen and make movement around the island easier. Curves remove sharp corners in a busy route, which helps in a household with children or in a kitchen where people pass the island often.

    Keep the curve shallow, so the island still holds useful drawers and a flat work run, and place stools along the curved side where the overhang gives even knee room. A curved island suits a larger room best, since the shape needs floor space to read as a curve rather than a cramped bump.

    21. Contrasting Cabinet Color and Mixed Materials

    Kitchen island in a contrasting deep green cabinet color beside pale wall cabinets.

    Paint or finish the island in a contrasting color to the wall cabinets, such as a deep green, navy, or warm wood tone beside pale cabinets, so the island becomes the clear focal point of the kitchen. A contrasting island also lets you test a bold color in one place, without repainting the whole room.

    Repeat the island color once more in a small detail, such as stool cushions, a runner, or a vase, so the contrast looks planned. For a full pale kitchen that can carry a dark or wood island, see white kitchen ideas, and for wider seasonal kitchen styling, see kitchen Christmas decor.

    Conclusion

    A good kitchen island earns its floor space by doing three jobs at once: storing the items you use daily, giving you a clear place to prep, and offering a comfortable spot to sit. Start with storage, then seating, then style, and test the outline on the floor before you order. Choose one or two ideas from this list that solve a real daily problem, such as deep drawers for heavy pans, a slim island for a small room, or a breakfast bar for family meals, and let the rest of the kitchen stay simple around it. The island should make cooking easier, not add a surface you must work around.

    FAQs

    How big should a kitchen island be?

    A kitchen island should fit the room with a comfortable walkway on every side, and with enough counter left for prep after any sink, cooktop, or seating is placed. Measure the room, tape the island outline on the floor, and walk the routes to the stove, sink, and fridge before you choose a final size.

    How much seating overhang do I need at a kitchen island?

    Allow about 12 inches of counter overhang for knees at the seating side, and choose stools that slide fully under the overhang when not in use. Keep the seating run clear of drawers that open into leg room, and leave enough elbow room per person so seated guests do not crowd each other.

    What is the best storage for a kitchen island?

    Deep full extension drawers suit heavy pots and pans best, since they slide out fully and keep items visible, while a pull-out pantry tower suits dry goods and a hidden pull-out suits trash and recycling. Sort each drawer or pull-out by one kind of item, so the system stays easy to use.

    Can a small kitchen have an island?

    Yes, a small kitchen can have an island if the room allows a slim or rolling island with a clear walkway on each side. Choose a slim fixed island for a galley kitchen, or a rolling island that parks against a wall when not in use, and skip a sink or cooktop in the island to save depth.

    Should the island match the rest of the kitchen cabinets?

    The island can match the wall cabinets for a calm, unified room, or it can use a contrasting color or material to become a focal point. If you choose a contrast, repeat the island color or material once more in a small detail, so the choice looks planned rather than random.

    Do I need a sink or cooktop in my kitchen island?

    No, a sink or cooktop is not required, and a plain prep and seating island suits many kitchens better, since it keeps the full counter clear and needs less plumbing or venting. Add a prep sink only if two cooks work together often, and add a cooktop only if the cook wants to face the room while cooking.


  • 21 Primary Bedroom Decorating Ideas for a Restful Retreat

    21 Primary Bedroom Decorating Ideas for a Restful Retreat

    Decorating a primary bedroom for rest starts with a calm palette, layered bedding, soft low light, and clear surfaces, so the room feels quiet at night and easy to use in the morning. Choose one restful color, repeat it in bedding, curtains, and a rug, and keep paths, nightstands, and the dresser partly clear.

    The 21 ideas below cover the bed, the windows, the walls, the floor, storage, and the small corners that make a primary bedroom work day to day. Each idea works on its own, so you can start with bedding and light, then add storage or a reading spot when you have time. For calm palette ideas in another room, see Fall Living Room Decor, and for the home page overview, visit the Dwell Ovell home page.

    Key Takeaways

    • Start with a calm base of white, cream, or soft grey, then add one restful color, such as sage, dusty blue, or warm oat, in bedding, curtains, and a rug.
    • Layer bedding in washable pieces, so the bed looks full but stays easy to make each morning.
    • Use low, warm light at night, with bedside lamps and a dimmer or low ceiling light, and keep bright overhead light for cleaning and getting dressed.
    • Keep nightstands, the dresser top, and the floor paths partly clear, with closed storage for clothes and daily items.
    • Give the room one comfortable place to sit and read, away from the bed, so the bed stays linked with sleep.
    • Repeat each color and material at least twice, so the room looks planned rather than collected at random.

    1. Layered White and Linen Bedding

    A bed dressed with layered white and oat linen bedding, folded blankets, and a few cream pillows.

    Dress the bed in white cotton sheets, a linen duvet in oat or soft white, and two or three sleeping pillows in matching cases, then fold a light blanket across the middle of the bed. White and linen keep the bed looking fresh, and the natural texture adds warmth without a strong pattern.

    Keep decorative pillows to two or three, so making the bed stays quick and the pillows have a chair or bench to sit on at night. Wash the top layers often, and choose a duvet cover with a simple closure, so changing the bedding does not become a chore.

    2. A Tall Upholstered Headboard

    A tall upholstered headboard in soft beige fabric behind a neatly made bed with pale bedding.

    Choose a tall upholstered headboard in a soft neutral fabric, sized to the bed width, as the main focal point behind the bed. The headboard gives the room a finished shape, supports sitting up to read, and softens a plain wall without art or pattern.

    Fix the headboard firmly to the bed frame or the wall, and check that pillows sit against it without sliding down behind it. Keep bedding pale against a mid tone headboard, or choose a pale headboard with deeper bedding, so one of the two gives the bed its contrast.

    3. Matched Nightstands with Clear Tops

    A bed with matched wooden nightstands on both sides, each with a clear top and one lamp.

    Place a matched pair of nightstands, one on each side of the bed, each with a drawer or a closed shelf for small items. Matching tables give the bed a balanced look, and closed storage keeps chargers, medicines, and small items out of sight.

    Leave each nightstand top mostly clear, with room for a lamp, a glass of water, and a book only. If a nightstand has no drawer, use a small lidded box inside it or on a lower shelf, so loose items do not spread across the top.

    4. Warm Dimmable Bedside Lamps

    Two warm bedside lamps with fabric shades glowing softly on nightstands beside a bed in the evening.

    Set a bedside lamp on each nightstand, with warm bulbs and a shade that glows softly, and use a dimmer or a low wattage bulb for evening light. Warm low light helps the room feel settled at night, and two lamps give even light on both sides of the bed.

    Check that each lamp switch is easy to reach from the bed, and that the shades sit at the same height. Keep lamp bases clear of the bed edge, and use a shade that hides the bare bulb from the pillow, so the light does not glare into the eyes.

    5. Sheer Curtains with Blackout Panels

    A bedroom window with sheer white curtains and darker blackout panels, in soft daylight.

    Hang sheer white curtains at the bedroom window for soft daylight and privacy, with blackout panels behind or beside them for night. Sheers keep the room bright during the day, while blackout panels help block street light and early morning sun.

    Hang the curtain rod high and wide, so the panels stack clear of the glass when open and the window looks larger. Close the blackout panels at night, and open both layers in the morning, so the room gets full daylight before the day starts.

    6. A Large Soft Rug Under the Bed

    A large soft neutral rug under a bed, extending past both sides and the foot of the bed.

    Lay a large soft rug under the bed, extending past both sides and the foot, so feet land on a warm surface in the morning. A rug in a calm neutral links the bed to the rest of the room and softens hard floors and footsteps.

    Choose a rug with a non slip pad under it, and a pile that vacuums easily. Check that wardrobe and bedroom doors clear the rug edge, and keep the rug size large enough that it does not look like a small mat beside the bed.

    7. Soft Sage Walls with White Trim

    A bedroom with soft sage walls, white trim, a neatly made bed, and pale bedding.

    Paint the bedroom walls in a soft sage, warm greige, or dusty blue, with white trim on doors, skirting, and window frames. A muted wall color calms the whole room at once, while white trim keeps the edges crisp and the room bright.

    Test a large sample on the wall behind the bed in daylight and in evening light, since muted tones can look grey or green under different bulbs. Keep the ceiling white, and repeat the wall color in one or two smaller items, such as a throw or a cushion, so the color feels planned.

    8. A Wooden Bench at the Foot of the Bed

    A simple wooden bench at the foot of a bed, with a folded throw and a cushion.

    Place a simple wooden bench at the foot of the bed, with a folded throw on one end and a cushion on the other. The bench gives a place to sit while dressing, holds the decorative pillows at night, and marks the end of the bed clearly.

    Keep the bench clear of laundry and bags, so it stays a seat rather than a storage pile. Check that the bench leaves a clear walking path around the foot of the bed, and choose a bench height close to the mattress height, so sitting on it feels natural.

    9. A Reading Chair with a Floor Lamp

    A comfortable armchair in a bedroom corner with a floor lamp and a small side table with a book.

    Set a comfortable armchair in a bedroom corner, with a floor lamp behind one shoulder and a small side table beside it. A reading chair gives the bedroom a second place to sit, so reading and resting do not always happen in bed.

    Keep the chair near the window or the lamp, with a throw folded over one arm and a book on the side table. Leave the seat clear each evening, and choose a chair size that fits the corner without blocking the wardrobe or the door.

    10. A Small Dressing Table by the Window

    A small dressing table by a bedroom window, with a mirror, a stool, and a small tray.

    Place a small dressing table by the window, with a mirror above it, a stool tucked under, and a small tray for daily items. Daylight at the window suits a dressing table, and a small table fits a primary bedroom without taking the place of a nightstand or a chair.

    Keep only daily items on the table top, such as a brush, a small tray, and one vase or candle holder, and store the rest in a drawer or a box. Sit at the table in daylight to check the mirror height, and keep the stool pushed in when not in use.

    11. One Large Calm Landscape Print

    One large calm landscape print in a simple frame hanging above a bedroom dresser.

    Hang one large landscape print above the dresser or on the main wall, in soft greens, blues, or neutral tones, in a simple wood or white frame. One large calm print gives the room a focal point without a busy gallery wall, and it suits a restful room better than many small competing pieces.

    Hang the print at eye level from the bed and the door, and fix it with hooks rated for its weight. Keep the wall around it plain, so the print can breathe, and choose a scene that feels quiet, such as fields, water, or soft hills, rather than a bright or busy image.

    12. Closed Wardrobe Doors for a Tidy Look

    A bedroom wardrobe with closed plain doors beside a neatly made bed.

    Use a wardrobe with closed doors, rather than open rails, for most bedroom clothes, so the room looks tidy even when the wardrobe is full. Closed doors hide color and shape clutter, and they give the room a calm wall of plain panels.

    Fix tall wardrobes to the wall, and check that the doors open fully without hitting the bed or a chair. Keep one small open hook or rail inside the wardrobe door for the next day outfit, so clothes do not end up on the chair or the bench.

    13. A Basket of Folded Throws by the Bed

    A woven basket beside a bed filled with neatly folded throws in cream and sage.

    Place a woven basket beside the bed or near the reading chair, filled with two or three folded throws in the room palette. Throws in a basket stay easy to reach on cool nights, and the basket itself adds a natural texture to the room.

    Fold the throws neatly, with the top one showing a clean edge, and keep the basket size modest, so it does not block the walking path. Wash the throws now and then, and keep only throws in the basket, so it does not become a place for stray clothes.

    14. A Tray on the Dresser for Daily Items

    A bedroom dresser top with a shallow tray holding keys, a watch, and a small dish.

    Set a shallow tray on the dresser for daily items, such as keys, a watch, a small dish for rings, and a hand cream. A tray gives small items a clear home, so the dresser top stays tidy and nothing small gets lost among larger pieces.

    Keep the tray to one per dresser, and leave the rest of the top mostly clear, with room for one vase or one framed photo. Lift the whole tray aside in one move for dusting, and empty it weekly, so old receipts and loose items do not build up.

    15. A Leaning Floor Mirror by the Wardrobe

    A tall floor mirror leaning against a bedroom wall near a wardrobe, secured with a wall bracket.

    Lean a tall floor mirror against the wall near the wardrobe, where it can be used for dressing and where it bounces daylight into the room. A tall mirror helps a bedroom feel larger, and it saves wall space above the dresser for art.

    Fix the mirror to the wall with a proper bracket or anti tip strap, since a tall mirror can fall if it is only leaned. Check the reflection from the bed and the door, and move the mirror if it reflects clutter or bright light straight into the bed.

    16. A Quiet Ceiling Light with a Fabric Shade

    A bedroom ceiling light with a simple fabric shade giving soft warm light.

    Fit a ceiling light with a fabric shade or a frosted cover, in a simple shape that suits the room, for bright light when cleaning or getting dressed. A fabric shade softens the overhead light, so the ceiling fixture does not glare when it is on.

    Use warm bulbs in the ceiling light, and switch it off in the evening in favor of bedside lamps. Check that the fixture hangs clear of tall wardrobe doors, and dust the shade now and then, so the light stays even and soft.

    17. A Low Bookcase for Bedtime Books

    A low wooden bookcase in a bedroom with neatly grouped books and one small plant.

    Place a low bookcase or a short shelf unit along one wall, with bedtime books, a small plant, and one or two calm objects. A low bookcase keeps books easy to reach from the bed or the reading chair, and its low height keeps the wall feeling open.

    Group books in short rows by height or color, and leave some shelf space empty, so the bookcase does not look crowded. Keep the top of the bookcase mostly clear, with one small plant or one framed photo, and dust the shelves weekly.

    18. Potted Greenery on the Windowsill

    Two potted plants in plain ceramic pots on a bright bedroom windowsill.

    Place two or three potted plants on the windowsill, in plain ceramic or terracotta pots, choosing plants that suit the light in the room. Greenery softens the window frame, adds a living note to a calm room, and needs only a small amount of care.

    Check the light and water needs of each plant before placing it, and use saucers under the pots to protect the sill. Keep plants clear of curtains and blackout panels, and trim dead leaves weekly, so the plants stay tidy.

    19. A Window Seat Cushion for Morning Light

    A bedroom window seat with a firm cushion, two pillows, and a folded throw in soft daylight.

    Style a window seat, or a wide sill with a bench below it, with a firm seat cushion, two pillows in the room palette, and a folded throw at one end. A window seat gives the primary bedroom a bright morning spot for coffee, reading, or quiet time.

    Keep the seat cushions in washable covers, since a window seat gets sun and daily use, and leave one end clear for sitting down easily. Check that pillows do not block the window handle, and keep the throw folded, so the seat stays tidy.

    20. A Small Desk Nook for Notes and Planning

    A small desk nook in a bedroom corner with a chair, a lamp, and a notebook on the desk.

    Set a small desk in a quiet corner, with a chair, a lamp, and a tray for a notebook, pens, and a few papers. A desk nook gives the primary bedroom a place for morning notes, lists, and planning, without turning the whole room into a workspace.

    Keep the desk top mostly clear, with only the notebook and the lamp in daily use, and store papers in a drawer or a folder. Face the desk toward the room or the window, rather than a blank wall, if space allows, and switch the desk lamp off at night.

    21. A Clear Landing Spot by the Bedroom Door

    A clear spot just inside a bedroom door with a robe hook, a small dish, and a clear floor area.

    Create a small landing spot just inside the bedroom door, with a hook for a robe, a small dish for keys, and a clear floor area for shoes. A landing spot keeps items that enter the room from spreading to the bed, the bench, and the chair.

    Keep the landing spot to one hook and one dish, and clear it each evening, so the door area stays open. Check that the door opens fully without hitting the hook or the dish, and keep the walking path from the door to the bed clear at all times.

    Conclusion

    A restful primary bedroom comes from a calm palette, layered bedding, soft low light, and clear surfaces, repeated in a few places rather than spread across every surface. Start with the bed and the light, add one rug and one calm wall color, then choose storage, seating, and reading spots that suit how you use the room each day.

    Keep the room easy to live in by washing bedding and throws often, clearing nightstands and the dresser weekly, and removing anything that ends up on the chair or the bench. For calm palette ideas in another room, see Fall Living Room Decor. Revisit the room after a week, remove anything that feels crowded, and keep only the pieces you use and enjoy each day.

    FAQs

    What colors make a primary bedroom restful?

    Soft sage, dusty blue, warm greige, cream, and white make a primary bedroom restful, because muted tones lower visual noise and pair well with wood, linen, and soft light. Pick one muted color as the main accent, use white or cream as the base, and repeat the accent in bedding, curtains, and a rug.

    How do I make a primary bedroom feel calm without redecorating fully?

    You can make a primary bedroom feel calm without redecorating fully by clearing nightstands and the dresser, adding layered white bedding, switching to warm bedside lamps, and closing wardrobe doors. These four changes calm the room at once, and they cost less and take less time than painting or buying new furniture.

    What bedding is best for a restful primary bedroom?

    White cotton sheets with a linen or cotton duvet in a soft neutral are best for a restful primary bedroom, because they feel cool, wash well, and look calm without a strong pattern. Add a light blanket for cool nights, keep decorative pillows to two or three, and choose washable covers, so the bed stays fresh and easy to make.

    How should I light a primary bedroom at night?

    A primary bedroom should be lit at night with warm, low bedside lamps on both sides of the bed, with the bright ceiling light switched off. Use a dimmer or a low wattage bulb for evening light, keep lamp shades at the same height, and keep switches within reach of the bed, so the light can be lowered without getting up.

    How much storage does a primary bedroom need to stay tidy?

    A primary bedroom needs enough closed storage for clothes, bedding, and daily items, such as a wardrobe with doors, a nightstand drawer on each side, and a tray or box on the dresser. Closed storage matters more than open shelves for a restful look, because it hides color and shape clutter and leaves surfaces clear.

    Can a small primary bedroom still feel restful?

    Yes, a small primary bedroom can still feel restful when you choose a calm palette, one large rug, matched nightstands, and closed storage, and keep the floor paths clear. Use mirrors and sheer curtains to keep daylight moving through the room, and limit seating to one chair or bench, so the room does not feel crowded.


  • 25 Cozy Room Decorating Ideas Using Color, Texture, and Lighting

    25 Cozy Room Decorating Ideas Using Color, Texture, and Lighting

    Cozy room decorating ideas work best when warm color, soft texture, and layered lighting are used together: paint or furnishings in warm tones, tactile layers such as wool, velvet, and wood, and lamps at several heights instead of one bright overhead light. The 25 ideas below show how to combine those three elements in living rooms, bedrooms, and small spaces.

    Start with the room you use most in the evening, since that is where warm light and soft layers pay off first. Pick two or three warm colors, such as cream, terracotta, and soft brown, and repeat each one at least twice, in a throw, a cushion, and a rug, so the room looks planned. Then add light at seating height, keep one surface clear for daily use, and work through the list one idea at a time. For seasonal ways to layer the same warm palette, see fall living room decor ideas.

    Key Takeaways

    • Combine all three cozy elements: warm color, soft texture, and layered light, rather than relying on color alone.
    • Hold the palette to two or three warm colors plus natural wood, and repeat each color at least twice in the room.
    • Mix textures that invite touch: knit, wool, velvet, linen, wood, and woven fiber, with one smooth surface left clear for balance.
    • Light the room at several heights: a floor lamp, a table lamp, and candles or a small glow source, with the overhead light off in the evening.
    • Keep seating and walkways usable: throws within reach, rugs flat and secure, and decor low enough to see across.
    • Start small: one warm wall or one lamp change can shift a room, and later ideas can build on that base.

    1. Warm Paint Color on One Accent Wall

    Living room with one warm terracotta accent wall behind a cream sofa, wood shelves, and soft evening lamplight.

    Paint one wall in a warm tone, such as soft terracotta, warm taupe, or muted clay, and keep the other walls in cream or warm white. One warm wall gives the room a clear cozy anchor without making a small room feel dark, and it makes wood, linen, and brass nearby look richer. Choose the wall behind the sofa or the bed, so the color frames the main seating rather than competing with it.

    Test the color on a large card in daylight and in evening lamplight before painting, since warm tones shift a lot under different bulbs. Paint two coats, let the wall dry fully, and hang art or a mirror against it only after the paint has cured. If painting is not possible, a large warm toned fabric panel or a set of framed prints in warm colors gives a similar focal wall without paint.

    2. Layered Throws in Mixed Textures

    Cream sofa with a chunky knit throw and a smooth fleece throw draped over the arm and back in warm tones.

    Drape two throws over the sofa in different textures, such as a chunky knit and a smooth fleece, in colors from the same warm palette. Mixed textures make the seating look soft even before anyone sits down, and two throws let people choose a light or heavy layer. Fold one throw in thirds across the sofa back and drape the other over one arm, so both stay within reach.

    Keep throw colors close to the cushion colors, with one plain and one lightly patterned piece, so the sofa stays calm. Wash throws before first use and shake them out weekly, since throws used daily gather dust and pet hair. Store a spare throw in a basket nearby, so the sofa never ends up bare when one throw is in the wash.

    3. A Soft Rug That Warms the Floor

    Cozy seating area with a soft warm patterned rug under a sofa and wood coffee table on a hard floor.

    Lay a soft rug under the seating area, large enough that front chair and sofa legs sit on it, with a non slip pad beneath. A rug in a warm neutral, a muted pattern, or a soft pile warms the floor at once, quiets footsteps, and links the sofa, chairs, and coffee table into one group. In a room with hard floors, the rug is often the single change that makes the space feel cozy underfoot.

    Choose a flat weave or low pile rug where chairs move often, and a plusher pile beside a bed or reading chair, where feet land first. Center the rug under the main seating, not just under the room, and vacuum it weekly, blotting spills at once. For a small room, one rug is enough; layering a second rug works best in larger rooms where both edges can show.

    4. Lamps at Three Heights Instead of One Overhead Light

    Living room in the evening lit by a floor lamp, a table lamp, and candles, with the overhead light off.

    Place lamps at three heights in the evening: a floor lamp beside the sofa, a table lamp on a side table or console, and a small glow source such as a candle on a tray. Light at several heights makes the room feel settled after dark, since no one sits in a pool of harsh overhead light or in shadow. Warm white bulbs suit cream, wood, and terracotta tones far better than cool white bulbs in a cozy room.

    Put the main lamp switch within reach of the main seat, and use a dimmer or a low watt bulb where possible, so the same lamps work for reading and for quiet evenings. Keep lamp shades in cream or linen, and keep lamp bases clear of throw ends and curtain fabric. For a wider warm lighting plan in a living room, see fall living room decor ideas.

    5. Sheer Curtains Layered with Heavier Drapes

    Living room window with sheer curtains and heavier cream linen drapes beside a cozy sofa.

    Hang sheer curtains next to the glass for daytime privacy and soft light, then add heavier drapes in linen or cotton on the outside, so the window looks finished day and night. Sheers soften bright light and keep the room from feeling bare, while drapes frame the window and add warmth in the evening when drawn. Choose drapes in cream, warm white, or a quiet warm stripe that tones with the sofa fabric.

    Hang the rod high and wide, so the window looks larger and the drapes clear the glass when open. Tie drapes back during the day for light, and draw them in the evening for warmth and privacy. Keep drape fabric clear of candles, radiators, and heaters, and brush or wash the panels before the cold season, since dust shows more on light fabric in daylight.

    6. Chunky Knit and Velvet Cushions Together

    Sofa with chunky knit and velvet cushions in cream, rust, and soft brown.

    Mix chunky knit cushion covers with velvet cushion covers on the same sofa, in two or three warm colors, with plain covers between patterned ones. Knit adds a chunky, handmade texture, while velvet adds a soft sheen, and the contrast keeps the sofa from looking flat. Use one knit texture and one velvet texture only, so the mix reads as planned rather than busy.

    Place larger cushions at the sofa corners and smaller ones in front, and keep the total count to what fits without a pile on the floor when someone sits down. Choose zip covers so you can wash them and swap them by season, and keep velvet covers out of strong direct sun, which can fade the pile unevenly. For farmhouse rooms that use the same soft layering, see farmhouse living room decor.

    7. Warm Wood Through a Coffee Table or Shelves

    Cozy living room anchored by a warm wood coffee table and wood shelves with books and a small plant.

    Anchor the room with one warm wood piece, such as a coffee table, a set of shelves, or a console, in oak, walnut, or a warm worn tone. Wood adds a natural, warm material that softens plain walls and pale sofas, and it gives textiles and metal accents a solid base to sit against. Keep other wood tones in the room close to this anchor tone, so the wood reads as one family rather than a set of unrelated pieces.

    Style the wood surface with restraint: a tray, a short stack of books, and one small plant or candle, with clear space left for cups. Wipe wood with a dry cloth for dust and a damp cloth for spills, and use coasters under hot drinks so the finish stays even. If a new wood piece is not in the budget, sand and oil a secondhand table top, or add wood frames and a wood tray to bring the same warm tone into the room.

    8. Candlelight in Clusters on a Tray

    Tray on a coffee table holding candles of two heights in brass and ceramic holders.

    Group three or four candles of two heights on a tray on the coffee table or sideboard, with holders in brass, ceramic, or glass. A candle cluster gives a low, warm glow that lamps alone cannot match, and the tray keeps the group together so it lifts off in one move when the table is needed. Keep the tray small enough that cups and books still fit beside it on the table.

    Use battery candles near fabric, paper, and dried stems, and keep real flames clear of throws, curtains, and garlands, never leaving them burning unattended. Trim wicks before lighting real candles, and set holders on a stable base so they do not tip. Change candle batteries together in a battery set, so the glow stays even across the group.

    9. A Reading Corner with an Armchair and a Lamp

    Reading corner with a comfortable armchair, a warm table lamp, a small side table, and a folded throw.

    Set one comfortable armchair in a quiet corner, with a cushion, a small side table, and a lamp with a warm bulb at chair height. A reading corner gives one seat a clear purpose on dark evenings, and the lamp light adds a second warm layer beside the main sofa lighting. Choose a chair with a seat deep enough to sit in for an hour, and a side table just large enough for a book and a cup.

    Place the lamp so light falls on a book, not straight into the eyes of the person sitting down, and keep the chair clear of clutter so it stays an invitation rather than a storage spot. Add a small basket for books or a folded throw beside the chair, and keep the corner in the same warm palette as the rest of the room, so it feels like part of the room rather than a separate display.

    10. A Gallery Wall in Warm Frames

    Gallery wall of framed prints in warm wood frames above a sofa in a cozy living room.

    Group framed prints, photos, and small art in warm wood or brass frames on one wall, with even spacing between frames and one larger piece as the anchor. A gallery wall adds warm color and personal detail at eye level, and it fills a bare wall without a large, costly piece. Choose prints in warm tones, such as landscapes, botanical studies, or simple line art, so the group suits the room palette.

    Hang the group centered over the sofa or console, at seated eye level where possible, and check the layout on the floor first, so spacing stays even on the wall. Keep frames in one or two finishes only, and use secure fixings rated for the weight, especially above seating. Dust frames before a gathering, since dust shows more in warm lamplight.

    11. A Woven Basket for Throws and Blankets

    Large woven basket beside a sofa filled with rolled throws in cream, rust, and soft brown.

    Stand a large woven basket beside the sofa, filled with two or three rolled or folded throws in cream, rust, and soft brown. Rolled throws are easy to grab and easy to put back, and the basket itself adds a warm woven texture to the room. This idea suits households where people reach for a throw most evenings, since the basket keeps blankets tidy without a cupboard.

    Roll throws to a similar size so the basket looks tidy, and keep the basket clear of walkways so it is not knocked over. Shake the basket outside now and then, since dust settles in the weave, and avoid damp spots near the basket, which can mark natural fibers. If floor space is tight, a smaller basket on a shelf or a ladder for throws gives the same tidy storage in less room.

    12. A Styled Mantel or Shelf Ledge

    Styled mantel shelf with a mirror above, brass candleholders at the ends, and a small vase of stems.

    Style a mantel or a single shelf ledge with a few warm pieces: a mirror or framed print above, a pair of candleholders at the ends, and one low group in the middle, such as a small vase of stems or a stack of books. A styled ledge gives the room a focal point at eye level, and the wood or painted shelf itself carries much of the interest, so the objects on it can stay few and quiet.

    If the room has no fireplace, a wood shelf mounted at mantel height on a plain wall gives the same ledge for seasonal styling. Keep anything flammable clear of a firebox opening, and check that candleholders sit on stable bases away from curtains. Change one item by season, such as stems in spring or pine in winter, so the ledge feels fresh without a full restyle.

    13. Brass and Warm Metal Accents

    Cozy room corner with brass candleholders, a brass tray, and a brass framed print in warm lamplight.

    Add three or four brass accents across the room, such as candleholders, a small tray, a picture frame, and a lamp base, keeping the finish consistent. Brass adds a warm metallic note that suits fall and winter light, and it links seating, shelves, and windows when the same finish repeats in more than one spot. Limit the metal to one warm finish, so it reads as a thread rather than a collection of unrelated pieces.

    Place one metallic piece near the seating area, one on the mantel or shelves, and one near the window, so the finish repeats without crowding any single surface. Wipe metal pieces clean before the season starts, and keep them away from damp spots where they can mark wood. If the room already has chrome or black fixtures, use brass sparingly, in one or two spots only, so the finishes do not compete.

    14. Greenery and Branches for Softness

    Living room corner with a tall potted plant and branches in a terracotta pot beside a bookcase.

    Stand a tall vase of branches, a potted plant, or a trailing plant on a shelf, so the room gains a soft, natural shape beside straight furniture lines. Greenery softens hard corners, adds a living color that suits warm wood and cream, and fills vertical space without taking up floor room. Choose plants that suit the room light, and keep the pot in a warm ceramic, terracotta, or woven cover that tones with the room.

    Place a tall plant in a bare corner or beside a bookcase, and a trailing plant on a high shelf where stems can hang clear of walkways. Water plants on a set day each week, wipe leaves now and then, and move pots on a tray or mat if the floor or shelf marks easily. If live plants are hard to keep, use one good quality faux stem in the same vase, wiped clean, rather than several poor ones.

    15. A Coffee Table Tray with Books and a Candle

    Wood coffee table with a tray holding a stack of books, a candle, and a small wooden bowl.

    Set a low tray in the center of the coffee table, with a short stack of books, a candle in a holder, and one small natural piece, such as a smooth stone or a small wooden bowl. A tray gives table decor a defined home and keeps the rest of the table free for cups, so the table stays useful as well as styled. Choose a tray in wood, rattan, or brass that tones with the room, and keep the group low enough to see across.

    Leave clear space on the table beside the tray for drinks, and lift the whole tray aside in one move when the table is needed for a meal or a game. Keep the book stack to two or three books with spines in warm colors, and keep the candle clear of book pages and throw ends. One tray, done well, reads more clearly than small items spread across the whole table.

    16. Swap to Warm White Bulbs and Add a Dimmer

    Living room lit by warm white lamps in the evening, with a dimmer switch detail near the sofa.

    Swap cool white bulbs for warm white bulbs in lamps and ceiling fittings, and add a dimmer to the main light where the wiring allows it. Warm white bulbs make cream, wood, and terracotta tones look richer, and a dimmer lets the same light work for a bright family evening and a quiet night in. This is a low cost change, since it needs no new furniture and takes minutes per lamp.

    Check the bulb base and wattage for each fitting before buying, and keep a spare warm bulb in the house so a blown bulb does not leave the room in cool light. Put the dimmer within reach of the main seat where possible, and keep the overhead light off in the evening once lamps are lit, so the room keeps its low, warm glow. Test the new bulbs at night, since daylight hides the difference warm bulbs make.

    17. Layered Bedding for a Cozy Bedroom Corner

    Cozy bedroom bed layered with cream bedding, a warm quilt, and a folded throw across the foot.

    Layer a bedroom bed with a fitted sheet, a flat sheet or light cover, a warm duvet or quilt, and a folded throw across the foot, in cream, soft brown, and one warm accent color. Layered bedding makes a bedroom feel cozy at once, since the bed is the largest soft surface in the room, and layers let sleepers adjust warmth through the night without remaking the bed. Add two sleeping pillows plus one or two soft cushions, and no more, so the bed stays easy to make each morning.

    Choose bedding in natural fibers, such as cotton and linen, that wash well, and keep the throw within the room palette so the bed links to curtains and rugs. Shake out the duvet each morning, fold the throw neatly at the foot, and wash bedding on a regular cycle so layers stay fresh. For a bedroom that stays cozy past the holidays, keep the same layering and swap only the accent color by season.

    18. A Mirror That Bounces Warm Light

    Mirror in a warm wood frame above a console, reflecting warm lamplight in a cozy room.

    Hang a mirror opposite or beside a lamp or window, so it bounces warm light deeper into the room and makes a small room feel larger. A mirror doubles lamplight in the evening, and a warm wood or brass frame adds a cozy detail even when the lamp is off. Choose a mirror sized to the wall, large enough to reflect light, but not so large that it crowds nearby frames or furniture.

    Hang the mirror centered over a console or sideboard, with its bottom edge clear of items on the top, and check the reflection from the main seat, since that is where it will be seen most. Keep the mirror glass clean, since smudges show more in warm lamplight, and avoid hanging a mirror where it reflects clutter or a bright bare bulb. In a small room, one mirror is enough; a second mirror works best on a different wall, not beside the first.

    19. A Woven Wall Hanging or Textured Panel

    Plain wall with a woven wall hanging in warm neutral tones above a console in a cozy room.

    Hang a woven wall hanging, a macrame piece, or a fabric panel in warm neutral tones on a plain wall, to add texture at eye level without paint or new furniture. Woven fiber adds a soft, handmade texture that paint alone cannot give, and it suits rooms with wood, linen, and rattan already in them. Choose a piece sized to the wall, so it fills the space without crowding nearby art or a mirror.

    Hang the piece from a single secure hook or a wood dowel rod, and check that it hangs level and clear of radiators and heaters. Brush or shake the piece outside now and then, since woven fiber gathers dust, and keep it out of strong direct sun, which can fade natural fibers unevenly. If a large woven piece feels too much, a small woven panel above a console gives the same soft texture in a smaller dose.

    20. Seasonal Textile Swaps for Autumn and Winter

    Sofa styled for autumn and winter with rust and mustard cushion covers and a warm throw.

    Swap cushion covers, throws, and a table runner to deeper warm tones for autumn and winter, such as rust, mustard, and deep brown, then swap back to lighter warm neutrals in spring. Seasonal textile swaps change the room in minutes and cost far less than new furniture, since covers and throws store flat when the season ends. Keep the swap to two or three pieces per room, so the change reads as cozy rather than themed.

    Choose zip cushion covers and washable throws, so the swap takes one laundry cycle and one short styling pass. Store out of season textiles washed and folded in a labeled basket or bag, so the next swap takes minutes. For seasonal living room layers that pair with this idea, see cozy Christmas living room ideas.

    21. Framed Photos and Personal Pieces on Display

    Console styled with framed photos in matching warm frames and one small keepsake.

    Group framed photos and one or two personal pieces, such as a small keepsake or a handmade item, on a console, shelf, or gallery wall, in matching warm frames. Personal pieces make a cozy room feel lived in, since they show who uses the room, and they suit a warm palette better than a row of identical store bought objects. Keep the group small, with space between frames, so each piece can be seen.

    Use the same frame finish across the group, and vary photo sizes only slightly, so the display reads as planned. Keep fragile keepsakes behind glass or away from walkway edges, and dust frames weekly, since a dusty personal display loses its warmth fast. If the group starts to grow, rotate pieces by season, keeping the current favorites out and storing the rest, so the display stays calm.

    22. Floor Cushions and a Pouf for Soft Extra Seating

    Living room corner with large floor cushions in knit and cotton and a woven pouf.

    Add two or three large floor cushions and one woven or fabric pouf in knit, cotton, or wool, stacked in a corner when not in use and set out for evening seating. Floor cushions add soft seating without new furniture, and they work well for family evenings, games, and film nights, especially in rooms where a second sofa would crowd the floor. Keep cushion colors inside the room palette, in cream, rust, or soft brown.

    Store floor cushions stacked, not in walkways, when they are not in use, and shake and air them regularly, washing covers on a gentle cycle where the care label allows. Check that floor cushions do not block a fireplace, a heater, or a walkway when set out, and keep the pouf as a footrest or a side table with a tray on top, so it earns its floor space daily.

    23. A Window Seat with Thick Cushions

    Window seat with a thick washable cushion, soft back cushions, and a basket of books beside it.

    Build a window seat from a wide sill, a bench, or a low storage unit under a window, topped with a thick cushion in a washable fabric, plus one or two soft back cushions. A window seat turns an unused window wall into the coziest seat in the room, with daylight by day and lamplight in the evening, and storage below keeps throws and books close. Choose a cushion thick enough to sit on for an hour, and a fabric that wipes clean.

    Keep the window seat clear of clutter, so it stays an invitation, and add a small basket beside it for a book and a throw. In a room without a built in seat, a low bench with the same thick cushion gives a similar seat in front of a window. Keep cushion fabric clear of radiators below the window, and air the cushions now and then, since a seat by glass gathers dust and damp in cold weather.

    24. Fairy Lights Along a Shelf or in a Glass Jar

    Glass jar with warm fairy lights glowing on a side table beside a cozy sofa in the evening.

    Run a short string of warm white fairy lights along a shelf edge, or place a small string inside a clear glass jar on a side table, with the battery pack hidden behind the jar. A lit jar or a lit shelf edge gives a soft, contained glow that suits a side table, a shelf, or a windowsill, and it adds cozy light without another strand across the room. One jar or one shelf run is enough in a small room.

    Use battery lights with a timer where available, so the lights come on at the same time each evening, and keep lights clear of curtain edges and throw ends. Wipe the jar glass before first use so the light shows clearly, and turn the lights off at night, keeping spare batteries with the other household lights. Keep fairy lights out of reach of small children, and check cords for damage before each season of use.

    25. A Warm Welcome Corner by the Door

    Entry corner inside a door with a narrow wood console, a mirror above, a tray for keys, and a basket below.

    Style the wall just inside the door as a warm welcome corner: a small console or bench, a mirror or framed print above, a tray for keys, and a basket for shoes or bags. A welcome corner makes the whole home feel cozy from the first step inside, since guests see warm wood, soft texture, and low light at once, and it keeps daily clutter in one place. Choose a console narrow enough to leave the walkway clear, and a mirror that reflects lamp light into the hall.

    Keep the top calm: one tray, one small plant or vase, and one candle or lamp, with the basket below for shoes. Empty the tray weekly, so keys and mail do not pile up, and wipe the console top after wet weather, since coats and bags bring in damp. For a farmhouse room that uses the same warm entry styling, see farmhouse living room decor.

    Conclusion

    A cozy room works when warm color, soft texture, and layered lighting are planned together, not added one at a time without a link between them. Start with a warm palette of two or three colors, add soft layers you can touch, such as throws, rugs, and cushions, then light the room at several heights with warm bulbs. Keep seating usable, walkways clear, and one surface in each room free for daily life.

    Work through this list one idea at a time, starting with light and textiles, since those two changes shift a room fastest. For seasonal layers in the same warm palette, see fall living room decor ideas, and for holiday warmth in a living room, see cozy Christmas living room ideas. Save this list on Pinterest for your next room refresh, and begin with the room you use most in the evening.

    FAQs

    What are the three main elements of cozy room decorating?

    The three main elements are warm color, soft texture, and layered lighting. Warm color sets the mood, soft texture such as wool, velvet, and wood invites touch, and layered lighting at several heights keeps the room soft in the evening instead of harsh under one overhead light.

    What colors make a room feel cozy?

    Warm colors make a room feel cozy, such as cream, warm white, terracotta, soft brown, rust, and muted gold, used in a palette of two or three colors plus natural wood. Repeat each color at least twice, in a throw, a cushion, and a rug, so the room looks planned, and keep one quiet pattern at most so the palette stays calm.

    How do I make a room cozy without painting or buying furniture?

    Start with textiles and light, since those two changes shift a room fastest without paint or new furniture. Add a soft rug, two throws in mixed textures, and lamps with warm white bulbs at seating height, then style one tray or shelf with books and a candle. Work through one layer at a time, and keep pieces you use daily within reach.

    How many lamps does a cozy room need?

    A cozy room needs light at two or three heights, not a set number of lamps: a floor lamp beside the sofa, a table lamp on a side table or console, and a small glow source such as candles or fairy lights. That spread keeps no one in shadow and lets you switch the overhead light off in the evening, which is the change that most often makes a room feel cozy.

    What textures work best for a cozy room?

    Knit, wool, velvet, linen, cotton, wood, and woven fiber work best together, because each adds a different kind of softness to the room. Mix one chunky texture, such as knit, with one smooth texture, such as velvet, and one natural texture, such as wood or rattan, and leave one smooth surface clear, such as a wood table top, so the room stays balanced.

    How do I keep a cozy room from looking cluttered?

    Keep one surface in each room clear for daily use, group decor in small sets on trays, and store throws and cushions in baskets when they are not in use. Limit decor to three or four pieces per surface, repeat the same warm colors across the room, and remove one item whenever a new piece is added, so the cozy layers stay soft rather than crowded.


  • 19 Nancy Meyers Inspired Living Room Ideas for a Collected Look

    19 Nancy Meyers Inspired Living Room Ideas for a Collected Look

    A Nancy Meyers living room feels collected and easy to live in. It pairs a slipcovered sofa with wood, linen, books, and soft lamp light, in a calm palette of cream, white, and pale blue. The 19 ideas below show how to layer seating, storage, art, and light so the room looks gathered over time, not bought in one trip.

    Start with the largest pieces first: the sofa, the rug, and the main seating layout. Then add layers that make the room feel used, such as books on the coffee table, a lamp that is switched on in the evening, and a basket of throws by the sofa. Keep the palette calm, repeat wood and linen in several places, and leave clear space for walking, sitting, and setting down a cup. For a related warm room built on the same base, see farmhouse decor ideas for living room.

    Key Takeaways

    • Start with a slipcovered sofa, a warm wood piece, and a calm cream, white, and pale blue palette.
    • Build the room in layers: seating, rugs, curtains, lighting, storage, art, and fresh greenery, in that order.
    • Mix new and older pieces so the room reads as collected over time, not matched in one shopping trip.
    • Repeat each material at least twice, such as linen on the sofa and curtains, or wood on the coffee table and mantel.
    • Keep one clear focal point, usually the fireplace or the main sofa wall, and keep other surfaces calmer.
    • Leave room for everyday life: clear seats, clear walkways, and a coffee table that still holds cups and books.

    1. Slipcovered Sofa in Washed White Linen

    Living room with a slipcovered sofa in washed white linen, wood legs, and soft cream pillows.

    A slipcovered sofa in washed white or cream linen sets the tone for the whole room, because it looks soft from day one and invites people to sit down. Choose a loose cover with a skirt that just brushes the floor, and let the relaxed wrinkles stay, since a perfectly pressed slipcover can look stiff beside wood and books. The pale sofa also gives every other layer, from pillows to art, a calm base to sit against.

    Keep the sofa cushions plump by flipping and rotating them each week, and wash the cover on a gentle cycle when it needs it. If white feels risky in a busy house, choose a warm cream or light oatmeal cover instead, and keep a spare throw over the seat for everyday use. Pair the sofa with wood legs or a low wood frame showing below the skirt, so the soft linen has a solid base.

    2. Paired Armchairs Facing the Fireplace

    Two linen armchairs facing each other beside a fireplace with a wood mantel.

    Two armchairs facing each other across a fireplace, or angled toward it, give a living room a clear conversation layout. Choose chairs with rolled arms and linen or cotton covers in cream or a soft stripe, and leave enough space between them for a small table or an ottoman. The pair reads as planned and balanced, even when the rest of the room mixes older and newer pieces.

    Set the chairs far enough from the firebox to be safe and comfortable, and close enough that people can talk without raising their voices. Add a small side table between a chair and the sofa for a cup and a book, and keep the chair seats clear, so the pair stays an invitation rather than a place for folded laundry. If the room has no fireplace, face the pair across a coffee table toward the sofa instead.

    3. Reading Chaise by a Bright Window

    Reading chaise by a bright window with a floor lamp, side table, and folded throw.

    A chaise or a deep lounge chair by a bright window gives the room a quiet corner for reading, with daylight during the day and a floor lamp after dark. Choose a chair deep enough to tuck your feet up, with a firm seat cushion and a small pillow for lower back support. Place a small side table beside it for a book, a cup, and reading glasses, so the corner works without a trip across the room.

    Keep the window dressing light at this spot, such as a sheer panel or a linen curtain pulled to one side, so daylight still reaches the chair. Add a throw folded over the chaise arm for cool evenings, and a small basket below the side table for the current book and a magazine. If floor space is tight, a single armchair with an ottoman gives the same long sit in a smaller footprint.

    4. Built-In Bookcases Around the Fireplace

    White built-in bookcases on either side of a fireplace filled with books and vases.

    Built-in bookcases on either side of a fireplace give a living room its collected backbone, because books, art, and a few objects fill the wall in a way that looks gathered over years. Use painted wood shelves in white or cream, and mix upright books with short stacks laid flat, leaving some open space on each shelf. The fireplace stays the center, while the shelves frame it without competing.

    Style each shelf with a mix of heights: a tall vase or candlestick, a stack of books, and one smaller object, with clear space between groups. Keep the palette close to the room, with cream spines, wood, and one soft blue or green accent, and leave one shelf partly empty so the display can change. If full built-ins are not possible, two tall bookcases in the same finish, placed tight to the fireplace wall, give a similar framed look.

    5. Round Coffee Table with Books and a Low Bowl

    Round wood coffee table with stacked books and a low bowl in a bright living room.

    A round coffee table suits a Nancy Meyers living room because its soft shape keeps walkways easy and its top stays simple to style. Choose wood or a wood top with a simple base, large enough to hold books and cups but small enough to walk around without turning sideways. A round table also links a sofa and two chairs without sharp corners in a busy family room.

    Style the top with restraint: a stack of two or three large books, a low bowl or tray for remotes, and one small vase of fresh stems. Leave at least half the top clear, so cups, a plate, and a book can all fit at once. Wipe wood tops with a dry cloth for dust and a damp cloth for spills, and use coasters under hot drinks so the finish stays even over time.

    6. Layered Jute and Wool Rugs

    Wool rug layered over a larger jute rug under a coffee table in a neutral living room.

    Layering a smaller wool rug over a larger jute or sisal rug warms the floor and marks the seating area without a loud pattern. Center the base rug under the sofa and chairs, with the front legs of the seating on it, then center the top rug under the coffee table, leaving an even border of the base rug showing. The natural fiber base adds texture, while the wool top adds softness underfoot.

    Use a rug pad between the layers if they slide, and vacuum both layers weekly so dirt does not build up between them. Choose a top rug in cream, soft blue, or a quiet stripe that repeats a color already in the pillows or art, and keep the pattern scale simple, since two strong patterns on the floor can crowd the room. In a small room, one wool rug alone is enough, since two layers need room to show their edges.

    7. Floor-Length Linen Drapes

    Tall living room windows with floor-length cream linen drapes and daylight.

    Floor-length linen drapes soften tall windows and make a living room feel finished, even when the rest of the room stays simple. Hang the rod close to the ceiling and wider than the window frame, so the window looks taller and the drapes can stack clear of the glass. Choose natural white, cream, or pale blue linen, and let the panels fall to the floor with a small break rather than pooling, so they stay clean and easy to vacuum around.

    Use rings with clips for a relaxed gathered look, and keep the drape color close to the sofa or rug so the window treatment links to the seating area. Wash linen drapes on a gentle cycle and hang them damp to reduce creases, and open them fully during the day, since this style depends on daylight to show the linen weave. For a related seasonal take on the same window, see fall living room decor.

    8. Collected Gallery Wall in Mixed Frames

    Collected gallery wall in mixed wood, gold, and black frames above a living room sofa.

    A gallery wall of art collected over time, in mixed wood, gold, and black frames, is the clearest way to get the collected look on one wall. Start with one larger piece at eye level from the sofa, then build around it with smaller landscapes, prints, and family photos, keeping a similar gap between frames. The mix of frames matters more than matching sizes, since varied frames read as gathered rather than bought as a set.

    Lay the arrangement on the floor first, and take a photo before hanging, so the spacing stays even once frames go up. Keep the wall around the gallery simple, with no competing shelf or large mirror beside it, and check that heavy frames have secure fixings. If the wall is small, a group of three or five frames gives the same collected note without crowding the room.

    9. Styled Wood Mantel with Candles and Greenery

    Wood mantel styled with candlesticks, a mirror above, and a low row of greenery.

    A wood mantel, whether a thick beam or a painted shelf, gives a living room a natural focal point even when the fireplace is rarely lit. Keep the styling simple: a large mirror or framed print above, a pair of candlesticks or vases at the ends, and one low row of greenery or a small garland in the middle. The wood itself carries most of the interest, so the objects on it can stay few and quiet.

    Keep anything flammable clear of the firebox, and set candles on stable holders away from curtains and dried stems. Change one item by season, such as a vase of fresh stems in spring or pine in winter, so the mantel feels fresh without a full restyle. If the room has no fireplace, a wood shelf mounted at mantel height on a plain wall gives the same ledge for seasonal styling.

    10. Large Upholstered Ottoman as a Coffee Table

    Large upholstered linen ottoman with a wood tray, books, and a small vase in a living room.

    A large upholstered ottoman in place of a coffee table gives a living room a soft center that also works as extra seating. Choose a square or rectangular ottoman in linen or a quiet stripe, firm enough to hold a tray, and large enough to anchor the sofa without blocking walkways. The soft top suits a family room, since there are no hard corners, and a tray on top turns it into a stable surface for cups and books.

    Set a wood or woven tray in the center of the ottoman, with a book and a small vase, and leave the rest of the top clear for feet at the end of the day. Keep the ottoman cover washable where possible, and vacuum it weekly, since a fabric top gathers dust faster than wood. If the room already has a wood coffee table, use a smaller ottoman at one end of the sofa instead, as a footrest and spare seat.

    11. Woven Baskets for Throws and Everyday Storage

    Woven seagrass baskets beside a sofa holding folded throws and magazines.

    Woven baskets are the quiet storage hero of a collected living room, because they hold real clutter and still look like decor. Use a large seagrass basket for throws beside the sofa, a medium basket for magazines or toys, and a small basket on a shelf for remotes and chargers. The woven texture adds warmth beside wood and linen, and the natural color works with almost any calm palette.

    Place baskets where the clutter actually happens: beside the sofa for throws, near the television for remotes, and by the door for shoes or bags. Choose baskets with handles for pieces that move often, and line baskets used for plants or damp items. Shake baskets outside monthly, since woven fibers gather dust and crumbs, and replace a basket when the weave starts to fray at the rim.

    12. Blue and White Ceramics on Open Shelves

    Blue and white ceramic jars and bowls grouped on white open shelves with books.

    Blue and white ceramics, from ginger jars to simple bowls and vases, give a calm living room a classic accent that links to the pale blue in pillows and art. Group two or three pieces on one open shelf or on the mantel, with books beside them, rather than spreading single pieces across every surface. The blue reads clearly against white shelves and cream walls, without needing a bright color elsewhere.

    Keep the group to one shelf or one surface, and vary heights, with one taller jar and one or two smaller bowls, so the group has a clear shape. Dust ceramics weekly, since open shelves gather dust, and keep them clear of walkways and chair backs where they could be knocked. If blue feels strong, use it only in ceramics and one pillow, and keep the rest of the room in cream, white, and wood.

    13. Layered Lamps for Soft Evening Light

    Living room in the evening lit by table lamps and a floor lamp with warm light and linen shades.

    Soft evening light comes from lamps at seating height, not from one bright overhead fixture. Use a floor lamp beside a reading chair, table lamps on side tables at both ends of the sofa, and one small lamp on a console or shelf, all with warm white bulbs. The layers together make cream, wood, and linen look warmer after dark, and they let one person read while another watches television without harsh light.

    Put lamps on dimmers where the wiring allows it, and keep switches within reach of the sofa so no one crosses a dark room. Use linen or cotton shades, which soften the bulb, and keep lamp bases clear of throws and paper. For a related warm evening room, see cozy Christmas living room ideas for how the same lamp layers work with seasonal greenery and candles kept clear of fabric.

    14. Window Seat with Cushions and Hidden Storage

    Window seat with a deep cushion, back pillows, and storage bench below in a bright living room.

    A window seat turns a wide window into a useful living room feature, with a deep cushion, back pillows, and storage below for books, games, or throws. Build or buy a low bench that fits the window width, add a firm cushion in a washable fabric, and layer two or three pillows against the window frame for back support. The seat gives the room a second place to sit, apart from the sofa, and it makes daylight the main feature of that corner.

    Use hinged lids or drawers below the seat for storage, and keep the items inside in groups, such as books in one section and throws in another, so the seat stays easy to open. Keep the cushion color close to the sofa, and add a small side table at one end for a cup and a book. If a built seat is not possible, a low bench with baskets below, placed under a window, gives the same sit and storage in a simpler form.

    15. Antique Wood Trunk as a Side Table

    Antique wood trunk beside a sofa used as a side table with a lamp and a book.

    An antique or vintage style wood trunk beside a sofa or chair gives a living room a piece with age, storage, and a solid surface in one object. Choose a trunk with a flat lid, so it can hold a lamp, a book, and a cup, and check that the lid stays open safely and the hinges hold. The worn wood and old hardware add the sense of history that new pieces alone cannot copy, and they pair well with new linen because the contrast keeps the room from feeling like a showroom.

    Keep the trunk top mostly clear, with a lamp at one end and one book or tray, and use the inside for throws, photo albums, or games. Wipe the wood with a dry cloth, and check older trunks for secure corners and handles before placing a heavy lamp on top. If a full trunk feels large, a smaller wood chest or a vintage suitcase stack beside a chair gives the same aged note in less floor space.

    16. Fresh Flowers and Potted Greens on Side Tables

    Side table with a vase of fresh flowers and a potted green plant beside a sofa.

    Fresh flowers in a simple vase and one or two potted greens on side tables make a collected living room feel alive without a large arrangement. Use a glass or white ceramic vase with short stems, such as roses, peonies in season, or garden greens, and set it on a side table where it can be seen from the sofa. A potted plant beside it, in a terracotta or cream pot, adds green that lasts far longer than cut stems.

    Change the water every day or two, trim stems at an angle, and remove any stem that wilts, since one cloudy vase can spoil the group. Water potted plants before they dry out fully, and set each pot on a saucer so the table stays dry. Keep arrangements low on side tables, so they do not block conversation or the view across the room, and keep flowers clear of direct heat and strong sun.

    17. Linen and Ticking Stripe Pillows in a Soft Palette

    Sofa with linen and ticking stripe pillows in cream, white, and pale blue.

    Pillows in linen and ticking stripe, in cream, white, pale blue, and soft grey, finish a slipcovered sofa without adding a loud pattern. Mix one plain linen, one ticking stripe, and one quiet check or floral, all in the same soft palette, and keep the count to what fits without a pile on the floor when someone sits down. The mix of textures matters more than bright color, since linen, cotton, and a light knit together read as layered and lived in.

    Repeat one pillow color elsewhere in the room, such as a throw or a piece of art, so the sofa links to the rest of the space. Use zip covers so pillows can be washed, and fluff inserts daily, since linen covers show dents more than firmer fabrics. If the sofa already has a pattern, use plain linen pillows in one soft color only, so the room stays calm.

    18. White Paneled Walls with Warm Wood Trim

    Living room with white paneled walls, warm wood trim, and a cream sofa.

    White paneled walls, from simple beadboard to wider planks, give a living room texture without a strong color or pattern, and they suit both older and newer houses. Paint the panels white or cream, and pair them with warm wood trim on doors, windows, or a mantel, so the white does not read as cold. The panels work best on one or two walls, such as the fireplace wall or the sofa wall, so the room keeps a calm balance.

    Keep furniture and art simple against paneled walls, since the lines themselves add interest, and avoid hanging a large patterned piece directly over busy paneling. Dust panel grooves with a dry cloth, and touch up paint at scuffs near seating, where chairs and bags mark the wall. If full paneling is not possible, a single framed panel section behind the sofa gives a similar textured backdrop without a full wall build.

    19. Console Table Behind the Sofa with Lamps and Books

    Wood console table behind a sofa styled with a lamp, stacked books, and a small vase.

    A console table behind a sofa gives a living room a work surface and a display ledge in a spot that often stays empty. Choose a wood console close to sofa height, and style the top with a lamp at one end for evening light, a stack of books in the middle, and a small vase or bowl at the other end. The table also marks the edge of the seating area in an open plan room, without a wall or a screen.

    Keep the tabletop mostly clear, with one lamp, one book stack, and one small object, so it does not become a shelf for mail and chargers. Slide a basket or two below for throws or games, and measure the depth first, since a table that sticks too far into a walkway will get bumped daily. Place the lamp so its light falls over the sofa for reading, and keep cords tucked behind the table, out of the walkway.

    Conclusion

    A Nancy Meyers living room does not need a large budget or a full remodel to feel collected. A slipcovered sofa, warm wood, layered rugs, linen drapes, books, and soft lamp light will carry most rooms, and the older pieces, such as a trunk, a gallery wall, or blue and white ceramics, give the room its gathered character over time. Start with seating and the rug, add light and storage, and finish with art and fresh greenery.

    For a related warm room on the same base, see farmhouse decor ideas for living room, and for a seasonal shift using the same lamp layers, see cozy Christmas living room ideas. Keep what you use often, store the rest together, and let the room return to a simple, usable base between seasons. Work through this list one idea at a time, and keep the palette calm, so each new layer adds warmth without crowding the room.

    FAQs

    What defines a Nancy Meyers living room?

    A Nancy Meyers living room is defined by a slipcovered sofa, warm wood, linen, books, and soft lamp light in a calm cream, white, and pale blue palette. The room feels collected rather than matched, with older pieces, art, and everyday objects mixed with new furniture. Seating stays deep and usable, surfaces hold books and flowers, and the overall feel is warm, bright, and easy to live in.

    How do I get the collected look without buying everything new?

    Start with the pieces you already own, and add one older or secondhand piece at a time, such as a wood trunk, a framed print, or a ceramic jar. Mix new linen with older wood, keep the palette to cream, white, pale blue, and wood tones, and repeat each material in at least two places. Living with one new piece for a few weeks before adding the next keeps the room from looking bought in one trip.

    What colors work best in a Nancy Meyers living room?

    Cream, white, soft grey, pale blue, and warm wood tones work best together, because they suit linen, wood floors, and daylight in a bright room. Repeat pale blue in at least two places, such as a pillow and a ceramic jar, and keep other colors to wood, green from plants, and one muted accent. Avoid adding a second strong color in the same room, since the calm palette is what keeps the layered look from feeling busy.

    What sofa works best for this style?

    A slipcovered sofa in washed white, cream, or light oatmeal linen works best, because it looks soft from day one and can be washed when life happens. Choose a deep seat, rolled or straight arms, and a skirt that just brushes the floor, with wood legs or a low wood frame below. Keep cushions plump by flipping them weekly, and add linen and ticking stripe pillows in the same soft palette.

    How do I light a Nancy Meyers living room in the evening?

    Use lamps at seating height rather than one bright overhead light, with a floor lamp by a reading chair and table lamps at both ends of the sofa. Choose warm white bulbs and linen shades, and put lamps on dimmers where possible, so the room can shift from bright daytime use to soft evening light. Keep one small lamp on a console or shelf as a third layer, and keep all lamps clear of throws and paper.

    How do I keep a white living room practical with children or pets?

    Choose washable slipcovers, a rug that can be cleaned, and an ottoman or coffee table with a tray that lifts off in one move for quick clearing. Keep a basket of throws by the sofa for everyday use, use cream or oatmeal rather than pure white where marks show most, and keep ceramics and art clear of walkways and chair backs. Washable covers and wipe clean wood mean the room can stay pale without staying off limits.


  • How to Choose Beach House Furniture for a Comfortable Coastal Home

    How to Choose Beach House Furniture for a Comfortable Coastal Home

    Choose beach house furniture by starting with light, durable materials that handle humidity and salt air, such as teak, rattan, and washable linen. Pick comfortable seating sized to your rooms, keep the palette pale and natural, and add storage for beach gear. Test every piece for comfort before you buy.

    A beach house asks more of furniture than a typical home does. Sand comes in on shoes, damp air settles into fabric, and bright light shows every mark on a dark finish. The pieces that work best are the ones you can clean easily, move without a struggle, and sit on for a long evening without thinking about them. For more coastal styling ideas, see these coastal fall decor ideas and these fall living room decor ideas.

    Key Takeaways

    • Start with materials that handle humidity, salt air, and sand, and check care needs before you fall for a look.
    • Measure every room, doorway, and stair turn before you order, since coastal homes often have tight halls and small bedrooms.
    • Choose seating for comfort first: seat depth, back height, and cushion firmness matter more than a pretty silhouette.
    • Use washable slipcovers and removable cushion covers wherever you can, so sand and spills do not become permanent.
    • Keep the palette pale and natural, and repeat one or two wood tones through the house for a calm, linked feel.
    • Plan storage for beach towels, shoes, and outdoor gear near the door, so clutter does not spread into living rooms.
    • Sit in every seat, open every drawer, and test the layout in the room before you commit.

    Materials and Supplies

    • A tape measure, a notebook, and painter’s tape for marking furniture footprints on the floor
    • A list of room dimensions, doorway widths, and stair turns for each room you plan to furnish
    • Fabric swatches in the colors you plan to use, to test against your light and wood tones
    • A short list of pieces you already own and plan to keep, with their measurements
    • Cleaning supplies suited to your chosen materials, such as a soft cloth, mild soap, and a vacuum with an upholstery head
    • Felt pads for chair and table legs, to protect wood and tile floors from sand grit
    • Storage baskets or lidded boxes for beach towels, shoes, and outdoor gear
    • A budget list by room, so one statement piece does not use up the whole furnishing plan

    1. Define Your Coastal Style and Palette

    Coastal mood board with white, sand, and dusty blue fabric swatches beside pale wood samples.

    Start by naming the coastal look you want, since “beach house” covers a wide range. A classic coastal room uses white walls, pale wood, linen, and blue accents. A relaxed surf style leans on rattan, jute, and weathered finishes. A modern coastal room keeps clean lines, light oak, and a quiet palette with one soft blue or green accent.

    Pick a palette of three or four colors and use it through the house. White, sand, pale gray, and driftwood tones make a calm base, and one accent color, such as sea glass green or dusty blue, gives rooms a link to each other. Write the palette down and carry the swatches when you shop, so a piece that looks right alone does not clash once it is home.

    Look at your light before you lock in colors. A room with strong south light can take slightly deeper tones, while a north facing room needs paler finishes to stay bright. If the house is a rental or a shared family home, favor neutral main pieces and add color through cushions and throws, which are easy to change.

    2. Measure Rooms, Doorways, and Traffic Paths

    Person measuring a coastal living room wall with painter's tape marking a sofa footprint on the floor.

    Measure each room wall to wall, and note window heights, radiator positions, and any built in features that limit placement. Measure doorways, hall widths, and stair turns too, since a sofa that fits the living room is no good if it cannot reach it. Sketch a simple floor plan for each room, even a rough one on paper, and mark the doors and walkways.

    Use painter’s tape to mark the footprint of each large piece on the floor. A taped outline shows at once whether a sofa blocks a path to the kitchen or a dining table leaves too little room to pull out chairs. Leave at least 30 inches for main walkways and about 24 inches to pull out a dining chair comfortably.

    Measure ceiling height as well, especially for tall bookcases, canopy beds, and pendant lights. In rooms with low ceilings, low profile seating and horizontal storage keep the room feeling open. Keep your measurements in one notebook or phone note, so you can check them in a shop without guessing.

    3. Set a Budget and a Room by Room Priority List

    Notebook budget list beside a room plan with coastal furniture sketches on a light wood table.

    Work out a total budget first, then split it by room based on how much each room will be used. Living rooms and main bedrooms usually deserve the largest share, since seating and beds get daily use. Guest rooms and hallways can often wait or use simpler pieces.

    List the pieces each room needs in order of importance. A bed, a sofa, and a dining table usually come first, while accent chairs, side tables, and extra storage can follow. This order stops you from spending the budget on small decorative pieces before the basics are covered.

    Allow a small reserve for delivery, assembly, and care supplies, such as felt pads and fabric protector. If you are furnishing in stages, buy the main pieces first and live with them for a few weeks before choosing accents. You will see the light, the traffic flow, and the storage gaps much more clearly once the big pieces are in place.

    4. Choose Frames and Materials Built for Humidity and Salt Air

    Teak, rattan, and pale oak furniture samples beside a window with sea light.

    Coastal air is damp and salty, so material choice matters more here than in a dry inland home. Teak, cedar, and properly sealed oak handle moisture better than raw softwood. Rattan and wicker suit covered porches and bright living rooms, but need protection from constant direct rain. Powder coated metal frames resist rust better than bare steel, so check the finish on any metal piece.

    Avoid materials that swell, peel, or rust quickly in damp air. Unsealed particleboard, thin veneers over damp prone cores, and uncoated iron frames tend to show damage early near the coast. Ask how a piece is sealed and whether the maker rates it for humid or covered outdoor use, and read the care directions before you buy.

    Check joints and construction as well as the surface. Solid joints, screwed and glued frames, and removable cushions usually last longer than stapled frames with fixed covers. A well built frame in a plain fabric is a better buy than a striking piece with a weak frame, since re-covering a good frame is possible and rebuilding a weak one is not.

    5. Pick Seating Depth, Height, and Comfort First

    Person sitting on a white slipcovered sofa in a bright coastal living room testing comfort.

    Sit in a sofa or chair before you buy it, and sit the way you actually sit at home, not perched on the edge. Check seat depth: a deep seat suits lounging with feet up, while a shallower seat suits upright sitting and smaller rooms. Check seat height too, since a seat that is too low is hard to get out of, and one that is too high leaves feet dangling.

    Test the back height and arm height as well. A low back keeps a room open and suits a view, while a higher back gives more support for reading and long evenings. Arms should support your elbows without pushing your shoulders up. If more than one person will use the seat, have each person test it, since comfort varies with height.

    Check cushion firmness and filling. Foam wrapped in fiber gives a tidy look and firm support, while feather wrapped cushions feel softer but need regular plumping. Removable cushion covers make cleaning far easier, so favor them in a beach house. Ask whether replacement cushions or covers are available, since that extends the life of a good frame.

    6. Choose Slipcovers and Washable Fabrics

    Washable white linen slipcover being removed from a sofa cushion in a coastal living room.

    Slipcovers are one of the most useful choices in a beach house. A washable linen or cotton slipcover lets you remove sand, sunscreen, and spills in a normal wash cycle, and a second set of covers lets you rotate while one set is in the wash. Choose a fit that suits you: a relaxed, slightly loose slipcover hides wrinkles, while a tailored fit looks neater but shows creases more.

    When you compare fabrics, check the cleaning code and wash directions, not just the color. Performance fabrics and treated cotton blends resist stains better than untreated velvet or silk, which are harder to clean after beach use. Order swatches and test them at home: rub in a little sand, spill a drop of water, and see how the fabric cleans and dries.

    Keep dark colors off main seating if the house gets strong sun, since dark fabric shows sand and fades faster in bright light. Pale, mid tone fabrics hide sand better and keep rooms bright. If you love a bold color, use it on cushions and throws that can be swapped, rather than on the whole sofa.

    7. Select Tables in Pale Wood, Rattan, or Weathered Finishes

    Pale wood dining table with rattan chairs in a bright coastal dining room near a window.

    Choose tables that suit how you eat, work, and gather. A round dining table fits small coastal dining rooms well, since it has no sharp corners and seats people evenly. A rectangular table suits larger rooms and longer gatherings. Check that the table height matches your chairs, with about 12 inches between the seat and the underside of the table.
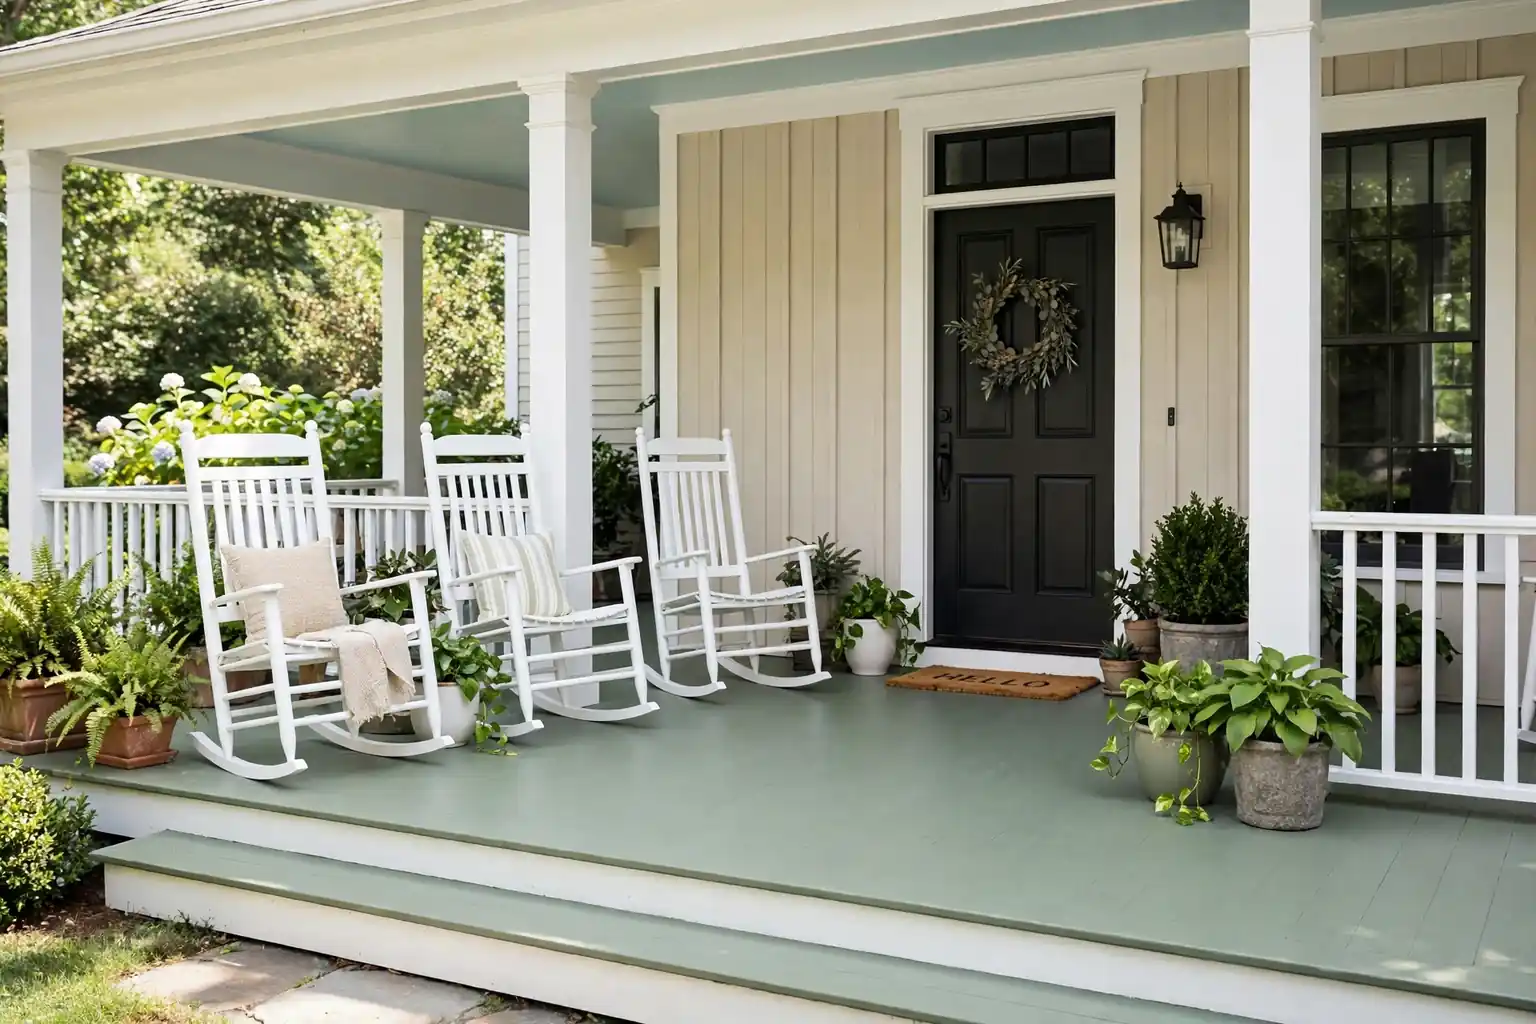
    Pale wood, whitewashed finishes, and rattan keep a coastal room light, and they show fewer marks than high gloss dark finishes. A sealed top matters in a beach house, since wet glasses, sunscreen, and sandy hands reach tables quickly. Ask whether the top is sealed and how to re-seal it, and use coasters and placemats for daily meals.

    For coffee and side tables, favor pieces you can move easily. A light side table can shift beside a reading chair or a sun lounger, and a nesting pair gives extra surface only when guests arrive. Check that table legs sit stable on your floors, and add felt pads so sand grit does not scratch wood or tile when tables move.

    8. Add Storage That Hides Beach Gear and Clutter

    Coastal entryway storage bench with lidded baskets holding beach towels and shoes beside a front door.

    Beach houses collect gear: towels, shoes, buckets, bags, and outdoor toys. Without planned storage, that gear spreads across living rooms and hallways. Place a storage bench or a set of lidded baskets near the door guests use from the beach, so towels and shoes have a home before anyone reaches the sofa.

    In living rooms, choose storage that looks like furniture: a coffee table with a shelf below, a console with doors, or an ottoman that opens. Closed storage hides clutter better than open shelves in a busy beach house, though one or two open baskets for throws keep the room inviting. Label baskets in a shared house so everyone knows where things belong.

    In bedrooms, favor wardrobes and chests with doors over open rails, since damp air and sand settle on open clothes. A lidded laundry basket per bedroom keeps sandy clothes separate from clean ones. Check that storage pieces are easy to wipe down, since beach storage gets sandy hands and wet towels more often than indoor storage.

    9. Layer Lighting for Bright Days and Soft Evenings

    Coastal living room in the evening with warm table lamps, a rattan floor lamp, and soft light over seating.

    Coastal rooms are bright by day, so plan lighting for evenings and cloudy days as well. Start with one overhead light or a set of recessed lights for general light, then add table lamps at seating height and a floor lamp near a reading chair. Lamps at different heights make a room feel settled after dark, while a single overhead light alone can feel harsh.

    Choose lamp bases in natural materials, such as ceramic, pale wood, or rattan, to keep the coastal palette going. Use warm white bulbs in living areas and bedrooms, since cool white light can make pale rooms feel clinical. Put lamps on separate switches or dimmers where you can, so you can lower the light for an evening without losing it altogether.

    Check that reading light reaches chairs and beds without glare on screens. A lamp beside, rather than behind, a reading chair works best. In dining areas, hang a pendant low enough to light the table, but high enough that seated guests can see each other across it. Keep spare bulbs in the house, since coastal shops may not be close by.

    10. Choose Rugs, Cushions, and Throws That Stand Up to Sand

    Flatweave jute rug under a coastal sofa with washable cushions and a folded cotton throw.

    Rugs in a beach house should be easy to clean and hard to damage. Flatweave cotton, jute, sisal, and indoor outdoor rugs shake out well and handle sand better than deep pile wool. Choose a rug large enough to anchor the seating area, with front legs of sofas and chairs on the rug, so the group reads as one space.

    Cushions and throws add color and comfort, and they are the easiest pieces to change with the season. Use removable, washable covers on cushions, and keep a spare set for guest turnovers. Throws in cotton or light wool wash well and dry fast, while heavy throws can feel too warm in a coastal summer.

    Shake rugs outside often, and vacuum with a head suited to your rug type. Sand sinks into pile and wears fibers from below, so regular shaking matters more than it does inland. Keep a small brush and dustpan near the main door, so sand gets swept up before it travels through the house.

    11. Test the Layout, Sit in Every Seat, and Check the Flow

    Coastal living room layout with chairs arranged for conversation and a clear walkway to the door.

    Once the main pieces arrive, live with the layout for a few days before you fix anything in place. Walk every path you use daily: from the door to the kitchen, from the sofa to the bathroom, and from the bedroom to the porch. Move any piece that forces a detour or blocks a door, even if it looked right on paper.

    Sit in every seat at different times of day. Check the view from each chair, the light on a reading spot, and whether a seat faces the television, the fireplace, or the window as you intended. Check conversation distances too: seats about 8 feet apart or less talk easily, while seats much farther apart feel disconnected.

    Test the room with guests in mind. Pull out extra chairs, set the dining table for a full meal, and open sofa beds or guest beds. If the room only works when it is empty, adjust the layout now. Small changes, such as turning a rug, swapping two side tables, or moving a lamp, often fix flow problems without new purchases.

    12. Protect, Clean, and Care for Pieces Through the Seasons

    Hands wiping a pale wood table with a soft cloth in a bright coastal room, with cleaning supplies nearby.

    Set a simple care routine and keep it short, so it actually happens. Shake rugs and cushion covers weekly in the beach season, wipe wood tops with a soft damp cloth, and vacuum upholstery with an upholstery head. Wipe metal frames dry after damp weather, and check rattan for dust in its weave.

    Protect pieces from the strongest sun. Move light sensitive fabrics out of direct midday sun where you can, or use sheer curtains to soften the light. Rotate cushions so one side does not fade faster than the other, and store spare covers out of sunlight. Re-seal wood tops when water stops beading on the surface, following the sealer directions.

    At the end of the season, clean each piece before you cover or store it. Wash slipcovers, shake rugs, and wipe frames, so sand and salt do not sit on surfaces through the winter. Check joints, screws, and fabric for wear, and repair small problems now. A short seasonal check keeps beach house furniture comfortable for years, and it makes the next season start with a clean, ready home.

    Conclusion

    Choosing beach house furniture comes down to a few steady choices: materials that handle damp and salt, seating tested for real comfort, washable covers, pale natural colors, and storage near the door. Measure first, set a budget by room, and test the layout once pieces arrive. With those steps done, the house stays light, easy to clean, and comfortable for long stays, guests, and sandy days alike.

    Frequently Asked Questions

    What is the best material for beach house furniture?

    Teak, sealed oak, rattan, and powder coated metal frames are strong choices for beach houses, since they handle humidity and salt air better than unsealed softwood or bare steel. The best choice depends on the room: teak and sealed wood suit living and dining rooms, rattan suits bright sitting areas, and powder coated metal suits covered porches.

    Should I choose a slipcovered sofa for a beach house?

    Yes, in most beach houses a slipcovered sofa is a practical choice. Washable slipcovers let you remove sand, sunscreen, and spills in a normal wash, and a second set of covers lets you rotate while one set is in the wash. Choose a fabric with clear wash directions and test a swatch at home before you commit.

    How do I keep sand out of beach house furniture?

    Place storage for shoes and towels near the beach door, shake rugs outside often, and use washable cushion covers and flatweave rugs that release sand easily. Keep a brush and dustpan by the main door, vacuum upholstery weekly in the beach season, and wipe wood and metal surfaces so sand grit does not scratch finishes.

    What colors work best for beach house furniture?

    White, sand, pale gray, driftwood, and light oak make a calm base that keeps coastal rooms bright, with sea glass green or dusty blue as an accent. Pale and mid tone fabrics hide sand better than very dark colors, and they fade less obviously in strong light. Use bold color on cushions and throws that can be swapped easily.

    How do I size a sofa for a small beach house living room?

    Measure the wall it will sit against, then choose a sofa that leaves at least 30 inches for main walkways and room to open nearby doors. In small rooms, a loveseat or an apartment sized sofa often fits better than a full three seat sofa, and low profile arms keep the room feeling open. Mark the footprint with painter’s tape on the floor before you order.

    Is rattan furniture durable enough for everyday use in a beach house?

    Yes, well made rattan with a solid frame and tight weave holds up well for everyday sitting in living rooms and covered porches. It suits dry indoor use best, so keep it out of constant direct rain and wipe it dry after damp weather. Check the frame joints and the weave before you buy, since a weak frame matters more than the rattan finish alone.


  • 21 DIY Fourth of July Decor Projects You Can Make at Home

    21 DIY Fourth of July Decor Projects You Can Make at Home

    You can make Fourth of July decor at home with paint, fabric, wood, paper, and jars, turning supplies into flags, wreaths, garlands, lanterns, and table pieces. Start with one focal project for the porch or table, repeat navy, red, and white across two or three spots, and use battery candles and outdoor-safe finishes so the pieces are safe and reusable.

    The 21 projects below use different materials and techniques, so you can pick a wood project for the porch, a fabric project for the table, and a paper or jar project for the evening. Most can be finished in an afternoon with basic tools, and many can be stored flat or in a box for next summer. For more seasonal styling ideas, visit the Dwell Ovell home page, and see how simple handmade pieces carry a whole season in DIY Fall Home Decor.

    Key Takeaways

    • Start with one focal project, such as a porch sign or a table runner, and add smaller pieces around it.
    • Repeat navy, red, and white across two or three spots, and keep one color dominant in each display.
    • Match the material to the spot: sealed wood and outdoor fabric for the porch, paper and glass for sheltered tables.
    • Use battery candles in jars, lanterns, and paper lights, and keep open flames away from fabric and paper.
    • Seal painted outdoor pieces and store fabric pieces dry, folded flat, so they last for next year.
    • Pick projects that fit your tools and time, and reuse jars, crates, and scrap wood you already own.

    1. Scrap Wood American Flag Wall Sign

    A painted scrap wood American flag sign hanging on a porch wall.

    Join three to five scrap boards side by side, sand the edges smooth, and paint red and white stripes across the boards. Paint a navy rectangle in the top left corner and add white stars with a stencil or a small brush, then seal the sign for outdoor use.

    Hang the sign on a porch wall, lean it on a bench, or mount it above a console indoors. A wide, flat sign suits a wall that needs one clear focal piece, and it pairs well with plain planters and a simple doormat.

    2. Sewn Fabric Pennant Bunting Garland

    A sewn fabric pennant bunting garland in red, navy, and white along a porch rail.

    Cut triangles from red, navy, and white cotton fabric, fold the top edge of each triangle over bias tape or ribbon, and stitch along the tape to form a garland. Mix solid and striped triangles so the garland reads clearly from across a yard or room.

    Hang the garland along a porch rail, a mantel, or a fence, with a gentle dip between fixing points. Sewn fabric holds its shape better than paper outdoors, and the garland folds flat for storage after the holiday.

    3. Punched Tin Can Star Lanterns

    Punched tin can lanterns with star holes glowing on porch steps in the evening.

    Fill clean tin cans with water and freeze them so the cans hold their shape while you work. Punch a star pattern through the sides with a nail and hammer, let the ice melt, dry the cans, and paint the outside in red, white, or navy.

    Place a battery candle inside each can and set the cans on porch steps or a patio table. The punched holes throw a star pattern of light in the evening, and the cans cost little beyond paint and candles.

    4. Hand-Painted Star Terracotta Pots

    Hand-painted terracotta pots with red stripes and navy stars holding red flowers by a front door.

    Paint terracotta pots white, then add red stripes around the rim and navy stars on the sides with a stencil or a fine brush. Seal the paint with a clear outdoor finish so the pots can stay outside through the holiday week.

    Plant red geraniums, white petunias, or small green herbs in the pots and group them by a front door or on porch steps. Painted pots work as a pair flanking a door, or as a row of three in different sizes along a walkway.

    5. No-Sew Bandana Table Runner

    A dining table with a no-sew bandana table runner in red and navy and plain white plates.

    Lay two or three bandanas in red and navy end to end down the center of a table, overlap the edges slightly, and press the seams flat. Add a plain white runner underneath if the bandanas do not cover the full table length.

    This runner needs no stitching and no special tools, so it suits a last minute table. Pair it with plain white plates and simple glassware, and wash the bandanas after the meal so the runner is ready for the next gathering.

    6. Rolled Paper Firework Wall Art

    Rolled paper firework wall art in red, white, and navy framed above a console table.

    Roll narrow strips of red, white, and navy paper into tight coils, then glue the coils to a plain board in bursts that radiate from a central point, like fireworks. Use a white or navy board so the paper colors stand out, and frame the finished piece in a simple frame.

    Hang the art above a console, a sofa, or a mantel as a seasonal picture. Rolled paper gives texture that flat prints do not, and the project uses only paper, glue, and a board.

    7. Painted Wooden Star Door Hanger

    A large painted wooden star door hanger in navy with a red and white striped band on a front door.

    Cut a large star shape from plywood or buy a plain wood star, sand the edges, and paint it navy with a red and white striped band across the middle. Add a loop of twine or ribbon at the top point for hanging.

    Hang the star on a front door, a porch post, or an interior door, and keep it flat against the surface so the door opens freely. One large star makes a clearer statement than several small ones on a busy door.

    8. Fabric Paint Star Pillow Covers

    A sofa with plain cotton pillow covers painted with red and navy stars.

    Lay plain cotton pillow covers flat, place a star stencil in the center, and dab fabric paint through the stencil in red or navy. Let the paint dry fully, heat set it if the paint instructions call for it, then slip the covers onto inserts.

    Place two painted covers at the ends of a sofa and keep the middle pillows plain, so the stars read as accents. Painted covers wash and store flat, which makes them easy to reuse each summer.

    9. Painted Mason Jar Candle Lanterns

    Painted mason jar candle lanterns with red and white stripes grouped on a table in the evening.

    Paint the outside of clean mason jars with red and white stripes, leaving a few unpainted patches so light can show through, or paint the whole jar and add a navy star on the front. Tie twine around the neck of each jar for a finished edge.

    Place a battery candle inside each jar and group the jars in threes on a table, a windowsill, or porch steps. Painted jars suit evening tables, since the glass softens the candlelight and the stripes carry the theme after dark.

    10. Paper Pinwheel Garden Stakes

    Paper pinwheels in red, white, and navy on wooden dowels in a garden bed.

    Cut squares of red, white, and navy card, fold the corners toward the center, and pin each pinwheel to a wooden dowel with a bead or button at the center so it spins freely. Push the dowels into garden beds, planters, or a row along a walkway.

    Pinwheels add movement to a garden, since they turn in a light breeze. Use sturdy card rather than thin paper outdoors, and bring the pinwheels inside during heavy rain so they hold their shape.

    11. Wooden Bead Garland with Painted Stars

    A wooden bead garland with red, white, and navy beads and small painted stars draped on a mantel.

    Paint wooden beads in red, white, and navy, thread them on twine with small painted wood stars spaced along the length, and knot the twine at each end. Add a loop at each end for hanging.

    Drape the garland along a mantel, a shelf, or a table edge, or wrap it around a vase as a table accent. Bead garlands suit small surfaces, since they add color without taking much space, and they store well coiled in a bag.

    12. Chalk-Painted Crate Centerpiece

    A chalk-painted wooden crate centerpiece with small flags, a jar of flowers, and a candle holder on a table.

    Paint a small wooden crate white or navy with chalk paint, sand the edges lightly for a worn look, and fill it with small flags, a jar of flowers, and a battery candle holder. Set the crate in the center of a dining or patio table.

    A crate keeps the centerpiece contained and easy to move when food is served. Keep the arrangement low so guests can talk across the table, and change only the small pieces inside the crate for other holidays.

    13. Star Stencil Tea Towels

    Plain cotton tea towels stenciled with red and navy stars hanging on an oven handle.

    Lay plain cotton tea towels flat, stencil a row of stars across one end in red and navy fabric paint, and let the towels dry before heat setting the paint if needed. Fold the towels so the stenciled end shows when they hang.

    Hang the towels on an oven handle or fold them in a basket near the sink. Stenciled towels add seasonal color to a working kitchen without changing the layout, and they wash with the rest of the kitchen linen.

    14. Yarn-Wrapped Star Wreath

    A yarn-wrapped star wreath in navy with small red and white bows hanging on a door.

    Wrap a star shaped wire or foam frame tightly with navy yarn, overlapping each pass so no frame shows through. Add small red and white yarn bows or felt stars at one corner, and attach a loop at the top for hanging.

    Hang the wreath on a front door, an interior door, or above a mantel. Yarn gives a soft, handmade texture that suits a sheltered door or an indoor wall, and the wreath is light enough for a removable hook.

    15. Painted Rock Garden Markers

    Painted flat rocks with red stars placed along a garden walkway edge.

    Paint smooth flat rocks white, then paint a red star or a short word such as “USA” or “July 4” on each rock with a fine brush. Seal the rocks with a clear outdoor finish so the paint holds up in a garden bed.

    Place the rocks along a walkway, at the edge of a flower bed, or in planters as small accents. Painted rocks suit a garden that already has plants and pots, since they add color at ground level without blocking the plants.

    16. Ribbon and Dowel Flag Windsock

    A ribbon windsock with red, white, and navy ribbons hanging from a porch ceiling.

    Cut strips of red, white, and navy ribbon in different lengths, tie them around a small embroidery hoop or a dowel ring, and hang the ring from a porch hook with twine. The ribbons hang down and move in the breeze like a windsock.

    Hang the windsock from a porch ceiling, a tree branch, or a patio umbrella frame, clear of walkways. Ribbon windsocks suit a covered porch, since the ribbons stay dry and keep their color through the holiday week.

    17. Cut Denim Star Placemats

    Cotton placemats with cut denim star appliques set on a cookout table with white plates.

    Cut star shapes from old denim jeans, stitch or glue each star onto a plain cotton placemat, and press the placemat flat. Use one large star per placemat, or a row of three small stars along one edge.

    Denim stars add a casual, sturdy accent to a cookout table, and the placemats wipe clean or wash with other table linen. Pair them with plain white plates so the denim stands out, and keep the rest of the table setting simple.

    18. Painted Bucket Firework Bouquet

    A painted navy bucket with white stars holding wooden dowels topped with stars and small flags by a front door.

    Paint a metal bucket or large tin in navy, add white stars with a stencil, and fill it with wooden dowels topped with painted wood stars, paper bursts, and small flags. The dowels stand at different heights, like a bouquet of fireworks.

    Set the bucket on a porch floor, beside a front door, or at the end of a buffet table. A bucket bouquet suits a floor or a wide table, since it is taller than most centerpieces, and it can be moved outside for the evening.

    19. Folded Paper Star String Lights

    Folded paper stars slipped over battery string lights hanging along a mantel in the evening.

    Fold small paper stars from red, white, and navy card, leaving a small opening at the back of each star, and slip one star over each bulb of a battery string light set. Space the stars evenly along the cord.

    Hang the lights along a mantel, a shelf, or a patio rail for evening glow. Use battery lights and keep the paper stars clear of any heat source, and switch the lights off when you leave the room or go to sleep.

    20. Hand-Lettered Wood Porch Sign

    A tall hand-lettered wood porch sign beside a front door with a potted plant.

    Paint a tall, narrow board white or navy, then letter a short phrase such as “Land of the Free” by hand or with a stencil, using the opposite color for the letters. Add a small painted star above or below the wording.

    Lean the sign beside a front door, on a porch bench, or against a wall near the entry. A tall sign suits a narrow spot beside a door, and it pairs well with a potted plant and a plain doormat.

    21. Torn Fabric Rag Wreath

    A torn fabric rag wreath in red, white, and navy hanging on a front door.

    Cut or tear red, white, and navy fabric into strips about one inch wide and eight inches long, then tie the strips tightly around a wire wreath frame until the frame is fully covered. Fluff the strips outward so the wreath looks full from the front.

    Hang the rag wreath on a front door or above a mantel with a loop of twine. Rag wreaths suit a casual porch, since the torn edges give a relaxed look, and the fabric strips can be untied and reused for other projects.

    Conclusion

    DIY Fourth of July decor works best when you pick one focal project, repeat navy, red, and white in a few spots, and choose materials that suit the place they will sit. A painted sign at the door, a fabric garland on the porch, and a dressed table can carry the whole holiday without a full room change. Start with a project that fits your tools and time, seal outdoor pieces, store fabric pieces dry, and revisit this list next summer to see which projects you want to make again.

    FAQs

    What are the easiest 4th of July DIY decor projects for beginners?

    The easiest projects are the no-sew bandana table runner, the painted rock garden markers, and the paper pinwheel garden stakes. Each one needs only a few supplies, no special tools, and less than an hour of work, so they are good starting points before trying sewn, built, or painted wood projects.

    What materials do I need for DIY Fourth of July decor?

    You need paint, brushes, and stencils for wood, pots, and jars; cotton fabric, ribbon, and twine for garlands, runners, and wreaths; paper and card for pinwheels, wall art, and string lights; and jars, crates, and dowels for lanterns and centerpieces. Start with supplies you already own, such as scrap wood, old denim, and clean jars, and buy only the colors you are missing.

    How do I make DIY Fourth of July decor safe for outdoor use?

    You can make DIY decor safe outdoors by sealing painted wood, pots, and rocks with a clear outdoor finish, using outdoor fabric or bringing fabric pieces inside during rain, and using battery candles in jars, lanterns, and paper lights. Keep paper pieces under cover, fix hanging pieces firmly, and bring light pieces inside during strong wind.

    Can I make Fourth of July decor with kids?

    Yes, you can make Fourth of July decor with kids by choosing paper pinwheels, painted rocks, rolled paper firework art, and torn fabric wreaths. These projects use safe, simple steps such as cutting, painting, gluing, and tying, while adults handle hammers, nails, saws, and hot glue. Keep small beads and pins away from very young children.

    How long do DIY Fourth of July decorations last?

    DIY Fourth of July decorations last one season or several seasons, depending on the material. Sealed wood signs, fabric garlands, pillow covers, and bead garlands often last for years with dry storage, while paper pinwheels, paper stars, and unsealed painted rocks usually last one season and are best remade each summer.

    How do I store DIY Fourth of July decor for next year?

    Store DIY Fourth of July decor dry, clean, and protected from crushing, with fabric pieces folded flat in a labeled box, wood signs stored upright, and paper pieces in a flat box with paper between layers. Remove batteries from string lights and battery candles before storage, and keep the box in a dry spot so paint and fabric stay in good shape.


  • 19 Spring Tablescapes for Everyday Dining and Special Gatherings

    19 Spring Tablescapes for Everyday Dining and Special Gatherings

    Spring tablescapes work best when the centerpiece stays low, the palette stays fresh, and each place has room to eat. Use a light runner or cloth, one low floral centerpiece, and plates, napkins, and candlelight in soft green, blush, cream, and pale yellow. The 19 ideas below cover everyday dining and special gatherings.
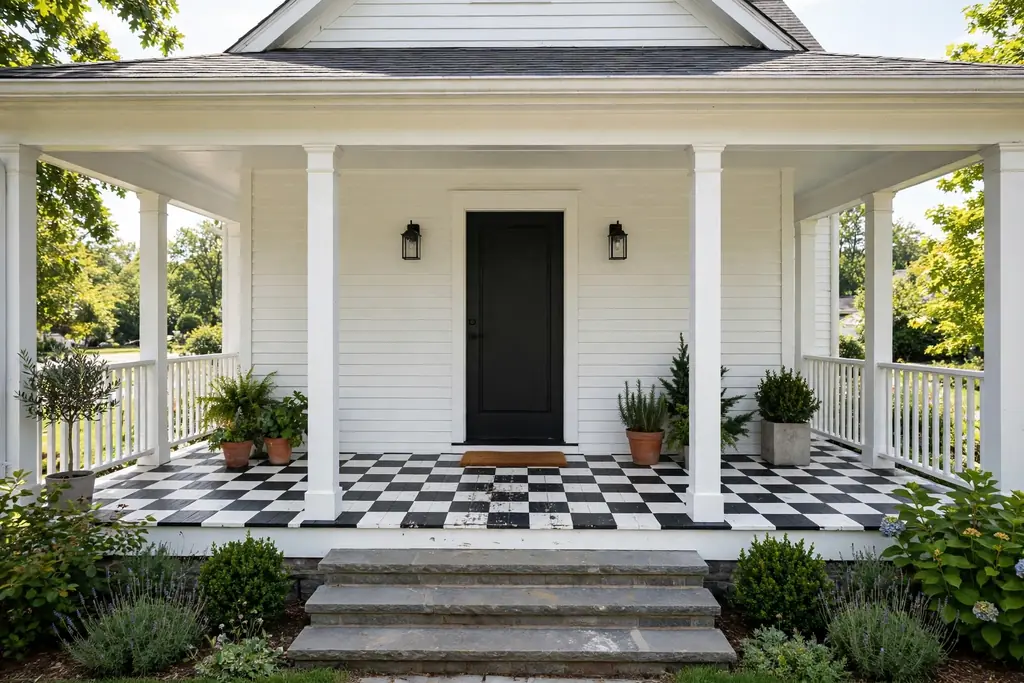
    Start with the base you already own: a plain cloth or runner, everyday plates, and cloth napkins in a pale neutral. Then add one spring layer at a time, such as a tulip vase, a lemon runner, or a set of herb pots. Keep the centerpiece low enough to see across, leave room for serving dishes, and choose pieces you can lift off in one move when the table needs to clear. The same low centerpiece rule that keeps a fall table usable applies here, with lighter colors and fresh flowers in place of pumpkins and dried leaves.

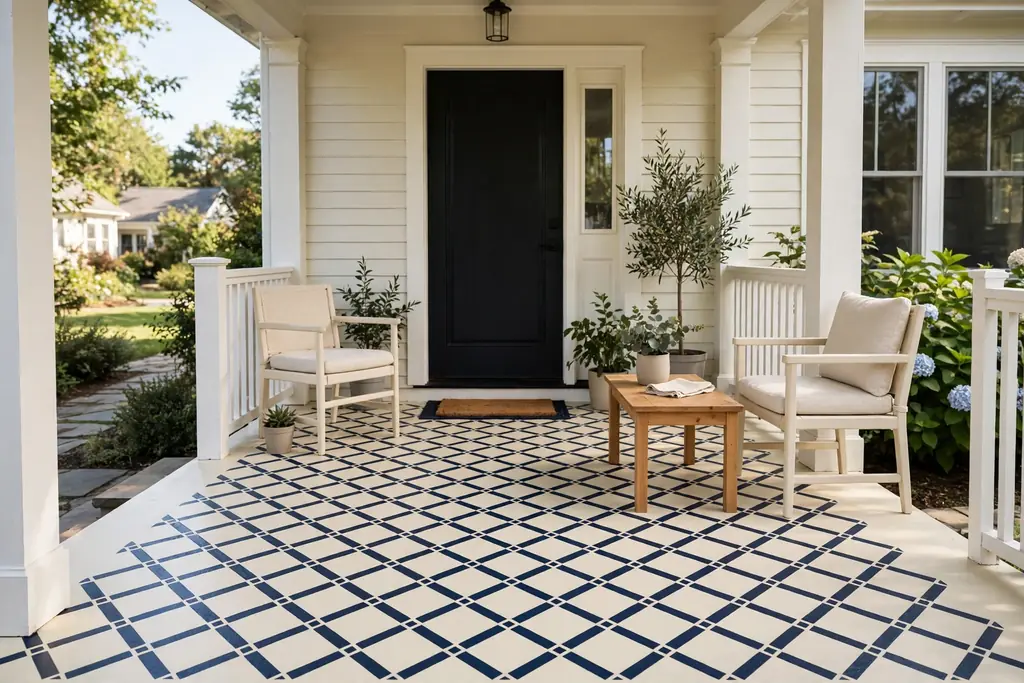

    Key Takeaways

    • Keep the centerpiece low and narrow, so guests can see each other and serving dishes still fit.
    • Pick a palette of soft green, blush, cream, and pale yellow, and repeat each color at least twice.
    • Start with textiles: a cloth, runner, napkins, and placemats carry most of the spring color and wash easily.
    • Use one main centerpiece per table, not several competing clusters, and leave empty space at each place.
    • Choose fresh flowers with care: trim stems, change the water often, and keep pollen heavy blooms clear of food.
    • For gatherings, add place cards, a drink tray, or a small favor at each place, so the table also helps guests settle in.

    1. Low Tulip Centerpiece in a Glass Vase

    Short wide glass vase with pink tulips on a spring dining table with white plates.

    Set a short, wide glass vase in the center of the table and fill it with tulips in one color, such as soft pink, pale yellow, or white, with the stems trimmed so the blooms sit just above the rim. The low height keeps sightlines open, and the clear glass suits almost any plates or napkins you already own.

    Change the water every two days and trim a small piece off each stem at an angle when you refresh it, so the tulips last through the week. If one tulip opens faster than the rest, move it to a small bud vase at the end of the table rather than letting it droop over the main group.

    2. Pastel Linen Cloth with White Plates

    Pastel blush linen tablecloth with plain white plates and cream napkins on a bright dining table.

    Lay a pastel linen cloth in blush, mint, or pale blue over the table, then set plain white plates at each place so the cloth carries the color and the plates stay calm. This simple pairing suits both a weeknight dinner and a spring lunch with guests, since it needs no patterned dishes.

    Iron or steam the cloth before a gathering, since creases show more on pastel linen than on a patterned cloth. If the cloth is light in color, use a plain undercloth or table protector beneath it, so a spill does not mark the table during the meal.

    3. Lemon and Leaf Runner Down the Center

    Leaf runner with whole lemons and short candles down the center of a spring dining table.

    Lay a light green leaf runner down the center of the table, then set whole lemons and small leaf sprigs along it at uneven intervals, with two short candles in holders to anchor the ends. The yellow and green pairing reads fresh and bright, and the lemons can go back to the kitchen after the meal.

    Keep the lemons clear of plates and glasses, and wash them before setting them out, since guests may pick them up. If real lemons feel too heavy for a small table, use three or four only, grouped at the center, and let the leaf runner carry the rest of the color.

    4. Wildflower Jars Down the Center

    Small glass jars with mixed wildflowers spaced down the center of a spring dining table.

    Fill three or five small glass jars with mixed wildflowers, such as daisies, buttercups, and small white blooms, and set the jars down the center of the table at even spacing. The small scale suits a narrow table, and each jar can move to a sideboard or windowsill after the meal.

    Use jars of the same height so the line looks planned, and keep the stems short enough to see over. If you gather flowers from a garden, check each stem for insects before bringing it inside, and keep wildflowers clear of food, since some blooms shed petals onto plates.

    5. Herb Pots at Each Place

    Small potted herbs in terracotta pots at each place on a spring dining table.

    Set one small potted herb, such as basil, mint, or parsley, at each place, in a plain terracotta or white pot, so each guest has a green place marker that doubles as a take home gift. The pots add scent and color without a large centerpiece, and they work well for a spring dinner with friends.

    Water the herbs lightly before guests arrive, and set each pot on a small saucer so damp soil does not mark the table. For everyday meals, keep two or three herb pots as a centerpiece group instead of one per place, and move them back to a sunny windowsill after dinner.

    6. Woven Placemats with Floral Plates

    Woven seagrass placemats under floral plates with plain napkins on a spring table.

    Use woven placemats in natural straw or seagrass under floral plates, so the table gains texture at each place while the pattern stays on the plates. This pairing suits a spring lunch, since the woven mats read casual and the floral plates carry the season.

    Wipe the placemats after meals and store them flat, since woven mats can bend if folded damp. If your floral plates are busy, keep napkins and glasses plain, so the table does not feel crowded with pattern at every place.

    7. Fresh Sprig Napkin Rings

    Folded napkin with a simple ring and a short fresh herb sprig beside a plate on a spring table.

    Wrap a simple napkin ring around each folded napkin, then tuck a short fresh sprig, such as rosemary, mint, or a small eucalyptus stem, under the ring. This small detail dresses an everyday place setting in minutes, and the scent adds a fresh note as guests sit down.

    Keep the sprig short so it does not brush the plate, and use the same sprig at every place for a matched look at a gathering. Remove the sprig before washing napkins, and compost fresh stems when they start to wilt, rather than storing them with the linen.

    8. Blue and White Porcelain with Tulips

    Blue and white porcelain plates with a vase of white tulips and white napkins on a spring table.

    Pair blue and white porcelain plates with a vase of white or pink tulips, and keep the rest of the table plain, with white napkins and clear glasses. The blue and white pattern gives the table a classic spring look, while the tulips soften it and tie the colors together.

    Let one patterned piece lead at each place, such as the dinner plate, and use plain bowls or side plates beside it, so the pattern does not repeat at every layer. If you only own a few blue and white plates, mix them at the ends of the table with plain white plates between, for a collected look.

    9. Blush Candles for a Spring Evening

    Blush pillar candles in glass holders with small pink blooms down the center of a spring dinner table.

    Set blush or cream pillar candles in glass holders down the center of the table, with a few small pink blooms or rose petals scattered between them, for a spring dinner after dark. The candlelight warms the pastel palette, and the low holders keep the table open for conversation.

    Use battery candles if the table will sit near fabric or paper, or if children will be at the table. For a real flame, keep candles in holders, clear of petals and napkins, and never leave them burning unattended. Trim wicks before lighting so the flames stay steady.

    10. Rustic Wood Table with Wildflowers

    Bare rustic wood table with a jar of wildflowers, cream plates, and sage green linen napkins.

    Leave a wood table bare, with no cloth, and let the grain show, then set a low jar of wildflowers at the center, with plain cream plates and linen napkins in sage green. This approach suits a farmhouse dining room, and it keeps the table easy to wipe after everyday meals.

    Use placemats under plates if the wood marks easily, and keep the centerpiece to one low group, so the wood still shows. Fold napkins the same way at every place for a tidy look, and iron linen napkins before a gathering, since creases show more on bare wood than under a patterned cloth.

    11. Outdoor Garden Party Table with Pastel Bunting

    Outdoor garden table with a pale cloth, white plates, pastel bunting, and a low vase of garden flowers.

    Set an outdoor table with a pale cloth, white plates, and pastel bunting strung above or along the edge, then add a low vase of garden flowers at the center. The bunting marks the occasion clearly, while the low flowers and plain plates keep the table practical for serving food outside.

    Weight the cloth or use clips at the corners, so a breeze does not lift it onto plates. Keep paper bunting clear of candles or a grill, and bring fabric bunting inside after the meal, since damp fabric can stain if left out overnight.

    12. Speckled Egg Place Cards

    Speckled decorative egg beside a plate with a small handwritten place card on a spring table.

    Set one speckled decorative egg at each place, with a small card tucked beside it showing the guest name or a short welcome note. This idea works for a spring gathering as well as a family dinner, because it marks each seat and doubles as a small seasonal detail guests notice right away.

    Choose eggs small enough to sit beside a plate without crowding the glass, and write names in clear, large lettering. For everyday meals, skip the names and use the eggs alone as a simple place marker, grouped in a small bowl at the center when the table is not set for guests.

    13. Green and White Minimal Tablescape

    White cloth and plates with a green leaf runner, green napkins, and white blooms on a spring table.

    Use a white cloth, white plates, and clear glasses, then add green only, through a leaf runner, green napkins, or a vase of green stems and white blooms. This restrained palette suits a bright dining room and works well with wood, glass, and pale stone.

    Vary the greens, with one deep leaf green and one soft sage, so the table does not look flat. Wipe white plates clean before setting them out, since marks show more on white than on patterned dishes, and keep one green accent at each place, such as the napkin, to tie the places together.

    14. Vintage Mixed Floral Plates

    Mixed vintage floral plates in pink, cream, and pale blue with plain napkins on a spring table.

    Mix vintage floral plates in soft, related colors, such as pink, cream, and pale blue, with one plate pattern per place, and keep napkins and glasses plain. The mixed plates give a collected, spring feel without buying a new set, and they suit a lunch with friends who enjoy an unfussy table.

    Group plates by tone, not by exact pattern, so a pink plate sits near a cream one rather than next to a strong blue. If a plate is chipped, use it as a side plate or under a serving dish, rather than at a place where a guest will eat from it.

    15. Tiered Stand for a Spring Brunch Table

    Tiered stand with mini flower pots, pastel eggs, and small candles at the end of a spring brunch table.

    Set a two or three tier stand at one end of the table or on a sideboard, and fill it with small spring details, such as mini flower pots, pastel eggs, and small candles in holders, so the brunch table gains height without blocking the center. A tiered stand also works for serving, with scones, fruit, or small bites on the tiers at a buffet style meal.

    Keep the stand stable and clear of the main serving path, and put heavier items on the bottom tier. If the stand will hold food, use it for food only, and set the decor version on a separate stand or tray, so crumbs and wax do not mix.

    16. Pink Peony Bowl Centerpiece

    Wide shallow bowl filled with pink peonies and green leaves in the center of a spring dining table.

    Fill a wide, shallow bowl with pink peonies and a few green leaves, and set it in the center of the table as a single, full centerpiece. The bowl shape keeps the peonies low and round, so the table gains a clear spring focus without a tall arrangement blocking views.

    Check peonies for insects before bringing them inside, and keep the bowl on a small mat if the table marks easily, since water can drip from fresh stems. If peonies are not in season where you live, use garden roses or ranunculus in the same wide bowl for a similar full, soft shape.

    17. Gingham Cloth for a Casual Spring Table

    Pale pink gingham tablecloth with plain white plates on a casual spring dining table.

    Lay a gingham cloth in pale pink, mint, or sky blue over the table, then set plain white or cream plates, so the check pattern carries the spring color and the plates stay simple. Gingham suits a casual family meal, a picnic style lunch indoors, and a table with children, since it hides small marks better than a solid pastel cloth.

    Match the check size to the table: a small check suits a round breakfast table, while a larger check suits a long dining table. If the cloth is thick, use it alone and skip a runner, so plates sit level, and wash it promptly after meals with tomato or berry dishes.

    18. Clear Glass and Gold Airy Tablescape

    Clear glass vases with single stems, gold cutlery, and white plates on a pale spring table.

    Use clear glass vases, gold cutlery, and white plates on a pale cloth, with a few single stems in tall, narrow vases spaced down the center. The clear glass and pale gold keep the table light and open, which suits a small dining room or a table near a bright window.

    Space the narrow vases so they do not crowd serving dishes, and keep each stem short enough to see over when guests are seated. Polish gold cutlery before a gathering, since marks show more on metal than on plain steel, and use plain napkins so the gold stays the main accent.

    19. Small Round Table Spring Breakfast Nook

    Small round table with a plain cloth, a bud vase with spring stems, and cream mugs and plates.

    Dress a small round table for two or four with a plain cloth, a single bud vase with one or two spring stems, and simple plates and mugs in cream or pale green. The small scale suits a breakfast nook or a kitchen corner, where a large centerpiece would crowd the table and leave no room for coffee and plates.

    Keep the vase at the center and the mugs to one side of each plate, so the small table still has a clear path for serving. For a weekend breakfast with guests, add a small plate of fruit or a tiny vase at each place, and skip the runner, since a runner can bunch on a round table.

    Conclusion

    A good spring tablescape does not need a new dinner set or a tall arrangement. Pick one low centerpiece, one fresh palette, and textiles you can wash, then repeat the same colors at each place and leave room for food and conversation. Start with one idea from this list for your next everyday meal, and add place cards, a drink tray, or a tiered stand when guests come, so the table grows with the occasion without getting crowded.

    FAQs

    What is a spring tablescape?

    A spring tablescape is a styled dining table for spring, with a low floral centerpiece, a light cloth or runner, and place settings in soft green, blush, cream, or pale yellow. It covers the whole table look, from the centerpiece to the napkins, rather than one single decoration.

    How do I keep a spring centerpiece low enough for conversation?

    Keep the centerpiece below eye level when guests are seated, which usually means blooms no higher than about 30 centimeters above the table. Use a wide, shallow vase or bowl, trim stems short, and test the height by sitting at the table before guests arrive.

    What colors work best for spring tablescapes?

    Soft green, blush pink, cream, white, and pale yellow work best for spring tablescapes, since they read fresh in daylight and pair well with fresh flowers. Pick two or three of these colors, repeat each one at least twice, and keep the rest of the table plain so the palette stays calm.

    Can I use a spring tablescape for everyday meals?

    Yes, you can use a spring tablescape for everyday meals by keeping one simple layer, such as a runner, a jar of flowers, or pastel napkins, and skipping place cards and favors. Choose washable textiles and a centerpiece you can lift off in one move, so the table still clears fast after dinner.

    How long do fresh flowers last in a spring centerpiece?

    Fresh flowers in a spring centerpiece usually last five to seven days if you trim the stems, change the water every two days, and keep the vase out of direct sun and away from fruit bowls. Remove wilted stems promptly, since one wilting stem can cloud the water and shorten the life of the rest.

    What is the easiest spring tablescape for a first gathering?

    The easiest spring tablescape for a first gathering is a plain cloth, white plates, a low vase of tulips, and a fresh sprig at each napkin. It needs no special dishes, takes under half an hour to set, and leaves the table open for food, glasses, and conversation.