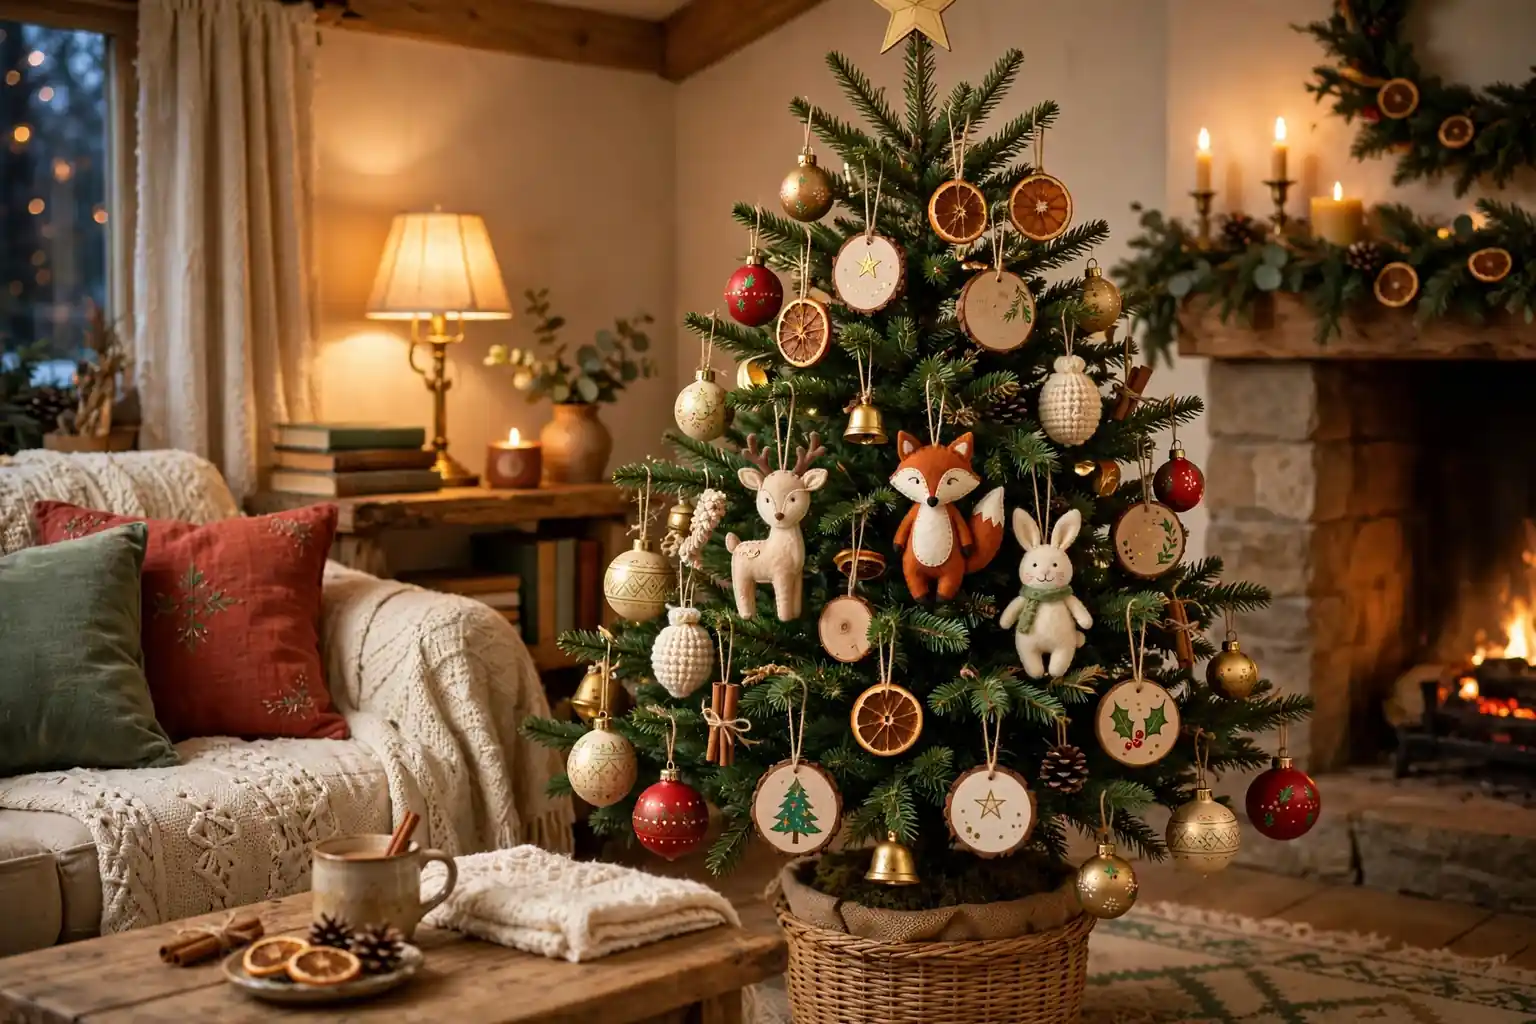
Author: Clara Bennett

  • 23 DIY Christmas Ornaments for Adults Who Love Handmade Decor

    23 DIY Christmas Ornaments for Adults Who Love Handmade Decor

    DIY Christmas ornaments for adults can be made at home with simple tools, clear steps, and materials such as wood, felt, clay, glass, paper, and dried citrus. The 23 ideas below range from painted baubles and embroidered hoops to salt dough keepsakes and pressed flower designs, so you can pick projects that match your skill level, time, and tree style.

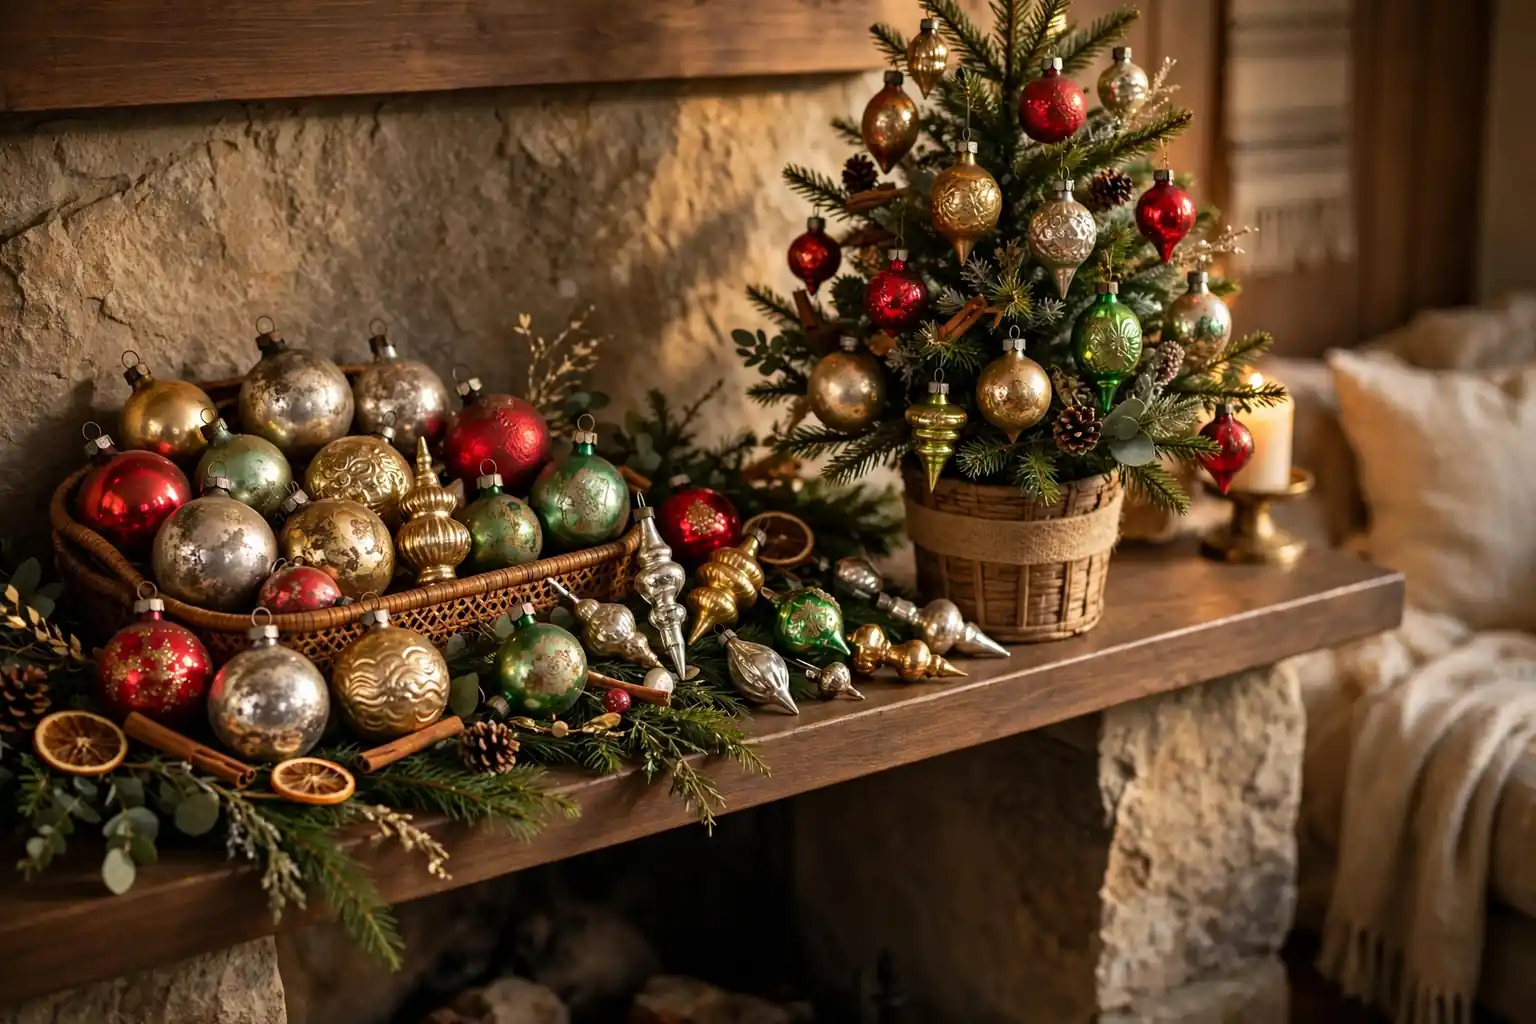
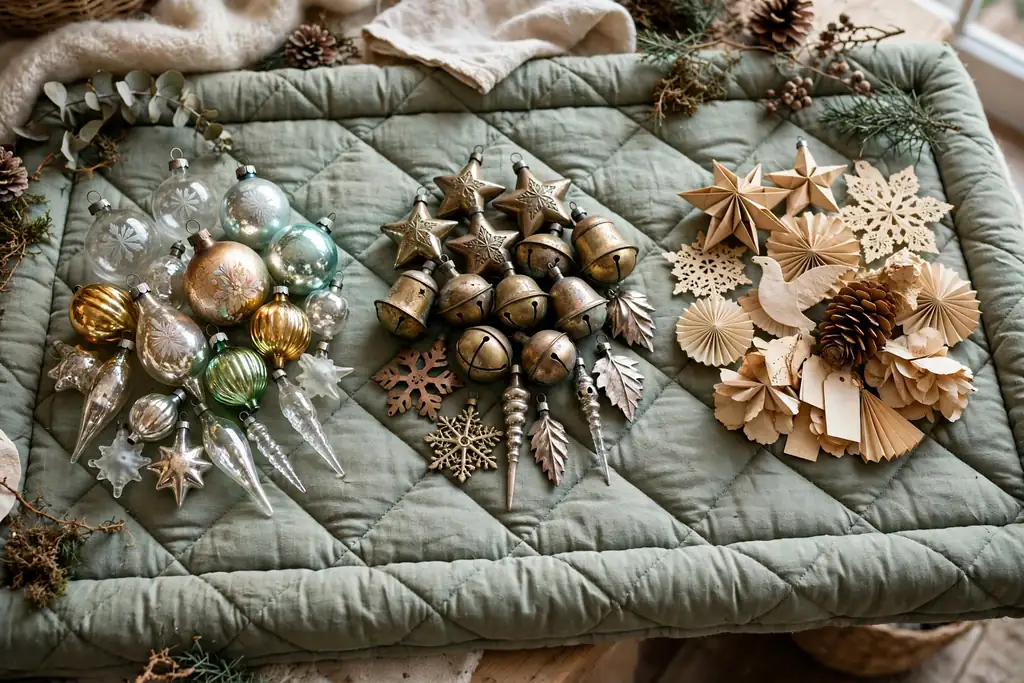
    Start with a palette of two or three colors and one main material, then repeat that palette across several ornaments so the tree looks planned rather than crowded. Make one test ornament first, check how it hangs and how heavy it feels on a branch, and then make the rest in a batch. For older pieces to pair with these handmade designs, see the vintage Christmas decor guide.

    Key Takeaways

    • Choose a small palette and one main material so handmade ornaments look cohesive on the tree.
    • Make a test ornament first to check weight, hanging length, and finish before batching.
    • Match the project to your time: painted baubles and dried citrus are quick, while embroidery and clay need drying or stitching time.
    • Use sturdy hangers and place heavier ornaments on inner branches, close to the trunk.
    • Keep ornaments away from heat, open flame, and damp rooms, and store them in divided boxes after the season.
    • Mix textures, such as glass, felt, wood, and paper, so a handmade tree has depth without needing many colors.

    1. Hand-Painted Clear Glass Baubles
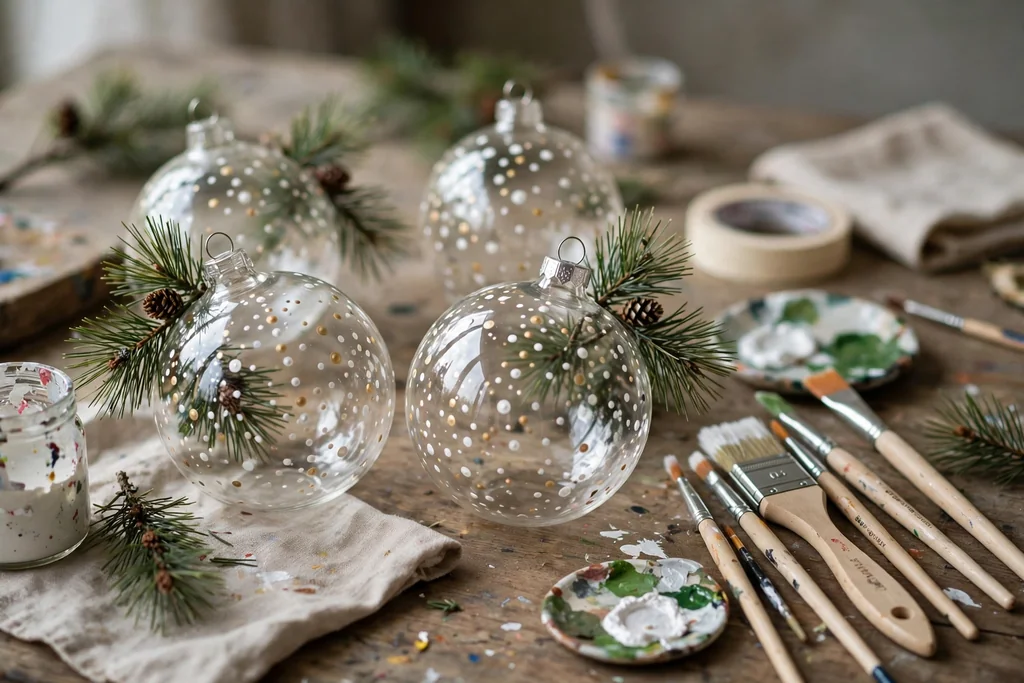
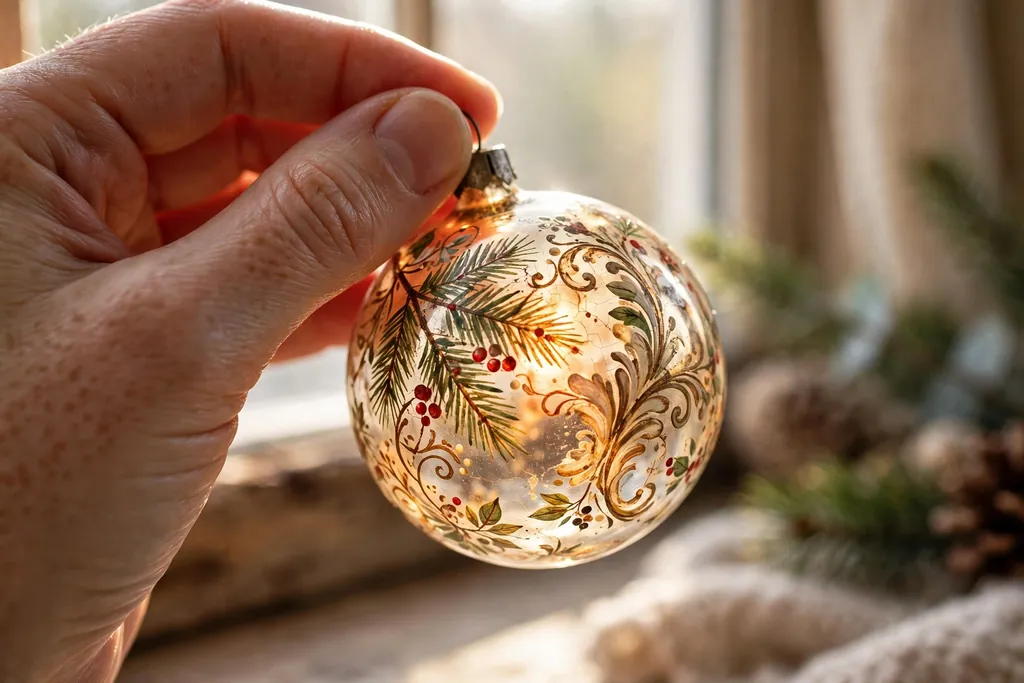
    Clear glass baubles painted with dots and pine sprigs on a work table beside paint brushes.

    Paint the inside or outside of clear glass baubles with acrylic paint, fine brushes, and a simple motif such as dots, stripes, stars, or a sprig of pine. Painting inside the bauble gives a soft, layered look, while painting outside gives sharper detail. This project suits adults who like fine detail and want a classic ornament with a personal finish.

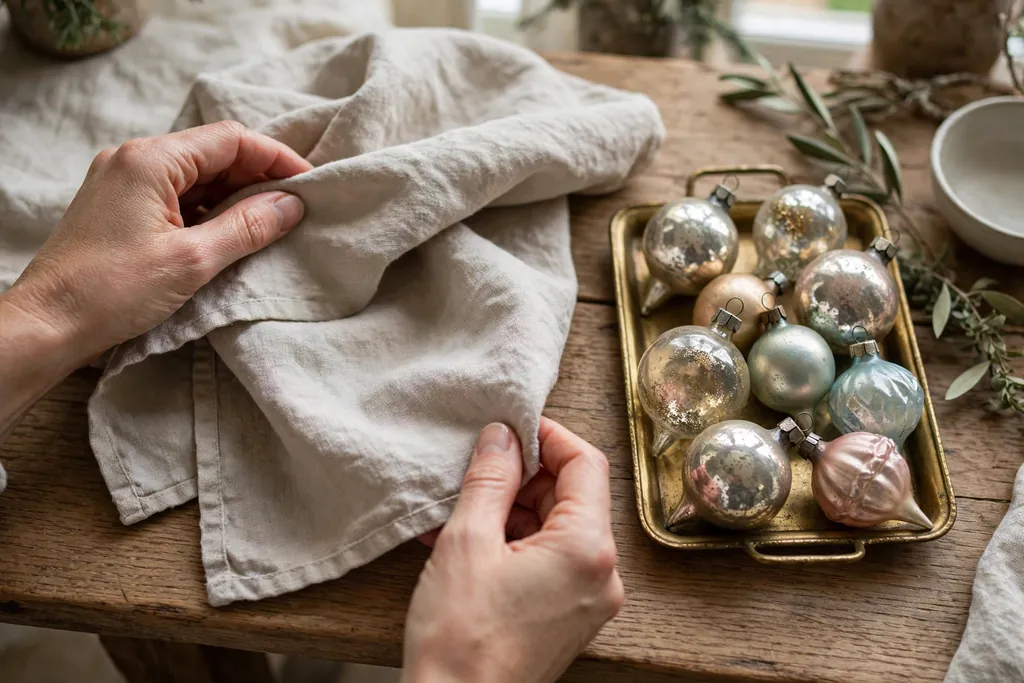
    Remove the cap, pour or brush in a small amount of paint, and rotate the bauble slowly until the paint covers the surface. Let each coat dry fully before adding detail, and replace the cap with a ribbon loop. Work on a tray, since paint can drip, and store painted baubles in divided boxes so the finish does not chip.

    2. Dried Orange Slice Ornaments

    Dried orange slice ornaments with twine loops hanging on a green Christmas tree branch.

    Dry thin orange slices in a low oven until firm, then thread them with twine, ribbon, or wire for a natural ornament with warm color and a light citrus scent. The translucent slices catch tree light well, and they suit a rustic, woodland, or kitchen tree. Add a small pine sprig, a cinnamon stick, or a star anise for extra detail.

    Slice oranges evenly, pat them dry, and dry them slowly so they do not curl too much. Cool them fully before hanging, and keep them away from damp rooms so they do not soften. Replace slices each season, since dried citrus fades and becomes brittle over time.

    3. Salt Dough Keepsake Ornaments

    Salt dough star and tree ornaments, unpainted and painted, on a baking tray with ribbon.

    Mix salt dough from flour, salt, and water, roll it out, cut shapes such as stars, trees, and houses, and bake until hard for a sturdy keepsake ornament. Adults can press in texture with lace, stamps, or leaves, paint the finished shapes, and add a name or year on the back. These ornaments suit family trees and gift giving.

    Roll the dough evenly, make a hanging hole with a straw before baking, and bake at a low heat until fully dry. Paint after cooling, seal with a clear coat, and thread ribbon through the hole. Store salt dough ornaments in a dry place, since damp air can soften them.

    4. Embroidered Hoop Ornaments
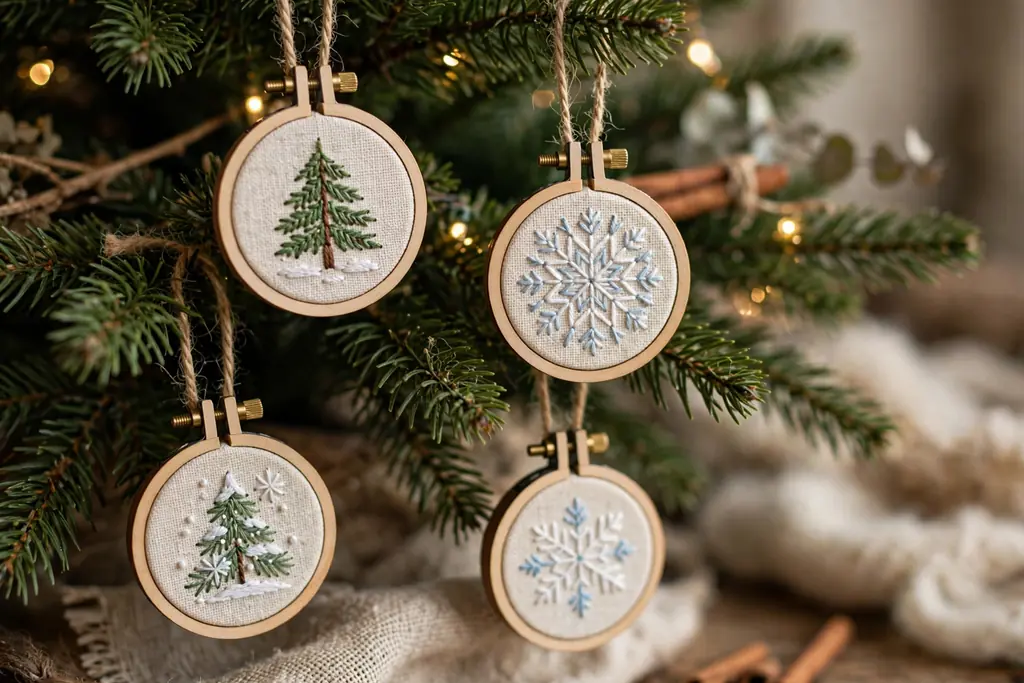
    Small wooden embroidery hoops with stitched tree and snowflake designs hanging on a Christmas tree.

    Stitch a small design, such as a tree, a snowflake, a house, or a short word, onto fabric stretched in a small wooden hoop, then finish the back with felt for a neat ornament. Embroidered hoops suit adults who enjoy slow stitching and want ornaments that also work as small wall pieces after the season.

    Choose a simple pattern, use two or three thread colors, and keep stitches even so the design reads clearly from a distance. Trim the fabric at the back, glue a felt circle over it, and add a ribbon loop at the top of the hoop. Hang hoops on strong branches, since wood hoops are heavier than fabric ornaments.

    5. Wood Slice Ornaments with Pyrography
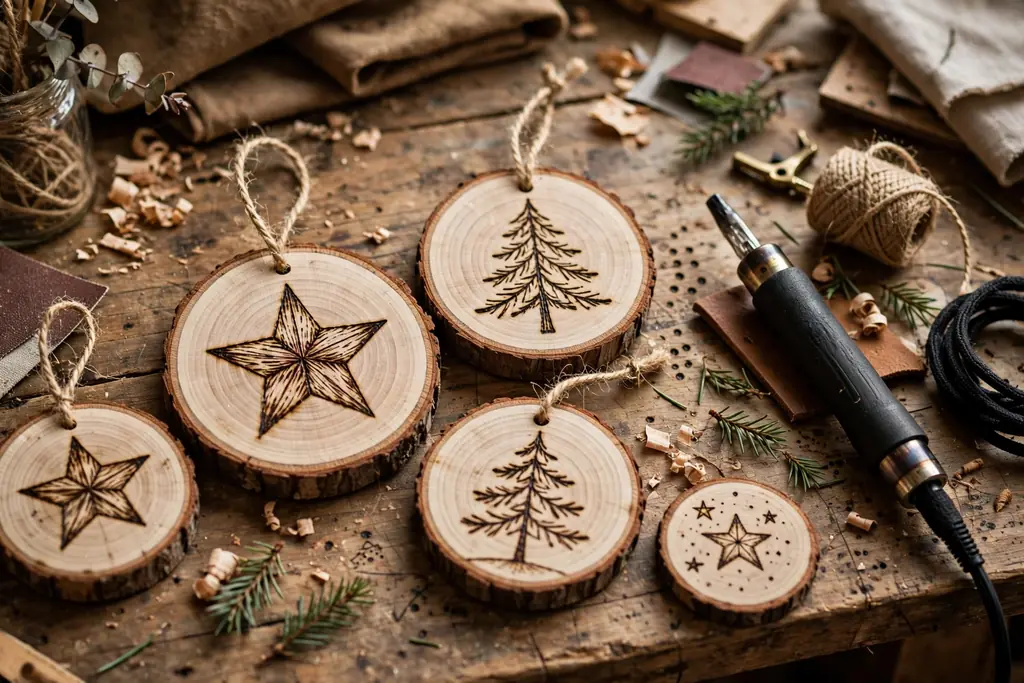
    Wood slice ornaments with burned star and tree designs on a workbench beside a pyrography pen.

    Burn a simple design, such as a star, a pine tree, a snowflake, or a name, into a thin wood slice with a pyrography pen, then finish with a light sealant. The burned lines give a warm, rustic look, and the natural wood edge keeps each ornament slightly different. This project suits a cabin, farmhouse, or woodland tree.

    Sand the wood slice smooth, sketch the design lightly in pencil, and burn slowly with steady pressure. Work in a ventilated space, let the piece cool, and seal it lightly so the burned lines stay clear. Drill or use a pre-drilled hole for the hanger, and hang wood slices on inner branches because of their weight.

    6. Felt Woodland Animal Ornaments

    Felt fox, deer, and owl ornaments hanging on a Christmas tree branch.

    Cut felt into simple animal shapes, such as a fox, a deer, an owl, or a rabbit, stitch the edges with blanket stitch, and stuff lightly for a soft ornament. Felt animals add gentle color and texture to a tree, and they are light enough for thin branches. They suit a woodland theme, a child friendly tree, or a cozy living room.

    Use a paper template for each animal, cut two matching pieces, and stitch around the edge, leaving a gap for stuffing. Add small felt details for eyes, ears, and tails, then close the gap and add a ribbon loop. Keep felt ornaments away from open flame and store them flat so they keep their shape.

    7. Beaded Snowflake Ornaments
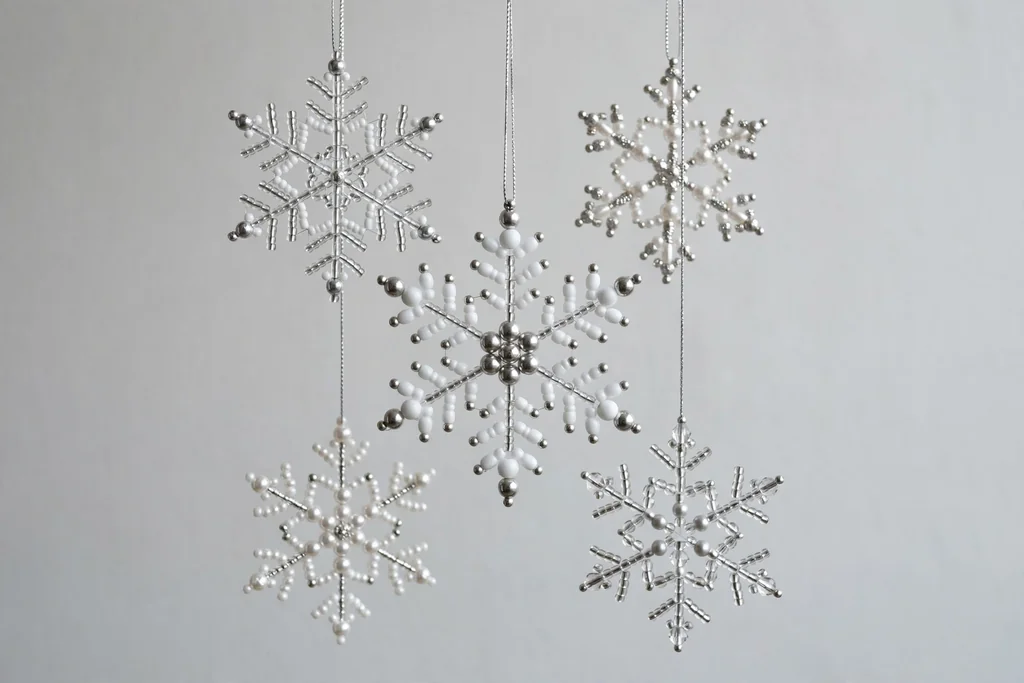
    Beaded snowflake ornaments in white and silver hanging against a plain background.

    Thread beads onto wire in a six point snowflake pattern, using glass, crystal, or wooden beads in white, silver, and pale blue. Beaded snowflakes catch light and suit a winter white tree, a silver tree, or a tree with cool colors. They also work well as window ornaments when hung with a longer thread.

    Cut wire to length, form a center loop, and thread beads in a repeated pattern on each arm so the snowflake stays balanced. Twist the wire ends neatly at the center and outer points, and add a hanging loop at the top point. Check each point for sharp wire ends before hanging, and store snowflakes flat in tissue.

    8. Macrame Mini Ornaments
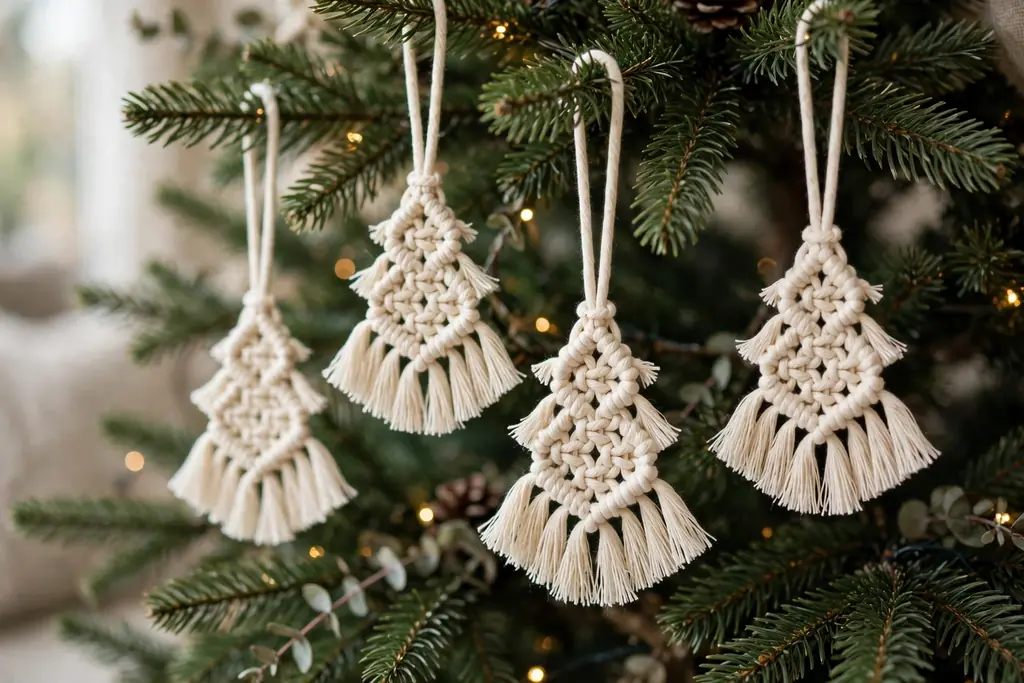
    Small macrame tree ornaments in cream cotton cord hanging on a Christmas tree.

    Knot cotton cord into small macrame shapes, such as a mini tree, a star, or a simple tassel, using basic knots such as square knots and lark’s head knots. Macrame ornaments suit a boho, neutral, or natural tree, and they add soft texture beside glass and wood. They also make good gifts, since they need few tools.

    Cut cords to the same length, knot slowly, and comb out the ends for a soft fringe where the design calls for it. Keep tension even so the shape stays straight, and trim the fringe after the ornament is finished. Hang macrame pieces away from heat, and brush the fringe gently before storing.

    9. Paper Quilled Star Ornaments
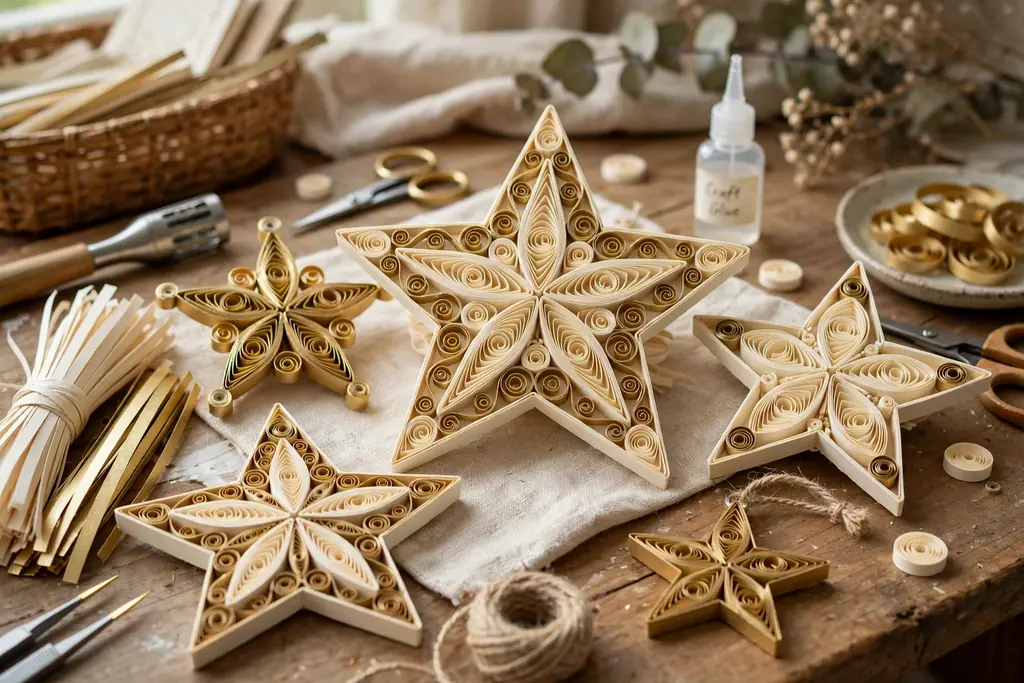
    Paper quilled star ornaments in cream and gold on a craft table.

    Roll narrow paper strips into coils, pinch them into teardrop and eye shapes, and glue them into a star or snowflake form for a light, detailed ornament. Quilling suits adults who like paper craft and want a delicate ornament in a chosen color, such as cream, red, gold, or deep green. A clear sealant can help the paper keep its shape.

    Roll coils with a quilling tool or a toothpick, glue the ends, and let each shape dry before joining them into a star. Use a template under the work to keep the star even, and add a small hanging loop of thread at one point. Keep quilled ornaments in a dry place, away from water and heavy items.

    10. Air-Dry Clay House Ornaments
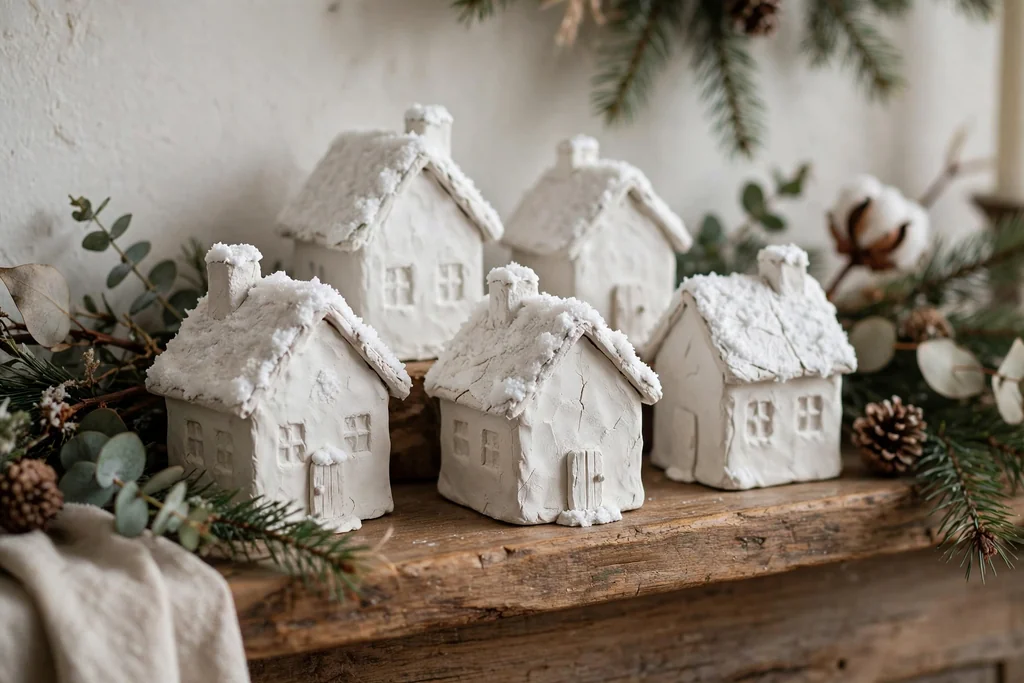
    Small air-dry clay house ornaments painted white with snowy roofs on a mantel.

    Shape air-dry clay into small houses, cottages, or cabins, cut out windows and doors, and let them dry fully before painting. Clay houses suit a village theme on a tree, a mantel display, or a windowsill group. Adults can keep the shapes simple and let paint and small details, such as a snowy roof, carry the charm.

    Roll the clay evenly, build the house from flat panels or a single shaped block, and smooth the joins with a damp finger. Let the piece dry slowly, turning it so all sides dry, then paint and seal it. Add a ribbon loop through a hole made before drying, and place heavier clay houses on strong branches.

    11. Pressed Flower Resin Ornaments
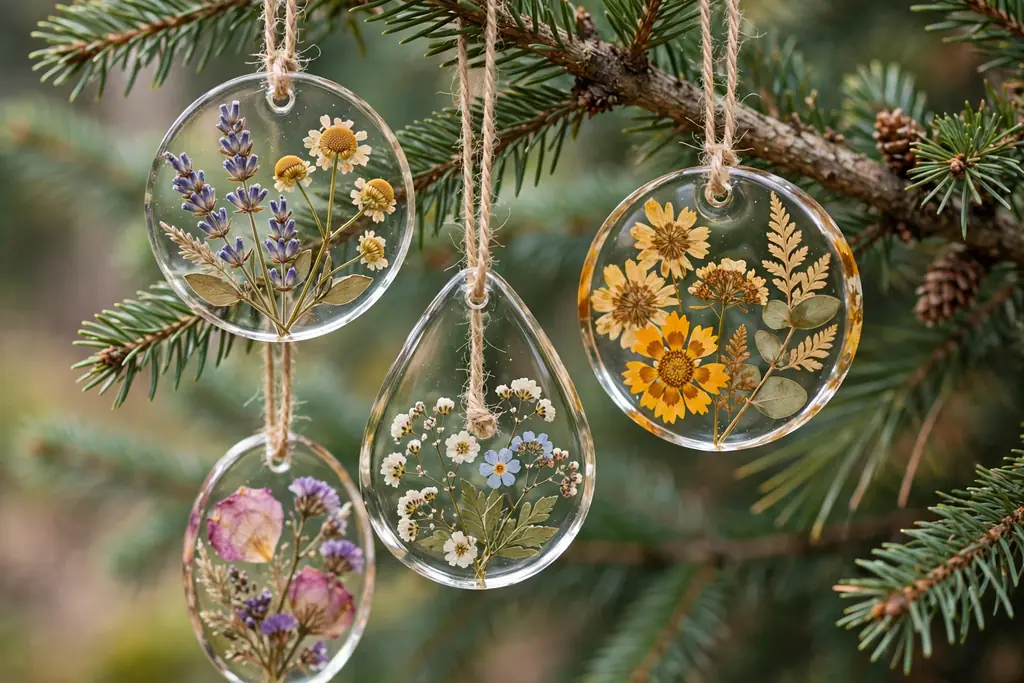
    Clear resin ornaments with pressed flowers inside, hanging on a Christmas tree branch.

    Press small flowers and leaves flat, arrange them in a round or teardrop mold, and pour clear resin over them for an ornament that holds real botanical detail. Pressed flower resin ornaments suit a garden theme, a pastel tree, or a gift for someone who loves flowers. They need curing time, so plan this project ahead.

    Press flowers between paper for at least a week until fully dry, since damp flowers can cloud resin. Pour resin in thin layers, place flowers with tweezers, and remove bubbles before curing. Follow the resin instructions for ventilation and curing time, and add a ribbon loop once the piece is fully set.

    12. Cinnamon Stick Bundle Ornaments
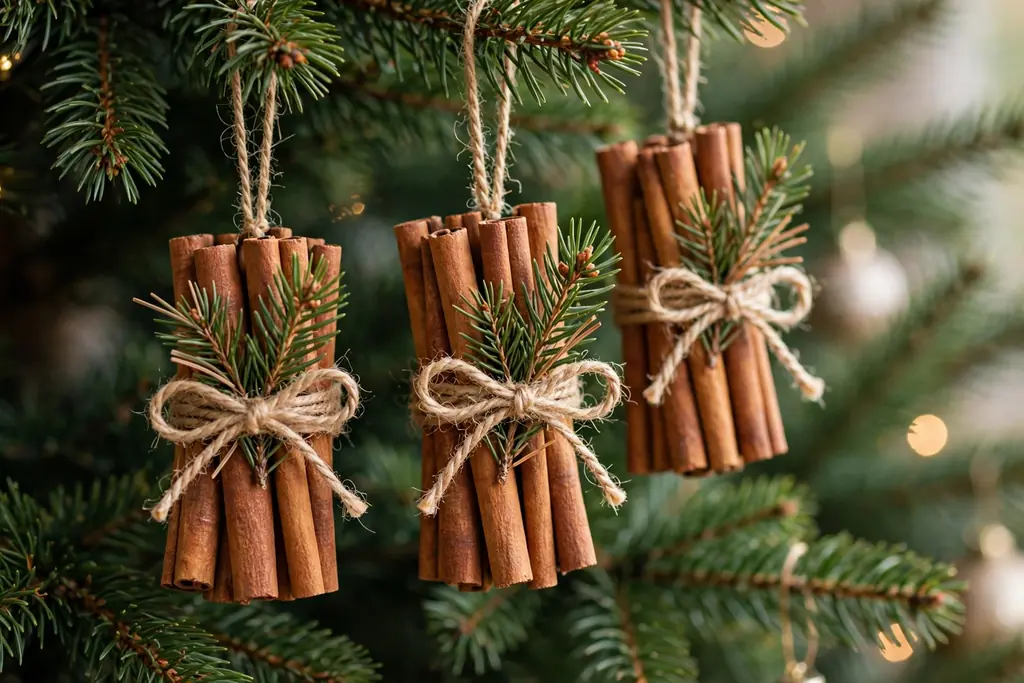
    Cinnamon stick bundles tied with twine and pine sprigs hanging on a Christmas tree.

    Tie three or four cinnamon sticks together with twine, add a small pine sprig, a dried orange slice, or a tiny bell, and hang the bundle as a scented ornament. Cinnamon bundles suit a rustic tree, a kitchen tree, or a doorway display, and they add scent as well as color. They are quick to make in a batch for gifts.

    Choose sticks of similar length, tie them tightly at the center, and trim the twine ends neatly. Add the pine sprig and bell on top of the tie so the bundle looks finished from the front. Keep cinnamon bundles away from open flame and damp rooms, and replace them each season if the scent fades.

    13. Fabric Scrap Patchwork Balls
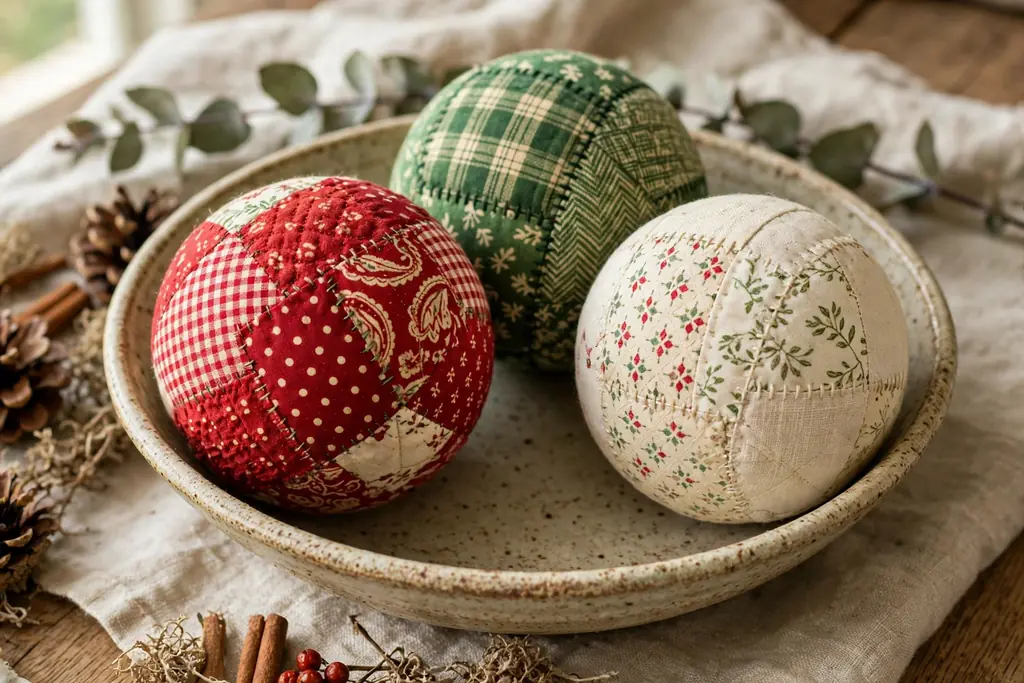
    Patchwork fabric ball ornaments in red, green, and cream patterns in a bowl.

    Cover a foam or polystyrene ball with small fabric scraps, folding and pinning each piece into place to form a patchwork ball ornament. Patchwork balls suit a cozy, colorful tree and are a good use for fabric scraps from other projects. They also work well in a bowl display when not on the tree.

    Cut fabric into even squares, fold the edges under, and pin each piece in place, overlapping slightly so no foam shows. Work in rows around the ball, add a ribbon loop at the top with a pin and glue, and finish with a small bow if you like. Store patchwork balls in a box with tissue so the pins do not catch other ornaments.

    14. Calligraphy Wood Tag Ornaments

    Wood tag ornaments with handwritten calligraphy words hanging on a Christmas tree branch.

    Write a word, a name, or a short phrase on a small wood tag with a calligraphy pen or a fine paint pen, then add a simple border or a small painted sprig. Calligraphy tags suit a minimal tree, a gift tag that doubles as an ornament, or a tree where each family member has a named ornament.

    Sand the tag smooth, practice the wording on paper first, and write slowly so letter spacing stays even. Let the ink dry fully, seal lightly, and thread ribbon through the hole. Keep tags away from water, since ink and paint can smudge if they get wet.

    15. Miniature Wreath Ornaments
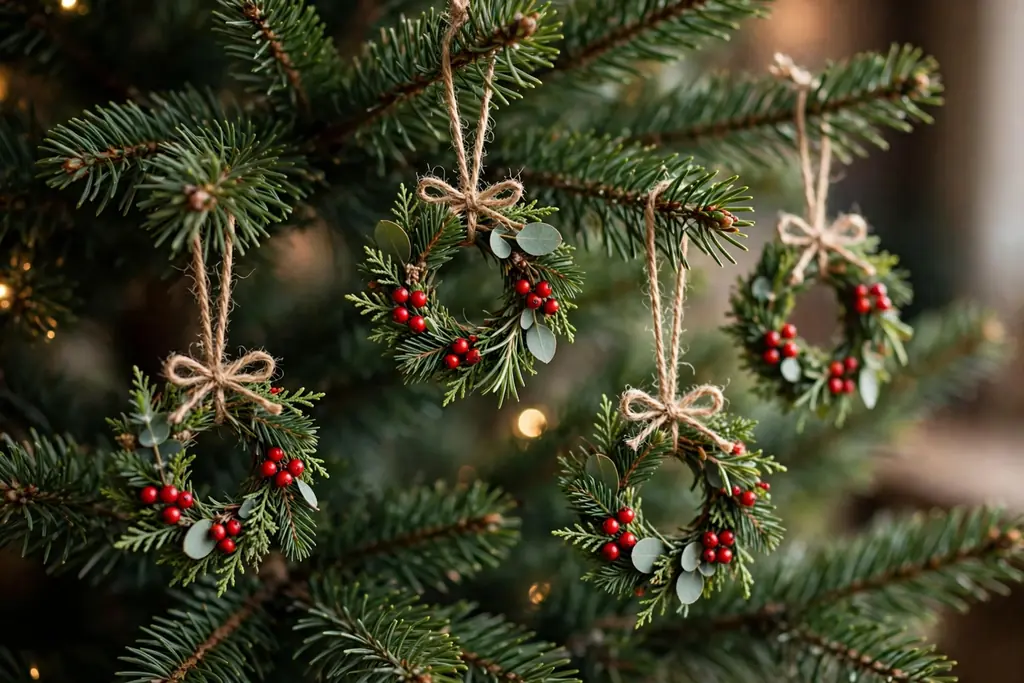
    Miniature wreath ornaments with greenery and red berries hanging on a Christmas tree.

    Form a small wreath from wire, a grapevine ring, or a foam ring, then wrap it with faux greenery, berries, and a tiny bow for a miniature wreath ornament. Mini wreaths suit a classic tree, a front door display in miniature, or a set of matching ornaments in one color. They also look good hung on cabinet knobs.

    Wrap the base evenly, glue greenery in one direction, and add berries and a bow at the bottom or top. Keep the wreath small enough to hang without hiding nearby ornaments, and add a short hanging loop at the back. Store mini wreaths in a box so the greenery does not get crushed.

    16. Beaded Icicle Drop Ornaments
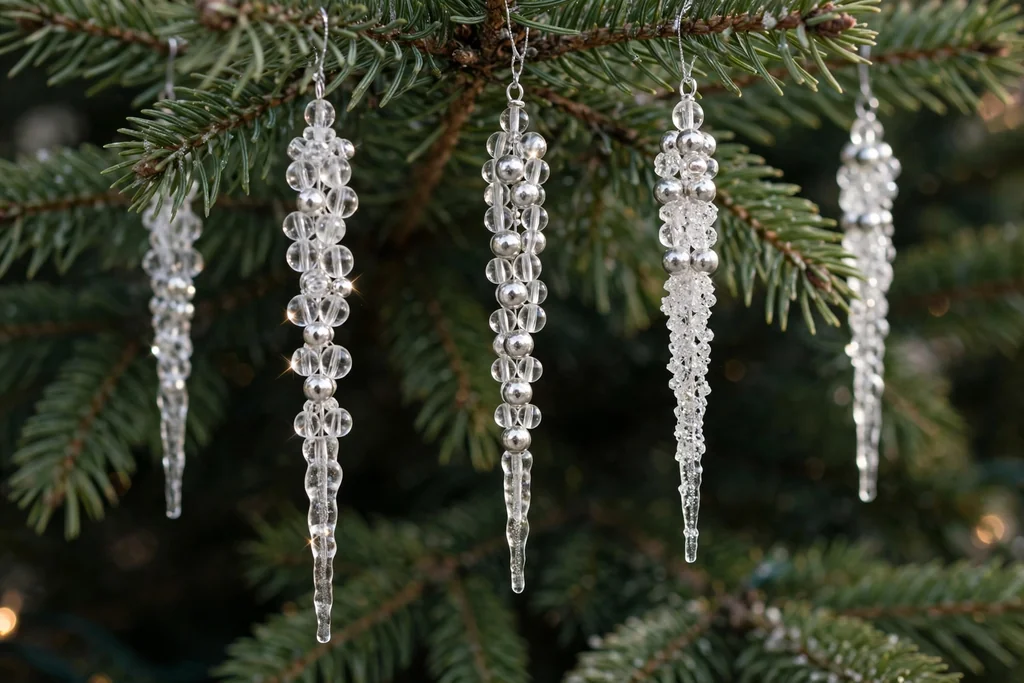
    Beaded icicle drop ornaments in clear and silver beads hanging on a Christmas tree branch.

    String beads in a tapered pattern onto wire or thread to form a long icicle drop, using clear, silver, and pale blue beads. Beaded icicles suit a winter white tree, an icy blue tree, or a tree with glass ornaments, since they add length and sparkle. They also suit a window display in winter light.

    Start with a small bead at the tip and increase bead size toward the top, or use a repeated pattern that tapers by spacing. Secure the ends well, add a loop at the top, and check that the drop hangs straight. Hang icicles near branch tips where they can catch light, and store them flat or hanging so the wire does not bend.

    17. Painted Pinecone Ornaments
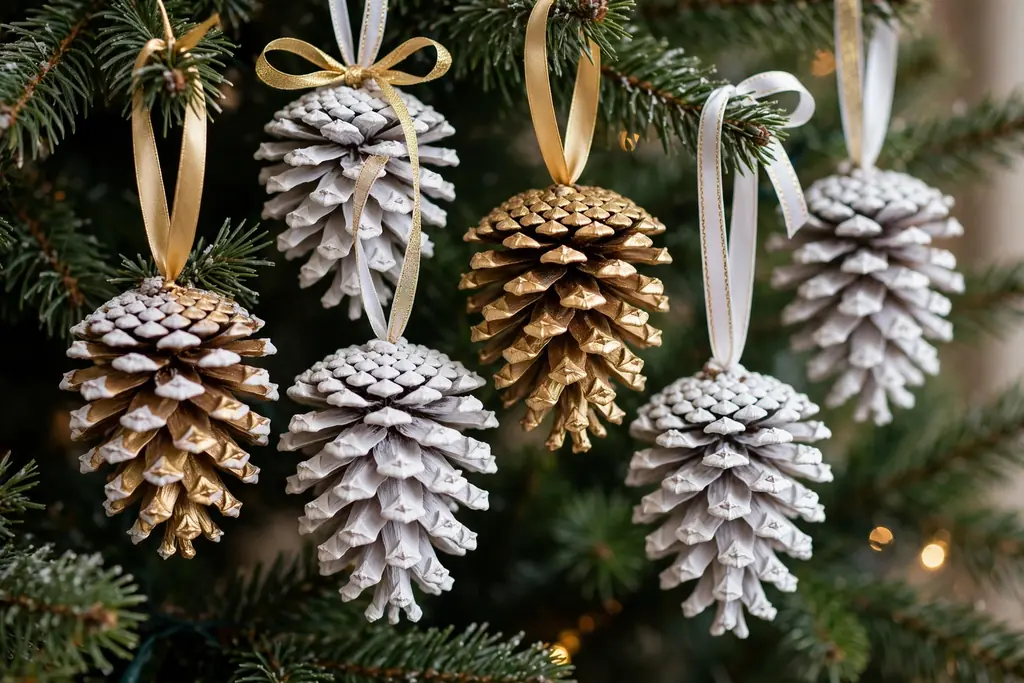
    Pinecone ornaments painted white and gold with ribbon loops on a Christmas tree.

    Paint pinecone tips, or the whole pinecone, in white, gold, silver, or a tree color, add a dusting of glitter if you like, and attach a ribbon loop. Painted pinecones suit a woodland tree, a rustic mantel, or a natural tree with dried citrus and wood slices. They are light, cheap to make, and easy to batch.

    Clean pinecones and let them dry fully before painting, since damp cones close up. Paint the tips first for a frosted look, or paint the whole cone for a bold color, and let each coat dry. Glue a ribbon loop to the base of the cone, and shake off loose glitter outdoors before hanging.

    18. Faux Stained Glass Ornaments
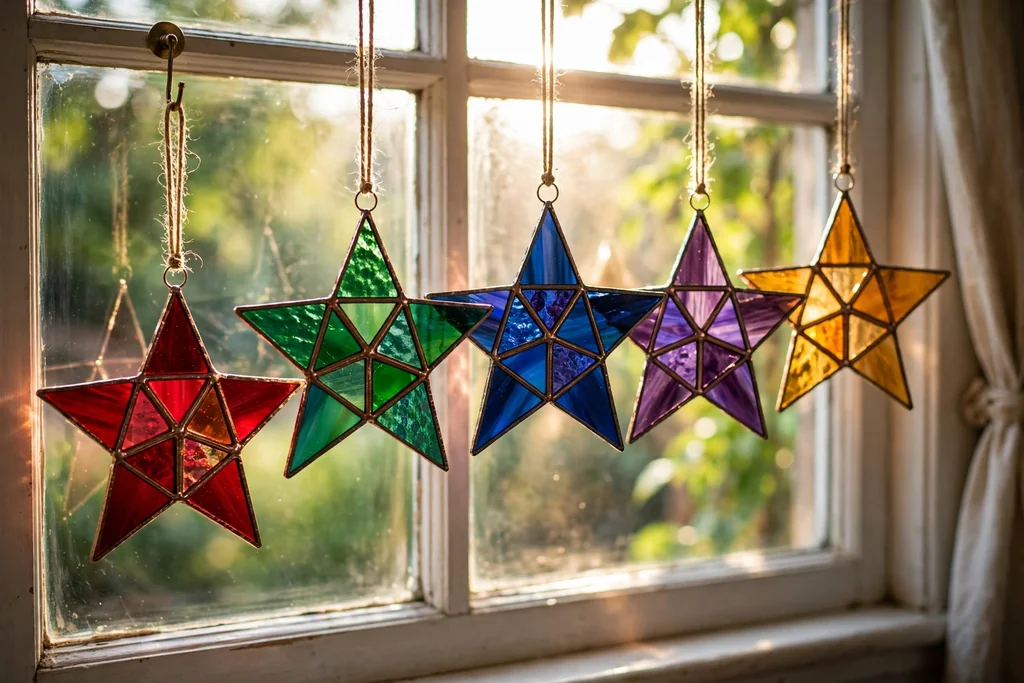
    Faux stained glass star ornaments in jewel colors hanging in a window with light behind them.

    Paint clear plastic or glass shapes with translucent glass paint in jewel colors, outline the shapes with a dark leading paint, and hang them where light passes through. Faux stained glass ornaments suit a window, a tree near a lamp, or a colorful tree, since light brings out the color. Simple shapes, such as stars, trees, and bells, work best.

    Draw the design on paper first, transfer the outline to the shape, and fill each section with one color, letting it dry before adding the next. Keep paint layers thin so light still passes through, and add a hanging loop at the top. Handle painted glass with care, and store pieces flat with tissue between them.

    19. Needle Felted Bauble Ornaments
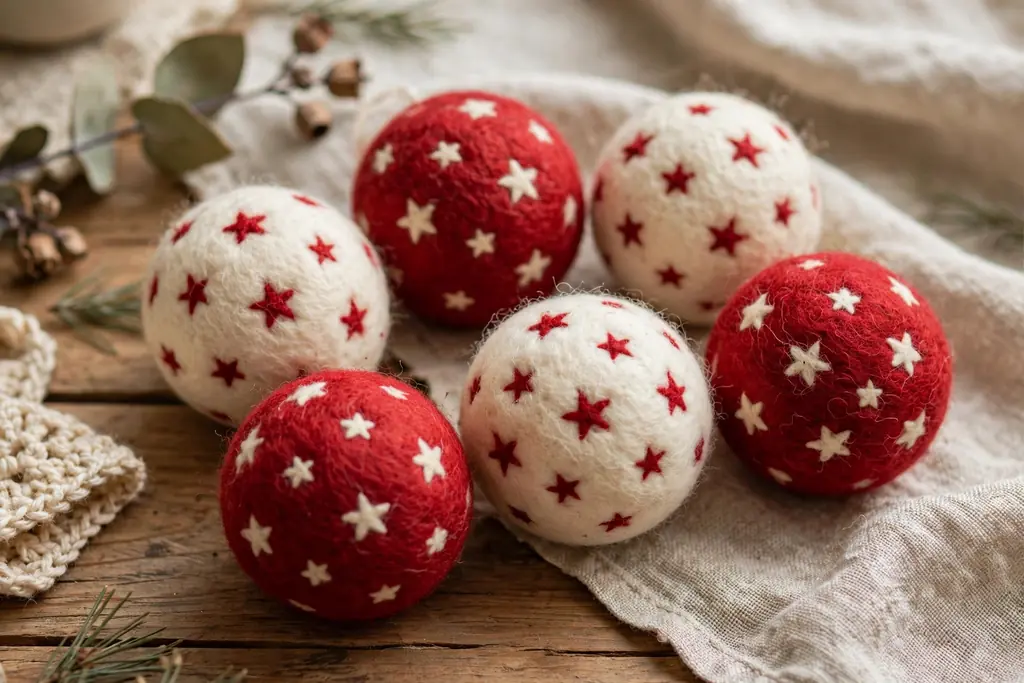
    Needle felted wool baubles in red and cream with small star motifs on a table.

    Wrap a foam ball with wool roving, then needle felt the wool into place and add small felted motifs, such as dots, stars, or a simple tree. Needle felted baubles suit a soft, cozy tree and add a handmade texture that contrasts with glass and metal. They are light and safe for thin branches.

    Work on a foam pad, use a felting needle with care, and build the wool layer evenly so no foam shows. Add motifs by placing small wool pieces on the surface and felting them in place. Finish with a ribbon loop pushed into the top and secured with glue, and store felted baubles away from moths and damp air.

    20. Decoupage Map Ornaments

    Baubles covered with map paper pieces hanging on a Christmas tree.

    Tear or cut old maps, sheet music, or patterned paper into small pieces, glue them onto a plain bauble or wood shape, and seal with decoupage medium. Map ornaments suit a travel themed tree, a vintage style tree, or a gift for someone who loves a particular place. Choose paper with clear place names or notes for the best effect.

    Apply a thin layer of decoupage medium, place each paper piece smooth, and brush over it to remove bubbles. Let each layer dry before adding the next, and finish with two or three sealing coats. Add a ribbon loop that matches the paper colors, and store decoupage ornaments in divided boxes so the sealed surface does not stick to other pieces.

    21. Velvet and Pearl Cluster Ornaments

    Velvet ball and pearl bead cluster ornaments in cream and gold on a Christmas tree branch.

    Gather small velvet balls, pearl beads, and tiny fabric leaves into a cluster, wire them together, and add a ribbon loop for a soft, dressy ornament. Velvet and pearl clusters suit an elegant tree, a gold and cream tree, or a mantel display. They also work as a gift topper that can later hang on a tree.

    Choose velvet in one or two colors, mix pearl sizes for depth, and wire the cluster tightly so no piece slips. Add a small bow or a fabric leaf at the top to hide the wire join, and check the cluster weight before hanging. Store clusters in tissue so velvet does not crush and pearls do not scratch other ornaments.

    22. Geometric Brass Ornaments
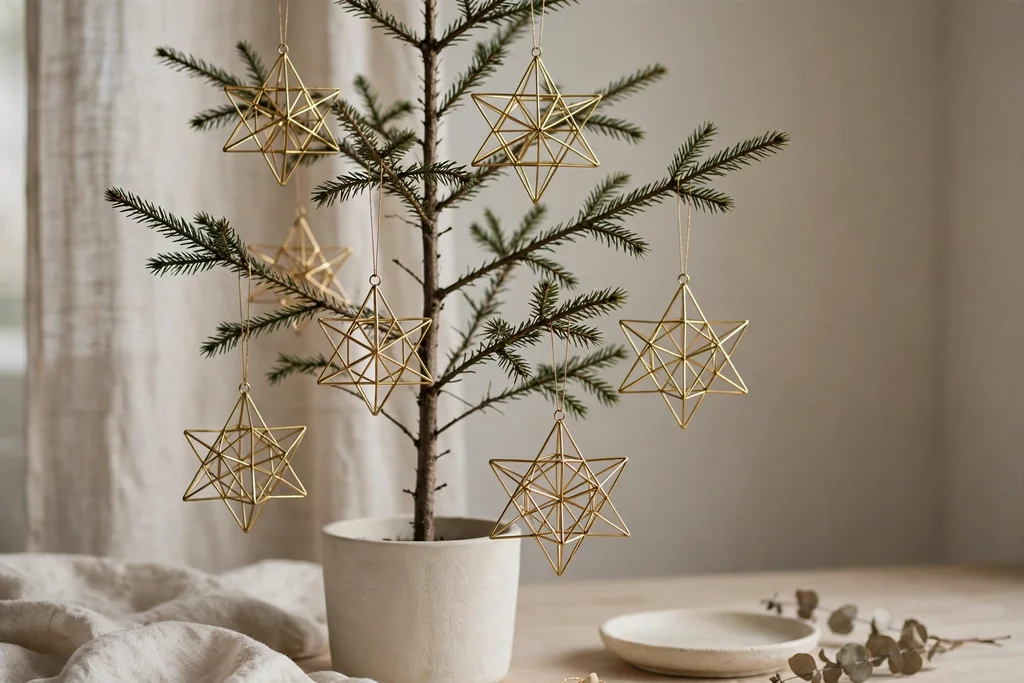
    Geometric brass wire star ornaments hanging on a minimal Christmas tree.

    Bend thin brass wire or use brass tubes and beads to form geometric shapes, such as a star, a diamond, or a small hanging mobile. Geometric brass ornaments suit a modern tree, a minimal tree, or a tree with black, white, and gold pieces. They add structure and shine without needing color.

    Plan the shape on paper, cut wire to length, and bend it with pliers, keeping angles even. Join the ends neatly, add a hanging loop at the top point, and check for sharp ends before hanging. Hang brass shapes where they will not knock against glass ornaments, and polish lightly if they dull over time.

    23. Photo Transfer Wooden Ornaments
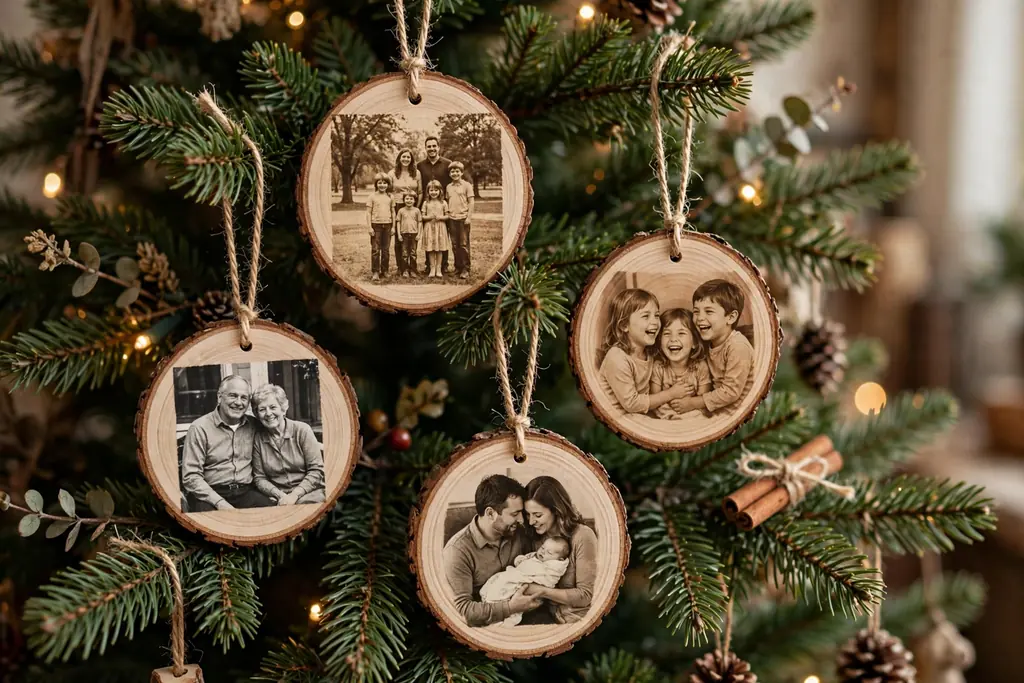
    Wood slice ornaments with transferred family photos hanging on a Christmas tree.

    Transfer a printed photo onto a wood slice or a flat wood shape using photo transfer medium, seal it, and add a ribbon loop for a personal ornament. Photo transfer ornaments suit a family tree, an anniversary gift, or a tree where each year adds one new photo. Choose clear, simple photos with a strong focal point.

    Print the photo in reverse if the transfer method needs it, apply transfer medium evenly, and press the photo firmly onto the wood. Let it dry fully, rub off the paper backing gently, and seal with a clear coat. Add a ribbon loop through a pre-drilled hole, and keep photo ornaments away from water and direct sun so the image does not fade.

    Conclusion

    Handmade ornaments give a tree a personal look that bought sets cannot match, since each piece carries a choice of color, material, and detail. Start with one or two projects from this list, make a small batch, and see how they sit on your tree before adding more. If you also display older pieces, the guide to antique Christmas ornaments explains how to identify, display, and store them safely. Save the ideas you like, gather materials in one box, and set aside an evening or a weekend afternoon for making, so the work stays relaxed and enjoyable.

    FAQs

    What are the easiest DIY Christmas ornaments for adults to make?

    Dried orange slices, cinnamon stick bundles, and painted pinecones are among the easiest, since they need few tools and can be finished in one sitting. Start with one of these if you are new to ornament making, then try felt, paper, or clay projects once you are comfortable with basic steps.

    What materials work best for handmade Christmas ornaments?

    Wood, felt, clay, glass, paper, and dried citrus all work well, and the best choice depends on the look you want and the time you have. Wood and clay give weight and structure, felt and paper give soft texture, and glass and resin give shine. Choose one main material per tree palette so the ornaments look cohesive.

    How do I make DIY ornaments last from year to year?

    Let paint, glue, resin, and sealant dry fully before storing, and pack ornaments in divided boxes with tissue between pieces. Keep boxes in a cool, dry place, away from damp rooms and direct sun. Check ornaments each year for loose hangers, chipped paint, or soft spots, and repair small issues before hanging.

    Are handmade ornaments safe to hang on a real tree?

    Yes, if you keep them light, use sturdy hangers, and place heavier pieces on inner branches close to the trunk. Keep paper, felt, and dried materials away from open flame and hot lights, and use battery lights near delicate ornaments. Remove ornaments before the tree is moved or taken down, so they do not get caught or dropped.

    How many handmade ornaments do I need for a tree?

    A small tree often needs 20 to 30 ornaments, while a full size tree may need 60 or more, depending on tree size and how full you want it to look. Start with a batch of 10 to 15 handmade pieces, mix them with plain baubles in your palette, and add more handmade ornaments each year rather than making a full set at once.

    Can I sell DIY Christmas ornaments I make at home?

    You can sell handmade ornaments if you follow local rules for small sellers, use safe materials, and describe each piece accurately, including its size, weight, and care needs. Price the work to cover materials and time, photograph each ornament in good light, and pack fragile pieces in divided boxes or padded mailers for shipping.
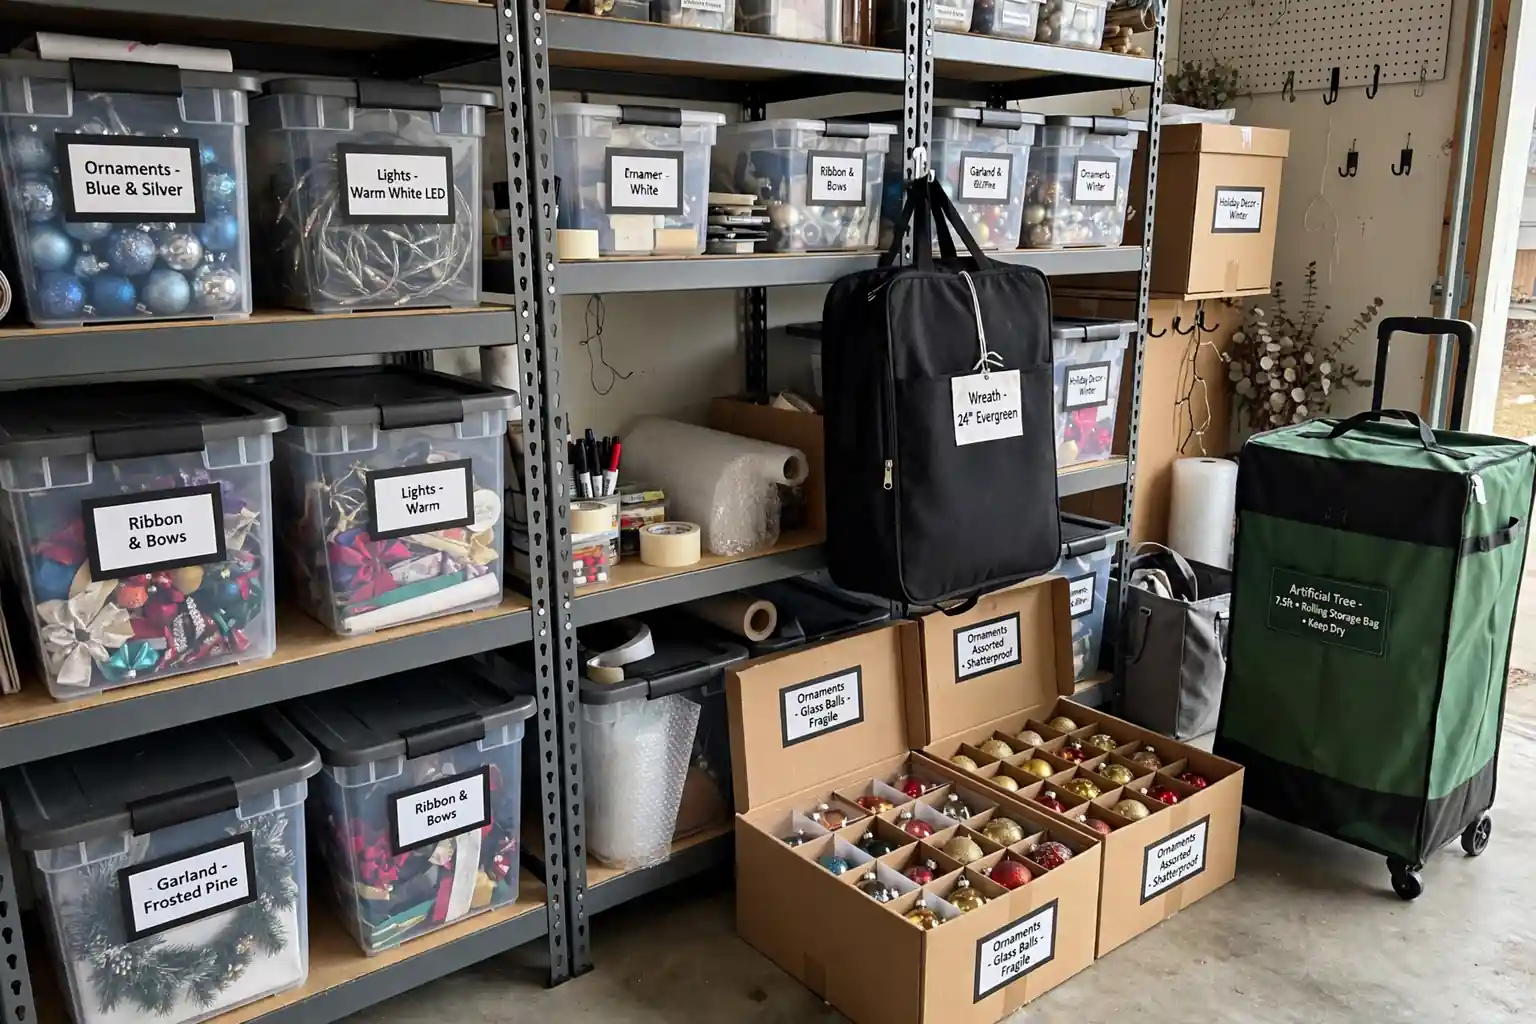
  • 19 Christmas Decoration Storage Ideas to Keep Everything Organized

    19 Christmas Decoration Storage Ideas to Keep Everything Organized

    Store Christmas decorations by sorting pieces by type, wrapping fragile items alone, and packing them in labeled, stackable bins in a cool, dry place. Use divided boxes for ornaments, bags for wreaths and trees, and reels for lights, so every piece stays safe, easy to find, and ready to use next December.

    Start with a clear table and one empty bin for each group: ornaments, lights, wreaths, tree parts, linens, and small pieces. Work through one group at a time, and label each bin before it goes on a shelf. For fragile older pieces, see the antique Christmas ornaments guide for careful wrapping and packing steps.

    Key Takeaways

    • Sort decorations by type before packing, and keep each group in its own labeled bin or bag.
    • Wrap fragile ornaments alone, and keep heavier pieces at the bottom of a box.
    • Use divided boxes, reels, and rolls to stop tangles, chips, and crushed shapes.
    • Label every bin on two sides with the contents and the room where the pieces belong.
    • Store bins in a cool, dry place, off the floor, and away from heat and damp air.
    • Photograph each bin as you pack it, so next December starts with a clear list.

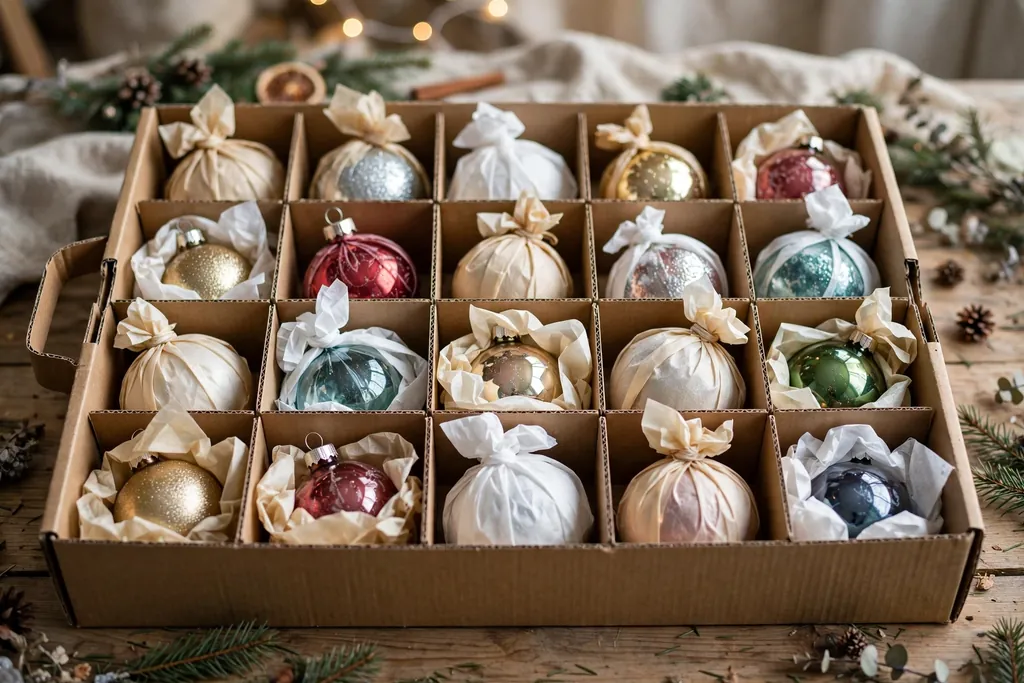
    1. Divided Ornament Boxes

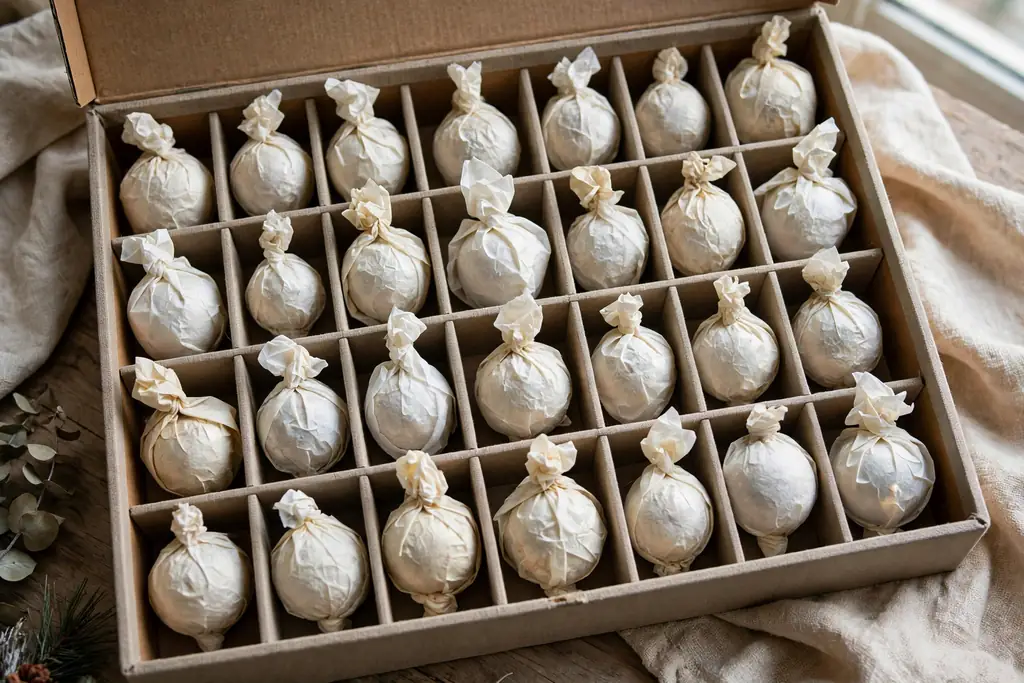
    Divided ornament storage box with tissue wrapped glass ornaments in separate cells.

    Use a divided ornament box with one cell per ornament, and wrap each glass or painted piece in tissue before it goes in its cell. Divided boxes stop ornaments from knocking together, and the grid makes it easy to see a gap where a piece is missing. Keep heavier ornaments low in the box and lighter pieces near the top.

    Label the box with the ornament type and color group, such as red glass balls or wood ornaments. Store the box upright, with a light tissue layer over the top before the lid closes. Do not stack a heavy bin on top of an ornament box, since pressure can crack glass and bend thin caps.

    2. Clear Bins Labeled by Room

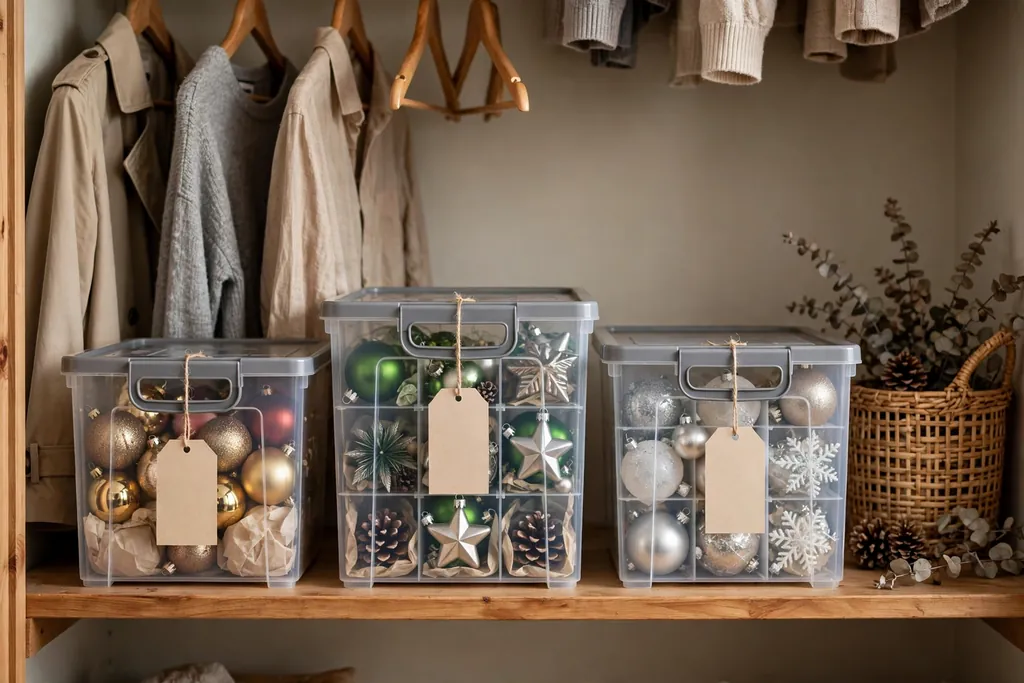
    Clear stackable storage bins with large room labels on a garage shelf.

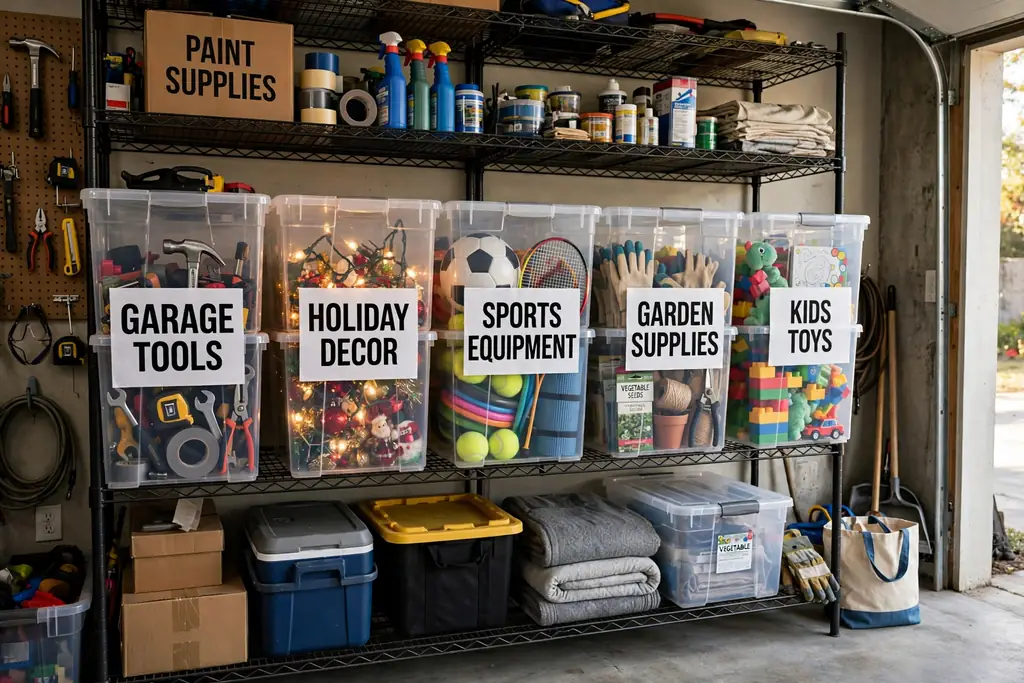
    Pack decorations in clear, stackable bins, one bin per room or area, and label each bin with large, plain text. Clear bins let you spot the right box without opening every lid, and room labels stop living room pieces from mixing with kitchen or porch pieces. Choose bins with lids that latch, so dust and pests stay out.

    Add a short list taped inside the lid, naming the main items in that bin. Keep bins to a weight you can lift safely, and place the most used bin on top of the stack. Store bins off the floor on a shelf or pallet, so a small leak or damp floor does not reach the contents.

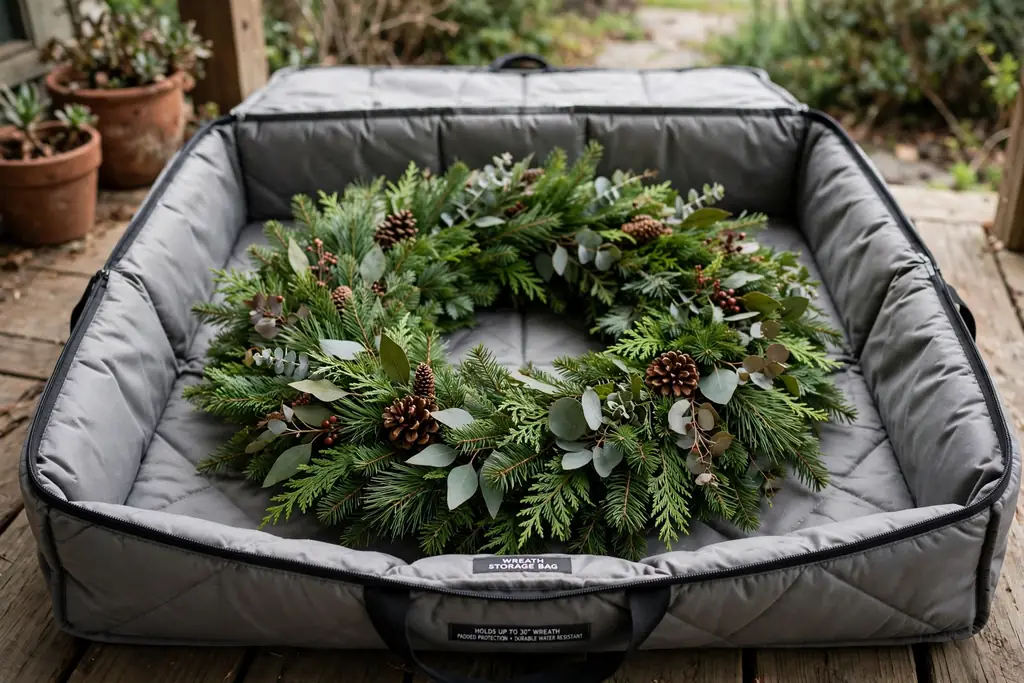
    3. Wreath Storage Bags

    Green wreath placed flat inside a padded wreath storage bag.

    Place each wreath in its own padded wreath bag, with the wreath lying flat and its bow or berries facing up. A bag keeps dust off branches, stops a wreath from snagging on nearby bins, and holds its round shape through the year. Hard wreath cases give extra shape support for thick or heavy wreaths.

    Hang wreath bags from a sturdy hook if shelf space is tight, and keep them away from heavy boxes that could press branches flat. Label each bag with the wreath style and door or room, so the right wreath comes out first next season. Check clasps and zippers before hanging, so a bag does not slip off its hook.

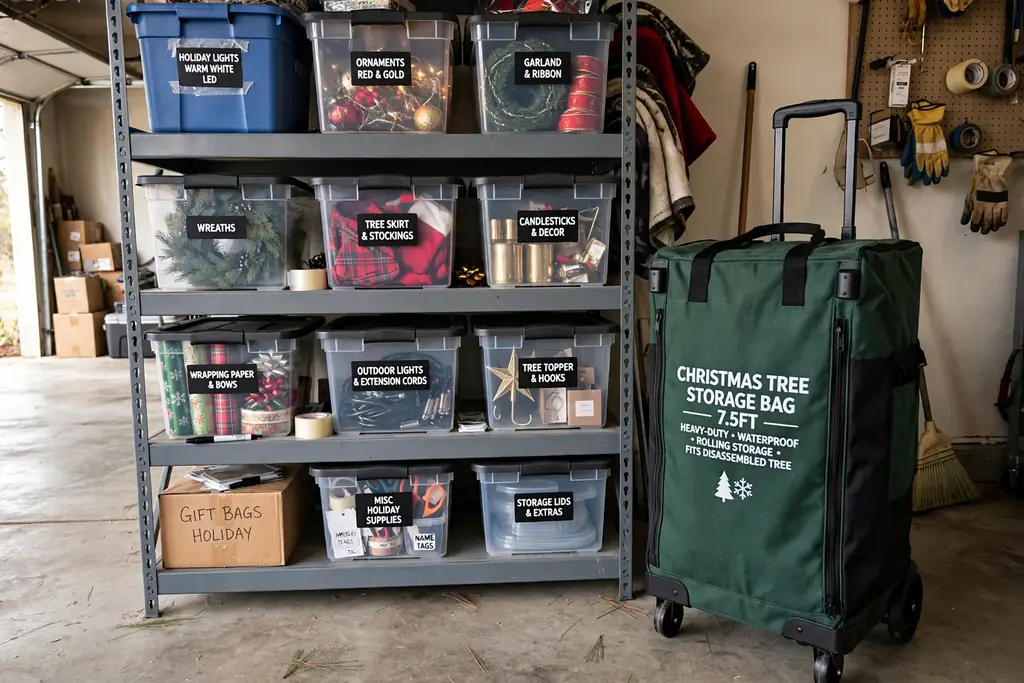
    4. A Rolling Tree Storage Bag

    Rolling Christmas tree storage bag with wheels beside a shelf of labeled bins.

    Pack an artificial tree in a rolling tree storage bag, with branches compressed gently and the stand packed in its own sleeve. A rolling bag moves a heavy tree without dragging, and its long shape fits along a wall or under a shelf. Wheels also help when the tree must move from an attic or garage to the living room.

    Keep the bag label facing out, and note the tree height and color on the label. Store the bag flat or upright as its design allows, and do not stack heavy bins on top of it. Before packing, remove lights and ornaments from branches, and shake out loose needles outdoors.

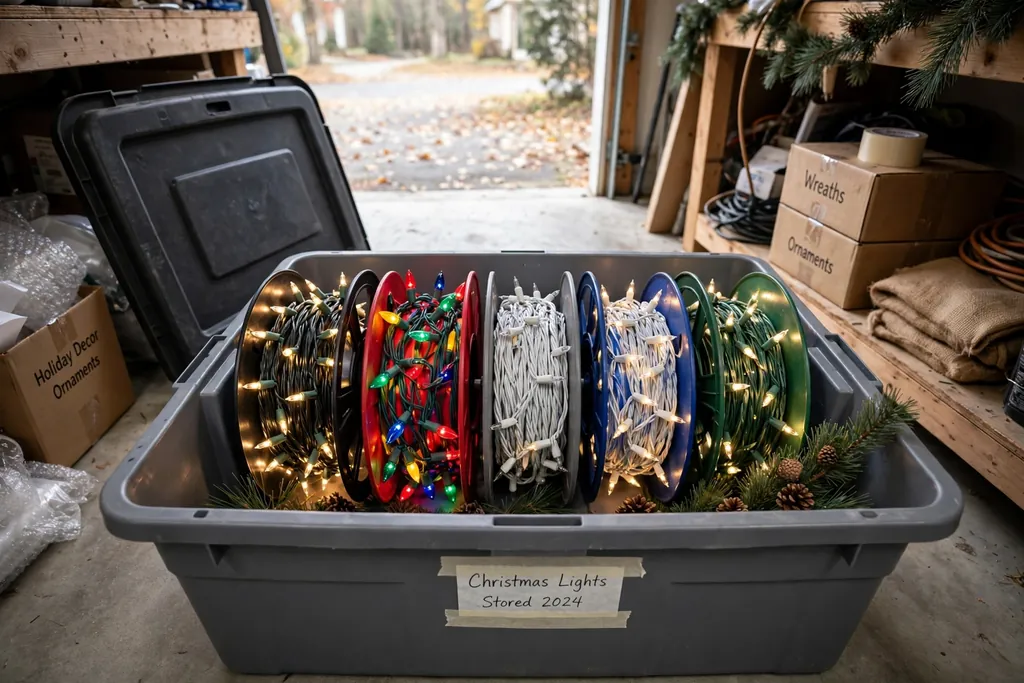
    5. Light and Garland Reels

    Christmas light strands wound neatly onto reels inside an open storage bin.

    Wind each string of lights onto its own reel or a flat cord winder, and secure the plug end with a small tie. Reels stop the tangled knot that forms when lights go into a bag loose, and they make testing lights faster next season. Wrap garland in a loose coil inside a large zip bag, rather than folding it tight.

    Label each reel with the light length, color, and room, such as porch white lights or tree warm lights. Store reels upright in a bin, with plugs facing the same way, so no reel crushes another. Test lights before packing, and set aside any strand with frayed wire for repair or safe disposal.

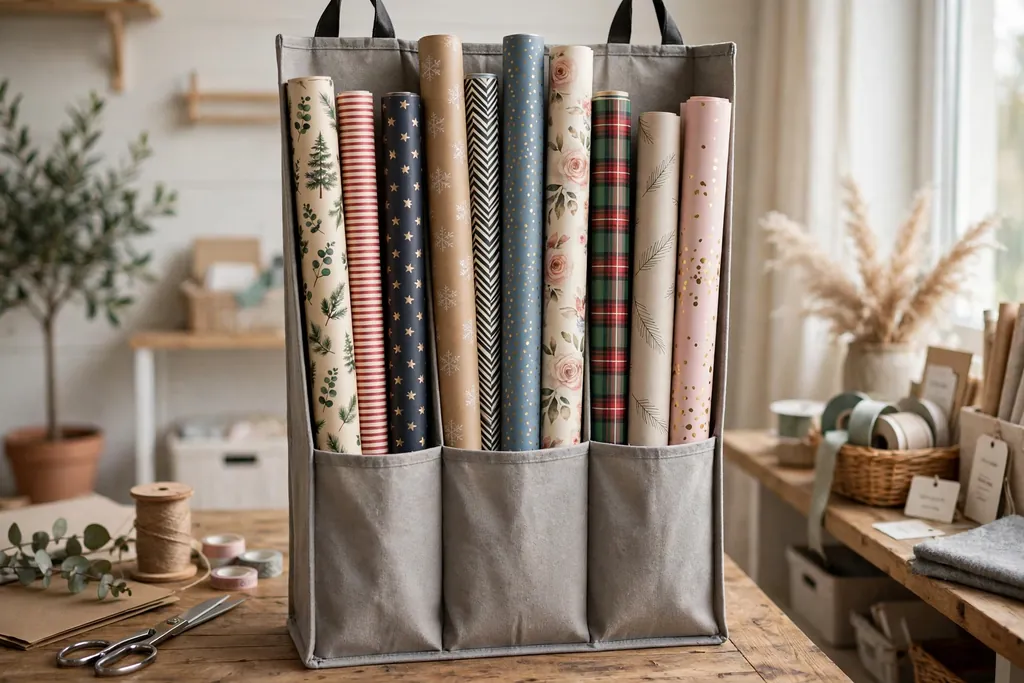
    6. A Vertical Wrapping Paper Organizer

    Wrapping paper rolls standing upright in a tall narrow organizer.

    Stand wrapping paper rolls upright in a tall, narrow organizer, with each roll in its own slot or section. Vertical storage stops rolls from getting crushed under other boxes, and it keeps paper ends clean and ready to unroll. A hanging organizer on a closet door works well in a small home.

    Group rolls by color or pattern, and keep scissors, tape, and tags in a side pocket of the same organizer. Store the organizer where rolls cannot bend against a low ceiling or shelf. At the end of the season, remove short rolls and move them to the front, so they get used before new rolls are bought.

    7. A Ribbon and Bow Organizer

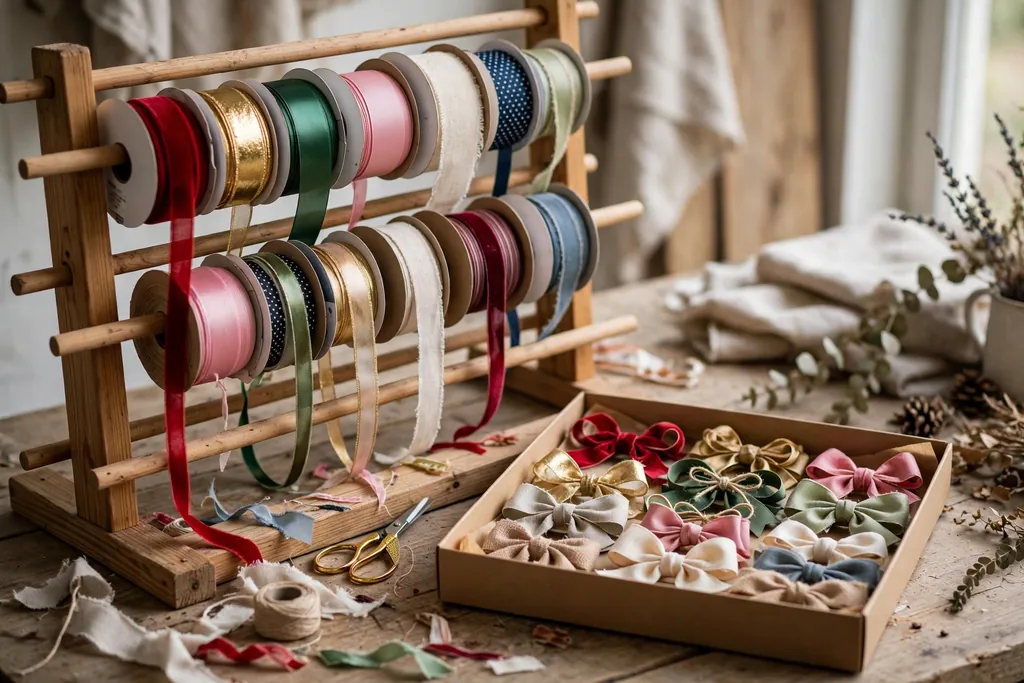
    Ribbon spools on a dowel rack beside a shallow box of finished bows.

    Keep ribbon spools on a dowel rack or in a divided box, with each spool able to turn freely. A rack stops ribbon from unspooling into a tangle, and it shows colors at a glance when wrapping starts. Store finished bows in a shallow box with tissue between layers, so loops keep their shape.

    Label ribbon by width and color, and keep curling ribbon apart from wired ribbon, since they handle in different ways. Place the organizer in the same bin or closet as wrapping paper, so wrapping supplies stay in one place. Replace ribbon that is crushed or damp, since it will not curl or tie cleanly.

    8. Padded Boxes for Village Figurines

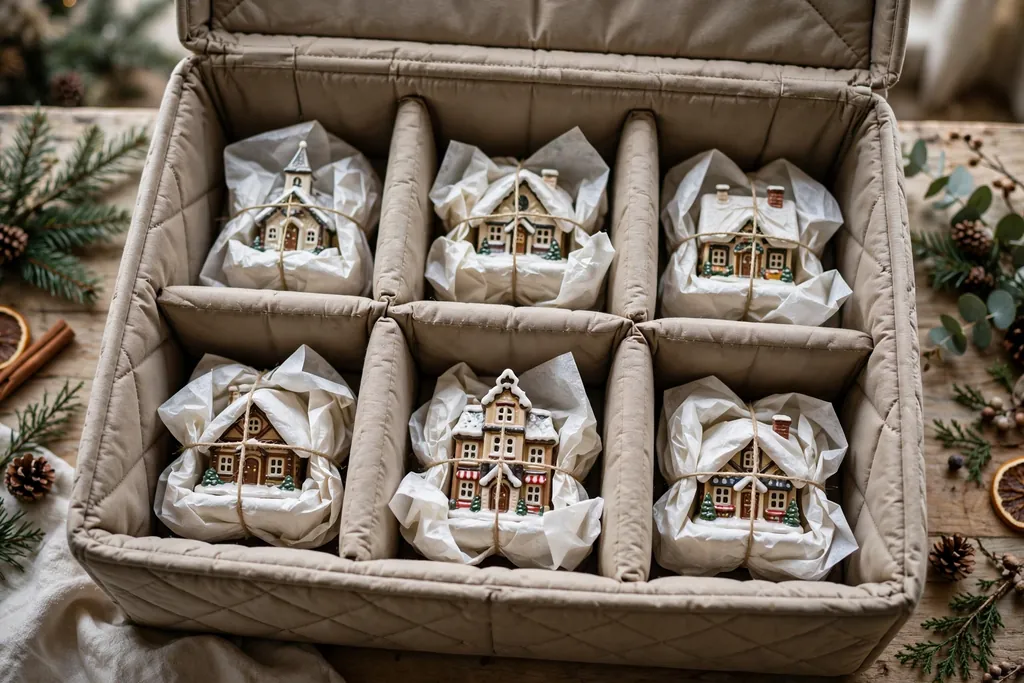
    Padded box with tissue wrapped Christmas village houses in separate compartments.

    Pack village houses and figurines in padded boxes with one piece per compartment, wrapped in tissue and cushioned on all sides. Small houses, trees, and figures chip easily, and a padded box stops them from shifting during a move or a shelf change. Keep roofs, chimneys, and small trees in their own cells, not loose in a shared bin.

    Label each box with the village set name and the number of pieces inside, and add a photo of the set layout to the lid. Store village boxes on a middle shelf, where they are easy to reach and safe from a fall. Handle each piece with dry hands, and keep cords and lights in a separate labeled pouch.

    9. Stocking Storage Pouches

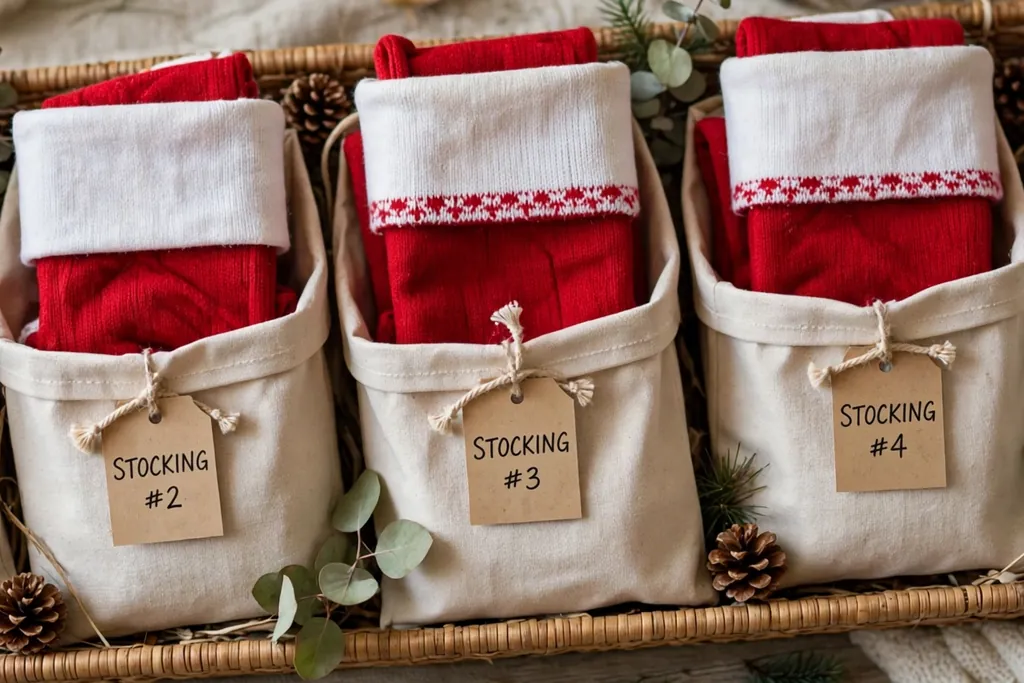
    Red Christmas stockings folded flat inside cloth storage pouches in a shallow bin.

    Place each stocking in its own cloth pouch or zip bag, folded flat with its cuff on top. Pouches keep stockings clean, stop hooks and clips from snagging fabric, and keep pairs or sets together. For stockings with names or embroidery, add tissue between folded layers to protect the stitching.

    Label each pouch with the stocking owner or room, and store pouches flat in a shallow bin. Do not pack heavy ornaments on top of stocking pouches, since pressure can crease fabric and flatten applique. Wash or air stockings before packing, so they stay fresh through the year.

    10. Table Linen Rolls

    Red and green table linens rolled around cardboard tubes in a cloth bag.

    Roll tablecloths and runners around a cardboard tube, rather than folding them into sharp creases. Rolling keeps fabric smooth, stops deep fold lines, and makes linens easy to unroll and check next season. Place each roll in a clean cloth bag, and add a label with the linen size and pattern.

    Store rolls on a shelf or in a long bin, away from damp air and strong light, which can fade color. Keep linen rolls apart from candle wax and ornament boxes, so fabric stays clean. Wash or clean linens before rolling, and note any stain or repair on the label for next year.

    11. Candle Boxes with Dividers

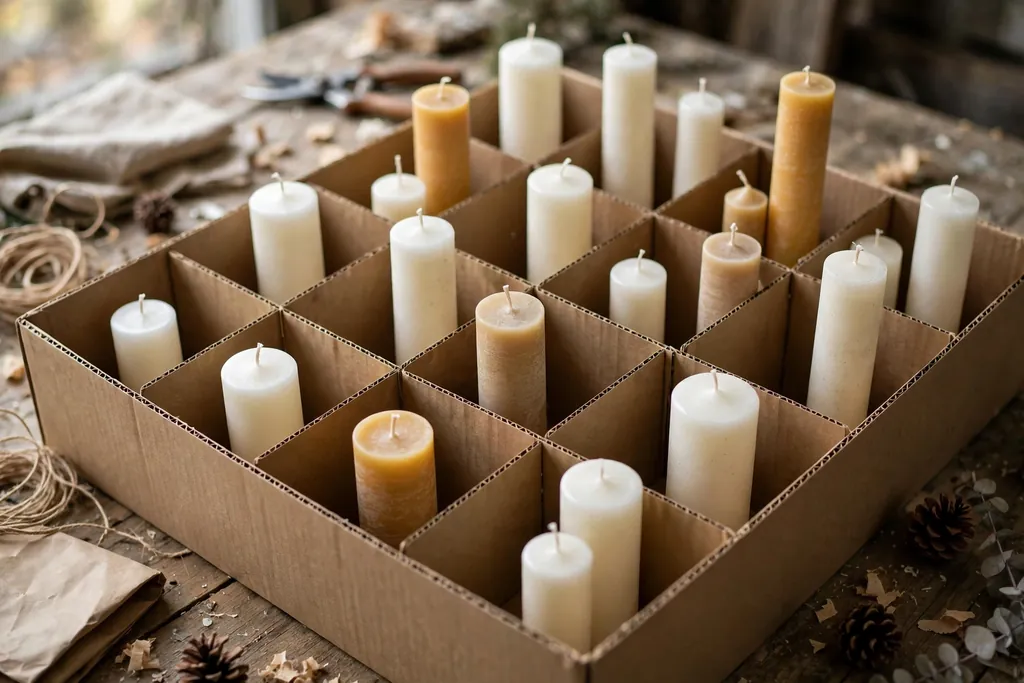
    Candles stored upright in a divided box with cardboard dividers.

    Store candles upright in a divided box, with tissue or cardboard dividers between pieces, in a cool place away from heat. Dividers stop candles from rubbing together and picking up color or scent from each other. Keep taper candles in a long, narrow box, and pillar candles in a box sized to their height.

    Label the box with candle sizes and colors, and keep matches and lighters in a separate pouch, not loose with candles. Check candles before packing, and set aside any candle with a cracked surface or bent wick. Never store candles in an attic that gets very hot, since heat can warp wax and melt scented pieces.

    12. Inflatable Decor Storage Bags

    Folded inflatable Christmas decoration packed loosely in a large storage bag.

    Dry inflatable decorations fully before packing, then fold them loosely into a large breathable bag with their blower and stakes in a separate pouch. Drying first stops damp fabric from marking or smelling in storage, and a loose fold stops seams from creasing in the same place each year. Keep the bag label facing out, with the inflatable size and theme noted.

    Store inflatable bags on a shelf, not under heavy bins, so fabric and seams stay intact. Coil cords loosely and tie them with a soft tie, rather than wrapping them tight around the blower. Before packing, check seams and zippers, and note any repair needed on the label for next season.

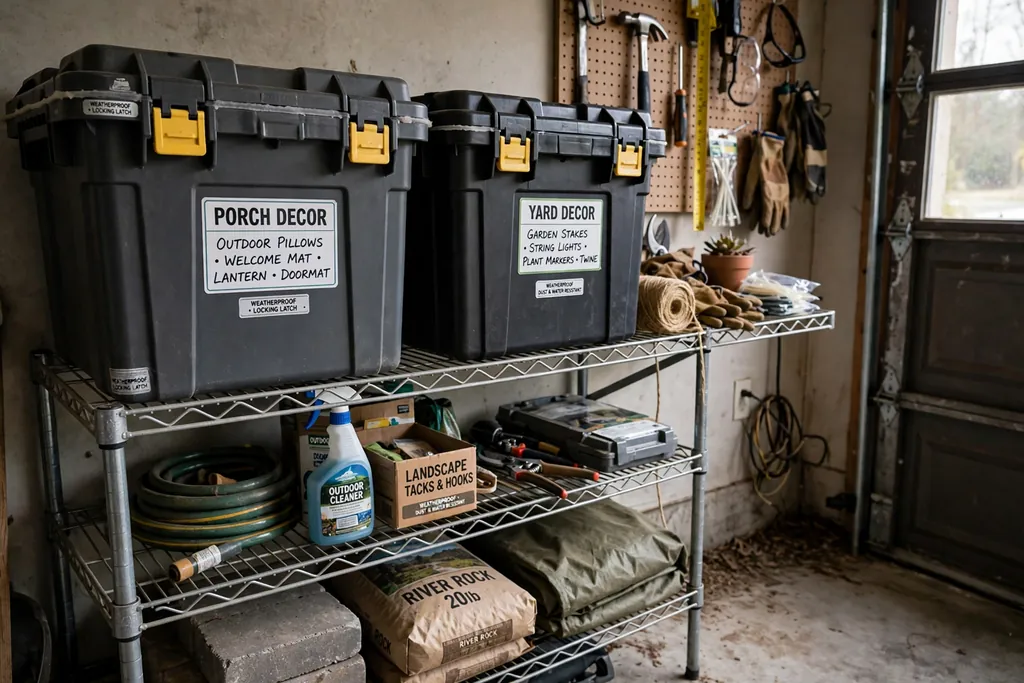
    13. Weatherproof Totes for Outdoor Decor

    Weatherproof latched totes labeled for porch and yard decor on a garage shelf.

    Use weatherproof totes with latched lids for porch, yard, and patio decorations, and keep them in a garage or shed where rain cannot reach them. A latched tote keeps dust, pests, and damp air away from outdoor pieces, and it stacks neatly on a garage shelf. Choose totes with handles that hold when the tote is full.

    Label outdoor totes by area, such as front porch or backyard, and keep stakes, clips, and extension cords in a small pouch inside the tote lid. Clean outdoor pieces before packing, and dry them fully so soil and damp do not stay in the tote. Place heavier totes low on a shelf, and lighter totes on top.

    14. Garland Bags Hung on Hooks

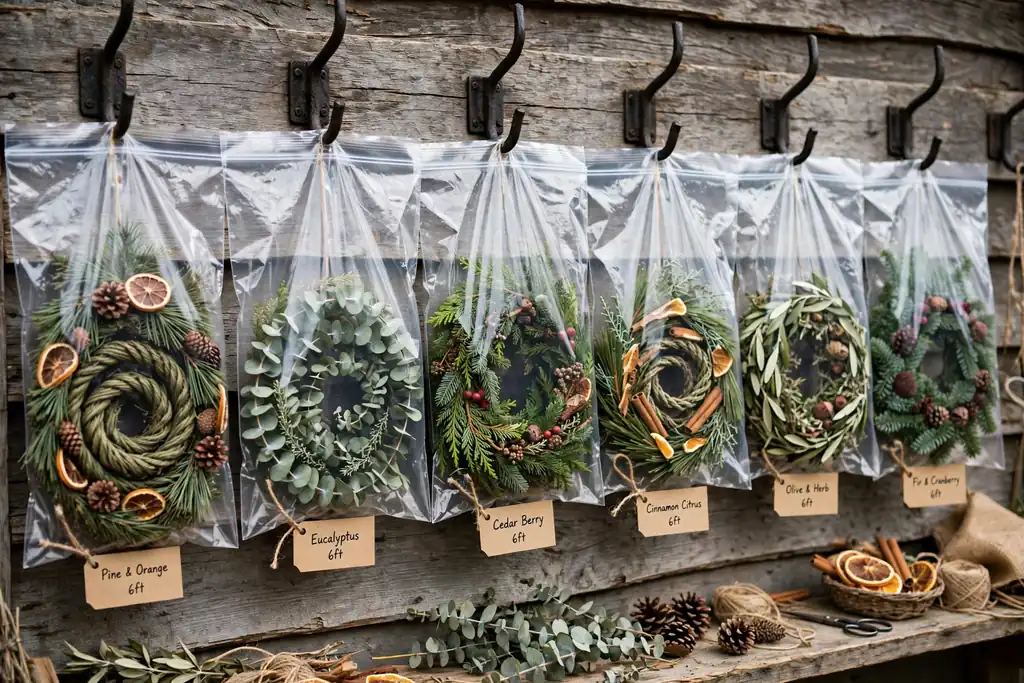
    Garland coils in clear zip bags hung from sturdy hooks on a wall.

    Place each garland in a large zip bag, coiled loosely, and hang the bag from a sturdy hook on a wall or closet rod. Hanging bags use wall space that bins cannot use, and they keep garlands from getting crushed under other boxes. A clear bag also shows the garland color and length at a glance.

    Label each bag with the garland length and material, such as pine garland or bead garland. Keep bags away from heat sources and sharp hooks that could snag branches. Do not hang more than one heavy garland per hook, and check hooks each season for loosening in drywall or wood.

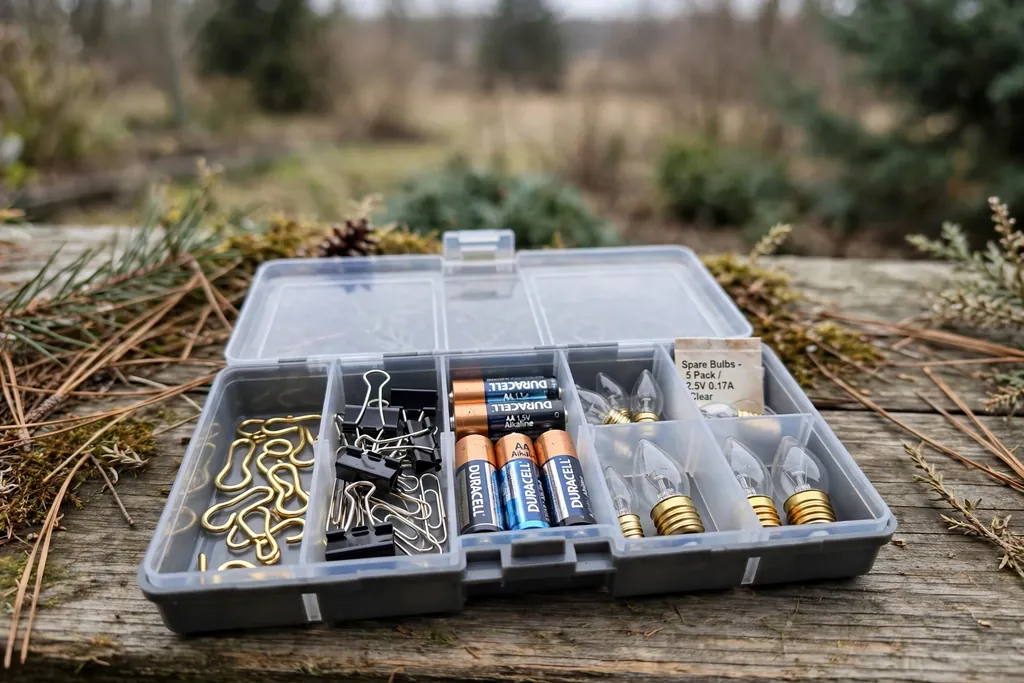
    15. A Small Parts Kit Box

    Small divided kit box with ornament hooks, clips, batteries, and spare bulbs.

    Keep ornament hooks, clips, batteries, timers, and spare bulbs in one small divided kit box, with each part type in its own section. A kit box stops small pieces from scattering across several bins, and it saves time when a hook bends or a timer battery runs out. Add a few spare ornament caps and ribbon loops to the kit as well.

    Label the kit box clearly, and store it with the ornament bins, so it comes out with the first decorations each season. Check the kit before packing, and replace bent hooks and dead batteries. Keep the kit box shallow, so small parts stay visible and easy to reach.

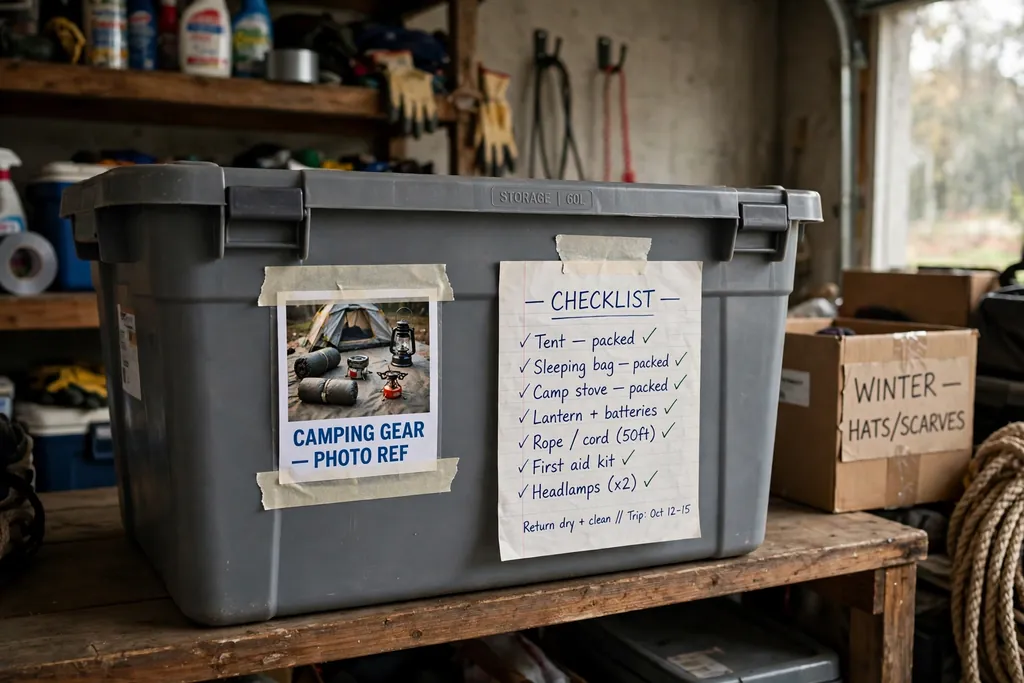
    16. A Photo Label and Inventory System

    Labeled storage bin with a photo label taped to the outside and a written list.

    Photograph each bin as you pack it, and tape a small photo to the outside of the bin or keep the photos in a folder on your phone. A photo label shows contents faster than a written list alone, and it helps other family members find the right bin without opening every lid. Number each bin, and match the number to a short written list.

    Keep the list simple: bin number, room, and main items. Update the list when a piece moves to a new bin, and keep one copy with the bins and one copy in the house. At the end of each season, check the list against the bins on the shelf, so a missing bin shows up before next December.

    17. Shelf Zones for Each Decoration Group

    Storage shelves divided into labeled zones for ornaments, lights, trees, and linens.

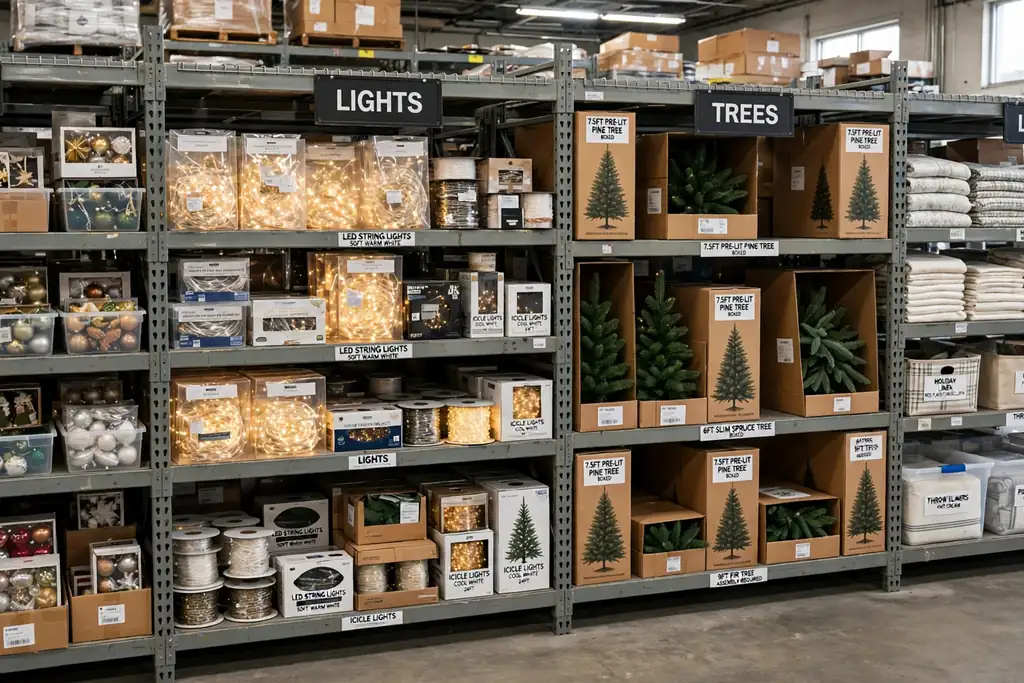
    Set up shelf zones in the attic, garage, or closet, with one zone for ornaments, one for lights, one for trees and wreaths, and one for linens and paper. Zones stop bins from drifting across shelves during the year, and they make unpacking faster, since each group has a set place to return to. Use shelf labels or colored tape to mark each zone edge.

    Place the most used zones at easy reach height, and less used zones higher or lower. Keep a clear path to each zone, and leave a small empty space on each shelf for a new bin. Review zones once a year, and move a zone if its bins no longer fit the shelf depth or height.

    18. Under Bed Flat Bins for Skirts and Flat Pieces

    Low flat storage bin with a folded tree skirt sliding under a bed.

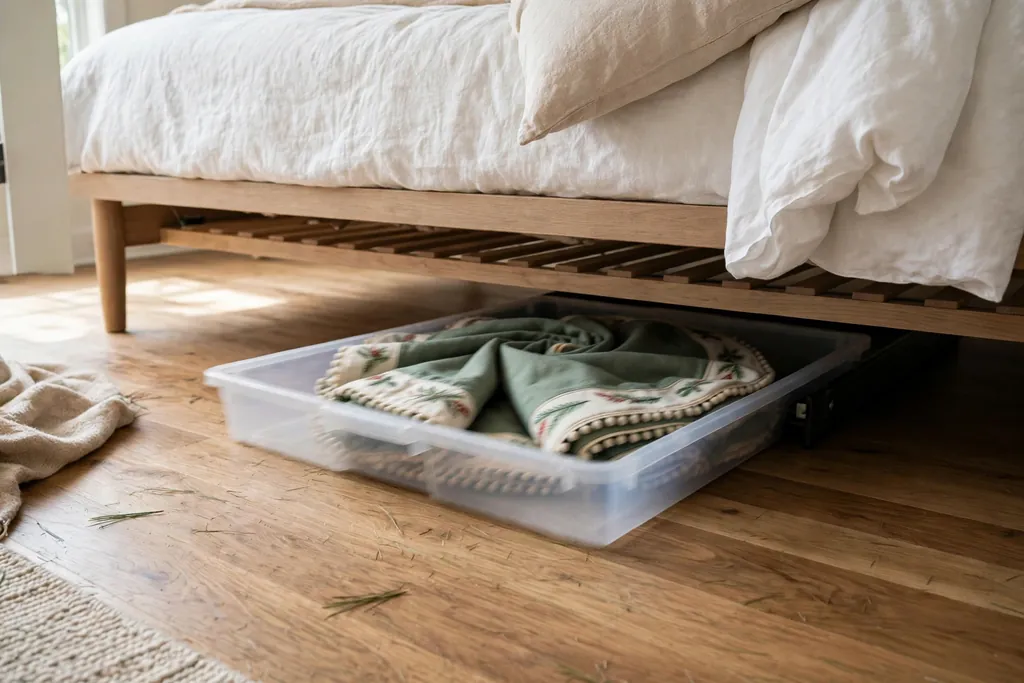
    Use low, flat bins under a bed for tree skirts, wall hangings, and other flat decorations that crease in a tall bin. Flat bins keep skirts smooth, use space that often goes unused, and keep flat pieces apart from heavy ornament boxes. Choose bins with wheels or handles, so they slide out without lifting.

    Label each flat bin on its front edge, with the skirt size or hanging type noted. Fold flat pieces loosely with tissue between layers, and keep the bin lid closed to stop dust. Check under bed bins once a year for damp air, and move them to a shelf if the floor area stays damp.

    19. A Keepsake Box for Handmade and Heirloom Pieces

    Keepsake box with tissue wrapped handmade ornaments and a handwritten note inside.

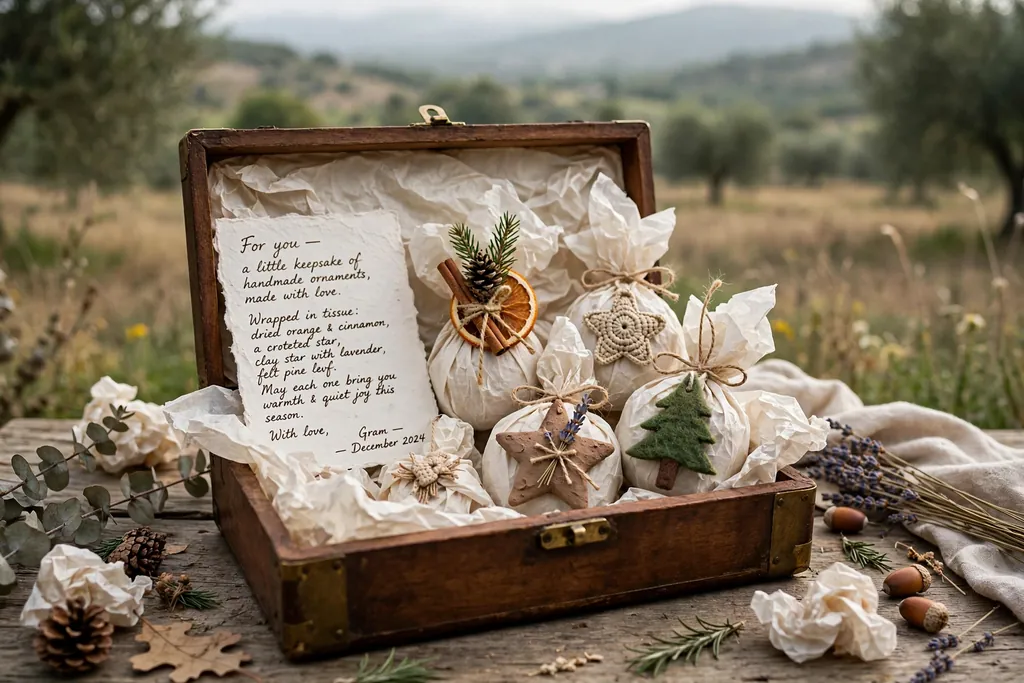
    Keep handmade ornaments, family heirlooms, and pieces with a personal story in one clearly marked keepsake box, with each piece wrapped alone in tissue. A separate keepsake box stops fragile, valued pieces from mixing with everyday decorations, and it tells family members to handle that box with extra care. For more ideas on caring for older pieces, see the vintage Christmas decor guide.

    Label the keepsake box on all sides, and add a short note inside naming each piece and who made or gave it. Store the keepsake box at easy reach height, not at the top of a tall stack, so it never falls during unpacking. Check the box once a year, and update the note when a new keepsake joins the collection.

    Conclusion

    Christmas decoration storage works best when each group has its own container, its own label, and its own place on a shelf. Divided boxes protect ornaments, bags protect wreaths and trees, reels stop light tangles, and rolls keep linens smooth. Start with one group at a time, photograph each bin as you pack it, and store bins in a cool, dry place off the floor. With a clear system in place, next December starts with decorations that are safe, easy to find, and ready to use.

    FAQs

    How should I store Christmas ornaments so they do not break?

    Store Christmas ornaments so they do not break by wrapping each piece alone in tissue and placing it in its own cell in a divided box. Keep heavier ornaments at the bottom, store the box upright, and do not stack heavy bins on top of ornament boxes.

    What is the best way to store Christmas lights?

    The best way to store Christmas lights is to wind each strand onto its own reel or cord winder and label it with length, color, and room. Reels stop tangles, make testing faster next season, and keep plugs and strands from crushing each other in a shared bin.

    How do I store a wreath without crushing it?

    Store a wreath without crushing it by placing it flat in its own padded wreath bag or hard case, with its bow and berries facing up. Hang the bag from a sturdy hook or place it on a shelf where no heavy box presses on it, and label the bag with the wreath style and room.

    Where should I store Christmas decorations?

    Store Christmas decorations in a cool, dry place, such as a closet shelf, a garage shelf, or an attic with steady temperature, with bins off the floor. Avoid damp basements, very hot attics, and spots near heat sources, since damp air and heat can damage fabric, wax, and painted pieces.

    How do I label Christmas storage bins so they are easy to find?

    Label Christmas storage bins so they are easy to find by writing large, plain labels on two sides of each bin, with the room and main contents named. Add a photo of the bin contents or a short list inside the lid, and number bins to match a simple inventory list kept with the bins.

    What should I do with Christmas decorations I no longer use?

    For Christmas decorations you no longer use, sort them into a keep box, a gift box, and a donation box at the end of the season. Keep pieces in good shape for donation, pass family pieces to relatives who want them, and recycle or discard broken pieces safely, so storage space stays clear for pieces you still use.


  • 23 Christmas Dining Table Decoration Ideas for Festive Gatherings

    23 Christmas Dining Table Decoration Ideas for Festive Gatherings

    Christmas decorations for a dining room table work best with one low centerpiece, a palette, and candlelight that lets guests see each other across the table. Start with a runner or bare wood, add greenery, candles, and ornaments, then set plates and napkins to match. The 23 ideas below cover classic, rustic, elegant, and simple tables for festive gatherings.

    Keep the centerpiece low and narrow, so sightlines stay open and serving dishes still fit. Pick two or three colors and repeat each one at least twice, in the runner, the napkins, and the centerpiece, so the table looks planned rather than crowded. For general table styling advice, see the fall table decor guide, and for a rustic room behind the table, see the farmhouse decor guide.

    Key Takeaways

    • Keep the centerpiece low and narrow, so guests can see each other and serving dishes still fit.
    • Pick a palette of two or three colors and repeat each color at least twice across the table.
    • Start with textiles: a runner, napkins, and placemats carry most of the seasonal color and wash easily.
    • Use one main centerpiece per table, not several competing clusters, and leave empty space at each place.
    • Choose candlelight with care: keep flames clear of greenery, fabric, and paper, and use flameless candles near children or dried material.
    • Set plates, glasses, and cutlery first, then add decor around them, so the table still works for a meal.

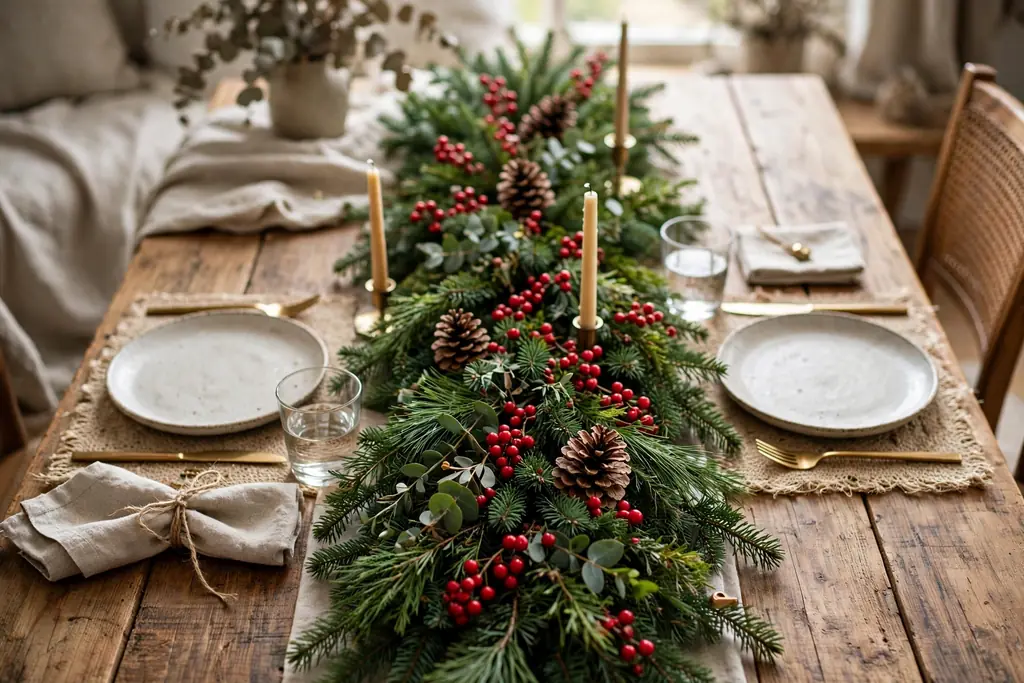
    1. Evergreen Garland Runner with Pinecones

    Dining table with an evergreen garland runner, pinecones, and small red berries down the center.

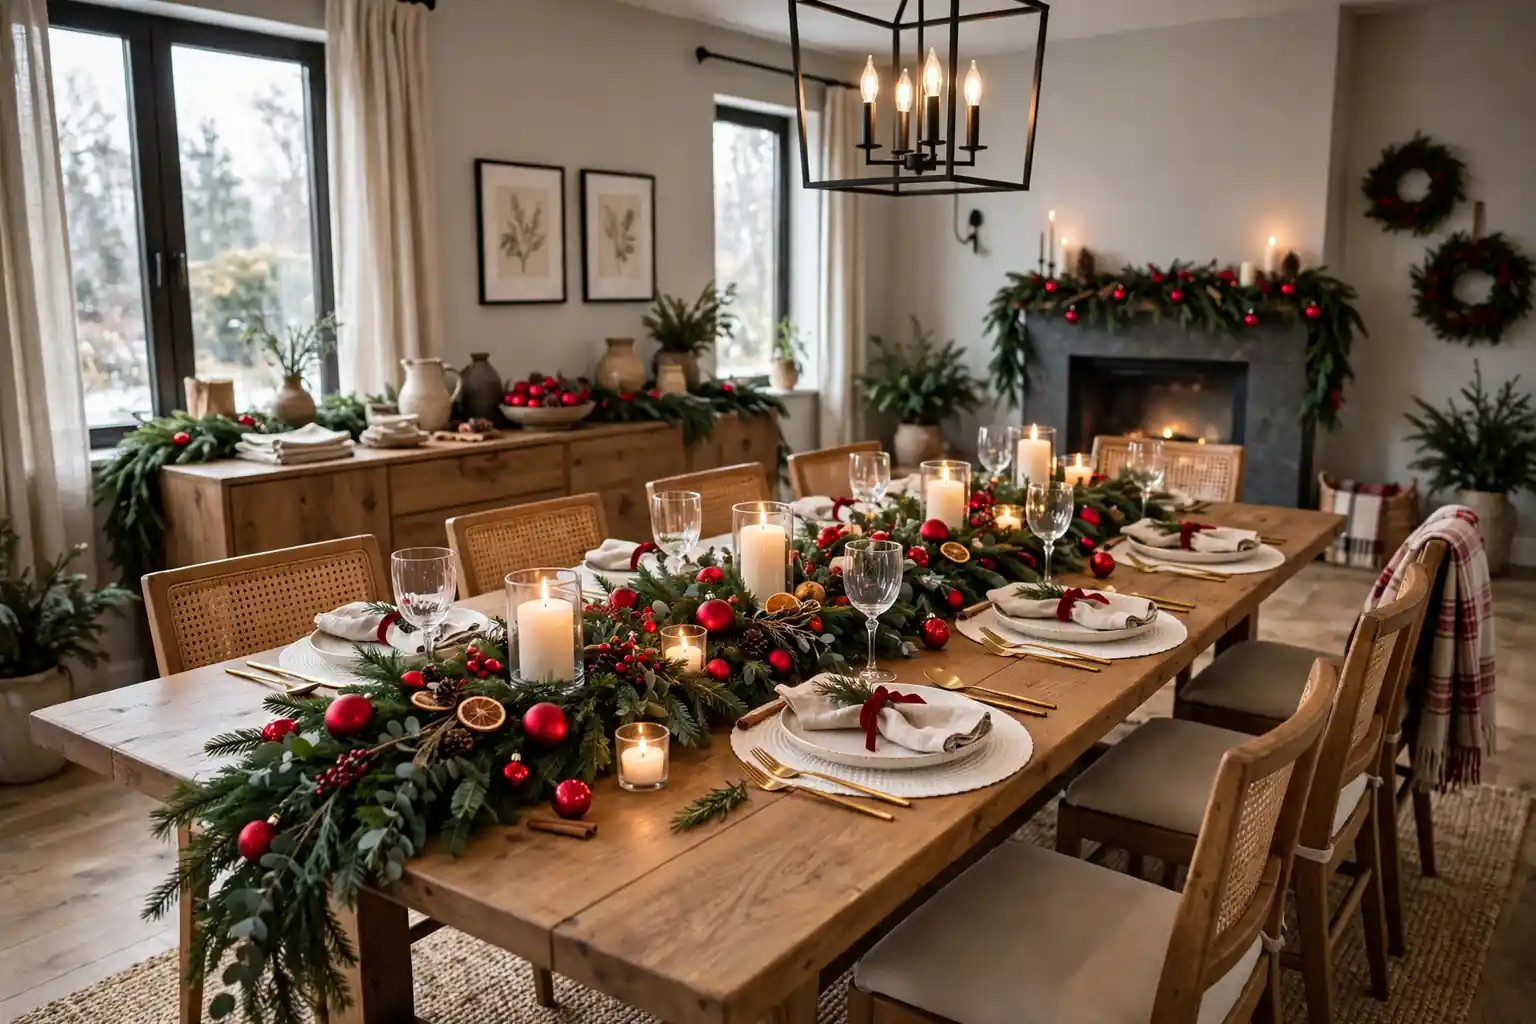
    Lay a fresh or faux evergreen garland down the center of the table, letting it curve gently rather than running in a stiff straight line. Tuck pinecones, small red berries, and a few gold ornaments into the garland, and keep the whole runner low, so guests can talk across it. This is the most flexible Christmas table base, since it suits almost any plate color.

    Trim the garland to fit the table, leaving room at each end for serving dishes. Shake fresh garland outdoors before laying it out, and keep real flames clear of dry needles. If needles shed, switch to a faux garland you can dust and reuse, and add a few fresh sprigs on top for scent.

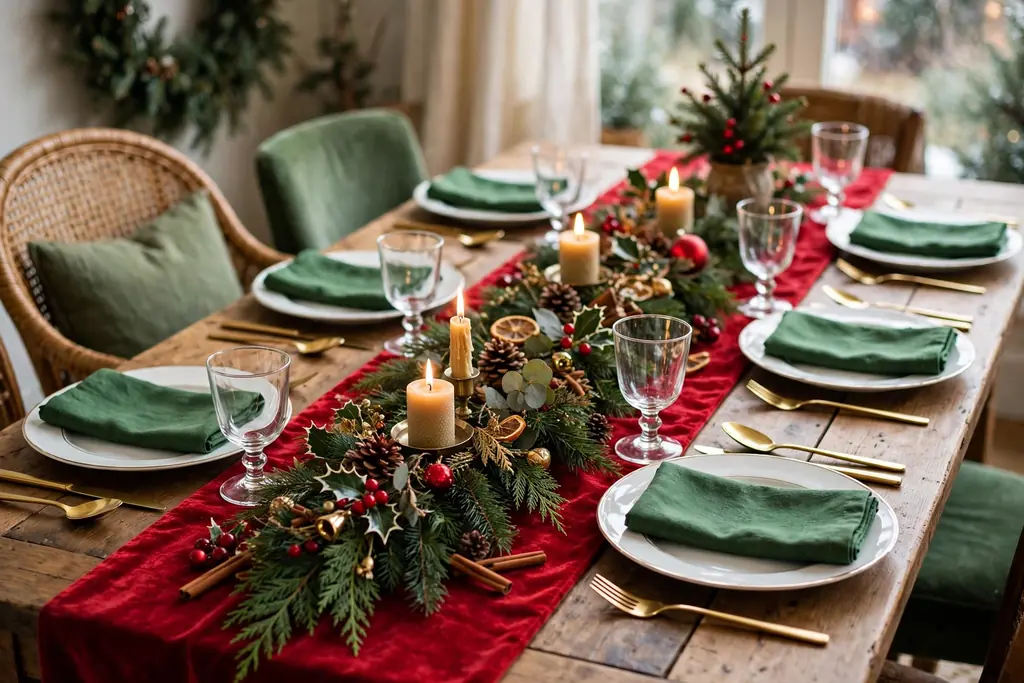
    2. Classic Red and Green Traditional Table

    Classic red and green Christmas dining table with a red runner, white plates, and green napkins.

    Set a classic red and green table with a plain red runner, white plates, green napkins, and a centerpiece of red ornaments, green garland, and white candles. The familiar colors read as Christmas at once, and they suit a room with wood furniture and warm light. Keep the red to the runner, napkins, and ornaments, so the table does not feel heavy.

    Use one shade of red through the table, rather than mixing bright red, burgundy, and pink. Add a thin gold or cream accent, such as a ribbon tied around each napkin, to soften the contrast. This palette works well for a large family gathering, where the table needs to feel festive from across the room.

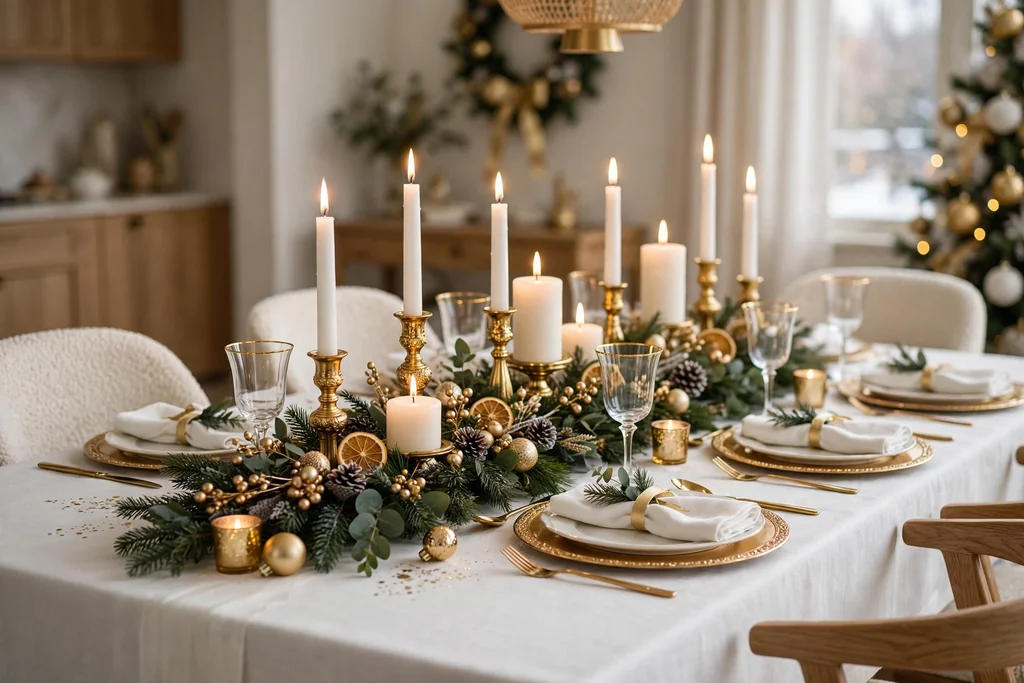
    3. White and Gold Elegant Tablescape

    Elegant white and gold Christmas dining table with gold chargers and white candles in gold holders.

    Dress the table in white and gold for a calm, elegant Christmas meal. Use a white tablecloth, gold chargers, white plates, and gold rimmed glasses, with a low centerpiece of white candles in gold holders and a few gold ornaments on greenery. The pale palette suits a bright dining room and a formal menu.

    Vary the gold finishes only slightly, such as brushed gold holders with shiny gold ornaments, so the table stays settled. Keep napkins white or cream, folded simply, so the gold does the work. One soft accent, such as a sage sprig on each plate, stops the white and gold from looking flat.

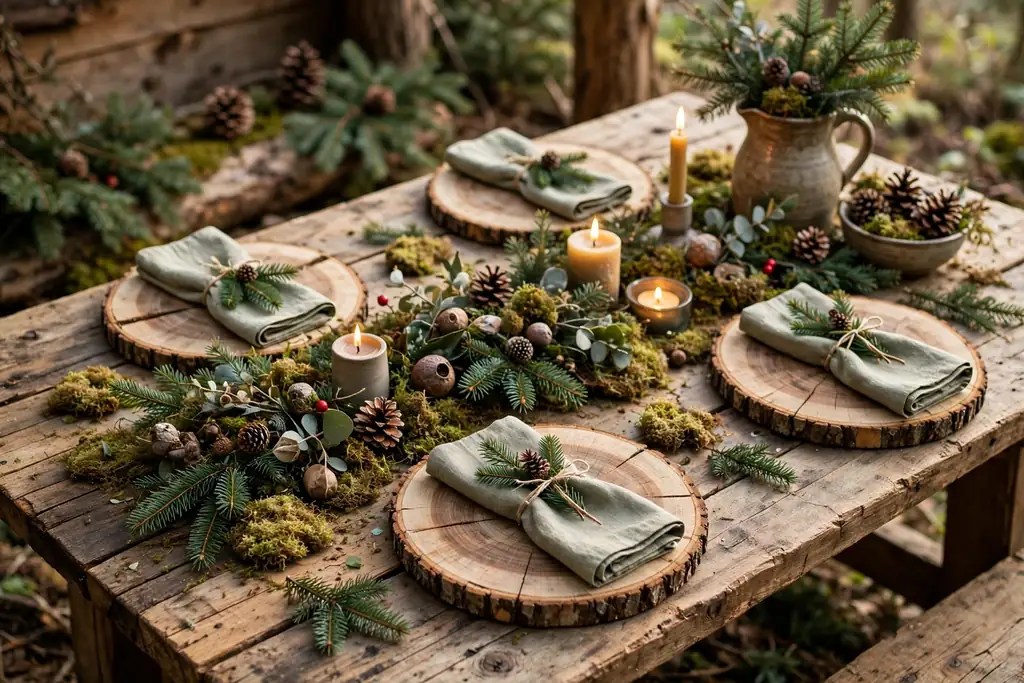
    4. Rustic Woodland Table with Wood Slices and Moss

    Rustic woodland Christmas dining table with wood slice chargers, moss, pinecones, and fir sprigs.

    Build a woodland table on bare wood or a linen runner, with wood slice chargers, moss, pinecones, and small fir sprigs down the center. The natural browns and greens suit a cabin style room, and the table feels gathered rather than formal. Use plain white or cream plates, so the wood and moss stay the focus.

    Choose wood slices with flat, sanded tops, so plates sit level. Keep moss in a shallow tray or on a board, so loose pieces do not reach plates or food. Wipe wood slices after meals and do not soak them, since wood can warp when left damp.

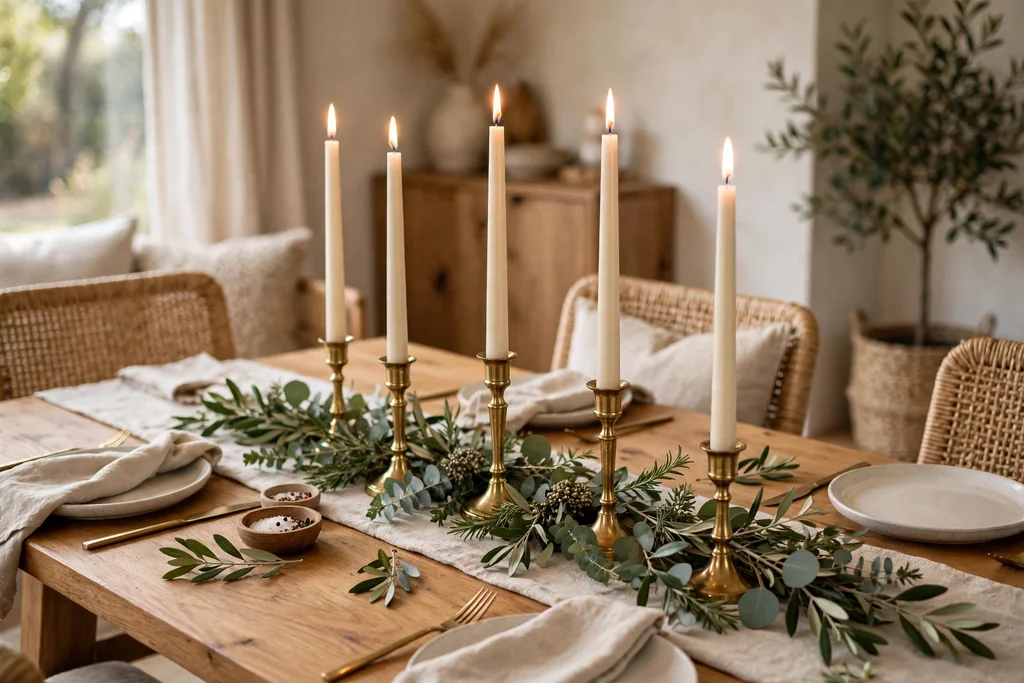
    5. Tall Taper Candles in Brass Holders

    Dining table with tall taper candles in brass holders over a short greenery runner.

    Set brass candlesticks of two heights down the center of the table, with cream or red taper candles in each, and keep the rest of the centerpiece simple, such as a short greenery runner at the base. Brass adds a warm metal note that suits both everyday dinners and larger gatherings, and candlelight softens the whole room in the evening.

    Check that candlesticks sit level and that tapers fit snugly, so candles do not lean or drip onto the table. Use a tray or small plates under the candlesticks if wax drips are a concern, and trim wicks before lighting. For a table with children, use flameless tapers in the same brass holders for the same look without a flame.

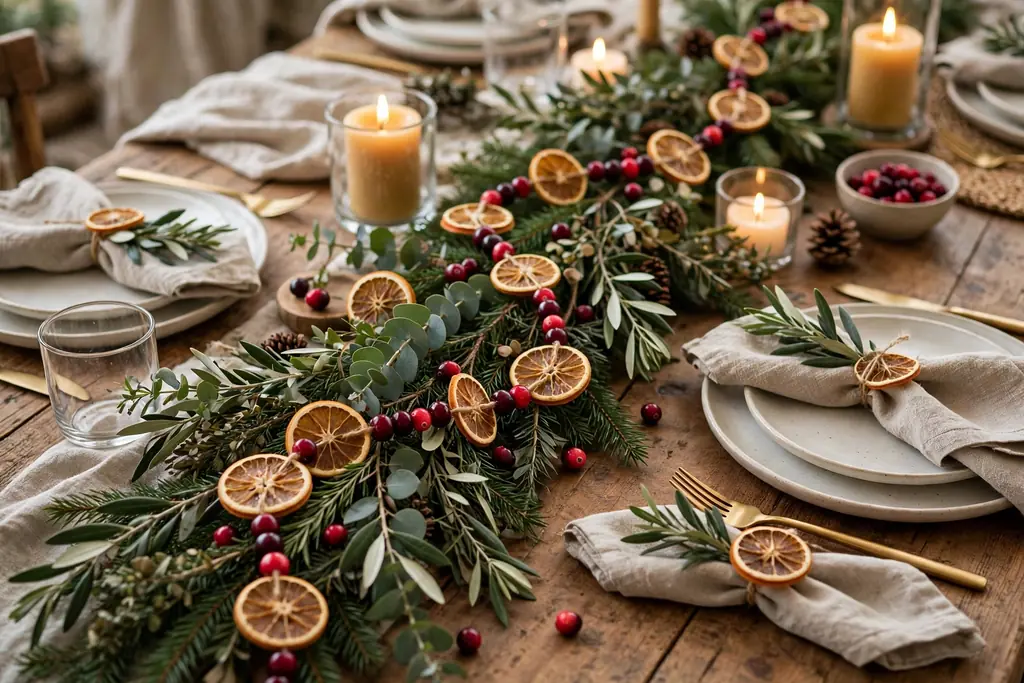
    6. Cranberry and Citrus Garland

    Dining table with cranberry and dried orange slice strands along a greenery runner.

    Thread fresh cranberries and dried orange slices onto twine or wire, and lay the strands along a greenery runner or drape them in loose loops down the table. The deep red cranberries and warm amber orange slices add natural color and a seasonal scent, and they suit a table with cream linen and wood accents.

    Use dried orange slices that are fully dry, so they do not bend or mark the table. Keep cranberry strands clear of plates and food, and compost fresh cranberries after the meal if they soften. If fresh cranberries are hard to find, use faux cranberry picks in the same deep red, tucked into greenery.

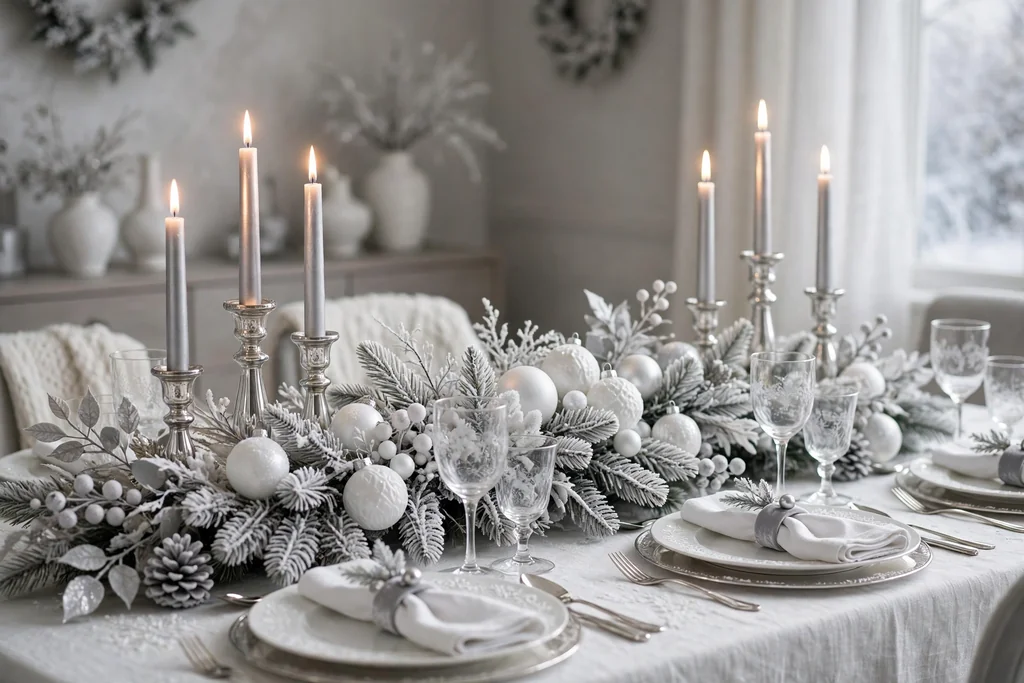
    7. Frosted Silver and White Winter Table

    Frosted silver and white Christmas dining table with frosted branches, white ornaments, and silver candles.

    Create a frosted winter table with white linen, silver chargers, clear glass, and a centerpiece of frosted branches, white ornaments, and silver candles. The cool palette suits a modern dining room and a snowy theme, and it pairs well with blue or grey walls. Keep the silver to chargers, candle holders, and a few ornaments, so the table stays bright rather than cold.

    Mix frosted and plain white pieces, so the table has texture as well as shine. Add one soft texture, such as a knit or velvet napkin, to warm the silver and glass. Wipe silver chargers after meals, since fingerprints show more on metal than on plain plates.

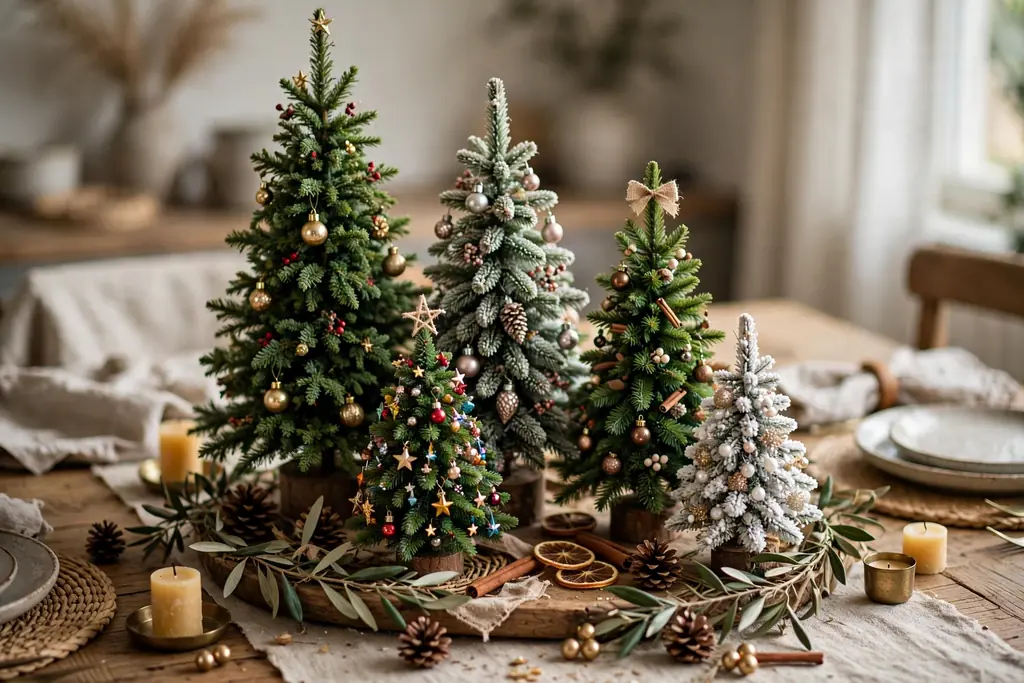
    8. Mini Christmas Tree Forest Centerpiece

    Dining table centerpiece of small mini Christmas trees in varied heights with tiny ornaments.

    Group three to five small potted or faux mini Christmas trees down the center of the table, in varied heights, with tiny ornaments and a string of small lights if the trees are faux. A tree forest gives instant height and shape without a large arrangement, and it suits a long table where one centerpiece would look lost.

    Keep the trees small enough to see over when seated, and set them on a tray or runner, so soil or needles do not reach the table. Space the trees unevenly, with a taller tree in the middle and shorter trees at the sides, for a natural group. After the meal, the trees can move to a sideboard or windowsill as a second display.

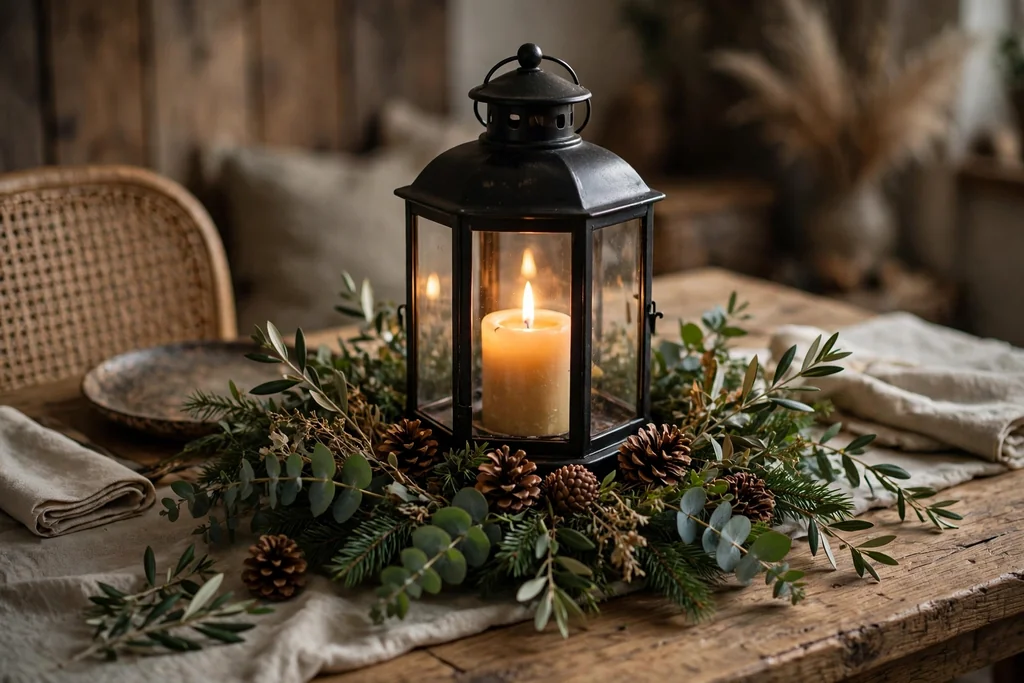
    9. Lantern Centerpiece with Candles and Greenery

    Dining table with a lantern centerpiece, candle glow, greenery, and pinecones at the base.

    Place one large lantern, or two smaller lanterns, in the center of the table, with a candle inside and greenery and pinecones around the base. Lanterns add a second layer of warm light at table level, and they make the centerpiece feel finished even before plates are set. Choose lanterns in wood and glass or black metal and glass, to match the room.

    Use battery candles inside closed lanterns, and real candles only in lanterns with open tops and stable bases. Keep lanterns clear of napkins, paper place cards, and serving dishes. Wipe the glass before the meal, so the light shows clearly, and keep spare batteries with the table decorations for quick changes.

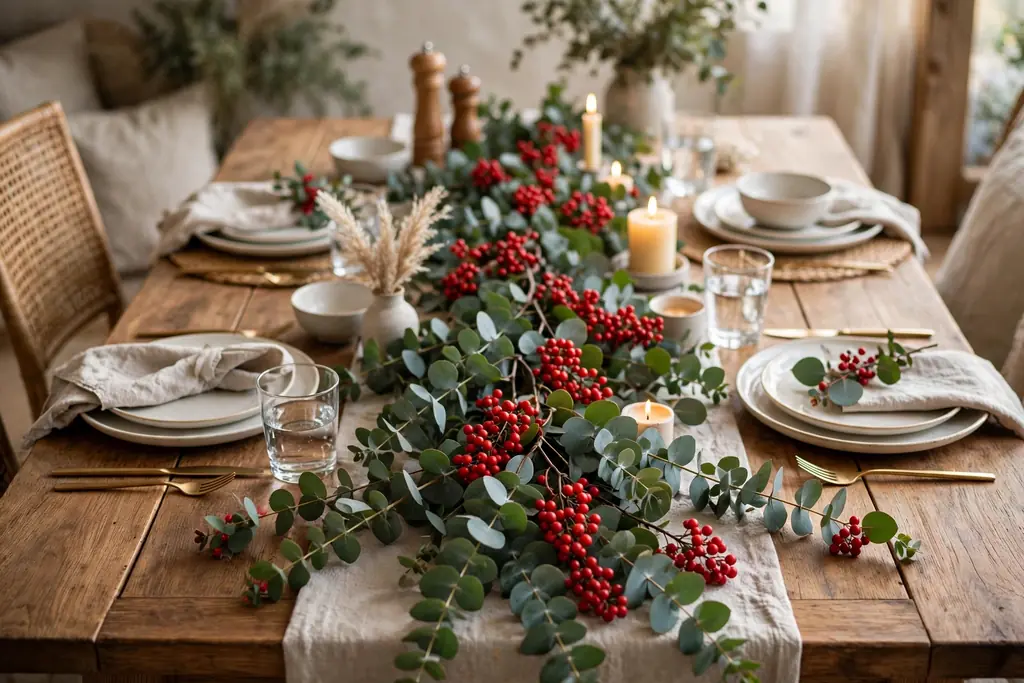
    10. Eucalyptus and Red Berry Runner

    Dining table with a eucalyptus runner and red berry clusters down the center.

    Lay a loose eucalyptus runner down the center of the table, then tuck clusters of red berries along it at uneven intervals. The green-grey leaves soften the table without adding height, and the red berries give a clear Christmas accent. This runner suits a table with white plates and gold or wood accents.

    Trim the eucalyptus so it stays inside the table edges and does not brush plates or glasses. If fresh stems dry out and shed, switch to faux eucalyptus you can wipe clean, or use short sprigs tucked into napkin rings instead of a full runner. Keep berry clusters clear of food, and use faux berries if small children will be at the table.

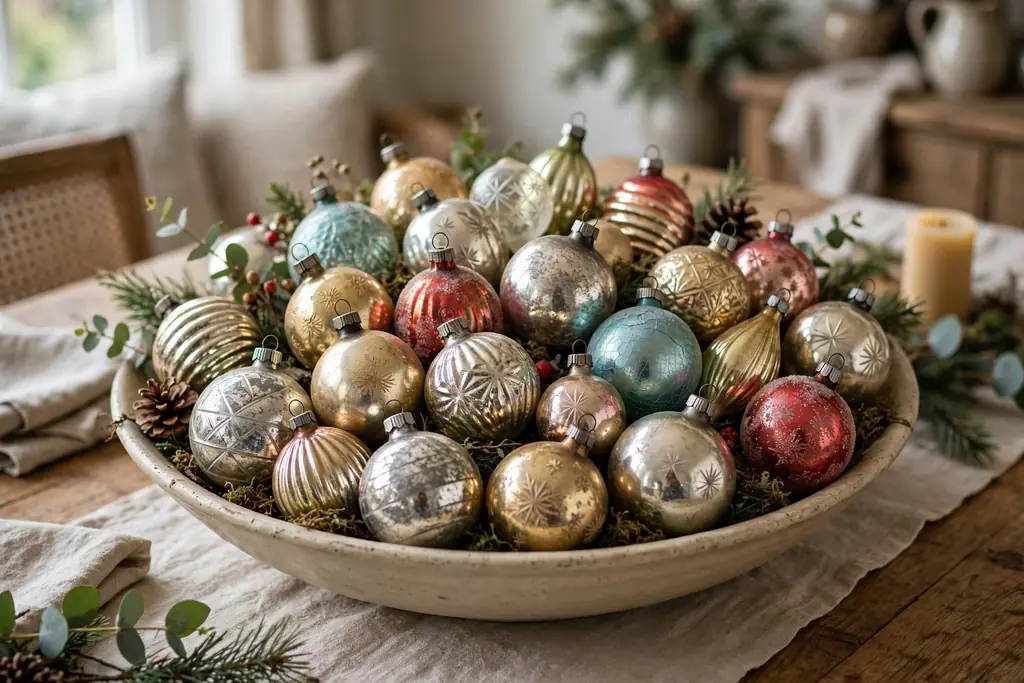
    11. Vintage Glass Ornaments in a Bowl

    Wide shallow bowl filled with vintage style glass Christmas ornaments as a dining table centerpiece.

    Fill a wide, shallow bowl or footed glass dish with vintage style glass ornaments in one palette, such as red and gold or silver and white, and set it in the center of the table. The bowl takes up only one spot, leaving the rest of the table free for plates and serving dishes, and the ornaments catch candlelight well in the evening.

    Choose ornaments large enough to show in a bowl, rather than small tree ornaments that sink out of sight. Set the bowl on a small mat if the table marks easily, and keep it low and wide rather than tall, so it does not block sightlines. At the end of the meal, the bowl can move to a sideboard in one step.

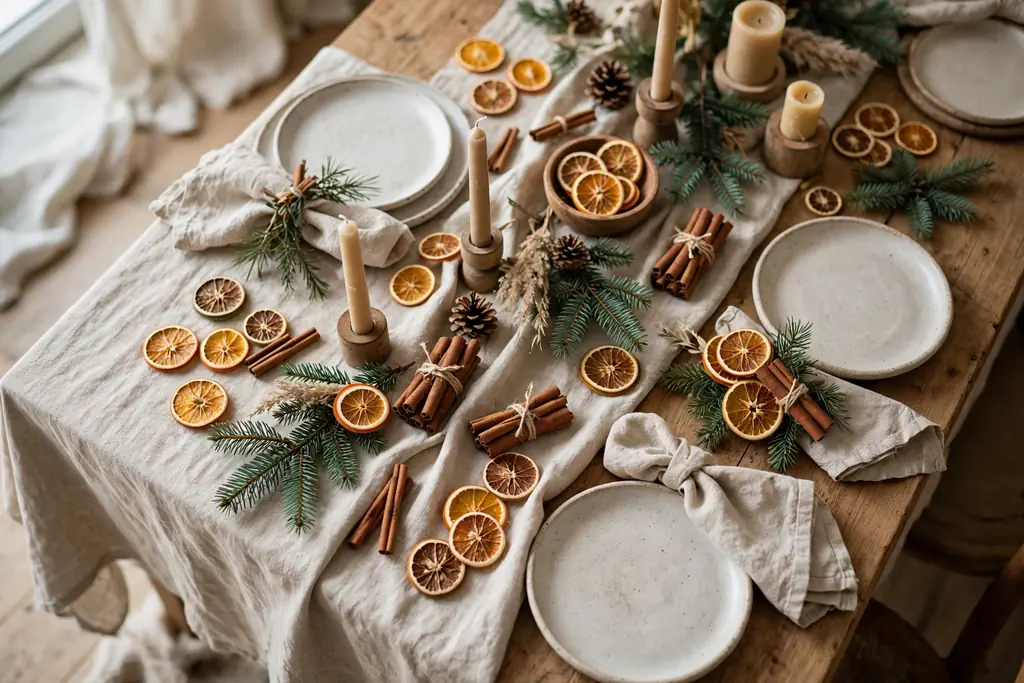
    12. Natural Linen with Dried Oranges and Cinnamon

    Natural linen Christmas dining table with dried orange slices, cinnamon sticks, and fir sprigs.

    Dress the table in natural linen, with a plain linen runner, cream napkins, and a centerpiece of dried orange slices, cinnamon sticks tied with twine, and fir sprigs. The muted browns, creams, and amber tones suit a quiet Christmas table, and the dried fruit and spice add a gentle scent near the table.

    Tie cinnamon sticks in small bundles of three or four, with a loop for hanging or laying flat. Keep dried oranges and cinnamon clear of plates and food, and replace dried slices each season, since they darken over time. This palette works well with wood plates or wood chargers and plain stoneware.

    13. Formal Gold Chargers with Red Napkins

    Formal Christmas dining table with gold chargers, white plates, and red cloth napkins.

    Set a formal table with gold chargers, white dinner plates, red cloth napkins folded in a simple rectangle, and a low centerpiece of white candles and greenery. The gold and red pairing reads as festive and formal, and it suits a Christmas dinner with a set menu and a dressed table.

    Fold napkins the same way at every place, and center each charger under its plate, so the table looks matched. Keep the centerpiece to one low group, so the formal settings stay the focus. Iron linen napkins before a gathering, since creases show more on a formal table than on a casual one.

    14. Buffalo Check Casual Family Table

    Casual family Christmas dining table with a red and cream buffalo check runner and wood chargers.

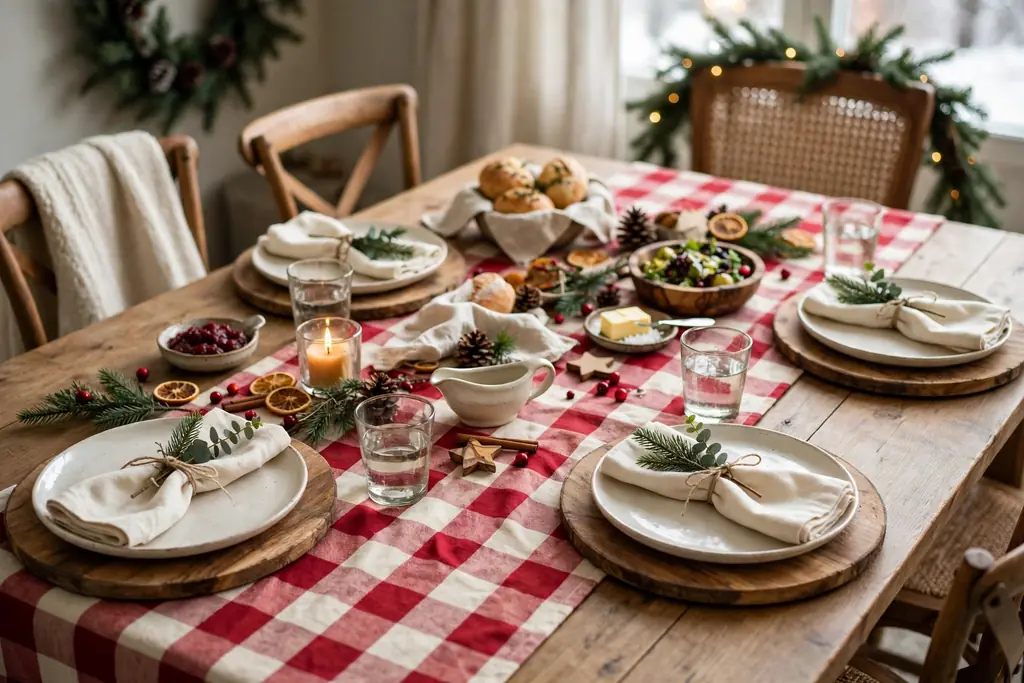
    Use a red and cream buffalo check runner or tablecloth for a casual family Christmas table, with plain white plates, wood chargers, and red or cream napkins. The large check gives a plain table an instant festive base, and it suits a family meal where the table needs to be easy to clear and wash.

    Keep the check scale in proportion to the table: a large check suits a long dining table, while a small check suits a round table. Use the check on the runner or the cloth, not both, so plates sit level and the pattern does not compete with itself. Wash the cloth or runner before the meal, and check for color transfer on light napkins.

    15. Farmhouse Burlap, Mason Jars, and Greenery

    Farmhouse Christmas dining table with a burlap runner, mason jars with candles, and fir sprigs.

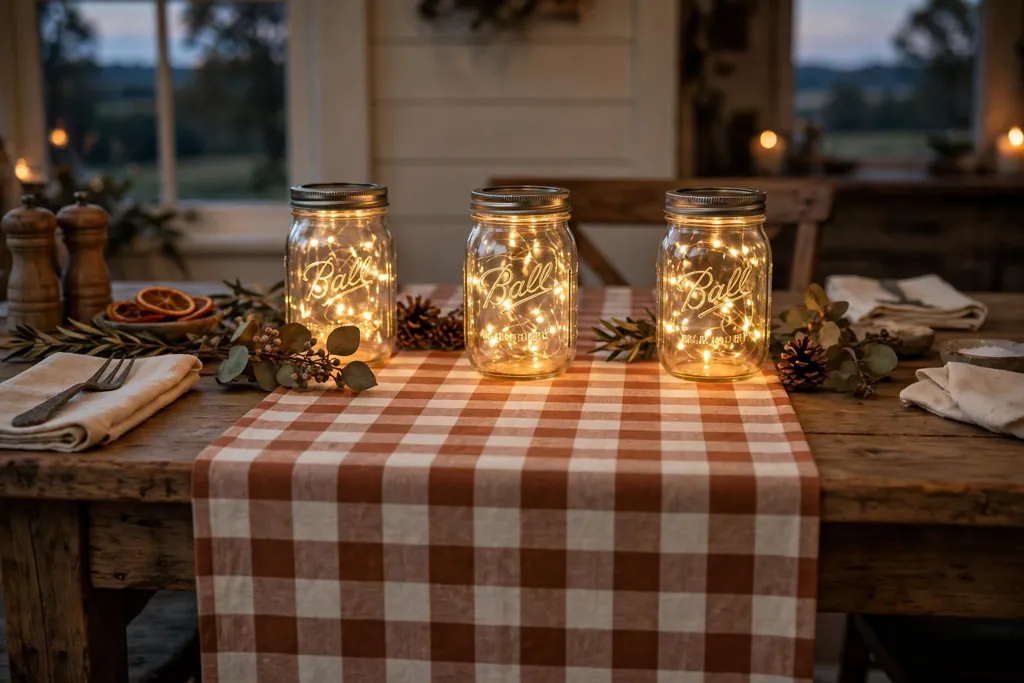
    Lay a burlap runner down the table, then set mason jars with battery candles and fir sprigs down the center, with pinecones at the base of each jar. Burlap adds texture without pattern, so it suits tables that already have patterned plates or colored glass, and the jars glow softly in the evening.

    Keep the jars short enough to see over, and set them on a small tray or wood board if the table surface marks easily. Use battery candles only inside narrow jars, since a real flame needs air and a safe holder. Shake the runner outside after the meal, since burlap sheds fibers, and wipe jars clean before storage.

    16. Blue and Silver Icy Table

    Icy blue and silver Christmas dining table with silver chargers, frosted branches, and blue candles.

    Dress the table in icy blue and silver, with a pale blue runner, silver chargers, white plates, and a centerpiece of silver ornaments, frosted branches, and blue candles. The cool palette suits a winter theme and a room with grey or white walls, and it offers a change from the usual red and green.

    Hold the blue to one shade, such as dusty blue or pale icy blue, and repeat it in the runner, napkins, and candles. Keep the rest of the table white and silver, so the blue reads as a clear accent. One warm note, such as wood chargers or cream napkins, stops the cool palette from feeling cold.

    17. Black and Gold Modern Table

    Modern black and gold Christmas dining table with black placemats, gold chargers, and gold candle holders.

    Set a modern Christmas table in black and gold, with a black runner or placemats, gold chargers, white plates, and a centerpiece of black candles in gold holders with gold ornaments on dark greenery. The dark base makes gold shine, and the look suits a modern dining room with simple furniture.

    Use black sparingly, on the runner or placemats only, and keep plates white, so food still looks clear on the table. Keep the centerpiece low and simple, since a dark palette can look heavy if it is also tall and crowded. Wipe black placemats after meals, since dust and crumbs show more on dark surfaces.

    18. Table Wreath Centerpiece with a Pillar Candle

    Dining table with a flat greenery wreath centerpiece and a pillar candle in a glass holder in the middle.

    Lay a flat greenery wreath in the center of the table, and set a single pillar candle in a glass holder in the middle of the wreath. A table wreath gives a clear focal point without the height of a vase arrangement, and it leaves the rest of the table free for plates and serving dishes. Add pinecones and red berries to the wreath for Christmas color.

    Choose a wreath sized to the table, wide enough to read as a centerpiece but narrow enough to leave room at each place. Keep the candle in a holder, clear of the greenery, and use a flameless pillar candle if the wreath is dried. After the meal, the wreath can move to a sideboard or hang on a wall as a second display.

    19. Tiered Stand with Ornaments and Greenery

    Dining table with a tiered stand filled with small ornaments, greenery sprigs, and candles.

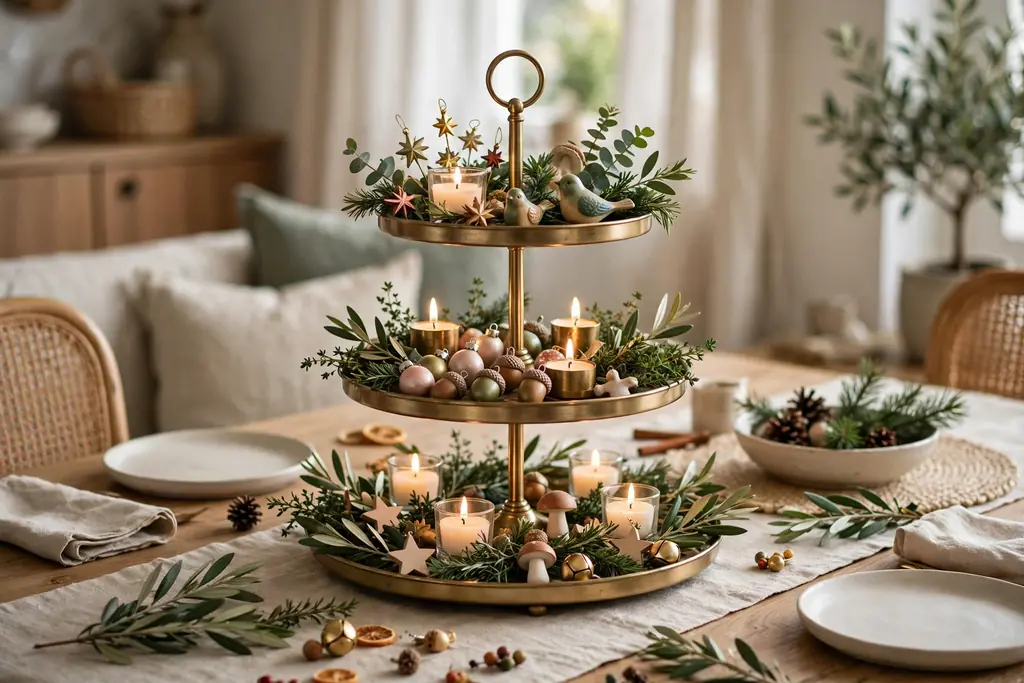
    Set a two or three tier stand at one end of the table or in the center of a long table, and fill it with small ornaments, greenery sprigs, and candles in holders, so the table gains height without blocking the center. A tiered stand also works for serving, with small bites or sweets on the tiers at a buffet style meal.

    Keep the stand stable and clear of the main serving path, and put heavier items on the bottom tier. If the stand will hold food, use it for food only, and set a separate decor stand for ornaments and candles. Wipe the tiers after use, since candle wax and greenery dust collect in the rims.

    20. Personalized Ornament Place Cards

    Christmas dining table place setting with a small ornament and a handwritten name card beside a plate.

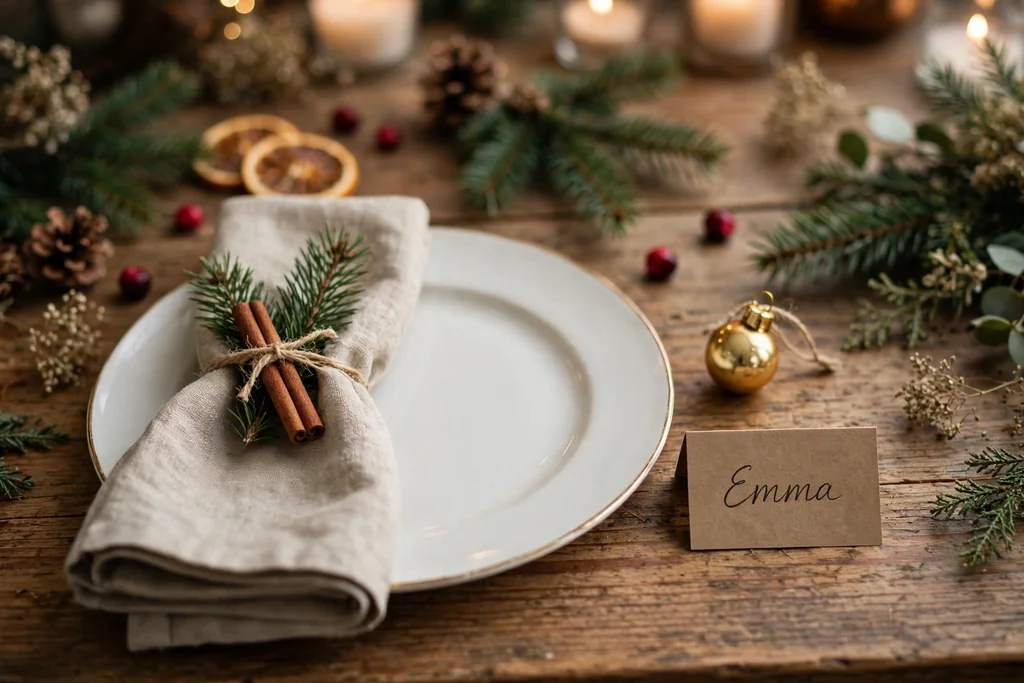
    Set one small ornament at each place, with a card tied to it showing the guest name, or use a flat ornament with the name written on it as the place card itself. This idea marks each seat, doubles as a small take-home piece, and adds a personal note to a gathering table without a large centerpiece.

    Choose ornaments small enough to sit beside a plate without crowding the glass. Write names in clear, large lettering, and keep the card short, since a long note will be read once and then set aside. For everyday meals, skip the names and use the ornaments alone as a simple place marker.

    21. Gingerbread House Centerpiece

    Dining table with a gingerbread house centerpiece on a board, fir sprigs, and pinecones around the base.

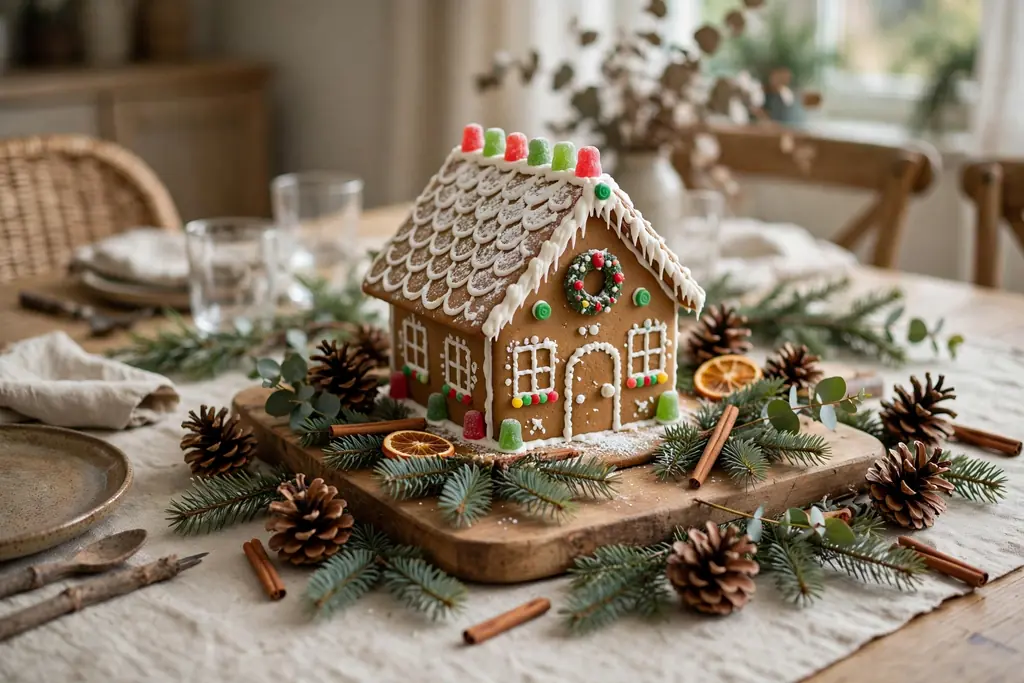
    Place a gingerbread house in the center of the table, on a board or tray, with a scatter of fir sprigs, pinecones, and small lights around the base. A gingerbread house gives a playful focal point that suits a family Christmas meal, and it can be eaten or kept as decor after the gathering, depending on how it was made.

    Set the house on a board, so crumbs and icing do not reach the table, and keep it clear of plates and glasses, so it does not get knocked during serving. Keep the house low and stable, and place it in the center of a long table or at one end of a round table, where guests can see it without leaning around it.

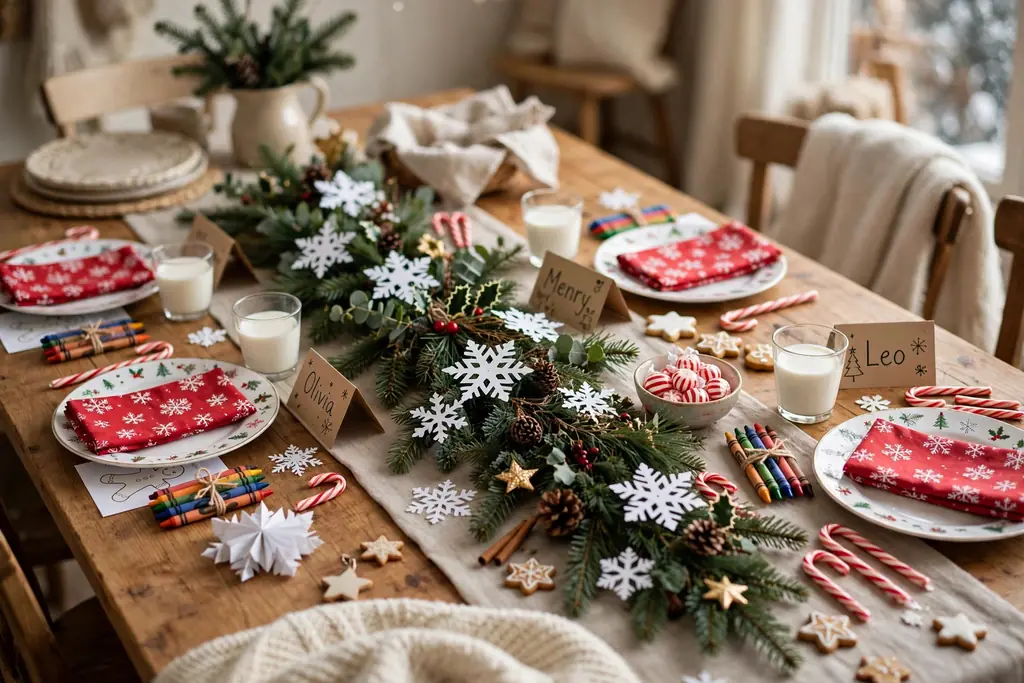
    22. Festive Kids Place Settings at the Family Table

    Family Christmas dining table with festive kids place settings, paper snowflakes, and small candy canes.

    Give children at the family table their own festive place settings, with a paper snowflake or felt tree at each place, a small candy cane tied with ribbon, and a simple paper place card they can color. Kids settings keep younger guests part of the main table, while the adult settings stay simple and clear.

    Keep kids pieces flat and light, so they do not crowd plates or glasses, and avoid small loose parts for very young children. Use washable placemats at kids places, so spills wipe clean, and keep candles and glass ornaments out of reach. After the meal, kids can take their paper pieces home as a small keepsake.

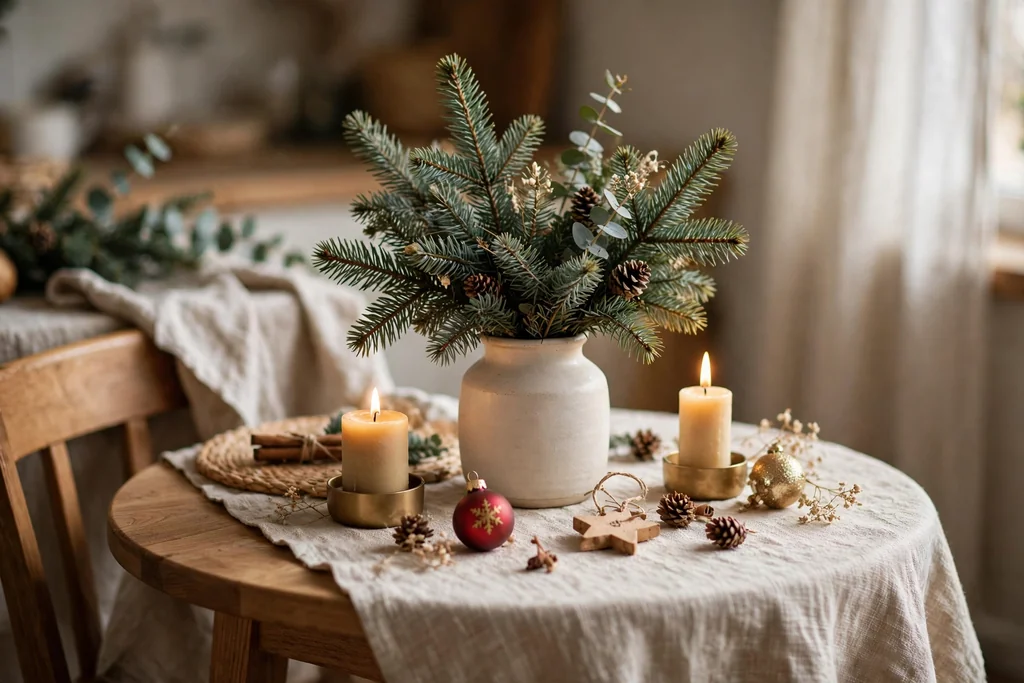
    23. Scaled Centerpiece for a Small or Round Table

    Small round Christmas dining table with a single vase of fir branches, two short candles, and a few ornaments.

    For a small or round table, use one scaled centerpiece instead of a long runner: a single vase of fir branches and berries, two short candles in holders, and a few ornaments at the base. The small group gives Christmas color and light without crowding a table where space is already tight.

    Keep the vase narrow and the branches trimmed below eye level when seated, so guests can talk across the table. Leave room for one serving dish in the center, or plan to serve from the kitchen, so the small table still works for a meal. One color accent, such as red berries or gold ornaments, is enough on a small table.

    Conclusion

    Christmas decorations for a dining room table work best when one low centerpiece, a small palette, and candlelight lead the table. Start with a runner or bare wood, add greenery and candles, then set plates and napkins to match, and leave room for serving dishes and conversation. Choose the ideas that fit your table size, your room, and your gathering, and let the rest wait for another season. A table that is easy to sit at, see across, and clear after the meal will feel more festive than a crowded display.

    FAQs

    What are good Christmas decorations for a dining room table?

    Good Christmas decorations for a dining room table are a low centerpiece, a runner or tablecloth, candles in safe holders, and napkins and place settings in a small, repeated palette. They add festive color and light while leaving room for plates, glasses, and serving dishes, and keeping sightlines open across the table.

    How do I keep a Christmas table centerpiece low enough for conversation?

    Keep the centerpiece below eye level when guests are seated, use a flat runner, a low bowl, a table wreath, or short candles, and avoid tall vases in the center of the table. Place taller pieces, such as a branch arrangement or a tiered stand, at one end of a long table or on a sideboard, so the center stays open.

    What colors work best for a Christmas dining table?

    Classic red and green, white and gold, silver and white, rustic wood and green, and icy blue and silver all work well for a Christmas dining table. Pick two or three colors, repeat each one at least twice in the runner, napkins, and centerpiece, and keep plates white or cream, so the palette stays settled.

    How do I decorate a Christmas table on a small budget?

    Start with a runner or bare wood, a greenery garland or loose fir sprigs, candles you already own, and cloth napkins in one festive color. Add pinecones, dried orange slices, or ornaments from your tree box, and use one personal detail, such as a simple place card, rather than buying a full new table set.

    Should I use real or flameless candles on a Christmas table?

    Use real candles only in stable holders, clear of greenery, fabric, and paper, and never leave them burning unattended. Use flameless candles near children, near dried greenery or paper, inside narrow jars or lanterns, or on a table where guests will lean across the centerpiece, for the same glow without a flame risk.

    How do I decorate a small or round Christmas dining table?

    Use one scaled centerpiece, such as a single vase of fir branches, two short candles, and a few ornaments at the base, and keep the rest of the table plain. Leave room for serving dishes or plan to serve from the kitchen, and use one color accent, so a small table looks festive without feeling crowded.


  • 21 Cozy Christmas Living Room Ideas with Warm and Simple Touches

    21 Cozy Christmas Living Room Ideas with Warm and Simple Touches

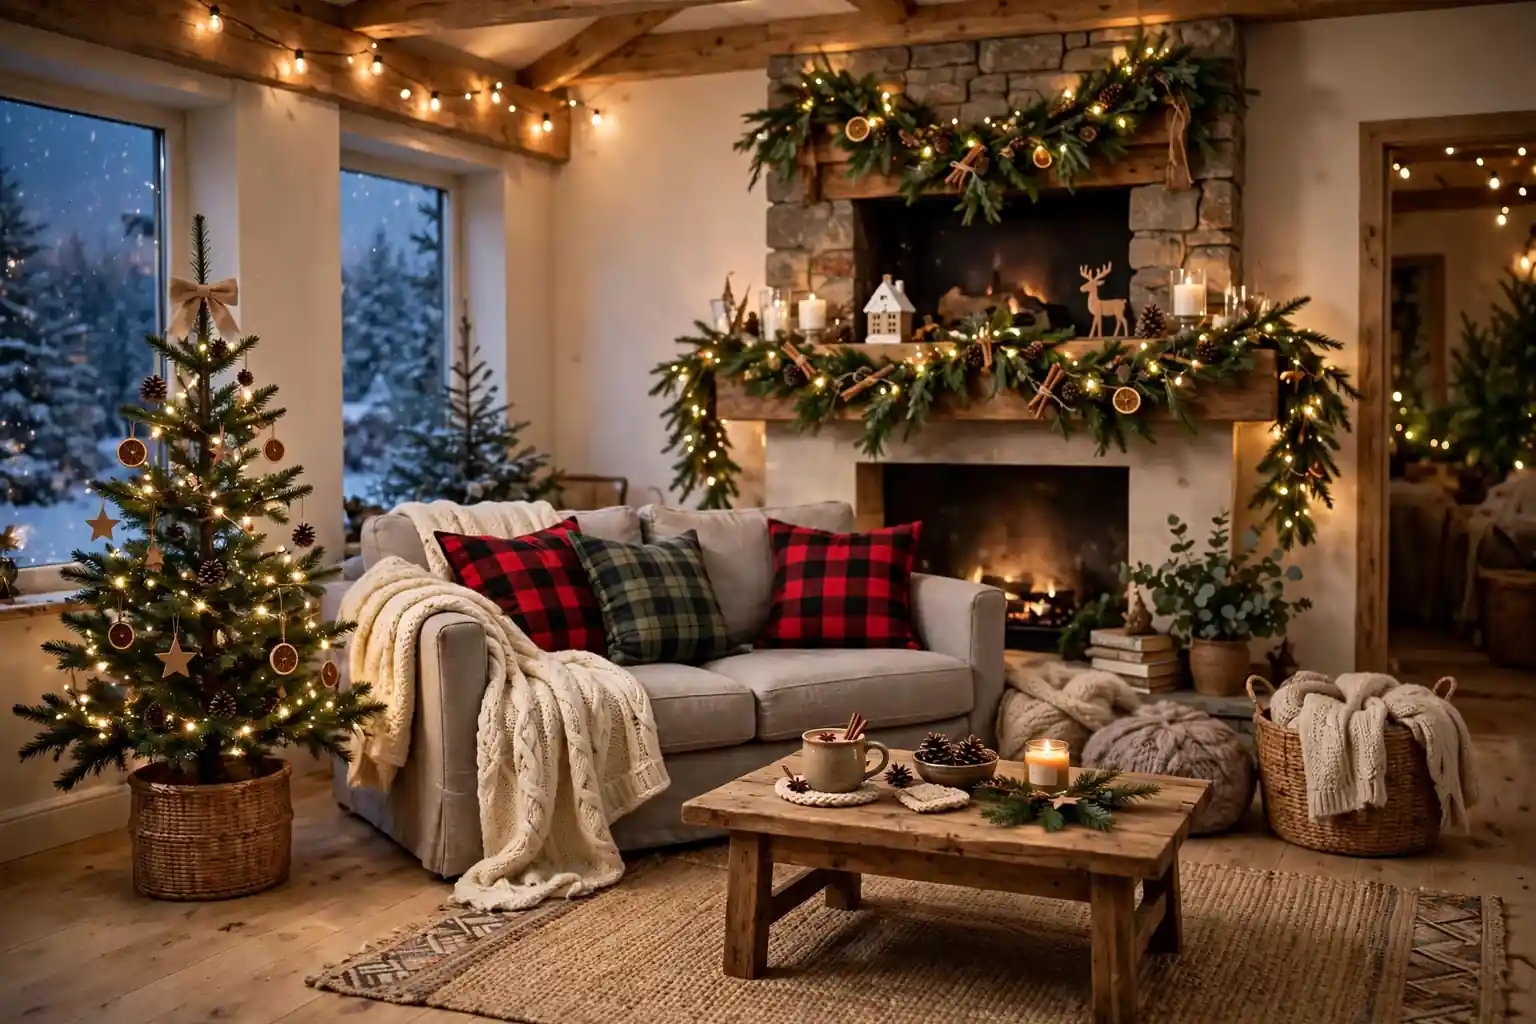
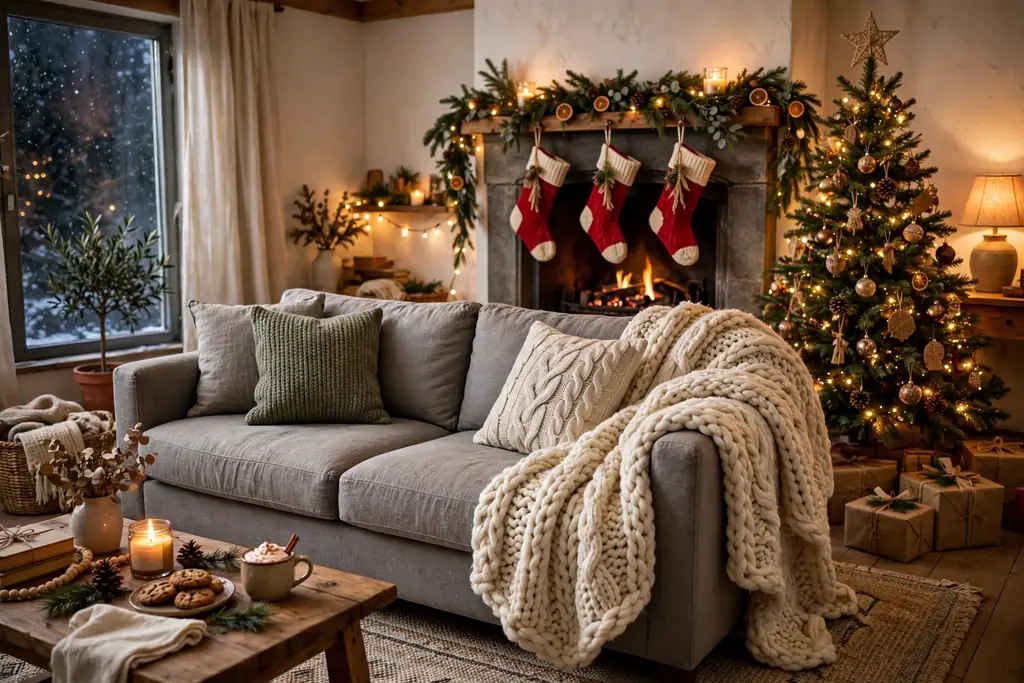
    A cozy Christmas living room uses warm white lights, soft throws, natural greenery, and a small set of simple decorations to make the room feel calm and inviting. Start with lighting and greenery, add textiles and a few meaningful pieces, keep the palette to two or three warm colors, and leave space for everyday living.

    Pick a palette first, such as cream, muted red, and soft green, or cream, brown, and warm gold, and repeat it in cushions, throws, and small decorations. A cozy room does not need a decoration on every surface. Choose one focal point, such as the mantel or a small tree, and keep the rest of the room quiet so the warm pieces stand out. For a wider warm and natural look behind the Christmas details, see the farmhouse decor guide, and for more seasonal ideas, browse the Dwell Ovell decor ideas index.

    Key Takeaways

    • Start with warm light and greenery, then add textiles, then add small decorations last.
    • Hold the palette to two or three warm colors plus natural wood and green.
    • Use soft textures: knit, wool, cotton, linen, wood, and pine greenery.
    • Keep one focal point, such as a mantel or a small tree, and leave other surfaces calm.
    • Leave room for everyday living: clear seats, clear walkways, and a usable coffee table.
    • Choose battery candles near fabric, paper, and greenery, and keep real flames clear of textiles.

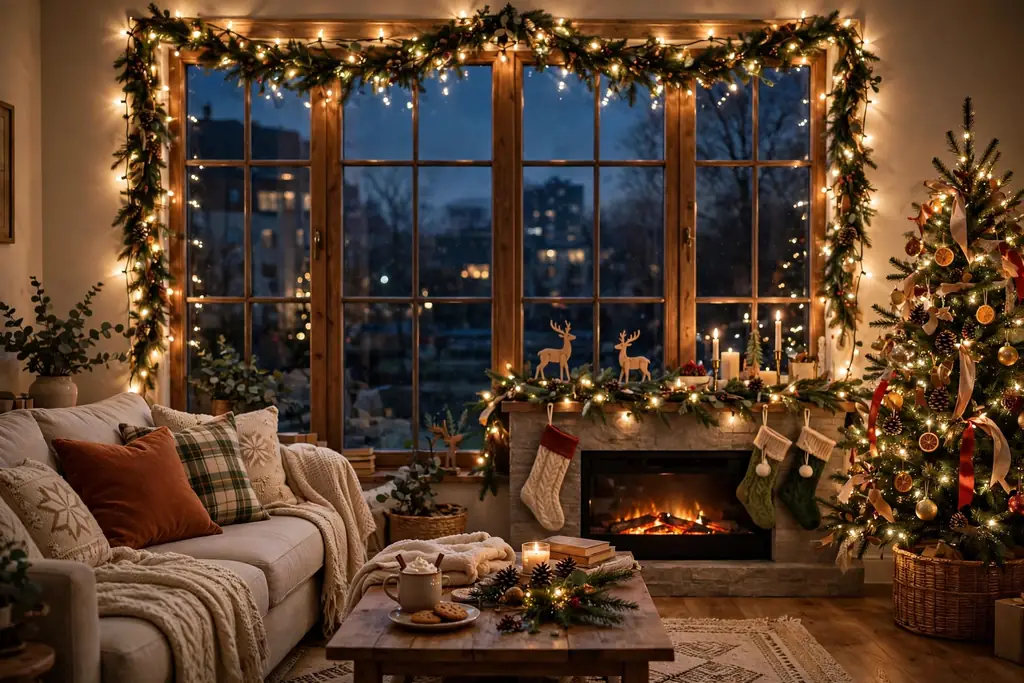
    1. Warm White Lights Around the Windows

    Living room window framed with warm white string lights in the evening.

    Run warm white string lights around one or two living room windows, following the frame rather than crossing the glass in a loose web. The lights give a soft evening glow and make the room feel warm from the street and from the sofa. Warm white suits cream, wood, and muted red far better than cool white in a cozy room.

    Fix the lights with small clear clips so they sit straight and do not pull at curtains. Keep plugs and joins clear of curtain fabric, and check cords for damage before use. Turn lights off when the room is empty, and keep one spare strand for any window that goes dark mid-season.

    2. A Small Tree in the Corner with Simple Ornaments

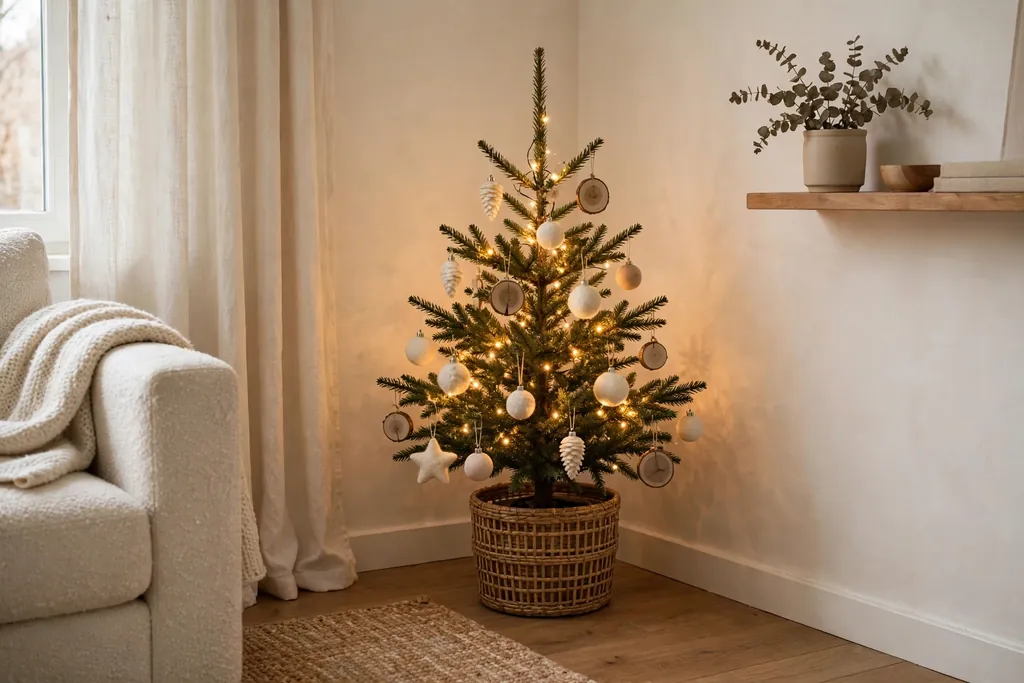
    Small Christmas tree in a living room corner with simple wood and cream ornaments and warm lights.

    Place a small tree in a living room corner, with plain wood, cream, and muted red ornaments and warm white lights. A small tree suits a cozy room because it adds Christmas shape without taking over the seating area or blocking a window. Keep ornaments to one or two materials, such as wood and fabric, so the tree looks calm.

    Hang larger ornaments deeper in the branches and smaller ones near the tips, and leave some green showing between them. Put the tree where it can be seen from the main seat but where it does not block a walkway. Water a fresh small tree regularly, and keep it clear of radiators and open flames.

    3. A Chunky Knit Throw on the Sofa

    Sofa with a chunky knit throw draped over one arm in a cozy living room.

    Drape a chunky knit throw over one sofa arm or across the back of the sofa, folded so it is easy to reach. A knit throw adds warmth at once, both as a texture to look at and as a cover to use on cold evenings. Cream, oatmeal, or soft grey knits suit most cozy Christmas rooms.

    Fold the throw to a similar width each time it is put away, so it looks tidy rather than bunched. Wash it on a gentle cycle before the season, and check the care label first, since some knits need a cool wash. Keep the throw on the sofa, not on the floor, so it stays clean and ready to use.

    4. Plaid Cushions in Cream and Muted Red

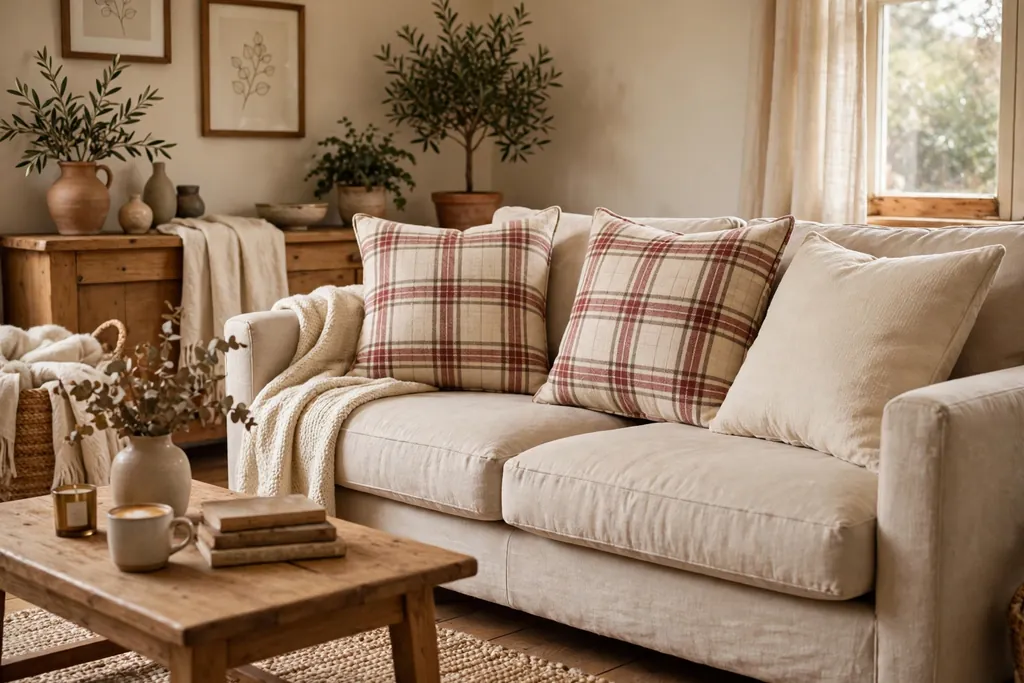
    Sofa with plaid cushions in cream and muted red beside a plain cushion.

    Swap two or three sofa cushions for plaid covers in cream and muted red, keeping the other cushions plain. Plaid gives a clear Christmas note without a full room change, and it pairs well with a knit throw and a plain sofa. Use one plaid scale, large or small, rather than mixing several checks that compete.

    Put plaid cushions at the sofa ends or corners, with plain cushions between them, so the pattern reads as an accent. Wash covers before first use to soften the fabric and check for color transfer. Store spare plaid covers folded in a basket at the end of the season, so they are easy to find next year.

    5. A Greenery Garland on the Mantel

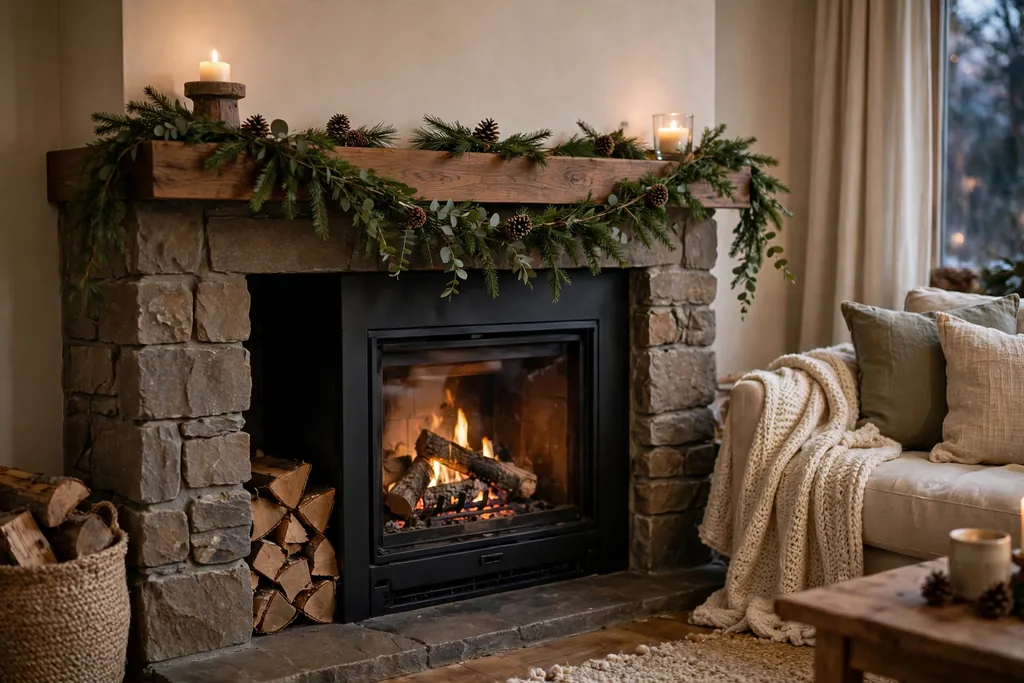
    Fireplace mantel with a simple greenery garland and pinecones.

    Lay a simple greenery garland along the mantel, with pine, fir, or mixed evergreen stems and a few pinecones tucked in. Greenery adds scent, color, and a natural line across the mantel, and it gives candles and small decorations a calm base. Keep the garland to one layer, so the mantel still shows beneath it.

    Secure the garland with small hooks or a non-slip mat so it does not slide, and trim any stems that hang over the fire opening. If the garland is fresh, mist it lightly and keep it clear of heat, and compost it at the end of the season. If it is artificial, shake it outdoors first to remove dust from storage.

    6. Pinecones and Battery Candles on the Coffee Table

    Coffee table tray with pinecones and battery candles in a cozy living room.

    Arrange a small group of pinecones and two or three battery candles on a tray on the coffee table. The tray keeps the group together, the pinecones add a natural texture, and the battery candles give a warm glow without a flame near books, throws, or paper. This centrepiece suits a cozy room because it is low and leaves room for cups.

    Keep the tray small enough that the table still holds drinks and a book, and put a mat under the tray if the table marks easily. Clean pinecones outdoors first, shaking off dust and loose seeds. Change battery candle batteries together, so the glow stays even across the group.

    7. A Basket of Rolled Throws by the Sofa

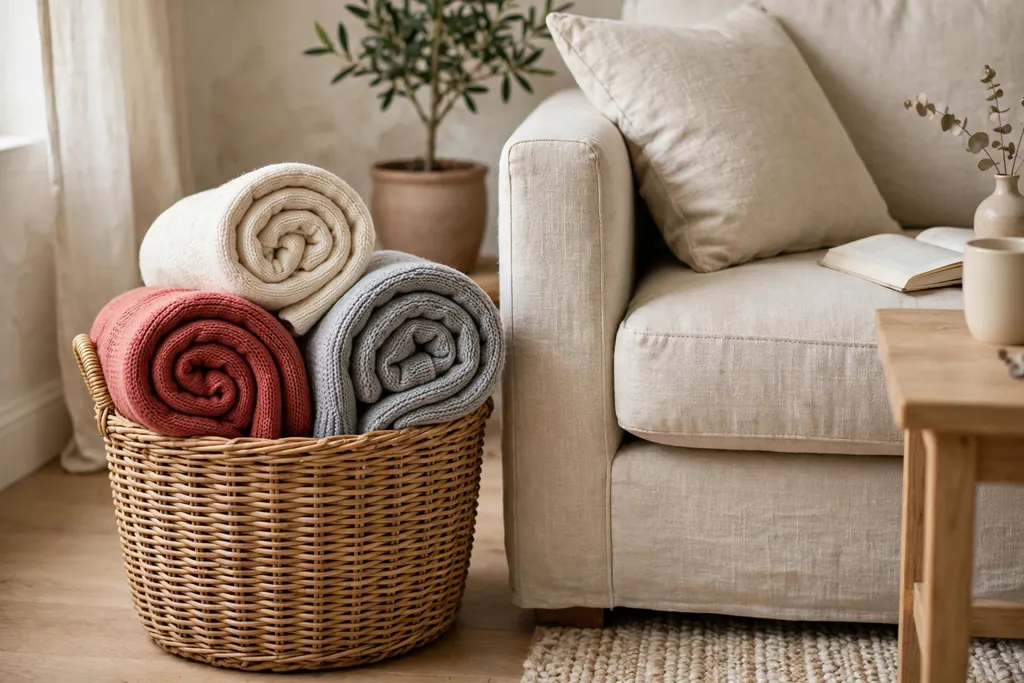
    Woven basket beside a sofa filled with rolled throws in cream, muted red, and soft grey.

    Stand a large woven basket beside the sofa, filled with two or three rolled throws in cream, muted red, and soft grey. Rolled throws are easy to grab, easy to put back, and the basket itself adds a warm woven texture to the room. This idea suits households where people reach for a throw most evenings.

    Roll throws to a similar size so the basket looks tidy, and keep the basket clear of walkways so it is not knocked over. Shake the basket outside now and then, since dust settles in the weave. Avoid damp spots near the basket, which can mark natural fibers.

    8. Stockings Hung with Simple Clips

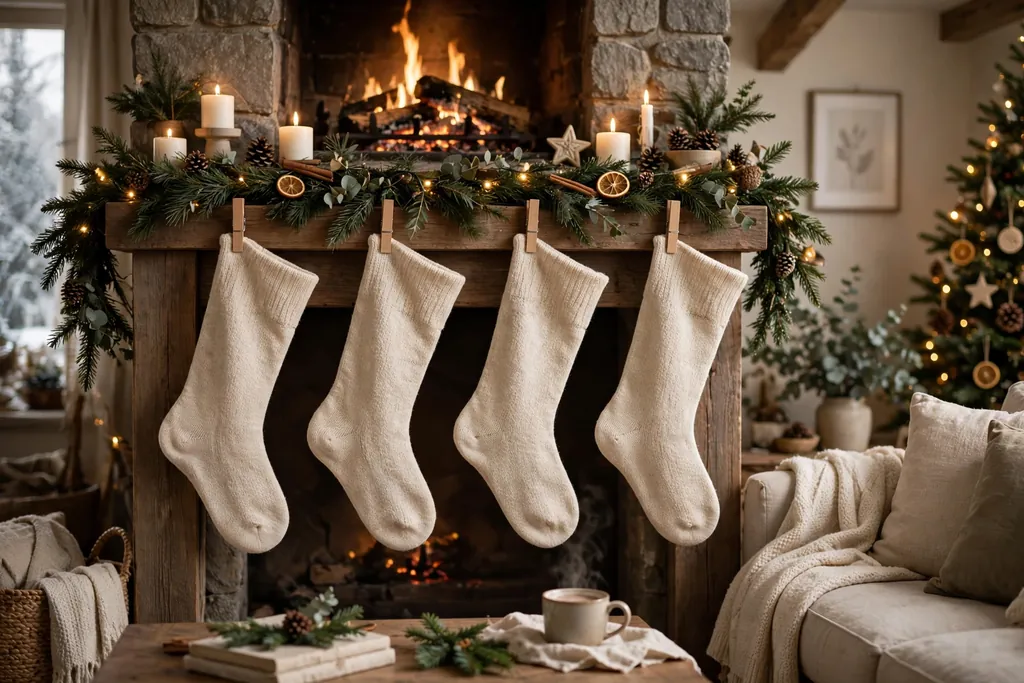
    Plain knit stockings hung evenly from a fireplace mantel with simple clips.

    Hang stockings from the mantel with simple metal clips or small hooks, one per person, in plain knit, linen, or felt. Stockings add a personal Christmas note to the living room, and plain stockings suit a cozy room better than glittered or heavily patterned ones. Keep the stocking colors inside the room palette.

    Space stockings evenly along the mantel, and check that each clip holds firmly before adding small items. Keep stockings clear of the fire opening and of real flames. If there is no mantel, hang stockings from a shelf, a stair rail, or a simple wall rail at the same even spacing.

    9. A Reading Corner with a Chair, a Throw, and a Lamp

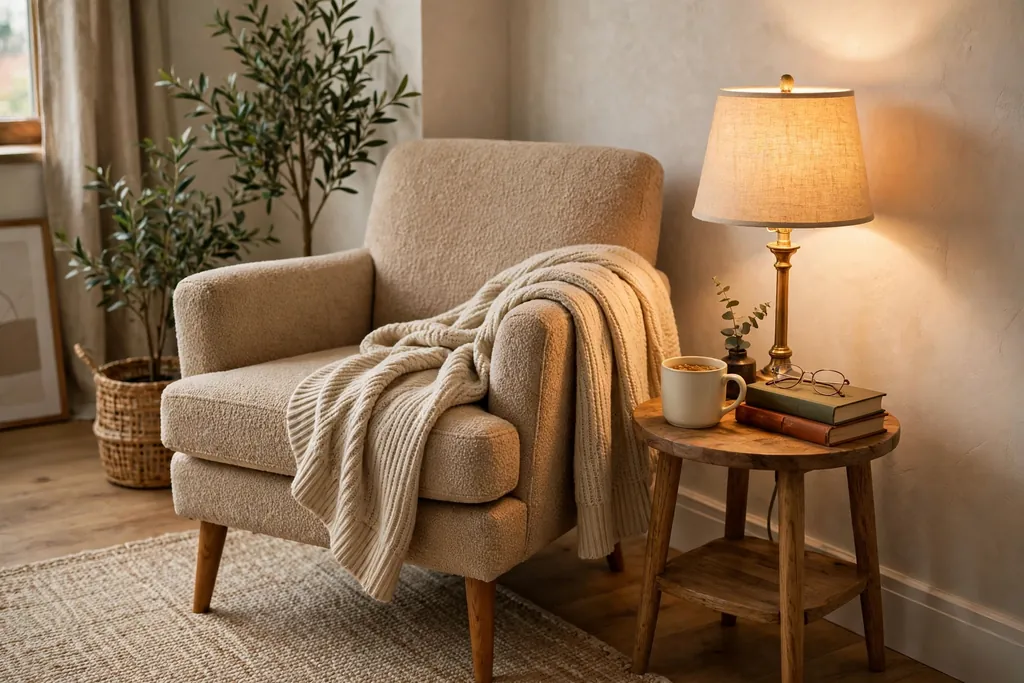
    Reading chair in a living room corner with a soft throw, a small side table, and a warm lamp.

    Set a comfortable chair in a quiet living room corner, with a soft throw, a small side table, and a lamp with a warm bulb. A reading corner makes a cozy Christmas room useful, not just decorated, because it gives one seat a clear purpose on dark evenings. The lamp light also adds a second warm layer beside the tree or mantel lights.

    Place the lamp so light falls on a book, not straight into the eyes of the person sitting down. Keep the side table clear except for a book and a cup, so the corner stays inviting. Add a small basket for books or magazines beside the chair, and keep the chair clear of tree branches and garlands.

    10. Paper Stars in the Window

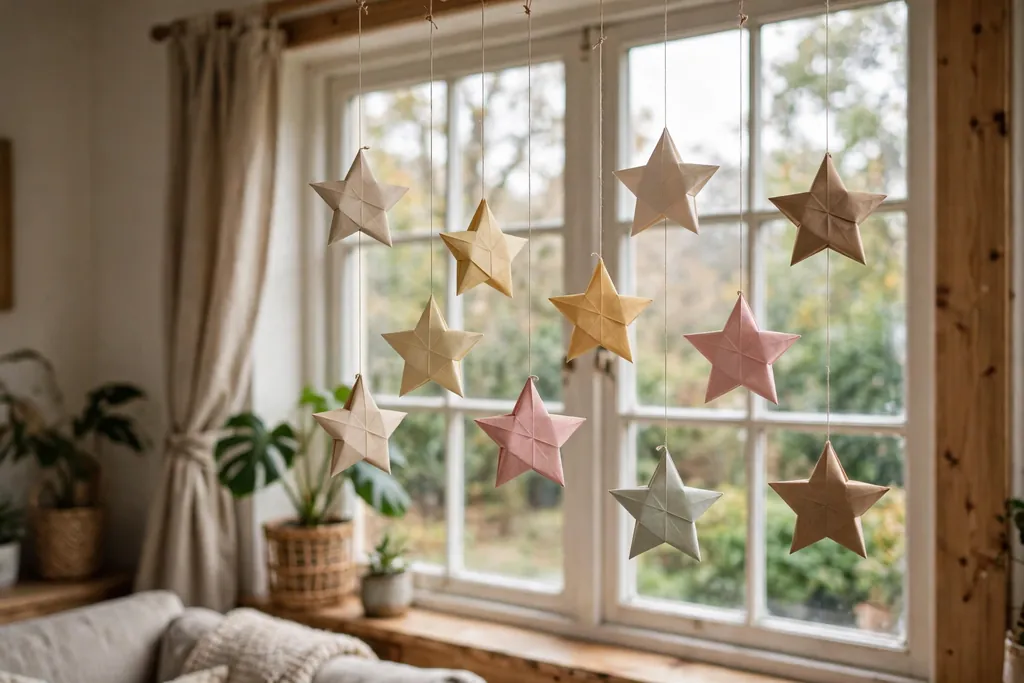
    Folded paper stars hanging in a living room window on thin thread.

    Hang two or three folded paper stars in a living room window, on thin thread at different heights, so they catch daylight and evening light. Paper stars add a light, handmade note, and they suit a cozy room because they are simple, pale, and quiet next to heavier textiles and wood. Use kraft or plain cream paper for a calm look.

    Hang stars with thread long enough that they sit clear of the glass, so they do not stick or tear. Keep paper stars away from damp windows and from heat sources, since paper bends near heat. Store stars flat in an envelope with tissue between them, so points do not fold over in storage.

    11. A Simple Wreath on the Living Room Door

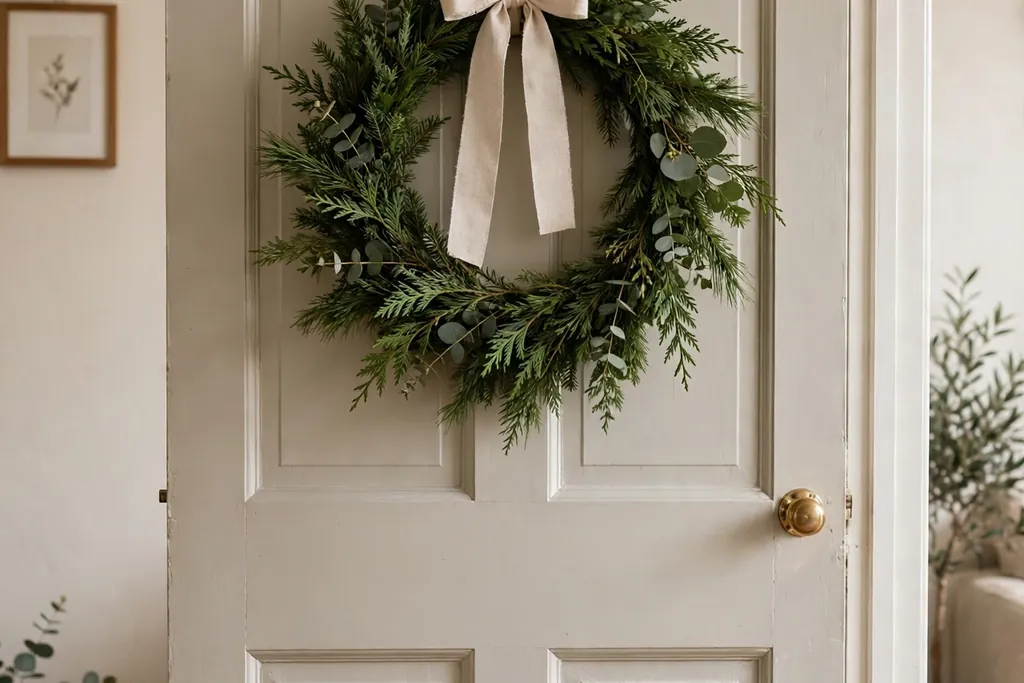
    Simple evergreen wreath with a plain ribbon hung on a living room door.

    Hang a simple evergreen wreath on the inside of the living room door, or on a plain wall, with a plain ribbon loop and no more than a few pinecones or dried orange slices. A wreath marks the room as Christmas without adding another mantel display, and it suits a cozy room when the greenery and ribbon stay plain.

    Hang the wreath at eye level, and check that the door still opens fully without brushing furniture. Keep a fresh wreath clear of radiators, and compost it when needles start to drop heavily. For an artificial wreath, fluff the stems gently and store it in a bag that keeps its round shape.

    12. A Dried Orange Garland on a Shelf or Tree

    Dried orange slice garland on twine draped along a living room shelf.

    String dried orange slices on twine, spaced evenly, and drape the garland along a shelf or on a small tree. Dried orange slices add a warm amber color and a natural, old fashioned note, and they glow softly when lights sit behind them. They suit a room with wood, cinnamon, and pinecone details.

    Dry slices fully before stringing, so they do not bend or mark shelves, and hang the garland where air can move around it. If a slice darkens after a season, replace it rather than trying to clean it. Store dried slices in a dry box with tissue, away from damp rooms, so they keep for another year.

    13. A Sheepskin or Wool Rug Layer by the Fireplace

    Small wool rug in front of a fireplace in a cozy living room.

    Lay a small sheepskin or wool rug in front of the fireplace or beside the sofa, over the existing floor or rug. A soft rug layer makes the seating area feel warmer underfoot and gives a cozy room a clear warm spot, especially on cold evenings. Cream or natural wool suits most palettes.

    Place the rug flat and clear of the fire opening, and use a non-slip mat under it on a hard floor. Shake it outdoors regularly, and follow the care label for washing, since wool and sheepskin need gentle care. Keep the rug clear of tree water and candle wax, and roll it for storage rather than folding it sharply.

    14. A Cocoa Corner on a Sideboard

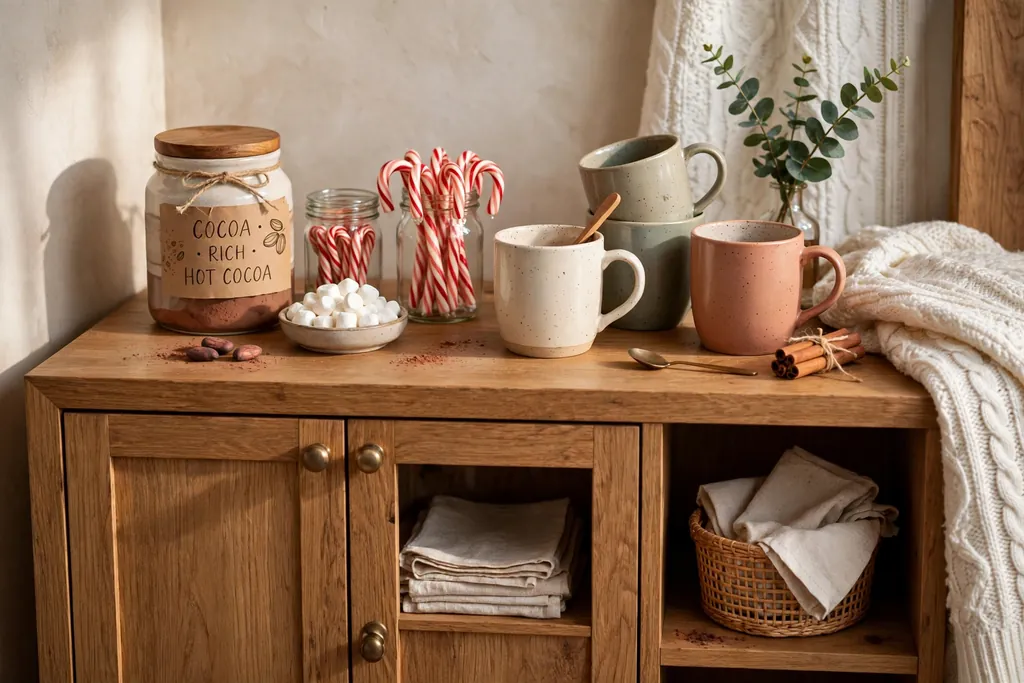
    Sideboard with a small cocoa corner of mugs, a cocoa jar, and candy canes in a jar.

    Set a small cocoa corner on a sideboard or a tray table, with mugs, a jar of cocoa, a small spoon jar, and a few candy canes in a jar. A cocoa corner makes a cozy Christmas room feel welcoming for guests, and it keeps mugs and cocoa in one place rather than spread across the kitchen. Keep the group small, so the sideboard still holds other items.

    Use a tray under the mugs and jars to catch drips, and keep the corner clear of the edge so nothing is knocked off. Wash mugs after use and return them to the tray, so the corner stays ready. At the end of the season, pack the cocoa jars and mugs away together, so the corner is easy to set up again.

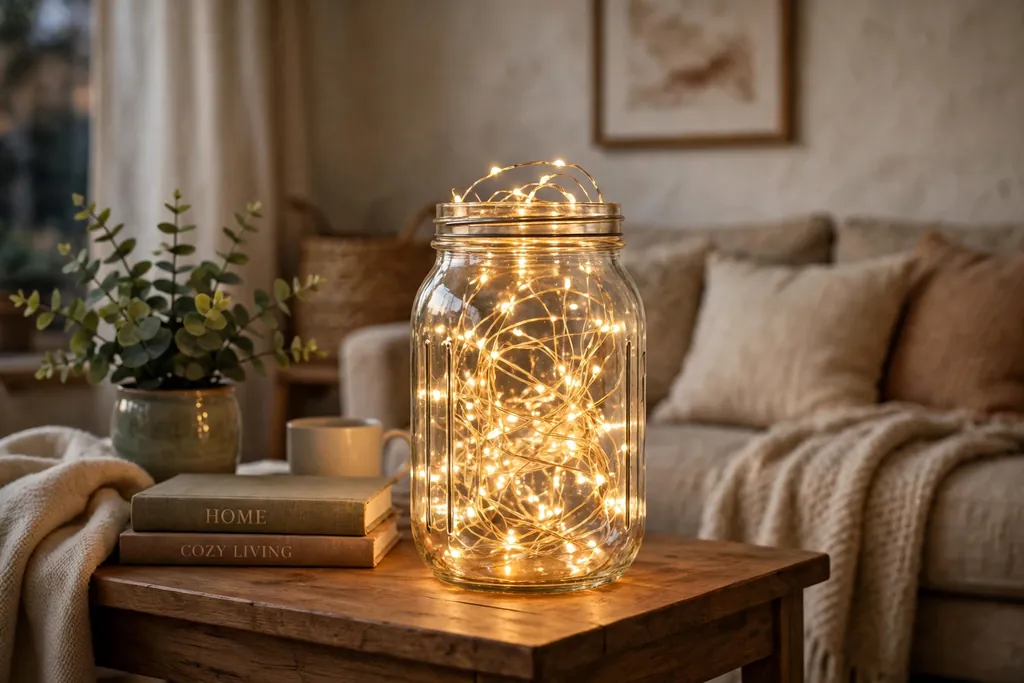
    15. Fairy Lights in a Glass Jar on a Side Table

    Glass jar with warm fairy lights on a living room side table.

    Place a small string of warm fairy lights inside a clear glass jar on a side table, with the battery pack hidden behind the jar. A lit jar gives a soft, contained glow that suits a side table, a shelf, or a windowsill, and it adds Christmas light without another strand across the room. One jar is enough in a small room.

    Use battery lights with a timer if available, so the jar lights at the same time each evening. Keep the jar clear of curtain edges and throw ends, and wipe the glass before the season so the light shows clearly. Turn the jar off at night, and keep spare batteries with the other Christmas lights.

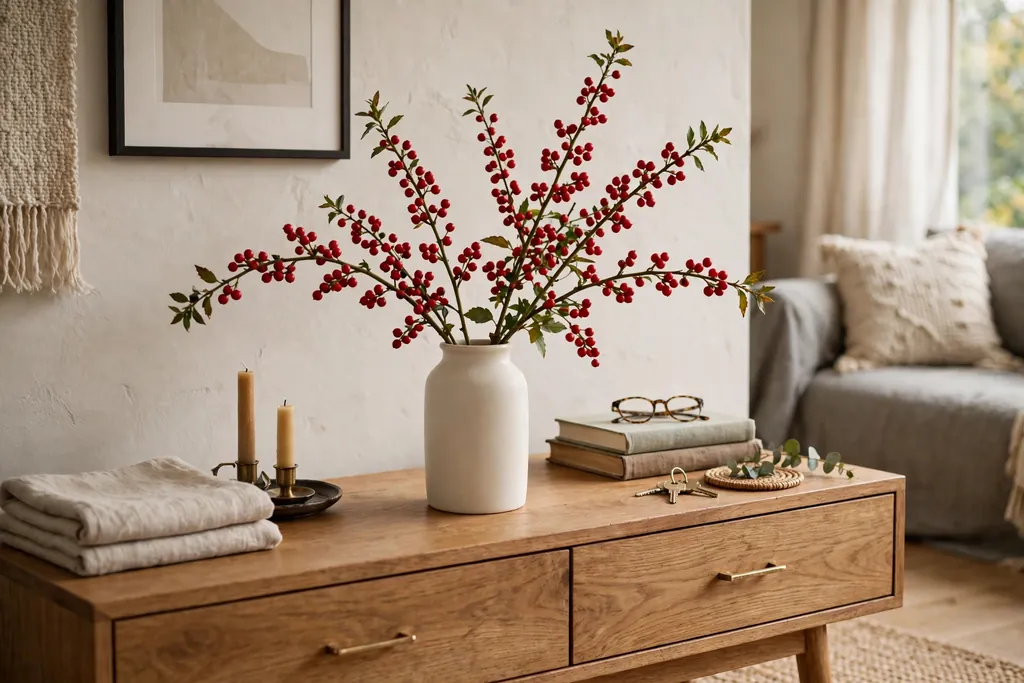
    16. Red Berry Stems in a Vase on the Sideboard

    Plain vase with red berry stems on a living room sideboard.

    Stand a few red berry stems in a plain vase on the sideboard or mantel, with the stems cut to a height that suits the vase. Red berries add a small, clear Christmas color without a large decoration, and they suit a cozy room with a cream and muted red palette. A plain glass or cream ceramic vase keeps the focus on the berries.

    Trim stems at an angle and arrange them so they fan slightly, rather than standing in a tight bunch. Keep artificial berries out of reach of small children and pets, since small parts can come loose. If a berry cluster sheds, remove it rather than leaving loose berries on the sideboard or floor.

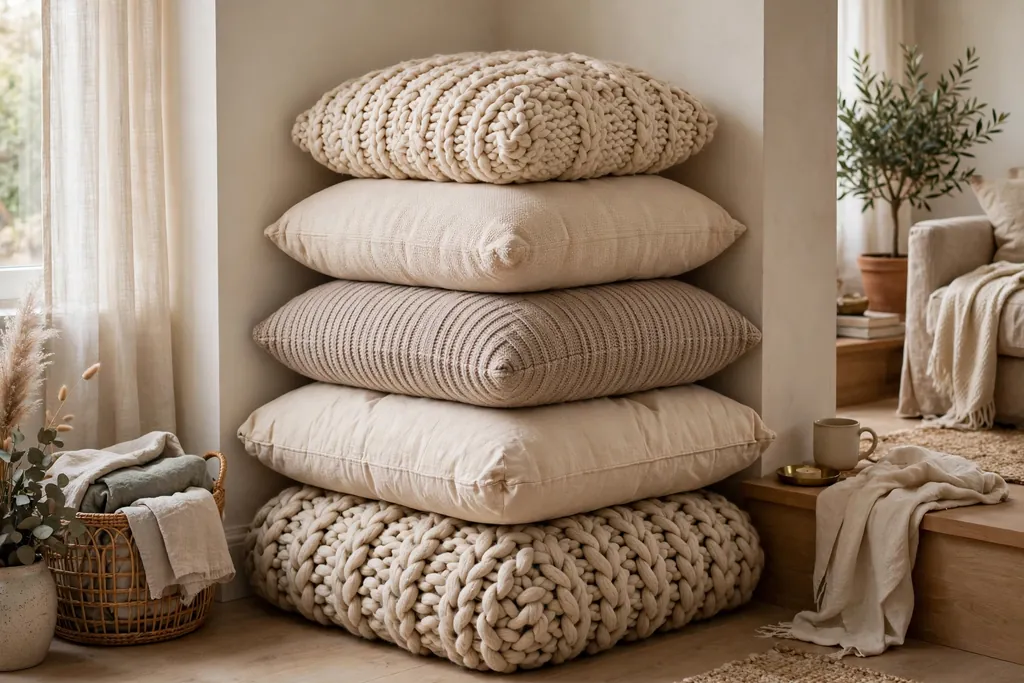
    17. Floor Cushions for Extra Evening Seating

    Large floor cushions in knit and cotton stacked in a living room corner.

    Add two or three large floor cushions in knit, cotton, or wool, stacked in a corner when not in use and set out for evening seating. Floor cushions suit a cozy Christmas room because they add soft seating without new furniture, and they work well for family evenings, games, and film nights. Keep cushion colors inside the room palette.

    Store floor cushions stacked, not on the floor in walkways, when they are not in use. Shake and air them regularly, and wash covers on a gentle cycle where the care label allows. Check that floor cushions do not block the fireplace, a heater, or a walkway when they are set out.

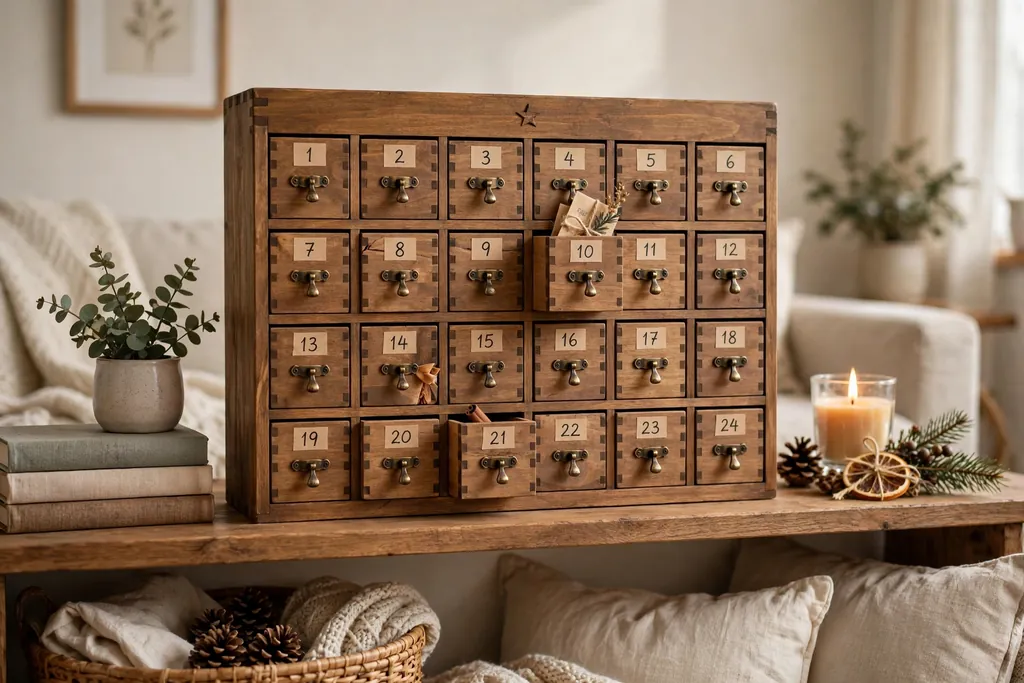
    18. A Wooden Advent Calendar on a Shelf

    Wooden advent calendar with small drawers on a living room shelf.

    Place a simple wooden advent calendar on a shelf or sideboard, with small drawers or doors in plain wood. An advent calendar adds a daily Christmas ritual to the living room, and a plain wooden calendar suits a cozy room better than a bright plastic one. Keep the shelf around it clear, so each drawer can open fully.

    Fill drawers with small items that fit easily, and check drawer sizes before buying fillers. Keep the calendar at a height children can reach if it is for children, and keep small items clear of very young children. At the end of the season, empty the drawers and wipe the wood dry before storage.

    19. Heavier Curtains in a Warm Neutral Tone

    Living room window with heavier curtains in cream hung to the floor.

    Swap light summer curtains for heavier curtains in cream, oatmeal, or soft grey, hung to the floor. Heavier curtains make a living room feel warmer and quieter, and they frame window lights well in the evening. A plain curtain suits a cozy Christmas room, since the tree, throws, and cushions already add pattern.

    Hang curtains so they clear the floor by a small gap, and check that they do not cover radiators fully, which blocks heat. Wash or steam curtains before hanging, and check the care label first. Keep curtain fabric clear of real flames and of tree branches near the window.

    20. A Memory Shelf with Photos and a Small Candle

    Living room shelf with framed family photos in wood frames, a pine sprig, and a small candle.

    Style one shelf with a few framed family photos in simple wood frames, a small plant or pine sprig, and one battery candle. A memory shelf adds a personal note to a cozy Christmas room without a large display, and wood frames tie the shelf to other wood pieces in the room. Keep the shelf to a few items, so each photo can be seen.

    Space frames evenly and lean larger frames at the back, with smaller frames in front. Keep the battery candle clear of photo frames and paper, even though it has no flame. Dust the shelf weekly in winter, since heating and closed windows leave more dust on open shelves.

    21. Gifts Wrapped in Kraft Paper in a Basket

    Basket beside a Christmas tree filled with gifts wrapped in kraft paper and twine.

    Wrap gifts in plain kraft paper with simple twine and a small pine sprig or a plain tag, and stack them in a basket beside the tree or sofa until Christmas. Kraft wrapping suits a cozy room because it repeats the wood, twine, and greenery palette, and a basket keeps gifts tidy before they go under the tree. Keep wrapping simple and consistent.

    Wrap gifts on a flat surface, and keep twine ends trimmed so they do not catch on fabric. Label each gift clearly on the tag, since kraft paper looks similar from gift to gift. Keep the basket clear of walkways and of the fireplace, and move gifts under the tree only when the room is ready for them.

    Conclusion

    A cozy Christmas living room works best when warm light leads, soft textiles follow, and small decorations stay simple. Start with window lights and greenery, add a knit throw, plaid cushions, and a basket of throws, then finish with one focal point, such as a small tree, a mantel garland, or a wreath. Keep the palette small, leave seats and walkways clear, and choose the ideas that fit your room and your daily life. The rest can wait for another season.

    FAQs

    How do I make my living room cozy for Christmas without clutter?

    Start with warm lights, one greenery piece, and soft textiles, then add only a few small decorations in one palette. A cozy Christmas living room stays calm when one surface, such as the mantel or a small tree, is the focal point and other surfaces stay clear for everyday use.

    What colors make a Christmas living room feel cozy?

    Cream, muted red, soft green, brown, and warm gold make a Christmas living room feel cozy, with plenty of wood tones and greenery. Hold the palette to two or three colors plus wood and green, and repeat those colors in cushions, throws, and small decorations so the room looks settled.

    Should I use warm white or cool white Christmas lights?

    Warm white lights suit a cozy Christmas living room, because they give a soft yellow glow that pairs well with cream, wood, and muted red. Cool white lights give a brighter, bluer light that suits a modern or icy theme, but they can make a cozy room feel cold.

    How can I decorate a small living room for Christmas?

    Use a small tree or a wreath instead of a large tree, add window lights and a few cushions and throws, and keep decorations vertical or on one shelf. A small living room feels cozy when decorations add light and texture without taking floor space, blocking walkways, or covering seating.

    What is the simplest Christmas mantel decoration?

    A simple greenery garland with a few pinecones and battery candles is the simplest Christmas mantel decoration. Lay the garland along the mantel, tuck pinecones into the greenery, and set battery candles at different heights, then leave the rest of the mantel clear.

    How do I keep Christmas decorations safe around children and pets?

    Choose battery candles instead of real flames near fabric and greenery, hang breakable ornaments high on the tree, and keep small parts such as artificial berries out of reach. Check cords for damage, keep cords clear of walkways, and turn lights off when the room is empty.


  • 17 Coastal Christmas Tree Ideas with Beach Inspired Details

    17 Coastal Christmas Tree Ideas with Beach Inspired Details

    A coastal Christmas tree blends a classic evergreen shape with beach details such as shells, sea glass, driftwood, rope, and soft blue, sand, and white colors for a calm, seaside holiday look that still feels festive in a living room.

    Start with a light base, then add one beach material at a time. A green, white, or flocked tree can all work, as long as the ornaments, garland, topper, and skirt share a small palette. For a wider coastal palette to reuse through the season, see the coastal fall decor ideas on Dwell Ovell, and for more seasonal looks, browse the Dwell Ovell decor ideas index. Keep ornaments spaced so branches stay visible, and repeat one beach detail, such as shells or rope, in two or three places rather than on every branch.

    Key Takeaways

    • Keep the base light: white, sand, pale blue, sea glass green, and natural wood suit a coastal tree best.
    • Choose one main beach material per tree, such as shells, sea glass, driftwood, rope, or coral, and use the rest as accents.
    • Balance a beach topper, garland, and skirt so no single layer hides the branches.
    • Use warm white lights as the base, and add blue or sea glass lights only as a small accent.
    • Place heavier ornaments near the trunk and lighter shells and glass pieces near the branch tips.
    • Save fragile shells and glass ornaments in divided boxes with tissue between pieces.

    1. Shell and Starfish Ornaments on a Green Tree

    Green Christmas tree decorated with shells, starfish, and sand dollars.

    Hang shells, starfish, and sand dollars on a full green tree, with plain white, sand, and pale blue balls filling the gaps. Place larger shells deeper in the branches and smaller, detailed shells near the outer tips where light catches them. Finish with warm white lights and a simple star topper so the shells stay the focus.

    Step back after every few ornaments to check the balance. If one side looks heavy, move a large shell to the lighter side rather than adding more pieces. Use short ornament hooks or thin ribbon loops, and keep fragile shells away from walkways and low branches where they can be knocked off.

    2. Sea Glass Ornaments on a White Flocked Tree

    White flocked Christmas tree decorated with sea glass ornaments in soft blue and green.

    Use sea glass ornaments in soft blue, green, and frosted white on a white flocked tree for a cool, shore inspired look. The frosted branches soften the color, so the glass reads as water and ice rather than bright decoration. Add clear glass balls and a few white shells to keep the tree light.

    Keep the palette narrow, with no more than three glass colors, so the tree does not look busy. Place sea glass ornaments at different depths, not only on the outer branches, to give the tree depth. A white or silver star topper suits this tree better than a colored topper.

    3. A Driftwood Star Tree Topper

    Christmas tree topped with a star made from driftwood pieces.

    Top the tree with a star made from small pieces of driftwood tied or wired into shape, and keep the rest of the tree simple. Use natural wood ornaments, plain white balls, and rope garland below the topper so the wood star stands out. The topper gives a coastal signal at once, even on a plain green tree.

    Check the topper weight and fit before decorating, since driftwood can be heavier than a foam star. Push the topper stem firmly into the top branches and tie it to a sturdy branch if it leans. If the tree is small, use a smaller driftwood star so it does not tip the top branches.

    4. Nautical Rope and Wooden Bead Garland

    Christmas tree wrapped with nautical rope and wooden bead garland.

    Wrap the tree with a garland of thick cotton rope and large wooden beads, draped in loose loops from top to bottom. The rope adds texture and a nautical line that plain tinsel cannot give. Pair it with white and sand ornaments, and skip shiny garland so the natural materials stay clear.

    Fasten the garland at the top with a hidden tie, then let each loop rest on a branch rather than pulling it tight. Keep loops even in depth, with deeper loops near the bottom and shorter loops near the top. If the rope sheds fibers, shake it outdoors before hanging it on the tree.

    5. Navy and White Striped Ribbon Cascades

    Christmas tree with navy and white striped ribbon cascades.

    Run wide navy and white striped ribbon down the tree in long vertical cascades, tucked into branches at intervals so the ribbon looks like flowing fabric. The stripes give a crisp nautical pattern, while plain white and navy ornaments fill the spaces between ribbons. Warm white lights keep the navy from looking dark.

    Cut ribbon in long lengths rather than short pieces, so each cascade runs from near the top to near the bottom. Pinch the ribbon into branches every 30 to 45 centimeters so it holds its shape. Use two or three cascades on a small tree and four or five on a full tree, and leave plain branches between them.

    6. Coral and Blush Ornaments in a Soft Palette

    Christmas tree decorated with coral shapes and blush pink ornaments.

    Decorate the tree with coral shapes, blush pink balls, cream shells, and pale gold accents for a soft coastal palette. The blush tones warm the tree without the strong red and green of a classic tree. Use a cream or blush ribbon as garland, and keep the topper simple in white or gold.

    Place coral pieces at eye level where their shapes show best, and use smaller blush balls near the top and bottom to spread the color. If the coral look feels too pink, add white shells and sand colored ornaments to pull it back toward the shore. Store coral shapes with padding, since thin branches can snap.

    7. A Tabletop Tree in a Woven Basket

    Small tabletop Christmas tree in a woven basket with shells at its base.

    Set a small tabletop tree in a woven basket on a console, side table, or kitchen counter, with shells and a small piece of driftwood arranged at its base. The basket acts as both stand and skirt, and it suits rooms with no floor space for a full tree. Decorate with mini shells, small glass balls, and a short string of warm white lights.

    Choose a basket wide enough that the tree sits steady, and place a small weight or a pot inside if the tree leans. Keep the tree away from table edges and from heat sources. A tabletop tree also works in a bedroom or entry, where a full tree would crowd the room.

    8. A Driftwood Branch Tree on the Wall

    Wall mounted tree shape made from driftwood branches with shells and lights.

    Build a coastal tree shape from driftwood branches fixed to a wall in tiers, shortest at the top and longest at the bottom, and hang shells, sea glass, and small lights from each branch. This flat tree suits a small room, a rental, or a wall with no floor space for a tree. It also uses no evergreen branches, so it needs no watering.

    Fix each branch to the wall with hardware rated for its weight, and check that the lowest branch clears furniture below it. Hang heavier ornaments near the wall end of each branch and lighter pieces near the tips. Keep lights to one short strand, and keep cords tidy behind the lowest branch.

    9. Lantern Glow Around the Tree Base

    Christmas tree base with glass lanterns, candles, shells, and sea glass.

    Place glass lanterns with battery candles around the base of the tree, with shells and sea glass scattered between them on the skirt or floor. The lantern light glows upward through the lower branches and gives the tree a beach evening feel. This lighting idea works with any ornament palette, since the lanterns sit outside the tree itself.

    Use battery candles in lanterns near a tree skirt, fabric, or dried material for safety. Vary lantern heights, with one tall lantern and one or two shorter ones, and keep them clear of walkways. If the tree skirt is light colored, choose clear glass lanterns so the skirt still shows.

    10. A Seagrass Tree Skirt with Driftwood Pieces

    Christmas tree with a woven seagrass tree skirt and driftwood pieces.

    Lay a woven seagrass tree skirt under the tree, and set a few small driftwood pieces and shells on the skirt near its edge. The woven texture grounds the tree in a coastal material, while the driftwood pieces link the skirt to the ornaments above. This skirt suits a green, white, or flocked tree.

    Choose a skirt wide enough to cover the tree stand and to extend past the lowest branches. Keep the skirt flat so it does not bunch under the stand, and place driftwood pieces at the outer edge only, so they do not tip the stand. Shake the skirt outdoors after the season to remove needles and sand.

    11. Glass Float Ornaments in Blue and Green

    Christmas tree decorated with blue and green glass fishing float ornaments.

    Hang glass fishing float ornaments in blue, green, and clear glass on the tree, with rope loops for hanging and plain white balls between them. The round floats recall old fishing gear and give the tree a collected, seaside character. Their smooth glass also reflects light well in a bright room.

    Place glass floats at different depths, with larger floats low and smaller floats high, so the tree keeps its shape. Use sturdy hooks, since glass floats can be heavier than foam balls. Keep a few floats near the front of the tree, where guests can see their color, and simpler balls at the back.

    12. Clear Ornaments Filled with Sand and Tiny Shells

    Clear Christmas ornaments filled with sand and tiny shells on a tree.

    Fill clear ball ornaments with a spoonful of fine sand and two or three tiny shells, then hang them on the tree with thin ribbon loops. Each ornament becomes a small beach scene, and the sand color ties the tree to a sand palette. This idea works well as a family project, since each ornament can hold shells from a different beach visit.

    Fill ornaments over a tray to catch spills, and seal each cap well before hanging. Use dry sand only, and keep the fill light so ornaments do not pull branches down. If an ornament looks cloudy, use less sand and one shell rather than packing it full.

    13. Warm White Lights with a Blue Accent Strand

    Christmas tree lit with warm white lights and a soft blue accent strand.

    Light the tree with warm white lights as the main strand, then add one short strand of soft blue lights woven through the middle branches only. The warm base keeps the tree festive, while the blue strand hints at water without turning the whole tree blue. This balance works on green, white, and flocked trees.

    Wrap the warm strand first, from the inside of the branches outward, then add the blue strand in loose loops near the front. Keep the blue strand to one third of the total lights or less. Check both strands before decorating, and keep spare bulbs with the light boxes for quick fixes.

    14. A Shell Garland Draped in Loose Loops

    Christmas tree draped with a shell garland of small shells and beads.

    String small shells, sand dollars, and wooden beads on sturdy cord to make a shell garland, and drape it in loose loops around the tree. Unlike a rope garland, this garland puts the shells themselves in a line, so the beach detail repeats around the whole tree. Pair it with plain balls in sand and white so the shells stand out.

    Knot the cord well at each end, and space shells evenly rather than bunching them. Drape the garland after lights and before hanging single ornaments, so single ornaments can fill gaps in the garland line. Store the garland coiled in a box, not hung, so shells do not tangle or break.

    15. A Weatherproof Porch Tree with Rope and Shells

    Porch Christmas tree decorated with rope, weatherproof shells, and outdoor lights.

    Decorate a porch tree with weatherproof shells, rope garland, and shatterproof balls in sand, white, and pale blue, and use outdoor rated lights. The porch tree brings the coastal look outside, where wind and rain rule out fragile glass and paper ornaments. A slim tree suits a porch corner and leaves the walkway clear.

    Fasten ornaments with wire or sturdy ties rather than thin hooks, so wind does not drop them. Check the tree stand and pot for stability, and bring fabric skirts inside during heavy rain. Unplug outdoor lights during storms, and check cords for wear before the season starts.

    16. An All White Coastal Tree with Texture Only

    All white Christmas tree decorated with white shells, glass balls, and white ribbon.

    Build a coastal tree in all white, using white shells, white glass balls, white ribbon, and frosted branches, with texture doing the work of color. Mix smooth glass, rough shells, woven ribbon, and matte ornaments so the tree does not look flat. Warm white lights add glow, while a white star topper finishes the look.

    Vary ornament sizes, with large white balls low, medium shells at eye level, and small white pieces near the top. If the tree looks too plain from across the room, add one natural wood piece, such as a driftwood star, as the only non white accent. Keep the skirt white or natural seagrass so the palette stays calm.

    17. A Collected Beach Finds Tree

    Christmas tree decorated with collected shells, sea glass, and driftwood pieces.

    Decorate the tree with shells, sea glass, driftwood pieces, and small beach finds collected over past trips, mixed with plain white and sand balls. This tree tells a personal story, since each ornament marks a beach, a walk, or a family trip. Label the back of a few pieces with the place and year in pencil, so the story stays with the tree.

    Sort finds by size before decorating, and place the largest pieces low and the smallest pieces high. Use plain balls to fill gaps, so the collected pieces do not crowd the branches. Store the most fragile finds in their own divided box, marked with the year they were collected.

    Conclusion

    A coastal Christmas tree works best when the shore stays in charge and the holiday details stay light. Keep the palette to white, sand, pale blue, and natural wood, choose one main beach material, and balance the topper, garland, skirt, and lights so branches still show. Start with shells or sea glass on a tree you already own, add a rope garland or a seagrass skirt, and let the rest wait for another season. The result is a tree that feels calm, bright, and coastal, with pieces that can return year after year.

    FAQs

    What is a coastal Christmas tree?

    A coastal Christmas tree is a Christmas tree decorated with beach inspired details such as shells, sea glass, driftwood, rope, and soft blue, sand, and white colors. It keeps a classic tree shape and festive lights, but replaces strong red and green with a lighter, seaside palette and natural coastal materials.

    What ornaments work best on a coastal Christmas tree?

    Shells, starfish, sand dollars, sea glass, glass floats, coral shapes, and plain balls in white, sand, and pale blue work best on a coastal Christmas tree. Choose one main material, such as shells or sea glass, and use plain balls to fill gaps, so the tree looks planned rather than crowded with competing beach themes.

    What color palette suits a coastal Christmas tree?

    White, sand, pale blue, sea glass green, driftwood gray, and warm cream suit a coastal Christmas tree best, with navy or blush used as a single accent. Keep bright red and deep green to small touches, or skip them, so the tree stays light and coastal rather than shifting into a classic red and green look.

    What topper works for a coastal Christmas tree?

    A driftwood star, a large starfish, a white star, or a simple shell cluster works well as a coastal Christmas tree topper. Choose a topper that matches the tree scale, check its weight and fit before decorating, and tie it to a sturdy top branch if it leans, so it stays upright through the season.

    How do I light a coastal Christmas tree?

    Light a coastal Christmas tree with warm white lights as the main strand, then add a short soft blue strand or lanterns at the base as an accent. Wrap lights from the inside of the branches outward, keep blue lights to one third of the total or less, and use battery candles in base lanterns near fabric or dried material.

    How should I store coastal Christmas ornaments?

    Store shells, sea glass, and glass floats in divided boxes with tissue between pieces, keep driftwood and rope garland coiled in separate boxes, and label each box by material or tree. Keep ornaments dry and out of direct sun, and check fragile shells for chips before packing them away for next season.


  • 17 Pink Ornament Ideas for Trees, Garlands, and Table Displays

    17 Pink Ornament Ideas for Trees, Garlands, and Table Displays

    Pink ornaments work on trees, garlands, and tables when you pick one pink family, mix matte and shiny finishes, and repeat the same pink in at least two places in the room. Use glass for sparkle, velvet or felt for softness, and a simple gold, white, or green base so the pink stays calm and not busy.

    Start by choosing blush, rose, or hot pink, and stay close to that family through the whole display. A green tree, a white tree, or plain greenery all suit pink, but mixing every pink shade at once can make a display look scattered. For more seasonal ideas to pair with these looks, browse the Dwell Ovell decor ideas index. Keep ornaments in a few sizes, leave space between the largest pieces, and repeat one accent, such as gold ribbon or white beads, so the tree, garland, and table feel connected.

    Key Takeaways

    • Pick one pink family, blush, rose, or hot pink, and use it in at least two places in the room.
    • Mix matte and shiny finishes so pink ornaments read as layered, not flat.
    • Pair pink with a calm base of green, white, cream, or gold.
    • Use different materials, such as glass, velvet, felt, paper, ceramic, and wood, for texture.
    • Vary ornament size, with large pieces deeper in a tree or display and small pieces near edges.
    • Keep table displays low and stable so guests can see across the table and ornaments do not roll.

    1. Blush Glass Balls on a Green Tree

    Green tree decorated with blush pink glass ball ornaments in several sizes.

    Hang blush pink glass balls in several sizes on a green tree, with larger balls set deeper in the branches and smaller balls near the tips. Add plain white or gold balls between the pink ones so the pink has room to show. Warm white lights help blush pink look soft rather than washed out.

    Step back after hanging each group of five or six ornaments and check for gaps or crowded spots. If one side looks heavy, move a large ball to the lighter side instead of adding more ornaments. Store glass balls in divided boxes with tissue between pieces so they do not chip.

    2. Velvet Pink Ornaments on a Flocked Tree

    Flocked white tree decorated with velvet pink ornaments.

    Hang velvet pink ornaments, such as balls, drops, and bows, on a flocked white or pale green tree. The soft fabric stands out against the frosted branches, and the matte surface keeps the pink gentle. Add a few satin ornaments in the same pink for a small amount of shine.

    Use ribbon loops in cream or gold for hanging, and keep the loops short so ornaments sit close to the branches. Velvet shows dust more than glass, so brush ornaments lightly before hanging and store them in a closed box away from damp air. This pairing suits a living room tree that needs a quiet, cozy feel.

    3. A Strung Pink Ornament Garland on the Mantel

    Mantel garland strung with pink ornaments in matte and shiny finishes.

    String pink ornaments of mixed sizes on sturdy cord or ribbon and drape the strand along a mantel in loose swags. Mix matte balls, shiny balls, and one or two shaped ornaments, such as stars or drops, for variety. Fasten the ends with small hooks so the garland stays in place.

    Keep the swags shallow enough that stockings, candles, or framed photos below still show. If the mantel holds a fire, keep the garland and any fabric ribbon well clear of heat, and use battery candles nearby instead of real flames. A single pink garland can carry a mantel without a full tree in the room.

    4. Hand Painted Pink Ceramic Ornaments on a Tabletop Tree

    Small tabletop tree decorated with hand painted pink ceramic ornaments.

    Hang small hand painted pink ceramic ornaments on a tabletop tree for a sideboard, desk, or bedroom dresser. Ceramic suits close viewing, since painted flowers, dots, or stripes show clearly at arm’s length. Keep the tree small and the ornaments light so thin tabletop branches do not bend.

    Place the tree on a tray or a folded cloth to catch any dropped pieces and to make the display easy to move. Because ceramic can break if it falls, keep this tree away from table edges and busy walkways. A tabletop tree also works well in a room that has no space for a full size tree.

    5. Pink Paper Honeycomb Ornaments in a Window

    Window hung with pink paper honeycomb ornaments at different heights.

    Hang pink paper honeycomb balls and fans in a window at different heights, using clear thread or thin ribbon. Daylight shows the folded paper texture, and the ornaments move slightly in air from a vent or an open door. Mix pale pink and deeper rose so the window display has depth.

    Paper ornaments are light, so they suit a curtain rod, a tension rod, or small adhesive hooks on the frame. Keep them away from damp windows and direct rain, since paper softens when wet. Fold flat styles store neatly after the season and can be reused the next year.

    6. Pink Felt Ornaments on a Small Bedroom Tree

    Small bedroom tree decorated with pink felt heart and star ornaments.

    Hang pink felt ornaments, such as hearts, stars, and small trees, on a small tree in a bedroom. Felt is soft, light, and quiet, which suits a nightstand tree or a dresser tree. Mix plain felt shapes with one or two embroidered pieces for detail without clutter.

    Use short ribbon loops in matching pink or cream so ornaments hang straight. Felt ornaments are a good choice where glass might break, such as a room used by children or pets. Store felt shapes flat with tissue between layers so they keep their shape.

    7. Pink Glitter Acrylic Ornaments on a White Tree

    White tree decorated with pink glitter acrylic ornaments.

    Hang pink glitter acrylic ornaments on a white tree for a bright, high shine look. Acrylic gives the sparkle of glitter without the weight or breakage risk of glass, and the white branches make pink read clearly. Add clear or silver ornaments between pink ones to keep the tree from looking solid pink.

    Use white or silver lights so the glitter catches light evenly. Because glitter can shed, hang these ornaments over a surface that is easy to vacuum, and check loops before hanging so ornaments do not slip off branches. This pairing suits a modern living room or a party display.

    8. A Pink Ornament Wreath on the Front Door

    Front door hung with a wreath made from pink ornaments and a gold bow.

    Wire pink ornaments in mixed sizes to a foam or wire wreath form to make a full ornament wreath for a front door. Mix matte, shiny, and glitter pink balls, and add a gold or cream bow at the top for a finished edge. The wreath gives strong color with no greenery needed.

    Use light ornaments if the wreath will hang on a door that moves often, and save heavy glass balls for a wall display. Hang the wreath with a sturdy over door hook and check that it clears the door frame when the door opens. Store the wreath flat in a box with tissue over the front so ornaments do not shift.

    9. A Bowl of Pink Ornaments as a Dining Table Centerpiece

    Dining table centerpiece with a low bowl filled with pink ornaments.

    Fill a wide, low bowl with pink ornaments in mixed finishes and set it in the center of a dining table. Mix blush, rose, and one deeper pink, and add a few gold or white balls for contrast. A low bowl keeps the centerpiece in scale and leaves sight lines open across the table.

    Choose a bowl with a flat base and a felt pad underneath to protect the table. If the bowl will stay on the table during meals, keep it narrow enough that plates and glasses still fit, and use shatterproof ornaments if children will be seated nearby. A runner under the bowl ties the centerpiece to the rest of the table.

    10. Painted Pink Wooden Ornaments on Branches in a Vase

    Vase with branches hung with painted pink wooden ornaments on a console.

    Hang small painted pink wooden ornaments from bare branches set in a tall vase on a console or sideboard. The branches give height without a tree, and the wood adds a handmade, rustic feel. Mix pink shapes, such as stars, hearts, and rounds, with a few plain wood pieces for balance.

    Weight the vase with stones or sand so tall branches do not tip, and trim branches to fit the vase height. Keep the arrangement away from doorways where coats or bags might catch branches. This display suits an entry or hallway where a full tree would block the walkway.

    11. Pink Ornaments Hung from a Chandelier with Ribbon

    Chandelier with pink ornaments hung from ribbons at staggered heights.

    Hang pink ornaments from a chandelier or pendant light with ribbons cut to different lengths, so ornaments hang at staggered heights. Use light ornaments only, and keep ribbons clear of bulbs and heat sources. A mix of blush balls and small drops in pink and gold works well over a dining table.

    Tie ribbons with a simple knot or a small bow, and trim ends evenly for a tidy look. Check the chandelier weight limit in practice by adding ornaments a few at a time and watching for any sway. Remove ornaments before cleaning the fixture, and store ribbons flat so they do not crease.

    12. Pink Dried Flower Ornaments under a Glass Cloche

    Glass cloche covering pink dried flower ornaments on a sideboard.

    Place pink dried flower ornaments, such as small rose buds or pressed flower rounds, under a glass cloche on a sideboard or bookshelf. The cloche protects delicate dried flowers from dust and touch while letting their color show. Add a small linen cloth or a wooden base under the cloche to ground the display.

    Keep the cloche out of direct sun, since strong sun can fade dried flowers. Handle dried pieces gently when setting up, and keep the display away from damp rooms, since moisture softens dried petals. A cloche display suits a quiet corner where a larger tree or garland would feel too busy.

    13. Pink Yarn Wrapped Ornaments on a Family Tree

    Family tree decorated with pink yarn wrapped ornaments.

    Wrap foam or plain balls in pink yarn, with a small pom pom or a felt star glued at the top, and hang them on a family tree. Yarn adds soft texture next to glass and metal ornaments, and the handmade look suits a tree decorated over time. Mix light pink, rose, and cream yarn for a varied but calm result.

    Use a short loop of matching yarn or ribbon for hanging, and keep yarn ends tucked or glued so they do not unravel. Yarn ornaments are light and safe for lower branches where children can reach them. Store them in a dry box with tissue so yarn does not snag on other ornaments.

    14. A Tall Glass Vase Filled with Pink Ornaments

    Entry console with a tall glass vase filled with pink ornaments.

    Fill a tall glass vase or hurricane with pink ornaments in graduated sizes, with larger balls at the bottom and smaller balls near the top, and set it on an entry console. The glass shows the full color stack, and the vase needs no tree or garland to make an impact. Add a single gold or white ornament near the top for contrast.

    Choose a vase with a wide, stable base, and place it away from the edge of the console. If the vase sits near a door, use shatterproof ornaments so a bump does not scatter glass. A vase display is easy to change after the season, since ornaments lift out and pack away in minutes.

    15. Pink Teardrop Ornaments on a Stair Banister Garland

    Stair banister garland hung with pink teardrop ornaments.

    Hang pink teardrop and finial ornaments from a green garland draped along a stair banister. The long teardrop shape adds movement to the garland, and pink stands out clearly against green branches. Space ornaments evenly along the swags, with a small cluster at each newel post.

    Fasten the garland with short ties or hooks rather than tape, so the banister finish stays clean. Keep ornaments high enough that hands can still grip the rail safely, and keep the swags clear of steps. Check ties after the first day, since garland can settle and pull ornaments lower.

    16. Pink Striped Ornaments on a Small Kitchen Tree

    Small kitchen tree decorated with pink and white striped ornaments.

    Hang pink and white striped ornaments on a small tree on a kitchen counter or a breakfast table. Stripes give a candy style pattern that suits a kitchen, and the small tree keeps counter space free for cooking. Mix striped balls with a few plain pink balls so the pattern does not overwhelm the tree.

    Keep the tree away from the stove, sink, and cutting areas, and use shatterproof ornaments if the counter sees heavy use. A small tray under the tree catches fallen needles or ornaments and makes cleanup simple. This idea also works on a kitchen windowsill where the tree catches daylight.

    17. A Pink Ornament as a Table Place Marker

    Dining table place setting with a pink ornament and a small name tag.

    Set one pink ornament at each dining table place setting, tied with a small name tag or a sprig of greenery, as a place marker guests can take home. Use the same ornament shape in the same pink at every seat for a unified table, and match the ribbon to the table linens. The marker doubles as a small favor and a table decoration.

    Keep ornaments flat or in a small dish at each setting so they do not roll off the table. If the table uses candles, keep ornaments and paper tags clear of flames, and use battery candles near paper or fabric. After the meal, guests can hang the ornament on their own tree, which makes the marker useful beyond one dinner.

    Conclusion

    Pink ornaments suit trees, garlands, and tables when one pink family leads and a calm base supports it. Start with the main tree, repeat the same pink on a garland or a table display, and vary the material so the pink feels layered rather than repeated. Choose the ideas that fit your rooms, your tree size, and your storage, and leave the rest for another season. A few well placed pink ornaments, in glass, velvet, felt, or wood, can carry a whole room without crowding it.

    FAQs

    What pink shade works best for ornaments?

    Blush pink works best in most rooms, since it pairs with green, white, cream, and gold without looking loud. Rose pink gives a stronger color for a main tree or a door wreath, while hot pink suits a small accent display, such as a vase or a single garland, rather than a whole room.

    How do I keep pink ornaments from looking childish?

    Pair pink with a calm base, such as green branches, white, cream, or gold, and mix matte and shiny finishes instead of using only bright pink. Limit hot pink to one display, use larger ornaments with simple shapes on a main tree, and repeat the same pink family in a second place, such as a table bowl, so the look feels planned.

    Can I mix pink ornaments with other colors?

    Yes, pink mixes well with gold, white, cream, silver, and green, and it also pairs with soft blue or sage for a pastel display. Keep the second color to one or two accents, such as gold ribbon or white beads, so pink stays the main color and the display does not turn into a mix of unrelated shades.

    Are pink ornaments only for Christmas trees?

    No, pink ornaments work on mantel garlands, stair garlands, wreaths, chandeliers, window displays, table bowls, vases, and place settings. The same ornament can move from a tree to a bowl or a vase after the season, which makes pink ornaments useful for parties, spring tables, and bedroom displays as well as holiday trees.

    How should I store pink ornaments?

    Store glass ornaments in divided boxes with tissue between pieces, keep velvet and felt ornaments in closed, dry boxes, and store paper ornaments flat. Label boxes by color and material, such as blush glass or pink felt, so next season setup is quick and fragile pieces are easy to find.

    How many pink ornaments do I need for a tree?

    A small tabletop tree needs about 10 to 20 ornaments, a medium tree needs about 40 to 60, and a large tree needs 80 or more, depending on branch fullness. Start with fewer ornaments than you think you need, step back to check for gaps, and add small ornaments last to fill thin spots without crowding the tree.


  • How to Identify, Display, and Store Antique Christmas Ornaments

    How to Identify, Display, and Store Antique Christmas Ornaments

    Identify antique Christmas ornaments by their glass weight, hand painted detail, metal caps, and maker marks, then display them on strong branches or stable shelves away from heat and direct sun. For storage, wrap each ornament alone in acid free tissue, pack it upright in a divided box, and keep the box in a cool, dry place.

    Old ornaments reward a slow, careful approach. A piece that looks plain in a box can show fine hand painting, a rare cap style, or a maker mark once it is held in good light. At the same time, thin glass, flaking paint, and brittle hanging loops break easily, so every check, display choice, and packing step should protect the piece first. For more seasonal ideas to pair with these displays, browse the Dwell Ovell decor ideas index. Work on a soft surface, handle one ornament at a time, and keep notes as you go so identification clues are not lost between seasons.

    Key Takeaways

    • Start with material and construction: thin blown glass, hand painting, and old metal caps point toward age, while thick molded plastic and printed labels usually point to later copies.
    • Check maker marks, cap styles, and paint wear together, since no single clue proves age on its own.
    • Record what you find with photos and notes before you hang or pack anything away.
    • Hang antique ornaments only on branches and hooks that can hold their weight, with space around each piece.
    • Keep displays away from heat, direct sun, and high traffic spots where pieces can be knocked.
    • Store each ornament wrapped alone in acid free tissue, upright in a divided box, in a cool, dry place, and inspect the box once a year.

    Supplies You Will Need

    • A soft towel or felt pad for a work surface
    • Cotton gloves or clean, dry hands
    • A magnifying glass or a phone camera with zoom
    • Acid free tissue paper, unprinted and undyed
    • Small divided ornament boxes or sturdy boxes with cardboard dividers
    • Soft ribbon or ornament hooks rated for the weight of each piece
    • Small labels, a notebook, and a pen for inventory notes
    • A soft, dry brush and a dry microfiber cloth for gentle dusting
    • Silica gel packets for storage boxes, used only where they will not touch ornaments directly

    1. Set Up a Safe Work Surface

    Soft towel work surface prepared beside a tray of antique glass Christmas ornaments.

    Lay a soft towel or felt pad on a table before you open any ornament box. Work away from the edge of the table, keep drinks and sharp tools out of reach, and handle one ornament at a time. A padded surface catches a piece if it slips, and a clear table keeps small caps, hooks, and loose glitter from being lost or mixed between ornaments.

    Work in daylight or bright, even indoor light so paint detail, glass color, and cap marks show clearly. Keep a small tray or bowl nearby for caps and hooks that come loose during inspection. If you are working with a full collection, sort boxes one at a time rather than emptying several boxes at once, since mixed pieces are harder to identify and easier to damage.

    2. Sort Ornaments by Material and Fragility

    Antique Christmas ornaments sorted by material into separate groups on a padded table.

    Group ornaments first by material: blown glass, molded glass, metal, paper, cotton, or wood. Then separate the most fragile pieces, such as thin glass balls, ornaments with long points, and pieces with flaking paint, from sturdier items such as solid metal bells or thick glass drops. Sorting this way sets the handling rules for the rest of the process, since fragile pieces need gloves, two hand support, and individual wrapping.
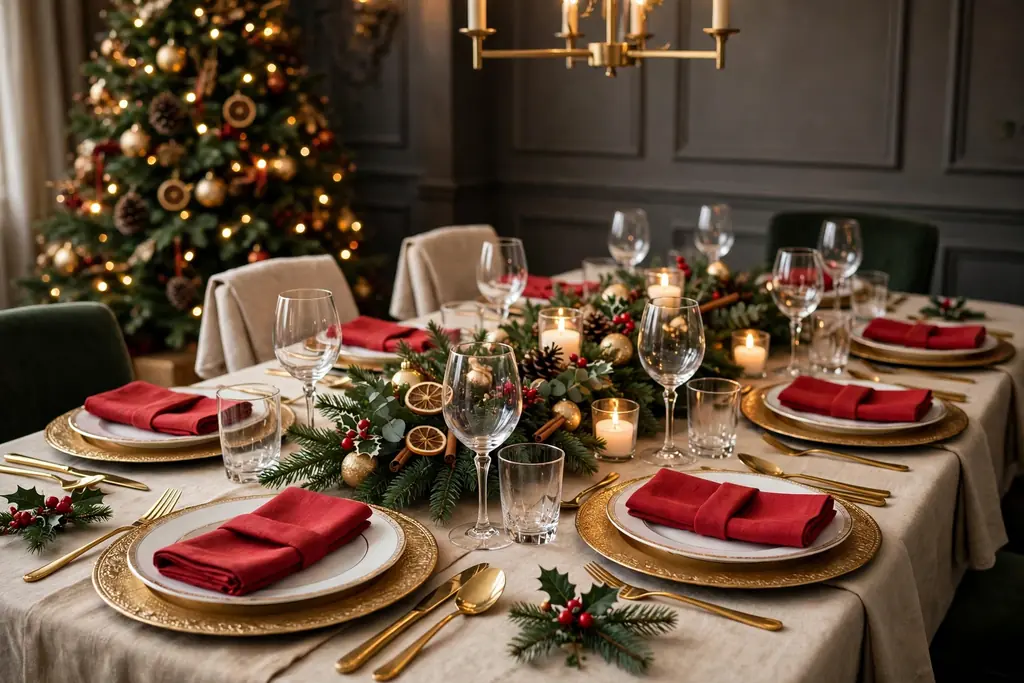
    Within each material group, set aside any ornament that rattles, feels loose at the cap, or shows a crack. Those pieces need a condition check before they are hung or packed, and some may be display only pieces that should stay on a shelf rather than on a tree. Label each group with a small paper tag so sorting notes carry through to the inventory step.

    3. Read Age Markers in Glass, Paint, and Weight

    Hand holding a thin blown glass antique ornament to the light to show hand painted detail.

    Hold each glass ornament in good light and look for signs of hand work: slight unevenness in shape, thin walls, hand painted lines that vary in width, and small paint wear at raised points. Early blown glass ornaments often feel light for their size and show soft, muted color under the paint, while later machine made pieces tend to feel heavier, more uniform, and glossier. Compare pieces side by side when you can, since differences in weight and finish are easier to spot in a group.

    Check the paint surface for age related wear, such as fine cracks in the paint layer, gentle fading on one side, and small chips at the hanging neck. Wear alone does not prove age, since new pieces can be made to look worn, but wear that matches how a piece would have been handled, hung, and stored over many seasons is a useful clue when it lines up with other markers. Note anything unusual in your inventory, such as repairs, repainting, or a replaced cap.

    4. Identify Maker Marks and Cap Styles

    Old metal ornament cap and maker mark examined with a magnifying glass.

    Look closely at the metal cap, the hanging loop, and any mark stamped or printed on the cap, the neck, or the base of the ornament. Early German glass ornaments often have simple wire caps with a small loop, while mid century American ornaments, including many Shiny Brite pieces, often carry caps marked with the maker name or “Made in USA” style wording. Dresden ornaments, made from pressed cardboard and foil, have a flat, embossed look that sets them apart from blown glass. Record the exact wording of any mark, since a close copy can differ by one word.
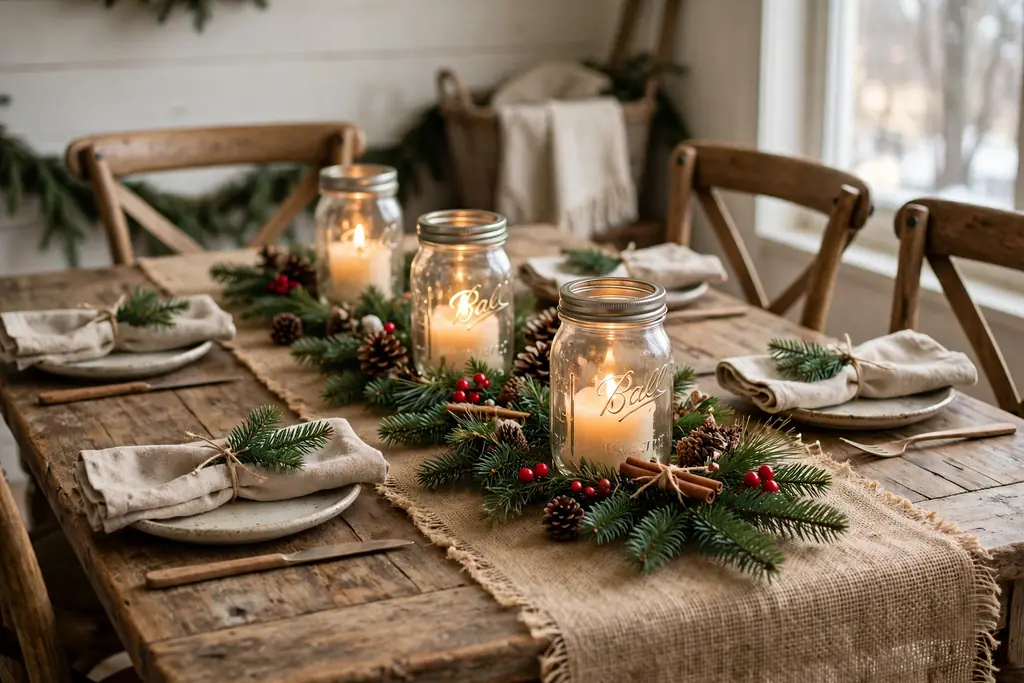
    Use a magnifying glass for small print and photograph each mark before you move on. If a cap is missing or clearly replaced, note that too, since a replacement cap changes both the look and the value clues of a piece. Do not force a stuck cap or scrape a mark clean, since cleaning can remove the very detail you are trying to read.

    5. Check Condition Before You Hang or Store Anything

    Person inspecting an antique glass ornament for chips and loose caps on a soft cloth.

    Inspect each ornament slowly, turning it in your hands to check for cracks, chips, loose glitter, flaking paint, and tarnish on metal parts. Tap a glass ornament very lightly near your ear only if it is sturdy enough to handle, and stop at once if you hear loose material inside or feel a weak point. Check that hanging loops sit firm, that caps fit snugly, and that paper or cotton parts are dry and free of mold spots or insect damage.

    Set aside damaged pieces in their own padded tray and decide whether each one is safe to display on a shelf, needs a repair by a careful hand, or should stay packed and handled only rarely. Never hang a cracked glass ornament on a tree branch, since heat, movement, and weight can widen the crack. A short written condition note for each damaged piece saves time next season and keeps fragile pieces from being hung by mistake.

    6. Photograph and Record Your Inventory

    Antique Christmas ornaments photographed one by one on a plain background beside a notebook.

    Photograph each ornament on a plain background, including one overall photo and one close photo of any maker mark, cap, or unusual detail. Keep the light even and avoid flash, which can wash out paint color and hide fine lines. Photograph groups only after single pieces are recorded, so each record stays tied to one ornament rather than to a mixed group shot.

    Write a short inventory line for each piece: a brief description, material, color, cap style, any maker mark, condition notes, and where it will be stored. Number the inventory lines to match numbered labels in the storage boxes. This record helps with insurance notes, helps family members handle pieces correctly, and makes it easy to spot a missing ornament at the end of a season.

    7. Choose Safe Hanging Hardware for Each Piece

    Sturdy ornament hooks and soft ribbon loops laid out beside antique glass ornaments.

    Match the hook or ribbon to the weight and neck size of each ornament. Use short, sturdy ornament hooks for light glass balls, and use ribbon loops tied through the cap for heavier or wide necked pieces that slip off thin hooks. Test each hook on a branch or display stand before the ornament goes on, and check that the hook closes enough that a light bump will not drop the piece.

    Avoid string, wire, and adhesive hooks for antique glass, since thin wire can cut into old caps and adhesive can fail without warning. Replace rusted or bent hooks rather than straightening them, since weakened metal can break under weight. Keep a small set of spare hooks and ribbons in the display kit so a weak hook can be swapped at once, without moving a fragile ornament more than needed.
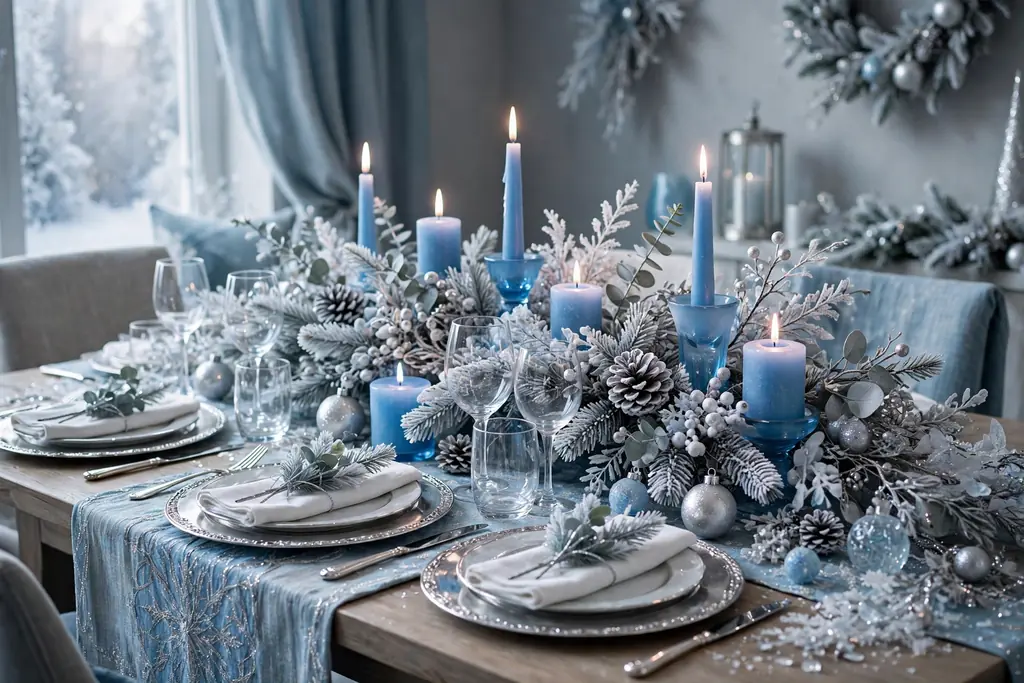
    8. Hang Antique Ornaments Safely on the Tree

    Christmas tree with antique glass ornaments hung on strong inner branches with space between pieces.

    Place antique ornaments on strong, inner branches rather than on thin outer tips, and hang heavier pieces low and close to the trunk where branches bend least. Leave space around each ornament so glass pieces do not knock together when the tree is brushed or when a door closes nearby. Put the most fragile pieces at eye level or above the reach of small children and pets, and keep them away from the tree base where gifts and feet can bump them.

    Hang a few pieces at a time, then step back and check balance and spacing before adding more. If a branch droops under an ornament, move that ornament to a stronger branch rather than adding support wire, which can scratch bark and hide a weak branch. At the end of the season, remove antique ornaments first, before lights and garlands are pulled off, so they are never caught in a tangle.

    9. Display Ornaments on Mantels, Shelves, and Tables

    Mantel shelf display of antique ornaments in a shallow bowl and on small stands.

    For pieces too fragile for a tree, use a stable shelf, mantel, or table display. Set ornaments in shallow bowls, on small stands, or in a row on a padded runner, with space between pieces so none touches its neighbor. Use museum putty or a small, soft pad under stands on a mantel, and keep displays back from the edge so a bump does not send a piece to the floor.

    Group displays by color, material, or maker so the arrangement reads as a collection rather than a random pile. A small number of pieces with breathing room shows hand painting and glass color better than a crowded shelf, and it lowers the chance of chips during dusting. Keep display ornaments out of direct paths, away from door swings, and off surfaces that hold drinks or hot dishes.
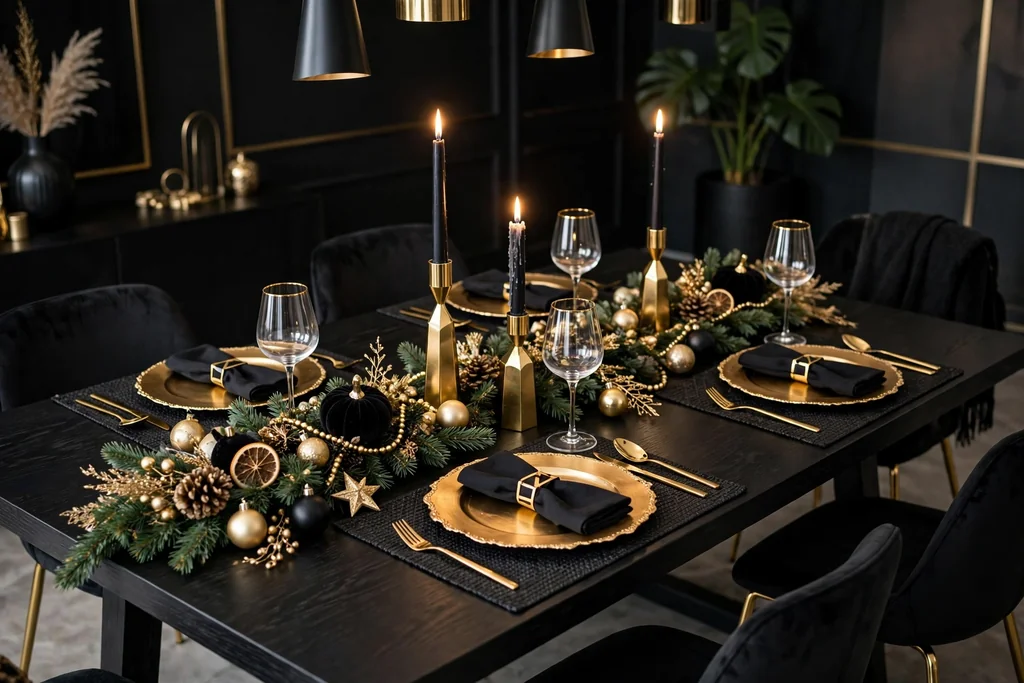
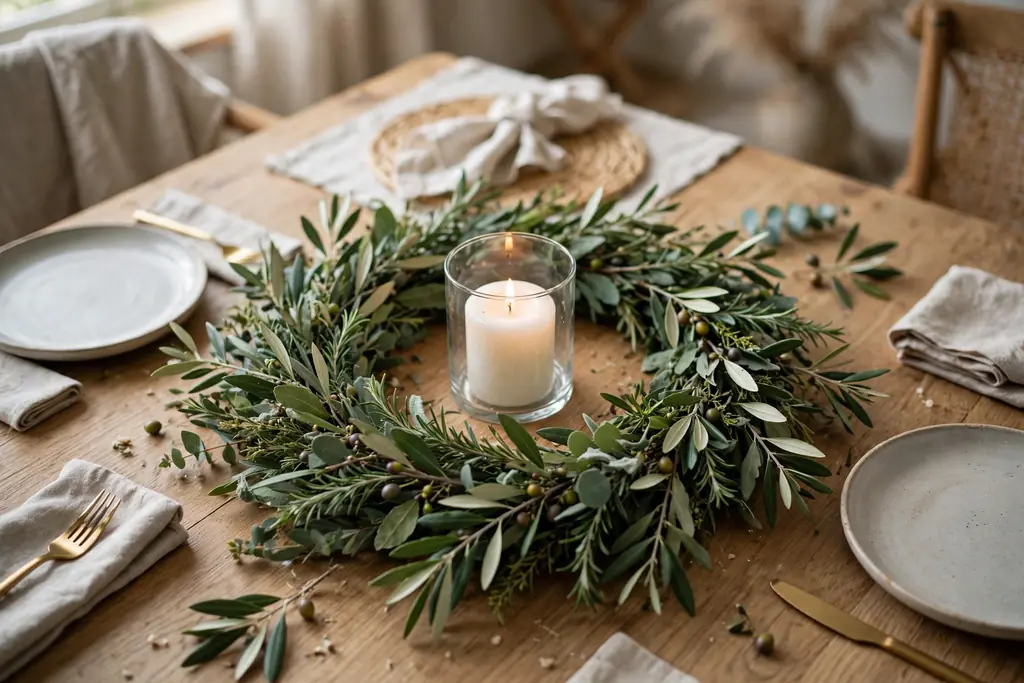
    10. Protect Displays from Light, Heat, and Handling

    Antique ornaments displayed away from a sunny window and fireplace in steady room light.

    Keep antique ornaments out of direct sunlight, since sun fades paint and heats glass unevenly, and keep them away from fireplaces, radiators, and heat vents. Use cool, steady room light for display, and avoid old incandescent mini lights draped close to glass, since heat can stress old paint and caps. If a display sits near a window, move it back a few feet or use a sheer curtain during the brightest hours.

    Limit handling during the display season by choosing the arrangement once and leaving it in place. When dusting is needed, use a soft, dry brush with a light touch and support the ornament with your other hand. Ask guests, especially children, to look without touching, and place a small sign or a gentle verbal note near a fragile display if the room will be busy.

    11. Clean Antique Ornaments Gently and Rarely

    Gentle dry dusting of an antique glass ornament with a soft brush.

    Clean only when dust or grime hides detail, and clean as little as possible. Dust with a soft, dry brush or a dry microfiber cloth, working in one direction and supporting thin points with your fingers. For sturdy glass with no flaking paint, a barely damp cloth can lift surface dust, but dry the piece at once and never soak an ornament, since water can enter through the cap, lift paint, and damage paper, cotton, or foil parts.

    Do not use household cleaners, polish, or abrasive cloths on antique ornaments, and never polish a patina off metal caps unless you are certain the piece is not valued for its aged finish. Leave flaking paint, loose glitter, and cracked glass alone, since cleaning can make the damage worse. If a piece has mold, heavy grime, or a broken part, set it aside for advice from a conservator or an experienced collector rather than trying a home repair.

    12. Wrap Each Ornament Alone in Acid Free Tissue

    Hands wrapping a single antique glass ornament loosely in acid free tissue paper.

    Wrap each ornament separately in a sheet of acid free tissue, folding the tissue loosely around the piece so points and thin necks are cushioned without pressure. Avoid newspaper, colored tissue, and bubble wrap pressed directly against painted glass, since newsprint can transfer ink, dyes can stain, and bubble wrap can leave marks on soft paint over time. For ornaments with long points or delicate protrusions, add a small extra tissue pad around the fragile area before the outer wrap.

    Place the wrapped ornament in its own compartment or cell, never two to a cell, and keep the wrap with the ornament so the pair stays together at unpacking time. If an ornament has a loose cap, wrap the cap with the ornament in the same tissue bundle and note it on the inventory line. A wrapped piece should sit snug enough not to roll, but loose enough that unwrapping does not pull paint.

    13. Pack Boxes Upright with Dividers and Padding

    Divided ornament storage box packed upright with tissue wrapped antique ornaments.

    Use sturdy boxes with cardboard dividers sized to the ornaments, or use individual ornament boxes with fitted cells. Pack glass ornaments upright where their shape allows, with tissue padding at the bottom of each cell and a light tissue layer over the top before the lid closes. Fill empty space in a box with crumpled acid free tissue so compartments do not shift in transit, but do not overfill a box until the lid presses down on the contents.

    Keep heavier ornaments at the bottom of a box and lighter, fragile pieces at the top, and mark the box “fragile” and “this side up” on more than one side. Carry boxes with two hands and set them down gently, since a dropped box can chip several pieces at once even when each one is wrapped. Avoid stacking heavy boxes on top of ornament boxes in storage.

    14. Store in a Cool, Dry Place and Inspect Once a Year

    Labeled ornament storage boxes on a dry indoor closet shelf kept off the floor.

    Store ornament boxes in a cool, dry indoor space with steady temperature, such as a bedroom closet or a dry interior storage room, rather than an attic or a damp basement. Heat, cold swings, and damp air can crack glass, lift paint, tarnish caps, and encourage mold on paper and cotton pieces. Keep boxes off the floor on a shelf or pallet, away from exterior walls, pipes, and sources of leaks.

    Label each box with its contents, such as material, color group, or display location, and keep the inventory list with the boxes or in a known file. Once a year, outside the busy holiday season, open each box, check for damp, pests, or new damage, replace worn tissue, and update the inventory. A short annual check catches small problems, such as a damp box or a loose cap, before they become lost or broken pieces.

    Conclusion

    Antique Christmas ornaments last when identification, display, and storage are treated as one careful routine. Learn the age markers and maker marks, record what you find, hang each piece where its weight and fragility are respected, and pack it alone in tissue in a cool, dry box. The extra time spent on sorting, wrapping, and labeling pays back every season, when pieces come out unchipped, colors stay clear, and the collection can be enjoyed without worry. Start with the most fragile pieces, work through the steps in order, and keep the inventory close so next Christmas begins with pieces you already know and trust.

    FAQs

    How can I tell if a Christmas ornament is truly antique?

    A truly antique ornament usually shows a mix of age clues, including thin blown glass, hand painted detail, an early cap style, and period maker marks or wording, with wear that matches long use. No single clue proves age, so compare material, weight, paint, caps, and marks together, and treat a piece as unproven if its clues point in different directions.

    What are the most common maker marks on antique Christmas ornaments?

    Common marks include simple wire caps on early German glass ornaments, caps marked with American maker names such as Shiny Brite on mid century pieces, and country of origin wording that changed over time. Record the exact wording and cap style, since small differences in spelling, font, or cap shape can separate an original piece from a later copy.

    Are antique glass ornaments safe to hang on a Christmas tree?

    Antique glass ornaments are safe on a tree when they are in good condition, hung on strong inner branches with sturdy hooks, and given space so they do not knock together. Keep cracked, loose capped, or very fragile pieces on a shelf display instead, place heavy pieces low and close to the trunk, and remove antique ornaments first at takedown time.

    How should I clean antique Christmas ornaments?

    Clean antique ornaments rarely and gently, using a soft, dry brush or dry microfiber cloth, and supporting thin points while you work. Avoid water soaking, household cleaners, and polish, since water can lift paint and damage paper or foil parts, and leave flaking paint, loose glitter, and cracks alone unless a conservator advises a repair.

    What is the best way to store antique Christmas ornaments?

    The best way to store antique Christmas ornaments is to wrap each piece alone in acid free tissue, pack it upright in its own divided cell, and keep the box in a cool, dry indoor space with steady temperature. Keep boxes off the floor, label each box by contents, and inspect the collection once a year for damp, pests, or new damage.

    Do antique Christmas ornaments have value, and should I get them appraised?

    Some antique Christmas ornaments carry collector value based on rarity, maker, condition, and demand, while many others carry mainly family or decorative value. If a piece has a rare maker mark, unusual form, or a full matching set, consider a written appraisal from a qualified appraiser or a reputable dealer, and keep that record with your inventory and photos.


  • 15 Fall Table Runner Ideas for a Cozy Dining Space

    15 Fall Table Runner Ideas for a Cozy Dining Space

    Fall themed table runners work best when the fabric, color, and centerpiece match the table size and the meal. Choose a washable runner in rust, mustard, or warm neutral tones, lay it down the center with a low centerpiece, and keep serving space clear at each end for a cozy dining space that still works for everyday meals.

    These 15 fall themed table runner ideas cover plaid, linen, burlap, velvet, and woven runners, plus centerpieces from pumpkins and candles to fruit bowls and lanterns. Each idea keeps the table usable, so you can set plates, pass dishes, and talk across the table without moving the whole display. Start with the runner you already own, or pick one fabric and color, then add a centerpiece only where the table still looks bare.

    Key Takeaways

    • Pick a runner that fits the table, with a drop of about 15 to 30 centimeters at each end, so it frames the table without hanging into laps.
    • Repeat two or three fall colors, such as rust, mustard, and warm wood brown, across the runner, napkins, and centerpiece.
    • Keep the centerpiece low and narrow, so guests can see each other and serving dishes still fit on the table.
    • Choose a washable runner for everyday tables, and save delicate fabrics for gatherings where spills are less likely.
    • Layer a runner over a plain tablecloth when the table surface needs protection or the runner alone looks too narrow.
    • Store runners rolled, not folded hard, so creases do not cut across the pattern next time you use them.

    1. Rust Plaid Runner with a Low Wood Board Centerpiece

    Dining table with a rust plaid runner and a wood board centerpiece with small pumpkins.

    A rust plaid runner is the fastest way to give a dining table a fall look. Lay the runner down the center of a wood table, then set a low wood board on top with two small pumpkins and a short vase of dried stems. The plaid sets the color plan, while the board keeps the centerpiece in one place that lifts away in a single move at mealtimes.

    Keep the board shorter than half the table length, so plates and serving bowls still fit at each end. For a small table, use one pumpkin and a single stem vase, and let the plaid do most of the work. This idea suits wood, painted, and stone tables alike, and the runner washes well after everyday use.

    2. Natural Linen Runner with Mini Pumpkins and Candles

    Natural linen table runner with mini pumpkins and candles down the center.

    A natural linen runner gives a fall table a calm base that works with almost any dishes. Lay the linen flat down the center, then line up three to five mini pumpkins in cream, muted orange, and pale green, with a flameless candle or two between them. The pale fabric keeps the table light, while the pumpkins add just enough fall color.

    Use flameless candles near linen and dried stems, and keep any real flame clear of fabric. For everyday meals, the pumpkins alone are enough, and the candles can stay unlit until evening. This runner pairs well with white plates and wood chargers, and it suits a dining space that already has warm wood furniture.
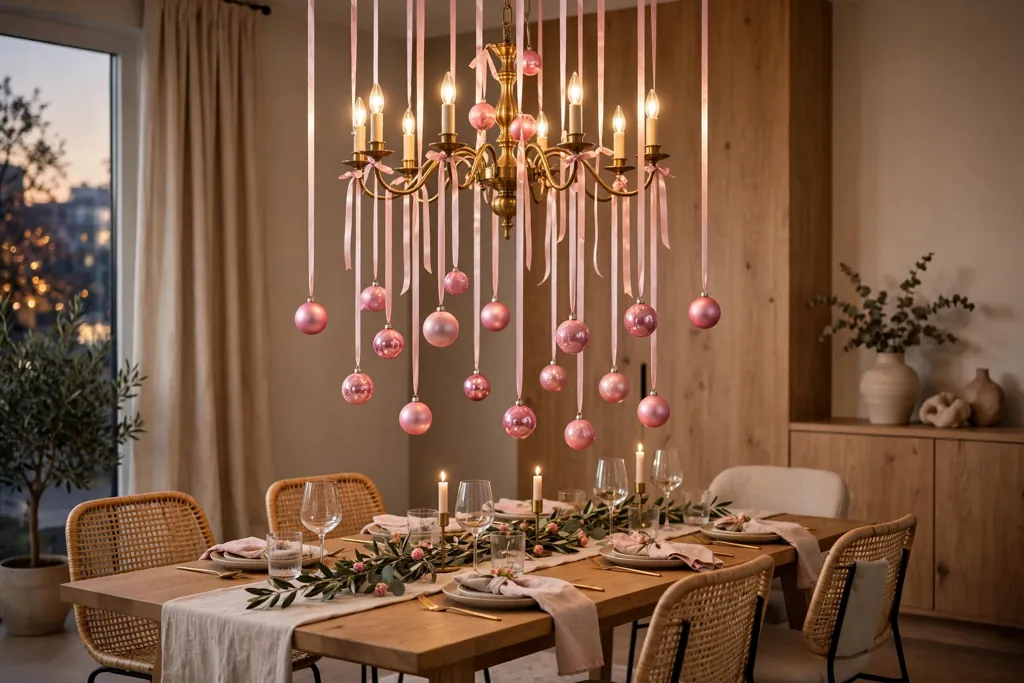
    3. Burlap Runner with Dried Wheat and Pinecones

    Burlap table runner with dried wheat and pinecones on a rustic wood table.

    A burlap runner brings a rustic harvest feel to the table with very little effort. Lay the burlap down the center, then add a bundle of dried wheat laid flat or in a low vase, plus a few pinecones spaced along the runner. The rough texture of burlap contrasts nicely with smooth plates and glassware.

    Line the burlap with a plain cloth underneath if the weave is open, so crumbs do not fall through to the table. Keep dried wheat clear of real flames, and shake the runner outside before washing it, since burlap sheds a little. This idea works well for a farmhouse table and for a harvest meal with simple place settings.

    4. Mustard and Cream Striped Runner for Everyday Meals

    Mustard and cream striped table runner with a small bowl of apples.

    A mustard and cream striped runner is a practical choice for a table used every day. The stripes add fall color without a busy pattern, and the cream keeps the table bright enough for morning light and weekday dinners. Lay the runner straight down the center and keep the centerpiece simple, such as a small bowl of apples or a single vase of dried stems.

    Because the pattern is simple, this runner works with patterned plates, plain plates, or a mix of both. Choose a washable cotton runner, and keep spare napkins in mustard or cream to repeat the colors at each place. For a gathering, add candles at the ends and the table still reads as dressed without a full restyle.

    5. Rust Velvet Runner with Brass Candlesticks

    Rust velvet table runner with brass candlesticks on a dark wood table.

    A rust velvet runner gives a fall table a richer feel for evening meals and gatherings. Lay the velvet down the center, then set two or three brass candlesticks at varied heights along it, with a few small leaves or berries tucked at their bases. The velvet catches low light, while the brass adds a warm metal note.

    Keep candlesticks clear of fabric edges if you use real candles, and never leave flames unattended. For a family table with children, use flameless taper candles in the same holders for the same look with less risk. This runner suits a darker wood table best, where the rust color stands out against the grain.

    6. Leaf Print Runner with a Harvest Fruit Bowl

    Leaf print table runner with a bowl of apples, pears, and small gourds.

    A leaf print runner in rust, gold, and green puts the fall pattern right on the table, so the centerpiece can stay simple. Lay the runner down the center, then set a wide, shallow bowl of apples, pears, and small gourds in the middle. The fruit adds real color and shape, and it can be eaten through the week and topped up as needed.

    Keep the bowl low and wide, so it does not block the view across the table. Choose fruit in colors that echo the leaf print, and wipe the bowl before refilling it. This idea suits a table that needs color fast, and it pairs well with plain cream napkins, which let the runner and the fruit do the talking.
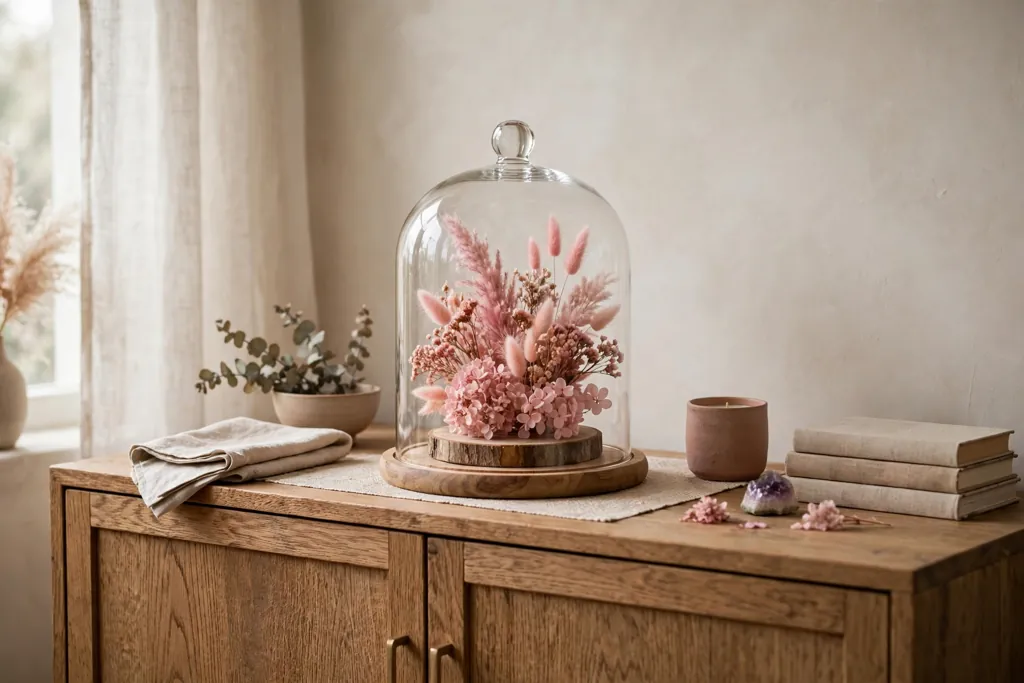
    7. Chunky Woven Runner with Lanterns at Each End

    Chunky woven table runner with small lanterns at each end.

    A chunky woven runner in cream or warm brown adds texture to a fall table without a loud pattern. Lay the woven runner down the center, then set a small lantern at each end of the runner, with a flameless candle inside each one. The lanterns frame the table and give a soft glow in the evening, while the middle stays clear for serving dishes.

    Use lanterns sized to the table, so they do not crowd the end place settings. For a long table, add a third lantern in the center, or a small pumpkin between the two end lanterns. This idea works well for a casual gathering, and the lanterns can move to a sideboard or porch when the meal is over.

    8. Farmhouse Checked Runner with Mason Jar Lights

    Farmhouse checked table runner with mason jars holding warm lights.

    A farmhouse checked runner in rust and cream is a classic fall choice for a wood dining table. Lay the checked runner down the center, then set two or three mason jars with flameless fairy lights or small candles along it, spaced so plates still fit between them. The checks give the table a homey pattern, while the jars add gentle light.

    Keep the jars low and the lights warm white, so the table feels cozy rather than bright. For everyday use, the runner alone is enough, and the jars can come out only for evening meals. This idea also works on a kitchen table, where the checked pattern echoes dish towels and other fall kitchen pieces. For more kitchen ideas, see these fall kitchen decor ideas.

    9. Layered Runner Over a Plain Tablecloth

    Cream tablecloth layered with a narrow fall plaid runner on a dining table.

    Layering a fall runner over a plain tablecloth solves two problems at once: it protects the table and adds seasonal color. Lay a cream or warm white tablecloth first, then center a narrower fall runner in plaid, rust, or leaf print on top. The cloth softens the table edges, while the runner draws the eye down the center.

    Keep the tablecloth plain, so the runner pattern stays the focus, and choose a runner in a heavier fabric than the cloth, so it lies flat. This pairing suits a formal gathering, a table with marks to hide, or a rented table you want to dress up without buying new furniture. Add a low centerpiece, and the layered look is complete.

    10. White Pumpkin and Eucalyptus Runner for a Neutral Table

    Cream table runner with white pumpkins and eucalyptus sprigs.

    A neutral fall table starts with a cream or soft grey runner, then adds white pumpkins and sprigs of eucalyptus along the center. Lay the runner down the middle, set three to five white or cream pumpkins at varied sizes along it, and tuck eucalyptus sprigs between them. The result is seasonal without strong orange, which suits a pale dining room.

    Eucalyptus adds a soft green-grey tone and a light scent, and it dries well if you want the display to last. Keep the pumpkins small enough that serving dishes still fit, and use plain white or cream plates so the table stays calm. This idea works well when the rest of the room is already neutral and you want fall color that does not shout.

    11. Amber Glass and Candle Runner for Evening Meals

    Rust table runner with amber glass candle holders in warm evening light.

    An amber glass and candle runner setup is made for evening meals, when warm light matters most. Lay a runner in rust, brown, or cream down the center, then group two or three amber glass holders or small amber vases with flameless candles along it. The amber glass glows when lit, even with flameless candles, and warms the whole table.

    Keep the group to one short stretch of the runner, so the ends stay clear for serving dishes and drinks. Add a few small leaves or berries at the bases of the holders, but keep them clear of any real flame. This idea suits a dinner party or a quiet weeknight meal alike, and it pairs well with wood chargers and cream napkins.

    12. Stenciled Pumpkin Runner You Can Make at Home

    Plain cotton runner with stenciled pumpkins and leaves in fall colors.

    A stenciled pumpkin runner is a simple make at home project for a plain runner you already own. Lay a plain cotton runner flat, stencil small pumpkins, leaves, or a simple vine pattern along the center in rust, mustard, and olive fabric paint, and let it dry fully before use. The handmade pattern makes the table feel personal, and you control the colors to match your dishes.

    Test the stencil on a spare cloth first, and keep the pattern to the center of the runner, so the ends stay plain under plates. Use fabric paint that washes well, and follow the paint instructions for setting the color. This idea suits a crafter who wants a one of a kind runner, and it is a good way to refresh a worn plain runner for fall.

    13. Runner with Rust Napkins and Wooden Chargers

    Dining table with a rust runner, wooden chargers, cream plates, and rust napkins.

    A fall table setting starts with the runner, but the place settings carry the look to each guest. Lay a runner in rust, plaid, or natural linen down the center, then set a wooden charger at each place, a cream plate on top, and a rust linen napkin folded beside or on the plate. The runner and the napkins repeat the same fall color, so the table reads as one plan.

    Keep the centerpiece low and narrow, such as a single vase of dried stems, so the place settings stay the focus. Choose napkins that wash well, since a dining table sees spills, and keep chargers for the table only, not for serving food directly. This idea works for everyday dinners and for gatherings, with only the napkin fold changing between the two.

    14. Thanksgiving Runner with Simple Place Cards

    Thanksgiving table with a plaid runner, pumpkins, pinecones, and place cards.

    A Thanksgiving table runner can carry the whole gathering plan, from color to seating. Lay a runner in rust, gold, or plaid down the center, add a low centerpiece of pumpkins, pinecones, and dried leaves, then set a simple place card at each setting, such as a small card tucked into a pinecone or tied to a napkin. The place cards help guests find seats and make the table feel planned.
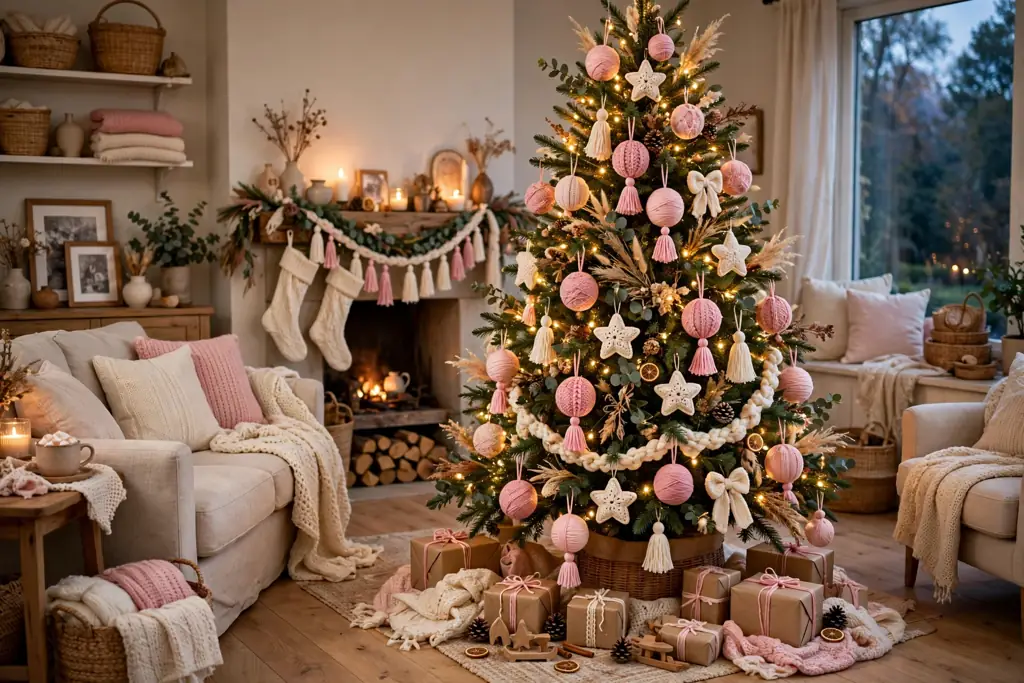
    Keep the centerpiece low enough that guests can talk across it, and keep the place cards short, with just a name. For a large table, run the runner the full length and add a second small pumpkin group at each end. This idea suits a holiday meal, and the runner and pinecones can stay out for the rest of the fall season.

    15. Reversible Runner for Early Fall to Late Fall

    Reversible fall table runner showing a light leaf print side and a rust plaid side.

    A reversible runner gives you two fall looks from one piece, which suits a table dressed from early fall through Thanksgiving. Use one side in a lighter pattern, such as cream with a small leaf print, for early fall, then flip it to a deeper side, such as rust plaid or mustard stripe, as the season moves on. The centerpiece can shift with it, from a vase of green stems to pumpkins and pinecones.

    Store the runner rolled with the current side facing out, so setup takes seconds. When you flip it, swap the napkins to match the new side, and the table looks restyled without a new purchase. This idea works well in a small home, where storage space is tight and one runner must do the work of two.

    Conclusion

    Fall themed table runners do not need a large budget or a complicated centerpiece. The ideas here work because they start with one runner in a fall fabric and color, keep the centerpiece low and narrow, and leave room for plates, serving dishes, and conversation. Pick the runner that fits your table and your washing routine first, live with it for a week, and then add candles, pumpkins, or place settings only where the table still feels bare. That slow approach keeps the dining space cozy for the season and easy to use every day. For a wider seasonal refresh, see these fall decor ideas for the rest of the home.

    FAQs

    What size fall table runner should I choose?

    Choose a fall table runner that runs the length of the table plus a drop of about 15 to 30 centimeters at each end, and a width that leaves room for plates on both sides. Measure the table before buying, since a runner that is too short looks lost and one that is too long hangs into laps. For a table used every day, a shorter drop is more practical.

    What fabric works best for a fall table runner?

    Cotton and linen work best for a fall table runner used every day, since both wash well and lie flat on the table. Burlap and woven cotton suit a rustic table, while velvet suits evening gatherings but needs more care. Pick the fabric by how often the table is used and how easy it is to wash, not by looks alone.

    How do I style a fall table runner without blocking conversation?

    Style a fall table runner without blocking conversation by keeping the centerpiece low, narrow, and in the middle third of the table. Use small pumpkins, a low bowl, or a single vase of short stems, and leave the ends clear for serving dishes. Sit down at the table after styling it, and remove anything that blocks the view across to the seat opposite.

    Can I use a fall table runner on a round table?

    You can use a fall table runner on a round table by laying it straight across the center, so it hangs evenly on two sides. Choose a runner that is long enough to drape over the edges, and keep the centerpiece to one small group in the middle, so plates still fit around it. A round table suits a single runner better than a crossed pair, which can look crowded.

    How do I wash and store a fall table runner?

    Wash a fall table runner by following the fabric care label, shaking it outside first to remove crumbs and dried leaves, and washing it on a gentle cycle if it is cotton or linen. Dry it flat or on a low heat, then roll it for storage rather than folding it hard, so creases do not cut across the pattern. Store it with other fall textiles in one box for a quick setup next year.

    What colors go with fall themed table runners?

    Rust, mustard, warm wood brown, cream, and muted olive go with fall themed table runners, since they echo harvest colors without overwhelming a dining room. Pick two or three of these colors and repeat them across the runner, napkins, and centerpiece, so the table reads as one plan. Keep bright orange to one or two small pieces, such as a pumpkin or a napkin, so the table stays calm.