Category: Seasonal Decor

Thoughtful seasonal touches, tablescapes, and holiday decorating ideas.

  • 19 Thanksgiving Wreath Ideas for a Warm Seasonal Welcome

    19 Thanksgiving Wreath Ideas for a Warm Seasonal Welcome

    A Thanksgiving wreath should welcome guests with harvest color, natural texture, and a clear seasonal theme. Choose dried oranges, wheat, pumpkins, pinecones, or eucalyptus on a grapevine, hoop, or foam base, hang it at eye level on the front door, and keep fresh elements on a covered porch so the wreath lasts through the holiday.

    A wreath is one of the simplest Thanksgiving changes you can make, since it needs no paint, no room rearrangement, and no change to the rest of the porch. Start with the base and the materials you like, then check the size against your door before you buy or build. For more seasonal looks to pair with these wreaths, browse the 27 fall decor ideas and the Dwell Ovell decor ideas index. A wreath about one half to two thirds the width of the door usually looks balanced, and a covered porch will suit fresh and dried materials better than a door in full sun and rain.

    Key Takeaways

    • Match the wreath to your door size, porch cover, and how long you want it to last.
    • Grapevine bases suit rustic harvest looks, hoop bases suit modern minimal looks, and foam bases suit full, dense wreaths.
    • Dried oranges, wheat, pinecones, and faux pumpkins last through Thanksgiving with little care.
    • Hang a wreath at eye level with a sturdy hook, and keep it clear of the door handle, lock, and hinges.
    • Keep fresh and dried wreaths out of heavy rain and strong wind, and bring them inside during storms.
    • Reuse a base year after year, and refresh it with new ribbon, greenery, or harvest accents.

    1. Wheat, Dried Orange, and Bay Leaf Wreath
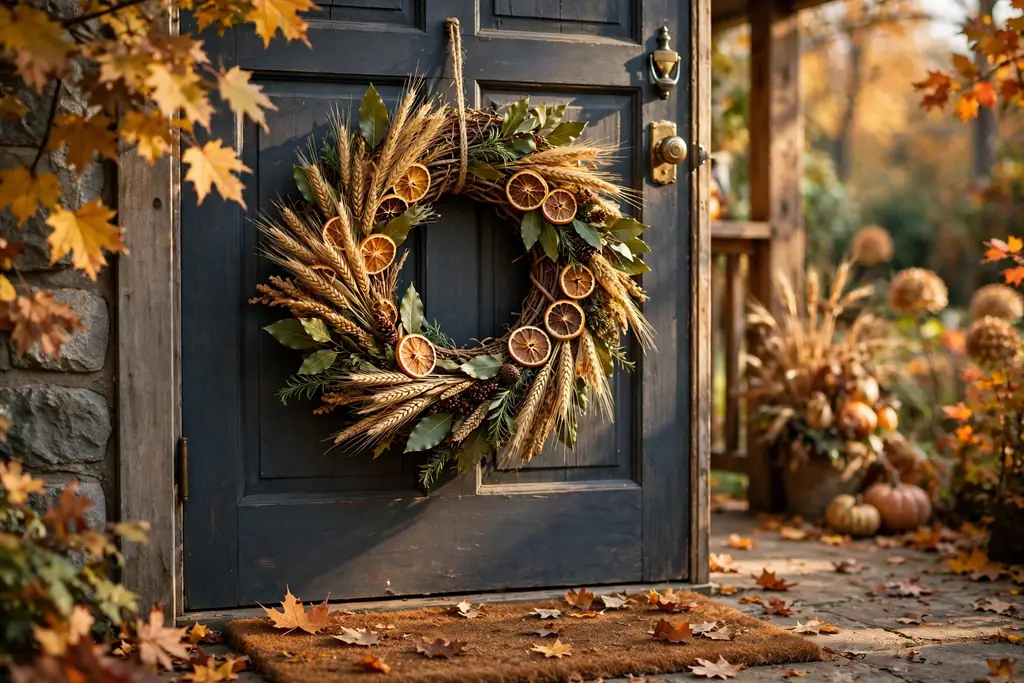
    Thanksgiving wreath with wheat, dried orange slices, and bay leaves on a front door.

    Build a classic harvest wreath from wheat bundles, dried orange slices, and bay leaves wired to a round grapevine base. The wheat gives height and a golden harvest color, the orange slices add warm amber circles, and the bay leaves fill gaps with deep green. Work in small bundles, wiring each one in the same direction so the ring reads full from the street.

    Dried oranges and wheat need no water and last for weeks on a covered porch, though they will fade in heavy rain. Keep the wreath sheltered and out of direct afternoon sun to slow fading. If an orange slice cracks, pull it out and wire in a replacement, or leave the gap and add a few extra bay leaves.

    2. Mini Pumpkin and Pinecone Grapevine Wreath
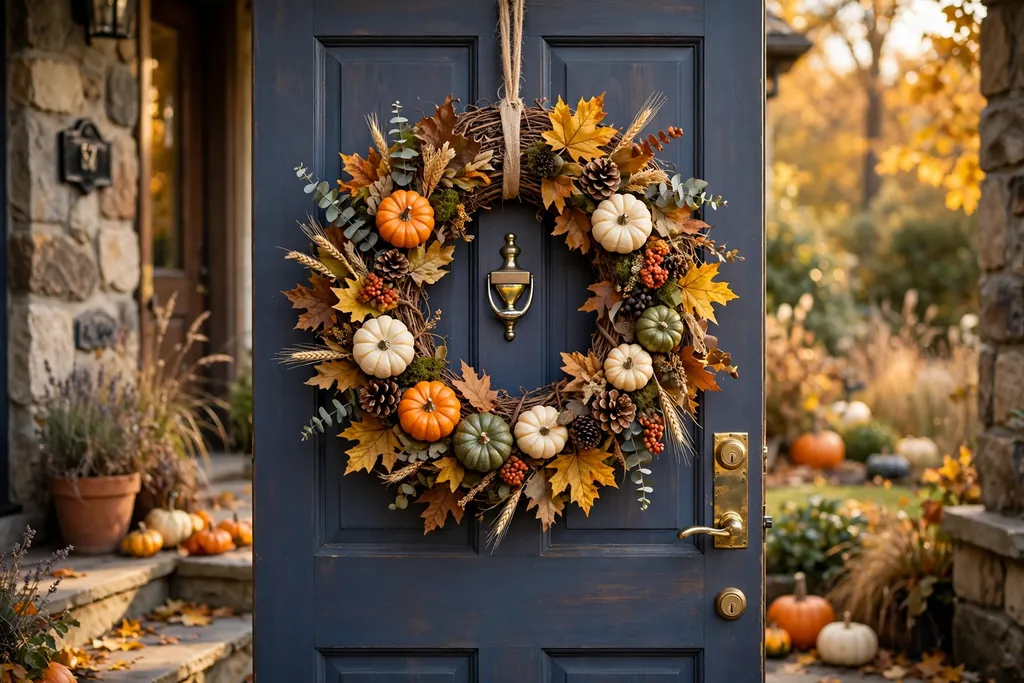
    Thanksgiving wreath with mini pumpkins and pinecones on a grapevine base.

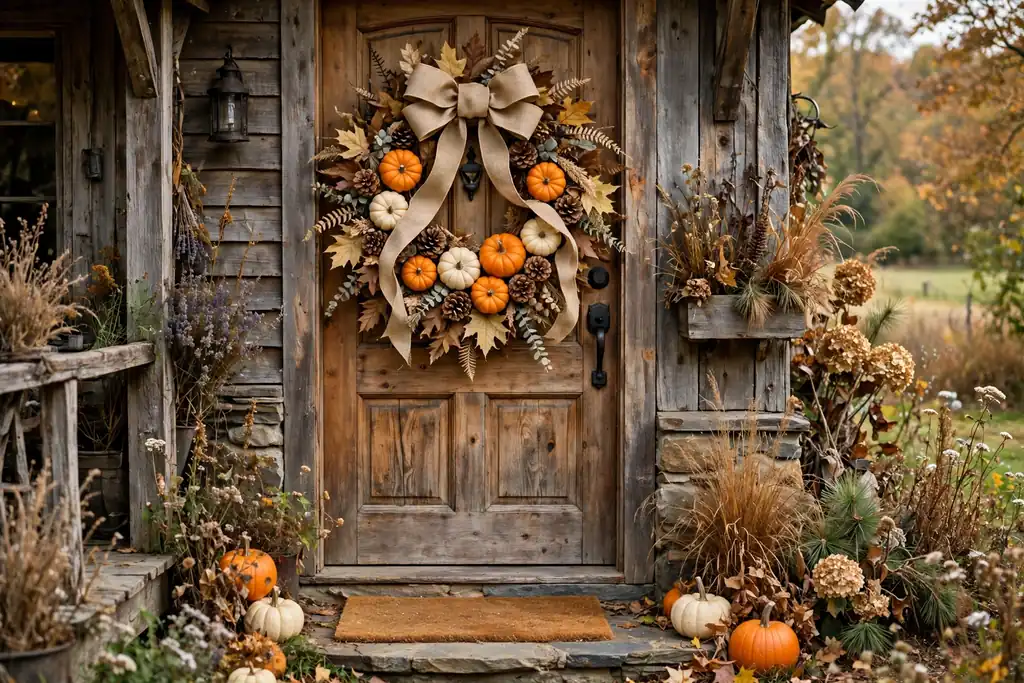
    Pair mini pumpkins in orange, cream, and soft green with pinecones and dried leaves on a grapevine base for a full harvest door wreath. Place the largest pumpkins first, spaced evenly around the ring, then fill gaps with pinecones and leaves so no bare vine shows. This style suits a wood, white, or dark painted door, where the pumpkin colors show clearly.

    Use faux mini pumpkins outdoors, since real pumpkins soften in rain and cold and can stain the door. Wire each pumpkin firmly through its stem so it does not shift in wind. Add a simple burlap bow at the bottom, and bring the wreath inside if a hard frost is forecast.

    3. Faux Pumpkin and Berry Wreath with a Plaid Bow

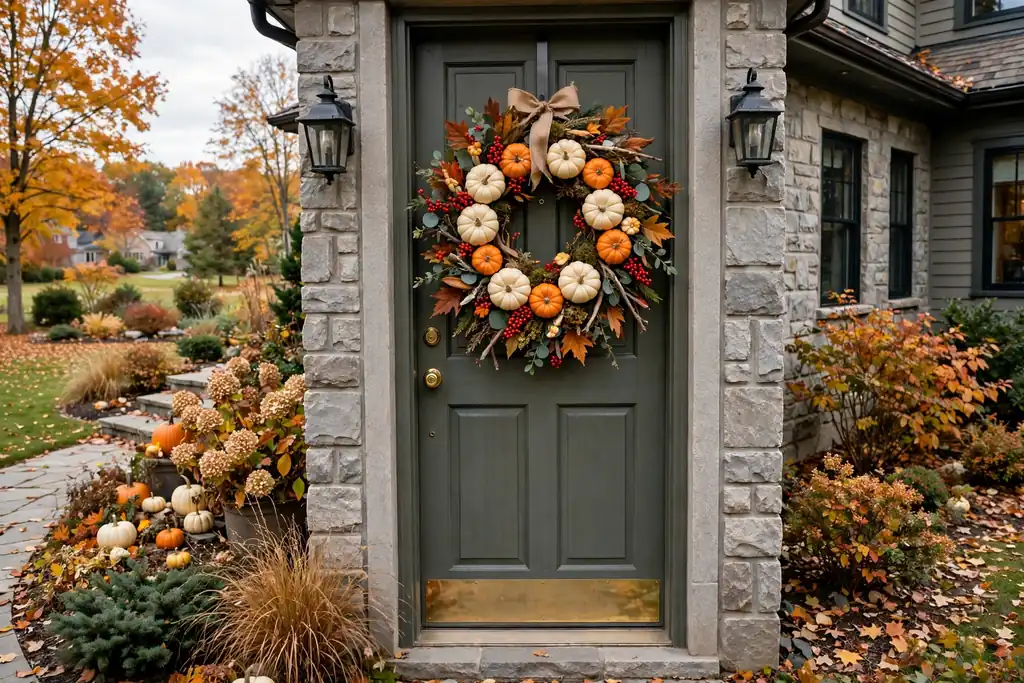
    Thanksgiving wreath with faux pumpkins, berries, and a plaid bow.

    Combine faux pumpkins with clusters of faux berries and autumn leaves on a foam base, and finish with a large plaid bow at the bottom. The berries add small pops of red and burgundy between the pumpkins, while the plaid bow gives a clear Thanksgiving pattern. Keep the bow in one or two colors, such as red and cream, so it does not fight with the pumpkins.

    A foam base holds heavy pumpkins well, since stems can be glued and wired deep into the foam. Hang this wreath with a sturdy over door hook, and check the weight before hanging it on a wreath hanger meant for light wreaths. Store it in a box with tissue paper after Thanksgiving so the berries do not crush.

    4. Dried Corn Husk and Raffia Wreath
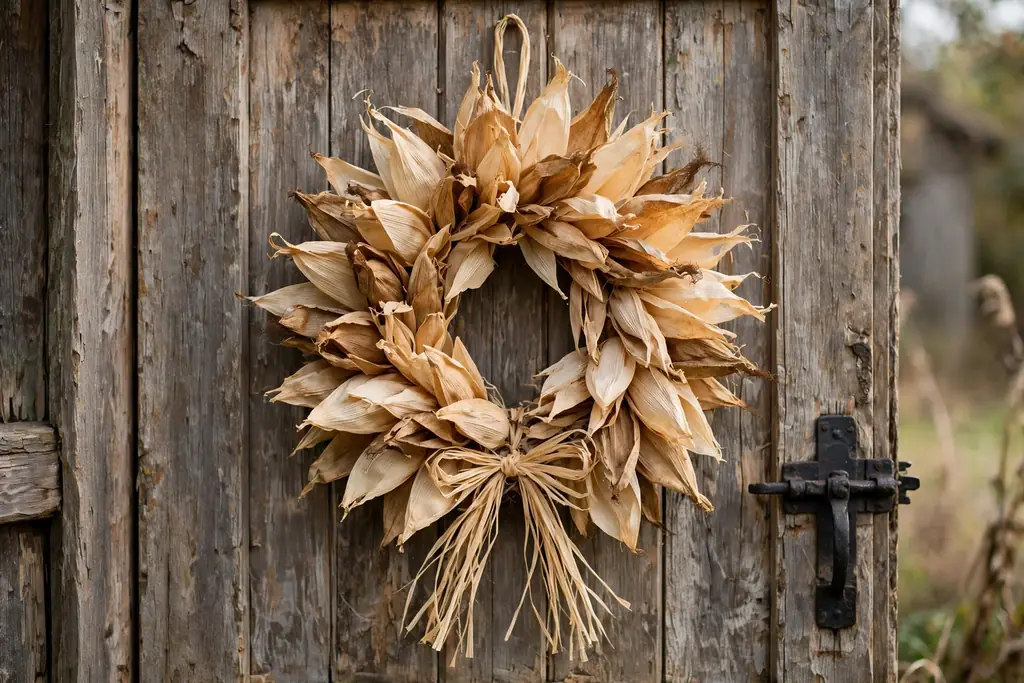
    Thanksgiving wreath made of dried corn husks tied with raffia.

    Wrap dried corn husks around a straw or grapevine base and tie them with raffia for a simple, natural Thanksgiving wreath in cream and gold tones. Layer the husks so they overlap like petals, and let a few tips curl outward for a loose, gathered shape. This style suits a farmhouse porch, a plain wood door, or a home with a calm, neutral entry.

    Dried corn husks last for months indoors and on a covered porch, and need no water. Keep the wreath away from heavy rain, which can make husks limp and spotty. Add a small bunch of wheat or a plain raffia bow if you want a finish, and avoid adding large pumpkins that would hide the husk texture.

    5. Magnolia Leaf and Copper Ribbon Wreath
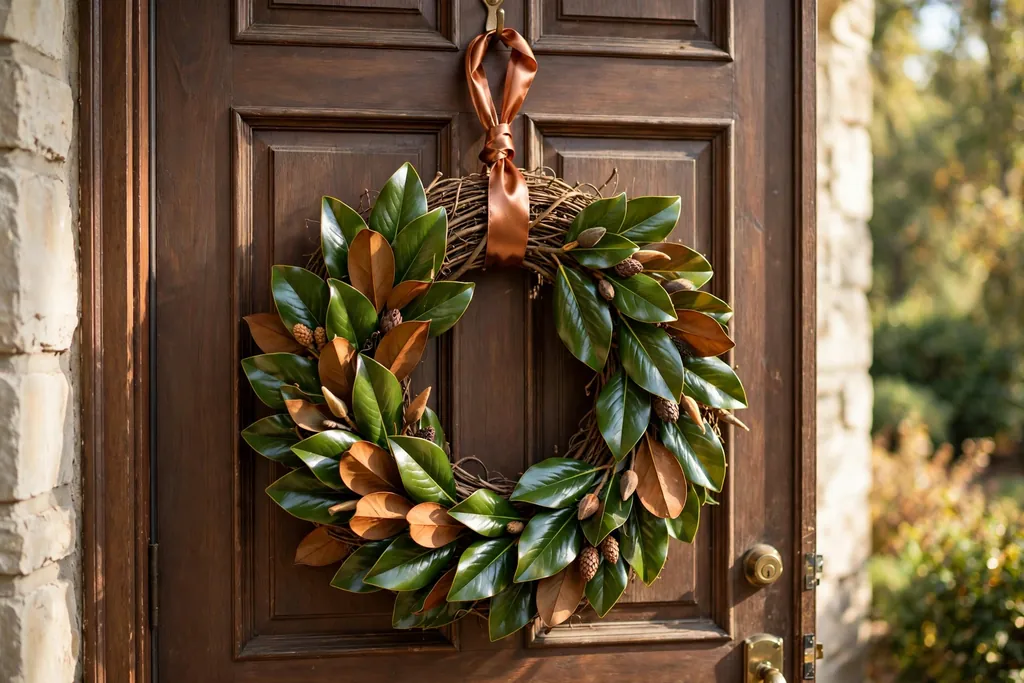
    Thanksgiving wreath of magnolia leaves with a copper ribbon.

    Use glossy magnolia leaves, fresh or faux, layered around a grapevine base, and finish with a copper satin ribbon loop. The large leaves give a bold, polished shape, while the copper ribbon adds a warm metallic note that suits Thanksgiving without looking like Christmas decor. Overlap leaves in the same direction so the ring reads smooth and even.

    Fresh magnolia leaves dry to a warm brown over a few weeks, which still suits a harvest theme. Faux magnolia leaves hold their green color all season and suit a sunny or windy door. Keep the ribbon simple and narrow, since a wide bow can hide the leaf pattern.

    6. Dried Hydrangea and Wheat Wreath in Muted Neutrals
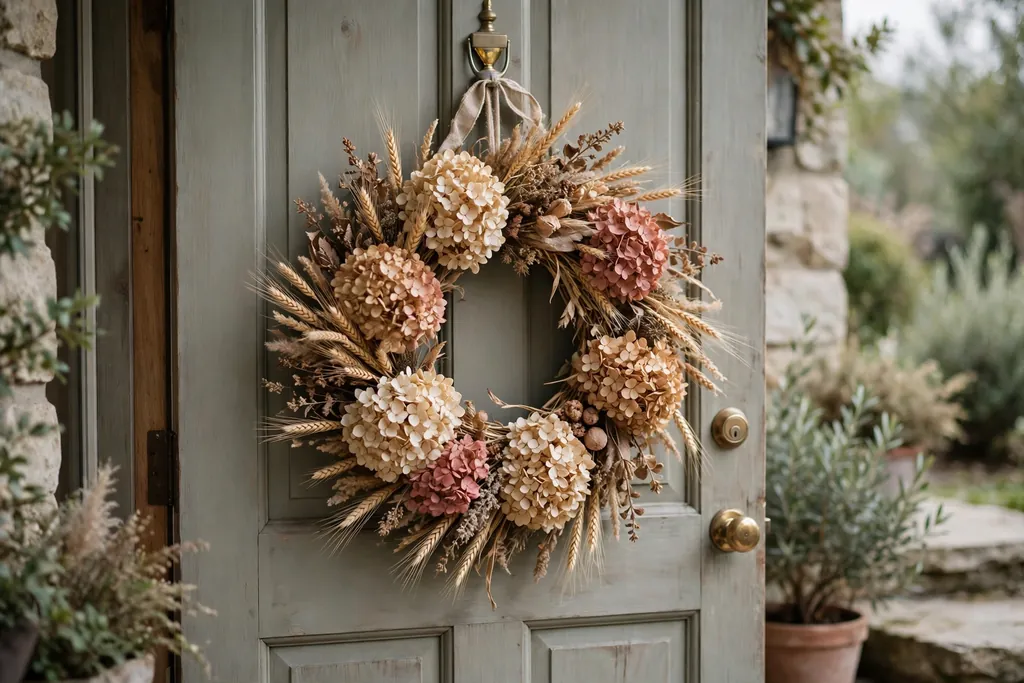
    Thanksgiving wreath with dried hydrangeas and wheat in muted neutrals.

    Build a soft, muted wreath from dried hydrangea heads in cream, tan, and dusty rose, mixed with wheat stems on a grapevine base. Hydrangeas cover a base quickly because each head is wide, so this is a good choice when you want a full look with fewer stems. Keep the color mix to two or three muted tones so the wreath stays calm rather than busy.

    Dried hydrangeas need a covered porch, out of direct rain and harsh sun, so colors fade slowly. Handle the wreath gently when hanging, since dried heads can shed petals. Shake it lightly outdoors now and then to remove dust, and store it in a box with tissue paper when Thanksgiving ends.

    7. Apple, Cinnamon Stick, and Clove Wreath

    Thanksgiving wreath with faux apples, cinnamon sticks, and dried orange slices.

    Wire faux apples, cinnamon sticks, and dried orange slices to a grapevine base for a scented harvest wreath with a kitchen garden feel. Space three or four apples evenly around the ring, then fill between them with cinnamon bundles and orange slices so the fruit reads as an accent rather than a pile. This style suits a kitchen door, a side entry, or a front door near a porch bench.

    Use faux apples outdoors, since real fruit will spoil, attract insects, and stain the door. Tie cinnamon sticks in small bundles with twine before wiring them in place, so they stay grouped. Add a few whole cloves pressed into an orange slice for a spiced detail, and keep the wreath out of heavy rain to protect the twine.

    8. Felt Leaf and Acorn Craft Wreath
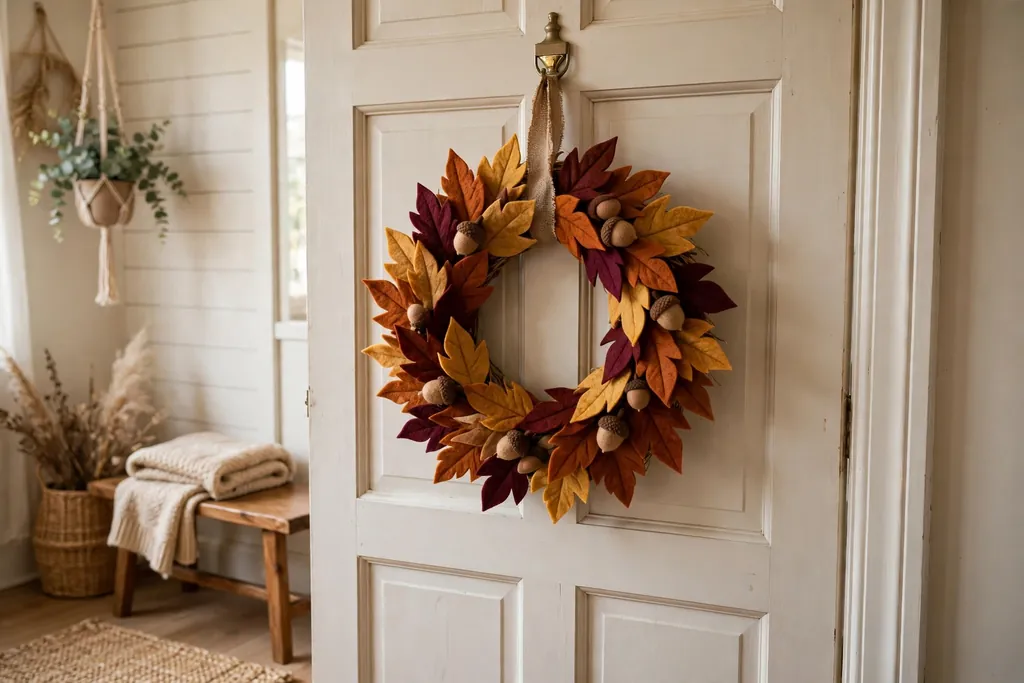
    Thanksgiving craft wreath made of felt leaves and acorns.

    Make a family friendly wreath from felt leaves in rust, gold, and burgundy, with felt or wooden acorns, sewn or glued to a foam or cardboard ring. Cut leaves in two or three shapes, such as oak and maple, and layer them so the ring looks full. This is a good project to make with children, since felt is soft, safe to cut, and easy to rearrange before gluing.

    A felt wreath is best indoors, on an interior door, a wall, or above a console table, since rain will spoil felt and glue. Use a hot glue gun with care, and keep small acorns out of reach of toddlers. Store the wreath flat after Thanksgiving so the leaves do not bend out of shape.

    9. Burlap and Plaid Ribbon Rustic Wreath

    Rustic Thanksgiving wreath wrapped in burlap with plaid ribbon and pinecones.

    Wrap a foam or wire base in burlap, then add a wide plaid ribbon, pinecones, and dried leaves for a rustic Thanksgiving wreath with clear texture. The burlap gives a rough, natural background, while the plaid ribbon adds pattern and color in one step. Loop the ribbon through the ring rather than tying one large bow, so the pattern shows around the wreath.

    Burlap frays at the edges, so fold cut edges under and secure them with glue or wire before hanging. Keep this wreath on a covered porch, since wet burlap takes a long time to dry and can sag. Pair it with a plain doormat and a pair of planters so the porch does not look busy.

    10. Eucalyptus, Pine, and Pinecone Transition Wreath
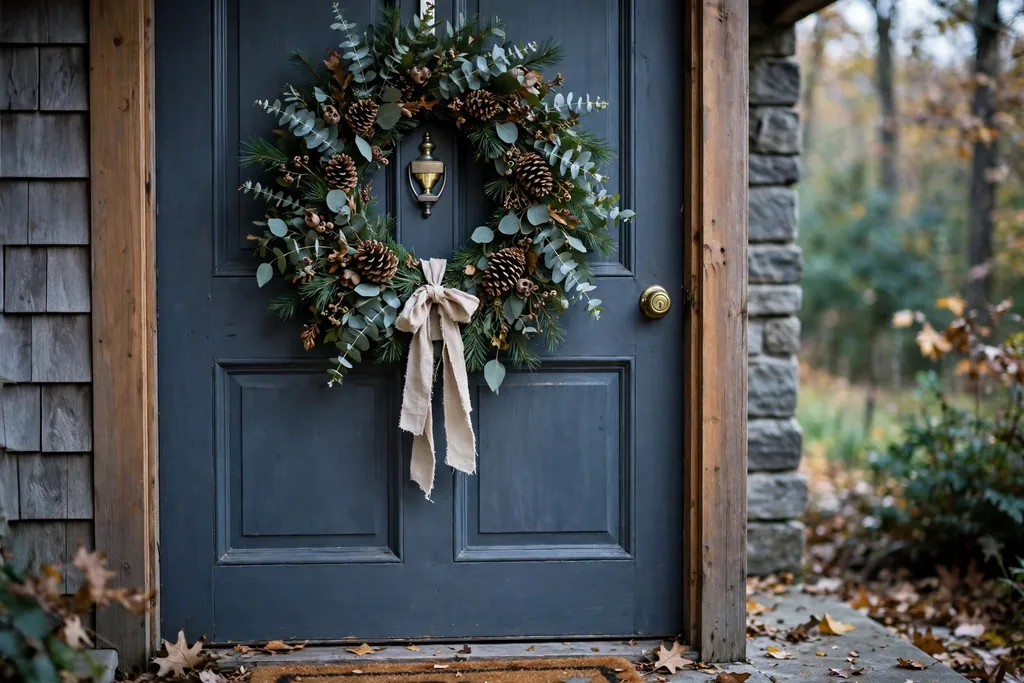
    Thanksgiving wreath with eucalyptus, pine branches, and pinecones.

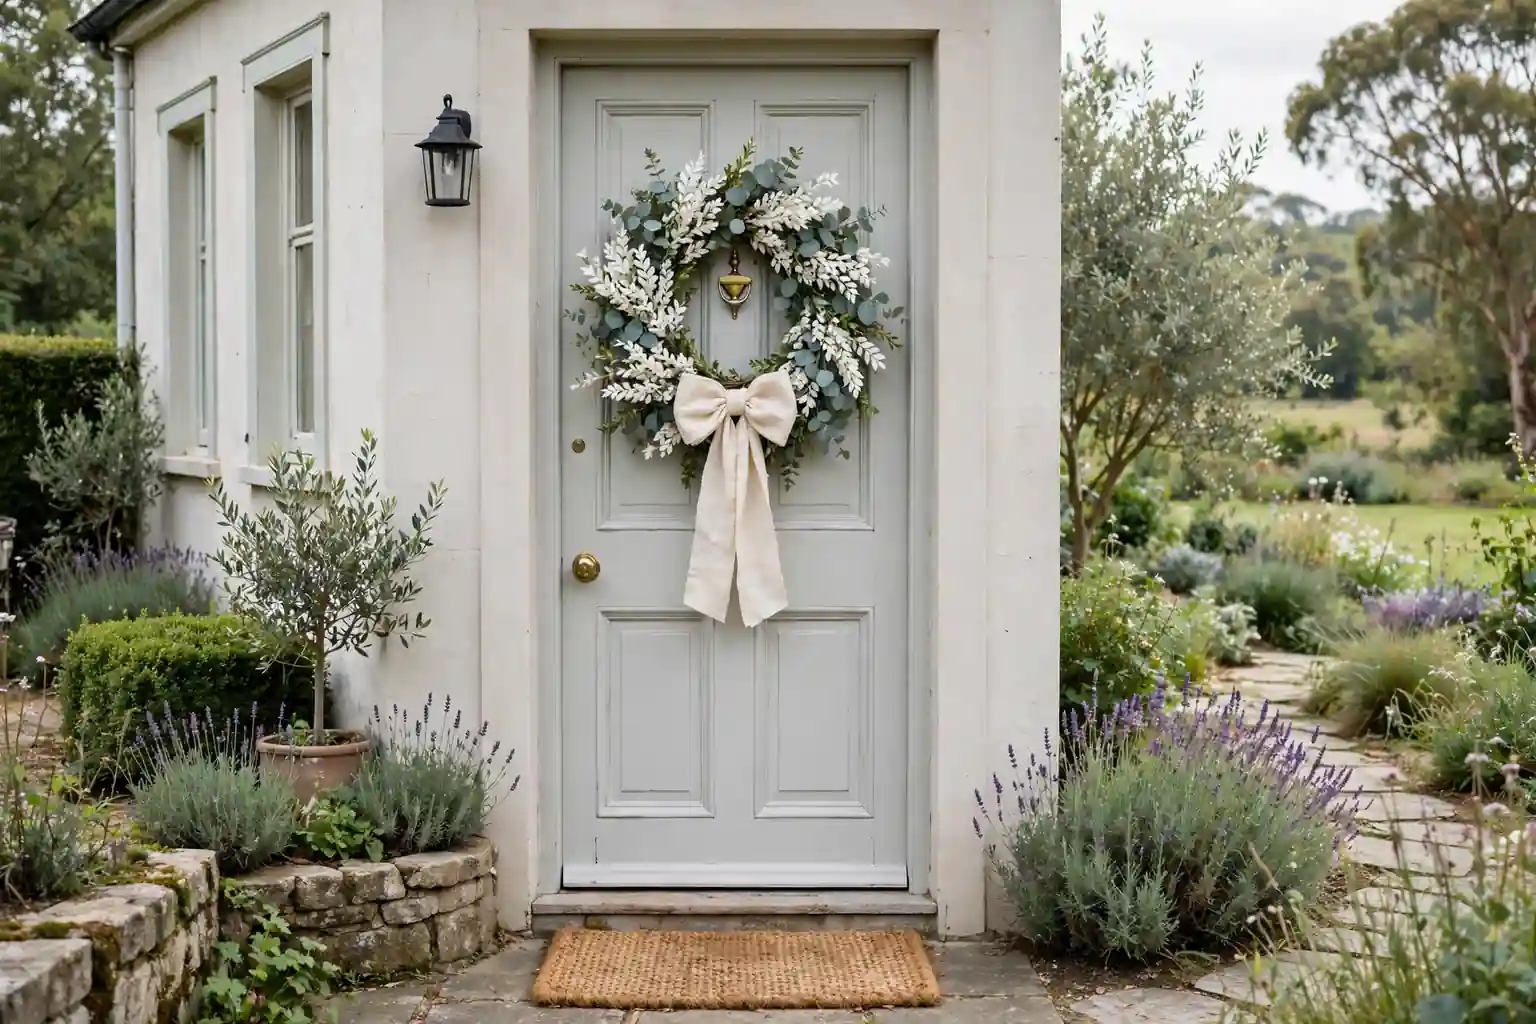
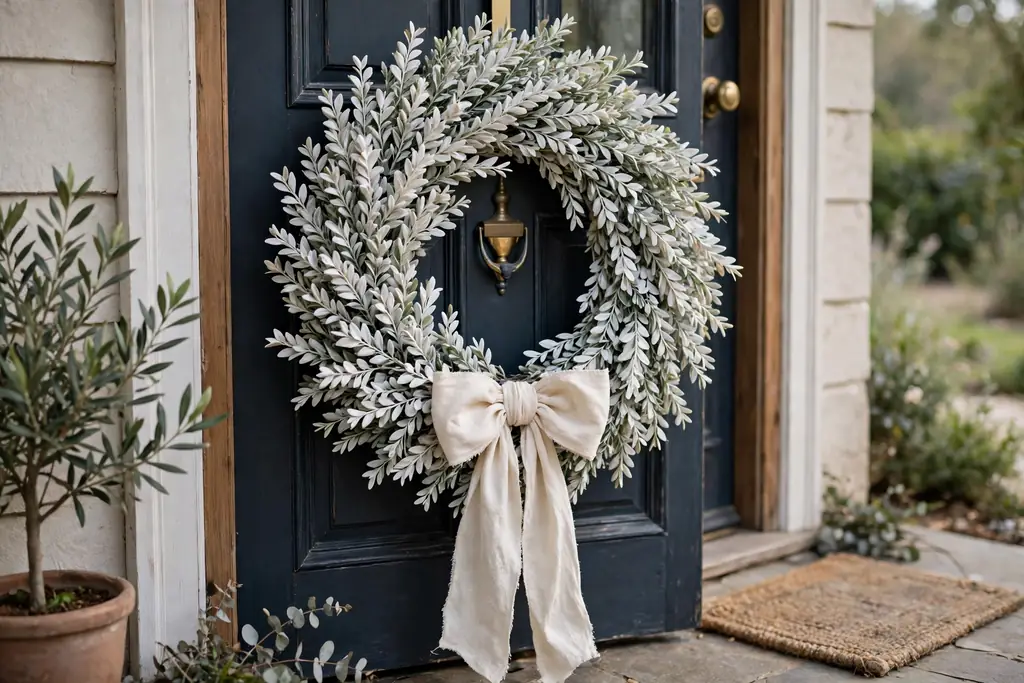
    Combine eucalyptus, pine branches, and pinecones on a grapevine base for a wreath that carries a home from Thanksgiving into early winter. The eucalyptus gives a soft silver green color, the pine adds fullness, and the pinecones add a harvest note that still suits December. Add a plain linen ribbon, and skip red berries if you want the wreath to read as autumn rather than Christmas.

    Dried or faux eucalyptus and pine last for weeks with no water, and suit a sunny or windy door better than fresh branches. Trim any branch that blocks the door handle or scrapes the door frame when the door opens. After Thanksgiving, swap the ribbon for a winter color and reuse the same wreath.

    11. Sunflower and Wheat Golden Wreath
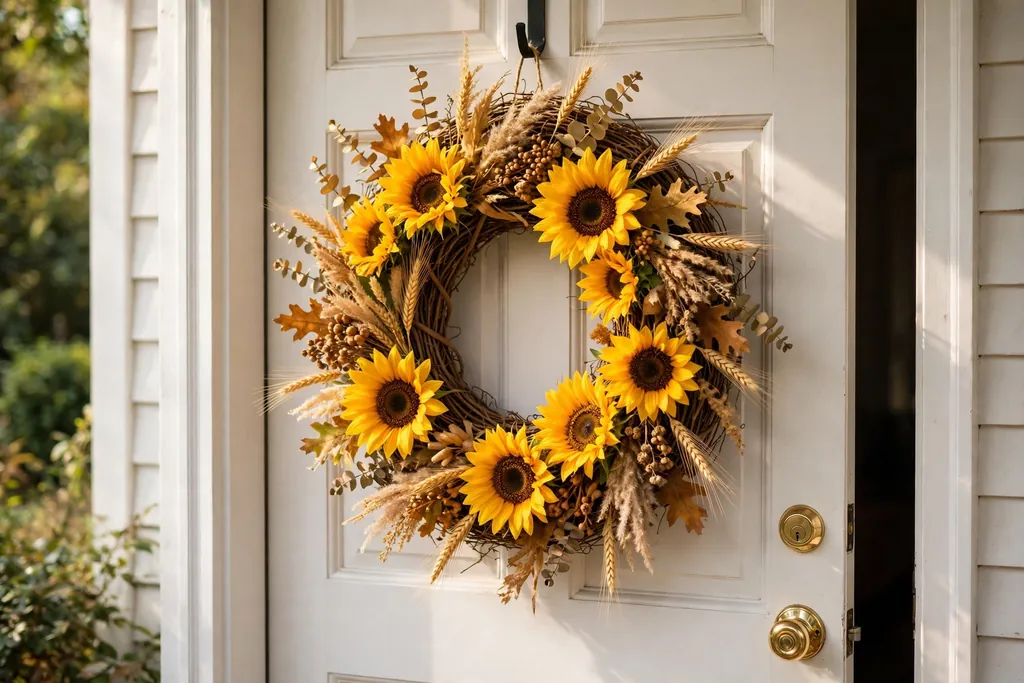
    Thanksgiving wreath with sunflowers and wheat in gold tones.

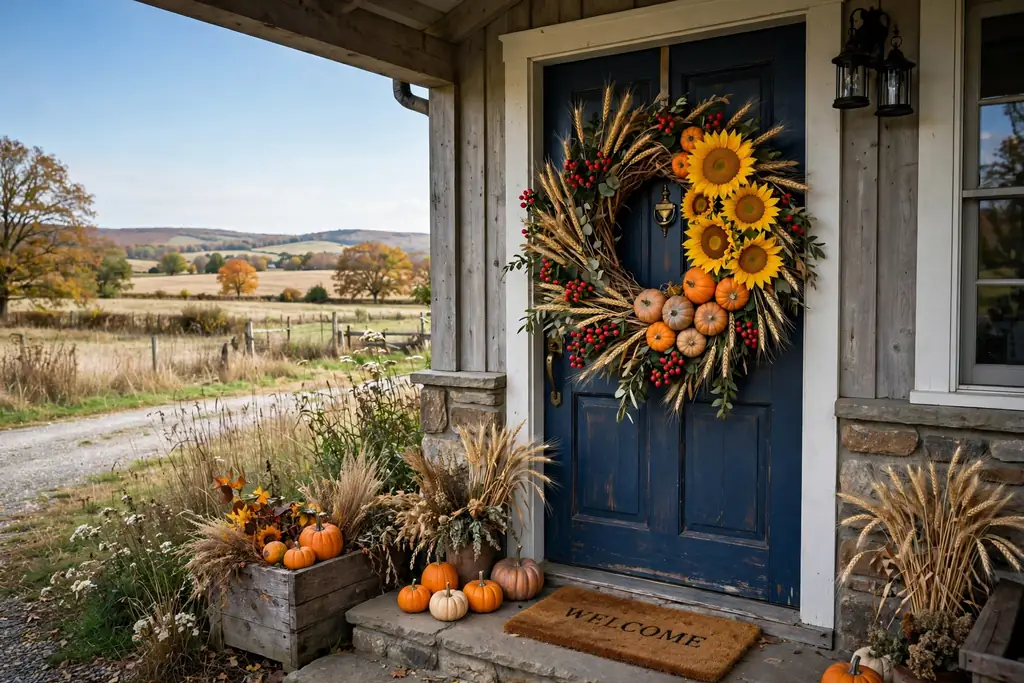
    Pair large sunflowers, fresh or faux, with wheat stems and dried grasses on a grapevine base for a bright golden Thanksgiving wreath. Place the sunflowers first, spaced evenly, then fill gaps with wheat so the yellow reads strong but not crowded. This style suits a white, navy, or sage door, where the gold shows clearly.

    Faux sunflowers hold their color and shape much longer outdoors than fresh ones, which fade in a few days. Choose blooms in a similar size and a clear yellow, and wire each one firmly so it does not shift in wind. Add a plain gold or cream ribbon, and keep the wreath out of heavy rain to protect the ribbon.

    12. Cranberry and Evergreen Wreath

    Thanksgiving wreath with cranberries, evergreen branches, and pinecones.

    Mix faux cranberry clusters with evergreen branches and pinecones on a foam base for a rich red and green Thanksgiving wreath. The cranberries give small, bright pops of color between the evergreen, while the pinecones add a natural harvest texture. Keep the cranberry clusters small and spread out, rather than clustering them together, so the eye moves around the ring.

    Use faux cranberries outdoors, since real cranberries soften, stain, and attract birds. Evergreen branches, fresh or faux, give a full background that hides the foam base. Hang this wreath at eye level, and check that no branch blocks the door handle or the lock.

    13. Olive Branch and Dried Citrus Minimal Wreath

    Minimal Thanksgiving hoop wreath with olive branches and dried citrus slices.

    Use olive branches and a few dried citrus slices on a thin metal hoop for a modern, minimal Thanksgiving wreath with an open shape. Leave part of the hoop bare so the metal shows, and cluster the branches on one side of the ring rather than covering it fully. This style suits a modern home, a narrow door, or a simple porch where a full wreath would look heavy.

    A hoop wreath is light and easy to hang with a small hook or a length of ribbon. Use dried citrus in a single color, such as orange, so the look stays calm. Keep the wreath sheltered from heavy rain, since dried slices can spot, and replace any faded slice with a fresh dried one.

    14. Wood Slice, Acorn, and Twine Woodland Wreath

    Woodland Thanksgiving wreath with wood slices, acorns, and pinecones.

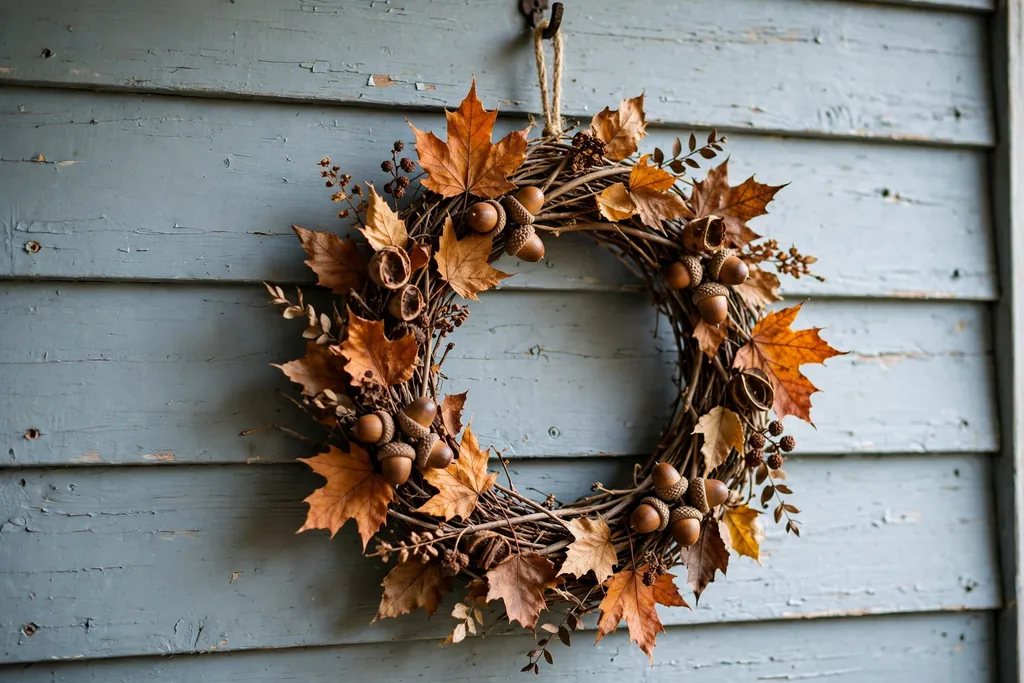
    Glue small wood slices, acorns, and pinecones to a grapevine base, and finish with a twine loop, for a woodland Thanksgiving wreath in natural browns. Space the wood slices evenly, then fill gaps with acorns and small pinecones so the ring looks gathered from a walk. This style suits a cabin, a wood sided home, or a porch with stone and timber details.

    Use a sturdy hook for this wreath, since wood slices add weight. Glue pieces firmly and let the glue dry fully before hanging, so nothing drops on the porch. Keep small acorns glued tightly, and keep the wreath out of reach of small children who might pull pieces loose.

    15. Velvet Pumpkin and Velvet Ribbon Elegant Wreath

    Elegant Thanksgiving wreath with velvet pumpkins and velvet ribbon.

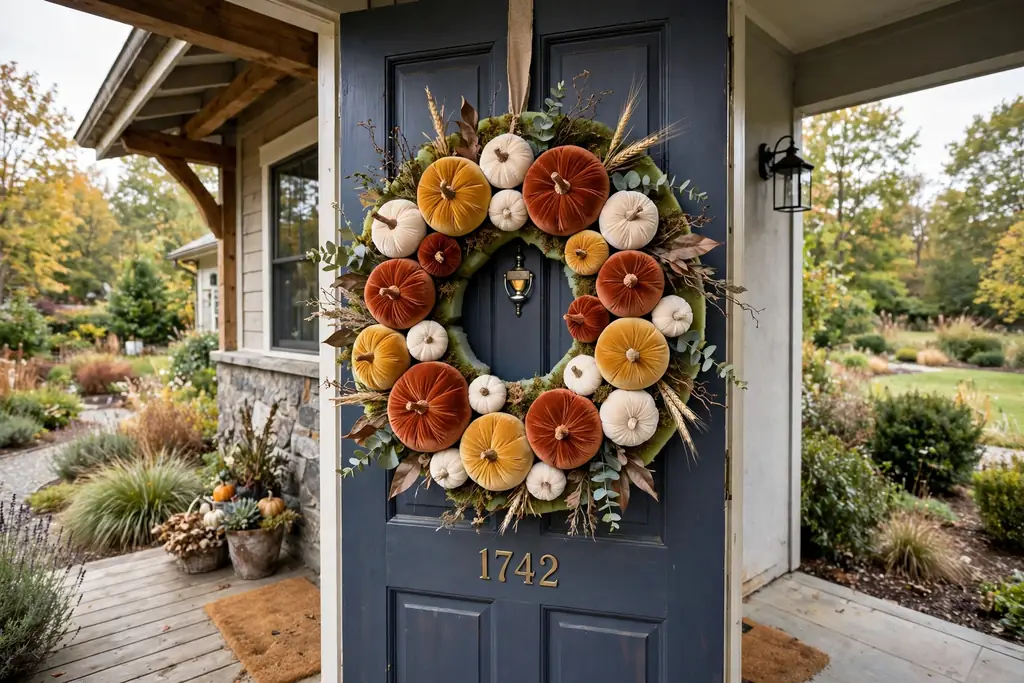
    Combine velvet pumpkins in cream, rust, and sage with dried leaves on a foam base, and finish with a velvet ribbon bow, for an elegant Thanksgiving wreath. The soft velvet gives a quiet, refined texture that suits an interior door, a dining room wall, or a covered entry. Keep the pumpkin colors muted and the bow in one matching tone.

    A velvet wreath is best indoors or on a fully covered porch, since rain will spoil velvet and make it sag. Dust it lightly with a soft cloth, and store it in a box with tissue paper after Thanksgiving. Pair it with cream candles and linen napkins indoors for a calm, coordinated look.

    16. Dried Flower and Pampas Grass Wreath
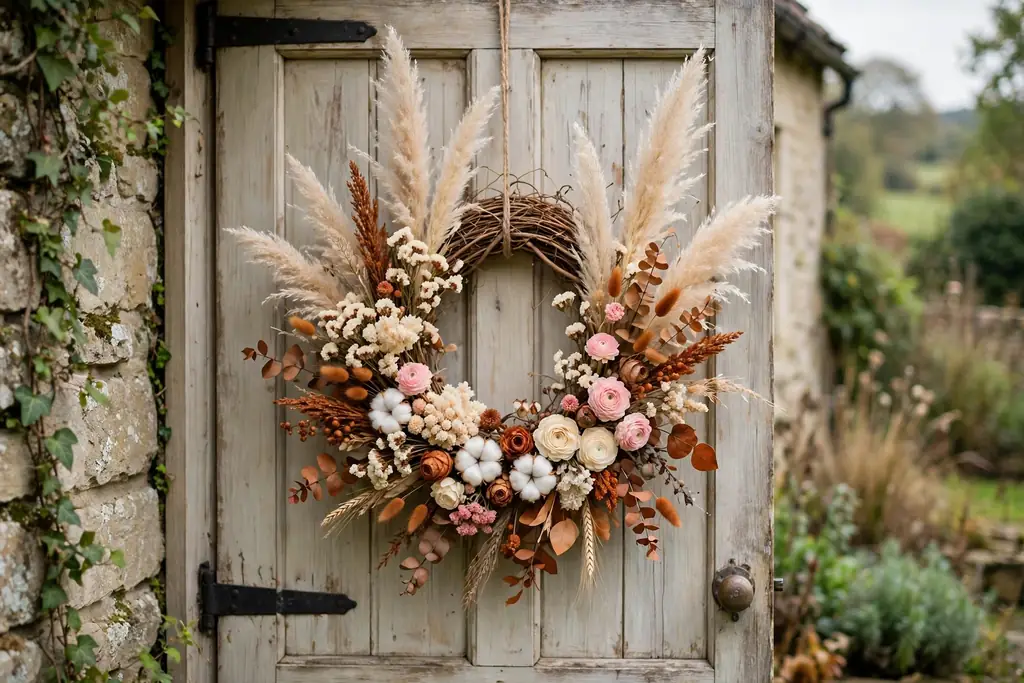
    Thanksgiving wreath with dried flowers and pampas grass plumes.

    Build a loose, airy wreath from dried flowers, such as strawflowers and statice, mixed with pampas grass plumes on a grapevine base. Let a few grass plumes extend past the edge, so the wreath looks gathered rather than arranged, and keep the flower colors soft, with cream, blush, and one rust accent. This style suits a boho, cottage, or garden style home.

    Dried flowers and pampas grass hold their shape for a full season, and the grapevine base is light and easy to hang. Work in small bundles, wiring each one to the base in the same direction, and overlap bundles so no bare vine shows. Keep the wreath on a covered porch, out of direct rain, so the plumes do not mat.

    17. Gourd and Dried Leaf Hoop Wreath
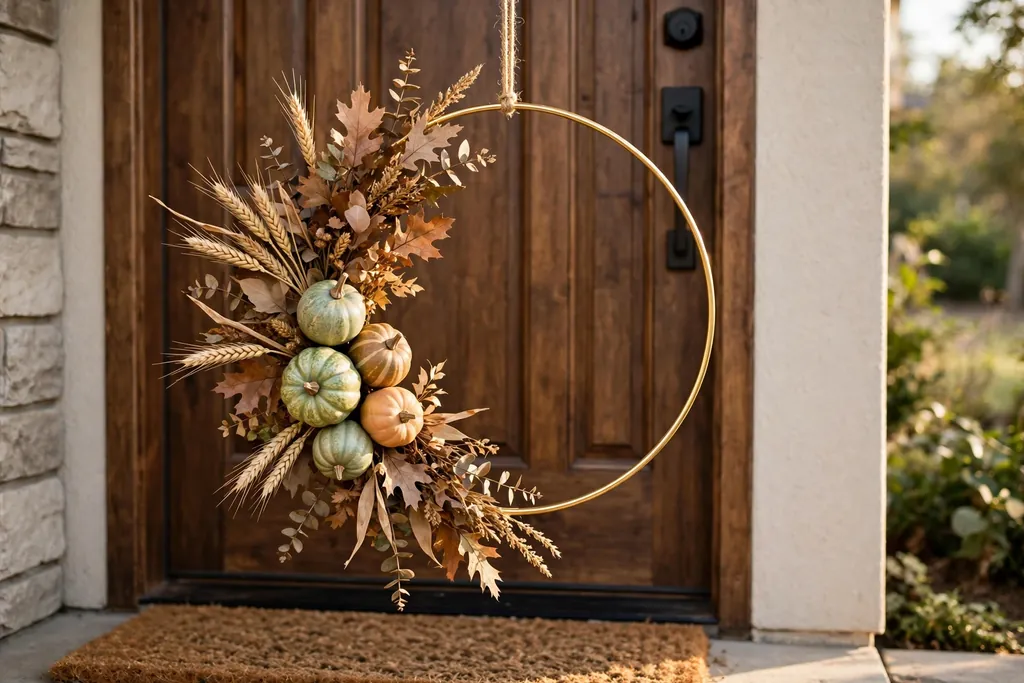
    Thanksgiving hoop wreath with mini gourds and dried leaves.

    Use mini gourds, dried leaves, and a few wheat stems clustered on one side of a large gold or wood hoop for a modern harvest wreath with an open center. The open center keeps the wreath light and lets the door color show through, while the gourds give a clear Thanksgiving note. Hang the hoop from a ribbon loop so it sits straight on the door.

    Wire each gourd firmly through its stem, since gourds are heavier than leaves and can shift in wind. Use faux gourds outdoors, since real gourds soften in rain and cold. Check that the hoop does not swing into the door handle, and use a hook rated for the full weight of the wreath.

    18. Flat Table Centerpiece Wreath with Candles

    Thanksgiving table centerpiece wreath with a candle in the center.

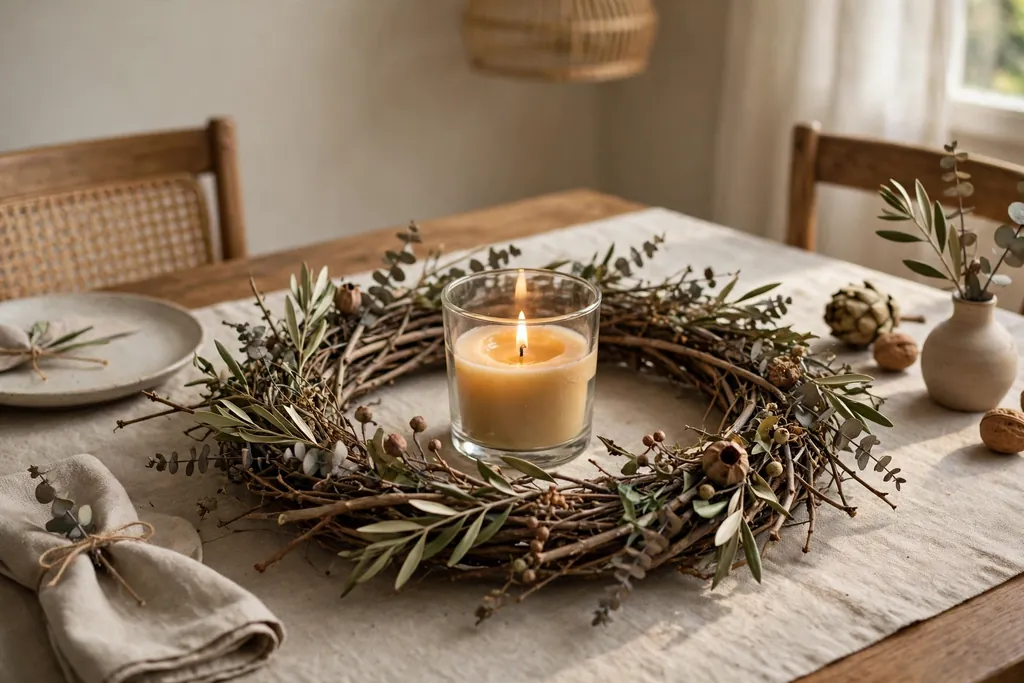
    Lay a low, full wreath flat on the Thanksgiving table as a centerpiece, and set a pillar candle or a small vase of flowers in the open center. Use a grapevine or foam ring with pumpkins, leaves, and berries around the edge, and keep the arrangement low so guests can talk across the table. This placement turns a door wreath idea into a table decoration with no extra tools.

    Use battery candles inside a wreath centerpiece, since an open flame near dried leaves and ribbon is a fire risk. Keep the wreath clear of plates and glasses, and leave room for serving dishes. After the meal, lift the wreath off the table and hang it on a wall or door for the rest of the week.

    19. Chair Back Mini Wreaths for the Dining Room

    Mini Thanksgiving wreaths tied with ribbon to dining chair backs.

    Tie a small wreath to the back of each dining chair with ribbon for a Thanksgiving dining room that greets guests at the table. Use mini grapevine rings with a few leaves, a mini pumpkin, and a small bow, and keep each wreath light so it does not pull the chair back or swing when guests sit down. Repeat the same design on every chair for a calm, coordinated look.

    Make the mini wreaths in one batch, using the same materials and ribbon on each, so the table looks planned rather than mixed. Use a simple knot or bow to tie each wreath on, so it is easy to remove after the meal. Store the mini wreaths together in a box, and reuse them next Thanksgiving with fresh ribbon.

    Conclusion

    A Thanksgiving wreath does not need to be large or costly to make a warm welcome. A grapevine base, a few harvest materials, and a ribbon in your home palette can change how the front door, the dining room, or the table feels for the whole holiday. Pick the ideas that fit your door, your porch cover, and your daily routine, and repeat a small palette of rust, gold, cream, and warm brown so the look holds together. Save this list and revisit it next autumn to see which wreaths you want to repeat or refresh.

    FAQs

    What size Thanksgiving wreath should I hang on my front door?

    Choose a wreath about one half to two thirds the width of your door, which usually means 20 to 24 inches for a standard front door. Measure the door width first, then check the wreath size before you buy or build, since a wreath that is too small can look lost and one that is too large can block the handle. Hang it at eye level and step back to the street to check the balance.

    Are real or faux materials better for a Thanksgiving wreath?

    Faux pumpkins, berries, and flowers last longer outdoors and suit a sunny or rainy door, while fresh and dried materials give scent and a natural look for a shorter time. Use faux fruit and berries outdoors, since real fruit spoils and stains, and use fresh or dried greenery on a covered porch for a display of a few weeks. A mix of a faux base with a few dried accents often lasts best.

    How do I hang a Thanksgiving wreath without damaging my door?

    Hang a wreath with an over door hook, a suction hook on glass, or a small adhesive hook rated for the wreath weight, and avoid nails in a finished door. Check the hook rating before hanging a heavy wreath with pumpkins or wood slices, and use ribbon looped over the top of the door as a simple alternative. Remove adhesive hooks slowly after the holiday to avoid pulling paint.

    How long will a Thanksgiving wreath last outdoors?

    A faux or dried wreath can last through Thanksgiving and beyond with little care, while a fresh wreath usually lasts one to two weeks on a covered porch. Keep any wreath out of heavy rain, strong wind, and direct afternoon sun to slow fading and wear, and bring it inside during storms. Replace faded stems or fruit as needed rather than replacing the whole wreath.

    Can I use a Thanksgiving wreath indoors?

    Yes, a Thanksgiving wreath works well on an interior door, a dining room wall, above a console table, or laid flat as a table centerpiece. Choose lighter materials and softer colors indoors, such as velvet pumpkins or dried flowers, and keep the wreath clear of heat sources and open flames. Use battery candles, not real candles, inside a wreath centerpiece.

    How do I store a Thanksgiving wreath after the holiday?

    Store a wreath in a sturdy box with tissue paper, hanging it from a hook inside the box or laying it flat so the shape does not crush. Keep dried and velvet wreaths in a dry place, out of damp basements and hot attics, and label the box so you can find it next autumn. Refresh the wreath next year with new ribbon or a few new accents rather than starting from scratch.

  • 17 Pumpkin Wreath Ideas for a Festive Fall Front Door

    17 Pumpkin Wreath Ideas for a Festive Fall Front Door

    A pumpkin wreath gives a front door fall color, using small pumpkins on a grapevine, foam, or hoop base with leaves, berries, ribbon, or lights. Choose a full round wreath for a bold entrance, a sparse hoop for a modern door, or a lit or Halloween style for evening impact. The 17 ideas below cover classic, rustic, and modern looks.

    A wreath is often the first thing guests notice at the door, so it helps to pick one that fits the door color, the porch size, and the rest of the entrance. A full wreath suits a plain door, while a lighter wreath suits a door with glass panels or bold paint. For wider porch styling, pair your wreath with the planters, mats, and lanterns in these fall front porch decor ideas. Hang the wreath at eye level, check that it clears the handle when the door swings, and bring fabric or dried pieces indoors in heavy rain so they last through the season.

    Key Takeaways

    • Start with the base: grapevine for a rustic look, foam for a full look, and a metal hoop for a sparse modern look.
    • Mix pumpkin sizes, with larger pumpkins as anchors and mini pumpkins as fillers, so the wreath reads as gathered rather than uniform.
    • Repeat one or two colors from the wreath in pots, mats, or cushions nearby so the entrance looks planned.
    • Use a bow, a cluster, or lights as one focal point, not all three at full strength, so the wreath stays easy to read from the walkway.
    • Hang the wreath at eye level, secure it against wind, and keep it clear of the handle, lock, and doorbell.
    • Choose weather hardy materials for an exposed door, and save dried leaves, fabric, and paper pieces for a covered porch or indoors.

    1. Classic Orange Mini Pumpkins on Grapevine

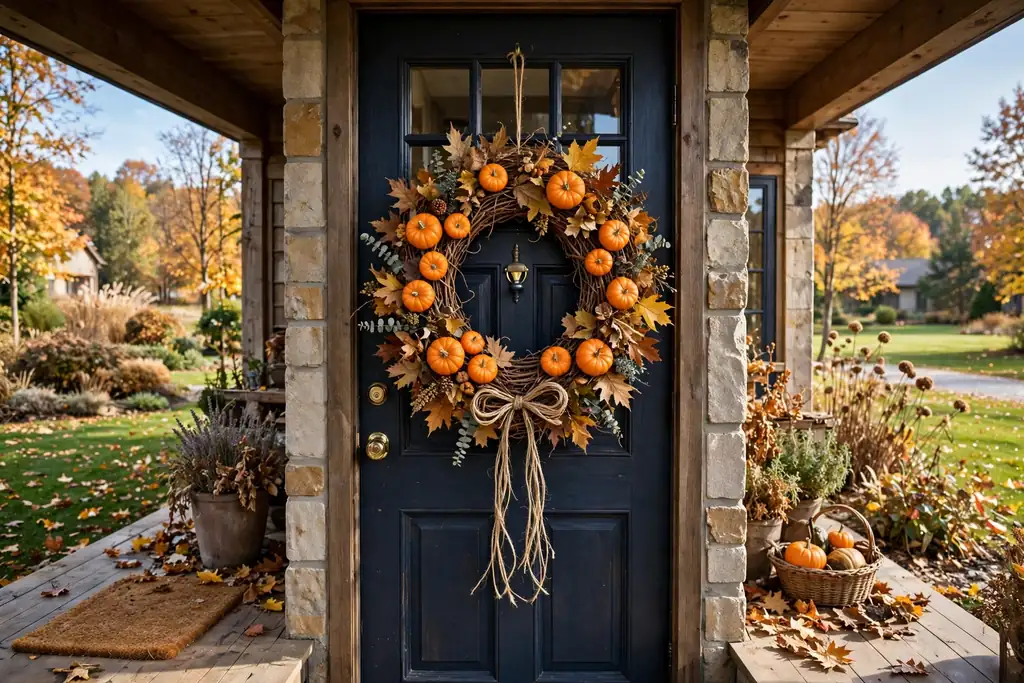
    Small orange pumpkins wired around a grapevine wreath ring with dried leaves and a twine bow, hanging on a front door.

    Small orange pumpkins wired around a grapevine ring make the most familiar fall wreath, and the open grapevine texture keeps it from looking heavy. Space five to seven mini pumpkins evenly around the ring, then fill the gaps with dried leaves and a few small berries. A simple twine bow at the bottom finishes the look without competing with the pumpkins.

    Keep the pumpkins to a similar size range so no single pumpkin pulls the eye off balance. If a pumpkin sits proud of the ring, wire it at two points rather than one, so wind cannot spin it. This style suits brick, painted wood, and most porch palettes, and it pairs well with mums and a plain doormat.

    2. All White and Cream Pumpkins

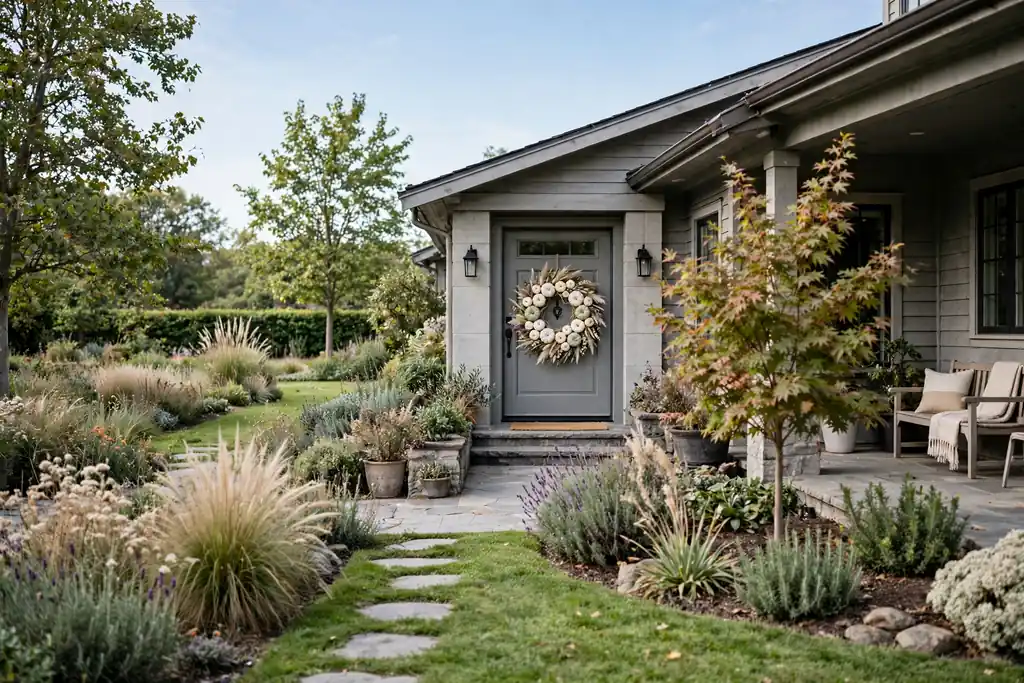
    A white and cream pumpkin wreath with pale green pumpkins and soft dried grasses hanging on a gray front door.

    A white and cream pumpkin wreath gives a calm, clean look for doors in gray, navy, black, or sage green. Use white, cream, and pale green pumpkins in varied sizes on a grapevine or foam base, with pale dried grasses or soft green leaves between them. The limited palette lets the shapes and textures do the work.

    Avoid adding orange or bright gold pieces here, since one strong color breaks the quiet effect. A cream linen bow or a simple twine loop suits this wreath better than a patterned ribbon. This is a good choice for a modern porch, a light colored door, or a home where the rest of the fall decor is already colorful.

    3. Pumpkin and Sunflower Harvest Wreath

    A pumpkin wreath with sunflower heads clustered on one side, mini pumpkins, wheat stems, and berries on a front door.

    Sunflowers and pumpkins together read as harvest at a glance, and the large flower heads give the wreath a clear focal point. Place two or three sunflower heads on one side of a full leaf base, then tuck mini pumpkins around them with wheat stems and small berries. Keep the sunflowers grouped rather than scattered, so the wreath has one strong cluster.

    Balance the cluster by placing a single mini pumpkin on the opposite side of the ring, which stops the wreath from looking lopsided. Faux sunflowers last longer outdoors, while dried sunflowers suit a covered porch. Pair this wreath with gold or rust pots by the door for a harvest entrance that holds together.

    4. Rustic Burlap and Pumpkin Wreath

    A rustic pumpkin wreath with a wide burlap bow, orange and cream mini pumpkins, dried leaves, and pinecones on a wood front door.

    Burlap gives a pumpkin wreath a farmhouse feel, especially when it is used as a wide bow, a wrapped base, or loose loops between pumpkins. Wrap a grapevine ring lightly with burlap ribbon, wire on orange and cream mini pumpkins, and add dried leaves and pinecones in the gaps. The rough texture of burlap contrasts well with smooth pumpkin skins.

    Use burlap sparingly on a small wreath, since too much fabric can hide the pumpkins. A single wide burlap bow at the bottom, with short tails, is often enough. Keep burlap pieces under a porch roof where possible, since wet burlap dries slowly and can sag. This style suits wood doors, stone porches, and rustic planters.

    5. Velvet Fabric Pumpkins

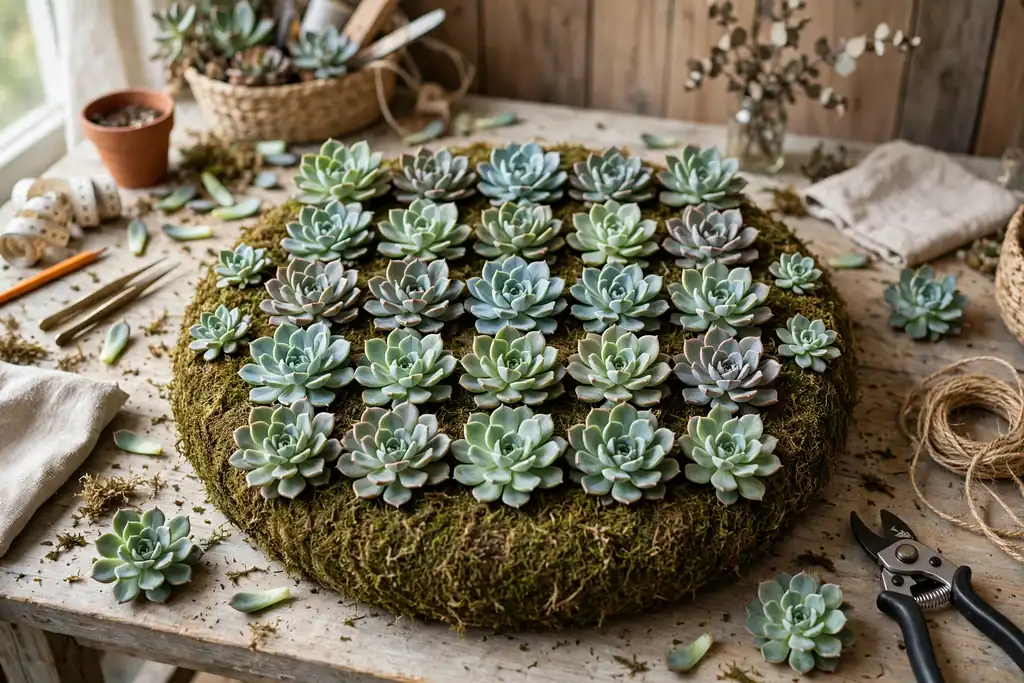
    A wreath of soft velvet pumpkins in rust, mustard, and cream on a foam base, hanging on a sheltered front door.

    Velvet pumpkins give a wreath a soft, plush look that works well on a sheltered porch or an interior door. Choose velvet pumpkins in rust, mustard, plum, or cream, and attach them to a foam base so the fabric sits snugly against the ring. Fill gaps with velvet leaves or small fabric berries rather than dried leaves, so the textures stay consistent.

    Keep velvet pumpkins out of rain, since wet fabric loses its soft finish and takes time to dry. A single color of velvet pumpkin, in two or three sizes, often looks tidier than a mixed rainbow of fabrics. This wreath suits a formal entrance, a painted door, and homes where the fall palette leans toward rich, deep tones.

    6. Pumpkin and Dried Leaf Wreath

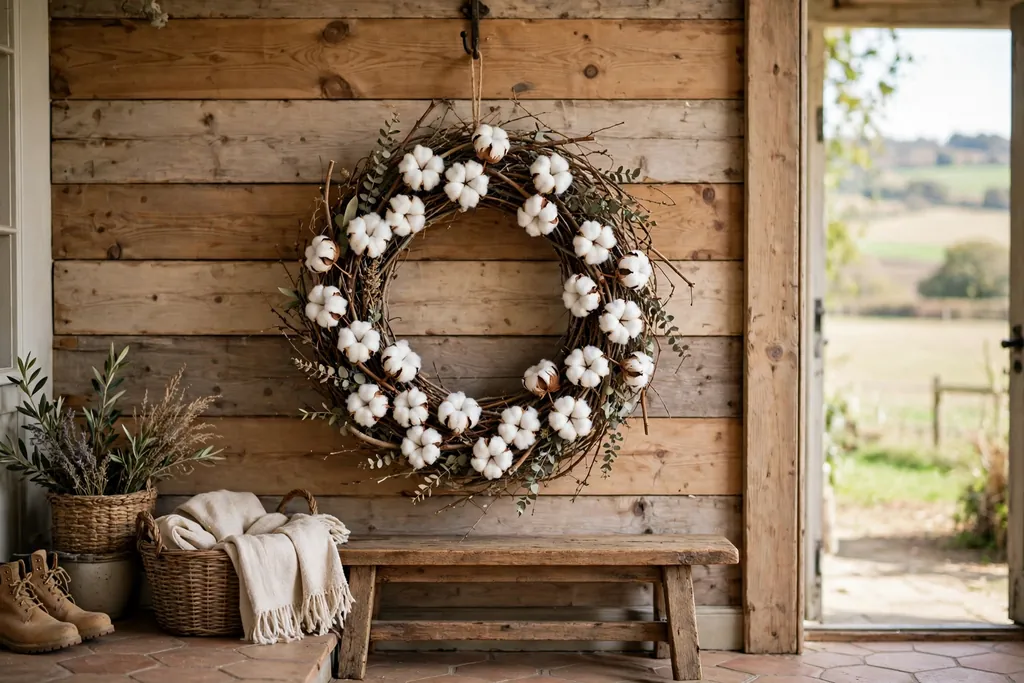
    A pumpkin wreath covered in dried leaves in rust, gold, and brown with mini pumpkins and acorns, on a covered porch door.

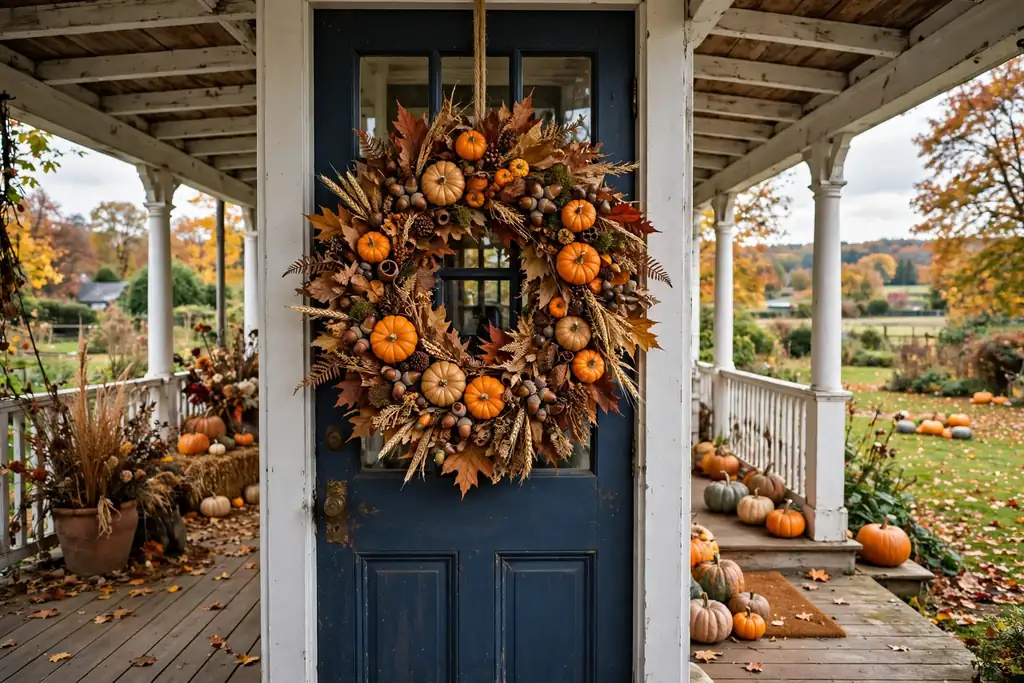
    Dried leaves in rust, gold, and brown make a full, natural base that lets mini pumpkins sit like fruit on a branch. Cover a foam or grapevine ring with overlapping dried leaves, then wire on mini pumpkins in orange, cream, and striped varieties. Add a few small acorns or seed heads for detail, but keep the leaf layer as the main texture.
    Press or dry leaves flat before use so they lie neatly against the ring, and expect some shedding on an exposed porch. A covered porch suits this wreath best, and a light shake outdoors before hanging removes loose pieces. Pair it with a leaf garland or a simple wooden sign for a natural entrance.

    7. Pumpkin and Pinecone Woodland Wreath

    A woodland pumpkin wreath with pinecones, moss, mini pumpkins, and dried seed heads on a grapevine base, hanging on a wood door.

    Pinecones, moss, and small pumpkins give a wreath a woodland feel that suits cabins, stone houses, and wooded lots. Start with a grapevine or moss covered base, wire on pinecones of varied sizes, then tuck mini pumpkins and dried seed heads into the gaps. Keep the pinecones as the dominant texture, with pumpkins as accents rather than the main mass.

    Use pinecones that are dry and fully open, and wire each one at its base so it cannot roll out of place. A twine bow suits this wreath better than a shiny ribbon. This style works from early fall through Thanksgiving, since it reads as woodland rather than Halloween, and it pairs well with lanterns and wood planters.

    8. Asymmetric Crescent Pumpkin Wreath

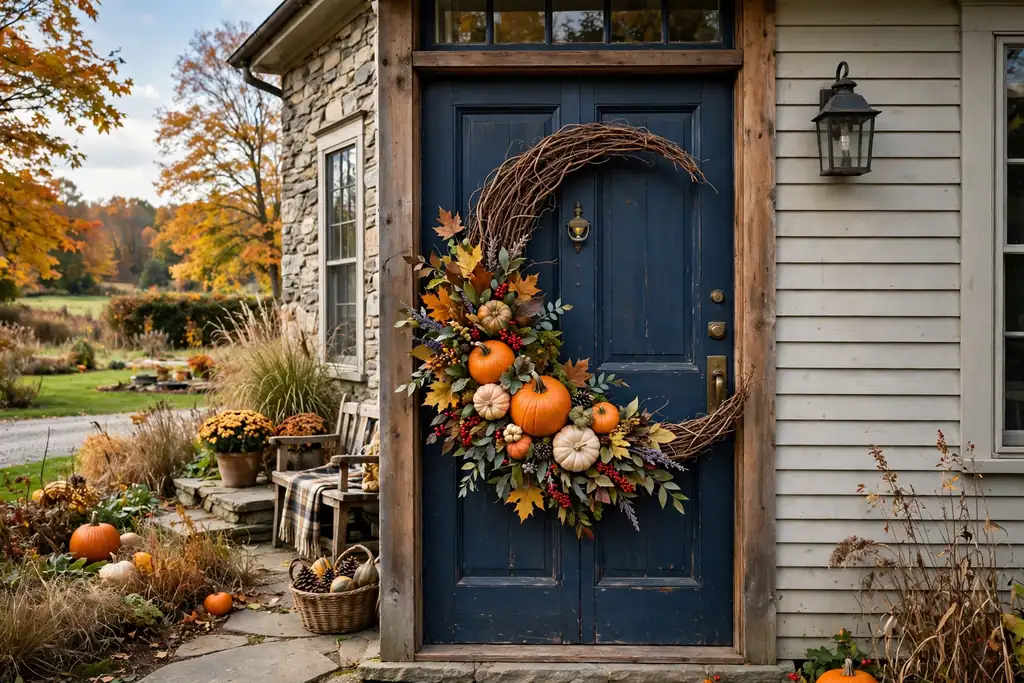
    An asymmetric crescent pumpkin wreath with pumpkins, leaves, and berries clustered on the lower side of a grapevine ring, on a front door.

    A crescent wreath clusters pumpkins, leaves, and berries along one side of the ring and leaves the rest of the base bare, which gives a modern, airy look. Build the cluster on the lower left or lower right of a grapevine ring, using larger pumpkins at the center of the cluster and smaller pieces trailing outward. Let a few leaves and stems extend past the ring edge for a loose, natural outline.

    Keep the bare section truly bare, with only the grapevine showing, so the contrast reads clearly. This style suits a door with glass panels, a narrow porch, or a home where a full wreath would feel too heavy. Hang it so the cluster sits slightly below eye level, where it is easiest to see from the walkway.

    9. Pumpkin and Wheat Harvest Wreath

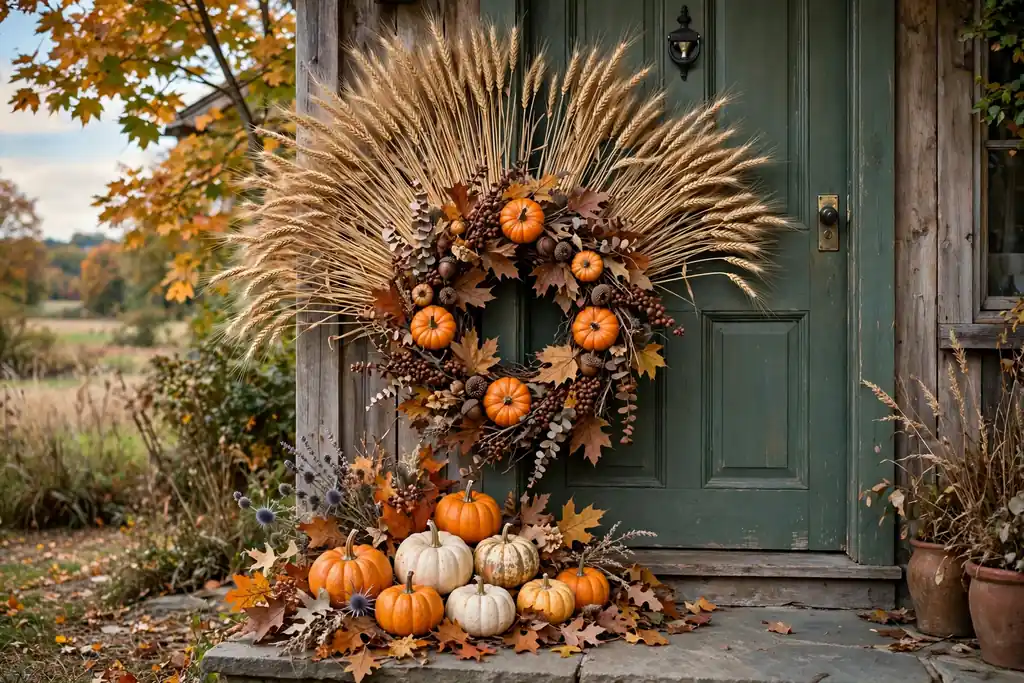
    A pumpkin wreath with dried wheat stems fanning behind a cluster of mini pumpkins and dried leaves on a front door.

    Wheat stems add height and a golden harvest tone that lifts a pumpkin wreath without adding bulk. Fan dried wheat stems behind a cluster of mini pumpkins on one side of a grapevine ring, then add a few dried leaves and small berries at the base of the cluster. The wheat should rise above the ring, not lie flat against it, so the wreath gains vertical shape.

    Trim wheat stems to varied lengths so the fan looks gathered rather than cut to a straight line. Keep wheat away from open flames and bring the wreath indoors in heavy rain, since wet wheat droops and sheds. This wreath pairs well with corn stalks, a wooden crate, and gold toned pots at the door.

    10. Black and Orange Halloween Pumpkin Wreath

    A black and orange Halloween pumpkin wreath with black berries, a black ribbon, and small bat accents on a front door.

    A Halloween pumpkin wreath uses black accents, orange pumpkins, and a few playful details to mark the holiday without covering the whole door. Start with a black grapevine or foam base, add orange and black mini pumpkins, and finish with black berries, a black ribbon, and one or two small bat or spider picks if you like them. Keep the spooky pieces small and removable, so the wreath can shift to Thanksgiving after Halloween.

    Place black pieces in groups rather than scattered one by one, so the wreath reads as planned rather than random. Remove the Halloween picks after October 31 and swap the black ribbon for burlap or rust ribbon, and the same wreath works for the rest of fall. This is a good choice for homes with trick or treat visitors, since it signals the holiday at the door.

    11. Pumpkin and Berry Wreath

    A pumpkin wreath with cream and orange mini pumpkins tucked among red berry picks and leaves on a front door.

    Berries add small pops of color and a finished detail to a pumpkin wreath, especially in red, burgundy, or orange. Cover a foam base with leaves or moss, wire on mini pumpkins in cream and orange, then tuck berry picks into every gap so no base shows through. The berries should sit at the same depth as the pumpkins, not buried behind them.

    Use faux berries outdoors, since real berries soften quickly in rain and attract insects. A berry wreath suits a red or dark green door, where the berry color echoes the door paint. Pair it with a simple doormat and one planter, since the wreath itself is already detailed.

    12. Sparse Metal Hoop Pumpkin Wreath

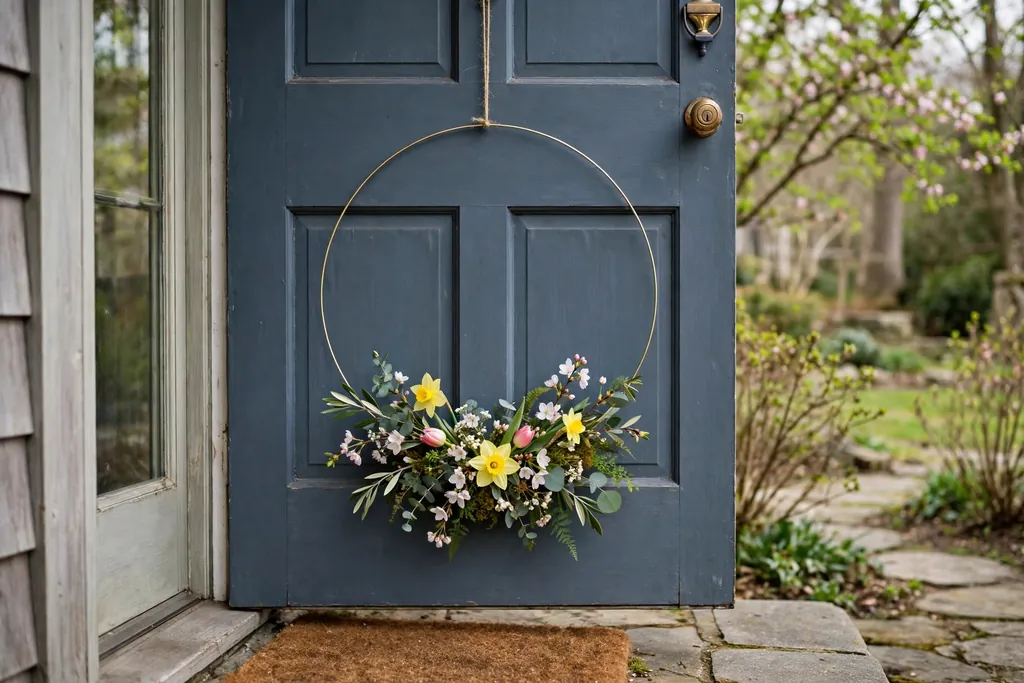
    A sparse metal hoop wreath with a few mini pumpkins and dried leaves on the lower half of a thin gold ring, on a modern front door.

    A metal hoop wreath uses only a few pumpkins on a thin gold or black ring, which suits modern doors and small porches. Wire three to five mini pumpkins in one color family to the lower half of the hoop, add a few sprigs of dried leaves or eucalyptus, and leave the top of the hoop bare. The empty space is part of the design, so resist the urge to fill it.

    Choose a hoop size that fits the door, with at least a hand width of door showing around it. A thin ribbon loop at the top, rather than a bulky hook, keeps the minimal look. This wreath works well on a glass paneled door, where a full wreath would block light, and it pairs with a single planter rather than a full porch display.

    13. Pumpkin and Plaid Ribbon Wreath

    A pumpkin wreath with a large plaid bow in rust, cream, and brown, mini pumpkins, and leaves on a front door.

    Plaid ribbon gives a pumpkin wreath a cozy, classic fall pattern that ties it to throws, cushions, and table linens nearby. Build a full wreath of mini pumpkins and leaves on a foam base, then add a large plaid bow at the bottom and two or three short plaid loops tucked into the wreath. Choose one plaid in rust, cream, and brown, and keep other patterns off the wreath.

    Make the bow the only patterned element, so the pumpkins and leaves stay as the main texture. A wired plaid ribbon holds its loops better outdoors than a soft ribbon. This style suits porches with plaid cushions or a plaid throw on a bench, and it reads well from the street because the pattern is bold at a distance.

    14. Pumpkin and Eucalyptus Wreath

    A pumpkin wreath with eucalyptus sprigs as a green background, cream and pale orange mini pumpkins, and dried seed heads on a front door.

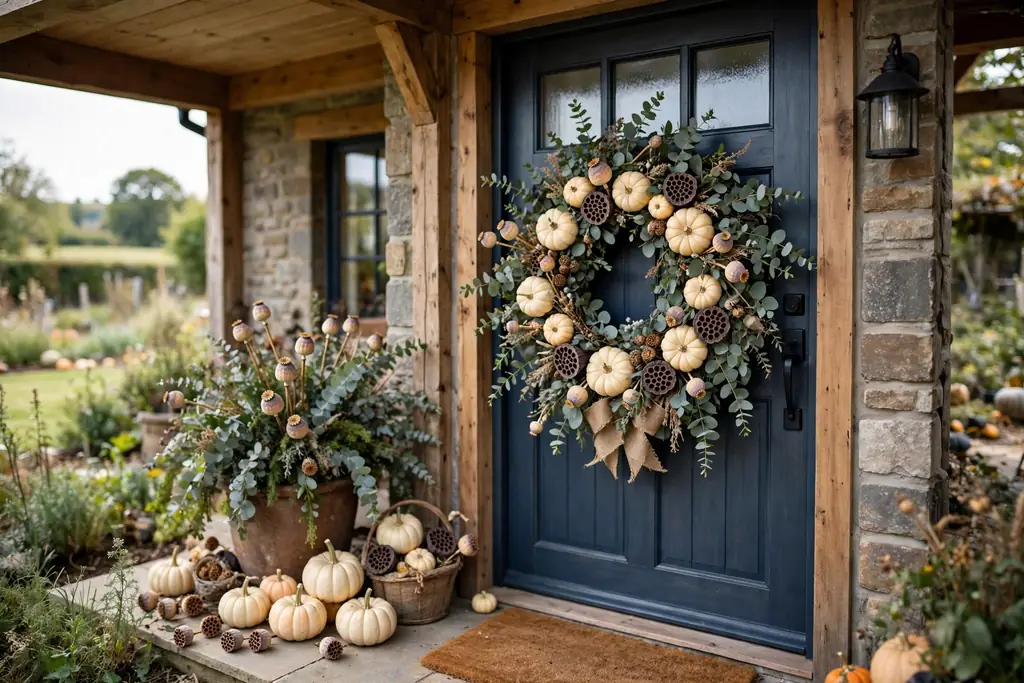
    Eucalyptus adds a soft green tone and a rounded leaf shape that cools down the warm orange of pumpkins. Cover a foam base with eucalyptus sprigs, then wire on cream and pale orange mini pumpkins, with a few dried seed heads for contrast. The green should form a full background layer, with pumpkins sitting on top of it rather than hidden inside it.

    Use faux eucalyptus outdoors for the longest life, or dried eucalyptus on a covered porch. A simple cream or sage ribbon suits this wreath better than a bright bow. This style suits gray, white, and sage doors, and it works indoors on a mantel or a wall when the front door already has a different wreath. For more room by room fall looks, see these fall decor ideas.

    15. Painted Pastel Pumpkins

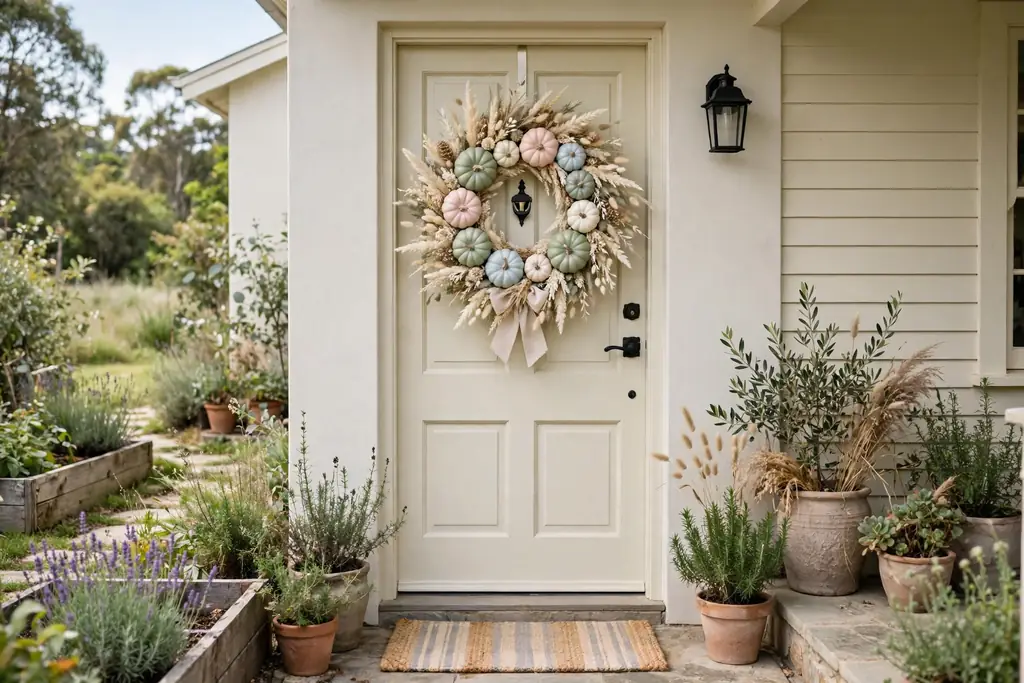
    A wreath of painted pastel pumpkins in sage, blush, pale blue, and cream with pale dried grasses on a light colored front door.

    Painted pumpkins in soft sage, blush, pale blue, and cream give a wreath a gentle, modern fall look that suits light colored homes. Paint faux mini pumpkins in a limited pastel palette, let them dry fully, then wire them onto a foam base with pale dried grasses and a few cream berries. Keep the palette to three pastels plus cream, so the wreath stays calm.

    Paint only faux pumpkins, since paint seals a real pumpkin skin and shortens its life. A cream or pale sage bow finishes this wreath without adding a new color. This style suits coastal homes, white porches, and doors in pale blue or soft green, where a classic orange wreath would feel too strong.

    16. Pumpkin and Corn Husk Wreath

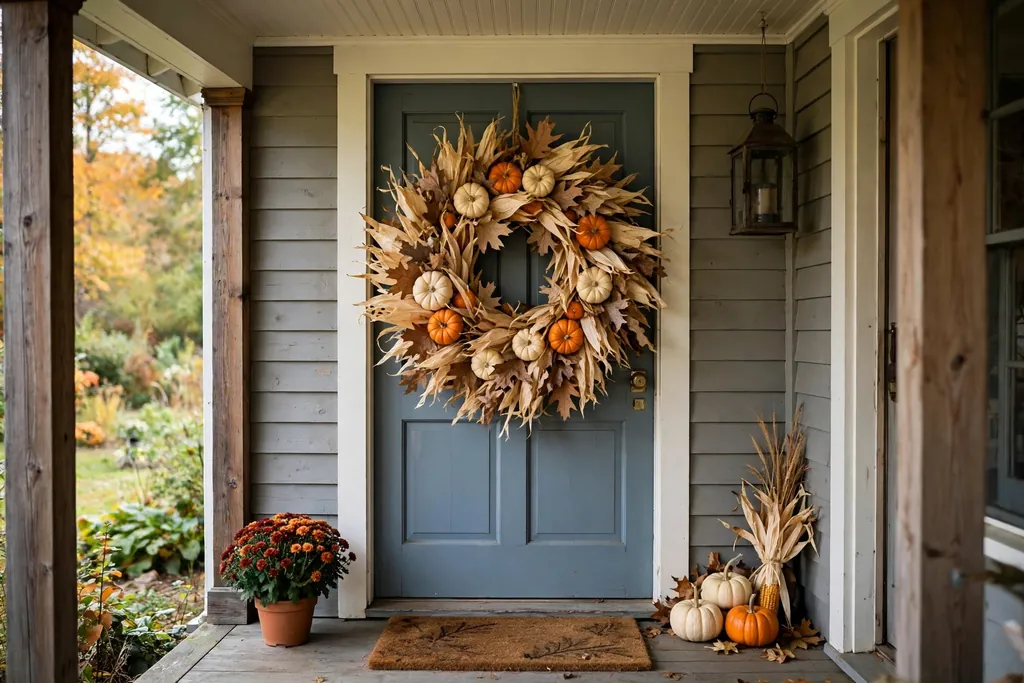
    A pumpkin wreath layered with dried corn husks, orange and cream mini pumpkins, and dried leaves on a covered porch door.

    Corn husks add a pale gold, papery texture that suits a harvest wreath and costs little when husks are saved from cooking or crafting. Layer dried corn husks around a grapevine ring, overlapping them like scales, then wire on mini pumpkins in orange and cream with a few dried leaves. The husks should fan slightly outward, so the wreath gains a ruffled edge.

    Keep corn husks dry, since wet husks go limp and lose their shape. A covered porch suits this wreath best, and a twine bow matches the natural material better than a shiny ribbon. This is a good handmade option for crafters, and it pairs well with corn stalk bundles and a wooden crate by the door. For more handmade fall projects, browse these DIY fall home decor ideas.

    17. Pumpkin Wreath with Warm Fairy Lights

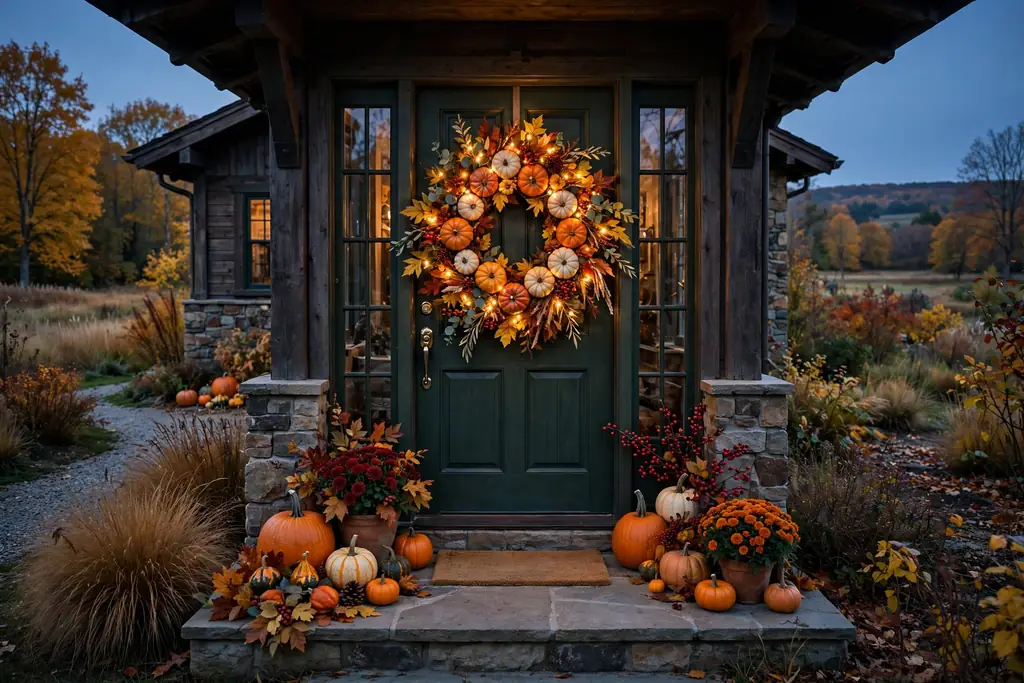
    A pumpkin wreath with warm fairy lights woven through mini pumpkins, leaves, and berries, glowing on a front door in the evening.

    Warm fairy lights turn a pumpkin wreath into an evening focal point, which matters in fall when guests often arrive after dark. Build a full wreath of mini pumpkins, leaves, and berries on a foam base, then weave a battery fairy light string through the wreath, tucking the battery pack behind the ring. Space the lights evenly, with no dark patches and no tangled clumps.

    Use warm white lights rather than cool white, since warm light suits pumpkins and wood doors better. Set the battery pack on a timer if it has one, and check that the wreath still hangs flat with the pack in place. This wreath suits a dark porch, a north facing door, or a home where the entrance is used most in the evening, and it pairs well with lanterns on the steps.

    Conclusion

    A pumpkin wreath works best when the base, the pumpkin size, and the focal point fit the door and the porch around it. A full grapevine wreath suits a plain door, a sparse hoop suits a modern door, and a lit or berry wreath suits an entrance used after dark. Pick one idea from this list, repeat one color from the wreath in a nearby pot or mat, and hang the wreath at eye level with a secure hook. With that simple plan, the front door reads as festive for the whole fall season, from early autumn through Thanksgiving.

    FAQs

    What is the best base for a pumpkin wreath?

    A grapevine base suits a rustic, open wreath, a foam base suits a full wreath that hides the ring, and a metal hoop suits a sparse modern wreath. Choose grapevine for outdoor use, foam for a dense look on a covered porch, and a hoop when you want most of the door to stay visible.

    How do I hang a pumpkin wreath on a front door?

    Hang a pumpkin wreath at eye level on a sturdy over door hook, a nail, or a suction hook rated for the wreath weight. Check that the wreath clears the handle and lock when the door swings, and add a small pad behind the lower edge if the wreath tilts forward.

    Should I use real or faux pumpkins on a wreath?

    Faux pumpkins last longer outdoors, hold paint well, and can be reused next year, while real mini pumpkins look natural but soften in rain and warm sun. Use faux pumpkins for an exposed door, and save real mini pumpkins for a covered porch or a short display period.

    How do I keep a pumpkin wreath from looking too busy?

    Use one focal point, such as a bow, a flower cluster, or lights, and keep the rest of the wreath to pumpkins plus one filler, such as leaves or berries. Limit the palette to two or three colors, and step back to view the wreath from the walkway before adding more pieces.

    Can a pumpkin wreath stay up through Thanksgiving?

    Yes, most pumpkin wreaths work through Thanksgiving if you avoid Halloween only details or make them removable. Remove black Halloween picks and swap a black ribbon for burlap or rust ribbon after October 31, and the same wreath reads as harvest rather than Halloween.

    How do I store a pumpkin wreath after fall?

    Store a pumpkin wreath in a large box or a wreath bag, with tissue around fragile pieces and nothing stacked on top of it. Keep the box in a dry place away from heat, remove battery packs from lit wreaths, and check faux pumpkins and ribbon for dust or damage before the next season.


  • How to Make a Pinecone Wreath with Natural Texture

    How to Make a Pinecone Wreath with Natural Texture

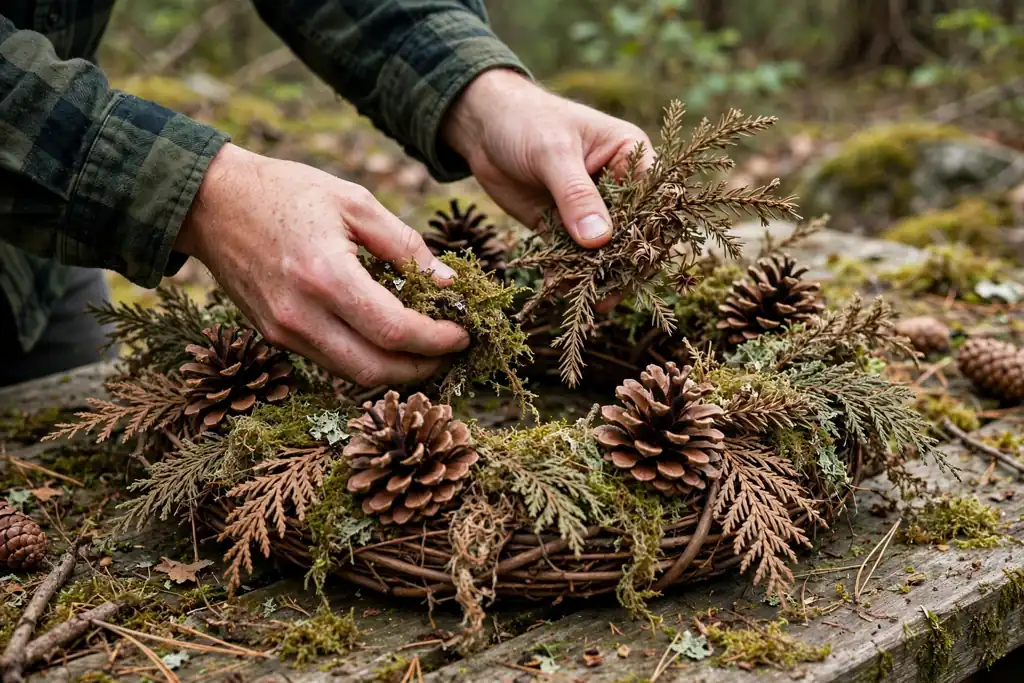
    To make a pinecone wreath with natural texture, clean and dry open pinecones, wire them in overlapping rings around a sturdy wreath form, fill gaps with small pinecones and greenery, add a bow if you like, then hang the wreath from a hook rated for its weight.

    The look comes from mixing pinecone sizes, shapes, and tones rather than using identical pieces. Large pinecones set the outer shape, medium pinecones fill the middle, and small pinecones and dried greenery soften the edges. Work in rings, step back often to check fullness, and leave the center opening clear so the wreath reads as a ring from across the room or the porch. For ideas on where a finished wreath fits outside, see these exterior decorating ideas for fall and these fall porch ideas.

    Key Takeaways

    • Use open, dry pinecones in several sizes, since mixed sizes give a fuller and more natural look than one uniform size.
    • Wire pinecones to the form instead of relying only on glue, so the wreath holds its shape and survives handling and hanging.
    • Build in rings from the outside in, overlapping each pinecone slightly, and check the wreath from the front and the side as you go.
    • Fill gaps with small pinecones, moss, dried leaves, or evergreen sprigs rather than adding one more large pinecone on top.
    • Keep the wreath balanced by spreading colors and textures around the ring, not clustering all the dark or light pinecones in one spot.
    • Hang the wreath from its form, not from a single pinecone, and store it in a box where it will not be crushed.

    Materials and Supplies

    • 40 to 60 open pinecones in mixed sizes, depending on the wreath form size
    • A sturdy wreath form, such as a wire frame, grapevine form, or foam form wrapped in ribbon or fabric
    • Floral wire, plus wire cutters and pliers
    • A hot glue gun and glue sticks, for small filler pieces only
    • Work gloves, since pinecone scales can be sharp and sap can be sticky
    • An old sheet or tray to catch scales and debris
    • Dried greenery, moss, dried leaves, or small twigs for filling gaps
    • Ribbon for a bow and a hanging loop, if you want them
    • Pruning shears or strong scissors for trimming greenery
    • A wreath hook or nail rated for the finished wreath weight

    1. Choose Pinecones and Plan the Wreath Size

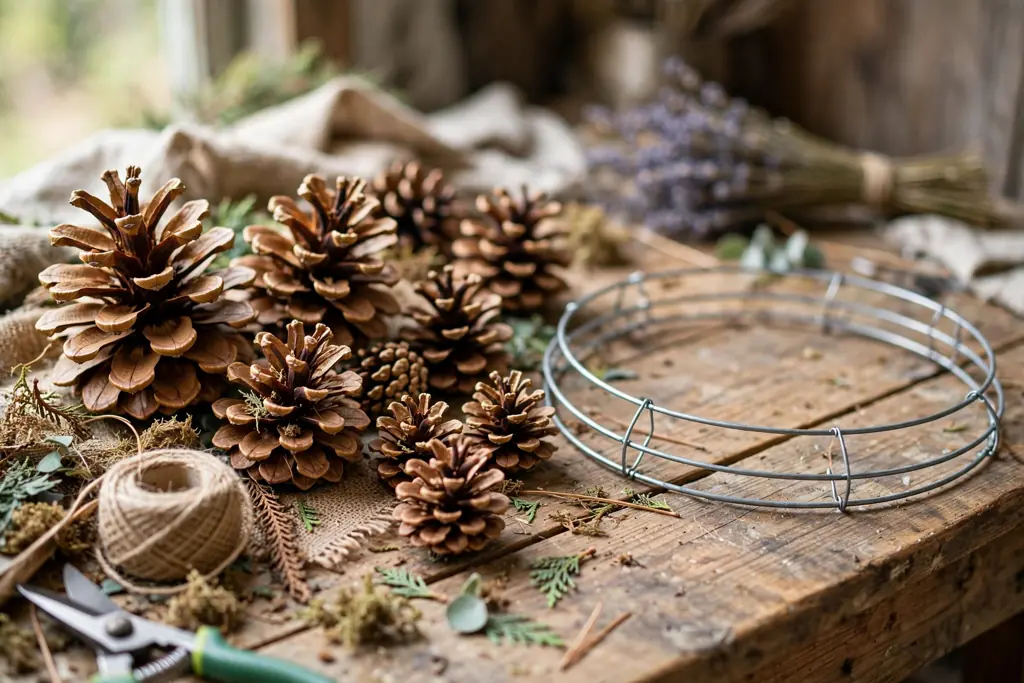
    Open pinecones of mixed sizes laid out beside a round wreath form on a work table.

    Start with pinecones that are open, dry, and firm, with scales that spread outward rather than lying flat and tight. Open pinecones sit well on a wreath form and show the layered texture that gives this project its look. Set aside any pinecones that are soft, moldy, cracked through the center, or missing large patches of scales, since they will not hold wire well and may shed.

    Decide the finished size before you start wiring. A wreath form of about 12 to 18 inches across suits most front doors, mantels, and interior walls, while a smaller form suits a narrow door, a window, or a table centerpiece. Count your pinecones against the form size: a larger form needs more pinecones, and running short halfway through a ring makes it hard to match sizes later. Lay the form on a table and set pinecones around it in a loose ring to check that you have enough before you wire anything.

    2. Clean and Dry the Pinecones

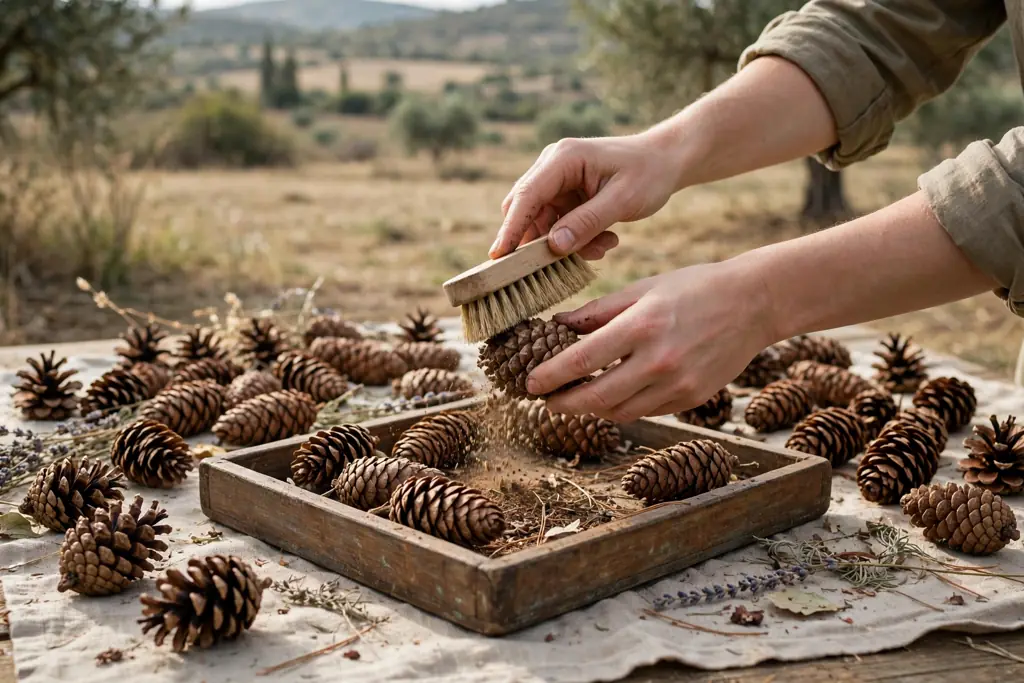
    Hands brushing a pinecone clean over a tray with dry pinecones nearby.

    Shake each pinecone gently over a tray to remove loose dirt, seeds, and debris, then brush the scales lightly with a dry brush or an old toothbrush. If pinecones gathered outdoors look dusty, rinse them briefly in water and let them drain upside down on a towel. Do not soak them for a long time, since soaked pinecones close up and take much longer to dry.

    Dry the pinecones fully before you build. Spread them in a single layer on a tray in a warm, dry spot with air moving around them, and turn them once a day until they feel dry and the scales have opened again. Drying time varies with pinecone size and room humidity, so check by touch rather than by the clock. Building with damp pinecones can lead to a musty smell indoors and to glue or wire that loosens as the pinecones shrink while drying.

    3. Choose a Base and Add a Hanging Loop

    Wire wreath form with a sturdy hanging loop tied at the top on a work table.

    Pick a form that matches how and where the wreath will hang. A wire frame is light, strong, and easy to wire pinecones to, and it suits a full pinecone wreath that will hang on a door. A grapevine form already has a natural look and suits a looser wreath with greenery showing between pinecones. A foam form works well if you plan to glue many small pieces, but wrap it first in ribbon, fabric, or twine so the foam does not show through gaps.

    Add the hanging loop before you add pinecones, while the back of the form is still easy to reach. Loop floral wire or sturdy ribbon through the top of the form, twist or knot it firmly, and test it by holding the empty form up by the loop. A loop fixed at this stage sits behind the pinecones and stays hidden, while a loop added at the end often ends up tied to a single pinecone that can pull loose.

    4. Sort Pinecones by Size and Tone

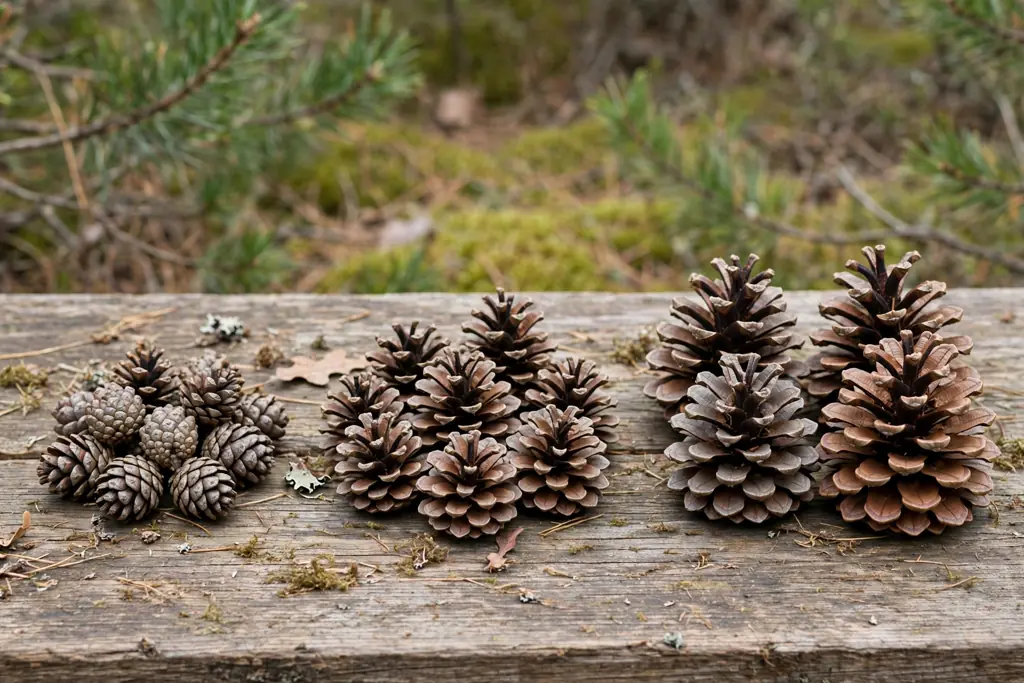
    Pinecones sorted into three groups by size on a table.

    Sort the dry pinecones into three groups: large, medium, and small. Large pinecones will form the outer ring and set the wreath width. Medium pinecones will fill the middle and inner rings. Small pinecones will fill gaps and soften the edges at the end. Sorting first saves time during wiring, since you will not have to hunt for the right size while holding wire in one hand.

    Within each size group, notice the tones. Some pinecones are warm brown, some are gray brown, and some have pale tips on the scales. Spread the tones around the wreath as you work, placing a dark pinecone, then a lighter one, then a mid tone one, so no quarter of the wreath looks much darker or lighter than the rest. Keep a few spare pinecones of each size aside for filling gaps in step 10, rather than using every pinecone in the first rings.

    5. Attach the First Outer Ring

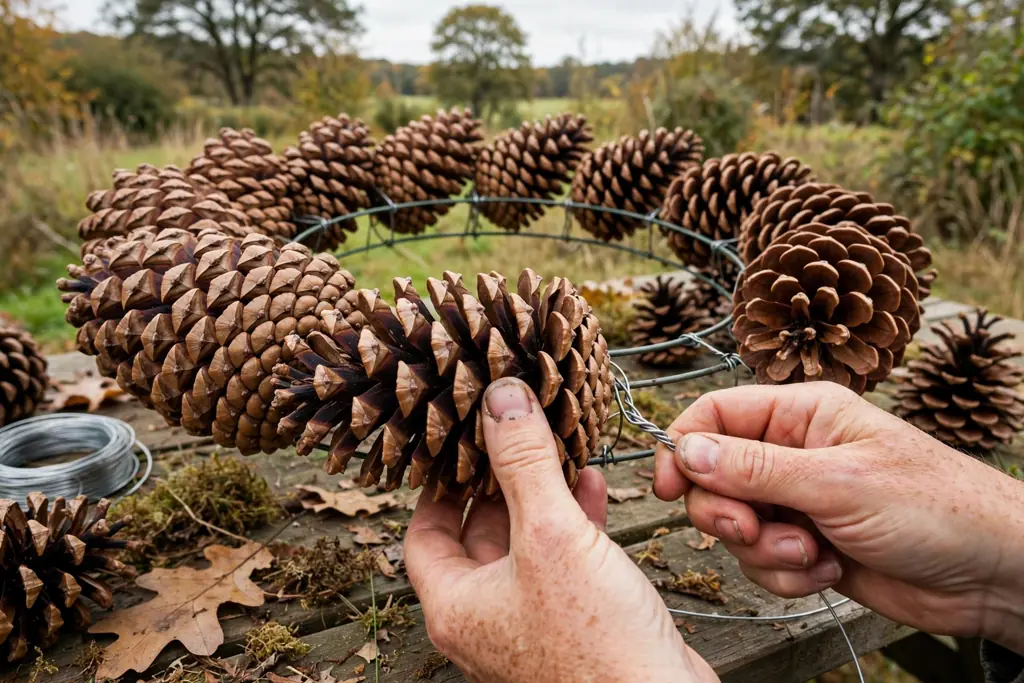
    Hands wiring large pinecones around the outer edge of a wreath form.

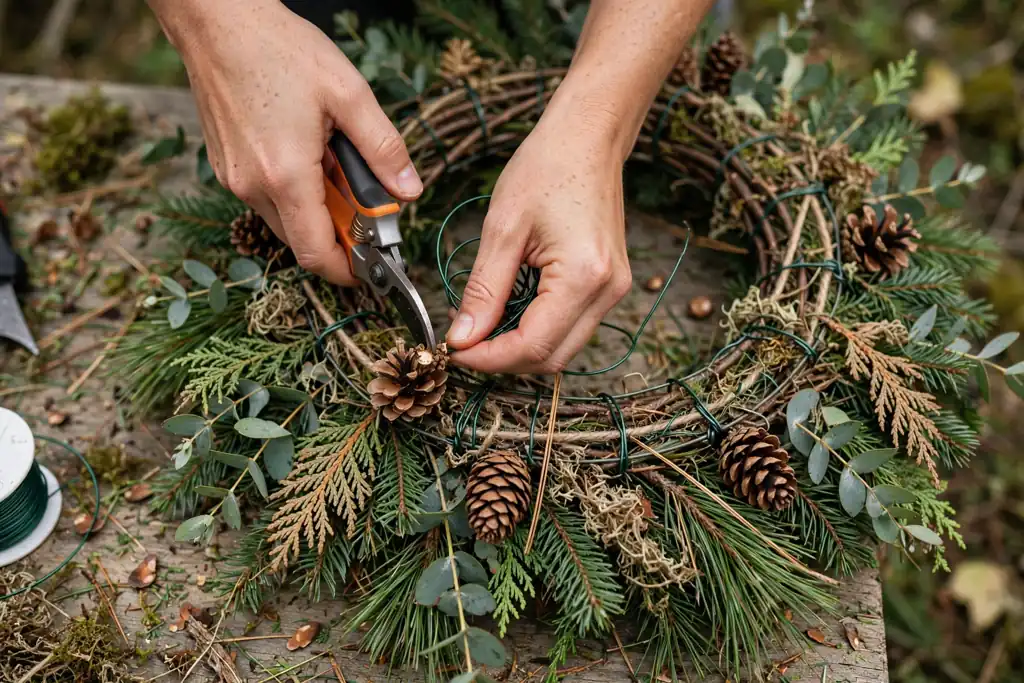
    Start the outer ring by wiring large pinecones around the outside edge of the form, with each pinecone facing outward and slightly forward. To wire a pinecone, wrap floral wire around its base, between the lower scales, twist the wire ends together at the back, and then wrap those ends around the form and twist again until the pinecone sits firm. Tug each pinecone gently after wiring; if it wobbles, add a second wrap of wire before moving on.

    Overlap each new pinecone slightly over the last one, so the scales layer like roof tiles and the form does not show through. Keep the pinecones at a similar depth from the front of the form, so the outer edge reads as one even ring rather than a bumpy line. Work all the way around the form before you start the next ring, and step back to check the shape from a few feet away.

    6. Fill the Middle and Inner Rings

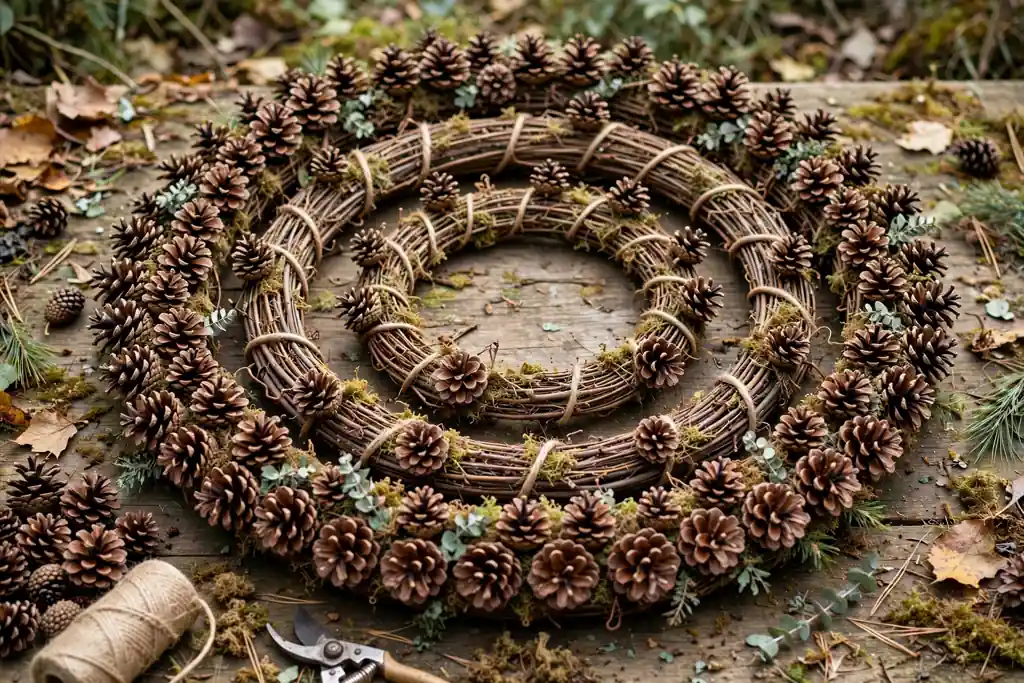
    Partly finished pinecone wreath with outer

    Add a second ring of medium pinecones just inside the outer ring, again facing forward and overlapping slightly. This ring should sit a little higher than the outer ring, so the wreath gains depth from the outside toward the center. Wire each pinecone to the form in the same way, and tuck the wire ends behind the form so they do not catch on a door or a wall.

    Add a third, inner ring of medium and small pinecones around the center opening, keeping that opening clear and round. The inner ring frames the hole in the middle of the wreath, which is what makes the shape read as a wreath rather than a solid disc. Check the center opening as you go, and move a pinecone that leans too far inward, since a blocked center opening makes the wreath look crowded.

    7. Add Greenery and Filler for Natural Texture

    Hands tucking dried evergreen sprigs and moss into gaps between pinecones on a wreath.

    Once the pinecone rings are in place, fill the gaps with dried greenery, moss, dried leaves, or small twigs. Tuck a short sprig of evergreen, dried fern, or eucalyptus between pinecones where the form still shows, and fix it with a dot of hot glue or a short wire wrap. Greenery softens the hard lines of the pinecones and adds the layered, natural texture that plain pinecone rings can lack.

    Use filler sparingly and spread it around the whole wreath. A few sprigs in each quarter of the ring look planned, while a large clump of greenery in one spot can hide the pinecones and unbalance the shape. Step back after each round of filler and look for bare patches of form, then fill only those patches. If a sprig sticks out too far, trim it with shears rather than bending it, since bent greenery often springs back out of place.

    8. Add Small Accents Without Crowding the Wreath

    Small dried accents including seed heads and cinnamon sticks placed in groups on a pinecone wreath.

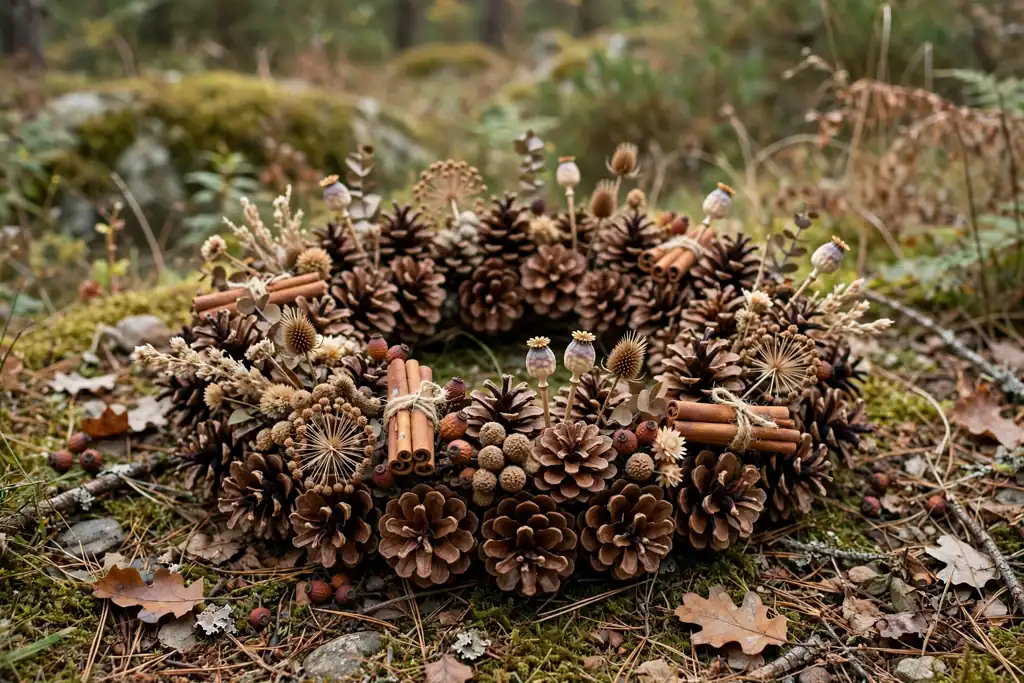
    Small accents, such as dried seed heads, cinnamon sticks, small dried orange slices, or a few berries, can add color and scent, but only if they stay small and few. Choose one or two accent types at most, and repeat them in small groups around the wreath rather than covering it with many different items. Three small groups, spaced evenly, usually read better than accents scattered at random.

    Fix each accent with wire or hot glue to a pinecone or to the form, not to loose greenery that may fall off. Keep accents low and close to the pinecone surface, so they do not catch on a door frame or a coat when the wreath hangs on a door. If you plan to use the wreath outdoors, skip accents that soften in rain, and keep the wreath under a covered porch where it stays drier.

    9. Add a Bow and Check the Balance

    Burlap bow wired to the bottom of a finished pinecone wreath hanging at eye level.

    If you want a bow, make it from ribbon that suits the setting, such as burlap for a rustic porch, plaid for a fall entry, or plain linen for a quiet interior wall. Wire the bow to the form at the top or the bottom of the wreath, not to a single pinecone, and spread the loops so the bow sits flat against the pinecones. A bow wired to the form stays in place when the wreath is lifted, while a glued bow can pull a pinecone loose.

    With the bow in place, hang the wreath on a hook at eye level and check the balance from a few feet away. Look for a heavy side, a bare patch, or a cluster of one tone that draws the eye. Move or add a small pinecone or a sprig of filler to fix a bare patch, and trim any pinecone scale or twig that sticks out much farther than its neighbors. Small fixes at this stage make a larger difference than they seem, since the eye catches imbalance most clearly once the wreath hangs upright.

    10. Secure Loose Pieces and Trim Stray Scales

    Hands trimming a stray pinecone scale and securing wire on the back of a wreath.

    Turn the wreath over and check the back for loose wire ends, then bend each wire end flat against the form or trim it short with pliers. Loose wire ends can scratch a door or a wall, snag fabric, and catch fingers when the wreath is lifted on and off its hook. Check the front again for any pinecone that still wobbles, and add a second wire wrap or a dot of hot glue at its base.

    Trim broken scale tips, long twigs, and stray greenery that stick out beyond the wreath outline, but keep the natural uneven edge of the pinecones themselves. The goal is a tidy outline with a natural surface, not a perfectly smooth circle. Shake the wreath gently over a tray one last time, and brush off loose scales, so the finished wreath does not shed on a mantel or a porch floor.

    11. Hang the Wreath and Adjust Its Position

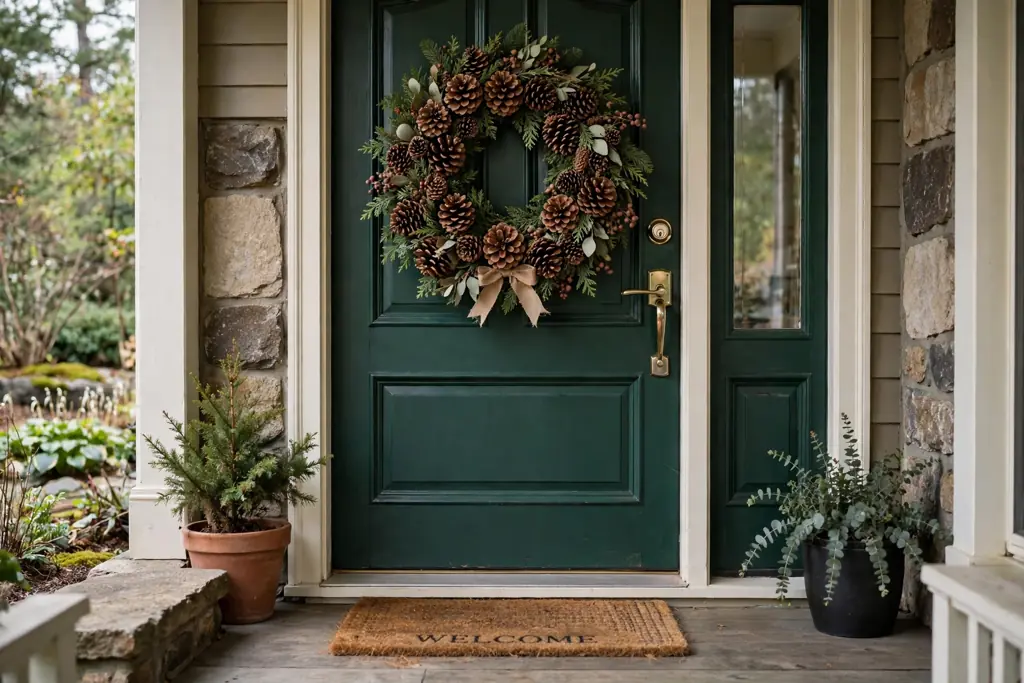
    Pinecone wreath centered on a front door clear of the handle and lock seen from the porch.

    Hang the wreath from the loop you fixed in step 3, using a wreath hook, a nail, or an over door hook rated for the finished weight. A pinecone wreath is heavier than a plain greenery wreath of the same size, so check the weight by holding it on a scale if you are unsure, and do not hang it from a hook meant for light decor. Set the wreath at eye level on a wall, or centered on the door so it does not cover the handle, the lock, or a door viewer.

    Stand back and check the position from across the room or from the yard. Adjust the loop length in small steps until the wreath sits level and centered, and check that a door with a wreath still opens and closes without the wreath catching on the frame. On a front door, check the wreath in wind as well, since a heavy wreath that swings can mark paint; a second short tie from the form to the hook can stop swinging on an exposed door.

    12. Store and Refresh the Wreath for Next Season

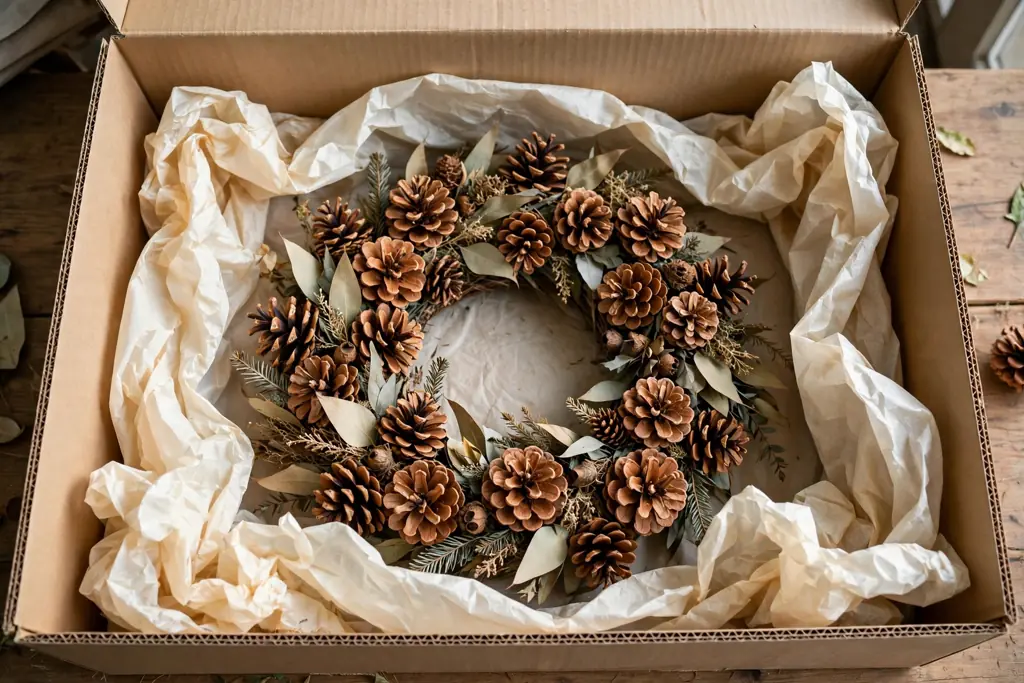
    Pinecone wreath stored flat in a large box with tissue paper around its edges.

    At the end of the season, take the wreath down on a dry day and brush off dust and loose scales before storing it. Store it flat in a box or a wreath bag that is slightly larger than the wreath, with tissue paper tucked around the edges so pinecones do not rub against the box. Do not stack heavy items on top of the box, since crushed pinecone scales do not spring back.

    Check the wreath before you hang it again next season. Tighten any wire that has loosened, replace a pinecone that has broken, and add a fresh sprig of greenery where the old filler looks tired. A pinecone wreath stored well can last several seasons, and a short refresh each year keeps it looking intentional rather than worn. Keep the wreath indoors or under cover when it is not in use, since long exposure to rain and sun fades tones and weakens glue.

    Conclusion

    A pinecone wreath with natural texture comes from patient layering, not from rare materials. Clean, dry pinecones in mixed sizes, wired in rings around a firm form, filled with a little greenery, and hung from a loop fixed to the form itself, give a wreath that looks gathered and holds its shape. Take time to sort, check balance as you go, and store the wreath with care, and the same wreath can return to the door or the wall for seasons to come.

    Frequently Asked Questions

    How many pinecones do I need for a pinecone wreath?

    You need about 40 to 60 open pinecones for a wreath form of 12 to 18 inches across, depending on pinecone size and how full you want the wreath. Large pinecones cover more of the form, so a wreath made mostly of large pinecones needs fewer pieces, while a wreath made of small pinecones needs more. Count your pinecones before you start, and keep a few spares aside for filling gaps at the end.

    Should I glue or wire pinecones to a wreath form?

    Wire pinecones to the form for the main rings, and use glue only for small filler pieces. Wired pinecones hold firm when the wreath is lifted, hung, and stored, while glue alone can fail under the weight of a large pinecone, especially in heat or damp air. Wrap wire around the pinecone base and around the form, twist it firm, and tug each pinecone to check it before moving on.

    How do I clean pinecones before making a wreath?

    Shake pinecones over a tray to remove dirt and seeds, brush the scales lightly, and rinse briefly only if they look dusty. Dry them fully in a single layer in a warm, dry spot with air moving around them, turning them once a day until they feel dry and the scales have opened again. Do not build with damp pinecones, since they can smell musty indoors and loosen as they dry.

    Can a pinecone wreath hang outside on a front door?

    Yes, a pinecone wreath can hang outside, but it lasts longest under a covered porch or entry where rain does not fall directly on it. Hang it from a hook rated for its weight, keep it clear of the handle and lock, and bring it inside during heavy storms. Skip accents that soften in rain, and check the wire and loop each season before hanging it again.

    Why does my pinecone wreath look flat or bare in spots?

    A flat or bare look usually comes from using one pinecone size, leaving the form showing between rings, or clustering all the filler in one place. Fix it by adding a second ring at a slightly different depth, filling gaps with small pinecones and greenery spread around the whole ring, and checking the wreath upright from a few feet away. Small filler pieces in each quarter of the ring fill bare patches without hiding the pinecones.

    How do I store a pinecone wreath so it lasts?

    Store a pinecone wreath flat in a box or bag slightly larger than the wreath, with tissue paper around the edges, and do not stack heavy items on top. Brush off dust before storing, keep the box in a dry indoor spot, and check the wire and pinecones before hanging the wreath again. Replace broken pinecones and tired filler each season, and the wreath can last several seasons.


  • How to Make a Succulent Wreath and Keep It Looking Fresh

    How to Make a Succulent Wreath and Keep It Looking Fresh

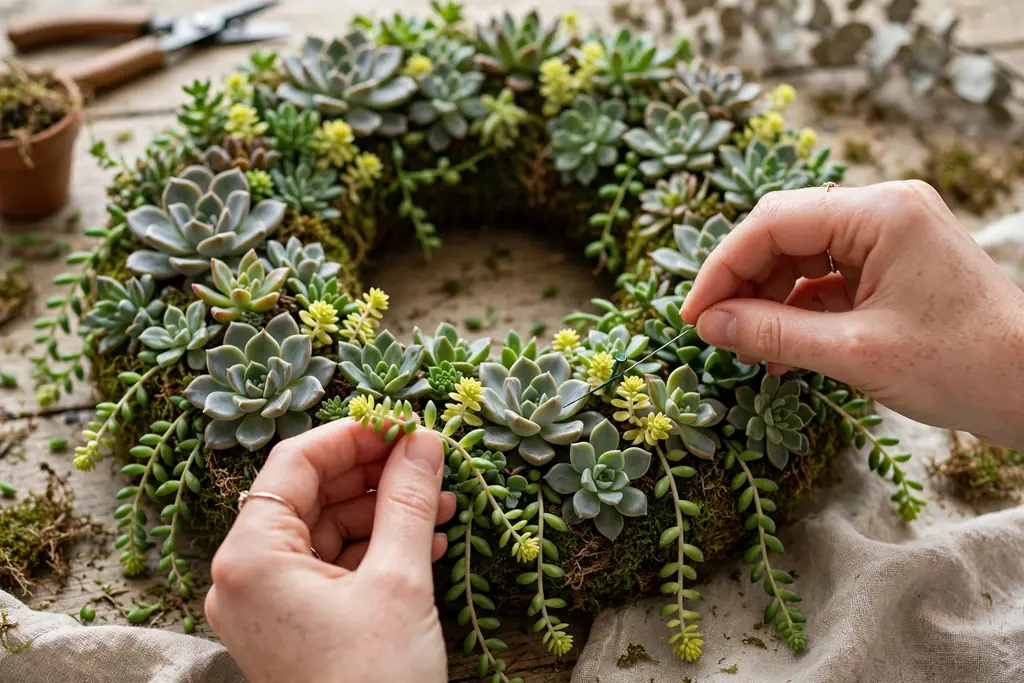
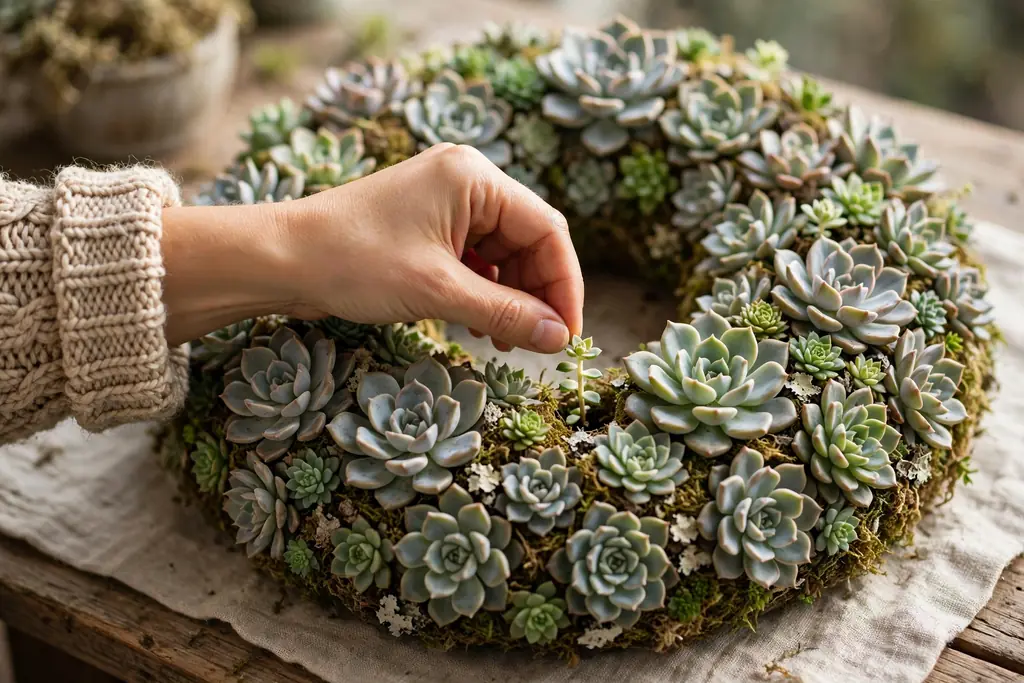
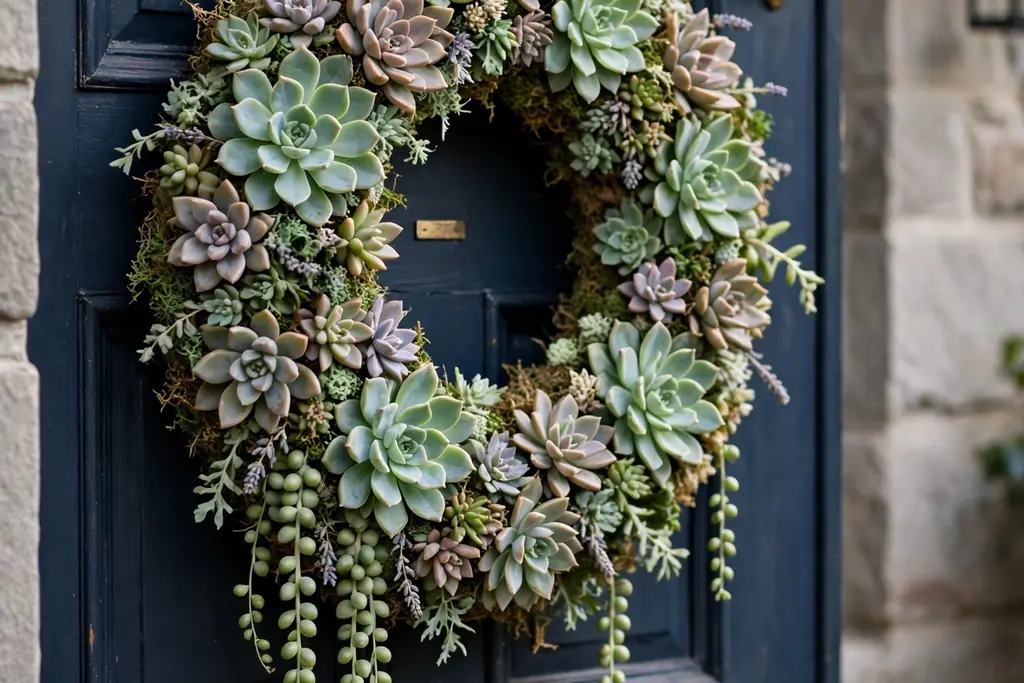
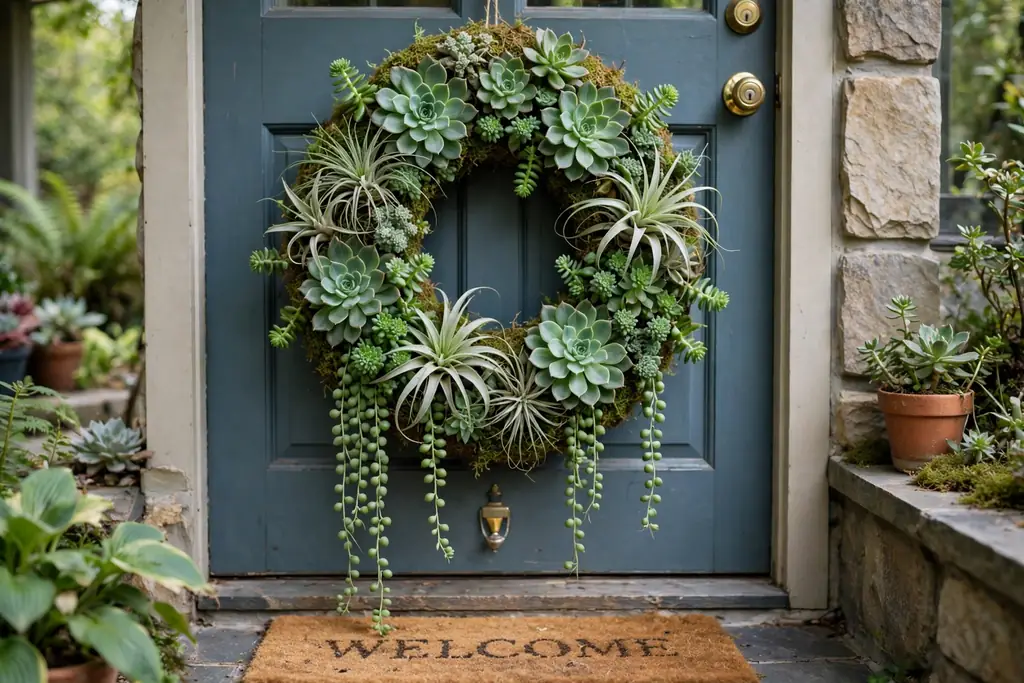
    To make a succulent wreath, pin rosette cuttings into a sphagnum moss wreath form until the surface is covered, then lay the wreath flat for two to three weeks while roots take hold. Water lightly, give it bright indirect light, and hang it where air can move around it to keep the rosettes compact and fresh.

    A succulent wreath is a living decoration, so it behaves a little differently from a wreath made of cut greenery. The plants need light, air, and very little water, and they reward a gentle routine with steady growth and full rosettes. The steps below cover choosing plants, building the wreath on a moss form, letting it root flat before hanging, and keeping it fresh through the seasons.

    Key Takeaways

    • Choose small rosette succulents for the main surface, plus a few trailing types for the outer edge.
    • Let cuttings callus for a day or two before pinning, so cut ends dry and root more reliably.
    • Pin cuttings close together on a damp moss form, since gaps show the moss until plants fill in.
    • Lay the wreath flat for two to three weeks after planting so roots take hold before it hangs upright.
    • Water lightly and only when the moss feels dry, and give the wreath bright indirect light.
    • Refresh the wreath by replacing tired cuttings and propagating trimmings into new plants.

    Materials and Tools

    • A wire wreath frame with sphagnum moss, or a moss wreath form in your chosen size
    • Sphagnum moss, plus extra moss for patching thin spots
    • Succulent cuttings: small rosettes such as echeveria and sempervivum, plus trailing types such as string of pearls or sedum
    • Floral pins or U-shaped greening pins
    • A spray bottle for misting and light watering
    • Sharp, clean scissors or pruning snips
    • Work gloves, a drop cloth or old sheet, and a shallow tray or bucket
    • A wreath hook, nail, or over door hanger rated for the wreath weight
    • A small trowel or dibber for making planting holes in the moss

    1. Decide on Size, Placement, and Style

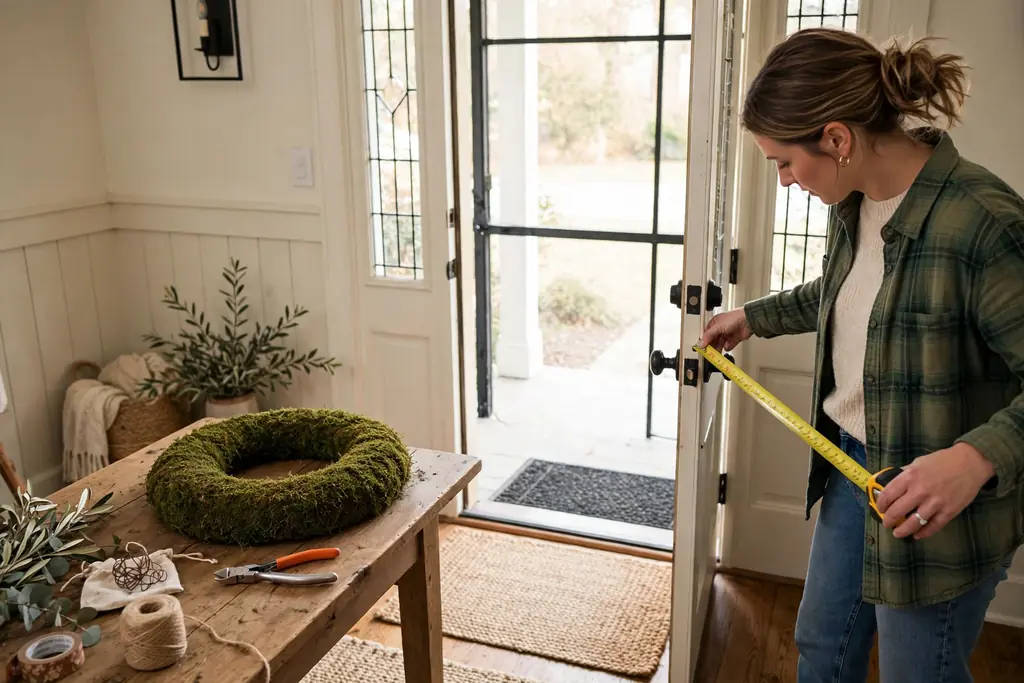
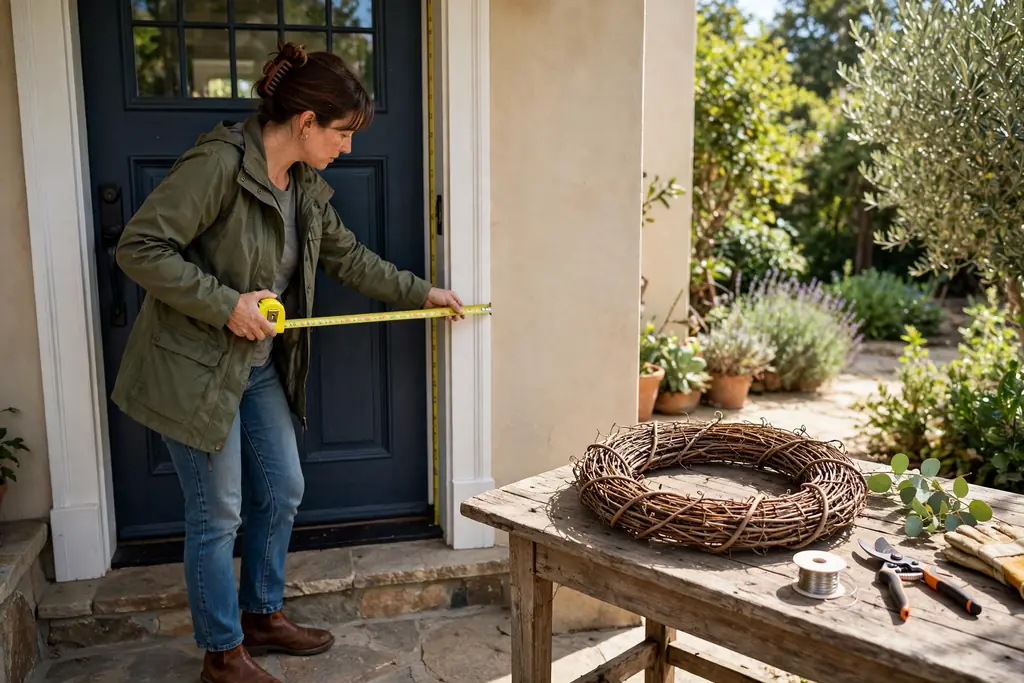
    A person measuring a front door space with a tape measure beside a round moss wreath form on a table.

    Start by choosing where the wreath will hang and how large it should be. A front door usually suits a wreath between 14 and 20 inches across, while a wall or window often suits a smaller wreath between 10 and 14 inches. Measure the space and leave a margin of several inches around the wreath so it does not crowd trim, handles, or nearby lights.

    Next, pick a style to guide your plant choices. A classic succulent wreath uses green and blue-green rosettes in a dense, even ring, a colorful wreath mixes rosettes in dusty pink, purple, and cream, and a woodland style wreath pairs green rosettes with trailing sedum at the edge. A living wreath also suits a farmhouse entryway, where natural wood and neutral colors let the plants stand out, as seen in these farmhouse decor ideas. Writing down your size and style before you shop keeps the project focused and avoids buying cuttings you will not use.

    2. Choose Succulents for the Wreath

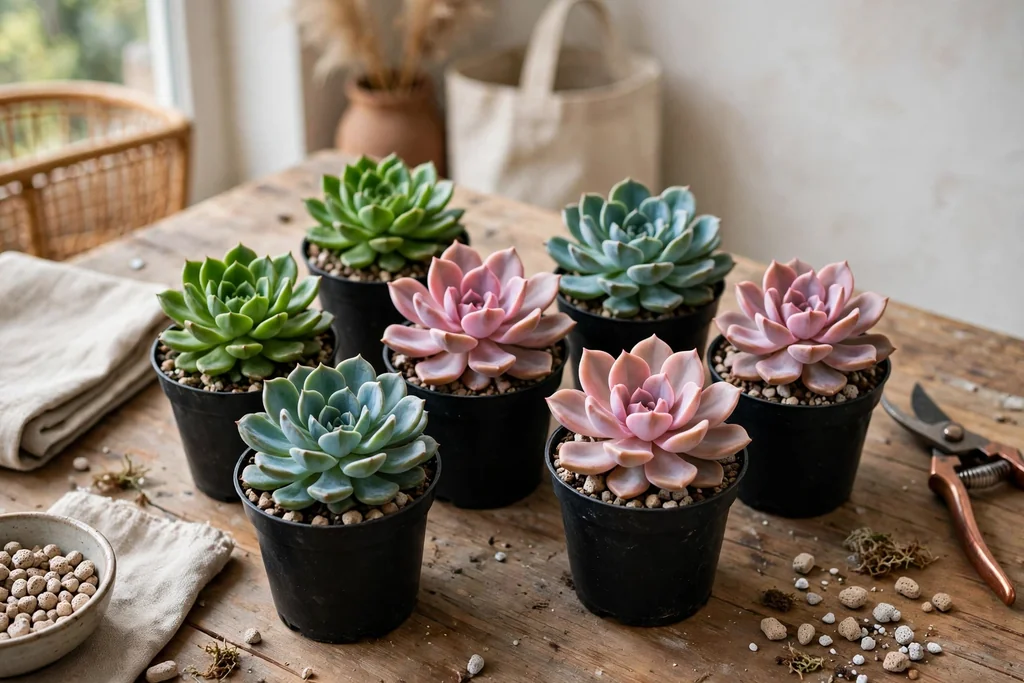
    Small rosette succulents in green, pink, and blue-green arranged in nursery pots on a work table.

    Pick small rosettes for the main surface, since they sit flat against the moss and form a tidy pattern. Echeveria, sempervivum (hens and chicks), and small graptopetalum rosettes are common choices, and they come in green, blue-green, pink, and purple tones. Choose rosettes between 1 and 3 inches across for a standard wreath, since larger rosettes crowd each other and smaller ones take longer to cover the form.

    Add a few trailing succulents for the outer edge, such as string of pearls, burro tail sedum, or trailing sedum, so the wreath has a soft, finished outline. Avoid succulents that grow tall or spread fast in a wreath, since they soon outgrow their neighbors and unbalance the shape. Buy a few spare cuttings beyond your estimate, since spares are useful for filling gaps and replacing any cutting that fails to root.

    3. Gather Materials and Tools

    Succulent wreath supplies laid out on a work table: moss form, sphagnum moss, floral pins, spray bottle, scissors, and cuttings.

    Lay out everything from the materials list before you start planting. Check that your floral pins are plentiful, your scissors are sharp and clean, and your spray bottle works, since stopping mid-build to search for tools can leave cuttings drying out on the table. Keep a small container for spare pins so they do not end up on the floor.

    If your moss form is dry, soak the moss briefly and squeeze out excess water so it is damp, not dripping. Keep cuttings in a cool, bright spot out of direct sun until you need them, and work on a drop cloth, since moss and soil crumbs scatter easily. Having all materials ready keeps the planting rhythm steady and the wreath even.

    4. Prepare the Moss Wreath Form

    Hands packing damp sphagnum moss into a wire wreath frame on a drop cloth.

    If you are using a wire frame, pack it firmly with damp sphagnum moss and wrap the moss with wire or twine so it holds its ring shape. A pre-made moss form saves this step, but check it before planting: squeeze it gently to confirm the moss is firm and damp all the way around, and patch any thin or loose spots with extra moss tucked in by hand.

    Decide which side is the front and mark the top, since a succulent wreath is planted and viewed from one side. Place the form on a drop cloth on your work surface, front side up. A firm, evenly packed form makes pinning easier, since pins grip well and cuttings sit at a consistent depth.

    5. Prepare and Sort the Cuttings

    Hands trimming succulent cuttings with scissors over a work table, with sorted piles of rosettes nearby.

    Trim each cutting to a stem of about 1 to 2 inches below the rosette, using sharp, clean scissors. Remove any damaged or dried lower leaves, and discard cuttings that feel soft or mushy, since those rarely root well. Lay the trimmed cuttings out for a day or two in a bright spot out of direct sun so the cut ends callus, which means a dry skin forms over the cut and helps the cutting root without rotting.

    Sort the callused cuttings into piles by type and color: one pile for the main rosettes, one for accent colors, and one for trailing types. If you have two or three rosette colors, keep them separate so you can control the pattern in each ring. Dampen the moss lightly if it has dried while you sorted, but do not soak it, since wet moss makes pins slip and cuttings rot.

    6. Plan the Layout Before You Pin

    Loose succulent rosettes arranged in a test pattern on top of a round moss wreath form.

    Plan the layout on the table before pinning anything, since moving pinned cuttings disturbs their roots later. Arrange a few rosettes on the form without pins to test your pattern: a single color ring, alternating colors, or a random mix all work, as long as the pattern repeats evenly around the ring. Place the largest rosettes first in your mind, then fill around them with smaller ones.

    Set trailing cuttings aside for the outer edge, and keep accent rosettes spaced evenly rather than grouped in one spot, so no side of the wreath looks heavier than another. Take a photo of your test layout if it helps you remember the pattern once pinning starts. A few minutes of planning here saves a patchy wreath later.

    7. Pin the Outer Ring of Rosettes

    Hands pinning a rosette succulent into the outer ring of a moss wreath form with a floral pin.

    Start with the outer ring, working in one direction around the form. Make a small hole in the moss with a dibber or the tip of your scissors, insert the cutting stem, and secure it with a floral pin pushed through the base of the rosette into the moss at a slight angle. The pin should sit snug against the rosette without crushing its leaves.

    Place each rosette so its outer leaves just touch its neighbor, and keep the rosettes facing outward at the same angle. Work all the way around the ring before moving inward, then check the back to make sure no pin ends stick out where they could scratch a door. A tight outer ring sets the wreath outline and hides the moss edge.

    8. Fill the Inner Ring

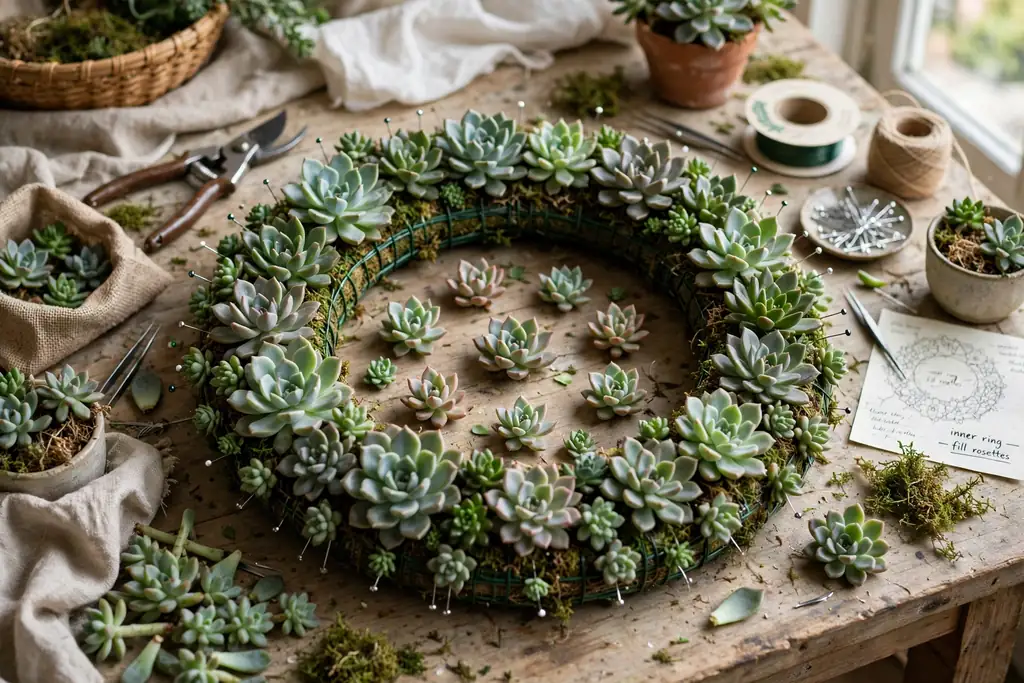
    A half finished succulent wreath with the outer ring pinned and the inner ring being filled with small rosettes.

    Once the outer ring is pinned, fill the inner ring with your remaining rosettes, working in the same direction. Use slightly smaller rosettes here if you have them, since the inner circle is tighter and large rosettes crowd each other. Angle each rosette so it faces forward and slightly outward, matching the outer ring, so the wreath reads as one even surface.

    Step back after every few rosettes and look at the wreath from the front, since it is easier to fix spacing now than after the wreath is hung. If a rosette sits too high, press it gently into the moss and add a second pin; if it sits too low, lift it and pack a little moss under its base. Fill the inner ring fully before adding trailing plants, so the main surface is complete.

    9. Add Trailing Succulents at the Edge

    Hands pinning trailing sedum strands around the outer edge of a full succulent wreath.

    Trailing succulents give the wreath its soft edge and draw the eye outward. Pin short lengths of trailing sedum, string of pearls, or burro tail around the outer edge, spacing them evenly and letting the strands fall outward and downward. Pin each strand at two points, near its base and a few inches along, so it does not swing loose once the wreath hangs upright.

    Keep the trailing lengths modest at first, since they grow longer over time and a wreath with very long trails can look unbalanced on a door. If a strand is too long, trim it with clean scissors and keep the trimming for propagation. Check that trailing plants do not cover the main rosettes, since the rosettes are the focus of the wreath.

    10. Fill Gaps with Small Cuttings

    Hands tucking a tiny sedum sprig into a gap between rosettes on a nearly full succulent wreath.

    Gaps show moss, so fill them with small rosettes, single leaves, or tiny sedum sprigs tucked between the larger plants. Use a dibber to open a small hole, insert the cutting, and pin it if needed, pushing the moss gently around its base. Work around the whole wreath, including the inner edge near the center hole, where gaps are most visible once the wreath hangs.

    Vary the filler rather than grouping one type in a single spot, and keep filler shorter than the main rosettes so it reads as texture, not as a competing layer. If a section looks crowded, remove a filler sprig rather than adding more, since a wreath with breathing room shows its rosette pattern better than one packed tight. At this stage the wreath should look full from the front with little moss showing.

    11. Water and Let the Wreath Root Flat

    Hands misting a newly planted succulent wreath with a spray bottle while it lies flat on a work table.

    Water the finished wreath lightly with a spray bottle or a gentle pour, just enough to dampen the moss through, then let excess water drain away. Lay the wreath flat in a bright spot out of direct sun for two to three weeks, and do not hang it yet. Roots form slowly in the moss, and a wreath hung too soon can shed cuttings under its own weight.

    During this flat period, check the moss every few days and water lightly only when it feels dry to the touch. Mist the rosettes lightly if the air is very dry, but avoid soaking the leaves, since water sitting in rosette centers can cause rot. After two to three weeks, give a rosette a gentle tug: if it resists, roots have taken hold and the wreath is ready to hang.

    12. Hang and Adjust the Wreath

    A finished succulent wreath being hung on a front door hook.

    Hang the wreath on its hook, nail, or over door hanger, and step back to check its height and centering. On a front door, the wreath usually sits at eye level or slightly above, with equal space on each side. If the wreath tilts, adjust the hanging loop or add a small pad behind the lower edge so it sits flat against the door.

    Check the wreath from across the room or from the street, since that is the view most people will see. Make small adjustments to any rosette that shifted during hanging, pressing it back into the moss and adding a pin if needed. If the wreath will hang on a door that opens often, test the door swing to make sure the wreath clears the frame and any nearby lights.

    13. Care for the Wreath Week to Week

    Hands watering a hanging succulent wreath lightly with a spray bottle in a bright entryway.

    A succulent wreath needs bright indirect light, good air movement, and very little water. Hang it where it gets several hours of bright light without harsh midday sun, such as a covered porch, a bright entryway wall, or a window that gets morning sun. Rotate the wreath a quarter turn every week or two so all sides get light and growth stays even.

    Water only when the moss feels dry, usually every one to two weeks indoors and more often in hot, dry weather outdoors. Water lightly, let excess drain, and never leave the wreath sitting in a puddle. Remove dried or fallen leaves promptly, since debris trapped between rosettes holds moisture and can cause rot. Bring the wreath inside if frost is forecast, since most rosette succulents dislike freezing temperatures.

    14. Refresh, Replace, and Propagate Cuttings

    Hands holding a fresh succulent cutting beside a succulent wreath, with small propagated rosettes in pots nearby.

    Over time, some rosettes outgrow their spot or lose their tight shape, and a few cuttings may fail. Refresh the wreath by pulling out tired rosettes, trimming them back, and pinning in fresh cuttings from your spares. Replace one or two plants at a time rather than rebuilding the whole wreath, so the established plants keep their roots undisturbed.

    Propagate trimmings instead of discarding them: lay healthy leaves or stem cuttings on dry soil or moss in a bright spot, and roots and tiny rosettes usually form within a few weeks. Once rooted, these new plants can fill future gaps or start a second wreath. A wreath refreshed this way can stay looking full for a year or more, with its plants slowly filling in and replacing each other.

    Conclusion

    Making a succulent wreath and keeping it looking fresh comes down to a simple sequence: choose small rosettes and a few trailing types, pin them close together on a damp moss form, let the wreath root flat for two to three weeks, then hang it in bright indirect light and water lightly only when the moss feels dry. Refresh tired plants as needed and propagate your trimmings, and the wreath will stay full and lively through the seasons.

    FAQs

    How long does it take to make a succulent wreath?

    It usually takes one to two hours to plant a succulent wreath, including preparing the moss form and sorting cuttings. Add a day or two before planting for cuttings to callus, and two to three weeks after planting for the wreath to root flat before it hangs upright.

    What succulents work best in a wreath?

    Small rosettes such as echeveria, sempervivum, and graptopetalum work best for the main surface, since they sit flat and form a tidy pattern. Add trailing types such as string of pearls, burro tail sedum, or trailing sedum at the outer edge for a soft outline, and avoid tall or fast spreading types that soon outgrow their neighbors.

    How often should I water a succulent wreath?

    Water a succulent wreath lightly only when the moss feels dry, usually every one to two weeks indoors and more often in hot, dry weather outdoors. Soak the moss lightly, let excess water drain away, and never leave the wreath sitting in water, since wet roots and rosette centers cause rot.

    How much light does a succulent wreath need?

    A succulent wreath needs bright indirect light for several hours a day, such as a covered porch, a bright entryway, or a window with morning sun. Avoid harsh midday sun, which can scorch rosettes, and rotate the wreath a quarter turn every week or two so growth stays even on all sides.

    Why is my succulent wreath losing cuttings?

    Cuttings usually fall out when the wreath is hung before roots take hold, when pins are loose, or when the moss dries out completely. Lay the wreath flat for two to three weeks after planting, check that each pin sits snug against its rosette, and water lightly whenever the moss feels dry.

    Can a succulent wreath stay outside all year?

    A succulent wreath can stay outside in mild weather, but most rosette succulents dislike frost and heavy rain. Bring the wreath inside or under cover if frost is forecast, and move it out of harsh midday sun in summer so rosettes stay compact and keep their color.


  • How to Hang Wreaths on Exterior Windows Securely

    How to Hang Wreaths on Exterior Windows Securely

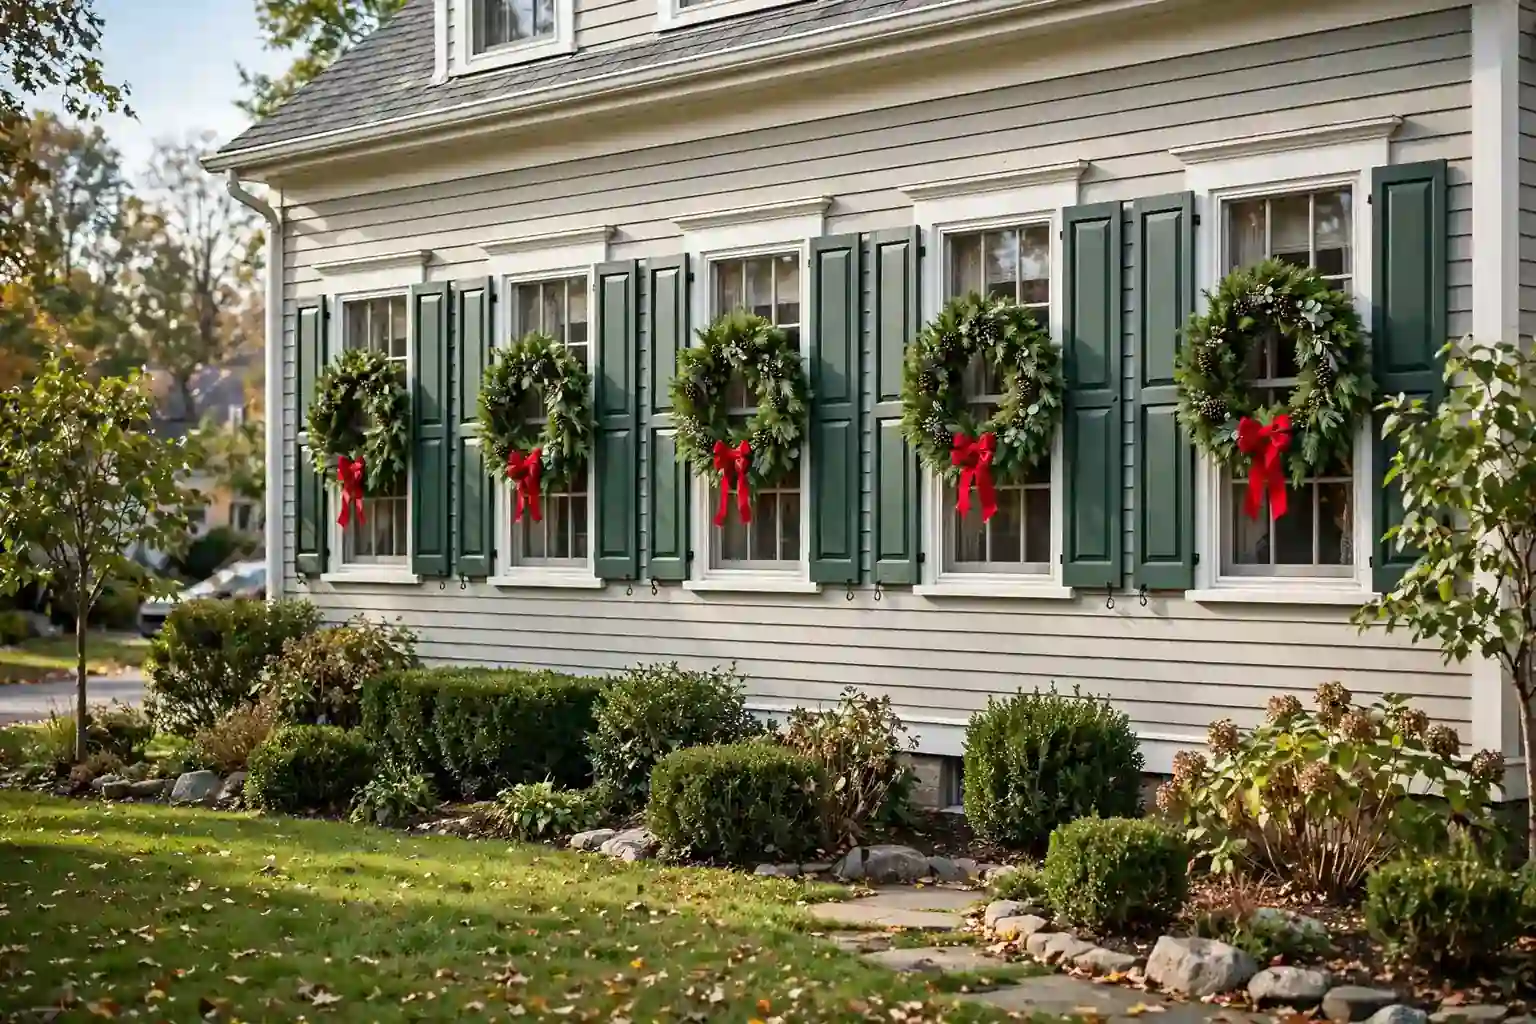
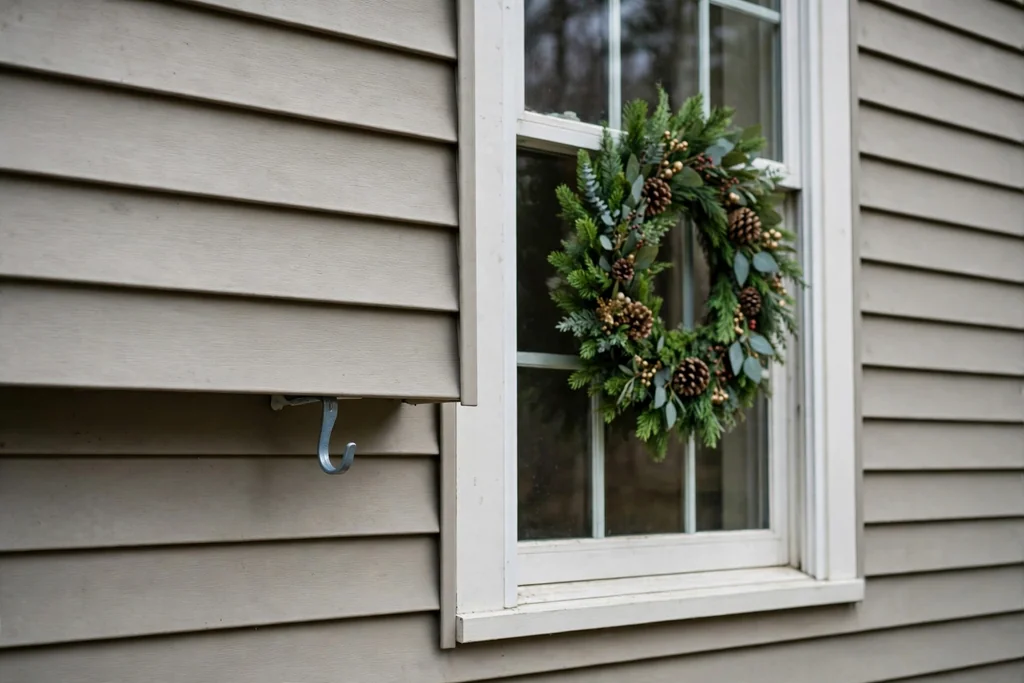
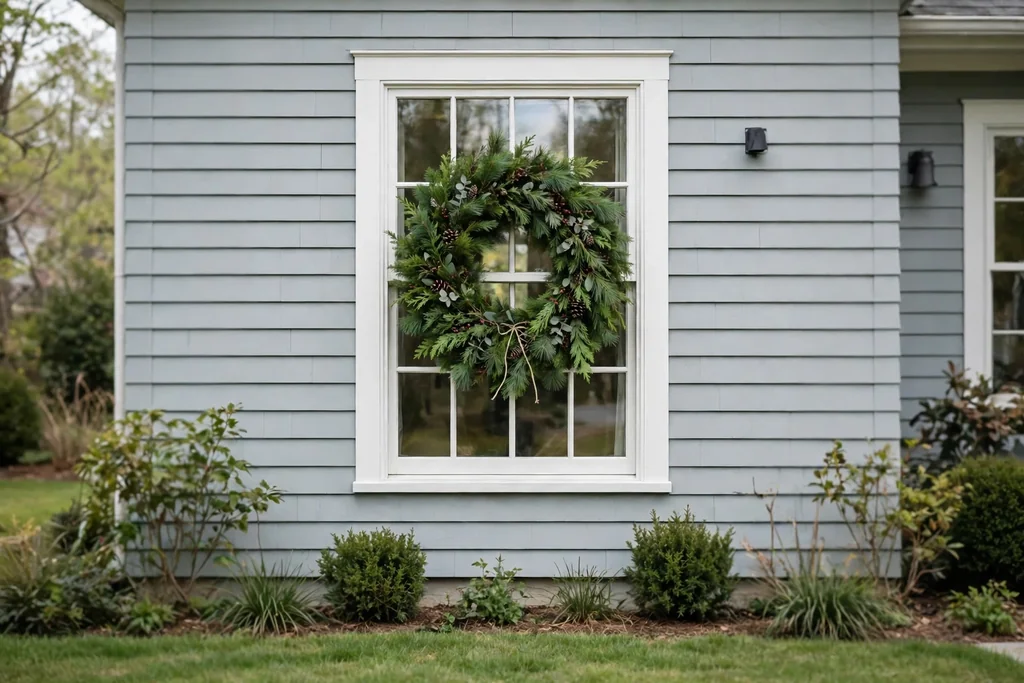
    Hang a wreath on an exterior window by choosing a hanger rated for the wreath weight, fixing it to clean glass or a solid frame, centering the wreath, and adding a second tie so wind cannot pull it loose. Check the hold after a day and again after strong wind.

    The right method depends on the window itself. A smooth glass pane suits a suction cup, a double hung window suits a hook over the top sash, and a window with a solid frame or nearby trim suits a removable hook or a siding hook. Work through the steps below in order, and do not hang a wreath that is heavier than its hanger is rated to hold. For more ways to dress the outside of a house, see these exterior decorating ideas for fall and these fall porch ideas.

    Key Takeaways

    • Measure the window and weigh the wreath before you choose a hanger, since size and weight decide which methods are safe.
    • Match the hanger to the window type: suction cups need smooth clean glass, over the top hooks need a movable sash, and frame hooks need a solid edge.
    • Clean the glass or frame first, and let it dry, so suction cups and adhesive hooks grip as well as they can.
    • Center the wreath on the glass and set the height so it does not cover trim, handles, or a house number.
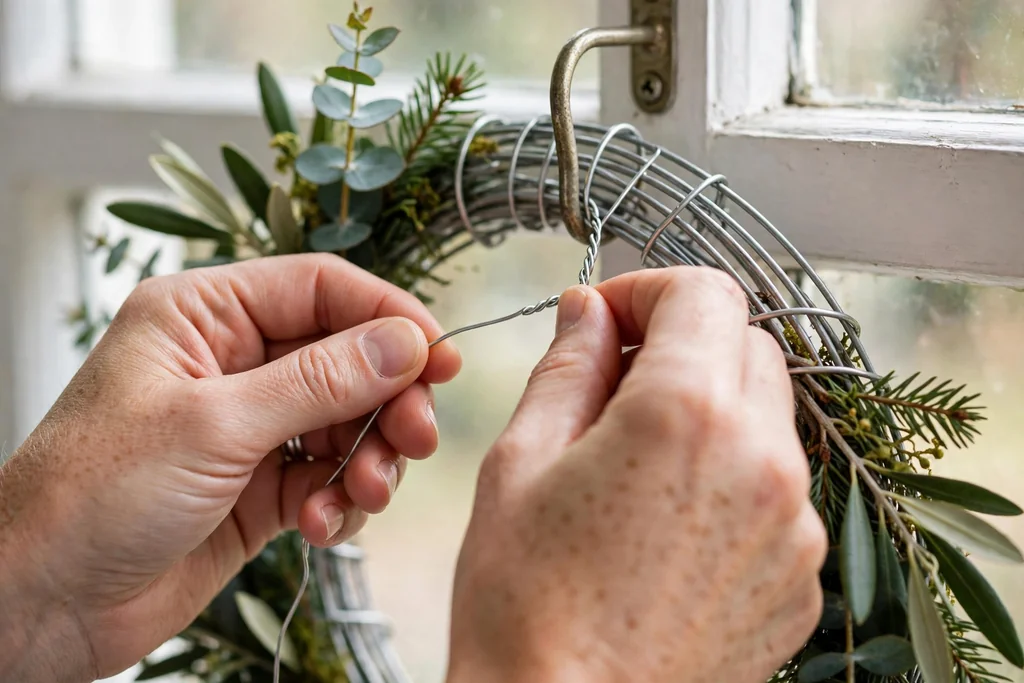
    • Add a second tie, such as wire or a cable tie, so wind cannot lift the wreath off its hook.
    • Check the hold after a day, after rain, and after strong wind, and take the wreath down before a storm if the hold looks weak.

    Materials and Supplies

    • A wreath with a firm hanging loop or frame wire at the top
    • A tape measure, a pencil, and a small level or a phone level app
    • A cloth, mild soap, and water for cleaning glass and frames
    • A suction cup wreath hanger rated for outdoor use, where the glass is smooth
    • An over the top window hook, where the window sash can take one
    • Removable adhesive hooks rated for outdoor use, where the frame is solid
    • A siding hook or a screw in hook, only where the wall material allows it and you are willing to make a small hole
    • Floral wire, thin cable ties, or ribbon for a second wind tie
    • A step ladder that reaches the window comfortably, with a helper nearby for high windows
    • Work gloves and safety glasses for outdoor work at height

    1. Measure the Window and the Wreath

    Measuring an exterior window with a tape measure beside a green wreath.

    Measure the width and height of the glass, not just the whole window frame, since the wreath should sit on the glass with a clear border around it. As a guide, leave at least a few inches of glass showing on each side of the wreath so the shape reads clearly from the street and the window still looks like a window.

    Measure the wreath across its widest point, including any bow, pinecones, or berries that stick out. Weigh the wreath on a kitchen or bathroom scale if you can, since a fresh evergreen wreath can be much heavier than a light faux wreath of the same size. Write down both numbers, and use them when you check hanger ratings in the next steps.

    2. Check How the Window Opens and Whether a Screen Is in Place

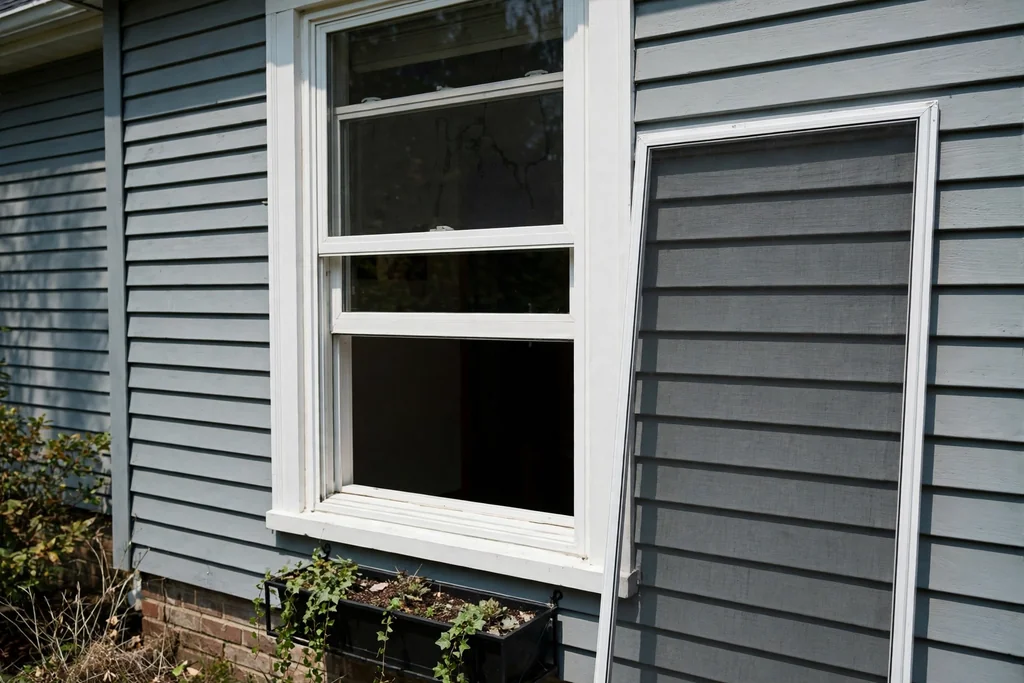
    Double hung exterior window with lower sash raised and screen beside it.

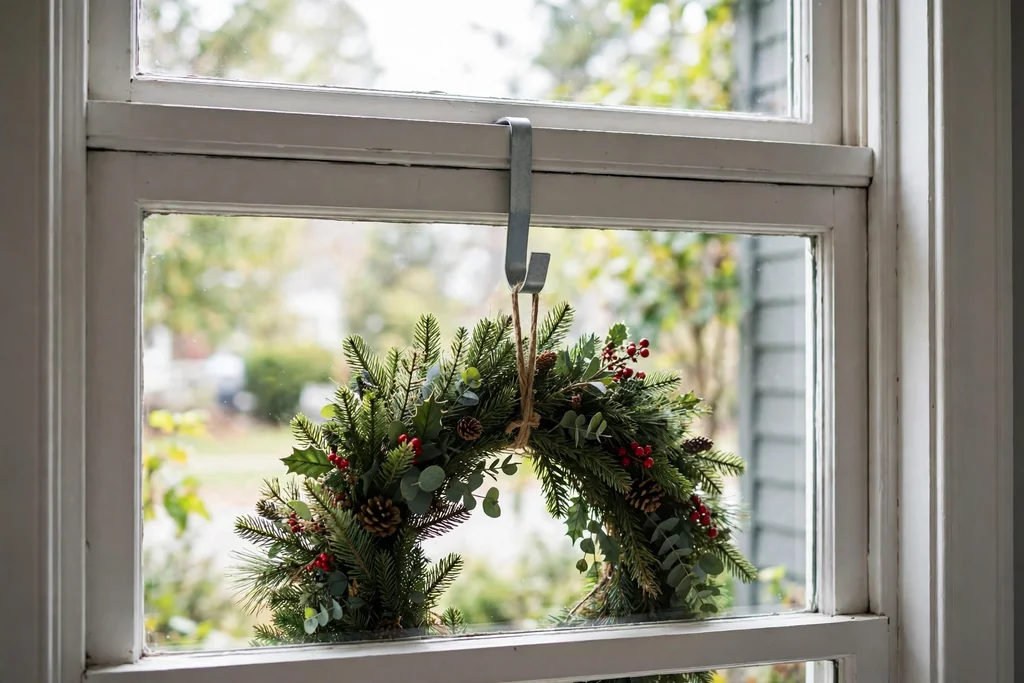
    Look at how the window works before you pick a hanger. A double hung window has a sash that slides up and down, a casement window swings open on hinges, and a fixed picture window does not open at all. An over the top hook only works where a sash can close over it, so it is not a good choice for a fixed or casement window.

    Check whether a screen sits in the window frame and whether it can be removed or moved. A screen can block a suction cup or a hook, and hanging a wreath over a screen can bend the screen mesh. If the screen is in the way, decide whether you can lift it out for the season, or choose a method that fixes to the frame or the wall around the window instead.

    3. Choose a Hanger That Fits Your Window Type

    Window wreath hangers laid out on a table including suction cup and hooks.

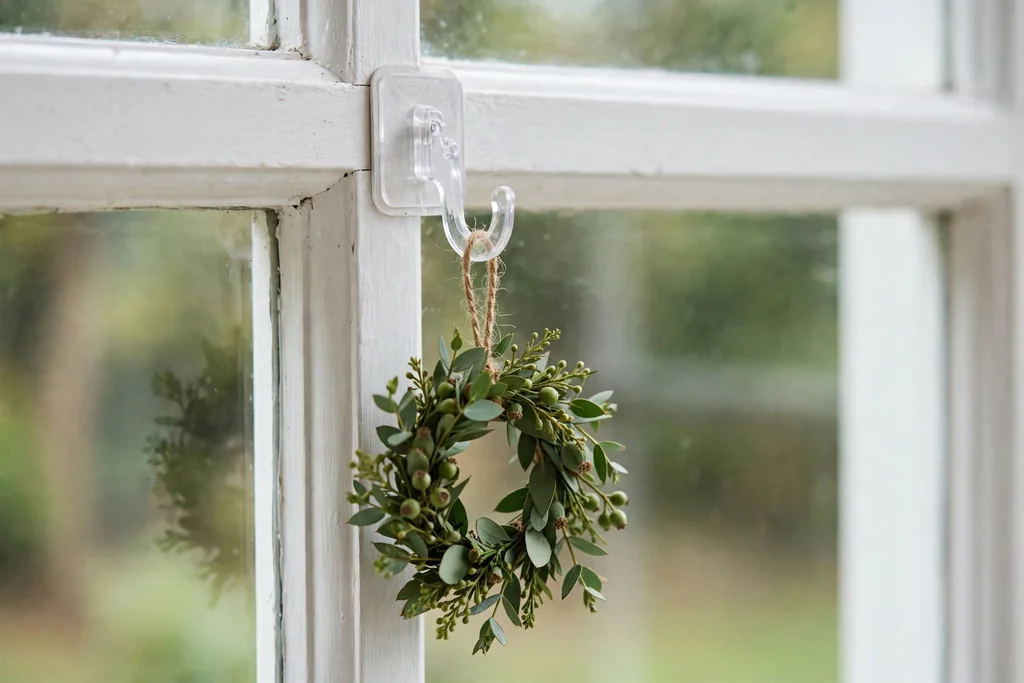
    Match the hanger to what you found in step 2, and check that its rated weight is above the wreath weight you recorded. For smooth single pane glass, a large outdoor suction cup with a hook is a common choice. For a double hung window, a flat hook that sits over the top of the lower sash lets the window close over it. For a solid frame, a removable adhesive hook made for outdoor use avoids holes.

    Avoid a hanger that relies on a surface your window does not offer. A suction cup will not hold on textured, frosted, or dirty glass, and an adhesive hook will not hold on rough, peeling, or wet paint. If no hanger fits the window itself, plan to hang from the trim or the wall around the window, as covered in step 9, rather than forcing a poor fit.

    4. Clean the Glass and Frame Before You Hang Anything

    Hands cleaning exterior window glass and frame with a cloth.

    Wipe the spot where the hanger will sit with a cloth, mild soap, and water, then rinse and dry it fully. Dust, pollen, and grime weaken suction cups and adhesive hooks, and a clean surface is the simplest way to get a stronger hold. Clean a wider area than the hanger itself, since you may need to move the hanger slightly when you center the wreath.

    Let the surface dry before you attach anything, and do the cleaning on a dry day if you can. Check the frame for loose paint, cracked putty, or soft wood at the same time. If the frame is damaged, fix it or choose a different hanging point, since a hanger fixed to weak material can pull loose in wind and take paint or putty with it.

    5. Hang with a Suction Cup on Smooth Glass

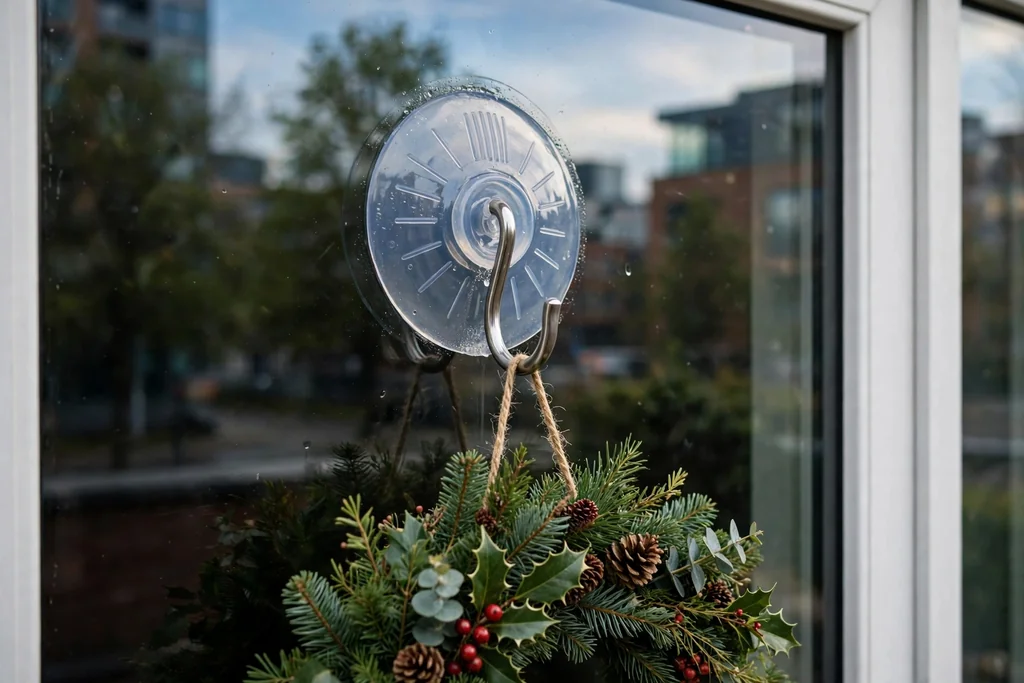
    Suction cup hook on exterior window glass holding a green wreath.

    Press a suction cup onto clean, smooth, dry glass at the center of the top of the window, where the wreath will hang. Press the center of the cup firmly, then work out any air by pressing from the center toward the edges. If the cup has a lever or a locking tab, close it as the maker directs, and give the cup a gentle tug to check the hold before you hang the wreath.

    Hang the wreath loop on the cup hook, and let the wreath settle so it hangs straight. Check the cup after an hour, since a slow air leak shows up early, and again after the first rain or cold night. If the cup slips, clean the glass and the cup again and reattach it, or switch to a different method rather than adding a heavier wreath to a weak cup.

    6. Hang with an Over the Top Window Hook

    Over the top window hook on a double hung sash holding a wreath outside.

    Open the lower sash of a double hung window, slide the flat hook over the top edge of the sash, and close the sash gently so the hook sits flat and the window can still lock. The hook should hang on the outside face of the glass, with the curved end pointing out to hold the wreath. Do not force the sash shut if the hook is too thick, since that can strain the sash or stop the lock from working.

    Hang the wreath on the hook and check that the window still closes and locks. If the window will not lock, the hook is not suitable for that window, and you should remove it and choose another method. A window that cannot lock is a security risk, so never leave a hook in place that stops the lock from engaging.

    7. Hang with a Magnetic Pair Across the Glass

    Magnetic window hanger pair across glass holding a wreath outside.

    A magnetic window hanger uses two magnets, one inside the glass and one outside, so the wreath hangs from the outside magnet without a hole or a hook on the frame. This method suits windows where the glass is thin enough for the magnets to grip each other firmly. Place the inside magnet high on the glass, then place the outside magnet directly opposite it and check that the pair holds firmly before you hang anything.

    Hang the wreath from the outside magnet hook, and add a second tie as described in step 11 if the wreath is large or the window faces strong wind. Keep the magnets away from small children and pets, and store them apart when they are not in use, since strong magnets can pinch fingers. If the magnets slide or feel weak, do not use them for that window, and choose a suction cup or a frame hook instead.

    8. Hang with a Removable Adhesive Hook on the Frame

    Removable adhesive hook on a white window frame holding a wreath.

    Stick a removable outdoor adhesive hook to a clean, dry, flat part of the window frame, not to the glass and not to rough or peeling paint. Press the adhesive pad firmly for the time the maker directs, then wait before hanging the wreath, since adhesive needs time to bond. Many makers advise waiting an hour or more, and hanging too soon is a common reason a hook fails.

    Hang the wreath once the wait time has passed, and check the hook after a day. At the end of the season, remove the hook by pulling the release tab slowly along the frame as directed, rather than pulling it straight out, which can take paint with it. If any adhesive stays behind, roll it off gently with a finger or a soft cloth, and wash the frame with mild soap and water.

    9. Hang on Trim or Siding Around the Window

    Siding hook beside an exterior window holding a wreath centered on the glass.

    When the window itself cannot take a hanger, hang from the trim or the wall beside it. A siding hook slides under a siding board without a hole, a trim hook clips over a piece of flat trim, and a screw in hook goes into solid wood trim or a wall stud where a small hole is acceptable. Choose the option that fits your wall material, and check that the hook is rated for outdoor use and for the wreath weight.

    Center the wreath on the window even though the hook sits on the trim, and use a short length of wire or ribbon from the hook to the wreath top if the hook sits to one side. Do not screw into vinyl siding, brick mortar, or a window frame without knowing that the material can take it, since the wrong fixing can crack siding, crumble mortar, or damage the frame. When in doubt, use a no hole hook or ask a local hardware store for advice on your wall type.

    10. Center the Wreath and Set the Height

    Green wreath centered on an exterior window seen from the front yard.

    Stand back from the house and check the wreath position from the street, since a wreath that looks centered from inside can look high or off to one side from outside. Aim for the center of the glass from left to right, and set the height so the wreath sits in the upper half of the window or at its center, depending on the window shape. A tall narrow window often suits a wreath set slightly above center, while a wide window suits a wreath at center height.

    Adjust the hanging loop or the wire length in small steps until the position looks right, and use a level or a straight edge across the top of the wreath if the wreath has a bow or a flat top that should sit level. Check that the wreath does not cover a house number, a handle, or a lock, and that it does not touch a neighboring window frame. Once the position is right, note the loop length so you can repeat it on matching windows.

    11. Secure the Wreath Against Wind

    Hands tying floral wire around a wreath frame and hook for wind security.

    Add a second tie so wind cannot lift the wreath off its hook. Loop a short length of floral wire or a thin cable tie through the top of the wreath frame and around the hook, or tie a ribbon from the wreath to a second small hook on the frame. The tie should be snug but not so tight that it pulls the wreath off center, and it should be hidden behind the wreath where possible.

    Check the tie from the side, since a wreath that swings in wind can rub paint off a frame or scratch glass over time. If the window faces a windy side of the house, use two ties, one at the top and one at the lower side of the wreath, to stop it swinging. Take the wreath down before a forecast storm if the ties look weak or the hanger has slipped before, since no seasonal display is worth a falling wreath.

    12. Add Lights or a Bow Without Adding Too Much Weight

    Wreath on an exterior window with battery lights and a red bow.

    If you want lights, use a short battery operated string made for outdoor use, and wire it lightly through the wreath so the weight stays close to the frame. Keep the battery pack tucked behind the wreath, not hanging below it, so it does not pull the wreath forward or swing in wind. Check that the total weight, wreath plus lights plus bow, is still below the hanger rating.

    Add a bow at the top or bottom of the wreath by wiring it to the frame, not by hanging it from a single sprig. A wired bow stays in place in wind, while a bow tied to loose foliage can slip and hang crooked. Step back and check the whole display after adding lights or a bow, and remove anything that makes the wreath sit crooked or pull the hanger away from the glass or frame.

    13. Check the Display from Inside and from the Street

    Person in a front yard checking wreath height and alignment on windows.

    Look at the wreath from inside the house as well as from outside. From inside, check that the hanger, magnet, or hook does not block the view badly, that the window can still open if you need it to, and that no wire or ribbon hangs where it could catch on a curtain or a blind. From the street, check the wreath against the other windows, and match the height across windows that sit side by side.

    Make small adjustments now, while the ladder is still out and the fixings are easy to reach. If one window in a row looks higher than the others, adjust its loop length rather than moving every other wreath. A row of wreaths at the same height reads as a planned display, while mixed heights can look accidental even when each wreath is centered on its own window.

    14. Take the Wreath Down Safely and Store the Hardware

    Wreath being placed into a storage box with hangers in a bag.

    Take the wreath down on a dry, calm day, and work from a stable ladder with a helper nearby for high windows. Remove the wind tie first, then lift the wreath off its hook with both hands, so it does not drop or swing into the glass. Remove the hanger next, following the maker directions for suction cups, adhesive hooks, or magnetic pairs, and clean the glass or frame as you go.

    Store the wreath in a box or a wreath bag where it will not be crushed, and keep the hangers, ties, and battery packs in a labeled bag with the wreath so the same setup is easy to repeat next season. Check the wreath for loose sprigs, worn loops, or rusted wire before you store it, and repair or replace weak parts now rather than discovering them when you hang it again.

    Conclusion

    Hanging a wreath on an exterior window is a short job when the hanger fits the window and the wreath weight stays within its rating. Measure first, clean the surface, center the wreath, add a wind tie, and check the hold after a day and after strong wind. With those steps done, the wreath should stay in place through the season and come down cleanly at the end, with no damage to the glass, the frame, or the wall around it.

    Frequently Asked Questions

    Can I hang a wreath on an exterior window with a suction cup?

    Yes, if the glass is smooth, clean, and dry, and the suction cup is rated for outdoor use and for the wreath weight. Press the cup firmly onto the glass, check the hold after an hour, and add a wind tie for large wreaths or windy spots. Do not use a suction cup on textured, frosted, or dirty glass, since it will not grip well.

    Will a wreath hanger damage my window frame?

    A well chosen hanger should not damage a sound frame. Suction cups and magnetic pairs avoid the frame altogether, removable adhesive hooks come off with a release tab, and over the top hooks sit on the sash without screws. Avoid screw in hooks on vinyl, weak wood, or peeling paint, and remove adhesive hooks slowly at the end of the season.

    How do I hang a wreath on a window that does not open?

    Use a suction cup on smooth glass, a magnetic pair across the glass, or a removable adhesive hook on the frame, since none of these need the window to open. If the glass is textured, use a siding hook or a trim hook around the window instead, and center the wreath on the glass with a short wire from the hook.

    What is the best way to keep a wreath from falling in wind?

    Use a hanger rated above the wreath weight, add a second tie of floral wire or a cable tie through the wreath frame and around the hook, and check the hold after strong wind. For very windy spots, add a second tie at the lower side of the wreath to stop it swinging, and take the wreath down before a forecast storm if the hold has slipped before.

    How high should a wreath hang on an exterior window?

    Hang the wreath centered left to right on the glass, in the upper half of the window or at its center, depending on the window shape. Tall narrow windows often suit a wreath slightly above center, while wide windows suit a wreath at center height. Match the height across windows in a row so the display reads as one plan.

    Can I hang a wreath on a window with a screen?

    It depends on the screen. If the screen can be lifted out for the season, remove it and hang on the glass or frame as normal. If the screen must stay, do not hang over it, since the weight can bend the mesh, and instead use a frame hook, a trim hook, or a siding hook around the window so the wreath hangs clear of the screen.


  • How to Make a Feather Wreath for Soft Seasonal Decor

    How to Make a Feather Wreath for Soft Seasonal Decor

    To make a feather wreath, layer feathers onto a foam or wire frame in one direction, starting with short feathers at the back and adding longer, fuller feathers on top. Secure each feather with glue or wire, fill gaps with small accent feathers, then add a bow or simple seasonal accent and hang the wreath on a hook.

    A feather wreath suits a door, a wall, or a mantel when you want soft texture without heavy greenery or bright color. Feathers catch light gently and fill a round shape quickly, so even a first wreath can look full if the layers are built in the right order. Work through the steps below in order, and check the wreath from a few feet away as you go, since that is how it will be seen once it is hung. For more seasonal looks to pair with a finished wreath, browse these fall decor ideas.

    Key Takeaways

    • Choose the feather type, color palette, and wreath size before you buy, since those choices decide the frame and how many feathers you need.
    • Layer feathers in one direction, starting with short feathers at the back and adding longer, fuller feathers on top.
    • Glue or wire each feather at the quill end so the soft vane stays free and the wreath keeps its fluffy shape.
    • Fill gaps with small accent feathers before adding a bow or seasonal accents, so the base looks even first.
    • Add accents sparingly, with one focal cluster and one bow at most, so the feathers stay the main feature.
    • Step back often to check the balance, and hang a feather wreath indoors or in a sheltered spot away from rain and strong wind.

    Materials and Tools

    • A foam, wire, or grapevine wreath frame in your chosen size
    • Craft feathers in your chosen palette: short body feathers for the base layer, longer plumes for the top layers, and small accent feathers for filling gaps
    • A hot glue gun with glue sticks, or floral wire and wire cutters if you prefer to wire feathers in place
    • Sharp scissors for trimming quills
    • A hanging loop of wire, ribbon, or twine
    • Wide ribbon for a bow, plus narrow ribbon or twine for tying
    • Optional seasonal accents: dried flowers, small pinecones, or a few plain ornaments
    • A wreath hook, nail, or over door hanger rated for the wreath weight
    • Work gloves if you are sensitive to feather dust, a drop cloth or old sheet, and a small bag for feather offcuts

    1. Choose the Feather Type, Color Palette, and Size

    Craft feathers in cream, blush, pale gray, and natural tan arranged in color groups on a work table beside a round wreath frame.

    Start by choosing where the wreath will hang and how large it should be. A front door usually suits a wreath between 20 and 30 inches across, while a wall, mirror, or mantel often suits a smaller wreath between 14 and 20 inches. Measure the space and leave a margin of several inches around the wreath so it does not crowd trim, handles, or nearby lights.

    Next, pick a feather type and palette to guide your shopping. Soft body feathers in cream, white, blush, or pale gray give a calm, airy look, while natural brown and tan feathers suit a rustic room. Marabou plumes add extra fluff, and longer ostrich style plumes add drama, but both need more room around the wreath so they do not get crushed. Write down your size and palette before you shop, so you buy feathers that work together rather than a mixed bag that fights for attention.

    2. Gather Materials and Check Your Frame

    Feather wreath making supplies laid out on a work table: foam wreath frame, bags of craft feathers, glue gun, scissors, ribbon, and wire.

    Lay out everything from the materials list before you start gluing or wiring feathers. Check that your glue gun heats fully, your scissors cut quills cleanly, and you have enough glue sticks or floral wire, since stopping mid-build to search for supplies can leave half glued feathers shifting out of place. Keep a small container for quill offcuts so they do not scatter across your work surface.

    Check the frame as well. A foam frame gives a smooth surface that glue grips well, and it works well for a full feather wreath. A wire frame needs feathers wired or glued to a wrapped base, such as ribbon or fabric wound around the rings, so the feathers have something to hold onto. A grapevine frame already looks finished, so it suits a lighter wreath where some of the frame shows between feathers. Decide which side is the front and mark the top, since feather wreaths are usually built and viewed from one side.

    3. Plan the Layout and Mark the Top of the Frame

    A round foam wreath frame on a work table with small tape markers at the top and a few feathers laid out to plan the layout.

    Before you attach anything, plan the layout on a flat surface. Place the frame on your drop cloth and set out a few feathers in each color to see how the palette reads together. Decide where the fullest part of the wreath will sit, where a focal cluster might go, and where the bow will sit, usually at the bottom or slightly off center.

    Mark the top of the frame with a small piece of tape or a pin, so the wreath keeps its orientation as you turn it during building. If you plan a focal cluster, mark that spot too, so you do not fill it with base layer feathers you later need to remove. A short planning pause here saves rework later, since feathers glued in the wrong place are hard to move without tearing the vane.

    4. Sort and Prepare the Feathers

    Hands sorting craft feathers into piles by size on a work table, with trimmed quill offcuts in a small bowl nearby.

    Sort the feathers into piles by size and type: short body feathers for the base layer, medium feathers for the middle layer, long plumes for the top layer, and small accent feathers for filling gaps. Set aside any feathers with broken vanes, bent quills, or heavy clumping, and keep the best feathers for the outer layers where they will be seen most.

    Trim the quill ends only if they are very long or uneven, cutting a small amount at a time so you do not shorten a feather you need at full length. Shake each feather gently to loosen dust, and if feathers are creased from packaging, hold them briefly over steam from a kettle at a safe distance, or let them sit overnight, so the vanes relax. Sorting and preparing now makes the layering steps faster, since you will not stop to hunt for the right feather for each spot.

    5. Attach a Hanging Loop

    Hands threading a wire hanging loop through the top of a bare foam wreath frame.

    Make a hanging loop before you add feathers, since it is much harder to reach the frame once the wreath is full. Thread a length of sturdy wire, ribbon, or twine through the top of the frame and twist or knot it into a loop large enough to sit on a hook or nail. Test the loop by holding the frame up by it and checking that it hangs level.

    For a heavy wreath with long plumes, use wire rather than ribbon for the loop, and add a second loop as backup if the frame allows it. A loop that sits flat against the back of the wreath will keep the wreath close to the door or wall, while a longer loop lets the wreath hang lower. Set the loop length now, since adjusting it later means working through layers of feathers.

    6. Build the Base Layer of Short Feathers

    Hands gluing short cream body feathers onto a foam wreath frame in one direction, with more feathers waiting on the table.

    Start the base layer with short body feathers, working around the frame in one direction. Place the first feather flat against the frame with its quill end toward the center of the ring and its tip pointing outward, then glue or wire the quill end firmly in place. Keep the glue on the quill only, so the soft vane stays free and fluffy.

    Place the next feather so its tip overlaps the quill end of the first feather, and continue around the frame in the same direction. Overlapping each feather this way hides the quills and the frame, and gives the wreath a smooth, even flow. Work all the way around the frame, then check the back to make sure no glue blobs or wire ends stick out where they could scratch a door.

    7. Add the Main Feather Layer in One Direction

    A half finished feather wreath with a main layer of medium blush and pale gray feathers being added over a cream base layer.

    Once the base layer covers the frame, add the main layer using medium feathers in your main palette colors. Place these feathers slightly outward from the base layer so the wreath gains depth and looks full from the side as well as the front. Keep every feather pointing in the same direction as the base layer, so the growth pattern stays consistent and the wreath does not look ruffled in patches.

    Use slightly longer feathers for this layer if you want a soft, full outline, or keep them close to the base layer length if you want a neat, compact wreath. Step back after every few feathers and look at the wreath from the front, since it is easier to fix a thin spot now than after accents are added. Fill any visible frame or glue spots with a short feather placed flat against the layer below.

    8. Add a Second Fuller Layer for Depth

    Hands adding long fluffy plumes as a second fuller layer on top of a nearly full feather wreath.

    Add a second fuller layer with your longest plumes or fullest feathers, placed on top of the main layer but not covering it completely. Space these feathers a little farther apart than the main layer, so the layers beneath still show and the wreath gains depth rather than turning into a single flat mass. Vary the feather colors within your palette in this layer, rather than grouping one color in a single spot.

    Keep the longest feathers toward the outer edge if you want a wide, airy outline, or toward the inner edge if you want a dense center with a tidy rim. If a section looks crowded, remove a plume rather than adding more, since a wreath with breathing room shows its shape better than one packed tight. At this stage the wreath should look full and even before any bow or accents go on.

    9. Fill Gaps with Small Accent Feathers

    Hands tucking small accent feathers into gaps in a full cream and blush feather wreath.

    Filler feathers give the wreath its finished detail and stop it looking patchy. Tuck small accent feathers into gaps between the main feathers, pushing the quill ends under the layered feathers above so they sit naturally. Use accent feathers in a slightly darker or lighter tone from your palette to add gentle contrast without breaking the overall color story.

    Keep the filler feathers shorter than the main layers so they read as texture, not as a competing layer. Work around the whole wreath, not just the front, since the sides are visible when the wreath hangs on a door that opens. When the base looks even from a few feet away, stop filling, since extra feathers past this point tend to flatten the layers below.

    10. Add a Focal Cluster of Statement Feathers

    A feather wreath with a focal cluster of long statement plumes at the lower side, on a work table.

    A focal cluster gives the eye one place to rest and keeps the wreath from looking uniform all the way around. Choose three to five of your best long plumes, or a small group of feathers in a contrast tone, and place them together at the spot you marked in step 3, usually near the bottom or lower side of the wreath. Fan the plumes slightly so each one shows, rather than stacking them directly on top of each other.

    Glue or wire each plume at the quill end, and check the cluster from the front and the side before moving on. The cluster should sit proud of the surrounding layers but not stick out so far that it unbalances the wreath when hung. If the cluster looks heavy on one side, move one plume to the opposite side of the cluster or trim its quill so it sits closer to the base.

    11. Make and Attach a Bow

    Hands forming a looped cream ribbon bow on a work table beside a finished feather wreath.

    A simple looped bow starts with a length of wide ribbon. Form two loops of equal size, pinch them together at the center, and wrap floral wire tightly around the pinch to hold the shape. Add two more loops, one on each side, for a fuller bow, then trim the ribbon tails at an angle for a tidy finish.

    Fluff the loops by pulling them gently outward and adjusting them until the bow looks even from the front. Wire the bow to the frame at the bottom of the wreath, which is the usual spot, or near the focal cluster if your design calls for it. Check that the bow sits flat against the feathers and does not flop forward when the wreath is held upright, and trim any ribbon tail that hangs over the focal cluster.

    12. Add Seasonal Accents Sparingly

    A feather wreath with a cream bow and a few dried flowers and small pinecones added as sparing seasonal accents.

    With the bow in place, add any remaining seasonal accents sparingly. A few dried flowers, a small pinecone cluster, or two or three plain ornaments can add a seasonal note, but each piece should earn its place. Wire or glue accents at the quill side of nearby feathers, not on top of the soft vanes, so the feathers keep their shape. For a soft, nostalgic finish, a small group of muted accents works well, as seen in these vintage Christmas decor ideas.

    Stand back after each addition and judge the wreath as a whole. If an accent draws the eye away from the focal cluster or unbalances one side, move it or leave it out. A wreath with a few well placed accents usually looks tidier than one covered in decorations, and it is easier to store if the accents are wired rather than glued flat onto the feathers.

    13. Check the Balance, Trim Stray Quills, and Secure Loose Feathers

    Hands trimming a stray quill tip on a finished feather wreath held upright over a drop cloth.

    Hold the wreath upright at arm’s length and turn it slowly, looking for thin spots, stray quills, and feathers that sit at odd angles. Trim only the longest stray quill tips with scissors, cutting just above the vane so the cut blends in. Avoid trimming the whole outer edge into a circle, since that removes the soft, natural shape you built layer by layer.

    Next, check every glued or wired feather by giving each one a gentle tug. Re-glue or re-wire any loose feather and tuck sharp wire ends into the layers so they cannot scratch a door or catch on clothing. Shake the wreath lightly over your drop cloth; if feathers fall in large numbers, several quills may need fresh glue, and it is better to fix them now than after hanging.

    14. Hang, Adjust, and Care for the Wreath

    A finished soft feather wreath in cream and blush being hung on a front door hook.

    Hang the wreath on its hook, nail, or over door hanger, and step back to check its height and centering. On a front door, the wreath usually sits at eye level or slightly above, with equal space on each side. If the wreath tilts, adjust the hanging loop or add a small pad behind the lower edge so it sits flat against the door.

    Check the wreath from across the room, since that is the view most people will see. Make small adjustments to the bow loops, the focal cluster, and any shifted feathers now, while you can still reach the wreath easily. Keep a feather wreath indoors or in a sheltered spot away from rain, strong wind, and direct sun where possible, since wet or crushed feathers lose their soft shape. At the end of the season, store the wreath in a large box with tissue around the plumes, so it keeps its shape for next year.

    Conclusion

    Making a feather wreath for soft seasonal decor comes down to a simple sequence: choose your feathers and size, prepare the frame, layer short feathers first, then build fuller layers in one direction, fill the gaps, add one focal cluster and a bow, then check the balance before hanging. Take your time with the base layer, since a well built base makes every later step easier. With the wreath hung and adjusted, you have a soft, light decoration made to fit your home, and a frame ready to refresh with new feathers next season.

    FAQs

    What kind of feathers work best for a feather wreath?

    Soft body feathers in cream, white, blush, pale gray, or natural brown and tan work well for most feather wreaths, with marabou plumes for extra fluff and longer plumes for a focal cluster. Choose feathers with full, unbroken vanes and firm quills, and sort them by size before building so each layer uses the right length.

    What frame should I use for a feather wreath?

    A foam frame is the easiest choice for a full feather wreath, since glue grips its smooth surface well. A wire frame needs a wrapped base of ribbon or fabric for feathers to hold onto, while a grapevine frame suits a lighter wreath where some of the frame stays visible between feathers.

    Should I glue or wire feathers onto a wreath?

    Glue works well on a foam frame and gives a fast, firm hold when applied to the quill end only. Wire works better on a wire or grapevine frame, and it lets you move or replace feathers later, which is useful if you want to refresh the wreath for a new season.

    How do I keep a feather wreath looking full?

    Layer feathers in one direction, starting with short feathers at the back and adding longer, fuller feathers on top, with each feather overlapping the quill end of the last one. Fill gaps with small accent feathers before adding a bow, and step back often to check for thin spots while they are still easy to fix.

    Can a feather wreath hang outdoors?

    A feather wreath lasts longest indoors or in a sheltered spot, such as a covered porch, away from rain and strong wind. Wet feathers clump and lose their soft shape, and strong wind can bend plumes, so bring the wreath inside during storms or heavy rain.

    How do I store a feather wreath after the season?

    Store the wreath in a large box with tissue paper around the plumes, keeping the box flat and away from heavy items that could crush the feathers. Remove wired accents you want to reuse, label the box, and check the feathers before the next season, replacing any that are bent or broken.


  • 15 Twig Wreath Decorating Ideas Using Natural Materials

    15 Twig Wreath Decorating Ideas Using Natural Materials

    Twig wreaths work best when you start with a sturdy grapevine or willow base, then add natural materials that suit the season and the spot. Use pinecones and berries for winter, dried flowers and moss for spring, and wheat or leaves for fall, and hang the wreath where wind and rain will not pull loose pieces free.

    A twig base is useful because it can be left bare, filled lightly, or dressed fully, and it can be refreshed without starting again. Check the base before you add anything: the twigs should feel firm, the ring should hold its shape when lifted, and any loose ends should be tucked in or wired down. For more seasonal ideas to pair with these looks, browse the Dwell Ovell decor ideas index. Hang heavier wreaths on a sturdy hook, keep dried materials out of heavy rain, and bring delicate indoor wreaths inside during storms.

    Key Takeaways

    • Start with a firm grapevine or willow base, and wire or tuck loose twig ends before adding decorations.
    • Match the filling to the season: pinecones and berries for winter, dried flowers and moss for spring, wheat and leaves for fall.
    • Keep outdoor wreaths light and well wired, since wind can pull loose dried pieces free.
    • Use a hook rated for the weight, especially for pinecone, driftwood, and moss filled wreaths.
    • Leave some twig visible in most designs, so the wreath still reads as a twig wreath rather than a solid flower ring.
    • Store twig wreaths hanging or flat in a dry place, away from damp rooms that can soften the base.

    1. A Bare Grapevine Wreath on the Front Door

    Bare grapevine twig wreath on a painted front door

    A bare grapevine wreath, with twisted brown vines and no filling, gives a plain rustic look for a front door, porch wall, or gate. The open weave lets the door color show through, and the shape suits farmhouse, cottage, and wood sided homes. Hang it with a simple hook and no ribbon for the cleanest result.

    Choose a wreath with even thickness all around the ring, since thin spots can snap when the wreath is lifted. Outdoors, tie the top of the ring to the hook with a short length of wire so wind cannot lift it off. Brush off dust and cobwebs now and then, and trim any twig that works loose.

    2. A Willow Twig Wreath with Dried Lavender

    Willow twig wreath with dried lavender on a light wall

    A willow wreath, made from pale flexible willow stems, pairs well with small bunches of dried lavender tucked around the lower half. The soft purple buds and grey green stems suit a bedroom door, a bathroom wall, or a sheltered porch. Keep the lavender bunches small so the willow shape stays clear.

    Dried lavender sheds buds if it is handled often, so hang this wreath where it will not be brushed by passing coats or bags. Keep it out of rain, which can darken the buds and loosen the stems. When the scent fades, replace just the lavender bunches and keep the willow base for another season.

    3. A Twig Wreath with Pinecones for Winter

    Twig wreath with natural brown pinecones on a wood door

    A twig base covered in mixed pinecones, in natural brown tones and varied sizes, gives a winter wreath that needs no greenery. Place larger cones at the bottom and smaller cones toward the top, and leave small gaps of twig showing between them. This style suits wood doors, stone porches, and neutral entry walls.

    Pinecone wreaths can be heavy, so use a sturdy hook and test it before leaving the wreath up. Keep the wreath under cover where possible, since soaked cones close up and take a long time to dry. A dry brush removes dust from between the cone scales without pulling cones loose.

    4. A Twig Wreath with Moss and Small Ferns

    Twig wreath with green moss and small ferns on a wall

    A twig wreath with patches of sheet moss and small dried ferns gives a woodland look for an indoor wall, a hallway, or a covered porch. The green moss softens the brown twigs, and the ferns add a light, feathery edge. Press the moss into the twig weave rather than covering the whole ring, so the structure still shows.

    Moss dries and can crumble if it is kept in a very dry room, so this wreath suits a spot away from radiators and direct sun. Handle it by the base, not by the moss, and keep it indoors or under cover in rain. If a patch loosens, press it back in with a small amount of wire rather than pulling the whole section apart.

    5. A Twig Wreath with Dried Citrus and Cinnamon

    Twig wreath with dried orange slices and cinnamon sticks

    A twig wreath with dried orange slices and cinnamon sticks gives a warm seasonal look for a kitchen door, a dining room wall, or a sheltered porch in late fall and winter. Space the orange slices evenly, add short cinnamon bundles in pairs, and keep the rest of the ring bare so the wreath does not look crowded.

    Dried citrus softens in damp air, so keep this wreath under cover and out of direct rain. Bring it indoors during wet spells if the porch is open. When a slice starts to curl or darken, replace just that slice if the base is still in good shape.

    6. A Twig Wreath with Eucalyptus Sprigs

    Twig wreath with eucalyptus sprigs on a light door

    A twig wreath with short eucalyptus sprigs tucked into the weave gives a calm grey green look for a modern door or a light interior wall. The round leaves soften the rough twigs without hiding them, and the wreath works from winter into early spring. Use sprigs of similar length for an even ring.

    Eucalyptus dries over time and becomes more brittle, so handle the wreath by the base and keep it out of heavy rain. Hang it where it will not be knocked by a door swing. When leaves start to drop, remove the tired sprigs and tuck in fresh ones rather than rebuilding the wreath.

    7. A Twig Wreath with Red Berries

    Twig wreath with red berry clusters on a dark door

    A twig wreath with clusters of red berries, real dried winterberry or a natural looking berry spray, adds a clear pop of color to a plain door. Place the berry clusters in three or four groups around the ring, with bare twig between them, rather than covering the whole wreath. This style suits dark green, black, and navy doors in winter.

    Check real berry clusters each week, since dried berries can drop over time. Keep real berry wreaths away from spots where children or pets might pick at them. Sweep up fallen berries from the porch so they do not stain the step or the door mat.

    8. A Driftwood and Twig Wreath for a Coastal Room

    Twig and driftwood wreath on a pale coastal wall

    A wreath that mixes small driftwood pieces with twigs gives a coastal look for a beach house entry, a bathroom wall, or a room with pale wood and linen. Use smooth, weathered pieces in varied lengths, wired flat against the twig base, and leave gaps so the ring shape stays clear. Keep the palette to wood tones, white, and sand colors.

    Driftwood wreaths can be heavy for their size, so use a hook rated for the weight and hang the wreath on a solid wall or door, not on a hollow panel alone. Check wire fixings after the wreath has been up for a few weeks, since wood can shift as it dries. Wipe pieces with a dry cloth to remove dust.

    9. A Twig Wreath with Dried Wheat and Grasses

    Twig wreath with dried wheat and grasses above a sideboard

    A twig wreath with dried wheat stems and ornamental grasses gives a harvest look for fall, suited to a front door, a dining room wall, or above a sideboard. Bundle the stems in small groups, angle them in the same direction around the ring, and trim the ends to a similar length for a tidy shape.

    Dried wheat sheds grains if it is shaken, so hang this wreath where it will not be bumped. Keep it indoors or on a covered porch, since rain can bend the stems and loosen the bundles. When stems start to break, replace a whole bundle rather than trying to glue single stems back in place.

    10. A Twig Wreath with Pussy Willow for Spring

    Twig wreath with pussy willow buds on a front door

    A twig wreath with pussy willow stems, with their soft grey buds, gives a simple spring look for a front door or a hallway wall. The pale buds stand out against dark twigs, and the wreath needs no flowers to look finished. Add a few short green sprigs at the base if the ring feels too bare.

    Pussy willow buds are soft and can be crushed by handling, so hang the wreath once and leave it in place. Keep it out of rain, which can mat the buds. This wreath suits a covered porch or an indoor wall best, where the buds stay dry and keep their shape.

    11. A Twig Wreath Centerpiece with a Candle

    Flat twig wreath centerpiece with a candle on a dining table

    A flat twig wreath laid on a table, with a candle in a glass holder set in the center, works as a centerpiece for a dining table or a sideboard. The twigs form a low ring, the candle adds light, and the display stays low enough for conversation across the table. Add a few pinecones or dried leaves inside the ring for a seasonal touch.

    Use a candle in a glass holder, never an open flame next to dry twigs, and keep the flame clear of overhanging stems. Place the wreath on a tray or a heat safe mat to protect the table. Remove the candle before moving the wreath, and keep the centerpiece away from curtains and paper decorations.

    12. A Twig Wreath with Dried Hydrangeas

    Twig wreath with dried hydrangea heads on a bedroom wall

    A twig wreath with dried hydrangea heads, in soft cream, mauve, or dusty blue, gives a full but gentle look for a bedroom wall, a living room, or a sheltered porch. Space the hydrangea heads evenly, tuck the stems into the twig weave, and leave some twig visible between heads so the wreath does not look solid.

    Dried hydrangeas are fragile and can crumble if pressed, so hang this wreath where it will not be bumped. Keep it out of rain and damp air, which can spot the petals. Dust it with a gentle shake outdoors or a soft dry cloth, and replace any head that starts to shed heavily.

    13. A Twig Wreath with Feathers in Natural Tones

    Twig wreath with natural tone feathers on an indoor wall

    A twig wreath with feathers in cream, brown, and grey gives a soft, textured look for an indoor wall or a bedroom door. Tuck short feathers into the weave in small groups, all angled the same way, and keep the feather count low so the twigs still show. This style suits rooms with linen, wool, and wood textures.

    Feathers bend easily, so hang this wreath indoors where it will not face wind or rain. Keep it away from open windows on windy days. If a feather bends, remove it and tuck in a fresh one rather than trying to straighten a creased shaft.

    14. A Twig Wreath with Autumn Leaves and Acorns

    Twig wreath with dried autumn leaves and acorns on a porch wall

    A twig wreath with dried autumn leaves and a few acorns gives a fall look for a front door or a porch wall. Use leaves in muted red, gold, and brown, pressed flat into the weave, and place acorns in small groups rather than scattered singly. The mix suits brick, wood, and painted doors in autumn.

    Dried leaves fade in strong sun, so this wreath lasts longest on a shaded porch or indoors. Keep it out of rain, which can make leaves curl and drop. When leaves start to look faded, swap in fresh dried leaves for the worst sections and keep the twig base.

    15. A Twig Wreath Above the Mantel with Pine Sprigs

    Twig wreath with pine sprigs above a fireplace mantel

    A twig wreath hung above the mantel, with short pine sprigs tucked into the lower half, keeps a fireplace wall looking finished through winter without holiday symbols. Choose a wreath narrower than the mantel, center it above the shelf, and hang it from a plain hook or a simple ribbon loop. The mix of brown twigs and green pine suits living rooms with wood furniture.

    Keep the wreath clear of heat from the fire, and use battery candles on the mantel rather than open flames near dried twigs and pine. Dust the wreath when you dust the mantel, since heat can draw dust upward. If the pine sprigs dry out, replace just those sprigs and keep the twig base for the next season.

    Conclusion

    Twig wreaths work well because the base stays useful across seasons: change the filling, not the whole wreath. Start with a firm grapevine or willow ring, pick natural materials that suit the spot and the weather, and wire loose pieces in place before hanging. A bare twig wreath suits a rustic door, a pinecone or berry version suits winter, and dried flowers, moss, or wheat suit spring and fall. Hang each wreath on a hook that holds its weight, keep dried materials out of heavy rain, and store the base dry so it can be refreshed next season.

    FAQs

    What is the best base for a twig wreath?

    A grapevine or willow base works best for most twig wreaths, since both hold their shape, accept wire and tucked stems, and can be reused. Grapevine gives a rough, rustic weave, while willow gives a smoother, paler ring, so choose grapevine for a farmhouse look and willow for a lighter, cleaner look.

    How do I keep dried materials from falling off a twig wreath?

    Wire each bunch or cluster to the twig base, rather than relying on glue or tucking alone, and hang the wreath where wind will not pull at it. Check the wreath after the first few days outdoors, and rewire any bunch that has loosened before more pieces drop.

    Can a twig wreath stay outdoors all year?

    A bare twig wreath can stay outdoors longer than a wreath filled with dried flowers, since it has fewer pieces to shed or fade. Filled wreaths last longer under a covered porch, and delicate fillings such as dried hydrangeas, feathers, and moss are best kept indoors or brought inside during rain and storms.

    How do I hang a heavy twig wreath on a front door?

    Use an over the door hanger or a wall hook rated for the weight of the wreath, and test it by hanging the wreath and leaving it for a day before relying on it. For a heavy pinecone or driftwood wreath, tie the top of the ring to the hook with wire so the wreath cannot slip off in wind.

    How long do dried flowers and leaves last on a twig wreath?

    Dried flowers and leaves usually look good for one season, sometimes longer indoors away from sun and damp air. Replace a section when petals crumble, leaves fade, or stems break, and keep the twig base, since it can carry a fresh filling next season.

    How should I store a twig wreath after the season?

    Store a twig wreath hanging on a hook or flat in a box in a dry place, away from damp rooms and hot attics. Keep the wreath in a bag or box that keeps dust off the filling, and check it before reuse for loose twigs, faded sections, or wire that needs tightening.


  • 17 White Wreath Ideas for Year Round Decorating

    17 White Wreath Ideas for Year Round Decorating

    White wreaths work year round when you choose a neutral base, such as boxwood, eucalyptus, or cotton, and change only small accents by season. Keep the wreath simple, hang it at eye level on a sturdy hook, and pair it with plain ribbon so it suits a front door, mantel, or wall in any month.

    White reads as fresh in spring, calm in summer, soft in fall, and clean in winter, which is why one wreath can stay up far longer than a brightly colored one. The trick is to avoid details tied to a single holiday, such as ornaments, snowflakes, or patterned seasonal ribbon. Choose a base you like on its own, then swap a bow or a few sprigs when you want a seasonal change. For more seasonal ideas to pair with these looks, browse the Dwell Ovell decor ideas index.

    Key Takeaways

    • Pick a neutral white base, such as boxwood, eucalyptus, cotton, or hydrangea, so the wreath is not tied to one season.
    • Keep holiday only details off the wreath, and change a bow or a few sprigs instead of replacing the whole wreath.
    • Hang wreaths at eye level on a sturdy hook, and keep outdoor wreaths sheltered from heavy wind and rain where possible.
    • Match the wreath size to the door, mantel, or wall, leaving clear space around the ring so the shape stays visible.
    • Use plain white, cream, linen, or pale gray ribbon for a look that works in every month.

    1. Classic White Boxwood Wreath on a Front Door

    Whitewashed boxwood wreath with a cream linen bow hanging on a front door.

    A whitewashed boxwood wreath gives a front door a tidy, finished look without a strong seasonal message. The small, dense leaves hold a round shape well, and a pale finish softens the green so the wreath reads as white from the street.

    Hang it centered on the door with an over door hook or a sturdy adhesive hook rated for outdoor use. Add a simple cream linen bow at the top, and leave the rest of the wreath plain so it works from spring through winter.

    2. White Eucalyptus Wreath for a Mantel

    White eucalyptus wreath hanging above a plain mantel in a pale living room.

    White eucalyptus brings a soft, rounded leaf shape and a muted silver green tone that pairs well with a plain mantel. It suits a living room that already uses pale walls, wood tones, and simple ceramics.

    Rest the wreath against the wall above the mantel, or hang it from a small nail centered over the fireplace. Keep candles and other mantel items low and to the sides, so the ring shape stays clear and the mantel does not look crowded.

    3. White Hydrangea Wreath Above a Console Table

    Full white hydrangea wreath hanging above a console table in an entry.

    A full white hydrangea wreath makes a strong focal point above a console table in an entry or hallway. The large flower heads fill the ring evenly, so the wreath looks complete without extra fillers.

    Hang it a few inches above the console, centered over the table, and keep the tabletop simple with one small vase or a stack of books. If the hydrangeas are dried or faux, keep them out of direct sun to slow fading.

    4. White Cotton Boll Wreath for a Farmhouse Entry

    White cotton boll wreath on a twig base hanging in a farmhouse entry.

    Cotton bolls on a grapevine or twig base give a relaxed farmhouse feel that suits an entry, mudroom, or covered porch. The soft white puffs break up the brown base and add texture without color.

    Hang it on a plain hook near the entry bench or coat rack, and pair it with natural wood and woven baskets nearby. Because cotton can collect dust, shake the wreath gently outdoors now and then, and keep it under cover if it hangs outside.

    5. White Rose Wreath for a Bedroom Wall

    White rose wreath hanging on a bedroom wall above a dresser.

    A white rose wreath adds a gentle, romantic note to a bedroom wall without the bold color of a traditional floral wreath. It works well above a dresser, beside a bed, or on a wall that needs a soft focal point.

    Choose roses in one shade of white or cream for a calm look, and keep the ring size modest so it does not overpower a small room. Hang it at eye level, and match nearby bedding or curtains in white or pale gray for a settled look.

    6. White Peony Wreath for a Dining Room Wall

    White peony wreath hanging on a dining room wall above a sideboard.

    White peonies give a dining room wall a lush, full look that suits spring and summer gatherings, yet stays neutral enough for other months. The layered petals add depth, so the wreath reads as rich even in a plain room.

    Center it on the wall behind a sideboard or above a buffet, and keep table linens in white or cream to echo the flowers. Avoid a bright centerpiece in the same view, so the wreath remains the main floral note in the room.

    7. Frosted White Pine Wreath for a Winter Door

    Frosted white pine wreath hanging on a sheltered front door in winter.

    A frosted white pine wreath keeps a door looking seasonal in winter without red berries or ornaments. The pale frosted tips suggest cold weather, while the green base keeps the wreath from looking stark.

    Hang it on a front door that is sheltered from driving rain, and use a plain white or silver ribbon for hanging. After winter, remove any frosted sprigs you added for the season, or store the wreath until the next cold months.

    8. White Berry and Silver Leaf Wreath for a Hallway Mirror

    White berry and silver leaf wreath hanging on a hallway mirror frame.

    White berries paired with silver toned leaves make a light, reflective wreath that suits a hallway mirror or a narrow wall. The pale berries catch light, so the wreath stands out even in a hallway with little natural light.

    Hang it centered on the mirror frame or just above it, using a hook that will not damage the frame. Keep the rest of the hallway simple, with a pale runner or plain wall color, so the wreath does not compete with patterns nearby.

    9. White Magnolia Leaf Wreath for a Coastal Living Room

    White magnolia leaf wreath on a pale wall in a coastal living room.

    White magnolia leaves, with their broad shape and pale undersides, suit a coastal living room with light wood, linen, and woven texture. The leaves give structure, while the white finish keeps the wreath bright.

    Hang it above a sofa, on a wall near a window, or over a fireplace in a room with pale walls. Pair it with plain cushions and a light throw, and avoid busy coastal prints in the same view so the wreath shape stays clear.

    10. White Dried Flower Wreath for a Bathroom Wall

    White dried flower wreath on a bathroom wall beside a mirror.

    A white dried flower wreath suits a bathroom wall because it adds soft texture without needing water or sunlight. Small white blooms, dried grasses, and pale seed heads keep the look calm and simple.

    Hang it away from direct shower steam where possible, on a wall beside a mirror or above a towel rail. Choose a smaller ring for a compact bathroom, and dust it gently with a dry cloth to keep the pale flowers looking clean.

    11. White Grapevine Wreath with a Plain White Ribbon

    Whitewashed grapevine wreath with a plain white ribbon on a porch door.

    A whitewashed grapevine wreath shows its twisted twig texture through a pale finish, which suits a porch, entry, or garden room. The open weave keeps the wreath light, so it works well on a door with glass panels.

    Tie a plain white ribbon in a simple bow at the top, and let the grapevine texture do the work. This is a good base wreath too, since you can add a few fresh sprigs or a seasonal bow and remove them later without changing the wreath itself.

    12. Minimal White Hoop Wreath for a Modern Wall

    Minimal white hoop wreath with a small white flower cluster on a plain modern wall.

    A thin metal or wooden hoop with a small cluster of white flowers at one side suits a modern wall that needs a quiet accent. The open center keeps the wreath from feeling heavy, and the single cluster draws the eye without filling the whole ring.

    Hang it on a plain wall in a living room, office, or bedroom, and leave space around it so the hoop shape is easy to read. This style also works well in a small room, where a full wreath might feel too large.

    13. White Pampas and Dried Grass Wreath for a Neutral Room

    White pampas and dried grass wreath above a sideboard in a neutral room.

    White pampas plumes and dried grasses give a wreath a soft, feathery edge that suits a neutral room with beige, cream, and pale wood tones. The tall plumes break the round outline slightly, which keeps the wreath from looking stiff.

    Hang it above a sideboard, on a bedroom wall, or near a reading chair, and keep nearby textures simple so the plumes stand out. Keep pampas away from open flames and high traffic spots, since the plumes can shed.

    14. White Tulip Wreath for a Spring Front Door

    White tulip wreath on a spring front door with a plain doormat.

    A white tulip wreath is a clear spring choice, yet its plain white color means it does not clash with summer or fall porch decor if it stays up longer. The upright tulip heads give the ring a fresh, garden feel.

    Hang it on a front door in spring, paired with a plain doormat and a potted plant in a simple pot. If the tulips are faux, store the wreath out of strong sun between seasons to keep the white from yellowing.

    15. White Orchid Wreath for an Elegant Entry

    White orchid wreath hanging in an elegant entry above a console table.

    White orchids on a wreath base give an entry a polished, elegant look without bright color. The clean flower shape suits a formal entry, a hallway with a console, or a dining room wall used for gatherings.

    Hang it centered and at eye level, and keep the surrounding decor restrained, with plain walls and simple furniture. Because orchid blooms are delicate in real form, a well made faux version often holds its shape better for year round display.

    16. White Felt Ball Wreath for a Nursery or Playroom

    White felt ball wreath on a nursery wall in a soft pale room.

    White felt balls on a ring base make a soft, lightweight wreath that suits a nursery, playroom, or a child’s bedroom wall. The uniform balls give a gentle, playful texture without strong color or small parts that could come loose.

    Hang it well above reach on a wall, using a secure hook, and pair it with white or pale gray bedding and simple wall art. Check the wreath now and then to make sure every ball is firmly attached, especially in a room used by young children.

    17. White Wreath as a Table Centerpiece with a Candle

    Flat white wreath on a dining table with a candle in a holder at its center.

    A flat white wreath laid on a table with a candle in the center turns a wall decoration into a centerpiece for a dining table, coffee table, or sideboard. The ring frames the candle, and the white flowers or greenery keep the table looking calm.

    Place the wreath on a flat surface, set a candle in a sturdy holder in the middle, and keep the candle away from the wreath material. Never leave a lit candle unattended, and use a flameless candle if the wreath is made from dried or faux materials.

    Conclusion

    White wreaths earn their place year round because they stay neutral while other decor changes around them. Start with a base you like in its plain form, hang it where its shape can be seen clearly, and change only a bow or a few sprigs when the season shifts. With that simple approach, one white wreath can serve a front door, mantel, wall, or table through every month of the year.

    FAQs

    How do you keep a white wreath looking good all year?

    Keep a white wreath looking good all year by choosing a neutral base, keeping it out of strong sun and heavy weather, and dusting it gently on a regular basis. Remove seasonal extras when they no longer fit, and store the wreath in a clean, dry box if you take it down for a time.

    What is the best white wreath for a front door?

    The best white wreath for a front door is a sturdy boxwood, grapevine, or cotton wreath that can handle outdoor air and wind. Choose a size that leaves clear space around the door edges, hang it on a strong hook, and keep it sheltered from driving rain where possible.

    Can you use a white wreath in summer?

    Yes, you can use a white wreath in summer, especially in eucalyptus, hydrangea, peony, or magnolia styles that read as fresh rather than wintry. Avoid frosted pine or snow like finishes in summer, and pair the wreath with plain linen ribbon for a warm weather look.

    How do you hang a wreath on a mantel?

    Hang a wreath on a mantel by fixing a small hook or nail centered above the fireplace, or by resting the wreath against the wall on the mantel itself. Keep the wreath centered, leave space on each side, and keep candles and other items low so the ring shape stays visible.

    What size white wreath should I buy for a standard door?

    For a standard front door, a wreath about 22 to 24 inches across usually looks balanced, leaving clear space around the ring. Measure your door first, and choose a smaller ring for a narrow door or a glass door, so the wreath does not cover the glass or the handle.

    How do you store a white wreath between seasons?

    Store a white wreath between seasons in a clean wreath box or a large bag, laid flat so the ring keeps its shape. Keep it in a dry place away from sun and damp, and add tissue paper around delicate flowers to stop them from flattening.


  • How to Make a Peony Wreath for a Full Floral Look

    How to Make a Peony Wreath for a Full Floral Look

    To make a peony wreath, build a greenery base on a sturdy frame, then wire or glue large peony blooms first, fill gaps with smaller blooms and buds, and finish with filler foliage and a bow. Work in one direction around the ring, step back often, and hang it where it stays out of strong sun.

    A peony wreath works well because peony blooms are large and layered, so a small number of blooms can cover a ring quickly. The trick to a full look is order: greenery first, large blooms second, then buds and filler to hide stems, wire, and frame. This guide walks through that order step by step, and it works for fresh, silk, or dried peonies, with notes on where the method changes for each type.

    Key Takeaways

    • Choose the wreath size and placement first, since that decides the frame size and how many peonies you need.
    • Build a greenery base before adding any blooms, so no frame shows through the finished wreath.
    • Place the largest peonies first, spaced around the ring, so the fullness is planned rather than patched at the end.
    • Fill gaps with buds, small blooms, and filler foliage, working in one direction around the ring.
    • Wire silk and dried stems in place, and use floral glue or wire for fresh stems, so blooms stay put when the wreath is hung.
    • Step back often to check the shape, and trim or move blooms before you add a bow or hang the wreath.

    Materials and Tools

    • A wire, grapevine, or foam wreath frame in your chosen size
    • Peony blooms in two or three sizes: large open blooms, medium blooms, and buds, in fresh, silk, or dried form
    • Greenery for the base: eucalyptus, ruscus, boxwood, or similar leafy stems, plus filler foliage such as small leaves or berry sprigs
    • Floral wire or paddle wire, plus wire cutters
    • Pruning shears or sturdy scissors for fresh stems, and scissors for silk stems
    • A hot glue gun and glue sticks, or floral glue, for fresh and silk blooms where wiring alone is not enough
    • Wide ribbon for a bow, plus narrow ribbon or twine for tying
    • A hanging loop of wire, ribbon, or twine
    • A wreath hook, nail, or over door hanger rated for the wreath weight
    • Work gloves, a drop cloth or old sheet, and a bucket of water for fresh cuttings

    1. Decide on the Wreath Size, Style, and Placement

    A person measuring a front door space with a tape measure beside a round wreath frame on a table.

    Start by choosing where the wreath will hang and how large it should be. A front door usually suits a wreath between 20 and 28 inches across once the blooms are added, while a wall, mirror, or window often suits a smaller wreath between 14 and 20 inches. Measure the space and leave a margin of several inches around the wreath so it does not crowd trim, handles, or nearby lights.

    Next, pick a style to guide your colors and materials. A single color wreath in blush or white reads calm and classic, a mixed pink wreath reads soft and full, and a peony wreath with cream blooms and green foliage suits a neutral room or door. Writing down your size, placement, and color plan before you shop keeps the project focused and avoids buying blooms you will not use.

    2. Gather Your Materials and Tools

    Peony wreath making supplies laid out on a work table: wreath frame, peony blooms, greenery bundles, floral wire, shears, ribbon, and a glue gun.

    Lay out everything from the materials list before you start cutting stems. Check that your wire cutters cut cleanly, your shears are sharp, and you have enough floral wire and glue sticks, since stopping mid-build to search for tools breaks your rhythm and can leave fresh cuttings drying out. Keep a small container for wire offcuts so they do not end up on the floor.

    If you are using fresh peonies, keep cut stems in a bucket of water in a cool spot until you need them. Buy a few more blooms and greenery stems than you think you need, since a full wreath uses more material than a first attempt usually suggests, and spare buds are useful for filling thin spots at the end.

    3. Choose Your Peonies and Plan the Color Mix

    Peony blooms in blush pink, white, and coral sorted into groups by size and color on a work table.

    Peonies come in fresh, silk, and dried forms, and each form changes how you attach blooms. Fresh peonies look soft and full but last days rather than months, silk peonies hold their shape and can be reused, and dried peonies are light and muted in color but fragile. Choose one form for the whole wreath so the blooms age and wear in the same way.

    Plan the color mix before you build. A full look usually comes from one main bloom color, one supporting color, and green foliage, rather than many competing colors. Lay the blooms on a table in groups by size and color, count the large blooms, and decide roughly where each large bloom will sit around the ring. This short planning step stops the common problem of running out of large blooms on one side of the wreath.

    4. Prepare the Wreath Frame

    A bare grapevine wreath frame lying flat on a drop cloth on a work table, ready for greenery.

    If you are using a wire frame, check that the rings are firm and the frame sits flat on your work surface. A wire frame gives a clear structure for wiring greenery and blooms, and it works well for full, layered wreaths. A grapevine frame already looks finished, so it suits a lighter wreath where some of the frame shows through the blooms.

    If you are using a foam frame, wrap it in green floral tape or fabric first so the foam does not show through gaps in the greenery. For any frame, decide which side is the front and mark the top, since wreaths are usually built and viewed from one side. Place the frame on a drop cloth to catch leaves and petals while you work.

    5. Attach a Hanging Loop

    Hands twisting a wire hanging loop onto the top of a bare wreath frame.

    Make a hanging loop before you add greenery, since it is much harder to reach the frame once the wreath is full. Thread a length of sturdy wire, ribbon, or twine through the top of the frame and twist or knot it into a loop large enough to sit on a hook or nail. Test the loop by holding the frame up by it and checking that it hangs level.

    For a heavy wreath, use wire rather than ribbon for the loop, and add a second loop as backup if the frame allows it. A loop that sits flat against the back of the wreath will keep the wreath close to the door, while a longer loop lets the wreath hang lower on a wall. Set the loop length now, since adjusting it later means working through layers of greenery and blooms.

    6. Build the Greenery Base Layer

    Hands wiring a small bundle of eucalyptus greenery onto a wire wreath frame, with more bundles waiting on the table.

    Start the base layer by making small bundles of two or three greenery stems, with the cut ends together and the leafy tips pointing outward. Lay the first bundle on the frame, then wire its stems tightly to the frame with two or three wraps of floral wire. Keep the wire snug but not so tight that it snaps the stems.

    Place the next bundle so its tips cover the wired stems of the first bundle, and continue around the frame in the same direction. Overlapping each bundle this way hides the wire and gives the wreath a smooth, even flow. Work all the way around the frame, then check the back to make sure no wire ends stick out where they could scratch a door.

    7. Add a Second Greenery Layer for Fullness

    A half finished wreath with a second layer of green foliage being wired over the first greenery layer.

    Once the base layer covers the frame, add a second layer using a different type of greenery or a mix of your remaining stems. Place these bundles slightly outward from the base layer so the wreath gains depth and looks full from the side as well as the front. Wire each bundle in the same direction as the base layer to keep the growth pattern consistent.

    Use slightly shorter bundles for this layer if you want a neat outer edge, or longer stems if you want a looser, more natural outline. Step back after every few bundles and look at the wreath from the front, since it is easier to fix a thin spot now than after blooms are added. Fill any gaps with single stems wired in flat against the frame.

    8. Place the Largest Peonies First

    Hands placing large blush pink peony blooms onto a full green wreath base, spaced around the ring.

    With the greenery base done, place the largest peony blooms before anything else. Set them on the wreath without fixing them first, spacing them evenly around the ring, with one at the bottom, one near the top, and others spread between them. This dry run shows whether you have enough large blooms and whether the spacing looks balanced.

    Once the spacing looks right, fix each large bloom in place. Wire silk and dried stems to the frame, and wire or glue fresh stems, pushing each stem into the greenery so the bloom sits on top of the leaves rather than floating above them. Angle the blooms slightly outward so their faces show from the front, and keep them clear of the hanging loop at the top.

    9. Fill Around the Large Blooms with Medium Blooms

    Hands adding medium coral peony blooms between large blush peonies on a nearly full wreath.

    Next, add medium peony blooms in the spaces between the large blooms. Place them slightly lower or slightly inward from the large blooms so the wreath gains layers instead of a flat ring of same-size flowers. Work around the ring in one direction, checking the front of the wreath after every few blooms.

    Vary the angle of the medium blooms: some facing forward, some angled to the side, so the wreath does not look like a row of identical flowers. If two blooms crowd each other, move one to a thinner spot rather than forcing both into the same gap. At this stage the wreath should look mostly floral, with only small gaps of greenery showing.

    10. Add Peony Buds and Small Blooms to Close the Gaps

    Hands tucking small white peony buds into gaps on a full peony wreath.

    Buds and small blooms are what turn a wreath with spaced flowers into a full floral wreath. Tuck buds into the remaining gaps, pushing their stems under the larger blooms so they sit naturally among the petals and leaves. Use buds to soften the outer edge and the inner edge of the ring, where gaps show most clearly.

    Keep the buds shorter than the main blooms so they read as supporting flowers, not as a competing layer. If a section looks crowded, remove a bud rather than adding more, since a wreath with breathing room shows its shape better than one packed tight. Step back after this step: the ring should now read as flowers first, with greenery as a backdrop.

    11. Tuck in Filler Foliage and Accent Sprigs

    Hands tucking small eucalyptus sprigs and berry accents between peony blooms on a full wreath.

    Filler foliage gives the wreath its detail and stops it looking flat. Tuck short sprigs of small leaves, eucalyptus tips, or berry sprigs into gaps between blooms, pushing the stems under the wired bundles so they sit naturally. Vary the filler around the wreath rather than grouping one type in a single spot.

    Use filler sparingly around the faces of the large peonies, since covering a bloom defeats the point of placing it first. Filler works best at the edges of blooms, in narrow gaps, and along the outer rim, where it softens the outline. At this stage the wreath should look full and even before any ribbon goes on.

    12. Make and Attach a Bow

    Hands forming a looped cream ribbon bow on a work table beside a finished peony wreath.

    A simple looped bow starts with a length of wide ribbon. Form two loops of equal size, pinch them together at the center, and wrap floral wire tightly around the pinch to hold the shape. Add two more loops, one on each side, for a fuller bow, then trim the ribbon tails at an angle and notch the ends if you like a classic finish.

    Fluff the loops by pulling them gently outward and adjusting them until the bow looks even from the front. Wire the bow to the frame at the bottom of the wreath, which is the usual spot, or at the top if your design calls for it. Check that the bow sits flat against the blooms and does not flop forward or hide a large peony when the wreath is held upright. A bow is optional: a wreath that already looks full can be left without one.

    13. Check the Balance, Trim, and Secure Loose Stems

    Hands trimming a stray greenery tip on a finished peony wreath held upright over a drop cloth.

    Hold the wreath upright at arm’s length and turn it slowly, looking for thin spots, stray stems, and blooms that sit at odd angles. Trim only the longest stray greenery tips with shears, cutting just above a leaf cluster so the cut blends in. Avoid trimming the whole outer edge into a circle, since that removes the natural shape you built layer by layer.

    Next, check every join by giving each bloom and bundle a gentle tug. Tighten any loose wire, add a dab of glue where a stem still moves, and tuck sharp wire ends into the greenery so they cannot scratch a door or catch on clothing. Shake the wreath lightly over your drop cloth; if petals or leaves fall in large numbers, a bloom may be loose or a fresh stem may be dry.

    14. Hang, Adjust, and Care for the Wreath

    A finished full peony wreath with blush pink, white, and coral blooms being hung on a front door hook.

    Hang the wreath on its hook, nail, or over door hanger, and step back to check its height and centering. On a front door, the wreath usually sits at eye level or slightly above, with equal space on each side. If the wreath tilts, adjust the hanging loop or add a small pad behind the lower edge so it sits flat against the door.

    Check the wreath from across the room, since that is the view most people will see. Make small adjustments to the bow loops and any shifted blooms now, while you can still reach the wreath easily. For care, keep a fresh peony wreath in a cool, sheltered spot out of strong sun and wind, and mist the greenery lightly if the air is dry. Keep a silk or dried wreath indoors or under cover, out of rain and strong sun, and dust it gently. At the end of the season, remove wired blooms and ribbon, store them in a labeled box, and keep the frame flat for reuse.

    Conclusion

    Making a peony wreath for a full floral look comes down to a simple sequence: choose your size and style, build a greenery base on a sturdy frame, place the largest peonies first, fill gaps with medium blooms, buds, and filler, then add a bow and check the balance before hanging. Take your time with the greenery base and the large blooms, since those two stages decide how full the finished wreath looks. With the wreath hung and adjusted, you have a floral wreath made to fit your door or wall, and a frame and silk blooms ready to reuse next season.

    FAQs

    How many peonies do I need for a full wreath?

    The number depends on the frame size and bloom size, but a full look usually needs a mix of large blooms, medium blooms, and buds rather than large blooms alone. Start with the large blooms spaced around the ring, then add medium blooms and buds until only small gaps of greenery show, and keep spares for thin spots found at the final check.

    Should I use fresh, silk, or dried peonies for a wreath?

    Fresh peonies give the softest, most natural look but last days rather than months, so they suit a short event or a wreath you plan to remake. Silk peonies hold their shape, can be reused, and suit a front door or a wreath that stays up for weeks. Dried peonies are light and muted in color but fragile, so they suit an indoor wreath kept out of rain and handling.

    What frame is best for a peony wreath?

    A wire frame is the easiest choice for a full layered wreath, since greenery and stems wire directly to it. A grapevine frame suits a lighter wreath where some of the frame shows through the blooms, and a foam frame wrapped in tape or fabric suits a wreath built mainly with glued silk blooms.

    How do I keep peony blooms from falling off a wreath?

    Wire silk and dried stems to the frame rather than relying on glue alone, since wire holds in wind and temperature changes. For fresh stems, wire the stem to the frame and add glue at the base of the bloom if it still moves, then tuck wire ends into the greenery so they do not scratch the door.

    How do I make a peony wreath look full instead of sparse?

    Build a greenery base first so no frame shows through, place large blooms first with even spacing, then close gaps with medium blooms, buds, and filler foliage. Working in one direction around the ring and stepping back often helps you spot thin spots early, when they are still easy to fill.

    How long will a peony wreath last, and how do I store it?

    A fresh peony wreath lasts days in a cool, sheltered spot out of strong sun and wind, while a silk wreath can last for seasons if kept indoors or under cover and dusted gently. To store a silk wreath, remove the bow if it crushes easily, place the wreath in a box that holds its shape, and keep it flat in a dry spot.


  • 21 Spring Wreaths for Front Doors in Different Decorating Styles

    21 Spring Wreaths for Front Doors in Different Decorating Styles

    Spring wreaths for front doors work best when the style matches the home, from farmhouse cotton and grapevine to modern greenery rings and cottage garden blooms. Choose fresh or faux blooms in soft pastels, a wreath sized to half the door width, and a sturdy hook, then keep the rest of the entry simple so the wreath stays the focus.

    A spring wreath sets the tone for the whole entry, so start with the house style rather than with a single flower. A brick colonial, a white farmhouse, a coastal cottage, and a modern townhouse all suit different wreaths, and the right match makes the door look planned instead of decorated at random. For more seasonal ideas to pair with these looks, browse the Dwell Ovell decor ideas index. Measure the door before you shop, check whether the porch is covered or open to wind and rain, and decide whether you want fresh blooms for a few weeks or faux blooms that last all season.

    Key Takeaways

    • Match the wreath style to the house style first, then pick blooms and colors that suit that style.
    • Size the wreath to about half the door width so it reads clearly without blocking the handle or lock.
    • Use fresh blooms for a short seasonal display and faux blooms for a wreath that lasts all spring.
    • Keep the rest of the entry simple: a plain doormat and one planter let the wreath stay the focus.
    • Hang outdoor wreaths with a sturdy hook or over-door hanger rated for the weight, and check it after wind and rain.
    • Store faux wreaths flat or hanging in a dry place, in a bag or box that keeps dust off the blooms.

    1. A Classic Tulip Wreath

    Full pink and yellow tulip wreath on a white front door

    A tulip wreath is the most direct spring choice, with full blooms in pink, yellow, white, or a soft mix. Tulips read as spring at a glance, so this style suits almost any door color, from white and navy to natural wood. Keep the bow small or skip it, since the blooms already carry the design.

    Fresh tulip wreaths last a week or two outdoors in cool weather, while faux tulips hold their shape all season. If the porch gets strong sun, choose faux blooms in a slightly muted shade, since bright faux petals can fade. Hang the wreath at eye level so the open blooms face visitors directly.

    2. A Farmhouse Cotton and Eucalyptus Wreath

    Cotton and eucalyptus wreath on a white farmhouse front door

    Cotton stems and eucalyptus give a farmhouse wreath a soft, neutral look that works through spring without bright color. The white cotton bolls stand out against grey green leaves, and the mix suits white, black, and wood doors on farmhouse and country style homes. A simple twine loop or a thin linen ribbon keeps the farmhouse feel.

    This wreath suits covered porches best, since cotton bolls can collect dust and moisture in open weather. Shake it outdoors now and then, and brush off dust with a dry cloth. Pair it with a plain coir doormat and a galvanized planter for a quiet farmhouse entry.

    3. A Modern Minimal Greenery Ring

    Thin modern greenery ring on a grey front door

    A thin greenery ring with even, short branches suits modern homes that favor clean lines and little ornament. Use eucalyptus, olive branches, or boxwood clipped close to the ring, with no bow and no blooms. The simple circle shape echoes modern door hardware and house numbers.

    Hang this wreath centered on the door with a slim hook that stays hidden behind the ring. Because the design is spare, neatness matters: trim any stray stems before hanging. This style also works well on apartment doors and narrow entries, where a full floral wreath could feel crowded.

    4. A Cottage Garden Mixed Bloom Wreath

    Cottage garden wreath with mixed pastel blooms on a sage door

    A cottage garden wreath packs small blooms in several pastel shades, such as pink roses, blue cornflowers, white daisies, and soft purple sweet peas. The mixed, slightly loose arrangement suits cottages, picket fences, and painted doors in cream, sage, or pale blue. It should look gathered from a garden, not arranged in strict rows.

    Balance matters more than symmetry here, so step back and check that no one color clumps on one side. Fresh versions need shade and water misting to last, while faux versions keep the garden look for months. A narrow gingham ribbon in a matching pastel ties the mix together without adding bulk.

    5. A Coastal Spring Wreath

    Coastal wreath with white blooms and sea grass on a light blue door

    A coastal spring wreath pairs white and pale blue blooms with sea grass, driftwood pieces, or small shells for a beach house entry. Keep the palette light: white, sand, soft blue, and one pale coral accent. The mix suits whitewashed doors, light grey siding, and homes near the coast.

    Use shells and driftwood sparingly so the wreath still reads as spring rather than as a beach souvenir display. Faux blooms hold up better than fresh ones in salty, windy air. Hang it on a covered porch when possible, and rinse salt spray off faux materials with a damp cloth at the end of the season.

    6. A French Country Lavender Wreath

    Lavender wreath with purple blooms on a cream front door

    Lavender stems bundled around a ring give a French country wreath a calm purple haze and a light scent when fresh. The style suits stone, cream, and pale grey homes, and pairs well with shuttered windows and a simple stone step. A thin lavender or cream ribbon loop finishes the look without fuss.

    Fresh lavender dries well, so a fresh wreath can move indoors once the blooms fade and still look good. Dried lavender sheds a little, so hang it where fallen buds will not stain a light porch floor. Keep other entry colors muted, with cream, grey, and soft green, so the lavender stays the accent.

    7. A Rustic Grapevine Wreath with Wildflowers

    Grapevine wreath with wildflowers on a wooden front door

    A bare grapevine base with wildflower sprigs tucked into one side gives a rustic wreath that suits cabins, log homes, and country porches. The twisted vine shows through the blooms, which keeps the design light and natural. Use daisies, small yellow blooms, and a few green sprigs rather than large formal flowers.

    Tuck stems firmly into the vine so wind does not pull them loose, and add a few extra sprigs on the fuller side for balance. This wreath looks good on wood doors and stone walls alike. If the porch is open, choose faux wildflowers, since fresh sprigs dry fast in wind and sun.

    8. A Boho Dried Flower and Pampas Wreath

    Dried flower and pampas wreath on a light front door

    Dried flowers, pampas grass plumes, and bunny tails give a boho wreath a soft, feathery texture in cream, blush, and tan. The style suits relaxed, eclectic entries and light colored doors, and it lasts all season without watering. Keep the plumes trimmed to a similar length so the shape stays round.

    Hang dried wreaths on covered porches, since rain flattens pampas and fades dried petals. Spray dried blooms lightly with hairspray from a distance if shedding is a problem, and test on one stem first. Pair this wreath with a woven doormat and a terracotta pot for a warm boho entry.

    9. A Traditional Boxwood Wreath with a Pastel Ribbon

    Boxwood wreath with a pale pink ribbon on a front door

    Boxwood gives a traditional wreath a dense, even green base that looks neat from the street. Add one pastel ribbon, in pink, yellow, or pale blue, tied in a simple bow at the bottom or top. This style suits colonial, brick, and traditional homes where a tidy entry matters most.

    Boxwood wreaths, fresh or faux, hold their shape well in spring weather. Fresh boxwood needs shade and occasional misting, while faux boxwood needs only a dusting. Change the ribbon color next spring for a fresh look without buying a new wreath, and keep the bow size modest so the green stays dominant.

    10. A Magnolia Leaf Spring Wreath

    Magnolia leaf wreath with green and brown leaves on a front door

    Magnolia leaves, with green tops and warm brown undersides, make a wreath that bridges winter greenery and spring blooms. Add a few small white or blush blooms and a cream ribbon for spring, or leave it plain for a quiet look. The large leaves suit wide doors and double entries, where small blooms could get lost.

    Fresh magnolia leaves dry slowly and keep their shape, but they can curl in strong sun, so a covered porch is best. Faux magnolia leaves avoid curling and suit open porches. Dust the leaves with a dry cloth, and wipe faux leaves with a damp cloth at season end before storage.

    11. A Cherry Blossom Branch Wreath

    Cherry blossom branch wreath with pale pink blooms on a white door

    Cherry blossom branches arranged in a loose ring give a spring wreath a light, airy feel, with pale pink blooms against bare brown branches. The style suits modern and traditional homes alike, and it pairs well with white, grey, and black doors. Keep the branches sparse so the pink blooms stand out against the door color.

    Fresh cherry blossom branches last about a week in cool weather, so faux branches are the practical choice for a full season display. Hang the wreath where it will not catch on coats or bags, since thin branches snag easily. A plain hook and no ribbon keep the focus on the blossom shape.

    12. A Lemon and Greenery Citrus Wreath

    Lemon and greenery wreath with yellow lemons on a blue door

    Lemons tucked into a greenery ring give a fresh, cheerful wreath that suits Mediterranean, coastal, and farmhouse entries. The yellow fruit pops against green leaves and white or blue doors, and the look feels right from early spring through summer. Use faux lemons for a wreath that lasts, since real lemons are heavy and spoil outdoors.

    Space the lemons evenly around the ring, or group three together at the bottom for a looser look. Check that the wreath is not too heavy for the hook, since fruit adds weight fast. Wipe faux lemons with a damp cloth now and then to keep them bright.

    13. A Lush Peony and Ranunculus Wreath

    Peony and ranunculus wreath in blush and coral on a dark door

    Peonies and ranunculus make a full, layered wreath in blush, coral, white, and soft pink. The large blooms suit formal entries, brick homes, and doors painted in deep colors, where a bold wreath can hold its own. Keep the blooms close together so no gaps show the base ring.

    Faux peonies are the safer choice outdoors, since fresh peonies open fast in warm sun and drop petals. Choose blooms in two or three shades rather than a rainbow mix, so the wreath looks layered instead of busy. A wide satin ribbon in a matching blush tone suits this fuller style.

    14. A Herb Garden Wreath

    Herb wreath with rosemary and sage on a cottage door

    Rosemary, thyme, sage, and mint woven into a ring make a herb garden wreath that suits kitchen doors, cottage entries, and cooks. The green tones vary from grey green sage to deep green rosemary, and the scent is a bonus when fresh. Add a few tiny white blooms for spring color, or leave it all green.

    Fresh herb wreaths dry naturally and can move to the kitchen once they fade, but they shed in wind, so a sheltered spot is best. Faux herbs keep the shape all season with no shedding. Hang this wreath near the kitchen door or herb bed so the theme feels connected to the garden.

    15. A Pastel Egg and Bloom Wreath

    Pastel egg and bloom wreath on a front door in spring

    Pastel eggs nestled among spring blooms give a playful wreath for the weeks around Easter and early spring. Use eggs in soft pink, blue, yellow, and mint, mixed with small white blooms and green sprigs, on a grapevine or twig base. The style suits family homes and cottages with a light, cheerful entry.

    Use lightweight faux eggs so the wreath stays balanced and the hook holds it safely. Glue eggs firmly to the base rather than resting them loose, since wind and door movement can shake them free. Swap this wreath for a plain bloom wreath after the Easter season so the entry does not look dated.

    16. A Vintage Shabby Chic Rose Wreath

    Vintage rose wreath in soft pink and cream on a cream door

    Soft pink and cream roses, a little faded lace ribbon, and a touch of dusty greenery give a vintage shabby chic wreath. The style suits older homes, painted furniture porches, and doors in cream, sage, or pale pink. Keep the roses small and the ribbon narrow so the wreath looks aged and gentle rather than formal.

    Faux roses in muted shades work better than bright ones for this vintage feel. Dust the wreath lightly, since lace and pale petals show dirt fast. Pair it with a painted wooden bench or a vintage milk can planter, and keep other entry colors pale so the wreath does not compete.

    17. A Woodland Moss and Fern Wreath

    Moss and fern wreath with white blooms on a stone cottage door

    Moss, ferns, and small woodland sprigs make a wreath that suits shaded entries, stone cottages, and homes near trees. The deep green texture looks natural against wood and stone, and a few tiny white blooms add spring lightness. Keep the shape slightly uneven, as a woodland wreath should look grown rather than trimmed.

    Fresh moss needs shade and moisture, so mist it in dry weather and keep it out of direct sun. Faux moss and ferns suit sunny porches with no upkeep. Hang this wreath on a sheltered door, and check after rain, since wet moss adds weight to the hook.

    18. A Bright Daffodil and Forsythia Wreath

    Daffodil and forsythia wreath with yellow blooms on a white door

    Daffodils and forsythia branches make the brightest spring wreath, with yellow blooms that show up well from the street. The style suits white, grey, and dark green doors, where yellow stands out, and it pairs well with a simple yellow or cream ribbon. Keep the yellow dominant and the greenery simple.

    Fresh daffodils last a week or two in cool weather, while faux daffodils keep the color all season. If the door faces a busy street, this high contrast wreath reads clearly from a distance. Balance the yellow with a plain doormat so the entry does not feel loud.

    19. A Monochrome White and Cream Wreath

    White and cream bloom wreath on a grey front door

    White and cream blooms, from roses and hydrangeas to small daisies, make a monochrome wreath that suits elegant, modern, and traditional homes alike. The single color family looks calm on any door color, and texture does the work: mix large soft blooms with small tight ones. A cream ribbon loop finishes the look.

    Because there is no color contrast to hide gaps, pack the blooms closely and check the wreath from a distance before hanging. White faux blooms can yellow in strong sun, so a covered porch keeps them bright longer. This wreath pairs well with white planters and a light doormat for a quiet entry.

    20. An Asymmetric Modern Floral Crescent

    Asymmetric floral wreath with blooms on one side of a plain ring

    An asymmetric wreath clusters blooms and greenery on one side of a plain ring, leaving the other side bare. The crescent shape suits modern and contemporary homes, and it works well on doors with a bold color, since the bare ring lets the door show through. Use blooms in one or two colors for a clean modern read.

    Hang the wreath so the full side sits at an angle, not straight at the bottom, for a deliberate modern look. Check that the clustered side is not too heavy, which can pull the wreath off center. This style also suits narrow walls and windows, where a full round wreath could feel heavy.

    21. A Mediterranean Olive Branch Wreath

    Olive branch wreath with grey green leaves on a whitewashed door

    Olive branches with grey green leaves make a Mediterranean wreath that suits stucco, terracotta, and whitewashed homes. The slim leaves and open shape feel light in warm spring weather, and a few small white blooms or a linen ribbon add a spring note without hiding the branches. This style also suits modern homes that favor natural materials.

    Fresh olive branches dry well and keep their color, while faux branches suit windy porches with no shedding. Hang this wreath on a light door so the grey green leaves show clearly. Pair it with a terracotta pot and a simple stone step for a calm Mediterranean entry.

    Conclusion

    Spring wreaths for front doors come in a style for every home, from classic tulips and farmhouse cotton to modern greenery rings and Mediterranean olive branches. Start with the house style, size the wreath to the door, and pick fresh blooms for a short display or faux blooms for the full season. With a sturdy hook and a simple entry around it, any of these 21 styles can give a front door a fresh spring welcome.

    FAQs

    What size spring wreath should I hang on a front door?

    Choose a wreath about half the width of a standard front door, usually 20 to 24 inches across, so it reads clearly without blocking the handle or lock. Measure the door width first, then pick a wreath that covers a good part of the door without touching the edges.

    Should I choose a fresh or faux spring wreath for the front door?

    Choose fresh blooms for a short display of one to three weeks in cool, shaded weather, and faux blooms for a wreath that lasts all spring with no watering. Faux wreaths also suit open porches, strong sun, and wind, where fresh blooms fade or dry fast.

    How do I hang a spring wreath so it stays put?

    Hang the wreath with a sturdy over-door hanger, a screw-in hook, or an adhesive hook rated for the wreath weight, and center it at eye level. Check the hook after wind and rain, and avoid suction cups on cold or textured doors, since they can fail.

    What colors work best for a spring wreath on a dark door?

    Soft pastels, white, cream, and bright yellow show up best on dark doors, since light blooms contrast with the door color. Avoid dark green only wreaths on dark doors, since they can blend in and lose their shape from the street.

    How long will a spring wreath last outdoors?

    A fresh spring wreath lasts one to three weeks outdoors depending on weather, shade, and bloom type, while a faux wreath lasts all season and can be reused for years. Store faux wreaths in a dry place, away from sun, to keep colors bright for the next spring.

    Can I use the same spring wreath style on double doors?

    Yes, hang one matching wreath on each door of a double entry, centered at the same height, for a balanced look. Choose a slightly smaller wreath than you would for a single door, since two wreaths together fill more visual space.


  • How to Make a DIY Spring Wreath with Simple Supplies

    How to Make a DIY Spring Wreath with Simple Supplies

    To make a DIY spring wreath, start with a grapevine or wire frame, cover it with greenery in overlapping bundles, then add spring flowers, filler blooms, and a ribbon bow in balanced groups. Check the shape from a distance, secure loose stems, and hang it at eye level on your front door.

    A spring wreath is a simple way to mark the change of season at the front door, and it needs only a few basic supplies. The method below works with fresh or faux flowers, so you can choose the option that suits your climate, your budget, and how long you want the wreath to last. Work in layers, step back often to check the shape, and keep the decorations grouped rather than scattered, since groups look more natural than single stems placed at even intervals.

    Key Takeaways

    • Choose the wreath size and placement first, since that decides the frame size and how many stems you need.
    • Cover the frame with greenery in overlapping bundles wired in the same direction, so no bare frame shows through.
    • Add spring flowers in small groups of two or three, then fill gaps with smaller blooms and buds.
    • Wire or firmly tie decorations in place rather than relying on glue alone, so they hold up outdoors.
    • Step back often to check the balance, and trim only after the wreath is full.
    • Hang a fresh wreath in a sheltered spot, and store a faux wreath dry and flat so it can be reused next spring.

    Materials and Supplies

    • A grapevine, wire, or foam wreath frame in your chosen size
    • Spring greenery: eucalyptus, boxwood, fern, or soft leafy stems, fresh or faux
    • Spring flowers: tulips, daffodils, hyacinths, ranunculus, or cherry blossom stems, fresh or faux
    • Smaller filler blooms and buds, such as baby’s breath, small daisies, or berry sprigs
    • Floral wire or paddle wire, plus wire cutters
    • Pruning shears or sturdy scissors
    • A hot glue gun and glue sticks, for faux stems and small accents only
    • Wide ribbon for a bow, plus narrow ribbon or twine for tying
    • A hanging loop of wire, ribbon, or twine
    • A wreath hook, nail, or over door hanger rated for the wreath weight
    • Work gloves, a drop cloth or old sheet, and a bucket of water if you are using fresh stems

    1. Choose the Wreath Style, Size, and Placement

    A person measuring a front door space with a tape measure beside a round grapevine wreath frame on a table.

    Start by deciding where the wreath will hang and how large it should be. A front door usually suits a wreath between 22 and 30 inches across, while an interior door or a wall often suits a smaller wreath between 16 and 22 inches. Measure the space and leave a margin of several inches around the wreath so it does not crowd trim, handles, or nearby lights.

    Next, pick a style to guide your supplies. A simple green wreath with a few tulips suits a plain door, a full garden wreath with mixed flowers suits a cottage style home, and a pastel wreath with soft pink, cream, and yellow blooms suits a light, airy entry. Writing down your style, size, and color palette before you shop keeps the project focused and avoids buying stems you will not use.

    2. Gather Your Supplies and Tools

    Spring wreath supplies laid out on a work table: grapevine frame, greenery bundles, tulips, floral wire, shears, and ribbon.

    Lay out everything from the materials list before you start building. Check that your wire cutters cut cleanly, your shears are sharp, and you have enough floral wire, since stopping mid-build to search for tools can leave fresh stems drying out on the table. Keep a small container for wire offcuts so they do not end up on the floor.

    If you are using fresh stems, keep them in a bucket of water in a cool spot until you need them, and trim the stem ends just before building. If you are using faux stems, sort them by type and color now, and bend each stem into a natural curve rather than leaving it perfectly straight. Buy a few more stems than you think you need, since a full wreath uses more than a first attempt usually suggests.

    3. Prepare the Wreath Base

    A bare grapevine wreath frame lying flat on a drop cloth on a work table, ready for greenery.

    If you are using a grapevine frame, check that it is firm and round, and trim any long twigs that stick out at odd angles. A grapevine frame already looks finished, so it suits a lighter wreath where some of the frame shows through the greenery. If you are using a wire frame, check that the rings sit flat and the frame is not bent.

    If you are using a foam frame, wrap it in green floral tape or fabric first so the foam does not show through gaps in the greenery. For any frame, decide which side is the front and mark the top, since wreaths are usually built and viewed from one side. Place the frame on a drop cloth to catch leaves and petals while you work. A similar simple ring project, the twig and twine wreath in these DIY fall home decor projects, shows how a plain base can carry light decorations well.

    4. Prepare the Greenery and Spring Flowers

    Hands trimming spring greenery and tulip stems with shears over a work table, with sorted piles of stems nearby.

    Trim each greenery stem to a workable length, usually 6 to 10 inches for the outer bundles, with shorter pieces for filler. Remove leaves from the bottom 2 inches of each stem so you have a clean section to wire onto the frame, and discard any dry, broken, or wilted stems. Sorting now makes the building steps faster, since you will not stop to trim each piece as you wire it.

    Sort the stems into piles by type: one pile for the greenery base, one for the main spring flowers, and one for filler blooms and buds. If you have two or three types of greenery, keep them separate so you can control the mix in each layer. For fresh flowers, keep the sorted piles in water until the moment you use them, and work in a cool room where possible.

    5. Attach a Hanging Loop

    Hands twisting a wire hanging loop onto the top of a bare grapevine wreath frame.

    Make a hanging loop before you add greenery, since it is much harder to reach the frame once the wreath is full. Thread a length of sturdy wire, ribbon, or twine through the top of the frame and twist or knot it into a loop large enough to sit on a hook or nail. Test the loop by holding the frame up by it and checking that it hangs level.

    For a heavy wreath, use wire rather than ribbon for the loop, and add a second loop as backup if the frame allows it. A loop that sits flat against the back of the wreath will keep the wreath close to the door, while a longer loop lets the wreath hang lower on a wall. Set the loop length now, since adjusting it later means working through layers of greenery and flowers.

    6. Build the Greenery Base Layer

    Hands wiring a small bundle of green eucalyptus onto a wreath frame, with more bundles waiting on the table.

    Start the base layer by making small bundles of three to five greenery stems, with the cut ends together and the tips pointing outward. Lay the first bundle on the frame, then wire its stems tightly to the frame with two or three wraps of floral wire. Keep the wire snug but not so tight that it snaps the stems.

    Place the next bundle so its tips cover the wired stems of the first bundle, and continue around the frame in the same direction. Overlapping each bundle this way hides the wire and gives the wreath a smooth, even flow. Work all the way around the frame, then check the back to make sure no wire ends stick out where they could scratch a door.

    7. Add a Second Layer for Fullness

    A half finished spring wreath with a second layer of leafy greenery being wired over the base layer.

    Once the base layer covers the frame, add a second layer using a different type of greenery or a mix of your remaining leafy stems. Place these bundles slightly outward from the base layer so the wreath gains depth and looks full from the side as well as the front. Wire each bundle in the same direction as the base layer to keep the growth pattern consistent.

    Use slightly shorter bundles for this layer if you want a neat outer edge, or longer bundles if you want a looser, more natural outline. Step back after every few bundles and look at the wreath from the front, since it is easier to fix a thin spot now than after flowers are added. Fill any gaps with single stems wired in flat against the frame.

    8. Add the Main Spring Flowers

    Hands wiring groups of pastel tulips and daffodils onto a full green spring wreath.

    Now add the main spring flowers in small groups of two or three stems, rather than scattering single blooms evenly around the wreath. Groups look more natural, like flowers growing in a garden bed, and they let you control the color balance. Place the first group near the lower left or lower right of the wreath, which is a natural focal point, then place matching groups around the ring.

    Wire each flower stem to the frame, or push faux stems firmly into a grapevine or foam base and add a dab of glue for faux stems only. Vary the flower heights slightly within each group so the blooms do not sit in a flat row. Spread the groups so no side looks bare and no side looks overloaded, and keep flowers clear of the hanging loop at the top.

    9. Fill Gaps with Smaller Blooms and Buds

    Hands tucking small white filler blooms and buds into gaps in a spring wreath with tulips.

    Filler blooms give the wreath its detail and stop it looking sparse between the main flowers. Tuck short sprigs of baby’s breath, small daisies, berry sprigs, or unopened buds into gaps between the main flower groups, pushing the stems under the wired bundles so they sit naturally. Vary the filler around the wreath rather than grouping one type in a single spot.

    Keep the filler shorter than the main flowers so it reads as texture, not as a competing layer. If a section looks crowded, remove a filler sprig rather than adding more, since a wreath with breathing room shows its shape better than one packed tight. At this stage the wreath should look full and even before any ribbon goes on.

    10. Make and Attach a Ribbon Bow

    Hands forming a looped cream ribbon bow on a work table beside a finished spring wreath.

    A simple looped bow starts with a length of wide ribbon in a color from your flower palette, such as soft green, cream, pale yellow, or gingham. Form two loops of equal size, pinch them together at the center, and wrap floral wire tightly around the pinch to hold the shape. Add two more loops, one on each side, for a fuller bow, then trim the ribbon tails at an angle.

    Fluff the loops by pulling them gently outward and adjusting them until the bow looks even from the front. Wire the bow to the frame at the bottom of the wreath, which is the usual spot, or at the top if your design calls for it. Check that the bow sits flat against the greenery and does not flop forward when the wreath is held upright.

    11. Add Small Seasonal Accents

    A spring wreath with tulips, a cream bow, moss clumps, and small pastel accents arranged on a work table.

    With the bow in place, add any remaining accents sparingly. Small touches such as moss clumps, a few pastel eggs on wire picks, a tiny bird figure, or short lengths of twine can add spring character, but each piece should earn its place. Wire accents to the frame where possible, and use glue only for light faux accents that cannot be wired.

    Stand back after each addition and judge the wreath as a whole. If an accent draws the eye away from the flowers or unbalances one side, move it or leave it out. A wreath with a few well placed accents usually looks tidier than one covered in decorations, and it is easier to store and reuse next year if the accents are wired rather than glued.

    12. Check the Balance, Trim, and Secure Loose Ends

    Hands trimming a stray greenery tip on a finished spring wreath held upright over a drop cloth.

    Hold the wreath upright at arm’s length and turn it slowly, looking for thin spots, stray stems, and flowers that sit at odd angles. Trim only the longest stray tips with shears, cutting just above a leaf cluster so the cut blends in. Avoid trimming the whole outer edge into a perfect circle, since that removes the natural shape you built layer by layer.

    Next, check every wire join by giving each bundle and flower group a gentle tug. Tighten any loose wire and tuck sharp wire ends into the greenery so they cannot scratch a door or catch on clothing. Shake the wreath lightly over your drop cloth; if petals or leaves fall in large numbers, a fresh stem may be wilted and should be replaced before hanging.

    13. Hang and Adjust the Wreath

    A finished spring wreath with pastel tulips and a cream bow being hung on a front door hook.

    Hang the wreath on its hook, nail, or over door hanger, and step back to check its height and centering. On a front door, the wreath usually sits at eye level or slightly above, with equal space on each side. If the wreath tilts, adjust the hanging loop or add a small pad behind the lower edge so it sits flat against the door.

    Check the wreath from the street or from across the room, since that is the view most people will see. Make small adjustments to the bow loops and any shifted flowers now, while you can still reach the wreath easily. If the wreath will hang on a door that opens often, test the door swing to make sure the wreath clears the frame and any nearby lights.

    14. Care for the Wreath and Store It After Spring

    Hands misting a hanging spring wreath with a spray bottle, with a storage box of ribbon and flower stems nearby.

    A fresh spring wreath lasts longer in a cool, sheltered spot out of direct sun and strong wind. Mist the greenery lightly if the air is dry, keep fresh stems out of heat, and replace any wilted flowers promptly so one faded bloom does not spoil the whole wreath. Bring the wreath inside if a storm is forecast.

    At the end of spring, remove wired decorations and store them in a labeled box for reuse. Compost fresh greenery and flowers if your area accepts them, or dispose of them with garden waste. For a faux wreath, dust it gently, cover it with a clean cloth or bag, and store it flat so the flowers are not crushed, ready to hang again next spring.

    Conclusion

    Making a DIY spring wreath with simple supplies comes down to a clear sequence: choose your size and style, prepare the frame and stems, wire greenery in layers in one direction, add spring flowers in groups with filler blooms, finish with a bow, then check the balance before hanging. Take your time with the first greenery layer, since a well built base makes every later step easier. With the wreath hung and adjusted, you have a seasonal decoration made to fit your door, and a frame and bow ready to reuse next spring.

    FAQs

    How long does it take to make a DIY spring wreath?

    It usually takes one to two hours for a first wreath, including gathering supplies and building the layers. The time depends on the wreath size and how many flowers you add, and later wreaths often go faster once the wiring rhythm feels familiar.

    Should I use fresh or faux flowers for a spring wreath?

    Fresh flowers suit a wreath that will hang in a sheltered spot for a short time, since they look and smell natural but wilt within days or weeks. Faux flowers suit an outdoor wreath or a wreath you want to reuse, since they hold their color and shape all season with no watering.

    What kind of frame is best for a spring wreath?

    A grapevine frame suits a light, natural wreath where some of the frame shows through, while a wire frame suits a full layered wreath built from wired bundles. A foam frame also works well for faux flowers, since stems can be pushed into the foam and held with a small amount of glue.

    How do I keep a spring wreath looking full?

    Wire greenery bundles in the same direction with each bundle overlapping the last, add a second layer for depth, then fill gaps with smaller blooms and buds. Step back often to check for thin spots, and add single stems flat against the frame where the base still shows through.

    How do I attach flowers so they stay on outdoors?

    Wire flower stems to the frame rather than relying on glue alone, since wire holds in wind and temperature changes. For faux stems on a grapevine or foam base, push the stem in firmly and add a small amount of glue as backup, then tuck wire ends into the greenery so they do not scratch the door.

    Can I reuse a spring wreath frame and decorations?

    Yes, grapevine, wire, and foam frames can be reused if they are stored flat and kept dry. Remove wired decorations at the end of spring, store them in a labeled box, and rebuild the wreath with fresh greenery and flowers next year, or store a faux wreath whole under a cover.


  • 23 Spring Wreath Ideas to Brighten Your Front Door

    23 Spring Wreath Ideas to Brighten Your Front Door

    A spring wreath should suit your door, your style, and how much upkeep you want. Choose fresh flowers for a short, fragrant welcome, dried or faux blooms for a wreath that lasts all season, and a grapevine, hoop, or moss base that fits your home. Hang it at eye level and protect it from harsh sun and rain.

    A front door wreath is one of the simplest seasonal changes you can make, since it needs no paint, no tools beyond a hook, and no change to the rest of the porch. Start with the base and the flowers you like, then check the size against your door before you buy or build. For more seasonal ideas to pair with these looks, browse the Dwell Ovell decor ideas index. A wreath about one half to two thirds the width of the door usually looks balanced, and a covered porch will suit fresh flowers better than a door in full sun and rain.

    Key Takeaways

    • Match the wreath to your door size, porch cover, and how much upkeep you want.
    • Fresh flowers give scent and soft color for a short time; dried and faux blooms last all season.
    • Grapevine, moss, and hoop bases each give a different look, from rustic to modern and minimal.
    • Hang a wreath at eye level with a sturdy hook, and keep it clear of the door handle and hinges.
    • Protect fresh wreaths from harsh sun, wind, and rain, and mist or replace stems as needed.
    • Reuse a base year after year, and refresh it with new ribbon, greenery, or seasonal accents.

    1. Classic Tulip and Boxwood Wreath

    Classic tulip and boxwood wreath with pink and yellow tulips on a white front door.

    Pair pink, yellow, or white tulips with clipped boxwood on a round grapevine base for a classic spring front door look. The boxwood fills gaps between blooms, so the wreath reads full from the street, while the tulips give clear spring color. Place larger blooms evenly around the ring, then tuck short boxwood sprigs into bare spots.

    Use fresh tulips for a short display on a covered porch, or good quality faux tulips for a wreath that holds its shape in sun and rain. Mist fresh boxwood lightly and keep the wreath out of direct afternoon sun. When fresh tulips fade, pull them out and replace them with a new bunch, or switch to faux stems for the rest of the season.

    2. Pastel Hydrangea Wreath

    Pastel hydrangea wreath in blush, lilac, and pale blue on a front door.

    Build a soft, full wreath from pastel hydrangea heads in blush, lilac, and pale blue on a foam or grapevine base. Hydrangeas cover a base quickly because each head is wide, so this is a good choice when you want a full look with fewer stems. Keep the color mix to two or three pastels so the wreath stays calm rather than busy.

    Fresh hydrangeas need water and shade, so they suit a covered porch for a short display. Faux hydrangeas hold their color and shape much longer and suit a sunny door. Add a few green leaves between heads to break up the color, and finish with a simple linen ribbon loop at the top.

    3. Lavender and Eucalyptus Wreath

    Lavender and eucalyptus wreath with purple buds and silver green leaves on a front door.

    Combine bundles of lavender with silver green eucalyptus on a grapevine base for a fragrant wreath with a soft, muted palette. The narrow stems and small buds give a lighter, airier shape than a full flower wreath, which suits a narrow door or a simple porch. Tie small bundles together first, then wire them around the base in the same direction.

    Dried lavender keeps its scent for weeks and needs no water, though it will shed a little if handled often. Keep the wreath sheltered from heavy rain so the buds stay intact. Add a plain twine bow at the bottom, and replace any faded bundles with fresh dried stems when the color dulls.

    4. Cherry Blossom Branch Wreath

    Cherry blossom branch wreath with pale pink blooms and bare twigs on a front door.

    Use cherry blossom branches, fresh or faux, wired to a grapevine base for a wreath that feels light and open, with pale pink blooms against bare twigs. Leave some branch tips free so the shape stays loose and branchlike, rather than a tight ball of flowers. This style suits a white, gray, or natural wood door, where the pink shows clearly.

    Fresh branches last about a week on a covered porch and need cool shade. Faux branches last all season and suit a sunny or windy door. Check that no branch blocks the door handle or scrapes the door frame when the door opens, and trim any stem that sticks out too far.

    5. Wildflower Meadow Wreath

    Wildflower meadow wreath with daisies, cornflowers, and grasses on a cottage front door.

    Mix small wildflowers such as daisies, buttercups, cornflowers, and Queen Anne’s lace with grasses on a moss or grapevine base for a loose meadow look. Use a mix of heights and flower sizes, and let a few grass stems trail past the edge, so the wreath looks gathered rather than arranged. This style suits a cottage, farmhouse, or garden style home.

    Faux wildflowers are the practical choice here, since fresh small blooms fade fast outdoors. Choose stems with varied greens so the wreath does not look flat. Keep the color mix natural, with white, yellow, and one accent color, and avoid adding too many flower types at once.

    6. Grapevine Wreath with Moss and Ferns

    Grapevine wreath with green moss and small ferns on a wood front door.

    Start with a plain grapevine base, then add sheet moss and small ferns for a green, woodland spring wreath with no large blooms. The moss covers the vine and gives a soft texture, while ferns add height and a fresh green shape. This is a good choice when you want a quiet, natural door that pairs with stone, brick, or wood.

    Use preserved moss and faux ferns for a wreath that lasts outdoors, since live moss dries out fast in sun and wind. Wire moss in small patches rather than gluing large sheets, so the vine still shows in places. Add a few tiny white blooms if you want a hint of flower color, but keep them small so the green stays the focus.

    7. Lemon and Leaf Wreath

    Lemon and leaf wreath with yellow lemons, green leaves, and white blossoms on a front door.

    Pair faux lemons with green leaves and small white blossoms on a grapevine base for a bright spring wreath with a fresh, kitchen garden feel. Space the lemons evenly, three or four around the ring, and fill between them with leaves so the fruit reads as an accent rather than a pile. This style suits a white, navy, or sage door.

    Use faux lemons outdoors, since real fruit will spoil, attract insects, and stain the door. Choose lemons in a similar size and a clear yellow, and wire each one firmly so it does not shift in wind. Add a gingham or plain ribbon in white or green, and keep the wreath out of heavy rain to protect the ribbon.

    8. Pussy Willow and Birch Wreath

    Pussy willow and birch wreath with soft gray buds on a neutral front door.

    Wrap pussy willow stems around a birch twig base for a simple, early spring wreath in soft gray and brown tones. The fuzzy buds give texture without bright color, which suits a home with a calm, neutral porch. Bend willow stems gently around the base, wire them in place, and let a few tips extend past the ring for a natural shape.

    Dried pussy willow lasts for months indoors and on a covered porch, and needs no water. Keep it away from heavy rain and strong wind, which can break the soft buds. Add a small bunch of dried grasses or a plain linen bow if you want a finish, and avoid adding large blooms that would hide the willow texture.

    9. Peony and Ranunculus Wreath

    Peony and ranunculus wreath in pink, coral, and cream on a front door.

    Combine large peonies with smaller ranunculus blooms in pink, coral, and cream on a foam base for a full, soft spring wreath. Place the peonies first, spaced evenly, then fill gaps with ranunculus and green leaves. The mix of large and small blooms gives depth, so the wreath looks full from the street and up close.

    Fresh peonies last only a few days outdoors, so faux peonies are the better choice for a front door. Choose blooms with layered petals and varied shades, rather than one flat color, so the wreath looks natural. Keep the wreath sheltered from rain, since heavy faux petals can hold water and sag.

    10. Dried Flower and Straw Wreath

    Dried flower and straw wreath with strawflowers, statice, and lavender on a front door.

    Build a long lasting wreath from dried strawflowers, statice, and lavender on a straw base for a muted, vintage spring look. Dried flowers hold their shape and color for a full season, and the straw base is light and easy to hang. Work in small bundles, wiring each one to the base in the same direction, and overlap bundles so no straw shows.

    Keep a dried wreath on a covered porch, out of direct rain and harsh sun, so colors fade slowly. Handle it gently when hanging, since dried stems can snap. Shake it lightly outdoors now and then to remove dust, and store it in a box with tissue paper when spring ends.

    11. Herb Garden Wreath

    Herb garden wreath with rosemary, thyme, and sage on a front door.

    Make a useful and fragrant wreath from rosemary, thyme, sage, and bay leaves wired to a grapevine base, with a few small white blooms for contrast. The herbs give scent and a kitchen garden feel, and the green palette suits a plain or painted door. Use fresh herbs for a short display, and replace stems as they dry, or use dried herbs for a longer lasting wreath.

    Tie herb bundles with twine before wiring them to the base, so stems stay grouped and easy to replace. Keep the wreath on a covered porch and out of heavy rain, since wet herbs will darken fast. Snip a sprig for cooking only from a wreath kept clean and away from road dust, and wash herbs before use.

    12. Butterfly and Blossom Wreath

    Butterfly and blossom wreath with pink and white blooms and small decorative butterflies on a front door.

    Add small decorative butterflies to a wreath of pink and white blossoms and green leaves for a playful spring door that suits a family home. Place three or four butterflies at different points around the ring, rather than clustering them together, so the eye moves around the wreath. Choose butterflies in colors that match the blooms, such as soft pink, white, or pale yellow.

    Use butterflies made for outdoor use, wired firmly to the base, so they do not blow off in wind. Keep the wreath out of heavy rain, since paper wings will spoil. This style pairs well with a simple porch, where the butterflies can be seen clearly, and it works best when the rest of the porch stays plain.

    13. Minimal White Blossom Wreath

    Minimal white blossom wreath with white blooms and green leaves on a dark front door.

    Use white blossoms, such as faux cherry blossom, jasmine, or small roses, with green leaves on a slim grapevine base for a minimal spring wreath. Keep the blooms spaced, with green showing between them, so the wreath feels light rather than crowded. This style suits a modern home, a dark door, or a porch with strong colors elsewhere.

    A slim wreath needs a firm hook and a level hang, since any tilt shows clearly. Choose blooms in one shade of white, with varied petal shapes, so the wreath does not look flat. Add a single white or natural ribbon loop, and avoid extra accents that would break the calm, simple look.

    14. Pink and White Dogwood Wreath

    Pink and white dogwood wreath with four petal blooms on a front door.

    Combine pink and white dogwood blooms with green leaves on a grapevine base for a wreath that echoes spring trees. Dogwood blooms have a clear four petal shape, so they read well from the street, and the pink and white mix keeps the wreath soft. Place white blooms as the base, then add pink blooms in small groups for balance.

    Faux dogwood suits a front door, since fresh dogwood branches are short lived and brittle. Wire branches firmly and trim any stem that sticks out at an odd angle. Keep the wreath out of strong wind, which can bend thin faux branches, and pair it with a plain doormat so the pink stays the focus.

    15. Coastal Spring Wreath

    Coastal spring wreath with white and pale blue blooms, sea grass, and small shells on a pale blue front door.

    Make a light coastal wreath from white and pale blue blooms, sea grass, and small shells on a driftwood style base for a beach house or a light, airy porch. Keep the palette pale, with white, sand, and soft blue, and use shells sparingly as accents rather than covering the wreath. This style suits a white or pale blue door near the coast.

    Use faux blooms and shells glued or wired firmly, since real shells can crack and fresh blooms fade fast in sea air. Keep the wreath sheltered from strong wind, and check wires after storms. Pair it with a plain rope or linen hanger, and keep other porch items simple so the coastal palette stays clear.

    16. Farmhouse Cotton and Burlap Wreath

    Farmhouse cotton and burlap wreath with cotton stems and a burlap bow on a wood front door.

    Wrap a grapevine base with a burlap bow and add cotton stems, small white blooms, and greenery for a farmhouse spring wreath. The cotton bolls give a soft, neutral texture, while the burlap adds a rustic finish without bright color. Place cotton stems in three groups around the ring, rather than spreading them evenly, for a more natural farmhouse look.

    Use faux cotton stems outdoors, since real cotton will stain and break down in rain. Keep the burlap bow out of heavy rain, or choose a weather resistant ribbon in a burlap look. This wreath suits a wood, black, or white door, and pairs well with a wooden porch sign or a plain woven doormat.

    17. Birdhouse and Nest Wreath

    Birdhouse and nest wreath with a small birdhouse and a tiny nest on a garden front door.

    Add a small decorative birdhouse and a tiny nest with faux eggs to a wreath of greenery and small blooms for a garden themed spring door. Place the birdhouse slightly off center, at the bottom or side of the ring, so it reads as a feature rather than blocking the center. Keep the rest of the wreath simple, with leaves and small blooms around the birdhouse.

    Use a lightweight birdhouse made for outdoor decor, wired firmly to the base, so it does not swing when the door opens. Keep faux eggs fixed in the nest, and avoid using a real nest or real eggs. This style suits a garden style home, and it pairs well with potted plants by the door.

    18. Asymmetric Crescent Wreath

    Asymmetric crescent wreath with pink blooms on the lower half of a grapevine base on a front door.

    Build a modern crescent wreath by covering only the lower half or one side of a grapevine base with blooms and leaves, leaving the rest bare. The open shape feels fresh and modern, and it suits a home with clean lines and a plain door. Place the fullest blooms at the bottom of the crescent, thinning out toward the ends, so the shape tapers naturally.

    A crescent wreath needs careful hanging, since the weight sits on one side and can tilt the ring. Use a firm hook and check the hang from the street. Choose two or three flower types in one color family, with plenty of green, so the crescent looks planned rather than unfinished.

    19. Hoop Wreath with a Single Floral Cluster

    Hoop wreath with a single cluster of spring blooms at the bottom of a thin metal hoop on a front door.

    Use a thin metal or wood hoop with one cluster of spring blooms and leaves at the bottom, leaving most of the hoop bare, for a minimal modern wreath. The open hoop suits a small door, a glass door, or a narrow porch, where a full wreath would feel heavy. Wire the cluster firmly at the bottom of the hoop, and let a few stems trail below the ring.

    Keep the cluster to one color family, such as pink and cream, with green leaves, so the hoop stays calm. Hang the hoop from a clear line or a slim ribbon so the open shape shows. This style works best when the door color is plain, since the hoop itself is part of the design.

    20. Monogram Initial Wreath

    Monogram initial wreath with a wooden letter in the center of a green wreath on a front door.

    Add a wooden or metal initial to the center of a green or floral wreath for a personal front door welcome. Choose an initial in a size that fits inside the ring without touching the blooms, and hang it from thin wire or ribbon so it sits flat. The wreath around it can stay simple, with greenery and a few small blooms, so the letter stays easy to read.

    Paint or stain the initial to match the door hardware or the porch trim, and seal it for outdoor use. Wire it at two points, top and bottom, so it does not spin in wind. This style suits a family home, and it pairs well with a matching doormat or porch sign in the same finish.

    21. Easter Egg Pastel Wreath

    Easter egg pastel wreath with pastel faux eggs, small blooms, and greenery on a front door.

    Make a spring wreath for the Easter weeks from pastel faux eggs, small blooms, and greenery on a grapevine base. Space the eggs evenly, in soft pink, blue, yellow, and lilac, and fill between them with leaves and tiny white blooms. Keep the eggs small, so the wreath does not look heavy, and use a simple ribbon in white or pastel.

    Use faux eggs only, since real eggs will spoil outdoors. Glue or wire each egg firmly, and keep the wreath on a covered porch out of heavy rain. After Easter, lift the eggs off and replace them with plain blooms, so the same base can serve for the rest of spring.

    22. Succulent and Air Plant Wreath

    Succulent and air plant wreath with green succulents on a moss base on a front door.

    Build a wreath from faux succulents and air plants on a moss base for a modern spring door that needs almost no upkeep. Mix succulent shapes and greens, with a few small blooms for spring color, and space plants so each one shows. This style suits a warm, sunny door where fresh flowers would fade fast.

    Use faux succulents outdoors, since live succulents need light, air, and careful watering that a door wreath cannot give. Wire each plant firmly to the moss base, and keep the wreath out of heavy rain so the moss does not sag. Dust the plants now and then, and replace any faded plant with a new faux stem.

    23. Spring Wreath on a Garden Gate

    Spring wreath on a garden gate with pink blooms and greenery beside a garden path.

    Hang a spring wreath on a garden gate, rather than the front door, to welcome guests along a garden path. Choose a wreath that suits the gate material, such as a grapevine wreath on a wood gate or a hoop wreath on a metal gate, and use a hook that fits over the gate without drilling. Keep the wreath light, so the gate still swings freely and latches cleanly.

    Check the gate swing and latch before you hang the wreath, and trim any stem that catches on the gate post. Use weather resistant blooms and a firm wire hanger, since a gate gets more wind and rain than a covered porch. Pair the gate wreath with potted spring flowers by the path, and keep the front door plain or use a smaller matching wreath there.

    Conclusion

    A good spring wreath starts with a base and flowers you like, sized to your door and suited to your porch. Fresh blooms give scent and soft color for a short time, while dried and faux options last through the season with little care. Choose one style from this list, hang it at eye level, and refresh the ribbon or accents as spring moves on. Your front door will give a clear, welcoming first look all season.

    FAQs

    What size spring wreath should I hang on a front door?

    Choose a wreath about one half to two thirds the width of your door, so it looks balanced from the street and does not crowd the handle. For a standard front door, a wreath around 22 to 24 inches across usually works well, while a double door can take a larger wreath or a matching pair.

    How long will a fresh spring wreath last outdoors?

    A fresh spring wreath usually lasts one to two weeks on a covered porch, less in full sun, wind, or rain. Mist greenery lightly, keep the wreath out of harsh afternoon sun, and replace faded stems as needed. For a display that must last all season, choose dried or faux blooms instead.

    Are faux spring wreaths a good choice for a sunny front door?

    Yes, good quality faux wreaths suit a sunny door, since they hold color and shape in sun and rain far longer than fresh flowers. Choose blooms with varied shades and natural leaf shapes, and keep the wreath out of heavy rain so petals and ribbon do not sag.

    How do I hang a wreath without damaging my door?

    Use an over door hook, a suction hook on glass, or a removable adhesive hook rated for the wreath weight, and hang the wreath at eye level. Avoid nails or screws in a finished door, and check that the wreath clears the handle, hinges, and door frame when the door opens and closes.

    Can I reuse a spring wreath base next year?

    Yes, a grapevine, foam, or hoop base can be reused for years if you store it dry and out of direct sun. Remove faded blooms and ribbon at the end of the season, clean the base lightly, and store it in a box with tissue paper so stems do not bend or break.

    What spring wreath style suits a modern home best?

    A hoop wreath with a single floral cluster, a minimal white blossom wreath, or an asymmetric crescent wreath suits a modern home, since each leaves open space and uses a limited palette. Keep blooms to one color family, use a slim base, and pair the wreath with a plain doormat and simple porch items.