Category: DIY & Styling

Simple styling projects and affordable ways to refresh your home.

  • 23 Craft Room Organization Ideas for Supplies of Every Size

    23 Craft Room Organization Ideas for Supplies of Every Size

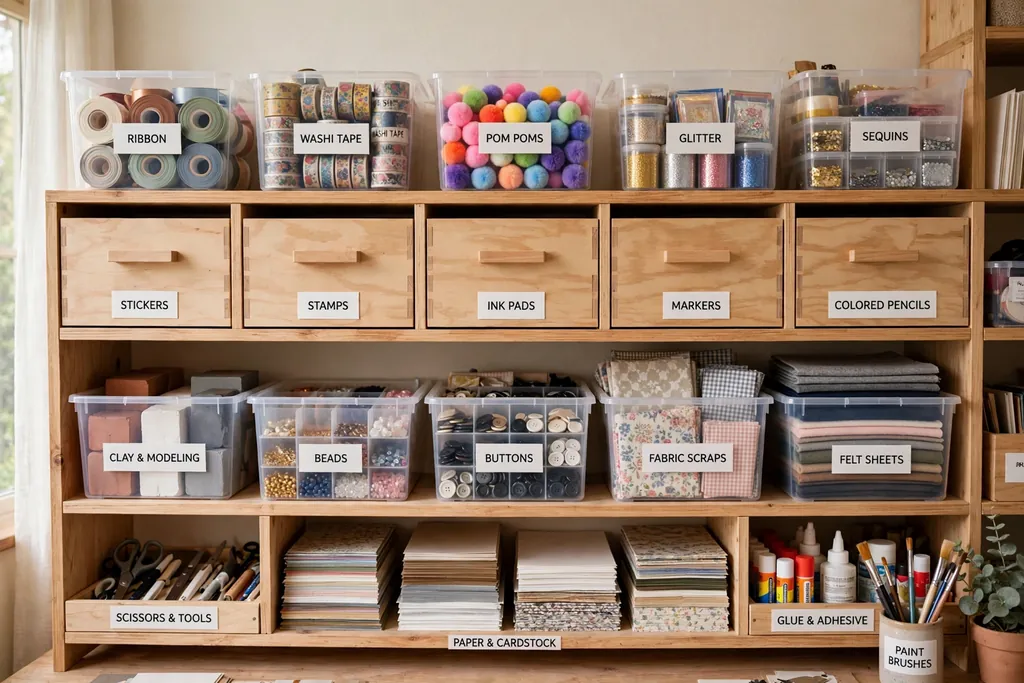
    Organize a craft room by sorting supplies by type, giving each group one home, and keeping daily tools within arm’s reach of your work surface. Use wall storage for tools, labeled bins for bulky items, divided boxes for beads and buttons, and upright holders for paper and fabric, so cleanup takes minutes.

    Start by pulling every supply out of its current spot and sorting it into groups: paper, fabric, yarn, paint, beads, tools, and finished pieces. Measure the largest item in each group before you buy a bin or shelf, since one roll of fabric or one long ruler can decide the size of a whole storage zone. Keep daily tools near the chair, seasonal or bulky stock higher or lower, and a clear work surface in the middle. The 23 ideas below cover tiny notions and large rolls, small rooms and shared rooms, so you can pick the ones that fit your supplies.

    Key Takeaways

    • Sort by supply type first, then choose a container that fits the largest item in each group.
    • Give every group one home, and label it, so supplies return to the same spot after each project.
    • Use walls and doors for tools and flat items, and save shelves and drawers for bulky stock.
    • Store small parts in divided, lidded boxes, and store paper and fabric upright so nothing gets buried.
    • Keep daily tools within arm’s reach, and move seasonal or rarely used supplies to higher or lower zones.
    • End each session with a short reset: tools back on the wall, scraps in one bin, and the work surface clear.

    1. Pegboard Wall for Tools and Small Supplies
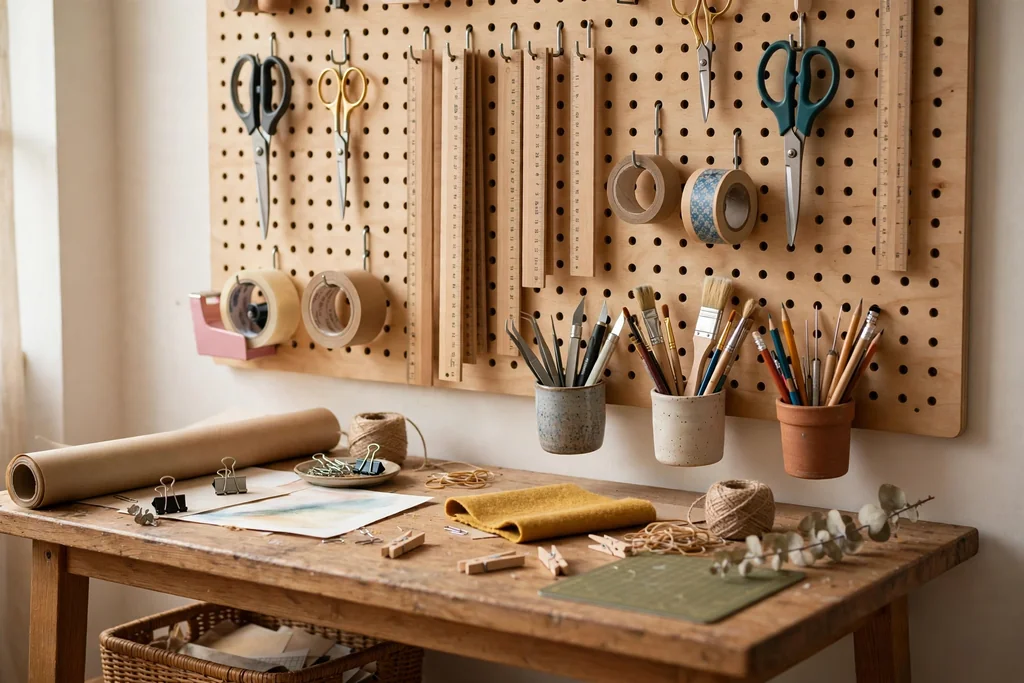
    Pegboard wall above a craft table with hooks holding scissors, rulers, tape, and small cups of tools.

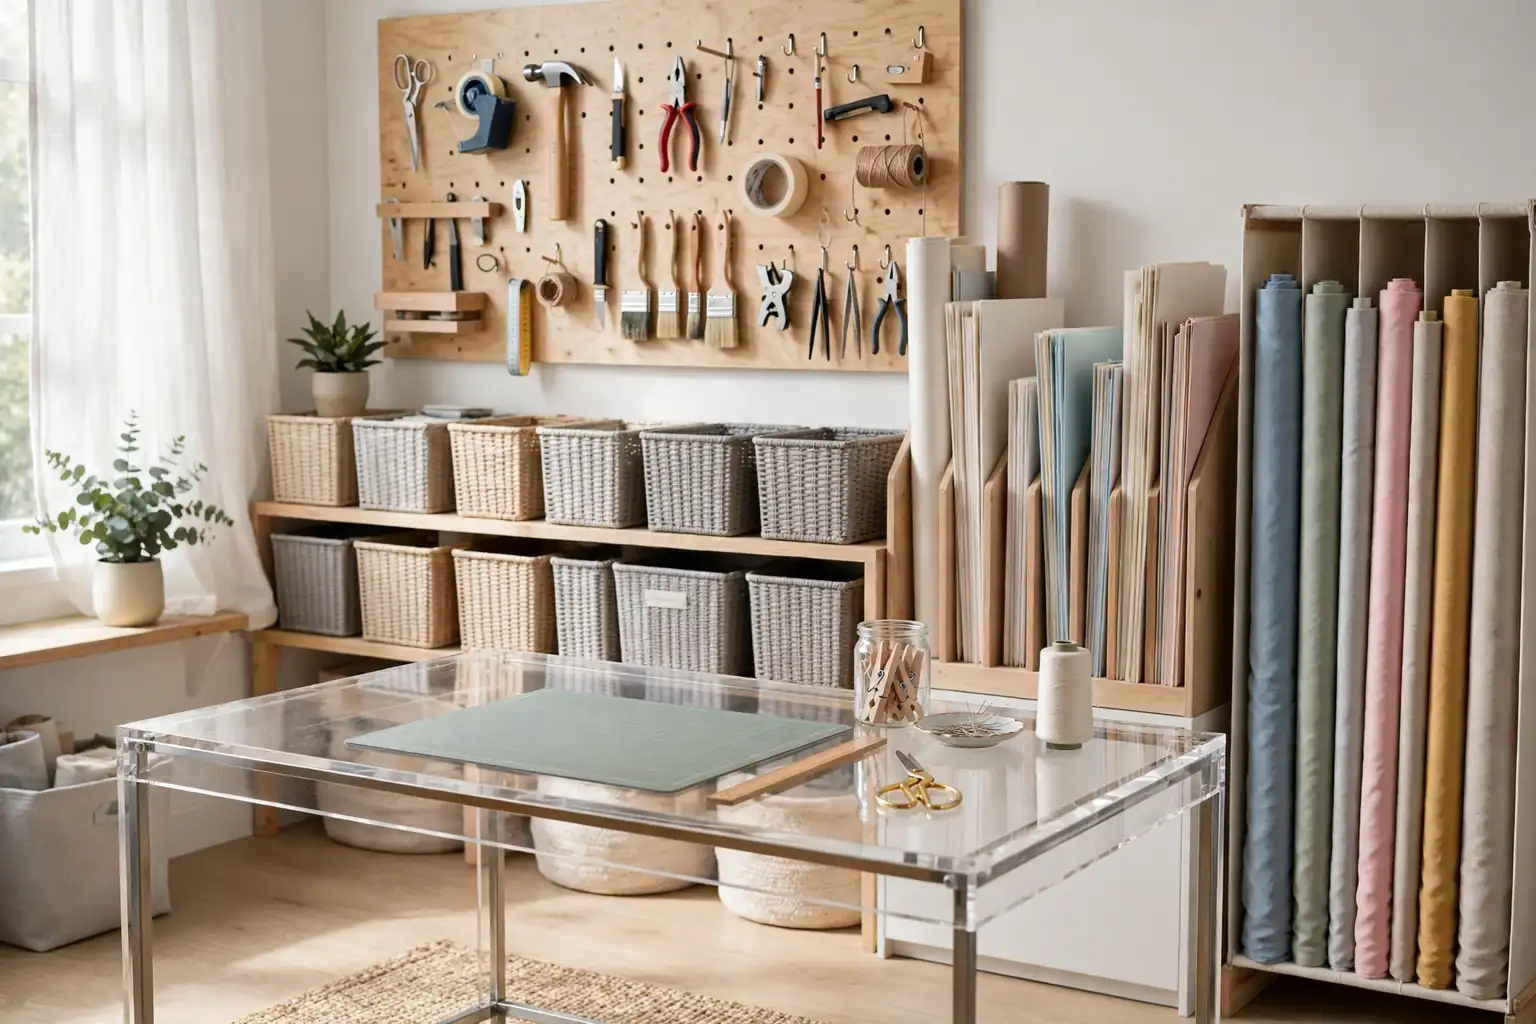
    Hang a pegboard panel above the work table and fit it with hooks, small cups, and a shelf rail for scissors, rulers, pliers, tape, and glue. Tools hung on the wall stay visible, so you stop buying a second pair of scissors because the first pair is lost in a drawer. Group tools by task, with cutting tools in one area and measuring tools in another, and leave a little empty space so new tools have a hook waiting.

    Outline each tool spot with a simple marker line on the board, so a missing tool shows up at a glance. Keep sharp tools on higher hooks, out of reach of small hands, and keep heavy items near the board frame, where the fixings hold best. Check the fixings once in a while, since a loaded board can loosen over time.

    2. Clear Lidded Jars on Open Shelves
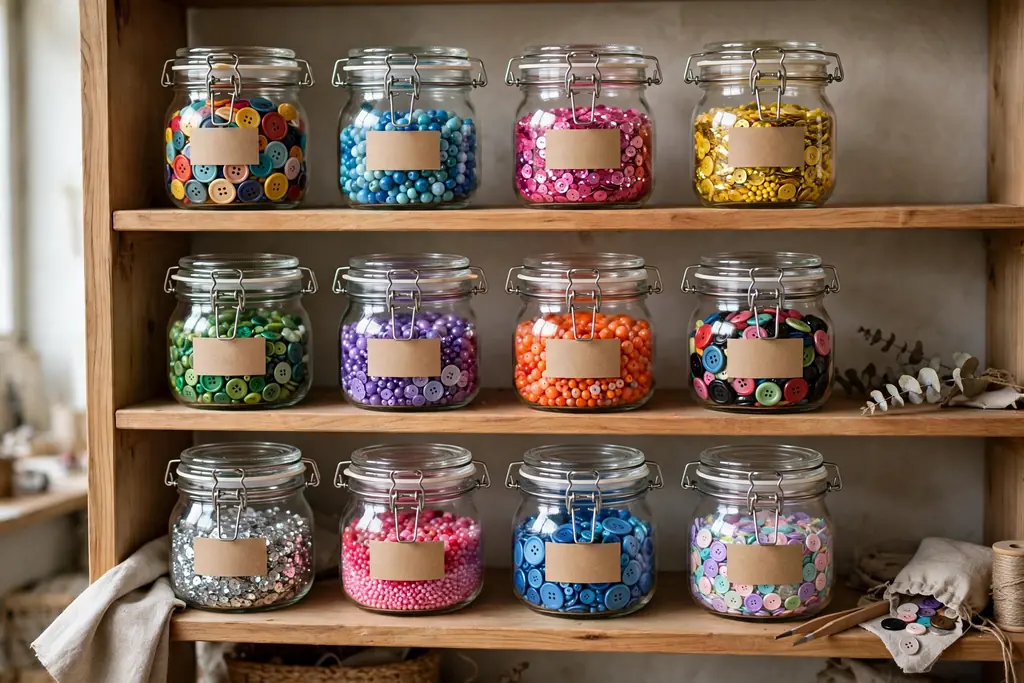
    Open shelves with clear lidded jars of colorful buttons, beads, and sequins, each jar labeled on the front.

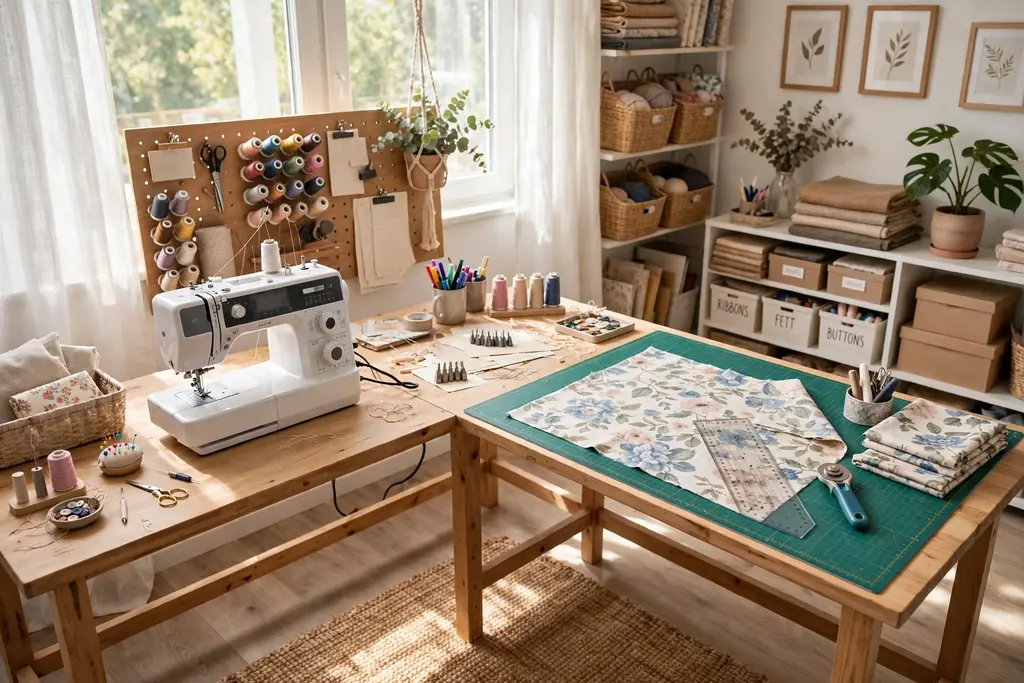
    Set clear jars with lids on open shelves for buttons, beads, sequins, pom poms, and small findings, one material per jar. Clear jars show the color and amount inside, so you can judge at a glance whether you have enough for a project without opening every lid. Use jars of one size for a tidy shelf, and keep the lids tight so tiny pieces stay put.

    Label each jar on the front with the material and color group, and keep a small scoop or spoon with jars that hold loose beads. Store jars at eye level for the colors you use most, and move rare colors to a higher shelf. Wash and dry jars before refilling, since dust and damp can dull beads and mark fabric findings.

    3. Rolling Cart for the Current Project
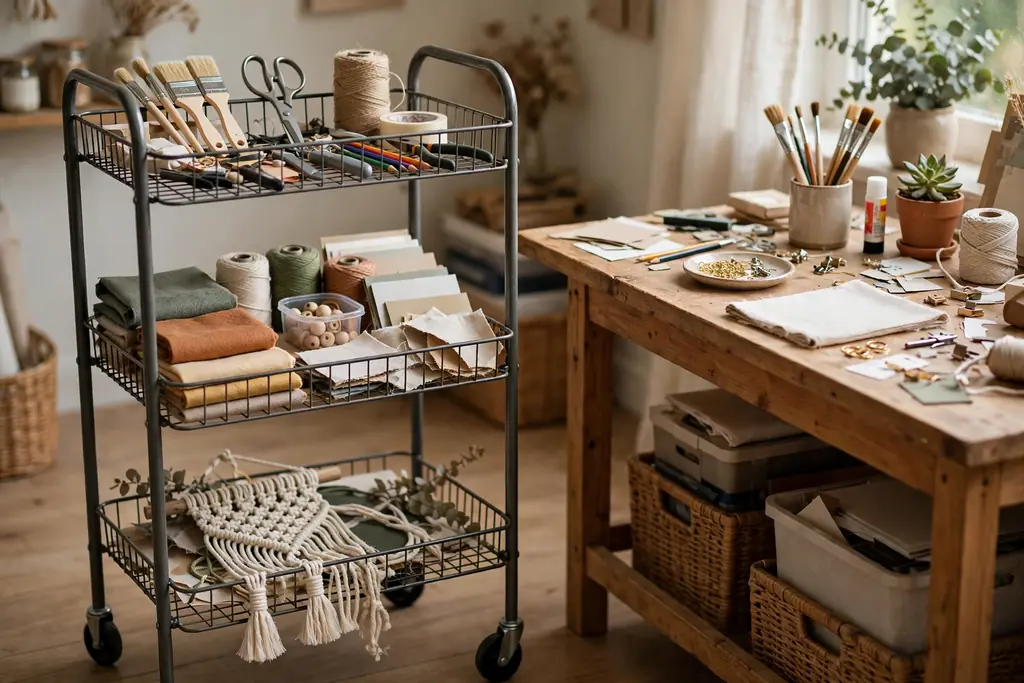
    Three tier rolling cart beside a craft table holding tools on top, materials in the middle, and a project at the bottom.

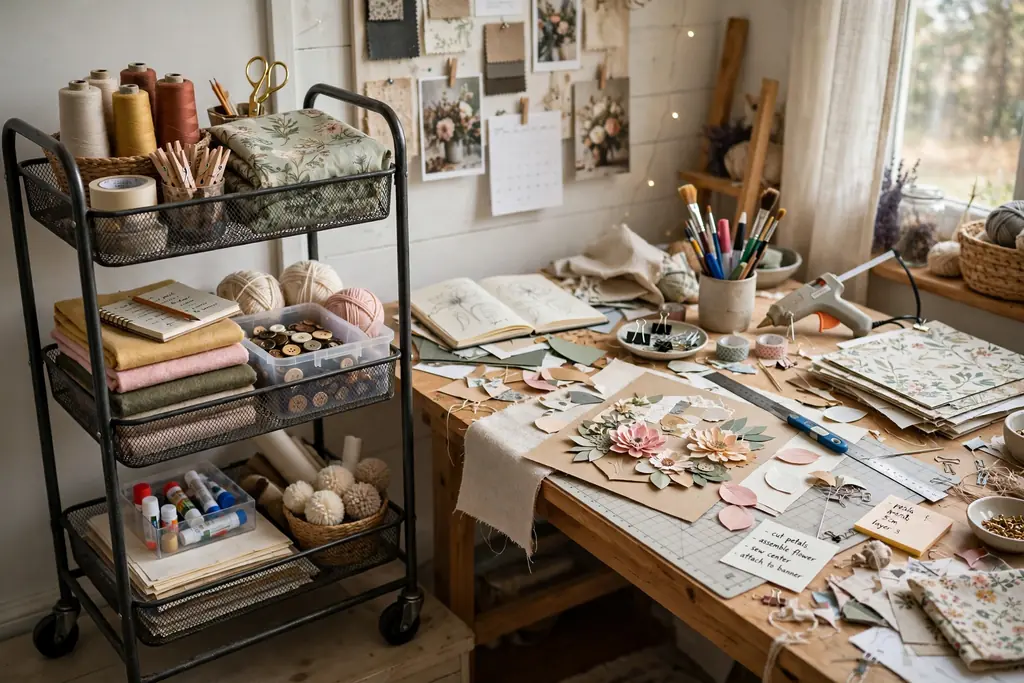
    Keep a three tier rolling cart beside the work table for the project in progress, with tools on top, materials in the middle, and works in progress at the bottom. A cart moves out of the way when guests arrive and rolls back when work resumes, so a half finished project never has to live on the dining table. Choose a cart with a lip on each tier, so small items do not slide off when it moves.

    Load the cart only with the current project, not with general stock, so it stays light and useful. When a project ends, empty the cart fully, wipe the tiers, and reload it for the next one. If the cart must cross a rug, pick larger wheels, since small wheels catch on thick pile.

    4. Labeled Bins Sorted by Supply Type
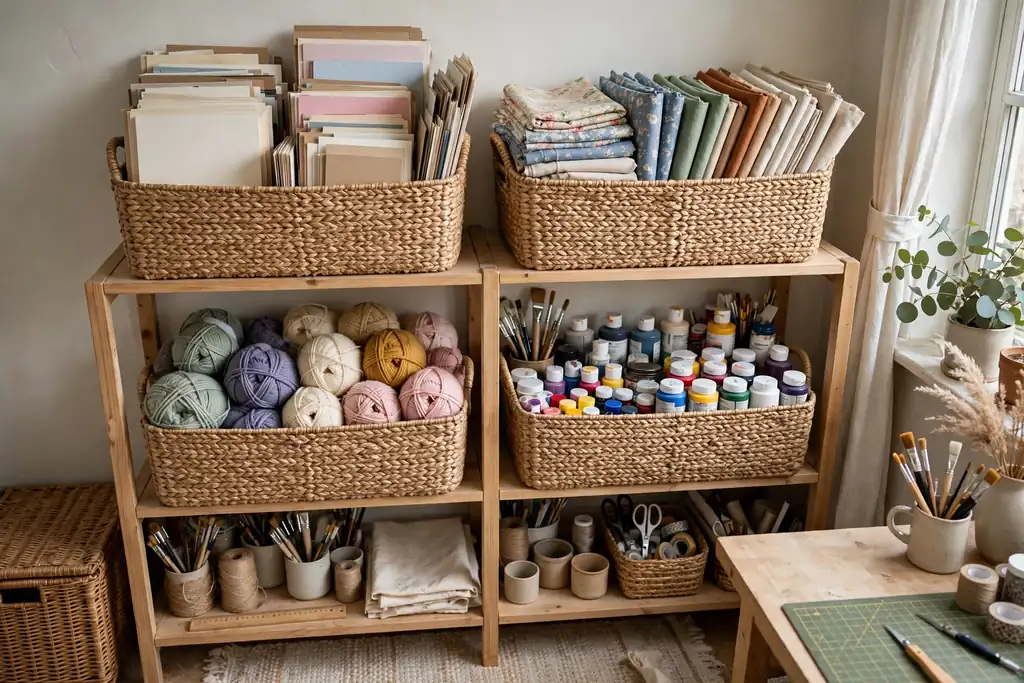
    Shelves with large labeled bins sorted by supply type for paper, fabric, yarn, and paint.

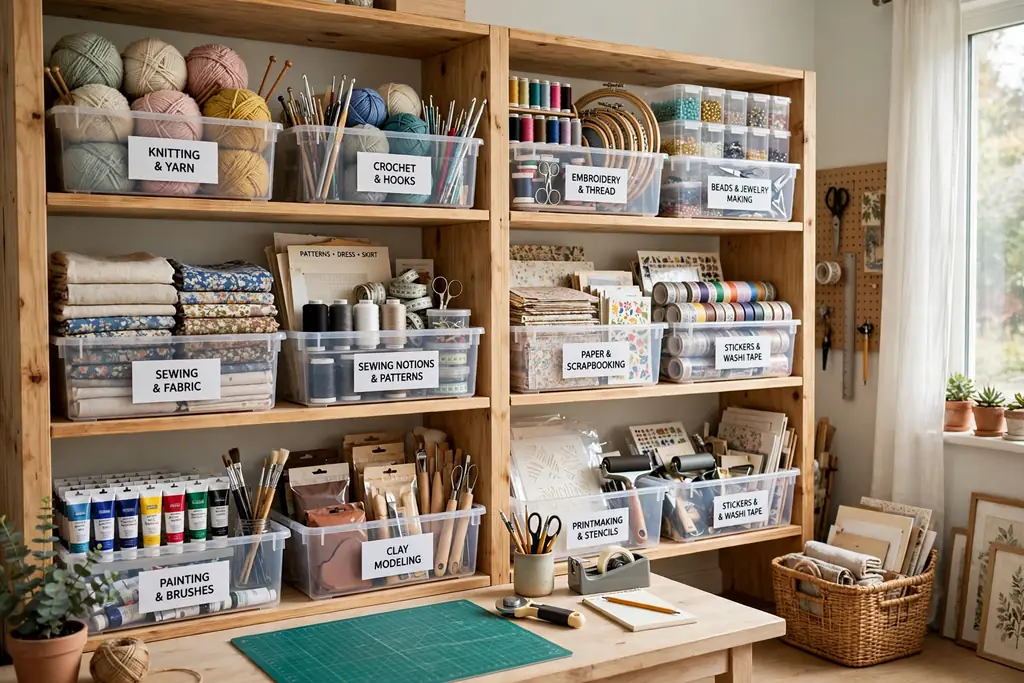
    Use open or lidded bins, one per supply type, for paper, fabric, yarn, paint, and general stock, with a large plain label on the front of each bin. Sorting by type stops one mixed bin from hiding the item you need, and labels let anyone in the house put a supply back in the right place. Keep bins to a weight you can lift with one hand, so a full bin of paper does not strain a shelf.

    Place the most used bins at easy reach height, and seasonal stock higher or lower. Tape a short contents list inside each lid for bins that hold several smaller bags. For a labeled bin method that also works for seasonal pieces, see Christmas decoration storage ideas.

    5. Shallow Drawer Dividers for Notions

    Shallow drawer with dividers holding needles, pins, thread spools, and small sewing notions in separate trays.

    Fit shallow drawers with dividers or small trays for needles, pins, snaps, hooks, thread, and other notions that vanish in a deep drawer. One compartment per notion type stops pins from mixing with beads and thread from tangling around scissors. Use trays you can lift out, so you can carry one tray to the table and return it whole.

    Label each tray on its front edge, and keep a small magnetic dish in one compartment for loose pins during a project. Empty and wipe trays when they start to collect thread ends and paper bits, since small debris hides the notion you need. Keep sharp notions in a lidded tray, and keep the drawer itself shallow so nothing sinks out of sight.

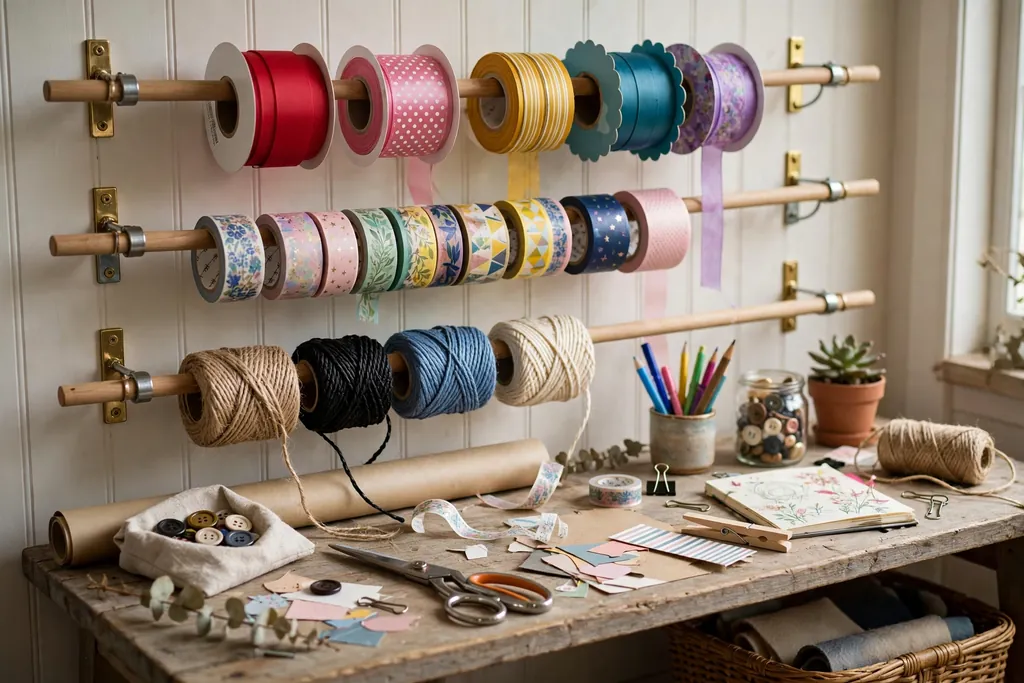
    6. Dowel Rack for Ribbon, Thread, and Tape

    Wall rack with horizontal dowels holding colorful ribbon and thread spools above a craft table.

    Mount a wall rack with horizontal dowels for ribbon spools, thread spools, and rolls of tape, so each spool turns freely and pulls cleanly. A dowel rack shows every color at once, which helps when matching ribbon to paper or thread to fabric, and it stops spools from unrolling into a tangled drawer. Space dowels far enough apart that a full spool clears the one below it.

    Group spools by color family, and keep one empty dowel section for new spools. Cut ribbon from the spool on the rack rather than removing the spool, so the end stays threaded and tidy. For tape rolls, use a shorter dowel near the work surface, since tape is reached for more often than ribbon.

    7. Upright Paper Storage in Magazine Holders
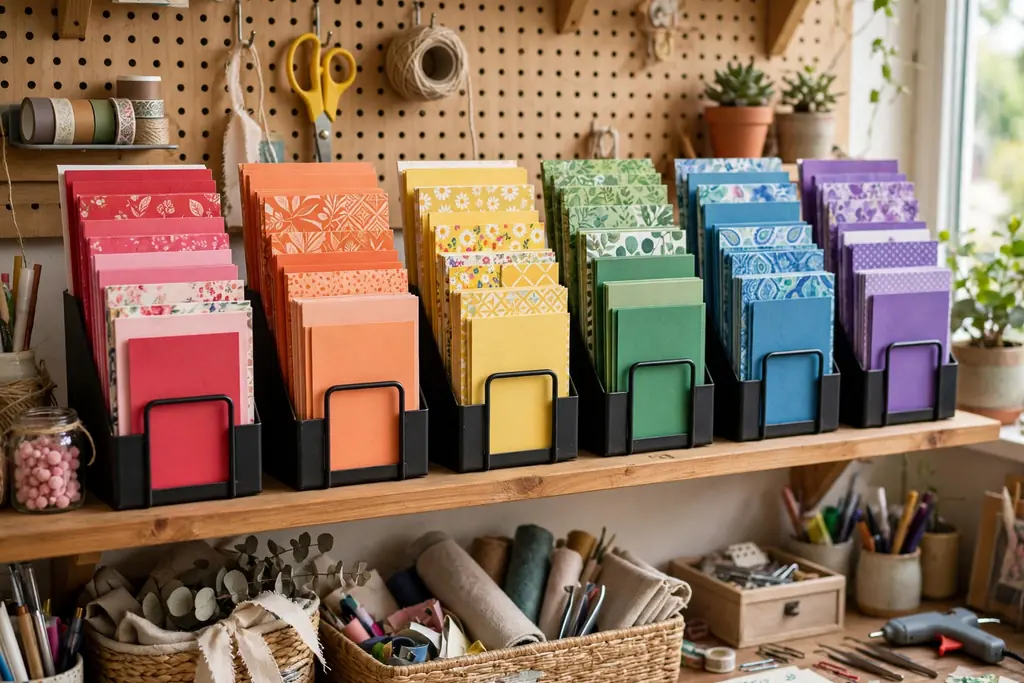
    Magazine holders on a shelf holding cardstock and patterned paper upright, sorted by color.

    Stand cardstock, patterned paper, and scrapbook sheets upright in sturdy magazine holders, sorted by color or theme, rather than stacking them flat. Upright paper is easy to flip through, and a single sheet slides out without disturbing the rest of the pile. Label each holder on its spine, and keep the most used colors at the front of the shelf.

    Trim off damaged corners before filing paper, since a bent corner catches on the sheet next to it. Keep paper away from direct sun and damp air, which can fade color and curl edges. Store very large sheets flat in a separate portfolio, since oversized paper folds and creases in a standard holder.

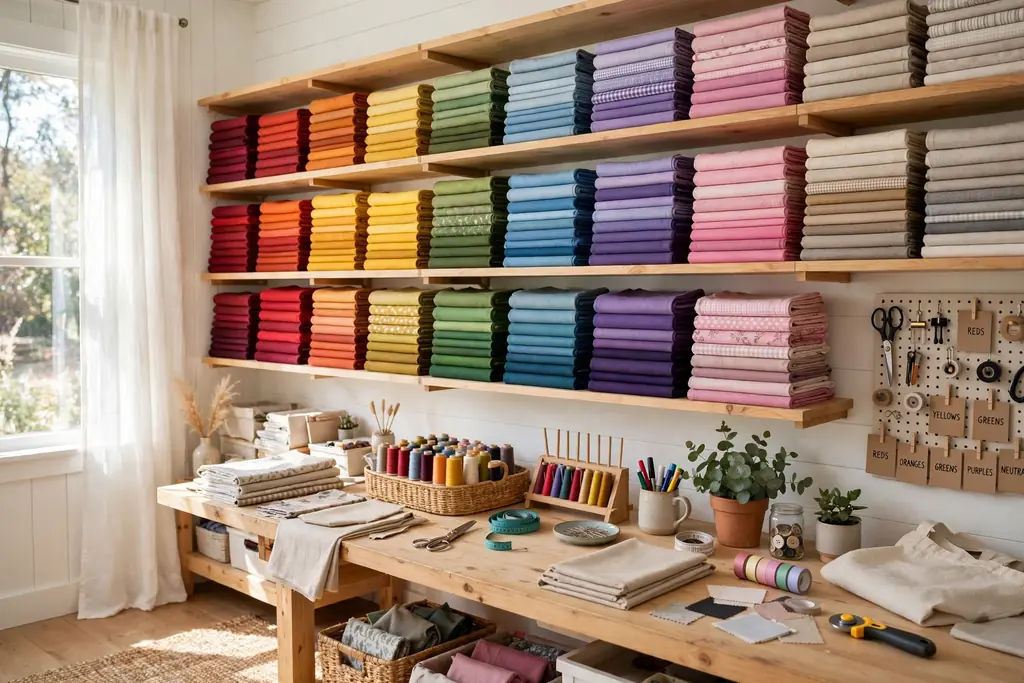
    8. Fabric Rolls Stored Standing in Bins

    Tall bins holding fabric rolls standing upright, sorted by color, beside a craft table.

    Stand fabric rolls and folded fabric bolts upright in tall bins or a small bookcase, sorted by color or project, so each roll pulls out without unrolling the rest. Upright fabric shows the pattern and color at the top edge, which makes choosing fabric faster than digging through a folded stack. Use bins deep enough that rolls stand steady, and keep heavy rolls at the bottom of the group.

    Fold small fabric scraps into one labeled bin of their own, rather than mixing them with full rolls, so scraps stay usable for small projects. Air fabric now and then, and keep bins away from damp walls. When a roll runs low, move the short remainder to the scrap bin, so the roll section holds only usable lengths.

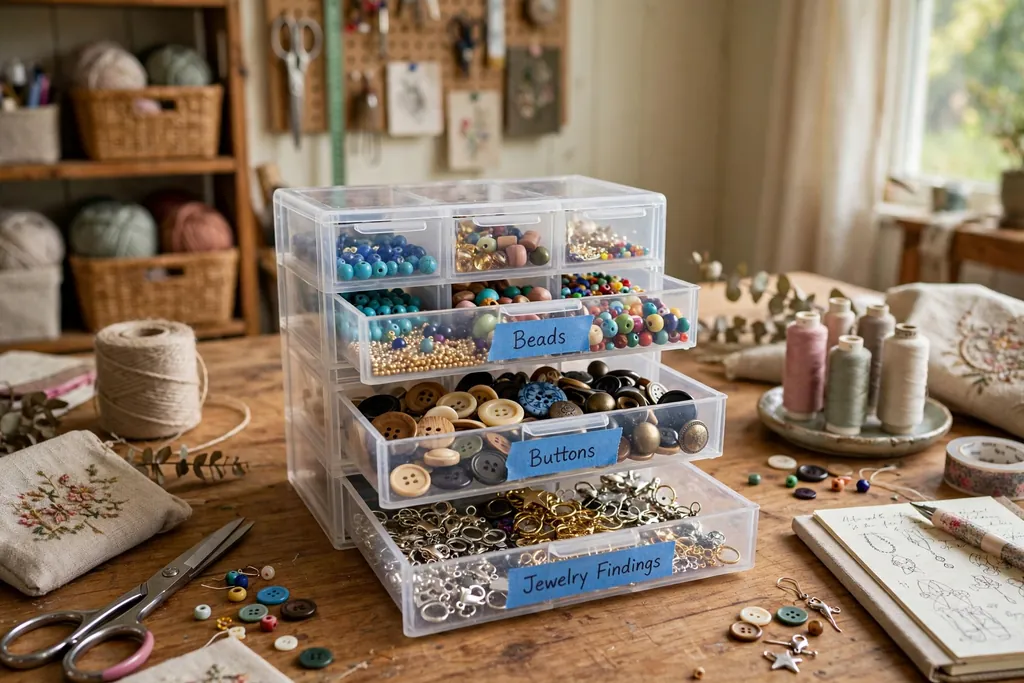
    9. Divided Boxes for Beads and Buttons
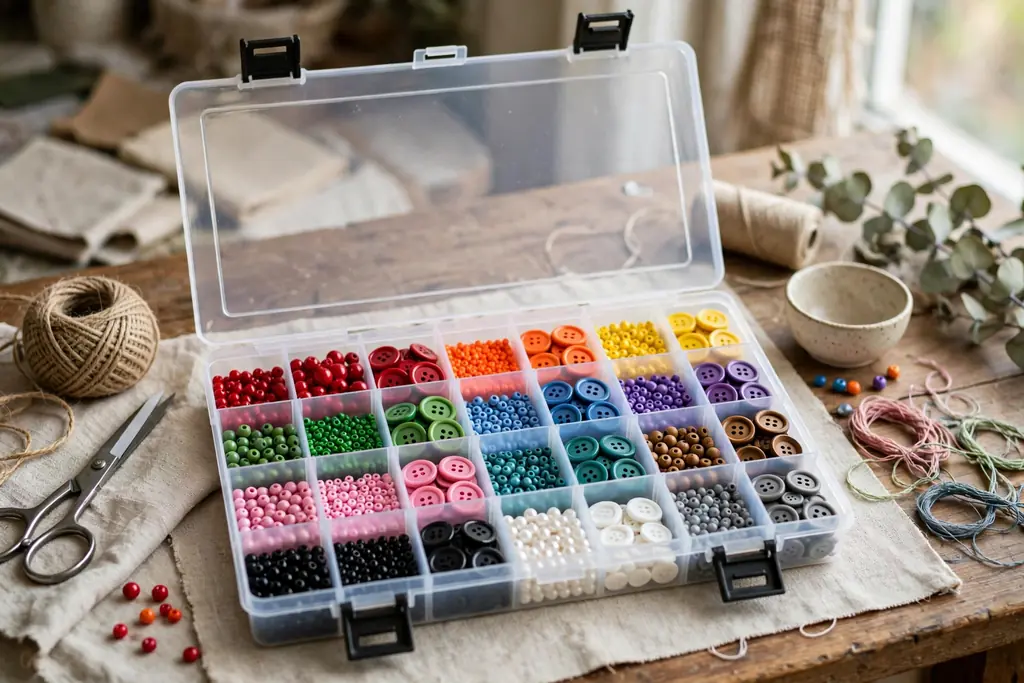
    Divided craft box with snap lid holding beads and buttons sorted by color in small compartments.

    Use divided craft boxes with snap lids for beads, buttons, eyelets, and other tiny findings, one box per craft type or color family. Small compartments stop colors from mixing, and a snap lid keeps a dropped box from scattering hundreds of pieces across the floor. Choose boxes with fixed dividers for very small beads, since movable dividers can shift and let pieces slip through.

    Label the outside of each box with its contents, and keep a small funnel with the bead boxes for pouring beads back after a project. Work over a tray when pouring beads, so a spill stays on the tray. Check lids and latches now and then, since a worn latch is the most common cause of a bead spill.

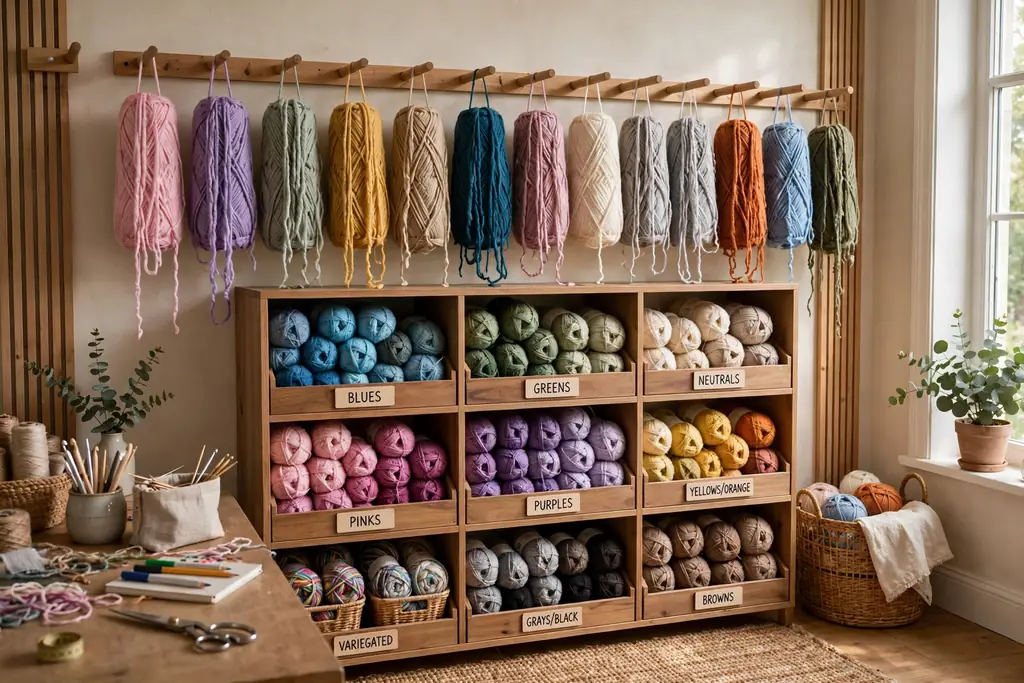
    10. Yarn Cubbies with One Color per Cubby

    Cubby shelf with yarn balls in separate cubbies, one color family per cubby, with yarn feeding from the front.

    Give yarn its own cubby shelf, with one color family or one project per cubby, and a small hole or slot at the front so yarn feeds out while the ball stays in place. Cubbies keep yarn balls from rolling together into a tangled pile, and they show the full color range at a glance. Use cubbies sized to your largest ball, and keep a spare cubby empty for yarn in use.

    Wind loose yarn into balls before shelving, since skeins unravel and catch on nearby yarn. Keep yarn away from direct sun, which fades color over time, and away from pets that pull loose ends. Label a cubby by project when yarn is bought for a specific piece, so it is not used for another project by mistake.

    11. Paint Shelf with a Front Lip

    Shallow shelf with a front lip holding paint bottles grouped by type with labels facing out.

    Set paints on a shallow shelf with a front lip or rail, grouped by type, with acrylics in one row, watercolors in another, and fabric paints apart from both. A front lip stops bottles from sliding off when a shelf is bumped, and grouping by type stops a watercolor set from being stained by an open acrylic bottle. Keep bottles upright with caps tight, and labels facing out.

    Wipe bottle necks before closing, since dried paint glues caps shut. Store brushes separately, bristles up in a jar, rather than lying across paint bottles. Keep paint away from heat and freezing air, and check old bottles once a year, since separated or dried paint is better discarded than kept.

    12. Over Door Pocket Organizer for Flat Tools
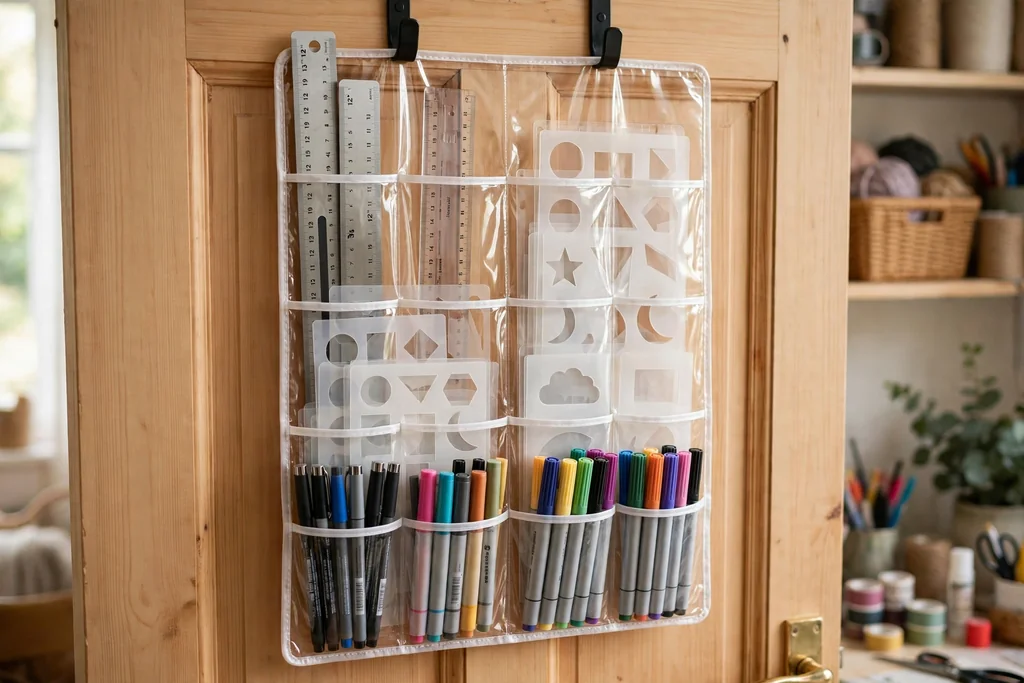
    Clear pocket organizer hanging on a craft room door holding rulers, stencils, pens, and markers.

    Hang a clear pocket organizer over the craft room door for flat and slim tools: rulers, stencils, cutting mats, pens, markers, and glue sticks. Door pockets use space that shelves cannot, and clear pockets show each tool without opening a drawer. Put the most used tools in the middle rows, where they are easiest to reach, and lighter items in the top rows.

    Keep the total weight modest, since a heavy organizer can strain door hinges. Use the bottom pockets for soft items, such as felt sheets or small cutting mats, rather than heavy tools. Check the door hooks now and then, and move the organizer to a wall hook if the door starts to sag or catch.

    13. Magnetic Strip for Metal Tools
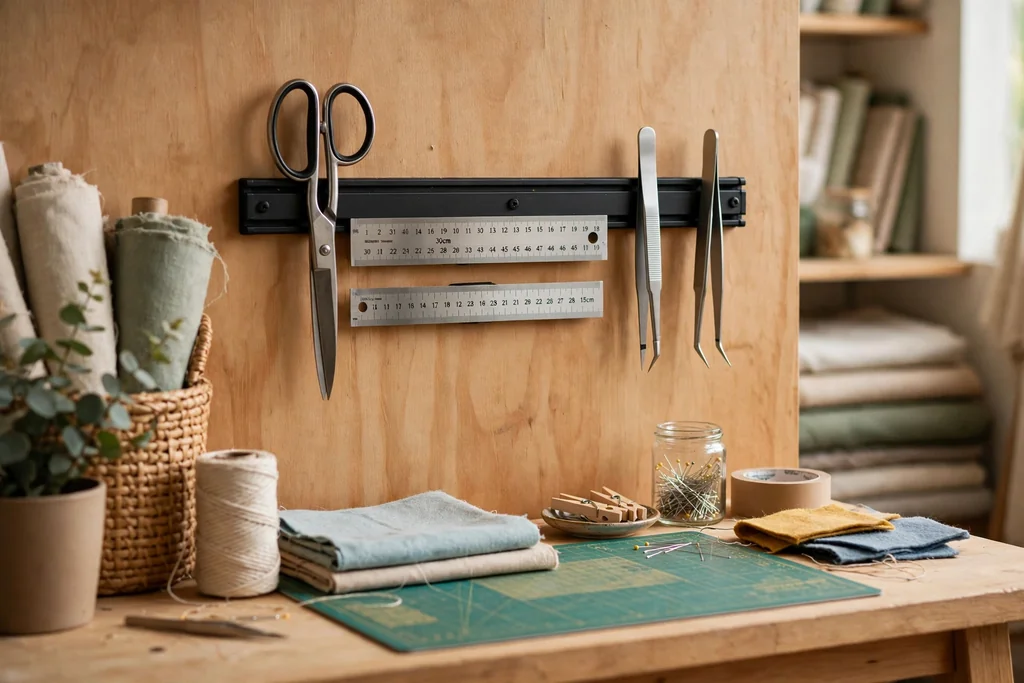
    Magnetic strip on a craft room wall holding metal scissors, rulers, and tweezers above a work table.

    Fix a magnetic strip to the wall above the work table for metal scissors, rotary cutters, rulers, tweezers, and needle cases. A magnetic strip holds metal tools in plain sight and frees a drawer for nonmetal items, and it keeps sharp edges away from fingers searching a drawer. Mount the strip at a height where tools lift off easily, and keep it clear of paper patterns that could catch.

    Keep the strip away from phones, cards, and electronic devices that magnets can affect. Wipe the strip now and then, since metal dust and pins collect along its length. Store rotary blades with their guards on, even on a magnetic strip, and keep the strip out of reach of small children.

    14. Fold Down Wall Desk for a Small Room
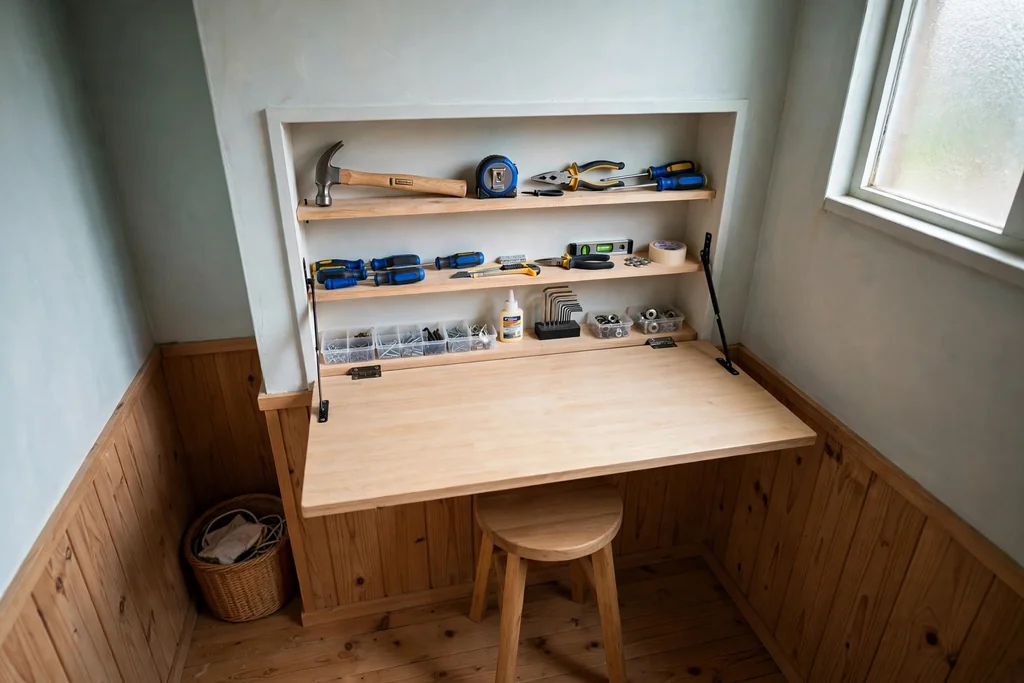
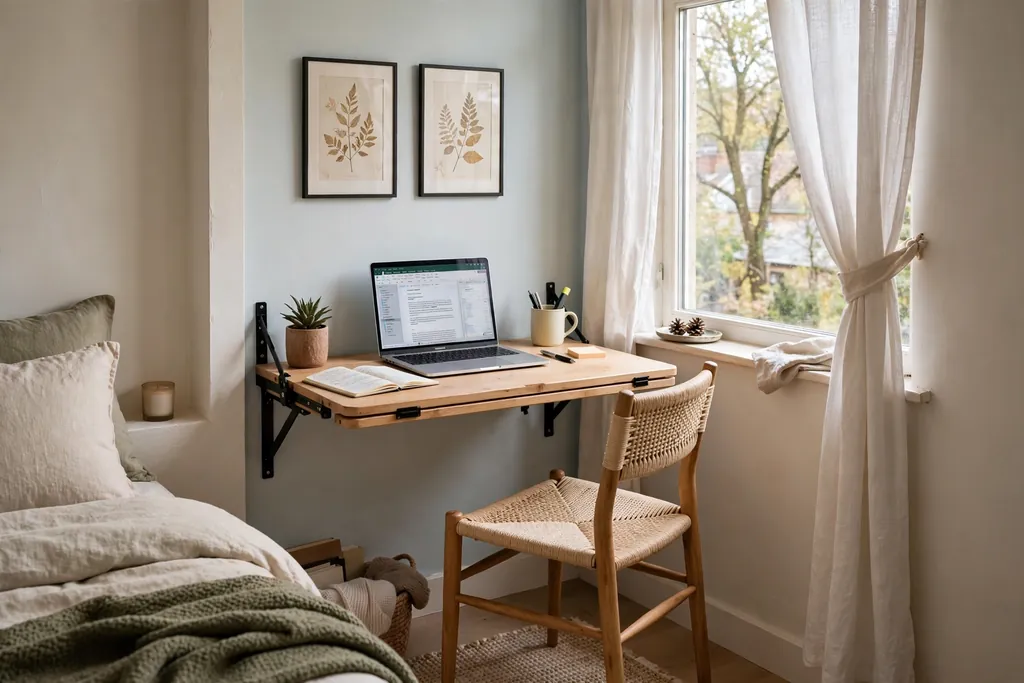
    Fold down wall desk open in a small room with shallow shelves of tools inside and a stool tucked under.

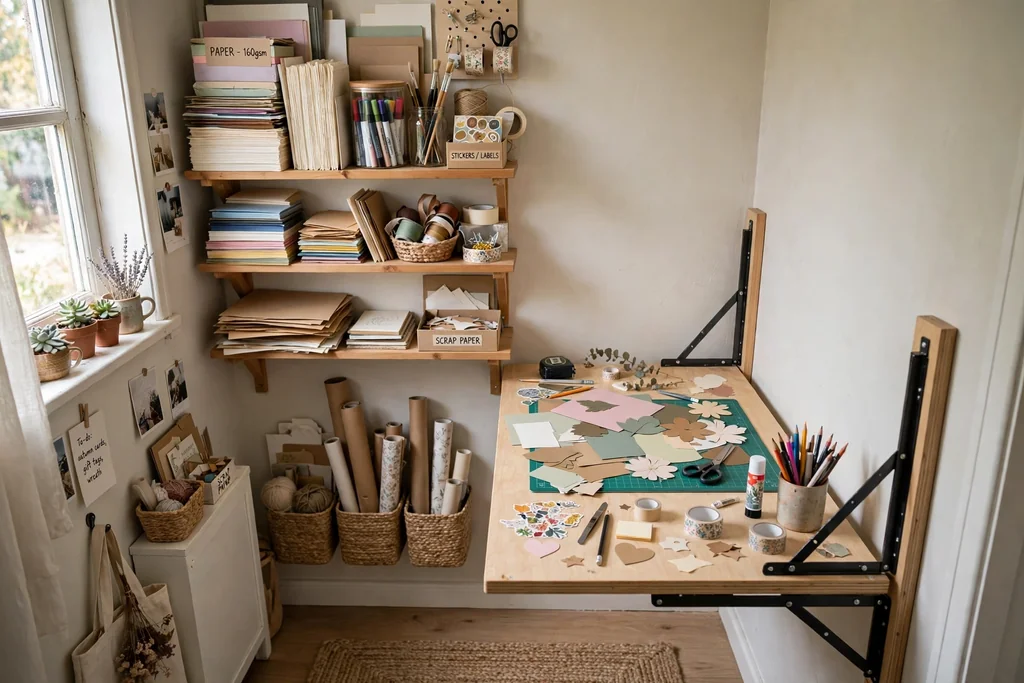
    Fit a fold down wall desk in a small room or a spare corner, with shallow shelves or pockets inside for the tools used most. A fold down desk gives a full work surface when open and returns the room to normal use when closed, which suits a shared room or a small bedroom. Choose a desk with a latch that holds it flat against the wall when closed.

    Store only light, flat items inside the desk, so the hinges carry no extra weight when it opens. Keep a small stool that tucks under the desk, and a single task lamp on the shelf above. Clear the desk surface before folding it up, since items left on it can fall when the desk closes.

    15. Corner Workstation with Overhead Shelves
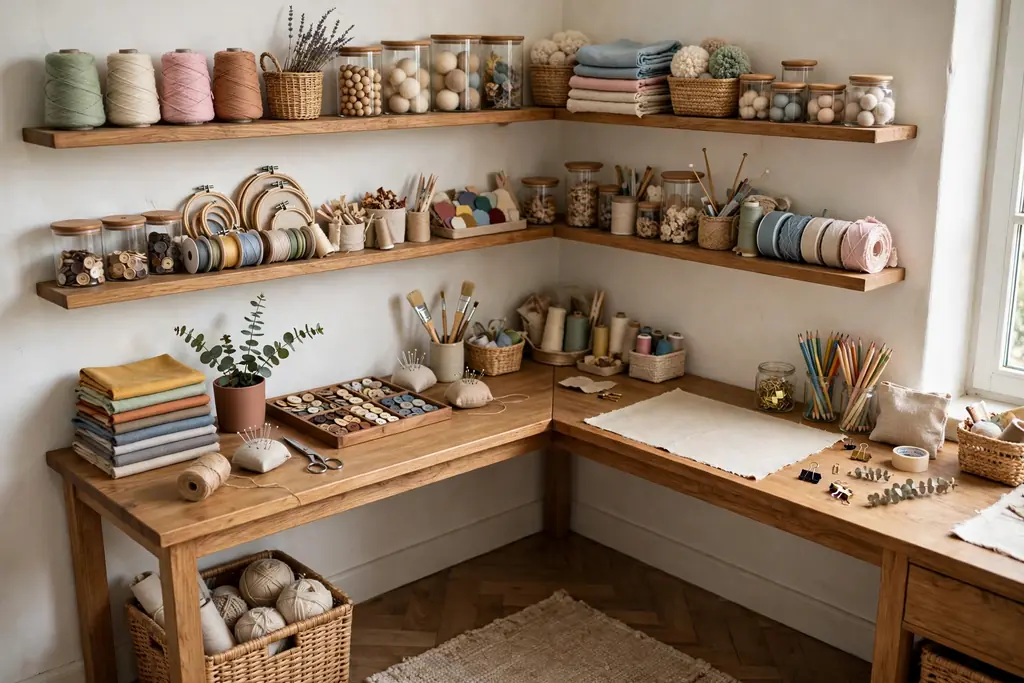
    Corner workstation with an L shaped desk and two rows of overhead shelves holding craft supplies.

    Build a corner workstation with an L shaped desk and two rows of overhead shelves, so the corner holds tools, reference books, and current projects without crowding the middle of the room. Corners often go unused, yet they give two walls of storage and a long work surface in a small footprint. Put daily tools on the lower shelf, and bulky stock on the upper shelf.

    Keep the desk surface clear except for the current project, and use the shelves for everything else. Add a small task light under the lower shelf, so the work area stays bright without a lamp taking desk space. Keep cords tidy with clips along the desk edge, so they do not snag fabric or paper.

    16. Rolling Bins Under the Work Table
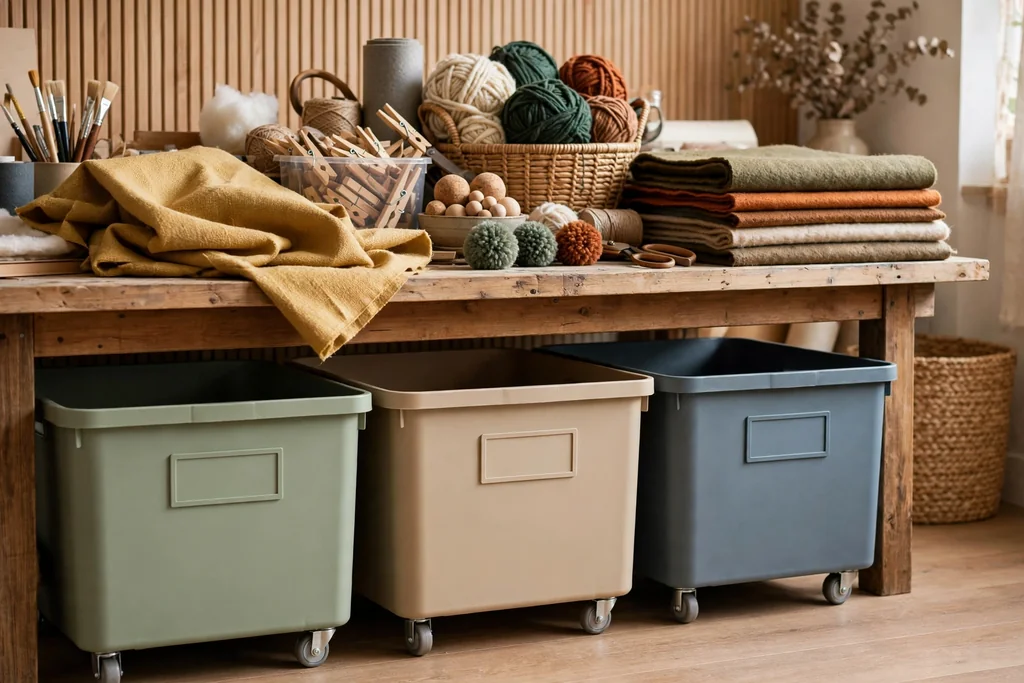
    Low rolling bins labeled on the front sliding under a craft work table holding bulky supplies.

    Slide low rolling bins under the work table for bulky stock, such as batting, felt sheets, large paper pads, and works in progress. Under table bins use dead space, keep bulky items close, and roll out for full access, then slide back when work ends. Label the front of each bin, since only the front edge shows when bins are tucked under a table.

    Measure the clearance under the table before buying bins, and leave a little room above each bin so lids lift freely. Keep the heaviest bin in the middle, where it rolls straight out, and lighter bins at the sides. Wipe bin wheels now and then, since thread and lint wrap around small wheels and stop them turning.

    17. Scrap and Offcut Bin with a Weekly Sort
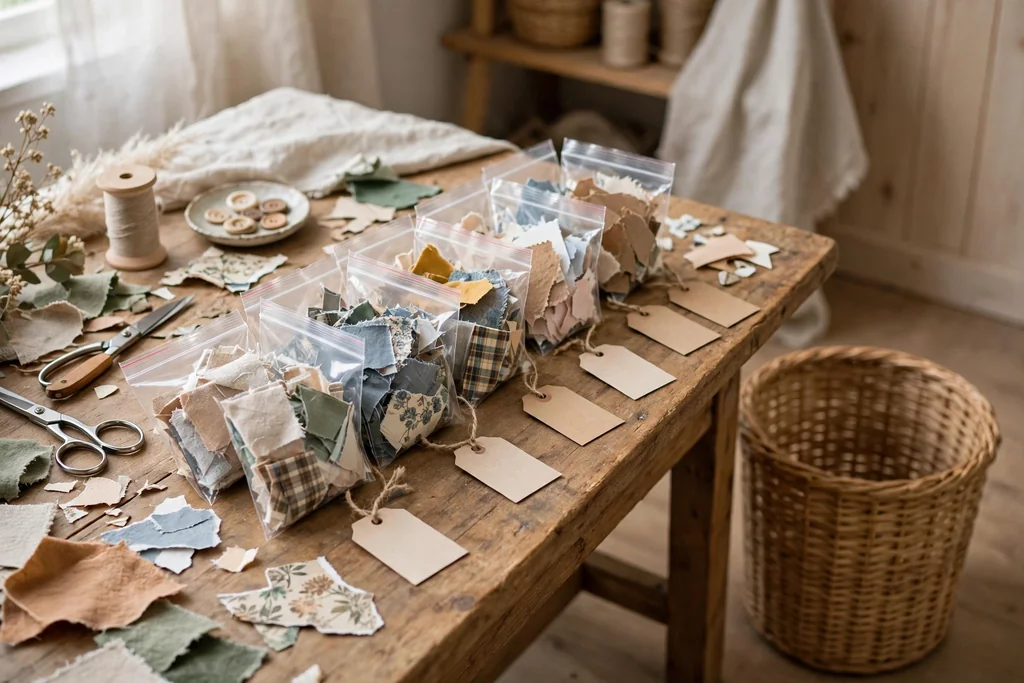
    Single bin near a craft table holding fabric and paper scraps sorted into small labeled bags.

    Keep one bin near the work table for scraps and offcuts, and sort it once a week into keep, use soon, and discard piles. A single scrap bin stops offcuts from spreading across the table and floor, and a weekly sort keeps it from growing into a second craft room. Set a size rule for keeps, such as pieces larger than your hand, so tiny offcuts leave the room promptly.

    Store kept scraps by material in small labeled bags inside the bin, so a usable piece is easy to find. Use the use soon pile first in the next project, and discard faded, stained, or frayed pieces without guilt. Empty the bin fully during the weekly sort, wipe it, and return only the kept bags.

    18. Inspiration Board for Samples and Color Swatches
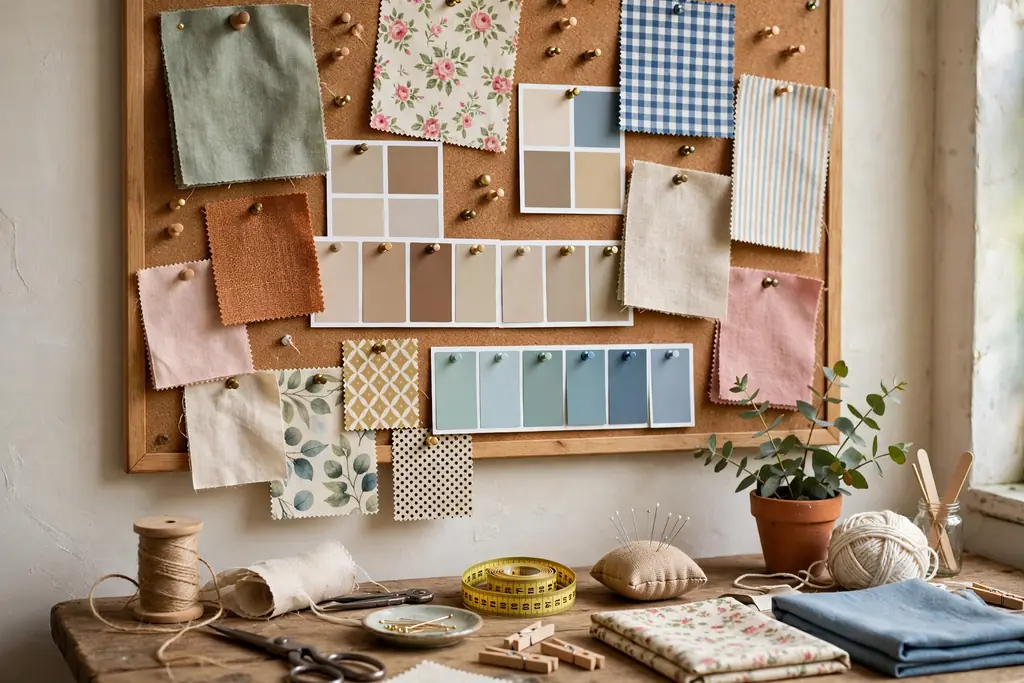
    Inspiration board near a craft table pinned with fabric swatches, color cards, and pattern samples.

    Pin an inspiration board near the work table for fabric swatches, color cards, pattern samples, and photos of finished projects. A board keeps ideas visible while you work, so colors and textures stay matched across a project, and it stops loose swatches from piling on the desk. Use pins or clips rather than glue, so samples can move and return to their bins.

    Group the board by project, with one section per current piece, and clear old sections when a project ends. Photograph the board before clearing it, so the color plan survives even after samples return to storage. Keep the board away from paint and glue work, so samples stay clean.

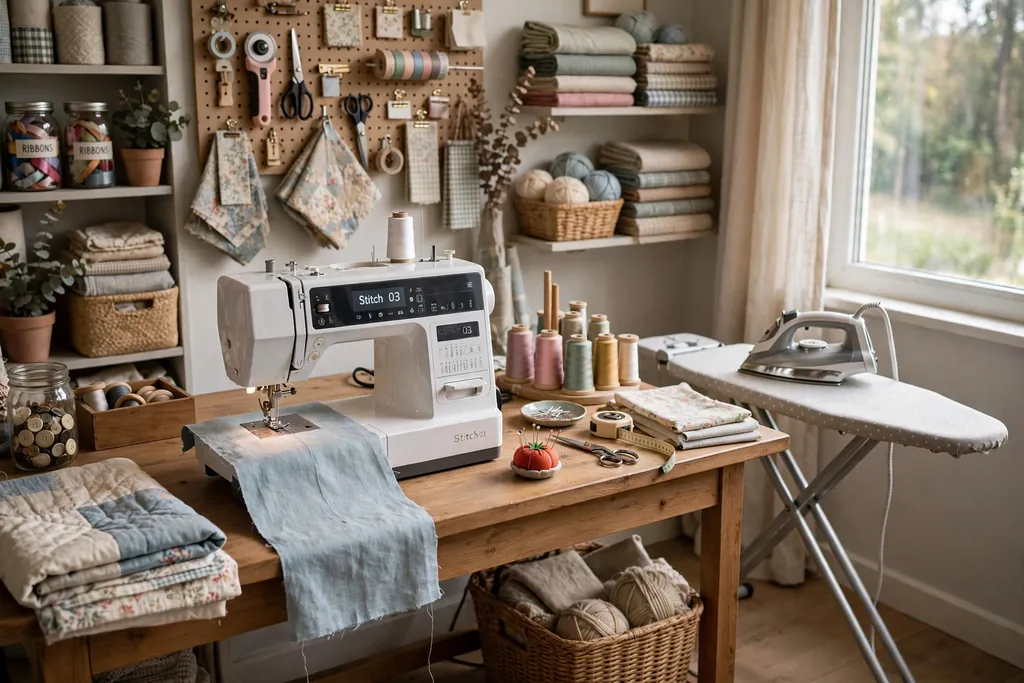
    19. Sewing Station with a Machine Table and Notions Drawer
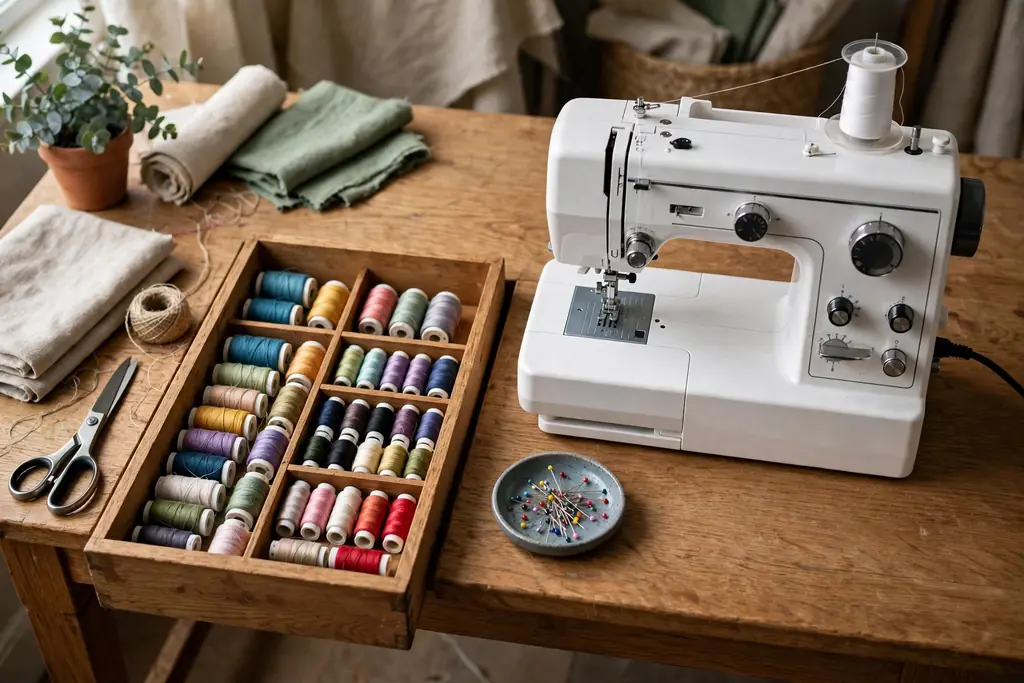
    Sewing station with a machine on a steady table, a drawer of bobbins and thread, and a pin tray beside it.

    Set up a sewing station with a steady table for the machine, a drawer beside it for bobbins, feet, needles, and thread, and a small tray for pins in use. A fixed sewing spot stops the machine from being packed away after each session, which makes short sewing jobs far more likely to happen. Keep the machine covered when not in use, and keep the power cord clipped to the table leg.

    Store bobbins wound with matching thread in a small case, so the right bobbin is easy to find. Keep scissors for fabric apart from scissors for paper, and label them, since paper dulls fabric scissors fast. Test the machine on a scrap piece after changing thread or feet, before starting on the real fabric.

    20. Gift Wrap Station with Vertical Roll Slots
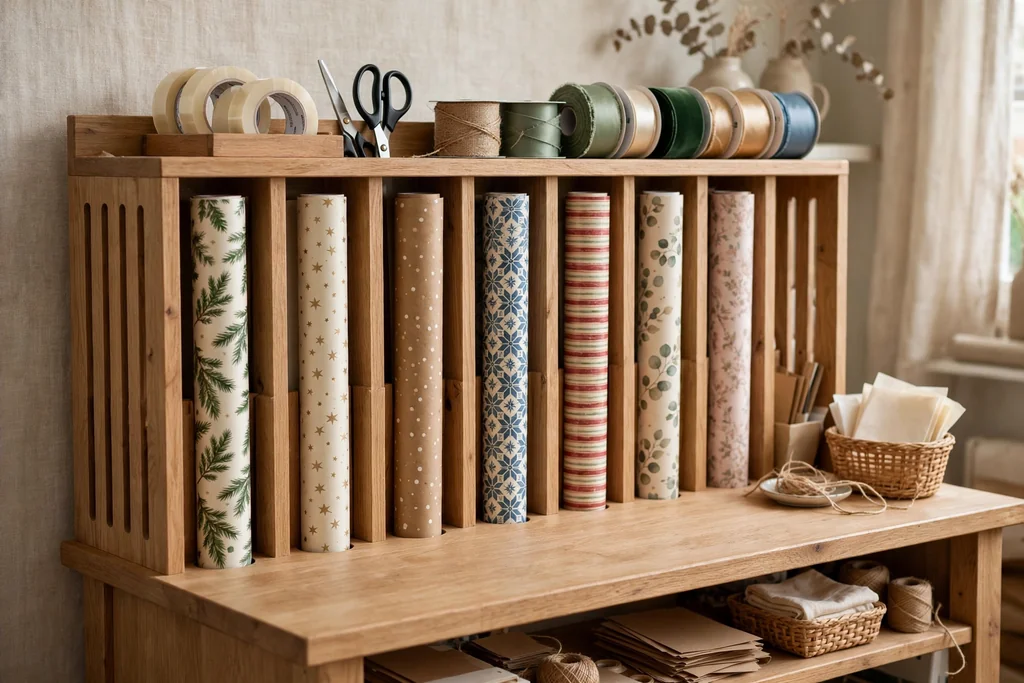
    Gift wrap station with vertical slots for wrapping paper rolls and a shelf of tape, scissors, and ribbon.

    Create a gift wrap station with vertical slots for wrapping paper rolls, a small shelf for tape, scissors, tags, and ribbon, and a flat area for wrapping. Vertical rolls stay clean and uncreased, and a station in the craft room keeps wrapping supplies out of general storage. Sort rolls by occasion or color, and keep the most used rolls at the front.

    Cut paper on a flat surface, not inside the slot, so rolls stay neat. Keep a small bin at the station for paper offcuts, and move short rolls to the front, so they are used before new rolls are opened. Store gift bags folded flat in a nearby bin, sorted by size.

    21. Low Kids Craft Zone with Washable Bins
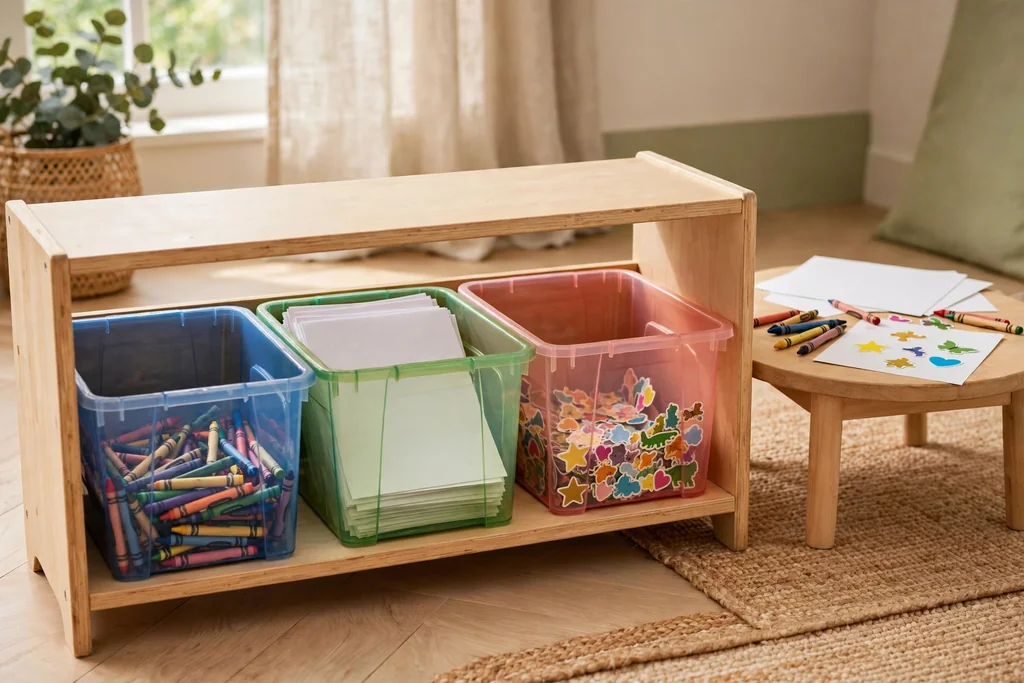
    Low kids craft zone with washable bins at child height holding crayons, paper, and stickers.

    Set a low zone for children’s craft supplies, with washable bins at child height for crayons, washable markers, paper, stickers, and safe scissors. Low bins let children choose and return supplies on their own, and washable bins wipe clean after paint and glue sessions. Keep adult tools, such as rotary cutters and hot glue, on high shelves, well away from the kids zone.

    Label kids bins with pictures as well as words, so younger children can return items to the right bin. Cover the kids table with a wipe clean cloth, and keep a small bin for drying artwork nearby. Sort the kids zone with children once a month, so broken crayons and dried markers leave the room.

    22. Portable Project Tote for Crafting Away from Home

    Portable project tote with inside pockets holding knitting tools and yarn, packed for crafting away from home.

    Pack a sturdy tote with the tools and materials for one portable project, such as knitting, embroidery, or hand sewing, so crafting can happen away from the craft room. A tote keeps a portable project in one place at home, and it stops small supplies from scattering across bags and pockets when you travel. Choose a tote with inside pockets for tools and a zip top to keep pieces safe.

    Keep a small checklist inside the tote lid, naming the tools the project needs, and check it before leaving the house. When the project ends, empty the tote fully, return stock to its home bins, and repack it for the next portable piece. Wash the tote now and then, since it picks up lint and dust on the move.

    23. Inventory List and Reset Kit for the End of Each Session
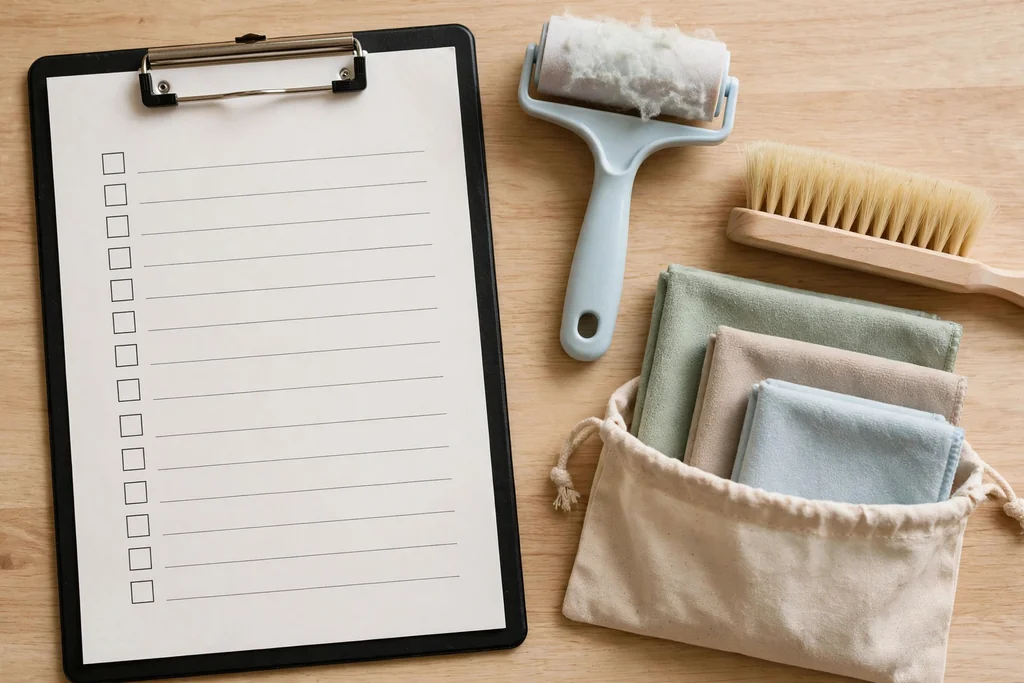
    Clipboard inventory list beside a tidy craft table with a lint roller, brush, and cloth reset kit.

    Keep a simple inventory list in a notebook or on a clipboard, naming each supply group, its home, and whether stock is low, plus a reset kit with a lint roller, a small brush, and a damp cloth. The list stops duplicate buying, since you can check it before shopping, and the reset kit makes the end of session tidy up a five minute job. Update the list when a group runs low, not when it runs out.

    End each session the same way: tools back on the wall or in their drawer, scraps in the scrap bin, works in progress in their box, and the work surface wiped. Photograph the tidy room once, and use that photo as the reset target after a long project. A short reset keeps the next session starting with work, not with searching.

    Conclusion

    Craft room ideas and organization work best when sorting comes before shopping: group supplies by type, give each group one labeled home, and keep daily tools close to the work surface. Start with the wall and the door, add bins and divided boxes for small parts, and store paper and fabric upright so nothing hides at the bottom of a pile. A short reset at the end of each session then keeps the system working, even when projects pile up.

    Pick three ideas from this list to start, such as the pegboard wall, the labeled bins, and the scrap bin, and add more only when the first three feel easy. For labeled bin ideas that work for seasonal supplies too, see Christmas decoration storage ideas, and for handmade projects to fill the room, see DIY fall home decor projects. Save this list on Pinterest, and work through it one supply group at a time.

    FAQs

    How do I start organizing a craft room?

    Start by sorting every supply into groups by type, such as paper, fabric, yarn, paint, beads, and tools, before buying any bins or shelves. Measure the largest item in each group, then choose one labeled home per group that fits that item. Keep daily tools near the work surface, and move seasonal or bulky stock to higher or lower zones.

    What is the best way to store small craft supplies?

    Store small craft supplies in divided, lidded boxes, with one compartment per type or color, and keep the boxes on a shelf at eye level. Divided boxes stop beads, buttons, and findings from mixing, and a snap lid keeps a dropped box from scattering pieces. Label each box on the outside, and work over a tray when pouring small parts.

    How do I organize a small craft room?

    Use walls, doors, and corners in a small craft room, with a pegboard for tools, a door organizer for flat items, and a corner desk with overhead shelves. Add a fold down desk if the room is shared, and use rolling bins under the table for bulky stock. Keep only the current project on the work surface, and store the rest in labeled homes.

    How should I store fabric and paper so they stay usable?

    Store fabric rolls standing upright in tall bins, sorted by color or project, and store paper upright in magazine holders, sorted by color or theme. Upright storage lets one roll or sheet slide out without disturbing the rest, and it shows colors at a glance. Keep both away from direct sun and damp air, and store oversized sheets flat in a separate portfolio.

    How do I keep a craft room tidy after each project?

    End each session with a short reset: return tools to the wall or drawer, put scraps in the scrap bin, store works in progress in their box, and wipe the work surface. Keep a reset kit with a lint roller, a small brush, and a damp cloth near the table, so tidy up takes about five minutes. A weekly scrap sort keeps offcuts from building up.

    How do I avoid buying craft supplies I already own?

    Keep a simple inventory list naming each supply group, its home, and whether stock is low, and check it before shopping. Photograph each bin as you fill it, so the list matches what is on the shelf, and update the list when a group runs low rather than when it runs out. A list also helps you use up short rolls and small scraps before buying new stock.
  • 25 Craft Room Ideas for a Creative and Organized Space

    25 Craft Room Ideas for a Creative and Organized Space

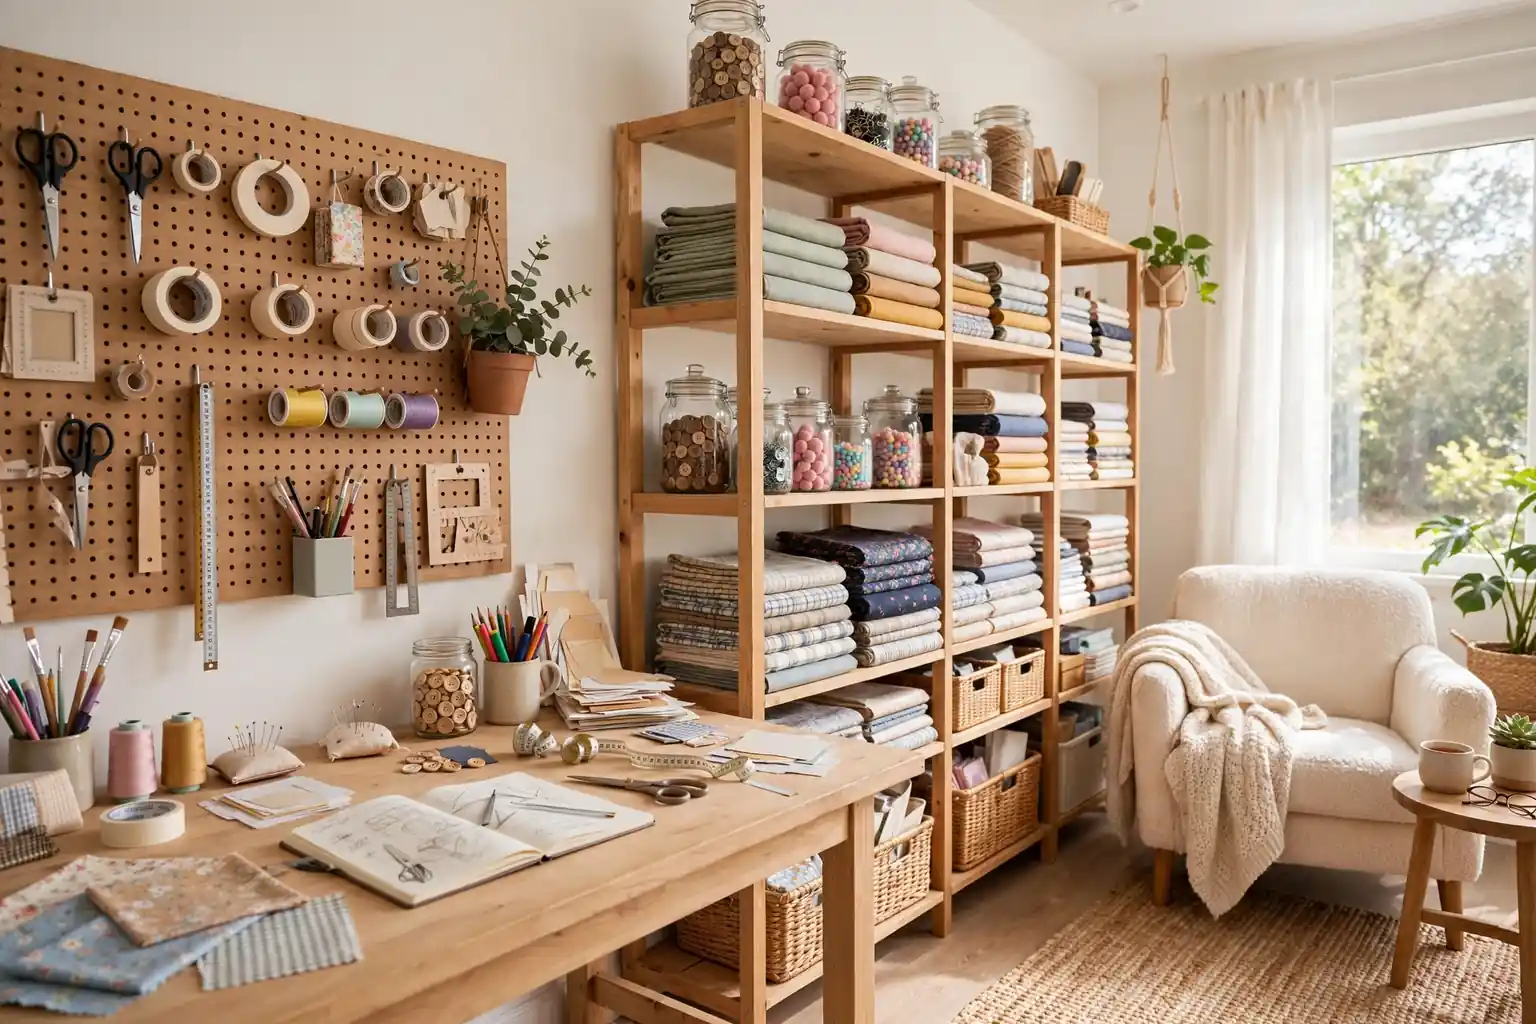
    A good craft room pairs a large work surface with storage you can see and reach. Start with zones for cutting, sewing, painting, and paper, add wall storage to free the desk, and label every bin. These 25 craft room ideas show how to set up each zone in rooms of any size.

    A craft room works best when it matches how you actually craft. If you sew most weeks, the machine should stay out and ready, not packed away in a closet. If you paint, you need a surface that wipes clean and a place for wet pieces to dry. Walk through your last three projects, note which supplies you reached for most, and give those items the easiest spots in the room.

    Key Takeaways

    • Give the room clear zones for cutting, sewing, painting, paper, and storage, even if a zone is only one shelf or one wall section.
    • Use wall storage first, since pegboard, rails, and shelves free the desk for actual work.
    • Store small supplies in clear or labeled containers so you can find items without opening every bin.
    • Keep current projects on a rolling cart or in a tote, and return finished supplies to their fixed homes.
    • Add strong task lighting and a comfortable chair, since most craft sessions run longer than planned.
    • Measure your desk, shelves, and closet before buying bins, so every container fits the spot it is meant for.

    1. Pegboard Wall for Tools and Supplies

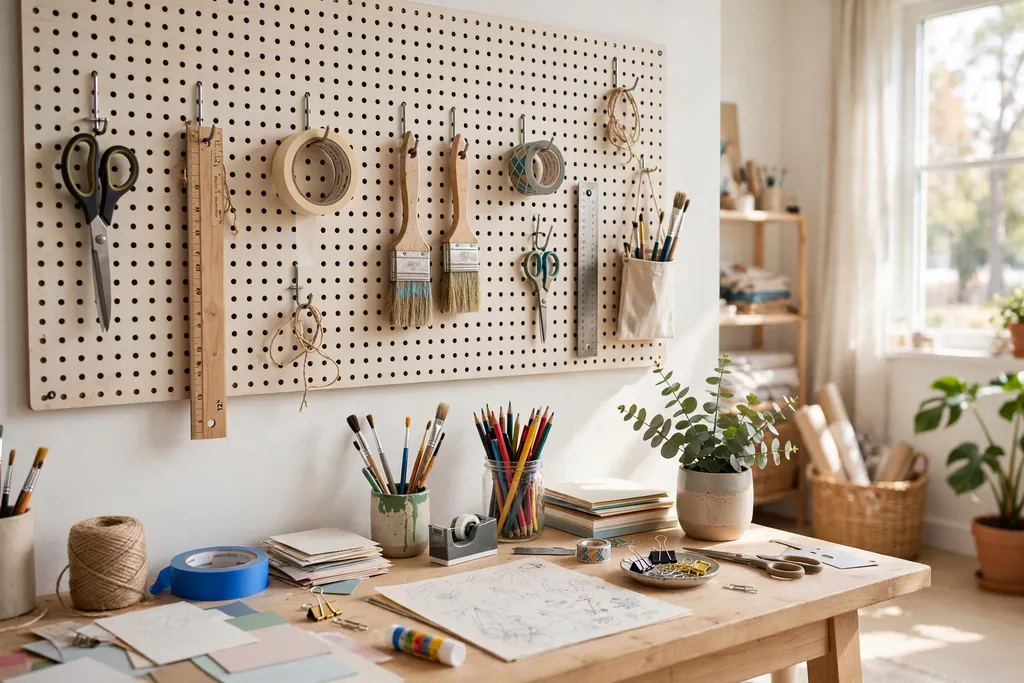
    Pegboard wall above a craft desk with hooks holding scissors, rulers, tape, and paintbrushes in a bright room.

    Hang a pegboard panel above the desk and fit it with hooks, small bins, and shelves for scissors, rulers, tape, glue, and paintbrushes. A pegboard keeps tools visible at eye level, so you stop buying duplicates of items you already own. Paint the board a light color or leave the wood plain, and keep the layout flexible by moving hooks as your crafts change.

    Group tools by task on the board, with cutting tools in one section, adhesives in another, and measuring tools in a third. Outline each tool position lightly in pencil if you want a quick visual check when tidying up. Keep heavy items, such as a hot glue gun stand or a large rotary cutter, on lower hooks, and keep sharp items out of reach of small children.

    2. Clear Jars on a Wall Shelf for Small Supplies

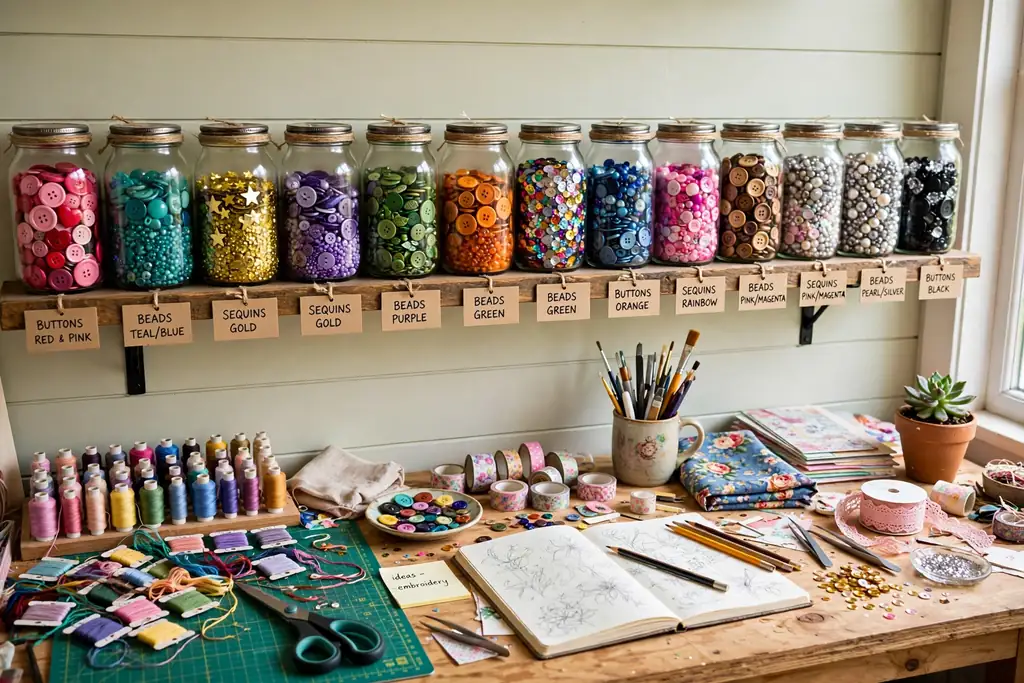
    Wall shelf lined with clear glass jars filled with colorful buttons, beads, and sequins above a desk.

    Mount a shelf at arm height and line it with clear jars for buttons, beads, eyelets, brads, and sequins. Clear jars let you see colors and quantities at a glance, which matters when you are matching a button or bead to a project in progress. Use jars of one size for a tidy row, and label each lid with the contents and color family.

    Sort jar contents by material first, then by color, so a search for red glass beads does not mean opening five mixed jars. Keep a small scoop or spoon in the jars you use most, and keep lids tight on jars holding tiny items. If the shelf sits near a window, choose jars with solid lids and keep light sensitive items, such as some dyes, in a closed cupboard instead.

    3. L Shaped Desk for Cutting and Sewing

    L shaped craft desk with a sewing machine on one arm and a flat cutting surface on the other.

    Set up an L shaped desk so one arm holds the sewing machine and the other gives a flat cutting surface. The corner shape keeps both jobs within reach without moving the machine, and it leaves the middle of the room open. A desk height of standard table height suits most sewing, while a slightly higher section helps for cutting fabric with a rotary cutter.

    Place the machine arm near an outlet and a light source, and keep the cutting arm clear of storage so fabric can lie flat. Add a small drawer unit under the desk for bobbins, needles, and presser feet. If the room is shared, choose a desk with a finish that wipes clean, since glue, paint, and fabric lint all land on a craft desk sooner or later.

    4. Rolling Cart for the Current Project

    Three tier rolling cart beside a craft desk loaded with paper, fabric, and tools for a current project.

    Keep a three tier rolling cart beside the desk for the project you are working on now. Load the top tier with tools, the middle tier with materials, and the bottom tier with the project itself, so you can roll the whole job to a table, a sofa, or another room. When the project ends, empty the cart and reload it for the next one.

    Label nothing on the cart itself, since its contents change with each project, but keep a small tray on top for loose items such as pins and clips. Choose a cart with wheels that lock, so it stays put while you work. A cart also suits a shared room, since the project can roll into a closet at the end of the day and roll out again the next morning.

    5. Fold Down Wall Table for Small Rooms

    Fold down wall table in a small room set up as a craft workspace with supplies on a nearby shelf.

    Fix a fold down table to the wall in a small room, a hallway nook, or a spare bedroom corner. Folded down, it gives a full work surface for cutting, gluing, or assembling; folded up, it frees the floor and leaves only a shallow cabinet on the wall. Add folding brackets rated for the weight of your machine or cutting mat, and test the table with your heaviest setup before relying on it.

    Mount a small shelf or a magnetic strip above the folded table for scissors and rulers, so the surface stays clear when it folds away. Store the project itself in a tote on a nearby shelf, and bring it out only when the table is down. This setup suits renters too, if the brackets can be fixed into wall studs and patched later with landlord permission.

    6. Labeled Bins by Craft Type

    Shelves of labeled storage bins sorted by craft type in a tidy craft room.

    Sort supplies into bins by craft type, such as sewing, paper, painting, and jewelry, and label each bin on the front and the top. Labels matter most for bins on high shelves, where the top label is the one you see first. Use one bin size for a shelf so the row looks tidy and bins can swap places as crafts change.

    Inside each bin, add smaller boxes or zip bags for sub groups, such as red thread with red thread, not mixed with blue. Keep a short list taped inside the cupboard door showing which bin holds what, and update it when a craft changes. When a bin starts to overflow, that is the signal to sort it, not to buy a bigger bin.

    7. Ribbon and Tape Rods on the Wall

    Wall mounted rods holding spools of colorful ribbon, washi tape, and twine above a craft table.

    Mount two or three horizontal rods or dowels on the wall and thread ribbon spools, washi tape rolls, and twine onto them. Pulling ribbon straight off a rod is faster than digging through a drawer, and the color range stays visible, which helps when matching ribbon to wrapping paper or a card. Keep rods at arm height and leave a little slack between spools so each one turns freely.

    Sort spools by width or by color family along the rod, and add a small pair of scissors on a hook at the end of the rod. For narrow tape rolls, use a shorter rod or a tension rod inside a shallow box. Replace empty spools promptly, since a rod full of empty cores looks busy and hides the spools you still need.

    8. Fabric Storage Sorted by Color on Open Shelves

    Open shelves stacked with folded fabric sorted by color in a bright craft room.

    Fold fabric by color and stack it on open shelves, with warm colors on one shelf, cool colors on another, and neutrals on a third. Open shelves let you compare prints and weights without unfolding stacks, and color order makes it easy to spot the fabric you pictured for a project. Use shelf dividers or small bookends to stop tall stacks from toppling.

    Fold each piece to the same width so stacks stay even, and place heavier fabrics, such as denim and canvas, on lower shelves. Keep delicate fabrics, such as silk, in closed boxes on a higher shelf to guard against dust and light. If shelf space is short, roll knit fabrics instead of folding them, since rolls take less depth and show prints at a glance.

    9. Sewing Station with Pressing Space Nearby

    Sewing station with a machine on a desk and a small ironing board beside it in a craft room.

    Place the sewing machine, a small ironing board, and a pressing mat in one zone, so seams can be pressed as you sew without crossing the room. Pressing each seam as it is sewn gives a neater finish than pressing a whole garment at the end, and a nearby board makes that habit easy. Keep the iron on a heat safe rest and the cord clear of the machine pedal.

    Store pressing tools, such as a seam roller, a tailor ham, and a spray bottle, in a small basket beside the board. Add a scrap bin at the end of the table for fabric offcuts, and empty it when it fills. If space is tight, use a tabletop pressing mat on the desk itself and a mini iron that stores in a drawer.

    10. Vertical Paper Sorters for Cardstock and Patterned Paper

    Vertical sorters holding upright cardstock and patterned paper in many colors on a craft desk.

    Store cardstock and patterned paper upright in vertical sorters, sorted by color or by collection, rather than stacked flat in a pile. Upright storage lets you pull one sheet without lifting a stack, and it shows the full color range at once. Use sorters sized for 12 inch paper if you scrapbook, and letter size sorters for card making.

    Label each sorter slot with the color or collection name, and keep a few empty slots for new paper. Store specialty paper, such as vellum and foil, in a separate sorter or in sleeves, since those sheets mark easily. Keep the sorters near the cutting zone, so paper moves straight from sorter to trimmer without crossing the room.

    11. Paint Station with a Wipe Clean Surface

    Paint station with a wipe clean mat, paint jars, brushes, and a water jar on a craft table.

    Set aside one table or one end of a desk for painting, covered with a wipe clean mat or an old shower curtain liner. A fixed paint zone keeps brushes, palettes, and water jars in one place, and it guards the rest of the room from drips. Keep paints in a caddy or on a small shelf above the table, sorted by type, such as acrylic, watercolor, and fabric paint.

    Place a jar of clean water, a jar for rinsing, and a rag at the edge of the table, and wash brushes before paint dries on them. Store finished paintings flat on a drying shelf or clipped to a line until dry. If the room has carpet, add a washable rug under the paint table, since even careful painters drop a brush now and then.

    12. Yarn Wall with Dowels and Cubby Bins

    Wall dowels holding yarn cakes and cubby bins filled with sorted yarn in a craft room.

    Mount dowels on the wall for yarn cakes you are using now, and store the rest of your stash in cubby bins sorted by weight and fiber. Dowels keep working yarn untangled and visible, while cubbies guard the larger stash from dust and light. Sort cubby bins by yarn weight, such as fingering, worsted, and bulky, and label each bin with the weight and the main colors inside.

    Keep a small basket beside your chair for the yarn in use, with a hole or clip to feed the strand without tangling. Wind new skeins into cakes before they join the wall, since loose skeins snag on hooks. If moths are a concern in your area, store wool in closed bins with cedar blocks and check the stash when the seasons change.

    13. Small Drawer Unit for Beads and Buttons

    Small multi drawer unit with labeled drawers holding beads, buttons, and jewelry findings.

    Use a small multi drawer unit, the kind with many shallow drawers, for beads, buttons, eyelets, and jewelry findings. Shallow drawers suit tiny items better than deep bins, and a drawer you can pull out and carry to the table beats a fixed shelf. Label each drawer with the item and size, such as seed beads size 11 or shirt buttons white.

    Sort beads by material and size before sorting by color, since a search usually starts with the bead type a pattern calls for. Keep a bead mat on the table when working, so dropped beads do not roll onto the floor. Store sharp findings, such as pins and needles, in a drawer with a lid or a magnetic strip inside, away from drawers children can reach.

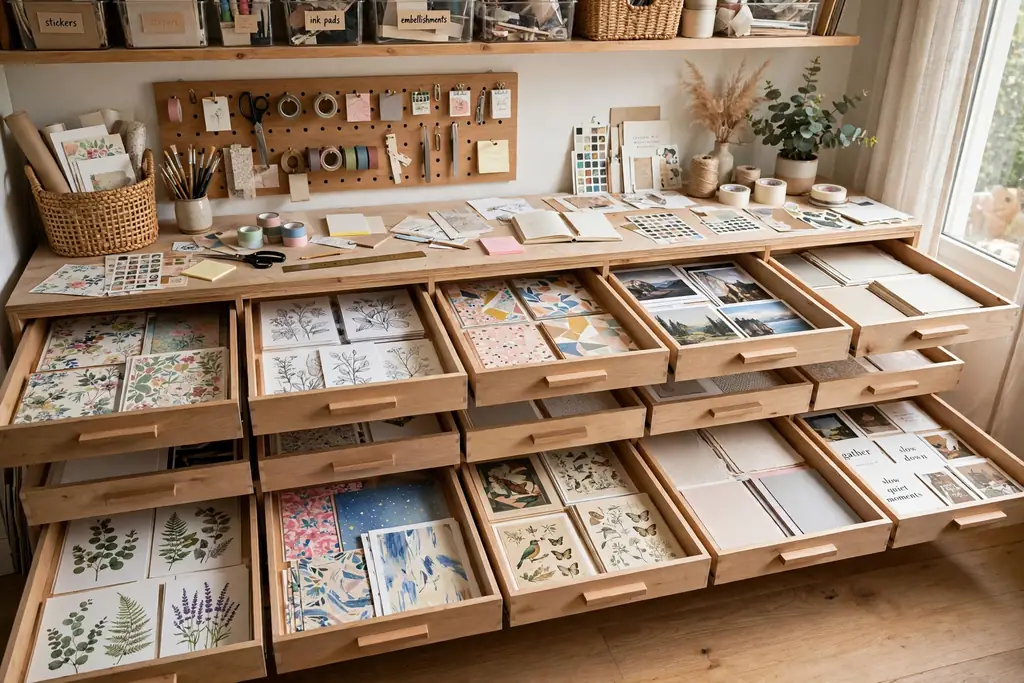
    14. Flat File Drawers for Scrapbook Paper and Prints

    Wide shallow drawers holding flat scrapbook paper and prints in a craft room.

    Store large paper, prints, and finished scrapbook pages flat in wide, shallow drawers, rather than rolled or stacked on a shelf. Flat storage stops paper from curling and guards finished pages from bending. Use dividers inside each drawer to separate collections, and label the drawer front with the collection or paper size it holds.

    If a full flat file is too large for the room, use a shallow under bed box or a portfolio case on a shelf, and keep only current pages in it. Handle large sheets by the edges and keep them away from damp walls. For prints you plan to frame, add a sheet of plain paper between each print to guard against marks.

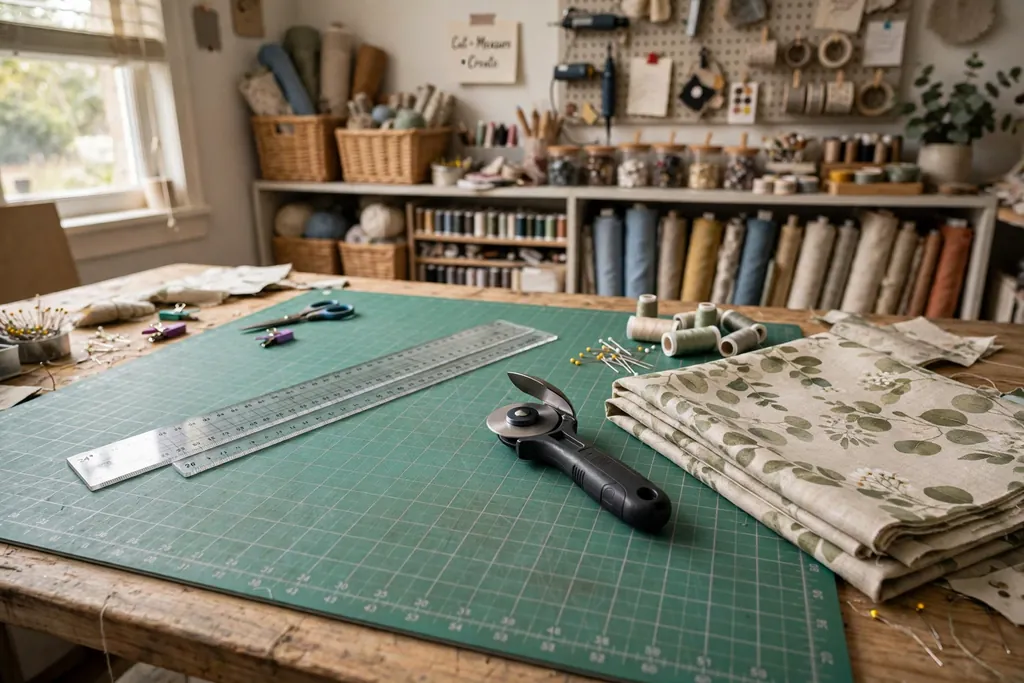
    15. Dedicated Cutting Zone with Mat and Rotary Cutter

    Cutting zone with a large green cutting mat, rotary cutter, clear ruler, and fabric on a table.

    Give cutting its own zone with a self healing mat, a rotary cutter, a clear ruler, and good light, kept clear of other supplies. A fixed cutting zone means fabric or paper can stay on the mat between sessions, and the ruler and cutter stay in the same place each time. Choose a mat size that fits your largest common cut, and store the cutter with its blade guard on.

    Replace a worn mat when cuts stop closing cleanly, since a grooved mat drags the blade and dulls it faster. Keep the cutting zone away from the sewing machine pedal area, so fabric does not bunch underfoot. Add a small waste bin beside the mat for trimmings, and empty it at the end of each session.

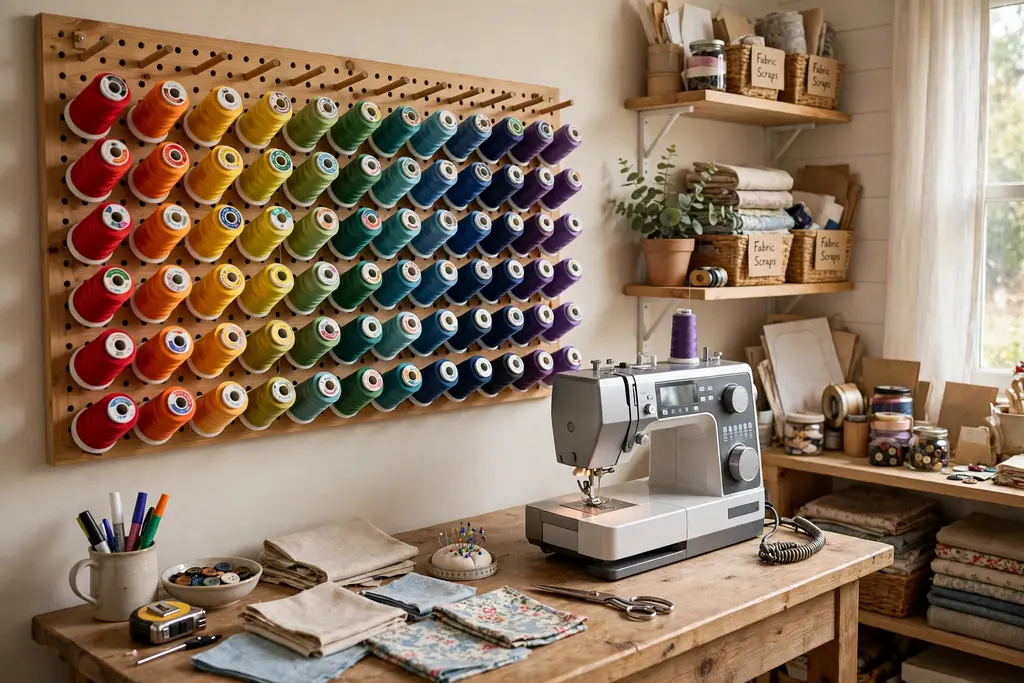
    16. Thread Spool Wall Rack in Color Order

    Wall thread rack with spools arranged in color order beside a sewing machine.

    Mount a thread rack on the wall near the sewing machine, with spools arranged in color order from light to dark. A wall rack keeps thread visible and stops spools from rolling off the desk, and color order makes matching thread to fabric a quick visual job. Choose a rack with pegs sized for your spool type, and leave a few empty pegs for new colors.

    Keep specialty threads, such as metallic and heavy topstitching thread, on a separate small rack or in a box, since those spools need different tension settings and are easy to mix up. Dust the rack now and then, since thread left on an open rack gathers lint. If the room gets strong sun, place the rack on a wall out of direct light, so thread colors stay true.

    17. Inspiration Board for Works in Progress

    Cork inspiration board pinned with fabric swatches, color palettes, and pattern pages above a desk.

    Pin a cork board, a magnetic board, or a length of wire with clips on the wall near your desk for fabric swatches, color palettes, pattern pages, and photos of finished work. An inspiration board keeps the plan for a project visible while you work, so you do not have to reopen pattern books or sample cards each time. Change the board when a project ends, and keep only the current project on it.

    Add a small section of the board for notes, such as measurements, due dates, and gift lists, written on cards that can move as plans change. Keep the board at eye level from your chair, not behind you, so a glance is enough. If wall space is short, use the inside of a cupboard door for the same purpose.

    18. Layered Task Lighting Over Every Work Zone

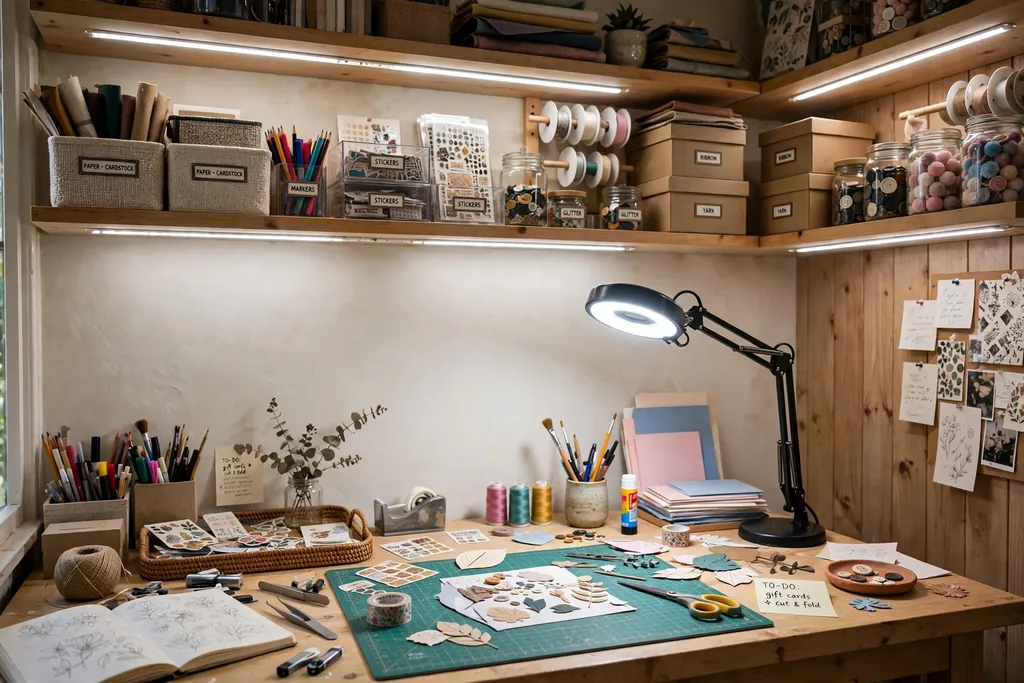
    Craft desk lit by a bright daylight lamp with under shelf light strips over nearby storage.

    Light each work zone separately, with a bright daylight lamp over the desk, under shelf strips over storage, and a floor lamp beside a reading or hand sewing chair. Good light matters most for matching thread colors, reading small print on patterns, and seeing true fabric colors. Place the main lamp on the opposite side from your writing hand, so your hand does not cast a shadow on the work.

    Choose bulbs with a daylight color temperature for the desk lamp, and keep a spare bulb in the room. Add dimmer or lower light for evening sessions if bright light strains your eyes. Clean lamp shades and strip covers now and then, since dust dims light more than most people notice.

    19. Comfortable Chair and Standing Height Option

    Comfortable adjustable chair at a craft desk beside a standing height cutting table.

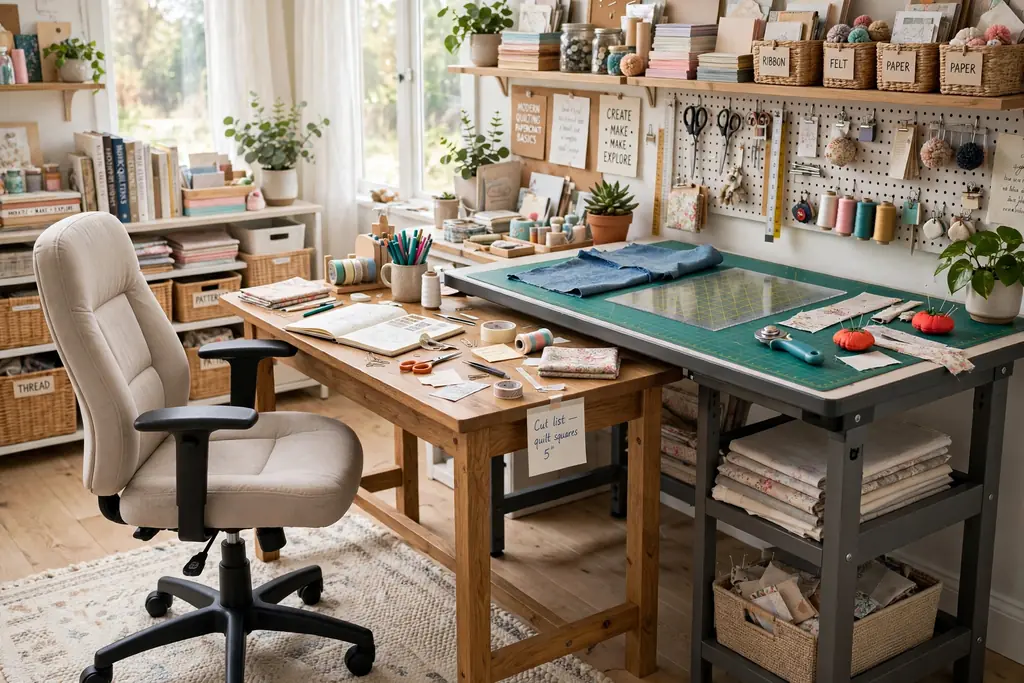
    Choose a chair with adjustable height and back support for long sessions at the desk, and add a standing height table or a raised mat section for cutting. Sitting for hours strains the back and neck, and a standing option for cutting or pressing breaks up a long session. Set the chair so your feet rest flat and your elbows sit near table height.

    Add a small footrest if the chair height leaves feet dangling, and place a cushioned mat under the standing section. Keep the chair wheels clear of cords and rug edges, so the chair rolls smoothly between the desk and storage. If the room doubles as a guest room, choose a chair that folds or stacks, and store it in a closet between craft sessions.

    20. Kids Craft Corner with Washable Surfaces

    Low kids craft table with washable mat, open bins of supplies, and colorful artwork drying on clips.

    Set aside one low table and a washable mat for children crafts, with supplies in open bins they can reach and return themselves. A kids corner keeps glitter, paint, and glue in one spot, and it lets children craft without taking over the main desk. Use washable markers, paints, and smocks, and keep scissors suited to the child age in a labeled cup.

    Sort kids supplies by activity, such as coloring, cutting and pasting, and building, and label bins with pictures as well as words for younger children. Add a drying line or a clip rail at child height for wet artwork. At the end of a session, have children return each bin to its marked spot, so the next session starts tidy.

    21. Gift Wrap Station in One Cupboard or Cart

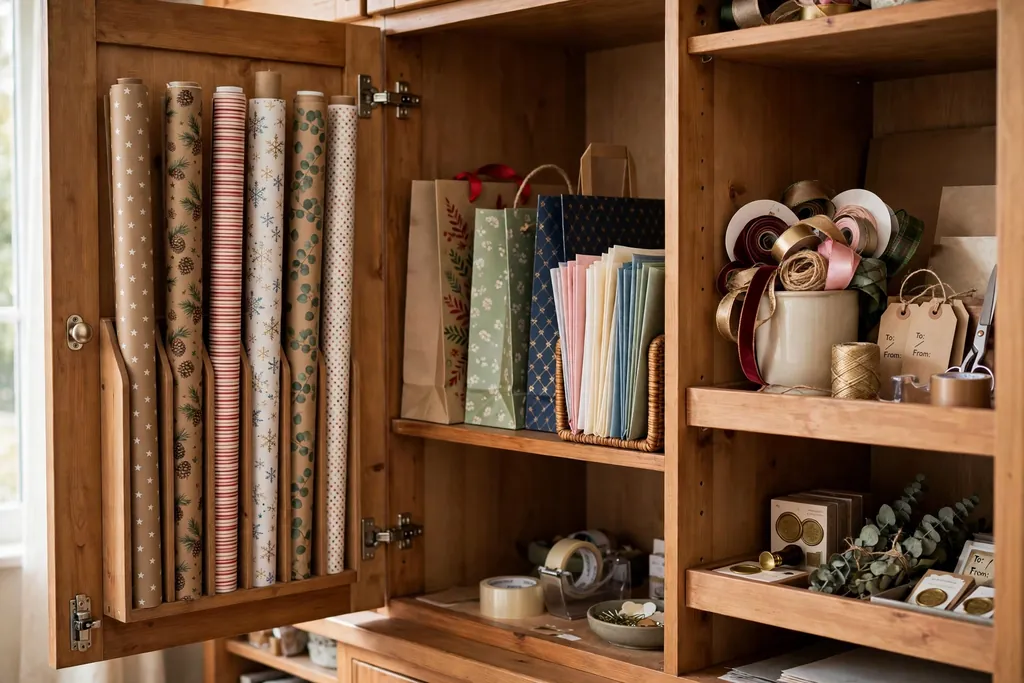
    Gift wrap station with upright paper rolls, gift bags, tissue, and ribbon in a cupboard.

    Gather wrapping paper rolls, gift bags, tissue, tape, scissors, and ribbon in one cupboard, a tall bin, or a rolling cart, so wrapping a gift does not mean hunting through several rooms. Store paper rolls upright in a tall bin to stop them from unrolling and creasing, and keep flat sheets in a large portfolio or a drawer. Sort bags by size and tissue by color.

    Add a small flat surface at the top of the cupboard or beside the cart for wrapping, and keep a pen and gift tags in a cup on the same shelf. At the end of the gift season, sort leftover paper and bags back into the station and recycle torn or crumpled pieces. A fixed wrap station also suits a closet door, with rolls hung on hooks inside the door.

    22. Drying Rack for Painted and Glued Pieces

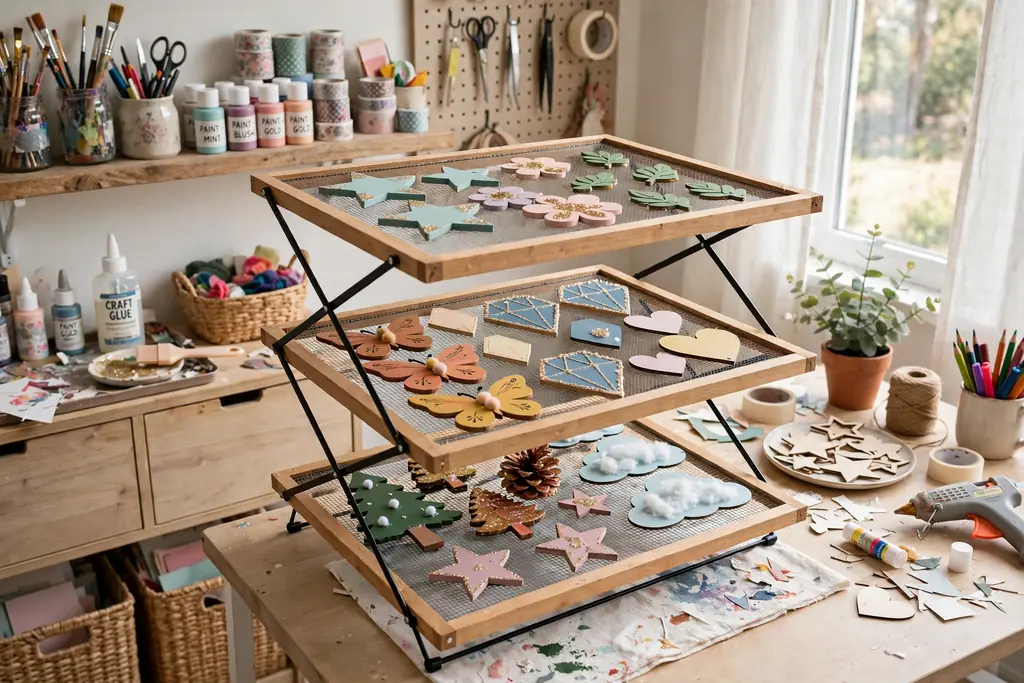
    Tiered drying rack holding painted and glued craft pieces in a bright craft room.

    Set up a folding drying rack, a tiered shelf, or a line with clips for painted, glued, and sealed pieces, so wet work does not sit on the desk and block the next step. A rack with several levels holds more pieces in less floor space, and it keeps wet surfaces from touching each other. Place the rack near airflow but away from direct dust and pets.

    Label a small card on each level with the project name and the date, if several projects dry at once. For small items, such as ornaments and cards, use a mesh rack or a tray lined with wax paper. Clean the rack after each use, since dried glue and paint build up and mark the next batch.

    23. Label System for Every Bin, Drawer, and Shelf

    Craft room shelves with matching printed labels on every bin, drawer, and shelf.

    Pick one label style for the whole room, such as printed labels in one font or handwritten labels in one color, and use it on every bin, drawer, and shelf. A single style makes the room easier to scan, and it stops the label system itself from looking cluttered. Include both the item and a hint, such as “Ribbon, satin, red to pink” rather than just “Ribbon.”

    Make labels easy to change, with removable label holders or tape, since craft interests change and a permanent label soon lies. Keep a label maker or a pen and blank labels in the desk drawer, so a new bin gets labeled the day it is filled. Walk the room once a season and fix labels that have faded or no longer match the contents.

    24. Project Totes for Works in Progress

    Labeled project totes stored upright like books on a craft room shelf.

    Pack each unfinished project into its own tote or zip bag, with its pattern, fabric or paper, thread, and tools together. A tote per project stops pieces from mixing, and it makes it easy to pick up a project after weeks away, since everything for that job sits in one bag. Label the tote with the project name and the next step, such as “Hem skirt” or “Glue frame.”

    Store totes upright on a shelf like books, so you can pull one without moving a stack. Keep a short list on the shelf edge showing which totes are active, and move finished totes to a storage box. If a project stalls for months, open the tote, note what is missing, and decide whether to finish it, gift the supplies, or set it aside.

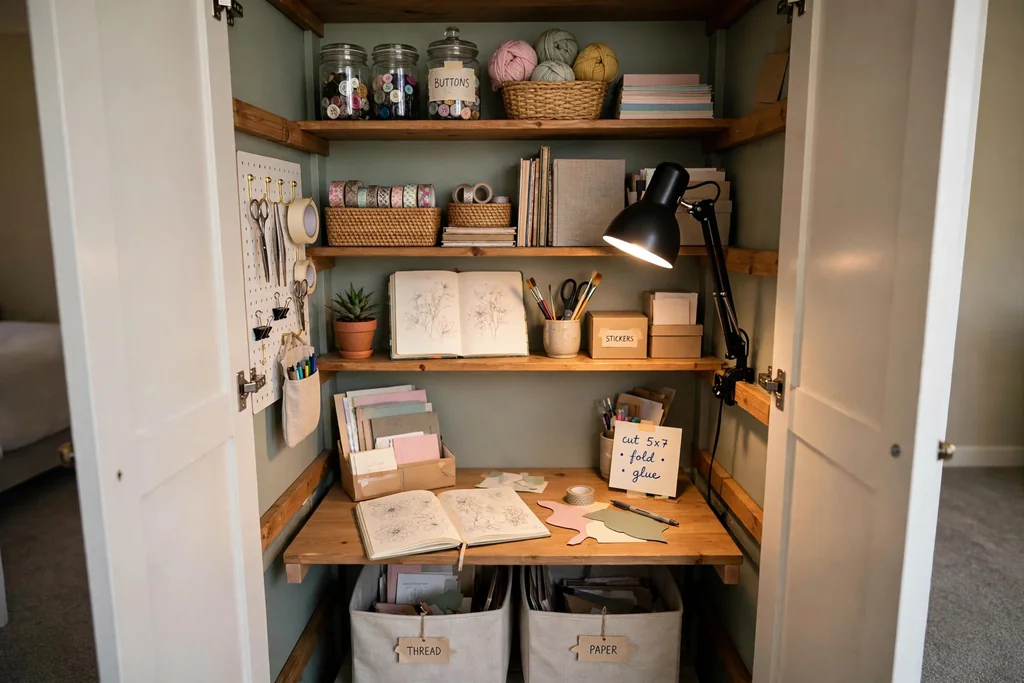
    25. Closet Turned into a Craft Nook

    Spare closet fitted with shelves, a small desk, and task lighting as a craft nook.

    Remove the doors from a spare closet and fit it with shelves, a small desk, and task lighting to make a craft nook that closes away when guests arrive. A closet nook suits a small home, since it uses space that already exists and keeps supplies behind a curtain or doors when not in use. Measure the closet depth first, since a desk deeper than the closet will block the doors from closing.

    Fit the nook with a pegboard on the back wall, shallow shelves for bins, and a power strip for the machine and lamp, keeping cords tidy with clips. Add a folding chair that hangs on the wall beside the nook, so the room still works as a bedroom or office. Keep the nook to one craft type at a time, since a closet fills fast and a crowded nook is hard to use.

    Conclusion

    A craft room does not need to be large or costly to work well. Start with a clear desk, wall storage for tools, labeled bins for supplies, and one zone for each craft you do most. Add light where you work, a comfortable chair, and a system for projects in progress, and the room will stay usable between sessions, not just on setup day.

    Work through these ideas one zone at a time, starting with the craft you do most often. For more hands on projects, see DIY fall home decor ideas, and for the whole house, browse Dwell Ovell home decor ideas. Keep what you use often within reach, store the rest in labeled bins, and let the room return to a tidy base when each project ends.

    FAQs

    How do I set up a craft room in a small space?

    Start with wall storage, a fold down table, and a rolling cart, so the work surface folds away and supplies stay on the walls and in one cart. Use a closet nook or one corner of a spare room, and keep only the craft you do most in that space, storing the rest elsewhere. Measure the room before buying bins, and choose shallow shelves and a folding chair to save floor space.

    What is the best way to organize craft supplies?

    Sort supplies by craft type first, then by color or size inside each group, and store small items in clear or labeled containers. Put daily items at arm height, seasonal items higher up, and heavy items low. Label every bin on the front and the top, and keep a list inside the cupboard door showing which bin holds what, so anyone in the house can find and return items.

    How do I keep a craft room tidy between projects?

    Give every supply a fixed home and return items to it at the end of each session, rather than leaving them on the desk for next time. Pack unfinished projects into labeled totes, keep a scrap bin at the desk and empty it when it fills, and run a short reset once a week to return stray items. A room stays tidy when tidying takes minutes, not a full afternoon.

    What lighting works best for a craft room?

    Use layered lighting, with a bright daylight lamp over the main desk, under shelf strips over storage, and a floor lamp beside a hand sewing chair. Place the desk lamp on the opposite side from your writing hand to avoid shadows, and choose daylight bulbs for true fabric and thread colors. Add lower light for evening work if bright light strains your eyes.

    How much does it cost to set up a craft room?

    Costs vary widely, since a basic setup can start with a table you own, a pegboard panel, clear jars, and labeled bins, while a full room adds shelving, a sewing desk, and task lighting. Start with storage and light, use furniture you already have, and add pieces one zone at a time as your crafts grow. Avoid buying bins before measuring shelves, since wrong size bins waste money and space.

    Can a craft room share space with a home office or guest room?

    Yes, a craft room can share space with an office or guest room if crafts stay in closed storage and the desk clears between uses. Use a rolling cart for the current project, a closet nook for supplies, and a fold down table that frees the floor when guests arrive. Keep the room to one active craft at a time, and agree on a reset routine so the desk returns to office or guest use after each session.


  • How to Choose a Farmhouse Sink for Your Kitchen

    How to Choose a Farmhouse Sink for Your Kitchen

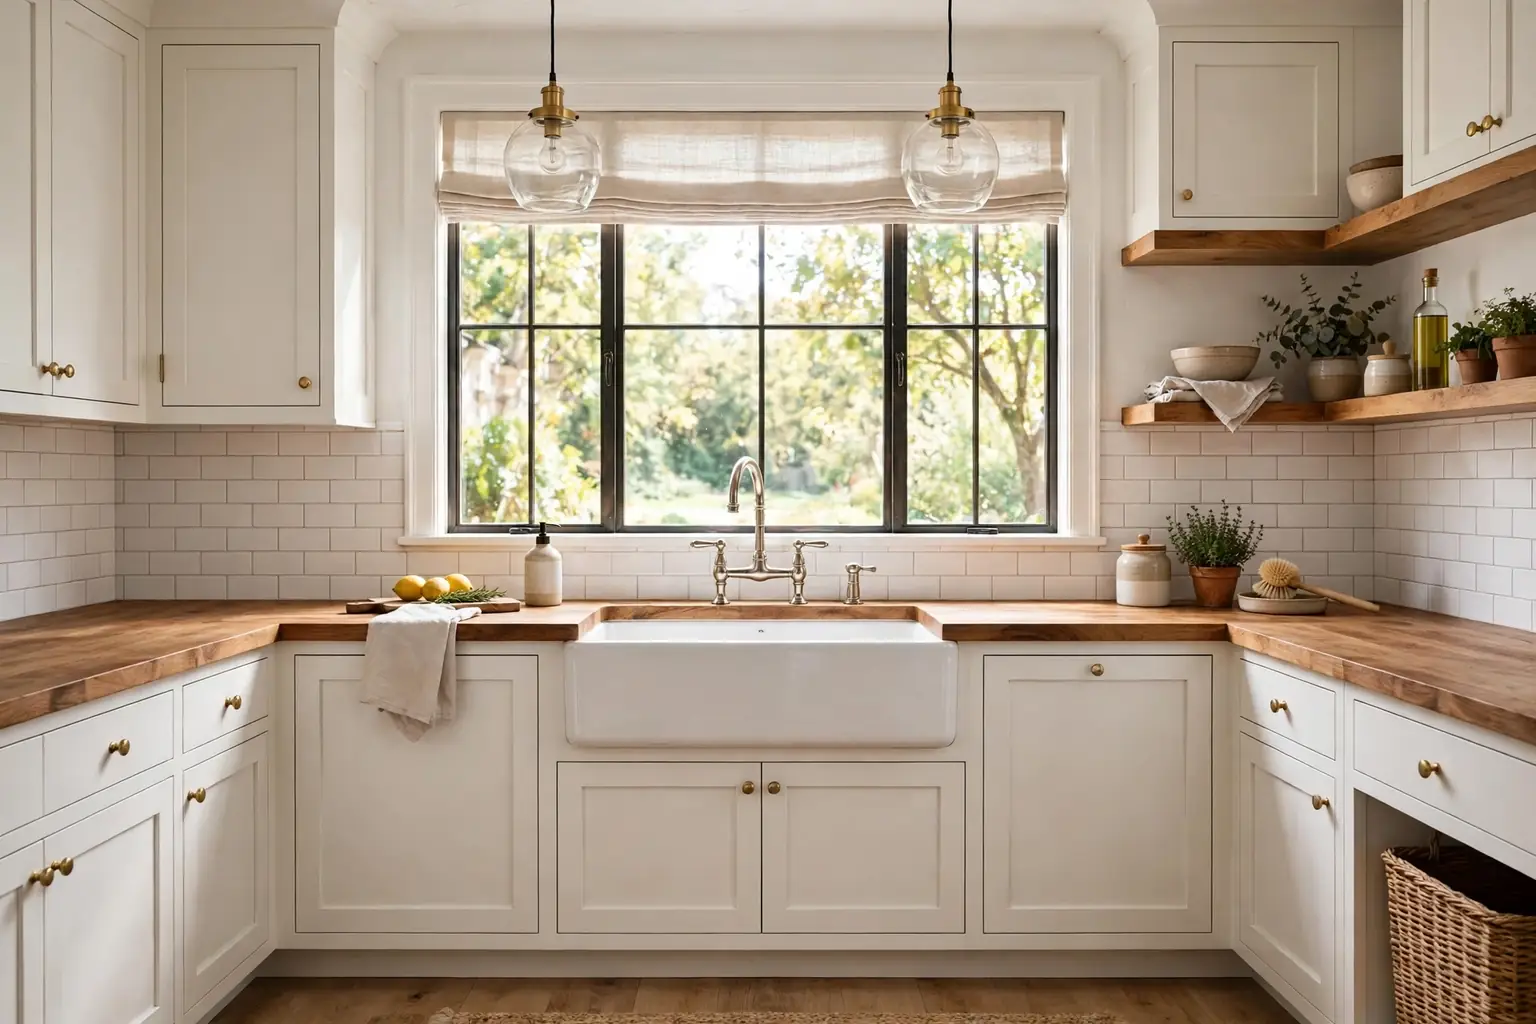
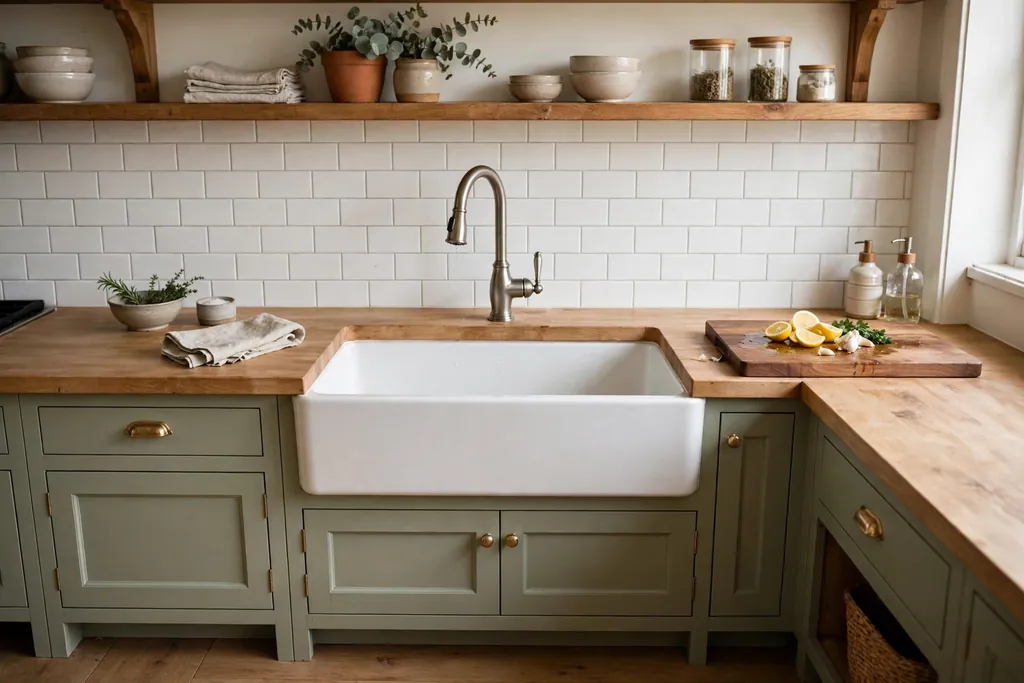
    To choose a farmhouse sink, measure your base cabinet first, then pick a material, bowl layout, and depth that suit how you cook and clean each day. Match the apron style and finish to your kitchen, check faucet and drain placement, and confirm the cabinet can support the sink before you buy.

    A farmhouse sink, also called an apron front sink, shows its front panel below the countertop instead of hiding it behind a cabinet door. That exposed front is part of its look, but it also changes how the sink fits, how it is supported, and how far you reach when you wash dishes. This guide works through those choices in order, so you can narrow the options to a sink that fits your cabinet, suits your cooking habits, and works with your faucet and plumbing.

    Key Takeaways

    • Measure the base cabinet inside width, depth, and height before you shop, since the cabinet sets the largest sink you can fit.
    • Choose the material for how you cook and clean, not only for looks, and weigh weight, care, and repair options.
    • Pick a single or double bowl based on how you wash large pots, rinse produce, and use a drying rack.
    • Check apron style, faucet holes, drain placement, and disposal fit early, since those details are hard to change after installation.
    • Confirm support, countertop cuts, and plumbing clearances with your installer before you order.

    What to Check Before You Buy

    • Tape measure and a notebook or phone notes for cabinet, countertop, and plumbing measurements
    • The inside width, depth, and height of the sink base cabinet
    • The position of drain pipes, water lines, and any garbage disposal
    • The faucet style you plan to use and how many holes your countertop or sink deck allows
    • The countertop material and whether it needs a new cut for an apron front
    • A note of large items you wash often, such as sheet pans, stockpots, and cutting boards

    1. Start With Your Cabinet and Measure First

    Measuring the inside of an open kitchen sink cabinet with a tape measure.

    Open the sink base cabinet and measure the inside width from side panel to side panel, the inside depth from front to back, and the clear height under the countertop. Note the position of the drain pipe, water lines, and any disposal, and check whether the cabinet has a center support or a drawer that the new sink would block. These measurements set the real limits for your sink, even if a larger model looks right in a showroom.
    Write the measurements down and keep them with you when you compare sinks. A farmhouse sink needs room for its apron front at the front of the cabinet, and the cabinet may need a front panel cut or a modified frame. If the cabinet is narrow, a smaller sink with a well planned layout will serve you better than a large sink that forces awkward plumbing or a weak support frame.

    2. Choose the Right Sink Size for Your Kitchen

    Farmhouse sink in a kitchen with counter space on both sides.

    Sink size should follow both your cabinet and your daily use. A wide sink gives room for large pans and baking sheets, while a smaller sink leaves more counter space on either side for prep and drying. Think about the longest item you wash by hand most weeks, and check that it can lie flat or tilt comfortably in the bowl you are considering.

    Also think about reach and counter space. A very wide sink can push the faucet farther back and leave less room for a cutting board or a drying rack beside it. In a small kitchen, a moderate sink with a useful layout often works better than the largest sink that fits. Balance bowl room against the counter space you need for everyday cooking.

    3. Pick a Depth That Suits Daily Use

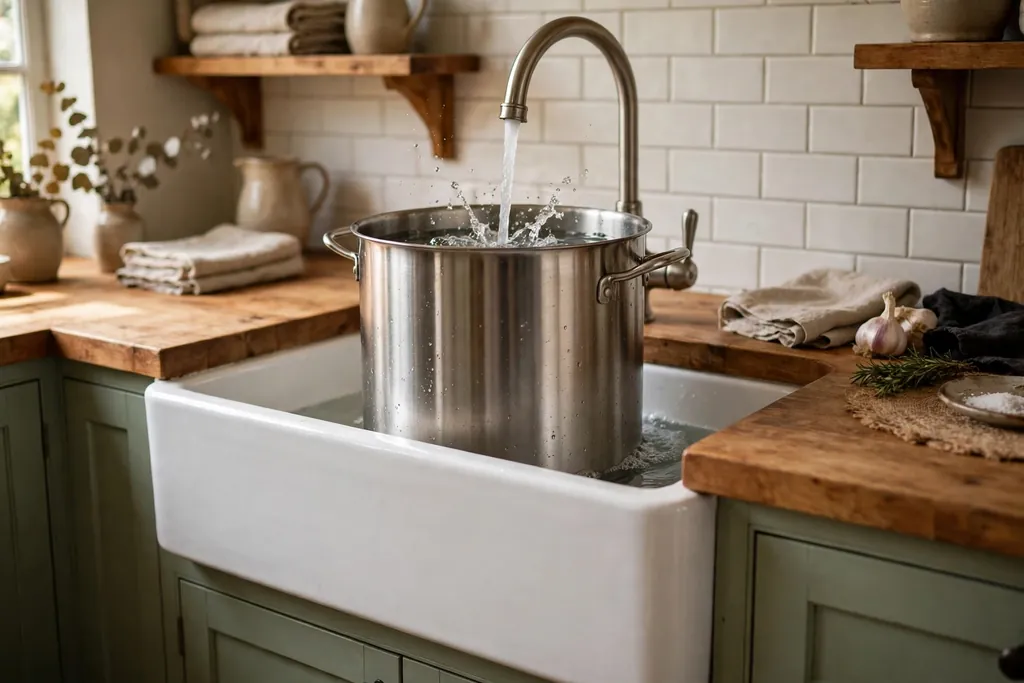
    Deep farmhouse sink holding a tall stockpot under a running faucet.

    Farmhouse sinks are often deeper than standard sinks, which helps with tall pots and stacked dishes. Depth also affects how far you bend to reach the bottom of the bowl, so the best depth depends on who uses the sink most and for how long at a time. If you wash large pots by hand every day, extra depth can help. If you mainly rinse cups and small items, a shallower bowl may feel easier to use.

    Check the clear space under the sink as well, since a deeper bowl leaves less room for plumbing, a disposal, and storage. Measure from the bottom of the bowl to the cabinet floor in your plan, and make sure the drain can still slope correctly to the wall pipe. A sink that fits the cabinet but leaves no room for a disposal or a filter may cause problems later.

    4. Compare Fireclay, Stainless Steel, and Cast Iron

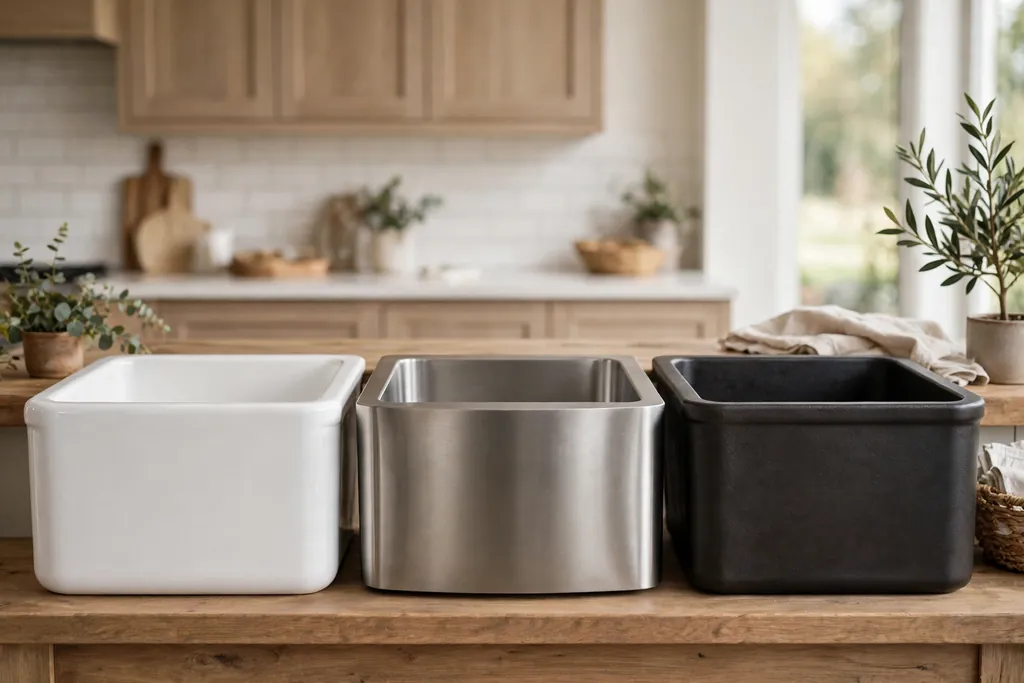
    Farmhouse sink samples in white fireclay, stainless steel, and dark cast iron finishes.

    Fireclay, stainless steel, and cast iron are the most common farmhouse sink materials, and each has a different feel and care routine. Fireclay gives a smooth, bright surface and a classic look, and it is usually heavy, so it needs solid cabinet support. Stainless steel is lighter, resists many stains, and suits a wide range of kitchen styles, but it can show water marks and scratches over time. Cast iron with an enamel coating gives a deep, glossy finish and a solid feel, and it is also heavy and needs careful support.

    Think about how you use the sink before you pick a material. If you drop heavy pans often, ask how each material handles chips and marks, and whether small marks can be touched up. If you want a quieter sink, check whether the model includes sound dampening pads or a coating on the underside. Choose the material that fits your care habits as well as your kitchen style.

    5. Consider Copper, Granite Composite, and Other Materials

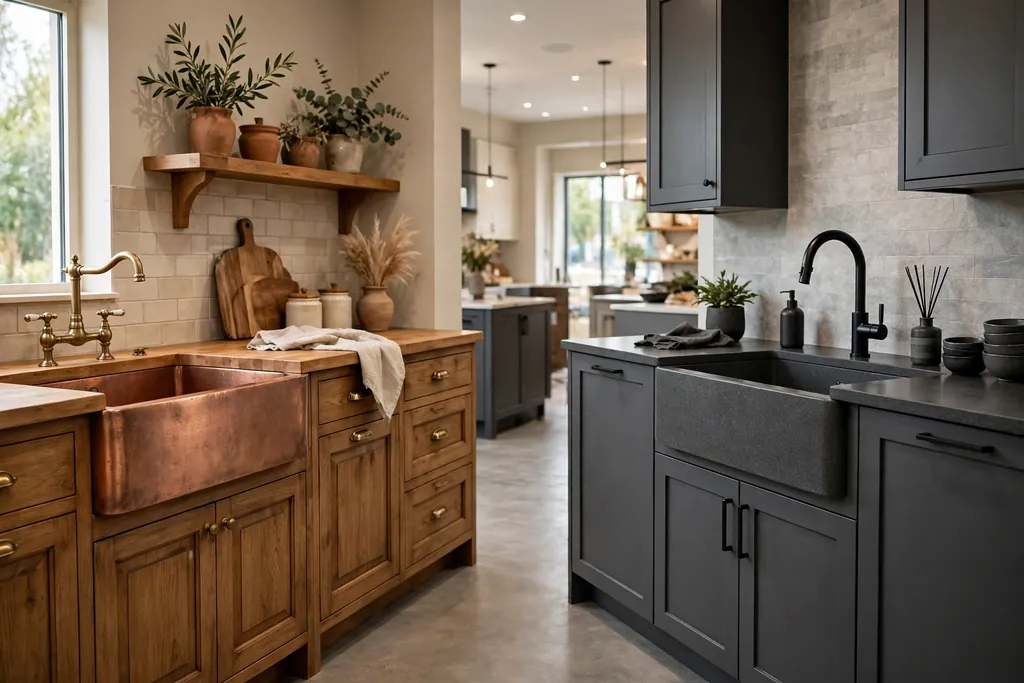
    Copper farmhouse sink and matte granite composite farmhouse sink in kitchen displays.

    Copper gives a warm, handcrafted look and changes in tone over time, which suits some kitchens and not others. If you like copper, check how it is finished and what cleaning routine the maker suggests, since harsh cleaners can change its surface. Granite composite sinks are made from a mix of stone and resin, give a matte finish, and come in a range of neutral colors that suit many countertops.

    Other materials, such as stone or concrete style sinks, can give a distinctive look, but they may need sealing or special care. For any less common material, ask about weight, cleaning, heat tolerance, and how chips or stains are handled. A material that looks right in a photo should also suit the cleaning products and cooking habits in your kitchen.

    6. Decide Between a Single Bowl and a Double Bowl

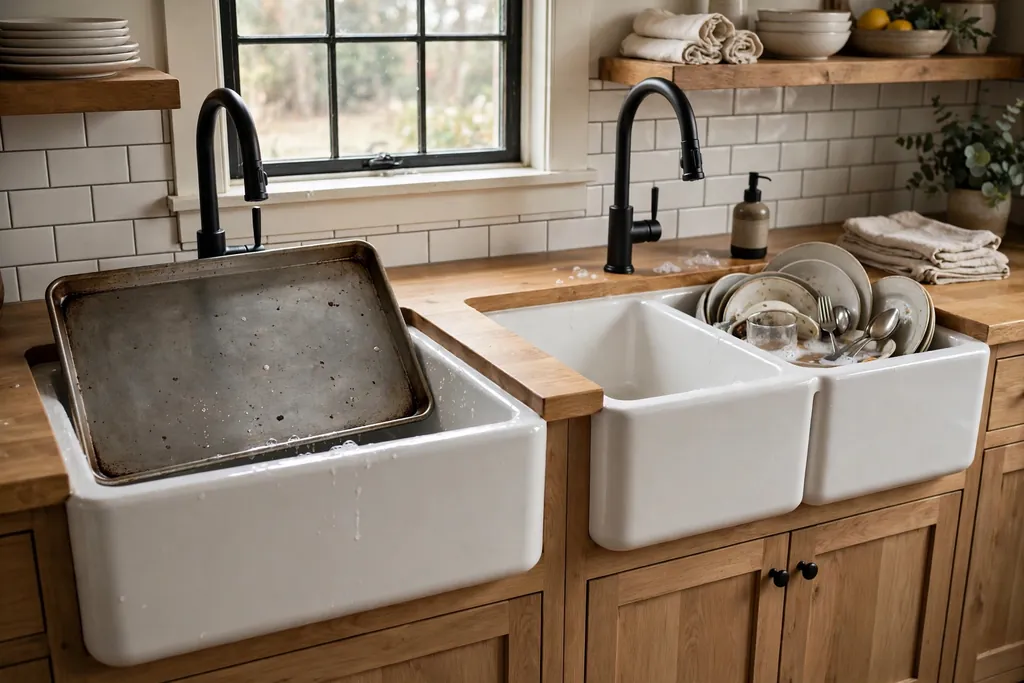
    Single bowl farmhouse sink with a sheet pan beside a double bowl farmhouse sink.

    A single bowl gives one large, open space for washing big pots, sheet pans, and roasting trays without a divider in the way. It suits cooks who wash large items by hand, soak baking sheets, or use a dish rack inside the sink. A single bowl can also make rinsing produce and filling large pots simpler, since nothing blocks the space.

    A double bowl splits the sink into two areas, so you can wash in one side and rinse or stack in the other. It suits kitchens where two people work at the sink, or where you like to keep dirty dishes apart from clean ones. Check the size of each bowl, not only the total width, since a double bowl with two small sides may not fit a large pan. If you use a disposal, check which bowl the drain and disposal will sit under.

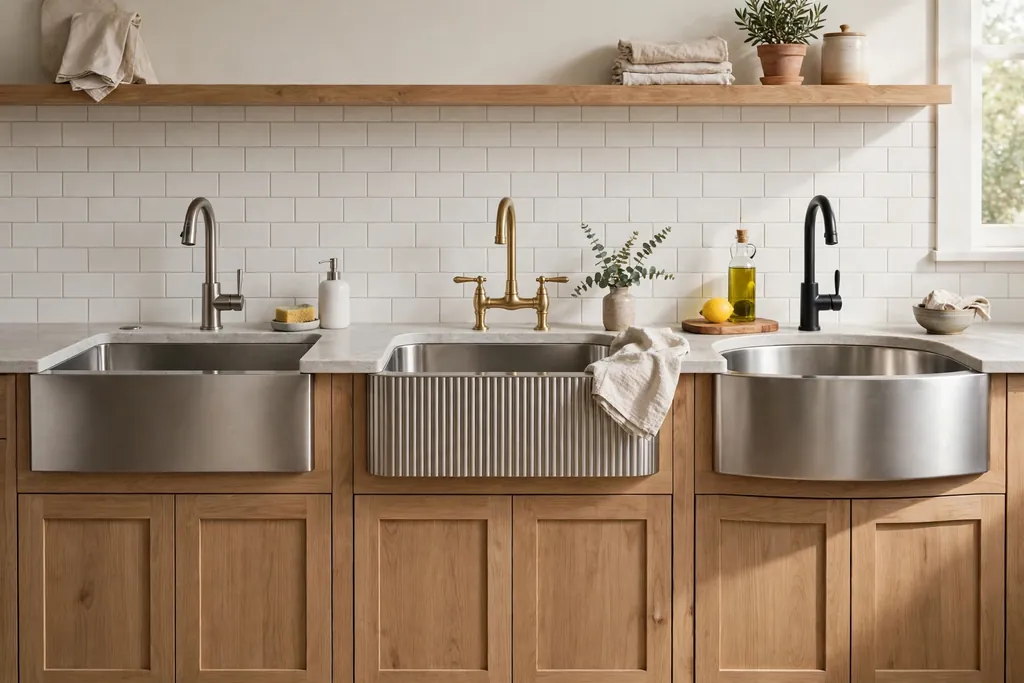
    7. Choose an Apron Front Style That Fits Your Kitchen

    Apron front sink fronts in flat, fluted, and curved styles.

    The apron is the exposed front panel of the sink, and its shape sets much of the sink’s character. A flat apron gives a clean, simple line that suits many kitchens. A fluted or paneled apron adds detail and suits a more traditional room. A curved or sloped apron softens the front and can feel less formal. Look at the apron in person if you can, since photos can flatten its shape and depth.

    Also check how the apron meets the countertop and the cabinet. Some aprons sit flush with the cabinet front, while others project slightly forward. The projection affects how close you stand to the sink and how water drips from the front edge. Choose an apron that fits the style of your cabinets and countertop, and confirm the cabinet front can be cut or adapted to fit it cleanly.

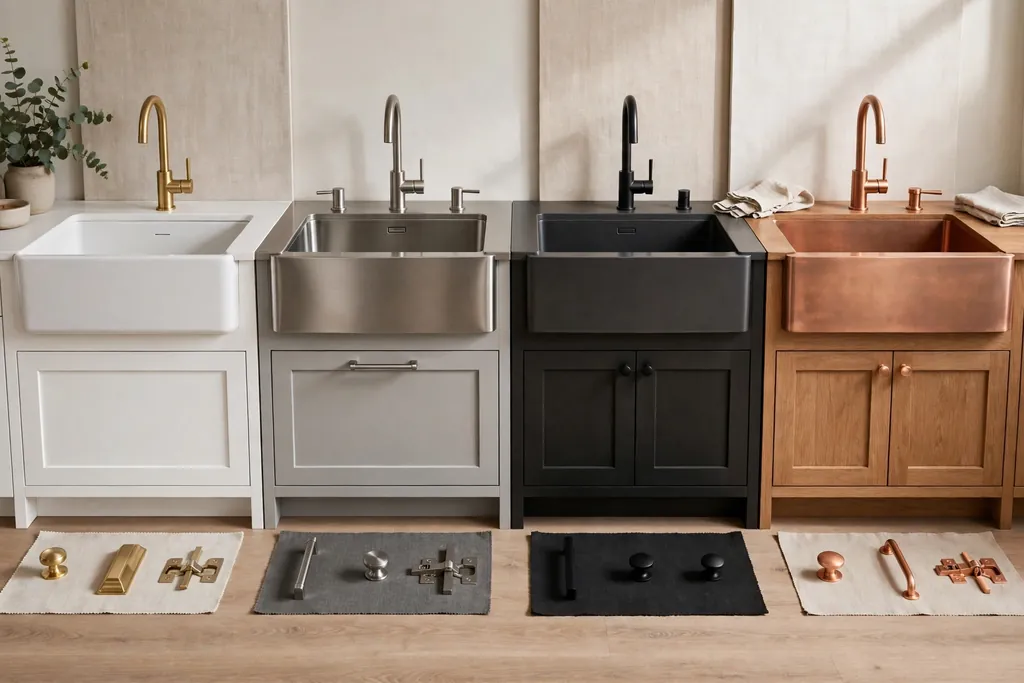
    8. Match the Sink Finish to Your Kitchen Style

    Kitchen sinks in white, steel, dark, and copper finishes with hardware samples.

    Finish covers color and surface texture, from bright white enamel to brushed steel, dark composite, and warm copper tones. A white sink can brighten a kitchen and suit painted cabinets, while a steel sink can blend with appliances and a modern countertop. A dark sink can anchor a light kitchen, but it may show water spots more clearly, so think about how often you wipe the sink dry.

    Match the sink finish to the faucet finish and the cabinet hardware, but do not feel you must match every metal exactly. Mixed finishes can work when they share a similar tone, such as warm metals together or cool metals together. Hold a sample near your countertop and cabinet color in daylight if you can, since kitchen lighting can change how a finish looks at home.

    9. Plan the Faucet and Hole Layout

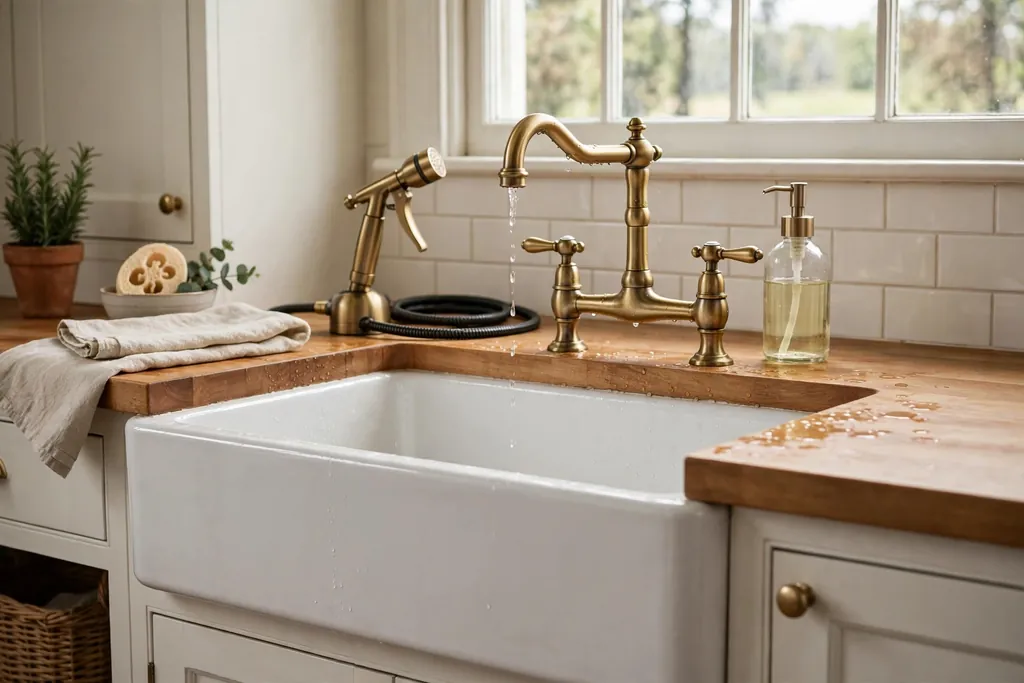
    Bridge faucet over a farmhouse sink with a soap dispenser and sprayer.

    Farmhouse sinks do not always include faucet holes, so check where your faucet will sit. Some kitchens mount the faucet on the countertop behind the sink, some use a wall mounted faucet, and some use a bridge faucet with separate hot and cold handles. Each option needs a different hole layout and a different amount of space behind the sink.

    Count the holes you need for the faucet, a sprayer, a soap dispenser, or a filtered water tap, and confirm the countertop or sink deck can hold them. Check the faucet height and reach against the bowl size, so the water stream lands in the center of the bowl and does not splash over the apron. If you plan a tall pot filler style faucet, check the clearance above the sink and any window or shelf behind it.

    10. Check Drain Placement and Garbage Disposal Fit

    Underside of a farmhouse sink showing a rear drain, pipes, and a garbage disposal.

    Drain placement affects how the sink drains and how much room is left under it. A rear drain leaves more usable space in the bowl and more room under the sink for a disposal or storage. A center drain can suit a double bowl, with one drain per side, but it may reduce the clear space under the middle of the sink. Check the drain position against your existing wall pipe before you order.

    If you use a garbage disposal, confirm that it fits under the bowl you plan to use it with, and that the drain height still allows a correct slope to the wall pipe. A deeper sink can lower the drain outlet, which may leave too little fall for the pipe. Measure the disposal height and the wall pipe height, and discuss any needed plumbing change with your installer before you commit to a sink depth.

    11. Understand Installation Types and Support Needs

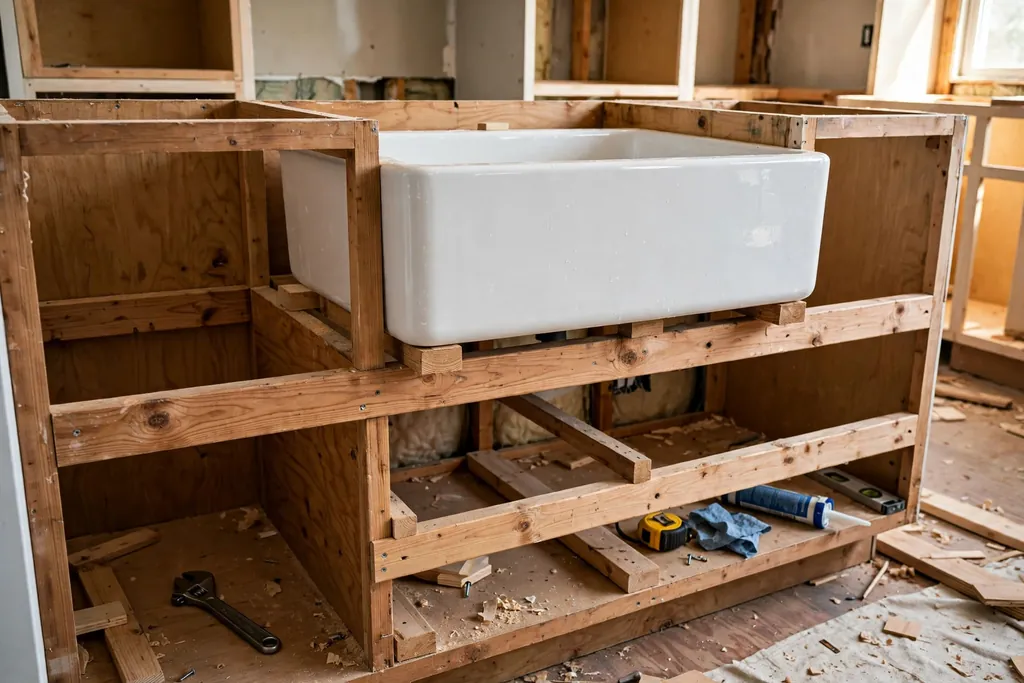
    Farmhouse sink supported by wooden rails inside an open kitchen cabinet.

    Farmhouse sinks are commonly installed as undermount sinks, where the sink rim sits below the countertop, or as flush mount sinks, where the rim sits level with the countertop. The choice affects the countertop cut, the seal around the sink, and how easy it is to wipe crumbs into the bowl. Ask your installer which method suits your countertop material, since some materials cut and seal more easily than others.

    Support is just as important as the cut. Heavy sinks need a sturdy frame or support rails inside the cabinet, not only a seal to the countertop. Ask how the sink will be supported, how the weight will be spread across the cabinet sides, and whether the cabinet frame needs reinforcement. A well supported sink stays level and keeps its seal, while a sink held only by sealant can shift over time.

    12. Plan for Accessories That Make Daily Use Easier

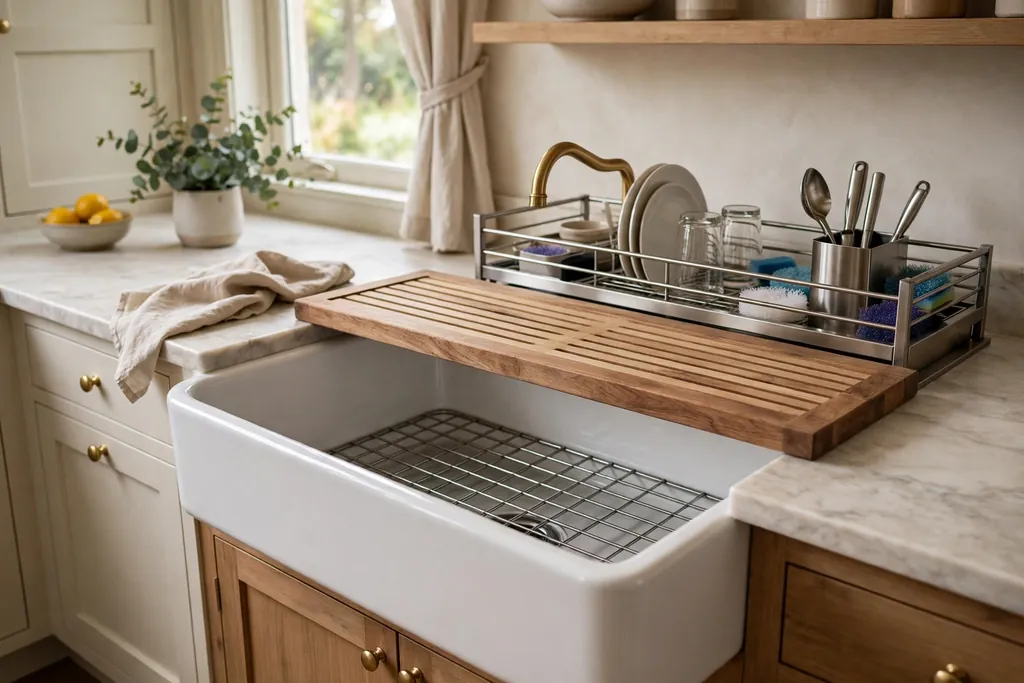
    Farmhouse sink fitted with a bottom grid, cutting board, and drying rack.

    Accessories can change how useful a farmhouse sink feels day to day. A bottom grid protects the bowl surface and keeps dishes off the drain. A cutting board that sits over the sink adds prep space in a small kitchen. A colander insert, a drying rack, and a sink caddy can help with rinsing and drying without taking counter space. Check which accessories are made to fit the exact sink model you are considering, since a grid or board made for another size may not sit level.

    Think about storage for accessories when they are not in use, and about cleaning them. A grid needs regular cleaning under its bars, and a wooden board needs drying after use. Choose accessories that solve a real daily task, such as rinsing produce or drying pans, rather than adding pieces that will sit unused in a cabinet.

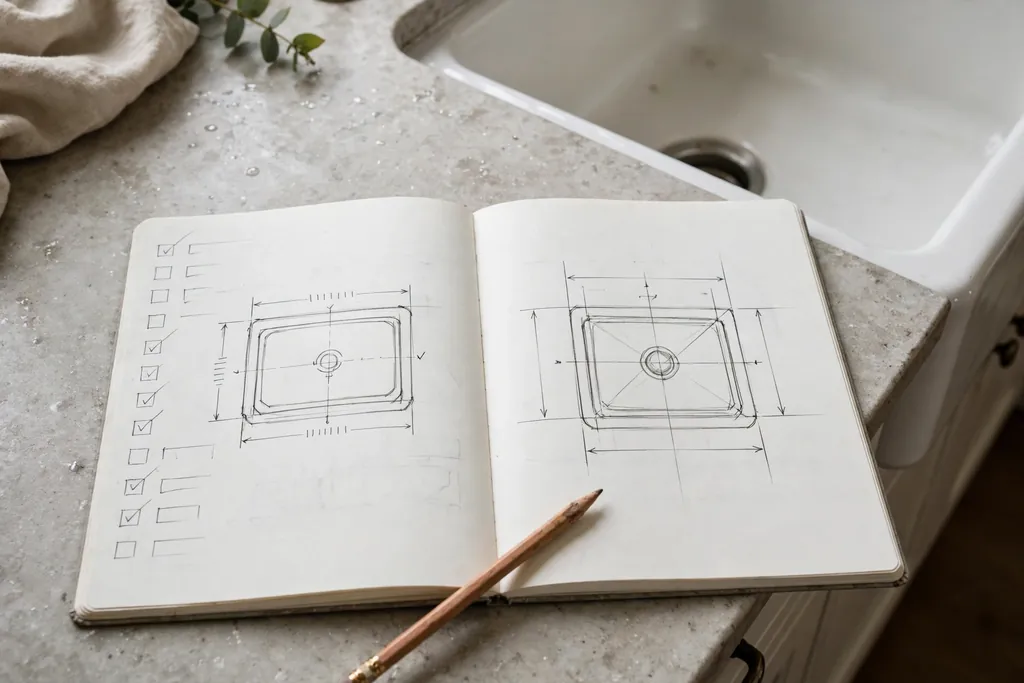
    13. Set a Practical Budget and Check What It Covers

    Kitchen planning notebook with sink measurements on a countertop near a farmhouse sink.
    Set a budget that covers the sink, the faucet if it is new, installation, countertop work, and any plumbing changes, not only the sink itself. Apron front installation can involve cabinet work, a new countertop cut, support framing, and plumbing adjustments, and those costs vary with the kitchen. Ask for a written scope that lists each item, so you can compare quotes fairly.
    Also check what is included with the sink, such as a grid, a drain assembly, or a mounting kit, and what you need to buy separately. A sink that seems lower in cost may need extra parts, while a higher cost sink may include a grid and drain. Compare the full cost of each option, and keep a small reserve for surprises found inside the cabinet during installation.

    14. Care for Your Farmhouse Sink Day to Day

    Wiping a clean farmhouse sink dry with a soft cloth in a bright kitchen.

    Daily care keeps a farmhouse sink looking good and working well. Rinse the bowl after use, wipe up standing water around the apron and faucet base, and dry the surface if your water leaves spots. Use cleaners suited to your sink material, and avoid harsh abrasives on enamel, copper, and composite surfaces unless the maker suggests them. A soft cloth and a mild cleaner suit most daily cleaning.

    Check the seal where the sink meets the countertop from time to time, and look for leaks under the cabinet after installation and after any plumbing work. Clean the drain and disposal as suggested by their makers, and keep heavy items from sitting in the sink for long periods. Simple, regular care protects the finish and the seal, and it keeps the sink a pleasant part of daily kitchen work.

    Conclusion

    Choosing a farmhouse sink starts with your cabinet measurements, then moves to size, depth, material, bowl layout, and apron style. Faucet holes, drain placement, disposal fit, support, and the full cost of installation all matter as much as the look of the sink. Work through the sections in order, write down your measurements, and confirm the details with your installer before you order. For more ideas from Dwell Ovell, browse the home page for home decor guides.

    FAQs

    What size farmhouse sink do I need for my kitchen?

    The size you need depends on your base cabinet inside width and on the large items you wash most often, so measure the cabinet first and check that your longest pan fits the bowl. A moderate sink often works better than the largest sink that fits, since it leaves more counter space for prep and drying.

    What is the best material for a farmhouse sink?

    The best material depends on how you cook and clean, since fireclay gives a classic bright surface, stainless steel is lighter and suits many styles, cast iron gives a deep glossy finish, and copper and granite composite give warmer or matte looks. Choose the material whose weight, care routine, and repair options fit your kitchen, rather than choosing on looks alone.

    Should I choose a single bowl or double bowl farmhouse sink?

    Choose a single bowl if you wash large pots, sheet pans, and roasting trays by hand and want one open space without a divider. Choose a double bowl if you like to wash in one side and rinse or stack in the other, or if two people often work at the sink, and check that each bowl is large enough for your pans.

    Do farmhouse sinks need special cabinet support?

    Yes, farmhouse sinks often need a sturdy support frame or rails inside the cabinet, especially heavy fireclay and cast iron models, since the sink should not rest on sealant alone. Ask your installer how the weight will be spread across the cabinet sides and whether the cabinet frame needs reinforcement before you order.

    Can a farmhouse sink fit in an existing kitchen cabinet?

    A farmhouse sink can fit an existing cabinet in some kitchens, but the cabinet front usually needs a cut or a modified frame for the apron, and the countertop may need a new cut as well. Measure the cabinet inside width, depth, and height, check the plumbing and disposal fit, and discuss the cabinet work with your installer before you buy.

    How do I clean and care for a farmhouse sink?

    Rinse the bowl after use, wipe up standing water around the apron and faucet base, and use a mild cleaner suited to your sink material with a soft cloth. Avoid harsh abrasives on enamel, copper, and composite surfaces unless the maker suggests them, and check the countertop seal and under cabinet plumbing from time to time for leaks.

  • White Quartz Kitchen Countertops: Colors, Finishes, and Design Ideas

    White Quartz Kitchen Countertops: Colors, Finishes, and Design Ideas

    Choose white quartz kitchen countertops by deciding how much pattern you want, then matching the finish and edge to your cabinets, backsplash, and lighting. Pure white slabs suit a clean, minimal look, while soft gray or gold veining adds movement without a busy pattern. Bring samples home, check them in daylight and evening light, and compare care needs.

    White quartz works in many kitchens because the base color stays light and calm while the pattern can range from nearly plain to clearly veined. That range is the main choice to make first. A plain slab keeps attention on cabinets, hardware, and a backsplash, while a veined slab becomes a feature of the room on its own. The sections below walk through each decision in order, so you can compare samples with a clear list of what to look for. For more room ideas, visit the Dwell Ovell home page.

    Key Takeaways

    • Decide on the amount of veining first, since it sets the look of the whole kitchen more than any other single choice.
    • Compare polished, honed, and matte finishes in your own kitchen light, because the same slab can look different under daylight and evening bulbs.
    • Choose an edge profile that suits your cabinet style and how the counter will be used each day.
    • Pair white quartz with cabinets and a backsplash that share an undertone, so the whites do not clash.
    • Take samples home and check them next to cabinet doors, flooring, and paint before you place an order.
    • Plan simple daily care and quick wipe ups, and check the care guidance for your chosen finish.

    1. Learn the Main White Quartz Color Families

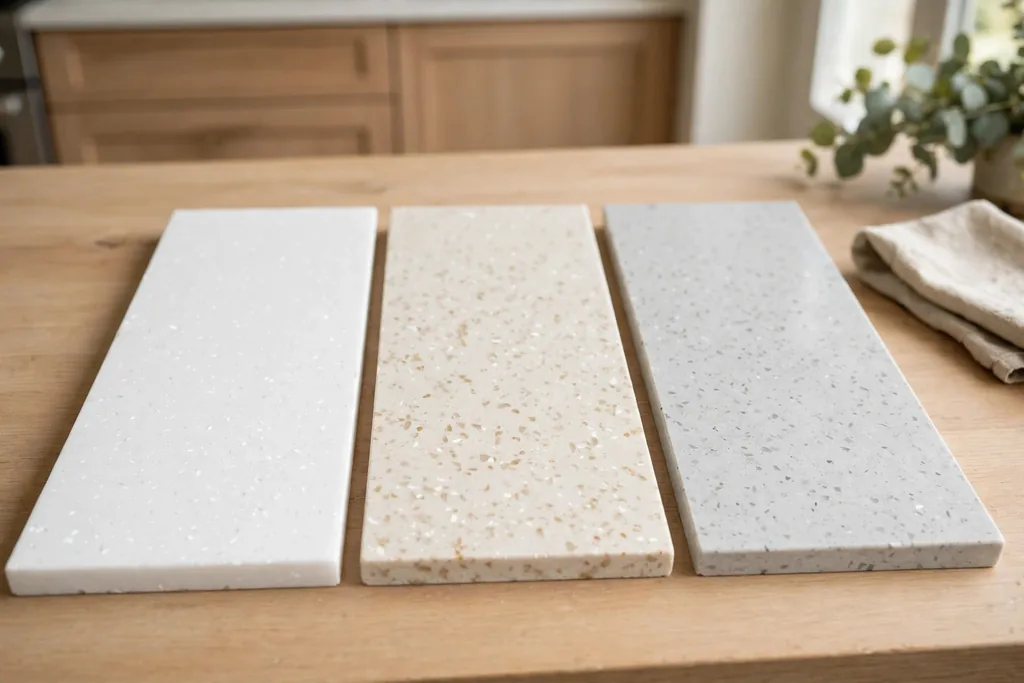
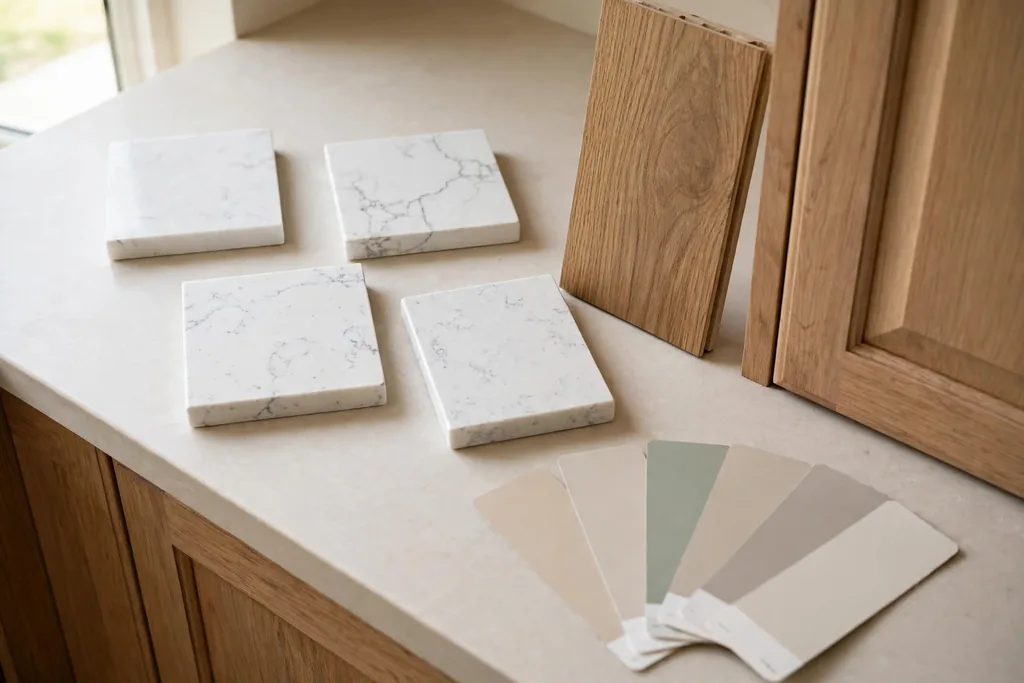
    Three white quartz samples in bright white, warm white, and soft white gray side by side.

    White quartz is not one single shade. Some slabs read as bright, cool white, others as warm white with a creamy cast, and others sit between the two with a soft gray tint. The undertone matters because it decides whether the counter blends with cool gray cabinets, warm wood, or crisp white paint. Hold a sample against your cabinet door and your wall color in daylight to see whether the white leans cool or warm.

    Start by sorting samples into three groups: bright white, warm white, and soft white gray. Bright white suits kitchens with cool grays, black hardware, and stainless steel. Warm white pairs well with cream cabinets, natural wood, and brass tones. Soft white gray works as a middle ground when your kitchen mixes warm and cool elements. Naming the family first makes every later choice easier, from backsplash tile to faucet finish.

    2. Compare Finishes: Polished, Honed, and Matte

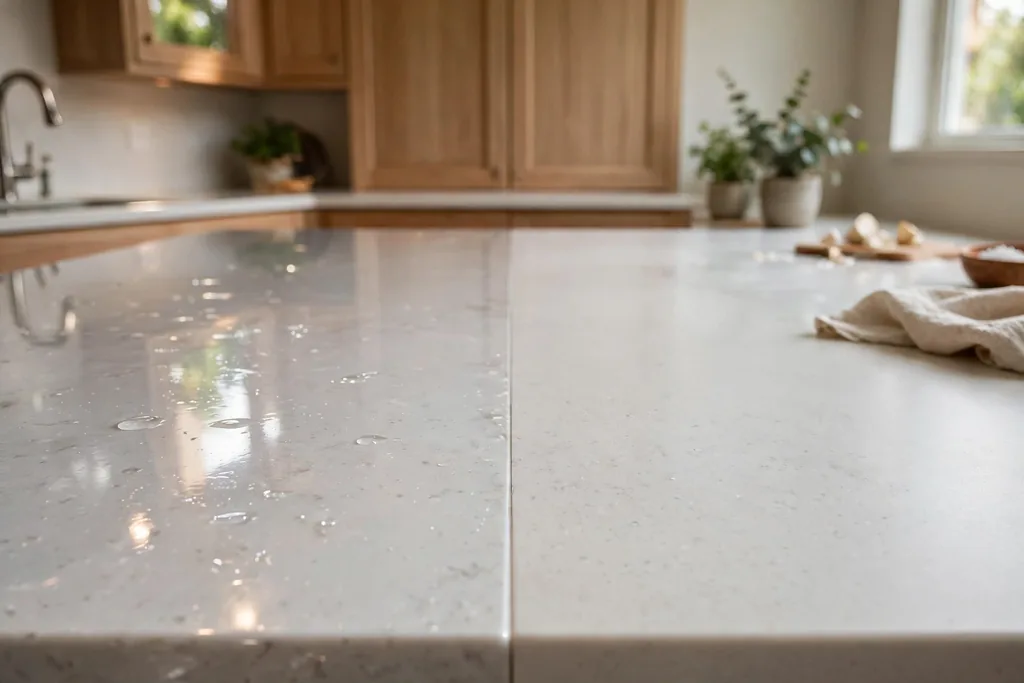
    White quartz countertop showing polished and honed finishes side by side.

    A polished finish has a clear shine that reflects light and makes veining stand out. It suits kitchens where you want a bright, crisp surface and where the counter is a focal point. A honed finish has a softer, low shine look that feels calm and muted, and it can suit farmhouse, rustic, and relaxed modern kitchens. A matte finish is flatter still, with very little reflection, and it pairs well with flat front cabinets and natural textures.

    Each finish also changes how the surface feels and how marks show in daily use. Shine can highlight fingerprints and water spots, while a softer finish can hide them better but may show some marks of its own. Ask for a sample in each finish you are considering, wipe it with a damp cloth, and look at it from different angles. The finish you like in the store may read differently under your kitchen lights, so a home check is worth the time.

    3. Read Veining Patterns Before You Choose

    Large white quartz slab with soft gray veining seen in full.

    Veining is the pattern of lines running through a slab, and it ranges from faint and fine to bold and wide. Fine veining gives a quiet look that suits small kitchens and busy backsplashes, because it adds interest without competing for attention. Medium veining suits most kitchens, since it reads as natural stone character while staying easy to pair with other materials. Bold veining makes a clear statement and works best when the rest of the kitchen stays simple.

    Look at the full slab, not only a small sample, when veining matters to you. A sample may show one quiet corner of a slab that is much busier elsewhere, or one bold streak that does not repeat across the whole piece. Ask how the pattern runs across the slab and where the main cuts will fall, such as across an island or beside a sink. A slab with a calm section for the main work area and a livelier section for an island can give you both looks in one kitchen.

    4. Check Thickness and Slab Layout

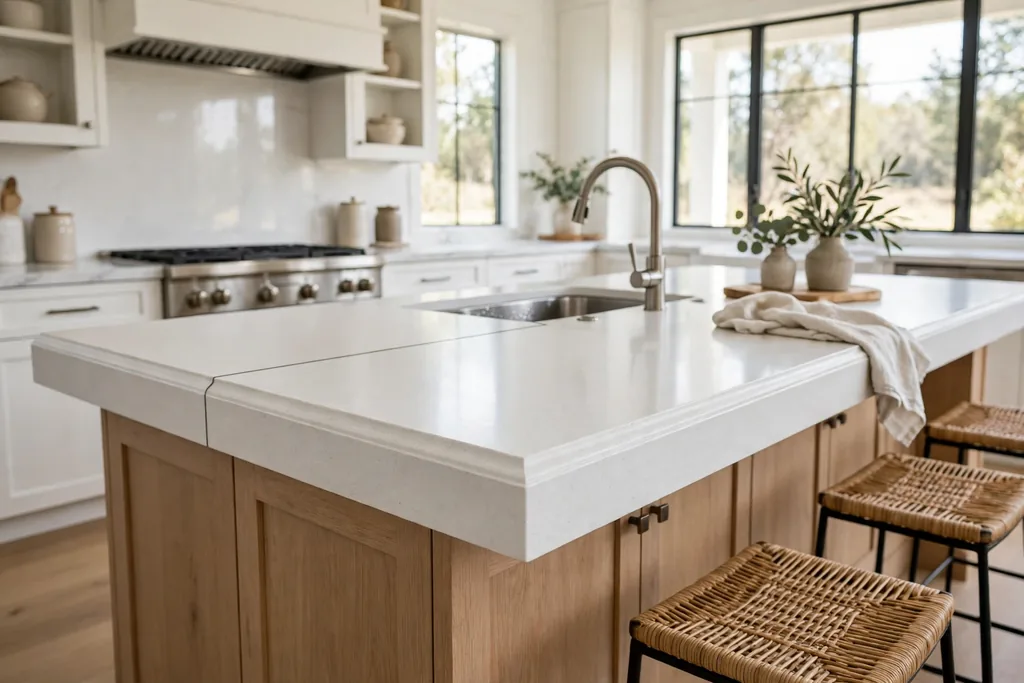
    Kitchen island with a thick white quartz edge and a seam near the sink.

    Most kitchen counters use a standard slab thickness, and the edge can be built up to look thicker if you want a chunkier profile. A thicker looking edge suits large islands and bold cabinet styles, while a slim edge suits a light, modern kitchen. Think about how the edge will meet the cabinet front and whether you want a small overhang for seating at an island or peninsula.

    Slab layout matters as much as thickness. Seams are the joins where two pieces meet, and their placement affects both the look and the pattern flow. Long runs, L shapes, and large islands often need at least one seam, so ask where seams will sit and whether veining can be lined up across them. A well placed seam near a sink or a cooktop is less noticeable than one cutting across an open island, so raise the question before cutting begins.

    5. Choose an Edge Profile

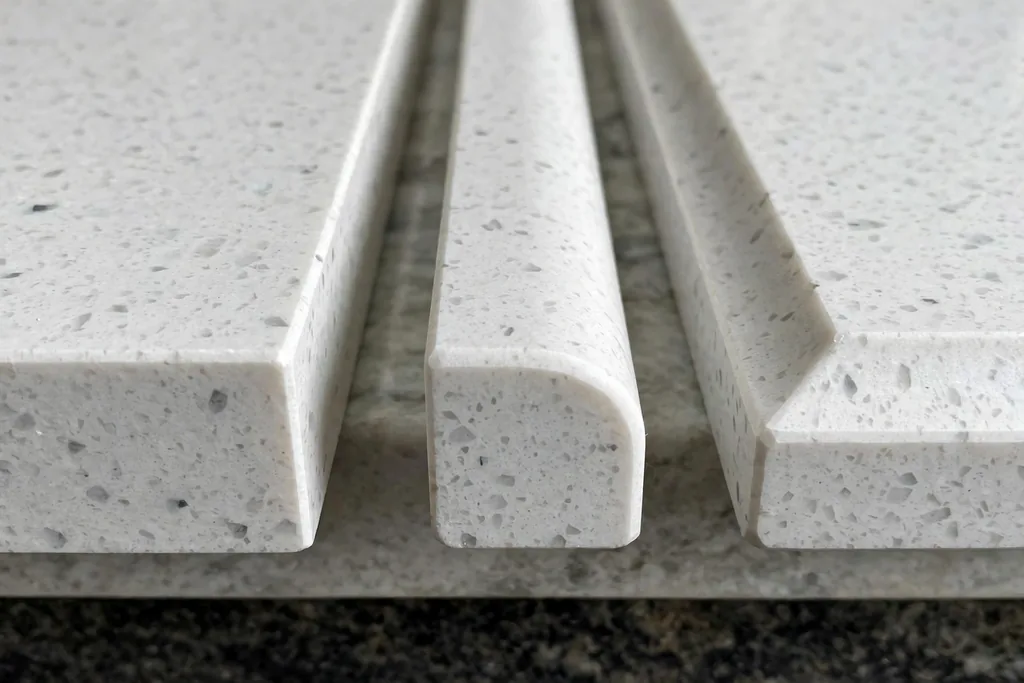
    Three white quartz edge profiles in square, rounded, and beveled shapes.

    The edge profile is the shape of the counter edge, and it changes the style of the kitchen more than many people expect. A straight, square edge suits modern and minimal kitchens. A slightly rounded eased edge softens the look and suits family kitchens where people lean on the counter often. A beveled edge adds a small angled detail, while an ogee or layered edge suits classic and traditional rooms with detailed cabinets.

    Practical use matters too. A rounded edge is kinder to hips and elbows in a busy kitchen, while a sharp square edge can chip more easily if heavy pots hit it. A thicker built up edge looks substantial on an island but adds weight and cost to the job, so weigh the look against the budget for the whole project. Ask to see and touch edge samples, since a profile that looks good in a photo may feel different in daily use.

    6. Pair White Quartz with Cabinet Colors

    White quartz countertops with deep green cabinets and brass hardware.

    White quartz pairs with almost every cabinet color, but the pairing changes the mood of the room. White cabinets with white quartz give a bright, seamless look, so vary the hardware, backsplash, or flooring to keep the room from feeling flat. Gray cabinets with white quartz give a cool, calm kitchen, especially with soft gray veining that ties the two together. Navy, green, and other deep colors make white counters stand out and give the kitchen a clear contrast point.

    Wood cabinets need a closer look at undertones. Warm wood with warm white quartz feels soft and welcoming, while warm wood with bright cool white can clash if the whites pull in opposite directions. Bring a cabinet door sample, or a photo of your cabinets in daylight, when you shop for slabs. The goal is a pairing where the counter and cabinets sit comfortably together, with one of them leading and the other supporting.

    7. Match a Backsplash Without Clashing

    White quartz countertops with a plain white subway tile backsplash.

    The backsplash sits right next to the counter, so a clash there is hard to ignore. A simple rule helps: let either the counter or the backsplash carry the pattern, and keep the other quiet. If your quartz has bold veining, a plain subway tile or a solid color slab backsplash keeps the kitchen calm. If your quartz is nearly plain, a patterned tile, a herringbone layout, or a textured stone backsplash can add the interest the counter does not.

    Check whites together before you decide. Tile whites vary just as quartz whites do, and a cool white tile next to a warm white counter can look mismatched once both are installed. Place the tile sample flat against the quartz sample, in the same light the kitchen gets, and step back to view them together. Grout color matters too: a matching grout keeps the backsplash quiet, while a dark grout draws attention to each tile and adds pattern of its own.

    8. Plan Sinks, Faucets, and Cooktop Cutouts

    White quartz countertop with an undermount sink and a gooseneck faucet.

    Cutouts for sinks, faucets, and cooktops should be planned before the slab is cut, since changes after cutting are limited. An undermount sink gives a smooth line from counter to sink and makes wiping crumbs into the sink easy. A farmhouse sink changes the front edge of the counter run, so its width and apron height need to be set early. A drop in sink is simpler to fit but leaves a rim on the surface that needs cleaning around.

    Faucet placement follows the same rule. Check the number of faucet holes, the reach of the faucet over the sink, and whether a soap dispenser or filtered water tap needs its own hole. Cooktop cutouts need exact measurements and clear space around burners for safe use. Write down every cutout, its size, and its position, and confirm them on the template before cutting starts, so the finished counter fits the fixtures you already own or plan to buy.

    9. Use Lighting to Show the True White

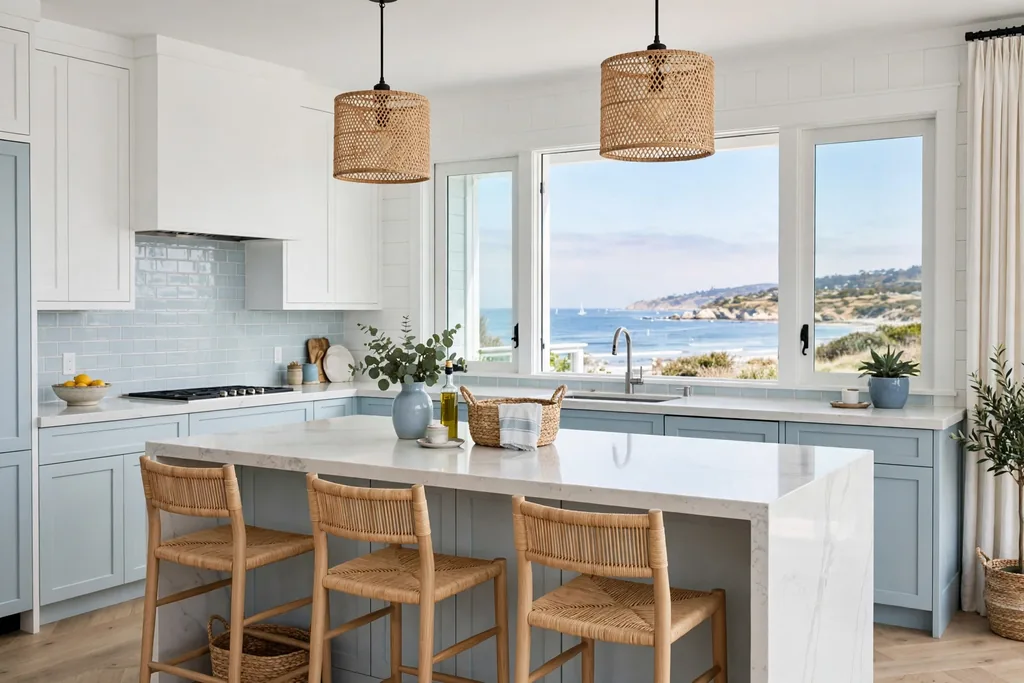
    White quartz kitchen island under daylight and warm pendant lights.

    White quartz changes with light, so check samples under the light your kitchen actually has. Daylight from a window shows the truest white, while warm evening bulbs can make a cool white look warmer and a warm white look creamier. Under cabinet lights add brightness to the work surface and can make veining stand out, while a single ceiling light can leave corners in shadow and make the counter look gray.

    Plan lighting in layers where you can. Daylight and general ceiling light set the overall tone, under cabinet lights brighten the work areas, and pendant lights over an island add warmth and focus. Check your chosen slab under each layer, not only in a bright showroom. If the kitchen has little daylight, a slightly brighter white may keep the room feeling open, while a warm white can stop a north facing kitchen from feeling cold.

    10. Plan Cleaning and Daily Care

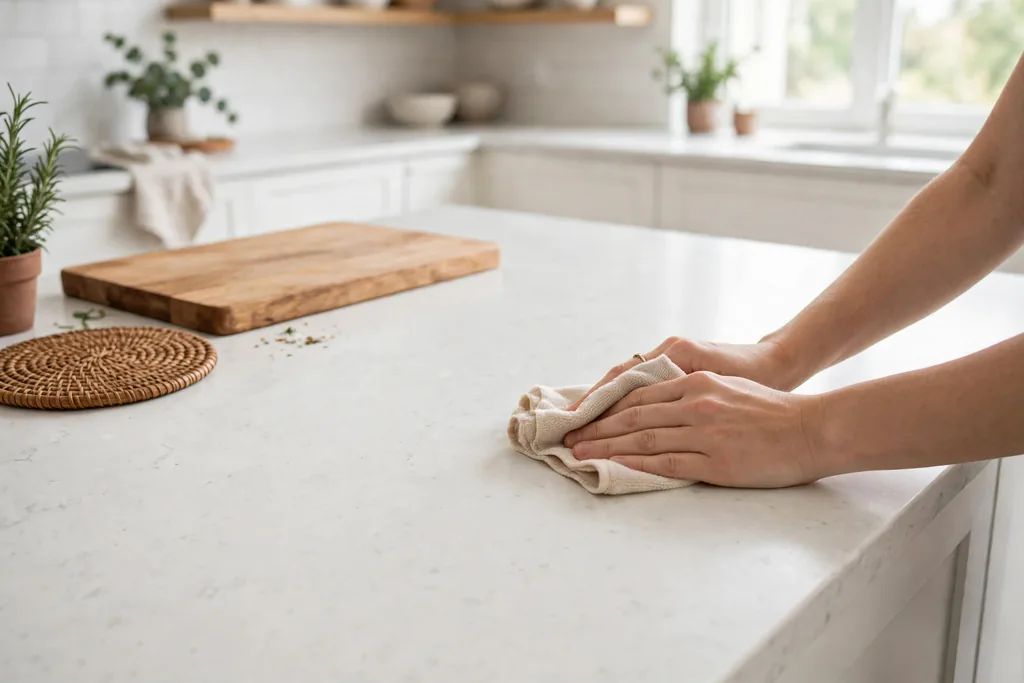
    Wiping a white quartz countertop with a soft cloth near a cutting board.

    White quartz is a practical choice for daily kitchen use, but a simple care routine keeps it looking its best. Wipe spills soon after they happen, especially strongly colored foods and drinks such as tomato sauce, coffee, and red wine, since sitting spills are harder to remove from any light surface. Use a soft cloth with warm water and a mild soap for daily cleaning, and dry the surface after wiping to avoid water marks.

    Avoid harsh pads and strong cleaners that can dull the finish over time, and use trivets or boards under very hot pans and for heavy chopping. Cutting boards protect both the counter and your knives, and they keep the surface free of small scratches that catch the eye on a white background. Read the care guidance that comes with your slab and keep it with your kitchen records, so everyone in the household follows the same routine.

    11. Match White Quartz to a Design Style

    Coastal kitchen with white quartz countertops and light wood stools.

    White quartz adapts to many styles, but the details around it set the style. A modern kitchen pairs white quartz with flat front cabinets, simple hardware, and a plain backsplash for a clean, open look. A farmhouse kitchen pairs it with shaker cabinets, wood accents, and a farmhouse sink for warmth. A classic kitchen pairs it with detailed cabinets, a layered edge profile, and brass or bronze hardware.

    Coastal kitchens pair white quartz with light wood, pale blues, and woven textures for an airy feel. A transitional kitchen mixes modern and classic details, such as simple cabinets with a soft edge profile and a quiet backsplash. Pick the style that matches the rest of your home, then let the veining, finish, and edge follow that style. A counter that fits the home around it will look right for years, even as small decor items change.

    12. Compare Samples at Home Before Deciding

    White quartz samples next to a cabinet door, flooring sample, and paint swatches.

    The last step is also the most useful: compare samples at home before you order. Borrow or buy samples of your top two or three slabs, in the finish you plan to use, and place them on your existing counters or on a board near the cabinets. Live with them for a few days, and look at them in morning light, afternoon light, and evening light, with the kitchen lights on and off.

    Test each sample the way you will use the counter. Set a mug, a cutting board, and a pan beside it, wipe it with a damp cloth, and check how it looks next to your flooring, wall paint, and hardware. Note which sample still looks good at the end of the day, when the kitchen is in normal use rather than showroom light. The sample that looks right in your own kitchen, next to your own cabinets, is the one to order.

    Conclusion

    Choosing white quartz kitchen countertops comes down to a short list of choices made in the right order: color family, finish, veining, edge, cabinets, backsplash, lighting, and care. Start with the amount of pattern you want, then check each later choice against that first decision. Samples checked at home, in your own light and next to your own cabinets, will tell you more than any showroom display. With those checks done, you can order with confidence and enjoy a bright, practical kitchen surface for years.

    FAQs

    What is the best white quartz color for a kitchen?

    The best white quartz color is the one whose undertone matches your cabinets and flooring, so check samples at home in your own light. Bright white suits cool gray and black kitchens, warm white suits cream and wood kitchens, and soft white gray works as a middle ground when your kitchen mixes warm and cool elements.

    Should I choose polished, honed, or matte white quartz?

    Choose polished white quartz for a bright, reflective surface that shows veining clearly, honed for a softer low shine look, or matte for a flat, calm surface with very little reflection. Compare all three in your kitchen light, since shine changes how marks and fingerprints show in daily use.

    Does white quartz show stains easily?

    White quartz can show sitting spills more clearly than a dark counter, so wipe up strongly colored foods and drinks soon after they happen. Daily cleaning with a soft cloth, warm water, and mild soap, plus quick wipe ups, keeps a white surface looking clean in normal kitchen use.

    What backsplash goes with white quartz countertops?

    A plain backsplash goes well with boldly veined white quartz, while a patterned tile or textured backsplash suits nearly plain white quartz. Match the whites first, since tile whites vary, and choose a grout color that either quiets the backsplash or adds pattern, depending on the look you want.

    What edge profile is best for white quartz kitchen countertops?

    A straight or slightly rounded eased edge suits most kitchens, since it looks clean and is kind to hips and elbows in daily use. A beveled edge adds a small detail, while a layered or ogee edge suits classic rooms with detailed cabinets, so match the edge to your cabinet style and how the counter will be used.

    How do I pick white quartz that will not clash with my cabinets?

    Hold a quartz sample directly against a cabinet door and check both in daylight and evening light before ordering. Pick a shared undertone, either cool or warm, and let either the counter or the cabinets lead, with the other supporting, so the two surfaces sit comfortably together.

  • 19 Farmhouse Kitchen Island Ideas with Practical Rustic Charm

    19 Farmhouse Kitchen Island Ideas with Practical Rustic Charm

    A farmhouse kitchen island works best when it pairs a hard working top with a simple rustic base and one clear job, such as seating, storage, or prep space. Butcher block, reclaimed wood, beadboard, and shiplap give the rustic look, while drawers, open shelves, and a seating overhang keep the island practical for daily cooking and family meals.

    Start by measuring the walkways around the island, since a farmhouse island needs room to work on every side. Leave enough space to open drawers and the dishwasher, and to pull out a stool without blocking the path to the stove. Then pick the top for how you cook, the base for the look you want, and one storage feature that solves a real problem in your kitchen, such as a place for baking trays or a bin that hides trash. If the island sits near the stove wall, see kitchen range hood ideas for a hood style that suits the same rustic scheme, and for storage ideas that pair with an island, see corner kitchen cabinet ideas.

    Key Takeaways

    • Give the island one clear job first: prep space, seating, storage, or a sink run, then build the rest around it.
    • Pick the top for how you cook: butcher block and reclaimed wood suit heavy prep, while a painted base suits a softer look.
    • Keep walkways clear on every working side, with room for drawers, the dishwasher door, and pulled out stools.
    • Use beadboard, shiplap, turned legs, or a trestle base to carry the farmhouse look, and keep the rest of the room plain enough to let the island lead.
    • Put everyday items at hand height: dishes on open shelves, trays in vertical slots, and bins on a pull out.
    • In a small kitchen, choose a narrow or rolling island that adds counter space without blocking the path between stove, sink, and fridge.

    1. Butcher Block Top on a Painted Base

    Farmhouse kitchen island with a thick butcher block top and a white painted shaker base, wood stools nearby.

    Pair a thick butcher block top with a painted base in white, cream, or soft grey for the most classic farmhouse island in this list. The wood top gives a warm, hard working prep surface that suits chopping, rolling dough, and serving, while the painted base keeps the island light in a room with wood floors or wood beams. Keep the base simple, with shaker style doors and plain cup pulls, so the wood grain stays the focus.

    Oil the top regularly if you use it for direct cutting, and wipe up water near the sink end at once, since standing water marks wood. A butcher block top also pairs well with a window over the sink nearby, and for window treatments that suit the same relaxed kitchen, see kitchen window decor ideas. If the top gets heavy knife marks, sand and re-oil one section at a time rather than replacing the whole top.

    2. Reclaimed Barn Wood Top

    Farmhouse kitchen island with a reclaimed barn wood top showing grain and knots, plain painted base, wood floor.

    Use a reclaimed barn wood top for an island with visible grain, knots, and a weathered tone that new wood cannot copy. Each board carries a slightly different color, so the top reads as collected over time, which suits a farmhouse kitchen with exposed beams, a wood floor, and simple white walls. Keep the base plain and painted, since a busy base beside a busy top will fight for attention.

    Check that the top is sealed with a food safe finish, and ask how the boards were cleaned and joined before you buy, since reclaimed wood varies. Keep hot pans on trivets, since a reclaimed top can scorch just like any wood top. This top suits a large island best, where the full length of the boards can show, and it pairs well with matte black hardware and a simple linen runner down the center.

    3. White Beadboard Panel Island

    White farmhouse kitchen island clad in vertical beadboard panels, light kitchen with white cabinets.

    Clad the island base in white beadboard panels for a cottage farmhouse look with vertical lines and soft shadow gaps. Beadboard suits a kitchen with white cabinets and a light floor, since the panel lines add texture without a new color. Use it on the seating side and the ends, where guests see it most, and keep the working side plain for easy cleaning.

    Paint the beadboard the same white as the cabinets so the island reads as part of the same run, or use a slightly warmer white for a hand painted feel. Wipe the grooves near the floor often, since crumbs and dust collect in the vertical lines. Beadboard also hides small dents better than a flat panel, which helps on an island that takes daily bumps from stools and feet.

    4. Shiplap Sided Island

    Farmhouse kitchen island with horizontal shiplap boards on the base, painted cream, open plan kitchen.

    Run horizontal shiplap boards around the island base for a relaxed farmhouse texture that matches shiplap walls or a shiplap range hood surround. The horizontal lines stretch the island visually, which helps a long island read as one calm block rather than a row of cabinet doors. Paint the boards white or cream for a light look, or leave them in a pale washed wood for more warmth.

    Keep the board gaps even and the corners neat, since uneven shiplap shows at the island ends. Seal the paint near the floor, where mops and shoes splash, and use a washable finish on the seating side. Shiplap suits an island in an open plan room, where the back of the island faces the living space and needs to look finished from every angle.

    5. Furniture Style Island with Turned Legs

    Furniture style farmhouse kitchen island with turned legs and a lower shelf holding baskets.

    Choose a furniture style island with turned legs and a lower shelf for a piece that looks like a farmhouse table rather than a row of cabinets. The open space under the top keeps the island light on the floor, which suits a smaller kitchen or a room where a solid base would feel heavy. Turned legs also suit a kitchen with a farmhouse table nearby, since the two pieces can share the same leg shape.

    Use the lower shelf for baskets, large bowls, or cookbooks, and keep the top clear for prep. Because a legged island has less closed storage, pair it with wall cabinets or a pantry for items that need hiding. Check that the legs sit level on your floor, and add felt pads if the island moves when you lean on it during prep.

    6. Island with an Apron Front Sink

    Farmhouse kitchen island with a white apron front sink, simple faucet, clear counters each side.

    Build an apron front sink into the island for a farmhouse kitchen where the island faces the room and the sink becomes part of the view. The wide front panel reads as a classic farmhouse detail, and standing at the island sink lets the cook face family or guests instead of a wall. Keep the counter on each side of the sink clear for a drying rack on one side and prep space on the other.

    Plan the plumbing before you order, since an island sink needs a vent route through the floor, and check the cabinet depth so the apron front sits flush with the base. Keep the faucet simple, in brushed nickel or matte black, so it does not compete with the apron front. This island suits a large kitchen best, where the sink run does not crowd out the prep counter.

    7. Breakfast Bar Island with Stool Seating

    Farmhouse kitchen island with a seating overhang and wood stools, family eating breakfast.

    Add a seating overhang on one side of the island so it doubles as a breakfast bar with room for two or three stools. A 12 inch overhang gives knees room without a support leg in most cases, but check the counter material, since a heavy stone top may need brackets. Wood or woven stools with a low back suit the farmhouse look and tuck under the overhang when not in use.

    Keep the seating side free of drawers and bins, so legs and feet have clear space, and put the working storage on the kitchen side. A breakfast bar island suits families who eat quick meals in the kitchen, and it keeps the cook in conversation while food is prepared. Wipe the overhang edge often, since it collects crumbs from every meal.

    8. Rolling Island on Casters

    Small rolling farmhouse kitchen island on lockable casters with a butcher block top.

    Choose a rolling island on lockable casters for a kitchen where the layout needs to change, such as a room that hosts large gatherings or a rental where a fixed island is not an option. Roll it against a wall for extra counter space during prep, then pull it out as a serving station when guests arrive. Lock the casters before chopping, so the island stays put under pressure.

    Pick casters rated for the loaded weight, and check that the island clears the fridge and oven doors when it moves. A rolling island suits a small kitchen well, since it can live in a corner when not needed. Keep the top in butcher block or a light wood, so the island stays easy to move, and store only lighter items inside.

    9. Two Tier Island for Prep and Seating

    Two tier farmhouse kitchen island with a lower prep counter and a raised bar top, tall stools.

    Build a two tier island with a lower prep counter on the kitchen side and a raised bar top on the seating side for a clear split between work and eating. The raised tier hides prep mess from guests seated on the other side, and it gives the seating side a bar height that suits taller stools. Keep the two tops in matching materials, such as butcher block below and the same wood above, so the split reads as planned.

    Check the total height against your stools, since a raised bar needs a taller seat than a standard counter. The lower tier should stay at normal counter height for comfortable chopping. This island suits an open plan kitchen, where the raised side faces the living room and acts as a visual screen between cooking and relaxing.

    10. Island with Open Shelving for Daily Dishes

    Farmhouse kitchen island with open shelving holding stacked white plates and bowls.

    Fit open shelves into one end or one side of the island for the dishes, bowls, and glasses you use every day. Open shelving keeps the most used items within one step of the dishwasher and the table, and it gives the island a relaxed, lived in feel that closed cabinets cannot. Keep one type of item per shelf, such as stacked white plates on one shelf and bowls on the next, so the display stays calm.

    Dust reaches open shelves faster than closed cabinets, so store only items you wash often here, and keep rarely used serving pieces behind doors. Line the shelf base with a washable mat if you stack wet dishes. Open shelving suits a farmhouse kitchen with plain white dishes, since a mixed collection can look cluttered at island height.

    11. Island with a Built In Wine Rack

    Farmhouse kitchen island end with a built in wine rack grid holding bottles on their sides.

    Slot a built in wine rack into the end of the island for bottles stored on their sides, with a small grid of cubbies that adds detail to plain cabinet doors nearby. Keep the rack away from the oven side of the island, since heat is unkind to wine, and choose a spot that stays cool and out of direct sun. If wine is not your drink, the same cubbies hold rolled linens, water bottles, or cookbooks stood upright.

    Size the cubbies to your bottles before ordering, since wide bottles need wider slots, and keep the rack low enough that bottles slide out without hitting the counter edge. A wine rack end suits an island that faces a dining area, where the grid reads as a display feature. Label the rack rows if you store both red and white, so guests can find a bottle without pulling out the whole row.

    12. Distressed Weathered Finish Island

    Farmhouse kitchen island with a lightly distressed weathered painted base, butcher block top.

    Paint the island base, then distress the edges lightly, for a weathered farmhouse finish that looks worn in the right places, such as corners and raised panels. A distressed base suits a kitchen with other aged pieces, like a worn wood table or vintage stools, and it hides small knocks better than a perfect painted finish. Keep the distressing light and even, so the island reads as aged rather than damaged.

    Seal the finish with a clear topcoat, especially near the floor and the seating side, where shoes and stools rub. Pair a distressed base with a plain top, such as butcher block or a simple stone, so the island has one strong texture, not two. This finish suits a relaxed family kitchen, where a perfect surface would feel too formal for daily use.

    13. Island with Pull Out Trash and Recycling Bins

    Farmhouse kitchen island with a pull out trash and recycling bin drawer open near the prep side.

    Fit pull out trash and recycling bins into the island, near the prep side, so scraps go straight from the chopping board into the bin without a trip across the kitchen. A double bin unit keeps trash and recycling side by side, and a lid on each bin holds smells down. Measure the cabinet width and the bin height before ordering, since tall bins need a full height cabinet.

    Line the cabinet floor, since leaks and crumbs reach the base, and wipe the bin fronts with the cabinet fronts during cleaning. This island feature suits cooks who prep a lot of fresh food, and it keeps the kitchen floor clear of a freestanding trash can. Put the bins on the side nearest the sink or the prep zone, not the seating side, so guests never sit beside an open bin.

    14. Island with a Microwave Drawer and Appliance Storage

    Farmhouse kitchen island with a microwave drawer below the counter and matched cabinet fronts.

    Place a microwave drawer in the island, below counter height, to free the main counter and keep the microwave out of sight while staying easy to reach. A drawer style microwave suits an island better than a countertop model, since it keeps the work surface clear and the controls at a comfortable height for adults. Add a drawer or cabinet beside it for small appliances, such as a blender or food processor, so the main counter stays free for prep.

    Follow the microwave maker’s clearance and ventilation guidance, and keep a landing spot on the counter above the drawer for hot dishes. This island suits a kitchen where the main counter is short, since moving the microwave off the counter gains a full stretch of prep space. Keep the drawer front matched to the island base, so the appliance reads as part of the cabinetry.

    15. Narrow Island for a Small Kitchen

    Narrow farmhouse kitchen island in a small kitchen, light base, clear walkways each side.

    Choose a narrow island, roughly 24 inches deep, for a small kitchen where a standard island would block the walkways. A slim island still adds prep space, a place for stools on one side, and storage below, while leaving clear paths to the stove, sink, and fridge. Keep the storage shallow, with one row of drawers or a single shelf, so nothing gets lost at the back.
    Use a light base color and a plain top, since a dark or busy island will crowd a small room. A narrow island also suits a galley kitchen with a run on each wall, as long as the walkways on both sides stay wide enough to pass with the dishwasher open. Test the layout with painter’s tape on the floor before you buy, and walk the route with a stool pulled out.

    16. Sage Green Painted Island

    Farmhouse kitchen island painted sage green with a butcher block top, cream walls, wood floor.

    Paint the island base in sage green for a soft farmhouse accent that sits between the white cabinets and the wood tones in the room. Sage green suits a kitchen with cream walls, a wood floor, and brass or matte black hardware, and it gives the island a clear identity without a bold color. Repeat the sage once more, in a stool cushion, a blind, or a plant pot, so the color does not sit alone.

    Test a large painted sample beside the cabinets in daylight and evening light before committing, since green shifts a lot between the two. Use a durable cabinet paint and a washable finish, since the island base takes more bumps than wall cabinets. A sage island suits a kitchen that already has one other painted accent, such as a painted pantry door, and it pairs well with a butcher block top.

    17. Island with Bookshelf Ends

    Farmhouse kitchen island with bookshelf ends holding cookbooks and a small plant.

    Fit bookshelf ends into the island, with two or three open shelves at each end, for cookbooks, a small plant, and a few display pieces. Bookshelf ends turn the dead ends of an island into useful storage, and they suit a kitchen where cookbooks are used daily and deserve a home near the prep space. Keep the shelves shallow, so books sit flush with the island end and do not catch passing hips.

    Group cookbooks by size, with the tallest at the bottom, and leave one shelf partly clear for a plant or a bowl, so the end does not look packed. Dust the shelves during weekly cleaning, since open ends collect dust faster than closed cabinets. This island suits a family kitchen with a reading habit, and it gives the island a furniture feel from the living room side.

    18. Trestle Base Farmhouse Table Island

    Farmhouse kitchen island on a trestle base with end panels and a stretcher bar, thick wood top.

    Build the island on a trestle base, with two solid end panels joined by a stretcher bar, for a farmhouse table look with a long, open span underneath. The trestle base suits a large island in an open plan room, where the long side faces the living space and needs a strong, simple shape. Use the open span for baskets or a low bench that slides under when not in use.

    Check the floor for level, since a trestle base rocks on an uneven floor, and add felt pads under the feet. Because a trestle island has less closed storage than a cabinet island, pair it with a pantry or wall cabinets for items that need hiding. Keep the top thick and plain, in butcher block or reclaimed wood, so the base shape stays the main feature.

    19. Island with a Pull Out Cutting Board

    Farmhouse kitchen island with a pull out wooden cutting board extended below the counter.

    Fit a pull out cutting board into the island, just below the counter, for extra prep space that slides away when not in use. A pull out board suits a kitchen where the main counter is short, since it adds a full chopping surface without a permanent extension. Choose a board in a hard wood that can be removed for cleaning, and keep it near the sink side of the island for easy rinsing.

    Oil the board regularly, and replace it when deep cuts hold stains, since a pull out board is cheaper to swap than a fixed top. Keep the slot clear of crumbs by wiping the runners during cleaning, so the board slides smoothly. This island suits cooks who prep at the island while facing the room, and it pairs well with a knife drawer fitted beside the slot.

    Conclusion

    A farmhouse kitchen island works when the top, base, and storage suit the way you actually cook and gather. Pick one clear job for the island, match the top to your prep habits, and choose a base style, such as beadboard, shiplap, or a trestle frame, that fits the room you already have. Measure the walkways first, then add one storage feature that solves a daily problem, such as pull out bins or open shelving for everyday dishes. Start with the island shape that fits your floor plan, and let the rustic details follow the practical choices, not the other way around.

    Save this list on Pinterest for your next kitchen update, and work through it by room size: a narrow or rolling island for a small kitchen, a seating island for family meals, and a sink or two tier island for a large open plan space.

    FAQs

    What is the best farmhouse kitchen island top?

    A butcher block top is the best all round choice for a farmhouse kitchen island, since it suits heavy prep, looks warm beside painted cabinets, and can be sanded and re-oiled when it marks. Reclaimed wood suits a more rustic room, while a stone top suits a cook who wants a heat proof surface. Pick the top for how you cook, not only for looks, and seal wood tops against water near the sink end.

    How much space do I need around a farmhouse kitchen island?

    You need clear walkways on every working side of the island, with room to open drawers and the dishwasher and to pull out a stool without blocking the path. As a general guide, keep at least 36 inches of clear floor between the island and the nearest counter or wall, and more on the side where two people pass or the dishwasher opens. Measure with painter’s tape on the floor before you order, and walk the route with stools pulled out.

    Can I put a sink in a farmhouse kitchen island?

    Yes, you can put a sink in a farmhouse kitchen island, and an apron front sink suits the style well. Plan the plumbing early, since an island sink needs a drain and vent route through the floor, and check that the cabinet depth lets the apron front sit flush with the base. Keep counter space on both sides of the sink for prep and drying, and choose a simple faucet that does not compete with the apron front.

    What color should I paint a farmhouse kitchen island?

    White, cream, and soft grey suit most farmhouse kitchens, since they keep the island light beside wood floors and beams. Sage green is a good accent color when the rest of the kitchen stays plain, and a distressed or weathered finish suits a relaxed family room. Test a large sample beside your cabinets in daylight and evening light, and repeat the island color once more in the room, such as in a stool cushion or a blind, so it looks planned.

    Is a rolling kitchen island practical?

    A rolling island is practical when the kitchen layout needs to change or a fixed island would block a walkway. Choose lockable casters rated for the loaded weight, lock them before chopping, and check that the island clears fridge and oven doors when it moves. Keep the top light, such as butcher block, and store lighter items inside, since a heavy rolling island is hard to move and can mark the floor.

    How do I add seating to a farmhouse kitchen island?

    Add seating with a counter overhang on one side of the island, keeping the seating side free of drawers and bins so knees and feet have clear space. A standard counter height suits most stools, while a raised bar tier needs taller stools, so match the seat height to the counter height. Leave room for each stool, and choose wood or woven stools with a low back that tuck under the overhang when not in use.


  • 21 Kitchen Island Ideas for Better Storage, Seating, and Style

    21 Kitchen Island Ideas for Better Storage, Seating, and Style

    The best kitchen island balances storage, seating, and work space in one unit. Choose deep drawers for heavy pots, a clear prep run beside the sink or cooktop, and an overhang of about 12 inches for knees at the seating side, then match the island size to the walkways around it, so two people can move without crowding.

    Start with the job the island must do most days, not the look alone. A busy cooking household needs drawers, a prep sink, and a clear landing spot for hot pans, while a household that eats at the island needs comfortable stools, a wipe clean top, and room for plates and elbows. For seasonal styling once the island is in place, see kitchen island Christmas decor for low displays that keep the middle clear, and for a calm pale kitchen around a new island, see white kitchen ideas.

    Key Takeaways

    • Plan storage first: deep drawers for pots, a pantry pull-out for dry goods, and a clear spot for trash and recycling.
    • Keep one prep run clear at all times, even when the island also holds seating, a sink, or a display.
    • Leave knee room at the seating side, and choose stools that slide fully under the overhang when not in use.
    • Match the island length to the room: a long island suits an open plan room, while a slim or rolling island suits a small kitchen.
    • Repeat one or two finishes from the rest of the kitchen, so the island reads as part of the room, not as a separate piece.
    • Test the layout before you commit: tape the island outline on the floor, then walk the routes to the stove, sink, and fridge.

    1. Deep Drawer Banks for Pots and Pans

    Kitchen island drawer bank pulled open showing stacked pots and pans with dividers.

    Replace deep base cabinets with full extension drawer banks on the working side of the island, so pots, pans, and lids slide out to you instead of hiding at the back of a dark cabinet. Use wide, deep drawers for stockpots and baking trays, and a shallower top drawer for utensils, wraps, and small tools, so each drawer holds one kind of item.

    Keep the heaviest drawers low and near the stove run, and add dividers or a lid rack inside one drawer so lids do not slide around. Label nothing on the outside; the drawer order itself becomes the system once everyone in the household learns that pans live in the first bank and baking trays in the second.

    2. Pull-Out Pantry Tower at the Island End

    Tall narrow pull-out pantry tower at the end of a kitchen island holding jars and dry goods.

    Add a tall, narrow pull-out pantry tower at one end of the island, with shelves that roll out as a single unit, so oils, sauces, grains, and canned goods stay visible and easy to reach. This idea suits kitchens without a full pantry wall, since the tower adds a large amount of storage in a small footprint.

    Sort the shelves by use, with everyday cooking items at hand height and baking or rarely used items higher or lower. Keep heavy jars low, and wipe the shelves when you restock, so spills do not build up behind closed doors.

    3. Open Shelving for Everyday Dishes

    Open shelves on the seating side of a kitchen island holding white dishes and bowls.

    Use open shelves on the seating side or one end of the island for the dishes, bowls, and glasses you reach for daily, so setting the table starts at the island itself. Open shelving also breaks up a long run of closed doors, and it lets a wood or painted island show a little color through the dishes.

    Keep the shelf contents to a small, matching set, and leave space between groups so the shelves read as calm, not crowded. Store fragile or rarely used pieces in closed cabinets instead, and dust the open shelves during a normal weekly clean.

    4. Built-In Microwave Drawer Below the Counter

    Kitchen island with a microwave drawer below the counter beside a clear landing spot.

    Fit a microwave drawer into the island base, below the counter and away from the main prep run, so the counter stays clear and the microwave sits at a safe, reachable height. This placement frees wall and upper cabinet space, and it keeps a bulky appliance out of sight in an open plan kitchen.

    Place the drawer near the fridge or the serving side, where reheating and plating happen, rather than in the middle of the chopping zone. Check the drawer size against the island depth before ordering, and keep the area above it clear for a landing spot when food comes out hot.

    5. Prep Sink Island for Two Cooks

    Kitchen island with a small prep sink, cutting board, and rinsed vegetables.

    Put a small prep sink in the island, near the fridge and the chopping area, so one cook can rinse vegetables while another works at the main sink. A prep sink also gives the island a clear work zone, which helps when two people cook together or when guests help with a meal.
    Keep the prep sink small, with a simple faucet and a cutting board that fits over the bowl, so it does not eat into counter space. Plan a drying spot beside it, such as a folded linen cloth or a small rack, and keep the main sink free for washing up.

    6. Cooktop Island with a Downdraft Vent

    Kitchen island with a cooktop and downdraft vent, cook facing the room.

    Place the cooktop in the island, with a downdraft vent that rises beside the burners or pulls steam down through the unit, so the cook faces the room instead of a wall. This layout suits open plan kitchens, where the cook wants to talk with family or guests while cooking.

    Keep the counter on both sides of the cooktop clear for pans, boards, and serving dishes, and keep seating away from the hot zone. Check the vent maker’s instructions for ducting and clearance before choosing this layout, since a cooktop island needs more planning than a plain prep island.

    7. Breakfast Bar Overhang with Counter Stools

    Kitchen island breakfast bar overhang with counter stools tucked underneath.

    Add a counter overhang on one long side of the island, with backless or low back stools that tuck fully underneath, to make a breakfast bar for quick meals, homework, and coffee. The overhang turns the island into the household gathering spot without needing a separate table.

    Choose stools at the right height for the counter, with a footrest that suits the people who will use them most, and keep the seating run clear of drawers that open into leg room. For everyday meals, set the table at the island itself, with placemats and a small centerpiece that lifts away when prep work starts.

    8. Two-Level Island for Prep and Dining

    Two-level kitchen island with a lower prep counter and a raised seating side.

    Build the island at two heights, with a standard work height on the cooking side and a raised bar height on the seating side, so the dining side hides prep clutter from the living area. The raised side also gives seated guests a clear sight line across the room, while the cook keeps a full work surface.

    Use the raised section for serving and eating only, and keep hot pans, boards, and raw ingredients on the lower work side. Choose a counter material that wipes clean on both levels, since the raised side will see drinks, plates, and homework as well as meals.

    9. Waterfall Countertop Island

    Kitchen island with a waterfall countertop wrapping down both ends.

    Wrap the counter material down both ends of the island, in a waterfall edge, so the island reads as one solid block and the side panels stay protected from kicks and scuffs. A waterfall edge suits stone and quartz counters, and it gives a plain island a finished look without extra decoration.

    Keep the island front simple, with no handles or panels competing with the stone, and put seating on one side only, so the waterfall ends stay visible. Measure the room first, and leave enough walkway space on every side, since a waterfall island looks best with breathing room around it.

    10. Warm Butcher Block Island Top

    Kitchen island with a warm butcher block top and wood stools.

    Top the island with butcher block, in a warm wood tone, to soften a kitchen full of painted cabinets and stone counters, and to give a work surface that feels pleasant to touch. Butcher block suits farmhouse, cottage, and Scandinavian style kitchens, and it pairs well with black, brass, or nickel hardware.

    Use butcher block on the island alone, rather than on every counter, if you want to limit care, and oil the surface on the schedule the supplier advises. Near a sink, use a stone section instead, since constant water contact wears wood faster than a dry prep run.

    11. Rolling Island for a Small Kitchen

    Small rolling kitchen island on locking casters in a compact kitchen.

    Choose a rolling island on sturdy locking casters for a small kitchen, so the extra counter moves where it is needed and parks against a wall when it is not. A rolling island adds prep space, a little storage, and a serving cart in one piece, without a fixed build.

    Lock the casters before chopping or placing hot pans on top, and keep the island light enough to move with one hand when it holds only everyday items. Store the heaviest items in fixed cabinets, and use the rolling island for boards, bowls, and a small set of tools.

    12. Slim Island for a Narrow Galley Kitchen

    Slim kitchen island in a narrow galley kitchen with a clear walkway beside it.

    Fit a slim island, narrower than a standard island, into a galley kitchen, with shallow drawers on one side and a clear walkway on the other, so a small room still gains a work surface. A slim island works when the room has room for one comfortable aisle on each side, even if those aisles are narrower than in a large kitchen.

    Keep the slim island free of a sink or cooktop, since plumbing and heat need more depth, and use it for prep, landing space, and seating for one or two people at most. For seasonal counter styling that keeps a small kitchen workable, see fall kitchen decor for surfaces that stay clear for cooking.

    13. L-Shaped Island That Defines the Room

    L-shaped kitchen island with a prep arm and a seating arm in an open plan room.

    Shape the island as an L, with one arm for prep and one arm for seating, to define the kitchen zone inside an open plan room without building a wall. The L shape gives two work faces and a natural corner for a cook to stand, while the seating arm faces the living area.

    Place the seating arm where guests can sit without blocking the route between the stove, sink, and fridge, and keep the corner itself for a large board or a serving tray. An L-shaped island suits a larger room best, since the shape needs floor space on both arms.

    14. Beverage Fridge and Glass Storage Island

    Kitchen island with a beverage fridge and glass storage drawer at the seating end.

    Fit a small beverage fridge into the island base, with glass storage in a drawer or cabinet beside it, so drinks stay cold and glasses stay close at hand for serving. This idea suits households that host often, and it keeps drink traffic away from the main cooking zone.

    Place the beverage side near the seating end, where guests can help themselves without crossing the prep run, and keep the fridge door swing clear of stools. Wipe the glass storage drawer often, since drink spills and condensation gather there faster than in a dry goods drawer.

    15. Island Homework and Charging Station

    Kitchen island end set up as a homework station with books and a charging drawer.

    Set aside one end of the island as a homework and charging station, with a shallow drawer for chargers and cables, a small shelf for books, and a wipe clean top for writing. This setup keeps schoolwork and laptops in the room where adults are already working, without spreading cables across the main prep run.

    Use a power strip inside a ventilated drawer or cabinet, following the maker’s instructions, and keep liquids away from the charging spot. When dinner starts, clear the station into its drawer in one move, so the island returns to a full work and serving surface.

    16. Island with a Built-In Bookshelf End

    Kitchen island end panel with a built-in bookshelf holding cookbooks.

    Build a bookshelf into one end panel of the island, for cookbooks, a small plant, and a few everyday reference books, so the end of the island becomes useful instead of blank. A bookshelf end suits islands that face a living area or entry, since guests see it as they walk in.

    Keep the bookshelf shallow, so books do not stick out past the panel, and store only books you use often, with heavier volumes low. Dust the shelf during a normal clean, and keep the top shelf clear, so the island end does not collect clutter.

    17. Island with Hidden Trash and Recycling Pull-Outs

    Kitchen island with hidden trash and recycling pull-out bins near the prep area.

    Hide trash and recycling pull-outs inside the island, near the prep sink or chopping area, so scraps go straight into a bin without crossing the kitchen. Two bins, one for trash and one for recycling, keep sorting simple, and a lid or closed front keeps the island looking tidy.

    Line the bins and wipe them when you take out the trash, and keep a small compost caddy beside them only if the household uses one daily. Place the pull-outs where the cook stands most, not at the seating end, so guests never sit beside an open bin.

    18. Island with a Herb Rail and Cutting Station

    Kitchen island back edge with a herb rail, small herb pots, and a cutting board station.

    Add a herb rail or a shallow planter strip along the back edge of the island, with a cutting board station beside it, so fresh herbs sit within arm’s reach while you chop. This idea suits cooks who use herbs daily, and it keeps small pots off the main counter.

    Keep the herb rail low and narrow, so it does not block sight lines across the island, and water the herbs over the sink, not over the counter. If live herbs do not suit the light in your kitchen, use the same rail for a knife strip, a towel bar, and a small jar of cooking tools instead.

    19. Bench Seating on One Side of the Island

    Long kitchen island with low bench seating on one side for family meals.

    Pair the island with a low bench on one side, instead of individual stools, so children, friends, and family can slide in together for casual meals. Bench seating suits a long island in a family kitchen, and it tucks neatly under the overhang when the meal is over.

    Choose a bench with a wipe clean seat and a small cushion that washes well, since island benches see daily use. Keep the bench length a little shorter than the island, so people can step around the ends without squeezing past the bench.

    20. Curved Island for Easier Movement

    Curved kitchen island with a rounded seating side and stools along the curve.

    Choose a curved island, with a rounded end or a gentle bow along the seating side, to soften a large kitchen and make movement around the island easier. Curves remove sharp corners in a busy route, which helps in a household with children or in a kitchen where people pass the island often.

    Keep the curve shallow, so the island still holds useful drawers and a flat work run, and place stools along the curved side where the overhang gives even knee room. A curved island suits a larger room best, since the shape needs floor space to read as a curve rather than a cramped bump.

    21. Contrasting Cabinet Color and Mixed Materials

    Kitchen island in a contrasting deep green cabinet color beside pale wall cabinets.

    Paint or finish the island in a contrasting color to the wall cabinets, such as a deep green, navy, or warm wood tone beside pale cabinets, so the island becomes the clear focal point of the kitchen. A contrasting island also lets you test a bold color in one place, without repainting the whole room.

    Repeat the island color once more in a small detail, such as stool cushions, a runner, or a vase, so the contrast looks planned. For a full pale kitchen that can carry a dark or wood island, see white kitchen ideas, and for wider seasonal kitchen styling, see kitchen Christmas decor.

    Conclusion

    A good kitchen island earns its floor space by doing three jobs at once: storing the items you use daily, giving you a clear place to prep, and offering a comfortable spot to sit. Start with storage, then seating, then style, and test the outline on the floor before you order. Choose one or two ideas from this list that solve a real daily problem, such as deep drawers for heavy pans, a slim island for a small room, or a breakfast bar for family meals, and let the rest of the kitchen stay simple around it. The island should make cooking easier, not add a surface you must work around.

    FAQs

    How big should a kitchen island be?

    A kitchen island should fit the room with a comfortable walkway on every side, and with enough counter left for prep after any sink, cooktop, or seating is placed. Measure the room, tape the island outline on the floor, and walk the routes to the stove, sink, and fridge before you choose a final size.

    How much seating overhang do I need at a kitchen island?

    Allow about 12 inches of counter overhang for knees at the seating side, and choose stools that slide fully under the overhang when not in use. Keep the seating run clear of drawers that open into leg room, and leave enough elbow room per person so seated guests do not crowd each other.

    What is the best storage for a kitchen island?

    Deep full extension drawers suit heavy pots and pans best, since they slide out fully and keep items visible, while a pull-out pantry tower suits dry goods and a hidden pull-out suits trash and recycling. Sort each drawer or pull-out by one kind of item, so the system stays easy to use.

    Can a small kitchen have an island?

    Yes, a small kitchen can have an island if the room allows a slim or rolling island with a clear walkway on each side. Choose a slim fixed island for a galley kitchen, or a rolling island that parks against a wall when not in use, and skip a sink or cooktop in the island to save depth.

    Should the island match the rest of the kitchen cabinets?

    The island can match the wall cabinets for a calm, unified room, or it can use a contrasting color or material to become a focal point. If you choose a contrast, repeat the island color or material once more in a small detail, so the choice looks planned rather than random.

    Do I need a sink or cooktop in my kitchen island?

    No, a sink or cooktop is not required, and a plain prep and seating island suits many kitchens better, since it keeps the full counter clear and needs less plumbing or venting. Add a prep sink only if two cooks work together often, and add a cooktop only if the cook wants to face the room while cooking.


  • 19 Black and White Bathroom Wallpaper Ideas for Every Style

    19 Black and White Bathroom Wallpaper Ideas for Every Style

    Black and white bathroom wallpaper works best when one pattern leads and the rest of the room stays plain. Use a large repeat on one feature wall in a larger bath, a small repeat in a powder room, and a moisture tolerant paper near damp zones, then repeat black once in a mirror frame or faucet finish.

    Start by choosing the wall you see first from the doorway, then check the light in that spot at morning and evening, since black reads much stronger in a dim room than in a bright one. In a room with tile already, pair wallpaper with the plainest tile you have, so the two surfaces do not compete. If you are pairing paper with tile, see black and white bathroom tile ideas for floors and shower walls that sit well beside a patterned wall, and for small rooms, see small bathroom space saving ideas before you commit to a bold repeat.

    Key Takeaways

    • Let one pattern lead: one wallpapered wall, or one wallpapered zone, with plain paint, tile, and towels elsewhere.
    • Match the repeat to the room: large repeats suit larger baths and feature walls, small repeats suit powder rooms and narrow walls.
    • Keep wallpaper out of direct shower spray, and choose a moisture tolerant or peel and stick paper for damp walls.
    • Repeat black once more, in a mirror frame, faucet, towel rail, or light fitting, so the paper looks planned.
    • Hang the pattern so the fullest motif lands at eye level on the main wall, not cut off behind the toilet or vanity.
    • In a rented home, start with peel and stick paper on one wall, and test a sample in your light before ordering full rolls.

    1. Oversized Damask on a Vanity Feature Wall

    Bathroom vanity wall with oversized black damask wallpaper on white, white vanity, and round mirror.

    Use an oversized damask in black on white behind the vanity, so the mirror and sconces sit against a bold, formal pattern. A large damask repeat reads as classic and dressed up, and it suits a primary bathroom or a guest bath where the vanity wall is the first thing guests see. Keep the vanity itself simple, in white or pale wood, so the pattern stays the focus.

    Hang the paper from ceiling to vanity splash height, or full height if the mirror allows it, and center the largest motif above the mirror. Keep towels and counter items plain white or black, since a third color will fight the damask. Wipe splashes near the sink at once, and choose a washable paper for this wall, since it sits in the splash zone.

    2. Checkerboard Grid as a Bold Accent Wall

    Bathroom accent wall with black and white checkerboard grid wallpaper behind a freestanding tub.

    Paper one wall in a black and white checkerboard grid for the clearest graphic look in this list. Equal squares give a crisp, retro diner feel, while larger squares suit a bigger bathroom and smaller squares suit a powder room. This idea works best on the wall behind a freestanding tub or on the toilet wall, where the grid can run unbroken.

    Keep the floor plain and the fixtures simple, since the grid already holds attention. A white vanity, a black mirror frame, and a plain white shower curtain, if you use one, will balance the wall. Check the grid at the corners, since a checkerboard that ends in a half square at a visible edge looks unfinished, so plan the layout from the center of the wall outward.

    3. Fine Pinstripes to Make a Low Ceiling Feel Taller

    Narrow bathroom with fine black pinstripe wallpaper on white walls, white vanity, and tall mirror.

    Choose fine black pinstripes on white for a narrow bathroom or a room with a low ceiling, since vertical lines draw the eye upward. Pinstripes are quieter than wide stripes, so they suit a room that already has patterned tile or a busy vanity, and they read as tailored rather than loud. Use them on all walls in a small powder room, or on one long wall in a family bath.

    Keep the ceiling white and the floor pale, so the stripes have a clean top and bottom edge. Avoid a striped shower curtain in the same room, since two stripe scales will clash. Pinstripes also pair well with a black framed mirror and chrome faucets, since the thin lines echo slim metal details.

    4. Wide Horizontal Stripes for a Long, Low Wall

    Long bathroom wall with wide horizontal black and white striped wallpaper behind a vanity.

    Use wide horizontal black and white stripes on a long wall to stretch the room sideways and give a modern, beach house feel. Broad bands, roughly hand width or wider, read as confident and simple, and they suit a wall behind a long vanity or a wall that runs the length of a tub. Keep the other walls plain white, so the striped wall reads as one deliberate panel.

    Center a stripe break at the vanity mirror or at the tub rim, rather than letting a black band cut straight through the mirror. In a small room, use wider white bands and narrower black bands, so the wall stays bright. This is a good peel and stick choice, since straight stripes are forgiving to align panel by panel.

    5. Small Polka Dots for a Playful Powder Room

    Small powder room with small black polka dot wallpaper on white, white pedestal sink, and round mirror.

    Paper a powder room in small black polka dots on white for a playful look that never feels heavy. Small dots suit the smallest rooms in the house, since the pattern stays light at close range and guests see it only for a short visit. It also suits a children’s bathroom or a guest powder room, where a formal pattern would feel too serious.

    Keep the vanity and mirror simple, and add one black accent, such as a towel ring or a soap dispenser, to tie the dots together. Avoid a dotted rug or dotted towels in the same room, since too many dots will blur into noise. A small dot paper is also a good first wallpaper project, since minor alignment slips show less than they do in a large geometric pattern.

    6. Art Deco Fans for a Glamorous Vanity Wall

    Bathroom vanity wall with black and white Art Deco fan wallpaper, round mirror, and brass sconces.

    Choose a black and white fan or scallop pattern for a glamorous, 1920s style bathroom, with repeating arcs that catch the light. Deco fans suit a vanity wall with brass or gold toned sconces, a round mirror, and a white basin, since the arcs echo the curve of the mirror. Use the pattern on one wall only, so the fans stay a feature rather than a full room wrap.

    Keep the floor in plain white or pale marble look tile, and keep towels white, so the fan wall does not compete with other patterns. If the room is small, choose a fan with more white than black, so the arcs read as light line work rather than a dark mass. This pattern also suits a dressing area beside the bath, where the glamour note can carry without steam exposure.

    7. Chinoiserie Panels with Birds and Branches

    Bathroom wall with black ink chinoiserie birds and branches wallpaper panels, wood vanity, and white basin.

    Use chinoiserie style panels, with black ink birds, branches, and blossoms on white, for a refined, collected bathroom. Unlike a full repeat, panel style paper often has breathing space between motifs, so it suits a larger wall where you want art as much as pattern. It pairs well with a wood vanity, a stone counter, and simple brass fittings.

    Hang panels so each bird group lands clear of the mirror and sconces, and keep the rest of the room plain, since chinoiserie already carries fine detail. This is best kept on a dry wall, away from the shower, to protect the fine print. If full panels feel too formal, use the same motif on the wall behind the toilet only, with plain white paint elsewhere.

    8. Hexagon Geometry for a Modern Family Bath

    Modern bathroom wall with black and white hexagon geometric wallpaper, floating vanity, and matte black faucets.

    Paper a wall in a black and white hexagon pattern for a modern family bathroom with a clean, architectural feel. Hexagons sit between a tile look and a wallpaper look, so they pair well with plain white tile, a floating vanity, and matte black faucets. The shape adds interest without a floral or vintage note, which suits households that want pattern but not decoration.

    Keep the hexagon scale in proportion to the room: small hexagons for a powder room, medium hexagons for a family bath. A white ground with black hexagon outlines reads lighter than solid black hexagons, so choose the outline version in a windowless bath. Wipe the wall near the sink often, since the geometric lines show soap splashes more than a busy floral does.

    9. Abstract Marble Veining for a Calm, Spa Like Wall

    Calm bathroom wall with abstract black marble veining wallpaper on white beside a freestanding tub.

    Choose an abstract marble veining paper, with soft black veins drifting across white, for a calm, spa like bathroom. The veins give movement without a repeating motif, so the wall reads as stone rather than as print, and it suits a bathroom with a freestanding tub, pale wood, and plain white towels. It also works where real marble would be costly or heavy.

    Keep fixtures in chrome or matte black, and keep the floor plain, so the veining stays the only natural pattern in the room. Because each panel differs, check how veins meet at the seams before hanging, and plan the layout so a strong vein does not run straight through the mirror. This paper suits a dry feature wall best, with tile in the shower zone itself.

    10. Small Vintage Floral for a Cottage Bathroom

    Cottage bathroom with small black vintage floral wallpaper on white, wood vanity, and pedestal sink.

    Use a small vintage floral in black on white for a cottage or farmhouse bathroom, with tiny blooms and leaves scattered evenly across the paper. The small scale keeps the room feeling soft and lived in, and it suits a bathroom with a wood vanity, a pedestal sink, and a linen shower curtain. It also suits a room with low light, since the white ground keeps the wall bright.

    Pair the floral with plain white towels and a simple black mirror frame, and avoid a floral rug in the same room. In a narrow bath, paper the wall behind the toilet and the wall beside the tub, and paint the vanity wall plain white, so the floral does not crowd the mirror. For more vintage room ideas to pair with this paper, see vintage bathroom decor ideas.

    11. Speckled Terrazzo Dots for a Playful Modern Bath

    Modern bathroom wall with speckled black terrazzo dot wallpaper on white, white vanity, and black faucets.

    Pick a speckled terrazzo style paper, with irregular black dots and chips scattered on white, for a modern bathroom that wants pattern without a strict repeat. The random scatter reads as stone chips, so it suits a bathroom with a concrete look counter, a plain white vanity, and black faucets. It also hides small marks better than a strict grid, which helps in a family bath.

    Keep the floor plain and the towels white, since the speckle already adds texture. Choose a version with more white than black for a small room, and a denser speckle only on a single feature wall in a larger room. This pattern suits peel and stick well, since the irregular scatter makes seam alignment far less visible than a grid or stripe.

    12. Chevron Zigzag for a Sharp Tub Surround Wall

    Bathroom wall behind a freestanding tub with black and white chevron zigzag wallpaper.

    Paper the wall behind the tub in a black and white chevron zigzag for a sharp, graphic focal point. Chevron points line up in straight rows, which gives a more formal read than a free zigzag, and it suits a modern or transitional bathroom with a freestanding tub and plain white walls elsewhere. The wall behind the tub is ideal, since the tub itself grounds the pattern.

    Keep the tub surround plain white, and keep towels and bath mats white, so the chevron stays the single bold move. Plan the chevron so a full point lands centered above the tub, not cut in half at the tub rim. In a small bath, choose a smaller chevron repeat, since a large zigzag can feel busy at close range.

    13. Pastoral Toile Scenes for a Traditional Bathroom

    Traditional bathroom wall with black pastoral toile scene wallpaper on white, wood vanity, and brass fittings.

    Use a pastoral toile in black on white, with small country scenes, trees, and figures, for a traditional bathroom with an old house feel. Toile suits a bathroom with a clawfoot style tub, a wood vanity, and brass fittings, and it reads as storybook detail rather than as a simple pattern. Keep it on one or two dry walls, so the scenes can be read without steam damage.

    Hang toile so a full scene lands at eye level on the main wall, and keep the mirror and sconces clear of the busiest scene groups. Pair it with plain white towels and a plain shower curtain, since a second print will fight the scenes. Toile also suits a guest bathroom, where visitors have time to notice the detail.

    14. Gingham Check for a Fresh Country Powder Room

    Country powder room with black and white gingham check wallpaper, wood vanity, and round mirror.

    Choose a black and white gingham check for a fresh, country style powder room, with overlapping bands that form light grey squares where they cross. Gingham reads softer than a hard checkerboard, since the crossed bands create a mid tone, and it suits a bathroom with a wood vanity, a woven basket, and a simple round mirror. It also suits a farmhouse guest bath.

    Keep the floor in plain wood look or pale tile, and keep towels white with a black trim, if any. In a larger bath, use gingham on the toilet wall only, since a full room of check can feel like a picnic blanket at large scale. Gingham is a forgiving peel and stick pattern, since the check lines help you align each panel straight.

    15. Harlequin Diamonds for a Dramatic Entry Wall

    Bathroom entry wall with black and white harlequin diamond wallpaper, white vanity, and black framed mirror.

    Paper the entry wall, the wall you see from the hallway, in black and white harlequin diamonds for a dramatic first impression. Diamonds read as bolder and more theatrical than squares, and they suit a powder room or a guest bath where the door opens straight onto the feature wall. Keep the rest of the room white, so the diamond wall acts as a single statement.

    Choose a diamond size that fits the wall without too many cut diamonds at the edges, and center the pattern on the doorway view. Pair it with a simple white vanity and a black framed mirror, and avoid a diamond rug or diamond towels nearby. If the room is very small, choose white diamonds outlined in black rather than solid black diamonds, so the wall stays bright.

    16. Fine Botanical Line Drawings for a Minimal Bath

    Minimal bathroom wall with fine black botanical line drawing wallpaper on white, floating vanity, and frameless mirror.

    Use fine black line drawings of leaves and stems on white for a minimal bathroom that wants pattern without weight. Line work reads as sketchbook detail, so it suits a modern bathroom with a floating vanity, a frameless mirror, and plain white tile. The thin lines keep the wall light, even in a windowless bath, since most of the paper stays white.

    Keep the room edited: one plant on the vanity or shelf, plain towels, and a single black accent in the faucet or light fitting. Avoid a second botanical print in the same room, such as a leaf shower curtain, since the line drawings will blur into it. This paper also suits a narrow wall beside a mirror, where a bold pattern would overwhelm the reflection.

    17. Black Script Typography for a Personal Powder Room

    Small powder room wall with black script typography wallpaper on white, white vanity, and round mirror.

    Paper a powder room wall in black script typography on white, with handwritten style words and phrases, for a personal, boutique hotel feel. Script suits a small room best, since guests read it at close range, and it pairs well with a simple white vanity, a round mirror, and a black towel ring. Choose words that suit a bathroom, such as wash, soak, and refresh, in a readable hand, not a tangled flourish.

    Keep the other walls plain white, and keep counter items to a soap dispenser and a hand towel, so the words stay readable. Avoid script towels or script art in the same room, since two scripts will compete. Check the script at full size before ordering, since a hand that looks charming on a sample can feel busy across a whole wall.

    18. Black and White Brick Pattern for an Industrial Bath

    Industrial bathroom wall with black and white brick pattern wallpaper, wood vanity, and matte black fittings.

    Use a black and white brick pattern paper for an industrial style bathroom, with a brick bond in white bricks and black mortar lines, or the reverse. Brick pattern adds texture and structure without real masonry work, and it suits a bathroom with a wood vanity, matte black fittings, and a plain concrete look floor. It also suits a basement bath, where the brick note adds warmth to a cool room.

    Keep the brick wall to one feature wall, such as the vanity wall or the tub wall, and paint the rest white. Match the brick scale to the room: smaller bricks for a powder room, larger bricks for a family bath. Choose a washable paper for the vanity wall, since brick lines show splashes, and wipe the mortar lines dry after heavy use.

    19. Star Pattern on the Ceiling for a Surprise Overhead

    Small bathroom with a small black and white star pattern wallpaper ceiling, plain white walls, and white vanity.

    Paper the ceiling in a small black and white star pattern, and keep the walls plain white, for a surprise overhead that guests notice only when they look up. A ceiling pattern suits a powder room or a small bath best, since the ceiling is close and the stars read clearly, and it leaves the walls free for mirrors, art, and storage. It also suits a children’s bathroom, where the ceiling becomes part of the fun.

    Keep the stars small and mostly white ground, so the ceiling does not feel low or dark, and paint the crown or ceiling edge white for a clean break. Use a paper rated for ceiling hanging, and check that the adhesive suits your ceiling surface before starting. For vanity styling that keeps the walls calm beneath a patterned ceiling, see bathroom vanity decor ideas.

    Conclusion

    Black and white bathroom wallpaper works when the pattern, scale, and placement suit the room you have. Pick one wall to lead, match the repeat to the room size, keep paper out of direct shower spray, and repeat black once in a fitting or frame so the room reads as planned. Start with a sample in your own light, then paper the feature wall first and live with it before deciding whether a second wall needs paper at all.

    Save this list on Pinterest for your next bathroom refresh, and work through it by room: a small repeat for a powder room, a large repeat for a feature wall, and a peel and stick paper where you rent or want a change that reverses cleanly.

    FAQs

    What is the best black and white bathroom wallpaper pattern for a small bathroom?

    A small repeat works best in a small bathroom, such as small polka dots, a small vintage floral, or fine pinstripes, since a large repeat can feel busy at close range. Paper one feature wall or the wall behind the toilet, and keep the other walls plain white, so the room stays bright. Check the pattern in your light before ordering, since black reads stronger in a dim room.

    Can you use wallpaper in a bathroom with a shower?

    Yes, you can use wallpaper in a bathroom with a shower, as long as the paper stays out of direct spray and the room has good ventilation. Choose a moisture tolerant or vinyl coated paper, keep it on dry walls such as the vanity wall or toilet wall, and use tile inside the shower itself. Run the fan during and after showers, and wipe splashes dry, since trapped steam shortens the life of most papers.

    Is peel and stick wallpaper good for a bathroom?

    Peel and stick wallpaper is a good choice for a rented bathroom and for a first wallpaper project, since it removes cleanly and suits a single feature wall. Choose a peel and stick paper made for damp rooms, apply it to a clean, dry, smooth wall, and avoid placing it inside the shower or directly above a steaming tub. Test one panel first, since adhesion varies with paint finish and humidity.

    How do I choose the right scale for black and white bathroom wallpaper?

    Match the repeat to the room and to the viewing distance: a large repeat suits a feature wall in a larger bath, where you see it from the doorway, while a small repeat suits a powder room, where you see it at close range. Hold a full repeat sample on the wall at eye level, and step back to the doorway to judge it. If the pattern blurs into a dark mass from the doorway, choose a smaller repeat or a version with more white.

    Should bathroom wallpaper match the tile?

    Bathroom wallpaper should sit well beside the tile, not match it exactly, since two strong patterns in one room will compete. Pair a patterned wall with plain tile, or pair a plain paper with patterned tile, and repeat one shared tone, such as black in a mirror frame or white in the vanity, to tie the two surfaces together. If your tile is already patterned, choose a quiet paper, such as pinstripes or fine line botanicals, for the wall.

    What goes with black and white bathroom wallpaper?

    Plain white towels, a simple vanity, chrome or matte black fittings, and one black accent, such as a mirror frame or towel rail, go best with black and white bathroom wallpaper. Keep rugs, shower curtains, and counter items plain, so the paper stays the single pattern in the room. Add warmth with wood, such as a wood vanity or a wood stool, if the room feels too stark in black and white alone.


  • 21 Guest Bedroom Ideas for a Comfortable and Welcoming Stay

    21 Guest Bedroom Ideas for a Comfortable and Welcoming Stay

    A comfortable guest bedroom needs a supportive bed with layered bedding, two pillow choices, clear bedside space, soft light, and room for luggage. Add fresh towels, water, charging space, and an extra blanket, and keep the room calm and uncluttered. The 21 ideas below cover bedding, storage, light, and small touches that help guests settle in fast.

    Start with the bed, since sleep matters most, then work outward to the bedside, the closet, and the door. Guests should be able to find a towel, charge a phone, hang a coat, and read in bed without asking for help. Keep surfaces clear enough for a book, a glass of water, and a phone, and keep one drawer or shelf empty for personal items. Small, useful choices beat a crowded room every time.

    Key Takeaways

    • Put sleep first: layered bedding, two pillow choices, and curtains that block morning light.
    • Leave clear space at the bedside, in a drawer, and in the closet, so guests can unpack and settle in.
    • Cover the basics before adding decor: fresh towels, water, charging space, and an extra blanket.
    • Use soft, warm light at the bedside and a brighter option for dressing and packing.
    • Keep the room calm and uncluttered, with one or two simple decor pieces rather than a crowded display.
    • Add one welcoming touch, such as a short welcome card, fresh flowers, or a tea tray.

    1. Layered Neutral Bedding for Easy Sleep

    Guest bed made with white sheets, a cream duvet, and a folded beige throw at the foot in a calm bedroom.

    Make the bed with clean sheets, a light duvet or coverlet, and a folded throw at the foot, all in calm neutral tones such as white, cream, or soft gray. Layers let guests adjust their warmth through the night without hunting for extra bedding, and a neutral base suits most tastes and seasons. Smooth the top layer, fluff the pillows, and leave the throw where it is easy to reach.

    Wash bedding before guests arrive and air the room, so the bed smells fresh rather than stored. If the room runs cool, add a second light blanket in the basket by the bed rather than a heavy cover on top, so guests can choose. Keep patterned pieces to one or two accents, so the bed looks restful rather than busy.

    2. Two Pillow Choices at Each Side

    Guest bed with a soft pillow and a firmer pillow stacked on each side in white pillowcases.

    Offer a soft pillow and a firmer pillow on each side of the bed, or stack one of each where space is tight, so guests can pick the support they like. Pillow comfort is personal, and a single flat or overly firm pillow can spoil an otherwise good room. Use pillow protectors under clean cases, and fluff both pillows before arrival.

    Store a spare pillow in the closet, clearly visible, for guests who like extra height for reading. Replace pillows that have lost their shape or smell stale, since guests notice both on the first night. Label nothing; the choice itself is the welcome, and guests will simply use the pillow that suits them.

    3. Bedside Lamps on Both Sides

    Two bedside tables with matching warm lamps glowing beside a made guest bed in the evening.

    Place a lamp on each bedside table, with a warm bulb and a switch guests can reach without getting up, so both sleepers can read or wind down. Matching lamps give the room a settled look, while mismatched lamps can still work if the light color and height are close. Keep the shade low enough that light falls on a book, not into tired eyes.

    Add a simple overhead option for dressing, but keep bedside light as the main evening source. Check that bulbs work and that cords sit behind the table, not across the floor. If a lamp wobbles, swap it before guests arrive, since a bedside lamp gets touched every night.

    4. Clear Nightstand and a Charging Spot

    Clear bedside table with a lamp, a glass of water, a small tray, and a phone charging cable.

    Clear each nightstand to a lamp, a glass of water, and a small tray, then add one easy charging spot with a cable guests can use for a phone. Guests need a place for glasses, a book, and a phone, and a crowded nightstand forces those items onto the floor. A small tray keeps keys and a watch together and protects the table surface.

    Use a short cable and a spare charger if you have one, and keep the outlet free of other plugs. Wipe the table and empty any drawers of old papers or cables before arrival, so the space feels ready rather than borrowed. A clear surface is a small detail that guests use from the first evening.

    5. Luggage Rack or a Bench at the Foot of the Bed

    Folding luggage rack with an open suitcase at the foot of a made guest bed.

    Set a folding luggage rack or a low bench at the foot of the bed, so guests can open a suitcase at waist height instead of on the floor or the bed. A rack keeps clothes accessible and keeps the bed free for sleep, which matters most in a small room. Choose a sturdy rack that folds flat for storage between visits.

    If a bench fits better, pick one with a flat top and no sharp corners, and leave the top clear. Place it where it does not block the path to the door or the closet. Guests who stay for several nights will use it daily, and it also gives a place to sit while putting on shoes.

    6. Empty Closet Space and Spare Hangers

    Open closet with an empty section of rod, spare hangers, and a clear shelf in a guest bedroom.

    Clear at least half a closet rod and one shelf, and add a dozen matching hangers, so guests can hang clothes rather than living out of a suitcase. An empty section signals that the room is ready for them, while a full closet tells guests to keep their bags closed. Remove out of season coats and storage boxes from that section before arrival.

    Add a small hook inside the closet door for a robe or a bag, and check that the rod holds weight without sagging. If the room has no closet, a simple garment rail in a corner does the same job. Leave the hangers visible and easy to reach, not buried behind stored items.

    7. Fresh Towels and a Toiletries Tray

    Folded white towels on a guest bed with a small tray of soap, shampoo, and lotion beside them.

    Fold two large towels, a hand towel, and a washcloth per guest on the bed or on a chair, and set a small tray with soap, shampoo, and lotion nearby. Guests should not need to ask for a towel after a long trip, and a tray keeps small bottles together and off the bathroom counter. Use towels that are soft, clean, and free of stains.

    Add a spare towel in the bathroom in case one gets damp, and check that the tray holds items without tipping. Keep scents light and simple, since strong fragrance can bother guests. If guests share a bathroom, place the tray in the bedroom so each guest knows which items are theirs.

    8. Bedside Water Carafe and Glasses

    Small glass water carafe and two clean glasses on a bedside table beside a guest bed.

    Set a small carafe of fresh water and two clean glasses on the bedside table or a nearby dresser, so guests can drink at night without walking to the kitchen. A carafe is easier than a single bottle, and it looks considered rather than improvised. Fill it on arrival day and wash it between visits.

    Choose a carafe with a lid or a stopper to keep dust out, and keep glasses upright and spot free. If the room is far from the kitchen, add a second glass for a partner. Empty and refill the carafe daily for longer stays, and wipe any drips from the tray beneath it.

    9. Reading Chair and a Small Side Table

    Comfortable armchair with a small side table and a lamp in a bright corner of a guest bedroom.

    Add a comfortable chair with a small side table and a lamp nearby, so guests have a place to read, lace shoes, or sit for a quiet moment away from the bed. A chair makes a guest room feel like a room to live in, not only a place to sleep. Pick a chair with arms if space allows, since arms help guests stand up easily.

    Place the chair near a window or a lamp, with room to pull it out and sit down without moving other furniture. Keep a book or two on the side table, and leave the table surface clear enough for a cup. In a small room, a compact armchair works better than a large lounge chair that blocks the path.

    10. Soft Rug Beside the Bed

    Soft cream rug beside a made guest bed with slippers placed on the rug.

    Lay a soft rug on each side of the bed, or one wide rug that extends past both sides, so guests step onto something warm on cold mornings. Bare floors can feel cold and stark at night, and a rug also softens sound in the room. Choose a low pile rug that a suitcase can roll over without catching.

    Vacuum the rug before arrival and check that it lies flat, with no curled corners to trip on. Use a rug pad if the rug slides on a hard floor. In a small room, a runner on the main side of the bed gives most of the benefit without covering the whole floor.

    11. Sheer and Blackout Curtains Together

    Guest bedroom window with sheer white curtains and heavier blackout curtains drawn partly closed.

    Hang sheer curtains for daytime privacy with blackout curtains or a blackout liner behind them, so guests can choose daylight or dark sleep. Sheers soften a bare window and let guests dress in private, while blackout fabric helps with early sun and street light. Mount the rod wide enough that curtains stack clear of the glass when open.

    Test the blackout layer at night and in bright morning light, and check that curtains close fully without gaps at the edges. Keep cords and pulls tidy and out of the path. If the room has no curtains, a simple roller blind with a sheer layer gives the same choice in less space.

    12. Welcome Card with House Notes

    Small welcome card on a bedside table beside a lamp and a glass of water in a guest bedroom.

    Leave a short handwritten or printed card on the bed or nightstand with a warm welcome, the Wi-Fi name and password if you share it, bathroom details, and breakfast time or plans. A card answers the questions guests are least comfortable asking, and it saves repeated trips to ask about towels or morning plans. Keep it to a few lines and a friendly tone.

    Include only details guests need: where to find towels, how to work the shower if it is unusual, and when you plan to eat. Avoid long house rules on the card; save those for a conversation if needed. Replace the card for each visit, and check that any password or time listed is still correct.

    13. Basket of Extra Blankets

    Woven basket with folded extra blankets and a throw beside a guest bed.

    Place a basket with one extra blanket and one light throw near the bed or in the closet, so guests can add warmth without searching the house at night. People sleep at different temperatures, and a basket solves that difference without changing the whole bed. Fold blankets neatly so the basket looks inviting, not like storage.

    Wash the blankets between visits and air them before guests arrive. Choose washable fabrics in neutral tones that match the bedding, and keep the basket where guests can see it on arrival. Mention the basket in the welcome card, so guests know it is theirs to use.

    14. Fresh Flowers or a Potted Plant

    Small vase of fresh flowers on a guest bedroom dresser beside a potted green plant.

    Set a small vase of fresh flowers or one healthy potted plant on the dresser or windowsill, so the room feels cared for from the moment guests walk in. Flowers add color and scent, while a potted plant suits longer stays and needs no daily care. Choose a low arrangement that does not block light or crowd the dresser.

    Water a plant before arrival and remove any dead leaves, and change flower water daily for longer stays. Skip strongly scented flowers if you are unsure about allergies, and keep arrangements away from bedding. A single stem in a small vase can be enough in a small room.

    15. Full-Length Mirror and Wall Hooks

    Full-length mirror leaning on a guest bedroom wall with coats hanging on nearby wall hooks.

    Hang a full-length mirror where guests can check an outfit, and add two or three wall hooks near the door or closet for coats, bags, and hats. A mirror helps guests dress with confidence, and hooks keep coats off the bed and chairs. Mount the mirror at a height that works for most adults, and secure it firmly to the wall.

    Space hooks so a coat and a bag can hang without overlapping, and check that they hold weight without pulling loose. In a small room, hooks on the back of the door save wall space. Keep the area below the hooks clear, so bags do not block the path to the door.

    16. Small Desk or Writing Corner

    Small desk with a chair, a lamp, and a notebook in a bright corner of a guest bedroom.

    Set a small desk or a wall shelf with a chair near a window or an outlet, so guests who work or write have a place to sit upright with a laptop or notebook. Many guests need to answer a message or plan the next day, and a bed is a poor desk. Keep the surface clear except for a lamp and a pen.

    Add a small bin nearby for paper, and check that the chair height suits the desk. In a small room, a narrow console or a fold down shelf can serve as a desk without taking over the room. Leave the outlet free, and keep cables tidy so the corner looks ready to use.

    17. Calm Art and Uncluttered Walls

    Guest bedroom wall with one calm landscape print in a simple wood frame above a clear dresser.

    Hang one or two calm pieces of art, such as a landscape print or a simple botanical print, and leave the rest of the walls clear, so the room feels restful rather than busy. Guests need visual rest after travel, and a crowded wall can make a small room feel smaller. Choose frames that match each other in color or material.

    Hang art at eye level and secure it well, and remove personal photos or clutter that make the room feel like someone else’s bedroom. If you keep a gallery wall, limit it to one wall and keep spacing even. A clear wall also gives guests a place to lean a bag or hang a garment without knocking a frame.

    18. Gentle Scent from Sachets and Clean Linen

    Open drawer with freshly folded linen and a small lavender sachet in a guest bedroom.

    Use clean, freshly washed linen and a lavender sachet in a drawer or closet for a gentle scent, rather than a strong plug in fragrance or an open flame. Scent is one of the first things guests notice, and a light, natural note feels welcoming without overwhelming the room. Air the room before arrival and wash pillowcases and sheets fresh.

    Place sachets where guests will find them, such as in a drawer or on a shelf, and skip scent entirely if you know a guest has allergies. Avoid open candles in a guest room, since guests may forget them. Clean linen, fresh air, and one sachet are enough for a room that smells cared for.

    19. Tea and Snack Tray on the Dresser

    Small tea tray with cups, tea bags, and biscuits on a guest bedroom dresser.

    Set a small tray on the dresser with a kettle or a few tea bags, a couple of cups, and a small snack such as biscuits or fruit, so guests can make a hot drink without going to the kitchen late at night. A tray makes a guest room feel like a small hotel room, and it helps early risers start the day quietly. Keep the tray tidy and the cups clean.

    Refill tea and snacks for each visit, and check dates on packaged snacks. If you offer a kettle, check that it works and that it sits on a stable surface away from bedding. For guests with food allergies, keep snacks simple and sealed, and note ingredients on the tray card if needed.

    20. Hamper for Longer Stays

    Small lidded hamper basket in the corner of a tidy guest bedroom near the closet.

    Place a small hamper or a lined basket in a corner or in the closet, so guests on longer stays have a place for worn clothes instead of piling them on a chair. A hamper keeps the room tidy through a multi night visit and makes packing easier at the end. Choose a basket with a lid or a liner that can be washed.

    Empty the hamper between visits and wipe the basket clean. Show guests where it is on arrival, either in the welcome card or in person, so they use it from the first night. In a small room, a slim hamper behind the door works without blocking the path.

    21. Temperature Choices: Light Cover, Warm Throw, Small Fan

    Guest bed with a light cover and a warm throw folded at the foot, with a small fan on a nearby shelf.

    Give guests control over temperature with a light cover on the bed, a warm throw in the basket, and a small quiet fan in the closet, so they can cool down or warm up without adjusting the whole house. Temperature is a common sleep problem for guests, and these three options cover most preferences. Check that the fan is clean, quiet, and easy to reach.

    Show guests where the fan and throw are stored, and check that bedding layers are easy to add or remove. If the room has its own thermostat or vent, note it on the welcome card. Small temperature choices help guests sleep well, even when the rest of the house runs warmer or cooler than they like.

    Conclusion

    A welcoming guest bedroom comes down to sleep, space, and small useful details. Layered bedding, two pillow choices, soft bedside light, and curtains that block morning sun cover sleep. Clear bedside space, an empty closet section, a luggage rack, and a hamper cover unpacking and longer stays. Fresh towels, water, charging space, and a welcome card cover the first evening without extra questions.

    Start with the bed and the basics, then add one or two personal touches, such as flowers or a tea tray, that suit your home. For seasonal bedroom ideas, see fall decor ideas, which includes a bedroom bedding swap and a bedside vase idea. Keep the room clean, calm, and easy to use, and guests will settle in quickly and sleep well.

    FAQs

    What should every guest bedroom have?

    Every guest bedroom should have a comfortable bed with clean layered bedding, two pillow choices, bedside light, fresh towels, water, charging space, and room for luggage. Start with those basics, then add an extra blanket, a mirror, and a place to hang clothes. A clear nightstand and an empty drawer or closet section help guests settle in without asking for help.

    How do I make a small guest bedroom feel welcoming?

    Use light bedding, a soft rug, and one clear focal point, such as a made bed with a folded throw, and keep surfaces clear. Add a luggage rack that folds away, wall hooks instead of bulky furniture, and layered curtains for privacy and dark sleep. A small chair, a welcome card, and fresh flowers add warmth without crowding the room.

    How many towels should I leave for each guest?

    Leave two large towels, one hand towel, and one washcloth per guest, plus one spare towel in the bathroom. Fold them where guests can see them, such as on the bed or a chair, and set toiletries on a small tray nearby. For stays longer than three nights, plan to swap towels midway through the visit.

    What bedding works best for guests with different sleep preferences?

    Layered bedding works best, since guests can add or remove layers through the night. Use clean sheets, a light duvet or coverlet, a folded throw at the foot, and a basket with one extra blanket nearby. Offer a soft pillow and a firmer pillow on each side, so guests can choose the support they like without asking.

    How do I prepare a guest bedroom the day before guests arrive?

    Wash bedding and towels, vacuum the rug, wipe surfaces, and air the room. Fill the water carafe, check bedside lamps and chargers, clear a drawer and closet section, and set out a welcome card with house notes. Add fresh flowers or a plant last, so the room looks and smells fresh when guests walk in.

    Should a guest bedroom have a TV or a desk?

    A desk suits guests who work or plan trips, while a TV suits guests who like to unwind in the evening, so choose based on your guests and your space. A small desk with a chair and an outlet is useful for most visits and takes less room than a TV setup. If you add a TV, keep the remote visible, note how it works on the welcome card, and keep volume low at night for the rest of the house.


  • 21 Primary Bedroom Decorating Ideas for a Restful Retreat

    21 Primary Bedroom Decorating Ideas for a Restful Retreat

    Decorating a primary bedroom for rest starts with a calm palette, layered bedding, soft low light, and clear surfaces, so the room feels quiet at night and easy to use in the morning. Choose one restful color, repeat it in bedding, curtains, and a rug, and keep paths, nightstands, and the dresser partly clear.

    The 21 ideas below cover the bed, the windows, the walls, the floor, storage, and the small corners that make a primary bedroom work day to day. Each idea works on its own, so you can start with bedding and light, then add storage or a reading spot when you have time. For calm palette ideas in another room, see Fall Living Room Decor, and for the home page overview, visit the Dwell Ovell home page.

    Key Takeaways

    • Start with a calm base of white, cream, or soft grey, then add one restful color, such as sage, dusty blue, or warm oat, in bedding, curtains, and a rug.
    • Layer bedding in washable pieces, so the bed looks full but stays easy to make each morning.
    • Use low, warm light at night, with bedside lamps and a dimmer or low ceiling light, and keep bright overhead light for cleaning and getting dressed.
    • Keep nightstands, the dresser top, and the floor paths partly clear, with closed storage for clothes and daily items.
    • Give the room one comfortable place to sit and read, away from the bed, so the bed stays linked with sleep.
    • Repeat each color and material at least twice, so the room looks planned rather than collected at random.

    1. Layered White and Linen Bedding

    A bed dressed with layered white and oat linen bedding, folded blankets, and a few cream pillows.

    Dress the bed in white cotton sheets, a linen duvet in oat or soft white, and two or three sleeping pillows in matching cases, then fold a light blanket across the middle of the bed. White and linen keep the bed looking fresh, and the natural texture adds warmth without a strong pattern.

    Keep decorative pillows to two or three, so making the bed stays quick and the pillows have a chair or bench to sit on at night. Wash the top layers often, and choose a duvet cover with a simple closure, so changing the bedding does not become a chore.

    2. A Tall Upholstered Headboard

    A tall upholstered headboard in soft beige fabric behind a neatly made bed with pale bedding.

    Choose a tall upholstered headboard in a soft neutral fabric, sized to the bed width, as the main focal point behind the bed. The headboard gives the room a finished shape, supports sitting up to read, and softens a plain wall without art or pattern.

    Fix the headboard firmly to the bed frame or the wall, and check that pillows sit against it without sliding down behind it. Keep bedding pale against a mid tone headboard, or choose a pale headboard with deeper bedding, so one of the two gives the bed its contrast.

    3. Matched Nightstands with Clear Tops

    A bed with matched wooden nightstands on both sides, each with a clear top and one lamp.

    Place a matched pair of nightstands, one on each side of the bed, each with a drawer or a closed shelf for small items. Matching tables give the bed a balanced look, and closed storage keeps chargers, medicines, and small items out of sight.

    Leave each nightstand top mostly clear, with room for a lamp, a glass of water, and a book only. If a nightstand has no drawer, use a small lidded box inside it or on a lower shelf, so loose items do not spread across the top.

    4. Warm Dimmable Bedside Lamps

    Two warm bedside lamps with fabric shades glowing softly on nightstands beside a bed in the evening.

    Set a bedside lamp on each nightstand, with warm bulbs and a shade that glows softly, and use a dimmer or a low wattage bulb for evening light. Warm low light helps the room feel settled at night, and two lamps give even light on both sides of the bed.

    Check that each lamp switch is easy to reach from the bed, and that the shades sit at the same height. Keep lamp bases clear of the bed edge, and use a shade that hides the bare bulb from the pillow, so the light does not glare into the eyes.

    5. Sheer Curtains with Blackout Panels

    A bedroom window with sheer white curtains and darker blackout panels, in soft daylight.

    Hang sheer white curtains at the bedroom window for soft daylight and privacy, with blackout panels behind or beside them for night. Sheers keep the room bright during the day, while blackout panels help block street light and early morning sun.

    Hang the curtain rod high and wide, so the panels stack clear of the glass when open and the window looks larger. Close the blackout panels at night, and open both layers in the morning, so the room gets full daylight before the day starts.

    6. A Large Soft Rug Under the Bed

    A large soft neutral rug under a bed, extending past both sides and the foot of the bed.

    Lay a large soft rug under the bed, extending past both sides and the foot, so feet land on a warm surface in the morning. A rug in a calm neutral links the bed to the rest of the room and softens hard floors and footsteps.

    Choose a rug with a non slip pad under it, and a pile that vacuums easily. Check that wardrobe and bedroom doors clear the rug edge, and keep the rug size large enough that it does not look like a small mat beside the bed.

    7. Soft Sage Walls with White Trim

    A bedroom with soft sage walls, white trim, a neatly made bed, and pale bedding.

    Paint the bedroom walls in a soft sage, warm greige, or dusty blue, with white trim on doors, skirting, and window frames. A muted wall color calms the whole room at once, while white trim keeps the edges crisp and the room bright.

    Test a large sample on the wall behind the bed in daylight and in evening light, since muted tones can look grey or green under different bulbs. Keep the ceiling white, and repeat the wall color in one or two smaller items, such as a throw or a cushion, so the color feels planned.

    8. A Wooden Bench at the Foot of the Bed

    A simple wooden bench at the foot of a bed, with a folded throw and a cushion.

    Place a simple wooden bench at the foot of the bed, with a folded throw on one end and a cushion on the other. The bench gives a place to sit while dressing, holds the decorative pillows at night, and marks the end of the bed clearly.

    Keep the bench clear of laundry and bags, so it stays a seat rather than a storage pile. Check that the bench leaves a clear walking path around the foot of the bed, and choose a bench height close to the mattress height, so sitting on it feels natural.

    9. A Reading Chair with a Floor Lamp

    A comfortable armchair in a bedroom corner with a floor lamp and a small side table with a book.

    Set a comfortable armchair in a bedroom corner, with a floor lamp behind one shoulder and a small side table beside it. A reading chair gives the bedroom a second place to sit, so reading and resting do not always happen in bed.

    Keep the chair near the window or the lamp, with a throw folded over one arm and a book on the side table. Leave the seat clear each evening, and choose a chair size that fits the corner without blocking the wardrobe or the door.

    10. A Small Dressing Table by the Window

    A small dressing table by a bedroom window, with a mirror, a stool, and a small tray.

    Place a small dressing table by the window, with a mirror above it, a stool tucked under, and a small tray for daily items. Daylight at the window suits a dressing table, and a small table fits a primary bedroom without taking the place of a nightstand or a chair.

    Keep only daily items on the table top, such as a brush, a small tray, and one vase or candle holder, and store the rest in a drawer or a box. Sit at the table in daylight to check the mirror height, and keep the stool pushed in when not in use.

    11. One Large Calm Landscape Print

    One large calm landscape print in a simple frame hanging above a bedroom dresser.

    Hang one large landscape print above the dresser or on the main wall, in soft greens, blues, or neutral tones, in a simple wood or white frame. One large calm print gives the room a focal point without a busy gallery wall, and it suits a restful room better than many small competing pieces.

    Hang the print at eye level from the bed and the door, and fix it with hooks rated for its weight. Keep the wall around it plain, so the print can breathe, and choose a scene that feels quiet, such as fields, water, or soft hills, rather than a bright or busy image.

    12. Closed Wardrobe Doors for a Tidy Look

    A bedroom wardrobe with closed plain doors beside a neatly made bed.

    Use a wardrobe with closed doors, rather than open rails, for most bedroom clothes, so the room looks tidy even when the wardrobe is full. Closed doors hide color and shape clutter, and they give the room a calm wall of plain panels.

    Fix tall wardrobes to the wall, and check that the doors open fully without hitting the bed or a chair. Keep one small open hook or rail inside the wardrobe door for the next day outfit, so clothes do not end up on the chair or the bench.

    13. A Basket of Folded Throws by the Bed

    A woven basket beside a bed filled with neatly folded throws in cream and sage.

    Place a woven basket beside the bed or near the reading chair, filled with two or three folded throws in the room palette. Throws in a basket stay easy to reach on cool nights, and the basket itself adds a natural texture to the room.

    Fold the throws neatly, with the top one showing a clean edge, and keep the basket size modest, so it does not block the walking path. Wash the throws now and then, and keep only throws in the basket, so it does not become a place for stray clothes.

    14. A Tray on the Dresser for Daily Items

    A bedroom dresser top with a shallow tray holding keys, a watch, and a small dish.

    Set a shallow tray on the dresser for daily items, such as keys, a watch, a small dish for rings, and a hand cream. A tray gives small items a clear home, so the dresser top stays tidy and nothing small gets lost among larger pieces.

    Keep the tray to one per dresser, and leave the rest of the top mostly clear, with room for one vase or one framed photo. Lift the whole tray aside in one move for dusting, and empty it weekly, so old receipts and loose items do not build up.

    15. A Leaning Floor Mirror by the Wardrobe

    A tall floor mirror leaning against a bedroom wall near a wardrobe, secured with a wall bracket.

    Lean a tall floor mirror against the wall near the wardrobe, where it can be used for dressing and where it bounces daylight into the room. A tall mirror helps a bedroom feel larger, and it saves wall space above the dresser for art.

    Fix the mirror to the wall with a proper bracket or anti tip strap, since a tall mirror can fall if it is only leaned. Check the reflection from the bed and the door, and move the mirror if it reflects clutter or bright light straight into the bed.

    16. A Quiet Ceiling Light with a Fabric Shade

    A bedroom ceiling light with a simple fabric shade giving soft warm light.

    Fit a ceiling light with a fabric shade or a frosted cover, in a simple shape that suits the room, for bright light when cleaning or getting dressed. A fabric shade softens the overhead light, so the ceiling fixture does not glare when it is on.

    Use warm bulbs in the ceiling light, and switch it off in the evening in favor of bedside lamps. Check that the fixture hangs clear of tall wardrobe doors, and dust the shade now and then, so the light stays even and soft.

    17. A Low Bookcase for Bedtime Books

    A low wooden bookcase in a bedroom with neatly grouped books and one small plant.

    Place a low bookcase or a short shelf unit along one wall, with bedtime books, a small plant, and one or two calm objects. A low bookcase keeps books easy to reach from the bed or the reading chair, and its low height keeps the wall feeling open.

    Group books in short rows by height or color, and leave some shelf space empty, so the bookcase does not look crowded. Keep the top of the bookcase mostly clear, with one small plant or one framed photo, and dust the shelves weekly.

    18. Potted Greenery on the Windowsill

    Two potted plants in plain ceramic pots on a bright bedroom windowsill.

    Place two or three potted plants on the windowsill, in plain ceramic or terracotta pots, choosing plants that suit the light in the room. Greenery softens the window frame, adds a living note to a calm room, and needs only a small amount of care.

    Check the light and water needs of each plant before placing it, and use saucers under the pots to protect the sill. Keep plants clear of curtains and blackout panels, and trim dead leaves weekly, so the plants stay tidy.

    19. A Window Seat Cushion for Morning Light

    A bedroom window seat with a firm cushion, two pillows, and a folded throw in soft daylight.

    Style a window seat, or a wide sill with a bench below it, with a firm seat cushion, two pillows in the room palette, and a folded throw at one end. A window seat gives the primary bedroom a bright morning spot for coffee, reading, or quiet time.

    Keep the seat cushions in washable covers, since a window seat gets sun and daily use, and leave one end clear for sitting down easily. Check that pillows do not block the window handle, and keep the throw folded, so the seat stays tidy.

    20. A Small Desk Nook for Notes and Planning

    A small desk nook in a bedroom corner with a chair, a lamp, and a notebook on the desk.

    Set a small desk in a quiet corner, with a chair, a lamp, and a tray for a notebook, pens, and a few papers. A desk nook gives the primary bedroom a place for morning notes, lists, and planning, without turning the whole room into a workspace.

    Keep the desk top mostly clear, with only the notebook and the lamp in daily use, and store papers in a drawer or a folder. Face the desk toward the room or the window, rather than a blank wall, if space allows, and switch the desk lamp off at night.

    21. A Clear Landing Spot by the Bedroom Door

    A clear spot just inside a bedroom door with a robe hook, a small dish, and a clear floor area.

    Create a small landing spot just inside the bedroom door, with a hook for a robe, a small dish for keys, and a clear floor area for shoes. A landing spot keeps items that enter the room from spreading to the bed, the bench, and the chair.

    Keep the landing spot to one hook and one dish, and clear it each evening, so the door area stays open. Check that the door opens fully without hitting the hook or the dish, and keep the walking path from the door to the bed clear at all times.

    Conclusion

    A restful primary bedroom comes from a calm palette, layered bedding, soft low light, and clear surfaces, repeated in a few places rather than spread across every surface. Start with the bed and the light, add one rug and one calm wall color, then choose storage, seating, and reading spots that suit how you use the room each day.

    Keep the room easy to live in by washing bedding and throws often, clearing nightstands and the dresser weekly, and removing anything that ends up on the chair or the bench. For calm palette ideas in another room, see Fall Living Room Decor. Revisit the room after a week, remove anything that feels crowded, and keep only the pieces you use and enjoy each day.

    FAQs

    What colors make a primary bedroom restful?

    Soft sage, dusty blue, warm greige, cream, and white make a primary bedroom restful, because muted tones lower visual noise and pair well with wood, linen, and soft light. Pick one muted color as the main accent, use white or cream as the base, and repeat the accent in bedding, curtains, and a rug.

    How do I make a primary bedroom feel calm without redecorating fully?

    You can make a primary bedroom feel calm without redecorating fully by clearing nightstands and the dresser, adding layered white bedding, switching to warm bedside lamps, and closing wardrobe doors. These four changes calm the room at once, and they cost less and take less time than painting or buying new furniture.

    What bedding is best for a restful primary bedroom?

    White cotton sheets with a linen or cotton duvet in a soft neutral are best for a restful primary bedroom, because they feel cool, wash well, and look calm without a strong pattern. Add a light blanket for cool nights, keep decorative pillows to two or three, and choose washable covers, so the bed stays fresh and easy to make.

    How should I light a primary bedroom at night?

    A primary bedroom should be lit at night with warm, low bedside lamps on both sides of the bed, with the bright ceiling light switched off. Use a dimmer or a low wattage bulb for evening light, keep lamp shades at the same height, and keep switches within reach of the bed, so the light can be lowered without getting up.

    How much storage does a primary bedroom need to stay tidy?

    A primary bedroom needs enough closed storage for clothes, bedding, and daily items, such as a wardrobe with doors, a nightstand drawer on each side, and a tray or box on the dresser. Closed storage matters more than open shelves for a restful look, because it hides color and shape clutter and leaves surfaces clear.

    Can a small primary bedroom still feel restful?

    Yes, a small primary bedroom can still feel restful when you choose a calm palette, one large rug, matched nightstands, and closed storage, and keep the floor paths clear. Use mirrors and sheer curtains to keep daylight moving through the room, and limit seating to one chair or bench, so the room does not feel crowded.


  • 25 Bedroom Makeover Ideas for a Fresh New Look

    25 Bedroom Makeover Ideas for a Fresh New Look

    A bedroom makeover works best when you start with the bed, then change one wall, the lighting, and the storage. Pick a calm color palette, add layered bedding, clear clutter, and add one focal point, such as a new headboard or art. These 25 ideas show simple changes you can make room by room, with most needing only a weekend.

    The 25 ideas below cover the bed, the walls, the windows, the lighting, and the storage spots that shape how a bedroom feels day to day. You can pick one idea for a quick refresh or combine several for a bigger change, and most ideas work in rented rooms as well as owned homes. For more home decor ideas across rooms, visit the Dwell Ovell home page.

    Key Takeaways

    • Start with the bed, since bedding, pillows, and a headboard set the tone for the whole room.
    • Change one wall at a time, with paint, wallpaper, art, or a mirror, so the room stays calm rather than busy.
    • Use warm, layered lighting, with bedside lamps or pendants, instead of relying on one bright ceiling light.
    • Give everything a home, with under bed storage, baskets, trays, and shelves, so clutter stays out of sight.
    • Repeat one or two colors and one or two materials through the room, so small changes look planned.
    • Work in stages, and live with each change for a few days before adding the next one.

    1. Layered White and Neutral Bedding

    A bed dressed with layered white and cream bedding, a folded throw at the foot, and soft pillows.

    Dress the bed in white or cream sheets, add a light duvet or coverlet, and finish with a folded throw at the foot of the bed. Pale bedding makes the room feel clean and bright, and it gives you a calm base that works with almost any wall color or rug.

    Layer a thin blanket under the duvet for cooler nights, and fold the top of the duvet back to show the layers. Keep the throw in a washable fabric, so it can be cleaned often, and choose a texture, such as cotton, linen, or a soft knit, that adds interest without a strong pattern.

    2. Paint an Accent Wall Behind the Bed

    A bedroom with a sage green accent wall behind the bed and pale bedding.

    Paint the wall behind the bed in a calm color, such as sage green, soft blue, warm grey, or muted clay, and leave the other walls pale. One painted wall gives the bed a clear backdrop and changes the whole room for the cost of a can of paint and a weekend afternoon.

    Test the color on a large board first, and look at it in morning light and evening light before you commit. Paint two coats for even coverage, and keep the bedding and curtains simple while the new color settles, so the wall stays the focus.

    3. Add a New Upholstered Headboard

    A bed with a new beige linen upholstered headboard and cream bedding.

    Swap a plain or dated headboard for a padded fabric headboard in linen, velvet, or cotton, in a color that matches your bedding. A soft headboard makes the bed look finished, and it gives you a comfortable backrest for reading in bed.

    Measure the bed width before you buy or build, and check that the headboard height suits your pillows when you sit up. Fix it firmly to the bed frame or the wall, so it does not shift when you lean on it, and keep the fabric in a color you can live with for a few years.

    4. Warm Bedside Lamps on Both Sides

    A bedroom with matching warm bedside lamps glowing on both nightstands beside the bed.

    Place a matching pair of lamps on the nightstands, with warm bulbs and shades that glow softly in the evening. Two lamps frame the bed, give each side of the bed its own light for reading, and let you turn off the main ceiling light at night.

    Choose lamp heights so the bottom of the shade sits near shoulder height when you sit in bed. Use warm white bulbs, and keep cords tucked behind the nightstand so they do not trail across the floor. If space is tight, a slim lamp or a wall mounted light can give the same effect.

    5. Lean a Large Mirror Against the Wall

    A tall mirror leaning against a bedroom wall near a window, reflecting daylight.

    Lean a tall mirror against a bedroom wall, near a window or beside the wardrobe, and fix it to the wall with a proper bracket or anti tip strap. A large mirror bounces daylight around the room, makes a small bedroom feel wider, and gives you a full length view when getting dressed.

    Check the reflection from the bed and the door, and move the mirror if it reflects clutter or a bright light straight into the bed. Keep the floor in front of the mirror clear, so the reflection stays open, and wipe the glass often, since a large mirror shows dust quickly.

    6. Layer Sheer and Blackout Curtains

    A bedroom window dressed with sheer white curtains and heavier blackout drapes.

    Hang sheer curtains closest to the window for daytime privacy, with blackout curtains or lined drapes on top for sleep. Sheers soften daylight and keep the room private, while the heavier layer blocks early morning light and helps the room feel calm at night.

    Hang the curtain rod high and wide, so the curtains frame the window rather than covering it. Use the same rod and rings for both layers, and check that the blackout curtains close fully, with no gap in the middle where light leaks through.

    7. Add Under Bed Storage Boxes

    Flat storage boxes sliding under a bed in a tidy bedroom.

    Slide flat storage boxes under the bed for out of season clothes, spare bedding, or shoes, and label each box so you can find things without pulling them all out. Under bed storage uses space that often sits empty, and it clears the floor and the top of the wardrobe in one step.

    Measure the clearance under the bed before you buy boxes, and choose boxes with lids to keep dust out. Keep the boxes you use most near the side of the bed you reach easily, and sort them once a season, so stored items do not pile up unnoticed.

    8. Lay a Rug That Extends Past the Bed

    A large soft rug under a bed extending past both sides and the foot of the bed.

    Place a large rug under the lower two thirds of the bed, so it extends past both sides and past the foot of the bed. A rug softens cold floors in the morning, anchors the bed in the room, and adds color or texture without painting or changing furniture.

    Choose a rug large enough that your feet land on it when you get out of bed on either side. Use a rug pad underneath to stop slipping, and pick a low pile rug if the room has a door that swings over it. Vacuum the rug often, since bedroom rugs collect dust and hair quickly.

    9. Hang a Gallery Wall of Framed Prints

    A bedroom gallery wall of framed landscape and botanical prints above a dresser.

    Hang a group of framed prints above the dresser or along one wall, choosing subjects you enjoy, such as landscapes, botanical prints, or simple abstract shapes, in frames of one or two finishes. A gallery wall fills a blank wall with personality, and it costs less than one large piece of art.

    Plan the layout on the floor first, with the largest print near the center and smaller prints around it, then hang the group at eye level. Use picture hooks rated for each frame, and leave a little space between frames so each print can be seen on its own.

    10. Paint the Nightstands a Fresh Color

    A pair of freshly painted sage green nightstands with new brass knobs beside a bed.

    Paint a pair of dated nightstands in a fresh color, such as soft white, sage, navy, or warm grey, and add new knobs to finish the change. Painted nightstands give the bedside a clean look for little cost, and they let you test a color before painting a whole wall.

    Clean and lightly sand the nightstands first, so the paint sticks well, and use paint suited to furniture for a hard wearing finish. Let each coat dry fully, and keep the nightstand tops clear while the paint cures, so nothing sticks to the new surface.

    11. Make a Reading Corner with a Chair

    A cozy bedroom reading corner with an armchair, a small side table, a lamp, and a throw.

    Set a comfortable chair in a bedroom corner, with a small side table, a reading lamp, and a folded throw. A reading corner gives the bedroom a second use beyond sleep, and it turns an empty corner into a spot you will actually sit in each day.

    Choose a chair that fits the corner without blocking the door or the wardrobe, and keep the side table large enough for a book and a mug. Place the lamp so light falls over your shoulder, not into your eyes, and keep the throw within reach for cooler evenings.

    12. Swap Drawer Knobs and Pulls

    A close view of a bedroom dresser with new brushed brass drawer knobs.

    Replace dated knobs and pulls on the dresser, wardrobe, and nightstands with new ones in a finish you like, such as brushed brass, matte black, or plain wood. New hardware changes the look of furniture in minutes, and it is easy to reverse if you move or change your mind.

    Remove one knob first and check the screw size and spacing before you buy replacements. Keep the old hardware in a labeled bag, so you can refit it later, and tighten each new knob firmly, so drawers do not rattle when you open them.

    13. Add Floating Shelves for Books and Plants

    Floating wooden shelves above a bedroom dresser holding books, a small plant, and framed photos.

    Fix two or three floating shelves above a dresser or a small desk, and use them for books, small plants, and a few framed photos. Shelves use wall space that often sits empty, and they keep books and small items off the dresser top, where they tend to pile up.

    Fix shelves into wall studs or use fixings rated for the weight, and keep heavier books on the lowest shelf. Leave some empty space on each shelf, so the display looks calm, and keep plants where they get enough light and where watering will not drip onto books below.

    14. Place a Bench at the Foot of the Bed

    A wooden bench at the foot of a bed holding a folded throw and a bag.

    Set a bench at the foot of the bed, in wood, fabric, or woven rattan, to hold a folded throw, a bag, or clothes laid out for the next day. A bench finishes the bed visually, gives you a seat while getting dressed, and adds storage without a new piece of large furniture.

    Measure the bed width and leave a clear path around the bench, so you can walk past it easily in the dark. Choose a bench height near the mattress height, so it looks balanced, and keep the top mostly clear, so it stays useful rather than becoming another clutter spot.

    15. Use Peel and Stick Wallpaper on the Bed Wall

    A bedroom bed wall covered in subtle striped peel and stick wallpaper behind the bed.

    Apply peel and stick wallpaper to the wall behind the bed, in a pattern you like, such as subtle stripes, small florals, or a soft geometric print. Peel and stick paper gives the bed wall pattern and color without paste, and it suits rented rooms, since it can be removed later.

    Start at one corner, smooth the paper as you go, and use a sharp blade for clean edges at the ceiling and skirting. Match the pattern at each join, and keep the rest of the room plain, so the patterned wall stays the focus. For a softer seasonal wall idea with pink tones, see Pink Christmas Decor.

    16. Add Potted Plants to the Windowsill and Dresser

    Potted green plants on a bedroom windowsill and dresser in daylight.

    Place two or three potted plants on the windowsill, dresser, or a small plant stand, choosing plants that suit your light, such as pothos, snake plants, or peace lilies for lower light rooms. Plants add green color and life to a bedroom, and they soften hard furniture edges.

    Check the light each spot gets through the day, and water only when the soil feels dry, since overwatering harms most indoor plants. Use pots with drainage holes and a tray underneath, so water does not mark the dresser or the sill, and rotate plants now and then, so they grow evenly.

    17. Hang Pendant Lights Beside the Bed

    A bedroom bed with a pair of pendant lights hanging on either side of the headboard.

    Hang a pair of pendant lights from the ceiling on either side of the bed, instead of table lamps, to free up nightstand space. Pendants give focused light for reading, add a clean look above the bed, and leave the nightstand top clear for a book, a glass of water, and a phone.

    Hang pendants so the bottom of each shade sits just above head height when you sit in bed, and keep both pendants at the same height. Use warm bulbs, and have the wiring done safely, with cords or ceiling mounts fixed firmly, so the pendants hang straight and steady.

    18. Create a Small Vanity or Dressing Corner

    A small bedroom vanity corner with a table, a mirror, and a stool beside a window.

    Set a small table and a mirror in a corner or beside the window, with a stool tucked under, to make a dressing corner for morning routines. A vanity gives makeup, jewelry, and hair tools one home, and it keeps those items off the dresser and out of the bathroom queue.

    Keep only daily items on the tabletop, such as a brush, a small tray, and one vase, and store the rest in a drawer or a box nearby. Sit at the vanity in daylight to check that the mirror height works, and keep the stool clear, so the corner stays inviting rather than crowded.

    19. Use Woven Baskets for Laundry and Loose Items

    Woven baskets in a tidy bedroom holding blankets and laundry.

    Place woven baskets around the bedroom for laundry, spare blankets, toys, or loose items that tend to collect on chairs and floors. Baskets hide clutter in a soft, natural material, and they are easy to carry when you need to tidy a room quickly before guests arrive.

    Label or assign each basket a job, such as laundry, blankets, or charging cables, so items do not mix. Choose baskets with lids for items you want hidden, and open baskets for blankets you reach for often. Empty and sort baskets once a week, so they do not become hidden clutter.

    20. Hang One Oversized Piece of Art Above the Bed

    One large landscape artwork hanging above a bed in a calm bedroom.

    Hang one large piece of art above the bed, sized about two thirds of the bed width, in colors that echo your bedding or rug. One large piece gives the room a clear focal point, and it looks calmer than many small frames competing for attention on the same wall.

    Hang the art so its center sits at eye level when you stand, and keep the wall around it plain. Check the hanging fixings for the weight, and step back to view it from the door, since that is the view you see most often when you enter the room.

    21. Set Up a Tidy Bedside Charging Spot

    A tidy bedroom nightstand with a small tray holding a phone, a watch, and a book.

    Keep a small tray or a cable organizer on one nightstand for a phone, a watch, and a book, with cables routed behind the nightstand. A set charging spot stops cables from tangling on the bed, keeps the nightstand clear, and helps you put the phone down at night.

    Use one short cable per device, and a small tray to hold the phone and watch together. Keep the tray away from water glasses, and charge devices before bed, so the nightstand stays calm through the night and the morning routine starts without searching for cables.

    22. Refresh the Pillow Mix with Euro Shams and a Lumbar

    A bed styled with sleeping pillows, euro shams, and a lumbar pillow in soft colors.

    Rebuild the bed pillows with sleeping pillows at the back, euro shams in front of them, and one lumbar pillow at the front for color. A layered pillow mix makes the bed look styled and inviting, and it gives you options for sleeping, sitting up, and reading.

    Use pillow covers in washable fabrics, and keep the total count low enough that making the bed each morning stays quick. Repeat one color from the rug or art in the lumbar pillow, so the bed ties in with the rest of the room, and store spare pillowcases in the same place each time.

    23. Swap a Dated Bed Frame for a Simple Wooden Frame

    A simple light wooden bed frame with white bedding in a bright bedroom.

    Replace a dated or wobbly bed frame with a simple wooden frame in oak, pine, or a painted finish that suits your room. A clean frame changes the look of the whole bed, and a sturdy frame stops squeaks and gives better support for the mattress.

    Measure the mattress and the room before you buy, and check that the frame leaves room to walk on both sides. Assemble it on a rug or a blanket to protect the floor, tighten all fixings, and test it by sitting and lying on each side before adding bedding.

    24. Add a Small Work Nook with a Fold Down Desk

    A small bedroom work nook with a fold down desk, a chair, and a laptop.

    Fix a small fold down desk or a slim writing table in a bedroom corner, with a chair that tucks under it, for a work nook that closes away after the day. A nook gives you a place to write, study, or plan, without turning the whole bedroom into an office.

    Keep the nook near a power outlet and natural light if possible, and store papers and cables in a small box or drawer, so the desk can fold away cleanly. When work ends, close the desk and return the chair, so the room feels like a bedroom again in the evening.

    25. Corral Small Items on a Dresser Top Tray

    A bedroom dresser top with a wooden tray holding jewelry, keys, and sunglasses.

    Place a tray on the dresser top for jewelry, keys, sunglasses, and small daily items, so they sit in one group instead of spreading across the surface. A tray makes the dresser look tidy at once, and it lets you lift the whole group in one move when you clean.

    Choose a tray that fits the dresser without crowding it, in a material that suits the room, such as wood, ceramic, or woven rattan. Keep only items you use daily on the tray, and return other items to drawers, so the tray stays a useful landing spot rather than a new pile.

    Conclusion

    A bedroom makeover works best when you change the bed first, then one wall, the lighting, and the storage, and stop before the room feels crowded. Start with layered bedding and a calm color, add one focal point such as a headboard, a mirror, or a large piece of art, then choose two or three ideas from this list that suit your room, your budget, and your daily routine.

    Keep the room easy to live in by leaving walking paths clear, choosing washable covers for pillows and throws, and giving every item a home in a basket, a box, or a tray. Revisit the room after a week, remove anything that feels crowded, and keep only the changes you notice and enjoy each day. Save this list to come back to when you are ready for the next stage, whether that is paint, new lighting, or a bigger furniture change.

    FAQs

    Where should I start a bedroom makeover?

    Start with the bed, since bedding, pillows, and a headboard set the tone for the room, then move to one wall, the lighting, and storage, in that order, so each change builds on a calm base.

    How can I make over a bedroom on a small budget?

    Focus on bedding, paint for one wall or the nightstands, new drawer knobs, and a rug, since these changes cost less than new furniture and change how the room looks and feels the most.

    What colors work best for a calm bedroom?

    Soft white, cream, sage green, pale blue, warm grey, and muted clay work best for a calm bedroom, with one deeper accent color repeated in pillows, art, or a throw, so the room stays restful.

    How do I make a small bedroom feel bigger?

    Use a large mirror, pale walls, a rug that extends past the bed, under bed storage, and floating shelves, and keep the floor and the nightstand clear, so light and open floor space do more of the work.

    Do I need to paint to refresh a bedroom?

    No, you do not need to paint to refresh a bedroom, since new bedding, curtains, a rug, art, plants, and a tidy storage plan can change the room without paint, though one painted wall gives the biggest change for the lowest cost.

    How long does a bedroom makeover take?

    Most bedroom makeovers in this list take a weekend or less, with bedding, hardware, and storage taking an afternoon, and paint, wallpaper, or a new bed frame taking a full day including drying and assembly time.


  • Great Room vs. Living Room: How to Plan and Decorate Each Space

    Great Room vs. Living Room: How to Plan and Decorate Each Space

    A great room is a large, tall, open space that joins living, dining, and often kitchen areas into one room, while a living room is a smaller, separate room with a standard ceiling, used mainly for sitting and conversation. Choose a great room for open gathering, and a living room for a quieter, easier to furnish retreat.

    The two rooms often get mixed up because both hold sofas, chairs, and a television or fireplace. The real difference is scale and connection. A great room is built to gather a household in one shared space, with high ceilings and sight lines across zones. A living room is built to hold one activity well, with walls that frame the seating and keep sound and heat inside. Once you know which room you have, the choices for layout, furniture size, lighting, and decorating become much clearer. For warm, wood based styling that suits either room, see these farmhouse decor ideas, and for seasonal layers in a standard living room, see these living room Christmas decor ideas.

    Key Takeaways

    • A great room is large, tall, and open to other areas, while a living room is smaller, separate, and has a standard ceiling height.
    • Great rooms need zones, large scale furniture, and layered lighting to avoid feeling empty or noisy.
    • Living rooms suit smaller furniture, one clear focal point, and a tighter, cozier arrangement.
    • Use rugs, lighting, and furniture placement to mark zones in a great room, since walls will not do that work for you.
    • Tall ceilings need tall art, long curtains, and light at more than one height, or the room can feel bare above eye level.
    • Sound, heating, and cooling behave differently in open, tall rooms, so plan soft surfaces, window coverings, and air circulation early.
    • Choose the room that fits how your household actually gathers, not the room that looks largest on a floor plan.

    Great Room vs Living Room at a Glance

    Feature Great Room Living Room
    Size Large, often the biggest room in the home Moderate, sized for one seating group
    Ceiling Tall, vaulted, or two story Standard height, usually flat
    Connection Open to kitchen and dining areas Separate room with walls and a door or opening
    Main use Gathering, dining, and everyday living in one space Sitting, reading, and conversation
    Furniture scale Large sectionals, tall bookcases, long tables Sofas, loveseats, and chairs sized to the walls
    Lighting Layered light at several heights One or two layers, often centered on seating
    Sound Travels and echoes more easily Stays contained by walls and soft furnishings
    Heating and cooling feel Harder to keep even, warm air rises Easier to keep even in a smaller volume

    1. What Defines a Great Room

    Open great room with a tall vaulted ceiling, a stone fireplace, and seating and dining zones on one open floor.

    A great room is a large living space with a tall ceiling that is open to adjoining areas, most often the kitchen and dining space. The name points to size and height rather than to a particular style. A great room may hold a fireplace, a seating group, a dining table, and a view into the kitchen, all without walls between them. The room is meant to be the shared center of the home, where cooking, eating, talking, and relaxing happen within sight of each other.

    Because the space is open, a great room needs a clear structure of its own. Without walls, the edges of the room come from furniture placement, rugs, lighting, and changes in flooring or ceiling detail. A seating group on one rug, a dining table on another surface, and a kitchen counter at the far end each read as their own zone. If those zones are not marked, the room can feel like one large empty floor instead of a set of useful places.

    2. What Defines a Living Room

    Smaller separate living room with a standard ceiling, a sofa facing a fireplace, and two chairs for conversation.

    A living room is a separate room set aside mainly for sitting, talking, reading, and watching television. It usually has a standard ceiling, four walls, and one or two clear focal points, such as a fireplace, a window, or a media wall. Doors or cased openings may connect it to a hall or dining room, but the room itself stays distinct, and its size suits one seating group rather than several activity zones.

    That separation is the living room’s main strength. Walls contain sound, hold heat, and give furniture a clear place to sit against. A sofa can anchor to one wall, chairs can face it, and the arrangement reads at once. A living room is easier to furnish on a modest budget, easier to keep tidy, and easier to close off when someone wants quiet. Its limits are real too: a small living room cannot host a large gathering and a dining table at the same time, and a closed room can feel cut off from the kitchen during a party.

    3. Size and Ceiling Height Compared

    Great room wall with tall two story windows showing high ceilings above a seating area.

    Size and ceiling height are the two clearest differences between these rooms. A great room is commonly much larger than a standard living room, with floor space that holds several furniture groups and a ceiling that rises well above standard height, sometimes to a second story. Tall windows often follow the tall wall, which brings in daylight and a view but also adds glass that needs covering and cleaning.

    A living room works at a more ordinary scale. Its ceiling is usually flat and standard in height, which keeps the room feeling close and easy to light. Furniture, art, and curtains can all be standard sizes, and one rug can ground the whole seating group. When you compare rooms in a home you are buying or building, measure both the floor area and the ceiling height. A room that looks generous on a plan can feel cramped if the ceiling is low, and a tall room can feel cold if the floor area is too small for the height.

    4. Open Plan vs Separate Rooms

    Open plan great room flowing into a kitchen, with seating in the foreground and a kitchen island beyond.

    A great room is an open plan room by definition, while a living room is a separate room by definition. Open plan living suits households that like to stay together while doing different things: one person cooks, another reads, and children play, all within earshot and sight. It also suits entertaining, since guests can move between food, drink, and seating without passing through doors.

    Separate rooms suit households that value quiet, privacy, and contained mess. A living room with walls keeps television sound out of bedrooms, keeps cooking smells out of seating, and lets one person read while another watches a film elsewhere. The trade off is connection: a cook in a closed kitchen is cut off from guests, and a small living room can feel isolated during a gathering. When you plan, think about a normal weekday evening, not only a party. The layout that serves daily life best is usually the right choice.

    5. Layout and Zones in a Great Room

    Great room with zones marked by rugs, a seating group on one rug and a dining table on another rug.

    A great room needs zones, because one open floor must do the work of several rooms. Start by placing the seating group first, since it is usually the largest zone. Anchor it with a rug, face the main seating toward the fireplace or the view, and leave clear walkways around it of at least 30 inches. Then place the dining zone near the kitchen, with enough room to pull out chairs, and keep a path between the kitchen and the table clear for carrying food.

    Use changes in the room to mark each zone without building walls. A rug under the seating, a pendant light over the dining table, a console behind the sofa, and a different floor finish at the kitchen edge all signal where one zone ends and the next begins. Keep sight lines open across the room, but give each zone its own light source and its own storage, such as a sideboard near dining and a basket near seating. Test the layout by walking the daily routes: front door to kitchen, kitchen to table, and seating to the nearest bathroom. If any route crosses through a seating group, move the group.

    6. Layout in a Standard Living Room

    Compact living room layout with a sofa, two chairs, a coffee table, and a clear walkway from the door.

    A standard living room layout starts with the focal point. In most living rooms that is the fireplace, the largest window, or the television wall. Place the sofa facing or angled toward that focal point, add two chairs opposite or beside it, and set a coffee table in the middle, within easy reach of every seat. Leave a clear path from the door to the far side of the room, and keep the walkway out of the middle of the seating group when you can.

    Because the walls frame the room, you can use them well. A console or bookcase on the wall behind the sofa gives storage and a place for lamps. A chair in a corner with a floor lamp makes a reading spot without taking floor from the main group. Measure before you buy, and mark large pieces on the floor with painter’s tape. In a small living room, a loveseat and two chairs often seat as many people as a large sofa, and they leave more room to move. Avoid pushing every piece against the walls: pulling the sofa a few inches out and adding a narrow console behind it can make the room feel planned rather than crowded.

    7. Furniture Scale for a Great Room

    Large sectional sofa and tall bookcase in a great room with a high ceiling.

    Furniture in a great room must match the height and floor area, or it will look lost. A standard sofa and a small rug can disappear in a tall, open room, leaving the space feeling empty even when it is full of pieces. Choose a larger seating group, such as a sectional or a sofa with two generous chairs, and pair it with a substantial coffee table and a rug large enough that the front legs of all seating sit on it. Tall bookcases, a large fireplace surround, and long curtains help fill the vertical space.

    Scale up in proportion, not in every piece at once. One oversized sofa plus oversized chairs plus an oversized table can crowd the floor, even in a large room. Balance large seating with open legged side tables and a few lighter pieces, so the room still has air around the furniture. Check the depth and height of seating against the people who will use it: deep seats suit lounging, while shallower seats suit upright conversation. In a great room, furniture also acts as a room divider, so the back of a sofa or a console table should look finished from the kitchen and dining zones, not only from the front.

    8. Furniture Scale for a Living Room

    Apartment scale sofa and small chairs in a standard living room with a coffee table sized to the sofa.

    Furniture in a standard living room should fit the walls and leave room to move. Measure the longest wall first, then choose a sofa that leaves space at each end for a side table or a lamp. A sofa that runs wall to wall leaves no room for end tables and makes the room feel packed. Choose chairs with a smaller footprint than the sofa, and pick a coffee table that is about two thirds the length of the sofa and low enough to see over from a seated position.

    Small and mid sized rooms reward lighter shapes. Sofas with visible legs, open armed chairs, and glass or slim legged tables take up less visual weight than heavy, floor hugging pieces. Use one larger piece as an anchor, such as the sofa, and keep the rest of the group lighter. If the room must seat many people, add a pair of occasional chairs that can move to the dining area or the porch when they are not needed, rather than buying a second sofa that fills the room every day. Leave at least 18 inches between the coffee table and seating, so legs have room and cups are still within reach.

    9. Decorating a Great Room Without Losing Warmth

    Great room decorated for warmth with long curtains on tall windows, large art, and a thick rug.

    A great room can feel grand but cold if the upper walls stay bare and the floor stays hard. Warm it by working at every height. Hang art large enough to read from across the room, and hang it at eye level from the seating, not near the ceiling. Use long curtains that run from near the ceiling to the floor on tall windows, which softens the glass and draws the eye down to the living zone. Add texture at floor level with a thick rug, woven baskets, and upholstered seating.

    Repeat one or two materials through the zones so the open space reads as one room. A wood tone that appears in the kitchen, the dining table, and a living room console links the zones, and one metal finish on lights and hardware does the same. Add plants at different heights, including one tall plant in a corner, to break up large walls. Keep the palette calm, with deeper color on cushions, throws, and art that can change, rather than on large fixed surfaces. A great room looks best when the decorating effort goes into the zone where people actually sit, and the rest of the room supports it quietly.

    10. Decorating a Living Room for Comfort and Focus

    Living room with a simple fireplace mantel, art above it, a rug, cushions, and a throw on the sofa.

    A living room is easier to decorate because the walls set the frame. Pick one focal point and let the rest of the room support it. If the fireplace is the focus, keep the mantel simple, hang one piece of art or a mirror above it, and arrange seating toward it. If the window is the focus, keep curtains light, place seating to catch the view, and keep the window wall free of tall furniture that blocks light.

    Layer textiles for comfort: a rug that fits the seating group, cushions in mixed sizes, and a throw within reach of the main seat. Use color in a controlled way, with a base of two or three colors and one accent repeated in cushions, art, and a small decor piece. In a small living room, keep large patterns to one item, such as one patterned cushion or one rug, and keep the rest plain so the room stays calm. Leave some empty wall and empty surface in every living room. A room that is full at every edge feels smaller, while a room with a little breathing space feels cared for.

    11. Lighting for High Ceilings and Open Plans

    Great room in the evening with pendant light, table lamps, and floor lamps lighting seating and dining zones.

    Lighting a great room needs more than one central fixture, since a single ceiling light cannot reach every zone and cannot flatter a tall space. Plan light in layers: overhead light for general use, such as recessed lights or a large pendant over the seating or dining zone; task light for reading and cooking, such as table lamps, floor lamps, and under cabinet lights; and accent light for art, bookcases, and the fireplace wall. Put different zones on separate switches or dimmers, so the dining zone can glow while the seating zone stays soft.

    Mind the height. Pendants over a dining table should hang low enough to light the table and the faces around it, but high enough to see across. A chandelier in a two story space should hang where it can be seen from below and from any upper landing, and it should be sized to the room, not to a standard living room. Use warm white bulbs through the room for a consistent evening feel, and check glare from tall windows during the day. Lamps at seating height matter most in a great room: they bring light down to where people sit and keep the tall ceiling from feeling like a dark void at night.

    12. Lighting for a Standard Living Room

    Standard living room in the evening with a floor lamp beside a reading chair and a table lamp beside the sofa.

    A standard living room is easier to light well, because the ceiling is close and the seating group is compact. Aim for three light sources in the room: one overhead or central light, one floor or table lamp beside the main seating, and one smaller lamp or wall light for balance. That mix lets you light the whole room for cleaning, light one corner for reading, and set a soft evening level without relying on a single bright fixture.

    Place lamps where they serve a seat, not just where they fill a corner. A floor lamp behind a reading chair, a table lamp on a side table beside the sofa, and a small lamp on a console give light at hand height, which flatters faces and makes the room feel welcoming. Use dimmers where you can, and keep bulb color consistent through the room, since mixed warm and cool bulbs make a small room feel unsettled. If the television is in the room, avoid placing a bright lamp directly behind or opposite the screen, where it causes glare, and add a soft lamp to one side instead.

    13. Sound, Heating, and Cooling Feel

    Great room with a ceiling fan, a fireplace, and heavy curtains on tall windows.

    Sound, heating, and cooling behave differently in the two rooms, and this difference affects daily comfort more than style does. In a great room, sound travels across the open floor and bounces off tall walls and hard floors, so conversation, television, and kitchen noise mix. Soft surfaces help: a thick rug, upholstered seating, curtains on tall windows, and fabric panels or bookcases on large walls all absorb sound. A separate rug in each zone also cuts echo, since bare floor between zones carries sound.

    Warm air rises, so a great room with a tall ceiling can feel warm near the ceiling and cool at seating level in winter, and hard to cool evenly in summer. A ceiling fan set to push air down in winter and circulate it in summer helps, as do window coverings that block summer sun on tall glass and hold warmth on cold nights. A fireplace warms the seating zone near it, but it will not heat the whole open space evenly. In a standard living room, walls and a lower ceiling keep sound and heat contained, so the room warms up faster, stays even, and keeps television sound from reaching the rest of the house. That contained feel is one reason many people prefer a living room for reading, homework, and quiet evenings.

    14. How to Choose and Plan Each Space

    Person measuring a living room wall with a tape measure beside a sketched floor plan with marked zones.

    Choose between a great room and a living room by looking at how your household lives on an ordinary day. If most evenings find the household in one shared space, with cooking, homework, and conversation overlapping, a great room supports that pattern. If different people need quiet at the same time, or if the household values a room that can close off, a separate living room serves better. Also weigh upkeep: a great room has more floor, more glass, and taller surfaces to clean and light, while a living room costs less time and money to furnish, heat, and keep tidy.

    When you plan either room, start with measurements, not furniture shopping. Measure the floor, the ceiling height, the window sizes, and the doorways, and sketch the zones on paper before you buy. In a great room, mark zones with tape on the floor and walk the daily routes before you commit to large pieces. In a living room, mark the sofa footprint and the walkways the same way. In both rooms, buy the largest pieces first, live with them for a few weeks, and then add lighting, art, and textiles once you know how the room is actually used. A room planned around real routines will feel right long after the first decorating choices fade into the background.

    Conclusion

    A great room and a living room are not two names for the same space. A great room is large, tall, and open, built for shared life across zones, while a living room is smaller, separate, and easier to furnish, heat, and keep quiet. Each room asks for different furniture scale, lighting layers, and decorating choices, and each one suits a different way of living. Measure your space, watch how your household uses it on a normal day, and plan zones, light, and sound before you buy. With those choices made early, either room can become the comfortable center of the home.

    Frequently Asked Questions

    What is the main difference between a great room and a living room?

    A great room is a large, tall, open space joined to the kitchen and dining areas, while a living room is a smaller, separate room with a standard ceiling used mainly for sitting and conversation. The difference is scale and connection, not style: great rooms gather several activities in one open space, and living rooms hold one seating group within walls.

    Is a great room the same as a family room?

    No, a great room and a family room are not the same, though the terms are sometimes used loosely. A great room is defined by its large size and tall ceiling and is usually open to the kitchen and dining space, while a family room is usually a casual, separate room near the kitchen used for television and everyday relaxing, often with a standard ceiling. A home can have both, or one room that serves both roles.

    Can a small home have a great room?

    A small home can have a great room only if it has the floor area and ceiling height to support one, since the term describes a large, tall, open space. In a small home, an open plan living and dining area can feel similar, but it will not have the scale of a true great room. In that case, treat it as an open plan living space: use rugs and lighting to mark zones, and choose furniture sized to the actual floor, not to the great room label.

    What furniture works best in a great room?

    Large scale seating works best in a great room, such as a sectional or a sofa with two generous chairs, paired with a substantial coffee table and a rug large enough for the front legs of all seating. Tall bookcases, long curtains, and large art help fill the vertical space. Balance large pieces with lighter side tables and open legged shapes, so the floor still has air around the furniture.

    How do you make a great room feel cozy?

    Use rugs, layered lighting, and soft surfaces to make a great room feel cozy. Anchor the seating group on a thick rug, add table and floor lamps at seating height, hang long curtains on tall windows, and add cushions, throws, and plants at different heights. Repeat one wood tone and one metal finish through the zones, and put decorating effort into the seating zone where people actually sit.

    Is a living room or a great room better for resale?

    Neither room type is better in every home, since buyers weigh layout, size, and daily use differently. A great room appeals to buyers who want open gathering space and a clear view across the main floor, while a separate living room appeals to buyers who want quiet, privacy, and rooms that are easy to heat and furnish. The stronger choice is the layout that fits the home’s size and the way its rooms connect, kept in good condition with clear zones and good lighting.


  • 25 Cozy Room Decorating Ideas Using Color, Texture, and Lighting

    25 Cozy Room Decorating Ideas Using Color, Texture, and Lighting

    Cozy room decorating ideas work best when warm color, soft texture, and layered lighting are used together: paint or furnishings in warm tones, tactile layers such as wool, velvet, and wood, and lamps at several heights instead of one bright overhead light. The 25 ideas below show how to combine those three elements in living rooms, bedrooms, and small spaces.

    Start with the room you use most in the evening, since that is where warm light and soft layers pay off first. Pick two or three warm colors, such as cream, terracotta, and soft brown, and repeat each one at least twice, in a throw, a cushion, and a rug, so the room looks planned. Then add light at seating height, keep one surface clear for daily use, and work through the list one idea at a time. For seasonal ways to layer the same warm palette, see fall living room decor ideas.

    Key Takeaways

    • Combine all three cozy elements: warm color, soft texture, and layered light, rather than relying on color alone.
    • Hold the palette to two or three warm colors plus natural wood, and repeat each color at least twice in the room.
    • Mix textures that invite touch: knit, wool, velvet, linen, wood, and woven fiber, with one smooth surface left clear for balance.
    • Light the room at several heights: a floor lamp, a table lamp, and candles or a small glow source, with the overhead light off in the evening.
    • Keep seating and walkways usable: throws within reach, rugs flat and secure, and decor low enough to see across.
    • Start small: one warm wall or one lamp change can shift a room, and later ideas can build on that base.

    1. Warm Paint Color on One Accent Wall

    Living room with one warm terracotta accent wall behind a cream sofa, wood shelves, and soft evening lamplight.

    Paint one wall in a warm tone, such as soft terracotta, warm taupe, or muted clay, and keep the other walls in cream or warm white. One warm wall gives the room a clear cozy anchor without making a small room feel dark, and it makes wood, linen, and brass nearby look richer. Choose the wall behind the sofa or the bed, so the color frames the main seating rather than competing with it.

    Test the color on a large card in daylight and in evening lamplight before painting, since warm tones shift a lot under different bulbs. Paint two coats, let the wall dry fully, and hang art or a mirror against it only after the paint has cured. If painting is not possible, a large warm toned fabric panel or a set of framed prints in warm colors gives a similar focal wall without paint.

    2. Layered Throws in Mixed Textures

    Cream sofa with a chunky knit throw and a smooth fleece throw draped over the arm and back in warm tones.

    Drape two throws over the sofa in different textures, such as a chunky knit and a smooth fleece, in colors from the same warm palette. Mixed textures make the seating look soft even before anyone sits down, and two throws let people choose a light or heavy layer. Fold one throw in thirds across the sofa back and drape the other over one arm, so both stay within reach.

    Keep throw colors close to the cushion colors, with one plain and one lightly patterned piece, so the sofa stays calm. Wash throws before first use and shake them out weekly, since throws used daily gather dust and pet hair. Store a spare throw in a basket nearby, so the sofa never ends up bare when one throw is in the wash.

    3. A Soft Rug That Warms the Floor

    Cozy seating area with a soft warm patterned rug under a sofa and wood coffee table on a hard floor.

    Lay a soft rug under the seating area, large enough that front chair and sofa legs sit on it, with a non slip pad beneath. A rug in a warm neutral, a muted pattern, or a soft pile warms the floor at once, quiets footsteps, and links the sofa, chairs, and coffee table into one group. In a room with hard floors, the rug is often the single change that makes the space feel cozy underfoot.

    Choose a flat weave or low pile rug where chairs move often, and a plusher pile beside a bed or reading chair, where feet land first. Center the rug under the main seating, not just under the room, and vacuum it weekly, blotting spills at once. For a small room, one rug is enough; layering a second rug works best in larger rooms where both edges can show.

    4. Lamps at Three Heights Instead of One Overhead Light

    Living room in the evening lit by a floor lamp, a table lamp, and candles, with the overhead light off.

    Place lamps at three heights in the evening: a floor lamp beside the sofa, a table lamp on a side table or console, and a small glow source such as a candle on a tray. Light at several heights makes the room feel settled after dark, since no one sits in a pool of harsh overhead light or in shadow. Warm white bulbs suit cream, wood, and terracotta tones far better than cool white bulbs in a cozy room.

    Put the main lamp switch within reach of the main seat, and use a dimmer or a low watt bulb where possible, so the same lamps work for reading and for quiet evenings. Keep lamp shades in cream or linen, and keep lamp bases clear of throw ends and curtain fabric. For a wider warm lighting plan in a living room, see fall living room decor ideas.

    5. Sheer Curtains Layered with Heavier Drapes

    Living room window with sheer curtains and heavier cream linen drapes beside a cozy sofa.

    Hang sheer curtains next to the glass for daytime privacy and soft light, then add heavier drapes in linen or cotton on the outside, so the window looks finished day and night. Sheers soften bright light and keep the room from feeling bare, while drapes frame the window and add warmth in the evening when drawn. Choose drapes in cream, warm white, or a quiet warm stripe that tones with the sofa fabric.

    Hang the rod high and wide, so the window looks larger and the drapes clear the glass when open. Tie drapes back during the day for light, and draw them in the evening for warmth and privacy. Keep drape fabric clear of candles, radiators, and heaters, and brush or wash the panels before the cold season, since dust shows more on light fabric in daylight.

    6. Chunky Knit and Velvet Cushions Together

    Sofa with chunky knit and velvet cushions in cream, rust, and soft brown.

    Mix chunky knit cushion covers with velvet cushion covers on the same sofa, in two or three warm colors, with plain covers between patterned ones. Knit adds a chunky, handmade texture, while velvet adds a soft sheen, and the contrast keeps the sofa from looking flat. Use one knit texture and one velvet texture only, so the mix reads as planned rather than busy.

    Place larger cushions at the sofa corners and smaller ones in front, and keep the total count to what fits without a pile on the floor when someone sits down. Choose zip covers so you can wash them and swap them by season, and keep velvet covers out of strong direct sun, which can fade the pile unevenly. For farmhouse rooms that use the same soft layering, see farmhouse living room decor.

    7. Warm Wood Through a Coffee Table or Shelves

    Cozy living room anchored by a warm wood coffee table and wood shelves with books and a small plant.

    Anchor the room with one warm wood piece, such as a coffee table, a set of shelves, or a console, in oak, walnut, or a warm worn tone. Wood adds a natural, warm material that softens plain walls and pale sofas, and it gives textiles and metal accents a solid base to sit against. Keep other wood tones in the room close to this anchor tone, so the wood reads as one family rather than a set of unrelated pieces.

    Style the wood surface with restraint: a tray, a short stack of books, and one small plant or candle, with clear space left for cups. Wipe wood with a dry cloth for dust and a damp cloth for spills, and use coasters under hot drinks so the finish stays even. If a new wood piece is not in the budget, sand and oil a secondhand table top, or add wood frames and a wood tray to bring the same warm tone into the room.

    8. Candlelight in Clusters on a Tray

    Tray on a coffee table holding candles of two heights in brass and ceramic holders.

    Group three or four candles of two heights on a tray on the coffee table or sideboard, with holders in brass, ceramic, or glass. A candle cluster gives a low, warm glow that lamps alone cannot match, and the tray keeps the group together so it lifts off in one move when the table is needed. Keep the tray small enough that cups and books still fit beside it on the table.

    Use battery candles near fabric, paper, and dried stems, and keep real flames clear of throws, curtains, and garlands, never leaving them burning unattended. Trim wicks before lighting real candles, and set holders on a stable base so they do not tip. Change candle batteries together in a battery set, so the glow stays even across the group.

    9. A Reading Corner with an Armchair and a Lamp

    Reading corner with a comfortable armchair, a warm table lamp, a small side table, and a folded throw.

    Set one comfortable armchair in a quiet corner, with a cushion, a small side table, and a lamp with a warm bulb at chair height. A reading corner gives one seat a clear purpose on dark evenings, and the lamp light adds a second warm layer beside the main sofa lighting. Choose a chair with a seat deep enough to sit in for an hour, and a side table just large enough for a book and a cup.

    Place the lamp so light falls on a book, not straight into the eyes of the person sitting down, and keep the chair clear of clutter so it stays an invitation rather than a storage spot. Add a small basket for books or a folded throw beside the chair, and keep the corner in the same warm palette as the rest of the room, so it feels like part of the room rather than a separate display.

    10. A Gallery Wall in Warm Frames

    Gallery wall of framed prints in warm wood frames above a sofa in a cozy living room.

    Group framed prints, photos, and small art in warm wood or brass frames on one wall, with even spacing between frames and one larger piece as the anchor. A gallery wall adds warm color and personal detail at eye level, and it fills a bare wall without a large, costly piece. Choose prints in warm tones, such as landscapes, botanical studies, or simple line art, so the group suits the room palette.

    Hang the group centered over the sofa or console, at seated eye level where possible, and check the layout on the floor first, so spacing stays even on the wall. Keep frames in one or two finishes only, and use secure fixings rated for the weight, especially above seating. Dust frames before a gathering, since dust shows more in warm lamplight.

    11. A Woven Basket for Throws and Blankets

    Large woven basket beside a sofa filled with rolled throws in cream, rust, and soft brown.

    Stand a large woven basket beside the sofa, filled with two or three rolled or folded throws in cream, rust, and soft brown. Rolled throws are easy to grab and easy to put back, and the basket itself adds a warm woven texture to the room. This idea suits households where people reach for a throw most evenings, since the basket keeps blankets tidy without a cupboard.

    Roll throws to a similar size so the basket looks tidy, and keep the basket clear of walkways so it is not knocked over. Shake the basket outside now and then, since dust settles in the weave, and avoid damp spots near the basket, which can mark natural fibers. If floor space is tight, a smaller basket on a shelf or a ladder for throws gives the same tidy storage in less room.

    12. A Styled Mantel or Shelf Ledge

    Styled mantel shelf with a mirror above, brass candleholders at the ends, and a small vase of stems.

    Style a mantel or a single shelf ledge with a few warm pieces: a mirror or framed print above, a pair of candleholders at the ends, and one low group in the middle, such as a small vase of stems or a stack of books. A styled ledge gives the room a focal point at eye level, and the wood or painted shelf itself carries much of the interest, so the objects on it can stay few and quiet.

    If the room has no fireplace, a wood shelf mounted at mantel height on a plain wall gives the same ledge for seasonal styling. Keep anything flammable clear of a firebox opening, and check that candleholders sit on stable bases away from curtains. Change one item by season, such as stems in spring or pine in winter, so the ledge feels fresh without a full restyle.

    13. Brass and Warm Metal Accents

    Cozy room corner with brass candleholders, a brass tray, and a brass framed print in warm lamplight.

    Add three or four brass accents across the room, such as candleholders, a small tray, a picture frame, and a lamp base, keeping the finish consistent. Brass adds a warm metallic note that suits fall and winter light, and it links seating, shelves, and windows when the same finish repeats in more than one spot. Limit the metal to one warm finish, so it reads as a thread rather than a collection of unrelated pieces.

    Place one metallic piece near the seating area, one on the mantel or shelves, and one near the window, so the finish repeats without crowding any single surface. Wipe metal pieces clean before the season starts, and keep them away from damp spots where they can mark wood. If the room already has chrome or black fixtures, use brass sparingly, in one or two spots only, so the finishes do not compete.

    14. Greenery and Branches for Softness

    Living room corner with a tall potted plant and branches in a terracotta pot beside a bookcase.

    Stand a tall vase of branches, a potted plant, or a trailing plant on a shelf, so the room gains a soft, natural shape beside straight furniture lines. Greenery softens hard corners, adds a living color that suits warm wood and cream, and fills vertical space without taking up floor room. Choose plants that suit the room light, and keep the pot in a warm ceramic, terracotta, or woven cover that tones with the room.

    Place a tall plant in a bare corner or beside a bookcase, and a trailing plant on a high shelf where stems can hang clear of walkways. Water plants on a set day each week, wipe leaves now and then, and move pots on a tray or mat if the floor or shelf marks easily. If live plants are hard to keep, use one good quality faux stem in the same vase, wiped clean, rather than several poor ones.

    15. A Coffee Table Tray with Books and a Candle

    Wood coffee table with a tray holding a stack of books, a candle, and a small wooden bowl.

    Set a low tray in the center of the coffee table, with a short stack of books, a candle in a holder, and one small natural piece, such as a smooth stone or a small wooden bowl. A tray gives table decor a defined home and keeps the rest of the table free for cups, so the table stays useful as well as styled. Choose a tray in wood, rattan, or brass that tones with the room, and keep the group low enough to see across.

    Leave clear space on the table beside the tray for drinks, and lift the whole tray aside in one move when the table is needed for a meal or a game. Keep the book stack to two or three books with spines in warm colors, and keep the candle clear of book pages and throw ends. One tray, done well, reads more clearly than small items spread across the whole table.

    16. Swap to Warm White Bulbs and Add a Dimmer

    Living room lit by warm white lamps in the evening, with a dimmer switch detail near the sofa.

    Swap cool white bulbs for warm white bulbs in lamps and ceiling fittings, and add a dimmer to the main light where the wiring allows it. Warm white bulbs make cream, wood, and terracotta tones look richer, and a dimmer lets the same light work for a bright family evening and a quiet night in. This is a low cost change, since it needs no new furniture and takes minutes per lamp.

    Check the bulb base and wattage for each fitting before buying, and keep a spare warm bulb in the house so a blown bulb does not leave the room in cool light. Put the dimmer within reach of the main seat where possible, and keep the overhead light off in the evening once lamps are lit, so the room keeps its low, warm glow. Test the new bulbs at night, since daylight hides the difference warm bulbs make.

    17. Layered Bedding for a Cozy Bedroom Corner

    Cozy bedroom bed layered with cream bedding, a warm quilt, and a folded throw across the foot.

    Layer a bedroom bed with a fitted sheet, a flat sheet or light cover, a warm duvet or quilt, and a folded throw across the foot, in cream, soft brown, and one warm accent color. Layered bedding makes a bedroom feel cozy at once, since the bed is the largest soft surface in the room, and layers let sleepers adjust warmth through the night without remaking the bed. Add two sleeping pillows plus one or two soft cushions, and no more, so the bed stays easy to make each morning.

    Choose bedding in natural fibers, such as cotton and linen, that wash well, and keep the throw within the room palette so the bed links to curtains and rugs. Shake out the duvet each morning, fold the throw neatly at the foot, and wash bedding on a regular cycle so layers stay fresh. For a bedroom that stays cozy past the holidays, keep the same layering and swap only the accent color by season.

    18. A Mirror That Bounces Warm Light

    Mirror in a warm wood frame above a console, reflecting warm lamplight in a cozy room.

    Hang a mirror opposite or beside a lamp or window, so it bounces warm light deeper into the room and makes a small room feel larger. A mirror doubles lamplight in the evening, and a warm wood or brass frame adds a cozy detail even when the lamp is off. Choose a mirror sized to the wall, large enough to reflect light, but not so large that it crowds nearby frames or furniture.

    Hang the mirror centered over a console or sideboard, with its bottom edge clear of items on the top, and check the reflection from the main seat, since that is where it will be seen most. Keep the mirror glass clean, since smudges show more in warm lamplight, and avoid hanging a mirror where it reflects clutter or a bright bare bulb. In a small room, one mirror is enough; a second mirror works best on a different wall, not beside the first.

    19. A Woven Wall Hanging or Textured Panel

    Plain wall with a woven wall hanging in warm neutral tones above a console in a cozy room.

    Hang a woven wall hanging, a macrame piece, or a fabric panel in warm neutral tones on a plain wall, to add texture at eye level without paint or new furniture. Woven fiber adds a soft, handmade texture that paint alone cannot give, and it suits rooms with wood, linen, and rattan already in them. Choose a piece sized to the wall, so it fills the space without crowding nearby art or a mirror.

    Hang the piece from a single secure hook or a wood dowel rod, and check that it hangs level and clear of radiators and heaters. Brush or shake the piece outside now and then, since woven fiber gathers dust, and keep it out of strong direct sun, which can fade natural fibers unevenly. If a large woven piece feels too much, a small woven panel above a console gives the same soft texture in a smaller dose.

    20. Seasonal Textile Swaps for Autumn and Winter

    Sofa styled for autumn and winter with rust and mustard cushion covers and a warm throw.

    Swap cushion covers, throws, and a table runner to deeper warm tones for autumn and winter, such as rust, mustard, and deep brown, then swap back to lighter warm neutrals in spring. Seasonal textile swaps change the room in minutes and cost far less than new furniture, since covers and throws store flat when the season ends. Keep the swap to two or three pieces per room, so the change reads as cozy rather than themed.

    Choose zip cushion covers and washable throws, so the swap takes one laundry cycle and one short styling pass. Store out of season textiles washed and folded in a labeled basket or bag, so the next swap takes minutes. For seasonal living room layers that pair with this idea, see cozy Christmas living room ideas.

    21. Framed Photos and Personal Pieces on Display

    Console styled with framed photos in matching warm frames and one small keepsake.

    Group framed photos and one or two personal pieces, such as a small keepsake or a handmade item, on a console, shelf, or gallery wall, in matching warm frames. Personal pieces make a cozy room feel lived in, since they show who uses the room, and they suit a warm palette better than a row of identical store bought objects. Keep the group small, with space between frames, so each piece can be seen.

    Use the same frame finish across the group, and vary photo sizes only slightly, so the display reads as planned. Keep fragile keepsakes behind glass or away from walkway edges, and dust frames weekly, since a dusty personal display loses its warmth fast. If the group starts to grow, rotate pieces by season, keeping the current favorites out and storing the rest, so the display stays calm.

    22. Floor Cushions and a Pouf for Soft Extra Seating

    Living room corner with large floor cushions in knit and cotton and a woven pouf.

    Add two or three large floor cushions and one woven or fabric pouf in knit, cotton, or wool, stacked in a corner when not in use and set out for evening seating. Floor cushions add soft seating without new furniture, and they work well for family evenings, games, and film nights, especially in rooms where a second sofa would crowd the floor. Keep cushion colors inside the room palette, in cream, rust, or soft brown.

    Store floor cushions stacked, not in walkways, when they are not in use, and shake and air them regularly, washing covers on a gentle cycle where the care label allows. Check that floor cushions do not block a fireplace, a heater, or a walkway when set out, and keep the pouf as a footrest or a side table with a tray on top, so it earns its floor space daily.

    23. A Window Seat with Thick Cushions

    Window seat with a thick washable cushion, soft back cushions, and a basket of books beside it.

    Build a window seat from a wide sill, a bench, or a low storage unit under a window, topped with a thick cushion in a washable fabric, plus one or two soft back cushions. A window seat turns an unused window wall into the coziest seat in the room, with daylight by day and lamplight in the evening, and storage below keeps throws and books close. Choose a cushion thick enough to sit on for an hour, and a fabric that wipes clean.

    Keep the window seat clear of clutter, so it stays an invitation, and add a small basket beside it for a book and a throw. In a room without a built in seat, a low bench with the same thick cushion gives a similar seat in front of a window. Keep cushion fabric clear of radiators below the window, and air the cushions now and then, since a seat by glass gathers dust and damp in cold weather.

    24. Fairy Lights Along a Shelf or in a Glass Jar

    Glass jar with warm fairy lights glowing on a side table beside a cozy sofa in the evening.

    Run a short string of warm white fairy lights along a shelf edge, or place a small string inside a clear glass jar on a side table, with the battery pack hidden behind the jar. A lit jar or a lit shelf edge gives a soft, contained glow that suits a side table, a shelf, or a windowsill, and it adds cozy light without another strand across the room. One jar or one shelf run is enough in a small room.

    Use battery lights with a timer where available, so the lights come on at the same time each evening, and keep lights clear of curtain edges and throw ends. Wipe the jar glass before first use so the light shows clearly, and turn the lights off at night, keeping spare batteries with the other household lights. Keep fairy lights out of reach of small children, and check cords for damage before each season of use.

    25. A Warm Welcome Corner by the Door

    Entry corner inside a door with a narrow wood console, a mirror above, a tray for keys, and a basket below.

    Style the wall just inside the door as a warm welcome corner: a small console or bench, a mirror or framed print above, a tray for keys, and a basket for shoes or bags. A welcome corner makes the whole home feel cozy from the first step inside, since guests see warm wood, soft texture, and low light at once, and it keeps daily clutter in one place. Choose a console narrow enough to leave the walkway clear, and a mirror that reflects lamp light into the hall.

    Keep the top calm: one tray, one small plant or vase, and one candle or lamp, with the basket below for shoes. Empty the tray weekly, so keys and mail do not pile up, and wipe the console top after wet weather, since coats and bags bring in damp. For a farmhouse room that uses the same warm entry styling, see farmhouse living room decor.

    Conclusion

    A cozy room works when warm color, soft texture, and layered lighting are planned together, not added one at a time without a link between them. Start with a warm palette of two or three colors, add soft layers you can touch, such as throws, rugs, and cushions, then light the room at several heights with warm bulbs. Keep seating usable, walkways clear, and one surface in each room free for daily life.

    Work through this list one idea at a time, starting with light and textiles, since those two changes shift a room fastest. For seasonal layers in the same warm palette, see fall living room decor ideas, and for holiday warmth in a living room, see cozy Christmas living room ideas. Save this list on Pinterest for your next room refresh, and begin with the room you use most in the evening.

    FAQs

    What are the three main elements of cozy room decorating?

    The three main elements are warm color, soft texture, and layered lighting. Warm color sets the mood, soft texture such as wool, velvet, and wood invites touch, and layered lighting at several heights keeps the room soft in the evening instead of harsh under one overhead light.

    What colors make a room feel cozy?

    Warm colors make a room feel cozy, such as cream, warm white, terracotta, soft brown, rust, and muted gold, used in a palette of two or three colors plus natural wood. Repeat each color at least twice, in a throw, a cushion, and a rug, so the room looks planned, and keep one quiet pattern at most so the palette stays calm.

    How do I make a room cozy without painting or buying furniture?

    Start with textiles and light, since those two changes shift a room fastest without paint or new furniture. Add a soft rug, two throws in mixed textures, and lamps with warm white bulbs at seating height, then style one tray or shelf with books and a candle. Work through one layer at a time, and keep pieces you use daily within reach.

    How many lamps does a cozy room need?

    A cozy room needs light at two or three heights, not a set number of lamps: a floor lamp beside the sofa, a table lamp on a side table or console, and a small glow source such as candles or fairy lights. That spread keeps no one in shadow and lets you switch the overhead light off in the evening, which is the change that most often makes a room feel cozy.

    What textures work best for a cozy room?

    Knit, wool, velvet, linen, cotton, wood, and woven fiber work best together, because each adds a different kind of softness to the room. Mix one chunky texture, such as knit, with one smooth texture, such as velvet, and one natural texture, such as wood or rattan, and leave one smooth surface clear, such as a wood table top, so the room stays balanced.

    How do I keep a cozy room from looking cluttered?

    Keep one surface in each room clear for daily use, group decor in small sets on trays, and store throws and cushions in baskets when they are not in use. Limit decor to three or four pieces per surface, repeat the same warm colors across the room, and remove one item whenever a new piece is added, so the cozy layers stay soft rather than crowded.