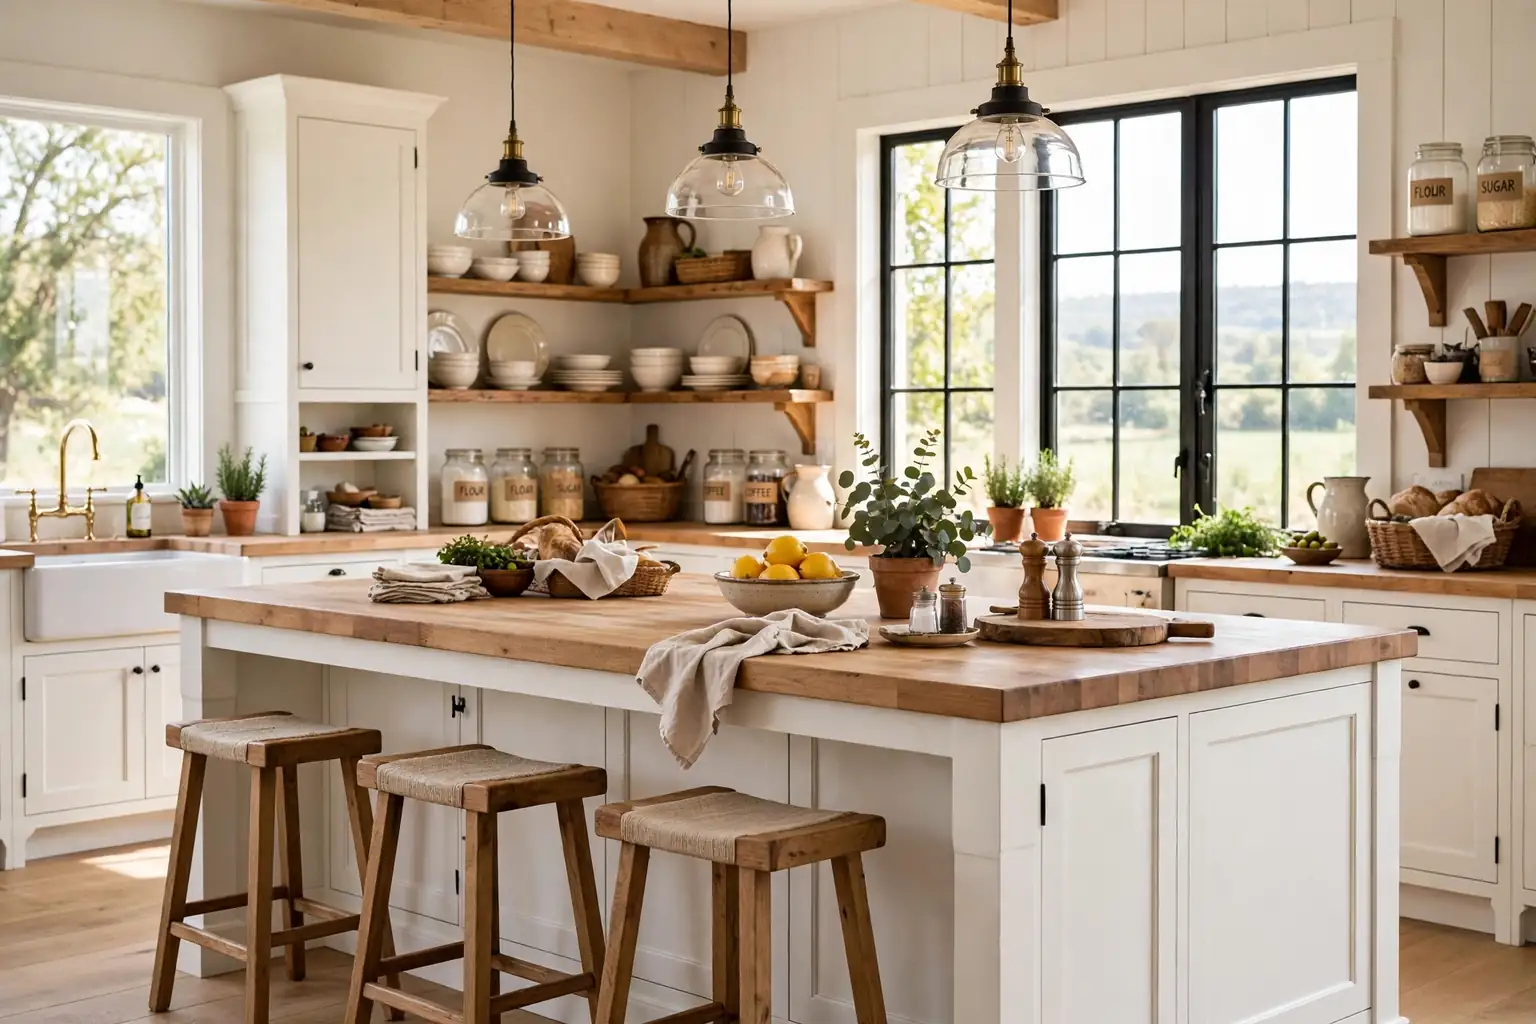
A farmhouse kitchen island works best when it pairs a hard working top with a simple rustic base and one clear job, such as seating, storage, or prep space. Butcher block, reclaimed wood, beadboard, and shiplap give the rustic look, while drawers, open shelves, and a seating overhang keep the island practical for daily cooking and family meals.
Start by measuring the walkways around the island, since a farmhouse island needs room to work on every side. Leave enough space to open drawers and the dishwasher, and to pull out a stool without blocking the path to the stove. Then pick the top for how you cook, the base for the look you want, and one storage feature that solves a real problem in your kitchen, such as a place for baking trays or a bin that hides trash. If the island sits near the stove wall, see kitchen range hood ideas for a hood style that suits the same rustic scheme, and for storage ideas that pair with an island, see corner kitchen cabinet ideas.
Key Takeaways
- Give the island one clear job first: prep space, seating, storage, or a sink run, then build the rest around it.
- Pick the top for how you cook: butcher block and reclaimed wood suit heavy prep, while a painted base suits a softer look.
- Keep walkways clear on every working side, with room for drawers, the dishwasher door, and pulled out stools.
- Use beadboard, shiplap, turned legs, or a trestle base to carry the farmhouse look, and keep the rest of the room plain enough to let the island lead.
- Put everyday items at hand height: dishes on open shelves, trays in vertical slots, and bins on a pull out.
- In a small kitchen, choose a narrow or rolling island that adds counter space without blocking the path between stove, sink, and fridge.
1. Butcher Block Top on a Painted Base
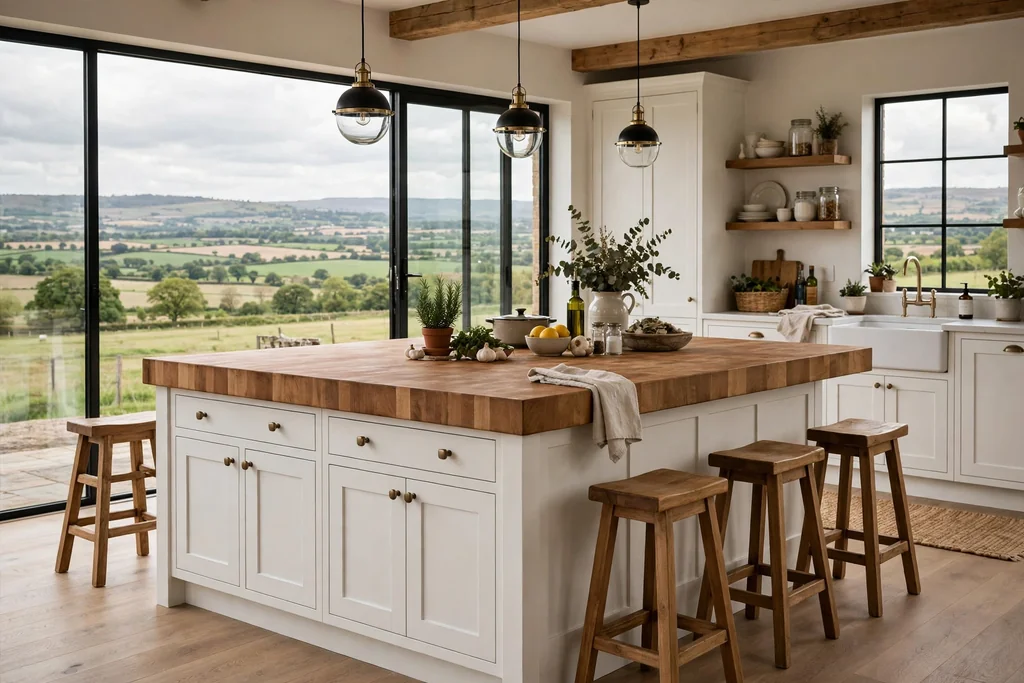
Pair a thick butcher block top with a painted base in white, cream, or soft grey for the most classic farmhouse island in this list. The wood top gives a warm, hard working prep surface that suits chopping, rolling dough, and serving, while the painted base keeps the island light in a room with wood floors or wood beams. Keep the base simple, with shaker style doors and plain cup pulls, so the wood grain stays the focus.
Oil the top regularly if you use it for direct cutting, and wipe up water near the sink end at once, since standing water marks wood. A butcher block top also pairs well with a window over the sink nearby, and for window treatments that suit the same relaxed kitchen, see kitchen window decor ideas. If the top gets heavy knife marks, sand and re-oil one section at a time rather than replacing the whole top.
2. Reclaimed Barn Wood Top
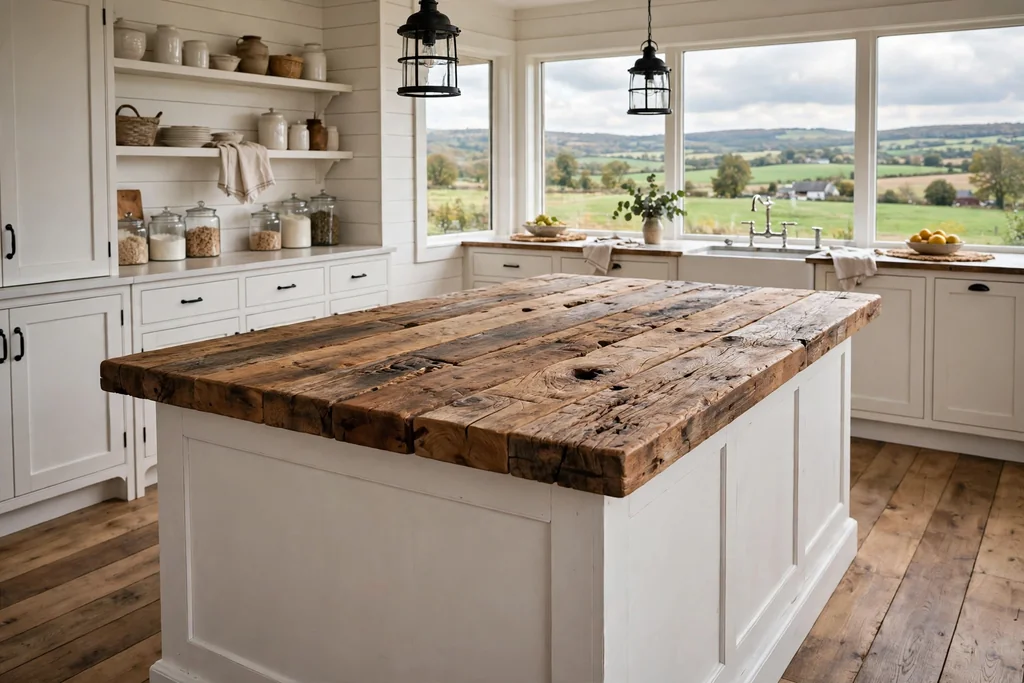
Use a reclaimed barn wood top for an island with visible grain, knots, and a weathered tone that new wood cannot copy. Each board carries a slightly different color, so the top reads as collected over time, which suits a farmhouse kitchen with exposed beams, a wood floor, and simple white walls. Keep the base plain and painted, since a busy base beside a busy top will fight for attention.
Check that the top is sealed with a food safe finish, and ask how the boards were cleaned and joined before you buy, since reclaimed wood varies. Keep hot pans on trivets, since a reclaimed top can scorch just like any wood top. This top suits a large island best, where the full length of the boards can show, and it pairs well with matte black hardware and a simple linen runner down the center.
3. White Beadboard Panel Island
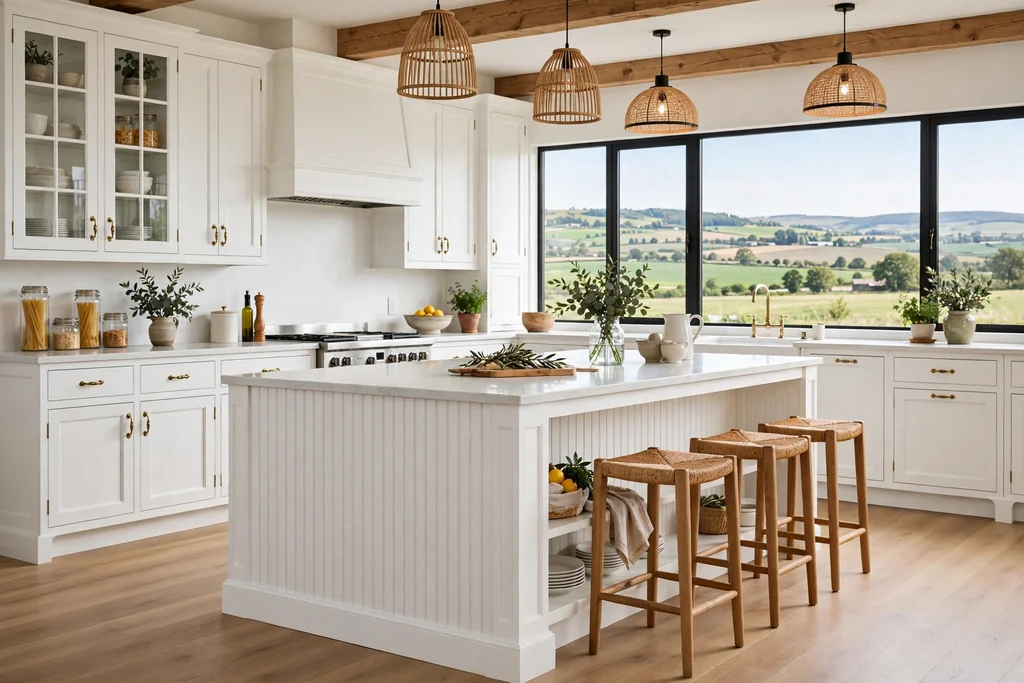
Clad the island base in white beadboard panels for a cottage farmhouse look with vertical lines and soft shadow gaps. Beadboard suits a kitchen with white cabinets and a light floor, since the panel lines add texture without a new color. Use it on the seating side and the ends, where guests see it most, and keep the working side plain for easy cleaning.
Paint the beadboard the same white as the cabinets so the island reads as part of the same run, or use a slightly warmer white for a hand painted feel. Wipe the grooves near the floor often, since crumbs and dust collect in the vertical lines. Beadboard also hides small dents better than a flat panel, which helps on an island that takes daily bumps from stools and feet.
4. Shiplap Sided Island
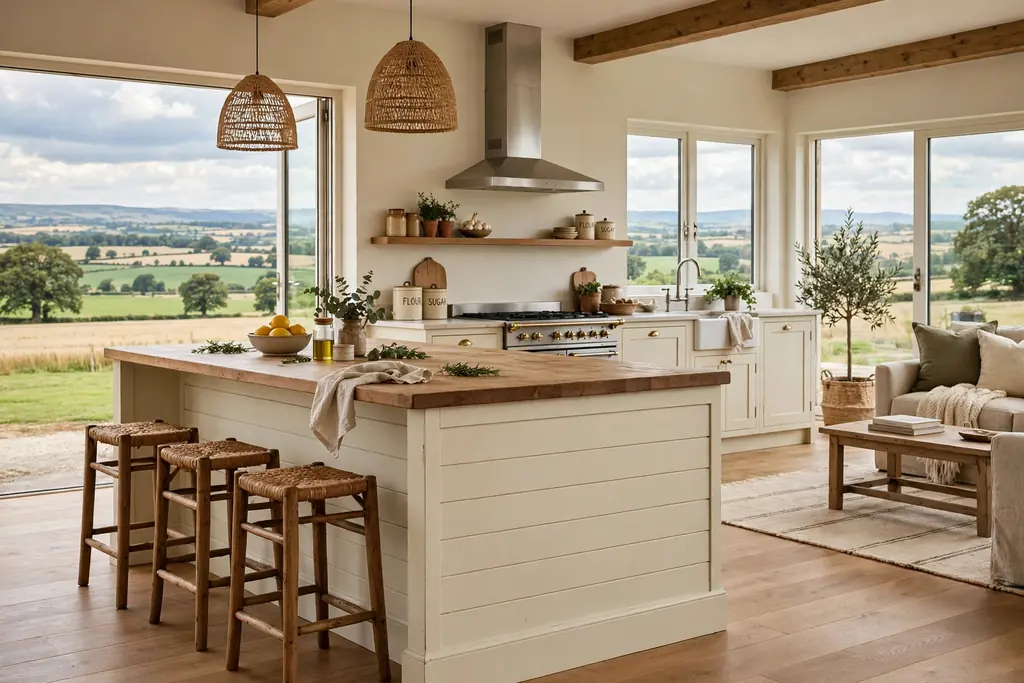
Run horizontal shiplap boards around the island base for a relaxed farmhouse texture that matches shiplap walls or a shiplap range hood surround. The horizontal lines stretch the island visually, which helps a long island read as one calm block rather than a row of cabinet doors. Paint the boards white or cream for a light look, or leave them in a pale washed wood for more warmth.
Keep the board gaps even and the corners neat, since uneven shiplap shows at the island ends. Seal the paint near the floor, where mops and shoes splash, and use a washable finish on the seating side. Shiplap suits an island in an open plan room, where the back of the island faces the living space and needs to look finished from every angle.
5. Furniture Style Island with Turned Legs
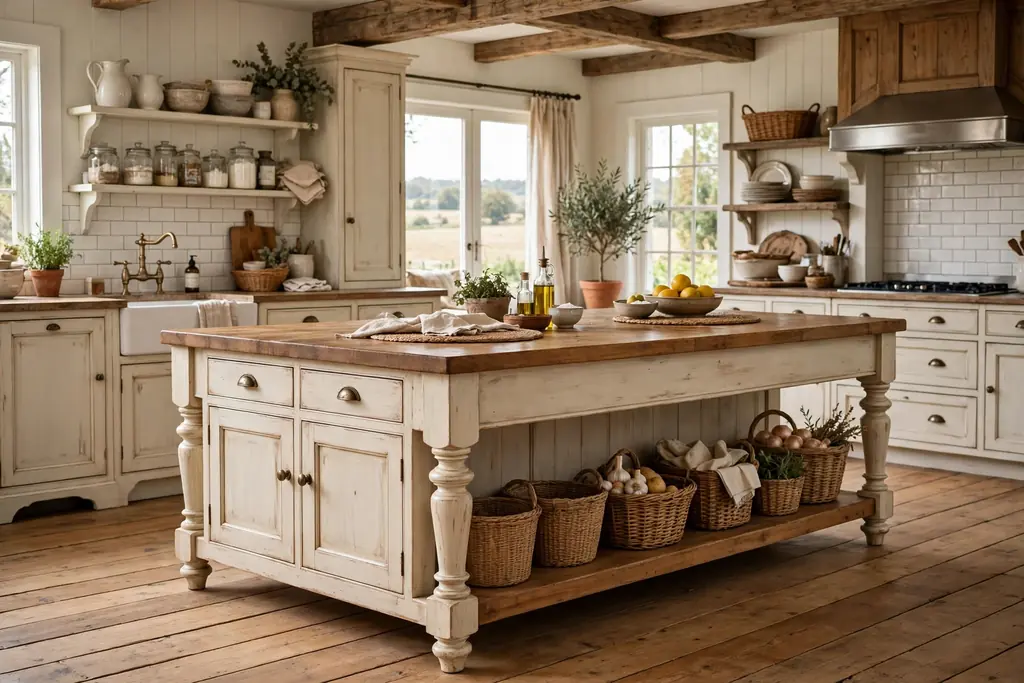
Choose a furniture style island with turned legs and a lower shelf for a piece that looks like a farmhouse table rather than a row of cabinets. The open space under the top keeps the island light on the floor, which suits a smaller kitchen or a room where a solid base would feel heavy. Turned legs also suit a kitchen with a farmhouse table nearby, since the two pieces can share the same leg shape.
Use the lower shelf for baskets, large bowls, or cookbooks, and keep the top clear for prep. Because a legged island has less closed storage, pair it with wall cabinets or a pantry for items that need hiding. Check that the legs sit level on your floor, and add felt pads if the island moves when you lean on it during prep.
6. Island with an Apron Front Sink
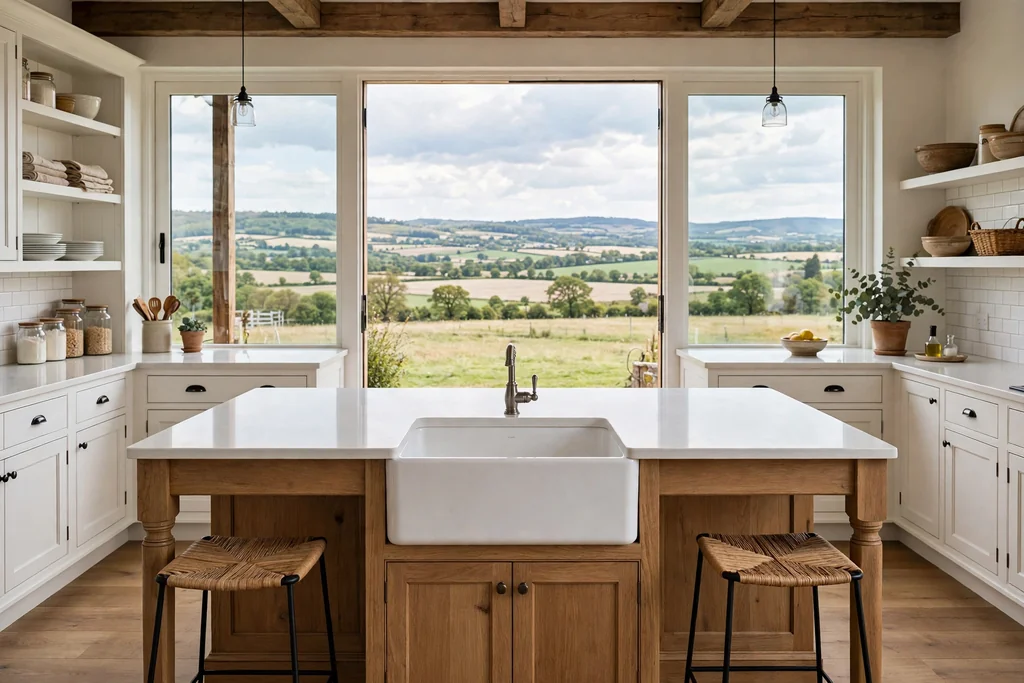
Build an apron front sink into the island for a farmhouse kitchen where the island faces the room and the sink becomes part of the view. The wide front panel reads as a classic farmhouse detail, and standing at the island sink lets the cook face family or guests instead of a wall. Keep the counter on each side of the sink clear for a drying rack on one side and prep space on the other.
Plan the plumbing before you order, since an island sink needs a vent route through the floor, and check the cabinet depth so the apron front sits flush with the base. Keep the faucet simple, in brushed nickel or matte black, so it does not compete with the apron front. This island suits a large kitchen best, where the sink run does not crowd out the prep counter.
7. Breakfast Bar Island with Stool Seating

Add a seating overhang on one side of the island so it doubles as a breakfast bar with room for two or three stools. A 12 inch overhang gives knees room without a support leg in most cases, but check the counter material, since a heavy stone top may need brackets. Wood or woven stools with a low back suit the farmhouse look and tuck under the overhang when not in use.
Keep the seating side free of drawers and bins, so legs and feet have clear space, and put the working storage on the kitchen side. A breakfast bar island suits families who eat quick meals in the kitchen, and it keeps the cook in conversation while food is prepared. Wipe the overhang edge often, since it collects crumbs from every meal.
8. Rolling Island on Casters
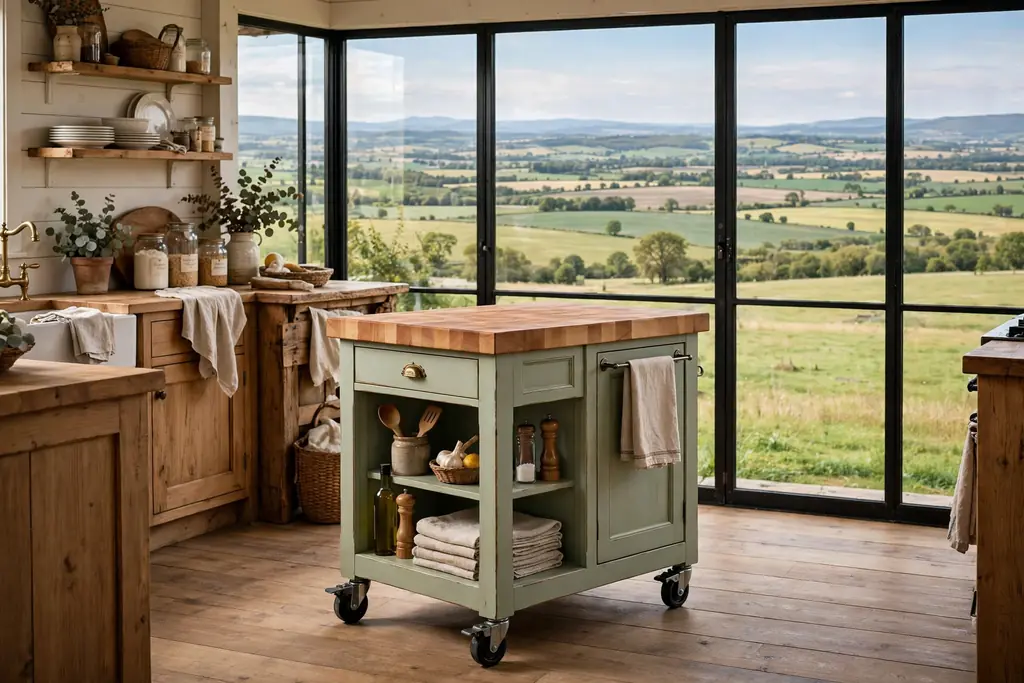
Choose a rolling island on lockable casters for a kitchen where the layout needs to change, such as a room that hosts large gatherings or a rental where a fixed island is not an option. Roll it against a wall for extra counter space during prep, then pull it out as a serving station when guests arrive. Lock the casters before chopping, so the island stays put under pressure.
Pick casters rated for the loaded weight, and check that the island clears the fridge and oven doors when it moves. A rolling island suits a small kitchen well, since it can live in a corner when not needed. Keep the top in butcher block or a light wood, so the island stays easy to move, and store only lighter items inside.
9. Two Tier Island for Prep and Seating
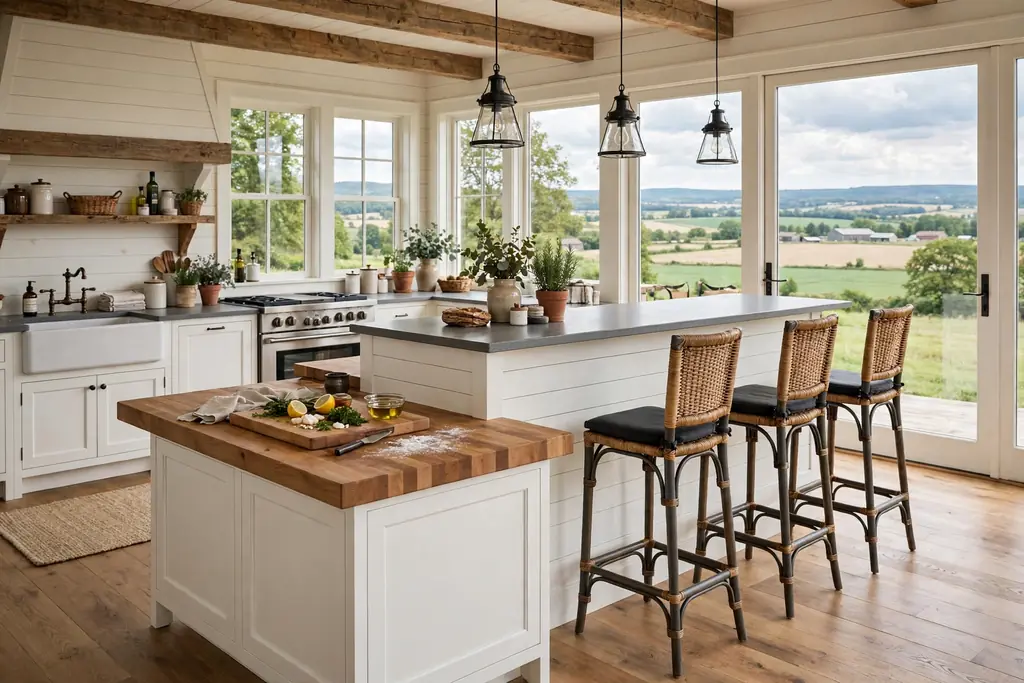
Build a two tier island with a lower prep counter on the kitchen side and a raised bar top on the seating side for a clear split between work and eating. The raised tier hides prep mess from guests seated on the other side, and it gives the seating side a bar height that suits taller stools. Keep the two tops in matching materials, such as butcher block below and the same wood above, so the split reads as planned.
Check the total height against your stools, since a raised bar needs a taller seat than a standard counter. The lower tier should stay at normal counter height for comfortable chopping. This island suits an open plan kitchen, where the raised side faces the living room and acts as a visual screen between cooking and relaxing.
10. Island with Open Shelving for Daily Dishes
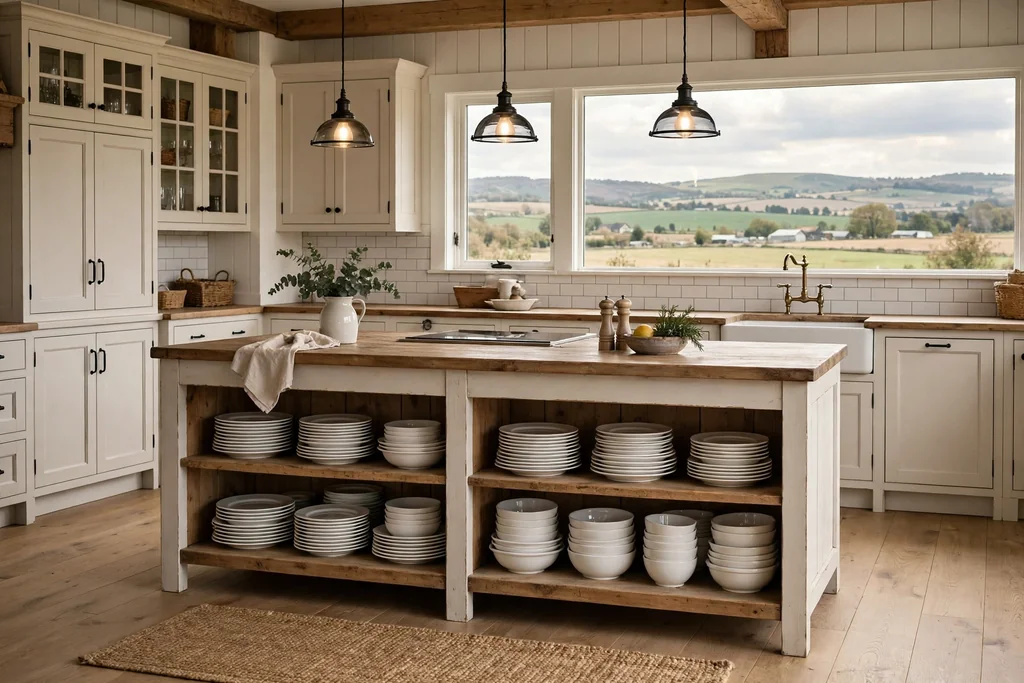
Fit open shelves into one end or one side of the island for the dishes, bowls, and glasses you use every day. Open shelving keeps the most used items within one step of the dishwasher and the table, and it gives the island a relaxed, lived in feel that closed cabinets cannot. Keep one type of item per shelf, such as stacked white plates on one shelf and bowls on the next, so the display stays calm.
Dust reaches open shelves faster than closed cabinets, so store only items you wash often here, and keep rarely used serving pieces behind doors. Line the shelf base with a washable mat if you stack wet dishes. Open shelving suits a farmhouse kitchen with plain white dishes, since a mixed collection can look cluttered at island height.
11. Island with a Built In Wine Rack
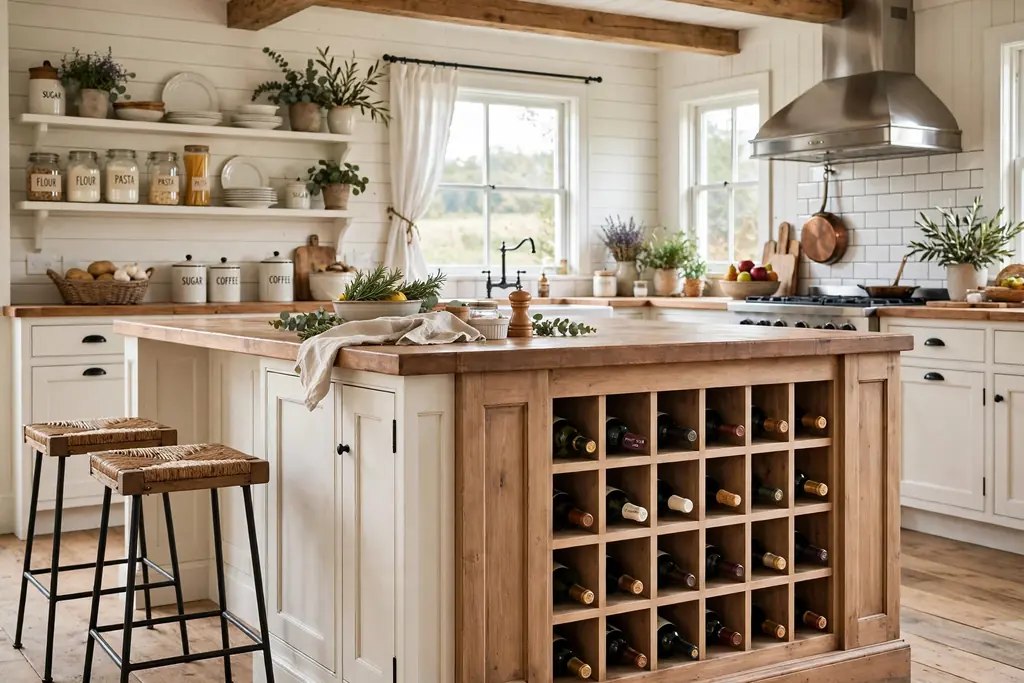
Slot a built in wine rack into the end of the island for bottles stored on their sides, with a small grid of cubbies that adds detail to plain cabinet doors nearby. Keep the rack away from the oven side of the island, since heat is unkind to wine, and choose a spot that stays cool and out of direct sun. If wine is not your drink, the same cubbies hold rolled linens, water bottles, or cookbooks stood upright.
Size the cubbies to your bottles before ordering, since wide bottles need wider slots, and keep the rack low enough that bottles slide out without hitting the counter edge. A wine rack end suits an island that faces a dining area, where the grid reads as a display feature. Label the rack rows if you store both red and white, so guests can find a bottle without pulling out the whole row.
12. Distressed Weathered Finish Island
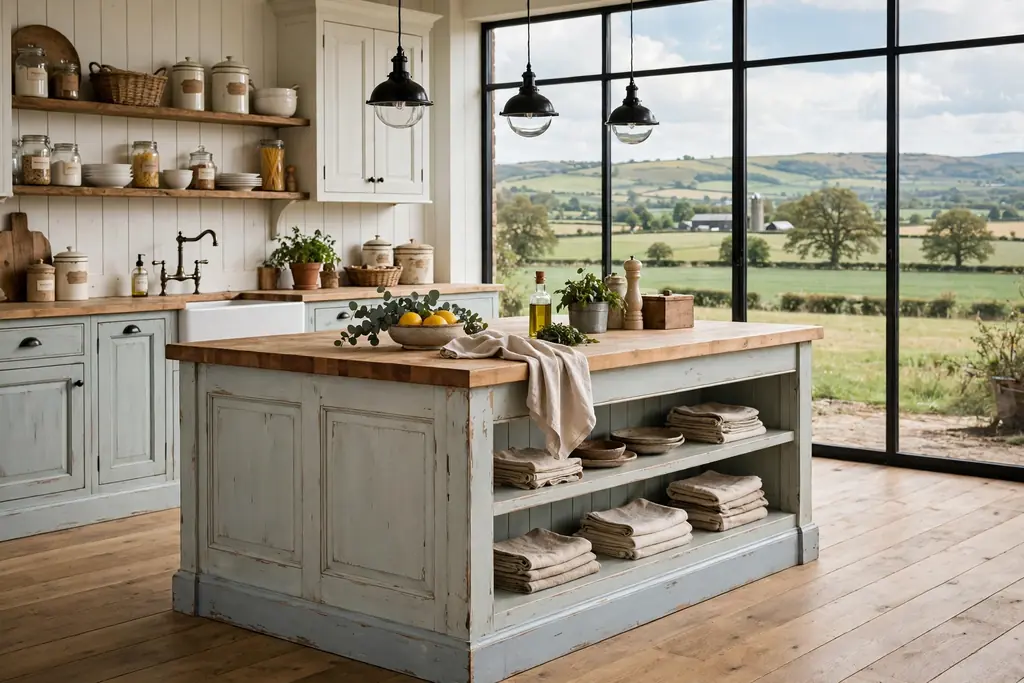
Paint the island base, then distress the edges lightly, for a weathered farmhouse finish that looks worn in the right places, such as corners and raised panels. A distressed base suits a kitchen with other aged pieces, like a worn wood table or vintage stools, and it hides small knocks better than a perfect painted finish. Keep the distressing light and even, so the island reads as aged rather than damaged.
Seal the finish with a clear topcoat, especially near the floor and the seating side, where shoes and stools rub. Pair a distressed base with a plain top, such as butcher block or a simple stone, so the island has one strong texture, not two. This finish suits a relaxed family kitchen, where a perfect surface would feel too formal for daily use.
13. Island with Pull Out Trash and Recycling Bins
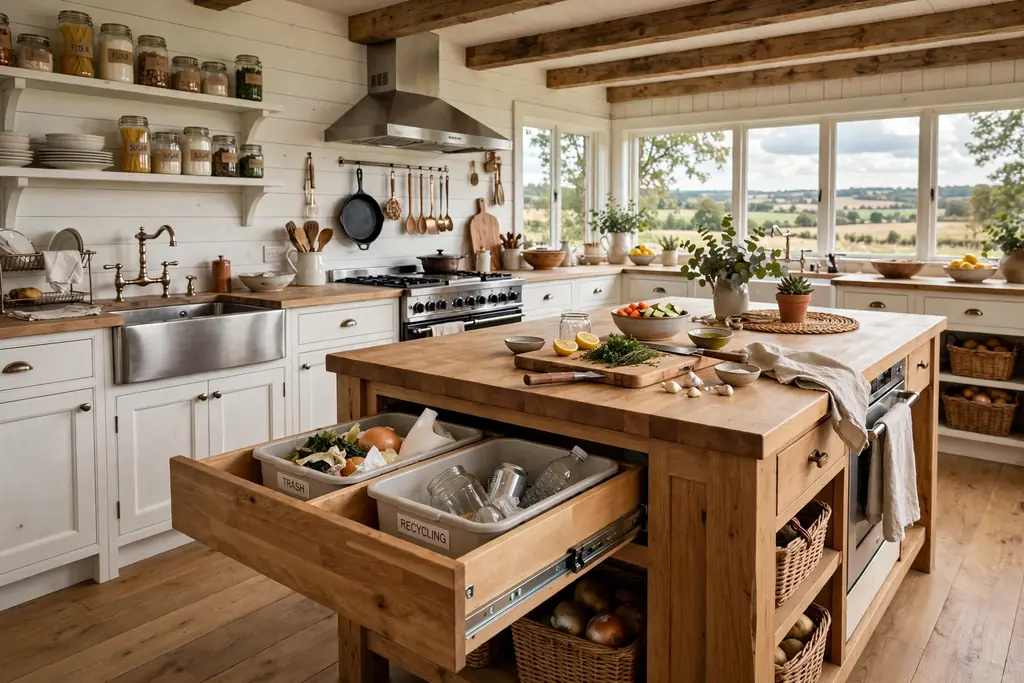
Fit pull out trash and recycling bins into the island, near the prep side, so scraps go straight from the chopping board into the bin without a trip across the kitchen. A double bin unit keeps trash and recycling side by side, and a lid on each bin holds smells down. Measure the cabinet width and the bin height before ordering, since tall bins need a full height cabinet.
Line the cabinet floor, since leaks and crumbs reach the base, and wipe the bin fronts with the cabinet fronts during cleaning. This island feature suits cooks who prep a lot of fresh food, and it keeps the kitchen floor clear of a freestanding trash can. Put the bins on the side nearest the sink or the prep zone, not the seating side, so guests never sit beside an open bin.
14. Island with a Microwave Drawer and Appliance Storage
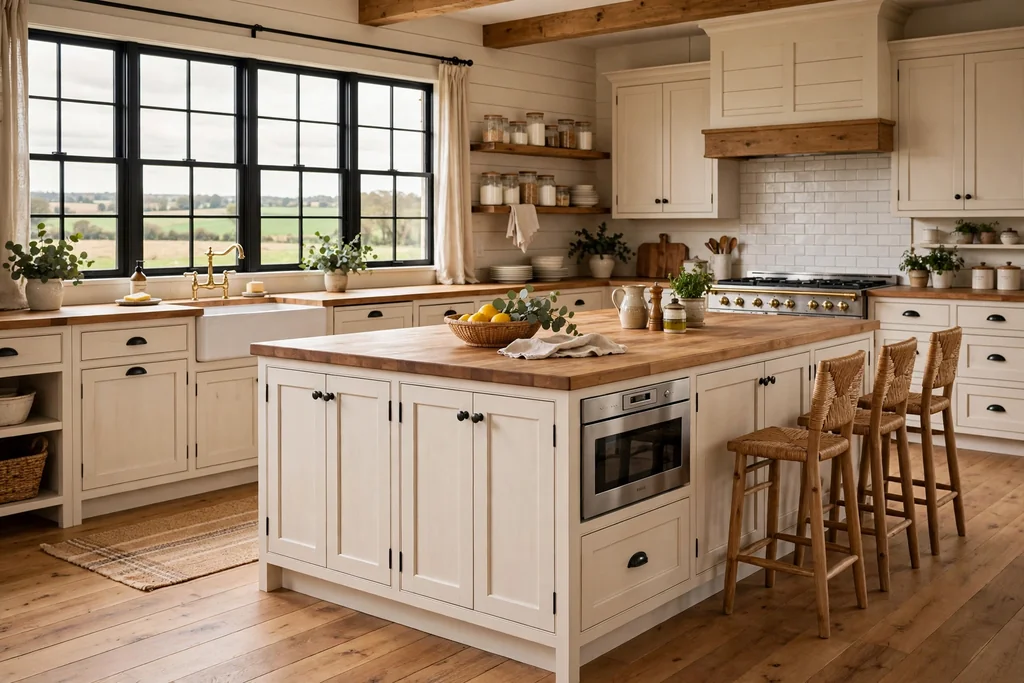
Place a microwave drawer in the island, below counter height, to free the main counter and keep the microwave out of sight while staying easy to reach. A drawer style microwave suits an island better than a countertop model, since it keeps the work surface clear and the controls at a comfortable height for adults. Add a drawer or cabinet beside it for small appliances, such as a blender or food processor, so the main counter stays free for prep.
Follow the microwave maker’s clearance and ventilation guidance, and keep a landing spot on the counter above the drawer for hot dishes. This island suits a kitchen where the main counter is short, since moving the microwave off the counter gains a full stretch of prep space. Keep the drawer front matched to the island base, so the appliance reads as part of the cabinetry.
15. Narrow Island for a Small Kitchen
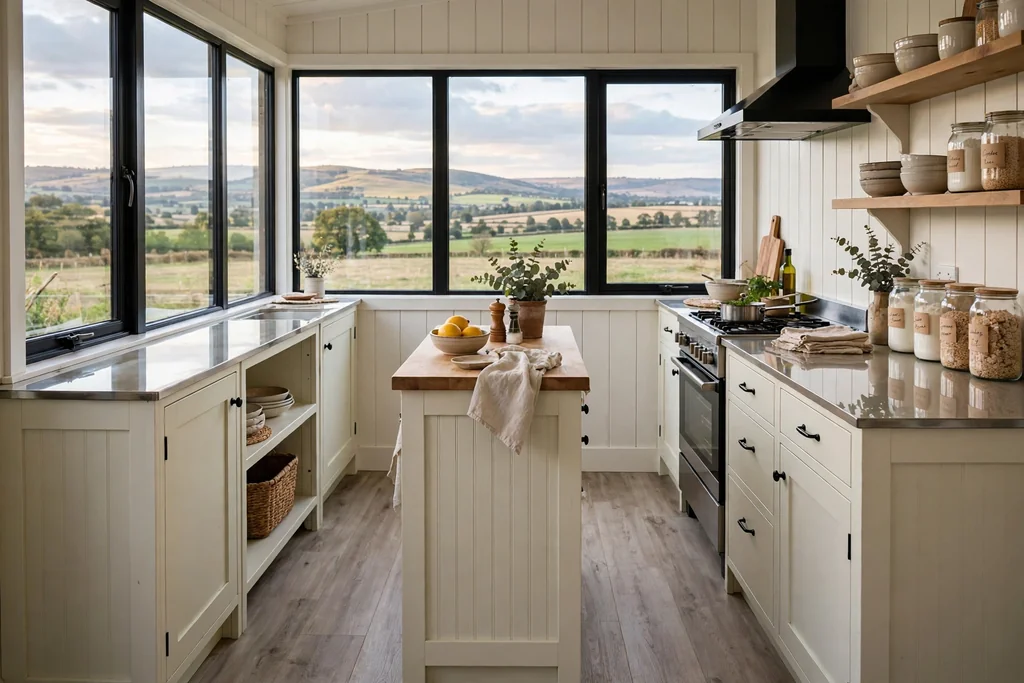
Choose a narrow island, roughly 24 inches deep, for a small kitchen where a standard island would block the walkways. A slim island still adds prep space, a place for stools on one side, and storage below, while leaving clear paths to the stove, sink, and fridge. Keep the storage shallow, with one row of drawers or a single shelf, so nothing gets lost at the back.
Use a light base color and a plain top, since a dark or busy island will crowd a small room. A narrow island also suits a galley kitchen with a run on each wall, as long as the walkways on both sides stay wide enough to pass with the dishwasher open. Test the layout with painter’s tape on the floor before you buy, and walk the route with a stool pulled out.
16. Sage Green Painted Island
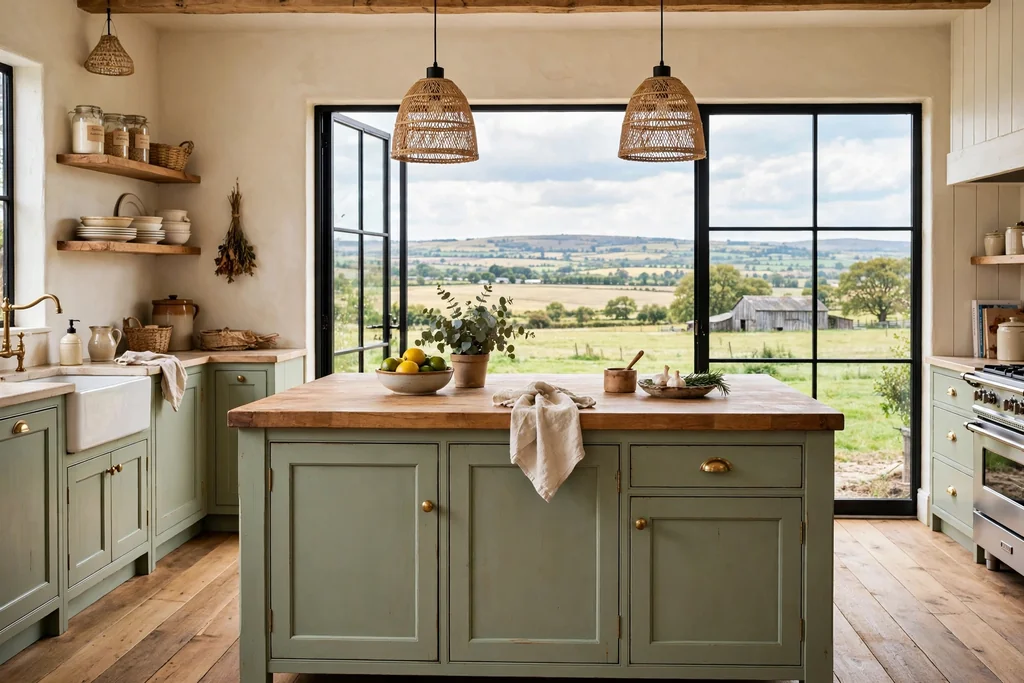
Paint the island base in sage green for a soft farmhouse accent that sits between the white cabinets and the wood tones in the room. Sage green suits a kitchen with cream walls, a wood floor, and brass or matte black hardware, and it gives the island a clear identity without a bold color. Repeat the sage once more, in a stool cushion, a blind, or a plant pot, so the color does not sit alone.
Test a large painted sample beside the cabinets in daylight and evening light before committing, since green shifts a lot between the two. Use a durable cabinet paint and a washable finish, since the island base takes more bumps than wall cabinets. A sage island suits a kitchen that already has one other painted accent, such as a painted pantry door, and it pairs well with a butcher block top.
17. Island with Bookshelf Ends
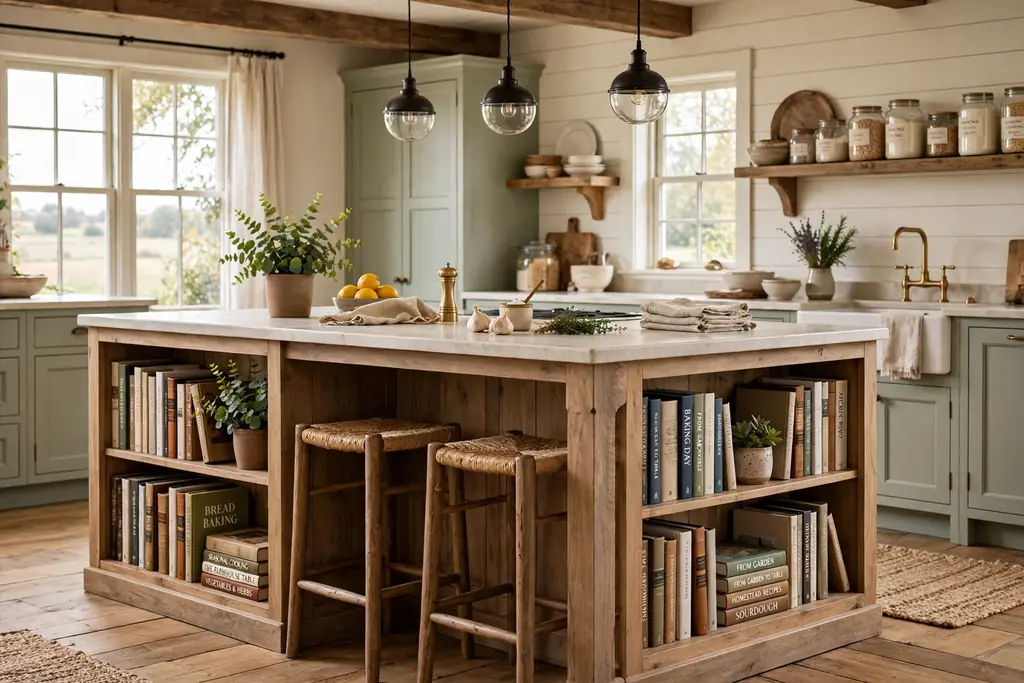
Fit bookshelf ends into the island, with two or three open shelves at each end, for cookbooks, a small plant, and a few display pieces. Bookshelf ends turn the dead ends of an island into useful storage, and they suit a kitchen where cookbooks are used daily and deserve a home near the prep space. Keep the shelves shallow, so books sit flush with the island end and do not catch passing hips.
Group cookbooks by size, with the tallest at the bottom, and leave one shelf partly clear for a plant or a bowl, so the end does not look packed. Dust the shelves during weekly cleaning, since open ends collect dust faster than closed cabinets. This island suits a family kitchen with a reading habit, and it gives the island a furniture feel from the living room side.
18. Trestle Base Farmhouse Table Island
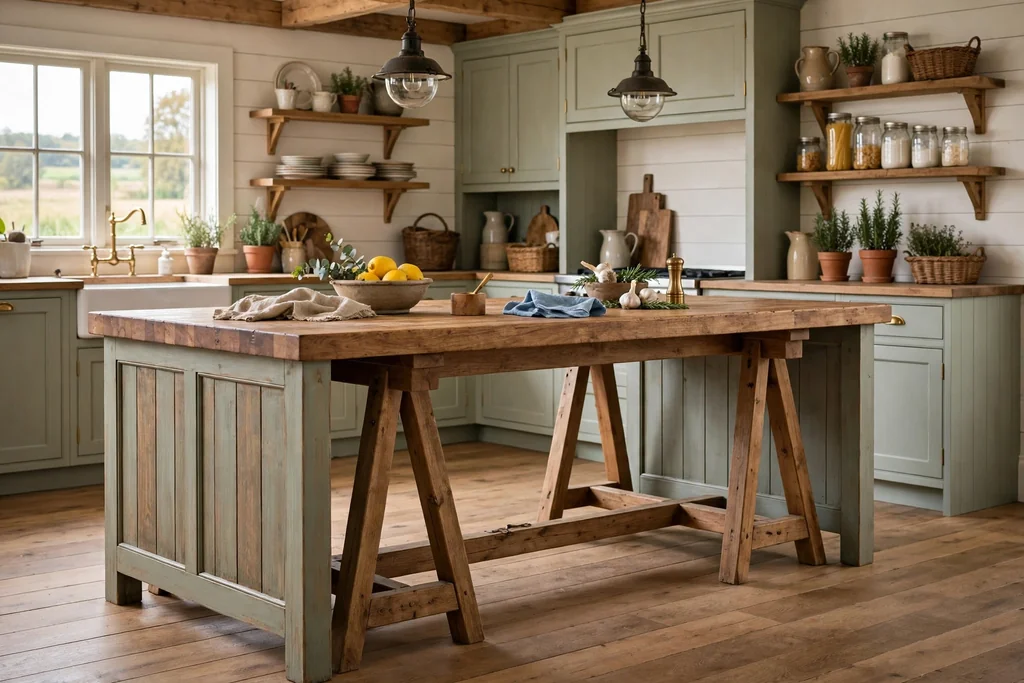
Build the island on a trestle base, with two solid end panels joined by a stretcher bar, for a farmhouse table look with a long, open span underneath. The trestle base suits a large island in an open plan room, where the long side faces the living space and needs a strong, simple shape. Use the open span for baskets or a low bench that slides under when not in use.
Check the floor for level, since a trestle base rocks on an uneven floor, and add felt pads under the feet. Because a trestle island has less closed storage than a cabinet island, pair it with a pantry or wall cabinets for items that need hiding. Keep the top thick and plain, in butcher block or reclaimed wood, so the base shape stays the main feature.
19. Island with a Pull Out Cutting Board
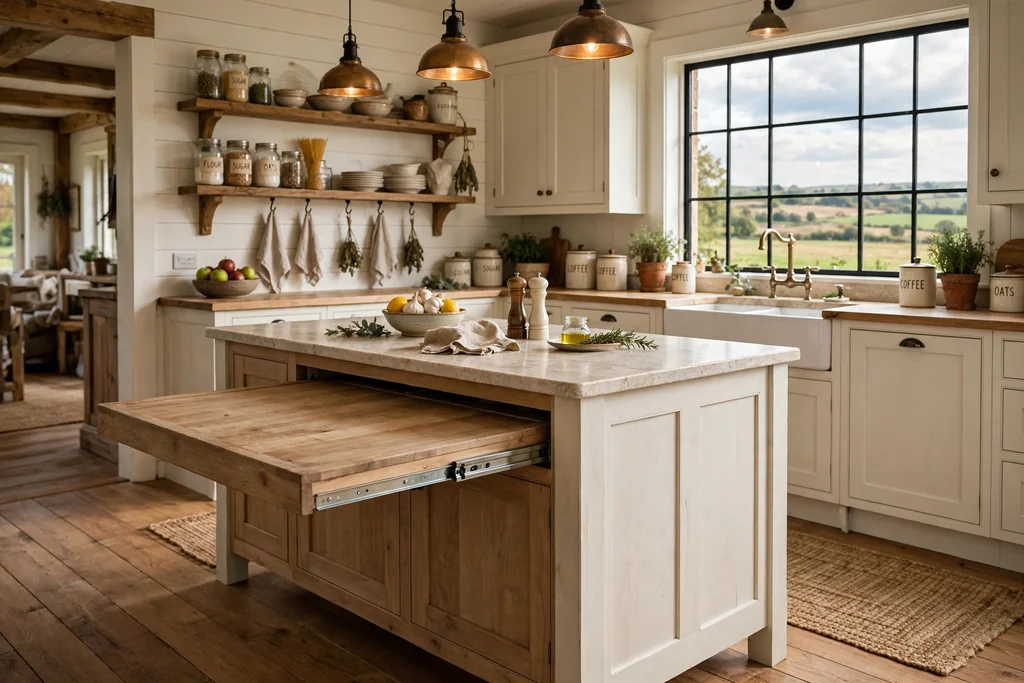
Fit a pull out cutting board into the island, just below the counter, for extra prep space that slides away when not in use. A pull out board suits a kitchen where the main counter is short, since it adds a full chopping surface without a permanent extension. Choose a board in a hard wood that can be removed for cleaning, and keep it near the sink side of the island for easy rinsing.
Oil the board regularly, and replace it when deep cuts hold stains, since a pull out board is cheaper to swap than a fixed top. Keep the slot clear of crumbs by wiping the runners during cleaning, so the board slides smoothly. This island suits cooks who prep at the island while facing the room, and it pairs well with a knife drawer fitted beside the slot.
Conclusion
A farmhouse kitchen island works when the top, base, and storage suit the way you actually cook and gather. Pick one clear job for the island, match the top to your prep habits, and choose a base style, such as beadboard, shiplap, or a trestle frame, that fits the room you already have. Measure the walkways first, then add one storage feature that solves a daily problem, such as pull out bins or open shelving for everyday dishes. Start with the island shape that fits your floor plan, and let the rustic details follow the practical choices, not the other way around.
Save this list on Pinterest for your next kitchen update, and work through it by room size: a narrow or rolling island for a small kitchen, a seating island for family meals, and a sink or two tier island for a large open plan space.
FAQs
What is the best farmhouse kitchen island top?
A butcher block top is the best all round choice for a farmhouse kitchen island, since it suits heavy prep, looks warm beside painted cabinets, and can be sanded and re-oiled when it marks. Reclaimed wood suits a more rustic room, while a stone top suits a cook who wants a heat proof surface. Pick the top for how you cook, not only for looks, and seal wood tops against water near the sink end.
How much space do I need around a farmhouse kitchen island?
You need clear walkways on every working side of the island, with room to open drawers and the dishwasher and to pull out a stool without blocking the path. As a general guide, keep at least 36 inches of clear floor between the island and the nearest counter or wall, and more on the side where two people pass or the dishwasher opens. Measure with painter’s tape on the floor before you order, and walk the route with stools pulled out.
Can I put a sink in a farmhouse kitchen island?
Yes, you can put a sink in a farmhouse kitchen island, and an apron front sink suits the style well. Plan the plumbing early, since an island sink needs a drain and vent route through the floor, and check that the cabinet depth lets the apron front sit flush with the base. Keep counter space on both sides of the sink for prep and drying, and choose a simple faucet that does not compete with the apron front.
What color should I paint a farmhouse kitchen island?
White, cream, and soft grey suit most farmhouse kitchens, since they keep the island light beside wood floors and beams. Sage green is a good accent color when the rest of the kitchen stays plain, and a distressed or weathered finish suits a relaxed family room. Test a large sample beside your cabinets in daylight and evening light, and repeat the island color once more in the room, such as in a stool cushion or a blind, so it looks planned.
Is a rolling kitchen island practical?
A rolling island is practical when the kitchen layout needs to change or a fixed island would block a walkway. Choose lockable casters rated for the loaded weight, lock them before chopping, and check that the island clears fridge and oven doors when it moves. Keep the top light, such as butcher block, and store lighter items inside, since a heavy rolling island is hard to move and can mark the floor.
How do I add seating to a farmhouse kitchen island?
Add seating with a counter overhang on one side of the island, keeping the seating side free of drawers and bins so knees and feet have clear space. A standard counter height suits most stools, while a raised bar tier needs taller stools, so match the seat height to the counter height. Leave room for each stool, and choose wood or woven stools with a low back that tuck under the overhang when not in use.