Category: DIY & Styling

Simple styling projects and affordable ways to refresh your home.

  • 21 Outdoor Table Centerpiece Ideas for Casual Gatherings

    21 Outdoor Table Centerpiece Ideas for Casual Gatherings

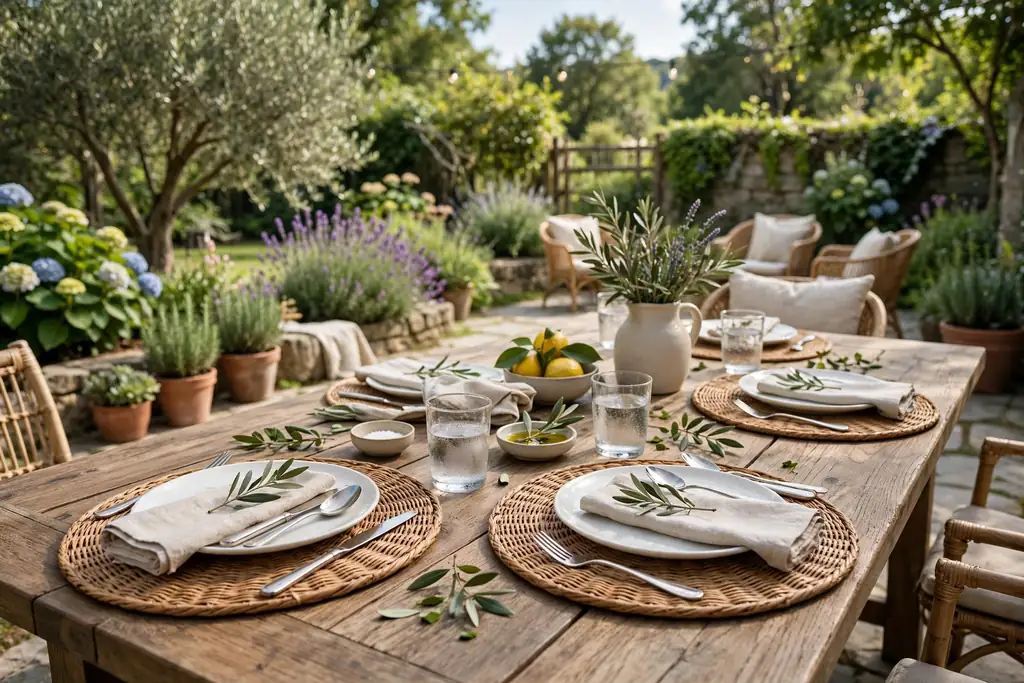
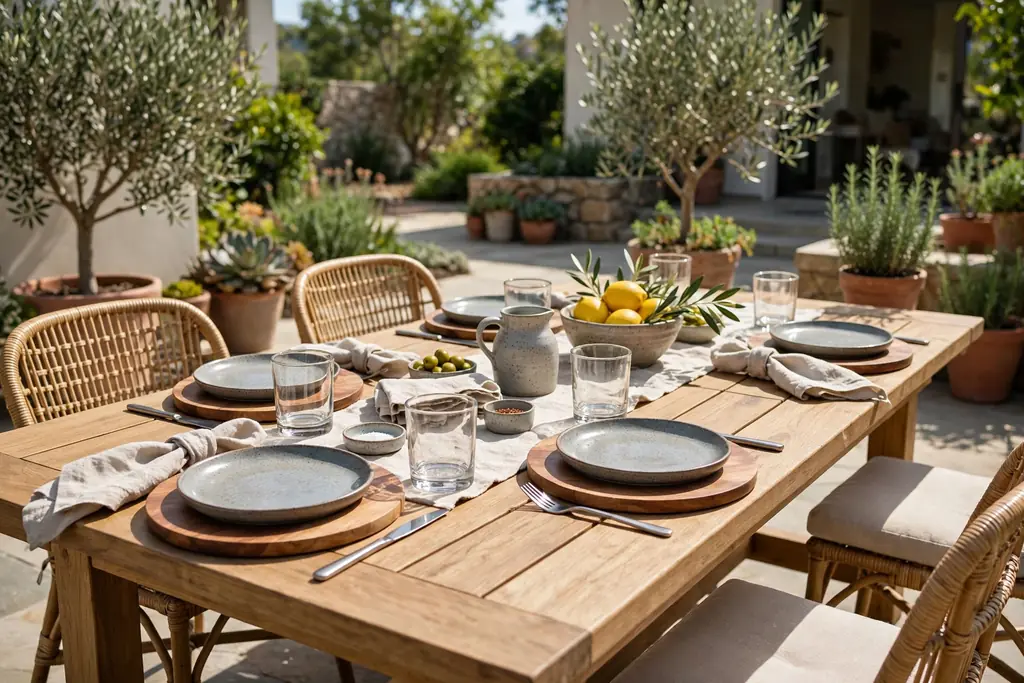
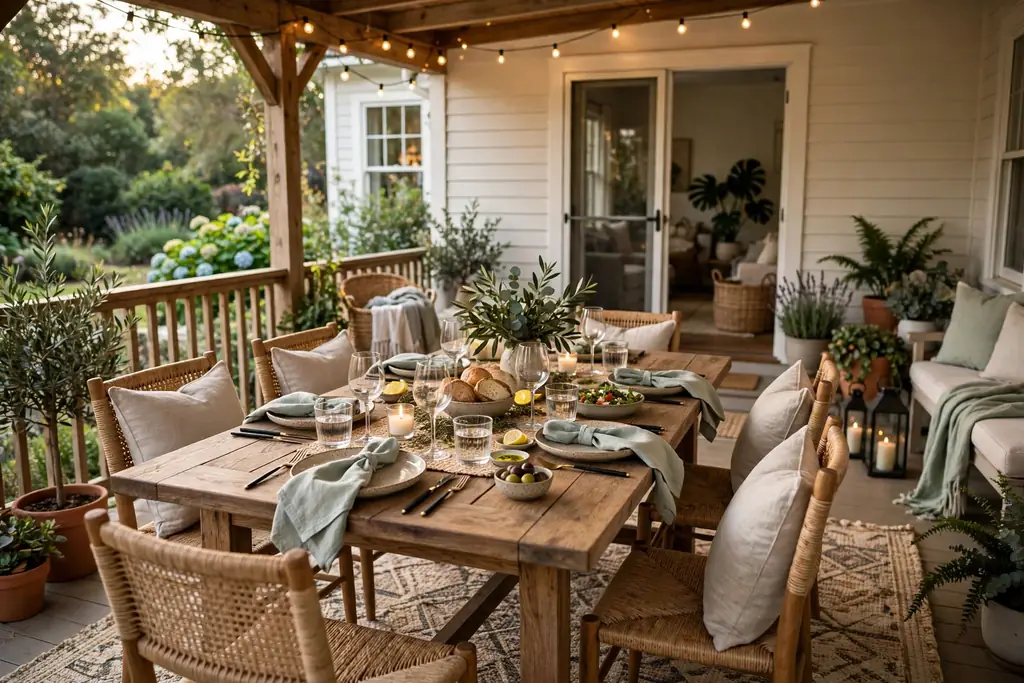
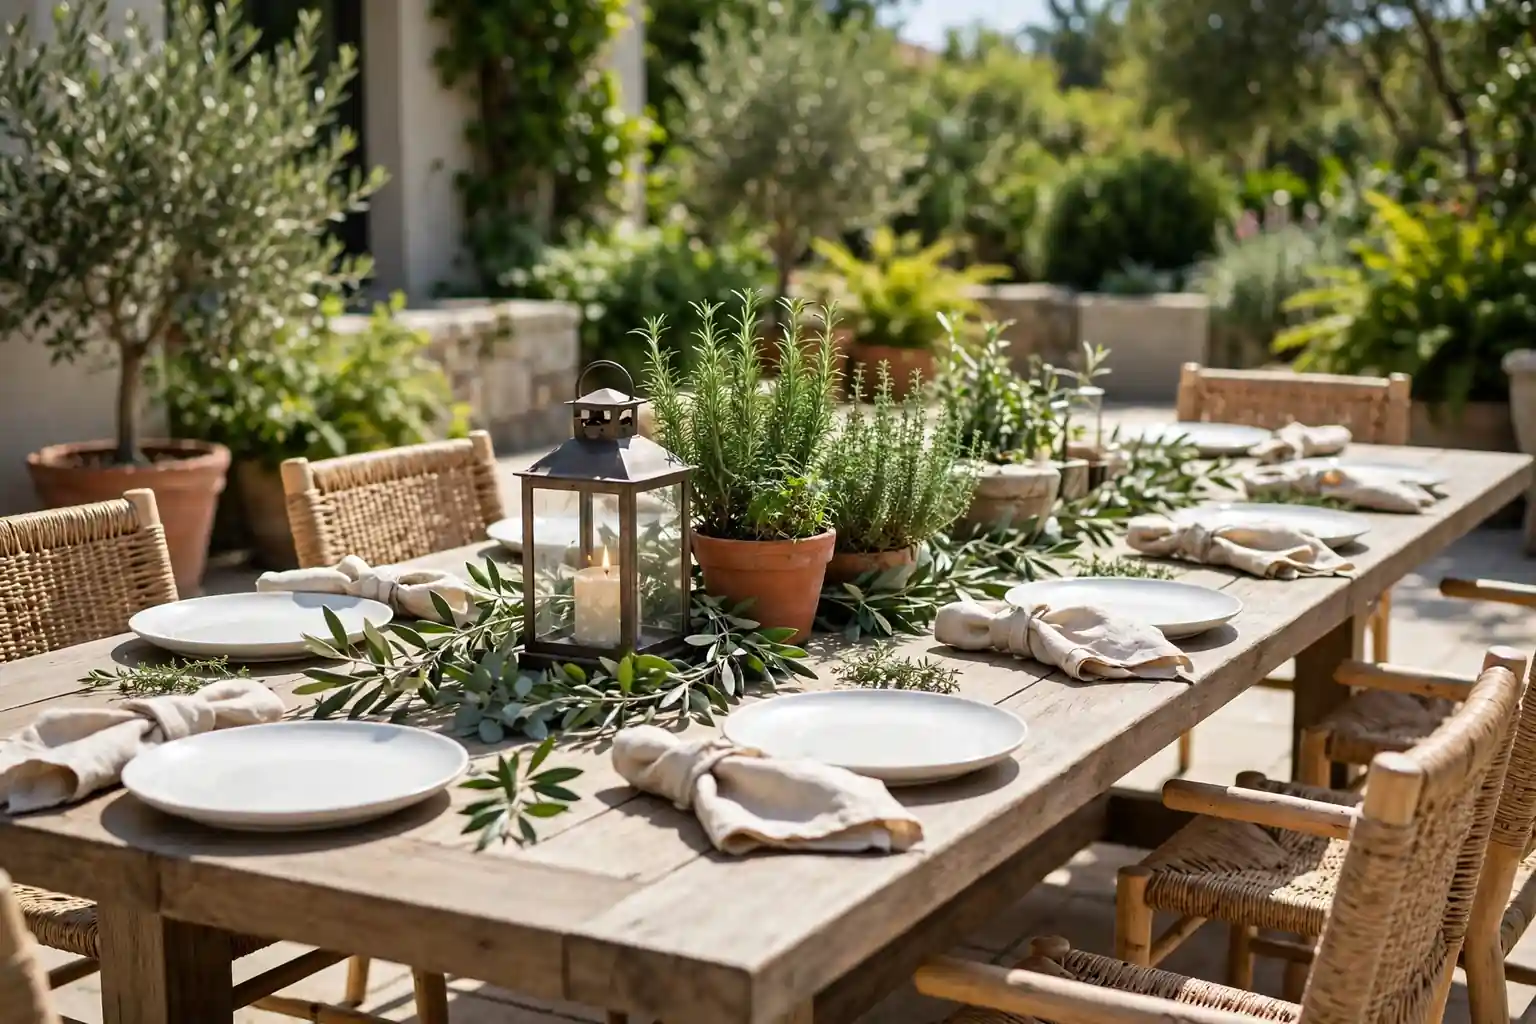
    Outdoor table centerpieces for casual gatherings work best when they stay low, heavy, and simple: one weighted group of lanterns, potted herbs, or short flowers down the center, with cloth napkins and a tray or runner to anchor it. Keep sightlines open, leave room for food and drinks, and choose pieces that handle wind, sun, and a quick move indoors.

    Start with the base you already own: plain plates, clear or sturdy glasses, and cloth napkins that will not blow away. Then add one centerpiece group at a time, such as a tray of lanterns, a row of herb pots, or a low bowl of citrus. Keep the group narrow, weight the light pieces, and leave a clear path for serving dishes. For evening meals, add candlelight in glass holders, kept clear of fabric, paper, and dry material, and never left burning unattended.

    Key Takeaways

    • Keep the centerpiece low and narrow, so guests can see each other and serving dishes still fit.
    • Weight every light piece: use heavy pots, trays, hurricane glass, and stones in the bottom of jars and vases.
    • Use one main centerpiece group per table, not several competing groups, and leave empty space at each place for plates and glasses.
    • Pick a small palette of white, green, and one warm accent, such as terracotta, amber, or soft yellow, repeated at least twice.
    • Choose cloth napkins over paper outdoors, and skip tall, light arrangements on windy days.
    • For evening gatherings, use glass holders and battery candles near fabric, children, and dry material.

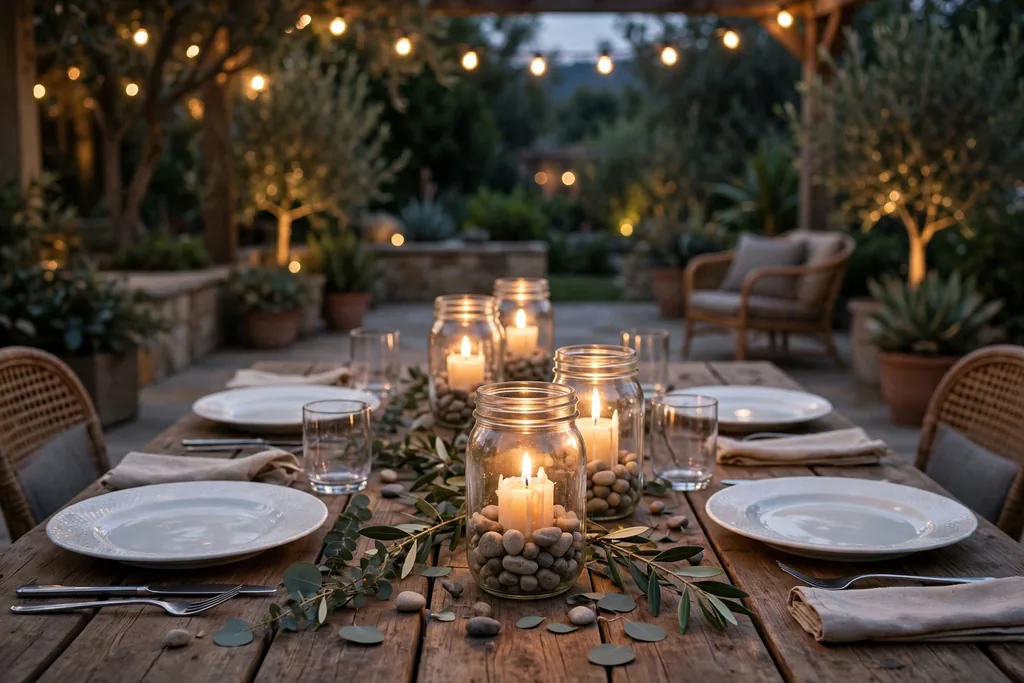
    1. Mason Jar Lanterns with Battery Candles
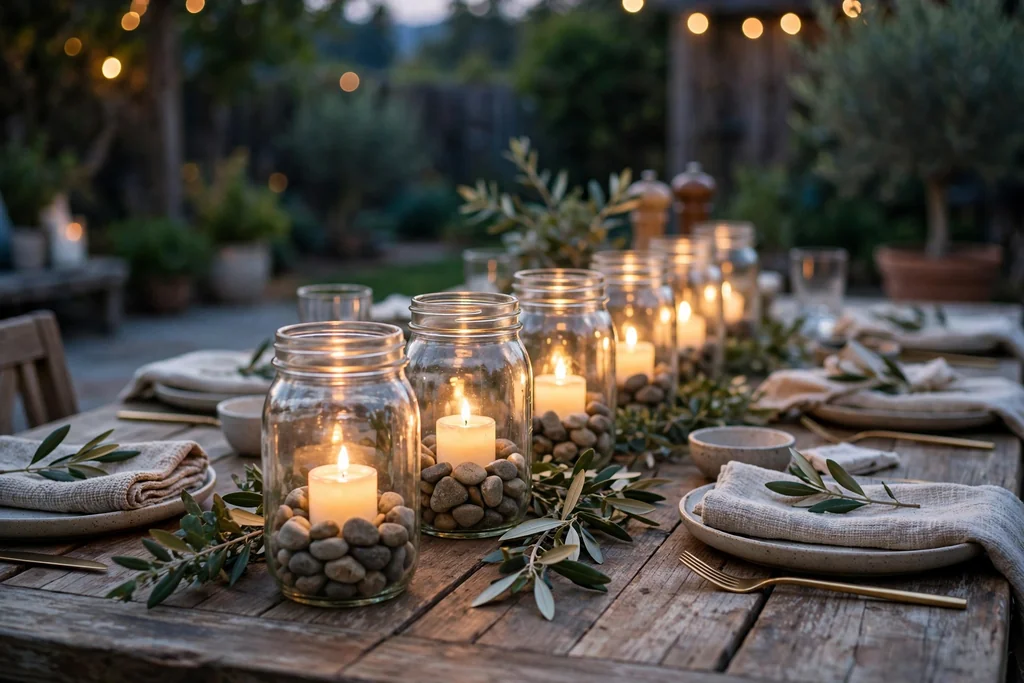
    Mason jars with battery candles and stones in the bottom set down the center of an outdoor dining table in the evening.

    Set three mason jars down the center of the table, each holding a battery candle, with a few stones in the bottom of each jar to weight it. The jars give soft evening light, cost little, and suit a patio, a deck, or a garden table. Use jars of the same size for a matched look, or mix two sizes with the tallest jar in the middle.

    Add a short length of twine around the rim of each jar if you want a rustic note, and keep the twine clear of any real flame. Use battery candles only in narrow or closed jars, since a real flame needs air and a safe holder. Wipe the glass before the meal, since fingerprints show more on clear glass in candlelight.

    2. Potted Herb Row Down the Center
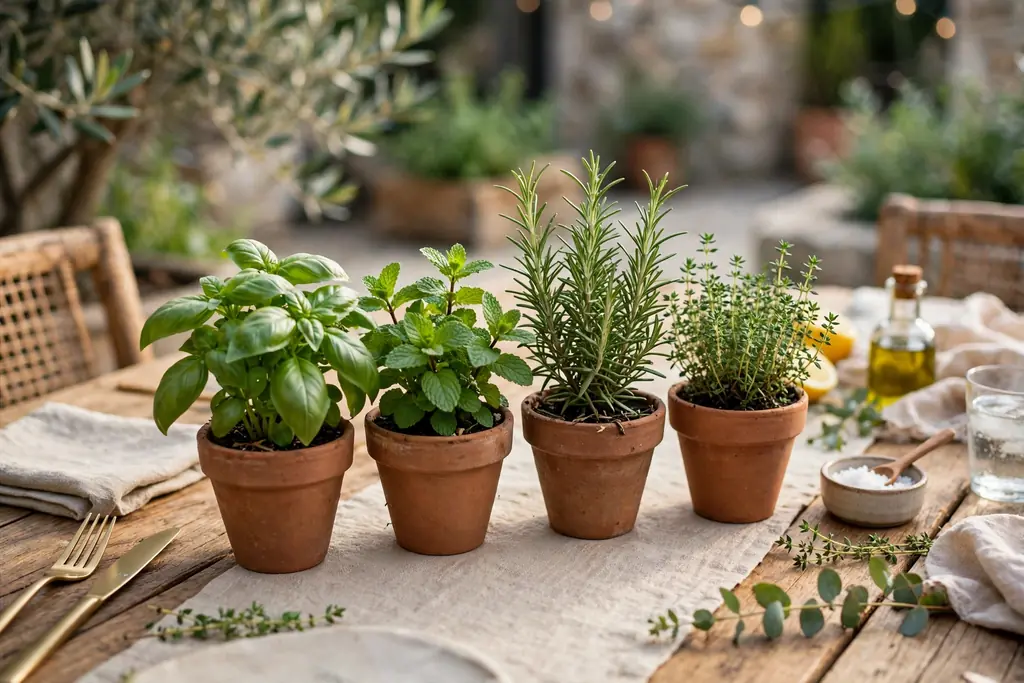
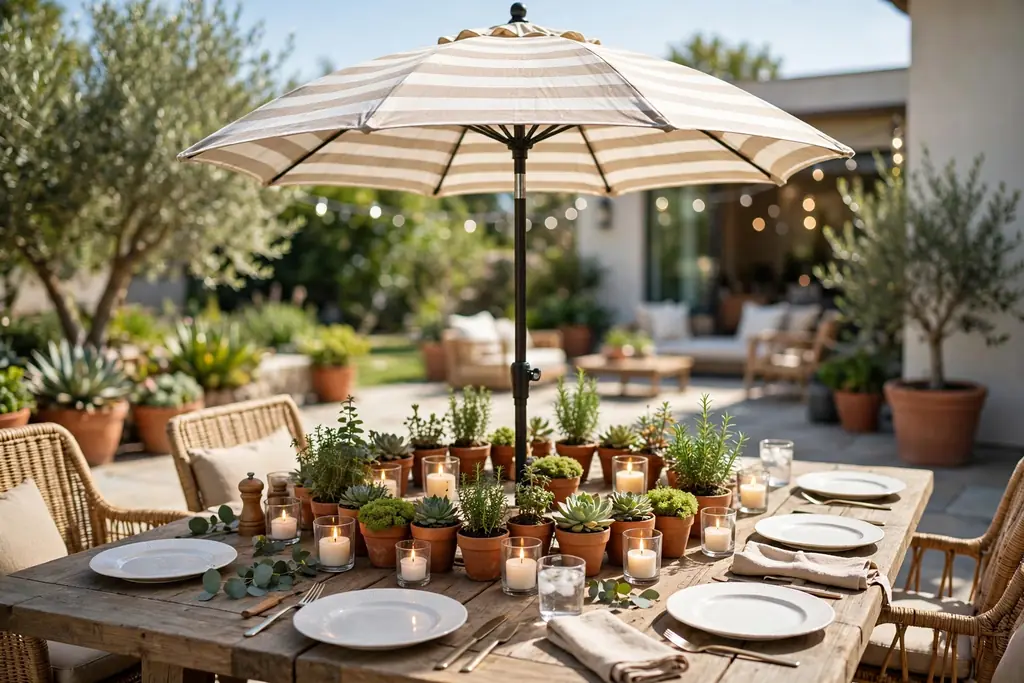
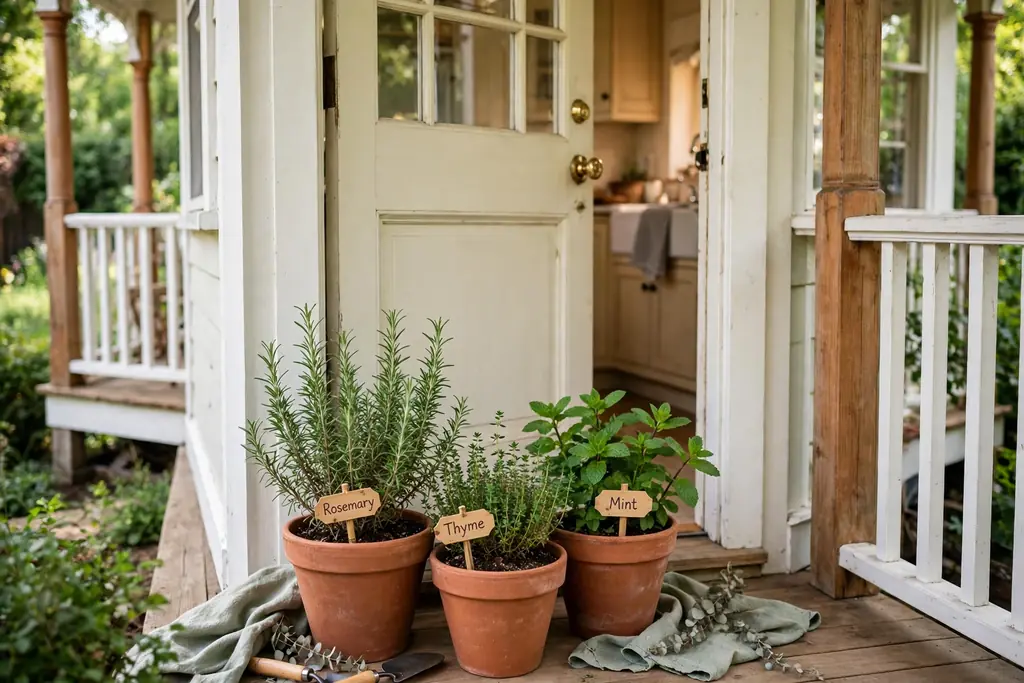
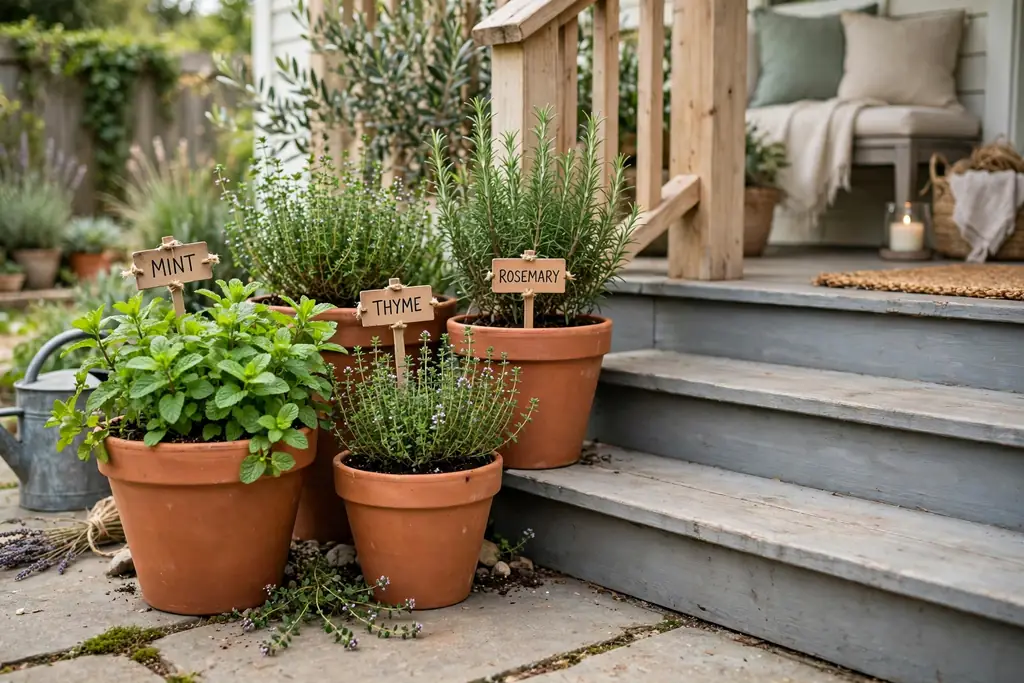
    Small terracotta pots of basil, mint, rosemary, and thyme grouped down the center of an outdoor dining table.

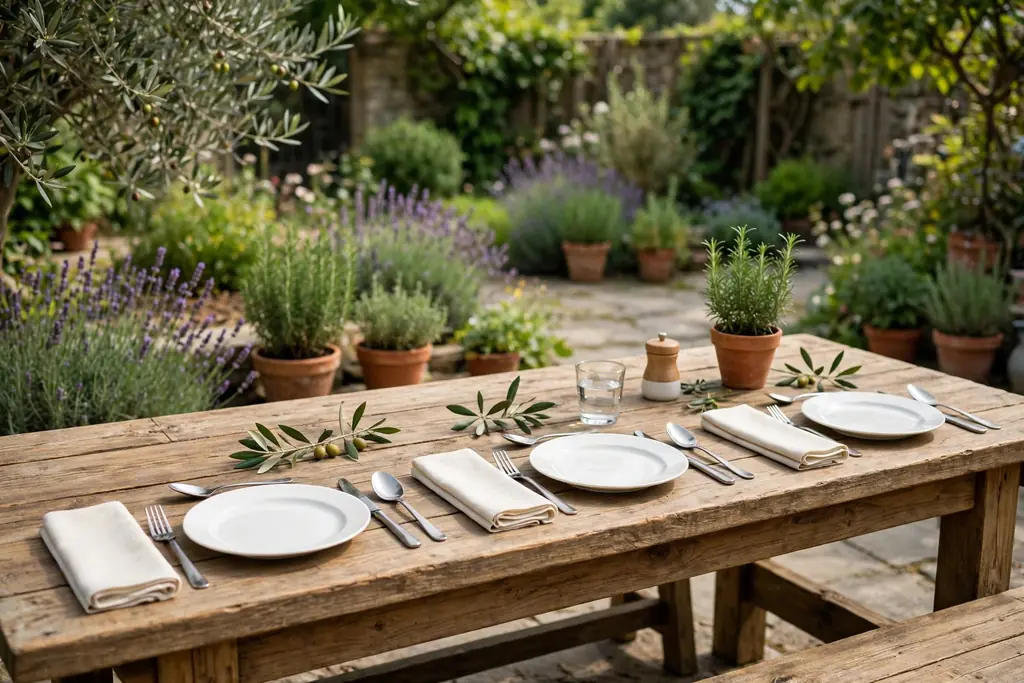
    Group three or four small pots of basil, mint, rosemary, and thyme down the center of the table, so the centerpiece smells good, looks green all season, and can be snipped for cooking. Herb pots last far longer outdoors than cut flowers in sun and heat, and they move back to a windowsill or garden bed after the meal. Use pots in one material, such as terracotta or white ceramic, so the group reads as one display.

    Water the herbs before the meal and set each pot on a small saucer, so the table stays dry. Keep pots small enough to see over, and trim tall stems before guests arrive. Keep mint in its own pot, since mint can crowd out other herbs in a shared planter.

    3. Low Citrus Bowl for a Backyard Lunch

    Wide shallow bowl filled with lemons, limes, and oranges with green leaves as a centerpiece on an outdoor table.

    Fill a wide, shallow bowl with lemons, limes, and a few oranges, and set it in the center of the table as a centerpiece you can also cook with later. The fruit gives clear color and shape, and the bowl takes up only one spot, leaving the rest of the table free for plates and serving dishes. Add a few green leaves between the fruit to break up the round shapes.

    Check the fruit before the meal and move any soft piece to the kitchen, since one spoiling lemon can mark the rest. Keep the bowl low and wide rather than tall, so it does not block sightlines. At the end of the meal, the bowl can move to the counter, which makes clearing the table a single step.

    4. Hurricane Lantern Trio on a Wood Tray
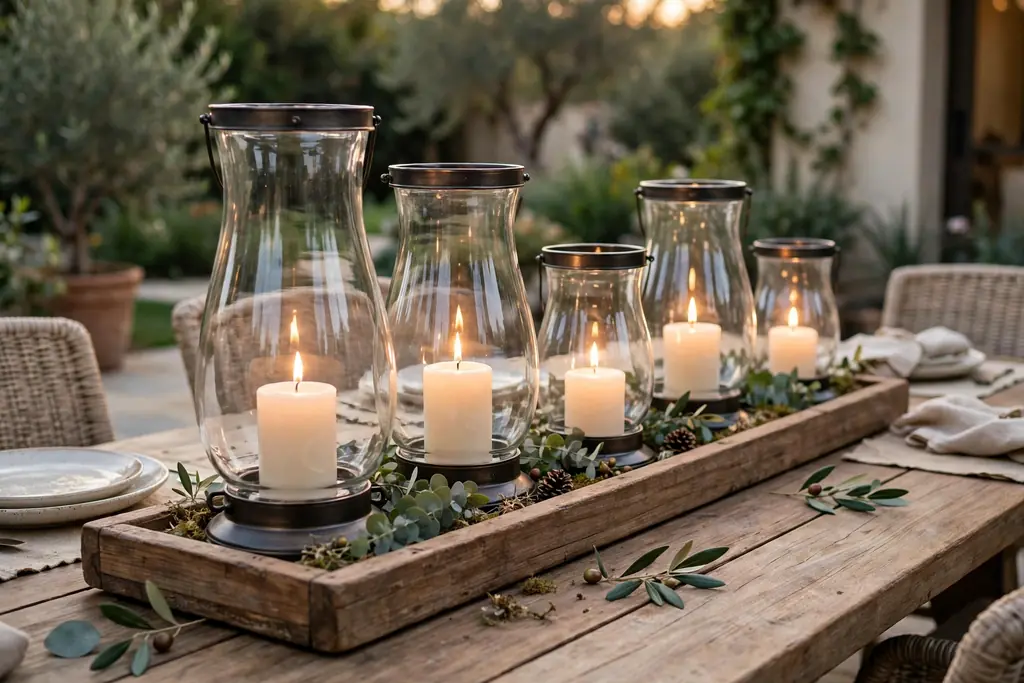
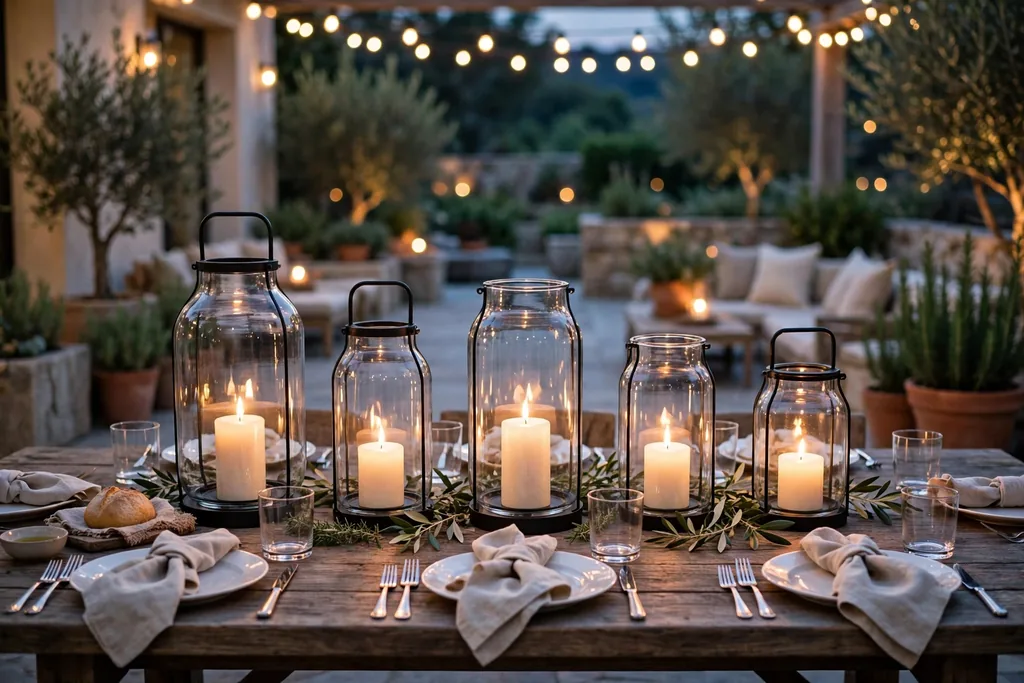
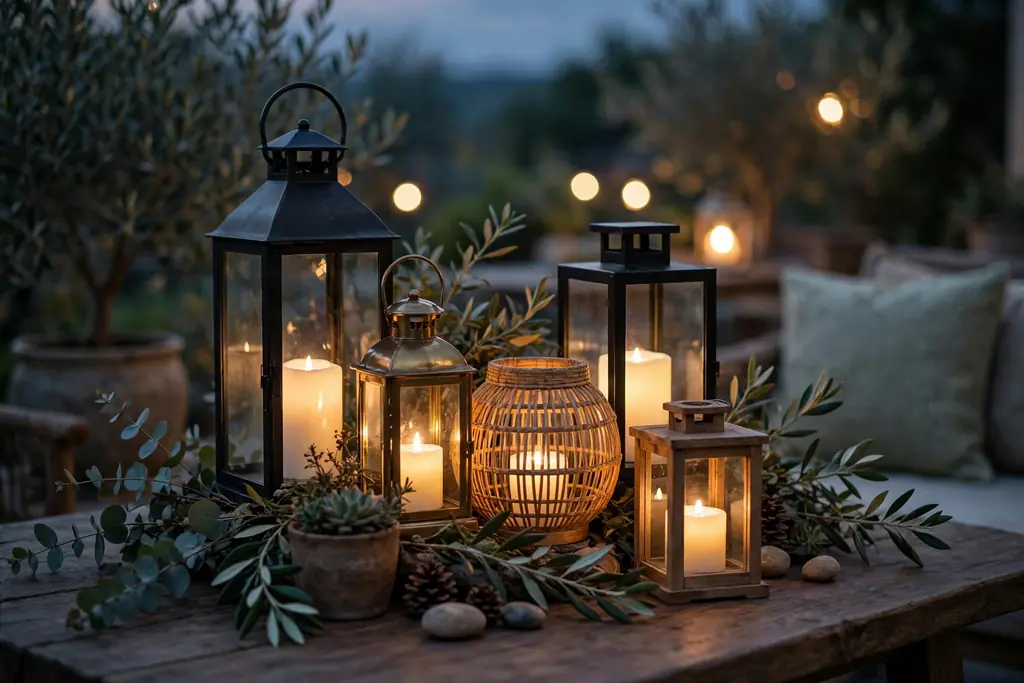
    Glass hurricane lanterns of different heights with candles on a long wood tray down the center of an outdoor table.

    Set three glass hurricane lanterns of different heights on a long wood tray down the center of the table, each holding a pillar or battery candle. The tray keeps the group contained, so it lifts off in one move when rain starts or the table needs to clear, and the glass shields the flame from a light breeze. This idea suits evening gatherings on a patio or deck.

    Keep lanterns low enough to see over, and set the tray flat so lanterns do not slide. Use battery candles inside closed lanterns or near fabric, and real candles only in proper holders on a stable surface. Wash the glass before the meal, since dust and fingerprints show more on clear glass in candlelight.

    5. Wildflower Jars in a Wooden Crate
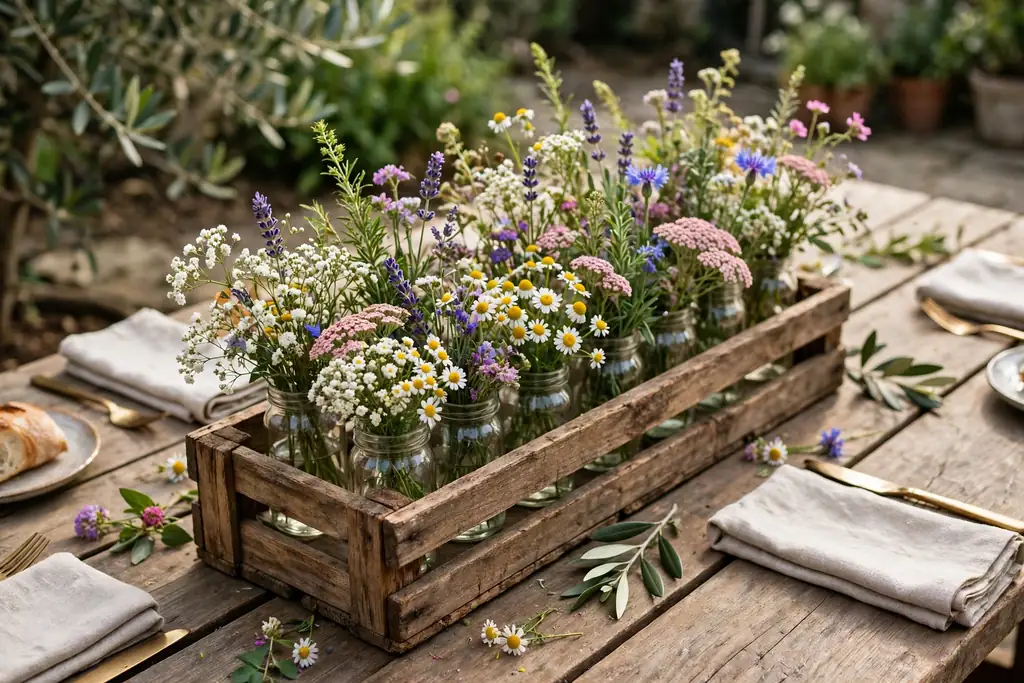
    Small jars of wildflowers set in a low wooden crate down the center of an outdoor gathering table.

    Fill four or five small jars with short stems of wildflowers, such as zinnias, cosmos, or daisies, and set the jars in a low wooden crate down the center of the table. The crate keeps the jars upright in wind, and the group looks relaxed and casual, which suits a brunch, a lunch, or a family dinner outdoors. Use jars of the same size for a matched group, or mix two sizes for a looser look.

    Trim stems so the flowers sit just above the jar rim, and keep the total height low enough to see across. Add a few stones to the bottom of each jar to weight it, and change the water if the flowers will stay out for more than a day. Remove any stem that wilts, since one cloudy jar can spoil the group.

    6. Succulent Pots on a Stone Slab
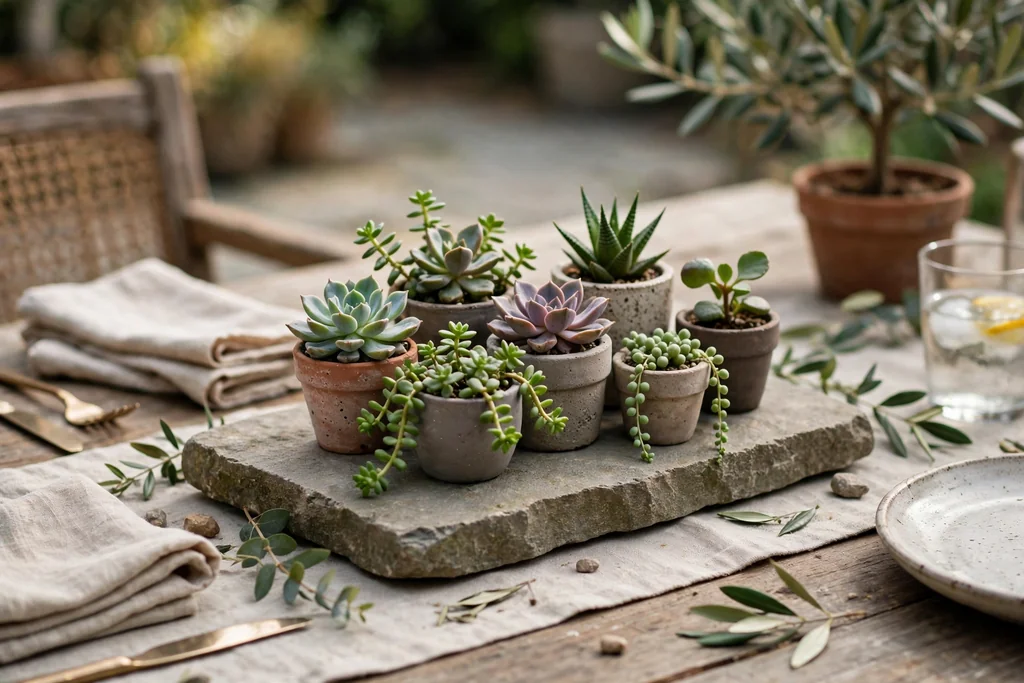
    Succulent pots grouped on a flat stone slab as a centerpiece on an outdoor dining table.

    Group three succulent pots on a flat stone slab or a large stone tile down the center of the table, so the centerpiece stays heavy, needs no water during the meal, and handles sun well. Succulents suit a modern patio, a dry garden table, or a small bistro table, and they last for weeks with little care. Use pots in one color, such as grey, white, or terracotta, so the group reads as one display.

    Vary the succulent shapes, with one rosette, one trailing plant, and one upright plant, and leave space between pots so each shape shows. Set each pot on the slab, not directly on a cloth, so soil does not mark the table. Wipe leaves clean before setting them out, since dust shows more on fleshy leaves in daylight.

    7. Ring of Bud Vases Around an Umbrella Pole
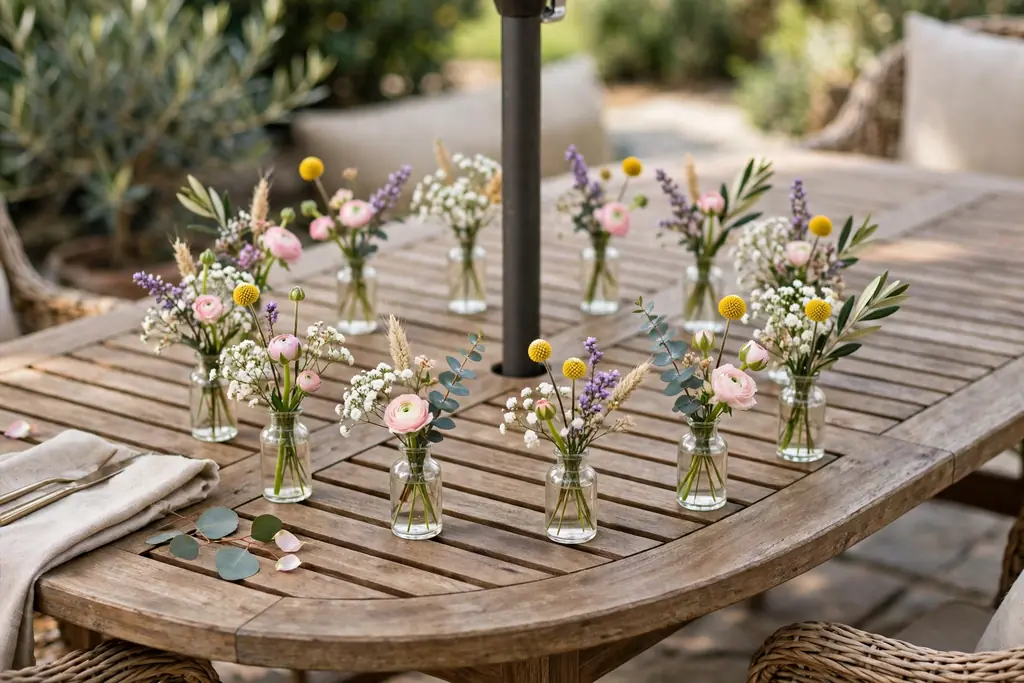
    Small bud vases with short stems arranged in a ring around an umbrella pole on a patio table.

    Place four or five small bud vases in a ring around the umbrella pole, each holding one or two short stems, so the pole becomes part of the centerpiece instead of an obstacle. This idea solves the most common patio table problem, since the pole sits in the middle of the table where a centerpiece would normally go. Use vases of the same height, or two heights set in an alternating pattern around the pole.

    Keep stems short, so they do not brush the umbrella canopy or block sightlines, and weight each vase with a few stones if the table is light. Use the same flower or leaf in every vase, so the ring looks planned rather than random. When the umbrella closes, lift the ring off in one tray or move the vases to the table ends.

    8. Terracotta Geranium Pots for a Patio Table
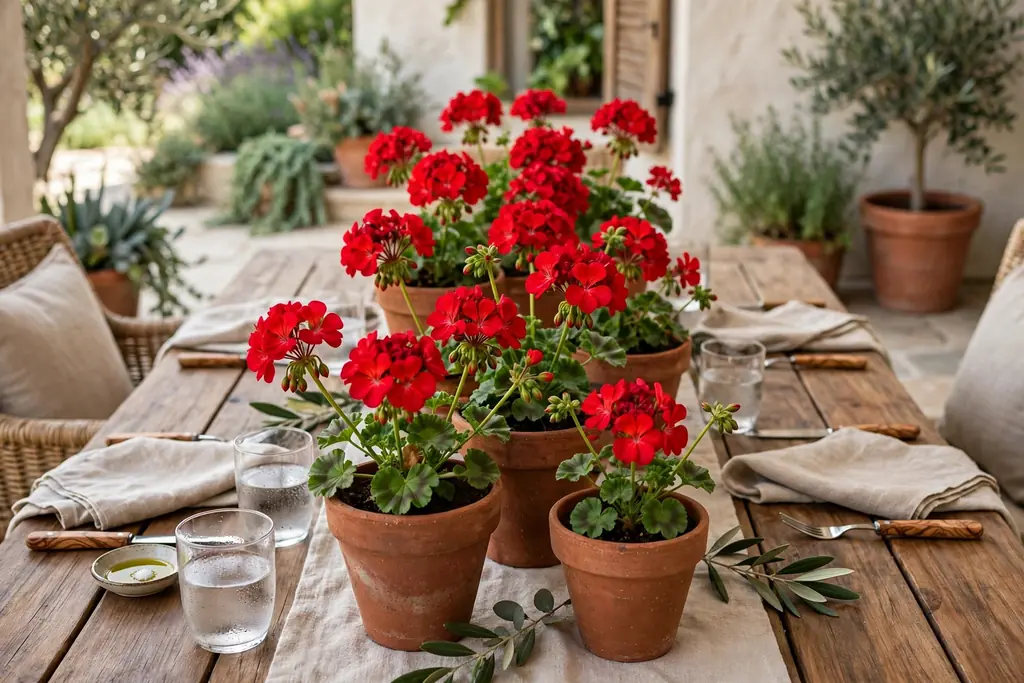
    Terracotta pots of geraniums grouped down the center of a patio dining table.

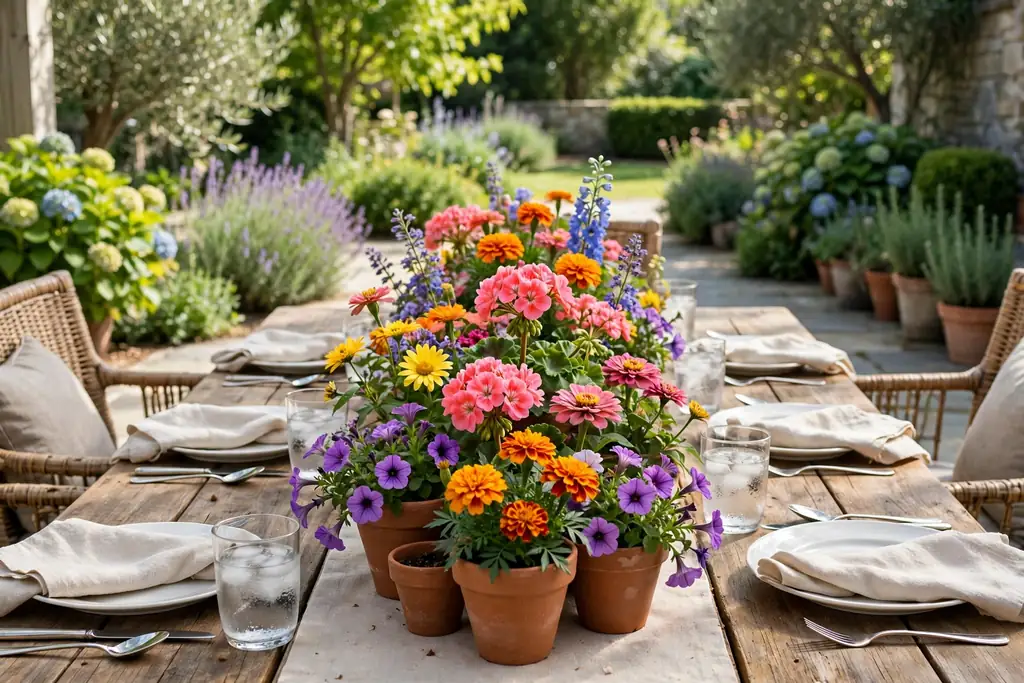
    Group three terracotta pots of geraniums down the center of the table, so the centerpiece brings real garden color to a patio or deck. Terracotta suits white, cream, and wood tables, and the pots can move back outside after the meal, where the plants keep growing. Use pots in one size for a matched group, or one larger pot with two smaller ones.

    Water the plants before the meal and set each pot on a saucer, so the table stays dry and soil does not mark the cloth. Trim spent blooms before guests arrive, and keep pots clear of elbows and serving dishes. If blooms drop petals, shake the pots outside before bringing them in, and sweep the table after the meal.

    9. Driftwood and Shell Group for a Coastal Table
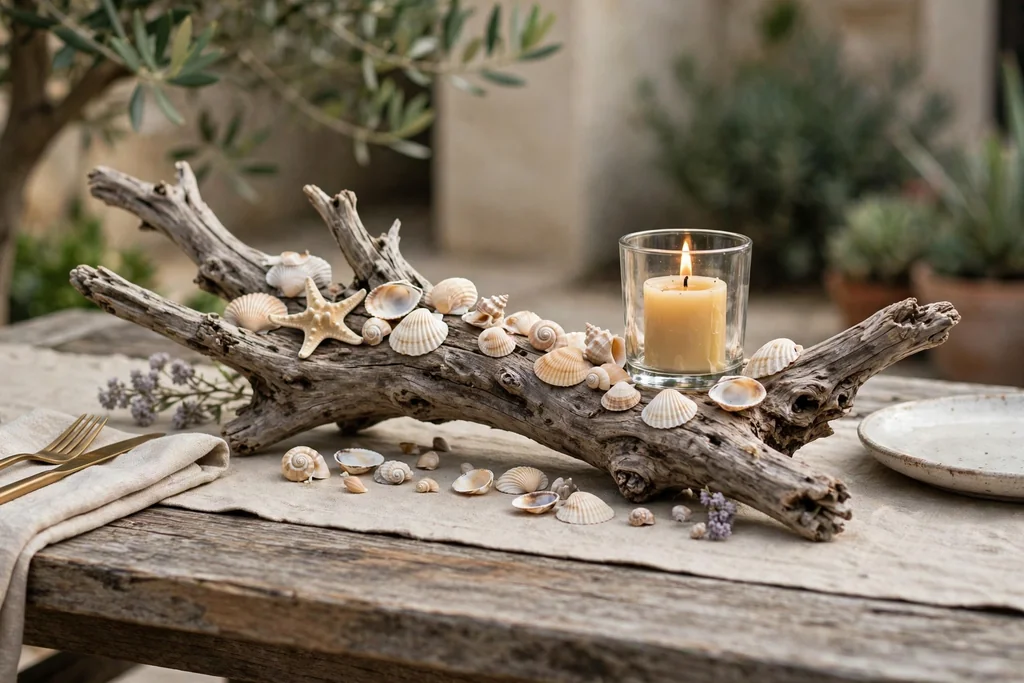
    Driftwood piece with shells and a short candle in a glass holder as a centerpiece on an outdoor table.

    Set one piece of driftwood down the center of the table, with two or three shells, a small rope knot, and one short candle in a glass holder beside it, for a coastal note that suits a beach house patio or a bright garden table. The driftwood gives a natural line without height, and the small group leaves plenty of room for plates and drinks. Keep shell accents to a small number, so the table still looks tidy.

    Wash and dry shells and driftwood before setting them out, and check driftwood for rough edges that could snag a cloth. Use shells large enough to see but small enough to leave room for serving dishes. For everyday meals, use the driftwood alone and skip the shells, so clearing the table stays quick.

    10. Fairy Lights in Glass Bottles
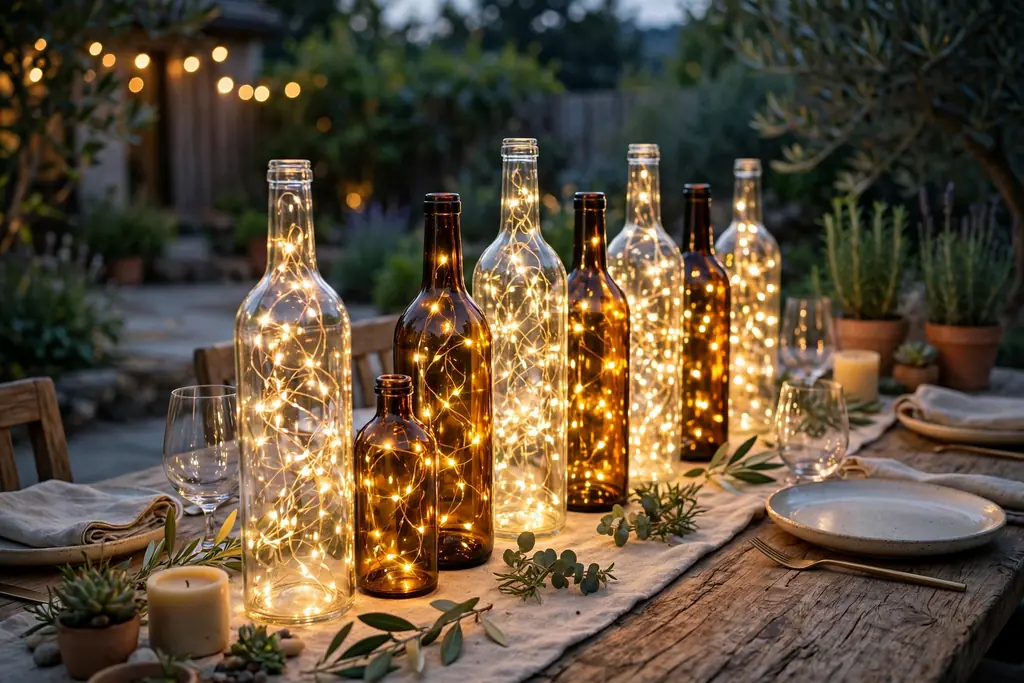
    Clear and amber glass bottles filled with battery fairy lights down the center of an outdoor table in the evening.

    Fill two or three clear or amber glass bottles with battery fairy lights, and set them down the center of the table for evening light that needs no flame. The bottles glow softly after sunset, suit a casual dinner on a deck or patio, and stay steady in a light breeze because glass bottles are heavier than paper lanterns. Use bottles of different heights, with the tallest bottle in the middle.

    Switch the lights on before guests sit down, and keep spare batteries nearby if the gathering will run late. Wash the bottles before the meal, since fingerprints show more on clear glass in low light. For a table with children, battery lights in bottles give the glow of candles without an open flame.

    11. River Stone and Pillar Candle Bowl
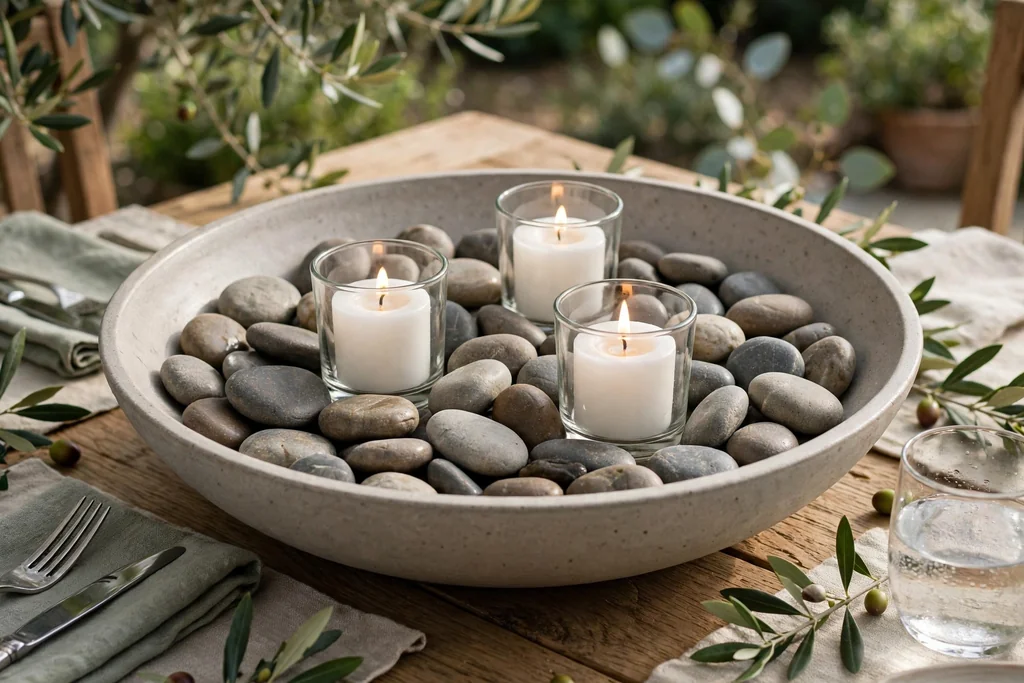
    Wide shallow bowl of smooth river stones with short pillar candles in glass holders on an outdoor table.

    Fill a wide, shallow bowl with smooth river stones, and set two or three short pillar candles in glass holders among the stones, so the centerpiece stays heavy, low, and wind resistant. The stones weight the bowl, and the candles give evening light without a tall arrangement that could topple. This idea suits a neutral table, where natural shapes and candlelight carry the look.

    Use stones large enough to stay put, and keep candles in holders, clear of any fabric or paper. Wipe stones clean before setting them out, since dust shows on smooth stone in daylight. For a table with young children, use battery candles in the same holders for the same look without a flame.

    12. Sunflower Bucket Centerpiece
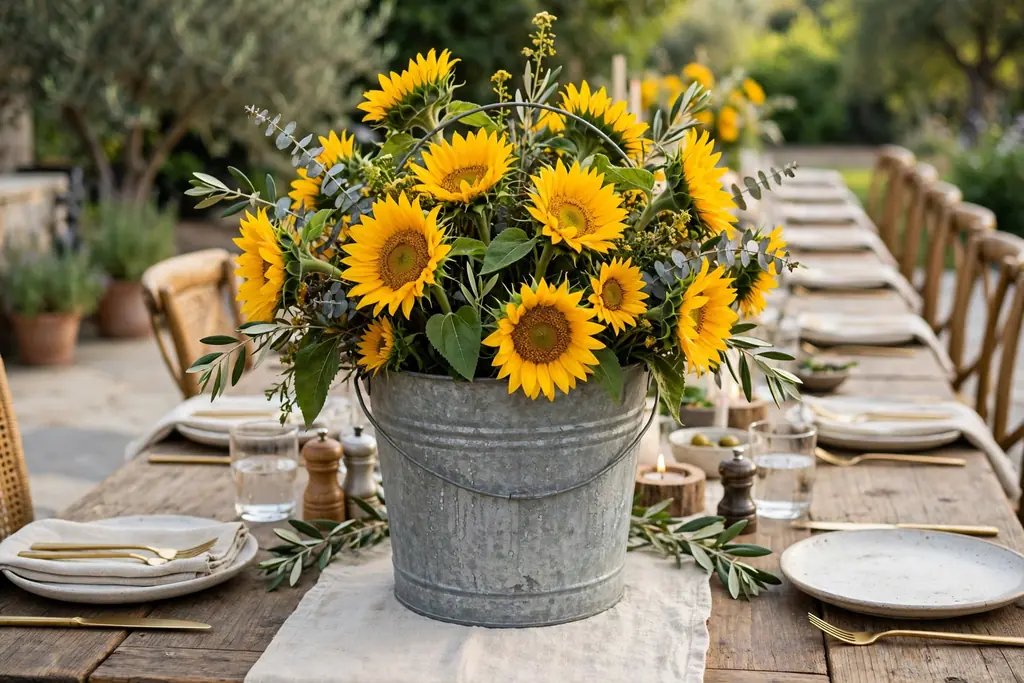
    Galvanized bucket of sunflowers as a centerpiece on a long outdoor gathering table.

    Set a galvanized bucket or a tin pail of sunflowers in the center of a long table, or at one end of a round table, for a clear summer note that suits a backyard gathering. Sunflowers give strong color with a single bunch, and the bucket keeps the stems contained and easy to move. Use one bunch for a small table, or two buckets at each end of a long table.

    Trim stems so the flower heads sit below eye level when guests are seated, and fill the bucket with enough water to keep stems fresh through the meal. Weight the bucket with a stone in the bottom if the table is light or the day is windy. Remove any drooping stem before guests arrive, and move the bucket to shade if the table sits in strong sun.

    13. Low Greenery Runner with Weighted Candle Holders
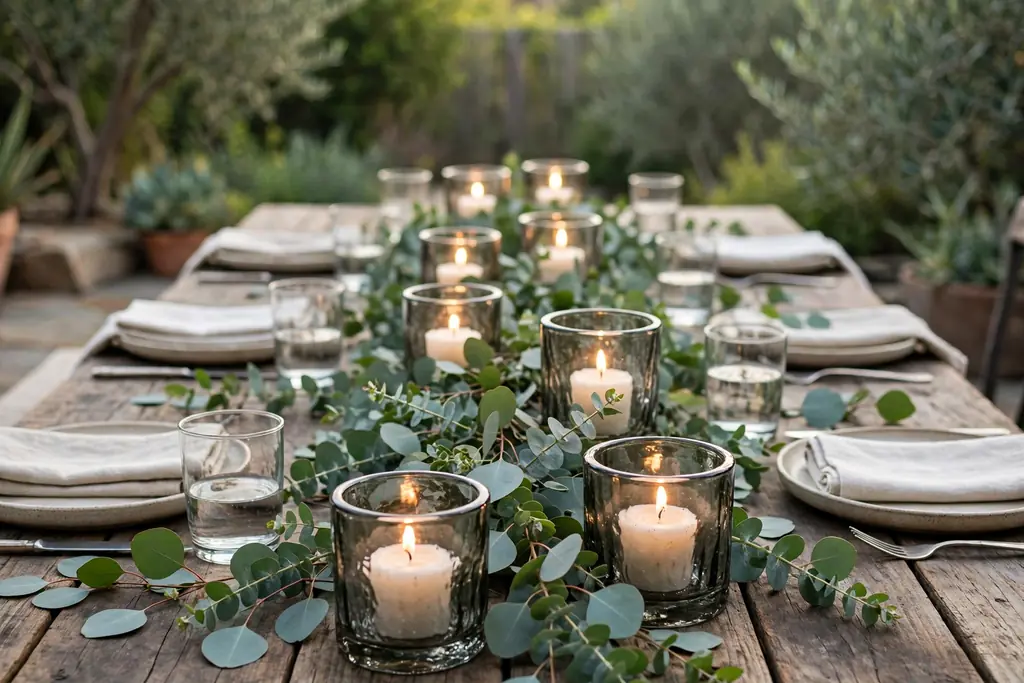
    Low runner of eucalyptus branches with short candles in heavy glass holders down the center of an outdoor table.

    Lay a low runner of eucalyptus or olive branches down the center of the table, then set short candles in heavy glass or stone holders along it at uneven intervals. The greenery gives color along the whole table without height, and the heavy holders stay put in a light breeze. This idea suits a long table for a gathering, where one long centerpiece reads better than several small groups.

    Trim the runner so it stays inside the table edges and does not brush plates or glasses. Keep real flames clear of the leaves, and use battery candles if the runner will sit near fabric or dry material. Shake the branches outside before laying them out, and remove any shedding leaves before the meal.

    14. Painted Tin Can Flower Holders
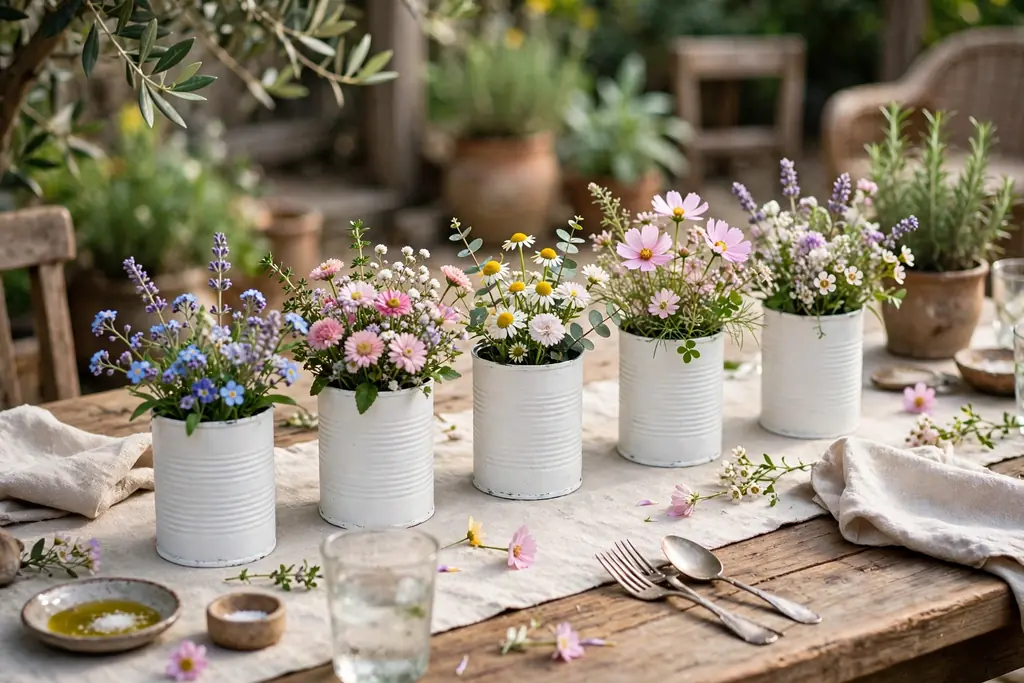
    Painted tin cans filled with short garden flowers set down the center of a casual outdoor table.

    Clean three tin cans, paint them in one color such as white, sage, or terracotta, and fill each with short stems of garden flowers, then set the cans down the center of the table. This idea costs little, reuses cans you already own, and suits a casual family gathering or a backyard lunch. Use cans of the same size for a matched group, and smooth any sharp rim before use.

    Add a few stones to the bottom of each can to weight it, and trim stems so the flowers sit just above the rim. Change the water if the flowers will stay out for more than a day, and remove any stem that wilts. For a windy patio, set the cans on a tray, so the group lifts off in one move if rain starts.

    15. Olive Sprigs in a Stoneware Jug

    Olive sprigs standing in a heavy stoneware jug as a centerpiece on a round outdoor table.

    Stand a small bunch of olive sprigs in a heavy stoneware jug at the center of a round table, or at one end of a long table, for a calm Mediterranean note. The jug keeps the sprigs steady in wind, and the soft green-grey leaves suit white plates, wood tables, and linen napkins. Keep the bunch small, so the jug does not block sightlines.

    Trim sprigs so the leaves sit below eye level when guests are seated, and keep the jug clear of elbows and serving dishes. If fresh sprigs shed, shake them outside before bringing them in, or use faux sprigs in the same jug for a no-shed version. Wipe the jug clean before setting it out, since dust shows on stoneware in daylight.

    16. Lemon Leaf and White Flower Arrangement
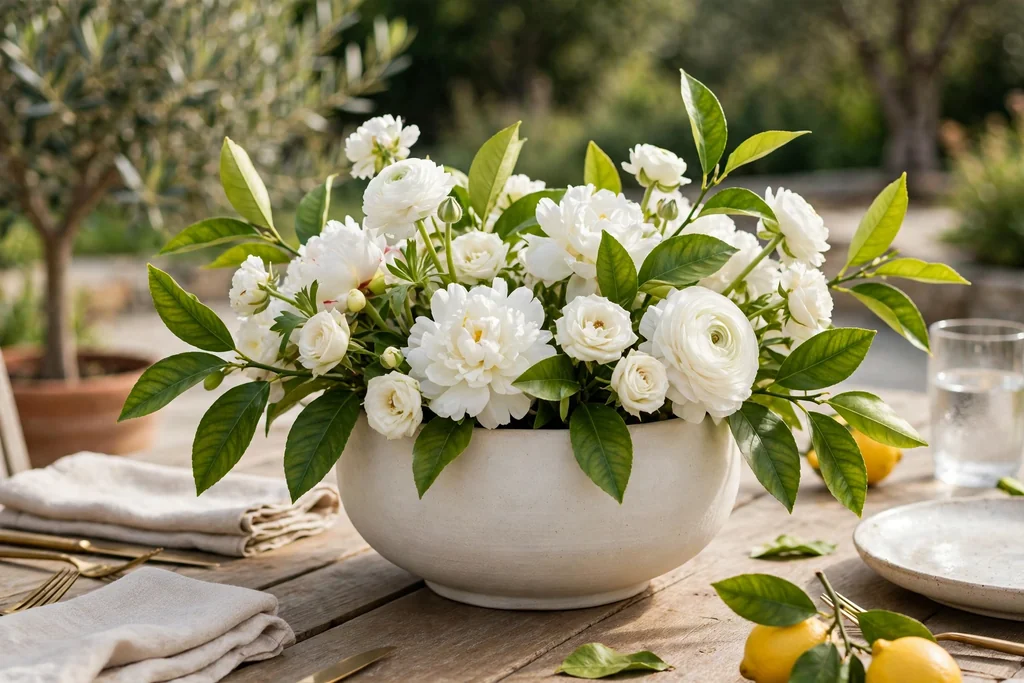
    Low wide vase of white flowers with lemon leaves as a centerpiece on an outdoor dining table.

    Set a low, wide vase of white flowers, such as white daisies or white carnations, with lemon leaves tucked between the stems, down the center of the table. The white flowers give a fresh, clean note, and the lemon leaves add scent and a clear green shape without needing a large arrangement. Use one vase for a small table, or two matching vases for a long table.

    Trim stems so the flowers sit low, and keep the total height below eye level when guests are seated. Change the water if the arrangement will stay out for more than a day, and remove any stem that wilts. For a windy patio, choose a wide, heavy vase, and add stones to the bottom to weight it.

    17. Citronella Candles in Terracotta Pots
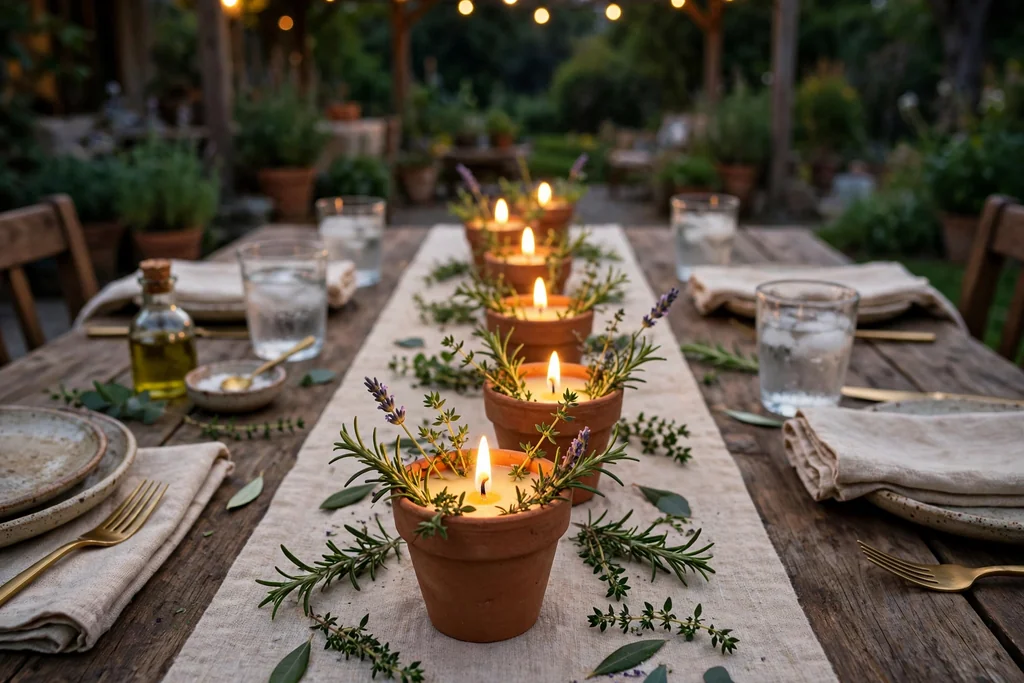
    Citronella candles in small terracotta pots with herb sprigs down the center of an outdoor evening table.

    Set two or three citronella candles in small terracotta pots down the center of the table, with a short herb sprig tucked beside each pot, for evening light that also helps with outdoor insects. The pots weight the candles, suit a patio or garden table, and look like part of the table decor rather than a separate repellent. Use pots in one size for a matched group.

    Keep candles in their pots on a tray or saucer, clear of fabric, paper, and dry material, and never leave them burning unattended. Trim wicks before lighting, and use battery candles instead if children will sit close to the table. Store citronella candles with their lids on when not in use, so the scent stays contained.

    18. Lavender Pots in a Row
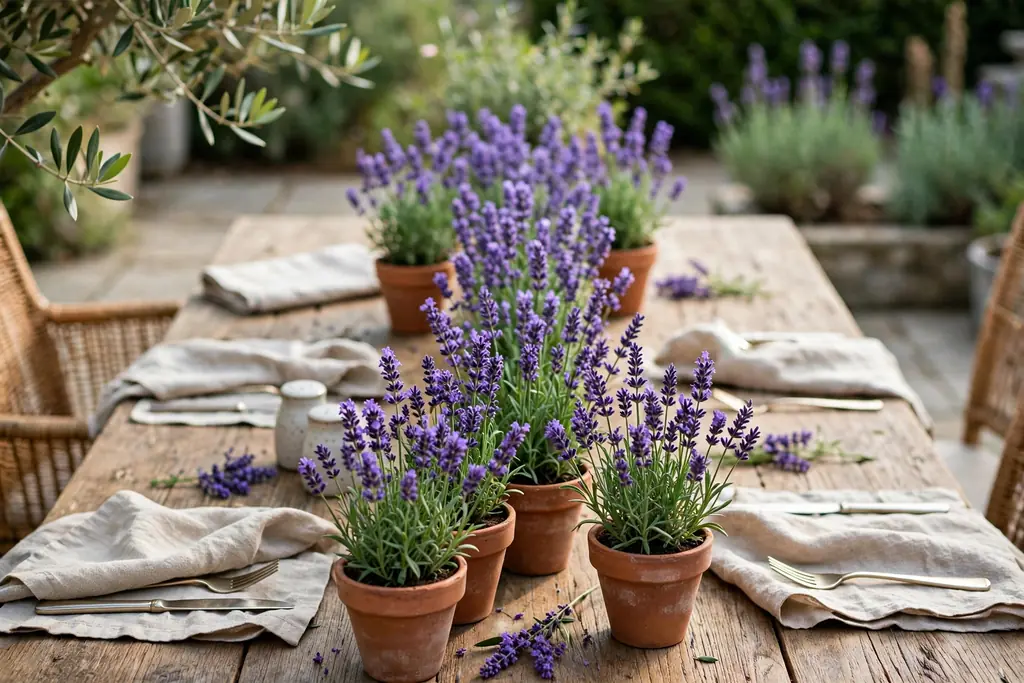
    Small pots of lavender grouped in a row down the center of an outdoor dining table.

    Group three or four small pots of lavender down the center of the table, so the centerpiece gives purple color, scent, and a clear garden note in one row. Lavender suits a cottage patio, a garden table, or a brunch gathering, and the pots move back outside after the meal, where the plants keep growing. Use pots in one material, such as terracotta or white ceramic, so the row reads as one display.

    Water the plants before the meal and set each pot on a saucer, so the table stays dry. Trim spent blooms before guests arrive, and keep pots small enough to see over. If lavender drops buds, shake the pots outside before bringing them in, and sweep the table after the meal.

    19. Wood Slice Tiered Stand with Candles and Small Plants
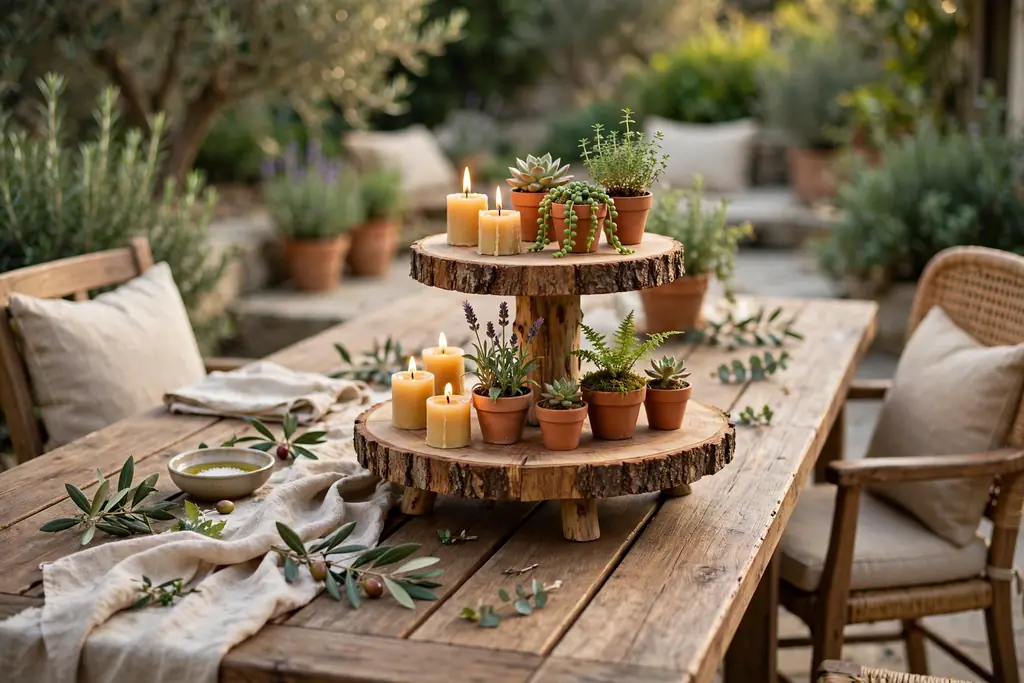
    Two tier wood slice stand with short candles and small potted plants at the end of an outdoor table.

    Set a two tier wood slice stand at one end of the table or on a sideboard, and fill it with short candles in holders and two or three small potted plants, so the gathering table gains height without blocking the center. A tiered stand also works for serving, with small bites or fruit on the tiers at a buffet style meal, but keep food and decor on separate stands if both are in use.

    Keep the stand stable and clear of the main serving path, and put heavier items on the bottom tier. Use battery candles on the stand if it will sit near plants or paper, and real candles only in proper holders on a stable surface. Wipe the tiers after use, since soil and wax collect in the rims.

    20. Shell and Sand Tray for a Coastal Gathering
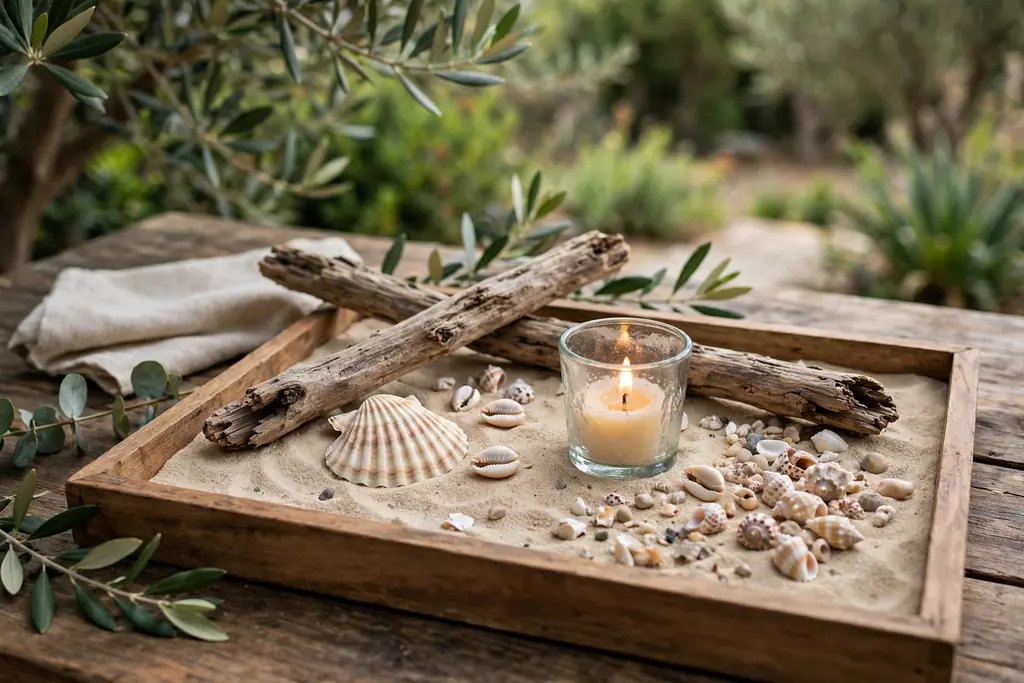
    Shallow tray with sand, shells, driftwood, and a short candle in a glass holder on an outdoor table.

    Fill a shallow tray with a thin layer of sand, then set two or three shells, a small piece of driftwood, and one short candle in a glass holder on the sand, for a coastal centerpiece that stays contained on one tray. The tray keeps sand off the table, and the group lifts off in one move when rain starts or the table needs to clear. This idea suits a beach house patio or a summer lunch outdoors.

    Use a tray with a raised edge, so sand stays inside, and keep the candle in a holder, clear of any dry material. Wash and dry shells before setting them out, and keep the group small, so plates and serving dishes still fit. For everyday meals, use the tray with shells alone and skip the candle, so clearing the table stays quick.

    21. Long Low Planter Box with Mixed Greens
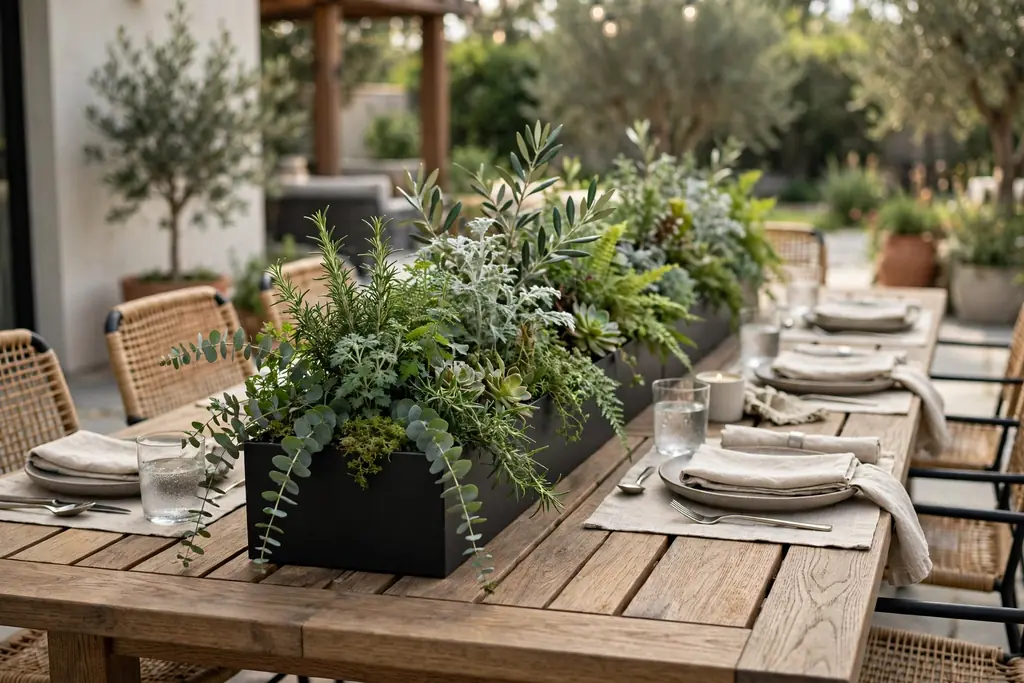
    Long low planter box filled with mixed greens down the center of a rectangular outdoor dining table.

    Set one long, low planter box down the center of a rectangular table, filled with mixed greens such as trailing ivy, small ferns, and a few herbs, for a centerpiece that looks like a small garden bed. The box gives green along the whole table without height, and it moves to a windowsill or garden bench after the meal. Use a box that fits the table with room at each end for serving dishes.

    Water the plants before the meal and line the box, so the table stays dry. Trim any stem that hangs over plates or glasses, and keep the total height low enough to see across. If the box is heavy, set it on a runner or mat, so it does not mark the table, and ask for help lifting it rather than dragging it across the surface.

    Conclusion

    Outdoor table centerpieces for casual gatherings do not need a large arrangement or new dishes. One low, weighted group, a small palette repeated at least twice, and cloth napkins that stay put will carry most tables, from a patio lunch to an evening dinner on a deck. Pick the ideas that fit your table size, your wind, and your daily routine, and keep serving space in mind first. For more table ideas in another season, see fall table decor ideas, and for the whole house, see fall decor ideas for home. Save this list for your next gathering, and work through it one idea at a time.

    FAQs

    What is the best height for an outdoor table centerpiece?

    Keep the centerpiece below eye level when guests are seated, so people can talk across the table without leaning around it. A low group of jars, pots, or a shallow bowl works best, with the tallest piece in the middle and shorter pieces at the sides. If a centerpiece blocks sightlines, move it to the table ends or swap it for a lower group.

    How do I stop an outdoor centerpiece from blowing over?

    Weight every light piece with heavy pots, a tray, hurricane glass, or stones in the bottom of jars and vases. Use cloth napkins instead of paper, skip tall, light arrangements on windy days, and set jars and vases on a tray so the group lifts off in one move. Bring linen and light pieces inside if strong wind or rain starts.

    What centerpiece works best for a patio table with an umbrella pole?

    Use a ring of small bud vases around the pole, each holding one or two short stems, so the pole becomes part of the centerpiece. Keep stems short, weight each vase with stones, and use the same flower or leaf in every vase. When the umbrella closes, lift the ring off in one tray or move the vases to the table ends.

    Can I use real candles outdoors?

    Yes, but keep real candles in glass holders on a stable surface, clear of fabric, paper, and dry material, and never leave them burning unattended. Use battery candles inside narrow jars, near children, or near fabric, and use hurricane glass to shield flames from a light breeze. Put candles out fully at the end of the meal.

    What is the simplest outdoor centerpiece for everyday meals?

    Start with a washable runner or placemats, cloth napkins, and one low centerpiece, such as a bowl of citrus or a row of herb pots. That set takes minutes to lay out, washes easily, and lifts off in one move when the table is needed for other uses. Add candles in glass holders in the evening, and the same base works for a weeknight dinner and a weekend meal.

    How do I store outdoor centerpieces after a gathering?

    Wash jars, vases, trays, and pots, dry them fully, and store them together in one box, so next setup is a single short job. Move live herb and flower pots to a windowsill or outside, compost spent flowers and leaves, and store candles with their lids on. Keeping the set together makes the next casual gathering easier to lay out.
  • 19 Patio Table Decor Ideas for Everyday Outdoor Dining

    19 Patio Table Decor Ideas for Everyday Outdoor Dining

    Patio table decor works best when it stays low, sturdy, and easy to clear. Use a washable runner or placemats, plain plates, and one low centerpiece of herbs, flowers, or candles in glass, then add cloth napkins and weighted pieces that resist wind. The 19 ideas below cover outdoor dining, from small bistro tables to long patio tables for guests.

    Start with the base you already own: everyday plates, clear or light glasses, and a runner or placemats you can wipe or wash. Then add one patio layer at a time, such as a pot of herbs, a bowl of citrus, or a lantern. Keep the centerpiece low enough to see across, leave room for serving dishes and drinks, and choose pieces you can lift off in one move when rain starts or the table needs to clear. For outdoor tables, weight matters: use heavy pots, glass hurricanes, and cloth napkins that will not blow away.

    Key Takeaways

    • Keep the centerpiece low and narrow, so guests can see each other and serving dishes still fit.
    • Pick a simple palette of white, cream, wood, and green, with one accent color repeated at least twice.
    • Start with washable textiles: a runner, napkins, and placemats carry most of the patio color and clean easily after outdoor meals.
    • Use one main centerpiece per table, not several competing groups, and leave empty space at each place for plates and glasses.
    • For outdoor dining, choose weighted, wind resistant pieces: heavy pots, hurricane lanterns, and cloth napkins over paper.
    • For evening meals, add candlelight in glass holders, kept clear of fabric, paper, and dry material, and never left burning unattended.

    1. Low Potted Herb Centerpiece

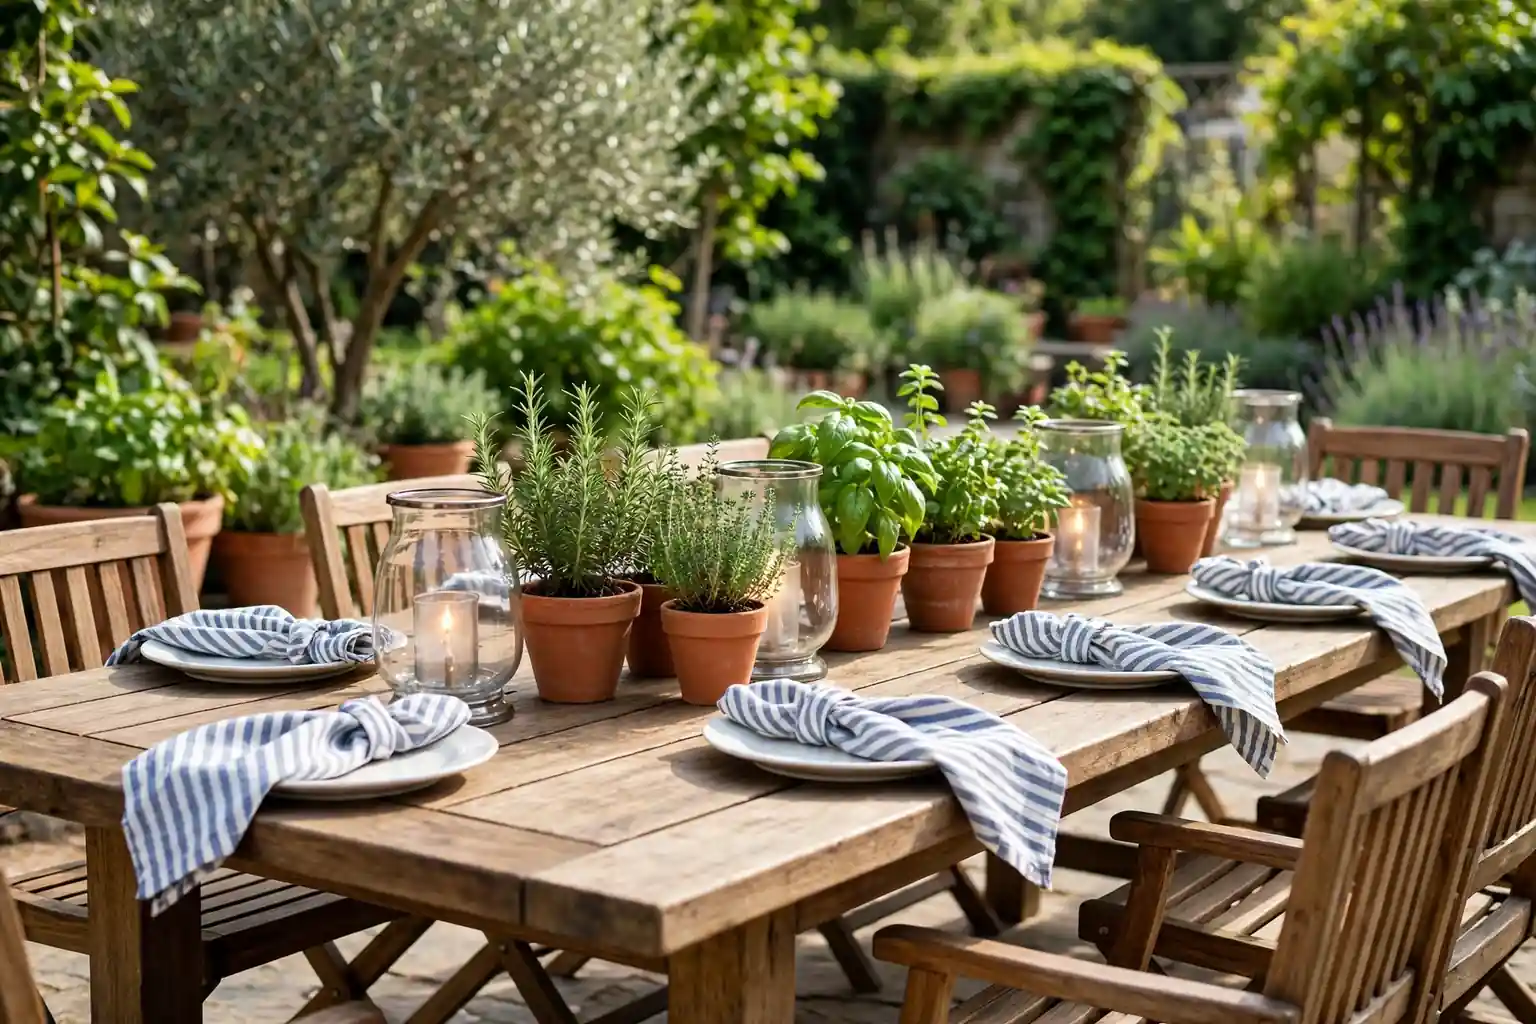
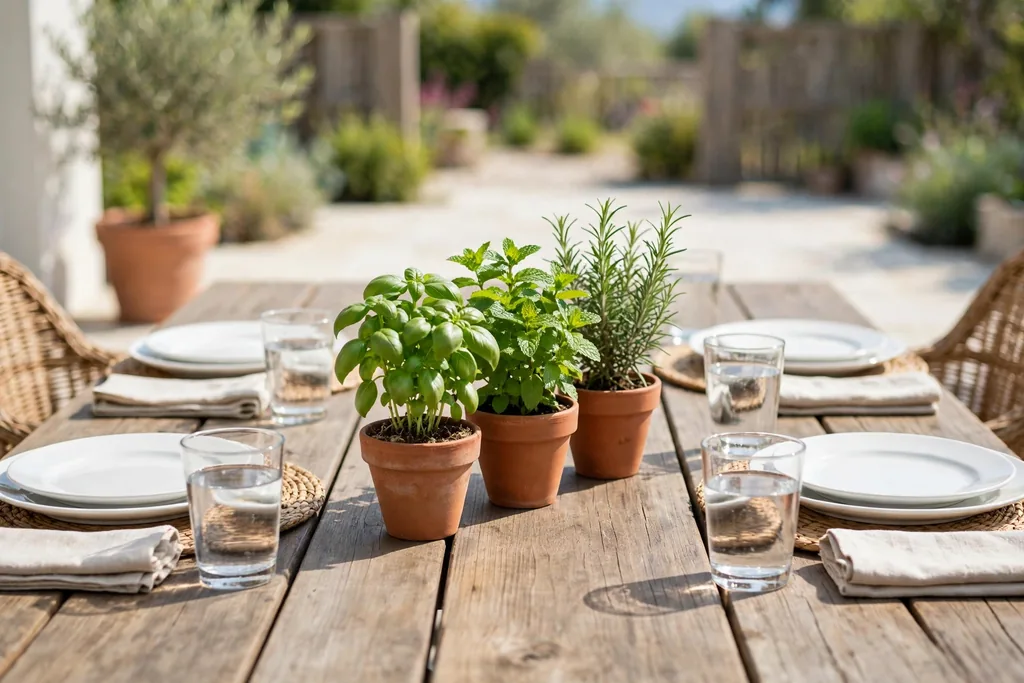
    Small terracotta pots of basil, mint, and rosemary grouped down the center of a patio dining table.

    Group three small pots of basil, mint, and rosemary down the center of the patio table, so the centerpiece smells good, looks green through the season, and can be snipped for cooking. Herb pots suit both small patios and long dining tables, and they last far longer than cut flowers in outdoor heat. Use pots in one material, such as terracotta or white ceramic, so the group reads as one display.

    Water the herbs before the meal and set each pot on a small saucer, so the table stays dry. Keep pots small enough to see over, and trim tall stems before guests arrive. If mint spreads fast, keep it in its own pot, since mint can crowd out basil and rosemary in a shared planter.

    2. Bare Wood Table with Folded Linen Napkins

    Bare wood patio table with folded cream linen napkins, plain plates, and simple cutlery.

    Leave a wood patio table bare, with no runner or cloth, and let the grain do the work, then set folded linen napkins in cream or sage at each place, with simple cutlery and plain plates. This approach suits a rustic or farmhouse patio, and it keeps the table easy to wipe after everyday meals.

    Use placemats under plates if the wood marks easily, and keep the centerpiece to one low group, such as a wood board with candles, so the wood still shows. Fold napkins the same way at every place for a tidy look, and iron linen napkins before a gathering, since creases show more on bare wood than under a patterned cloth.

    3. Wipe-Clean Woven Placemats for Daily Use

    Round woven placemats with white plates on a patio dining table in daylight.

    Use round woven placemats under each plate, with plain white plates on top, for a patio table that feels relaxed and still looks set. Woven texture suits outdoor light and hides small marks from outdoor meals, while the placemat defines each place without a full tablecloth. Center one placemat at each place, with cutlery in its usual spots.

    Choose placemats that wipe clean or wash easily, since outdoor meals bring dust, juice, and crumbs. Shake them outside after meals and wipe them dry before storing, so they do not hold damp. If placemats vary in color, put the same color at every place for a tidy look, and save mixed colors for a casual family lunch.

    4. Citrus Bowl Centerpiece for Everyday Meals

    Wide shallow bowl filled with lemons, limes, and oranges with green leaves as a centerpiece on a patio table.

    Fill a wide, shallow bowl with lemons, limes, and a few oranges, and set it in the center of the patio table as a centerpiece you can also cook with later. The fruit gives clear color and shape, and the bowl takes up only one spot, leaving the rest of the table free for plates and serving dishes. Add a few green leaves between the fruit to break up the round shapes.

    Check the fruit every few days and move any soft piece to the kitchen, since one spoiling lemon can mark the rest. Keep the bowl low and wide rather than tall, so it does not block sightlines. At the end of the meal, the bowl can move to the counter, which makes clearing the table a single step.

    5. Glass Hurricane Lanterns for Evening Dining

    Glass hurricane lanterns of different heights with candles down the center of an evening patio table.

    Set two or three glass hurricane lanterns of different heights down the center of the patio table, each holding a pillar or battery candle, for evening light that stays steady in a light breeze. The glass shields the flame from wind, so the table keeps its glow through a long outdoor dinner, and the lanterns look just as good on a covered patio as in an open garden.

    Keep lanterns low enough to see over, and set them on a tray or runner if the table surface marks easily. Use battery candles inside closed lanterns or near fabric, and real candles only in proper holders on a stable surface. Wash the glass before the meal, since fingerprints and dust show more on clear glass in candlelight.

    6. Terracotta Pots with Seasonal Flowers

    Terracotta pots of seasonal flowers grouped down the center of a patio dining table.

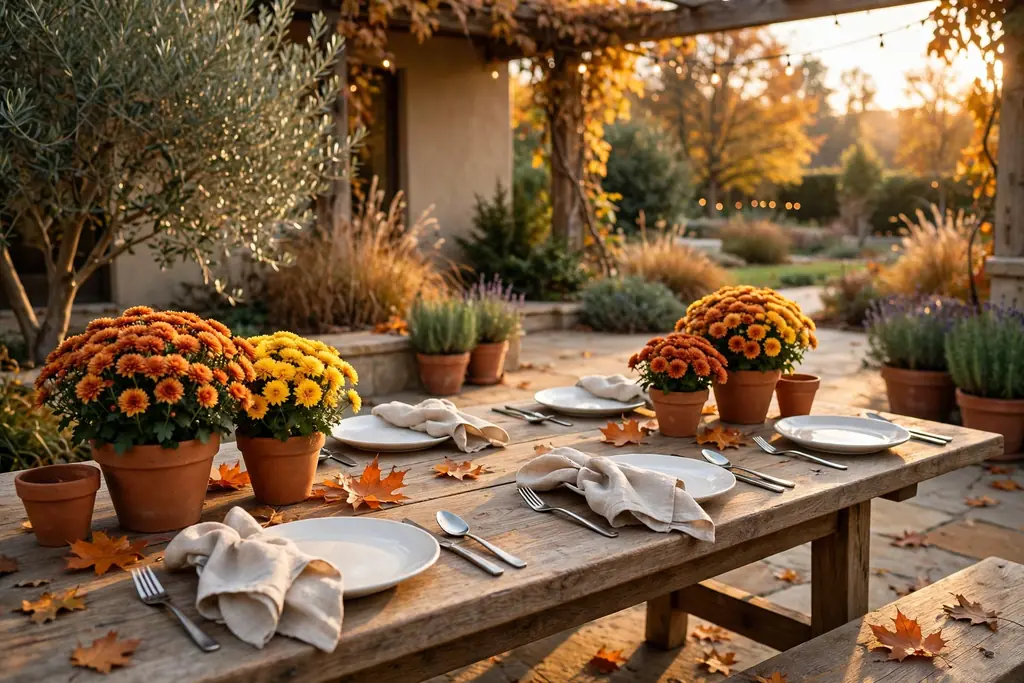
    Group terracotta pots of seasonal flowers down the center of the patio table, such as geraniums in summer, mums in fall, or pansies in spring, with plain plates and linen napkins at each place. The pots give the table a garden feel that changes with the season, and they can move to a patio step or windowsill after the meal.

    Vary the pot heights slightly, with one taller pot in the middle and shorter ones at the sides, and leave space between pots so each plant shows. Water plants before the meal and set each pot on a saucer, so the table stays dry. Deadhead faded blooms before setting the pots out, since one wilted flower draws the eye more than the rest of the group.

    7. Wind-Safe Striped Runner

    Striped outdoor runner secured with clips on a patio table with white plates and clear glasses.

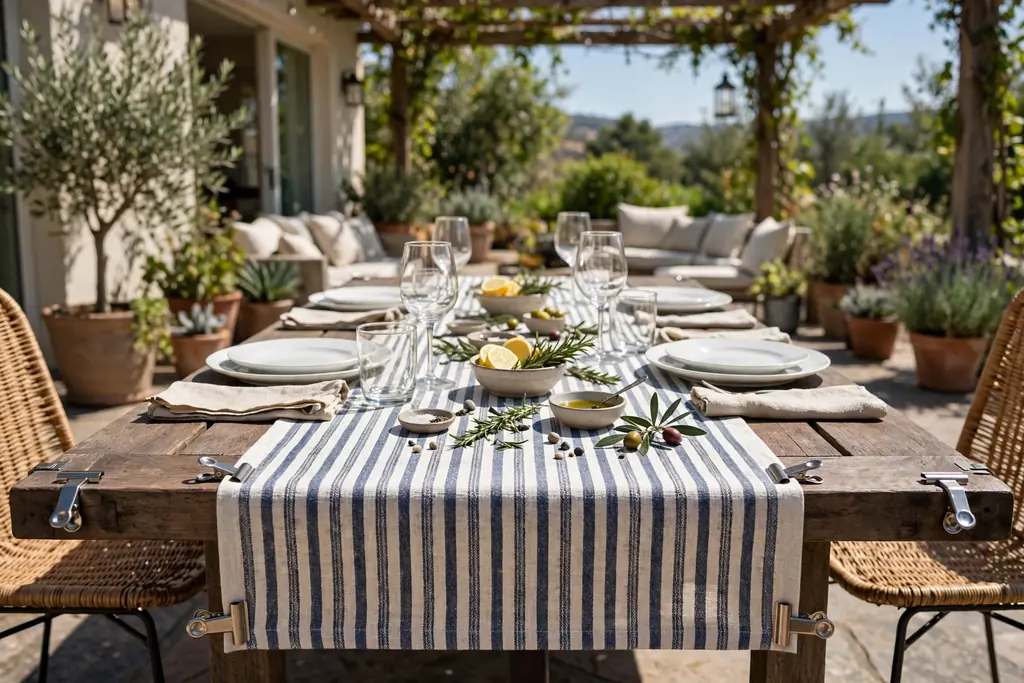
    Lay a striped outdoor runner down the patio table, and secure it with tablecloth clips or small weights at each end, so it stays put on breezy days. A striped runner gives a plain table a clear pattern base, and it works with white plates, wood chargers, and clear glasses without needing new dishes. Choose a runner made for outdoor use, so it dries fast after a shower.

    Keep the stripe scale in proportion to the table: a wide stripe suits a long dining table, while a narrow stripe suits a round breakfast table. Hang the runner evenly at both ends, and skip a loose tablecloth on windy days, since a secured runner and placemats hold their place far better. Shake the runner outside after meals, and store it dry.

    8. Durable Everyday Place Settings

    Patio table set with durable stoneware plates, wood chargers, and sturdy glasses for everyday outdoor dining.

    Set the patio table with durable everyday pieces: melamine or stoneware plates, wood chargers or woven placemats, and sturdy glasses that can handle outdoor use. This base looks set for a meal but does not ask guests to handle fragile dishes outside, and it cleans fast after grilled food, salads, and drinks. Keep one consistent plate color at every place, so the table looks matched.

    Repeat one accent, such as a colored napkin or a wood charger, at every place, and keep the rest of the setting plain. Stack spare plates at one end of the table for seconds, rather than crowding each place. At the end of the meal, the whole setting can go to the kitchen in a few trips, which suits weeknight patio dinners.

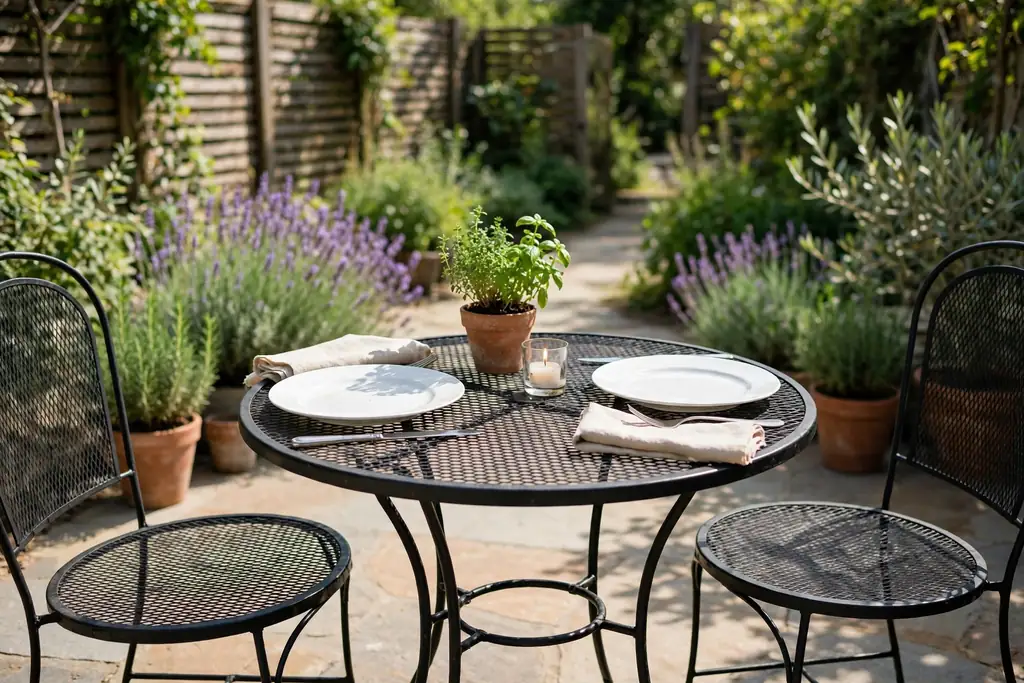
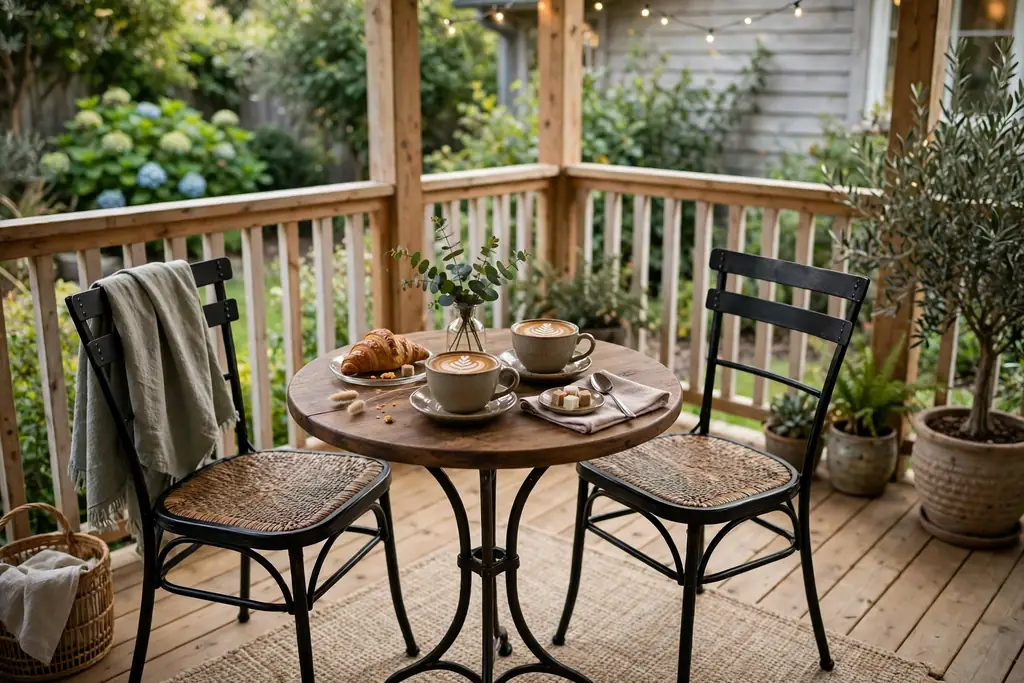
    9. Small Round Bistro Table for Two

    Small round bistro table for two on a patio with one herb pot, two plain place settings, and a short candle in glass.

    Style a small round bistro table for two with one small pot of herbs, two plain place settings, and a single short candle in a glass holder. A small table needs only one centerpiece, and a single pot leaves room for two plates, two glasses, and a shared dish. Keep the palette to white, wood, and green, so the small surface does not look crowded.

    Use a pot heavy enough to stay put in wind, and keep the candle in glass, so the flame stays steady. Fold napkins in a simple rectangle, and skip a runner, since a runner can crowd a small round top. For morning coffee, swap the candle for a small vase with one or two short stems, and keep the same plain base.

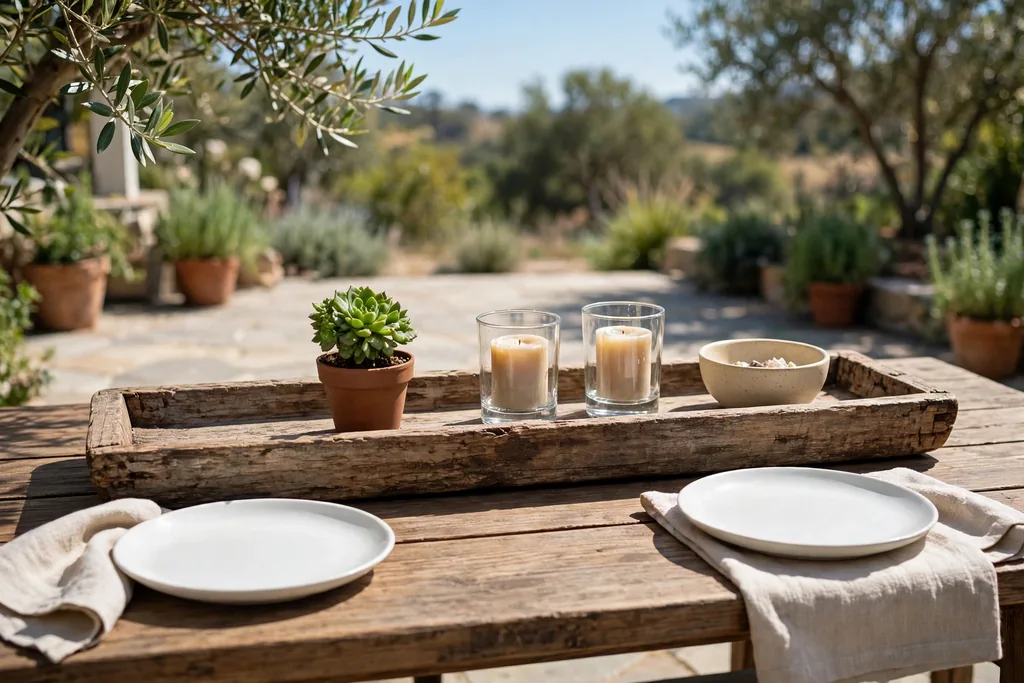
    10. Wood Tray Centerpiece That Lifts Off

    Long wood tray on a patio table holding a small potted plant, short candles in glass holders, and a small bowl.

    Set a long wood tray down the middle of the patio table, then group a small potted plant, two short candles in glass holders, and a small bowl on it, so the whole centerpiece lifts off in one move. The tray keeps the group contained, so it reads as one centerpiece, and it clears the table fast when rain starts or serving dishes need the space.

    Use a tray with handles if the table is long, and set it on a runner or placemats if the table surface marks easily. Keep the tray group low enough to see across, and use battery candles if the tray will sit near dry leaves or fabric. Wipe the tray after meals, since candle wax and plant soil collect in its corners.

    11. Weighted Mason Jar Candles

    Mason jars with battery candles and a layer of small stones at the bottom down the center of a patio table.

    Fill two or three mason jars with a battery candle and a layer of small stones at the bottom, then set the jars down the center of the patio table. The stones weight the jars against wind, and the glass glows softly in the evening, which suits a casual patio dinner or a weekend gathering. Use jars of the same size for a matched look, or mix two sizes for a relaxed group.

    Keep the jars short enough to see over, and set them on a small tray if the table surface marks easily. Use battery candles only inside narrow jars, since a real flame needs air and a safe holder. If a jar looks too plain, tie a short length of twine around the neck, and keep the twine clear of any flame.

    12. Shallow Succulent Planter Centerpiece

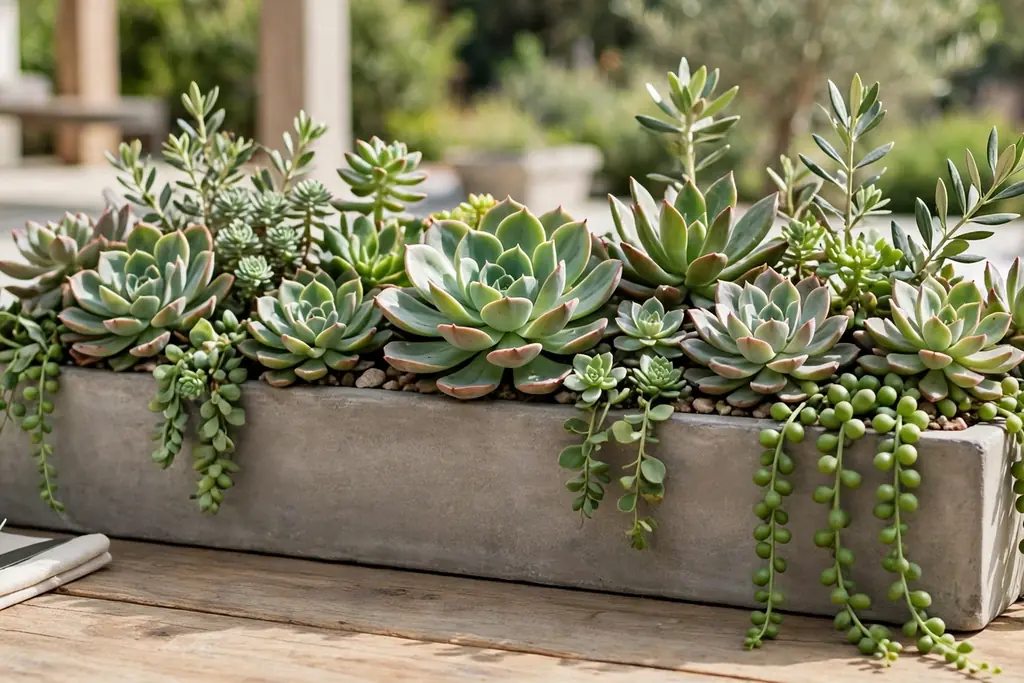
    Shallow wide planter with varied succulents as a centerpiece on a patio dining table.

    Plant a shallow, wide planter with succulents in varied shapes, such as rosettes, trailing stems, and upright spikes, and set it in the center of the patio table. Succulents suit outdoor tables well, since they handle sun and need little water, and the planter takes up only one spot, leaving the rest of the table free. Use a planter in one material, such as concrete, stone, or terracotta.

    Water sparingly and let the soil dry between waterings, since succulents rot in wet soil. Keep the planter low and wide rather than tall, so it does not block sightlines. At the end of the season, the planter can move to a sunny patio step, which makes it one of the easiest patio centerpieces to keep.

    13. Blue and White Coastal Patio Table

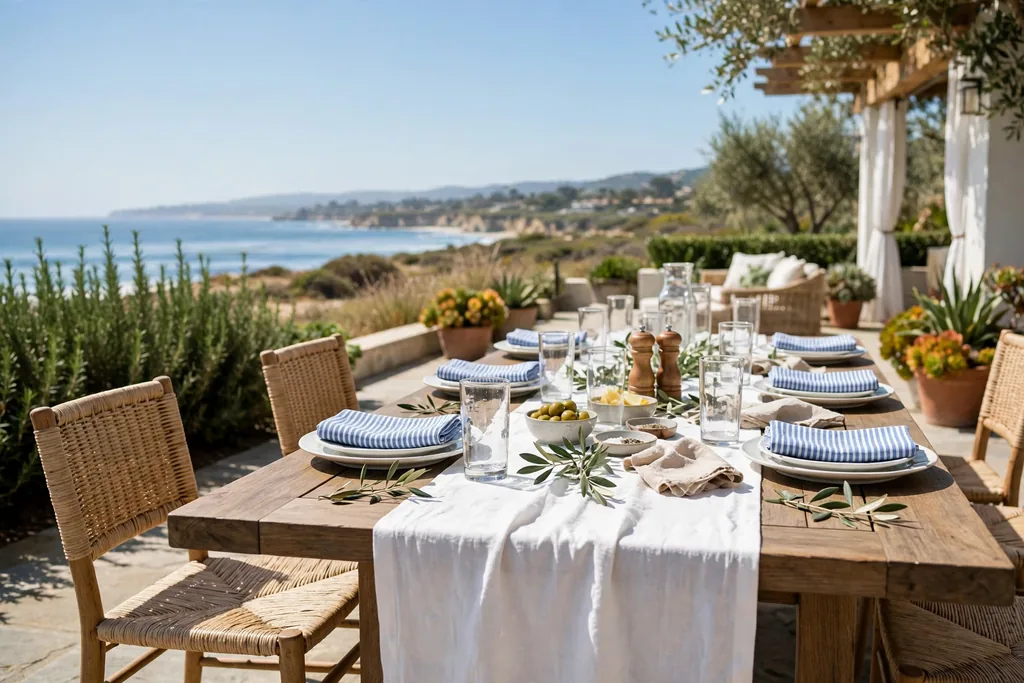
    Patio table with a white runner, blue striped napkins, white plates, and clear glasses in bright daylight.

    Set a white runner with blue striped napkins, white plates, and clear glasses for a coastal patio look that suits bright outdoor light. The blue and white pairing reads clean in strong sun, and it works with wood, rattan, and rope details without needing new dishes. Add one natural accent, such as a small shell or a piece of driftwood, at the center.

    Repeat the blue at least twice, such as striped napkins with a blue glass, so the table looks planned rather than random. Keep the stripes to one scale, since mixing wide and narrow stripes on the same table can look busy. For a windy patio, use a runner and placemats with clips instead of a loose tablecloth.

    14. Centerpiece Ring Around the Umbrella Pole

    Low ring of small pots and short candles in glass holders around the umbrella pole of a patio table.

    On a patio table with a center umbrella, build the centerpiece as a low ring around the pole: small pots, short candles in glass holders, or a wreath of greenery laid flat around the base. The ring uses space that is often left bare, and it keeps the centerpiece clear of plates, since the pole already marks the middle of the table. Keep every piece low, so guests can still see across.

    Choose pieces that fit the ring without crowding it, and leave gaps for serving dishes at the table edge. Use heavy pots or glass holders, so the ring stays put in wind, and keep candles clear of the umbrella fabric. When the umbrella comes down, the ring pieces can move to a tray, so the table still works without shade.

    15. Drink Station at the End of the Table

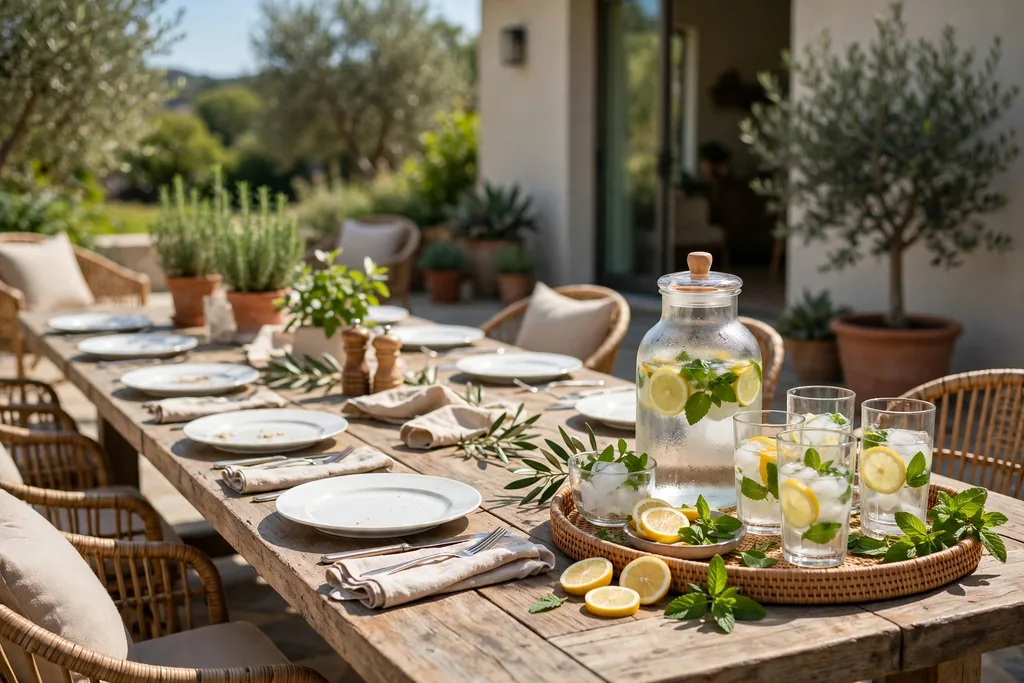
    Drink station at the end of a patio table with a water jug, glasses, lemon slices, and mint on a tray.

    Set a drink station at one end of the patio table, or on a small side table beside it, with a water jug, glasses, lemon slices, and mint, so guests can help themselves without crowding the main settings. A drink station keeps pitchers off the center of the table, which leaves room for food and conversation, and it suits gatherings where guests arrive at different times.

    Keep the station on a tray, so spills stay contained, and set out only as many glasses as guests need, with spares stacked nearby. Chill drinks before the meal and keep the jug in the shade for outdoor meals, since drinks warm fast in sun. At the end of the meal, the tray carries the whole station back to the kitchen in one trip.

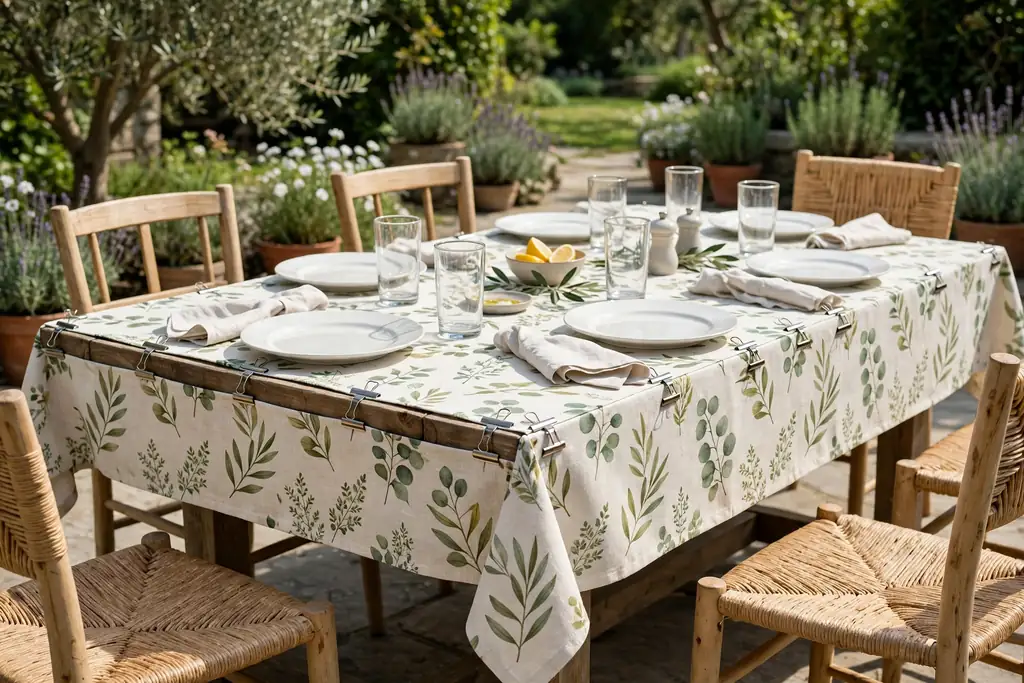
    16. Patterned Outdoor Tablecloth with Clips

    Patio table dressed with a patterned outdoor tablecloth secured with clips, plain plates, and clear glasses.

    Dress the patio table with a patterned outdoor tablecloth, such as a simple stripe, check, or botanical print, and secure it with tablecloth clips at each corner. A patterned cloth gives a plain patio table a full new base in minutes, and it suits tables that already have plain plates and glasses. Choose a cloth made for outdoor use, so it wipes clean and dries fast.

    Clip the cloth at every corner and at the middle of each long side on a large table, so wind cannot lift it. Keep the pattern scale in proportion to the table, and keep the centerpiece simple, since a busy cloth with a busy centerpiece can look crowded. Shake the cloth outside after meals, and store it dry to avoid mildew.

    17. Colorful Ceramic Plates as the Main Decor

    Patio table set with colorful ceramic plates in terracotta on a plain runner with cream napkins.

    Let colorful ceramic plates carry the patio table decor: set plates in one strong color, such as cobalt, terracotta, or sage, on a plain runner or bare wood table, with white or cream napkins and clear glasses. The plates give the table a clear color note without a large centerpiece, and they work for everyday meals as well as gatherings. Keep the rest of the setting plain, so the plate color stands out.
    Repeat the plate color once more, such as a matching napkin stripe or a single candle, so the table looks planned. Use plates that are sturdy enough for outdoor use, and stack them with care, since ceramic chips on stone or concrete. For a mixed set, put the same color at every place, and save mixed colors for a casual family lunch.

    18. Seasonal Pot Swap Through the Year

    Patio table with terracotta pots of seasonal mums beside plain place settings in fall light.

    Keep one set of patio table pots, and swap only the plants inside them through the year: pansies in spring, geraniums in summer, mums in fall, and evergreen sprigs in winter. The pot swap keeps the table base the same, so the table always looks set, while the plants mark the season with little cost or storage. Use pots in one material, so the group reads as one display in every season.

    Water and trim the plants before each meal, and keep a spare pot ready, so a tired plant can be swapped without a trip to the store. Label the pots if they hold different plants, and move tender plants inside before frost. This approach suits small patios well, since it needs no extra storage box for seasonal decor.

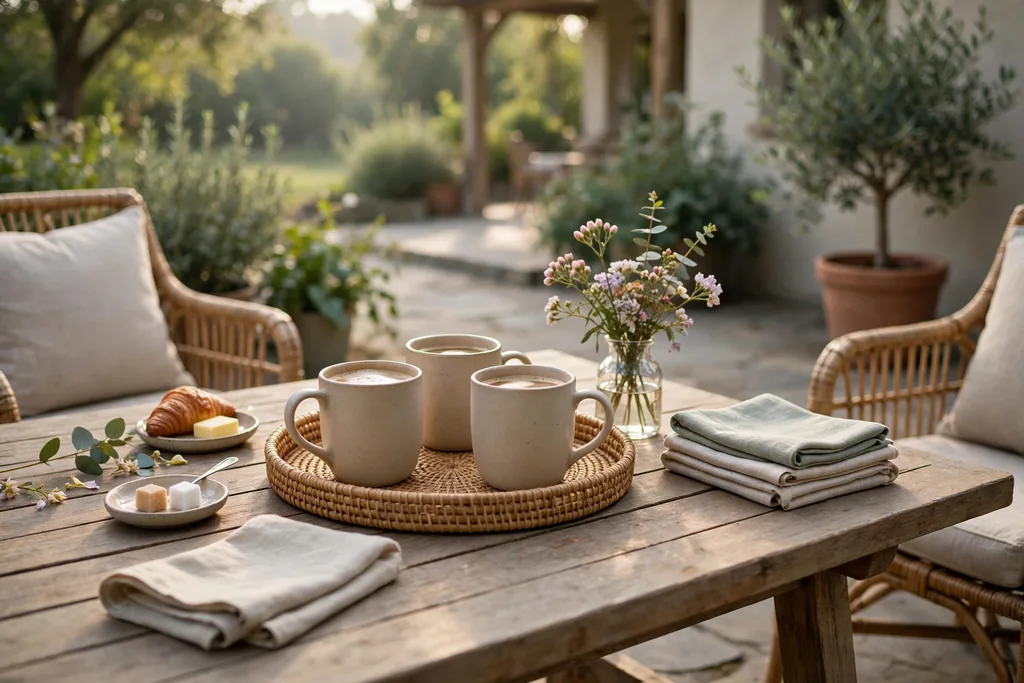
    19. Simple Morning Coffee Table Setup

    Patio table set for morning coffee with a tray of mugs, a small vase of short stems, and folded napkins.

    Set the patio table for morning coffee with a small tray holding a coffee pot or mugs, a small vase with one or two short stems, and a folded cloth napkin at each place. A morning table needs little: the tray keeps cups and spoons contained, the vase adds one fresh note, and the plain base keeps the table usable for reading or work after breakfast. Keep the palette to white, wood, and green.

    Use a tray with a rim, so cups do not slide on a smooth table, and keep the vase short, so it does not block the view across the table. Bring the tray inside after breakfast, and leave the table bare, so it is ready for lunch or an afternoon meal. This simple setup suits everyday patio use better than a large arrangement that must be moved twice a day.

    Conclusion

    Patio table decor does not need a large centerpiece or a new dinner set to work. A washable runner or placemats, plain plates, one low centerpiece of herbs, flowers, or candles in glass, and weighted pieces that resist wind will carry most patio tables through everyday meals and weekend gatherings. Start with the base you already own, add one seasonal group at the center, and leave room for serving dishes, drinks, and conversation.

    For more table ideas in another season, see fall table decor ideas. Keep what you use often, store the rest together in one box, and let the table return to a simple, usable base between meals. Save this list on Pinterest for your next outdoor meal, and work through it one idea at a time.

    FAQs

    What is the best centerpiece for a patio table?

    A low, heavy centerpiece works best, such as potted herbs, a shallow succulent planter, or candles in glass holders. It stays below eye level when guests are seated, resists wind, and leaves room for serving dishes. Avoid tall, light arrangements outdoors, since wind can topple them and block conversation.

    How do I keep patio table decor from blowing away?

    Use weighted pieces: heavy pots, glass hurricane lanterns, cloth napkins, and a runner or tablecloth secured with clips. Set jars and vases on a tray, add stones to the bottom of light jars, and skip paper napkins and tall, light centerpieces on windy days. Bring linen and light pieces inside if strong wind or rain starts.

    What tablecloth works best outdoors?

    A washable outdoor tablecloth or runner in a simple stripe, check, or solid color works best, secured with clips at each corner. Outdoor fabrics dry fast and wipe clean after spills, while a secured runner and placemats hold their place better than a loose indoor cloth on a windy patio. Shake the cloth outside after meals and store it dry to avoid mildew.

    Can I use real candles on a patio table?

    Yes, real candles work on a patio table when they sit in glass holders on a stable surface, clear of fabric, paper, and dry material. Hurricane lanterns shield the flame from wind, and battery candles are the safer choice inside closed lanterns, near children, or near dry leaves. Never leave any burning candle unattended, and bring candles inside when strong wind starts.

    How do I protect a patio table from rain and sun?

    Bring textiles, candles, and light decor inside before rain, and use outdoor fabrics and weighted pots that dry fast and resist sun fading. Wipe the table dry after rain, store cushions and runners dry, and use a cover or shade for long stretches of strong sun. A tray centerpiece helps here, since the whole group lifts off in one move before a storm.

    What should I put on a small patio table?

    One low centerpiece is enough for a small patio table, such as a single herb pot, a small succulent planter, or one short candle in glass. Keep the palette to white, wood, and green, skip a runner if it crowds the top, and use plain place settings with folded napkins. Leave room for two plates, two glasses, and one shared dish, and the small table will feel set without feeling crowded.


  • 23 Sunroom Decorating Ideas for a Bright and Comfortable Room

    23 Sunroom Decorating Ideas for a Bright and Comfortable Room

    Sunroom decorating ideas work best when you start with light, washable fabrics, seating that faces the view, and shade you can adjust through the day. Add plants that suit bright light, a rug to ground the seating, and low evening light, then repeat one calm palette so the glass room feels bright, comfortable, and easy to use all year.

    A sunroom is a room with a lot of glass and a lot of sun, so comfort depends on practical choices as much as on color. Fabrics fade, plants dry out, and seats that face a wall waste the best feature in the room. The 23 ideas below start with layout and light, then cover seating, plants, storage, and seasonal changes, so you can pick one change or work through the room in order. The same calm base that works in a farmhouse living room works here too, with lighter fabrics and more attention to sun and shade.

    Key Takeaways

    • Face seating toward the view or toward each other, and leave clear paths to doors and windows.
    • Choose light, washable fabrics and fade resistant cushions, since sunroom fabric gets strong daily sun.
    • Add shade in layers: sheers for soft light, plus blinds or shades you can lower at midday.
    • Group plants by light and water needs, and keep pots on trays so water does not mark floors or tables.
    • Ground the seating with one rug, repeat one calm palette at least twice, and leave some glass clear.
    • Plan for evening use with low lamps or lanterns, and for seasonal change with throws and cushion covers you can swap.

    1. Face the Seating Toward the View

    Sunroom seating facing large windows with a garden view and a small table between chairs.

    Set the sofa or main chairs so they face the largest window or the best garden view, with a small table between them for cups and books. This layout uses the reason the room exists, and it keeps conversation natural when two people sit facing each other across the table.

    Leave a clear path to each door, and keep tall furniture clear of the main window wall, so the view stays open from the seats. If the room is long, place seating at the garden end and a smaller table or reading chair at the house end, so each zone has its own use.

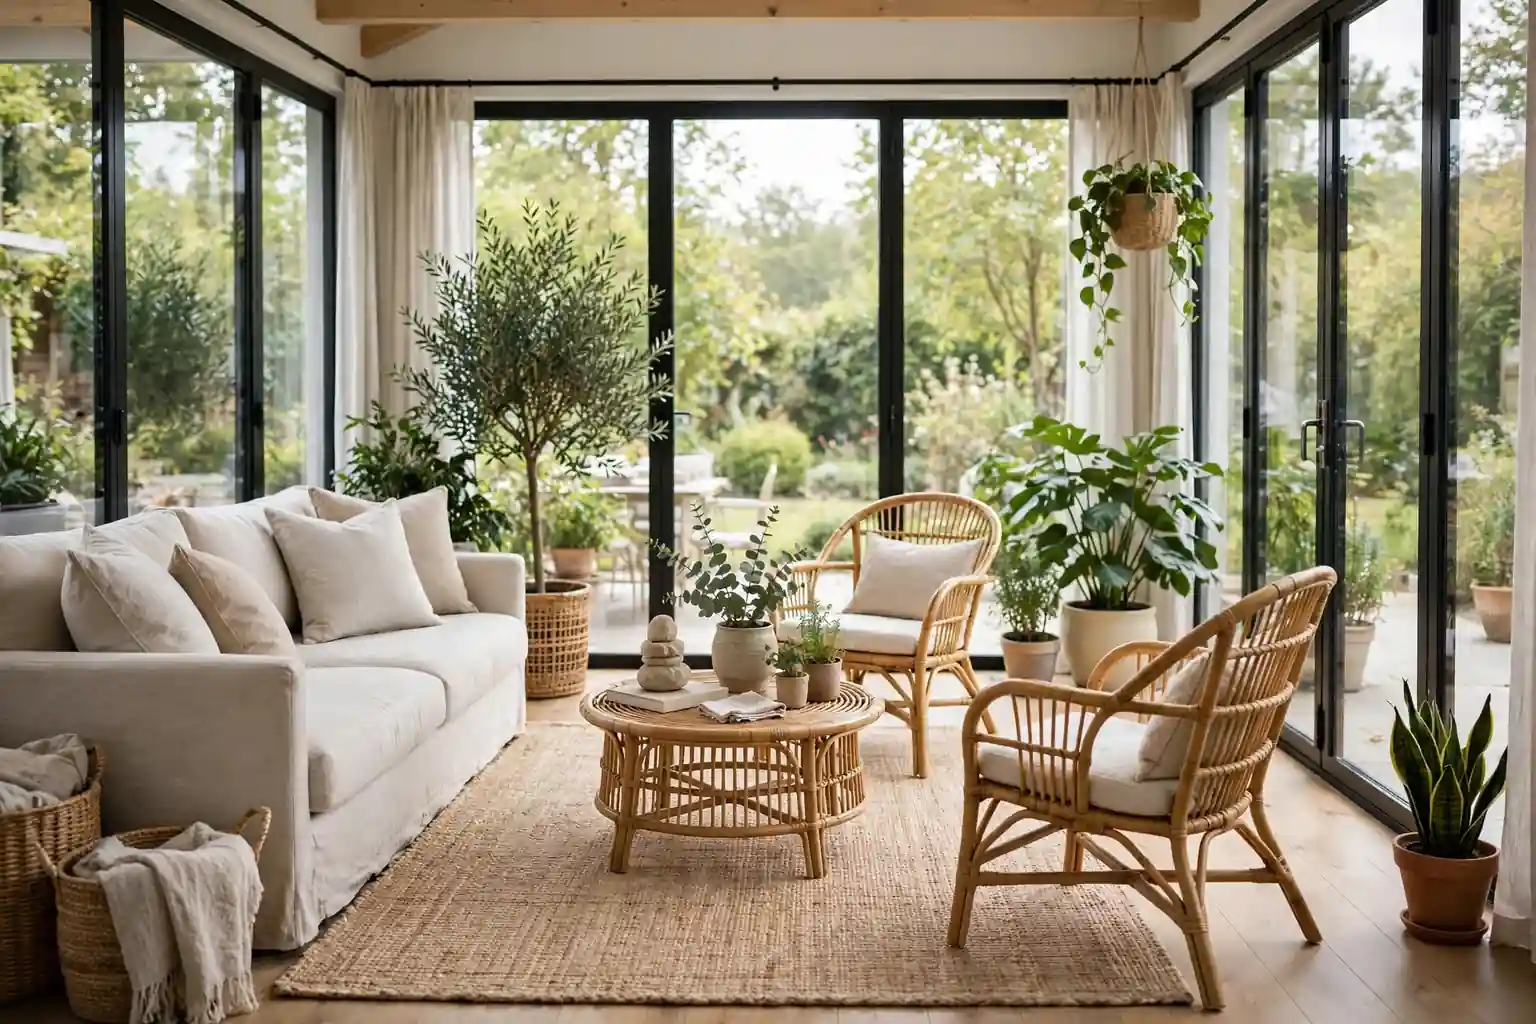
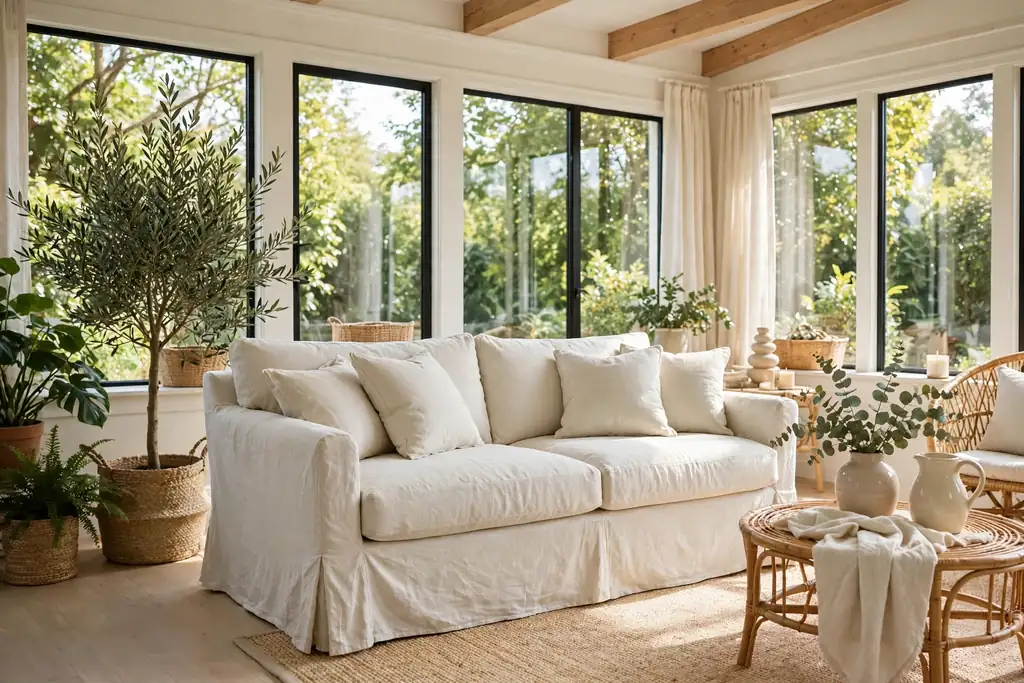
    2. Slipcovered Sofa in Light Linen

    Light cream linen slipcovered sofa in a bright sunroom with pale cushions.

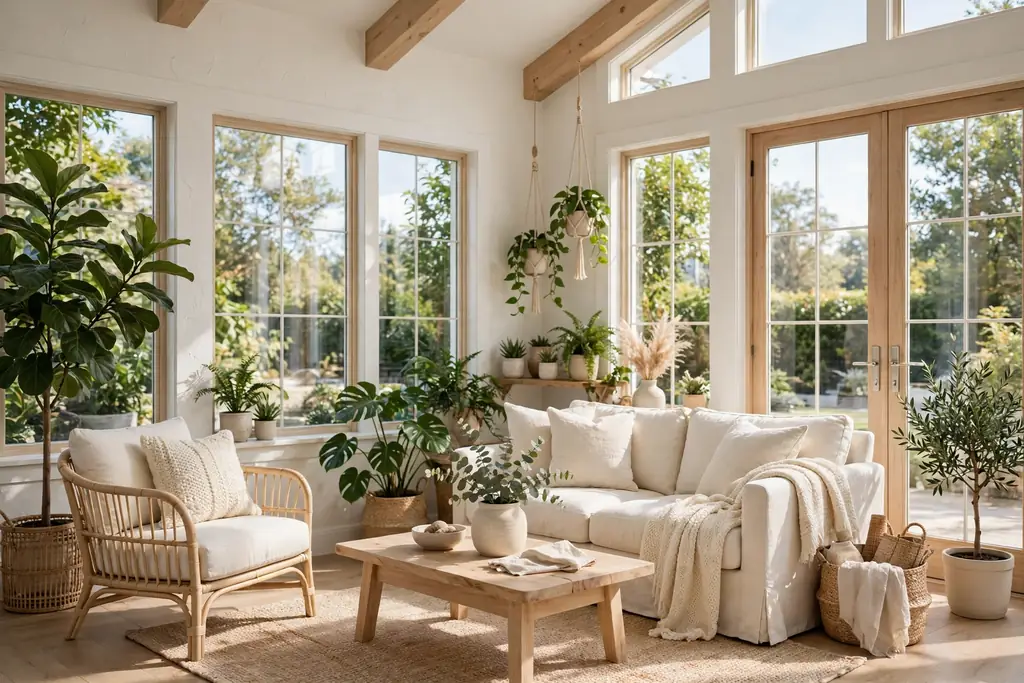
    Choose a slipcovered sofa in white, cream, or pale grey linen, so the main seat stays light in a bright room and the cover can be washed. The relaxed linen look suits a sunroom, and a spare cover lets you keep the sofa fresh through summer dust and garden use.

    Pair the sofa with wood or rattan legs showing below the skirt, so the soft seat has a solid base. Keep cushion covers in the same light family, and add one accent color through pillows only, so the sofa does not compete with the view outside.

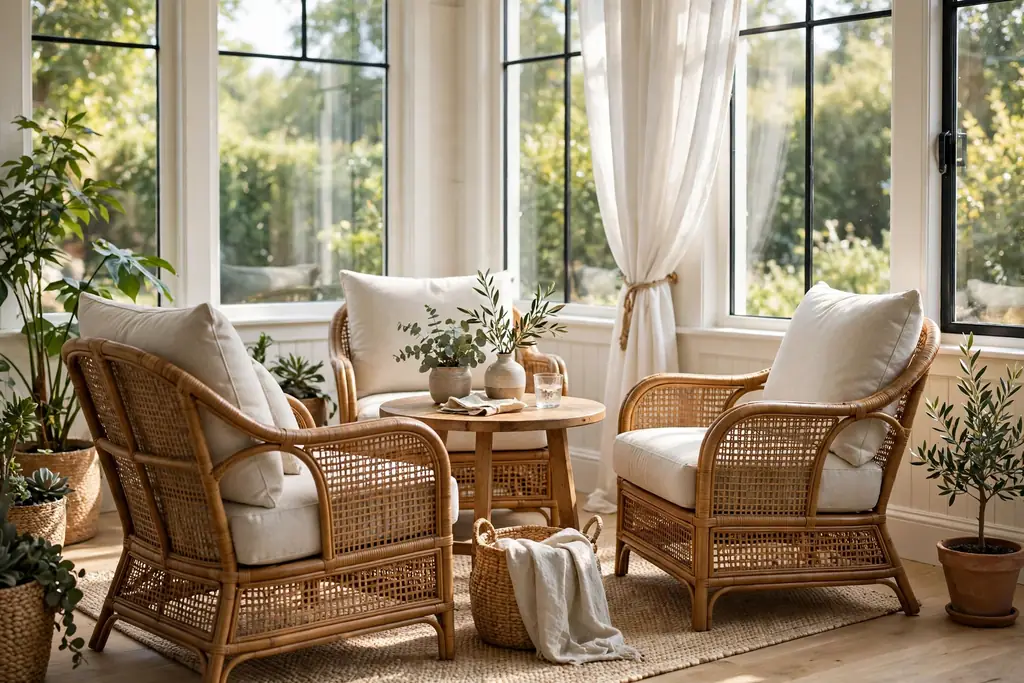
    3. Rattan Armchairs for Casual Seating

    Rattan armchairs with thick pale cushions angled around a small table in a sunroom.

    Add one or two rattan armchairs with thick seat cushions, placed at an angle to the sofa so the group feels open rather than boxed in. Rattan is light to move, which helps when you want to shift a chair into sun or shade, and its woven texture suits a glass room.

    Choose cushions with removable, washable covers in a pale neutral, and add a small side table beside each chair for a drink. Check that chair legs sit level on the floor, and use small felt pads under the feet so rattan does not mark wood or tile.

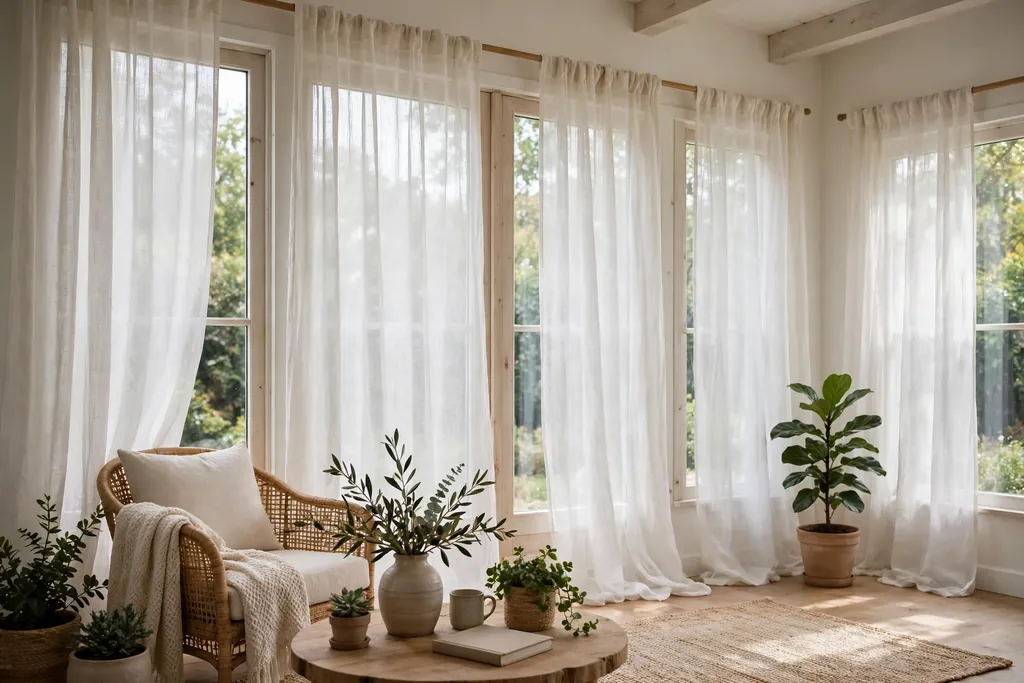
    4. Sheer Linen Curtains for Soft Light

    Sheer white linen curtains on tall sunroom windows filtering soft daylight.

    Hang sheer linen curtains on a rod close to the ceiling and wider than each window, so the panels can stack clear of the glass when you want full light. Sheers soften glare without blocking the view, and they give the room a finished edge in the evening.

    Use curtain rings with clips for a relaxed gathered look, and let the panels fall to the floor with a small break rather than pooling, so they stay clean. Wash sheers on a gentle cycle and hang them damp to reduce creases, and keep the color close to the wall color for a calm frame.

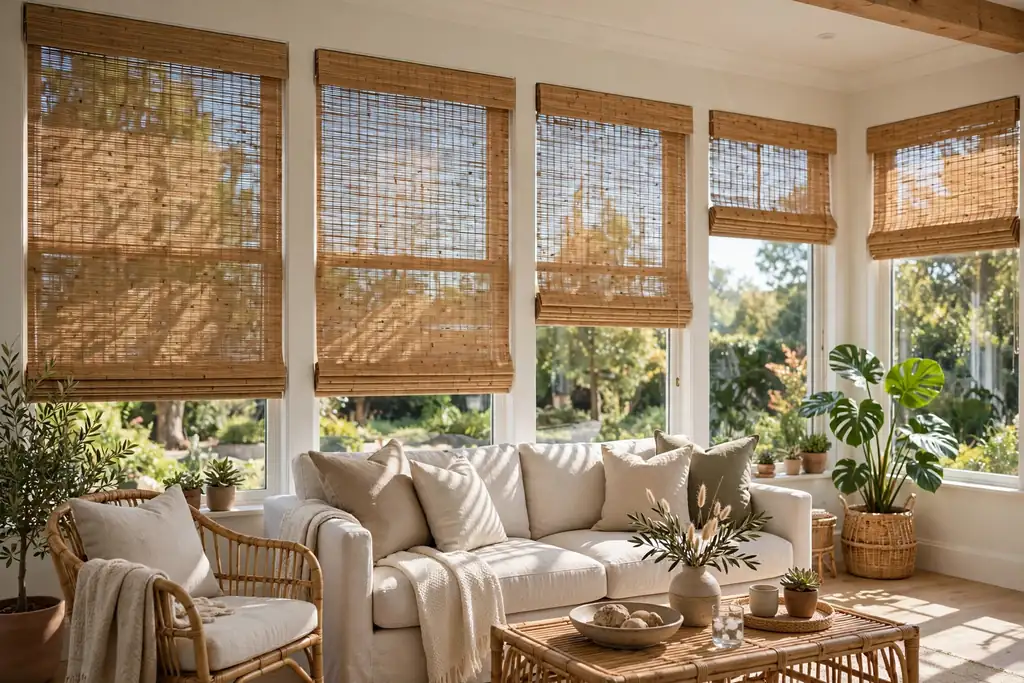
    5. Bamboo Shades for Midday Shade

    Bamboo woven shades lowered halfway over sunroom windows at midday.

    Add bamboo or woven wood shades inside the window frames, so you can lower them at midday when the sun is strongest and raise them fully in the morning and late afternoon. The natural woven texture adds warmth beside linen and rattan, and the shades roll up small when not needed.

    Measure each window before ordering, since sunroom windows often vary in width, and choose a cordless or looped control that keeps cords clear of children and pets. Dust the shades with a dry cloth, and lower them on the sunniest side first, rather than closing the whole room.

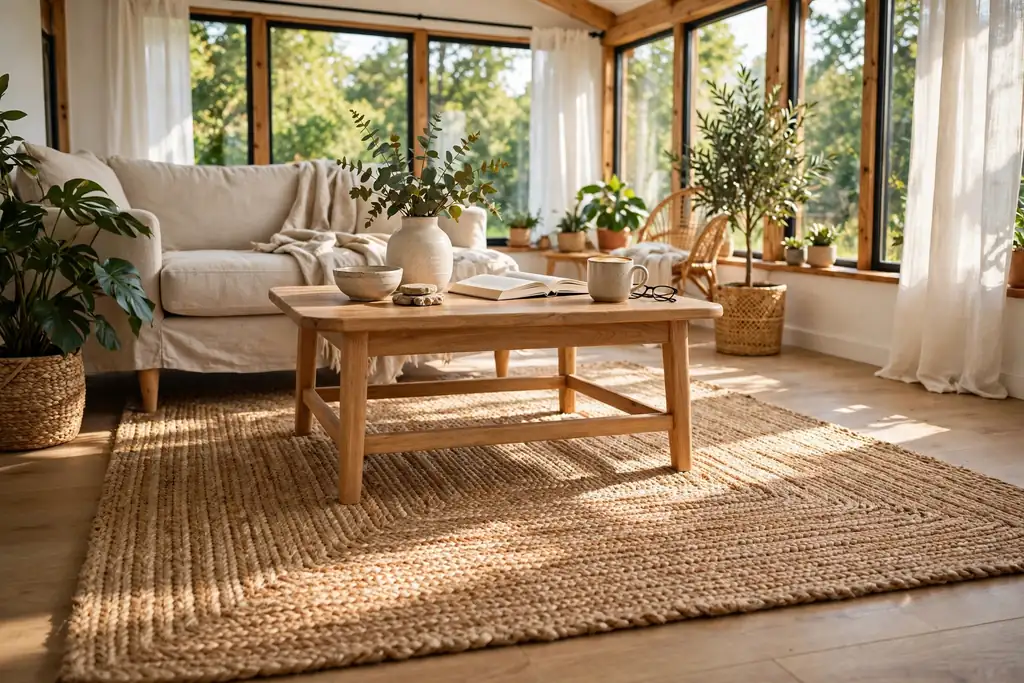
    6. Natural Fiber Rug to Ground the Seating

    Natural jute rug under a coffee table and sofa legs in a bright sunroom.

    Lay a natural fiber rug, such as jute or sisal, under the coffee table and front legs of the seating, so the group reads as one zone on a hard floor. The woven texture adds warmth underfoot, and a neutral rug lets cushions and plants carry the color.

    Choose a rug pad under the rug so it does not slide on tile or wood, and vacuum both sides of the rug edge weekly, since sunroom floors gather dust and pollen. In a small sunroom, one rug in the seating zone is enough, since a second rug can crowd the floor.

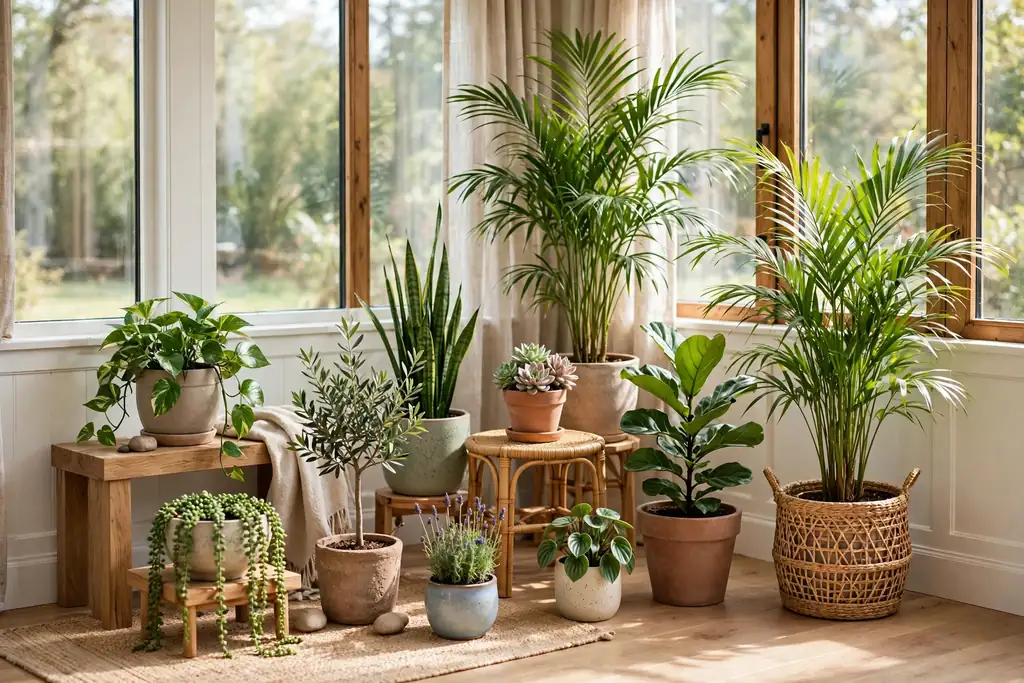
    7. Grouped Potted Plants for Bright Light

    Group of potted plants in varied heights on the floor and low stands in a sunroom.

    Group potted plants in threes on the floor and on low stands, mixing one tall plant, one medium plant, and one trailing plant, so the group has height and shape. Sunrooms suit plants that like bright light, but check each plant label for its light needs before placing it in direct sun.

    Set each pot on a saucer or tray, and water plants over the tray so spills do not mark the floor. Rotate pots a quarter turn each week so growth stays even, and move any plant that scorches or wilts to a spot with softer light for a few days.

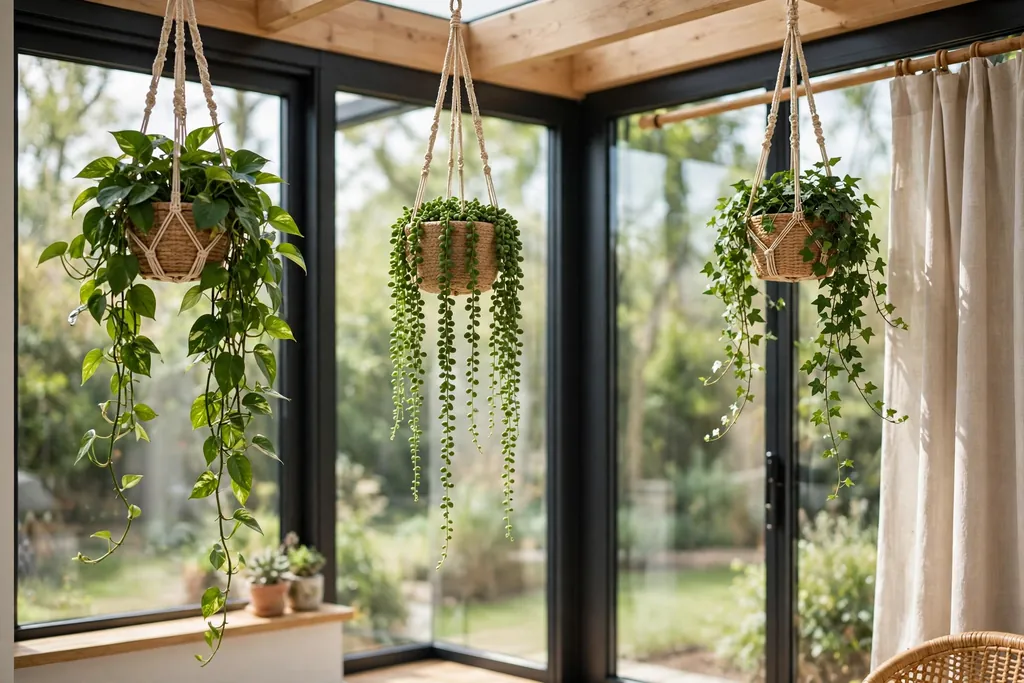
    8. Hanging Planters Near the Glass

    Hanging planters with trailing plants near sunroom glass, clear of the main view.

    Hang one or two planters from ceiling hooks near, but not against, the glass, using trailing plants that can hang down without blocking the view. Hanging planters use vertical space well in a small sunroom, and they keep floor space clear for seating.

    Use hooks rated for the weight of a watered pot, and hang planters where you can reach them easily for watering. Water over a tray or take the planter down to water it, so drips do not fall on seats or the floor below.

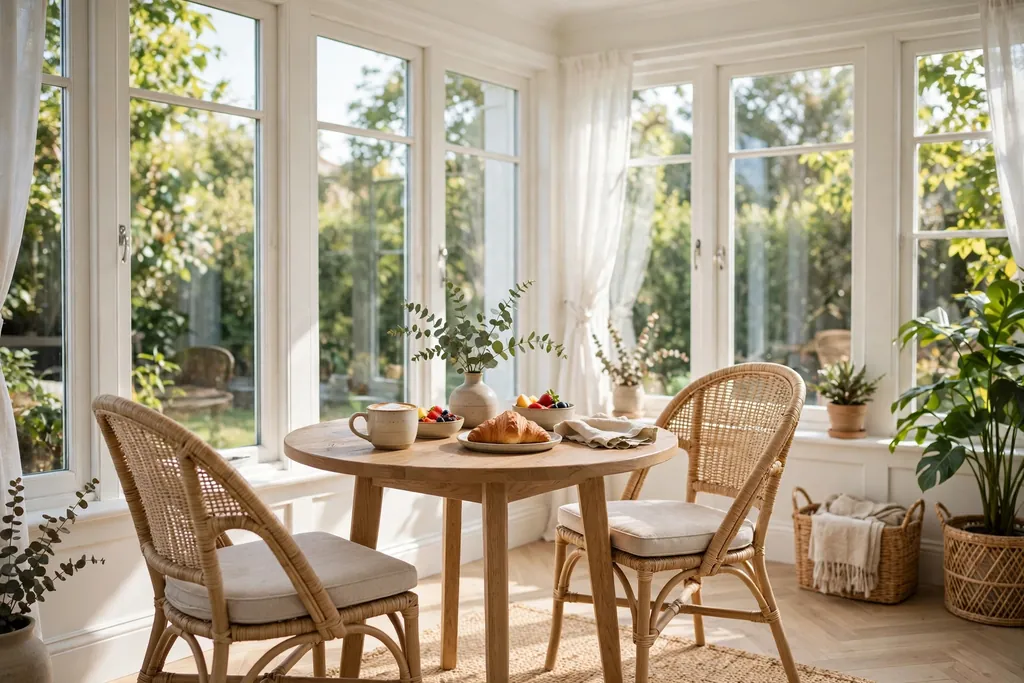
    9. Small Breakfast Table by the Windows

    Small round breakfast table with two chairs by bright sunroom windows.

    Set a small round table with two chairs by the brightest window, so the sunroom works as a breakfast spot as well as a sitting room. A round table fits a corner or a window bay better than a square table, and two chairs leave room to move around it.

    Use a wipe clean top or a washable cloth, since breakfast tables see daily use and spills. Keep the centerpiece low, such as a small vase or a single candle in a holder, so the table stays usable and the view stays clear across it.

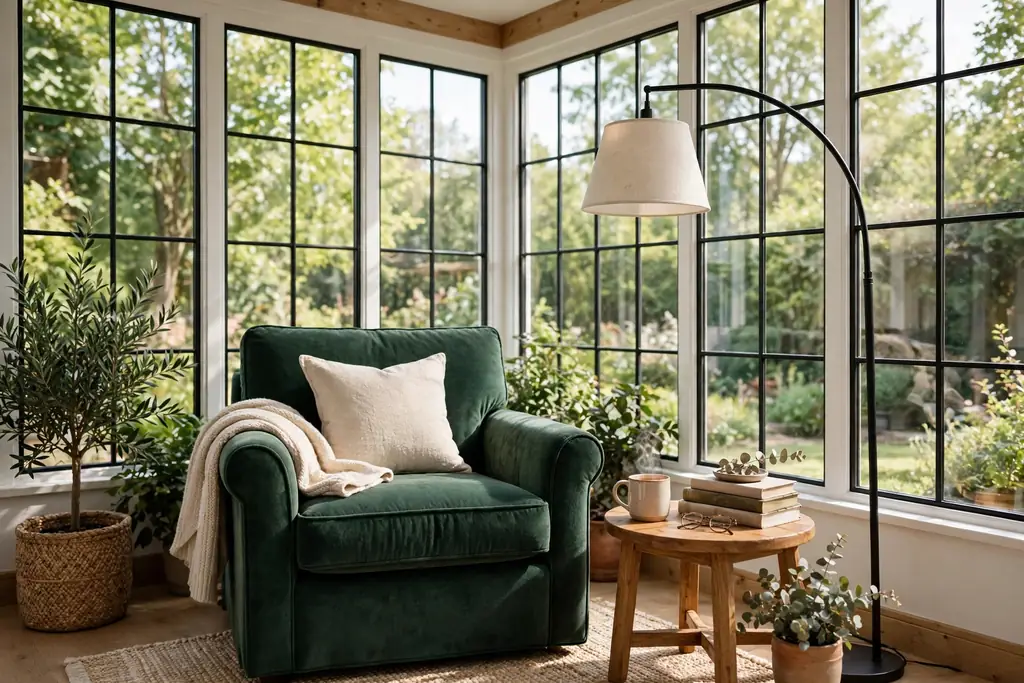
    10. Reading Nook with an Armchair and Lamp

    Reading nook with a deep armchair, side table, and floor lamp in a sunroom corner.

    Place one deep armchair in a corner with a small side table and a floor lamp at chair height, so the sunroom has a defined place to read that is not the main sofa. Add a cushion for back support and a throw folded over the chair arm, ready for cooler evenings.

    Keep the chair clear so it stays an invitation rather than a pile for clothes or bags. In a tight room, a floor cushion beside a low shelf works instead, with the same small lamp beside it, and the same calm palette as the rest of the room.

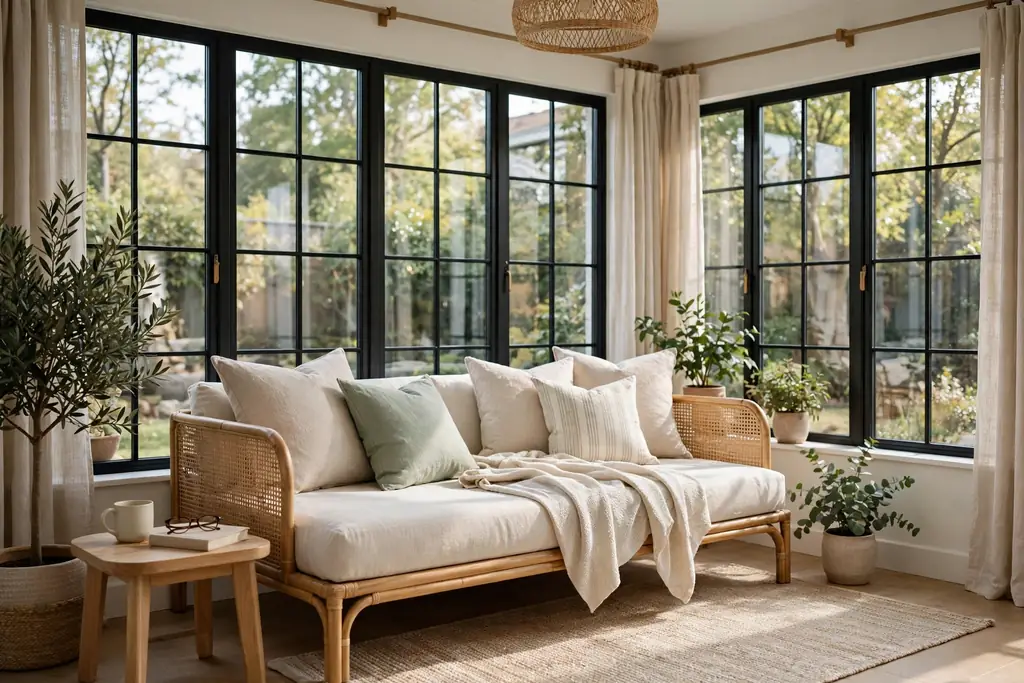
    11. Daybed or Chaise for Afternoon Lounging

    Daybed with a light throw and washable pillows along a sunroom window wall.

    Add a daybed or a chaise lounge along one window wall, dressed with a firm mattress pad, a flat sheet, and two or three pillows in washable covers. A daybed gives the sunroom a place to nap or stretch out, and it can serve as extra seating when guests visit.

    Keep a light throw folded at one end, and place a small table or stool at the side for a book and a drink. If the daybed sits in direct sun, use a shade or sheer panel above it at midday, so the seat stays comfortable and fabric fades more slowly.

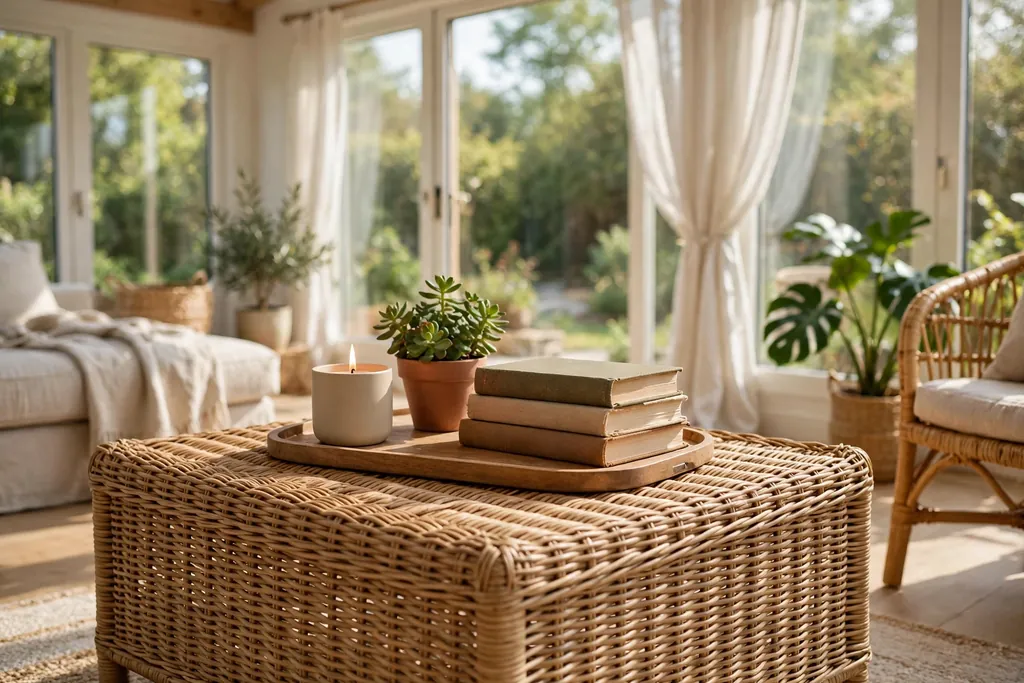
    12. Wicker Coffee Table with a Tray

    Wicker coffee table with a tray holding a candle, small plant, and books in a sunroom.

    Use a low wicker or rattan coffee table in the center of the seating group, with a wood or metal tray on top to group a candle, a small plant, and a stack of books. The tray keeps small items contained, and the whole tray lifts off in one move when you need the table clear.

    Leave clear space on the table for cups, since a coffee table must work as well as look good. Wipe the wicker with a dry cloth for dust and a damp cloth for spills, and keep the tray small enough that cups still fit beside it.

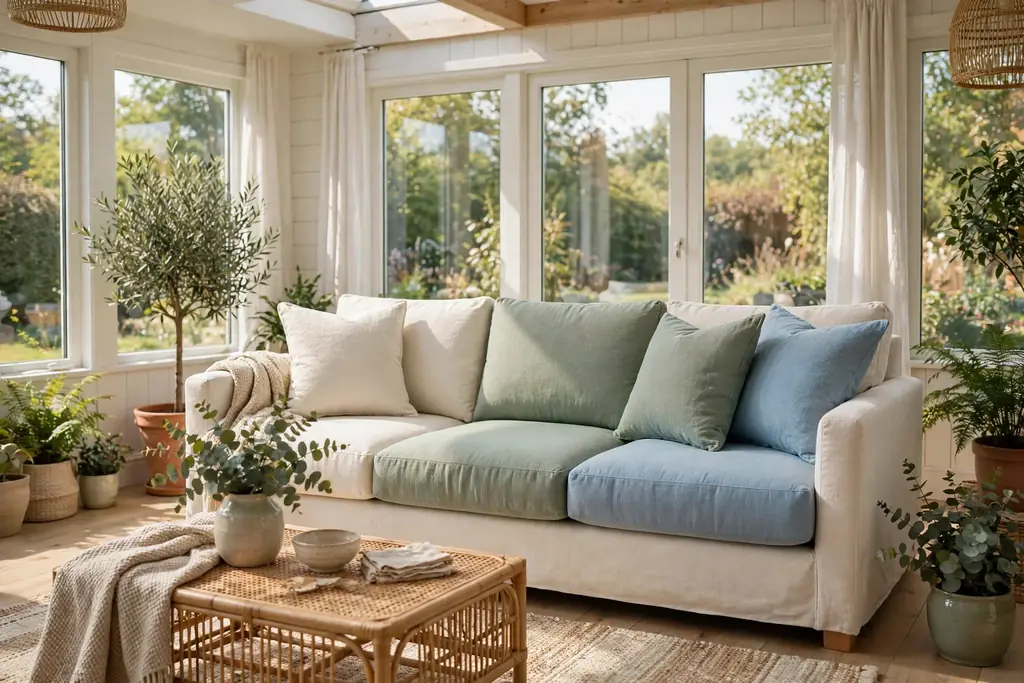
    13. Washable Cushion Covers in One Palette

    Sofa with washable cushion covers in cream, sage, and soft blue in a sunroom.

    Swap cushion covers to a small palette, such as cream, sage, and soft blue, using plain, knit, and one subtle pattern, and repeat one of those colors somewhere else in the room. Washable zip covers make seasonal and practical changes simple, since covers wash and store flat.

    Keep the number of cushions to what fits without a pile on the floor when someone sits down. If the sofa is already patterned, use plain covers in one color only, so the room stays calm and the view stays the main feature.

    14. Light Wall Palette of White and Cream

    Sunroom with white and cream walls, light furniture, and green plants in daylight.

    Paint the solid walls white, cream, or a very pale warm grey, so the room reflects daylight and the window frames, plants, and furniture stand out. A light wall color also makes a small sunroom feel larger, since dark walls can close in a glass room.
    Test the paint beside your floor and cushion colors in daylight and evening light, since white shifts a lot under warm bulbs. Keep trim in the same light family, and let one accent color come through textiles and plants rather than a bold wall.

    15. Coastal Blue and White Accents

    Sunroom with blue and white accents, a striped pillow, and a blue ceramic vase.

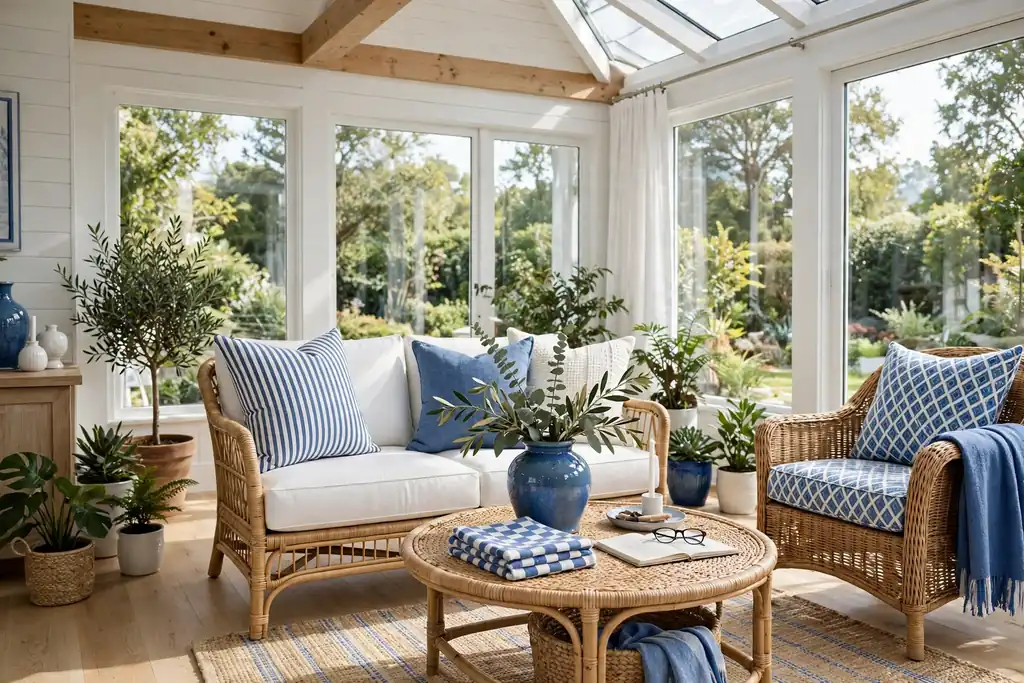
    Add coastal blue and white accents through two or three pieces only, such as a striped pillow, a blue ceramic vase, and a white throw, so the room gains a fresh seaside note without a full theme. Blue suits sunrooms because it links to sky and garden tones outside.

    Keep the blue to one shade family, such as soft navy or pale sky blue, and repeat it in at least two places so it looks planned. If the room already has a strong accent color, use blue sparingly, in one or two spots only, so the palette does not split.

    16. Botanical Prints on the Solid Wall

    Framed botanical prints hung in a row on a solid sunroom wall above a bench.

    Hang two or three framed botanical prints on the one solid wall, at eye level from the seats, using the same frame color and similar print sizes for a calm group. Botanical prints suit a sunroom because they link the indoor plants to the garden outside.

    Hang prints with fixings rated for their weight, and keep glass frames secure, since sunroom walls can get warm in direct sun. Avoid hanging prints on glass or in direct sun if the print will fade, and choose one wall for art so the window walls stay clear.

    17. Lanterns and Low Lamps for Evenings

    Sunroom in the evening with lanterns and low lamps giving warm light beside seating.

    Set lanterns with battery candles on the coffee table and side tables, and add table lamps with linen shades at seating height, so the sunroom works after dark without harsh overhead light. Low, warm light makes cream, wood, and plant tones look richer in the evening.

    Use battery candles inside lanterns near fabric or dried stems, and keep real flames in holders, clear of curtains and throws, and never left burning unattended. Put lamps at both ends of the seating area so no one sits in shadow, and keep switches within reach of the sofa.

    18. Ceiling Fan for Air Movement

    Sunroom ceiling fan with light wood blades centered over a seating group.

    Fit a ceiling fan with light wood blades and a simple light kit, centered over the seating group, so warm air moves on still summer days and the room stays usable without closing the windows. A fan also helps on mild days when you want air movement but no draft from an open door.

    Choose a fan size suited to the room, and set the blades high enough to clear heads and tall plants. Dust the blades often, since sunroom dust shows on light blades, and use the fan on a low setting first, so papers and light throws do not blow around.

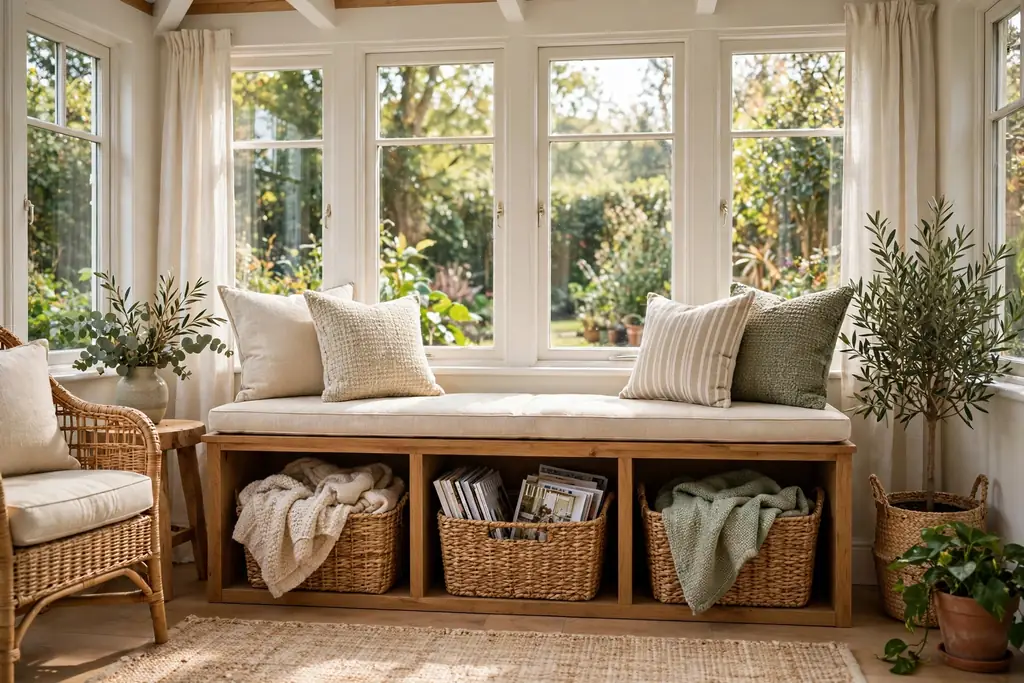
    19. Baskets and a Storage Bench for Clutter

    Storage bench with woven baskets holding throws and magazines in a sunroom.

    Place a storage bench under a window or against the solid wall, with woven baskets inside or beneath it for throws, magazines, and garden tools. Baskets keep daily clutter out of sight while the bench top stays clear for a plant, a tray, or extra seating.

    Label baskets only if the household needs it, and keep one basket empty for quick tidy ups before guests arrive. Shake baskets outside monthly, since woven fibers gather dust, and replace a basket when the weave starts to fray at the rim.

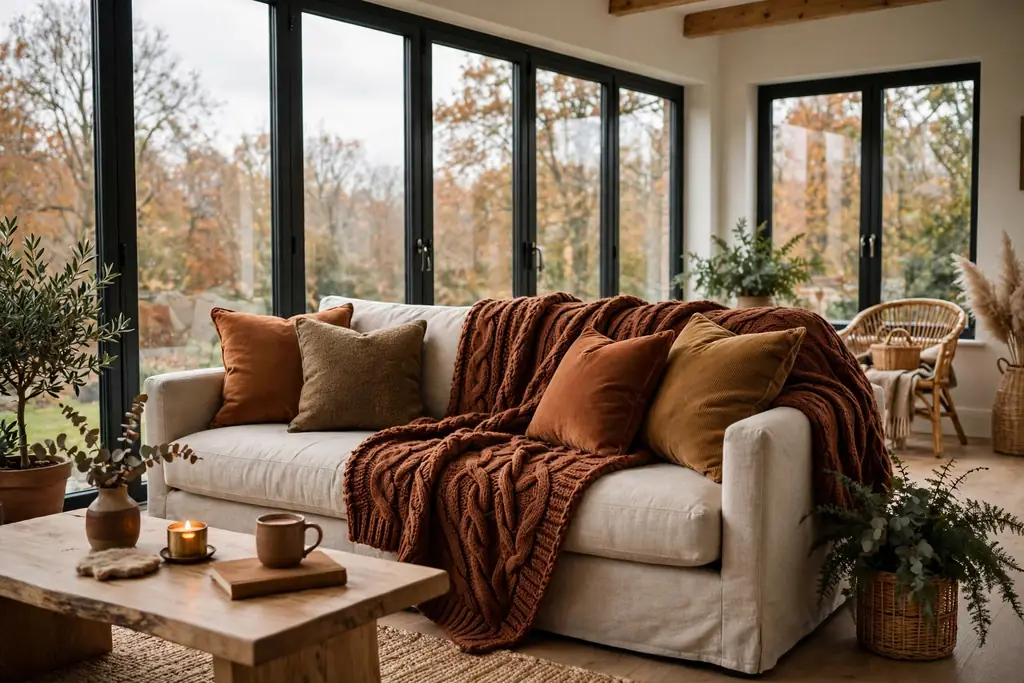
    20. Seasonal Cushion and Throw Swap

    Sunroom sofa with a heavier knit throw and warmer cushion covers for cooler months.

    Plan a simple seasonal swap: light cotton throws and pale cushion covers for summer, and heavier knit throws and warmer covers for cooler months, stored in one labeled basket or bag. The same approach works in a fall living room, with warmer colors and thicker fabrics for the cooler season.

    Swap one layer at a time, starting with throws, then cushion covers, so the room changes without a full restyle. Wash the outgoing covers before storing them, and store them dry and flat, so the next swap takes minutes rather than a wash day.

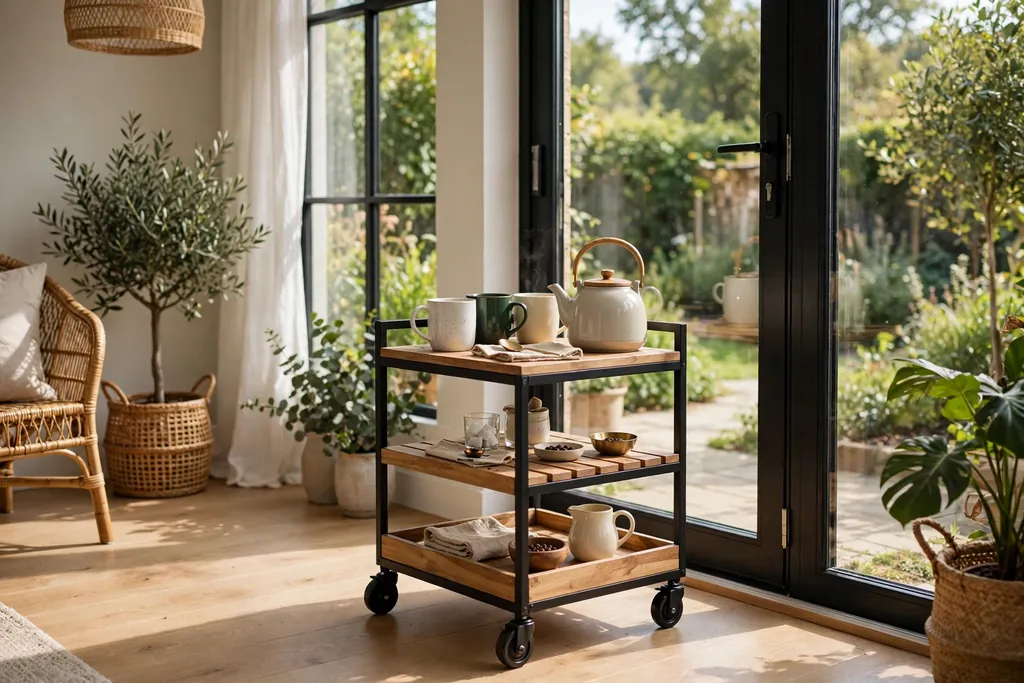
    21. Small Coffee Cart by the Door

    Small rolling coffee cart with mugs and a teapot near a sunroom door.

    Set a small rolling cart near the sunroom door with mugs, a small teapot or coffee pot, and a jar for spoons, so drinks stay in the sunroom and trips to the kitchen drop. A cart works well in a sunroom used for morning coffee or afternoon tea.

    Keep the cart stable and clear of the main walkway, and put heavier items on the bottom shelf. Wipe the cart after use, and move it aside when the room needs extra floor space for guests, since a cart on wheels is easy to shift.

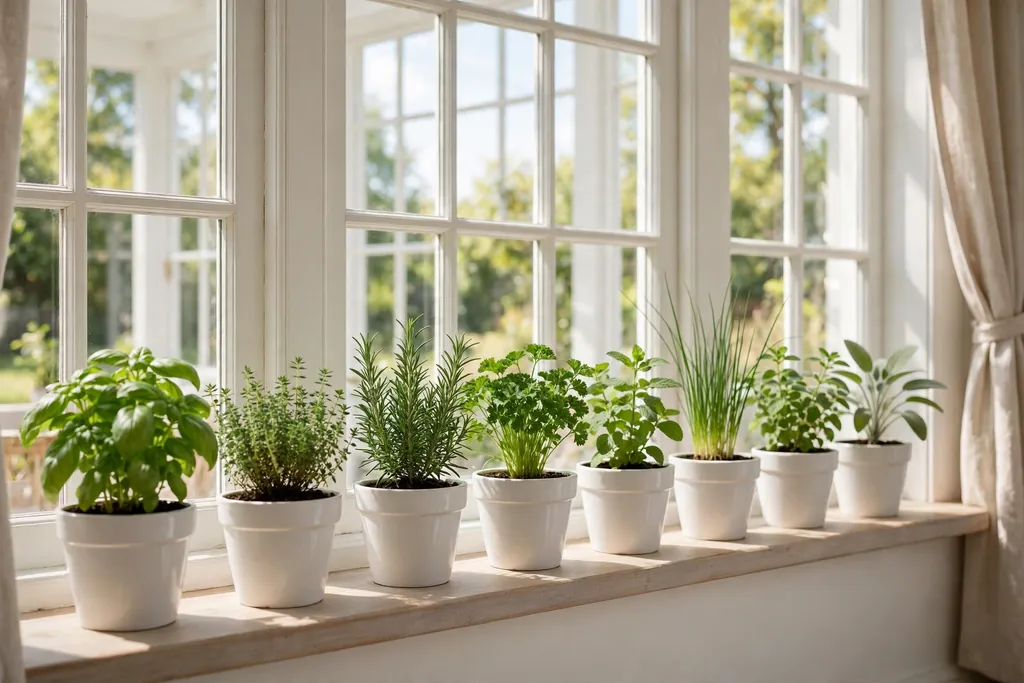
    22. Windowsill Herbs in Matching Pots

    Small herb pots in matching white pots lined along a sunny sunroom windowsill.

    Line the sunniest windowsill with small herb pots in matching terracotta or white pots, such as basil, mint, and parsley, so the sill works as a small kitchen garden. Herbs suit a sunroom sill because they get bright light and stay within reach for cooking.

    Water herbs lightly and set each pot on a small saucer, so damp soil does not mark the sill. Trim herbs often for cooking, which also keeps them bushy, and move any herb that wilts in strong midday sun to a slightly shaded spot on the same sill.

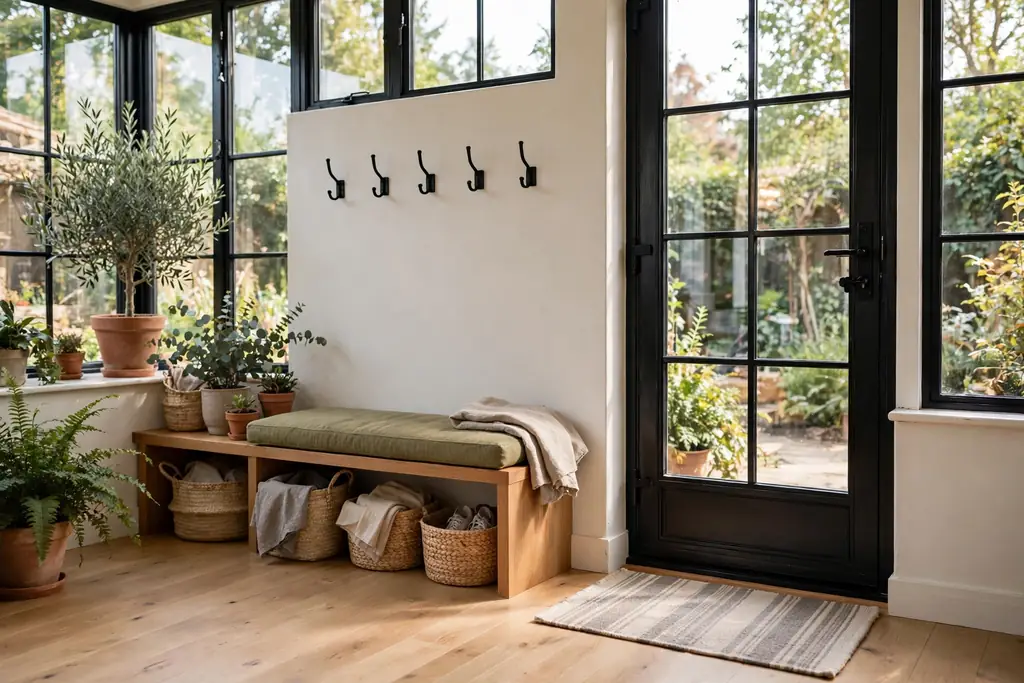
    23. Entry Bench with Hooks and a Mat

    Low entry bench with wall hooks and a washable mat just inside a sunroom door.

    Place a low bench just inside the sunroom door, with wall hooks above it for hats and light jackets, and a washable mat under it for shoes. This entry zone keeps garden shoes and outdoor gear from spreading into the seating area, and it gives guests a clear place to settle.

    Keep the bench top mostly clear, with one small tray for keys or sunglasses, so it stays usable as a seat. Shake the mat outside weekly, and wipe the bench after wet days, since sunroom entries see mud and pollen from the garden.

    Conclusion

    A bright sunroom works best when layout, light, and fabric choices come first. Face seating toward the view, layer sheers with shades you can adjust, choose washable fabrics, and group plants by their light needs. Then add one rug, one calm palette, and low evening light, and swap throws and cushion covers as the seasons change. Start with the one idea that fixes your biggest daily problem, whether that is glare, seating, or storage, and add the next idea only when the first one feels settled.

    FAQs

    How do you decorate a sunroom on a small budget?

    Start with textiles, plants, and shade, since cushion covers, a rug, sheers, and grouped pots change a sunroom for less than new furniture. Use pieces you already own first, such as a side table, a lamp, and baskets, then add one larger piece, like a rug or a chair, only when you know the layout works.

    What furniture works best in a sunroom?

    Light, movable furniture works best, such as a slipcovered sofa, rattan chairs, a wicker coffee table, and a small side table for each seat. Choose washable cushion covers and fade resistant fabric where possible, and keep pieces low enough that they do not block windows or the view.

    How do you keep a sunroom from getting too hot?

    Use shade in layers, with sheer curtains for soft light and bamboo shades or blinds you can lower at midday, and open windows or run a ceiling fan for air movement. Keep dark fabrics and heavy rugs to a minimum in the sunniest spots, since they hold heat, and move heat sensitive plants out of direct midday sun.

    What plants are good for a sunroom?

    Plants that suit bright light work well, but the right plant depends on how much direct sun your room gets and how often you water. Check each plant label for light and water needs, group plants with similar needs together, and start with a few pots so you can learn what thrives before filling every sill and corner.

    How do you make a small sunroom feel larger?

    Keep walls light, leave some glass clear, and use one rug, one palette, and low furniture that does not block windows. Choose a round table, hanging planters, and a storage bench that serves two uses, and avoid filling every wall and corner, since open floor and clear glass make a small room feel larger.

    Can a sunroom be used all year?

    Yes, a sunroom can be used all year if it has shade for summer, a heat source or warm throws for cooler months, and fabrics and plants suited to changing light. Add low evening light for dark winter afternoons, swap cushion covers and throws by season, and check windows and doors for drafts before the coldest months.


  • 17 Ways to Style White Patio Furniture for a Relaxed Outdoor Space

    17 Ways to Style White Patio Furniture for a Relaxed Outdoor Space

    White patio furniture suits a relaxed outdoor space when you pair its clean finish with soft cushions, natural textures, and simple layout choices. Choose weather-ready pieces, add shade and warm light, and keep the palette calm with wood, woven fibers, and greenery. The 17 ideas below show how to arrange white chairs, sofas, and tables for everyday comfort.

    White works outdoors because it stays light in bright sun and pairs with almost any cushion color. The trick is to soften it: bare white plastic or metal can look stark on its own, while cushions, throws, rugs, and plants give it warmth. Use this guide one idea at a time, or combine a seating idea with a dining idea and an evening lighting idea to build a patio you actually use.

    Key Takeaways

    • Start with a calm base: white furniture, one wood or woven tone, and one or two cushion colors repeated across the space.
    • Add comfort first: thick outdoor cushions, a shade source, and a surface within reach for drinks and books.
    • Soften white with natural textures such as wood, rattan, linen-look fabric, terracotta, and leafy plants.
    • Leave clear paths around chairs and tables so the patio feels open, even when it is fully furnished.
    • Choose outdoor-rated fabrics and wipe white frames regularly, since dust and pollen show more on white.
    • Finish with warm light in the evening, such as lanterns or string lights, so the space stays inviting after sunset.

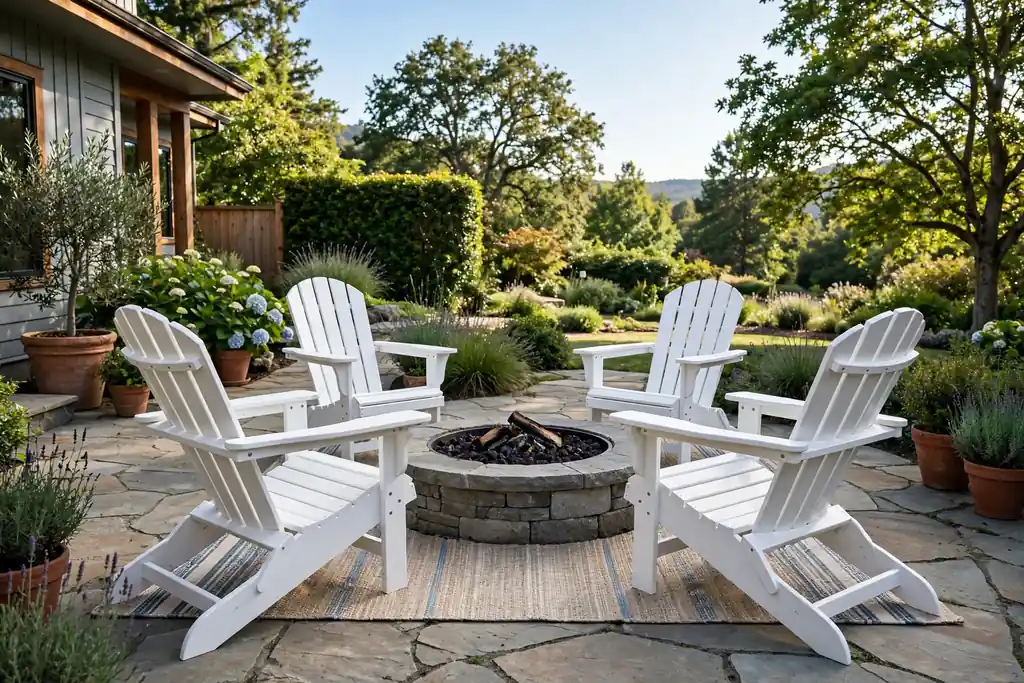
    1. White Adirondack Chairs Around a Fire Pit

    White Adirondack chairs arranged around a fire pit on a patio in daylight.

    White Adirondack chairs set the tone for a laid-back patio, especially arranged in a loose circle around a fire pit. Their wide arms hold a drink or a book, and their slanted backs invite long sits. Place them on a flat surface with enough room to pull each chair out, and leave a gap between chairs so conversation stays easy.

    Add a thin seat cushion in a solid neutral or a quiet stripe for comfort, and keep a small side table or two within reach. In the evening, the white frames catch firelight and look warm against dark garden planting. Wipe the chairs after rain, since dirt splashes show on white slats, and store cushions under cover when storms are forecast.

    2. White Wicker Lounge Set with Cream Cushions

    White wicker lounge set with cream cushions and a low coffee table on a patio.

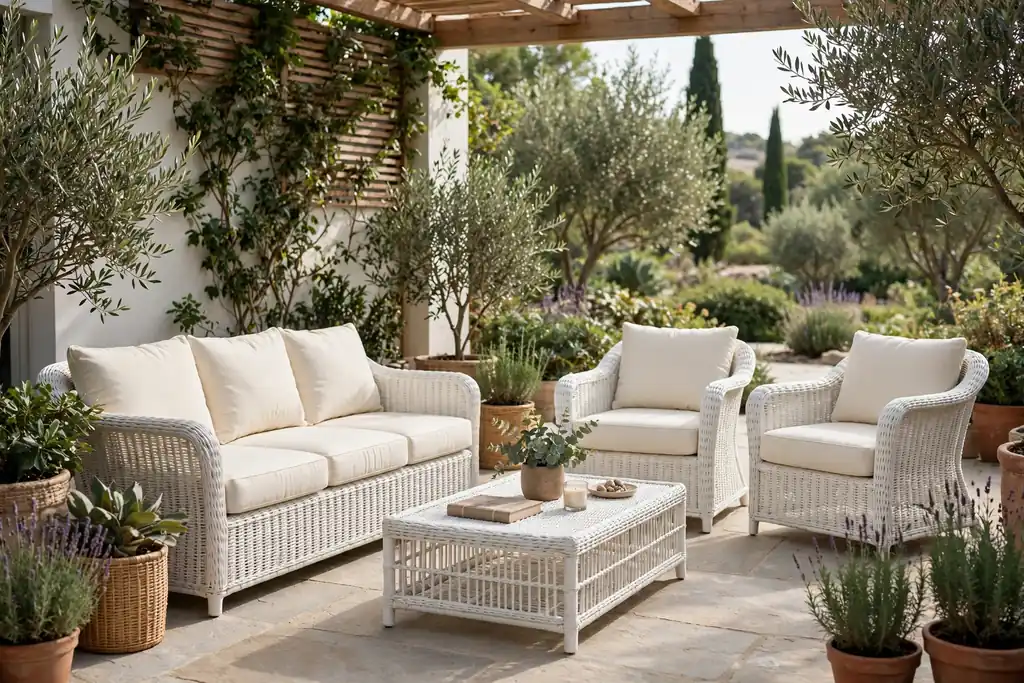
    A white wicker lounge set with cream cushions gives a patio a soft, resort-like feel without a bold color scheme. Wicker adds texture that stops white from looking flat, and cream cushions keep the whole arrangement calm. Place the sofa and chairs around a low coffee table so the group reads as one seating area rather than scattered pieces.

    Layer a light throw over one arm and add two or three cushions in slightly different tones, such as cream, sand, and pale sage. A woven rug under the set grounds the group and protects the patio surface. Brush wicker regularly to clear dust from the weave, and bring cushions inside during long wet spells to keep them fresh.

    3. White Metal Bistro Set for a Small Patio

    White metal bistro table and two chairs on a small patio beside a door.

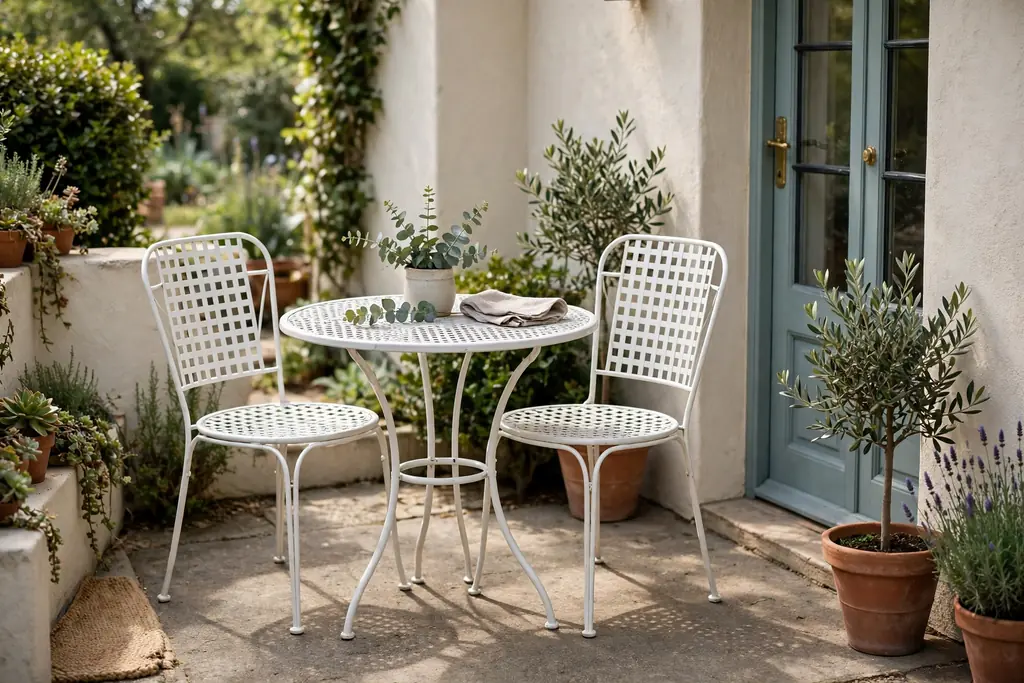
    A white metal bistro set is a practical choice for a small patio, a balcony, or a sunny corner by a door. One small round table and two chairs give you a spot for morning coffee or an evening drink without crowding the space. Foldable chairs are useful here, since they can be stored flat when the patio needs to clear for other uses.

    Add a single cushion on each chair in a washable outdoor fabric, and keep the table mostly clear except for a small potted herb or a candle. A light rug under the set can mark the seating zone on a plain concrete or stone patio. Wipe metal frames after rain to prevent water marks, and check folding joints now and then so they stay smooth.

    4. White Outdoor Sofa with Layered Neutral Throws

    White outdoor sofa layered with neutral throws and cushions against a garden fence.

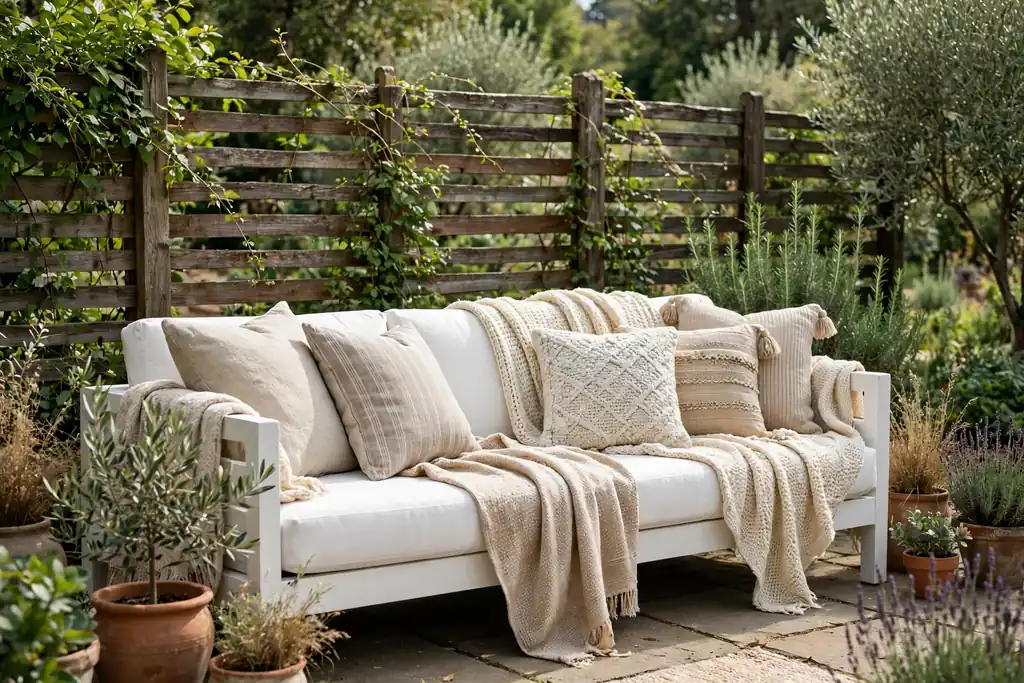
    A white outdoor sofa becomes the heart of a relaxed patio when it is layered with neutral throws and cushions. Start with the sofa against a wall, a fence, or a hedge for a sense of shelter, then add cushions in cream, beige, and soft grey. A throw draped over one corner adds softness and gives you something warm for cooler evenings.

    Keep the cushion mix simple: two larger cushions at the corners, two smaller ones in front, and one throw. Too many patterns can fight with the clean white frame, so let texture do the work instead. Choose outdoor fabrics that dry quickly, and shake out throws and cushions weekly to clear leaves and dust.

    5. White Dining Table with Woven Chairs

    White outdoor dining table with woven chairs and a simple greenery centerpiece.

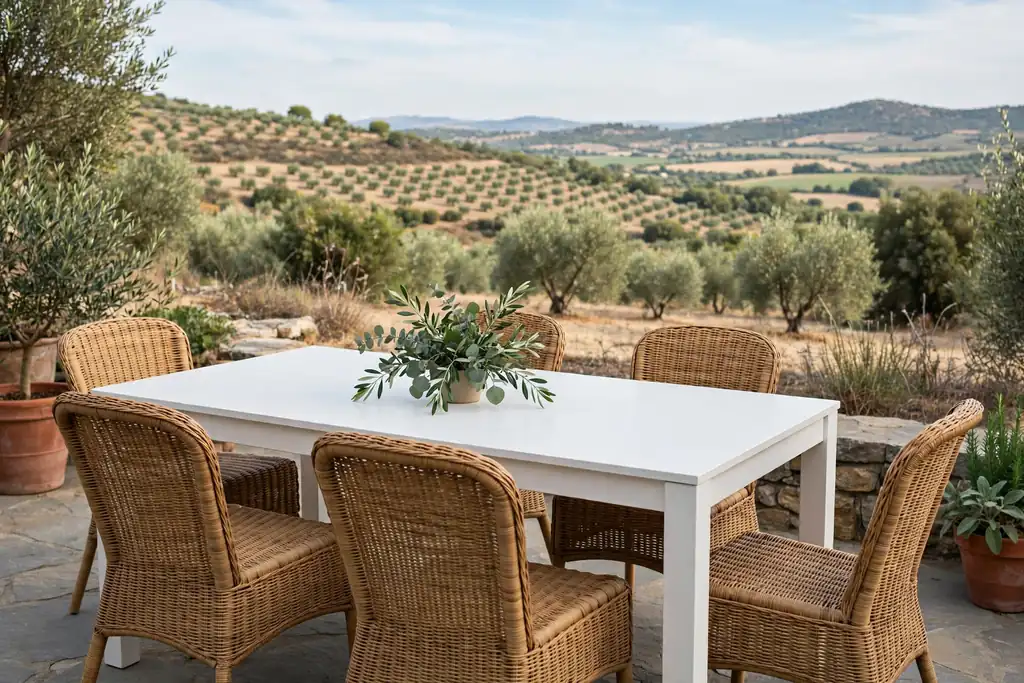
    Pairing a white dining table with woven chairs balances the clean tabletop with natural texture, and it suits long outdoor meals. The woven seats warm the look, while the white table keeps the setting light in strong sun. Set the table with plain placemats and simple glassware so the mix of materials stays the focus.

    Add a low centerpiece, such as a bowl of lemons, a small potted herb, or a plain vase with cut greenery, so guests can still see each other across the table. Leave enough room to pull chairs out fully, about a chair depth behind each seat. Wipe the table after meals, since food marks show quickly on white, and use placemats to protect the surface from hot dishes.

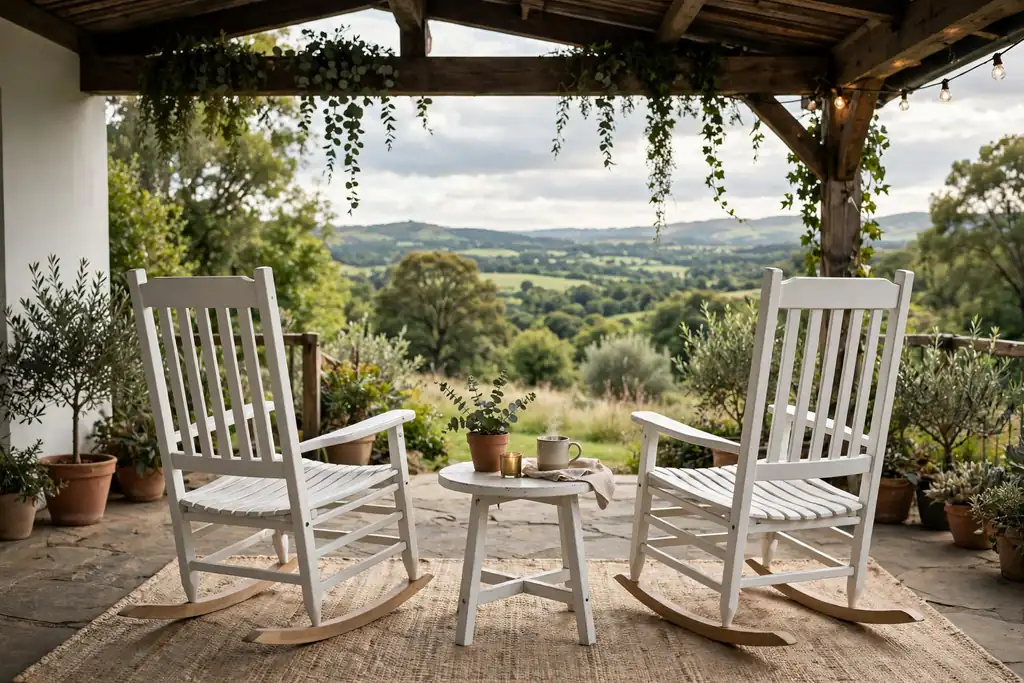
    6. White Rocking Chairs on a Covered Patio

    Two white rocking chairs with a small table between them on a covered patio.

    White rocking chairs suit a covered patio or a porch edge, where the roof gives shade and shelter from light rain. Their gentle motion makes them natural spots for reading, chatting, or watching the garden, and the white finish keeps a shaded space from feeling dark. Place them side by side with a small table between them for drinks.

    Add a thin cushion on the seat and a folded throw over the back for cooler mornings. A rug under the rockers protects the floor and keeps the chairs from sliding on smooth surfaces. Check that the rockers have room to move without hitting a wall or a rail, and wipe the spindles now and then, since dust settles in the joints.

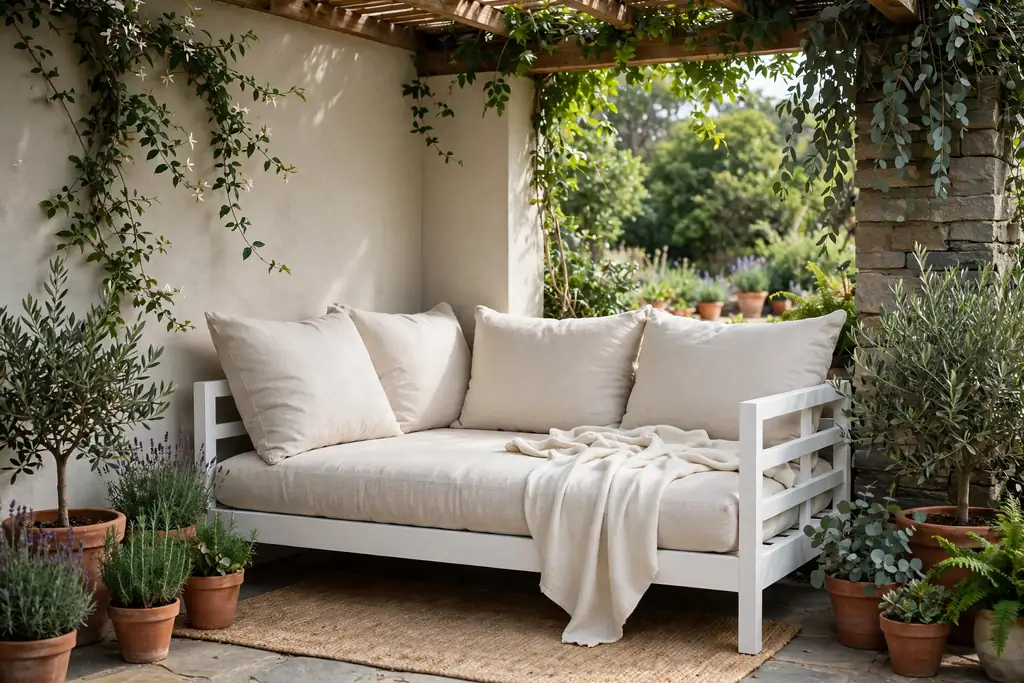
    7. White Daybed for Slow Afternoon Lounging

    White outdoor daybed with large cushions and a light throw in a shaded patio corner.

    A white outdoor daybed gives a patio a true lounging spot, somewhere between a sofa and a bed. It suits a quiet corner with shade, where you can read, nap, or sit with a drink in the afternoon. Dress it with a fitted outdoor mattress pad, two or three large cushions along the back, and a light throw for cooler air.

    Keep the palette calm with white, cream, and one soft accent, such as pale blue or sage, so the daybed feels restful rather than busy. A small side table beside it holds a book and a glass of water. Cover the daybed when rain is expected, and wash the pad cover regularly, since a daybed gets more body contact than a standard chair.

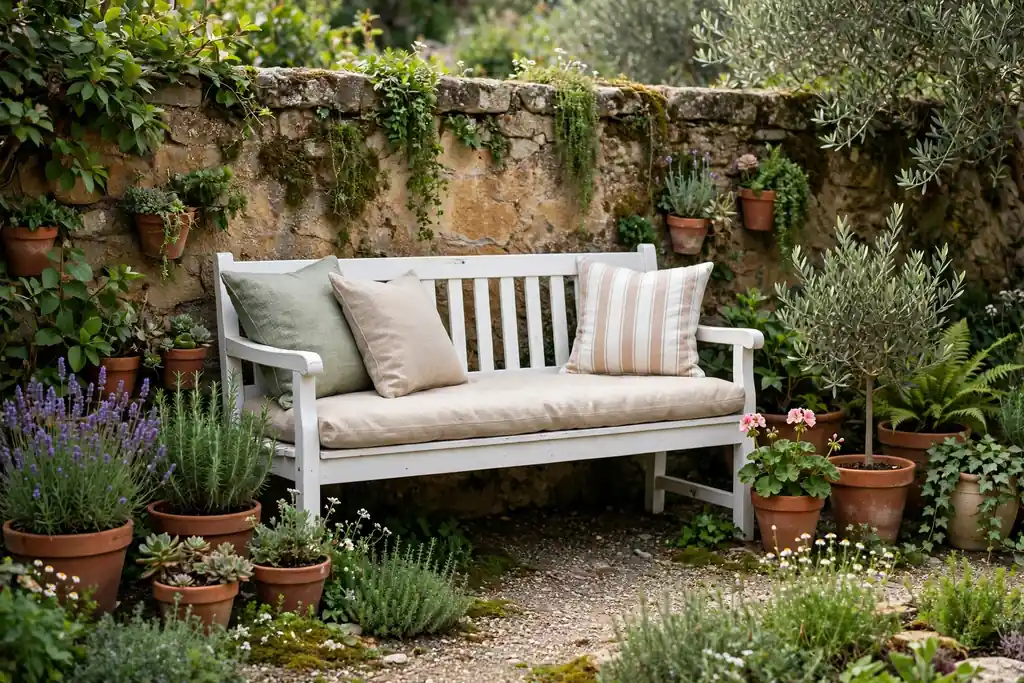
    8. White Bench Seating Along a Garden Wall

    White bench with outdoor cushions along a garden wall with potted plants.

    A white bench along a garden wall turns an unused edge of a patio into useful seating, and it leaves the center of the space open. Benches seat more people than single chairs in the same length, which helps when friends visit. Place the bench against a wall or a hedge, and add a couple of outdoor cushions along its length for comfort.

    Style it with a small side table at one end and a potted plant at the other, so the bench feels like part of the garden rather than an afterthought. If the bench is backless, the wall behind it gives support for cushions. Wipe the seat after rain and clear leaves from under the bench, since damp debris can stain white paint over time.

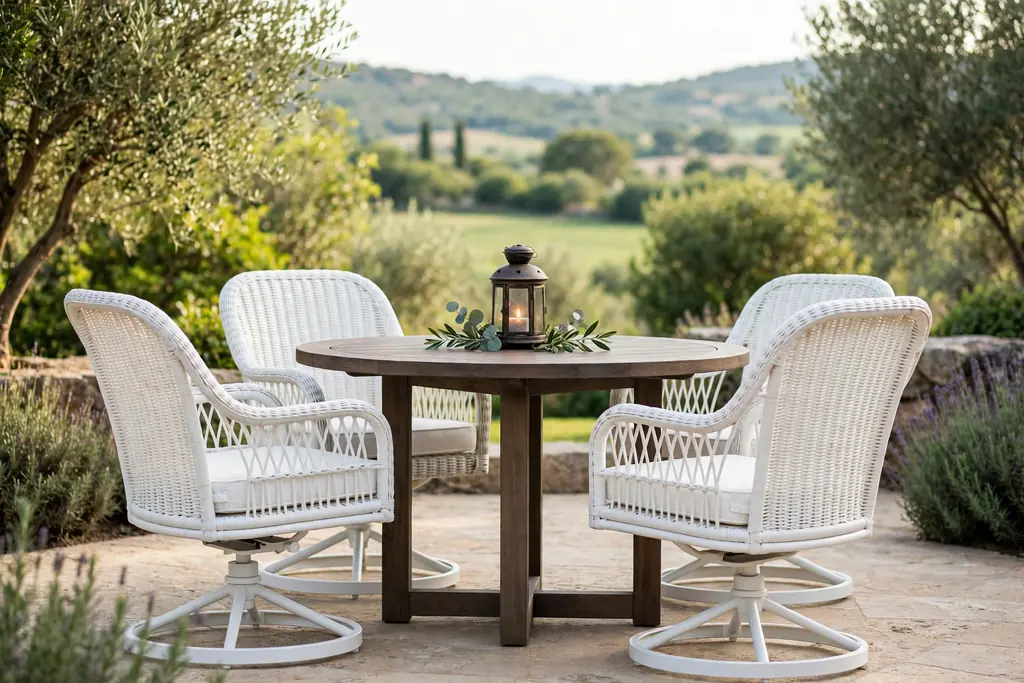
    9. White Swivel Chairs Around a Round Table

    White swivel chairs around a round patio table with a small lantern centerpiece.

    White swivel chairs around a round table make a sociable patio corner, since everyone can turn to join a conversation or face the garden. The round table suits four chairs well and avoids sharp corners in a small space. Choose chairs with a sturdy swivel base and a comfortable seat depth, and test the swivel before buying if you can.

    Add a cushion in a solid outdoor fabric and keep the table centerpiece low, such as a small lantern or a shallow bowl, so sight lines stay open. A round rug under the set can mark the zone and soften hard patio flooring. Wipe the swivel mechanism clear of grit now and then, since sand and dirt can make it stiff.

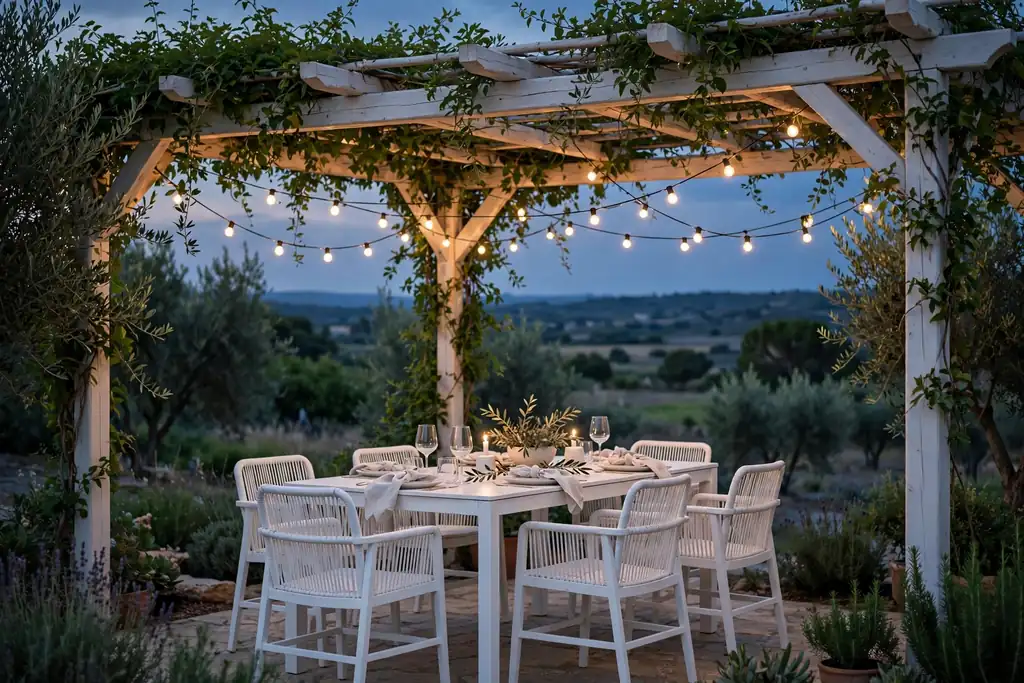
    10. White Dining Setup Under a Pergola with String Lights

    White dining set under a pergola with string lights in early evening.

    A white dining set under a pergola gains shade by day and warmth by night, especially with string lights draped along the beams. The pergola frames the dining area and gives the white furniture a clear setting, while the lights make evening meals feel special without extra decor. Hang lights high enough to clear heads and keep them away from direct heat sources.

    Use a plain tablecloth or simple placemats, and keep the centerpiece low so the lights and the garden stay visible. If the pergola has no roof, a shade cloth or a large umbrella can cover the table during the hottest hours. Take lights down or check them after storms, and wipe the white chairs after rain, since water drips from beams onto seats.

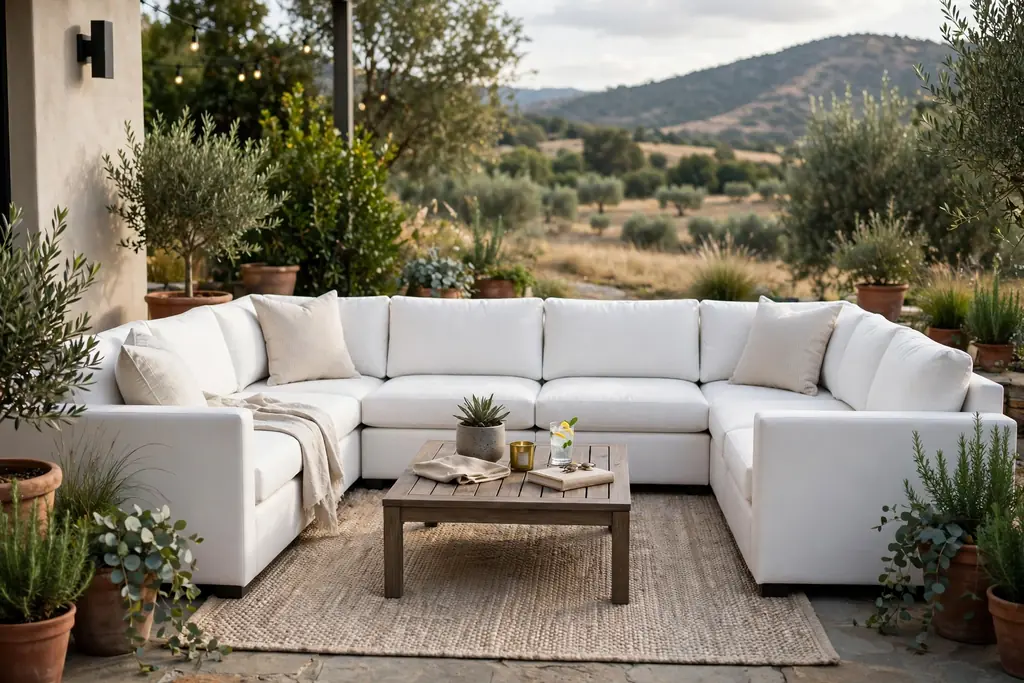
    11. White Sectional Arranged for Conversation

    White outdoor sectional arranged around a low coffee table for conversation.

    A white sectional lets you shape a patio seating area around conversation, with seats facing each other rather than lined up in a row. An L-shaped arrangement works well in a corner, while a U-shaped arrangement suits a larger patio with a fire table or a coffee table in the middle. Keep the center open so people can move in and out without climbing over seats.

    Use cushions in two or three calm tones, repeated on both sides of the sectional, so the long run of white feels planned. A low table in the middle holds drinks and snacks within reach of every seat. Brush the sectional frame and shake cushions weekly, since a large piece collects leaves and dust faster than single chairs.

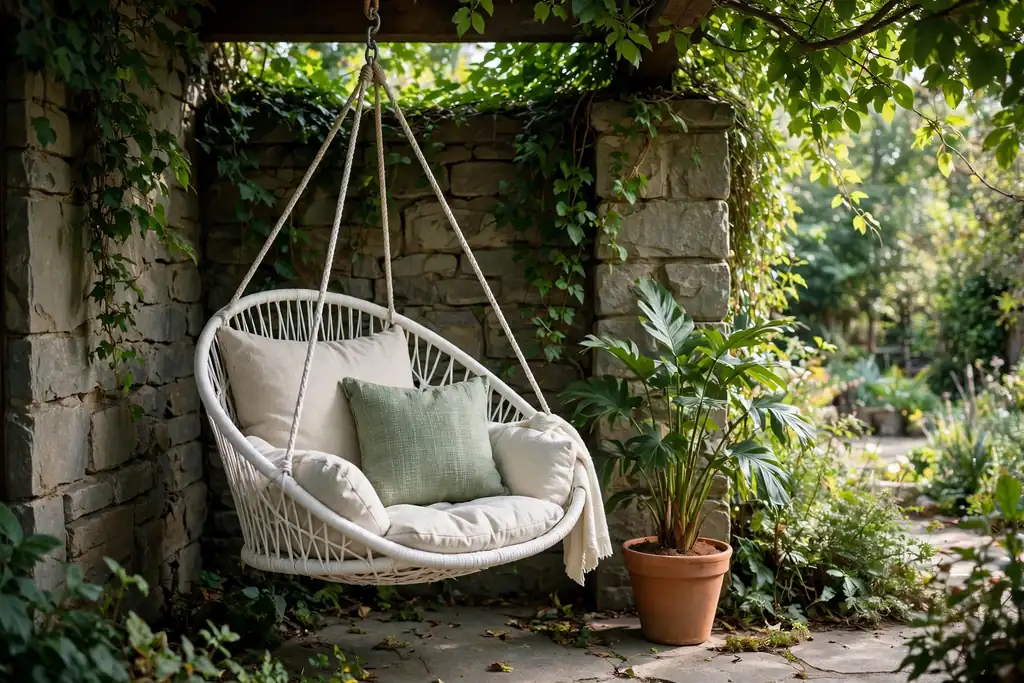
    12. White Hanging Chair in a Shady Corner

    White hanging chair with cushions in a shady patio corner beside a potted plant.

    A white hanging chair adds a playful, relaxing note to a shady patio corner, and it suits reading or quiet time alone. Hang it from a sturdy stand or a strong beam, following the weight guidance for the chair, and leave room for it to swing without hitting a wall or a plant. A thick seat cushion and a small back cushion make it comfortable for longer sits.

    Place a small stool or a side table nearby for a book and a drink, and add a potted plant beside the chair to soften the frame. The white finish stands out nicely against green foliage, so the corner becomes a small focal point. Check the hanging hardware regularly, and bring the cushion inside during wet weather.

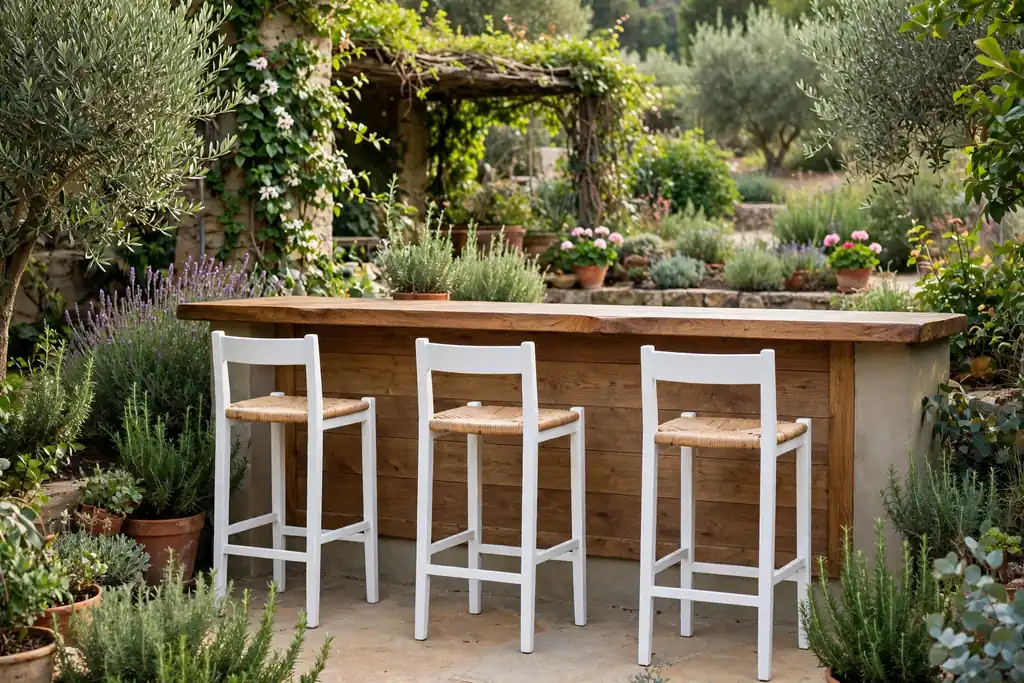
    13. White Bar Stools at an Outdoor Counter

    White bar stools at an outdoor counter with a wood top in a garden setting.

    White bar stools at an outdoor counter turn a grill area or a garden bar into a casual gathering spot. Guests can sit and chat while food is prepared, and the stools tuck under the counter when not in use. Choose a seat height that matches the counter, with a footrest for comfort, and pick a backless or low-back style if space is tight.

    Add a thin seat pad in a washable fabric for comfort, and keep the counter clear except for drinks and a small plant. White stools pair well with wood or stone counters, since the warm counter material balances the cool white. Wipe seats after use, especially near a grill, since grease and food marks show on white, and stack or store stools during storms if they are light.

    14. White Side Tables and Plant Stands as Accents

    White side table and plant stand beside a lounge chair on a patio.

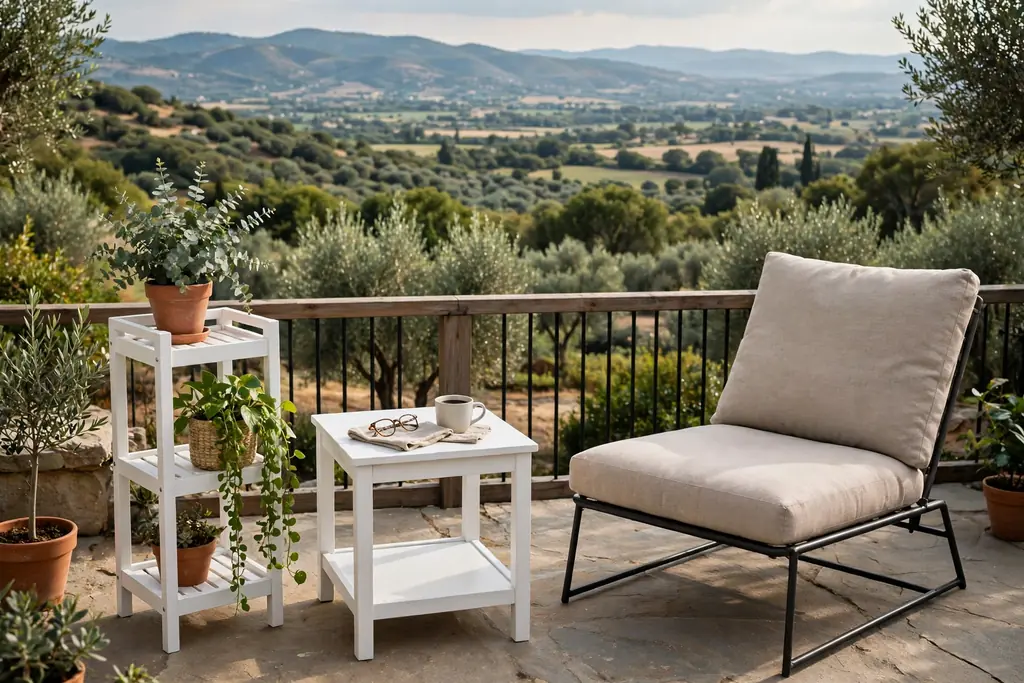
    White side tables and plant stands are small accents that tie a patio together, even when the main seating is a different material. A white side table beside a wood lounge chair, or a white plant stand holding a leafy pot, repeats the white note across the space without needing a full white set. Use them to fill gaps between larger pieces.

    Group a side table with one chair for a reading spot, or place two plant stands at different heights near a door to frame the entry to the patio. Keep the tops mostly clear, with one item each, such as a candle, a small pot, or a glass. Wipe the stands after watering plants, since soil and water marks show on white, and move them under cover in heavy rain if they are light.

    15. White Furniture with Terracotta Pots and Greenery

    White patio chairs surrounded by terracotta pots and leafy green plants.

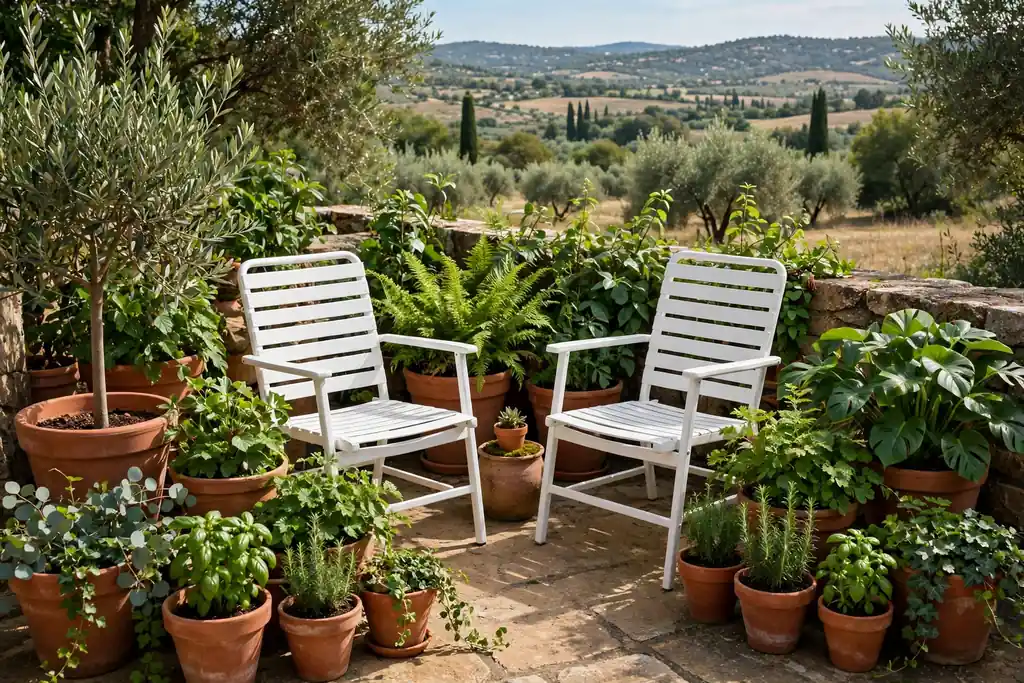
    Terracotta pots and leafy greenery warm white patio furniture more than almost any other pairing. The warm clay tone contrasts gently with white, and plants soften hard lines and fill empty corners. Place large pots at the ends of a seating group, medium pots beside chairs, and a trailing plant on a side table or a stand.

    Choose plants that suit your light and watering routine, such as herbs, grasses, or leafy shrubs, and group pots in odd numbers for a natural look. Keep pot saucers under each pot to protect the patio surface and the furniture legs from water marks. Wipe white frames after watering, and rotate pots now and then so plants grow evenly.

    16. White Sun Loungers on a Sunny Deck

    White sun loungers with light pads on a sunny deck with a small side table.

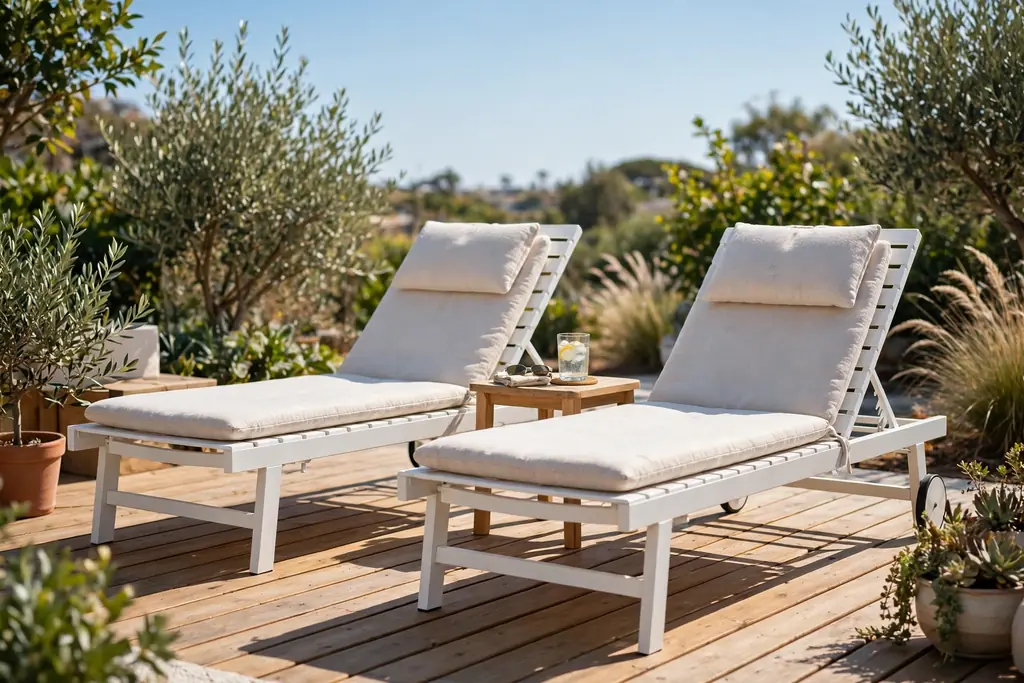
    White sun loungers suit a sunny deck or a flat area of lawn, where they give you a dedicated spot for sunbathing and rest. Their adjustable backs let you sit up to read or lie flat to rest, and the white finish stays cooler in sun than dark frames. Place them in a row with a small table between each pair for drinks, sunscreen, and a book.

    Add a thin lounger pad in a light color and a rolled towel at one end, and keep a shade option nearby, such as an umbrella, for breaks from direct sun. Leave space between loungers so each person can get in and out easily. Wipe the frames after use and store pads under cover at night to keep them dry and clean.

    17. White Furniture Styled for Evening with Lanterns

    White patio furniture styled with lanterns glowing in the evening.

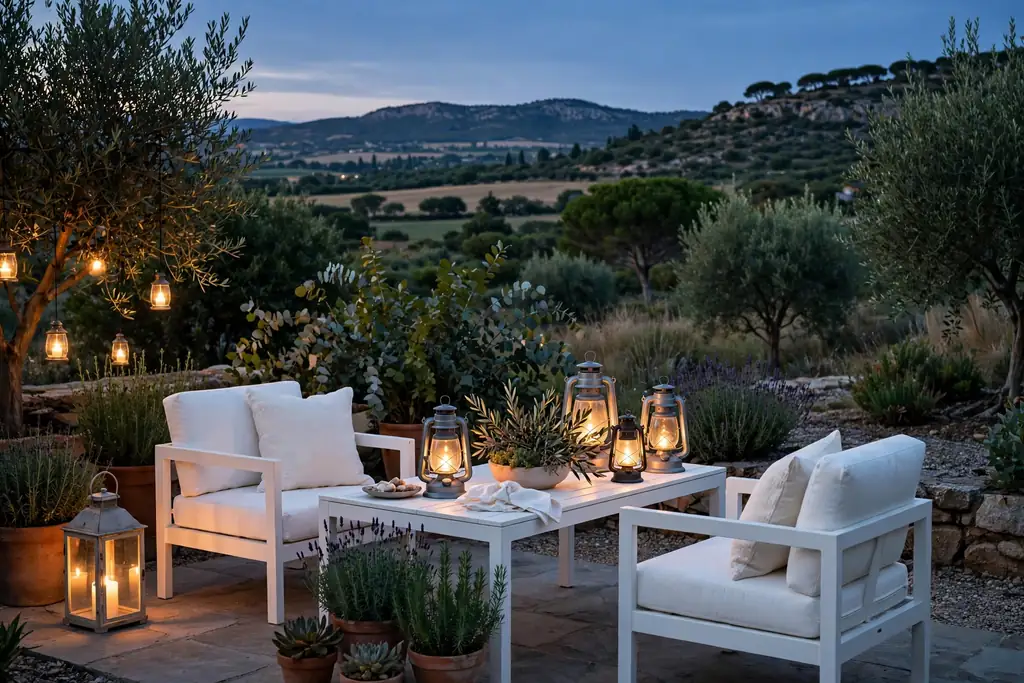
    White furniture looks its best in the evening when paired with lanterns, since the white frames catch and reflect warm light. Place lanterns on the table, on the ground beside chairs, and along a path or a wall, at different heights for a layered glow. Battery candles inside lanterns give steady light without the worry of open flames near cushions.

    Keep the rest of the evening styling simple: a folded throw on each chair, a clear table, and one small plant or candle group as a centerpiece. The white furniture will do much of the visual work in lantern light, so there is no need for extra color. Check lantern glass for dust and insects, and bring fabric items inside at the end of the evening if dew is expected.

    Conclusion

    White patio furniture works for a relaxed outdoor space when comfort comes first and styling stays simple. Pick the seating that fits how you actually use the patio, soften the white with cushions, wood, woven fibers, and plants, and add shade by day and warm light by night. Start with one idea from this list, live with it for a few weeks, and add the next piece only when it solves a real need, whether that is seating, shade, or a surface for drinks. For more home decor ideas, visit the Dwell Ovell home page.

    FAQs

    How do I keep white patio furniture clean?

    You keep white patio furniture clean by wiping frames weekly with a soft cloth and mild soapy water, then rinsing and drying them so water marks do not set. Wash cushion covers following their care labels, brush off pollen and leaves before they stain, and cover or store furniture during long wet spells to limit dirt buildup.

    What cushion colors go best with white patio furniture?

    Cream, beige, sand, soft grey, pale sage, and dusty blue go best with white patio furniture, since they soften the white without competing with it. Use one or two of these tones across the whole patio, repeat them in throws and rugs, and add a single deeper accent, such as navy or terracotta, only if you want a stronger focal point.

    Does white patio furniture get too hot in the sun?

    White patio furniture generally stays cooler in the sun than dark furniture, since white reflects more sunlight, but metal frames and bare seats can still feel warm after hours in direct sun. Cushions, shade from an umbrella or a pergola, and a light throw over a seat all help, and moving chairs into partial shade during the hottest hours keeps them comfortable.

    What materials are best for white patio furniture?

    Powder-coated metal, resin wicker, and weather-ready wood with a white finish are common choices for white patio furniture, and each suits a different need. Metal is sturdy and easy to wipe, resin wicker adds texture and resists moisture, and painted wood looks warm but needs more regular care to keep its finish in good shape.

    Can white patio furniture work on a small patio?

    Yes, white patio furniture can work well on a small patio, since white reflects light and makes a tight space feel more open than dark furniture. Choose a bistro set, two folding chairs, or a bench against a wall, keep the footprint small, and leave a clear path through the space so it feels open rather than crowded.

    How do I style white patio furniture for evening use?

    You style white patio furniture for evening use by adding warm light, such as lanterns, string lights, or battery candles, and soft layers, such as throws and outdoor cushions. Place lights at different heights around the seating area, keep the table clear, and bring a throw for each seat, so the white frames glow softly and the space stays comfortable after sunset.


  • 21 Outdoor Patio Seating Ideas for Spaces Big and Small

    21 Outdoor Patio Seating Ideas for Spaces Big and Small

    Outdoor patio seating works best when you match the seat to the space and the way you use it: a lounge set for relaxing, a dining set for meals, and one or two movable chairs for small patios. Start with a rug and shade, add weatherproof cushions, then leave room to walk around each seat with ease.

    The 21 ideas below cover large patios, narrow balconies, and everything between, so you can pick one seating group for your main use and add a second spot for quiet mornings or evening gatherings. The same layered approach that makes a fall front porch decor plan feel inviting works outdoors too, with cushions and light swapped by season as in exterior decorating for fall.

    Key Takeaways

    • Match the seat to the main use first: lounging, dining, or gathering around a fire.
    • Measure the patio and leave a clear walking path around every chair and table.
    • Choose outdoor rated frames and fabrics, or bring cushions indoors in rain, so seating stays tidy.
    • Anchor each seating group with a rug, and add shade with an umbrella, pergola, or nearby tree.
    • Repeat two or three colors across cushions, throws, and planters so separate seats read as one plan.
    • Add movable pieces, such as poufs or folding chairs, so the patio can flex for guests.

    1. Deep Seat Lounge Sofa Set

    Deep seat outdoor lounge sofa set with thick cushions and a coffee table on a patio rug.

    A deep seat lounge sofa set gives a patio the feel of an outdoor living room. A three seat sofa with two matching armchairs and a low coffee table suits a large patio, with thick cushions that invite long sits. Set the group on a flat rug, facing the garden or the best view, and leave room behind each chair for easy movement.

    Choose frames in teak, powder coated metal, or all weather wicker, and cushions with removable, washable covers. If your patio is partly uncovered, pick quick dry foam fills or bring cushions indoors at night. Add a small side table at each end so drinks and books always have a place.

    2. Wicker Armchairs with a Side Table

    Two wicker armchairs with a small side table on a patio.

    Two wicker armchairs with a small side table make a simple conversation spot that fits most patios. Place the chairs at a slight angle toward each other, close enough for easy talk, with the table between them for drinks. The woven texture warms stone and concrete patios without a large furniture purchase.

    Pick cushions in one calm color, such as cream or sage, and add a folded throw over one chair arm for cool evenings. If the chairs sit in full sun, choose fade resistant fabric and rotate the cushions weekly so color wear stays even. This pair also works as a second seating spot beside a larger dining group.

    3. Adirondack Chairs Around a Fire Pit

    Adirondack chairs arranged around a fire pit on a patio at dusk.

    Adirondack chairs around a fire pit turn a patio corner into a gathering place after dark. Set four to six chairs in a loose ring, with enough space between them for a small side table or a footrest. The wide arms hold drinks, so no extra table is needed, and the low, reclined seat suits long evenings.

    Check local rules for open flames before lighting a fire, and keep cushions and throws clear of sparks. If the chairs sit on grass, set each leg on a flat stone so they stay level. Wood chairs need an annual oil or seal coat, while molded resin versions need only a wash each season.

    4. Metal Bistro Set for Small Patios

    Small metal bistro set with two chairs and a round table on a narrow patio.

    A metal bistro set with two chairs and a small round table fits balconies and narrow patios that cannot hold a full lounge group. Tuck the set into a sunny corner or beside a door, and fold the chairs flat when the space must serve another purpose. The light frame moves with ease, so you can chase shade through the day.

    Choose a set with a stable base that does not wobble on uneven pavers, and add one thin seat pad per chair for comfort. If wind is a problem, pick heavier cast metal rather than thin tubular frames. A bistro set also suits a side yard nook where a single chair and table are all the space allows.

    5. L Shaped Outdoor Sectional

    L shaped outdoor sectional with cushions on a large patio.

    An L shaped outdoor sectional seats a crowd without a room full of separate chairs. Place the long side against a wall or railing, with the short side facing the garden, and add a coffee table or ottoman in the bend. The corner seat becomes the natural spot for reading, while the rest of the sectional serves guests.

    Measure the corner carefully before buying, since sectionals are hard to return once delivered. Leave at least two feet of walking space on the open sides, and choose a modular set if you want to split it into a sofa and chaise later. Store loose cushions in a deck box overnight in wet weather.

    6. Hanging Egg Chair for One

    Hanging egg chair with a cushion standing in a patio corner.

    A hanging egg chair gives one person a sheltered, swinging seat on a patio of any size. Hang it from its own stand on a flat surface, with room to swing forward and back without hitting a wall or railing. The curved frame feels private, which suits a reading corner or a quiet morning coffee spot.

    Check the weight rating of the stand and chair before use, and place the chair where the base sits fully on solid ground. Add a seat pad and one lumbar cushion, since the curved seat can feel deep without them. If the chair sits outside the roof line, bring the cushion indoors in rain to keep it fresh.

    7. Wooden Bench with Cushions

    Wooden bench with cushions set along a patio wall.

    A wooden bench with cushions seats two or three people along a patio edge or under a window. Set the bench against a wall or fence, add a long seat cushion and two or three back cushions, and pair it with a small table for drinks. The straight shape suits narrow patios where armchairs would crowd the path.

    Pick a bench in teak, cedar, or powder coated metal, and seal wood each year to slow weather wear. If the bench sits on soil, set its legs on flat stones so they stay level and dry. A bench with a lower shelf or open space below also holds baskets for cushions and throws.

    8. Freestanding Hammock for Lazy Afternoons

    Freestanding hammock on a stand in a quiet patio corner.

    A freestanding hammock gives a patio a lazy, open air seat that needs no trees. Set the stand on level ground away from the main walking path, and hang the hammock with a gentle sag so it cradles rather than pulls tight. One hammock suits a side yard or a quiet patio corner where naps and reading are the point.

    Choose a fabric hammock for softness, or a rope style for airflow on hot days, and test the hang height so getting in and out feels safe. Bring the fabric indoors in storms and over winter to extend its life. A hammock pairs well with a small side table for a drink and a book.

    9. Dining Table with Six Chairs

    Outdoor dining table with six chairs set for a meal on a patio.

    A dining table with six chairs turns a large patio into a place for shared meals. Choose a rectangular table in teak, metal, or stone, with chairs that tuck fully under the edge when not in use. Center the table on a rug or a paved area, and leave at least three feet behind each chair so guests can pull out with ease.

    Pick chairs with a seat height that matches the table, and add thin seat pads in a washable fabric for long meals. If the table sits in sun, add an umbrella through the center hole or a freestanding shade beside it. A dining group also works for games and homework on warm afternoons.

    10. Bar Height Table and Stools

    Bar height table with stools beside a patio railing.

    A bar height table with stools suits patios where guests stand, snack, and move between groups. Set a narrow table against a railing or wall, with two to four stools tucked under it, and keep the top clear for drinks and small plates. The tall height suits a view over a railing and saves floor space.

    Choose stools with a footrest and a stable base, since tall stools tip more easily than chairs. If children use the patio, keep one lower chair nearby as an option. A bar table also serves as a serving spot during gatherings, with the stools moved aside when food takes over the top.

    11. Rocking Chairs on a Covered Patio

    Two rocking chairs with a small table on a covered patio.

    Rocking chairs on a covered patio give a classic, gentle seat for mornings and evenings. Place two chairs side by side near the railing, facing the yard, with a small table between them for drinks. The roof keeps the chairs dry, so wood and woven seats last longer than they would in open weather.

    Check that each chair rocks freely without hitting the wall or railing, and set the chairs on a rug or mat to protect the patio surface. Add a thin cushion and a folded throw for cool evenings. One rocking chair alone still works on a small covered porch beside the door.

    12. Outdoor Daybed for Lounging

    Outdoor daybed with a thick mattress pad and cushions under a pergola.

    An outdoor daybed gives a patio a lounge bed for naps, reading, and sunbathing. Place it in a sunny corner or under a pergola, with a thick mattress pad and several back cushions along one side. The wide seat suits one person stretched out or two people sitting up with drinks.

    Choose a daybed with a canopy or a shade panel if it sits in full sun, and pick a mattress cover that removes for washing. Bring the mattress indoors in heavy rain unless it is rated for outdoor use. A daybed anchors a large patio well, but it needs a wide, flat spot, so measure before buying.

    13. Folding Chairs and a Small Table for Tiny Patios

    Two folding chairs with a small table on a tiny patio by a door.

    Folding chairs with a small side table give a tiny patio seating that appears only when needed. Keep two folding chairs by the door or in a storage box, and set them out with a lightweight table for morning coffee or an evening drink. When guests leave, the chairs fold flat and the patio returns to open space.

    Choose folding chairs rated for outdoor use, with a seat that does not trap water, and add a thin pad for comfort. If the patio is a balcony, check weight limits and keep the total set light. This is the most flexible option for renters, since nothing is fixed to the space.

    14. Rattan Peacock Chair as a Statement Seat

    Rattan peacock chair with a round cushion in a patio corner beside a planter.

    A rattan peacock chair gives a patio a single bold seat that draws the eye. Place it in a corner or beside a planter, with a round cushion on the seat and a small table nearby for a drink. The tall, fanned back suits boho and coastal patios, and it photographs well as a focal point.

    Keep the chair under cover when possible, since natural rattan weakens in long rain. If the chair sits in sun, rotate it monthly so fading stays even. Pair it with plainer chairs nearby, so the statement seat stands out rather than competing with other bold pieces.

    15. Built In Bench Around the Patio Edge

    Built in bench with cushions running along the edge of a patio.

    A built in bench around the patio edge seats many people without filling the floor with chairs. Build the bench from wood, stone, or concrete blocks along one or two sides, with a wood top and outdoor cushions for comfort. The fixed seat leaves the center of the patio open for a table, fire pit, or play space.

    Plan the bench height near chair height, about eighteen inches, so guests sit and stand with ease. Add storage inside the bench base for cushions and throws if the build allows. A built in bench suits patios that host large groups often, since it never needs to be moved or stored.

    16. Swivel Glider Chairs for Easy Talk

    Swivel glider chairs facing a sofa around a coffee table on a patio.

    Swivel glider chairs let guests turn toward whoever is speaking, which suits a conversation group. Set two gliders facing a sofa or a pair of chairs, with a coffee table in the middle, and leave room for the chairs to turn fully without hitting the table. The gentle glide suits long talks better than a fixed chair.

    Check the swivel base on uneven pavers, and set each chair on a flat rug so it turns smoothly. Add a lumbar cushion, since glider backs can feel upright without one. Gliders work well on covered patios, where the moving parts stay dry and last longer.

    17. Poufs and Floor Cushions for Flexible Seating

    Poufs and floor cushions grouped around a low table on a patio.

    Poufs and floor cushions add flexible seating that moves where guests need it. Scatter two or three poufs around a low table for a casual gathering, or stack them in a corner when the patio needs open floor. The low height suits children and relaxed evenings, and the soft shapes fit patios of any size.

    Choose poufs in outdoor rated fabric with a fill that holds shape, and bring them indoors in rain. Mix one pattern with solid colors so the group looks planned rather than random. Poufs also serve as footrests when the main chairs are full, which makes them useful even on small patios.

    18. Porch Swing as a Hanging Bench

    Porch swing with cushions hanging on a covered patio.

    A porch swing gives a covered patio a hanging bench seat for two or three people. Hang the swing from sturdy ceiling joists, with chains rated for the weight, and add a seat cushion and two back cushions. The gentle motion suits evenings, and the swing reads as a feature rather than just a seat.

    Check the chains and hooks each season for rust or wear, and tighten them as needed. Keep the swing clear of walls and railings so it moves freely, and leave room to step on and off at one end. If the swing faces rain, use quick dry cushions or bring them indoors at night.

    19. Stackable Resin Chairs for Easy Storage

    Stacked resin chairs beside a patio dining table.

    Stackable resin chairs give a patio practical seating that stores in a small footprint. Keep a stack of four to six chairs in a shed or garage, and set them out around a table when guests arrive. The light weight makes them easy to carry, and the stack keeps the patio clear between gatherings.

    Choose chairs with a seat shape that stacks without wobbling, and wipe them clean each season since resin shows dust and pollen. Add a thin pad for long meals, held in place with ties so wind does not lift it. Resin chairs suit dining groups best, where comfort matters less than easy storage.

    20. Corner Nook with an L Bench and Cushions

    Corner nook with an L shaped bench, cushions, and a small square table on a patio.

    A corner nook with an L bench turns an unused patio corner into a cozy seat for three or four people. Set two benches at a right angle in the corner, add a small square table in front, and pile cushions along both bench backs. The corner shape feels sheltered, which suits a spot near a fence or wall.

    Add a planter at the open end of the nook to mark the edge without blocking entry. If the nook sits in shade, choose light cushion colors to keep it bright. This layout suits small and medium patios well, since it uses corner space that single chairs often waste.

    21. Conversation Set Around a Fire Table

    Conversation chairs arranged around a low fire table on a patio at dusk.

    A conversation set around a fire table gives a patio warmth and a focal point in one piece. Arrange four chairs or a small sofa set around a low fire table, with room for feet and drinks on the table edge. The flame draws guests together after sunset, and the table doubles as a coffee table when the fire is off.

    Check the fuel type and local rules before use, and keep cushions, throws, and paper items clear of the flame. If the table uses gas, store the tank safely and check connections each season. A fire table suits large patios best, where the seating ring has room to breathe.

    Conclusion

    Outdoor patio seating comes down to three choices: the main use, the space you have, and the weather your patio faces. Start with one group that serves your most common use, whether that is lounging, dining, or gathering, then add one flexible piece, such as a pouf or a folding chair, for guests. Measure before you buy, leave clear paths around every seat, and choose fabrics and frames that handle your climate with simple care. With those basics in place, the patio becomes a room you use daily, not just on fine weekends.

    FAQs

    What is the best outdoor patio seating for a small patio?

    The best outdoor patio seating for a small patio is a bistro set, a pair of folding chairs with a small table, or a corner bench nook. These options seat two to four people without blocking the path, and folding pieces store flat when the patio needs open space. Measure the patio first, and leave at least two feet of walking room around each seat.

    How much space do you need around patio chairs?

    You need about two feet of walking space around patio chairs, and about three feet behind dining chairs so guests can pull out with ease. A lounge group needs extra room in front of each seat for a coffee table and foot space. If the patio feels tight, choose fewer, smaller pieces rather than crowding a full set into the space.

    What material lasts longest for outdoor patio seating?

    Teak, powder coated aluminum, and all weather wicker tend to last longest for outdoor patio seating with simple care. Teak weathers to grey unless oiled, aluminum resists rust, and all weather wicker handles rain better than natural rattan. Whichever frame you pick, bring cushions indoors in heavy rain to extend their life.

    Should patio cushions stay outside all year?

    Patio cushions should not stay outside all year in wet or cold climates, even when the fabric is rated for outdoor use. Bring cushions indoors during heavy rain and over winter, and store them in a deck box or shed so they stay clean and dry. Quick dry foam helps after summer showers, but it does not replace dry storage.

    How do you arrange patio seating for conversation?

    Arrange patio seating for conversation by placing chairs facing each other, about four to eight feet apart, with a table in the middle for drinks. Angle the chairs slightly inward rather than in a straight row, so guests can talk without turning their heads. Add a rug under the group to mark the conversation zone.

    What is the easiest way to add shade over patio seating?

    The easiest way to add shade over patio seating is a freestanding umbrella through or beside the table, since it needs no build work. A pergola or shade sail gives wider cover for a lounge group, while a nearby tree gives natural shade that shifts through the day. Match the shade to the seating group size so every seat gets cover at midday.


  • 25 Outdoor Patio Decorating Ideas for a Comfortable Retreat

    25 Outdoor Patio Decorating Ideas for a Comfortable Retreat

    A comfortable outdoor patio starts with shaded seating, a clear place to eat, soft light for evenings, and plants that soften hard edges. Choose weatherproof furniture sized to your patio, add a rug to mark the seating area, layer light with string lights and lanterns, and finish with pots, shade, and a heat source for cool nights.

    The 25 ideas below work for a small concrete slab as well as a large paved patio, since most of them scale down to one chair and one pot, or up to a full seating and dining group. Start with seating and shade, then add light and plants. Keep a clear path from the house door to the seating area, and leave room to pull out chairs and walk around the table with ease.

    Key Takeaways

    • Start with seating and shade, since a patio that is too hot or has nowhere comfortable to sit will go unused.
    • Size furniture to the patio, leaving clear walkways around chairs, tables, and planters.
    • Use an outdoor rug to mark the seating area and to make hard paving feel softer underfoot.
    • Layer light with overhead string lights, lanterns, and solar path lights, so the patio works after dark.
    • Repeat two or three colors across cushions, pots, and throws, so many separate pieces read as one planned space.
    • Choose weatherproof fabrics and finishes, or store cushions and throws in a bench or basket when rain is expected.
    • Add plants at different heights, from ground pots to a trellis wall, to soften fences and walls.

    1. Deep Seat Sofa Group with Washable Cushions

    Deep seat outdoor sofa group with washable cushions around a low coffee table on a patio.

    A deep seat sofa group turns a patio into an outdoor living room. Set a two or three seat sofa with two armchairs around a low coffee table, facing each other so conversation feels natural. Thick seat cushions make the group comfortable for long sits, and a coffee table holds drinks, books, and a small lantern within reach.

    Choose cushions with removable, washable covers, since outdoor cushions gather dust, pollen, and spills. Measure the group before buying, and leave at least 60 centimeters of walking space around the seating. If the patio is small, a loveseat with one chair gives the same living room feel in less space.

    2. Layered Outdoor Rugs for a Softer Floor

    Layered outdoor rugs under a patio coffee table and seating group.

    Layered outdoor rugs soften a concrete or stone patio in one step. Lay a larger flat rug in a plain color first, then add a smaller patterned rug on top, centered under the coffee table. The layers mark the seating area clearly, even on a long patio that also holds a dining table and a grill.

    Pick rugs rated for outdoor use, so they dry after rain and resist fading in sun. Shake them out weekly, and lift them now and then to check for damp marks on the paving below. A rug with a simple stripe or border pairs well with plain cushions, since the rug carries the pattern.

    3. Overhead String Lights for Evening Glow

    Warm string lights hung over a patio seating area at dusk.

    Overhead string lights give a patio a warm glow after dark and make evening sits feel planned rather than improvised. Hang them in straight lines or a gentle zigzag from the house wall to posts, a pergola, or a fence, high enough that no one walks into them. Warm white bulbs suit most patios and flatter wood, stone, and plants alike.

    Use outdoor rated lights and a weatherproof outlet or timer, and check the span before fixing hooks so the lights do not sag into the seating area. Keep one run over the seating group and another over the dining table, so both areas are lit. In winter, take the lights down or check them for damage before switching them on again.

    4. Pergola with Climbing Vines for Natural Shade

    Wood pergola with climbing vines shading patio chairs.

    A pergola with climbing vines gives shade that grows fuller each year and softens a plain patio roofline. Set the pergola over the seating area, with posts fixed firmly to the patio or to footings, and train vines such as jasmine, grape, or climbing roses along the top beams. The leaves filter sun in summer and let more light through when they thin in cooler months.

    Prune the vines once or twice a year to keep growth off gutters and to stop heavy stems from pulling on the beams. Choose a vine suited to your light and climate, and give it a trellis or wires to climb at first. A pergola also gives a clear place to hang string lights and outdoor curtains.

    5. Cantilever Umbrella for Flexible Shade

    Cantilever umbrella shading a patio sofa group.

    A cantilever umbrella shades a seating group without a pole in the middle of the table or chairs. The offset pole stands to one side, with a heavy base, and the canopy swings over the sofa or dining table as the sun moves. This makes it easy to shade a corner seat in the morning and a dining table at midday with the same umbrella.

    Choose a base weight rated for the canopy size, and close the umbrella in strong wind so it cannot tip or lift. A light colored canopy reflects heat and keeps the shade cooler, while a tilt function lets you angle the shade as the sun drops. Keep the base clear of walkways so no one trips over it.

    6. Fire Pit Conversation Circle

    Chairs in a circle around a patio fire pit at dusk.

    A fire pit conversation circle gives the patio a clear evening focus. Set low chairs in a circle around a fire pit, with enough room to stretch legs and to reach a side table for drinks. The circle suits cool evenings, when guests gather around the heat, and it works on a paved area away from overhangs and dry plants.

    Follow local rules for open flames, and keep the fire pit on a nonflammable surface with a safe distance from furniture, fences, and house walls. Use a spark screen when the fire is lit, and let ashes cool fully before clearing them. A portable fire bowl gives the same circle on a smaller patio, with chairs pulled in close.

    7. Outdoor Dining Table for Shared Meals

    Outdoor dining table with chairs and a simple centerpiece on a patio.

    An outdoor dining table makes the patio a place for shared meals, not only for sitting. Choose a table sized to your usual group, with chairs that slide out with ease and leave walking room behind them. A wood or metal table with a simple centerpiece, such as a low bowl of lemons or a small potted herb, keeps the table usable without a full table setting every day.

    Protect the table with a cover in heavy rain if the finish needs it, and wipe spills promptly so they do not stain. If the patio is narrow, a rectangular table against a wall with a bench on one side seats more people in less space. Add a shade umbrella or pergola over the table so midday meals stay comfortable.

    8. Bistro Set for a Small Patio

    Small bistro set with two chairs and a round table in a patio corner.

    A bistro set suits a small patio, a balcony edge, or a narrow side yard where a full dining set would crowd the space. Two chairs and a small round table fit in a corner, leaving room for a pot or two and a clear path to the door. The set works for morning coffee, reading, and a light lunch for two.

    Choose folding chairs if the set must be stored in winter, and pick a table top that wipes clean after meals. A bistro set in metal or wood suits most house styles, and a single patterned cushion on each chair adds color without extra pieces. Keep the set near the door, so it is easy to use on a short break.

    9. Hanging Egg Chair for a Cozy Corner

    Hanging egg chair with a cushion and throw in a patio corner.

    A hanging egg chair fills a patio corner with a cozy seat that feels separate from the main group. Hang the chair from its own sturdy stand, with a thick seat cushion and a small throw, and place it where it can swing a little without hitting a wall, a planter, or a railing. The curved shape shelters the sitter and suits reading and quiet breaks.

    Check the stand and hanging point for weight rating and wear each season, and keep the swing path clear of children running past. A cushion in a plain color lets the chair shape stand out, while a patterned throw adds warmth on cool evenings. If the chair sits in rain, bring the cushion indoors or use a quick dry fill.

    10. Hammock for Lazy Afternoons

    Striped hammock hung between posts on a patio.

    A hammock gives a patio a relaxed seat for lazy afternoons and naps. Hang it between two sturdy posts, trees, or a freestanding stand, with the ends fixed at a height that lets the middle hang low enough to sit into with ease. A striped or plain cotton hammock suits most patios, and a small pillow at one end makes it comfortable for reading.

    Check ropes, hooks, and fabric for wear before each season, and take the hammock down in storms or winter. Keep the ground below clear of sharp stones and pots, so stepping out of the hammock is safe. A hammock with a stand works where there are no trees or posts, and it can move to follow shade through the day.

    11. Sun Loungers with a Shared Side Table

    Two sun loungers with a shared side table on a sunny patio.

    Sun loungers with a shared side table make a sunny patio corner easy to use all afternoon. Set two loungers side by side, facing the sun or the garden, with one low side table between them for drinks, sunscreen, and a book. Adjustable backs let each person sit up to read or lie flat to rest, without moving the whole lounger.

    Choose loungers with weatherproof frames and quick dry cushions, and fold or stack them in winter if storage is tight. A small side table with a lower shelf holds extra towels and keeps the top clear. Place loungers where they do not block the path to the dining area, and leave room to walk around the foot of each lounger.

    12. Planter Clusters at Different Heights

    Cluster of planters at different heights beside a patio door.

    Planter clusters at different heights add green to a patio without a garden bed. Group three or five pots of varied heights in a corner or beside the door, with a tall plant at the back, medium plants in the middle, and trailing plants at the front. The mix of heights draws the eye up and softens a plain wall or fence.

    Use pots with drain holes and saucers, and match the plants to the light the spot gets, with sun lovers in open spots and shade plants near walls. Water when the top of the soil feels dry, and feed plants through the growing season as the pot label directs. Keep the cluster clear of walkways, and move tender pots indoors before frost.

    13. Trellis Garden Wall for Green Privacy

    Trellis garden wall with climbers and hanging pots on a patio fence.

    A trellis garden wall covers a plain fence or wall with living green and gives a patio a garden feel in a small footprint. Fix a wood or metal trellis to the wall, with a small gap behind it for air, and plant climbers at the base or hang small pots from the trellis frame. The wall suits narrow patios where floor space for pots is short.

    Water climbers at the base, and tie new stems to the trellis as they grow so the cover stays even. Prune once a year to keep the wall tidy and to stop growth from blocking windows or lights. A trellis with potted herbs and small flowers gives color at eye level, while a climber alone gives a fuller green screen.

    14. Herb Pots by the Door for Cooking and Scent

    Herb pots in terracotta beside a patio kitchen door.

    Herb pots by the door give a patio scent, green, and fresh leaves for cooking in one small group. Set pots of basil, mint, rosemary, thyme, and parsley near the kitchen door or beside the dining table, where they are easy to reach while cooking. Mint grows fast, so give it its own pot to stop it from crowding other herbs.

    Water herbs when the top of the soil feels dry, and snip leaves from the top so the plants stay bushy. Most herbs need sun for at least part of the day, so place the pots where they get morning or midday light. Label the pots if guests cook with you, and bring tender herbs indoors before frost.

    15. Privacy Lattice Screens for a Sheltered Feel

    Lattice privacy screens with climbing plants along a patio edge.

    Privacy lattice screens shelter a patio from neighbors and wind without building a solid wall. Set freestanding lattice panels along one side of the patio, fixed to posts or heavy planters, and let climbing plants or hanging pots soften the frame. The open pattern lets air and light through while breaking the direct view.

    Check that the screens are stable in wind, with posts set firmly or bases weighted, and keep them clear of walkways and fire pits. A lattice screen also gives a place to hang lanterns, small pots, or outdoor art. Paint or stain the lattice to match the fence or furniture, so it reads as part of the patio rather than a temporary fix.

    16. Outdoor Curtains for Soft Shade and Privacy

    Outdoor curtains drawn across one side of a shaded patio.

    Outdoor curtains on a rod or wire give a patio soft shade and privacy that can be opened or closed as needed. Hang weatherproof curtains from a pergola beam, a wall mounted rod, or a freestanding frame, and draw them across the sunny or overlooked side in the afternoon. Light colors keep the shade bright, while a heavier weave blocks more sun and wind.

    Use curtains rated for outdoor use, and tie them back in strong wind so they do not pull on the rod. Wash or hose them down at the start of the season, and take them down in winter to keep the fabric fresh. Curtains pair well with string lights, since the fabric softens the light in the evening.

    17. Lanterns with Battery Candles for Table Light

    Lanterns with battery candles grouped on a patio table at dusk.

    Lanterns with battery candles give a patio safe table light that can move from the dining table to the seating group as the evening goes on. Group three lanterns of varied heights on a table or along a low wall, with battery candles inside for a steady glow. The glass protects the flame effect from wind, and the light flatters food, faces, and plants alike.

    Use battery candles where wind, children, or pets make real flames risky, and keep real candles inside glass with a stable base if you use them. Bring lanterns indoors in storms, and wipe the glass clean so the light stays bright. Black metal lanterns suit most patios, while wood or brass lanterns warm a rustic space.

    18. Solar Path Lights Along the Walkway

    Solar path lights along a walkway to a patio seating area at dusk.

    Solar path lights along the walkway make a patio safe and welcoming after dark, without wiring or running costs. Set small stake lights along the path from the door to the seating area, spaced evenly and clear of mowing and foot traffic. The lights charge in daylight and switch on at dusk, marking the edges of the path.

    Choose lights with a warm white glow, and keep the solar panels clear of leaves and shade from pots. Replace rechargeable batteries when the light fades, and move a light that sits in deep shade to a sunnier spot. Path lights work best as a guide, with string lights or lanterns giving the main light in the seating area.

    19. Chiminea for Warmth on Cool Evenings

    Chiminea beside two chairs on a small patio in the evening.

    A chiminea gives a patio warmth on cool evenings in a compact shape that suits smaller spaces than a full fire pit. Set the chiminea on a nonflammable surface, away from overhangs, fences, and dry plants, with a clear space around it for safety. The chimney directs smoke up and away from seats, so guests can sit close without smoke in their faces.

    Burn only dry wood suited to the chiminea, and let ashes cool fully before clearing them. Cover the chiminea in rain to protect the finish, and check the chimney and body for cracks each season. A chiminea beside one or two chairs makes a quiet evening corner, while a larger fire pit suits a full group.

    20. Storage Bench for Cushions and Throws

    Storage bench with a cushion beside a patio seating group.

    A storage bench holds cushions, throws, and small outdoor games, and gives guests an extra seat. Set a wood or resin bench beside the seating group or against a wall, with a hinged lid that lifts with ease. Inside, keep cushions in a dry bag or basket, so they stay clean and ready to use.

    Check the bench lid for water leaks after rain, and wipe the inside dry if needed. A bench with a cushion on top reads as seating, while a plain bench top can hold a tray of drinks or a lantern. Keep heavy items at the bottom of the bench, and leave the top clear so the bench can seat guests at short notice.

    21. Side Tables at Every Seat

    Small side tables beside patio chairs holding drinks and a book.

    Side tables at every seat mean no one has to balance a drink on an armrest or the ground. Place a small table beside each chair and at each end of a sofa, sized to hold a drink, a book, and a phone. Tables in the same material as the main furniture tie the group together, while a mix of wood and metal adds a collected look.

    Choose tables with a stable base that will not tip on uneven paving, and keep the tops clear of clutter so guests can set things down. A side table with a lower shelf holds a spare throw or a small lantern. On a small patio, one shared table between two chairs still gives each seat a place within reach.

    22. Drinks Station on a Rolling Cart

    Rolling drinks cart with glasses and a pitcher near a patio dining table.

    A drinks station on a rolling cart keeps glasses, a pitcher, and snacks in one place and lets the host stay with guests. Set a bar cart or a small side table near the dining area, with glasses on top, bottles or a pitcher below, and a small tray for napkins. The cart rolls to the table for meals and back to a corner when the meal ends.

    Keep the cart stable on level paving, and lock the wheels when it is in use. Use unbreakable glasses outdoors where children play, and bring glassware indoors at night. A cart with a removable tray doubles as a serving tray, so food and drinks can move from the kitchen to the patio in one trip.

    23. Basket of Throws for Cool Evenings

    Woven basket of folded throws beside a patio sofa.

    A basket of throws keeps a patio usable when the temperature drops after sunset. Set a large woven basket beside the sofa or the fire pit, filled with two or three washable throws in the patio palette. Guests can take a throw as they sit down, and the basket keeps the throws tidy during the day.

    Choose throws that wash well and dry quickly, and bring the basket indoors in rain. A basket with handles moves from the seating group to the fire pit as the evening goes on. Keep the basket clear of walkways, and fold the throws neatly so the basket reads as decor, not storage alone.

    24. Tabletop Fountain for Gentle Sound

    Small tabletop fountain on a patio side table near seating.

    A tabletop fountain adds gentle water sound to a patio and masks street noise without taking floor space. Set a small solar or plug in fountain on a side table or a low wall, where the sound can be heard from the seating group but the splash stays clear of cushions. The moving water also draws birds to the patio during the day.

    Keep the water level topped up, and clean the pump and basin as the maker directs so the flow stays steady. Place the fountain on a level surface with a tray beneath it if it sits near wood furniture. In frost, empty the fountain and store it indoors so ice cannot crack the basin.

    25. Outdoor Mirror and Wall Decor for Light

    Weatherproof outdoor mirror and metal wall decor above a planter on a patio wall.

    Outdoor mirror and wall decor reflect light and give a plain patio wall a focal point. Hang a weatherproof mirror or a set of metal wall pieces on a sheltered wall, facing the seating area so it reflects plants and light rather than a fence. The reflection makes a small patio feel wider and brighter, especially in a shaded corner.

    Fix wall decor firmly, with fixings suited to the wall material, and check them after storms. Choose pieces rated for outdoor use, since indoor mirrors and art can tarnish or warp outside. Keep wall decor clear of the fire pit and the grill, and pair it with a planter below so the wall display feels grounded.

    Conclusion

    A comfortable patio does not need a full redesign. Pick seating that fits the space, add shade for the hottest part of the day, layer light for evenings, and finish with plants and a heat source. Start with one seating group and one shade idea, then add the smaller touches, such as lanterns, a throw basket, and herb pots, as you learn how you use the patio. With those layers in place, the patio can serve as a second living room through much of the year, for quiet mornings, shared meals, and relaxed evenings outside.

    FAQs

    What is the first step in decorating an outdoor patio?

    The first step is to measure the patio and decide how you will use it, for sitting, eating, or both. Seating and shade come next, since they set the size and layout of everything else, from rugs to planters and lights.

    How do I make a small patio feel comfortable?

    A small patio feels comfortable with a bistro set or a loveseat, one shade source, and plants at different heights. Keep walkways clear, use a rug to mark the seating area, and choose folding or stackable pieces that can be stored when not in use.

    What kind of furniture lasts best on a patio?

    Weatherproof furniture lasts best on a patio, with frames in metal, teak, or resin and cushions in outdoor rated fabric. Removable, washable cushion covers help, since outdoor cushions gather dust and spills, and a storage bench keeps cushions dry in rain.

    How can I add shade to a patio without a pergola?

    You can add shade to a patio without a pergola with a cantilever umbrella, a shade sail, or outdoor curtains on a frame. Each option shades a seating or dining area, and an umbrella or sail can move or come down as the sun and seasons change.

    What lighting works best for a patio at night?

    String lights, lanterns, and solar path lights work best together for a patio at night. String lights give the main glow over seating and dining areas, lanterns add movable table light, and solar path lights mark the walkway safely.

    How do I keep patio plants alive through the season?

    Patio plants stay alive with the right light, drain holes, and watering when the top of the soil feels dry. Match plants to the sun the spot gets, feed them through the growing season as the pot label directs, and move tender pots indoors before frost.


  • 17 Painted Porch Floor Ideas to Refresh Your Entrance

    17 Painted Porch Floor Ideas to Refresh Your Entrance

    Painted porch floors refresh an entrance by adding color, pattern, and a clean finish to worn wood or concrete, and the best choice depends on your house color, porch size, and how much upkeep you accept. Solid colors suit small porches, while checkerboard, stripes, and stencils suit larger floors with room for pattern to breathe.

    The 17 ideas below cover solid colors, classic patterns, stencils, and two tone schemes, so you can pick one that fits your porch size and your house style. Start with the floor color, then add the door, planters, and seating around it, since the floor sets the tone for the whole entrance. The same layered approach that works for a fall front porch applies here: one strong floor choice, repeated in small touches, reads as one plan rather than a collection of separate pieces.

    Key Takeaways

    • Pick the floor color first, then repeat it in small touches, such as the door, planters, or cushions, so the entrance reads as one plan.
    • Solid colors suit small porches, while bold patterns, such as checkerboard and wide stripes, need a larger floor to breathe.
    • Clean, sand, and prime the floor before painting, and use paint rated for floors and outdoor use, so the finish lasts through foot traffic and weather.
    • Test a color in daylight and at dusk before painting the whole floor, since porch light changes how a color looks.
    • Keep the walking path clear of decor, and add a mat at the door to protect the painted finish from grit and wet shoes.
    • Touch up high traffic areas, such as the steps and the threshold, once a season, so small chips do not spread.

    1. Classic White Porch Floor

    Front porch with a classic white painted wood floor, white trim, and a dark front door.

    A classic white porch floor brightens a shaded entrance and makes the whole porch feel clean and open. Paint the boards in a warm white, not a cold blue white, so the floor suits wood siding, brick, and painted trim alike. White works best on covered porches, where it stays cleaner longer.

    Clean the boards well before painting, and fill gaps and nail holes so the finish looks smooth. Two thin coats give a more even result than one thick coat, and a floor rated topcoat helps the white resist scuffs. Pair a white floor with a dark door or dark planters for contrast, and sweep it weekly, since dust shows fast on white.

    2. Soft Sage Green Boards

    Front porch with soft sage green painted floor boards, cream trim, and terracotta pots.

    Soft sage green boards give a porch a calm, garden linked color that suits cream trim and natural wood. Paint each board in the same sage tone, with the grain still faintly visible, so the floor reads as painted wood rather than a flat slab. Sage suits houses with green yards and muted siding.

    Test the sage in daylight, since some greens turn grey in shade and yellow in sun. Keep the door and trim in cream or warm white, so the green stays the main color. Sage pairs well with terracotta pots and plain wood chairs, and it hides dust better than white or pale grey.

    3. Black and White Checkerboard

    Wide front porch with a black and white checkerboard painted floor and a plain front door.

    A black and white checkerboard floor is the boldest classic porch pattern, and it suits a wide porch with a plain door and simple furniture. Paint the squares in equal sizes, sized to the porch so the pattern ends in full squares at the edges where possible. Large squares suit large porches, while smaller squares suit a narrow porch.

    Mark the grid with chalk lines and tape before painting, and paint the lighter color first, then the darker color. Check the grid from the street, since a crooked line shows at once in a checkerboard. Keep furniture and planters simple, since the floor already carries the pattern, and use a dark mat at the door to ground the scheme.

    4. Wide Navy and White Stripes

    Front porch with wide navy and white striped painted floor boards leading to the front door.

    Wide navy and white stripes run along the porch boards and draw the eye toward the door. Paint stripes across the width of the porch, in bands of equal width, so the pattern feels calm rather than busy. Navy suits white houses, grey siding, and coastal style homes.

    Tape each stripe carefully and press the tape edges down, so paint does not bleed under the tape. Paint the white bands first, let them dry fully, then tape and paint the navy bands. A striped floor pairs well with plain cushions and a simple wreath, and it suits a porch where the door is already a strong color.

    5. Warm Terracotta Solid Color

    Front porch with a warm terracotta painted floor, warm white trim, and green plants.

    A warm terracotta floor brings sun baked color to a porch and suits brick houses, stucco walls, and wood siding. Paint the whole floor in one terracotta tone, and keep the trim in warm white, so the color reads as warm rather than loud. Terracotta suits porches that get strong sun, where cooler colors can look washed out.
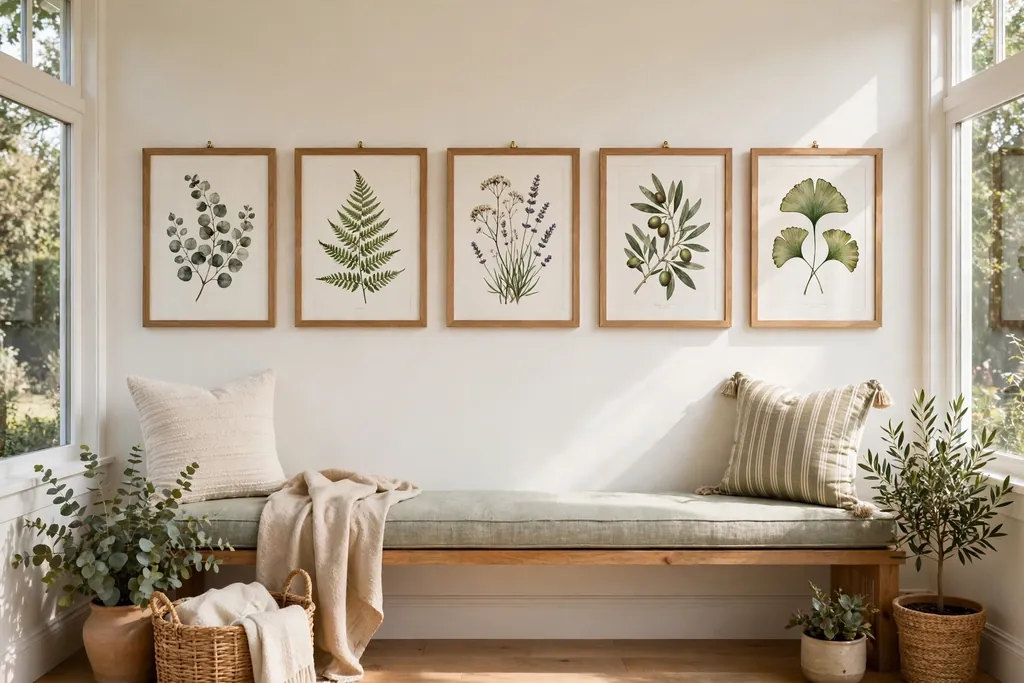
    Choose a terracotta with a brown base rather than an orange base, so it sits calmly next to plants and wood. Terracotta hides dust and leaf marks better than pale colors, which helps on an open porch. Pair it with cream planters and dark green plants for a garden feel.

    6. Weathered Grey Wash

    Older wood porch with a weathered grey wash painted floor showing wood grain and simple wood furniture.

    A weathered grey wash lets wood grain show through a thin coat of grey paint, for a soft, aged look. Brush on a thinned grey coat, wipe off the excess, and repeat until the tone is even, rather than painting a solid opaque layer. This suits older wood porches where a solid coat would hide character.

    A grey wash works best on wood in fair shape, since it does not hide cracks or stains the way a solid coat can. Seal the wash with a clear outdoor floor finish, so rain and foot traffic do not wear it away fast. Pair a grey wash floor with white trim and simple wood furniture for a quiet, coastal feel.
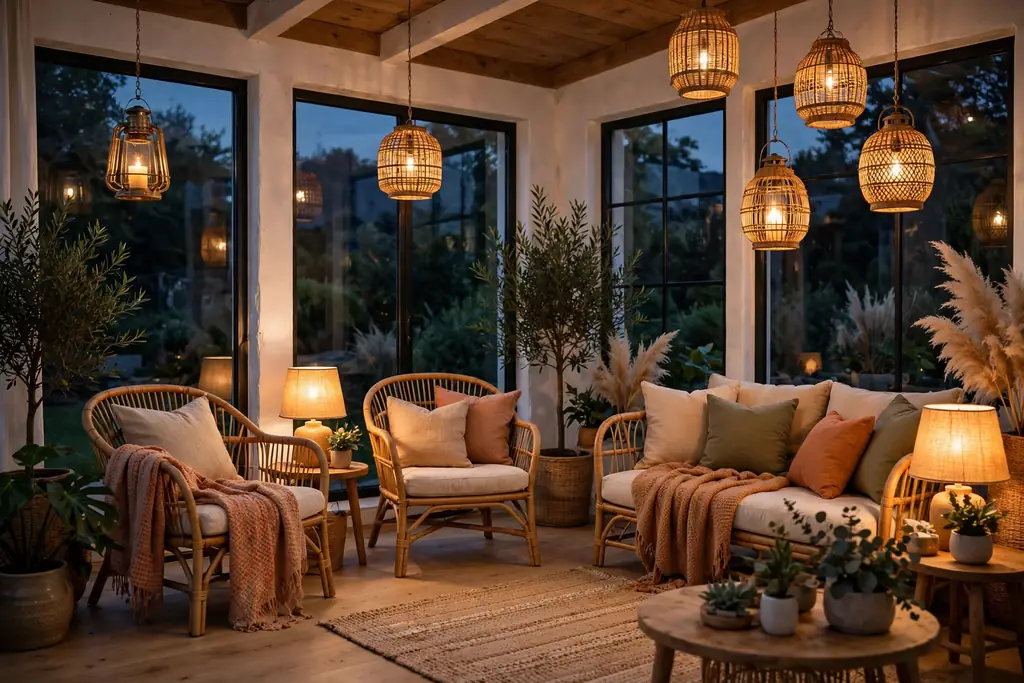
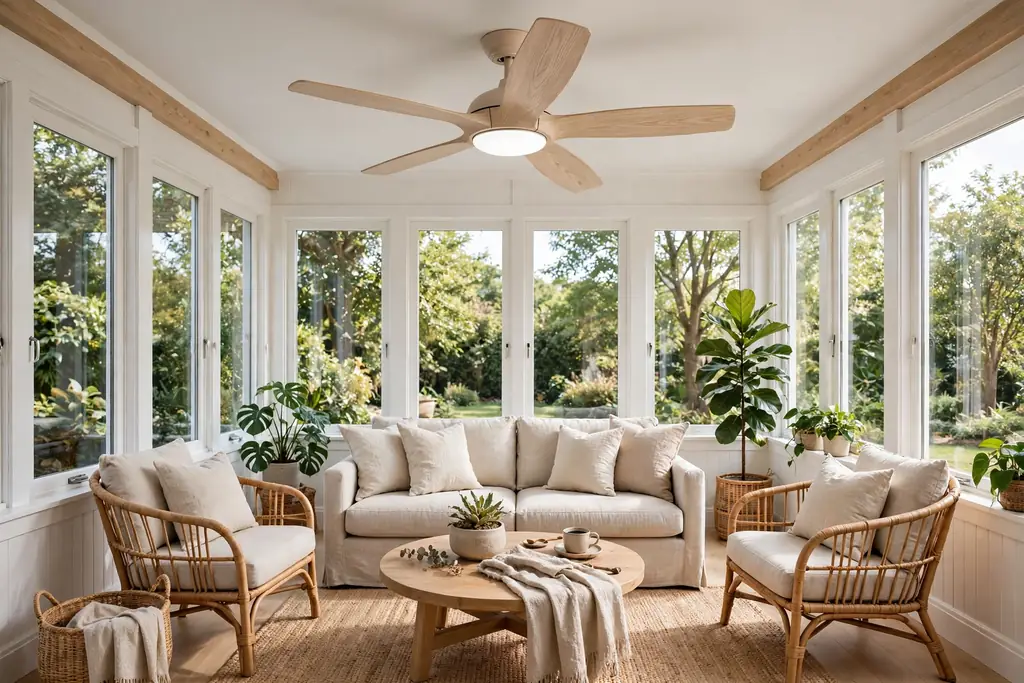
    7. Faux Tile Squares with a Stencil

    Concrete porch with cream and charcoal faux tile squares painted with a stencil.

    A stencil that mimics tile squares gives a wood or concrete porch the look of tile without the cost or weight of real tile. Choose a square stencil with a simple pattern, in two colors, such as cream and charcoal, and repeat it in a grid across the floor. This suits concrete porches especially well, where the flat surface takes a stencil cleanly.

    Start in the center of the porch and work outward, so the pattern stays centered at the door. Use a dense foam roller and very little paint per pass, so the stencil edges stay crisp. Seal the finished floor with a clear topcoat, since stenciled paint wears faster than a solid coat under foot traffic.

    8. Herringbone Painted Pattern

    Formal front porch with a herringbone painted pattern in cream and soft grey.

    A herringbone pattern paints short boards or rectangles in a zigzag layout, for a tailored floor that suits a formal entrance. Paint the rectangles in two tones, such as cream and soft grey, or in one color with a darker grout style line between each piece. Herringbone suits a rectangular porch where the pattern can run in full rows.

    Plan the layout on paper first, and mark the center lines on the floor before taping, since herringbone goes wrong fast without a guide. Keep the rest of the porch plain, with one pair of planters and a simple mat, so the floor stays the focus. This pattern takes more time than stripes or solids, so it suits a porch you plan to keep for years.

    9. Haint Blue Porch Floor

    Front porch with a pale blue green haint blue painted floor, white rocking chairs, and green plants.

    Haint blue, a soft blue green with a long history on Southern porches, gives an entrance a calm, sky linked color. Paint the floor in a pale blue green, and keep the ceiling and trim in white or the same blue, for a porch that feels light even in shade. Haint blue suits white houses, brick houses, and homes with deep porch roofs.

    Test the blue on a board in place, since porch shade can make it look grey, and sun can make it look bright. Pair it with white rocking chairs and green plants, and keep the door in a contrasting color, such as dark green or black, so the entrance still has a focal point.

    10. Brick Red Porch Floor

    Farmhouse porch with a muted brick red painted floor, warm white trim, and a cream front door.

    A brick red floor ties a porch to a brick house, a brick path, or red toned siding, and it grounds the entrance with a warm, earthy color. Paint the floor in a muted brick red, not a bright post box red, so it reads as a natural tone next to plants and wood. Brick red suits farmhouse and cottage style homes.

    Brick red hides dirt well, which helps on porches near gardens and gravel paths. Keep the trim in warm white and the door in cream, black, or dark green, so the red does not compete with the door color. A brick red floor pairs well with terracotta pots and dark wood furniture.

    11. Painted Border Frame

    Front porch with a pale floor and a dark charcoal painted border frame around the edge.

    A painted border frames the porch floor with a contrasting edge, for a finished look without painting the whole floor a new color. Paint the main floor in a pale tone, then paint a border band, about the width of one board, around the edge in a darker tone, such as charcoal or navy. This suits porches where the floor is in good shape but looks plain.

    Measure the border from the edge inward and tape both sides of the band, so the lines stay straight at the corners. Miter the corners by taping at a diagonal, or square them off for a simpler look. A border pairs well with a plain mat at the door and planters set inside the border line.

    12. Painted Rug at the Door

    Small front porch with a painted rug rectangle in charcoal and cream on the floor at the door.

    A painted rug is a flat rectangle painted on the floor at the door, in a pattern such as stripes or a simple border, that never needs shaking out. Paint the rectangle in a color that contrasts with the main floor, such as charcoal on cream, or cream on sage, and add a thin border line inside the edge. This suits small porches where a real rug would bunch or blow away.
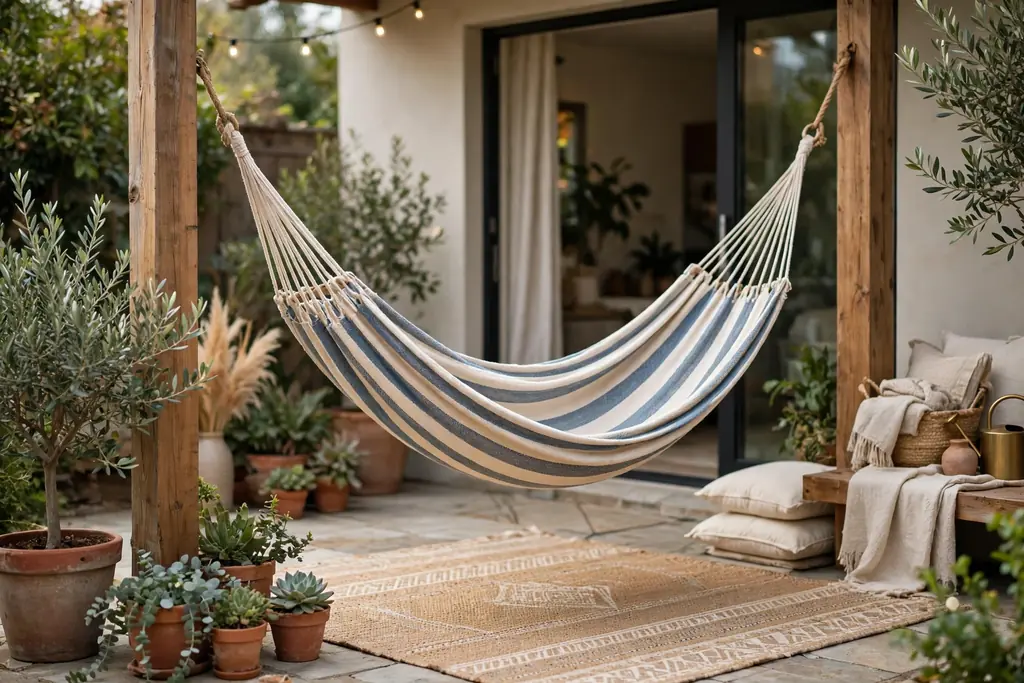
    Size the painted rug to the door, about as wide as the door plus a small margin on each side, and long enough for two steps. Keep the pattern simple, since a busy painted rug competes with the door itself. A painted rug also gives a useful landing zone for shoes and parcels, and it can be repainted when the pattern wears.

    13. Two Tone Floor and Steps

    Front porch with a cream painted floor and darker charcoal painted steps leading to the door.

    A two tone scheme paints the porch floor one color and the steps a second color, for a clear, layered entrance. Try a pale floor with darker steps, such as cream boards with charcoal steps, or a sage floor with white steps, so the change of level reads clearly. This suits porches with three or more steps, where the steps are a visible part of the entrance.

    Paint the steps with extra care at the edges, since step edges wear fastest, and add a non slip additive to the step paint if the porch gets wet. Keep the handrail and trim in one of the two colors, so the scheme stays to two tones plus white. A two tone floor also helps guests see the steps at dusk.

    14. Diamond Lattice Stencil

    Front porch with a navy diamond lattice stencil painted on a cream floor.

    A diamond lattice stencil paints a repeating diamond grid across the floor, for a pattern that feels dressier than stripes but calmer than checkerboard. Choose a stencil with open diamonds in one accent color over a pale base, such as navy diamonds on cream, or charcoal diamonds on soft grey. This suits a porch with plain furniture and a simple door.

    Align the stencil rows with chalk lines, and check the first row from the door before continuing, since a drift in the first row repeats across the floor. Use a light hand with the roller, and lift the stencil straight up to avoid smudging. Seal the floor well, since the fine lines of a lattice wear faster than broad bands of color.

    15. Dark Charcoal Modern Floor

    Modern farmhouse porch with a dark charcoal painted floor, white trim, and pale planters.

    A dark charcoal floor gives a porch a modern, grounded look and makes white trim, light doors, and green plants stand out. Paint the whole floor in a flat charcoal tone, and keep the walls and trim pale, so the porch does not feel dark. Charcoal suits modern farmhouse homes and houses with black window frames or black doors.

    Charcoal shows dust and pollen more than mid tones, so sweep it often, and expect to touch up scuffs near the door. Pair it with pale planters, a light mat, and wood furniture, so the porch keeps a warm note. A charcoal floor also suits a porch with strong sun, where pale floors can glare.

    16. Soft Butter Yellow Floor

    Cottage porch with a soft butter yellow painted floor, warm white trim, and white chairs.

    A soft butter yellow floor adds a gentle, sunny note to a porch without the boldness of a bright yellow. Paint the boards in a pale, creamy yellow, and keep the trim in warm white, so the color reads as soft rather than loud. Butter yellow suits cottage style homes, white siding, and porches that face north and need warmth.

    Test the yellow in shade, since it can look cream on a bright day and mustard in deep shade. Pair it with white chairs, green plants, and a door in sage or navy for contrast. Butter yellow hides light dust better than white, but shows dark soil marks, so keep a mat at the door.

    17. Alternating Accent Boards

    Long front porch with alternating navy accent boards on a cream painted floor.

    Alternating accent boards paint every third or fourth board in an accent color, with the rest in a neutral tone, for a subtle rhythm across the floor. Try navy accent boards on a cream floor, or terracotta accent boards on a warm grey floor, keeping the accent boards evenly spaced. This suits a porch where a full pattern would feel too busy, but a solid color feels too plain.

    Count the boards and mark the accent boards before painting, so the spacing stays even across the whole floor. Paint the neutral boards first, then the accent boards, and keep the door and planters in the neutral tone, so the accent color stays a rhythm rather than a theme. This idea also suits a long porch, where the repeated accent boards lead the eye to the door.

    Conclusion

    Painted porch floors work best when the color or pattern fits the house, the porch size, and the amount of upkeep you accept. Start with one idea from this list, test the color in place, and prep the floor well before you paint, since prep decides how long the finish lasts. A solid color is the safest first step, while checkerboard, stripes, and stencils reward a larger porch and a steadier hand. Whichever idea you pick, keep the door, planters, and seating calm, so the floor can carry the entrance, and touch up the high traffic spots once a season. For a seasonal take on the same entrance, the farmhouse fall palette of rust, cream, and olive pairs well with most of these floor colors.

    FAQs

    What paint should I use for a painted porch floor?

    Use paint rated for floors and outdoor use, with a primer suited to your floor material, wood or concrete, and a clear topcoat if the paint maker advises one. Floor rated paint resists scuffs and foot traffic better than wall paint, and outdoor rated paint handles rain and sun. Check the label for porch, deck, or concrete floor use before you buy, and follow the drying times between coats.

    How do I prepare a porch floor before painting?

    Prepare a porch floor by sweeping it clean, washing off dirt and mildew, sanding rough or peeling spots, and filling cracks and nail holes, then priming bare wood or bare concrete. Let the floor dry fully before priming, since trapped damp lifts paint. On a previously painted floor, sand glossy areas lightly so the new coat grips, and remove any loose paint first.

    Do painted porch floors last, and how do I keep them looking good?

    Painted porch floors last well on covered porches with good prep, and less long on open porches in harsh weather, but most last a few seasons before they need touch ups. Sweep weekly, keep a mat at the door to catch grit, and touch up chips at the threshold and step edges once a season. Repaint the whole floor when wear covers large areas rather than small spots.

    What is the best painted porch floor color for a small porch?

    The best painted porch floor color for a small porch is a pale solid, such as warm white, soft sage, or pale grey, since pale colors make a small floor feel open. Keep the pattern simple, with a border or a painted rug rather than a bold checkerboard, and repeat the floor color in one small touch, such as a planter or a cushion, so the small porch reads as planned.

    Can I paint a concrete porch floor?

    You can paint a concrete porch floor with concrete rated floor paint, after cleaning the surface, etching or priming it as the paint label directs, and letting it dry fully. Concrete takes stencils well, since the flat surface gives crisp edges, and solid colors look smooth on concrete. Avoid painting concrete that stays damp, since damp lifts paint, and use a non slip additive on steps.

    How do I choose between a solid color and a pattern for my porch floor?

    Choose a solid color if your porch is small, your door is already bold, or you want a quick refresh, and choose a pattern, such as checkerboard, stripes, or a stencil, if your porch is large and the rest of the entrance is plain. Patterns need a larger floor to breathe and more prep time, while solids suit a first painting project and hide small flaws better.


  • 19 Wrap Around Porch Ideas for Comfortable Outdoor Living

    19 Wrap Around Porch Ideas for Comfortable Outdoor Living

    A wrap around porch works best when each side has a clear job, such as seating on the sunny side, dining near the kitchen door, and a quiet chair at the far end. Start with one seating group, add shade and light, then use rugs and planters to mark each zone.

    The 19 ideas below suit porches that run along two or more sides of a house, from a narrow deck to a wide, covered porch. Many of them scale down to one chair and one planter, or up to a full dining group, and the same zoning approach that makes a fall porch ideas list feel welcoming works here all year, with seasonal pieces swapped as the weather changes. A farmhouse decor palette of wood, cream, and green keeps the zones feeling connected, even when each side serves a different purpose.

    Key Takeaways

    • Give each side of the porch a job: seating, dining, reading, or a quiet corner, so no stretch of decking sits unused.
    • Put the main seating group where the view and the breeze are best, and keep the path to each door clear.
    • Use outdoor rugs, planters, and light to mark zones, rather than walls or screens that block airflow.
    • Choose outdoor rated fabrics, fans, and lights, or bring cushions and throws indoors in rain, so the porch stays tidy.
    • Repeat two or three colors, such as cream, sage green, and warm wood, across textiles, pots, and cushions.
    • Keep one side flexible, with a bench or a small table that can serve guests, games, or extra dining seats.

    1. Rocking Chairs at the Corner Bend

    Two rocking chairs at the corner bend of a wrap around porch with a small table between them.

    Two rocking chairs at the corner bend make the turn of the porch a natural place to sit and watch the yard from two directions. Set the chairs at a slight angle to each other, with a small table between them for drinks, and leave enough room behind each chair for the rockers to move freely. The corner gives each chair a different view, so two people can sit together without facing the same way.

    Choose chairs rated for outdoor use, and add cushions with removable, washable covers, since porch cushions gather dust and pollen. If the corner is narrow, one rocking chair still works, placed beside the railing with a small side table. Add a folded throw over one chair arm for cool evenings.

    2. Porch Swing on the Long Side

    Wooden porch swing with cream cushions hanging on the long side of a wrap around porch.

    A porch swing on the long side of the house gives the porch its most inviting seat, with room to sway and a view down the length of the deck. Hang the swing from sturdy ceiling joists, with chains rated for the weight, and add a seat cushion and two back cushions in cream or natural linen. The long side suits a swing best, since it can move freely without hitting a wall or a door.

    Check the chains and hooks each season for rust or wear, and tighten them as needed. If the swing faces rain, use quick dry foam cushions or bring the cushions indoors at night. Keep one end of the swing clear of planters, so guests can step on and off with ease.

    3. Outdoor Sectional for a Living Room Zone

    Outdoor sectional sofa with a coffee table on a rug on a wrap around porch.

    An outdoor sectional turns one stretch of the porch into a living room, with a sofa, a corner seat, and a coffee table grouped on one rug. Set the sectional against the house wall, facing the yard, with the coffee table in reach of every seat. The grouped layout suits a wide porch best, where the sectional can sit clear of the walking path.

    Choose a sectional with outdoor rated cushions and a frame that handles rain, and keep a storage box nearby for extra cushions. If the porch is narrow, a two seat sofa and one chair give the same living room feel in less space. Add one throw and one lantern on the table to finish the group.

    4. Long Dining Table for Gatherings

    Long wooden dining table with chairs on a wrap around porch near a kitchen door.

    A long dining table near the kitchen door turns the porch into the main place for family meals in warm weather. Set a wood or metal table with six to eight chairs along the wall, so guests can reach the kitchen with ease, and leave room behind each chair to pull out. The long shape suits a wrap around porch, since it fits the length of the deck better than a round table.
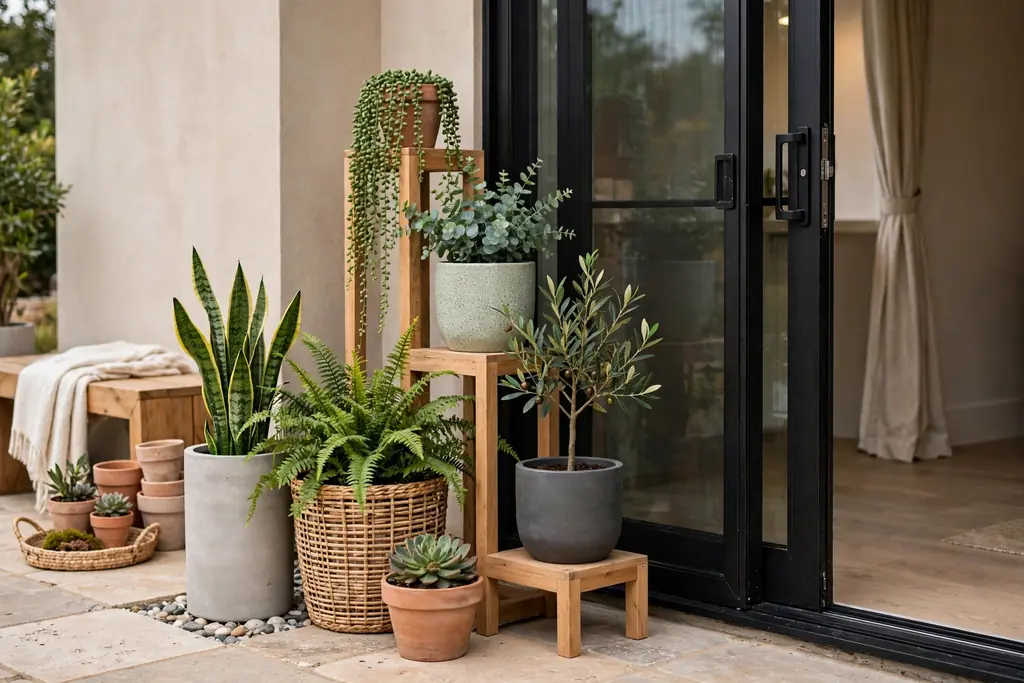
    Use placemats and a simple centerpiece, such as a low planter or a group of candles in glass holders, so the table stays clear for serving. If the table sits outside the roof line, choose a table rated for outdoor use and bring table linens indoors after meals. A bench on one side adds seats for children without extra chairs.

    5. Daybed for Afternoon Rests

    Porch daybed with pillows and a light throw in a covered corner of a wrap around porch.

    A porch daybed gives the quiet end of the porch a place for naps, reading, and long afternoon rests. Set the daybed against the house wall, with a thick mattress, several pillows, and a light throw, and keep a small side table nearby for a book and a drink. The daybed suits a covered corner best, where it stays dry and shaded through the day.

    Choose a mattress cover that can be removed and washed, and bring pillows indoors in rain or overnight in wet weather. If a full daybed feels too large, a wide chaise lounge gives the same restful seat in a smaller footprint. Place the daybed where the breeze reaches it, so it stays cool on warm afternoons.
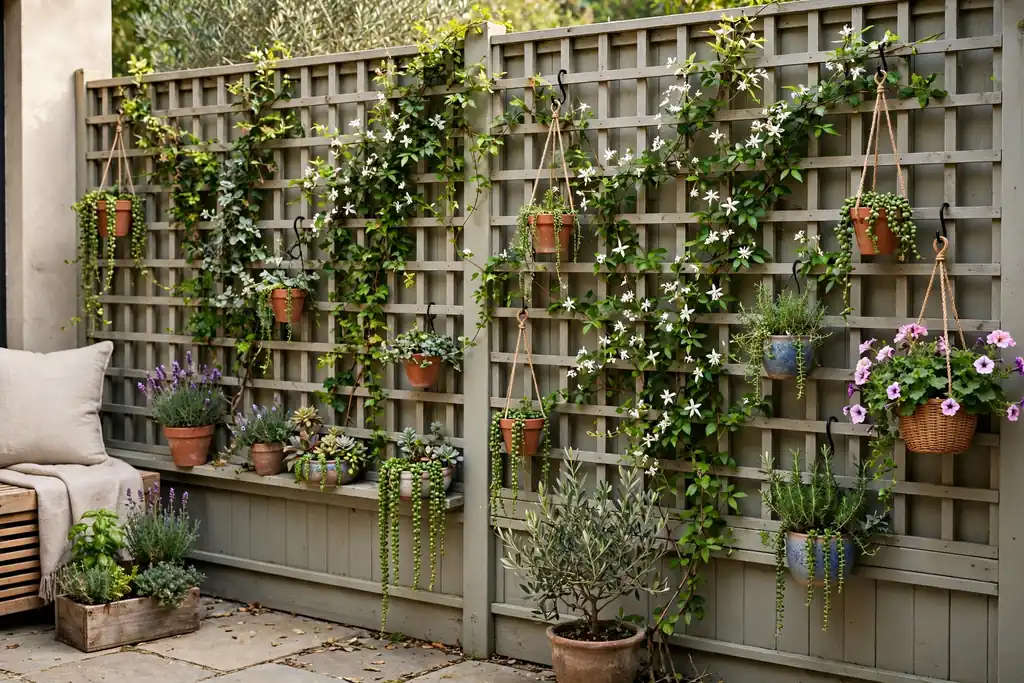
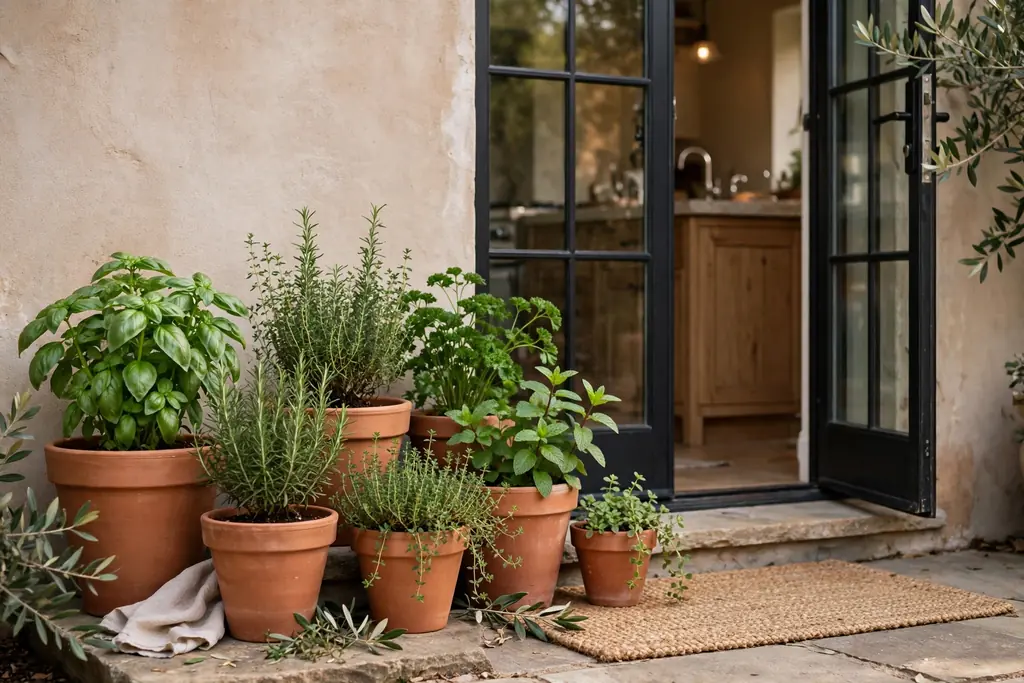
    6. Bistro Set for Morning Coffee

    Small bistro table with two chairs on the side of a wrap around porch facing a garden.

    A small bistro set at the side of the porch makes a simple spot for morning coffee, with two chairs and a round table that fit a narrow stretch of decking. Set the table near the railing, facing the garden, with one chair on each side, and keep the path behind the chairs clear. The small scale suits a side porch that cannot hold a full seating group.

    Choose a metal or wood set rated for outdoor use, and add one cushion to each chair for comfort. If the spot faces morning sun, add a small shade, such as a porch curtain or a tall planter, so the table stays pleasant through breakfast. Bring paper and fabric items indoors after use, since damp fabric can stain if left out overnight.

    7. Reading Chair with a Lamp and Side Table

    Deep reading chair with a lamp and side table in a sheltered corner of a wrap around porch.

    A reading chair with a lamp and a side table turns a sheltered corner into a private reading spot, away from the main seating group. Set a deep armchair near a post or a wall, with a small table for a book and a drink, and a portable or battery lamp for evening reading. The single chair needs little floor space, so it fits corners that larger groups cannot use.

    Pick a chair with outdoor rated fabric, or keep a washable cover on it, and bring the lamp indoors in rain if it is not rated for outdoor use. Add a small basket beside the chair for books and magazines, so the corner stays tidy. A footrest or a low stool makes long reading sessions more comfortable.

    8. Fire Table Seating for Cool Evenings

    Fire table with four chairs on a wide stretch of a wrap around porch in the evening.

    A fire table with four chairs extends porch use into cool evenings, with warmth at the center of a small seating circle. Set the fire table on a flat, stable part of the deck, with chairs pulled close enough to feel the warmth, and keep the table clear of fabric, dried plants, and paper. The fire table suits a wide, open stretch of porch, where smoke and heat can rise freely.

    Follow the maker’s safety guidance for clearance and fuel, and never leave a lit fire table unattended. Use a cover when the table is not in use, and keep a clear path to the door, so guests can move away from the heat with ease. If open flame is not practical for your porch, a group of large lanterns gives a similar warm glow without fire.

    9. Hanging Egg Chair at the Quiet End

    Hanging egg chair with a cushion at the quiet end of a wrap around porch.

    A hanging egg chair at the quiet end of the porch gives one person a sheltered, swaying seat for reading or resting. Hang the chair from its own stand or from a sturdy ceiling joist, with enough clearance to swing gently without hitting the wall or railing. The rounded shape suits a far corner, where it can sit apart from the main seating group.

    Check the stand and hooks for weight and wear each season, and add a seat cushion and a small pillow for comfort. If the chair faces rain, bring the cushion indoors at night, and keep the chair under the roof line when possible. One egg chair also gives children a favorite porch seat, so place it where adults can see it from the main group.

    10. Built-In Bench Along the Railing

    Built-in wood bench with cushions along the railing of a wrap around porch.

    A built-in bench along the railing adds seating without filling the porch with loose chairs, and it follows the line of the porch itself. Build or place a wood bench against the railing on a long side, with a seat cushion and two or three back pillows, and leave the walking path clear in front of it. The bench suits narrow porches best, since it uses the edge of the deck rather than the center.

    Add storage under the bench seat, if the design allows, for cushions, throws, or small garden tools. If the bench sits in sun, use a light cushion color that stays cool, and bring cushions indoors in heavy rain. A bench also gives extra seats at dining time, when guests can carry a plate to the railing side.

    11. Outdoor Rugs to Mark Separate Zones

    Outdoor rugs marking seating and dining zones on a long wrap around porch.

    Outdoor rugs mark separate zones on a long porch in one move, so the seating, dining, and reading areas read as distinct rooms. Lay one rug under the sectional, a second under the dining table, and a smaller rug at the reading chair, each large enough to sit under the front legs of the furniture. The rugs define each zone clearly, even on a porch with more than one use.

    Pick rugs rated for outdoor use, so they dry quickly after rain, and shake them out weekly so leaves and dirt do not build up underneath. If a rug sits on painted wood, lift it now and then to check for damp marks. Repeat one color across the rugs, such as cream or sage, so the zones feel connected rather than separate.

    12. Ceiling Fans for Airflow on Still Days

    Ceiling fans over seating zones on a covered wrap around porch.

    Ceiling fans keep a covered wrap around porch comfortable on still, warm days, when a long porch can feel hot despite the shade. Mount one fan over each main seating zone, sized to the porch width, with outdoor rated motors and blades, and set the fans to move air down over the seats. Fans suit a covered porch best, where they can hang from the ceiling joists.

    Check the fan mounts and blades each season for wear, and clean the blades so dust does not settle on the seating below. If wiring a new fan feels like a large job, a portable outdoor fan gives airflow to one zone without new wiring. Pair fans with shade on the sunny side, so the porch stays cool through the afternoon.

    13. String Lights and Lanterns for Evenings

    Warm string lights and lanterns on a wrap around porch at dusk.

    String lights and lanterns give a wrap around porch a warm glow after dark, when guests most often use it. Drape warm white string lights along the porch ceiling edge, around posts, or across a beam, with the cord tucked out of the walking path, and set lanterns on tables and steps for light at seat height. The two layers of light make the whole porch usable after sunset.

    Choose outdoor rated lights and a timer so they switch on at dusk without daily effort. Keep bulbs clear of dried leaves, curtains, and fabric, and check cords each season for wear. Warm white suits a porch better than cool white, since it echoes candlelight and keeps the porch feeling calm. Battery candles inside lanterns are a safe choice where wind or children make real flames risky.

    14. Outdoor Curtains for Shade and Privacy

    Outdoor curtains tied back along the sunny side of a wrap around porch.

    Outdoor curtains give a wrap around porch shade, privacy, and shelter from wind, without closing off the view entirely. Hang weather resistant curtains from a rod or wire along the sunny or street facing side, and tie them back when you want the porch open. The curtains suit a porch that faces a road or a neighbor, where privacy matters as much as shade.

    Choose curtains rated for outdoor use, in a light color that blocks sun without darkening the porch, and wash them as needed so pollen does not build up. Weight the hems or use tiebacks, so a breeze does not lift the fabric onto tables or lights. Keep curtains clear of fire tables, candles, and heaters, and bring them indoors in storms if they are not rated for high wind.

    15. Planters and Hanging Baskets Along the Railing

    Planters and hanging baskets with trailing plants along the railing of a wrap around porch.

    Planters and hanging baskets along the railing add living color to every side of a wrap around porch, and they soften the long line of the deck. Set large planters at the corners and beside the steps, with smaller pots spaced along the railing, and hang one basket from each post or ceiling hook, with trailing plants that spill over the rim. The plants draw the eye along the porch and tie it to the garden.

    Water hanging baskets more often than floor pots, since they dry out faster in wind and sun, and set each floor planter on a saucer or a flat stone to protect the decking. Match the plant to the light on each side: ferns and ivy for shade, geraniums and ornamental grass for sun. In cold weather, move tender plants close to the house wall for shelter, as in many exterior decorating for fall plans.

    16. Serving Station Near the Kitchen Door

    Serving station with a tray and plates beside the kitchen door on a wrap around porch.

    A serving station near the kitchen door makes porch dining simple, with drinks, plates, and serving dishes within easy reach of the table. Set a console table, a bar cart, or a sideboard against the wall beside the kitchen door, with a tray for drinks, a stack of plates, and a small planter on top. The station keeps the dining table clear for guests, since serving pieces stay off the table itself.

    Keep the station tidy and restock it before meals, so guests can help themselves without trips indoors. Choose a station rated for outdoor use, or bring it under the roof line in rain, and wipe it clean after meals. A cart with wheels suits a long porch best, since it can move to the seating zone for drinks and back to the door for serving.

    17. Games Table for Family Evenings

    Games table with four chairs and board games on a wrap around porch.

    A games table gives the porch a shared activity for family evenings, with a small table and four chairs set apart from the main seating group. Set a sturdy table near the railing, with chairs on all sides, and keep a basket or a box nearby for board games, cards, and puzzles. The table suits a side of the porch that gets evening light, so games can run after dinner.

    Choose a table with a wipe clean top, since drinks and snacks sit beside the games, and pick chairs that can be moved to the dining group when extra seats are needed. If the table sits outside the roof line, bring games indoors after play, so damp does not damage boards and cards. A games table also gives teenagers a porch spot of their own, away from adult conversation.

    18. Herb Pots by the Kitchen Door

    Herb pots with rosemary, thyme, and mint grouped by a kitchen door on a wrap around porch.

    Herb pots by the kitchen door add scent and useful green to the porch, and they sit within easy reach of cooking. Group three pots of different heights near the kitchen door, with rosemary, thyme, and mint, and water them in the morning so the soil stays damp but not soaked. Guests brush past the scent on the way to the dining table, and the herbs can go to the kitchen after.

    Set each pot on a saucer to protect the decking, and trim herbs often, since regular picking keeps the plants bushy. Mint spreads fast, so keep it in its own pot rather than sharing a planter. In cold weather, move tender herbs close to the house wall for shelter, or bring them indoors overnight in frost.

    19. Four Season Corner with Heaters, Throws, and Storage

    Sheltered four season porch corner with a heater, throws, and a storage bench on a wrap around porch.

    A four season corner keeps one part of the porch usable through cold months, with a heater, warm throws, and a storage bench for cushions. Set a small seating group in the most sheltered corner, with an outdoor rated heater placed at a safe distance from fabric and furniture, and a bench or box nearby for throws and cushion covers. The corner suits a covered side best, where wind and rain reach it least.

    Follow the heater maker’s safety guidance for clearance, and never leave a heater running unattended. Bring throws indoors in wet weather, and store cushions in the bench when the porch is not in use, so the corner stays ready for a mild winter day. Swap the throws and the planter contents with the season, and keep the seating and the heater in place all year.

    Conclusion

    A comfortable wrap around porch does not need new furniture on every side or a full redesign. Pick one seating group, one dining spot, and one quiet corner, then use rugs, planters, and light to mark each zone and keep the paths to the doors clear. Start with the side you use most this week, and add shade or light next, so the porch grows into a set of small outdoor rooms you use every day.

    FAQs

    What is a wrap around porch?

    A wrap around porch is a porch that runs along two or more sides of a house, often around a corner, giving access and outdoor living space on more than one side. It differs from a front porch, which covers only the entrance, since a wrap around porch can hold seating, dining, and quiet corners on separate sides.

    How do you arrange furniture on a wrap around porch?

    Arrange furniture on a wrap around porch by giving each side a job, such as seating on the sunny side, dining near the kitchen door, and a reading chair at the quiet end. Use rugs and planters to mark each zone, keep the paths to every door clear, and place the largest group where the view and the breeze are best.

    What furniture works best on a wrap around porch?

    Rocking chairs, a porch swing, an outdoor sectional, a long dining table, and a daybed work best on a wrap around porch, since they suit different sides and uses. Choose outdoor rated frames and cushions, add a storage bench for throws and cushion covers, and keep one side flexible with a bench or a small table for extra guests.

    How do you keep a wrap around porch comfortable in summer?

    Keep a wrap around porch comfortable in summer with ceiling fans for airflow, outdoor curtains or shade on the sunny side, and light colored cushions that stay cool. Place seating where the breeze reaches it, water plants in the morning, and bring cushions indoors in heavy rain so the porch stays dry and tidy.

    How do you light a wrap around porch for evenings?

    Light a wrap around porch for evenings with string lights along the ceiling edge for overall glow, plus lanterns on tables and steps for light at seat height. Use warm white, outdoor rated lights on a timer, keep cords out of walking paths, and add battery candles inside lanterns where wind or children make real flames risky.

    Can a wrap around porch be used in cold weather?

    A wrap around porch can be used in cold weather in its most sheltered corner, with an outdoor rated heater, warm throws, and a storage bench for cushions. Follow the heater maker’s safety guidance for clearance, keep fabric clear of the heater, bring throws indoors in wet weather, and swap planter contents with the season.


  • 21 Back Porch Decorating Ideas for a Relaxing Outdoor Space

    21 Back Porch Decorating Ideas for a Relaxing Outdoor Space

    Back porch decorating ideas work best when you start with comfortable seating, shade, soft light, and plants, then add one calm focal point such as a rug, a swing, or a fountain. Keep the walking path clear, repeat two or three colors, and choose outdoor rated pieces so the porch stays inviting in sun and rain.

    The 21 ideas below suit small back porches as well as wide ones, since most of them scale down to one chair and one planter, or up to a full seating and dining group. Pick one seating idea and one light idea first, then add shade and plants. The same layered approach that makes fall porch ideas feel welcoming works on a back porch all year, and a fall front porch palette can guide the colors you repeat out back.

    Key Takeaways

    • Start with seating you want to sit in: deep chairs, a swing, or a daybed, not decor alone.
    • Give the porch one clear zone for sitting and one clear path to the yard, so nothing blocks the door or the steps.
    • Repeat two or three colors, such as cream, sage green, and warm wood, across cushions, pots, and textiles.
    • Add shade and soft light early, since a porch that is too bright at noon or too dark at dusk gets little use.
    • Choose outdoor rated fabrics and finishes, or bring cushions and throws indoors in rain, so the porch stays tidy.
    • Add plants at varied heights, and keep one calm focal point, such as a rug, a fountain, or a swing, so the porch reads as one plan.

    1. Deep-Seated Lounge Chairs with Weatherproof Cushions

    Two deep seated lounge chairs with weatherproof cushions and a small table on a back porch.

    Deep-seated lounge chairs are the simplest way to make a back porch feel like a room. Choose two chairs with thick seat cushions, a low back, and armrests at a height that supports a book or a drink. Place them at a slight angle toward the yard, with a small table between them, so conversation feels natural and the view stays open.

    Pick cushions with removable, washable covers and quick dry fills, since porch cushions gather dust and pollen. If the porch is narrow, one deep chair still gives the same restful feel, placed beside a side table and a planter. Add a folded throw over one arm for cool evenings, and keep the chair feet on a rug or flat stones so they do not mark decking.

    2. Wooden Porch Swing with Soft Cushions

    Wooden porch swing with soft cream cushions hanging on a back porch.

    A wooden porch swing turns a back porch into a place to sit and stay. Hang the swing from sturdy ceiling joists, with chains rated for the weight, and add a seat cushion and two back cushions in cream or natural linen. The gentle motion suits a wide porch best, where the swing can move freely without hitting the wall or railing.

    Check the chains and hooks each season for rust or wear, and tighten them as needed. If the swing faces rain, use quick dry foam cushions or bring the cushions indoors at night. Keep one end of the swing clear of planters, so guests can step on and off with ease, and place a small rug under the swing to catch dust from shoes.

    3. Outdoor Daybed for Afternoon Rests

    Outdoor daybed with a firm base cushion and back pillows in a shaded back porch corner.

    An outdoor daybed gives a back porch a clear spot for naps, reading, and long sits. Choose a daybed with a firm base cushion, a back cushion along one side, and a few smaller pillows for support. Place it against the house wall or in a shaded corner, with a side table close by for water, glasses, or a book.

    Use outdoor rated fabric for the base and back cushions, and store extra pillows in a dry box when rain is forecast. If space is tight, a single daybed can replace two chairs, since it seats two people for a chat and one person stretched out for a rest. Keep a light blanket folded at the foot of the daybed for cool afternoons.

    4. Layered Outdoor Rug Under the Seating Group

    Large patterned outdoor rug under back porch chairs and a small table.

    A large outdoor rug under the seating group defines the porch living area in one move. Lay a flat, washable rug in cream and sage, navy, or rust stripes, large enough to sit under the front legs of chairs and a table. The rug marks the seating zone clearly, even on a long porch with more than one use.

    Pick a rug rated for outdoor use, so it dries quickly after rain, and shake it out weekly so leaves and dirt do not build up underneath. If the rug sits on painted wood, lift it now and then to check for damp marks. A patterned rug pairs well with plain cushions, since the rug carries the pattern while the chairs stay calm.

    5. String Lights Across the Porch Ceiling

    Warm string lights draped across a back porch ceiling at dusk.

    String lights across the porch ceiling give the porch a gentle glow that flatters every other piece on display. Drape warm white lights along the ceiling edge, around posts, or across a beam, with the cord tucked out of the walking path. The light makes the porch usable after sunset and highlights plants and seating.

    Choose outdoor rated lights and a timer so they switch on at dusk without daily effort. Keep bulbs clear of dried leaves, curtains, and fabric, and check the cord each season for wear. Warm white suits a relaxing porch better than cool white, since it echoes candlelight and keeps the porch feeling calm.

    6. Lantern Clusters on Tables and Steps

    Lanterns with battery candles grouped on a back porch table and steps.

    Lanterns with battery candles add warm light at table height and at the steps, where guests most often arrive. Group three lanterns of varied heights on a side table or at the base of the steps, with battery candles inside for safety. The glow softens the whole porch and makes the door and steps easier to find after dark.

    Use battery candles on porches where wind or children make real flames risky, and keep real candles inside glass with a stable base if you use them. Bring lanterns indoors in storms, and wipe the glass clean so the light stays bright. Black metal lanterns suit most house styles, while wood or brass lanterns warm a rustic porch.

    7. Outdoor Curtains for Shade and Privacy

    Outdoor curtains in a light color hanging along the open side of a back porch.

    Outdoor curtains give a back porch shade, privacy, and a soft room feel in one step. Hang weatherproof curtain panels from a rod or wire along the open side of the porch, and draw them closed on the sunny side or the side facing neighbors. The fabric softens hard posts and railings and cuts glare on bright afternoons.

    Choose curtains rated for outdoor use, in a light color that still lets some daylight through, and tie them back with simple ties when you want the view open. Wash the panels now and then, and bring them indoors in storms if they are not rated for heavy rain. Curtains also help a porch feel enclosed on cool evenings, when paired with lantern light.

    8. Large Patio Umbrella Over a Dining Spot

    Large patio umbrella shading a back porch dining table and chairs.

    A large patio umbrella shades a back porch dining spot without a fixed roof change. Set a heavy base under the table, open the umbrella so it covers the table and chairs, and tilt it in late afternoon so the shade follows the sun. The umbrella suits a porch with an open edge or a deck beyond the roof line best.

    Choose a base heavy enough that wind cannot tip the umbrella, and close it in storms or strong gusts. If the table sits near the house wall, a half umbrella or a wall mounted shade may fit better than a full round one. Keep the umbrella fabric clean and dry before storing it, so it stays free of marks through the season.

    9. Potted Plants in Varied Heights

    Potted plants in varied heights grouped near a back porch door and railing.

    Potted plants in varied heights give a back porch living color with a clear plan. Group pots of different heights near the door, the railing, and the seating, with tall plants at the back, mid height plants in the middle, and trailing plants at the front. The mix keeps the porch from looking flat, even with a small plant count.

    Water plants when the top of the soil feels dry, and set each pot on a saucer or flat stone to protect steps and decking. Match the plant to the light: shade loving plants for a covered porch, sun loving plants for an open edge. When a plant finishes, the same pots can hold evergreen cuttings or seasonal flowers, so the structure stays in place.

    10. Hanging Planters from Porch Posts

    Hanging planters with trailing plants hanging from back porch posts.

    Hanging planters add green at eye level and above, where floor space is short. Hang one planter from each porch post or ceiling hook, with trailing ivy, ferns, or flowering plants that spill over the rim. The planters soften plain posts and draw the eye up to the porch roof.

    Water hanging planters more often than floor pots, since they dry out faster in wind and sun. Check the hooks and chains for weight, and bring planters indoors in frost or storms. For a matched look, use the same plant in each planter, and vary only the planter color or hanger, so the display reads as planned.

    11. Herb Pots by the Steps

    Terracotta herb pots grouped beside back porch steps.

    Herb pots by the steps add scent and useful green to the back porch entrance. Group three pots of different heights near the steps, with rosemary, thyme, and mint, and water them in the morning so the soil stays damp but not soaked. Guests brush past the scent on the way to the yard, and the herbs can go to the kitchen after.

    Set each pot on a saucer to protect steps and decking, and trim herbs often, since regular picking keeps the plants bushy. Mint spreads fast, so keep it in its own pot rather than sharing a planter. In cold weather, move tender herbs close to the house wall for shelter, or cover them with cloth overnight.

    12. Small Bistro Table for Morning Coffee

    Small bistro table with two chairs and coffee cups on a back porch.

    A small bistro table makes a casual back porch spot for morning coffee or a quiet drink. Set a round metal or wood table near the railing, with two chairs, and keep the top clear except for two cups and a small plant. The small scale suits a narrow porch, where a full dining table would block the path.

    Weight a tablecloth or use placemats instead of a loose cloth, so a breeze does not lift it onto cups. Keep paper or fabric clear of candles, and bring cushions indoors after use if rain is forecast. For everyday use, two woven placemats and one small vase give the table a finished look without daily effort.

    13. Outdoor Dining Table for Gatherings

    Outdoor dining table with chairs set for a gathering on a back porch.

    An outdoor dining table turns a back porch into a gathering spot for meals with family and friends. Choose a table that seats your usual group with room for serving dishes, and pair it with chairs that slide in fully so the path stays clear. Place the table near the kitchen door when you can, so carrying food stays short.

    Pick a table material rated for outdoor use, such as treated wood, metal, or stone, and wipe it clean after meals so food marks do not set. If the porch is small, a folding table that stores flat gives you gathering space only when you need it. Add one centerpiece, such as a lantern or a low plant, and keep the rest of the table clear for plates.

    14. Hammock Chair in a Quiet Corner

    Hammock chair with a cushion hanging in a quiet back porch corner.

    A hammock chair in a quiet corner gives a back porch a single seat made for slow sitting. Hang the chair from a sturdy ceiling joist or a freestanding frame, with room to swing gently without hitting the wall or railing. Add one cushion and a small footrest or side table, so the chair works for reading as well as resting.

    Check the hanging hardware each season for wear, and keep the chair weight limit in mind when choosing a frame. If the chair faces rain, bring the cushion indoors at night, and let the fabric dry fully before storing it. A hammock chair suits a corner that gets morning light, where one person can sit apart from the main seating group.

    15. Woven Basket with Throws and Blankets

    Woven basket with folded throws beside back porch seating.

    A woven basket with throws and blankets keeps cozy layers within reach on a back porch. Set a sturdy basket beside the seating group, roll or fold two or three throws inside, and drape one throw over the basket edge so guests see it and use it. The basket adds texture and keeps throws off the chairs.

    Keep the basket light enough to move in one hand, so you can lift it indoors on wet nights. Choose washable throws, and shake them out weekly so dust and leaves do not build up. A basket with handles also moves easily indoors, so the same throws can follow you into the living room when the evening turns cool.

    16. Tabletop Fire Bowl for Cool Evenings

    Small tabletop fire bowl with a flame on a heat safe table on a back porch at dusk.

    A tabletop fire bowl adds warmth and a focal point to a back porch on cool evenings. Set a small, stable fire bowl on a heat safe table, away from curtains, cushions, and overhanging plants, and follow the maker instructions for fuel and use. The flame gives the seating group a center to gather around after sunset.

    Keep the fire bowl clear of fabric and dried plants, and never leave it burning when you go indoors or go to bed. Choose a bowl size that suits the table, so it does not crowd drinks or plates, and let it cool fully before moving it. On a small porch, a single fire bowl can replace several lanterns as the evening light source.

    17. Outdoor Ceiling Fan for Airflow

    Outdoor ceiling fan mounted over a back porch seating group.

    An outdoor ceiling fan keeps a back porch comfortable on warm, still days. Mount a fan rated for damp or wet locations on the porch ceiling, centered over the seating group, and run it at a low speed for a gentle breeze. The moving air makes the porch usable in heat that would otherwise push everyone indoors.

    Choose a fan size that suits the porch: a small fan for a narrow porch, a larger fan or two fans for a wide porch. Clean the blades now and then, since porch dust settles on them, and check the mount each season for wear. A fan also helps keep flying insects from settling over the seating area on calm evenings.

    18. Rolling Drink Cart for Easy Serving

    Rolling drink cart with glasses and a pitcher beside back porch seating.

    A rolling drink cart makes serving on a back porch simple, since drinks, glasses, and snacks move in one trip. Set a cart with two shelves beside the seating group, stock the top shelf with glasses and a pitcher, and keep the lower shelf for extra supplies. The wheels let you roll the cart indoors when rain arrives.

    Keep the cart off the main walking path, and lock the wheels when it is in place so it does not roll on a sloped floor. Wipe the shelves clean after use, and avoid overloading the top shelf, since a heavy cart tips more easily. A cart also works as a plant stand or a book holder when it is not serving drinks.

    19. Small Fountain for Gentle Sound

    Small fountain with gentle water flow near back porch seating.

    A small fountain adds gentle water sound to a back porch, which helps mask street noise and makes the space feel calm. Choose a tabletop or floor fountain that suits the porch size, set it on a level, waterproof base near the seating, and keep the water level topped up so the pump runs quietly. The sound suits a porch used for reading and resting best.

    Place the fountain where splashes cannot reach cushions, rugs, or wood floors, and clean the pump and basin now and then so the water stays clear. In cold weather, drain the fountain and bring it indoors if frost is forecast, since frozen water can crack the basin. A solar fountain suits a sunny porch edge with no nearby outlet.

    20. Trellis Screen with Climbing Plants

    Trellis screen with climbing plants giving privacy on the side of a back porch.

    A trellis screen with climbing plants gives a back porch privacy and green in one structure. Set a freestanding or wall mounted trellis on the side facing neighbors or the street, and train climbing plants such as jasmine, ivy, or clematis up the frame. The screen softens a plain railing and frames the seating area.

    Fix the trellis firmly so wind cannot topple it, and trim the plants often so they do not block the path, the light, or the house numbers. Choose plants suited to your light and climate, and water them at the base so the roots stay damp. A trellis also works as a backdrop for string lights in the evening.

    21. Reading Nook with a Storage Bench

    Reading nook with a storage bench, cushions, and books on a back porch.

    A reading nook with a storage bench turns one end of a back porch into a quiet retreat. Set a bench with storage underneath at the far end of the porch, add a seat cushion and two back pillows, and keep books, a blanket, and a small lamp or lantern in the bench. The storage keeps the nook tidy, while the pillows make it a seat guests return to.

    Keep the bench close to good light, near a window or under a porch light, and choose a bench lid that lifts with ease. Empty the storage now and then, so it does not fill with items that belong indoors. A reading nook suits a porch with a calm corner away from the dining table, where one person can sit apart from the group.

    Conclusion

    A relaxing back porch does not need new furniture or a full redesign. Pick comfortable seating, one shade idea, soft light, and plants at varied heights, then repeat a small palette through cushions and pots and keep the path to the yard clear. Start with one idea from this list this week, and add shade or light next, so the porch grows into a place you use every day.

    FAQs

    What is the best seating for a relaxing back porch?

    A relaxing back porch needs seating you want to sit in for an hour, such as deep lounge chairs, a porch swing, or a daybed with thick outdoor cushions. Pair the seating with a small side table and a rug, keep the path to the yard clear, and add a throw for cool evenings so the seat stays inviting in every season.

    How do I decorate a small back porch?

    Decorate a small back porch with one chair or a bistro set, one planter group, a rug, and string lights, keeping the path to the door and steps clear. Choose vertical pieces, such as hanging planters or a trellis screen, for height without floor space, and skip large dining groups that block movement.

    What colors work best for a relaxing back porch?

    Cream, warm white, sage green, soft grey, and natural wood tones work best for a relaxing back porch, with one accent color, such as navy, rust, or muted blue, in cushions or pots. Repeat each color at least twice, across textiles, pots, and the rug, so the porch reads as one plan rather than a set of separate pieces.

    How do I add shade to a back porch without a roof change?

    Add shade to a back porch with outdoor curtains, a large patio umbrella, or a trellis screen with climbing plants, none of which need a roof change. Curtains suit a covered porch edge, an umbrella suits a dining spot beyond the roof line, and a trellis suits a side that needs privacy as well as shade.

    How do I keep back porch cushions and throws in good shape outdoors?

    Keep back porch cushions and throws in good shape by choosing outdoor rated fabrics with removable, washable covers, and bringing them indoors in rain and overnight in wet weather. Shake cushions out weekly, store them in a dry box when not in use, and pick quick dry foam fills for chairs outside the roof line.

    What plants suit a back porch?

    Ferns, trailing ivy, potted herbs, climbing jasmine, and sun loving flowers suit a back porch, since they suit plain pots and need only regular water and trimming. Match the plant to the light: ferns and ivy for shade, herbs and flowers for sun, and evergreen plants for color through winter.


  • 23 Farmhouse Front Porch Ideas for a Warm Welcome

    23 Farmhouse Front Porch Ideas for a Warm Welcome

    A farmhouse front porch feels warm and welcoming when you layer natural wood, soft textiles, and living plants around a clear path to the door. Start with comfortable seating, a wreath or sign at the door, layered mats, and warm light, then add planters and simple seasonal touches that suit your porch size and climate.

    The 23 ideas below work for small stoops as well as wide wraparound porches, since most of them scale down to one chair and one planter, or up to a full seating group. Pick one idea at the door and one for seating first, then add plants and light. The same layered approach that makes a fall front porch feel inviting works all year, with the seasonal pieces swapped in a farmhouse fall palette when autumn arrives.

    Key Takeaways

    • Start at the door: a wreath, layered mats, and one pair of planters set the tone for the whole porch.
    • Keep the path to the door clear, with seating and decor grouped to the sides, so guests can reach the door with ease.
    • Repeat two or three colors, such as cream, sage green, and warm wood, across textiles, pots, and cushions.
    • Choose outdoor rated fabrics and finishes, or bring cushions and throws indoors in rain, so the porch stays tidy.
    • Add warm light with lanterns, sconces, or string lights, since porches are used most in the early evening.
    • Swap only the small seasonal pieces, such as wreaths and door mats, and keep the seating and planters in place all year.

    1. White Rocking Chairs with Plaid Cushions

    Two white rocking chairs with plaid cushions and a small table on a farmhouse front porch.

    Two white rocking chairs with plaid cushions are the classic farmhouse porch welcome. Set them side by side near the railing, facing the yard or the street, with a small table between them for drinks. The white paint keeps the porch bright, while the plaid cushions add pattern without a new furniture purchase.

    Choose cushions with removable, washable covers, since porch cushions gather dust and pollen. If your porch is narrow, one rocking chair still gives the same welcome, placed beside the door with a small side table. Add a folded throw over one chair arm for cool evenings.

    2. Layered Doormats and a Plaid Rug

    Layered plaid rug under a coir doormat at a farmhouse front door threshold.

    Layering a larger patterned rug under a smaller coir doormat dresses the threshold in one step. Lay a flat outdoor rug in muted plaid or stripes first, then center the coir mat on top, leaving an even border of pattern showing on all sides. The layers catch dirt and give the doorway a finished look.

    Keep both mats low and flat so the door opens freely over them. Shake them out weekly, and move the patterned rug to a dry spot in heavy rain if it is not rated for outdoor use. Swap the top mat for a seasonal version later in the year while the base rug stays put.

    3. Eucalyptus Wreath on a Painted Door

    Simple eucalyptus wreath hanging on a painted farmhouse front door.

    A simple eucalyptus wreath suits a painted farmhouse door in any season. Choose a full, round wreath in soft green, sized to the door so it does not cover the handle or the letterbox, and hang it from an over door hook. The green softens a bold door color and adds a fresh note at eye level.

    Check that the door still closes fully and that the wreath does not catch on the frame. If your door faces strong sun, pick a wreath with fade resistant leaves, and bring a dried wreath indoors during heavy rain to keep it looking fresh. A plain twig wreath with a few eucalyptus stems can stay up all year.

    4. Galvanized Planters with Ferns

    Galvanized metal planters with green ferns beside a farmhouse front door.

    Galvanized metal planters filled with ferns give the porch living color with a clear farmhouse note. Set one planter on each side of the door, or group three planters of different heights on one side for a fuller display. The grey metal contrasts with wood siding and white trim, and ferns stay green through much of the year.

    Water ferns when the top of the soil feels dry, and set each planter on a saucer or a flat stone to protect steps and decking. In a sunny spot, swap ferns for trailing ivy or ornamental grass, which handle direct light better. When the plants finish, the same planters can hold evergreen cuttings for winter.

    5. Wooden Porch Swing with Cream Cushions

    Wooden porch swing with cream cushions hanging on a farmhouse front porch.

    A wooden porch swing with cream cushions turns the porch into a place to sit and stay. Hang the swing from sturdy ceiling joists, with chains rated for the weight, and add a seat cushion and two back cushions in cream or natural linen. The swing suits a wide porch best, where it can move freely without hitting the wall or railing.

    Check the chains and hooks each season for rust or wear, and tighten them as needed. If the swing faces rain, use quick dry foam cushions or bring the cushions indoors at night. Keep one end of the swing clear of planters, so guests can step on and off with ease.

    6. Lanterns Along the Steps

    Lanterns with warm candles lined along farmhouse front porch steps.

    Lanterns along the steps add warm light to the porch after dark, when guests most often arrive. Place one lantern on each step, or group three lanterns of varied heights at the base of the steps, with battery candles inside for safety. The glow softens the whole entrance and makes the house number and door easier to find.

    Use battery candles on porches where wind or children make real flames risky, and keep real candles inside glass with a stable base if you use them. Bring lanterns indoors in storms, and wipe the glass clean so the light stays bright. Black metal lanterns suit most house styles, while wood or brass lanterns warm a rustic porch.

    7. Farmhouse Bench with Baskets Underneath

    Wooden farmhouse bench with woven baskets underneath and a cushion on the seat.

    A farmhouse bench with woven baskets underneath gives guests a place to sit and gives you hidden storage. Set a wood bench beside the door, with two baskets below for shoes, dog leads, or small garden tools. Add one cushion and a folded throw on the bench seat, so it reads as seating rather than storage alone.

    Keep the baskets tidy and empty them weekly, so they do not become a dumping spot. Choose baskets that fit the bench frame with a small gap on each side, so they slide out with ease. If the bench sits outside the roof line, use outdoor rated baskets or bring them indoors in wet weather.

    8. Milk Can with Dried Stems

    Old milk can filled with dried stems standing in a farmhouse porch corner.

    An old milk can filled with dried stems adds height and a collected farmhouse note to a porch corner. Set the can beside the door or bench, fill it with a bundle of dried wheat, cotton stems, or tall branches tied at the base, and let the stems fan out above the rim. The tall shape suits a corner that pots alone cannot fill.

    Weigh the can down with stones at the base so wind cannot tip the tall stems. Trim stems to a height that clears the porch roof and does not block windows. Keep dried stems away from open flames, and shake them outdoors once a month so dust does not build up.

    9. Tall Wood Welcome Sign by the Door

    Tall weathered wood welcome sign leaning beside a farmhouse front door.

    A tall wood welcome sign leans beside the door and greets guests before they knock. Choose a sign in weathered wood with simple painted lettering, and lean it against the wall or porch post at a slight angle. It fills a narrow gap beside the door that pots alone cannot fill.

    Secure the sign so wind cannot topple it, with a small stake behind it or a heavy base pot at its foot. Keep the lettering simple and easy to read from the walkway, and avoid signs with long phrases that crowd the board. A plain welcome sign works in every season, so it is one of the longest lived porch pieces.

    10. Hanging Baskets with Trailing Plants

    Hanging baskets with trailing green plants hanging from farmhouse porch posts.

    Hanging baskets with trailing plants add green at eye level and above, where floor space is short. Hang one basket from each porch post or ceiling hook, with trailing ivy, petunias, or ferns that spill over the rim. The baskets soften plain posts and draw the eye up to the porch roof.

    Water hanging baskets more often than floor pots, since they dry out faster in wind and sun. Check the hooks and chains for weight, and bring baskets indoors in frost or storms. For a matched look, use the same plant in each basket, and vary only the basket liner or hanger.

    11. Striped Outdoor Rug Under the Seating

    Striped outdoor rug under porch chairs and a small table on a farmhouse porch.

    A striped outdoor rug under the seating group defines the porch living area in one move. Lay a flat, washable rug in cream and sage, navy, or rust stripes, large enough to sit under the front legs of chairs and a table. The rug marks the seating zone clearly, even on a long porch with more than one use.

    Pick a rug rated for outdoor use, so it dries quickly after rain, and shake it out weekly so leaves and dirt do not build up underneath. If the rug sits on painted wood, lift it now and then to check for damp marks. A striped rug pairs well with plain cushions, since the rug carries the pattern.

    12. Potted Topiary by the Door

    Potted ball topiary in a stone pot beside a farmhouse front door.

    A potted topiary by the door gives the entrance a tidy, formal shape. Choose one ball or cone topiary in a plain terracotta or stone pot, and set one on each side of the door for symmetry, or a single topiary beside a bench for a quieter look. The clipped shape contrasts with looser plants nearby.

    Water topiary when the top of the soil feels dry, and trim stray shoots with small shears to keep the shape neat. In a sunny spot, boxwood topiary holds its shape well, while a rosemary topiary adds scent near the door. Bring tender topiary indoors in hard frost, or cover it with cloth overnight.

    13. Vintage Ladder with Folded Throws

    Vintage wood ladder with folded throws leaning against a farmhouse porch wall.

    A vintage wood ladder leaning against the porch wall holds folded throws within easy reach. Lean the ladder at a slight angle, with the feet firm on the porch floor, and drape one throw over each rung, in cream, rust, and a muted check. The ladder adds height to a blank wall and keeps throws off the chairs.

    Secure the ladder so it cannot slide, with small pads under the feet and a hook at the top if needed. Keep the throws light, so the ladder does not tip, and bring them indoors in rain. This idea suits a covered porch best, where the ladder and throws stay dry through the day.

    14. Window Boxes with Seasonal Flowers

    Window boxes with pink and white flowers under farmhouse front windows.

    Window boxes with seasonal flowers dress the porch from the street as well as from the chairs. Fit a wood or metal box under each front window, line it, and fill it with flowers in your porch palette, such as white petunias, pink geraniums, or trailing lobelia. The flowers soften the house front and tie the porch to the garden.

    Water window boxes often, since shallow boxes dry out fast, and deadhead spent blooms to keep new buds opening. Choose boxes with drain holes, and set a tray beneath them if they hang over seating. Swap the flowers with the season, and keep the box itself in place all year.

    15. Warm String Lights Along the Porch Ceiling

    Warm string lights draped along a farmhouse porch ceiling at dusk.

    String lights along the porch ceiling give the porch a gentle glow that flatters every other piece on display. Drape warm white lights along the ceiling edge, around posts, or across a beam, with the cord tucked out of the walking path. The light makes the porch usable after sunset and highlights the wreath and planters.

    Choose outdoor rated lights and a timer so they switch on at dusk without daily effort. Keep bulbs clear of dried leaves, garlands, and fabric, and check the cord each season for wear. Warm white suits a farmhouse porch better than cool white, since it echoes candlelight and keeps the porch feeling calm.

    16. Wicker Chairs and a Small Side Table

    Wicker chairs with cream cushions and a small side table on a farmhouse front porch.

    Wicker chairs with a small side table make a compact porch seating group for morning coffee or evening chats. Set two wicker chairs at a slight angle, with a round side table between them, and add plain cushions in cream or sage. The woven texture suits a farmhouse porch and reads lighter than solid wood chairs.

    Choose wicker rated for outdoor use, or bring the chairs under cover in heavy rain, and wipe them clean so dust does not settle in the weave. If the chairs are used daily, pick washable cushion covers and shake them out each week. A small table also gives guests a place for keys and parcels.

    17. Boxwood Wreath for All Seasons

    Plain deep green boxwood wreath hanging on a farmhouse front door.

    A boxwood wreath is the year round option for a farmhouse front door. Choose a full wreath in deep green, with no seasonal extras, and hang it at eye level from an over door hook. The plain green suits every season, so you only change the door mat or the planters when you want a seasonal shift.

    Keep the wreath clean by shaking it outdoors and wiping faux leaves as needed. If you use a fresh boxwood wreath, mist it lightly and bring it indoors in hard frost to slow drying. Pair it with a plain welcome mat, so the door stays calm rather than crowded with competing pieces.

    18. Terracotta Pots with Herbs by the Steps

    Terracotta pots with green herbs grouped beside farmhouse porch steps.

    Terracotta pots with herbs by the steps add scent and useful green to the entrance. Group three pots of different heights near the steps, with rosemary, thyme, and mint, and water them in the morning so the soil stays damp but not soaked. Guests brush past the scent on the way to the door, and the herbs can go to the kitchen after.

    Set each pot on a saucer to protect steps and decking, and trim herbs often, since regular picking keeps the plants bushy. Mint spreads fast, so keep it in its own pot rather than sharing a planter. In cold weather, move tender herbs close to the house wall for shelter.

    19. Painted Porch Ceiling in Soft Blue

    Farmhouse porch ceiling painted soft blue with white posts and a rocking chair below.

    A porch ceiling painted in soft blue is a classic farmhouse detail that guests notice without knowing why the porch feels calm. Paint the ceiling boards in a pale blue, such as a soft sky or haint blue, and keep the posts and trim white. The pale color brightens a shaded porch and reflects light onto the seating below.

    Use exterior paint rated for ceilings, and clean the boards before painting so the finish lasts. If repainting feels like a large job, test the color on one board first, and check it in morning and evening light. The blue ceiling pairs well with white rocking chairs and natural wood floors.

    20. Crate Side Table with Candles

    Wood crate side table with a candle and small plant beside a farmhouse porch chair.

    A wood crate turned on its side makes a simple porch side table with a farmhouse feel. Set the crate beside a chair, line the inside with a small cloth if needed, and top it with a candle in a glass holder and a small potted plant. The crate costs little and suits a porch where a formal table would look out of place.

    Keep the crate off the main walking path, and set it on small feet or a stone slab in rain, so the wood stays dry. At the end of the season, the crate can hold garden tools or firewood, so it earns its keep beyond summer. Use a battery candle if the table sits near fabric or dried stems.

    21. Wall Lanterns Beside the Door

    Black metal wall lanterns mounted on each side of a farmhouse front door.

    Wall lanterns beside the door give the entrance steady light and a finished look. Mount one lantern on each side of the door, at eye level or just above, in black metal or aged brass, with warm bulbs inside. The pair frames the door and lights the lock and handle for evening guests.

    Choose outdoor rated fixtures, and check that the lanterns clear the door swing and any wreath or sign nearby. If wiring a new fixture feels like a large job, use solar or battery wall lanterns in the same style. Wipe the glass clean often, since porch dust dulls the light fast.

    22. Small Bistro Table with a Gingham Cloth

    Small bistro table with a gingham cloth and two chairs on a farmhouse front porch.

    A small bistro table with a gingham cloth makes a casual porch spot for breakfast or a drink. Set a round metal or wood table near the railing, with two chairs, and cover it with a gingham cloth in cream and sage or cream and rust. The cloth adds pattern at table height, while the chairs stay plain.

    Weight the cloth or use clips at the corners, so a breeze does not lift it onto plates. Keep paper or fabric clear of candles, and bring the cloth indoors after meals, since damp fabric can stain if left out overnight. For everyday use, skip the cloth and use two woven placemats instead.

    23. Bold Front Door with Brass Hardware

    Bold sage green farmhouse front door with brass handle, knocker, and house numbers.

    A bold front door with brass hardware is the simplest way to make a farmhouse porch stand out. Paint the door in a deep, welcoming color, such as sage green, navy, or warm red, and add a brass handle, knocker, and house numbers. The color draws the eye to the entrance, while the brass warms the whole porch.

    Test the paint color on the door in daylight before committing, since porch shade can dull a color. Keep the rest of the porch calm, with white trim and plain planters, so the door stays the focus. Clean brass hardware with a soft cloth, and check screws each season so the handle stays firm.

    Conclusion

    A warm farmhouse front porch does not need new furniture or a full redesign. Pick comfortable seating, one door detail, layered mats, and warm light, then repeat a small palette through planters and textiles and keep the path to the door clear. Start with one idea from this list this week, and add plants or light next, so the porch grows into a place guests enjoy and you use every day.

    FAQs

    What makes a front porch look farmhouse?

    A farmhouse front porch uses natural wood, white or cream paint, woven textures, simple metal accents, and living plants, with a calm palette and comfortable seating. The look comes from plain, useful pieces, such as rocking chairs, a wood bench, and galvanized planters, rather than ornate or glossy decor.

    How do I decorate a small farmhouse front porch?

    Decorate a small farmhouse front porch with one chair, one pair of small planters, layered mats, and a wreath on the door, keeping the path clear. Choose vertical pieces, such as a tall sign or hanging baskets, for height without floor space, and skip large seating groups that block the door.

    What colors work best for a farmhouse front porch?

    Cream, warm white, sage green, soft grey, and natural wood tones work best for a farmhouse front porch, with one accent color, such as rust, navy, or muted red, at the door or in cushions. Repeat each color at least twice, across textiles, pots, and the door, so the porch reads as one plan.

    How do I keep porch cushions and throws in good shape outdoors?

    Keep porch cushions and throws in good shape by choosing outdoor rated fabrics with removable, washable covers, and bringing them indoors in rain and overnight in wet weather. Shake cushions out weekly, store them in a dry box when not in use, and pick quick dry foam fills for chairs outside the roof line.

    What plants suit a farmhouse front porch?

    Ferns, trailing ivy, boxwood topiary, potted herbs, and seasonal flowers suit a farmhouse front porch, since they suit plain pots and need only regular water and trimming. Match the plant to the light: ferns and ivy for shade, herbs and geraniums for sun, and evergreen cuttings for winter color.

    What is the easiest farmhouse porch idea to start with?

    The easiest farmhouse porch idea to start with is layered mats, a wreath on the door, and one pair of planters flanking the entrance. It needs no tools or new furniture, takes under an hour to set, and gives the porch a finished welcome that you can build on with seating and light later.


  • 17 Craft Storage Cabinet Ideas to Keep Supplies Within Reach

    17 Craft Storage Cabinet Ideas to Keep Supplies Within Reach

    A craft storage cabinet works best when it groups supplies by use, keeps tools at hand level, and hides bulky stock behind closed doors. The 17 ideas below cover tall cabinets, armoires, wall units, and rolling carts with labeled bins, pull out trays, and clear fronts, so paper, paint, fabric, and small tools stay sorted and easy to reach.

    Start by sorting supplies into groups you actually use together, such as paper and card making, paint and brushes, sewing, and small parts. Give each group one shelf, bin, or drawer, and label it in plain words. The same grouping rule that keeps bedroom storage usable applies here: what you reach for weekly stays at hand level, and backup stock goes higher or lower. Measure your tallest items first, from paper pads to paint bottles, so shelf heights fit the supplies instead of forcing supplies to fit the shelves.

    Key Takeaways

    • Group supplies by use, not by color alone, so each project pulls from one shelf or bin.
    • Keep weekly tools at hand level and move backup stock to higher or lower shelves.
    • Label every bin, drawer, and shelf in plain words, and keep the label facing out.
    • Use clear fronts or open bins for small items you need to spot fast, and closed doors to hide bulky stock.
    • Measure tall items before buying or building, so paper, rolls, and bottles fit without bending or tipping.
    • Leave one empty shelf or tray for works in progress, so new projects do not spill onto the work table.

    1. Tall Cabinet with Labeled Bins

    Tall craft cabinet with uniform labeled bins for paper paint fabric and ribbon

    Use a tall cabinet with one labeled bin per supply group, such as paper, paint, fabric scraps, and ribbon, stacked from floor to eye level. Uniform bins keep the cabinet tidy even when the contents differ, and a label on each bin front means you can pull the right one without opening three others first.

    Keep heavy bins low and light bins high, and leave a small gap at the top of each bin so you can lift it out by its handle. If a bin holds small loose items, add a smaller box inside it, so beads or buttons do not slide to the bottom and mix with larger supplies.

    2. Armoire with a Fold Down Work Table

    Armoire craft cabinet with a fold down work table paper and tools set out for use

    Turn a freestanding armoire into a craft cabinet with a fold down table fixed at sitting height inside the doors. When the table folds down, you gain a work surface; when it folds up, tools, paper, and small bins stay stored behind closed doors, and the room looks like a normal living space again.

    Fix a small lip or rail along the table edge so pens and scissors do not roll off while you work. Keep only the tools for the current project on the fold down surface, and return the rest to the shelves above, so the table can fold away without a clear out first.

    3. Cabinet with Clear Front Doors

    Craft cabinet with clear glass doors showing colorful paper thread and paint inside

    Choose a cabinet with clear glass or clear acrylic doors so you can see paper colors, thread, and paint at a glance without opening every door. Clear fronts suit supplies you pick by color, since you can compare shades through the door before you start a project.

    Wipe the doors often, since dust and fingerprints show more on clear fronts than on solid wood. If the cabinet sits in bright sun, keep light sensitive items, such as photos and dyed fabric, in solid bins inside, so the clear doors do not expose them to fading light.

    4. Pull Out Tray Cabinet for Paper and Cardstock

    Cabinet with shallow pull out trays holding flat paper and cardstock in color groups

    Fit a cabinet with shallow pull out trays, one tray per paper size or color family, so sheets slide out flat instead of bending when you lift them from a stack. Shallow trays stop the common problem of a tall paper pile tipping over when you pull a sheet from the middle.

    Label each tray edge with the paper size and weight, and keep a sheet of scrap paper on top of each stack for test cuts. Store specialty paper, such as foil or vellum, in its own tray at the back, since it tears or creases more easily than plain cardstock.

    5. Paint Cabinet with Upright Bottle Rows

    Cabinet with short shelves holding paint bottles standing upright in color rows

    Set up a cabinet with short shelves spaced to fit paint bottles standing upright, with one row per color family and labels facing out. Upright storage keeps caps sealed and paint ready to use, and short shelf spacing stops bottles from tipping into a tall, hard to reach stack.

    Keep a small tray on one shelf for open bottles in current use, so wet caps do not mark the shelf. Check caps each month and wipe dried paint from threads, since a stuck cap can crack a bottle when forced. Store fabric paint apart from wall or craft paint, so the wrong paint does not end up on the wrong surface.

    6. Ribbon and Roll Cabinet with Dowel Rods

    Cabinet interior with dowel rods holding ribbon rolls in bright colors

    Mount dowel rods across the inside of a cabinet door or along a shallow cabinet section, and thread ribbon rolls onto the rods so each roll unwinds without leaving the cabinet. This setup keeps ribbon visible by color and stops rolls from unraveling inside a drawer.

    Cut each ribbon end at an angle after use and tuck it back through the rod gap, so the next pull starts clean. Keep wide rolls on the lowest rod and narrow rolls above, since wide rolls are heavier and easier to handle low. If a roll runs out, slide a new one on from the rod end without removing the rest.

    7. Fabric Cabinet with Cubbies and Folded Bolts

    Cabinet with cubbies holding folded fabric bundles sorted by color

    Divide a cabinet into cubbies sized for folded fabric, with one cubby per color family or fabric type, such as cotton, felt, and linen. Folding fabric to the same width keeps the cubbies neat, and you can see at a glance which colors are running low before you start cutting.

    Fold fabric around a stiff card to keep edges straight, and stand the bundles upright like files where the cubby allows it. Keep delicate fabrics, such as silk, in a closed bin on a higher shelf, away from rough fabrics that could snag them. Air the cabinet now and then, since stored fabric can pick up a musty smell in a closed space.

    8. Small Parts Cabinet with Tiny Drawers

    Cabinet with rows of tiny labeled drawers holding beads buttons and small findings

    Use a cabinet fitted with rows of tiny drawers for beads, buttons, eyelets, sequins, and findings, with one drawer per item type and a label on each drawer front. Tiny drawers stop small parts from mixing in one large box, and they let you carry a single drawer to the table instead of the whole cabinet.

    Line each drawer with a small piece of felt or paper so tiny parts do not rattle or slip under the drawer divider. Keep a spare empty drawer for new findings, and sort it once a month, since small parts multiply fast and an unlabeled drawer soon becomes a mixed drawer again.

    9. Rolling Cabinet for a Shared Table

    Rolling craft cabinet with drawers beside a shared table in a bright room

    Pick a rolling cabinet with drawers and a flat top that slides under or beside a shared table, so craft supplies can move to the work spot and roll away when the table is needed for meals or homework. Casters with brakes keep the cabinet still while you work and let it move when the room changes use.

    Lock the casters before opening heavy drawers, since a rolling cabinet can shift when a full drawer slides out. Keep the top clear except for the current project, and store tools for that project in the top drawer, so setup takes minutes rather than a full unpack.

    10. Wall Mounted Cabinet Above a Desk

    Shallow wall mounted cabinet with open doors above a desk with craft tools

    Mount a shallow wall cabinet above a desk, with doors that open upward or outward, to store tools and small supplies without taking desk space. Wall mounting suits a small room, since it uses wall height that a floor cabinet cannot, and it keeps supplies at eye level while you sit and work.

    Check the wall fixings for the cabinet weight when full, not empty, since paper and paint add weight fast. Keep daily tools in the lowest wall section and backup stock higher, so you do not need a step stool for a pair of scissors. Leave the desk surface clear under the cabinet for the project in hand.

    11. Corner Cabinet for an Awkward Nook

    Corner craft cabinet with angled shelves and a turntable holding jars and supplies

    Fit a corner cabinet, with angled shelves or a rotating turntable inside, into a nook that a standard cabinet would waste. Corner cabinets suit rooms with an unused corner near a window or door, and a turntable shelf brings back items to the front without reaching deep into a dark corner.

    Measure the door swing before fitting, since a corner cabinet door can hit a nearby wall or desk. Keep large flat items, such as cutting mats, on the lowest shelf, and small jars on the turntable above, so nothing hides behind a taller item at the back.

    12. Cabinet with a Pegboard Door Interior

    Craft cabinet door interior with a pegboard holding scissors rulers and tape on hooks

    Fix a pegboard panel to the inside of a cabinet door and hang scissors, rulers, cutters, and tape on hooks, so tools hang in plain sight when the door opens and stay hidden when it closes. Door storage uses space that shelves waste, and it keeps sharp tools off the work table between uses.

    Use short hooks for heavy tools and longer hooks for rolls of tape, and keep sharp edges pointing down or covered. Test the door weight after loading it, since a heavy pegboard door can pull hinges loose over time. Tighten hinge screws each season if the door starts to sag.

    13. Sewing Cabinet with a Machine Lift

    Sewing cabinet with a machine lift raised to table height beside fabric and thread

    Choose a sewing cabinet with a machine lift shelf that raises the sewing machine to table height for use and lowers it for storage under a closed lid. A lift keeps the machine dust free between sessions and frees the table top for cutting and pinning when the machine is down.

    Keep bobbins, needles, and presser feet in a shallow drawer beside the lift, so machine parts stay with the machine. Cover the machine when the lid is open for a long session, since dust settles on an open machine fast. Oil and clean the machine as its manual directs, and keep the manual in the same drawer as the feet.

    14. Kids Craft Cabinet with Low Open Bins

    Low kids craft cabinet with open bins of crayons paper and glue sticks at child height

    Set up a low cabinet with open bins at child height for crayons, paper, glue sticks, and safety scissors, and closed storage above for paint, glitter, and sharp tools. Low open bins let children pick supplies on their own and put them back in the right bin, while adult only supplies stay out of reach above.

    Label bins with pictures as well as words for younger children, and keep one bin empty for finished work waiting to go home or on display. Wipe bins often, since glue and crayon marks build up fast, and check the low bins weekly for dried out markers or broken crayons to remove.

    15. Vintage Hutch Converted to a Craft Cabinet

    Vintage hutch converted to a craft cabinet with bins jars and folded fabric

    Convert a vintage hutch or dresser into a craft cabinet by adding shelf dividers, small bins, and a coat of paint that suits the room. A hutch gives deep drawers for fabric and tall upper shelves for jars, and it looks like furniture rather than storage, which suits a living room or bedroom corner.

    Check old drawers for smooth runners before loading them, since a sticking drawer will spill small supplies. Line drawers with paper to protect both the wood and the supplies, and keep heavy items in the lowest drawers. The same furniture first approach that suits small storage ideas for small spaces works here: pick the piece for the room first, then fit the storage inside it.

    16. Narrow Hall Cabinet for a Small Room

    Narrow tall craft cabinet in a hallway nook with shallow shelves of jars and boxes

    Use a narrow, tall cabinet in a hallway, landing, or beside a door, with shallow shelves that hold one row of jars or boxes each. Narrow cabinets fit where a deep cabinet would block a walkway, and shallow shelves stop items from hiding behind a front row.

    Keep the most used supplies at waist to eye level and seasonal stock at the top, since a narrow cabinet is easy to knock when reaching high. Fix the cabinet to the wall, since tall narrow pieces tip more easily than wide ones. Leave the floor in front clear, so the door opens fully without moving shoes or bags.

    17. Cabinet with Sliding Trays for Works in Progress

    Cabinet with sliding trays holding unfinished craft projects with small note cards

    Reserve one cabinet section for sliding trays, one tray per unfinished project, with a small card on each tray noting the next step. Sliding trays keep half finished work flat and dust free, and they stop a project from taking over the table while you wait for glue to dry or a part to arrive.

    Stack trays with a small gap between them so air moves and wet paint does not stick to the tray above. Date each project card, so the oldest project gets finished first instead of sitting at the back. When a project finishes, wipe the tray clean before it takes the next one, so old scraps do not mix into new work.

    Conclusion

    A good craft storage cabinet does not need to hold every supply you own. It needs to hold the supplies you use, in groups that make sense, at heights you can reach, with labels you can read at a glance. Start with one idea from this list that fits your room and your largest supply group, then add bins, trays, or a door pegboard as the system settles. Keep one tray free for works in progress, and review the cabinet each season, so backup stock does not crowd out the tools you reach for weekly. For seasonal stock that only comes out once a year, the same closed door rule in Christmas decoration storage applies: label the bin, store it high or low, and keep daily tools in the prime middle shelves.

    FAQs

    What is the best craft storage cabinet for a small room?

    The best craft storage cabinet for a small room is a narrow tall cabinet or a wall mounted cabinet, since both use height instead of floor space and keep supplies at eye level. Pick shallow shelves so items do not hide behind a front row, fix a tall cabinet to the wall, and keep weekly tools at waist to eye level.

    How should I organize a craft storage cabinet?

    Organize a craft storage cabinet by grouping supplies by use, such as paper, paint, sewing, and small parts, and giving each group one shelf, bin, or drawer with a plain word label. Keep weekly tools at hand level, move backup stock higher or lower, and leave one empty tray for works in progress.

    What size craft storage cabinet do I need?

    The size you need depends on your tallest and widest supplies, so measure paper pads, paint bottles, fabric bolts, and rolls before you buy or build. Allow shelf heights that fit those items standing upright, add a few centimeters of clearance for lifting bins out, and choose a cabinet depth that lets you reach the back without moving the front row.

    How do I store paint in a craft cabinet?

    Store paint in a craft cabinet standing upright on short shelves, with one row per color family and caps facing out for easy checking. Keep open bottles on a small tray to catch drips, wipe cap threads often so caps do not stick, and store fabric paint apart from other craft paint.

    Can a craft storage cabinet also serve as a work table?

    Yes, a craft storage cabinet can serve as a work table if it has a fold down table, a machine lift, or a flat rolling top at sitting height. Keep only the current project on that surface, store the rest behind doors or in drawers, and lock casters or fold the table away when the room needs to change use.

    How do I keep a craft cabinet tidy over time?

    Keep a craft cabinet tidy by labeling every bin and drawer, returning each supply to its group after a session, and reviewing the cabinet each season. Remove dried out markers, broken tools, and duplicate supplies during that review, and move backup stock out of prime middle shelves so weekly tools stay easy to reach.


  • 19 Office and Craft Room Ideas for a Shared Workspace

    19 Office and Craft Room Ideas for a Shared Workspace

    The best office craft room setup gives work and crafts separate zones in one room: a desk for focused tasks, a wipe-clean table for making, and closed storage for supplies. Put the desk near natural light, keep craft tools in labeled bins or a rolling cart, and leave a switch-over routine, so one room serves both jobs without clutter spreading.

    Start by listing what each job truly needs. Work usually needs a screen, a keyboard, a notebook, and quiet. Crafts usually need a flat surface, good task light, and many small supplies within reach. When those two lists share one desk, the craft supplies win the surface and work slows down. Give each job its own surface, even a small one, and give each job its own storage, even a single bin or shelf. For storage tactics that work in tight rooms, see small storage ideas before you buy new furniture.

    Key Takeaways

    • Give work and crafts separate surfaces, even if one surface is small, so supplies never cover the keyboard.
    • Zone the room by task, not by person: a work zone, a making zone, and a shared storage zone.
    • Use closed storage for craft supplies and open storage only for daily work items, so the room looks calm at a glance.
    • Put the work desk near the best light and the craft table where mess is easy to wipe up.
    • Keep a five minute switch-over routine: clear the surface, park the tools, and reset the chair.
    • Measure door swings, chair pull-out space, and table heights before buying a second desk or a storage unit.

    1. L-Shaped Layout with a Work Leg and a Craft Leg

    L-shaped desk setup with a computer on one leg and craft supplies on the other leg, with a corner tray between them.

    Set two desks at a right angle so one leg holds the computer and the other holds the craft project. The corner becomes the shared point, and each leg keeps its own tools, lamp, and storage. This layout suits a square room where one long desk would block the door or the window.

    Keep the work leg near the window for daylight on the screen, and keep the craft leg on the wall with the most shelf space. Use a different mat or desk cover on each leg, so a glue spot or a paint mark never lands on work papers. A small turntable or a tray at the corner holds shared items, such as scissors, tape, and pens, without letting them spread across both legs.

    2. Back-to-Back Desks Down the Middle of the Room

    Two desks back to back in the middle of a room, one set for computer work and one set for crafts, with chairs on opposite sides.

    Place two desks back to back in the center of the room, one for work and one for crafts, so each side has its own front edge and chair. This suits a larger room, or a room shared by two people, since neither person faces a wall all day and both sides get equal light.

    Run a low shelf or a narrow rail along the shared back edge for items both jobs use, such as a printer or a small plant, and keep tall items off that edge so sight lines stay open. Anchor both desks so they do not drift apart, and leave a clear walkway on at least one side. If the room is small, use narrow desks for this layout, since two deep desks back to back can eat the whole floor.

    3. One Long Desk with a Centre Divider

    One long desk divided down the middle, with a laptop and notebook on one half and paper crafts on the other half.

    Use one long desk and divide it down the middle with a low divider, a monitor stand, or a row of small storage boxes. Work takes one half and crafts take the other, and the divider marks the boundary without a wall. This is the simplest shared setup for a room that fits only one desk.

    Keep the work half clear except for the screen and a notebook, and keep craft tools in a tray on the craft half, so they can lift off in one move. Choose a desk surface that wipes clean, and protect the work half with a desk mat. If the divider is tall, it can block light, so keep it low, at or below monitor height, and store tall craft items on a shelf instead.

    4. Closet Turned into a Craft Nook Beside a Work Desk

    Small closet fitted as a craft nook with shelves and a task light, beside a work desk in the main room.

    Remove the closet doors, or take them off their hinges, and fit a small table, shelves, and a task light inside the closet frame. The work desk stays in the main room, and the craft nook closes off visually when you step back, even without doors. This suits rooms where a spare closet already exists and floor space is short.

    Fit shelves at craft height, not closet height, and add a power strip for a glue gun or a sewing machine. For closet systems that keep supplies sorted, see closet organization ideas for rails, bins, and shelf plans that fit a nook. Keep the nook shallow enough that you can reach the back without leaning over a project, and leave the floor under the nook clear so a chair or a stool can tuck in.

    5. Pegboard Wall Above the Craft Bench

    Craft bench with a pegboard wall above it holding scissors, ribbons, and small jars, with a desk visible to one side.

    Hang a pegboard above the craft bench so tools, ribbons, scissors, and small jars hang in view instead of filling drawers. Work stays at the desk, and the pegboard makes the craft zone easy to read at a glance, which speeds up both starting and tidying a project.

    Mount the board on battens so hooks have room behind them, and use fixings rated for the wall and the weight you plan to hang. Group tools by task, such as cutting tools together and painting tools together, and leave some pegs empty for new supplies. Keep sharp tools high and out of reach of small children, and keep the board to one wall section, so the room still has a calm wall for the work side.

    6. Rolling Craft Cart That Docks Under the Desk

    Tiered rolling cart with craft supplies parked under a work desk, with a laptop on the desk above.

    Use a tiered rolling cart for craft supplies, and park it under the desk or beside it when work is in progress. When it is craft time, roll the cart out to the table, and when work resumes, roll it back and close the loop. This suits renters, since it needs no wall fixings, and small rooms, since the cart uses dead space under a desk.

    Sort the cart by tier, with daily tools on top and bulk supplies below, and keep heavier items low so it rolls steadily. Label each tier, and keep the cart to one project family at a time, such as paper crafts or sewing, so it never becomes a general dumping ground. Choose a cart with locking wheels, so it stays put while you cut, sew, or paint.

    7. Fold-Down Craft Table Beside a Fixed Work Desk

    Fold-down wall table open for crafts beside a fixed work desk with a laptop.

    Fix a fold-down table to the wall beside a regular work desk, and fold it down only for craft sessions. The work desk stays set up all day, and the craft table appears when needed and disappears when the project is done. This suits a room where a second full table would block a walkway or a door.

    Mount the fold-down table at a comfortable sitting or standing height, and check the fixings suit the weight of the table plus the project. Keep a folding chair nearby on a wall hook, so the whole craft station packs away together. Clear the table before folding it up, or loose items will slide, and store craft tools in a bin beside the table, not on it, so folding stays quick.

    8. Opposite-Wall Layout: Work on One Wall, Crafts on the Other

    Room with a work desk on one wall and a craft table on the opposite wall, with a clear walkway between them.

    Put the work desk on one wall and the craft table on the opposite wall, so each job has its own wall, light, and storage. Walking between the two becomes the switch-over moment, which helps the brain change tasks, and neither job can slowly take over the other surface.

    Give the work wall shelves for books and files, and give the craft wall shelves for jars, paper, and fabric. If the room is narrow, use slim tables on both walls and keep the middle clear for chairs. A rug or a different wall color on each side can mark the zones without any building work, and a shared bin in the middle holds items both jobs use, such as a recycling box.

    9. Open Shelving Unit as a Room Divider

    Open shelving unit dividing a room, with a work desk on one side and a craft table on the other side.

    Stand an open shelving unit across the room, with its back to one zone and its front to the other, so it divides work from crafts without closing the room off. Work sits on one side, crafts on the other, and the shelves hold shared storage in the middle. This suits a long room that feels like one big space with no natural break.

    Keep the shelves low enough to see over, or use a unit with open cubes, so light still crosses the room. Put closed baskets on the craft side to hide small supplies, and keep books and files on the work side. Anchor the unit to the floor or wall, especially in a home with children or pets, since a freestanding divider can tip if leaned on.

    10. One Large Table Split by Task Lamps and Mats

    One large table split by lamps and mats, with a laptop at one end and a cutting mat with paper crafts at the other end.

    Use one large table and split it by task: a desk lamp and a plain mat mark the work end, while a bright task lamp and a cutting mat mark the craft end. The split is visual, not structural, so it suits a room that already has a good table and no space for a second one.

    Set a rule for the middle line, such as no craft item crosses it during work hours, and keep a tray at each end for that job’s tools. At switch-over time, slide the work tray onto a shelf and slide the craft tray onto the table. This layout works best for crafts that pack into one tray or bin, such as card making or journaling, rather than large projects that need the whole table.

    11. Built-In Desk Run with Closed Cabinets for Crafts Above

    Long desk run with closed cabinets above holding craft supplies, with a tidy desk surface below.

    Fit a long desk run along one wall, with closed cabinets or cupboards above it for craft supplies. The desk surface stays shared, but the supplies live behind doors, so the room reads as an office until the cabinet opens. This suits a room where craft supplies look busy and work needs a calm backdrop for video calls.

    Sort cabinets by craft type, one for paper, one for fabric, one for paint, and label the inside of each door with its contents. Keep daily work items in a desk drawer, not in the cabinets, so opening a cabinet never becomes part of the work routine. Choose cabinet doors that close fully and stay shut, since a door left ajar brings the craft clutter back into view.

    12. Corner Work Desk Plus a Window-Side Craft Table

    Corner desk with a computer and a separate craft table beside a bright window.

    Place a compact corner desk for work, and put a separate craft table beside the window, where daylight helps with color matching and fine detail. The corner desk uses dead space, and the window table gets the best light for making, which is often the job that needs it most.

    Keep the craft table near the window but clear of curtains, so fabric and paper never catch on fabric or block the window latch. A small stool at the craft table, rather than a second office chair, saves floor space and signals that the craft seat is for shorter sessions. If glare hits the work screen, angle the corner desk away from direct sun and use a blind on the window side.

    13. Rolling Island That Serves Both Zones

    Rolling island with a flat top and shelves below, placed between a work desk and a craft bench.

    Add a rolling island or a kitchen style cart between the desk and the craft bench, with a flat top for cutting or assembling and shelves below for shared tools. Roll it to the desk when you need extra work surface, and roll it to the craft bench when a project needs room to spread out. This suits rooms where neither zone can spare a permanent extra table.

    Choose an island at counter height or desk height, matching the job you will use it for most, and lock the wheels before cutting or pressing anything on it. Keep the top clear when it is parked, so it is always ready to roll to the job that needs it. For storage ideas that keep a rolling unit tidy, see small storage ideas for bins and baskets that fit narrow shelves.

    14. Time-Share Layout: One Desk, Swap Bins Morning and Evening

    One desk with a clear surface, a labeled work bin on a shelf, and a labeled craft bin beside it.

    Use one desk for both jobs, but swap the setup by time of day: a work bin in the morning, a craft bin in the evening. Each bin holds everything that job needs, so the swap takes minutes and the desk never holds both jobs at once. This suits a very small room, or a household where only one person uses the room at a time.

    Keep each bin labeled and packed the same way every time, so the swap becomes a habit rather than a sort. Store the off-duty bin on a shelf, in a closet, or under the desk, never on the floor where it blocks the chair. End each session by returning tools to the bin, since a half-packed bin makes the next swap slower and the desk messier.

    15. Color-Coded Zones with Matching Bins and Chairs

    Shared room with blue bins and labels on the work side and green bins and labels on the craft side.

    Give each zone its own color: for example, blue bins, a blue chair pad, and blue labels for work, and green bins and labels for crafts. Color makes the boundary obvious at a glance, even for children sharing the room, and it speeds up tidying, since every item has a color home.

    Keep the colors to two, plus a neutral base for furniture and walls, so the room does not look like a classroom. Use the same color on the shelf edge, the bin label, and the tool tray for each zone, so the system works even when bins move. If two people share the room, color by job still works better than color by person, since jobs, not people, create the clutter.

    16. Full-Height Storage Wall Dividing Work Shelves from Craft Cubbies

    Full-height storage wall with work shelves on one section and craft cubbies with labeled baskets on another.

    Fit a full-height storage wall, or a tall bookcase run, along one wall, with work shelves on one section and craft cubbies on another. The wall holds almost everything, so both desks stay clear, and the split between sections keeps the two jobs from mixing. This suits a room with one long blank wall and little closet space.

    Put work files and books at desk height on the work section, and craft cubbies at standing height on the craft section, with bulk supplies up high. Label each cubby, and keep one cubby empty for a project in progress. For bedroom style storage that also works in a workroom, see bedroom storage ideas for baskets, bins, and shelf plans that fit a tall unit. Anchor tall units to the wall before loading them.

    17. Fold-Away Wall Desk for Work Plus a Craft Armoire

    Fold-away wall desk and a tall craft armoire with open doors showing shelves of supplies.

    Mount a fold-away wall desk for work, and keep crafts in a tall armoire with doors that close over shelves, drawers, and a fold-out work surface inside. When the armoire doors close, the craft side vanishes, and when the wall desk folds up, the room becomes free floor again. This suits a spare room that must also host guests or exercise gear.

    Keep the wall desk for light work only, such as a laptop and a notebook, since a fold-away desk suits less weight than a fixed desk. Inside the armoire, sort supplies by shelf, and keep the fold-out surface clear, so opening the armoire never means clearing a pile first. Test both folding parts fully loaded before relying on them daily, since a stiff hinge will discourage the routine.

    18. Dedicated Sewing Corner Beside the Work Desk

    Sewing machine on a small table beside a work desk, with a fabric basket underneath and a cutting mat rolled to one side.

    Set a sewing machine on its own small table beside the work desk, with a cutting mat that rolls away and a basket for fabric underneath. Sewing needs a stable surface and a little extra side room for fabric, so giving it a corner, rather than a share of the work desk, keeps both jobs usable. This suits makers who sew weekly and work daily in the same room.

    Keep the sewing table at a height where your arms rest comfortably, and keep the iron or pressing mat on a separate heat-safe surface, never on the work desk. Store fabric in closed bins by color or project, so dust stays off it, and keep pins and needles in a lidded container. When sewing is done, roll the mat, close the basket lid, and the corner reads as tidy again.

    19. Drying Rail and Display Shelf Above the Craft Zone

    Wall-mounted drying rail with clipped cards above a craft table, with a display shelf of finished pieces beside it.

    Fit a wall-mounted drying rail or a set of hooks above the craft zone, plus one display shelf for finished pieces, so wet or drying projects never sit on the work desk. Painted cards, printed sheets, and glued pieces can dry in the air while work continues below, and finished work gets a home instead of a pile.

    Keep the rail away from the work screen and from direct sun, so drying pieces do not drip or fade onto work items. Use clips or pegs that hold pieces firmly, and put a washable mat or tray below the rail to catch drips. Rotate the display shelf often, keeping only recent favorites on show, and file older pieces in a flat box, so the shelf stays a display, not a second storage pile.

    Conclusion

    A shared office and craft room works when each job has its own surface, its own storage, and a clear switch-over step. Start with the layout that fits your room shape, add closed storage for the messiest supplies, and keep the work desk as the calmest surface in the room. Try one idea for a week, adjust the zones to match how you actually work and make, and the room will serve both jobs without either one taking over.

    FAQs

    How do you set up an office and craft room in one small room?

    Give each job its own surface and its own storage, even if both are small, and use a switch-over routine to change the room between jobs. A fold-down table, a rolling cart, or a time-share bin system can make one small room serve both jobs without a second full desk.

    What is the best layout for a shared office and craft room?

    The best layout depends on the room shape: an L-shaped layout suits a square room, opposite walls suit a narrow room, and back-to-back desks suit a larger room. In every case, keep the work desk near good light, keep craft storage closed, and leave a clear walkway between zones.

    How do you keep craft supplies from taking over a home office?

    Store craft supplies in closed bins, cabinets, or a rolling cart, and keep only daily work items on the desk surface. Label each bin by craft type, keep one bin per project family, and return tools to their bin at the end of every craft session.

    Can one desk work for both office work and crafts?

    Yes, one desk can work if you swap setups by time of day, using a work bin and a craft bin that each hold everything that job needs. The swap only works if both bins have a fixed home off the desk, and if each session ends with tools returned to the bin.

    What storage works best in a combined office and craft room?

    Closed storage works best for crafts, since it hides many small items, while open shelves suit books and files used daily for work. Pegboards, labeled bins, cubbies, and a rolling cart cover most craft storage needs, and tall units use wall height that small rooms often waste.

    How much space do you need for an office and craft room combo?

    You can make a combo work in a spare bedroom or a large nook, as long as each job has a surface, a chair, and storage that does not block door swings or walkways. Measure the chair pull-out space and the table depths first, and choose slim or fold-away furniture if the room is tight.