Category: Bathroom

Bathroom decorating ideas, useful storage, seasonal styling, and everyday comfort.

  • 24 Innovative Bathroom Ideas That Bring Practical Style Home

    24 Innovative Bathroom Ideas That Bring Practical Style Home

    A bathroom works hardest in the morning and late at night, so the best new ideas are the ones that make those routines easier. A mirror that stays clear after a shower, a vanity drawer that keeps a phone charged, a shower drain that lets large tiles run in one slope, and a hamper that hides inside a cabinet all save time and floor space. These 24 innovative bathroom ideas cover lighting, storage, showers, tubs, toilets, and small layouts, so you can pick one fix for a weekend or plan a larger refresh around several ideas that share one finish and one color. Start with the change that removes your daily annoyance first.

    Key Takeaways

    • Start with the daily problem, not the trend: steam on the mirror, cold tile, nowhere to put laundry, or a door that blocks the room.
    • Keep one metal finish and one main tile tone across the new pieces, so several new ideas still read as one planned room.
    • Put hidden storage where it is used: a hamper in the vanity, a niche in the shower, and a rail by the sink, rather than one large cabinet far from the action.
    • Choose water friendly materials in wet zones and keep fabric, wood, and plants in dry zones where they can dry between uses.
    • Plan drains, heating, and wiring before tile and paint, since those three decisions are hard to change later.

    1. Smart Mirror With Defogger and Adjustable Light
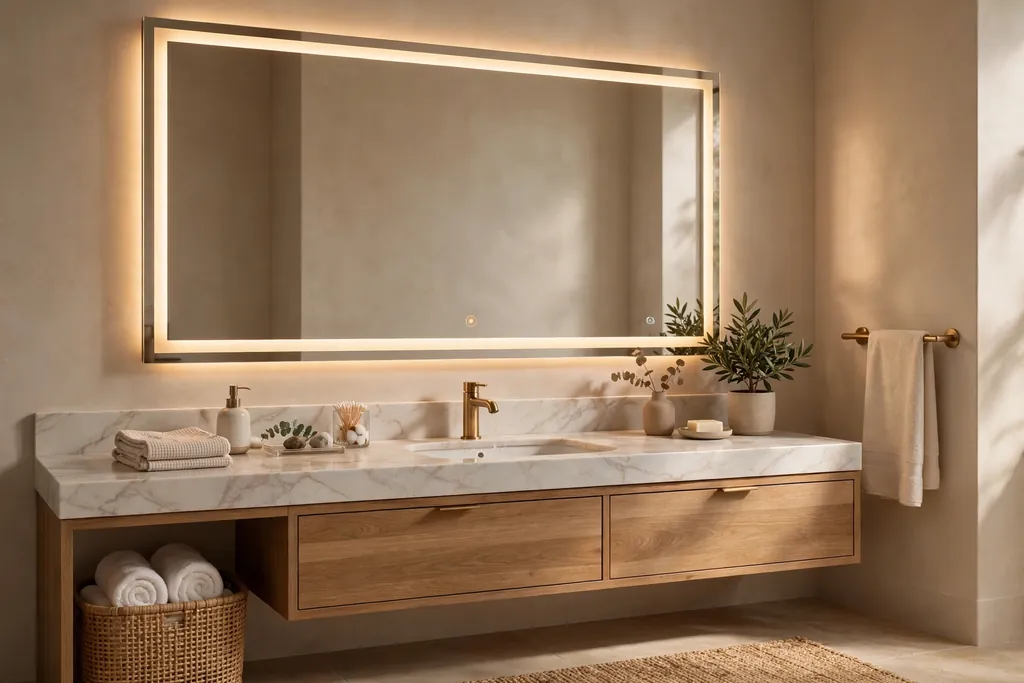
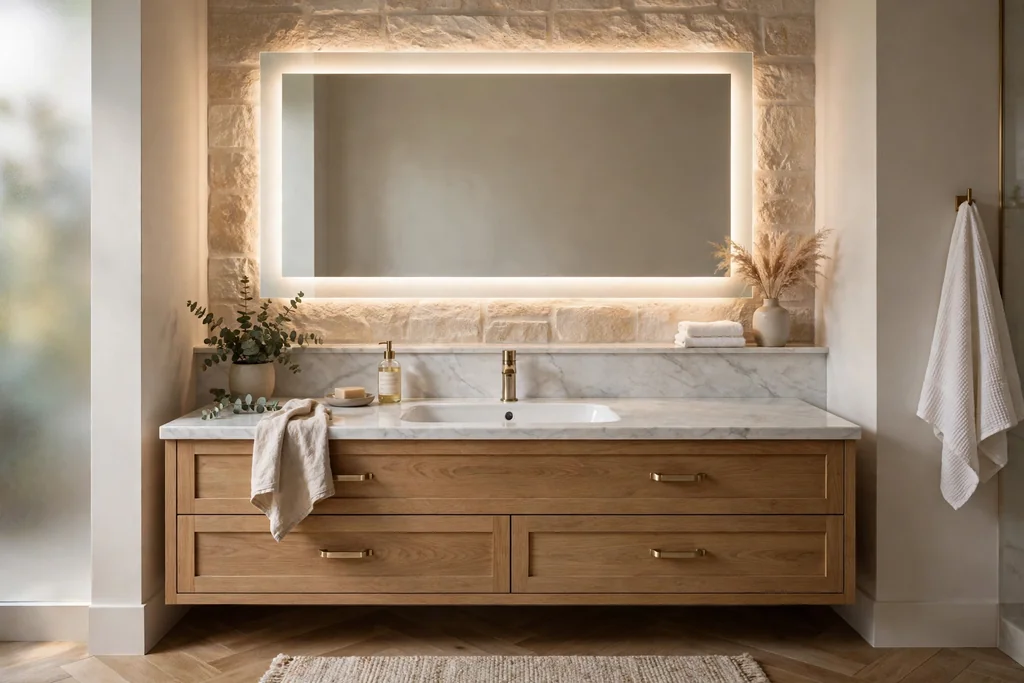
    Bathroom vanity with a smart mirror with warm adjustable light and a clear defogged surface.

    A smart mirror with a built in defogger pad and adjustable light solves the most common morning complaint in one swap. The defogger keeps a clear patch after a hot shower, and a light that shifts from bright white for grooming to warm white for evening use suits both routines. Hang the mirror centered over the sink at eye level, and keep its width a little narrower than the vanity so the light does not crowd the wall fixtures.

    Check the power route before you buy, since many defogger mirrors need a wired connection or a nearby outlet. If wiring is not an option, a plug in defogger film on an existing mirror and a separate dimmable light give much of the same benefit without a full replacement.

    2. Floating Vanity With a Charging Drawer
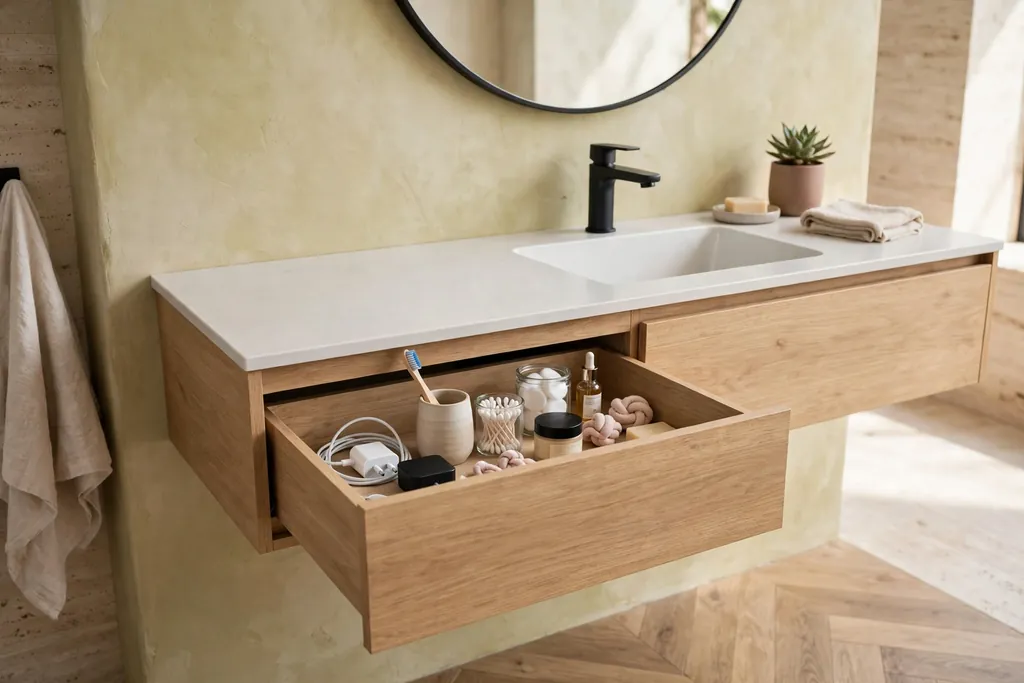
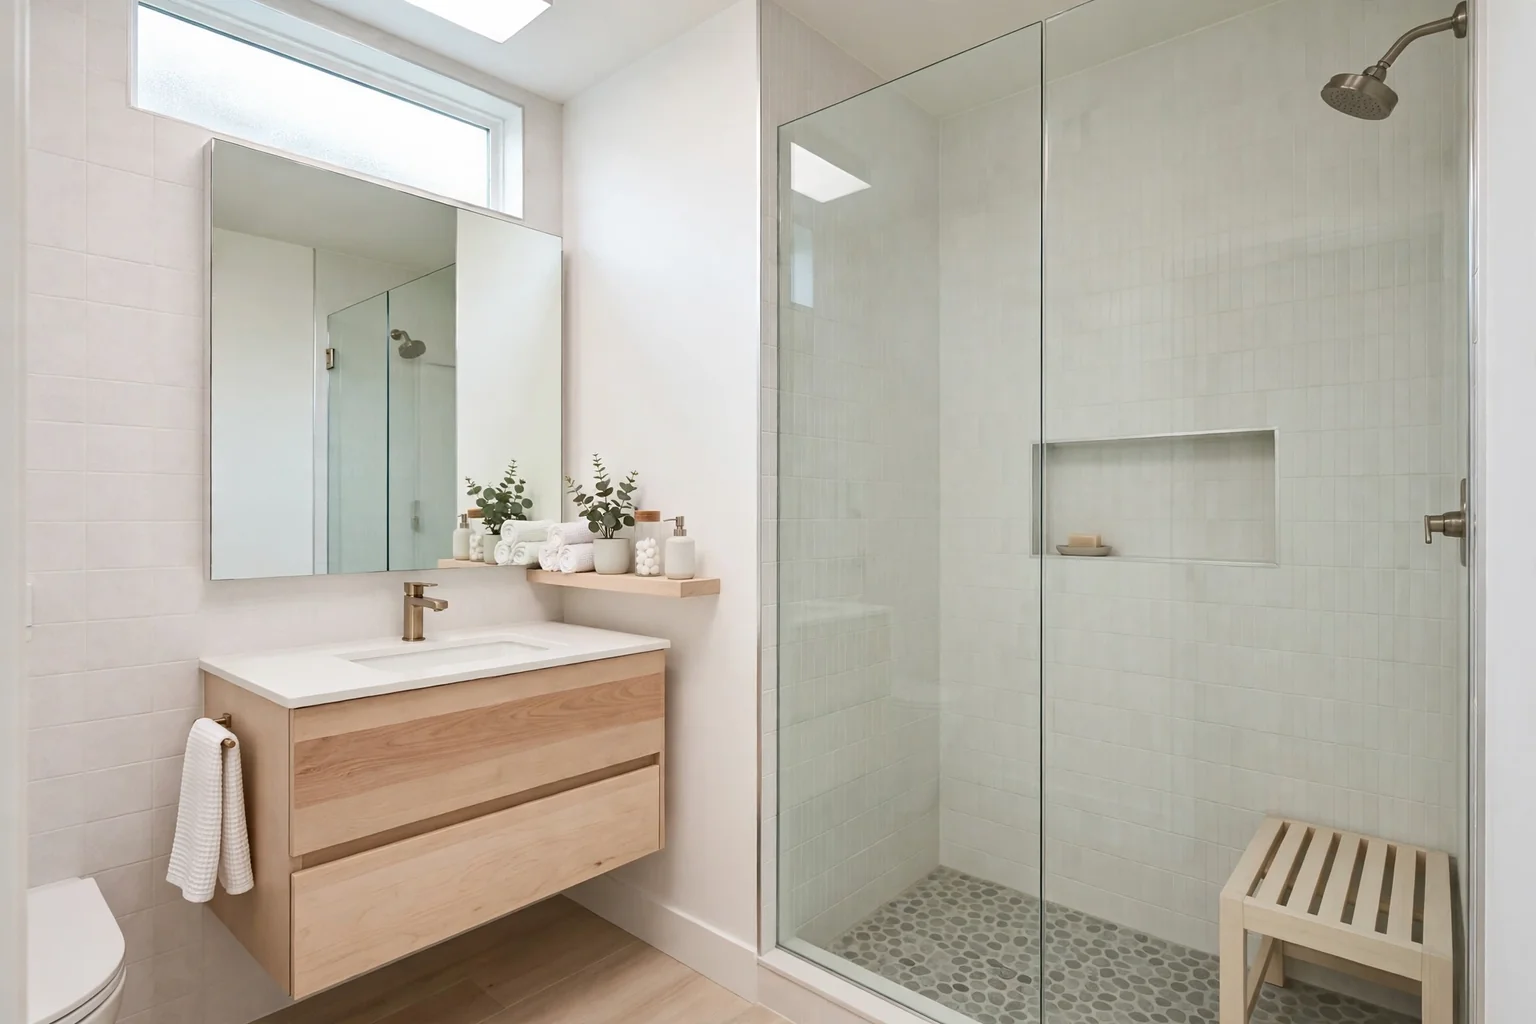
    Floating bathroom vanity with an open top drawer holding a phone charger and toiletries.

    A floating vanity lifts the cabinet off the floor, which makes a small bathroom feel larger and makes the floor easier to mop. The real innovation is inside: a shallow top drawer fitted with an outlet and a cable tray keeps a phone, toothbrush charger, and hair tool cord out of sight while they charge. Keep the drawer shallow so it does not clash with the sink drain, and use a drawer outlet rated for bathroom use.

    Pair the floating unit with a wall mounted faucet if your plumbing allows, since that frees even more counter space. Keep heavier items in the lower drawers and daily items in the charging drawer, so the counter stays clear for washing and grooming.

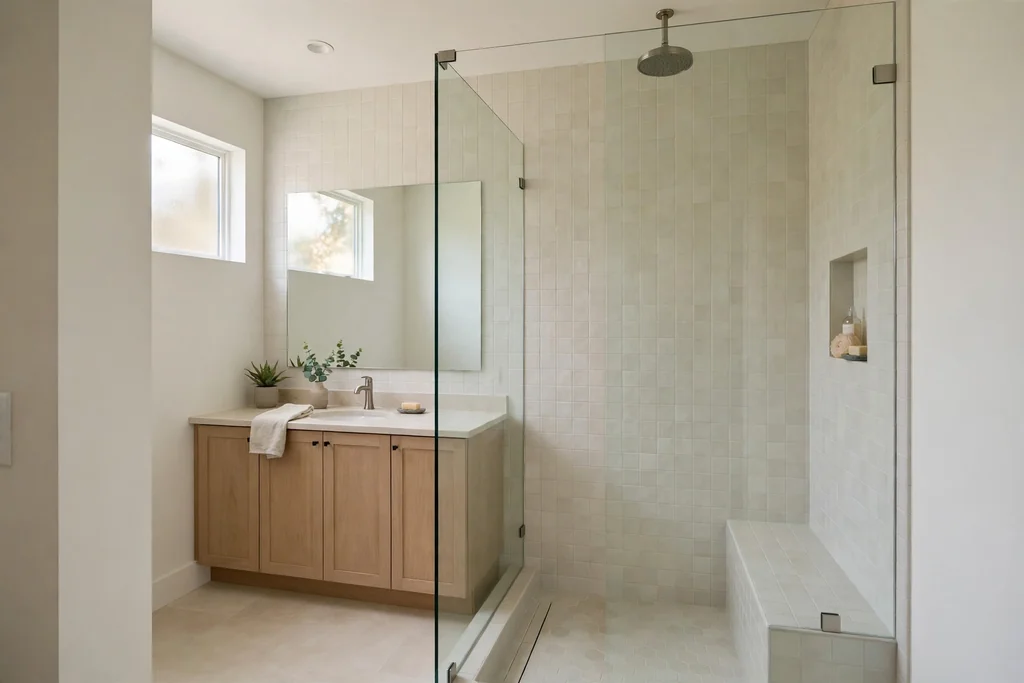
    3. Frameless Walk-In Shower With a Linear Drain
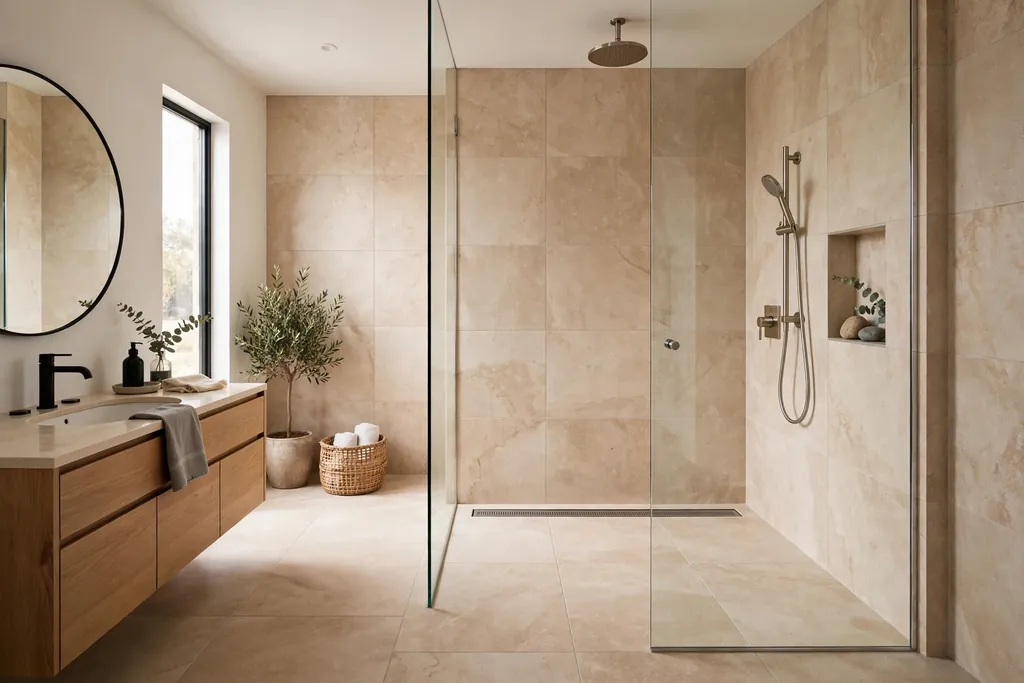
    Frameless walk-in shower with a linear drain along the wall and large format tiles.

    A frameless walk-in shower removes the door track and the high tub edge, so the bathroom floor flows into the shower in one clean line. A linear drain, a long narrow channel along one edge, lets large tiles run in a single slope instead of being cut into small pieces around a center drain, which means fewer grout lines to clean. Place the drain along the wall farthest from the entry and slope the whole floor gently toward it.

    Use a single fixed glass panel to contain spray while keeping the entry open, and keep the showerhead angled away from the opening. For more walk in layouts, these walk in shower ideas show how one strong floor and one glass panel can carry a plain room.

    4. Heated Floor in the Main Walking Zone
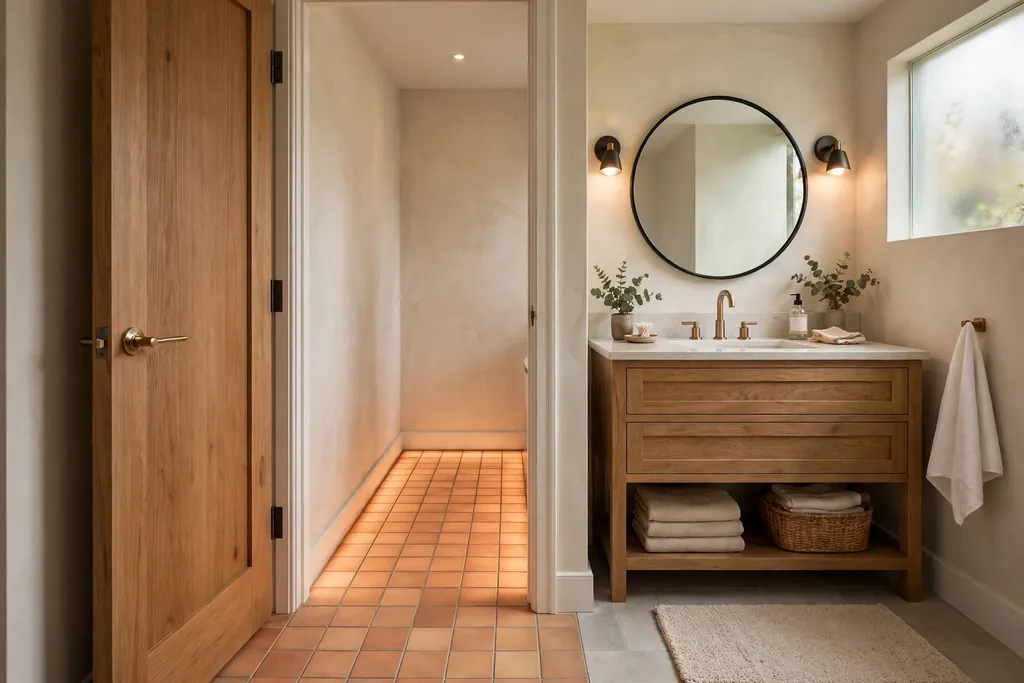
    Bathroom with warm heated floor tiles in the walking zone between the door and vanity.

    Heated flooring under the main walking zone, from the door to the vanity and the shower entry, takes the cold edge off tile on winter mornings and helps the floor dry faster after showers. It works best when planned before tile is laid, with the heating mat set in a layer suited to wet zones and paired with a timer so the floor is warm for the morning routine. Keep the heating zone out of the area directly under a fixed vanity or bench, where heat is wasted.

    Follow the maker guidance for wet room use, and keep a thermostat control outside the direct spray zone. In a small bathroom, heating just the walking path rather than the whole floor can keep the project simpler while still giving the benefit where bare feet land.

    5. Touchless Faucet With a Water Saving Aerator
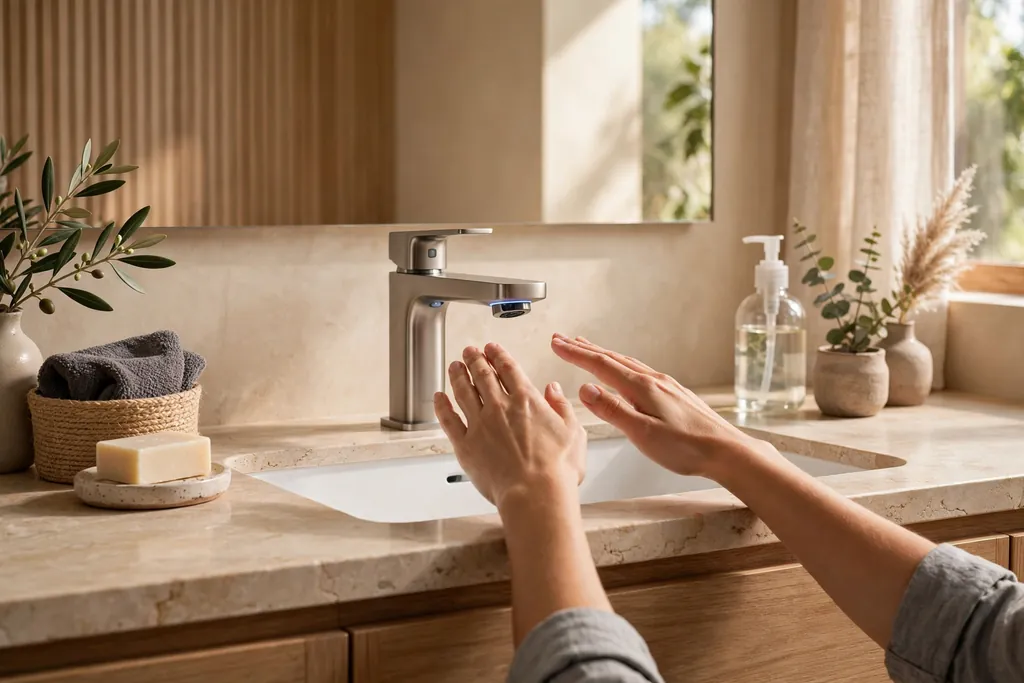
    Bathroom sink with a touchless faucet and hands waved near the sensor.

    A touchless faucet starts the water with a wave of a hand, which keeps handles cleaner and helps children and anyone with limited grip use the sink with ease. Pair it with a water saving aerator, a small fitting that mixes air into the stream, so the flow still feels full while using less water. Check the sensor range and the battery or power route before you buy, and keep the sensor clear of soap bottles that could trigger it by accident.

    Keep the faucet finish matched to the mirror frame and towel rail, so the sensor unit reads as part of the room rather than a gadget stuck on the sink. If a full touchless swap is too much, a single lever faucet with an aerator gives much of the water saving benefit at a lower cost.

    6. Recessed Shower Niche With a Slim LED Strip
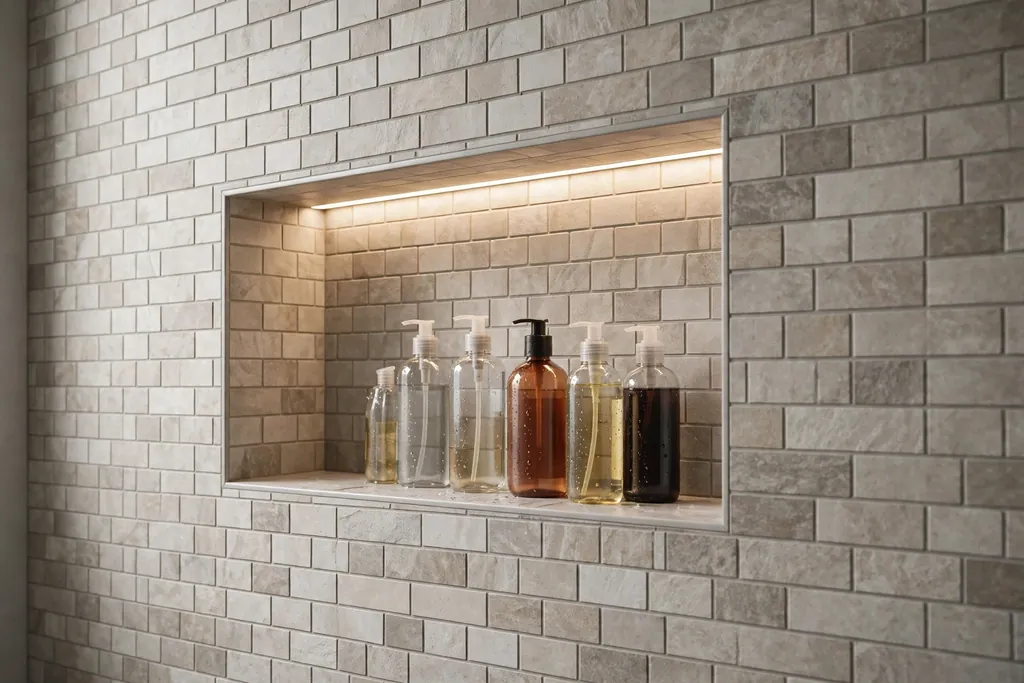
    Recessed shower niche with a slim LED strip lighting shampoo bottles on a tiled wall.

    A recessed niche set into the shower wall keeps shampoo, conditioner, and soap off the floor and out of the spray path, and a slim LED strip along its top edge makes bottles easy to find in a dim shower. Line the niche with the same tile as the wall or a small accent tile, and slope the base slightly forward so water drains out instead of pooling. Place the niche on the wall you face when you step in, at shoulder height, so essentials are visible at once.

    Use a waterproof rated strip and keep the power driver outside the shower zone, as your product maker advises. Keep bottles to a few daily essentials so the lit niche looks calm instead of crowded, and leave breathing room around each bottle.

    7. Heated Towel Ladder on a Spare Wall
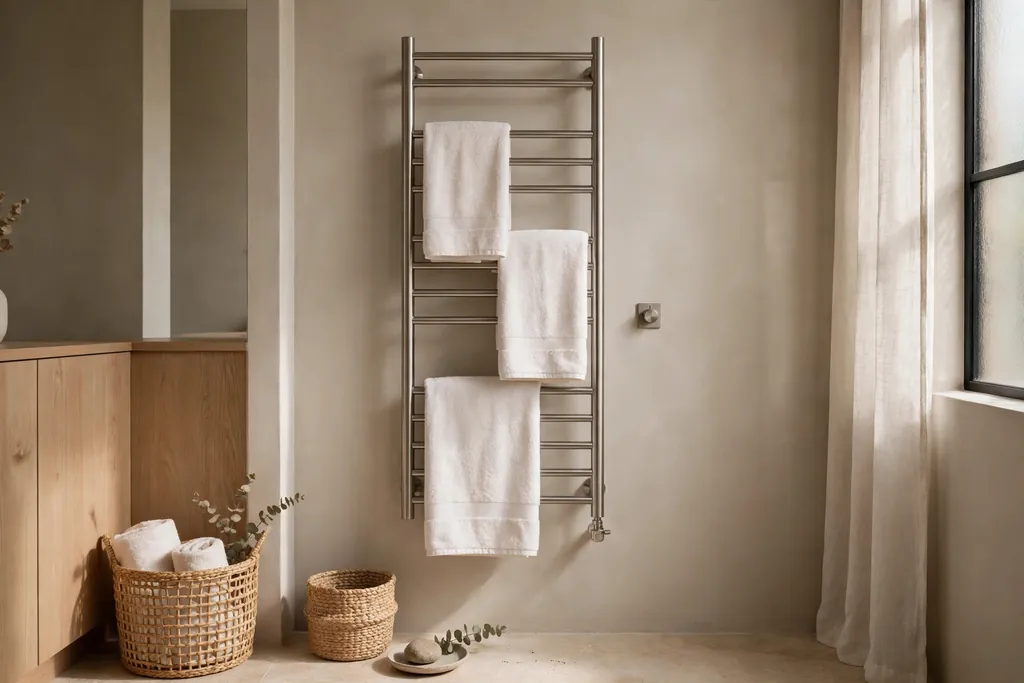
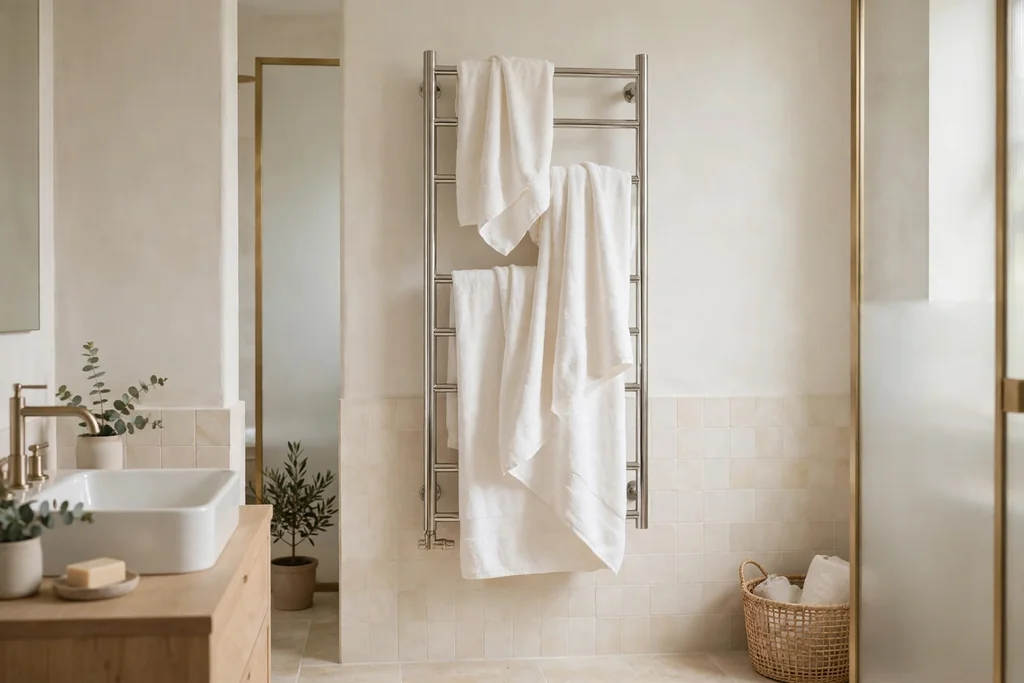
    Heated towel ladder on a spare bathroom wall holding warm white towels.

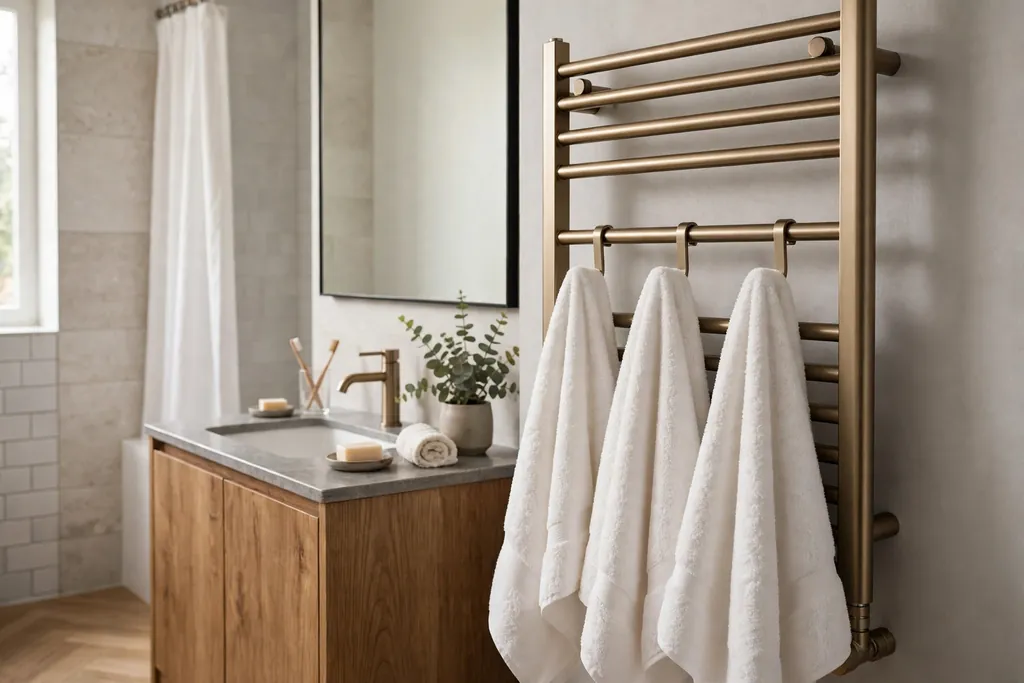
    A heated towel ladder warms towels and helps them dry between uses, which matters in a bathroom with no radiator and little air flow. Mount it on a spare wall beside the door or at the end of the tub, where a deep cabinet would block the walkway, and put heavier bath towels on the lower rungs and lighter hand towels higher up. Many models offer a timer, so the ladder runs before the morning shower and switches off during the day.

    Check the wiring route and keep the ladder clear of direct shower spray. If hard wiring is not possible, a plug in model on a dry wall gives the same warm towel benefit, as long as the cord stays clear of wet floors and the outlet is rated for bathroom use.

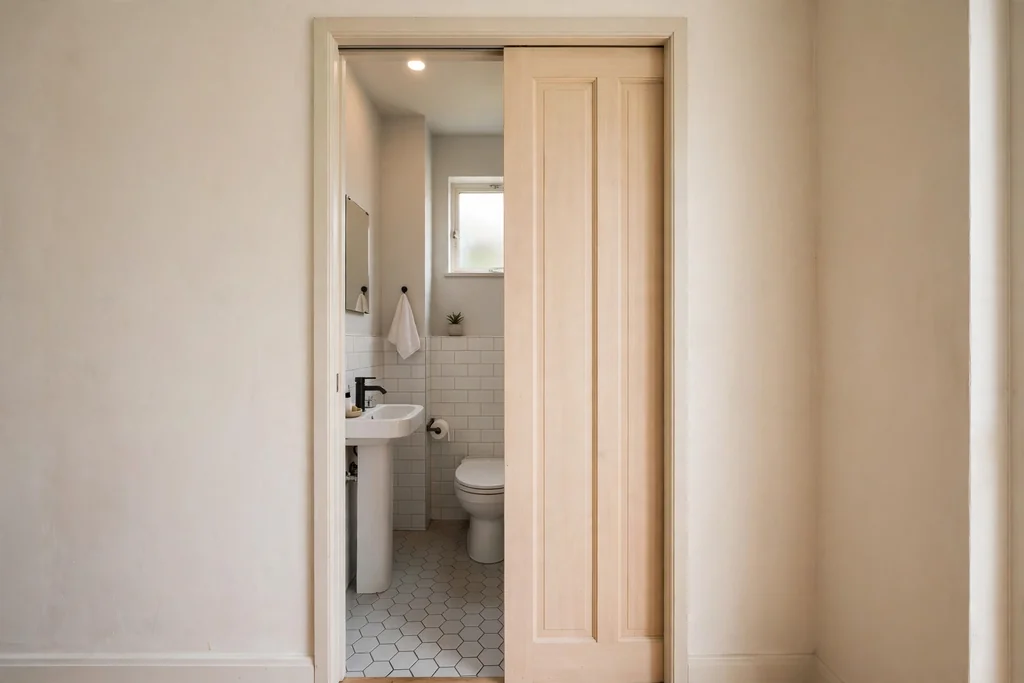
    8. Frosted Glass Pocket Door for a Tight Layout
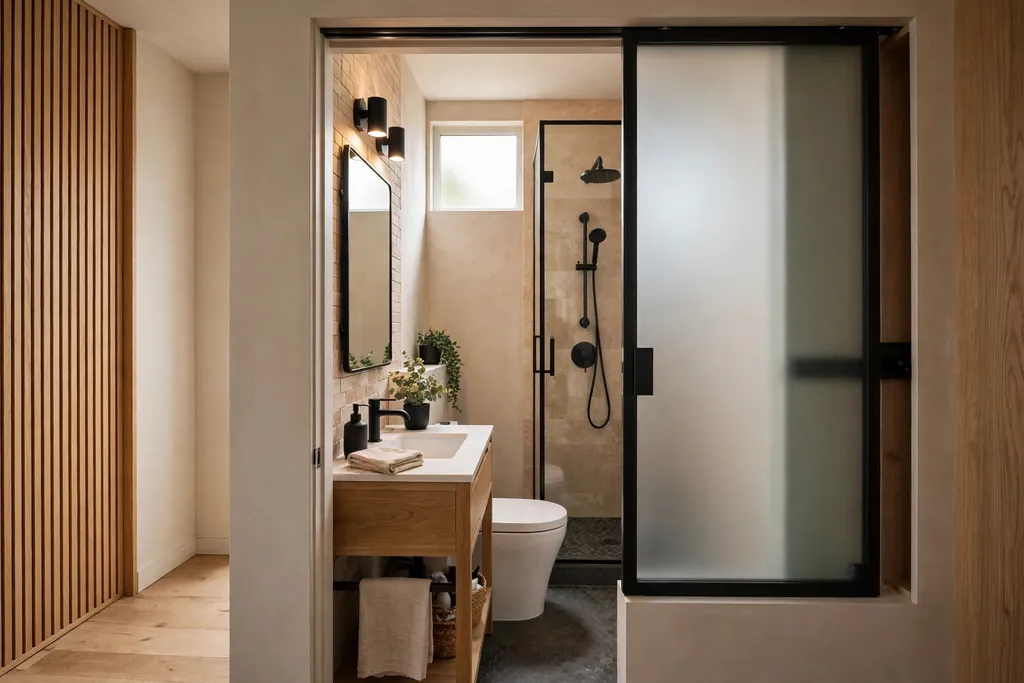
    Frosted glass pocket door slid open into a small modern bathroom.

    A pocket door that slides into the wall frees the floor space a swinging door needs, which can be the difference between a cramped bathroom and one that works. Frosted glass in the door panel lets borrowed light pass between rooms while keeping privacy, and it suits a bathroom off a hallway or bedroom where daylight is scarce. Check the wall cavity before you commit, since pipes and wiring can block the pocket, and choose a soft close track so the door does not slam.

    Add a recessed pull that is easy to grip with wet hands, and keep the door track clean so the panel glides. If a full pocket door is not possible, a sliding barn style door on the outside of the wall gives a similar space saving benefit without opening the wall.

    9. Deep Soaking Tub in a Corner Alcove
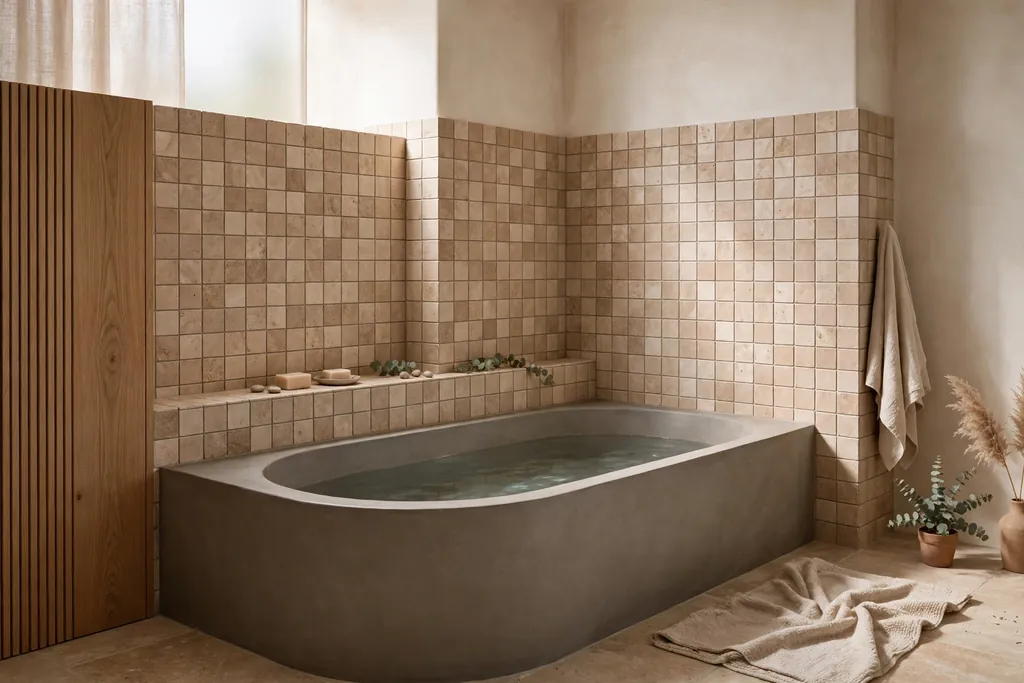
    Deep soaking tub set into a tiled corner alcove with a small ledge for soap.

    A deep soaking tub set into a corner alcove gives a small bathroom a real bathing spot without the floor space a freestanding tub needs. The alcove walls support the tub on two sides, leaving the front open for a step in, and the depth lets water cover the shoulders while seated, which a shallow tub cannot do. Tile the alcove walls in a plain tile so the tub stays the focus, and add a small ledge at one end for soap and a washcloth.

    Keep the tub length matched to the tallest user who will bathe in it, and check the floor load and water heater capacity before you order, since a deep tub holds more water than a standard tub. A handheld showerhead on the wall above the tub makes rinsing and cleaning the alcove easy.

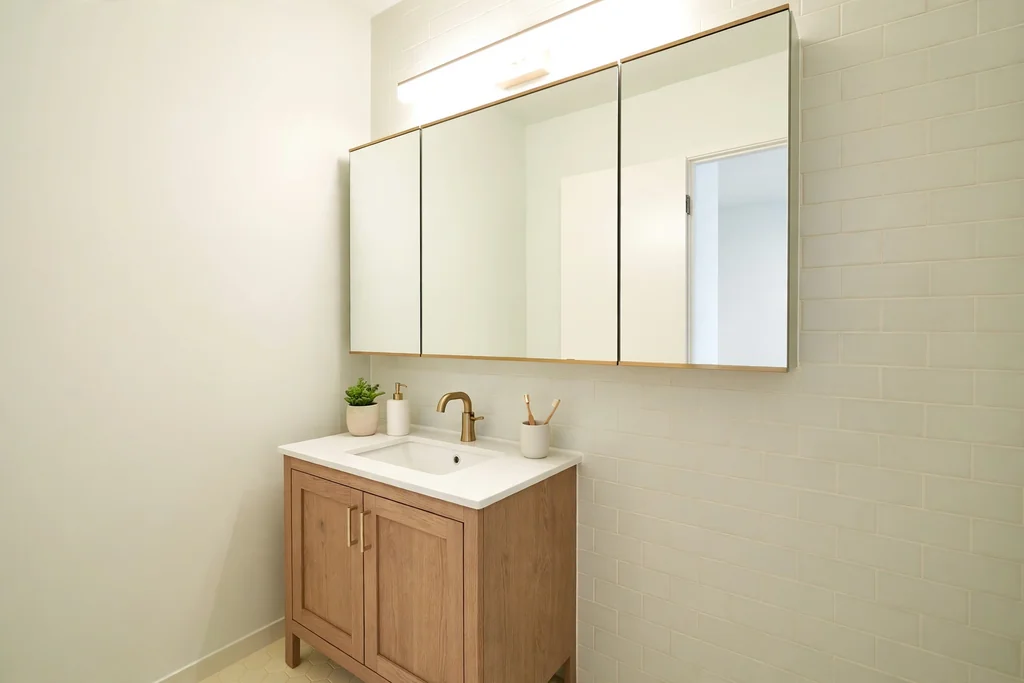
    10. Backlit Mirror Cabinet With Hidden Storage
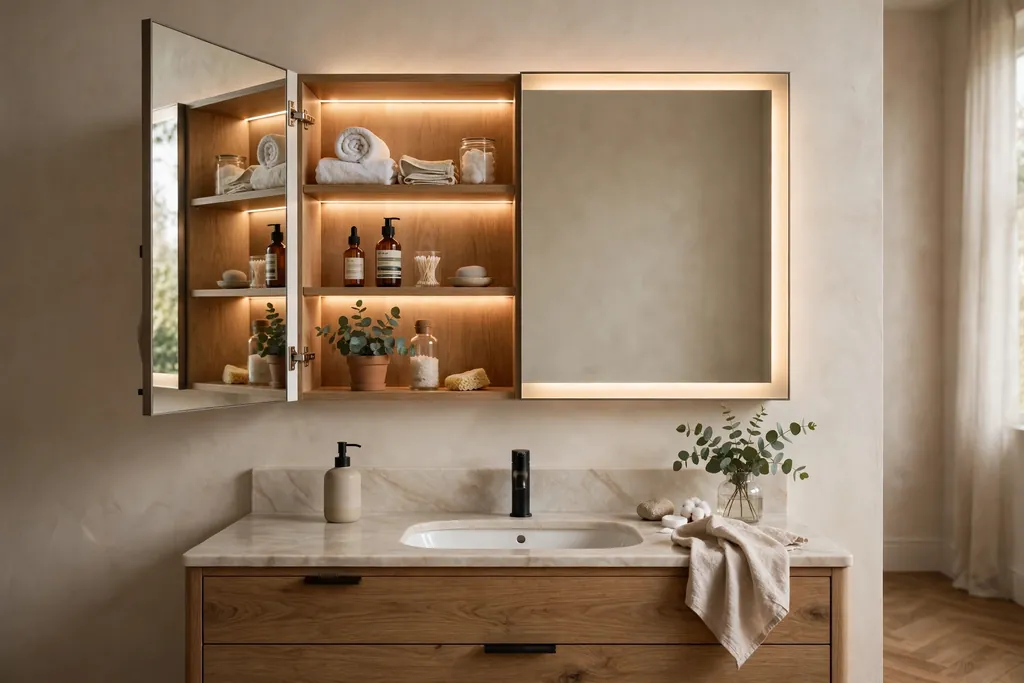
    Backlit mirror cabinet above a vanity with the door open showing hidden shelves.

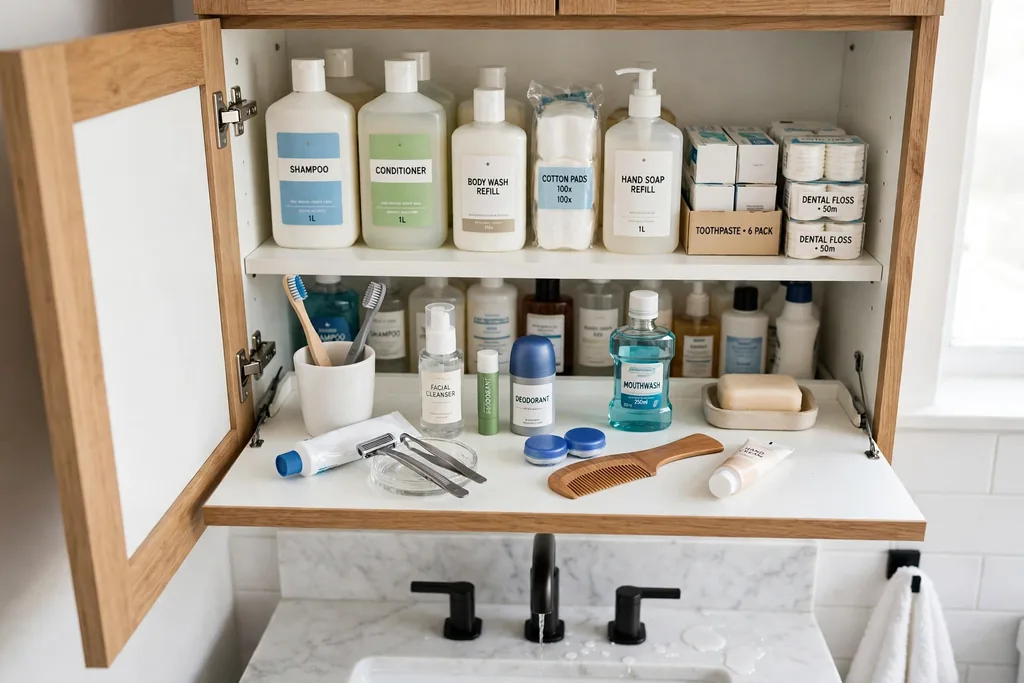
    A backlit mirror cabinet hides storage behind the mirror itself, so toothbrushes, medicines, and grooming tools sit at eye level without a separate cabinet taking wall space. The light behind the mirror gives a soft halo glow that flatters faces and makes night trips easier without switching on the main light. Choose a cabinet depth that holds your tallest bottle with the door closed, and keep daily items on the middle shelf where they are easiest to reach.

    Mount the cabinet so the mirror center sits at eye level for the main user, and match its frame finish to the faucet and towel rail. Keep the inside to one row per shelf, since a cabinet packed two deep quickly becomes a cupboard you have to dig through each morning.

    11. Pull-Out Hamper Inside the Vanity Cabinet
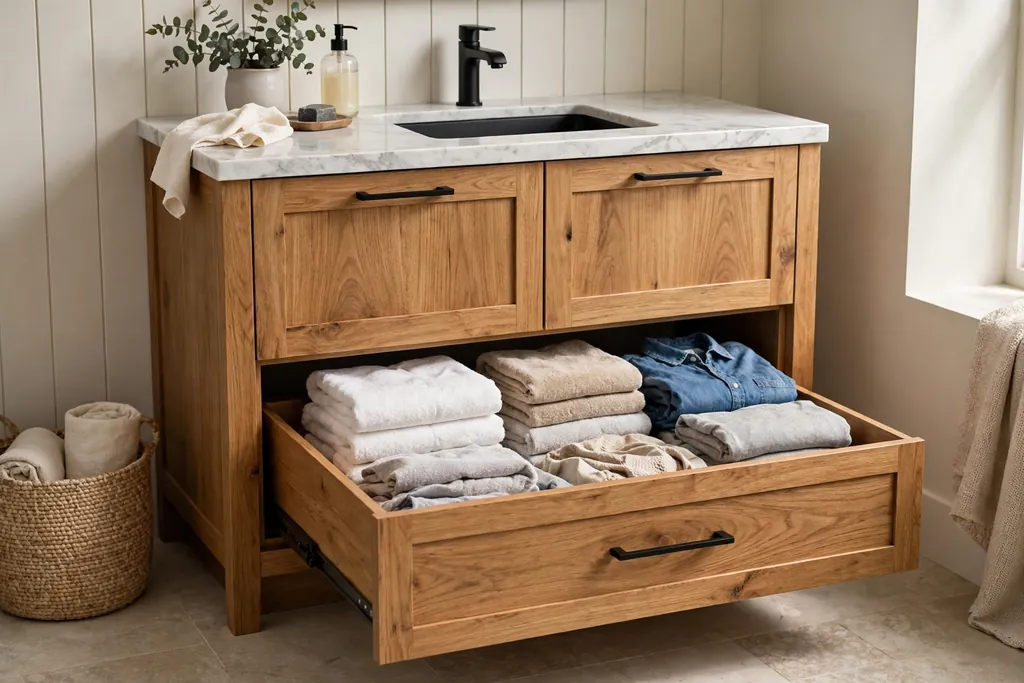
    Vanity cabinet with a pull-out hamper drawer holding towels and laundry.

    A pull-out hamper fitted inside the vanity cabinet hides dirty laundry where it is generated, instead of letting a basket take floor space in a small bathroom. A tilt out or slide out hamper with a washable liner keeps damp towels off the cabinet floor, and a lid keeps the room looking tidy between laundry days. Measure the cabinet opening and the hamper depth before you buy, so the door still closes with a full load inside.

    Empty the hamper often in a humid bathroom, since damp clothes left for days can smell musty. If the vanity is too small for a full hamper, a narrow tilt out bin for hand towels and washcloths still removes the most common clutter from the floor.

    12. Digital Shower Control With Preset Temperatures
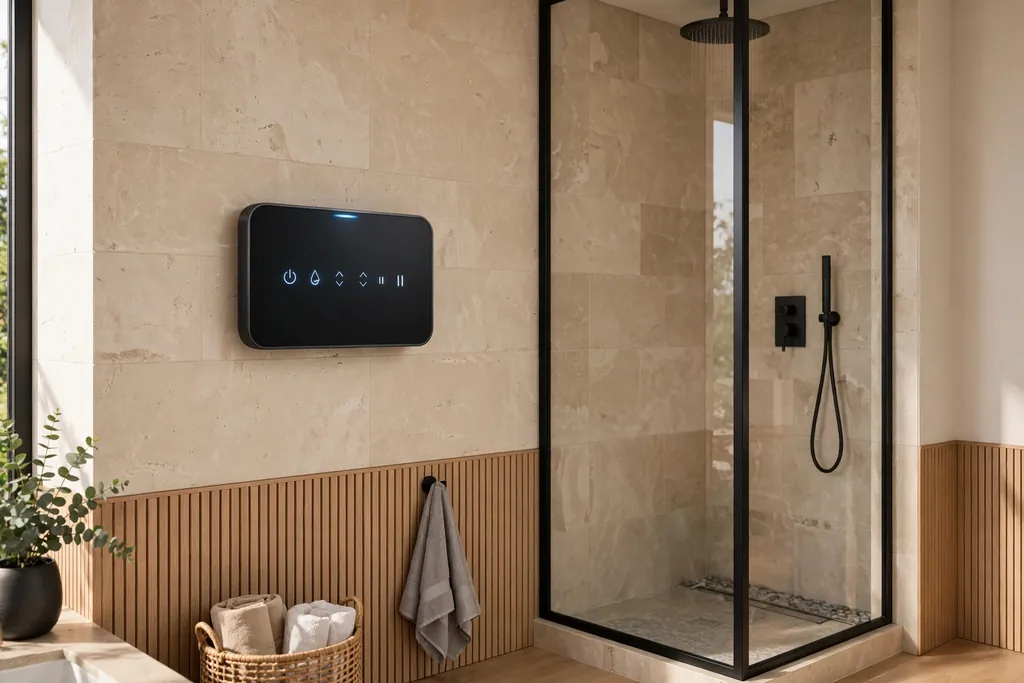
    Digital shower control panel on a bathroom wall outside the shower spray zone.

    A digital shower control lets each person save a preset temperature and flow, so the shower starts at a comfortable setting without fiddling with hot and cold taps each time. The control panel sits outside the direct spray, within reach from the entry, so you can set the temperature before stepping under the water, and a pause button saves water while you lather. Check the plumbing compatibility and the power route before you buy, since some panels need a wired connection and a control box hidden in the wall.

    Keep one manual override in the plan, such as a simple on and off control, in case the panel ever needs service. Pair the digital control with a handheld head on a slide bar, so the same shower suits adults, children, and seated users.

    13. Solar Tube That Brings Daylight Over the Shower
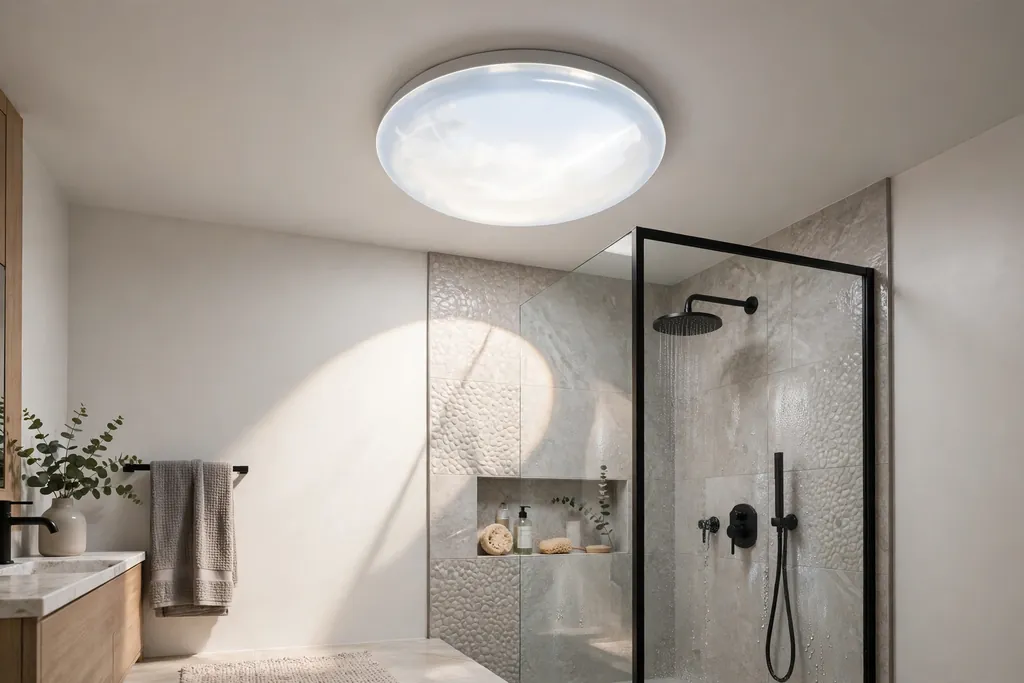
    Bathroom ceiling with a round solar tube diffuser bringing daylight over the shower area.

    A solar tube, a reflective tube that runs from a small roof dome to a ceiling diffuser, brings daylight into a windowless bathroom without a full skylight opening. Over the shower it makes tile and glass look better without extra lighting, and it gives steam a bright, airy space to clear from. The diffuser sits flush with the ceiling, so it suits a low ceiling better than a deep skylight well, and it needs no wiring.

    Check the roof route and the distance from roof to ceiling before you commit, since a long tube with many bends gives less light than a short straight run. Use a diffuser with a frosted finish for privacy, and keep the tube clear of the shower spray zone by placing it over the dry part of the shower ceiling where possible.

    14. Preserved Moss Panel on a Dry Wall
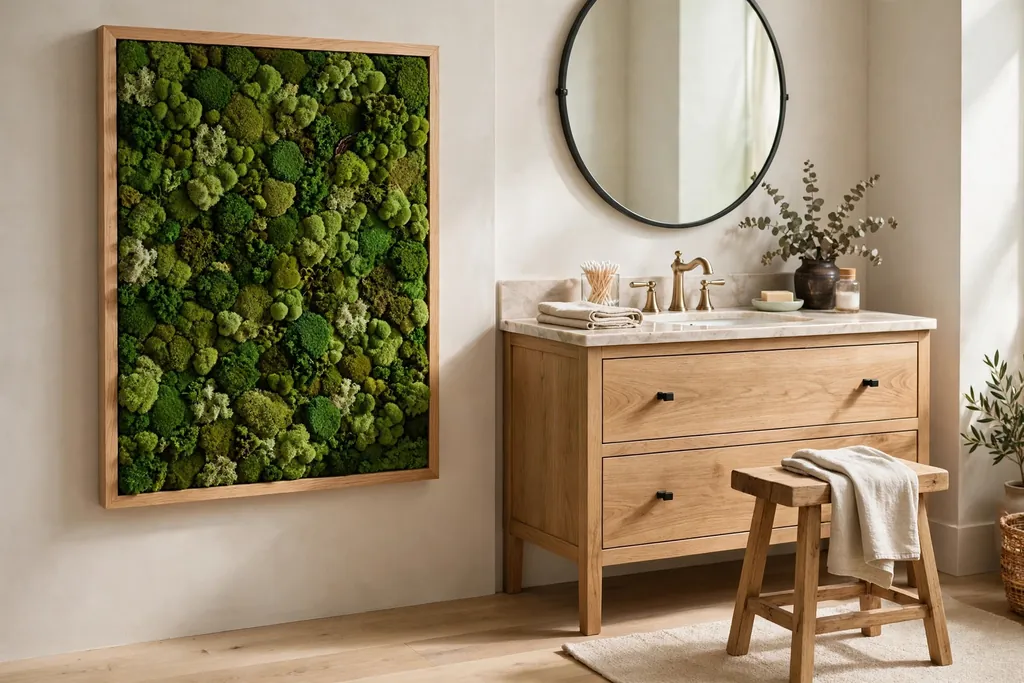
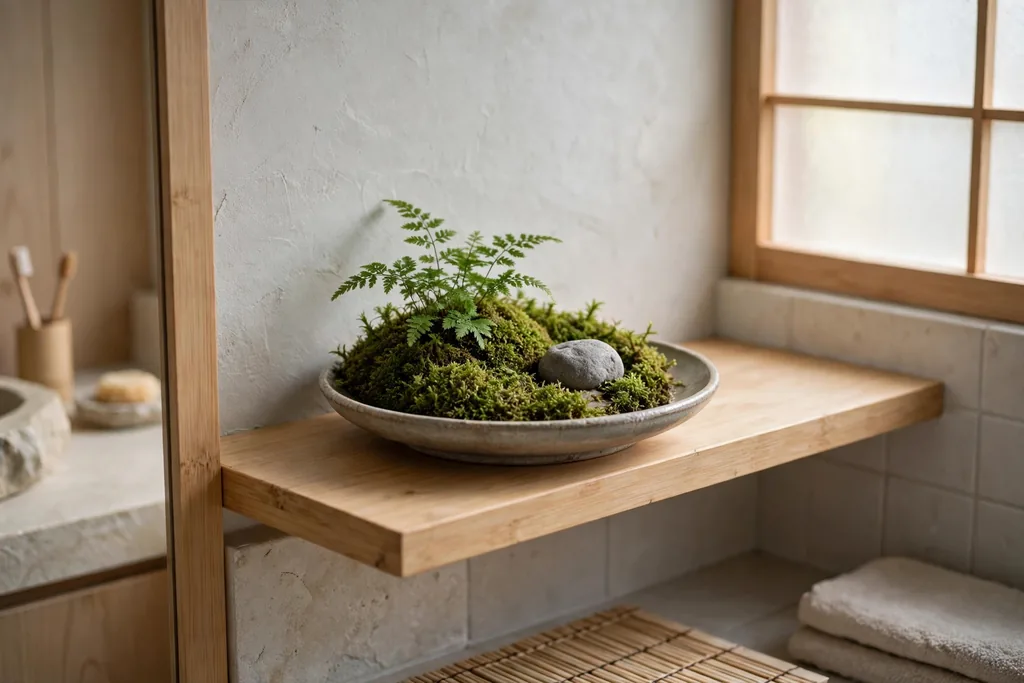
    Preserved moss panel on a dry bathroom wall beside a vanity with a wood stool.

    A preserved moss panel brings living green texture to a bathroom without watering, soil, or daily care, since the moss is treated to hold its color and softness. It suits a dry wall away from direct shower spray, such as the wall beside the vanity or above the toilet, where it softens hard tile and adds a natural focal point. Mount the panel on a backing board with a small air gap behind it, so the wall can breathe and the panel can be removed for cleaning.

    Keep the panel out of constant steam and direct water, since preserved moss is not meant to be soaked, and dust it with a dry cloth or a low air blower. Pair it with one wood accent, such as a teak stool, so the green reads as part of a calm scheme rather than a single novelty piece.

    15. Fold-Down Teak Seat in the Shower
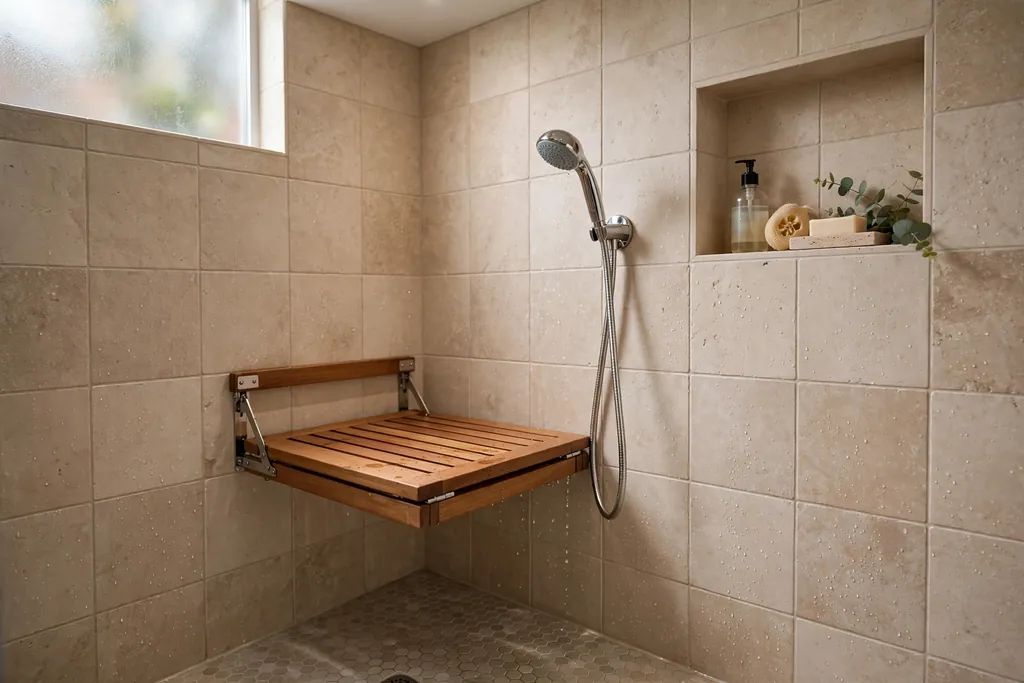
    Fold-down teak seat in a tiled shower beside a handheld showerhead.

    A fold-down teak seat in the shower gives a place to sit, shave legs, or rest a towel, and folds flat against the wall when not in use, so it never crowds the standing area. Teak copes with wet conditions better than most woods, but still benefits from being left to drain and dry between showers. Mount the seat at a height that lets feet rest flat on the floor when seated, and fix it to a stud or a solid backing board, since a seat must hold full body weight safely.

    Keep the seat depth shallow enough that the standing area stays clear, and pair it with a handheld showerhead, since rinsing while seated is easier with a head you can move. If wall fixing is not possible, a small teak stool that lives in the shower gives a similar benefit and can be moved out to dry.

    16. Modular Wall Rail for Hooks, Shelves, and Baskets
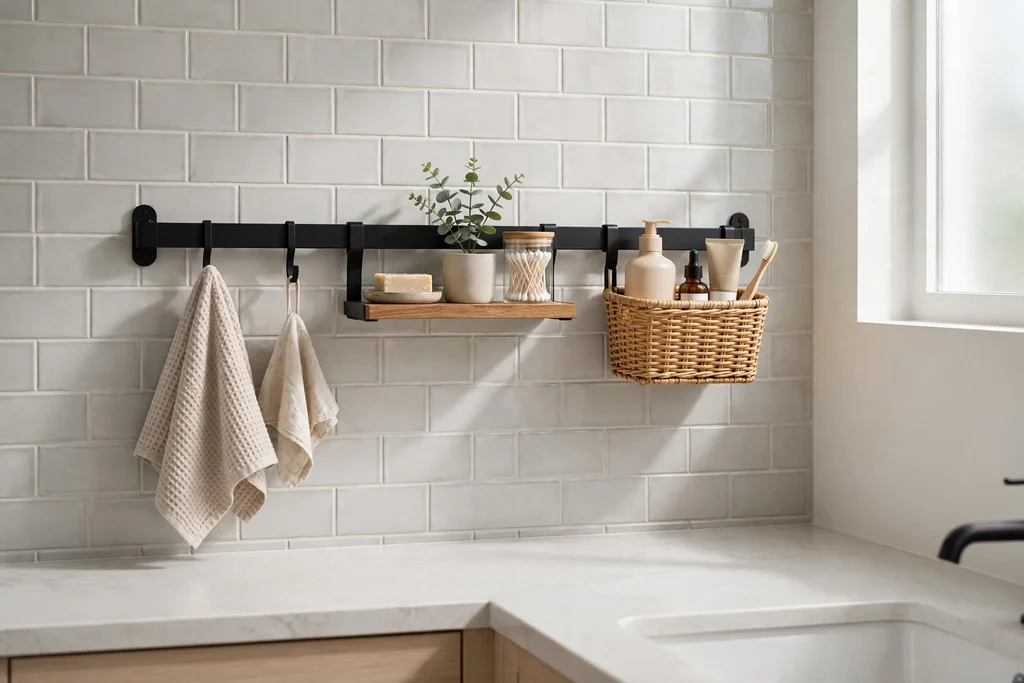
    Modular wall rail in a bathroom holding hooks, a small shelf, and a basket.

    A modular wall rail, a single horizontal bar with sliding hooks, small shelves, and baskets, lets you change bathroom storage without drilling new holes each time. Mount one rail by the sink at hand height and one by the shower entry, then slide the pieces along the bar as needs change: a hook for a robe, a small shelf for soap, a basket for hair tools. Keep the rail fixings in tile rated anchors, and test the load with a full water bottle before trusting it with anything breakable.

    Keep the rail shorter than the wall it sits on, so it reads as one deliberate line rather than a crowded strip. If you share the bathroom, assign one hook and one basket per person, so the rail stays organized instead of becoming a shared dumping ground.

    17. Bidet Seat on an Existing Toilet
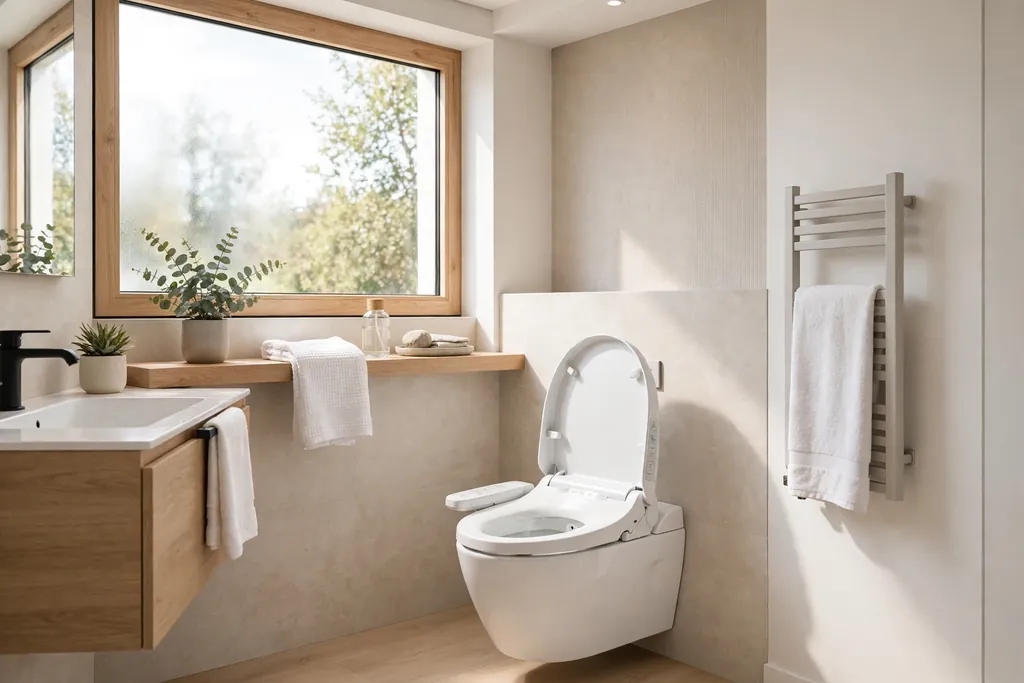
    Modern toilet fitted with a bidet seat in a bright bathroom.

    A bidet seat fitted onto an existing toilet adds a warm water wash, a heated seat, and adjustable pressure without replacing the whole toilet. It uses the existing water supply with a small tee fitting, and many models plug into a nearby outlet, so the swap is often a weekend job for a confident DIYer or a short visit from a plumber. Check the toilet shape, round or elongated, before you order, since the seat must match the bowl, and keep the cord clear of wet floors.

    Start with the lowest pressure and temperature settings and adjust slowly, since bidet sprays feel stronger than expected at first. If a full bidet seat is more than you want, a simple spray attachment on the same toilet gives a basic wash function at a lower cost.

    18. Integrated Sink and Countertop in One Slab
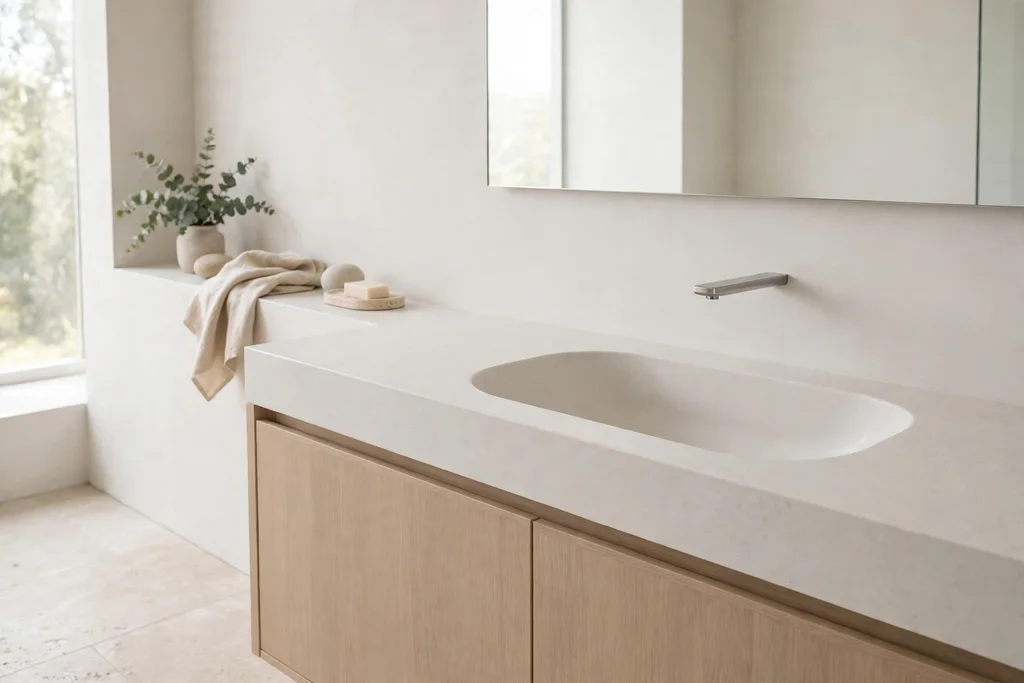
    Bathroom vanity with an integrated sink and countertop in one smooth slab.

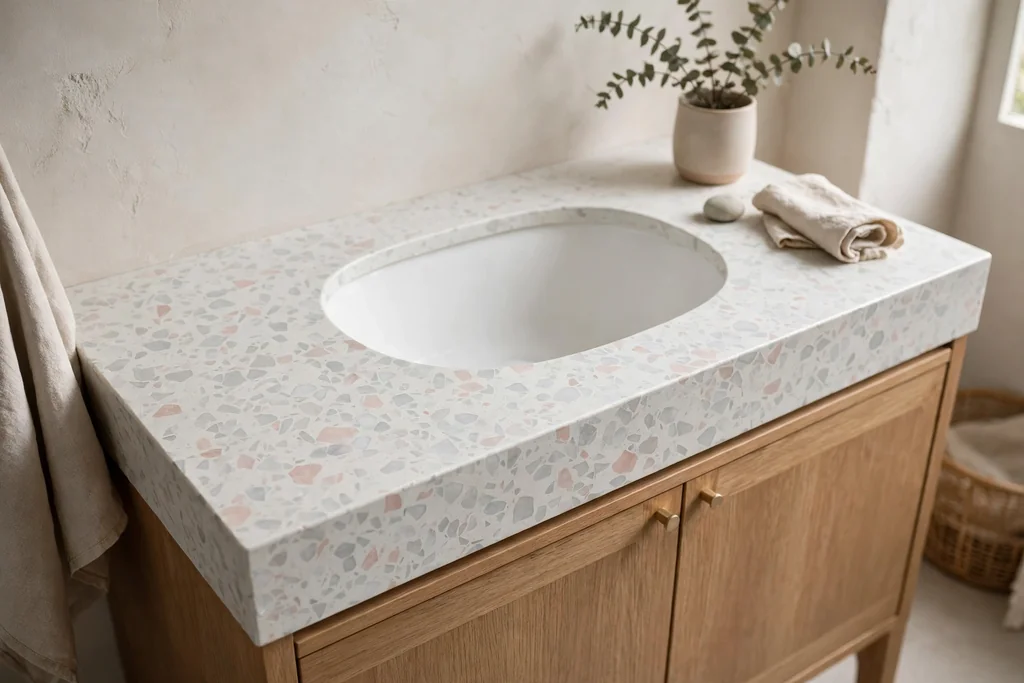
    An integrated sink and countertop made from one slab, with the basin molded into the surface, removes the rim and seam where soap scum and grime usually collect. The smooth run from counter to basin wipes clean in one pass, and the lack of a raised edge makes the vanity look longer and calmer. Choose a material suited to daily use, such as solid surface or molded stone, and keep the faucet wall mounted or deck mounted to suit the slab thickness.

    Keep the slab color close to the wall tile, so the vanity reads as one quiet block, and add one wood or woven accessory for warmth. If a full slab is beyond budget, a simple undermount basin with a seamless counter joint gives much of the easy cleaning benefit at a lower cost.

    19. Motion Sensor Night Light Under the Vanity
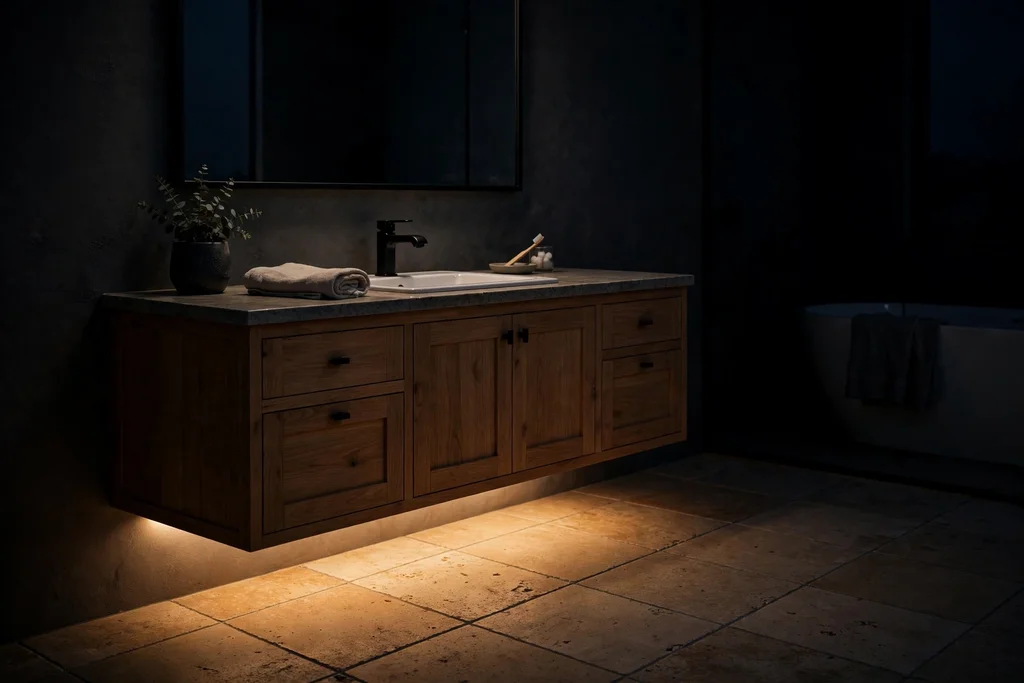
    Soft motion sensor light glowing under a bathroom vanity at night.

    A motion sensor light strip under the vanity gives a soft glow for night trips to the bathroom without switching on the main light and waking the household. The sensor picks up movement at floor level, lights the path to the toilet and sink, and switches off after a short delay, so it uses little power. Battery models stick under the vanity with adhesive and suit renters, while plug in models give steadier brightness.

    Choose a warm color temperature and a low brightness, so the glow guides rather than glares, and keep the sensor clear of the shower curtain, which can trigger it with movement. For more small room fixes, these apartment bathroom ideas show how one low light and one storage change can make a plain bathroom feel finished.

    20. Curved Shower Screen for a Corner Shower
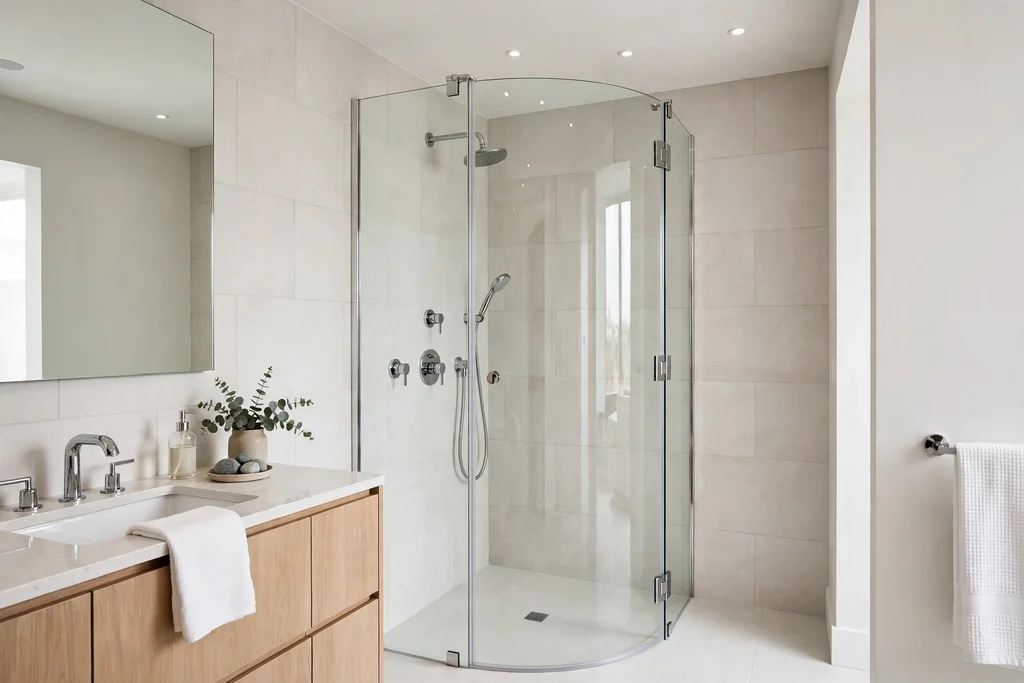
    Curved glass shower screen bowed outward from a corner shower.

    A curved shower screen bows outward from a corner shower, giving several extra inches of elbow and shoulder room inside without moving any plumbing. The curved glass uses the same wall fixings as a straight screen in most cases, so the swap is often a single day job, and the bowed shape keeps water inside the shower while making the corner feel less boxed in. Hang the screen so the opening sits on the side away from the vanity, and keep the door swing clear of the towel rail.

    Pair the curved screen with a handheld head, since the extra elbow room makes rinsing easier, and squeegee the glass after showers to keep the curve clear. In a very narrow bathroom, check that the bowed glass does not block the door swing before you commit.

    21. Recessed Niche for Toilet Paper Beside the Toilet
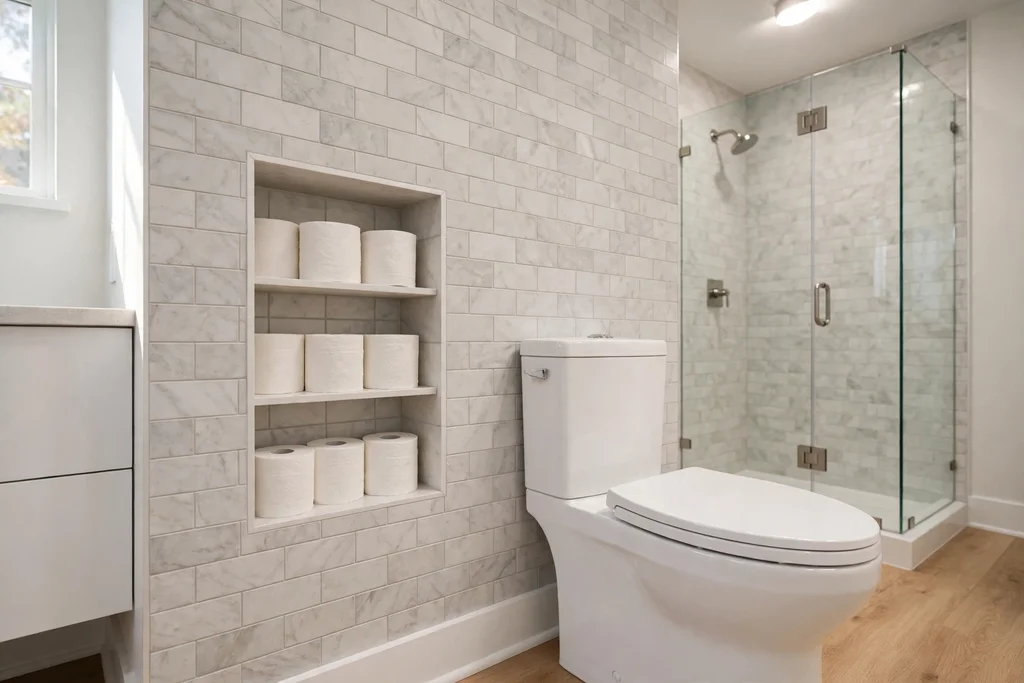
    Recessed wall niche beside a toilet holding spare toilet paper rolls.

    A recessed niche beside the toilet, set into the wall at arm height, keeps spare toilet paper rolls within reach without a freestanding holder taking floor space. Line the niche with the same tile as the wall, keep it shallow enough that rolls sit flush, and place it on the side of the toilet where the hand naturally reaches. One niche holding two or three rolls is enough for daily use, with bulk spares kept in a cabinet elsewhere.

    Keep the niche out of the direct splash zone from the sink or shower, and wipe the tile inside it during the weekly clean, since a recessed spot can collect dust. If opening the wall is not possible, a slim wall mounted holder at the same height gives a similar reach benefit without a remodel.

    22. High Ledge for Humidity Loving Plants
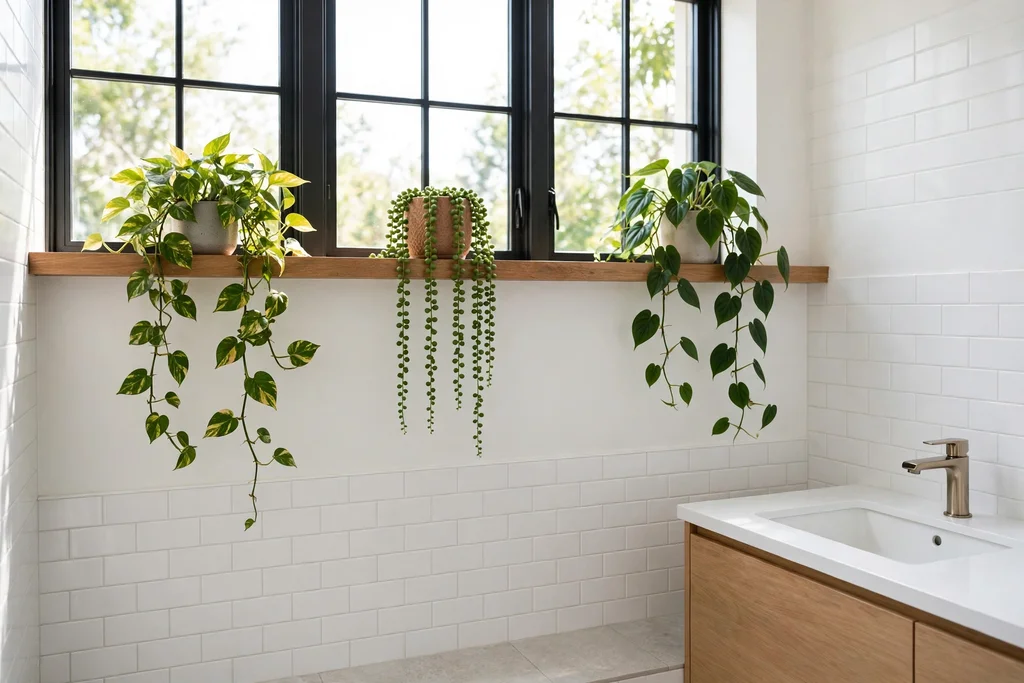
    High bathroom ledge with trailing humidity loving plants near a window.

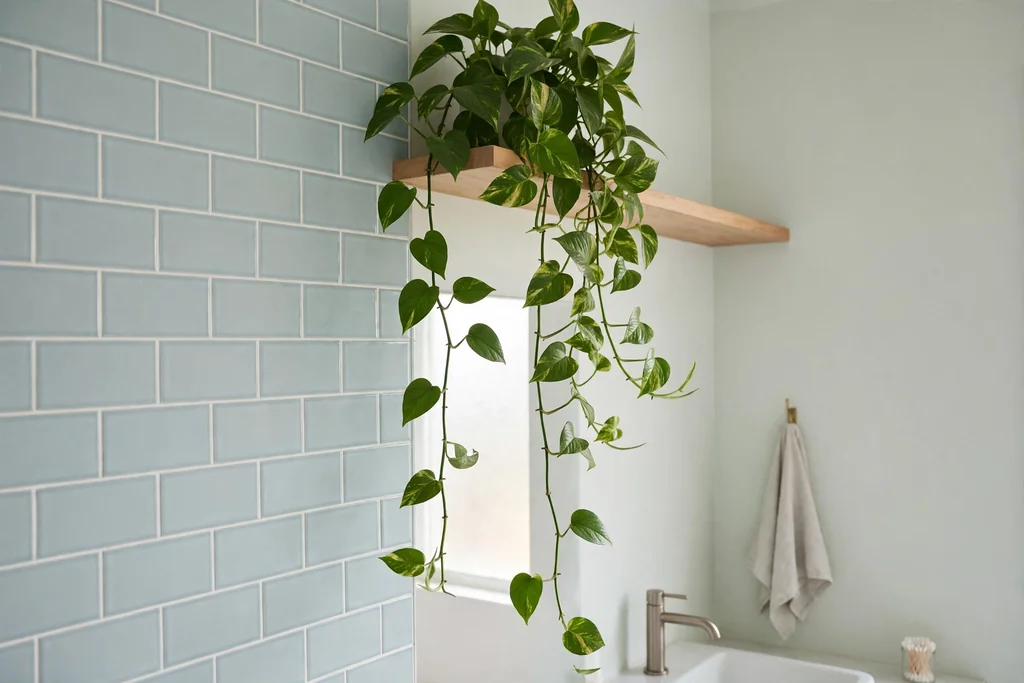
    A high ledge near the bathroom window, or on the wall above the door, gives humidity loving plants a home away from splashes while letting vines trail down the wall. Plants such as pothos and ferns enjoy bathroom humidity and indirect light, and a ledge keeps them off the counter where they would crowd daily items. Use pots with drainage holes and saucers, and check the soil before watering, since bathroom air already adds moisture.

    If the bathroom has no window, rotate the plant to a brighter room for a few days each week, or choose a low light tolerant variety. One trailing plant usually looks better than a crowded collection in a small room, and it softens hard tile without taking floor space.

    23. Split Height Vanity for Seated and Standing Use
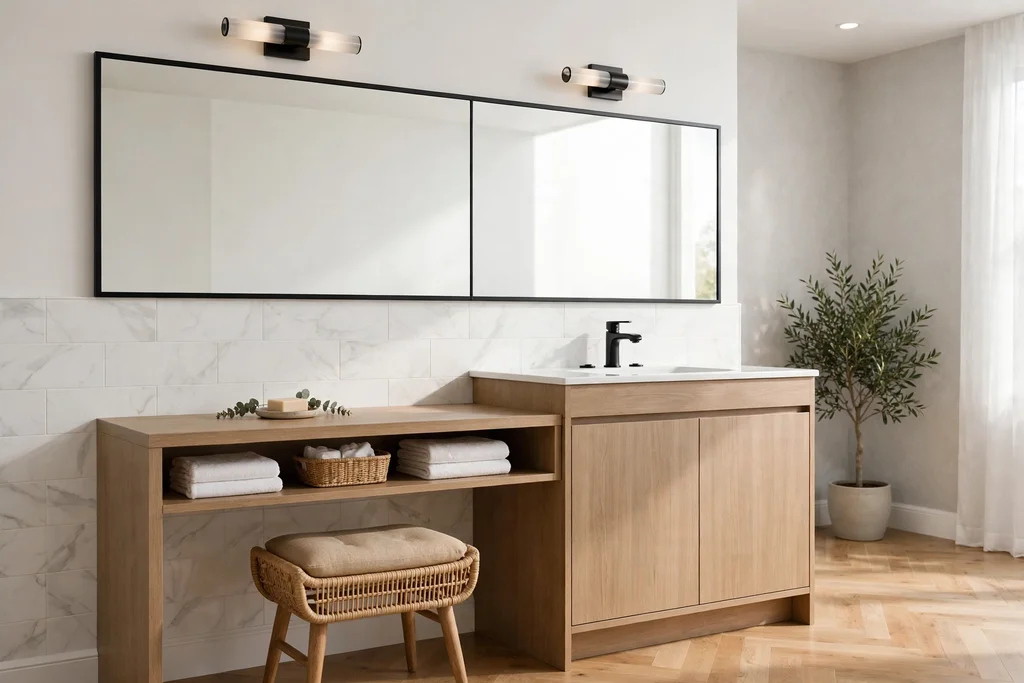
    Split height bathroom vanity with a lower seated section and a standing basin.

    A split height vanity gives one side at standard standing height and a lower, open section at seated height, so the same bathroom suits adults, children, and anyone who prefers to sit while grooming. The lower section leaves knee space open underneath, with a small mirror at seated eye level, while the standing side holds the main basin and storage drawers. Keep the counter material the same across both heights, so the split reads as one designed unit rather than two cabinets pushed together.

    Place the seated section near the window or the best light, and keep a stool that slides fully underneath it when not in use. This layout also suits a shared bathroom, since one person can sit to groom while another uses the standing basin.

    24. Sealed Wood Slat Wall Behind the Vanity
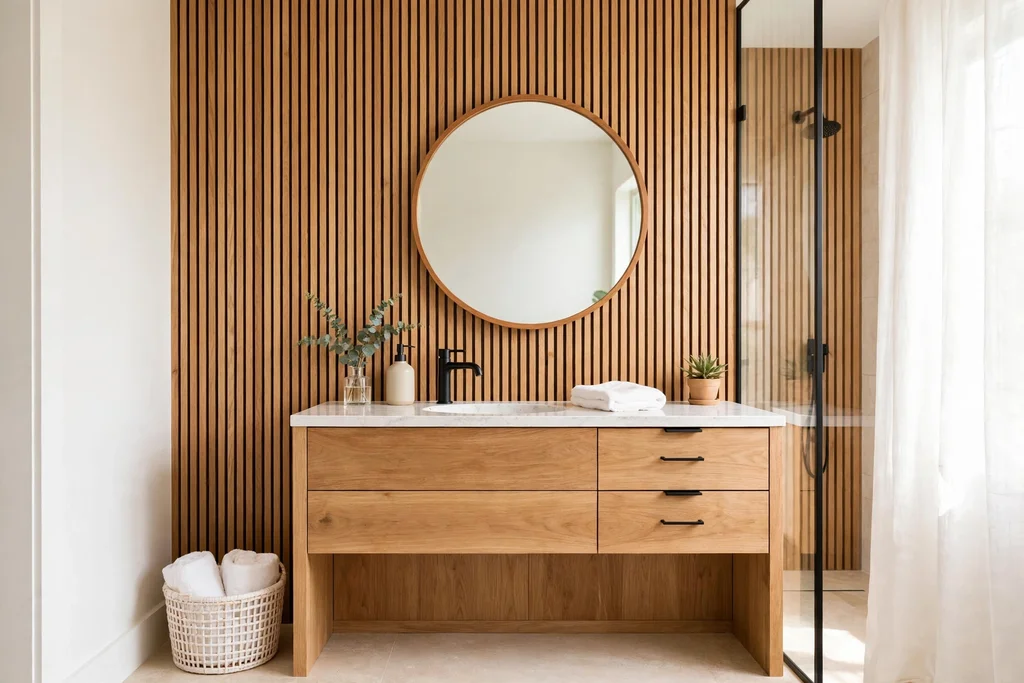
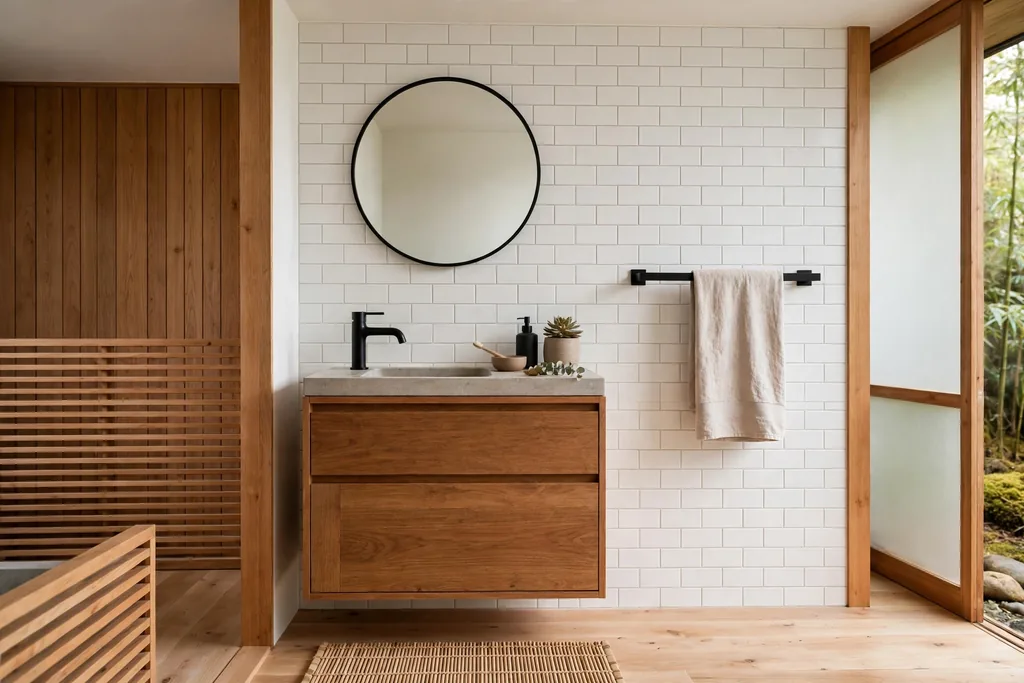
    Sealed wood slat wall behind a bathroom vanity with a round mirror.

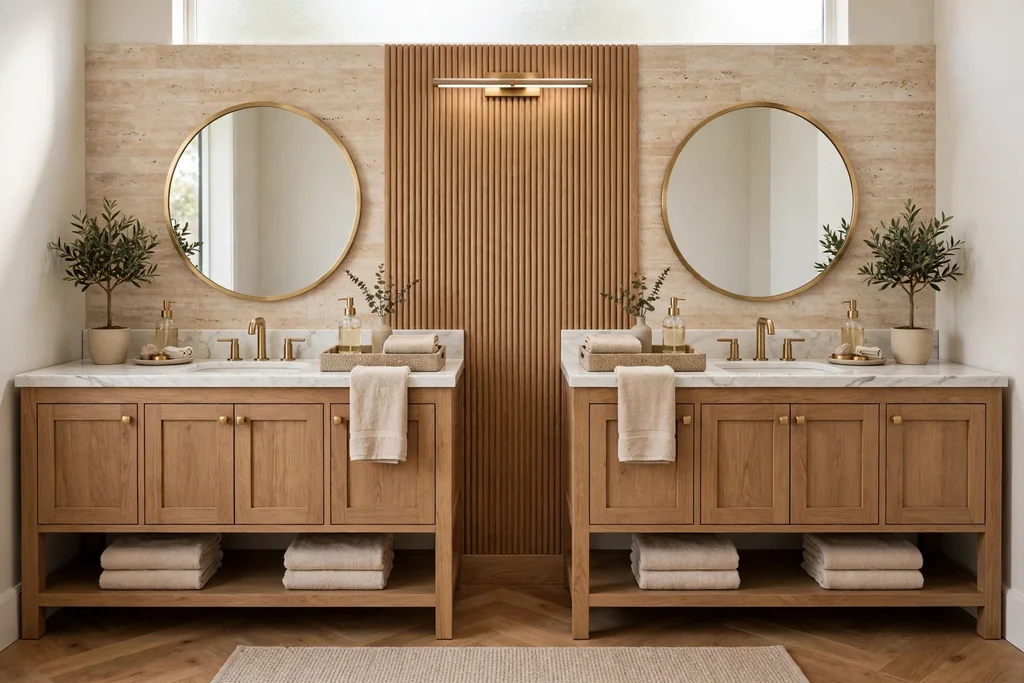
    A sealed wood slat wall behind the vanity adds warmth and vertical rhythm to a bathroom full of tile and porcelain, without the upkeep of a full wood room. Narrow slats in a pale or mid wood tone, sealed for bathroom humidity, draw the eye upward and give the mirror a finished backdrop. Fix the slats to a backing board with a small gap behind them for air flow, and keep the slat wall on the dry vanity wall, not inside the shower.

    Keep the rest of the room quiet when the slats are the feature: plain tile, one metal finish, and simple towels are enough. Wipe the slats dry if they get splashed, and reseal them as your product maker advises, so the wood keeps its color in a humid room.

    Conclusion

    An innovative bathroom does not need every new gadget at once. Pick the fix that removes your biggest daily annoyance, such as a foggy mirror, a cold floor, or nowhere to put laundry, then add one storage idea and one comfort idea that share the same finish and tile tone. Plan drains, heating, and wiring before tile and paint, keep wet zone materials water friendly, and leave plain space on walls and counters so the new pieces stand out. Save the ideas that fit your layout, light, and budget, and build the scheme in stages so each step still feels like a finished room.

    FAQs

    What is the most practical innovative bathroom idea to start with?

    Start with the idea that fixes your daily annoyance. A smart mirror helps if steam is the problem, a heated floor helps if cold tile is the problem, and a pull-out hamper helps if laundry on the floor is the problem. One well chosen fix usually changes daily use more than five small accessories, and it gives you a finish and tile tone to match later changes to.

    How can I add smart bathroom features without a full remodel?

    Choose features that fit existing plumbing and wiring first: a bidet seat on an existing toilet, a touchless faucet on an existing sink, a battery night light under the vanity, and a plug in heated towel ladder. Keep the original fixtures and parts in a labeled bag, so you can reverse the change later, and check power and water routes before you buy any wired or plumbed item.

    Do innovative bathroom ideas work in a small bathroom?

    Yes, many of the ideas here suit small rooms best, since they save floor space rather than taking it. A floating vanity, a pocket door, a fold-down shower seat, a recessed niche, and a pull-out hamper all free floor or counter space. Pick one layout change, such as the door or the vanity, and one storage fix, then stop and live with the room before adding more.

    How do I keep a bathroom with new technology easy to maintain?

    Keep one manual override for digital controls, choose finishes that wipe clean, and keep water friendly materials in wet zones. Wipe glass after showers, empty hampers often, and keep sensors clear of soap bottles and curtains that could trigger them by accident. Read the maker care advice for heated, digital, and sealed wood items before you install them, since each has its own cleaning limits.

    What should I plan before tiling or painting for these ideas?

    Plan the drain position for a linear drain shower, the heating zone for a heated floor, and the power routes for mirrors, towel ladders, digital controls, and night lights before tile and paint go in. Those decisions are hard to change later, while paint color, towels, and accessories can change any time. Mark the drain, heating mat, and wiring on a simple sketch of the room and share it with anyone doing the work.

    Are heated floors and digital showers worth the cost in a main bathroom?

    They are worth considering in a main bathroom you use every day, since a warm floor and a preset shower temperature remove daily friction rather than adding decoration. They cost more to plan and install than a simple swap, and they need correct waterproofing and wiring, so get a quote for the full job, not just the product, before you commit. In a rarely used guest bathroom, a simpler swap such as a new faucet or a heated towel ladder may give a better return.
  • 34 Coastal Bathroom Ideas for a Fresh Take on Your Home

    34 Coastal Bathroom Ideas for a Fresh Take on Your Home

    A coastal bathroom should feel light, clean, and easy to spend time in, whether you live near the sea or just like the look. White walls, pale wood, soft blue, and natural fibers do most of the work, and details such as a rope mirror or a pebble shower floor give the room its seaside character. These 34 coastal bathroom ideas cover walls, floors, vanities, showers, tubs, storage, and accessories, so you can start with one change or build a full scheme. Pick white and one blue as your base, then add wood and woven texture in two or three places. For small rooms, the storage ideas in these apartment bathroom ideas pair well with the color ideas below.

    Key Takeaways

    • Start with a calm base: white walls, a pale floor, and one blue, such as sea blue, aqua, or navy, repeated in two or three places.
    • Add natural texture through wood, rattan, seagrass, jute, and linen, rather than covering every surface in beach themed prints.
    • Put the strongest coastal detail on one feature, such as the shower tile, the vanity, or one wall, and keep the other surfaces quiet.
    • Choose water friendly materials in wet zones: sealed wood, woven baskets kept off wet floors, and washable rugs and curtains.
    • Keep towels, rugs, and one accessory in the same blue family so the room reads as planned, not patched together.

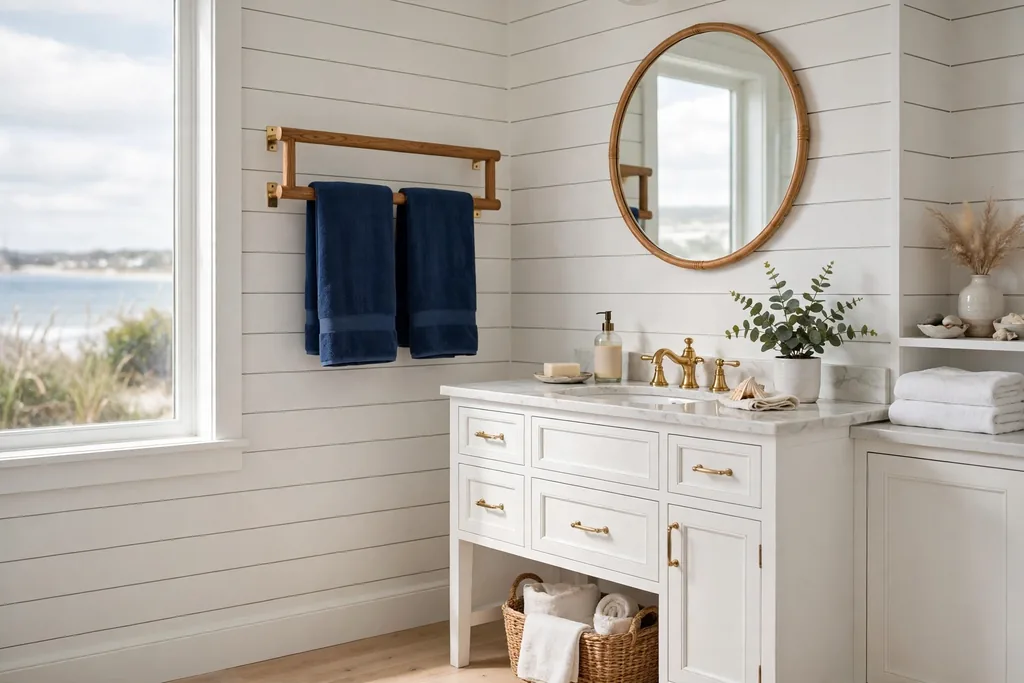
    1. White Shiplap Walls With Navy Towels

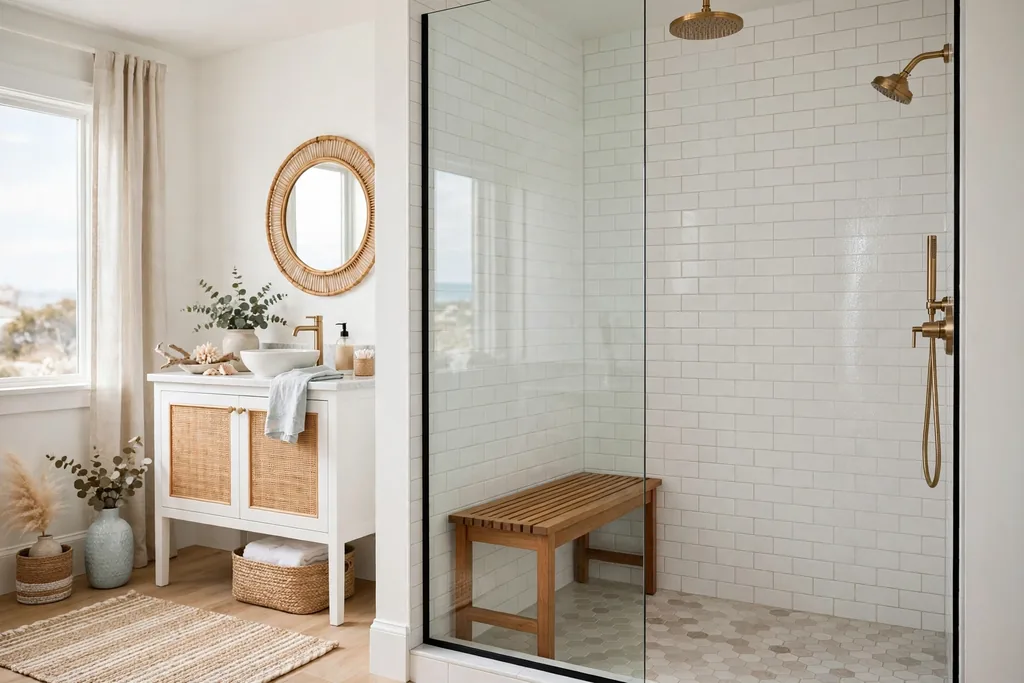
    Coastal bathroom with white shiplap walls, navy towels on a wooden rail, and a white vanity.

    White shiplap gives a bathroom instant coastal character, even before you add any decor. The horizontal boards add texture to plain walls, and the white keeps a small room bright. Paint the boards in a moisture resistant white paint, and seal the joints in the shower zone or keep shiplap out of direct spray.

    Pair the walls with navy towels, a navy bath mat, and plain white bedding style towels for guests. The navy reads as a clear coastal accent without needing a themed print. Keep the mirror frame and hardware simple so the boards stay the feature.

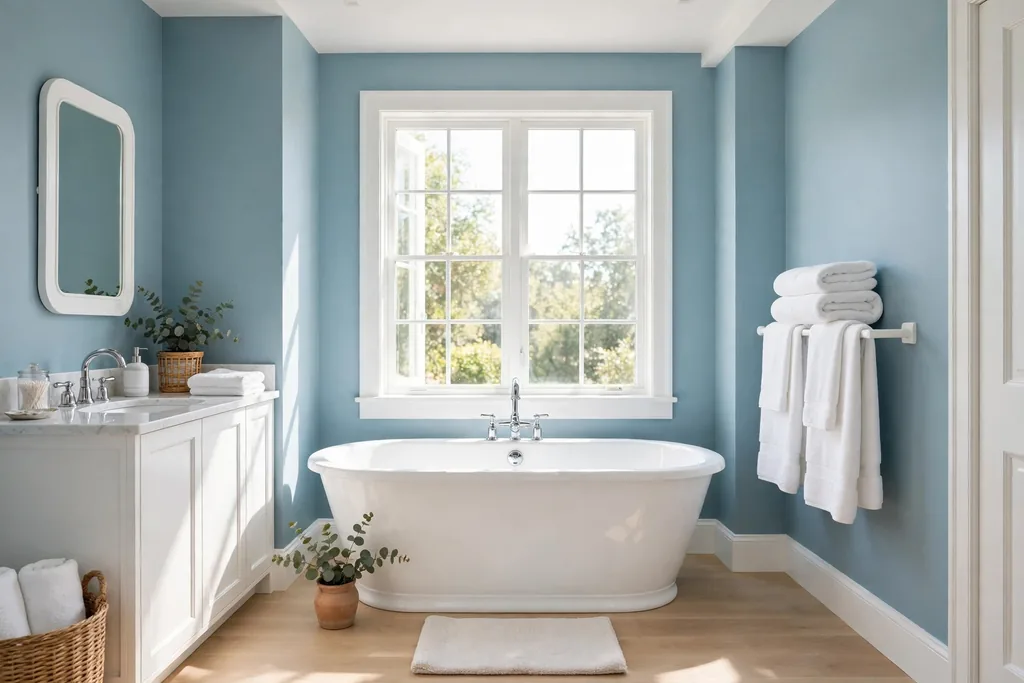
    2. Soft Sea Blue Walls

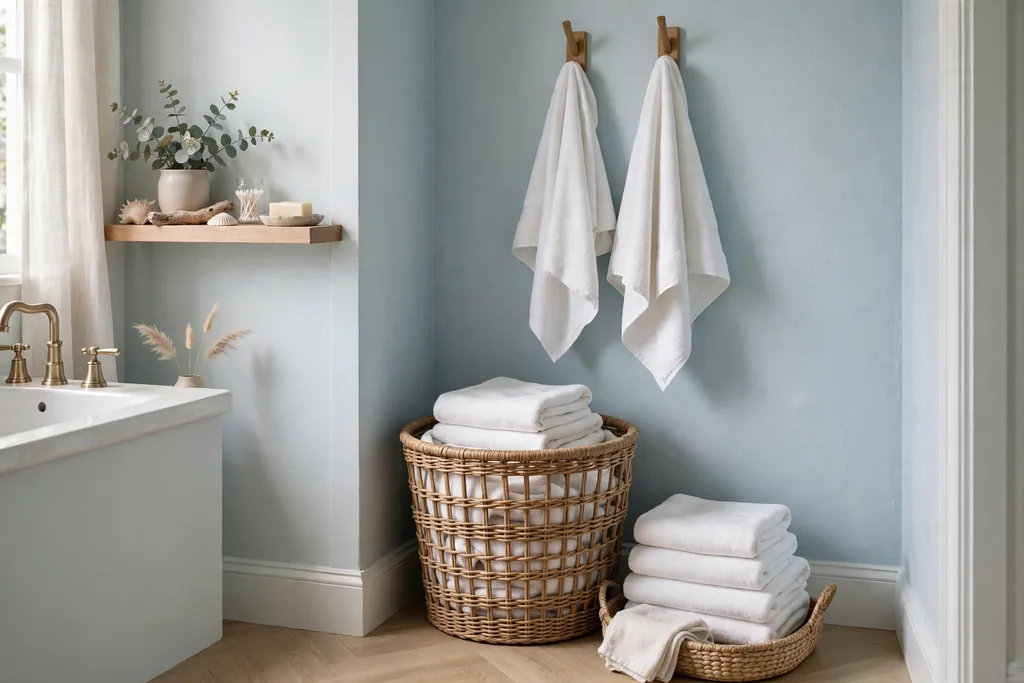
    Bathroom with soft sea blue walls, white trim, and a white freestanding tub.

    A soft sea blue on the walls sets a calm coastal mood in one coat of paint. It suits bathrooms with white tile and white fixtures, since the blue stays pale enough to keep the room light. Test the shade in daylight and lamplight before you commit, because sea blue can shift toward grey or green.

    Keep the ceiling, trim, and vanity white, and add one deeper blue towel for contrast. If the room is small or dim, paint only the wall behind the vanity in sea blue and keep the other walls white.

    3. Sandy Beige Floor Tile

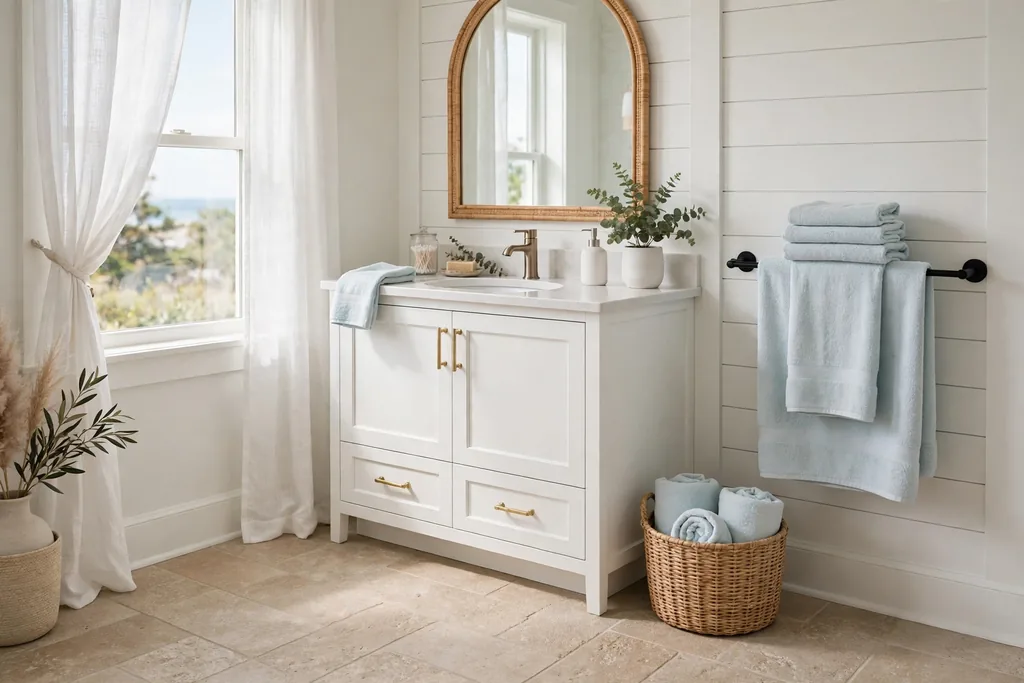
    Coastal bathroom floor in sandy beige stone look tiles with a white vanity.

    Sandy beige floor tile grounds a coastal bathroom the way sand grounds a beach scene. Stone look or porcelain tiles in warm beige cope well with water, and a matte finish gives grip underfoot. Lay larger tiles to reduce grout lines, and choose a grout color close to the tile so the floor reads as one calm surface.

    Pair the floor with white walls and pale blue towels. The beige adds warmth without competing with blue accents, and it hides dust and water marks better than a bright white floor.

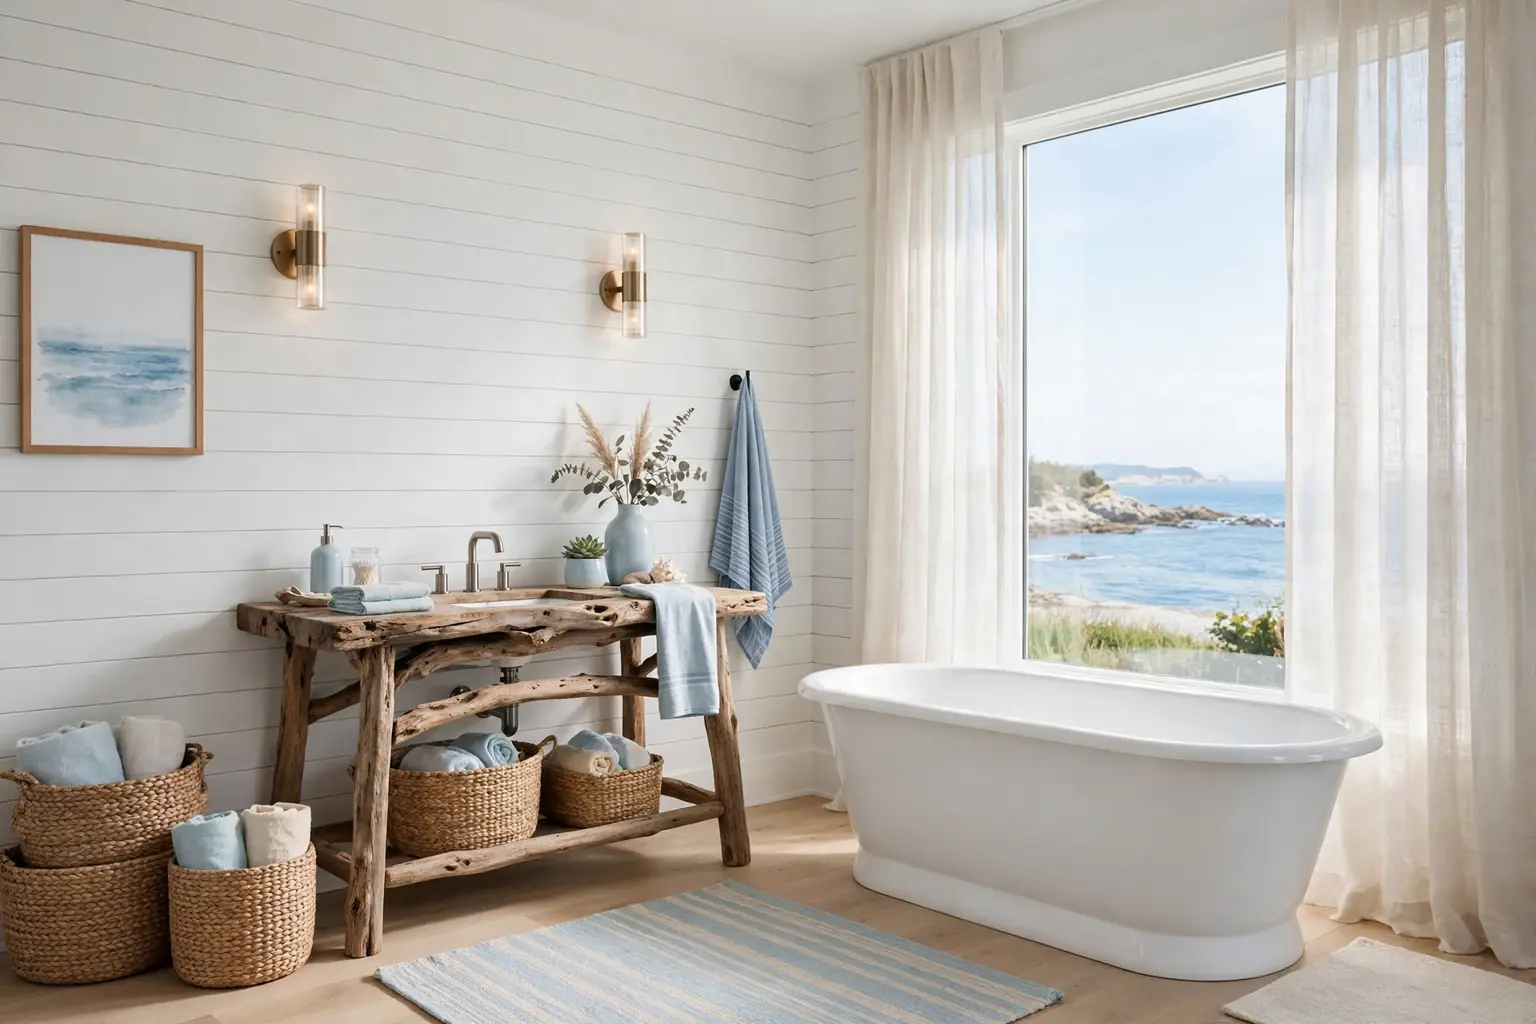
    4. Driftwood Look Vanity

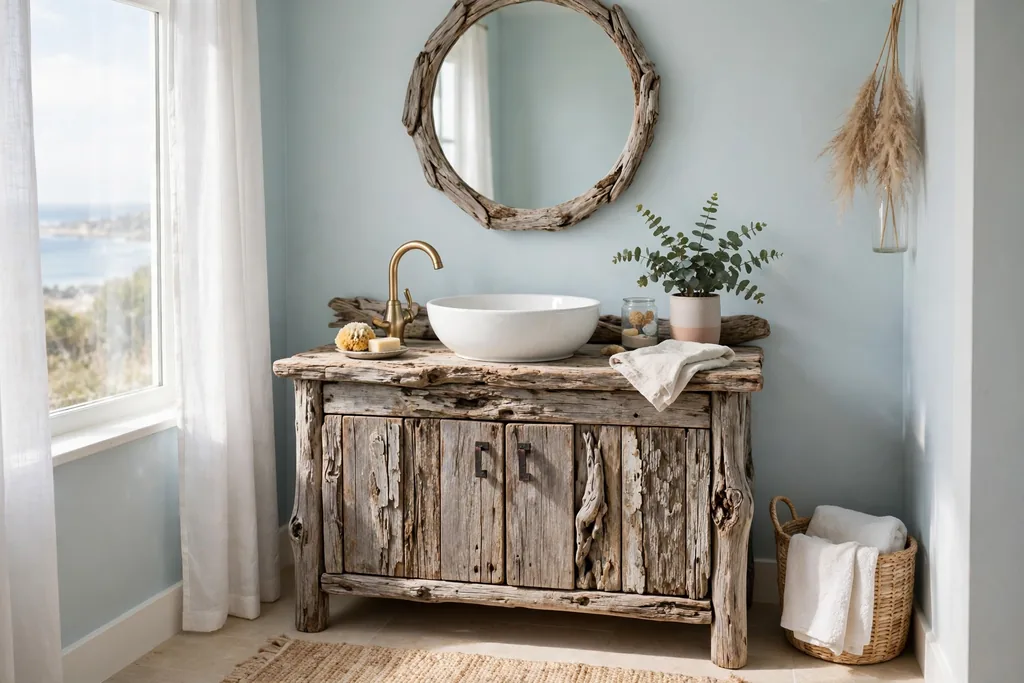
    Coastal bathroom with a weathered driftwood look vanity and a white vessel sink.

    A driftwood look vanity brings weathered wood into the bathroom without needing real beach wood. The grey brown tone pairs well with white counters and pale blue walls, and it softens a room full of tile and porcelain. Choose a sealed finish made for bathroom humidity, and wipe spills promptly so the surface lasts.

    Keep the hardware simple, such as brushed nickel or matte black pulls, so the wood tone stays the focus. A white vessel sink on top keeps the vanity light and easy to clean.

    5. Rope Framed Round Mirror

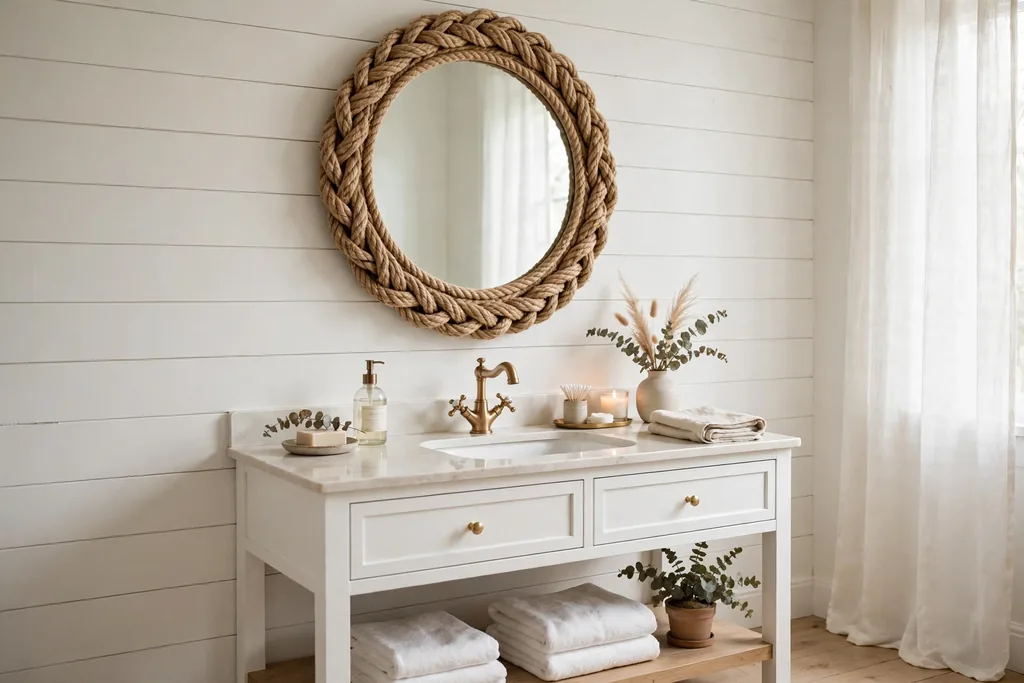
    Bathroom vanity with a round mirror framed in thick natural rope.

    A round mirror framed in thick natural rope is a quick coastal focal point above the vanity. The round shape softens the straight lines of tile and cabinets, and the rope adds texture at eye level. Hang it centered over the sink, a little narrower than the vanity, so the edges do not crowd the lights.

    Keep the rest of the wall plain so the mirror stands out. If you already have a rope mirror, skip other rope details nearby, and use wood or rattan elsewhere instead.

    6. Seagrass Baskets on Open Shelves

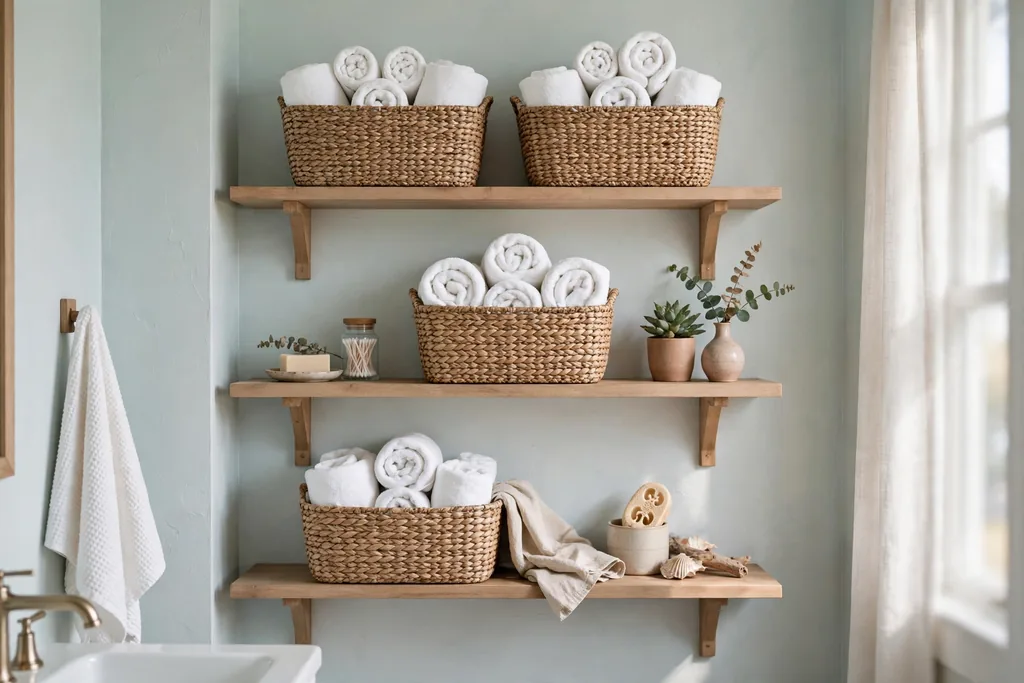
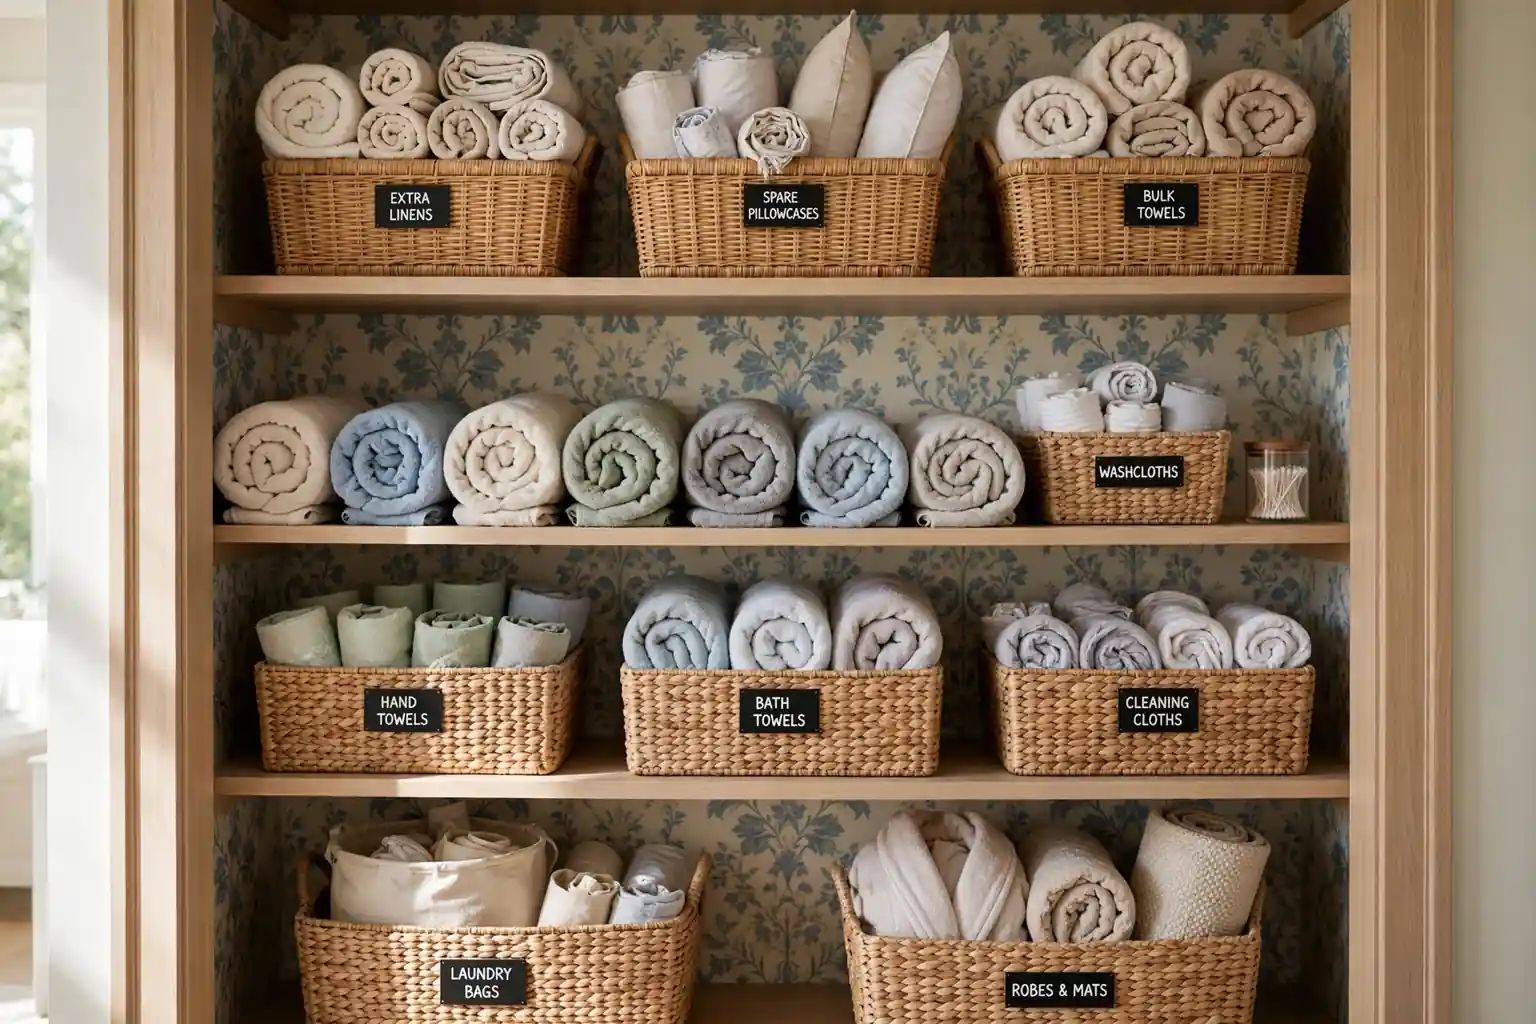
    Bathroom shelves with woven seagrass baskets holding rolled white towels.

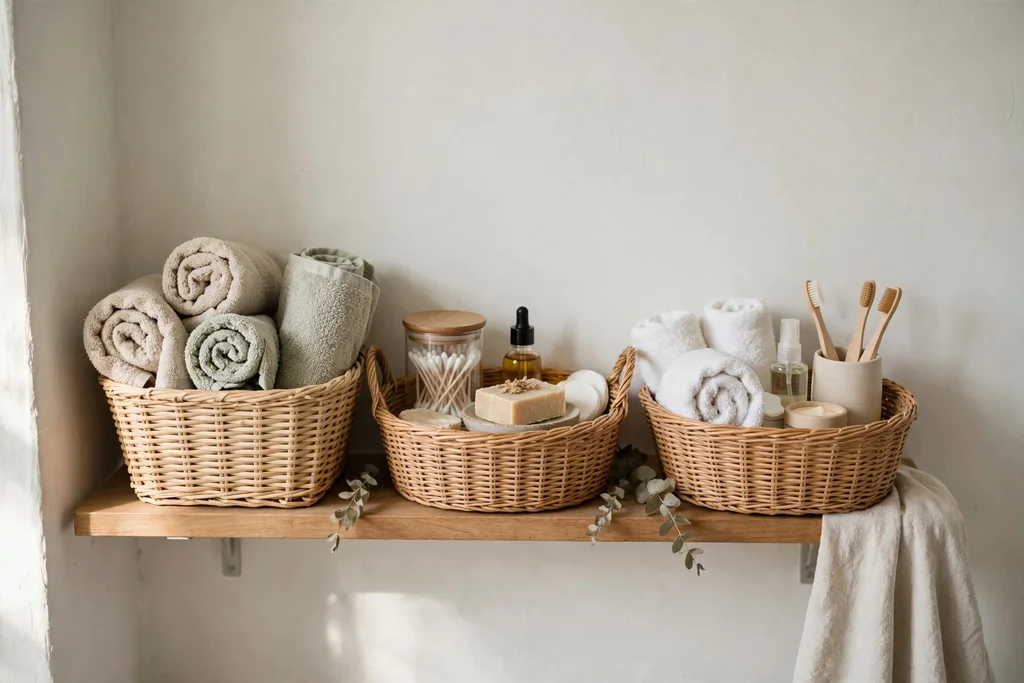
    Seagrass baskets hide bathroom clutter while adding woven coastal texture. Use one basket per job, such as hair care, skin care, or spare towels, and set them on open shelves where they are easy to reach. Keep the baskets off wet floors and away from direct shower spray, since constant damp can damage natural fibers.

    Label the base of each basket if they look alike, and empty them once a month to return only what you actually use. Rolled white towels on top of one basket add a neat, hotel style finish.

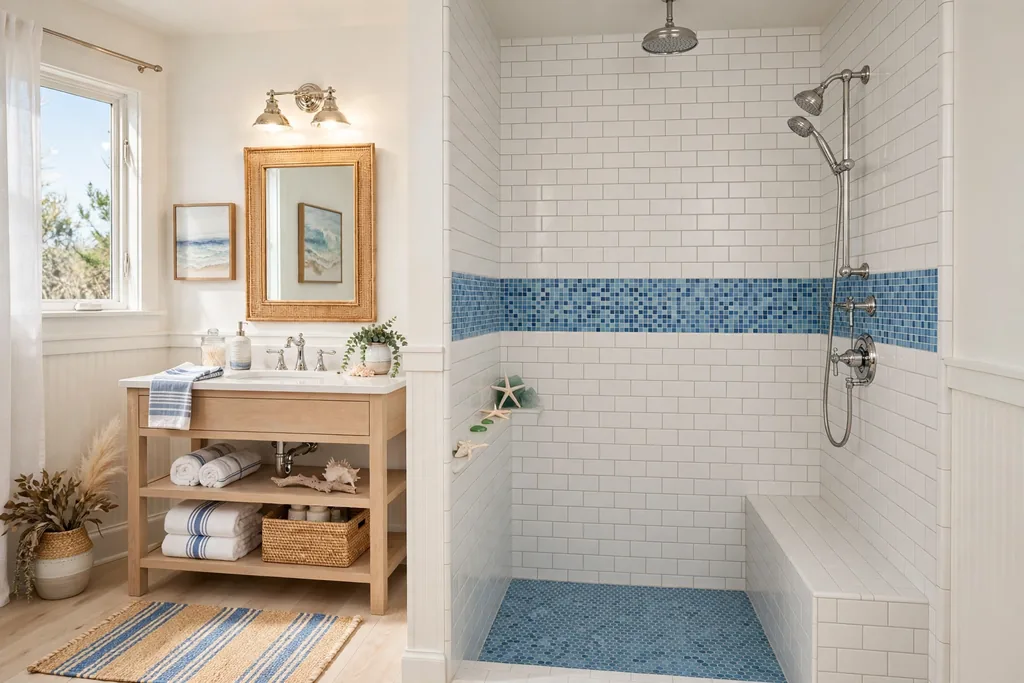
    7. Blue Mosaic Tile Border in the Shower

    Walk in shower with white subway tiles and a blue mosaic tile border.

    A blue mosaic tile border gives a white shower a clear coastal accent without retiling the whole wall. Run the border at eye level around the shower, or as a single stripe behind the showerhead, and pull one blue from it for towels and a rug. Small mosaic tiles also work well on curved walls and niches where large tiles are hard to cut.

    Keep the other shower walls in plain white subway tile so the border reads as a deliberate detail. Seal the grout as your tile maker advises, since shower grout needs regular care.

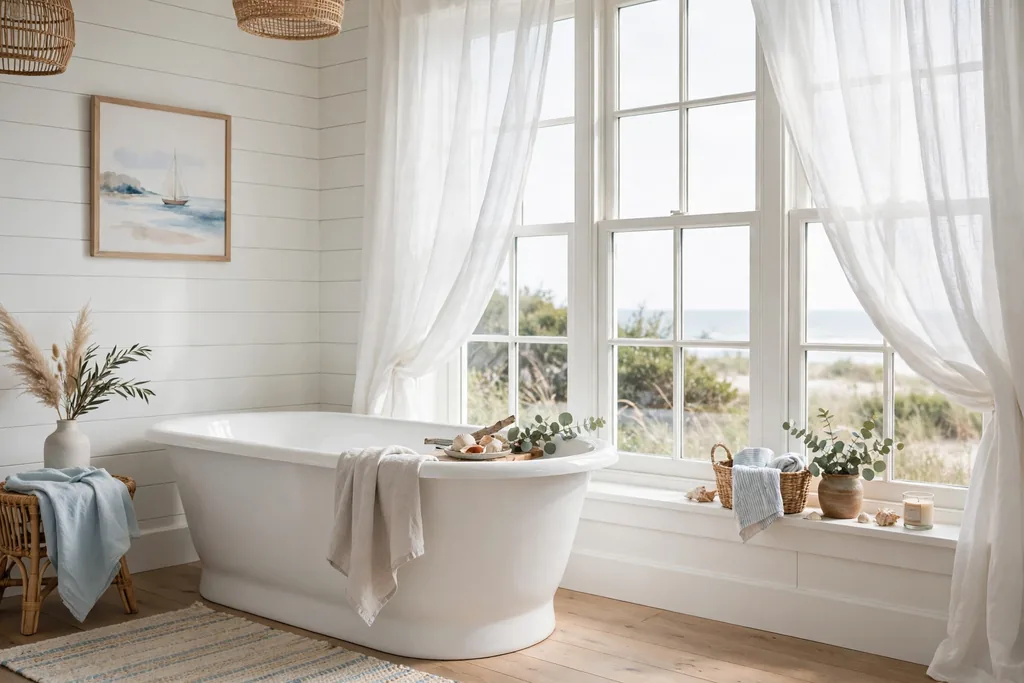
    8. Freestanding Tub Beside a Bright Window

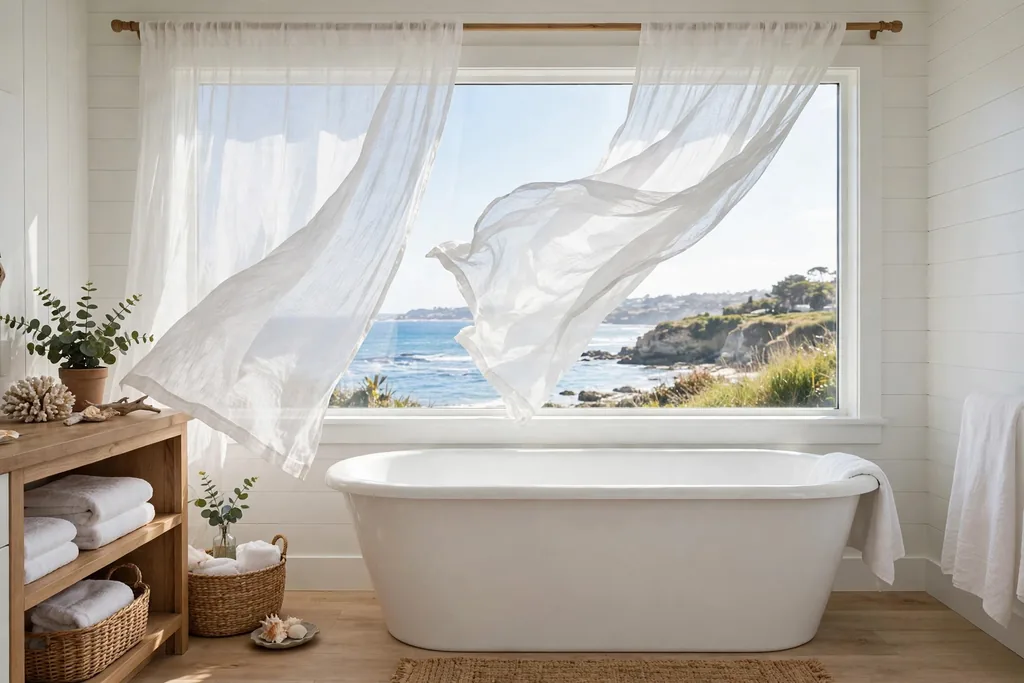
    Freestanding white bathtub beside a large bright bathroom window with sheer curtains.

    A freestanding tub beside a bright window makes the bath the calm center of a coastal bathroom. Place the tub where daylight reaches it, but keep it clear of the window frame so cleaning stays easy, and use frosted or sheer glass for privacy. A small wooden stool beside the tub holds a towel and a book within reach.

    Keep the walls around the tub white or pale blue, and add one plant on the sill if the light suits it. This layout suits a larger bathroom best, since a freestanding tub needs clear floor space on at least two sides.

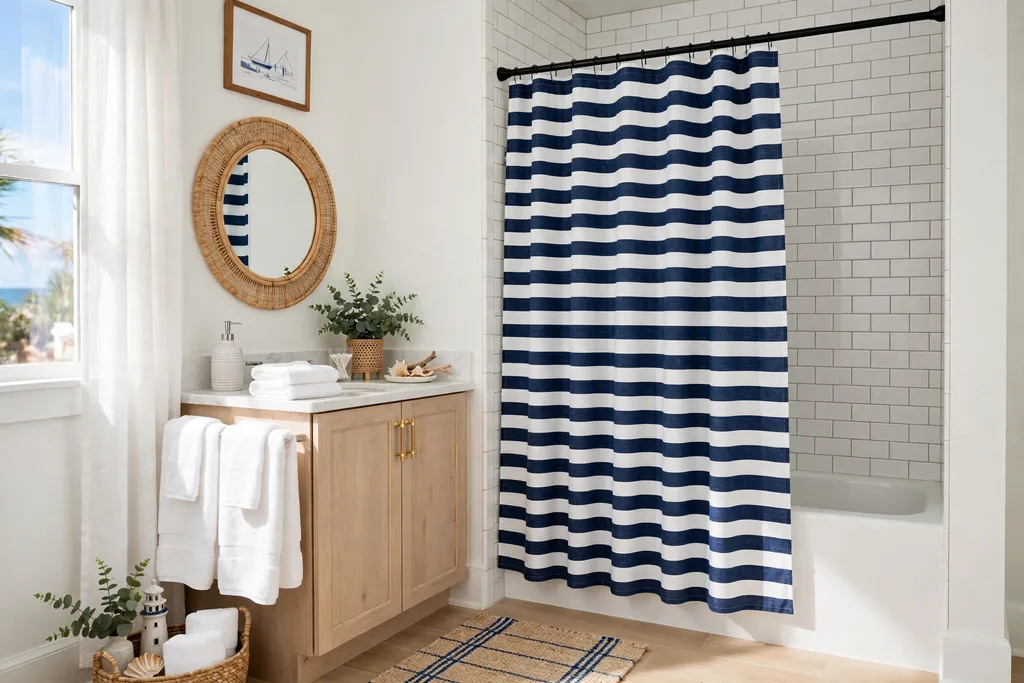
    9. Navy and White Striped Shower Curtain

    Bathroom with a navy blue and white striped shower curtain and white tiles.

    A navy and white striped shower curtain is the fastest coastal change in a bathroom, since it covers the largest single surface in the room. The stripes set the color palette for towels and a rug in one move, and a fabric outer curtain with a separate washable liner hangs better than a thin plastic curtain alone.

    Keep the rest of the room quiet when the curtain is bold: plain white towels, a simple mat, and one matching accessory are enough. Hang the curtain a little higher than usual so the stripes read as one tall panel.

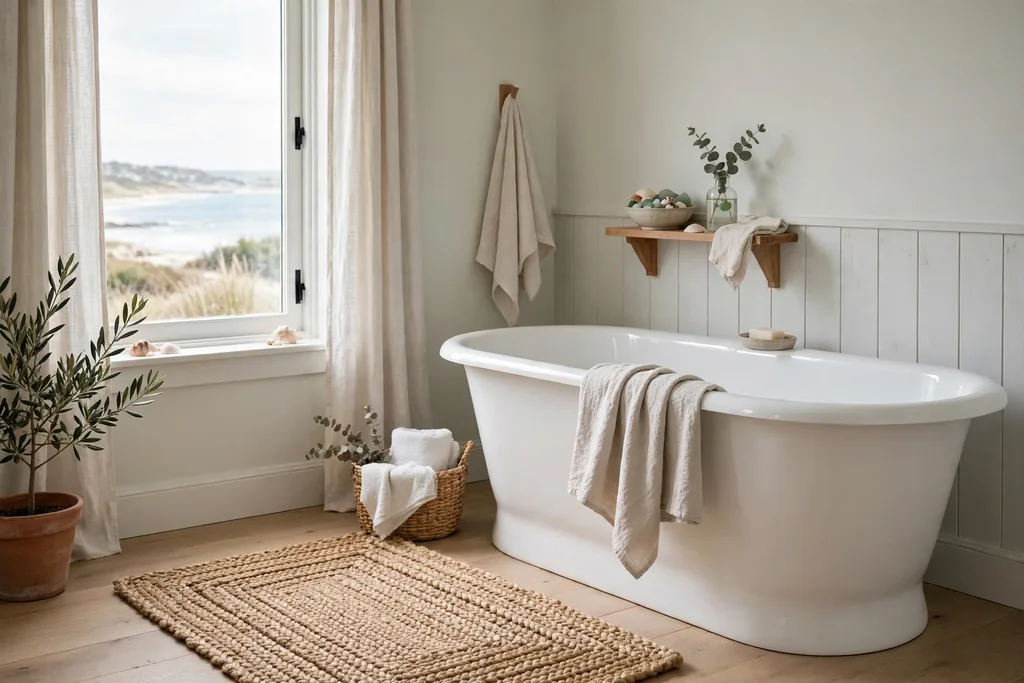
    10. Woven Jute Rug by the Tub

    Coastal bathroom with a woven natural jute rug beside a white bathtub.

    A woven jute rug adds natural fiber texture underfoot beside the tub or vanity. The sandy tone pairs with white tile and pale blue walls, and the weave feels warmer than cold tile on bare feet. Choose a rug with a non slip backing, and keep it out of the direct splash zone so it dries between uses.

    Shake the rug outside weekly, and rotate it so wear stays even. If your bathroom stays damp, use the jute rug in the dry zone only, and put a washable cotton mat by the shower instead.

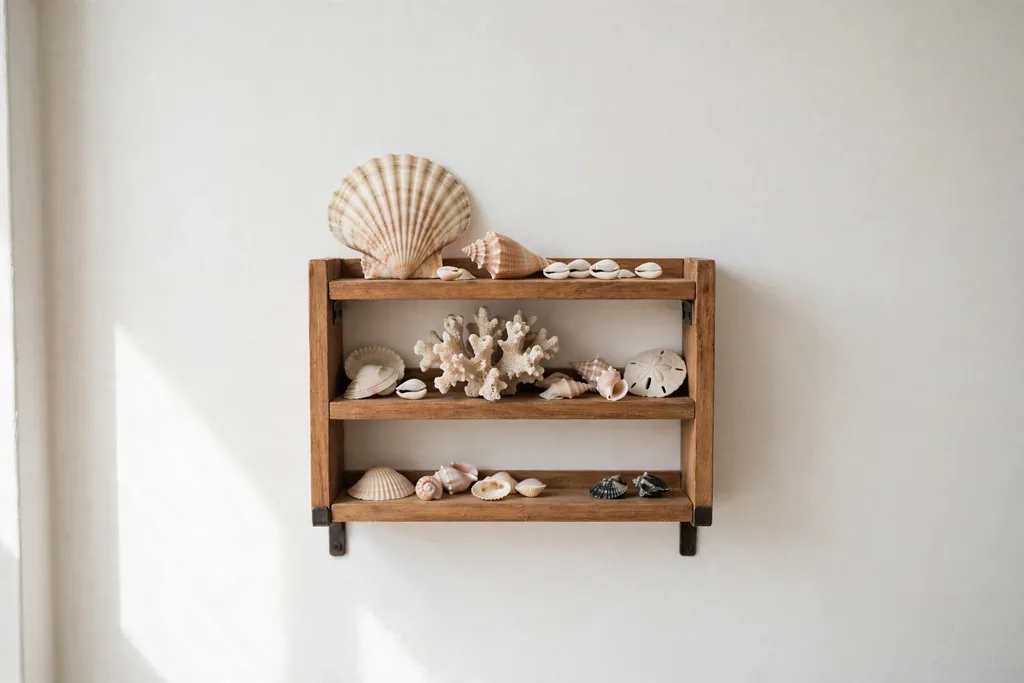
    11. Shell Display on a Small Shelf

    Small wooden bathroom shelf displaying seashells and a piece of coral.

    A small shelf of shells and coral gives a bathroom a personal coastal note without a themed overhaul. Choose a few pieces you like, rather than a crowded collection, and set them on one shelf where they will not get splashed. A plain white or pale wood shelf keeps the focus on the shapes and colors of the shells.

    Keep the display to one shelf, and leave the other shelves for towels and daily items. Dust the shells with a dry cloth, and move them away from the shower if steam builds up in the room.

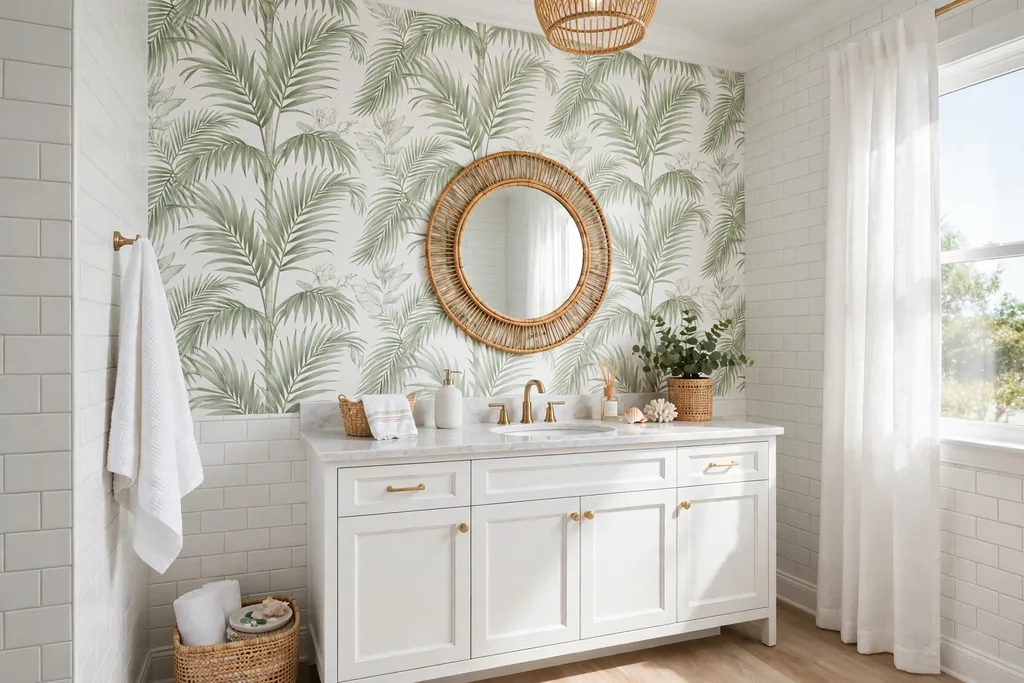
    12. Palm Print Wallpaper on One Wall

    Bathroom accent wall with palm leaf wallpaper in soft green and white.

    Palm print wallpaper on one wall brings a lush coastal feel to a bathroom in an afternoon. Use it on the wall behind the vanity or the wall you face when you enter, and keep the other walls white so the print does not close the room in. Choose a moisture resistant paper, and keep it out of the wall directly inside the shower.

    Pick a print with a small to medium repeat for a small room, since a very large repeat can feel busy in a tight space. Pull one green or blue from the print for towels to tie the scheme together.

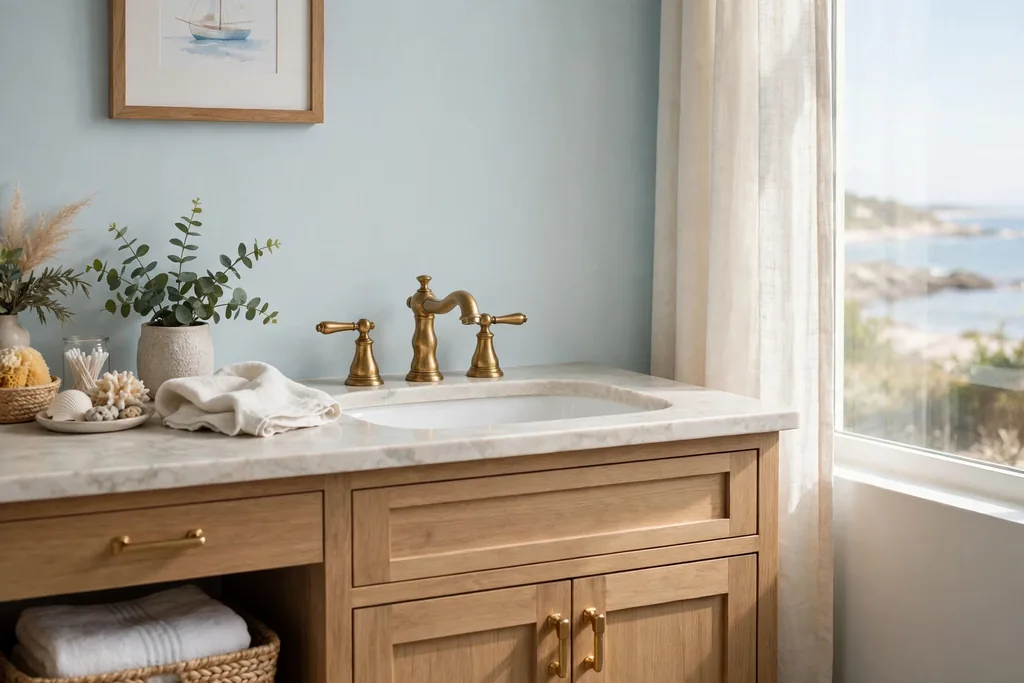
    13. Brass Fixtures With a Ship Feel

    Coastal bathroom sink with warm brass faucets and a white basin.

    Warm brass faucets, shower controls, and mirror frames give a coastal bathroom a ship cabin warmth that chrome cannot match. Brass pairs well with white tile, pale blue walls, and wood vanities, and it warms the cool tones in the room. Use the same brass finish across the pieces you change, so the metal reads as one choice.

    Wipe brass dry after showers to slow water spots, and check the care advice for your finish, since lacquered and unlacquered brass age differently. If a full brass swap is too much, start with the faucet and mirror frame only.

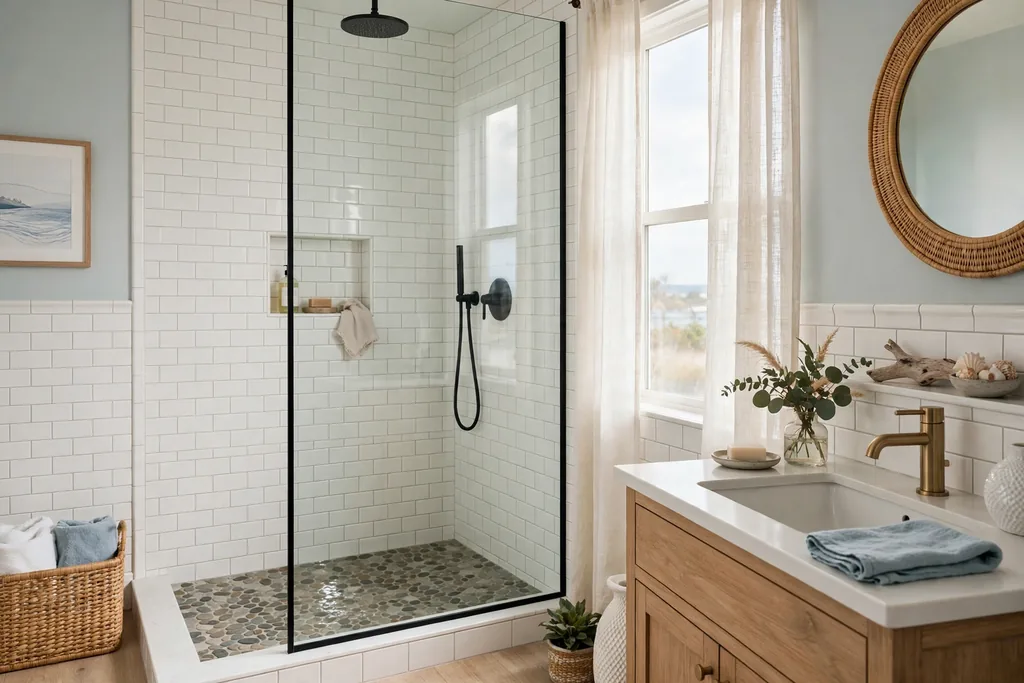
    14. Pebble Floor in the Shower

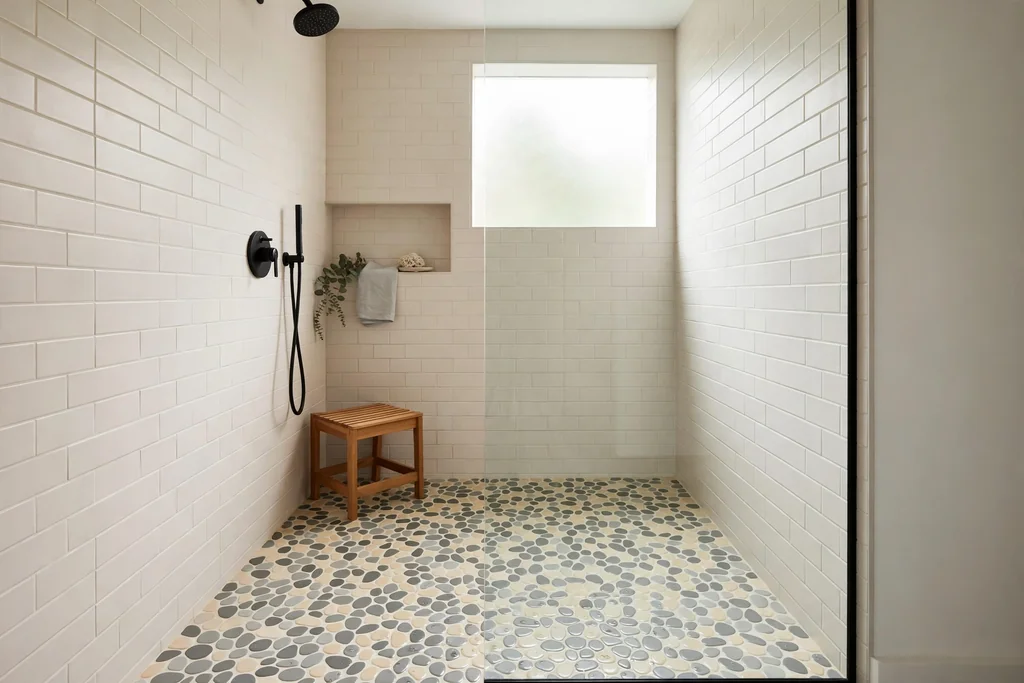
    Walk in shower with a pebble stone floor and white wall tiles.

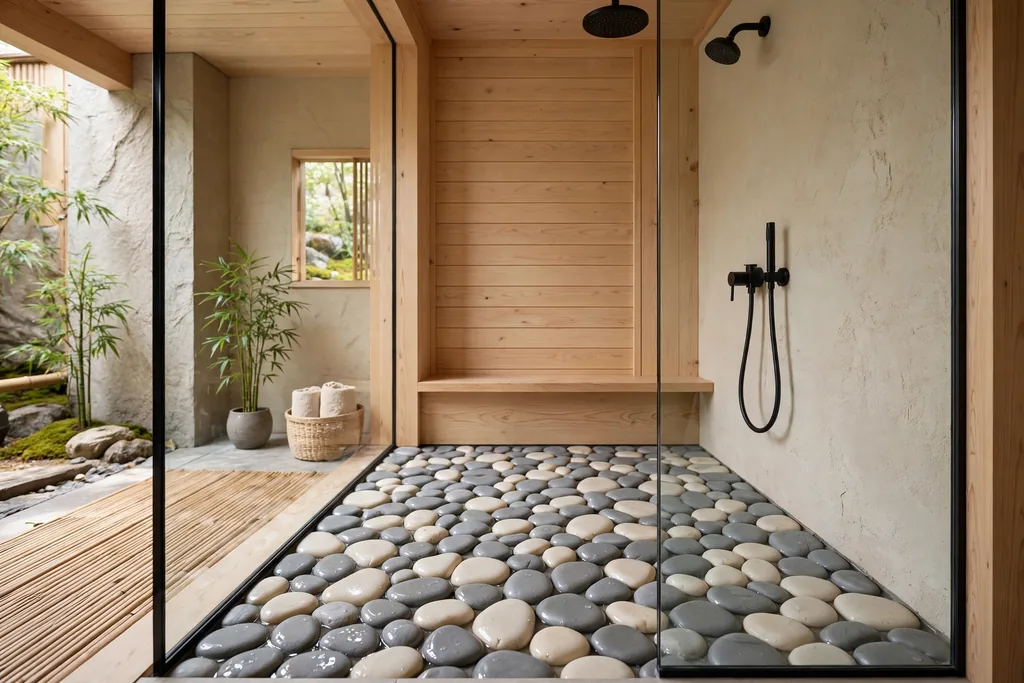
    A pebble floor gives a shower natural grip and a beach underfoot feel that flat tile cannot match. Small rounded stones set in grout suit a shower where slip resistance matters, and they pair well with plain wall tile so the floor stays the feature. Check that the stones sit level and the grout fills the gaps evenly, since uneven stones can feel uncomfortable to stand on.

    Keep the shower walls quiet when the floor is busy, and use a simple glass panel so the pebbles stay visible. For more walk in shower layouts, these walk in shower ideas show how one strong floor can carry a plain room.

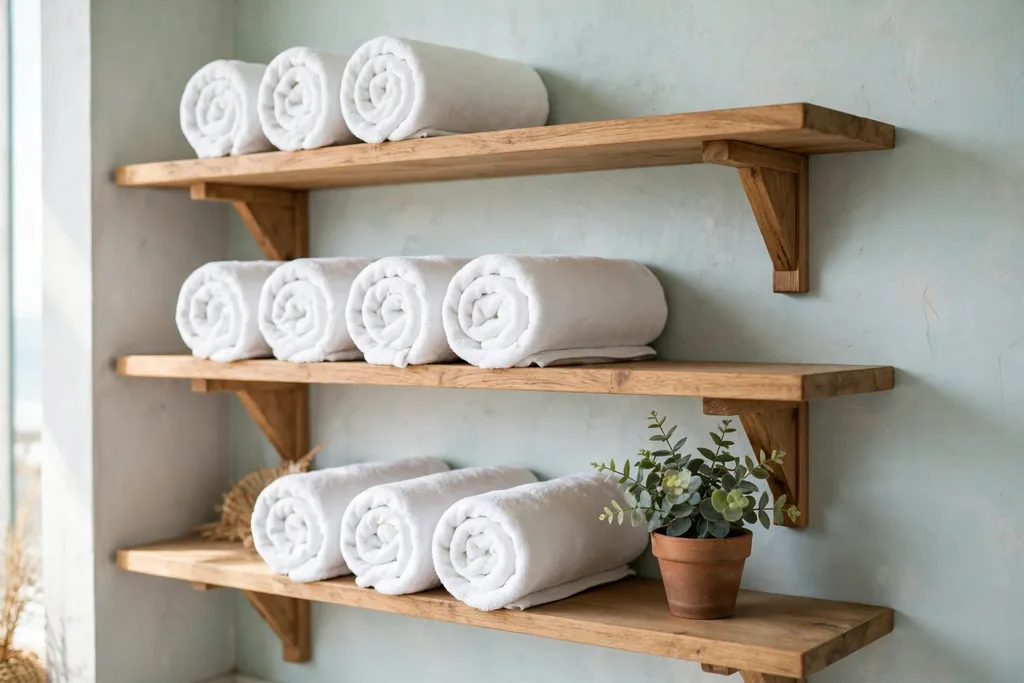
    15. Rolled White Towels on Open Shelves

    Open wooden bathroom shelves with neatly rolled white towels and a small plant.

    Rolled white towels on open shelves look neat, stay easy to grab, and suit any coastal color scheme. Roll towels of the same size together, and stack them in rows of two or three so the shelf reads as calm rather than crowded. Place the shelf near the tub or shower, but out of direct spray, so towels stay dry.

    Add one small plant or one basket on the same shelf for warmth, and keep the rest of the shelf clear. Rotate towels from the back to the front so the same towels do not sit unused for months.

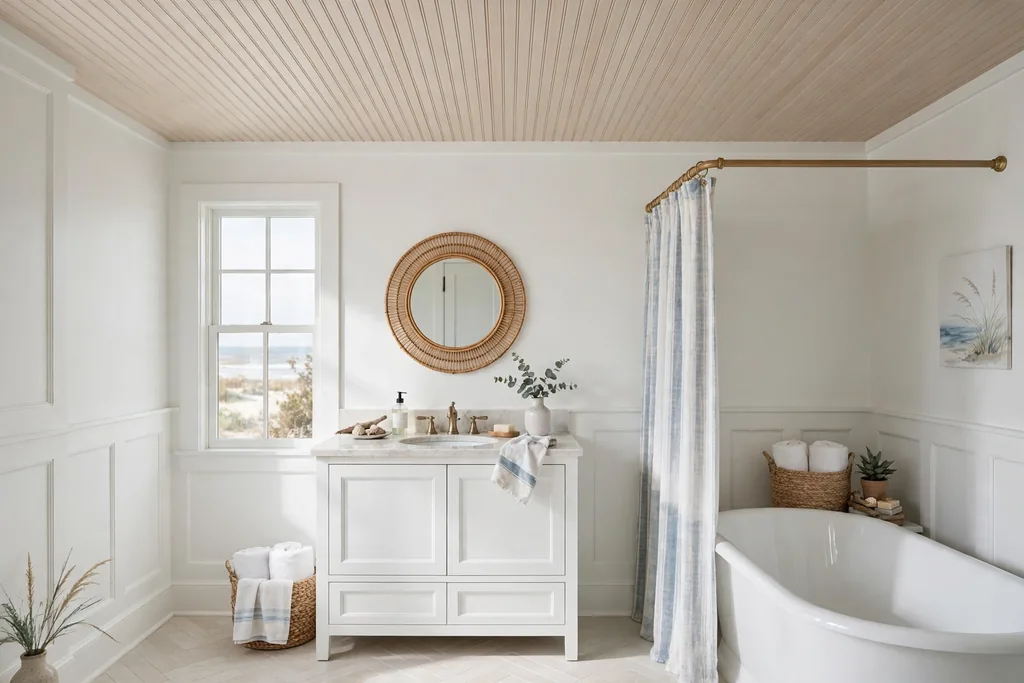
    16. Pale Wood Beadboard Ceiling

    Coastal bathroom with a pale wood beadboard ceiling and white walls.

    A pale wood beadboard ceiling adds warmth overhead and draws the eye up in a coastal bathroom. The narrow boards suit white walls and a white vanity, and a pale wash keeps the ceiling light rather than heavy. Seal the boards for bathroom humidity, and use moisture resistant fixings in the shower zone.

    Keep the walls simple when the ceiling has texture, so the room does not feel busy from every angle. A single pendant or flush light in a natural material suits the beadboard better than a row of bright downlights.

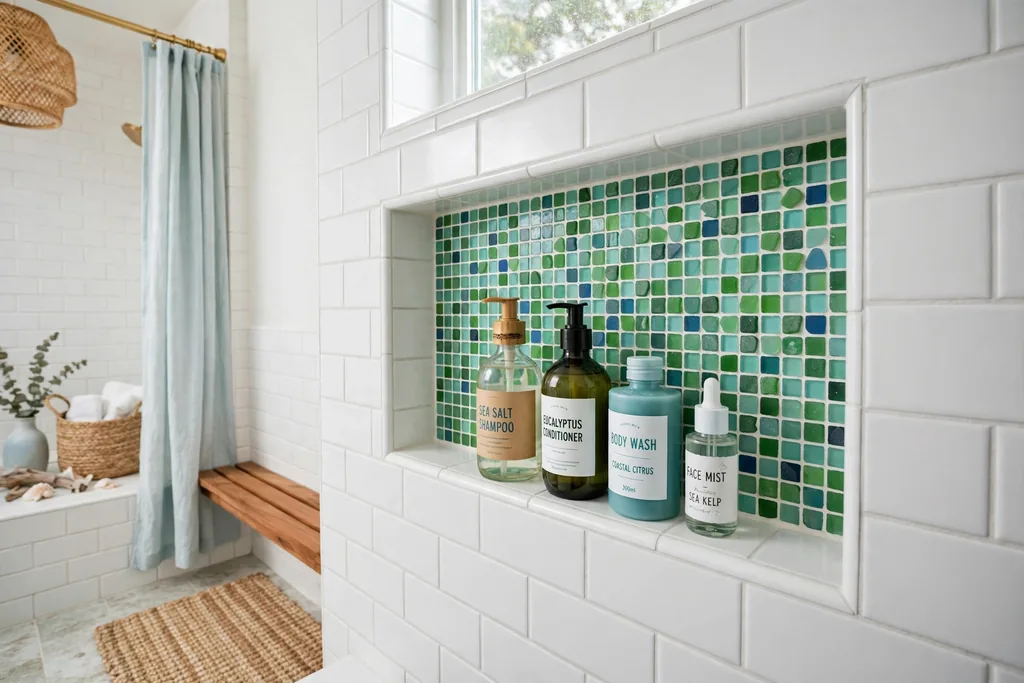
    17. Sea Glass Tile Shower Niche

    Shower niche lined with sea glass green and aqua tiles holding bottles.

    A shower niche lined in sea glass tile turns a useful storage spot into a coastal detail. Aqua and soft green tiles catch the light inside the niche, and they pair well with white wall tile. Line the niche in the same tile on all sides, and slope the base slightly forward so water drains out.

    Keep bottles to a few daily essentials so the niche looks calm instead of crowded. If you already have a blue mosaic border, choose sea glass in a close blue family so the two details work together rather than competing.

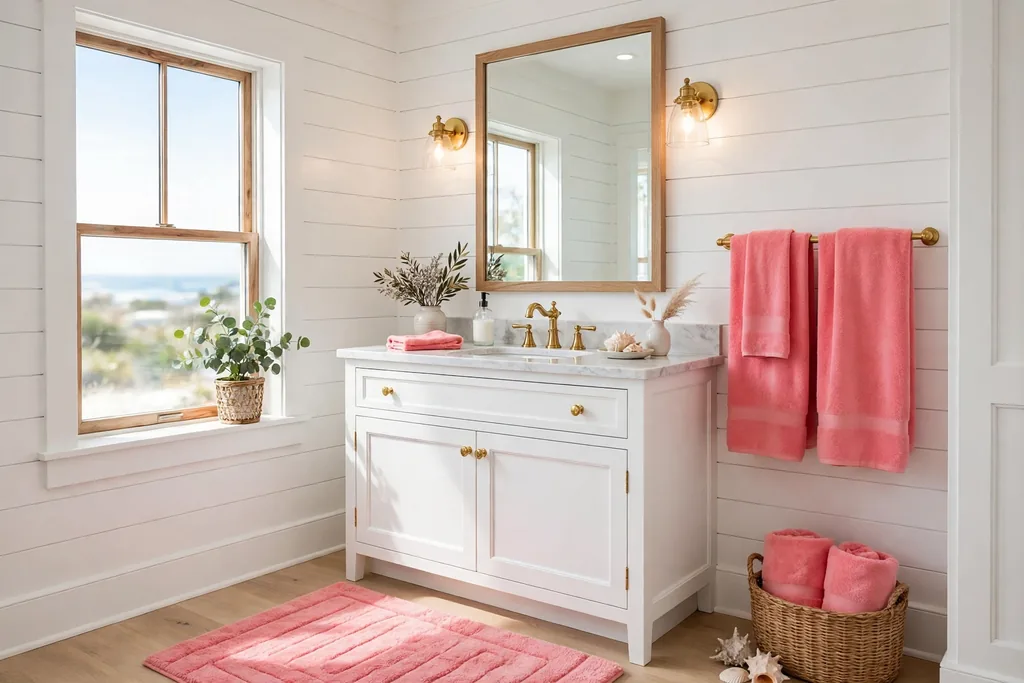
    18. Coral Accent Towels and Rug

    White coastal bathroom with coral pink towels and a coral bath rug.

    Coral towels and a coral rug add a warm accent to a white and blue coastal bathroom. Coral sits well beside sea blue and aqua, and it keeps the room from feeling too cool. Use coral in just two places, such as towels and a rug, and keep the shower curtain, walls, and vanity neutral.

    Wash coral towels separately the first few times, since bright dyes can transfer in the wash. If coral feels too strong for the whole room, start with hand towels only and see how the color reads in daylight.

    19. Driftwood Ladder Towel Rail

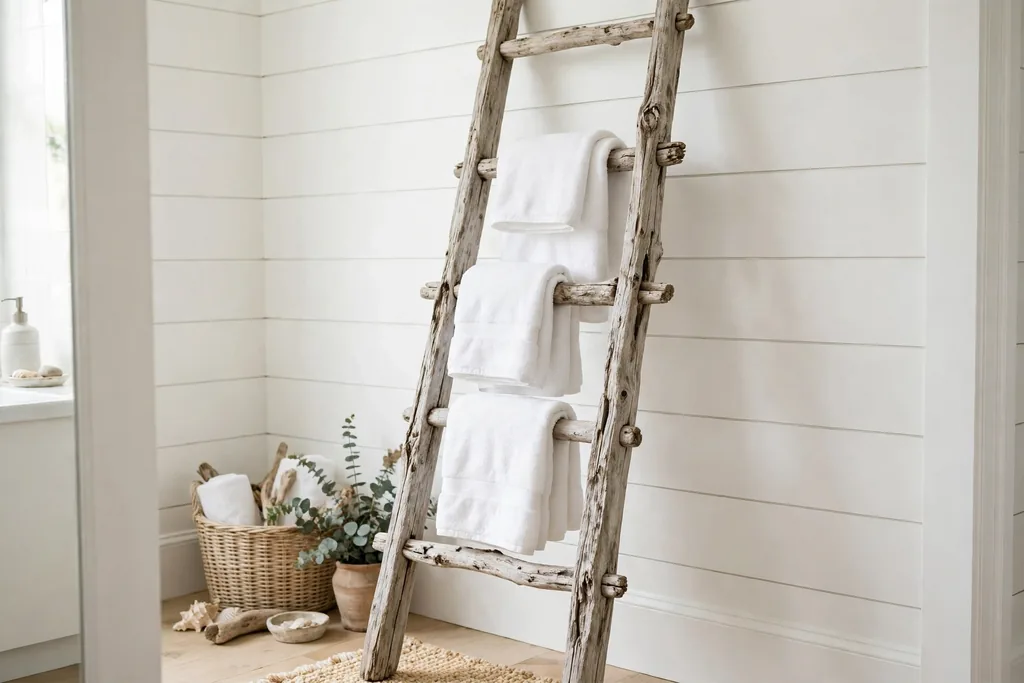
    Weathered driftwood ladder towel rail leaning against a white coastal bathroom wall.

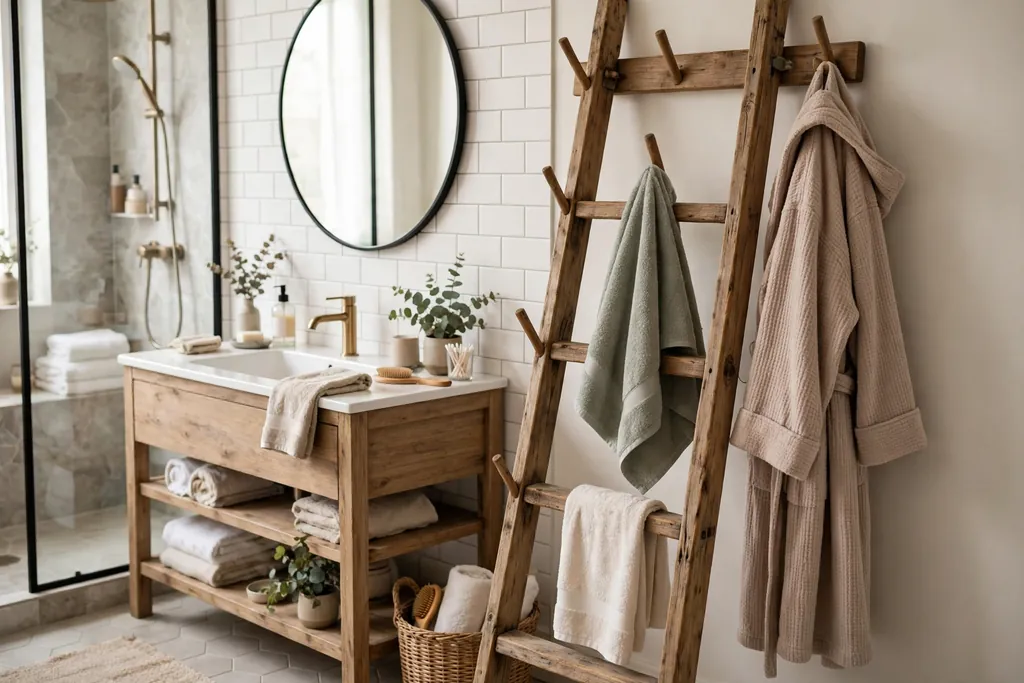
    A driftwood ladder leaned against the wall gives towels a place to dry without drilling or a new cabinet. It suits a spare wall beside the door or at the end of the tub, where a deep cabinet would block the walkway. Put heavier towels on the lower rungs and lighter hand towels higher up, and add small pads under the feet so it does not slide on tile.

    Check that the top of the ladder cannot tip forward if a child pulls on it, and anchor it if your household needs that extra safety. Keep the ladder clear of direct shower spray so the wood dries between uses.

    20. Glass Bottles for Soap and Lotion

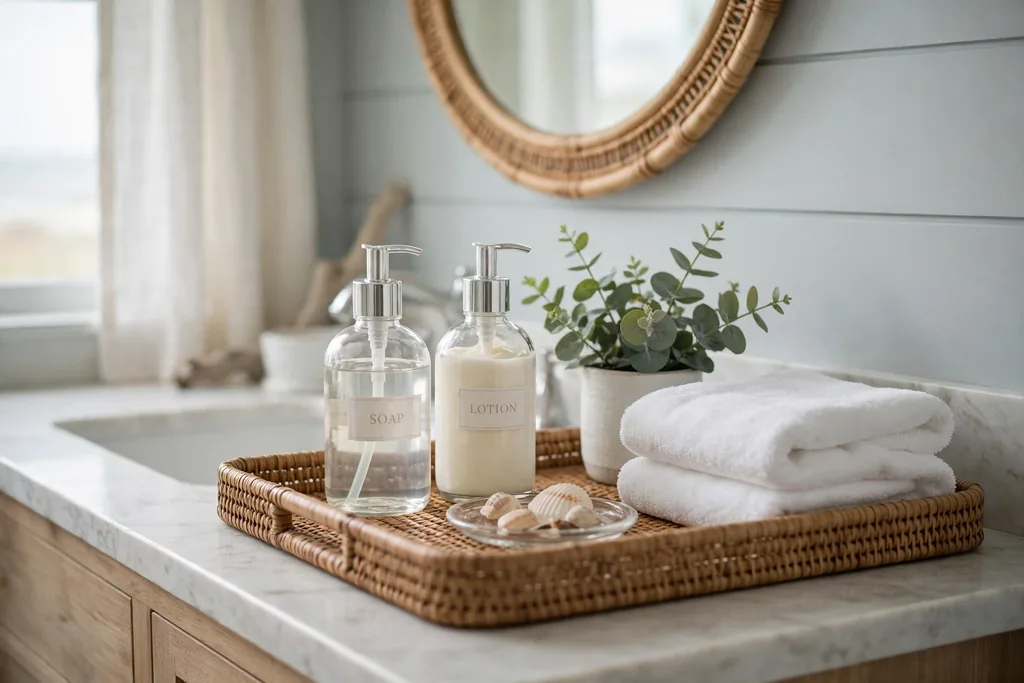
    Bathroom vanity tray with clear glass soap and lotion bottles.

    Clear glass bottles for soap, lotion, and shampoo give a coastal vanity a clean, seaside apothecary feel. Decanting into matching bottles removes the visual noise of mismatched labels, and the glass suits white counters and pale blue walls. Label each bottle clearly, especially if two liquids look alike, and keep pump tops clean so they do not stick.

    Refill the bottles over a sink to catch drips, and keep spare refills in a basket under the vanity. If glass feels risky in a busy family bathroom, use sturdy clear bottles with the same clean shape instead.

    21. Blue and White Patterned Floor Tile

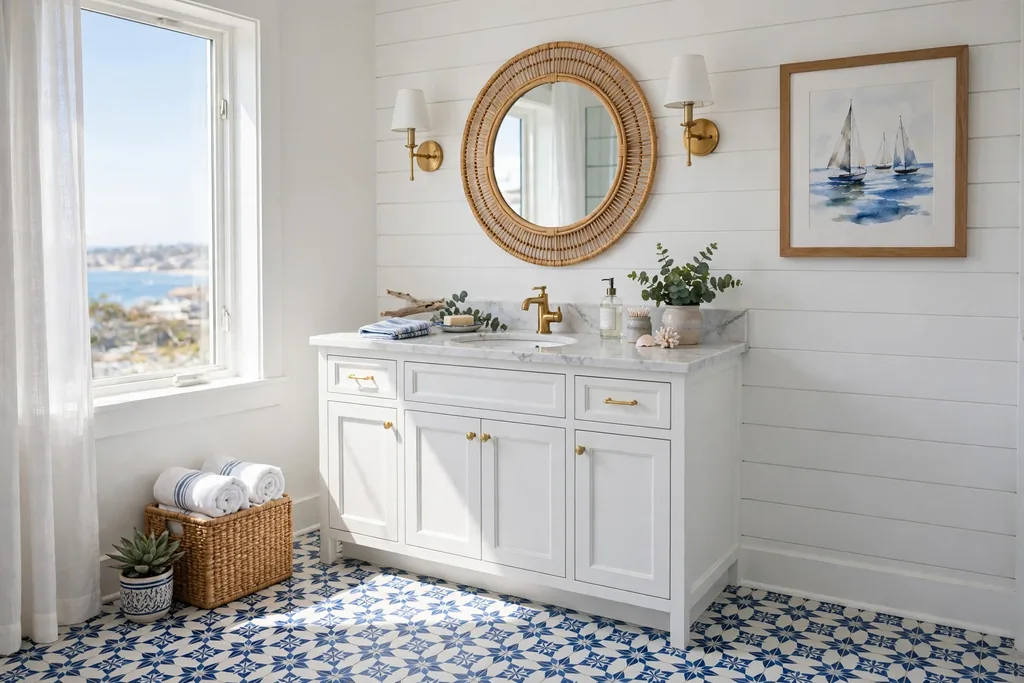
    Coastal bathroom with blue and white patterned floor tiles and a white vanity.

    Blue and white patterned floor tile makes the floor the feature in a coastal bathroom. Geometric or floral patterns in two blues and white suit a white vanity and pale walls, and the pattern hides dust better than a plain floor. Order a few spare tiles for future repairs, since patterned tiles can be hard to match later.

    Keep the walls and shower tile plain when the floor is patterned, so the room does not feel busy. Pull one blue from the floor for towels, and keep the rug simple or skip it so the tile stays visible.

    22. Sand Toned Limewash Walls

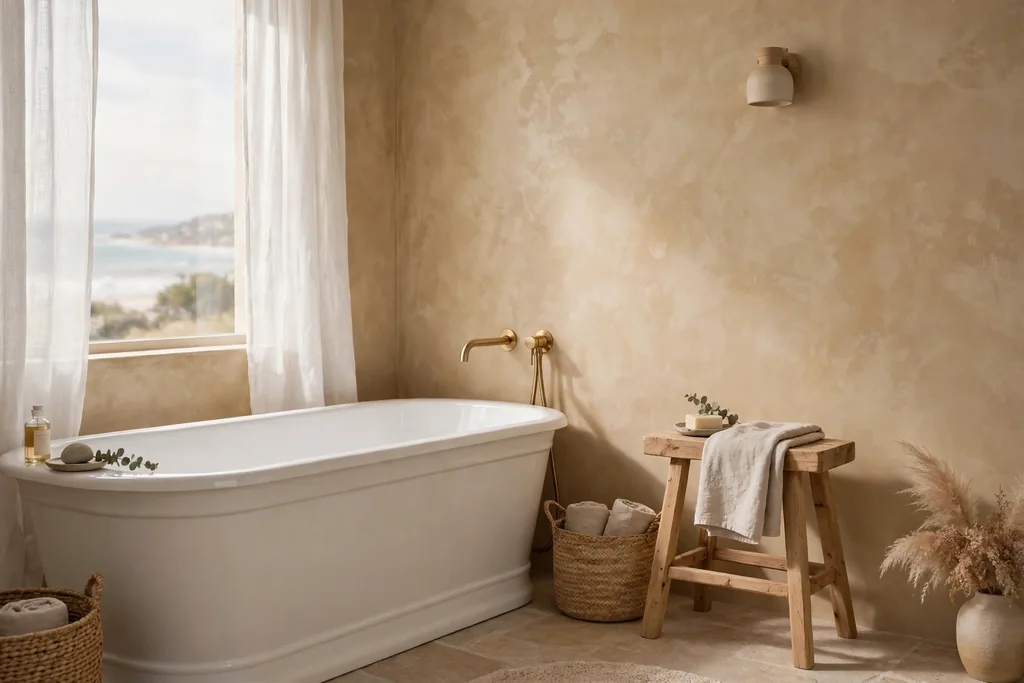
    Bathroom with warm sand toned limewash plaster walls and a white tub.

    Sand toned limewash walls give a coastal bathroom a soft, matte finish with gentle movement in the color. The warm sand tone suits white fixtures and natural wood, and it feels calmer than a flat painted wall. Apply limewash as your product maker advises, and seal it for bathroom use, especially near the sink and tub.

    Keep the ceiling and trim white, and add pale blue towels for a cool contrast against the warm walls. This finish suits a bathroom with good light, since the texture shows best in daylight.

    23. Teak Bench in the Shower

    Walk in shower with a teak wood bench, white tiles, and a glass panel.

    A teak bench in the shower gives a place to sit, rest a towel, or set soap within reach, and it turns a plain shower into a more comfortable space. Teak copes with wet conditions better than most woods, but still benefits from being left to drain and dry between showers. Build or buy a bench at a height that lets feet rest flat on the floor when seated.

    Keep the bench depth shallow enough that it does not crowd the standing area, and slope a built in bench top slightly toward the drain so water does not pool. A handheld showerhead pairs well with a bench, since it makes rinsing while seated easy.

    24. Sheer Linen Curtain at the Window

    Coastal bathroom window with sheer white linen curtains and a white tub below.

    A sheer linen curtain at the bathroom window softens daylight and adds gentle movement to a coastal room. The pale fabric keeps the room bright while giving privacy during the day, and it pairs well with white shiplap and pale wood. Hang the curtain on a simple rod, and keep the hem clear of the tub or sink splash zone.

    Wash the curtain regularly, since bathroom humidity can leave linen feeling damp. If the window sits directly over the shower, use a frosted film for privacy instead, and keep linen for a dry zone window.

    25. Wicker Laundry Hamper

    Coastal bathroom corner with a woven wicker laundry hamper.

    A wicker hamper adds woven texture to a bathroom corner while hiding dirty laundry. Choose a hamper with a washable liner, so damp towels do not sit against the wicker, and set it where it does not block the door or the vanity. A lidded hamper keeps the room looking tidy between laundry days.

    Empty the hamper often in a humid bathroom, since damp clothes left for days can smell musty. If floor space is tight, use a tall narrow hamper in the gap beside the vanity instead of a wide basket.

    26. Framed Coastal Prints Gallery

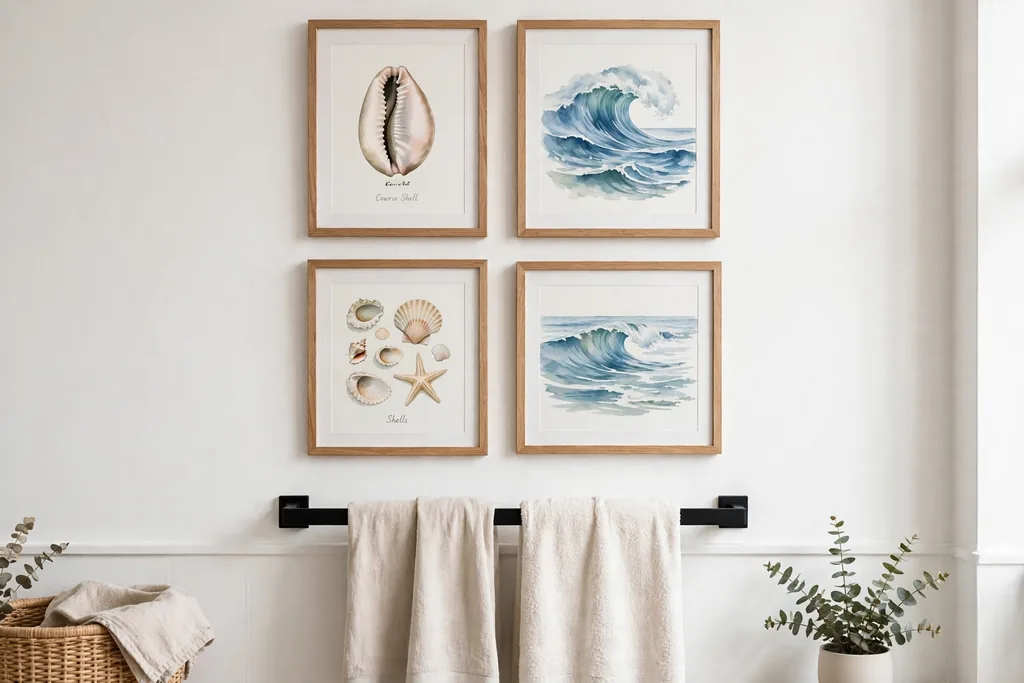
    Bathroom gallery wall with framed coastal prints of shells and waves.

    A small gallery of framed coastal prints gives a bathroom personality without taking counter or floor space. Choose three to five prints in one theme, such as shells, waves, or beach grasses, and keep the spacing even so the group reads as one arrangement. Use frames with sealed backs or acrylic covers, and avoid hanging unprotected paper directly beside the shower, where steam will damage it over time.

    Keep the frames in one finish, such as pale wood or white, so the group feels planned. Adhesive picture strips hold light frames well on tile and painted walls if drilling is not allowed.

    27. Pale Aqua Painted Vanity

    Bathroom with a pale aqua painted vanity cabinet and a white countertop.

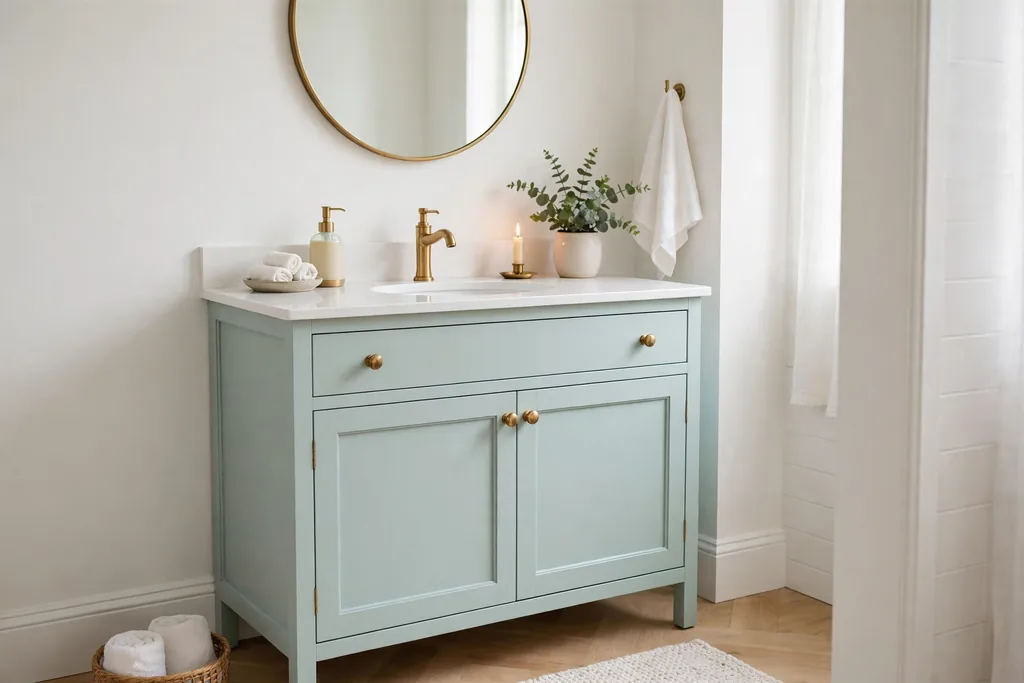
    A pale aqua vanity cabinet adds gentle color to a coastal bathroom without the commitment of a blue wall. The soft aqua pairs with white counters, brass or nickel hardware, and pale walls, and it suits both small and large bathrooms. Remove the doors and hardware before painting, clean off soap residue, sand lightly, and use a primer made for slick cabinet surfaces before two thin coats of moisture resistant paint.

    Keep the walls white or very pale blue so the vanity stays the color feature. If aqua feels too strong, use it on a small single vanity only, and keep a double vanity white.

    28. Clawfoot Tub With a Wooden Bath Tray

    White clawfoot bathtub with a wooden bath tray holding a candle and a book.

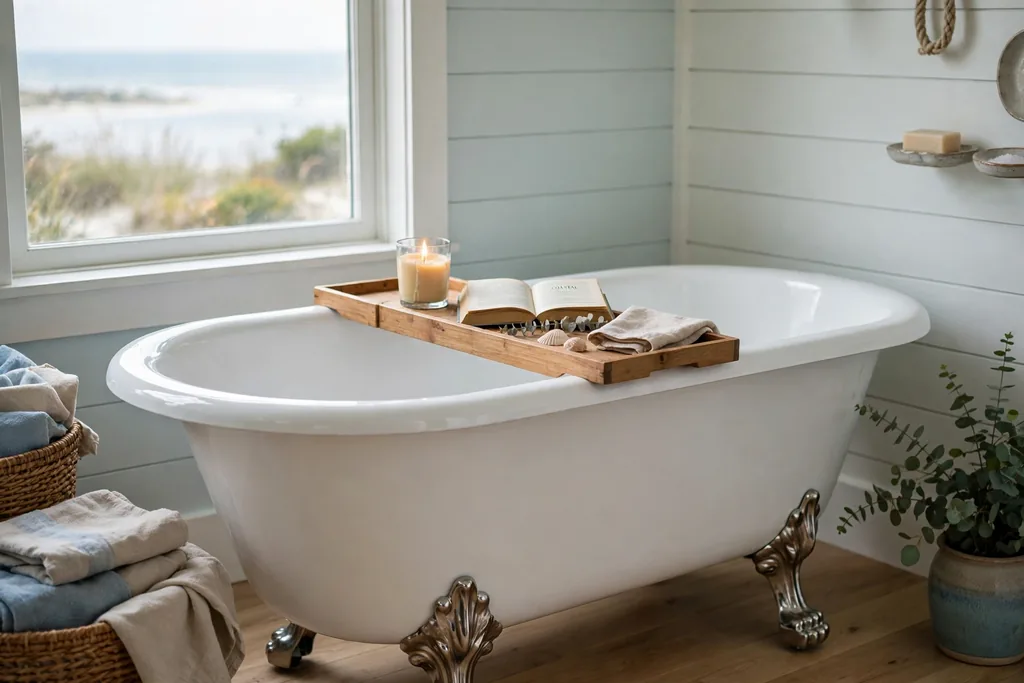
    A white clawfoot tub with a wooden bath tray turns a bath into a slow, comfortable ritual. The tray spans the tub width and holds a book, a candle kept safely away from the water, and a washcloth within reach. Choose a tray with extendable sides so it fits your tub, and dry wood trays after each use to avoid warping.

    Keep the walls around the tub simple, since the clawfoot shape is already a strong feature. A small stool beside the tub holds a towel, so you do not need to reach across a wet floor after bathing.

    29. White Subway Tile With Blue Grout

    Bathroom wall in white subway tiles with soft blue grout lines.

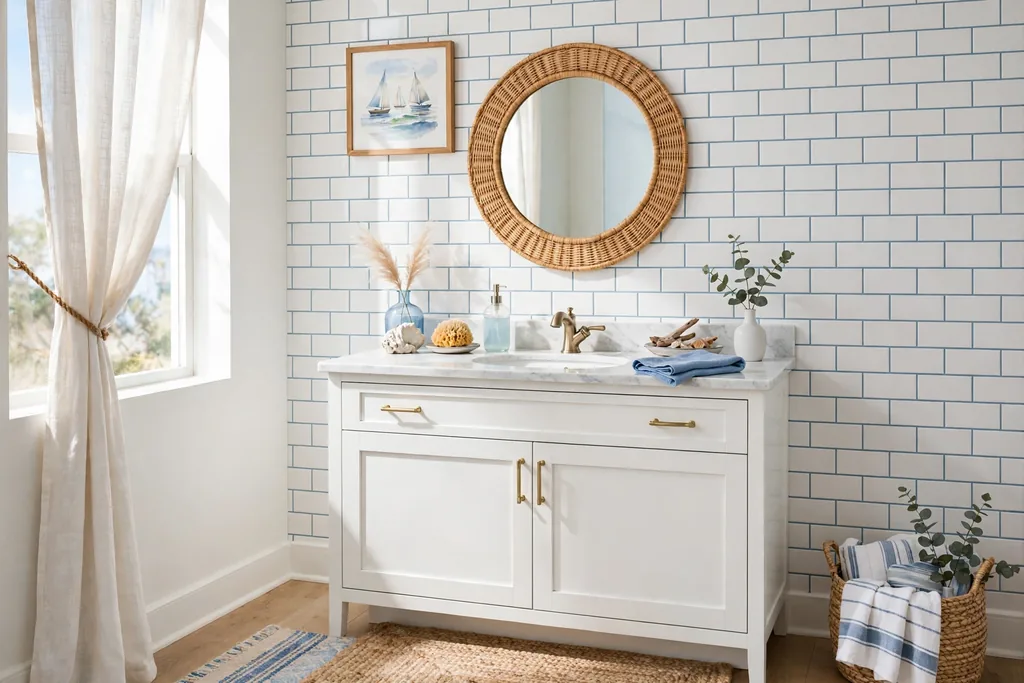
    White subway tile with soft blue grout is a quiet way to add coastal color to a shower or backsplash. The blue grout lines outline each tile without needing a patterned tile, and the effect stays subtle from across the room. Choose a grout color close to sea blue rather than a bright blue, so the lines read as texture rather than a grid.

    Seal the grout as your tile maker advises, and clean it with a grout safe cleaner so the blue stays even. Pair this tile with white fixtures and pale wood, and keep towels in white or one matching blue.

    30. Rattan Pendant Lights

    Coastal bathroom with woven rattan pendant lights above a white vanity.

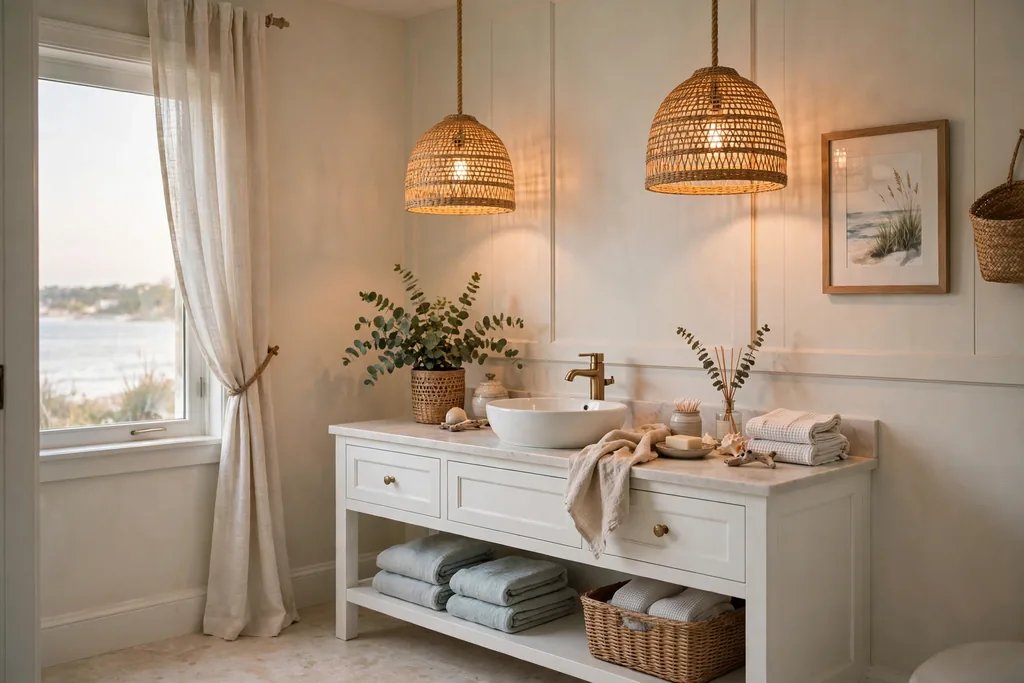
    Woven rattan pendant lights hang above the vanity or tub and add warm, natural texture at eye level. The woven shade softens the light and casts a gentle pattern on the walls, which suits a coastal bathroom in the evening. Hang pendants high enough that no one bumps their head, and keep them clear of direct shower spray.

    Use warm white bulbs so the light feels calm rather than clinical, and put the pendants on a dimmer if your wiring allows. If you have a low ceiling, use a single flush rattan light instead of hanging pendants.

    31. Plant Corner With a Potted Palm

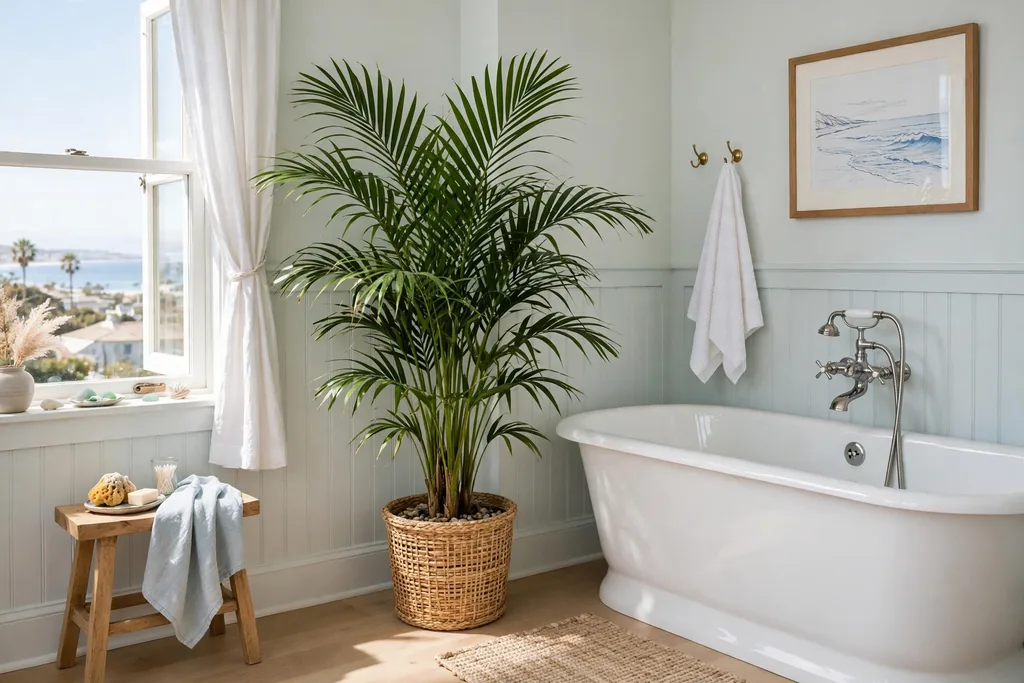
    Bright coastal bathroom corner with a large potted palm plant beside a white bathtub.

    A plant corner with a potted palm brings living green into a coastal bathroom and softens hard tile edges. Bathrooms suit plants that enjoy humidity and indirect light, and a palm in a large pot beside the tub or vanity makes a clear focal point. Use a pot with drainage holes and a saucer, and check the soil before watering, since bathroom air already adds moisture.

    If your bathroom has no window, rotate the plant to a brighter room for a few days each week, or choose a low light tolerant variety. One large plant usually looks better than a crowded collection in a small room.

    32. Striped Roman Blind at the Window

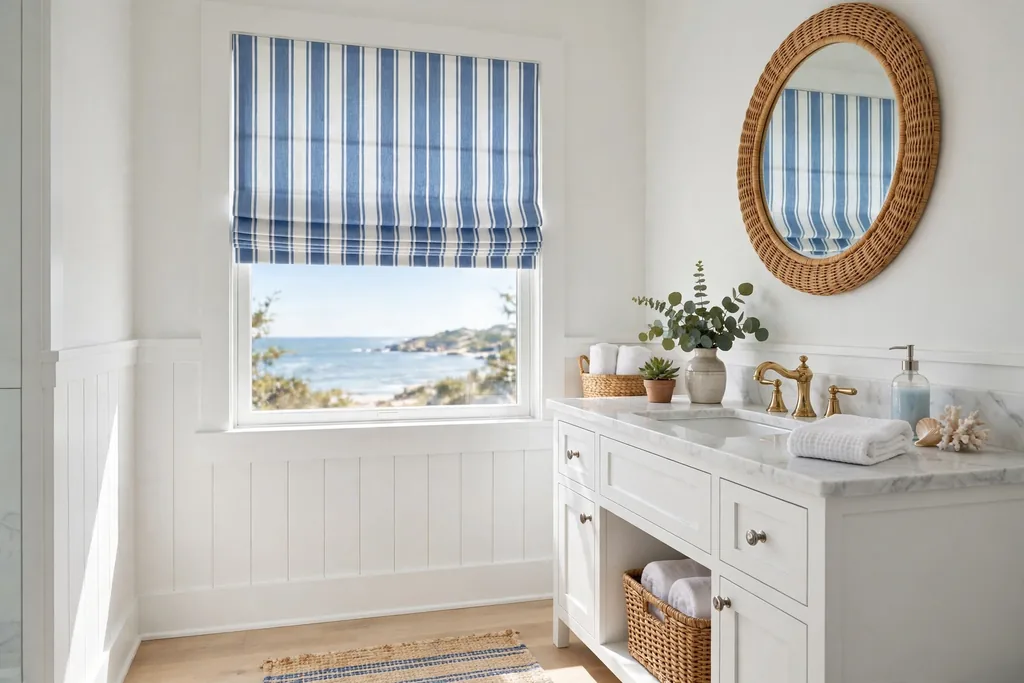
    Coastal bathroom window with a blue and white striped Roman blind.

    A blue and white striped Roman blind gives a bathroom window a tailored coastal finish that a curtain cannot match. The blind folds up neatly to let in full daylight, and folds down for privacy in the evening. Choose a washable fabric, since bathroom blinds collect steam and dust, and keep the blind clear of the tub splash zone.

    Measure the window carefully, and mount the blind inside the frame for a neat fit or outside the frame to make a small window look larger. Pair the stripes with plain white towels so the window stays the pattern feature.

    33. Speckled Sand Countertop

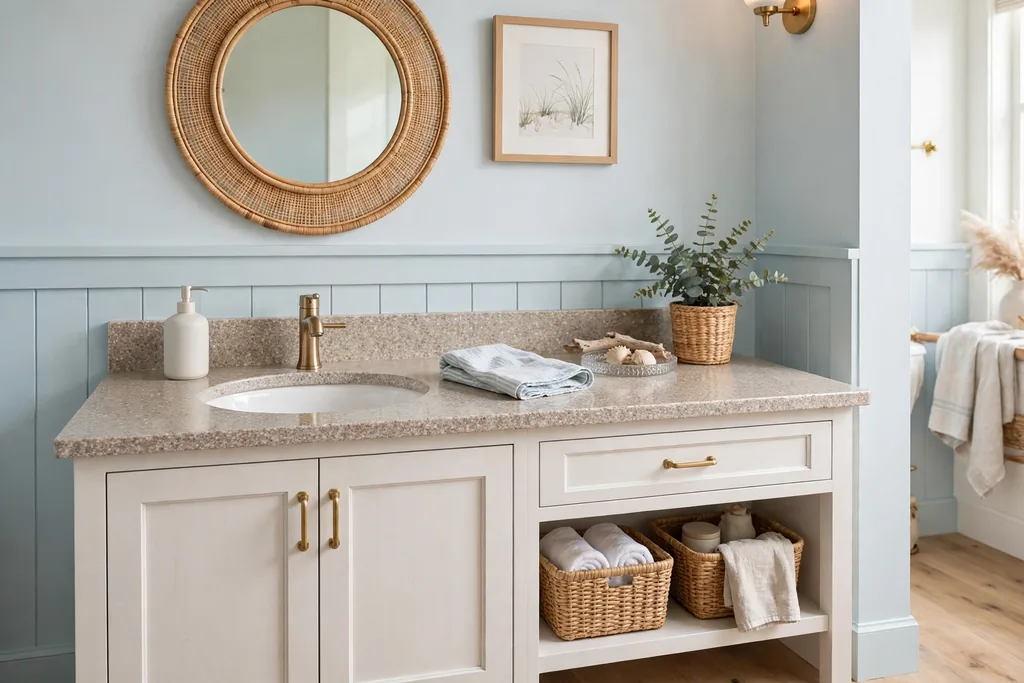
    Bathroom vanity with a speckled sand toned stone countertop and a white basin.

    A speckled sand toned countertop gives a coastal vanity a natural stone feel without a bright white slab. The speckles hide water marks better than a plain counter, and the warm sand tone pairs with white basins and pale blue walls. Seal the stone as your supplier advises, and wipe spills promptly, especially around the sink.

    Keep the backsplash simple, such as plain white tile, so the countertop pattern stays visible. A white or pale wood vanity below the counter keeps the whole unit light.

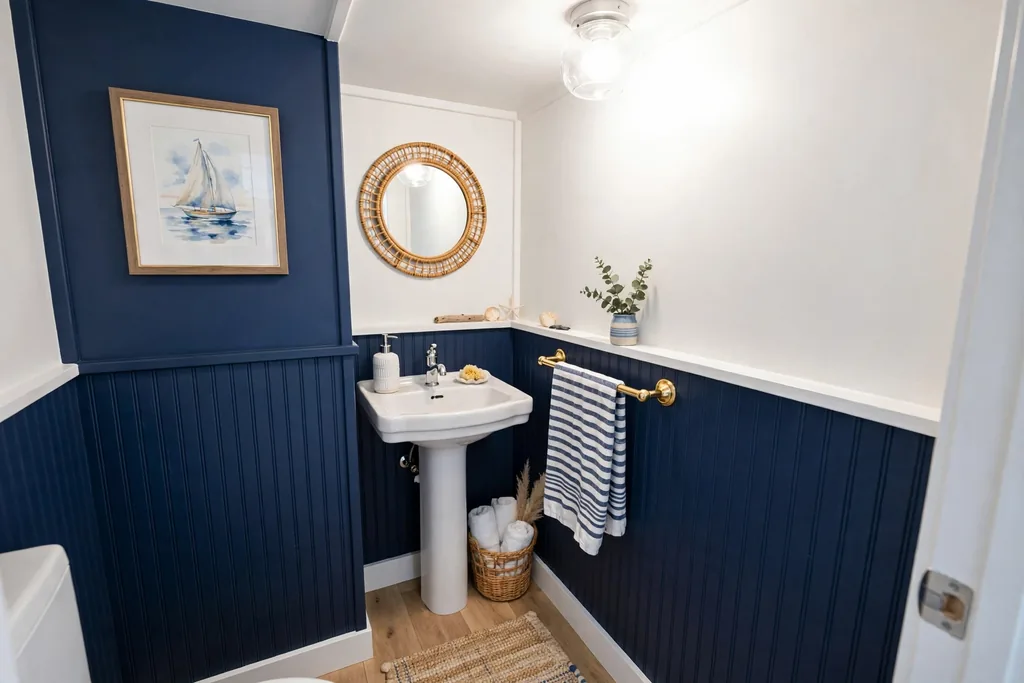
    34. Small Coastal Powder Room in Blue and White

    Small coastal powder room with navy blue and white walls and a small white sink.

    A small coastal powder room proves the seaside look works in the tightest space, as long as you limit the palette. Use white walls, one navy accent such as a striped hand towel or a small painted stool, and a single coastal detail, such as a rope mirror or a shell print. A small white sink and a wall mounted faucet free up floor space, which matters more than decor in a tiny room.

    Keep the floor in one pale tone, and skip a rug if it crowds the door swing. For more small room storage ideas, the apartment bathroom ideas guide shows how one strong wall and one storage fix can carry a plain room.

    Conclusion

    A coastal bathroom works best when the base stays calm and the seaside details stay few and well placed. White walls, a pale floor, one blue, and natural wood and woven texture give you a room that feels fresh in summer and calm in winter, without needing a full remodel. Start with the change that will show up most in your room, such as paint, a shower curtain, or a vanity color, then add one texture and one accessory at a time. Save the ideas that fit your space, light, and budget, and build the scheme in stages so each step still feels like a finished room.

    FAQs

    What colors work best in a coastal bathroom?

    White, pale blue, sea blue, aqua, and navy form the core coastal palette, with sandy beige and pale wood adding warmth. Start with white walls and one blue, then repeat that blue in towels and one accessory. Keep deeper navy for small accents, such as a shower curtain or hand towels, so a small room does not feel dark.

    How can I make a bathroom feel coastal without a remodel?

    Start with a striped shower curtain, white and blue towels, a jute rug, and a rope mirror, since these swaps need no plumbing or tile work. Add seagrass baskets and glass bottles on the vanity for texture, and paint one wall in sea blue if your lease or budget allows. These changes set the scheme in a weekend and are easy to reverse later.

    What flooring suits a coastal bathroom?

    Sandy beige porcelain or stone look tile, blue and white patterned tile, and pebble shower floors all suit a coastal bathroom. Choose a matte finish for grip, and a grout color close to the tile so the floor reads as one calm surface. Keep the floor pale if the room is small, since a dark floor can close a tight bathroom in.

    How do I keep a coastal bathroom from looking themed or cluttered?

    Limit beach prints to one feature, such as a shower curtain or one wallpaper wall, and use plain white, wood, and woven textures elsewhere. Keep shells and coral to one shelf, and repeat one blue in two or three places rather than using a different blue on every surface. Leave plenty of plain white space on walls, ceilings, and counters.

    Does a coastal bathroom suit a small bathroom?

    Yes, a coastal palette suits a small bathroom well, because white walls, pale floors, and mirrors keep the room light. Put the strongest coastal detail on one surface only, such as a striped curtain or patterned floor, and use open shelves and a ladder rail for storage without a bulky cabinet. Keep the door swing and walkway clear, and skip a large rug if it crowds the floor.

    What materials cope best with bathroom humidity in a coastal scheme?

    Sealed wood, teak, porcelain tile, glass, and brass cope well with bathroom humidity when wiped dry after use. Keep natural fibers, such as seagrass, jute, and wicker, in dry zones and off wet floors, and wash linen curtains and rugs regularly. Choose moisture resistant paint and wallpaper, and run the bathroom fan after showers so surfaces dry faster.


  • 16 Small Bathroom Space Saving Design Ideas for More Style

    16 Small Bathroom Space Saving Design Ideas for More Style

    A small bathroom does not need a bigger footprint to feel easier to use. It needs a clear layout, storage that uses the walls, and fixtures sized for the room you have. The ideas below cover vanities, showers, toilets, doors, and storage, so you can pick one change for a weekend or plan a fuller refresh. Start by measuring the room, noting the door swing, and listing what crowds the counter each morning. That short list will show which of these 16 ideas earns its place first. For renter friendly storage and surface ideas that pair well with these layouts, see these apartment bathroom ideas.

    Key Takeaways

    • Free the floor first: a floating vanity, a wall hung toilet, and a glass shower panel make the same room read larger at once.
    • Use the walls: recessed niches, over toilet storage, tall narrow cabinets, and high shelves hold daily items without a new cabinet on the floor.
    • Shrink the swing: a pocket or sliding door, a corner sink, and a slim rolling cart use space a standard layout wastes.
    • Keep one finish and one pale tile tone through the room so storage, fixtures, and walls read as one plan.
    • Measure before buying: door clearances, toilet clearances, and the gap beside the vanity decide which ideas will fit your room.

    1. Hang a Floating Vanity to Free the Floor

    Small bathroom with a wall hung floating vanity and open floor space below it.

    Fix a wall hung vanity so the floor runs clear beneath it. The open gap makes the room look larger, gives a place to tuck a small step stool or a spare towel basket, and makes mopping far simpler. Choose a vanity depth that still leaves a comfortable walkway, and keep the plumbing tidy with a bottle trap or a neat cover panel.

    Mount the vanity at a height that suits the people who use it most, and pair it with a wall hung faucet if the basin allows it, since that frees counter space as well. Keep only daily items on the counter and move the rest into the vanity drawers. This idea suits almost any small bathroom, and it works best when the floor tile continues under the vanity without a break.

    2. Cut Recessed Niches Into the Walls

    Small bathroom shower wall with recessed tiled niches holding shampoo bottles.

    Build recessed niches into the shower wall and the wall beside the sink for storage that takes no floor or counter space at all. A shower niche holds shampoo and soap at hand height, while a shallow niche by the sink holds a toothbrush cup and skin care without crowding the basin. Line each niche with the same tile as the wall, or a small accent tile, and slope the base slightly forward so water drains out.

    Check the wall before cutting, since pipes, wiring, and studs decide where a niche can safely sit. In a rented home, a surface mounted niche box or a tension shelf gives a similar result without cutting. Keep only daily bottles in each niche, and leave a little empty space so the recess reads as calm rather than crammed.

    3. Add a Cabinet and Shelves Over the Toilet

    Small bathroom with a cabinet and open shelves above the toilet holding towels.

    Use the wall above the toilet, often the only free wall in a small bathroom, for a shallow cabinet or two open shelves. That dead space holds towels, spare toilet paper, and cleaning supplies within reach, and it costs no floor space. Mount shelves high enough that no one bumps their head when standing, and keep the lowest shelf for items used daily.

    Use closed baskets on one shelf for anything you would rather not see, and keep the display tidy with matching containers. A cabinet with a mirrored front adds a second job to the same wall, reflecting light back into the room. This is one of the quickest weekend changes in this list, and it suits rented homes when fixed with tile rated anchors.

    4. Fit a Mirrored Cabinet and a Large Mirror

    Small bathroom vanity with a large mirrored medicine cabinet above the sink.

    Replace a flat mirror with a mirrored medicine cabinet, and make the mirror as wide as the vanity allows. The cabinet hides small bottles behind glass, while the large mirror doubles the sense of space and bounces light around the room. Choose a cabinet depth that does not crowd the faucet, and keep the mirror clear of a light fitting that casts shadows.

    Hang the cabinet centered over the sink at eye level, and store daily items at the front of each shelf so nothing hides behind a tall bottle. If a cabinet will not fit, a large plain mirror plus a small wall shelf beside the sink gives most of the same benefit. Clean the mirror often, since smudges show fast in a small, bright room.

    5. Use a Frameless Glass Shower Panel

    Small bathroom with a frameless clear glass shower panel and walk in shower.

    Swap a shower curtain or a framed enclosure for a single frameless glass panel. Clear glass keeps the sightline open across the room, so the shower zone reads as part of the bathroom rather than a separate box. A fixed panel also removes a curtain that billows inward and a door track that collects grime.

    Angle the showerhead away from the open edge, and size the panel to catch the main spray zone. Keep the glass free of heavy framing near eye level, and plan a quick squeegee pass after showers to limit water spots. For more glass shower layouts, from curbless entries to L shaped corners, see these walk in shower ideas. This idea suits a bathroom with good ventilation, since an open panel dries faster than a closed curtain.

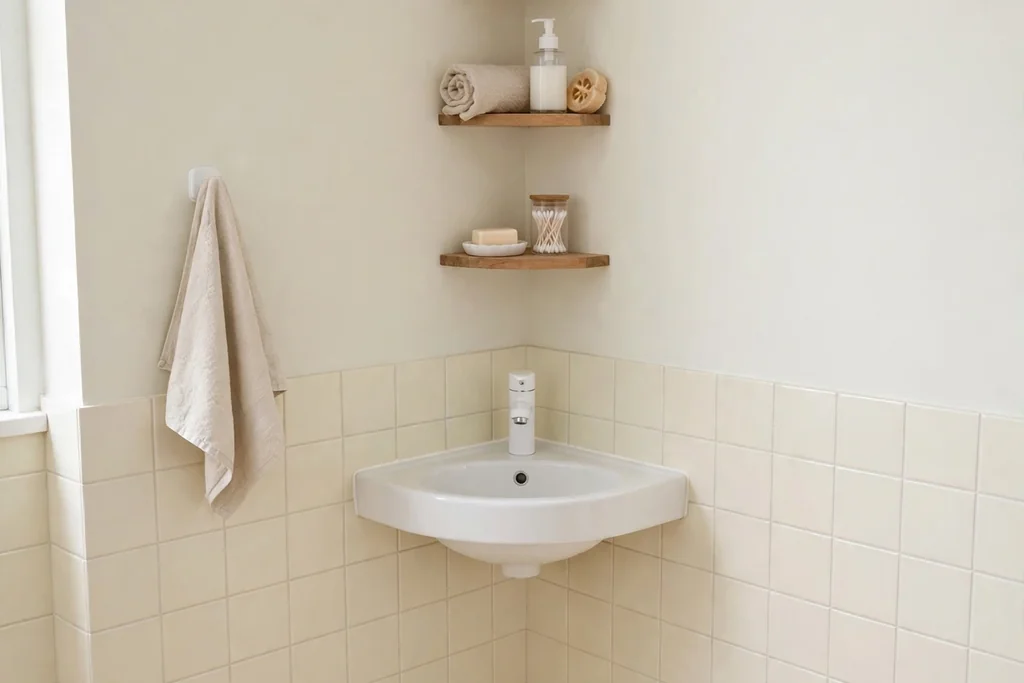
    6. Fit a Corner Sink and Corner Shelves

    Small bathroom corner with a compact corner sink and small corner shelves.

    Place a compact corner sink where a standard vanity would crowd the door or the toilet. A corner sink uses a spot that often stays empty, and it leaves the main wall free for storage or a towel rail. Pair it with small corner shelves above it for a soap dispenser and a toothbrush cup, so nothing needs to sit on a narrow basin edge.

    Check the plumbing route before committing, since a corner sink may need a short pipe run. Keep the faucet compact and the mirror above it small enough to suit the corner, such as a round or oval shape. This layout works well in a cloakroom or a half bath, where a full vanity would leave no room to turn.
    7. Replace the Swing Door With a Pocket or Sliding Door

    Small bathroom doorway with a sliding pocket door partly open into the wall.

    Change a standard swing door for a pocket door that slides into the wall, or a surface mounted sliding door that runs along the hall wall. A swing door can eat up valuable floor space, and in a small bathroom that space often blocks the vanity or the toilet. A sliding door gives that floor back and makes the entry easier to use.

    Check the wall first: a pocket door needs a hollow wall section free of pipes and wiring, while a surface slider needs clear wall space beside the doorway. Fit a simple privacy lock, and keep the door track clean so it runs smoothly. If neither option fits, reversing the swing so the door opens into the hall can free the same floor space for less work.

    8. Add a Tall Narrow Pull Out Tower Cabinet

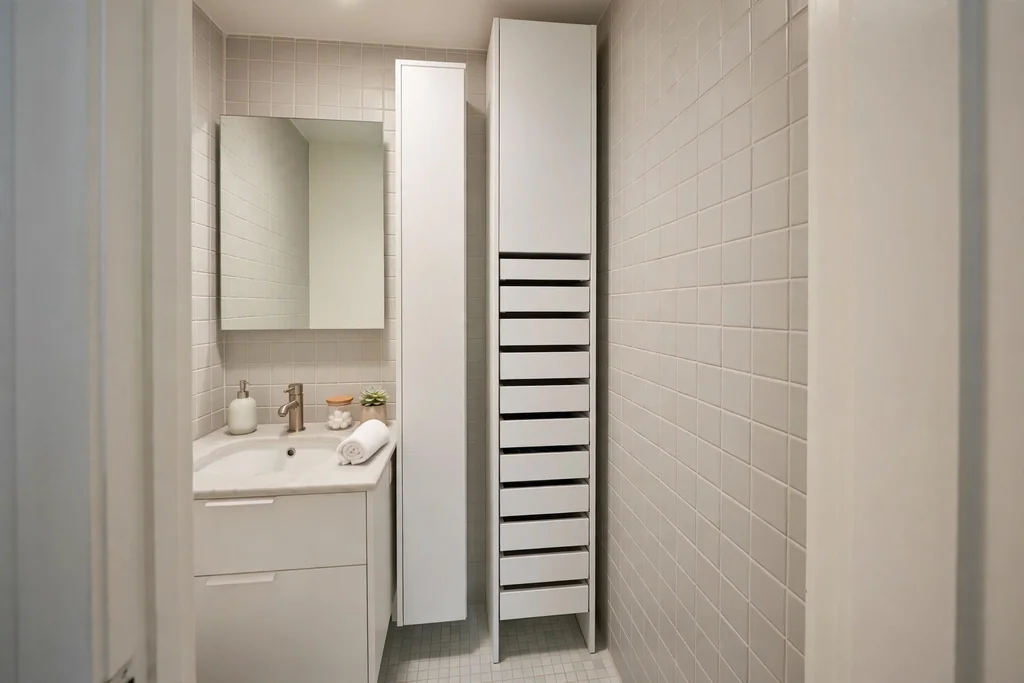
    Small bathroom with a tall narrow white tower cabinet beside the vanity.

    Fit a tall, narrow tower cabinet or a pull out unit in the gap beside the vanity or the toilet. A slim tower uses vertical space for towels, cleaning supplies, and spare toiletries, and its small footprint suits a strip of wall that is too narrow for a standard cabinet. Pull out shelves bring items from the back of the unit to the front, so nothing gets lost behind a tall bottle.

    Anchor the tower to the wall, especially in a home with children, and keep heavier items low so the unit stays stable. Use one finish that matches the vanity, so the tower reads as part of the room rather than an added box. Measure the gap twice, including skirting boards, before ordering a unit made for a tight space.

    9. Organize Under the Sink With Bins and Dividers

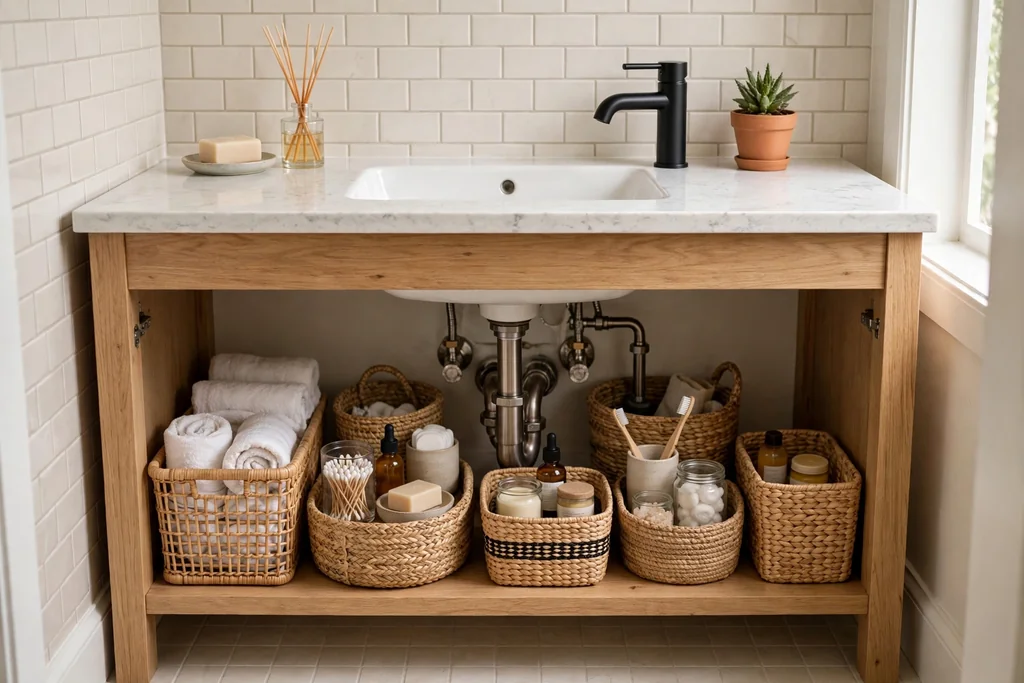
    Small bathroom vanity with open under sink storage bins holding toiletries.

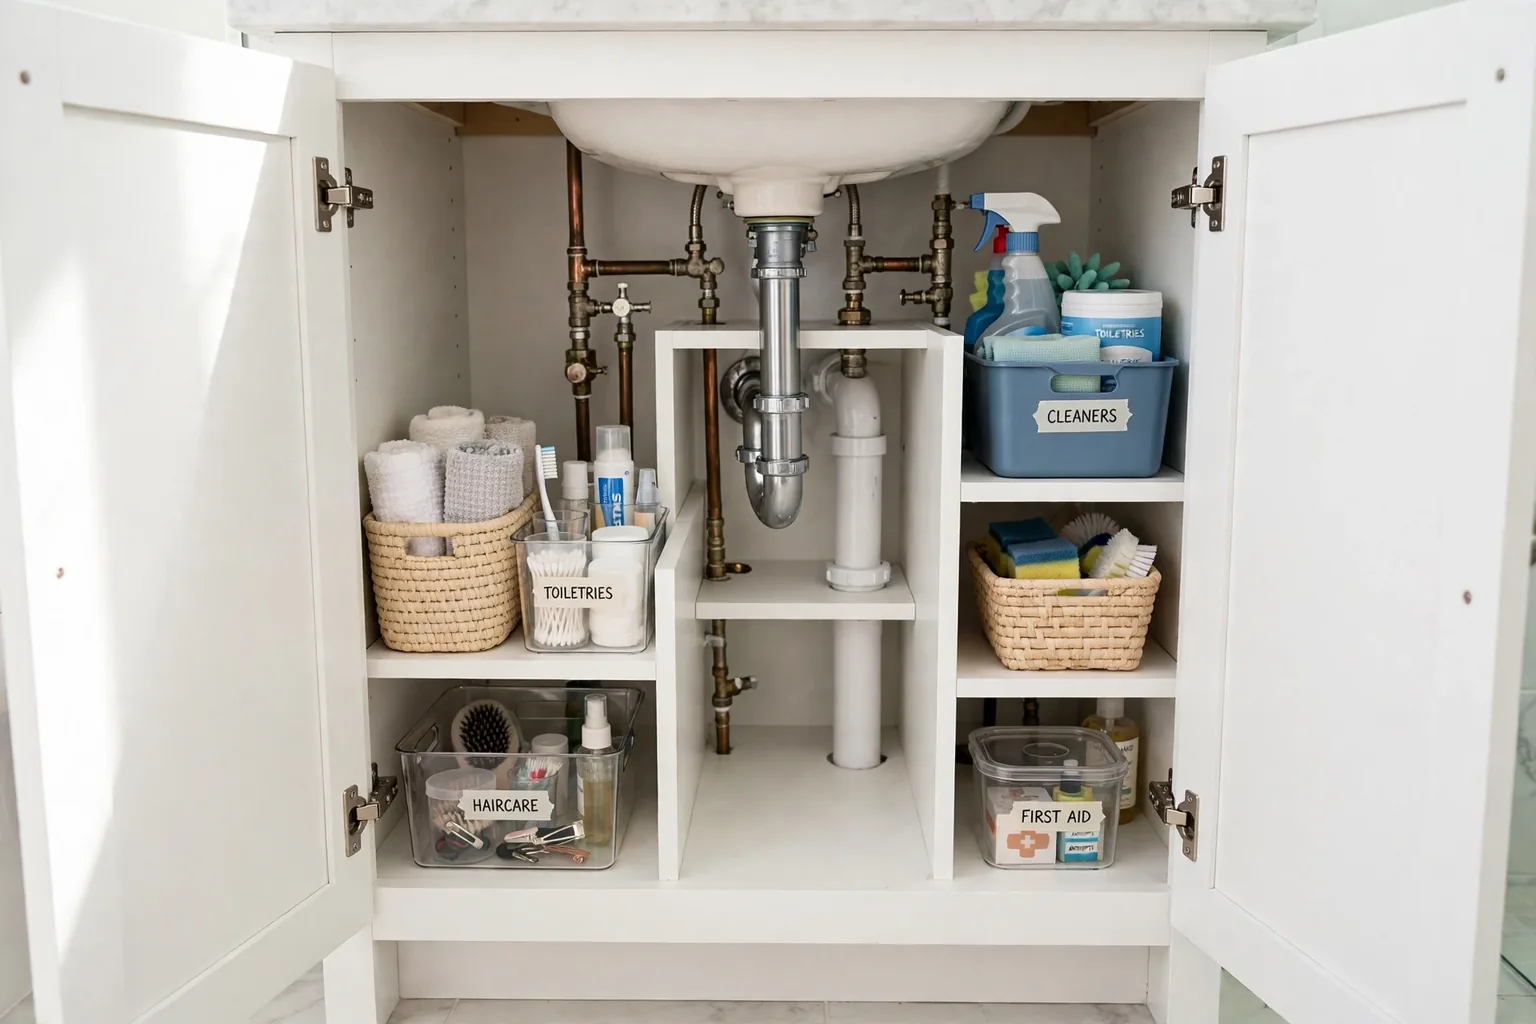
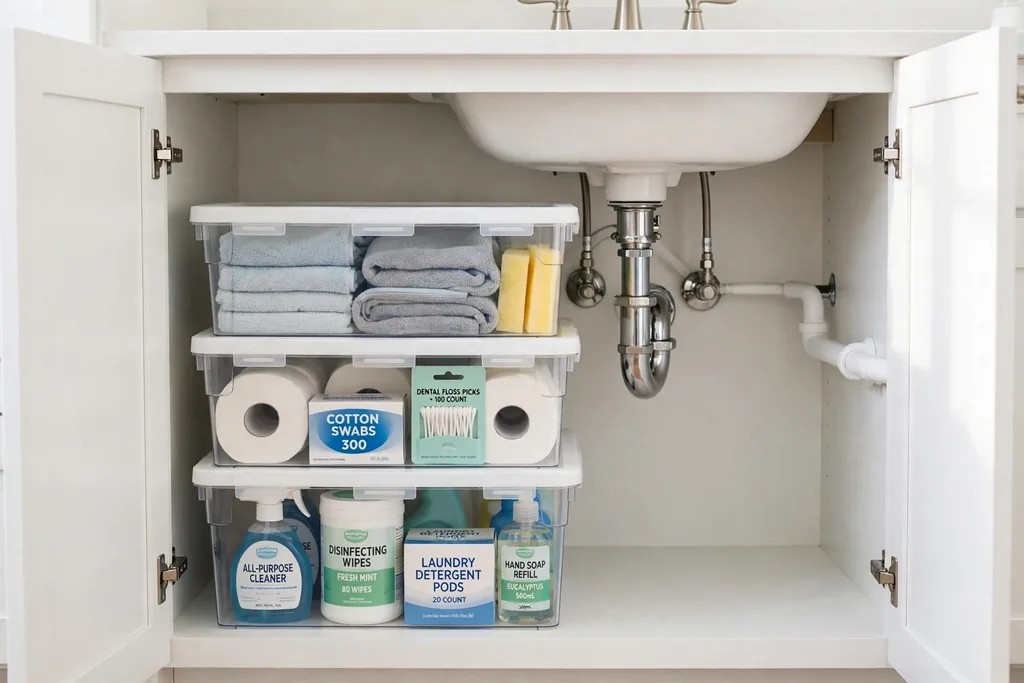
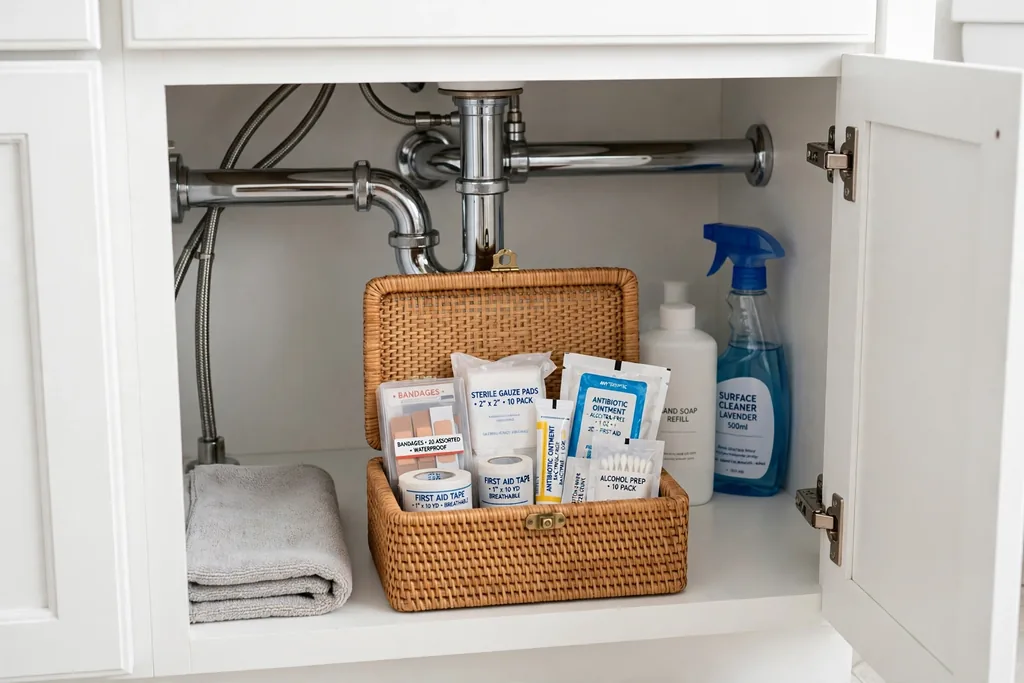
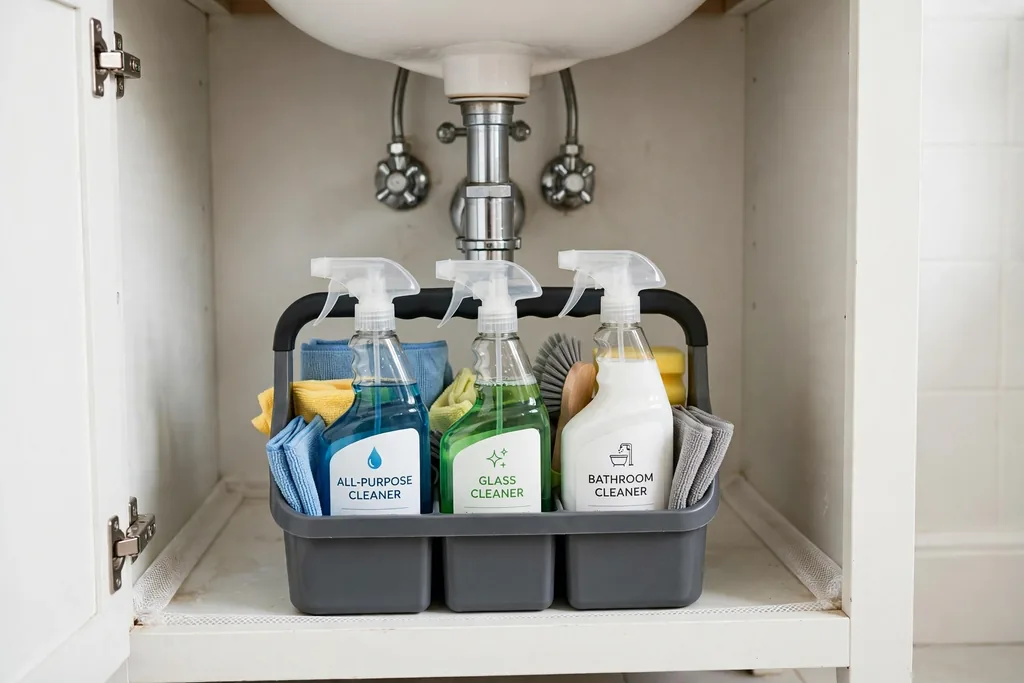
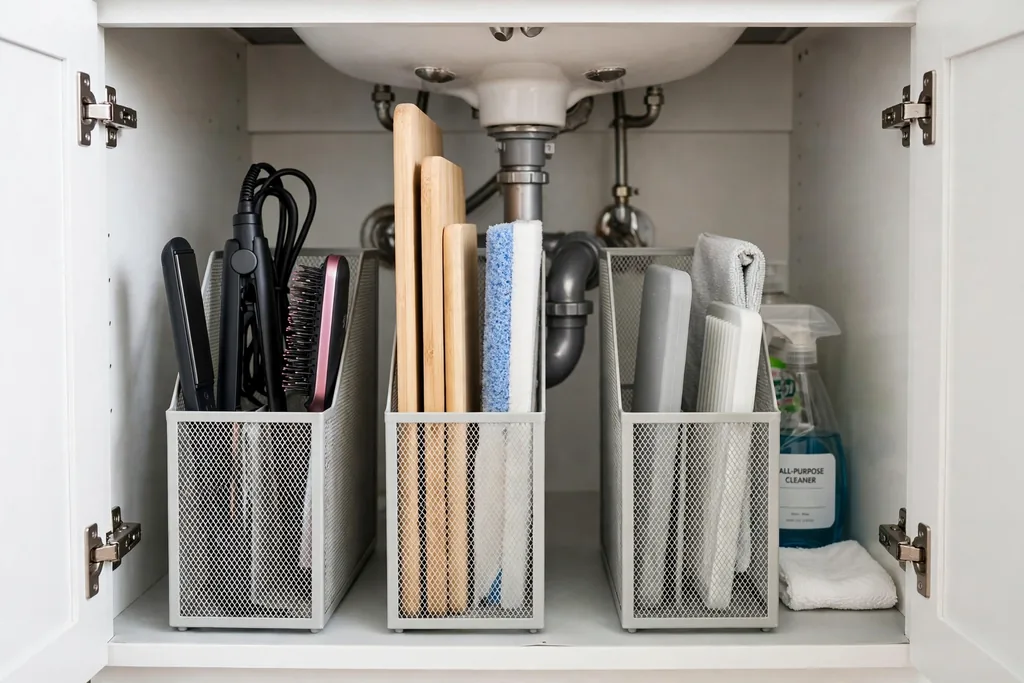
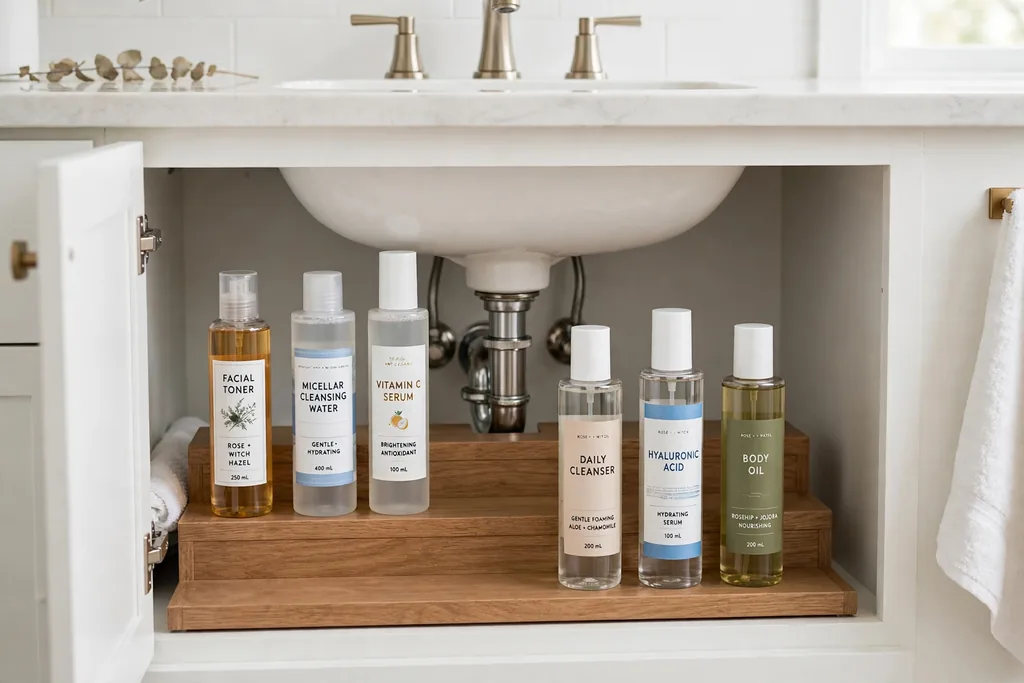
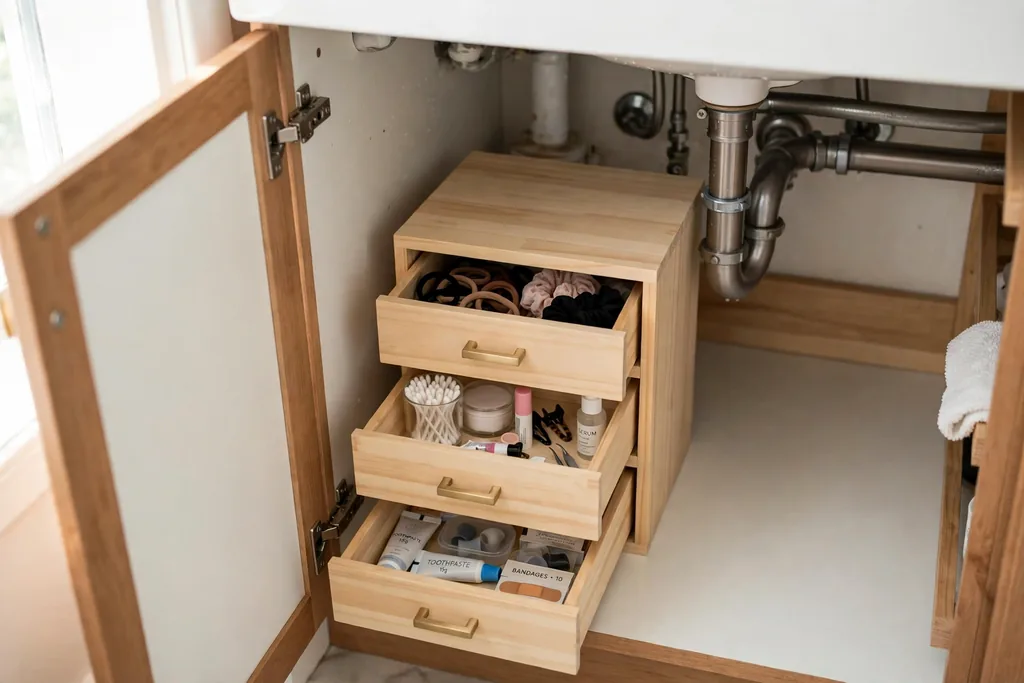
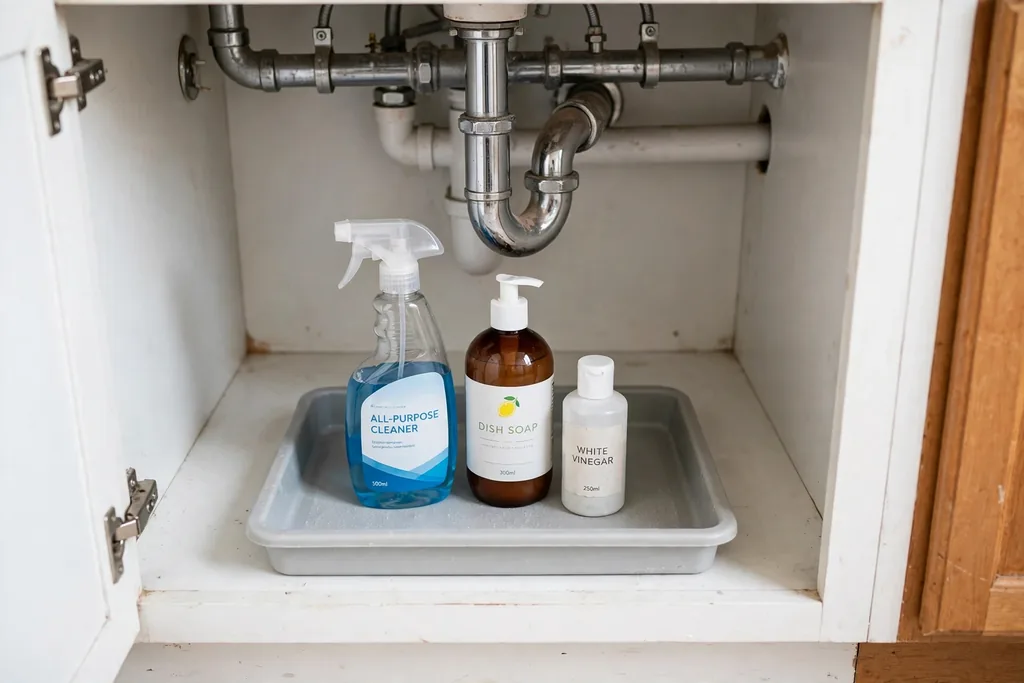
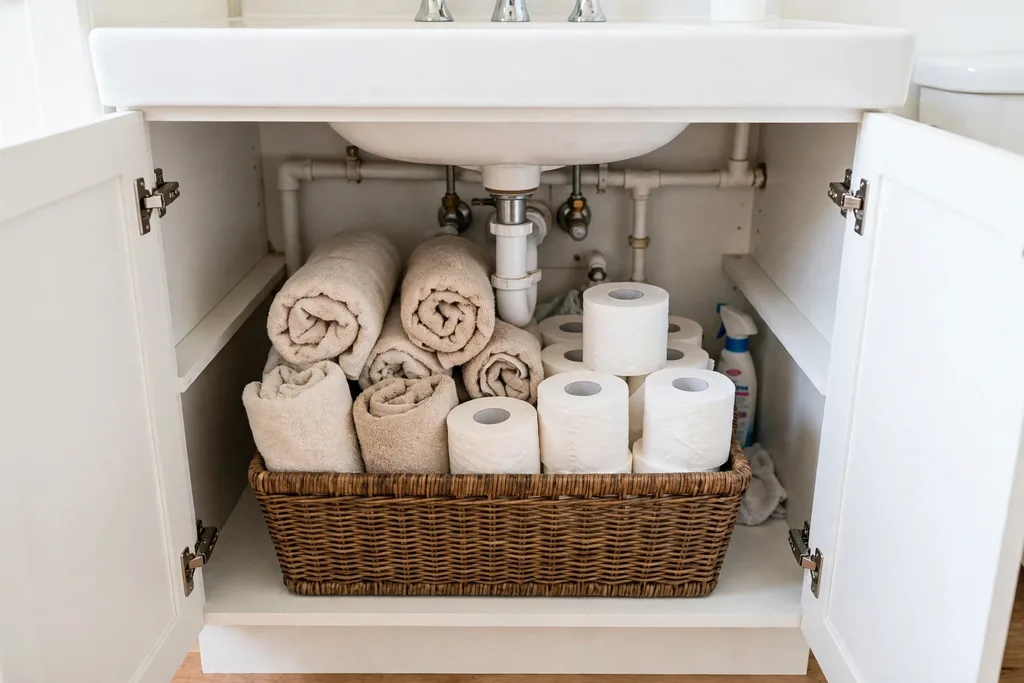
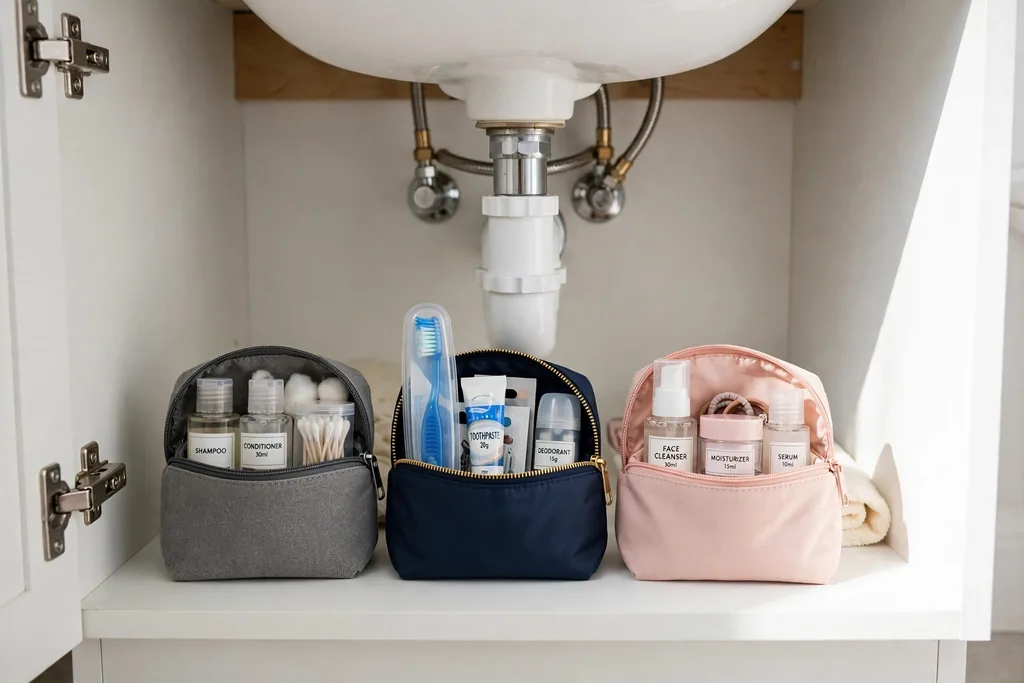
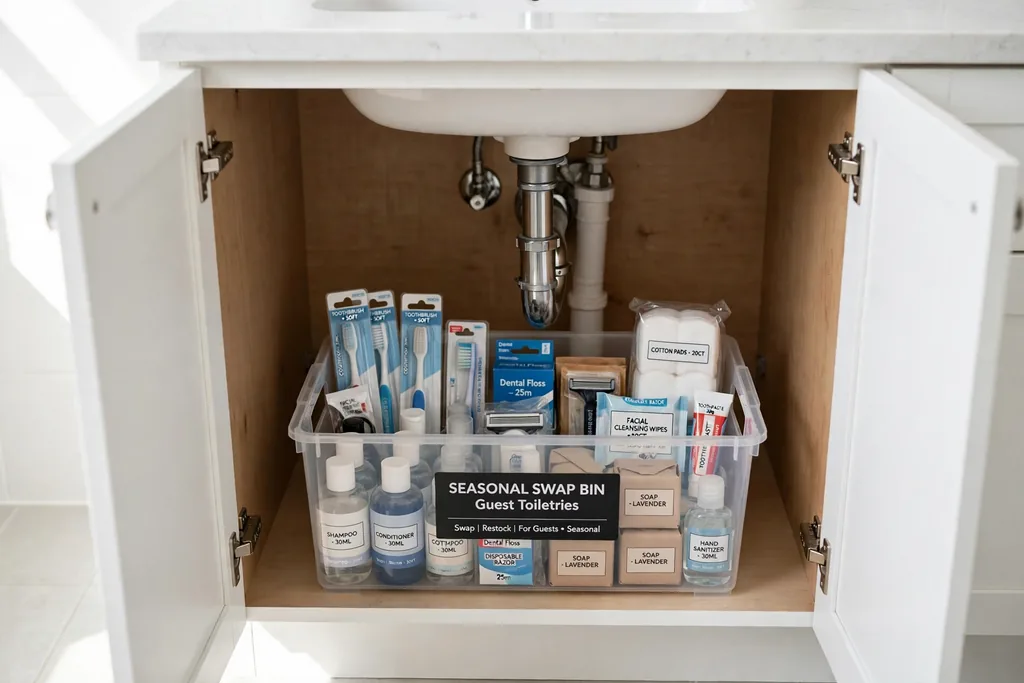
    Sort the space under the sink with stackable bins, a small drawer unit, and dividers that work around the pipes. Most under sink space is wasted because bottles fall over and small items sink to the back. Bins grouped by job, such as hair care, cleaning, and first aid, keep each group easy to pull out and put back.

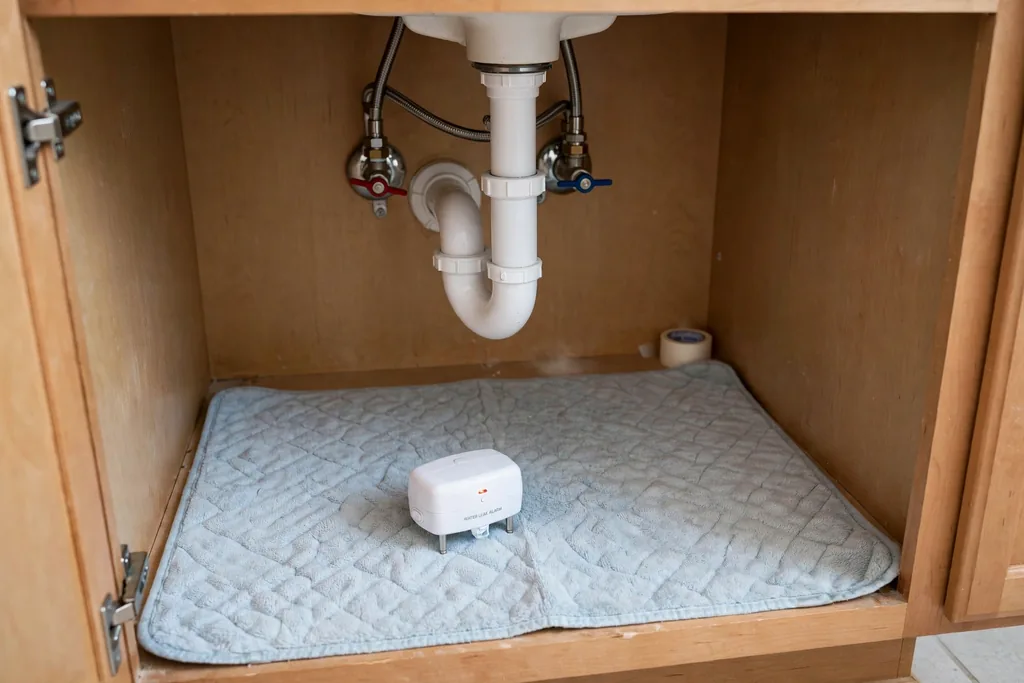
    Use a bin with a handle for each group, and label the front if the bins look alike. Keep daily items in a shallow tray at the front, and store spare stock behind it. Wipe the base of the cabinet when you reorganize, and check for slow drips while the cabinet is empty, since a leak is easier to spot before the bins go back in.

    10. Use the Back of the Door for Hooks and an Organizer

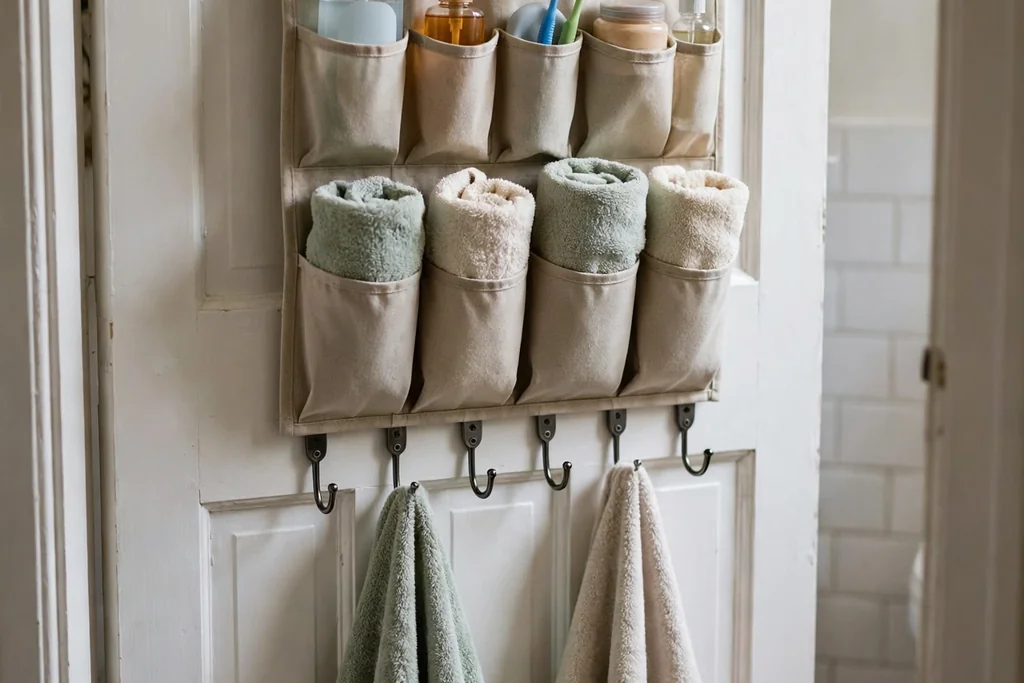
    Small bathroom door with hooks and a hanging organizer holding towels.

    Hang hooks and a slim organizer on the inside face of the bathroom door for towels, a robe, hair tools, and spare toiletries. The door is wasted space in most small bathrooms, and using it keeps towels off the floor and off a rail that crowds the vanity. Keep heavy bottles low so the door still swings freely, and trim the hooks if the door rubs the frame.

    Use hooks rated for damp conditions, and keep the organizer shallow so it does not hit the toilet or the vanity when the door opens. Hang the organizer on the inside face so the pockets do not show from the hall. This change costs little, needs no drilling in many cases, and suits rented homes well.

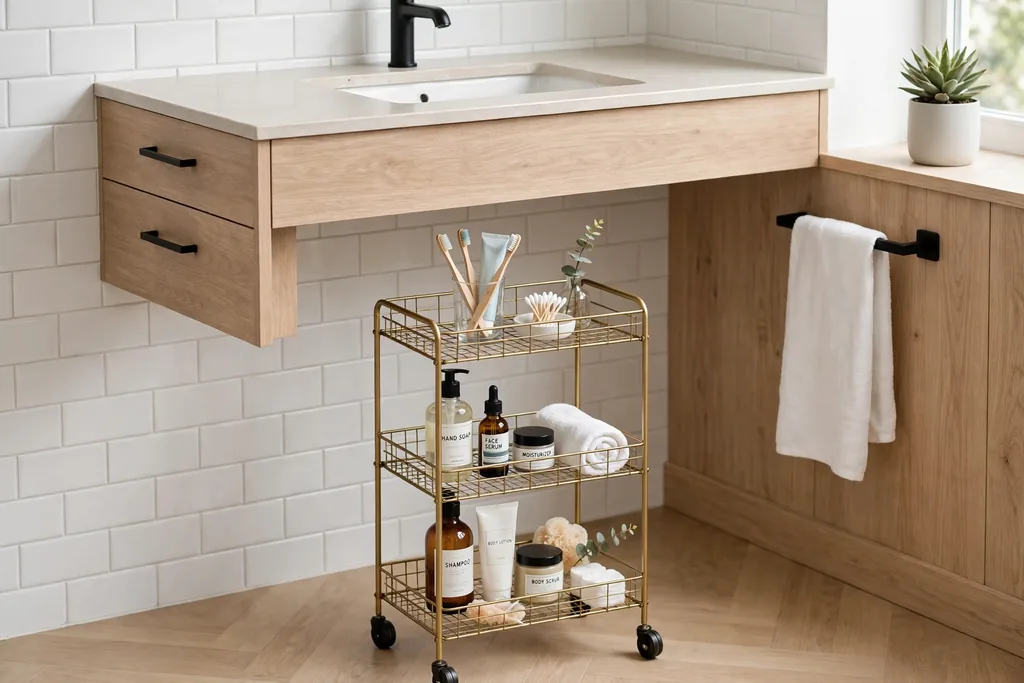
    11. Slide a Slim Rolling Cart Into a Narrow Gap

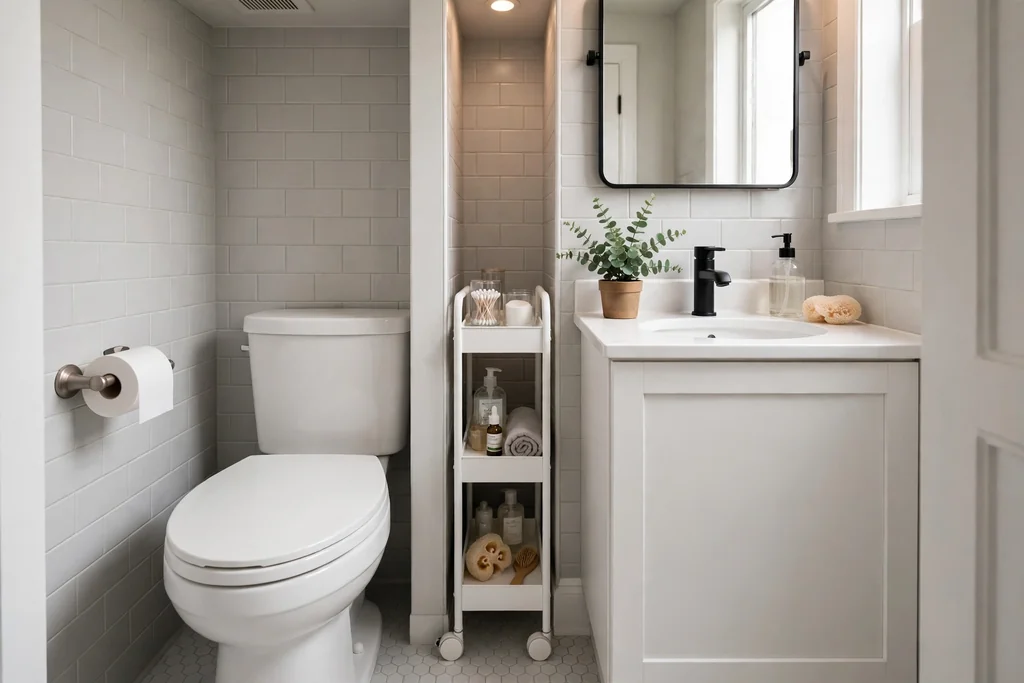
    Small bathroom with a slim rolling cart in the gap between toilet and vanity.

    Place a slim rolling cart in the narrow gap between the toilet and the vanity, or between the vanity and the wall. Gaps of 15 to 25 centimetres often sit empty in a small bathroom, and a cart on wheels turns that gap into three or four shelves of storage. Pull the cart out to reach the back shelves, then slide it back flush when done.

    Choose a cart narrower than the gap, with a handle at the front and shelves that hold bottles upright. Keep tall bottles on the lowest shelf so the cart stays stable when pulled out. This idea works for spare toilet paper, cleaning sprays, and hair tools, and it can move to another gap if you rearrange the room later.

    12. Fit a Wall Hung Toilet With a Concealed Tank

    Small modern bathroom with a wall hung toilet and concealed tank.

    Fit a wall hung toilet with the tank hidden in the wall or in a shallow housing. The bowl floats above the floor, so the room looks larger and the floor beneath it is easy to clean. A concealed tank also shortens the depth of the toilet compared with many standard models, which can free a few valuable centimetres in front of the bowl.

    Check the wall structure and the waste position before planning this change, since it needs a sturdy frame and a suitable drain route. Keep the flush plate simple and easy to reach, and leave access to the tank mechanism for future repairs. This is a bigger job than a shelf or a cart, so it suits a planned refresh rather than a weekend fix.

    13. Add a Fold Down Shelf That Works Twice

    Small bathroom wall with a fold down wooden shelf lowered beside the sink.

    Fix a fold down wall shelf beside the sink or above a laundry basket that folds flat when not in use. Lowered, it gives a grooming surface or a place to fold towels; folded up, it leaves the wall clear and the floor free. A fold down shelf suits a bathroom that needs a work surface only at certain times of day, such as for hair drying or for folding laundry.

    Use sturdy hinges and a support arm rated for the load, and fix the shelf into studs or solid wall anchors. Keep the shelf depth shallow enough that it does not block the walkway when lowered, and store only light items on it. Pair it with a small mirror above so the lowered shelf becomes a compact dressing spot.

    14. Run Large Format Pale Tile From Floor to Wall

    Small bathroom with large format pale tiles running from floor up the walls.

    Lay large format pale tiles on the floor and run the same tile up one or two walls. Fewer grout lines mean fewer visual breaks, so the floor and walls read as one continuous surface and the room feels larger. A pale tone reflects light, which helps a bathroom with a small window or no window at all.

    Choose a tile size that fits the room without too many cuts at the edges, and keep the grout color close to the tile so the joints fade. Use a matte or lightly textured finish on the floor for grip, and seal the grout as the tile maker advises. This idea pairs well with the glass shower panel in idea 5, since the same tile can run straight into the shower zone.

    15. Add High Shelves Above the Door and in Unused Nooks

    Small bathroom with high open shelves above the door holding towels and baskets.

    Fit open shelves above the door and in any shallow nook that would otherwise stay empty, such as the wall above a tall cabinet or the recess beside a chimney breast. High shelves hold spare towels, baskets, and stock items that you need weekly rather than daily, and they cost no floor space. Keep the shelves shallow so items stay easy to reach with a small step stool.

    Use matching baskets so the high storage reads as tidy from below, and label the baskets if several people share the bathroom. Keep heavier items low and light items high, and check that nothing on a shelf above the door can fall onto someone entering the room. This idea works best for items you do not reach for every morning.

    16. Choose a Compact Deep Soaking Tub With a Shower Overhead

    Small bathroom with a compact deep soaking tub and overhead shower.

    Pick a compact deep soaking tub with a shower overhead instead of a long standard tub. A shorter, deeper tub gives a proper soak in a smaller footprint, and the shower above it means one zone serves both bathing and showering. That single wet zone frees wall space for a vanity, storage, or a towel rail that a separate shower would have taken.

    Check the tub length against the wall and the door swing, and choose a glass panel rather than a curtain to keep the room open, as in idea 5. Add a recessed niche at the tub end for soap and shampoo, and keep the floor beside the tub clear for safe stepping. This idea suits a household that wants a bath but cannot spare room for both a tub and a separate shower.

    Conclusion

    A small bathroom feels larger when the floor stays clear, the walls do real work, and every fixture earns its footprint. Pick the change that fixes your biggest daily annoyance first, whether that is a crowded counter, a door that blocks the vanity, or a shower that closes the room in. Add one storage idea next, then step back and check the room before adding more. A few well chosen changes, fitted to your measurements, will do more for a small bathroom than a room full of small accessories. Save this list for your next refresh, and use it as a checklist when you measure, shop, and plan.

    FAQs

    How do I make a small bathroom feel larger without moving walls?

    Free the floor with a floating vanity and a wall hung toilet, use clear glass for the shower, and run one pale tile tone from floor to wall. Those three changes open sightlines and reflect light, which makes the same footprint feel larger without structural work.

    What is the best storage for a very small bathroom?

    Use the walls before the floor: recessed niches, over toilet shelves, a mirrored cabinet, and a tall narrow tower. Add a slim rolling cart for narrow gaps and hooks on the back of the door. Together these hold daily items without a bulky cabinet.

    Is a floating vanity worth it in a small bathroom?

    Yes, in most cases. It frees floor space, makes cleaning easier, and makes the room look larger. Check that the wall can carry the load and that the plumbing can be tidied with a bottle trap or a cover panel before fixing it in place.

    Should I choose a shower or a bath in a small bathroom?

    Choose based on daily use. A glass shower panel suits a household that showers daily and wants the most open room. A compact deep soaking tub with a shower overhead suits a household that wants a bath but cannot spare room for both fixtures.

    Can I fit a pocket door in an existing small bathroom?

    It depends on the wall. A pocket door needs a hollow wall section free of pipes and wiring. If that section is not free, a surface mounted sliding door or reversing the swing into the hall can free similar floor space with less work.

    How do I keep a small bathroom tidy once it is organized?

    Give every group a home, such as one bin per job under the sink and one basket per person on a shelf, and return items to that home after use. Once a month, empty each bin and shelf and remove anything you did not use, since small bathrooms collect clutter fast.


  • 30 Under Sink Organization Ideas for Bathroom for Small Spaces

    30 Under Sink Organization Ideas for Bathroom for Small Spaces

    The cabinet under a bathroom sink often holds pipes, a trap, and a tangle of bottles, yet it can still work hard in a small room. These 30 under sink organization ideas for bathroom storage show how to use the space around plumbing, on the cabinet doors, and in the gaps most people leave empty. You will find shelf risers, pull-out drawers, turntables, labelled bins, and renter friendly fixes that need no drilling. Start by measuring around your pipes, then pick the ideas that fit your cabinet width, depth, and door type. For the wider small bathroom picture, these apartment bathroom ideas show how under sink storage fits with the rest of a compact room.

    Key Takeaways

    • Measure around the pipes, trap, and water lines before buying anything, since a few inches decide whether a shelf, drawer, or bin fits.
    • Put daily items at the front, spare stock at the back, and rarely used items up high or in a separate bin.
    • Use the cabinet doors, the side walls, and the space above low items, since the floor of the cabinet alone is never enough.
    • Keep cleaning supplies apart from toiletries and medicines, and keep anything unsafe for children in a lidded box out of easy reach.
    • Choose bins and shelves you can lift out for cleaning, since the cabinet under a sink needs a wipe more often than most cupboards.
    • Leave a clear gap around the pipes and valves, so you can reach a shutoff quickly and spot a drip early.

    1. A U-Shaped Shelf Riser Around the Pipes

    U-shaped shelf riser around bathroom sink pipes holding small bottles.

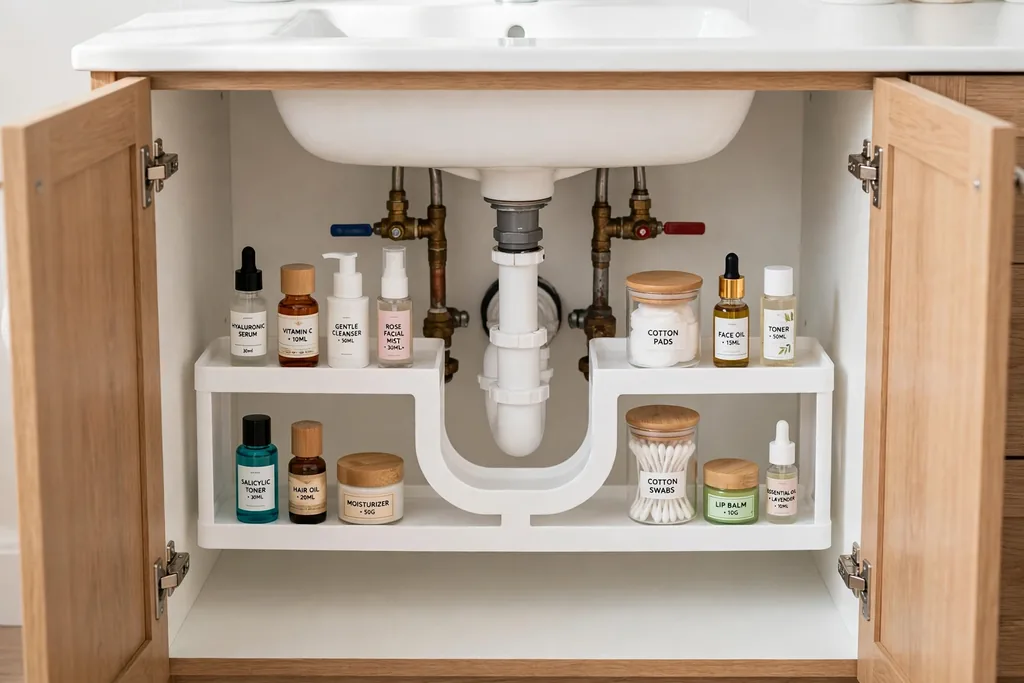
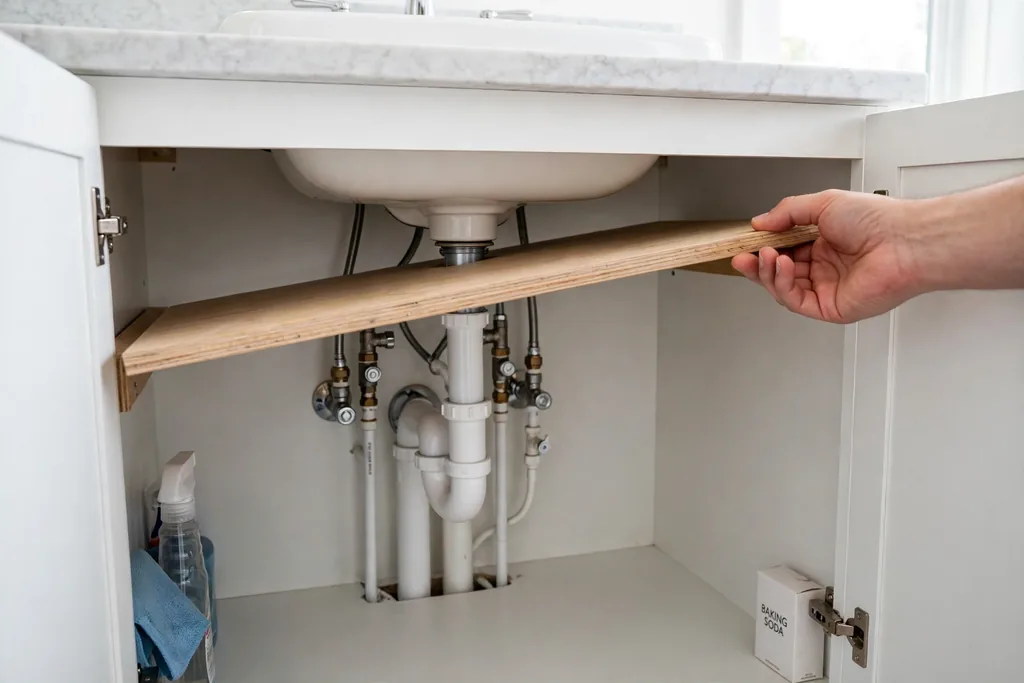
    Fit a U-shaped shelf riser around the trap and water lines to claim the space above the cabinet floor. The cutout lets the shelf sit close to the pipes without pressing on them, and the raised level doubles the usable surface in a cabinet that otherwise holds only one layer of bottles. This is the best first step in most under sink cabinets, and it suits both fixed shelves and freestanding risers.

    Measure the pipe positions and the height of your tallest bottle before you buy, and leave at least a finger width of air around every pipe. Put short daily items on the riser and taller bottles on the floor beside it, so nothing tips when you reach in. If your pipes sit off center, a riser with adjustable legs lets you level the shelf around them.

    2. A Pull-Out Drawer on Rails

    Pull-out drawer sliding from under a bathroom sink holding toiletries.

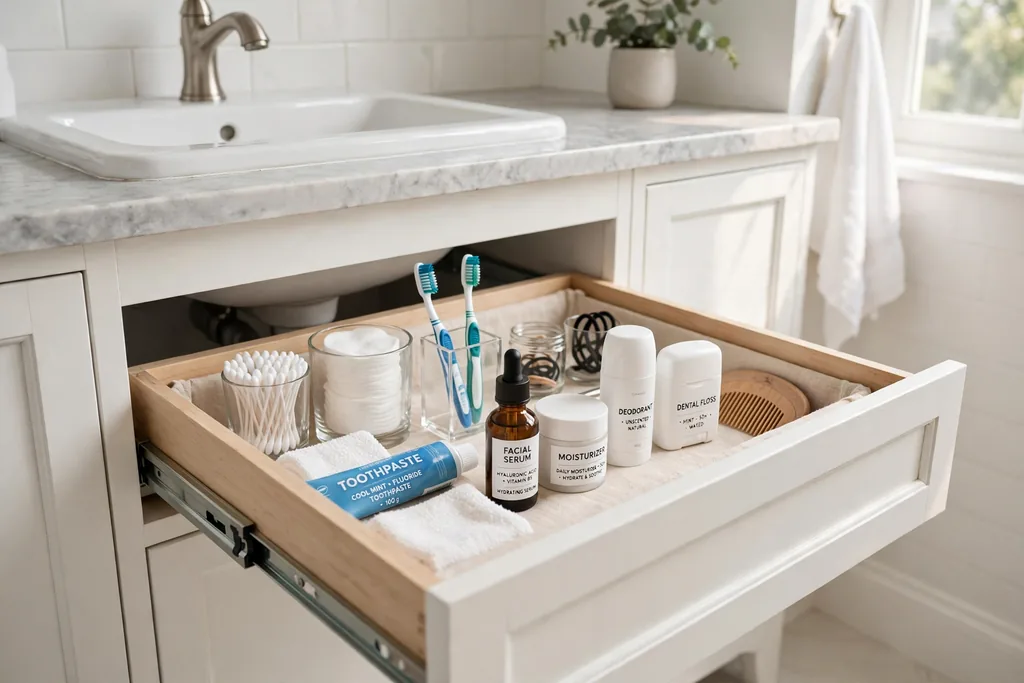
    Fit a pull-out drawer or basket on rails so the back of the cabinet comes to you. Deep cabinets hide items at the back, and a sliding drawer stops the habit of pulling everything out to find one bottle. A single low drawer suits most cabinets, while a double tier version suits a tall cabinet with room to spare.

    Check that the drawer clears the pipes when it slides, and keep heavy bottles at the front of the drawer so it runs smoothly. Sort the drawer by task, such as daily skin care in one section and hair care in another, and add a small divider if bottles slide sideways. Wipe the rails now and then, since damp air can leave a film on metal parts.

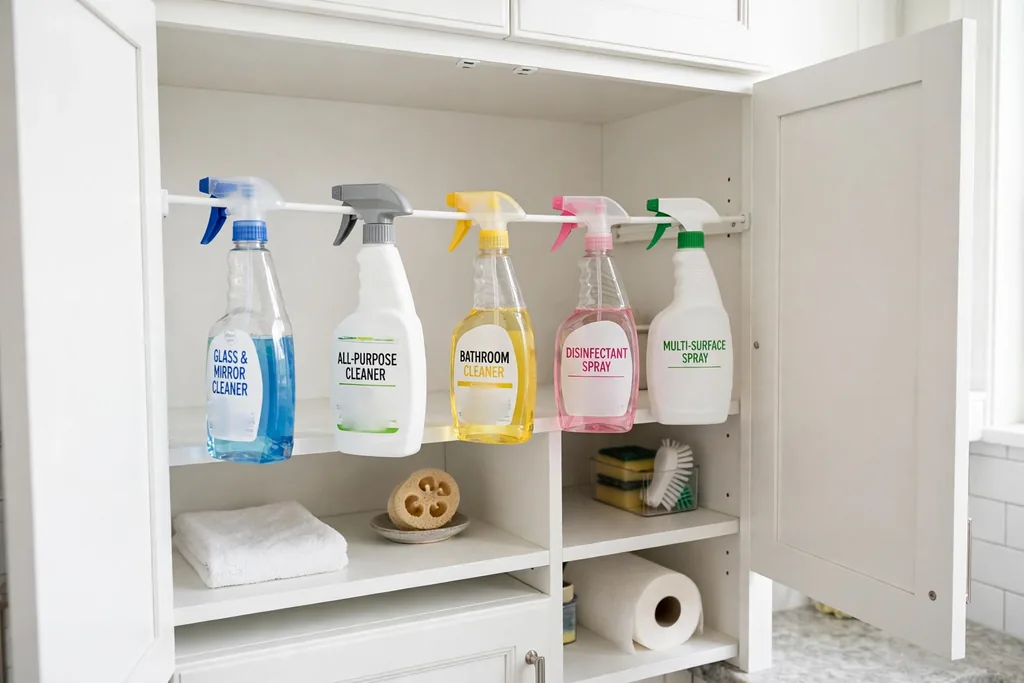
    3. A Tension Rod for Spray Bottles

    Tension rod across a bathroom cabinet holding hanging spray bottles.

    Hang spray bottles from a tension rod fixed across the cabinet, just below the top. The rod uses the empty air above low bottles, and hanging sprays by their triggers keeps them upright, visible, and easy to grab. This works well for cleaning sprays, which are often the tallest and most awkward items under a sink.

    Set the rod high enough that bottles clear the shelf below, and test the tension before loading it fully. Keep the heaviest bottles near the ends, where the rod grips the walls, and lighter ones in the middle. If your cabinet walls are uneven, a rod with rubber ends grips better and marks the surface less.

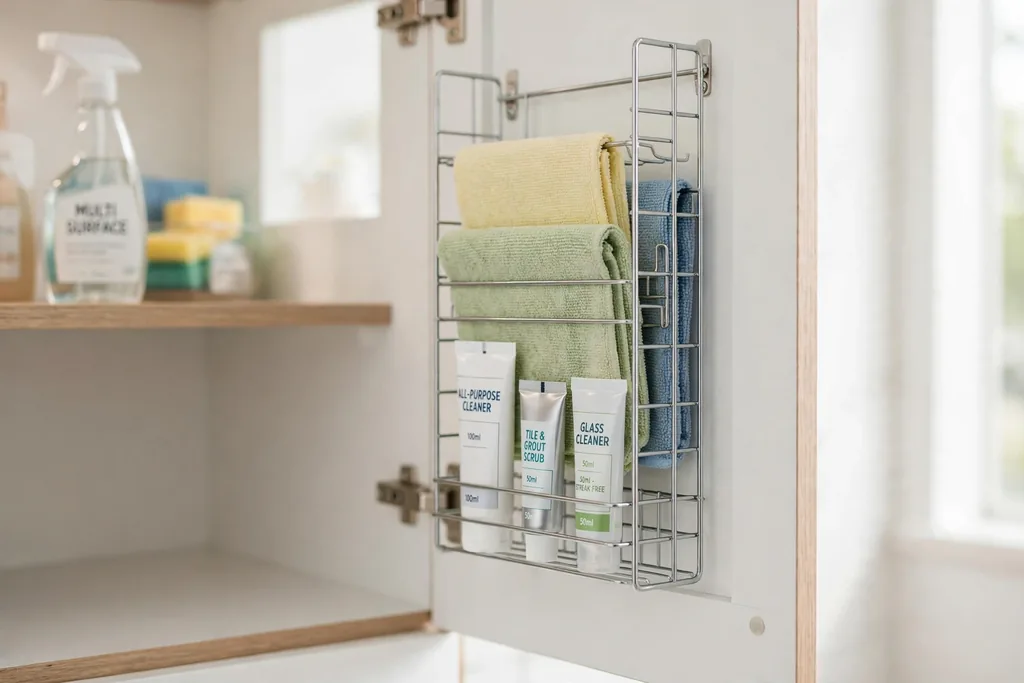
    4. A Rack on the Inside of the Cabinet Door

    Slim rack on the inside of a bathroom cabinet door holding cloths and tubes.

    Fix a slim rack or a row of small baskets on the inside of a cabinet door for flat items such as cleaning cloths, gloves, and small tubes. The door is unused space in most cabinets, and a flat rack adds storage without taking a single inch of shelf. Wire racks suit damp cabinets, since air moves around them and they dry fast.

    Keep the rack shallow enough that the door still closes without pressing on bottles inside, and put heavy items low on the door so it swings freely. Sort by use, such as cleaning cloths in one basket and spare sponges in another. If you rent, a rack that hooks over the door needs no drilling, but check that it does not stop the door closing flush.

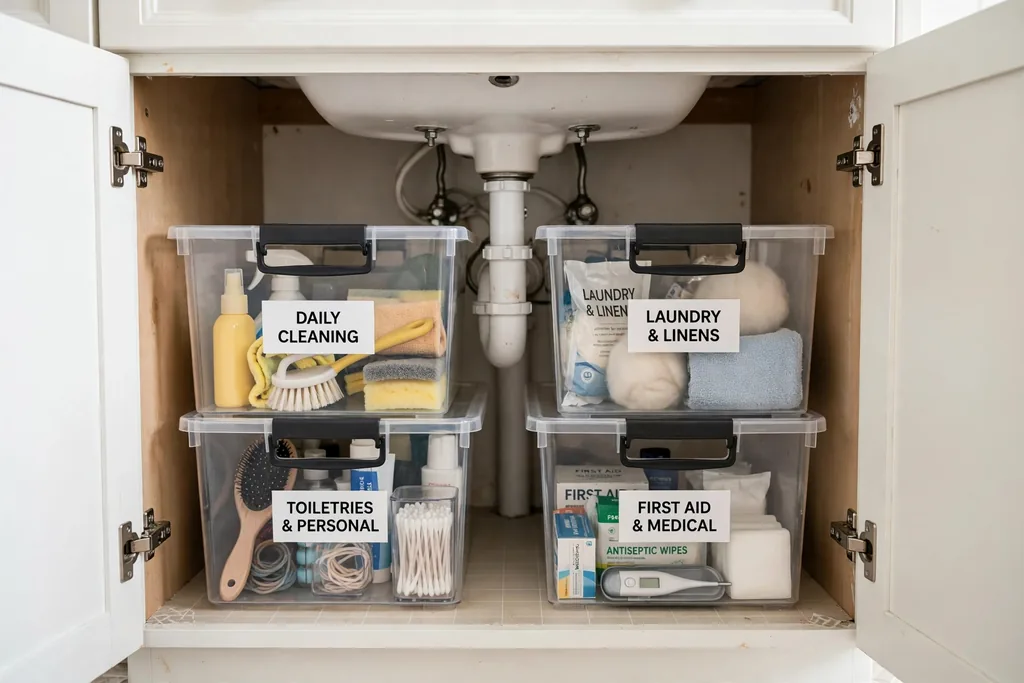
    5. Labelled Clear Bins by Task

    Labelled clear bins under a bathroom sink sorted by task.

    Sort the cabinet into clear bins, one per task, and label each bin on the side that faces out. Clear sides let you see what is inside without pulling every bin out, and labels save you from opening three bins to find one item. Good groupings are daily toiletries, hair care, cleaning supplies, and first aid.

    Keep bins shallow enough to lift out with one hand, and avoid packing them so full that items fall out when you lift. Put a short list on the label, such as “shampoo, conditioner, treatment,” rather than a single vague word. Review each bin monthly, and move out empties and items you no longer use, since under sink bins quietly collect half used bottles.

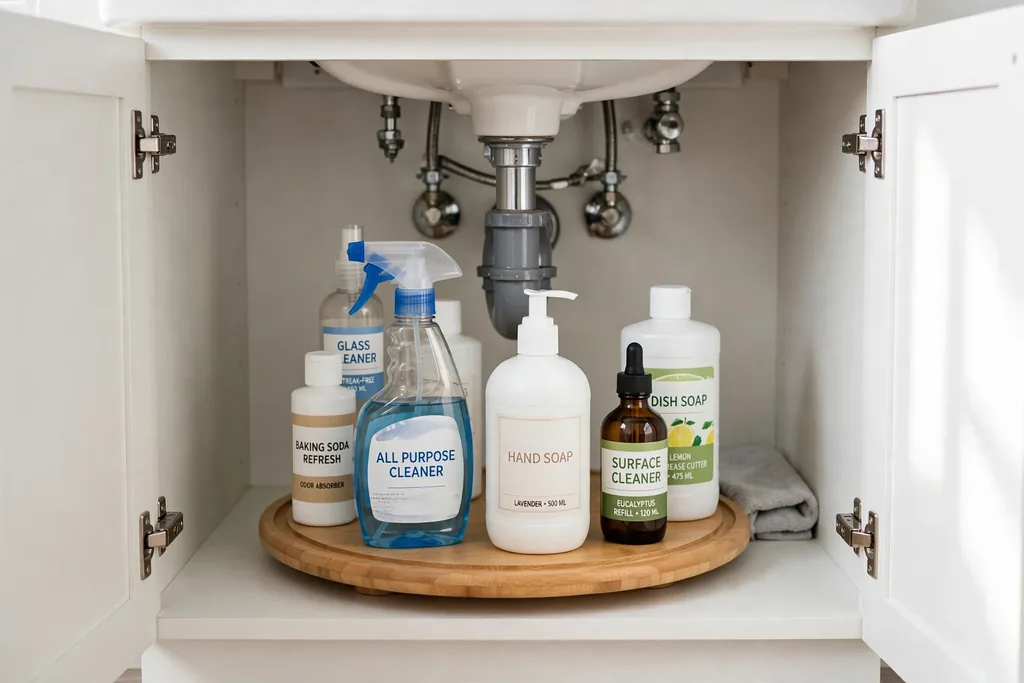
    6. A Lazy Susan for Deep Corners

    Turntable in a bathroom cabinet holding bottles that spin to the front.

    Place a turntable, often called a lazy Susan, in a deep cabinet so items at the back spin to the front. Deep cabinets hide bottles behind the pipes, and a turntable brings the back row forward with one spin, so every bottle stays in use. A low turntable with a rim suits the cabinet floor, while a two tier version suits a tall cabinet.

    Group similar items on the turntable, such as cleaning supplies on one and spare toiletries on another, and avoid stacking bottles, since a tall stack topples when it spins. Keep the turntable away from the pipes, so it turns freely without catching. If the cabinet is very narrow, a small rectangular turntable fits better than a round one.

    7. Stackable Bins With Lids

    Stackable lidded bins under a bathroom sink holding supplies.

    Use stackable bins with lids to build a second level over low items, without fixing a shelf in place. Lids keep dust and drips off the contents, and the stack can be rearranged when your supplies change. This suits renters and anyone who wants to test a layout before fitting a fixed shelf.

    Put heavy items in the bottom bin and light items on top, and keep the stack low enough that you can lift the top bin out safely. Label each lid as well as the side, since you often see the top of a stack first. Leave one bin partly empty for new stock, since a full stack pushes overflow onto the cabinet floor.

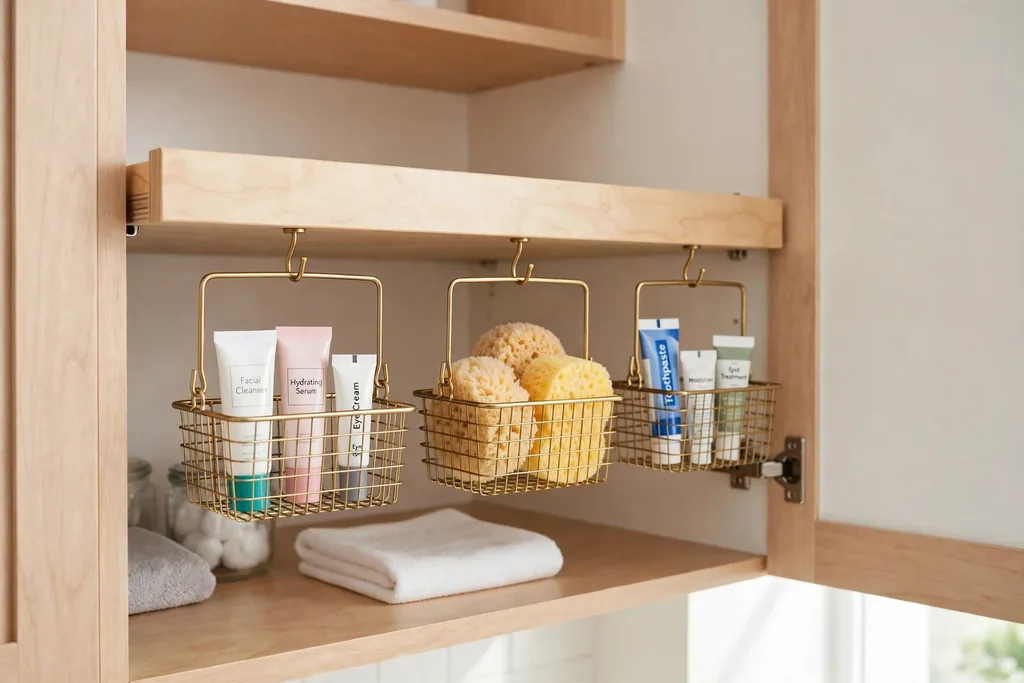
    8. Hanging Baskets Under a Shelf

    Small baskets hanging under a shelf inside a bathroom cabinet.

    Hang small baskets from the underside of a shelf to use the air below it. The gap under a shelf is often wasted, yet it is deep enough for small tubes, sponges, and spare soap bars. Clip-on or hook-on baskets suit a wire shelf, while screw-on baskets suit a solid shelf in a home you own.

    Keep the baskets shallow, so they do not block the items stored below them, and sort each basket by task. Wipe the baskets when you clean the cabinet, since hanging baskets collect dust on their rims. If the shelf is thin, test one basket with a full load before hanging several, so the shelf does not bow.

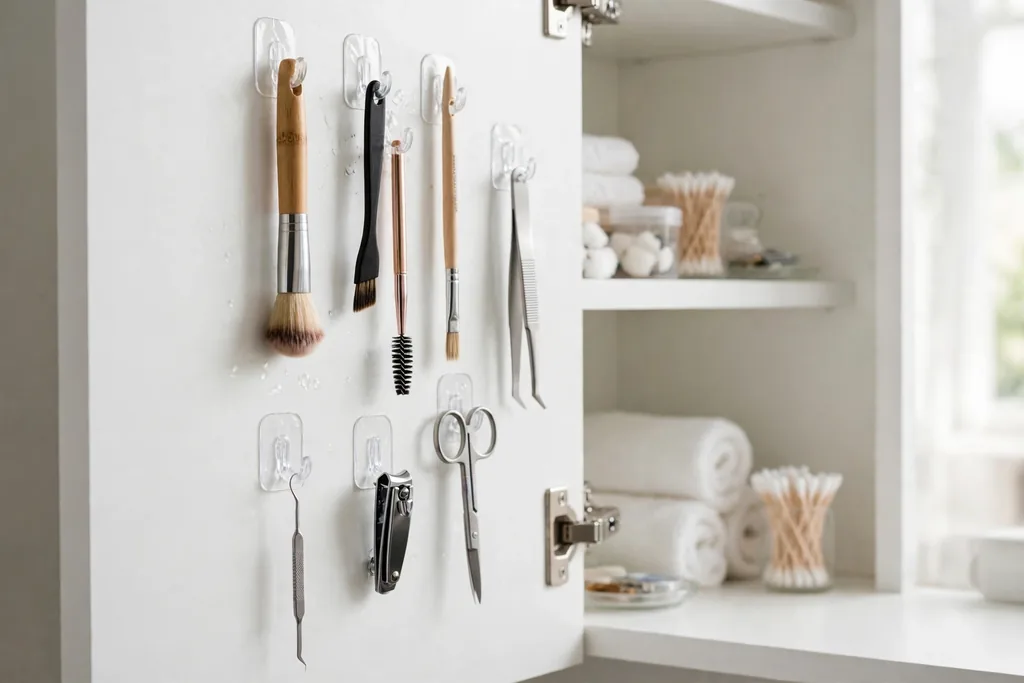
    9. Adhesive Hooks on the Cabinet Side Walls

    Adhesive hooks on a bathroom cabinet side wall holding brushes and tools.

    Stick adhesive hooks on the inside side walls for brushes, small tools, and measuring cups. Side walls are often bare, yet they sit at hand height and hold items that otherwise fall behind bottles. One hook per tool keeps handles from tangling, and hooks suit items that are awkward to stand upright.

    Clean and dry the wall before sticking a hook, and let the adhesive set for the time the maker advises before loading it. Keep heavy items off adhesive hooks, since damp air can weaken the bond over time. If a hook fails, move it to a drier spot or swap it for a small screw hook in a home you own.

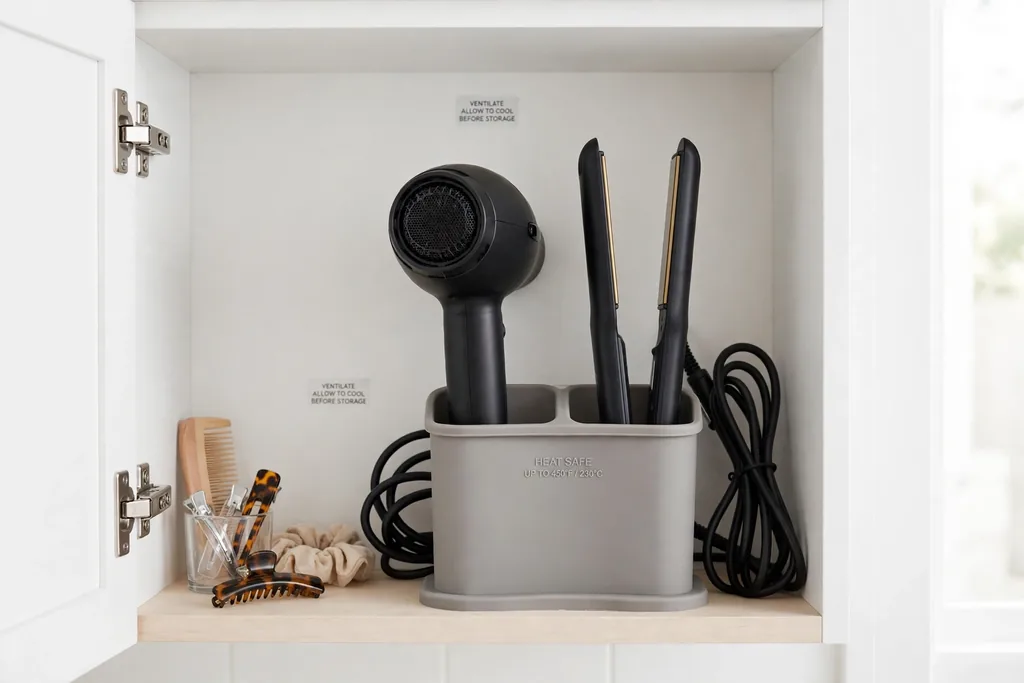
    10. A Heat Safe Holder for Hair Tools

    Heat safe holder inside a bathroom cabinet holding a hair dryer and straightener.

    Store a hair dryer, straightener, and curling tool in a heat safe holder fixed to the door or a side wall. Hair tools tangle in a drawer and take up a wide shelf, while a holder keeps each tool upright, its cord wrapped, and the hot end away from bottles and cloths. A holder with a heat resistant sleeve is safest for a tool that is still warm.

    Let tools cool for a few minutes before putting them away if your holder is not heat rated, and keep the cord wrapped loosely so it does not kink. Sort tools by use, with the daily tool at the front and occasion tools behind it. If the cabinet is very small, a holder on the door keeps the whole shelf free for bottles.

    11. A Lidded Caddy for Medicines and First Aid

    Lidded caddy under a bathroom sink holding first aid supplies.

    Keep medicines and first aid supplies in a small lidded caddy, stored high or at the back of the cabinet. A caddy with a lid keeps small packets and tubes together, and it lifts out as one unit when you need it, which matters when you are looking for a plaster in a hurry. A clear caddy lets you check stock without opening every packet.

    Keep this caddy out of easy reach of young children, and check expiry dates when you restock it. Put a short list inside the lid, such as plasters, pain relief, and antiseptic, so anyone in the home can find what they need. If your bathroom stays damp, a caddy with a tight lid protects paper packets better than an open tray.

    12. A Portable Cleaning Caddy

    Portable cleaning caddy with a handle holding sprays and cloths under a sink.

    Keep all cleaning supplies in one portable caddy with a handle, so you can lift the whole set out to clean the bathroom. A caddy stops cleaning bottles from spreading across the cabinet, and it means you never leave a spray behind in another room. Sort the caddy by job, with a cloth and a sponge in one section and sprays in another.

    Choose a caddy with a waterproof base, since a leaking bottle can otherwise soak the cabinet floor. Keep cloths separate from sprays, so a damp cloth does not soak a paper label. When you finish cleaning, return the caddy to the same spot, so the cabinet keeps its layout instead of drifting into clutter.

    13. Vertical File Holders for Flat Items

    Vertical file holders under a bathroom sink holding flat tools upright.

    Stand flat items upright in vertical file holders, like books on a shelf, so you can pull one out without moving the rest. Flat items such as a straightener, a cleaning board, spare cloths, and thin trays slide and stack badly when laid flat, but they stand well in a narrow holder. This works best along a side wall or at the end of a shelf.

    Keep each holder to one category, so hair tools do not mix with cleaning gear, and choose holders with drainage holes if they will hold damp cloths. Label the front of each holder, since upright items can look alike from the front. If a holder slides on the cabinet floor, a small non slip mat under it holds it steady.

    14. A Narrow Tiered Shelf for Tall Bottles

    Narrow tiered shelf under a bathroom sink holding tall bottles in steps.

    Fit a narrow tiered shelf, like small steps, for tall bottles at the back of the cabinet. Steps lift the back row above the front row, so you can see every label without pulling bottles forward. This suits cabinets where tall cleaning bottles hide short daily items behind them.

    Put the tallest bottles on the highest step and the shortest at the front, and keep the steps shallow enough that bottles do not tip forward. Wipe the steps when you clean, since drips run down onto the step below. If your pipes block the back wall, a freestanding tiered shelf that sits on the cabinet floor works around them.

    15. A Mini Drawer Unit Inside the Cabinet

    Small drawer unit inside a bathroom cabinet holding hair ties and small items.

    Place a small drawer unit inside the cabinet for tiny items that vanish in a big bin, such as hair ties, clips, cotton pads, and spare batteries. Drawers beat open piles because each drawer holds one category, and you can open one without disturbing the rest. A unit with three or four shallow drawers suits a wide cabinet better than one deep drawer.

    Sort drawers by type, such as hair accessories in one and nail care in another, and add small dividers inside so items stay sorted. Leave a little air above the top drawer so the shelf above it still clears tall bottles nearby. If the cabinet has no floor space to spare, a small hanging drawer that hooks under a shelf gives a similar result.

    16. A Waterproof Tray Under the Pipes

    Waterproof tray on a bathroom cabinet floor under sink pipes.

    Set a shallow waterproof tray on the cabinet floor under the pipes and trap. A tray catches drips before they soak the cabinet base, and it makes a small leak easy to spot, since water pools in the tray instead of spreading unseen. It also protects the cabinet floor from damp bottles and cleaning spills.

    Choose a tray that fits around the pipes, and check it monthly for standing water, which is a sign to look for a drip. Wipe the tray dry when you clean, and keep bottles on the tray rather than beside it, so any leak from a bottle is caught too. If your cabinet floor is already marked, a tray hides the marks and stops further damage.

    17. A Magnetic Strip for Small Metal Tools

    Magnetic strip on a bathroom cabinet door holding bobby pins and small tools.

    Fix a magnetic strip on the inside of a cabinet door for bobby pins, nail clippers, tweezers, and other small metal tools. Small metal items vanish in a drawer and slip to the bottom of a bin, while a strip holds each one visible and easy to grab. This is a small change that saves a daily search for a single bobby pin.

    Keep the strip away from medicines with magnetic closures and from any item the maker warns against magnets, and wipe it when you clean, since pins collect hair and dust. Sort pins by type along the strip, so you can see at a glance when you are running low. If you rent, a strip with adhesive backing needs no drilling, but test the hold before loading it fully.

    18. A Zone System: Daily at the Front, Stock at the Back

    Bathroom cabinet divided into daily front zone and spare stock back zone.

    Divide the cabinet into zones, with daily items at the front, weekly items in the middle, and spare stock at the back. Zoning stops the morning search through everything you own, since you only reach into the zone you need. It also makes it clear which zone is overfull when the cabinet starts to feel tight.

    Keep the same order every time you restock, such as daily toiletries, then hair care, then cleaning, then spares, so the eye learns where things live. Leave a small gap between zones, even if it is only one empty bin space, so the sections stay distinct. Review the stock zone monthly, since spare bottles are the ones most likely to pile up unnoticed.

    19. A Deep Basket for Towels and Spare Rolls

    Deep basket under a bathroom sink holding rolled towels and spare rolls.

    Keep a deep basket on the cabinet floor for bulky items such as spare hand towels, washcloths, and toilet rolls. Bulky items fill a shelf fast, yet they stack well in a basket, which keeps them together and easy to lift out as one unit. A basket with handles suits this job, since you will carry it out to restock the bathroom.

    Roll towels instead of folding them, since rolled towels pack tighter and are easier to pull out one at a time. Keep the basket to one category, such as towels only, and put spare rolls in a second basket if space allows. If the cabinet is damp, a wire or mesh basket dries faster than a solid one.

    20. Zipper Pouches for Travel and Spare Toiletries

    Zipper pouches under a bathroom sink holding travel toiletries.

    Sort spare and travel toiletries into small zipper pouches, one per person or per trip type. Pouches stop small tubes from rolling to the back of the cabinet, and they lift out as a ready packed set when you travel. Clear pouches let you see the contents, while fabric pouches give a calmer look inside the cabinet.

    Label each pouch, such as “weekend” or “guest,” and keep one pouch for half used minis so they do not mix with full size bottles. Check pouches before a trip, and refill them from the stock zone rather than buying duplicates. If a pouch leaks, a zipper pouch contains the spill better than an open tray.

    21. Decanted Refills in Matching Bottles

    Matching labelled refill bottles lined up under a bathroom sink.

    Decant cleaning and toiletry refills into matching, labelled bottles that fit your shelves. Mixed bottle shapes waste space, since a tall thin bottle beside a short wide one leaves gaps no other item can use. Matching bottles line up neatly, and clear labels stop a mix-up between similar liquids.

    Keep the original labels or a note of what is inside each bottle, and never decant a product into a food or drink container. Use a funnel and wipe the neck before labelling, since a sticky bottle attracts dust. Refill from a large stock bottle kept at the back, so the front row stays tidy and uniform.

    22. A Lift-Out Shelf Board for Plumber Access

    Lift-out shelf board above bathroom sink pipes ready to be removed.

    Fit a shelf board that lifts out without tools, so a plumber can reach the pipes fast. Fixed shelves around pipes can block access to valves and traps, and a lift-out board gives you storage most of the year and clear access when a repair is needed. A board with finger holes or handles lifts out easily even when loaded lightly.

    Keep the board light, and store only small items on it, so one person can lift it out without emptying the whole cabinet. Mark the front edge, so the board goes back in the right way round. If your pipes need regular access, a board in two halves lets you lift only the half above the work area.

    23. A Leak Alarm and Absorbent Mat

    Small water alarm and absorbent mat on a bathroom cabinet floor under pipes.

    Place a small water alarm on the cabinet floor and an absorbent mat under the pipes. An alarm sounds at the first sign of a leak, which matters under a sink, where a slow drip can go unnoticed for weeks. A mat soaks up small drips and protects the cabinet base while you find the source.

    Test the alarm battery monthly, and replace the mat when it stays damp or smells musty. Keep the alarm where it will touch water first, such as beside the trap, rather than buried under bins. If you rent, tell your landlord promptly about any leak the alarm finds, since early repairs cost less than water damage.

    24. A Seasonal Swap Bin

    Seasonal swap bin under a bathroom sink holding guest toiletries.

    Keep a seasonal swap bin for items you use only part of the year, such as guest toiletries, holiday scents, or summer sun care. A small cabinet cannot hold every season at once without crowding, and swapping twice a year frees a full bin for the items you actually use now. Keep the out-of-season bin on a high shelf or in another room.

    Wash and dry items before packing them away, and add a short list to the bin lid so you know what is inside without opening it. When the season changes, swap the bins in one session and review each item as you put it back. Anything you did not use last season is a good candidate to pass on before it goes back in the bin.

    25. A Slim Rolling Cart for an Open Vanity

    Slim rolling cart parked under a floating bathroom vanity holding toiletries.

    Park a slim rolling cart under a floating vanity or beside a pedestal sink, where there is no cabinet at all. A cart suits a narrow gap beside the sink, and it rolls out when you need it and back when you do not. Tiers keep categories separate, with daily items on top and spares below.

    Choose a cart with wheels that lock, so it does not drift when you pull a tier. Keep the cart to one routine, such as daily toiletries, rather than general overflow, since a cart filled with mixed items becomes a second clutter spot. Wipe the tiers regularly, since small toiletries shed drips and dust.

    26. A Sink Skirt for a Pedestal Sink

    Fabric sink skirt around a pedestal sink hiding storage bins behind it.

    Hang a sink skirt around a pedestal sink to hide bins and baskets stored behind it. A pedestal sink has no cabinet, yet the space around the pedestal can hold a surprising amount, and a skirt hides it in one move. Choose a washable fabric, since a skirt near the floor collects dust and splashes.

    Hang the skirt from a tension rod or adhesive hooks fixed to the wall behind the sink, so it can be lifted for cleaning. Keep bins low and pushed back, so the skirt hangs straight and does not bulge. If you like an open look, tie the skirt back during the day and close it when guests visit.

    27. An Adhesive Caddy for Sponges and Brushes

    Adhesive caddy on a bathroom cabinet wall holding sponges and brushes.

    Stick a small adhesive caddy on an inside cabinet wall for sponges, brushes, and scrub pads. These items are damp after use and need air, yet they often sit in a puddle on the cabinet floor. A caddy with drainage holes holds them upright, lets them dry, and keeps them away from dry supplies.

    Clean and dry the wall before sticking the caddy, and let the adhesive set before loading it. Rinse sponges before putting them back, so the caddy does not hold dirty water. If the caddy stays damp, move it closer to the front of the cabinet, where air moves more freely when the door opens.

    28. Hooks for the Cabinet Doors to Hold a Hand Towel

    Small hook on a bathroom cabinet door holding a hand towel.

    Hang a small hook on the outside of a cabinet door for a hand towel, freeing the towel rail for bath towels. A hand towel inside the cabinet gets damp and lost among bottles, while a door hook keeps it where you reach for it after washing your hands. This is a small change that also frees a shelf, since the towel no longer lives in a bin.

    Choose a hook with a soft backing to protect the door surface, and keep the towel light so the door still closes fully. Wash the towel often, since a towel on a cabinet door is used many times a day. If you prefer a tidier front, a hook on the inside of the door holds a small towel for cleaning up spills instead.

    29. A Weekly Reset Routine on the Door

    Short reset checklist fixed on the inside of a bathroom cabinet door.

    Stick a short reset checklist on the inside of the cabinet door, and run through it once a week. A five minute reset, which covers wiping the tray, tossing empties, returning stray items to their bins, and checking the stock zone, stops small piles from becoming clutter. A checklist on the door keeps the routine visible, so it happens instead of being forgotten.

    Keep the list short, with no more than five steps, and tick off items with a dry wipe marker if you use a laminated card. Review the list each month, and change any step that no longer fits your supplies. The zoning tips in these creative closet ideas for small spaces pair well with this routine when a bathroom cabinet shares storage duties with a bedroom closet.

    30. A Spare Stock List to Stop Duplicates

    Short stock list on a bathroom cabinet door beside organized bins.

    Keep a short stock list on the cabinet door or in the stock bin, noting what you already own. Duplicates are the main cause of an overfull under sink cabinet, since it is easy to buy a second bottle of something already sitting at the back. A list you check before shopping stops that habit fast.

    Update the list when you restock, and cross off items as you open the last spare. Keep the list to one side of paper or one small card, so updating it takes seconds. If several people share the bathroom, a shared list stops two people buying the same item in the same week.

    Conclusion

    An organized under sink cabinet comes down to a clear layout, not more stuff in it. A shelf riser around the pipes, a pull-out drawer, labelled bins, and a home for cleaning supplies cover most of the gain, and small additions such as a door rack, a turntable, or a waterproof tray make the cabinet easier to use every day. Start with one change, such as measuring around the pipes and fitting a riser, and live with it for a week before adding another, so each addition earns its place. The storage ideas in these apartment bathroom ideas pair well with this guide when the cabinet sits in a compact bathroom. Pick the ideas that fit your cabinet, your lease, and your routine, and save this guide to Pinterest so you can find your favorite setup again.

    FAQs

    How do I measure an under sink cabinet around pipes?

    Measure the width, depth, and height of the cabinet, then measure the position and diameter of each pipe, the trap, and the water lines, noting how far each one sits from the walls. Sketch the layout on paper, marking the pipes, and take the sketch when you shop for shelves or drawers. Leave a finger width of air around every pipe, and leave the shutoff valves clear so you can reach them fast.

    What is the best first step for organizing under a bathroom sink?

    Empty the cabinet, clean it, and sort everything into keep, move elsewhere, and throw away piles. Then measure around the pipes and fit a U-shaped shelf riser or a pull-out drawer, since these two changes use the space most cabinets waste. Sort what remains into labelled bins by task, with daily items at the front and spare stock at the back.

    How can renters organize under a sink without drilling?

    Use freestanding shelf risers, stackable bins, turntables, tension rods, and over door racks, all of which need no drilling. Adhesive hooks and caddies also add storage without fixing anything to the wall, but clean the surface first and test one hook before loading them all. Keep the original cabinet parts if you swap anything, so you can restore the cabinet when you move out.

    How do I keep cleaning supplies separate from toiletries under a sink?

    Give cleaning supplies their own caddy or bin, with a lid, and store it on the opposite side of the cabinet from toiletries. Keep medicines and first aid in a separate lidded caddy, stored high or at the back. Label each bin clearly, and never decant cleaning products into toiletry bottles, since a mix-up can be harmful.

    What should I do if my bathroom sink has no cabinet?

    Use a slim rolling cart that parks under a floating vanity, or hang a sink skirt around a pedestal sink to hide bins stored behind it. A small stool or a wall shelf beside the sink can hold daily items, while spare stock lives in another room. Keep the setup light and easy to move, so cleaning around the sink stays simple.

    How often should I clean and reset an under sink cabinet?

    Wipe the cabinet floor and tray monthly, and run a five minute reset weekly, tossing empties and returning stray items to their bins. Check the stock list and expiry dates when you restock, and test a leak alarm battery monthly if you use one. A full sort twice a year, when you swap seasonal items, keeps the cabinet from filling up again.


  • 11 Small Bathroom Pocket Door Ideas to Make Any Room Feel Cozier

    11 Small Bathroom Pocket Door Ideas to Make Any Room Feel Cozier

    A swinging bathroom door can steal a surprising amount of room, since it needs clear floor in front of it every time it opens. A pocket door solves that problem by sliding into the wall, so the space beside the door stays free for a vanity, a towel rail, or simply a clear path. These 11 small bathroom pocket door ideas cover plain, glass, mirrored, wood, and double doors, plus hardware and layout choices that add warmth and privacy. For more small room planning, see these apartment bathroom ideas. Start by checking the wall beside the opening, then pick the door that fits how you use the room each day.

    Key Takeaways

    • A pocket door frees the floor space a swinging door needs, which is the main gain in a small bathroom.
    • Check the pocket wall first for pipes, wires, and studs, since the wall must have room for the door to slide into.
    • Frosted glass and mirrors add light to a small bathroom, while solid panels give the most privacy and sound control.
    • Repeat one finish, such as matte black or brushed brass, on the handle, towel rail, and mirror frame so the door reads as part of the room.
    • Soft-close hardware and a proper privacy lock make a pocket door feel solid rather than light or rattly.
    • Paint, wood, and trim can warm up a plain pocket door without changing the frame or the track.

    1. Choose a Flush White Panel That Blends Into the Wall

    Small bathroom with a flush white pocket door closed matching white trim and pale walls

    A flush white pocket door is the quietest choice for a small bathroom, because it reads as part of the wall when closed. Use a flat slab door painted the same white as the trim, with a simple recessed pull, and keep the wall beside it plain so the door does not draw attention. When the door slides open, it disappears into the wall, and the bathroom feels like an open part of the bedroom or hall.

    This suits a bathroom where you want calm, not a feature door, and it pairs well with white tile and pale walls. Keep the paint in a moisture resistant finish made for bathrooms, since steam finds a door edge fast. Wipe the pull clean now and then, and check the track for dust each year, since a dirty track is the main reason a pocket door starts to stick.

    2. Fit Frosted Glass to Borrow Light Without Losing Privacy

    Small bathroom with a frosted glass pocket door glowing with borrowed daylight from the next room

    A frosted glass pocket door lets daylight from a bedroom or hall reach a windowless bathroom, while still keeping the room private. The frosted surface softens shapes behind it, so you get glow rather than a clear view, and it suits a bathroom that feels dark with a solid door closed. Choose a door with a wood or metal frame around the glass, so the panel feels sturdy and the edges stay protected.

    This suits an ensuite or a hall bathroom where the room outside has a window. Wipe the glass with a soft cloth, and keep the frame finish matched to the taps or the mirror frame. Avoid clear glass for a main bathroom door, since it gives light but no privacy, and check that the glass is safety glass before fitting, since bathroom doors get daily use.

    3. Add a Full Length Mirror Panel to Double the Light

    Small bathroom with a full length mirror panel on a pocket door reflecting daylight and pale tile

    A pocket door with a full length mirror panel does two jobs at once: it closes the bathroom and it gives you a dressing mirror. The mirror reflects daylight across a small room, which helps a tight bathroom feel larger, and it saves the wall space a separate mirror would take. This suits a small ensuite where you dress each morning and want one clear check before you leave.

    Keep the mirror clean with a soft cloth, and check the track for dust so the door glides smoothly. If a full wall of mirror feels too bright, use a mirror on the room side only, with a plain panel on the bathroom side. Fix the track firmly and keep it level, since a mirrored door that sticks or wobbles is hard to live with. For more door styles that save space, see these closet door ideas.

    4. Warm the Room With a Wood Plank Pocket Door

    Small bathroom with a warm wood plank pocket door beside a vanity with cream walls

    A wood plank pocket door brings warmth to a bathroom full of tile and porcelain, with each plank showing its own grain. Use planks fixed to a solid backing frame, so the door stays flat and does not warp in steam, and seal the wood to protect it from damp and marks. A warm oak or walnut face suits a bathroom with wood shelves, a wood stool, or a teak bath mat.

    This suits a bathroom that feels cold or clinical, and it pairs well with cream walls and brass taps. Check that the wood is dry and sealed on all edges before fitting, and keep the door weight in mind, since solid wood is heavier than a hollow door. Pair a plank door with plain towels and simple walls, so the wood stays the main feature of that wall.

    5. Fit Double Pocket Doors for a Wide Ensuite Opening

    Wide ensuite bathroom opening with double pocket doors slid open into pockets on each side

    Double pocket doors suit a wide ensuite opening, where one door would be very heavy or would leave a narrow gap. Two panels slide into a pocket on each side, so the full opening clears when both doors are open, and the room feels connected to the bedroom. When closed, the pair meets in the middle with a simple lock, giving the same privacy as a single door.

    This suits a main bedroom ensuite with a wide doorway, or a bathroom shared by two bedrooms. Measure the opening and both pocket walls carefully, since each side needs its own clear pocket. Use matching pulls on both doors, and add soft-close hardware to both tracks, so neither door slams into the frame. Keep the floor clear at the meeting point, so the doors close fully without catching a rug edge.

    6. Paint the Pocket Door a Warm, Cozy Color

    Small bathroom with a sage green painted pocket door white trim and pale walls

    Painting a pocket door a warm color, such as sage green, dusty blue, or soft terracotta, turns a plain door into a gentle feature. Keep the walls pale and the trim white, so the color reads as one calm note rather than a loud block, and repeat the same color once in a towel, a plant pot, or a small stool. The door gives color at eye level, where you see it every time you enter the room.

    This suits a small bathroom that needs warmth but not a full repaint. Test a large painted sample on the door in morning and evening light before painting the whole panel, since colors shift a lot with light. Use paint made for doors and damp rooms, and allow full drying time between coats, since a rushed coat shows marks on a flat panel.

    7. Add a Towel Rail to the Room Side of the Door

    Small bathroom pocket door with a towel rail holding a folded hand towel on its room side

    A towel rail fixed to the room side of a pocket door gives a small bathroom a towel spot that takes no extra wall space. Fit a short rail or a row of hooks to the face of the door, at a height that clears the vanity and the floor, and keep the rail for one hand towel or a robe, not a heavy stack. When the door slides open, the towel moves with it, out of the way of the sink and the shower.

    This suits a bathroom with no free wall near the sink, or a guest bathroom where one towel rail is enough. Check that the rail fixings suit the door material, and keep the load light, since a heavy towel can pull a fixing loose over time. Keep the towel clear of the track and the pocket edge, so the door still slides fully into the wall.

    8. Choose Soft Close Hardware and a Proper Privacy Lock

    Close view of a pocket door edge with soft close track hardware and a round pull

    Soft close hardware and a proper privacy lock make a pocket door feel solid, which matters in a bathroom used every day. Soft close stops the door from slamming into the frame, and a privacy lock with a small turn button gives the same peace of mind as a hinged door lock. Choose a lock that can be opened from outside in an emergency, and keep the turn button at a height that is easy to reach.

    This suits any small bathroom, but it matters most in a shared home or a family bathroom. Test the lock and the soft close after fitting, and check the track alignment, since a door that drags will wear the hardware faster. Wipe the pull and the lock with a soft cloth, and keep the track free of dust, so the door keeps gliding quietly.

    9. Use a Pocket Door to Close Off a Toilet Nook

    Bathroom toilet nook closed off by a white pocket door beside a sink vanity

    A pocket door that closes off a toilet nook inside a larger bathroom gives privacy without a swinging door eating into the main room. Fit the door to the nook opening, so one person can use the toilet while another uses the sink or the shower, and keep the nook walls in the same tile as the rest of the room, so the closed door reads as part of the bathroom. A small vent or a gap under the door keeps air moving in the nook.

    This suits a family bathroom or a shared ensuite where two people use the room at once. Measure the nook opening and the pocket wall before fitting, since a nook wall may hold pipes. Keep the nook light on its own switch, and choose a solid panel for this door, since privacy matters more than borrowed light in a toilet nook.

    10. Fit a Louvered Pocket Door for Airflow in a Damp Room

    Small bathroom with a white louvered pocket door with angled slats pale tile and soft daylight

    A louvered pocket door has angled slats that let air move in and out of the bathroom while still hiding the room from direct view. This helps in a warm bathroom, a room with no window, or a home where steam lingers after showers, since moving air helps the room dry faster. The slatted face also adds texture to a plain wall, and it suits coastal, cottage, and warm climate homes well.

    Dust settles on slats, so wipe them with a dry cloth or a soft brush now and then. Louvered doors give less sound control than solid doors, so store the noisiest routines, such as early morning showers, with that trade-off in mind. Paint louvered doors in a pale color to keep the slat shadows light, and check that the slats are fixed firmly before you hang a hook on the door.

    11. Hide a Linen Closet Behind a Matching Pocket Door

    Small bathroom with a matching white pocket door hiding a linen closet with folded towels on shelves

    A pocket door that matches the bathroom door can hide a linen closet inside the bathroom, giving storage without a second door style. Use the same panel, paint, and pull as the main bathroom door, and fit shelves inside the closet for towels, spare toilet paper, and cleaning items. When closed, the closet reads as part of the wall, and when open, everything you need for the room is at hand.

    This suits a bathroom with a shallow closet beside the door, or a remodel where a linen nook can be built into a spare wall. Plan the shelf heights before the doors: folded towels at hand height, spare stock higher up, and cleaning items low in a closed basket. For more small space storage planning, see these creative closet ideas for small spaces. Keep the closet dry, with a small gap for air, so stored towels stay fresh.

    Conclusion

    A small bathroom pocket door works best when the wall is checked first, the door style fits the light and privacy you need, and the hardware feels solid every day. Start with a plain flush panel or a frosted glass door for the main gain, which is free floor space, then add warmth with wood, paint, or a mirror panel. Keep one finish consistent across the handle, towel rail, and mirror frame, and leave the floor clear beside the opening, so the door can slide fully into its pocket. With those basics in place, the bathroom feels roomier and cozier, without a bigger footprint.

    Save this list on Pinterest before you start, and work through it one idea at a time: check the pocket wall first, then choose the door style, then fit soft close hardware and a privacy lock as the finishing step.

    FAQs

    Can a pocket door fit in any small bathroom wall?

    Not every wall suits a pocket door. The wall beside the opening must have room for the door to slide into, with no pipes, wires, or load bearing studs in that section. Check the wall before you plan one, and ask a builder to look at it if you are unsure. In a new build or a remodel, a pocket door is easier to plan, since the pocket frame can be built into the wall from the start.

    Does a pocket door give enough privacy for a bathroom?

    Yes, with the right panel and lock. A solid panel with a privacy lock gives good privacy for a bathroom, while frosted glass gives visual privacy but less sound control. Louvered doors give the least sound control, since air passes through the slats. For a main bathroom, choose a solid or frosted panel with a proper privacy lock, and seal the door edges well.

    How much floor space does a pocket door save?

    A pocket door saves the full swing area of a hinged door, which is the floor in front of the opening that must stay clear. In a small bathroom, that area can hold a vanity, a towel rail, a laundry basket, or simply a clear path to the sink. The gain is largest where the door would otherwise swing into the vanity, the toilet, or a narrow hall.

    Is a pocket door hard to repair if the track fails?

    Repairs to a pocket door track are harder to reach than repairs to a hinged door, since the track sits inside the wall. That is why track quality and fitting matter: choose a sturdy track, keep it free of dust, and check the rollers each year. A well fitted pocket door should glide for years with only light cleaning, and most small faults show up first as dragging, which is easier to fix early.

    What is the best pocket door for a bathroom with no window?

    A frosted glass pocket door suits a windowless bathroom best, since it borrows light from the room outside while keeping privacy. Pair it with bright mirror lighting inside the bathroom, and keep the walls pale, so the borrowed light goes further. If privacy matters more than light, a solid panel with a bright ceiling light and a lit mirror is the safer choice.

    Can I keep my existing bathroom door frame with a pocket door?

    Usually not. A pocket door needs a pocket frame inside the wall and a track above the opening, which is a different setup from a hinged door frame. Fitting a pocket door in an existing wall is a bigger job than swapping a hinged door, and it often means opening up the wall. For a simpler update with no wall work, a sliding barn door on an outside track gives some of the same floor saving without a pocket.


  • 26 Rustic Bathroom Ideas to Make Every Corner Count

    26 Rustic Bathroom Ideas to Make Every Corner Count

    A rustic bathroom works best when wood, stone, and linen do most of the work, and nothing feels too polished to touch. A reclaimed vanity, a shiplap wall, and warm light can make even a plain room feel like a cabin retreat, while still giving you clear counters and easy cleaning. These 26 rustic bathroom ideas cover vanities, walls, tubs, showers, storage, and small details, so you can pick one change or plan a full room. Start with the largest surface first, then add texture in small doses. If your shower needs a layout plan first, the layout advice in these walk in shower ideas pairs well with the rustic finishes below.

    Key Takeaways

    • Start with one large wood or stone surface, such as a vanity or a wall, and keep the rest of the room quiet so that surface stands out.
    • Repeat one wood tone and one metal finish in three or four places, so the room reads as planned rather than collected at random.
    • Choose water friendly materials in wet zones, such as sealed wood, stone, and wood look tile, and save raw untreated wood for dry walls and shelves.
    • Layer warm light with a main light plus a sconce or lantern, since harsh overhead light alone flattens wood grain and stone texture.
    • Keep counters clear with baskets, hooks, and one shelf group, because clutter hides the natural materials that give rustic rooms their calm feel.
    • Add soft textiles last, such as linen, wool, and cotton towels, to balance hard tile, metal, and stone.

    1. Reclaimed Wood Vanity with a Vessel Sink

    Rustic bathroom with a reclaimed wood vanity and a vessel sink.

    Build the room around a reclaimed wood vanity, with a simple vessel sink sitting on top and open space below for baskets. The rough grain and knots give the bathroom instant character, and the vanity becomes the focal point without needing bold color. This suits a main bathroom best, where the vanity can be wider and the wood has room to show.

    Seal the wood well, especially around the sink and taps, and wipe splashes promptly so water does not sit in the grain. Keep the counter clear except for a soap dish and one small plant, so the wood stays visible. Pair the vanity with a plain mirror and simple taps, so the wood remains the star of the room.

    2. Shiplap Accent Wall Behind the Vanity

    Rustic bathroom with a white shiplap wall behind a wood vanity.

    Add shiplap boards to the wall behind the vanity, running them horizontally to widen the room visually or vertically to add height. Painted white shiplap keeps the room bright, while a natural wood stain gives a deeper cabin feel. This is a good first rustic change, since one wall changes the whole room without a full remodel.

    Seal boards in a bathroom with a moisture resistant finish, and keep shiplap off the wall directly inside the shower, where constant steam can damage it. Leave a small gap at the floor and seal the bottom edge, so mop water does not soak into the boards. A wood framed mirror over shiplap ties the wall to the vanity below.

    3. Freestanding Clawfoot Tub as the Centerpiece

    Rustic bathroom with a freestanding clawfoot tub and a wood stool.

    Place a freestanding clawfoot tub where it can be seen from the door, with space around it for a small stool and a bath tray. The curved shape and raised feet suit rustic rooms well, since they echo older farmhouse bathrooms without needing ornate trim. This idea needs floor space, so measure the tub plus a step in and out before you commit.

    Keep the walls near the tub simple, with one wood shelf or a towel hook, so the tub stays the centerpiece. A floor mounted filler in matte black or aged copper keeps the rustic tone, and a soft rug beside the tub protects bare feet from cold tile. If floor space is tight, a shorter slipper tub gives a similar look in a smaller footprint.

    4. Sliding Barn Door for the Bathroom Entry

    Rustic bathroom entry with a sliding wood barn door on a black rail.

    Swap a standard bathroom door for a sliding barn door on a visible rail, which saves swing space and adds a strong wood feature at the entry. Barn doors suit bathrooms that open onto a hall or bedroom, where the door itself becomes part of the decor. Choose a solid wood door in a warm tone, and match the rail finish to your taps and mirror frame.

    Check that the wall beside the door is clear for the full slide, and that the door closes fully for privacy, since barn doors can leave a small gap at the edge. Add a soft close stop so the door does not slam, and keep the track clean of dust. If privacy is a concern, use a door with no gaps at the sides, or add a simple latch.

    5. Stone Vessel Sink on a Wood Counter

    Rustic bathroom with a carved stone vessel sink on a thick wood counter.

    Set a carved stone vessel sink on a thick wood counter, so two natural materials meet at the most used spot in the room. Stone sinks vary in color and texture, from pale limestone to dark slate, so choose one that echoes your floor tile or shower stone. This idea suits a powder room well, where a single striking sink can carry the whole room.

    Check the sink height with the counter added, since a vessel sits higher than a built in sink, and shorter users may need a lower counter. Seal the stone as the maker advises, and wipe it after use to avoid soap marks. Keep the taps simple and wall mounted if possible, so the stone shape stays clear.

    6. Open Reclaimed Shelves Above the Toilet

    Rustic bathroom with open reclaimed wood shelves above a toilet holding towels.

    Fix two or three open reclaimed wood shelves above the toilet, for towels, spare toilet paper, and a small plant. Open shelves use wall space that often sits empty, and they keep daily items within reach without a cabinet door to open. This suits small rustic bathrooms, where a deep cabinet would crowd the room.

    Mount the shelves high enough that no one bumps their head, and keep the lowest shelf for items you use daily. Use baskets on one shelf for anything you would rather not see, such as cleaning supplies, and leave breathing room around each group so the shelves look calm. Anchor shelves into studs or with fixings rated for tile and plaster, following the maker guidance.

    7. Matte Black Wrought Iron Fixtures

    Rustic bathroom with matte black wrought iron style taps and towel bars.

    Use matte black wrought iron style fixtures for taps, towel bars, and mirror frames, to give the room a hand forged feel that pairs well with wood and stone. Black hardware reads clearly against pale shiplap and white tile, and it ties separate pieces together when the same finish repeats. This is an easy change that does not need plumbing work for bars and hooks.

    Keep the finish consistent across the pieces you change, and save original screws and fittings if you rent. Wipe black fixtures weekly, since water spots show more on matte black than on chrome. If you change taps too, check that the new taps suit your existing sink holes and water pressure before ordering.

    8. Exposed Wood Ceiling Beams

    Rustic bathroom with exposed wood ceiling beams and warm light.

    Add exposed wood beams across the bathroom ceiling, or highlight existing beams with a clear seal, to draw the eye up and give the room a cabin structure. Beams suit bathrooms with a higher ceiling, where they add warmth without making the room feel low. In a low ceiling room, use slim beams in a pale stain so they add texture without pressing down visually.

    Seal beams against bathroom steam, and keep light fixtures clear of the beams so light still spreads evenly. A beam over the tub or vanity can frame that zone, while beams across the whole ceiling give a more complete cabin feel. If real beams are not possible, hollow wood look beams give a similar outline with less weight.

    9. Pebble Shower Floor for Grip and Texture

    Rustic shower with a pebble stone floor and plain wall tile.

    Lay a pebble floor in the shower, with small rounded stones set in grout, for natural grip underfoot and a texture that flat tile cannot match. Pebble floors suit rustic bathrooms well, since they echo a riverbed and pair with plain wall tile. Keep the walls quiet when the floor is busy, so the pebbles stay the feature.

    Check that the stones sit level and that grout fills the gaps evenly, since uneven stones can feel uncomfortable to stand on. Seal the floor as your tile maker advises, and rinse it after showers to stop soap buildup in the grout. If a full pebble floor feels too bold, use pebbles on the shower floor only, with plain tile on the bathroom floor.

    10. Thick Wood Framed Mirror

    Rustic bathroom with a thick wood framed mirror above a wood vanity.

    Hang a thick wood framed mirror over the vanity, with a frame in the same tone as the vanity or shelves, to anchor the sink wall. A chunky frame suits rustic rooms better than a thin metal frame, since it echoes the wood elsewhere and adds weight to the wall. Choose a mirror a little narrower than the vanity, so the edges do not crowd the light fixtures.

    Seal the wood frame against steam, especially at the bottom edge nearest the sink, and wipe splashes promptly. If the mirror is heavy, fix it into studs or with hardware rated for its weight. A wood frame with a simple shape, such as a straight plank frame, stays calm and lets the grain show.

    11. Wooden Ladder Towel Rack

    Rustic bathroom with a wooden ladder towel rack holding folded towels.

    Lean a wooden ladder against a spare wall for towels, with wider rungs at the bottom for bath towels and narrower rungs higher up for hand towels. A ladder rack needs no drilling, suits renters, and adds a tall wood shape to a room that often has only low furniture. Place it near the shower or tub, where towels are easy to reach.

    Add small pads under the feet so the ladder does not slide on tile, and check that the top cannot tip forward if a child or pet pulls on it, anchoring it if your household needs that safety. Keep only towels on the ladder, so it does not become general storage. A ladder in a warm wood tone ties neatly to a reclaimed vanity or wood shelves.

    12. Woven Basket Storage for Toiletries

    Rustic bathroom shelf with woven baskets holding toiletries and rolled towels.

    Sort toiletries and towels into woven baskets, with one basket per person or per job, such as hair care, skin care, and cleaning. Baskets soften hard tile and porcelain, hide bottle clutter, and add the woven texture that rustic rooms need. Seagrass and cotton rope baskets cope well with bathroom humidity if kept off wet floors, so set them on a shelf or stool rather than beside the tub.

    Label the base of each basket if several look alike, and empty each basket once a month, returning only what you actually used. Keep one basket for spare towels, rolled rather than folded, so it looks full without taking extra space. If baskets sit near the shower, choose ones with a wipe clean lining.

    13. Galvanized Metal Accents

    Rustic bathroom with galvanized metal accents, a bucket planter, and wood shelves.

    Add galvanized metal in small doses, such as a metal bucket planter, a metal framed mirror, or metal sconce shades, for a farmhouse workshop feel. Galvanized metal pairs well with wood, since the cool grey tone balances warm wood, and it works best as an accent rather than the main material. One or two metal pieces are enough in a small bathroom.

    Keep metal away from constant water spray, and dry it after splashes, since even galvanized metal can mark over time in a damp room. A metal tray on the vanity, a metal bin, or metal wall hooks give the look without a large change. Match the metal tone to your other hardware only loosely, since a mix of black and galvanized metal can still read as rustic if wood ties them together.

    14. Natural Stone Feature Wall

    Rustic bathroom with a natural stone feature wall behind a freestanding tub.

    Cover one wall in natural stone, such as stacked slate or limestone tiles, to give the bathroom a rugged focal point behind the tub or vanity. Stone walls suit larger bathrooms best, where the texture has room to show, and they pair well with a plain floor and simple fixtures. Keep the other walls pale, so the stone wall does not make the room feel dark.

    Seal the stone as the supplier advises, especially near the shower or tub, and choose a grout color close to the stone so the joints fade. If full stone feels heavy, use stone on the lower half of one wall, with painted boards above, for a lighter version of the same idea. A stone wall behind a freestanding tub makes the tub zone feel like a natural retreat.

    15. Wooden Bath Tray Across the Tub

    Rustic bathroom with a wooden bath tray across a clawfoot tub holding a book.

    Rest a wooden bath tray across the tub, with slots for a book, a cup, and a candle kept safely away from the water. A tray turns a plain tub into a place to slow down, and it adds a warm wood line across white porcelain. Choose a tray that spans your tub width with extendable sides, and look for a model with a phone ledge that keeps electronics out of splash range.

    Dry wood trays after each use to avoid warping, while bamboo and coated wood versions cope better with steam. Store the tray upright behind the door when not in use, so it does not become a permanent clutter spot. A tray in the same wood tone as the vanity ties the tub zone to the rest of the room.

    16. Linen Shower Curtain in a Natural Tone

    Rustic bathroom with a natural linen shower curtain and a wood vanity.

    Swap a plastic shower curtain for a washable linen look curtain in a natural tone, such as oatmeal, sage, or warm white, with a separate waterproof liner inside. Linen softens a bathroom full of tile and metal, and it hangs better than thin plastic, giving the shower a finished, fabric feel. This is a low cost change that suits renters, since it needs no fixing beyond the existing rod.

    Keep the curtain length so the hem stays clear of the tub floor, and wash it with the towels so it stays fresh. Use a fabric outer curtain with a liner that you can replace separately, since the liner takes the water while the outer curtain gives the look. Pair a plain linen curtain with a patterned rug or towels, so the room has one soft pattern, not two competing ones.

    17. Tree Branch Towel Rail

    Rustic bathroom with a smooth tree branch towel rail on a wood wall.

    Fix a smooth, sealed tree branch as a towel rail on a spare wall, with sturdy brackets at each end, for a rustic detail that costs little and looks hand made. A branch rail suits a wall beside the tub or shower, where towels hang within reach, and it adds a natural line that straight metal rails cannot match. Choose a branch with a gentle curve, sand it smooth, and seal it well against steam.

    Check that the brackets hold the weight of wet towels, and test the rail before hanging good towels on it. Keep the branch clear of direct shower spray, and wipe it after steamy showers. If a real branch feels too rough, a turned wood dowel with bark texture gives a similar shape with a smoother finish.

    18. Mason Jar Wall Sconces

    Rustic bathroom vanity with mason jar wall sconces beside a wood mirror.

    Mount mason jar sconces on either side of the mirror, with a warm bulb inside each jar and a wood or metal bracket behind it, for soft light with a farmhouse feel. Jar sconces suit vanity walls well, since they give light at face height rather than from above, which flatters faces and softens shadows. Use LED bulbs that stay cool, and keep jars clear of direct water spray.

    Fix the brackets into studs or with fixings rated for tile, and keep a spare bulb in the vanity drawer, since jar sconces use bulbs that may differ from your main light. If wiring a new sconce is not possible, a battery jar light on a shelf gives a similar glow with no wiring. Clean the jars now and then, since steam can cloud glass over time.

    19. Aged Copper Faucet and Fixtures

    Rustic bathroom with an aged copper faucet and a stone sink on a wood counter.

    Choose an aged copper faucet for the sink or tub, with a living finish that deepens in color over time, for warmth that chrome cannot match. Copper pairs well with wood and stone, and it suits both a vessel sink and a clawfoot tub. Keep copper as the main metal in the room, with black or wood accents alongside it, so the finishes do not compete.

    Check that copper suits your water type, since hard water can mark it faster, and wipe it after use if you prefer an even tone. If you like the aged look, let the patina develop naturally and clean it only with a soft cloth. A copper mirror frame or copper towel ring can echo the faucet without repeating it too often.

    20. Warm Wood Look Floor Tile

    Rustic bathroom with warm wood look floor tile and a wood vanity.

    Lay warm wood look porcelain tile on the bathroom floor, with planks running toward the longest wall to stretch the room visually. Wood look tile gives the warmth of wood with a surface that copes with daily water, which makes it a practical choice for a rustic bathroom floor. Choose a tone a little darker than the vanity, so the floor grounds the room without matching it exactly.

    Use a matte finish for grip underfoot, and keep grout close to the tile color so the planks read as wood rather than a grid. A rug over the tile near the tub or sink adds softness under bare feet. This floor pairs well with the shower layouts in these walk in shower ideas, since the tile can run from the bathroom floor into the shower zone in one tone.

    21. Wooden Bath Bench Beside the Tub

    Rustic bathroom with a small wooden bench beside a freestanding tub.

    Place a small wooden bench beside the tub or in a wide shower, for a towel, a book, or a place to sit while dressing. A bench adds a useful surface at sitting height, and it gives the tub zone a piece of furniture rather than only fixtures. Teak and other water tolerant woods cope best near water, but any sealed wood bench works if it dries between uses.

    Keep the bench clear of the main walkway, and choose a size that fits the gap without crowding the tub. A bench with a lower shelf can hold a spare towel or a basket, which adds storage without a cabinet. Wipe the bench after steamy baths, and reseal it when water stops beading on the surface.

    22. Wood Framed Window with Frosted Glass

    Rustic bathroom with a wood framed window, frosted glass, and a linen curtain.

    Frame the bathroom window in warm wood, with frosted or textured glass for privacy, so daylight still enters while the room stays private. A wood frame softens a plain window opening and ties it to the vanity and shelves, which is useful in a bathroom where the window is often the only natural feature. Place the window high on the wall if possible, so it stays out of direct spray.

    Use a frame material that copes with moisture, and slope the sill toward the room so water drains back rather than pooling on the frame. Add a simple linen cafe curtain on the lower half if you want extra privacy without blocking daylight. If the window opens, it also gives steam a direct exit, which helps the room dry faster.

    23. Terracotta Pots and Dried Stems

    Rustic bathroom shelf with terracotta pots and dried eucalyptus stems.

    Add terracotta pots with dried stems, such as eucalyptus or lavender, on a shelf, the vanity, or the windowsill, for a natural detail that needs no watering. Dried stems suit bathrooms well, since they cope with steam better than fresh cut flowers, and terracotta adds an earthy color that pairs with wood and stone. Keep pots clear of the sink splash zone, so water does not stain the terracotta.

    Use one tall stem group as a focal point, rather than many small pots, so the room stays calm. A trailing dried vine on a high shelf can soften a plain wall, while a single pot on the vanity adds color at eye level. Replace dried stems when they collect dust, and keep them away from open flames if you use candles nearby.

    24. Wooden Crate Storage Under the Sink

    Rustic bathroom with wooden crates under an open sink holding towels.

    Slide wooden crates under an open sink or vanity, for towels, spare toilet paper, and cleaning supplies, with the open side facing out so items stay visible. Crates suit open vanities well, since they fill the empty space below with a rustic storage box that still lets air circulate. Choose crates in a tone close to the vanity, and sand any rough edges.

    Line the bottom of each crate with a washable liner, so damp items do not mark the wood, and keep heavy items low. Label crates if several look alike, and pull one crate out at a time when you need something, rather than stacking items on top. If floor space is tight, use one crate only, for towels, and keep the rest of the space clear.

    25. Lantern Style Lighting for Warm Evenings

    Rustic bathroom at dusk with lantern style lights and warm glow.

    Hang a lantern style light, or place lanterns on a shelf and the vanity, with warm bulbs or battery candles inside, for evening light that flatters wood and stone. Lantern light suits rustic bathrooms well, since the metal frame and glass echo farmhouse and cabin rooms, and the warm glow softens tile and porcelain. Use lanterns as a second light, not the only light, so morning routines still have clear, bright light.

    Keep real candles away from curtains, towels, and dried stems, and use battery candles if the lantern sits near fabric. Hang a lantern from a ceiling hook only if the ceiling fixing suits its weight, and keep the glass clean so the light stays bright. A lantern on the windowsill at night gives the room a welcoming glow from the hall.

    26. Chunky Knit and Wool Textiles

    Rustic bathroom with chunky knit textiles, waffle towels, and a thick cotton rug.

    Finish the room with chunky knit and wool textiles, such as a thick cotton rug, waffle towels, and a folded wool throw over the bench, to balance hard tile, metal, and stone. Textiles add the soft layer that rustic rooms need, and they are easy to change with the seasons. Choose towels and rugs in natural tones, such as cream, oatmeal, and sage, so they echo the wood and stone rather than competing with them.

    Keep one set of towels in use and one set in rotation, so the bathroom never sits bare on wash day, and wash textiles as the maker advises to keep them soft. A rug with a low pile dries faster than a thick pile rug and is safer underfoot near the tub. Fold a throw over the bench or ladder rack, so the soft layer is visible even when towels are in the wash.

    Conclusion

    A rustic bathroom does not need a full remodel to feel warm and natural. Start with one large wood or stone surface, repeat one wood tone and one metal finish, and keep counters clear so those materials can show. Add a clawfoot tub or a stone sink only where space allows, and use shelves, baskets, and hooks to keep daily items tidy. For small rooms, the renter friendly storage ideas in these apartment bathroom ideas pair well with the wood and basket storage above, since both focus on vertical space and removable changes.

    Work through this list in order: vanity and walls first, then tub and shower, then storage, then light and textiles last. Change one corner at a time, live with it for a week, and add the next idea only where the room still feels unfinished. That slow pace keeps the room calm, and it lets the wood, stone, and linen do the work.

    FAQs

    What is the easiest way to make a bathroom look rustic?

    Start with one large wood surface, such as a reclaimed vanity or shiplap wall, plus warm light and woven baskets. Those three changes give a rustic feel without plumbing work, and they work in rented rooms if you use a ladder rack, a linen curtain, and baskets instead of fixed wood. Keep the rest of the room plain, so the wood stands out rather than competing with bold tile or color.

    Can a rustic bathroom work in a small space?

    Yes, if you pick small scale rustic details rather than large furniture. A wood framed mirror, open shelves, a ladder towel rack, baskets, and a linen curtain give a rustic feel without taking floor space. Avoid a large clawfoot tub or a stone feature wall in a small room, and use a wood look tile floor plus one wood vanity to carry the look. Light colors on walls and a clear floor keep the room feeling open.

    How do I protect wood in a rustic bathroom from water damage?

    Seal wood well, especially around sinks and tubs, and wipe splashes promptly so water does not sit in the grain. Use sealed or water tolerant wood near water, such as teak for a bench, and save raw untreated wood for dry walls and high shelves. Reseal wood when water stops beading on the surface, and keep wood clear of direct shower spray. Good ventilation, such as a fan or an opening window, helps wood dry between uses.

    What colors work best in a rustic bathroom?

    Warm neutrals work best, such as cream, oatmeal, sage, warm grey, and soft brown, with wood tones as the main color. Keep walls pale so wood and stone stand out, and add color in small doses, such as terracotta pots, sage towels, or a linen curtain. Avoid strong bright colors on large surfaces, since they can make wood and stone look busy rather than calm.

    Is shiplap safe to use in a bathroom?

    Shiplap can work in a bathroom if it is sealed with a moisture resistant finish and kept off the wall directly inside the shower. Use it on a dry wall, such as behind the vanity, and seal the bottom edge so mop water does not soak into the boards. Ventilate the room well after showers, and wipe splashes promptly. If your bathroom has constant steam and poor ventilation, use shiplap on one accent wall only, or choose a moisture resistant board instead of raw wood.

    How do I mix rustic style with modern fixtures?

    Repeat one wood tone and one metal finish across the room, and keep modern fixtures simple in shape, so they do not fight the rustic materials. A plain matte black faucet, a simple vessel sink, and a frameless mirror can sit well beside reclaimed wood and stone, as long as the finishes stay consistent. Avoid ornate modern fixtures with bright chrome and sharp angles, since they can break the calm, natural feel that wood and stone create.


  • 22 Bathroom Freshening Hacks to Make Your Bathroom Smell Good

    22 Bathroom Freshening Hacks to Make Your Bathroom Smell Good

    A bathroom can look clean and still smell stale, because steam, damp towels, and drains leave odors that a quick wipe cannot fix. The fix is usually a mix of better airflow, a regular cleaning routine, and one or two pleasant scents layered in the right places. These 22 bathroom freshening hacks cover ventilation, drains, towels, trash, and simple scent ideas that work in small rooms and rented homes alike. Start with airflow and the hidden odor sources first, then add the scented touches that suit your household, your budget, and anyone sensitive to strong fragrance.

    Key Takeaways

    • Fix airflow first: run the fan, open a window briefly, and let towels and mats dry fully, since trapped steam is the main cause of a stale bathroom.
    • Find the odor source before adding scent: drains, grout, shower curtains, towel hampers, and trash cans often cause the smell that air freshener only covers for an hour.
    • Layer one or two scents, not five: pick a main scent for the room and repeat it lightly in soap, a diffuser, or linen spray so the room smells planned rather than crowded.
    • Keep scented items away from water, heat, and small hands: candles, warmers, and essential oils need a stable, dry spot and must never sit where they can fall into water.
    • Build a short weekly routine: one drain refresh, one towel wash, one trash and brush clean, and a quick grout check keep the room fresh with little extra work.
    • In a rented room, favor reversible hacks: reed diffusers, sachets, sprays, cotton balls, and bundles leave no holes and no permanent change behind.

    1. Run the Exhaust Fan After Every Shower

    Bathroom exhaust fan running above a shower as steam clears from the mirror

    Run the exhaust fan during your shower and for 20 to 30 minutes after it, so steam leaves the room instead of settling into towels, grout, and paint. A fan that only runs while you shower leaves the dampest air behind, and that damp air is what turns musty over days. If your fan has a timer or humidity sensor, set it to run until the mirror clears, then a little longer, so walls and curtains dry fully.

    Clean the fan cover every few months, since dust on the grille slows airflow and traps odors in the vent itself. Vacuum the cover, wipe it with a damp cloth, and let it dry before refitting it. If your bathroom has no fan, leave the door ajar after a shower and run a small portable fan toward the hall for 20 minutes, which moves damp air out without any fitting work.

    2. Open a Window for a Short Cross Breeze

    Small bathroom window opened wide letting daylight and fresh air over a clean sink

    Open the bathroom window for 10 to 15 minutes after a shower, even in cool weather, to flush out steam and stale air in one move. A short, strong burst of fresh air dries surfaces faster than a window left cracked all day, and it carries cooking and household odors out of the room too. If the bathroom has no window, open the bathroom door and a window in the next room to create a path for air to move through.

    Keep the window trick simple in winter: open it wide for a few minutes rather than leaving it ajar for hours, so the room airs without chilling the pipes or the floor. A small window fan set to exhaust, placed safely away from water, speeds the job in a windowless layout or a room with a weak fan. Close the window once the mirror and tiles feel dry to the touch.

    3. Hang a Eucalyptus Bundle on the Showerhead

    Fresh eucalyptus bundle tied with string hanging from a showerhead in a bright shower

    Tie a small bundle of fresh eucalyptus to the showerhead with cotton string, keeping the stems out of the direct water stream, so steam releases a gentle green scent each morning. The bundle adds color to a plain shower, costs little, and needs no power, plug, or spray. Choose a bundle about the size of your hand, since a very large bundle sheds leaves into the drain and can overpower a small room.

    Replace the bundle every two to three weeks, or when the scent fades and the leaves turn brittle, and dry the string between showers so it does not go musty. If anyone in the household is sensitive to strong scents, use a smaller bundle or skip it and keep a potted plant on the sill instead. For more natural greenery ideas that pair with a shower bundle, see these Swedish bathroom ideas.

    4. Set a Reed Diffuser Beside the Sink

    Reed diffuser with wooden reeds on a bathroom vanity beside a sink

    Place a reed diffuser on the vanity or a shelf beside the sink, where air moves past it but water cannot splash into the bottle. Reeds draw scented oil upward and release it slowly, so the room smells steady all day with no flame, heat, or plug. Start with four or five reeds for a small bathroom, and add more only if the scent feels too faint after a day, since too many reeds can turn a fresh room into a heavy one.

    Flip the reeds once a week to renew the scent, and wipe any drips from the bottle base so oil does not stain the counter. Keep the diffuser away from the edge where elbows or towels can knock it over, and away from radiators, since heat speeds evaporation and shortens its life. A light citrus, lavender, or cedar scent suits most bathrooms and pairs well with plain white towels.

    5. Drop Toilet Fizzies Into the Bowl

    Toilet fizzies in a glass jar beside a clean toilet bowl

    Drop one homemade or store bought toilet fizzy into the bowl, let it fizz for a few minutes, then brush and flush, for a quick fresh scent plus a light clean in one step. Fizzies made from baking soda and citric acid release scent as they dissolve, and they reach under the rim where a brush alone can miss. Use them once or twice a week, not every flush, so the scent stays pleasant rather than constant.

    Store fizzies in a lidded jar on a high shelf, away from moisture, so they do not dissolve early or attract damp. Keep them away from children and pets, and never mix a fizzy with bleach or another toilet cleaner, since mixing cleaners can create harmful fumes. If you prefer no added scent, a plain baking soda fizzy still freshens the bowl without fragrance.

    6. Refresh the Drain With Baking Soda and Hot Water

    Baking soda being poured into a bathroom sink drain with hot water nearby

    Pour half a cup of baking soda down a slow or stale smelling drain, follow it with hot (not boiling) water, and let it sit for 15 minutes before running the tap for a minute. This routine clears the thin film of soap and hair residue that causes many drain odors, and it works for sink, tub, and shower drains alike. Repeat it every two weeks in a bathroom that sees daily use, and more often if the drain gurgles or drains slowly.

    Never pour boiling water down a drain with plastic pipes or a porcelain basin you are unsure about, and never follow baking soda with bleach, since mixing cleaners is unsafe. If the smell stays after two refreshes, check the trap for trapped hair, clean the drain cover, and look for a dry trap in a rarely used sink, which lets sewer air rise into the room. A dry trap usually needs only a cup of water poured down it to seal again.

    7. Add Essential Oil to the Toilet Paper Roll

    Essential oil drops being added to the cardboard tube of a toilet paper roll

    Add two or three drops of essential oil to the inside of a toilet paper roll, on the cardboard tube, so each pull releases a faint scent without any device in the room. This hack costs almost nothing, needs no plug or flame, and suits a guest bathroom where you want a fresh note without a visible diffuser. Lavender, lemon, or peppermint work well, since they read as clean without smelling like a cleaning spray.

    Apply the oil to the cardboard only, never to the paper itself, and let it dry for a few minutes before hanging the roll. Use only a few drops, since oil can stain a holder or transfer to hands if overapplied. Skip this hack if anyone in the household dislikes strong scents or has a fragrance sensitivity, and keep the oil bottle stored upright in a cabinet, away from children.

    8. Hide Scented Cotton Balls Behind the Toilet

    Small dish with scented cotton balls on a shelf behind a toilet

    Place two or three cotton balls with a few drops of essential oil in a small open dish behind the toilet or inside the vanity cabinet, where they scent the air quietly without being seen. This is one of the easiest freshening hacks for a small bathroom, since the dish takes no counter space and the scent stays near the floor where odors collect. Refresh the drops every three or four days, when the scent fades.

    Use a shallow dish or a small jar lid so the cotton balls do not roll onto the floor, and keep them away from the toilet tank mechanism and any heat source. If pets can reach the spot, put the dish inside a closed cabinet with the door ajar, or skip loose cotton balls and use a sachet instead. One scent at a time is enough here, since this hack pairs with a diffuser or a candle in the same room.

    9. Light a Scented Candle on the Vanity

    Lit scented candle on a tray on a bathroom vanity beside folded towels

    Light a scented candle on a stable vanity tray for 30 to 60 minutes before guests arrive, or during a bath, for a warm scent that also softens the room. A candle suits an evening routine best, since the flame and the scent both signal a slower pace, and a lidded candle keeps dust out between uses. Choose a scent you already like in soap or laundry, such as lavender, cedar, or clean linen, so the room smells consistent rather than mixed.

    Never leave a candle burning unattended, and keep it clear of towels, curtains, and the shower curtain, with at least a hand span of clear space on all sides. Trim the wick to about 5 millimeters before lighting, so the flame stays small and soot stays low, and snuff the flame rather than blowing it out to avoid wax splatter. If your household includes small children or pets, use the flameless warmer in Idea 10 instead.

    10. Use a Flameless Wax Melt Warmer

    Small wax melt warmer with wax cubes on a dry bathroom shelf

    Plug a wax melt warmer into a wall outlet away from water, add one or two wax cubes, and let the gentle heat release scent with no flame at all. A warmer suits households with children, pets, or a busy morning routine, since there is no open flame to watch, and the scent can be changed by swapping cubes. Start with one cube in a small bathroom, since two cubes in a tiny room can quickly smell strong.

    Keep the warmer on a dry, heat safe surface, clear of towels and curtains, and unplug it when you leave the house or go to sleep. Wipe the dish clean between scent changes, while it is cool and unplugged, so old wax does not mix with the new scent. Choose one main scent family for the warmer and the soap in the room, so the bathroom smells planned rather than crowded.

    11. Rotate Towels and Wash Them Hot

    Stack of fresh white towels drying on a rail in a bright bathroom

    Wash bath towels every three to four uses in hot water, dry them fully before folding, and rotate in a fresh set, since damp towels are the most common source of a stale bathroom smell. A towel that stays damp in a closed room or a pile breeds the musty odor that no spray can cover for long. Hang each towel spread out on a rail after use, never bunched on a hook, so air reaches both sides and it dries between showers.

    Keep two sets of towels in rotation, so one set can wash and dry while the other hangs in the room, and wash hand towels and bath mats on the same cycle. Add a cup of white vinegar to the rinse now and then if towels smell musty even when clean, and skip fabric softener on towels, since it coats fibers and traps odor over time. For more small room storage and towel ideas, see these apartment bathroom ideas.

    12. Keep a Lidded Hamper With Lavender Sachets

    Lidded laundry hamper with a lavender sachet in a bathroom corner

    Use a lidded hamper for dirty towels and laundry, and tuck a lavender sachet inside the lid or in a side pocket, so the hamper holds odor in instead of releasing it into the room. An open basket lets damp towel smell drift out all day, while a lid plus a sachet keeps the corner fresh between wash days. Empty the hamper at least twice a week, and never let damp towels sit in it for a full week.

    Wash the hamper liner monthly, wipe the inside of a hard hamper with a damp cloth, and let it dry fully before refilling it. Refresh the sachet every month, or make a new one from dried lavender in a small cloth bag tied with string. If lavender feels too floral for the room, cedar chips or a plain cotton sachet with a few drops of essential oil give the same result with a woodier note.

    13. Line the Trash Can and Empty It Daily

    Small lidded bathroom trash can with a fresh liner beside a vanity

    Line the bathroom trash can with a small bag, sprinkle a spoonful of baking soda in the bottom of the liner, and empty the can daily, since cotton pads, tissues, and hair collect odor fast in a warm room. A lined can also keeps the bin itself clean, so you wipe it once a week instead of scrubbing dried residue. Choose a can with a lid if the bathroom stays warm or if the can sits near the toilet, since a lid holds odor in between emptying.

    Wash the can itself every week with warm soapy water, dry it fully, and add fresh baking soda to the new liner before use. Keep a roll of small bags beside the can, so emptying takes seconds and never gets put off for lack of a bag. If the can still smells after washing, leave it outside in fresh air for an hour, or wipe it with a vinegar and water mix and let it dry before relining it.

    14. Set Out a Bowl of Dried Citrus and Herbs

    Bowl of dried orange slices

    Fill a shallow bowl with dried orange slices, cinnamon sticks, star anise, and a few sprigs of dried rosemary, and set it on a shelf or the vanity as a dry, flame free scent display. Dried citrus and herbs release a gentle scent for weeks, add color to a plain shelf, and need no power or liquid to work. Keep the bowl on a dry surface away from the shower, since steam softens dried slices and shortens their life.

    Refresh the bowl every three to four weeks, or when the scent fades, by adding a few drops of orange or rosemary oil to the dried pieces and stirring them gently. Keep the bowl out of reach of small children and pets, since star anise and cinnamon sticks are not food for them, and dust the bowl weekly so it stays a display rather than a dust trap. This bowl pairs well with a plain soap and a single candle scent, so the room does not carry three competing fragrances.

    15. Mist Shower Curtains and Towels With Linen Spray

    Hand misting a shower curtain lightly with linen spray

    Mist the shower curtain, bath mat, and hanging towels lightly with linen spray after they dry, so fabric that absorbs steam smells fresh instead of musty. Linen spray suits fabric surfaces that cannot go in the wash every day, and a light mist is enough, since soaking fabric only adds damp back into the room. Spray from about 30 centimeters away, in short bursts, and let the fabric dry for a few minutes before use.

    Make a simple spray at home from water and a few drops of essential oil in a clean spray bottle, shaken before each use, or use a store bought linen spray in a scent that matches the soap in the room. Test any spray on a hidden corner of the curtain first, since oil can mark some fabrics, and never spray near the floor, where wet mist can make tile slippery. Reapply every two or three days, or after washing the curtain, rather than daily.

    16. Display Scented Bar Soaps at the Sink

    Scented bar soaps in a small dish on a bathroom vanity beside a sink

    Set one or two unwrapped scented bar soaps in a small dish on the vanity, beside the hand soap you use daily, so the sink area smells fresh even when no one is washing. Bar soaps release scent slowly without power, and a dish of soaps adds color and a shop like detail to a plain counter. Choose soaps in the same scent family as the diffuser or candle in the room, such as lavender, citrus, or cedar, so the scents agree.

    Keep the dish on a dry part of the counter, away from direct splashes, and rotate the bars every few weeks, since the scent fades once the outer layer dries out. Use the oldest bar next for hand washing, and replace it with a fresh bar from the cupboard, so nothing sits unused for months. If the household prefers unscented soap for skin reasons, keep the display bars as decor only and use a separate unscented pump for washing.

    17. Wash the Shower Curtain Before Mildew Sets In

    Clean white shower curtain hanging spread out to dry in a bright bathroom

    Wash the shower curtain and liner every three to four weeks, in the washing machine on a gentle cycle if the maker allows it, or by hand in warm soapy water, so mildew never gets a hold. A curtain that smells musty will scent the whole room, even when the rest of the bathroom is clean, because it hangs in the warmest, wettest air. Hang the curtain back up to dry fully, spread out rather than bunched, so it does not mildew again while damp.

    Between washes, spray the lower edge of the liner with a vinegar and water mix once a week, let it sit for 10 minutes, then rinse, since the lower edge collects soap scum and mildew first. Replace a liner that stays stained or smells musty after washing, since a cheap liner costs less than the odor it causes. Keep a spare liner in the cupboard, so a swap takes minutes on wash day.

    18. Scrub Grout to Remove the Musty Source

    Hand scrubbing bathroom tile grout with a small brush and baking soda paste

    Scrub tile grout with a paste of baking soda and water, applied with an old toothbrush, left for 10 minutes, then rinsed, to remove the mildew that causes a musty bathroom smell. Grout is porous, so it holds soap scum and moisture long after the tiles look clean, and that trapped residue is a common hidden odor source. Work in small sections, from the top of the shower wall downward, so dirty rinse water does not run over cleaned grout.

    Rinse each section well, dry it with a towel, and seal shower grout once a year with a grout sealer suited to wet rooms, so future cleaning takes less effort. Avoid bleach on colored grout, since it can lighten the color unevenly, and ventilate the room while you scrub, since even mild cleaners smell strong in a small space. If grout stays dark or soft after scrubbing, it may need repair rather than cleaning, so check for cracks and loose tiles at the same time.

    19. Clean the Toilet Brush and Its Holder

    Clean toilet brush drying over a toilet bowl beside a clean holder

    Rinse the toilet brush under hot water after each use, let it drip dry over the bowl for a few minutes, and clean its holder weekly with warm soapy water, since a wet brush in a closed holder is a strong hidden odor source. Many bathrooms smell stale because the brush holder holds dirty water that never dries, even when the toilet itself is clean. Choose a holder with drainage holes or a drip tray, so water does not pool at the base.

    Once a month, soak the brush in warm soapy water for 10 minutes, rinse it well, and let it dry fully before returning it to a clean, dry holder. Add a drop of scented cleaner or a splash of vinegar to the holder rinse if you like, but rinse it out, so the holder does not stay sticky. Replace a brush with bent or missing bristles, since a worn brush cleans poorly and traps more residue than a new one.

    20. Keep a Baking Soda Odor Jar in the Cabinet

    Open jar of baking soda with a cloth cover inside a bathroom vanity cabinet

    Keep a small open jar of baking soda inside the vanity cabinet or linen cupboard, with a few drops of essential oil stirred in, as a quiet odor absorber for closed storage. Baking soda absorbs odors from cleaning sprays, damp cloths, and spare toiletries that share the cabinet, and the jar needs no power and no flame. Use a jar with holes punched in the lid, or a cloth cover tied with string, so air can reach the soda while the jar stays spill proof.

    Replace the baking soda every month, or when the scent fades, and wipe the jar before refilling it, since old soda clumps in damp air. Label the jar clearly, so no one mistakes it for a food or bath product, and keep it upright on a shelf, away from the sink pipes where a leak could soak it. This jar suits a cabinet that smells stale even when the open room smells fine.

    21. Tuck Charcoal Bags Under the Sink

    Activated charcoal bags tucked under a bathroom sink

    Tuck one or two activated charcoal bags under the sink or inside the linen cupboard, where they absorb moisture and odor from pipes, cleaning products, and spare towels. Charcoal bags work without scent, which suits households that prefer a neutral bathroom or have scent sensitivities, and they last for months with simple care. Place them where air can move around them, not pressed flat behind a stack of towels, so they can absorb from the whole space.

    Recharge the bags once a month by setting them in direct sunlight for two to three hours, as the maker advises, which releases trapped moisture and restores their absorbing power. Replace bags that stay damp, torn, or dusty after recharging, and keep them away from direct water, since soaked charcoal stops working and can stain. Pair charcoal bags with good ventilation, since they absorb odor but do not replace fresh air.

    22. Put a Fresh Herb Bouquet in a Small Vase

    Small bouquet of fresh mint and lavender in a narrow vase on a bathroom windowsill

    Put a small bouquet of fresh mint, rosemary, or lavender in a narrow vase on the vanity or windowsill, where steam and warm air release a gentle herbal scent through the day. A herb bouquet adds green life to a bathroom, costs little from a garden or market bunch, and can be used in cooking or a bath once it fades, so nothing goes to waste. Choose a vase with a narrow neck, so stems stay upright and water does not splash onto the counter.

    Change the water every two days, trim the stems at an angle each time, and remove any leaves that sit below the waterline, since rotting leaves cause the very odor you want to avoid. Replace the bouquet every one to two weeks, or when the scent fades and leaves droop, and wipe the vase before refilling it. If the bathroom has little light, keep the bouquet on the sill for a few hours a day, or use dried herbs from Idea 14 instead.

    Conclusion

    A fresh smelling bathroom comes from routine more than from any single product. Start with airflow, clean the hidden sources in drains, grout, curtains, and brush holders, then add one or two scents you enjoy and can keep up with. Rotate towels, empty the trash, and refresh diffusers and sachets on a short weekly cycle, and the room will stay pleasant between deep cleans. Save this guide on Pinterest, pick three hacks to try this week, and add more only where the room still needs them.

    FAQs

    1. Why does my bathroom smell bad even after cleaning?

    A bathroom can smell stale after cleaning because the odor source hides in drains, grout, a damp shower curtain, a wet toilet brush holder, or towels that never dry fully. Clean those spots first, run the fan until surfaces dry, and check for a dry trap in a rarely used sink. Adding scent before fixing the source only covers the smell for an hour.

    2. What is the fastest hack to make a bathroom smell good before guests arrive?

    Open a window for 10 minutes, run the fan, mist towels and the shower curtain with linen spray, light a candle for 30 minutes, and put out fresh hand towels. This five step routine freshens air, fabric, and surfaces at once, and it takes less time than a full clean. Empty the trash can first, since a full can can undo the rest of the work.

    3. Are essential oils safe to use in a small bathroom?

    Essential oils are safe for most adults when used in small amounts, kept away from skin in undiluted form, and never applied near the face or in a steam filled room at high strength. Use only a few drops per hack, ventilate the room, and skip strong scents if anyone in the household has asthma, allergies, or a fragrance sensitivity. Keep oil bottles upright, capped, and out of reach of children and pets.

    4. How often should I refresh a reed diffuser or eucalyptus bundle?

    Flip reed diffuser reeds once a week and replace the oil every four to six weeks, or when the scent fades even after flipping. Replace a eucalyptus bundle every two to three weeks, or sooner if leaves turn brittle or the string smells musty. Both last longer away from direct water, heat, and strong airflow, which speed evaporation and drying.

    5. Can I make a bathroom smell good without any fragrance?

    Yes. Ventilation, a clean drain, dry towels, washed curtains, scrubbed grout, and charcoal bags or baking soda jars can keep a bathroom smelling neutral with no added fragrance at all. This unscented routine suits scent sensitive households, and it often works better than fragrance, since it removes odor sources instead of covering them.

    6. What should I avoid when freshening a bathroom?

    Avoid mixing cleaning products, especially bleach with any other cleaner, and avoid overusing scent, since five strong scents in one small room smell crowded rather than fresh. Never leave a candle burning unattended, never place a plug in warmer near water, and never pour boiling water down a drain you are unsure about. Fix leaks and damp spots first, since scent cannot fix a plumbing or ventilation problem.


  • 18 Bathroom Towel Hook Ideas for a Warm, Inviting Home

    18 Bathroom Towel Hook Ideas for a Warm, Inviting Home

    A towel hook is a small fitting, but it decides whether towels dry properly, stay within reach, and look tidy instead of draped over a door. The right hook also adds warmth to a room full of tile and porcelain, especially when the finish matches the rest of the bathroom. These 18 bathroom towel hook ideas cover single hooks, rows, peg rails, over-door racks, and renter friendly options, plus placement tips for small rooms, shared bathrooms, and family homes. Start with where you actually reach for a towel after a shower, then pick a hook style that fits that spot and your wall.

    Key Takeaways

    • Place hooks where you reach for a towel, usually beside the shower or tub, not across the room from it.
    • Give each person at least one hook, and give bath towels and hand towels separate hooks so nothing stays bunched up.
    • Match the hook finish to the faucet and mirror frame so the room reads as planned, not patched together.
    • In a rented home, start with over-door, adhesive, or suction hooks before drilling any holes.
    • Leave space between hooks so towels hang flat and dry fully between uses.
    • Use wood, brass, or warm black finishes to soften tile and chrome, and keep the hook style simple in a small room.

    1. Single Matte Black Hook Beside the Vanity

    Single matte black towel hook beside a bathroom vanity holding a white hand towel.

    Hang one matte black hook beside the vanity, at shoulder height, for the hand towel you reach for most often. A single hook keeps the towel flat against the wall, so it dries faster than a towel folded over a bar, and the dark finish gives a quiet contrast against white tile. This suits a small bathroom where a long rail would crowd the mirror or the light fixtures.

    Fix the hook into a stud or use a wall anchor rated for tile if you drill, and test it with a damp bath towel before trusting it daily. Keep the hook clear of the faucet splash zone so the towel stays dry, and leave a few inches of wall on each side so the towel does not brush the mirror frame or a light shade.

    2. Double Hook for a Bath Towel and a Hand Towel

    Double wall hook holding a bath towel and a smaller hand towel in a bathroom.

    Use a double hook, with one arm above the other or two arms side by side, to hold a bath towel and a hand towel on a single wall plate. This pairing keeps the towels you use in one shower together, and it saves wall space in a bathroom shared by one person. The two arms also stop a thick bath towel from covering a smaller towel underneath it.

    Hang the double hook near the shower door or the tub edge, at a height where the bath towel clears the floor by several inches. Check the weight rating if both towels are thick cotton, and space the arms wide enough that air moves between the two towels. If the bathroom is shared, give each person their own double hook rather than asking two people to share one.

    3. Over-Door Hook Rack for a No-Drill Fix

    Over-door hook rack on a bathroom door holding several folded towels.

    Fit an over-door hook rack on the bathroom door for instant towel storage with no drilling, no anchors, and no damage to tile. Most racks hold three to five hooks, which is enough for a couple or a small household, and the rack moves with you when you move home. This is one of the simplest options for a rented bathroom, and the renter friendly ideas in these apartment bathroom ideas use the same no-drill thinking for the rest of the room.

    Choose a rack that fits your door thickness so it does not rattle or scratch the frame, and add felt pads where the metal meets the door. Hang lighter towels on the top hooks and heavier bath towels lower down, so the door still swings freely. If the door rubs the frame, trim the rack hooks or move the rack to a closet door just outside the bathroom instead.

    4. Reclaimed Wood Board with Iron Hooks

    Reclaimed wood board with black iron hooks holding towels on a bathroom wall.

    Mount a board of reclaimed or weathered wood with three or four iron hooks for a warm, rustic towel station on one wall. The wood softens a tiled wall, and the iron hooks carry heavy bath towels without bending. This style suits a bathroom with wood on the vanity or the mirror frame, since the board ties those pieces together.

    Seal the wood with a water resistant finish before hanging it, and keep the board on a dry wall rather than inside the shower spray. Space the hooks evenly so each towel hangs flat, and use screws long enough to reach a stud or a solid anchor, since a loaded board is heavier than a single hook. Wipe the board dry after steamy showers so the finish lasts.

    5. Shaker Peg Rail Along a Spare Wall

    Shaker peg rail with rounded wooden pegs holding towels along a bathroom wall.

    Fit a Shaker style peg rail, a flat wood strip with rounded wooden pegs, along a spare wall for a row of towel hooks that look calm and orderly. Pegs hold towels by their loops or folded over the peg, and the flat rail gives the wall a finished edge even when only one towel hangs on it. This suits a hallway bathroom or a family bathroom where several people need a hook each.

    Mount the rail at a height that suits the shortest regular user, and label nothing: give each person a peg position and keep it consistent. Space the pegs at least six inches apart so towels do not overlap, and choose a wood tone that matches the vanity or the door trim. A peg rail also works in a narrow wall beside the door, where a deep cabinet would block the walkway.

    6. Adhesive Hooks for Renters and Tile Walls

    Adhesive hooks on smooth bathroom tile holding a hand towel beside a sink.

    Stick adhesive hooks to smooth tile, glass, or painted walls for towel storage that needs no tools and leaves no holes. Modern adhesive hooks hold a surprising amount of weight, and they suit renters, tiled walls you do not want to drill, and a trial layout you can change later. They are also useful for a hand towel beside a pedestal sink where there is no room for a rail.

    Clean the wall with soap and water, dry it fully, and press the hook firmly for the time the maker advises before hanging a towel. Hang the towel by its loop or fold it over the hook so the weight pulls straight down rather than outward. Replace the adhesive strip on wash day if the hook starts to slip, and keep adhesive hooks off textured walls, where the bond is much weaker.

    7. Suction Cup Hooks Inside the Shower

    Suction cup hook on shower glass holding a small towel inside a shower.

    Press suction cup hooks onto shower glass or smooth shower tile to hold a washcloth, a small towel, or a robe just inside the shower. This keeps a towel within arm’s reach while you shower, so you do not step out dripping to fetch one, and the hooks move in seconds when you clean the glass. Suction hooks also suit a shower with no spare wall for a fixed hook.

    Wet the suction cup lightly, press it flat against clean glass, and test it with a damp washcloth before trusting it with a full towel. Re-press the cups each week, since steam and soap film loosen the seal over time, and avoid suction hooks on textured tile or grout lines, where air leaks under the cup. Keep the hook out of the direct spray line so the towel stays dry until you need it.

    8. Freestanding Towel Hook Stand by the Tub

    Freestanding towel hook stand beside a bathtub holding towels at different heights.

    Stand a freestanding towel hook stand, sometimes called a towel valet, beside the tub or in a corner for towel storage that needs no wall at all. A stand usually holds two or three towels on hooks at different heights, and it moves wherever the bathroom layout changes. This suits a bathroom with fragile walls, a lot of glass, or a tub in the middle of the room.

    Choose a stand with a wide, heavy base so it does not tip when you pull a towel off one side, and keep it clear of the walkway into the shower. Hang the towel you will use next on the highest hook, and use the lower hooks for a robe or a spare towel. Dry the base after showers, since standing water under a metal stand can mark the floor over time.

    9. Heated Towel Hook for Warm, Dry Towels

    Heated towel rail with hooks holding warm white towels in a bathroom.

    Fit a heated towel hook or a small heated rail with hooks so towels warm up and dry between uses instead of staying damp on a cold wall. Warm towels are a comfort on winter mornings, and a heated hook also helps the bathroom itself dry out faster, which keeps the room fresher. This suits a main bathroom used every morning, where towels otherwise stay damp all day.

    Size the heated hook to the number of towels your household uses daily, and follow the maker guidance on distance from water and shower spray. A model with a timer saves energy and keeps the hook from running all day, and a freestanding heated stand gives a similar result with no wiring. Keep curtains, laundry, and long towels clear of the heated surface for safety, and wipe the rail dry so mineral marks do not build up.

    10. Brass Hooks for a Warm Metallic Accent

    Brushed brass towel hooks on a pale bathroom wall holding cream towels.

    Choose brass hooks, in brushed or aged brass, to add a warm metallic accent to a bathroom with white tile, pale walls, or a wood vanity. Brass reads softer than chrome and warmer than black, and it pairs well with warm bulbs, wood tones, and cream towels. Two or three brass hooks can carry the whole warm scheme, since the eye picks up the repeated finish.

    Keep the brass finish consistent across the hooks, the faucet, and the mirror frame if you can, so the room reads as one scheme rather than a mix of metals. Wipe brass hooks dry after steamy showers in a hard water area, since water spots show more on a warm metal. If you rent, keep the original hooks in a labeled bag, so you can refit them when you move out.

    11. Hidden Hook Inside the Cabinet Door

    Small hook inside an open vanity cabinet door holding a hand towel.

    Fix a small hook to the inside of a vanity cabinet door for a hand towel or a cleaning cloth that stays out of sight. This hidden spot suits a bathroom where wall space is taken by a mirror, a window, or a shower screen, and it keeps the room looking calm when guests visit. It also gives cleaning cloths a drying spot that does not clutter the sink area.

    Use short screws that do not poke through the door face, and check that the door still closes with a towel hanging on the hook. Hang only a light hand towel or cloth here, since a heavy bath towel can strain the hinges, and keep the hook clear of pipes and bottles inside the cabinet. Dry the towel on a wall hook now and then, since a closed cabinet slows drying.

    12. Hook on the Side of the Vanity

    Towel hook mounted on the side panel of a bathroom vanity beside a bathtub.

    Mount a hook on the side panel of the vanity, facing the tub or the shower, for a towel that stays close to the bathing area without taking wall space. The side of a vanity is often unused, and a hook there puts the towel exactly where you step out of the shower. This suits a small bathroom where the walls are full but the vanity side is free.

    Check that the vanity side is solid wood or a sturdy panel before fixing the hook, and use screws short enough to stay inside the panel. Hang a bath towel here rather than a hand towel, since the tub side is where bath towels are needed, and keep the hook clear of the drawer or door swing. If the vanity side faces a walkway, choose a hook that sits flat against the panel so no one catches a sleeve on it.

    13. Leaning Ladder with Hooks for Towels and Robes

    Wooden leaning ladder with hooks holding towels and a robe in a bathroom.

    Lean a wooden ladder against a spare wall and use its rungs and side hooks for towels, a robe, and a wash bag. A ladder needs no drilling, gives several hanging spots in a narrow footprint, and suits a wall beside the door or at the end of the tub. The same leaning ladder idea appears in the calm, wood-led rooms in these Swedish bathroom ideas, where pale wood softens white tile.

    Put heavier bath towels on the lower rungs and lighter items higher up, and add small adhesive pads under the feet so the ladder does not slide on tile. Check that the top cannot tip forward if a child pulls on it, and anchor it if your household needs that extra safety. A ladder also works as a drying rack for hand washed items, as long as the rungs stay clear of direct shower spray.

    14. Low Row of Hooks for Children

    Low row of colorful towel hooks at child height holding small towels in a bathroom.

    Hang a row of hooks at child height, low enough for a child to reach without a step stool, so children can hang their own towels and robes. A low row builds a simple habit, keeps towels off the floor, and stops children pulling towels down from adult height hooks. Give each child one hook in a color or position they recognize, and keep the row on a dry wall away from the shower spray.

    Fix the hooks firmly into a stud or a solid anchor, since children pull harder than adults, and choose hooks with rounded ends rather than sharp points. Space the hooks wide enough that a child’s towel and robe do not overlap, and move the row up as the child grows, filling old holes before repainting. A low row also suits a seated user, so it is worth keeping one low hook in a family bathroom even after children grow.

    15. Hook Just Outside the Shower Door

    Towel hook on the wall just outside a shower door holding a white bath towel.

    Place a hook on the wall just outside the shower door, at arm’s length from the entry, so a towel is waiting the moment you step out. This placement matters more than the hook style: a towel across the room is little use when you are wet, while a hook by the door keeps water off the floor. This suits both a walk-in shower and a shower over a tub, and the layout ideas in these walk-in shower ideas show how the entry wall can carry storage without crowding the shower itself.

    Hang the hook on the dry side of the glass or curtain, clear of the door swing, and at a height where the towel clears the floor. If two people shower at different times, give each person a hook by the door so no one has to hunt for a dry towel. Keep a spare towel on a second hook nearby for guests, so the main hook is never empty when you need it.

    16. Staggered Hooks at Different Heights

    Towel hooks at staggered heights on a bathroom wall holding towels of different sizes.

    Hang hooks at staggered heights, high for bath towels, mid height for hand towels, and low for washcloths, on one wall to sort towels by size and use. Staggering stops a long bath towel from covering a smaller towel, and it uses a tall, narrow wall that a straight row would waste. This suits a wall beside a tall mirror or a narrow wall between a door and a vanity.

    Plan the layout on paper first, marking each hook height against the towel length, so every towel clears the floor and the one below it. Keep the highest hook within easy reach, and put the most used towel at the most comfortable height rather than at the top. A staggered row also looks intentional when the hooks share one finish, even if the towels are different colors.

    17. Towel Hook with a Shelf Above

    Towel hook with a small wood shelf above it holding a folded towel in a bathroom.

    Combine a hook with a small shelf above it, so the shelf holds a folded spare towel, a plant, or a candle while the hook holds the towel in use. This pairing gives a plain wall a finished look and adds storage without a cabinet, and it suits a wall beside the vanity or above a toilet. The shelf also gives you a spot for the towel you will use next, so the changeover is quick.

    Mount the shelf at a height that clears the top of a hanging towel, and keep the shelf load light, with one folded towel and one small item at most. Use wall anchors rated for tile if you drill, and keep the shelf clear of the shower spray so folded towels stay dry. If the bathroom is small, choose a shelf no deeper than a folded towel, so it does not crowd the walkway.

    18. Leather Loop and Rope Hooks for Natural Texture

    Leather loop towel hooks on a wooden dowel holding towels in a warm bathroom.

    Hang towels from leather loops or thick cotton rope loops fixed to a wall hook or a wooden dowel for a soft, natural texture in the bathroom. Leather and rope warm up a room full of hard tile and porcelain, and they suit a bathroom with wood, woven baskets, or plants. A loop also folds flat against the wall when empty, which keeps a small bathroom looking tidy.

    Choose loops made for damp rooms, with sealed leather or washable cotton rope, and wipe them dry after steamy showers so they do not stiffen or smell. Fix the loop holder firmly to the wall, since a towel pulls down on the loop with its full weight, and replace a loop at the first sign of fraying. Keep rope and leather hooks on dry walls, away from direct shower spray, and pair them with a wood peg rail or a wood board for a matching natural scheme.

    Conclusion

    A good towel hook plan starts with placement, not shopping: one hook by the shower door, one by the vanity, and one per person, all at heights that suit the people who use them. Match the finish to the rest of the bathroom, keep towels hanging flat with air between them, and choose no-drill options first if you rent. Work through this list from the shower outward, starting with the hook you will use every morning, then add a row, a rail, or a ladder only where towels still pile up. For a small rented room, the storage and no-drill ideas in these apartment bathroom ideas pair well with the hooks above, and the pale wood and warm finishes in these Swedish bathroom ideas show how a simple hook can carry the whole warm look of the room.

    Keep this list handy the next time a towel ends up on the floor, and fix that one spot first: a hook by the shower door, a low row for the children, or a heated hook for winter mornings. Small fittings, placed where you actually reach for a towel, make a bathroom feel warm, tidy, and easy to use every day.

    FAQs

    Where should bathroom towel hooks go?

    Put the main bath towel hook on the wall just outside the shower or tub, at arm’s length from the entry, so the towel is waiting when you step out. Put a hand towel hook beside the vanity, at shoulder height, where you wash your hands. Keep hooks on dry walls, clear of direct shower spray and door swings, and leave enough space that each towel hangs flat and dries fully.

    How high should a towel hook be?

    A good starting height is around 60 to 66 inches from the floor for an adult bath towel hook, with the towel clearing the floor by several inches. For a hand towel beside the vanity, shoulder height for the main user works well. For children, hang a row at a height the child can reach without a step stool, and move it up as they grow.

    Are hooks or towel bars better for drying towels?

    Hooks usually dry towels faster than bars, because a towel on a hook hangs in a single layer with air moving around it, while a towel folded over a bar stays doubled up. Bars suit a hand towel that is used often and refolded, and they look neat in a row. In a small or humid bathroom, hooks have the edge, especially if you give each towel its own hook.

    Can I hang towel hooks without drilling?

    Yes. Over-door racks need no drilling at all, adhesive hooks stick to smooth tile and glass, and suction hooks work on shower glass and smooth tile. Freestanding stands and leaning ladders also need no wall fixings. Clean the surface first, check the weight rating for a damp bath towel, and test the fixing for a day before trusting it fully. For heavy towels on a permanent hook, a drilled fixing into a stud is still the strongest option.

    How many towel hooks does a bathroom need?

    Allow at least one hook per person for a bath towel, plus one hand towel hook by each sink. A shared family bathroom often needs one hook per person plus a spare for guests, while a guest bathroom can manage with two hooks: one bath towel and one hand towel. If towels pile on the floor or stay bunched on one hook, that is the sign to add another hook rather than a bigger rail.

    What finish should bathroom towel hooks be?

    Match the hook finish to the faucet, shower fittings, and mirror frame already in the room, so the bathroom reads as one scheme. Matte black suits white tile and modern rooms, brass adds warmth to pale walls and wood vanities, and chrome suits a bright, cool bathroom. In a hard water area, brushed finishes hide water spots better than polished ones, so wipe hooks dry after steamy showers whatever finish you choose.


  • 31 Soft Bathroom Ideas for a Stylish Room That Works

    31 Soft Bathroom Ideas for a Stylish Room That Works

    A soft bathroom is not about one color or one purchase. It is about surfaces that feel good to touch, light that does not glare, and a layout where towels, soap, and storage sit within easy reach. Pale walls, plush cotton, warm wood, and a dimmer can change a hard, cold room into a place where mornings feel slower and evenings feel restful. These 31 soft bathroom ideas cover color, texture, lighting, fixtures, storage, and small comforts, so you can start with one easy swap or build a full scheme over time. For small rooms, the renter friendly storage and surface ideas in these apartment bathroom ideas pair well with the soft finishes below.

    Key Takeaways

    • Pick one soft base color, such as warm white, pale sage, or blush, and repeat it in two or three places so the room reads as planned.
    • Put softness where your body meets the room: towels, mats, the shower floor, and the seat or stool you use daily.
    • Use warm, dimmable light at face level and a low light for evenings, rather than one harsh ceiling light.
    • Keep hard surfaces quiet when a soft texture leads, and keep busy patterns to one surface at a time.
    • Choose washable, moisture safe fabrics and finishes, since a bathroom needs softness that can cope with steam and splashes.
    • Start small if you are unsure: towels, a mat, a curtain, and a lamp change the feel before you paint or retile anything.

    1. Warm White Walls With Soft White Trim

    Bathroom with warm white walls, soft white trim, and folded white towels.

    Paint the walls a warm white with a hint of cream, and keep the trim, ceiling, and door in a clean soft white. Warm white removes the cold, clinical feel of a stark white room while still keeping the space bright and easy to clean. It suits small bathrooms well, because the pale tone does not shrink the room.

    Use a washable, moisture resistant paint finish, and test a large sample beside your tile and floor in both morning light and evening lamplight. Keep towels in white with one pale accent towel, and use brushed nickel or chrome fixtures so the room stays fresh. A warm white base also lets you change accent colors later by swapping towels and a curtain only.

    2. Blush Pink Accent Towels and Rug

    Bathroom with blush pink towels and a matching rug beside a white tub.

    Add blush pink as a single soft accent through towels and one rug, while the walls, tile, and vanity stay pale and quiet. Blush reads as warm and gentle without turning the room pink all over, and it suits white tile, pale wood, and brushed nickel. It is an easy first step into color for a bathroom that now feels plain.

    Fold blush hand towels on a shelf, hang one blush bath towel on the rail, and place a matching rug beside the tub. Wash new colored towels separately first, so dye does not transfer to white towels. Keep a second set in rotation so the bathroom never sits bare on wash day.

    3. Layered Plush Towels on an Open Shelf

    Open bathroom shelf with stacked plush white and pale grey towels.

    Stack plush cotton towels in two soft tones, such as white and pale grey, on an open shelf beside the vanity or above the toilet. Thick, folded towels add visible softness before you even touch them, and an open shelf keeps daily towels within reach. This suits a bathroom with limited cabinet space, since the shelf uses wall space instead of floor space.

    Keep towel quality consistent, since mixed weights look untidy on an open shelf. Roll one towel per person in a basket for a softer, hotel style display, and keep spare towels folded flat. Check that the shelf sits clear of direct shower spray, so towels stay dry between uses.

    4. Pale Sage Vanity Cabinet

    Pale sage green bathroom vanity with brushed nickel knobs and a pale countertop.

    Paint or choose a vanity cabinet in pale sage green, and finish it with brushed nickel knobs and a pale countertop. Sage is a soft, leafy green that calms a room full of white tile, and it pairs well with warm wood and white towels. A painted vanity changes the whole room for the cost of one cabinet, not a full remodel.

    Remove the doors and hardware before painting, clean off soap residue, sand lightly, and use a primer made for slick cabinet surfaces before two thin coats of a moisture resistant paint. Keep the walls pale so the sage stays the focal point, and add a small wooden tray on the counter to repeat the warm material once more.

    5. Soft Blue Grey Wall Tile in the Shower

    Shower with soft blue grey subway tile walls and white fixtures.

    Line the shower walls with soft blue grey tile in a simple running bond pattern. The muted blue grey reads as calm water rather than a bold color statement, and it pairs well with white fixtures and pale grout. Subway tile is easy to clean, and the soft tone keeps a small shower from feeling busy.
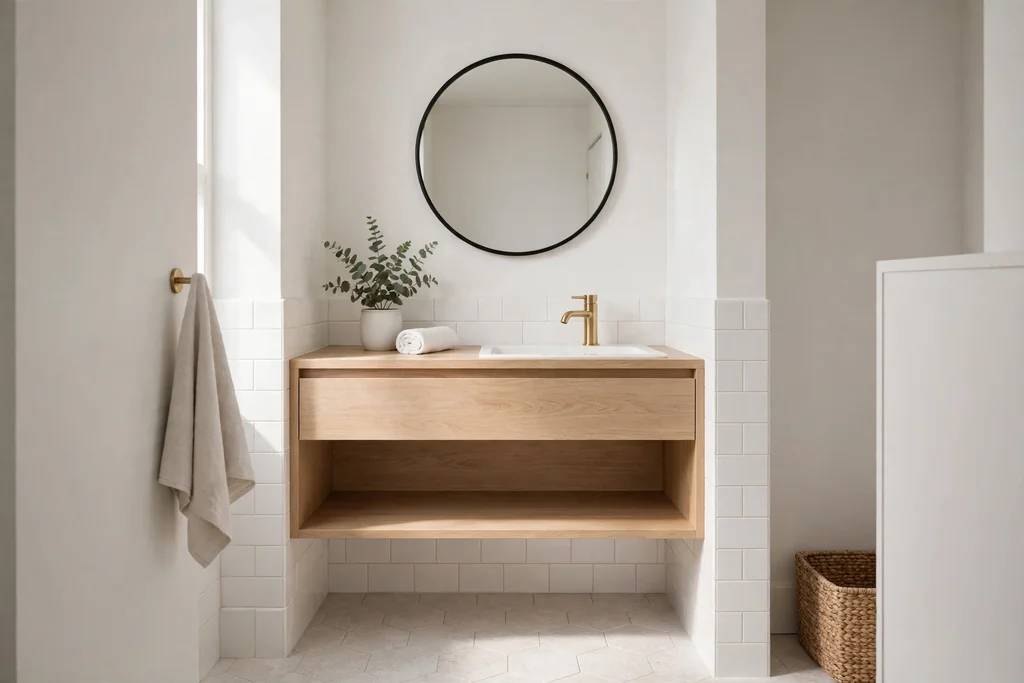
    Run the tile to the ceiling in a small shower so the eye travels upward, and keep the rest of the bathroom walls plain warm white. Use a matching blue grey tile on the shower floor in a smaller size for grip, or keep the floor white and let the walls carry the color. Seal the grout as the tile maker advises.

    6. Rounded Arched Mirror With a Soft Frame

    Arched mirror with a pale wood frame above a bathroom vanity.

    Hang an arched mirror with a pale wood or soft white frame above the vanity. The arch breaks up the rectangles of tile and cabinetry, draws the eye upward, and softens the hard lines of the room. A rounded shape suits a soft scheme better than a sharp, square mirror in a heavy frame.

    Center the mirror over the sink at eye level, and keep its width a little narrower than the vanity so the edges do not crowd the light fixtures. If you paint a frame, use a moisture resistant paint and seal it well. Pair the arched mirror with one curved accessory nearby, such as a rounded soap dish, so the shape repeats once more.

    7. Dimmable Warm Sconces Beside the Mirror

    Bathroom mirror with warm sconces on either side casting soft light.

    Hang warm sconces at eye level on either side of the mirror, and put them on a dimmer if your wiring allows. Light from the sides flatters faces far better than a single overhead fitting, and a dimmer lets the same room serve bright mornings and quiet evenings. Warm white bulbs keep the glow gentle rather than clinical.

    Choose sconces rated for bathroom use, and keep them clear of direct shower spray. Pair them with a plain mirror and pale walls so the light itself becomes the feature. Renters who cannot change wiring can use a plug in wall light or a small rechargeable lamp on a shelf for a similar layered effect.

    8. Backlit Mirror With a Warm Halo Glow

    Bathroom mirror glowing with a warm halo light behind its frame at night.

    Fit a mirror with a warm LED strip behind it, so the light forms a soft halo around the frame. The halo glow flatters faces, makes night trips to the bathroom easier without switching on the main light, and adds a calm, spa like feel to a plain wall. It suits a modern bathroom with simple tile and a floating vanity.

    Stick the strip to the back of the mirror frame, not to the wall, so you can take it with you if you move, and hide the battery pack or driver behind the frame edge. Choose a warm color temperature and a dimmable strip so the glow stays gentle rather than glaring. Keep the rest of the lighting low in the evening to let the halo lead.

    9. Linen Look Shower Curtain

    Bathroom with a linen look shower curtain in warm white with soft folds.

    Hang a shower curtain in a linen look fabric, in warm white or pale stone, with a separate washable liner behind it. A fabric curtain hangs in soft folds, unlike a thin plastic curtain that clings and crackles, and it makes the whole room feel more like a bedroom than a wet room. The pale tone keeps a small bathroom bright.

    Choose a fabric that copes with humidity, and wash the liner often so it stays fresh. Keep towels, mats, and walls plain when the curtain carries a subtle woven texture, so the room stays calm. A fabric outer curtain with a separate liner also lasts longer and hangs better than a plastic curtain on its own.
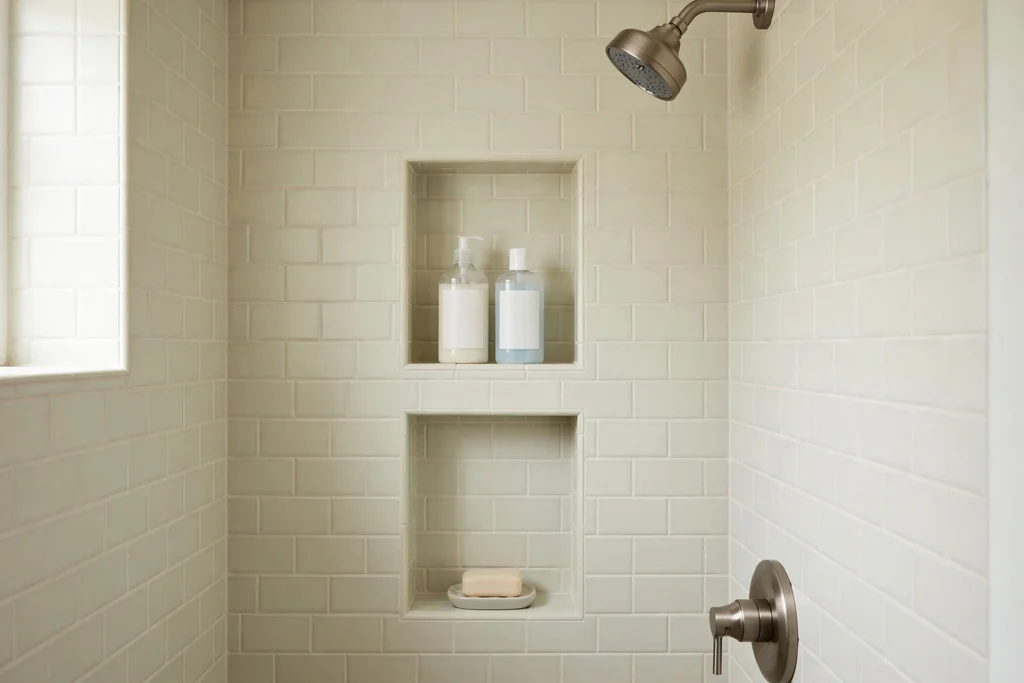
    10. Thick Cotton Bath Mat and Runner Pair
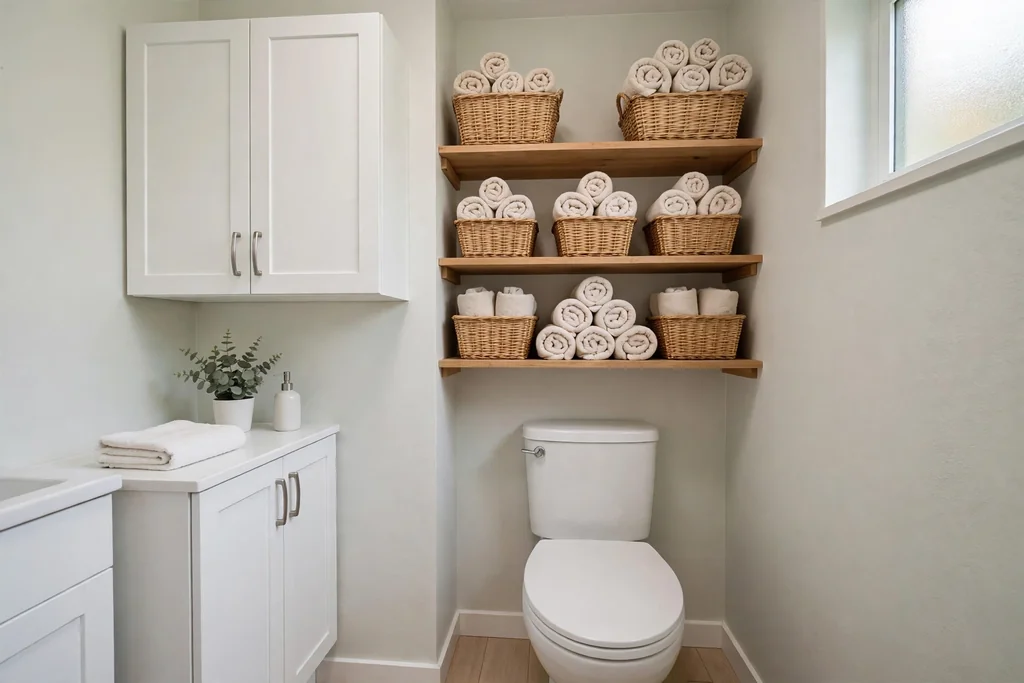
    Thick cotton bath mat beside a tub and a matching runner at a vanity.

    Use a thick cotton bath mat beside the tub and a matching runner in front of the vanity. Repeating the same soft rug in two places ties the room together, and the thick pile feels warm underfoot on cold tile. A washable cotton mat dries faster than a thick shag rug and can go in the laundry with the towels.

    Keep a second set in rotation so the bathroom never sits bare on wash day. Choose mats with a non slip backing, and lift them to dry the floor after showers so damp does not sit under the rug. If the room is small, use one mat only and repeat the color in a towel instead.

    11. Teak Bath Mat and Wood Stool

    Teak bath mat and a small wooden stool with a folded towel in a bathroom.

    Warm the room with teak and other water tolerant woods: a teak bath mat underfoot, a small wooden stool beside the tub, and a wooden soap dish or tray on the vanity. Wood softens a room full of tile and chrome, and teak copes with wet conditions better than most woods. A stool also gives a place to set a towel, a book, or a change of clothes.

    Leave teak to drain and dry between showers, and oil it as the maker advises if you want to keep its warm tone. If a full teak mat is more than you want to spend, start with one wooden accessory and see whether the warmth suits the room. Pair wood with white towels so the natural tone stands out.

    12. Oval Freestanding Tub With Curved Lines

    Oval freestanding white tub with curved lines in a pale bathroom.

    Choose an oval freestanding tub with soft, curved lines instead of a sharp rectangular tub. The oval shape invites a slower bath, and its curves echo the arched mirror and rounded accessories elsewhere in a soft scheme. A freestanding tub also becomes a clear focal point in a larger bathroom, with space to walk around it.

    Check the floor loading and the plumbing route before you commit, since a freestanding tub needs a floor waste in the right place. Keep the walls behind the tub pale, add a wooden bath tray, and use soft white towels so the tub shape leads. In a small bathroom, a curved corner tub gives a similar soft line in less space.

    13. Rainfall Showerhead With a Gentle Spray Setting

    Rainfall showerhead with a gentle spray over a pale tiled shower.

    Fit a rainfall showerhead with a gentle spray setting, so the water falls softly rather than hitting hard. A wide, even spray feels calmer than a narrow jet, and it suits a soft bathroom where the shower should feel like a rinse, not a blast. Most models screw onto the existing shower arm with no tools beyond pliers and thread tape.

    Check your water pressure first, since a very wide head can feel weak on a low pressure line, and choose a model with a flow setting or a smaller face plate if needed. Keep the original head in a labeled bag if you rent. For layout ideas around a calm shower, see these walk in shower ideas.

    14. Matte Finish Stone Look Floor Tile

    Bathroom floor in matte stone look tile in pale warm grey.

    Lay matte finish, stone look floor tile in a pale warm grey or soft beige. A matte surface feels softer underfoot than glossy tile, shows fewer water spots, and gives better grip when wet. The stone look adds gentle variation without a busy pattern, so the floor grounds the room without shouting for attention.

    Keep the wall tile plain and pale so the floor pattern leads quietly, and use a grout color close to the tile so the joints fade. Seal the tile as advised, and use a pale rug in front of the tub to soften the hard surface underfoot. A matte floor also hides dust better than a plain pale glossy floor.

    15. Soft Curved Faucet in Brushed Nickel

    Bathroom vanity with a curved faucet in brushed nickel and a pale basin.

    Choose a faucet with a soft, curved spout in brushed nickel, rather than a sharp angular fitting in bright chrome. The curved line repeats the oval tub and arched mirror, and brushed nickel reads warmer and quieter than polished chrome. One curved faucet can soften a whole vanity, even when the rest of the fittings stay simple.

    Keep the finish consistent across the faucet, towel bar, and cabinet knobs, so the metal reads as one choice, not three. Save every original screw and fixture in a bag taped inside the vanity if you rent. Wipe the brushed finish with a soft cloth, since harsh cleaners can dull it over time.

    16. Frosted Window Film for Soft Daylight

    Bathroom window with frosted film giving soft diffused daylight.

    Apply frosted window film to the bathroom window, so daylight enters as a soft glow while privacy stays intact. Frosted film diffuses harsh sun into even light, which flatters skin tones and makes pale walls look warm rather than washed out. It suits a bathroom with a street facing window where a curtain would block too much light.

    Clean the glass well before applying, measure twice, and smooth the film from the center outward to push out air. Choose a plain frosted film rather than a patterned one if the room already has tile pattern or wallpaper. The film peels off cleanly, which suits renters, and it costs far less than replacing the glass.

    17. Sheer Cafe Curtain at the Bathroom Window

    Bathroom window with a sheer cafe curtain across its lower half.

    Hang a sheer cafe curtain across the lower half of the bathroom window, so the top half stays open to daylight while the lower half gives privacy. Sheer fabric softens the window edge, filters sun into a gentle glow, and suits a bathroom with a garden view or a high window. The curtain reads as a bedroom detail, which helps the bathroom feel less hard and tiled.

    Choose a washable sheer fabric that copes with humidity, and keep the curtain clear of direct shower spray. Use a tension rod inside the frame if you rent, so no holes are needed. Pair the sheer curtain with a plain roller blind for evenings, when privacy matters more than daylight.

    18. Candle and Diffuser Corner Away From Water

    Dry bathroom shelf corner with a candle, a reed diffuser, and a tray.

    Set aside one dry corner, on a shelf or a stool well away from the tub and sink, for a candle and a reed diffuser. Scent is a soft detail that costs little and changes how the room feels on entry, and a dedicated corner keeps candles off wet surfaces. Choose a calm scent, such as lavender, cedar, or clean cotton, and keep it to one scent at a time.

    Never leave a burning candle unattended, and keep flames clear of towels, curtains, and the diffuser reeds. Use a tray under both items to catch drips and to mark the corner as a styled spot. A diffuser suits households with children or pets better than an open flame, since it needs no heat.

    19. Eucalyptus Bundle on the Showerhead

    Small eucalyptus bundle tied to a showerhead beside pale tile.

    Tie a small bundle of fresh eucalyptus to the showerhead with twine, clear of the direct spray, so steam releases a gentle scent during a shower. This is a low cost, low effort soft touch that needs no new fitting and no wiring. It suits a bathroom that already has plants or a natural, wood led scheme.

    Replace the bundle every two to three weeks, or sooner if it dries out, and keep it clear of the drain so leaves do not wash down. If anyone in the household is sensitive to strong scents, use a smaller bundle or skip this idea. Dry the twine between showers so it does not stay damp against the metal.

    20. Humidity Loving Plants on a High Shelf

    Trailing pothos plant on a high bathroom shelf beside a tiled wall.

    Grow humidity loving plants, such as pothos, ferns, and philodendron, on a high shelf away from splashes, letting vines trail down the wall. Plants soften hard tile with living green, and bathroom air suits them well, since they enjoy humidity and indirect light. One trailing plant usually looks better than a crowded collection in a small room.

    Use pots with drainage holes and saucers, and check the soil before watering, since bathroom air already adds moisture. If your bathroom has no window, rotate the plant to a brighter room for a few days each week or choose a low light tolerant variety. Keep leaves clear of the shower spray so they do not stay wet.

    21. Woven Baskets for Soft Storage

    Woven baskets holding toiletries and rolled towels on a bathroom shelf.

    Sort toiletries into woven baskets in seagrass, cotton rope, or rattan, on shelves or on the floor beside the vanity. Baskets soften hard tile and porcelain while hiding the visual noise of bottles and tubes. Assign one basket per person or per job, such as hair care, skin care, and cleaning, and label the base if the baskets look alike.

    Seagrass and cotton rope baskets cope well with bathroom humidity if they are kept off wet floors, so set them on a shelf or a stool rather than beside the tub. Once a month, empty each basket and return only what you actually used, since bathroom baskets quietly collect empty bottles. A basket with a lid suits items you would rather not see.

    22. Fabric Covered Boxes Inside the Vanity

    Vanity drawer lined with pale fabric boxes holding toiletries in order.

    Line the vanity drawers or cabinet with fabric covered boxes in a pale linen tone, one box per job: daily skin care, hair tools, medicines, and spares. Fabric boxes stop bottles from sliding and rattling, make drawers feel finished when opened, and keep small items from getting lost behind larger ones. They suit a vanity with deep drawers where loose bottles tend to drift.

    Measure each drawer before buying, and leave a finger gap at the front so boxes lift out easily. Choose washable or wipeable fabric, since spills happen in a bathroom. Label the boxes on the inside edge if several people share the vanity, so each person finds their own items fast.

    23. Soft Close Drawers and Toilet Seat

    Bathroom vanity with soft close drawers and a soft close toilet seat.

    Fit soft close drawer runners and a soft close toilet seat, so nothing slams in a quiet house. Soft close fittings remove the sharp bang of a closing drawer or seat, which matters most at night and in a small home where the bathroom sits near bedrooms. They are a small, practical luxury that guests notice without knowing why the room feels calmer.

    Check that the runners and seat fit your existing vanity and toilet before buying, and follow the maker instructions for the hinge type. Keep the original parts in a bag if you rent. Soft close fittings also protect the vanity and seat from wear, since they stop repeated hard impacts.

    24. Heated Towel Rail for Warm Towels

    Heated towel rail holding warm white towels in a pale bathroom.

    Fit a heated towel rail, or a plug in heated rail if plumbing changes are not possible, so towels come out warm and dry. A warm towel after a shower is one of the clearest soft touches in a bathroom, and a heated rail also helps towels dry faster between uses, which keeps the room fresher. It suits a main bathroom used daily more than a rarely used guest bathroom.

    Keep the rail clear of the shower spray, and hang only one or two towels on it at a time so air can move around them. Check the power or plumbing route before you commit, and follow the maker guidance for bathroom zones. If a heated rail is not possible, warm towels briefly in a dryer before a bath for a similar feel.

    25. Heated Floor Mat Under the Tile

    Warm bathroom floor in pale tile with a thick rug beside the tub.

    Plan a heated floor mat under the bathroom tile, with a timer set for morning showers, so the floor feels warm under bare feet. Warm floors make tile far more pleasant in colder months, help the floor dry faster after showers, and suit a soft scheme where every surface should feel kind to touch. This works best when planned before the tile is laid.

    Keep the heating zone out of the area directly under a fixed vanity or tub, where heat is wasted, and follow the maker guidance for wet room use. Pair the mat with a timer so the floor is warm only when needed, which keeps running costs down. If a full heated floor is not possible, a thick rug by the tub gives a smaller version of the same comfort.

    26. Plush Bathrobe Hook Station

    Bathrobe hook station with a plush robe and slippers beside a shower.

    Set up a bathrobe station beside the shower or tub: two sturdy hooks at easy reach, one plush robe, and a small shelf for slippers. A robe station turns the step out of the shower into a warm moment, instead of a cold dash for a towel. It suits a main bathroom where the same person showers daily, and it keeps the robe off the floor and off the door.

    Choose hooks rated for the weight of a wet robe, and fix them into studs or with fixings rated for your wall type. Keep the station clear of the shower spray so the robe stays dry. If two people share the bathroom, give each person their own hook and robe color, so the station stays tidy.

    27. Wooden Bath Tray for Slow Baths

    Wooden bath tray across a bathtub holding a book and a cup.

    Rest a wooden bath tray across the tub, with slots for a book, a cup, and a candle kept safely away from the water. A tray turns a plain tub into a place to slow down, and wood adds the same warm material as the teak mat and stool elsewhere in the room. Choose a tray that spans your tub width with extendable sides, and look for a model with a phone ledge that keeps electronics out of splash range.

    Dry wood trays after each use to avoid warping, while bamboo and coated metal versions cope better with steam. Store the tray upright behind the door when it is not in use so it does not become a permanent clutter spot. Keep candles on the tray only when you are in the bath and can watch them.

    28. Soft Art Prints in Moisture Safe Frames

    Small group of soft botanical art prints in pale frames above a towel rail.

    Hang a small group of three to five soft art prints, such as botanical prints, gentle abstracts, or pale landscapes, in moisture safe frames above the towel rail or beside the mirror. Art gives a bathroom personality without taking counter or floor space, and soft colors echo the pale walls and towels. One theme, kept consistent, reads as one arrangement rather than a random set.

    Use frames with sealed backs or acrylic covers, and avoid hanging unprotected paper directly beside the shower, where steam will cockle it over time. Keep the spacing even, and use adhesive picture strips for light frames on tile and painted walls if you rent. For help pairing a soft color with a calmer one, see these stylish purple bathroom ideas for a gentle lilac accent option.

    29. Pale Terrazzo Vanity Top

    Pale terrazzo vanity top with soft grey and blush stone chips.

    Choose a pale terrazzo vanity top, with small stone chips in soft grey, cream, and blush, instead of a plain white top. Terrazzo adds gentle speckled interest that reads as soft confetti rather than a bold pattern, and it copes well with daily water and cleaning. It suits a bathroom that needs a hard wearing top but still wants a soft, warm finish.

    Keep the surrounding finishes simple, such as plain pale walls and one metal finish, so the speckle stays the feature. Seal the top as your supplier advises, and wipe spills promptly, since pale stone can mark. Pair the terrazzo top with a simple undermount basin so the top itself leads.

    30. Rounded Pebble Tile Shower Floor

    Shower floor in rounded pebble tile in soft grey and cream.

    Lay a rounded pebble tile floor in the shower, in soft grey and cream stones set in grout, for gentle grip and a natural feel underfoot. Pebbles give slip resistance that flat tile cannot match, and their rounded shapes echo the oval tub and arched mirror in a soft scheme. The floor becomes a textured detail that you feel, not just see.

    Check that the stones sit level and that the grout fills the gaps evenly, since uneven stones can feel uncomfortable to stand on. Keep the shower walls plain when the floor is busy, so the room stays calm. Seal the grout as advised, and rinse the floor after showers so soap does not build up between stones.

    31. Low Evening Lamp Corner for Wind Down Baths

    Low evening lamp on a bathroom stool with a folded towel beside a tub.

    Create a low evening corner for wind down baths: a small rechargeable lamp on a stool, a folded towel, and a candle kept safely away from water, all on the dry side of the room. In the evening, switch off the main light and use only the low lamp, so the bathroom feels like a quiet retreat rather than a bright utility room. This is the simplest soft idea in the list, and it costs almost nothing.

    Keep all plug in or rechargeable lights away from direct water spray, and choose a warm bulb so the glow stays gentle. Store the lamp on its stool between baths, so the corner stays ready. Pair the low light with the heated towel rail or a warm robe, so the whole evening routine feels soft from start to finish.

    Conclusion

    A soft bathroom comes from a few calm choices repeated well: one pale base color, soft textures where your body meets the room, warm light you can dim, and storage that keeps clutter out of sight. Start with towels, a mat, and a light swap, then add paint, tile, or a fixture only where the room still feels hard or cold. Work through this list in order, color first, then texture, then light, then storage, and adjust after a week of real use. For small rooms, the storage and surface ideas in these apartment bathroom ideas and the calm shower layouts in these walk in shower ideas pair well with the soft finishes above.

    Keep this list handy for your next free hour at home, and build your soft bathroom one gentle change at a time: a towel set today, a mat this weekend, and a dimmer and a plant to finish the room.

    FAQs

    How do I make a bathroom feel soft without a remodel?

    Start with towels, a thick bath mat, a fabric shower curtain, and warm dimmable light. Those four swaps change how the room feels to touch and to the eye, with no paint or tile work. Add a plant, a woven basket, and a wooden tray next, and only then consider paint or a vanity change if the room still feels hard.

    What are the best soft bathroom colors?

    Warm white, pale sage, blush pink, soft blue grey, and pale stone all work as soft bathroom colors, because they are pale, muted, and easy to pair with white tile and wood. Pick one as the lead color, repeat it in two or three places, and keep the rest of the room quiet. Test a large sample in morning light and evening lamplight before committing, since pale colors shift a lot between light sources.

    How do I keep a soft bathroom from looking washed out?

    Repeat one accent color in three or four places, such as towels, a rug, and a small accessory, and add one warm material, such as wood or woven baskets, for contrast. A matte tile floor or a terrazzo top also adds gentle variation without a bold pattern. Keep the ceiling and trim in a clean soft white so the room keeps its shape.
    What soft bathroom ideas work in a small bathroom?

    Use one pale color all over, a large mirror to bounce light, and soft textures that do not take floor space: plush towels on a shelf, a fabric curtain, and a thick mat. Choose a rounded mirror, a wall hung vanity, and baskets on shelves for storage, so the floor stays clear. Avoid busy patterns on more than one surface, since a small room shows clutter fast.

    How do I make bathroom lighting softer in the evening?

    Put sconces or a backlit mirror on a dimmer, and add a low rechargeable lamp for evening baths, so you can switch off the main ceiling light. Warm white bulbs, around the warm end of the range, keep the glow gentle rather than clinical. Keep plug in lights away from direct water spray, and use a timer or dimmer so the evening setting is easy to repeat.

    How do I keep soft fabrics fresh in a humid bathroom?

    Choose washable cotton towels and mats, keep a second set in rotation, and lift mats to dry the floor after showers. Wash shower curtains and liners often, keep baskets off wet floors, and run the extractor fan during and after showers so steam clears fast. Dry wood trays and stools between uses, and replace scent bundles and plants before they dry out or fade.


  • 12 Bathroom Closet Organizer Ideas to Bring More Personality Home

    12 Bathroom Closet Organizer Ideas to Bring More Personality Home

    A bathroom closet holds more than towels. It holds spare toiletries, cleaning supplies, first aid items, and the extras you reach for when guests arrive, so a messy closet slows down every morning. These 12 bathroom closet organizer ideas give each group a clear home, from labelled bins on the top shelf to rolled towels, turntables, and hooks on the side wall. You can start with one shelf, add a finishing touch that shows your taste, and keep the rest plain until you are ready. For more small bathroom storage planning, see these apartment bathroom ideas.

    Key Takeaways

    • Empty the closet and sort everything into groups first, such as towels, daily toiletries, spares, cleaning supplies, and first aid, before you buy any bins.
    • Put daily items at eye and hand level, spare and seasonal items up high, and heavy items low, so the closet is easy to use every day.
    • Use one bin style and one label style across the closet, and repeat one accent color in two or three places, so the inside looks planned when the door opens.
    • Roll or file-fold towels and washcloths instead of stacking them high, since tall stacks topple and hide what is at the bottom.
    • Use the door and the side walls for small items, since those surfaces add storage without taking a single inch of shelf space.
    • Add one personal finish, such as patterned paper on the back wall or a scented sachet, so the closet feels like part of your home rather than a cupboard.

    1. Zone Shelves by Person and Job

    Bathroom closet shelves divided into zones for towels, toiletries, spares, and cleaning supplies.

    Divide the closet into zones by person and job before you add any bins. Put one shelf for daily towels, one for daily toiletries, one for spares and seasonal extras, and one for cleaning supplies, with a small first aid zone that everyone can find fast. Zoning stops the morning search through everything you own, since you only open the zone you need, and it makes it clear which zone is overfull when the closet starts to feel tight.

    Keep the same order on each shelf every time, such as towels on the left and toiletries on the right, so your eye learns where things live. If you share the closet, give each person a labelled bin or a shelf section, and keep shared items in the middle where both of you can reach them. Review the zones once a season, and move out anything you did not use, since a zone that holds only one category stays tidy far longer than a shelf that collects everything.

    2. Store Spares in Clear Labelled Bins Up Top

    Clear labelled bins on the top shelf of a bathroom closet holding spare towels and toiletries.

    Store spare and seasonal items in clear bins on the top shelf, with a label on each bin. Clear sides let you see what is inside without pulling every box down, and labels save you from opening three bins to find one item. This works well for spare shampoo, guest towels, holiday toiletries, and bulk buys that you reach for only a few times a year.
    Keep bins shallow enough to lift safely from a step stool, and avoid packing them so full that the lid will not close. Put a short list on the label, such as “guest towels, spare soap, cotton pads,” rather than a single vague word. Keep a small step stool nearby, since a shelf you cannot reach safely becomes a place where things are forgotten, and keep the weight light enough to lift down with one hand.

    3. Roll Towels by Color for a Boutique Look

    Bathroom closet shelf with towels rolled by color in neat rows.

    Roll bath towels, hand towels, and washcloths by color, and line the rolls up on one shelf like a small shop display. Rolling suits a linen closet because a roll shows its color and size at a glance, and you can pull one towel out without toppling a stack. Group the rolls by color, with white and cream together, then blues, greens, or warm tones, so the shelf reads as a planned color story rather than a pile of laundry.

    This is also the fastest personality change in the closet, since towel color sets the mood every time the door opens. Choose one main towel color and one accent color, and repeat the accent in a bin, a label, or a washcloth stack. Keep the rolls snug but not squeezed, and place daily towels at the front and guest towels behind them, so the rolls you use most are the easiest to reach.

    4. Add Shelf Dividers to Keep Stacks Upright

    Bathroom closet shelf with dividers keeping folded towel stacks upright and separate.

    Add shelf dividers to keep folded stacks upright and separate, so one pulled towel does not topple the whole shelf. Folded clothes and towels slide and collapse without a boundary, and dividers give each stack its own slot, like books on a shelf. This works best for folded bath towels, hand towels, and bedding that you store on open shelves in the closet.

    Fold items to the same width so stacks line up, and keep each stack to a height you can lift with one hand. Leave one slot empty for fresh laundry or new items, so a full shelf does not push overflow onto the floor. Wipe the shelf when you refold, since folded stacks collect lint at the edges, and check that the dividers fit the shelf depth, so they do not slide forward when you pull a towel out.

    5. Fit Pull-Out Drawers at the Base

    Pull-out drawer unit at the base of a bathroom closet holding folded washcloths and accessories.

    Fit a pull-out drawer unit or a set of stacking drawers at the base of the closet for folded items, underwear, and small accessories that do not suit open shelves. Drawers beat open piles because each drawer holds one category, and you can open one without disturbing the rest. A unit with three or four shallow drawers suits a reach-in closet better than one deep drawer that hides everything at the bottom.

    Sort drawers by type, such as washcloths in one, hair tools in another, and first aid in a third, and add small dividers inside so items stay upright. Leave a little air above the top drawer so the shelf above it still clears hanging items, if any. If the closet has no floor space to spare, a hanging shelf unit with drawer inserts gives a similar result, and it needs no tools to fit.

    6. Hang a Pocket Organizer on the Inside of the Door

    Pocket organizer on the inside of a bathroom closet door holding small toiletries.

    Hang a pocket organizer or a row of hooks on the inside of the closet door for small toiletries, hair tools, and cleaning sprays that otherwise fill shelves. The door is unused space in most closets, and a flat organizer adds storage without taking a single inch of rail or shelf. Clear pockets suit small bottles and accessories you want to see at a glance, while fabric pockets give a calmer look that hides the contents.

    Keep heavy bottles low so the door still swings freely, and reserve the top pockets for light items such as headbands, spare washcloths, and cotton pads. If the door is used often, choose hooks with a soft backing to protect the door surface, and check that nothing rattles when the door moves. For more door storage planning, see these closet door ideas.

    7. Use a Turntable for Daily Toiletries

    Turntable on a bathroom closet shelf holding daily toiletry bottles.

    Place a turntable, also called a lazy Susan, on the shelf that holds daily toiletries, so nothing hides at the back. A turntable suits a deep closet shelf because you can spin it to reach shampoo, skin care, and medicine without pulling every bottle out. Choose a turntable with a low rim, so bottles do not slide off when you spin it, and keep it to one category per turntable, such as skin care on one and hair care on another.

    Keep the tallest bottles in the middle and shorter items at the edge, so you can see each label as the turntable turns. Wipe the turntable when you clean the shelf, since bottles leave rings and drips, and check that it spins freely before you load it with glass bottles. If the shelf is narrow, use a half-round turntable against the back wall, which gives the same spin benefit in less depth.

    8. Match Baskets in One Accent Color

    Matching baskets in one accent color on bathroom closet shelves holding toiletries.

    Use matching baskets in one accent color for the items you want hidden, one basket per category, such as hair care, skin care, cleaning, and first aid. Matching baskets give closed storage without doors, and one color keeps the closet calm even when the contents differ. Choose baskets that fit the shelf depth with a little air at the front, so you can pull each one out without moving the next basket.

    Label the front of each basket, since baskets that look alike are easy to mix up, and keep the label style the same across the closet. Use washable baskets or baskets with a wipe-clean liner in a bathroom, since steam and drips mark plain fabric over time. Keep the baskets on shelves rather than on a wet floor, and empty each basket once a month, returning only what you actually used, since bathroom baskets quietly collect empty bottles.

    9. File-Fold Washcloths in Shallow Bins

    Shallow bins in a bathroom closet with washcloths file-folded upright in rows.

    File-fold washcloths and hand towels in shallow bins, standing them upright in rows like files, instead of stacking them flat. File folding suits small items because you can see every washcloth at once, and you can pull one out without disturbing the rest. Use one shallow bin per color or per person, and fold each cloth to the same width so the rows line up.

    This method also shows off a color story, since the folded edges form neat stripes across the bin. Place the bins at eye level if you use washcloths daily, and keep one bin for clean cloths and a small basket nearby for used ones, so clean and used items never mix. Wash the bins when you change the towels, since lint collects in the corners, and keep the bins shallow enough that the cloths stay upright rather than flopping forward.

    10. Fix Hooks on the Side Wall for Robes and Bags

    Side wall of a bathroom closet with hooks holding a robe and a wash bag.

    Fix a row of hooks on the closet side wall for robes, wash bags, and tomorrow’s outfit, since side walls are often bare yet sit at hand height. One hook per item keeps straps from tangling, and robes hung by their loop keep their shape better than robes folded in a pile. This suits a closet where shelves are full but the side wall still has free space, and it gives bulky items a home that does not crowd the towels.

    Keep the heaviest bag on the lowest hook, and check that hooks are fixed into studs or with fixings rated for the load. Leave a gap between hooks so items do not press against each other and mark the fabric. If you rent, removable hooks give a similar result, but check their weight rating and test one hook before loading them all. For more small closet layouts, see these creative closet ideas for small spaces.

    11. Add a Battery Light Strip Inside the Closet

    Bathroom closet lit by a warm battery light strip under a shelf, showing labelled bins.

    Add a battery light strip inside the closet, fixed under a shelf or along the door frame, so you can see labels, colors, and small bottles without a main bathroom light. A dark closet hides what you own and makes getting dressed slower, and a light strip solves that problem with no wiring. Battery strips with a remote suit renters, while plug-in versions give steadier brightness if you have a socket nearby.

    Stick the strip to the underside of a shelf, not to the wall, so you can move it when you change the layout, and choose a warm white strip so towels and wood tones look soft rather than clinical. Keep the light away from direct water spray, and check the battery or the plug position before you load the shelf above it. A motion sensor strip is a good choice here, since it lights up when the door opens and switches off when the door closes.

    12. Line the Back Wall and Add a Scented Finish

    Bathroom closet with a patterned paper back wall, a scented sachet, and a small framed print.

    Line the back wall of the closet with patterned paper, and finish with a scented sachet and one small framed print, so the closet has personality even when it is only half open. Patterned paper on the back wall shows between bins and towels, and it sets the color palette for the whole closet in one move. Choose a small repeat pattern, such as a stripe, a botanical print, or a simple geometric shape, so it reads well in a tight space, and keep the paper off any wall that gets direct shower steam.

    Place a lavender or cedar sachet on a shelf, away from towels you use on your face, and hang one small print in a moisture-safe frame where it will not be knocked by bins. This finishing touch suits a guest closet most of all, since guests notice the paper and the scent before they notice the bins. For more bathroom personality ideas, see these walk in shower ideas for how one strong finish can carry a plain room, and keep the rest of the closet quiet so the back wall stays the focus.

    Conclusion

    A bathroom closet works best when each group has a home, daily items sit at hand level, and one personal finish shows your taste. Start by emptying the closet and sorting into zones, then add clear bins up top, rolled or file-folded towels, a turntable for daily toiletries, and hooks on the door and side wall. Keep one bin style, one label style, and one accent color across the closet, and leave one shelf or slot partly empty, so fresh laundry has a place to land. With those basics in place, you can shift the look with the seasons, swapping a towel color or a sachet, without a full reorganization.

    Save this list on Pinterest before you start, and work through it one idea at a time: zones and bins first for a quick tidy, then towels and hooks, then the patterned back wall when you have an hour to spare.

    FAQs

    How do I start organizing a bathroom closet?

    Empty the closet fully, sort everything into groups such as towels, daily toiletries, spares, cleaning supplies, and first aid, and move out anything empty, expired, or unused. Clean the shelves, then put daily items at eye and hand level, spares up high, and heavy items low. Add bins only after the zones are set, so each bin holds one clear group rather than a mix of leftovers.

    What bins work best in a bathroom closet?

    Clear bins work best up top, since you can see spares without pulling each box down, while matching baskets in one accent color work best at eye level, where you want a calmer look. Use shallow bins for washcloths and small items, and deeper bins for spare towels and bulk buys. Label every bin on the side that faces out, and keep bins shallow enough to lift safely from a step stool.

    How should I store towels so they stay tidy?

    Roll bath towels by color on one shelf, or file-fold washcloths and hand towels upright in shallow bins, so you can see each item and pull one out without toppling a stack. Keep daily towels at the front and guest towels behind them, and keep each stack or row to a height you can lift with one hand. Leave one slot empty for fresh laundry, so a full shelf does not push overflow onto the floor.

    Can I organize a bathroom closet in a rental without drilling?

    Yes. Use a hanging pocket organizer on the door, a turntable on a shelf, matching baskets, and removable hooks on the side wall, all of which need no drilling. Battery light strips with adhesive backing also work without wiring, and patterned paper can be fixed with removable strips if your lease forbids paste. Keep the original shelves and doors as they are, so you can remove every organizer at move-out.

    How do I stop a bathroom closet from smelling musty?

    Keep air moving by leaving a small gap between bins and the back wall, and avoid packing the closet so full that air cannot circulate. Use a cedar or lavender sachet on a shelf, away from face towels, and check for leaks or damp spots before you add paper or fabric organizers. Wipe shelves when you change towels, and move out any bottle that has leaked, since one spill can scent the whole closet.

    How often should I reorganize a bathroom closet?

    Review the closet once a season, when you swap seasonal towels or guest supplies, and do a quick tidy once a month, emptying each basket and returning only what you actually used. A seasonal review catches expired medicines, empty bottles, and towels you no longer use, while a monthly tidy keeps the zones clear. If a zone keeps overflowing, it usually means that group needs its own bin or a smaller count, not a bigger closet.


  • 27 Bathroom Vanity Decor Ideas to Refresh Your Space

    27 Bathroom Vanity Decor Ideas to Refresh Your Space

    A bathroom vanity works hard every morning, yet it is often the first spot to collect clutter. A tray, a better mirror, warmer light, and a few well chosen accessories can change how the whole room feels without a remodel. The ideas below cover counters, mirrors, lighting, storage, and small finishing touches, so you can start with one tray or restyle the full vanity. For more room ideas from the same site, start at the Dwell Ovell home page.

    Key Takeaways

    • Start with a tray or a small group of items so the counter reads as styled, not scattered.
    • Keep daily items within reach and move the rest into a drawer, basket, or closed cabinet.
    • Match metals and finishes across the faucet, mirror frame, and tray for a calm, planned look.
    • Use layered light, such as sconces plus a lit mirror, to soften shadows at face level.
    • Add one living touch, like a stem vase or a small plant, to keep a hard surfaced room feeling warm.
    • Choose towels and small accessories in one accent color if you want change without repainting.

    1. Corralled Tray Vignette

    Bathroom vanity counter with a tray holding a soap dispenser, small dish, and candle.

    Set a shallow tray on the vanity and group your soap dispenser, a small dish, and one decorative item inside it. The tray gives scattered bottles a clear boundary, so the counter looks tidy even when items stay out. Choose a tray that leaves room on each side for a hand towel or a cup.

    A stone, wood, or ceramic tray suits most bathrooms. Keep the group to three or four pieces, and leave the tray itself partly visible so it reads as a frame rather than another cluttered surface.

    2. Arched Mirror Statement

    Bathroom vanity with an arched mirror above a white sink and brass faucet.

    Swap a plain rectangular mirror for an arched mirror to soften the straight lines of a vanity and sink. The curve draws the eye up, which helps a small bathroom feel taller, and it works with both modern and traditional faucets. Hang it so the center sits at eye level for most users.

    Pair the arch with simple sconces or a single pendant if you need extra light. Keep the frame slim in black, brass, or wood so the shape, not the frame, does the work.

    3. Paired Wall Sconces

    Bathroom vanity mirror flanked by two wall sconces with frosted glass shades.

    Mount one sconce on each side of the mirror for even light across the face. Side lighting cuts the shadows that a single overhead light leaves under the eyes and chin, which makes morning routines easier. It also adds a finished, hotel-like feel to a plain vanity wall.

    Choose shades that spread light softly, such as frosted glass or linen, and keep both sconces at the same height. If wiring is not an option, battery sconces with a warm bulb give a similar look without an electrician.

    4. Floating Shelf Beside the Mirror

    Wood floating shelf beside a bathroom mirror holding a vase, folded towel, and jar.

    Add one floating shelf beside the mirror for a vase, a folded towel, and a small jar. A shelf lifts decor off the counter, which frees space for daily items, and it fills a blank stretch of wall without a bulky cabinet. It suits narrow vanities where counter space is tight.

    Fix the shelf at a height you can reach without stretching, and keep it to three light items so it does not feel top heavy. A wood shelf warms a white bathroom, while a glass shelf keeps a small room feeling open.

    5. Matching Refillable Dispensers

    Matching amber glass refillable soap and lotion dispensers on a bathroom vanity tray.

    Decant hand soap, lotion, and hand wash into matching refillable bottles for an instant tidy look. Mismatched product labels are often what makes a vanity look busy, and a matched set calms the whole counter in minutes. Amber glass, white ceramic, or clear glass all work.

    Label the bottles if the contents look alike, and keep a refill bottle under the sink. Choose pump tops that suit thick lotions, since a pump that clogs will quickly undo the neat effect.

    6. Fresh Eucalyptus Stem Vase

    Slim vase with eucalyptus stems beside a bathroom faucet on a light counter.

    Place two or three eucalyptus stems in a slim vase beside the faucet for color, scent, and softness. The silvery green suits most bathroom palettes, and the stems last well in a dry vase without daily care. A slim vase matters here, since a wide vase eats counter space fast.

    Trim the stems so they sit just above the mirror frame or below it, depending on your shelf height. Replace the stems when they dry out fully, and wipe the vase base often to avoid water rings on stone counters.

    7. Tiered Stand for Daily Items

    Two tier stand on a bathroom vanity holding small daily items in a neat stack.

    Use a two tier stand to hold small daily items, such as a lip balm, a hair tie holder, and a small perfume bottle, in one vertical stack. Going vertical saves counter space and keeps small items from rolling into the sink area. It also makes the vanity easier to wipe clean around the base.

    Keep the top tier for the items you reach for each morning and the lower tier for backups. A metal stand with a small footprint suits a narrow counter, while a ceramic stand suits a wider one.

    8. Backlit LED Mirror Glow

    Bathroom vanity with a backlit LED mirror glowing softly around a white sink.

    Choose a mirror with a built in LED halo for soft, even light around the face. Backlit mirrors remove the need for bulky fixtures in a small bathroom, and the glow flatters skin tones better than a harsh overhead bulb. Many models let you switch between warm and cool light.

    Check the mirror size against your vanity width before ordering, since a mirror wider than the vanity looks unbalanced. Keep the wall behind it plain so the halo reads clearly, and dim the light in the evening for a calmer mood.

    9. Symmetrical Double Vanity Styling

    Symmetrical double bathroom vanity with matching trays, dispensers, and hand towels.

    Style each side of a double vanity as a mirror image, with matching trays, dispensers, and hand towels. Symmetry makes a shared bathroom feel fair and calm, and it stops one side from drifting into clutter while the other stays neat. It also photographs well, which helps if you plan to share the room online.

    Allow one personal item per side, such as a different scent or brush, so the pair does not feel like a showroom. Keep the center clear for shared items, such as a tissue box or a small plant.

    10. Vessel Sink as a Feature

    White ceramic vessel sink on a wood vanity counter with a tall faucet.

    Let a vessel sink be the feature by keeping the counter around it almost bare. A bowl sink in stone, ceramic, or glass already adds shape and height, so it needs little else beside it. This approach suits a guest bathroom or a powder room where daily clutter is low.

    Pair the vessel with a tall faucet that clears the bowl rim, and place only a soap dispenser nearby. Wipe the base of the bowl often, since water can pool where the bowl meets the counter.

    11. Marble Tray and Candle Pairing

    Small marble tray on a bathroom vanity holding a candle and soap dispenser.

    Set a small marble tray on the vanity with a candle and a soap dispenser for a calm, spa-like group. Marble adds cool weight and a natural pattern, while the candle brings warmth and scent to a room full of hard surfaces. The pairing works best on a light counter where the marble veins show.

    Choose an unscented or lightly scented candle for a small bathroom, and trim the wick before each use. Keep the candle away from towels and curtains, and never leave it burning unattended.

    12. Woven Baskets Below the Vanity

    Woven baskets under an open bathroom vanity shelf holding rolled towels.

    Slide woven baskets under an open vanity shelf for towels, spare toilet paper, and cleaning cloths. Baskets hide everyday supplies while adding texture that softens tile and porcelain. They also make it easy to pull out one category at a time when you clean.

    Label the baskets if several people share the bathroom, and choose baskets with handles for easy lifting. Measure the shelf height first, since a basket that is too tall will not slide in cleanly.

    13. Glass Apothecary Jars

    Clear glass apothecary jars holding cotton pads and bath salts on a bathroom vanity.

    Store cotton pads, bath salts, and hair ties in clear glass jars with lids on the counter or a shelf. Jars turn plain supplies into part of the decor, and you can see at a glance when something needs refilling. They suit bathrooms with a classic or spa-like style.

    Use jars of different heights for visual interest, and keep lids tight in a steamy room. Wash the jars monthly, since bathroom humidity can leave a film on glass that sits untouched.

    14. Leaning Framed Art

    Small framed print leaning against the wall behind a bathroom vanity.

    Lean a small framed print against the wall behind the vanity instead of hanging it. Leaning art feels relaxed and is easy to swap, which suits renters and anyone who likes seasonal changes. It also fills the wall space above a low backsplash without drilling.

    Choose a frame with glass or a sealed print, since steam can damage paper over time. Keep the art clear of the faucet splash zone, and rest it on a tray or a shelf so it does not slide.

    15. Brushed Brass Hardware Refresh

    Bathroom vanity with brushed brass knobs, faucet, and mirror frame accents.

    Swap chrome knobs and faucet accents for brushed brass to warm a cool white bathroom. Brass pairs well with marble, wood, and soft green towels, and a small hardware change can shift the whole vanity style without replacing the cabinet. It also hides water spots better than polished chrome.

    Match the new knobs to the faucet finish as closely as you can, and keep the mirror frame in the same family. If a full faucet swap is too costly, start with knobs and a matching soap dish.

    16. Small Trailing Plant

    Small trailing pothos plant in a ceramic pot on a shelf beside a bathroom vanity.

    Place a small trailing plant, such as a pothos, on a shelf above or beside the vanity for living green that softens tile. Trailing leaves add movement to a room full of straight lines, and many bathroom plants cope well with humidity. A small pot keeps the plant from crowding the counter.

    Choose a pot with drainage and a saucer to protect wood or stone surfaces. Trim the vines when they reach the faucet or mirror, and move the plant to brighter light if growth stalls.

    17. Rolled Linen Hand Towels

    Rolled linen hand towels stacked in a basket beside a bathroom vanity.

    Roll hand towels instead of folding them, and stack the rolls in a basket or on a shelf by the vanity. Rolled towels look neat, are easy to grab with wet hands, and add a spa feel to an ordinary counter. They also let you mix two towel colors without a messy pile.

    Roll towels tightly so they hold their shape, and keep two or three out at a time. Wash the basket lining often, since damp towels can leave a musty smell in woven storage.

    18. Minimal All White Vanity

    All white bathroom vanity with a white tray, white dispensers, and white towel.

    Keep the vanity all white, with a white tray, white dispensers, and a white towel, for a clean and calm look. A single color removes visual noise, which helps a small bathroom feel larger and easier to clean. The key is texture, so mix matte ceramic, glossy porcelain, and soft cotton.

    Add one wood or stone item, such as a small stool or a soap dish, so the room does not feel cold. Wipe white surfaces weekly, since soap splashes show more on white than on patterned counters.

    19. Warm Wood and Stone Pairing

    Warm wood bathroom vanity tray with a stone soap dish on a stone counter.

    Pair a warm wood vanity or wood tray with a stone soap dish and a stone counter for a natural, grounded feel. Wood softens the coolness of stone and tile, while stone gives the wood a solid, durable partner. This pairing suits bathrooms with beige, cream, or soft grey walls.

    Seal wood items used near water, and wipe them dry after splashes to avoid stains. Keep the wood tone consistent across the tray, stool, and mirror frame so the group reads as planned.

    20. Matte Black Accent Group

    Bathroom vanity with matte black tray, faucet, and framed mirror against white tile.

    Add matte black accents, such as a black tray, black faucet, and black framed mirror, for a sharp modern contrast. Black grounds a light vanity and pairs well with white tile, oak, and brushed brass. A little black goes a long way, so keep it to three or four items.

    Use matte rather than glossy black to avoid harsh reflections under bright lights. Wipe black fixtures with a soft cloth, since water spots and soap film show clearly on dark surfaces.

    21. Vintage Tray and Mirror Pairing

    Vintage style tray with an aged mirror above a classic bathroom vanity.

    Style a vintage style tray with an ornate or aged mirror for a collected, old house feel. A tray with a worn finish or a detailed edge adds character that a new set cannot copy, and it suits bathrooms with classic tile or a clawfoot tub nearby. The pairing works best when the rest of the vanity stays simple.

    Check a vintage tray for rust or sharp edges before use, and line it with a small cloth if the base is rough. Keep modern items, such as electric toothbrushes, off the tray so the vintage look stays clear.

    22. Bold Towel Color Accent

    Bathroom vanity with deep green towels as the main color accent.

    Use towels in one bold color, such as deep green, navy, or terracotta, as the main accent on a neutral vanity. Towels are easy to change, wash, and store, so they are a low cost way to test a color before painting. The bold color also gives the eye a clear focal point.

    Hang one towel on a ring or bar and fold a matching towel on the counter or shelf. Keep the soap dispenser and tray neutral so the towel color stands out rather than competing with other bright items.

    23. Edited Counter with Drawer Organizers

    Tidy bathroom vanity counter with only daily items out and drawer organizers below.

    Edit the counter down to daily items only, and move the rest into drawer organizers inside the vanity. A clear counter looks larger and is faster to clean, while organizers stop drawers from becoming a second cluttered zone. This idea suits busy mornings when every item needs a fixed home.

    Sort drawer contents into small groups, such as hair care, skin care, and first aid, and label the dividers if needed. Do a quick reset each Sunday so stray items do not creep back onto the counter during the week.

    24. Candle and Diffuser Scent Pairing

    Candle and reed diffuser on a tray on a bathroom vanity.

    Pair a candle with a reed diffuser in the same scent family for layered fragrance that lasts between uses. The diffuser keeps scent going when the candle is unlit, while the candle adds a warm glow in the evening. Place both on one tray so they read as a set.

    Keep reeds away from the faucet splash zone, and flip them weekly for a stronger scent. Choose a light scent for a small bathroom, since strong fragrance can feel heavy in a closed room.

    25. Small Vanity Stool for a Dressing Corner

    Small wood stool beside a wide bathroom vanity creating a dressing corner.

    Add a small stool beside a wider vanity to create a dressing corner for makeup or hair care. A stool makes long routines more comfortable, and it fills an awkward gap beside the cabinet. It also gives you a spot to set a small bag or a folded robe.

    Choose a stool that tucks fully under the counter overhang or beside the vanity without blocking a drawer. A wood or upholstered stool with a wipeable seat works best in a damp room.

    26. Rattan and Seagrass Coastal Touch

    Bathroom vanity with a rattan mirror frame and seagrass basket.

    Add rattan and seagrass through a basket, a tray, and a mirror frame for a light coastal feel. Natural fibers bring warmth and texture to a white or pale blue bathroom without a full beach theme. They also pair well with wood and stone already in the room.

    Keep natural fiber items away from constant splashes, and dry them if they get wet. One rattan mirror plus a seagrass basket is enough; too many woven pieces can make a small vanity look busy.

    27. Patterned Backsplash Backdrop

    Bathroom vanity with a patterned tile backsplash and a simple tray on the counter.

    Use a patterned tile backsplash behind the vanity as the backdrop for simple decor. Pattern adds interest to the wall, so the counter itself can stay minimal with just a tray and a dispenser. This idea suits a remodel or a peel and stick tile project in a rental.

    Keep the pattern scale small in a narrow bathroom, since large patterns can overwhelm a small wall. Match one color from the tile in a towel or vase so the vanity and the wall feel linked.

    Conclusion

    A fresh vanity does not need a full remodel. A tray to group daily items, a mirror that suits the room, layered light, and one or two personal touches can change how the space feels each morning. Start with the idea that solves your biggest frustration, whether that is clutter, poor light, or a plain wall, then add a second idea once the first feels settled. Save this guide on Pinterest to return to it when you are ready for the next small change.

    FAQs

    1. How do I decorate a bathroom vanity without making it look cluttered?

    Start with a tray, keep only daily items on the counter, and move the rest into drawers or baskets. Limit each group to three or four pieces, and leave empty counter space around the tray so the vanity still looks usable.

    2. What should I put on a small bathroom vanity?

    Choose a slim tray, a soap dispenser, a small vase or plant, and a hand towel. Vertical storage, such as a tiered stand or a floating shelf, helps when the counter itself is narrow.

    3. How do I choose a mirror for my vanity?

    Match the mirror width to the vanity, hang the center at eye level, and pick a shape that suits the room. Arched mirrors soften straight lines, while a backlit mirror adds light in a small bathroom.

    4. What is the best lighting for a bathroom vanity?

    Side sconces at face level give the most even light, and a backlit mirror adds a soft glow. Avoid relying on a single overhead light alone, since it casts shadows under the eyes and chin.

    5. How can I refresh a rental bathroom vanity without drilling?

    Use a tray, matching dispensers, towels, baskets, and a leaning mirror or art piece. Peel and stick backsplash tiles and battery sconces also add style without permanent changes.

    6. How often should I clean vanity decor items?

    Wipe trays, dispensers, and jars weekly to remove soap film and water spots, and wash towels and basket linings often. A quick weekly wipe keeps the vanity looking styled rather than dusty, even in a steamy bathroom.


  • 31 Japanese Bathroom Decor Ideas to Refresh Your Space

    31 Japanese Bathroom Decor Ideas to Refresh Your Space

    Japanese bathrooms are built around quiet routines: washing before soaking, sitting low, and letting water, wood, and light do most of the work. Natural wood, stone, bamboo, and soft paper light replace busy patterns, while each item earns its place by being used every day. These 31 Japanese bathroom decor ideas cover tubs, showers, vanities, storage, lighting, plants, and small rituals you can start this week. Begin with one material you can repeat, such as hinoki wood or bamboo, and keep counters clear so the room stays easy to clean. If you like the same calm palette in a cooler, northern style, these Swedish bathroom ideas show how pale wood and white tile create a similar restful room.

    Key Takeaways

    • Build the look on natural materials first: wood, stone, bamboo, cotton linen, and paper light, rather than on themed ornaments.
    • Repeat one wood tone in two or three places, such as the bath mat, a stool, and a mirror frame, so the room reads as planned.
    • Separate washing and soaking in your routine: a rinse area, a stool, and a deep tub make even a short bath feel unhurried.
    • Keep surfaces mostly clear and store daily items in baskets or closed cabinets, since calm is the whole point of the style.
    • Choose water tolerant finishes near the tub and shower, and keep untreated wood, paper, and fabric on drier walls.
    • Add warmth last with soft light, a plant, and a simple soaking tray, so the room feels settled rather than crowded.

    1. Deep Ofuro Soaking Tub

    Deep freestanding ofuro soaking tub in a calm Japanese bathroom with wood accents.

    Choose a deep, compact soaking tub in the ofuro style for baths that cover the shoulders while seated upright. The tub is shorter than a standard Western tub but deeper, so it fits a small bathroom and still gives a full soak. A freestanding oval or rectangular tub in white acrylic, stone resin, or wood-look composite keeps the shape simple and the focus on the water.

    Keep the floor around the tub clear, with a duckboard mat and a small stool nearby for towels and a drink. Check the floor load and the water heater capacity before fitting a deep tub, since it holds more water than a shallow tub. If a new tub is not planned, a deeper soak can be borrowed in miniature with a foot soak basin and a warm towel routine after a shower.

    2. Hinoki Wood Duckboard Bath Mat

    Hinoki wood duckboard bath mat beside a bathtub in a Japanese bathroom.

    Lay a hinoki cypress duckboard mat beside the tub for a warm, scented surface underfoot. Hinoki is a pale Japanese cypress prized for baths, and its light scent suits a steamy room. The slatted boards let water drain and air move, so the mat dries faster than a thick fabric rug.

    Lift the mat after baths and lean it upright to dry fully, and oil it now and then with a wood oil suited to wet rooms. Keep the mat clear of direct shower spray when possible, so it lasts longer. If hinoki is hard to find, a teak or cedar duckboard gives a similar warm wood feel with the same drainage benefit.

    3. Shoji Frosted Glass Shower Screen

    Shoji-style frosted glass shower screen with a wood frame in a Japanese bathroom.

    Fit a shoji-style shower screen with frosted glass panels in a slim wood or dark metal frame for privacy that still lets light through. The grid pattern reads as Japanese at a glance, while the frosted glass keeps the shower private and the room bright. A single fixed panel suits a walk-in shower, and a folding panel suits a tub with a shower above it.

    Keep the frame finish matched to the taps or mirror frame, and wipe the glass weekly to stop limescale marks. Use toughened safety glass rated for bathrooms, and keep the lower track clear of soap buildup. This screen works best where the rest of the room is plain, so the grid can carry the pattern.

    4. Bamboo Towel Ladder

    Bamboo towel ladder leaning against a wall holding folded towels in a Japanese bathroom.

    Lean a bamboo towel ladder against a spare wall for towels, a robe, and a hanging wash bag. The ladder needs no drilling, gives four or five rungs in the footprint of a towel bar, and suits a narrow wall beside the door or at the end of the tub. Bamboo keeps the look light and warm, and it copes well with bathroom humidity when dried between uses.

    Put heavier towels on the lower rungs and lighter items higher up, and add small adhesive pads under the feet so it does not slide on tile. Check that the top cannot tip forward if a child pulls on it, and anchor it if your household needs that safety. A ladder also works as a drying rack for hand washed items.

    5. Stone Vessel Basin

    Carved stone vessel basin on a wood vanity in a Japanese bathroom.

    Set a carved stone vessel basin on a wood vanity for a sink that feels like a garden basin brought indoors. The rough stone texture contrasts with smooth tile and pale walls, and the bowl shape suits a single tap mounted on the wall or on a tall stand. Stone basins suit bathrooms with a plain vanity, where the basin can be the main feature.

    Seal the stone at install and reseal now and then, since stone can stain from soap and toothpaste. Keep the counter clear apart from a soap dish and a small tray, so the basin stays visible. Check the vanity can carry the weight of a stone basin, and choose a basin height that leaves comfortable hand washing room.

    6. River Pebble Shower Floor

    River pebble shower floor in a Japanese bathroom shower.

    Lay smooth river pebbles as a shower floor for a surface that feels like standing in a stream bed. The rounded stones massage the feet, drain well between the gaps, and bring a natural texture that flat tile cannot match. Pebbles in soft grey, cream, and pale brown suit most bathroom palettes and hide water marks well.

    Choose pebbles fixed on mesh sheets with grout rated for wet rooms, and seal the grout so it resists mildew. Test the texture barefoot before committing, since some people prefer flatter pebbles. Keep a small brush for cleaning the grout lines, and slope the floor correctly toward the drain so water never pools between stones.

    7. Cedar Rinse Bucket and Stool Set

    Cedar rinse bucket and low washing stool beside a bathtub in a Japanese bathroom.

    Add a cedar rinse bucket and a low washing stool for the Japanese habit of washing seated before soaking. The bucket holds warm rinse water, and the stool puts you at a comfortable height beside the tub or in the shower. Cedar copes well with humidity and stays pleasant to sit on, and the set takes very little floor space.

    Keep the bucket and stool near the shower or tub, with a small shelf for soap and a washcloth. Empty and dry the bucket after use, and oil the stool now and then with a wood oil suited to wet rooms. This set suits a household that wants a slower bathing routine without changing any plumbing.

    8. Washi Paper Pendant Light

    Washi paper pendant light glowing softly in a Japanese bathroom.

    Hang a washi paper pendant light over the vanity or in a corner for soft, diffused light that flatters faces and calms the room. The paper shade glows warmly and hides the bulb, so the light feels gentle rather than clinical. A round or drum shade suits most bathrooms, while a long lantern shape suits a tall corner.

    Keep the pendant clear of direct shower spray and steam paths, and choose a bulb that runs cool. Dust the shade gently with a dry cloth, and replace a stained shade rather than washing paper. If wiring a new pendant is not possible, a battery paper lantern on a high shelf gives a similar glow with no electrical work.

    9. Indigo Noren Curtain

    Indigo noren curtain hanging in a doorway of a Japanese bathroom.

    Hang an indigo noren curtain in a doorway or across open shelving for a soft fabric divider with a Japanese shopfront feel. The short split curtain covers the lower half of an opening, so it hides storage while still letting air and light pass. Indigo dye gives a deep blue that pairs well with pale wood, white tile, and stone.

    Choose a washable cotton noren and wash it regularly, since bathroom humidity breeds mildew on fabric. Hang it from a slim tension rod so renters can fit it with no drilling. Keep the curtain clear of direct shower spray, and use it on a dry wall, such as over a laundry nook or a linen shelf, rather than inside the shower zone.

    10. Sliding Shoji-Front Vanity Cabinets

    Vanity cabinets with sliding shoji-style fronts in a Japanese bathroom.

    Fit vanity cabinets with sliding shoji-style fronts for storage that opens without swinging doors into a small room. The frosted panels hide toiletries while keeping the vanity light, and the sliding action suits a narrow bathroom where a door would hit the toilet or the tub. A wood frame keeps the panels warm against white tile.

    Keep daily items in the front section and spare stock behind, so the most used cabinet opens first. Wipe the frames dry after steamy showers so wood does not darken over time. If a full vanity swap is too large a job, shoji-style panels fixed to an existing cabinet front give a similar look for far less work.

    11. Bonsai Display Shelf

    Small bonsai on a wall shelf in a Japanese bathroom.

    Place a small bonsai on a wall shelf or a window ledge for a living focal point that rewards slow care. A juniper or ficus bonsai suits indoor light, and a shallow ceramic pot in a muted glaze keeps the display calm. The tree adds green without taking floor space, and its pruned shape suits the tidy Japanese feel.

    Keep the bonsai in bright indirect light, water it when the soil surface dries, and rotate the pot weekly so growth stays even. Choose a pot with a drainage hole and a saucer, and keep the shelf clear of direct shower spray. If bonsai care feels demanding, a small potted fern on the same shelf gives green with less pruning.

    12. Charcoal and Warm Wood Palette

    Japanese bathroom with a charcoal feature wall, warm wood, and white tile.

    Paint the walls or one feature wall in a soft charcoal, and pair it with warm wood, white tile, and cream towels for a grounded Japanese palette. The dark wall makes wood grain stand out and gives the room depth, while pale tile and a clear mirror keep it from feeling closed in. This palette suits a bathroom with good daylight or strong warm lighting.

    Test the charcoal in daylight and evening light before painting a large area, since dark paint reads darker on a wall than on a sample card. Keep the ceiling and the upper walls pale, and repeat the wood tone in the vanity and mirror frame. If full dark walls feel bold, start with charcoal on the wall behind the vanity only.

    13. Bamboo Accessory Tray

    Bamboo tray with soap, a toothbrush cup, and a small dish beside a basin.

    Group soap, a toothbrush cup, and a small dish on a bamboo tray beside the basin for a tidy sink zone. The tray corrals daily items into one group, so the counter stays clear and cleaning takes seconds. Bamboo suits the Japanese material palette, and a tray with a raised edge stops bottles from sliding off.

    Keep the tray to daily items only, and move spare stock into a cabinet or basket. Dry the tray between uses, since standing water stains bamboo over time. A single bamboo tray can also hold a candle kept safely away from towels and curtains, plus a small stone dish, into one calm group.

    14. Tatami-Look Washable Bath Rug

    Washable tatami-look bath rug beside a bathtub in a Japanese bathroom.

    Lay a washable rug with a tatami straw look beside the tub for woven texture underfoot without real straw in a wet room. The woven pattern brings the tatami room feel into the bathroom, while a washable cotton or synthetic weave copes with splashes and laundry. A long runner suits a galley bathroom, and a square rug suits the space beside a freestanding tub.

    Wash the rug often, and hang it to dry fully between uses so it never stays damp on tile. Keep a second rug in rotation so the bathroom never sits bare on wash day. Choose a rug with a non-slip backing, and keep it clear of the direct shower spray line where possible.

    15. Japanese Maple Print in a Sealed Frame

    Framed Japanese maple print on a bathroom wall above a towel rail.

    Hang a framed print of Japanese maple leaves or a simple mountain scene on the driest wall of the bathroom. The seasonal image brings nature indoors in a quiet way, and a single large print can anchor a plain wall without crowding it. Maple red or soft green suits a pale bathroom, while a black and white ink style print suits a charcoal wall.

    Use a frame with a sealed back or an acrylic cover, and avoid hanging unprotected paper directly beside the shower, where steam will cockle it over time. Keep the spacing even if you hang a pair, and use adhesive strips on tile if drilling is not allowed. One print above a towel rail is an easy starting layout.

    16. Open Wood Shelving with Rolled Towels

    Open wood shelves with rolled towels above a toilet in a Japanese bathroom.

    Fit two open wood shelves above the toilet or beside the vanity, and stack rolled towels onsen style for storage that looks like a spa. Rolled towels take less depth than folded stacks, and the wood shelves warm up white tile. This suits a bathroom with one free wall, where a cabinet would crowd the walkway.

    Keep the shelves to towels and one basket for spare toiletries, and leave breathing room between groups so shelves read as tidy, not crowded. Dust open shelves weekly, since open storage collects cooking style film from steam and dust. Put heavier stacks low, and keep shelves clear of direct shower steam.

    17. Tenugui Hand Towel Display

    Tenugui hand towels with Japanese patterns hanging on a rail in a bathroom.

    Hang tenugui hand towels on a slim rail or a set of hooks for thin, quick drying towels with Japanese patterns. Tenugui are narrow cotton towels printed with waves, cranes, fans, or simple stripes, and they dry faster than thick towels, which suits a humid bathroom. A row of two or three in one color family reads as decor as well as daily use.

    Wash tenugui often, since thin cotton dries fast but shows soap marks, and rotate the display so one towel does not fade in sunlight. Keep the rail on a dry wall near the basin, not inside the shower. If patterned towels feel busy, choose plain indigo or cream tenugui and let the texture carry the interest.

    18. Soaking Ritual Tray

    Soaking ritual tray with bath salts, a candle, and a folded towel in a bathroom.

    Set a small tray on the vanity or a stool with bath salts, a candle kept safely away from fabric, and a folded towel for a soaking ritual station. The tray turns bath prep into one calm step: gather salts, light the candle away from the tub edge, and lay out the towel before the water runs. A stone or ceramic tray suits the material palette and wipes clean.

    Keep the tray to ritual items only, and store spare salts in a closed jar nearby. Use flameless candles if you want the glow without a live flame near fabric. Dry the tray after baths, and refill the salt jar weekly so the station stays ready rather than half empty.

    19. Moss and Stone Mini Garden

    Shallow moss and stone mini garden dish on a shelf in a Japanese bathroom.

    Arrange a shallow dish garden with moss, a small stone, and a miniature fern on a shelf or window ledge for a tiny landscape indoors. The moss stays green in bathroom humidity, and the stone gives the dish a garden feel with no soil mess on the counter. A dish garden suits a bathroom with indirect light and a dry shelf clear of splashes.

    Mist the moss lightly when it looks dry, and keep the dish out of direct shower spray. Choose a dish with drainage or a layer of pebbles below the moss, so roots never sit in standing water. If moss care feels fussy, a single smooth stone and a small potted fern in a ceramic pot give a similar garden note.

    20. Black Matte Fixtures with Wood

    Japanese bathroom with matte black taps and warm wood accents.

    Pair matte black taps, shower fittings, and towel rails with warm wood for a crisp Japanese contrast. The black lines act like ink outlines in the room, giving character to an otherwise pale scheme without adding bright color. This is one of the cheapest ways to change the feel of a bathroom, since fittings swap without moving plumbing.

    Keep the black finish consistent across the tap, showerhead, and towel rail, and repeat it once more in a mirror frame or a cabinet knob. Wipe black fittings dry after use in hard water areas, since limescale shows more on dark surfaces. If you rent, keep the original fittings in a labeled bag for move-out day.

    21. Frosted Window with a Bamboo Blind

    Bathroom window with frosted glass and a bamboo roller blind.

    Fit frosted glass or a privacy film on the bathroom window, and add a bamboo roller blind for light, privacy, and texture in one window treatment. The frosted glass floods the room with daylight without giving neighbors a view, while the bamboo blind softens the light and adds a natural layer. Roll the blind up by day for full light, and down in the evening for privacy.

    Keep the window frame painted white or pale wood, and the sill clear apart from one plant or a small stone. Open the window briefly each day, or fit a trickle vent, so steam escapes and the room stays fresh. If the window is small, a mirror opposite it bounces the light deeper into the room.

    22. Wooden Bath Bridge Tray

    Wooden bath bridge tray across a bathtub holding a book and a cup.

    Rest a wooden bath bridge tray across the tub for a book, a cup, and a candle kept safely away from the water. The tray spans the tub width with extendable sides, and a slot or ledge keeps a book open without holding it. Wood trays need drying after each use to avoid warping, while bamboo and coated wood versions cope better with steam.

    Choose a tray that fits your tub width, and look for a phone ledge that keeps electronics out of splash range. Store the tray upright behind the door when it is not in use, so it does not become a permanent clutter spot. Keep candles on a stable tray, away from towels and curtains, and use flameless candles if you want glow without a live flame near fabric.

    23. Low Cedar Bench Beside the Tub

    Low cedar bench beside a bathtub holding folded towels in a Japanese bathroom.

    Place a low cedar bench beside the tub for a seat, a towel stack, and a place to rest clothes within reach. The bench gives the soaking area a furnished feel without a chair, and cedar copes well with humidity. A bench with slatted top drains and dries fast, and its low height suits the seated Japanese bathing style.

    Leave gaps between the slats so water drains and air moves, and oil the bench now and then with a wood oil suited to wet rooms. Keep the bench away from direct shower spray so it dries fully between uses. If floor space is tight, a narrow bench that slides partly under the vanity gives the same seat with less footprint.

    24. Indoor Bamboo Plant Corner

    Potted bamboo plant in a corner of a Japanese bathroom.

    Grow a potted bamboo plant in a corner for height, green, and gentle movement without taking wall space. Bamboo suits bathroom humidity and indirect light, and a tall pot in stone or muted ceramic anchors the corner. One tall plant usually looks better than a crowded collection in a small room.

    Use a pot with drainage holes and a saucer, and check the soil before watering, since bathroom air already adds moisture. Keep the plant clear of direct shower spray, and wipe leaves now and then so dust does not dull them. If the bathroom has no window, rotate the plant to a brighter room for a few days each week.

    25. Dark Wood Towel Hooks

    Dark wood towel hooks on a wall holding towels in a Japanese bathroom.

    Fix a row of dark wood towel hooks on a dry wall for towels and robes that hang flat and dry fast. Hooks take less space than a rail, suit a narrow wall beside the door, and let each towel hang singly so air moves around it. Dark wood repeats the vanity or mirror frame tone and gives the wall a finished detail.

    Mount hooks at a height that lets towels hang clear of the floor, and space them wide enough that towels do not overlap. Use wall anchors rated for tile if you drill, or strong adhesive hooks if your lease forbids holes. Keep one hook spare for guests, rather than crowding the row.

    26. Sliding Wood Pocket Door

    Sliding wood pocket door with a frosted panel in a Japanese bathroom.

    Fit a sliding wood pocket door, or a barn style sliding door on a wood track, to save the floor space a swinging door needs. The door slides into the wall or along it, so the bathroom layout gains a full door swing of usable space. A wood frame with a frosted panel keeps the Japanese feel while letting a little light pass.

    Check that the wall can carry the track and that the door clears the vanity and toilet when open. Keep the track clean so the door slides smoothly, and add a soft close fitting so it never slams. If a pocket door is too large a job, a sliding curtain on a ceiling track gives part of the same space saving with far less work.

    27. Rain Showerhead Over a Deep Tub

    Rainfall showerhead over a deep bathtub in a Japanese bathroom.

    Fit a rainfall showerhead over the deep tub so one tub serves both quick showers and long soaks without a separate shower tray. The wide, even spray suits the rinse before soaking, and a hand shower on a rail adds a practical rinse for the tub and for hair washing. A ceiling or high wall mount keeps the spray clear of the tub edge.

    Keep the showerhead height high enough that tall users stay under cover, and choose a thermostatic mixer so the temperature stays steady. Check water pressure before choosing a wide rainfall head, since a very wide head can feel weak on a low pressure line. Wipe the head now and then to stop limescale buildup.

    28. Under-Sink Bamboo Basket Storage

    Bamboo baskets under a bathroom sink holding toiletries and towels.

    Sort toiletries and spare towels into bamboo baskets under the sink and on one shelf, so a small bathroom stays tidy without a tall cabinet. Baskets soften hard tile and porcelain, and one basket per job, such as hair care, cleaning, and spare towels, stops bottles from spreading across the counter. Bamboo copes well with bathroom humidity when kept off wet floors.

    Label the base if several baskets look alike, and empty each one once a month, returning only what you actually used. Keep daily items on the counter in one small tray, and move the rest into baskets, so the basin stays clear for washing. For more renter friendly storage that needs no drilling, see these apartment bathroom ideas.

    29. Soft Warm Dimmer Lighting

    Japanese bathroom glowing with soft warm dimmer lighting in the evening.

    Put the main bathroom light on a dimmer, and add a warm plug-in lamp or a battery lantern on a shelf for evening soaks. Bright overhead light alone tends to feel clinical at night, while a low warm glow suits a long bath and helps the room wind down. Warm white bulbs keep wood and stone tones rich, rather than cold.

    Keep all plug-in lights away from direct water spray, and choose a dimmable warm bulb so the glow stays gentle rather than glaring. A dimmer also helps with morning use, since low light suits early hours. If wiring a dimmer is not possible, a battery lantern with a remote gives a similar low glow with no electrical work.

    30. Small Stone Lantern Accent

    Small stone lantern with a flameless candle in a corner of a Japanese bathroom.

    Place a small stone lantern, or a stone-look lantern with a flameless candle inside, on a shelf or in a floor corner for a garden accent indoors. The lantern shape echoes Japanese garden paths, and its glow at night gives the bathroom a quiet focal point. A small lantern suits a corner beside the tub or a shelf above the toilet, where it stays clear of splashes.

    Keep the lantern stable on a flat surface, and use a flameless candle inside so there is no live flame near towels or curtains. Dust the stone now and then, and keep the lantern clear of direct shower spray. If stone feels heavy, a ceramic lantern in a muted glaze gives the same shape with less weight.

    31. Minimal Linen and Wood Finishing Touches

    Japanese bathroom finished with linen towels, a wood soap dish, and a ceramic vase with one stem.

    Finish the room with plain linen towels, a wood soap dish, and a single ceramic vase with one stem for touches that complete the look without clutter. The linen softens tile, the wood dish repeats the vanity tone, and one stem gives a living detail that changes with the season. Small, plain touches suit a Japanese bathroom better than a shelf of ornaments.

    Keep towels in cream, oatmeal, or indigo, and repeat one of those colors on the bath mat so the soft layers read as one plan. Wash towels separately from the mat, and shake the mat out weekly to keep the pile even. Swap the stem weekly, and keep the vase on a dry shelf, so the finishing touches stay fresh rather than dusty.

    Conclusion

    A Japanese bathroom does not need a themed makeover, it needs better materials, a slower bathing routine, and fewer things on show. Start with a deep tub or a rinse stool, since those set how the room is used, then add one wood tone, a stone basin or pebble floor, and soft paper light. Baskets, hooks, and sliding storage handle daily clutter, while a bonsai, a moss dish, or a single stem adds living calm without crowding the walls. Test paint and tile samples in daylight and evening light, keep wood and paper clear of direct spray, and add one change at a time, checking that the door, the tub, and the basin still have a clear path. For the same warm, practical approach in a compact room, see these Irish bathroom ideas for fittings and storage that work hard in small spaces.

    FAQs

    What is the main idea behind a Japanese bathroom?

    The main idea is a calm bathing routine built on natural materials and clear surfaces. Washing seated before soaking, using wood, stone, bamboo, and soft light, and keeping counters clear all help the room feel restful. Start with one material and one routine change, such as a rinse stool or a duckboard mat, before adding decor.

    Can I get a Japanese bathroom look without replacing the tub?

    Yes. Keep your existing tub and add the look around it: a hinoki or cedar duckboard mat, a bath bridge tray, a bamboo ladder, a noren curtain, and warm dimmer lighting. A cedar rinse bucket and stool set also brings the seated washing routine into any bathroom, with no plumbing change at all.

    What colors work best in a Japanese bathroom?

    Warm wood tones, white or cream tile, soft charcoal, stone grey, and indigo form a calm base, with green from plants as the living accent. Keep bright color to towels, a mat, or one print, so the room feels planned rather than busy, and test dark paint in daylight and evening light before painting a large area.

    Is wood safe to use in a damp bathroom?

    Yes, with care. Choose water tolerant woods such as hinoki, cedar, teak, and bamboo for mats, stools, and trays, seal painted wood with moisture resistant finishes, and keep paper shades and untreated wood clear of direct shower spray. Dry wood trays and mats after use, and oil them now and then with a wood oil suited to wet rooms.

    How do I keep a Japanese bathroom from looking bare?

    Use texture instead of ornaments: wood grain, stone, pebbles, woven rugs, linen towels, and a living plant give the room interest without clutter. One framed print, one bonsai or moss dish, and one stone lantern are enough focal points, and plain surfaces between them let each texture stand out.

    What is the best storage for a small Japanese bathroom?

    Use the walls and the space under the sink first: sliding vanity cabinets, open wood shelves with rolled towels, bamboo baskets, dark wood hooks, and a low bench beside the tub. One basket per job keeps bottles grouped, and a small tray on the counter holds only daily items, so the basin stays clear for washing.