Author: Emma Whitmore

  • 27 Table Centerpiece Ideas for Every Season

    27 Table Centerpiece Ideas for Every Season

    A good table centerpiece stays low, narrow, and easy to lift off, with one main group at the center and room left for plates and serving dishes. Choose fresh flowers in spring and summer, fruit or pumpkins in autumn, and evergreen with candles in winter, then keep the palette to two or three colors so the table stays calm.

    Start with a base you already own, such as a tray, a wood board, or a runner, then add one main group and stop. Keep the centerpiece below seated eye level, leave space at each end for serving dishes, and pick pieces you can lift off in one move when the table needs to clear. For autumn tables in a warm palette, see the fall table decor guide, and for a calm table after the holidays, browse the winter table decor guide.

    Key Takeaways

    • Keep every centerpiece low and narrow, so guests can see each other and serving dishes still fit.
    • Use one main group per table, on a tray or board, so the whole centerpiece lifts off in one move.
    • Change the season with flowers, fruit, or greenery, and keep the tray, candles, and vases the same.
    • Pick two or three colors per table and repeat each one at least twice, such as napkins plus one vase.
    • Keep flames in holders and clear of dried material, fabric, and paper, and use flameless candles near children or dried stems.
    • Leave empty space at each place for elbows, glasses, and serving dishes, and test the full table before guests arrive.

    1. Low Greenery Runner with Pillar Candles
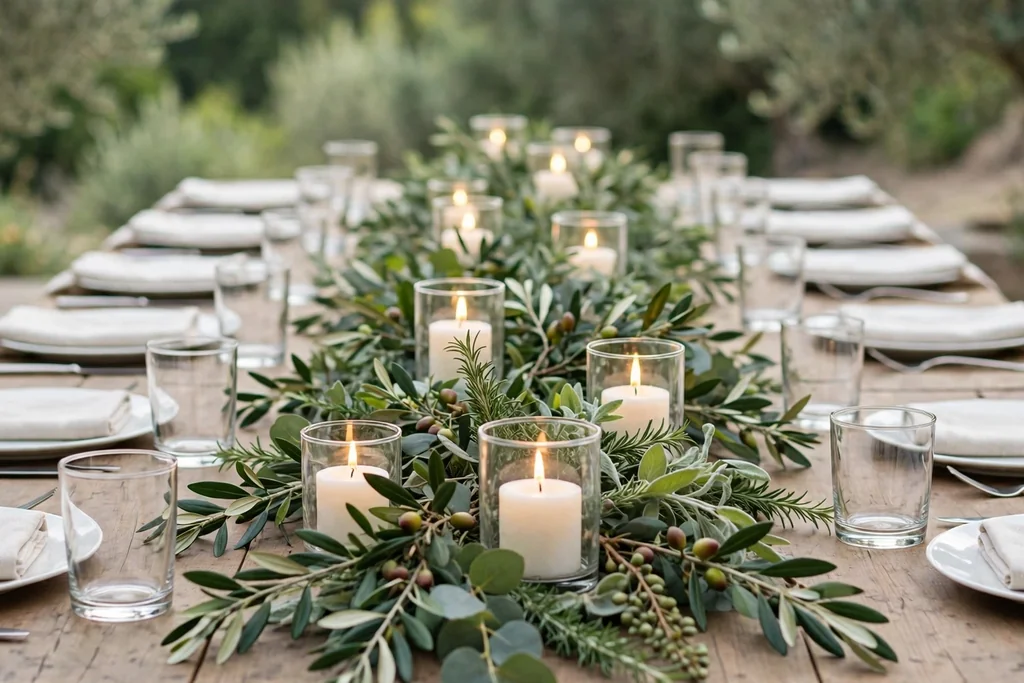
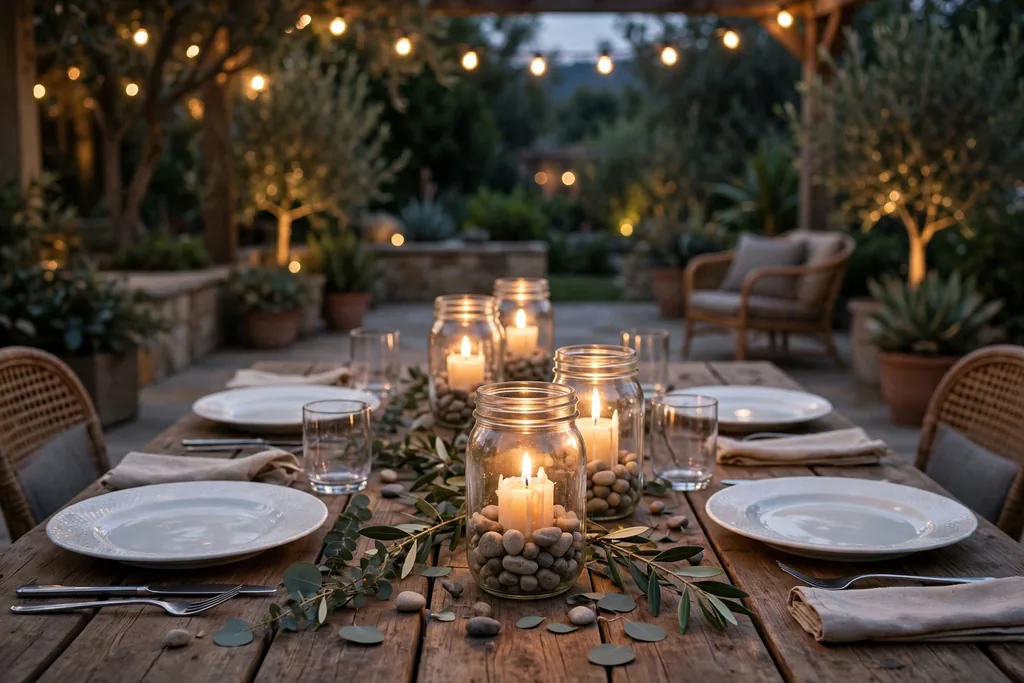
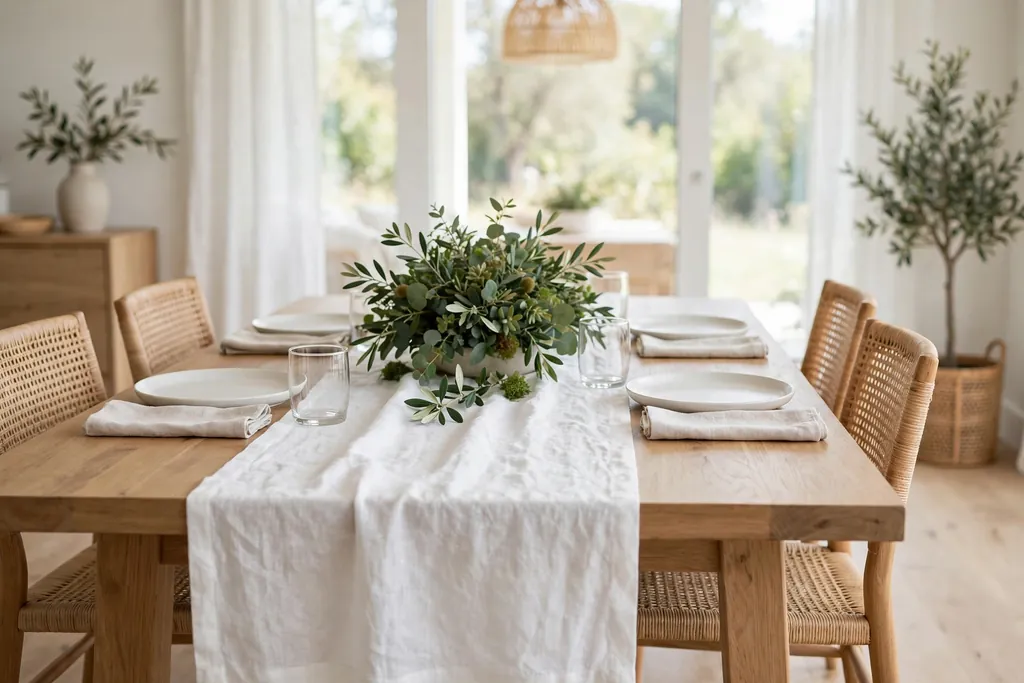
    Low greenery runner down a dining table with short pillar candles in glass holders.

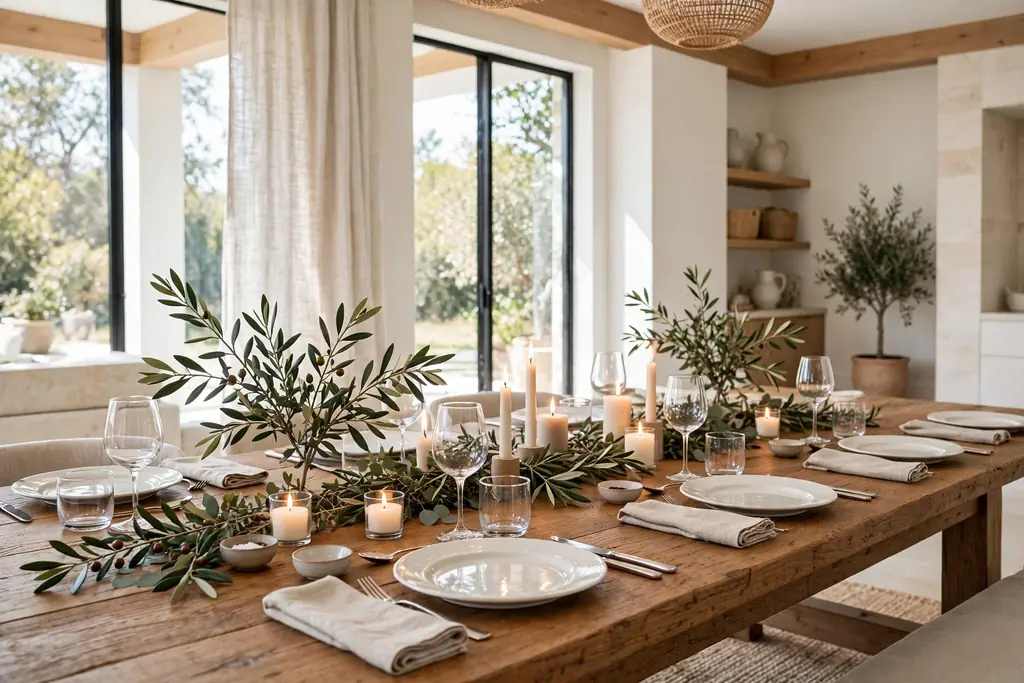
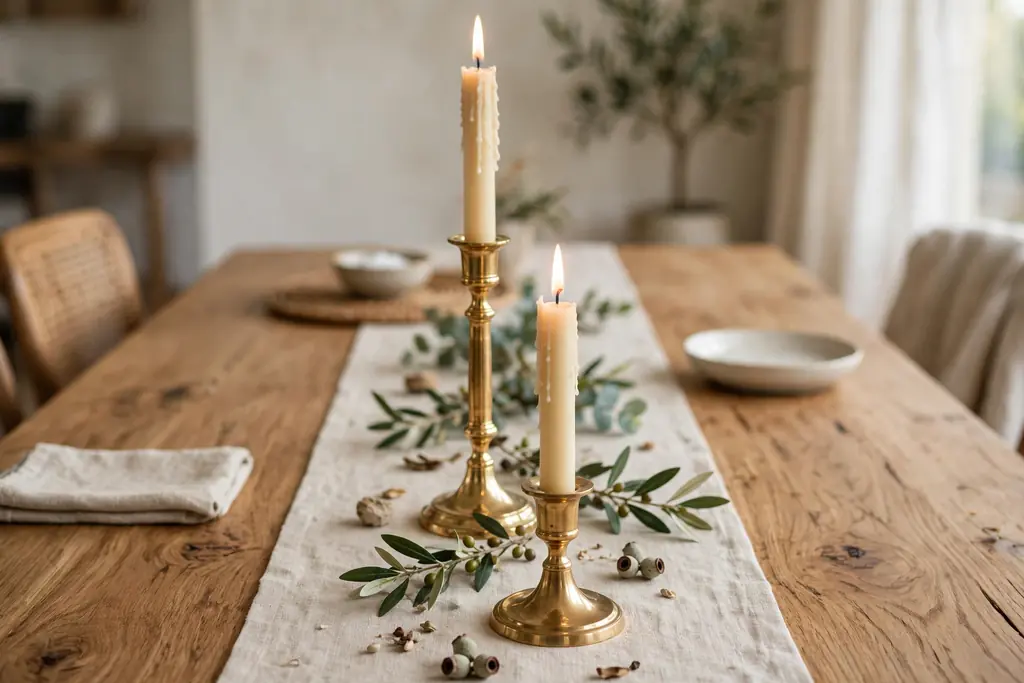
    Lay a loose greenery runner, such as eucalyptus or olive branches, down the center of the table, then set short pillar candles in glass holders along it at uneven intervals. The greenery carries color along the whole table without adding height, and it suits a long dining table for a gathering as well as a simple weeknight meal. Trim the stems so they stay inside the table edges and do not brush plates or glasses.

    Secure the runner so it does not slide when plates are set down, and keep real flames clear of dry leaves. Use flameless candles if the runner will sit near curtains or if children will be at the table. Swap the greenery with the season: fresh eucalyptus in spring, olive in summer, dried leaves in autumn, and evergreen in winter, while the candles and holders stay the same.

    2. Spring Tulip Bowl
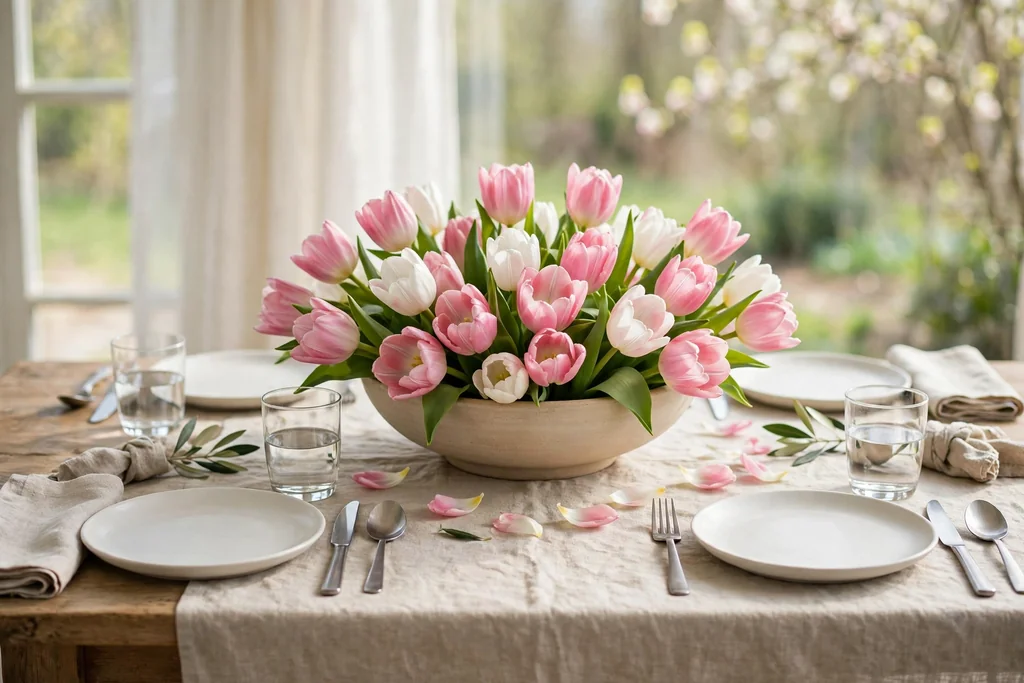
    Low wide bowl of pink and white tulips on a spring dining table.

    Fill a low, wide bowl with tulips trimmed short, so the flowers sit just above the rim, and add a few green leaves for shape. The low height keeps sightlines open, and the spring color suits a bright dining room better than a tall, formal bouquet. Use one color for a calm table, or mix two close colors, such as pink and white, for a softer look.

    Trim tulip stems at an angle and keep them in cool water, since tulips keep growing and can lean toward light. Set the bowl on a small mat if the table marks easily, and replace any drooping tulip before guests arrive. For a longer table, use two small bowls spaced apart rather than one large bowl, so the flowers read as one matched centerpiece.

    3. Summer Citrus Bowl

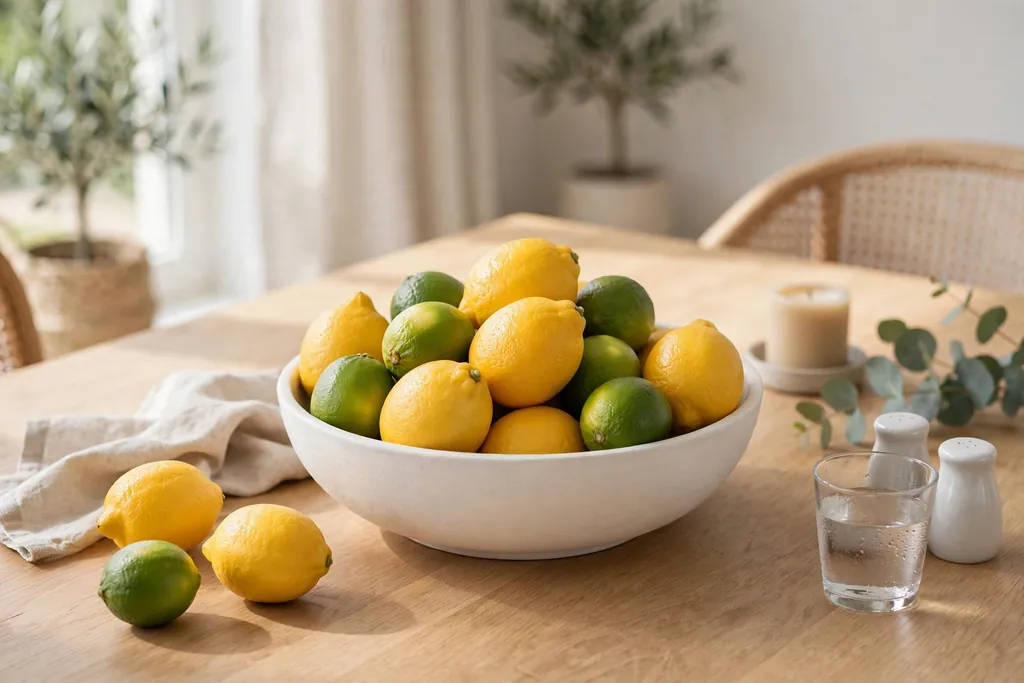
    Wide shallow bowl of lemons and limes with green leaves on a summer dining table.

    Fill a wide, shallow bowl with lemons, limes, or oranges, and tuck a few green leaves or small white flowers between the fruit. The citrus gives real color and shape, and the bowl takes up only one spot, leaving the rest of the table free for plates and serving dishes. This idea suits a summer lunch or a bright kitchen table, and the bowl can move to the counter after the meal.

    Keep the bowl low and wide rather than tall, so it does not block sightlines, and check the fruit every few days, moving any soft piece to the kitchen. For a cooler look, use lemons with white flowers; for a warmer look, use oranges with green leaves. At the end of the meal, the fruit can be used in cooking or drinks, so nothing is wasted.

    4. Autumn Pumpkin and Candle Board
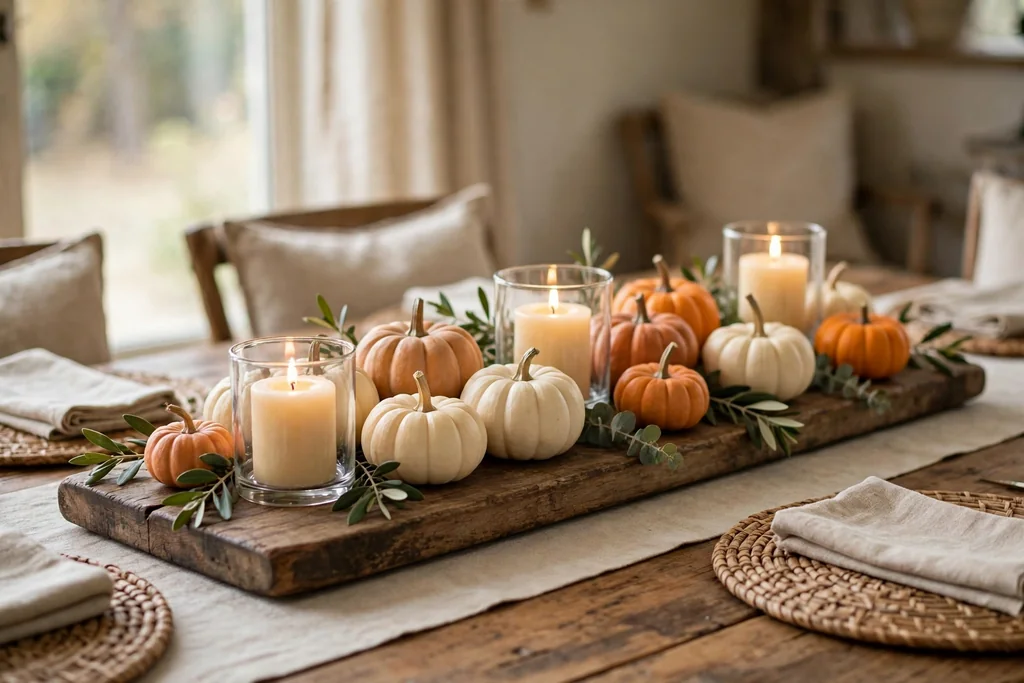
    Wood board centerpiece with small pumpkins and short pillar candles on a dining table.

    Set a long wood board down the middle of the table, then group three to five small pumpkins in cream, muted orange, and pale green along it, with short pillar candles in glass holders between them. The board keeps the group contained, so it reads as one centerpiece, and it lifts off in one move when you need the full table for serving. For more autumn table ideas, see the fall table decor guide.

    Use battery candles if the board will sit near dried leaves or if children will be at the table. For a real flame, keep candles in holders, clear of pumpkin stems and any fabric, and never leave them burning unattended. Swap one pumpkin for a small vase of dried stems if the group looks too round and flat.

    5. Winter Evergreen and Pinecone Tray
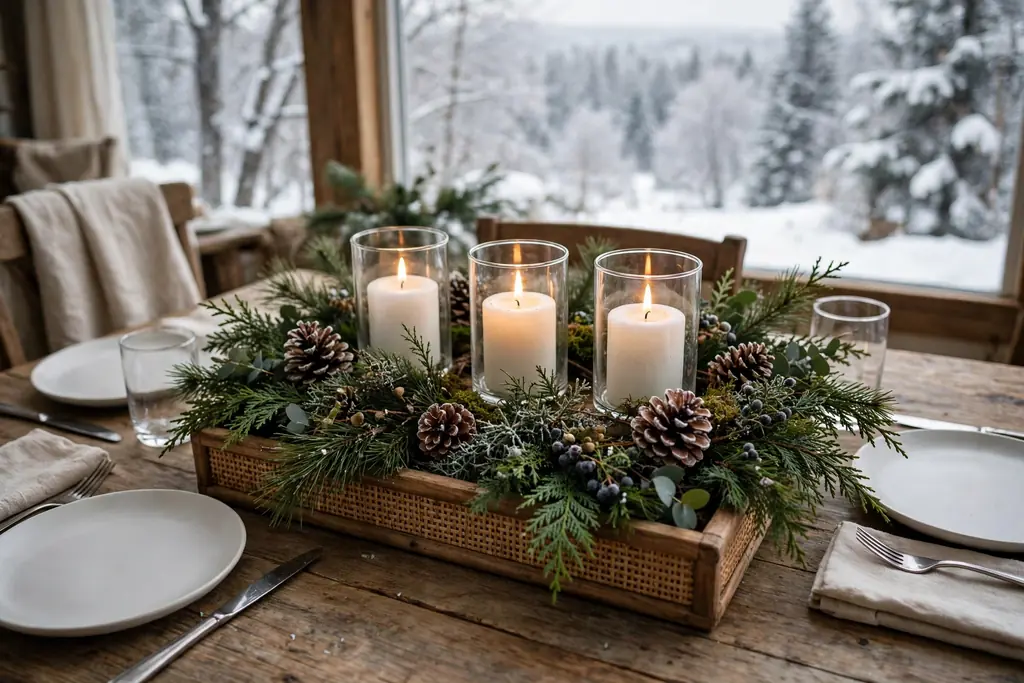
    Tray with evergreen greenery, pinecones, and pillar candles on a winter dining table.

    Lay a short length of evergreen greenery on a tray, add a few pinecones and short pillar candles in glass holders, and set the tray in the center of the table. The tray keeps the group contained, so it reads as one centerpiece, and it lifts off in one move when you need the full table for serving. The evergreen and pinecone mix suits winter meals after the holidays, when the table needs a calm, natural look.

    Use battery candles if the tray will sit near dried greenery or if children will be at the table. Clean gathered pinecones fully and check them before bringing them inside, and keep them clear of real flames. Swap one pinecone for a small vase of fresh sprigs if the group looks too flat, and shake the greenery outdoors before laying it out.

    6. Single Stem Bud Vases in a Row
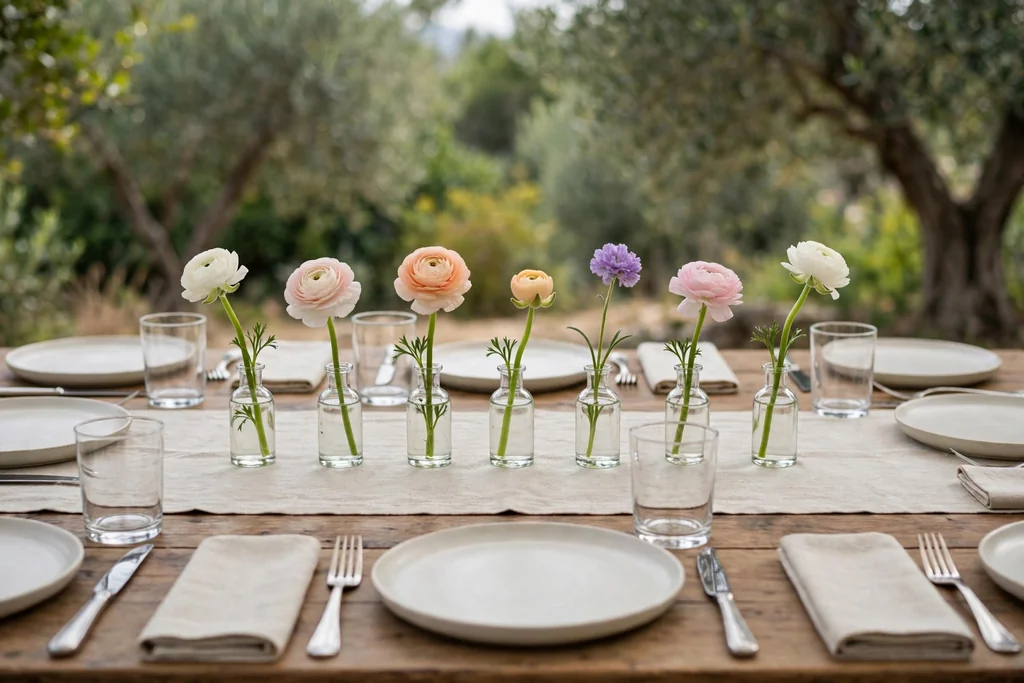
    Row of small bud vases with single flower stems down the center of a dining table.

    Set a row of small bud vases down the center of the table, each holding one stem, such as a rose, a daisy, or a sprig of herbs. The single stems give a light, fresh centerpiece that leaves sightlines open, and they suit a small table as well as a long one, since you can add or remove vases to fit the length. Use the same vase shape at every spot, so the row reads as one centerpiece.

    Keep the vases low and the stems short, so guests can see across the table. Fill vases with fresh water before the meal and trim stems at an angle, so they drink well. Change the stems with the season: tulips in spring, daisies in summer, dried stems in autumn, and evergreen sprigs in winter, while the vases stay the same.

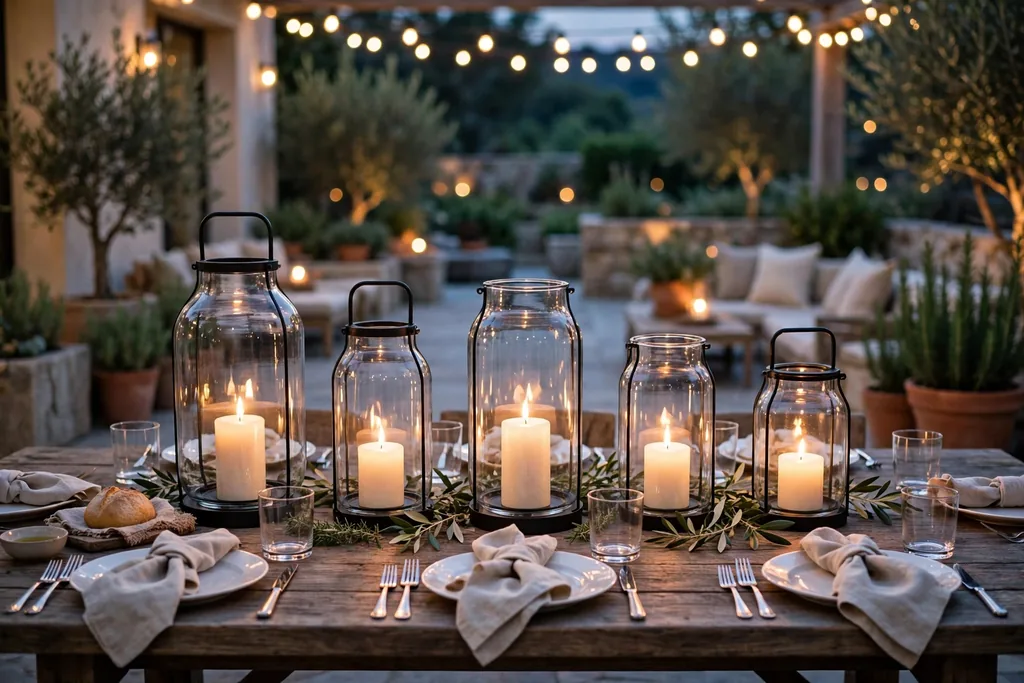
    7. Lantern Group with Battery Candles
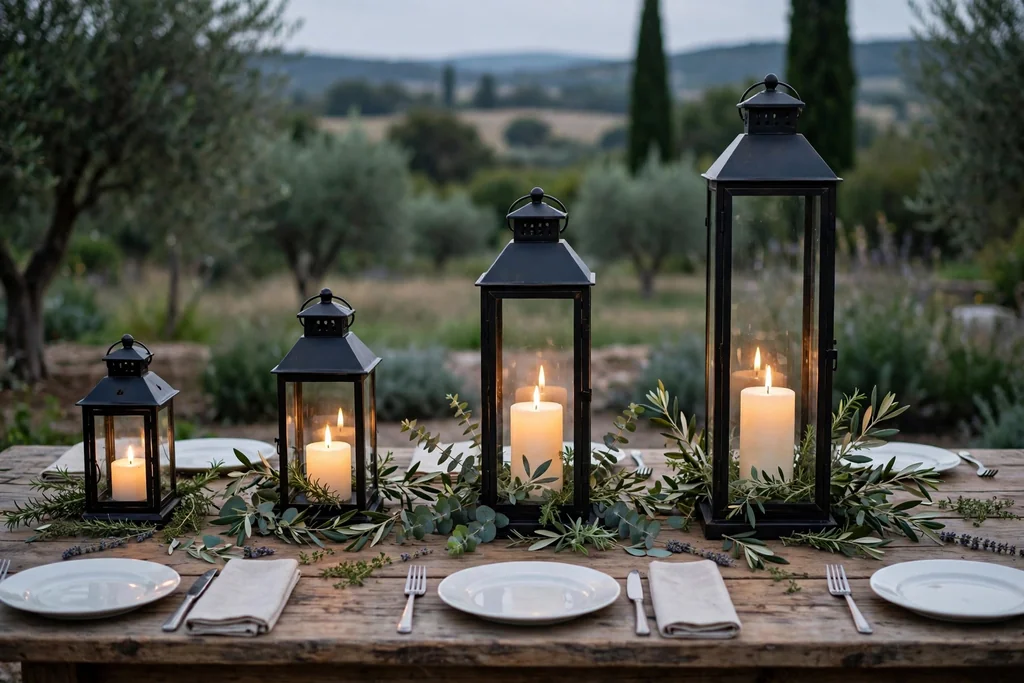
    Lanterns of different heights with battery candles on a dining table.

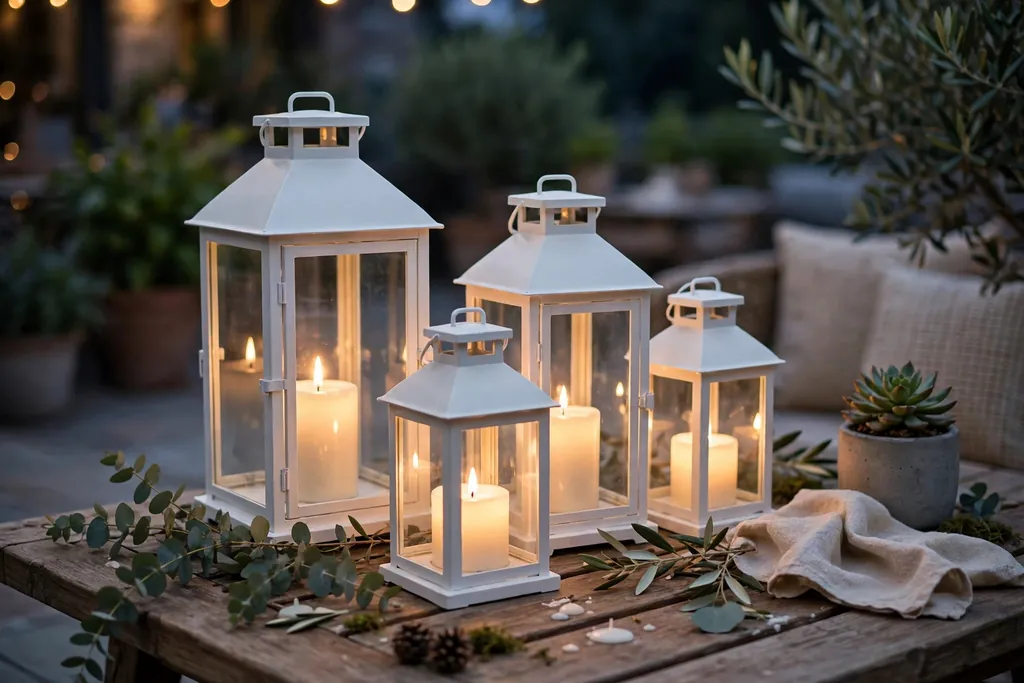
    Set two or three lanterns of different heights down the center of the table, with battery candles inside and a few sprigs or small stones grouped around the bases. Lanterns give a warm, steady glow and a clear focal point, and they lift off the table in one move when serving needs the full surface. Choose lanterns short enough to see over when guests are seated.

    Place a small tray or runner under the lantern group to protect the table and to keep the sprigs contained. Use battery candles inside closed or narrow lanterns, since a real flame needs air and a safe holder. Wipe lantern glass before the meal, since fingerprints show more on glass than on wood, and swap the sprigs with the season.

    8. Mason Jar Flowers on a Wood Board
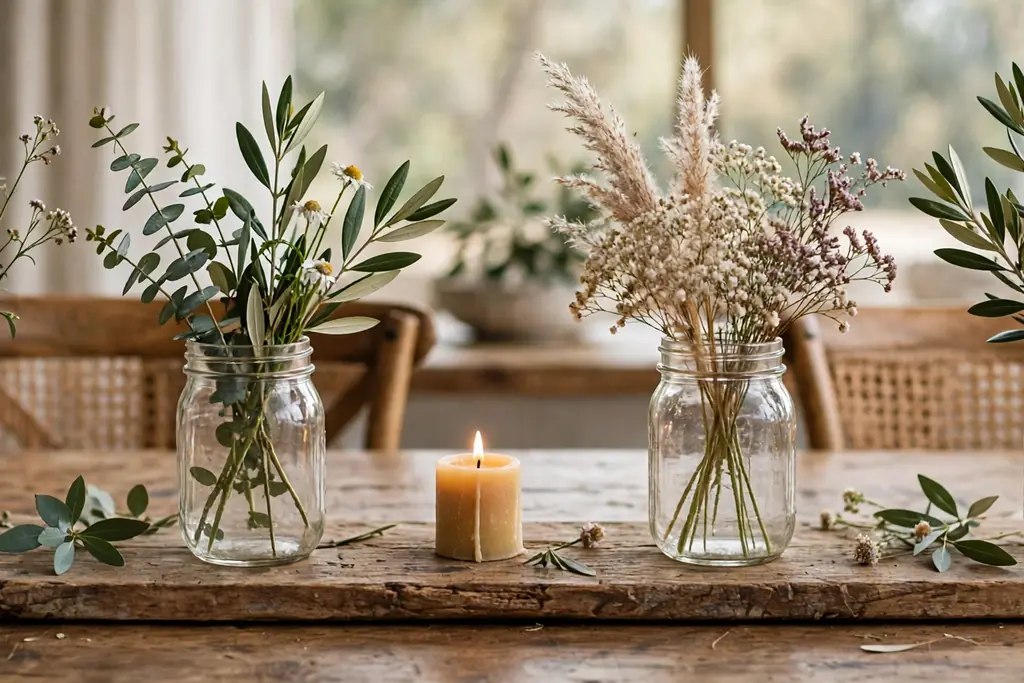
    Mason jars with flower stems on a long wood board down a dining table.

    Set three mason jars on a long wood board down the center of the table, with two or three flower stems in each jar, and add a short candle in a holder between the jars. The board keeps the group contained as one centerpiece, and the jars suit a rustic or casual table in any season. Use jars of the same size for a matched look, or mix two sizes with the tallest jar in the middle.

    Tie twine around each jar neck for a simple finish, and fill jars only halfway so stems stay steady. For a longer table, add a fourth jar, but keep the board narrow enough that plates still fit on both sides. Change the flowers with the season, and keep the board and jars for the next table.

    9. Seasonal Fruit Bowl Centerpiece
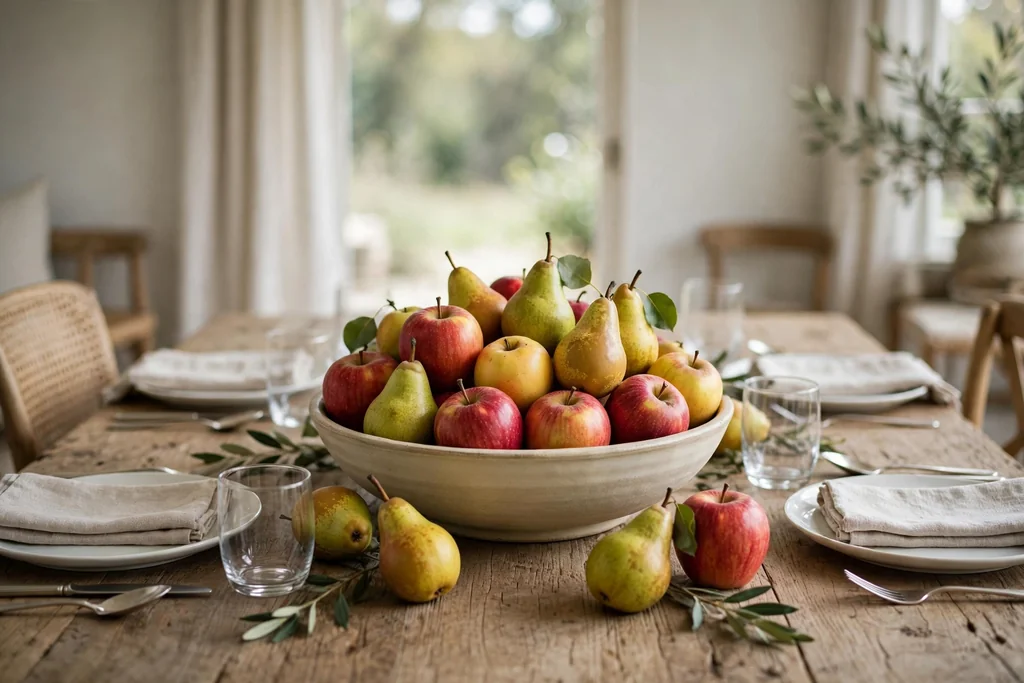
    Wide shallow bowl of apples and pears as a centerpiece on a dining table.

    Fill a wide, shallow bowl with fruit in season, such as apples and pears in autumn, citrus in winter, berries in summer, and stone fruit in late spring, and set it in the center of the table as a centerpiece you can also eat from. The fruit gives real color and shape, and the bowl takes up only one spot, leaving the rest of the table free for plates and serving dishes.

    Keep the bowl low and wide rather than tall, so it does not block sightlines, and set it on a small mat if the table surface marks easily. Check the fruit every few days and move any soft piece to the kitchen, since one spoiling piece can mark the rest. At the end of the meal, the bowl can move to the counter, which makes clearing the table a single step.

    10. Herb Pots on a Tray
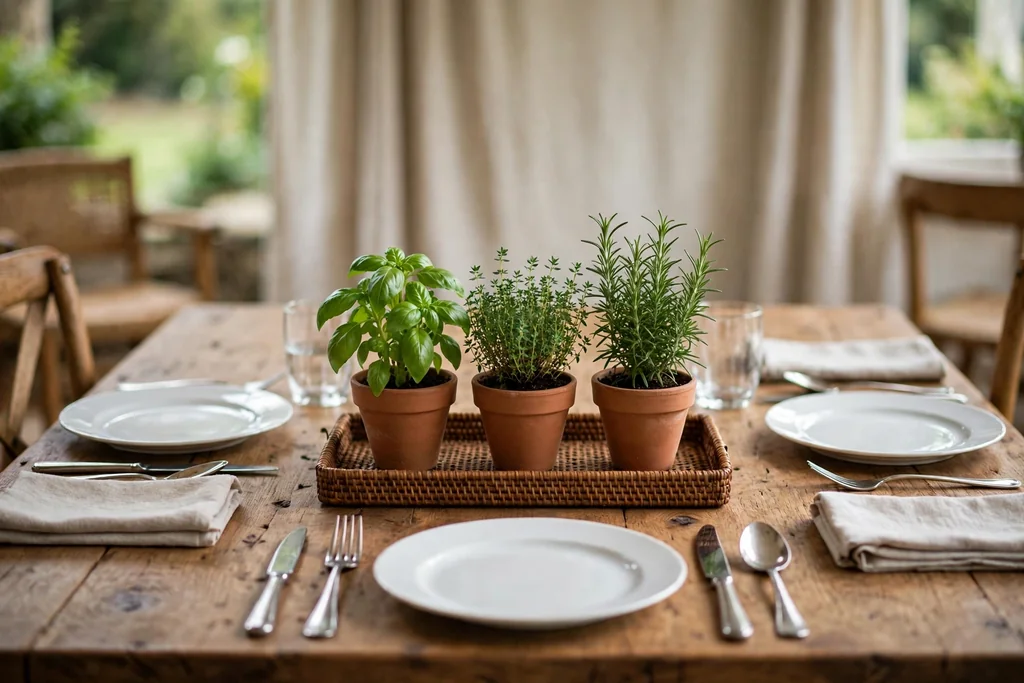
    Three small potted herbs on a tray in the center of a dining table.

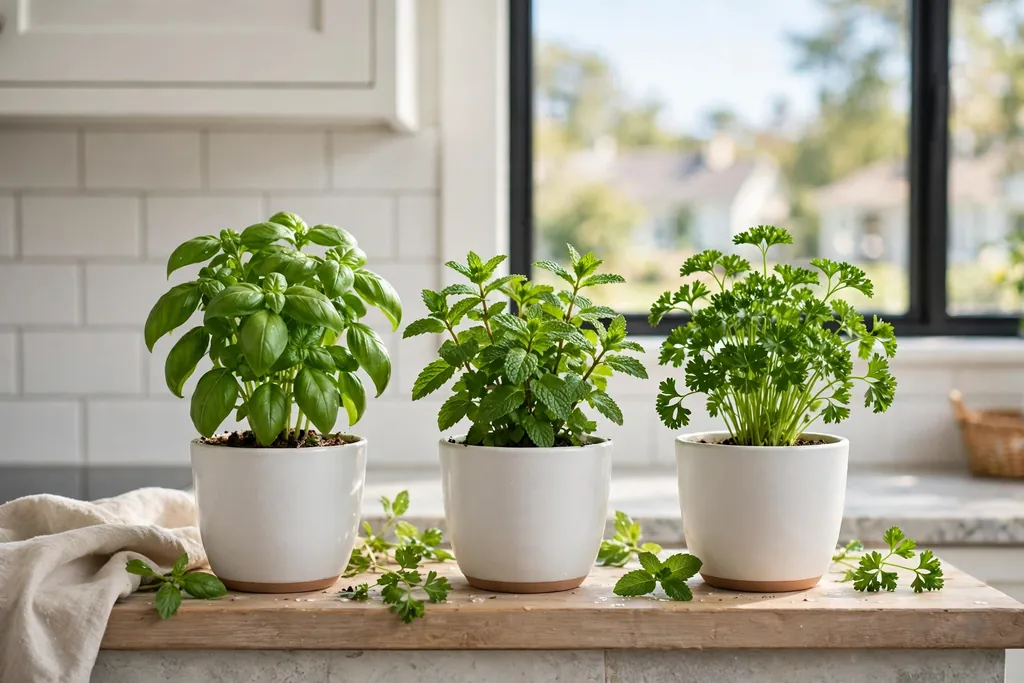
    Group three small potted herbs, such as rosemary, thyme, and basil, on a tray in the center of the table. The herbs give a fresh green centerpiece that suits everyday meals, and they keep growing after the meal, so the centerpiece lasts far longer than cut flowers. Choose pots in the same material, such as plain clay, so the group reads as one centerpiece.

    Water the herbs before the meal and set the tray on a mat, since pots can leave rings on wood. Snip a few leaves for cooking, and keep the pots in bright light between meals. For a gathering, add a small candle in a holder beside the pots, and keep the herbs clear of the flame.

    11. Brass Taper Candlesticks
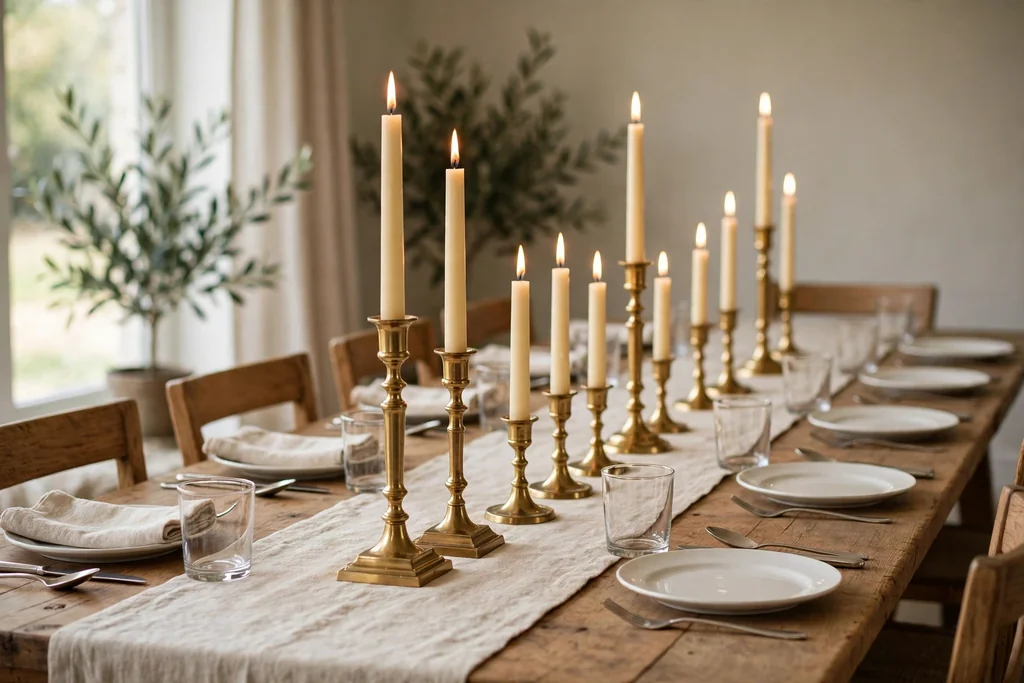
    Brass candlesticks of two heights with cream taper candles down a dining table.

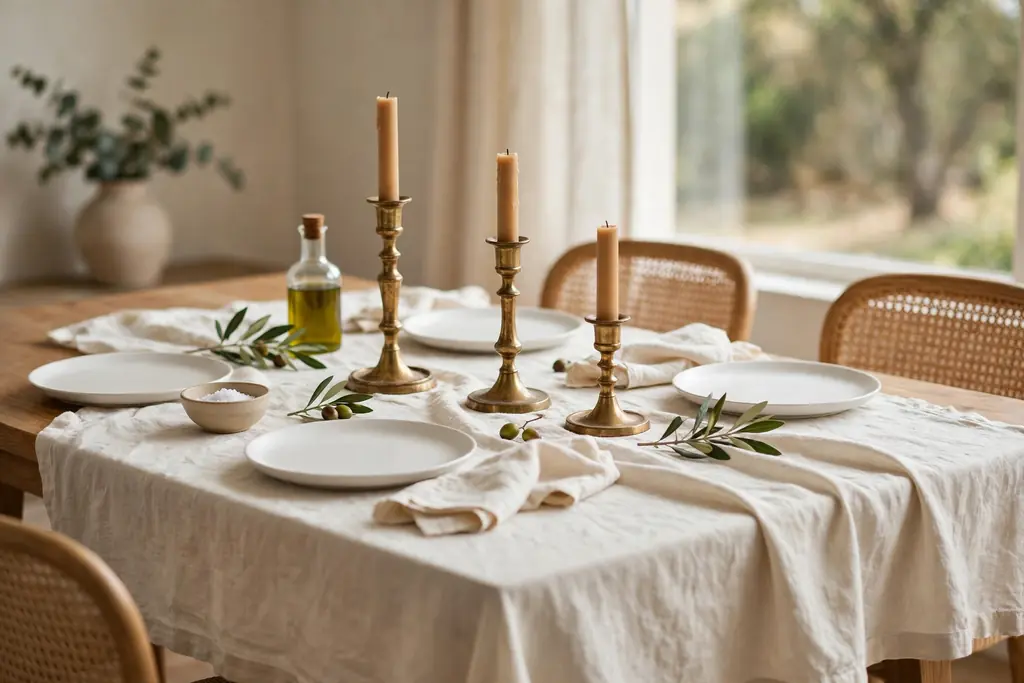
    Set brass candlesticks of two heights down the center of the table, with cream taper candles in each, and keep the rest of the centerpiece simple, such as a short runner or a few small sprigs at the base. Brass adds a warm metal note that suits both everyday dinners and larger gatherings, and it works with blue, green, cream, and gold palettes.

    Check that candlesticks sit level and that tapers fit snugly, so candles do not lean or drip onto the table. Use a tray or small plates under the candlesticks if wax drips are a concern, and trim wicks before lighting. For a table with children, use flameless tapers in the same brass holders for the same look without a flame.

    12. Floating Candles in a Wide Bowl
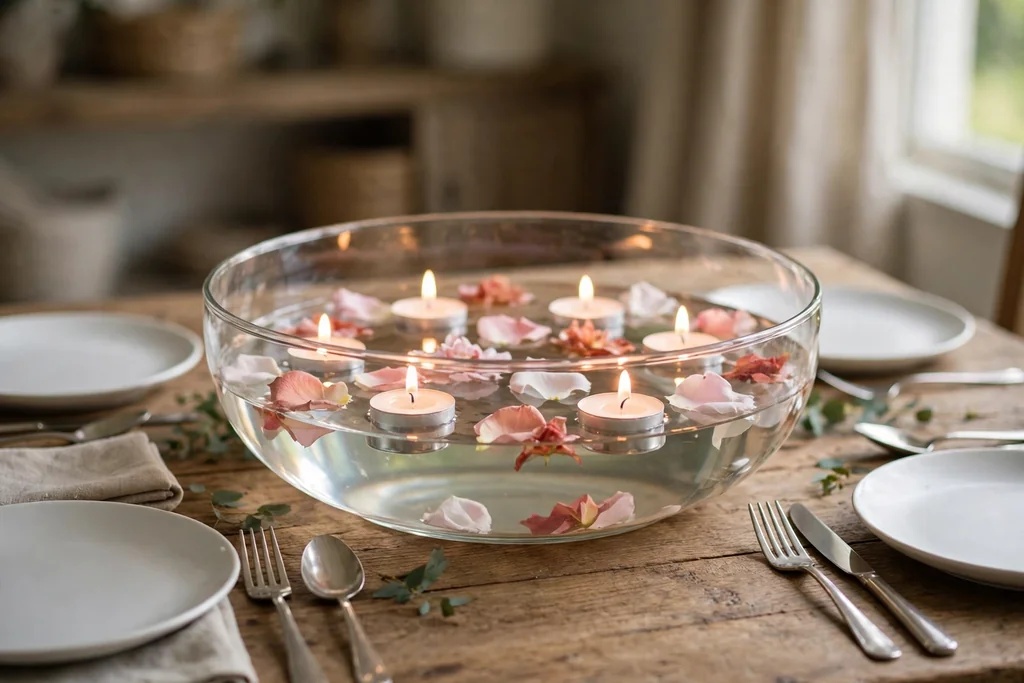
    Wide glass bowl of water with floating candles and flower petals on a dining table.

    Fill a wide, shallow glass bowl with water, float two or three small floating candles on the surface, and scatter fresh flower petals or small leaves around them. The water reflects the candlelight, and the bowl stays low, so this centerpiece suits a round table or a dinner for two. Change the petals with the season: rose petals in spring, white petals in summer, and cranberries in winter.

    Set the bowl on a tray or mat, since water can splash when the bowl is moved, and fill it only three quarters full to leave room for the candles. Use floating candles made for water, not ordinary tea lights, and keep petals clear of the flames. At the end of the evening, lift the candles out first, then carry the bowl to the sink.

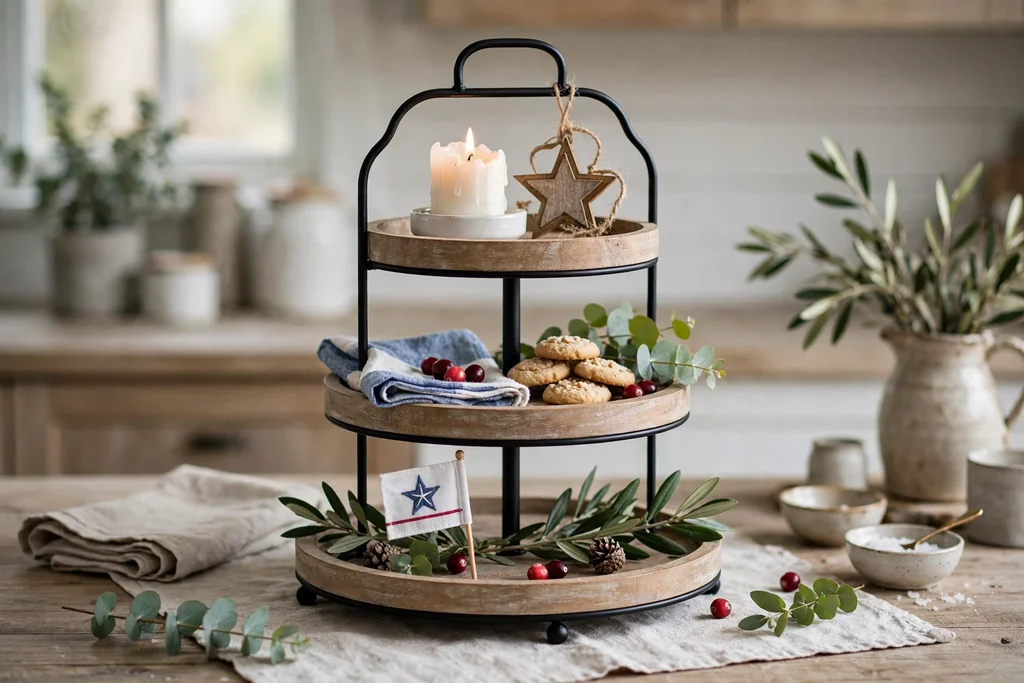
    13. Tiered Stand Centerpiece
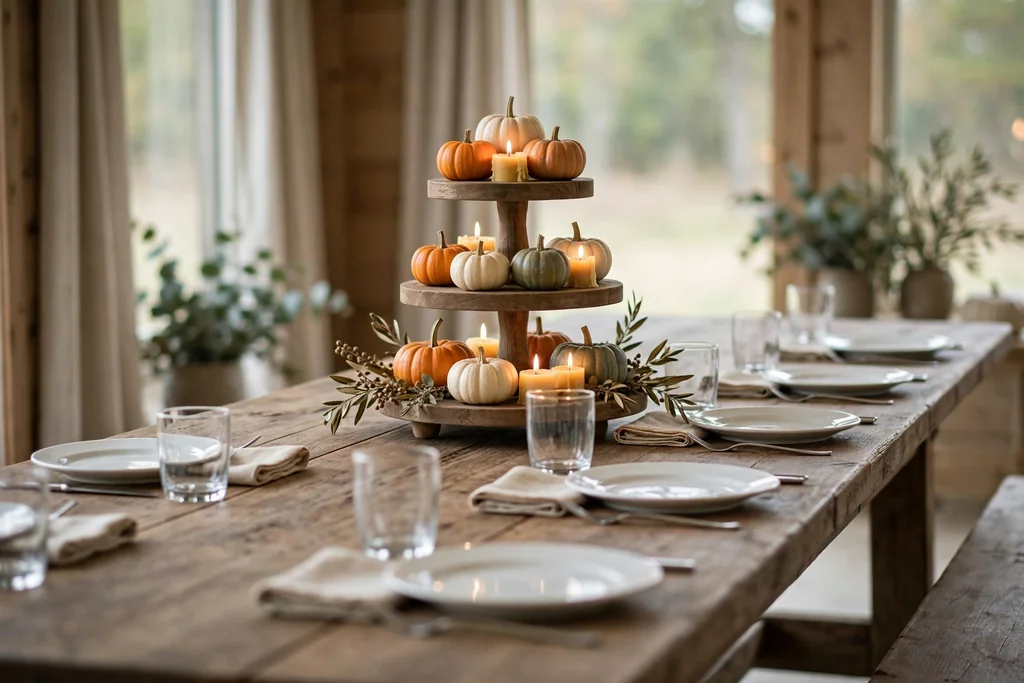
    Tiered stand with small pumpkins and candles at the end of a dining table.

    Set a two or three tier stand at the center of the table or at one end of a long table, and fill it with small seasonal pieces, such as mini pumpkins in autumn, small flowers in spring, or candles and pinecones in winter. The stand gives height without blocking the center, since the tiers sit at one spot rather than across the whole table. Put heavier items on the bottom tier, so the stand stays stable.

    Keep the stand clear of the main serving path, and wipe the tiers after use, since candle wax and leaf dust collect in the rims. If the stand will hold food, use it for food only, and set the decor version on a separate stand. Swap the small pieces with the season, and keep the stand itself all year.

    14. White and Cream Monochrome Group
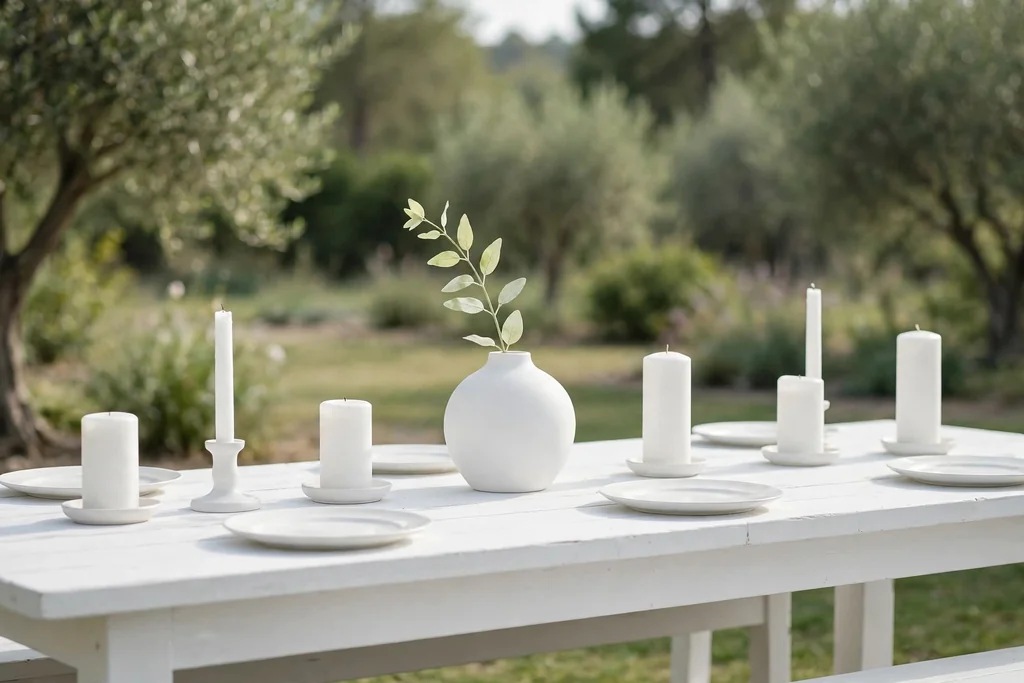
    All white dining table with white candles, a white vase, and white plates.

    Set white plates on white or cream placemats, and keep the centerpiece to white candles, a white vase, and one pale green sprig group at the center. The all white palette suits a bright dining room and a calm mood, and it pairs well with glass, pale wood, and silver cutlery. Add one soft accent, such as a single green sprig, so the table does not look flat.

    Use clear glasses so the white shows through, and keep the candle group low enough to see across. Iron white napkins before the meal, since creases show more on white than on color. For a seasonal change, swap only the sprigs: white flowers in spring, green leaves in summer, cream pumpkins in autumn, and evergreen in winter.

    15. Blue and White Coastal Shell Tray
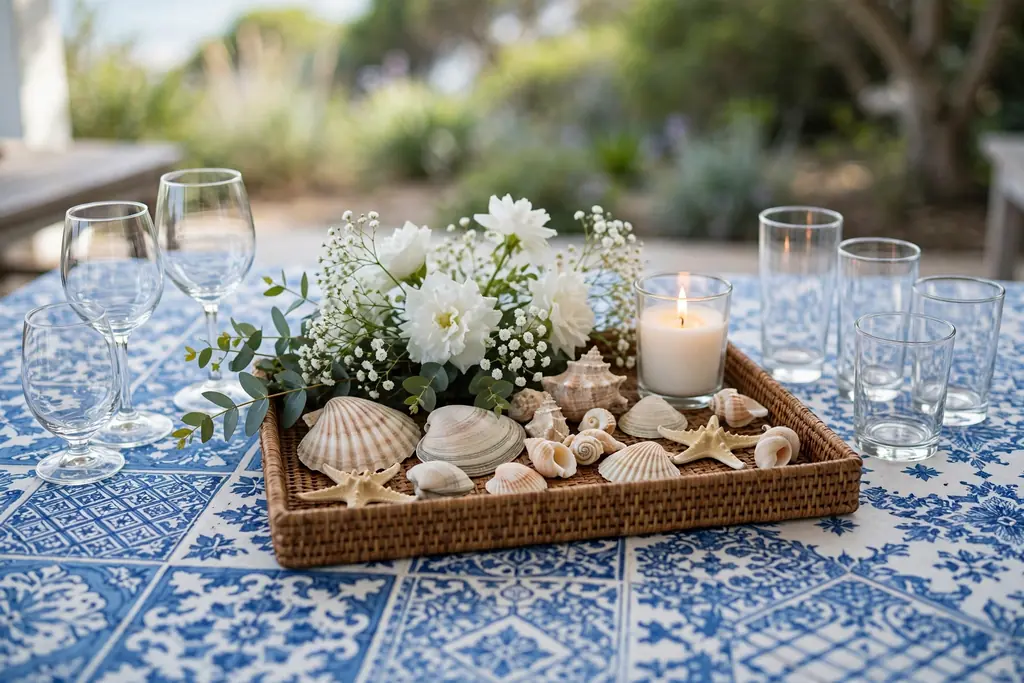
    Tray with shells, white flowers, and a candle on a blue and white dining table.

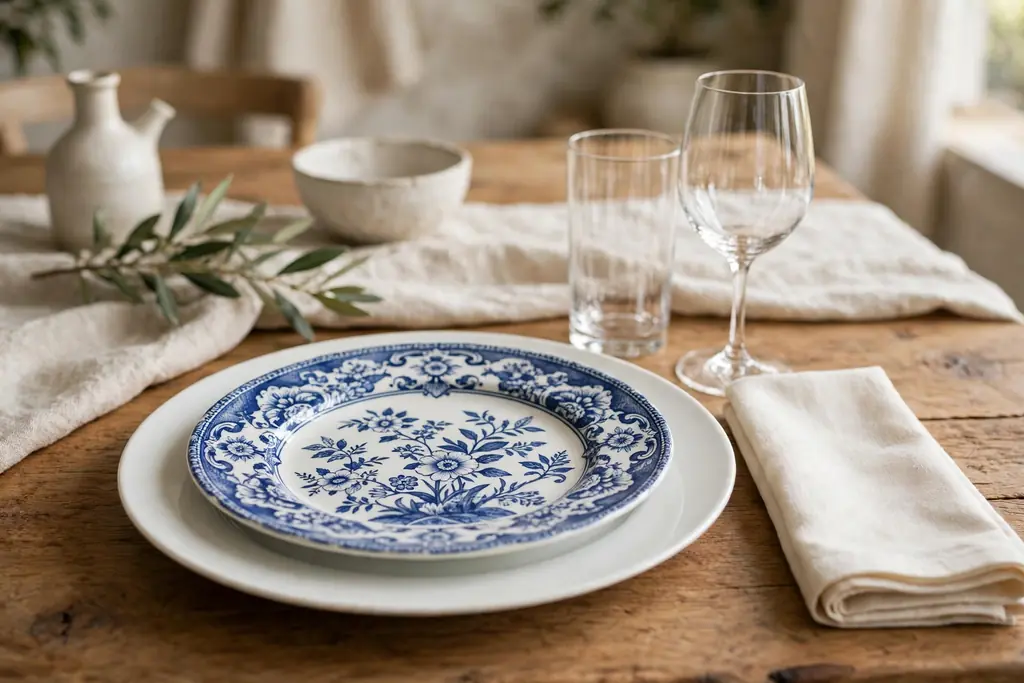
    Set blue and white plates or white plates with blue napkins, and keep the centerpiece to a tray with a few shells, a small vase of white flowers, and one short candle in a holder. The blue and white pairing suits a bright room and a relaxed coastal mood, and it works for everyday meals as well as summer gatherings. Keep the blue to napkins, plates, and one centerpiece accent, so the table stays fresh rather than busy.

    Use a light runner, such as cream linen, so the blue stands out, and keep cutlery plain silver. Rinse shells before setting them out, and keep them clear of food, since small pieces can end up on plates. For a winter version, swap the shells for white candles and keep the same blue and white base.

    16. Wildflower Jars on Wood Slices
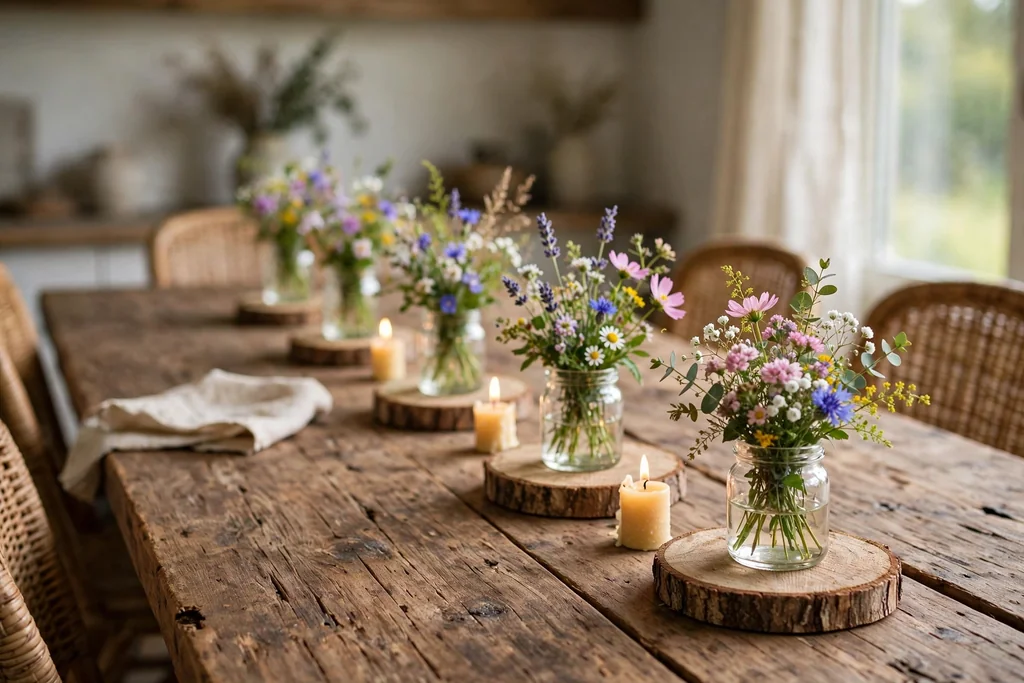
    Small jars of wildflowers on round wood slices down a dining table.

    Set small jars of wildflowers or garden flowers on round wood slices down the center of the table, with one short candle in a holder between every second jar. The wood slices give a rustic base, and the mixed flowers suit a casual summer table or a spring gathering. Use jars of the same size, so the row reads as one centerpiece, even though the flowers differ.

    Choose wood slices with a flat, sanded top, so jars sit level and do not wobble. Wipe slices clean after meals and do not soak them, since wood can warp when left damp. For a longer table, add more jars in the same pattern, and keep the spacing even so the row stays matched.

    17. Cranberry and Candle Cylinders
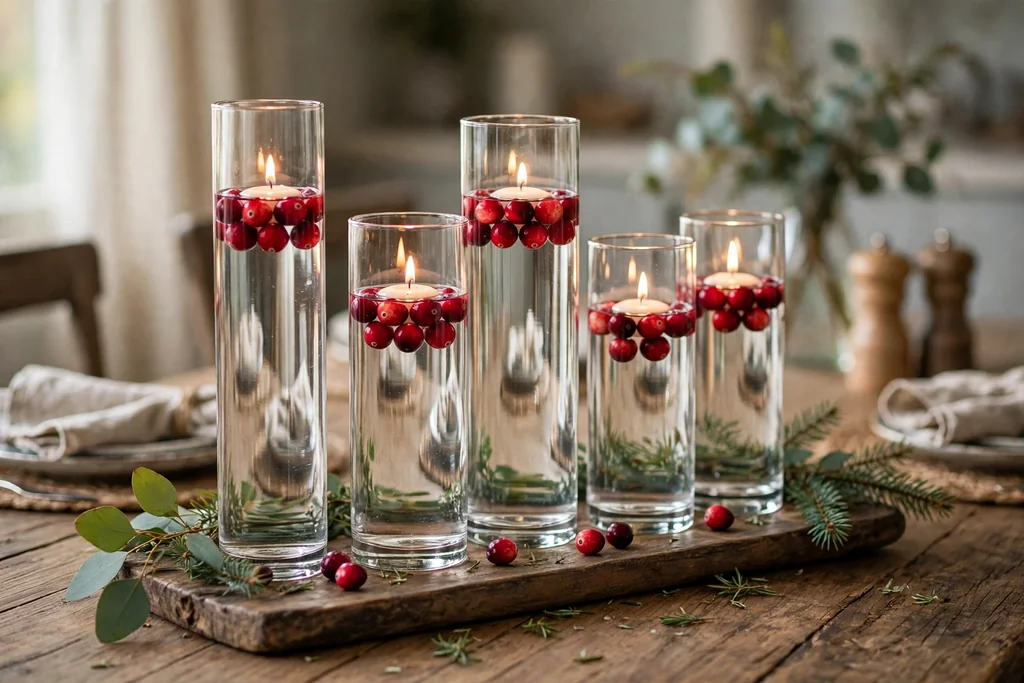
    Tall glass cylinders with water, cranberries, and floating candles on a tray.

    Fill two or three tall glass cylinders partway with water, add a handful of fresh cranberries and a few small leaves, then float a candle on top of each one. The red berries and soft light give a clear winter and holiday color, and the glass keeps the whole group narrow and easy to see around. For a Thanksgiving version of this table, browse the Thanksgiving table decorating ideas.

    Set the cylinders on a tray, so any drips stay contained and the group lifts off in one move. Keep the water level below the rim, and change the water if it clouds before guests arrive. Use flameless floating candles if children will be near the table, since the glass can tip if bumped.

    18. Sunflower Bucket Centerpiece
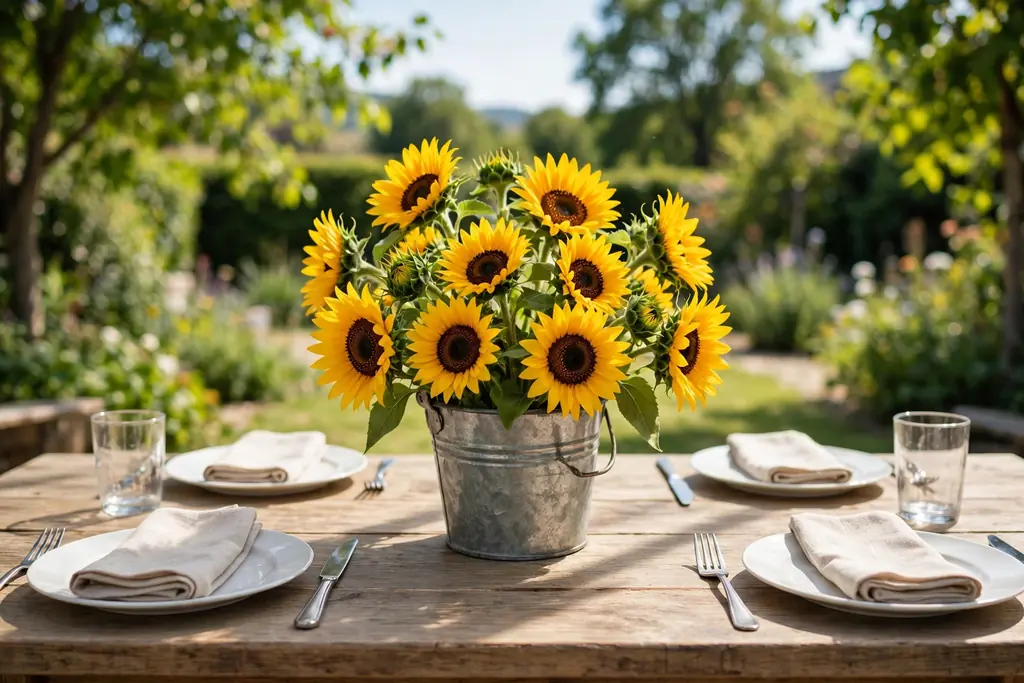
    Small metal bucket of sunflowers in the center of a dining table.

    Set a small metal bucket or tin pail in the center of the table, filled with sunflowers trimmed to one height, and add a few green leaves for shape. The sunflowers give a clear summer note, and the bucket suits a casual table, a patio meal, or a late summer gathering. Keep the stems short enough to see over when guests are seated.

    Set the bucket on a small mat if the table marks easily, and fill it with fresh water before the meal. Trim stems at an angle, and replace any drooping flower before guests arrive. For a smaller table, use one sunflower in a small jar instead of a full bucket, and keep the rest of the table plain.

    19. Dried Wheat and Pampas in a Jug

    Bundle of dried wheat stems tied with twine in a stoneware jug on a dining table.

    Tie a bundle of dried wheat or pampas stems with twine and stand it in a heavy stoneware jug at one end of a long table, or in the center of a round table. The dried stems give height and a clear autumn shape, while the jug keeps the bundle steady and easy to move. Trim the stems so the heads sit below eye level when guests are seated.

    Keep the jug clear of elbows and serving dishes, and shake the bundle outside before bringing it in, since dried stems shed. Keep dried material clear of real flames, and use flameless candles nearby instead. If shedding bothers you, use faux stems in the same jug, and keep the jug for spring branches later in the year.

    20. Cherry Blossom Branches in a Vase
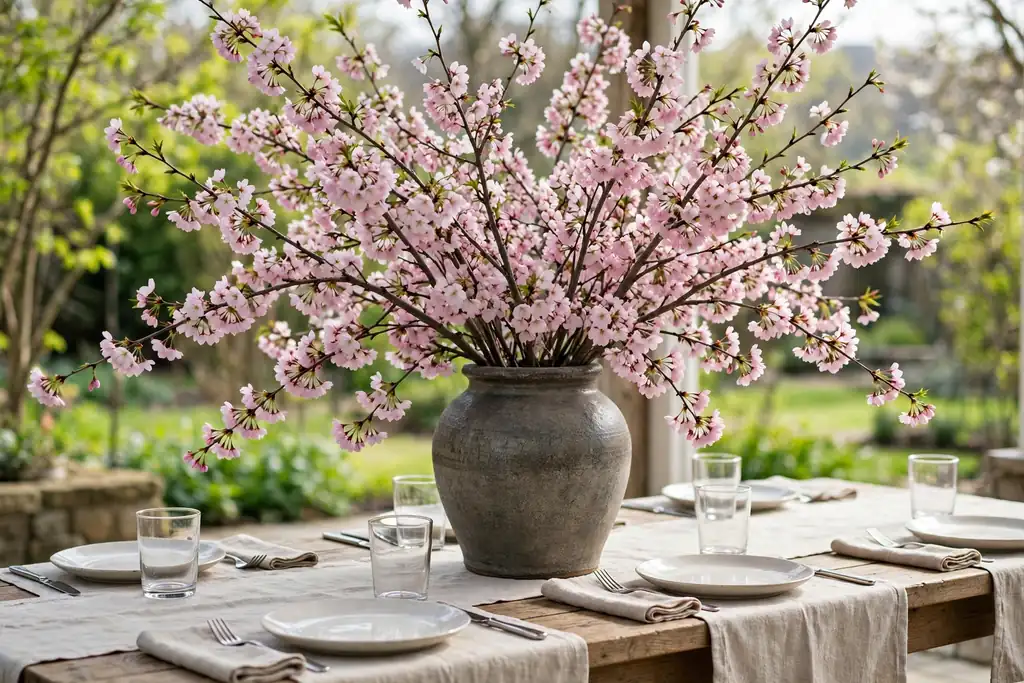
    Cherry blossom branches in a heavy vase on a spring dining table.

    Stand a few cherry blossom branches, real or faux, in a heavy vase in the center of the table, and keep the rest of the centerpiece plain, such as a small candle in a holder beside the vase. The branches give height without blocking conversation, since guests can see between slim branches, and the pale blossoms suit a spring table. Choose a heavy vase that will not tip.

    Trim branches so they clear light fixtures, and keep the arrangement narrow, not wide. Set the vase where it will not be brushed by serving dishes passing down the table. For a longer lasting version, use faux branches in the same vase, and swap them for bare branches in winter or gold branches for a holiday table.

    21. Pinecone and Moss Runner
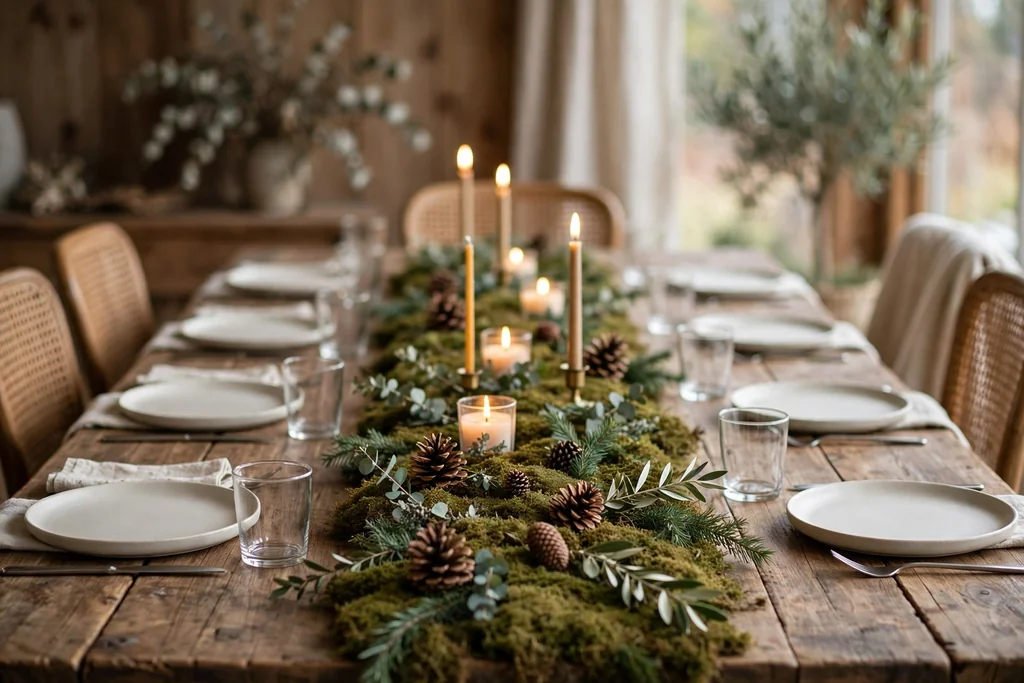
    Moss runner with pinecones, sprigs, and candles down a dining table.

    Lay a narrow runner of moss or plain green fabric down the center of the table, then set pinecones, a few sprigs, and one or two candles along it. The woodland mix gives a natural winter note without a large arrangement, and it suits a neutral table where texture carries the season. Use pinecones sparingly, about a handful along a long table, and keep them clear of plates and food.

    Clean gathered pinecones fully and check them before bringing them inside, and keep them clear of real flames. If small pieces worry you with young children at the table, use larger pinecones only. For a spring version, swap the pinecones for small white flowers and keep the same moss runner.

    22. Rose and Peony Low Bowl
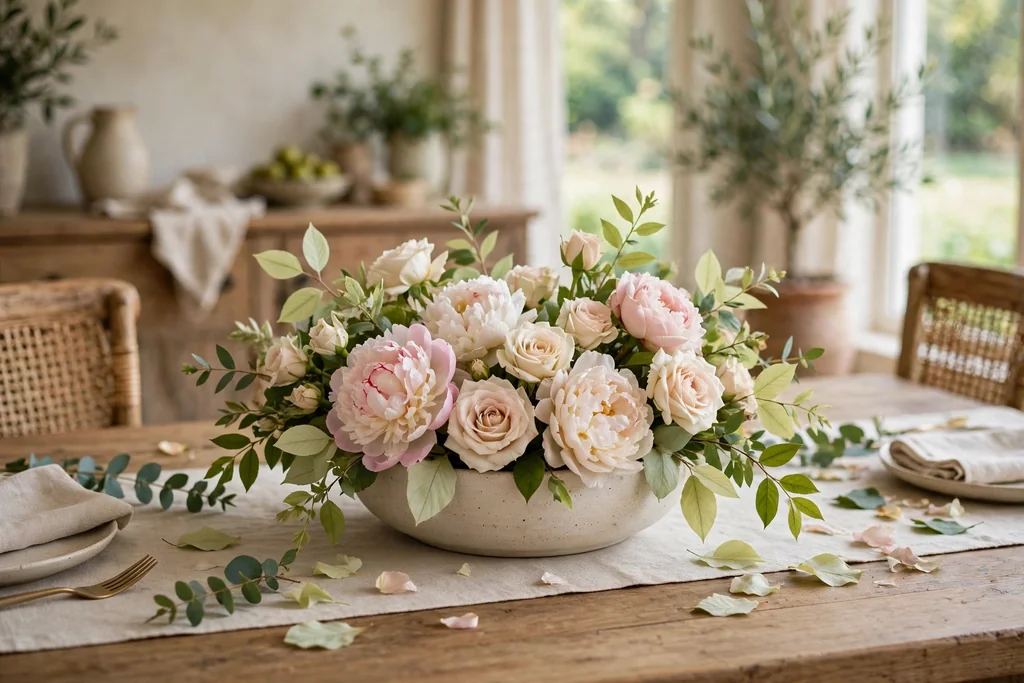
    Low ceramic bowl of roses and peonies on a dining table.

    Fill a low ceramic bowl with roses and peonies trimmed short, and add a few pale green leaves to soften the edges. The layered petals give a soft, full look, and the blush and cream palette suits a spring or early summer table that does not want a strong color contrast. Set the bowl where guests can see the flowers from above, since the shape reads best from a seated view.

    Peonies open over a few days, so buy them slightly closed if the meal is two or three days away, and keep them in cool water out of direct heat. Rose stems are sturdier, so mix them through the peonies rather than grouping them at one side. For a Valentine table in the same style, see the Valentine centerpieces.

    23. Succulent Planter Box
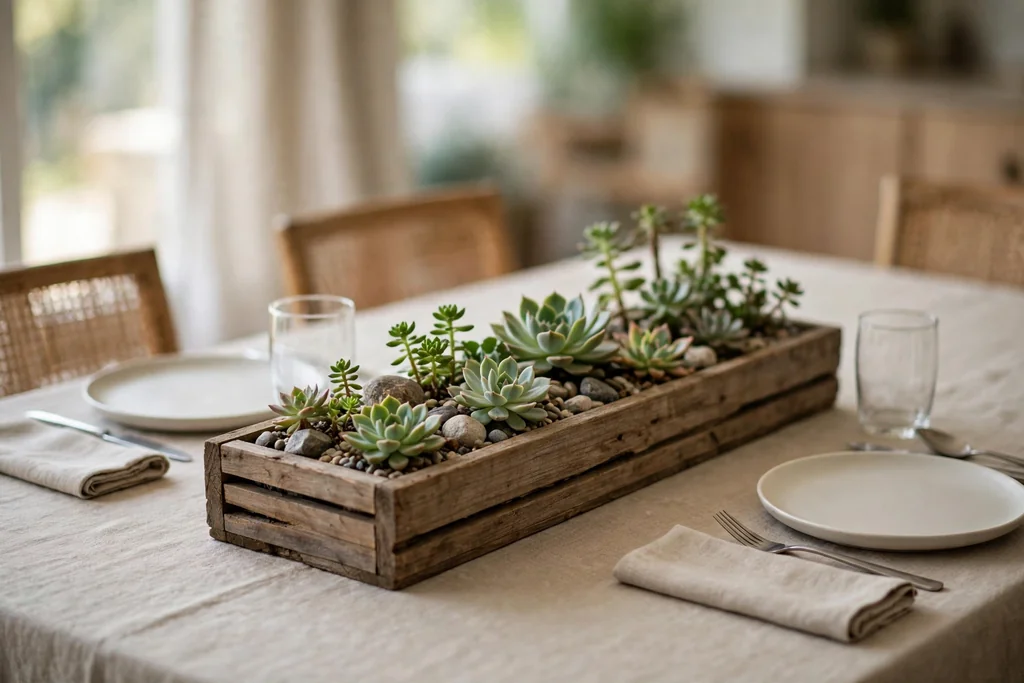
    Low wooden planter box with small succulents on a dining table.

    Set a low wooden planter box in the center of the table, filled with small succulents in plain pots or planted straight into the box, with small stones between them. The succulents give a green centerpiece that needs little water, lasts for months, and suits a modern or casual table in any season. Choose succulents in mixed shapes but one green palette, so the box reads as one centerpiece.

    Water sparingly, and set the box on a mat, since soil and water can mark wood. Keep the box low and narrow, so guests can see across, and move it to a bright spot between meals. For a seasonal change, add one small candle in a holder beside the box, or swap one stone for a small seasonal piece, such as a pinecone in winter.

    24. Hurricane Candle with Seasonal Filler
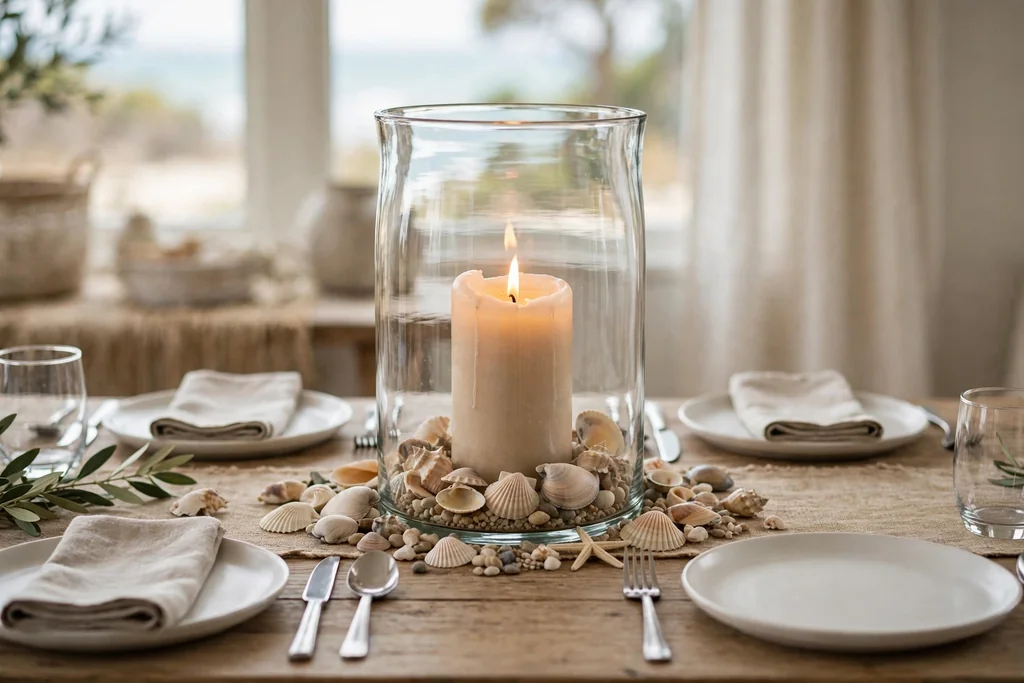
    Large glass hurricane with a pillar candle and shells at its base on a dining table.

    Set one or two large glass hurricanes in the center of the table, with a pillar candle inside each, and fill the base around the candle with a seasonal filler, such as sand and shells in summer, small pumpkins in autumn, cranberries in winter, or petals in spring. The glass keeps the group narrow and safe, and the filler is the only part that changes with the season.

    Use battery candles inside narrow hurricanes, and real candles only in proper holders on a stable surface. Keep the filler clear of the flame, and use a tray under the hurricanes if the filler could spill. Wash the glass before the meal, since fingerprints show more on glass than on wood, and store the fillers in labeled bags for next year.

    25. Vintage Teacups with Single Blooms
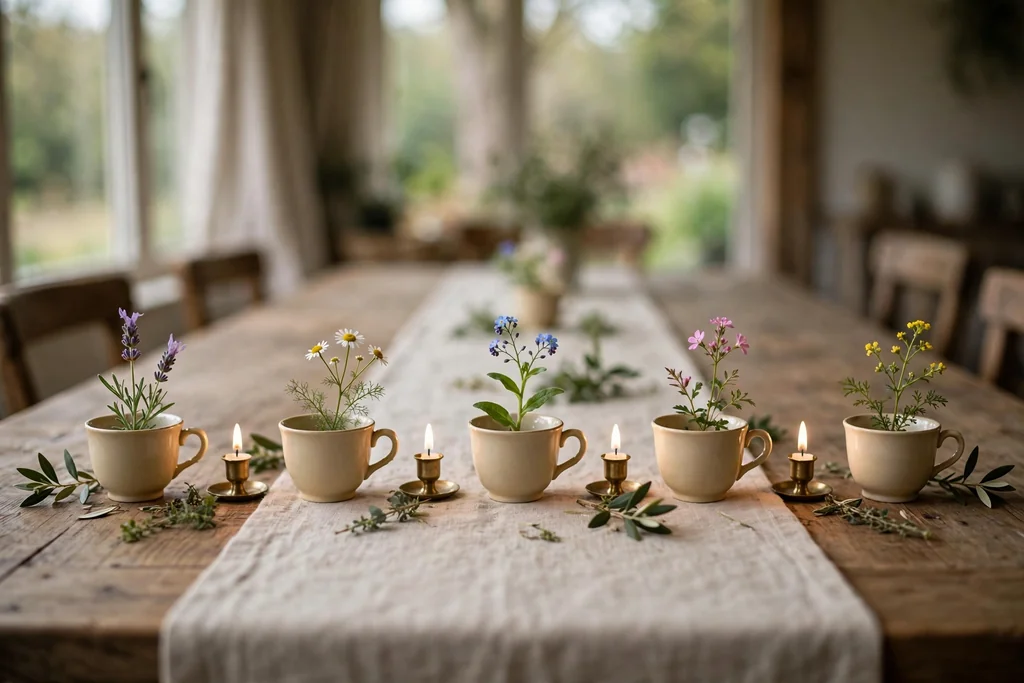
    Small teacups each holding one short flower stem in a row down a dining table.

    Set three or four small teacups down the center of the table, each holding one short flower stem in water, with a small candle in a holder between every second cup. This idea suits a small table or an afternoon tea style meal, because each cup is a small focal point rather than one large arrangement. Use teacups of the same pattern for a matched row, or mix patterns in the same color family for a collected look.

    Keep each stem trimmed so the flower sits just above the cup rim, and top up the water before guests arrive, since teacups hold little. For a longer table, add more cups, but keep the spacing even so the row reads as one centerpiece. Change the flowers with the season, and keep the teacups for the next table.

    26. Olive Branch and Stoneware Jug
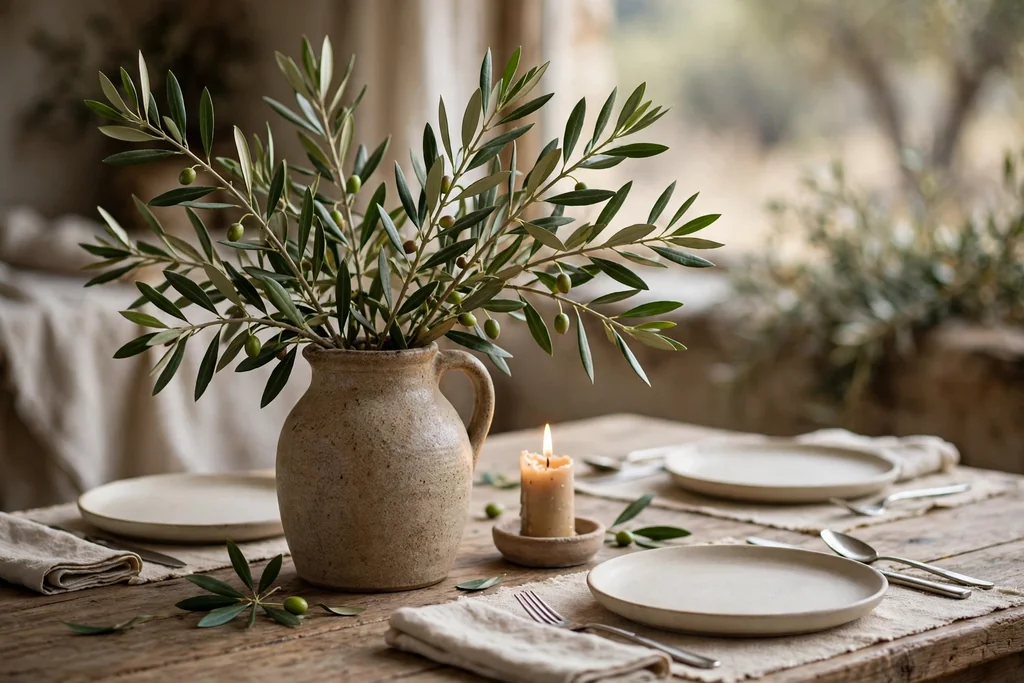
    Olive branches in a stoneware jug on a dining table with a short candle beside it.

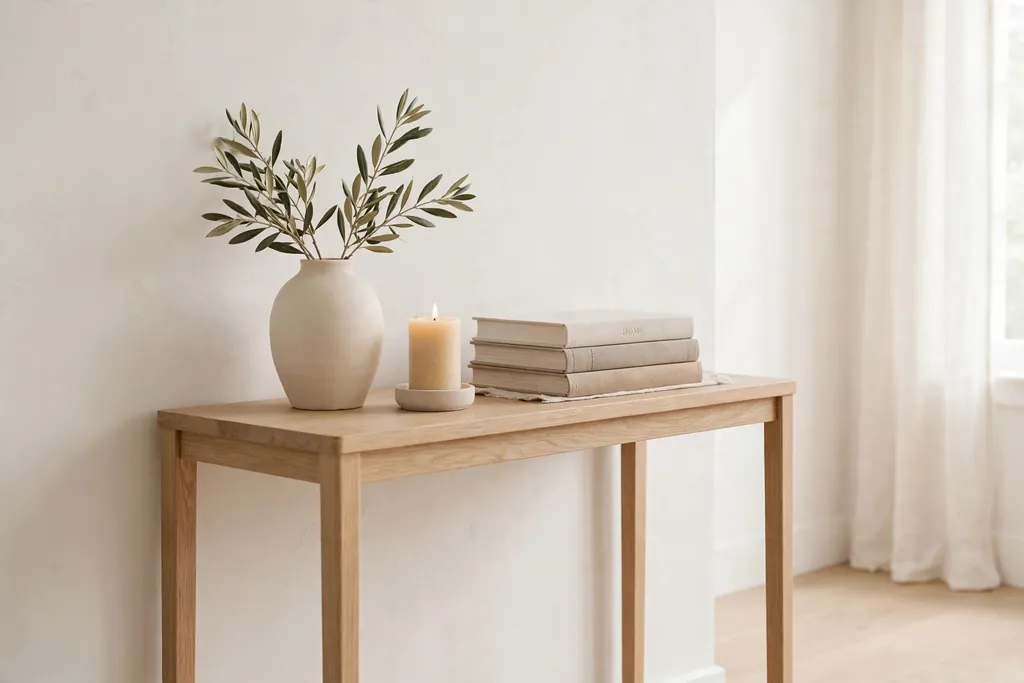
    Stand a few olive branches in a heavy stoneware jug at one end of a long table, or in the center of a round table, and keep the rest of the centerpiece plain, such as a short candle in a holder beside the jug. The olive branches give a calm, Mediterranean note that suits spring and summer tables, and the jug keeps the branches steady and easy to move.

    Trim the branches so they stay inside the table area and do not brush plates or glasses. Keep the jug heavy enough to hold the tall stems steady, and change the water every two days if the branches are fresh. For a winter version, swap the olive branches for evergreen sprigs and keep the same jug.

    27. Single Tray Centerpiece for a Small Table
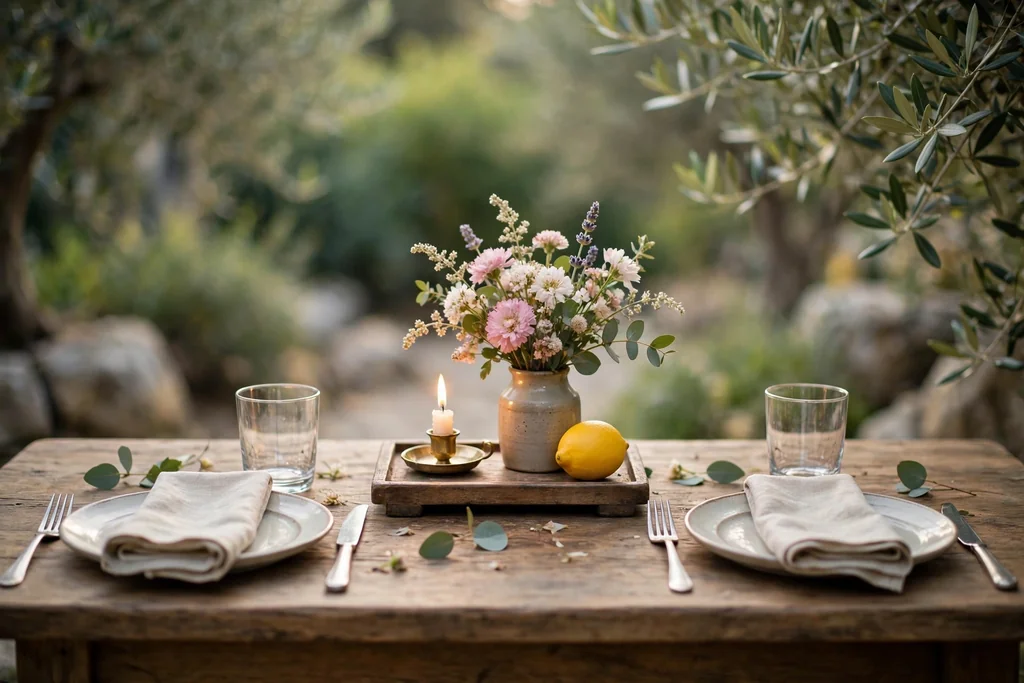
    Small tray with one candle, a short vase of flowers, and a lemon on a small dining table.

    On a small table, use one centerpiece only, such as a small tray with one candle, a short vase of flowers, and one small seasonal piece, such as a pinecone in winter or a lemon in summer. The single tray keeps the table usable, since a small table has little spare room, and it lifts off in one move for serving. Keep the tray small enough that plates and glasses still fit around it.

    Keep the vase short so it does not block sightlines, and use a plain runner or a single round placemat under the tray if the table marks easily. For daily use, leave just the candle on the tray and add flowers when guests come. Swap only the small seasonal piece with the season, and keep the tray, candle, and vase all year.

    Conclusion

    A good table centerpiece does not need a new set of pieces for each season. Start with a tray or board, keep the centerpiece low, and change only the flowers, fruit, or greenery while the candles, vases, and holders stay the same. Spring tables suit tulips and blossom branches, summer tables suit citrus and sunflowers, autumn tables suit pumpkins and dried stems, and winter tables suit evergreen, pinecones, and candlelight. Try one idea from this list at your next meal, keep what works for your table, and change only one layer at a time until the centerpiece feels like yours.

    Frequently Asked Questions

    What is a good table centerpiece for every season?

    A good table centerpiece for every season is one low group on a tray or board, with candles and vases that stay the same all year and only the flowers, fruit, or greenery changed with the season. This setup keeps the table easy to clear, leaves room for plates and serving dishes, and suits spring flowers, summer fruit, autumn pumpkins, and winter greenery alike.

    How low should a table centerpiece be?

    A table centerpiece should stay below seated eye level, so guests can see each other across the table without leaning around it. Use low bowls, short vases, and candle groups on a tray, and place tall pieces, such as branches, at one end of a long table or in the center of a round table, where they block fewer sightlines.

    What centerpiece works best for a small table?

    The best centerpiece for a small table is a single small tray with one candle, one short vase, and one small seasonal piece, such as a pinecone or a lemon. Skip runners and large groups on a small table, fold napkins flat, and set extra dishes on a sideboard, so the table stays free for eating.

    How do I make a centerpiece with things I already own?

    Start with a tray, a wood board, or a runner you already own, then add candles in holders, a vase or jars, and one seasonal piece, such as fruit from the kitchen, herbs in pots, or greenery from the garden. Keep the palette to two or three colors, use one main group, and swap only the seasonal piece when the season changes.

    What is the simplest centerpiece for a dinner party?

    The simplest centerpiece for a dinner party is a low greenery runner with short pillar candles in glass holders, or a row of bud vases with one stem each. Both ideas leave sightlines open, suit a long table as well as a small one, and lift off in one move when serving needs the full table.

    How do I keep candles safe in a table centerpiece?

    Keep candles in holders on a stable surface, clear of dried material, fabric, paper, and greenery, and never leave a lit candle unattended. Use flameless candles near children, dried stems, or paper, and inside closed or narrow lanterns and hurricanes, where a real flame needs air and a safe holder.
  • 19 Patio Table Decor Ideas for Everyday Outdoor Dining

    19 Patio Table Decor Ideas for Everyday Outdoor Dining

    Patio table decor works best when it stays low, sturdy, and easy to clear. Use a washable runner or placemats, plain plates, and one low centerpiece of herbs, flowers, or candles in glass, then add cloth napkins and weighted pieces that resist wind. The 19 ideas below cover outdoor dining, from small bistro tables to long patio tables for guests.

    Start with the base you already own: everyday plates, clear or light glasses, and a runner or placemats you can wipe or wash. Then add one patio layer at a time, such as a pot of herbs, a bowl of citrus, or a lantern. Keep the centerpiece low enough to see across, leave room for serving dishes and drinks, and choose pieces you can lift off in one move when rain starts or the table needs to clear. For outdoor tables, weight matters: use heavy pots, glass hurricanes, and cloth napkins that will not blow away.

    Key Takeaways

    • Keep the centerpiece low and narrow, so guests can see each other and serving dishes still fit.
    • Pick a simple palette of white, cream, wood, and green, with one accent color repeated at least twice.
    • Start with washable textiles: a runner, napkins, and placemats carry most of the patio color and clean easily after outdoor meals.
    • Use one main centerpiece per table, not several competing groups, and leave empty space at each place for plates and glasses.
    • For outdoor dining, choose weighted, wind resistant pieces: heavy pots, hurricane lanterns, and cloth napkins over paper.
    • For evening meals, add candlelight in glass holders, kept clear of fabric, paper, and dry material, and never left burning unattended.

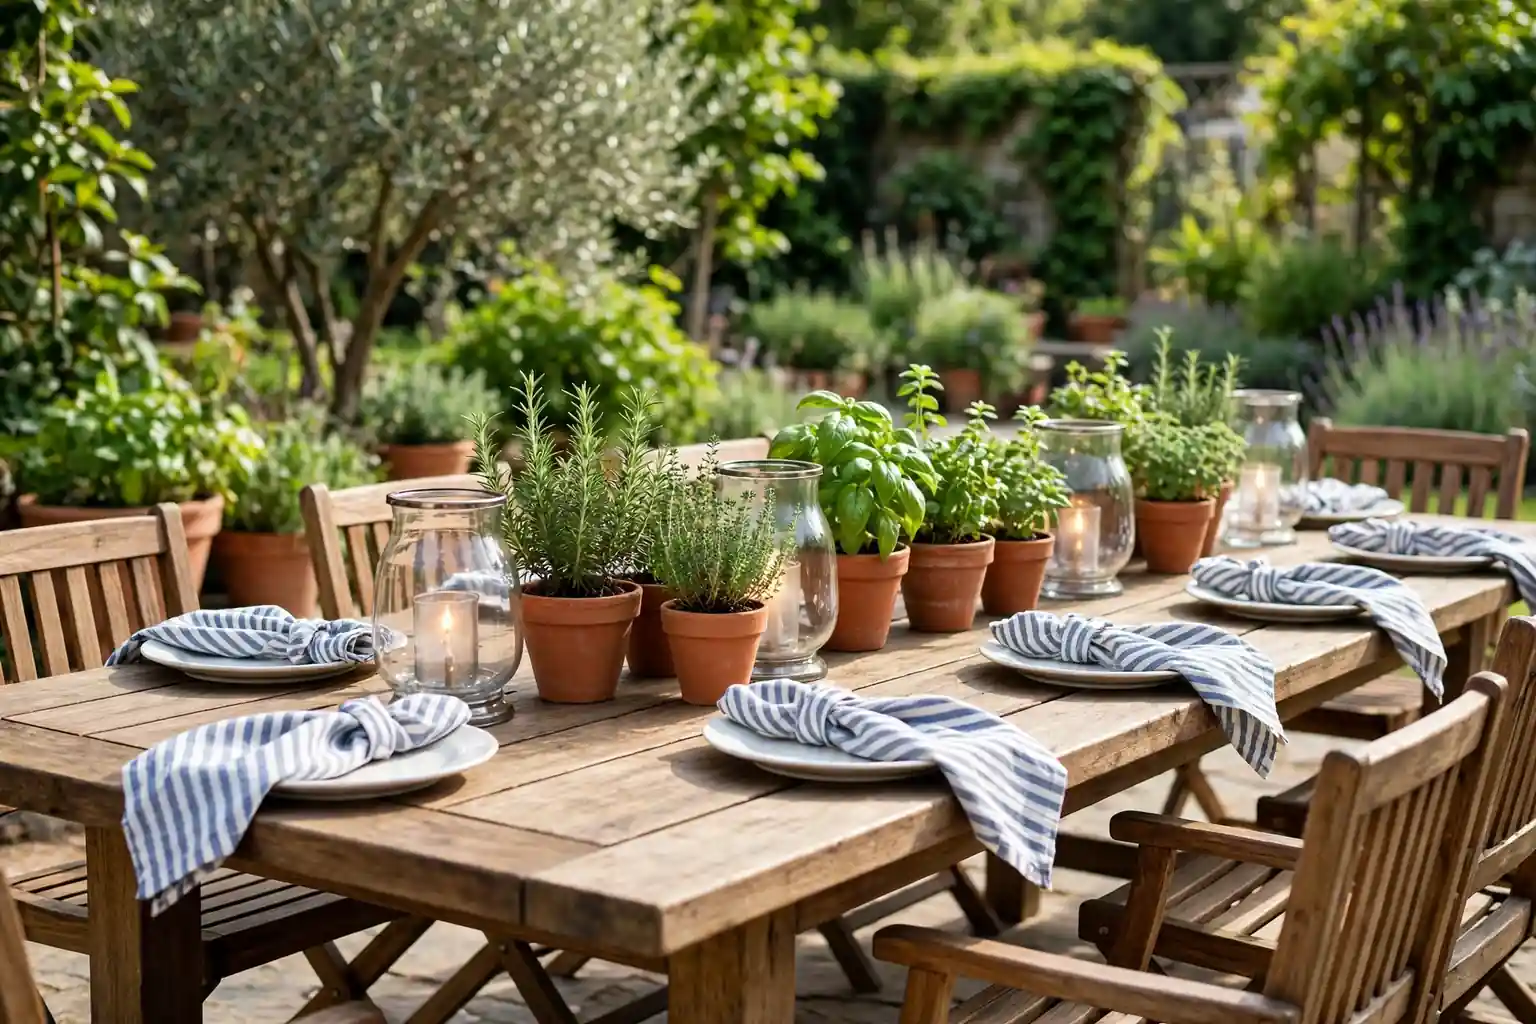
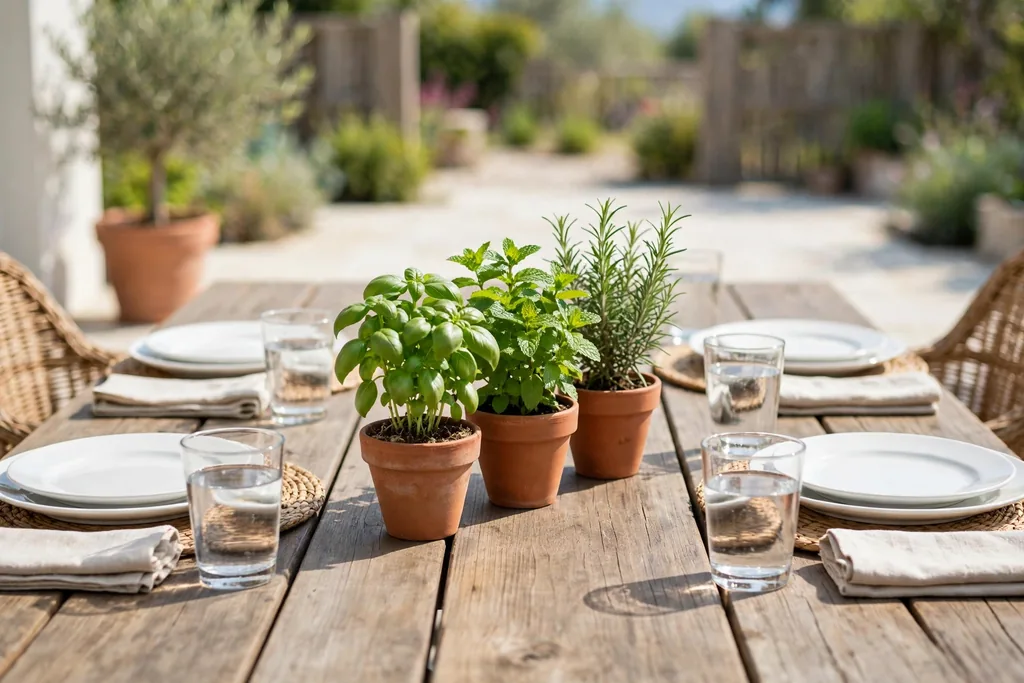
    1. Low Potted Herb Centerpiece

    Small terracotta pots of basil, mint, and rosemary grouped down the center of a patio dining table.

    Group three small pots of basil, mint, and rosemary down the center of the patio table, so the centerpiece smells good, looks green through the season, and can be snipped for cooking. Herb pots suit both small patios and long dining tables, and they last far longer than cut flowers in outdoor heat. Use pots in one material, such as terracotta or white ceramic, so the group reads as one display.

    Water the herbs before the meal and set each pot on a small saucer, so the table stays dry. Keep pots small enough to see over, and trim tall stems before guests arrive. If mint spreads fast, keep it in its own pot, since mint can crowd out basil and rosemary in a shared planter.

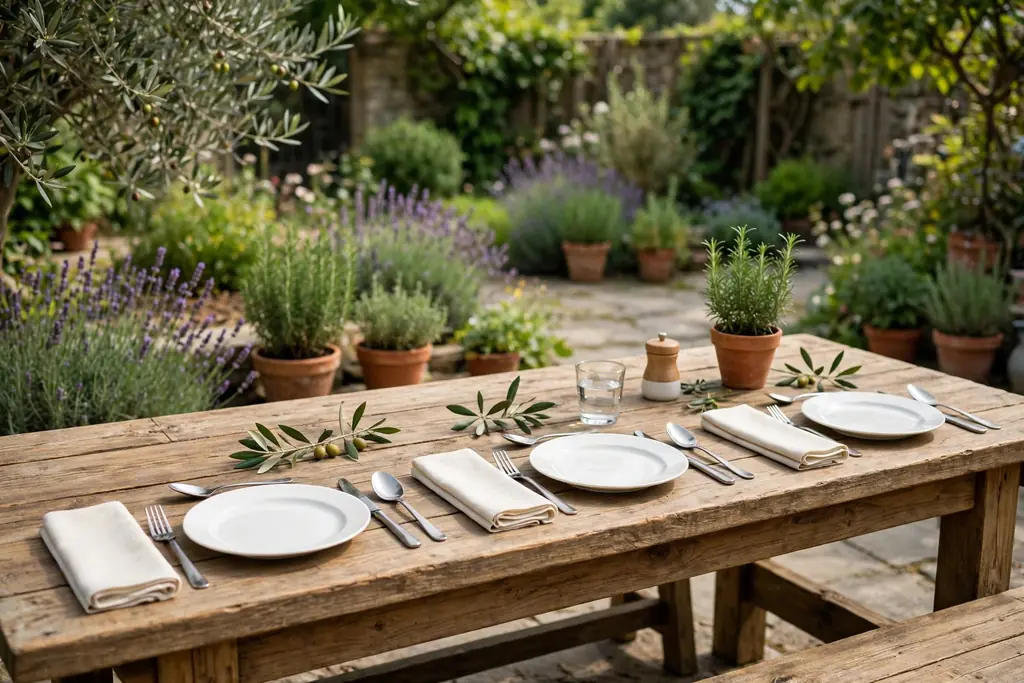
    2. Bare Wood Table with Folded Linen Napkins

    Bare wood patio table with folded cream linen napkins, plain plates, and simple cutlery.

    Leave a wood patio table bare, with no runner or cloth, and let the grain do the work, then set folded linen napkins in cream or sage at each place, with simple cutlery and plain plates. This approach suits a rustic or farmhouse patio, and it keeps the table easy to wipe after everyday meals.

    Use placemats under plates if the wood marks easily, and keep the centerpiece to one low group, such as a wood board with candles, so the wood still shows. Fold napkins the same way at every place for a tidy look, and iron linen napkins before a gathering, since creases show more on bare wood than under a patterned cloth.

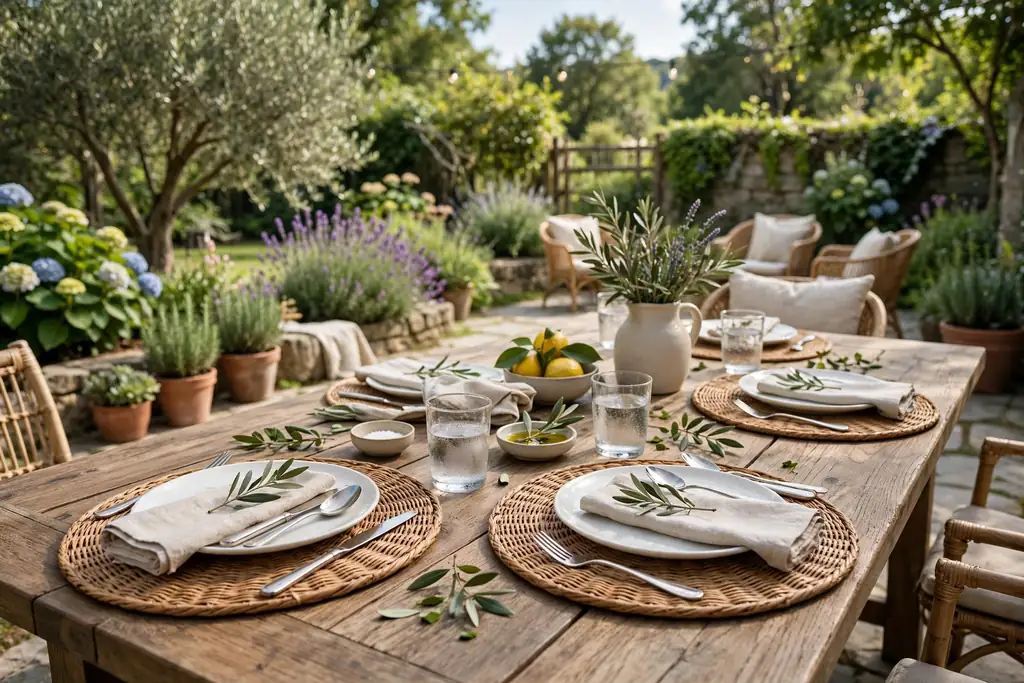
    3. Wipe-Clean Woven Placemats for Daily Use

    Round woven placemats with white plates on a patio dining table in daylight.

    Use round woven placemats under each plate, with plain white plates on top, for a patio table that feels relaxed and still looks set. Woven texture suits outdoor light and hides small marks from outdoor meals, while the placemat defines each place without a full tablecloth. Center one placemat at each place, with cutlery in its usual spots.

    Choose placemats that wipe clean or wash easily, since outdoor meals bring dust, juice, and crumbs. Shake them outside after meals and wipe them dry before storing, so they do not hold damp. If placemats vary in color, put the same color at every place for a tidy look, and save mixed colors for a casual family lunch.

    4. Citrus Bowl Centerpiece for Everyday Meals

    Wide shallow bowl filled with lemons, limes, and oranges with green leaves as a centerpiece on a patio table.

    Fill a wide, shallow bowl with lemons, limes, and a few oranges, and set it in the center of the patio table as a centerpiece you can also cook with later. The fruit gives clear color and shape, and the bowl takes up only one spot, leaving the rest of the table free for plates and serving dishes. Add a few green leaves between the fruit to break up the round shapes.

    Check the fruit every few days and move any soft piece to the kitchen, since one spoiling lemon can mark the rest. Keep the bowl low and wide rather than tall, so it does not block sightlines. At the end of the meal, the bowl can move to the counter, which makes clearing the table a single step.

    5. Glass Hurricane Lanterns for Evening Dining

    Glass hurricane lanterns of different heights with candles down the center of an evening patio table.

    Set two or three glass hurricane lanterns of different heights down the center of the patio table, each holding a pillar or battery candle, for evening light that stays steady in a light breeze. The glass shields the flame from wind, so the table keeps its glow through a long outdoor dinner, and the lanterns look just as good on a covered patio as in an open garden.

    Keep lanterns low enough to see over, and set them on a tray or runner if the table surface marks easily. Use battery candles inside closed lanterns or near fabric, and real candles only in proper holders on a stable surface. Wash the glass before the meal, since fingerprints and dust show more on clear glass in candlelight.

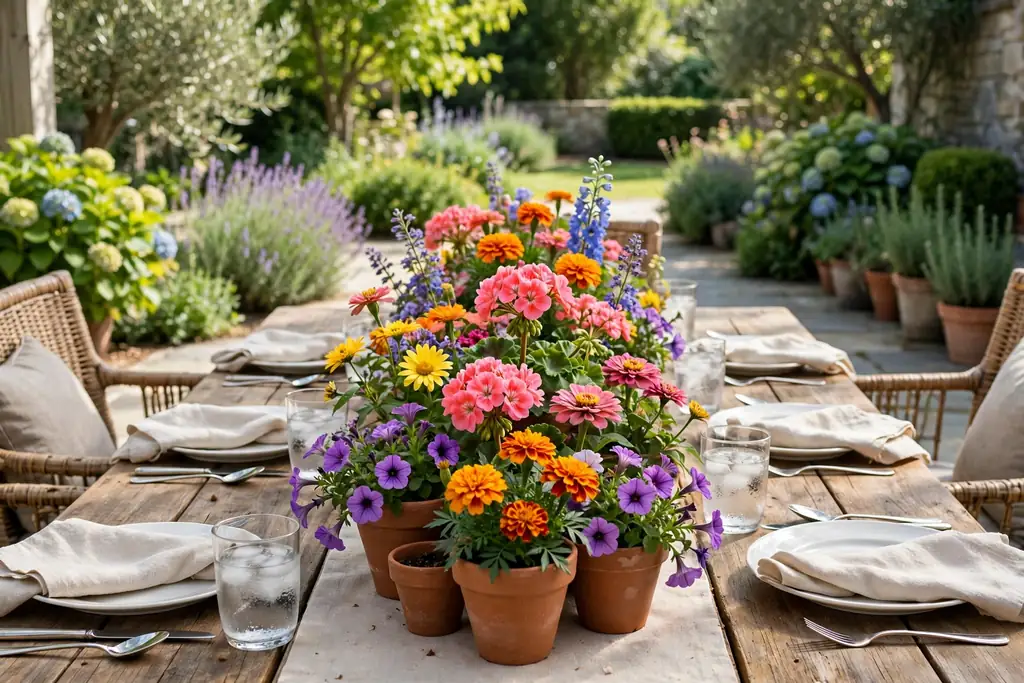
    6. Terracotta Pots with Seasonal Flowers

    Terracotta pots of seasonal flowers grouped down the center of a patio dining table.

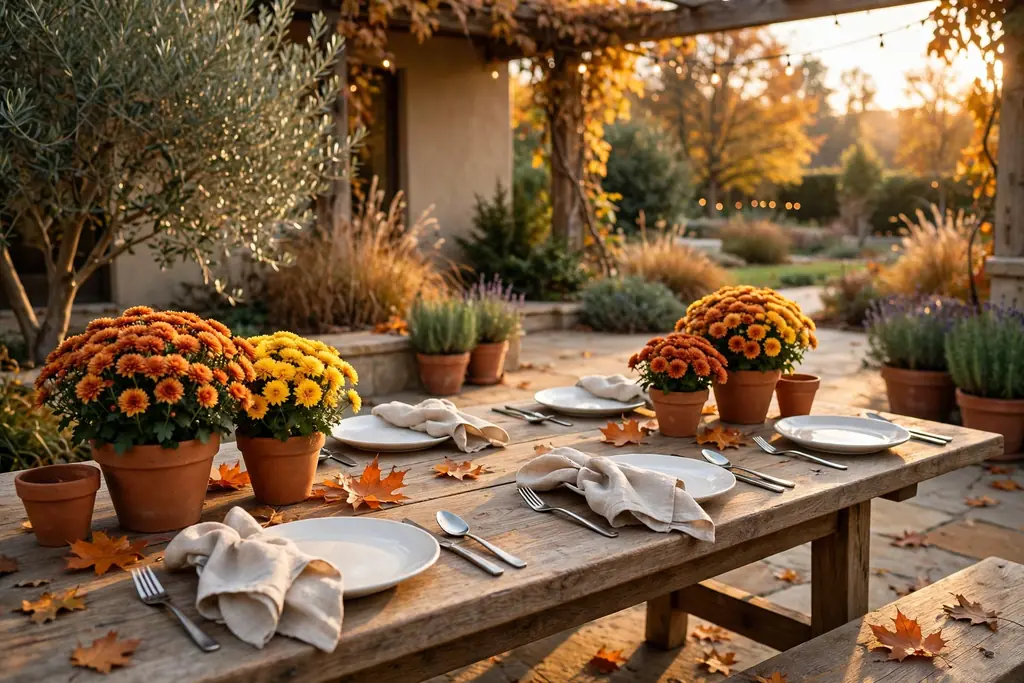
    Group terracotta pots of seasonal flowers down the center of the patio table, such as geraniums in summer, mums in fall, or pansies in spring, with plain plates and linen napkins at each place. The pots give the table a garden feel that changes with the season, and they can move to a patio step or windowsill after the meal.

    Vary the pot heights slightly, with one taller pot in the middle and shorter ones at the sides, and leave space between pots so each plant shows. Water plants before the meal and set each pot on a saucer, so the table stays dry. Deadhead faded blooms before setting the pots out, since one wilted flower draws the eye more than the rest of the group.

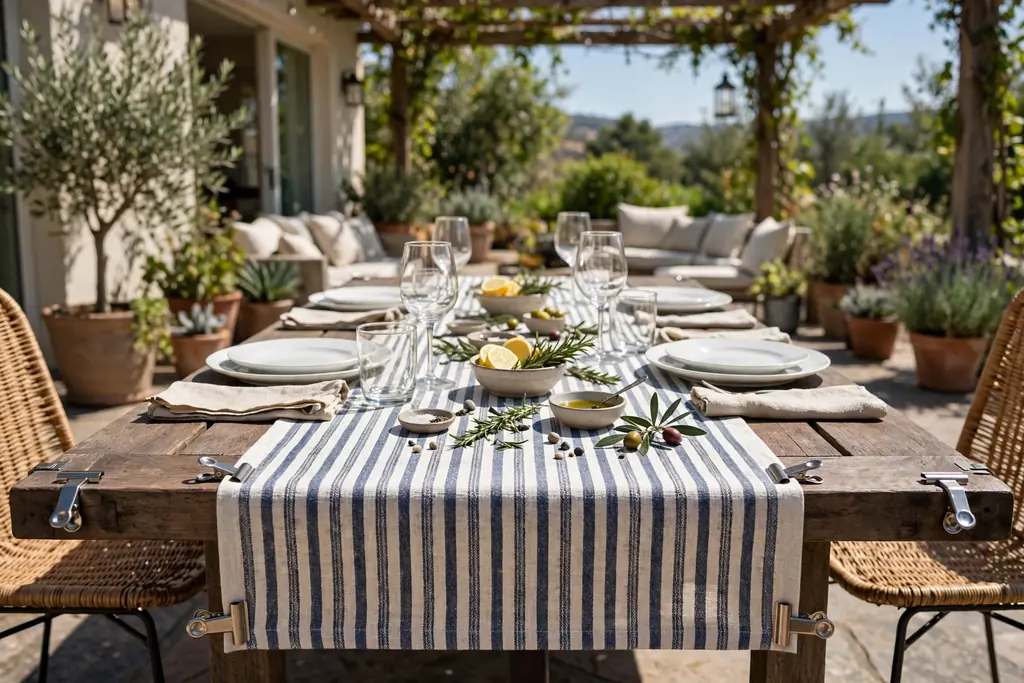
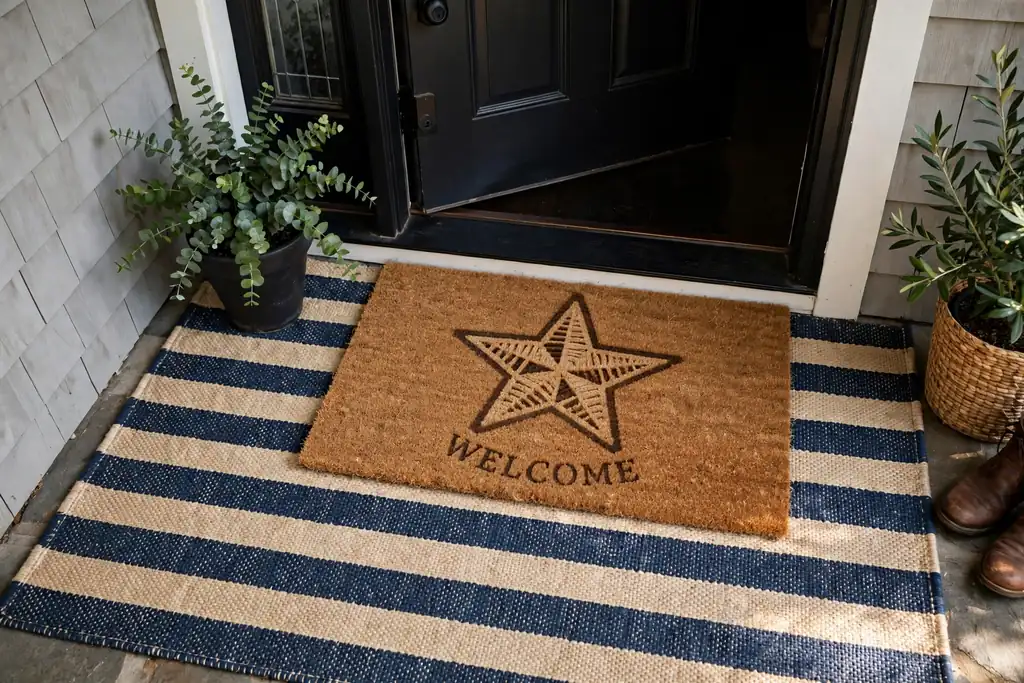
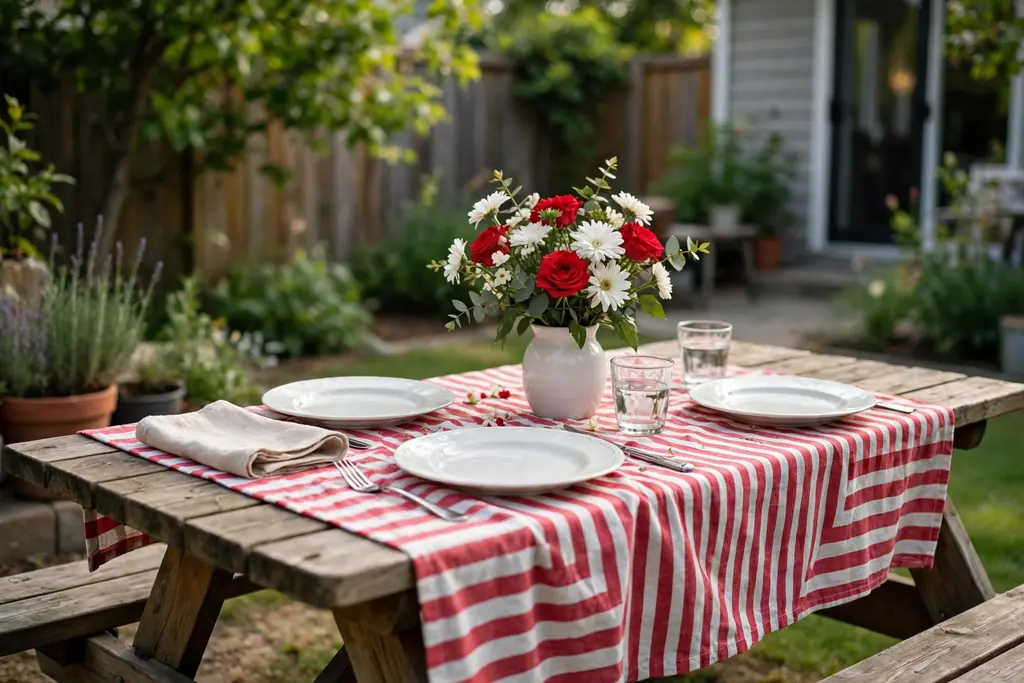
    7. Wind-Safe Striped Runner

    Striped outdoor runner secured with clips on a patio table with white plates and clear glasses.

    Lay a striped outdoor runner down the patio table, and secure it with tablecloth clips or small weights at each end, so it stays put on breezy days. A striped runner gives a plain table a clear pattern base, and it works with white plates, wood chargers, and clear glasses without needing new dishes. Choose a runner made for outdoor use, so it dries fast after a shower.

    Keep the stripe scale in proportion to the table: a wide stripe suits a long dining table, while a narrow stripe suits a round breakfast table. Hang the runner evenly at both ends, and skip a loose tablecloth on windy days, since a secured runner and placemats hold their place far better. Shake the runner outside after meals, and store it dry.

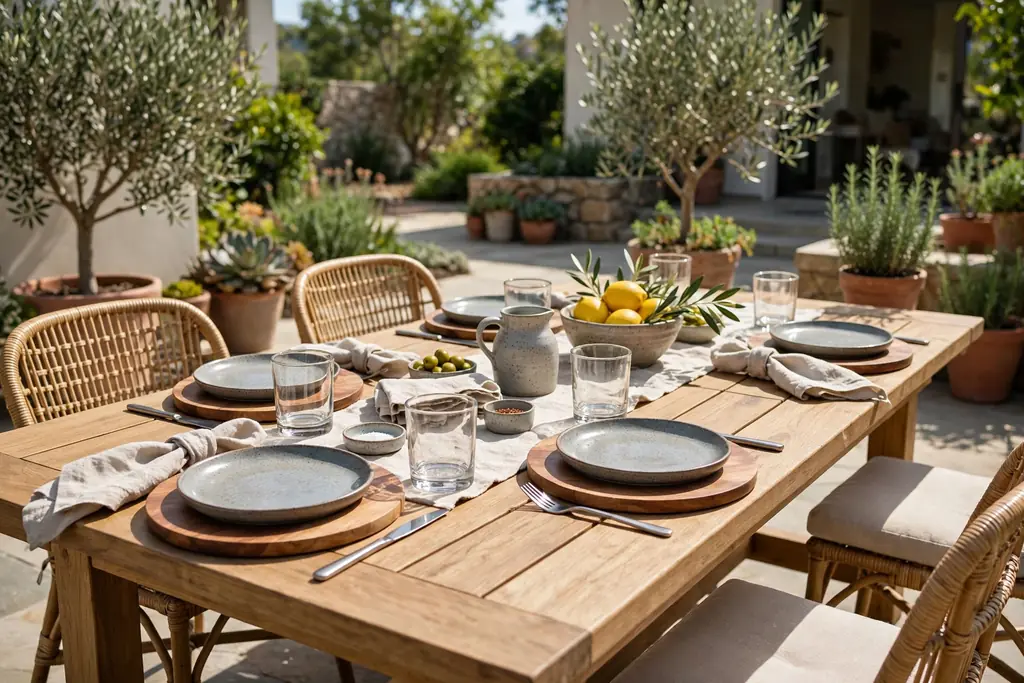
    8. Durable Everyday Place Settings

    Patio table set with durable stoneware plates, wood chargers, and sturdy glasses for everyday outdoor dining.

    Set the patio table with durable everyday pieces: melamine or stoneware plates, wood chargers or woven placemats, and sturdy glasses that can handle outdoor use. This base looks set for a meal but does not ask guests to handle fragile dishes outside, and it cleans fast after grilled food, salads, and drinks. Keep one consistent plate color at every place, so the table looks matched.

    Repeat one accent, such as a colored napkin or a wood charger, at every place, and keep the rest of the setting plain. Stack spare plates at one end of the table for seconds, rather than crowding each place. At the end of the meal, the whole setting can go to the kitchen in a few trips, which suits weeknight patio dinners.

    9. Small Round Bistro Table for Two

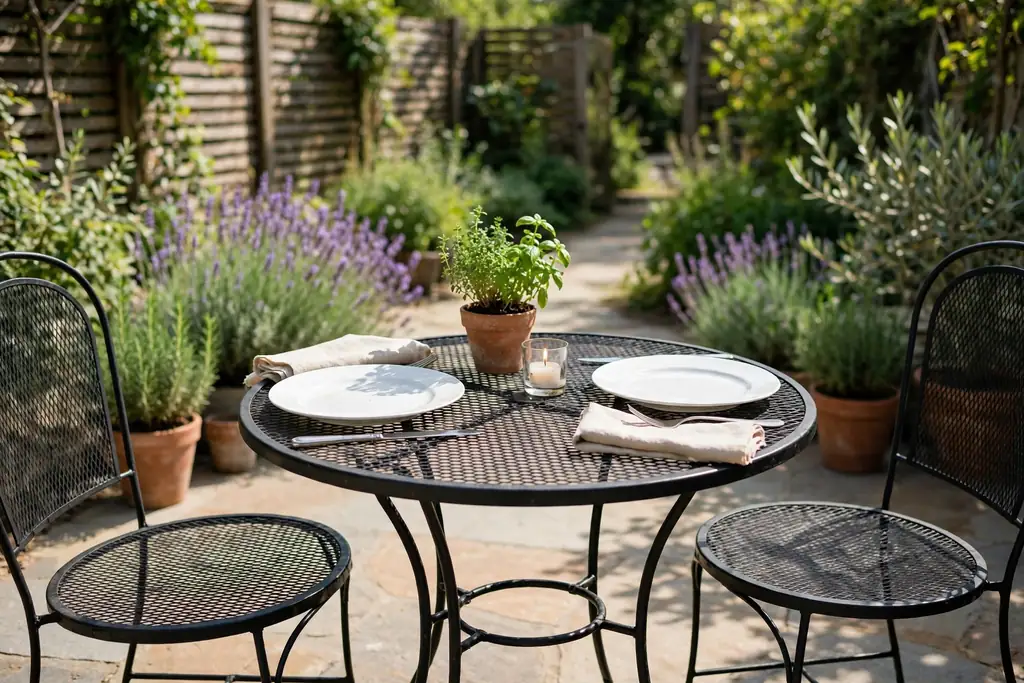
    Small round bistro table for two on a patio with one herb pot, two plain place settings, and a short candle in glass.

    Style a small round bistro table for two with one small pot of herbs, two plain place settings, and a single short candle in a glass holder. A small table needs only one centerpiece, and a single pot leaves room for two plates, two glasses, and a shared dish. Keep the palette to white, wood, and green, so the small surface does not look crowded.

    Use a pot heavy enough to stay put in wind, and keep the candle in glass, so the flame stays steady. Fold napkins in a simple rectangle, and skip a runner, since a runner can crowd a small round top. For morning coffee, swap the candle for a small vase with one or two short stems, and keep the same plain base.

    10. Wood Tray Centerpiece That Lifts Off

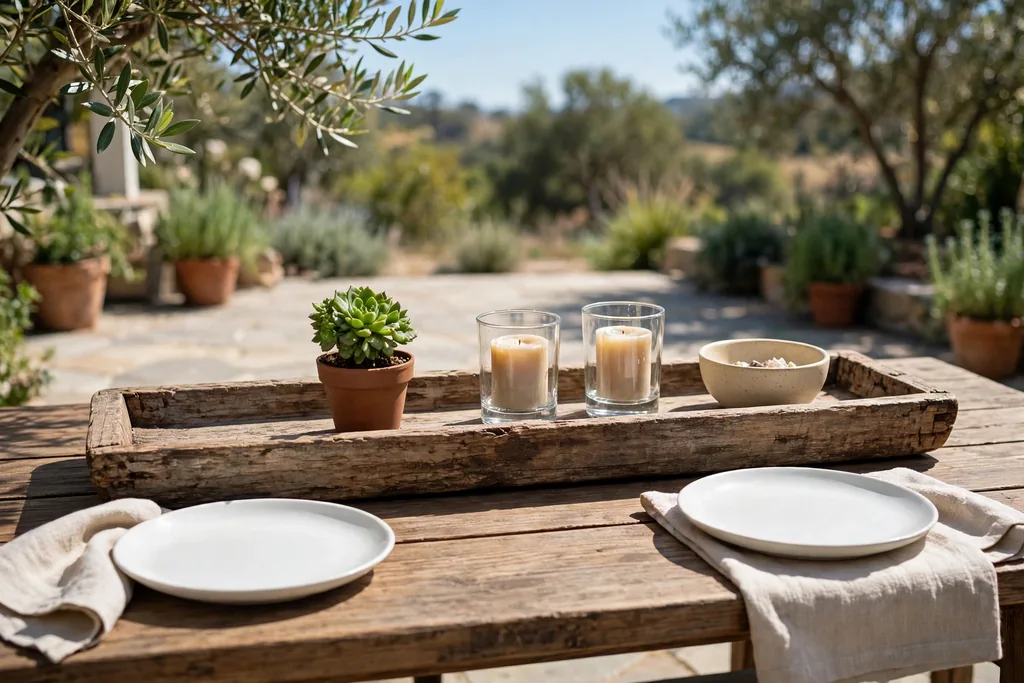
    Long wood tray on a patio table holding a small potted plant, short candles in glass holders, and a small bowl.

    Set a long wood tray down the middle of the patio table, then group a small potted plant, two short candles in glass holders, and a small bowl on it, so the whole centerpiece lifts off in one move. The tray keeps the group contained, so it reads as one centerpiece, and it clears the table fast when rain starts or serving dishes need the space.

    Use a tray with handles if the table is long, and set it on a runner or placemats if the table surface marks easily. Keep the tray group low enough to see across, and use battery candles if the tray will sit near dry leaves or fabric. Wipe the tray after meals, since candle wax and plant soil collect in its corners.

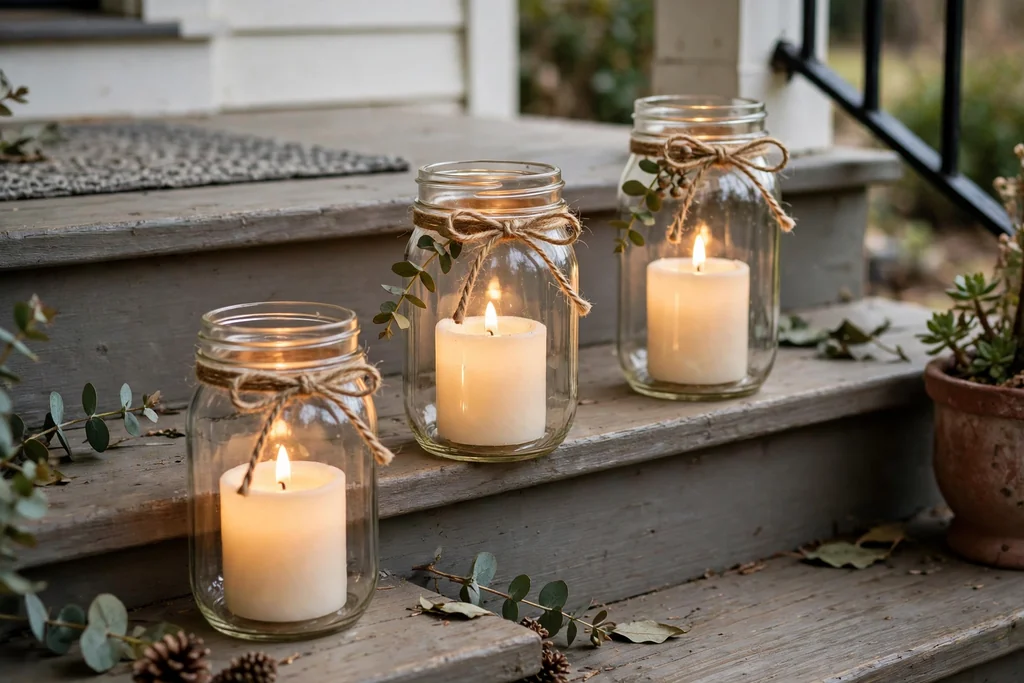
    11. Weighted Mason Jar Candles

    Mason jars with battery candles and a layer of small stones at the bottom down the center of a patio table.

    Fill two or three mason jars with a battery candle and a layer of small stones at the bottom, then set the jars down the center of the patio table. The stones weight the jars against wind, and the glass glows softly in the evening, which suits a casual patio dinner or a weekend gathering. Use jars of the same size for a matched look, or mix two sizes for a relaxed group.

    Keep the jars short enough to see over, and set them on a small tray if the table surface marks easily. Use battery candles only inside narrow jars, since a real flame needs air and a safe holder. If a jar looks too plain, tie a short length of twine around the neck, and keep the twine clear of any flame.
    12. Shallow Succulent Planter Centerpiece

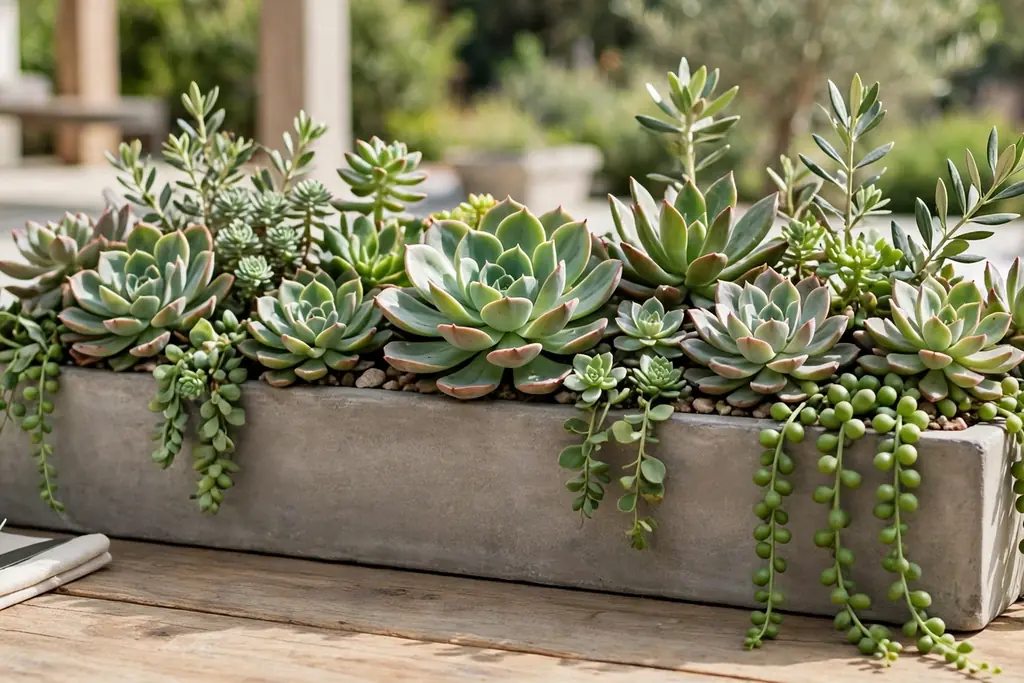
    Shallow wide planter with varied succulents as a centerpiece on a patio dining table.

    Plant a shallow, wide planter with succulents in varied shapes, such as rosettes, trailing stems, and upright spikes, and set it in the center of the patio table. Succulents suit outdoor tables well, since they handle sun and need little water, and the planter takes up only one spot, leaving the rest of the table free. Use a planter in one material, such as concrete, stone, or terracotta.

    Water sparingly and let the soil dry between waterings, since succulents rot in wet soil. Keep the planter low and wide rather than tall, so it does not block sightlines. At the end of the season, the planter can move to a sunny patio step, which makes it one of the easiest patio centerpieces to keep.

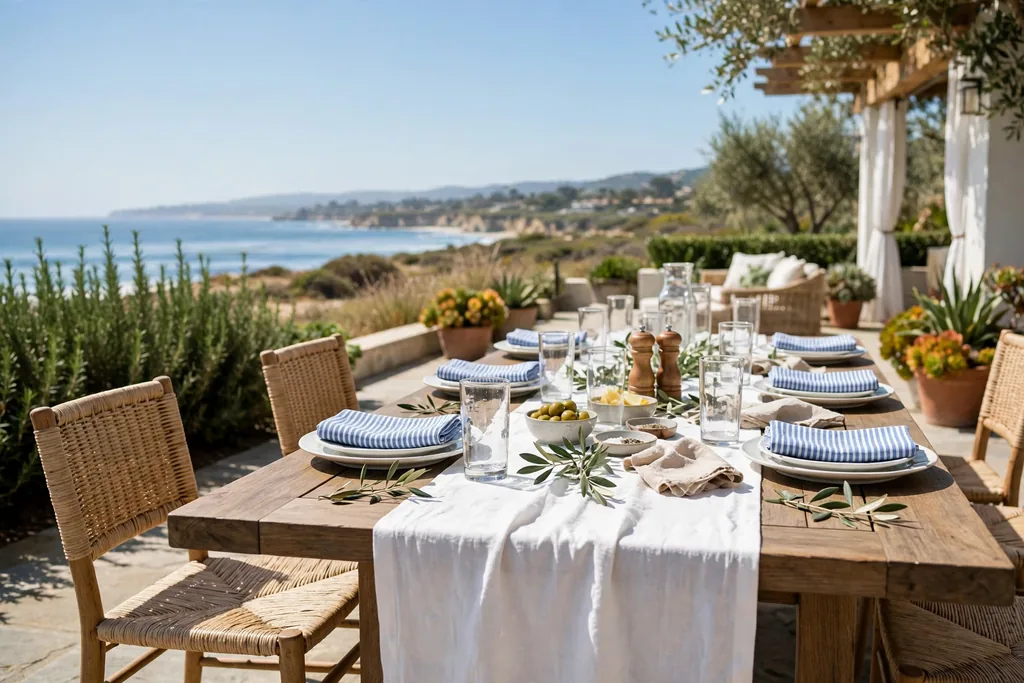
    13. Blue and White Coastal Patio Table

    Patio table with a white runner, blue striped napkins, white plates, and clear glasses in bright daylight.

    Set a white runner with blue striped napkins, white plates, and clear glasses for a coastal patio look that suits bright outdoor light. The blue and white pairing reads clean in strong sun, and it works with wood, rattan, and rope details without needing new dishes. Add one natural accent, such as a small shell or a piece of driftwood, at the center.

    Repeat the blue at least twice, such as striped napkins with a blue glass, so the table looks planned rather than random. Keep the stripes to one scale, since mixing wide and narrow stripes on the same table can look busy. For a windy patio, use a runner and placemats with clips instead of a loose tablecloth.

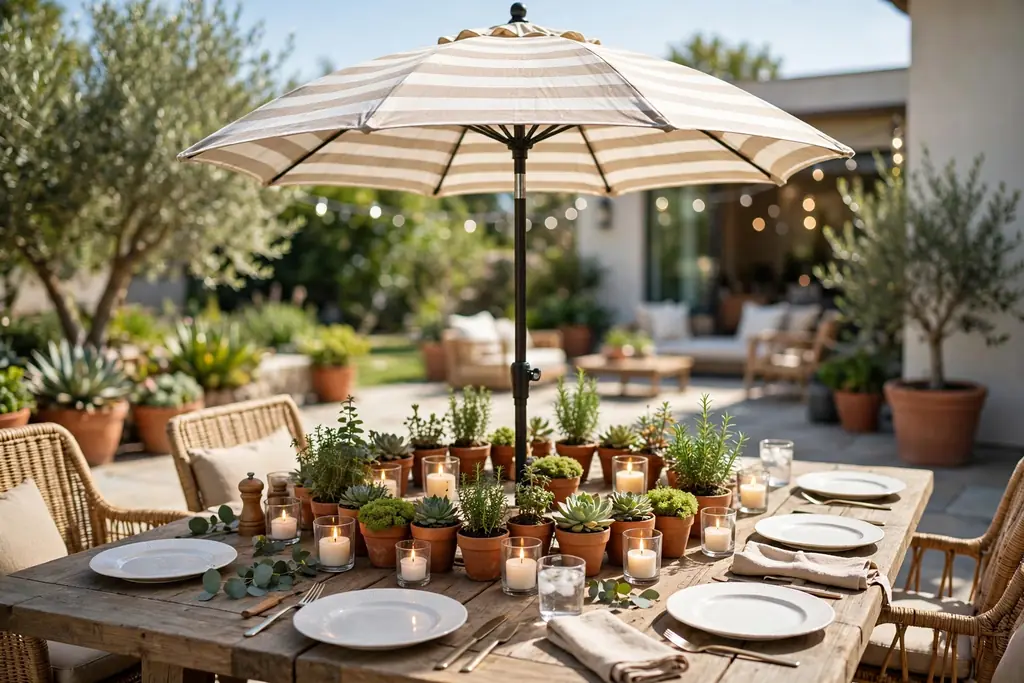
    14. Centerpiece Ring Around the Umbrella Pole

    Low ring of small pots and short candles in glass holders around the umbrella pole of a patio table.

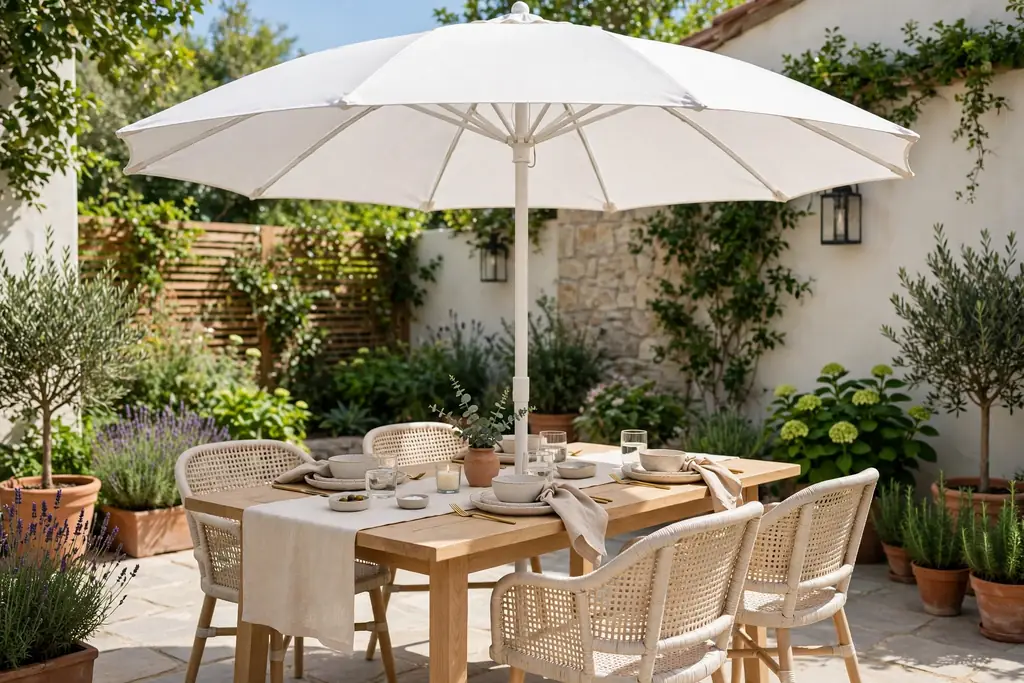
    On a patio table with a center umbrella, build the centerpiece as a low ring around the pole: small pots, short candles in glass holders, or a wreath of greenery laid flat around the base. The ring uses space that is often left bare, and it keeps the centerpiece clear of plates, since the pole already marks the middle of the table. Keep every piece low, so guests can still see across.

    Choose pieces that fit the ring without crowding it, and leave gaps for serving dishes at the table edge. Use heavy pots or glass holders, so the ring stays put in wind, and keep candles clear of the umbrella fabric. When the umbrella comes down, the ring pieces can move to a tray, so the table still works without shade.

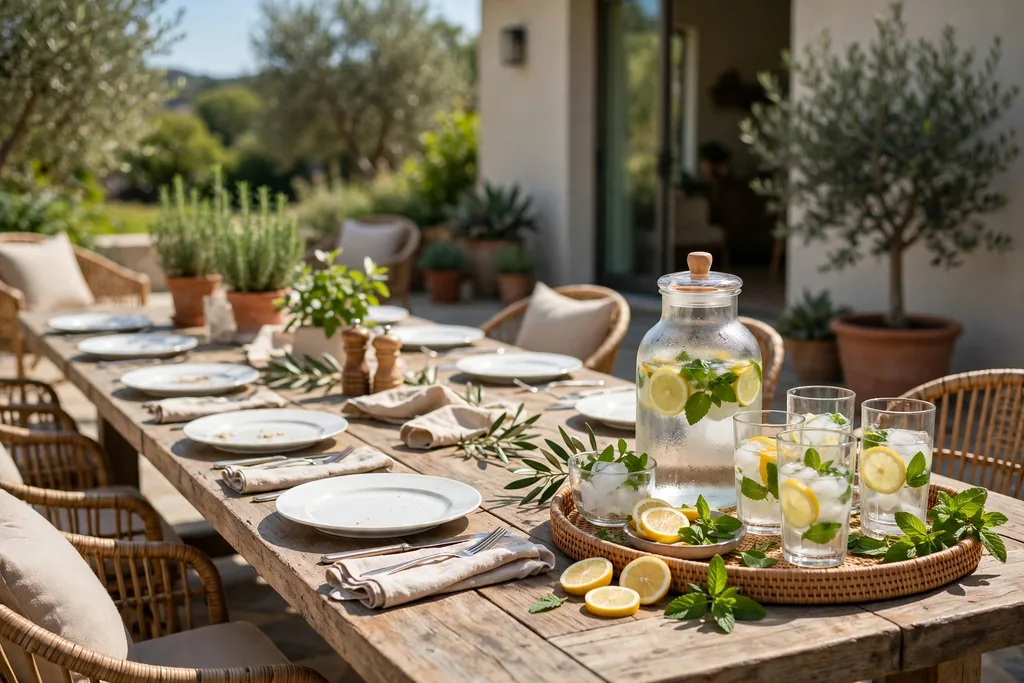
    15. Drink Station at the End of the Table

    Drink station at the end of a patio table with a water jug, glasses, lemon slices, and mint on a tray.

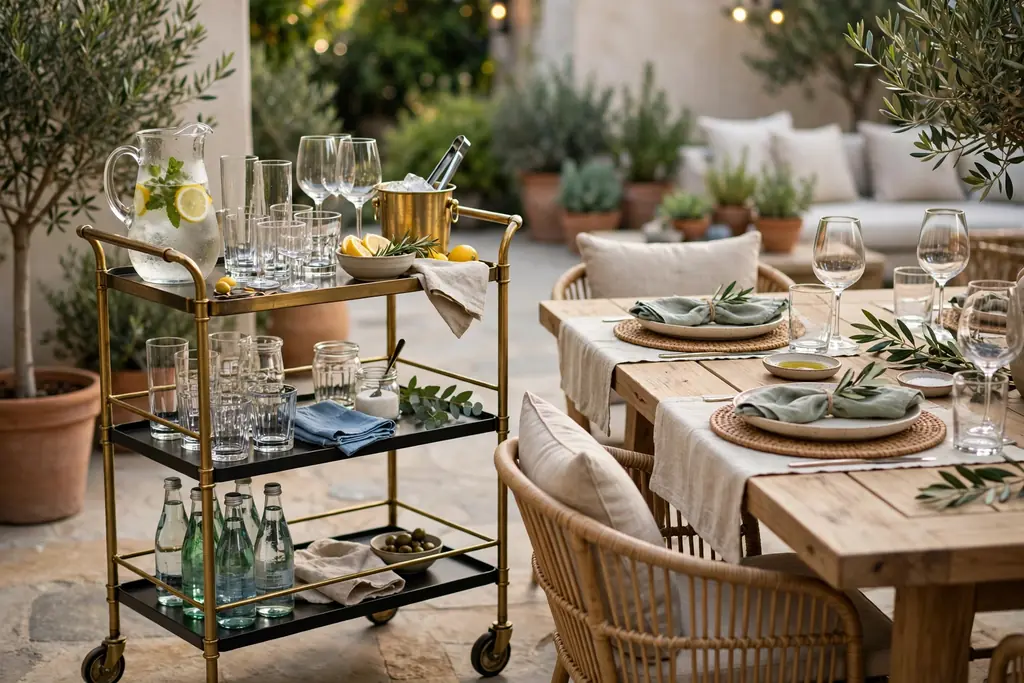
    Set a drink station at one end of the patio table, or on a small side table beside it, with a water jug, glasses, lemon slices, and mint, so guests can help themselves without crowding the main settings. A drink station keeps pitchers off the center of the table, which leaves room for food and conversation, and it suits gatherings where guests arrive at different times.

    Keep the station on a tray, so spills stay contained, and set out only as many glasses as guests need, with spares stacked nearby. Chill drinks before the meal and keep the jug in the shade for outdoor meals, since drinks warm fast in sun. At the end of the meal, the tray carries the whole station back to the kitchen in one trip.

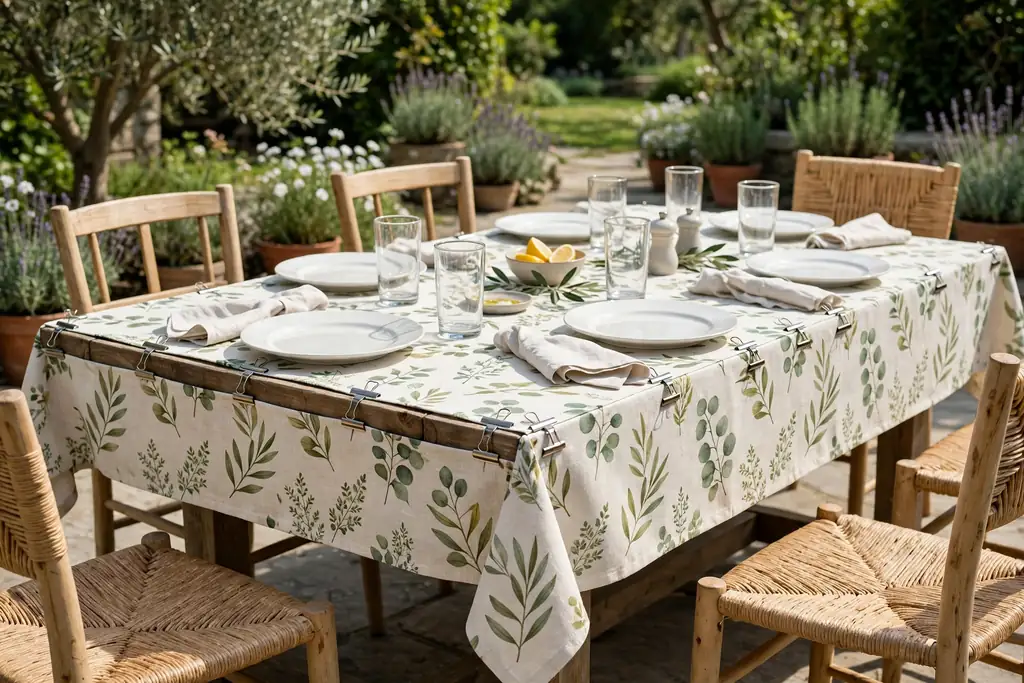
    16. Patterned Outdoor Tablecloth with Clips

    Patio table dressed with a patterned outdoor tablecloth secured with clips, plain plates, and clear glasses.

    Dress the patio table with a patterned outdoor tablecloth, such as a simple stripe, check, or botanical print, and secure it with tablecloth clips at each corner. A patterned cloth gives a plain patio table a full new base in minutes, and it suits tables that already have plain plates and glasses. Choose a cloth made for outdoor use, so it wipes clean and dries fast.

    Clip the cloth at every corner and at the middle of each long side on a large table, so wind cannot lift it. Keep the pattern scale in proportion to the table, and keep the centerpiece simple, since a busy cloth with a busy centerpiece can look crowded. Shake the cloth outside after meals, and store it dry to avoid mildew.

    17. Colorful Ceramic Plates as the Main Decor

    Patio table set with colorful ceramic plates in terracotta on a plain runner with cream napkins.

    Let colorful ceramic plates carry the patio table decor: set plates in one strong color, such as cobalt, terracotta, or sage, on a plain runner or bare wood table, with white or cream napkins and clear glasses. The plates give the table a clear color note without a large centerpiece, and they work for everyday meals as well as gatherings. Keep the rest of the setting plain, so the plate color stands out.

    Repeat the plate color once more, such as a matching napkin stripe or a single candle, so the table looks planned. Use plates that are sturdy enough for outdoor use, and stack them with care, since ceramic chips on stone or concrete. For a mixed set, put the same color at every place, and save mixed colors for a casual family lunch.

    18. Seasonal Pot Swap Through the Year

    Patio table with terracotta pots of seasonal mums beside plain place settings in fall light.

    Keep one set of patio table pots, and swap only the plants inside them through the year: pansies in spring, geraniums in summer, mums in fall, and evergreen sprigs in winter. The pot swap keeps the table base the same, so the table always looks set, while the plants mark the season with little cost or storage. Use pots in one material, so the group reads as one display in every season.

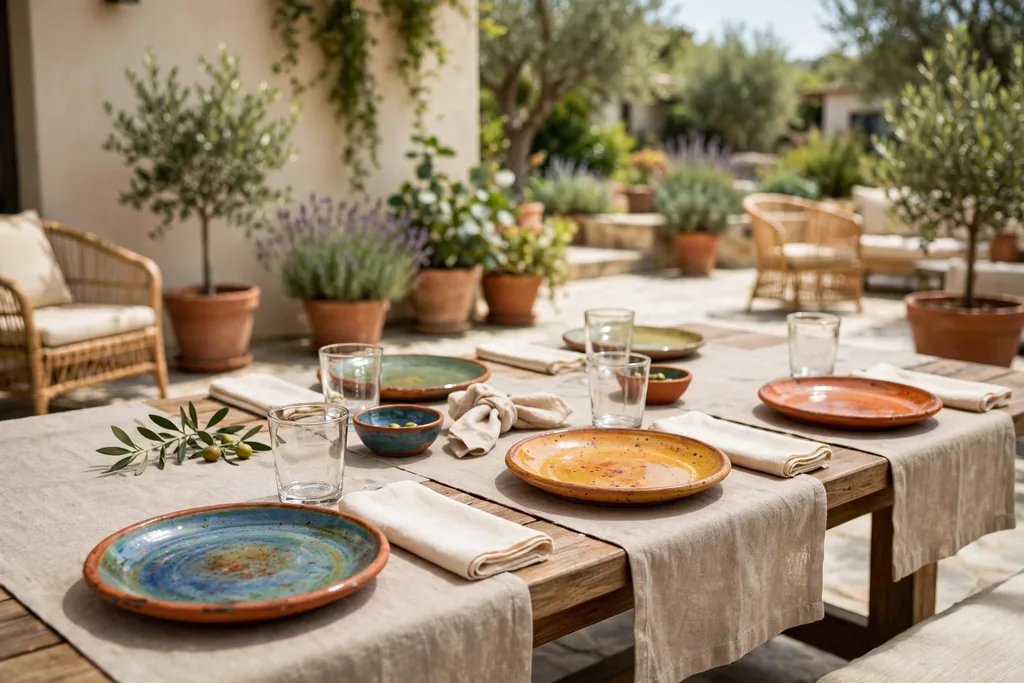
    Water and trim the plants before each meal, and keep a spare pot ready, so a tired plant can be swapped without a trip to the store. Label the pots if they hold different plants, and move tender plants inside before frost. This approach suits small patios well, since it needs no extra storage box for seasonal decor.

    19. Simple Morning Coffee Table Setup

    Patio table set for morning coffee with a tray of mugs, a small vase of short stems, and folded napkins.

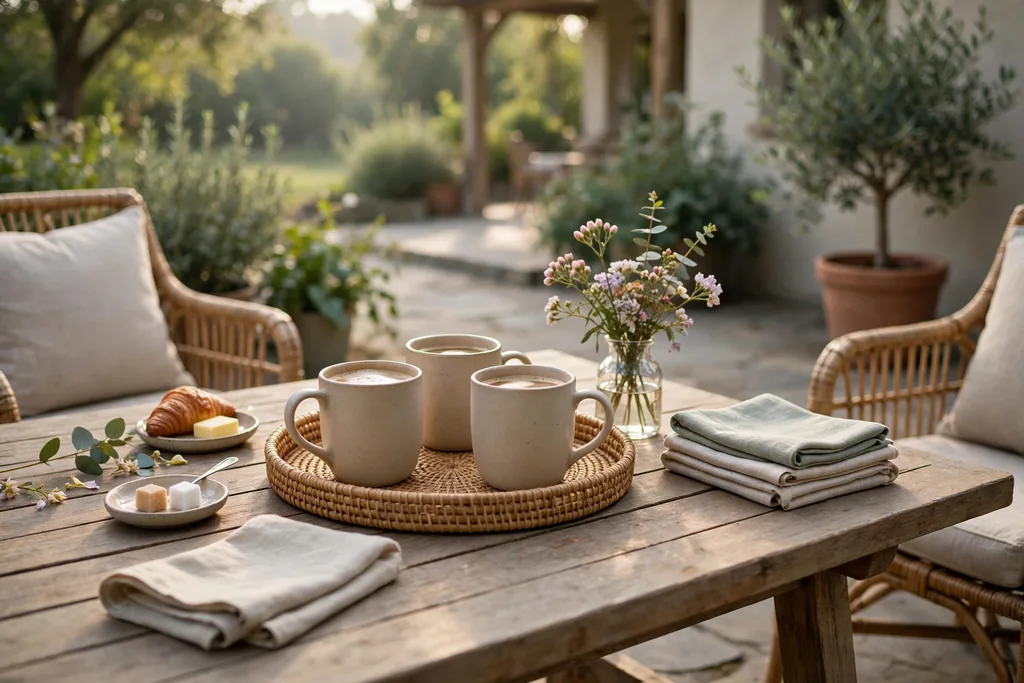
    Set the patio table for morning coffee with a small tray holding a coffee pot or mugs, a small vase with one or two short stems, and a folded cloth napkin at each place. A morning table needs little: the tray keeps cups and spoons contained, the vase adds one fresh note, and the plain base keeps the table usable for reading or work after breakfast. Keep the palette to white, wood, and green.

    Use a tray with a rim, so cups do not slide on a smooth table, and keep the vase short, so it does not block the view across the table. Bring the tray inside after breakfast, and leave the table bare, so it is ready for lunch or an afternoon meal. This simple setup suits everyday patio use better than a large arrangement that must be moved twice a day.

    Conclusion

    Patio table decor does not need a large centerpiece or a new dinner set to work. A washable runner or placemats, plain plates, one low centerpiece of herbs, flowers, or candles in glass, and weighted pieces that resist wind will carry most patio tables through everyday meals and weekend gatherings. Start with the base you already own, add one seasonal group at the center, and leave room for serving dishes, drinks, and conversation.

    For more table ideas in another season, see fall table decor ideas. Keep what you use often, store the rest together in one box, and let the table return to a simple, usable base between meals. Save this list on Pinterest for your next outdoor meal, and work through it one idea at a time.

    FAQs

    What is the best centerpiece for a patio table?

    A low, heavy centerpiece works best, such as potted herbs, a shallow succulent planter, or candles in glass holders. It stays below eye level when guests are seated, resists wind, and leaves room for serving dishes. Avoid tall, light arrangements outdoors, since wind can topple them and block conversation.

    How do I keep patio table decor from blowing away?

    Use weighted pieces: heavy pots, glass hurricane lanterns, cloth napkins, and a runner or tablecloth secured with clips. Set jars and vases on a tray, add stones to the bottom of light jars, and skip paper napkins and tall, light centerpieces on windy days. Bring linen and light pieces inside if strong wind or rain starts.

    What tablecloth works best outdoors?

    A washable outdoor tablecloth or runner in a simple stripe, check, or solid color works best, secured with clips at each corner. Outdoor fabrics dry fast and wipe clean after spills, while a secured runner and placemats hold their place better than a loose indoor cloth on a windy patio. Shake the cloth outside after meals and store it dry to avoid mildew.

    Can I use real candles on a patio table?

    Yes, real candles work on a patio table when they sit in glass holders on a stable surface, clear of fabric, paper, and dry material. Hurricane lanterns shield the flame from wind, and battery candles are the safer choice inside closed lanterns, near children, or near dry leaves. Never leave any burning candle unattended, and bring candles inside when strong wind starts.

    How do I protect a patio table from rain and sun?

    Bring textiles, candles, and light decor inside before rain, and use outdoor fabrics and weighted pots that dry fast and resist sun fading. Wipe the table dry after rain, store cushions and runners dry, and use a cover or shade for long stretches of strong sun. A tray centerpiece helps here, since the whole group lifts off in one move before a storm.

    What should I put on a small patio table?

    One low centerpiece is enough for a small patio table, such as a single herb pot, a small succulent planter, or one short candle in glass. Keep the palette to white, wood, and green, skip a runner if it crowds the top, and use plain place settings with folded napkins. Leave room for two plates, two glasses, and one shared dish, and the small table will feel set without feeling crowded.


  • 25 Outdoor Patio Decorating Ideas for a Comfortable Retreat

    25 Outdoor Patio Decorating Ideas for a Comfortable Retreat

    A comfortable outdoor patio starts with shaded seating, a clear place to eat, soft light for evenings, and plants that soften hard edges. Choose weatherproof furniture sized to your patio, add a rug to mark the seating area, layer light with string lights and lanterns, and finish with pots, shade, and a heat source for cool nights.

    The 25 ideas below work for a small concrete slab as well as a large paved patio, since most of them scale down to one chair and one pot, or up to a full seating and dining group. Start with seating and shade, then add light and plants. Keep a clear path from the house door to the seating area, and leave room to pull out chairs and walk around the table with ease.

    Key Takeaways

    • Start with seating and shade, since a patio that is too hot or has nowhere comfortable to sit will go unused.
    • Size furniture to the patio, leaving clear walkways around chairs, tables, and planters.
    • Use an outdoor rug to mark the seating area and to make hard paving feel softer underfoot.
    • Layer light with overhead string lights, lanterns, and solar path lights, so the patio works after dark.
    • Repeat two or three colors across cushions, pots, and throws, so many separate pieces read as one planned space.
    • Choose weatherproof fabrics and finishes, or store cushions and throws in a bench or basket when rain is expected.
    • Add plants at different heights, from ground pots to a trellis wall, to soften fences and walls.

    1. Deep Seat Sofa Group with Washable Cushions

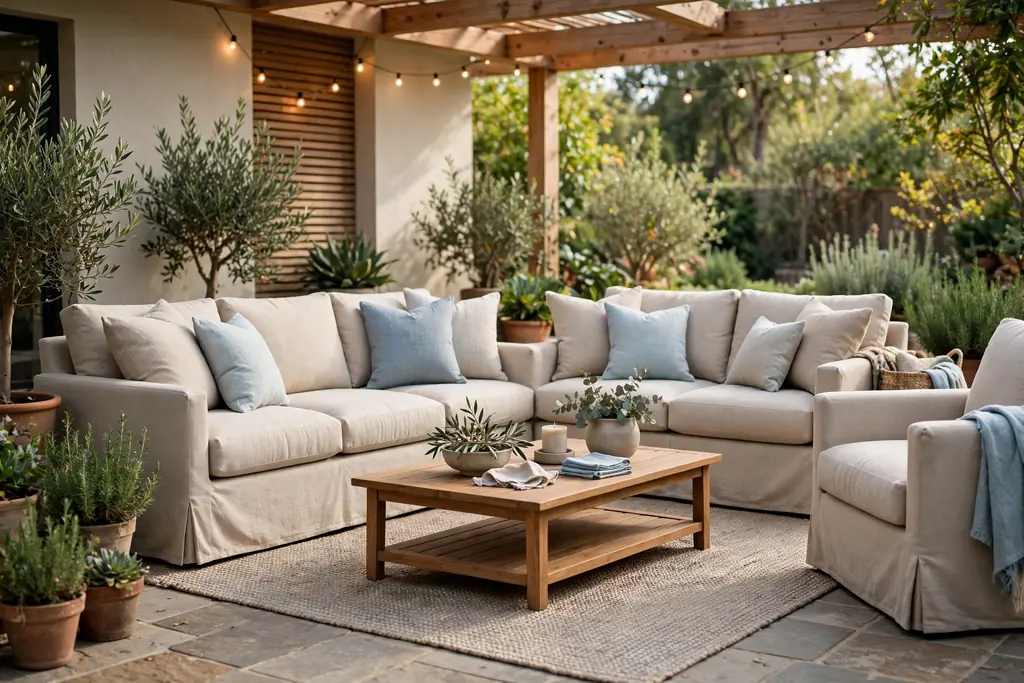
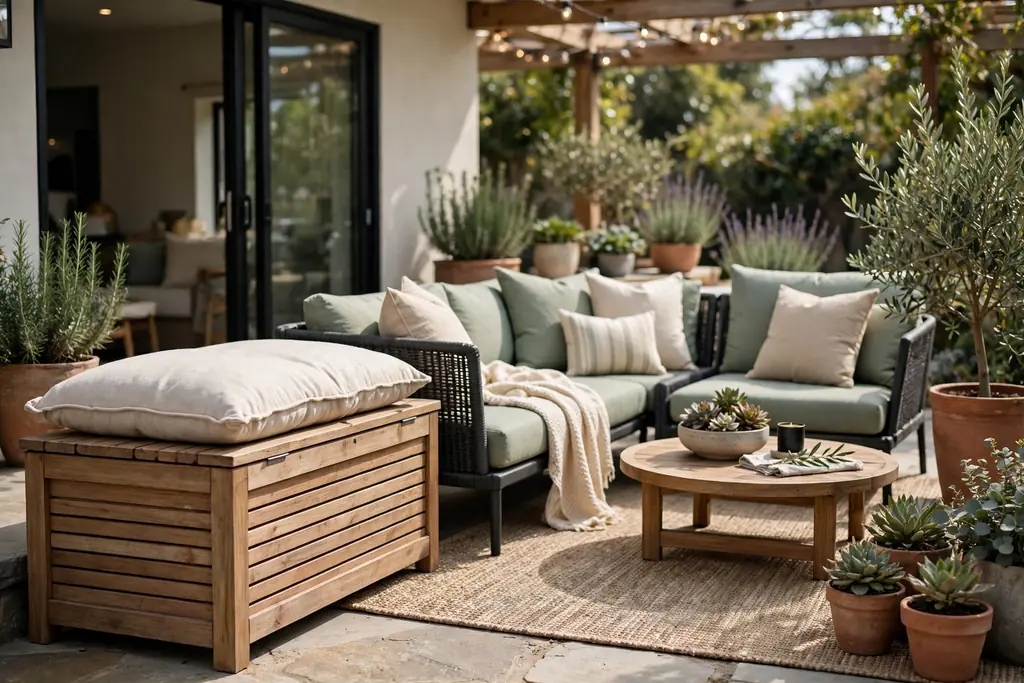
    Deep seat outdoor sofa group with washable cushions around a low coffee table on a patio.

    A deep seat sofa group turns a patio into an outdoor living room. Set a two or three seat sofa with two armchairs around a low coffee table, facing each other so conversation feels natural. Thick seat cushions make the group comfortable for long sits, and a coffee table holds drinks, books, and a small lantern within reach.

    Choose cushions with removable, washable covers, since outdoor cushions gather dust, pollen, and spills. Measure the group before buying, and leave at least 60 centimeters of walking space around the seating. If the patio is small, a loveseat with one chair gives the same living room feel in less space.

    2. Layered Outdoor Rugs for a Softer Floor

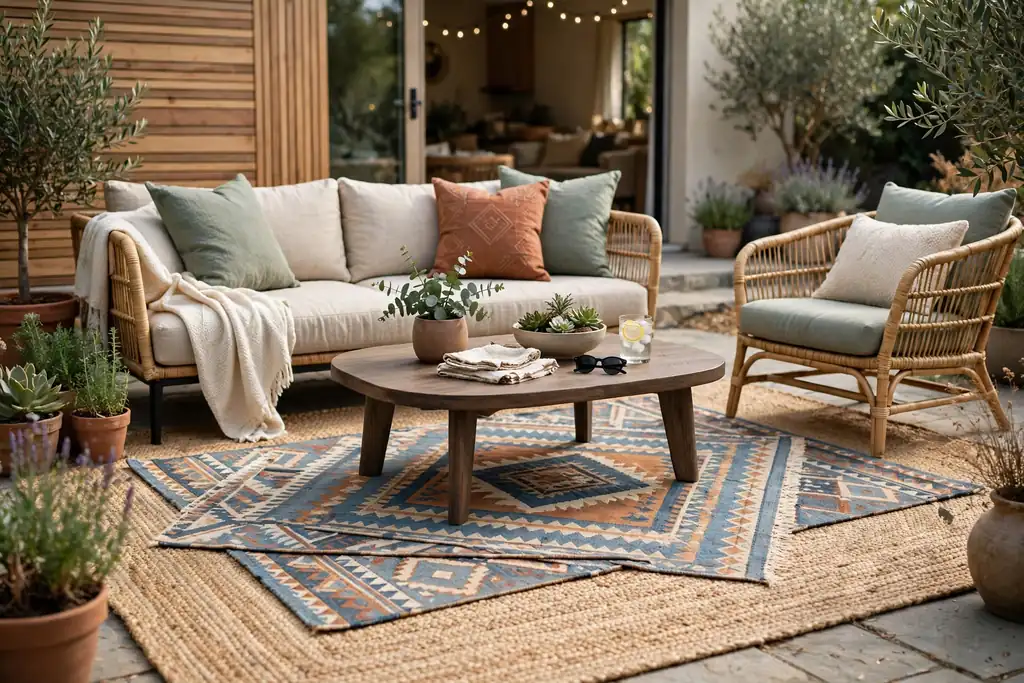
    Layered outdoor rugs under a patio coffee table and seating group.

    Layered outdoor rugs soften a concrete or stone patio in one step. Lay a larger flat rug in a plain color first, then add a smaller patterned rug on top, centered under the coffee table. The layers mark the seating area clearly, even on a long patio that also holds a dining table and a grill.

    Pick rugs rated for outdoor use, so they dry after rain and resist fading in sun. Shake them out weekly, and lift them now and then to check for damp marks on the paving below. A rug with a simple stripe or border pairs well with plain cushions, since the rug carries the pattern.

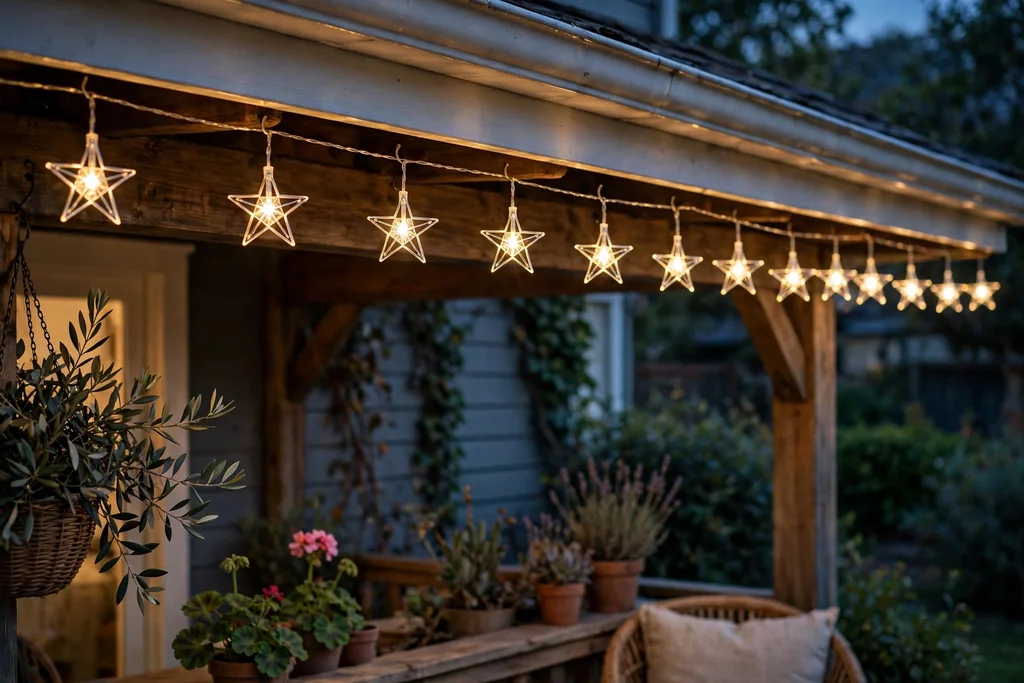
    3. Overhead String Lights for Evening Glow

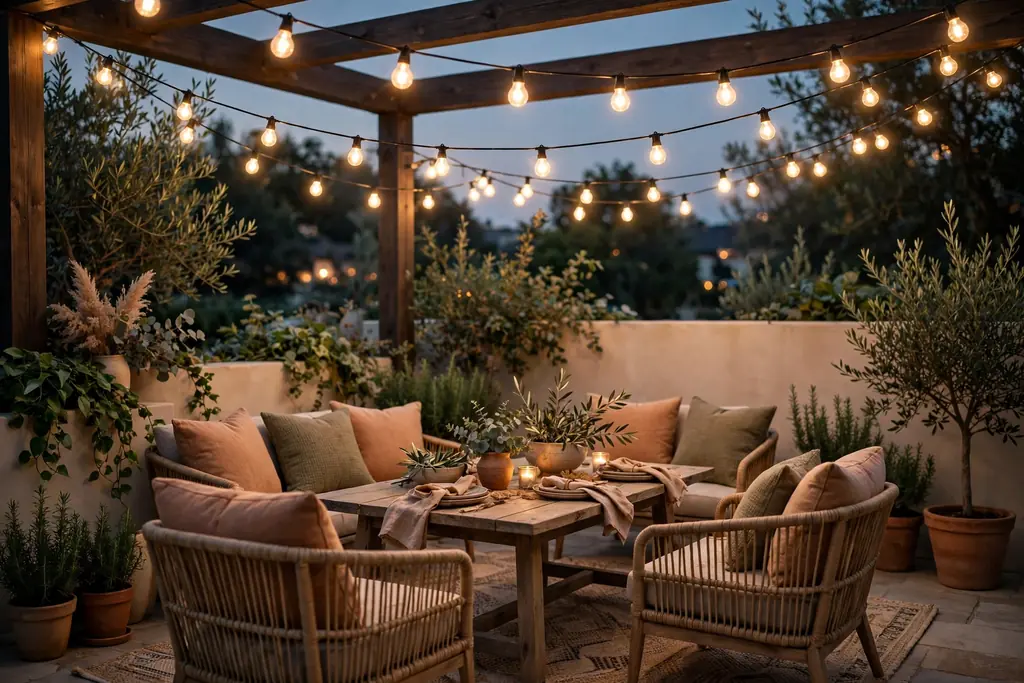
    Warm string lights hung over a patio seating area at dusk.

    Overhead string lights give a patio a warm glow after dark and make evening sits feel planned rather than improvised. Hang them in straight lines or a gentle zigzag from the house wall to posts, a pergola, or a fence, high enough that no one walks into them. Warm white bulbs suit most patios and flatter wood, stone, and plants alike.

    Use outdoor rated lights and a weatherproof outlet or timer, and check the span before fixing hooks so the lights do not sag into the seating area. Keep one run over the seating group and another over the dining table, so both areas are lit. In winter, take the lights down or check them for damage before switching them on again.

    4. Pergola with Climbing Vines for Natural Shade

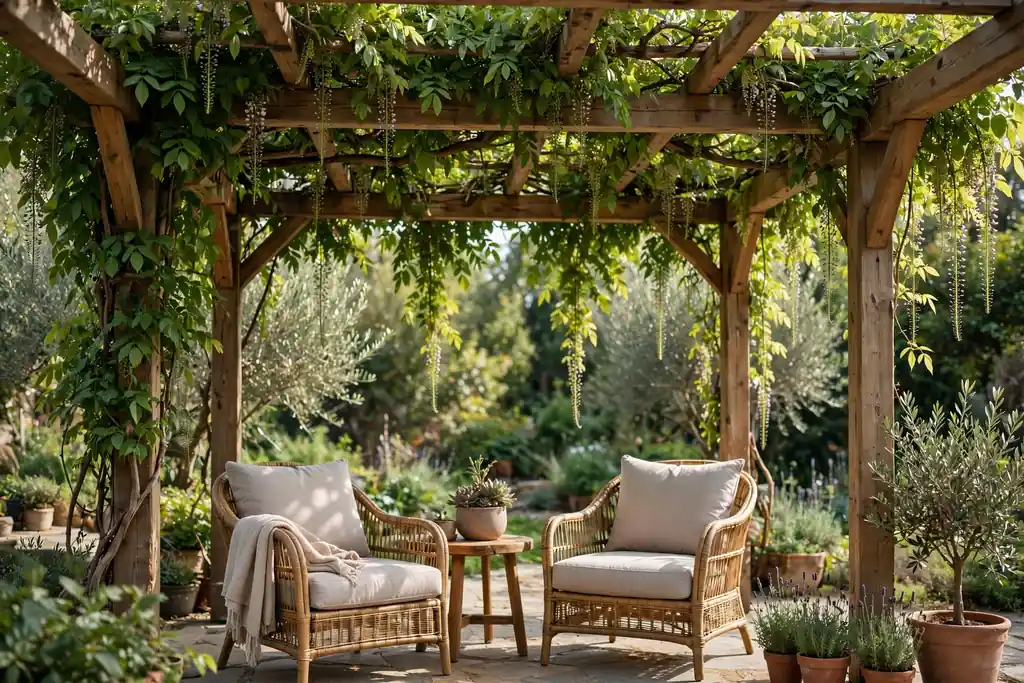
    Wood pergola with climbing vines shading patio chairs.

    A pergola with climbing vines gives shade that grows fuller each year and softens a plain patio roofline. Set the pergola over the seating area, with posts fixed firmly to the patio or to footings, and train vines such as jasmine, grape, or climbing roses along the top beams. The leaves filter sun in summer and let more light through when they thin in cooler months.

    Prune the vines once or twice a year to keep growth off gutters and to stop heavy stems from pulling on the beams. Choose a vine suited to your light and climate, and give it a trellis or wires to climb at first. A pergola also gives a clear place to hang string lights and outdoor curtains.

    5. Cantilever Umbrella for Flexible Shade

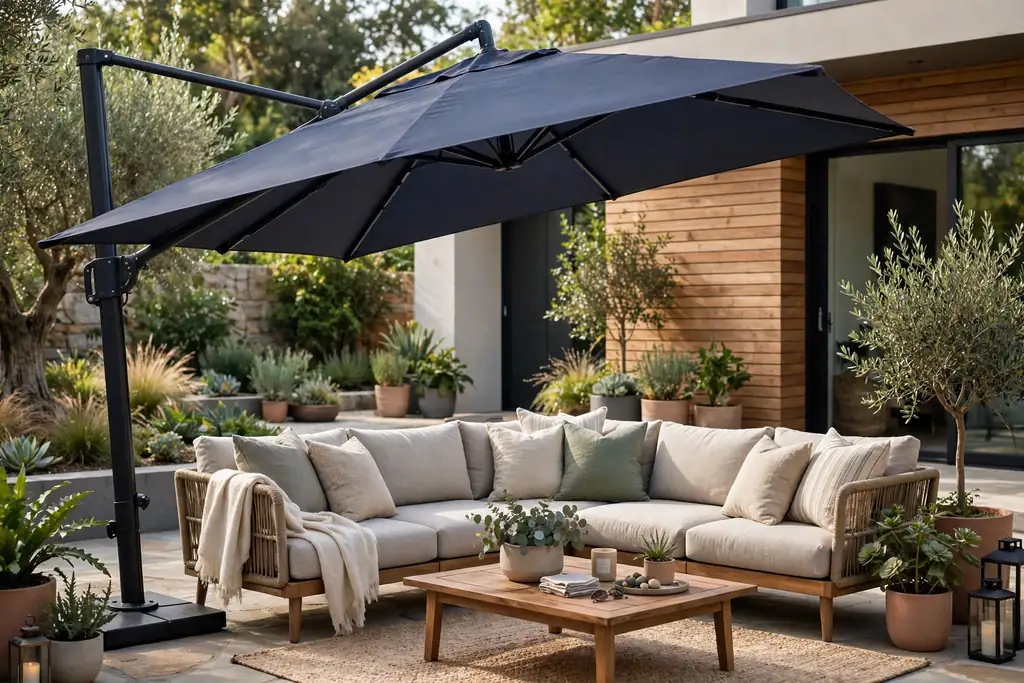
    Cantilever umbrella shading a patio sofa group.

    A cantilever umbrella shades a seating group without a pole in the middle of the table or chairs. The offset pole stands to one side, with a heavy base, and the canopy swings over the sofa or dining table as the sun moves. This makes it easy to shade a corner seat in the morning and a dining table at midday with the same umbrella.

    Choose a base weight rated for the canopy size, and close the umbrella in strong wind so it cannot tip or lift. A light colored canopy reflects heat and keeps the shade cooler, while a tilt function lets you angle the shade as the sun drops. Keep the base clear of walkways so no one trips over it.

    6. Fire Pit Conversation Circle

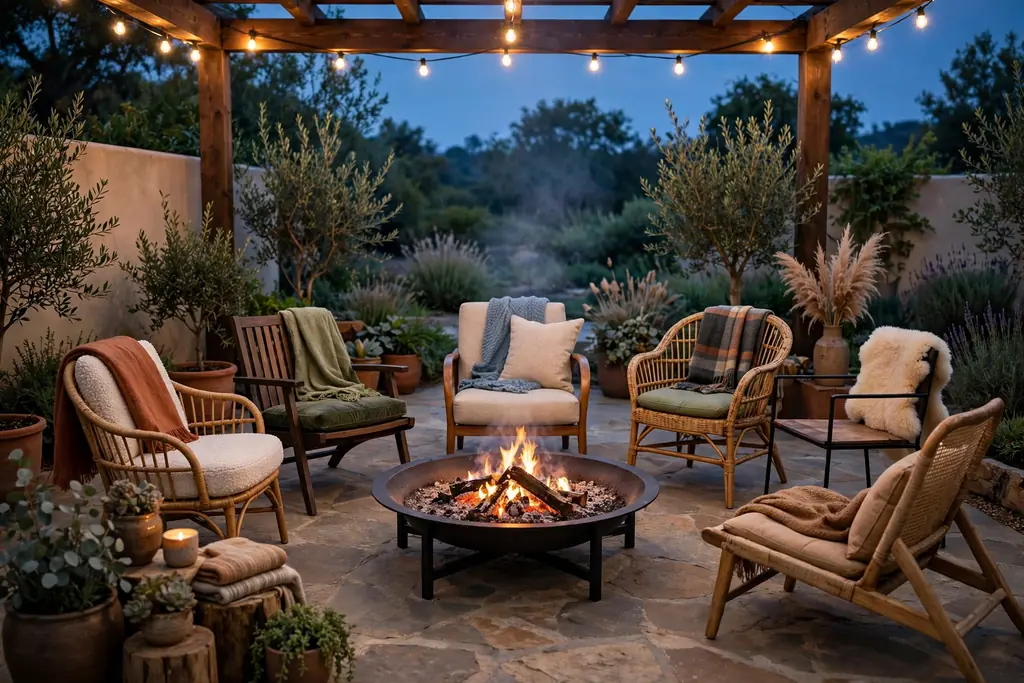
    Chairs in a circle around a patio fire pit at dusk.

    A fire pit conversation circle gives the patio a clear evening focus. Set low chairs in a circle around a fire pit, with enough room to stretch legs and to reach a side table for drinks. The circle suits cool evenings, when guests gather around the heat, and it works on a paved area away from overhangs and dry plants.

    Follow local rules for open flames, and keep the fire pit on a nonflammable surface with a safe distance from furniture, fences, and house walls. Use a spark screen when the fire is lit, and let ashes cool fully before clearing them. A portable fire bowl gives the same circle on a smaller patio, with chairs pulled in close.

    7. Outdoor Dining Table for Shared Meals

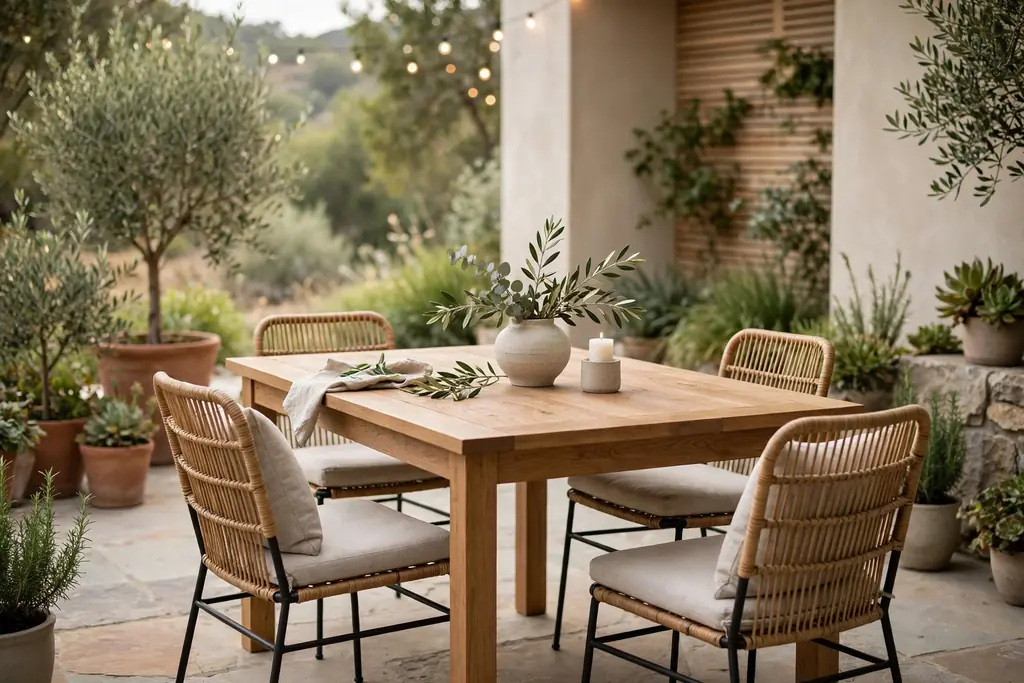
    Outdoor dining table with chairs and a simple centerpiece on a patio.

    An outdoor dining table makes the patio a place for shared meals, not only for sitting. Choose a table sized to your usual group, with chairs that slide out with ease and leave walking room behind them. A wood or metal table with a simple centerpiece, such as a low bowl of lemons or a small potted herb, keeps the table usable without a full table setting every day.

    Protect the table with a cover in heavy rain if the finish needs it, and wipe spills promptly so they do not stain. If the patio is narrow, a rectangular table against a wall with a bench on one side seats more people in less space. Add a shade umbrella or pergola over the table so midday meals stay comfortable.

    8. Bistro Set for a Small Patio

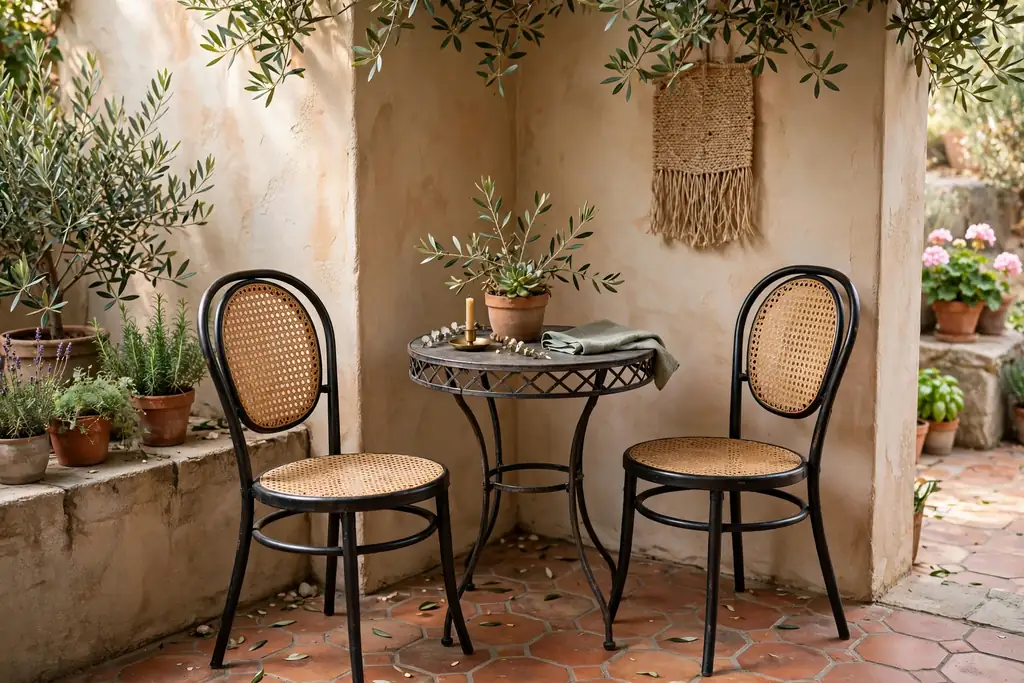
    Small bistro set with two chairs and a round table in a patio corner.

    A bistro set suits a small patio, a balcony edge, or a narrow side yard where a full dining set would crowd the space. Two chairs and a small round table fit in a corner, leaving room for a pot or two and a clear path to the door. The set works for morning coffee, reading, and a light lunch for two.

    Choose folding chairs if the set must be stored in winter, and pick a table top that wipes clean after meals. A bistro set in metal or wood suits most house styles, and a single patterned cushion on each chair adds color without extra pieces. Keep the set near the door, so it is easy to use on a short break.

    9. Hanging Egg Chair for a Cozy Corner

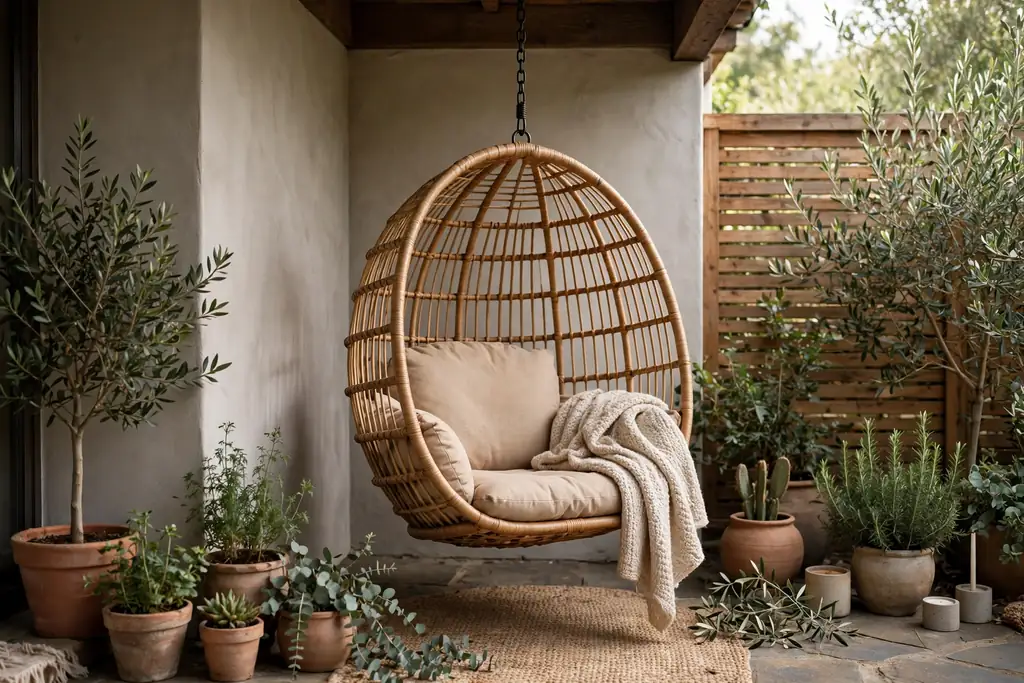
    Hanging egg chair with a cushion and throw in a patio corner.

    A hanging egg chair fills a patio corner with a cozy seat that feels separate from the main group. Hang the chair from its own sturdy stand, with a thick seat cushion and a small throw, and place it where it can swing a little without hitting a wall, a planter, or a railing. The curved shape shelters the sitter and suits reading and quiet breaks.

    Check the stand and hanging point for weight rating and wear each season, and keep the swing path clear of children running past. A cushion in a plain color lets the chair shape stand out, while a patterned throw adds warmth on cool evenings. If the chair sits in rain, bring the cushion indoors or use a quick dry fill.

    10. Hammock for Lazy Afternoons

    Striped hammock hung between posts on a patio.

    A hammock gives a patio a relaxed seat for lazy afternoons and naps. Hang it between two sturdy posts, trees, or a freestanding stand, with the ends fixed at a height that lets the middle hang low enough to sit into with ease. A striped or plain cotton hammock suits most patios, and a small pillow at one end makes it comfortable for reading.

    Check ropes, hooks, and fabric for wear before each season, and take the hammock down in storms or winter. Keep the ground below clear of sharp stones and pots, so stepping out of the hammock is safe. A hammock with a stand works where there are no trees or posts, and it can move to follow shade through the day.

    11. Sun Loungers with a Shared Side Table

    Two sun loungers with a shared side table on a sunny patio.

    Sun loungers with a shared side table make a sunny patio corner easy to use all afternoon. Set two loungers side by side, facing the sun or the garden, with one low side table between them for drinks, sunscreen, and a book. Adjustable backs let each person sit up to read or lie flat to rest, without moving the whole lounger.

    Choose loungers with weatherproof frames and quick dry cushions, and fold or stack them in winter if storage is tight. A small side table with a lower shelf holds extra towels and keeps the top clear. Place loungers where they do not block the path to the dining area, and leave room to walk around the foot of each lounger.

    12. Planter Clusters at Different Heights

    Cluster of planters at different heights beside a patio door.

    Planter clusters at different heights add green to a patio without a garden bed. Group three or five pots of varied heights in a corner or beside the door, with a tall plant at the back, medium plants in the middle, and trailing plants at the front. The mix of heights draws the eye up and softens a plain wall or fence.

    Use pots with drain holes and saucers, and match the plants to the light the spot gets, with sun lovers in open spots and shade plants near walls. Water when the top of the soil feels dry, and feed plants through the growing season as the pot label directs. Keep the cluster clear of walkways, and move tender pots indoors before frost.

    13. Trellis Garden Wall for Green Privacy

    Trellis garden wall with climbers and hanging pots on a patio fence.

    A trellis garden wall covers a plain fence or wall with living green and gives a patio a garden feel in a small footprint. Fix a wood or metal trellis to the wall, with a small gap behind it for air, and plant climbers at the base or hang small pots from the trellis frame. The wall suits narrow patios where floor space for pots is short.

    Water climbers at the base, and tie new stems to the trellis as they grow so the cover stays even. Prune once a year to keep the wall tidy and to stop growth from blocking windows or lights. A trellis with potted herbs and small flowers gives color at eye level, while a climber alone gives a fuller green screen.

    14. Herb Pots by the Door for Cooking and Scent

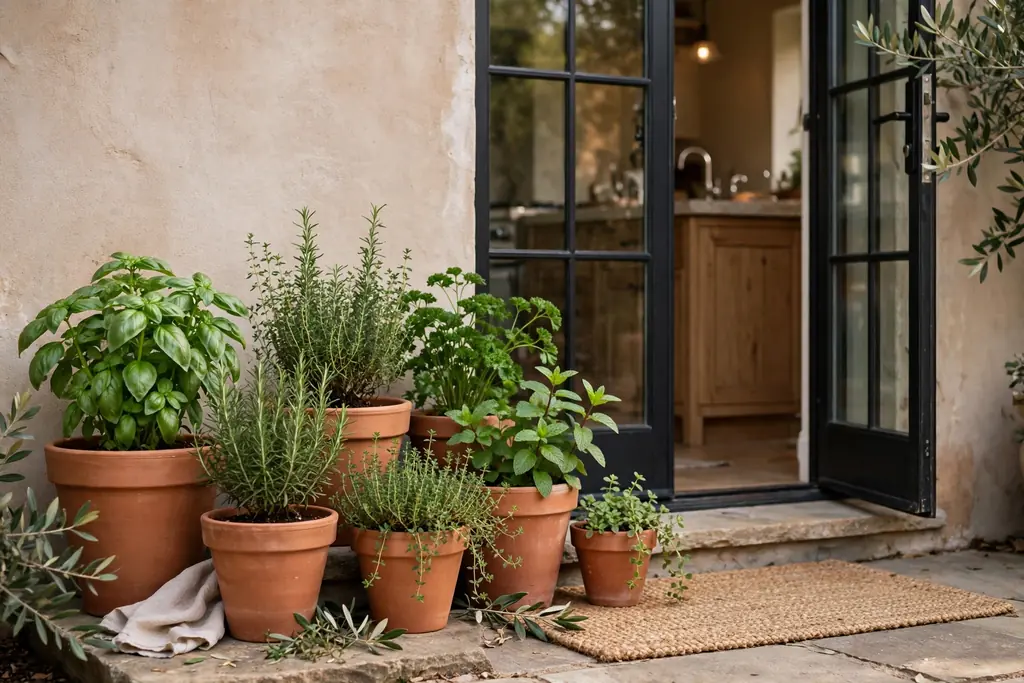
    Herb pots in terracotta beside a patio kitchen door.

    Herb pots by the door give a patio scent, green, and fresh leaves for cooking in one small group. Set pots of basil, mint, rosemary, thyme, and parsley near the kitchen door or beside the dining table, where they are easy to reach while cooking. Mint grows fast, so give it its own pot to stop it from crowding other herbs.

    Water herbs when the top of the soil feels dry, and snip leaves from the top so the plants stay bushy. Most herbs need sun for at least part of the day, so place the pots where they get morning or midday light. Label the pots if guests cook with you, and bring tender herbs indoors before frost.

    15. Privacy Lattice Screens for a Sheltered Feel

    Lattice privacy screens with climbing plants along a patio edge.

    Privacy lattice screens shelter a patio from neighbors and wind without building a solid wall. Set freestanding lattice panels along one side of the patio, fixed to posts or heavy planters, and let climbing plants or hanging pots soften the frame. The open pattern lets air and light through while breaking the direct view.

    Check that the screens are stable in wind, with posts set firmly or bases weighted, and keep them clear of walkways and fire pits. A lattice screen also gives a place to hang lanterns, small pots, or outdoor art. Paint or stain the lattice to match the fence or furniture, so it reads as part of the patio rather than a temporary fix.

    16. Outdoor Curtains for Soft Shade and Privacy

    Outdoor curtains drawn across one side of a shaded patio.

    Outdoor curtains on a rod or wire give a patio soft shade and privacy that can be opened or closed as needed. Hang weatherproof curtains from a pergola beam, a wall mounted rod, or a freestanding frame, and draw them across the sunny or overlooked side in the afternoon. Light colors keep the shade bright, while a heavier weave blocks more sun and wind.

    Use curtains rated for outdoor use, and tie them back in strong wind so they do not pull on the rod. Wash or hose them down at the start of the season, and take them down in winter to keep the fabric fresh. Curtains pair well with string lights, since the fabric softens the light in the evening.

    17. Lanterns with Battery Candles for Table Light

    Lanterns with battery candles grouped on a patio table at dusk.

    Lanterns with battery candles give a patio safe table light that can move from the dining table to the seating group as the evening goes on. Group three lanterns of varied heights on a table or along a low wall, with battery candles inside for a steady glow. The glass protects the flame effect from wind, and the light flatters food, faces, and plants alike.

    Use battery candles where wind, children, or pets make real flames risky, and keep real candles inside glass with a stable base if you use them. Bring lanterns indoors in storms, and wipe the glass clean so the light stays bright. Black metal lanterns suit most patios, while wood or brass lanterns warm a rustic space.

    18. Solar Path Lights Along the Walkway

    Solar path lights along a walkway to a patio seating area at dusk.

    Solar path lights along the walkway make a patio safe and welcoming after dark, without wiring or running costs. Set small stake lights along the path from the door to the seating area, spaced evenly and clear of mowing and foot traffic. The lights charge in daylight and switch on at dusk, marking the edges of the path.

    Choose lights with a warm white glow, and keep the solar panels clear of leaves and shade from pots. Replace rechargeable batteries when the light fades, and move a light that sits in deep shade to a sunnier spot. Path lights work best as a guide, with string lights or lanterns giving the main light in the seating area.

    19. Chiminea for Warmth on Cool Evenings

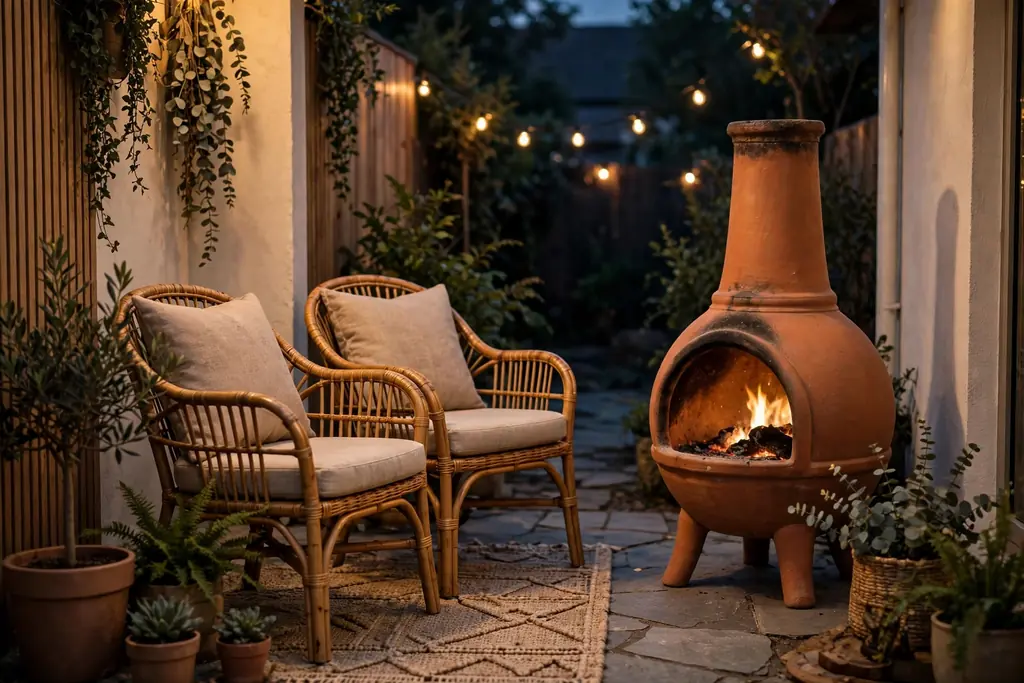
    Chiminea beside two chairs on a small patio in the evening.

    A chiminea gives a patio warmth on cool evenings in a compact shape that suits smaller spaces than a full fire pit. Set the chiminea on a nonflammable surface, away from overhangs, fences, and dry plants, with a clear space around it for safety. The chimney directs smoke up and away from seats, so guests can sit close without smoke in their faces.

    Burn only dry wood suited to the chiminea, and let ashes cool fully before clearing them. Cover the chiminea in rain to protect the finish, and check the chimney and body for cracks each season. A chiminea beside one or two chairs makes a quiet evening corner, while a larger fire pit suits a full group.

    20. Storage Bench for Cushions and Throws

    Storage bench with a cushion beside a patio seating group.

    A storage bench holds cushions, throws, and small outdoor games, and gives guests an extra seat. Set a wood or resin bench beside the seating group or against a wall, with a hinged lid that lifts with ease. Inside, keep cushions in a dry bag or basket, so they stay clean and ready to use.

    Check the bench lid for water leaks after rain, and wipe the inside dry if needed. A bench with a cushion on top reads as seating, while a plain bench top can hold a tray of drinks or a lantern. Keep heavy items at the bottom of the bench, and leave the top clear so the bench can seat guests at short notice.

    21. Side Tables at Every Seat

    Small side tables beside patio chairs holding drinks and a book.

    Side tables at every seat mean no one has to balance a drink on an armrest or the ground. Place a small table beside each chair and at each end of a sofa, sized to hold a drink, a book, and a phone. Tables in the same material as the main furniture tie the group together, while a mix of wood and metal adds a collected look.

    Choose tables with a stable base that will not tip on uneven paving, and keep the tops clear of clutter so guests can set things down. A side table with a lower shelf holds a spare throw or a small lantern. On a small patio, one shared table between two chairs still gives each seat a place within reach.

    22. Drinks Station on a Rolling Cart

    Rolling drinks cart with glasses and a pitcher near a patio dining table.

    A drinks station on a rolling cart keeps glasses, a pitcher, and snacks in one place and lets the host stay with guests. Set a bar cart or a small side table near the dining area, with glasses on top, bottles or a pitcher below, and a small tray for napkins. The cart rolls to the table for meals and back to a corner when the meal ends.

    Keep the cart stable on level paving, and lock the wheels when it is in use. Use unbreakable glasses outdoors where children play, and bring glassware indoors at night. A cart with a removable tray doubles as a serving tray, so food and drinks can move from the kitchen to the patio in one trip.

    23. Basket of Throws for Cool Evenings

    Woven basket of folded throws beside a patio sofa.

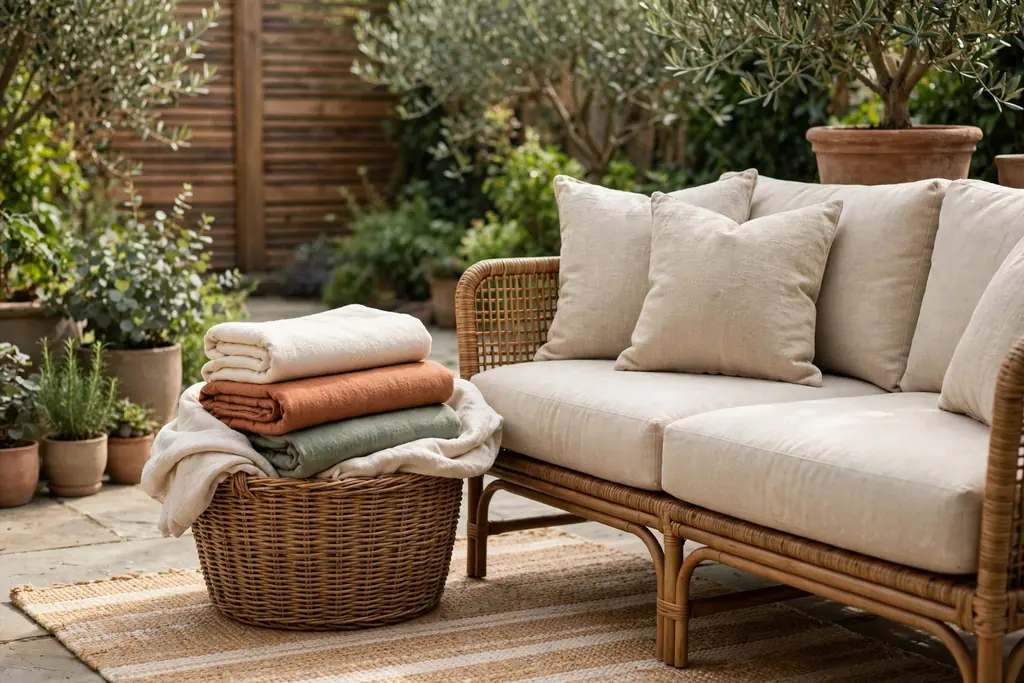
    A basket of throws keeps a patio usable when the temperature drops after sunset. Set a large woven basket beside the sofa or the fire pit, filled with two or three washable throws in the patio palette. Guests can take a throw as they sit down, and the basket keeps the throws tidy during the day.

    Choose throws that wash well and dry quickly, and bring the basket indoors in rain. A basket with handles moves from the seating group to the fire pit as the evening goes on. Keep the basket clear of walkways, and fold the throws neatly so the basket reads as decor, not storage alone.

    24. Tabletop Fountain for Gentle Sound

    Small tabletop fountain on a patio side table near seating.

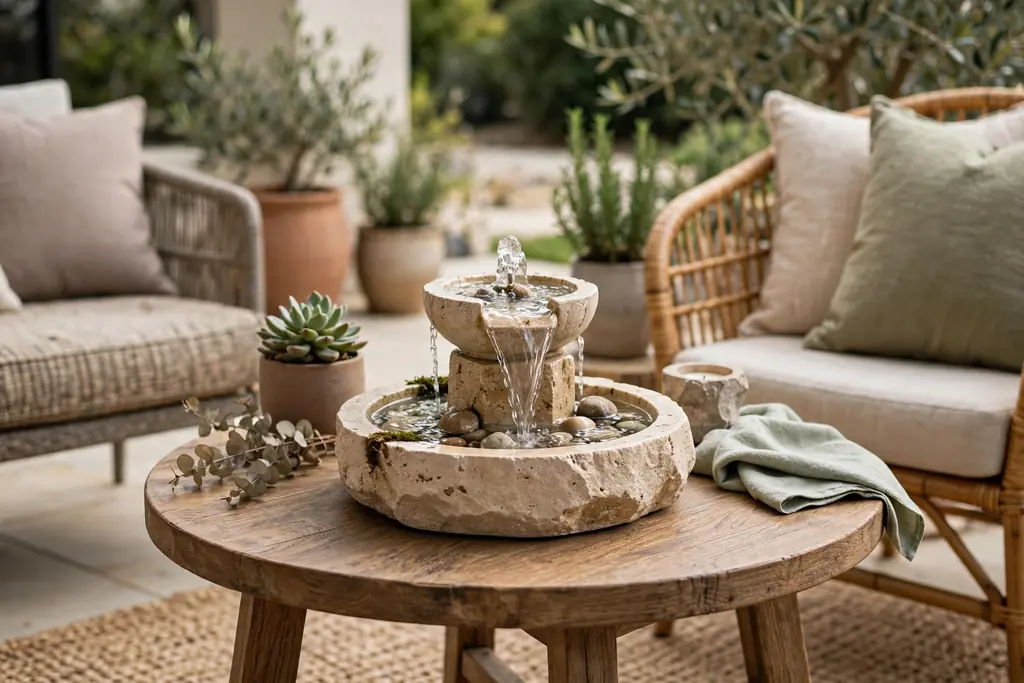
    A tabletop fountain adds gentle water sound to a patio and masks street noise without taking floor space. Set a small solar or plug in fountain on a side table or a low wall, where the sound can be heard from the seating group but the splash stays clear of cushions. The moving water also draws birds to the patio during the day.

    Keep the water level topped up, and clean the pump and basin as the maker directs so the flow stays steady. Place the fountain on a level surface with a tray beneath it if it sits near wood furniture. In frost, empty the fountain and store it indoors so ice cannot crack the basin.

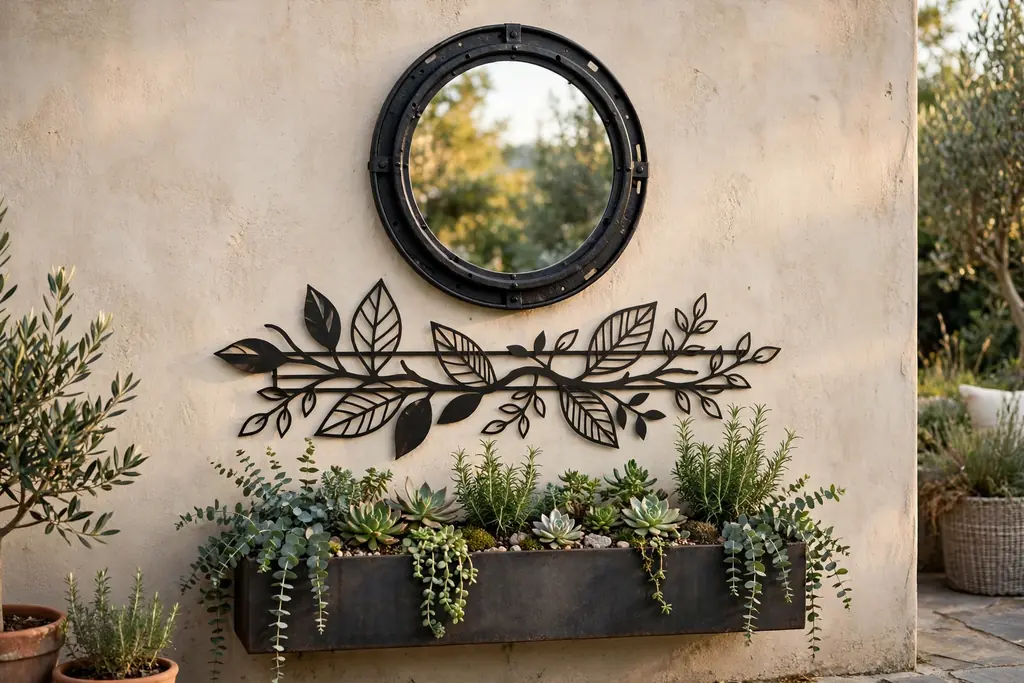
    25. Outdoor Mirror and Wall Decor for Light

    Weatherproof outdoor mirror and metal wall decor above a planter on a patio wall.

    Outdoor mirror and wall decor reflect light and give a plain patio wall a focal point. Hang a weatherproof mirror or a set of metal wall pieces on a sheltered wall, facing the seating area so it reflects plants and light rather than a fence. The reflection makes a small patio feel wider and brighter, especially in a shaded corner.

    Fix wall decor firmly, with fixings suited to the wall material, and check them after storms. Choose pieces rated for outdoor use, since indoor mirrors and art can tarnish or warp outside. Keep wall decor clear of the fire pit and the grill, and pair it with a planter below so the wall display feels grounded.

    Conclusion

    A comfortable patio does not need a full redesign. Pick seating that fits the space, add shade for the hottest part of the day, layer light for evenings, and finish with plants and a heat source. Start with one seating group and one shade idea, then add the smaller touches, such as lanterns, a throw basket, and herb pots, as you learn how you use the patio. With those layers in place, the patio can serve as a second living room through much of the year, for quiet mornings, shared meals, and relaxed evenings outside.

    FAQs

    What is the first step in decorating an outdoor patio?

    The first step is to measure the patio and decide how you will use it, for sitting, eating, or both. Seating and shade come next, since they set the size and layout of everything else, from rugs to planters and lights.

    How do I make a small patio feel comfortable?

    A small patio feels comfortable with a bistro set or a loveseat, one shade source, and plants at different heights. Keep walkways clear, use a rug to mark the seating area, and choose folding or stackable pieces that can be stored when not in use.

    What kind of furniture lasts best on a patio?

    Weatherproof furniture lasts best on a patio, with frames in metal, teak, or resin and cushions in outdoor rated fabric. Removable, washable cushion covers help, since outdoor cushions gather dust and spills, and a storage bench keeps cushions dry in rain.

    How can I add shade to a patio without a pergola?

    You can add shade to a patio without a pergola with a cantilever umbrella, a shade sail, or outdoor curtains on a frame. Each option shades a seating or dining area, and an umbrella or sail can move or come down as the sun and seasons change.

    What lighting works best for a patio at night?

    String lights, lanterns, and solar path lights work best together for a patio at night. String lights give the main glow over seating and dining areas, lanterns add movable table light, and solar path lights mark the walkway safely.

    How do I keep patio plants alive through the season?

    Patio plants stay alive with the right light, drain holes, and watering when the top of the soil feels dry. Match plants to the sun the spot gets, feed them through the growing season as the pot label directs, and move tender pots indoors before frost.


  • 23 Farmhouse Front Porch Ideas for a Warm Welcome

    23 Farmhouse Front Porch Ideas for a Warm Welcome

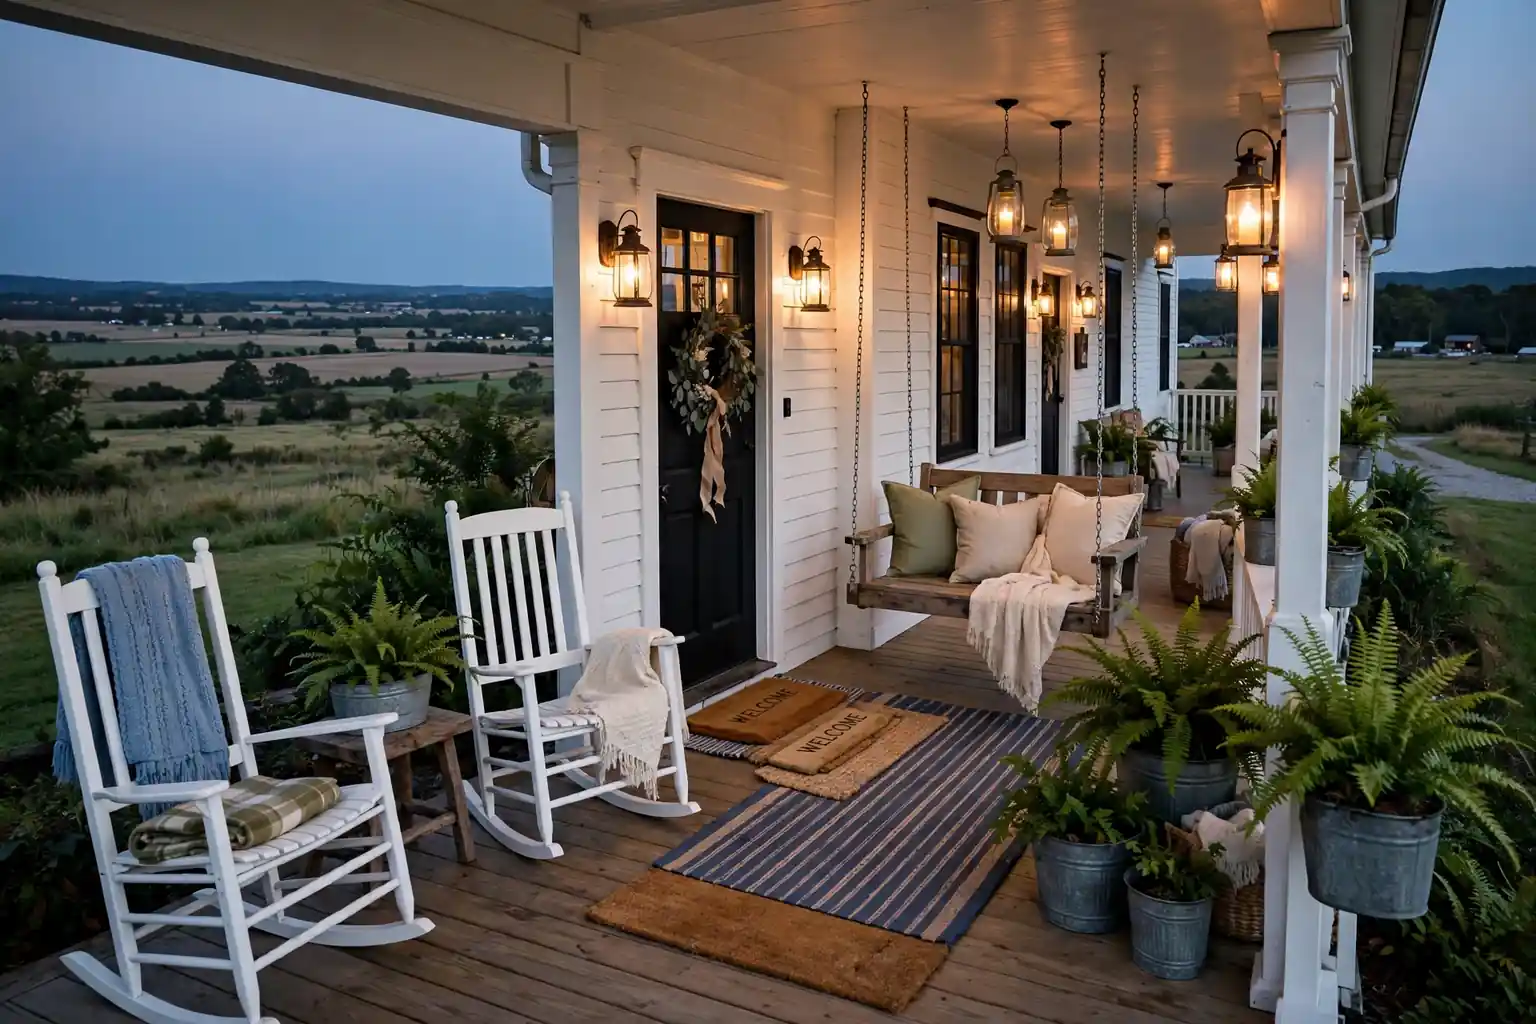
    A farmhouse front porch feels warm and welcoming when you layer natural wood, soft textiles, and living plants around a clear path to the door. Start with comfortable seating, a wreath or sign at the door, layered mats, and warm light, then add planters and simple seasonal touches that suit your porch size and climate.

    The 23 ideas below work for small stoops as well as wide wraparound porches, since most of them scale down to one chair and one planter, or up to a full seating group. Pick one idea at the door and one for seating first, then add plants and light. The same layered approach that makes a fall front porch feel inviting works all year, with the seasonal pieces swapped in a farmhouse fall palette when autumn arrives.

    Key Takeaways

    • Start at the door: a wreath, layered mats, and one pair of planters set the tone for the whole porch.
    • Keep the path to the door clear, with seating and decor grouped to the sides, so guests can reach the door with ease.
    • Repeat two or three colors, such as cream, sage green, and warm wood, across textiles, pots, and cushions.
    • Choose outdoor rated fabrics and finishes, or bring cushions and throws indoors in rain, so the porch stays tidy.
    • Add warm light with lanterns, sconces, or string lights, since porches are used most in the early evening.
    • Swap only the small seasonal pieces, such as wreaths and door mats, and keep the seating and planters in place all year.

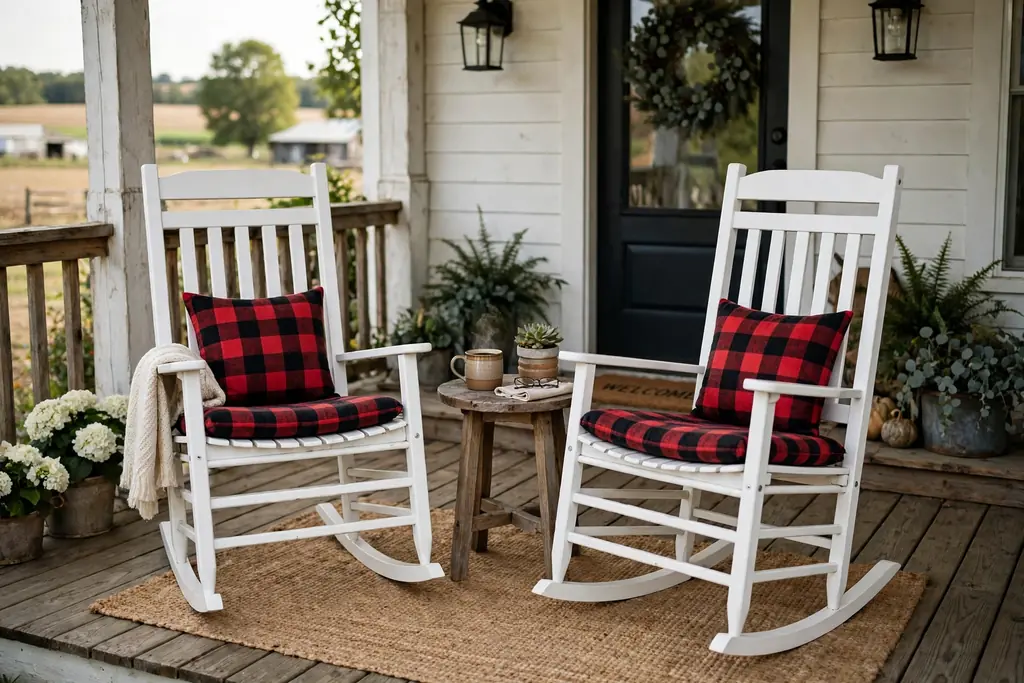
    1. White Rocking Chairs with Plaid Cushions

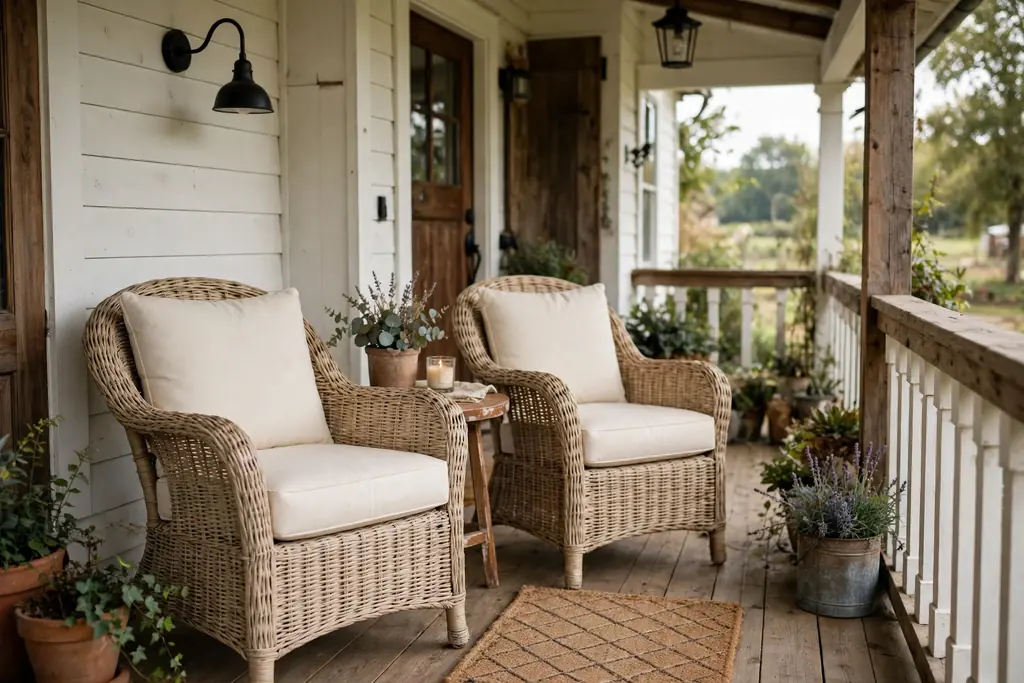
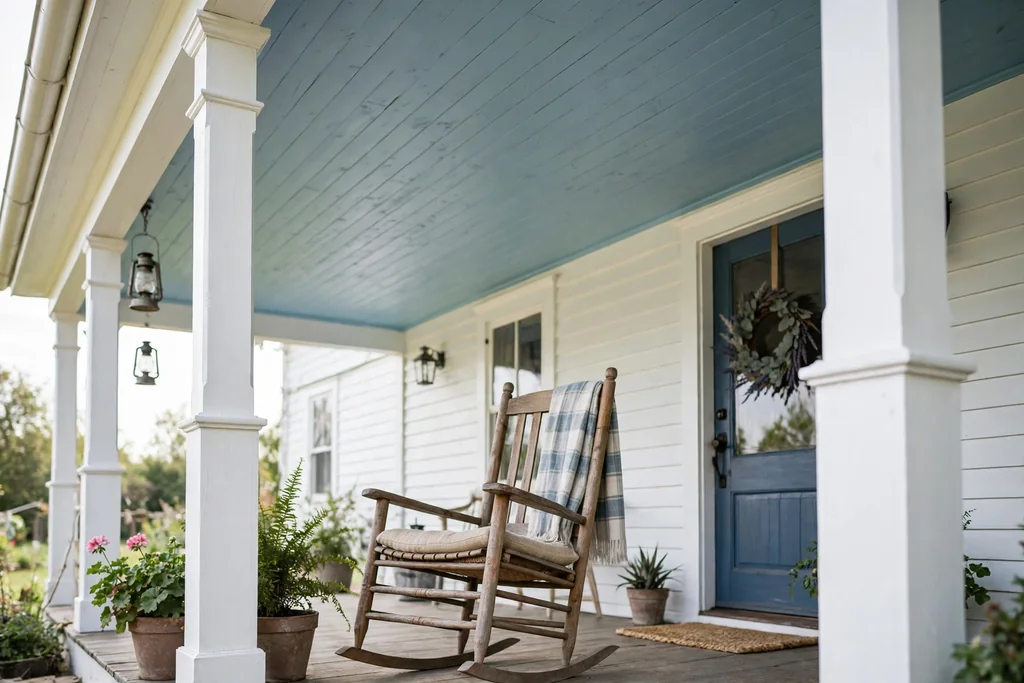
    Two white rocking chairs with plaid cushions and a small table on a farmhouse front porch.

    Two white rocking chairs with plaid cushions are the classic farmhouse porch welcome. Set them side by side near the railing, facing the yard or the street, with a small table between them for drinks. The white paint keeps the porch bright, while the plaid cushions add pattern without a new furniture purchase.

    Choose cushions with removable, washable covers, since porch cushions gather dust and pollen. If your porch is narrow, one rocking chair still gives the same welcome, placed beside the door with a small side table. Add a folded throw over one chair arm for cool evenings.

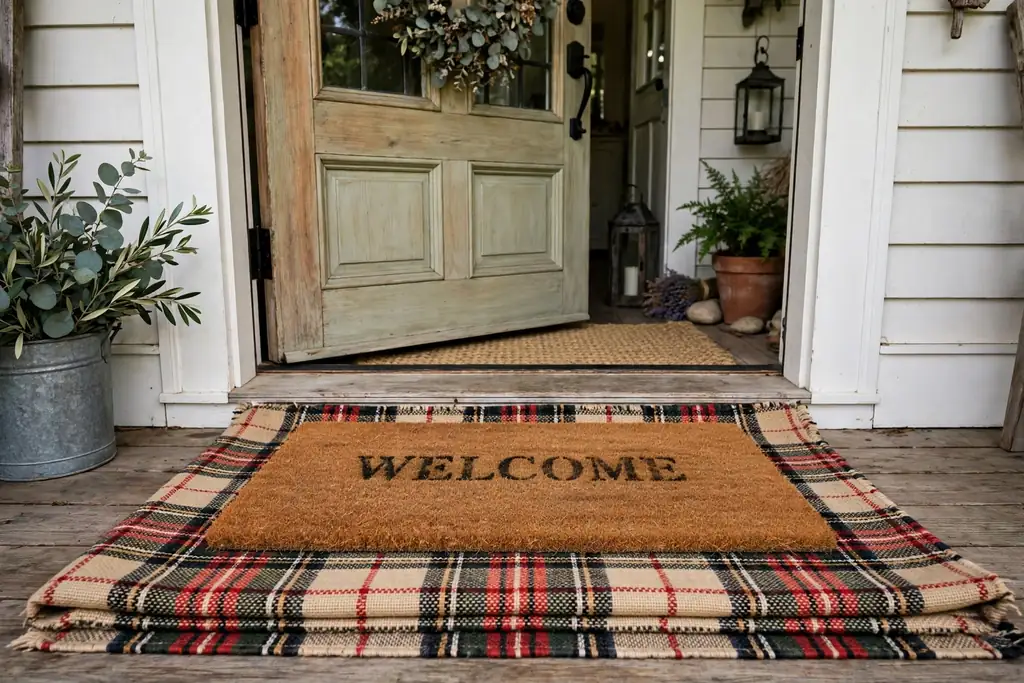
    2. Layered Doormats and a Plaid Rug

    Layered plaid rug under a coir doormat at a farmhouse front door threshold.

    Layering a larger patterned rug under a smaller coir doormat dresses the threshold in one step. Lay a flat outdoor rug in muted plaid or stripes first, then center the coir mat on top, leaving an even border of pattern showing on all sides. The layers catch dirt and give the doorway a finished look.

    Keep both mats low and flat so the door opens freely over them. Shake them out weekly, and move the patterned rug to a dry spot in heavy rain if it is not rated for outdoor use. Swap the top mat for a seasonal version later in the year while the base rug stays put.

    3. Eucalyptus Wreath on a Painted Door

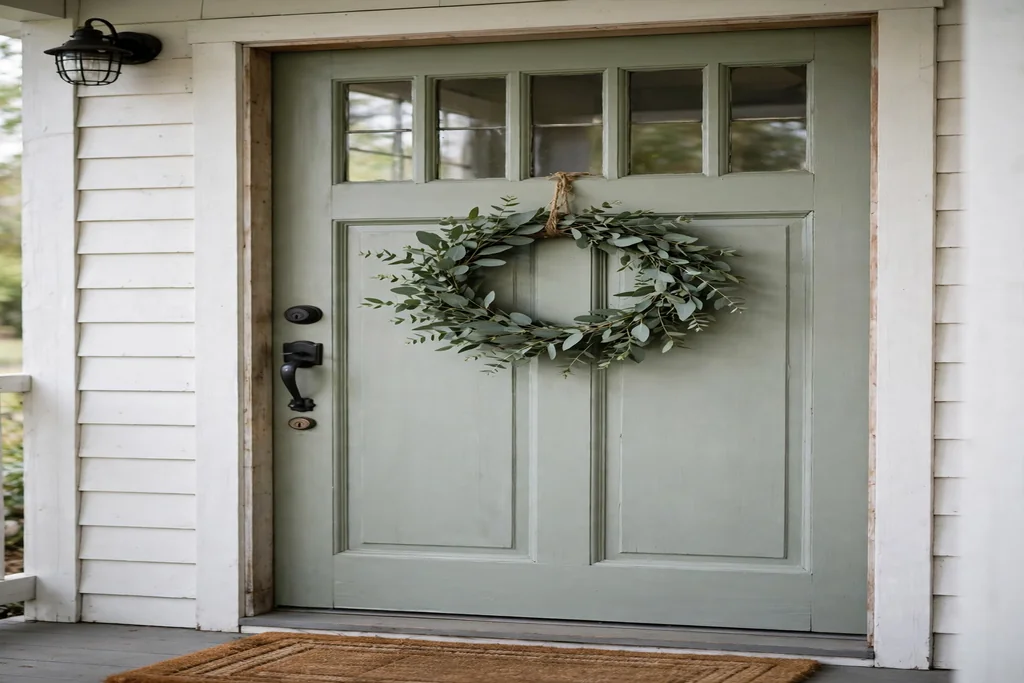
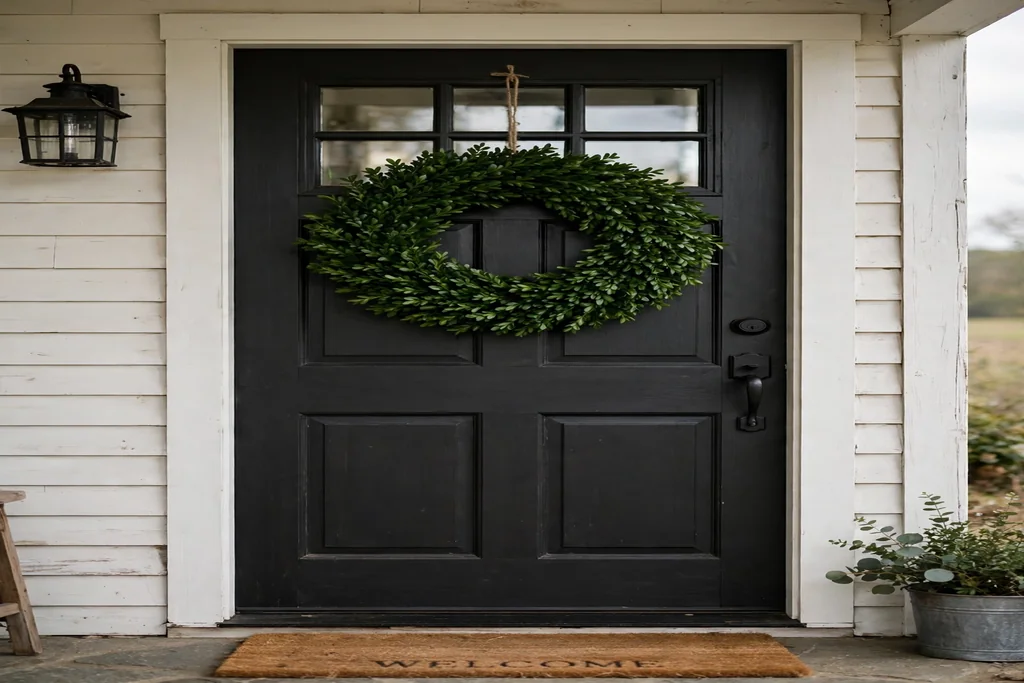
    Simple eucalyptus wreath hanging on a painted farmhouse front door.

    A simple eucalyptus wreath suits a painted farmhouse door in any season. Choose a full, round wreath in soft green, sized to the door so it does not cover the handle or the letterbox, and hang it from an over door hook. The green softens a bold door color and adds a fresh note at eye level.

    Check that the door still closes fully and that the wreath does not catch on the frame. If your door faces strong sun, pick a wreath with fade resistant leaves, and bring a dried wreath indoors during heavy rain to keep it looking fresh. A plain twig wreath with a few eucalyptus stems can stay up all year.

    4. Galvanized Planters with Ferns

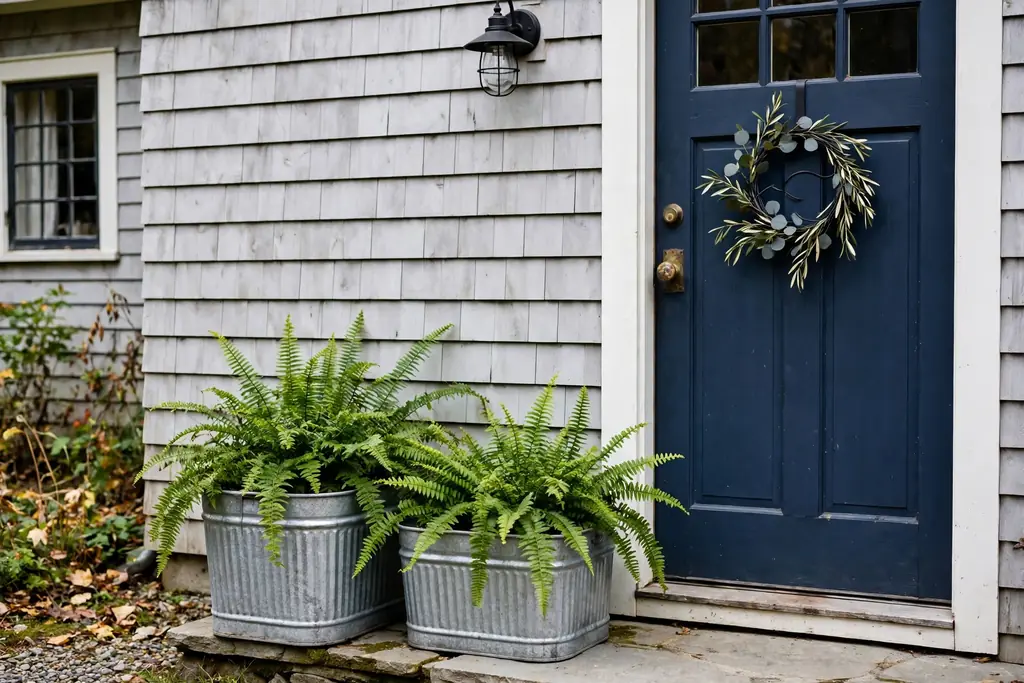
    Galvanized metal planters with green ferns beside a farmhouse front door.

    Galvanized metal planters filled with ferns give the porch living color with a clear farmhouse note. Set one planter on each side of the door, or group three planters of different heights on one side for a fuller display. The grey metal contrasts with wood siding and white trim, and ferns stay green through much of the year.

    Water ferns when the top of the soil feels dry, and set each planter on a saucer or a flat stone to protect steps and decking. In a sunny spot, swap ferns for trailing ivy or ornamental grass, which handle direct light better. When the plants finish, the same planters can hold evergreen cuttings for winter.

    5. Wooden Porch Swing with Cream Cushions

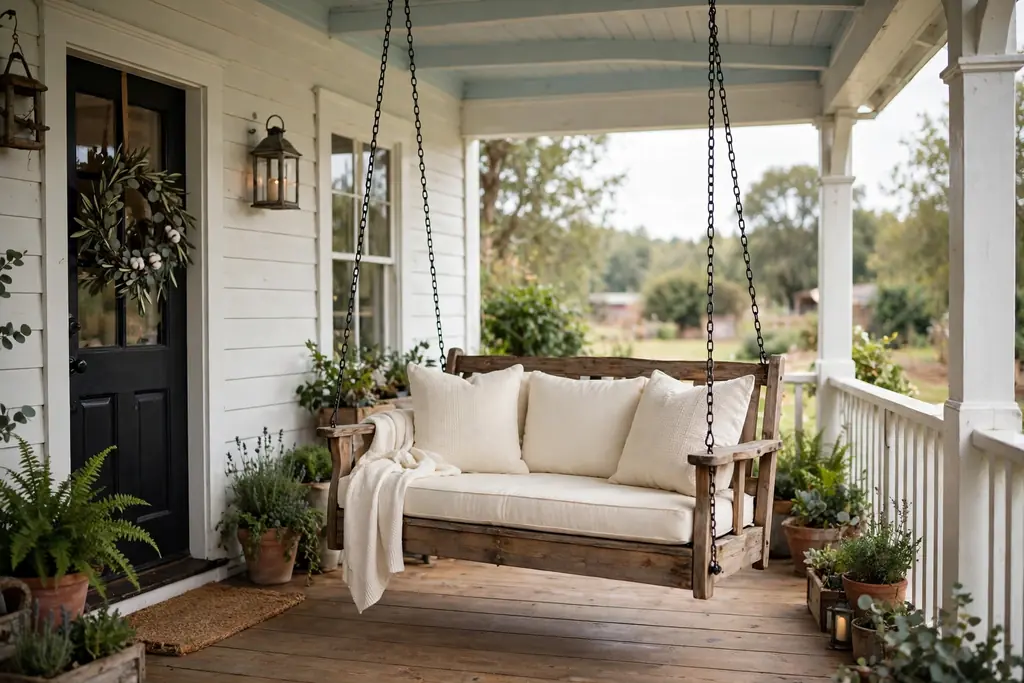
    Wooden porch swing with cream cushions hanging on a farmhouse front porch.

    A wooden porch swing with cream cushions turns the porch into a place to sit and stay. Hang the swing from sturdy ceiling joists, with chains rated for the weight, and add a seat cushion and two back cushions in cream or natural linen. The swing suits a wide porch best, where it can move freely without hitting the wall or railing.

    Check the chains and hooks each season for rust or wear, and tighten them as needed. If the swing faces rain, use quick dry foam cushions or bring the cushions indoors at night. Keep one end of the swing clear of planters, so guests can step on and off with ease.

    6. Lanterns Along the Steps

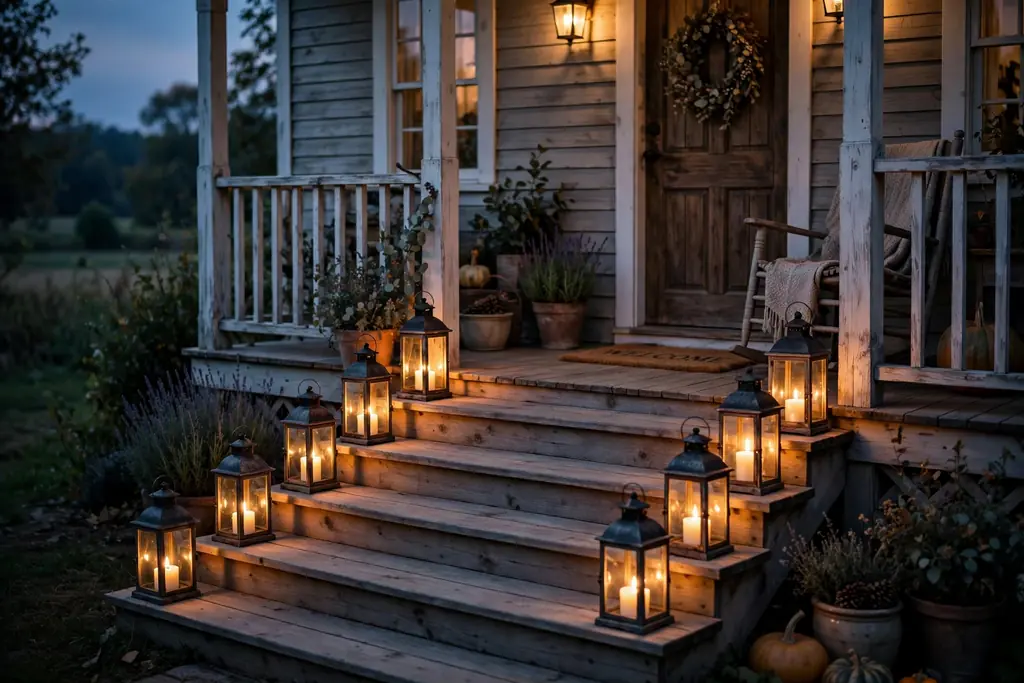
    Lanterns with warm candles lined along farmhouse front porch steps.

    Lanterns along the steps add warm light to the porch after dark, when guests most often arrive. Place one lantern on each step, or group three lanterns of varied heights at the base of the steps, with battery candles inside for safety. The glow softens the whole entrance and makes the house number and door easier to find.

    Use battery candles on porches where wind or children make real flames risky, and keep real candles inside glass with a stable base if you use them. Bring lanterns indoors in storms, and wipe the glass clean so the light stays bright. Black metal lanterns suit most house styles, while wood or brass lanterns warm a rustic porch.

    7. Farmhouse Bench with Baskets Underneath

    Wooden farmhouse bench with woven baskets underneath and a cushion on the seat.

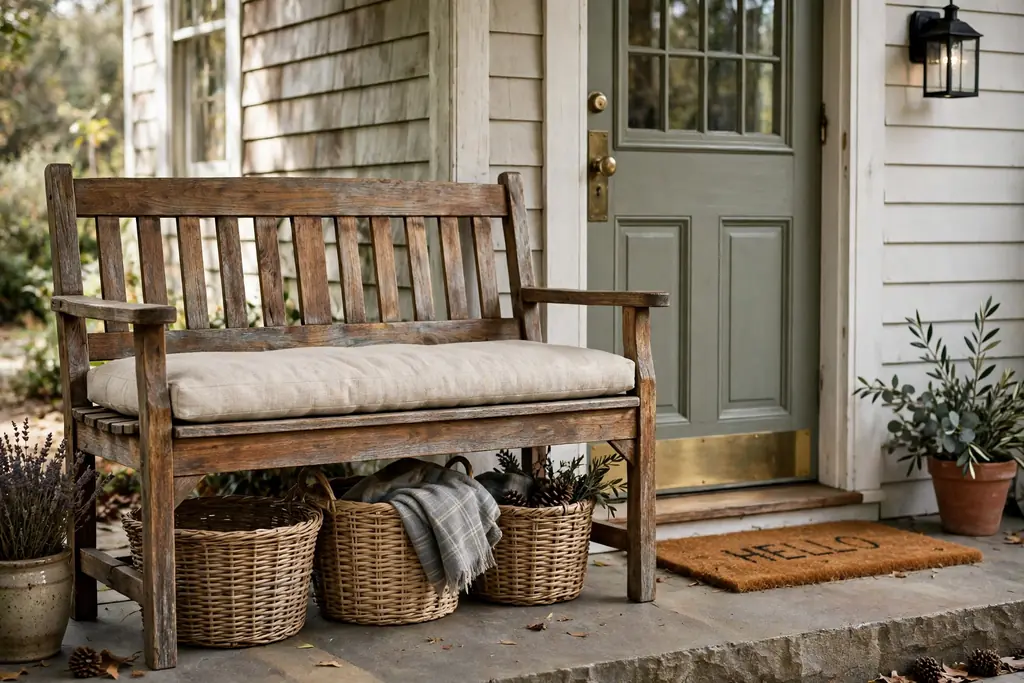
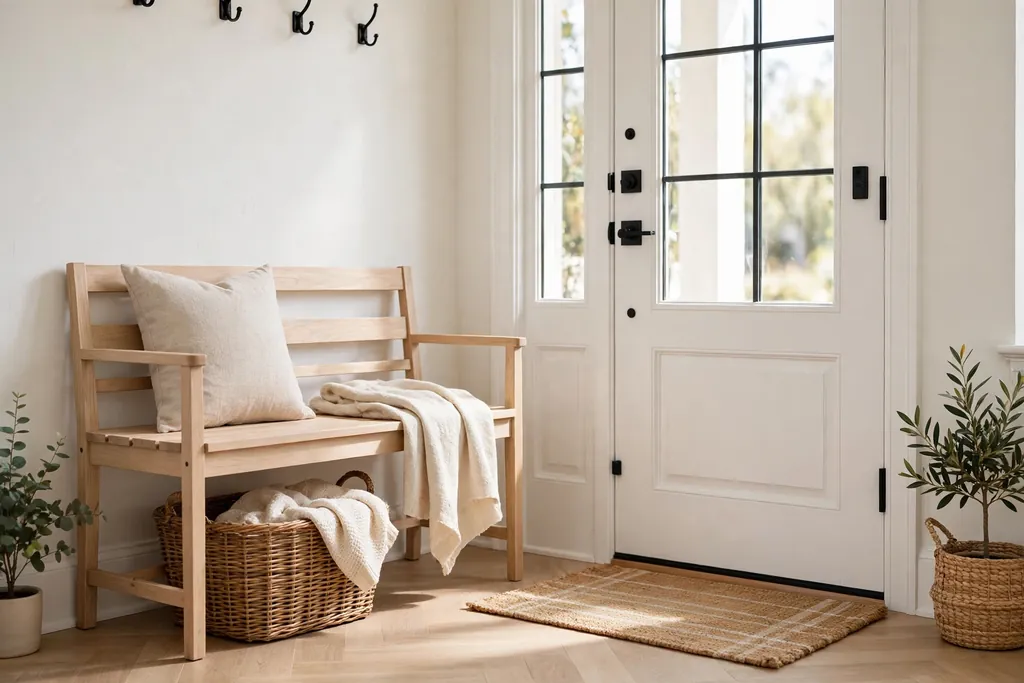
    A farmhouse bench with woven baskets underneath gives guests a place to sit and gives you hidden storage. Set a wood bench beside the door, with two baskets below for shoes, dog leads, or small garden tools. Add one cushion and a folded throw on the bench seat, so it reads as seating rather than storage alone.

    Keep the baskets tidy and empty them weekly, so they do not become a dumping spot. Choose baskets that fit the bench frame with a small gap on each side, so they slide out with ease. If the bench sits outside the roof line, use outdoor rated baskets or bring them indoors in wet weather.

    8. Milk Can with Dried Stems

    Old milk can filled with dried stems standing in a farmhouse porch corner.

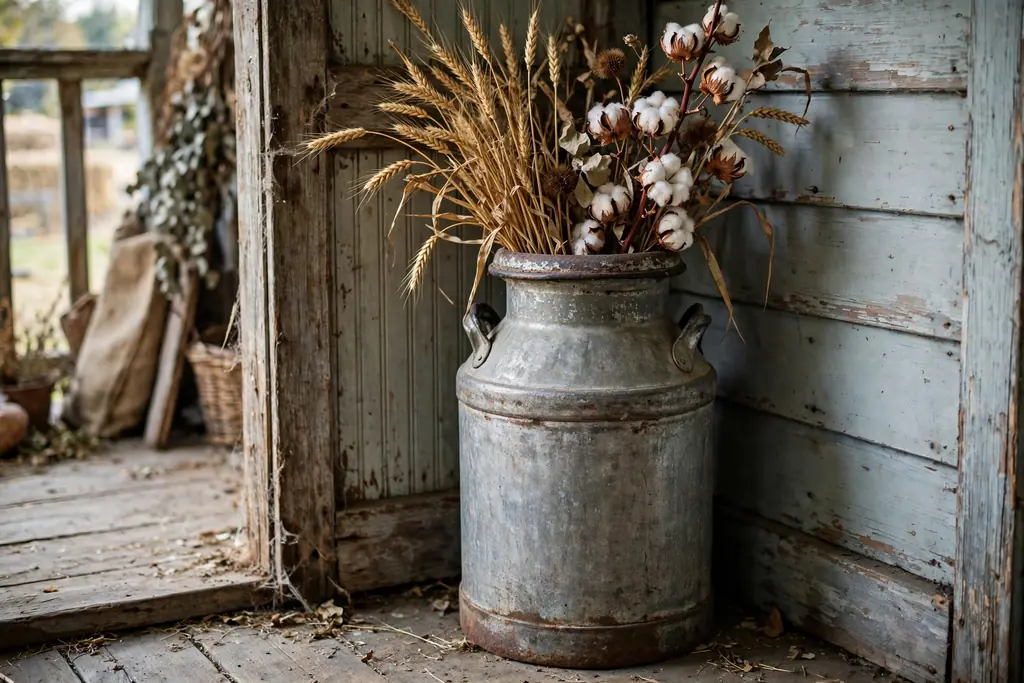
    An old milk can filled with dried stems adds height and a collected farmhouse note to a porch corner. Set the can beside the door or bench, fill it with a bundle of dried wheat, cotton stems, or tall branches tied at the base, and let the stems fan out above the rim. The tall shape suits a corner that pots alone cannot fill.

    Weigh the can down with stones at the base so wind cannot tip the tall stems. Trim stems to a height that clears the porch roof and does not block windows. Keep dried stems away from open flames, and shake them outdoors once a month so dust does not build up.

    9. Tall Wood Welcome Sign by the Door

    Tall weathered wood welcome sign leaning beside a farmhouse front door.

    A tall wood welcome sign leans beside the door and greets guests before they knock. Choose a sign in weathered wood with simple painted lettering, and lean it against the wall or porch post at a slight angle. It fills a narrow gap beside the door that pots alone cannot fill.

    Secure the sign so wind cannot topple it, with a small stake behind it or a heavy base pot at its foot. Keep the lettering simple and easy to read from the walkway, and avoid signs with long phrases that crowd the board. A plain welcome sign works in every season, so it is one of the longest lived porch pieces.

    10. Hanging Baskets with Trailing Plants

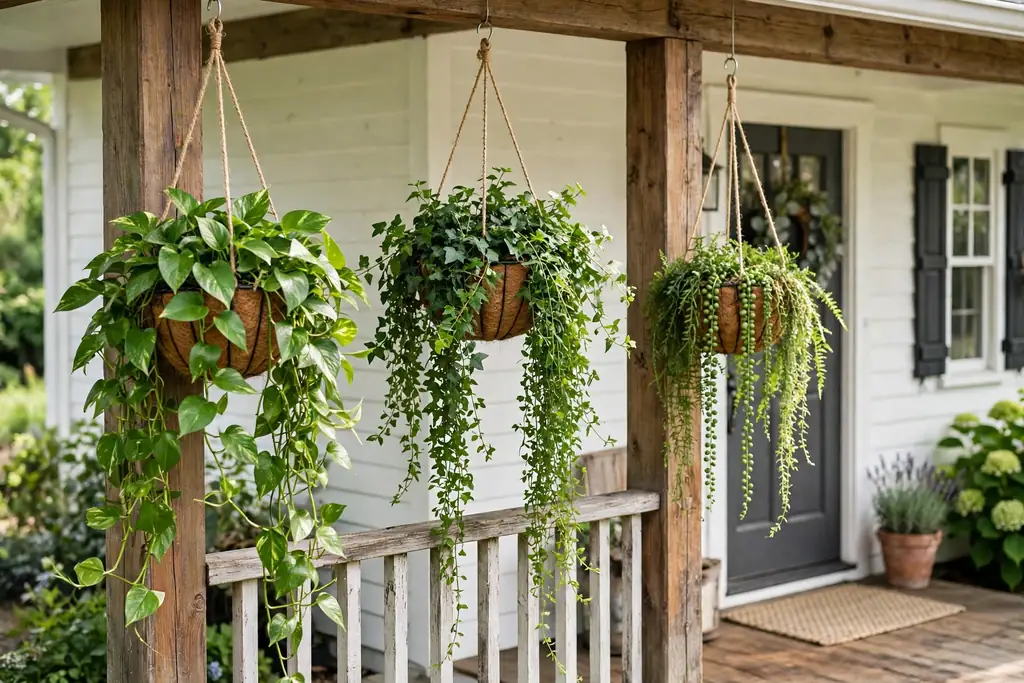
    Hanging baskets with trailing green plants hanging from farmhouse porch posts.

    Hanging baskets with trailing plants add green at eye level and above, where floor space is short. Hang one basket from each porch post or ceiling hook, with trailing ivy, petunias, or ferns that spill over the rim. The baskets soften plain posts and draw the eye up to the porch roof.

    Water hanging baskets more often than floor pots, since they dry out faster in wind and sun. Check the hooks and chains for weight, and bring baskets indoors in frost or storms. For a matched look, use the same plant in each basket, and vary only the basket liner or hanger.

    11. Striped Outdoor Rug Under the Seating

    Striped outdoor rug under porch chairs and a small table on a farmhouse porch.

    A striped outdoor rug under the seating group defines the porch living area in one move. Lay a flat, washable rug in cream and sage, navy, or rust stripes, large enough to sit under the front legs of chairs and a table. The rug marks the seating zone clearly, even on a long porch with more than one use.

    Pick a rug rated for outdoor use, so it dries quickly after rain, and shake it out weekly so leaves and dirt do not build up underneath. If the rug sits on painted wood, lift it now and then to check for damp marks. A striped rug pairs well with plain cushions, since the rug carries the pattern.

    12. Potted Topiary by the Door

    Potted ball topiary in a stone pot beside a farmhouse front door.

    A potted topiary by the door gives the entrance a tidy, formal shape. Choose one ball or cone topiary in a plain terracotta or stone pot, and set one on each side of the door for symmetry, or a single topiary beside a bench for a quieter look. The clipped shape contrasts with looser plants nearby.

    Water topiary when the top of the soil feels dry, and trim stray shoots with small shears to keep the shape neat. In a sunny spot, boxwood topiary holds its shape well, while a rosemary topiary adds scent near the door. Bring tender topiary indoors in hard frost, or cover it with cloth overnight.

    13. Vintage Ladder with Folded Throws

    Vintage wood ladder with folded throws leaning against a farmhouse porch wall.

    A vintage wood ladder leaning against the porch wall holds folded throws within easy reach. Lean the ladder at a slight angle, with the feet firm on the porch floor, and drape one throw over each rung, in cream, rust, and a muted check. The ladder adds height to a blank wall and keeps throws off the chairs.

    Secure the ladder so it cannot slide, with small pads under the feet and a hook at the top if needed. Keep the throws light, so the ladder does not tip, and bring them indoors in rain. This idea suits a covered porch best, where the ladder and throws stay dry through the day.

    14. Window Boxes with Seasonal Flowers

    Window boxes with pink and white flowers under farmhouse front windows.

    Window boxes with seasonal flowers dress the porch from the street as well as from the chairs. Fit a wood or metal box under each front window, line it, and fill it with flowers in your porch palette, such as white petunias, pink geraniums, or trailing lobelia. The flowers soften the house front and tie the porch to the garden.

    Water window boxes often, since shallow boxes dry out fast, and deadhead spent blooms to keep new buds opening. Choose boxes with drain holes, and set a tray beneath them if they hang over seating. Swap the flowers with the season, and keep the box itself in place all year.

    15. Warm String Lights Along the Porch Ceiling

    Warm string lights draped along a farmhouse porch ceiling at dusk.

    String lights along the porch ceiling give the porch a gentle glow that flatters every other piece on display. Drape warm white lights along the ceiling edge, around posts, or across a beam, with the cord tucked out of the walking path. The light makes the porch usable after sunset and highlights the wreath and planters.

    Choose outdoor rated lights and a timer so they switch on at dusk without daily effort. Keep bulbs clear of dried leaves, garlands, and fabric, and check the cord each season for wear. Warm white suits a farmhouse porch better than cool white, since it echoes candlelight and keeps the porch feeling calm.

    16. Wicker Chairs and a Small Side Table

    Wicker chairs with cream cushions and a small side table on a farmhouse front porch.

    Wicker chairs with a small side table make a compact porch seating group for morning coffee or evening chats. Set two wicker chairs at a slight angle, with a round side table between them, and add plain cushions in cream or sage. The woven texture suits a farmhouse porch and reads lighter than solid wood chairs.

    Choose wicker rated for outdoor use, or bring the chairs under cover in heavy rain, and wipe them clean so dust does not settle in the weave. If the chairs are used daily, pick washable cushion covers and shake them out each week. A small table also gives guests a place for keys and parcels.

    17. Boxwood Wreath for All Seasons

    Plain deep green boxwood wreath hanging on a farmhouse front door.

    A boxwood wreath is the year round option for a farmhouse front door. Choose a full wreath in deep green, with no seasonal extras, and hang it at eye level from an over door hook. The plain green suits every season, so you only change the door mat or the planters when you want a seasonal shift.

    Keep the wreath clean by shaking it outdoors and wiping faux leaves as needed. If you use a fresh boxwood wreath, mist it lightly and bring it indoors in hard frost to slow drying. Pair it with a plain welcome mat, so the door stays calm rather than crowded with competing pieces.

    18. Terracotta Pots with Herbs by the Steps

    Terracotta pots with green herbs grouped beside farmhouse porch steps.

    Terracotta pots with herbs by the steps add scent and useful green to the entrance. Group three pots of different heights near the steps, with rosemary, thyme, and mint, and water them in the morning so the soil stays damp but not soaked. Guests brush past the scent on the way to the door, and the herbs can go to the kitchen after.

    Set each pot on a saucer to protect steps and decking, and trim herbs often, since regular picking keeps the plants bushy. Mint spreads fast, so keep it in its own pot rather than sharing a planter. In cold weather, move tender herbs close to the house wall for shelter.

    19. Painted Porch Ceiling in Soft Blue

    Farmhouse porch ceiling painted soft blue with white posts and a rocking chair below.

    A porch ceiling painted in soft blue is a classic farmhouse detail that guests notice without knowing why the porch feels calm. Paint the ceiling boards in a pale blue, such as a soft sky or haint blue, and keep the posts and trim white. The pale color brightens a shaded porch and reflects light onto the seating below.

    Use exterior paint rated for ceilings, and clean the boards before painting so the finish lasts. If repainting feels like a large job, test the color on one board first, and check it in morning and evening light. The blue ceiling pairs well with white rocking chairs and natural wood floors.

    20. Crate Side Table with Candles

    Wood crate side table with a candle and small plant beside a farmhouse porch chair.

    A wood crate turned on its side makes a simple porch side table with a farmhouse feel. Set the crate beside a chair, line the inside with a small cloth if needed, and top it with a candle in a glass holder and a small potted plant. The crate costs little and suits a porch where a formal table would look out of place.

    Keep the crate off the main walking path, and set it on small feet or a stone slab in rain, so the wood stays dry. At the end of the season, the crate can hold garden tools or firewood, so it earns its keep beyond summer. Use a battery candle if the table sits near fabric or dried stems.

    21. Wall Lanterns Beside the Door

    Black metal wall lanterns mounted on each side of a farmhouse front door.

    Wall lanterns beside the door give the entrance steady light and a finished look. Mount one lantern on each side of the door, at eye level or just above, in black metal or aged brass, with warm bulbs inside. The pair frames the door and lights the lock and handle for evening guests.

    Choose outdoor rated fixtures, and check that the lanterns clear the door swing and any wreath or sign nearby. If wiring a new fixture feels like a large job, use solar or battery wall lanterns in the same style. Wipe the glass clean often, since porch dust dulls the light fast.

    22. Small Bistro Table with a Gingham Cloth

    Small bistro table with a gingham cloth and two chairs on a farmhouse front porch.

    A small bistro table with a gingham cloth makes a casual porch spot for breakfast or a drink. Set a round metal or wood table near the railing, with two chairs, and cover it with a gingham cloth in cream and sage or cream and rust. The cloth adds pattern at table height, while the chairs stay plain.

    Weight the cloth or use clips at the corners, so a breeze does not lift it onto plates. Keep paper or fabric clear of candles, and bring the cloth indoors after meals, since damp fabric can stain if left out overnight. For everyday use, skip the cloth and use two woven placemats instead.

    23. Bold Front Door with Brass Hardware

    Bold sage green farmhouse front door with brass handle, knocker, and house numbers.

    A bold front door with brass hardware is the simplest way to make a farmhouse porch stand out. Paint the door in a deep, welcoming color, such as sage green, navy, or warm red, and add a brass handle, knocker, and house numbers. The color draws the eye to the entrance, while the brass warms the whole porch.

    Test the paint color on the door in daylight before committing, since porch shade can dull a color. Keep the rest of the porch calm, with white trim and plain planters, so the door stays the focus. Clean brass hardware with a soft cloth, and check screws each season so the handle stays firm.

    Conclusion

    A warm farmhouse front porch does not need new furniture or a full redesign. Pick comfortable seating, one door detail, layered mats, and warm light, then repeat a small palette through planters and textiles and keep the path to the door clear. Start with one idea from this list this week, and add plants or light next, so the porch grows into a place guests enjoy and you use every day.

    FAQs

    What makes a front porch look farmhouse?

    A farmhouse front porch uses natural wood, white or cream paint, woven textures, simple metal accents, and living plants, with a calm palette and comfortable seating. The look comes from plain, useful pieces, such as rocking chairs, a wood bench, and galvanized planters, rather than ornate or glossy decor.

    How do I decorate a small farmhouse front porch?

    Decorate a small farmhouse front porch with one chair, one pair of small planters, layered mats, and a wreath on the door, keeping the path clear. Choose vertical pieces, such as a tall sign or hanging baskets, for height without floor space, and skip large seating groups that block the door.

    What colors work best for a farmhouse front porch?

    Cream, warm white, sage green, soft grey, and natural wood tones work best for a farmhouse front porch, with one accent color, such as rust, navy, or muted red, at the door or in cushions. Repeat each color at least twice, across textiles, pots, and the door, so the porch reads as one plan.

    How do I keep porch cushions and throws in good shape outdoors?

    Keep porch cushions and throws in good shape by choosing outdoor rated fabrics with removable, washable covers, and bringing them indoors in rain and overnight in wet weather. Shake cushions out weekly, store them in a dry box when not in use, and pick quick dry foam fills for chairs outside the roof line.

    What plants suit a farmhouse front porch?

    Ferns, trailing ivy, boxwood topiary, potted herbs, and seasonal flowers suit a farmhouse front porch, since they suit plain pots and need only regular water and trimming. Match the plant to the light: ferns and ivy for shade, herbs and geraniums for sun, and evergreen cuttings for winter color.

    What is the easiest farmhouse porch idea to start with?

    The easiest farmhouse porch idea to start with is layered mats, a wreath on the door, and one pair of planters flanking the entrance. It needs no tools or new furniture, takes under an hour to set, and gives the porch a finished welcome that you can build on with seating and light later.


  • 25 Craft Room Ideas for a Creative and Organized Space

    25 Craft Room Ideas for a Creative and Organized Space

    A good craft room pairs a large work surface with storage you can see and reach. Start with zones for cutting, sewing, painting, and paper, add wall storage to free the desk, and label every bin. These 25 craft room ideas show how to set up each zone in rooms of any size.

    A craft room works best when it matches how you actually craft. If you sew most weeks, the machine should stay out and ready, not packed away in a closet. If you paint, you need a surface that wipes clean and a place for wet pieces to dry. Walk through your last three projects, note which supplies you reached for most, and give those items the easiest spots in the room.

    Key Takeaways

    • Give the room clear zones for cutting, sewing, painting, paper, and storage, even if a zone is only one shelf or one wall section.
    • Use wall storage first, since pegboard, rails, and shelves free the desk for actual work.
    • Store small supplies in clear or labeled containers so you can find items without opening every bin.
    • Keep current projects on a rolling cart or in a tote, and return finished supplies to their fixed homes.
    • Add strong task lighting and a comfortable chair, since most craft sessions run longer than planned.
    • Measure your desk, shelves, and closet before buying bins, so every container fits the spot it is meant for.

    1. Pegboard Wall for Tools and Supplies

    Pegboard wall above a craft desk with hooks holding scissors, rulers, tape, and paintbrushes in a bright room.

    Hang a pegboard panel above the desk and fit it with hooks, small bins, and shelves for scissors, rulers, tape, glue, and paintbrushes. A pegboard keeps tools visible at eye level, so you stop buying duplicates of items you already own. Paint the board a light color or leave the wood plain, and keep the layout flexible by moving hooks as your crafts change.

    Group tools by task on the board, with cutting tools in one section, adhesives in another, and measuring tools in a third. Outline each tool position lightly in pencil if you want a quick visual check when tidying up. Keep heavy items, such as a hot glue gun stand or a large rotary cutter, on lower hooks, and keep sharp items out of reach of small children.

    2. Clear Jars on a Wall Shelf for Small Supplies

    Wall shelf lined with clear glass jars filled with colorful buttons, beads, and sequins above a desk.

    Mount a shelf at arm height and line it with clear jars for buttons, beads, eyelets, brads, and sequins. Clear jars let you see colors and quantities at a glance, which matters when you are matching a button or bead to a project in progress. Use jars of one size for a tidy row, and label each lid with the contents and color family.

    Sort jar contents by material first, then by color, so a search for red glass beads does not mean opening five mixed jars. Keep a small scoop or spoon in the jars you use most, and keep lids tight on jars holding tiny items. If the shelf sits near a window, choose jars with solid lids and keep light sensitive items, such as some dyes, in a closed cupboard instead.

    3. L Shaped Desk for Cutting and Sewing

    L shaped craft desk with a sewing machine on one arm and a flat cutting surface on the other.

    Set up an L shaped desk so one arm holds the sewing machine and the other gives a flat cutting surface. The corner shape keeps both jobs within reach without moving the machine, and it leaves the middle of the room open. A desk height of standard table height suits most sewing, while a slightly higher section helps for cutting fabric with a rotary cutter.

    Place the machine arm near an outlet and a light source, and keep the cutting arm clear of storage so fabric can lie flat. Add a small drawer unit under the desk for bobbins, needles, and presser feet. If the room is shared, choose a desk with a finish that wipes clean, since glue, paint, and fabric lint all land on a craft desk sooner or later.

    4. Rolling Cart for the Current Project

    Three tier rolling cart beside a craft desk loaded with paper, fabric, and tools for a current project.

    Keep a three tier rolling cart beside the desk for the project you are working on now. Load the top tier with tools, the middle tier with materials, and the bottom tier with the project itself, so you can roll the whole job to a table, a sofa, or another room. When the project ends, empty the cart and reload it for the next one.

    Label nothing on the cart itself, since its contents change with each project, but keep a small tray on top for loose items such as pins and clips. Choose a cart with wheels that lock, so it stays put while you work. A cart also suits a shared room, since the project can roll into a closet at the end of the day and roll out again the next morning.

    5. Fold Down Wall Table for Small Rooms

    Fold down wall table in a small room set up as a craft workspace with supplies on a nearby shelf.

    Fix a fold down table to the wall in a small room, a hallway nook, or a spare bedroom corner. Folded down, it gives a full work surface for cutting, gluing, or assembling; folded up, it frees the floor and leaves only a shallow cabinet on the wall. Add folding brackets rated for the weight of your machine or cutting mat, and test the table with your heaviest setup before relying on it.

    Mount a small shelf or a magnetic strip above the folded table for scissors and rulers, so the surface stays clear when it folds away. Store the project itself in a tote on a nearby shelf, and bring it out only when the table is down. This setup suits renters too, if the brackets can be fixed into wall studs and patched later with landlord permission.

    6. Labeled Bins by Craft Type

    Shelves of labeled storage bins sorted by craft type in a tidy craft room.

    Sort supplies into bins by craft type, such as sewing, paper, painting, and jewelry, and label each bin on the front and the top. Labels matter most for bins on high shelves, where the top label is the one you see first. Use one bin size for a shelf so the row looks tidy and bins can swap places as crafts change.

    Inside each bin, add smaller boxes or zip bags for sub groups, such as red thread with red thread, not mixed with blue. Keep a short list taped inside the cupboard door showing which bin holds what, and update it when a craft changes. When a bin starts to overflow, that is the signal to sort it, not to buy a bigger bin.

    7. Ribbon and Tape Rods on the Wall

    Wall mounted rods holding spools of colorful ribbon, washi tape, and twine above a craft table.

    Mount two or three horizontal rods or dowels on the wall and thread ribbon spools, washi tape rolls, and twine onto them. Pulling ribbon straight off a rod is faster than digging through a drawer, and the color range stays visible, which helps when matching ribbon to wrapping paper or a card. Keep rods at arm height and leave a little slack between spools so each one turns freely.

    Sort spools by width or by color family along the rod, and add a small pair of scissors on a hook at the end of the rod. For narrow tape rolls, use a shorter rod or a tension rod inside a shallow box. Replace empty spools promptly, since a rod full of empty cores looks busy and hides the spools you still need.

    8. Fabric Storage Sorted by Color on Open Shelves

    Open shelves stacked with folded fabric sorted by color in a bright craft room.

    Fold fabric by color and stack it on open shelves, with warm colors on one shelf, cool colors on another, and neutrals on a third. Open shelves let you compare prints and weights without unfolding stacks, and color order makes it easy to spot the fabric you pictured for a project. Use shelf dividers or small bookends to stop tall stacks from toppling.

    Fold each piece to the same width so stacks stay even, and place heavier fabrics, such as denim and canvas, on lower shelves. Keep delicate fabrics, such as silk, in closed boxes on a higher shelf to guard against dust and light. If shelf space is short, roll knit fabrics instead of folding them, since rolls take less depth and show prints at a glance.

    9. Sewing Station with Pressing Space Nearby

    Sewing station with a machine on a desk and a small ironing board beside it in a craft room.

    Place the sewing machine, a small ironing board, and a pressing mat in one zone, so seams can be pressed as you sew without crossing the room. Pressing each seam as it is sewn gives a neater finish than pressing a whole garment at the end, and a nearby board makes that habit easy. Keep the iron on a heat safe rest and the cord clear of the machine pedal.

    Store pressing tools, such as a seam roller, a tailor ham, and a spray bottle, in a small basket beside the board. Add a scrap bin at the end of the table for fabric offcuts, and empty it when it fills. If space is tight, use a tabletop pressing mat on the desk itself and a mini iron that stores in a drawer.

    10. Vertical Paper Sorters for Cardstock and Patterned Paper

    Vertical sorters holding upright cardstock and patterned paper in many colors on a craft desk.

    Store cardstock and patterned paper upright in vertical sorters, sorted by color or by collection, rather than stacked flat in a pile. Upright storage lets you pull one sheet without lifting a stack, and it shows the full color range at once. Use sorters sized for 12 inch paper if you scrapbook, and letter size sorters for card making.

    Label each sorter slot with the color or collection name, and keep a few empty slots for new paper. Store specialty paper, such as vellum and foil, in a separate sorter or in sleeves, since those sheets mark easily. Keep the sorters near the cutting zone, so paper moves straight from sorter to trimmer without crossing the room.

    11. Paint Station with a Wipe Clean Surface

    Paint station with a wipe clean mat, paint jars, brushes, and a water jar on a craft table.

    Set aside one table or one end of a desk for painting, covered with a wipe clean mat or an old shower curtain liner. A fixed paint zone keeps brushes, palettes, and water jars in one place, and it guards the rest of the room from drips. Keep paints in a caddy or on a small shelf above the table, sorted by type, such as acrylic, watercolor, and fabric paint.

    Place a jar of clean water, a jar for rinsing, and a rag at the edge of the table, and wash brushes before paint dries on them. Store finished paintings flat on a drying shelf or clipped to a line until dry. If the room has carpet, add a washable rug under the paint table, since even careful painters drop a brush now and then.

    12. Yarn Wall with Dowels and Cubby Bins

    Wall dowels holding yarn cakes and cubby bins filled with sorted yarn in a craft room.

    Mount dowels on the wall for yarn cakes you are using now, and store the rest of your stash in cubby bins sorted by weight and fiber. Dowels keep working yarn untangled and visible, while cubbies guard the larger stash from dust and light. Sort cubby bins by yarn weight, such as fingering, worsted, and bulky, and label each bin with the weight and the main colors inside.

    Keep a small basket beside your chair for the yarn in use, with a hole or clip to feed the strand without tangling. Wind new skeins into cakes before they join the wall, since loose skeins snag on hooks. If moths are a concern in your area, store wool in closed bins with cedar blocks and check the stash when the seasons change.

    13. Small Drawer Unit for Beads and Buttons

    Small multi drawer unit with labeled drawers holding beads, buttons, and jewelry findings.

    Use a small multi drawer unit, the kind with many shallow drawers, for beads, buttons, eyelets, and jewelry findings. Shallow drawers suit tiny items better than deep bins, and a drawer you can pull out and carry to the table beats a fixed shelf. Label each drawer with the item and size, such as seed beads size 11 or shirt buttons white.

    Sort beads by material and size before sorting by color, since a search usually starts with the bead type a pattern calls for. Keep a bead mat on the table when working, so dropped beads do not roll onto the floor. Store sharp findings, such as pins and needles, in a drawer with a lid or a magnetic strip inside, away from drawers children can reach.

    14. Flat File Drawers for Scrapbook Paper and Prints

    Wide shallow drawers holding flat scrapbook paper and prints in a craft room.

    Store large paper, prints, and finished scrapbook pages flat in wide, shallow drawers, rather than rolled or stacked on a shelf. Flat storage stops paper from curling and guards finished pages from bending. Use dividers inside each drawer to separate collections, and label the drawer front with the collection or paper size it holds.

    If a full flat file is too large for the room, use a shallow under bed box or a portfolio case on a shelf, and keep only current pages in it. Handle large sheets by the edges and keep them away from damp walls. For prints you plan to frame, add a sheet of plain paper between each print to guard against marks.

    15. Dedicated Cutting Zone with Mat and Rotary Cutter

    Cutting zone with a large green cutting mat, rotary cutter, clear ruler, and fabric on a table.

    Give cutting its own zone with a self healing mat, a rotary cutter, a clear ruler, and good light, kept clear of other supplies. A fixed cutting zone means fabric or paper can stay on the mat between sessions, and the ruler and cutter stay in the same place each time. Choose a mat size that fits your largest common cut, and store the cutter with its blade guard on.

    Replace a worn mat when cuts stop closing cleanly, since a grooved mat drags the blade and dulls it faster. Keep the cutting zone away from the sewing machine pedal area, so fabric does not bunch underfoot. Add a small waste bin beside the mat for trimmings, and empty it at the end of each session.

    16. Thread Spool Wall Rack in Color Order

    Wall thread rack with spools arranged in color order beside a sewing machine.

    Mount a thread rack on the wall near the sewing machine, with spools arranged in color order from light to dark. A wall rack keeps thread visible and stops spools from rolling off the desk, and color order makes matching thread to fabric a quick visual job. Choose a rack with pegs sized for your spool type, and leave a few empty pegs for new colors.

    Keep specialty threads, such as metallic and heavy topstitching thread, on a separate small rack or in a box, since those spools need different tension settings and are easy to mix up. Dust the rack now and then, since thread left on an open rack gathers lint. If the room gets strong sun, place the rack on a wall out of direct light, so thread colors stay true.

    17. Inspiration Board for Works in Progress

    Cork inspiration board pinned with fabric swatches, color palettes, and pattern pages above a desk.

    Pin a cork board, a magnetic board, or a length of wire with clips on the wall near your desk for fabric swatches, color palettes, pattern pages, and photos of finished work. An inspiration board keeps the plan for a project visible while you work, so you do not have to reopen pattern books or sample cards each time. Change the board when a project ends, and keep only the current project on it.

    Add a small section of the board for notes, such as measurements, due dates, and gift lists, written on cards that can move as plans change. Keep the board at eye level from your chair, not behind you, so a glance is enough. If wall space is short, use the inside of a cupboard door for the same purpose.

    18. Layered Task Lighting Over Every Work Zone

    Craft desk lit by a bright daylight lamp with under shelf light strips over nearby storage.

    Light each work zone separately, with a bright daylight lamp over the desk, under shelf strips over storage, and a floor lamp beside a reading or hand sewing chair. Good light matters most for matching thread colors, reading small print on patterns, and seeing true fabric colors. Place the main lamp on the opposite side from your writing hand, so your hand does not cast a shadow on the work.

    Choose bulbs with a daylight color temperature for the desk lamp, and keep a spare bulb in the room. Add dimmer or lower light for evening sessions if bright light strains your eyes. Clean lamp shades and strip covers now and then, since dust dims light more than most people notice.

    19. Comfortable Chair and Standing Height Option

    Comfortable adjustable chair at a craft desk beside a standing height cutting table.

    Choose a chair with adjustable height and back support for long sessions at the desk, and add a standing height table or a raised mat section for cutting. Sitting for hours strains the back and neck, and a standing option for cutting or pressing breaks up a long session. Set the chair so your feet rest flat and your elbows sit near table height.

    Add a small footrest if the chair height leaves feet dangling, and place a cushioned mat under the standing section. Keep the chair wheels clear of cords and rug edges, so the chair rolls smoothly between the desk and storage. If the room doubles as a guest room, choose a chair that folds or stacks, and store it in a closet between craft sessions.

    20. Kids Craft Corner with Washable Surfaces

    Low kids craft table with washable mat, open bins of supplies, and colorful artwork drying on clips.

    Set aside one low table and a washable mat for children crafts, with supplies in open bins they can reach and return themselves. A kids corner keeps glitter, paint, and glue in one spot, and it lets children craft without taking over the main desk. Use washable markers, paints, and smocks, and keep scissors suited to the child age in a labeled cup.

    Sort kids supplies by activity, such as coloring, cutting and pasting, and building, and label bins with pictures as well as words for younger children. Add a drying line or a clip rail at child height for wet artwork. At the end of a session, have children return each bin to its marked spot, so the next session starts tidy.

    21. Gift Wrap Station in One Cupboard or Cart

    Gift wrap station with upright paper rolls, gift bags, tissue, and ribbon in a cupboard.

    Gather wrapping paper rolls, gift bags, tissue, tape, scissors, and ribbon in one cupboard, a tall bin, or a rolling cart, so wrapping a gift does not mean hunting through several rooms. Store paper rolls upright in a tall bin to stop them from unrolling and creasing, and keep flat sheets in a large portfolio or a drawer. Sort bags by size and tissue by color.

    Add a small flat surface at the top of the cupboard or beside the cart for wrapping, and keep a pen and gift tags in a cup on the same shelf. At the end of the gift season, sort leftover paper and bags back into the station and recycle torn or crumpled pieces. A fixed wrap station also suits a closet door, with rolls hung on hooks inside the door.

    22. Drying Rack for Painted and Glued Pieces

    Tiered drying rack holding painted and glued craft pieces in a bright craft room.

    Set up a folding drying rack, a tiered shelf, or a line with clips for painted, glued, and sealed pieces, so wet work does not sit on the desk and block the next step. A rack with several levels holds more pieces in less floor space, and it keeps wet surfaces from touching each other. Place the rack near airflow but away from direct dust and pets.

    Label a small card on each level with the project name and the date, if several projects dry at once. For small items, such as ornaments and cards, use a mesh rack or a tray lined with wax paper. Clean the rack after each use, since dried glue and paint build up and mark the next batch.

    23. Label System for Every Bin, Drawer, and Shelf

    Craft room shelves with matching printed labels on every bin, drawer, and shelf.

    Pick one label style for the whole room, such as printed labels in one font or handwritten labels in one color, and use it on every bin, drawer, and shelf. A single style makes the room easier to scan, and it stops the label system itself from looking cluttered. Include both the item and a hint, such as “Ribbon, satin, red to pink” rather than just “Ribbon.”

    Make labels easy to change, with removable label holders or tape, since craft interests change and a permanent label soon lies. Keep a label maker or a pen and blank labels in the desk drawer, so a new bin gets labeled the day it is filled. Walk the room once a season and fix labels that have faded or no longer match the contents.

    24. Project Totes for Works in Progress

    Labeled project totes stored upright like books on a craft room shelf.

    Pack each unfinished project into its own tote or zip bag, with its pattern, fabric or paper, thread, and tools together. A tote per project stops pieces from mixing, and it makes it easy to pick up a project after weeks away, since everything for that job sits in one bag. Label the tote with the project name and the next step, such as “Hem skirt” or “Glue frame.”

    Store totes upright on a shelf like books, so you can pull one without moving a stack. Keep a short list on the shelf edge showing which totes are active, and move finished totes to a storage box. If a project stalls for months, open the tote, note what is missing, and decide whether to finish it, gift the supplies, or set it aside.

    25. Closet Turned into a Craft Nook

    Spare closet fitted with shelves, a small desk, and task lighting as a craft nook.

    Remove the doors from a spare closet and fit it with shelves, a small desk, and task lighting to make a craft nook that closes away when guests arrive. A closet nook suits a small home, since it uses space that already exists and keeps supplies behind a curtain or doors when not in use. Measure the closet depth first, since a desk deeper than the closet will block the doors from closing.

    Fit the nook with a pegboard on the back wall, shallow shelves for bins, and a power strip for the machine and lamp, keeping cords tidy with clips. Add a folding chair that hangs on the wall beside the nook, so the room still works as a bedroom or office. Keep the nook to one craft type at a time, since a closet fills fast and a crowded nook is hard to use.

    Conclusion

    A craft room does not need to be large or costly to work well. Start with a clear desk, wall storage for tools, labeled bins for supplies, and one zone for each craft you do most. Add light where you work, a comfortable chair, and a system for projects in progress, and the room will stay usable between sessions, not just on setup day.

    Work through these ideas one zone at a time, starting with the craft you do most often. For more hands on projects, see DIY fall home decor ideas, and for the whole house, browse Dwell Ovell home decor ideas. Keep what you use often within reach, store the rest in labeled bins, and let the room return to a tidy base when each project ends.

    FAQs

    How do I set up a craft room in a small space?

    Start with wall storage, a fold down table, and a rolling cart, so the work surface folds away and supplies stay on the walls and in one cart. Use a closet nook or one corner of a spare room, and keep only the craft you do most in that space, storing the rest elsewhere. Measure the room before buying bins, and choose shallow shelves and a folding chair to save floor space.

    What is the best way to organize craft supplies?

    Sort supplies by craft type first, then by color or size inside each group, and store small items in clear or labeled containers. Put daily items at arm height, seasonal items higher up, and heavy items low. Label every bin on the front and the top, and keep a list inside the cupboard door showing which bin holds what, so anyone in the house can find and return items.

    How do I keep a craft room tidy between projects?

    Give every supply a fixed home and return items to it at the end of each session, rather than leaving them on the desk for next time. Pack unfinished projects into labeled totes, keep a scrap bin at the desk and empty it when it fills, and run a short reset once a week to return stray items. A room stays tidy when tidying takes minutes, not a full afternoon.

    What lighting works best for a craft room?

    Use layered lighting, with a bright daylight lamp over the main desk, under shelf strips over storage, and a floor lamp beside a hand sewing chair. Place the desk lamp on the opposite side from your writing hand to avoid shadows, and choose daylight bulbs for true fabric and thread colors. Add lower light for evening work if bright light strains your eyes.

    How much does it cost to set up a craft room?

    Costs vary widely, since a basic setup can start with a table you own, a pegboard panel, clear jars, and labeled bins, while a full room adds shelving, a sewing desk, and task lighting. Start with storage and light, use furniture you already have, and add pieces one zone at a time as your crafts grow. Avoid buying bins before measuring shelves, since wrong size bins waste money and space.

    Can a craft room share space with a home office or guest room?

    Yes, a craft room can share space with an office or guest room if crafts stay in closed storage and the desk clears between uses. Use a rolling cart for the current project, a closet nook for supplies, and a fold down table that frees the floor when guests arrive. Keep the room to one active craft at a time, and agree on a reset routine so the desk returns to office or guest use after each session.


  • 19 Farmhouse Kitchen Island Ideas with Practical Rustic Charm

    19 Farmhouse Kitchen Island Ideas with Practical Rustic Charm

    A farmhouse kitchen island works best when it pairs a hard working top with a simple rustic base and one clear job, such as seating, storage, or prep space. Butcher block, reclaimed wood, beadboard, and shiplap give the rustic look, while drawers, open shelves, and a seating overhang keep the island practical for daily cooking and family meals.

    Start by measuring the walkways around the island, since a farmhouse island needs room to work on every side. Leave enough space to open drawers and the dishwasher, and to pull out a stool without blocking the path to the stove. Then pick the top for how you cook, the base for the look you want, and one storage feature that solves a real problem in your kitchen, such as a place for baking trays or a bin that hides trash. If the island sits near the stove wall, see kitchen range hood ideas for a hood style that suits the same rustic scheme, and for storage ideas that pair with an island, see corner kitchen cabinet ideas.

    Key Takeaways

    • Give the island one clear job first: prep space, seating, storage, or a sink run, then build the rest around it.
    • Pick the top for how you cook: butcher block and reclaimed wood suit heavy prep, while a painted base suits a softer look.
    • Keep walkways clear on every working side, with room for drawers, the dishwasher door, and pulled out stools.
    • Use beadboard, shiplap, turned legs, or a trestle base to carry the farmhouse look, and keep the rest of the room plain enough to let the island lead.
    • Put everyday items at hand height: dishes on open shelves, trays in vertical slots, and bins on a pull out.
    • In a small kitchen, choose a narrow or rolling island that adds counter space without blocking the path between stove, sink, and fridge.

    1. Butcher Block Top on a Painted Base

    Farmhouse kitchen island with a thick butcher block top and a white painted shaker base, wood stools nearby.

    Pair a thick butcher block top with a painted base in white, cream, or soft grey for the most classic farmhouse island in this list. The wood top gives a warm, hard working prep surface that suits chopping, rolling dough, and serving, while the painted base keeps the island light in a room with wood floors or wood beams. Keep the base simple, with shaker style doors and plain cup pulls, so the wood grain stays the focus.

    Oil the top regularly if you use it for direct cutting, and wipe up water near the sink end at once, since standing water marks wood. A butcher block top also pairs well with a window over the sink nearby, and for window treatments that suit the same relaxed kitchen, see kitchen window decor ideas. If the top gets heavy knife marks, sand and re-oil one section at a time rather than replacing the whole top.

    2. Reclaimed Barn Wood Top

    Farmhouse kitchen island with a reclaimed barn wood top showing grain and knots, plain painted base, wood floor.

    Use a reclaimed barn wood top for an island with visible grain, knots, and a weathered tone that new wood cannot copy. Each board carries a slightly different color, so the top reads as collected over time, which suits a farmhouse kitchen with exposed beams, a wood floor, and simple white walls. Keep the base plain and painted, since a busy base beside a busy top will fight for attention.

    Check that the top is sealed with a food safe finish, and ask how the boards were cleaned and joined before you buy, since reclaimed wood varies. Keep hot pans on trivets, since a reclaimed top can scorch just like any wood top. This top suits a large island best, where the full length of the boards can show, and it pairs well with matte black hardware and a simple linen runner down the center.

    3. White Beadboard Panel Island

    White farmhouse kitchen island clad in vertical beadboard panels, light kitchen with white cabinets.

    Clad the island base in white beadboard panels for a cottage farmhouse look with vertical lines and soft shadow gaps. Beadboard suits a kitchen with white cabinets and a light floor, since the panel lines add texture without a new color. Use it on the seating side and the ends, where guests see it most, and keep the working side plain for easy cleaning.

    Paint the beadboard the same white as the cabinets so the island reads as part of the same run, or use a slightly warmer white for a hand painted feel. Wipe the grooves near the floor often, since crumbs and dust collect in the vertical lines. Beadboard also hides small dents better than a flat panel, which helps on an island that takes daily bumps from stools and feet.

    4. Shiplap Sided Island

    Farmhouse kitchen island with horizontal shiplap boards on the base, painted cream, open plan kitchen.

    Run horizontal shiplap boards around the island base for a relaxed farmhouse texture that matches shiplap walls or a shiplap range hood surround. The horizontal lines stretch the island visually, which helps a long island read as one calm block rather than a row of cabinet doors. Paint the boards white or cream for a light look, or leave them in a pale washed wood for more warmth.

    Keep the board gaps even and the corners neat, since uneven shiplap shows at the island ends. Seal the paint near the floor, where mops and shoes splash, and use a washable finish on the seating side. Shiplap suits an island in an open plan room, where the back of the island faces the living space and needs to look finished from every angle.

    5. Furniture Style Island with Turned Legs

    Furniture style farmhouse kitchen island with turned legs and a lower shelf holding baskets.

    Choose a furniture style island with turned legs and a lower shelf for a piece that looks like a farmhouse table rather than a row of cabinets. The open space under the top keeps the island light on the floor, which suits a smaller kitchen or a room where a solid base would feel heavy. Turned legs also suit a kitchen with a farmhouse table nearby, since the two pieces can share the same leg shape.

    Use the lower shelf for baskets, large bowls, or cookbooks, and keep the top clear for prep. Because a legged island has less closed storage, pair it with wall cabinets or a pantry for items that need hiding. Check that the legs sit level on your floor, and add felt pads if the island moves when you lean on it during prep.

    6. Island with an Apron Front Sink

    Farmhouse kitchen island with a white apron front sink, simple faucet, clear counters each side.

    Build an apron front sink into the island for a farmhouse kitchen where the island faces the room and the sink becomes part of the view. The wide front panel reads as a classic farmhouse detail, and standing at the island sink lets the cook face family or guests instead of a wall. Keep the counter on each side of the sink clear for a drying rack on one side and prep space on the other.

    Plan the plumbing before you order, since an island sink needs a vent route through the floor, and check the cabinet depth so the apron front sits flush with the base. Keep the faucet simple, in brushed nickel or matte black, so it does not compete with the apron front. This island suits a large kitchen best, where the sink run does not crowd out the prep counter.

    7. Breakfast Bar Island with Stool Seating

    Farmhouse kitchen island with a seating overhang and wood stools, family eating breakfast.

    Add a seating overhang on one side of the island so it doubles as a breakfast bar with room for two or three stools. A 12 inch overhang gives knees room without a support leg in most cases, but check the counter material, since a heavy stone top may need brackets. Wood or woven stools with a low back suit the farmhouse look and tuck under the overhang when not in use.

    Keep the seating side free of drawers and bins, so legs and feet have clear space, and put the working storage on the kitchen side. A breakfast bar island suits families who eat quick meals in the kitchen, and it keeps the cook in conversation while food is prepared. Wipe the overhang edge often, since it collects crumbs from every meal.

    8. Rolling Island on Casters

    Small rolling farmhouse kitchen island on lockable casters with a butcher block top.

    Choose a rolling island on lockable casters for a kitchen where the layout needs to change, such as a room that hosts large gatherings or a rental where a fixed island is not an option. Roll it against a wall for extra counter space during prep, then pull it out as a serving station when guests arrive. Lock the casters before chopping, so the island stays put under pressure.

    Pick casters rated for the loaded weight, and check that the island clears the fridge and oven doors when it moves. A rolling island suits a small kitchen well, since it can live in a corner when not needed. Keep the top in butcher block or a light wood, so the island stays easy to move, and store only lighter items inside.

    9. Two Tier Island for Prep and Seating

    Two tier farmhouse kitchen island with a lower prep counter and a raised bar top, tall stools.

    Build a two tier island with a lower prep counter on the kitchen side and a raised bar top on the seating side for a clear split between work and eating. The raised tier hides prep mess from guests seated on the other side, and it gives the seating side a bar height that suits taller stools. Keep the two tops in matching materials, such as butcher block below and the same wood above, so the split reads as planned.

    Check the total height against your stools, since a raised bar needs a taller seat than a standard counter. The lower tier should stay at normal counter height for comfortable chopping. This island suits an open plan kitchen, where the raised side faces the living room and acts as a visual screen between cooking and relaxing.

    10. Island with Open Shelving for Daily Dishes

    Farmhouse kitchen island with open shelving holding stacked white plates and bowls.

    Fit open shelves into one end or one side of the island for the dishes, bowls, and glasses you use every day. Open shelving keeps the most used items within one step of the dishwasher and the table, and it gives the island a relaxed, lived in feel that closed cabinets cannot. Keep one type of item per shelf, such as stacked white plates on one shelf and bowls on the next, so the display stays calm.

    Dust reaches open shelves faster than closed cabinets, so store only items you wash often here, and keep rarely used serving pieces behind doors. Line the shelf base with a washable mat if you stack wet dishes. Open shelving suits a farmhouse kitchen with plain white dishes, since a mixed collection can look cluttered at island height.

    11. Island with a Built In Wine Rack

    Farmhouse kitchen island end with a built in wine rack grid holding bottles on their sides.

    Slot a built in wine rack into the end of the island for bottles stored on their sides, with a small grid of cubbies that adds detail to plain cabinet doors nearby. Keep the rack away from the oven side of the island, since heat is unkind to wine, and choose a spot that stays cool and out of direct sun. If wine is not your drink, the same cubbies hold rolled linens, water bottles, or cookbooks stood upright.

    Size the cubbies to your bottles before ordering, since wide bottles need wider slots, and keep the rack low enough that bottles slide out without hitting the counter edge. A wine rack end suits an island that faces a dining area, where the grid reads as a display feature. Label the rack rows if you store both red and white, so guests can find a bottle without pulling out the whole row.

    12. Distressed Weathered Finish Island

    Farmhouse kitchen island with a lightly distressed weathered painted base, butcher block top.

    Paint the island base, then distress the edges lightly, for a weathered farmhouse finish that looks worn in the right places, such as corners and raised panels. A distressed base suits a kitchen with other aged pieces, like a worn wood table or vintage stools, and it hides small knocks better than a perfect painted finish. Keep the distressing light and even, so the island reads as aged rather than damaged.

    Seal the finish with a clear topcoat, especially near the floor and the seating side, where shoes and stools rub. Pair a distressed base with a plain top, such as butcher block or a simple stone, so the island has one strong texture, not two. This finish suits a relaxed family kitchen, where a perfect surface would feel too formal for daily use.

    13. Island with Pull Out Trash and Recycling Bins

    Farmhouse kitchen island with a pull out trash and recycling bin drawer open near the prep side.

    Fit pull out trash and recycling bins into the island, near the prep side, so scraps go straight from the chopping board into the bin without a trip across the kitchen. A double bin unit keeps trash and recycling side by side, and a lid on each bin holds smells down. Measure the cabinet width and the bin height before ordering, since tall bins need a full height cabinet.

    Line the cabinet floor, since leaks and crumbs reach the base, and wipe the bin fronts with the cabinet fronts during cleaning. This island feature suits cooks who prep a lot of fresh food, and it keeps the kitchen floor clear of a freestanding trash can. Put the bins on the side nearest the sink or the prep zone, not the seating side, so guests never sit beside an open bin.

    14. Island with a Microwave Drawer and Appliance Storage

    Farmhouse kitchen island with a microwave drawer below the counter and matched cabinet fronts.

    Place a microwave drawer in the island, below counter height, to free the main counter and keep the microwave out of sight while staying easy to reach. A drawer style microwave suits an island better than a countertop model, since it keeps the work surface clear and the controls at a comfortable height for adults. Add a drawer or cabinet beside it for small appliances, such as a blender or food processor, so the main counter stays free for prep.

    Follow the microwave maker’s clearance and ventilation guidance, and keep a landing spot on the counter above the drawer for hot dishes. This island suits a kitchen where the main counter is short, since moving the microwave off the counter gains a full stretch of prep space. Keep the drawer front matched to the island base, so the appliance reads as part of the cabinetry.

    15. Narrow Island for a Small Kitchen

    Narrow farmhouse kitchen island in a small kitchen, light base, clear walkways each side.

    Choose a narrow island, roughly 24 inches deep, for a small kitchen where a standard island would block the walkways. A slim island still adds prep space, a place for stools on one side, and storage below, while leaving clear paths to the stove, sink, and fridge. Keep the storage shallow, with one row of drawers or a single shelf, so nothing gets lost at the back.

    Use a light base color and a plain top, since a dark or busy island will crowd a small room. A narrow island also suits a galley kitchen with a run on each wall, as long as the walkways on both sides stay wide enough to pass with the dishwasher open. Test the layout with painter’s tape on the floor before you buy, and walk the route with a stool pulled out.

    16. Sage Green Painted Island

    Farmhouse kitchen island painted sage green with a butcher block top, cream walls, wood floor.

    Paint the island base in sage green for a soft farmhouse accent that sits between the white cabinets and the wood tones in the room. Sage green suits a kitchen with cream walls, a wood floor, and brass or matte black hardware, and it gives the island a clear identity without a bold color. Repeat the sage once more, in a stool cushion, a blind, or a plant pot, so the color does not sit alone.

    Test a large painted sample beside the cabinets in daylight and evening light before committing, since green shifts a lot between the two. Use a durable cabinet paint and a washable finish, since the island base takes more bumps than wall cabinets. A sage island suits a kitchen that already has one other painted accent, such as a painted pantry door, and it pairs well with a butcher block top.

    17. Island with Bookshelf Ends

    Farmhouse kitchen island with bookshelf ends holding cookbooks and a small plant.

    Fit bookshelf ends into the island, with two or three open shelves at each end, for cookbooks, a small plant, and a few display pieces. Bookshelf ends turn the dead ends of an island into useful storage, and they suit a kitchen where cookbooks are used daily and deserve a home near the prep space. Keep the shelves shallow, so books sit flush with the island end and do not catch passing hips.

    Group cookbooks by size, with the tallest at the bottom, and leave one shelf partly clear for a plant or a bowl, so the end does not look packed. Dust the shelves during weekly cleaning, since open ends collect dust faster than closed cabinets. This island suits a family kitchen with a reading habit, and it gives the island a furniture feel from the living room side.

    18. Trestle Base Farmhouse Table Island

    Farmhouse kitchen island on a trestle base with end panels and a stretcher bar, thick wood top.

    Build the island on a trestle base, with two solid end panels joined by a stretcher bar, for a farmhouse table look with a long, open span underneath. The trestle base suits a large island in an open plan room, where the long side faces the living space and needs a strong, simple shape. Use the open span for baskets or a low bench that slides under when not in use.

    Check the floor for level, since a trestle base rocks on an uneven floor, and add felt pads under the feet. Because a trestle island has less closed storage than a cabinet island, pair it with a pantry or wall cabinets for items that need hiding. Keep the top thick and plain, in butcher block or reclaimed wood, so the base shape stays the main feature.

    19. Island with a Pull Out Cutting Board

    Farmhouse kitchen island with a pull out wooden cutting board extended below the counter.

    Fit a pull out cutting board into the island, just below the counter, for extra prep space that slides away when not in use. A pull out board suits a kitchen where the main counter is short, since it adds a full chopping surface without a permanent extension. Choose a board in a hard wood that can be removed for cleaning, and keep it near the sink side of the island for easy rinsing.

    Oil the board regularly, and replace it when deep cuts hold stains, since a pull out board is cheaper to swap than a fixed top. Keep the slot clear of crumbs by wiping the runners during cleaning, so the board slides smoothly. This island suits cooks who prep at the island while facing the room, and it pairs well with a knife drawer fitted beside the slot.

    Conclusion

    A farmhouse kitchen island works when the top, base, and storage suit the way you actually cook and gather. Pick one clear job for the island, match the top to your prep habits, and choose a base style, such as beadboard, shiplap, or a trestle frame, that fits the room you already have. Measure the walkways first, then add one storage feature that solves a daily problem, such as pull out bins or open shelving for everyday dishes. Start with the island shape that fits your floor plan, and let the rustic details follow the practical choices, not the other way around.

    Save this list on Pinterest for your next kitchen update, and work through it by room size: a narrow or rolling island for a small kitchen, a seating island for family meals, and a sink or two tier island for a large open plan space.

    FAQs

    What is the best farmhouse kitchen island top?

    A butcher block top is the best all round choice for a farmhouse kitchen island, since it suits heavy prep, looks warm beside painted cabinets, and can be sanded and re-oiled when it marks. Reclaimed wood suits a more rustic room, while a stone top suits a cook who wants a heat proof surface. Pick the top for how you cook, not only for looks, and seal wood tops against water near the sink end.

    How much space do I need around a farmhouse kitchen island?

    You need clear walkways on every working side of the island, with room to open drawers and the dishwasher and to pull out a stool without blocking the path. As a general guide, keep at least 36 inches of clear floor between the island and the nearest counter or wall, and more on the side where two people pass or the dishwasher opens. Measure with painter’s tape on the floor before you order, and walk the route with stools pulled out.

    Can I put a sink in a farmhouse kitchen island?

    Yes, you can put a sink in a farmhouse kitchen island, and an apron front sink suits the style well. Plan the plumbing early, since an island sink needs a drain and vent route through the floor, and check that the cabinet depth lets the apron front sit flush with the base. Keep counter space on both sides of the sink for prep and drying, and choose a simple faucet that does not compete with the apron front.

    What color should I paint a farmhouse kitchen island?

    White, cream, and soft grey suit most farmhouse kitchens, since they keep the island light beside wood floors and beams. Sage green is a good accent color when the rest of the kitchen stays plain, and a distressed or weathered finish suits a relaxed family room. Test a large sample beside your cabinets in daylight and evening light, and repeat the island color once more in the room, such as in a stool cushion or a blind, so it looks planned.

    Is a rolling kitchen island practical?

    A rolling island is practical when the kitchen layout needs to change or a fixed island would block a walkway. Choose lockable casters rated for the loaded weight, lock them before chopping, and check that the island clears fridge and oven doors when it moves. Keep the top light, such as butcher block, and store lighter items inside, since a heavy rolling island is hard to move and can mark the floor.

    How do I add seating to a farmhouse kitchen island?

    Add seating with a counter overhang on one side of the island, keeping the seating side free of drawers and bins so knees and feet have clear space. A standard counter height suits most stools, while a raised bar tier needs taller stools, so match the seat height to the counter height. Leave room for each stool, and choose wood or woven stools with a low back that tuck under the overhang when not in use.


  • 21 Guest Bedroom Ideas for a Comfortable and Welcoming Stay

    21 Guest Bedroom Ideas for a Comfortable and Welcoming Stay

    A comfortable guest bedroom needs a supportive bed with layered bedding, two pillow choices, clear bedside space, soft light, and room for luggage. Add fresh towels, water, charging space, and an extra blanket, and keep the room calm and uncluttered. The 21 ideas below cover bedding, storage, light, and small touches that help guests settle in fast.

    Start with the bed, since sleep matters most, then work outward to the bedside, the closet, and the door. Guests should be able to find a towel, charge a phone, hang a coat, and read in bed without asking for help. Keep surfaces clear enough for a book, a glass of water, and a phone, and keep one drawer or shelf empty for personal items. Small, useful choices beat a crowded room every time.

    Key Takeaways

    • Put sleep first: layered bedding, two pillow choices, and curtains that block morning light.
    • Leave clear space at the bedside, in a drawer, and in the closet, so guests can unpack and settle in.
    • Cover the basics before adding decor: fresh towels, water, charging space, and an extra blanket.
    • Use soft, warm light at the bedside and a brighter option for dressing and packing.
    • Keep the room calm and uncluttered, with one or two simple decor pieces rather than a crowded display.
    • Add one welcoming touch, such as a short welcome card, fresh flowers, or a tea tray.

    1. Layered Neutral Bedding for Easy Sleep

    Guest bed made with white sheets, a cream duvet, and a folded beige throw at the foot in a calm bedroom.

    Make the bed with clean sheets, a light duvet or coverlet, and a folded throw at the foot, all in calm neutral tones such as white, cream, or soft gray. Layers let guests adjust their warmth through the night without hunting for extra bedding, and a neutral base suits most tastes and seasons. Smooth the top layer, fluff the pillows, and leave the throw where it is easy to reach.

    Wash bedding before guests arrive and air the room, so the bed smells fresh rather than stored. If the room runs cool, add a second light blanket in the basket by the bed rather than a heavy cover on top, so guests can choose. Keep patterned pieces to one or two accents, so the bed looks restful rather than busy.

    2. Two Pillow Choices at Each Side

    Guest bed with a soft pillow and a firmer pillow stacked on each side in white pillowcases.

    Offer a soft pillow and a firmer pillow on each side of the bed, or stack one of each where space is tight, so guests can pick the support they like. Pillow comfort is personal, and a single flat or overly firm pillow can spoil an otherwise good room. Use pillow protectors under clean cases, and fluff both pillows before arrival.

    Store a spare pillow in the closet, clearly visible, for guests who like extra height for reading. Replace pillows that have lost their shape or smell stale, since guests notice both on the first night. Label nothing; the choice itself is the welcome, and guests will simply use the pillow that suits them.

    3. Bedside Lamps on Both Sides

    Two bedside tables with matching warm lamps glowing beside a made guest bed in the evening.

    Place a lamp on each bedside table, with a warm bulb and a switch guests can reach without getting up, so both sleepers can read or wind down. Matching lamps give the room a settled look, while mismatched lamps can still work if the light color and height are close. Keep the shade low enough that light falls on a book, not into tired eyes.

    Add a simple overhead option for dressing, but keep bedside light as the main evening source. Check that bulbs work and that cords sit behind the table, not across the floor. If a lamp wobbles, swap it before guests arrive, since a bedside lamp gets touched every night.

    4. Clear Nightstand and a Charging Spot

    Clear bedside table with a lamp, a glass of water, a small tray, and a phone charging cable.

    Clear each nightstand to a lamp, a glass of water, and a small tray, then add one easy charging spot with a cable guests can use for a phone. Guests need a place for glasses, a book, and a phone, and a crowded nightstand forces those items onto the floor. A small tray keeps keys and a watch together and protects the table surface.

    Use a short cable and a spare charger if you have one, and keep the outlet free of other plugs. Wipe the table and empty any drawers of old papers or cables before arrival, so the space feels ready rather than borrowed. A clear surface is a small detail that guests use from the first evening.

    5. Luggage Rack or a Bench at the Foot of the Bed

    Folding luggage rack with an open suitcase at the foot of a made guest bed.

    Set a folding luggage rack or a low bench at the foot of the bed, so guests can open a suitcase at waist height instead of on the floor or the bed. A rack keeps clothes accessible and keeps the bed free for sleep, which matters most in a small room. Choose a sturdy rack that folds flat for storage between visits.

    If a bench fits better, pick one with a flat top and no sharp corners, and leave the top clear. Place it where it does not block the path to the door or the closet. Guests who stay for several nights will use it daily, and it also gives a place to sit while putting on shoes.

    6. Empty Closet Space and Spare Hangers

    Open closet with an empty section of rod, spare hangers, and a clear shelf in a guest bedroom.

    Clear at least half a closet rod and one shelf, and add a dozen matching hangers, so guests can hang clothes rather than living out of a suitcase. An empty section signals that the room is ready for them, while a full closet tells guests to keep their bags closed. Remove out of season coats and storage boxes from that section before arrival.

    Add a small hook inside the closet door for a robe or a bag, and check that the rod holds weight without sagging. If the room has no closet, a simple garment rail in a corner does the same job. Leave the hangers visible and easy to reach, not buried behind stored items.

    7. Fresh Towels and a Toiletries Tray

    Folded white towels on a guest bed with a small tray of soap, shampoo, and lotion beside them.

    Fold two large towels, a hand towel, and a washcloth per guest on the bed or on a chair, and set a small tray with soap, shampoo, and lotion nearby. Guests should not need to ask for a towel after a long trip, and a tray keeps small bottles together and off the bathroom counter. Use towels that are soft, clean, and free of stains.

    Add a spare towel in the bathroom in case one gets damp, and check that the tray holds items without tipping. Keep scents light and simple, since strong fragrance can bother guests. If guests share a bathroom, place the tray in the bedroom so each guest knows which items are theirs.

    8. Bedside Water Carafe and Glasses

    Small glass water carafe and two clean glasses on a bedside table beside a guest bed.

    Set a small carafe of fresh water and two clean glasses on the bedside table or a nearby dresser, so guests can drink at night without walking to the kitchen. A carafe is easier than a single bottle, and it looks considered rather than improvised. Fill it on arrival day and wash it between visits.

    Choose a carafe with a lid or a stopper to keep dust out, and keep glasses upright and spot free. If the room is far from the kitchen, add a second glass for a partner. Empty and refill the carafe daily for longer stays, and wipe any drips from the tray beneath it.

    9. Reading Chair and a Small Side Table

    Comfortable armchair with a small side table and a lamp in a bright corner of a guest bedroom.

    Add a comfortable chair with a small side table and a lamp nearby, so guests have a place to read, lace shoes, or sit for a quiet moment away from the bed. A chair makes a guest room feel like a room to live in, not only a place to sleep. Pick a chair with arms if space allows, since arms help guests stand up easily.

    Place the chair near a window or a lamp, with room to pull it out and sit down without moving other furniture. Keep a book or two on the side table, and leave the table surface clear enough for a cup. In a small room, a compact armchair works better than a large lounge chair that blocks the path.

    10. Soft Rug Beside the Bed

    Soft cream rug beside a made guest bed with slippers placed on the rug.

    Lay a soft rug on each side of the bed, or one wide rug that extends past both sides, so guests step onto something warm on cold mornings. Bare floors can feel cold and stark at night, and a rug also softens sound in the room. Choose a low pile rug that a suitcase can roll over without catching.

    Vacuum the rug before arrival and check that it lies flat, with no curled corners to trip on. Use a rug pad if the rug slides on a hard floor. In a small room, a runner on the main side of the bed gives most of the benefit without covering the whole floor.

    11. Sheer and Blackout Curtains Together

    Guest bedroom window with sheer white curtains and heavier blackout curtains drawn partly closed.

    Hang sheer curtains for daytime privacy with blackout curtains or a blackout liner behind them, so guests can choose daylight or dark sleep. Sheers soften a bare window and let guests dress in private, while blackout fabric helps with early sun and street light. Mount the rod wide enough that curtains stack clear of the glass when open.

    Test the blackout layer at night and in bright morning light, and check that curtains close fully without gaps at the edges. Keep cords and pulls tidy and out of the path. If the room has no curtains, a simple roller blind with a sheer layer gives the same choice in less space.

    12. Welcome Card with House Notes

    Small welcome card on a bedside table beside a lamp and a glass of water in a guest bedroom.

    Leave a short handwritten or printed card on the bed or nightstand with a warm welcome, the Wi-Fi name and password if you share it, bathroom details, and breakfast time or plans. A card answers the questions guests are least comfortable asking, and it saves repeated trips to ask about towels or morning plans. Keep it to a few lines and a friendly tone.

    Include only details guests need: where to find towels, how to work the shower if it is unusual, and when you plan to eat. Avoid long house rules on the card; save those for a conversation if needed. Replace the card for each visit, and check that any password or time listed is still correct.

    13. Basket of Extra Blankets

    Woven basket with folded extra blankets and a throw beside a guest bed.

    Place a basket with one extra blanket and one light throw near the bed or in the closet, so guests can add warmth without searching the house at night. People sleep at different temperatures, and a basket solves that difference without changing the whole bed. Fold blankets neatly so the basket looks inviting, not like storage.

    Wash the blankets between visits and air them before guests arrive. Choose washable fabrics in neutral tones that match the bedding, and keep the basket where guests can see it on arrival. Mention the basket in the welcome card, so guests know it is theirs to use.

    14. Fresh Flowers or a Potted Plant

    Small vase of fresh flowers on a guest bedroom dresser beside a potted green plant.

    Set a small vase of fresh flowers or one healthy potted plant on the dresser or windowsill, so the room feels cared for from the moment guests walk in. Flowers add color and scent, while a potted plant suits longer stays and needs no daily care. Choose a low arrangement that does not block light or crowd the dresser.

    Water a plant before arrival and remove any dead leaves, and change flower water daily for longer stays. Skip strongly scented flowers if you are unsure about allergies, and keep arrangements away from bedding. A single stem in a small vase can be enough in a small room.

    15. Full-Length Mirror and Wall Hooks

    Full-length mirror leaning on a guest bedroom wall with coats hanging on nearby wall hooks.

    Hang a full-length mirror where guests can check an outfit, and add two or three wall hooks near the door or closet for coats, bags, and hats. A mirror helps guests dress with confidence, and hooks keep coats off the bed and chairs. Mount the mirror at a height that works for most adults, and secure it firmly to the wall.

    Space hooks so a coat and a bag can hang without overlapping, and check that they hold weight without pulling loose. In a small room, hooks on the back of the door save wall space. Keep the area below the hooks clear, so bags do not block the path to the door.

    16. Small Desk or Writing Corner

    Small desk with a chair, a lamp, and a notebook in a bright corner of a guest bedroom.

    Set a small desk or a wall shelf with a chair near a window or an outlet, so guests who work or write have a place to sit upright with a laptop or notebook. Many guests need to answer a message or plan the next day, and a bed is a poor desk. Keep the surface clear except for a lamp and a pen.

    Add a small bin nearby for paper, and check that the chair height suits the desk. In a small room, a narrow console or a fold down shelf can serve as a desk without taking over the room. Leave the outlet free, and keep cables tidy so the corner looks ready to use.

    17. Calm Art and Uncluttered Walls

    Guest bedroom wall with one calm landscape print in a simple wood frame above a clear dresser.

    Hang one or two calm pieces of art, such as a landscape print or a simple botanical print, and leave the rest of the walls clear, so the room feels restful rather than busy. Guests need visual rest after travel, and a crowded wall can make a small room feel smaller. Choose frames that match each other in color or material.

    Hang art at eye level and secure it well, and remove personal photos or clutter that make the room feel like someone else’s bedroom. If you keep a gallery wall, limit it to one wall and keep spacing even. A clear wall also gives guests a place to lean a bag or hang a garment without knocking a frame.

    18. Gentle Scent from Sachets and Clean Linen

    Open drawer with freshly folded linen and a small lavender sachet in a guest bedroom.

    Use clean, freshly washed linen and a lavender sachet in a drawer or closet for a gentle scent, rather than a strong plug in fragrance or an open flame. Scent is one of the first things guests notice, and a light, natural note feels welcoming without overwhelming the room. Air the room before arrival and wash pillowcases and sheets fresh.

    Place sachets where guests will find them, such as in a drawer or on a shelf, and skip scent entirely if you know a guest has allergies. Avoid open candles in a guest room, since guests may forget them. Clean linen, fresh air, and one sachet are enough for a room that smells cared for.

    19. Tea and Snack Tray on the Dresser

    Small tea tray with cups, tea bags, and biscuits on a guest bedroom dresser.

    Set a small tray on the dresser with a kettle or a few tea bags, a couple of cups, and a small snack such as biscuits or fruit, so guests can make a hot drink without going to the kitchen late at night. A tray makes a guest room feel like a small hotel room, and it helps early risers start the day quietly. Keep the tray tidy and the cups clean.

    Refill tea and snacks for each visit, and check dates on packaged snacks. If you offer a kettle, check that it works and that it sits on a stable surface away from bedding. For guests with food allergies, keep snacks simple and sealed, and note ingredients on the tray card if needed.

    20. Hamper for Longer Stays

    Small lidded hamper basket in the corner of a tidy guest bedroom near the closet.

    Place a small hamper or a lined basket in a corner or in the closet, so guests on longer stays have a place for worn clothes instead of piling them on a chair. A hamper keeps the room tidy through a multi night visit and makes packing easier at the end. Choose a basket with a lid or a liner that can be washed.

    Empty the hamper between visits and wipe the basket clean. Show guests where it is on arrival, either in the welcome card or in person, so they use it from the first night. In a small room, a slim hamper behind the door works without blocking the path.

    21. Temperature Choices: Light Cover, Warm Throw, Small Fan

    Guest bed with a light cover and a warm throw folded at the foot, with a small fan on a nearby shelf.

    Give guests control over temperature with a light cover on the bed, a warm throw in the basket, and a small quiet fan in the closet, so they can cool down or warm up without adjusting the whole house. Temperature is a common sleep problem for guests, and these three options cover most preferences. Check that the fan is clean, quiet, and easy to reach.

    Show guests where the fan and throw are stored, and check that bedding layers are easy to add or remove. If the room has its own thermostat or vent, note it on the welcome card. Small temperature choices help guests sleep well, even when the rest of the house runs warmer or cooler than they like.

    Conclusion

    A welcoming guest bedroom comes down to sleep, space, and small useful details. Layered bedding, two pillow choices, soft bedside light, and curtains that block morning sun cover sleep. Clear bedside space, an empty closet section, a luggage rack, and a hamper cover unpacking and longer stays. Fresh towels, water, charging space, and a welcome card cover the first evening without extra questions.

    Start with the bed and the basics, then add one or two personal touches, such as flowers or a tea tray, that suit your home. For seasonal bedroom ideas, see fall decor ideas, which includes a bedroom bedding swap and a bedside vase idea. Keep the room clean, calm, and easy to use, and guests will settle in quickly and sleep well.

    FAQs

    What should every guest bedroom have?

    Every guest bedroom should have a comfortable bed with clean layered bedding, two pillow choices, bedside light, fresh towels, water, charging space, and room for luggage. Start with those basics, then add an extra blanket, a mirror, and a place to hang clothes. A clear nightstand and an empty drawer or closet section help guests settle in without asking for help.

    How do I make a small guest bedroom feel welcoming?

    Use light bedding, a soft rug, and one clear focal point, such as a made bed with a folded throw, and keep surfaces clear. Add a luggage rack that folds away, wall hooks instead of bulky furniture, and layered curtains for privacy and dark sleep. A small chair, a welcome card, and fresh flowers add warmth without crowding the room.

    How many towels should I leave for each guest?

    Leave two large towels, one hand towel, and one washcloth per guest, plus one spare towel in the bathroom. Fold them where guests can see them, such as on the bed or a chair, and set toiletries on a small tray nearby. For stays longer than three nights, plan to swap towels midway through the visit.

    What bedding works best for guests with different sleep preferences?

    Layered bedding works best, since guests can add or remove layers through the night. Use clean sheets, a light duvet or coverlet, a folded throw at the foot, and a basket with one extra blanket nearby. Offer a soft pillow and a firmer pillow on each side, so guests can choose the support they like without asking.

    How do I prepare a guest bedroom the day before guests arrive?

    Wash bedding and towels, vacuum the rug, wipe surfaces, and air the room. Fill the water carafe, check bedside lamps and chargers, clear a drawer and closet section, and set out a welcome card with house notes. Add fresh flowers or a plant last, so the room looks and smells fresh when guests walk in.

    Should a guest bedroom have a TV or a desk?

    A desk suits guests who work or plan trips, while a TV suits guests who like to unwind in the evening, so choose based on your guests and your space. A small desk with a chair and an outlet is useful for most visits and takes less room than a TV setup. If you add a TV, keep the remote visible, note how it works on the welcome card, and keep volume low at night for the rest of the house.


  • Living Room vs. Family Room: Layout, Furniture, and Decorating Differences

    Living Room vs. Family Room: Layout, Furniture, and Decorating Differences

    A living room is usually the more formal front room for greeting guests and quiet conversation, while a family room is the casual everyday space for relaxing, watching television, and spending time together. Living rooms tend to sit near the entry with tidier furniture, and family rooms sit near the kitchen with softer, hardwearing seating built for daily use.

    The names get mixed up often, because many homes use one room for both jobs, and open floor plans blur the line further. The difference is less about the label on a floor plan and more about how the room is used, where it sits in the home, and how formal it feels. This guide compares the two room types side by side so you can name what you have, plan what you need, and decorate each room to fit its real job.

    Key Takeaways

    • A living room is typically the formal front room near the entry, used for guests, conversation, and quieter activities.
    • A family room is typically the casual everyday room near the kitchen, used for television, play, homework, and relaxed gathering.
    • Living room layouts often center on conversation and a fireplace or view, while family room layouts often center on a television and flexible seating.
    • Living room furniture tends to look tidier and more structured, while family room furniture tends to be softer, deeper, and easier to clean.
    • Homes with only one gathering room can blend both roles with zoned seating, layered lighting, and storage that hides everyday clutter.
    • Choose based on how your household actually lives, not on the room name printed on a floor plan.

    1. What a Living Room Is

    Tidy formal living room near a front entry with a tailored sofa and matching chairs.

    A living room is the room most homes place near the front door, and it is usually the first gathering space a guest sees. It is meant for conversation, reading, music, and receiving visitors, so it often looks more put together than the rest of the house. In older floor plans, the living room sits at the front of the home, separate from the kitchen and the bedrooms, with a clear doorway rather than an open connection to the cooking area.

    Because guests see it first, a living room often carries the home’s more polished pieces: a sofa with a tailored shape, matching chairs, a coffee table kept fairly clear, and decor chosen for looks as much as use. That does not mean the room must be off limits. Many households use the living room daily for reading or quiet evenings, but the room still keeps a tidier standard, with toys, work papers, and everyday clutter stored elsewhere.

    2. What a Family Room Is

    Casual family room near a kitchen with a deep sectional sofa and a television.

    A family room is the casual gathering room where a household spends most of its relaxed time together. It usually sits toward the back of the home, near or open to the kitchen, so meals, homework, television, and conversation can flow between rooms. In many floor plans it is also called a den, a great room, or a rec room, depending on the region and the size of the home.

    The family room is built for daily use rather than display. Seating is often deeper and softer, surfaces are chosen to stand up to snacks, pets, and board games, and storage is part of the design rather than an afterthought. A television is common here, along with game storage, blankets, and chargers, because the room is where the household actually unwinds at the end of the day.

    3. Living Room vs Family Room at a Glance

    Side by side comparison of a tidy formal seating area and a relaxed family seating area.

    This short comparison sums up the usual differences. Individual homes vary, and a room can borrow traits from both columns, but the pattern below is a useful starting point for planning.

    Feature Living Room Family Room
    Usual location Near the front entry Near or open to the kitchen
    Main purpose Guests, conversation, quiet activities Daily relaxing, television, play
    Formality More formal and polished Casual and relaxed
    Layout focus Conversation and a fireplace or view Television and flexible seating
    Furniture Structured, tailored, tidier Soft, deep, hardwearing
    Lighting Layered lamps and a central fixture Bright, flexible, screen friendly
    Storage Display pieces and closed cabinets Baskets, bins, and media storage
    Everyday clutter Kept out of sight Managed in the open with storage

    If your home has both rooms, use this table to check which job each room is actually doing. If the “formal” room holds the television and the toy bins, it may be acting as the family room whatever the floor plan calls it.

    4. How the Layout Differs

    Living room layout with chairs facing each other around a coffee table near a fireplace.

    Living room layouts usually center on conversation. Sofas and chairs face each other, or face a fireplace or a window view, with a coffee table between them and clear paths around the group. The television, if there is one, is often secondary or hidden, because the arrangement is designed so people face each other rather than a screen.

    Family room layouts usually center on the television and on flexible seating. A large sofa or sectional often faces the screen, with extra chairs or floor cushions that can move for movie nights or game nights. Because the room also connects to the kitchen, the layout needs open paths for carrying food and drinks, and seating that can turn toward the kitchen for conversation during meal prep.

    5. How the Furniture Differs

    Structured living room furniture with a tailored sofa and matching side tables.

    Living room furniture tends to have a structured shape and a tailored finish. Sofas often have upright backs, neat arms, and legs that show, and chairs are chosen to match or coordinate closely. Side tables, a console, and a bookshelf complete the room, and each piece has a fixed place that does not move often.

    Family room furniture tends to be larger, softer, and more forgiving. Sectionals, recliners, and deep lounge chairs are common, and ottomans often serve as extra seats, footrests, and coffee tables in one piece. Pieces move more often in a family room, pulled closer for a movie or pushed aside for a game, so lighter frames, washable covers, and sturdy joints matter more than a perfectly matched set.

    6. Seating Comfort and Everyday Use

    Deep soft family room sectional with plump cushions throws and pillows.

    In a living room, seating is chosen for a mix of comfort and appearance, and it often stays neat between uses. Cushions are firmer and hold their shape, upholstery may be a lighter color or a finer fabric, and throw pillows are arranged rather than piled. The room invites guests to sit and talk, but it is not usually where the household sprawls for hours.

    In a family room, seating is chosen for long, relaxed use first. Deep seats, soft cushions, and washable fabrics suit naps, reading, and movie nights, and blankets and extra pillows are part of the room rather than decoration. If your household has children or pets, this is the room where durable fabric, removable covers, and stain friendly colors pay off, because the seating gets used hard every day.

    7. Decorating Style and Formality

    Polished living room with a balanced color palette framed art and a clear coffee table.

    Living room decorating often leans more formal, with a clear color palette, matched frames, and decor arranged in balanced groups. Art, mirrors, and lamps are chosen to suit the room as a whole, and surfaces are kept fairly clear so the room looks calm and finished. Formal does not have to mean stiff, but the room usually has a sense of order that guests notice at once.

    Family room decorating is usually looser and more personal. Family photos, collections, game shelves, and children’s art can all belong here, and the palette often includes warmer, darker, or bolder colors that hide wear. The room should still look cared for, but the standard is comfort and personality over polish, and a little lived-in texture is part of the charm.

    8. Lighting in Each Room

    Living room at dusk lit by table lamps and a ceiling fixture.

    Living rooms often use layered lighting: a central ceiling fixture or chandelier for general light, table lamps beside seating for reading, and accent light for art or a fireplace. Dimmers help, because the same room may need bright light for a gathering and soft light for a quiet evening. Lamps with warm bulbs suit conversation, since the light falls at seated eye level rather than from above.

    Family rooms need flexible lighting that works with a screen. Overhead light should be bright enough for homework and games but easy to dim or switch off for television, and lamps near reading chairs keep one person from needing full room light. Avoid placing a bright light directly opposite the television, where glare lands on the screen, and keep a small lamp or strip light behind or beside the screen for evening viewing comfort.

    9. Storage and Organization

    Family room storage with baskets for blankets bins for games and a media unit.

    Living room storage is often built to look like furniture: closed cabinets, a console with doors, and bookshelves with a mix of books and display pieces. The goal is to keep everyday items out of sight so the room stays tidy for guests. A single basket for throws or magazines is usually enough, because bulkier household storage lives in other rooms.

    Family room storage has to work harder and hold more. Media units, baskets for blankets, bins for games and toys, and shelves for books and chargers all belong here, and open storage works well when bins are labeled and easy to reach. Plan one closed spot for clutter that needs to vanish fast, such as a cabinet or a large lidded basket, so the room can be tidied quickly before guests arrive.

    10. Traffic Flow and Where Each Room Sits

    Clear walkway from a front entry into a living room with seating set back.

    A living room near the entry handles a different kind of traffic from a family room near the kitchen. Guests arrive, remove coats, and sit down, so the living room needs a clear path from the door to the seating and a place for coats and bags that does not block the walkway. Paths should be wide enough for two people to pass, and furniture should not force visitors to squeeze behind a sofa.

    A family room handles daily household traffic, including trips between the kitchen, the back door, and the stairs. Keep the main path through the room clear of ottomans, toy bins, and trailing cables, and arrange seating so people can cross the room without walking in front of the television. If the family room opens to the kitchen, leave a clear serving path between the two spaces so food and drinks move safely.

    11. Who Uses Each Room and When

    Family room in the evening with people relaxing reading and watching television together.

    Living rooms are most often used by guests and by adults for quieter moments: a visit with friends, a phone call, reading, or an evening drink. They also suit activities that need calm and order, such as homework interviews, small celebrations, and holiday gatherings where the room is dressed up for the occasion.

    Family rooms are used by the whole household, often at the same time and for different activities: one person watches television while another reads, children play on the floor, and someone works on a laptop at the table. Evenings and weekends are peak times, and the room often stays busy from after school until bedtime. When you plan either room, list who uses it and when, because that list decides seating count, storage, and lighting better than any floor plan label.

    12. How to Choose the Right Room for Your Home

    Homeowner comparing two room layouts on a floor plan sketch at a table.

    If your home has both a living room and a family room, assign each room by use rather than by name. Give the television, the games, and the daily lounging to the room near the kitchen, and keep the front room for guests, conversation, and quieter activities. This split keeps noise and clutter away from the entry and gives each room a clear job.

    If your home has only one gathering room, choose the role that fits your household best, or blend both roles on purpose (see section 13). A household that rarely hosts guests may prefer a casual family room setup, while a household that entertains often may prefer a tidier living room with a television kept secondary. There is no wrong choice, but a room with no clear job tends to collect clutter from every other room, so name its main purpose and decorate to support it.

    13. How to Blend Both Rooms in One Home

    Large room zoned into a conversation area and a television lounge area with rugs.

    Many homes need one room to do both jobs, and zoning is the simplest way to blend them. Arrange a conversation group of sofa and chairs around a coffee table for guests, and place a separate lounge chair or chaise near the television for daily relaxing. A rug under each group marks the zones, and a console or open shelf between them can divide the space without blocking light or conversation.

    Keep the shared room tidy with family room storage hidden inside living room furniture: a storage ottoman for blankets, a closed cabinet for games, and baskets that match the room palette. Choose seating fabric that looks tailored but cleans easily, and use layered lighting so the room can shift from bright family time to softer guest evenings. The blend works when each zone has its own purpose, even if both zones share one room.

    14. Mistakes to Avoid When Planning Either Room

    Tape measure and furniture layout notes on a living room floor next to a sofa.

    One common mistake is buying furniture before measuring the room and the walkways. A sectional that blocks the path to the kitchen, or a sofa that crowds the front door, causes daily friction whatever the room is called. Measure the seating wall, the walkways, and the door swings first, and leave clear paths before you choose large pieces.

    Another mistake is giving the television the best wall in a living room meant for conversation, or placing formal, light colored seating in a family room used by children and pets. Match the room’s main job to its layout and materials, keep one room’s clutter from spilling into the other, and revisit the plan once a season: rooms change as households grow, and a small rearrangement can restore a room’s purpose without new furniture.

    Conclusion

    A living room and a family room differ mainly in purpose, place, and formality: the living room is the formal front room for guests and conversation, and the family room is the casual back room for daily relaxing near the kitchen. Layout, furniture, lighting, and storage all follow from that difference, so start with how your household actually lives and let each room’s job guide its design. Whether you have both rooms or one room doing double duty, a clear purpose, measured furniture, and storage for everyday clutter will keep the space comfortable for guests and family alike. For more ideas from Dwell Ovell, browse the home page for room guides and decorating ideas.

    FAQs

    What is the main difference between a living room and a family room?

    The main difference is purpose and formality: a living room is usually the formal front room for guests and conversation, while a family room is the casual everyday room for relaxing, television, and family time. Living rooms tend to sit near the entry, and family rooms tend to sit near the kitchen, but how each room is used matters more than its name.

    Is a family room the same as a den?

    A family room and a den are similar but not always the same. A den is often a smaller, cozier room used as a study, library, or quiet retreat, while a family room is usually larger and built for group relaxing and television. In some homes the terms overlap, and the room’s actual use decides which label fits better.

    Do new homes still have both a living room and a family room?

    Some new homes have both rooms, but many newer floor plans combine them into one open great room near the kitchen. In an open plan home, the living and family roles are usually handled by zones within one large space, with a conversation group in one area and a television lounge in another.

    Which room should have the television?

    The television usually belongs in the family room, where daily viewing, games, and relaxed seating are expected. If a home has only a living room, the television can still work there, but place it so it does not dominate the conversation group, and keep seating arranged so guests can talk without facing the screen.

    Can a small home have both a living room and a family room?

    A small home can have both roles even without two separate rooms, by zoning one gathering room into a conversation area and a lounge area. Use rugs, lighting, and furniture placement to mark each zone, and choose storage that hides everyday clutter so the room can shift from family time to guest ready quickly.

    Should a living room be formal even if guests rarely visit?

    No, a living room does not have to stay formal if guests rarely visit. If the household uses the front room daily, decorate it for that real use, with comfortable seating, good reading light, and storage for the items that actually live there, and keep only as much formality as suits the household’s habits.

  • 17 Nancy Meyers Inspired Dining Room Ideas for Warm Gatherings

    17 Nancy Meyers Inspired Dining Room Ideas for Warm Gatherings

    A Nancy Meyers dining room is a warm, collected room built around a wood table, soft linen, white dishes, and candlelight, where guests linger over a long meal. Start with a sturdy table, comfortable chairs, one low centerpiece, and layered light, then keep place settings simple. The 17 ideas below build that look for everyday dinners and larger gatherings.

    Start with the pieces you already own: a wood table, plain white plates, clear glasses, and cloth napkins in white or cream. Then add one warm layer at a time, such as a linen cloth, brass candlesticks, or a bowl of lemons on the sideboard. Keep the centerpiece low enough to see across, leave room for serving dishes, and choose pieces that can stay out for daily use rather than pieces saved only for formal meals. For seasonal table layers that pair with this room, see fall table decor ideas, and for room ideas beyond the table, see fall living room decor.

    Key Takeaways

    • Anchor the room with a warm wood table and chairs guests can sit in for a long meal, not chairs chosen only for looks.
    • Keep the palette calm: warm white, cream, soft blue, natural wood, and brass, with one quiet pattern repeated at least twice.
    • Use layered light: a chandelier or pendant on a dimmer, plus sconces or lamps, so evenings glow without harsh overhead light.
    • Keep the centerpiece low and simple, and move taller pieces to the sideboard, windowsill, or wall.
    • Mix old and new pieces, such as a worn wood table with plain white dishes, so the room looks collected over time.
    • Set the table for real use: space for plates, glasses, serving dishes, and elbows, with cloth napkins and a carafe of water within reach.

    1. A Long Warm Wood Table as the Room Anchor

    Long warm wood dining table set with white plates, linen napkins, and a low candle centerpiece in a bright dining room.

    Choose a long wood table in a warm, worn tone, such as aged oak or mahogany, and let it set the scale for the whole room. The table should seat the household plus a few guests without crowding, with room at each end for a serving dish or a carafe. A wood top with visible grain suits white dishes, linen, brass, and glass, and it looks better with use than a glossy top that shows every mark.

    Leave the wood bare for everyday meals, or cover it with a linen cloth for gatherings, and wipe it after meals so spills do not mark the grain. Use placemats under plates if the wood marks easily, and keep the centerpiece to one low group so the wood still shows. A long table also suits family style serving, since platters can sit down the middle and guests can pass food without standing.

    2. Mixed Chairs with Upholstered Armchairs at the Heads

    Dining table with Windsor side chairs and upholstered linen armchairs at the heads, set with white dishes.

    Mix side chairs with two upholstered armchairs at the heads of the table, so the ends feel like host seats and the room looks gathered over time rather than bought as one set. Use Windsor or ladder back chairs along the sides for a light, classic shape, and choose armchairs with a simple linen or cotton cover in cream, soft blue, or a quiet stripe. The mix keeps the table from looking too formal while still giving guests a comfortable seat.

    Keep seat heights close, so the table line stays even, and test that armchairs slide under the table without catching the cloth. Use the same cushion fabric or the same wood tone on both armchairs, so the pair reads as planned. If chairs wobble, tighten joints and add felt pads, since a steady chair matters more at a long meal than a matched set.

    3. A Round Pedestal Table for a Small Dining Nook

    Small round pedestal wood table in a dining nook with four chairs, white plates, and a low vase of flowers.

    Use a round pedestal table in a small dining nook or a corner of the kitchen, where a long table would block the walkway. A single center leg leaves room for chair legs and feet, and a round top lets every guest see each other, which suits conversation at a small gathering. Choose a wood top in a warm tone, with four or five chairs that tuck in close when the table is not in use.

    Keep the setting simple on a round table: one low centerpiece, plain white plates, and cloth napkins, with no runner that needs centering. A round table also works well for breakfast and homework, since it clears fast and needs only one cloth or a set of placemats. Measure the room before buying, and leave at least enough space behind each chair to pull out and stand up with ease.

    4. White Dishes Layered with Blue and White Accent Plates

    Place setting with plain white dinner plates layered with blue and white accent plates, clear glasses, and cream napkins.

    Set plain white dinner plates as the base, then layer one blue and white accent plate or salad plate on top at each place for a classic, collected look. The white base keeps the table calm and lets the pattern show without needing a patterned cloth or colored glasses. Repeat the blue at least twice, such as accent plates with a blue napkin or a blue and white bowl at the center, so the color looks planned.

    Use the same accent plate at every place for a gathering, and keep the rest of the setting plain: clear glasses, simple cutlery, and a cream napkin. White dishes also mix well with wood, brass, and linen, and they suit everyday meals as well as guests. Wash patterned plates by hand if the maker advises it, and stack them with care so rims do not chip.

    5. A Relaxed Linen Tablecloth for Gatherings

    Dining table covered with a relaxed cream linen tablecloth, white plates, and brass candlesticks.

    Lay a linen tablecloth in white, cream, or soft natural flax over the table for gatherings, and let it hang evenly at both ends without ironing out every crease. Linen wrinkles are part of the look here, and a relaxed cloth suits a wood table far better than a stiff, shiny cloth. Choose a cloth long enough to cover the top with a drop at each end, but short enough that it does not catch on chair legs.

    Wash the cloth before a gathering and fold it flat for storage, so it stays soft and ready to use. For everyday meals, skip the cloth and use placemats instead, so the table clears fast. If the cloth is light, set a thin pad or a second cloth underneath to guard the wood from heat and damp, and keep hot dishes on trivets.

    6. Brass Taper Candles Down the Center

    Brass candlesticks of two heights with cream taper candles down the center of a wood dining table.

    Set brass candlesticks of two heights down the center of the table, with cream taper candles in each, and keep the rest of the centerpiece simple. Brass adds a warm metal note that suits wood, linen, and white dishes, and candlelight gives evening meals a soft glow that overhead light cannot match. Space the candlesticks evenly, with room between them for serving dishes.

    Check that candlesticks sit level and that tapers fit snugly, so candles do not lean or drip onto the table. Use a tray or small plates under the candlesticks if wax drips are a concern, and trim wicks before lighting. For a table with children, use flameless tapers in the same brass holders for the same look without a flame, and never leave real candles burning unattended.

    7. A Sideboard Styled as a Serving Station

    Wood sideboard in a dining room styled as a serving station with a carafe, extra plates, a vase of flowers, and candlesticks.

    Use a wood sideboard against the main wall as a serving station, not just a display shelf, with space on top for a carafe, extra plates, and a platter waiting its turn. A sideboard keeps the table clear for guests, since serving dishes, drinks, and dessert plates can wait there instead of crowding the center. Choose a sideboard in a warm wood tone that matches or tones with the table, with drawers for napkins, candles, and place cards.

    Keep the top calm: one low vase of flowers, a pair of candlesticks, and one clear stretch for serving. Inside, group like items together, such as table linens in one drawer and candles in another, so setting the table takes minutes. Wipe the top after meals, and return serving pieces to the sideboard at once, so the room stays ready for the next meal.

    8. Layered Window Treatments with Sheers and Drapes

    Dining room window with sheer curtains and full linen drapes beside a wood table set for dinner.

    Hang sheer curtains next to the glass for daytime privacy and soft light, then add full drapes in linen or cotton on the outside, so the window looks finished day and night. Sheers soften bright light and keep the room from feeling bare, while drapes frame the window and add warmth in the evening when they are drawn. Choose drapes in cream, soft white, or a quiet stripe that tones with the table linen.

    Hang the rod high and wide, so the window looks larger and the drapes clear the glass when open. Tie drapes back during the day for light, and draw them in the evening for warmth and privacy. Keep drape fabric clear of candles, radiators, and heaters, and wash or brush the panels before the season, since dust shows more on light fabric in daylight.

    9. A Warm Chandelier Hung Low Over the Table

    Warm brass chandelier hung low over a wood dining table set with white dishes and linen napkins in the evening.

    Hang a chandelier or a large pendant over the center of the table, with the bottom of the fitting low enough to pool light on the table but high enough to see across. A brass, aged metal, or wood and glass fitting suits this room better than a sleek chrome fitting, and warm bulbs keep wood, linen, and skin tones looking soft. Put the fitting on a dimmer, so the same light works for a bright family dinner and a quiet evening meal.

    Measure before hanging: center the fitting over the table, not just over the room, and check the height from seated eye level. If the table moves for a large gathering, center the fitting over the usual table spot and use candles to fill the ends. Dust the fitting before a gathering, since dust shows in warm light, and keep the fitting clear of tall centerpieces and hanging greenery.

    10. Sconces and Table Lamps for Layered Evening Light

    Dining room in the evening lit by wall sconces and a small table lamp on a sideboard beside a set table.

    Add wall sconces on the main wall or a small table lamp on the sideboard, so the room does not rely on the chandelier alone in the evening. Low, warm light at two heights makes the room feel settled after dark, and it lets guests see each other without a bright overhead glare. Choose sconces or lamps with warm bulbs and simple shades in cream or linen, and keep the finish consistent with the chandelier, such as aged brass.

    Place one lamp or one pair of sconces where they will not block art or a mirror, and keep cords tidy behind the sideboard. Use a dimmer or a low watt bulb for the lamp, so it glows rather than glares. In the daytime, the lamp and sconces act as quiet decor, so choose shapes that suit the room even when switched off.

    11. A Built In Banquette for Casual Family Meals

    Banquette bench with cream cushions along a dining room wall, with a wood table and chairs set for a family meal.

    Build or place a banquette bench along one wall, with a wood or upholstered base and loose cushions in a washable fabric, so everyday family meals feel relaxed and the room seats more people in less space. A banquette suits a nook or a long wall, since guests slide in and the table can sit close to the wall without a row of chairs behind it. Add a cushion in cream or a quiet stripe, with one or two back pillows for comfort.

    Keep the table at a height that lets guests slide in with ease, and choose a bench depth that supports sitting without feeling like a sofa. Use washable cushion covers, since a banquette gets daily use, and keep the area under the bench clear or fitted with drawers for table linens. For a gathering, the banquette seats children well, while adults take the chairs on the open side.

    12. A Glass Front Hutch for Everyday Dishes on Display

    Glass front wood hutch in a dining room displaying white dishes, blue and white bowls, and clear glasses.

    Use a glass front hutch or a pair of open shelves to display everyday dishes, bowls, and glasses, so the room looks lived in and setting the table takes only a few steps. White dishes, blue and white bowls, and clear glasses look calm behind glass, and they are easy to reach for daily meals. Choose a hutch in a warm wood tone, with shelves spaced for plates, bowls, and a few serving pieces.

    Keep the display light: group dishes by type, leave space between groups, and put the most used pieces at hand height. Dust the shelves before a gathering, and keep fragile pieces behind glass rather than on open shelves near a walkway. If the hutch doors stick, adjust hinges and add felt pads, since doors used daily should open with one hand.

    13. A Patterned Rug That Grounds the Table Group

    Patterned rug in soft blue and cream under a wood dining table with chairs pulled out in a warm dining room.

    Lay a patterned rug under the dining table, large enough that chairs stay on it when pulled out, with a non slip pad beneath. A rug in a muted pattern, such as a soft blue and cream floral, a quiet stripe, or a traditional medallion in warm tones, grounds the table group and adds warmth at floor level. The rug also softens sound in the room, which helps conversation at a long meal.

    Choose a flat weave or a low pile rug, so chairs move with ease and crumbs shake out. Measure the table plus chair pull out space before buying, and center the rug under the table, not just under the room. Vacuum the rug weekly and blot spills at once, since food and drink reach a dining rug often, and use a washable rug in a home with young children or pets.

    14. A Gallery Wall and Mirror Above the Sideboard

    Mirror above a wood sideboard with framed botanical prints grouped beside it in a dining room.

    Hang a mirror above the sideboard to reflect light and make the room feel larger, then group framed prints beside it, such as botanical studies, landscapes, or simple line art in plain frames. A mirror doubles candlelight in the evening, and a small gallery gives the wall a collected feel without needing a large, costly piece. Keep frames in one or two finishes, such as wood and brass, so the group reads as one display.

    Hang the mirror centered over the sideboard, with its bottom edge clear of items on the top, and hang prints at seated eye level where possible. Leave space between frames, and check the group from the table seats, since that is where it will be seen most. Dust frames before a gathering, and keep the mirror glass clean, since smudges show more in candlelight.

    15. Family Style Serving at the Center of the Table

    Wood dining table set family style with white platters, a soup tureen, a bread board, and a salad bowl down the center.

    Serve meals family style, with platters, a soup tureen, a bread board, and a salad bowl down the center of the table, so guests pass food and help themselves. Family style serving suits this room, since it keeps the meal relaxed and the table becomes the center of the gathering rather than a formal stage. Use platters in white or cream, with one wood board for bread, so the serving pieces tone with the place settings.

    Leave room at each place for a plate, a glass, and elbows, and set serving spoons with each dish before guests sit down. Keep hot dishes on trivets, and refill platters from the sideboard rather than crowding the table with spares. At the end of the meal, clear serving pieces to the sideboard in one pass, so the table can stay set for dessert and coffee.

    16. A Low Centerpiece That Changes with the Season

    Low centerpiece of fresh garden flowers in a small vase on a wood dining table with white plates and linen napkins.

    Use one low centerpiece that changes with the season, such as fresh garden flowers in spring, a bowl of lemons in summer, greenery in winter, or a small vase of dried stems in fall. A single changing piece keeps the table fresh without a new table setting each season, and it suits a room that already has wood, linen, and brass as its base. Keep the piece low and narrow, so guests can see across, and set it on a tray or a wood board so it lifts off in one move.

    Change the water for fresh flowers every day or two, and remove any stem that wilts, since one cloudy vase can spoil the group. For fruit, check pieces every few days and move any soft piece to the kitchen. Keep the centerpiece clear of candles and serving paths, and move taller seasonal pieces to the sideboard, where they can be seen without blocking conversation.

    17. Host Ready Details for a Relaxed Gathering

    Dining table place setting with a folded cloth napkin, a place card, a water carafe, and brass candlesticks.

    Add small host details that help guests settle in: cloth napkins folded in a simple rectangle, a water carafe and glasses within reach, a place card or a short menu card at each place, and a candle lit before guests arrive. These details take minutes, yet they make a gathering feel planned without making it feel formal. Use the same napkin fold and the same card style at every place, so the table looks matched from the end of the room.

    Write place cards in clear, large lettering, and keep the note short, since a long note will be read once and then set aside. Set the carafe where guests can reach it without standing, and keep a spare napkin and a cloth nearby for spills. For a larger gathering, add a drink station on the sideboard, so guests can help themselves without leaving the room, and keep the table clear for food and conversation.

    Conclusion

    A Nancy Meyers dining room works when the table is sturdy, the chairs are comfortable, the light is soft, and the setting stays simple enough for daily use. Start with a warm wood table, white dishes, linen, and brass candles, then add one collected layer at a time, such as a sideboard, layered curtains, or a rug under the table. Keep the centerpiece low, leave room for serving dishes, and let the room look lived in rather than staged.

    For table ideas in a seasonal palette, see fall table decor ideas, for a holiday table to pair with this room, see Christmas table setting ideas, and for room ideas beyond the table, see Christmas decor in the dining room. Save this list on Pinterest for your next gathering, and work through it one idea at a time, starting with light and seating before adding decor.

    FAQs

    What is a Nancy Meyers dining room?

    A Nancy Meyers dining room is a warm, collected dining room built around a wood table, soft linen, white dishes, and candlelight, where the room feels lived in and comfortable for long meals. It favors classic pieces, natural materials, and layered light over sleek finishes or formal, matched sets.

    What colors work best in a Nancy Meyers dining room?

    Warm white, cream, soft blue, natural wood, and brass work best together, because they suit wood tables, white dishes, and linen in both daylight and candlelight. Repeat each color at least twice, such as blue accent plates with a blue napkin, so the room looks planned. Keep one quiet pattern, such as blue and white, and let the rest stay plain.

    How do I make a dining room feel warm without a full renovation?

    Start with layered light, a linen cloth or placemats, and comfortable chairs, since those three changes shift the room more than new wall color alone. Add a rug under the table, sheers and drapes at the window, and brass candlesticks at the center, then keep the palette to warm white, cream, wood, and brass. Work through one layer at a time, and keep pieces you use daily within reach.

    What kind of table suits a Nancy Meyers dining room?

    A warm wood table suits this room best, such as a long aged oak or mahogany table for gatherings, or a round pedestal table for a small nook. Choose a table that seats the household plus a few guests, with room for serving dishes down the center, and a top that can be wiped after meals. A worn wood top suits this look better than a glossy top that shows every mark.

    How do I mix dining chairs without the room looking mismatched?

    Mix chairs by keeping one thread consistent, such as the same wood tone, the same seat height, or the same cushion fabric, while letting chair shapes differ. Use Windsor or ladder back chairs along the sides and upholstered armchairs at the heads, so the mix looks gathered over time. Test that every chair slides under the table and sits steady, since comfort matters more than a matched set.

    How do I set a Nancy Meyers table for everyday meals?

    Start with plain white plates, clear glasses, and cloth napkins, then add one low centerpiece, such as brass candles or a small vase of flowers, and leave room for serving dishes. Use placemats instead of a full cloth for daily meals, so the table clears fast, and keep a water carafe within reach. Save the linen cloth, accent plates, and place cards for gatherings, so everyday settings stay quick to lay out and clear away.


  • 21 Coquette Bedroom Ideas with Soft Colors and Romantic Details

    21 Coquette Bedroom Ideas with Soft Colors and Romantic Details

    A coquette bedroom blends soft blush, cream, and rose tones with bows, ruffles, lace, and vintage pieces, kept light so the room feels romantic rather than crowded. Start with pale bedding, one ornate focal piece, and gentle lighting, then add small romantic details in two or three spots only.

    The 21 ideas below cover the bed, the windows, the vanity, the walls, the lighting, and the small corners that give a bedroom its charm, so you can refresh one spot or style the whole room. Pick blush as the main color, cream as the calm base, and rose as the deeper accent, and repeat each color at least twice so the room looks planned. For soft pink pairing ideas in another room, see Pink Christmas Decor, and for the home page overview, visit the Dwell Ovell home page.

    Key Takeaways

    • Start with a pale base of cream and white, then add blush as the main color and rose as a deeper accent in a few places only.
    • Choose one ornate focal piece, such as a vintage bed frame, a crystal chandelier, or a floral accent wall, and keep the rest of the room calm.
    • Use bows, ruffles, and lace as small repeats, on bedding, curtains, mirrors, and shelves, rather than on every surface at once.
    • Keep lighting soft and low in the evening, with warm lamps, candles in safe holders, and shades that glow gently.
    • Mix materials for depth: velvet, satin, lace, ceramic, glass, and fresh or faux roses.
    • Leave walking paths, the bedside, and the top of the dresser partly clear, so the room stays easy to live in and easy to clean.

    1. Ruffled Blush Bedding in Layers

    A bed dressed with ruffled blush pink bedding, layered pillows in cream and rose, and a soft folded throw.

    Dress the bed with a blush duvet or coverlet, add a ruffled pillow sham in cream, and finish with two or three sleeping pillows in soft pink and white. A ruffled edge gives the bed a romantic shape at once, while pale colors keep the look light and restful.

    Layer a thin white blanket under the blush cover so the bed looks full without feeling heavy. Fold the top of the duvet back by a hand width to show the layers, and keep the number of decorative pillows low enough that making the bed each morning stays quick.

    2. A Vintage Ornate Bed Frame in Cream

    A vintage ornate cream painted metal bed frame with curved details in a soft pink bedroom.

    Choose a vintage style metal or wood bed frame in cream, with curved details at the headboard and footboard, as the main furniture piece in the room. The frame gives the room its romantic character, so the rest of the furniture can stay simple and pale.

    Check that the frame fits the mattress and sits level before adding bedding, since an ornate frame draws the eye and any tilt will show. Pair it with plain cream nightstands and a soft rug, so the frame stays the focus rather than competing with patterned furniture.

    3. Sheer Curtains Tied with Satin Bows

    A bedroom window with sheer white curtains tied back with pale pink satin bows in soft daylight.

    Hang sheer white curtains at the bedroom window and tie each panel back with a wide satin bow in pale pink. The sheers soften daylight and keep the room private, while the bows add a clear coquette note at the window.

    Tie the bows at the same height on both sides and check them from inside the room, since uneven ties are easy to spot. Use washable satin so the bows can be cleaned, and keep curtain fabric clear of lamps and candles.

    4. A Sheer Tulle Canopy over the Bed

    A bed with a sheer white tulle canopy draped from the ceiling over the headboard, with blush bedding.

    Drape sheer white tulle from a ceiling hook or a simple canopy frame over the headboard, letting it fall softly on both sides of the bed. The canopy gives the bed a dreamy shape and softens the whole room, without blocking light during the day.

    Gather the tulle loosely rather than pulling it tight, and keep it clear of the floor so it does not catch on feet or collect dust. Wash the tulle now and then, and take it down if it starts to snag on the headboard or the bedding.

    5. A Dressing Table Vanity with a Ruffled Skirt

    A vintage dressing table vanity with a ruffled skirt, an oval mirror, perfume bottles, and a small stool.

    Set a small dressing table in a corner or beside the window, add a ruffled skirt under the tabletop, and place an oval mirror above it with a small stool tucked under. The skirt hides storage under the table and gives the vanity a soft, vintage feel.

    Keep only daily items on the vanity top, such as a brush, a small tray, and one vase, and store the rest in a drawer or a box under the skirt. Sit at the vanity in daylight to check that the mirror height works, and keep the stool clear so the corner stays inviting.

    6. A Gilt Gallery Wall of Romantic Prints

    A bedroom wall gallery of small gilt framed romantic floral and landscape prints arranged above a dresser.

    Hang a group of small gilt framed prints above a dresser or along one wall, choosing romantic subjects such as roses, soft landscapes, and vintage portraits in blush and cream tones. The gold frames add warmth, while the small size keeps the wall from feeling formal.

    Plan the layout on the floor first, with the largest print near the center and smaller prints around it, then hang the group at eye level. Use picture hooks rated for each frame, and leave a little space between frames so each print can be seen on its own.

    7. A Small Crystal Chandelier over the Bed

    A small crystal chandelier hanging over a bed in a blush pink bedroom, with a soft warm glow.

    Hang a small crystal chandelier over the center of the bed or in the middle of the room, with warm bulbs that glow softly in the evening. The crystals catch the light and give the room a gentle sparkle, while the small size keeps the fixture in scale with a bedroom.

    Check the ceiling height before hanging, so the chandelier clears the bed and no one can bump it when standing. Use a dimmer if one is available, so the light can stay bright for getting dressed and soft for winding down at night.

    8. An Arched Floor Mirror with a Satin Bow

    A tall arched floor mirror in a bedroom corner decorated with a large pale pink satin bow at the top.

    Lean a tall arched mirror against a bedroom wall, in a corner near the window or beside the wardrobe, and tie a large pale pink satin bow at the top of the frame. The arch softens the room shape, the mirror bounces daylight around, and the bow ties the mirror to the rest of the room.

    Fix the mirror to the wall with a proper bracket or anti tip strap, since a tall mirror can fall if it is only leaned. Check the reflection from the bed and the door, and move the mirror if it reflects clutter or a bright light straight into the bed.

    9. Fresh Roses in Vintage Ceramic Vases

    Fresh pink roses in vintage ceramic vases arranged on a white bedroom dresser beside a small candle.

    Place fresh or good quality faux roses in vintage ceramic vases on the dresser, choosing blush and cream roses with a few rose toned blooms for depth. Ceramic vases suit a coquette bedroom because they feel handmade and soft, unlike plain glass.

    Use two or three vases of different heights rather than one large bunch, and trim fresh stems every few days so the roses last longer. Keep vases on a small tray to protect the dresser top from water marks, and change the water daily in warm weather.

    10. A Velvet Reading Chair with a Lace Pillow

    A velvet blush reading chair in a bedroom corner with a lace edged cushion and a small side table with a book.

    Set a small velvet chair in blush or cream in a bedroom corner, add a lace edged cushion, and place a small side table beside it with a book and a candle in a holder. The chair gives the room a quiet place to sit, and the lace pillow links it to the bedding.

    Keep the chair near the window or a lamp so it is easy to read in, and leave the seat clear rather than piling it with clothes. Choose a washable cushion cover, since a chair cushion gets daily use, and fold a small throw over one arm for cool evenings.

    11. A Nightstand with a Pearl Lamp and Candles

    A bedroom nightstand styled with a pearl base lamp, a small candle, and a tiny vase of roses in soft evening light.

    Style the nightstand with a lamp that has a pearl or beaded base, a small candle in a glass holder, and a tiny vase with one or two roses. The nightstand is the last thing seen at night, so soft light and one small floral note here set the mood for the whole room.

    Keep the nightstand surface mostly clear, with room for a glass of water and a book, and use a battery candle if the candle sits near bedding or curtains. Check that the lamp switch is easy to reach from the bed, so the light can be turned off without getting up.

    12. A Scalloped Velvet Headboard in Blush

    A bed with a scalloped blush velvet upholstered headboard, cream bedding, and rose pillows.

    Choose a scalloped upholstered headboard in blush velvet, sized to match the bed width, and pair it with cream bedding and rose pillows. The scalloped edge gives the bed a soft, vintage outline, while velvet adds a plush texture that suits evening light.

    Vacuum the headboard now and then with a soft brush attachment, and keep it clear of damp items such as wet hair or drinks. If the headboard is a separate panel, fix it firmly to the bed frame or the wall so it does not shift when pillows are leaned against it.

    13. A Floral Wallpaper Accent Wall

    A bedroom accent wall behind a bed covered in pale pink floral wallpaper, with cream furniture.

    Paper the wall behind the bed in a pale pink floral wallpaper, with small roses or trailing blooms on a cream ground, and keep the other walls plain cream or white. One patterned wall gives the room its romantic base, while plain side walls keep the pattern from feeling busy.

    Check a large sample in daylight and in evening light before papering, since pink tones can look stronger under warm bulbs. Hang art and mirrors sparingly on the patterned wall, and keep bedding pale so the wallpaper stays the main pattern in the room.

    14. A Vintage Wardrobe with Bow Handles

    A vintage white wardrobe with mirrored doors, satin bows on the handles, and blush bedding nearby.

    Use a vintage style white wardrobe with mirrored doors, and tie small satin bows on the handles or hang a bow on each door pull. The wardrobe gives the room storage and a vintage shape, while the mirrored doors bounce light and the bows add a playful coquette detail.

    Check that the wardrobe doors open fully without hitting the bed or a chair, and fix the wardrobe to the wall if it is tall. Keep the bows light and small so they do not catch on clothes, and replace them if the satin starts to fray.

    15. A Plush Rose Rug Beside the Bed

    A plush pale rose rug beside a bed in a soft pink bedroom, with cream bedding and a small nightstand.

    Lay a plush rug in pale rose beside the bed, large enough to step onto from both sides, with a soft pile that feels warm underfoot in the morning. The rug adds a block of blush color at floor level and links the bed to the rest of the room.

    Choose a rug with a non slip pad under it, and vacuum it weekly so the pile stays soft. If the rug sits on a hard floor, check that it does not slide when stepping out of bed, and keep it clear of the wardrobe doors so they can open fully.

    16. A Floating Shelf of Teacups and Perfume Bottles

    A white floating shelf in a bedroom displaying vintage teacups, perfume bottles, small framed photos, and a bow.

    Fix a white floating shelf on a bedroom wall and style it with vintage teacups, small perfume bottles, a tiny framed photo, and one small satin bow. The shelf turns small pretty objects into a display, without taking up floor or dresser space.

    Keep the shelf light, with only a few pieces, and fix it with wall anchors rated for the weight, since teacups and glass bottles can break if the shelf fails. Dust the shelf weekly, and keep it away from the bed edge so nothing can be knocked off in the dark.

    17. A Window Seat with Bow Pillows

    A bedroom window seat with cream cushions, blush bow pillows, a folded throw, and a small stack of books.

    Build or style a window seat with cream seat cushions, blush pillows tied with small bows, a folded throw, and a small stack of books at one end. The window seat gives the bedroom a second place to sit and enjoy daylight, and the bow pillows tie it to the curtains.

    Keep the seat cushions in washable covers, since a window seat gets sun and daily use, and leave one end clear for sitting down easily. Check that pillows do not block the window handle, and keep the throw folded so the seat stays tidy.

    18. A Dried Rose Wreath on the Bedroom Door

    A bedroom door decorated with a small dried rose wreath tied with a pale pink ribbon bow.

    Hang a small wreath of dried roses and greenery on the inside of the bedroom door, tied with a pale pink ribbon bow at the top. The wreath greets anyone entering the room with a romantic note, and it uses a spot that often stays bare.

    Hang the wreath with an over door hook or a small adhesive hook rated for the weight, and check that it clears the door frame when the door opens. Keep the wreath away from direct sun if the roses are real, since strong sun can fade dried blooms quickly.

    19. A Bookshelf Styled with Novels and Bows

    A bedroom bookshelf styled with romance novels, a small candle, a tiny vase of roses, and a satin bow.

    Style one bedroom bookshelf with romance novels, a small candle in a glass holder, a tiny vase of roses, and a satin bow tied on one shelf edge. The shelf then reads as part of the room decor, rather than only as storage for books.

    Group books by height or color in short rows, and leave some shelf space empty so the display does not look crowded. Keep candles in glass holders and away from book spines and paper, and use a battery candle if the shelf sits near curtains.

    20. A Satin Throw with Rose Embroidery at the Foot of the Bed

    A bed in a blush bedroom with a satin throw blanket embroidered with roses folded neatly at the foot of the bed.

    Fold a satin throw embroidered with small roses neatly across the foot of the bed, over the blush duvet, with the embroidered edge showing. The throw adds a smooth shine that contrasts with ruffled bedding, and the rose embroidery repeats the floral theme of the room.

    Fold the throw in thirds so it sits flat and does not slide off, and keep it as a decorative layer that can be lifted off at night. Wash satin gently by hand or on a gentle cycle, and store it folded rather than hung, so the embroidery keeps its shape.

    21. Pink Glass Wall Sconces Flanking the Bed

    Two pink glass wall sconces with soft shades flanking a bed headboard in a romantic blush bedroom, with a warm glow.

    Fix two pink glass wall sconces, one on each side of the headboard, with soft shades that glow warmly in the evening. Sconces free up nightstand space, give even light on both sides of the bed, and add a pair of romantic glass details at eye level.

    Have sconces wired or fixed by someone with the right skills if they need mains wiring, and use plug in or battery sconces if wiring is not practical. Check that both shades sit at the same height, and use warm bulbs so the pink glass glows softly rather than looking harsh.

    Conclusion

    A coquette bedroom works best when soft colors, one ornate piece, and gentle light do most of the work, with bows, ruffles, and roses added in small repeats. Start with pale bedding and a calm base, add one focal piece such as a vintage frame or a crystal chandelier, then choose two or three ideas from this list that suit your room and your budget.

    Keep the room easy to live in by leaving paths clear, choosing washable covers for pillows and throws, and using battery candles near fabric and bedding. For living room styling that follows a similar calm palette approach, see Fall Living Room Decor. Revisit the room after a week, remove anything that feels crowded, and keep only the details you notice and enjoy each day.

    FAQs

    What is a coquette bedroom?

    A coquette bedroom is a romantic bedroom style that uses soft blush, cream, and rose colors with bows, ruffles, lace, and vintage pieces, kept light so the room feels pretty rather than crowded.

    What colors work best in a coquette bedroom?

    Blush, cream, white, and soft rose work best, with one deeper rose or gold accent for warmth, and pale colors kept as the main base so the room stays calm.

    How do I keep a coquette bedroom from looking too busy?

    Keep one ornate focal piece, repeat bows and ruffles in only two or three spots, leave surfaces partly clear, and use plain cream bedding or walls to balance any patterned pieces.

    Can a coquette bedroom work in a small room?

    Yes, a small coquette bedroom works well when you choose small scale pieces, such as a ruffled duvet, bow tied curtains, and one mirror, and keep the floor and nightstand clear.

    What bedding suits a coquette bedroom?

    Ruffled or lace edged bedding in blush or cream suits a coquette bedroom best, layered with a white blanket and two or three pillows in soft pink and white, with a satin throw at the foot of the bed.

    Are bows and ruffles hard to keep clean in a bedroom?

    No, bows and ruffles are easy to keep clean when you choose washable satin and cotton, remove them for washing now and then, and keep them away from damp spots and open flames.


  • 17 Memorial Day Decorating Ideas for Your Home and Porch

    17 Memorial Day Decorating Ideas for Your Home and Porch

    Memorial Day decorating works best with a calm red, white, and blue palette used in a few clear spots: the front porch, the front door, the dining table, and the living room. Add a flag, fresh flowers, and warm evening light, keep one pattern dominant in each display, and leave room for guests to sit, eat, and move around.

    The 17 ideas below cover porches, entries, living rooms, kitchens, dining tables, and the backyard, so you can style one spot or dress the whole home for the day. Memorial Day is a day of remembrance, so keep the mood calm and respectful: one flag, one wreath, or one vase of flowers can say more than a house full of decorations. For more seasonal styling ideas, visit the Dwell Ovell home page, and see how a limited palette holds a season together in Fall Decor Ideas.

    Key Takeaways

    • Use red, white, and blue in a few focal spots, such as the front porch, the front door, and the dining table, rather than in every corner.
    • Choose navy, bright red, and white as the core palette, and let one of the three lead in each display.
    • Mix flags, stars, and stripes, but keep one pattern dominant in each room so the look stays calm.
    • Add a quiet remembrance note, such as a single candle or a small vase of flowers, to mark what the day means.
    • Use battery candles and outdoor rated string lights for evening glow, and keep open flames away from fabric, paper, and dry plants.
    • Style surfaces you already use, such as the porch, the kitchen counter, and the dining table, before adding new displays.
    • Store flags, bunting, and fabric pieces folded flat or rolled in a dry box, so they are ready to use again next year.

    1. Flag Display on the Front Porch

    A flag hanging from a porch bracket beside a plain doormat and planters.

    Hang a full size flag from a porch bracket, or place a garden flag near the steps, so the porch reads as festive from the street. A single flag works best with a plain doormat and one or two planters, since the flag itself carries the theme.

    Check that the flag hangs free and does not catch on the rail or the door. Fix the bracket firmly, and take the flag inside during strong wind or heavy rain to keep it in good shape.

    2. Red, White, and Blue Wreath on the Front Door

    A wreath of red, white, and blue flowers and stars hanging on a front door at eye level.

    Hang a wreath made with fabric flowers, wood stars, or ribbon in red, white, and blue on the front door. Keep the wreath flat against the door so it does not block the handle, and hang it at eye level for the clearest view.

    A wreath suits a painted door in navy, white, or red, since the colors stand out against a plain background. Pair it with a simple doormat and skip extra door decor, so the wreath stays the focus of the entry.

    3. Striped Bunting Across the Porch Rail

    Red and white striped bunting with navy pennants draped along a porch rail.

    Drape striped bunting in red and white along the porch rail, with a gentle dip between posts and the ends tied neatly at each side. Add small navy pennants between the stripes to bring in the third color.

    Bunting suits a porch rail because it is light and easy to fix with small removable ties. Keep it clear of walkways and steps, and balance it with plain planters at each end of the porch.

    4. Quiet Remembrance Corner Indoors

    A small remembrance table with a single white candle

    Set aside a small table or shelf as a remembrance corner, with a single white candle, a small framed photo or printed remembrance note, and a small vase with one red flower. Keep the display simple and uncluttered, so it feels calm rather than busy.

    This corner works well in a living room or hallway where guests pass through. Use a battery candle if the corner sits near fabric or paper, and keep the rest of the surface clear.

    5. Red, White, and Blue Flower Planters by the Door

    Porch planters with red geraniums, white petunias, and blue lobelia flanking a front door.

    Fill porch planters with red geraniums, white petunias, and blue lobelia for a living patriotic display that lasts past the holiday. Place one planter on each side of the door for balance, and water the plants in the morning so they look fresh through the day.

    Choose planters in a plain color, such as white, navy, or terracotta, so the flowers carry the color. Deadhead spent blooms during the week to keep the planters looking tidy.

    6. Layered Doormats at the Entry

    A striped outdoor rug layered under a coir doormat with a star design at a front door.

    Layer a larger striped outdoor rug under a smaller coir doormat at the front door. The two layers add texture and help catch dirt, and the combination looks planned rather than bare.

    Keep the top mat flat and low so the door opens freely. A simple star design or a plain striped pattern works well, and the rug underneath can stay in place for the whole summer.

    7. Porch Chairs with Navy Cushions and Striped Throws

    Porch chairs with navy cushions and folded red and white striped throws.

    Add navy seat cushions and a folded red and white striped throw to each porch chair, so the seating feels ready for guests. The chairs become a spot for morning coffee or an evening chat once the day’s gatherings wind down.

    Use outdoor rated fabric if the chairs stay outside in rain. Bring cushions inside overnight in wet weather to keep them fresh, and store throws in a basket by the door.

    8. Star String Lights Along the Porch or Patio

    Star shaped string lights hanging along a porch roof edge in the evening.

    Hang star shaped string lights along a porch roof edge, a pergola, or a patio fence, spacing the stars evenly so the line reads clearly after dark. Warm white bulbs suit a calm evening, while red, white, and blue bulbs give a bolder party feel.

    Check cords for damage before hanging lights, and keep cords clear of walkways. Switch lights off when you leave the house or go to sleep.

    9. Mason Jar Lanterns with Battery Candles on the Steps

    Mason jars with battery candles and twine tied around the necks on porch steps.

    Place battery candles inside clear mason jars, tie twine or ribbon in red, white, or navy around the neck of each jar, and set the jars along the porch steps or a windowsill. The glass softens the light and gives the display a relaxed, handmade feel.

    Use jars of the same size for a neat row, or mix two sizes and group them in threes. Battery candles are the safe choice here, since the jars sit near fabric, paper, and plants, and they can stay lit through the evening without attention.

    10. Striped Table Runner Centerpiece for the Dining Table

    A dining table with a striped runner, a white vase of red flowers, and a navy candle holder.
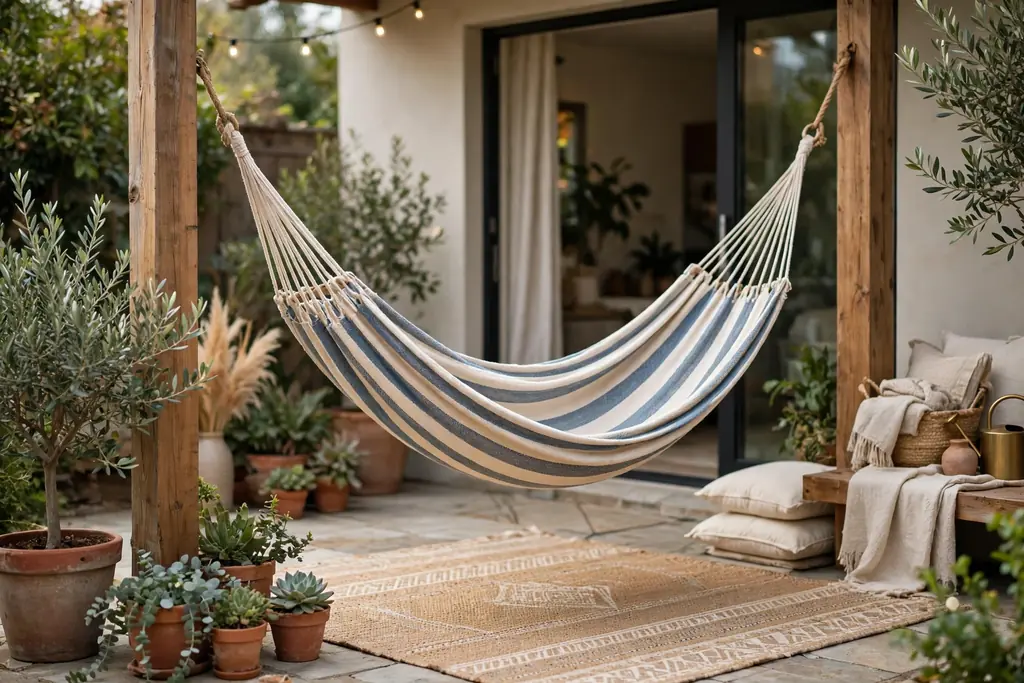
    Lay a striped or star print runner down the center of the dining table, then build a low centerpiece on top of it with a white vase, red flowers, and a small navy accent such as a candle holder. Keep the arrangement low so guests can talk across the table.
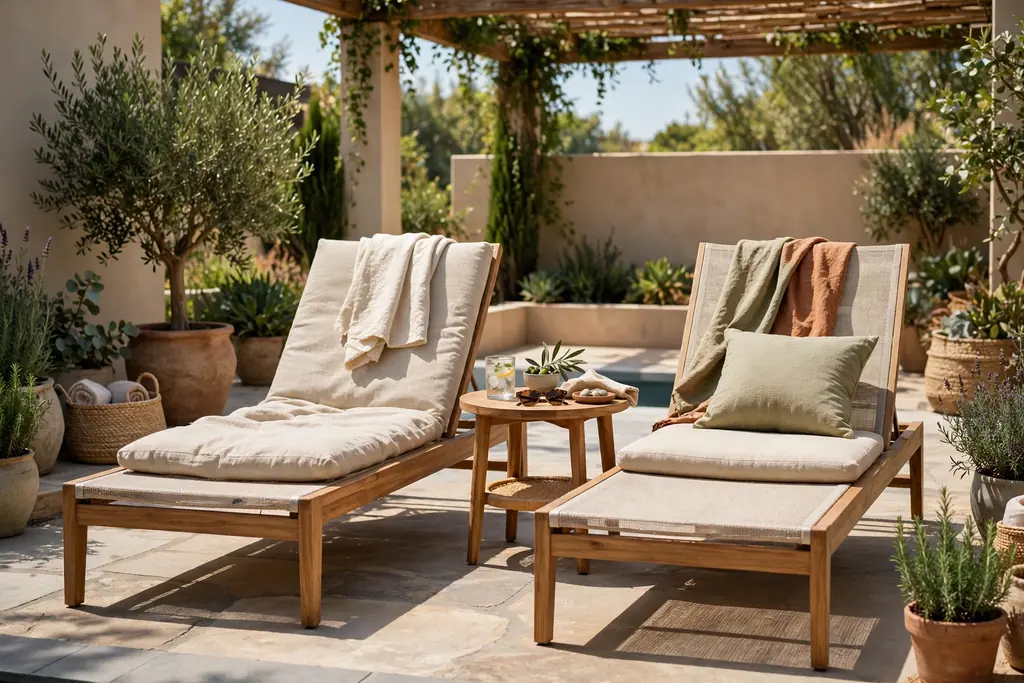
    A runner defines the table without covering it, which leaves room for plates and glasses. Choose a washable fabric if the table will be used for a cookout meal, and fold the runner away after the day to keep the print fresh.

    11. Star Place Cards for the Cookout Table

    A dinner table place setting with a star shaped place card on a white plate.

    Place a star shaped place card on each plate or beside each napkin, with a guest name written in plain lettering. The cards add a personal touch to a cookout table without taking up much space.

    Use card stock in white or navy, and keep the stars small so they do not crowd the plate. Guests can take the cards home, which makes them a simple favor as well as decor.

    12. Patriotic Throw Pillows on the Sofa

    A sofa with navy striped, red star, and plain white throw pillows.

    Swap everyday sofa pillows for covers in navy stripes, red stars, and plain white, mixing two patterns with one plain cover so the sofa stays calm. A pillow swap changes the whole living room in minutes, with no other changes needed.

    Choose washable covers if the sofa gets daily use, and store the swapped covers flat in a dry box. One or two patterned pillows per sofa is enough; a full set of patterned covers can feel busy.

    13. Mantel Display with Small Flags and Candles

    A mantel styled with small flags, battery candles, and a framed print above.

    Style the mantel with two small flags in plain holders, a row of battery candles, and one framed print or simple wreath above. Keep the display low and spaced out, so the mantel reads as calm and balanced.

    Balance the flags with plain vases or candle holders at each end, and keep paper and fabric clear of any open flame. A mantel display suits a living room gathering, since guests see it as soon as they sit down.

    14. Patriotic Tiered Tray in the Kitchen

    A tiered kitchen tray styled with a tiny flag, a star ornament, and a white candle holder.
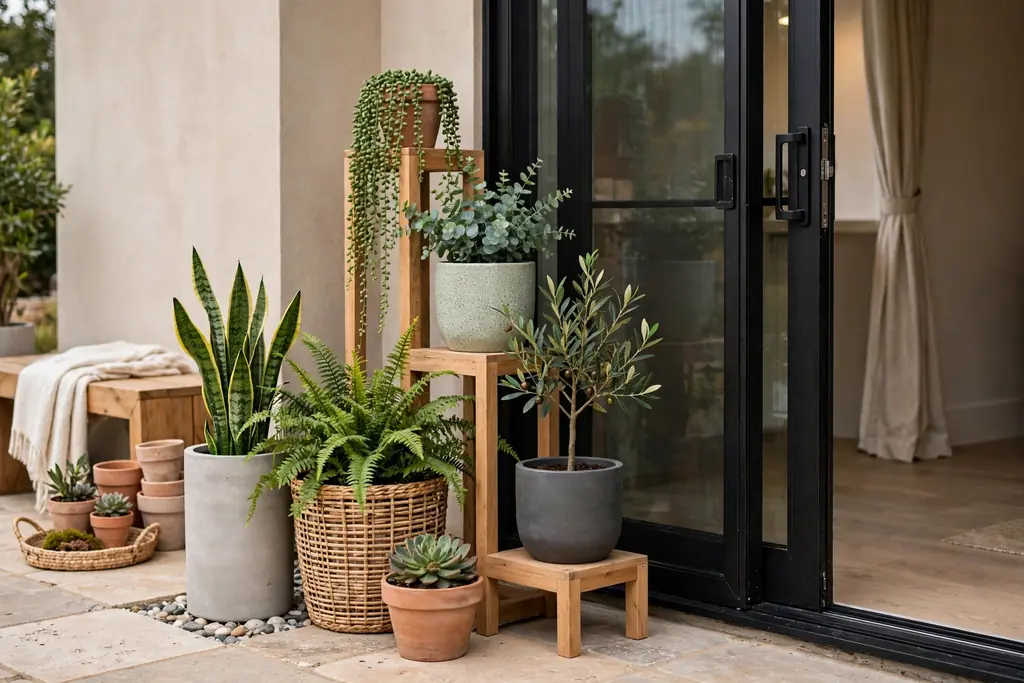
    Style a two or three tier kitchen tray with a tiny flag, a star ornament, a small white candle holder, and a few red berries or small flowers. The tray keeps small pieces contained on a counter or island, and it is easy to move when you need the space.

    Group items in odd numbers on each tier, and leave one small gap on each level so the tray does not look crowded. Swap the tray pieces out after the holiday and reuse the tray for summer fruit or herbs.

    15. Paper Star Garland Across a Window

    A garland of red, white, and navy paper stars strung across a bright window.

    String paper stars in red, white, and navy across a bright window, spacing them evenly so daylight shows through the gaps. A window garland adds color to a room without taking up any surface space.

    Use lightweight paper stars and clear tape or small hooks, so the garland comes down cleanly after the day. Pair it with plain curtains, so the stars stay the focus of the window.

    16. Backyard Picnic Table with a Striped Cloth

    A backyard picnic table with a red and white striped cloth, white plates, and a vase of red and white flowers.

    Set a backyard picnic table with a red and white striped cloth, plain white plates, and a low vase of mixed red and white flowers. A picnic setup suits a relaxed outdoor meal, and the striped cloth carries the theme on its own.

    Weigh the cloth down with clips or small stones at the corners on a breezy day, and keep serving dishes in the shade. Fold the cloth away after the meal so the stripes stay crisp for the next gathering.

    17. Entry Console Vase with Red, White, and Blue Flowers

    A tall vase with red roses, white daisies, and blue delphinium on an entry console table.

    Place a tall vase of red roses or geraniums, white daisies, and blue delphinium on an entry console, so guests see fresh color as soon as they step inside. A single large arrangement suits a console better than several small ones, since it reads clearly from the door.

    Trim stems so the arrangement sits about one and a half times the height of the vase, and change the water daily to keep the flowers fresh. Keep the rest of the console clear, with room for keys and mail.

    Conclusion

    Memorial Day decor does not need a full room makeover. A flag at the porch, a wreath on the door, a dressed table, and warm light in the evening can change how a home feels for the day, while a quiet candle or a single flower marks what the day means. Pick the ideas that fit your rooms and your routine, repeat navy, red, and white across two or three spots, and leave the rest of the house calm. Save this list and revisit it next spring to see which ideas you want to repeat.

    FAQs

    What colors should I use for Memorial Day decorating?

    Use navy, bright red, and white as the core colors for Memorial Day decorating, since they read clearly as patriotic and pair with most room colors. Pick one color as the main tone in each display, use the second as an accent, and keep the third for small details, so no single room feels crowded with all three at full strength.

    How can I decorate for Memorial Day in a respectful way?

    Keep the mood calm by using one flag, one wreath, or one vase of flowers as the focus, and add a quiet note such as a single candle or a small remembrance display. Avoid loud or crowded displays, and leave space for guests to gather and talk, since the day is about remembrance as well as time with family.

    How do I decorate a small space for Memorial Day?

    Choose small scale items like a paper star garland, a single vase of red and white flowers, and one striped throw, and style surfaces you already use, such as a windowsill, a shelf, or a side table. Skip large displays that block walkways, and use vertical space with a door wreath or a window garland, since one clear focal point per room is enough in a small home.

    How can I decorate for Memorial Day on a small budget?

    Start with a flag, bunting, paper stars, and pillow covers, since these pieces cost little and make a visible difference in a room. Style one focal point per room, such as the mantel or the front door, and reuse vases, jars, candle holders, and baskets you already own, adding a few new pieces each year instead of buying a full set at once.

    Are real or faux flowers better for Memorial Day decor?

    Fresh flowers are better for a one day centerpiece, since they look and smell their best on the day of the gathering, while faux flowers are better for a display that stays up for a week or more. Fresh stems need daily water and shade from direct sun, while faux stems need only a quick dust and can be stored and reused next year.

    Can I reuse Memorial Day decor next year?

    Yes, you can reuse Memorial Day decor next year if you store flags, bunting, fabric covers, and faux flowers folded flat or rolled in a dry box, with paper between layers to stop prints from sticking together. Fabric and metal pieces store well, while paper stars need a flat box and gentle handling, and battery lights should be stored with the batteries removed.


  • 25 Summer Decor Ideas for a Light and Airy Home

    25 Summer Decor Ideas for a Light and Airy Home

    Summer decor ideas work best when you keep rooms light, pale, and uncluttered: white and sand tones, sheer curtains, natural fibers, clear glass, and fresh greenery let daylight move through the home. The 25 ideas below use those elements room by room, so each space feels cool, bright, and easy to live in all summer.

    Start with the largest surfaces first: sofa covers, curtains, bedding, and rugs set the tone, and smaller pieces such as vases, bowls, and baskets finish the look. Keep most of the room in white, cream, sand, and pale blue, and let one natural texture or one green plant carry the interest. For seasonal styling in other parts of the year, see the fall decor ideas on Dwell Ovell, and for a pale coastal base that works in summer too, see the coastal fall decor guide.

    Key Takeaways

    • Keep two thirds of each room in white, cream, sand, or pale blue, so daylight stays the main feature.
    • Swap heavy fabrics for linen, cotton, rattan, and seagrass, which read light and breathe well in warm weather.
    • Use sheer curtains, mirrors, and clear glass to move light deeper into the room.
    • Add fresh greenery or a bowl of citrus for color, rather than adding many small colored objects.
    • Leave clear space on tables, shelves, and floors, so each display has room around it.
    • Repeat one or two natural materials through the home, so rooms feel linked without matching exactly.

    1. White Linen Slipcovers on the Sofa

    Sofa covered in a white linen slipcover with sand and pale blue cushions in a bright living room.

    Cover a dark or patterned sofa with a white or cream linen slipcover to lighten the whole living room at once. Linen wrinkles a little, which suits a relaxed summer room, and a washable cover can be laundered when it needs freshening.

    Keep the rest of the seating simple while the slipcover is on. Plain cushions in sand or pale blue sit well against white linen, and a light throw folded over one arm adds softness without adding weight.

    2. Sheer White Curtains at Every Window

    Sheer white curtains filtering daylight at a large living room window.

    Hang sheer white curtains on the windows you use most, so daylight filters in while the room still has privacy. Sheers soften strong summer sun and make a room feel taller, since the eye follows the fabric from rod to floor.

    Hang the rod close to the ceiling and let the panels fall to just above the floor. Keep the fabric plain, with no heavy pattern, so the light stays even and the window remains the focus.

    3. Pale Blue and Sand Throw Pillows

    Light sofa styled with pale blue and sand throw pillows in linen and cotton.

    Swap dark winter pillow covers for pale blue and sand covers in linen or cotton. Two or three pillows are enough on a standard sofa, and a mix of one solid, one stripe, and one plain textured cover keeps the group from looking flat.

    Place the darkest pillow at each end of the sofa and the lightest in the middle, so the eye moves across the seat. Store the winter covers together in one bag, so the swap is easy to reverse.

    4. Lightweight White Cotton Throw

    Lightweight white cotton throw folded over the arm of a light sofa.

    Replace a heavy knit throw with a lightweight white cotton throw, folded neatly over a sofa arm or across the foot of a chair. Cotton is easy to wash, and white reads cool against wood, rattan, and pale upholstery.

    Use the throw as a practical layer for cool evenings rather than as a thick blanket. Folded, not bunched, it looks tidy during the day and is ready to use at night.

    5. Rattan Accent Chair in a Bright Corner

    Rattan accent chair with a pale cushion beside a bright window and a small side table.

    Place a rattan accent chair near a window, with a small side table and a pale cushion. Rattan brings an open, woven texture that suits summer, and the chair gives a bright corner a clear purpose.

    Keep the chair away from direct midday sun if the cushion fabric fades easily, and add a small plant beside it. One chair is enough in a small room; a pair works in a larger living room with space between them.

    6. Clear Glass Coffee Table

    Clear glass coffee table with a small vase and books on a light rug in a living room.

    Use a clear glass coffee table, or a glass top on a light wood base, to keep the center of the living room open. Glass lets the rug and floor show through, so the room feels larger than it does with a solid dark table.

    Style the top with only two or three items, such as a small vase, a stack of books, and a candle in a glass holder. Wipe the glass often in summer, since fingerprints and dust show more on a clear surface.
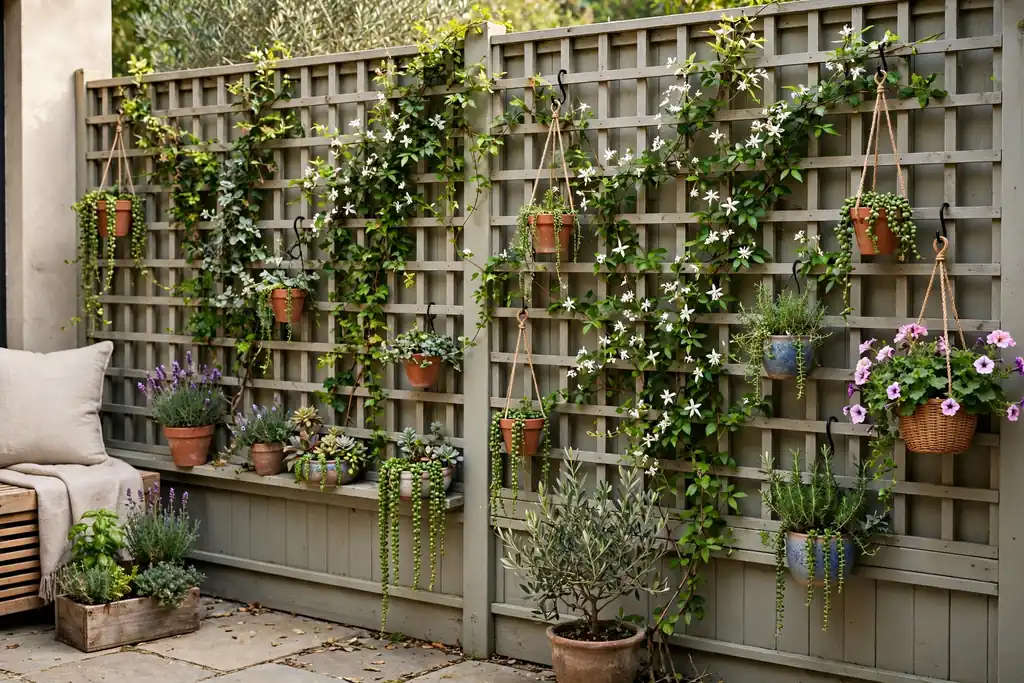
    7. Whitewashed Wood Side Tables

    Whitewashed wood side table beside a light armchair with a small vase.

    Add a whitewashed wood side table beside the sofa or an armchair, in place of a dark wood table. The pale washed finish keeps the wood grain visible while lightening the piece, and it pairs well with linen, glass, and rattan.

    Keep the tabletop clear except for a lamp or a small vase, so the table stays useful for a drink or a book. In a small room, choose a round top, which is easier to walk past than a square corner.

    8. Seagrass Baskets for Everyday Storage

    Seagrass baskets holding folded throws beside a light sofa.

    Set seagrass baskets beside the sofa, by the door, and in the bedroom for throws, magazines, toys, and shoes. Baskets hide daily clutter while adding a natural woven texture that suits summer.

    Choose baskets with handles, so they are easy to move for cleaning, and keep one basket per job rather than filling one large basket with mixed items. Empty each basket once a week, so it does not slowly fill with things that belong elsewhere.

    9. Fresh Greenery in Clear Glass Vases

    Fresh green eucalyptus stems in a clear glass vase on a light wood table.

    Cut fresh greenery from the garden, or buy a bunch of eucalyptus or olive stems, and place it in a clear glass vase on a table or shelf. Green leaves against clear glass give instant summer color without paint, pattern, or new furniture.

    Trim stems so the arrangement sits about one and a half times the height of the vase, and change the water every few days. One tall vase makes a stronger statement than several small vases crowded together.

    10. Lemon and Lime Bowl on the Dining Table

    Shallow white bowl filled with lemons and limes in the center of a dining table.

    Fill a shallow white or glass bowl with lemons and limes, and set it in the center of the dining table. Citrus adds fresh yellow and green color, smells clean, and can be used in cooking, so the display is practical as well as decorative.

    Use whole fruit, not cut fruit, and replace pieces as they soften. Keep the bowl low and narrow, so guests can still talk across the table and pass serving dishes easily.

    11. White Linen Table Runner

    Dining table with a white linen runner, plain plates, and a low green centerpiece.

    Lay a white linen table runner down the center of the dining table, in place of a full tablecloth. A runner protects the middle of the table, frames a centerpiece, and leaves the wood visible at each side, which keeps the table looking light.

    Pair the runner with plain white or cream plates and simple glassware. For a meal, the runner can stay in place under a low centerpiece, as long as serving dishes still have room at each end.

    12. String Lights on the Porch or Patio

    Warm white string lights hung along a porch rail in the early evening.

    Hang warm white string lights along a porch rail, a patio fence, or under a pergola, so outdoor evenings have soft light without harsh bulbs. Battery or solar strands work well where there is no outdoor outlet nearby.

    Space the strands evenly and fix them with small clips rather than nails, so they can come down easily at the end of the season. Use one set of lights as the main outdoor glow, and keep other outdoor decor simple.

    13. Crisp White Cotton Bedding

    Bedroom with crisp white cotton bedding, pale pillows, and a light throw at the foot of the bed.

    Change the bed to crisp white cotton sheets and a white or cream duvet cover, with pillowcases to match. White bedding makes a bedroom feel clean and cool, and it gives a clear base for one or two pale accent pillows.

    Fold a light cotton throw across the foot of the bed for cool nights, and keep the bedside tables clear except for a lamp and a small vase. White bedding shows dust and marks more readily, so wash it on a regular cycle.

    14. Woven Straw Placemats at the Table

    Dining table set with woven straw placemats, plain plates, and linen napkins.

    Use woven straw or seagrass placemats under each place setting, instead of a full tablecloth or dark mats. Straw adds texture and a warm natural tone, and each mat defines a place without covering the whole table.

    Wipe mats clean after meals and store them flat, so they do not curl at the edges. Pair straw mats with plain plates and linen napkins for a table that looks dressed but still relaxed.

    15. White Ceramics on Open Kitchen Shelves

    Open kitchen shelves styled with white ceramic bowls, plates, and mugs.

    Style open kitchen shelves with white ceramic bowls, plates, and mugs, grouped by size and shape. White ceramics reflect light and make a kitchen feel tidy, even when the shelves hold everyday dishes.

    Keep everyday items at the front, where they are easy to reach, and decorative pieces at the back. Leave breathing room between groups, so the shelves look styled rather than crowded, and keep the total number of pieces low.

    16. Large Mirror Opposite a Window

    Large mirror with a light wood frame on a wall opposite a bright window.

    Hang a large mirror on the wall opposite a window, so it reflects daylight and the view back into the room. A mirror doubles the sense of light in a room that gets sun from only one side, and it makes a small room feel wider.
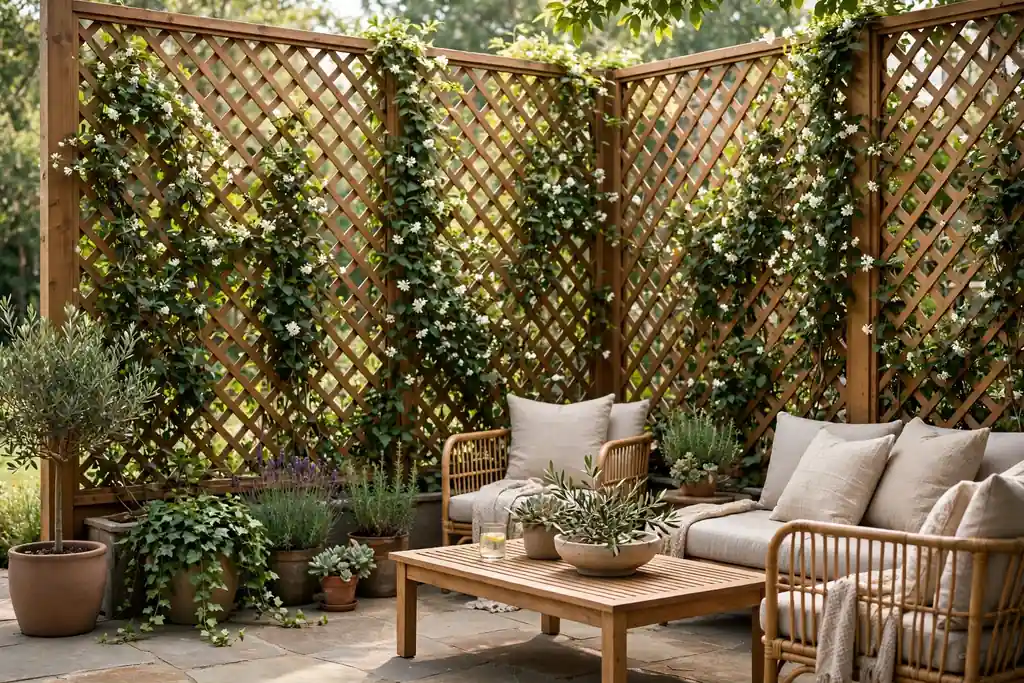
    Choose a simple light wood or white frame, and hang the mirror at eye level, centered on the window opposite. Keep the wall around the mirror plain, so the reflection stays the main feature.

    17. Natural Fiber Rug Over Bare Floors

    Flatweave jute rug over a bare wood floor under a light sofa and coffee table.

    Lay a flatweave jute or sisal rug over bare wood or tile floors, in place of a thick pile rug. A natural fiber rug adds warmth underfoot while keeping the floor visible at the edges, which suits a light summer room.

    Choose a rug large enough to sit under the front legs of the sofa or dining chairs, and use a rug pad underneath to stop it slipping. Shake the rug outside regularly, since natural fibers trap dust and sand in summer.
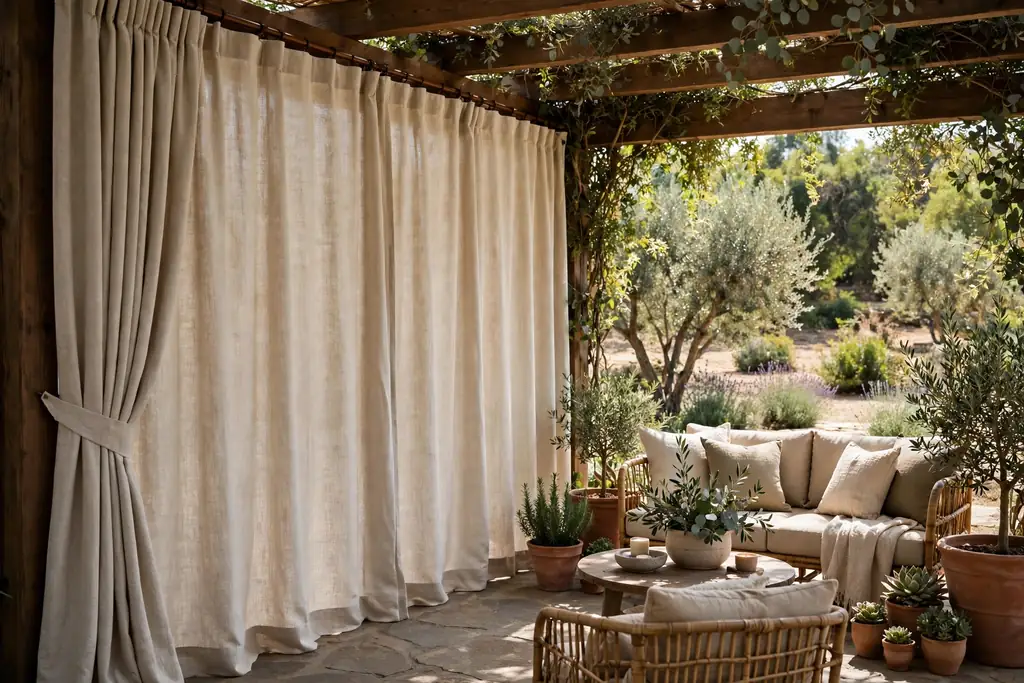
    18. Light Coastal Prints in Pale Frames

    Light coastal prints in pale wood frames hung as a small gallery wall.

    Hang two or three light coastal prints, such as shore scenes, botanical drawings, or pale landscapes, in pale wood or white frames. Light art keeps walls bright, while the pale frames link the prints into one group.

    Lay the frames on the floor first to plan spacing, then hang the largest print slightly off center to anchor the group. If a wall already holds art, swap one or two prints for summer, rather than adding a whole new wall of frames.

    19. Potted Herbs on the Kitchen Windowsill

    Potted basil, mint, and parsley in white pots on a bright kitchen windowsill.

    Grow potted herbs such as basil, mint, and parsley on the kitchen windowsill, in plain white or terracotta pots. Herbs add fresh green color, smell pleasant, and can be picked for cooking, so the display earns its place.

    Water pots based on the plant label and the weather, and check drainage so pots do not sit in standing water. Keep the pots in a row with even spacing, and trim the herbs often so they stay full rather than leggy.
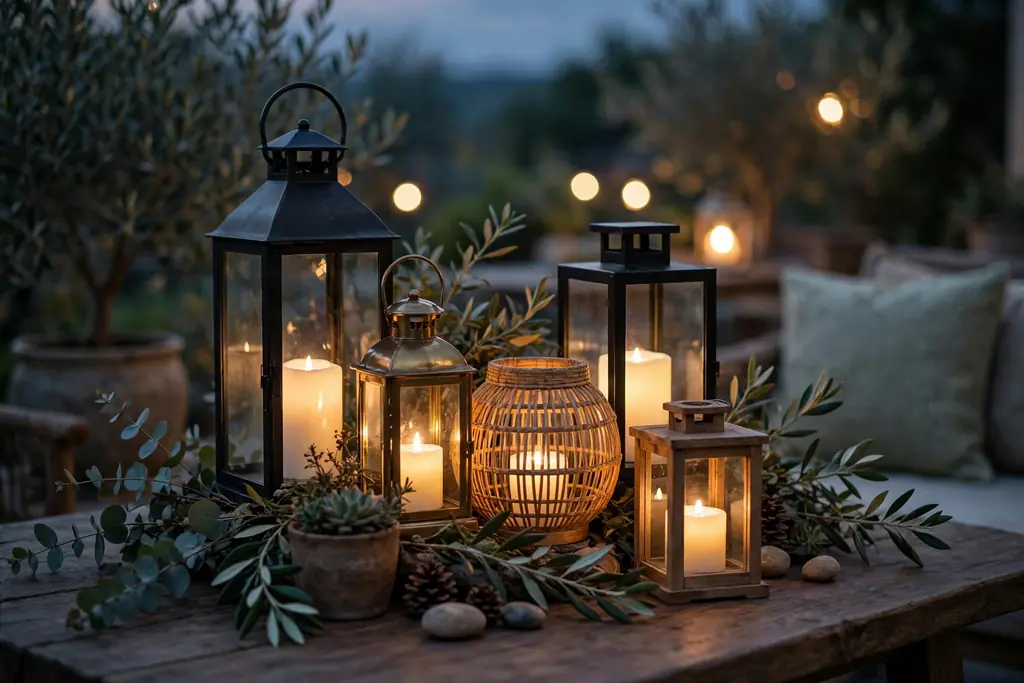
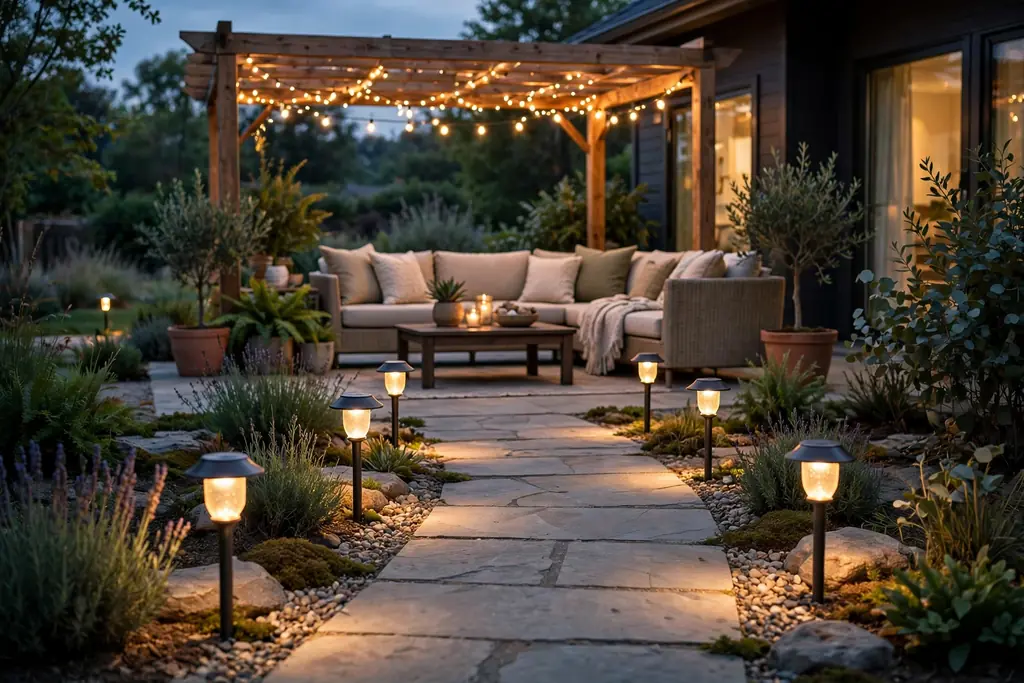
    20. White Lanterns with Battery Candles

    White lanterns with battery candles grouped on a patio table in the evening.

    Group two or three white lanterns on a porch, a patio table, or a mantel, each holding a battery candle. Lanterns give soft evening light, and white frames blend with pale summer decor in a way dark metal does not.

    Use different lantern heights, so the group looks collected rather than matched, and keep lanterns away from table edges and curtains. Battery candles are a safer choice than real flames near fabric, plants, and outdoor cushions.

    21. White and Sea Blue Towels in the Bathroom

    Bright bathroom with rolled white towels and one sea blue towel on open shelves.

    Swap dark bathroom towels for white towels with one sea blue accent towel, folded or rolled on open shelves or a towel rail. White towels make a small bathroom feel cleaner and brighter, while the blue towel adds a hint of summer color.

    Roll towels rather than folding them into thick stacks, so they take less shelf space and are easy to grab. Wash towels often in summer, and keep a spare towel on a ring or hook for guests.

    22. Entry Bench with a Woven Basket

    Light wood entry bench with a woven basket underneath beside a front door.

    Place a light wood bench by the front door, with a woven basket underneath for shoes, sandals, or a beach bag. The bench gives a place to sit while putting on shoes, and the basket keeps entry clutter out of sight.

    Keep the bench top clear except for a small dish for keys, so the entry stays useful as well as tidy. One basket is enough in a narrow entry; a second basket only helps if the entry is wide enough to stay clear.

    23. White Patio Umbrella Over Outdoor Dining

    White patio umbrella shading an outdoor dining table with light chairs.

    Set a white patio umbrella over an outdoor dining table, so summer meals have shade without a dark canopy that heats up in the sun. White fabric reflects light and keeps the patio feeling bright, even under cover.
    Choose an umbrella large enough to shade the table and chairs, and use a weighted base so it stays steady in a breeze. Close the umbrella in strong wind, and store it dry at the end of the season.

    24. One Simple Vignette Per Surface

    Console table styled with one simple vignette of a vase, a candle, and stacked books.

    Style each table, shelf, and mantel with one simple vignette: three items at most, such as a vase, a candle, and a small stack of books. One vignette per surface keeps rooms calm, and the empty space around it lets each piece show.

    Step back and look at the surface from across the room before adding anything else. If the display feels busy, remove one item first, and only add a new piece if the surface still looks bare after that check.

    25. Breezy Reading Nook by the Window

    Breezy reading nook with a light armchair, small side table, and books beside a bright window.

    Create a reading nook by a window with a light armchair, a small side table, a pale cushion, and a floor lamp for evenings. A window nook uses daylight for reading and gives a bright corner a clear use through the summer.
    Place the chair at an angle to the window, so light falls on the book without glare, and keep the side table small so the chair stays easy to get in and out of. A woven basket beside the chair can hold a throw and a few books when the nook is not in use.
    Conclusion

    A light and airy summer home does not need new furniture or a full room makeover. White linen, sheer curtains, rattan, seagrass, fresh greenery, and a pale palette do most of the work, and one simple vignette per surface keeps the result calm. Pick the ideas that fit your rooms and your daily routine, repeat one or two natural materials through the home, and leave clear space around each display. The rooms will feel brighter, cooler, and easier to live in all summer.

    FAQs

    What colors make a home feel light and airy in summer?

    White, cream, sand, pale blue, and soft sage make a home feel light and airy in summer, because pale colors reflect daylight instead of absorbing it. Keep two thirds of each room in those tones, and use one stronger accent, such as sea blue or leaf green, in small doses through pillows, towels, or plants.

    How do I make a small room feel airy in summer?

    You make a small room feel airy in summer by using sheer curtains, a mirror opposite the window, a clear glass or light wood table, and one simple vignette per surface. Remove extra furniture and heavy textiles first, then add pale colors and natural fibers, since a small room shows clutter faster than a large one.

    What fabrics are best for summer decor?

    Linen and lightweight cotton are best for summer decor, because they breathe well, wash easily, and drape softly in pale colors. Use linen for slipcovers, curtains, and table runners, cotton for bedding and throws, and rattan or seagrass for baskets and chairs, so the room stays light in both color and texture.

    How can I decorate for summer without buying new furniture?

    You can decorate for summer without buying new furniture by swapping textiles, changing pillow covers and bedding to white or pale tones, adding sheer curtains, and styling surfaces with greenery, citrus, or white ceramics you already own. A slipcover can lighten a dark sofa, and a mirror or a natural fiber rug can change how a room feels without replacing any large piece.

    How do I keep a light summer room from looking bare?

    You keep a light summer room from looking bare by adding texture rather than color: woven baskets, rattan, linen, jute, clear glass, and fresh greenery all add interest while keeping the palette pale. Use one vignette per surface, repeat one natural material through the home, and add plants at different heights, so the room feels layered instead of empty.

    What should I do first when styling a home for summer?

    Start with the largest surfaces first, since sofa covers, curtains, bedding, and rugs set the tone for the whole room. Once those are pale and light, add smaller pieces such as vases, bowls, and baskets, and finish by editing each surface down to one simple vignette, so the home feels bright without feeling crowded.