Author: Noah Ellis

  • 21 Outdoor Table Centerpiece Ideas for Casual Gatherings

    21 Outdoor Table Centerpiece Ideas for Casual Gatherings

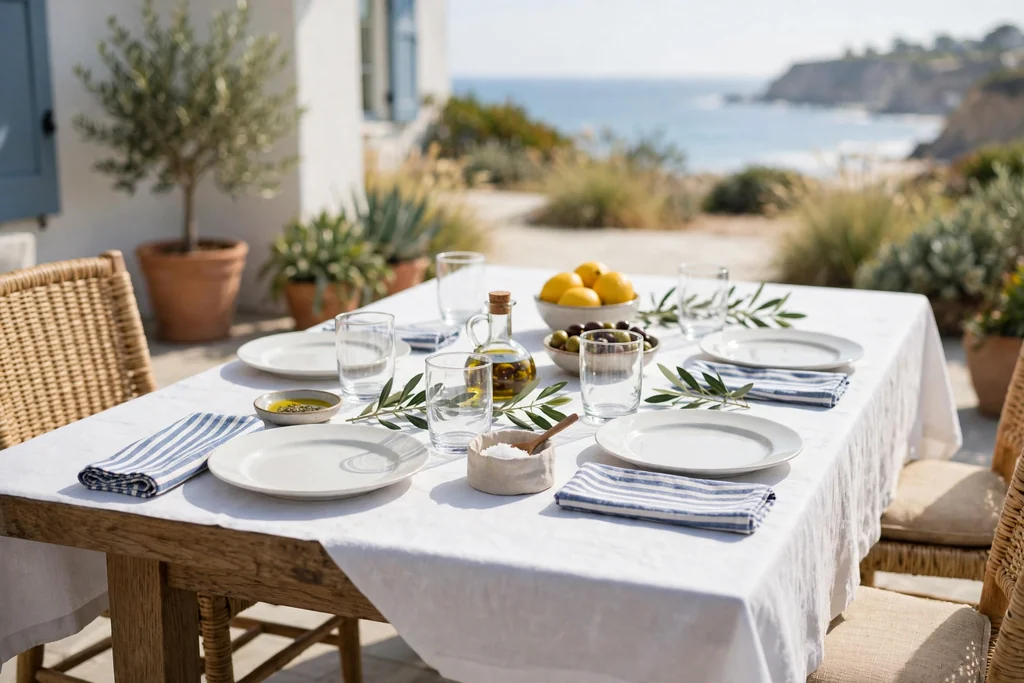
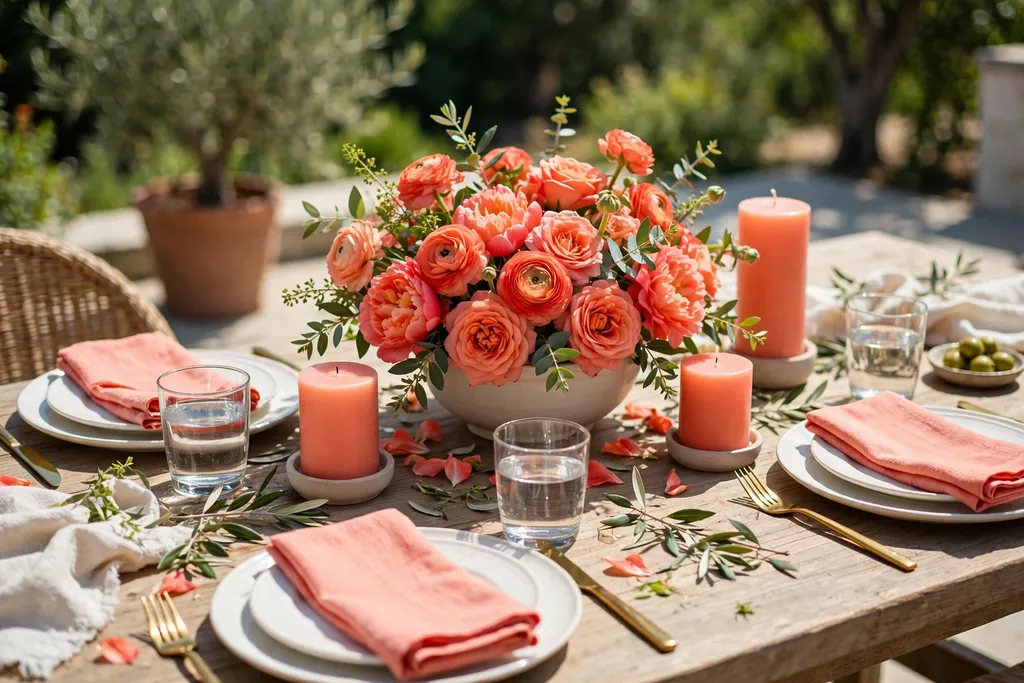
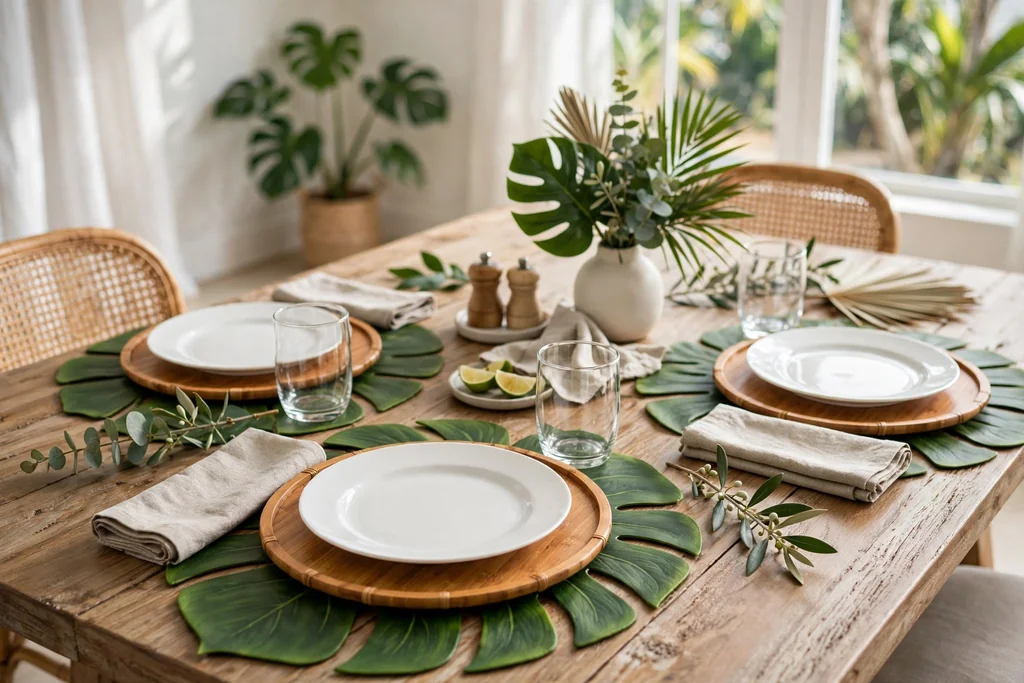
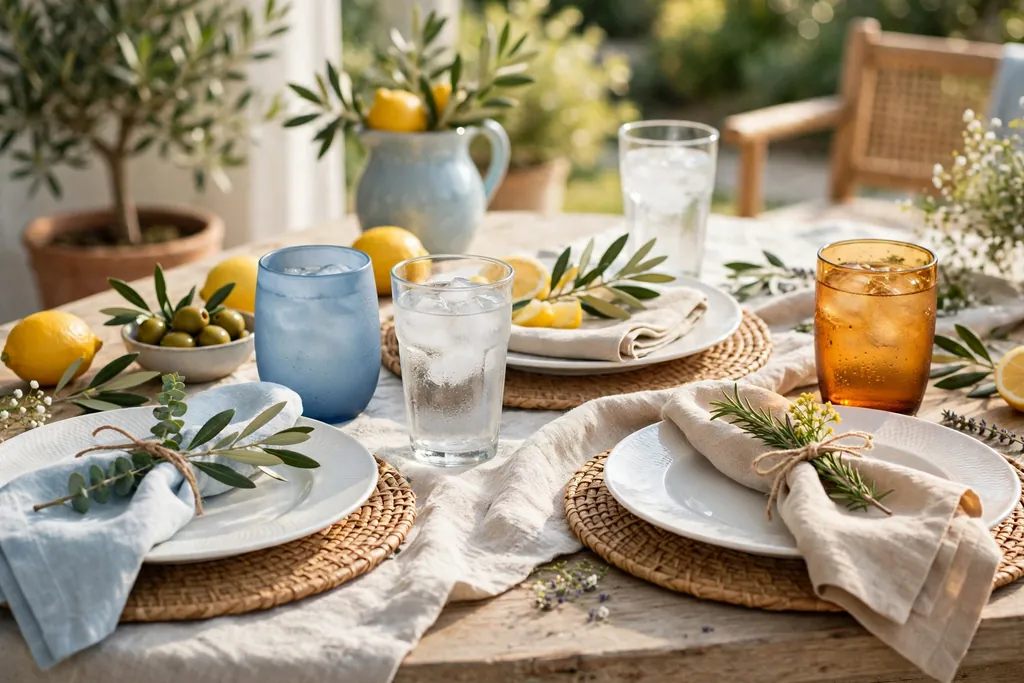
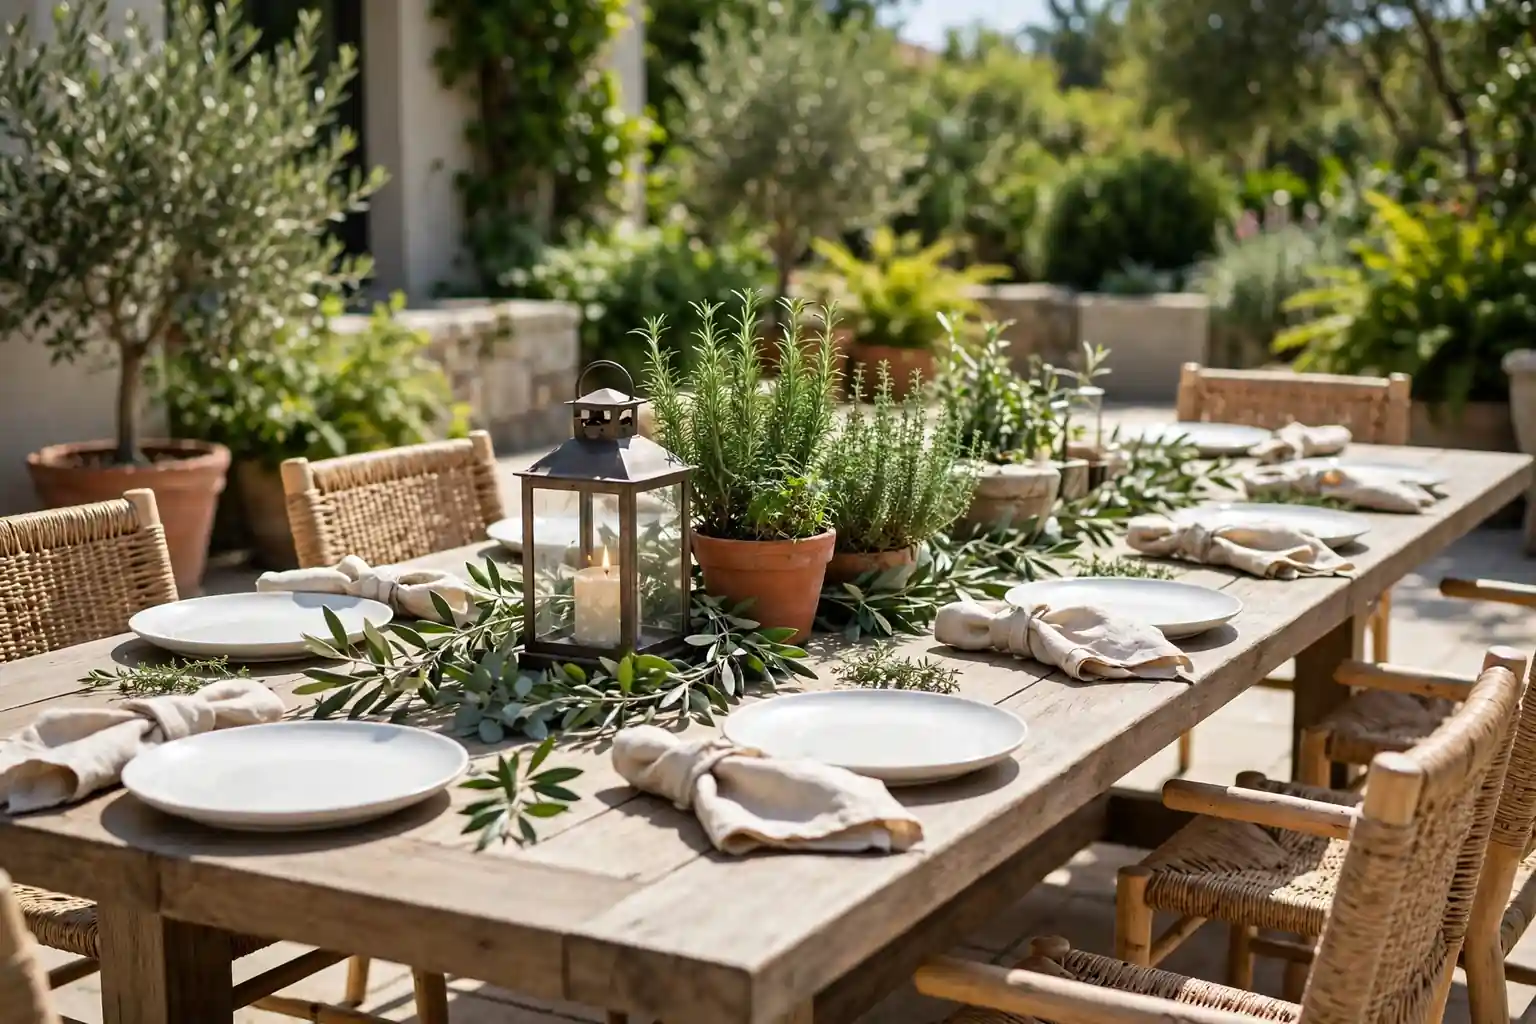
    Outdoor table centerpieces for casual gatherings work best when they stay low, heavy, and simple: one weighted group of lanterns, potted herbs, or short flowers down the center, with cloth napkins and a tray or runner to anchor it. Keep sightlines open, leave room for food and drinks, and choose pieces that handle wind, sun, and a quick move indoors.

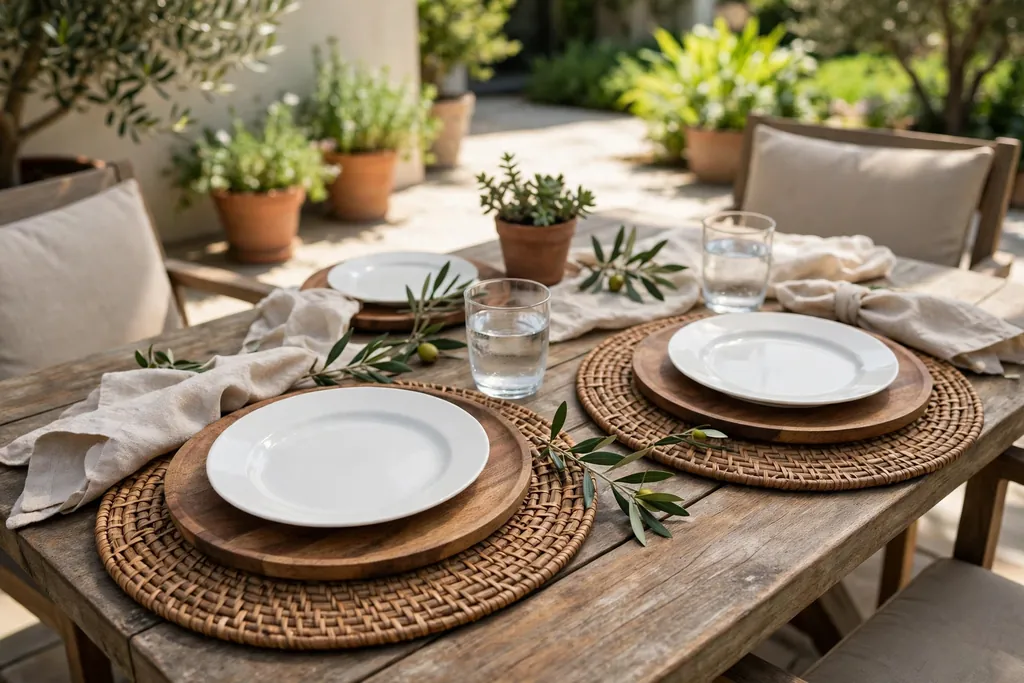
    Start with the base you already own: plain plates, clear or sturdy glasses, and cloth napkins that will not blow away. Then add one centerpiece group at a time, such as a tray of lanterns, a row of herb pots, or a low bowl of citrus. Keep the group narrow, weight the light pieces, and leave a clear path for serving dishes. For evening meals, add candlelight in glass holders, kept clear of fabric, paper, and dry material, and never left burning unattended.

    Key Takeaways

    • Keep the centerpiece low and narrow, so guests can see each other and serving dishes still fit.
    • Weight every light piece: use heavy pots, trays, hurricane glass, and stones in the bottom of jars and vases.
    • Use one main centerpiece group per table, not several competing groups, and leave empty space at each place for plates and glasses.
    • Pick a small palette of white, green, and one warm accent, such as terracotta, amber, or soft yellow, repeated at least twice.
    • Choose cloth napkins over paper outdoors, and skip tall, light arrangements on windy days.
    • For evening gatherings, use glass holders and battery candles near fabric, children, and dry material.

    1. Mason Jar Lanterns with Battery Candles
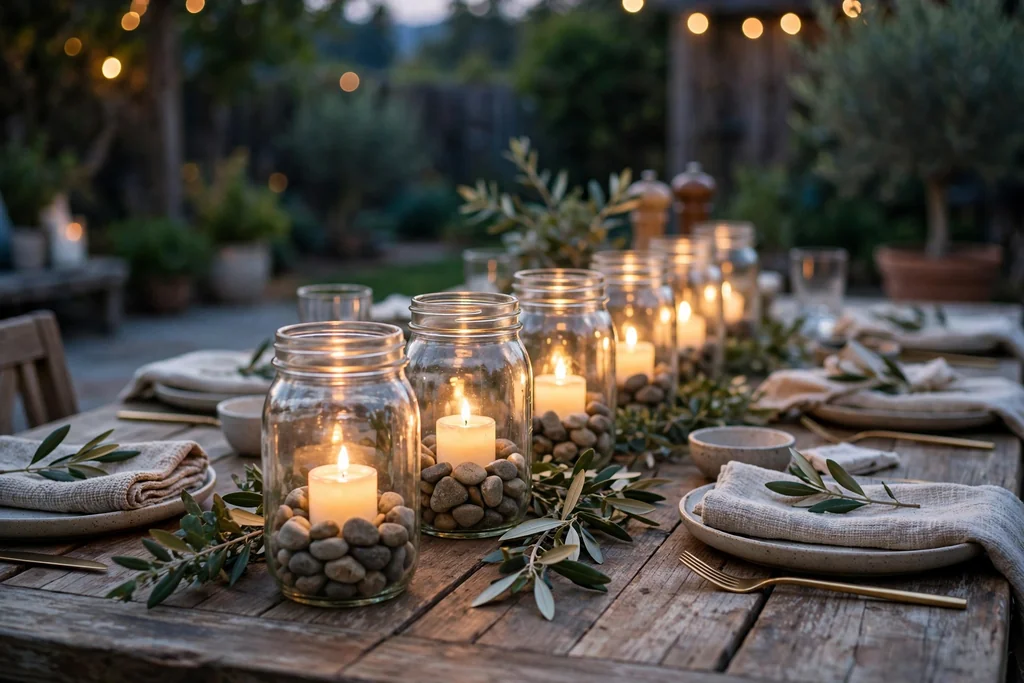
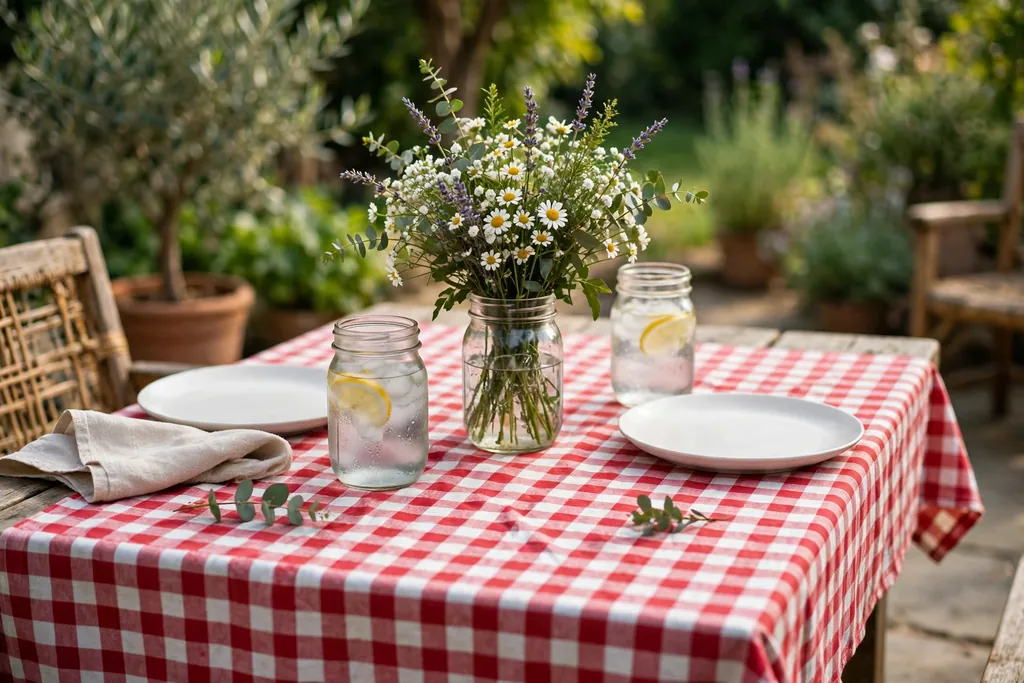
    Mason jars with battery candles and stones in the bottom set down the center of an outdoor dining table in the evening.

    Set three mason jars down the center of the table, each holding a battery candle, with a few stones in the bottom of each jar to weight it. The jars give soft evening light, cost little, and suit a patio, a deck, or a garden table. Use jars of the same size for a matched look, or mix two sizes with the tallest jar in the middle.

    Add a short length of twine around the rim of each jar if you want a rustic note, and keep the twine clear of any real flame. Use battery candles only in narrow or closed jars, since a real flame needs air and a safe holder. Wipe the glass before the meal, since fingerprints show more on clear glass in candlelight.

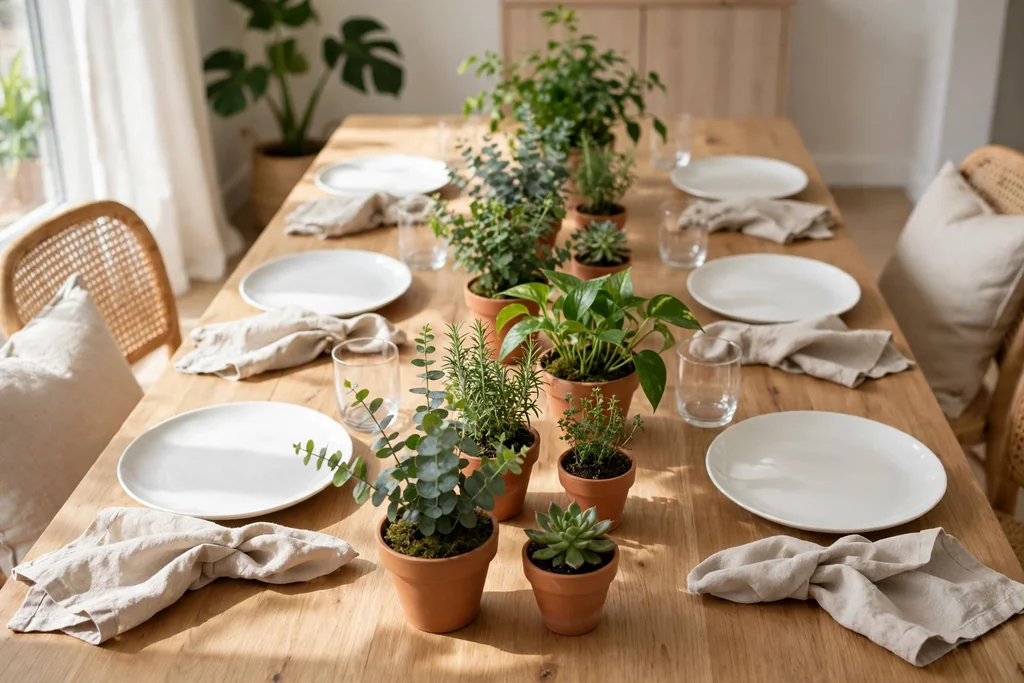
    2. Potted Herb Row Down the Center
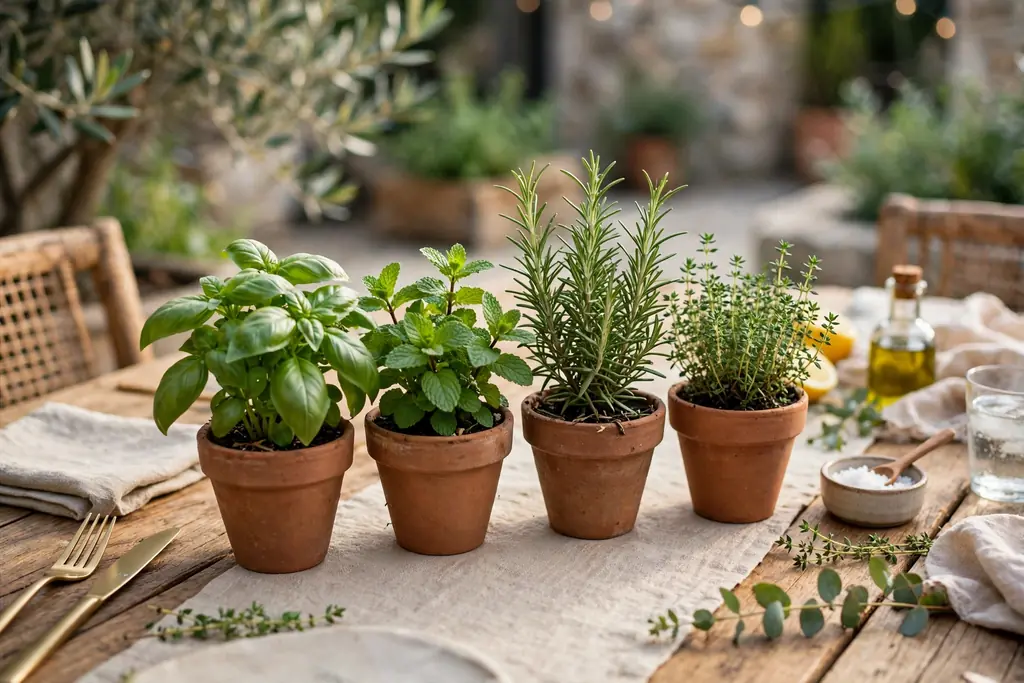
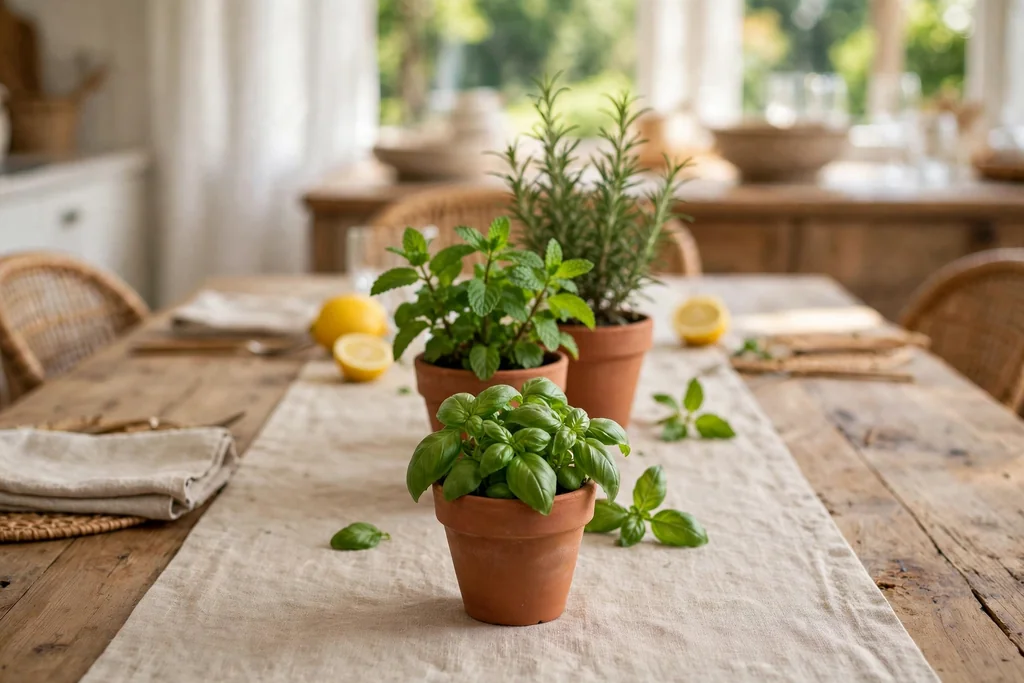
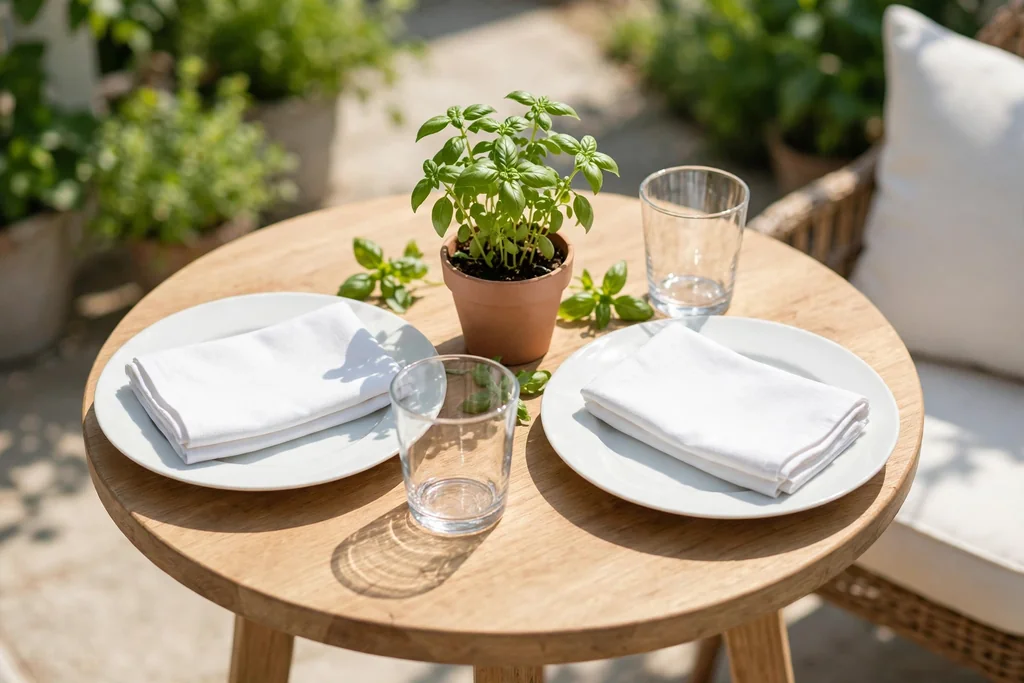
    Small terracotta pots of basil, mint, rosemary, and thyme grouped down the center of an outdoor dining table.

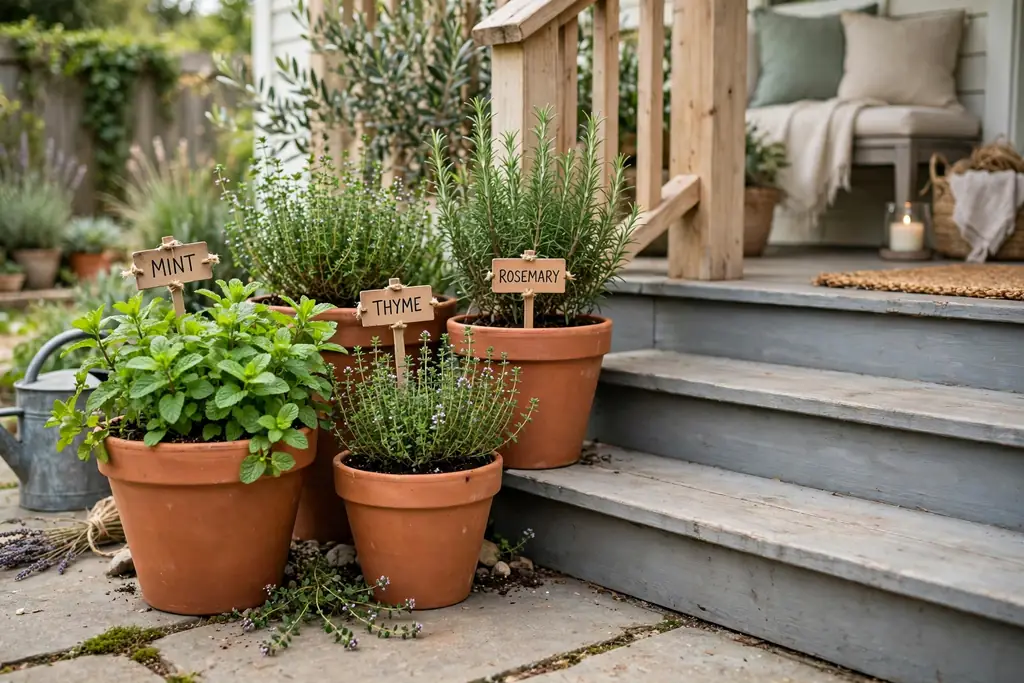
    Group three or four small pots of basil, mint, rosemary, and thyme down the center of the table, so the centerpiece smells good, looks green all season, and can be snipped for cooking. Herb pots last far longer outdoors than cut flowers in sun and heat, and they move back to a windowsill or garden bed after the meal. Use pots in one material, such as terracotta or white ceramic, so the group reads as one display.

    Water the herbs before the meal and set each pot on a small saucer, so the table stays dry. Keep pots small enough to see over, and trim tall stems before guests arrive. Keep mint in its own pot, since mint can crowd out other herbs in a shared planter.

    3. Low Citrus Bowl for a Backyard Lunch

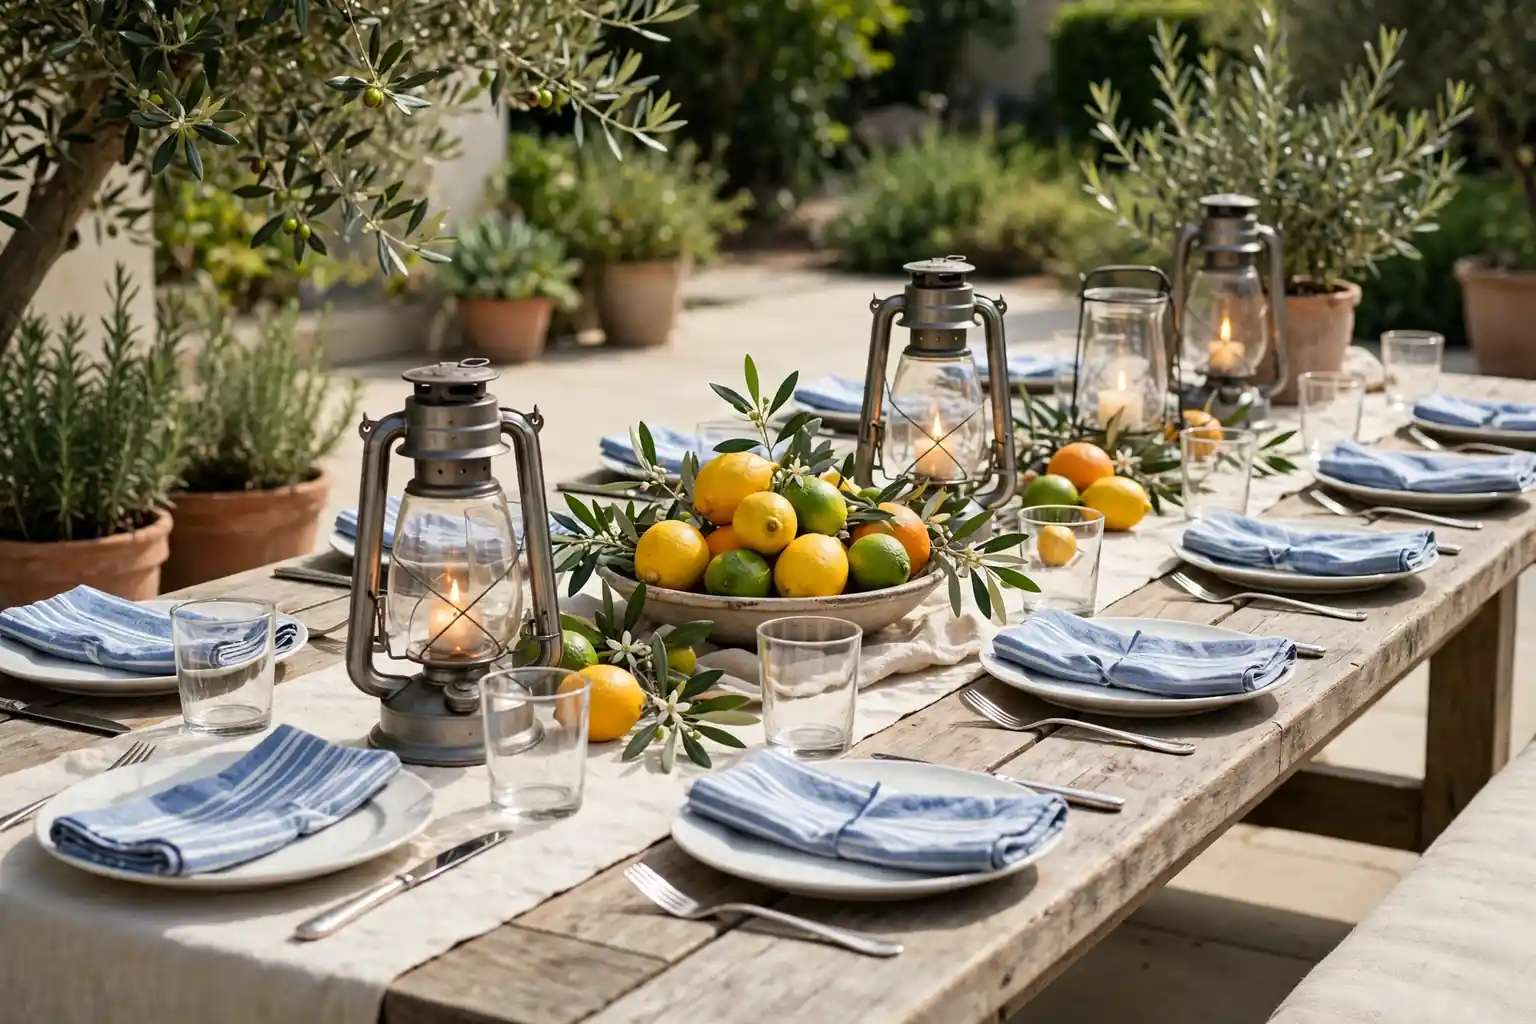
    Wide shallow bowl filled with lemons, limes, and oranges with green leaves as a centerpiece on an outdoor table.

    Fill a wide, shallow bowl with lemons, limes, and a few oranges, and set it in the center of the table as a centerpiece you can also cook with later. The fruit gives clear color and shape, and the bowl takes up only one spot, leaving the rest of the table free for plates and serving dishes. Add a few green leaves between the fruit to break up the round shapes.

    Check the fruit before the meal and move any soft piece to the kitchen, since one spoiling lemon can mark the rest. Keep the bowl low and wide rather than tall, so it does not block sightlines. At the end of the meal, the bowl can move to the counter, which makes clearing the table a single step.

    4. Hurricane Lantern Trio on a Wood Tray
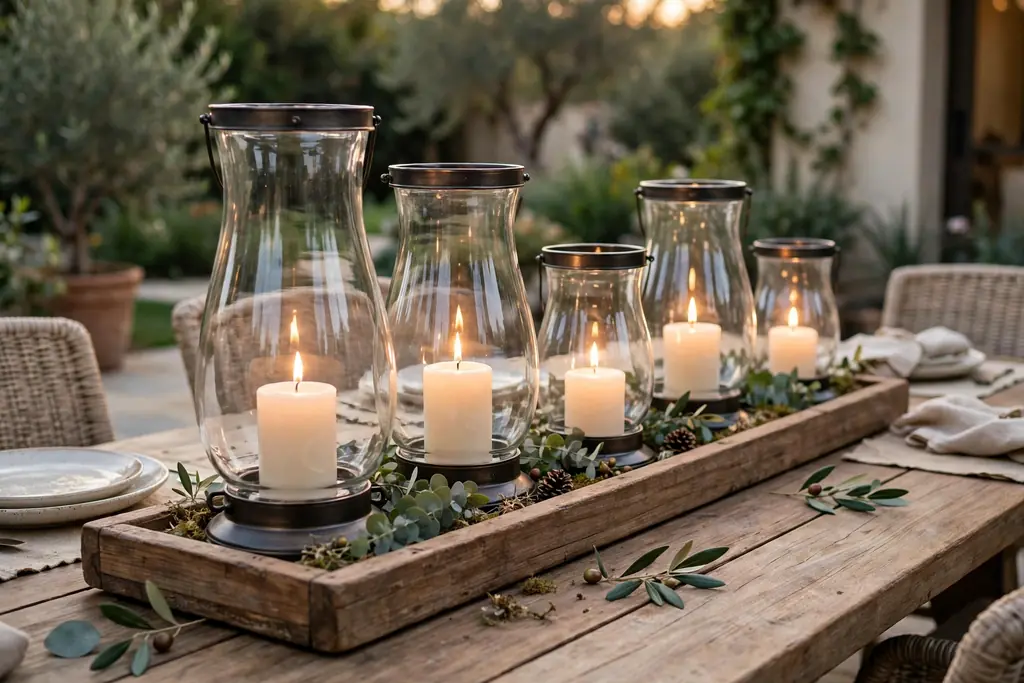
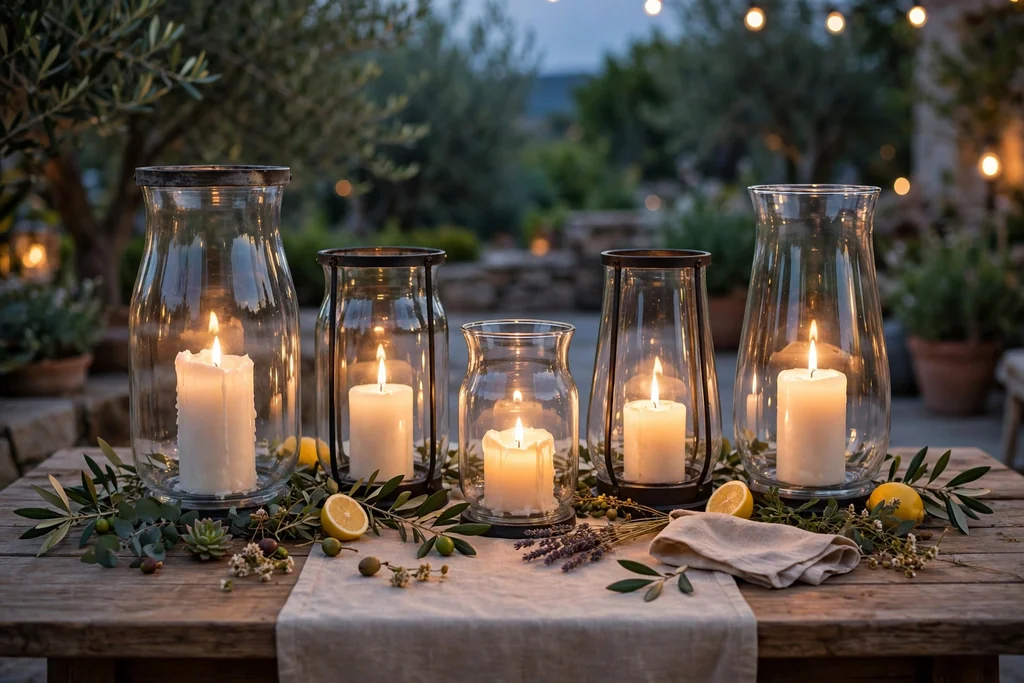
    Glass hurricane lanterns of different heights with candles on a long wood tray down the center of an outdoor table.

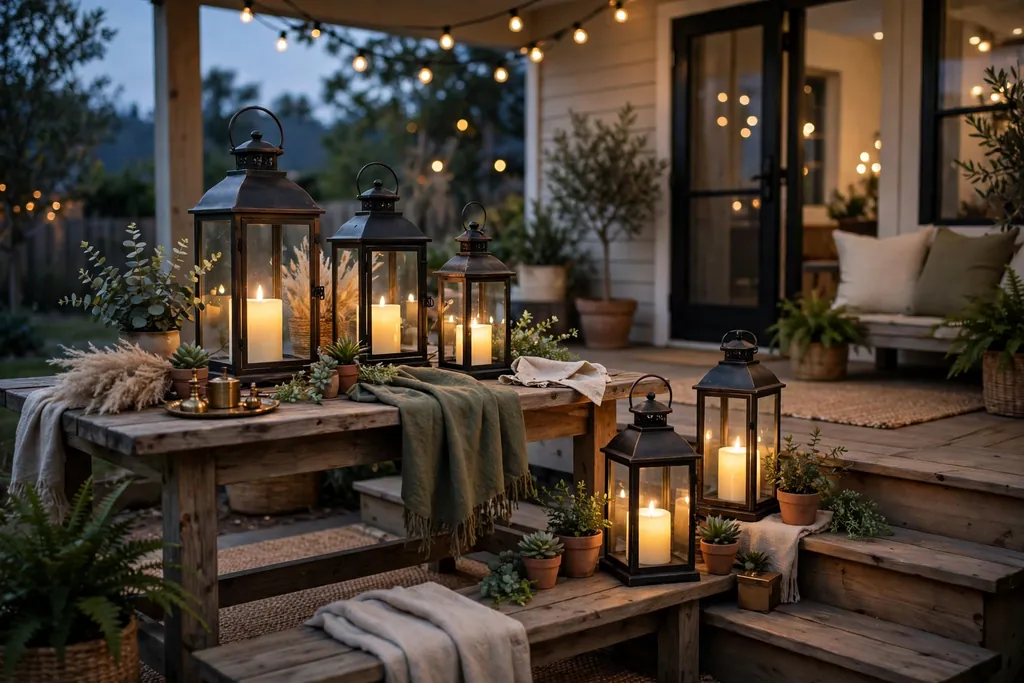
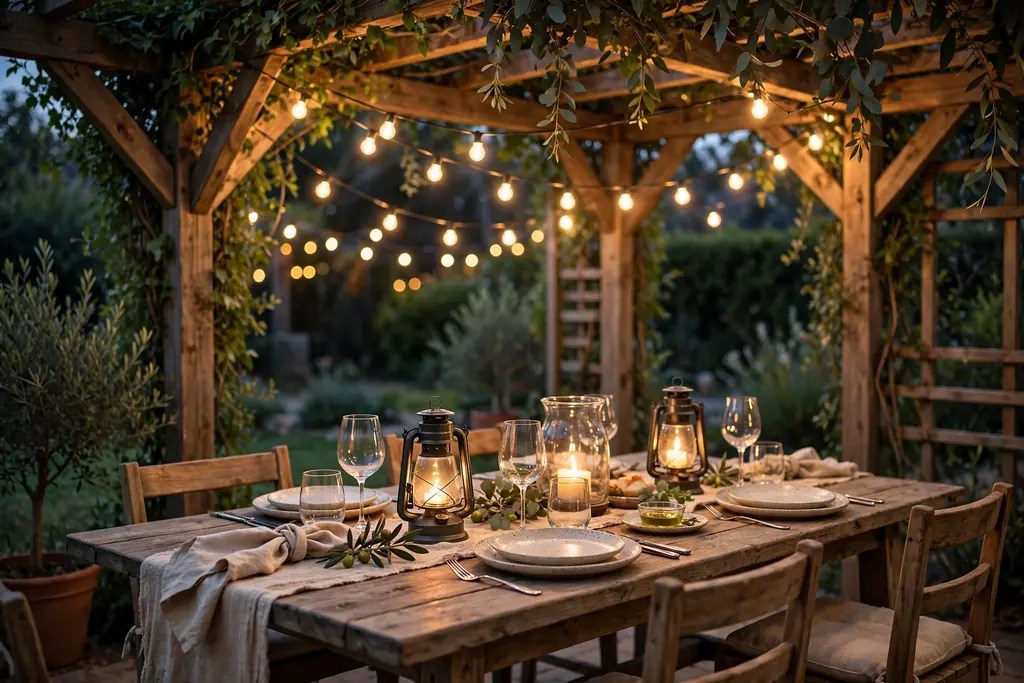
    Set three glass hurricane lanterns of different heights on a long wood tray down the center of the table, each holding a pillar or battery candle. The tray keeps the group contained, so it lifts off in one move when rain starts or the table needs to clear, and the glass shields the flame from a light breeze. This idea suits evening gatherings on a patio or deck.

    Keep lanterns low enough to see over, and set the tray flat so lanterns do not slide. Use battery candles inside closed lanterns or near fabric, and real candles only in proper holders on a stable surface. Wash the glass before the meal, since dust and fingerprints show more on clear glass in candlelight.

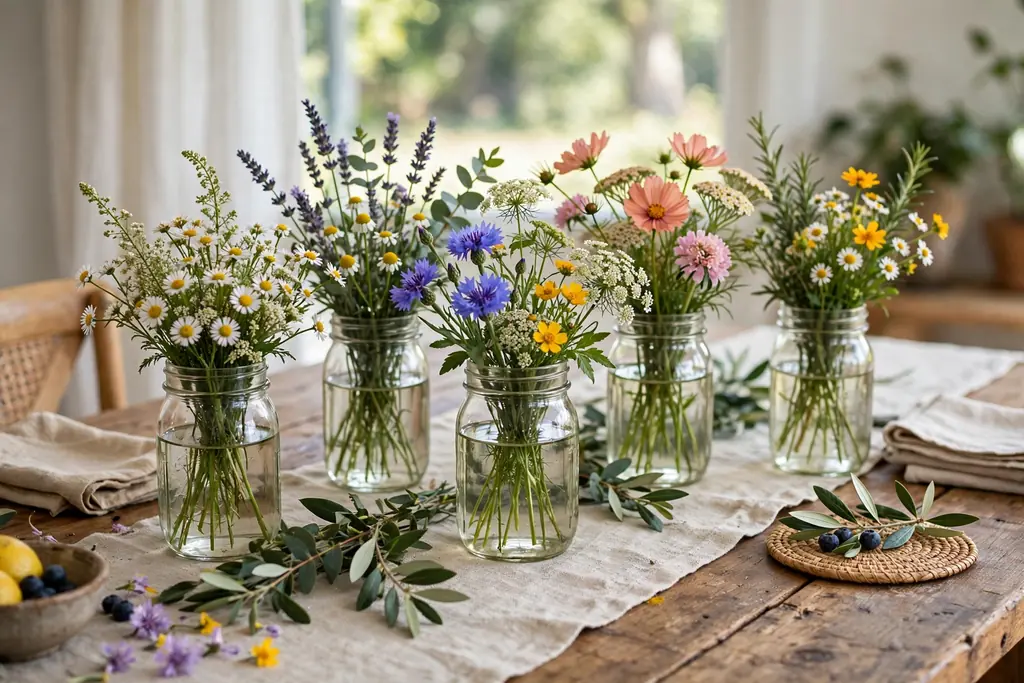
    5. Wildflower Jars in a Wooden Crate
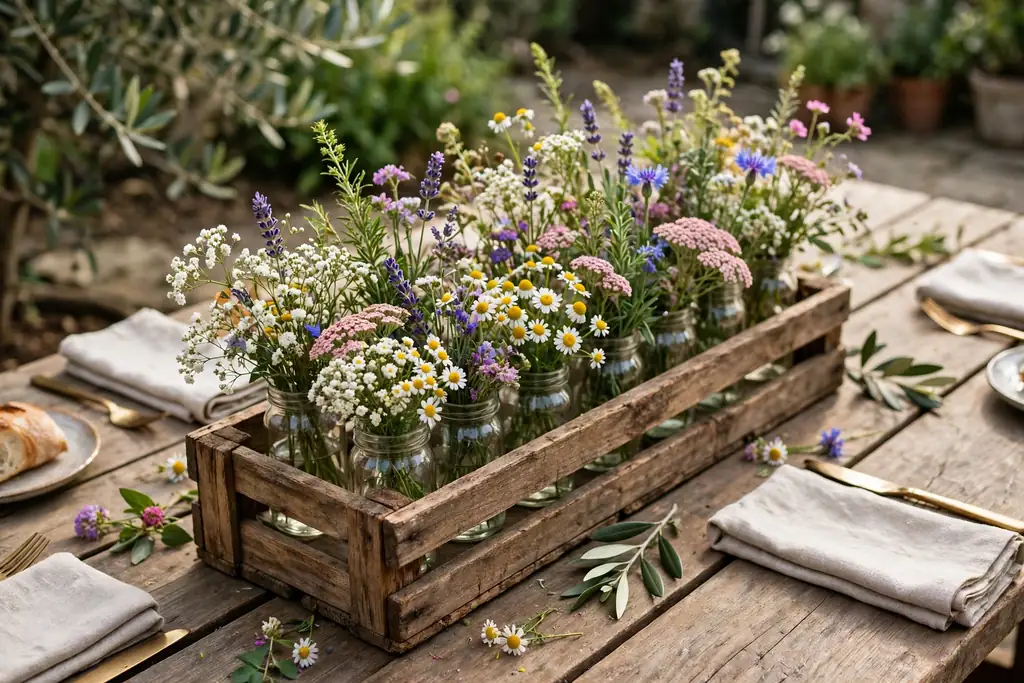
    Small jars of wildflowers set in a low wooden crate down the center of an outdoor gathering table.

    Fill four or five small jars with short stems of wildflowers, such as zinnias, cosmos, or daisies, and set the jars in a low wooden crate down the center of the table. The crate keeps the jars upright in wind, and the group looks relaxed and casual, which suits a brunch, a lunch, or a family dinner outdoors. Use jars of the same size for a matched group, or mix two sizes for a looser look.

    Trim stems so the flowers sit just above the jar rim, and keep the total height low enough to see across. Add a few stones to the bottom of each jar to weight it, and change the water if the flowers will stay out for more than a day. Remove any stem that wilts, since one cloudy jar can spoil the group.

    6. Succulent Pots on a Stone Slab
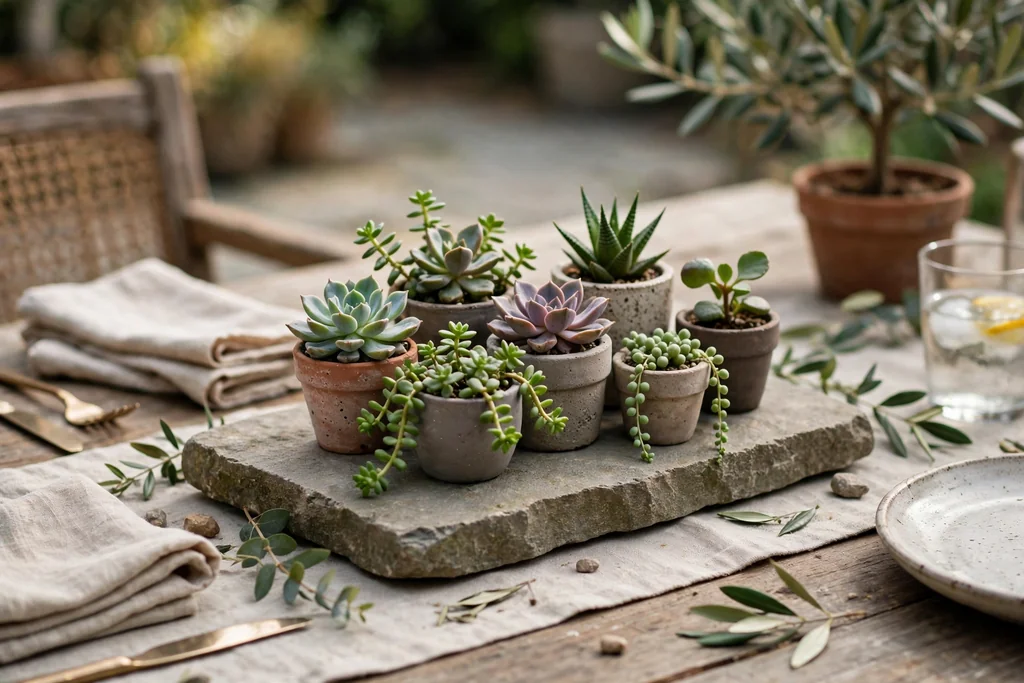
    Succulent pots grouped on a flat stone slab as a centerpiece on an outdoor dining table.

    Group three succulent pots on a flat stone slab or a large stone tile down the center of the table, so the centerpiece stays heavy, needs no water during the meal, and handles sun well. Succulents suit a modern patio, a dry garden table, or a small bistro table, and they last for weeks with little care. Use pots in one color, such as grey, white, or terracotta, so the group reads as one display.

    Vary the succulent shapes, with one rosette, one trailing plant, and one upright plant, and leave space between pots so each shape shows. Set each pot on the slab, not directly on a cloth, so soil does not mark the table. Wipe leaves clean before setting them out, since dust shows more on fleshy leaves in daylight.

    7. Ring of Bud Vases Around an Umbrella Pole
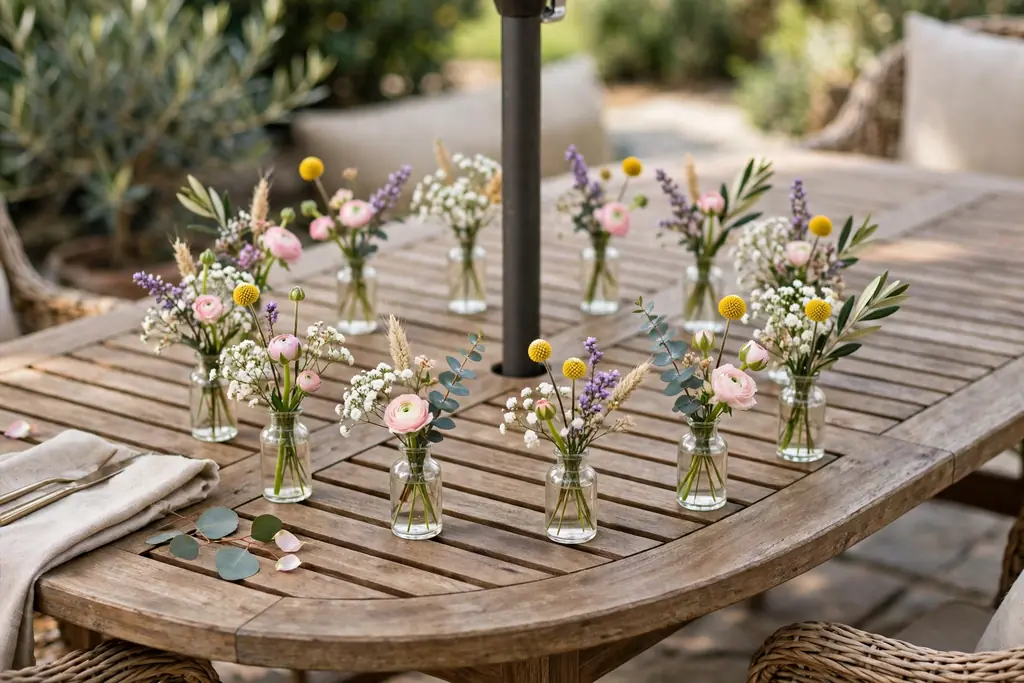
    Small bud vases with short stems arranged in a ring around an umbrella pole on a patio table.

    Place four or five small bud vases in a ring around the umbrella pole, each holding one or two short stems, so the pole becomes part of the centerpiece instead of an obstacle. This idea solves the most common patio table problem, since the pole sits in the middle of the table where a centerpiece would normally go. Use vases of the same height, or two heights set in an alternating pattern around the pole.

    Keep stems short, so they do not brush the umbrella canopy or block sightlines, and weight each vase with a few stones if the table is light. Use the same flower or leaf in every vase, so the ring looks planned rather than random. When the umbrella closes, lift the ring off in one tray or move the vases to the table ends.

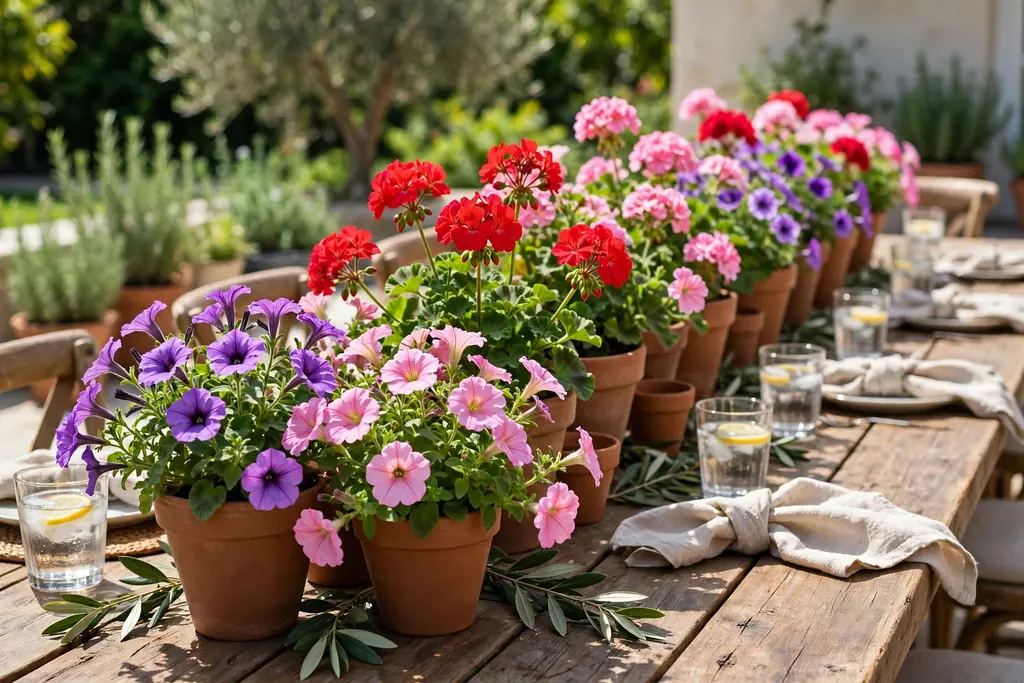
    8. Terracotta Geranium Pots for a Patio Table
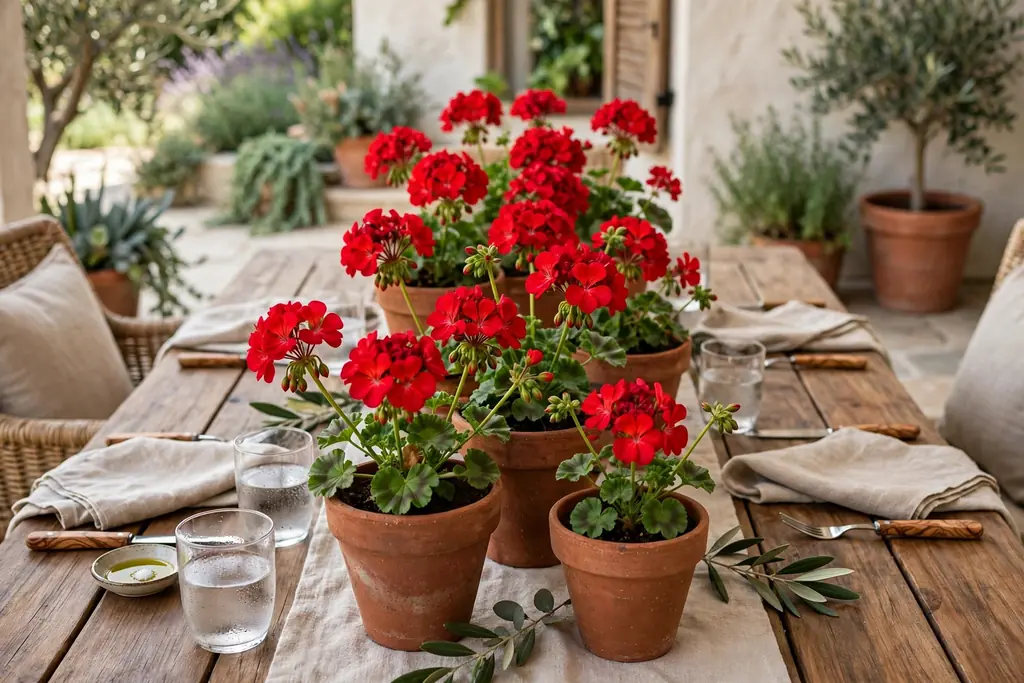
    Terracotta pots of geraniums grouped down the center of a patio dining table.

    Group three terracotta pots of geraniums down the center of the table, so the centerpiece brings real garden color to a patio or deck. Terracotta suits white, cream, and wood tables, and the pots can move back outside after the meal, where the plants keep growing. Use pots in one size for a matched group, or one larger pot with two smaller ones.

    Water the plants before the meal and set each pot on a saucer, so the table stays dry and soil does not mark the cloth. Trim spent blooms before guests arrive, and keep pots clear of elbows and serving dishes. If blooms drop petals, shake the pots outside before bringing them in, and sweep the table after the meal.

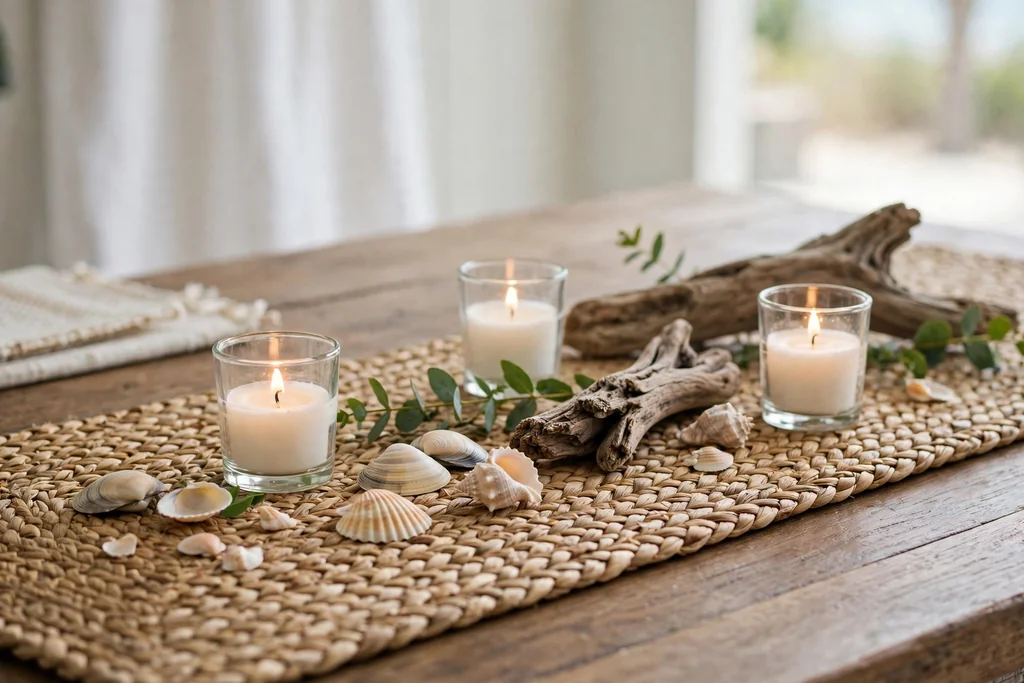
    9. Driftwood and Shell Group for a Coastal Table
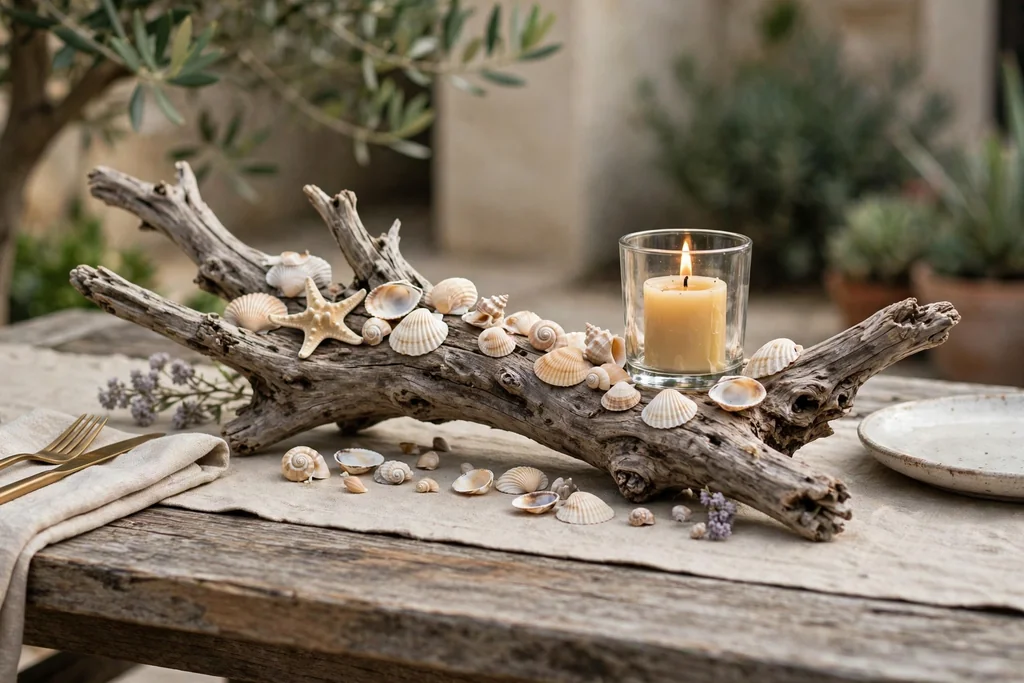
    Driftwood piece with shells and a short candle in a glass holder as a centerpiece on an outdoor table.

    Set one piece of driftwood down the center of the table, with two or three shells, a small rope knot, and one short candle in a glass holder beside it, for a coastal note that suits a beach house patio or a bright garden table. The driftwood gives a natural line without height, and the small group leaves plenty of room for plates and drinks. Keep shell accents to a small number, so the table still looks tidy.

    Wash and dry shells and driftwood before setting them out, and check driftwood for rough edges that could snag a cloth. Use shells large enough to see but small enough to leave room for serving dishes. For everyday meals, use the driftwood alone and skip the shells, so clearing the table stays quick.

    10. Fairy Lights in Glass Bottles
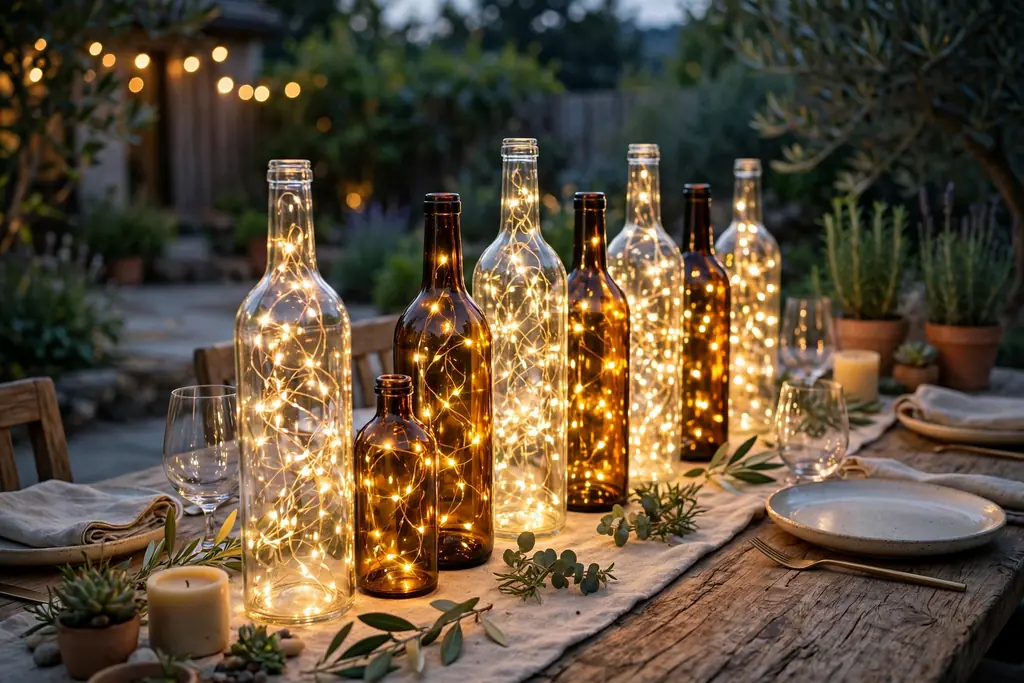
    Clear and amber glass bottles filled with battery fairy lights down the center of an outdoor table in the evening.

    Fill two or three clear or amber glass bottles with battery fairy lights, and set them down the center of the table for evening light that needs no flame. The bottles glow softly after sunset, suit a casual dinner on a deck or patio, and stay steady in a light breeze because glass bottles are heavier than paper lanterns. Use bottles of different heights, with the tallest bottle in the middle.

    Switch the lights on before guests sit down, and keep spare batteries nearby if the gathering will run late. Wash the bottles before the meal, since fingerprints show more on clear glass in low light. For a table with children, battery lights in bottles give the glow of candles without an open flame.

    11. River Stone and Pillar Candle Bowl
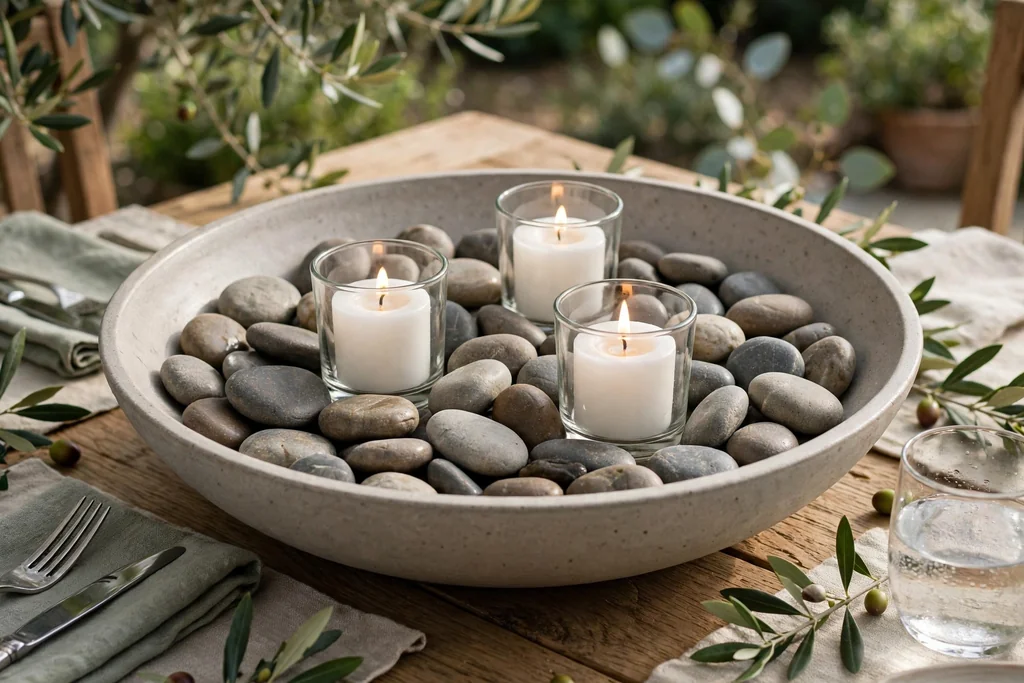
    Wide shallow bowl of smooth river stones with short pillar candles in glass holders on an outdoor table.

    Fill a wide, shallow bowl with smooth river stones, and set two or three short pillar candles in glass holders among the stones, so the centerpiece stays heavy, low, and wind resistant. The stones weight the bowl, and the candles give evening light without a tall arrangement that could topple. This idea suits a neutral table, where natural shapes and candlelight carry the look.

    Use stones large enough to stay put, and keep candles in holders, clear of any fabric or paper. Wipe stones clean before setting them out, since dust shows on smooth stone in daylight. For a table with young children, use battery candles in the same holders for the same look without a flame.

    12. Sunflower Bucket Centerpiece
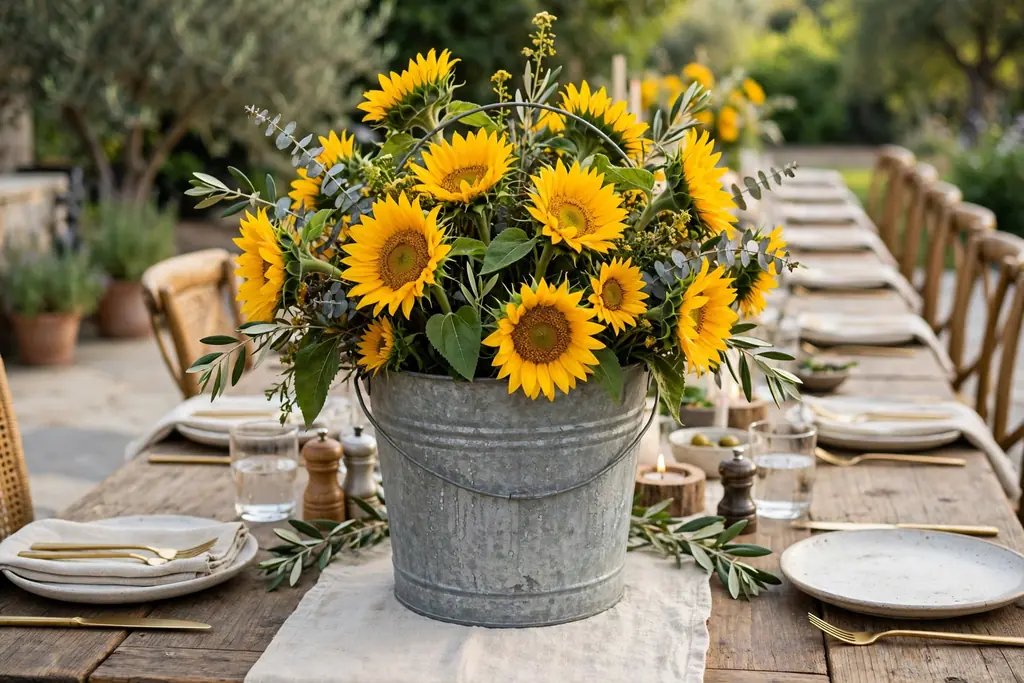
    Galvanized bucket of sunflowers as a centerpiece on a long outdoor gathering table.

    Set a galvanized bucket or a tin pail of sunflowers in the center of a long table, or at one end of a round table, for a clear summer note that suits a backyard gathering. Sunflowers give strong color with a single bunch, and the bucket keeps the stems contained and easy to move. Use one bunch for a small table, or two buckets at each end of a long table.

    Trim stems so the flower heads sit below eye level when guests are seated, and fill the bucket with enough water to keep stems fresh through the meal. Weight the bucket with a stone in the bottom if the table is light or the day is windy. Remove any drooping stem before guests arrive, and move the bucket to shade if the table sits in strong sun.

    13. Low Greenery Runner with Weighted Candle Holders
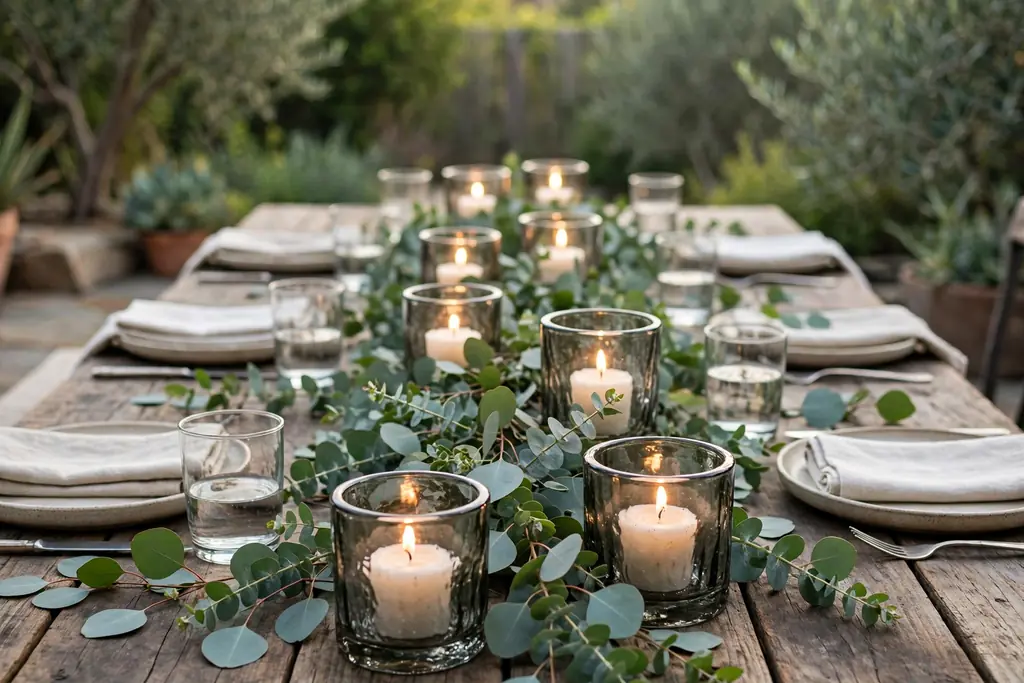
    Low runner of eucalyptus branches with short candles in heavy glass holders down the center of an outdoor table.

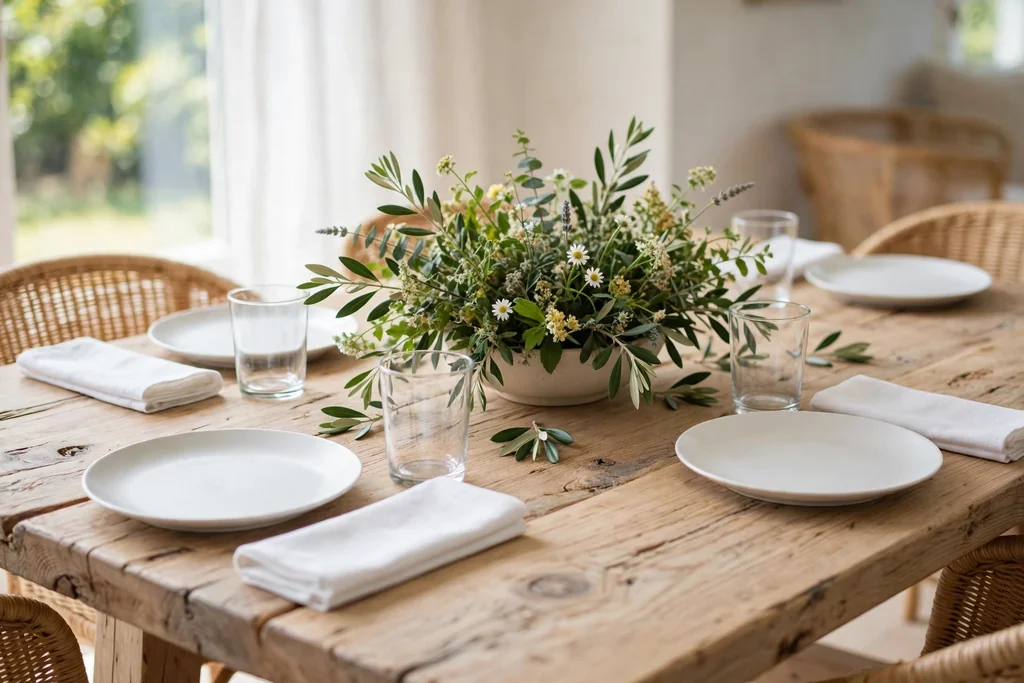
    Lay a low runner of eucalyptus or olive branches down the center of the table, then set short candles in heavy glass or stone holders along it at uneven intervals. The greenery gives color along the whole table without height, and the heavy holders stay put in a light breeze. This idea suits a long table for a gathering, where one long centerpiece reads better than several small groups.

    Trim the runner so it stays inside the table edges and does not brush plates or glasses. Keep real flames clear of the leaves, and use battery candles if the runner will sit near fabric or dry material. Shake the branches outside before laying them out, and remove any shedding leaves before the meal.

    14. Painted Tin Can Flower Holders
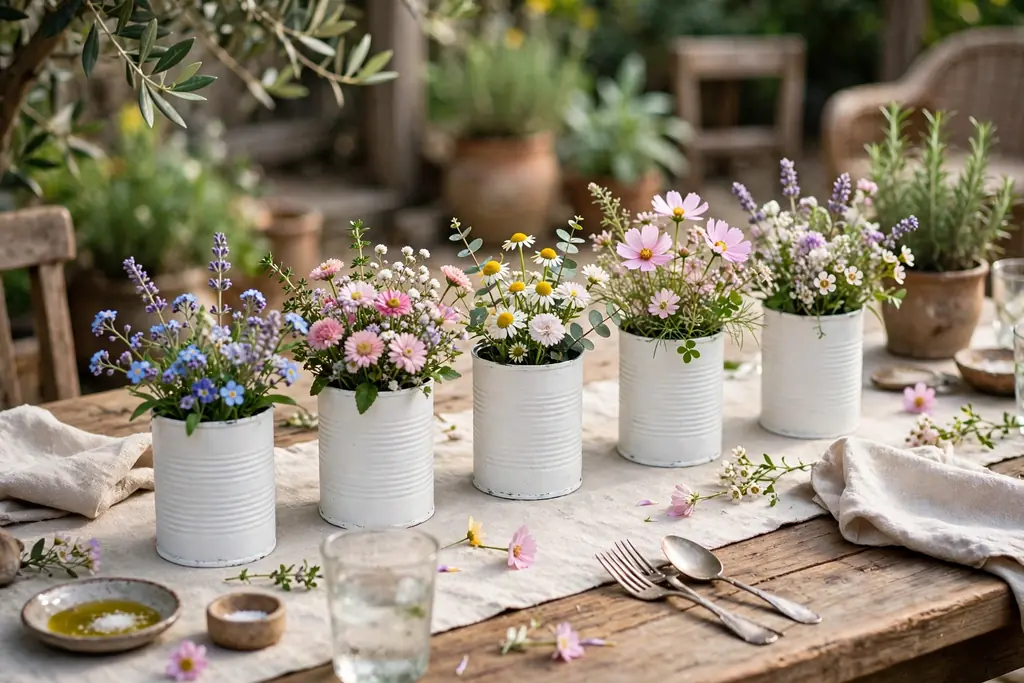
    Painted tin cans filled with short garden flowers set down the center of a casual outdoor table.

    Clean three tin cans, paint them in one color such as white, sage, or terracotta, and fill each with short stems of garden flowers, then set the cans down the center of the table. This idea costs little, reuses cans you already own, and suits a casual family gathering or a backyard lunch. Use cans of the same size for a matched group, and smooth any sharp rim before use.

    Add a few stones to the bottom of each can to weight it, and trim stems so the flowers sit just above the rim. Change the water if the flowers will stay out for more than a day, and remove any stem that wilts. For a windy patio, set the cans on a tray, so the group lifts off in one move if rain starts.

    15. Olive Sprigs in a Stoneware Jug

    Olive sprigs standing in a heavy stoneware jug as a centerpiece on a round outdoor table.

    Stand a small bunch of olive sprigs in a heavy stoneware jug at the center of a round table, or at one end of a long table, for a calm Mediterranean note. The jug keeps the sprigs steady in wind, and the soft green-grey leaves suit white plates, wood tables, and linen napkins. Keep the bunch small, so the jug does not block sightlines.

    Trim sprigs so the leaves sit below eye level when guests are seated, and keep the jug clear of elbows and serving dishes. If fresh sprigs shed, shake them outside before bringing them in, or use faux sprigs in the same jug for a no-shed version. Wipe the jug clean before setting it out, since dust shows on stoneware in daylight.

    16. Lemon Leaf and White Flower Arrangement
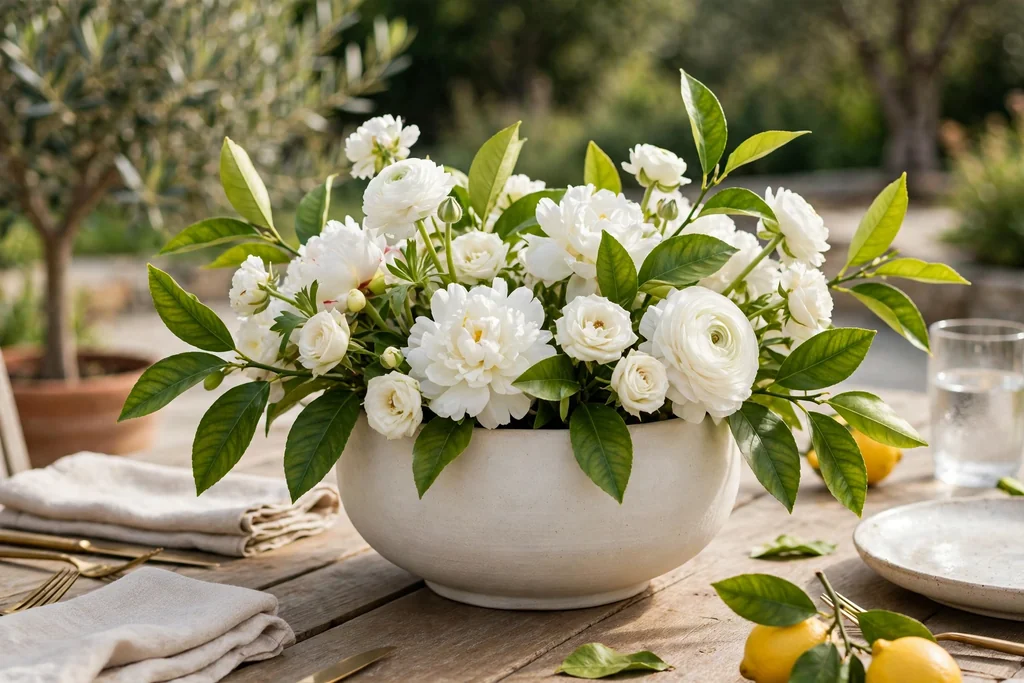
    Low wide vase of white flowers with lemon leaves as a centerpiece on an outdoor dining table.

    Set a low, wide vase of white flowers, such as white daisies or white carnations, with lemon leaves tucked between the stems, down the center of the table. The white flowers give a fresh, clean note, and the lemon leaves add scent and a clear green shape without needing a large arrangement. Use one vase for a small table, or two matching vases for a long table.

    Trim stems so the flowers sit low, and keep the total height below eye level when guests are seated. Change the water if the arrangement will stay out for more than a day, and remove any stem that wilts. For a windy patio, choose a wide, heavy vase, and add stones to the bottom to weight it.

    17. Citronella Candles in Terracotta Pots
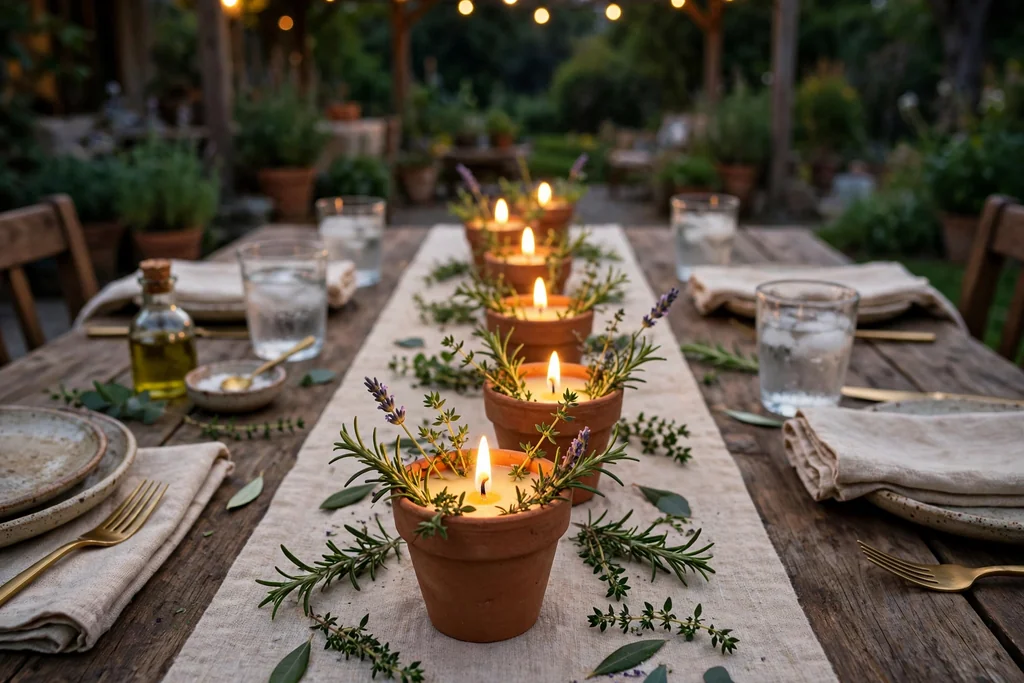
    Citronella candles in small terracotta pots with herb sprigs down the center of an outdoor evening table.

    Set two or three citronella candles in small terracotta pots down the center of the table, with a short herb sprig tucked beside each pot, for evening light that also helps with outdoor insects. The pots weight the candles, suit a patio or garden table, and look like part of the table decor rather than a separate repellent. Use pots in one size for a matched group.

    Keep candles in their pots on a tray or saucer, clear of fabric, paper, and dry material, and never leave them burning unattended. Trim wicks before lighting, and use battery candles instead if children will sit close to the table. Store citronella candles with their lids on when not in use, so the scent stays contained.

    18. Lavender Pots in a Row
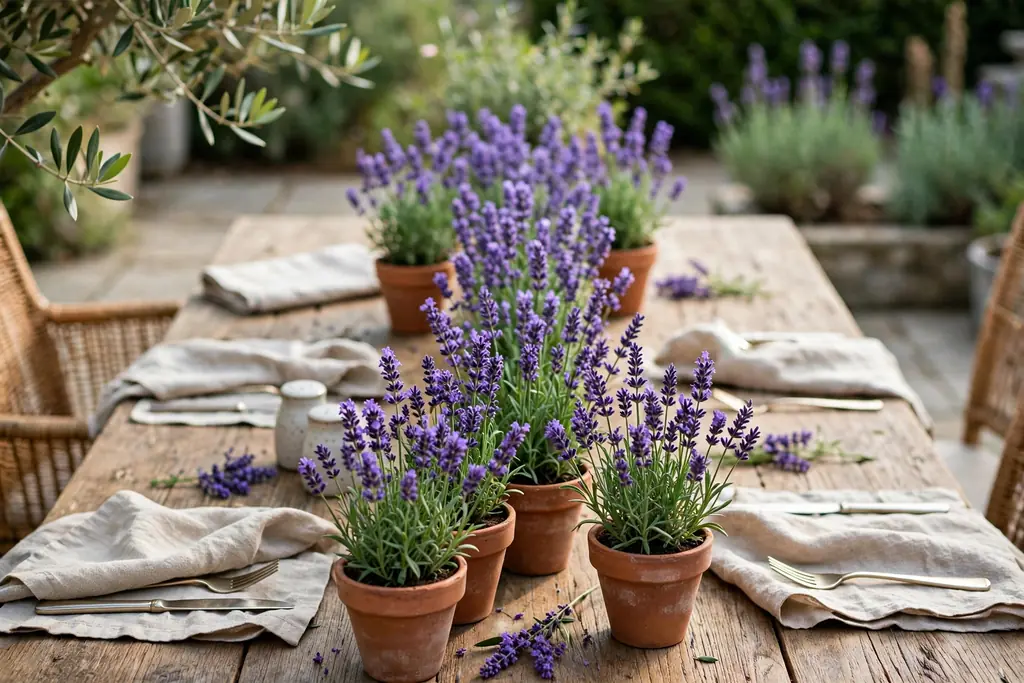
    Small pots of lavender grouped in a row down the center of an outdoor dining table.

    Group three or four small pots of lavender down the center of the table, so the centerpiece gives purple color, scent, and a clear garden note in one row. Lavender suits a cottage patio, a garden table, or a brunch gathering, and the pots move back outside after the meal, where the plants keep growing. Use pots in one material, such as terracotta or white ceramic, so the row reads as one display.

    Water the plants before the meal and set each pot on a saucer, so the table stays dry. Trim spent blooms before guests arrive, and keep pots small enough to see over. If lavender drops buds, shake the pots outside before bringing them in, and sweep the table after the meal.

    19. Wood Slice Tiered Stand with Candles and Small Plants
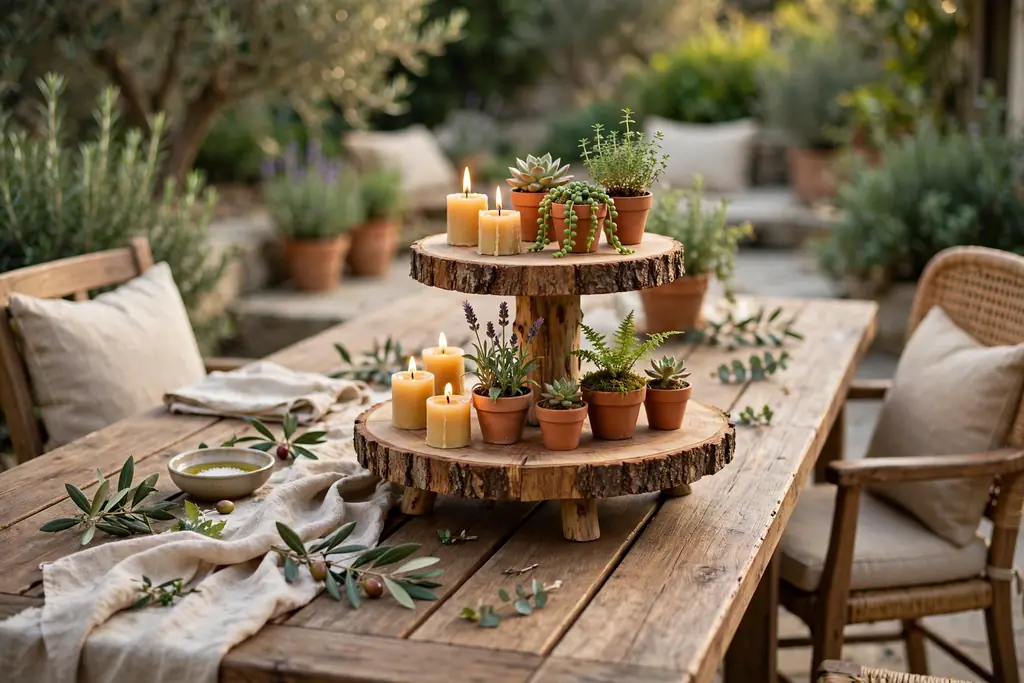
    Two tier wood slice stand with short candles and small potted plants at the end of an outdoor table.

    Set a two tier wood slice stand at one end of the table or on a sideboard, and fill it with short candles in holders and two or three small potted plants, so the gathering table gains height without blocking the center. A tiered stand also works for serving, with small bites or fruit on the tiers at a buffet style meal, but keep food and decor on separate stands if both are in use.

    Keep the stand stable and clear of the main serving path, and put heavier items on the bottom tier. Use battery candles on the stand if it will sit near plants or paper, and real candles only in proper holders on a stable surface. Wipe the tiers after use, since soil and wax collect in the rims.

    20. Shell and Sand Tray for a Coastal Gathering
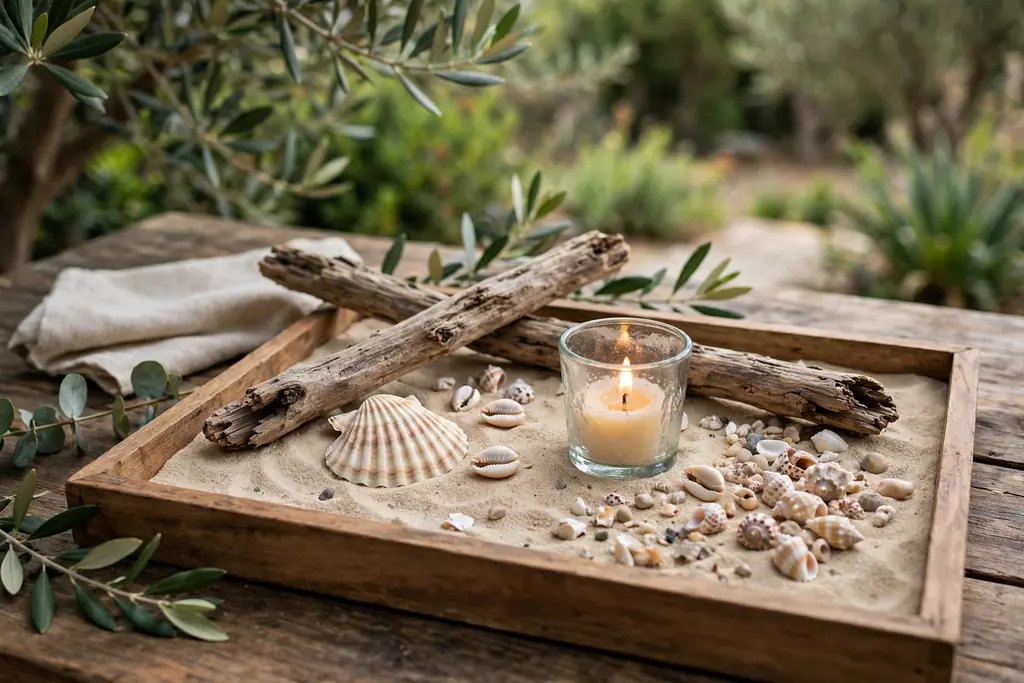
    Shallow tray with sand, shells, driftwood, and a short candle in a glass holder on an outdoor table.

    Fill a shallow tray with a thin layer of sand, then set two or three shells, a small piece of driftwood, and one short candle in a glass holder on the sand, for a coastal centerpiece that stays contained on one tray. The tray keeps sand off the table, and the group lifts off in one move when rain starts or the table needs to clear. This idea suits a beach house patio or a summer lunch outdoors.

    Use a tray with a raised edge, so sand stays inside, and keep the candle in a holder, clear of any dry material. Wash and dry shells before setting them out, and keep the group small, so plates and serving dishes still fit. For everyday meals, use the tray with shells alone and skip the candle, so clearing the table stays quick.

    21. Long Low Planter Box with Mixed Greens
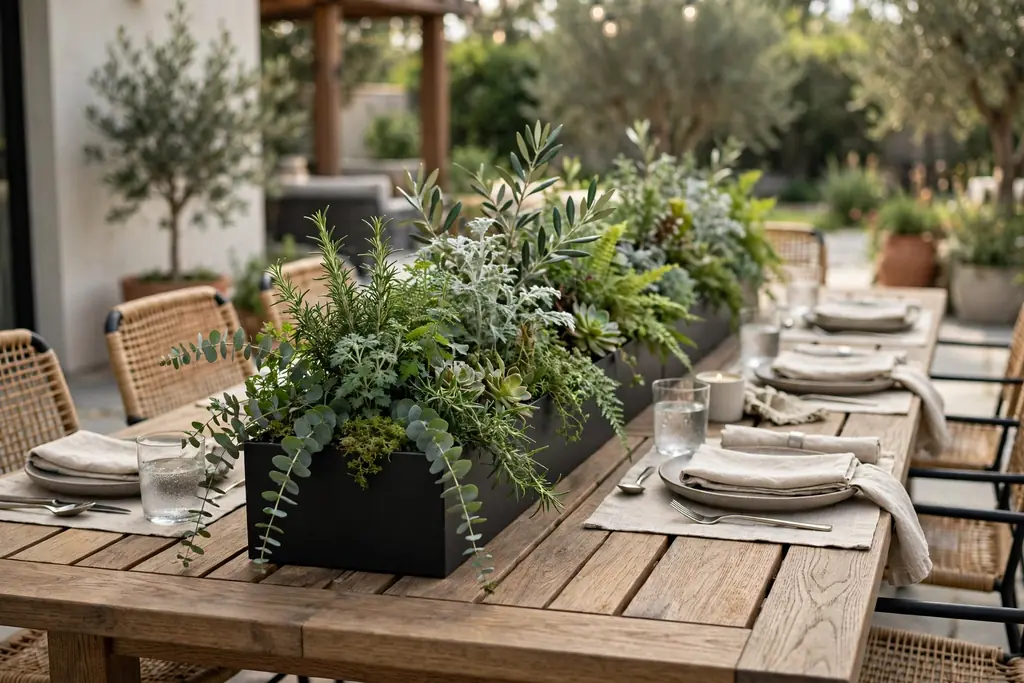
    Long low planter box filled with mixed greens down the center of a rectangular outdoor dining table.

    Set one long, low planter box down the center of a rectangular table, filled with mixed greens such as trailing ivy, small ferns, and a few herbs, for a centerpiece that looks like a small garden bed. The box gives green along the whole table without height, and it moves to a windowsill or garden bench after the meal. Use a box that fits the table with room at each end for serving dishes.

    Water the plants before the meal and line the box, so the table stays dry. Trim any stem that hangs over plates or glasses, and keep the total height low enough to see across. If the box is heavy, set it on a runner or mat, so it does not mark the table, and ask for help lifting it rather than dragging it across the surface.

    Conclusion

    Outdoor table centerpieces for casual gatherings do not need a large arrangement or new dishes. One low, weighted group, a small palette repeated at least twice, and cloth napkins that stay put will carry most tables, from a patio lunch to an evening dinner on a deck. Pick the ideas that fit your table size, your wind, and your daily routine, and keep serving space in mind first. For more table ideas in another season, see fall table decor ideas, and for the whole house, see fall decor ideas for home. Save this list for your next gathering, and work through it one idea at a time.

    FAQs

    What is the best height for an outdoor table centerpiece?

    Keep the centerpiece below eye level when guests are seated, so people can talk across the table without leaning around it. A low group of jars, pots, or a shallow bowl works best, with the tallest piece in the middle and shorter pieces at the sides. If a centerpiece blocks sightlines, move it to the table ends or swap it for a lower group.

    How do I stop an outdoor centerpiece from blowing over?

    Weight every light piece with heavy pots, a tray, hurricane glass, or stones in the bottom of jars and vases. Use cloth napkins instead of paper, skip tall, light arrangements on windy days, and set jars and vases on a tray so the group lifts off in one move. Bring linen and light pieces inside if strong wind or rain starts.

    What centerpiece works best for a patio table with an umbrella pole?

    Use a ring of small bud vases around the pole, each holding one or two short stems, so the pole becomes part of the centerpiece. Keep stems short, weight each vase with stones, and use the same flower or leaf in every vase. When the umbrella closes, lift the ring off in one tray or move the vases to the table ends.

    Can I use real candles outdoors?

    Yes, but keep real candles in glass holders on a stable surface, clear of fabric, paper, and dry material, and never leave them burning unattended. Use battery candles inside narrow jars, near children, or near fabric, and use hurricane glass to shield flames from a light breeze. Put candles out fully at the end of the meal.

    What is the simplest outdoor centerpiece for everyday meals?

    Start with a washable runner or placemats, cloth napkins, and one low centerpiece, such as a bowl of citrus or a row of herb pots. That set takes minutes to lay out, washes easily, and lifts off in one move when the table is needed for other uses. Add candles in glass holders in the evening, and the same base works for a weeknight dinner and a weekend meal.

    How do I store outdoor centerpieces after a gathering?

    Wash jars, vases, trays, and pots, dry them fully, and store them together in one box, so next setup is a single short job. Move live herb and flower pots to a windowsill or outside, compost spent flowers and leaves, and store candles with their lids on. Keeping the set together makes the next casual gathering easier to lay out.
  • 21 Outdoor Patio Seating Ideas for Spaces Big and Small

    21 Outdoor Patio Seating Ideas for Spaces Big and Small

    Outdoor patio seating works best when you match the seat to the space and the way you use it: a lounge set for relaxing, a dining set for meals, and one or two movable chairs for small patios. Start with a rug and shade, add weatherproof cushions, then leave room to walk around each seat with ease.

    The 21 ideas below cover large patios, narrow balconies, and everything between, so you can pick one seating group for your main use and add a second spot for quiet mornings or evening gatherings. The same layered approach that makes a fall front porch decor plan feel inviting works outdoors too, with cushions and light swapped by season as in exterior decorating for fall.

    Key Takeaways

    • Match the seat to the main use first: lounging, dining, or gathering around a fire.
    • Measure the patio and leave a clear walking path around every chair and table.
    • Choose outdoor rated frames and fabrics, or bring cushions indoors in rain, so seating stays tidy.
    • Anchor each seating group with a rug, and add shade with an umbrella, pergola, or nearby tree.
    • Repeat two or three colors across cushions, throws, and planters so separate seats read as one plan.
    • Add movable pieces, such as poufs or folding chairs, so the patio can flex for guests.

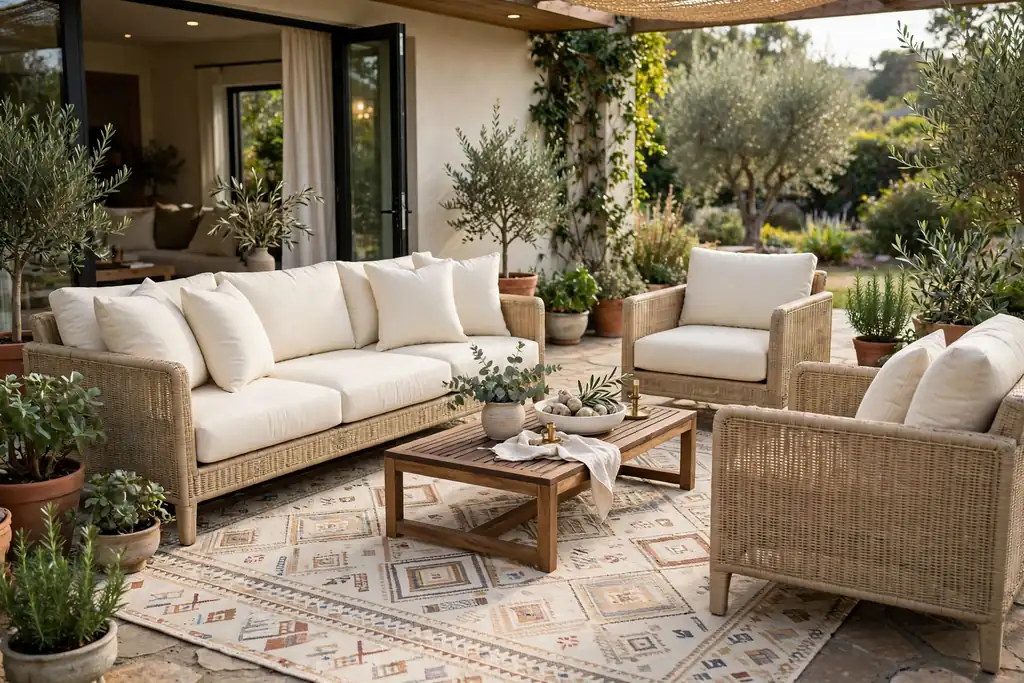
    1. Deep Seat Lounge Sofa Set

    Deep seat outdoor lounge sofa set with thick cushions and a coffee table on a patio rug.

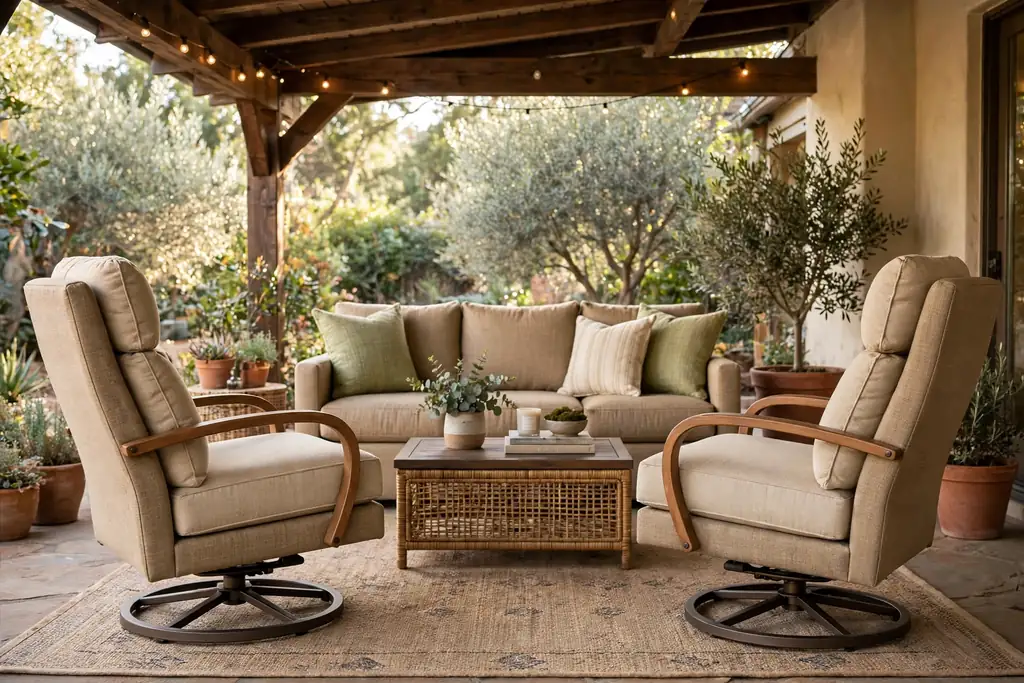
    A deep seat lounge sofa set gives a patio the feel of an outdoor living room. A three seat sofa with two matching armchairs and a low coffee table suits a large patio, with thick cushions that invite long sits. Set the group on a flat rug, facing the garden or the best view, and leave room behind each chair for easy movement.

    Choose frames in teak, powder coated metal, or all weather wicker, and cushions with removable, washable covers. If your patio is partly uncovered, pick quick dry foam fills or bring cushions indoors at night. Add a small side table at each end so drinks and books always have a place.

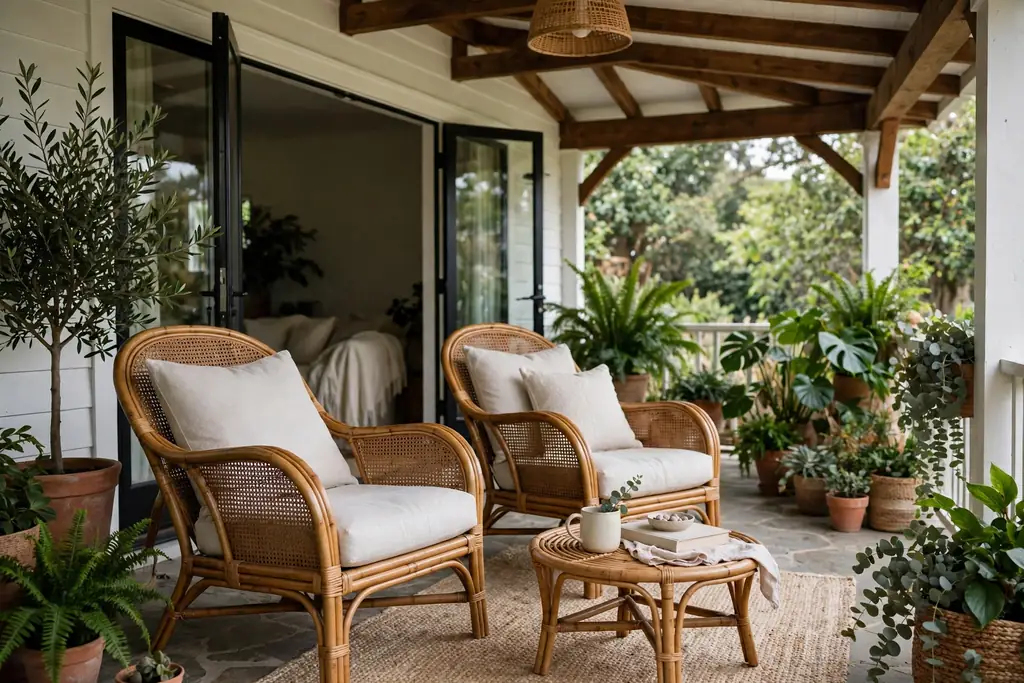
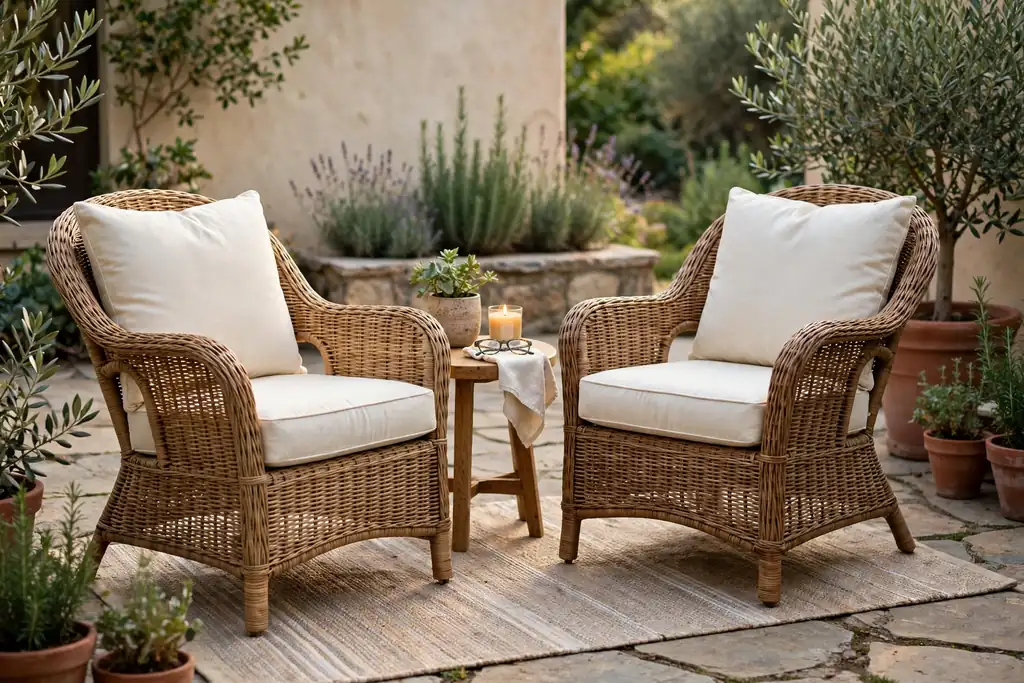
    2. Wicker Armchairs with a Side Table

    Two wicker armchairs with a small side table on a patio.

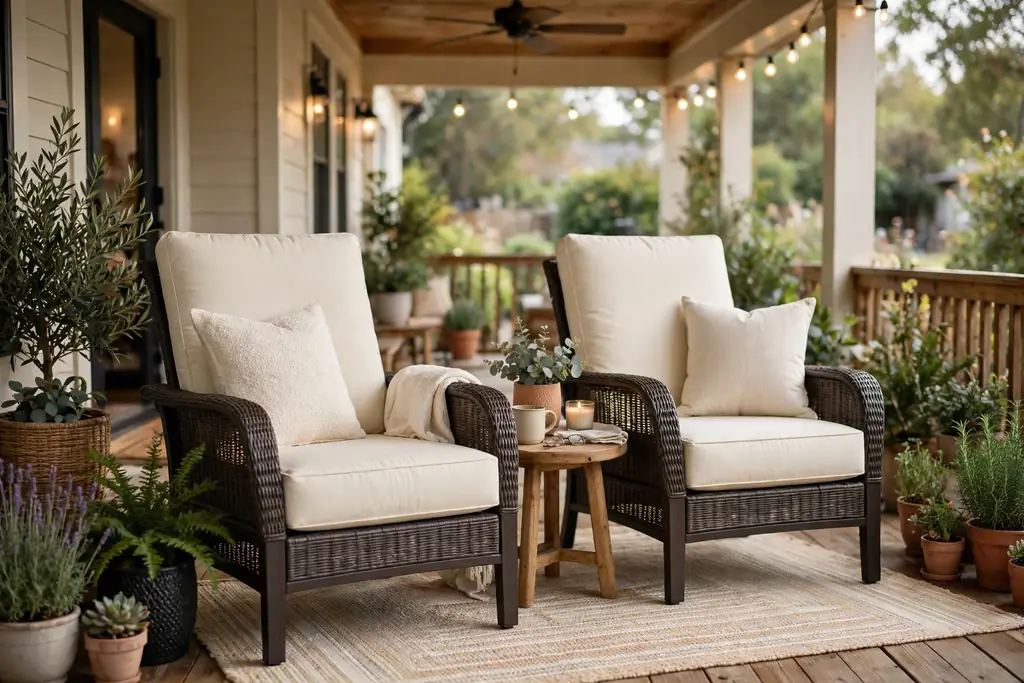
    Two wicker armchairs with a small side table make a simple conversation spot that fits most patios. Place the chairs at a slight angle toward each other, close enough for easy talk, with the table between them for drinks. The woven texture warms stone and concrete patios without a large furniture purchase.

    Pick cushions in one calm color, such as cream or sage, and add a folded throw over one chair arm for cool evenings. If the chairs sit in full sun, choose fade resistant fabric and rotate the cushions weekly so color wear stays even. This pair also works as a second seating spot beside a larger dining group.

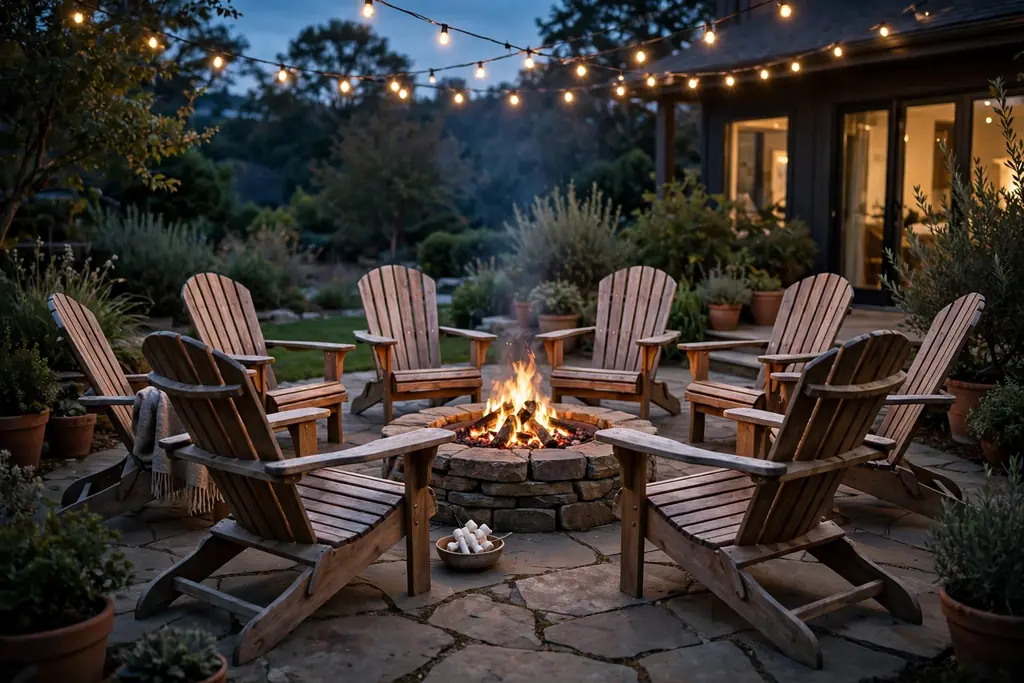
    3. Adirondack Chairs Around a Fire Pit

    Adirondack chairs arranged around a fire pit on a patio at dusk.

    Adirondack chairs around a fire pit turn a patio corner into a gathering place after dark. Set four to six chairs in a loose ring, with enough space between them for a small side table or a footrest. The wide arms hold drinks, so no extra table is needed, and the low, reclined seat suits long evenings.

    Check local rules for open flames before lighting a fire, and keep cushions and throws clear of sparks. If the chairs sit on grass, set each leg on a flat stone so they stay level. Wood chairs need an annual oil or seal coat, while molded resin versions need only a wash each season.

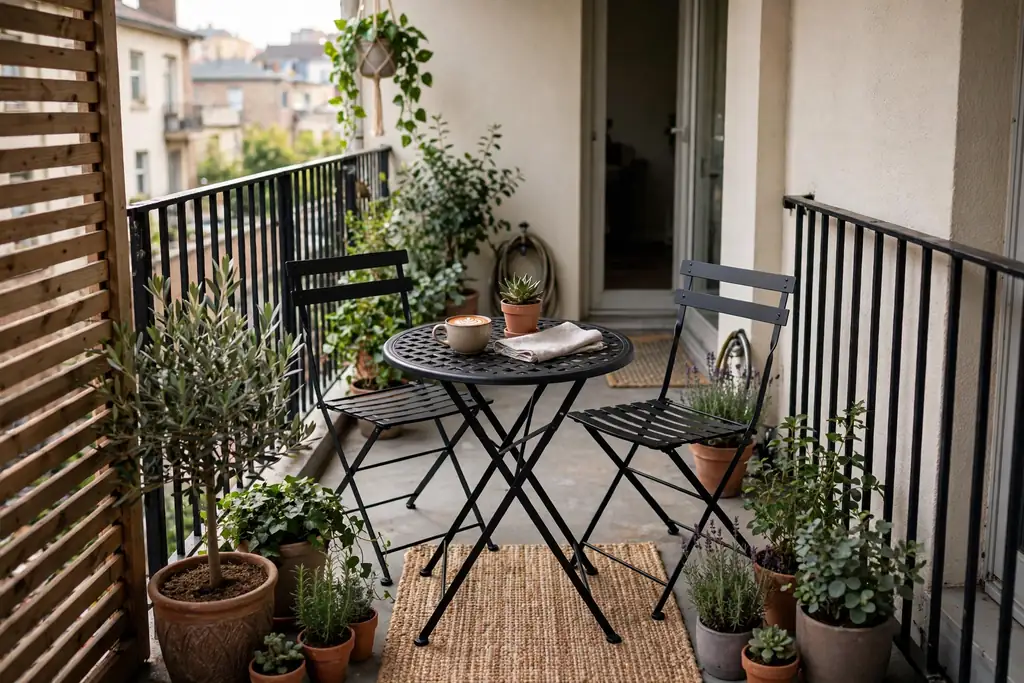
    4. Metal Bistro Set for Small Patios

    Small metal bistro set with two chairs and a round table on a narrow patio.

    A metal bistro set with two chairs and a small round table fits balconies and narrow patios that cannot hold a full lounge group. Tuck the set into a sunny corner or beside a door, and fold the chairs flat when the space must serve another purpose. The light frame moves with ease, so you can chase shade through the day.

    Choose a set with a stable base that does not wobble on uneven pavers, and add one thin seat pad per chair for comfort. If wind is a problem, pick heavier cast metal rather than thin tubular frames. A bistro set also suits a side yard nook where a single chair and table are all the space allows.

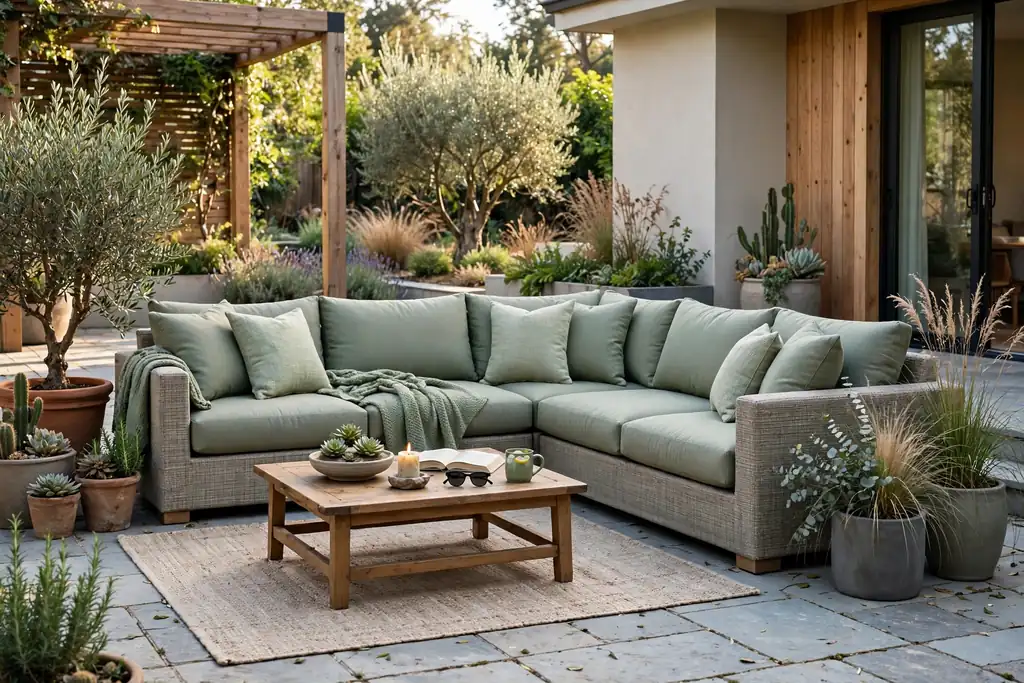
    5. L Shaped Outdoor Sectional

    L shaped outdoor sectional with cushions on a large patio.

    An L shaped outdoor sectional seats a crowd without a room full of separate chairs. Place the long side against a wall or railing, with the short side facing the garden, and add a coffee table or ottoman in the bend. The corner seat becomes the natural spot for reading, while the rest of the sectional serves guests.

    Measure the corner carefully before buying, since sectionals are hard to return once delivered. Leave at least two feet of walking space on the open sides, and choose a modular set if you want to split it into a sofa and chaise later. Store loose cushions in a deck box overnight in wet weather.

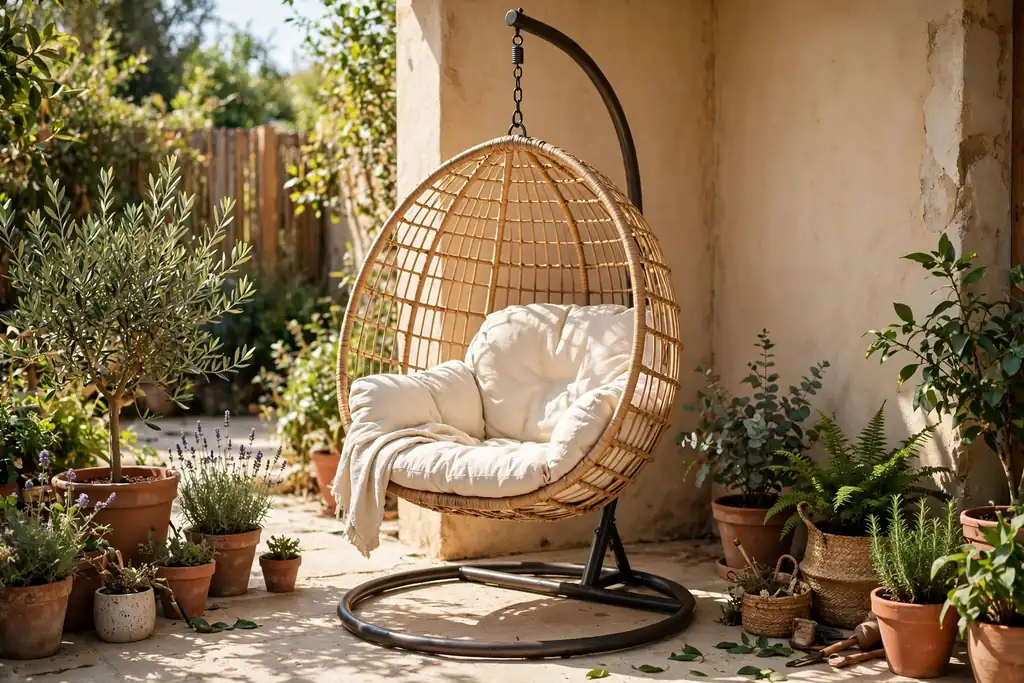
    6. Hanging Egg Chair for One

    Hanging egg chair with a cushion standing in a patio corner.

    A hanging egg chair gives one person a sheltered, swinging seat on a patio of any size. Hang it from its own stand on a flat surface, with room to swing forward and back without hitting a wall or railing. The curved frame feels private, which suits a reading corner or a quiet morning coffee spot.

    Check the weight rating of the stand and chair before use, and place the chair where the base sits fully on solid ground. Add a seat pad and one lumbar cushion, since the curved seat can feel deep without them. If the chair sits outside the roof line, bring the cushion indoors in rain to keep it fresh.

    7. Wooden Bench with Cushions

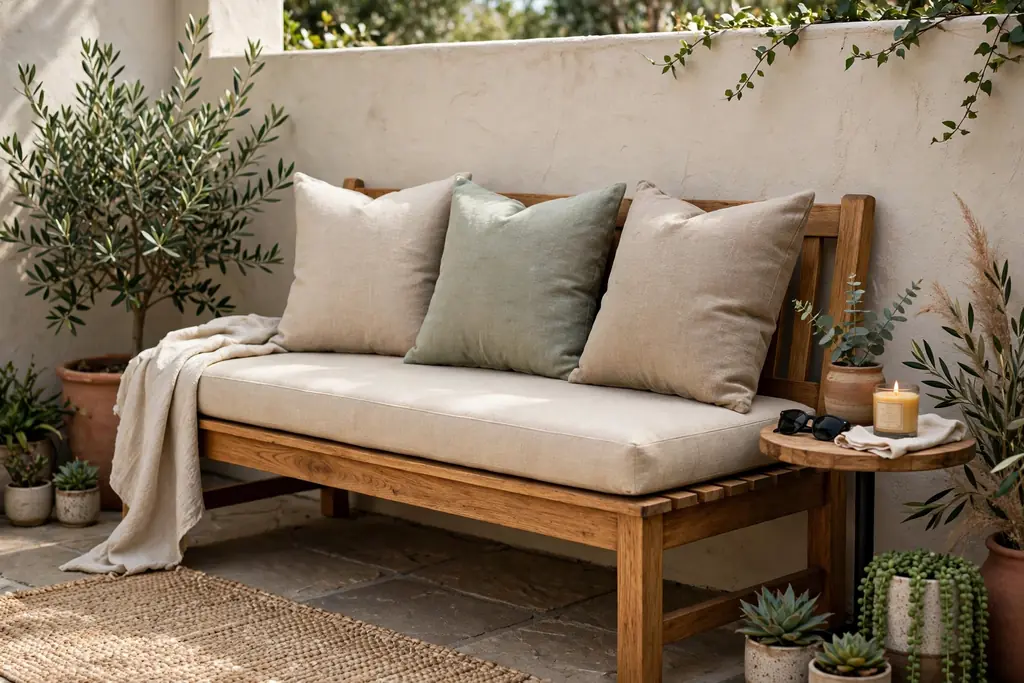
    Wooden bench with cushions set along a patio wall.

    A wooden bench with cushions seats two or three people along a patio edge or under a window. Set the bench against a wall or fence, add a long seat cushion and two or three back cushions, and pair it with a small table for drinks. The straight shape suits narrow patios where armchairs would crowd the path.

    Pick a bench in teak, cedar, or powder coated metal, and seal wood each year to slow weather wear. If the bench sits on soil, set its legs on flat stones so they stay level and dry. A bench with a lower shelf or open space below also holds baskets for cushions and throws.

    8. Freestanding Hammock for Lazy Afternoons

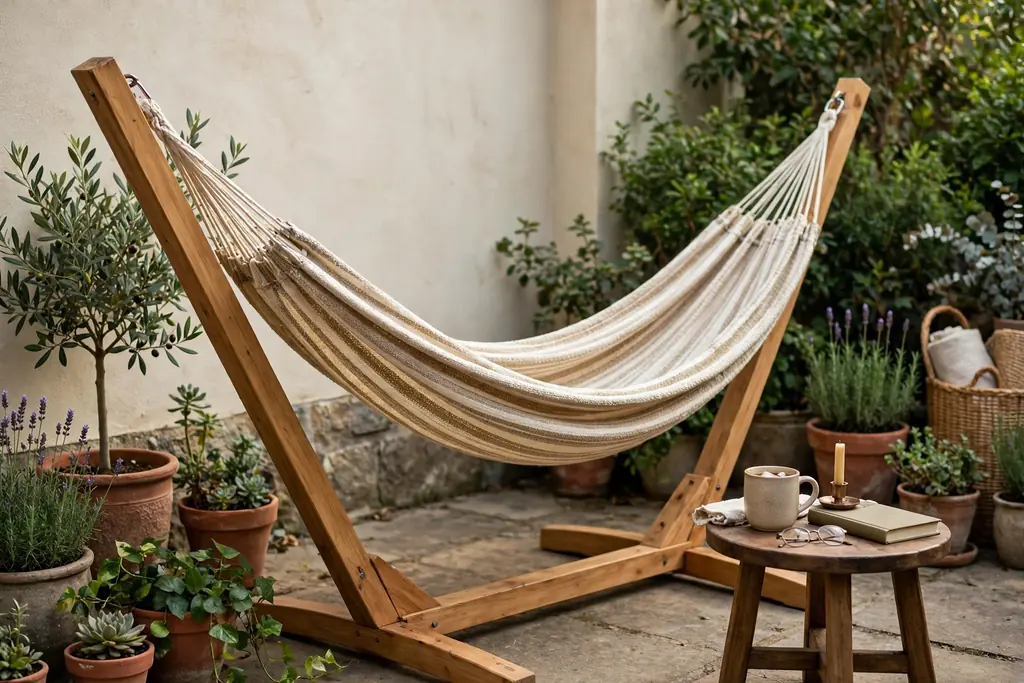
    Freestanding hammock on a stand in a quiet patio corner.

    A freestanding hammock gives a patio a lazy, open air seat that needs no trees. Set the stand on level ground away from the main walking path, and hang the hammock with a gentle sag so it cradles rather than pulls tight. One hammock suits a side yard or a quiet patio corner where naps and reading are the point.

    Choose a fabric hammock for softness, or a rope style for airflow on hot days, and test the hang height so getting in and out feels safe. Bring the fabric indoors in storms and over winter to extend its life. A hammock pairs well with a small side table for a drink and a book.

    9. Dining Table with Six Chairs

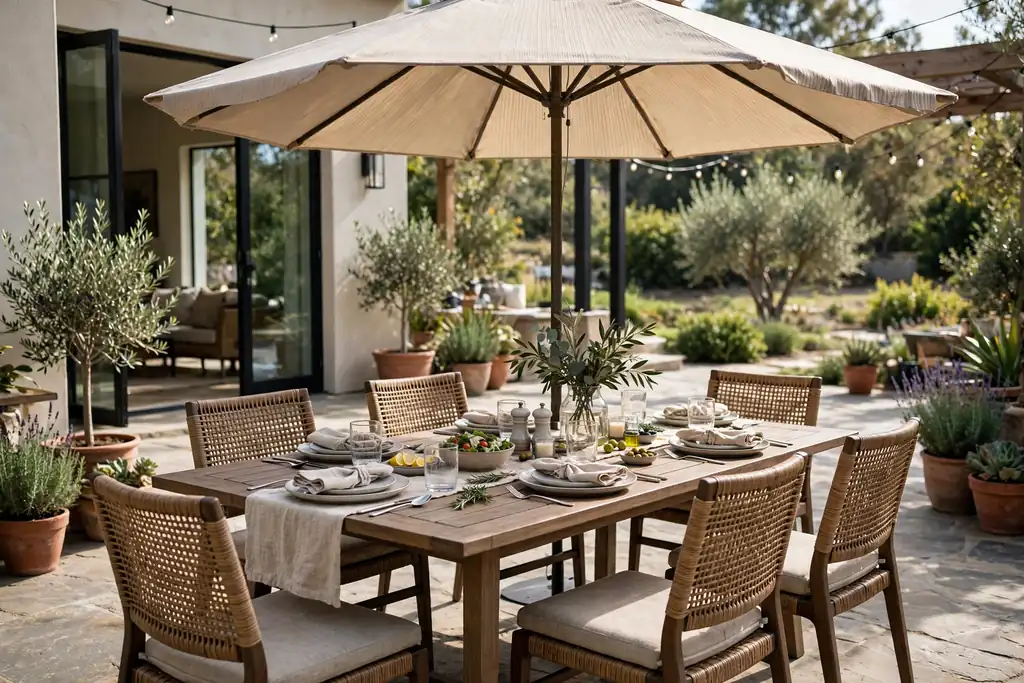
    Outdoor dining table with six chairs set for a meal on a patio.

    A dining table with six chairs turns a large patio into a place for shared meals. Choose a rectangular table in teak, metal, or stone, with chairs that tuck fully under the edge when not in use. Center the table on a rug or a paved area, and leave at least three feet behind each chair so guests can pull out with ease.

    Pick chairs with a seat height that matches the table, and add thin seat pads in a washable fabric for long meals. If the table sits in sun, add an umbrella through the center hole or a freestanding shade beside it. A dining group also works for games and homework on warm afternoons.

    10. Bar Height Table and Stools

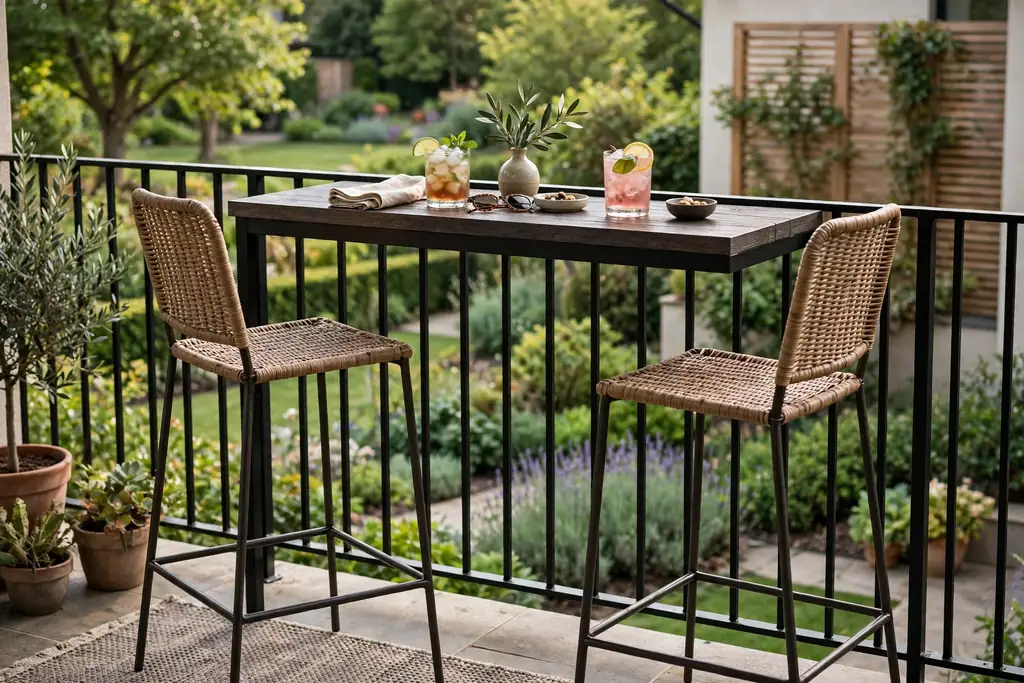
    Bar height table with stools beside a patio railing.

    A bar height table with stools suits patios where guests stand, snack, and move between groups. Set a narrow table against a railing or wall, with two to four stools tucked under it, and keep the top clear for drinks and small plates. The tall height suits a view over a railing and saves floor space.

    Choose stools with a footrest and a stable base, since tall stools tip more easily than chairs. If children use the patio, keep one lower chair nearby as an option. A bar table also serves as a serving spot during gatherings, with the stools moved aside when food takes over the top.

    11. Rocking Chairs on a Covered Patio

    Two rocking chairs with a small table on a covered patio.

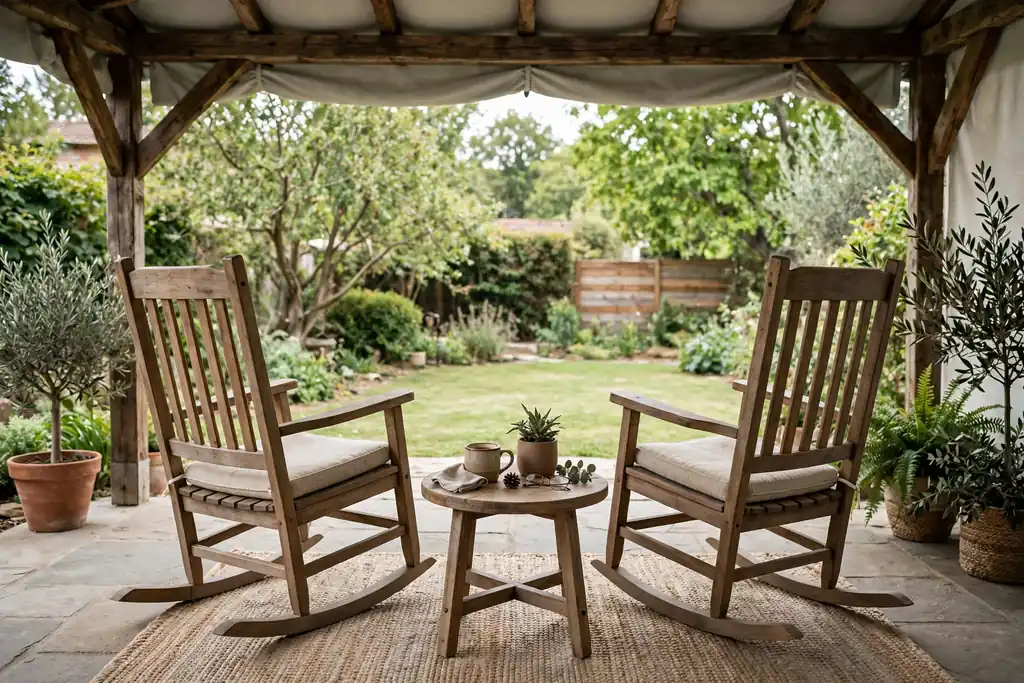
    Rocking chairs on a covered patio give a classic, gentle seat for mornings and evenings. Place two chairs side by side near the railing, facing the yard, with a small table between them for drinks. The roof keeps the chairs dry, so wood and woven seats last longer than they would in open weather.

    Check that each chair rocks freely without hitting the wall or railing, and set the chairs on a rug or mat to protect the patio surface. Add a thin cushion and a folded throw for cool evenings. One rocking chair alone still works on a small covered porch beside the door.

    12. Outdoor Daybed for Lounging

    Outdoor daybed with a thick mattress pad and cushions under a pergola.

    An outdoor daybed gives a patio a lounge bed for naps, reading, and sunbathing. Place it in a sunny corner or under a pergola, with a thick mattress pad and several back cushions along one side. The wide seat suits one person stretched out or two people sitting up with drinks.

    Choose a daybed with a canopy or a shade panel if it sits in full sun, and pick a mattress cover that removes for washing. Bring the mattress indoors in heavy rain unless it is rated for outdoor use. A daybed anchors a large patio well, but it needs a wide, flat spot, so measure before buying.

    13. Folding Chairs and a Small Table for Tiny Patios

    Two folding chairs with a small table on a tiny patio by a door.

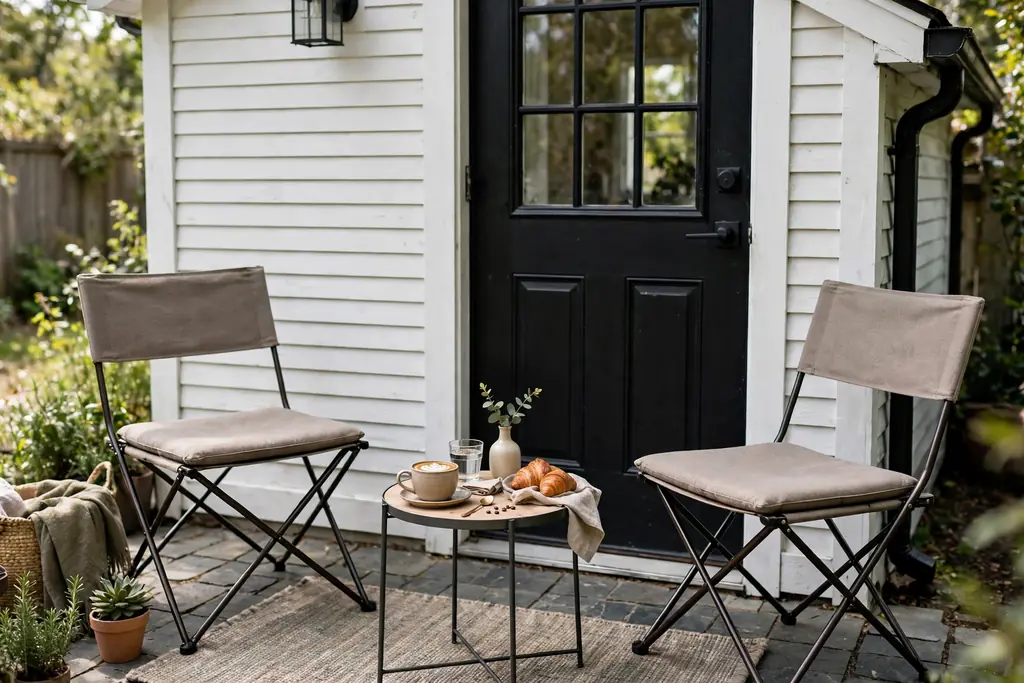
    Folding chairs with a small side table give a tiny patio seating that appears only when needed. Keep two folding chairs by the door or in a storage box, and set them out with a lightweight table for morning coffee or an evening drink. When guests leave, the chairs fold flat and the patio returns to open space.

    Choose folding chairs rated for outdoor use, with a seat that does not trap water, and add a thin pad for comfort. If the patio is a balcony, check weight limits and keep the total set light. This is the most flexible option for renters, since nothing is fixed to the space.

    14. Rattan Peacock Chair as a Statement Seat

    Rattan peacock chair with a round cushion in a patio corner beside a planter.

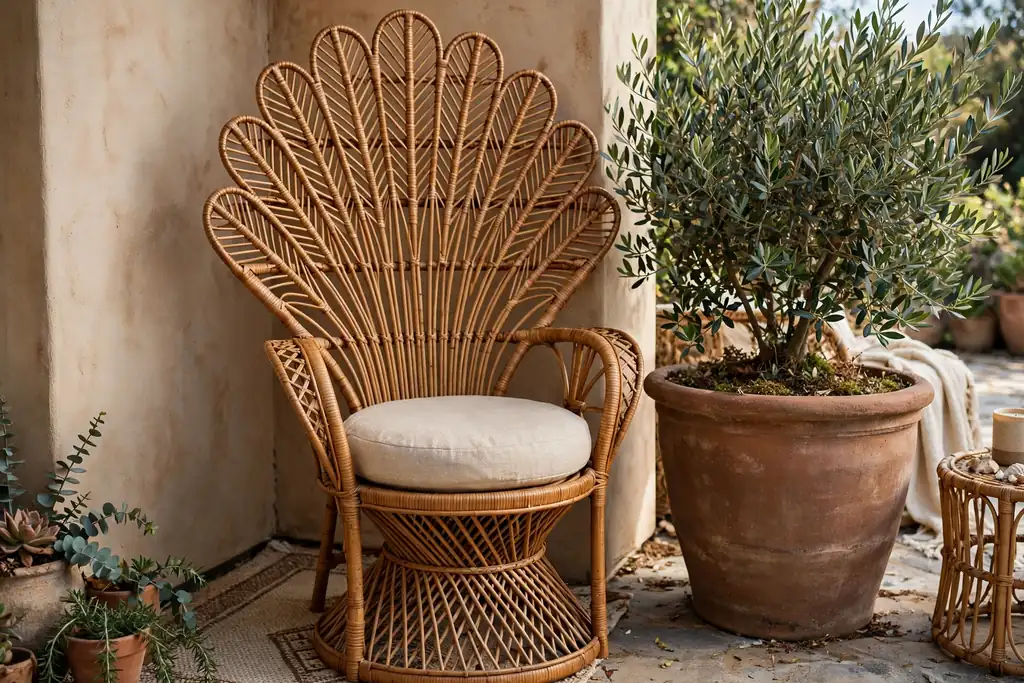
    A rattan peacock chair gives a patio a single bold seat that draws the eye. Place it in a corner or beside a planter, with a round cushion on the seat and a small table nearby for a drink. The tall, fanned back suits boho and coastal patios, and it photographs well as a focal point.

    Keep the chair under cover when possible, since natural rattan weakens in long rain. If the chair sits in sun, rotate it monthly so fading stays even. Pair it with plainer chairs nearby, so the statement seat stands out rather than competing with other bold pieces.

    15. Built In Bench Around the Patio Edge

    Built in bench with cushions running along the edge of a patio.

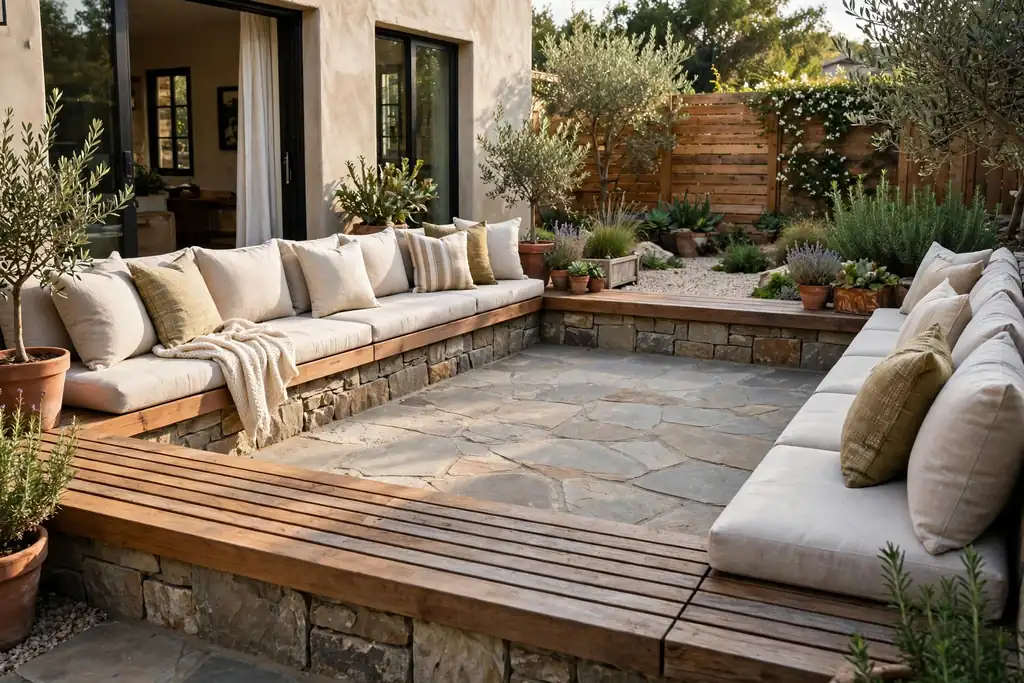
    A built in bench around the patio edge seats many people without filling the floor with chairs. Build the bench from wood, stone, or concrete blocks along one or two sides, with a wood top and outdoor cushions for comfort. The fixed seat leaves the center of the patio open for a table, fire pit, or play space.

    Plan the bench height near chair height, about eighteen inches, so guests sit and stand with ease. Add storage inside the bench base for cushions and throws if the build allows. A built in bench suits patios that host large groups often, since it never needs to be moved or stored.

    16. Swivel Glider Chairs for Easy Talk

    Swivel glider chairs facing a sofa around a coffee table on a patio.

    Swivel glider chairs let guests turn toward whoever is speaking, which suits a conversation group. Set two gliders facing a sofa or a pair of chairs, with a coffee table in the middle, and leave room for the chairs to turn fully without hitting the table. The gentle glide suits long talks better than a fixed chair.

    Check the swivel base on uneven pavers, and set each chair on a flat rug so it turns smoothly. Add a lumbar cushion, since glider backs can feel upright without one. Gliders work well on covered patios, where the moving parts stay dry and last longer.

    17. Poufs and Floor Cushions for Flexible Seating

    Poufs and floor cushions grouped around a low table on a patio.

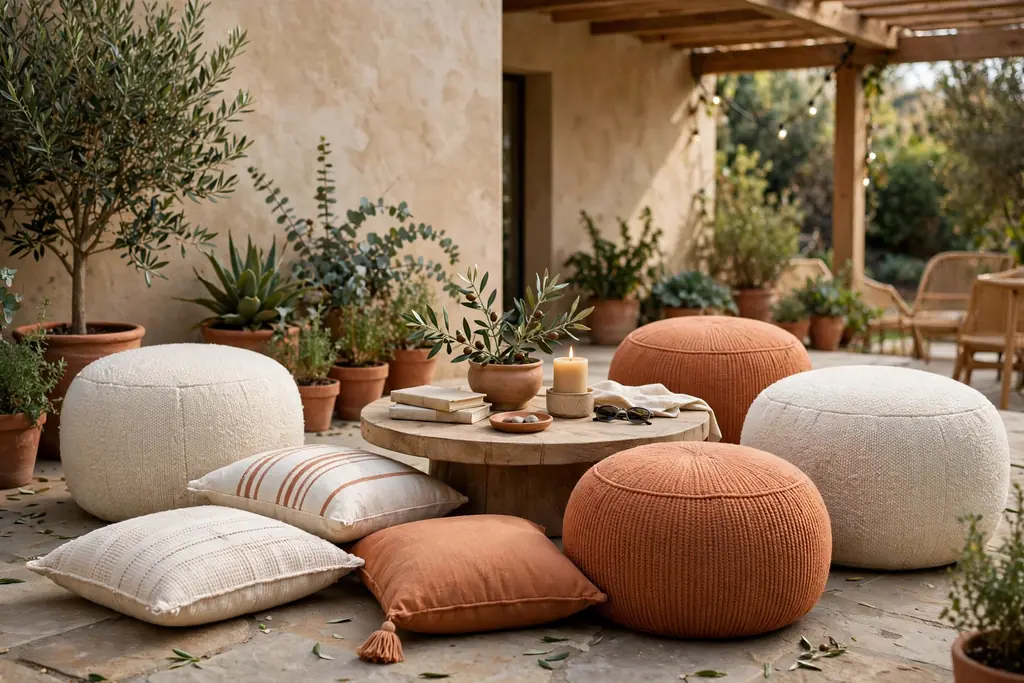
    Poufs and floor cushions add flexible seating that moves where guests need it. Scatter two or three poufs around a low table for a casual gathering, or stack them in a corner when the patio needs open floor. The low height suits children and relaxed evenings, and the soft shapes fit patios of any size.

    Choose poufs in outdoor rated fabric with a fill that holds shape, and bring them indoors in rain. Mix one pattern with solid colors so the group looks planned rather than random. Poufs also serve as footrests when the main chairs are full, which makes them useful even on small patios.

    18. Porch Swing as a Hanging Bench

    Porch swing with cushions hanging on a covered patio.

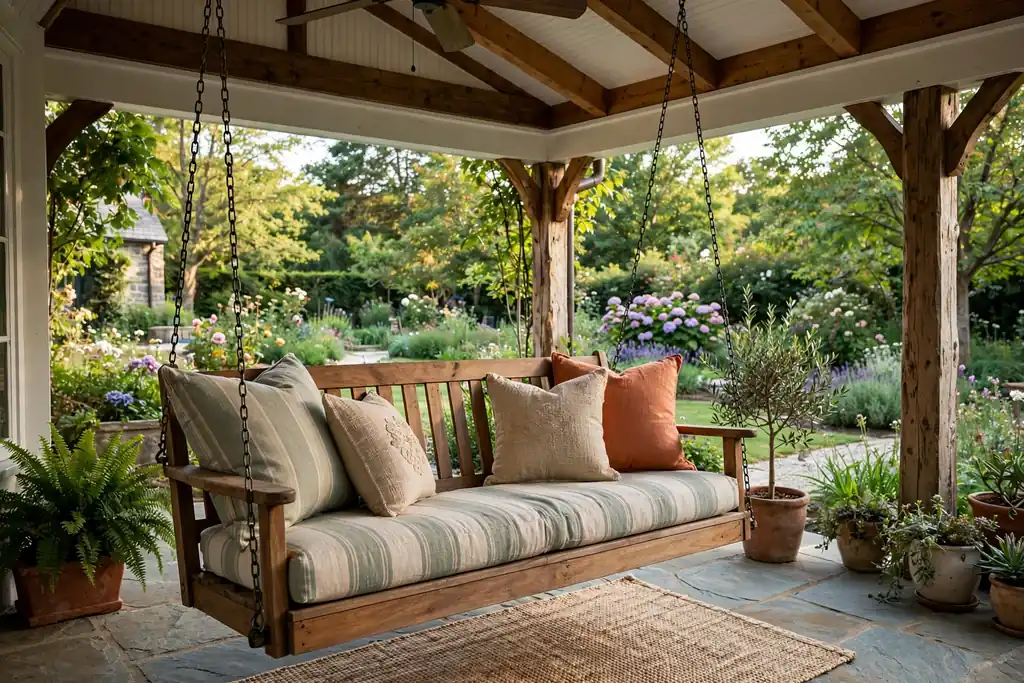
    A porch swing gives a covered patio a hanging bench seat for two or three people. Hang the swing from sturdy ceiling joists, with chains rated for the weight, and add a seat cushion and two back cushions. The gentle motion suits evenings, and the swing reads as a feature rather than just a seat.

    Check the chains and hooks each season for rust or wear, and tighten them as needed. Keep the swing clear of walls and railings so it moves freely, and leave room to step on and off at one end. If the swing faces rain, use quick dry cushions or bring them indoors at night.

    19. Stackable Resin Chairs for Easy Storage

    Stacked resin chairs beside a patio dining table.

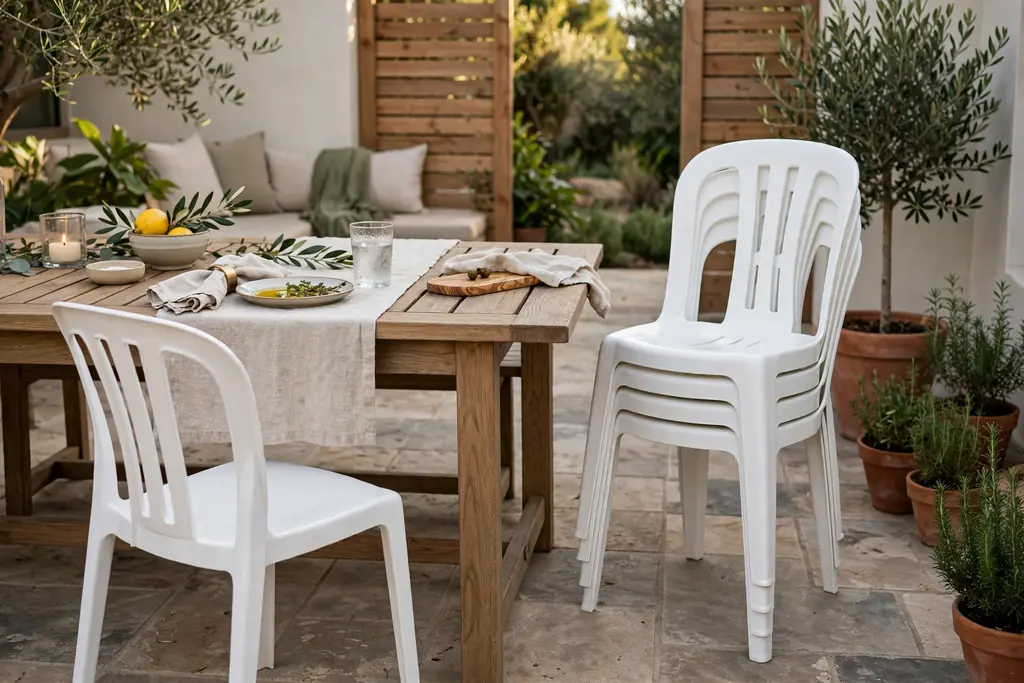
    Stackable resin chairs give a patio practical seating that stores in a small footprint. Keep a stack of four to six chairs in a shed or garage, and set them out around a table when guests arrive. The light weight makes them easy to carry, and the stack keeps the patio clear between gatherings.

    Choose chairs with a seat shape that stacks without wobbling, and wipe them clean each season since resin shows dust and pollen. Add a thin pad for long meals, held in place with ties so wind does not lift it. Resin chairs suit dining groups best, where comfort matters less than easy storage.

    20. Corner Nook with an L Bench and Cushions

    Corner nook with an L shaped bench, cushions, and a small square table on a patio.

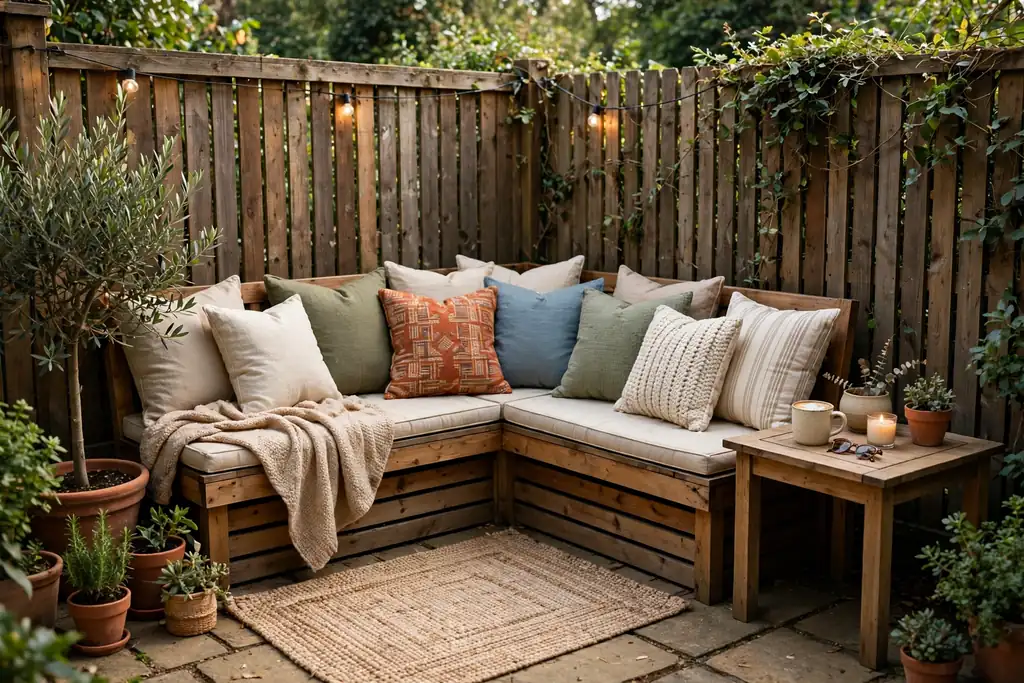
    A corner nook with an L bench turns an unused patio corner into a cozy seat for three or four people. Set two benches at a right angle in the corner, add a small square table in front, and pile cushions along both bench backs. The corner shape feels sheltered, which suits a spot near a fence or wall.

    Add a planter at the open end of the nook to mark the edge without blocking entry. If the nook sits in shade, choose light cushion colors to keep it bright. This layout suits small and medium patios well, since it uses corner space that single chairs often waste.

    21. Conversation Set Around a Fire Table

    Conversation chairs arranged around a low fire table on a patio at dusk.

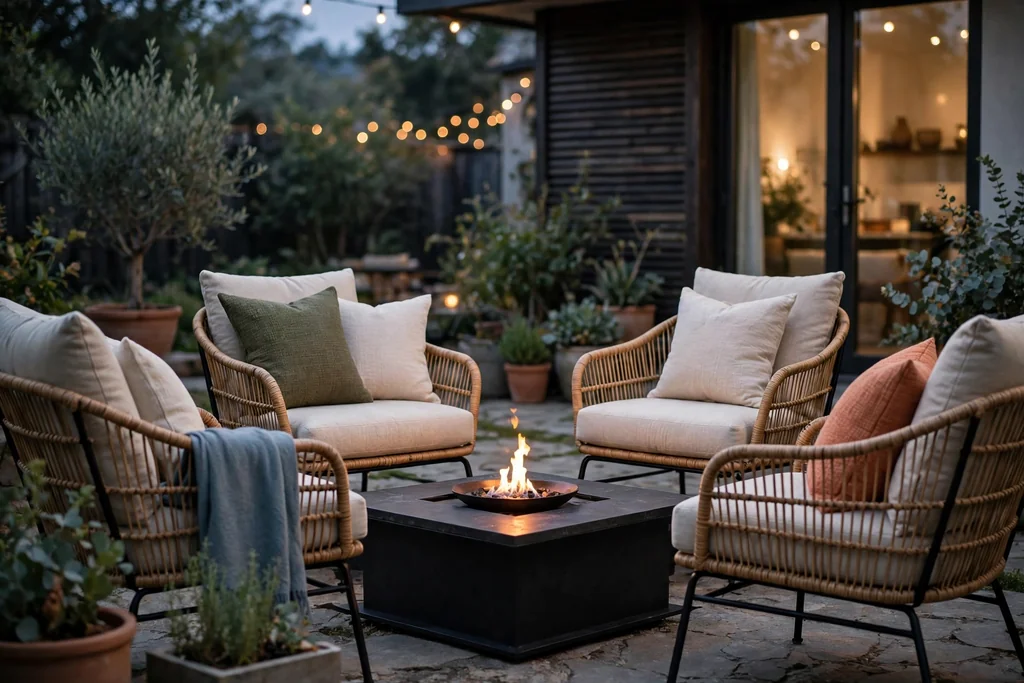
    A conversation set around a fire table gives a patio warmth and a focal point in one piece. Arrange four chairs or a small sofa set around a low fire table, with room for feet and drinks on the table edge. The flame draws guests together after sunset, and the table doubles as a coffee table when the fire is off.

    Check the fuel type and local rules before use, and keep cushions, throws, and paper items clear of the flame. If the table uses gas, store the tank safely and check connections each season. A fire table suits large patios best, where the seating ring has room to breathe.

    Conclusion

    Outdoor patio seating comes down to three choices: the main use, the space you have, and the weather your patio faces. Start with one group that serves your most common use, whether that is lounging, dining, or gathering, then add one flexible piece, such as a pouf or a folding chair, for guests. Measure before you buy, leave clear paths around every seat, and choose fabrics and frames that handle your climate with simple care. With those basics in place, the patio becomes a room you use daily, not just on fine weekends.

    FAQs

    What is the best outdoor patio seating for a small patio?

    The best outdoor patio seating for a small patio is a bistro set, a pair of folding chairs with a small table, or a corner bench nook. These options seat two to four people without blocking the path, and folding pieces store flat when the patio needs open space. Measure the patio first, and leave at least two feet of walking room around each seat.

    How much space do you need around patio chairs?

    You need about two feet of walking space around patio chairs, and about three feet behind dining chairs so guests can pull out with ease. A lounge group needs extra room in front of each seat for a coffee table and foot space. If the patio feels tight, choose fewer, smaller pieces rather than crowding a full set into the space.

    What material lasts longest for outdoor patio seating?

    Teak, powder coated aluminum, and all weather wicker tend to last longest for outdoor patio seating with simple care. Teak weathers to grey unless oiled, aluminum resists rust, and all weather wicker handles rain better than natural rattan. Whichever frame you pick, bring cushions indoors in heavy rain to extend their life.

    Should patio cushions stay outside all year?

    Patio cushions should not stay outside all year in wet or cold climates, even when the fabric is rated for outdoor use. Bring cushions indoors during heavy rain and over winter, and store them in a deck box or shed so they stay clean and dry. Quick dry foam helps after summer showers, but it does not replace dry storage.

    How do you arrange patio seating for conversation?

    Arrange patio seating for conversation by placing chairs facing each other, about four to eight feet apart, with a table in the middle for drinks. Angle the chairs slightly inward rather than in a straight row, so guests can talk without turning their heads. Add a rug under the group to mark the conversation zone.

    What is the easiest way to add shade over patio seating?

    The easiest way to add shade over patio seating is a freestanding umbrella through or beside the table, since it needs no build work. A pergola or shade sail gives wider cover for a lounge group, while a nearby tree gives natural shade that shifts through the day. Match the shade to the seating group size so every seat gets cover at midday.


  • 21 Back Porch Decorating Ideas for a Relaxing Outdoor Space

    21 Back Porch Decorating Ideas for a Relaxing Outdoor Space

    Back porch decorating ideas work best when you start with comfortable seating, shade, soft light, and plants, then add one calm focal point such as a rug, a swing, or a fountain. Keep the walking path clear, repeat two or three colors, and choose outdoor rated pieces so the porch stays inviting in sun and rain.

    The 21 ideas below suit small back porches as well as wide ones, since most of them scale down to one chair and one planter, or up to a full seating and dining group. Pick one seating idea and one light idea first, then add shade and plants. The same layered approach that makes fall porch ideas feel welcoming works on a back porch all year, and a fall front porch palette can guide the colors you repeat out back.

    Key Takeaways

    • Start with seating you want to sit in: deep chairs, a swing, or a daybed, not decor alone.
    • Give the porch one clear zone for sitting and one clear path to the yard, so nothing blocks the door or the steps.
    • Repeat two or three colors, such as cream, sage green, and warm wood, across cushions, pots, and textiles.
    • Add shade and soft light early, since a porch that is too bright at noon or too dark at dusk gets little use.
    • Choose outdoor rated fabrics and finishes, or bring cushions and throws indoors in rain, so the porch stays tidy.
    • Add plants at varied heights, and keep one calm focal point, such as a rug, a fountain, or a swing, so the porch reads as one plan.

    1. Deep-Seated Lounge Chairs with Weatherproof Cushions

    Two deep seated lounge chairs with weatherproof cushions and a small table on a back porch.

    Deep-seated lounge chairs are the simplest way to make a back porch feel like a room. Choose two chairs with thick seat cushions, a low back, and armrests at a height that supports a book or a drink. Place them at a slight angle toward the yard, with a small table between them, so conversation feels natural and the view stays open.

    Pick cushions with removable, washable covers and quick dry fills, since porch cushions gather dust and pollen. If the porch is narrow, one deep chair still gives the same restful feel, placed beside a side table and a planter. Add a folded throw over one arm for cool evenings, and keep the chair feet on a rug or flat stones so they do not mark decking.

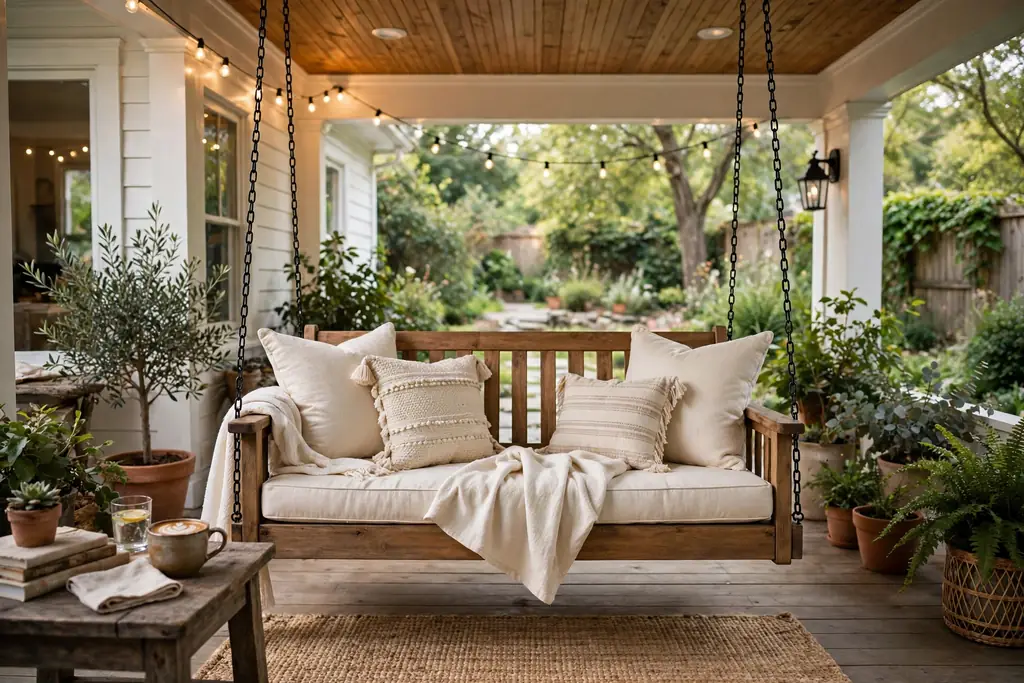
    2. Wooden Porch Swing with Soft Cushions

    Wooden porch swing with soft cream cushions hanging on a back porch.

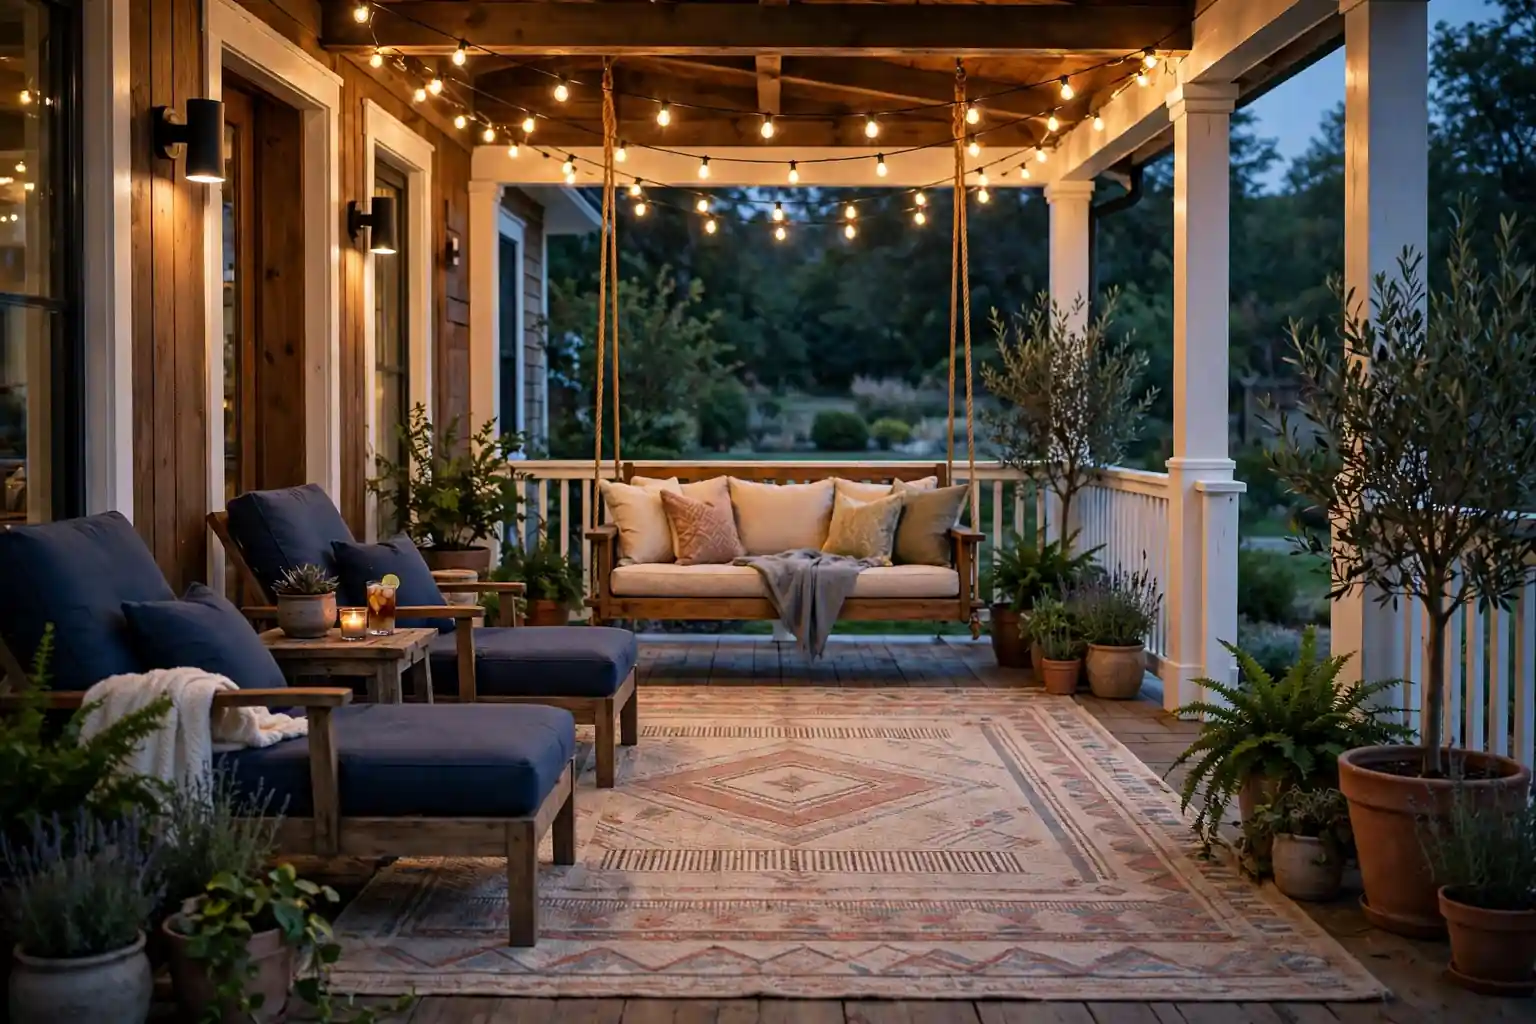
    A wooden porch swing turns a back porch into a place to sit and stay. Hang the swing from sturdy ceiling joists, with chains rated for the weight, and add a seat cushion and two back cushions in cream or natural linen. The gentle motion suits a wide porch best, where the swing can move freely without hitting the wall or railing.

    Check the chains and hooks each season for rust or wear, and tighten them as needed. If the swing faces rain, use quick dry foam cushions or bring the cushions indoors at night. Keep one end of the swing clear of planters, so guests can step on and off with ease, and place a small rug under the swing to catch dust from shoes.

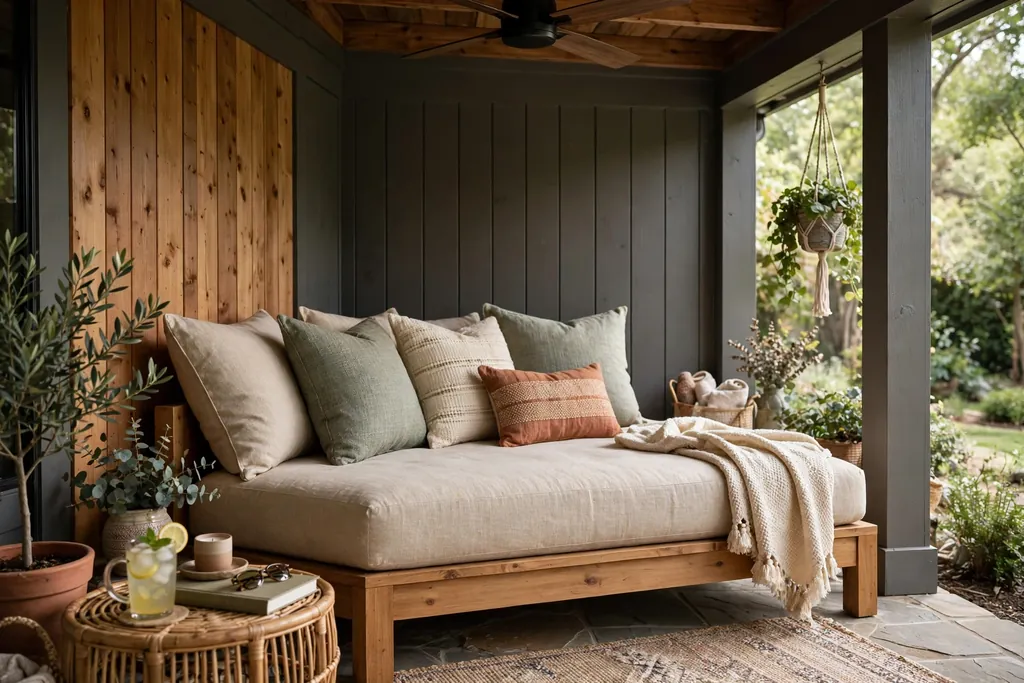
    3. Outdoor Daybed for Afternoon Rests

    Outdoor daybed with a firm base cushion and back pillows in a shaded back porch corner.

    An outdoor daybed gives a back porch a clear spot for naps, reading, and long sits. Choose a daybed with a firm base cushion, a back cushion along one side, and a few smaller pillows for support. Place it against the house wall or in a shaded corner, with a side table close by for water, glasses, or a book.

    Use outdoor rated fabric for the base and back cushions, and store extra pillows in a dry box when rain is forecast. If space is tight, a single daybed can replace two chairs, since it seats two people for a chat and one person stretched out for a rest. Keep a light blanket folded at the foot of the daybed for cool afternoons.

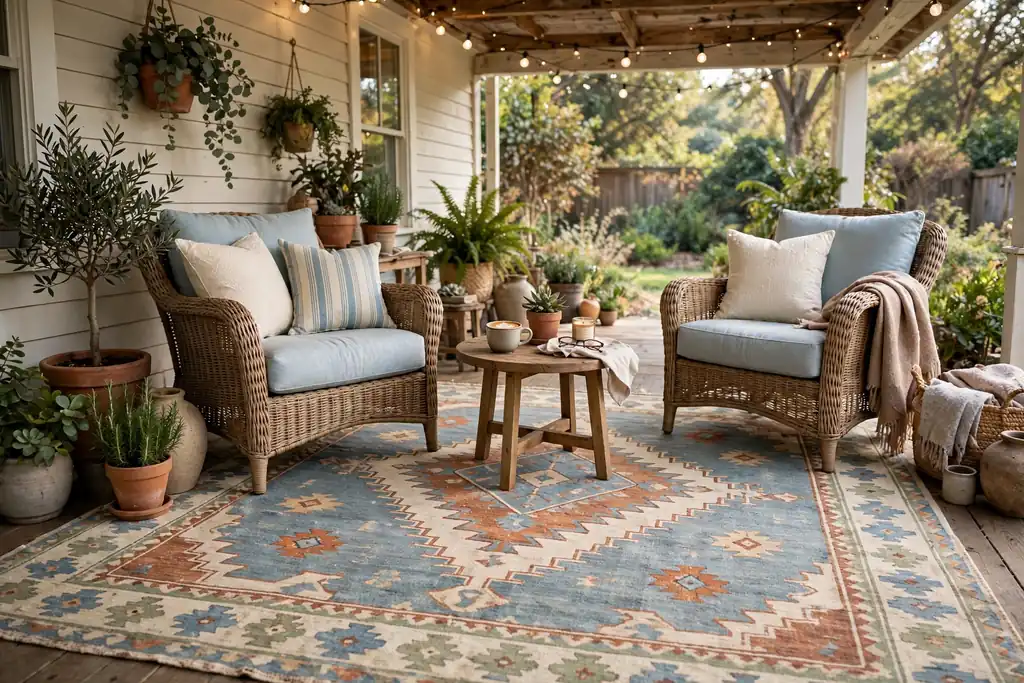
    4. Layered Outdoor Rug Under the Seating Group

    Large patterned outdoor rug under back porch chairs and a small table.

    A large outdoor rug under the seating group defines the porch living area in one move. Lay a flat, washable rug in cream and sage, navy, or rust stripes, large enough to sit under the front legs of chairs and a table. The rug marks the seating zone clearly, even on a long porch with more than one use.

    Pick a rug rated for outdoor use, so it dries quickly after rain, and shake it out weekly so leaves and dirt do not build up underneath. If the rug sits on painted wood, lift it now and then to check for damp marks. A patterned rug pairs well with plain cushions, since the rug carries the pattern while the chairs stay calm.

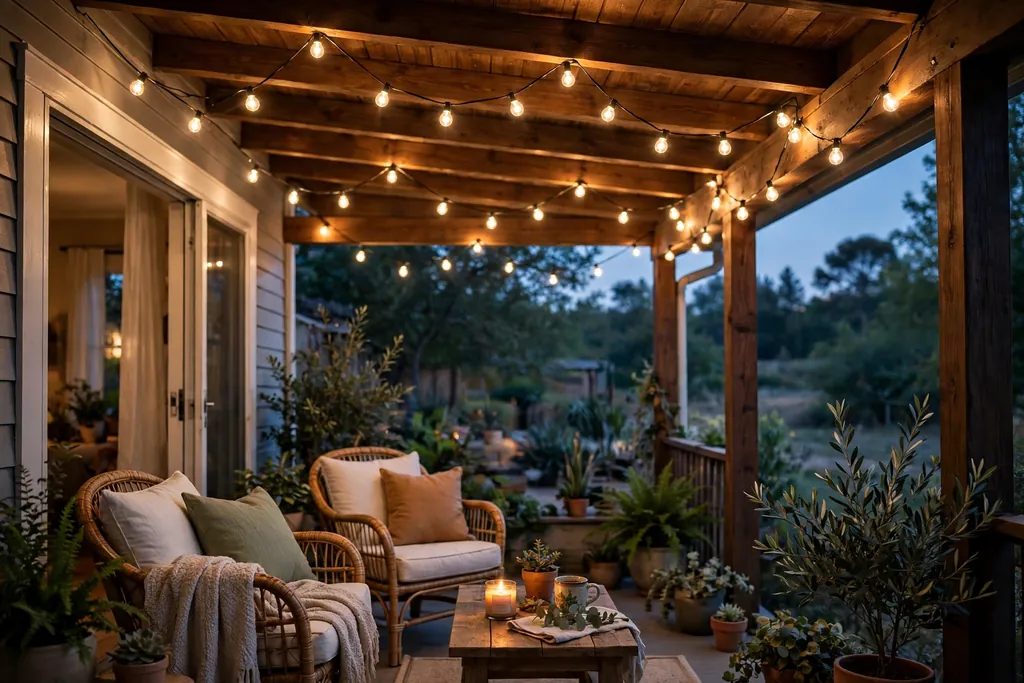
    5. String Lights Across the Porch Ceiling

    Warm string lights draped across a back porch ceiling at dusk.

    String lights across the porch ceiling give the porch a gentle glow that flatters every other piece on display. Drape warm white lights along the ceiling edge, around posts, or across a beam, with the cord tucked out of the walking path. The light makes the porch usable after sunset and highlights plants and seating.

    Choose outdoor rated lights and a timer so they switch on at dusk without daily effort. Keep bulbs clear of dried leaves, curtains, and fabric, and check the cord each season for wear. Warm white suits a relaxing porch better than cool white, since it echoes candlelight and keeps the porch feeling calm.

    6. Lantern Clusters on Tables and Steps

    Lanterns with battery candles grouped on a back porch table and steps.

    Lanterns with battery candles add warm light at table height and at the steps, where guests most often arrive. Group three lanterns of varied heights on a side table or at the base of the steps, with battery candles inside for safety. The glow softens the whole porch and makes the door and steps easier to find after dark.

    Use battery candles on porches where wind or children make real flames risky, and keep real candles inside glass with a stable base if you use them. Bring lanterns indoors in storms, and wipe the glass clean so the light stays bright. Black metal lanterns suit most house styles, while wood or brass lanterns warm a rustic porch.

    7. Outdoor Curtains for Shade and Privacy

    Outdoor curtains in a light color hanging along the open side of a back porch.

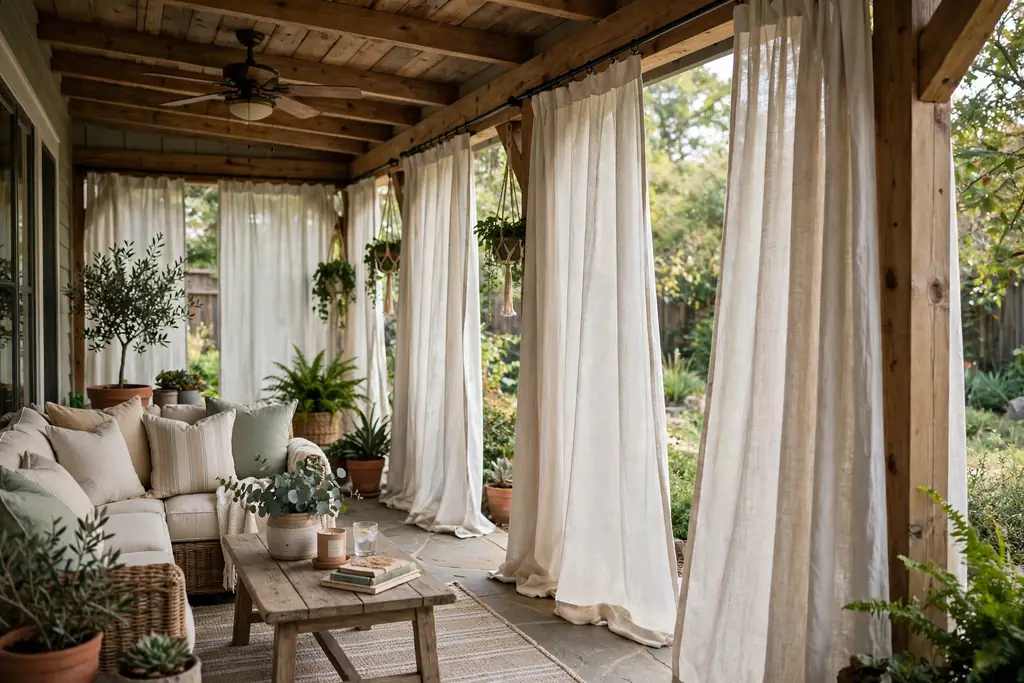
    Outdoor curtains give a back porch shade, privacy, and a soft room feel in one step. Hang weatherproof curtain panels from a rod or wire along the open side of the porch, and draw them closed on the sunny side or the side facing neighbors. The fabric softens hard posts and railings and cuts glare on bright afternoons.

    Choose curtains rated for outdoor use, in a light color that still lets some daylight through, and tie them back with simple ties when you want the view open. Wash the panels now and then, and bring them indoors in storms if they are not rated for heavy rain. Curtains also help a porch feel enclosed on cool evenings, when paired with lantern light.

    8. Large Patio Umbrella Over a Dining Spot

    Large patio umbrella shading a back porch dining table and chairs.

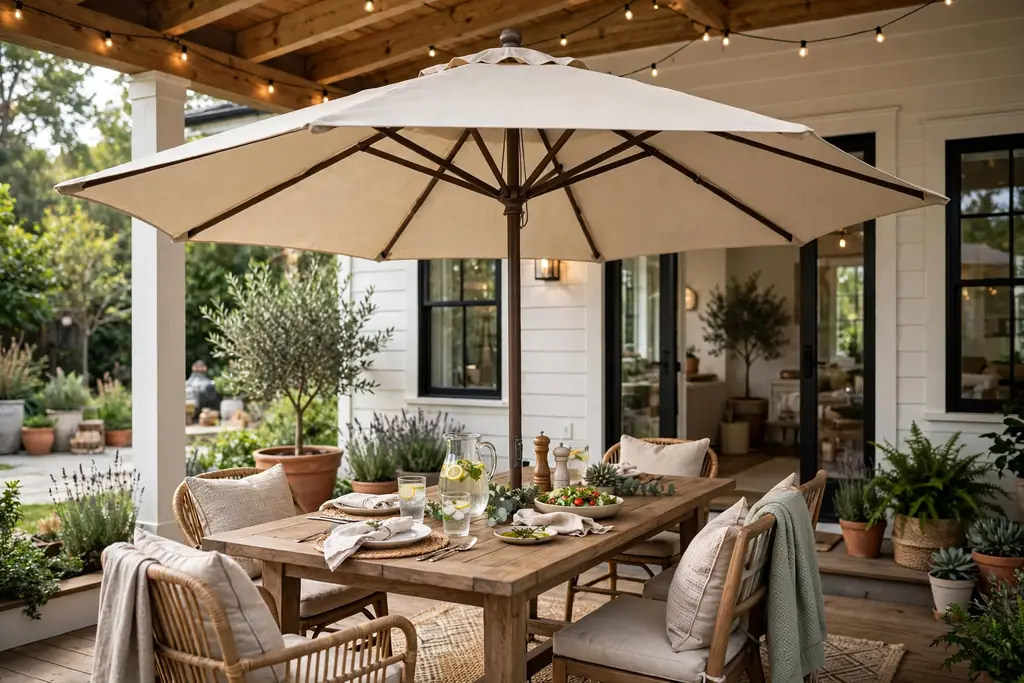
    A large patio umbrella shades a back porch dining spot without a fixed roof change. Set a heavy base under the table, open the umbrella so it covers the table and chairs, and tilt it in late afternoon so the shade follows the sun. The umbrella suits a porch with an open edge or a deck beyond the roof line best.

    Choose a base heavy enough that wind cannot tip the umbrella, and close it in storms or strong gusts. If the table sits near the house wall, a half umbrella or a wall mounted shade may fit better than a full round one. Keep the umbrella fabric clean and dry before storing it, so it stays free of marks through the season.

    9. Potted Plants in Varied Heights

    Potted plants in varied heights grouped near a back porch door and railing.

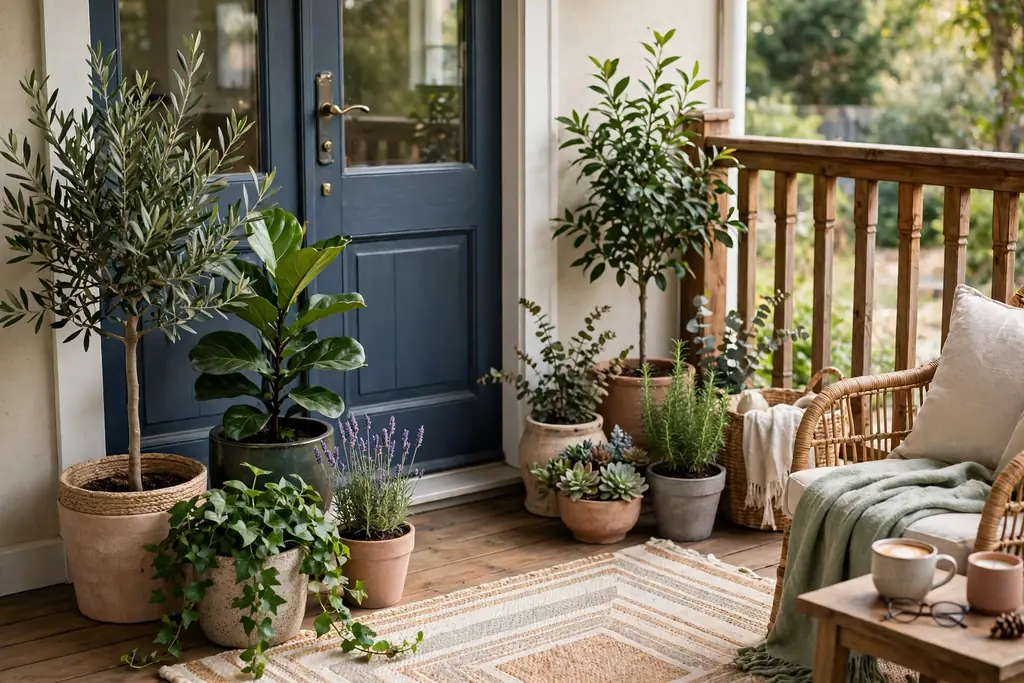
    Potted plants in varied heights give a back porch living color with a clear plan. Group pots of different heights near the door, the railing, and the seating, with tall plants at the back, mid height plants in the middle, and trailing plants at the front. The mix keeps the porch from looking flat, even with a small plant count.

    Water plants when the top of the soil feels dry, and set each pot on a saucer or flat stone to protect steps and decking. Match the plant to the light: shade loving plants for a covered porch, sun loving plants for an open edge. When a plant finishes, the same pots can hold evergreen cuttings or seasonal flowers, so the structure stays in place.

    10. Hanging Planters from Porch Posts

    Hanging planters with trailing plants hanging from back porch posts.

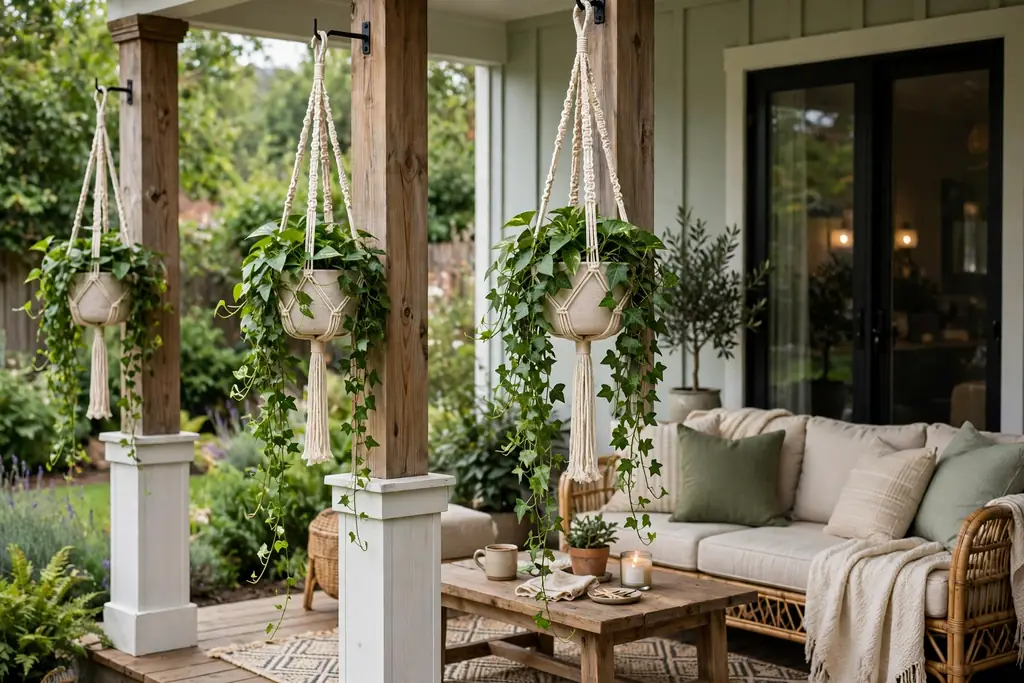
    Hanging planters add green at eye level and above, where floor space is short. Hang one planter from each porch post or ceiling hook, with trailing ivy, ferns, or flowering plants that spill over the rim. The planters soften plain posts and draw the eye up to the porch roof.

    Water hanging planters more often than floor pots, since they dry out faster in wind and sun. Check the hooks and chains for weight, and bring planters indoors in frost or storms. For a matched look, use the same plant in each planter, and vary only the planter color or hanger, so the display reads as planned.

    11. Herb Pots by the Steps

    Terracotta herb pots grouped beside back porch steps.

    Herb pots by the steps add scent and useful green to the back porch entrance. Group three pots of different heights near the steps, with rosemary, thyme, and mint, and water them in the morning so the soil stays damp but not soaked. Guests brush past the scent on the way to the yard, and the herbs can go to the kitchen after.

    Set each pot on a saucer to protect steps and decking, and trim herbs often, since regular picking keeps the plants bushy. Mint spreads fast, so keep it in its own pot rather than sharing a planter. In cold weather, move tender herbs close to the house wall for shelter, or cover them with cloth overnight.

    12. Small Bistro Table for Morning Coffee

    Small bistro table with two chairs and coffee cups on a back porch.

    A small bistro table makes a casual back porch spot for morning coffee or a quiet drink. Set a round metal or wood table near the railing, with two chairs, and keep the top clear except for two cups and a small plant. The small scale suits a narrow porch, where a full dining table would block the path.

    Weight a tablecloth or use placemats instead of a loose cloth, so a breeze does not lift it onto cups. Keep paper or fabric clear of candles, and bring cushions indoors after use if rain is forecast. For everyday use, two woven placemats and one small vase give the table a finished look without daily effort.

    13. Outdoor Dining Table for Gatherings

    Outdoor dining table with chairs set for a gathering on a back porch.

    An outdoor dining table turns a back porch into a gathering spot for meals with family and friends. Choose a table that seats your usual group with room for serving dishes, and pair it with chairs that slide in fully so the path stays clear. Place the table near the kitchen door when you can, so carrying food stays short.

    Pick a table material rated for outdoor use, such as treated wood, metal, or stone, and wipe it clean after meals so food marks do not set. If the porch is small, a folding table that stores flat gives you gathering space only when you need it. Add one centerpiece, such as a lantern or a low plant, and keep the rest of the table clear for plates.

    14. Hammock Chair in a Quiet Corner

    Hammock chair with a cushion hanging in a quiet back porch corner.

    A hammock chair in a quiet corner gives a back porch a single seat made for slow sitting. Hang the chair from a sturdy ceiling joist or a freestanding frame, with room to swing gently without hitting the wall or railing. Add one cushion and a small footrest or side table, so the chair works for reading as well as resting.

    Check the hanging hardware each season for wear, and keep the chair weight limit in mind when choosing a frame. If the chair faces rain, bring the cushion indoors at night, and let the fabric dry fully before storing it. A hammock chair suits a corner that gets morning light, where one person can sit apart from the main seating group.

    15. Woven Basket with Throws and Blankets

    Woven basket with folded throws beside back porch seating.

    A woven basket with throws and blankets keeps cozy layers within reach on a back porch. Set a sturdy basket beside the seating group, roll or fold two or three throws inside, and drape one throw over the basket edge so guests see it and use it. The basket adds texture and keeps throws off the chairs.

    Keep the basket light enough to move in one hand, so you can lift it indoors on wet nights. Choose washable throws, and shake them out weekly so dust and leaves do not build up. A basket with handles also moves easily indoors, so the same throws can follow you into the living room when the evening turns cool.

    16. Tabletop Fire Bowl for Cool Evenings

    Small tabletop fire bowl with a flame on a heat safe table on a back porch at dusk.

    A tabletop fire bowl adds warmth and a focal point to a back porch on cool evenings. Set a small, stable fire bowl on a heat safe table, away from curtains, cushions, and overhanging plants, and follow the maker instructions for fuel and use. The flame gives the seating group a center to gather around after sunset.

    Keep the fire bowl clear of fabric and dried plants, and never leave it burning when you go indoors or go to bed. Choose a bowl size that suits the table, so it does not crowd drinks or plates, and let it cool fully before moving it. On a small porch, a single fire bowl can replace several lanterns as the evening light source.

    17. Outdoor Ceiling Fan for Airflow

    Outdoor ceiling fan mounted over a back porch seating group.

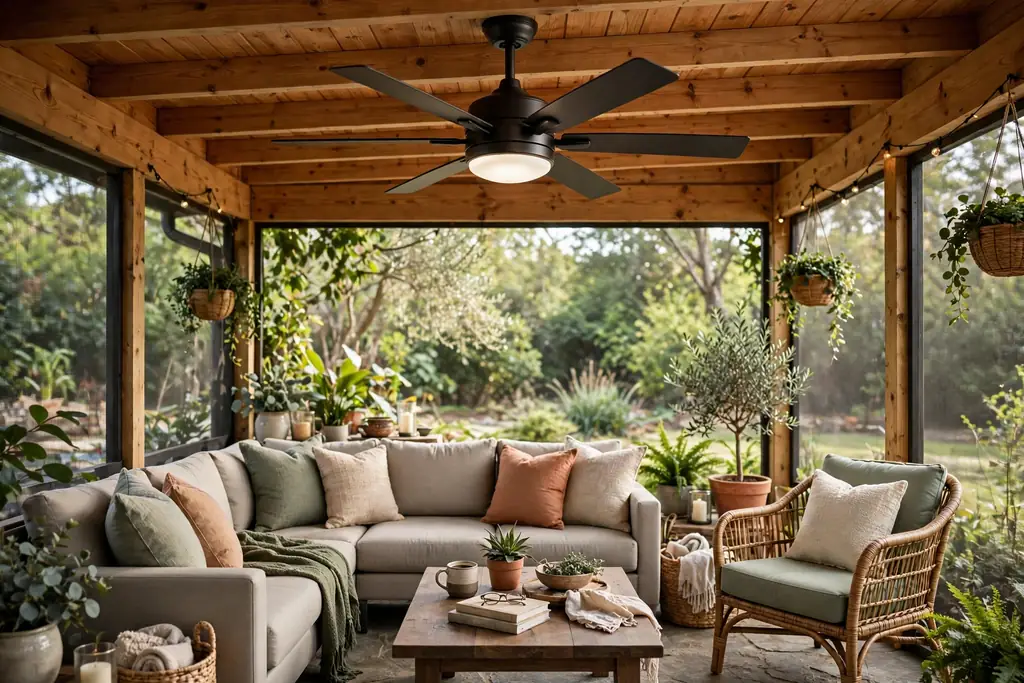
    An outdoor ceiling fan keeps a back porch comfortable on warm, still days. Mount a fan rated for damp or wet locations on the porch ceiling, centered over the seating group, and run it at a low speed for a gentle breeze. The moving air makes the porch usable in heat that would otherwise push everyone indoors.

    Choose a fan size that suits the porch: a small fan for a narrow porch, a larger fan or two fans for a wide porch. Clean the blades now and then, since porch dust settles on them, and check the mount each season for wear. A fan also helps keep flying insects from settling over the seating area on calm evenings.

    18. Rolling Drink Cart for Easy Serving

    Rolling drink cart with glasses and a pitcher beside back porch seating.

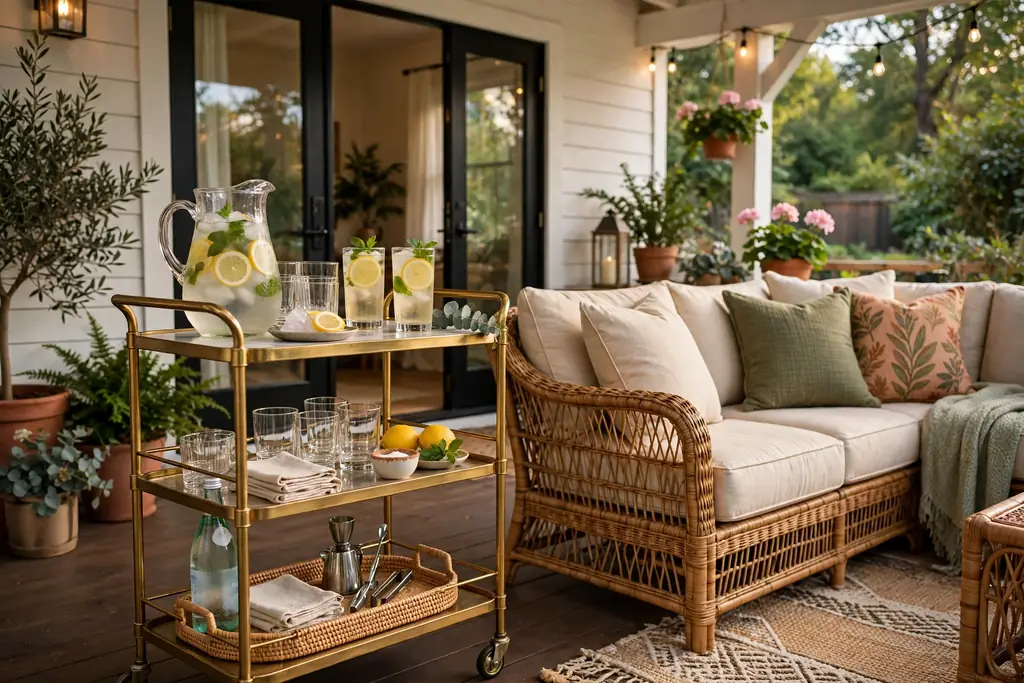
    A rolling drink cart makes serving on a back porch simple, since drinks, glasses, and snacks move in one trip. Set a cart with two shelves beside the seating group, stock the top shelf with glasses and a pitcher, and keep the lower shelf for extra supplies. The wheels let you roll the cart indoors when rain arrives.

    Keep the cart off the main walking path, and lock the wheels when it is in place so it does not roll on a sloped floor. Wipe the shelves clean after use, and avoid overloading the top shelf, since a heavy cart tips more easily. A cart also works as a plant stand or a book holder when it is not serving drinks.

    19. Small Fountain for Gentle Sound

    Small fountain with gentle water flow near back porch seating.

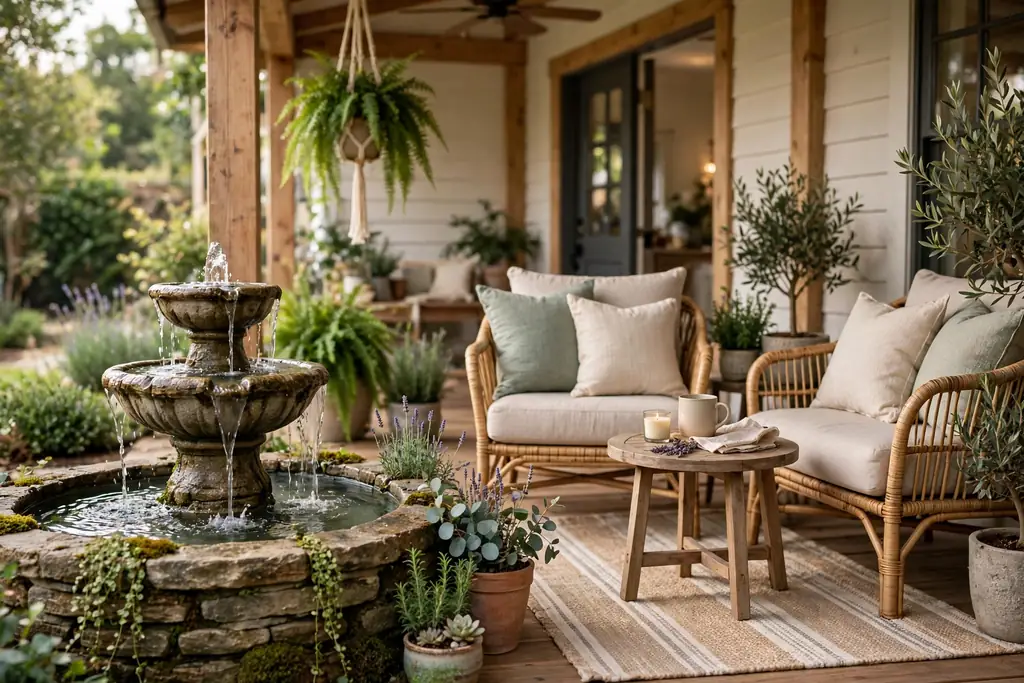
    A small fountain adds gentle water sound to a back porch, which helps mask street noise and makes the space feel calm. Choose a tabletop or floor fountain that suits the porch size, set it on a level, waterproof base near the seating, and keep the water level topped up so the pump runs quietly. The sound suits a porch used for reading and resting best.

    Place the fountain where splashes cannot reach cushions, rugs, or wood floors, and clean the pump and basin now and then so the water stays clear. In cold weather, drain the fountain and bring it indoors if frost is forecast, since frozen water can crack the basin. A solar fountain suits a sunny porch edge with no nearby outlet.

    20. Trellis Screen with Climbing Plants

    Trellis screen with climbing plants giving privacy on the side of a back porch.

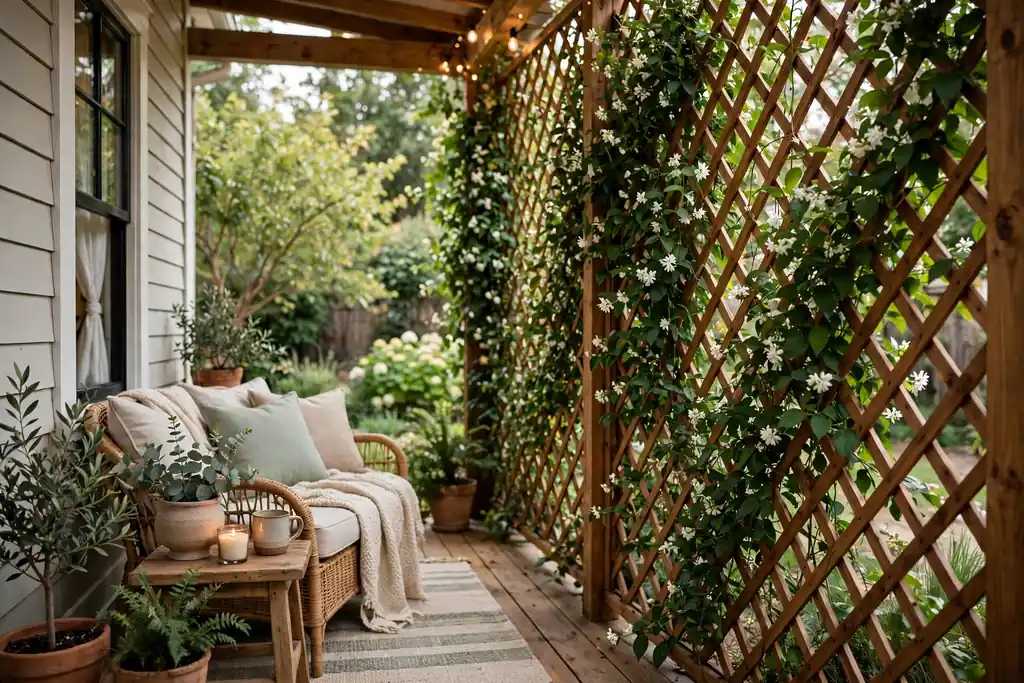
    A trellis screen with climbing plants gives a back porch privacy and green in one structure. Set a freestanding or wall mounted trellis on the side facing neighbors or the street, and train climbing plants such as jasmine, ivy, or clematis up the frame. The screen softens a plain railing and frames the seating area.

    Fix the trellis firmly so wind cannot topple it, and trim the plants often so they do not block the path, the light, or the house numbers. Choose plants suited to your light and climate, and water them at the base so the roots stay damp. A trellis also works as a backdrop for string lights in the evening.

    21. Reading Nook with a Storage Bench

    Reading nook with a storage bench, cushions, and books on a back porch.

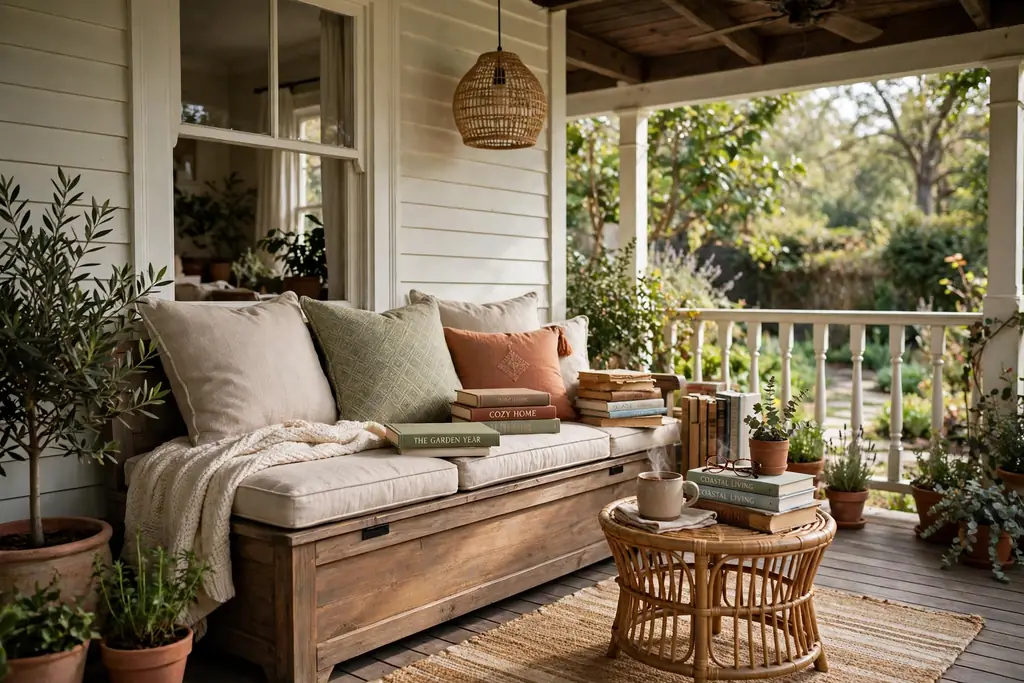
    A reading nook with a storage bench turns one end of a back porch into a quiet retreat. Set a bench with storage underneath at the far end of the porch, add a seat cushion and two back pillows, and keep books, a blanket, and a small lamp or lantern in the bench. The storage keeps the nook tidy, while the pillows make it a seat guests return to.

    Keep the bench close to good light, near a window or under a porch light, and choose a bench lid that lifts with ease. Empty the storage now and then, so it does not fill with items that belong indoors. A reading nook suits a porch with a calm corner away from the dining table, where one person can sit apart from the group.

    Conclusion

    A relaxing back porch does not need new furniture or a full redesign. Pick comfortable seating, one shade idea, soft light, and plants at varied heights, then repeat a small palette through cushions and pots and keep the path to the yard clear. Start with one idea from this list this week, and add shade or light next, so the porch grows into a place you use every day.

    FAQs

    What is the best seating for a relaxing back porch?

    A relaxing back porch needs seating you want to sit in for an hour, such as deep lounge chairs, a porch swing, or a daybed with thick outdoor cushions. Pair the seating with a small side table and a rug, keep the path to the yard clear, and add a throw for cool evenings so the seat stays inviting in every season.

    How do I decorate a small back porch?

    Decorate a small back porch with one chair or a bistro set, one planter group, a rug, and string lights, keeping the path to the door and steps clear. Choose vertical pieces, such as hanging planters or a trellis screen, for height without floor space, and skip large dining groups that block movement.

    What colors work best for a relaxing back porch?

    Cream, warm white, sage green, soft grey, and natural wood tones work best for a relaxing back porch, with one accent color, such as navy, rust, or muted blue, in cushions or pots. Repeat each color at least twice, across textiles, pots, and the rug, so the porch reads as one plan rather than a set of separate pieces.

    How do I add shade to a back porch without a roof change?

    Add shade to a back porch with outdoor curtains, a large patio umbrella, or a trellis screen with climbing plants, none of which need a roof change. Curtains suit a covered porch edge, an umbrella suits a dining spot beyond the roof line, and a trellis suits a side that needs privacy as well as shade.

    How do I keep back porch cushions and throws in good shape outdoors?

    Keep back porch cushions and throws in good shape by choosing outdoor rated fabrics with removable, washable covers, and bringing them indoors in rain and overnight in wet weather. Shake cushions out weekly, store them in a dry box when not in use, and pick quick dry foam fills for chairs outside the roof line.

    What plants suit a back porch?

    Ferns, trailing ivy, potted herbs, climbing jasmine, and sun loving flowers suit a back porch, since they suit plain pots and need only regular water and trimming. Match the plant to the light: ferns and ivy for shade, herbs and flowers for sun, and evergreen plants for color through winter.


  • 23 Craft Room Organization Ideas for Supplies of Every Size

    23 Craft Room Organization Ideas for Supplies of Every Size

    Organize a craft room by sorting supplies by type, giving each group one home, and keeping daily tools within arm’s reach of your work surface. Use wall storage for tools, labeled bins for bulky items, divided boxes for beads and buttons, and upright holders for paper and fabric, so cleanup takes minutes.

    Start by pulling every supply out of its current spot and sorting it into groups: paper, fabric, yarn, paint, beads, tools, and finished pieces. Measure the largest item in each group before you buy a bin or shelf, since one roll of fabric or one long ruler can decide the size of a whole storage zone. Keep daily tools near the chair, seasonal or bulky stock higher or lower, and a clear work surface in the middle. The 23 ideas below cover tiny notions and large rolls, small rooms and shared rooms, so you can pick the ones that fit your supplies.

    Key Takeaways

    • Sort by supply type first, then choose a container that fits the largest item in each group.
    • Give every group one home, and label it, so supplies return to the same spot after each project.
    • Use walls and doors for tools and flat items, and save shelves and drawers for bulky stock.
    • Store small parts in divided, lidded boxes, and store paper and fabric upright so nothing gets buried.
    • Keep daily tools within arm’s reach, and move seasonal or rarely used supplies to higher or lower zones.
    • End each session with a short reset: tools back on the wall, scraps in one bin, and the work surface clear.

    1. Pegboard Wall for Tools and Small Supplies

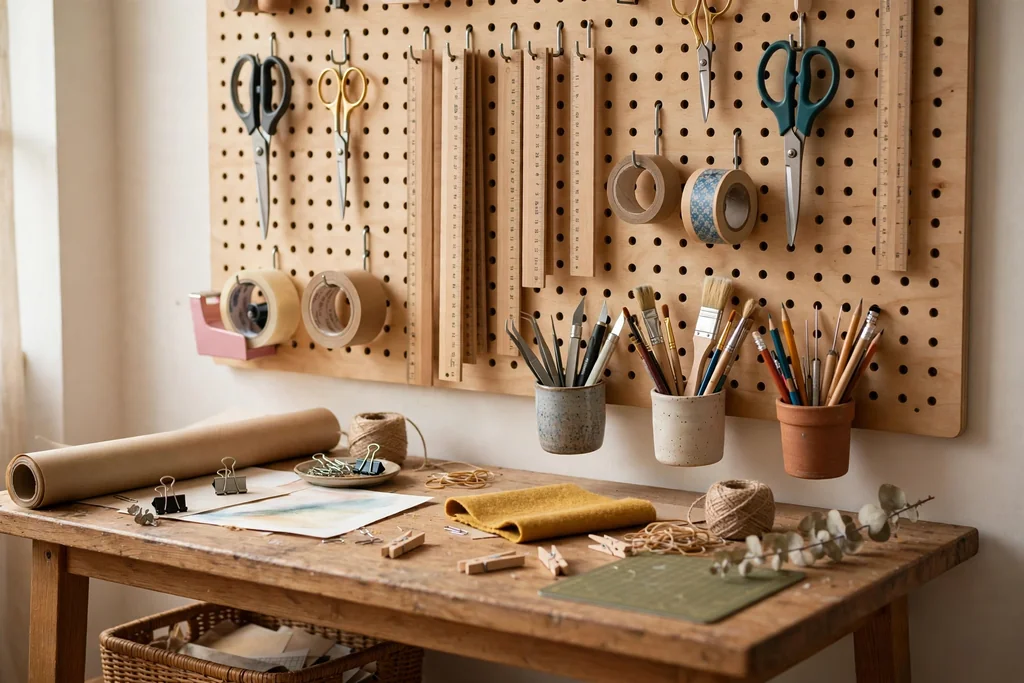
    Pegboard wall above a craft table with hooks holding scissors, rulers, tape, and small cups of tools.

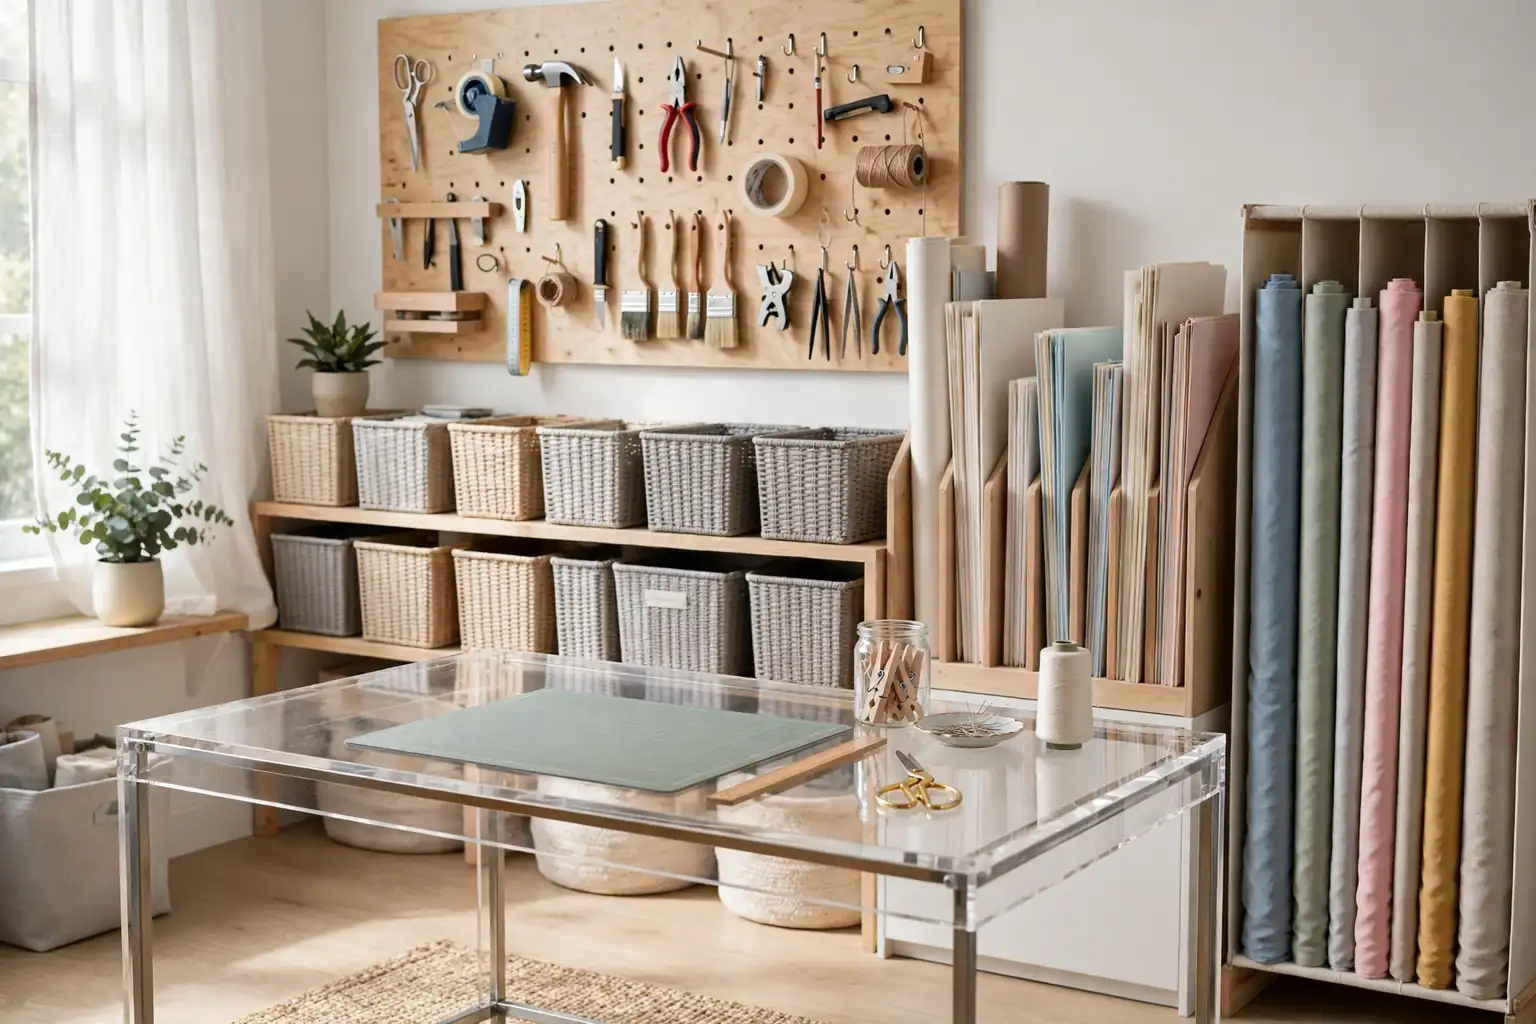
    Hang a pegboard panel above the work table and fit it with hooks, small cups, and a shelf rail for scissors, rulers, pliers, tape, and glue. Tools hung on the wall stay visible, so you stop buying a second pair of scissors because the first pair is lost in a drawer. Group tools by task, with cutting tools in one area and measuring tools in another, and leave a little empty space so new tools have a hook waiting.

    Outline each tool spot with a simple marker line on the board, so a missing tool shows up at a glance. Keep sharp tools on higher hooks, out of reach of small hands, and keep heavy items near the board frame, where the fixings hold best. Check the fixings once in a while, since a loaded board can loosen over time.

    2. Clear Lidded Jars on Open Shelves

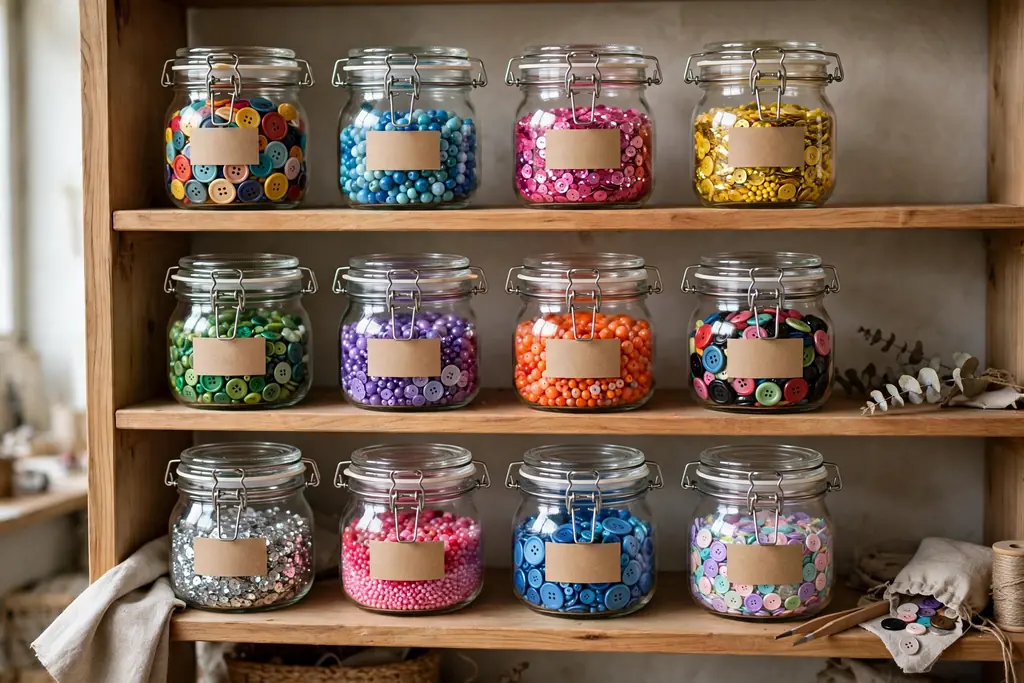
    Open shelves with clear lidded jars of colorful buttons, beads, and sequins, each jar labeled on the front.

    Set clear jars with lids on open shelves for buttons, beads, sequins, pom poms, and small findings, one material per jar. Clear jars show the color and amount inside, so you can judge at a glance whether you have enough for a project without opening every lid. Use jars of one size for a tidy shelf, and keep the lids tight so tiny pieces stay put.

    Label each jar on the front with the material and color group, and keep a small scoop or spoon with jars that hold loose beads. Store jars at eye level for the colors you use most, and move rare colors to a higher shelf. Wash and dry jars before refilling, since dust and damp can dull beads and mark fabric findings.

    3. Rolling Cart for the Current Project

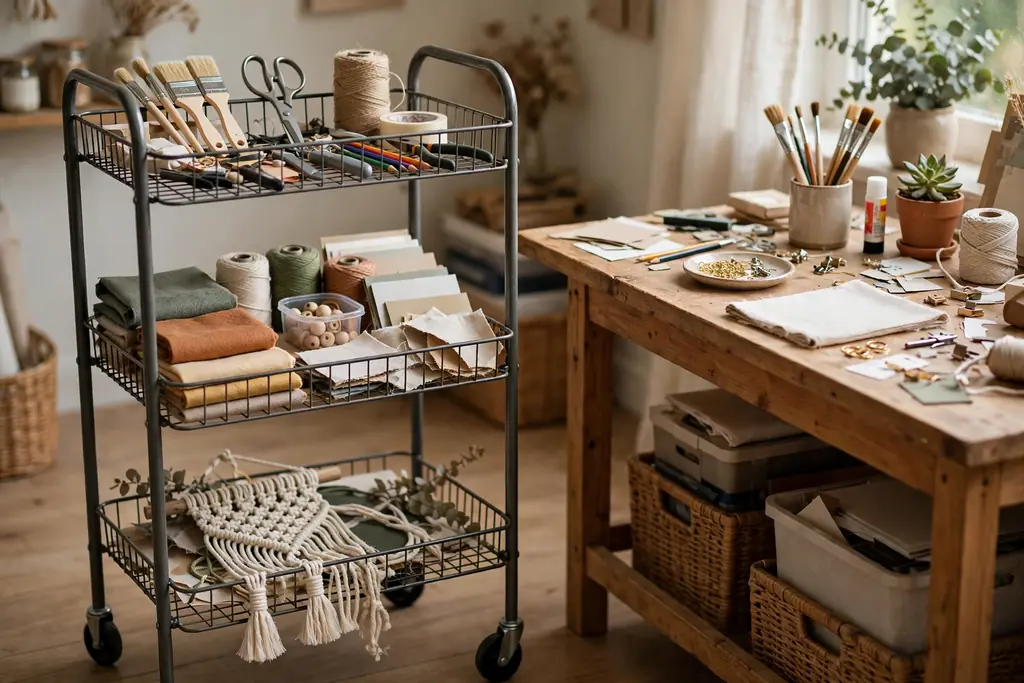
    Three tier rolling cart beside a craft table holding tools on top, materials in the middle, and a project at the bottom.

    Keep a three tier rolling cart beside the work table for the project in progress, with tools on top, materials in the middle, and works in progress at the bottom. A cart moves out of the way when guests arrive and rolls back when work resumes, so a half finished project never has to live on the dining table. Choose a cart with a lip on each tier, so small items do not slide off when it moves.

    Load the cart only with the current project, not with general stock, so it stays light and useful. When a project ends, empty the cart fully, wipe the tiers, and reload it for the next one. If the cart must cross a rug, pick larger wheels, since small wheels catch on thick pile.

    4. Labeled Bins Sorted by Supply Type

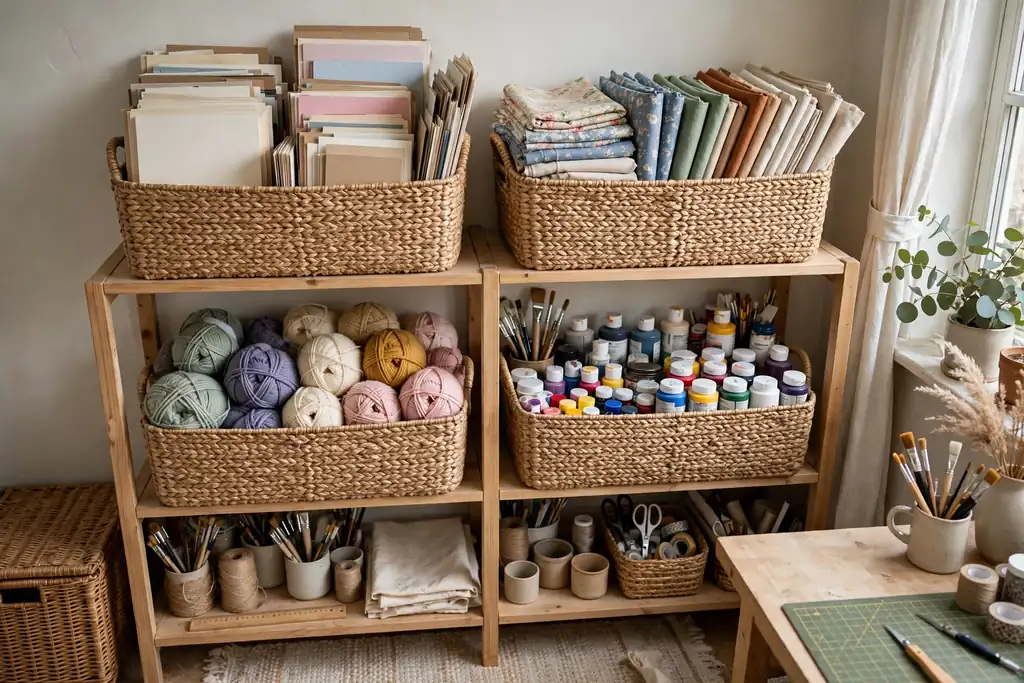
    Shelves with large labeled bins sorted by supply type for paper, fabric, yarn, and paint.

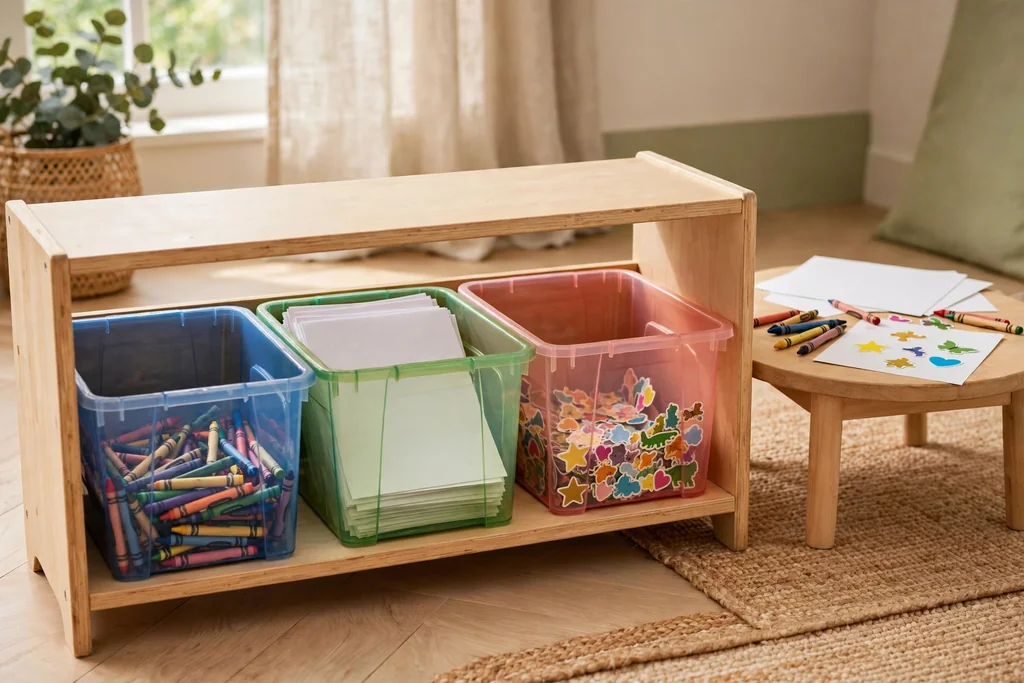
    Use open or lidded bins, one per supply type, for paper, fabric, yarn, paint, and general stock, with a large plain label on the front of each bin. Sorting by type stops one mixed bin from hiding the item you need, and labels let anyone in the house put a supply back in the right place. Keep bins to a weight you can lift with one hand, so a full bin of paper does not strain a shelf.

    Place the most used bins at easy reach height, and seasonal stock higher or lower. Tape a short contents list inside each lid for bins that hold several smaller bags. For a labeled bin method that also works for seasonal pieces, see Christmas decoration storage ideas.

    5. Shallow Drawer Dividers for Notions

    Shallow drawer with dividers holding needles, pins, thread spools, and small sewing notions in separate trays.

    Fit shallow drawers with dividers or small trays for needles, pins, snaps, hooks, thread, and other notions that vanish in a deep drawer. One compartment per notion type stops pins from mixing with beads and thread from tangling around scissors. Use trays you can lift out, so you can carry one tray to the table and return it whole.

    Label each tray on its front edge, and keep a small magnetic dish in one compartment for loose pins during a project. Empty and wipe trays when they start to collect thread ends and paper bits, since small debris hides the notion you need. Keep sharp notions in a lidded tray, and keep the drawer itself shallow so nothing sinks out of sight.

    6. Dowel Rack for Ribbon, Thread, and Tape

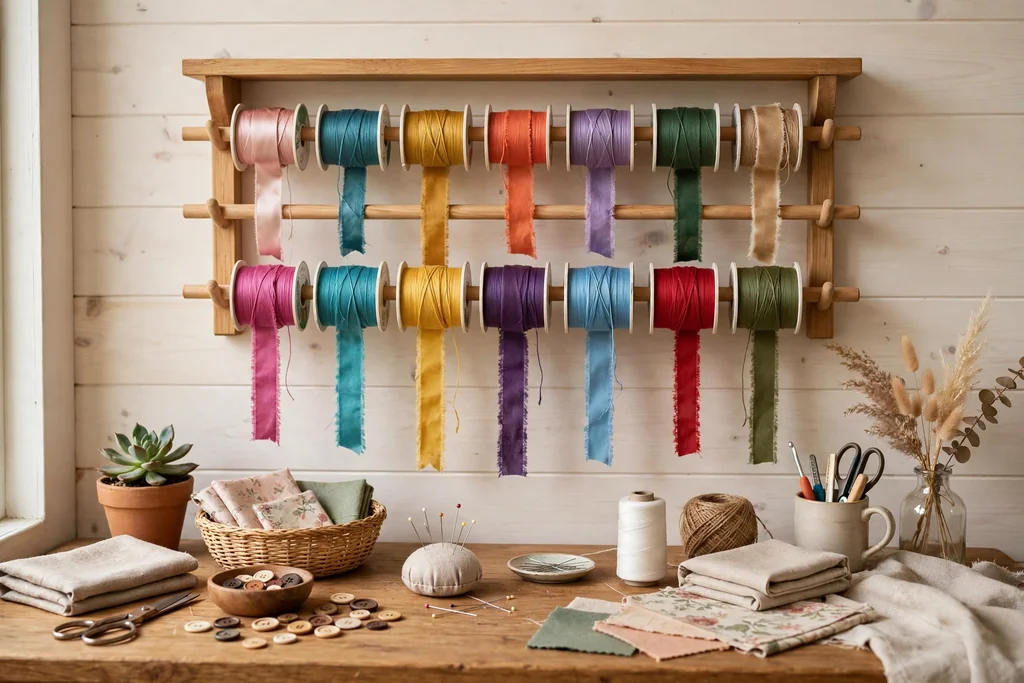
    Wall rack with horizontal dowels holding colorful ribbon and thread spools above a craft table.

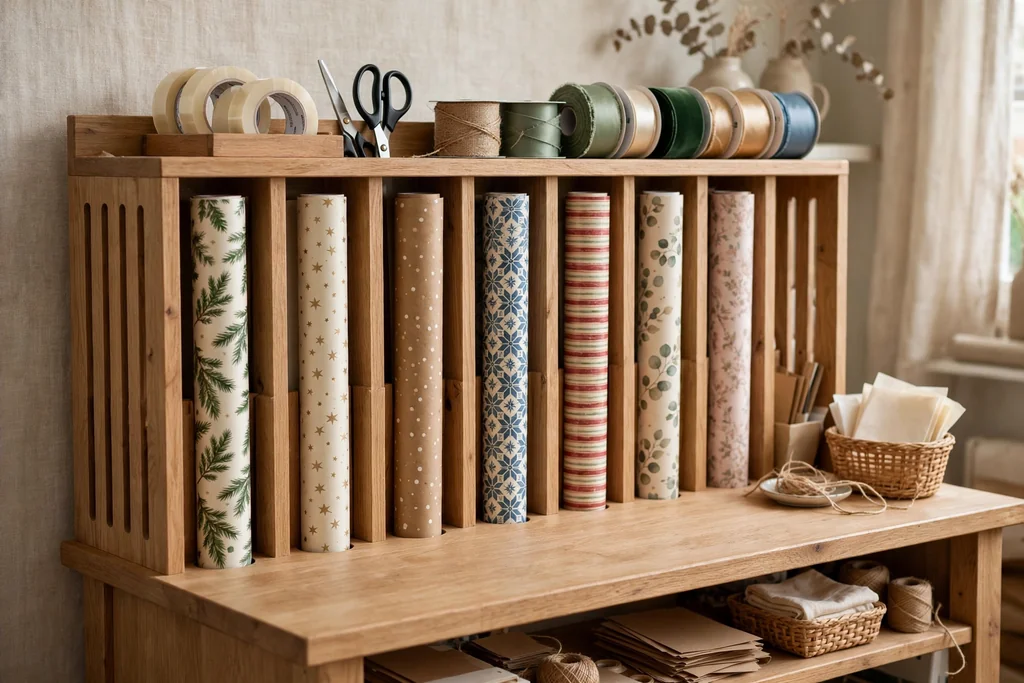
    Mount a wall rack with horizontal dowels for ribbon spools, thread spools, and rolls of tape, so each spool turns freely and pulls cleanly. A dowel rack shows every color at once, which helps when matching ribbon to paper or thread to fabric, and it stops spools from unrolling into a tangled drawer. Space dowels far enough apart that a full spool clears the one below it.

    Group spools by color family, and keep one empty dowel section for new spools. Cut ribbon from the spool on the rack rather than removing the spool, so the end stays threaded and tidy. For tape rolls, use a shorter dowel near the work surface, since tape is reached for more often than ribbon.

    7. Upright Paper Storage in Magazine Holders

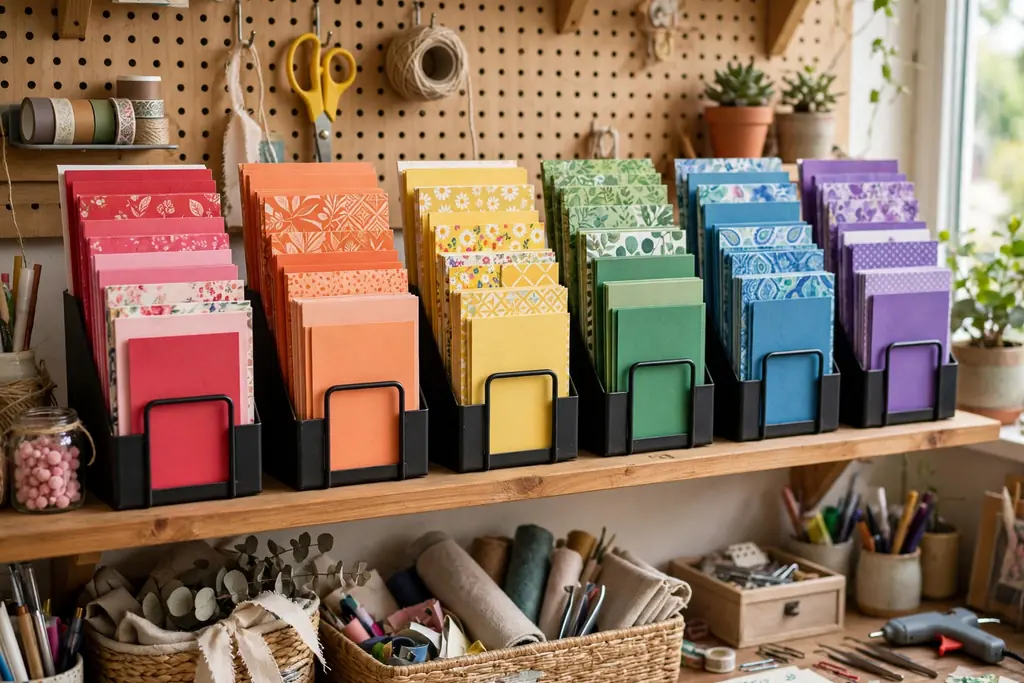
    Magazine holders on a shelf holding cardstock and patterned paper upright, sorted by color.

    Stand cardstock, patterned paper, and scrapbook sheets upright in sturdy magazine holders, sorted by color or theme, rather than stacking them flat. Upright paper is easy to flip through, and a single sheet slides out without disturbing the rest of the pile. Label each holder on its spine, and keep the most used colors at the front of the shelf.

    Trim off damaged corners before filing paper, since a bent corner catches on the sheet next to it. Keep paper away from direct sun and damp air, which can fade color and curl edges. Store very large sheets flat in a separate portfolio, since oversized paper folds and creases in a standard holder.

    8. Fabric Rolls Stored Standing in Bins

    Tall bins holding fabric rolls standing upright, sorted by color, beside a craft table.

    Stand fabric rolls and folded fabric bolts upright in tall bins or a small bookcase, sorted by color or project, so each roll pulls out without unrolling the rest. Upright fabric shows the pattern and color at the top edge, which makes choosing fabric faster than digging through a folded stack. Use bins deep enough that rolls stand steady, and keep heavy rolls at the bottom of the group.

    Fold small fabric scraps into one labeled bin of their own, rather than mixing them with full rolls, so scraps stay usable for small projects. Air fabric now and then, and keep bins away from damp walls. When a roll runs low, move the short remainder to the scrap bin, so the roll section holds only usable lengths.

    9. Divided Boxes for Beads and Buttons

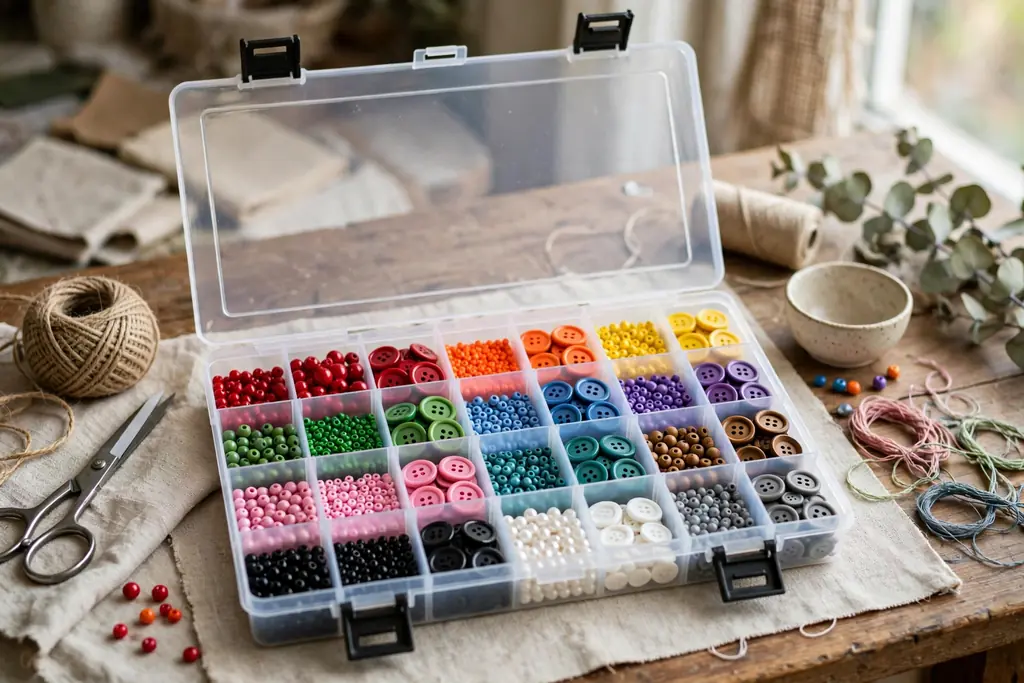
    Divided craft box with snap lid holding beads and buttons sorted by color in small compartments.

    Use divided craft boxes with snap lids for beads, buttons, eyelets, and other tiny findings, one box per craft type or color family. Small compartments stop colors from mixing, and a snap lid keeps a dropped box from scattering hundreds of pieces across the floor. Choose boxes with fixed dividers for very small beads, since movable dividers can shift and let pieces slip through.

    Label the outside of each box with its contents, and keep a small funnel with the bead boxes for pouring beads back after a project. Work over a tray when pouring beads, so a spill stays on the tray. Check lids and latches now and then, since a worn latch is the most common cause of a bead spill.

    10. Yarn Cubbies with One Color per Cubby

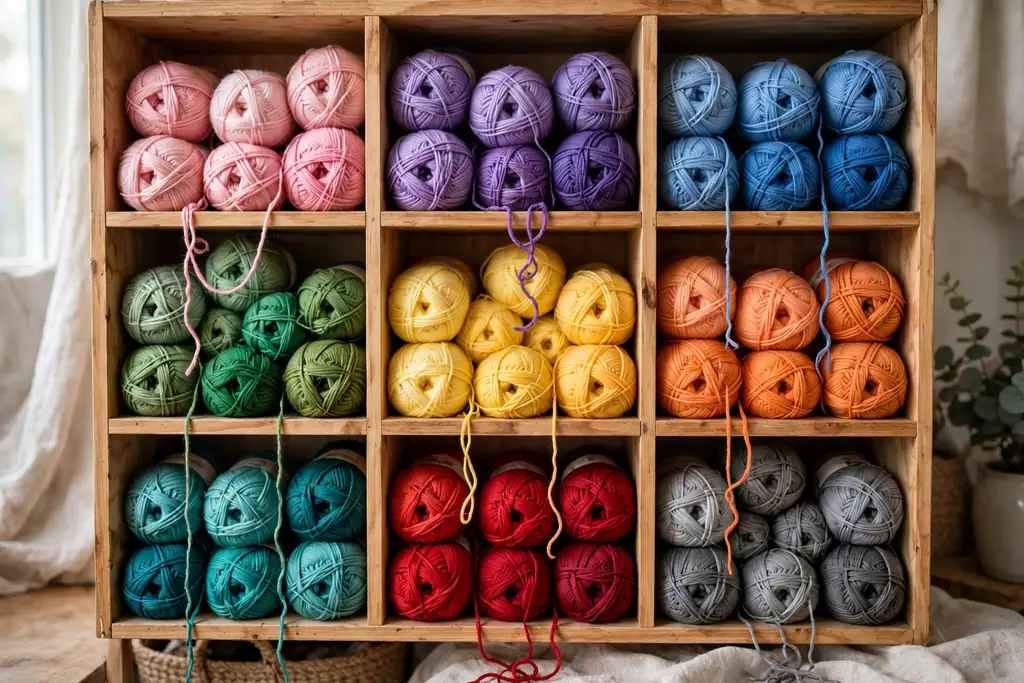
    Cubby shelf with yarn balls in separate cubbies, one color family per cubby, with yarn feeding from the front.

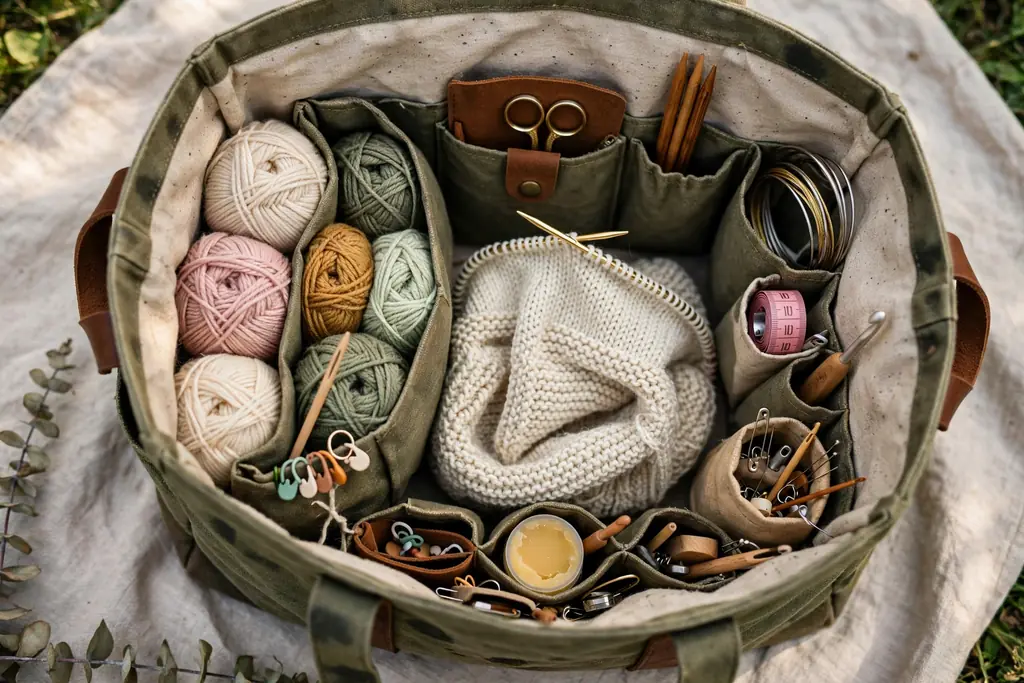
    Give yarn its own cubby shelf, with one color family or one project per cubby, and a small hole or slot at the front so yarn feeds out while the ball stays in place. Cubbies keep yarn balls from rolling together into a tangled pile, and they show the full color range at a glance. Use cubbies sized to your largest ball, and keep a spare cubby empty for yarn in use.

    Wind loose yarn into balls before shelving, since skeins unravel and catch on nearby yarn. Keep yarn away from direct sun, which fades color over time, and away from pets that pull loose ends. Label a cubby by project when yarn is bought for a specific piece, so it is not used for another project by mistake.

    11. Paint Shelf with a Front Lip

    Shallow shelf with a front lip holding paint bottles grouped by type with labels facing out.
    Set paints on a shallow shelf with a front lip or rail, grouped by type, with acrylics in one row, watercolors in another, and fabric paints apart from both. A front lip stops bottles from sliding off when a shelf is bumped, and grouping by type stops a watercolor set from being stained by an open acrylic bottle. Keep bottles upright with caps tight, and labels facing out.
    Wipe bottle necks before closing, since dried paint glues caps shut. Store brushes separately, bristles up in a jar, rather than lying across paint bottles. Keep paint away from heat and freezing air, and check old bottles once a year, since separated or dried paint is better discarded than kept.
    12. Over Door Pocket Organizer for Flat Tools
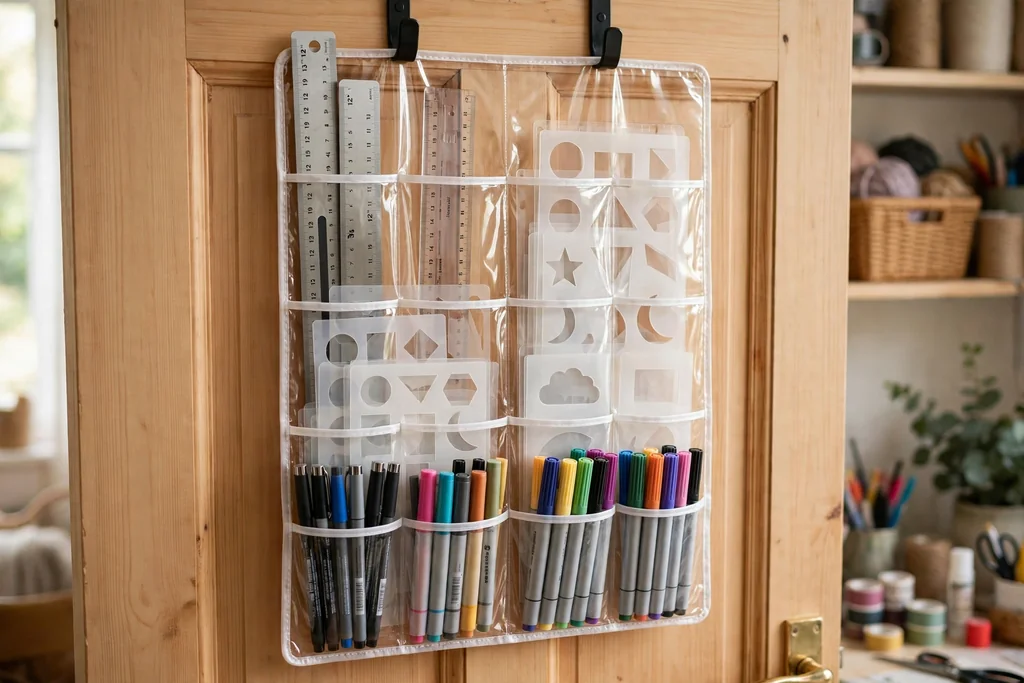
    Clear pocket organizer hanging on a craft room door holding rulers, stencils, pens, and markers.

    Hang a clear pocket organizer over the craft room door for flat and slim tools: rulers, stencils, cutting mats, pens, markers, and glue sticks. Door pockets use space that shelves cannot, and clear pockets show each tool without opening a drawer. Put the most used tools in the middle rows, where they are easiest to reach, and lighter items in the top rows.

    Keep the total weight modest, since a heavy organizer can strain door hinges. Use the bottom pockets for soft items, such as felt sheets or small cutting mats, rather than heavy tools. Check the door hooks now and then, and move the organizer to a wall hook if the door starts to sag or catch.

    13. Magnetic Strip for Metal Tools

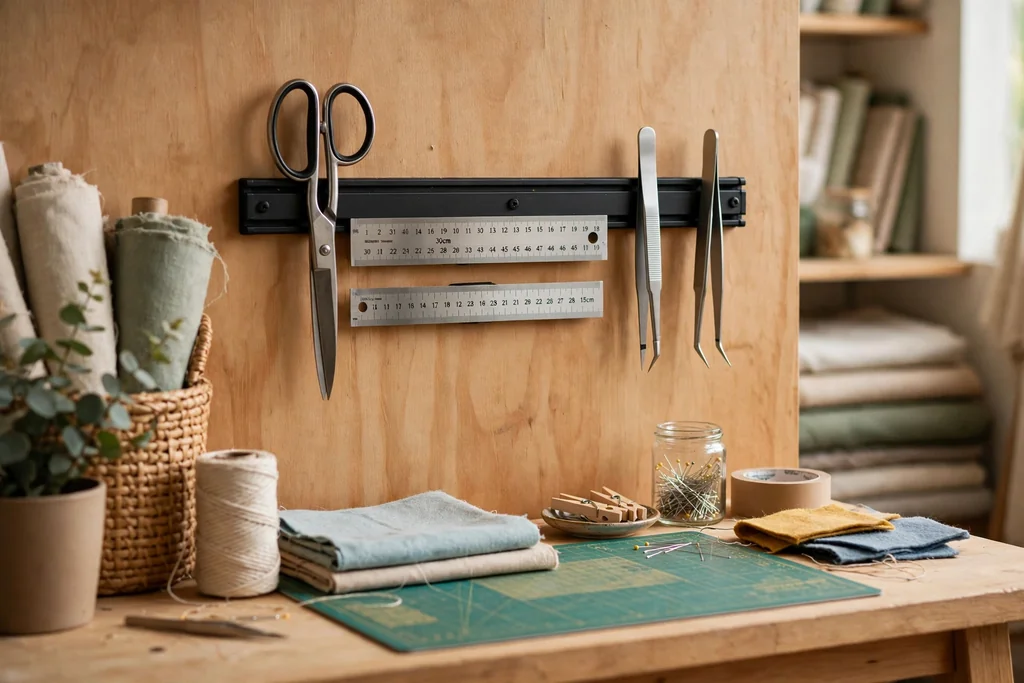
    Magnetic strip on a craft room wall holding metal scissors, rulers, and tweezers above a work table.

    Fix a magnetic strip to the wall above the work table for metal scissors, rotary cutters, rulers, tweezers, and needle cases. A magnetic strip holds metal tools in plain sight and frees a drawer for nonmetal items, and it keeps sharp edges away from fingers searching a drawer. Mount the strip at a height where tools lift off easily, and keep it clear of paper patterns that could catch.

    Keep the strip away from phones, cards, and electronic devices that magnets can affect. Wipe the strip now and then, since metal dust and pins collect along its length. Store rotary blades with their guards on, even on a magnetic strip, and keep the strip out of reach of small children.

    14. Fold Down Wall Desk for a Small Room

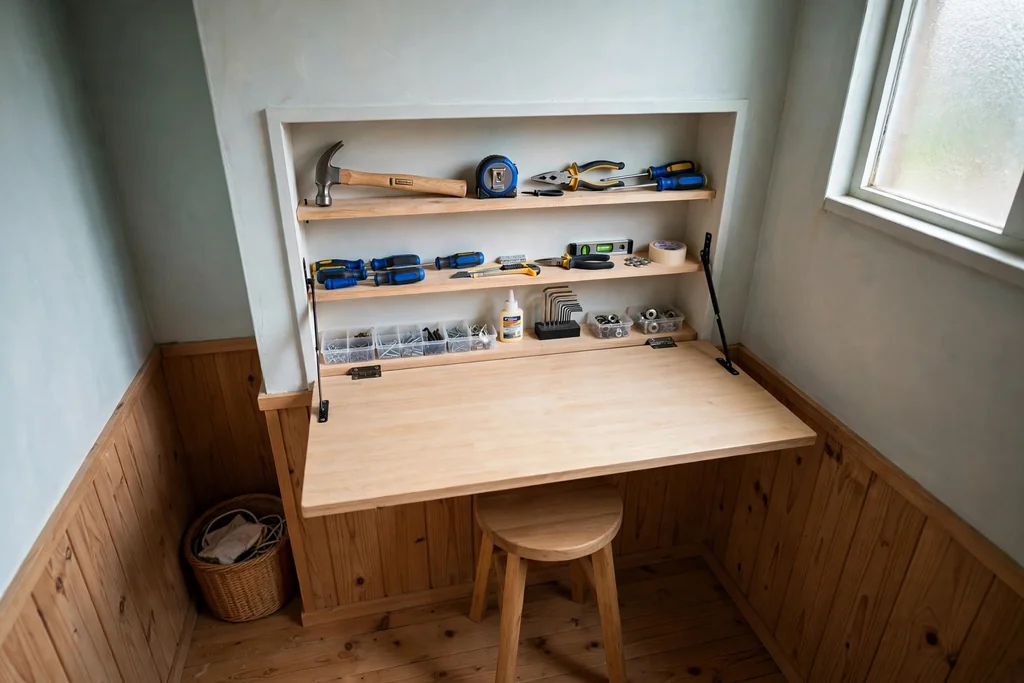
    Fold down wall desk open in a small room with shallow shelves of tools inside and a stool tucked under.

    Fit a fold down wall desk in a small room or a spare corner, with shallow shelves or pockets inside for the tools used most. A fold down desk gives a full work surface when open and returns the room to normal use when closed, which suits a shared room or a small bedroom. Choose a desk with a latch that holds it flat against the wall when closed.

    Store only light, flat items inside the desk, so the hinges carry no extra weight when it opens. Keep a small stool that tucks under the desk, and a single task lamp on the shelf above. Clear the desk surface before folding it up, since items left on it can fall when the desk closes.

    15. Corner Workstation with Overhead Shelves

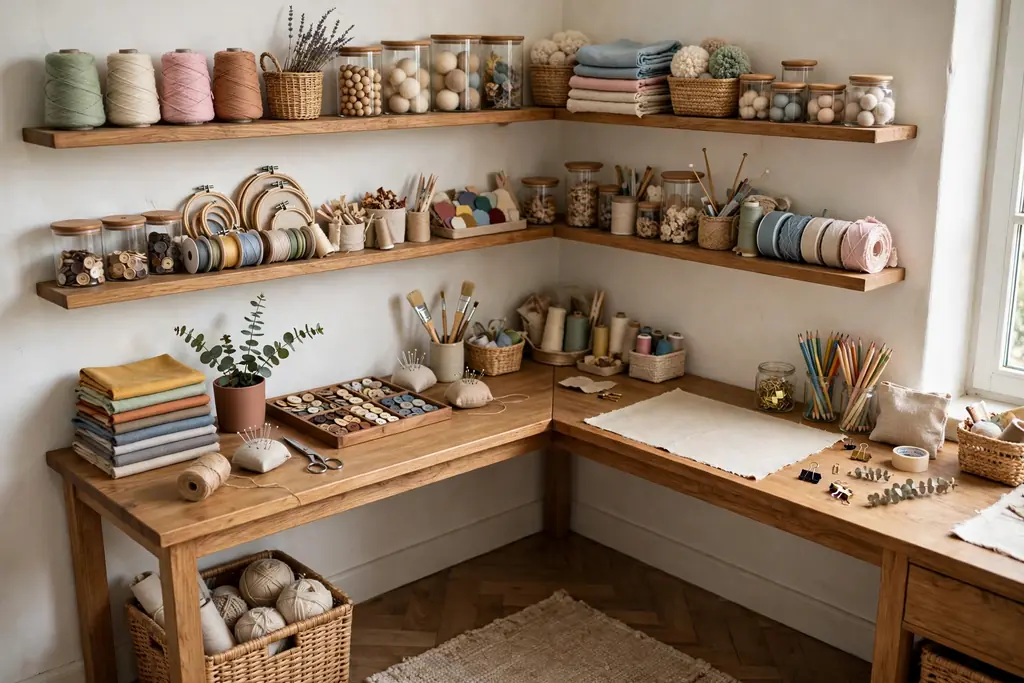
    Corner workstation with an L shaped desk and two rows of overhead shelves holding craft supplies.

    Build a corner workstation with an L shaped desk and two rows of overhead shelves, so the corner holds tools, reference books, and current projects without crowding the middle of the room. Corners often go unused, yet they give two walls of storage and a long work surface in a small footprint. Put daily tools on the lower shelf, and bulky stock on the upper shelf.

    Keep the desk surface clear except for the current project, and use the shelves for everything else. Add a small task light under the lower shelf, so the work area stays bright without a lamp taking desk space. Keep cords tidy with clips along the desk edge, so they do not snag fabric or paper.

    16. Rolling Bins Under the Work Table

    Low rolling bins labeled on the front sliding under a craft work table holding bulky supplies.

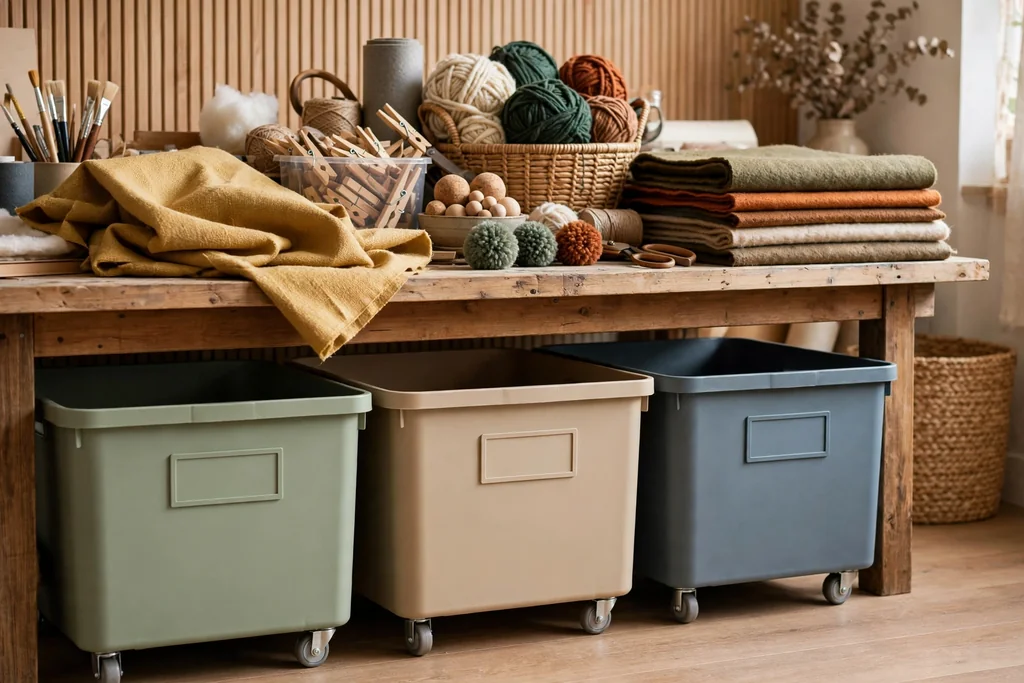
    Slide low rolling bins under the work table for bulky stock, such as batting, felt sheets, large paper pads, and works in progress. Under table bins use dead space, keep bulky items close, and roll out for full access, then slide back when work ends. Label the front of each bin, since only the front edge shows when bins are tucked under a table.

    Measure the clearance under the table before buying bins, and leave a little room above each bin so lids lift freely. Keep the heaviest bin in the middle, where it rolls straight out, and lighter bins at the sides. Wipe bin wheels now and then, since thread and lint wrap around small wheels and stop them turning.

    17. Scrap and Offcut Bin with a Weekly Sort

    Single bin near a craft table holding fabric and paper scraps sorted into small labeled bags.

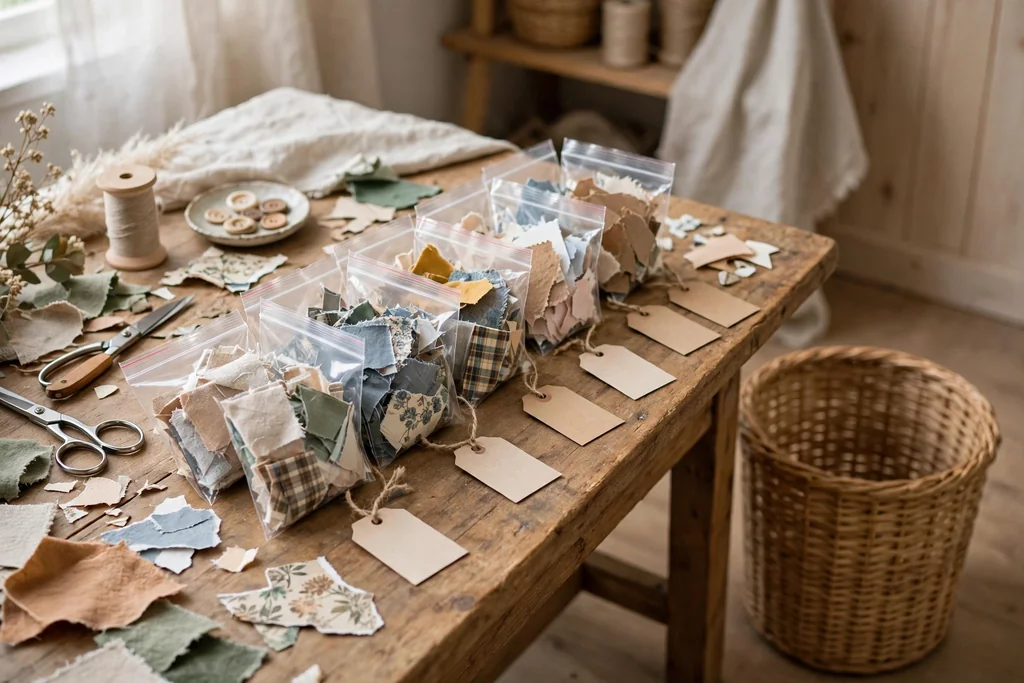
    Keep one bin near the work table for scraps and offcuts, and sort it once a week into keep, use soon, and discard piles. A single scrap bin stops offcuts from spreading across the table and floor, and a weekly sort keeps it from growing into a second craft room. Set a size rule for keeps, such as pieces larger than your hand, so tiny offcuts leave the room promptly.

    Store kept scraps by material in small labeled bags inside the bin, so a usable piece is easy to find. Use the use soon pile first in the next project, and discard faded, stained, or frayed pieces without guilt. Empty the bin fully during the weekly sort, wipe it, and return only the kept bags.

    18. Inspiration Board for Samples and Color Swatches

    Inspiration board near a craft table pinned with fabric swatches, color cards, and pattern samples.

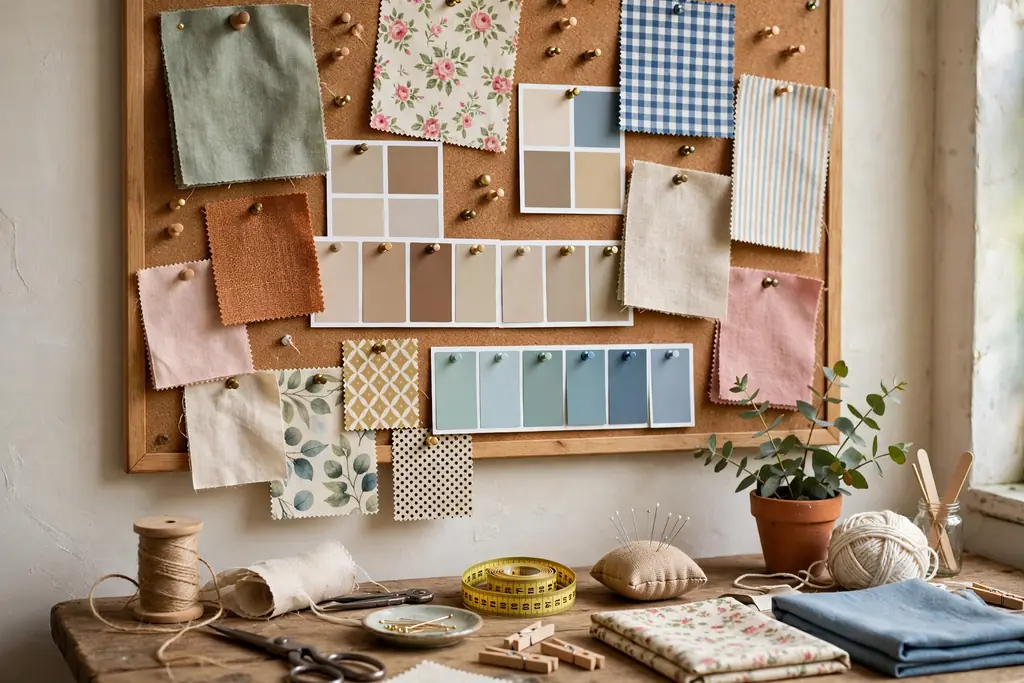
    Pin an inspiration board near the work table for fabric swatches, color cards, pattern samples, and photos of finished projects. A board keeps ideas visible while you work, so colors and textures stay matched across a project, and it stops loose swatches from piling on the desk. Use pins or clips rather than glue, so samples can move and return to their bins.

    Group the board by project, with one section per current piece, and clear old sections when a project ends. Photograph the board before clearing it, so the color plan survives even after samples return to storage. Keep the board away from paint and glue work, so samples stay clean.

    19. Sewing Station with a Machine Table and Notions Drawer

    Sewing station with a machine on a steady table, a drawer of bobbins and thread, and a pin tray beside it.

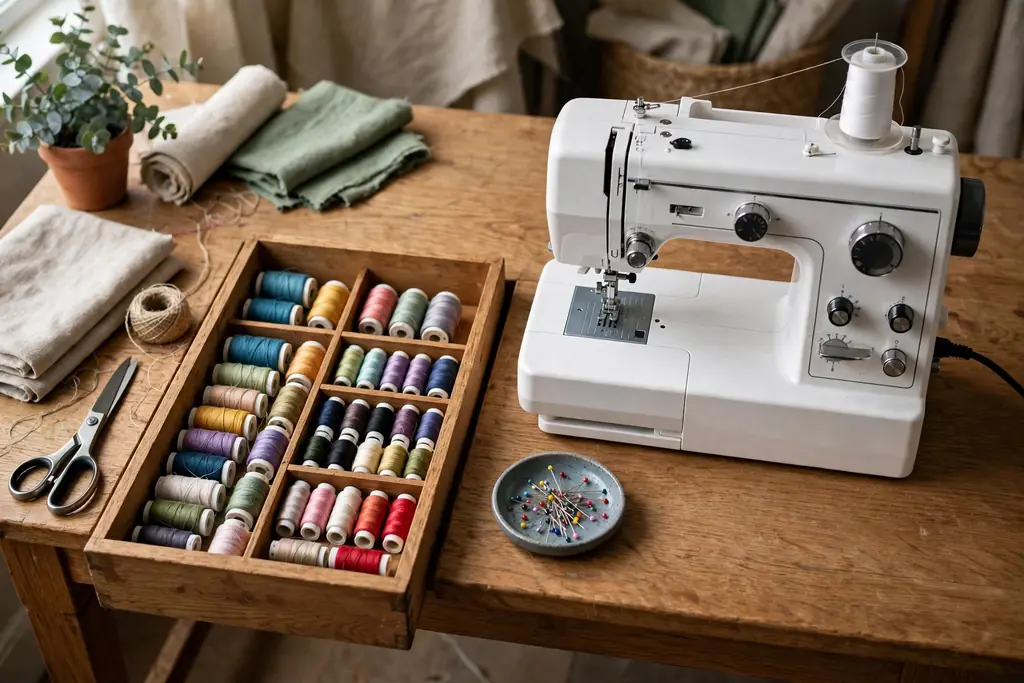
    Set up a sewing station with a steady table for the machine, a drawer beside it for bobbins, feet, needles, and thread, and a small tray for pins in use. A fixed sewing spot stops the machine from being packed away after each session, which makes short sewing jobs far more likely to happen. Keep the machine covered when not in use, and keep the power cord clipped to the table leg.

    Store bobbins wound with matching thread in a small case, so the right bobbin is easy to find. Keep scissors for fabric apart from scissors for paper, and label them, since paper dulls fabric scissors fast. Test the machine on a scrap piece after changing thread or feet, before starting on the real fabric.

    20. Gift Wrap Station with Vertical Roll Slots

    Gift wrap station with vertical slots for wrapping paper rolls and a shelf of tape, scissors, and ribbon.

    Create a gift wrap station with vertical slots for wrapping paper rolls, a small shelf for tape, scissors, tags, and ribbon, and a flat area for wrapping. Vertical rolls stay clean and uncreased, and a station in the craft room keeps wrapping supplies out of general storage. Sort rolls by occasion or color, and keep the most used rolls at the front.

    Cut paper on a flat surface, not inside the slot, so rolls stay neat. Keep a small bin at the station for paper offcuts, and move short rolls to the front, so they are used before new rolls are opened. Store gift bags folded flat in a nearby bin, sorted by size.

    21. Low Kids Craft Zone with Washable Bins

    Low kids craft zone with washable bins at child height holding crayons, paper, and stickers.

    Set a low zone for children’s craft supplies, with washable bins at child height for crayons, washable markers, paper, stickers, and safe scissors. Low bins let children choose and return supplies on their own, and washable bins wipe clean after paint and glue sessions. Keep adult tools, such as rotary cutters and hot glue, on high shelves, well away from the kids zone.

    Label kids bins with pictures as well as words, so younger children can return items to the right bin. Cover the kids table with a wipe clean cloth, and keep a small bin for drying artwork nearby. Sort the kids zone with children once a month, so broken crayons and dried markers leave the room.

    22. Portable Project Tote for Crafting Away from Home

    Portable project tote with inside pockets holding knitting tools and yarn, packed for crafting away from home.

    Pack a sturdy tote with the tools and materials for one portable project, such as knitting, embroidery, or hand sewing, so crafting can happen away from the craft room. A tote keeps a portable project in one place at home, and it stops small supplies from scattering across bags and pockets when you travel. Choose a tote with inside pockets for tools and a zip top to keep pieces safe.

    Keep a small checklist inside the tote lid, naming the tools the project needs, and check it before leaving the house. When the project ends, empty the tote fully, return stock to its home bins, and repack it for the next portable piece. Wash the tote now and then, since it picks up lint and dust on the move.

    23. Inventory List and Reset Kit for the End of Each Session

    Clipboard inventory list beside a tidy craft table with a lint roller, brush, and cloth reset kit.

    Keep a simple inventory list in a notebook or on a clipboard, naming each supply group, its home, and whether stock is low, plus a reset kit with a lint roller, a small brush, and a damp cloth. The list stops duplicate buying, since you can check it before shopping, and the reset kit makes the end of session tidy up a five minute job. Update the list when a group runs low, not when it runs out.
    End each session the same way: tools back on the wall or in their drawer, scraps in the scrap bin, works in progress in their box, and the work surface wiped. Photograph the tidy room once, and use that photo as the reset target after a long project. A short reset keeps the next session starting with work, not with searching.

    Conclusion

    Craft room ideas and organization work best when sorting comes before shopping: group supplies by type, give each group one labeled home, and keep daily tools close to the work surface. Start with the wall and the door, add bins and divided boxes for small parts, and store paper and fabric upright so nothing hides at the bottom of a pile. A short reset at the end of each session then keeps the system working, even when projects pile up.

    Pick three ideas from this list to start, such as the pegboard wall, the labeled bins, and the scrap bin, and add more only when the first three feel easy. For labeled bin ideas that work for seasonal supplies too, see Christmas decoration storage ideas, and for handmade projects to fill the room, see DIY fall home decor projects. Save this list on Pinterest, and work through it one supply group at a time.

    FAQs

    How do I start organizing a craft room?

    Start by sorting every supply into groups by type, such as paper, fabric, yarn, paint, beads, and tools, before buying any bins or shelves. Measure the largest item in each group, then choose one labeled home per group that fits that item. Keep daily tools near the work surface, and move seasonal or bulky stock to higher or lower zones.

    What is the best way to store small craft supplies?

    Store small craft supplies in divided, lidded boxes, with one compartment per type or color, and keep the boxes on a shelf at eye level. Divided boxes stop beads, buttons, and findings from mixing, and a snap lid keeps a dropped box from scattering pieces. Label each box on the outside, and work over a tray when pouring small parts.

    How do I organize a small craft room?

    Use walls, doors, and corners in a small craft room, with a pegboard for tools, a door organizer for flat items, and a corner desk with overhead shelves. Add a fold down desk if the room is shared, and use rolling bins under the table for bulky stock. Keep only the current project on the work surface, and store the rest in labeled homes.

    How should I store fabric and paper so they stay usable?

    Store fabric rolls standing upright in tall bins, sorted by color or project, and store paper upright in magazine holders, sorted by color or theme. Upright storage lets one roll or sheet slide out without disturbing the rest, and it shows colors at a glance. Keep both away from direct sun and damp air, and store oversized sheets flat in a separate portfolio.

    How do I keep a craft room tidy after each project?

    End each session with a short reset: return tools to the wall or drawer, put scraps in the scrap bin, store works in progress in their box, and wipe the work surface. Keep a reset kit with a lint roller, a small brush, and a damp cloth near the table, so tidy up takes about five minutes. A weekly scrap sort keeps offcuts from building up.

    How do I avoid buying craft supplies I already own?

    Keep a simple inventory list naming each supply group, its home, and whether stock is low, and check it before shopping. Photograph each bin as you fill it, so the list matches what is on the shelf, and update the list when a group runs low rather than when it runs out. A list also helps you use up short rolls and small scraps before buying new stock.


  • White Quartz Kitchen Countertops: Colors, Finishes, and Design Ideas

    White Quartz Kitchen Countertops: Colors, Finishes, and Design Ideas

    Choose white quartz kitchen countertops by deciding how much pattern you want, then matching the finish and edge to your cabinets, backsplash, and lighting. Pure white slabs suit a clean, minimal look, while soft gray or gold veining adds movement without a busy pattern. Bring samples home, check them in daylight and evening light, and compare care needs.

    White quartz works in many kitchens because the base color stays light and calm while the pattern can range from nearly plain to clearly veined. That range is the main choice to make first. A plain slab keeps attention on cabinets, hardware, and a backsplash, while a veined slab becomes a feature of the room on its own. The sections below walk through each decision in order, so you can compare samples with a clear list of what to look for. For more room ideas, visit the Dwell Ovell home page.

    Key Takeaways

    • Decide on the amount of veining first, since it sets the look of the whole kitchen more than any other single choice.
    • Compare polished, honed, and matte finishes in your own kitchen light, because the same slab can look different under daylight and evening bulbs.
    • Choose an edge profile that suits your cabinet style and how the counter will be used each day.
    • Pair white quartz with cabinets and a backsplash that share an undertone, so the whites do not clash.
    • Take samples home and check them next to cabinet doors, flooring, and paint before you place an order.
    • Plan simple daily care and quick wipe ups, and check the care guidance for your chosen finish.

    1. Learn the Main White Quartz Color Families

    Three white quartz samples in bright white, warm white, and soft white gray side by side.

    White quartz is not one single shade. Some slabs read as bright, cool white, others as warm white with a creamy cast, and others sit between the two with a soft gray tint. The undertone matters because it decides whether the counter blends with cool gray cabinets, warm wood, or crisp white paint. Hold a sample against your cabinet door and your wall color in daylight to see whether the white leans cool or warm.

    Start by sorting samples into three groups: bright white, warm white, and soft white gray. Bright white suits kitchens with cool grays, black hardware, and stainless steel. Warm white pairs well with cream cabinets, natural wood, and brass tones. Soft white gray works as a middle ground when your kitchen mixes warm and cool elements. Naming the family first makes every later choice easier, from backsplash tile to faucet finish.

    2. Compare Finishes: Polished, Honed, and Matte

    White quartz countertop showing polished and honed finishes side by side.

    A polished finish has a clear shine that reflects light and makes veining stand out. It suits kitchens where you want a bright, crisp surface and where the counter is a focal point. A honed finish has a softer, low shine look that feels calm and muted, and it can suit farmhouse, rustic, and relaxed modern kitchens. A matte finish is flatter still, with very little reflection, and it pairs well with flat front cabinets and natural textures.


    Each finish also changes how the surface feels and how marks show in daily use. Shine can highlight fingerprints and water spots, while a softer finish can hide them better but may show some marks of its own. Ask for a sample in each finish you are considering, wipe it with a damp cloth, and look at it from different angles. The finish you like in the store may read differently under your kitchen lights, so a home check is worth the time.

    3. Read Veining Patterns Before You Choose

    Large white quartz slab with soft gray veining seen in full.

    Veining is the pattern of lines running through a slab, and it ranges from faint and fine to bold and wide. Fine veining gives a quiet look that suits small kitchens and busy backsplashes, because it adds interest without competing for attention. Medium veining suits most kitchens, since it reads as natural stone character while staying easy to pair with other materials. Bold veining makes a clear statement and works best when the rest of the kitchen stays simple.

    Look at the full slab, not only a small sample, when veining matters to you. A sample may show one quiet corner of a slab that is much busier elsewhere, or one bold streak that does not repeat across the whole piece. Ask how the pattern runs across the slab and where the main cuts will fall, such as across an island or beside a sink. A slab with a calm section for the main work area and a livelier section for an island can give you both looks in one kitchen.

    4. Check Thickness and Slab Layout

    Kitchen island with a thick white quartz edge and a seam near the sink.

    Most kitchen counters use a standard slab thickness, and the edge can be built up to look thicker if you want a chunkier profile. A thicker looking edge suits large islands and bold cabinet styles, while a slim edge suits a light, modern kitchen. Think about how the edge will meet the cabinet front and whether you want a small overhang for seating at an island or peninsula.

    Slab layout matters as much as thickness. Seams are the joins where two pieces meet, and their placement affects both the look and the pattern flow. Long runs, L shapes, and large islands often need at least one seam, so ask where seams will sit and whether veining can be lined up across them. A well placed seam near a sink or a cooktop is less noticeable than one cutting across an open island, so raise the question before cutting begins.

    5. Choose an Edge Profile

    Three white quartz edge profiles in square, rounded, and beveled shapes.

    The edge profile is the shape of the counter edge, and it changes the style of the kitchen more than many people expect. A straight, square edge suits modern and minimal kitchens. A slightly rounded eased edge softens the look and suits family kitchens where people lean on the counter often. A beveled edge adds a small angled detail, while an ogee or layered edge suits classic and traditional rooms with detailed cabinets.

    Practical use matters too. A rounded edge is kinder to hips and elbows in a busy kitchen, while a sharp square edge can chip more easily if heavy pots hit it. A thicker built up edge looks substantial on an island but adds weight and cost to the job, so weigh the look against the budget for the whole project. Ask to see and touch edge samples, since a profile that looks good in a photo may feel different in daily use.

    6. Pair White Quartz with Cabinet Colors

    White quartz countertops with deep green cabinets and brass hardware.

    White quartz pairs with almost every cabinet color, but the pairing changes the mood of the room. White cabinets with white quartz give a bright, seamless look, so vary the hardware, backsplash, or flooring to keep the room from feeling flat. Gray cabinets with white quartz give a cool, calm kitchen, especially with soft gray veining that ties the two together. Navy, green, and other deep colors make white counters stand out and give the kitchen a clear contrast point.

    Wood cabinets need a closer look at undertones. Warm wood with warm white quartz feels soft and welcoming, while warm wood with bright cool white can clash if the whites pull in opposite directions. Bring a cabinet door sample, or a photo of your cabinets in daylight, when you shop for slabs. The goal is a pairing where the counter and cabinets sit comfortably together, with one of them leading and the other supporting.

    7. Match a Backsplash Without Clashing

    White quartz countertops with a plain white subway tile backsplash.

    The backsplash sits right next to the counter, so a clash there is hard to ignore. A simple rule helps: let either the counter or the backsplash carry the pattern, and keep the other quiet. If your quartz has bold veining, a plain subway tile or a solid color slab backsplash keeps the kitchen calm. If your quartz is nearly plain, a patterned tile, a herringbone layout, or a textured stone backsplash can add the interest the counter does not.

    Check whites together before you decide. Tile whites vary just as quartz whites do, and a cool white tile next to a warm white counter can look mismatched once both are installed. Place the tile sample flat against the quartz sample, in the same light the kitchen gets, and step back to view them together. Grout color matters too: a matching grout keeps the backsplash quiet, while a dark grout draws attention to each tile and adds pattern of its own.

    8. Plan Sinks, Faucets, and Cooktop Cutouts

    White quartz countertop with an undermount sink and a gooseneck faucet.

    Cutouts for sinks, faucets, and cooktops should be planned before the slab is cut, since changes after cutting are limited. An undermount sink gives a smooth line from counter to sink and makes wiping crumbs into the sink easy. A farmhouse sink changes the front edge of the counter run, so its width and apron height need to be set early. A drop in sink is simpler to fit but leaves a rim on the surface that needs cleaning around.

    Faucet placement follows the same rule. Check the number of faucet holes, the reach of the faucet over the sink, and whether a soap dispenser or filtered water tap needs its own hole. Cooktop cutouts need exact measurements and clear space around burners for safe use. Write down every cutout, its size, and its position, and confirm them on the template before cutting starts, so the finished counter fits the fixtures you already own or plan to buy.

    9. Use Lighting to Show the True White

    White quartz kitchen island under daylight and warm pendant lights.

    White quartz changes with light, so check samples under the light your kitchen actually has. Daylight from a window shows the truest white, while warm evening bulbs can make a cool white look warmer and a warm white look creamier. Under cabinet lights add brightness to the work surface and can make veining stand out, while a single ceiling light can leave corners in shadow and make the counter look gray.

    Plan lighting in layers where you can. Daylight and general ceiling light set the overall tone, under cabinet lights brighten the work areas, and pendant lights over an island add warmth and focus. Check your chosen slab under each layer, not only in a bright showroom. If the kitchen has little daylight, a slightly brighter white may keep the room feeling open, while a warm white can stop a north facing kitchen from feeling cold.

    10. Plan Cleaning and Daily Care

    Wiping a white quartz countertop with a soft cloth near a cutting board.

    White quartz is a practical choice for daily kitchen use, but a simple care routine keeps it looking its best. Wipe spills soon after they happen, especially strongly colored foods and drinks such as tomato sauce, coffee, and red wine, since sitting spills are harder to remove from any light surface. Use a soft cloth with warm water and a mild soap for daily cleaning, and dry the surface after wiping to avoid water marks.

    Avoid harsh pads and strong cleaners that can dull the finish over time, and use trivets or boards under very hot pans and for heavy chopping. Cutting boards protect both the counter and your knives, and they keep the surface free of small scratches that catch the eye on a white background. Read the care guidance that comes with your slab and keep it with your kitchen records, so everyone in the household follows the same routine.

    11. Match White Quartz to a Design Style

    Coastal kitchen with white quartz countertops and light wood stools.

    White quartz adapts to many styles, but the details around it set the style. A modern kitchen pairs white quartz with flat front cabinets, simple hardware, and a plain backsplash for a clean, open look. A farmhouse kitchen pairs it with shaker cabinets, wood accents, and a farmhouse sink for warmth. A classic kitchen pairs it with detailed cabinets, a layered edge profile, and brass or bronze hardware.

    Coastal kitchens pair white quartz with light wood, pale blues, and woven textures for an airy feel. A transitional kitchen mixes modern and classic details, such as simple cabinets with a soft edge profile and a quiet backsplash. Pick the style that matches the rest of your home, then let the veining, finish, and edge follow that style. A counter that fits the home around it will look right for years, even as small decor items change.

    12. Compare Samples at Home Before Deciding

    White quartz samples next to a cabinet door, flooring sample, and paint swatches.

    The last step is also the most useful: compare samples at home before you order. Borrow or buy samples of your top two or three slabs, in the finish you plan to use, and place them on your existing counters or on a board near the cabinets. Live with them for a few days, and look at them in morning light, afternoon light, and evening light, with the kitchen lights on and off.

    Test each sample the way you will use the counter. Set a mug, a cutting board, and a pan beside it, wipe it with a damp cloth, and check how it looks next to your flooring, wall paint, and hardware. Note which sample still looks good at the end of the day, when the kitchen is in normal use rather than showroom light. The sample that looks right in your own kitchen, next to your own cabinets, is the one to order.

    Conclusion

    Choosing white quartz kitchen countertops comes down to a short list of choices made in the right order: color family, finish, veining, edge, cabinets, backsplash, lighting, and care. Start with the amount of pattern you want, then check each later choice against that first decision. Samples checked at home, in your own light and next to your own cabinets, will tell you more than any showroom display. With those checks done, you can order with confidence and enjoy a bright, practical kitchen surface for years.

    FAQs

    What is the best white quartz color for a kitchen?

    The best white quartz color is the one whose undertone matches your cabinets and flooring, so check samples at home in your own light. Bright white suits cool gray and black kitchens, warm white suits cream and wood kitchens, and soft white gray works as a middle ground when your kitchen mixes warm and cool elements.

    Should I choose polished, honed, or matte white quartz?

    Choose polished white quartz for a bright, reflective surface that shows veining clearly, honed for a softer low shine look, or matte for a flat, calm surface with very little reflection. Compare all three in your kitchen light, since shine changes how marks and fingerprints show in daily use.

    Does white quartz show stains easily?

    White quartz can show sitting spills more clearly than a dark counter, so wipe up strongly colored foods and drinks soon after they happen. Daily cleaning with a soft cloth, warm water, and mild soap, plus quick wipe ups, keeps a white surface looking clean in normal kitchen use.

    What backsplash goes with white quartz countertops?

    A plain backsplash goes well with boldly veined white quartz, while a patterned tile or textured backsplash suits nearly plain white quartz. Match the whites first, since tile whites vary, and choose a grout color that either quiets the backsplash or adds pattern, depending on the look you want.

    What edge profile is best for white quartz kitchen countertops?

    A straight or slightly rounded eased edge suits most kitchens, since it looks clean and is kind to hips and elbows in daily use. A beveled edge adds a small detail, while a layered or ogee edge suits classic rooms with detailed cabinets, so match the edge to your cabinet style and how the counter will be used.

    How do I pick white quartz that will not clash with my cabinets?

    Hold a quartz sample directly against a cabinet door and check both in daylight and evening light before ordering. Pick a shared undertone, either cool or warm, and let either the counter or the cabinets lead, with the other supporting, so the two surfaces sit comfortably together.

  • How to Organize a Small Bedroom and Make Better Use of Space

    How to Organize a Small Bedroom and Make Better Use of Space

    To organize a small bedroom, start by removing what you do not use, then give every remaining item a fixed place close to where you use it. Use the bed, closet, walls, and door for storage, choose furniture that holds more than one job, and keep surfaces clear with a short daily reset.

    A small bedroom feels crowded when items have no home, when the closet holds things you never wear, and when flat surfaces collect odds and ends. This guide works through the room in order, so you can measure once, clear out what you do not need, set up storage that fits the space you have, and finish with habits that stop clutter from building up again.

    Key Takeaways

    • Measure the room, doorways, and large furniture before you buy any bins, shelves, or storage furniture.
    • Declutter by category, not by drawer, so you see everything you own in that category at once.
    • Give the room clear zones for sleeping, dressing, and reading or working, even if a zone is only one corner.
    • Use the space under the bed, inside the closet, on the walls, and behind the door before adding floor furniture.
    • Keep a short daily reset and a weekly check so the room stays organized after the first clear out.

    Supplies You May Need

    • Measuring tape and a notebook or phone notes for room and furniture measurements
    • Sturdy bags or boxes labeled keep, move elsewhere, donate, and discard
    • Clear or labeled bins that fit under the bed, with lids if you store bedding or out of season clothes
    • Closet dividers, slim hangers, and small shelf baskets
    • Wall shelves, picture ledges, or a peg rail with hooks
    • Over the door hooks or a hanging organizer, if your door and hinges allow it
    • Small drawer dividers or trays for the nightstand and dresser
    • Labels and a marker for bins, boxes, and closet sections
    • A laundry basket or hamper that fits the space you have

    1. Measure the Room and Note the Fixed Features

    Measuring a small bedroom wall with a tape measure near a bed.

    Measure the length and width of the room, the height of the walls, and the size of the bed, dresser, and any other large piece you plan to keep. Note the position of doors, windows, outlets, heating vents, and the swing of each door, since a bin or shelf placed in a door swing will soon be moved and then left out of place.

    Write the measurements down and keep them with you when you shop for storage. A shelf that is a few inches too wide, a bin that will not slide under the bed, or a basket that blocks a drawer is easy to avoid with a tape measure in hand. Measure the clear space under the bed and inside the closet as well, including shelf depth and hanging height, so each storage choice fits the spot it is meant for.

    2. Declutter by Category Before You Organize Anything

    Sorted clothes with labeled bags for keep, donate, and discard in a bedroom.

    Work through one category at a time, starting with clothes, then books and papers, then accessories, chargers, and other small items. Gather everything in that category in one place, even items stored in other rooms, so you can see duplicates and decide what you truly use.

    Sort each item into keep, move elsewhere, donate, or discard, and take the donate and discard bags out of the room the same day. Keeping bags in the room only moves clutter from a drawer to a corner. For items you keep, ask where you use them and how often. Daily items earn the easiest spots, while items used once a season can go higher, deeper, or into a less handy place.

    3. Divide the Room Into Simple Zones

    Small bedroom with sleeping, dressing, and reading zones.

    Give each main activity a place, even in a very small room. The bed area is for sleeping, the closet or dresser area is for dressing, and a chair, small desk, or reading corner can hold books and a lamp. Zones stop items from drifting, because a book left near the bed is easy to return to a reading spot when that spot is clear.

    Keep zone boundaries simple. A small rug, a shelf, or a lamp can mark a reading corner without a divider that eats floor space. Place dressing items near the closet or dresser, reading items near the chair or bed, and charging items near one outlet. When each zone holds only its own items, tidying becomes a short task of returning a few things to their zones.

    4. Place the Bed and Large Furniture First

    Bed placed against the longest wall in a small bedroom with a clear walkway.

    Set the bed position before you place smaller pieces, since the bed takes the most floor space and sets the flow of the room. In many small rooms, the bed works best against the longest wall, with room to make the bed and reach a nightstand on at least one side. Leave a clear path to the door and to the closet so you do not have to climb over furniture to reach daily items.

    Put the dresser or wardrobe next, in the spot that leaves the most open floor and keeps drawers and doors able to open fully. Avoid placing a tall piece where it blocks a window or a vent. Once the large pieces sit well, smaller storage can fill the gaps that remain, rather than forcing the bed or dresser into an awkward spot around a shelf.

    5. Make the Space Under the Bed Work Hard

    Labeled flat storage bins sliding out from under a bed.

    The space under the bed is often the largest hidden storage area in a small bedroom. Use low, flat bins that slide out easily, and label each bin by what it holds, such as spare bedding, out of season clothes, or shoes. Keep bins shallow enough to pull out without lifting the mattress, and leave a small gap so air can move around stored items.

    Store only items you need a few times a year, or items you rotate often, under the bed. Daily clothes belong in the closet or dresser, where they are quicker to reach. Check under bed bins when the seasons change, and return anything you did not use during that season to the declutter step before you pack the bins again.

    6. Rework the Closet With a Simple System

    Organized small closet with slim hangers, shelf baskets, and shoes in a row.

    Start with the closet rod, shelves, and floor, and give each a job. Hang daily clothes at eye level, place folded items and small baskets on shelves, and keep shoes and bags on the closet floor in a row you can see. Slim hangers save rail space and keep clothes from slipping, while a second lower rod can double hanging space for shirts and short items if the closet height allows it.

    Use dividers or small labels to mark sections, such as work clothes, casual clothes, and outerwear, so clothes return to the same spot after laundry. Keep a small bag or bin in the closet for items to donate, and move it out when it fills. A closet that holds only clothes you wear, with a clear place for each group, is far easier to keep tidy than a closet used as general storage.

    7. Use the Walls for Storage That Keeps the Floor Clear

    Wall shelves and a peg rail with hooks in a small bedroom.

    Wall storage adds room without taking floor space. Shelves above a desk, a peg rail near the door for bags and hats, and hooks behind the bedroom door can hold items that would otherwise sit on a chair or the floor. Place daily items at arm height and lighter, less used items higher up, where they are still easy to reach with a small step stool.

    Keep wall storage neat by limiting each shelf or rail to one kind of item. A shelf crowded with books, boxes, and loose items looks cluttered even when it is organized. Leave a little empty space on each shelf, and check wall hooks often, since hooks collect coats, bags, and scarves quickly. When a hook holds more than one layer, it is time to return some items to the closet.

    8. Choose Furniture That Does More Than One Job

    Storage bench at the foot of a bed beside a nightstand with a drawer.

    In a small bedroom, each large piece should earn its floor space. A bed with drawers underneath, a storage bench at the foot of the bed, a nightstand with a drawer and a shelf, or a small desk that folds away when not in use can hold items without adding another cabinet. Choose pieces that fit your measurements from step 1, with drawers and lids that open fully in the space available.

    Think about what each piece will hold before you buy it. A bench works well for extra blankets and books you read at night, while a nightstand drawer suits chargers, a notebook, and small personal items. Avoid furniture with open shelves for items you want out of sight, since open shelves need regular tidying to look calm. One well chosen piece often replaces two smaller pieces that only add clutter.

    9. Use the Door, Corners, and Other Overlooked Spots

    Hooks on the back of a bedroom door holding a robe and a bag.

    Look for small pockets of space that are easy to miss. The back of the door can hold hooks for a robe, a bag, or tomorrow’s outfit. A narrow gap beside a dresser can hold a slim rolling cart for books or chargers. A corner can hold a small shelf or a tall, narrow basket for laundry, as long as it does not block a door or a drawer.

    Check that door hooks and carts do not damage the door, block the hinges, or stop the door from closing. If you rent, use hooks and organizers that hang over the door or attach without holes, and remove them cleanly when you move. These small spots are best for one clear job each, such as a robe hook or a laundry basket, rather than a mix of items that soon pile up.

    10. Keep Surfaces Clear With a Place for Daily Items

    Clear nightstand with a small tray holding a phone, glasses, and a book.

    Flat surfaces collect clutter because they are easy to drop things on. Give daily items a fixed home: a small tray on the nightstand for a phone, glasses, and a book; a hook by the door for keys and a bag; and a single spot for mail and papers, rather than several piles around the room. When each daily item has a home, putting it away takes seconds.

    Clear the top of the dresser and the nightstand at the end of each day, and return anything without a home to the zone it belongs in. If an item keeps landing on a surface, it may need a better home, such as a hook, a tray, or a drawer divider. A clear surface also makes the room feel larger and calmer, since the eye rests on bedding and walls rather than on piles.

    11. Set Up a Laundry and Seasonal Rotation System

    Laundry hamper near a closet with a labeled bin of seasonal clothes.

    Laundry is a common source of bedroom clutter, so give it a clear path. Place a hamper where clothes come off, or near the closet, and choose a size that fits the room and your laundry routine. Wash and put away one load at a time when you can, since clean clothes left in a basket soon become a second pile to sort.

    Rotate seasonal items at the same time each year. When you swap summer clothes for winter clothes, or light bedding for heavier bedding, pack the out of season items in labeled bins under the bed or on a high closet shelf. Check each item as you pack it, and donate anything you did not wear or use during the past season. A simple rotation keeps the closet and drawers holding only what fits the current season.

    12. Use Light, Color, and Low Furniture to Keep the Room Calm

    Calm small bedroom in light colors with low furniture and a mirror.

    Organization is easier to keep up when the room feels calm and easy to move through. Light wall colors, bedding in one or two main colors, and curtains that let in daylight can make a small room feel more open. A mirror placed where it reflects a window can add a sense of depth, but keep mirrors to one or two so the room does not feel busy.

    Choose low, simple furniture shapes where you can, and keep tall or bulky pieces to one wall. Leave some wall space bare and some shelf space empty, since a room packed from floor to ceiling can feel crowded even when it is tidy. These choices do not replace storage, but they make the organized room easier to enjoy and easier to keep that way.

    13. Keep It Tidy With a Daily Reset and a Weekly Check

    Neatly made bed in a tidy small bedroom after a daily reset.

    A daily reset takes only a few minutes: make the bed, return items to their zones, put dirty clothes in the hamper, and clear the nightstand and dresser tops. Doing this at the same time each day, such as before bed or after dressing in the morning, turns tidying into a habit rather than a large weekend job.

    Once a week, do a slightly longer check. Empty the donate bag, wipe surfaces, check the closet floor and the under bed bins, and return any item that drifted into the wrong zone. Add a simple rule for new items: when something new comes into the room, an older item of the same kind leaves it. With this rhythm, a small bedroom stays organized because clutter is caught early, before it builds up again.

    Conclusion

    Organizing a small bedroom starts with measuring and clearing out what you do not use, then giving every remaining item a fixed place in a clear zone. Bed, closet, wall, and door storage add room without adding floor furniture, multi-use pieces hold more in less space, and a short daily reset keeps the system working. Work through the steps in order, adjust each one to fit your room, and keep only what you use and enjoy. For more ideas from Dwell Ovell, browse the home page for home decor guides.

    FAQs

    What is the first step to organize a small bedroom?

    The first step is to measure the room and note the fixed features, such as doors, windows, outlets, and the space under the bed and inside the closet. Measurements stop you from buying bins or shelves that do not fit, and they help you place the bed and large furniture before adding smaller storage.

    How do I declutter a small bedroom without getting overwhelmed?

    Declutter one category at a time, starting with clothes, then books and papers, then small items, and gather each category in one place before you sort it. Sort items into keep, move elsewhere, donate, or discard, and take donate and discard bags out of the room the same day so clutter does not simply move to a corner.

    Where should I store things in a small bedroom with no closet space?

    Use the space under the bed for labeled bins, add wall shelves and hooks for daily items, and choose a dresser or wardrobe that fits the room and opens fully. A storage bench, a nightstand with a drawer, and a slim rolling cart in a narrow gap can also add storage without taking much floor space.

    What is the best way to organize a small bedroom closet?

    Hang daily clothes at eye level, place folded items and small baskets on shelves, and keep shoes in a row on the closet floor where you can see them. Use slim hangers, a second lower rod for short items if the height allows it, and labels for sections such as work clothes and casual clothes so items return to the same spot after laundry.

    How can I keep a small bedroom tidy after organizing it?

    Keep a short daily reset: make the bed, return items to their zones, put dirty clothes in the hamper, and clear the nightstand and dresser tops. Once a week, do a longer check of the closet floor, under bed bins, and donate bag, and use a one in, one out rule so new items replace older items of the same kind.

    How do I make a small bedroom feel larger while keeping it organized?

    Use light wall colors, bedding in one or two main colors, low and simple furniture shapes, and a little empty space on shelves and walls so the room does not feel packed. Keep surfaces clear, let daylight in where you can, and use one or two mirrors to add a sense of depth without making the room feel busy.

  • Great Room vs. Living Room: How to Plan and Decorate Each Space

    Great Room vs. Living Room: How to Plan and Decorate Each Space

    A great room is a large, tall, open space that joins living, dining, and often kitchen areas into one room, while a living room is a smaller, separate room with a standard ceiling, used mainly for sitting and conversation. Choose a great room for open gathering, and a living room for a quieter, easier to furnish retreat.

    The two rooms often get mixed up because both hold sofas, chairs, and a television or fireplace. The real difference is scale and connection. A great room is built to gather a household in one shared space, with high ceilings and sight lines across zones. A living room is built to hold one activity well, with walls that frame the seating and keep sound and heat inside. Once you know which room you have, the choices for layout, furniture size, lighting, and decorating become much clearer. For warm, wood based styling that suits either room, see these farmhouse decor ideas, and for seasonal layers in a standard living room, see these living room Christmas decor ideas.

    Key Takeaways

    • A great room is large, tall, and open to other areas, while a living room is smaller, separate, and has a standard ceiling height.
    • Great rooms need zones, large scale furniture, and layered lighting to avoid feeling empty or noisy.
    • Living rooms suit smaller furniture, one clear focal point, and a tighter, cozier arrangement.
    • Use rugs, lighting, and furniture placement to mark zones in a great room, since walls will not do that work for you.
    • Tall ceilings need tall art, long curtains, and light at more than one height, or the room can feel bare above eye level.
    • Sound, heating, and cooling behave differently in open, tall rooms, so plan soft surfaces, window coverings, and air circulation early.
    • Choose the room that fits how your household actually gathers, not the room that looks largest on a floor plan.

    Great Room vs Living Room at a Glance

    Feature Great Room Living Room
    Size Large, often the biggest room in the home Moderate, sized for one seating group
    Ceiling Tall, vaulted, or two story Standard height, usually flat
    Connection Open to kitchen and dining areas Separate room with walls and a door or opening
    Main use Gathering, dining, and everyday living in one space Sitting, reading, and conversation
    Furniture scale Large sectionals, tall bookcases, long tables Sofas, loveseats, and chairs sized to the walls
    Lighting Layered light at several heights One or two layers, often centered on seating
    Sound Travels and echoes more easily Stays contained by walls and soft furnishings
    Heating and cooling feel Harder to keep even, warm air rises Easier to keep even in a smaller volume

    1. What Defines a Great Room

    Open great room with a tall vaulted ceiling, a stone fireplace, and seating and dining zones on one open floor.

    A great room is a large living space with a tall ceiling that is open to adjoining areas, most often the kitchen and dining space. The name points to size and height rather than to a particular style. A great room may hold a fireplace, a seating group, a dining table, and a view into the kitchen, all without walls between them. The room is meant to be the shared center of the home, where cooking, eating, talking, and relaxing happen within sight of each other.

    Because the space is open, a great room needs a clear structure of its own. Without walls, the edges of the room come from furniture placement, rugs, lighting, and changes in flooring or ceiling detail. A seating group on one rug, a dining table on another surface, and a kitchen counter at the far end each read as their own zone. If those zones are not marked, the room can feel like one large empty floor instead of a set of useful places.

    2. What Defines a Living Room

    Smaller separate living room with a standard ceiling, a sofa facing a fireplace, and two chairs for conversation.

    A living room is a separate room set aside mainly for sitting, talking, reading, and watching television. It usually has a standard ceiling, four walls, and one or two clear focal points, such as a fireplace, a window, or a media wall. Doors or cased openings may connect it to a hall or dining room, but the room itself stays distinct, and its size suits one seating group rather than several activity zones.

    That separation is the living room’s main strength. Walls contain sound, hold heat, and give furniture a clear place to sit against. A sofa can anchor to one wall, chairs can face it, and the arrangement reads at once. A living room is easier to furnish on a modest budget, easier to keep tidy, and easier to close off when someone wants quiet. Its limits are real too: a small living room cannot host a large gathering and a dining table at the same time, and a closed room can feel cut off from the kitchen during a party.

    3. Size and Ceiling Height Compared

    Great room wall with tall two story windows showing high ceilings above a seating area.

    Size and ceiling height are the two clearest differences between these rooms. A great room is commonly much larger than a standard living room, with floor space that holds several furniture groups and a ceiling that rises well above standard height, sometimes to a second story. Tall windows often follow the tall wall, which brings in daylight and a view but also adds glass that needs covering and cleaning.

    A living room works at a more ordinary scale. Its ceiling is usually flat and standard in height, which keeps the room feeling close and easy to light. Furniture, art, and curtains can all be standard sizes, and one rug can ground the whole seating group. When you compare rooms in a home you are buying or building, measure both the floor area and the ceiling height. A room that looks generous on a plan can feel cramped if the ceiling is low, and a tall room can feel cold if the floor area is too small for the height.

    4. Open Plan vs Separate Rooms

    Open plan great room flowing into a kitchen, with seating in the foreground and a kitchen island beyond.

    A great room is an open plan room by definition, while a living room is a separate room by definition. Open plan living suits households that like to stay together while doing different things: one person cooks, another reads, and children play, all within earshot and sight. It also suits entertaining, since guests can move between food, drink, and seating without passing through doors.

    Separate rooms suit households that value quiet, privacy, and contained mess. A living room with walls keeps television sound out of bedrooms, keeps cooking smells out of seating, and lets one person read while another watches a film elsewhere. The trade off is connection: a cook in a closed kitchen is cut off from guests, and a small living room can feel isolated during a gathering. When you plan, think about a normal weekday evening, not only a party. The layout that serves daily life best is usually the right choice.

    5. Layout and Zones in a Great Room

    Great room with zones marked by rugs, a seating group on one rug and a dining table on another rug.

    A great room needs zones, because one open floor must do the work of several rooms. Start by placing the seating group first, since it is usually the largest zone. Anchor it with a rug, face the main seating toward the fireplace or the view, and leave clear walkways around it of at least 30 inches. Then place the dining zone near the kitchen, with enough room to pull out chairs, and keep a path between the kitchen and the table clear for carrying food.

    Use changes in the room to mark each zone without building walls. A rug under the seating, a pendant light over the dining table, a console behind the sofa, and a different floor finish at the kitchen edge all signal where one zone ends and the next begins. Keep sight lines open across the room, but give each zone its own light source and its own storage, such as a sideboard near dining and a basket near seating. Test the layout by walking the daily routes: front door to kitchen, kitchen to table, and seating to the nearest bathroom. If any route crosses through a seating group, move the group.

    6. Layout in a Standard Living Room

    Compact living room layout with a sofa, two chairs, a coffee table, and a clear walkway from the door.

    A standard living room layout starts with the focal point. In most living rooms that is the fireplace, the largest window, or the television wall. Place the sofa facing or angled toward that focal point, add two chairs opposite or beside it, and set a coffee table in the middle, within easy reach of every seat. Leave a clear path from the door to the far side of the room, and keep the walkway out of the middle of the seating group when you can.

    Because the walls frame the room, you can use them well. A console or bookcase on the wall behind the sofa gives storage and a place for lamps. A chair in a corner with a floor lamp makes a reading spot without taking floor from the main group. Measure before you buy, and mark large pieces on the floor with painter’s tape. In a small living room, a loveseat and two chairs often seat as many people as a large sofa, and they leave more room to move. Avoid pushing every piece against the walls: pulling the sofa a few inches out and adding a narrow console behind it can make the room feel planned rather than crowded.

    7. Furniture Scale for a Great Room

    Large sectional sofa and tall bookcase in a great room with a high ceiling.

    Furniture in a great room must match the height and floor area, or it will look lost. A standard sofa and a small rug can disappear in a tall, open room, leaving the space feeling empty even when it is full of pieces. Choose a larger seating group, such as a sectional or a sofa with two generous chairs, and pair it with a substantial coffee table and a rug large enough that the front legs of all seating sit on it. Tall bookcases, a large fireplace surround, and long curtains help fill the vertical space.

    Scale up in proportion, not in every piece at once. One oversized sofa plus oversized chairs plus an oversized table can crowd the floor, even in a large room. Balance large seating with open legged side tables and a few lighter pieces, so the room still has air around the furniture. Check the depth and height of seating against the people who will use it: deep seats suit lounging, while shallower seats suit upright conversation. In a great room, furniture also acts as a room divider, so the back of a sofa or a console table should look finished from the kitchen and dining zones, not only from the front.

    8. Furniture Scale for a Living Room

    Apartment scale sofa and small chairs in a standard living room with a coffee table sized to the sofa.

    Furniture in a standard living room should fit the walls and leave room to move. Measure the longest wall first, then choose a sofa that leaves space at each end for a side table or a lamp. A sofa that runs wall to wall leaves no room for end tables and makes the room feel packed. Choose chairs with a smaller footprint than the sofa, and pick a coffee table that is about two thirds the length of the sofa and low enough to see over from a seated position.

    Small and mid sized rooms reward lighter shapes. Sofas with visible legs, open armed chairs, and glass or slim legged tables take up less visual weight than heavy, floor hugging pieces. Use one larger piece as an anchor, such as the sofa, and keep the rest of the group lighter. If the room must seat many people, add a pair of occasional chairs that can move to the dining area or the porch when they are not needed, rather than buying a second sofa that fills the room every day. Leave at least 18 inches between the coffee table and seating, so legs have room and cups are still within reach.

    9. Decorating a Great Room Without Losing Warmth

    Great room decorated for warmth with long curtains on tall windows, large art, and a thick rug.

    A great room can feel grand but cold if the upper walls stay bare and the floor stays hard. Warm it by working at every height. Hang art large enough to read from across the room, and hang it at eye level from the seating, not near the ceiling. Use long curtains that run from near the ceiling to the floor on tall windows, which softens the glass and draws the eye down to the living zone. Add texture at floor level with a thick rug, woven baskets, and upholstered seating.

    Repeat one or two materials through the zones so the open space reads as one room. A wood tone that appears in the kitchen, the dining table, and a living room console links the zones, and one metal finish on lights and hardware does the same. Add plants at different heights, including one tall plant in a corner, to break up large walls. Keep the palette calm, with deeper color on cushions, throws, and art that can change, rather than on large fixed surfaces. A great room looks best when the decorating effort goes into the zone where people actually sit, and the rest of the room supports it quietly.

    10. Decorating a Living Room for Comfort and Focus

    Living room with a simple fireplace mantel, art above it, a rug, cushions, and a throw on the sofa.

    A living room is easier to decorate because the walls set the frame. Pick one focal point and let the rest of the room support it. If the fireplace is the focus, keep the mantel simple, hang one piece of art or a mirror above it, and arrange seating toward it. If the window is the focus, keep curtains light, place seating to catch the view, and keep the window wall free of tall furniture that blocks light.

    Layer textiles for comfort: a rug that fits the seating group, cushions in mixed sizes, and a throw within reach of the main seat. Use color in a controlled way, with a base of two or three colors and one accent repeated in cushions, art, and a small decor piece. In a small living room, keep large patterns to one item, such as one patterned cushion or one rug, and keep the rest plain so the room stays calm. Leave some empty wall and empty surface in every living room. A room that is full at every edge feels smaller, while a room with a little breathing space feels cared for.

    11. Lighting for High Ceilings and Open Plans

    Great room in the evening with pendant light, table lamps, and floor lamps lighting seating and dining zones.

    Lighting a great room needs more than one central fixture, since a single ceiling light cannot reach every zone and cannot flatter a tall space. Plan light in layers: overhead light for general use, such as recessed lights or a large pendant over the seating or dining zone; task light for reading and cooking, such as table lamps, floor lamps, and under cabinet lights; and accent light for art, bookcases, and the fireplace wall. Put different zones on separate switches or dimmers, so the dining zone can glow while the seating zone stays soft.

    Mind the height. Pendants over a dining table should hang low enough to light the table and the faces around it, but high enough to see across. A chandelier in a two story space should hang where it can be seen from below and from any upper landing, and it should be sized to the room, not to a standard living room. Use warm white bulbs through the room for a consistent evening feel, and check glare from tall windows during the day. Lamps at seating height matter most in a great room: they bring light down to where people sit and keep the tall ceiling from feeling like a dark void at night.

    12. Lighting for a Standard Living Room

    Standard living room in the evening with a floor lamp beside a reading chair and a table lamp beside the sofa.

    A standard living room is easier to light well, because the ceiling is close and the seating group is compact. Aim for three light sources in the room: one overhead or central light, one floor or table lamp beside the main seating, and one smaller lamp or wall light for balance. That mix lets you light the whole room for cleaning, light one corner for reading, and set a soft evening level without relying on a single bright fixture.

    Place lamps where they serve a seat, not just where they fill a corner. A floor lamp behind a reading chair, a table lamp on a side table beside the sofa, and a small lamp on a console give light at hand height, which flatters faces and makes the room feel welcoming. Use dimmers where you can, and keep bulb color consistent through the room, since mixed warm and cool bulbs make a small room feel unsettled. If the television is in the room, avoid placing a bright lamp directly behind or opposite the screen, where it causes glare, and add a soft lamp to one side instead.

    13. Sound, Heating, and Cooling Feel

    Great room with a ceiling fan, a fireplace, and heavy curtains on tall windows.

    Sound, heating, and cooling behave differently in the two rooms, and this difference affects daily comfort more than style does. In a great room, sound travels across the open floor and bounces off tall walls and hard floors, so conversation, television, and kitchen noise mix. Soft surfaces help: a thick rug, upholstered seating, curtains on tall windows, and fabric panels or bookcases on large walls all absorb sound. A separate rug in each zone also cuts echo, since bare floor between zones carries sound.

    Warm air rises, so a great room with a tall ceiling can feel warm near the ceiling and cool at seating level in winter, and hard to cool evenly in summer. A ceiling fan set to push air down in winter and circulate it in summer helps, as do window coverings that block summer sun on tall glass and hold warmth on cold nights. A fireplace warms the seating zone near it, but it will not heat the whole open space evenly. In a standard living room, walls and a lower ceiling keep sound and heat contained, so the room warms up faster, stays even, and keeps television sound from reaching the rest of the house. That contained feel is one reason many people prefer a living room for reading, homework, and quiet evenings.

    14. How to Choose and Plan Each Space

    Person measuring a living room wall with a tape measure beside a sketched floor plan with marked zones.

    Choose between a great room and a living room by looking at how your household lives on an ordinary day. If most evenings find the household in one shared space, with cooking, homework, and conversation overlapping, a great room supports that pattern. If different people need quiet at the same time, or if the household values a room that can close off, a separate living room serves better. Also weigh upkeep: a great room has more floor, more glass, and taller surfaces to clean and light, while a living room costs less time and money to furnish, heat, and keep tidy.

    When you plan either room, start with measurements, not furniture shopping. Measure the floor, the ceiling height, the window sizes, and the doorways, and sketch the zones on paper before you buy. In a great room, mark zones with tape on the floor and walk the daily routes before you commit to large pieces. In a living room, mark the sofa footprint and the walkways the same way. In both rooms, buy the largest pieces first, live with them for a few weeks, and then add lighting, art, and textiles once you know how the room is actually used. A room planned around real routines will feel right long after the first decorating choices fade into the background.

    Conclusion

    A great room and a living room are not two names for the same space. A great room is large, tall, and open, built for shared life across zones, while a living room is smaller, separate, and easier to furnish, heat, and keep quiet. Each room asks for different furniture scale, lighting layers, and decorating choices, and each one suits a different way of living. Measure your space, watch how your household uses it on a normal day, and plan zones, light, and sound before you buy. With those choices made early, either room can become the comfortable center of the home.

    Frequently Asked Questions

    What is the main difference between a great room and a living room?

    A great room is a large, tall, open space joined to the kitchen and dining areas, while a living room is a smaller, separate room with a standard ceiling used mainly for sitting and conversation. The difference is scale and connection, not style: great rooms gather several activities in one open space, and living rooms hold one seating group within walls.

    Is a great room the same as a family room?

    No, a great room and a family room are not the same, though the terms are sometimes used loosely. A great room is defined by its large size and tall ceiling and is usually open to the kitchen and dining space, while a family room is usually a casual, separate room near the kitchen used for television and everyday relaxing, often with a standard ceiling. A home can have both, or one room that serves both roles.

    Can a small home have a great room?

    A small home can have a great room only if it has the floor area and ceiling height to support one, since the term describes a large, tall, open space. In a small home, an open plan living and dining area can feel similar, but it will not have the scale of a true great room. In that case, treat it as an open plan living space: use rugs and lighting to mark zones, and choose furniture sized to the actual floor, not to the great room label.

    What furniture works best in a great room?

    Large scale seating works best in a great room, such as a sectional or a sofa with two generous chairs, paired with a substantial coffee table and a rug large enough for the front legs of all seating. Tall bookcases, long curtains, and large art help fill the vertical space. Balance large pieces with lighter side tables and open legged shapes, so the floor still has air around the furniture.

    How do you make a great room feel cozy?

    Use rugs, layered lighting, and soft surfaces to make a great room feel cozy. Anchor the seating group on a thick rug, add table and floor lamps at seating height, hang long curtains on tall windows, and add cushions, throws, and plants at different heights. Repeat one wood tone and one metal finish through the zones, and put decorating effort into the seating zone where people actually sit.

    Is a living room or a great room better for resale?

    Neither room type is better in every home, since buyers weigh layout, size, and daily use differently. A great room appeals to buyers who want open gathering space and a clear view across the main floor, while a separate living room appeals to buyers who want quiet, privacy, and rooms that are easy to heat and furnish. The stronger choice is the layout that fits the home’s size and the way its rooms connect, kept in good condition with clear zones and good lighting.


  • 19 Serena and Lily Inspired Living Room Ideas on a Budget

    19 Serena and Lily Inspired Living Room Ideas on a Budget

    A Serena and Lily inspired living room on a budget starts with a white slipcovered sofa, natural textures such as rattan and jute, and blue and white accents, plus light linen curtains and simple greenery. The 19 ideas below show low-cost swaps, secondhand finds, and styling steps that build the relaxed coastal feel without a full room of new furniture.

    Start with the largest surfaces first: the sofa cover, the rug, and the curtains. Those three set the palette, and every later layer, from pillows to ceramics, should repeat white, sand, wood, or soft blue. Shop secondhand for rattan and wood pieces, change covers rather than furniture where you can, and keep one clear focal point, usually the sofa wall or the fireplace. For a related warm room built on the same neutral base, see farmhouse decor ideas for living room.

    Key Takeaways

    • Start with a white or cream slipcover, a jute rug, and sheer linen curtains to set the coastal base.
    • Repeat white, sand, natural wood, and soft blue through every layer, and keep other colors out of the room.
    • Buy rattan, wood, and ceramic pieces secondhand where possible, and change covers instead of replacing furniture.
    • Mix textures, such as linen, rattan, jute, and woven baskets, so a simple palette still feels layered.
    • Keep surfaces calm: one styled tray, one vase of stems, and one group of ceramics per surface.
    • Work in budget order: covers and paint first, then the rug, then lighting, then small decor last.

    1. White Slipcovered Sofa in Washable Cotton

    Living room with a white slipcovered sofa in washable cotton, wood legs, and soft cream pillows.

    A white slipcovered sofa is the clearest starting point for this style, because it gives the room its light base and its relaxed shape at once. If a new sofa is out of budget, a washable slipcover over an existing sofa gives the same look for far less, and a spare cover means the seat can be washed when life happens. Choose cotton or a cotton blend in white or warm cream, with a skirt that just brushes the floor.

    Keep the cover fresh by washing it on a gentle cycle and putting it back on slightly damp, so creases settle as it dries. If pure white feels risky, choose warm cream or light oatmeal, and keep a folded throw over the seat for everyday use. Pair the sofa with wood legs or a low wood frame showing below the skirt, so the soft cover has a solid base.

    2. Blue and White Striped Pillow Covers

    Sofa with blue and white striped pillow covers mixed with plain cream linen pillows.

    Blue and white striped pillow covers are one of the lowest cost ways to bring the coastal note into the room, since covers cost less than new pillows and can be swapped by season. Mix one wide stripe, one narrow stripe, and one plain white or cream linen cover, all in the same soft blue, and keep the count to what fits without a pile on the floor when someone sits down. The stripe reads as coastal at once, without a loud pattern elsewhere.

    Use zip covers so they can be washed, and fluff inserts daily, since linen covers show dents more than firmer fabrics. Repeat the same blue in one other place, such as a throw or a ceramic jar, so the pillows link to the rest of the room. If the sofa already has a pattern, use plain blue and white covers in one stripe scale only, so the room stays calm.

    3. Natural Jute Rug Under the Seating Area

    Natural jute rug under a sofa and chairs in a bright coastal living room.

    A natural jute rug under the sofa and chairs grounds the room in the same way a wood floor does, with texture that suits bare feet and the coastal palette. Choose a rug large enough for the front legs of the sofa and chairs to sit on it, in a natural tan tone with a simple woven border. The plain weave keeps the room calm, and it lets striped pillows and blue ceramics stand out against it.

    Use a rug pad below so the jute does not slide on a smooth floor, and vacuum weekly so dirt does not build up in the weave. Shake the rug outside now and then, and blot spills at once, since jute marks if liquid soaks in. In a small room, one jute rug alone is enough, since layering a second rug over it needs floor space to show both edges.

    4. Secondhand Rattan Armchair by the Sofa

    Rattan armchair with a cream cushion and striped pillow beside a white sofa.

    A rattan armchair beside the sofa adds the woven texture this style depends on, and secondhand chairs are often the best value way to get it. Look for a chair with a firm frame, tight weaving, and no broken strands, and check that it sits level on your floor before buying. One chair is enough to set the note; a pair works when the room has space for a conversation layout.

    Add a plain cream cushion and one striped pillow, so the chair links to the sofa rather than standing apart. Wipe rattan with a dry cloth, and keep it out of strong direct sun, which can dry the weave over time. If a full rattan chair is hard to find, a rattan side table or a woven stool beside the sofa gives the same texture in a smaller piece.

    5. Driftwood Finish Coffee Table

    Driftwood finish coffee table with a woven tray, books, and a small vase in a coastal living room.

    A coffee table in a driftwood finish, with pale weathered wood and visible grain, anchors the seating area without darkening the room. Look for a simple rectangular or round top with a lower shelf, so books and baskets have a home below and the top stays clear for cups. The pale wood tone sets the guide for other wood in the room, so keep side tables and frames within a close family of light tones.

    Style the top with restraint: a woven tray, a stack of two books, and one small vase, leaving at least half the top clear. Wipe the top with a dry cloth for dust and a damp cloth for spills, and use coasters under hot drinks so the finish stays even. If a new table is out of budget, sanding and whitewashing an existing wood table gives a similar pale finish with paint and a brush.

    6. Sheer White Linen Curtains

    Tall living room windows with sheer white linen curtains and daylight.

    Sheer white linen curtains soften tall windows and let daylight fill the room, which is what keeps this pale palette from feeling flat. Hang the rod close to the ceiling and wider than the window frame, so the window looks taller and the curtains can stack clear of the glass. Choose natural white or cream linen, and let the panels fall to the floor with a small break rather than pooling, so they stay clean and easy to vacuum around.

    Use rings with clips for a relaxed gathered look, and keep the curtain color close to the sofa so the window treatment links to the seating area. Wash linen curtains on a gentle cycle and hang them damp to reduce creases, and open them fully during the day, since this style depends on daylight to show the linen weave. For a related room on the same neutral base, see farmhouse decor ideas.

    7. Seagrass Baskets for Throws and Everyday Storage

    Seagrass baskets beside a sofa holding folded throws and magazines.

    Seagrass baskets beside the sofa hold throws, magazines, and everyday clutter while adding the woven texture the room needs. Use a large basket for throws, a medium basket for magazines or toys, and a small basket on a shelf for remotes and chargers. The natural color works with almost any calm palette, and the baskets keep the room tidy without closed cabinets.

    Place baskets where the clutter actually happens: beside the sofa for throws, near the television for remotes, and by the door for shoes or bags. Choose baskets with handles for pieces that move often, and line baskets used for plants or damp items. Shake baskets outside monthly, since woven fibers gather dust and crumbs, and replace a basket when the weave starts to fray at the rim.

    8. Coastal Gallery Wall with Simple Framed Prints

    Coastal gallery wall with framed shoreline and botanical prints in white frames above a sofa.

    A gallery wall of coastal prints in simple white or light wood frames gives one wall a clear focal point for very little money, especially when prints are bought as plain art prints and framed at home. Start with one larger piece at eye level from the sofa, such as a shoreline or botanical print, then build around it with smaller prints, keeping a similar gap between frames. The calm palette matters more than matching sizes.

    Lay the arrangement on the floor first, and take a photo before hanging, so the spacing stays even once frames go up. Keep the wall around the gallery simple, with no competing shelf or large mirror beside it, and check that heavy frames have secure fixings. If the wall is small, a group of three or five frames gives the same coastal note without crowding the room.

    9. Blue and White Ceramic Jars on a Console

    Blue and white ceramic jars and bowls grouped on a light wood console with books.

    Blue and white ceramic jars, from ginger jars to simple bowls and vases, give a calm living room a classic accent that links to the blue in pillows and art. Group two or three pieces on one console or shelf, with books beside them, rather than spreading single pieces across every surface. Thrift shops and secondhand markets are a good source for these, since the shapes are simple and small chips on the base do not show.

    Keep the group to one surface, and vary heights, with one taller jar and one or two smaller bowls, so the group has a clear shape. Dust ceramics weekly, since open shelves gather dust, and keep them clear of walkways and chair backs where they could be knocked. If blue feels strong, use it only in ceramics and one pillow, and keep the rest of the room in cream, white, and wood.

    10. Woven Pendant Light Over the Seating Area

    Woven rattan pendant light hanging over a coastal seating area with a white sofa.

    A woven pendant light, in rattan or a similar natural fiber, brings the room’s light down to eye level and adds texture overhead for less than a full fixture change. Choose a shade large enough to read from the sofa, with an open weave that lets light through, and hang it high enough to see across the room but low enough to feel close to the seating below. One strong pendant beats three small ones competing for attention.

    Use a warm white bulb so linen, wood, and skin tones read warm rather than cold, and put the main light on a dimmer if your wiring allows it. Dust the weave with a dry cloth, since woven shades gather dust in their gaps. If rewiring is out of budget, a woven shade fitted over an existing pendant cord gives the same look without an electrician.

    11. Light Wood Console Behind the Sofa

    Light wood console behind a sofa styled with a lamp, stacked books, and a small vase.

    A light wood console behind the sofa gives the room a work surface and a display ledge in a spot that often stays empty. Choose a console close to sofa height in pale oak or whitewashed wood, and style the top with a lamp at one end for evening light, a stack of books in the middle, and a small vase or bowl at the other end. The table also marks the edge of the seating area in an open plan room, without a wall or a screen.

    Keep the tabletop mostly clear, with one lamp, one book stack, and one small object, so it does not become a shelf for mail and chargers. Slide a basket or two below for throws or games, and measure the depth first, since a table that sticks too far into a walkway will get bumped daily. Place the lamp so its light falls over the sofa for reading, and keep cords tucked behind the table, out of the walkway.

    12. Woven Tray Styling on the Coffee Table

    Woven seagrass tray on a coffee table holding a book, a small vase, and a candle holder.

    A woven tray on the coffee table groups small items into one neat unit and adds another layer of natural texture for very little money. Set a round or rectangular tray in seagrass or rattan in the center of the table, with a book, a small vase, and a candle holder inside it, and leave the rest of the top clear for cups. The tray also makes clearing the table fast, since the whole group lifts off in one move.

    Keep the tray contents to three or four items, and match the tray tone to the rug or baskets so the textures link across the room. Wipe the tray with a dry cloth, and keep candles on stable holders away from curtains and dried stems. If the coffee table is small, a single woven placemat under a vase and a book gives the same grouped look in less space.

    13. Soft Blue Knit Throw on the Sofa Arm

    Soft blue knit throw folded over the arm of a white slipcovered sofa.

    A soft blue knit throw folded over one sofa arm adds color and warmth without a new piece of furniture, and it is the easiest layer to swap by season. Choose a knit or cotton throw in a muted blue that matches the striped pillows, and fold it to a neat width so it reads as planned rather than tossed. The throw also protects the sofa arm in the spot that gets the most use.

    Wash the throw on a gentle cycle and fold it the same way each time, so the sofa keeps a tidy shape between uses. Keep one throw per seating area, not one per seat, since several throws on one sofa crowd the cushions. In warm months, swap the knit for a light cotton throw in the same blue, so the color thread stays while the weight changes.

    14. Olive Branches in a Tall Glass Vase

    Tall glass vase with olive branches on a console in a bright coastal living room.

    Olive branches in a tall glass vase give the room fresh greenery with a coastal feel, and a few stems cost far less than a large arrangement. Choose a clear glass or white ceramic vase tall enough to hold the stems upright, trim the stems at an angle, and set the vase on a console, a side table, or the floor beside the fireplace where it can be seen from the sofa. The grey green leaves suit the soft blue and cream palette without adding a new color.

    Change the water every day or two, remove any stem that wilts, and keep the arrangement clear of direct heat and strong sun. Fresh stems last longer in a cool spot, and dried olive branches work as a longer lasting swap when fresh stems are hard to find. Keep the vase low on side tables, so it does not block conversation or the view across the room.

    15. Whitewashed Mantel Shelf Styling

    Whitewashed mantel styled with a mirror above, candlesticks, and a low row of greenery.

    A whitewashed mantel, whether a thick beam or a painted shelf, gives the room a pale focal point even when the fireplace is rarely lit. Keep the styling simple: a large mirror or framed print above, a pair of candlesticks or vases at the ends, and one low row of greenery in the middle. The pale wood itself carries most of the interest, so the objects on it can stay few and quiet.

    Keep anything flammable clear of the firebox, and set candles on stable holders away from curtains and dried stems. Change one item by season, such as a vase of fresh stems in spring or pine in winter, so the mantel feels fresh without a full restyle. If the room has no fireplace, a whitewashed shelf mounted at mantel height on a plain wall gives the same ledge for seasonal styling, and a coat of whitewash paint over an existing dark shelf is a low-cost way to get there.

    16. Rattan Mirror Above the Console

    Round rattan mirror hanging above a light wood console in a coastal living room.

    A round rattan mirror above the console or sofa adds a woven frame that echoes the rattan chair and the woven pendant, while bouncing daylight around the room. Choose a mirror large enough to read from across the room, with a simple rattan or woven frame, and hang it at eye level from the sofa, centered over the console below. The mirror works best on a plain wall, where its frame can be seen clearly.

    Check the hanging wire and wall fixing before hanging, since round mirrors with thick frames can be heavier than they look. Keep the wall around the mirror simple, with no competing art beside it, and wipe the glass with a dry cloth so dust does not dull the reflection. If a rattan mirror is out of budget, a plain round mirror with a woven wreath hung beside it gives a similar natural frame note.

    17. Open Wood Shelves with Ceramics and Books

    Open pale wood shelves holding blue and white ceramics, books, and a small plant.

    Open wood shelves on one living room wall give the room a place to show ceramics, books, and small plants without a full cabinet build. Use two or three thick shelves in pale wood on simple brackets, and keep the wall to one run so the display stays calm. This idea works best when the shelves hold items you use and enjoy, such as bowls, vases, and well loved books, rather than a full collection.

    Style each shelf with a mix of heights: a stack of books lying flat, a tall vase, and a small plant, with clear space between groups so the shelf reads as tidy. Keep the palette to cream, wood, soft blue, and green from plants, and leave one shelf partly empty so the display can change. Dust open shelves weekly, since open storage gathers dust faster than closed cabinets.

    18. Linen Shade Table Lamps for Evening Light

    Living room in the evening lit by table lamps with linen shades and warm light.

    Soft evening light comes from lamps at seating height, not from one bright overhead fixture. Use table lamps on side tables at both ends of the sofa, with linen or cotton shades and warm white bulbs, plus one small lamp on the console as a third layer. The layers together make cream, wood, and rattan look warmer after dark, and they let one person read while another watches television without harsh light.

    Put lamps on dimmers where the wiring allows it, and keep switches within reach of the sofa so no one crosses a dark room. Use shades in white or cream, which soften the bulb, and keep lamp bases clear of throws and paper. Choose lamp bases in wood, ceramic, or woven finishes that repeat a material already in the room, so the lamps link to the rest of the decor.

    19. Three Low-Cost Swaps That Change the Room First

    Bright coastal living room refreshed with a white slipcover, sheer curtains, and a jute rug, showing the low-cost base layers.

    When the budget is tight, start with three swaps that change the room most for the least money: paint or whitewash one dark wood piece, change the sofa and pillow covers, and swap the curtains for sheer white linen. Those three set the palette, and everything after them, from baskets to ceramics, simply repeats it. Buy the rest secondhand, one piece at a time, and live with each piece for a few weeks before adding the next.

    Set a simple order and stick to it: covers and paint first, then the rug, then lighting, then small decor last. Keep a short list of pieces you still need, with the size and tone for each, so secondhand shopping stays focused instead of filling the room with near matches. Skip anything that does not repeat white, sand, wood, or soft blue, since one off-palette piece can pull the whole room away from the calm coastal feel.

    Conclusion

    A Serena and Lily inspired living room on a budget does not need a full room of new furniture. A white slipcover, a jute rug, sheer linen curtains, and a few secondhand rattan and wood pieces will carry most rooms, and the blue and white accents, from striped pillows to ceramic jars, give the room its coastal character. Start with covers, paint, and curtains, add the rug and lighting, and finish with baskets, ceramics, and greenery.

    For a related warm room on the same neutral base, see farmhouse decor ideas for living room, and for the wider farmhouse version of the same palette, see farmhouse decor ideas. Keep what you use often, store the rest together, and let the room return to a simple, usable base between seasons. Work through this list one idea at a time, and keep the palette calm, so each new layer adds warmth without crowding the room.

    FAQs

    What is a Serena and Lily inspired living room?

    A Serena and Lily inspired living room is a relaxed coastal room built on white linen, natural textures such as rattan and jute, light wood, and blue and white accents. The style uses a calm palette of white, cream, sand, and soft blue, with woven baskets, striped pillows, and simple greenery. This post uses “inspired” to describe the styling direction only, and it does not claim affiliation with or endorsement by any brand.

    How do I get the Serena and Lily look on a budget?

    Start with the three lowest cost swaps: a washable slipcover over your existing sofa, blue and white striped pillow covers, and sheer white linen curtains. Then add a jute rug, shop secondhand for rattan and wood pieces, and finish with baskets, ceramics, and greenery one piece at a time. Changing covers and paint costs far less than replacing furniture, and it sets the palette for every later layer.

    What colors work best in a Serena and Lily inspired living room?

    White, cream, sand, natural wood tones, and soft blue work best together, because they suit linen, rattan, jute, and daylight in a bright room. Repeat soft blue in at least two places, such as a pillow and a ceramic jar, and keep other colors to wood and green from plants. Avoid adding a second strong color in the same room, since the calm palette is what keeps the layered coastal look from feeling busy.

    What sofa works best for this style on a budget?

    A slipcovered sofa in white, cream, or light oatmeal cotton works best, because it looks soft from day one and the cover can be washed when life happens. If a new sofa is out of budget, a washable slipcover over an existing sofa gives the same look, with a deep seat and a skirt that just brushes the floor. Keep cushions plump by flipping them weekly, and add striped and plain linen pillows in the same soft blue and white palette.

    How do I keep a white living room practical with children or pets?

    Choose washable slipcovers and pillow covers, a jute rug with a pad below, and a coffee table with a woven tray that lifts off in one move for quick clearing. Keep a basket of throws by the sofa for everyday use, use cream or oatmeal rather than pure white where marks show most, and keep ceramics and mirrors clear of walkways and chair backs. Washable covers and wipe clean wood mean the room can stay pale without staying off limits.

    Where should I spend first, and where can I save?

    Spend first on the sofa cover, the rug, and the curtains, since those large surfaces set the palette for the whole room. Save on rattan chairs, wood tables, mirrors, and ceramics by shopping secondhand, and save on decor by changing covers instead of replacing furniture. Leave lighting and small decor until last, so every small piece you buy repeats a color or material already in the room.


  • 19 Rattan Decor Ideas to Add Natural Texture to Your Home

    19 Rattan Decor Ideas to Add Natural Texture to Your Home

    Rattan decor adds natural texture to a home through woven chairs, lights, baskets, and furniture that bring warmth without heavy color or pattern. Use one or two rattan pieces per room, pair them with linen, wood, and plants, and keep the palette pale so the weave stays the focus.

    Start with the piece that will be used most, such as a chair, a light, or a storage basket, then add a smaller rattan accent only if the room still needs texture. Rattan suits living rooms, bedrooms, dining areas, entries, and porches, and it works best against plain walls, light wood, and soft textiles. For a warm wood and woven base in a living room, see the farmhouse decor ideas on Dwell Ovell, for a light coastal base that pairs well with rattan, see the coastal fall decor guide, and for living room styling order, see the fall living room decor guide.

    Key Takeaways

    • Use one or two rattan pieces per room, so the weave reads as texture rather than a theme.
    • Pair rattan with linen, light wood, cotton, and plants, and keep most of the room in white, cream, sand, or soft green.
    • Choose the most used piece first, such as a chair, a pendant light, or a storage basket, then add a smaller accent.
    • Mix one open weave with one tighter weave for contrast, and keep other patterns plain.
    • Keep rattan out of damp spots and direct rain, and dust the weave regularly so it stays clean.
    • Repeat the same rattan tone in two rooms to link the home, rather than matching every piece exactly.

    1. Rattan Accent Chair in the Living Room

    Rattan accent chair with a cream linen cushion beside a window and a small side table in a living room.

    Place a rattan accent chair near a window or beside a sofa, with a plain linen cushion and a small side table. The open weave gives the chair a light look, even though the frame is sturdy, and it adds texture without a strong color. A single chair works well in a small room, while a pair suits a larger living room with space between the chairs.

    Keep the cushion in cream, sand, or pale sage, and add a folded throw only in cooler months. Check that the chair sits at a comfortable height for the side table beside it, and leave clear floor space in front so the chair stays easy to get in and out of.

    2. Rattan Pendant Lights Over a Dining Table

    Three rattan pendant lights hanging over a wood dining table with plain place settings.

    Hang two or three rattan pendant lights over a dining table, spaced evenly along the length of the table. The woven shades soften the light and cast a gentle pattern, while the open weave keeps the fixtures from looking heavy above the table. This idea works best over a plain wood or white table, where the shades can be the main feature.

    Hang the shades high enough to see across the table, and use warm white bulbs for evening meals. If the dining area is small, one larger rattan pendant can give the same woven effect without crowding the ceiling.

    3. Rattan Headboard in the Bedroom

    Bedroom with a woven rattan headboard, white bedding, and light wood nightstands.

    Use a rattan headboard, either a full woven panel or a rattan insert in a wood frame, to add texture behind the bed. The weave softens a plain bedroom wall and pairs well with white or cream bedding, light wood nightstands, and a simple lamp. A headboard also frames the bed without paint or wallpaper.

    Choose a headboard that is wide enough to sit behind both pillows, and keep wall art above it simple or leave the wall bare. Dust the weave with a dry cloth, and avoid placing the headboard where it will be brushed by a door or a closet.

    4. Rattan Coffee Table in the Living Room

    Round rattan coffee table with a small vase and books in front of a linen sofa.

    Set a rattan coffee table in front of the sofa, with a glass top if you want a flat surface for cups and books, or a solid woven top for a softer look. The table adds natural texture at the center of the room, and its light frame keeps the seating area from feeling crowded. A round rattan table suits a small room, since it has no corners to walk around.

    Style the top with only two or three items, such as a small vase, a stack of books, and a candle in a glass holder. Keep the table height near the sofa seat height, so reaching for a cup feels natural.

    5. Rattan Dining Chairs Around the Table

    Wood dining table surrounded by rattan dining chairs with plain seat cushions.

    Use rattan dining chairs around a wood or white dining table, with plain seat cushions tied on if the seats need softening. Woven chair backs add texture at every place setting, and the chairs are light enough to move for guests or cleaning. This idea suits a dining room, a kitchen nook, or a covered porch used for meals.

    Keep the table setting plain, with simple plates and linen napkins, so the chairs carry the texture. Check that chairs slide under the table easily, and wipe the weave after meals, since food and dust settle in the open pattern.

    6. Rattan Room Divider in an Open Space

    Three panel rattan room divider marking a reading corner in an open living area.

    Stand a rattan room divider in an open living area to mark a reading corner, a work zone, or a sleeping area without building a wall. The woven panels give privacy while still letting light pass through, so the divided space does not feel closed off. A three panel divider folds flat for storage, which suits a rented home or a room that changes use.

    Place the divider where it will not block a walkway or a heater, and anchor it with a heavy plant or a small table at one end if it wobbles. Keep the panels in a pale rattan tone, so the divider reads as a light screen rather than a dark barrier.

    7. Rattan Sunburst Mirror in the Entry

    Rattan sunburst mirror hanging above a console in a bright entry.

    Hang a rattan sunburst mirror in an entry, a hallway, or above a console, where it can catch light and add a woven frame to a plain wall. The radiating rattan spokes give the mirror a clear shape, and the round mirror itself helps a small entry feel wider. This is a good first rattan piece, since it needs no floor space.

    Hang the mirror at eye level, centered over the console or bench below it. Keep the surface below the mirror clear except for a small dish for keys, so the mirror and its frame stay the focus.

    8. Rattan Storage Baskets for Daily Clutter

    Large rattan storage baskets holding folded throws beside a sofa.

    Set large rattan baskets beside the sofa, by the door, and in bedrooms for throws, toys, magazines, and shoes. Baskets hide daily clutter while adding woven texture at floor level, and lidded baskets keep the contents out of sight in a bedroom or bathroom. Choose baskets with handles, so they are easy to move for cleaning.

    Give each basket one job, such as throws only or shoes only, rather than filling one large basket with mixed items. Empty each basket once a week, so it does not slowly fill with things that belong elsewhere, and keep baskets out of damp spots.

    9. Rattan Serving Tray on an Ottoman

    Rattan serving tray with a vase and books on a linen ottoman in a living room.

    Place a rattan serving tray on an ottoman or a large coffee table to hold a vase, a candle, and a small stack of books. The tray defines one display area, keeps small items from sliding, and adds a woven layer over plain upholstery or wood. A tray with raised edges works best, since it holds items in place when the ottoman is used.

    Use the tray in the living room for daily drinks and books, or carry it to the porch for outdoor serving. Lift the whole tray aside in one move when the ottoman is needed as a footrest, and wipe the tray clean after use.

    10. Rattan Side Table Beside a Chair or Bed

    Small round rattan side table with a lamp and a book beside an armchair.

    Add a small rattan side table beside an armchair or a bed, in place of a solid wood table. The woven table is light to move, adds texture at seating height, and pairs well with a lamp, a book, and a small vase. A round top suits a tight corner, while a square top gives more room for a lamp and a drink together.

    Keep the tabletop to two items at most, so the table stays useful rather than crowded. If the table will hold a lamp, check that the base sits flat on the woven top, and use a lamp with a plain linen shade.

    11. Rattan Front Credenza in the Living Room

    Living room sideboard with rattan front doors, a lamp, and a small vase on top.

    Use a sideboard or credenza with rattan front doors in a living room or dining room, to store books, games, table linens, or media items. The woven doors hide storage while adding a large area of natural texture, and the piece can anchor a wall that would otherwise hold only a plain console. Pair it with a mirror or plain art above, so the doors stay the feature.

    Keep the top of the credenza simple, with a lamp at one end and a small vase at the other. Open the doors fully before loading the shelves, and keep heavy items low, so the piece stays stable.

    12. Rattan Hanging Planters for Greenery

    Rattan hanging planters with trailing green plants near a bright window.

    Hang rattan planters from ceiling hooks or wall brackets, with trailing plants such as pothos or ivy, to add greenery at eye level and above. The woven planters soften a plain wall or a window corner, and hanging plants free up floor and table space. This idea works well in a kitchen, a living room, or a covered porch with good light.

    Use a lined inner pot, so water does not drip through the weave onto floors or furniture. Hang planters where they will not be brushed by doors, and check the hooks regularly, since a watered plant is heavier than a dry one.

    13. Rattan Lounge Chairs on the Porch

    Rattan lounge chairs with pale cushions on a covered porch with plants.

    Set rattan lounge chairs with weather resistant cushions on a covered porch or patio, with a small side table between them. Rattan suits outdoor living because it looks natural beside plants and wood decking, and lounge chairs give the porch a clear use for reading and evening drinks. Keep the set under cover, since rattan should not sit in direct rain.

    Choose cushions in a pale, washable fabric, and store them indoors during heavy rain or winter. Brush the weave after dusty weather, and check the chair frames at the start of each season for loose joints.

    14. Rattan Entry Bench with Storage Below

    Rattan entry bench with baskets for shoes below, beside a front door.

    Place a rattan bench by the front door, with an open shelf or baskets below for shoes, bags, and hats. The bench gives a place to sit while putting on shoes, and the woven seat and storage add texture to an entry that often holds only a plain console. A bench with a cushion in cream or sand is more comfortable for daily use.

    Keep the bench top clear except for a small dish for keys, and keep one basket per person below, so shoes do not pile up. Measure the entry first, so the bench leaves a clear path to the door.

    15. Rattan Open Bookshelf in a Study or Living Room

    Open rattan bookshelf with books and plants in a bright study corner.

    Use an open rattan bookshelf, with woven side panels or a rattan back, to hold books, plants, and a few decorative pieces. The open frame keeps the shelf from looking like a heavy bookcase, while the weave adds texture behind the books. This idea suits a study corner, a living room wall, or a bedroom used for reading.

    Group books by size, leave breathing room between groups, and place plants on the top shelf where they get light. Keep heavy books on the lowest shelf, so the unit stays stable, and dust the woven panels with a dry cloth.

    16. Rattan Floor Lamp with a Woven Shade

    Floor lamp with a woven rattan shade beside an armchair in the evening.

    Place a floor lamp with a rattan shade beside an armchair or a sofa, to give warm light through a woven pattern in the evening. The shade softens the bulb and adds texture at standing height, while the lamp itself takes little floor space. This idea works well in a reading corner, where a table lamp would crowd a small side table.

    Use a warm white bulb, and keep the shade clear of curtains and throws. If the lamp will be used for reading, choose a shade that lets enough light fall on the book, and place the lamp slightly behind the chair.

    17. Rattan Wall Panels as Woven Art

    Flat woven rattan wall panels hung as a group on a plain living room wall.

    Hang flat woven rattan panels, or a set of three small rattan wall hangings, on a plain living room or bedroom wall. The panels add large scale texture without paint or a framed print, and they suit a wall that already holds a sofa or a bed, where a picture frame might compete with furniture below. Keep the panels in one rattan tone for a calm group.

    Lay the panels on the floor first to plan spacing, then hang the largest panel slightly off center to anchor the group. Leave even gaps between panels, and keep other wall decor on that wall to a minimum, so the weave stays the feature.

    18. Rattan Hanging Swing Chair in a Corner

    Rattan hanging swing chair with a cream cushion in a bright living room corner.

    Hang a rattan swing chair from a sturdy ceiling joist or a freestanding frame, in a living room corner, a bedroom, or a covered porch. The hanging chair adds a playful seat and a strong woven shape, and it gives a corner a clear purpose beyond a plant or a floor lamp. Add a plain cushion and a small throw for comfort.

    Check the ceiling fixing or frame rating before hanging the chair, and leave clear space around it so it can move without hitting walls or furniture. Keep the chair away from doors and high traffic paths, and test the height so feet touch the floor when seated.

    19. Rattan Placemats and Chargers at the Table

    Dining table set with rattan placemats, plain plates, and linen napkins.

    Set rattan placemats and chargers under each place setting, instead of a full tablecloth, to add woven texture to a dining table. Each mat defines a place, protects the table, and pairs well with plain plates, linen napkins, and simple glassware. This is a low cost way to try rattan, since mats store flat when not in use.

    Wipe mats clean after meals, and store them flat so they do not curl at the edges. For a special meal, add a small rattan napkin ring at each place, but keep the rest of the table plain, so the woven mats stay the focus.

    Conclusion

    Rattan decor works best when the weave is allowed to do the work: one or two pieces per room, pale colors, plain textiles, and light wood let the natural texture show without crowding the space. Start with the piece you will use most, such as a chair, a light, or a basket, then add a smaller accent only where the room still needs warmth. Pick the ideas that fit your rooms, your budget, and your daily routine, and repeat one rattan tone through the home to link the rooms. With simple care, dusting, and protection from damp, rattan pieces will stay useful and good looking for years.

    FAQs

    What is rattan decor?

    Rattan decor is decorating with furniture and accents made from rattan, a natural woven material used for chairs, lights, baskets, headboards, and storage. It adds warm, open texture to a room, suits pale and coastal styles, and works best in small doses, with one or two pieces per room paired with linen, wood, and plants.

    How much rattan should I use in one room?

    Use one or two rattan pieces in one room, such as a chair and a basket, or a pendant light and a tray, so the weave reads as texture rather than a theme. If the room already has rattan furniture, keep other woven accents small, and let plain textiles and light wood balance the look.

    Does rattan work in a modern home?

    Rattan works in a modern home when the shapes are simple and the palette stays pale, such as a rattan pendant light over a plain table, or a rattan front credenza against a white wall. Keep other patterns plain, use one rattan tone, and pair the weave with clean lines, light wood, and neutral textiles.

    How do I clean rattan furniture?

    Clean rattan furniture by dusting the weave with a dry cloth, then wiping it with a lightly damp cloth and letting it dry fully in fresh air. Avoid soaking rattan or using harsh cleaners, keep pieces out of damp spots, and check joints now and then, since dry rattan can loosen if it is left in very dry heat.

    Can rattan be used outdoors?

    Rattan can be used outdoors on a covered porch or patio, with weather resistant cushions, but it should not sit in direct rain for long periods. Natural rattan lasts longer under cover, so store cushions indoors during heavy rain, brush the weave after dusty weather, and check frames at the start of each season.

    What colors pair best with rattan decor?

    White, cream, sand, pale sage, soft green, and light wood pair best with rattan decor, because pale tones let the warm weave stand out without competing with it. Add one muted accent, such as olive cushions or a terracotta pot, in small doses, and keep most of the room plain so the texture stays the focus.


  • 21 Halloween Decor Ideas for a Festive Home

    21 Halloween Decor Ideas for a Festive Home

    The best Halloween decor mixes a few bold focal points with warm light: carved pumpkins at the door, a spooky mantel, a themed table, and glowing touches in the yard. Keep one palette, such as black, orange, and cream, repeat it in two or three rooms, and leave paths, seats, and table space clear for guests.

    The 21 ideas below cover porches, entryways, living rooms, kitchens, bedrooms, bathrooms, and yards, so you can style one spot or dress the whole house. Start with the pieces guests see first, such as the door and the porch, then add smaller touches indoors. For more seasonal styling ideas, visit the Dwell Ovell home page, see how a limited palette holds a season together in Fall Decor Ideas, and borrow porch layering ideas from Fall Front Porch Decor.

    Key Takeaways

    • Pick one palette, such as black, orange, and cream, and repeat it in two or three rooms so the house reads as one plan.
    • Style the door and porch first, since guests see those areas before anything indoors.
    • Use battery candles and string lights for evening glow, and keep open flames away from fabric, paper, and dry plants.
    • Group decor to the sides of walkways, steps, and table edges so paths, seats, and serving space stay clear.
    • Mix one bold piece per room, such as a mantel garland or a yard scene, with smaller accents rather than filling every surface.
    • Store pumpkins, garlands, and fabric pieces in a dry box after the season so they are ready to use again next year.

    1. Carved Pumpkin Cluster on the Porch Steps

    A cluster of carved pumpkins on porch steps glowing from battery candles inside at dusk.

    Group three to five carved pumpkins on the porch steps, with the largest at the bottom and smaller ones higher up. Mix classic jack-o-lantern faces with simple cutout shapes, such as stars or moons, and place a battery candle inside each one for a steady glow after dark.

    Keep one side of each step clear so guests can walk up safely. Real pumpkins last well in cool autumn air, and you can swap any that soften before a gathering. Faux pumpkins work well if you want to carve once and reuse the same faces next year.

    2. Ghost Lanterns Along the Walkway

    White ghost lanterns with glowing battery candles lining a front walkway at dusk.

    Line the walkway with ghost lanterns made from white fabric draped over small frames or from frosted jars with painted ghost faces. Set a battery candle inside each one so the path glows softly and guides visitors to the door.

    Space the lanterns evenly, about two or three steps apart, and keep them off the walking surface itself. White ghosts suit any porch color, and they read clearly from the street once the light is on. Bring fabric ghosts inside during heavy rain to keep them clean.

    3. Black Bat Garland Across the Mantel

    A garland of black bats draped across a fireplace mantel with plain black candle holders.

    Drape a garland of black paper or felt bats across the mantel, with the bats sized from small at the ends to larger in the middle. Add a few bats flying up the wall above the mantel for a sense of movement, and keep the rest of the mantel plain so the bats stay the focus.

    Fix the garland with small removable hooks so it does not mark the mantel. Bats suit a mantel because they are light, flat, and easy to store folded flat after the season. Pair them with plain black candle holders at each end for balance.

    4. Spider Web Corner in the Living Room

    A large faux spider web stretched across a living room upper corner with plastic spiders.

    Stretch a large faux spider web across one upper corner of the living room, anchoring it to the wall, the ceiling, and a nearby shelf. Add two or three plastic spiders of different sizes, with the largest near the center of the web.

    Choose a corner that does not block a doorway or a light switch, and keep the web high enough that guests do not walk through it. A single web makes a strong statement, so leave the rest of the room calm and let the web carry the spooky note.

    5. Haunted Dining Table with a Black Candelabra

    A dining table with a tall black candelabra, dark runner, small pumpkins, and black plates.

    Build the dining table around a tall black candelabra with dripping-style candles, set on a dark runner down the center of the table. Add small pumpkins, black plates, and deep purple napkins around it, and keep the arrangement low enough that guests can talk across the table.

    Use battery taper candles if the table will be used for a meal, since real flames near fabric and paper need watching. A candelabra suits a formal table because it adds height without covering the whole surface, leaving room for plates and glasses.

    6. Witch’s Apothecary Shelf in the Kitchen

    A kitchen shelf styled as a witch's apothecary with amber and green labeled bottles and dried herbs.

    Turn one kitchen shelf into a witch’s apothecary with labeled bottles, small jars of dried herbs, and a mortar and pestle. Use amber and green glass bottles with simple paper labels, such as “eye of newt” or “pumpkin spice,” and add a small cauldron or black pot at one end.

    Keep everyday items at the front of the shelf and decorative bottles at the back, so the shelf still works for cooking. This idea suits open shelves best, where the bottles read as a display, and it needs no carving or outdoor setup.

    7. Skeleton Greeter Beside the Front Door

    A friendly skeleton figure seated beside a front door with a small pumpkin at its feet.

    Place a life-size or half-size skeleton beside the front door, seated on a chair or leaning against the porch post, with a small sign or a pumpkin at its feet. Pose the arms in a welcoming wave so the figure reads as playful rather than grim.

    Secure the skeleton so wind cannot topple it, with a chair, a heavy pot, or a stake behind it. A friendly pose works best for homes with trick-or-treaters, while a darker pose suits an adults-only gathering. Bring the figure inside in heavy rain to keep joints working.

    8. Pumpkin Topiary in an Urn at the Entry

    A pumpkin topiary stacked in a large urn beside a front door with moss at the base.

    Stack three pumpkins that decrease in size from bottom to top inside a large urn beside the front door, with a dowel through the center for stability. Tuck moss or dried leaves around the base pumpkin to hide the urn rim and give the stack a finished look.

    Use lighter faux pumpkins for the top tiers if real pumpkins feel heavy or unstable, and keep the urn base wide so wind cannot tip it. Place one topiary on each side of the door for symmetry, or a single topiary beside a bench for a quieter look.

    9. Halloween Wreath with Mini Pumpkins and Black Ribbon

    A Halloween wreath of black ribbon, dried leaves, and mini pumpkins hanging on a front door.

    Hang a wreath of black ribbon, dried leaves, and mini pumpkins on the front door, with a small bat or spider accent near the top. Keep the wreath flat against the door so it does not block the handle, and hang it at eye level for the clearest view.

    A wreath suits a painted door in black, white, or deep orange, since the mini pumpkins stand out against a plain background. Pair it with a simple doormat and skip extra door decor, so the wreath stays the focus of the entry.

    10. Eerie Window Silhouettes After Dark

    Black paper silhouettes of cats and bats taped inside a front window glowing at night.

    Cut black silhouettes of cats, bats, witches, or a haunted house from card or craft paper and tape them inside the front windows. After dark, place a lamp or a string light behind them so the shapes glow against the glass and read clearly from the street.

    Silhouettes suit windows that face the street or the walkway, and they cost little while making a big impact at night. Tape them flat so they do not curl, and remove the tape gently after the season to protect the glass and the frames.

    11. Trick-or-Treat Candy Station by the Door

    A candy station table by a front door with a bowl of treats, black cloth, and a glowing lantern.

    Set a small table or crate by the front door as a candy station, with a large bowl of treats, a black cloth, and a sign that says “take one” or “happy Halloween.” Add a small pumpkin and a lantern beside the bowl so the station looks dressed rather than bare.

    Keep the table to one side of the door so trick-or-treaters can reach the bowl without blocking the path. If you expect many visitors, use two bowls and refill the second one from inside, so the station never sits empty during the evening.

    12. Black Cat Vignette on the Console Table

    A console table with black cat figurines of different sizes, books, and a black candle holder.

    Style a console or hall table with black cat figurines of different sizes, a small stack of books, and a battery candle in a black holder. Place the tallest cat at the back and smaller ones in front, and leave space for keys and mail so the table still works day to day.

    Black cats suit a narrow console because they are compact and read clearly against a light wall. Mix materials, such as ceramic, wood, and metal cats, so the group looks collected rather than matched, and add one orange accent, such as a mini pumpkin, for contrast.

    13. Harvest Porch with Hay Bales, Mums, and Lanterns

    A harvest porch with a hay bale topped with pumpkins, potted mums, and a glowing lantern.

    Build a harvest porch by setting a hay bale at the side of the porch, topping it with a wood board, and arranging pumpkins, potted mums, and a lantern on top. The bale gives the display height, while the mums add living color that lasts for weeks in cool weather.

    Keep the bale out of the walking path and away from open flames, since dry straw catches fire with ease. Cover the bale in heavy rain, or set it under the porch roof, to slow it breaking down. At the end of the season, the bale can go to garden beds as mulch.

    14. Ghost Throw Pillows and Blanket on the Sofa

    A sofa with ghost print pillows and a black throw draped over one arm.

    Swap everyday sofa cushions for ghost print pillows and drape a black or cream throw over one sofa arm. The textile swap changes the living room mood in minutes, and it works even in a small room where larger displays would crowd the space.

    Choose washable pillow covers so the look lasts through the season, and keep one plain cushion in the mix so the sofa still feels comfortable for sitting. A throw in the basket beside the sofa gives guests an extra layer on cool evenings.

    15. Floating Witch Hats from the Entry Ceiling

    Black witch hats hanging from an entry ceiling at varied heights, appearing to float.

    Hang three to five black witch hats from the entry ceiling at varied heights, using clear fishing line and small ceiling hooks, with a battery light inside one or two hats for a soft glow. The hats appear to float above guests as they walk in, which makes the entry feel magical.

    Hang the hats high enough that tall guests do not bump them, and keep them clear of ceiling fans and light fixtures. This idea suits an entry with a plain ceiling, where the hats stand out, and it takes down in minutes after the season.

    16. Pumpkin Vase with Autumn Flowers

    A hollowed pumpkin vase filled with mums, sunflowers, and dried wheat stems on a table.

    Hollow out a medium pumpkin, place a jar of water inside, and fill it with autumn flowers such as mums, sunflowers, or dried wheat stems. Set the pumpkin vase on the dining table, the mantel, or the entry console as a centerpiece that mixes harvest color with Halloween shape.

    Line the pumpkin well so water does not soak the shell, and change the water every two days to keep the flowers fresh. A pumpkin vase lasts about a week indoors, so make it close to a gathering rather than at the start of the month.

    17. Spooky Bathroom Accents

    A bathroom with black hand towels, a potion-style soap dispenser, and a small bat accent.

    Give the bathroom a light spooky touch with black hand towels, a potion-style soap dispenser, and a small spider or bat accent on the mirror frame. Swap the usual towels for black or deep purple ones, and add a small bowl of candy or a mini pumpkin on the counter if space allows.

    Keep the changes small, since the bathroom still needs to work for daily use. A soap dispenser and towels are enough to carry the theme, and they take seconds to swap back after the season. Avoid loose pieces near the sink that could fall into the basin.

    18. Halloween Bedding Swap in the Bedroom

    A bedroom with Halloween bedding in black and orange and a dark throw at the foot of the bed.

    Change the bed to Halloween bedding in black, orange, or a subtle ghost or pumpkin print, and add a dark throw across the foot of the bed. The bedding swap brings the theme into the bedroom without any carving, hanging, or outdoor work.

    Layer the throw over a plain duvet so it stands out, and add one or two cushions in a matching tone while keeping the rest of the bedding calm for sleep. Choose washable fabrics, since themed bedding gets daily use through the season.

    19. Front Yard Graveyard Scene

    A front yard graveyard scene with foam tombstones, skeleton hands, and a green spotlight.

    Create a small graveyard scene in the front yard with foam tombstones, a low fence or stones marking the edge, and a few skeleton hands or bones poking out of a mulch bed. Add a green or purple spotlight at night so the scene glows after dark.

    Keep the scene to one corner of the yard so the lawn still looks cared for, and keep tombstones clear of the walkway and the mailbox. Foam stones are light and easy to store, and they survive rain better than cardboard versions.

    20. Halloween Tiered Tray on the Kitchen Counter

    A tiered tray on a kitchen counter with mini pumpkins, a ghost figurine, and a black candle holder.

    Style a two or three tiered tray on the kitchen counter with mini pumpkins, a small ghost figurine, a black candle holder, and a tiny sign. Place larger pieces on the bottom tier and smaller ones on top, and leave one tier partly clear so the tray does not look crowded.

    A tiered tray suits a kitchen counter because it contains the display in one footprint and leaves the rest of the counter free for cooking. Swap one or two pieces each week, such as a fresh mini pumpkin, to keep the tray looking fresh through the season.

    21. Mummy Wrapped Porch Columns

    Porch columns wrapped in white gauze like mummies with large googly eyes near the top.

    Wrap porch columns or posts in white gauze or cheesecloth, layering the strips loosely and tucking in two large googly eyes near the top of each column. The columns read as friendly mummies from the street, and the gauze moves gently in the breeze.

    Secure the gauze with tape or pins at the top and bottom so wind does not unwind it, and keep it clear of lantern flames and light bulbs. Mummy columns suit a porch with plain posts, where the wrapping stands out, and they come down fast after Halloween night.

    Conclusion

    The best Halloween decor does not need a full house makeover. A carved pumpkin cluster at the door, a bat garland on the mantel, a themed table, and a glowing touch in the yard can change how a home feels for the whole season. Pick the ideas that fit your rooms, your budget, and your daily routine, and repeat a small palette of black, orange, and cream so the look holds together. Save this list and revisit it next October to see which ideas you want to repeat.

    FAQs

    What is the best Halloween decor for a front porch?

    Carved pumpkins, a wreath, lanterns, and a welcome figure such as a skeleton make the strongest porch display, because guests see them first. Group pieces to the sides of the steps and door, keep one side of each step clear for safe footing, and add battery candles or string lights so the porch glows after dark.

    How can I decorate for Halloween on a small budget?

    Start with paper cutouts, fabric ghosts, and a pumpkin vase, since these cost little and make a visible difference. Style one focal point per room, such as a mantel or a table, and reuse baskets, jars, and candle holders you already own. Add a few new pieces each year instead of buying a full set at once.

    How do I decorate for Halloween in a small space?

    Choose compact ideas like a wreath, a tiered tray, ghost throw pillows, and window silhouettes, and style surfaces you already use, such as a console, a windowsill, or a shelf. Skip large yard scenes and tall displays that block walkways, and use vertical space with hanging hats or a web in an upper corner. One clear focal point per room is enough in a small home.

    Are real or faux pumpkins better for Halloween decor?

    Real pumpkins suit carved displays and pumpkin vases, since they look natural and last well in cool autumn air, but they soften after a week or two indoors. Faux pumpkins suit topiaries, wreaths, and stacks, since they are light, stable, and reusable year after year. Many homes mix both, using real pumpkins at the door and faux ones indoors.

    How early should I put up Halloween decor?

    Most homes put up Halloween decor in late September or early October, which leaves time to enjoy it before Halloween night. Outdoor pieces such as graveyard scenes and mummy columns hold up best when set out in mid-October, while carved pumpkins last longest when carved in the final week. Indoor swaps like bedding and pillows can go up as early as you like.

    How can I make Halloween decor safe for trick-or-treaters?

    Keep walkways, steps, and paths clear of cords, props, and low displays, and use battery candles instead of open flames near fabric, paper, and dry plants. Secure tall figures and yard pieces so wind cannot topple them, and add enough light along the path that visitors can see where they are walking. Check the display after dark to spot any trip hazards you missed in daylight.


  • 21 Summer Table Decoration Ideas for Indoor and Outdoor Dining

    21 Summer Table Decoration Ideas for Indoor and Outdoor Dining

    Summer table decorations work best with a low centerpiece, a light palette, and pieces that handle heat, wind, and spills. Start with a washable runner or placemats, light plates, and one low group of citrus, herbs, or flowers, then add candles for evening meals. The 21 ideas below cover indoor tables and outdoor patios for everyday meals and summer gatherings.

    Start with the base you already own: plain white or cream plates, clear or light glasses, and a runner or placemats you can wipe or wash. Then add one summer layer at a time, such as a bowl of lemons, a pot of basil, or a striped cloth. Keep the centerpiece low enough to see across, leave room for serving dishes and drinks, and choose pieces you can lift off in one move when rain starts or the table needs to clear. For outdoor tables, weight matters: use heavier pots, glass hurricanes, and cloth napkins that will not blow away.

    Key Takeaways

    • Keep the centerpiece low and narrow, so guests can see each other and serving dishes still fit.
    • Pick a light palette of white, cream, soft blue, and green, with one bright accent such as coral, lemon yellow, or terracotta, repeated at least twice.
    • Start with washable textiles: a runner, napkins, and placemats carry most of the summer color and clean easily after outdoor meals.
    • Use one main centerpiece per table, not several competing groups, and leave empty space at each place for plates and glasses.
    • For outdoor dining, choose weighted, wind resistant pieces: heavy pots, hurricane lanterns, and cloth napkins over paper.
    • For evening meals, add candlelight in glass holders, kept clear of fabric, paper, and dry material, and never left burning unattended.

    1. Low Citrus Bowl Centerpiece for Everyday Summer Meals

    Wide shallow bowl filled with lemons, limes, and oranges with green leaves as a centerpiece on a summer dining table.

    Fill a wide, shallow bowl with lemons, limes, and a few oranges, and set it in the center of the table as a centerpiece you can also cook with later. The fruit gives clear summer color and shape, and the bowl takes up only one spot, leaving the rest of the table free for plates and serving dishes. Add a few green leaves between the fruit to break up the round shapes.

    Check the fruit every few days and move any soft piece to the kitchen, since one spoiling lemon can mark the rest. Keep the bowl low and wide rather than tall, so it does not block sightlines. At the end of the meal, the bowl can move to the counter, which makes clearing the table a single step.

    2. Blue and White Coastal Table for Outdoor Dining

    Outdoor dining table with a white cloth, blue striped napkins, white plates, and clear glasses in bright daylight.

    Set a white tablecloth or runner with blue striped napkins, white plates, and clear glasses for a coastal look that suits a patio or a bright dining room. The blue and white pairing reads clean in strong summer light, and it works with wood, rattan, and rope details without needing new dishes. Add one natural accent, such as a driftwood piece or a small shell, at the center.

    Repeat the blue at least twice, such as striped napkins with a blue glass or a blue candle, so the table looks planned rather than random. Keep the stripes to one scale, since mixing wide and narrow stripes on the same table can look busy. For a windy patio, use a tablecloth with clips or choose a runner and placemats instead.

    3. Lemon Napkin Rings with Fresh Herbs

    Folded linen napkin wrapped with twine and a fresh rosemary sprig beside a white plate on a summer table.

    Wrap a length of twine or thin ribbon around each folded napkin, tie it in a simple knot, and tuck a real sprig of rosemary, mint, or thyme under the twine. This small detail dresses an everyday place setting in minutes, adds scent at each place, and costs little, since herbs grow well in a pot by the kitchen door.

    Fold napkins in a simple rectangle or roll so the twine sits flat, and keep the herb sprig short so it does not brush the plate. For a gathering, use the same herb at every place, so the table looks matched. Remove the herb before washing napkins, and replace wilted sprigs with fresh ones just before guests sit down.

    4. Woven Placemats and Wood Chargers for Patio Dining

    Round woven placemats with wood chargers under white plates on a patio dining table.

    Use round woven placemats under each plate, with wood chargers or plain white plates on top, for a patio table that feels relaxed and still looks set. Woven texture suits outdoor light and hides small marks from outdoor meals, while the wood adds warmth that plastic alone cannot give. Center one placemat at each place, with cutlery in its usual spots.

    Choose placemats that wipe clean or wash easily, since outdoor meals bring dust, juice, and crumbs. Wipe wood chargers after meals and do not soak them, since wood can warp when left damp. If placemats vary in color, put the same color at every place for a tidy look, and save mixed colors for a casual family lunch.

    5. Tall Glass Hurricane Lanterns for Evening Tables

    Glass hurricane lanterns of different heights with candles down the center of an evening summer table.

    Set two or three glass hurricane lanterns of different heights down the center of the table, each holding a pillar or battery candle, for evening light that stays steady in a light breeze. The glass shields the flame from wind, so the table keeps its glow through a long outdoor dinner, and the lanterns look just as good indoors on a dining table.

    Keep lanterns low enough to see over, and set them on a tray or runner if the table surface marks easily. Use battery candles inside closed lanterns or near fabric, and real candles only in proper holders on a stable surface. Wash the glass before the meal, since fingerprints and dust show more on clear glass in candlelight.

    6. Fresh Herb Pots as Living Centerpieces

    Small terracotta pots of basil, mint, and rosemary grouped down the center of a summer dining table.

    Group three small pots of basil, mint, and rosemary down the center of the table, so the centerpiece smells good, looks green all summer, and can be snipped for cooking. Herb pots suit both indoor dining tables and patios, and they last far longer than cut flowers in summer heat. Use pots in one material, such as terracotta or white ceramic, so the group reads as one display.

    Water the herbs before the meal and set each pot on a small saucer, so the table stays dry. Keep pots small enough to see over, and trim tall stems before guests arrive. If mint spreads fast, keep it in its own pot, since mint can crowd out basil and rosemary in a shared planter.

    7. Bright Coral and White Table for a Summer Party

    Summer party table with white plates, coral napkins, coral candles, and a bowl of coral flowers.

    Set white plates and a white runner with coral napkins, coral candles, and one coral accent at the center, such as a bowl of coral flowers or coral paper fans on a sideboard. The coral and white pairing gives a party table a clear summer note without needing patterned plates or a new dinner set. Keep the rest of the table plain, so the coral stands out.

    Repeat the coral at least twice, such as napkins with candles, and keep other colors to white, cream, and light wood. For a large party, use the same coral napkin fold at every place, so the table looks matched from the end of the room. Choose washable napkins if the menu includes sauces or grilled food.

    8. Seagrass Runner with Shell Accents

    Seagrass runner on a dining table with a few shells, driftwood, and short candles in glass holders.

    Lay a seagrass or woven grass runner down the table, then set two or three shells, a small piece of driftwood, or a rope knot at the center, with short candles in glass holders at each end. The woven runner adds texture without pattern, so it suits tables that already have patterned plates or colored glass. Keep shell accents to a small number, so the table still looks tidy.

    Use shells large enough to see but small enough to leave room for serving dishes, and wash and dry them before setting them out. Keep the runner flat and trimmed to fit the table, leaving room at each end for platters. For everyday meals, use the runner alone and skip the shells, so clearing the table stays quick.

    9. Mason Jar Flower Centerpieces for Casual Gatherings

    Mason jars with short stems of summer flowers set down the center of a casual gathering table.

    Fill two or three mason jars with short stems of summer flowers, such as zinnias, cosmos, or wildflowers, and set the jars down the center of the table. The jars suit a casual gathering, a brunch, or a patio lunch, and they cost little, since one bunch of flowers fills several jars. Use jars of the same size for a matched look, or mix two sizes for a relaxed group.

    Trim stems so the flowers sit just above the jar rim, and keep the total height low enough to see across. Change the water every day or two, and remove any stem that wilts, since one cloudy jar can spoil the group. For a windy patio, add a few stones to the bottom of each jar to weight it down.

    10. Indoor Garden Table with Potted Greens

    Indoor dining table with potted green plants down the center, white plates, and linen napkins.

    Set a long indoor table with potted green plants at intervals down the center, such as small ferns, trailing pothos in pots, or potted succulents, with plain white plates and linen napkins at each place. The green plants give an indoor table a garden feel without cut flowers that wilt in warm rooms, and they can move to a windowsill after the meal.

    Vary the pot heights slightly, with one taller plant in the middle and shorter ones at the sides, and leave space between pots so each shape shows. Water plants before the meal and set each pot on a saucer, so the table stays dry. Wipe leaves clean before setting them out, since dust shows more on green leaves in daylight.

    11. Watermelon and Berry Fruit Centerpiece

    Wide bowl of watermelon slices, strawberries, blueberries, and grapes with mint leaves on a summer table.

    Fill a wide bowl or a low tray with watermelon slices, strawberries, blueberries, and grapes, and set it in the center of the table as a centerpiece guests can eat from during the meal. The fruit gives bold summer color and a clear seasonal note, and the bowl takes up only one spot, leaving the rest of the table free for plates and drinks. Add mint leaves on top for a fresh green note.

    Serve fruit chilled and keep the bowl on ice or in the shade for outdoor meals, since cut fruit warms fast in summer heat. Use a shallow bowl so guests can reach the fruit without standing, and keep a serving fork or spoon with the bowl. At the end of the meal, cover leftovers and refrigerate them promptly.

    12. Terracotta Pots with Summer Blooms

    Terracotta pots of geraniums and petunias grouped down the center of a summer dining table.

    Group three terracotta pots of summer blooms, such as geraniums, petunias, or marigolds, down the center of the table, so the centerpiece brings real garden color indoors or onto a patio. Terracotta suits white, cream, and wood tables, and the pots can move outside after the meal, where the plants keep growing. Use pots in one size for a matched group, or one larger pot with two smaller ones.

    Water the plants before the meal and set each pot on a saucer, so the table stays dry and soil does not mark the cloth. Trim spent blooms before guests arrive, and keep pots clear of elbows and serving dishes. If blooms drop petals, shake the pots outside before bringing them in, and sweep the table after the meal.

    13. White Plates on a Bare Wood Table

    Bare wood dining table with white plates, clear glasses, and folded white linen napkins.

    Leave a wood table bare, with no runner or cloth, and let the grain do the work, then set white plates, clear glasses, and folded linen napkins in white or soft blue at each place, with one low centerpiece, such as a citrus bowl or herb pots. This approach suits a farmhouse or coastal dining room, and it keeps the table easy to wipe after everyday meals.

    Use placemats under plates if the wood marks easily, and keep the centerpiece to one low group, so the wood still shows. Fold napkins the same way at every place for a tidy look, and iron linen napkins before a gathering, since creases show more on bare wood than under a patterned cloth. Wipe the wood after meals to guard against juice rings.

    14. Pastel Table for a Summer Brunch

    Summer brunch table with pastel napkins, white plates, clear glasses, and a small vase of pastel flowers.

    Set a brunch table with pastel plates or pastel napkins in soft pink, pale yellow, and mint, with white plates, clear glasses, and a small vase of pastel flowers at the center. The soft colors suit morning light and a light menu of fruit, pastries, and eggs, and they work well in a bright dining room or on a shaded patio. Keep the palette to two pastels plus white, so the table stays calm.

    Repeat each pastel at least twice, such as pink napkins with pink flowers, and keep other colors to white and light wood. For a brunch gathering, use the same napkin fold and flower at every place, so the table looks matched. Choose washable napkins, since brunch menus often include juice and berries.

    15. Candlelit Pergola Table for Warm Evenings

    Dining table under a pergola with string lights above, hurricane lanterns, and linen napkins in the evening.

    Set a table under a pergola or a shaded patio cover with string lights above, hurricane lanterns down the center, and linen napkins at each place, for an evening table that glows after sunset. The overhead lights and lanterns together give soft light without harsh overhead bulbs, and the covered setting keeps the table usable on warm evenings. Add one low green centerpiece, such as herb pots, so the light has something to fall on.

    Keep flames in glass holders, clear of fabric, paper, and dry leaves, and never leave candles burning unattended. Use battery candles inside lanterns near fabric or under a low cover, and real candles only in proper holders on a stable surface. Bring linen napkins inside after the meal if dew is likely, so they stay dry overnight.

    16. Picnic Style Table with a Checkered Cloth

    Patio table with a red and white checkered cloth, simple plates, mason jar glasses, and a jar of flowers.

    Cover a patio or garden table with a red and white or blue and white checkered cloth, then set simple plates, mason jar glasses, and cloth napkins at each place, with a low jar of flowers at the center. The checkered cloth gives an instant picnic note, suits grilled food and casual menus, and hides small marks from outdoor meals. Keep the rest of the setting plain, so the cloth carries the pattern.

    Weight the cloth with clips or a runner on top if wind is likely, and choose a washable cloth, since outdoor meals bring crumbs and spills. For a large picnic table, use one long cloth rather than two short ones, so plates sit level. Fold napkins in a simple rectangle, so the table still looks set rather than thrown together.

    17. Tropical Leaf Placemats and Bamboo Details

    Dining table with tropical leaf placemats, bamboo chargers, white plates, and clear glasses.

    Use placemats printed or woven in a tropical leaf pattern, with bamboo cutlery or bamboo chargers, white plates, and clear glasses, for a table with a warm, holiday feel. The leaf pattern suits a patio, a sunroom, or a bright dining room, and it works with plain white plates, so no new dinner set is needed. Add one green centerpiece, such as a large leaf in a vase or a pot of green plants.

    Keep the leaf pattern to the placemats alone, and keep napkins, plates, and glasses plain, so the table does not look busy. If placemats are printed, choose a wipe clean surface for outdoor meals. For a gathering, use the same placemat at every place, so the table looks matched from the end of the room.

    18. Simple White and Green Table for Small Spaces

    Small round table with white plates, white napkins, clear glasses, and one small herb pot centerpiece.

    Set a small round or square table with white plates, white napkins, clear glasses, and one small green centerpiece, such as a single herb pot or a short vase of green stems, for a summer table that fits a small dining area or a balcony. The white and green pairing keeps a small table bright and open, and the single centerpiece leaves room for plates, glasses, and a serving dish.

    Keep the centerpiece to one small pot or vase, not a group, since a small table has little spare room. Fold napkins flat beside the plate rather than standing them up, so sightlines stay open. Choose a light runner or no runner at all, so the table surface still shows and the setting feels larger.

    19. Drink Station at the Table End

    Tray at the end of a summer dining table with a water jug, glasses, lemon slices, and mint.

    Set a tray or a small board at one end of the table with a jug of water, glasses, lemon slices, and mint, so guests can help themselves to drinks without leaving the table. A drink station suits a summer gathering, since guests drink more in warm weather, and it keeps the main table clear of extra jugs and bottles. Add a small bowl of ice if the meal will run long.

    Keep the tray stable and clear of the main serving path, and put heavier items, such as the jug, at the back of the tray. Refill the jug before guests sit down, and keep a cloth nearby for drips. If children are at the table, use sturdy glasses on the tray and keep the tray at the adult end of the table.

    20. Mixed Glassware and Colored Tumblers

    Summer table place setting with clear glasses mixed with soft blue and amber tumblers beside white plates.

    Mix clear glasses with colored tumblers in soft blue, green, or amber at each place, so a plain white table gains summer color without new plates or a new cloth. Colored glass suits both indoor and outdoor tables, and it catches light well in bright rooms and in evening candlelight. Use the same color mix at every place, such as one clear glass and one colored tumbler, so the table looks planned.

    Wash colored glass before the meal, since fingerprints show more on colored glass than on clear glass. For outdoor meals, choose sturdy tumblers over thin stemware, since outdoor tables get knocked more often. Keep the total glass count to two per place, so the table does not crowd.

    21. Sunset Tablescape with Amber Glass and Candles

    Dining table centerpiece of amber glass bottles and small vases with short candles in warm evening light.

    Set amber glass bottles, small vases, or drinking glasses down the center of the table, with short candles in holders between them, so the glass catches the low evening light and warms the whole setting. Amber glass suits white, cream, and wood tables, and it works with plain white plates as well as patterned ones. Add one green sprig in a vase to keep the group from looking too warm.

    Mix heights, with one taller bottle and two shorter glasses, but keep the total group low enough to see across. Use battery candles inside narrow bottles, and real candles only in proper holders on a stable surface. For a sunset meal outdoors, set the table so guests face the light, and keep candles sheltered from wind in glass holders.

    Conclusion

    Summer table decorations do not need a large centerpiece or a new dinner set to work. A low runner or placemats, light plates, one low centerpiece of citrus, herbs, or flowers, and candlelight for evening meals will carry most tables through everyday meals and summer gatherings. Start with washable textiles, add one seasonal group at the center, and leave room for serving dishes, drinks, and conversation.

    For more table ideas in another season, see fall table decor ideas, and for the whole house, see fall decor ideas for home. Keep what you use often, store the rest together in one box, and let the table return to a simple, usable base when summer ends. Save this list on Pinterest for your next meal, and work through it one idea at a time.

    FAQs

    How do I decorate a summer table without blocking conversation?

    Keep the centerpiece low and narrow, below eye level when guests are seated, and leave the middle of the table partly open. A citrus bowl, herb pots, or a row of short candles all sit low enough to see across. If a taller arrangement is needed for a large table, use slim stems in a narrow vase, so guests can see around them.

    What colors work best for summer table decorations?

    White, cream, soft blue, and green work well together, because they suit wood tables, white plates, and clear glass in bright summer light. Repeat each color at least twice, such as blue napkins with a blue glass, or green herbs with green placemats, so the table looks planned. Keep one bright accent, such as coral or lemon yellow, to a few pieces, so the table stays calm enough for everyday meals.

    How do I keep an outdoor summer table from blowing away?

    Use weighted pieces: heavy pots, glass hurricane lanterns, cloth napkins, and a tablecloth with clips or a runner and placemats instead of a loose cloth. Set jars and vases on a tray, add stones to the bottom of light jars, and skip paper napkins and tall, light centerpieces on windy days. Bring linen and light pieces inside if strong wind or rain starts.

    What is the simplest summer table for everyday meals?

    Start with washable placemats or a runner in a light color, cloth napkins in white or soft blue, and one low centerpiece, such as a bowl of lemons or a pot of basil. That set takes minutes to lay out, washes easily, and lifts off in one move when the table is needed for homework or work. Add candles in the evening, and the same base works for a weeknight dinner and a weekend meal.

    How do I scale summer table decor up for a gathering?

    Add place cards, a drink station at the table end, and a consistent napkin fold at every place, while keeping the same runner and centerpiece base. Use the same herb sprig or flower at every place, and add one warm element, such as amber glass or hurricane lanterns, only if the table is long enough to keep sightlines open. Keep serving dishes in mind, and leave space at the table ends for platters.

    How do I store summer table decor after the season?

    Wash runners, napkins, placemats, and tablecloths, dry them fully, and store them folded together in one box. Wash and dry glassware, shells, and terracotta pots before packing, keep dried material in a separate bag so it does not shed onto linen, and move live herb pots to a windowsill or outside. Storing the set together makes next summer setup a single short job.


  • 15 Easter Pillow Cover Ideas for a Cheerful Home Refresh

    15 Easter Pillow Cover Ideas for a Cheerful Home Refresh

    The best Easter pillow covers use soft pastels, one clear motif, and a washable fabric, so a sofa, bed, or porch bench feels fresh for spring without a full room change. Choose two or three covers in pastel pink, yellow, mint, or lilac, pair them with plain covers you already own, and keep one motif as the focus.

    Start by checking the insert size, since a cover one or two inches smaller than its insert looks fuller on a sofa or bed. Pick a palette of three pastel colors at most, and repeat one of them in a throw or a small vase of spring flowers nearby, so the new covers connect with the rest of the room. For more seasonal pillow styling, see Fall Pillow Covers: 17 Cozy Ideas to Refresh Your Sofa, and browse the Dwell Ovell home page for ideas for every room.

    Key Takeaways

    • Limit the Easter palette to three pastel colors, and repeat one color elsewhere in the room so the covers look planned.
    • Use a cover one or two inches smaller than its insert for a full, plump shape on sofas and beds.
    • Keep one motif as the focus, such as bunnies or eggs, and pair it with plain or striped covers.
    • Choose washable cotton or linen covers for sofas and porches used every day, and save velvet or embroidered covers for lighter use.
    • Mix two solids, one pattern, and one texture so an Easter sofa looks layered rather than busy.
    • Store Easter covers clean, dry, and folded flat, with tissue between embroidered covers, so they keep their shape for next spring.

    1. Pastel Bunny Silhouette Covers on a Sofa

    Cream linen pillow cover with a pastel pink bunny silhouette on a neutral sofa.

    A single bunny silhouette in soft pink, mint, or grey on a cream linen cover gives a sofa a clear Easter note without a loud print. Place two silhouette covers at the ends of a neutral sofa, with plain cream or pale grey covers between them, so the motif reads from across the room.

    Silhouette covers suit a living room because the simple shape stays calm next to other spring decor. Choose a printed silhouette for easy washing, or an appliqued felt bunny if you want a little texture. Keep the rest of the sofa plain, so the bunny shape stays the focus.

    2. Embroidered Egg Covers in Soft Colors

    White pillow cover with embroidered pastel eggs in pink, yellow, and blue thread on a reading chair.

    Embroidered eggs in pastel thread on a white or oatmeal cover add a crafted detail that suits a sofa or a reading chair. Look for eggs stitched in pink, yellow, and blue thread, spaced evenly across the cover, with a plain border so the stitching stands out.

    Embroidery reads best up close, so these covers work well on chairs and small sofas where guests sit near the pillows. Wash them gently inside a laundry bag, and press from the back if ironing is needed, so the raised threads keep their shape. Pair embroidered covers with solid linen covers in one of the thread colors.

    3. Gingham Check Covers in Spring Pastels

    Pink gingham check pillow covers on a sofa with cream solid covers beside them.

    Pink, mint, or butter yellow gingham covers bring a fresh, cottage feel to a sofa or a bedroom bench. The small, even check reads as a pattern without competing with a bunny or egg motif nearby, which makes gingham a good partner cover.

    Use gingham on one or two pillows per sofa, and pair it with solid covers in cream or white. Gingham suits farmhouse, cottage, and traditional rooms, and it also works in a modern room when the rest of the palette stays pale. Wash gingham with similar colors, and check that the dye is colorfast before the first wash.

    4. Carrot Patch Print Covers for a Kitchen Bench

    Cream cotton pillow cover with a small carrot print on a kitchen bench seat.

    A carrot print in soft orange and green on a cream or natural cotton cover adds a playful Easter note to a kitchen bench or breakfast nook seat. The vegetable motif feels right in a kitchen, where it can sit near a bowl of fruit or a small potted herb.

    Keep the carrot print to one or two covers, and pair it with plain cream covers so the print does not crowd the bench. Cotton covers wash well, which matters in a kitchen where spills happen. If orange feels strong for the room, choose a print with small carrots and plenty of cream ground showing between them.

    5. Watercolor Spring Floral Covers for a Bedroom

    Pale pillow covers with a watercolor tulip and daffodil print on a bed with white bedding.

    Watercolor tulips, daffodils, and cherry blossom on a pale cover bring Easter color to a bedroom without a holiday motif. Place two floral covers in front of plain white sleeping pillows, so the bed looks dressed for spring but still calm enough for sleep.

    Floral covers suit a bedroom because the soft, painted look pairs well with white bedding and light wood furniture. Choose a print with a pale ground, such as cream or blush, and repeat one flower color in a throw at the foot of the bed. Wash floral covers with similar colors to keep the soft tones from fading.

    6. Pom Pom Trim Covers in Butter Yellow

    Butter yellow pillow cover with white pom pom trim on an armchair.

    Butter yellow covers with small white pom pom trim add a light, cheerful edge detail to a sofa or an armchair. The trim outlines the cover and gives a solid color cover a finished look, which helps it stand out next to plain linen covers.

    Use pom pom trim covers as single accent pillows, since the trim is a strong detail on its own. Wash them gently in a laundry bag, so the trim does not tangle or flatten, and dry them flat, fluffing the pom poms by hand once dry. Butter yellow pairs with cream, mint, and soft grey covers for a balanced spring palette.

    7. Appliqued Bunny Ear Covers for a Family Room

    Cream pillow cover with soft bunny ears sewn on the top edge, upright on a family room sofa.

    Covers with soft bunny ears stitched or sewn onto the top edge make a fun Easter pillow for a family room or a child’s bedroom. The ears stand up from the pillow, so the cover works best on a sofa or bed where the pillow sits upright against a back cushion.

    Choose bunny ear covers in cream, grey, or soft pink, with ears in a matching or slightly darker tone. Keep the rest of the bedding or sofa plain, since the ears are the feature. Wash these covers gently, and reshape the ears while damp so they dry standing upright.

    8. Sage and Cream Ticking Stripe Covers with Egg Embroidery

    Sage and cream ticking stripe pillow cover with a small embroidered egg at one corner on a sofa.

    Narrow sage and cream ticking stripes with a small embroidered egg at one corner give a sofa a quiet Easter detail. The stripe is calm enough for everyday use, while the single egg marks the season without turning the whole cover into a holiday print.

    Ticking stripe suits rustic, farmhouse, and traditional rooms, and it bridges the gap between a solid cover and a bold print on the same sofa. Use it on one or two pillows, and repeat the sage in a solid cover elsewhere on the sofa. Cotton ticking washes well, and a medium iron setting keeps the stripes crisp.

    9. Happy Easter Typography Covers for an Entryway Bench

    Cream pillow cover with small grey Happy Easter lettering on an entryway bench.

    A simple “Happy Easter” message in soft grey or sage lettering on a cream cover suits an entryway bench, where guests see it as they arrive. Keep the lettering small and centered, with plenty of plain fabric around it, so the cover reads as welcoming rather than loud.

    Typography covers work well in an entryway because the message is read at a glance. Pair the message cover with a plain pastel cover beside it, and add a small basket or a vase of spring stems nearby. Choose a printed message for easy washing, since entryway pillows get frequent handling.

    10. Seersucker Covers in Pastel Blue for a Sunroom

    Pastel blue seersucker pillow covers on chairs in a bright sunroom.

    Seersucker covers in pastel blue or mint add a light, crinkled texture that suits a sunroom or a bright living room. The puckered weave feels cool and casual, which fits rooms that get warm in spring sun.

    Use seersucker on the pillows you lean against most, since the texture is comfortable and the fabric breathes well. Pair seersucker with smooth cotton covers in white or cream, so the crinkle stands out as a texture contrast. Wash seersucker gently and skip heavy ironing, since the puckered texture is part of the look.

    11. Crochet Edge Covers for a Vintage Bedroom

    White pillow cover with a crochet lace edge on a bed with white bedding.

    Cream or white covers with a crochet or lace edge bring a vintage note to a bedroom or a guest room bed. The handmade edge softens a plain cover and pairs well with white bedding, light wood, and small spring flowers on a nightstand.

    Crochet edge covers suit a bed because they are seen up close, where the edge detail can be appreciated. Place them in front of sleeping pillows, with a pastel solid cover behind them for a layered look. Wash them gently in a laundry bag, and dry them flat so the edge keeps its shape.

    12. Speckled Egg Print Covers for a Modern Living Room

    White pillow cover with a small speckled egg print in soft blue, pink, and lilac on a modern sofa.

    Small speckled eggs in soft blue, pink, and lilac on a white or pale grey cover give a modern living room a subtle Easter pattern. The small scale of the print keeps it calm, which suits rooms with clean lines and little other pattern.

    Use speckled egg covers on one or two pillows, with solid covers in white, grey, or one pastel from the print. The small print also works on a lumbar pillow in front of larger square covers. Choose a cotton or linen blend for everyday use, and wash with similar colors to keep the pale ground bright.

    13. Soft Lilac Velvet Covers for an Elegant Sofa

    Soft lilac velvet pillow covers on an elegant sofa with cream covers beside them.

    Soft lilac velvet covers add a gentle spring color and a smooth, rich texture to a sofa in a more formal living room. Velvet catches light softly, so lilac reads as elegant rather than bright, especially next to cream and pale grey covers.

    Use velvet covers on pillows that get light use, since the pile shows pressure marks where people lean. Brush the pile lightly after use to keep it even, and keep velvet covers away from long stretches of direct sun, which can fade the color unevenly. Pair lilac velvet with a cream boucle or linen cover for texture contrast.

    14. Outdoor Pastel Covers for a Porch Bench

    Pastel pink and mint outdoor pillow covers on a porch bench with a potted plant nearby.

    Pastel covers in a weather resistant fabric bring Easter color to a porch bench or patio chair without worry about spring showers. Look for covers in soft pink, yellow, or mint with a wipe clean or quick dry finish, and a hidden zipper that keeps rain out of the insert.

    Outdoor covers suit a porch because they can stay out through the Easter season, then be stored for summer. Pair a pastel outdoor cover with a plain cream outdoor cover, and add a small potted plant nearby to echo the spring palette. Shake outdoor covers outside between washes, and store them dry at the end of the season.

    15. Mix and Match Easter Lumbar Covers for a Bed or Bench

    Mixed Easter lumbar pillow covers in a bunny print, a stripe, and a solid pastel on a long bench.

    A set of lumbar covers in mixed Easter patterns, such as one bunny print, one stripe, and one solid pastel, gives a bed or a long bench a styled look in one step. The long rectangular shape breaks up a row of square pillows and runs neatly along the back of a bench.

    Place the lumbar in front of square sleeping pillows on a bed, or centered on a bench, with plain covers at each end. Keep the three lumbar patterns in one pastel family, such as pink, cream, and mint, so the mix looks planned. Lumbar covers also suit a window seat, where their low shape does not block the view.

    Conclusion

    Easter pillow covers work best when the palette stays soft, one motif leads, and the fabric suits the room. Start with two or three covers in pastels you already like, pair them with plain covers you own, and check the insert size before ordering. Swap the covers out after Easter, store them clean and dry, and the same set will be ready for next spring. Save the ideas you like, and try one new combination each year to keep the seasonal refresh feeling fresh.

    FAQs

    What colors work best for Easter pillow covers?

    Pastel pink, yellow, mint, lilac, and soft blue work best for Easter pillow covers, since they read as spring colors without overpowering a room. Limit the mix to three pastel colors, and pair them with cream or white covers so the sofa or bed stays calm.

    How many Easter pillow covers should I use on a sofa?

    Two or three Easter covers are enough for most sofas, paired with plain covers you already own. Place one patterned cover at each end of the sofa, or use a single feature cover in the center, so the Easter motif stays a highlight rather than covering every pillow.

    Are Easter pillow covers washable?

    Most cotton and linen Easter pillow covers are washable, but embroidered, appliqued, and velvet covers often need gentle washing or dry cleaning. Always check the care label before washing, and wash patterned covers with similar colors to protect the print or stitching.

    What size Easter pillow cover should I buy?

    Buy a cover one or two inches smaller than your insert, so the pillow looks full and plump rather than flat. Measure the insert before ordering, and check whether the cover size given is the finished cover size or the recommended insert size, since brands label them differently.

    Can I use Easter pillow covers outdoors?

    Yes, you can use Easter pillow covers outdoors if they are made from a weather resistant fabric with a quick dry or wipe clean finish. Standard cotton or velvet covers should stay indoors, since rain and strong sun can stain or fade them, and damp inserts can develop odors.

    How do I store Easter pillow covers after the season?

    Store Easter covers clean, dry, and folded flat, with tissue paper between embroidered or appliqued covers to protect the detail. Keep them in a closed box or bag away from damp and direct sun, and they will hold their color and shape until next spring.