Category: DIY & Styling

Simple styling projects and affordable ways to refresh your home.

  • 19 Winter Wreath Ideas to Display After Christmas

    19 Winter Wreath Ideas to Display After Christmas

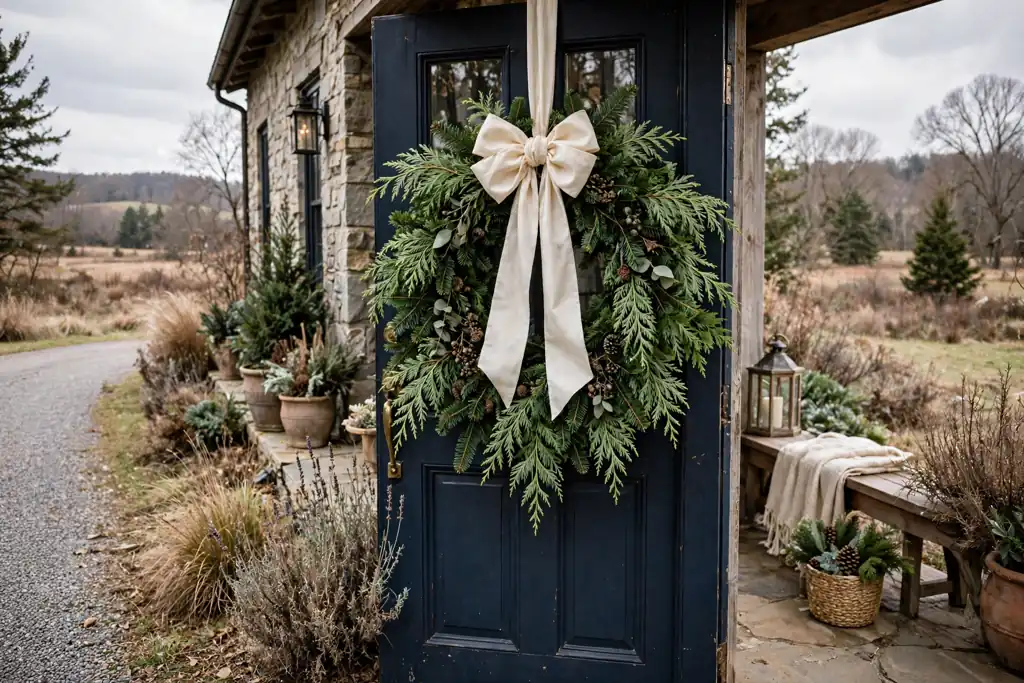
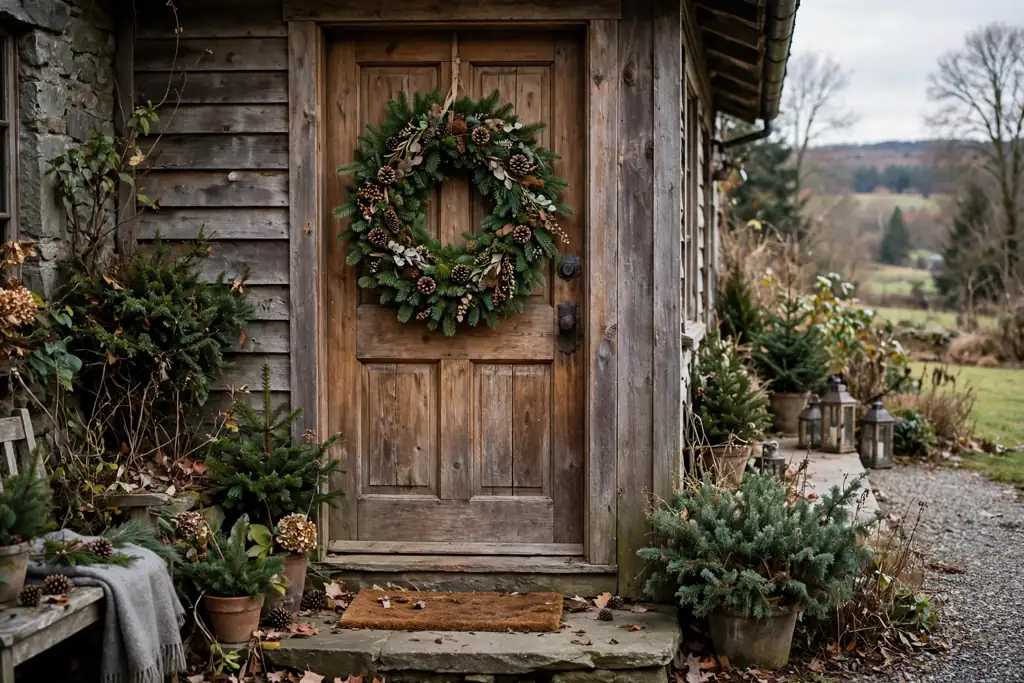
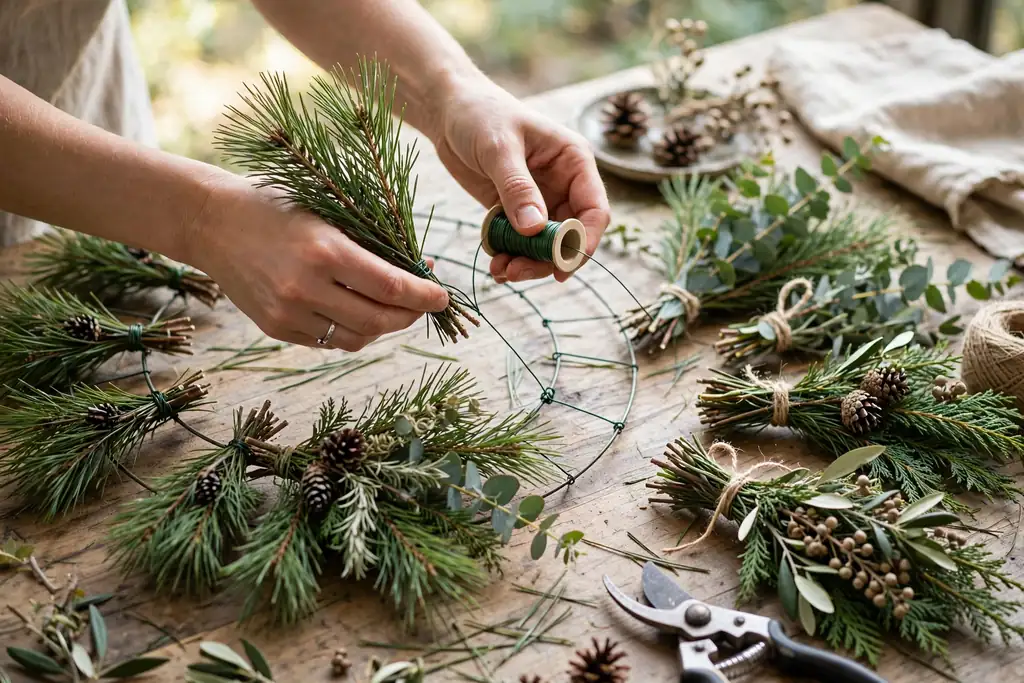
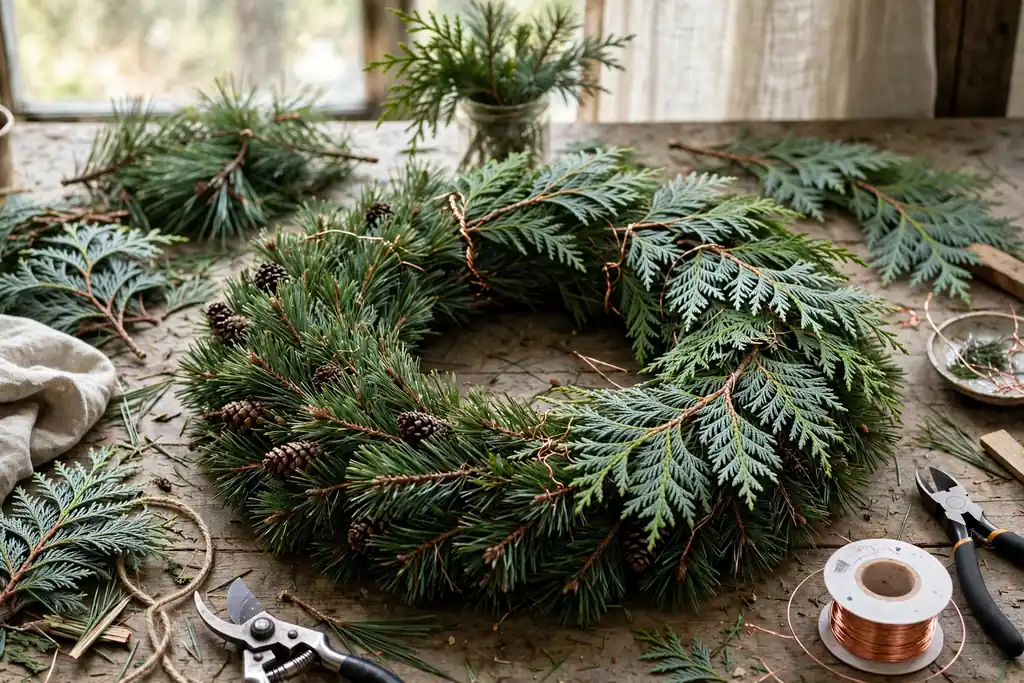
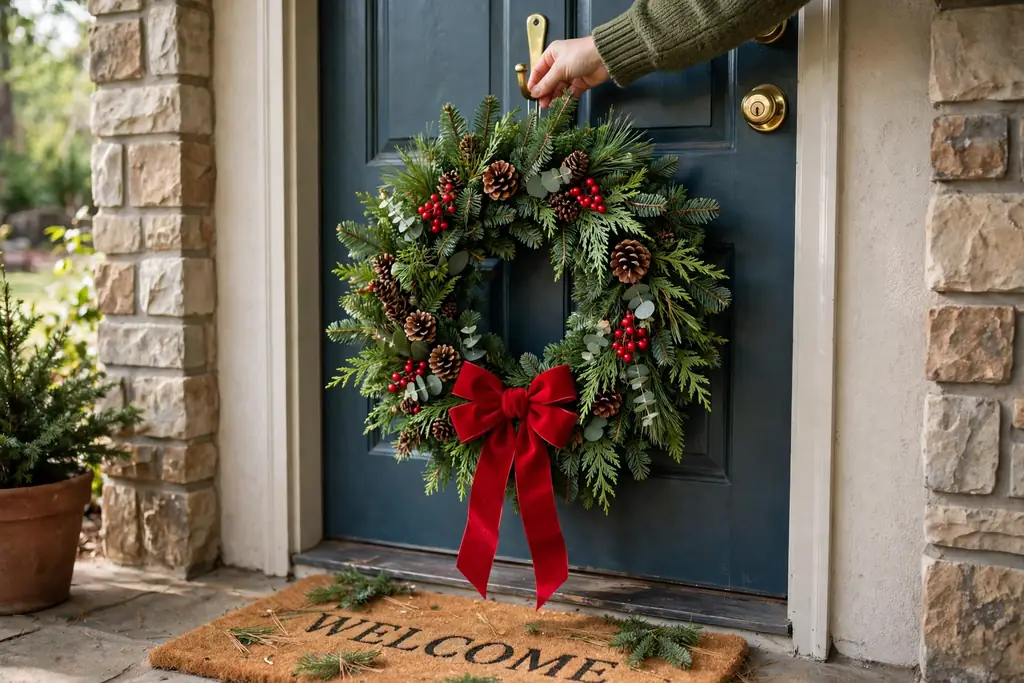
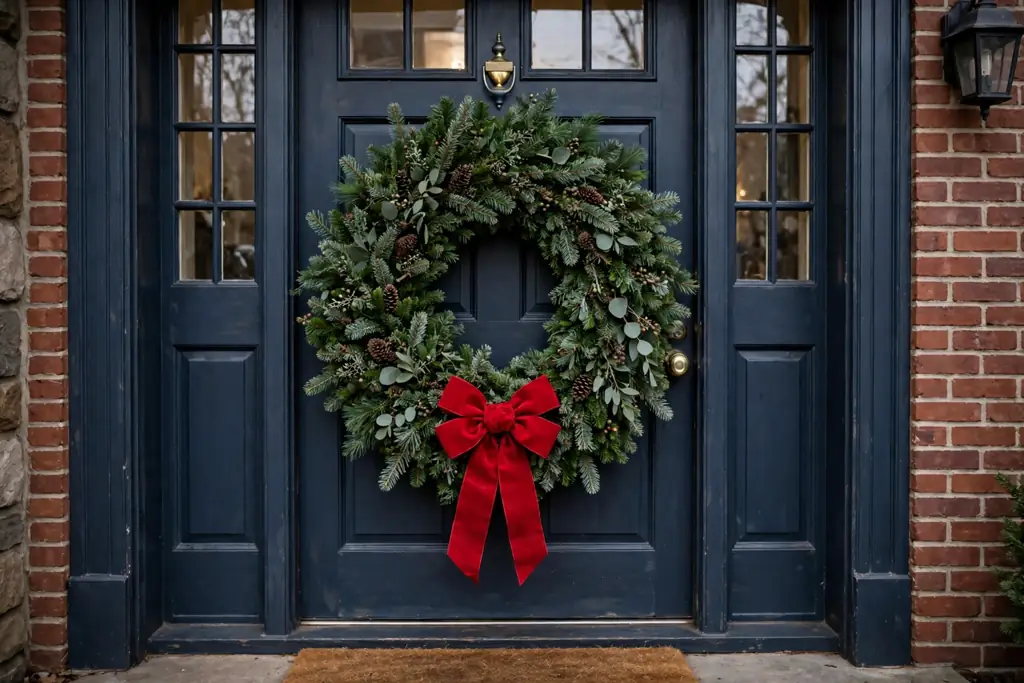
    After Christmas, winter wreaths keep a front door or wall looking finished without holiday symbols. Choose pine, eucalyptus, or snowy greenery, add a simple bow or none at all, and hang the wreath where it can handle cold air, wind, and moisture through the rest of winter.

    The easiest change is to remove anything that reads as Christmas only, such as ornaments, stocking shapes, and bright red ribbon with a holiday pattern. Keep the greenery, pinecones, berries, and neutral ribbon, and the wreath reads as winter rather than as a leftover holiday decoration. For more seasonal ideas to pair with these looks, browse the Dwell Ovell decor ideas index. Check the hanging spot for wind and rain, use a sturdy hook or hanger, and bring delicate indoor wreaths inside during storms.

    Key Takeaways

    • Remove Christmas only details, such as ornaments and holiday patterned ribbon, and keep greenery, pinecones, and berries for a winter look.
    • Choose hardy materials for outdoor doors, such as pine, cedar, juniper, and pinecones, and save felt, dried flowers, and paper details for sheltered or indoor spots.
    • Match the wreath size to the door or wall, with larger wreaths for wide doors and smaller wreaths for windows, mantels, and narrow walls.
    • Keep the palette simple after Christmas: greens, white, silver, wood tones, and one berry color are enough.
    • Hang wreaths with a hook or hanger rated for the weight, and check them after wind and heavy rain.
    • Store wreaths flat or hanging in a dry place, in a bag or box that keeps dust off the greenery.

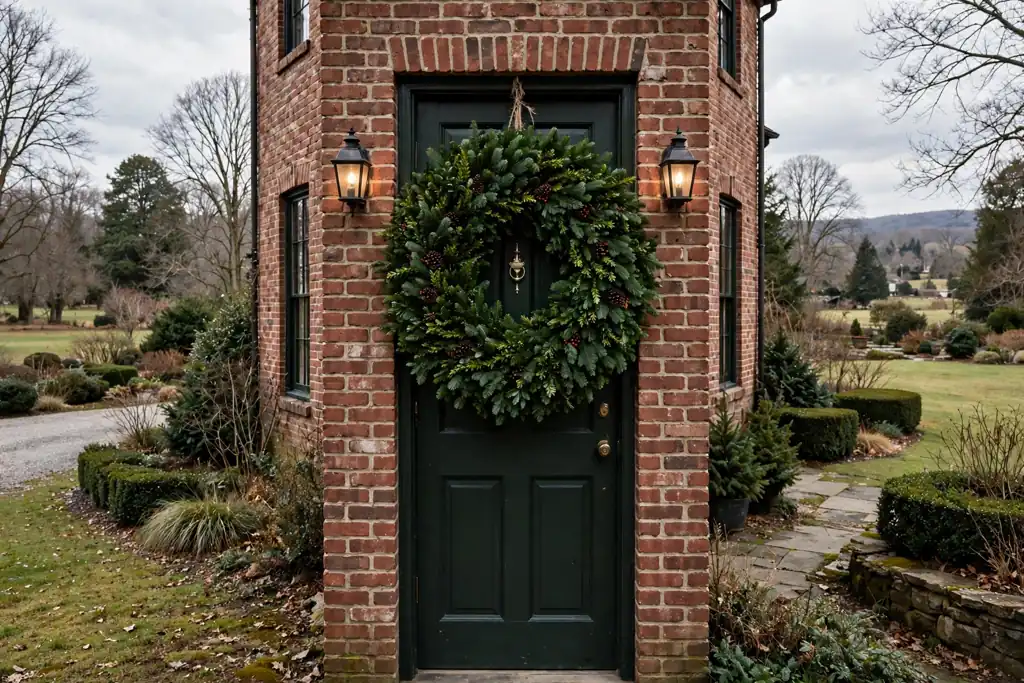
    1. A Classic Pine Wreath on the Front Door
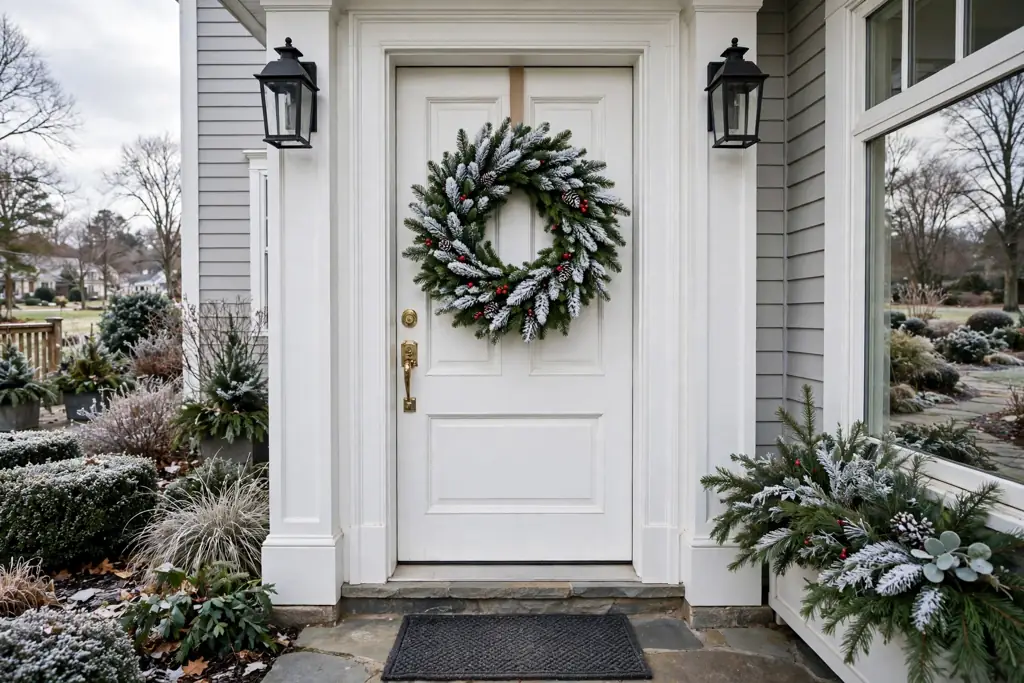
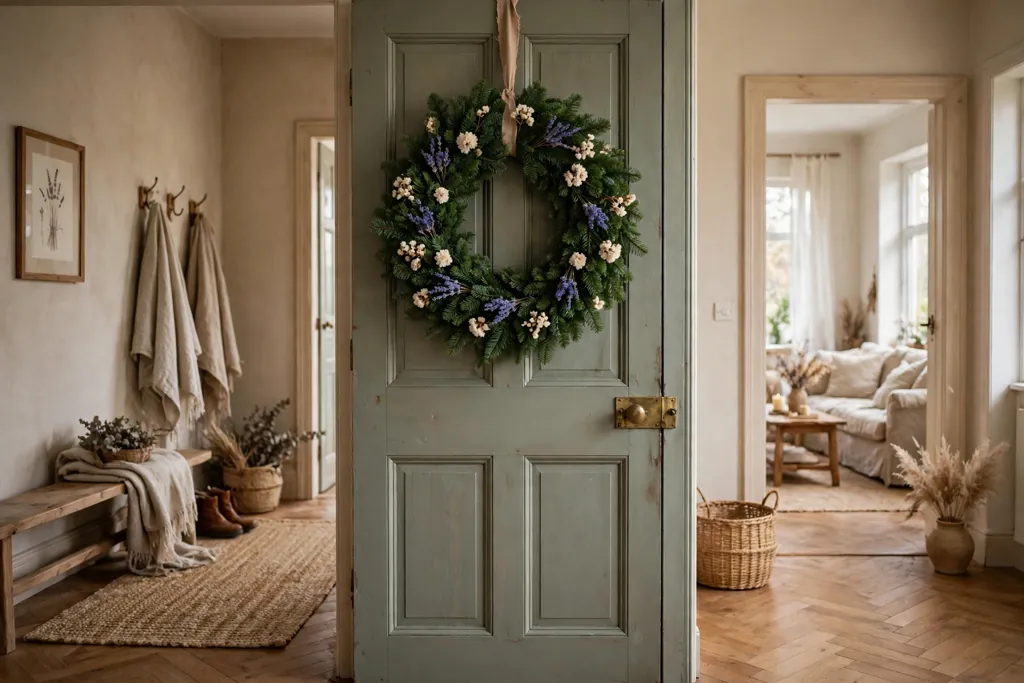
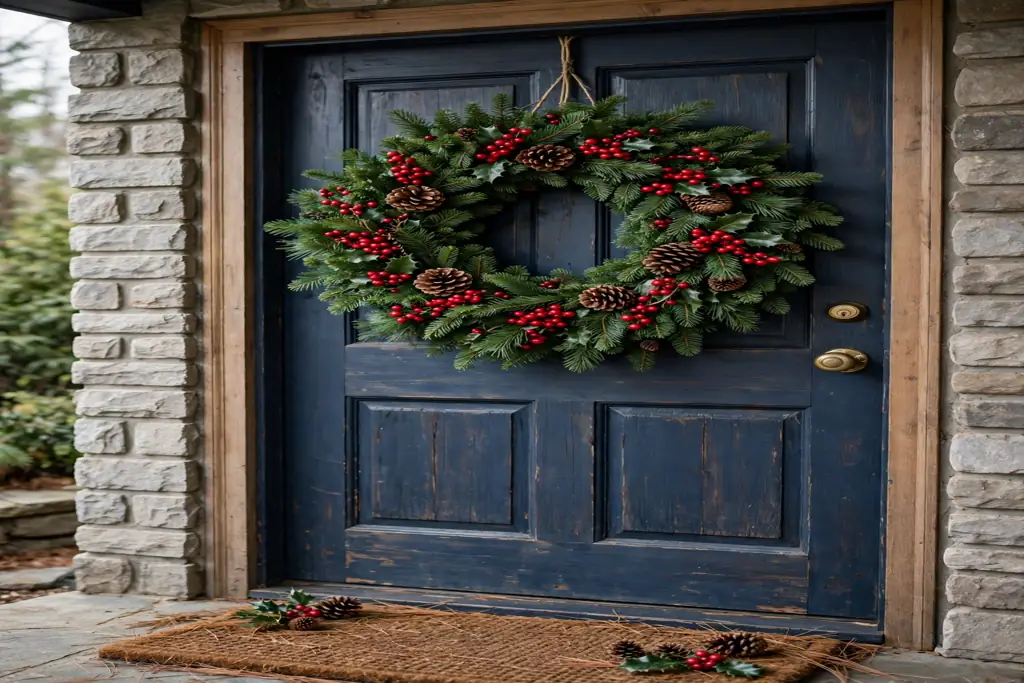
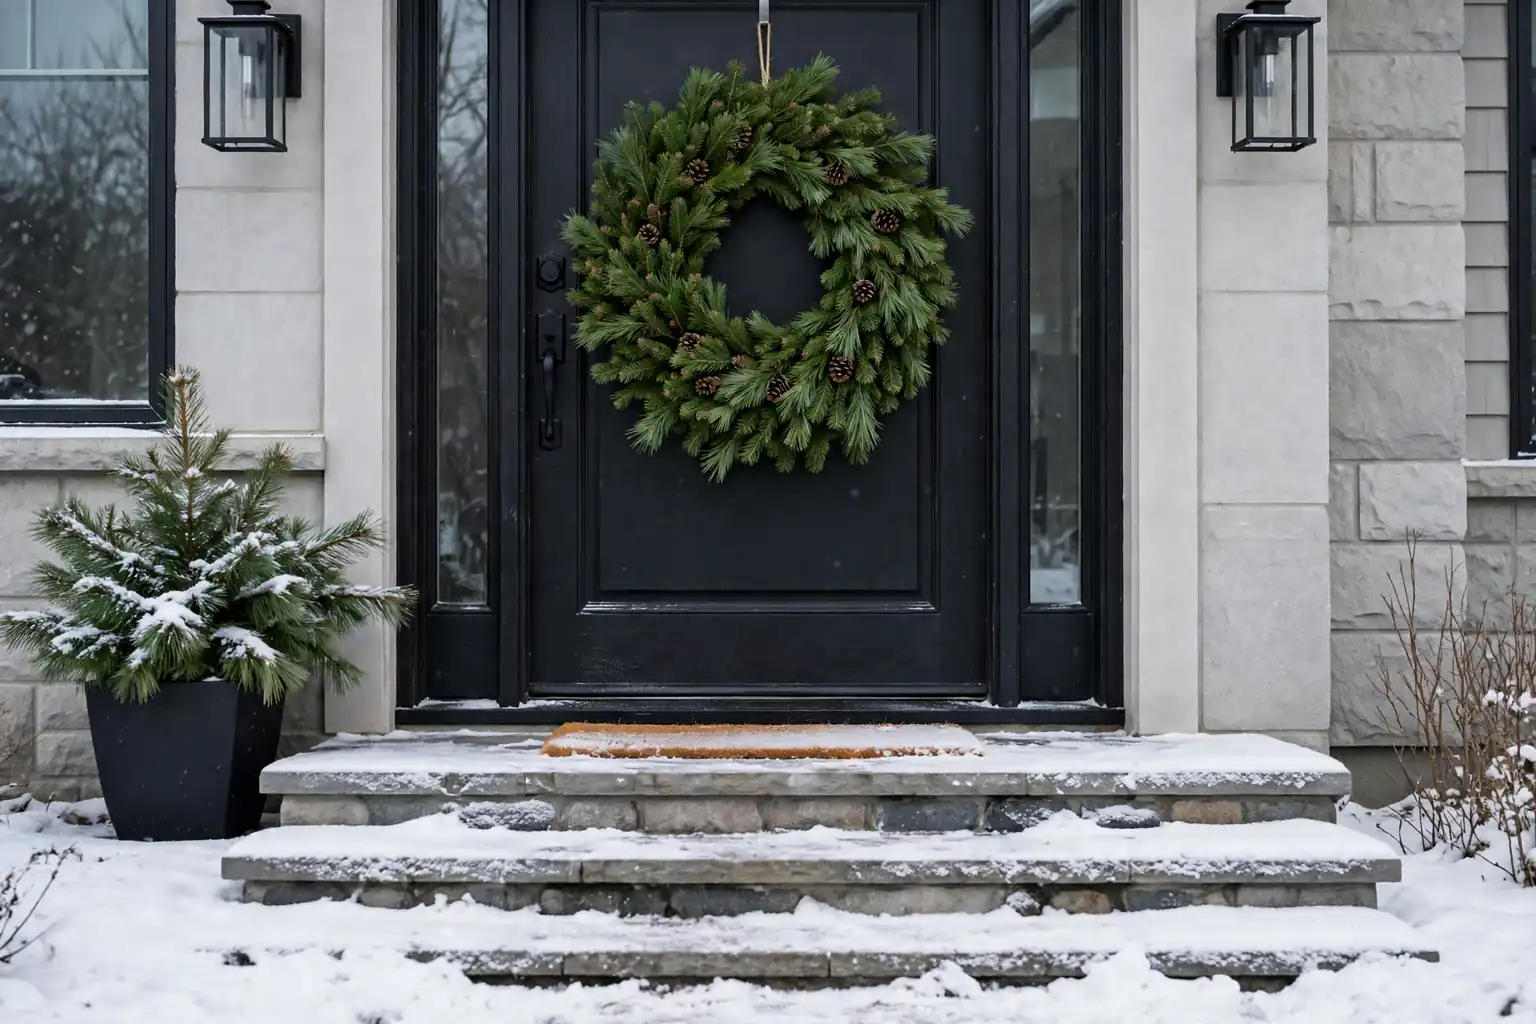
    Full pine wreath on a painted front door in winter

    Hang a full pine wreath on the front door with a plain hook and no bow, or with a simple cream or grey ribbon loop. Pine holds its shape in cold air, and its deep green color suits brick, painted wood, and stone entryways alike. Choose a wreath that covers a good part of the door width without blocking the handle or the lock.

    Shake the wreath outdoors before hanging to remove loose needles. If the door faces strong wind, use a hanger that hooks over the top of the door rather than a suction cup, which can fail in cold weather. Brush off snow rather than letting it sit and melt into the branches.

    2. A Flocked Wreath for a Snowy Look
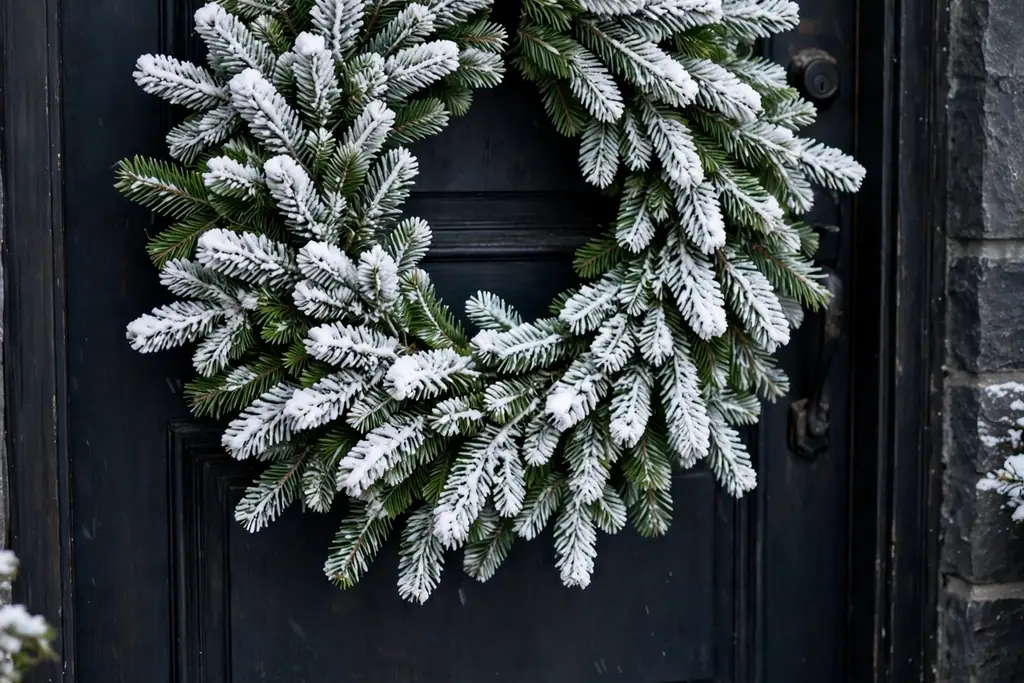
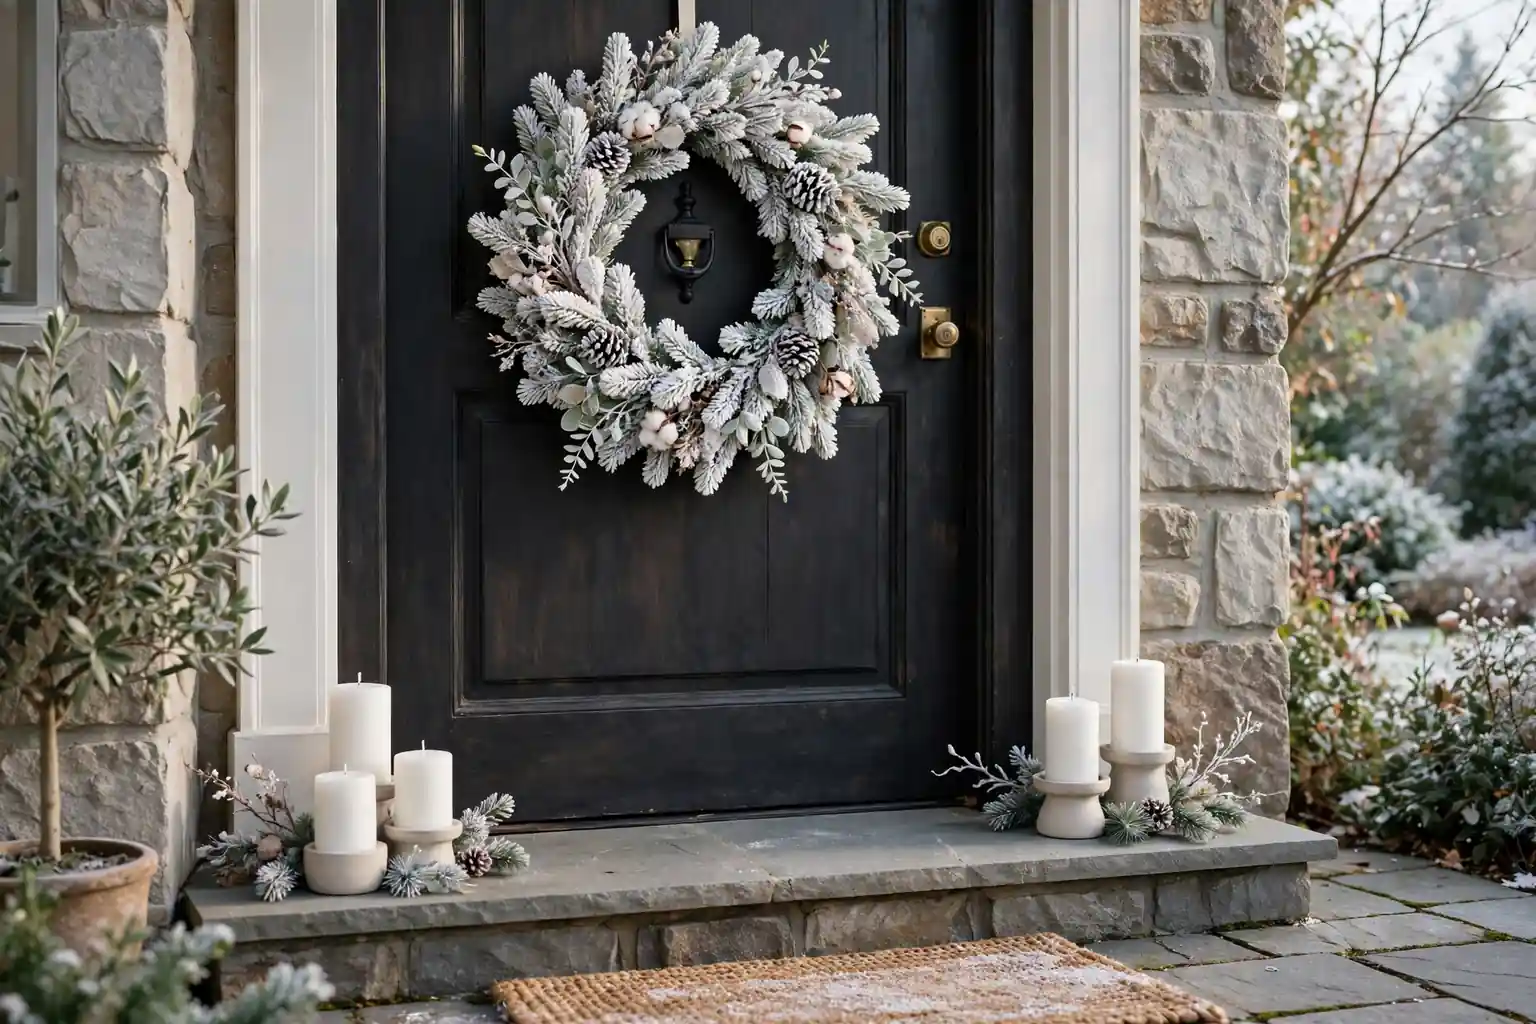
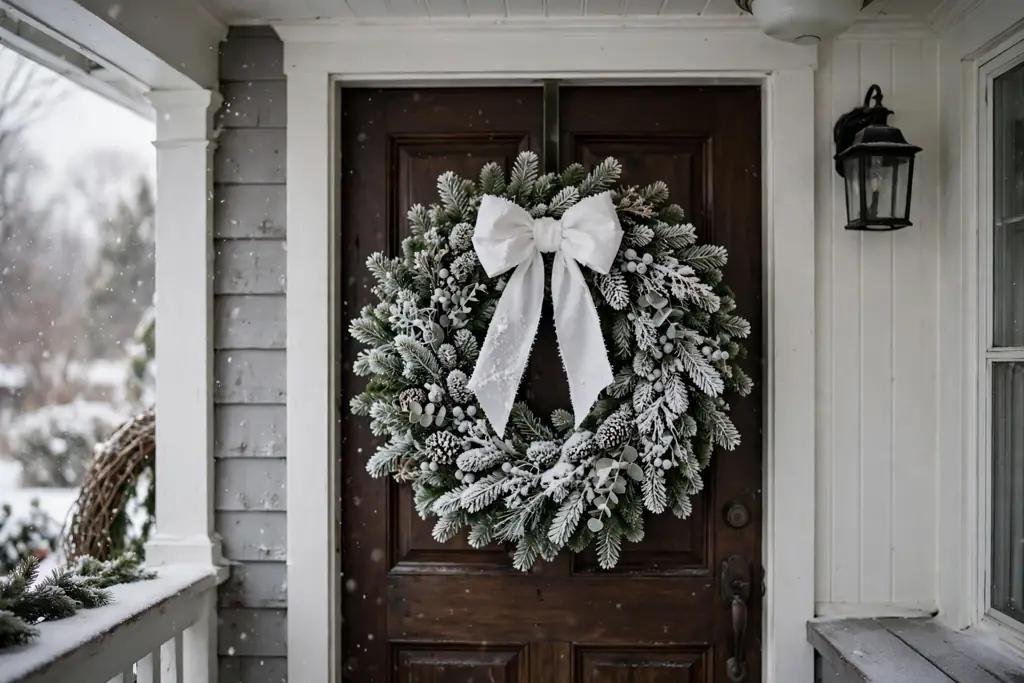
    Flocked wreath with snowy white tipped branches on a dark door

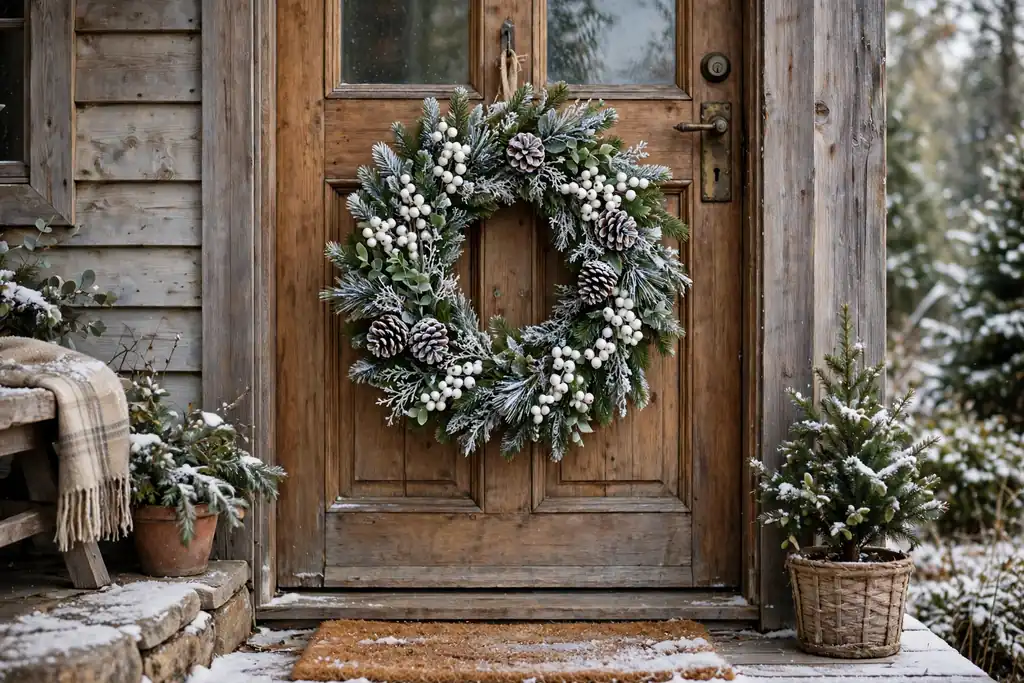
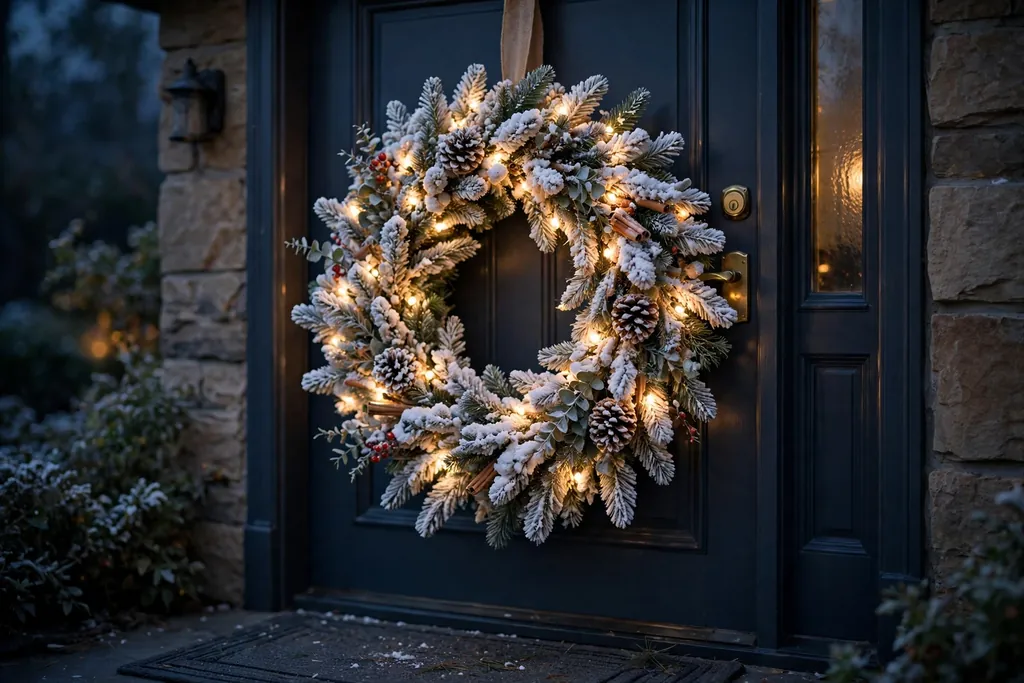
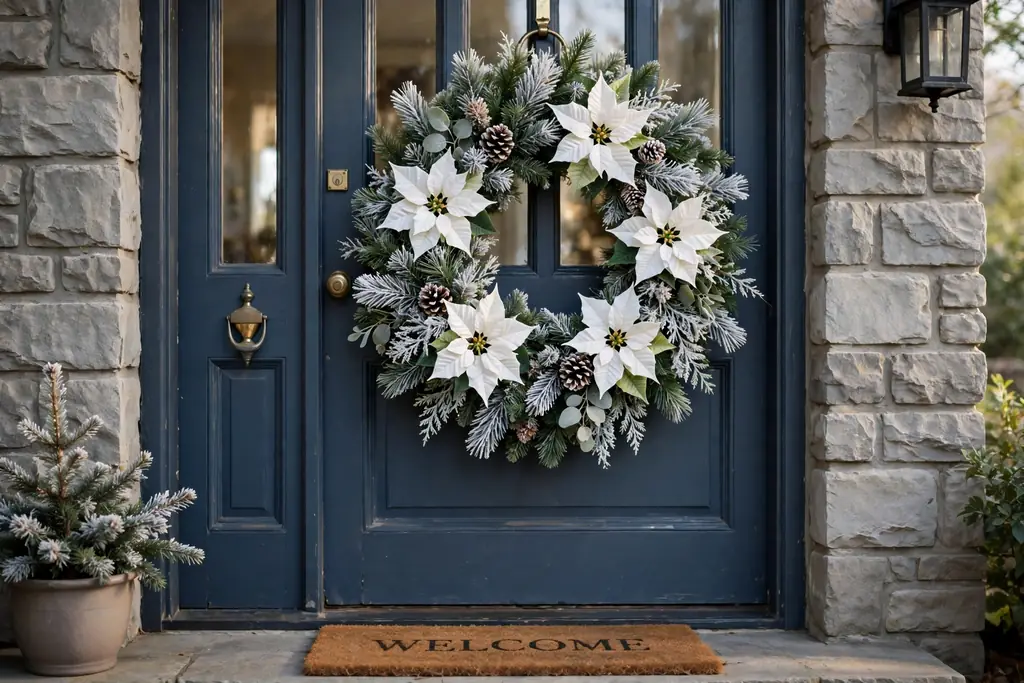
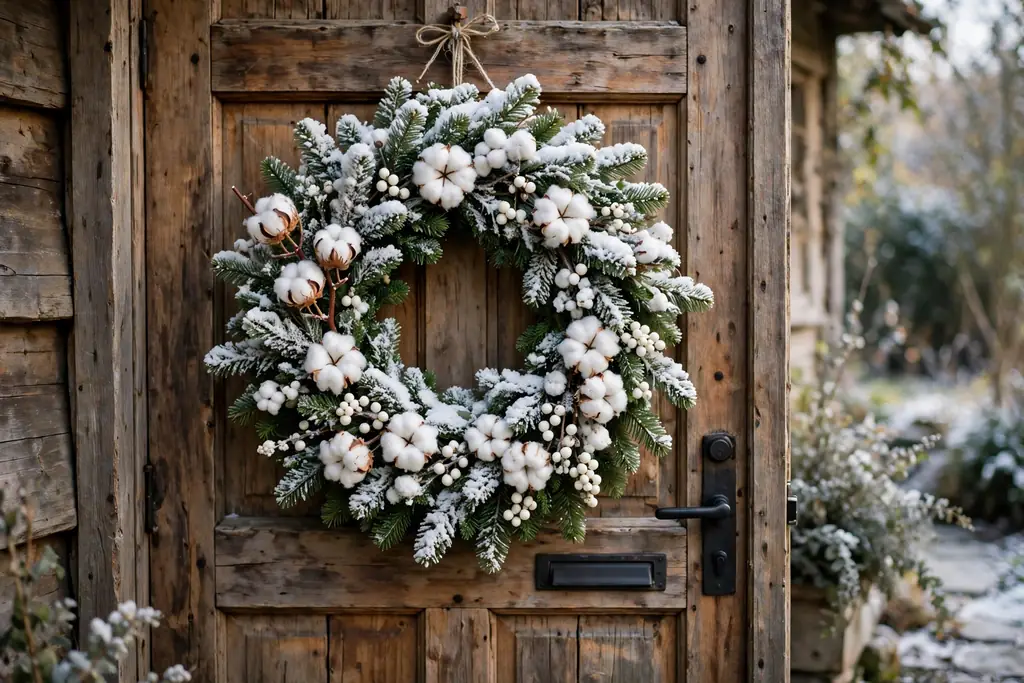
    A flocked wreath, with white tips brushed over green branches, gives a snowy look without needing real snow. It works well on a dark door, where the white tips stand out, and on a light door, where it adds soft texture. Keep other entry details plain so the snowy branches stay the focus.

    Flocked wreaths suit covered porches best, since heavy rain can wash the flocking away over time. If the porch is open, bring the wreath in during wet storms and hang it again once the weather clears. Dust it lightly with a dry cloth rather than washing it.

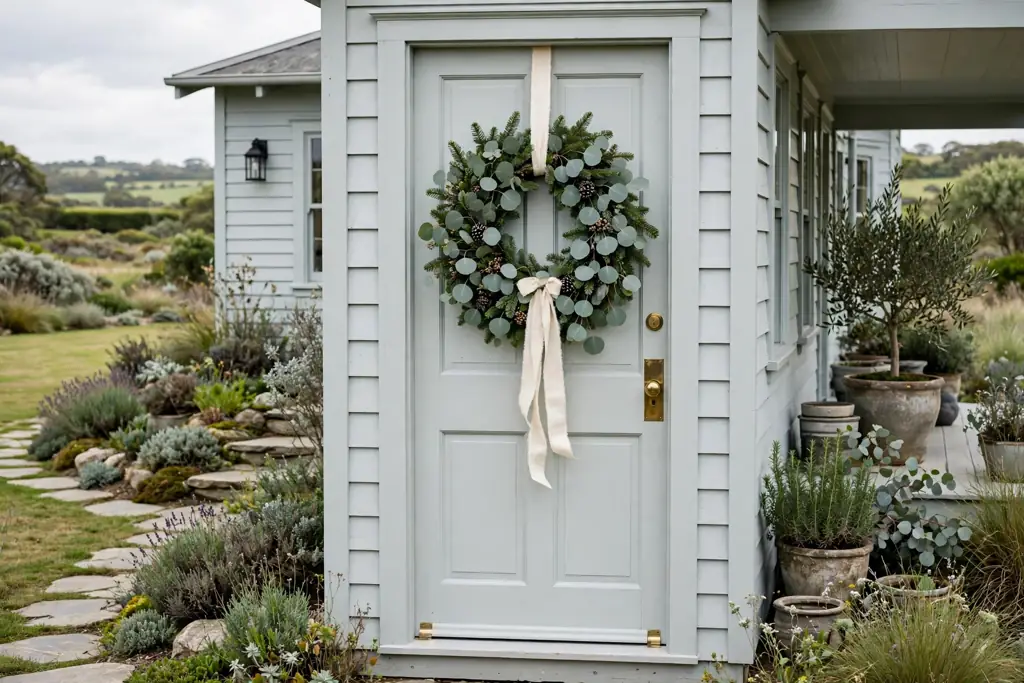
    3. A Simple Eucalyptus Wreath
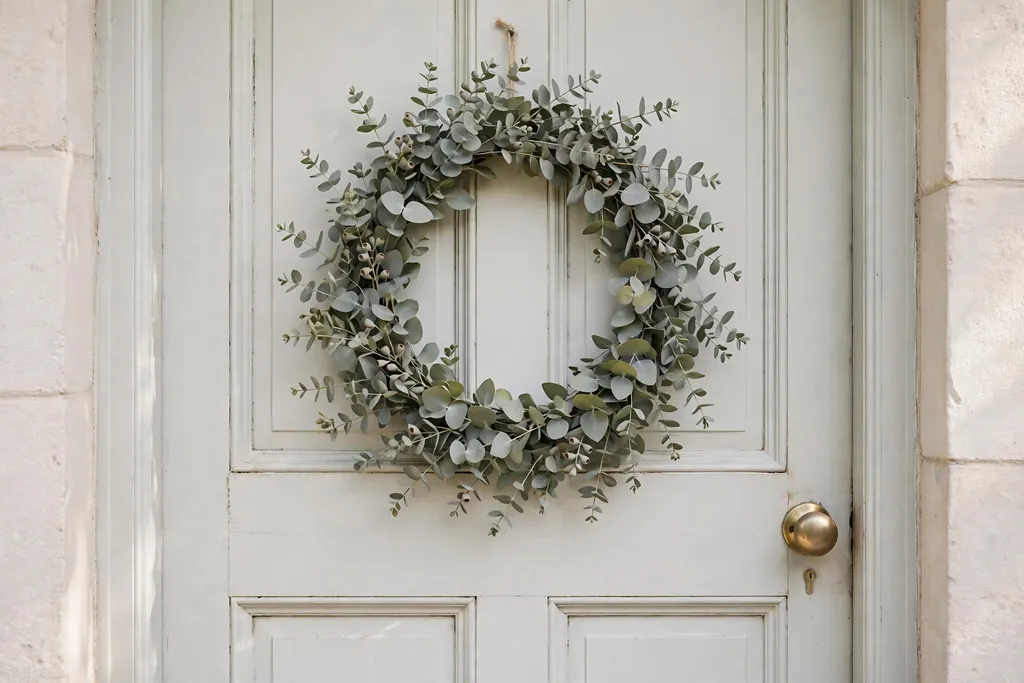
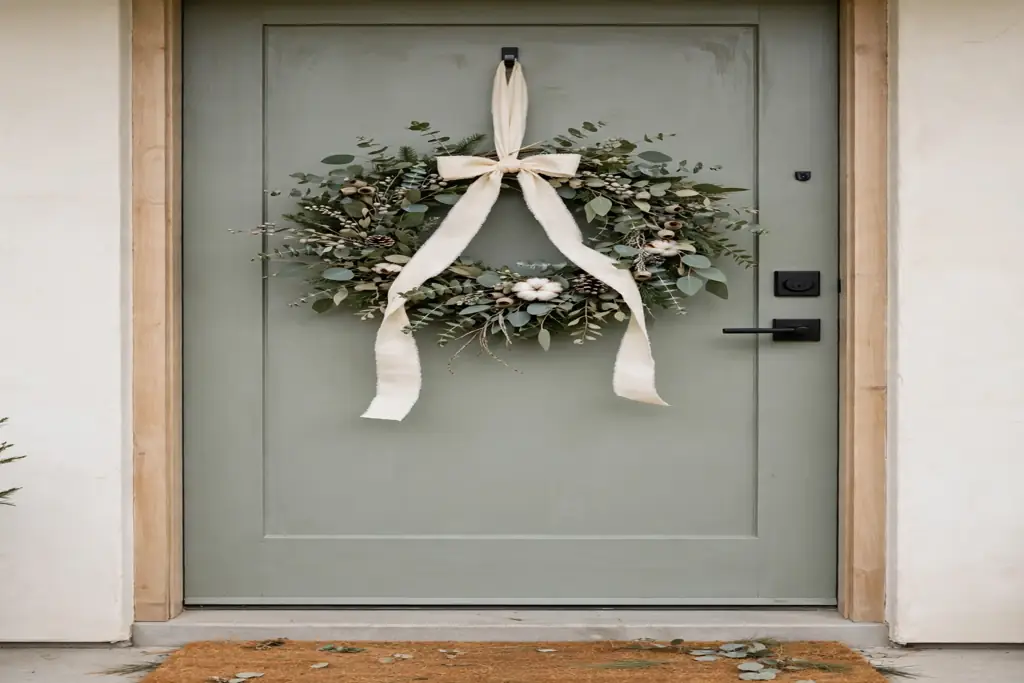
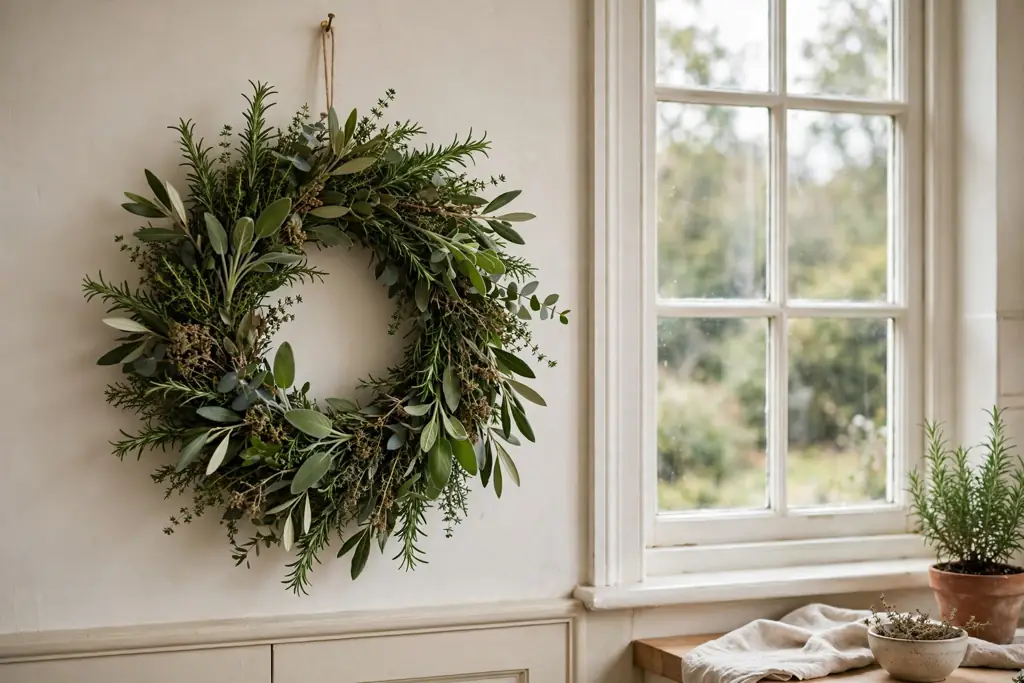
    Simple eucalyptus wreath with grey green leaves on a light door

    A eucalyptus wreath uses soft grey green leaves in a loose, even ring, and it suits modern doors and light colored walls. It has no pine needles to drop, and its calm color works from January into early spring. Hang it alone, with no bow, for the cleanest look.

    Eucalyptus dries over time, so expect the leaves to become more brittle as the weeks pass. Keep it out of direct rain to slow that change, and handle it by the base rather than by the leaves. When the leaves start to crumble, replace the wreath rather than trying to glue loose leaves back in place.

    4. A Bare Twig and Birch Branch Wreath
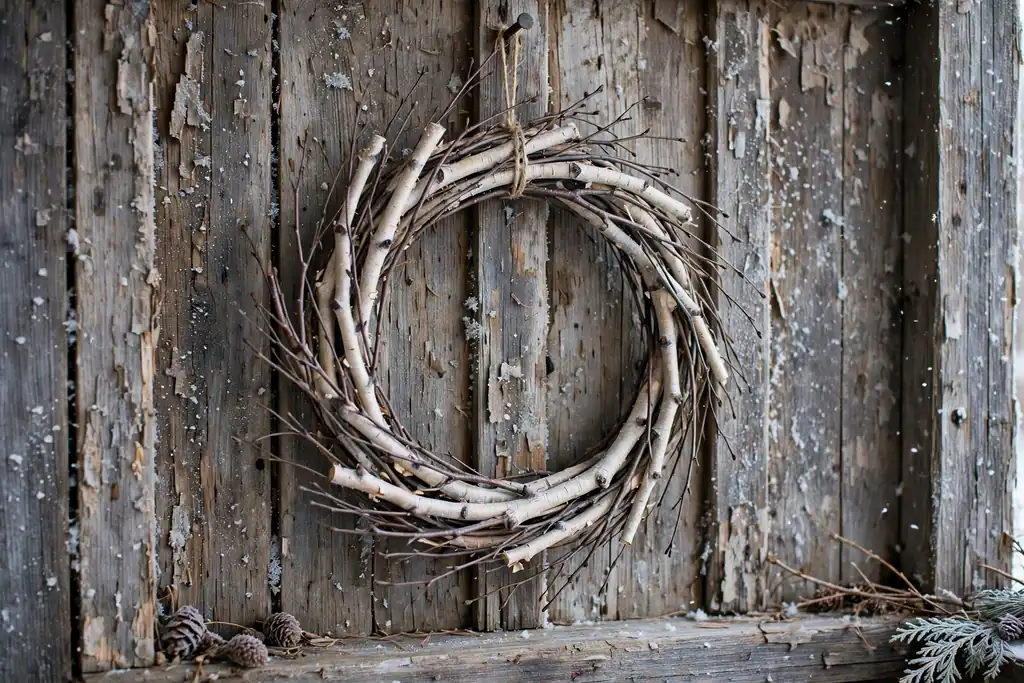
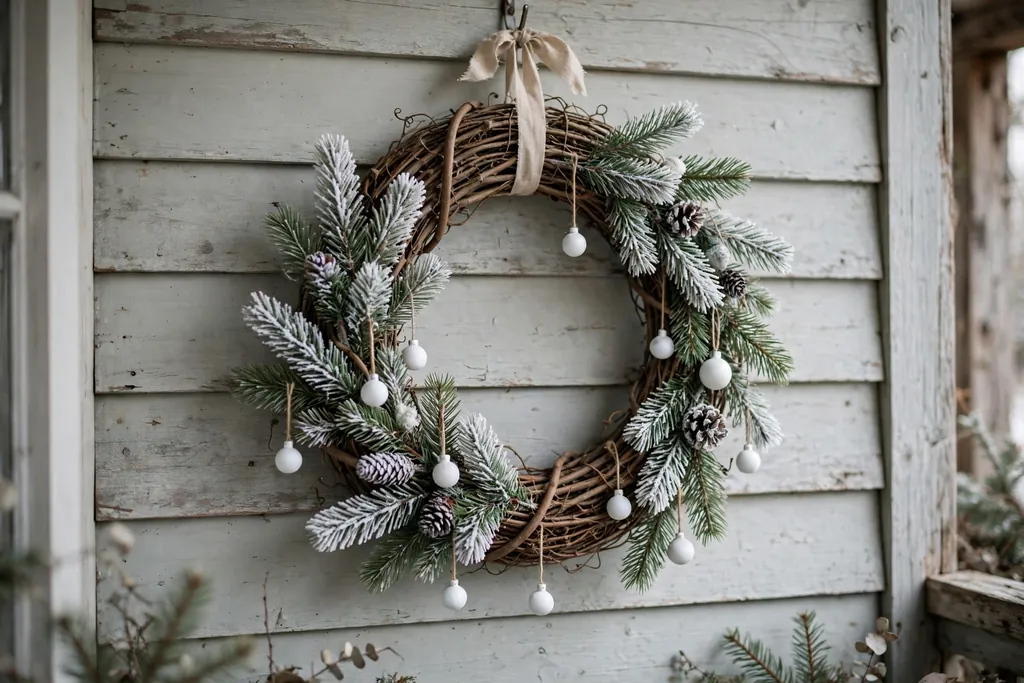
    Bare birch twig wreath hanging on a rustic wooden wall

    A twig wreath made from birch branches or bare twigs gives a winter look with no greenery at all. The pale bark and open shape suit rustic entries, farmhouse porches, and rooms with a lot of wood. Add a single sprig of pine at the bottom if the open shape feels too bare.

    Twig wreaths are light, so a small nail or hook is usually enough indoors. Outdoors, tie the wreath to the hook with wire so wind cannot lift it off. Check thin twigs after storms, since a snapped twig can be trimmed or tucked back into the ring.

    5. A Pinecone Only Wreath
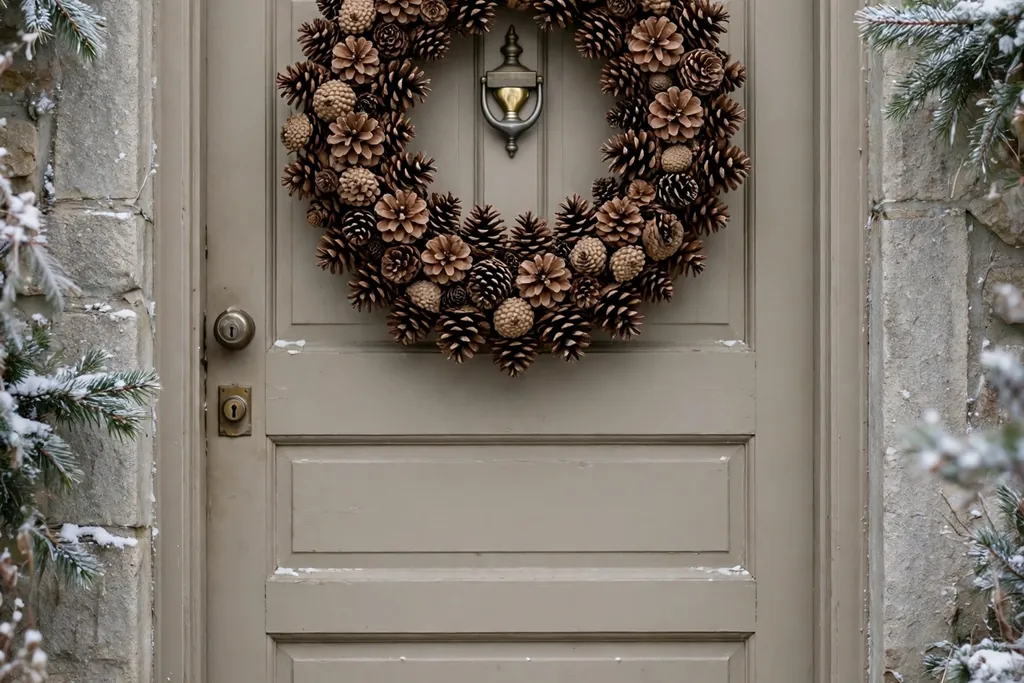
    Wreath covered in natural brown pinecones on a neutral door

    A wreath covered in pinecones, in mixed sizes and natural brown tones, reads as winter long after the holidays. It needs no greenery, and it pairs well with stone, wood, and neutral painted doors. Look for cones that are fully open and firmly attached to the base.

    Pinecone wreaths can be heavy, so use a hook rated for the weight and test it before leaving the wreath up. Keep the wreath under cover if possible, since soaked cones close up and take a long time to dry. A dry brush removes dust from between the cone scales.

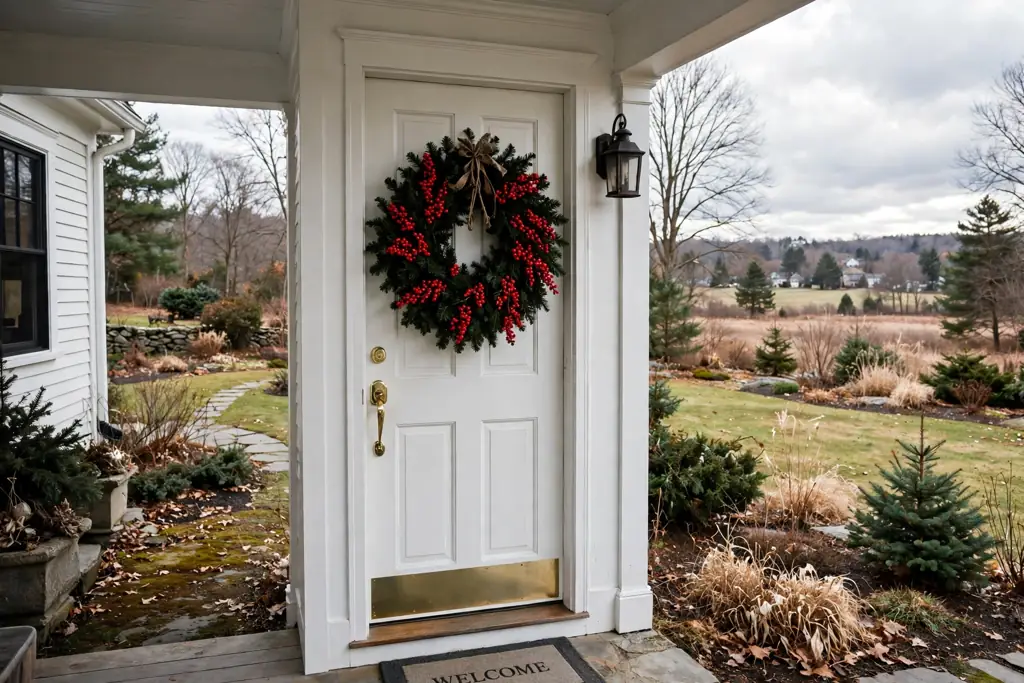
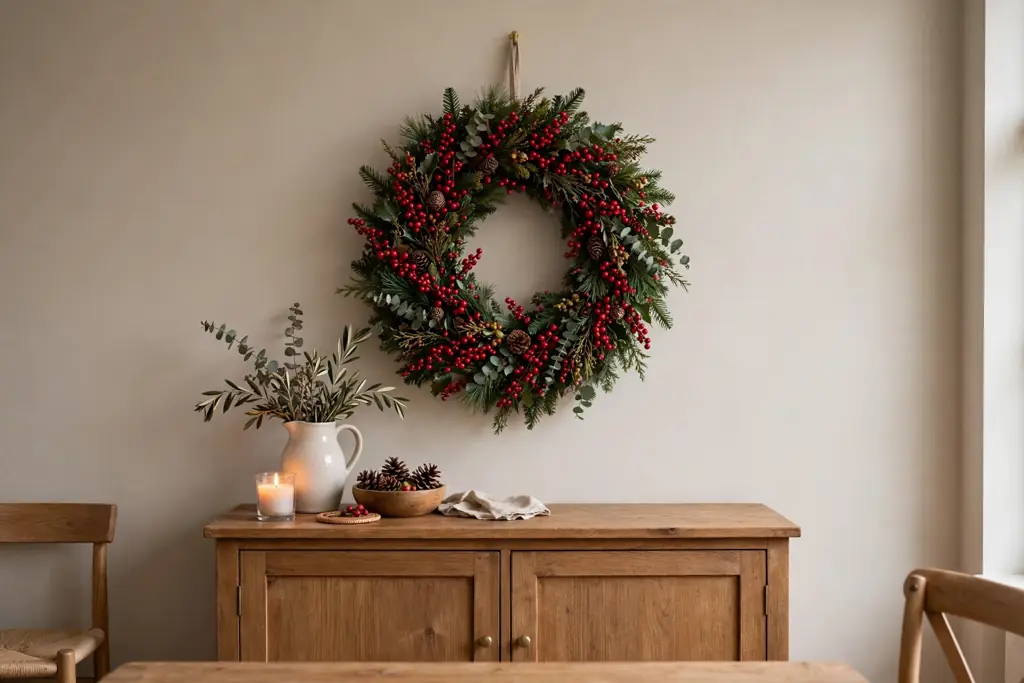
    6. A Red Winterberry Wreath

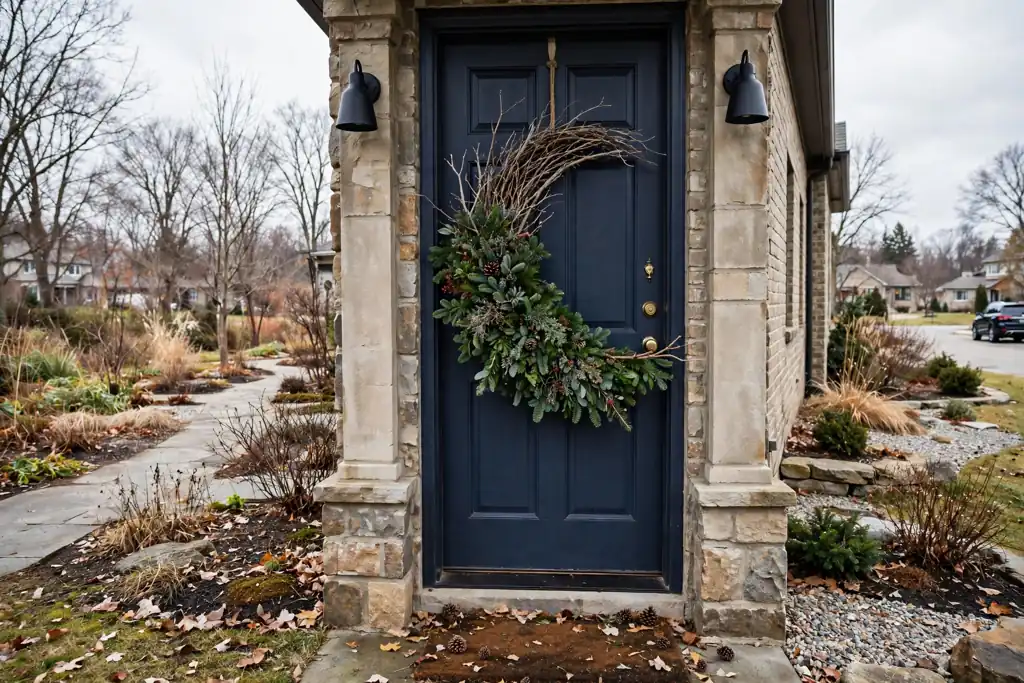
    Red winterberry wreath with green leaves on a dark front door

    Red winterberry branches, wired into a ring with a little greenery, add a clear pop of color to a plain winter door. The berries look seasonal without reading as Christmas, especially when paired with a plain bow in cream or grey rather than red ribbon. This is a good choice for a dark green, black, or navy door.

    Real winterberries dry and drop over time, so check the wreath each week and remove loose berries. Keep real berry wreaths away from areas where children or pets might pick at them. Faux winterberry wreaths keep their color longer and suit uncovered doors better.

    7. A White and Silver Minimal Wreath
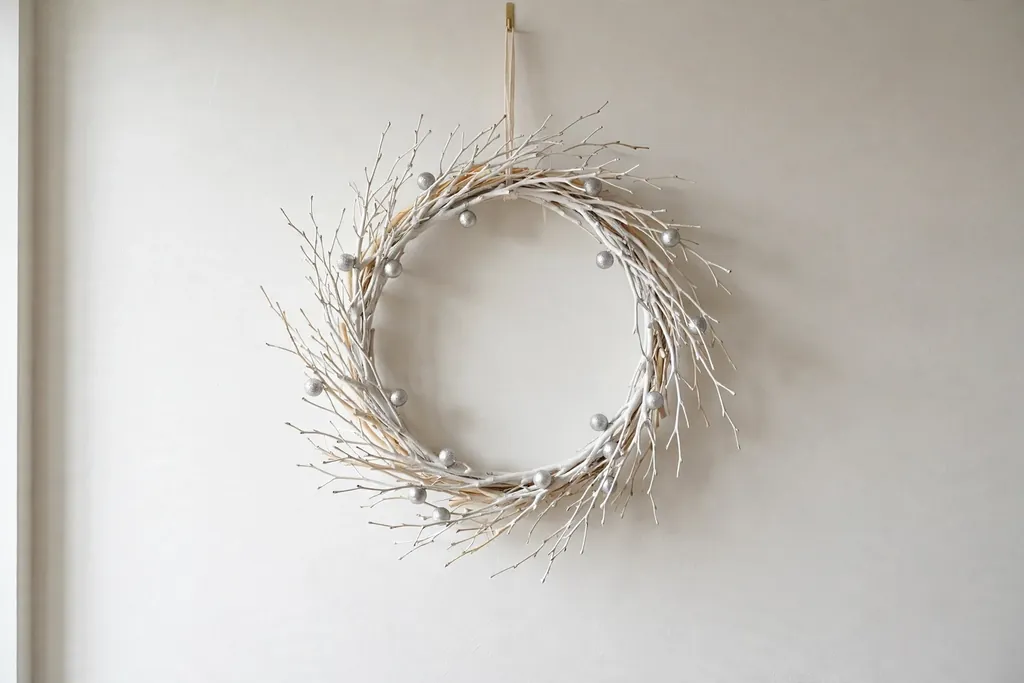
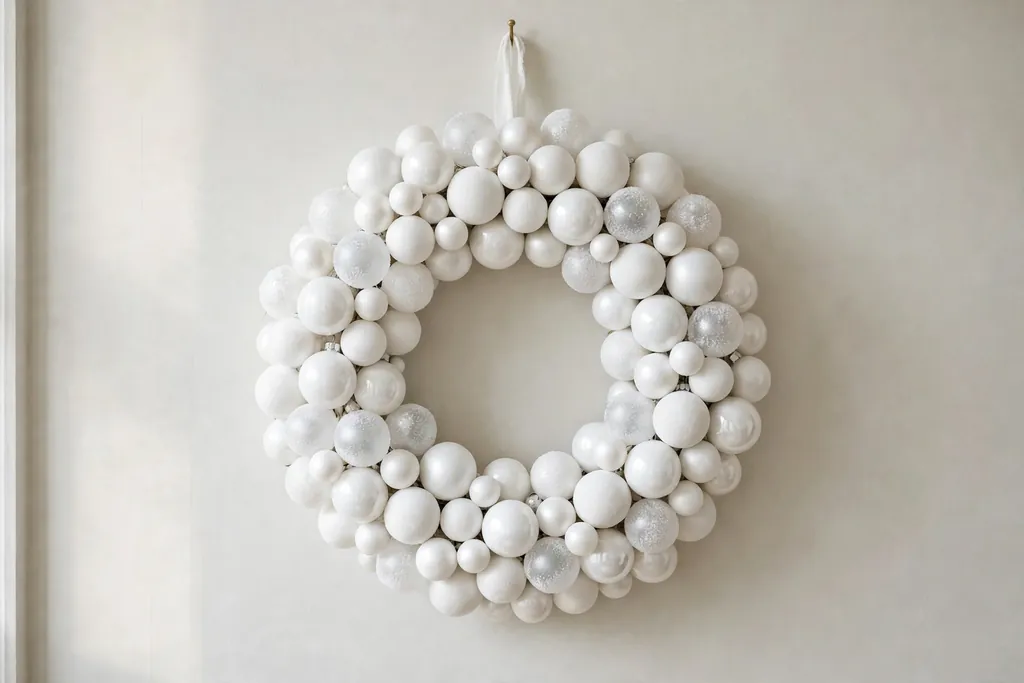
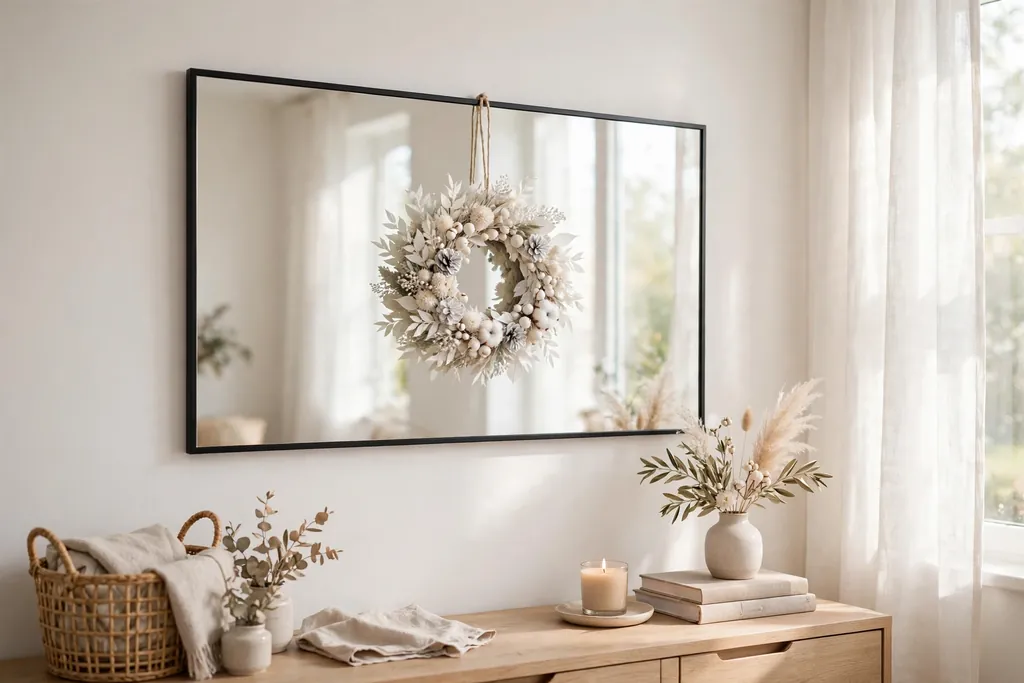
    White and silver wreath with pale branches on a light wall

    A white and silver wreath, made from pale branches, silver balls, or frosted leaves, suits a minimal entry or a light interior wall. The pale palette keeps the look calm after the color of the holidays, and it pairs well with white, grey, and pale wood. Keep the ring even and uncluttered, with no extra ribbon.

    This style shows dust more than a dark green wreath, so hang it where it will not sit near a wood stove or a dusty entry. A soft dry cloth or a gentle shake outdoors keeps it clean. If silver balls loosen, reattach them with wire rather than glue, which can show on pale branches.

    8. A Rustic Wreath with a Burlap Bow
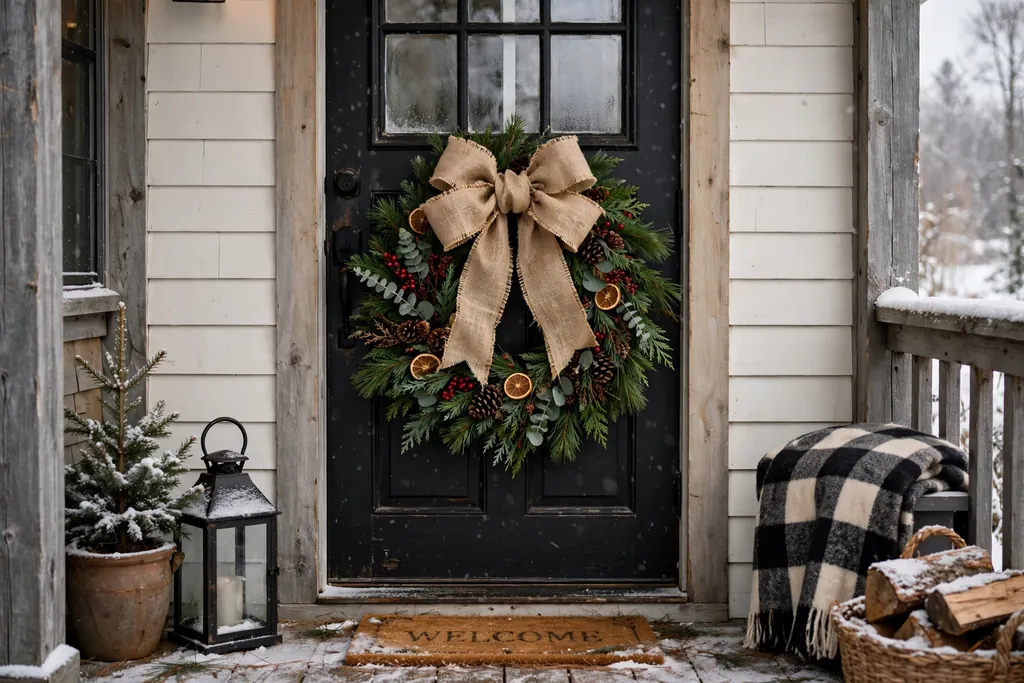
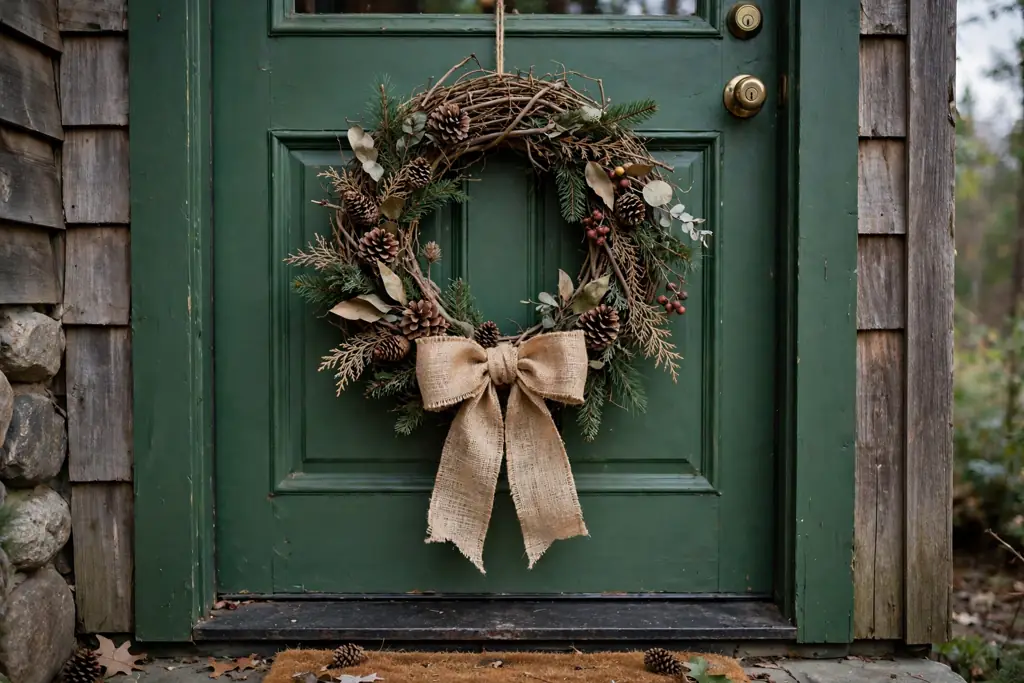
    Pine wreath with a wide burlap bow on a farmhouse porch

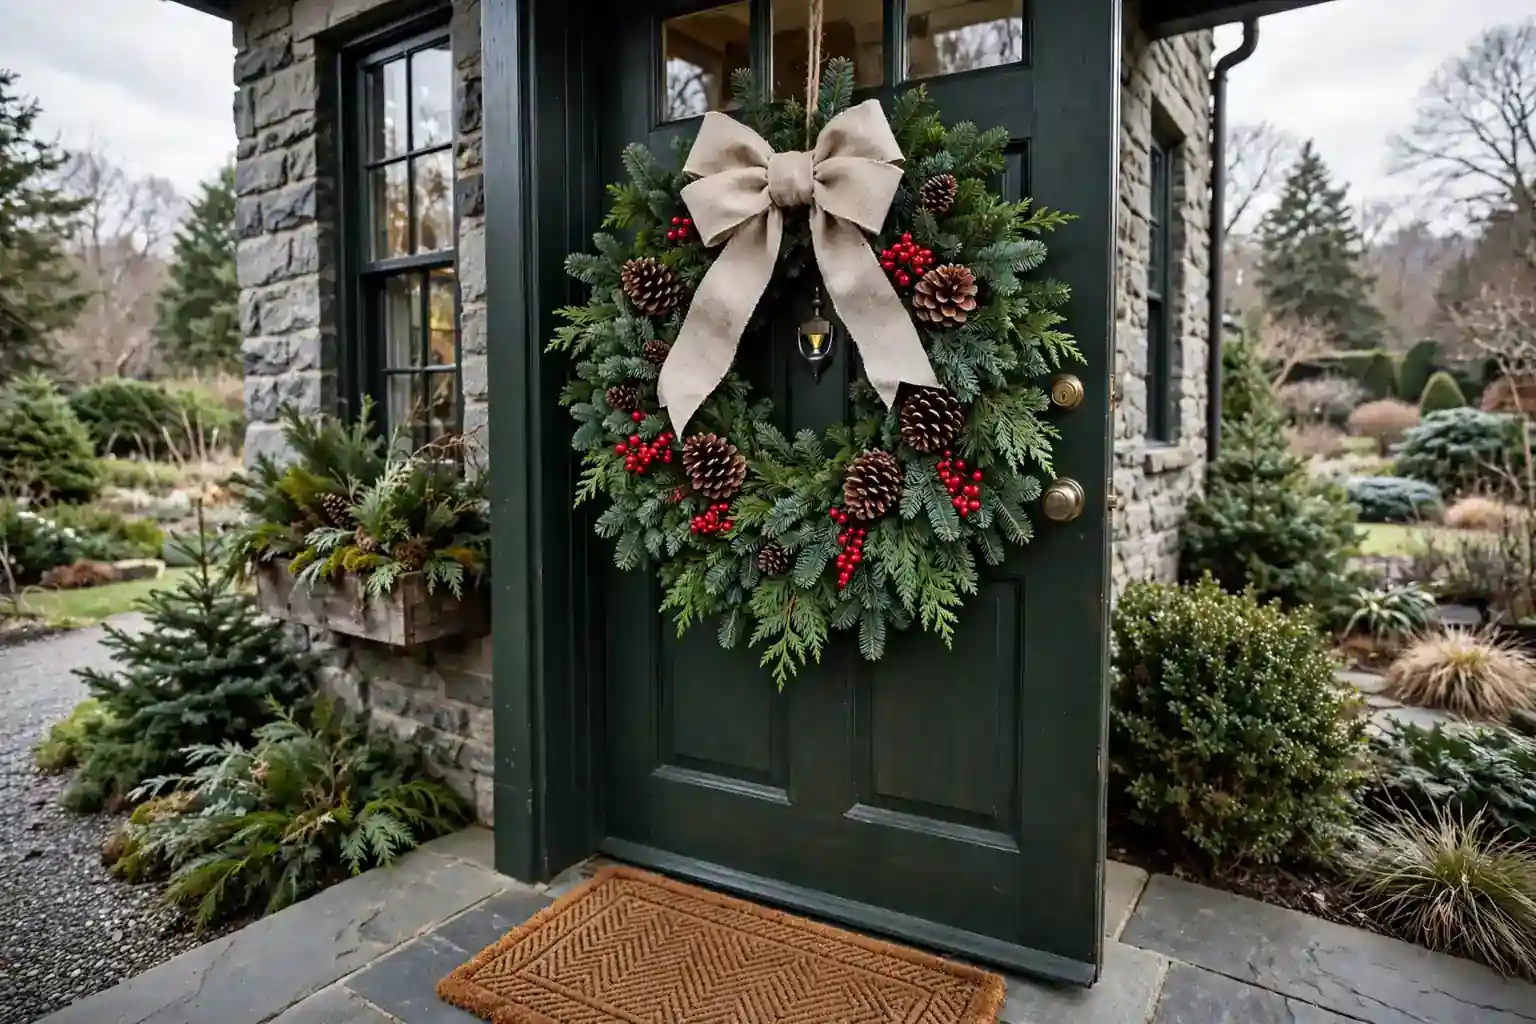
    A pine or mixed greenery wreath with a wide burlap bow gives a rustic winter look for a farmhouse porch or a wood door. Burlap adds texture without shine, and its natural tan color sits well next to stone, brick, and wood. Tie the bow with long tails for a relaxed shape, or keep the tails short for a tidier look.

    Burlap fades and stiffens in rain, so this wreath suits a covered porch best. If the bow gets wet, let it dry flat before reshaping it. Keep a spare length of burlap ribbon on hand, since a fresh bow can renew the whole wreath in a few minutes.

    9. A Dried Citrus and Pine Wreath

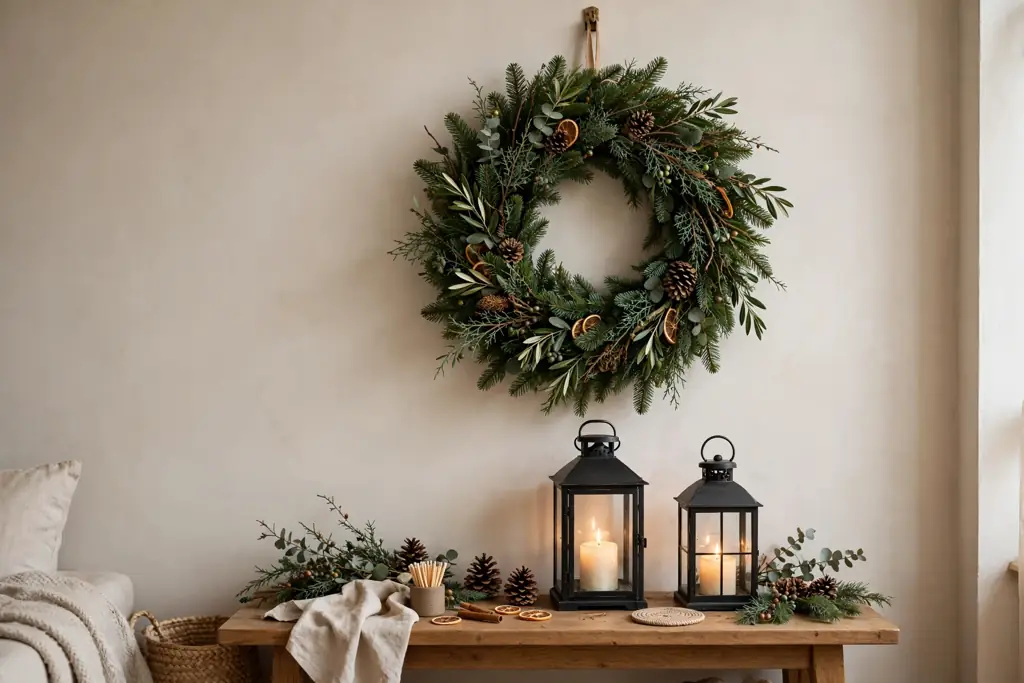
    Pine wreath with dried orange slices and pinecones on a porch

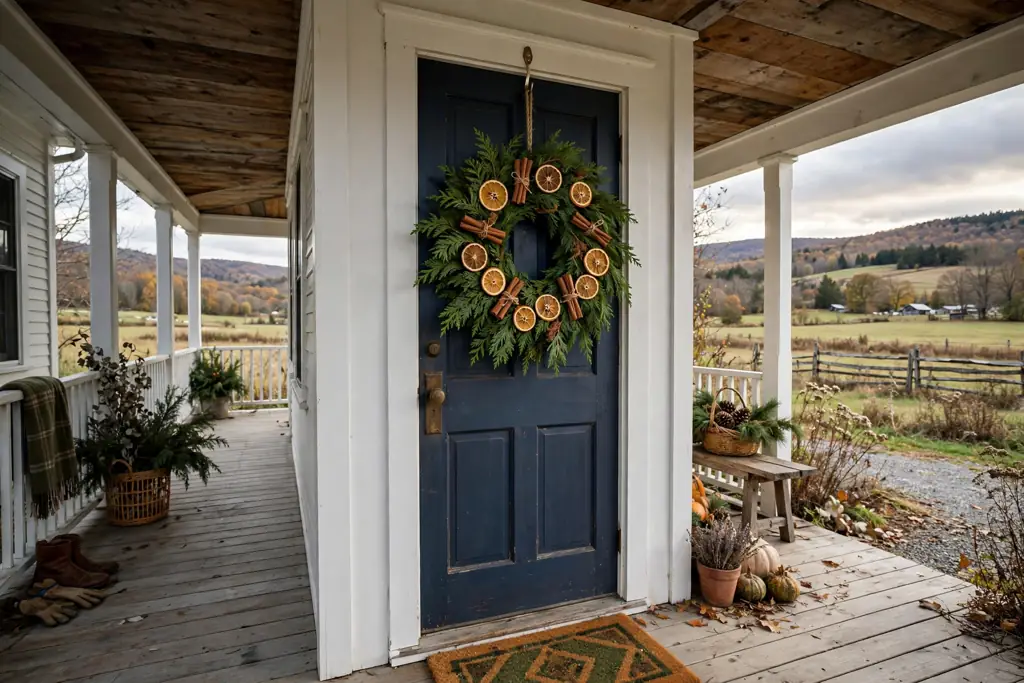
    A pine wreath with dried orange slices and a few pinecones gives a warm, natural winter look for a kitchen door or a sheltered porch. The orange slices add color without holiday symbols, and the mix of green, brown, and amber suits wood kitchens and neutral entries. Space the slices evenly so no side looks heavy.

    Dried citrus softens in damp air, so keep this wreath under cover and out of direct rain. Bring it indoors during wet spells if the porch is open. When slices start to curl or darken, replace just those slices rather than the whole wreath, if the base is still in good shape.

    10. A Cedar and Juniper Wreath
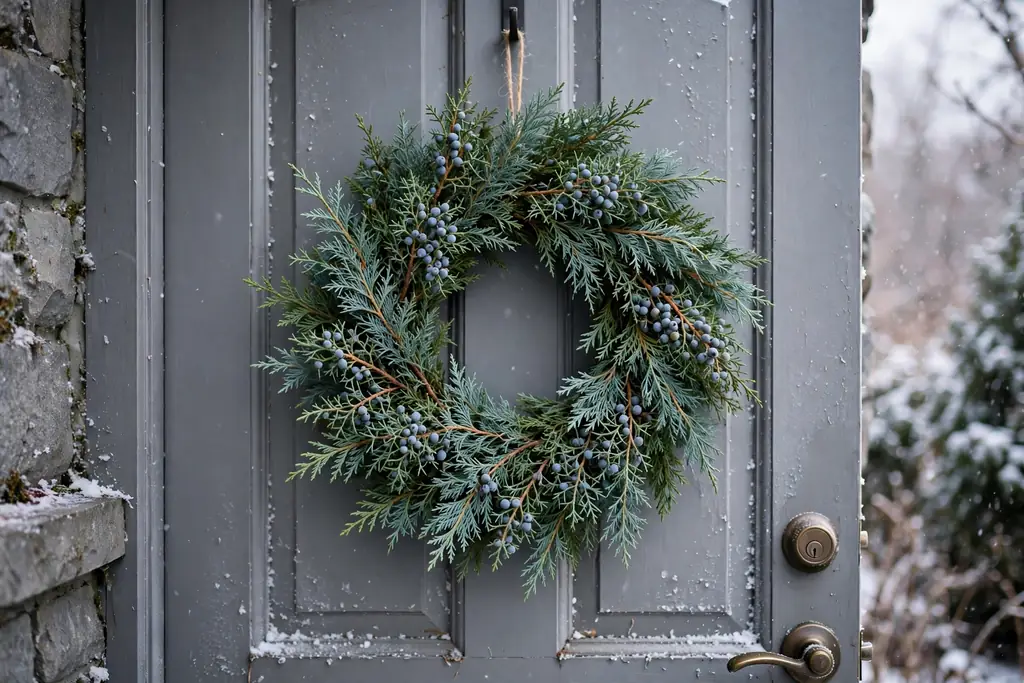
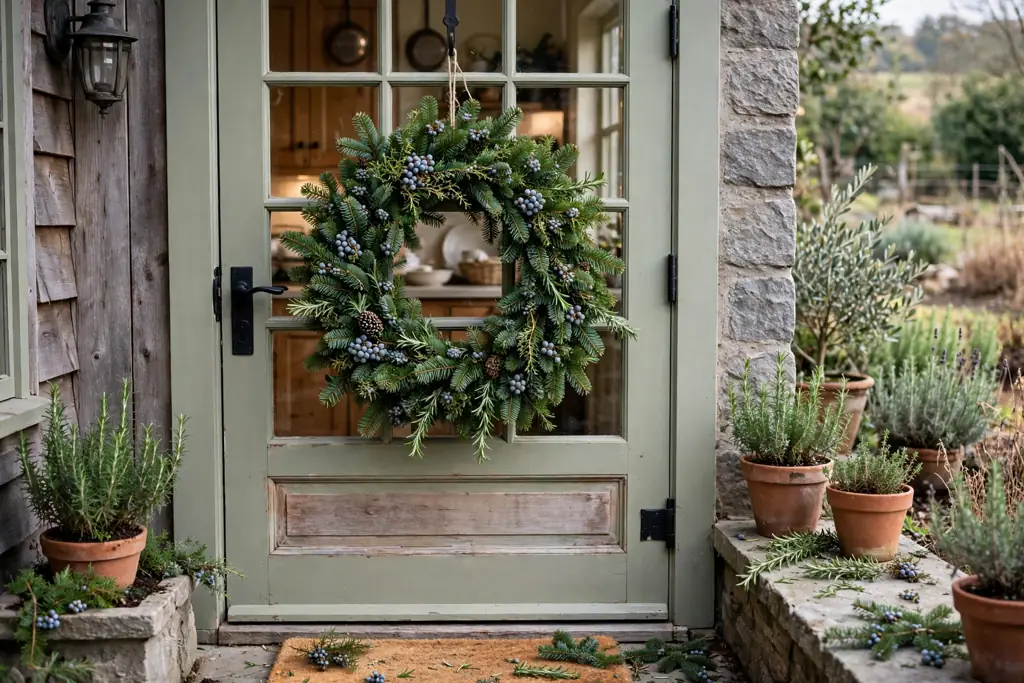
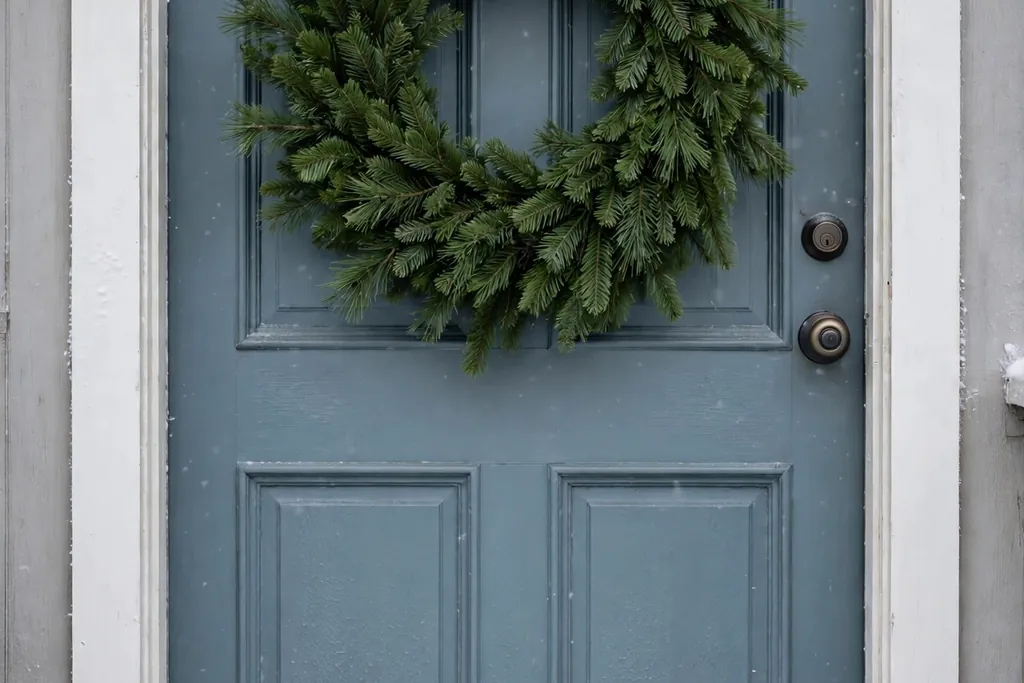
    Cedar and juniper wreath with blue green branches on a grey door

    Cedar and juniper branches make a soft, feathery wreath with blue green tones that differ from plain pine. The mix suits grey, white, and natural wood doors, and it holds up well in cold air. Add a few juniper berries for texture, and skip ribbon so the branch shapes stay visible.

    Cedar sheds small pieces as it dries, so hang it where fallen bits are easy to sweep. A covered porch slows drying and keeps the branches softer for longer. Trim any brown tips with small scissors to keep the ring looking even as the season goes on.

    11. A Dense Boxwood Wreath
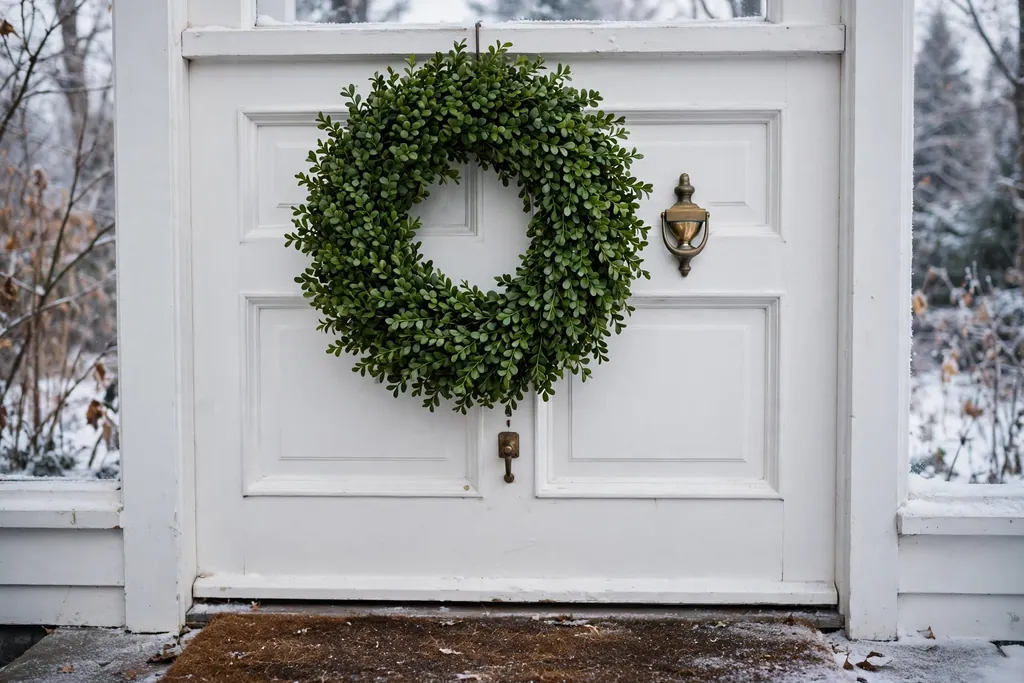
    Dense boxwood wreath with small round leaves on a white door

    A dense boxwood wreath, with small round leaves packed tightly, gives a neat, formal look for a front door, a gate, or a pair of French doors. Its even texture suits brick homes, white trim, and classic entries. Hang it without a bow for a clean shape, or add a thin cream ribbon loop.

    Boxwood wreaths, real or faux, hold their shape well and need little care. Real boxwood dries slowly and may drop leaves, so sweep the porch often. Faux boxwood suits uncovered doors, since it does not drop leaves and it keeps its color through rain and snow.

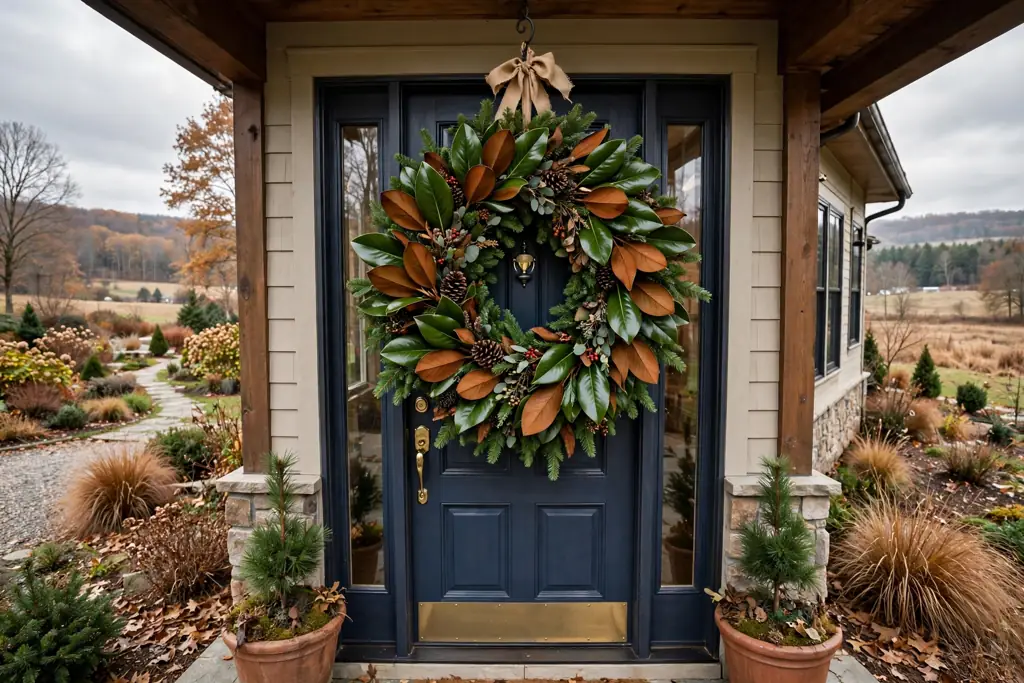
    12. A Magnolia Leaf Wreath
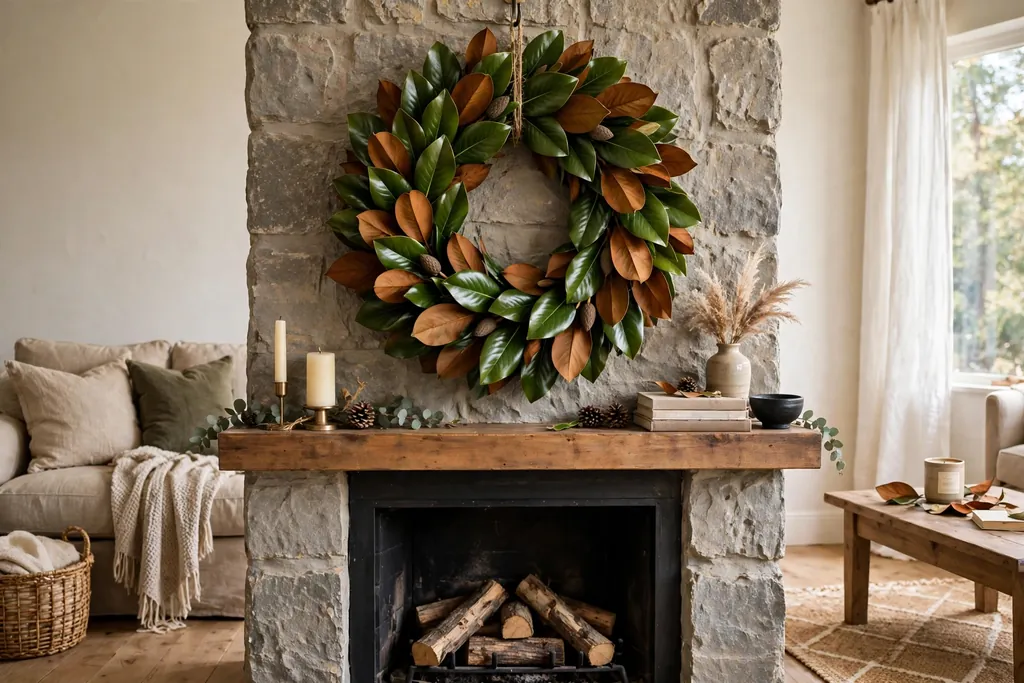
    Magnolia leaf wreath with large green and brown leaves above a mantel

    A magnolia leaf wreath uses large, glossy leaves with brown undersides, layered in a ring for a bold winter look. The mix of green and brown suits dark doors, wood entries, and rooms with leather or wood furniture. It works indoors too, where its size and shine make it a clear focal point.

    Magnolia leaves are stiff, so the wreath can be heavier than a pine wreath of the same size. Use a sturdy hook, and hang it where it will not brush against people passing by. Wipe leaves with a dry cloth to remove dust, and keep the wreath out of damp spots so the leaves do not spot.

    13. A Wool Felt Ball Wreath for Indoors
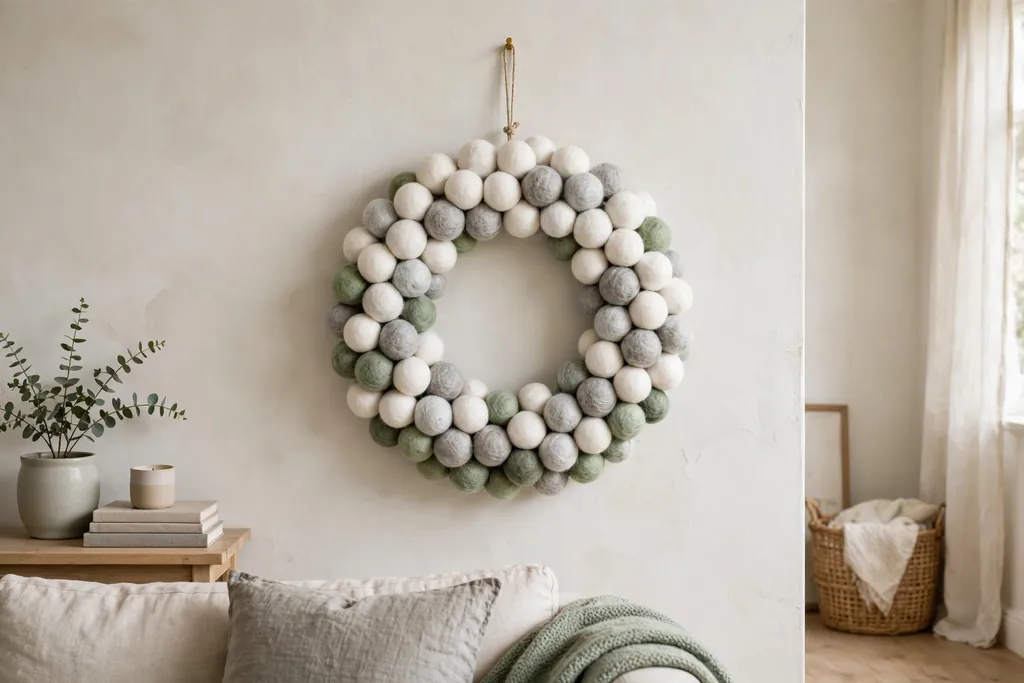
    Wool felt ball wreath in white, grey, and soft green on an indoor wall

    A wreath made from wool felt balls in white, grey, and soft green gives a warm winter look for an indoor wall, a bedroom door, or a nursery. The soft texture suits rooms where a pine wreath would drop needles, and the pale colors keep the look calm after the holidays. Choose one main color with a few accent balls for a tidy pattern.

    Felt ball wreaths are for indoor use only, since rain and snow will soak the wool. Hang them with a small nail or a removable hook, and keep them away from radiators and damp walls. Roll a lint roller over the balls now and then to pick up dust and loose fibers.

    14. A Grapevine Wreath with Pine Sprigs
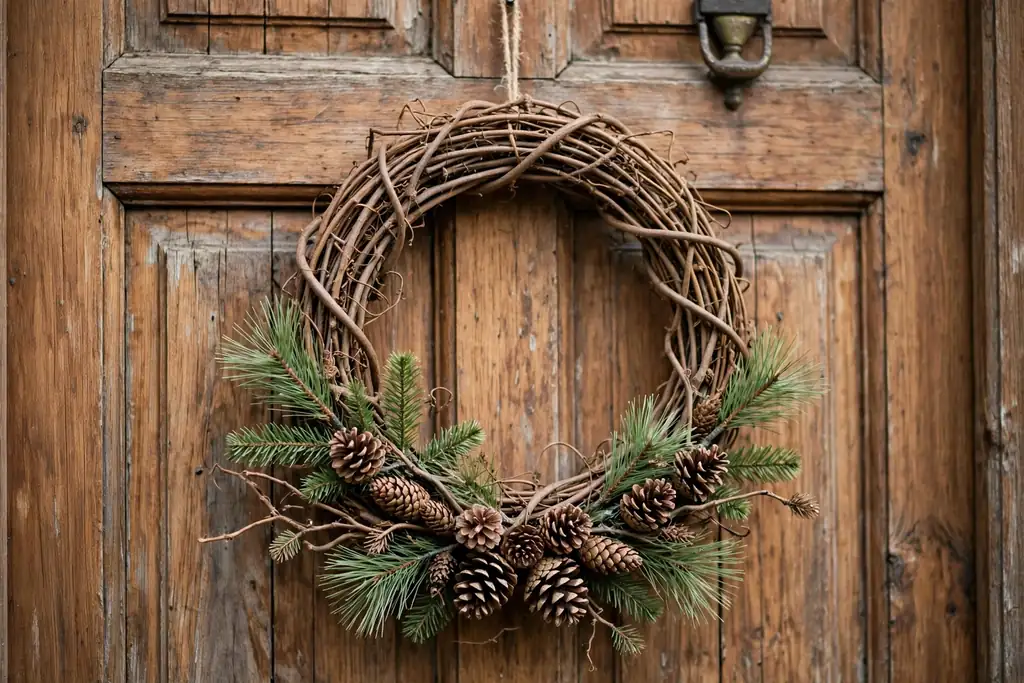
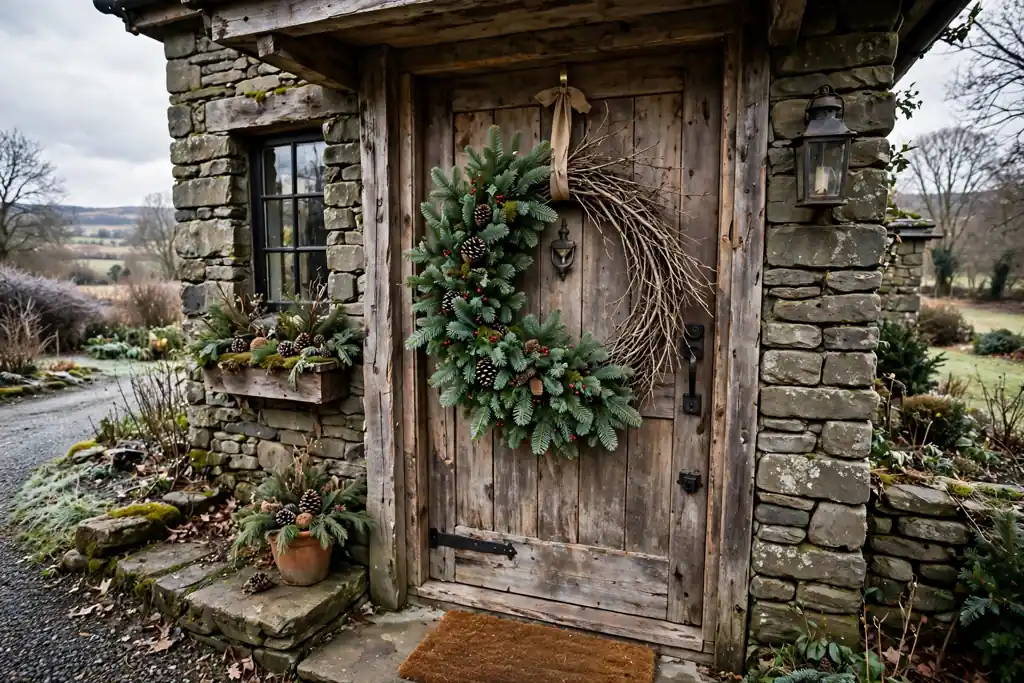
    Grapevine wreath with pine sprigs and pinecones on a wood door

    A grapevine base, with its twisted brown vines, gives a natural frame that can be refreshed through winter. Tuck short pine sprigs, a few pinecones, and a small bunch of berries into the lower half, and leave the top of the ring open. This half dressed style suits rustic and farmhouse homes.

    The open grapevine base makes it easy to swap sprigs as they dry. Pull out tired greenery and tuck in fresh sprigs without rebuilding the wreath. Wire the sprigs in place outdoors, since a loose sprig can fall in wind. Store the bare grapevine base at the end of winter for reuse next year.

    15. An Asymmetric Wreath with Greenery on One Side

    Asymmetric wreath with greenery on one side of a plain ring

    An asymmetric wreath keeps greenery on one side of the ring and leaves the other side bare, for a modern winter look. Use pine, cedar, or eucalyptus on the full side, and a plain wood or metal ring on the bare side. This style suits modern doors, white walls, and entries with simple lines.

    Balance matters with this design, so hang it with the heavy side slightly lower than the bare side, or it can look tilted. Check the hanging point after the first day, since the uneven weight can shift the ring. Keep the bare side free of ribbon so the contrast stays clear.

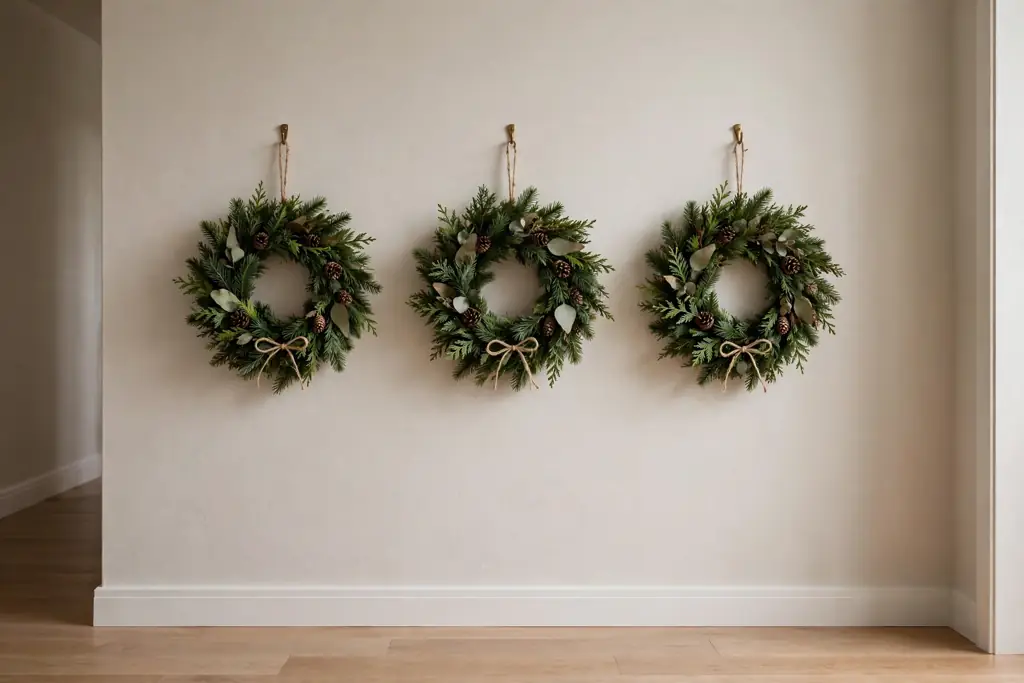
    16. A Matching Pair for Double Doors
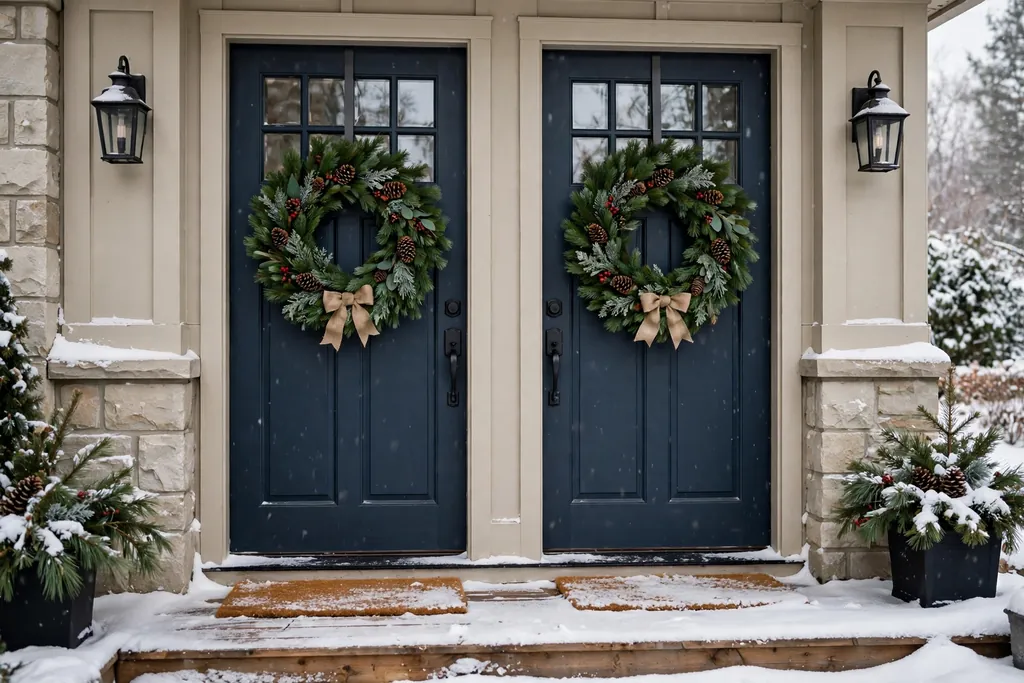
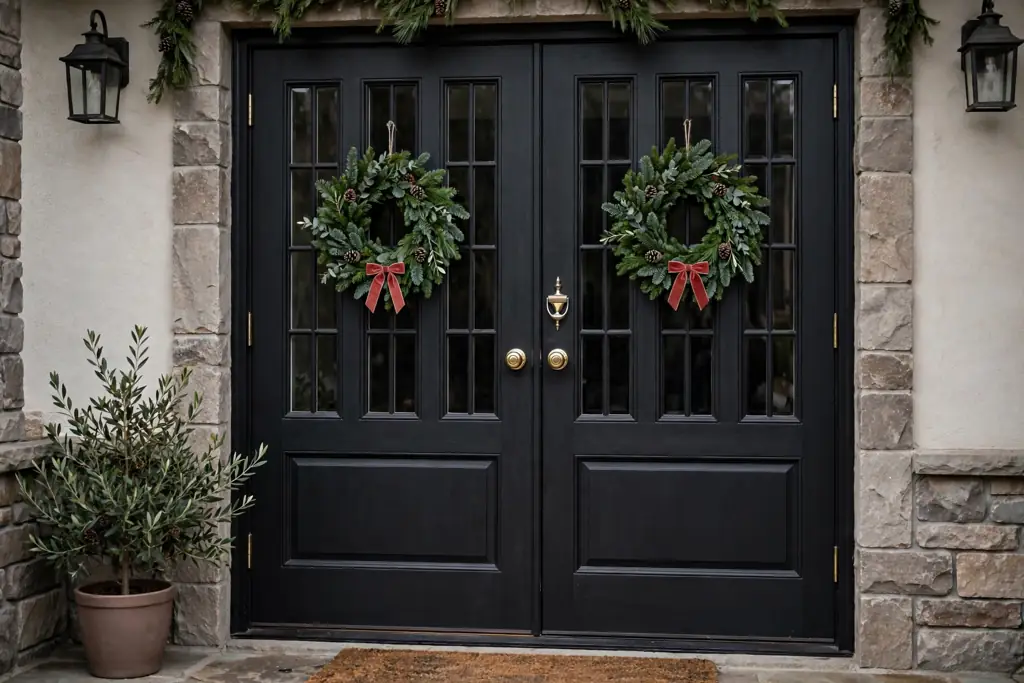
    Matching pair of pine wreaths on double front doors

    A pair of matching wreaths, one on each door of a double entry, gives a balanced winter look for wide porches. Use the same size, material, and bow on both doors, and hang them at the same height. Pine, boxwood, and magnolia all work well as pairs, since their shapes stay even.

    Measure from the top of each door to the hook so both wreaths sit level. Stand back from the street or the far end of the porch to check the height, since small differences show up from a distance. If one door is used more than the other, check its wreath often, since opening and closing can shift it.

    17. A Wreath Above the Mantel
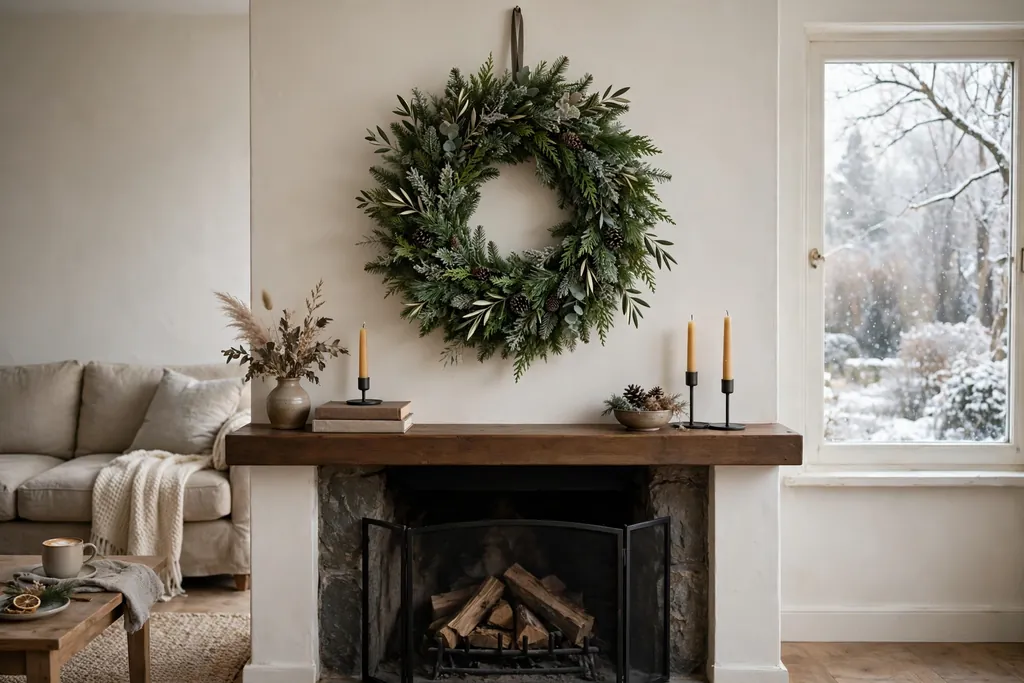
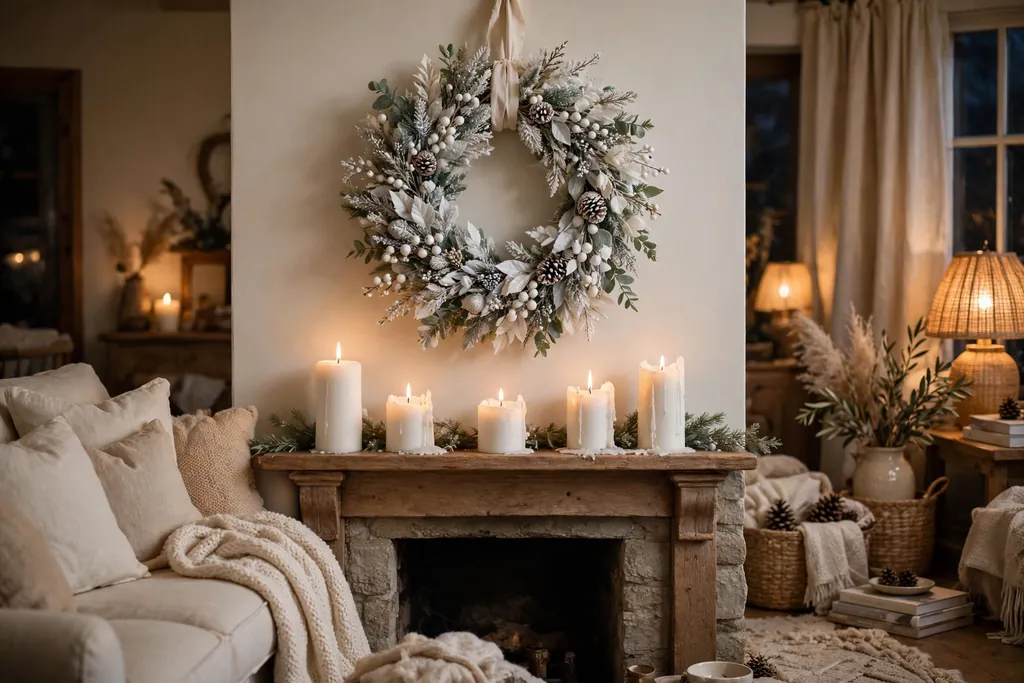
    Winter wreath centered above a fireplace mantel in a living room

    A winter wreath above the mantel keeps the fireplace wall looking finished after stockings and garlands come down. Choose a wreath that is narrower than the mantel, and hang it centered above the mantel shelf. Pine, boxwood, and twig wreaths all work here, with a simple ribbon loop or a plain hook.

    Keep the wreath clear of heat from the fire, and use battery candles on the mantel rather than open flames near dried greenery. If the mantel holds a mirror or art, hang the wreath on the wall above it only if there is enough clear space. Dust the wreath when you dust the mantel, since heat can draw dust upward.

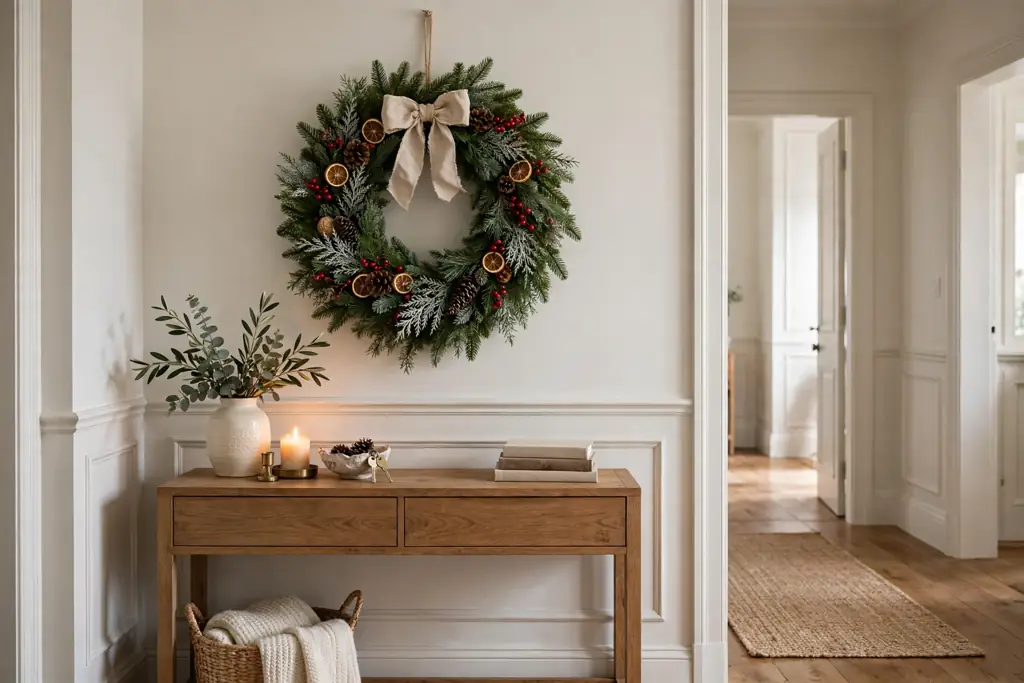
    18. A Wreath Above an Entry Console
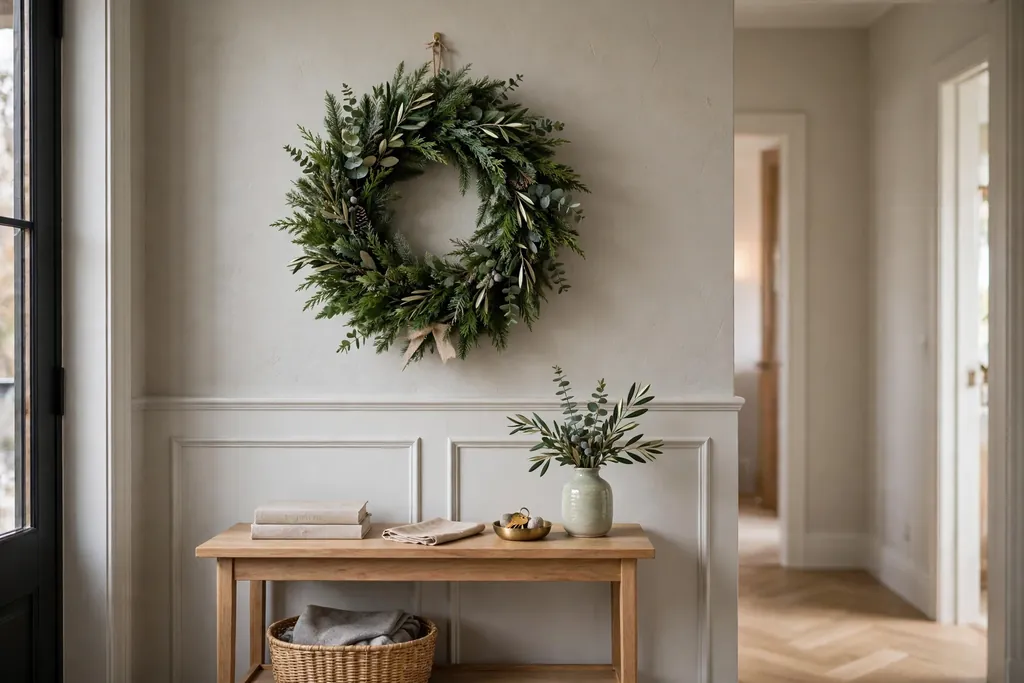
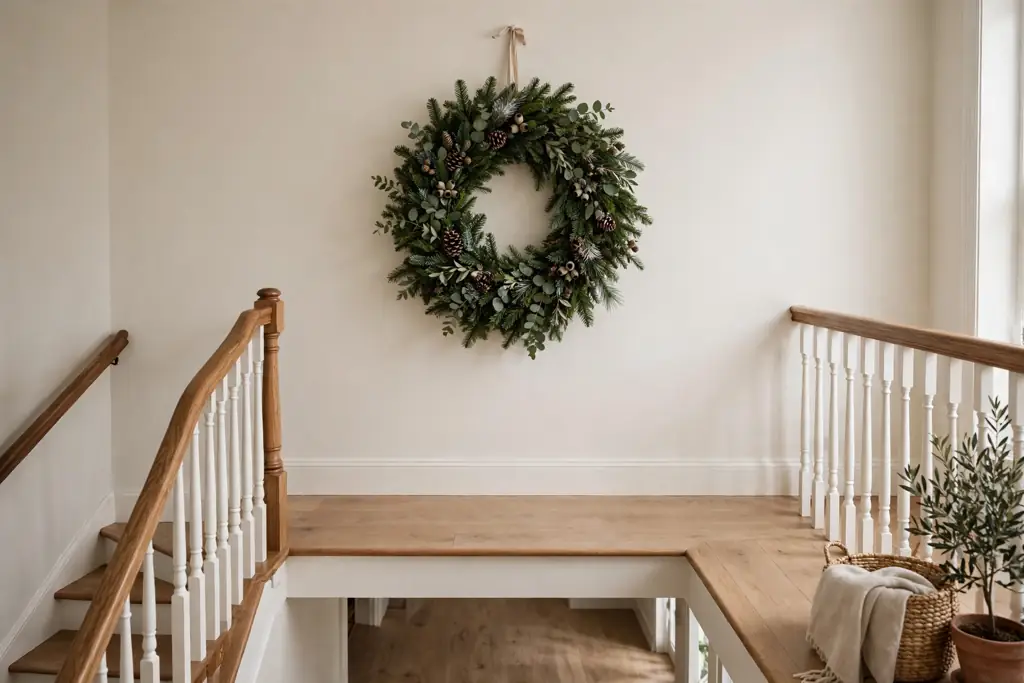
    Wreath above an entry console table in a hallway

    A wreath hung above an entry console or a hallway table gives a winter focal point indoors, without needing a door at all. Pair it with a small stack of books, a candle in a glass holder, or a plain vase, and keep the table surface simple so the wreath stands out. A medium wreath, smaller than a front door wreath, usually fits best.

    Center the wreath over the table, not over the wall as a whole, so the grouping reads as one display. Hang it high enough that it does not block a mirror or art hung nearby. If the console sits in a narrow hall, choose a flat wreath rather than a deep, full one, so passersby do not brush against it.

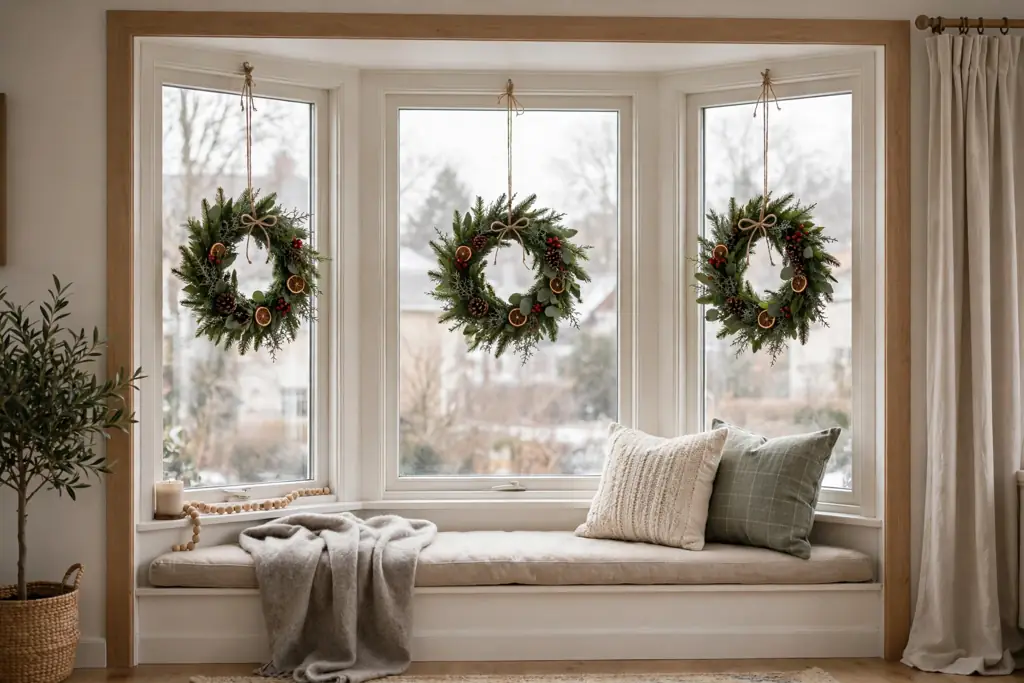
    19. A Wreath in a Window

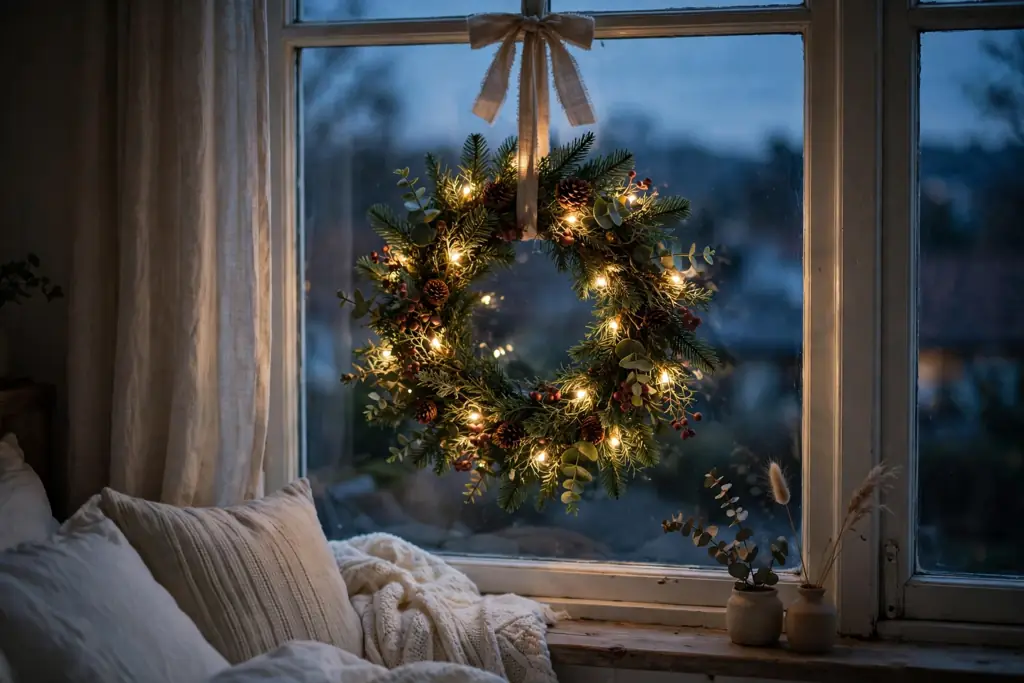
    Pine wreath hanging centered in a window in winter

    A wreath hung in a window, facing outward or inward, adds winter color to a room and to the street at the same time. Hang it from a small hook at the top of the window frame, with ribbon or clear line, so it sits centered in the glass. Pine, boxwood, and faux greenery suit windows best, since they hold up in sun and cold.

    Keep the wreath clear of curtains and blinds so it does not catch or tangle. If the window opens, hang the wreath on the fixed frame rather than on the moving sash. In sunny windows, faux greenery keeps its color longer than real greenery, which can fade on the sun side.

    Conclusion

    Winter wreaths work best after Christmas when they drop holiday only details and keep simple greenery, pinecones, berries, and neutral ribbon. Start with the spot, front door, mantel, wall, or window, then choose a material that suits the weather there and a size that fits the space. A plain pine, boxwood, or eucalyptus wreath is a safe first choice, and a second wreath indoors can carry the same palette through the house. Check hooks after storms, refresh dried sprigs when needed, and store each wreath dry so it is ready to hang again next winter.

    FAQs

    How long can I leave a winter wreath up after Christmas?

    You can leave a winter wreath up through January and into February, as long as it still looks fresh and suits the space. Remove it when greenery turns brown, berries drop heavily, or the wreath starts to look tired, and replace it with a spring wreath when the weather turns.

    What makes a wreath look like winter instead of Christmas?

    A winter wreath drops ornaments, holiday patterned ribbon, and Christmas only shapes, and keeps pine, cedar, pinecones, berries, and neutral ribbon. The change is small, but it shifts the wreath from a holiday display to a seasonal one that fits January and February.

    Which winter wreath lasts longest outdoors?

    Faux boxwood and faux pine wreaths last longest outdoors, since they do not drop needles or fade quickly in cold and wet weather. Among real wreaths, pine, cedar, and juniper hold up best in cold air, especially on a covered porch out of direct rain.

    Can I reuse my Christmas wreath as a winter wreath?

    Yes, you can reuse a Christmas wreath as a winter wreath by removing ornaments, holiday ribbon, and any Christmas only picks. Keep the greenery, pinecones, and plain berries, add a neutral bow if you want one, and hang it again for a clean winter look.

    How do I hang a wreath on a front door without damage?

    Use an over the door hanger, a removable adhesive hook rated for the weight, or a small nail in the door frame, depending on the door material. Avoid suction cups in cold weather, since they can fail, and check the hanger after wind and rain.

    How should I store a winter wreath after the season?

    Store a winter wreath hanging in a dry place, or flat in a box or bag that keeps dust off the greenery. Keep it away from damp basements and hot attics, since moisture can cause mold and heat can dry out real greenery and fade faux leaves.
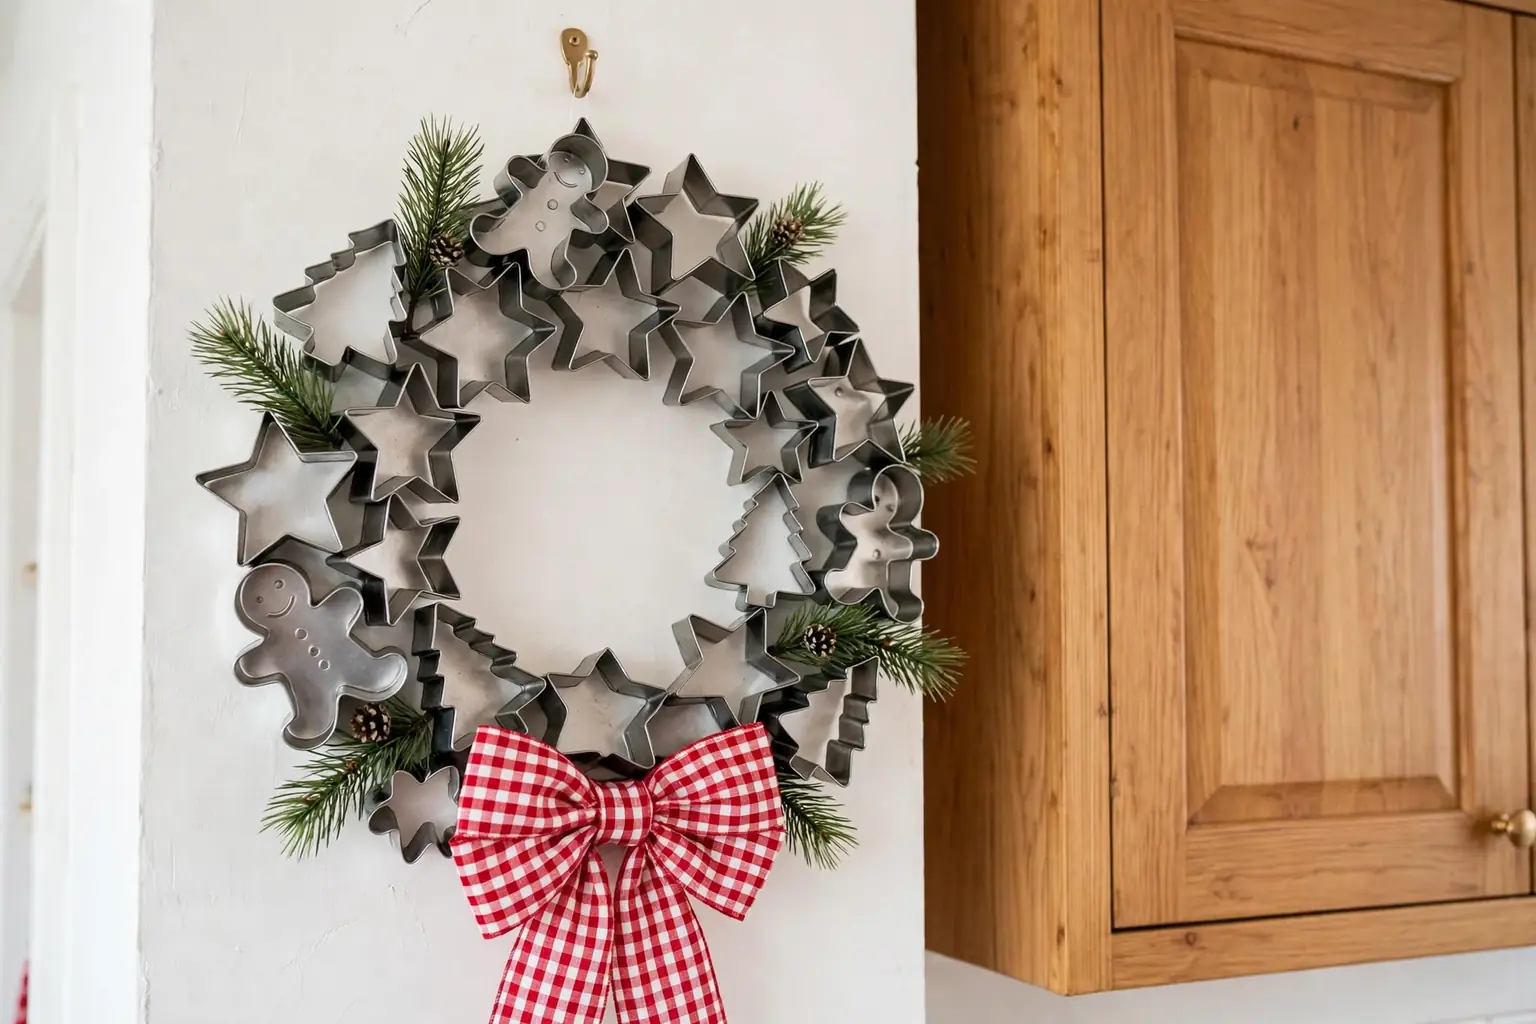

  • How to Make a Cookie Cutter Wreath for Your Kitchen

    How to Make a Cookie Cutter Wreath for Your Kitchen

    To make a cookie cutter wreath, arrange metal cookie cutters around a wire or grapevine ring, wire each cutter in place, fill gaps with small cutters and greenery, add a ribbon bow, and hang the ring with a sturdy loop. The full guide below walks through each step, from choosing cutters to storing the finished wreath.

    A cookie cutter wreath suits a kitchen because it nods to baking without taking counter space. Metal cutters in stars, trees, hearts, and gingerbread shapes read clearly from across the room, and a simple ring keeps the project light enough to hang on a wall, a door, or a pantry cabinet. Work on a table covered with newspaper or a cutting mat, and keep the wreath flat until the hanging loop goes on.

    Key Takeaways

    • Choose metal cutters in two or three sizes so the ring fills evenly, with large shapes for the main layer and small shapes for gaps.
    • Wire each cutter to the ring rather than relying on glue alone, so the wreath holds its shape when hung.
    • Test the full layout flat on a table before attaching anything, and step back to check balance and spacing.
    • Add greenery and ribbon after the cutters are fixed, so the soft details fill gaps instead of hiding the shapes.
    • Keep the wreath away from stove heat and steam, and hang it with a loop rated for its weight.
    • Set aside the crafting cutters from baking cutters once glue, paint, or wire touches them.

    What You Will Need

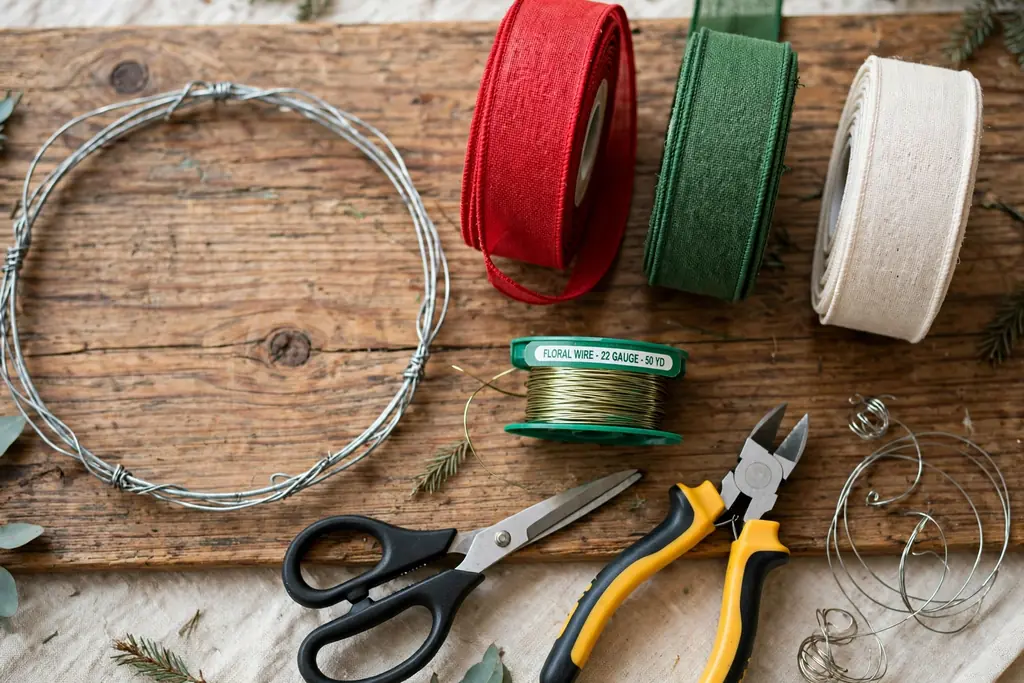
    • 12 to 18 metal cookie cutters in mixed shapes and sizes
    • A wire wreath frame or a grapevine wreath ring, about 12 to 14 inches across
    • Floral wire or thin craft wire, plus wire cutters and pliers
    • Faux greenery sprigs, such as pine, eucalyptus, or boxwood
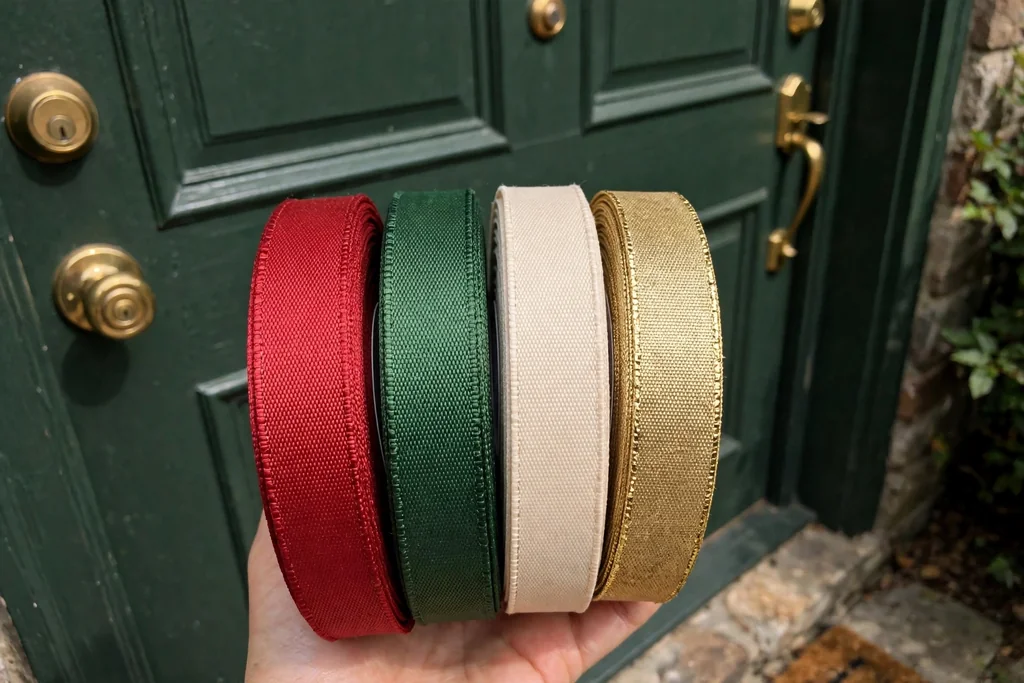
    • Ribbon for a bow and a hanging loop, about 1 to 2 inches wide
    • Small seasonal accents, such as wood beads, dried orange slices, or small bells (optional)
    • A hot glue gun and glue sticks, for small accents only
    • Scissors, a ruler or tape measure, and a pencil for marking placement

    1. Choose a Theme and Pick Your Cutters

    Metal cookie cutters in star, tree, and gingerbread shapes sorted by size on a table.

    Start with a theme, since it decides which cutters to buy or pull from the drawer. A Christmas theme calls for trees, stars, candy canes, and gingerbread people, while a year round baking theme suits hearts, whisks, rolling pins, and houses. Pick one theme and stick to it, so the wreath reads as one idea rather than a random collection.

    Lay the cutters out and sort them by size. Aim for four to six large cutters for the main ring, six to eight medium cutters to sit between them, and four to six small cutters for gaps. Metal cutters work best for this project, since they hold their shape, take wire well, and catch light in a kitchen. Skip plastic cutters if you can, as they bend and glue poorly.

    2. Clean, Dry, and Inspect Each Cutter

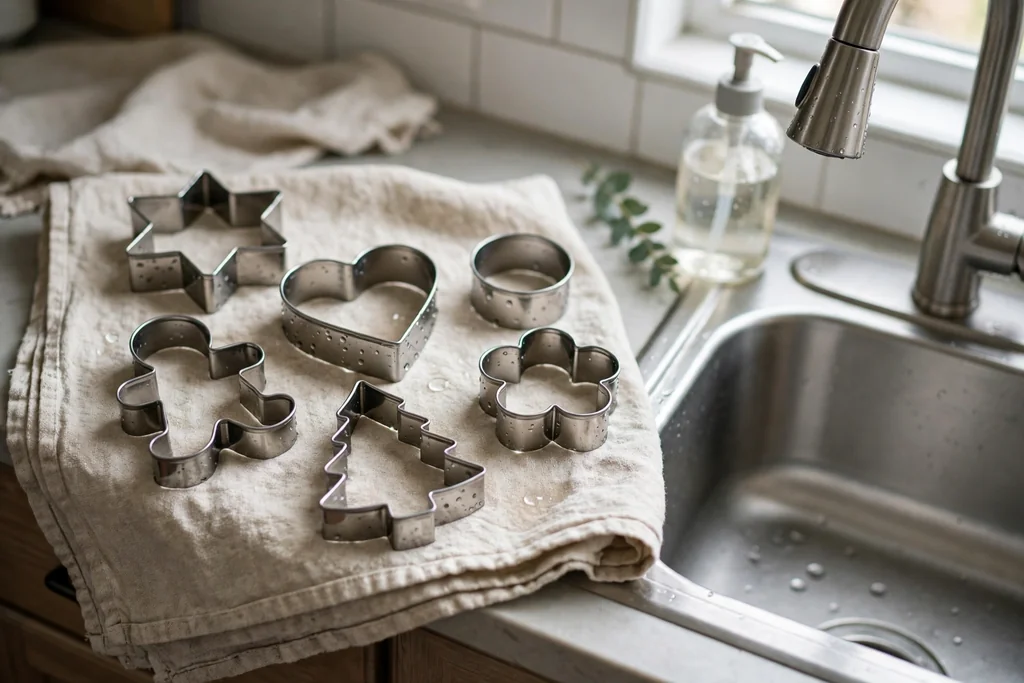
    Clean metal cookie cutters drying on a towel beside a kitchen sink.

    Wash the cutters in warm soapy water, rinse them, and dry them fully with a towel before you start. This removes flour dust, storage grime, and any sticky residue, and it gives wire and glue a clean surface to grip. Let the cutters air dry for a few minutes after toweling, so no damp spots hide inside rolled edges or joints.

    Inspect each cutter as you dry it. Check that the cutting edge is even, the shape is not bent, and any handle or joint feels firm. Straighten a bent cutter gently by hand, and set aside any cutter with a sharp broken edge or loose joint. A quick inspection now avoids a wobbly cutter that shifts after the wreath is hung.

    3. Lay Out the Ring and Test the Arrangement

    Wire wreath ring on a table with large cookie cutters laid out in a test arrangement.

    Place the wreath ring flat on the table and set the large cutters around it, evenly spaced, with each cutter overlapping the ring. Turn some cutters at slight angles so the ring does not look like a row of identical shapes. Leave a small gap between neighbors at this stage, since medium cutters and greenery will fill those spaces later.

    Step back and look at the ring from a few feet away, which is how it will be seen on a wall. Check that no side looks heavier than the rest and that the shapes vary around the ring. Move cutters until the ring feels balanced, and mark the planned spot of each large cutter lightly with a pencil dot on the ring or a quick phone photo for reference.

    4. Prepare the Base Ring

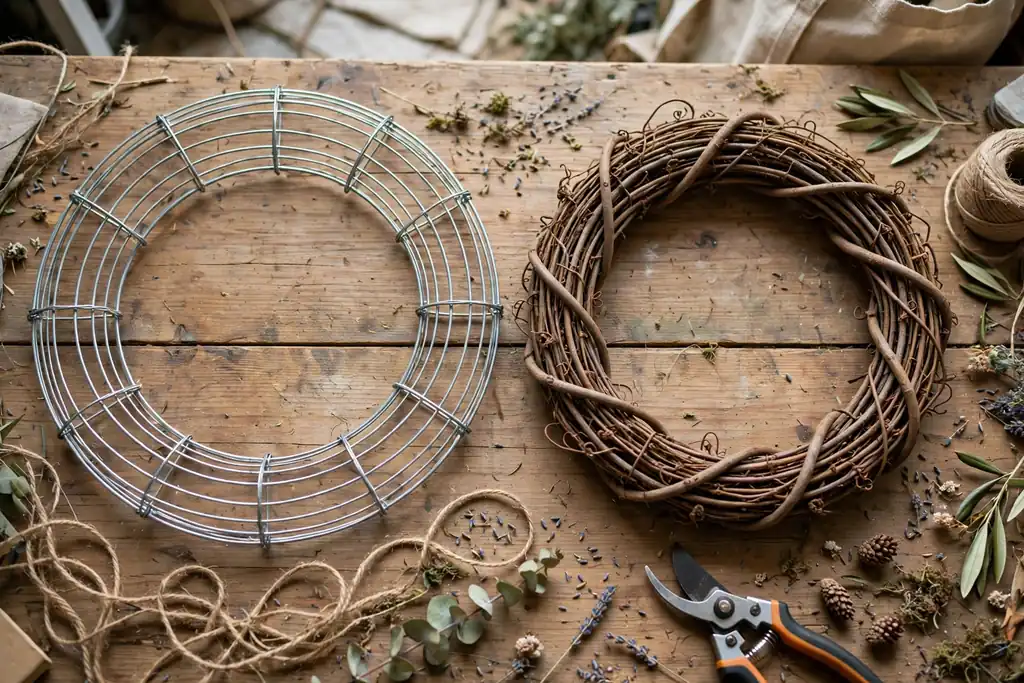
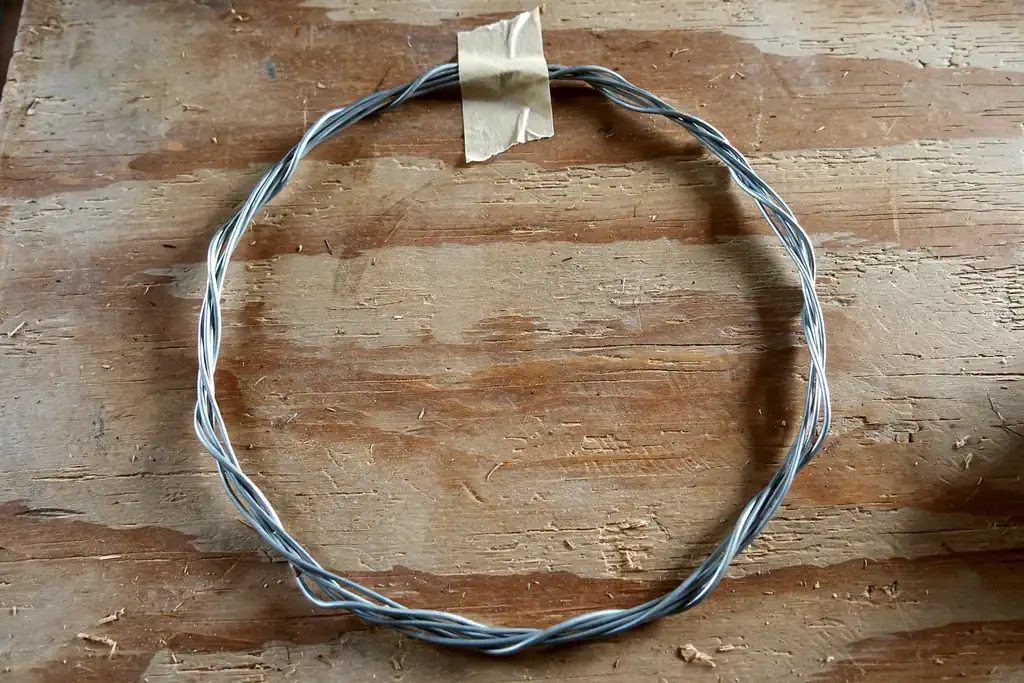
    Wire wreath frame and grapevine ring side by side on a work table.

    If you use a wire frame, check that the frame is round and the wires are firm, and bend any warped section back into shape by hand. A wire frame suits a neat, flat wreath and lets you wire cutters on from the front or back. If you use a grapevine ring, shake off loose twigs and trim any long stray vine with scissors, so the ring sits flat against a wall.

    Decide which side of the ring will face the room, and keep that side up for the whole build. For a grapevine ring, the fuller side usually faces out, while the flatter side rests against the wall. A quick pass with a dry cloth removes dust from the ring before you attach anything.

    5. Attach the First Layer of Cutters

    Hands wiring a metal star cookie cutter to a wreath ring with floral wire.

    Start with the large cutters, working around the ring in order. Hold a cutter against the ring, thread a short length of floral wire through or around the cutter, and twist the wire ends tightly around the ring at the back. Use pliers to press the twisted ends flat, so nothing snags a wall or a hand when the wreath hangs.

    Attach one cutter, then move to the opposite side of the ring before filling in the rest, which keeps the ring balanced as weight builds up. After each cutter, press it flat and check that it does not rock. If a cutter wobbles, add a second wire tie at another point on the cutter, since two anchor points hold far better than one.

    6. Fill Gaps with Medium and Small Cutters

    Wreath ring partly covered with large and small metal cookie cutters.

    Once the large cutters are fixed, add the medium cutters in the gaps between them, overlapping the edges of neighbors slightly so the ring looks full. Wire each one the same way, with the twist at the back of the ring, and keep the cutter faces pointing forward. Vary the shapes in each gap, so no two matching cutters sit side by side.

    Finish with the small cutters, tucking them into any remaining holes, especially near the top and bottom of the ring where gaps show most. Small stars, hearts, and circles work well here, since they read as detail rather than new focal points. Step back again and check that the ring looks covered from a distance, with no bare ring showing through in large patches.

    7. Add Greenery Between the Cutters

    Faux pine sprigs tucked between metal cookie cutters on a wreath ring.

    Cut faux greenery sprigs into short pieces, about 4 to 6 inches long, and tuck them behind and between the cutters. Pine suits a Christmas wreath, while eucalyptus or boxwood suits a year round kitchen wreath. Push each sprig under a wired cutter or wire it to the ring, so it stays put when the wreath moves.

    Keep the greenery low and close to the ring, so the cutter shapes stay the stars of the wreath. A few sprigs peeking out between cutters add color and soften the metal, while too much greenery hides the shapes you just arranged. Trim any sprig that sticks out far past the outer edge, unless you want a fuller, wilder outline.

    8. Weave in Ribbon and Make a Bow

    Red gingham bow tied onto the bottom of a cookie cutter wreath.

    Choose a ribbon that matches the theme, such as red gingham for Christmas or plain linen for a year round kitchen look. Weave a length of ribbon loosely through the cutters near the bottom of the ring, or wrap it once around the ring between two cutters, and secure the ends at the back with wire. The ribbon should read as an accent, not a wrap that covers the cutters.

    Make a simple bow from a separate length of ribbon, with two loops and two tails, and wire it to the bottom center of the ring or slightly off center. Trim the tails at an angle for a neat finish, and fluff the loops so the bow holds its shape. If the bow flops forward, add a small wire tie from the bow center to the ring to hold it upright.

    9. Add Small Seasonal Accents

    Wood beads, small bells, and dried orange slices arranged beside a cookie cutter wreath.

    Add accents sparingly, one type at a time, so the wreath stays about cutters rather than clutter. Wood beads threaded on wire, small bells, dried orange slices, or tiny pinecones all suit a cookie cutter wreath. Place accents in small groups of two or three, tucked beside greenery or at the base of the bow, rather than scattered evenly around the ring.

    Use a hot glue gun only for light accents, and press each piece in place until the glue sets. Never glue a main cutter in place of wiring it, since glue alone can fail under the weight of metal. Keep accents away from the hanging loop area at the top, where extra bulk can tilt the wreath forward.

    10. Check Balance, Spacing, and Stability

    Person holding a cookie cutter wreath upright to check balance and spacing.

    Hold the wreath upright by the top of the ring and look at it straight on. Check that the cutters sit flat, the greenery does not droop, and the bow stays centered where you placed it. Turn the wreath slowly and listen for rattles, which point to a loose cutter that needs a second wire tie.

    Lay the wreath flat again and press each cutter, sprig, and accent gently to confirm it is fixed. Fix any wobble now, since a loose piece will only loosen further once the wreath hangs. Also check the back of the ring: trim wire ends, press twists flat, and remove any glue strings, so the back sits cleanly against a wall or door.

    11. Add a Strong Hanging Loop

    Ribbon hanging loop threaded through the top of a cookie cutter wreath.

    Thread a sturdy ribbon or wire loop through the top of the ring, and secure it with a tight knot or a wire twist at the back. The loop should be long enough to hang over a hook or nail, usually 4 to 6 inches of visible loop above the ring, but short enough that the wreath does not swing far from the wall. Test the loop by lifting the wreath from it and holding it up for a few seconds.

    Weigh the finished wreath in your hands to judge the hook you need. A metal cutter wreath is heavier than a greenery wreath, so use a hook or nail rated for the weight, and avoid adhesive hooks unless they are rated for that load. If the wreath tilts forward when hung from the loop, move the loop slightly or add a small pad behind the bottom of the ring.

    12. Hang and Adjust the Wreath

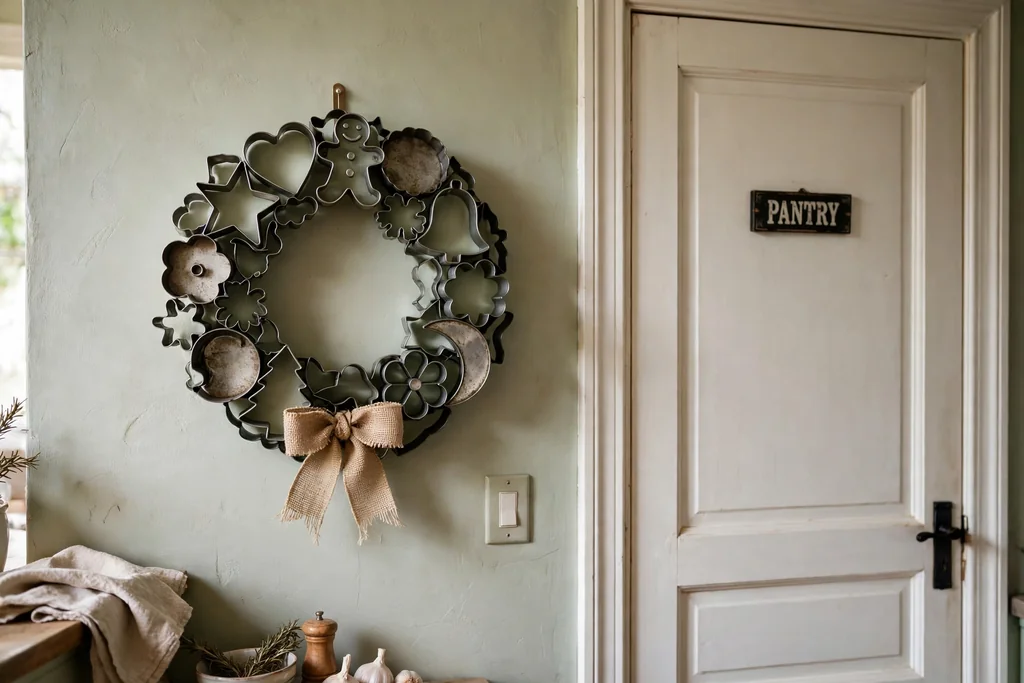
    Cookie cutter wreath hanging on a kitchen wall beside a pantry door.

    Choose a spot away from direct stove heat, steam, and splashes, such as a wall beside the table, a pantry door, or the side of a cabinet. A kitchen wall at eye level shows the cutter shapes best, while a door needs a wreath flat enough to clear the frame when it opens. Hang the wreath, step back, and check it from the table and from the doorway.

    Adjust the tilt by shifting the loop or adding a small felt pad behind the bottom edge, so the wreath hangs straight rather than leaning forward. Straighten the bow, fluff any flattened greenery, and turn any cutter that twisted during hanging. Leave the wreath in place for a day, then check once more that the hook holds and nothing has slipped.

    13. Keep the Wreath Clean and Safe in the Kitchen

    Hand dusting a cookie cutter wreath on a kitchen wall with a dry cloth.

    Dust the wreath every few weeks with a dry cloth or a soft brush, working around the cutters and greenery. Wipe metal cutters with a dry cloth only, since water can dull the finish and damp greenery can hold kitchen grease. Keep the wreath clear of the stove, the kettle steam path, and any open flame, and never hang it above a burner.

    If the kitchen gets steamy during cooking, move the wreath to a drier wall or take it down during heavy cooking sessions. Check the hanging loop and wire ties once a season, and tighten anything that feels loose. Keep the wreath out of reach of small children, since metal edges and small bells can be a hazard if pulled down.

    14. Store the Wreath for Next Season

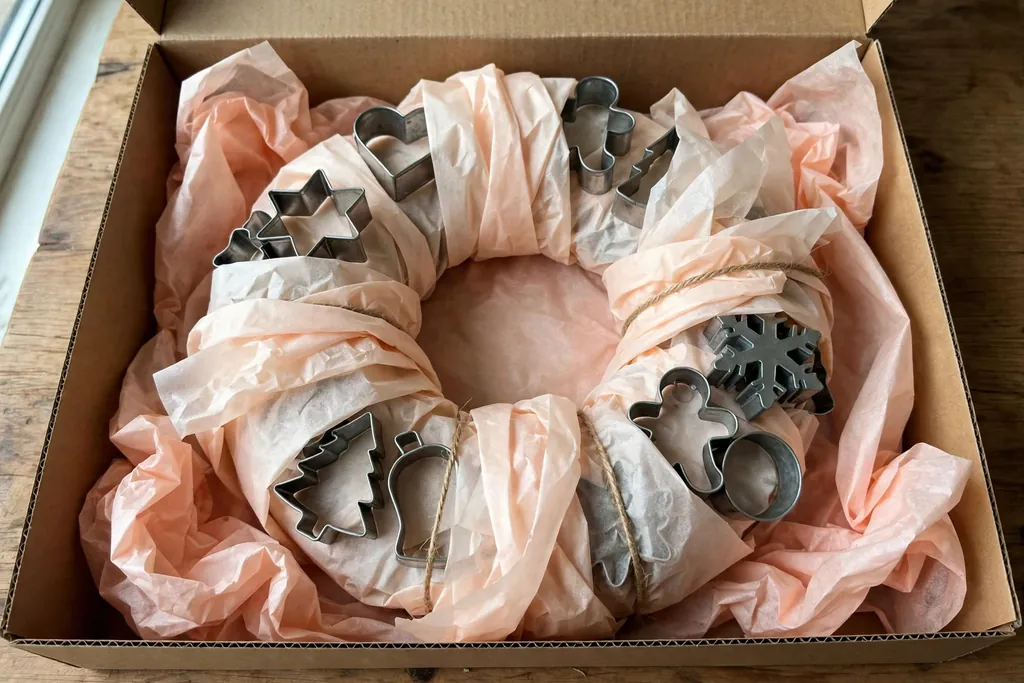
    Cookie cutter wreath wrapped in tissue paper inside a flat storage box.

    When the season ends, or when you want a change, take the wreath down and brush off dust before packing it. Wrap the wreath in tissue paper, lay it flat in a box slightly larger than the ring, and fill gaps with crumpled tissue so cutters do not press against each other. Store the box flat, not on edge, so the ring keeps its shape.

    Label the box with the theme and the year, and store it in a dry spot away from heat and damp. Do not stack heavy boxes on top of the wreath box, since the weight can bend cutters and flatten the bow. Next season, unwrap the wreath, fluff the greenery and bow, tighten any loose ties, and hang it again.

    Conclusion

    A cookie cutter wreath is a simple kitchen project that rewards a little planning: pick a theme, lay out the cutters before fixing them, wire each one firmly, and finish with greenery, ribbon, and a strong loop. The steps above keep the wreath balanced, safe to hang, and easy to store, so it can come back season after season. Start with the cutters you already own, build the ring flat on the table, and hang it where the shapes show best, away from stove heat. For more seasonal kitchen styling, see the fall kitchen decor ideas on Dwell Ovell, and browse the home page for more room by room guides.

    FAQs

    What kind of cookie cutters work best for a wreath?

    Metal cookie cutters work best for a wreath, since they hold their shape, wire neatly to a ring, and catch light in a kitchen. Choose a mix of large, medium, and small cutters in one theme, and avoid thin plastic cutters, which bend and glue poorly. Check each cutter for bent edges before you start, and straighten them gently by hand.

    What size wreath ring should I use for a cookie cutter wreath?

    Use a wire or grapevine ring about 12 to 14 inches across for a standard kitchen wreath, since that size fits a wall or pantry door and holds 12 to 18 cutters without crowding. A smaller ring suits a cabinet door, while a larger ring needs more cutters and a stronger hook to hold the extra weight. Measure the hanging spot before choosing the ring, so the wreath fits with room around it.

    How do I attach cookie cutters to a wreath ring?

    Attach cookie cutters with floral or craft wire, threading the wire through or around each cutter and twisting it tightly around the ring at the back. Use two wire ties for large or heavy cutters, and press the twisted ends flat with pliers. Wire holds metal cutters far better than glue alone, which can fail under their weight once the wreath hangs.

    Can I use the cookie cutters for baking after making a wreath?

    Do not use cutters for baking once glue, paint, or wire has touched them, since residues and rough edges can end up in food. Keep one set of cutters for crafting and a separate set for baking, and label the crafting set if the two sets look alike. If a cutter was only wired and never glued or painted, wash and dry it fully before any food use, and check it for sharp spots first.

    Where should I hang a cookie cutter wreath in the kitchen?

    Hang a cookie cutter wreath on a wall beside the table, a pantry door, or the side of a cabinet, at eye level where the shapes show clearly. Keep it away from stove heat, kettle steam, and splashes, and make sure a door wreath is flat enough to clear the frame. Use a hook or nail rated for the wreath weight, since metal cutters make it heavier than a greenery wreath.

    How do I store a cookie cutter wreath?

    Store a cookie cutter wreath flat in a box slightly larger than the ring, wrapped in tissue paper with crumpled tissue filling the gaps between cutters. Label the box with the theme, keep it in a dry spot away from heat and damp, and do not stack heavy boxes on top. Before hanging it again, fluff the greenery and bow and tighten any loose wire ties.

  • How to Make Burlap Garland for Rustic Holiday Decor

    How to Make Burlap Garland for Rustic Holiday Decor

    To make burlap garland, gather loops of wired burlap ribbon along a sturdy cord, securing each loop with wire or twine so the garland holds a full, ruffled shape. Add greenery, pinecones, and lights if you like, then hang the finished garland on a mantel, stair rail, or doorway. The steps below cover measuring, looping, decorating, and hanging.

    Burlap garland suits rustic holiday decorating because the coarse woven texture pairs well with pine, wood, and simple ornaments, and the material holds a shape once it is looped and wired. You can make a plain garland in an afternoon with a roll of burlap ribbon, cord, and wire, then dress it up or keep it simple. For more seasonal styling ideas, visit the Dwell Ovell home page.

    Key Takeaways

    • Wired burlap ribbon holds loops and ruffles far better than unwired burlap, so choose wired ribbon when you want a full garland.
    • Measure the mantel, rail, or doorway first, then add extra length for swags and draping so the garland does not end up short.
    • Work in steady sections, securing each loop before moving on, so the garland keeps even fullness from end to end.
    • Add greenery, pinecones, and lights after the burlap base is finished, so decorations sit on top of the loops rather than getting buried in them.
    • Hang the garland with hooks or ties that suit the surface, and test the drape before fixing the final positions.
    • Store the garland loosely coiled in a dry box so the loops keep their shape for next year.

    Materials and Tools

    Materials:

    • Wired burlap ribbon, about 5 to 6 inches wide, in natural tan or a holiday color
    • Sturdy cord, jute twine, or thin rope for the garland base
    • Floral wire or thin craft wire for securing loops and decorations
    • Faux or fresh greenery sprigs, such as pine or cedar, if you plan to decorate the garland
    • Pinecones, berries, small ornaments, or wood beads for decoration
    • Battery fairy lights, if you plan to add lights
    • Ribbon or twine for tying the ends and hanging loops

    Tools and supplies:

    • Sharp fabric scissors
    • Wire cutters
    • Measuring tape
    • A flat work surface or table
    • Command hooks, mantel hooks, or zip ties for hanging, chosen to suit your surface
    • A lighter or fray sealant for sealing cut burlap edges, used with care

    1. Choose Your Burlap and Garland Style

    Rolls of wired burlap ribbon in natural tan, red, and cream arranged on a table with pine sprigs.

    Start by deciding the look you want, since that choice sets which burlap to buy. Natural tan burlap gives a classic rustic look and pairs with pine, red berries, and wood ornaments. Colored burlap, such as red, green, or cream, suits a more themed display, while a burlap ribbon with a printed pattern adds detail without extra decorations.

    Choose wired burlap ribbon when you want loops that hold their shape. The thin wire sewn into each edge lets you bend and fluff each loop, and the garland will keep its fullness once hung. Unwired burlap works for a flatter, draped garland, but it needs more securing to keep from going limp. Pick a ribbon width of about 5 to 6 inches for a mantel or stair garland, since narrower ribbon can look thin over a long span and wider ribbon can be hard to loop neatly.

    2. Gather Materials and Tools

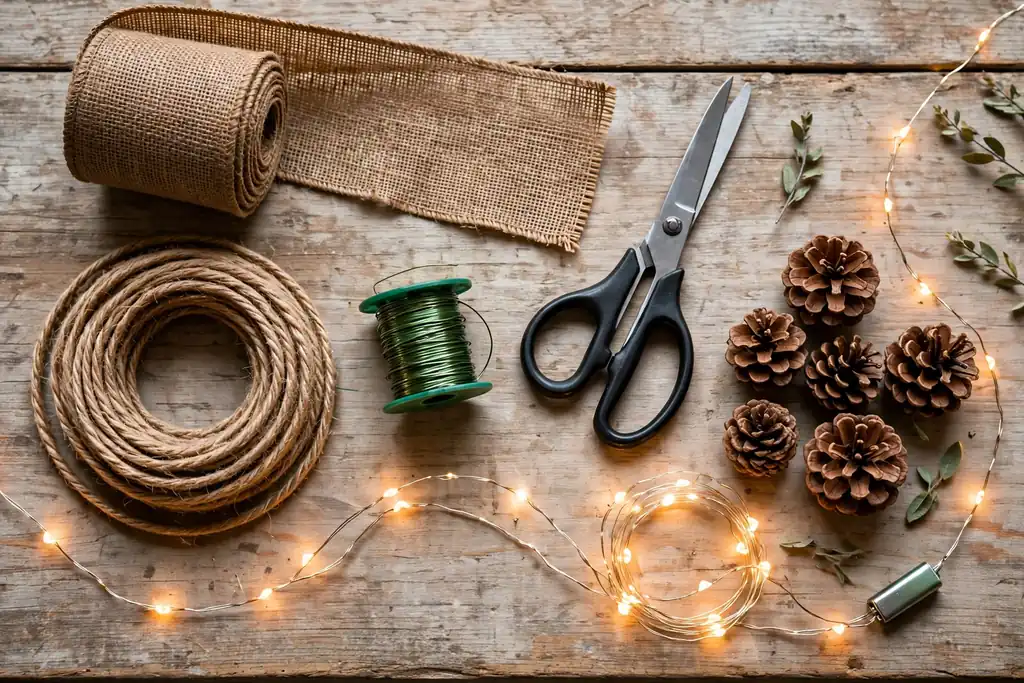
    Burlap ribbon, cord, floral wire, scissors, pinecones, and fairy lights laid out on a work table.

    Lay out everything from the materials list before you start looping, so you do not have to stop halfway to find wire or scissors. Unroll the burlap ribbon and check that you have enough for the full length you planned, plus a little extra for the ends. Cut several short lengths of floral wire in advance, since you will reach for them often while securing loops.

    Keep a small bin or tray nearby for offcuts and wire ends, because burlap sheds fibers and wire snippings scatter easily. If you plan to add greenery or lights, set those aside in a separate pile so they stay clean and untangled until the burlap base is done. Working with everything at hand keeps the looping rhythm steady and helps the garland stay even.

    3. Measure the Space and Plan the Length

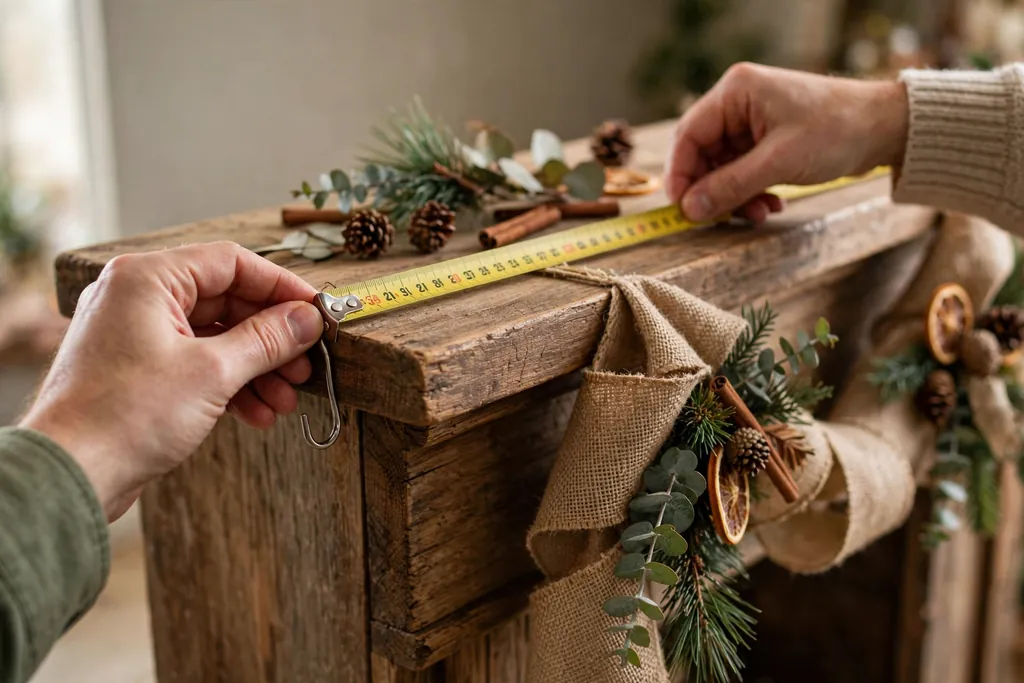
    Hands measuring a wood mantel with a measuring tape, with a burlap garland draped nearby.

    Measure the mantel, stair rail, doorway, or tree where the garland will hang, using a measuring tape along the path the garland will follow, not just straight across. For a swagged mantel garland, add about one third extra to the straight width so the garland can dip in the middle and still reach both ends. For a stair rail, measure along the slope of the rail and add extra for each swag between balusters.

    Write the planned length down before you cut anything, and mark where the garland will start and end. If the garland will wrap a tree, measure around the tree at the widest point and plan for several wraps, spacing each wrap a few inches apart as it spirals upward. Planning the length first avoids the most common mistake with this project, which is a garland that ends a foot short of the corner.

    4. Cut the Burlap to Size

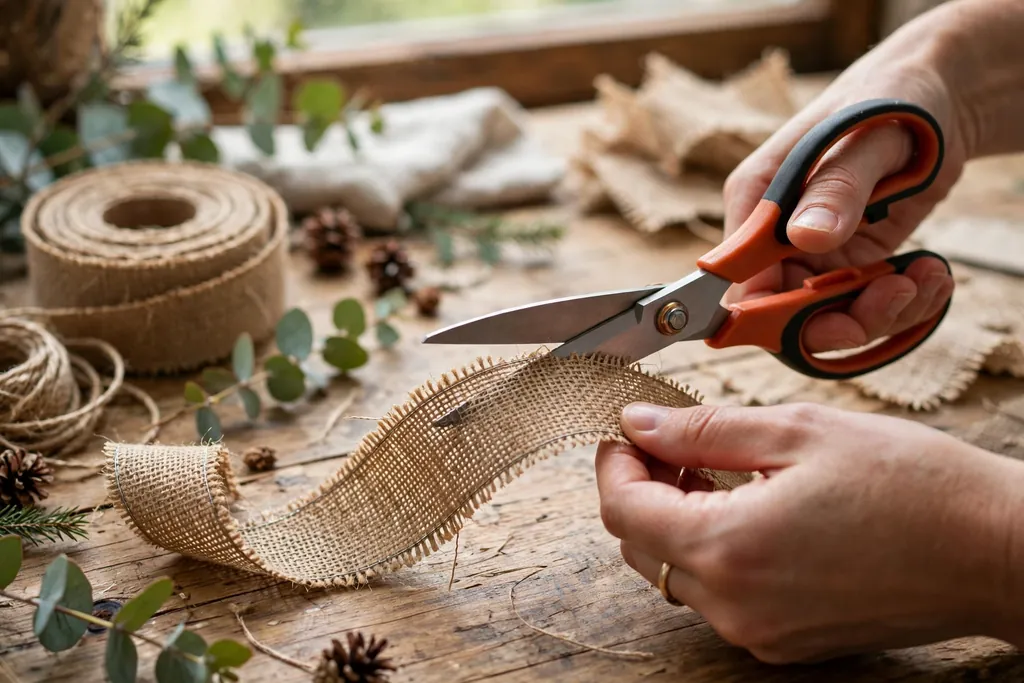
    Hands cutting wired burlap ribbon with fabric scissors on a work table.

    Cut the burlap ribbon to the planned length, adding about 12 inches extra at each end for finishing and hanging loops. Use sharp fabric scissors and cut along a single thread line where possible, since burlap cuts more cleanly when you follow the weave. If you are working from a wide bolt of burlap cloth instead of ribbon, cut strips about 5 to 6 inches wide, pulling a thread to mark a straight line before cutting.

    Seal the cut ends lightly to slow fraying, either with a small amount of fray sealant or by passing a flame briefly near the edge with care, keeping the flame away from loose fibers and working over a safe surface. Fold each raw end under by about an inch and press it flat, so the finished ends look neat once they are tied off. Set the cut ribbon aside, keeping it rolled loosely so it does not crease before you start looping.

    5. Set Up the Base Cord

    A length of jute cord laid straight on a table with a small loop tied at one end.

    Cut a length of sturdy cord, jute twine, or thin rope to match the planned garland length, plus about 12 inches extra at each end for hanging loops. The cord is the backbone of the garland, so choose one strong enough to carry the weight of the burlap plus any greenery and ornaments. Lay the cord straight along your work surface and tape or pin one end down so it does not slide while you work.

    Tie a small loop at each end of the cord now, since these loops will serve as hanging points later and are harder to add once the burlap is in place. Keep the cord taut but not stretched as you work, and mark the middle point with a small piece of tape, so you can check that your looping stays centered. A steady base cord is what keeps a long garland from sagging unevenly once it is hung.

    6. Form and Secure the First Loop

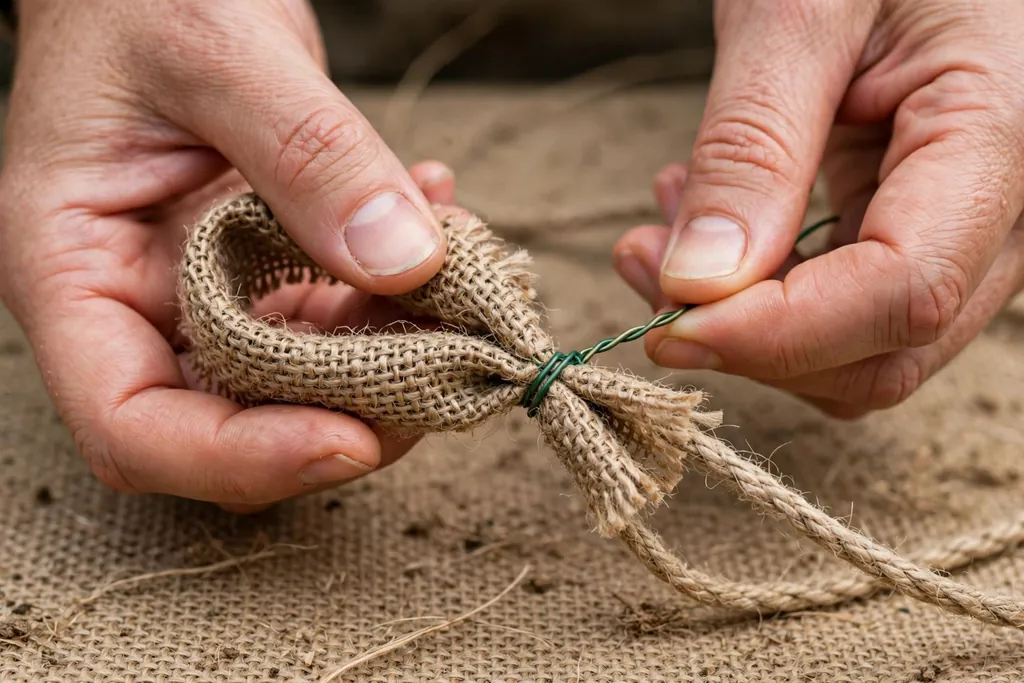
    Hands forming the first burlap loop around a cord and securing it with floral wire.

    Start about 12 inches from one end of the cord, leaving that section bare for the finishing loop. Gather a section of burlap ribbon about 8 to 10 inches long, pinch it together at the cord, and fold it into a loop that stands up from the cord. The loop should be roughly 4 to 5 inches tall, with the burlap edges fanning out slightly so the loop looks full rather than flat.

    Wrap a short length of floral wire tightly around the pinched base of the loop and the cord together, twisting the wire ends at the back so they do not show from the front. Tug the loop gently to check that it holds, then fluff the burlap edges outward with your fingers. This first loop sets the size and fullness for the whole garland, so take a moment to get it right before moving on.

    7. Work Loops Along the Cord

    A row of even burlap loops wired along a cord on a work table, half finished.

    Continue down the cord, forming one loop after another in the same way, spacing each new loop about 2 to 3 inches from the last. Keep each loop about the same height and fullness as the first, pinching the burlap at the cord and wiring it in place before forming the next. Working in order from one end to the other keeps the garland even, since jumping around makes it harder to judge spacing.

    After every few feet, step back and look along the garland to check for thin spots or loops that sit much taller than their neighbors. Push loops gently toward each other where gaps show, and pull a flat loop outward to match the rest. A steady rhythm matters more than speed here, and a garland looped in even sections will hang with a smooth, full line.

    8. Check Fullness and Even Out the Spacing

    Hands fluffing burlap loops and filling a thin spot on a garland laid on a table.

    Once the full length is looped, run your hands lightly along the garland and look for gaps where the cord shows through. Where a gap appears, pull the neighboring loops toward each other and add a small extra loop of burlap in the thin spot, wiring it to the cord in the same way as the others. Turn the garland over and check the back as well, since a garland on a stair rail or doorway is often seen from both sides.

    Fluff each loop by pulling the wired edges outward and separating the burlap layers slightly, which gives the garland a fuller, softer outline. Trim any long stray threads with scissors, but leave the wired edges intact so the loops keep their shape. This pass over the finished base takes only a few minutes and makes the difference between a garland that looks sparse and one that looks full.

    9. Add a Second Layer for Extra Fullness

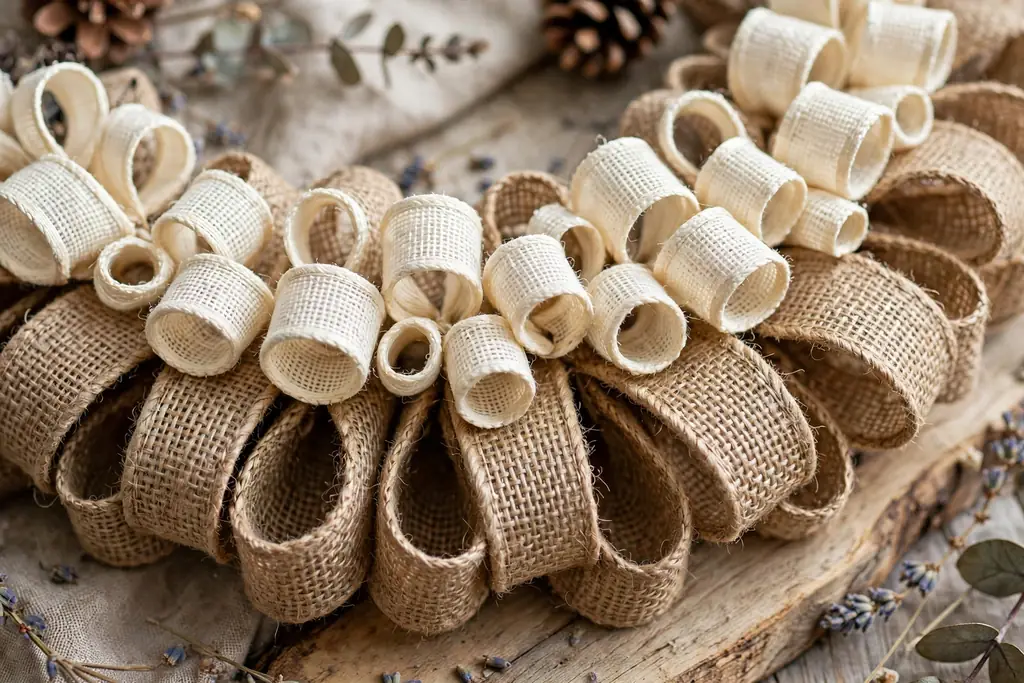
    A second layer of smaller cream burlap loops added over natural tan loops on a garland.

    If the garland still looks thin for a mantel or a wide doorway, add a second layer of loops on top of the first. Use a narrower burlap ribbon, or the same ribbon in a second color, and form smaller loops of about 3 inches, wiring each one to the cord between the existing loops. The second layer fills the spaces between the first loops and gives the garland depth when viewed from the front.

    Keep the second layer lighter than the first, so the garland does not become too heavy to hang. A second color, such as cream over natural tan or red over natural tan, adds contrast without extra ornaments, while a second layer in the same color simply adds fullness. Step back after a few feet of the second layer to check that the two layers blend rather than sitting as two separate rows.

    10. Weave in Greenery

    Pine and cedar sprigs being tucked into a burlap garland on a work table.

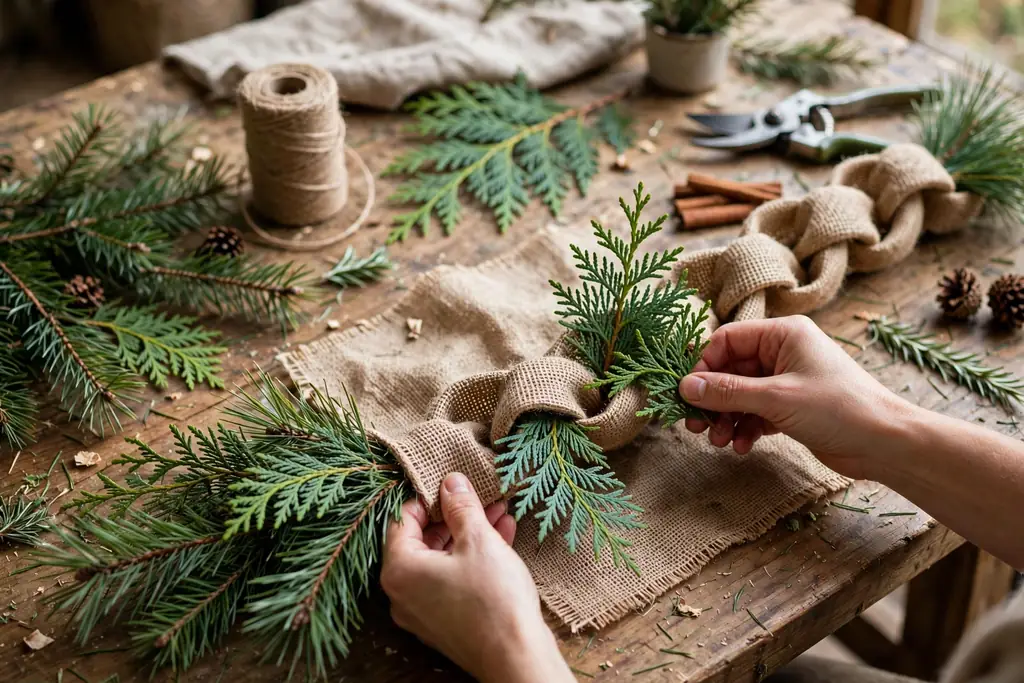
    With the burlap base finished, tuck greenery sprigs into the garland, working from one end to the other. Use pine, cedar, or fir sprigs, either fresh or faux, and slide each stem under a loop near the cord, then wire the stem to the cord so it stays put. Angle the sprigs outward and slightly downward, so the greenery frames the burlap loops instead of covering them.

    Mix sprig lengths for a natural outline, with longer sprigs at the ends and shorter ones in the middle, and keep the greenery to one or two types so the garland looks settled rather than busy. If you use fresh greenery, mist it lightly and expect it to dry over the season, which suits the rustic look of burlap. Faux greenery keeps its color all season and lets you reuse the garland next year without replacing the sprigs.

    11. Add Pinecones, Berries, and Ornaments

    Pinecones, red berries, and small wood ornaments being wired onto a burlap garland.

    Add pinecones, berry picks, small ornaments, or wood beads next, spacing them along the garland so no section looks crowded or bare. Wire each piece to the cord rather than gluing it, since wired pieces can be moved or removed without tearing the burlap. Place larger pieces, such as pinecones, at even intervals of about 12 to 18 inches, then fill the spaces between them with smaller berries or beads.

    Keep the decoration count modest, since burlap garland looks best when the texture of the burlap still shows between the decorations. Three to five larger pieces per mantel length, plus a scattering of berries, is usually enough. Turn the garland and check the back before you finish, so no wire ends poke out where hands will grip the garland while hanging it.

    12. Weave in Fairy Lights

    Warm fairy lights being woven through a decorated burlap garland on a mantel.

    If you want lights, weave a battery fairy light strand through the garland now, after the greenery and ornaments are in place. Start at one end and thread the wire in and out of the loops, keeping the lights near the front of the garland so they show, and spacing the bulbs evenly along the length. Tuck the battery pack into a loop near one end, where it can sit out of sight but stay easy to reach for switching on and off.

    Use battery lights rather than plug-in lights for a mantel or stair garland, since the battery pack avoids a trailing cord and lets you hang the garland anywhere. Check the full strand before weaving it in, and replace any strand with dead bulbs so you do not have to unweave it later. A warm white light suits burlap best, since it keeps the rustic tone of the garland instead of competing with it.

    13. Finish and Secure Both Ends

    Hands tying a burlap bow over the finished end of a garland on a table.

    Finish each end by folding the bare cord section into a hanging loop and wrapping it tightly with wire, then covering the wire wrap with a short piece of burlap ribbon tied in a simple bow or knot. Tuck any raw burlap edges into the last loop and secure them with a few stitches or a dab of fray sealant, so the ends do not unravel while the garland is hung or stored.

    Trim the cord ends close to the wrap, and check that both hanging loops are strong enough to hold the garland weight by giving each a firm tug. If one end will sit against a wall or in a corner, make that end neater and shorter, since it will be seen at close range. Neat ends matter because they are the first thing people notice when they look at a garland up close.

    14. Hang and Drape the Finished Garland

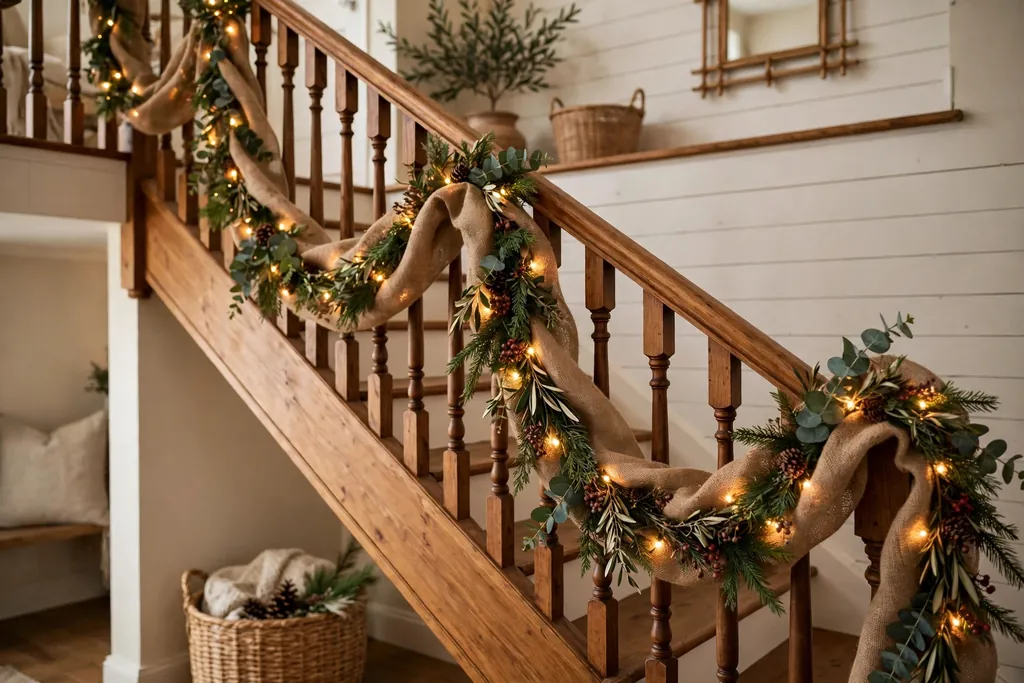
    Finished burlap garland with greenery and lights draped along a stair rail with swags.

    Hang the garland using the end loops, hooking them over mantel hooks, stair newel posts, or adhesive hooks rated for the garland weight. Start by fixing one end, then drape the garland to the other end, letting it dip in the middle for a mantel or swagging it between balusters on a stair rail. Secure the middle of a long garland with a tie or hook as well, so the weight does not pull the ends loose over time.

    Step back and adjust the drape, pulling loops outward where the garland looks flat and shifting ornaments so they face forward. On a tree, wrap the garland in a loose spiral from top to bottom, tucking the ends behind branches at the back. Take a final look from across the room, since a garland that looks even up close can still show a thin spot or a sagging section from a distance.

    15. Take Down and Store It for Next Year

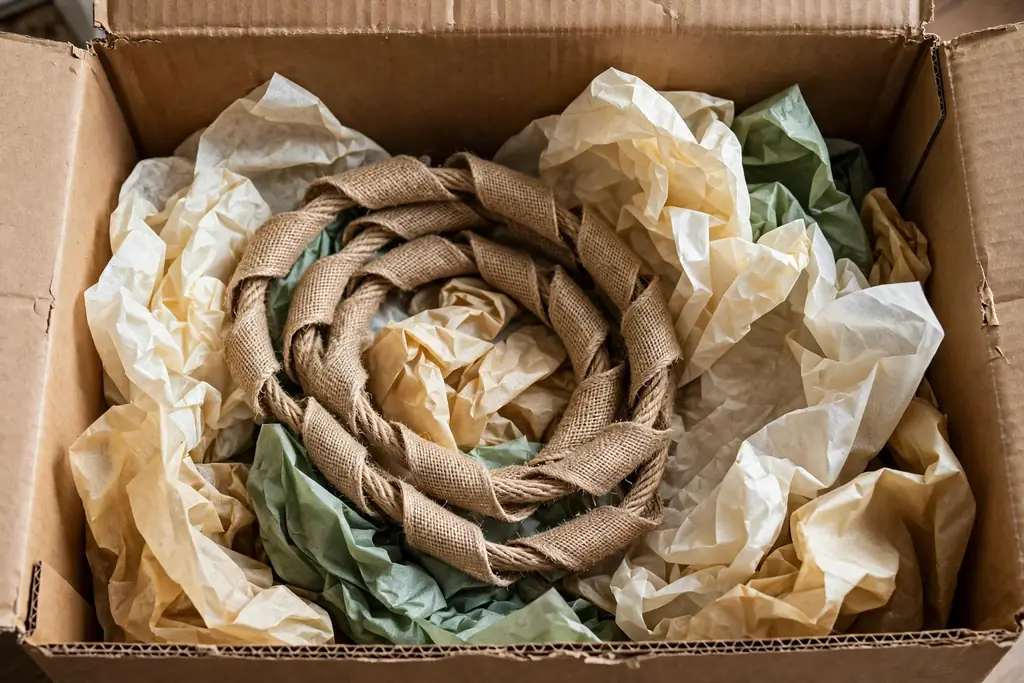
    Burlap garland loosely coiled with tissue paper in a cardboard storage box.

    When the season ends, take the garland down by unhooking the ends first, then lifting the middle supports, so the garland does not snag or stretch. Remove battery packs from light strands and take out any fresh greenery, since fresh sprigs will dry and shed if stored with the garland. Leave wired ornaments and faux greenery in place if they are secure, since removing and reattaching them each year wears the burlap.

    Coil the garland loosely in a large box or bag, with tissue paper between the coils so the loops do not crush each other. Store the box in a dry place away from damp, since burlap absorbs moisture and can develop a musty smell if stored damp. Label the box with the garland length and where it hung, so next year you can hang it again without remeasuring.

    Conclusion

    Making burlap garland comes down to a sturdy cord, wired burlap ribbon, and steady looping, with greenery, ornaments, and lights added once the base is full and even. Measure first, loop in even sections, and finish the ends neatly, and the garland will hang well on a mantel, stair rail, doorway, or tree. Store it loosely coiled in a dry box, and the same garland can come back out next holiday season with only a quick fluff of the loops.

    FAQs

    What kind of burlap works best for garland?

    Wired burlap ribbon about 5 to 6 inches wide works best for garland, because the wire in the edges holds each loop open and keeps the garland full once it is hung. Unwired burlap can work for a flat draped garland, but it needs more securing and tends to go limp over a long span. Choose natural tan for a classic rustic look, or a colored ribbon for a themed display.

    How much burlap do I need for a mantel garland?

    You need the straight width of the mantel plus about one third extra for swagging, plus about 12 inches at each end for finishing loops. For a 6 foot mantel, that means roughly 10 feet of burlap ribbon in total. Measure along the path the garland will follow, not just straight across, and add extra if the garland will also drape down the sides of the mantel.

    How do I keep burlap garland from fraying?

    You keep burlap garland from fraying by sealing the cut ends with fray sealant or a brief pass of flame near the edge, and by folding raw ends under before tying them off. Wired ribbon frays less than cut cloth, since the wired edges hold the weave together. Trim stray threads with scissors as they appear, and handle the garland gently when hanging and storing it.

    Can I add lights to burlap garland?

    Yes, you can add lights to burlap garland by weaving a battery fairy light strand in and out of the loops after the greenery and ornaments are in place. Battery lights work best, since the pack tucks into a loop at one end and avoids a trailing cord. Keep the bulbs near the front of the garland so they show, and check the strand for dead bulbs before weaving it in.

    How do I hang burlap garland on a mantel or stair rail?

    You hang burlap garland by hooking its end loops over mantel hooks, stair newel posts, or adhesive hooks rated for the garland weight, then securing the middle of a long garland with an extra tie or hook. Fix one end first, drape the garland to the other end with a dip in the middle, and adjust the loops and ornaments once it is up. Test the hold before leaving the garland in place, since a heavy garland can pull a weak hook loose over time.

    How do I store burlap garland after the holidays?

    You store burlap garland by removing battery packs and fresh greenery, coiling the garland loosely in a large box or bag with tissue paper between the coils, and keeping the box in a dry place. Loose coiling keeps the loops from crushing, and a dry store keeps the burlap from developing a musty smell. Label the box with the garland length and where it hung, so you can hang it again next year without remeasuring.


  • 17 Ways to Style Christmas Wreaths and Garlands Together

    17 Ways to Style Christmas Wreaths and Garlands Together

    Pair a Christmas wreath and garland by repeating the same greenery, color, and ribbon in both pieces, then place them where they frame one view, such as a door, mantel, or staircase. Keep one piece as the focal point and let the other support it, so the pairing looks planned rather than crowded.

    Before you hang anything, pick one greenery to repeat, such as pine, cedar, or mixed evergreen, and one accent, such as red berries, gold bells, or plaid ribbon. Use that pairing in both the wreath and the garland, and keep the rest simple. For more seasonal ideas to pair with these looks, browse the Dwell Ovell decor ideas index. The 17 ideas below cover doors, mantels, staircases, tables, windows, and small rooms, so you can pick the spots that suit your home.

    Key Takeaways

    • Repeat one greenery and one accent color or ribbon in both the wreath and the garland for a matched look.
    • Let one piece lead: a bold wreath pairs with a simple garland, and a full garland pairs with a plain wreath.
    • Frame a single view, such as a door, mantel, or staircase, rather than decorating every surface in the same way.
    • Match scale to the space: large wreaths suit wide doors and mantels, while slim garlands suit narrow frames and shelves.
    • Fasten garlands with hooks, ties, or clips that hold the weight and protect paint and wood.
    • Keep walkways, handrails, and candle flames clear so the pairing stays safe as well as pretty.

    1. A Front Door Wreath with Porch Rail Garland

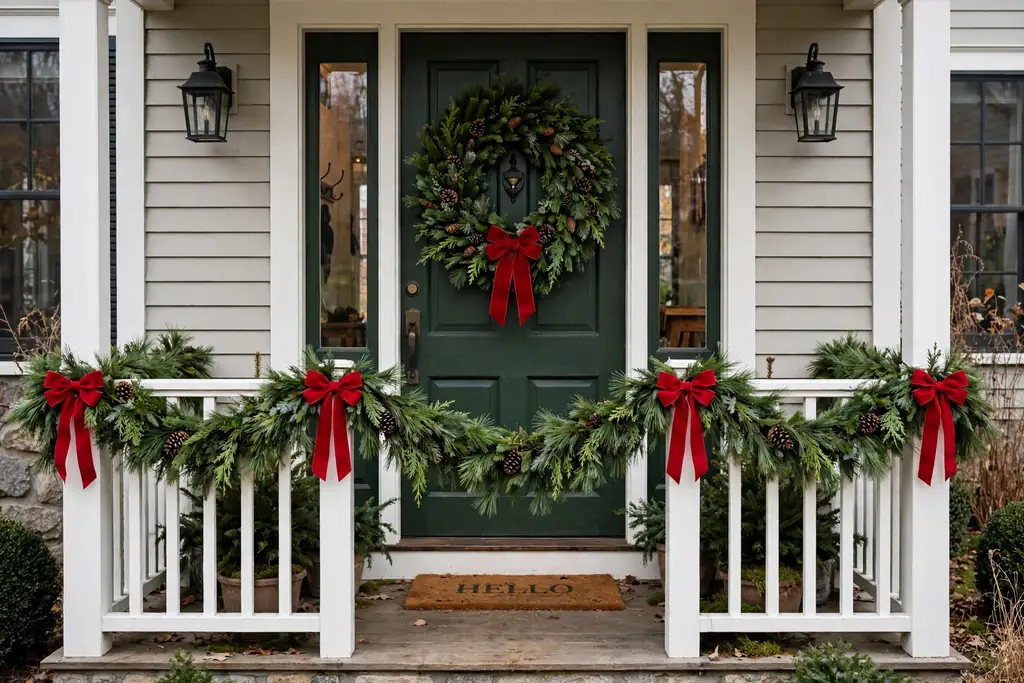
    Front door with a pine wreath and matching pine garland along the porch rail.

    Hang a full pine wreath on the front door and run a matching pine garland along the porch rail. Tie the same red ribbon at the top of the wreath and at each rail post so the two pieces read as one display. Add pinecones to both pieces, but keep the wreath fuller and the rail garland slimmer so the door stays the focal point.

    Fasten the rail garland with outdoor ties or hooks at each post, and leave the ends tucked behind the last post. Step back to the walkway to check the balance: the wreath should draw the eye first, with the rail garland leading the eye toward the door.

    2. A Mantel Garland with a Wreath Hung Above It

    Fireplace mantel with a cedar garland and a cedar wreath hung above it.

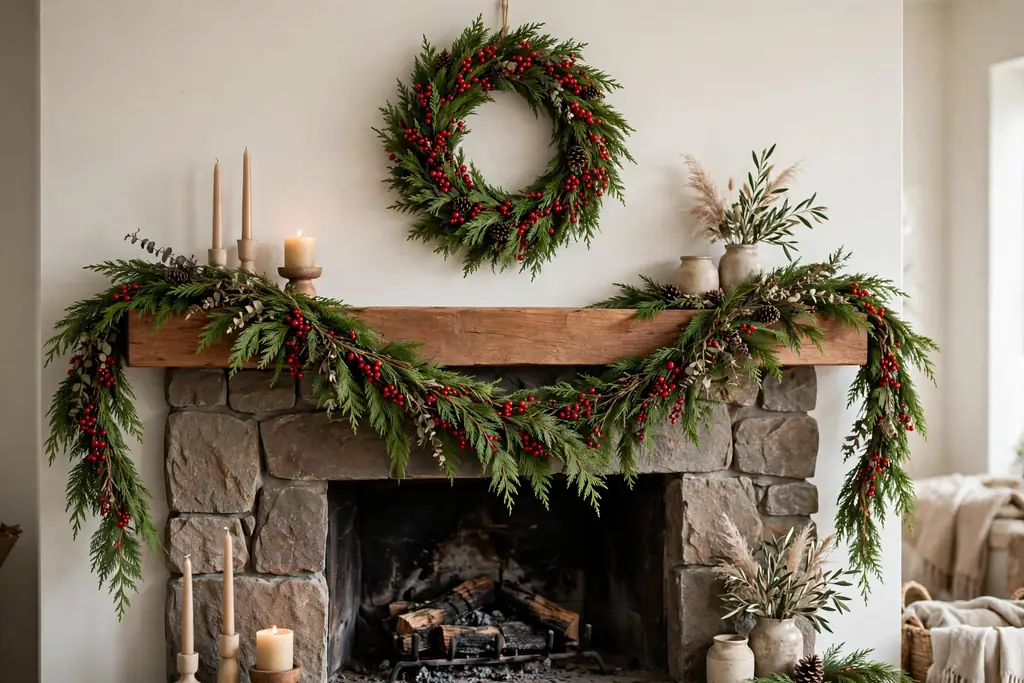
    Drape a cedar garland across the mantel in a soft dip, then hang a round wreath centered on the wall above it. Use the same cedar and the same berry clusters in both pieces so the vertical pairing feels joined. Keep stockings or candles to one side if the mantel starts to look crowded.

    Hang the wreath high enough that it clears the garland by a few inches, and use a wall hook rated for the wreath weight. If the mantel holds a mirror, hang the wreath on the mirror instead and let the garland frame the base of the mirror.

    3. A Staircase Garland with Wreaths on the Newel Posts

    Staircase banister with swagged evergreen garland and small wreaths on the newel posts.

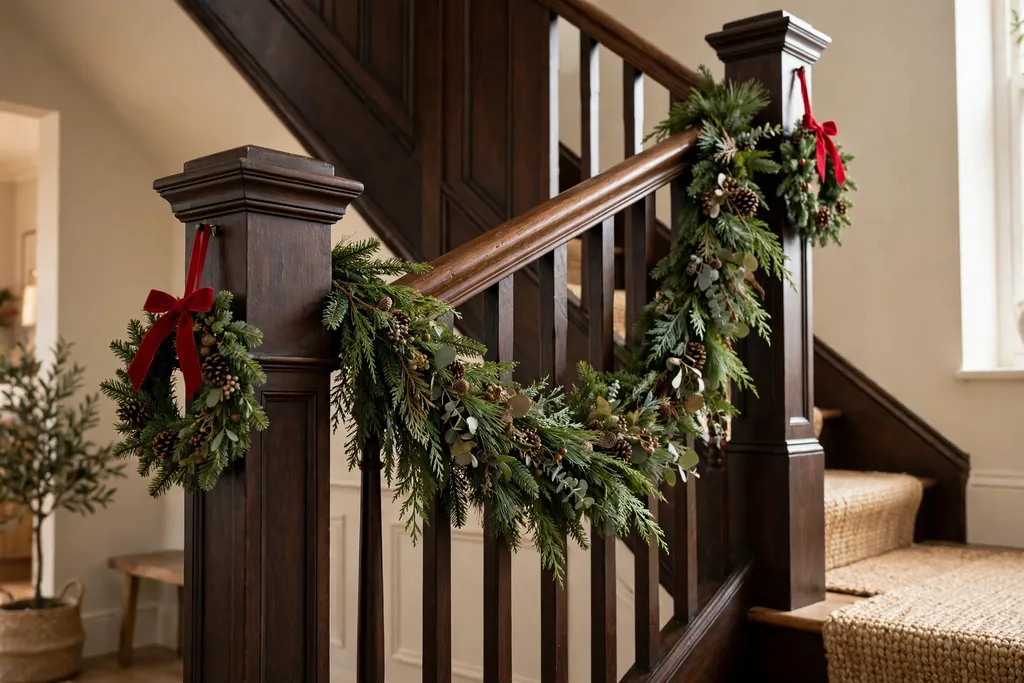
    Swag an evergreen garland along the staircase banister, looping it between newel posts, and hang a small wreath on each newel post cap. Use one ribbon color for the swag ties and the wreath bows so the staircase reads as a single run. Keep the swags loose and even, with the lowest point of each swag at about the same height.

    Tie the garland so hands can still grip the rail safely, and keep the newel wreaths small enough that they do not block the walkway. Battery fairy lights woven into the garland add glow without cords crossing the steps.

    4. A Table Garland Runner with Mini Wreath Candle Rings

    Dining table with a pine garland runner and mini wreath candle rings.

    Lay a slim pine garland down the center of the dining table as a runner, then set a mini wreath around each candle holder. Use the same greenery and one accent, such as gold berries, in both the runner and the rings. Keep the runner narrow so plates and glasses still fit comfortably on either side.

    Use battery candles inside the mini wreaths if the table will hold food close by, and trim any loose needles before guests arrive. Lift the whole runner off in one piece when clearing the table by sliding a narrow board or tray beneath it first.

    5. A Window Wreath Framed by Garland Across the Top

    Window with a wreath in the center and garland across the top of the frame.

    Hang a wreath in the center of a window with a suction hook or ribbon over the frame, then drape a garland across the top of the same window frame. Match the greenery in both pieces and keep the garland ends short so they do not cover the glass. The pairing frames the view outside while adding holiday color indoors.

    If the window gets direct sun, check the garland ties each week, since heat can loosen suction hooks. For a double window, hang one wreath per pane and run a single garland across both frames to tie them together.

    6. An Entry Console Garland with a Wreath Above the Mirror

    Entry console with a garland on top and a wreath above the mirror.

    Drape a short garland across the top of an entry console, letting the ends fall slightly at each side, and hang a wreath centered on the mirror or wall above it. Use the same ribbon on the wreath and as small bows at the garland ends. Keep the console surface clear except for a bowl or a pair of candle holders so the pairing stays the focus.

    This works well in a narrow entry because it uses wall space rather than floor space. Choose a wreath no wider than the console so the grouping stays balanced from the front door view.

    7. Kitchen Shelf Garland with a Wreath on a Cabinet Door

    Kitchen shelves with a slim garland and a small wreath on a cabinet door.

    Run a slim garland along the top of open kitchen shelves and hang a small wreath on a nearby cabinet door with a removable hook. Repeat one herb like rosemary sprigs or one berry color in both pieces to link the shelf and the door. Keep the garland away from the stove and any open flame.

    Use a lightweight wreath on the cabinet door so the door still opens freely, and hang it slightly off center if the door has a handle on one side. Wipe the shelf garland lightly before cooking sessions so loose needles do not fall into food areas.

    8. A Headboard Garland with a Wreath Above the Bed

    Bedroom with a garland across the headboard and a wreath above the bed.

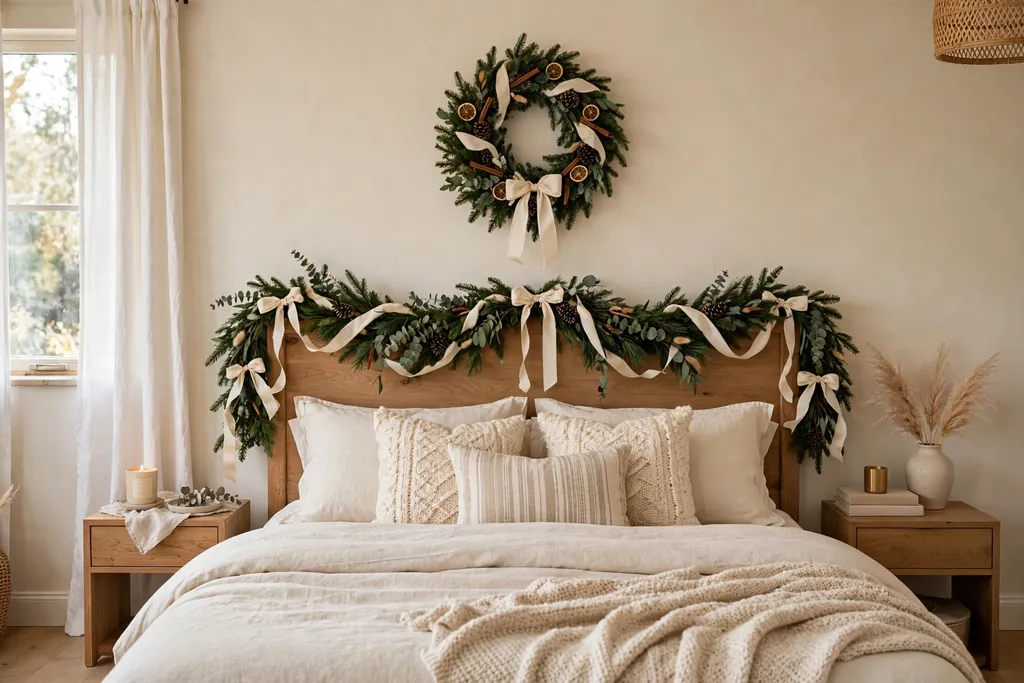
    Drape a soft evergreen garland across the headboard and hang a wreath centered on the wall above the bed. Choose a light, flat-backed wreath and a garland without heavy ornaments so nothing feels heavy over the pillows. Use one calm accent, such as cream ribbon or silver bells, to keep the bedroom restful.

    Hang the wreath with a secure wall hook and check it after making the bed, since pillows and bedding can nudge the garland. If the bed has no headboard, run the garland along a wall shelf above the bed instead.

    9. A Chandelier Wrapped in Garland with a Hanging Wreath

    Chandelier wrapped in garland with a small wreath hanging from its center.

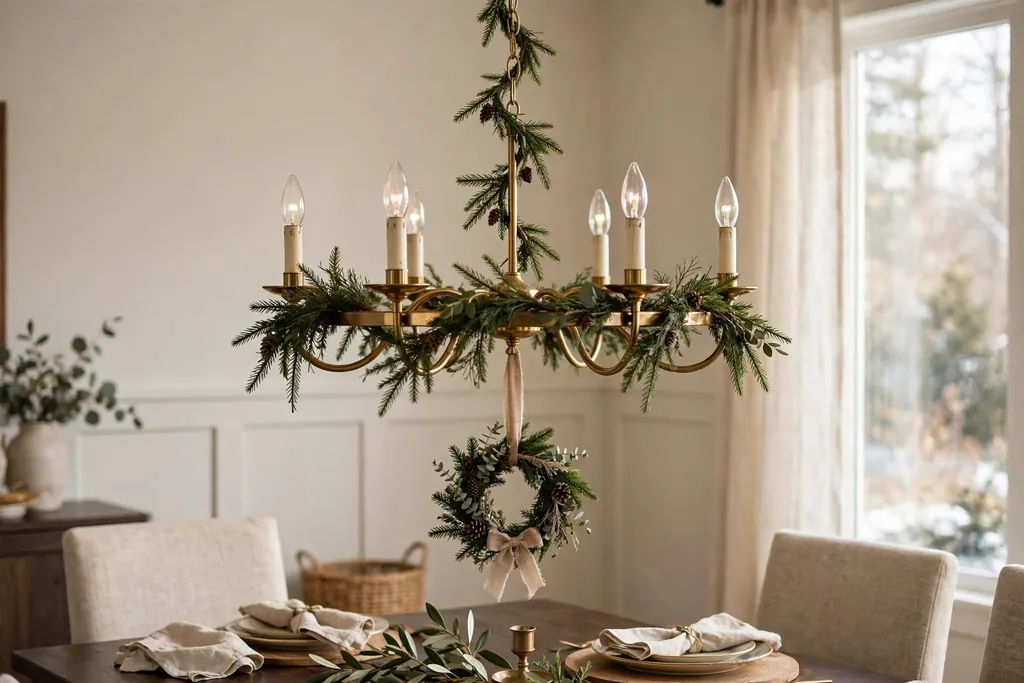
    Wrap a slim garland loosely around the arms of a dining chandelier and hang a small wreath from the center of the fixture with a sturdy ribbon. Keep both pieces light and clear of the bulbs, and use battery lights rather than candles near the garland. Match the ribbon on the hanging wreath to the garland ties for a finished look.

    Check that the wreath hangs above head height and does not swing into plates or glasses. This pairing suits a dining room best, where the chandelier already acts as a centerpiece.

    10. A Bookshelf Garland Swag with a Leaning Wreath

    Bookcase with a garland swag on the top shelf and a wreath leaning on a lower shelf.

    Swag a short garland across the top shelf of a bookcase, letting it dip in the middle, and lean a small wreath against the books on a lower shelf. Use the same pine and the same small ornaments in both pieces. Keep books upright with bookends so the wreath does not slide forward.

    Place the wreath on a shelf that is easy to reach, since leaning wreaths need a quick straighten now and then. Leave one shelf bare between the garland and the wreath if the bookcase starts to look full.

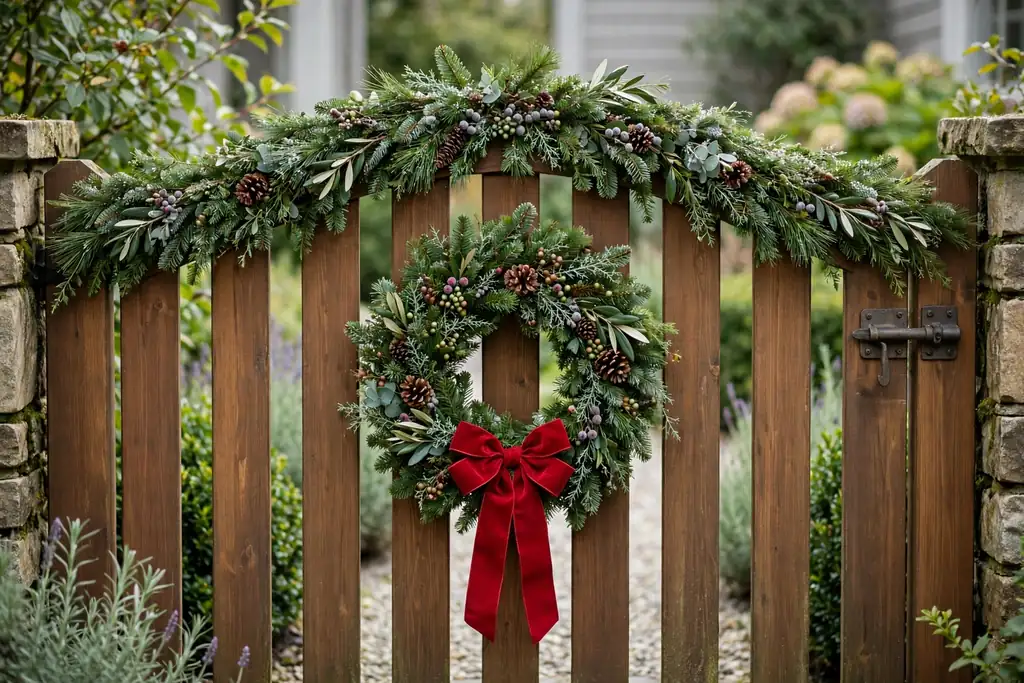
    11. A Garden Gate Garland with a Wreath on the Gate

    Garden gate with evergreen garland along the top rail and a wreath on the gate.

    Run a weatherproof evergreen garland along the top rail of a garden gate and hang a wreath in the center of the gate. Use outdoor-rated ties and one bold ribbon color that shows up from the street. Keep the wreath clear of the latch and hinges so the gate still opens and closes fully.

    Shake the garland outdoors before hanging to drop loose needles, and check the ties after wind or rain. A gate pairing greets visitors before they reach the front door, so keep it simpler than the door display to avoid repeating the same look twice.

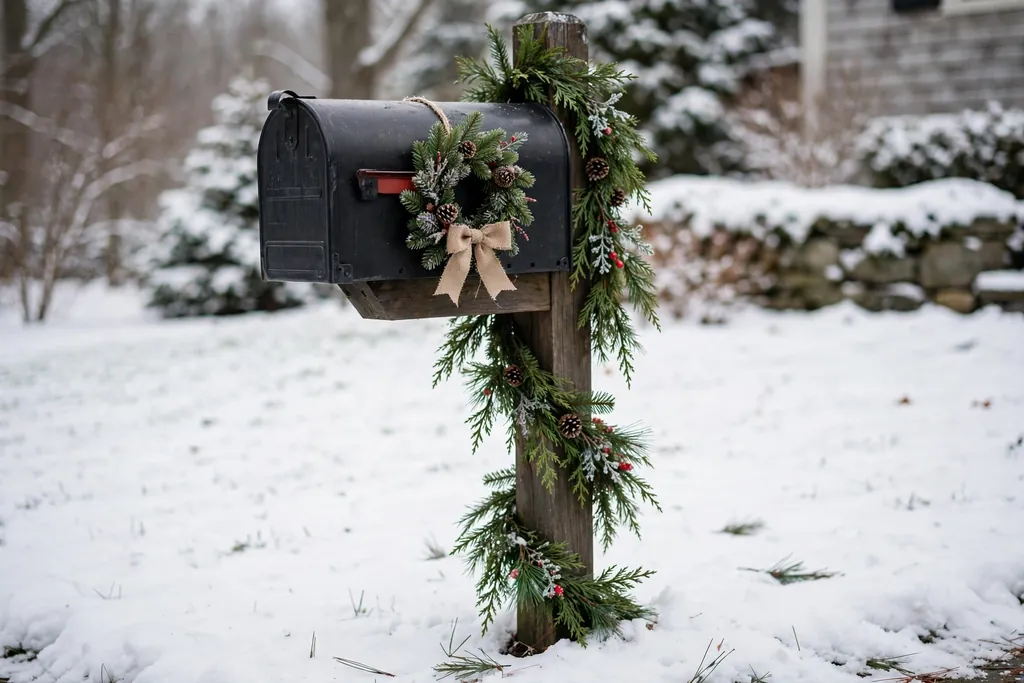
    12. A Mailbox Garland Wrap with a Mini Wreath

    Mailbox post wrapped in garland with a mini wreath on the mailbox.

    Wrap a slim garland around a mailbox post and hang a mini wreath on the front of the mailbox box. Use the same greenery as the front door wreath so the mailbox echoes the house display at a smaller scale. Keep the wreath clear of the mailbox door and the flag so mail delivery stays easy.

    Fasten the garland with ties rather than tape, and keep decorations off the house number if the number is posted on the mailbox. This small pairing adds holiday color to the curb without needing a large display.

    13. A Media Console Garland with a Wreath on the Wall Above

    Media console with a garland along the top and a wreath on the wall above.

    Drape a garland along the top of a media console and hang a wreath centered on the wall above the television or console. Match the garland greenery to the wreath and keep both pieces flat against the wall so they do not block the screen. Use one metallic accent, such as gold or brass, in both pieces for a calm, joined look.

    Keep cords and vents clear, and avoid hanging the wreath where it reflects glare onto the screen. This pairing suits a living room where the television wall is the main focal point.

    14. An Interior Door Frame Garland with a Wreath on the Door

    Interior doorway with garland over the door frame and a wreath on the door.

    Run a garland over the top of an interior door frame, letting both ends hang partway down the sides, and hang a wreath in the center of the door. Use the same ribbon at the garland ends and on the wreath bow. Choose a wreath size that leaves a clear margin around the door edges so the door still opens without brushing the frame garland.

    Use a removable over-door hook for the wreath and adhesive hooks or small nails for the garland, depending on the frame finish. This pairing marks the passage between rooms, so it works well for a doorway between a hall and a living room.

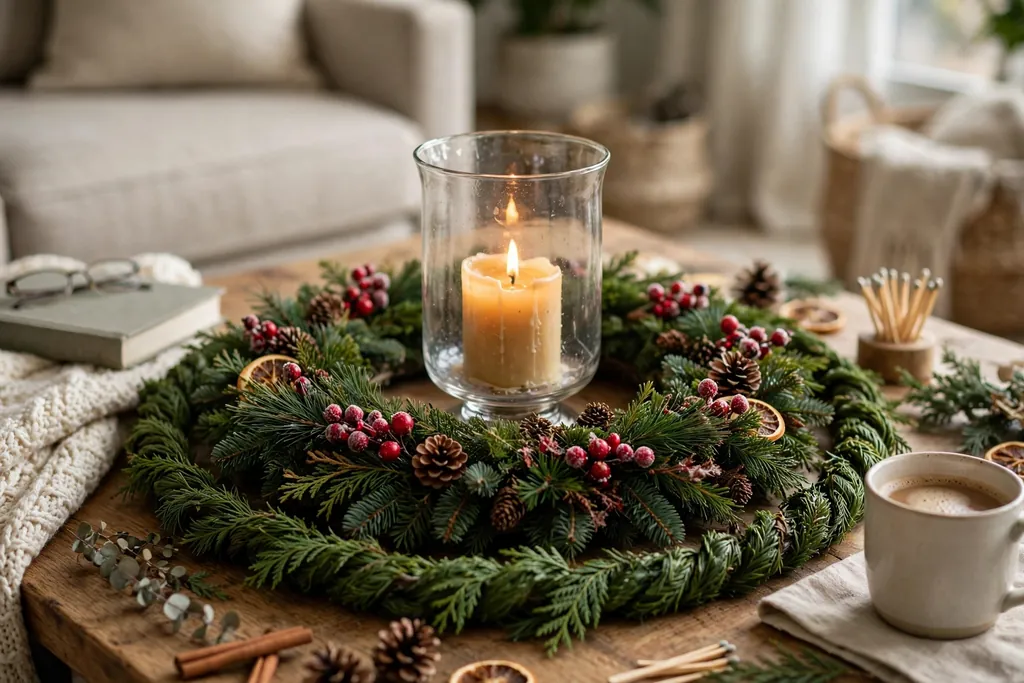
    15. A Flat Wreath Centerpiece Ringed with Garland

    Coffee table centerpiece with a flat wreath ring and garland coiled around it.

    Lay a wreath flat on a coffee table or side table as a centerpiece ring, set a candle holder or a small vase in its center, and coil a short garland around the outer edge of the wreath. Use the same greenery in both pieces and one accent, such as red berries, repeated around the ring. Keep the center clear and the outer coil low so the table stays useful.

    Use a battery candle in the center if the wreath is dry or if the table will be used often. Lift the whole centerpiece onto a tray so it can move aside quickly when the table is needed.

    16. An Archway Garland with a Wreath at the Top Center

    Arched doorway with garland following the arch and a wreath at the top center.

    Drape a full garland over an arched doorway, following the curve of the arch, and hang a wreath at the top center where the two garland ends meet. Use the same greenery and the same ribbon at the meeting point so the wreath looks like the center of the arch display. Keep the garland ends even on both sides so the arch stays symmetrical.

    Fasten the garland at several points along the arch so it does not sag in the middle, and hang the wreath from a hook above the arch rather than from the garland itself. This pairing suits a wide opening between a hall and a dining room.

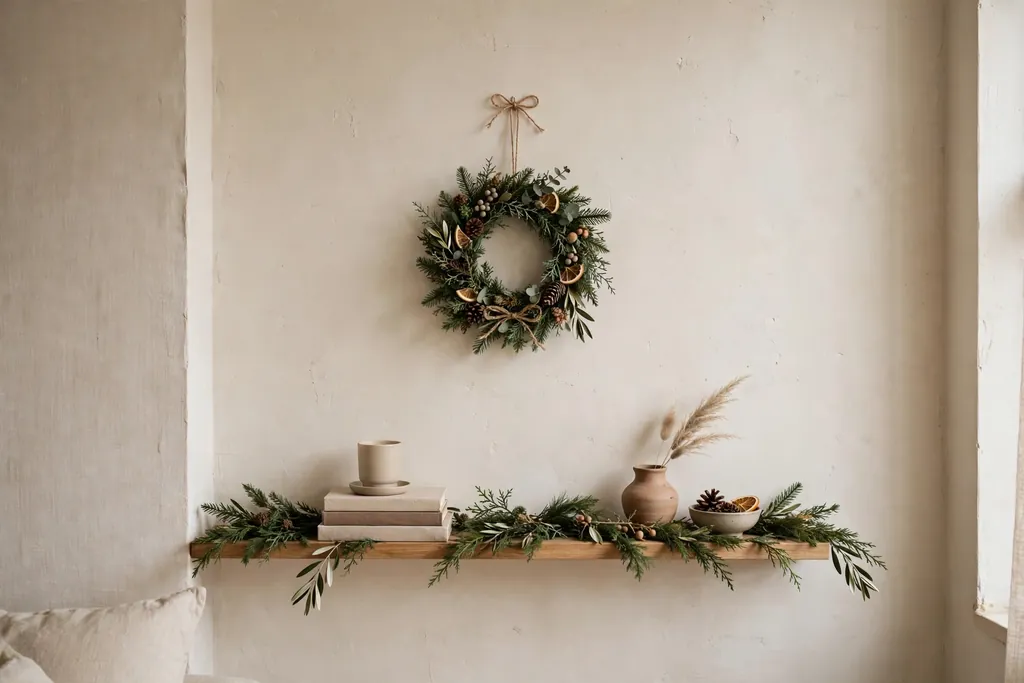
    17. A Small Space Mini Wreath and Garland Pairing on One Wall

    Small living room wall with a mini wreath and a short garland on a shelf.

    In a small room, hang a mini wreath on the wall and run a short garland along a nearby shelf, picture rail, or wall ledge. Use the same slim greenery and one accent in both pieces, and keep both pieces compact so the wall does not feel crowded. One matched pair on one wall gives a small space a clear holiday focus without filling every surface.

    Choose a wreath no wider than the shelf below it, and keep the garland to a single short run rather than wrapping the whole room. This is a good option for apartments, studios, and rooms where a full door or mantel display is not possible.

    Conclusion

    Wreaths and garlands look best together when they share greenery, color, and ribbon and frame one view at a time. Start with the spot guests see first, such as the front door or the mantel, then repeat the pairing in one or two more places at a smaller scale. Keep one piece as the lead, match the scale to the space, and check hooks and clearances as you hang each piece. With those simple rules, the 17 pairings above can mix and match across rooms without looking busy.

    FAQs

    Can you use different greenery in a wreath and garland?

    Yes, you can mix greenery, but repeat at least one type, such as pine, in both pieces so the pairing still looks joined. If the wreath is mixed evergreen, use one of its greens as the main green in the garland. Keep the accent, such as berries or ribbon, the same in both pieces to hold the pairing together.

    How do you match a wreath and garland without buying a set?

    Pick one greenery and one accent color or ribbon, then use them in both pieces. A plain pine garland and a plain pine wreath become a matched pair once you tie the same ribbon on both and add the same berries or pinecones. You do not need a boxed set to get a planned look.

    Should the wreath or the garland be the focal point?

    One piece should lead and the other should support it. If the wreath is large or heavily decorated, keep the garland slim and simple. If the garland is full and long, choose a plainer wreath. This contrast keeps the eye on one spot instead of splitting attention between two bold pieces.

    How do you hang garland so it stays up?

    Fasten garland at several points with hooks, clips, or ties rated for its weight, and check the first fastener by tugging gently before adding the rest. For banisters and mantels, tie the garland at each post or end and add a middle support for long runs. Avoid tape on painted or finished wood, since it can peel the finish when removed.

    Can wreaths and garlands work in a small home?

    Yes, small homes suit slim garlands and mini wreaths paired on one wall, shelf, or door. Use one matched pair as the main display rather than repeating the pairing in every room. Light, flat-backed pieces keep small spaces feeling open while still adding holiday color.

    How do you store wreaths and garlands after Christmas?

    Store wreaths in round wreath bags or boxes with tissue between decorated pieces, and coil garlands loosely in a box rather than folding them tightly. Label each box with the room it belongs to, such as front door or mantel, so next year the matched pairs stay together. Keep stored greenery dry and away from direct heat.


  • 15 Evergreen Christmas Wreath Ideas with Natural Texture

    15 Evergreen Christmas Wreath Ideas with Natural Texture

    Evergreen Christmas wreaths use fresh fir, cedar, pine, or boxwood as a lasting green base, then add natural texture with pinecones, berries, dried citrus, moss, or seed pods. Choose a full, fresh base, layer one or two textures, and hang it in a sheltered spot for a classic door display that lasts through the season.

    Fresh greenery does most of the work in these wreaths, so the best designs keep the extras simple and let the foliage show. A full base, a clear texture, and a plain bow or a few well placed accents read as woodland and calm rather than busy. The ideas below cover classic fir, cedar, boxwood, berries, pinecones, dried citrus, and herbs, so you can match a wreath to a front door, a mantel, or a window. Check that the base feels soft and green, not dry and brittle, and hang the wreath out of harsh wind and direct sun where you can.

    Key Takeaways

    • Start with a full, fresh evergreen base, since flat or sparse greenery is hard to fix with decorations.
    • Layer one or two natural textures, such as pinecones, berries, or dried citrus, rather than mixing many competing materials.
    • Keep the color range close to green, brown, cream, and red so the wreath reads as natural and calm.
    • Hang wreaths in a sheltered spot and mist fresh greenery lightly if indoor air is dry.
    • Choose lighter accents for a wreath hung on glass or a thin hook, and save heavy pinecones for a sturdy door hook.
    • A plain linen, velvet, or twine bow suits most of these wreaths and lets the foliage stay the focus.

    1. Classic Mixed Fir and Cedar

    Mixed fir and cedar Christmas wreath with feathery cedar sprays and a cream bow on a front door.

    A mixed fir and cedar wreath pairs the dense, soft needles of fir with the flat, layered sprays of cedar. The mix gives the wreath depth, since fir fills the gaps and cedar adds a feathery edge that moves in a light breeze. Hang it on a front door with a plain dark green or cream bow, and let the greenery carry the design.

    To keep the mix looking even, spread cedar sprays around the full circle rather than grouping them on one side. Tuck any loose stems into the base with wire, and trim stray ends so the outline stays round. This is a good first choice if you want a traditional wreath that suits most door colors and house styles.

    2. Pinecone and Fir Wreath

    Fir Christmas wreath with small and medium pinecones spaced around the ring on a wooden front door.

    Pinecones add a rough, woody texture that stands out against soft fir needles, and they suit a rustic or cabin style door. Use a mix of small and medium cones, and place larger cones near the bottom or at one side so the wreath does not look top heavy. A few cones are enough, since too many can hide the greenery.

    Attach each cone with wire wrapped around its base scales rather than glue alone, so it stays put in cold weather. Check the wreath from a few steps back as you add cones, and leave clear patches of fir between them. A thin twine loop for hanging keeps the woodland feel intact.

    3. Cedar and Dried Citrus Wreath

    Cedar Christmas wreath with flat dried orange slices and cinnamon sticks on a covered porch door.

    Dried orange slices bring warm color and a thin, crisp texture to a cedar wreath, and they pair well with cinnamon sticks or star anise shapes. Space the citrus slices evenly around the ring, and keep them flat against the greenery so they do not catch wind on a door. The amber color reads well against both dark and light painted doors.

    Dry the slices fully before adding them, since damp citrus can soften and curl. Wire each slice at two points so it sits flat, and add a small cluster of cedar tips behind each one for support. This wreath suits a kitchen door or a covered porch where the citrus scent can be noticed up close.

    4. Eucalyptus and Fir Wreath

    Fir Christmas wreath dotted with round silvery green eucalyptus leaves and a cream ribbon on a light painted door.

    Eucalyptus adds round, silvery green leaves that soften the sharper look of fir, and the mix suits a modern or coastal home. Use short eucalyptus stems tucked between fir branches, so the round leaves dot the wreath rather than forming a separate layer. The pale green tone also lightens a dark door.

    Because eucalyptus dries well, this wreath holds its shape even as the fir loses some moisture. Keep the stems short and wired in place, and avoid long trailing pieces on a front door where they can snag. A simple cream ribbon bow finishes the look without adding a new color.

    5. Boxwood and Fir Wreath

    Dense boxwood and fir Christmas wreath with a neat round outline on a brick house front door.

    Boxwood gives a neat, small leaf texture that fills gaps in fir and makes the wreath look dense and tidy. This combination suits a formal front door or a brick house, where a clean outline matters. The small leaves also hold up well in cold weather, so the wreath keeps a groomed look for weeks.

    Layer boxwood sprigs over the fir base in the same direction, so the leaves lie flat and the ring looks smooth. Trim the outer edge lightly after layering, and add only a small bow or a few berries if you want an accent. Too many extras will hide the tidy boxwood texture that makes this wreath distinct.

    6. Magnolia and Fir Wreath

    Fir Christmas wreath with broad glossy magnolia leaves showing green tops and warm brown undersides on a front door.

    Magnolia leaves add broad, glossy green tops with warm brown undersides, a two tone texture that fir alone does not offer. Place magnolia leaves in small groups around the ring, with the brown side showing on some leaves for contrast. The large leaves suit a wide front door or a double door, where smaller foliage can look lost.

    Keep the magnolia groups spaced apart so fir still shows between them, and wire each leaf stem firmly, since broad leaves catch more wind. A deep red or gold bow picks up the warm brown underside without adding a new material. This wreath works well on a porch with other natural wood or wicker details.

    7. Winterberry and Fir Wreath

    Dark fir Christmas wreath with clusters of bright red winterberries on a white front door.

    Winterberry stems bring bright red berries in tight clusters, a sharp color contrast against dark fir. Use short berry stems in groups of three, spaced evenly around the ring, so the red reads as a pattern rather than a solid band. This is a classic choice for a white, black, or deep green door.

    Push each stem deep into the base and wire it in place, since berry stems can slip as greenery dries. Keep berries away from the hanging point at the top, where a hook or nail can crush them. If you have birds nearby, expect some berries to be nibbled over the season, so start with a generous number.

    8. Snow Dusted Fir Wreath

    Fir Christmas wreath lightly dusted with artificial snow on the outer tips on a white trimmed front door.

    A snow dusted fir wreath uses flocking or a light dusting of artificial snow on fresh fir to suggest a winter woodland scene. Apply the dusting lightly and unevenly, heavier on the outer tips and lighter inside, so the green still shows through. The effect suits a snowy climate or a home with white trim and a simple door.

    Use this wreath in a sheltered spot, since rain can wash flocking off and leave patchy spots. Pair it with a plain white or silver bow, and skip pinecones or berries, which can make the snowy look busy. Check the wreath after a storm and shake off real snow gently rather than pulling at the branches.

    9. Woodland Moss, Acorn, and Pinecone Wreath

    Fir Christmas wreath with moss pads, acorn clusters, and pinecones on a timber porch door.

    Moss, acorns, and pinecones give this wreath a forest floor feel, with soft, rough, and smooth textures in one ring. Press small moss pads into gaps in the fir base, then add acorns in small groups and a few pinecones for height. The mix suits a stone or timber house, or a porch with potted evergreens nearby.

    Attach moss with wire or pins rather than loose placement, so it does not blow off a door. Keep acorns in clusters of two or three, and check that none sit where the wreath presses against the door, since hard shells can mark paint. A twine bow completes the woodland look.

    10. Juniper and Rosemary Herb Wreath

    Fir Christmas wreath with juniper berries and short rosemary sprigs on a kitchen door.

    Juniper berries and rosemary sprigs add a fragrant, herb garden texture to a fir base, with blue green berries and needle thin leaves. Tuck short rosemary stems between fir branches, and add small juniper clusters where the greenery looks thin. The scent is noticeable on a sheltered porch or an indoor door.

    Use rosemary sparingly, since its thin leaves dry fast in warm indoor air. This wreath suits a kitchen door or a mudroom, where the herbal scent fits the room. A plain linen tie at the top keeps the focus on the greenery and the scent rather than on a large bow.

    11. Twig Base with Fir Sprigs Wreath

    Twig ring Christmas wreath with fir sprigs covering two thirds of the circle and bare twigs visible on the rest.

    A twig base shows bare branches through gaps in the fir, so the wreath has both woody structure and soft greenery. Start with a grapevine or twig ring, then wire fir sprigs around about two thirds of the circle, leaving part of the twig base visible. The open section keeps the wreath from looking heavy on a narrow door.

    Place the bare section at the top or one side, and add a small pinecone or berry cluster where the fir meets the twigs. Wire each fir sprig at two points so it does not slide around the ring. This style suits a rustic door, a barn style entry, or a home with natural wood trim.

    12. Asymmetric Crescent Wreath

    Asymmetric crescent Christmas wreath with dense fir on the lower side and a bare ring on the upper side.

    An asymmetric crescent wreath covers only part of the ring with dense fir, leaving the rest of the base bare or lightly dressed. Build up greenery on the lower left or lower right, tapering the foliage toward the top, so the shape feels like a crescent moon. The open space gives the wreath a modern feel while keeping the evergreen texture.

    This design needs a firm base, such as a wire or twig ring, since one side carries most of the weight. Hang it with a hook at the top center and check that it sits level, since a heavy side can pull the wreath sideways. A small bow at the point where the greenery ends marks the crescent shape clearly.

    13. Layered Double Wreath

    Two layered evergreen Christmas wreaths, a smaller wreath in front of a larger one, on a wide front door.

    A layered double wreath stacks a smaller evergreen ring in front of a larger one, giving a deep, full outline. Use the same greenery for both rings, or pair fir on the back ring with cedar or boxwood on the front, so the layers read as one wreath with depth. The full shape suits a wide front door or a double door entry.

    Wire the two rings together at four points around the circle, and check that the front ring does not slide down as the greenery dries. Keep decorations minimal, since the layered foliage is the main feature. A single bow at the bottom center ties the two layers together visually.

    14. Fir and Dried Flower Wreath

    Fir Christmas wreath with small dried lavender and cream flowers spaced around the ring on an indoor door.

    Dried flowers such as lavender, strawflower, or small dried roses add soft color and a papery texture to a fir base. Use short dried stems in small groups, spaced around the ring, and keep the colors muted, such as lavender, cream, or dusty pink. The mix suits an indoor door, a bedroom door, or a covered porch away from rain.

    Handle dried flowers gently and wire them by the stem, since dried heads can break off if glued. Keep this wreath indoors or fully sheltered, since rain and strong wind will damage dried petals fast. A thin ribbon in a matching muted tone finishes the design without competing with the flowers.

    15. Simple Fir Wreath with a Linen Bow

    Plain full fir Christmas wreath with only a wide linen bow on a modern front door.

    A simple fir wreath with only a linen bow lets the evergreen texture stand alone, with no berries, cones, or flowers to distract from it. Choose a very full fir base, trim it into a clean round shape, and tie a wide linen bow at the top or bottom. The plain design suits a minimalist home, a modern door, or a house where the door color is already a feature.

    Because there are no extras to hide gaps, check the base from all angles and fill any thin spots with extra fir sprigs before hanging. Use a sturdy hook, since a full fresh wreath is heavier than it looks. This is also the easiest wreath to refresh, since you can swap the bow color through the season.

    Conclusion

    Evergreen Christmas wreaths work best when the greenery leads and the natural textures support it. Pick a full, fresh base, add one or two textures that suit your door and house style, and hang the wreath where wind and sun will not dry it out fast. With that simple approach, a fir, cedar, boxwood, or mixed wreath can carry a front door through the whole holiday season.

    Frequently Asked Questions

    How long do fresh evergreen Christmas wreaths last?

    Fresh evergreen Christmas wreaths usually last three to four weeks outdoors in cool weather, and less time indoors where heated air dries the needles faster. Hang the wreath in a sheltered, shaded spot, mist it lightly every few days, and bring it indoors only for short periods if you want it to last through the season.

    Which evergreen is best for a Christmas wreath?

    Fir is a good all round choice for a Christmas wreath because its needles are soft, dense, and hold well, while cedar adds a feathery edge and boxwood adds a neat, small leaf texture. Choose fir for a classic full wreath, cedar for a softer outline, or a mix of fir and cedar for depth and a fuller shape.

    How do you keep an evergreen wreath fresh on a front door?

    Keep an evergreen wreath fresh by hanging it out of direct sun and strong wind, misting the greenery lightly every few days, and avoiding a spot above a heat vent or next to a hot porch light. A north facing or covered porch helps most, and you can soak the base briefly before hanging if the wreath arrives dry.

    Can you hang an evergreen wreath indoors?

    Yes, you can hang an evergreen wreath indoors, but expect it to dry faster than one kept outside in cool air. Hang it away from radiators, fireplaces, and sunny windows, mist it lightly, and choose a lighter wreath for an interior door so the hook and door are not strained.

    How do you attach pinecones and berries to a wreath?

    Attach pinecones and berries by wiring them into the wreath base, wrapping wire around the cone scales or the berry stem and twisting it around a branch underneath. Wire holds better than glue in cold and damp weather, and it lets you move or replace an accent without pulling greenery loose.

    What size evergreen wreath should I choose for a front door?

    A 24 inch wreath suits most standard front doors, while a smaller 18 to 20 inch wreath fits a narrow door and a larger 30 inch wreath suits a wide or double door. Measure the door width and leave clear space around the wreath so it does not cover the handle, the lock, or a door knocker.


  • How to Make a Christmas Ribbon Wreath for Your Front Door

    How to Make a Christmas Ribbon Wreath for Your Front Door

    To make a Christmas ribbon wreath for your front door, cut wired ribbon into strips, fold each strip into a loop, and wire small bundles of loops to a wire wreath frame until the frame is covered. Add a bow, trim the tails, attach a hanger, and hang the wreath against the door so the loops stay full and even.

    A ribbon wreath suits a front door because it is light, it holds its shape in cool weather, and it can be made in colors that match the rest of your porch. Wired ribbon is the key supply, since the wire inside the edge helps each loop keep its curve. Plan for a relaxed afternoon session, work on a clear table, and keep scissors, wire, and ribbon within reach so you can build clusters in a steady rhythm.

    Key Takeaways

    • Wired ribbon holds loop shapes better than soft ribbon, so use it for the main loops.
    • Cut strips to one even length, and keep loop sizes close so the wreath looks full and even.
    • Build small clusters of loops first, then wire each cluster to the frame, rather than wiring single loops one by one.
    • Work around the frame in sections, and check the front often so gaps do not pile up on one side.
    • Trim tails last, after the bow is attached and the loops are shaped, so lengths stay balanced.
    • Hang the wreath from a sturdy hook or hanger, and check that it sits flat and does not swing into the door frame.

    Materials and Tools

    Supplies:

    • One wire wreath frame, 14 to 18 inches across
    • Wired ribbon in two or three colors, 2.5 inches wide for the main loops
    • Narrower wired ribbon, 1.5 inches wide, for accent loops if wanted
    • Floral wire or thin craft wire for wiring clusters
    • One length of ribbon for the bow, plus a short wire piece to hold it
    • Pine picks, berry picks, or small ornaments for accents, if wanted
    • A ribbon loop or wreath hanger for hanging

    Tools:

    • Sharp scissors
    • Wire cutters
    • A ruler or tape measure
    • A flat work surface, such as a table covered with a cloth

    1. Gather Your Supplies

    Wire wreath frame, rolls of red, green, and cream wired ribbon, floral wire, scissors, and wire cutters arranged on a table.

    Set out the wire frame, ribbon rolls, floral wire, wire cutters, scissors, and ruler before you cut anything. Having the supplies in one place keeps the work moving, and it lets you spot a missing item early, while it is still easy to find a substitute. Cover the table so ribbon does not slide, and keep a small bowl or tray for wire offcuts.

    Count your ribbon rolls and check that each roll has enough length for its share of loops. If one color is short, plan to use it as an accent rather than a main color, so the wreath does not run out halfway around the frame. Keep the bow ribbon aside for now, so it is not cut up by mistake during the loop cutting step.

    2. Choose Ribbon Colors and Widths

    Rolls of red, green, cream, and gold wired ribbon held against a dark green front door in daylight.

    Pick two or three colors that sit well together on a front door, such as red and green with cream, or red and gold with a deep green. Two main colors give a clear pattern, and a third accent color adds depth without making the wreath look busy. Hold the rolls against your door color in daylight, since porch light can change how a ribbon reads.

    Use 2.5 inch wired ribbon for the main loops, since that width makes loops that read clearly from the street. Narrower ribbon works well as an accent loop inside a cluster, and it adds texture without adding bulk. Avoid mixing too many patterns at once, and keep at least one solid color in the mix so patterned ribbon has room to show.

    3. Prepare the Wreath Frame

    A bare wire wreath frame lying flat on a table, with a small tape mark at the top.

    Lay the wire frame flat on the table and check that the rings are even and the cross supports are firm. A standard wire frame has two or three concentric rings joined by supports, and those rings give you clear anchor points for wiring clusters. Decide which side will face out, and mark the top of the frame with a small piece of tape so the bow ends up in the right place later.

    If the frame has a hanging tab, leave it at the top and plan your bow for the bottom or the top, away from the tab. Wipe the frame clean if it has dust from storage, and bend any bent ring gently back into shape. A flat, even frame makes the finished wreath hang straight, so this short check is worth the time.

    4. Measure and Cut Ribbon Strips

    Hands measuring and cutting wired ribbon strips with scissors and a ruler on a table.

    Decide on one strip length for the main loops, such as 10 inches, and use the ruler to measure the first few strips. Cut a test strip, fold it into a loop, and hold it against the frame to check the size before you cut the whole batch. Loops that are too small will leave the frame showing, and loops that are too large will flop and hide the shape of the wreath.

    Cut strips in batches of ten, and stack them by color so you can grab the right color without sorting later. For a 16 inch frame, plan on roughly 60 to 80 main strips, depending on loop size and how full you want the wreath. Cutting in batches also lets you adjust the length early if the test loop looks too small or too large.

    5. Fold Strips Into Loops

    Hands folding a wired ribbon strip into an open loop, pinching the ends together at the base.

    Take one strip, bring the two ends together, and pinch the ends flat so the ribbon forms a loop with a small tail of pinched ribbon at the base. The loop should be round and open, not creased flat, so keep a finger inside the loop while you pinch the base. Wired ribbon helps here, since you can bend the edges gently to round out the shape.

    Repeat the fold for every strip, and stack finished loops in piles by color. Keep loop sizes close by using the same strip length and the same pinch point each time. If a loop looks flat, open it with your fingers and bend the wired edges outward until it matches the others, since uneven loops show clearly once they are wired to the frame.

    6. Bundle Loops Into Small Clusters

    Small clusters of red, green, and cream ribbon loops bundled together with floral wire on a table.

    Group three or four loops into a cluster, mixing colors as planned, with one accent loop tucked in the middle if you are using one. Hold the cluster at the pinched bases, fan the loops slightly so they point in different directions, and check the cluster from the front. A good cluster looks full from the front and still has a clear pinched base at the back for wiring.

    Wrap a short piece of floral wire tightly around the pinched bases, twist it firm, and leave two wire tails about 3 inches long for attaching the cluster to the frame. Make clusters in batches of five or six, and set them aside in a row so you can work through them in order. Building clusters first keeps the wreath even, since each section of the frame gets a similar amount of ribbon.

    7. Wire the First Cluster to the Frame

    Hands wiring the first ribbon loop cluster to a wire wreath frame, twisting wire at the back of the frame.

    Place the first cluster on the front of the frame, near the top, with the loops facing outward and slightly upward. Thread the wire tails around the nearest ring, pull them snug, and twist them tight on the back of the frame. The cluster should sit firm against the frame, with no wobble when you tap it lightly.

    Check the cluster from the front and from the side before moving on. Loops should stand away from the frame, not lie flat against it, and the cluster should cover the wire ring beneath it. If a loop flops forward, bend its wired edge gently to lift it, and tighten the wire twist if the whole cluster shifts. This first cluster sets the pattern, so take a moment to get it right.

    8. Work Around the Frame in Sections

    A wire wreath frame partly covered with red, green, and cream ribbon loop clusters, with more clusters waiting on a table.

    Add clusters one at a time around the frame, working in one direction from the first cluster. Place each new cluster close to the last one, so loops overlap slightly and the wire frame stays hidden. Keep the same mix of colors in each cluster, and keep loops facing outward as you move around the curve.

    Stop after every four or five clusters and hold the frame upright to check the front. Look for thin spots, a color that has piled up on one side, or loops that all lean one way. Small fixes are easy at this stage, while a full ring of clusters is harder to adjust. Continue around the frame until you return to the starting cluster, with no bare ring showing.

    9. Fill Gaps With a Second Layer

    Hands wiring an extra ribbon loop into a thin gap on a nearly finished ribbon wreath.

    Turn the frame over in your hands and look through the loops for bare wire, thin patches, or flat spots. Make a few extra single loops or small two loop clusters, and wire them into the gaps from the front, twisting the wire on the back as before. A second layer in thin spots gives the wreath its full look, and it also covers the wire twists from the first layer.

    Focus on the inner ring and the outer edge, since those areas show most from the street. Add loops until the frame reads as a full ring of ribbon from a few steps back, not just from close up. Step back from the table and view the wreath at arm’s length, since that distance is closer to how it will look on a door.

    10. Make a Large Bow for the Wreath

    Hands forming a large four loop bow from red wired ribbon, with long tails, on a table.

    Cut a length of wired ribbon about 36 inches long for the bow, and form two loops on each side by folding the ribbon back and forth, pinching the center after each fold. Keep the loops even, with the largest loops on the outside and slightly smaller loops toward the center, and leave two tails about 10 inches long. A four loop bow suits a ribbon wreath, since it matches the loop texture without adding a second style.

    Wrap a short piece of floral wire tightly around the pinched center, twist it firm, and leave wire tails for attaching the bow to the frame. Fan the loops out with your fingers, pull the tails down, and cut each tail end into a V shape with scissors. Check the bow from the front, and bend the wired edges until the loops stand open and even.

    11. Attach the Bow and Add Pine Picks

    A large red ribbon bow wired to a Christmas ribbon wreath, with pine picks and red berries tucked beside it.

    Decide on the bow position, usually at the top center or the bottom center of the wreath, and wire it to the frame through the back, twisting the wire tails tight. The bow should sit on top of the loops, not sunk between them, so add a small extra loop cluster behind it if it sits too low. Step back and check that the bow reads clearly from a few steps away.

    Add pine picks, berry picks, or small ornaments now, if you are using them, by wiring each pick stem to the frame in the same way as a cluster. Place accents in odd groups of three or five around the wreath, rather than in a strict ring, so they look placed rather than lined up. Keep accents light, since heavy ornaments can pull loops out of shape and weigh down one side.

    12. Trim Tails and Shape the Loops

    Hands trimming ribbon tails with scissors and shaping loops on a finished Christmas ribbon wreath.

    Look over the whole wreath and trim any ribbon tail that sticks out past the loop edge or hangs much longer than its neighbors. Cut tails at an angle or into a V shape, and keep the cuts clean so frayed ends do not show. Work slowly, since a tail cut too short cannot be put back, and check the balance after each few cuts.

    Shape the loops with your fingers, opening flat loops, lifting loops that lean inward, and bending wired edges to round out the curves. Turn the wreath slowly and shape each section in turn, so no side is left flat while another side is full. The goal is a wreath that looks even from the front and from both sides, with no single loop drawing the eye.
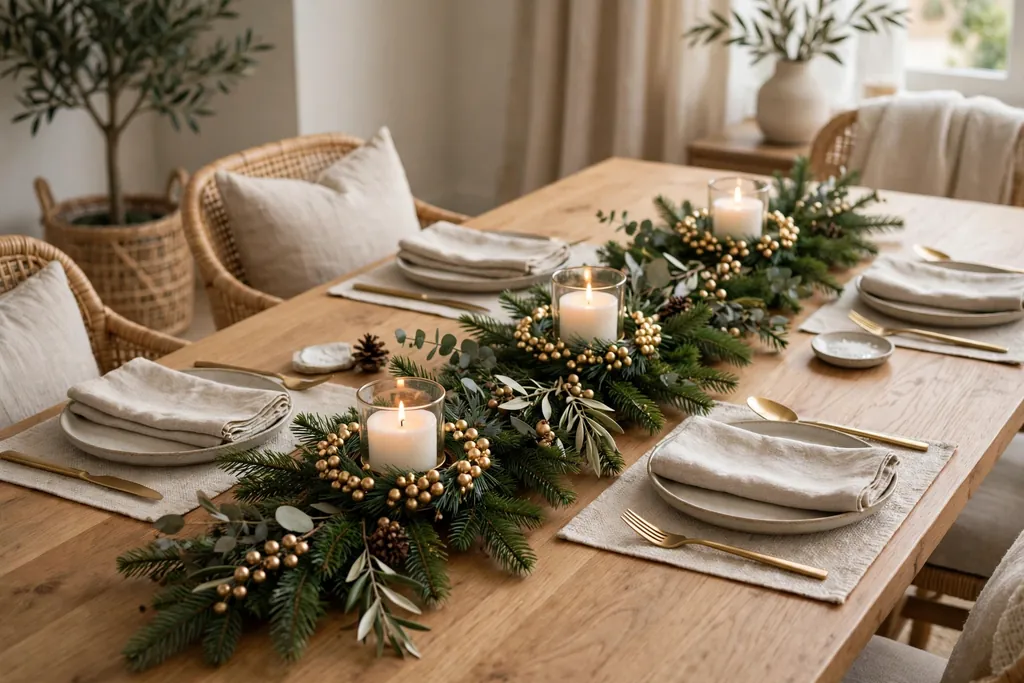
    13. Add a Hanger and Check the Balance

    Hands attaching a ribbon hanging loop to the top of a Christmas ribbon wreath and holding it up to check balance.

    Thread a loop of ribbon or a wire hanger through the top ring of the frame, and tie or twist it firm so it cannot slip. Hold the wreath up by the hanger and check that it hangs straight, with the bow level and no side dipping lower than the other. If one side dips, the ribbon is heavier on that side, so move one accent or trim a few loops on the heavy side.

    Shake the wreath gently to check that no cluster works loose, and tighten any wire twist that shifts. Check the back for sharp wire ends, and bend each end flat against the frame or cover it with a small piece of tape, so it cannot scratch the door. A wreath that hangs straight and has no loose wires is ready to go outside.

    14. Hang the Wreath and Make Final Adjustments

    A finished Christmas ribbon wreath in red, green, and cream hanging centered on a front door at eye level, with a porch lantern beside it.

    Hang the wreath on a sturdy over door hook, a nail, or a wreath hanger rated for the wreath weight, and center it on the door at eye level. Step back to the street or the end of the path and check the wreath from a distance, since door wreaths are mostly seen from a few steps away. Adjust loops that look flat from that distance, and straighten the bow if it tilted during hanging.

    Check the wreath again after the first windy day, and reshape any loops that were pressed flat against the door. In wet weather, bring a ribbon wreath under cover if your porch is fully exposed, and let it dry flat if it gets damp. Store the wreath in a box with tissue between the loops at the end of the season, so it keeps its shape for next year.

    Conclusion

    A Christmas ribbon wreath for your front door comes together from simple repeated steps: cut strips, fold loops, bundle clusters, wire them to the frame, and finish with a bow and a hanger. Keep loop sizes even, work around the frame in sections, fill gaps with a second layer, and shape the loops last, after the bow is in place. Hang the wreath straight, check it from a distance, and reshape it after wind or rain. With wired ribbon and a steady rhythm, the wreath will look full and festive all season.

    FAQs

    What kind of ribbon works best for a Christmas ribbon wreath?

    Wired ribbon works best for a Christmas ribbon wreath, since the wire in the edges helps each loop hold its curve. Use 2.5 inch wired ribbon for the main loops, and add a narrower wired ribbon as an accent if you want extra texture. Soft ribbon without wire can work for tails, but it will not hold loop shapes as well on a front door.

    How much ribbon do I need for a ribbon wreath?

    You need roughly 60 to 80 strips of 10 inch ribbon for the main loops of a 16 inch frame, plus a 36 inch length for the bow. The exact amount varies with loop size and how full you want the wreath, so buy an extra roll if you are unsure. Cutting a test loop first helps you judge loop size before you cut the full batch.

    What size wreath frame should I use for a front door?

    A 14 to 18 inch wire frame suits most front doors, since it reads clearly from the street without covering the door. A 16 inch frame is a safe middle choice for a standard door, while a smaller door suits a 14 inch frame. Measure your door and check the wreath size against it before you start wiring clusters.

    How do I keep ribbon loops from going flat?

    Keep ribbon loops from going flat by using wired ribbon, keeping loops open while you pinch the base, and shaping the wired edges after wiring. Wire clusters tightly to the frame so they cannot shift, and reshape loops with your fingers after hanging. If a loop keeps flattening, bend its wired edge outward and check that the cluster behind it is firm.

    Where should I place the bow on a ribbon wreath?

    Place the bow at the top center or the bottom center of the wreath, wired firmly to the frame so it sits on top of the loops. Top placement suits a wreath with a hanging loop at the top, while bottom placement suits a wreath where the bow acts as a visual anchor. Either position works, so pick the one that looks balanced on your door.

    How do I store a ribbon wreath after Christmas?

    Store a ribbon wreath in a box large enough to hold it flat, with tissue paper between the loops so they do not crush each other. Keep the box in a cool, dry place, and keep heavy items off the top of the box. Check the loops when you take the wreath out next year, and reshape any flat loops with your fingers before hanging.


  • 17 White Christmas Wreath Ideas for a Soft Winter Look

    17 White Christmas Wreath Ideas for a Soft Winter Look

    A white Christmas wreath works best when you start with a frosted or snowy green base, add white ornaments, berries, pinecones, or flowers in one palette, and finish with a ribbon or warm lights. Keep the design full but uncluttered, hang it in good light, and repeat one white accent nearby so the look feels calm and wintry.

    White wreaths suit almost any door color, since white reads clearly against dark paint, brick, wood, and glass. Pick one main white material, such as frosted pine, white berries, or white flowers, and let the other details stay quiet. For more seasonal ideas to pair with these looks, browse the Dwell Ovell decor ideas index. If your home already leans neutral, the calm palette in 21 Neutral Christmas Decor Ideas for a Calm Holiday Home pairs well with every wreath below.

    Key Takeaways

    • Start with one main white material per wreath, such as frosted pine, white berries, white flowers, or white ornaments, so the design stays calm.
    • Keep the palette narrow: white, cream, soft green, and one metallic, such as silver or gold, is enough for a soft winter look.
    • Hang white wreaths where they catch daylight or warm light, since light is what makes white details glow.
    • Use a sturdy hook or hanger rated for the wreath weight, and check centering from the street or across the room.
    • Repeat one white accent nearby, such as a candle, a throw, or a second small wreath, so the wreath feels part of the room.
    • Protect fresh wreaths from strong sun and heat, and bring them inside when they start to shed heavily.

    1. A Classic Frosted Pine Wreath on the Front Door

    Frosted pine Christmas wreath with a cream ribbon on a front door.

    Hang a frosted pine wreath on the front door, with branches dusted in fake snow and a simple white or cream ribbon at the top. The frosted tips give the wreath a snowy look even before any ornaments are added, and the green underneath keeps it grounded. Keep the ribbon bow modest so the branches stay the focus.

    Hang the wreath with an over door hook or a nail rated for its weight, and step back to the street to check that it sits centered on the door. If the door gets strong sun, choose a sturdy faux frosted wreath that holds its flocking. Shake a new faux wreath outdoors before hanging to remove loose flocking.

    2. An All White Ornament Wreath

    Wreath covered in white ornaments in matte, shiny, and frosted finishes.
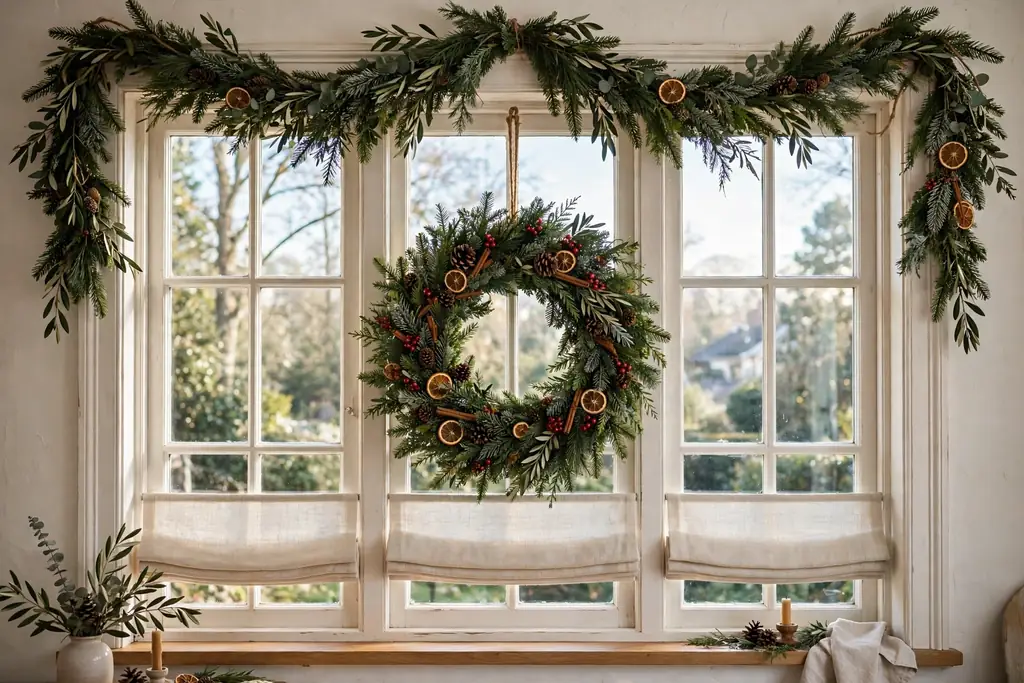
    Cover a foam or grapevine wreath form with white ornaments in mixed finishes: matte, shiny, glittered, and frosted. Mix round ornaments with a few stars, drops, or finials for shape, and place larger ornaments first, then fill gaps with smaller ones. The all white mix reads as snowy and bright without needing any other color.
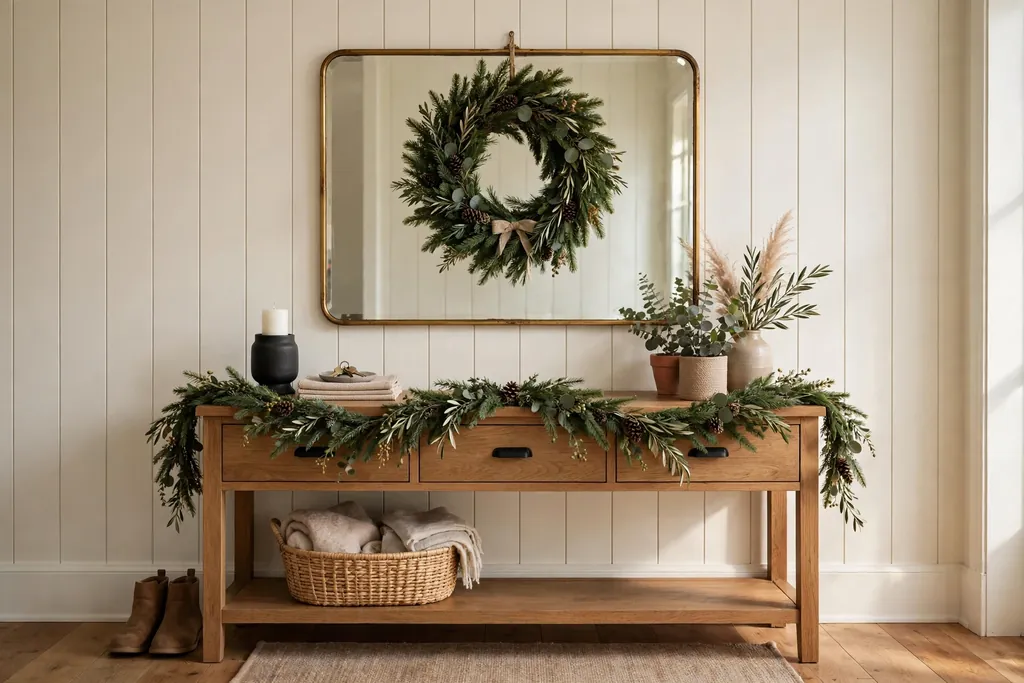

    Fasten ornaments with hot glue or wire so none slip off when the door moves. Keep the back flat so the wreath hangs flush against the door. Store an ornament wreath in a box with tissue around the outer edge so the finish on the front ornaments stays clean.

    3. A Snowy Berries and Pinecones Wreath

    Snowy green wreath with white berries and frosted pinecones.
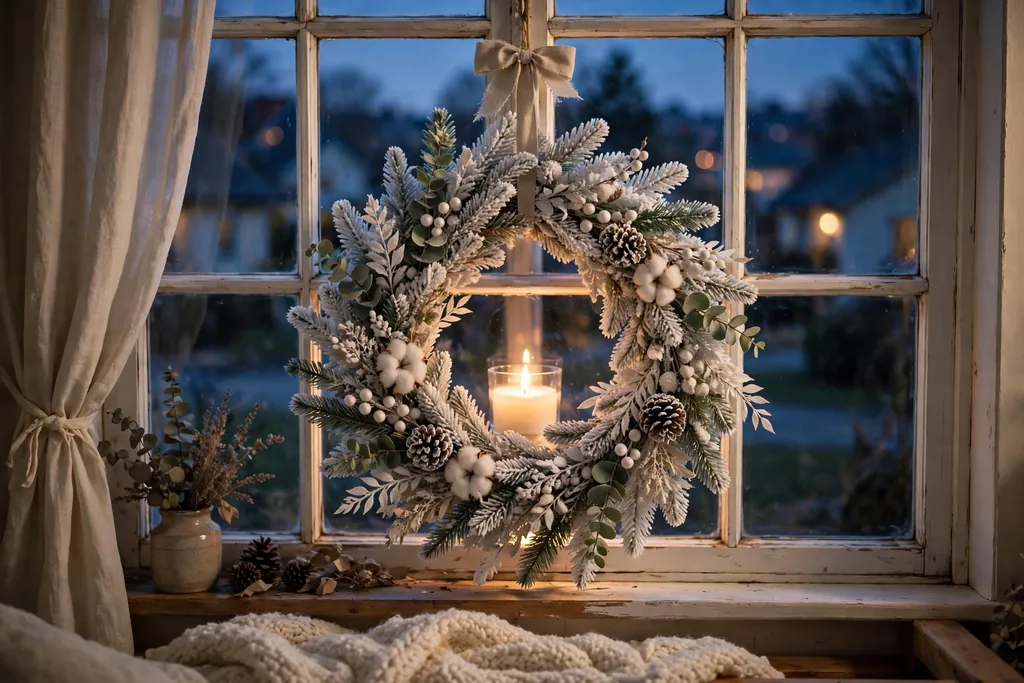
    Build a wreath from snowy green branches, then tuck in clusters of white berries and a few frosted pinecones. The berries add small points of white through the green, while the pinecones add texture and a natural feel. Keep the berries in small groups rather than spread singly, so they read as intentional clusters.
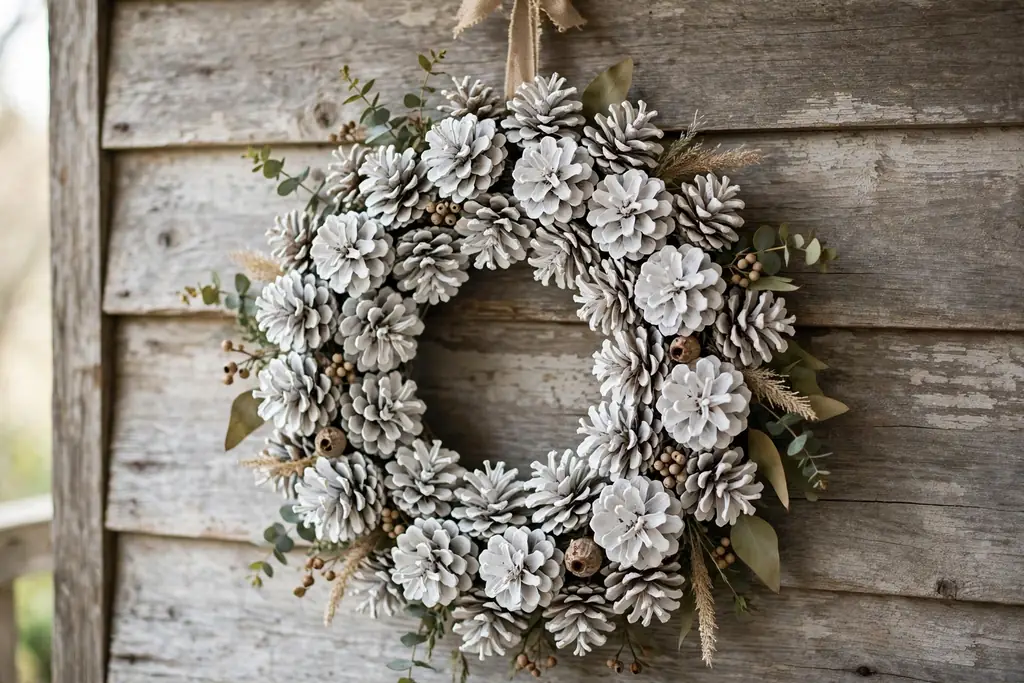
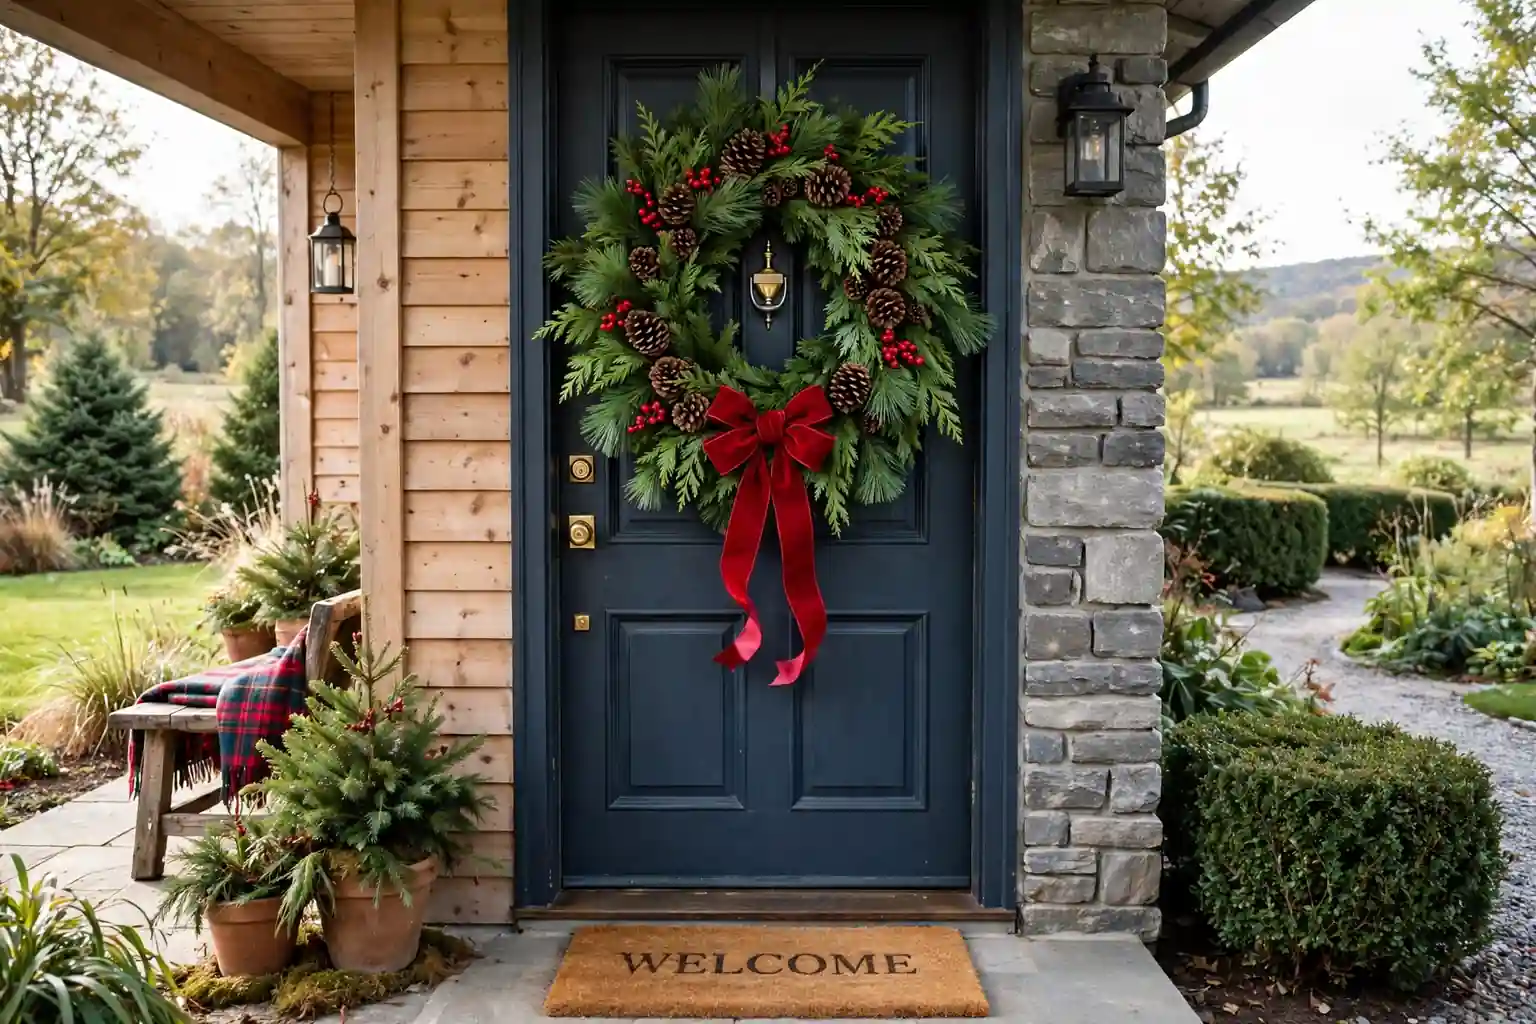
    Wire each berry stem and pinecone firmly to the base so they do not shift when the wreath is hung. If the wreath will hang outdoors, bring it under cover during heavy rain so the snowy finish does not wash off. A berry and pinecone wreath also works well above a mantel, where it can be seen up close.

    4. A White Roses and Eucalyptus Wreath

    Wreath of white roses and eucalyptus on a light wall.

    Combine white roses, real or faux, with soft gray green eucalyptus on a simple wreath base. The roses give the wreath a gentle, full shape, while the eucalyptus adds a loose, airy outline. Use roses in one size for a calm look, or mix one large rose with smaller buds for a little variation.

    If you use fresh roses, mist them lightly and keep the wreath out of direct heat so the blooms last longer. For a lasting version, choose good quality faux roses and bend the eucalyptus stems outward for a natural, uneven edge. This wreath suits an interior door, a bedroom wall, or a mirror, where its softer materials are protected.

    5. A Flocked Wreath with Warm White Lights

    Flocked Christmas wreath with warm white lights on a door.

    Wrap a string of warm white lights through a heavily flocked wreath, winding the wire deep into the branches so the lights glow from inside the snow. Warm white light suits a white wreath better than cool white, since it keeps the snow looking soft rather than blue. Add no ornaments, or just a few white ones, so the light stays the main feature.

    Use battery lights with a timer for a door wreath, so the lights switch on each evening without a cord across the doorway. Hide the battery pack behind the wreath or under a ribbon loop. Check the lights before hanging, and replace any dark section so the glow stays even around the full circle.

    6. An Oversized White Ribbon Bow Wreath

    Frosted wreath with a large white satin bow on a front door.

    Start with a plain frosted or snowy green wreath, then add one oversized bow in white satin, velvet, or wired ribbon at the top or bottom. A large bow turns a simple wreath into a clear focal point, and it needs little else: a few white berries or a single pinecone tucked near the bow is enough. Keep the ribbon tails long enough to move slightly, but short enough that they do not catch in the door.

    Shape the bow loops by hand after hanging, pulling each loop outward so the bow looks full from the front. Use wired ribbon if the bow will hang outdoors, since it holds its shape in wind. Store the bow flat or on a form after the season so the loops do not flatten.

    7. A White Poinsettia Wreath

    Wreath ringed with white poinsettia blooms and frosted pine tips.

    Ring a wreath base with white poinsettia blooms, real or faux, facing outward so each bloom shows its full shape. Fill gaps with frosted pine tips or white berries, and keep the blooms evenly spaced around the circle. White poinsettias give a classic Christmas signal in a softer color than the usual red.

    If you use fresh poinsettias, keep the wreath cool and out of drafts, and replace any bloom that wilts. Faux poinsettias hold up better on an exterior door and can be reused year after year. Pair this wreath with a plain cream ribbon rather than a patterned one, so the blooms stay the focus.

    8. A Minimal White Hoop Wreath

    Minimal hoop wreath with white flowers on the lower third.

    Make a wreath from a slim metal or wooden hoop, decorating only the lower third with white flowers, a few frosted sprigs, and a thin white ribbon. The bare hoop above gives the design breathing room and a modern, airy feel. This style suits small doors, narrow walls, and apartments where a full wreath would feel heavy.

    Hang a hoop wreath from a single nail or a small adhesive hook rated for its weight, and check that it hangs level. Keep the decorated section balanced left to right so the hoop does not tilt. A hoop wreath also works as a table centerpiece when laid flat with a candle in the center, using a battery candle for safety.

    9. A White and Silver Metallic Wreath

    White wreath with silver ornaments and silver ribbon on a dark door.

    Mix white ornaments, frosted branches, and silver accents, such as silver balls, silver ribbon, or a light dusting of silver glitter picks. Silver cools the white palette slightly and adds shine in low light, which suits evening entries and mantels. Keep silver to one or two accent types so the wreath does not look busy.

    Place silver pieces near the outer edge and at the top, where they catch light first. If the wreath will hang near a silver framed mirror or silver candle holders, the shared metal ties the display together. Wipe silver ornaments with a dry cloth before storing so the finish stays bright.

    10. A Cotton Stems and White Berries Wreath

    Snowy wreath with cotton stems and white berries.

    Tuck cotton stems with soft white bolls into a snowy green wreath base, then add small clusters of white berries between them. Cotton adds a soft, farmhouse feel and a texture that reads clearly even from the street. Keep the cotton bolls spread around the full circle rather than grouped on one side.

    Trim cotton stems to different lengths so the bolls sit at varied depths in the branches. If the wreath will hang outdoors, keep it under a porch roof, since cotton bolls can flatten in heavy rain. This wreath pairs well with a burlap or linen ribbon for a relaxed, natural finish.

    11. A White Wreath Above the Mantel

    White wreath above a mantel with white pillar candles below.

    Hang a white wreath centered above the mantel, with a long white or cream ribbon looped from a hook so the wreath hangs slightly lower than the mantel shelf. Add two white pillar candles or a small pair of lanterns on the mantel below to echo the wreath color. The white circle becomes the focal point of the room without competing with stockings or garland.

    Measure the wall space first so the wreath size fits the mantel width, leaving clear space on both sides. If stockings also hang on the mantel, keep them in cream or white so the whole display stays in one palette. Use a picture hook rated for the wreath weight, and check the hang from across the room.

    12. A Snow Dusted Grapevine Wreath

    Grapevine wreath with frosted pine tips and small white ornaments.

    Start with a natural grapevine wreath, then add frosted pine tips, white berries, and a few small white ornaments tucked into the twigs. The open grapevine base shows through in places, giving the wreath a rustic, woodland feel that differs from a full pine wreath. Keep the added pieces light so the twig structure stays visible.

    Wire additions to the thickest twigs so they hold firm. A grapevine wreath is light, so a small hook or nail is usually enough, but check the hang after the door has been opened and closed a few times. This style suits a porch, a garden gate, or a kitchen wall, where its natural texture fits the setting.

    13. A White Hydrangea Wreath

    Wreath of white hydrangea blooms on a light colored wall.

    Cover a wreath form with white hydrangea blooms, real dried blooms or faux, packed closely so the surface looks full and soft. Add a few frosted leaves or white berries at the edges for a winter touch, but let the hydrangeas carry the design. The rounded blooms give the wreath a cloudlike shape that suits a soft winter look.

    If you use dried hydrangeas, handle the wreath gently and hang it indoors, since dried blooms crush easily. Faux hydrangeas hold their shape on a front door and through the whole season. Hang a hydrangea wreath where it will not be brushed by coats or bags, so the blooms stay intact.

    14. A White Wreath on an Interior Door or Mirror

    Small white wreath hanging on a mirror in a bright room.

    Hang a smaller white wreath on an interior door, a bedroom door, or centered on a mirror with a suction hook or a ribbon over the top. An interior wreath brings the Christmas look into rooms that do not have a mantel or a tree, and a mirror doubles the effect by reflecting the wreath. Choose a lighter wreath for a mirror, with fewer ornaments and a slim ribbon.

    Check that the wreath does not block the door handle or the mirror frame, and that it hangs high enough to clear furniture below. A white wreath on a mirror works best with a simple design, since the reflection adds visual weight. This is also a good spot for a delicate wreath, such as one with white roses or dried hydrangeas.

    15. A White and Gold Wreath

    White wreath with gold ribbon and small gold ornaments on a front door.

    Pair white ornaments, frosted branches, and white berries with gold accents, such as gold ribbon, gold balls, or small gold pinecones. Gold warms the white palette and suits rooms with brass, wood, or warm lighting. Keep gold to a few pieces, placed evenly around the wreath, so the white still leads the design.

    Use a gold ribbon bow as the single strongest gold element, then repeat gold in smaller pieces, such as two or three gold ornaments. If the room already has gold candle holders or a gold framed mirror, the wreath will tie in naturally. Store gold ornaments separately from white ones so metallic dust does not mark the white finishes.

    16. A White Wreath in the Window with Candle Glow

    White wreath in a window with a glowing candle behind it.

    Hang a white wreath in a front window, centered in the glass, with a battery candle or a small lamp placed on the sill behind it. From the street, the wreath shows as a glowing white circle, and from inside, the candlelight softens the room in the evening. Use a suction hook or a ribbon from the top of the window frame to hold the wreath in place.

    Choose a wreath with a clear, simple outline for a window, since glass and outdoor light can hide fine detail. Keep the wreath size smaller than the window pane so a margin of glass shows all around it. If the window gets strong sun, use a faux wreath so the white materials do not fade.

    17. A Painted White Pinecone Wreath

    Wreath made from painted white pinecones in overlapping rows.

    Paint pinecones white, or whitewash them lightly so some brown shows through, then glue or wire them onto a wreath form in overlapping rows. Fill small gaps with frosted moss or tiny white berries. The result is a fully textured wreath made from one natural material, with a handmade feel that suits a porch, a kitchen, or a rustic entry.

    Collect pinecones of similar size for an even look, or mix sizes with the largest at the outer edge and smaller ones toward the center. Let painted pinecones dry fully before assembling, and seal them lightly if the wreath will hang outdoors. This is a good project for using pinecones gathered on a walk, cleaned and dried first.

    Conclusion

    A white Christmas wreath can be as simple as a frosted pine ring with a white bow, or as full as an all white ornament wreath, and either version gives a home a soft winter look. Start with one main white material, keep the palette narrow, and hang the wreath where light can reach it. Then repeat one white accent nearby, so the wreath feels like part of a calm, planned display rather than a single decoration on its own. Save the idea that fits your door, your room, and your time, and let the white do the quiet work all season.

    Frequently Asked Questions

    What is the best base for a white Christmas wreath?

    A frosted or snowy green pine base is the best starting point, since it gives the wreath a winter look before any white details are added. A grapevine base suits a rustic style, a foam form suits an ornament wreath, and a slim hoop suits a minimal style.

    How do I keep a white wreath from looking flat?

    Mix textures rather than adding color: combine matte, shiny, and frosted white finishes with natural materials such as pine, berries, pinecones, or cotton. Vary the depth of the pieces, with some tucked deep into the branches and others sitting near the surface, so light and shadow give the wreath shape.

    Can a white wreath hang on a dark colored door?

    Yes, a white wreath shows up well on a dark door, since the light wreath contrasts with the dark paint, wood, or brick behind it. Check the hang from the street, and choose a fuller wreath if the door is very dark, so the white reads clearly at a distance.

    Should I use fresh or faux materials for a white wreath?

    Use fresh materials indoors, where they are protected from sun, wind, and rain, and where their scent and softness can be enjoyed up close. Use faux materials on an exterior door or in a sunny window, since they hold their white color and shape through the whole season.

    How do I hang a wreath without damaging the door?

    Use an over door hook, a suction hook for glass, or a nail in the wall above the door, and check that the hook is rated for the wreath weight. Avoid tape or adhesive hooks on painted doors unless the product states it is safe for that surface, and test it in a hidden spot first.

    How do I store a white wreath so it stays white?

    Store the wreath in a clean, dry box or bag, with tissue around white ornaments and blooms so finishes do not rub or pick up dust. Keep the box out of damp storage areas, and check the wreath before hanging it next year, replacing any piece that has yellowed or lost its finish.


  • How to Make a Christmas Wreath from Start to Finish

    How to Make a Christmas Wreath from Start to Finish

    To make a Christmas wreath, build layers of fresh greenery onto a sturdy frame, wiring each bundle in the same direction until the frame is covered. Then add pinecones, berries, and a bow, check the shape from a distance, and hang the finished wreath on a hook or nail.

    A wreath made at home lets you control the size, the mix of greenery, and the decorations, so the result fits your door or wall rather than a generic shape. The process is forgiving: thin spots can be filled with extra bundles, and a bow or cluster of pinecones can cover a join or a bare patch. Work slowly through the steps below, and check the wreath from a few feet away as you go, since that is how it will be seen once it is hung.

    Key Takeaways

    • Choose the wreath size and placement first, since that decides the frame size and how much greenery you need.
    • Wire every bundle in the same direction so the greenery lies flat and the wreath looks full from the front.
    • Build the base in layers: a base layer, a fuller second layer, then filler foliage for texture.
    • Wire decorations in place rather than gluing them, so they stay put outdoors and can be moved if the balance is off.
    • Step back often to check the shape, and trim only after the wreath is full, not during the early layers.
    • Hang a fresh wreath out of strong sun and wind where possible, and mist it lightly to slow needle drop.

    Materials and Tools

    • A wire, grapevine, or foam wreath frame in your chosen size
    • Fresh greenery: pine, fir, cedar, or spruce branches, plus a filler such as juniper, boxwood, or eucalyptus
    • Floral wire or paddle wire, plus wire cutters
    • Pruning shears or sturdy garden scissors
    • A hanging loop of wire, ribbon, or twine
    • Pinecones, berry sprigs, dried orange slices, or small ornaments for decoration
    • Wide ribbon for a bow, plus narrow ribbon or twine for tying
    • A wreath hook, nail, or over door hanger rated for the wreath weight
    • Work gloves, a drop cloth or old sheet, and a bucket of water for fresh cuttings

    1. Decide on the Wreath Style, Size, and Placement

    A person measuring a front door space with a tape measure beside a round wreath frame on a table.

    Start by choosing where the wreath will hang and how large it should be. A front door usually suits a wreath between 24 and 36 inches across, while a wall or window often suits a smaller wreath between 18 and 24 inches. Measure the space and leave a margin of several inches around the wreath so it does not crowd trim, handles, or nearby lights.

    Next, pick a style to guide your materials. A classic green wreath uses only pine and fir with a simple bow, a woodland wreath adds pinecones and berries, and a vintage style wreath can use brass bells and plaid ribbon, as seen in these vintage Christmas decor ideas. Writing down your style and size before you shop keeps the project focused and avoids buying greenery you will not use.

    2. Gather Your Materials and Tools

    Wreath making supplies laid out on a work table: wire frame, greenery bundles, floral wire, shears, ribbon, and pinecones.

    Lay out everything from the materials list before you start cutting greenery. Check that your wire cutters cut cleanly, your shears are sharp, and you have enough floral wire, since stopping mid-build to search for tools breaks your rhythm and can leave cut greenery drying out. Keep a small container for wire offcuts so they do not end up on the floor.

    If you are using fresh greenery, keep cut branches in a bucket of water in a cool spot until you need them. Buy a little more greenery than you think you need, since a full wreath uses more bundles than a first attempt usually suggests, and spare branches are useful for filling thin spots at the end.

    3. Prepare and Sort the Fresh Greenery

    Hands trimming fresh pine and cedar branches with shears over a work table, with sorted piles of greenery nearby.

    Trim each branch to a workable length, usually 6 to 10 inches for the outer bundles, with shorter pieces for filler. Remove needles or leaves from the bottom 2 inches of each stem so you have a clean section to wire onto the frame, and discard any dry, brown, or broken branches. Sorting now makes the building steps faster, since you will not stop to trim each piece as you wire it.

    Sort the greenery into piles by type: one pile for the base layer, one for the second layer, and one for filler and accents. If you have two or three types of greenery, keep them separate so you can control the mix in each layer. Dampen the piles lightly if they feel dry, but do not soak them, since wet branches are heavier and harder to wire neatly.

    4. Prepare the Wreath Frame

    A bare wire wreath frame lying flat on a drop cloth on a work table, ready for greenery.

    If you are using a wire frame, check that the rings are firm and the frame sits flat on your work surface. A wire frame gives a clear structure for wiring bundles, and it works well for full, layered wreaths. A grapevine frame already looks finished, so it suits a lighter wreath where some of the frame shows through the greenery.

    If you are using a foam frame, wrap it in green floral tape or fabric first so the foam does not show through gaps in the greenery. For any frame, decide which side is the front and mark the top, since wreaths are usually built and viewed from one side. Place the frame on a drop cloth to catch needles while you work.

    5. Attach a Hanging Loop

    Hands twisting a wire hanging loop onto the top of a bare wreath frame.

    Make a hanging loop before you add greenery, since it is much harder to reach the frame once the wreath is full. Thread a length of sturdy wire, ribbon, or twine through the top of the frame and twist or knot it into a loop large enough to sit on a hook or nail. Test the loop by holding the frame up by it and checking that it hangs level.

    For a heavy wreath, use wire rather than ribbon for the loop, and add a second loop as backup if the frame allows it. A loop that sits flat against the back of the wreath will keep the wreath close to the door, while a longer loop lets the wreath hang lower on a wall. Set the loop length now, since adjusting it later means working through layers of greenery.

    6. Build the Base Layer of Greenery

    Hands wiring a small bundle of pine branches onto a wire wreath frame, with more bundles waiting on the table.

    Start the base layer by making small bundles of three to five stems, with the cut ends together and the tips pointing outward. Lay the first bundle on the frame, then wire its stems tightly to the frame with two or three wraps of floral wire. Keep the wire snug but not so tight that it snaps the stems.

    Place the next bundle so its tips cover the wired stems of the first bundle, and continue around the frame in the same direction. Overlapping each bundle this way hides the wire and gives the wreath a smooth, even flow. Work all the way around the frame, then check the back to make sure no wire ends stick out where they could scratch a door.

    7. Add a Second Layer for Fullness

    A half finished wreath with a second layer of cedar branches being wired over the pine base layer.

    Once the base layer covers the frame, add a second layer using a different type of greenery or a mix of your remaining branches. Place these bundles slightly outward from the base layer so the wreath gains depth and looks full from the side as well as the front. Wire each bundle in the same direction as the base layer to keep the growth pattern consistent.

    Use slightly shorter bundles for this layer if you want a neat outer edge, or longer bundles if you want a wilder, more natural outline. Step back after every few bundles and look at the wreath from the front, since it is easier to fix a thin spot now than after decorations are added. Fill any gaps with single stems wired in flat against the frame.

    8. Add Filler Foliage and Texture

    Hands tucking short juniper and boxwood sprigs into gaps in a nearly full green wreath.

    Filler foliage gives the wreath its detail and stops it looking flat. Tuck short sprigs of juniper, boxwood, cedar tips, or eucalyptus into gaps between the main bundles, pushing the stems under the wired bundles so they sit naturally. Vary the filler around the wreath rather than grouping one type in a single spot.

    Keep the filler shorter than the main greenery so it reads as texture, not as a competing layer. If a section looks crowded, remove a filler sprig rather than adding more, since a wreath with breathing room shows its shape better than one packed tight. At this stage the wreath should look full and even before any decorations go on.

    9. Wire in Pinecones and Berries

    Hands wiring pinecones and red berry sprigs onto a full green Christmas wreath.

    Decorations wired in place last longer than glued ones, especially outdoors. To wire a pinecone, wrap floral wire around its base scales, twist the wire ends together, and use those ends to fasten the pinecone to the frame through the greenery. Place pinecones in small groups of two or three rather than scattering single ones evenly, since groups look more natural.

    Add berry sprigs the same way, wiring the stems to the frame and letting the berries sit on top of the greenery. Spread the groups around the wreath so no side looks bare and no side looks overloaded, and keep decorations clear of the hanging loop at the top. If a pinecone sits at an odd angle, rewire it now rather than forcing it, since a loose decoration will shift once the wreath is hung.

    10. Make a Bow

    Hands forming a looped red ribbon bow on a work table beside a finished green wreath.

    A simple looped bow starts with a length of wide ribbon. Form two loops of equal size, pinch them together at the center, and wrap floral wire tightly around the pinch to hold the shape. Add two more loops, one on each side, for a fuller bow, then trim the ribbon tails at an angle and notch the ends if you like a classic finish.

    Fluff the loops by pulling them gently outward and adjusting them until the bow looks even from the front. Wire the bow to the frame at the bottom of the wreath, which is the usual spot, or at the top if your design calls for it. Check that the bow sits flat against the greenery and does not flop forward when the wreath is held upright.

    11. Add Ornaments, Ribbon, or Extra Accents

    A green Christmas wreath with a red bow, pinecones, and small gold ornaments arranged on a work table.

    With the bow in place, add any remaining accents sparingly. Small ornaments, dried orange slices, cinnamon sticks, or short lengths of ribbon can add color, but each piece should earn its place. Wire ornaments through their hanging loops, and wire flat accents like dried orange slices at two points so they do not spin.

    Stand back after each addition and judge the wreath as a whole. If an accent draws the eye away from the bow or unbalances one side, move it or leave it out. A wreath with a few well placed accents usually looks tidier than one covered in decorations, and it is easier to store and reuse next year if the accents are wired rather than glued.

    12. Check the Balance, Trim, and Secure Loose Ends

    Hands trimming a stray branch tip on a finished Christmas wreath held upright over a drop cloth.

    Hold the wreath upright at arm’s length and turn it slowly, looking for thin spots, stray stems, and decorations that sit at odd angles. Trim only the longest stray tips with shears, cutting just above a needle cluster so the cut blends in. Avoid trimming the whole outer edge into a circle, since that removes the natural shape you built layer by layer.

    Next, check every wire join by giving each bundle and decoration a gentle tug. Tighten any loose wire and tuck sharp wire ends into the greenery so they cannot scratch a door or catch on clothing. Shake the wreath lightly over your drop cloth; if needles fall in large numbers, the greenery may be dry, and a light misting can help before hanging.

    13. Hang and Adjust the Wreath

    A finished Christmas wreath with a red bow being hung on a front door hook.

    Hang the wreath on its hook, nail, or over door hanger, and step back to check its height and centering. On a front door, the wreath usually sits at eye level or slightly above, with equal space on each side. If the wreath tilts, adjust the hanging loop or add a small pad behind the lower edge so it sits flat against the door.

    Check the wreath from the street or from across the room, since that is the view most people will see. Make small adjustments to the bow loops and any shifted decorations now, while you can still reach the wreath easily. If the wreath will hang on a door that opens often, test the door swing to make sure the wreath clears the frame and any nearby lights.

    14. Care for the Wreath and Store It After the Season

    Hands misting a hanging Christmas wreath with a spray bottle, with a storage box of pinecones and ribbon nearby.

    A fresh wreath lasts longer in a cool, sheltered spot out of direct sun and strong wind. Mist the greenery lightly every few days if the air is dry, and keep the wreath away from heat vents and open flames, since dry greenery catches fire easily. Bring the wreath inside if a storm is forecast, or if it starts shedding heavily.

    At the end of the season, remove wired decorations and store them in a labeled box for reuse. Compost the greenery if your area accepts it, or dispose of it with garden waste. Wipe the frame clean, coil any leftover wire, and store the frame flat so it keeps its shape for next year, when you can repeat this same process with fresh greenery.

    Conclusion

    Making a Christmas wreath from start to finish comes down to a simple sequence: choose your size and style, prepare the frame and greenery, wire bundles in layers in one direction, add wired decorations and a bow, then check the balance before hanging. Take your time with the first layer, since a well built base makes every later step easier. With the wreath hung and adjusted, you have a decoration made to fit your home, and a frame and decorations ready to reuse next season.

    FAQs

    How long does it take to make a Christmas wreath?

    It usually takes one to two hours for a first wreath, including gathering materials and building the layers. The time depends on the wreath size and how many decorations you add, and later wreaths often go faster once the wiring rhythm feels familiar.

    What greenery is best for a Christmas wreath?

    Pine, fir, cedar, and spruce are common choices because they hold their needles well and smell fresh. Mixing two types, such as pine for the base and cedar for the second layer, gives the wreath depth, and adding juniper or boxwood as filler adds texture.

    Can I make a Christmas wreath without a wire frame?

    Yes, you can use a grapevine frame, a foam frame wrapped in tape or fabric, or even a bent willow ring. A wire frame is the easiest for a full layered wreath, while a grapevine frame suits a lighter wreath where part of the frame stays visible.

    How do I keep a fresh Christmas wreath from drying out?

    Hang it in a cool, sheltered spot out of direct sun and wind, and mist the greenery lightly every few days. Avoid heat vents and radiators, and bring the wreath inside during storms or very dry spells to slow needle drop.

    How do I attach decorations so they stay on outdoors?

    Wire decorations to the frame rather than gluing them, since wire holds in wind and temperature changes. Wrap wire around pinecone bases, ornament loops, or accent stems, twist the ends tight, and tuck the ends into the greenery so they do not scratch the door.

    Can I reuse a Christmas wreath frame and decorations?

    Yes, wire and grapevine frames can be reused for years if they are stored flat and kept dry. Remove wired decorations at the end of the season, store them in a labeled box, and rebuild the wreath with fresh greenery next year.


  • 21 Christmas Wreath Decor Ideas for Doors, Windows, and Walls

    21 Christmas Wreath Decor Ideas for Doors, Windows, and Walls

    Christmas wreath decor works best when the wreath fits its spot, with full evergreen and berry wreaths for front doors, lighter eucalyptus and dried flower wreaths for windows and walls, and a hanging method that suits the surface. Choose a size that leaves a clear border and repeat one accent color.

    A wreath is a fast way to mark the season, but the same wreath does not work everywhere. A front door needs a sturdy wreath that can handle movement and weather. A window needs a lighter wreath hung so it does not block light. A wall needs a wreath sized to the blank space around it, not just to the room. For more seasonal ideas to pair with these looks, browse the Dwell Ovell decor ideas index. Start with placement, then choose greenery, color, and a hanging method that fits that surface.

    Key Takeaways

    • Match the wreath to the spot: full and sturdy for doors, lighter for windows, and sized to the wall space for walls.
    • Leave a clear border around the wreath so it reads as a focal point, not as clutter.
    • Repeat one accent color, such as red, gold, cream, or burgundy, through wreaths in the same view.
    • Choose the hanging method for the surface: over door hooks, suction hooks, ribbon, nails, or adhesive hooks rated for the weight.
    • Keep wreaths clear of door swings, heat sources, candles, and paths where people brush past.
    • Store wreaths flat or hanging in a box or bag so branches keep their shape for next year.

    1. A Classic Evergreen Wreath on the Front Door

    Classic evergreen Christmas wreath with a red bow on a front door.

    Hang a full evergreen wreath on the front door with a sturdy over door hook, centered at eye level. Pine, fir, or mixed evergreen branches give a classic look that suits most door colors, and a simple red bow adds color without covering the greenery. Keep the wreath smaller than the door panel so the door handle and lock stay easy to reach.

    Check the wreath from the street, not just from inside, since depth and fullness read differently at a distance. If the door gets strong sun or wind, choose a wreath with wired branches that hold their shape. Bring a natural wreath inside when it starts to shed heavily, and shake it outdoors before hanging.

    2. A Red Berry and Pinecone Wreath on the Front Door

    Evergreen Christmas wreath with red berries and pinecones on a front door.

    Add red berries and pinecones to an evergreen wreath for a front door that reads clearly from the walkway. Place larger pinecones near the lower half and berries in small clusters through the branches, so color spreads evenly rather than sitting in one spot. A gold or cream ribbon can soften the red without competing with it.

    Keep berries and cones wired in place, since a door that opens and closes will shake loose items free. If the door is sheltered, natural berries last longer; on an exposed door, use sturdy faux berries that keep their color in rain. Step back after hanging and move any cluster that looks crowded.

    3. A Frosted Snowy Wreath for a Covered Door

    Frosted snowy Christmas wreath with a white bow on a covered porch door.

    Choose a frosted evergreen wreath for a covered front door or porch, where snow dusting on the branches reads as wintry without blocking the door. Pair it with a white or silver bow and a few frosted pinecones for a calm, cool palette. This style suits light colored doors and homes with white trim.

    Frosted wreaths shed flocking when handled, so hang them once and avoid moving them often. Keep them under cover, since rain can wash flocking off and leave patchy branches. Wipe the door around the wreath after the season, since loose flocking can settle on the threshold.

    4. A Rustic Twig and Burlap Wreath on a Side Door

    Rustic twig Christmas wreath with a burlap bow on a side door.

    Use a twig wreath wrapped with a burlap bow on a side door, mudroom door, or garden door, where a lighter, rustic look fits better than a full evergreen wreath. Add a few dried pinecones or a small bunch of dried grass for texture. The open twig base lets the door color show through, which keeps a small entry from feeling heavy.

    Hang a twig wreath with a hook that holds it flat against the door, since twig wreaths can tilt forward if hung from a single loop. Keep burlap dry where possible, and bring the wreath inside during heavy rain if the door is fully exposed. A twig wreath also works well on a pantry or utility door inside the home.

    5. A Modern Eucalyptus Wreath on a Painted Door

    Modern eucalyptus Christmas wreath with a cream ribbon on a painted door.

    Hang a eucalyptus wreath on a painted front door or interior door for a simple, modern Christmas look. Silver green leaves, a plain metal ring, and a single cream or black ribbon give a clean shape that suits gray, navy, or white doors. Keep decorations minimal so the leaf shape stays the focus.

    Eucalyptus wreaths are lighter than full evergreen wreaths, so an adhesive hook or a slim over door hook often holds them well. Check the hook rating against the wreath weight before hanging, especially on a door that moves often. If leaves dry and drop, misting does not restore them, so replace a shedding wreath rather than patching it.

    6. A Glass Ornament Wreath on an Interior Door

    Christmas wreath made from red, green, gold, and silver ornaments on an interior door.

    Make or hang a wreath formed from glass style ornaments in red, green, gold, and silver on an interior door, where it will not face weather or constant door slamming. Wire ornaments to a foam or wire form in mixed sizes, with larger ornaments at the back and smaller ones at the front for depth. The color alone carries the look, so no greenery is needed.

    Use shatterproof ornaments if the door is used often, and save fragile glass for a door that stays mostly closed, such as a guest room door. Hang the wreath with a sturdy hook and check that it clears the door frame when the door opens. Store the wreath flat in a box with tissue over the front so ornaments do not shift.

    7. Mini Wreaths on Double Doors

    Matching mini evergreen Christmas wreaths on double doors.

    Hang a matching mini wreath on each panel of a double door or French door for a balanced entry. Keep both wreaths the same size, greenery, and bow, and hang them at the same height so the pair reads as one design. Small evergreen wreaths with a single bow work well here, since large wreaths can crowd a narrow panel.

    Measure each panel before choosing a size, and leave space around handles and locks on both doors. Use one hook per wreath, and check that neither wreath catches when both doors open. If only one door is used daily, hang the wreath on the fixed panel with a hook that does not interfere with the working door.

    8. A Ribbon Hung Wreath in a Front Window

    Christmas wreath hanging in a front window from a wide red ribbon.

    Hang a wreath in a front window from a wide ribbon looped over the top of the window frame, so the wreath sits centered in the glass. A red, green, or plaid ribbon adds color above the wreath and gives a finished look from both inside and outside. Choose a wreath smaller than the window pane so light still enters the room.

    Fasten the ribbon with a small hook or pin at the top of the frame, and check that the wreath hangs flat and does not swing into the glass. From the street, a wreath in a front window reads best when the room behind it is lit in the evening. Keep the ribbon length the same on matching windows for a tidy street view.

    9. A Pair of Matching Wreaths on Twin Windows

    Pair of matching Christmas wreaths on twin windows beside a front door.

    Hang matching wreaths on twin windows, such as the windows on either side of a front door or a fireplace, for a symmetrical look. Use the same wreath size, greenery, and ribbon on both windows, and hang them at the same height. Symmetry suits formal rooms and front facades, where a single wreath can look uneven.

    Check both windows from outside after hanging, since small height differences show clearly from the street. If the windows differ in size, match the wreath size to the smaller window so neither wreath looks cramped. Use the same ribbon color on both, even if the rooms behind the windows have different decor.

    10. A Dried Orange and Cinnamon Wreath in a Kitchen Window

    Dried orange and cinnamon Christmas wreath in a kitchen window above a sink.

    Hang a dried orange, cinnamon stick, and greenery wreath in a kitchen window, where warm colors and natural scent suit cooking and gathering. Keep the wreath light and slim so it does not block daylight over a sink or counter. A twine loop and a small bow suit this style better than a wide satin ribbon.

    Keep dried fruit wreaths away from steam and splashes where possible, since moisture can soften dried slices. If the window is above a sink, hang the wreath slightly to one side of the main splash zone. Store dried fruit wreaths in a dry box after the season, since they can attract moisture if left in a damp room.

    11. A Small Lit Wreath in a Bedroom Window

    Small Christmas wreath with warm fairy lights in a bedroom window.

    Hang a small wreath with battery fairy lights in a bedroom window for a soft evening glow. A slim evergreen or eucalyptus wreath works well here, since a heavy wreath can darken a small window. Wrap lights loosely through the branches so the glow spreads evenly, and hide the battery pack behind the frame or curtain.

    Use a timer on the battery pack where available, so lights switch off overnight without handling the wreath. Keep lights away from curtains and fabric, and check that the wreath does not press against the glass when the window is closed. A lit wreath in a bedroom window also reads well from outside in the evening.

    12. A Group of Wreaths Across a Bay Window

    Three small matching Christmas wreaths across a bay window.

    Hang three small wreaths across a bay window, one in each section, for a look that fills a wide window without one oversized wreath. Use the same greenery and ribbon on all three, and hang them at the same height. Small wreaths keep light coming in, while the repeated shape ties the three sections together.

    Measure each bay section before choosing a size, since bay windows often have a wider center section. If the center section is wider, use a slightly larger wreath there, but keep the same greenery and bow so the group still matches. Check the group from inside the room, where the angled glass changes how the wreaths line up.

    13. A Large Wreath Above the Mantel

    Large evergreen Christmas wreath hanging above a fireplace mantel.

    Hang a large evergreen wreath above the mantel as the main wall focal point, centered over the fireplace. A wreath larger than a door wreath suits this spot, since the mantel and chimney breast give it room to breathe. Add a bow at the top or bottom, and keep mantel decorations low so they do not compete with the wreath.

    Hang the wreath from a nail or hook rated for its weight, and check that it sits clear of the mantel shelf and any stockings. Keep the wreath away from a working fire and from candles on the mantel. If the mantel holds a mirror, hang the wreath in front of the mirror only if the mirror is large enough to frame it, or move the wreath to a plain wall instead.

    14. A Wreath Above a Console Table

    Christmas wreath hanging above a console table in an entry hallway.

    Hang a wreath above a console table in an entry or hallway, centered over the table and sized to about two thirds of the table width. This proportion keeps the wreath in scale with the furniture below it. Pair it with a small lamp, a stack of books, or a bowl on the table, and leave space between the tabletop items and the wreath.

    Use a picture hook or nail that suits the wall type, and hang the wreath so its bottom edge sits well above the tallest table item. If the console holds a mirror, a wreath can hang beside the mirror rather than over it, to avoid a crowded reflection. A simple evergreen or eucalyptus wreath suits this spot, since the table already carries detail.

    15. A Wreath as Dining Room Wall Art

    Berry Christmas wreath on a dining room wall above a sideboard.

    Hang a wreath on a dining room wall as seasonal wall art, using a frame free section of wall where it can stand alone. A berry, magnolia, or mixed greenery wreath gives color in a room that often has plain walls and a large table. Center the wreath at eye level when seated, since guests view it from chairs rather than standing.

    Keep the wreath clear of serving areas and sideboards where platters pass, and avoid hanging it where chair backs brush against it. A wreath with a flat back sits better on a wall than a very deep door wreath. If the dining room has art on other walls, match the wreath size to the nearest framed piece so the wall does not look uneven.

    16. A Wreath Above a Bed

    Slim eucalyptus Christmas wreath hanging above a bed.

    Hang a wreath above a bed as a seasonal headboard alternative, centered over the bed and sized to the bed width. A slim eucalyptus, dried flower, or light evergreen wreath suits a bedroom, where a heavy door wreath can feel too dense. Keep the wreath high enough that pillows do not touch it when the bed is made.

    Hang the wreath from a secure wall hook, not from a bed frame or headboard that moves. If the bed has a headboard, hang the wreath above the headboard rather than on it, so the layers do not compete. A wreath above a bed works best in a room with plain bedding, where the wreath provides the main seasonal color.

    17. A Row of Three Small Wreaths on a Hallway Wall

    Row of three small identical Christmas wreaths on a hallway wall.

    Hang three small wreaths in a horizontal row on a hallway wall for a gallery style display. Use identical wreaths and equal spacing, and keep the row at eye level along the hallway. This idea suits a long, plain hallway where one large wreath would leave empty wall on either side.

    Measure the wall and mark all three hook positions before hanging the first wreath, since small spacing errors show in a row. Use light wreaths, such as boxwood or eucalyptus, so hallway hooks hold them well. Keep the row clear of coat hooks and door swings, and leave the same gap between each wreath and the wall ends.

    18. A Wreath on a Blank Staircase Wall

    Evergreen Christmas wreath on a staircase wall above a landing.

    Hang a wreath on a blank staircase wall, centered on the wall section between floors or above a landing. A medium evergreen wreath with a simple bow suits this spot, since the staircase already has rails and steps for detail. Hang it at a height that reads well from both the lower and upper floors.

    Check the wreath from the stairs, not just from the floor, since the viewing angle changes as you climb. Use a secure hook, since a wreath that falls on a staircase can land on steps below. Keep the wreath clear of handrails and light fixtures, and avoid a very deep wreath on a narrow staircase wall.

    19. A Wreath with Lanterns on a Living Room Wall

    Evergreen Christmas wreath on a living room wall with lanterns below.

    Hang a wreath on a living room wall with a pair of lanterns or candle holders on a table or shelf below it, so the wall display has a base. A plain evergreen wreath with a cream bow suits this pairing, since the lanterns add warmth below. Keep the table or shelf narrow enough that the wreath still reads as the main piece.

    Use battery candles in lanterns near a wreath, especially if the wreath is natural greenery. Keep the lanterns clear of the wreath branches, and leave space between the shelf and the wreath bottom edge. This pairing works on a wall beside a sofa or fireplace, where a single wreath alone might look small.

    20. A Wreath on a Kitchen Wall with Greenery

    Herb and greenery Christmas wreath on a kitchen wall beside a window.

    Hang a wreath on a kitchen wall, such as the wall beside a window or above a small shelf, where it adds seasonal color without taking counter space. A herb, bay leaf, or mixed greenery wreath suits a kitchen, since its colors match cooking herbs and wood tones. Keep the wreath away from the stove, oven, and sink splash zone.

    Hang the wreath from a hook that can be wiped clean, since kitchen walls collect grease and steam. A slim wreath sits better on a kitchen wall than a deep door wreath, which can catch on passing shoulders. If wall space is tight, a small wreath above a shelf or beside a cabinet gives the same effect in a smaller footprint.

    21. An Oversized Wreath as an Entry Wall Statement

    Oversized evergreen Christmas wreath on a large entry wall.

    Hang an oversized wreath on a large entry wall as a single statement piece, where a standard door wreath would look small. Choose a full evergreen wreath with a bold bow, and center it on the wall with generous space on all sides. This idea suits entries with high ceilings or a wide blank wall beside the front door.

    Measure the wall before buying, and choose a wreath that fills the wall without touching the ceiling, nearby doors, or light fixtures. Use a wall anchor rated for the wreath weight, since oversized wreaths are heavier than standard ones. Keep the rest of the entry simple, with one console or bench below, so the wreath stays the clear focal point.

    Conclusion

    Christmas wreath decor is easier when placement comes first. Doors need sturdy, weather ready wreaths hung at eye level. Windows need lighter wreaths that let light in and hang at a matching height. Walls need wreaths sized to the blank space, with a clear border and a simple base below where needed. Choose one accent color, hang each wreath securely for its surface, and keep wreaths clear of heat, door swings, and heavy traffic. Start with the front door, add one window or wall wreath, then repeat the look only where the space supports it.

    FAQs

    What size Christmas wreath should I use on a front door?

    A front door wreath usually looks best when it is smaller than the door panel, with a clear border around it, so the handle and lock stay easy to reach. Standard front doors suit a medium to large wreath, while narrow or side doors suit a smaller wreath. Measure the door panel before buying, and check the wreath from the street after hanging.

    How do I hang a Christmas wreath on a door without damage?

    Use an over door hook for a sturdy, damage free option, or a suction hook on glass, or an adhesive hook rated for the wreath weight on a smooth door. Check the hook rating before hanging, since a wreath that is too heavy can slip. Avoid nails on a door you want to keep unmarked, and test adhesive hooks on a small area first if the door finish is delicate.

    How do I hang a Christmas wreath in a window?

    Hang a window wreath from a ribbon looped over the top of the window frame, or from a suction hook on the glass, so the wreath sits centered in the pane. Choose a wreath smaller than the pane so light still enters the room. Check that the wreath hangs flat, does not swing into the glass, and matches the height of wreaths on nearby windows.

    What is the best Christmas wreath for a wall?

    The best wall wreath is one sized to the blank wall space, with a flat back and a weight your wall hook can hold. Large walls suit a large or oversized wreath, while narrow walls suit a slim eucalyptus or boxwood wreath. Center the wreath at eye level, leave a clear border around it, and keep it clear of furniture that brushes against it.

    How long does a natural Christmas wreath last?

    A natural evergreen wreath lasts longer in a cool, sheltered spot and when it is kept away from strong sun, wind, and heat. Covered doors and indoor walls help a natural wreath keep its needles longer than an exposed door. Bring the wreath inside when it sheds heavily, and choose a faux wreath for an exposed door if you need it to last the full season.

    How should I store a Christmas wreath after the holidays?

    Store a wreath hanging in a wreath bag or box, or flat in a box with tissue over the front, so branches keep their shape. Keep ornaments wired in place, and store dried fruit or frosted wreaths in a dry place away from moisture. Label the box by wreath style and spot, such as front door or mantel, so next season setup is quick.


  • An Easy Ornament Dough Recipe for Handmade Holiday Decorations

    An Easy Ornament Dough Recipe for Handmade Holiday Decorations

    An ornament dough recipe makes firm, paintable holiday ornaments from flour, salt, and water. Mix two cups of flour with one cup of salt, add water a little at a time, and knead until smooth. Roll the dough flat, cut shapes, bake at low heat until hard, then cool, paint, and seal each piece.

    This is a classic salt dough recipe, and it suits beginners because the ingredients are cheap and the steps are simple. The dough is for decoration only, so do not eat the finished ornaments, and keep unbaked dough and finished pieces away from pets. Work on a covered surface, since flour and salt can dust a table, and make a small first batch to learn how thick to roll and how long your shapes need in the oven.

    Key Takeaways

    • Mix two cups of flour with one cup of salt, then add water a little at a time until the dough holds together.
    • Knead until smooth, and roll to an even thickness so ornaments bake through without cracking.
    • Poke the hanging hole before baking, since baked dough is hard to pierce cleanly.
    • Bake low and slow, and let ornaments cool fully before painting or sealing.
    • Seal painted ornaments so the finish lasts, and store them in a dry box between layers of tissue.
    • Keep dough ornaments as decorations only, and hang heavier pieces on strong branches.

    Materials and Tools

    Ingredients:

    • 2 cups plain flour
    • 1 cup fine salt
    • 3/4 to 1 cup water, added a little at a time
    • Paint for decorating, such as acrylic craft paint
    • A clear craft sealant, spray or brush on

    Tools and supplies:

    • Large mixing bowl and measuring cups
    • Wooden spoon and a clean work surface
    • Rolling pin and cookie cutters
    • A straw or skewer for hanging holes
    • Baking sheet lined with parchment paper
    • Cooling rack, paintbrushes, ribbon or twine

    1. Gather Your Ingredients and Tools

    Flour, salt, water, mixing bowl, measuring cups, rolling pin, and cookie cutters arranged on a kitchen counter.

    Set out the flour, salt, water, bowl, measuring cups, rolling pin, cutters, baking sheet, and parchment before you start mixing. Having everything ready keeps the dough from drying out while you search for a tool, and it keeps flour off other parts of the kitchen. Cover the work surface with parchment or a clean cloth for easy cleanup.

    Check that your baking sheet fits your oven and that you have a cooling rack ready for later. If children will help, set out a small bowl of flour for dusting hands and cutters, and keep paint and sealant aside until the baking and cooling steps are done.

    2. Measure the Flour and Salt

    Hands measuring flour and salt into a large mixing bowl on a kitchen counter.

    Measure two cups of plain flour and one cup of fine salt, and level each cup with the back of a knife for a consistent mix. Fine salt blends more evenly than coarse salt, and it gives a smoother surface for painting. Use plain flour rather than self raising flour, since raising agents can puff the dough and blur cut shapes.

    Pour both into a large mixing bowl, and keep the water jug nearby but unmeasured for now. You will add water in small amounts in the next steps, since too much water at once makes a sticky dough that is hard to roll and slow to bake.

    3. Mix the Dry Ingredients

    Wooden spoon stirring flour and salt together in a large mixing bowl.

    Stir the flour and salt together with a wooden spoon until the mix looks even, with no pockets of plain salt or plain flour. An even dry mix helps the dough hold together when water is added, and it helps each ornament bake at a similar rate. Break up any small lumps with the back of the spoon as you stir.

    Take a few seconds to check the bottom of the bowl, where salt can settle. A quick final stir from the bottom up gives a uniform base, and that uniform base is what makes the dough smooth in the kneading step that follows.

    4. Add Water a Little at a Time

    Water being poured slowly into a bowl of flour and salt mixture, with a spoon nearby.

    Pour in about half a cup of water first, then stir until the mix starts to clump. Add the rest of the water one tablespoon at a time, stirring after each addition, until the dough comes together in a single mass. Most batches need between three quarters of a cup and one full cup, but the exact amount varies with the flour and the humidity in the room.

    Stop adding water as soon as the dough holds together and leaves the sides of the bowl fairly clean. A dough that feels soft but not sticky is right for rolling. If the dough turns sticky, knead in a little more flour, one tablespoon at a time, until it feels workable again.

    5. Knead Until Smooth

    Hands kneading smooth salt dough on a lightly floured kitchen surface.

    Turn the dough onto a lightly floured surface and knead it for five to ten minutes, pushing it away with your palms, folding it back, and turning it. Kneading blends the flour, salt, and water into a smooth, even dough that rolls without tearing. The dough is ready when it feels firm and smooth, with no dry cracks or sticky patches.

    If the dough cracks at the edges while you knead, add a few drops of water and keep kneading. If it sticks to your hands, dust the surface with a little more flour. Do not overwork the dough past the smooth stage, since extra handling can dry it out and make rolled sheets crack.

    6. Roll Out to an Even Thickness

    Salt dough being rolled flat with a wooden rolling pin on a floured surface.

    Dust the surface and the rolling pin lightly with flour, then roll the dough to about 6 mm thick, or about one quarter of an inch. An even thickness matters more than an exact number, since thin spots bake fast and can burn while thick spots stay soft inside. Roll from the center outward, and turn the sheet a quarter turn now and then to keep it even.

    If the dough sticks to the pin, dust the pin again rather than pressing harder. For a large batch, roll and cut half the dough at a time, and keep the rest covered with a damp cloth so it does not dry out while you work.

    7. Cut Shapes and Trim the Edges

    Star and tree cookie cutters cutting shapes from rolled salt dough on a counter.

    Press cookie cutters firmly through the rolled dough, then lift each shape with a flat spatula or a thin knife so the edges stay clean. Stars, trees, hearts, bells, and circles all work well, and simple shapes hold up best on the tree. Gather the scraps, knead them briefly, roll again, and cut more shapes until the dough is used up.

    Trim any rough edges with your fingers or a small knife before baking, since rough edges stay rough after baking. Place the cut shapes on a parchment lined baking sheet with a small gap between them, so warm air can move around each piece in the oven.

    8. Add Texture and Details

    A leaf pattern being pressed into a salt dough star ornament on a work surface.

    Press a stamp, a leaf, lace, or the end of a skewer lightly into the surface of each shape to add pattern before baking. Keep the marks shallow so they do not cut through the dough, and press evenly so the pattern reads clearly after painting. You can also add a name, a year, or initials with a skewer tip for a keepsake ornament.

    Work on one shape at a time while the dough is still soft, and re-cut any shape that distorts while you press a pattern into it. Skip heavy or deep details on thin ornaments, since deep marks can weaken a thin piece and cause it to crack as it dries in the oven.

    9. Make a Hanging Hole in Each Ornament

    A straw poking a hanging hole near the top of a salt dough ornament shape.

    Push a straw or skewer through the top of each shape, about 6 mm from the edge, and wiggle it gently to make a clean hole large enough for ribbon or twine. Make the hole before baking, since baked dough is hard and can crack if you try to drill or poke it after. Check each hole from both sides, and clear out any dough plug left inside.

    Place the hole so the ornament will hang straight, near the top center of the shape. For long shapes, such as a tree or a bell, test the balance by holding the shape up by the hole before baking, and move the hole slightly if the shape tilts to one side.

    10. Bake Low and Slow

    Salt dough ornaments baking on a parchment lined tray inside a low oven.

    Heat the oven to about 200 degrees Fahrenheit, or about 100 degrees Celsius, and bake the ornaments for two to three hours, depending on thickness. Turn the shapes over halfway through so both sides dry evenly, and check them often near the end of the bake. The ornaments are done when they feel hard all the way through and sound solid when tapped, with no soft or cool spots in the center.

    Let thicker pieces bake longer rather than raising the heat, since high heat can brown or puff the surface. If a piece still feels soft in the middle, return it to the oven for another 30 minutes and check again. Leave the baked ornaments in the cooling oven for a short while if your oven cools slowly, then move them to a rack.

    11. Cool Completely Before Decorating

    Baked salt dough ornaments cooling on a wire rack on a kitchen counter.

    Move the baked ornaments to a cooling rack and leave them until they feel cool all the way through, not just on the surface. Paint applied to warm dough can bubble or peel, and sealant applied too soon can trap dampness inside. Cooling also lets you check each piece for cracks or soft spots before you spend time painting it.

    Set aside any piece that still feels damp or soft in the center, and return it to a low oven for more drying time. Check the hanging holes again once the ornaments are cool, and clear any hole that narrowed during baking with a skewer before you thread ribbon through it.

    12. Paint and Decorate the Ornaments

    Hands painting a cooled salt dough star ornament red with a small brush.

    Paint each cool ornament with thin coats of acrylic craft paint, and let each coat dry before adding the next. Thin coats keep detail sharp, while thick coats can fill stamped patterns and take much longer to dry. Use small brushes for edges and details, and paint the back of each ornament too, so it looks finished from every angle on the tree.

    Add simple details such as dots, stripes, or a name in a contrast color once the base coat is dry. Keep glitter and small glued items for ornaments that will hang high or sit on a mantel, where loose pieces are less likely to drop. Let all paint dry fully before moving on to sealing.

    13. Seal, Hang, and Store the Finished Ornaments

    Finished painted salt dough ornaments with ribbon loops hanging on a Christmas tree branch.

    Brush or spray a clear craft sealant over each painted ornament in a well ventilated area, and let it dry fully before handling. Sealant protects the paint from chipping and helps keep damp air out during storage, which is the main cause of softening over time. Apply a second thin coat if the first coat looks patchy, and let that coat dry fully too.

    Thread ribbon or twine through each hanging hole, and hang heavier ornaments on strong inner branches close to the trunk. For storage, wrap each ornament in tissue and pack them in a dry box with heavier pieces at the bottom. Check stored ornaments each year for damp or damage, and re-seal any piece where the finish has worn thin.

    Conclusion

    An ornament dough recipe is a simple way to make handmade holiday decorations from flour, salt, and water. Mix and knead the dough until smooth, roll it evenly, cut clean shapes, poke hanging holes before baking, and bake low until each piece feels hard through. Cool the ornaments fully, paint in thin coats, seal the finish, and hang them where they can be seen and enjoyed. Make a small batch first, learn how your oven handles the dough, and save the shapes and colors that work best for next year.

    FAQs

    What is an ornament dough recipe?

    An ornament dough recipe is a method for making firm, paintable holiday ornaments from flour, salt, and water. The dough is mixed, kneaded, rolled flat, cut into shapes, baked at low heat until hard, then cooled, painted, and sealed for hanging on a tree or giving as a gift.

    What ingredients do I need for ornament dough?

    You need two cups of plain flour, one cup of fine salt, and three quarters to one cup of water for a basic ornament dough recipe. You also need paint and a clear sealant for decorating, plus a rolling pin, cookie cutters, a baking sheet, and ribbon or twine for hanging.

    How thick should I roll ornament dough?

    Roll ornament dough to about 6 mm thick, or about one quarter of an inch, and keep the thickness even across the whole sheet. Even thickness helps each ornament bake through at the same rate, while thin spots can burn and thick spots can stay soft inside.

    How long do I bake salt dough ornaments?

    Bake salt dough ornaments at about 200 degrees Fahrenheit, or about 100 degrees Celsius, for two to three hours, depending on thickness. Turn them halfway through, and keep baking until each piece feels hard all the way through, with no soft or cool spot in the center.

    Why did my salt dough ornaments crack?

    Salt dough ornaments crack when the dough is rolled unevenly, baked at too high a heat, or dried too fast, or when a hanging hole is made after baking. Roll evenly, bake low and slow, let pieces cool fully, and always poke hanging holes before baking to reduce cracking.

    How do I store dough ornaments so they last?

    Store dough ornaments in a dry box with tissue between layers, heavier pieces at the bottom, and fragile pieces wrapped alone. Keep the box in a cool, dry place, check the ornaments each year for damp or damage, and re-seal any piece where the finish has worn thin.


  • 15 Personalized Photo Ornament Ideas for Meaningful Holiday Decor

    15 Personalized Photo Ornament Ideas for Meaningful Holiday Decor

    A personalized photo ornament turns a favorite picture into a tree decoration you can hang, gift, or keep for years. Choose a clear bauble, wood slice, acrylic disc, metal print, or fabric shape, add one sharp photo, and finish with a name, date, or short message. The best choice depends on the photo, the tree, and who will receive it.

    Photo ornaments work because they carry a specific memory, not just a color or theme. A wedding photo, a first home, a grandparent, a pet, or a family trip all read at a glance on a tree, and they invite conversation when guests notice them. Start with the photo first, then pick a format that suits its shape, its colors, and where it will hang. A bright, detailed photo suits a clear print surface, while a soft, older photo suits wood, fabric, or a sepia treatment. For more nostalgic seasonal looks to pair with these ornaments, see the vintage Christmas decor ideas. Keep each ornament light enough for the branch it will hang on, and protect printed photos from strong sunlight and damp storage.

    Key Takeaways

    • Start with one sharp, well lit photo per ornament, and crop it to the ornament shape before printing.
    • Match the format to the photo: clear surfaces suit bright, detailed pictures, while wood, fabric, and sepia suit soft or older pictures.
    • Add a name, date, or short message so the ornament still tells its story years later.
    • Keep ornaments light, hang them on sturdy branches, and test the loop before the tree goes up.
    • Use copies of precious original photos, and keep the originals safe in an album or a digital backup.
    • Store photo ornaments in tissue lined boxes, away from sunlight and damp, so prints stay clear.

    1. Clear Fillable Photo Baubles

    Clear glass bauble ornament with a family photo inside hanging on a Christmas tree branch.

    A clear fillable bauble holds a printed photo curled gently inside a transparent ball, so the picture shows through from every side. Open the two halves, curl the photo with the image facing out, and slip it inside with a small amount of fake snow, dried greenery, or plain tissue for support. Close the halves firmly, add a ribbon loop, and hang the bauble where light can pass through it.

    This format suits bright, colorful photos, such as a family portrait or a beach trip, because the clear shell adds shine without covering detail. Print on sturdy photo paper rather than thin copy paper, so the curl holds its shape and the ink does not smudge inside the ball. If the photo slips, add a small piece of tissue behind it to hold it in place. Avoid very large prints, since a photo that is too wide will crease at the edges and hide faces.

    2. Wood Slice Photo Transfers

    Wood slice ornament with a photo transferred onto the wood hanging by twine.

    A wood slice photo transfer places a picture on a thin round slice of wood, with the grain showing softly through lighter parts of the image. Print the photo in reverse on plain paper, brush transfer medium over the wood, press the paper face down, and let it dry fully before rubbing the paper away with a damp cloth. Seal the finished slice with a clear matte finish, drill or use a pre drilled hole, and hang it with twine.

    This idea suits rustic trees, cabin style rooms, and outdoor themed displays, where wood, pine, and twine already set the tone. Photos with strong contrast and simple backgrounds transfer most clearly, while very dark photos can lose detail in the grain. Test the method on a spare slice first, since drying time and rubbing pressure affect the result. A short handwritten date on the back turns the slice into a dated keepsake.

    3. Flat Acrylic Photo Discs

    Flat acrylic photo disc ornament with a family portrait hanging on a Christmas tree.

    A flat acrylic disc prints a photo on a clear, round panel that hangs like a modern ornament, with light passing around its edges. The photo is printed on the back of the disc or set behind clear acrylic, so the front stays smooth and easy to wipe clean. Add a simple ribbon or cord loop through a hole at the top, and hang the disc near the outer branches, where it can catch light.

    Acrylic suits sharp, modern photos and clean, simple trees, since the flat shape and clear edge keep attention on the picture itself. Round discs suit single portraits, while a larger disc can hold a small group photo without crowding faces. Keep the disc away from heavy neighboring ornaments, since acrylic can scratch if it knocks against glass or metal. Wipe it with a soft dry cloth, and store it flat with tissue over the printed side.

    4. Brushed Metal Photo Discs

    Brushed gold metal photo disc ornament with a wedding portrait hanging on a tree.

    A brushed metal photo disc prints a picture on a thin metal round with a soft, matte sheen, giving the photo a firm, lasting feel. The metal surface adds gentle contrast, so portraits and landscape photos both read clearly, and the disc hangs flat against the tree without swinging much. Choose a silver, gold, or copper tone that matches the rest of the tree, and add a ribbon loop in a plain, matching color.

    Metal discs suit photos meant to last, such as wedding portraits, anniversary pictures, and milestone family photos, since metal resists bending and fading better than paper based formats. Keep the disc light by choosing a small or medium size, and check the branch weight before hanging a full set. If the metal edge feels sharp, cover it with a thin ribbon border or choose a disc with a finished, rolled edge.

    5. Mini Photo Snow Globe Ornaments

    Mini snow globe ornament with a winter family photo inside and falling glitter snow.

    A mini photo snow globe ornament sets a small photo inside a clear, water filled or sealed globe, with glitter or fake snow that drifts when the globe is shaken. The photo sits upright on a small base inside the globe, and the base can carry a name, a year, or a short message. Hang the globe from a sturdy branch, or stand it on a mantel or shelf when the tree is not up.

    This format suits winter photos, such as a snowy vacation, a first snowfall, or a family ski trip, since the falling snow matches the picture. Keep the globe small and light, since a water filled globe is heavier than a hollow bauble, and hang it low on the tree where a fall would do less harm. Check the seal before hanging, and keep the globe away from heat sources and direct sun, which can cloud the liquid over time.

    6. Fabric Photo Pillow Ornaments

    Fabric pillow ornament with a child photo printed on cream cotton hanging on a tree.

    A fabric photo pillow ornament prints a picture on soft fabric, then sews it into a small, lightly stuffed pillow shape with a ribbon loop. Print the photo on printable fabric or have it printed on cotton, cut two matching shapes, sew them together with the photo on the front, and add a small amount of stuffing before closing the seam. Round, heart, and star shapes all work, and a plain backing fabric keeps the ornament light.

    Fabric ornaments suit homes with young children or pets, since they are soft, light, and safe on low branches. They also suit cozy, handmade trees, where felt, linen, and cotton already appear. Photos with bold shapes and clear faces print best on fabric, since fine detail can soften in the weave. If the fabric is washable, spot clean only, and store the ornament flat so the stuffing keeps its shape.

    7. Ceramic Photo Tile Ornaments

    Round ceramic tile ornament with a family photo and cream border hanging on a tree.

    A ceramic photo tile ornament prints a picture on a small glazed tile, giving the photo a smooth, firm surface and a clean, finished edge. The tile can be round, square, or shaped like a house or star, and it hangs from a ribbon loop through a hole or a glued hanger on the back. A thin border around the photo, in cream, gold, or a plain color, helps the picture stand out on a busy tree.

    Ceramic suits formal trees and mantel displays, where a firm, weighty ornament reads as a keepsake rather than a casual decoration. Hang ceramic tiles on strong branches near the trunk, or display them on a small stand, since tile is heavier and breakable if dropped. Photos with clear faces and simple backgrounds suit tile best, because glaze can soften very fine detail. Wrap each tile in tissue for storage, and keep tiles apart so edges do not chip.

    8. Multi Photo Mini Frame Ornaments

    Small wood mini frame ornament holding three family photos hanging on a tree branch.

    A multi photo mini frame ornament groups two to four small photos in one hanging frame, so one ornament can hold a short story, such as a year of milestones or a family of siblings. Use a small wood or metal frame with several openings, or mount small prints on a backing board inside a single frame. Keep each photo small and clearly cropped, so faces stay readable at tree distance.

    This idea suits grandparents, parents, and anyone who wants one ornament per child, per trip, or per year, rather than a full set of single photo ornaments. Choose photos with similar lighting and color, so the group reads as one piece, and add a small label with a year or a family name on the frame. Hang the frame where guests can step close and look, such as near the front of the tree or on a mantel hook, since small photos need a closer view.

    9. Star Shaped Photo Ornaments

    Gold star shaped ornament with a celebration photo in the center hanging on a tree.

    A star shaped photo ornament cuts or prints a picture into a star outline, so the photo itself takes the shape of a classic tree decoration. The star can be wood, acrylic, metal, or stiff card, with the photo mounted on the front and a plain backing on the reverse. Hang stars near the top of the tree, mixed with plain stars, or use one large photo star as a tree topper for a small tree.

    Stars suit celebration photos, such as a graduation, a new job, a wedding, or a first home, since the shape already signals a highlight. Keep the star size in balance with the tree: small stars suit tabletop trees, while larger stars suit full size trees. Crop the photo so the main face or subject sits in the center of the star, away from the points, where cropping can cut off important detail.

    10. Heart Shaped Photo Keepsake Ornaments

    Red heart shaped ornament with a couple photo and cream ribbon loop hanging on a tree.

    A heart shaped photo keepsake ornament pairs a picture with a heart outline, making it a clear choice for couples, close family, and memorial ornaments. The heart can be wood, ceramic, fabric, or acrylic, with the photo on the front and a name, date, or short line of text on the back. A simple ribbon loop in red, cream, or gold finishes the piece without competing with the photo.

    Heart ornaments suit anniversary photos, wedding pictures, and photos of loved ones who are missed at the holidays, since the shape carries meaning on its own. Keep the design plain, with one photo and one short message, so the ornament reads as sincere rather than crowded. Hang heart ornaments at eye level, where they are easy to see and easy to lift down for a closer look.

    11. Film Strip Photo Ornaments

    Vertical film strip ornament with four small travel photos hanging on a tree branch.

    A film strip photo ornament arranges three to five small photos in a vertical strip, like frames from a roll of film, telling a short sequence in one hanging piece. Print the photos in a row on a strip of card, acrylic, or fabric, add small sprocket style borders or plain dividers, and hang the strip from a ribbon loop at the top. The strip can follow one day, one trip, or one year in order.

    Film strips suit travel photos, a baby first year series, and a set of holiday mornings over several years, since the sequence adds meaning that a single photo cannot carry. Keep each frame small but sharp, and order the photos from top to bottom in time order, so the story reads clearly. Hang the strip where it can hang straight, away from heavy branches that could bend it, and keep the total length short enough to clear the branch below.

    12. Sepia Photos in Vintage Brass Frames

    Small ornate brass frame ornament holding a sepia family portrait hanging on a tree.

    A sepia photo in a vintage brass frame ornament gives an old or old style photo a formal, aged setting on the tree. Print the photo in warm sepia tones, mount it in a small ornate brass frame, and hang it with a dark ribbon or a thin cord. The brass frame adds weight and detail, so the ornament suits trees with gold, cream, and deep green tones.

    This idea suits scanned family photos from past decades, wedding photos from parents or grandparents, and portraits meant to feel historic. Scan the original photo at a high resolution and print a copy, keeping the original safe, since brass frames and tree light can fade prints over time. Keep the frame small, so its weight stays safe on a branch, and hang it near the front of the tree, where the sepia tones and frame detail can be seen.

    13. Pet Photo Paw Ornaments

    Paw shaped wood ornament with a dog photo in the center hanging on a tree.

    A pet photo paw ornament combines a pet picture with a paw shape, a paw print accent, or a small bone detail, making the ornament easy to spot as a pet tribute. The paw shape can be wood, acrylic, or ceramic, with the pet photo mounted in the center and the pet name added below the picture. A plain ribbon loop keeps the focus on the photo and the paw outline.

    Pet ornaments suit households where a dog, cat, or other pet is part of family holidays, and they make thoughtful gifts for pet owners. Choose a clear, close photo where the pet face fills the frame, since a distant photo will lose detail in a small ornament. Add the pet name and, if wanted, the year, so the ornament stays clear when many pet ornaments share one tree. Hang pet ornaments at a height where children and guests can find them easily.

    14. Clay Footprint and Photo Ornaments for a First Christmas

    Clay ornament with a baby footprint impression beside a small first Christmas photo.

    A clay footprint and photo ornament pairs a small clay impression of a baby foot or hand with a first Christmas photo, marking a milestone year in one keepsake. Press the print into soft, air dry clay, let it dry fully, and mount a small photo beside or below the print on the same ornament, or on a backing card behind it. Add the baby name and the year in plain lettering, and seal the clay before hanging.

    This idea suits a baby first Christmas, a first holiday in a new home, and gifts for grandparents, since the print and the photo together record growth at one point in time. Make the print early, while the clay is soft and the baby is calm, and keep a spare piece of clay for a second try. Keep the finished ornament light and hang it low or display it on a stand, since clay can break if dropped. Store it wrapped in tissue, with the photo side protected.

    15. Shadow Box Photo Ornaments with Small Keepsakes

    Deep shadow box ornament with a wedding photo and small keepsakes inside hanging on a tree.

    A shadow box photo ornament sets a picture inside a deep, small frame, with room for tiny keepsakes beside it, such as a dried flower, a ticket stub, a small shell, or a snippet of ribbon. The depth keeps the keepsakes in place behind clear glass or acrylic, while the photo stays at the back of the box. Hang the box from a strong loop, or stand it on a mantel, since the added depth makes it heavier than a flat ornament.

    Shadow box ornaments suit trips, weddings, and milestone years, where one photo alone does not carry the full memory. Choose only two or three small, flat keepsakes, and fix each one in place, so nothing shifts when the ornament moves. Keep the photo as the largest item in the box, and leave clear space around it, so the keepsakes support the picture rather than covering it. Label the back with the year and the event, so the story stays attached to the ornament.

    Conclusion

    A personalized photo ornament works best when the photo leads and the format supports it, rather than competing with it. Pick one clear picture, choose a material that suits its tone and the tree it will hang on, and add a name or date so the memory stays clear in future years. Start with one or two ornaments, check how they hang and how they look in tree light, then build a set over time. The most meaningful trees are rarely the most crowded ones: a few well chosen photo ornaments, spaced where they can be seen, will carry more memory than a tree covered in pictures no one can read.

    Frequently Asked Questions

    What is the best photo to use for a personalized photo ornament?

    The best photo is a sharp, well lit picture where the main face or subject fills much of the frame, since small ornaments hide fine detail. Choose a photo with simple background and good contrast, crop it to the ornament shape, and print a test copy at the final size before making the full ornament.

    How do you protect a photo ornament from fading?

    Keep photo ornaments out of strong, direct sunlight, use printed copies rather than original photos, and store them in tissue lined boxes in a cool, dry place. Avoid damp storage and heat sources, and seal wood, clay, and transfer ornaments with a clear finish made for the material, following the product directions.

    What size photo do I need for a photo ornament?

    Most photo ornaments use small prints, often between two and four inches across, depending on the ornament shape and size. Measure the ornament opening or print area first, crop the photo to that shape, and print a test at the exact size, since a photo that looks clear on a screen can lose faces when printed small.

    Can photo ornaments be washed or cleaned?

    Most photo ornaments should be dusted gently with a soft, dry cloth rather than washed, since water can damage prints, fabric, and transfer finishes. Acrylic and metal ornaments can be wiped with a soft dry cloth, while fabric, wood, and paper based ornaments should be kept dry and stored with tissue between pieces.

    How do you hang a heavy photo ornament safely?

    Hang heavy ornaments, such as ceramic tiles, brass frames, and shadow boxes, on strong branches near the trunk, using a sturdy loop and a hook rated for the weight. Test the branch by hanging the ornament and checking for bending or slipping, and move heavier pieces lower on the tree, where a fall would cause less damage.

    What makes a good personalized photo ornament gift?

    A good photo ornament gift pairs a meaningful photo with a clear name, date, or short message, in a format that suits the recipient tree and home. Choose a light, durable format for shipping, wrap the ornament in tissue inside a sturdy box, and include a short note explaining the photo, so the gift reads as personal even before it reaches the tree.


  • 17 Ways to Display 12 Days of Christmas Tree Ornaments

    17 Ways to Display 12 Days of Christmas Tree Ornaments

    Display a 12 Days of Christmas set by giving each ornament its own clear spot in story order, from the partridge on day one through the drummers on day twelve, on a tree, mantel, shelf, or wall rail where light reaches every piece and no ornament hides behind another.

    A 12-piece set works best when the order is easy to follow. The song gives the set a built-in sequence, so a display that keeps day one through day twelve in order will read at a glance, even to a guest who only looks for a few seconds. Start by laying the ornaments out in order on a table and checking which pieces are large, heavy, or fragile. Heavy pieces need strong branches or a flat surface, fragile glass needs space around it, and small pieces need a spot near eye level or they will vanish. Once you know the order and the sizes, pick a display that fits the room you have, not the room you wish you had. A small set on a crowded tree can look lost, while the same set on a mantel rail or a tiered tray can look planned and calm. For a wider seasonal look to pair with this set, see the vintage Christmas decor ideas.

    Key Takeaways

    • Keep the set in story order, day one through day twelve, so guests can follow the song from piece to piece.
    • Give each ornament its own space, with light on it and no piece hidden behind another.
    • Put heavy ornaments on strong branches or flat surfaces, and fragile glass where it will not be bumped.
    • Match the display to the room: a tree, mantel, shelf, wall rail, or table display can each carry a full set.
    • Repeat one ribbon color, one metal finish, or one greenery type through the display to tie the 12 pieces together.
    • Label or number the pieces lightly at first, until you and your family know the order by heart.

    1. Hang the Set in Story Order Down One Side of the Tree

    Christmas tree with Twelve Days of Christmas ornaments hung in story order down one side.

    Hang the 12 ornaments in a clear line down one side of the tree, starting with the partridge near the top and ending with the drummers near the base. Work from the top down so you can check spacing as you go, and keep each ornament on its own branch tip where it can be seen from the front of the room. This method suits a main tree, since it uses the tree you already have and keeps the set together in one readable run.

    Step back after every three or four ornaments and check the line from across the room. If two ornaments sit at the same height on facing branches, move one slightly up or down so the eye follows a steady path. Keep plain ornaments in matching colors near the set, rather than between the 12 pieces, so the story order is not broken. Place the heaviest piece on a strong inner branch, even if that pulls it slightly off the line, since a safe hang matters more than a straight line.

    2. Give the Set Its Own Small Tabletop Tree

    Small tabletop Christmas tree decorated with a Twelve Days of Christmas ornament set.

    Put the 12 ornaments on a small tabletop tree of their own, with no other ornaments competing for attention. A tree about two to three feet tall suits most sets, since 12 pieces can fill it without crowding, and the small size lets you place it on a side table, a bookshelf top, or a kitchen counter. Use warm white lights only, so color and detail on each ornament stay easy to see.

    Hang the partridge near the top and work down in order, placing larger pieces low and small pieces at eye level. Leave a few empty branch tips between pieces, so each ornament has breathing room and the tree does not look stuffed. This display works well in a room without a full-size tree, and it lets children follow the song by pointing to each piece in turn. Store the small tree with the set, if space allows, so the display goes up the same way each year.

    3. Line the Set Along a Mantel Garland in Order

    Mantel garland with Twelve Days of Christmas ornaments lined up in order.

    Lay a simple pine or cedar garland along the mantel, then hang or nest the 12 ornaments along it from left to right, in story order. Use small hooks, short ribbon loops, or ornament stands tucked into the garland, and keep the spacing even so the line reads like a sentence across the mantel. This method suits a living room where the mantel is already a focal point, and it keeps the set at eye level for guests seated nearby.

    Balance the garland before you add ornaments: check that it sits level, does not droop at the center, and leaves room for stockings or candles if those also live on the mantel. Place heavier ornaments near the ends, where the garland rests on the mantel, and lighter pieces toward the center. If a piece keeps slipping, set it in a small stand on the mantel in front of the garland instead of forcing a hook into thin greenery.

    4. Hang Each Ornament from a Wall Mounted Branch Rail

    Wall mounted branch with Twelve Days of Christmas ornaments hanging from ribbon loops.

    Fix a single bare branch, a wooden dowel, or a slim wall rail to the wall, then hang the 12 ornaments from it in order, with ribbon loops of the same length or graduated lengths. A wall rail suits a hallway, a dining room wall, or a narrow room where a tree would block a walkway, and it turns the set into wall art for the season. Choose a rail long enough that ornaments do not touch, and fix it into wall studs or with fixings rated for the total weight.

    Vary the ribbon lengths slightly, with longer drops at the center and shorter drops at the ends, or keep every drop the same for a tidy row. Either way, keep the order left to right and check the rail from the side, since ornaments that look even from the front can swing into each other when a door closes. Add a small paper tag or a numbered card under each piece for the first season, so guests can match each ornament to its day.

    5. Frame the Set in a Divided Shadow Box

    Divided shadow box holding a Twelve Days of Christmas ornament set in separate compartments.

    Set the 12 ornaments into a large shadow box with 12 compartments, one piece per compartment, arranged in rows that read left to right and top to bottom in story order. A shadow box suits fragile or valuable pieces, since the glass front keeps dust and hands off the ornaments while still showing every detail. Line the back of the box with plain linen, felt, or wrapping paper in a color that contrasts gently with the ornaments.

    Fix each ornament with a small stand, a pin through its loop, or museum putty on its base, and test the box flat before you hang it, so nothing shifts when it goes upright. Keep the box out of direct sun, since sun fades paint and heats glass, and hang it where it can be viewed up close, such as a hallway or above a sideboard. Label each compartment lightly on the back or on a small card beside the box, rather than writing on the box itself.

    6. Arrange the Set on a Tiered Tray Vignette

    Three tier tray holding a Twelve Days of Christmas ornament set in story order.

    Build the display on a two or three tier tray, placing four ornaments per tier in story order, starting at the top tier with days one to four. A tiered tray suits a kitchen island, a dining table, or a coffee table, and it keeps the set contained in one movable display that can be lifted off the table when serving food. Use small stands, tiny cups, or a ring of tissue to keep round ornaments from rolling.

    Keep the tallest or bulkiest pieces on the bottom tier, where the tray is most stable, and the smallest pieces on the top tier, where they sit closest to eye level. Add only a little greenery, such as a few pine sprigs or a small pinecone, so the ornaments stay the focus. Check the tray from all sides, since a table display is seen from more than one angle, and turn any ornament that faces only one way so its best side shows to the room.

    7. Hang the Set from a Chandelier at Varied Heights

    Chandelier with Twelve Days of Christmas ornaments hanging at varied heights above a table.

    Hang the 12 ornaments from a chandelier or a ceiling light fitting, using ribbon loops at varied heights, in story order around the fitting. This method suits a dining room, since the set hangs above the table where guests look during a meal, and the light from the fitting shines through glass or metallic pieces. Use only lightweight ornaments for this display, and keep every piece clear of bulbs and heat.

    Tie each ribbon to a sturdy part of the fitting, not to a shade or a loose chain link, and test the weight before you hang the full set. Keep the longest drops at the outer edge and shorter drops near the center, or reverse that pattern, as long as ornaments do not knock together when air moves. Take the set down before cleaning the fitting, and check ribbons each season, since heat and dust weaken ribbon over time.

    8. Show Each Ornament in Its Own Glass Jar

    Row of clear glass jars on a shelf, each holding one Twelve Days of Christmas ornament.

    Place each ornament in its own clear glass jar, cloche, or apothecary jar, and line the 12 jars in a row on a shelf, sideboard, or windowsill in story order. Single jars suit delicate pieces, since each ornament gets its own dust cover and cannot knock against its neighbors. Choose jars tall enough that the lid closes without pressing the ornament, and set a small fold of tissue under each piece so it sits level.

    Keep the jars in the same style, with the same lid finish, so the row reads as one set rather than a collection of odd jars. If the jars vary in height, place the tallest at the ends or sort them in a gentle rise and fall, and keep the order labels on the shelf in front of each jar, not on the glass. This display works well in a kitchen or bathroom shelf display, where a tree would not fit, and it packs away neatly, jar by jar, at the end of the season.

    9. String the Set as a Garland Across a Doorway or Window

    Garland of Twelve Days of Christmas ornaments strung in order across a doorway.

    Thread the 12 ornaments onto a long ribbon, cord, or thin garland, spacing them evenly in story order, and hang the strand across a doorway, a window, or a wall. A garland display suits a room that needs color at height without a tree, and it lets the set move with the room: a doorway garland greets guests, while a window garland catches daylight. Use a cord strong enough for the total weight, and fix both ends to hooks rated for that weight.

    Space the ornaments so the strand hangs in a gentle swag, not a tight straight line, and check that the lowest point clears heads in a doorway. Alternate the hanging direction of each ornament slightly, so flat pieces face forward rather than edge on. If the garland will hang in a window, keep ornaments out of direct midday sun, and bring the strand inside during strong wind if the window opens.

    10. Place One Ornament per Bookshelf Section

    Bookshelf with Twelve Days of Christmas ornaments placed one per shelf section among books.

    Set the 12 ornaments along bookshelves, one piece per shelf section or book stack, in story order from the top shelf down or from left to right. A bookshelf display suits a living room or study where shelves already hold books and small objects, and it lets each ornament act as a bookend or a focal point among plain books. Use a small stand or a folded cloth under each piece so it does not roll off the shelf.

    Pull a few books forward or turn a stack sideways to make a flat spot for each ornament, and keep the ornament clear of the shelf edge. Match the ribbon color on each piece to the room, so the 12 spots feel linked even though they sit apart. Check the display at night, when shelf lighting or lamp light changes which pieces stand out, and move a piece that falls into shadow to a better lit section.

    11. Hang the Set from a Leaning Ladder Display

    Wooden ladder leaning against a wall with Twelve Days of Christmas ornaments hanging from its rungs.

    Lean a wooden ladder or a blanket ladder against a wall, then hang the ornaments from its rungs in story order, with the partridge on the top rung and the drummers near the base. A ladder display suits a corner, an entry, or a room with an empty wall, and it gives the set a tall, narrow footprint that fits beside a sofa or a door. Fix the ladder foot so it cannot slip, and keep the ladder clear of walkways.

    Hang two or three ornaments per rung, spaced so they do not touch, and use ribbon loops long enough that pieces hang clear of the rung below. Drape a little greenery or a single strand of lights along one side of the ladder, keeping lights away from fabric ribbons and dry greenery. This display packs flat at the end of the season, since ornaments come off the rungs and the ladder folds or leans in storage.

    12. Arrange the Set in a Wreath Ring Around a Mirror

    Greenery wreath ring with Twelve Days of Christmas ornaments fixed around it in order.

    Form a large wreath ring from greenery, or use a plain wreath frame, and fix the 12 ornaments around the ring in story order, clockwise from the top. Hang the finished ring on a wall or around a round mirror, so the set frames a reflection and draws the eye from piece to piece around the circle. This method suits an entry or a dining room wall where a round shape breaks up straight furniture lines.

    Fix each ornament with wire or a short ribbon tied to the frame, and test the ring flat before hanging, so no piece drops when the ring goes upright. Place the largest or heaviest pieces at the bottom of the ring, where the frame bears weight best, and keep small pieces near the top. Balance color around the ring, so one side does not carry all the bright pieces while the other side looks plain.

    13. Build a Table Centerpiece in a Wooden Crate or Tray

    Low wooden crate on a dining table holding a Twelve Days of Christmas ornament set as a centerpiece.

    Set the 12 ornaments in a low wooden crate, a shallow tray, or a dough bowl, arranged in story order in rows, and use the crate as a dining table or coffee table centerpiece. A crate display suits a rustic or farmhouse room, and it keeps the set low enough that guests can see across the table. Line the crate with tissue, moss, or a plain cloth, and nest each ornament in its own hollow so round pieces do not roll.

    Sort the ornaments by size within the crate, with larger pieces at the back or ends and smaller pieces toward the front, so every piece shows from a seated view. Add a few pine sprigs or pinecones between pieces, but leave gaps so the crate does not look stuffed. Lift the whole crate off the table when serving food, and keep the display away from candles and hot dishes, since heat and spills damage ornament finishes.

    14. Hang the Set on a Branch Tree in a Vase

    Tall bare branches in a heavy vase with Twelve Days of Christmas ornaments hanging from the branches.

    Stand several tall bare branches in a heavy vase or jug, then hang the 12 ornaments from the branches in story order, working from the top of the tallest branch down. A branch tree suits a small home, a tabletop, or a room where a full tree is not wanted, and it gives the set a natural, open look with plenty of air around each piece. Choose a vase heavy enough that the branches cannot tip, and trim branch tips so no ornament hangs past the vase edge.

    Hang the lightest ornaments on thin outer twigs and heavier pieces on thick inner branches, close to the vase. Check the branch tree from the front and the side, since branches seen from behind can hide an ornament that looks clear from the front. This display also works on a porch or in a sheltered entry, as long as wind cannot swing the branches into each other.

    15. Space the Set Along a Staircase Banister Garland

    Staircase banister garland with Twelve Days of Christmas ornaments spaced along it in order.

    Drape a garland along the staircase banister, then hang or nest the 12 ornaments along it in story order, from the bottom newel post to the top. A banister display suits a home with a staircase that guests use and see on arrival, and it spreads the set over a long line that can be followed step by step. Fix the garland with ties or hooks, never with tape that can damage the banister finish, and keep ornaments clear of the handrail grip.

    Place ornaments on the outer face of the garland, where they show from the hall, and keep them high enough that hands on the rail do not brush them. Space the pieces evenly along the run, rather than clustering them at the newel posts, and check the display from the bottom of the stairs, where the full line is visible. For fragile pieces, set them in small stands on the stair treads beside the garland instead of hanging them where they could be knocked.

    16. Hang the Set in a Window at Varied Heights

    Window with Twelve Days of Christmas ornaments hanging from ribbons at varied heights.

    Hang the 12 ornaments in a window, each on its own ribbon from a curtain rod, a tension rod, or a branch fixed across the frame, in story order from left to right and at varied heights. A window display catches daylight and, in the evening, shows the set as a silhouette against the glass, which suits a front room or a kitchen window. Use suction hooks or rod clips rated for the weight, and keep ribbons clear of window locks and handles.

    Cut ribbons in a gentle pattern, such as short, medium, and long drops that repeat, so the eye moves across the window without a flat line. Keep fragile glass away from the glass pane, where cold and knocks can damage it, and move the display if condensation forms on the window. This method also works for a set that will be seen from outside, since the order reads from the street as well as from inside.

    17. Reveal One Ornament per Day on a Numbered Rail

    Wall rail with numbered hooks and a row of Twelve Days of Christmas ornaments in a daily reveal display.

    Mount a rail, a row of hooks, or a strip of pegs on a wall, and hang one new ornament each day, in story order, over 12 days, with a small numbered tag beside each hook. A daily reveal suits families who want the set to build slowly, since each morning brings one new piece, and by the last day the full set hangs together. Start with an empty rail and a card that lists the 12 days, so children can check off each reveal.

    Fix the rail at a height children can reach for the lower hooks, and keep higher hooks for adults to fill. Use the same ribbon and tag style for every piece, so the rail looks planned even when only a few ornaments hang on it. Photograph the rail on the last day, when all 12 pieces hang together, and keep the numbered tags with the set in storage, so next year the reveal runs in the same order. For safe handling of older or fragile pieces in a daily reveal, follow the care steps in the antique Christmas ornaments guide.

    Conclusion

    A 12 Days of Christmas set earns its place when every piece can be seen, in order, without crowding. Pick one display from this list that fits your room, your tree, or your wall, lay the ornaments out in story order first, and check weight, light, and spacing before you fix anything in place. A tree line, a mantel garland, a shadow box, or a numbered rail can each carry the full set, as long as heavy pieces sit on strong support, fragile pieces get space, and the order stays clear from day one to day twelve. Once the display is up, step back, look from across the room, and move any piece that hides behind another. The set will then read the way the song reads: one gift at a time, building to a full, joyful group.

    FAQs

    What is the best way to display 12 days of Christmas tree ornaments?

    The best way is to give each ornament its own clear spot in story order, on a tree, mantel, shelf, or wall rail, with light on every piece and space between pieces. Start by laying the set out in order on a table, checking weight and fragility, then pick the display that fits your room and keeps day one through day twelve easy to follow.

    In what order should I hang a 12 days of Christmas ornament set?

    Hang the set in the order of the song: partridge in a pear tree on day one, turtle doves on day two, French hens on day three, calling birds on day four, golden rings on day five, geese on day six, swans on day seven, maids on day eight, ladies on day nine, lords on day ten, pipers on day eleven, and drummers on day twelve. Keep that order on a tree, mantel, rail, or shelf so guests can follow the story.

    How do I display a 12 days ornament set if I have no tree?

    You can display the set without a tree on a mantel garland, a wall rail, a bookshelf, a tiered tray, a shadow box, or a branch tree in a vase. A wall rail or a shadow box works well in a small room, while a tiered tray or a crate centerpiece suits a table display that can be moved when you serve food.

    How do I keep fragile ornaments safe in a 12 days display?

    Keep fragile ornaments safe by giving each piece space, placing it on a strong branch or a flat surface, and keeping it away from heat, direct sun, high traffic spots, and the edge of a shelf or mantel. Use a shadow box or single glass jars for the most delicate pieces, use ribbon loops or stands rated for the weight, and remove fragile pieces first at takedown time.

    Can I mix a 12 days set with other Christmas ornaments?

    You can mix a 12 days set with other ornaments, but keep the 12 pieces together in order and use plain ornaments in matching colors around them, rather than between them. Mixing works best when the other ornaments share a color palette or finish with the set, so the story group still reads as one group on the tree or mantel.

    How should I store a 12 days of Christmas ornament set?

    Store the set in story order, with each ornament wrapped alone in tissue and packed in its own compartment in a divided box, in a cool, dry place. Keep a numbered list or small tags with the box so the order is clear next season, keep heavier pieces at the bottom of the box, and check the box once a year for damp, damage, or loose caps and loops.