
To make a Christmas ribbon wreath for your front door, cut wired ribbon into strips, fold each strip into a loop, and wire small bundles of loops to a wire wreath frame until the frame is covered. Add a bow, trim the tails, attach a hanger, and hang the wreath against the door so the loops stay full and even.
A ribbon wreath suits a front door because it is light, it holds its shape in cool weather, and it can be made in colors that match the rest of your porch. Wired ribbon is the key supply, since the wire inside the edge helps each loop keep its curve. Plan for a relaxed afternoon session, work on a clear table, and keep scissors, wire, and ribbon within reach so you can build clusters in a steady rhythm.
Key Takeaways
- Wired ribbon holds loop shapes better than soft ribbon, so use it for the main loops.
- Cut strips to one even length, and keep loop sizes close so the wreath looks full and even.
- Build small clusters of loops first, then wire each cluster to the frame, rather than wiring single loops one by one.
- Work around the frame in sections, and check the front often so gaps do not pile up on one side.
- Trim tails last, after the bow is attached and the loops are shaped, so lengths stay balanced.
- Hang the wreath from a sturdy hook or hanger, and check that it sits flat and does not swing into the door frame.
Materials and Tools
Supplies:
- One wire wreath frame, 14 to 18 inches across
- Wired ribbon in two or three colors, 2.5 inches wide for the main loops
- Narrower wired ribbon, 1.5 inches wide, for accent loops if wanted
- Floral wire or thin craft wire for wiring clusters
- One length of ribbon for the bow, plus a short wire piece to hold it
- Pine picks, berry picks, or small ornaments for accents, if wanted
- A ribbon loop or wreath hanger for hanging
Tools:
- Sharp scissors
- Wire cutters
- A ruler or tape measure
- A flat work surface, such as a table covered with a cloth
1. Gather Your Supplies
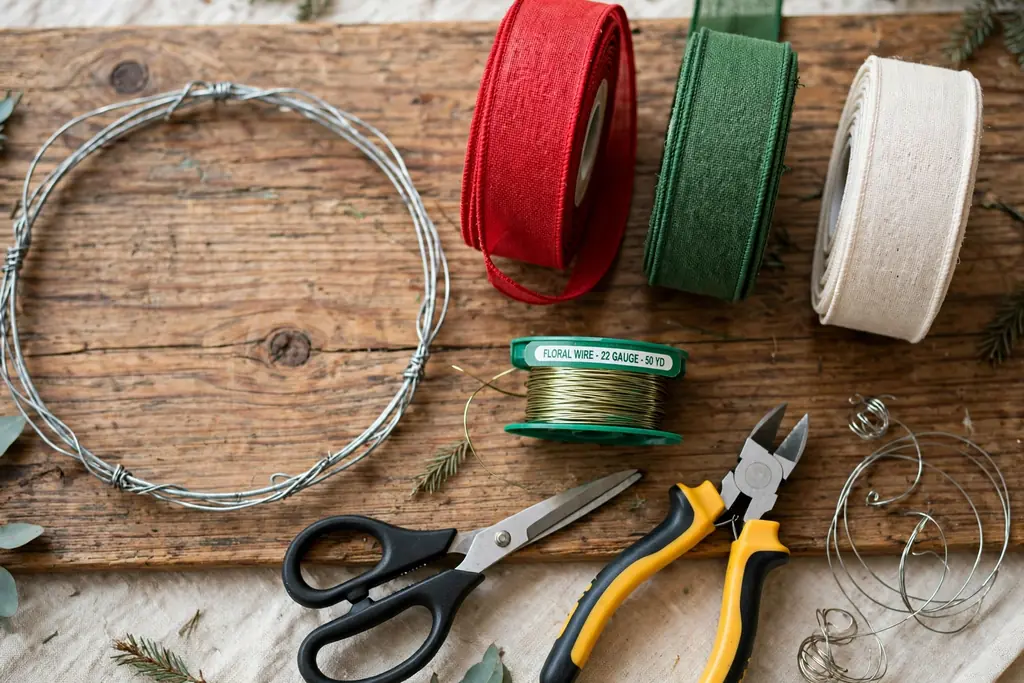
Set out the wire frame, ribbon rolls, floral wire, wire cutters, scissors, and ruler before you cut anything. Having the supplies in one place keeps the work moving, and it lets you spot a missing item early, while it is still easy to find a substitute. Cover the table so ribbon does not slide, and keep a small bowl or tray for wire offcuts.
Count your ribbon rolls and check that each roll has enough length for its share of loops. If one color is short, plan to use it as an accent rather than a main color, so the wreath does not run out halfway around the frame. Keep the bow ribbon aside for now, so it is not cut up by mistake during the loop cutting step.
2. Choose Ribbon Colors and Widths
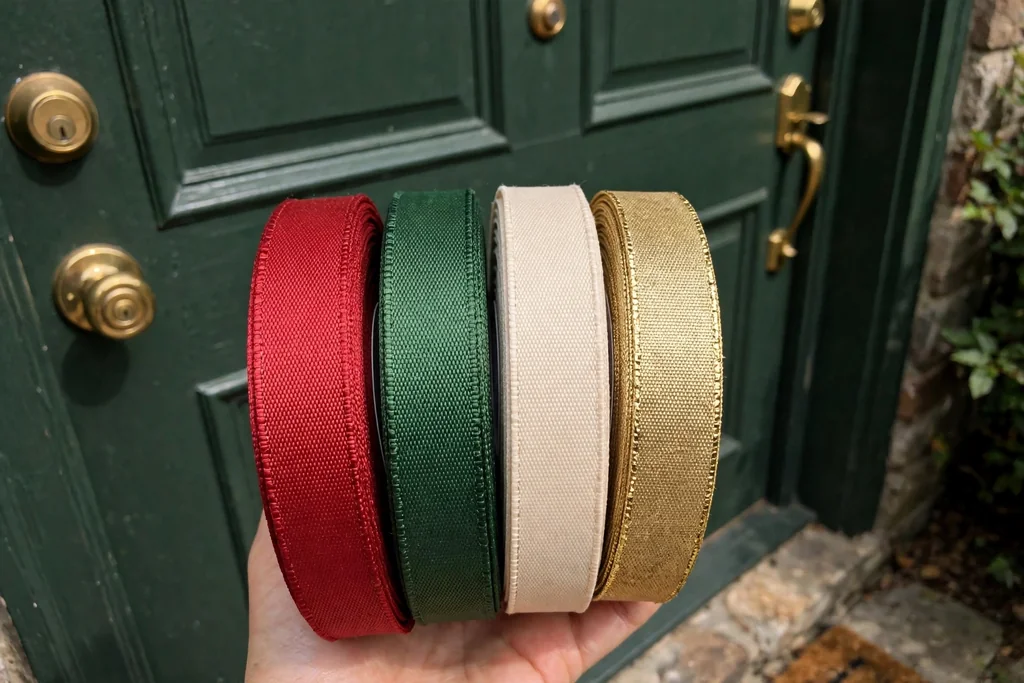
Pick two or three colors that sit well together on a front door, such as red and green with cream, or red and gold with a deep green. Two main colors give a clear pattern, and a third accent color adds depth without making the wreath look busy. Hold the rolls against your door color in daylight, since porch light can change how a ribbon reads.
Use 2.5 inch wired ribbon for the main loops, since that width makes loops that read clearly from the street. Narrower ribbon works well as an accent loop inside a cluster, and it adds texture without adding bulk. Avoid mixing too many patterns at once, and keep at least one solid color in the mix so patterned ribbon has room to show.
3. Prepare the Wreath Frame
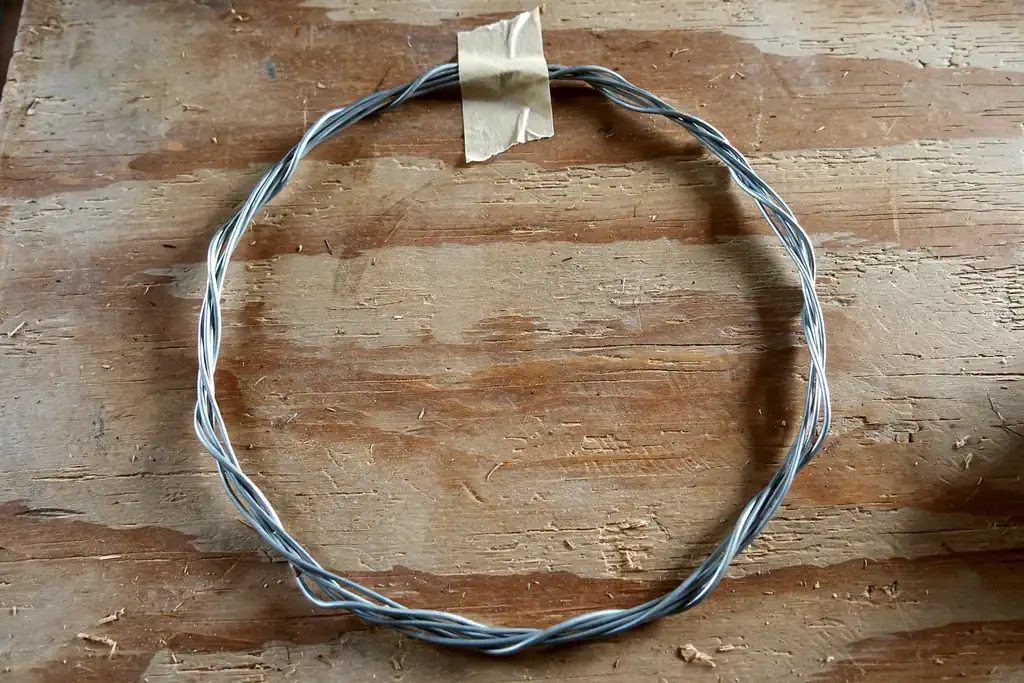
Lay the wire frame flat on the table and check that the rings are even and the cross supports are firm. A standard wire frame has two or three concentric rings joined by supports, and those rings give you clear anchor points for wiring clusters. Decide which side will face out, and mark the top of the frame with a small piece of tape so the bow ends up in the right place later.
If the frame has a hanging tab, leave it at the top and plan your bow for the bottom or the top, away from the tab. Wipe the frame clean if it has dust from storage, and bend any bent ring gently back into shape. A flat, even frame makes the finished wreath hang straight, so this short check is worth the time.
4. Measure and Cut Ribbon Strips
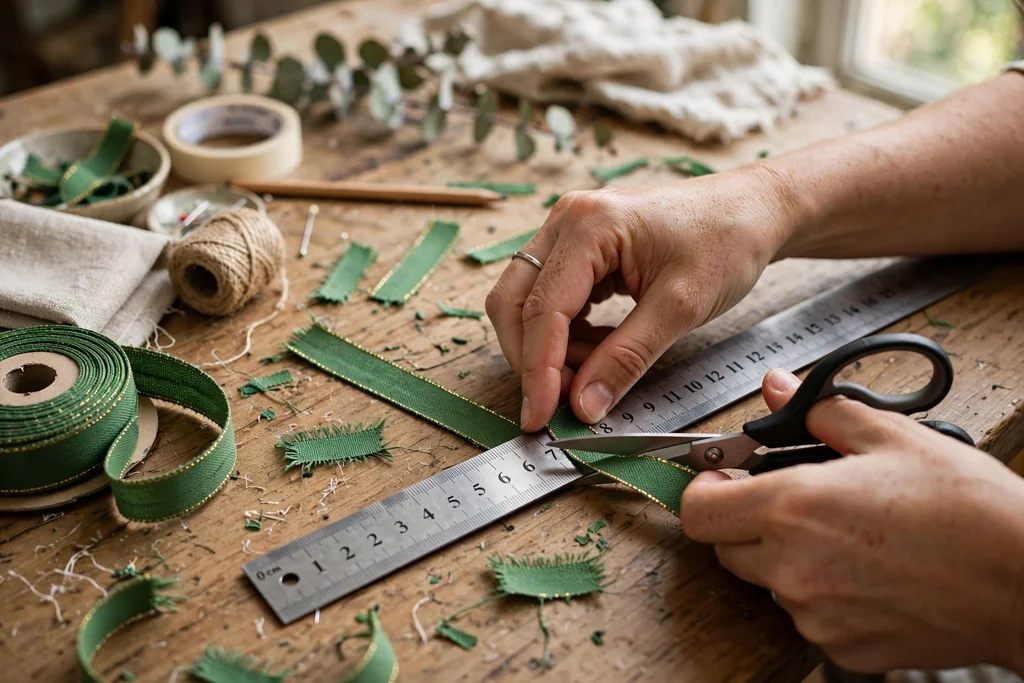
Decide on one strip length for the main loops, such as 10 inches, and use the ruler to measure the first few strips. Cut a test strip, fold it into a loop, and hold it against the frame to check the size before you cut the whole batch. Loops that are too small will leave the frame showing, and loops that are too large will flop and hide the shape of the wreath.
Cut strips in batches of ten, and stack them by color so you can grab the right color without sorting later. For a 16 inch frame, plan on roughly 60 to 80 main strips, depending on loop size and how full you want the wreath. Cutting in batches also lets you adjust the length early if the test loop looks too small or too large.
5. Fold Strips Into Loops
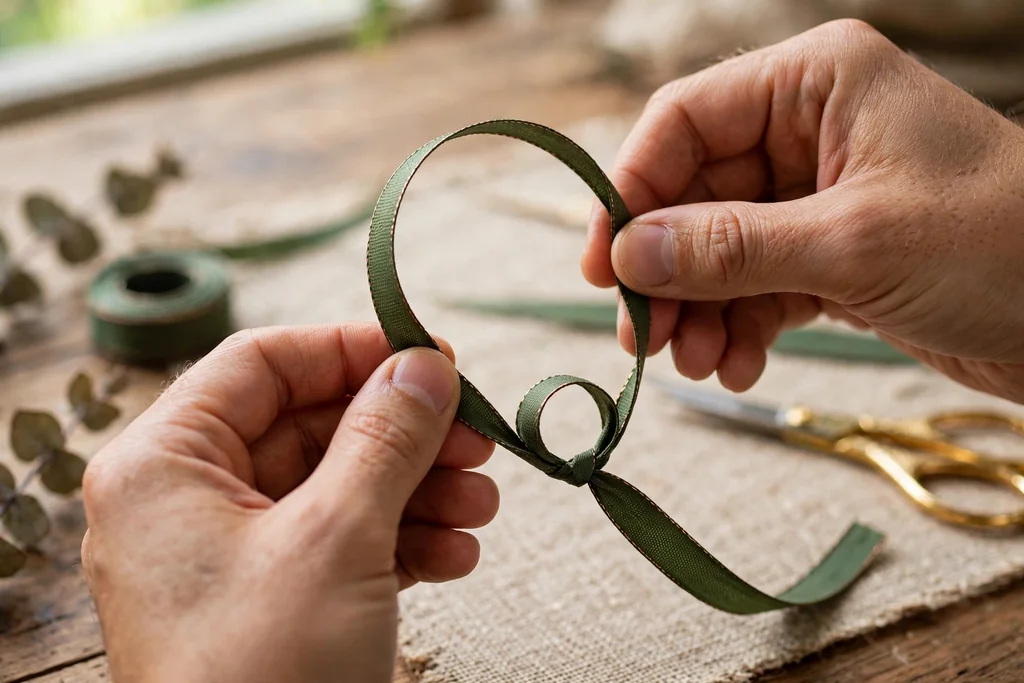
Take one strip, bring the two ends together, and pinch the ends flat so the ribbon forms a loop with a small tail of pinched ribbon at the base. The loop should be round and open, not creased flat, so keep a finger inside the loop while you pinch the base. Wired ribbon helps here, since you can bend the edges gently to round out the shape.
Repeat the fold for every strip, and stack finished loops in piles by color. Keep loop sizes close by using the same strip length and the same pinch point each time. If a loop looks flat, open it with your fingers and bend the wired edges outward until it matches the others, since uneven loops show clearly once they are wired to the frame.
6. Bundle Loops Into Small Clusters
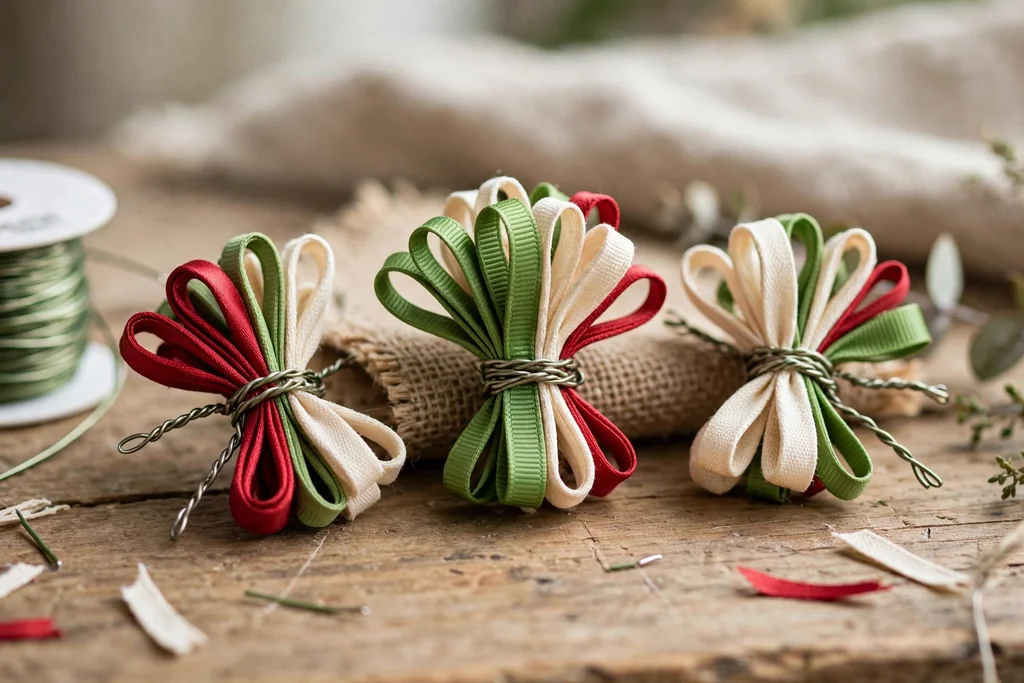
Group three or four loops into a cluster, mixing colors as planned, with one accent loop tucked in the middle if you are using one. Hold the cluster at the pinched bases, fan the loops slightly so they point in different directions, and check the cluster from the front. A good cluster looks full from the front and still has a clear pinched base at the back for wiring.
Wrap a short piece of floral wire tightly around the pinched bases, twist it firm, and leave two wire tails about 3 inches long for attaching the cluster to the frame. Make clusters in batches of five or six, and set them aside in a row so you can work through them in order. Building clusters first keeps the wreath even, since each section of the frame gets a similar amount of ribbon.
7. Wire the First Cluster to the Frame
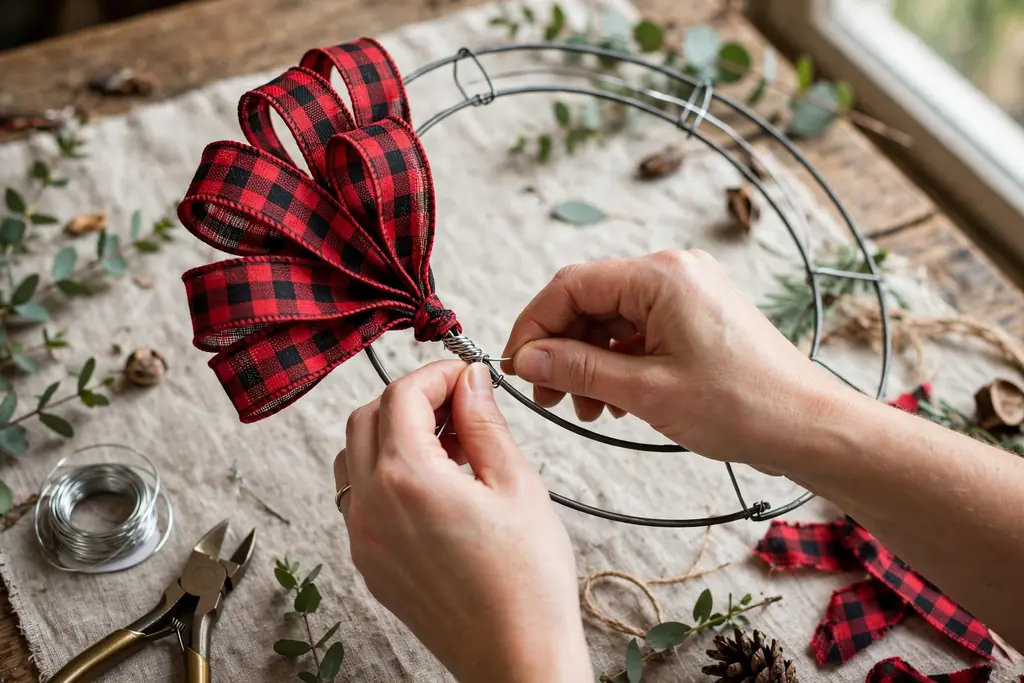
Place the first cluster on the front of the frame, near the top, with the loops facing outward and slightly upward. Thread the wire tails around the nearest ring, pull them snug, and twist them tight on the back of the frame. The cluster should sit firm against the frame, with no wobble when you tap it lightly.
Check the cluster from the front and from the side before moving on. Loops should stand away from the frame, not lie flat against it, and the cluster should cover the wire ring beneath it. If a loop flops forward, bend its wired edge gently to lift it, and tighten the wire twist if the whole cluster shifts. This first cluster sets the pattern, so take a moment to get it right.
8. Work Around the Frame in Sections
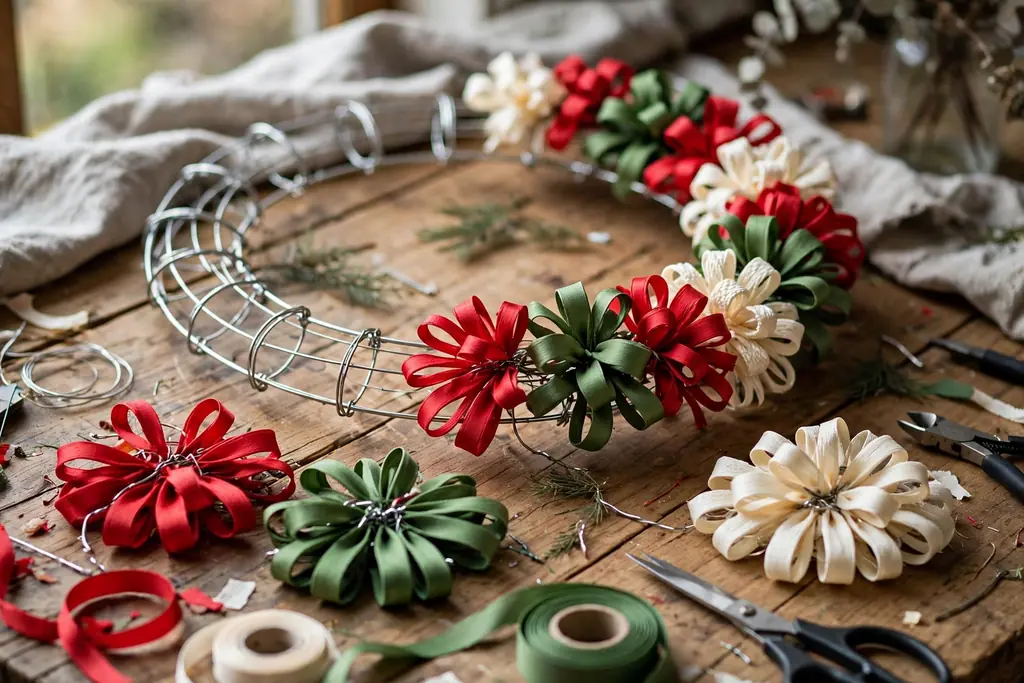
Add clusters one at a time around the frame, working in one direction from the first cluster. Place each new cluster close to the last one, so loops overlap slightly and the wire frame stays hidden. Keep the same mix of colors in each cluster, and keep loops facing outward as you move around the curve.
Stop after every four or five clusters and hold the frame upright to check the front. Look for thin spots, a color that has piled up on one side, or loops that all lean one way. Small fixes are easy at this stage, while a full ring of clusters is harder to adjust. Continue around the frame until you return to the starting cluster, with no bare ring showing.
9. Fill Gaps With a Second Layer

Turn the frame over in your hands and look through the loops for bare wire, thin patches, or flat spots. Make a few extra single loops or small two loop clusters, and wire them into the gaps from the front, twisting the wire on the back as before. A second layer in thin spots gives the wreath its full look, and it also covers the wire twists from the first layer.
Focus on the inner ring and the outer edge, since those areas show most from the street. Add loops until the frame reads as a full ring of ribbon from a few steps back, not just from close up. Step back from the table and view the wreath at arm’s length, since that distance is closer to how it will look on a door.
10. Make a Large Bow for the Wreath

Cut a length of wired ribbon about 36 inches long for the bow, and form two loops on each side by folding the ribbon back and forth, pinching the center after each fold. Keep the loops even, with the largest loops on the outside and slightly smaller loops toward the center, and leave two tails about 10 inches long. A four loop bow suits a ribbon wreath, since it matches the loop texture without adding a second style.
Wrap a short piece of floral wire tightly around the pinched center, twist it firm, and leave wire tails for attaching the bow to the frame. Fan the loops out with your fingers, pull the tails down, and cut each tail end into a V shape with scissors. Check the bow from the front, and bend the wired edges until the loops stand open and even.
11. Attach the Bow and Add Pine Picks

Decide on the bow position, usually at the top center or the bottom center of the wreath, and wire it to the frame through the back, twisting the wire tails tight. The bow should sit on top of the loops, not sunk between them, so add a small extra loop cluster behind it if it sits too low. Step back and check that the bow reads clearly from a few steps away.
Add pine picks, berry picks, or small ornaments now, if you are using them, by wiring each pick stem to the frame in the same way as a cluster. Place accents in odd groups of three or five around the wreath, rather than in a strict ring, so they look placed rather than lined up. Keep accents light, since heavy ornaments can pull loops out of shape and weigh down one side.
12. Trim Tails and Shape the Loops

Look over the whole wreath and trim any ribbon tail that sticks out past the loop edge or hangs much longer than its neighbors. Cut tails at an angle or into a V shape, and keep the cuts clean so frayed ends do not show. Work slowly, since a tail cut too short cannot be put back, and check the balance after each few cuts.
Shape the loops with your fingers, opening flat loops, lifting loops that lean inward, and bending wired edges to round out the curves. Turn the wreath slowly and shape each section in turn, so no side is left flat while another side is full. The goal is a wreath that looks even from the front and from both sides, with no single loop drawing the eye.
13. Add a Hanger and Check the Balance

Thread a loop of ribbon or a wire hanger through the top ring of the frame, and tie or twist it firm so it cannot slip. Hold the wreath up by the hanger and check that it hangs straight, with the bow level and no side dipping lower than the other. If one side dips, the ribbon is heavier on that side, so move one accent or trim a few loops on the heavy side.
Shake the wreath gently to check that no cluster works loose, and tighten any wire twist that shifts. Check the back for sharp wire ends, and bend each end flat against the frame or cover it with a small piece of tape, so it cannot scratch the door. A wreath that hangs straight and has no loose wires is ready to go outside.
14. Hang the Wreath and Make Final Adjustments
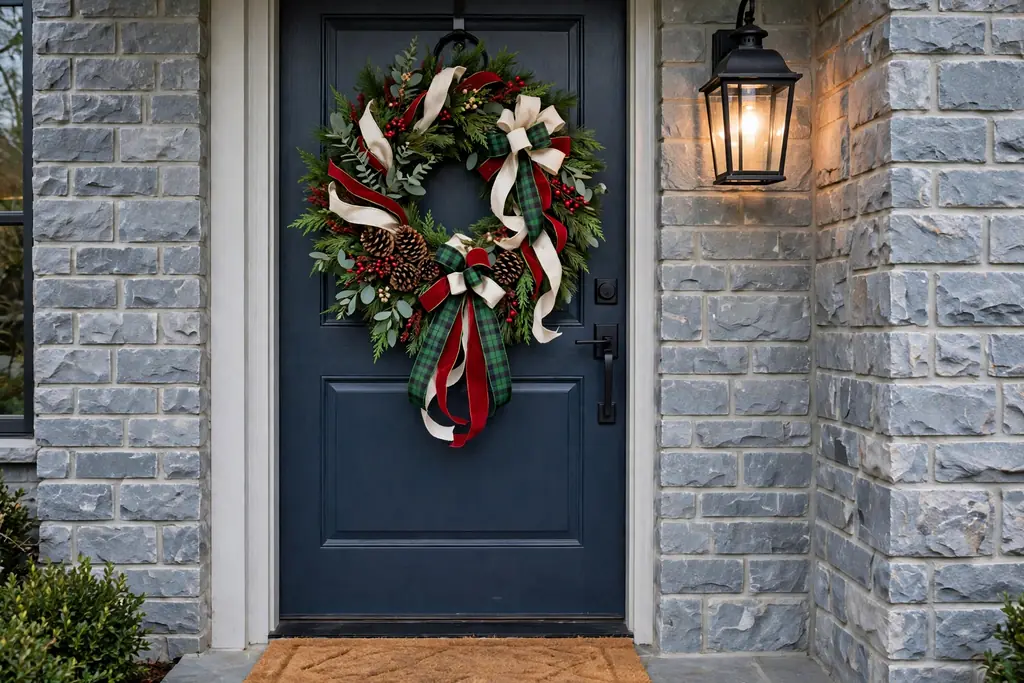
Hang the wreath on a sturdy over door hook, a nail, or a wreath hanger rated for the wreath weight, and center it on the door at eye level. Step back to the street or the end of the path and check the wreath from a distance, since door wreaths are mostly seen from a few steps away. Adjust loops that look flat from that distance, and straighten the bow if it tilted during hanging.
Check the wreath again after the first windy day, and reshape any loops that were pressed flat against the door. In wet weather, bring a ribbon wreath under cover if your porch is fully exposed, and let it dry flat if it gets damp. Store the wreath in a box with tissue between the loops at the end of the season, so it keeps its shape for next year.
Conclusion
A Christmas ribbon wreath for your front door comes together from simple repeated steps: cut strips, fold loops, bundle clusters, wire them to the frame, and finish with a bow and a hanger. Keep loop sizes even, work around the frame in sections, fill gaps with a second layer, and shape the loops last, after the bow is in place. Hang the wreath straight, check it from a distance, and reshape it after wind or rain. With wired ribbon and a steady rhythm, the wreath will look full and festive all season.
FAQs
What kind of ribbon works best for a Christmas ribbon wreath?
Wired ribbon works best for a Christmas ribbon wreath, since the wire in the edges helps each loop hold its curve. Use 2.5 inch wired ribbon for the main loops, and add a narrower wired ribbon as an accent if you want extra texture. Soft ribbon without wire can work for tails, but it will not hold loop shapes as well on a front door.
How much ribbon do I need for a ribbon wreath?
You need roughly 60 to 80 strips of 10 inch ribbon for the main loops of a 16 inch frame, plus a 36 inch length for the bow. The exact amount varies with loop size and how full you want the wreath, so buy an extra roll if you are unsure. Cutting a test loop first helps you judge loop size before you cut the full batch.
What size wreath frame should I use for a front door?
A 14 to 18 inch wire frame suits most front doors, since it reads clearly from the street without covering the door. A 16 inch frame is a safe middle choice for a standard door, while a smaller door suits a 14 inch frame. Measure your door and check the wreath size against it before you start wiring clusters.
How do I keep ribbon loops from going flat?
Keep ribbon loops from going flat by using wired ribbon, keeping loops open while you pinch the base, and shaping the wired edges after wiring. Wire clusters tightly to the frame so they cannot shift, and reshape loops with your fingers after hanging. If a loop keeps flattening, bend its wired edge outward and check that the cluster behind it is firm.
Where should I place the bow on a ribbon wreath?
Place the bow at the top center or the bottom center of the wreath, wired firmly to the frame so it sits on top of the loops. Top placement suits a wreath with a hanging loop at the top, while bottom placement suits a wreath where the bow acts as a visual anchor. Either position works, so pick the one that looks balanced on your door.
How do I store a ribbon wreath after Christmas?
Store a ribbon wreath in a box large enough to hold it flat, with tissue paper between the loops so they do not crush each other. Keep the box in a cool, dry place, and keep heavy items off the top of the box. Check the loops when you take the wreath out next year, and reshape any flat loops with your fingers before hanging.