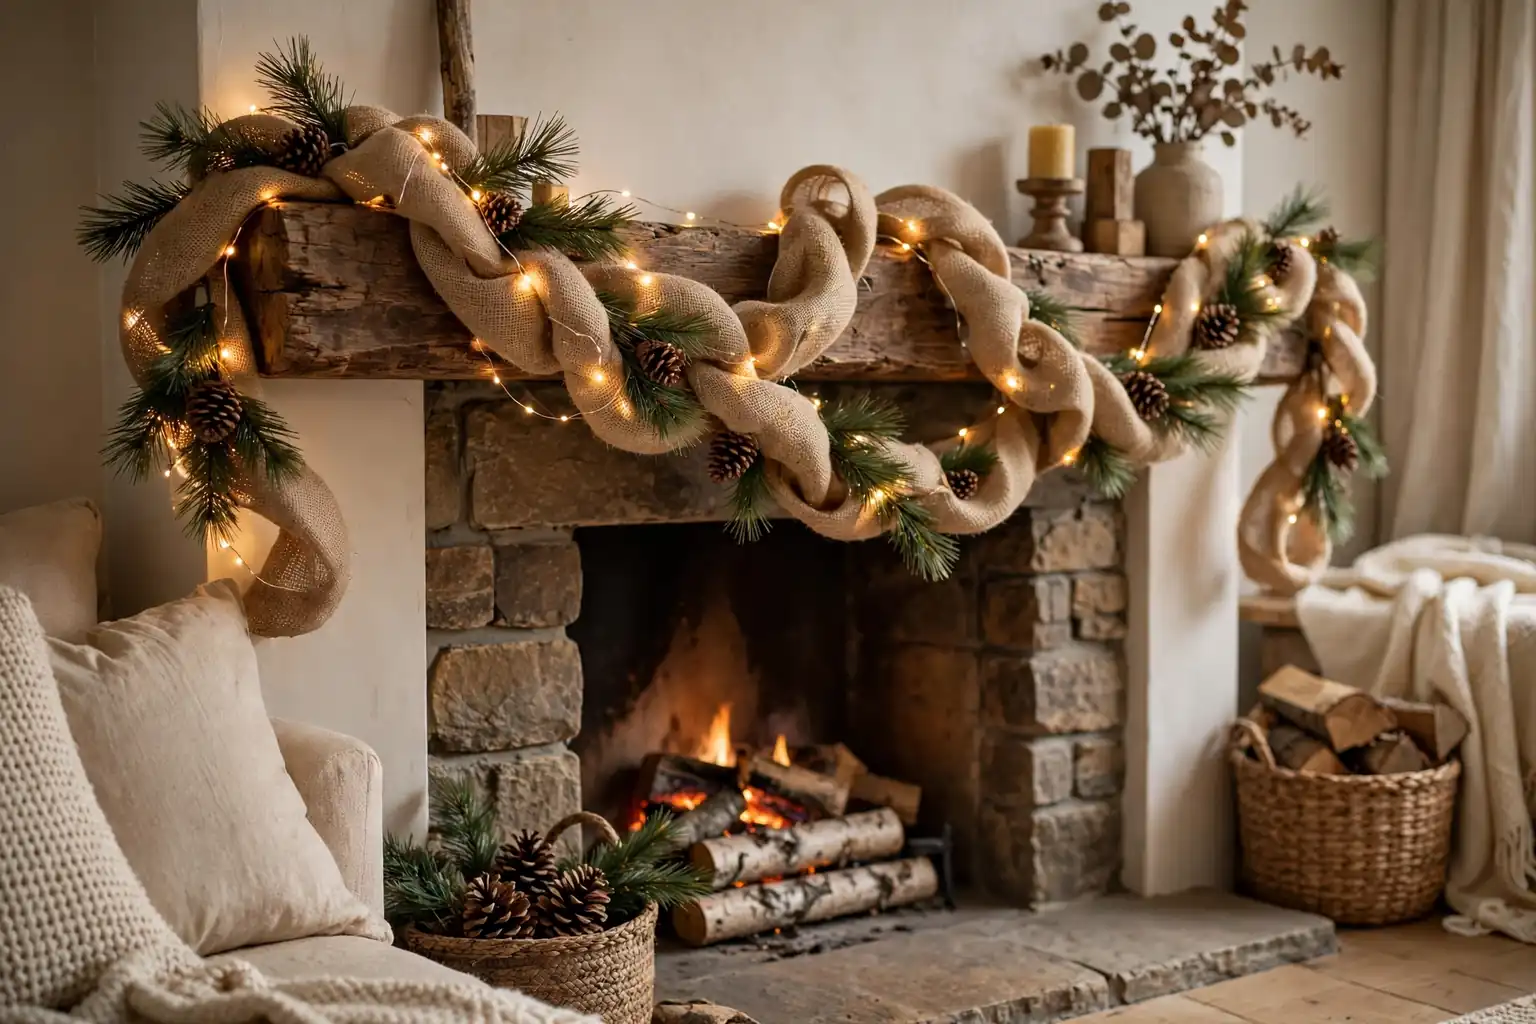
To make burlap garland, gather loops of wired burlap ribbon along a sturdy cord, securing each loop with wire or twine so the garland holds a full, ruffled shape. Add greenery, pinecones, and lights if you like, then hang the finished garland on a mantel, stair rail, or doorway. The steps below cover measuring, looping, decorating, and hanging.
Burlap garland suits rustic holiday decorating because the coarse woven texture pairs well with pine, wood, and simple ornaments, and the material holds a shape once it is looped and wired. You can make a plain garland in an afternoon with a roll of burlap ribbon, cord, and wire, then dress it up or keep it simple. For more seasonal styling ideas, visit the Dwell Ovell home page.
Key Takeaways
- Wired burlap ribbon holds loops and ruffles far better than unwired burlap, so choose wired ribbon when you want a full garland.
- Measure the mantel, rail, or doorway first, then add extra length for swags and draping so the garland does not end up short.
- Work in steady sections, securing each loop before moving on, so the garland keeps even fullness from end to end.
- Add greenery, pinecones, and lights after the burlap base is finished, so decorations sit on top of the loops rather than getting buried in them.
- Hang the garland with hooks or ties that suit the surface, and test the drape before fixing the final positions.
- Store the garland loosely coiled in a dry box so the loops keep their shape for next year.
Materials and Tools
Materials:
- Wired burlap ribbon, about 5 to 6 inches wide, in natural tan or a holiday color
- Sturdy cord, jute twine, or thin rope for the garland base
- Floral wire or thin craft wire for securing loops and decorations
- Faux or fresh greenery sprigs, such as pine or cedar, if you plan to decorate the garland
- Pinecones, berries, small ornaments, or wood beads for decoration
- Battery fairy lights, if you plan to add lights
- Ribbon or twine for tying the ends and hanging loops
Tools and supplies:
- Sharp fabric scissors
- Wire cutters
- Measuring tape
- A flat work surface or table
- Command hooks, mantel hooks, or zip ties for hanging, chosen to suit your surface
- A lighter or fray sealant for sealing cut burlap edges, used with care
1. Choose Your Burlap and Garland Style

Start by deciding the look you want, since that choice sets which burlap to buy. Natural tan burlap gives a classic rustic look and pairs with pine, red berries, and wood ornaments. Colored burlap, such as red, green, or cream, suits a more themed display, while a burlap ribbon with a printed pattern adds detail without extra decorations.
Choose wired burlap ribbon when you want loops that hold their shape. The thin wire sewn into each edge lets you bend and fluff each loop, and the garland will keep its fullness once hung. Unwired burlap works for a flatter, draped garland, but it needs more securing to keep from going limp. Pick a ribbon width of about 5 to 6 inches for a mantel or stair garland, since narrower ribbon can look thin over a long span and wider ribbon can be hard to loop neatly.
2. Gather Materials and Tools
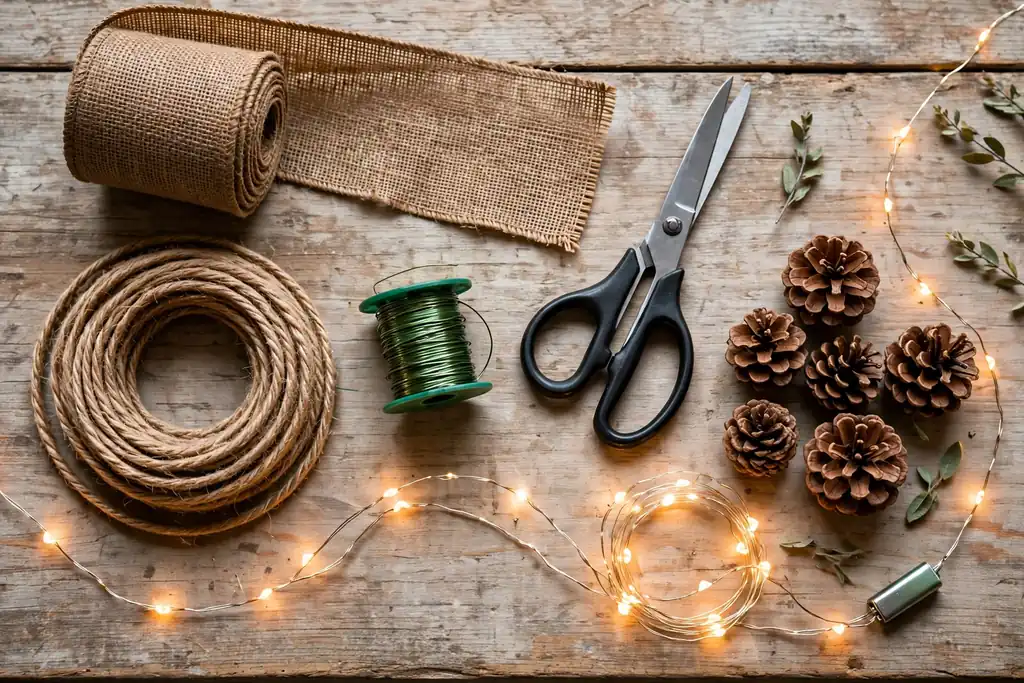
Lay out everything from the materials list before you start looping, so you do not have to stop halfway to find wire or scissors. Unroll the burlap ribbon and check that you have enough for the full length you planned, plus a little extra for the ends. Cut several short lengths of floral wire in advance, since you will reach for them often while securing loops.
Keep a small bin or tray nearby for offcuts and wire ends, because burlap sheds fibers and wire snippings scatter easily. If you plan to add greenery or lights, set those aside in a separate pile so they stay clean and untangled until the burlap base is done. Working with everything at hand keeps the looping rhythm steady and helps the garland stay even.
3. Measure the Space and Plan the Length
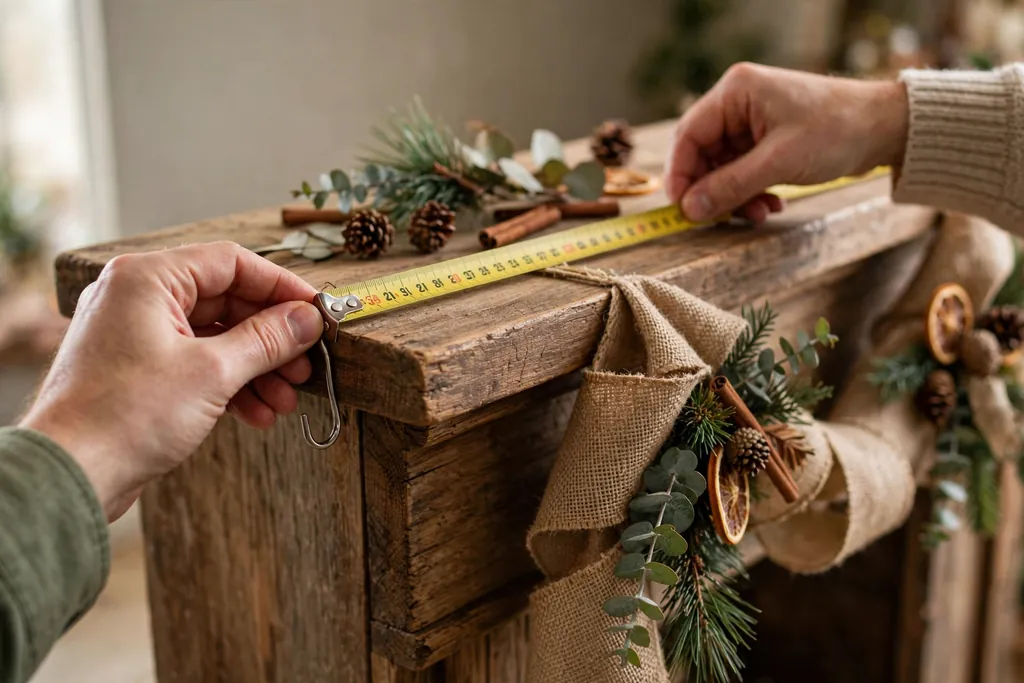
Measure the mantel, stair rail, doorway, or tree where the garland will hang, using a measuring tape along the path the garland will follow, not just straight across. For a swagged mantel garland, add about one third extra to the straight width so the garland can dip in the middle and still reach both ends. For a stair rail, measure along the slope of the rail and add extra for each swag between balusters.
Write the planned length down before you cut anything, and mark where the garland will start and end. If the garland will wrap a tree, measure around the tree at the widest point and plan for several wraps, spacing each wrap a few inches apart as it spirals upward. Planning the length first avoids the most common mistake with this project, which is a garland that ends a foot short of the corner.
4. Cut the Burlap to Size
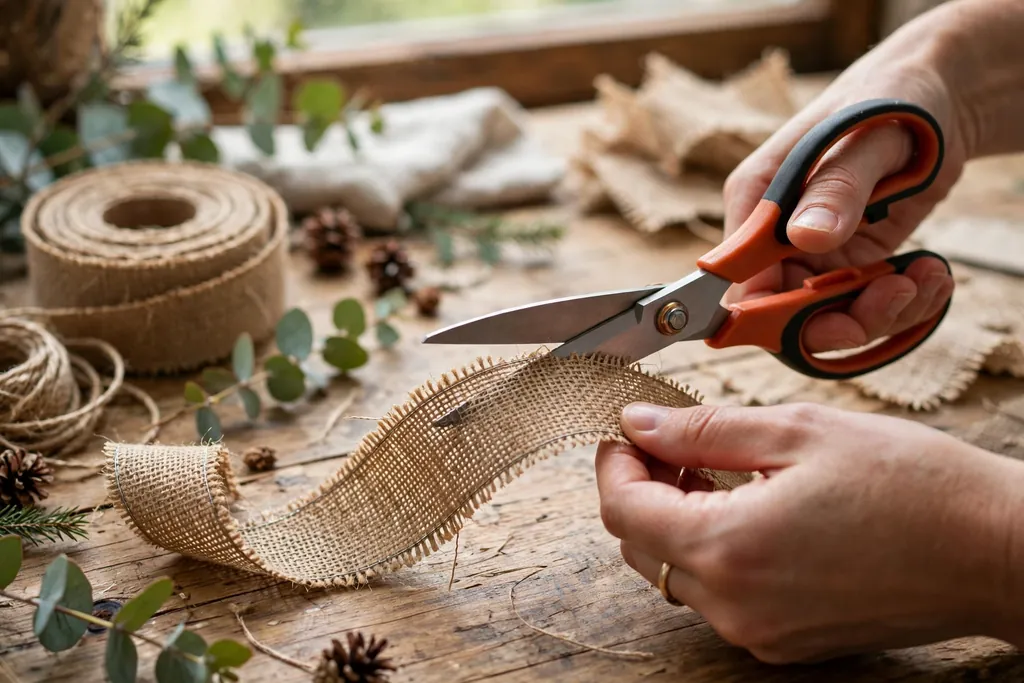
Cut the burlap ribbon to the planned length, adding about 12 inches extra at each end for finishing and hanging loops. Use sharp fabric scissors and cut along a single thread line where possible, since burlap cuts more cleanly when you follow the weave. If you are working from a wide bolt of burlap cloth instead of ribbon, cut strips about 5 to 6 inches wide, pulling a thread to mark a straight line before cutting.
Seal the cut ends lightly to slow fraying, either with a small amount of fray sealant or by passing a flame briefly near the edge with care, keeping the flame away from loose fibers and working over a safe surface. Fold each raw end under by about an inch and press it flat, so the finished ends look neat once they are tied off. Set the cut ribbon aside, keeping it rolled loosely so it does not crease before you start looping.
5. Set Up the Base Cord

Cut a length of sturdy cord, jute twine, or thin rope to match the planned garland length, plus about 12 inches extra at each end for hanging loops. The cord is the backbone of the garland, so choose one strong enough to carry the weight of the burlap plus any greenery and ornaments. Lay the cord straight along your work surface and tape or pin one end down so it does not slide while you work.
Tie a small loop at each end of the cord now, since these loops will serve as hanging points later and are harder to add once the burlap is in place. Keep the cord taut but not stretched as you work, and mark the middle point with a small piece of tape, so you can check that your looping stays centered. A steady base cord is what keeps a long garland from sagging unevenly once it is hung.
6. Form and Secure the First Loop
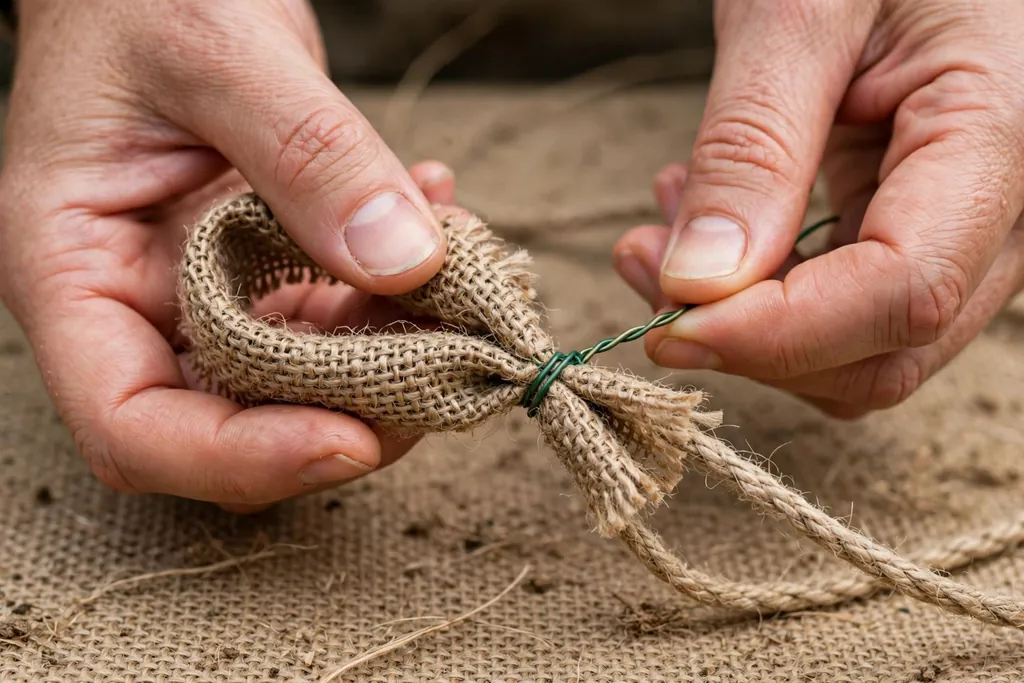
Start about 12 inches from one end of the cord, leaving that section bare for the finishing loop. Gather a section of burlap ribbon about 8 to 10 inches long, pinch it together at the cord, and fold it into a loop that stands up from the cord. The loop should be roughly 4 to 5 inches tall, with the burlap edges fanning out slightly so the loop looks full rather than flat.
Wrap a short length of floral wire tightly around the pinched base of the loop and the cord together, twisting the wire ends at the back so they do not show from the front. Tug the loop gently to check that it holds, then fluff the burlap edges outward with your fingers. This first loop sets the size and fullness for the whole garland, so take a moment to get it right before moving on.
7. Work Loops Along the Cord
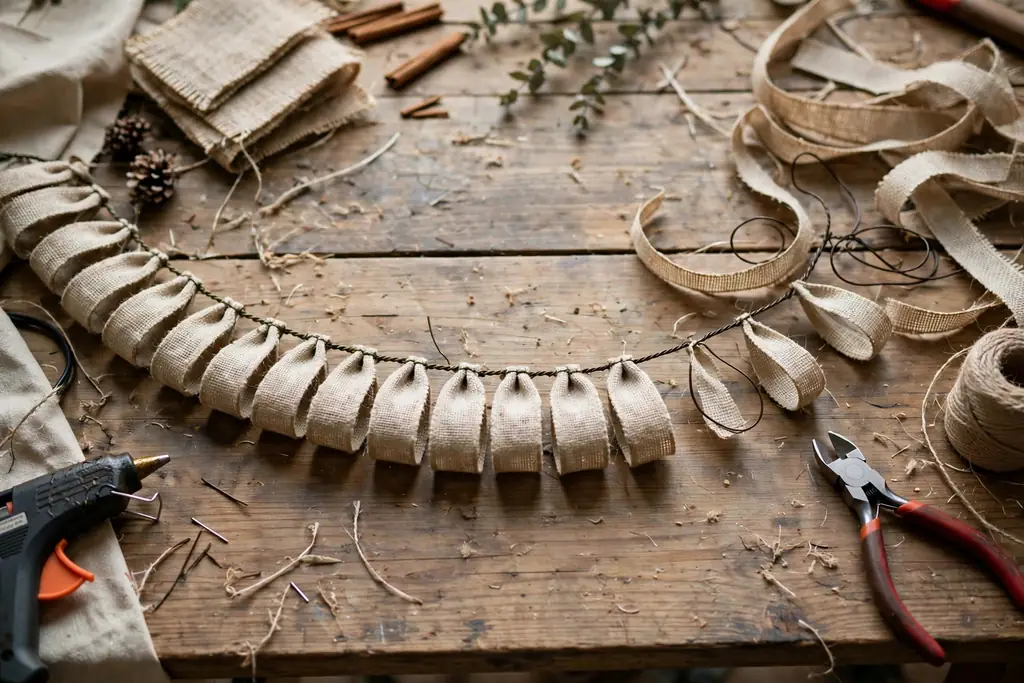
Continue down the cord, forming one loop after another in the same way, spacing each new loop about 2 to 3 inches from the last. Keep each loop about the same height and fullness as the first, pinching the burlap at the cord and wiring it in place before forming the next. Working in order from one end to the other keeps the garland even, since jumping around makes it harder to judge spacing.
After every few feet, step back and look along the garland to check for thin spots or loops that sit much taller than their neighbors. Push loops gently toward each other where gaps show, and pull a flat loop outward to match the rest. A steady rhythm matters more than speed here, and a garland looped in even sections will hang with a smooth, full line.
8. Check Fullness and Even Out the Spacing
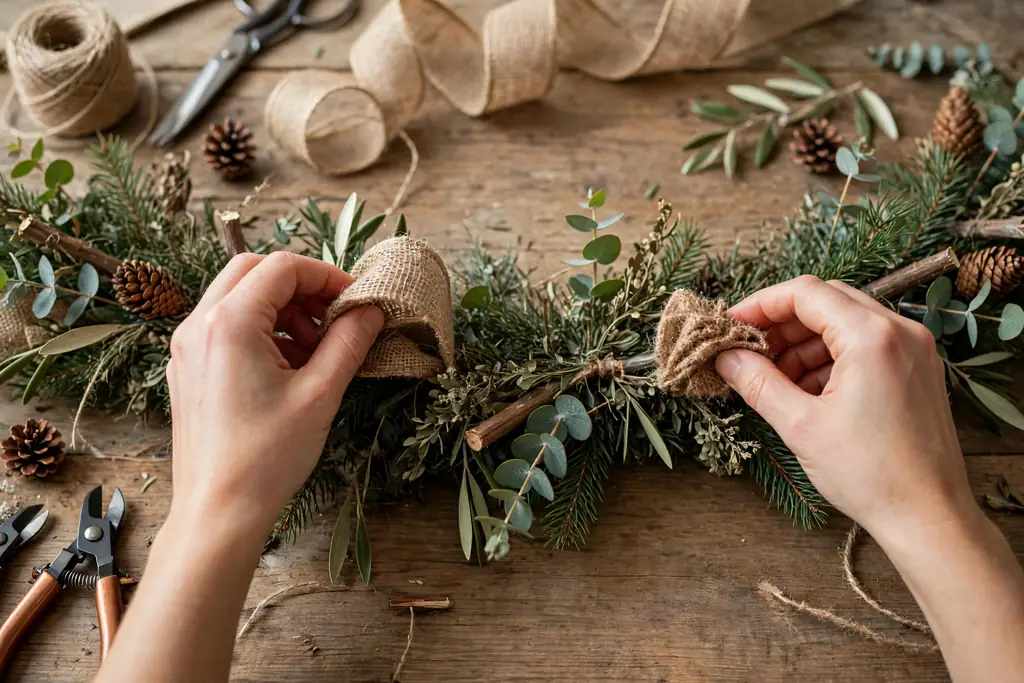
Once the full length is looped, run your hands lightly along the garland and look for gaps where the cord shows through. Where a gap appears, pull the neighboring loops toward each other and add a small extra loop of burlap in the thin spot, wiring it to the cord in the same way as the others. Turn the garland over and check the back as well, since a garland on a stair rail or doorway is often seen from both sides.
Fluff each loop by pulling the wired edges outward and separating the burlap layers slightly, which gives the garland a fuller, softer outline. Trim any long stray threads with scissors, but leave the wired edges intact so the loops keep their shape. This pass over the finished base takes only a few minutes and makes the difference between a garland that looks sparse and one that looks full.
9. Add a Second Layer for Extra Fullness
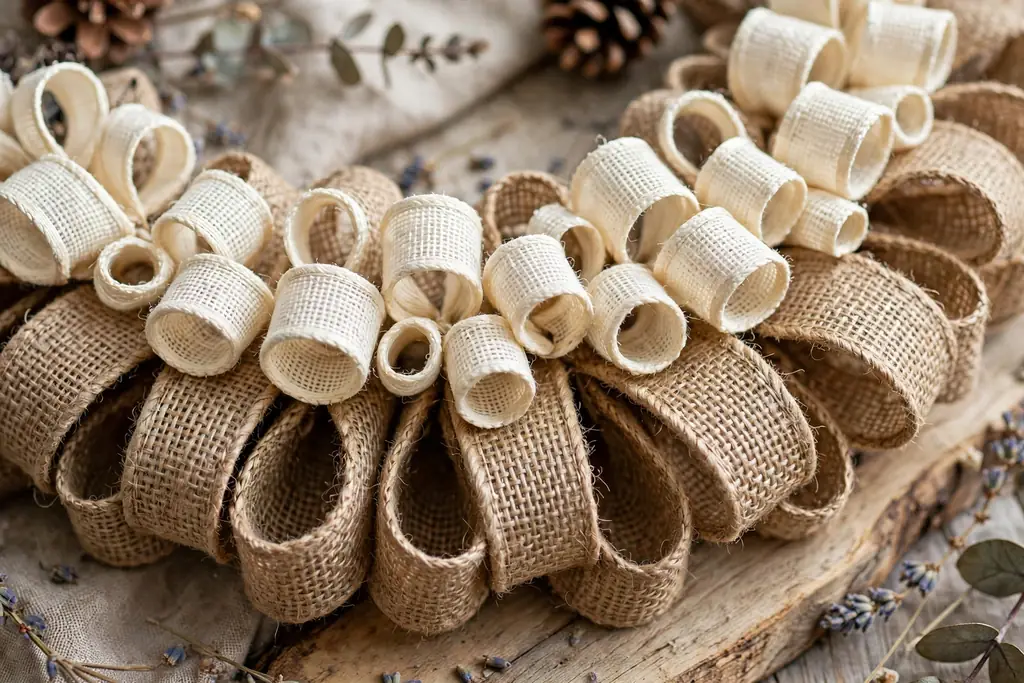
If the garland still looks thin for a mantel or a wide doorway, add a second layer of loops on top of the first. Use a narrower burlap ribbon, or the same ribbon in a second color, and form smaller loops of about 3 inches, wiring each one to the cord between the existing loops. The second layer fills the spaces between the first loops and gives the garland depth when viewed from the front.
Keep the second layer lighter than the first, so the garland does not become too heavy to hang. A second color, such as cream over natural tan or red over natural tan, adds contrast without extra ornaments, while a second layer in the same color simply adds fullness. Step back after a few feet of the second layer to check that the two layers blend rather than sitting as two separate rows.
10. Weave in Greenery
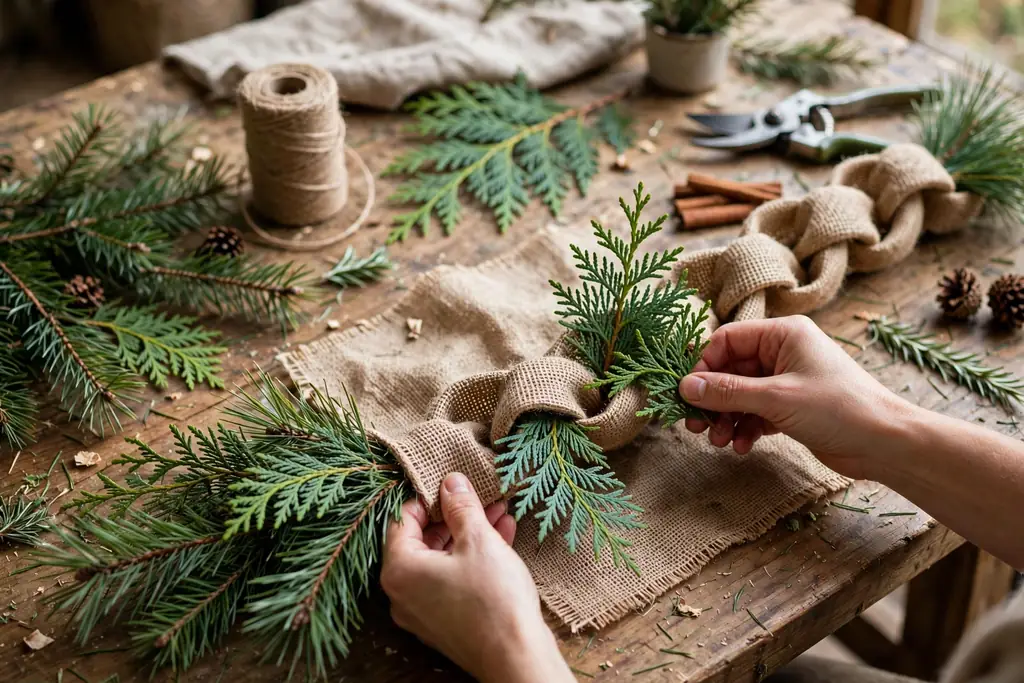
With the burlap base finished, tuck greenery sprigs into the garland, working from one end to the other. Use pine, cedar, or fir sprigs, either fresh or faux, and slide each stem under a loop near the cord, then wire the stem to the cord so it stays put. Angle the sprigs outward and slightly downward, so the greenery frames the burlap loops instead of covering them.
Mix sprig lengths for a natural outline, with longer sprigs at the ends and shorter ones in the middle, and keep the greenery to one or two types so the garland looks settled rather than busy. If you use fresh greenery, mist it lightly and expect it to dry over the season, which suits the rustic look of burlap. Faux greenery keeps its color all season and lets you reuse the garland next year without replacing the sprigs.
11. Add Pinecones, Berries, and Ornaments
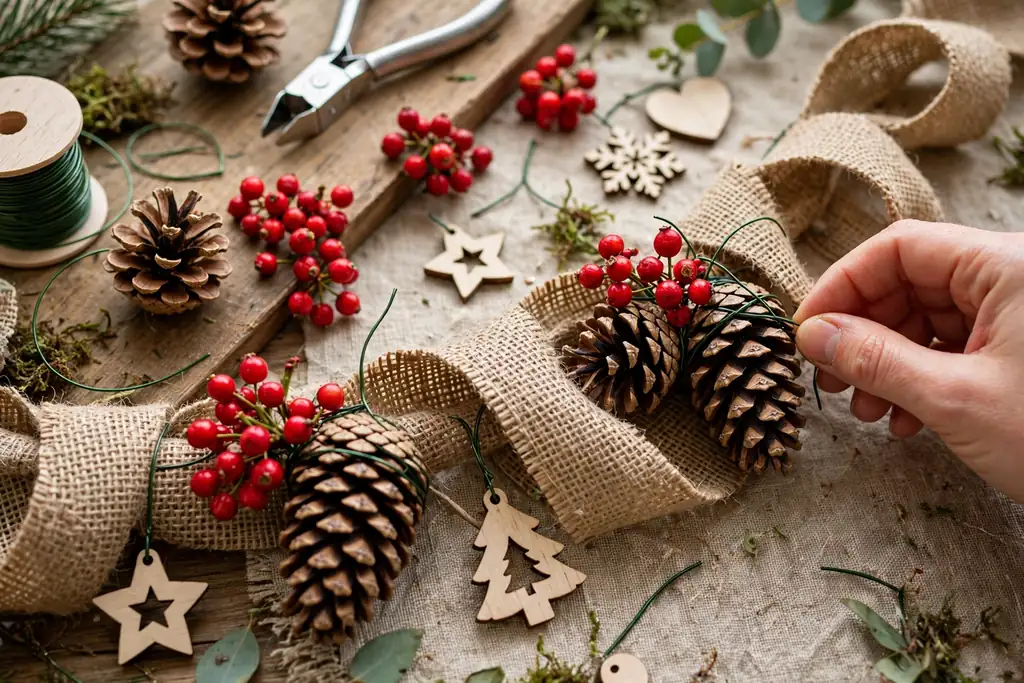
Add pinecones, berry picks, small ornaments, or wood beads next, spacing them along the garland so no section looks crowded or bare. Wire each piece to the cord rather than gluing it, since wired pieces can be moved or removed without tearing the burlap. Place larger pieces, such as pinecones, at even intervals of about 12 to 18 inches, then fill the spaces between them with smaller berries or beads.
Keep the decoration count modest, since burlap garland looks best when the texture of the burlap still shows between the decorations. Three to five larger pieces per mantel length, plus a scattering of berries, is usually enough. Turn the garland and check the back before you finish, so no wire ends poke out where hands will grip the garland while hanging it.
12. Weave in Fairy Lights
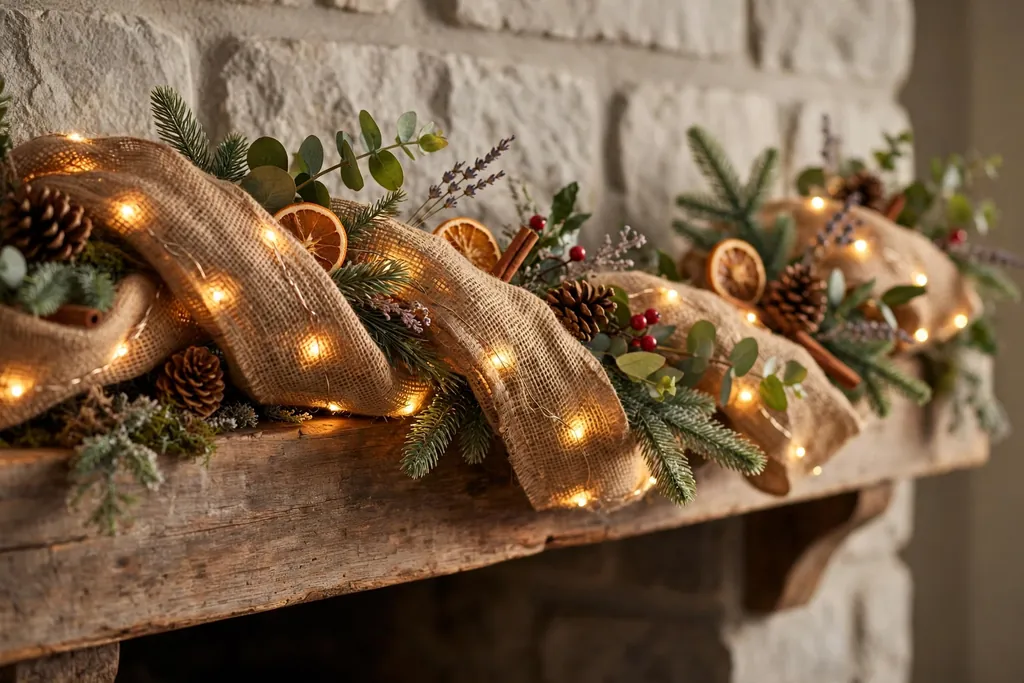
If you want lights, weave a battery fairy light strand through the garland now, after the greenery and ornaments are in place. Start at one end and thread the wire in and out of the loops, keeping the lights near the front of the garland so they show, and spacing the bulbs evenly along the length. Tuck the battery pack into a loop near one end, where it can sit out of sight but stay easy to reach for switching on and off.
Use battery lights rather than plug-in lights for a mantel or stair garland, since the battery pack avoids a trailing cord and lets you hang the garland anywhere. Check the full strand before weaving it in, and replace any strand with dead bulbs so you do not have to unweave it later. A warm white light suits burlap best, since it keeps the rustic tone of the garland instead of competing with it.
13. Finish and Secure Both Ends
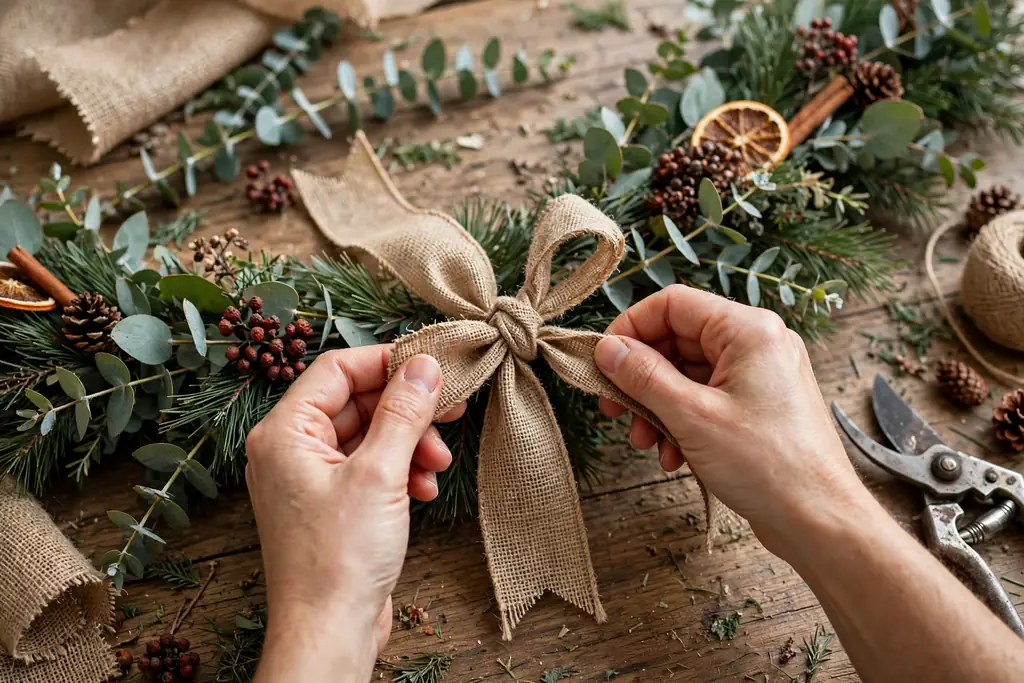
Finish each end by folding the bare cord section into a hanging loop and wrapping it tightly with wire, then covering the wire wrap with a short piece of burlap ribbon tied in a simple bow or knot. Tuck any raw burlap edges into the last loop and secure them with a few stitches or a dab of fray sealant, so the ends do not unravel while the garland is hung or stored.
Trim the cord ends close to the wrap, and check that both hanging loops are strong enough to hold the garland weight by giving each a firm tug. If one end will sit against a wall or in a corner, make that end neater and shorter, since it will be seen at close range. Neat ends matter because they are the first thing people notice when they look at a garland up close.
14. Hang and Drape the Finished Garland
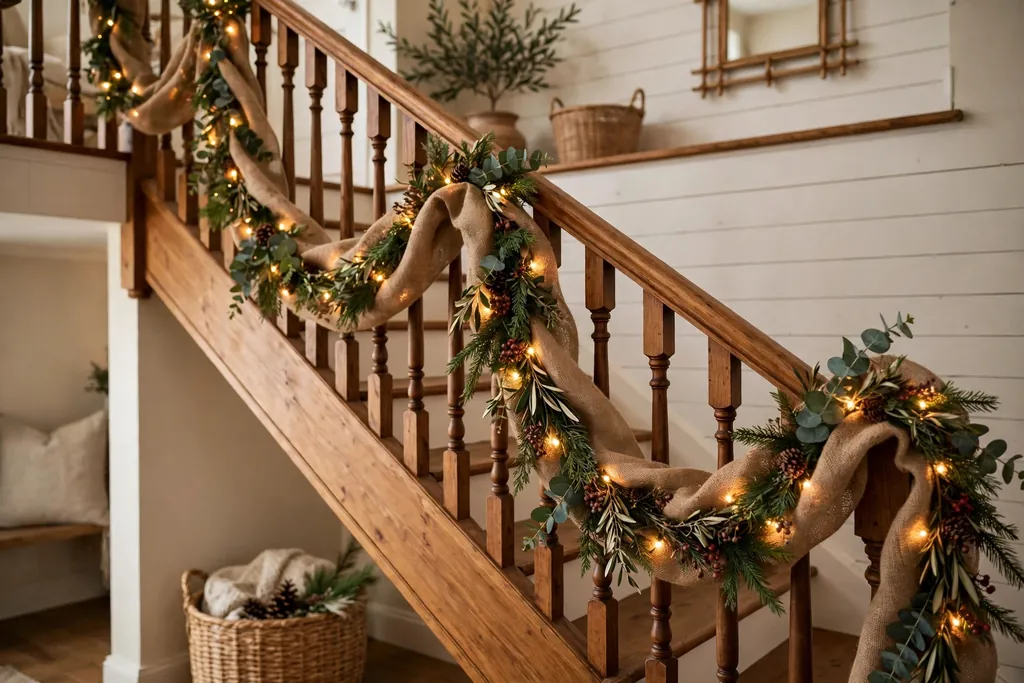
Hang the garland using the end loops, hooking them over mantel hooks, stair newel posts, or adhesive hooks rated for the garland weight. Start by fixing one end, then drape the garland to the other end, letting it dip in the middle for a mantel or swagging it between balusters on a stair rail. Secure the middle of a long garland with a tie or hook as well, so the weight does not pull the ends loose over time.
Step back and adjust the drape, pulling loops outward where the garland looks flat and shifting ornaments so they face forward. On a tree, wrap the garland in a loose spiral from top to bottom, tucking the ends behind branches at the back. Take a final look from across the room, since a garland that looks even up close can still show a thin spot or a sagging section from a distance.
15. Take Down and Store It for Next Year
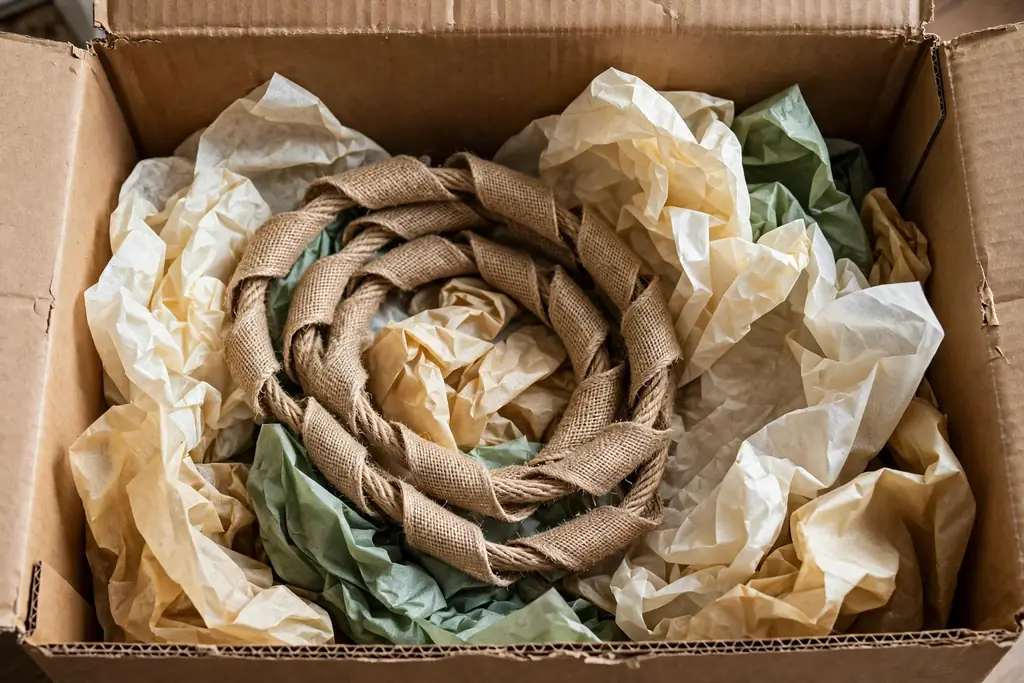
When the season ends, take the garland down by unhooking the ends first, then lifting the middle supports, so the garland does not snag or stretch. Remove battery packs from light strands and take out any fresh greenery, since fresh sprigs will dry and shed if stored with the garland. Leave wired ornaments and faux greenery in place if they are secure, since removing and reattaching them each year wears the burlap.
Coil the garland loosely in a large box or bag, with tissue paper between the coils so the loops do not crush each other. Store the box in a dry place away from damp, since burlap absorbs moisture and can develop a musty smell if stored damp. Label the box with the garland length and where it hung, so next year you can hang it again without remeasuring.
Conclusion
Making burlap garland comes down to a sturdy cord, wired burlap ribbon, and steady looping, with greenery, ornaments, and lights added once the base is full and even. Measure first, loop in even sections, and finish the ends neatly, and the garland will hang well on a mantel, stair rail, doorway, or tree. Store it loosely coiled in a dry box, and the same garland can come back out next holiday season with only a quick fluff of the loops.
FAQs
What kind of burlap works best for garland?
Wired burlap ribbon about 5 to 6 inches wide works best for garland, because the wire in the edges holds each loop open and keeps the garland full once it is hung. Unwired burlap can work for a flat draped garland, but it needs more securing and tends to go limp over a long span. Choose natural tan for a classic rustic look, or a colored ribbon for a themed display.
How much burlap do I need for a mantel garland?
You need the straight width of the mantel plus about one third extra for swagging, plus about 12 inches at each end for finishing loops. For a 6 foot mantel, that means roughly 10 feet of burlap ribbon in total. Measure along the path the garland will follow, not just straight across, and add extra if the garland will also drape down the sides of the mantel.
How do I keep burlap garland from fraying?
You keep burlap garland from fraying by sealing the cut ends with fray sealant or a brief pass of flame near the edge, and by folding raw ends under before tying them off. Wired ribbon frays less than cut cloth, since the wired edges hold the weave together. Trim stray threads with scissors as they appear, and handle the garland gently when hanging and storing it.
Can I add lights to burlap garland?
Yes, you can add lights to burlap garland by weaving a battery fairy light strand in and out of the loops after the greenery and ornaments are in place. Battery lights work best, since the pack tucks into a loop at one end and avoids a trailing cord. Keep the bulbs near the front of the garland so they show, and check the strand for dead bulbs before weaving it in.
How do I hang burlap garland on a mantel or stair rail?
You hang burlap garland by hooking its end loops over mantel hooks, stair newel posts, or adhesive hooks rated for the garland weight, then securing the middle of a long garland with an extra tie or hook. Fix one end first, drape the garland to the other end with a dip in the middle, and adjust the loops and ornaments once it is up. Test the hold before leaving the garland in place, since a heavy garland can pull a weak hook loose over time.
How do I store burlap garland after the holidays?
You store burlap garland by removing battery packs and fresh greenery, coiling the garland loosely in a large box or bag with tissue paper between the coils, and keeping the box in a dry place. Loose coiling keeps the loops from crushing, and a dry store keeps the burlap from developing a musty smell. Label the box with the garland length and where it hung, so you can hang it again next year without remeasuring.