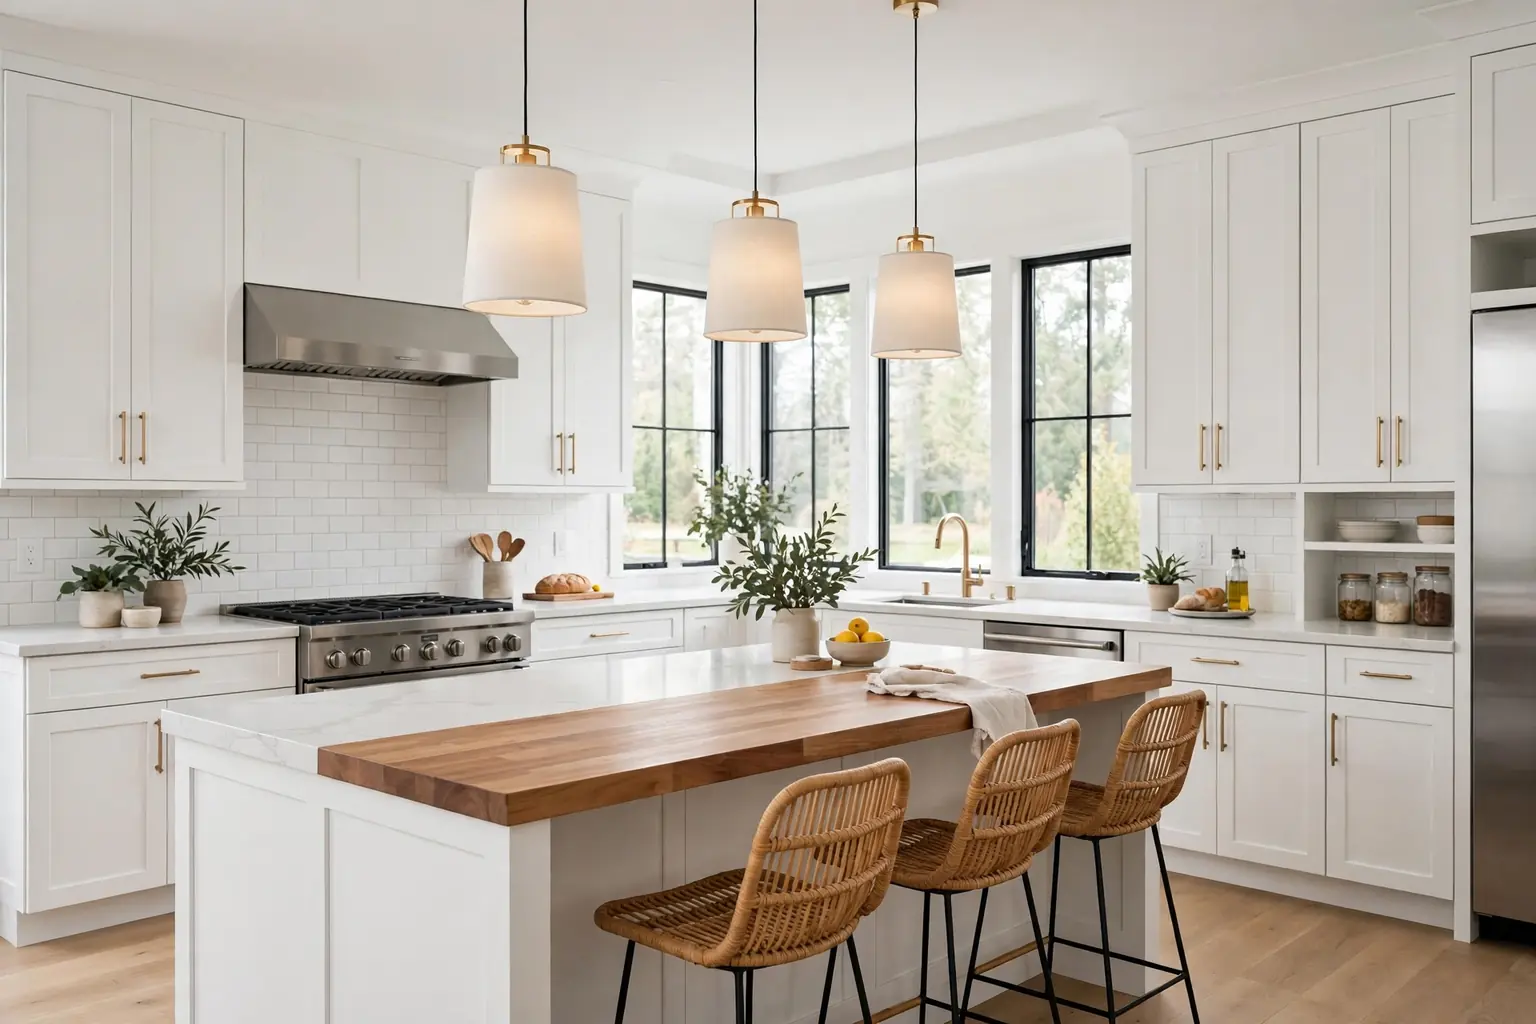
A kitchen remodel works best when you start with how you cook, not with a single product or finish. Think about where you prep, where pans live, where people gather, and where clutter builds up, then let those answers shape the layout, cabinets, and counters. These 29 kitchen remodel ideas cover layout changes, cabinet updates, work surfaces, appliances, storage, and finishing details, so you can plan a small refresh or a fuller renovation with a clear order of work. If you are also weighing costs, these kitchen ideas on a budget show which changes give a visible result without a full rebuild.
Key Takeaways
- Start with layout and workflow: prep, cooking, and cleanup zones matter more than any single finish.
- Keep cabinets, counters, and flooring in one palette, with one metal finish repeated through the room.
- Test cabinet colors, tiles, and counter samples in daylight and evening light before ordering.
- Choose wipeable, hard wearing finishes near the stove and sink, where a remodel gets its hardest use.
- Add storage where clutter actually forms: near the stove, beside the sink, and at the pantry.
- Plan the work in phases, with layout and services first, then cabinets, counters, and finishing details.
1. Open the Kitchen to the Living Space
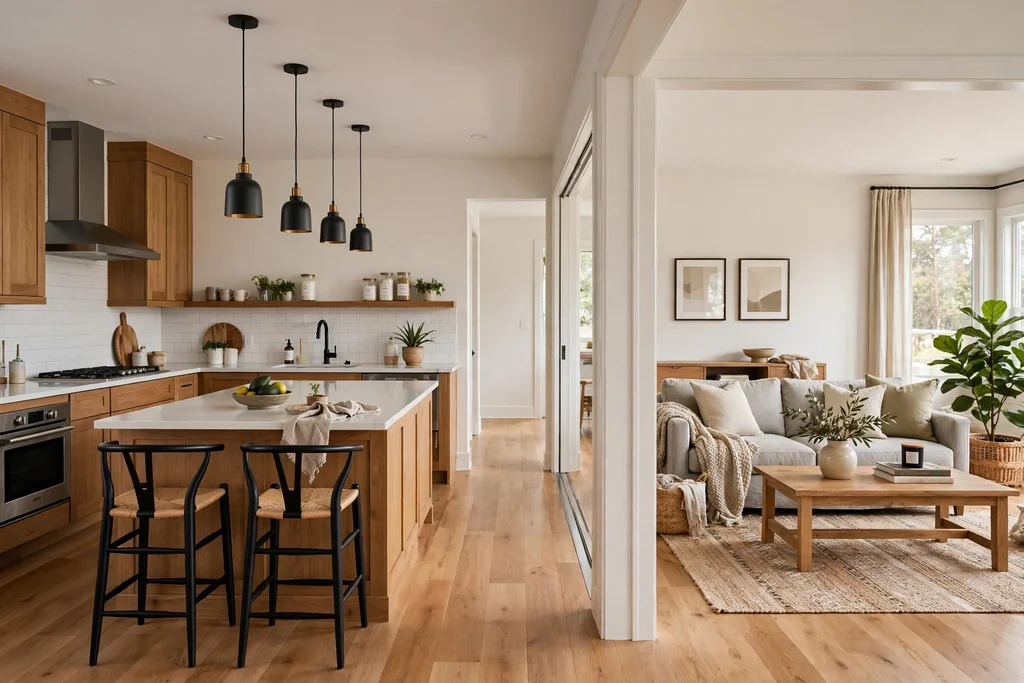
Removing a wall between the kitchen and the living area can make both rooms feel larger and let the cook stay part of the conversation. This suits homes where the kitchen is closed off but the rooms beside it are already open and well lit. Before any demolition, ask a qualified professional to check whether the wall carries load, and where pipes, wires, and vents run inside it.
Keep a clear walkway through the new opening, and leave enough wall for the fridge or tall storage on the kitchen side. A beam or a wide cased opening can mark the change of room without a full wall, and it gives a place to run lighting or a pendant over a new island or table.
2. Rework the Layout Into Cooking Zones
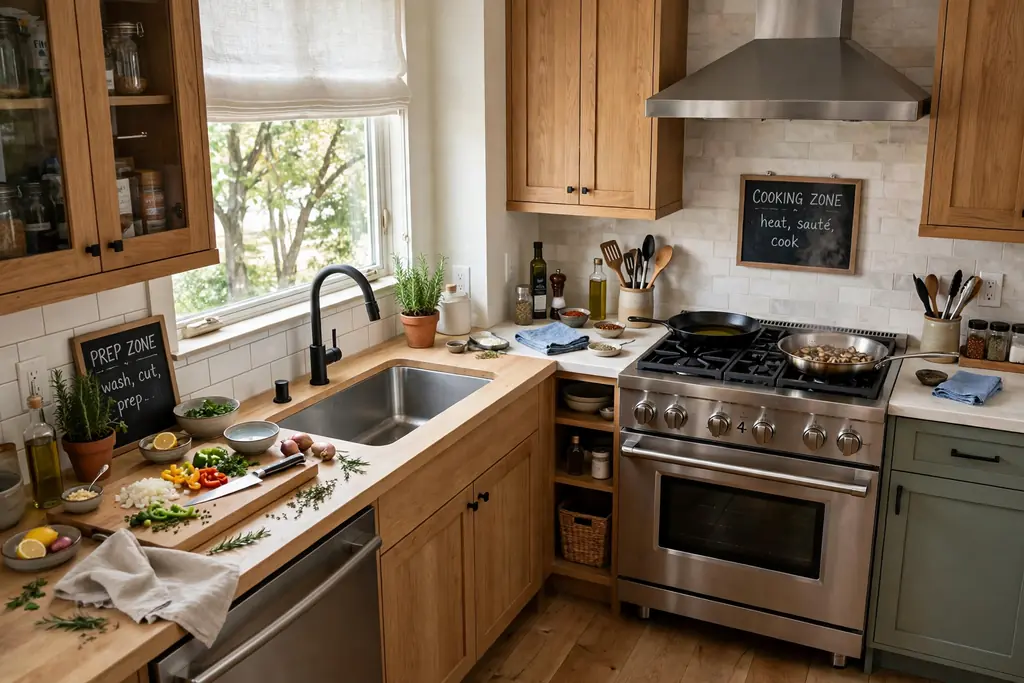
A zone layout groups the kitchen by task: prep near the sink, cooking near the stove, and cleanup near the dishwasher. This cuts the back and forth of a remodel that only changes finishes, since the room starts to work better even before new cabinets arrive. Sketch your current path for a simple meal, and note where you cross the room or reach past someone else.
Place the fridge at the edge of the cooking zone so others can reach drinks without crossing the cook. Keep the prep zone beside the sink with board space and a bin close by, and keep the cooking zone clear of through traffic. Small shifts, such as swapping a tall unit to the end of a run, can create zones without moving plumbing.
3. Add a Kitchen Island With Seating
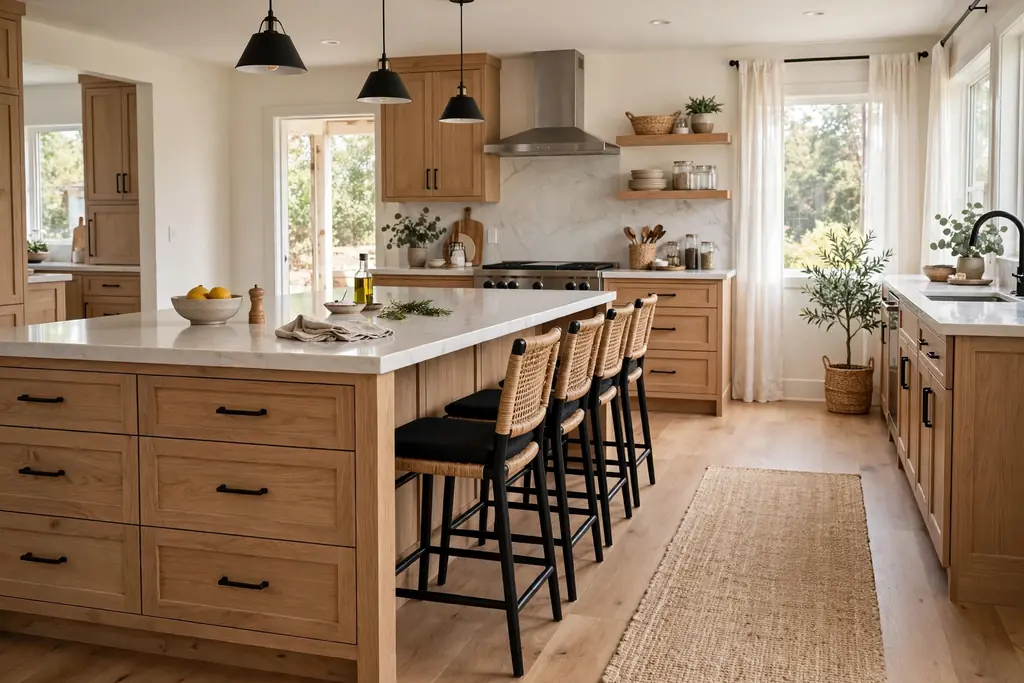
An island adds prep space, storage, and a gathering spot in one piece, which is why it suits many remodels. It works best when the room leaves at least a metre of clear walkway on each working side, so doors, drawers, and the dishwasher can open without blocking the path. Size the island to the room, not to the largest top you can fit.
Use the side facing the cook for drawers and the side facing guests for stools, with a knee space of about 30 centimetres under the overhang. Keep the island top clear of tall items that block sight lines, and plan power points on the side or end for small appliances. A plain island top in a hard wearing material keeps prep simple and seating relaxed.
4. Choose a Peninsula for a Narrow Kitchen
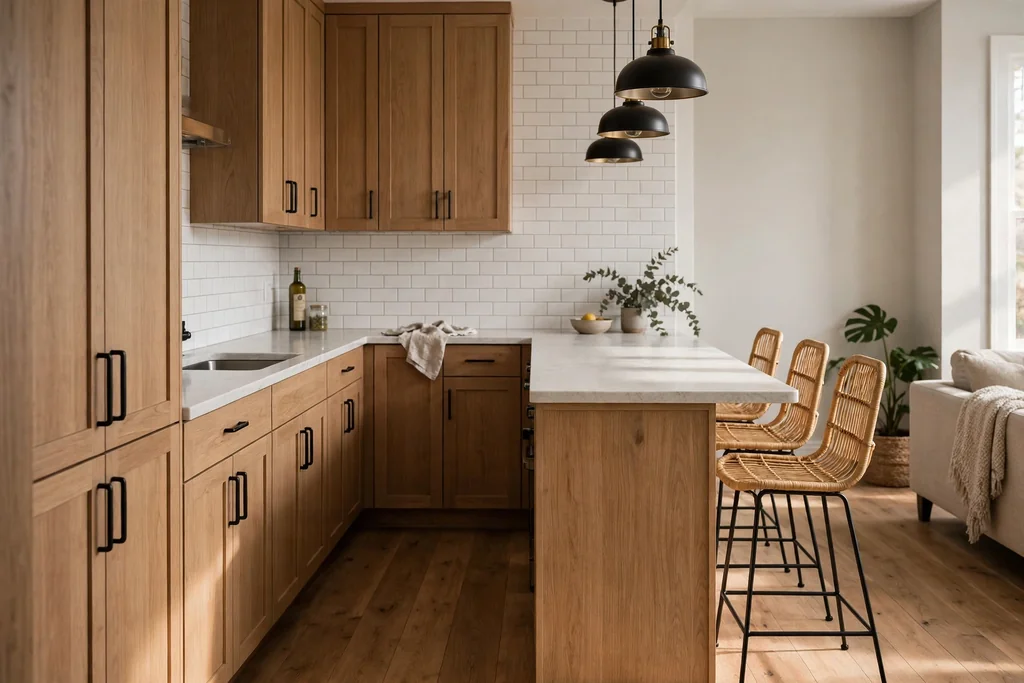
A peninsula gives many island benefits in a room too narrow for a freestanding island, since one end stays fixed to a wall or a cabinet run. It adds a work surface and a seating edge while keeping the main walkway clear. This suits galley kitchens and L shaped rooms where a full island would crowd the cooking zone.
Build the peninsula at counter height for prep, or at bar height on the seating side if you want a clearer split between cooking and eating. Add drawers on the kitchen side and open shelving or a wine rack on the end, so the fixed end earns its space. Keep the seating side clear of the main cooking path, so guests do not stand behind the cook.
5. Reface Cabinets With New Doors and Drawer Fronts
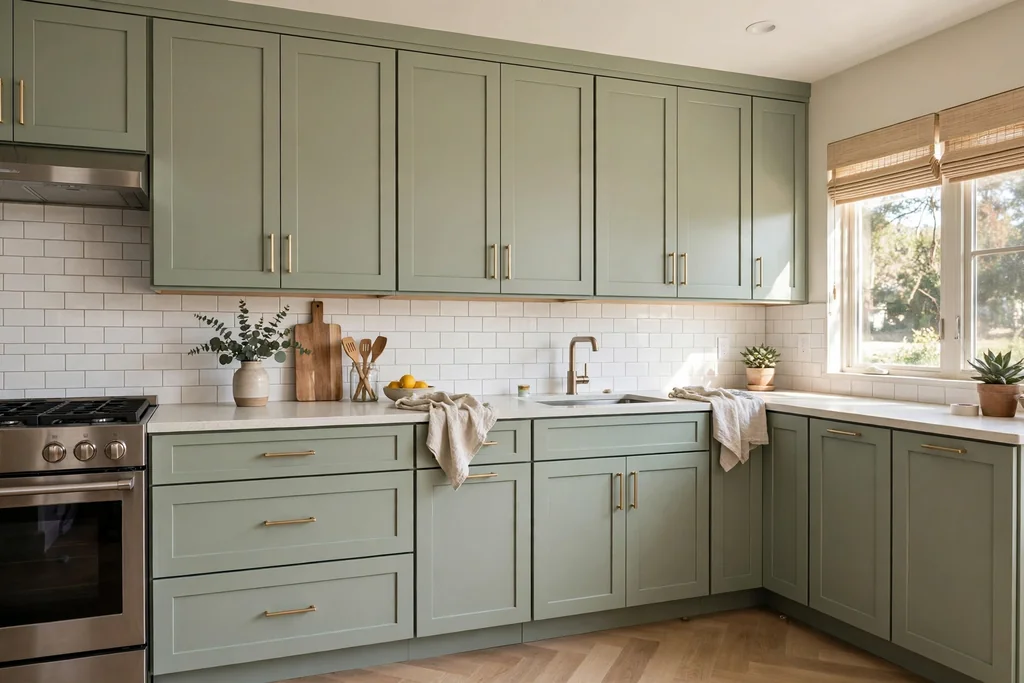
Refacing keeps sound cabinet boxes and replaces only the doors, drawer fronts, and visible panels, which can refresh a kitchen for less work than a full cabinet replacement. This suits kitchens where the layout works and the boxes are solid, but the fronts look dated. Measure every door and drawer front before ordering, since sizes vary even within one kitchen.
Match the new fronts to the existing boxes in style and finish, and replace hinges and handles at the same time so the whole run reads as new. Paint or stain any visible side panels to match, and check that soft close hinges fit the old boxes. If boxes are damaged, swollen, or poorly laid out, full replacement is the better route.
6. Extend Cabinets to the Ceiling
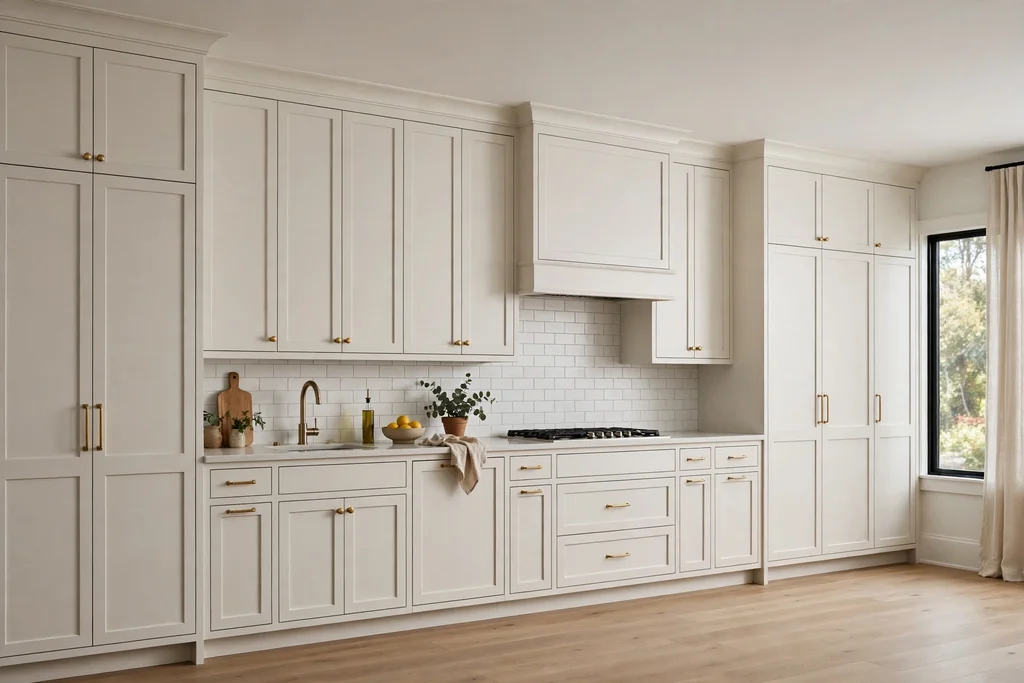
Full height cabinets remove the dusty gap above wall cabinets and add a full row of storage for rarely used items. This suits kitchens with standard ceiling heights, where a stacked row or a taller cabinet can reach the ceiling without looking forced. Keep everyday items at easy reach height, and use the top row for serving dishes, seasonal pieces, and bulk supplies.
Finish the top with a simple cornice or a flush panel so the run looks built in rather than added on. If the ceiling is uneven, a small filler strip at the top hides the gap better than a tall trim. Leave a stable step stool in the kitchen, since top row storage only helps if you can reach it safely.
7. Paint Cabinets in Two Tones
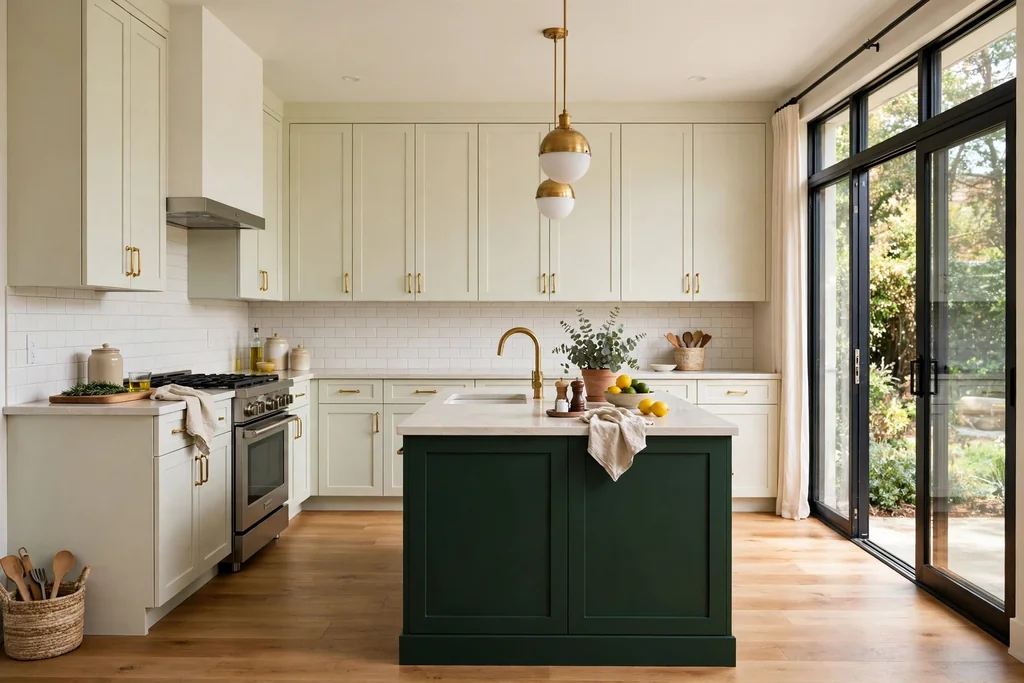
Two tone cabinets use one color for the main run and a second color for the island or the lower cabinets, which gives the kitchen a clear focal point without a bold whole room color. This suits kitchens where a single strong color would feel heavy, but plain white feels flat. Keep the upper cabinets pale so the room stays bright, and use the deeper tone low down where it grounds the space.
Repeat the deeper tone once more, in stools, a runner, or open shelf brackets, so the scheme looks planned. These colors for your kitchen cabinets help compare warm and cool tones beside your floor and counters. Test both colors on large boards in the room before painting a full run.
8. Add Glass Front Upper Cabinets
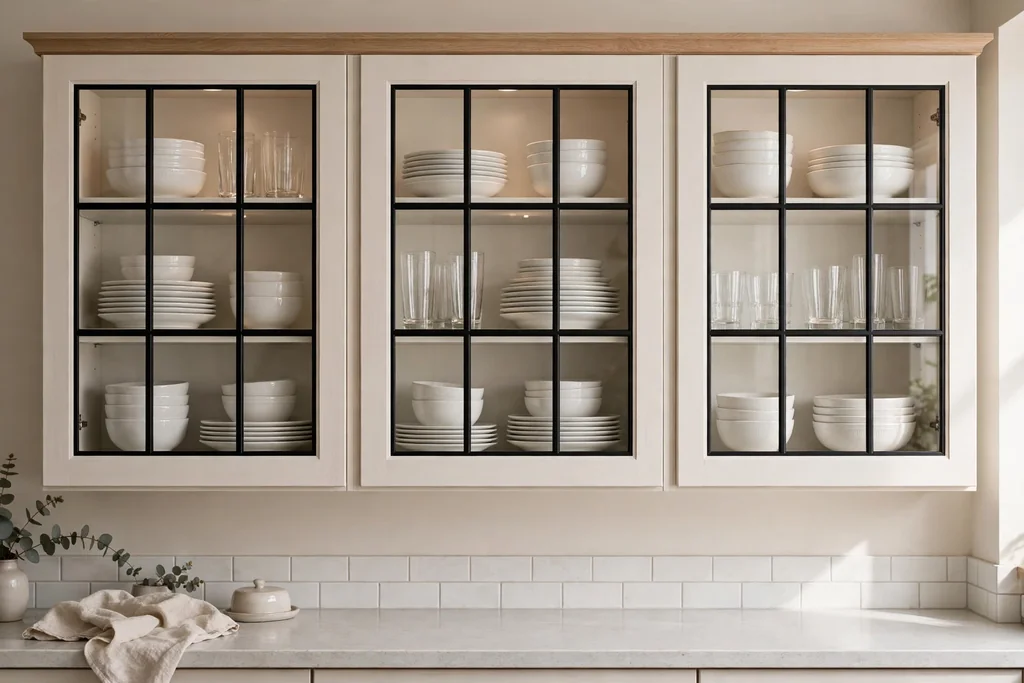
Glass front uppers break up a long run of solid doors and give a place to show dishes, glasses, and serving pieces. This suits one run of cabinets, such as the pair beside a window or above a coffee station, rather than every upper cabinet at once. Use clear glass for a display look, or reeded glass if you want shape without full visibility.
Keep the contents simple, with one or two stacks per shelf and matching dishes where possible, so the cabinet reads as calm. Add a small light inside the cabinet if the run sits in a darker corner, and wipe the glass weekly since kitchen grease shows quickly. Store everyday mugs elsewhere if the display set is only for serving.
9. Swap One Upper Run for Open Shelving
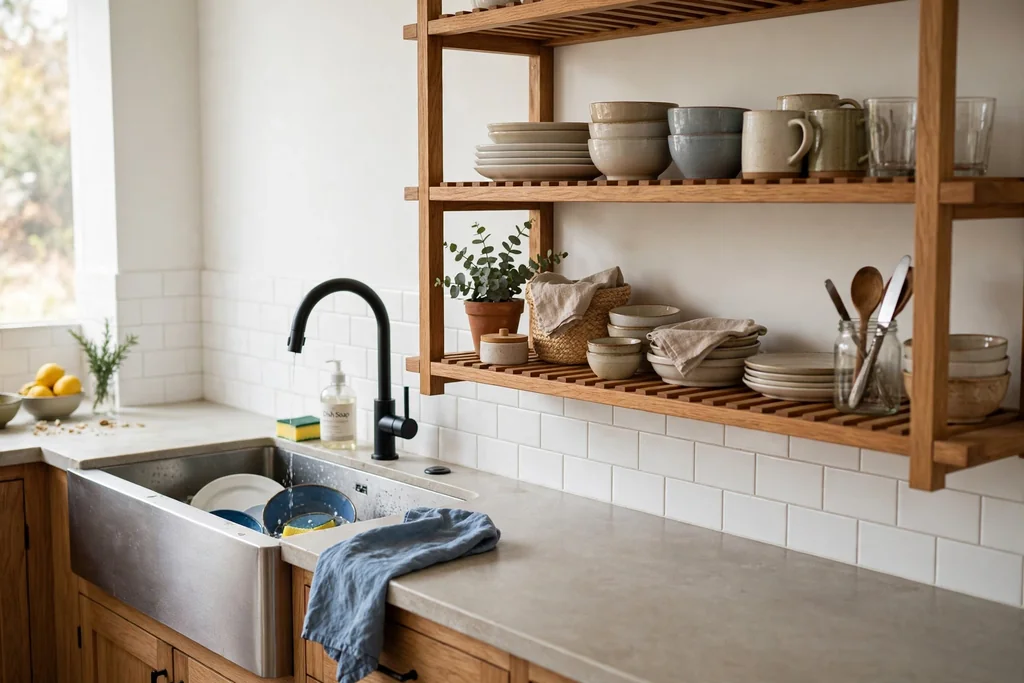
Open shelves on one wall give display space and easy reach for daily dishes, without opening up the whole kitchen. This suits a wall beside the sink or above a coffee station, where the items are used often and stay tidy by habit. Fix shelves into studs or with fixings rated for the load, and keep the depth to plate depth so items do not sit too far back.
Limit each shelf to one or two groups, with space left at each end, so the wall reads as storage rather than clutter. Our guide to kitchen wall storage ideas covers rails, racks, and baskets that pair well with open shelves. Put heavy stacks low and lighter pieces up high, and keep shelves clear of direct stove steam. If open shelves start to collect items you rarely use, move those pieces to closed storage and keep only the daily set on show.
10. Switch Base Cabinets to Deep Drawers
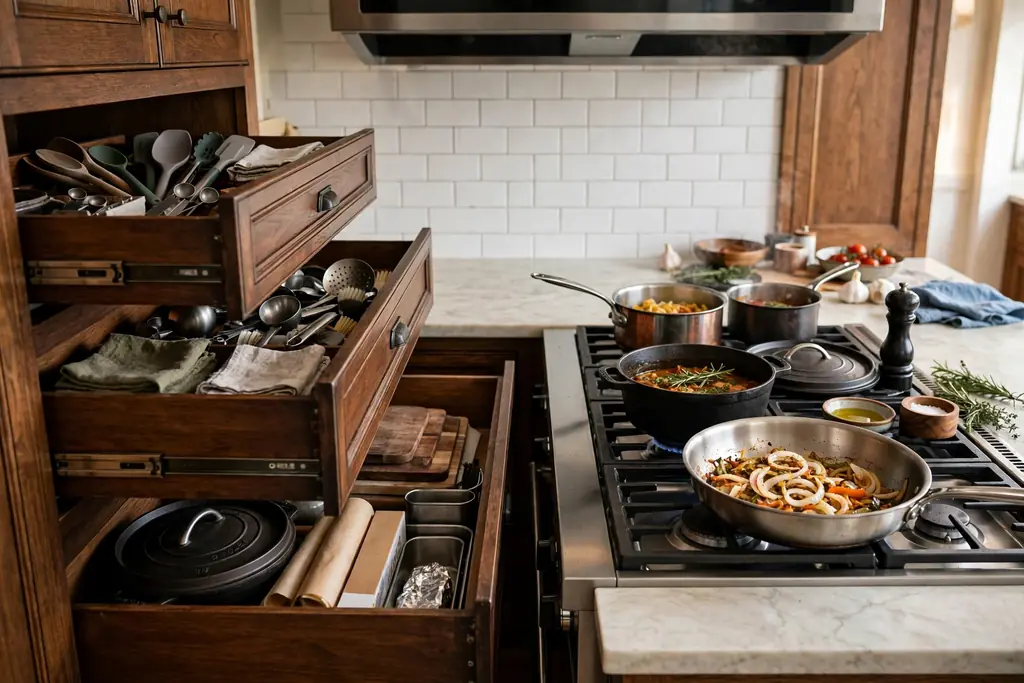
Deep drawers hold pots, pans, and small appliances better than low cabinets with doors, since you pull the whole drawer out and see everything at once. This suits the base run beside the stove, where heavy pans are used daily. Replace one or two base cabinets with wide drawers, and keep narrow cabinets for trays and boards.
Use dividers or peg boards inside drawers so pans do not slide when the drawer closes. Keep the heaviest drawer lowest, and check the drawer weight rating before loading it with cast iron. A drawer run beside the stove, paired with a utensil drawer above, can cut most of the bending and reaching of a door cabinet kitchen.
11. Add a Pull Out Pantry Tower
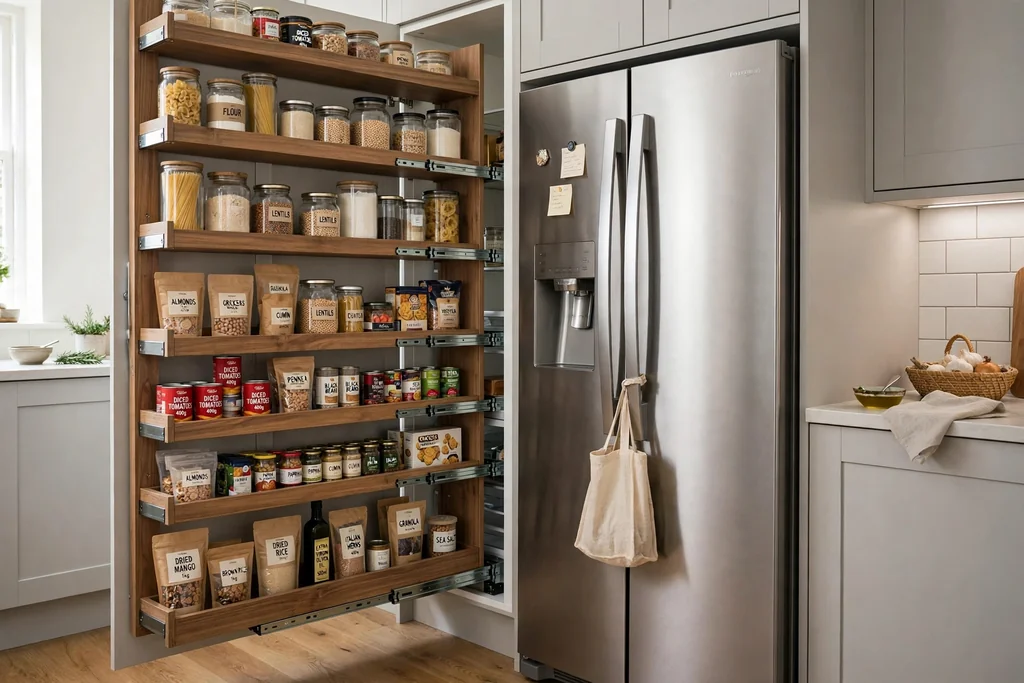
A tall pull out pantry tower turns a narrow gap into full height storage for dry goods, oils, and baking supplies. This suits kitchens short on pantry space, where a single tall unit beside the fridge can hold the weekly shop in one place. Choose a tower with full extension runners, so the back of each shelf comes out into the light.
Group items by use, such as breakfast, baking, and cooking, and label the front edge of each shelf if several people cook. Keep heavy items low and light items up high, and check the tower width against your largest bottles before ordering. A pantry tower beside the prep zone shortens the walk for ingredients at every meal.
12. Install Quartz Counters
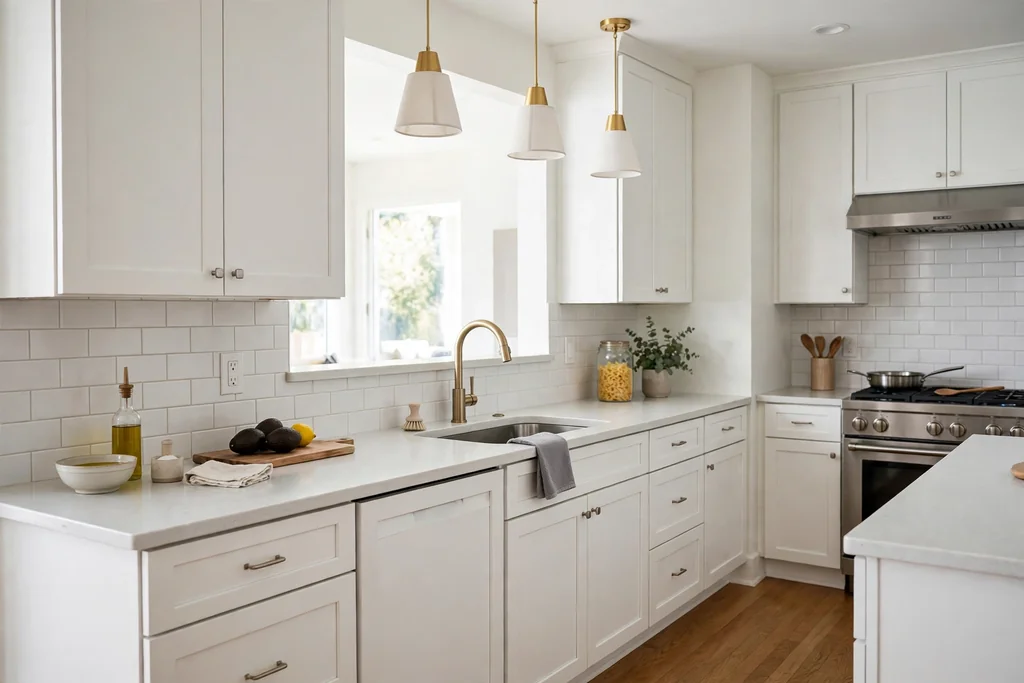
Quartz counters give a consistent pattern, a hard surface, and simple care, which suits busy kitchens that need a worktop that wipes clean. The pattern runs through the slab in a controlled way, so a large island and a long run can match closely. Choose a pale or mid tone for the main run, since very dark counters show dust and water marks more clearly.
Order the counter after cabinets are fitted and templated, since quartz is cut to the exact run. Keep a cutting board for knives and trivets for hot pans, even on a hard surface, and wipe spills promptly near seams. Pair quartz with a simple backsplash so the counter pattern stays the main feature of the work surface.
13. Top the Island With Butcher Block
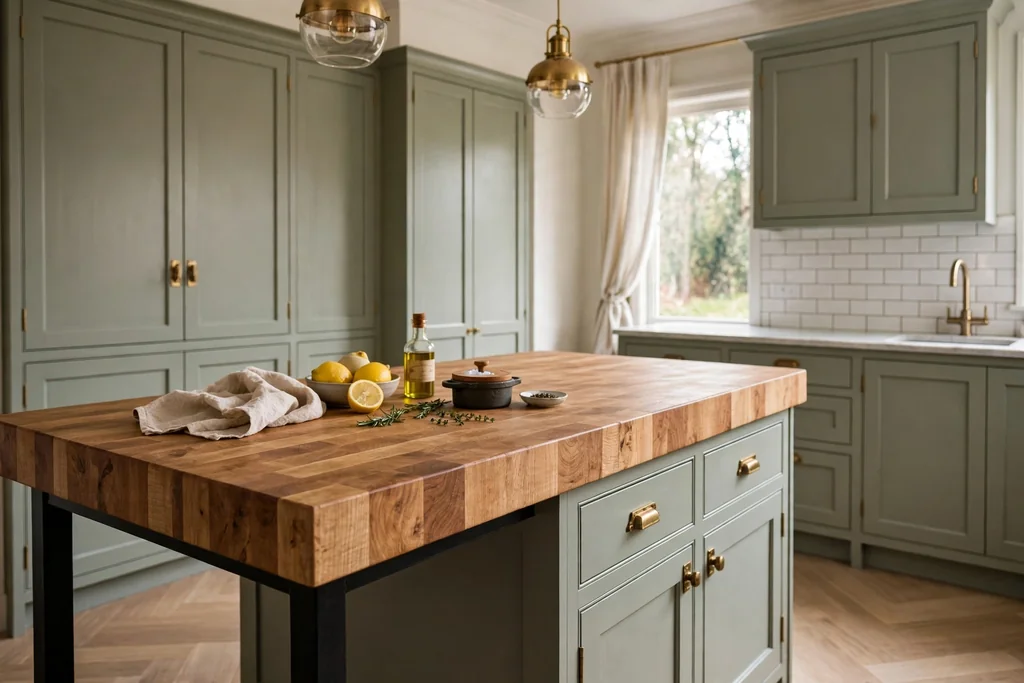
A butcher block island top adds warmth to a kitchen with painted cabinets or stone counters, and it gives a forgiving prep surface. This suits an island used for chopping, baking, and casual meals, where a wood top feels more relaxed than stone. Choose a thick top with a sealed finish made for kitchen use, and keep the grain direction running along the island.
Wipe spills promptly so water does not sit on the wood, and use trivets for hot pans since heat marks wood. Sand and reseal a worn section rather than replacing the whole top, which keeps this a long lasting choice. Pair the wood top with painted base cabinets so the island reads as a distinct piece in the room.
14. Add a Waterfall Edge to the Island
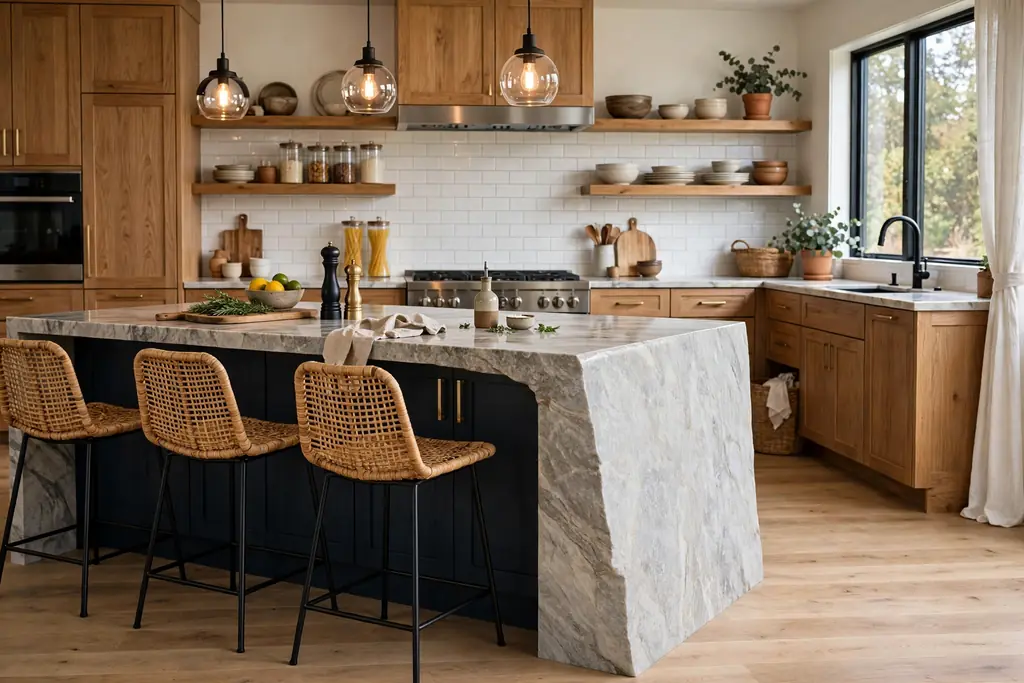
A waterfall edge runs the counter material down the side of the island to the floor, which gives the island a solid, furniture like finish. This suits a showpiece island in an open plan kitchen, where the end of the island is seen from the living area. The waterfall side should face the room, with drawers and seating kept on the working sides.
Match the vein or pattern at the corner as closely as possible, since a mismatched join shows at eye level. Keep the waterfall end clear of stool legs and bags, since scuffs show on a full height panel. A waterfall edge works best with a plain or lightly patterned counter, where the continuous surface is the feature.
15. Run a Backsplash Slab Up the Wall
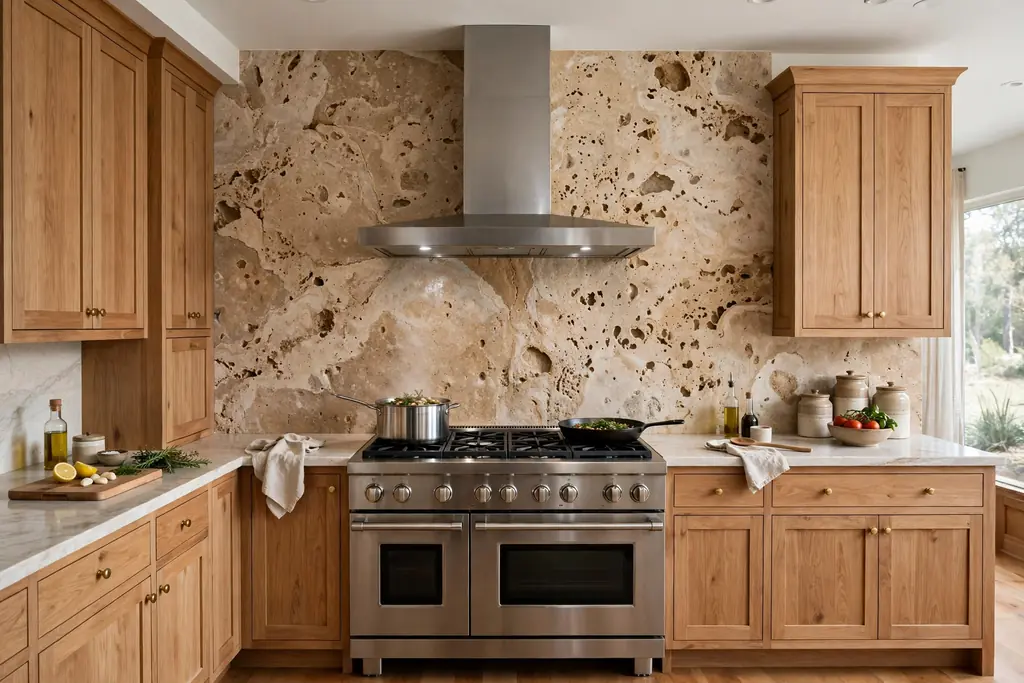
A full height backsplash slab carries the counter material up the wall to the underside of the upper cabinets, or to the ceiling in an open run. This gives a clean, joint free wall behind the stove and sink, and it suits kitchens where grout lines would collect grease. Use the same material as the counter for a calm look, or a contrasting stone for a bolder wall.
Template the slab after the counter is fitted, and plan joins carefully on long runs. Keep the slab clear of open shelving brackets that would cut across the stone, and wipe it with a soft cloth after cooking. A slab wall pairs well with simple cabinets, since the wall itself becomes the main pattern in the room.
16. Choose a Handmade Look Tile Backsplash
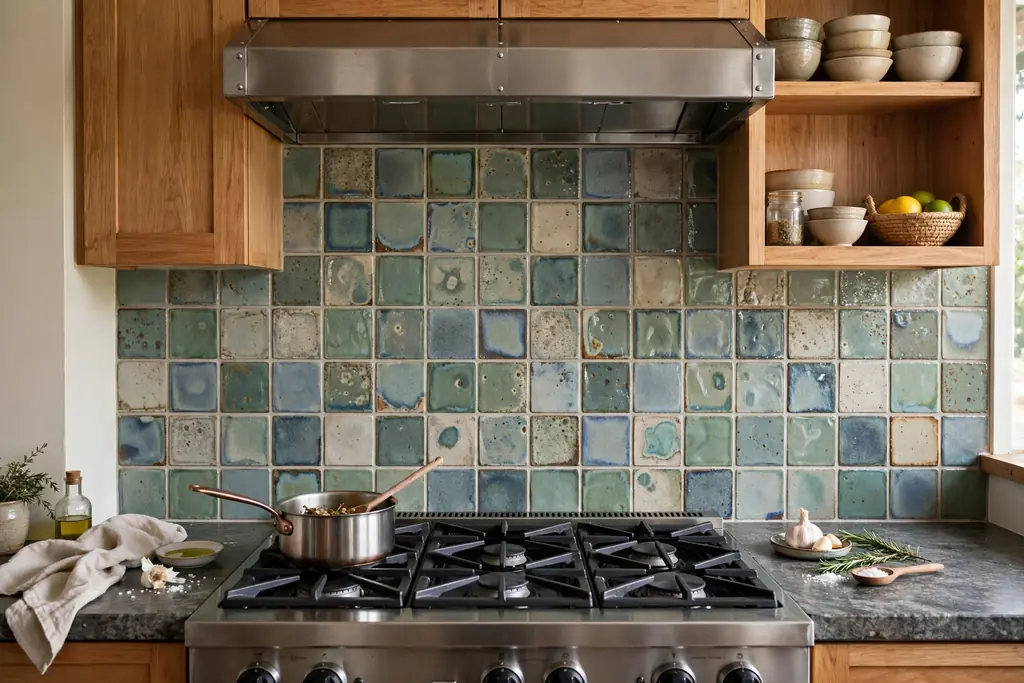
Handmade look tiles, with slight variation in glaze and edge, add texture to a backsplash without a busy pattern. This suits kitchens with plain cabinets and counters, where the wall needs warmth and detail. Lay the tiles in a simple stack or subway pattern so the glaze variation shows, rather than a complex pattern that fights it.
Order extra tiles for cuts and spares, since glaze batches vary and a future repair needs a close match. Seal grout in the cooking zone, and wipe tiles after frying so grease does not settle in the grout. A handmade look tile in a pale tone keeps the wall bright, while a deeper glaze suits a kitchen with strong natural light.
17. Layer Under Cabinet and Pendant Lighting
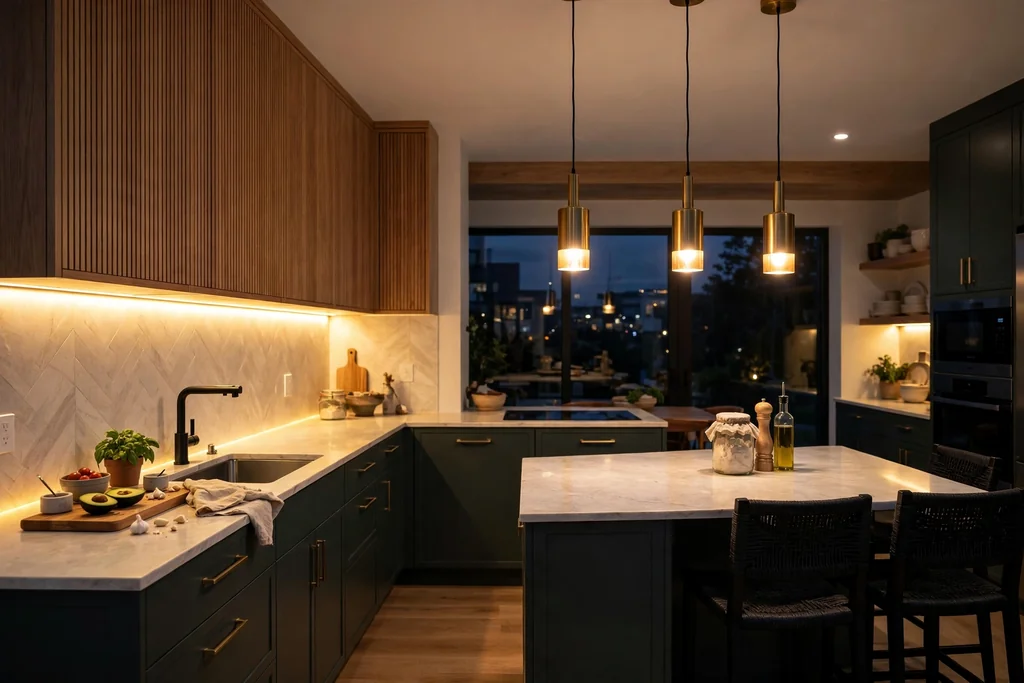
Layered lighting pairs task light under the upper cabinets with pendants over the island and a plain ceiling light for general use. This suits almost every remodel, since one ceiling light alone leaves counters in shadow. Run under cabinet strips along the full prep run, and space pendants evenly over the island at a height that clears heads and steam.
Choose warm white bulbs so food and wood tones look natural, and put task lights on a separate switch or dimmer from general lights. Keep light strips clear of the stove and steam, and hide drivers behind a cabinet. Test the light at night before finishing, since a kitchen that looks bright by day can feel dark at the counter after sunset.
18. Make the Range Hood a Focal Point
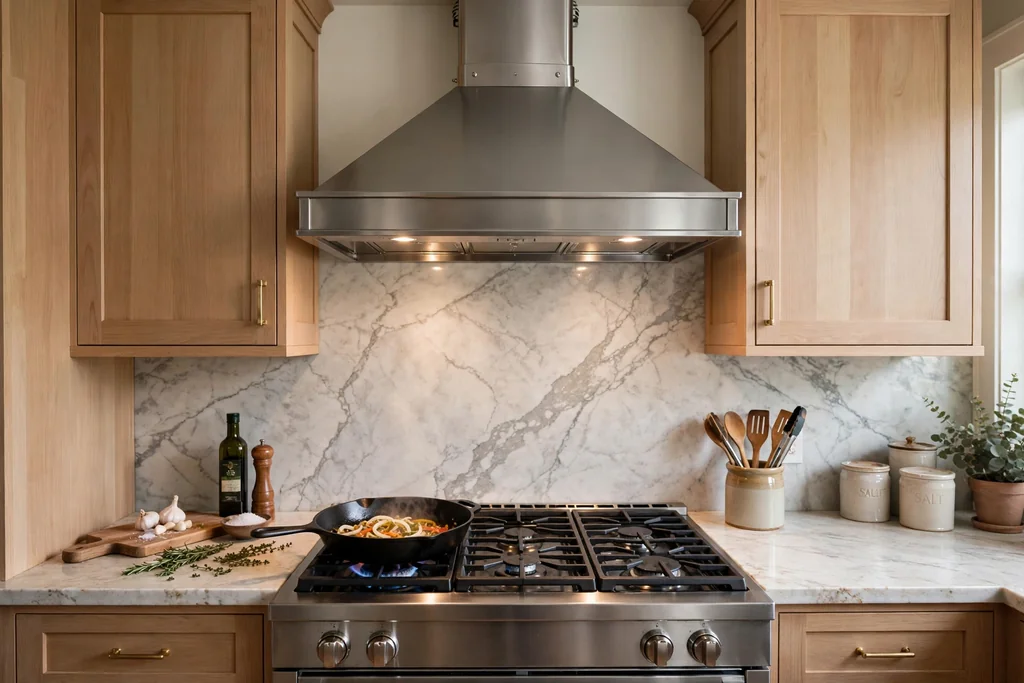
A well chosen range hood can anchor the cooking wall, especially when the stove sits on a feature wall. This suits kitchens where the hood is visible from the living area, and where a plain hood would leave the wall flat. Choose a hood shape that fits the stove width and the room style, such as a simple chimney hood, a plaster look cover, or a wood trimmed cover.
Keep the hood finish in the same family as the cabinets or the metal finishes elsewhere, so it reads as part of the plan. Leave clear space above the stove for safe cooking, and check the hood height against the stove maker guidance. A focal hood works best when the rest of the cooking wall stays simple, with plain tiles and one metal finish.
19. Choose Panel Ready Integrated Appliances
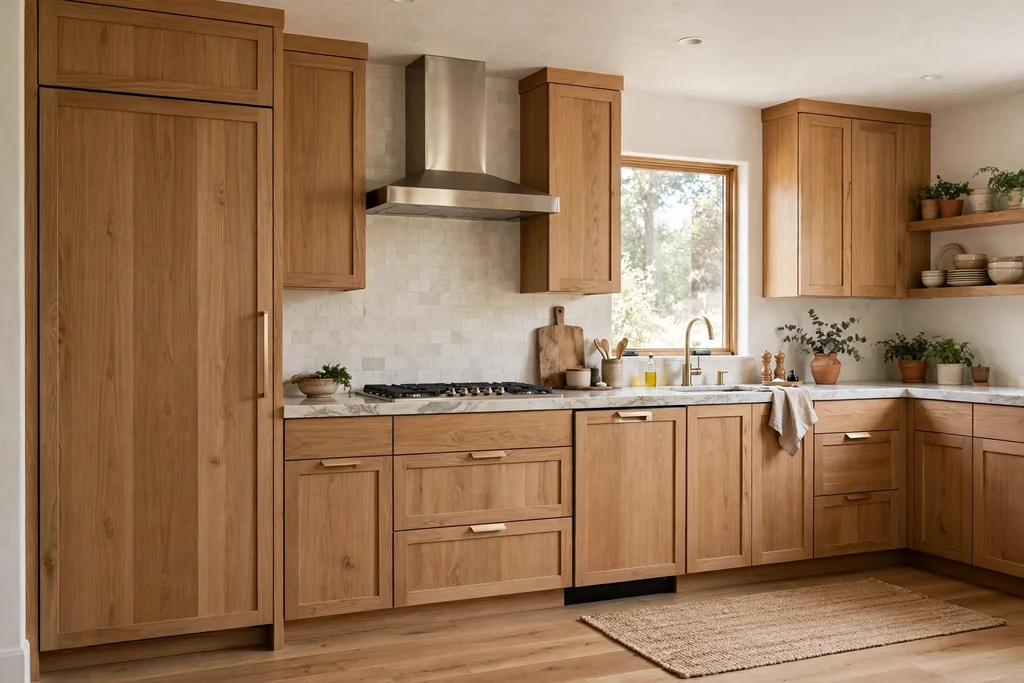
Panel ready appliances take cabinet fronts that match the rest of the kitchen, so the fridge and dishwasher blend into the run. This suits open plan kitchens where large appliances would break the cabinet line, and smaller kitchens where a calm wall makes the room feel larger. Order panels with the cabinets, so the finish and handle style match exactly.
Check ventilation and access before fitting panels, since a fridge and a dishwasher still need air and service space. Keep handles consistent across panels and cabinets, and label the dishwasher panel discreetly if guests use it. Integrated appliances suit a remodel where the cabinet run is the main visual feature, rather than the appliances themselves.
20. Split the Oven and Cooktop
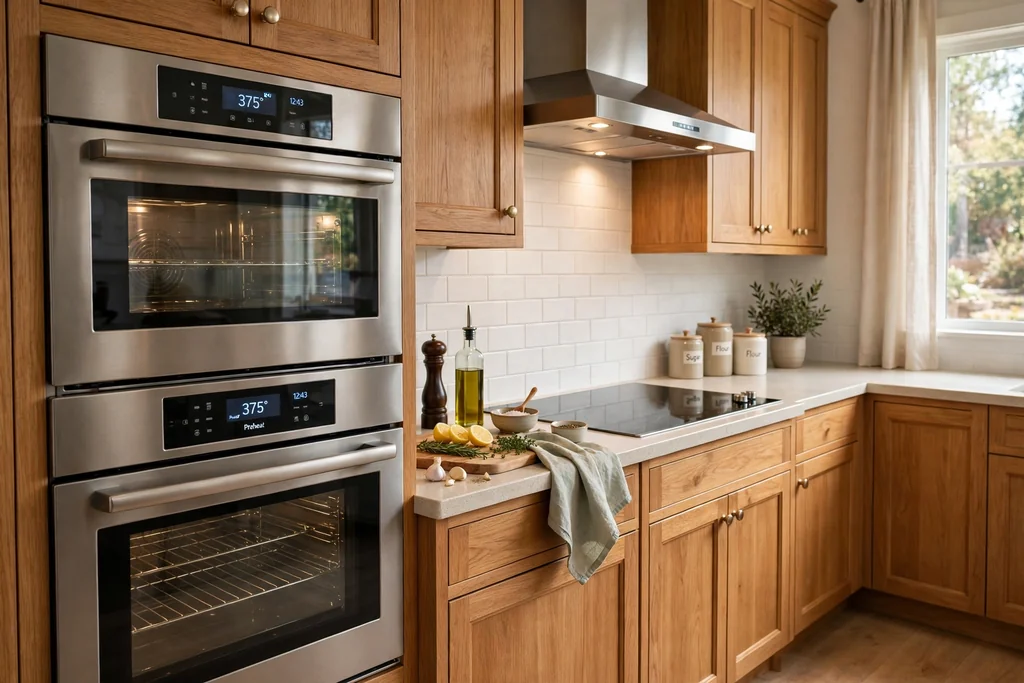
Moving the oven to a wall stack and keeping the cooktop on the counter separates two jobs that often crowd one range. This suits cooks who bake often, since a wall oven sits at a comfortable height and the cooktop keeps a clear prep space beside it. Place the wall oven near the prep zone, with a landing surface beside it for hot trays.
Plan power or gas supply for both spots before cabinets are ordered, since moving services after fitting costs far more. Keep the cooktop clear of through traffic, and add a drawer below it for pans and utensils. A split layout also lets two people cook at once, one at the oven and one at the hob, without crossing paths.
21. Install a Farmhouse Sink
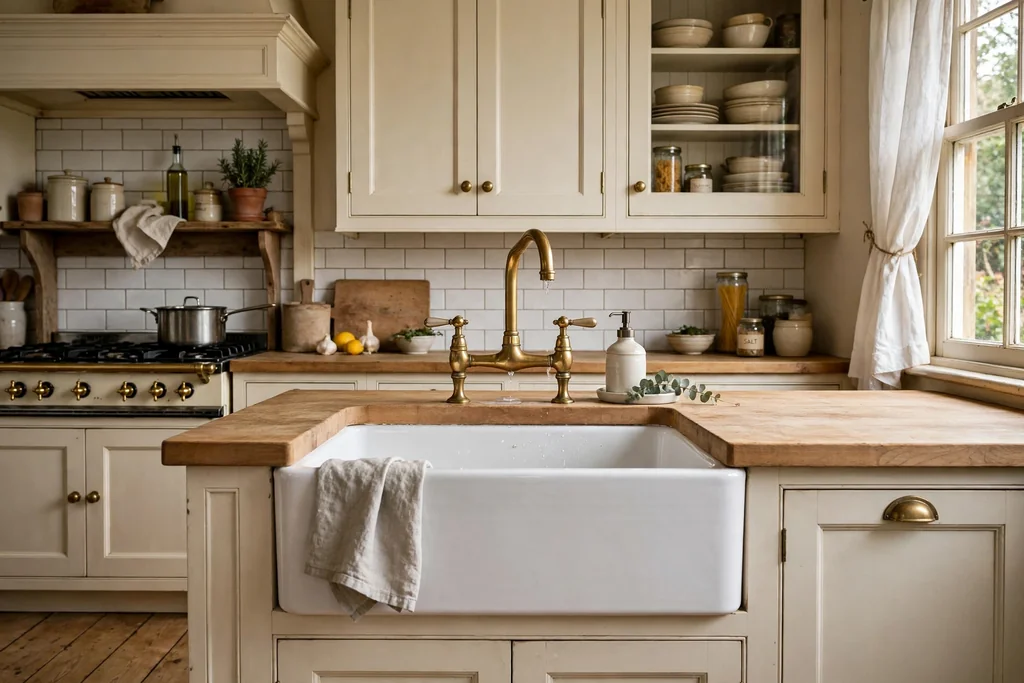
A farmhouse sink, with its front apron showing, gives a wide single bowl for large pans and baking trays. This suits kitchens with a traditional or cottage feel, and remodels where the sink wall is a feature. Check the cabinet below before ordering, since a farmhouse sink needs a shaped cabinet front and support for its weight.
Pair the sink with a bridge or single lever tap in the same finish as the hardware, and keep the counter around it clear so large items can drain. Wipe the apron front after use, since splashes show on a visible front. A farmhouse sink works best with a plain counter and simple tap, so the sink itself stays the feature.
22. Add a Pot Filler Above the Range
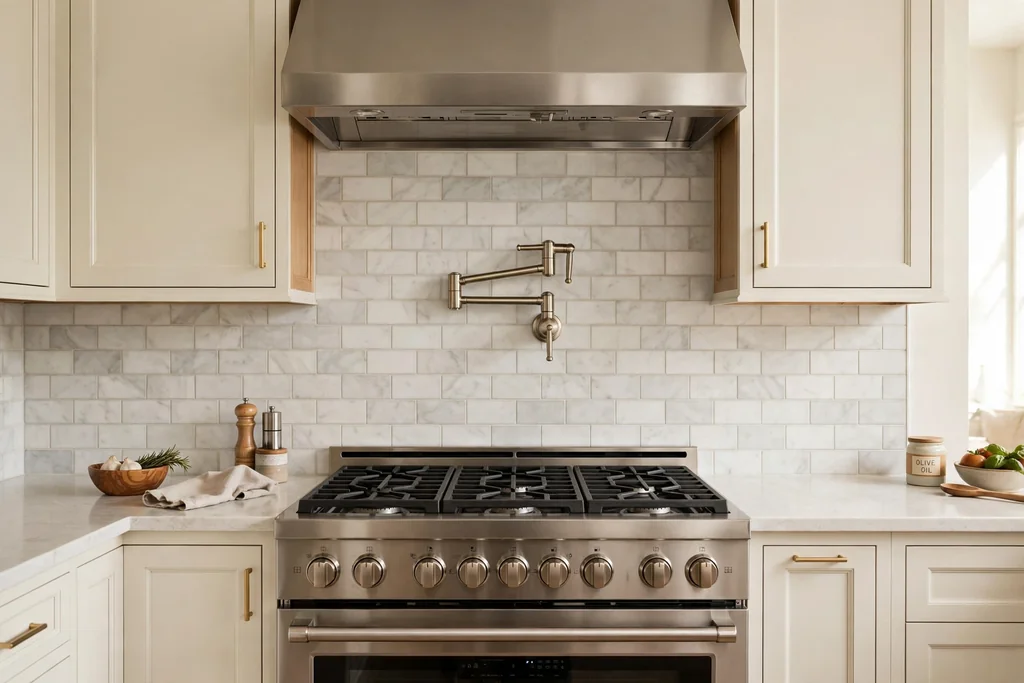
A pot filler is a folding tap above the range that fills large pots where they cook, so you do not carry a heavy pot across the kitchen. This suits cooks who boil pasta, stock, or large batches often, and kitchens where the sink sits far from the stove. Fit the filler at a height that clears the largest pot, with a cold water supply run during the remodel.
Choose a finish that matches the main tap and hardware, and keep the wall behind it simple so the filler reads as a tool rather than decoration. Turn the filler off fully after use, and check joints during the first weeks for drips. A pot filler is a small remodel detail with a clear daily use, which is why it earns its place on a busy cooking wall.
23. Build a Banquette Breakfast Nook
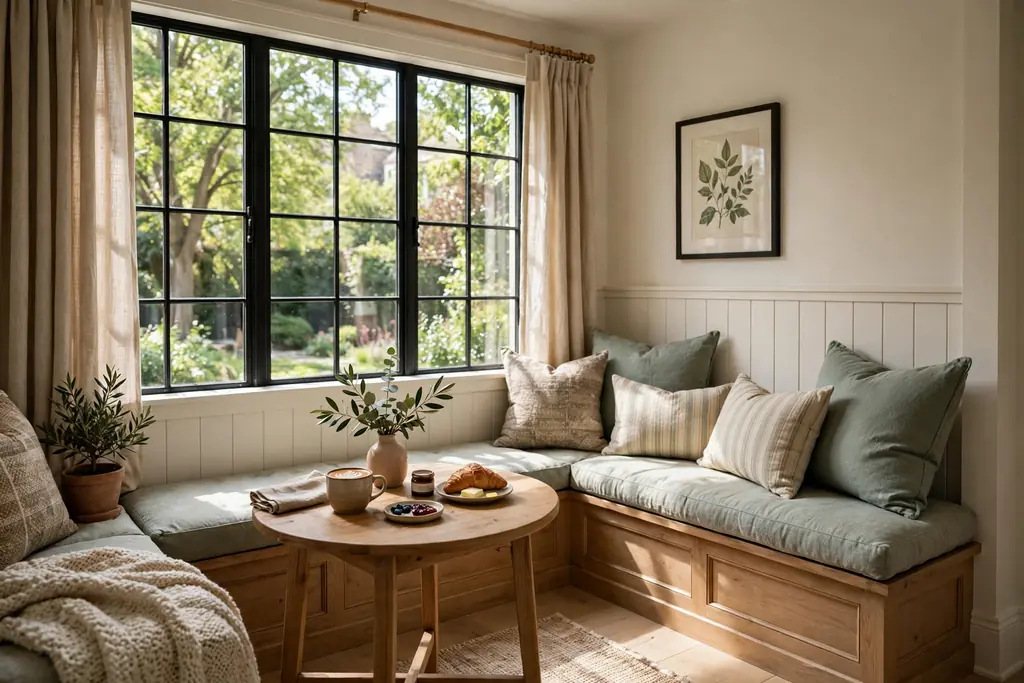
A banquette nook turns a corner or a window wall into fixed bench seating with a table, which suits family breakfasts and small kitchens where loose chairs crowd the walkway. Build the bench with storage inside, so cushions lift to reveal space for table linen, board games, or rarely used appliances. Keep the table size modest, so people can slide in and out without moving the whole table.
Add cushions in a washable fabric, and keep the wall behind the bench simple, with one picture or a shelf rather than a full gallery. Place the nook near natural light where possible, and leave a clear path from the nook to the kitchen so serving stays easy. A banquette also gives children a fixed spot for homework while dinner cooks nearby.
24. Create a Dedicated Coffee Bar
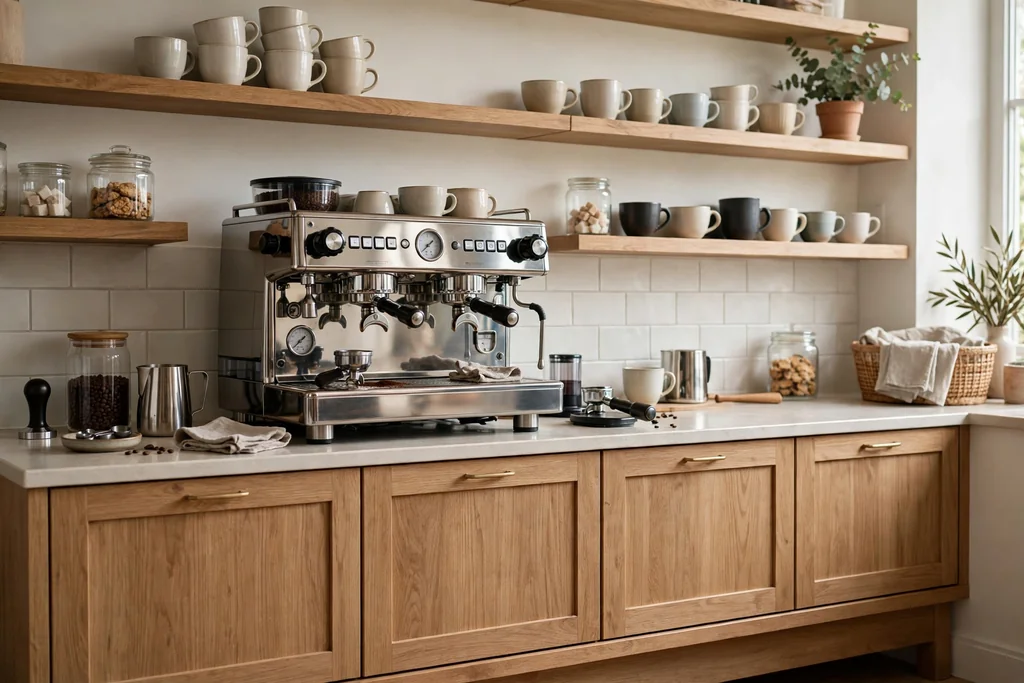
A coffee bar groups the machine, cups, beans, and filters in one station, so morning prep does not spread across the main counter. This suits a corner of the kitchen, a wide section of counter, or a tall cabinet fitted with a pull out shelf. Add a small sink or a water point nearby if the layout allows, and keep a bin or a knock box close for grounds.
Use closed storage below for spare filters and beans, and open shelving above for daily cups. Keep the coffee bar clear of the main cooking zone, so one person can make coffee while another cooks. A coffee bar works best when it holds only coffee items, since extra clutter quickly turns a station back into a crowded counter.
25. Add an Appliance Garage
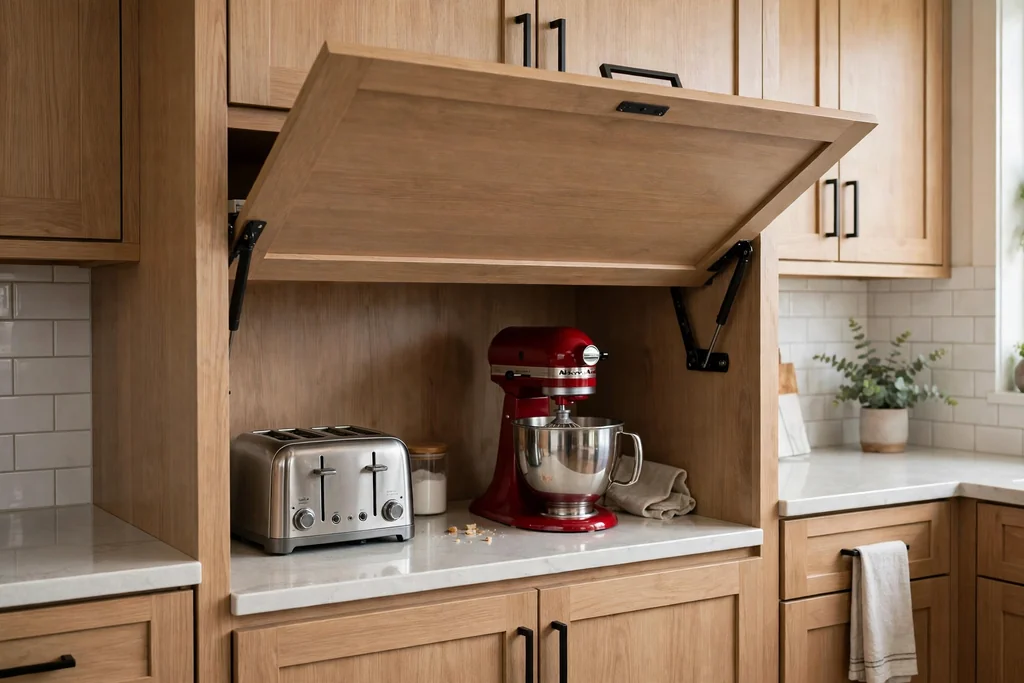
An appliance garage is a cabinet with a lift up or tambour door that hides small appliances on the counter, such as a toaster, blender, or mixer. This suits kitchens where the counter fills up between meals, but the appliances are used often enough that storing them in a high cabinet is a chore. Fit the garage at counter level, with power points inside, so appliances stay plugged in and ready.
Keep the garage door style matched to the cabinets, and leave enough depth for the tallest appliance with its lid on. Wipe inside the garage weekly, since crumbs and steam collect in a closed space. An appliance garage keeps the main counter clear for prep, while daily tools stay within one step of the work surface.
26. Replace Flooring With a Durable Kitchen Floor
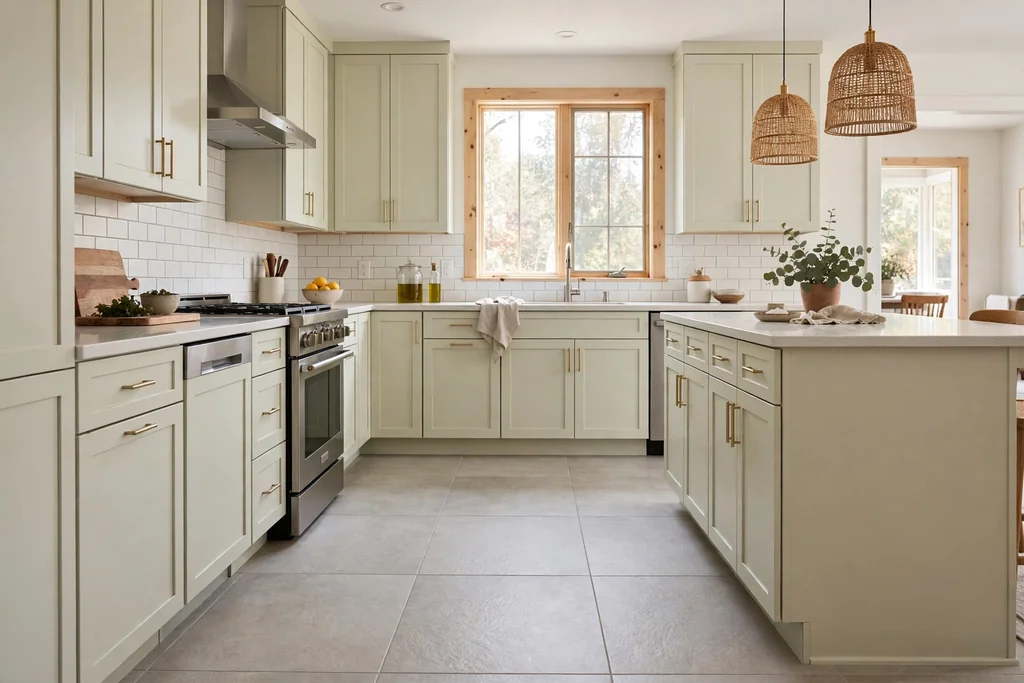
Kitchen flooring takes water, dropped pans, and daily foot traffic, so a remodel is the right time to choose a floor that handles all three. Tile suits wet zones near the sink and dishwasher, while engineered wood suits open plan rooms where the kitchen floor runs into the living area. Choose a finish that hides dust and crumbs between cleans, and a grout color that stays calm with use.
Fit the floor before the final cabinet kick plates go on, and leave expansion gaps where the floor maker advises. Keep a spare box of tiles or planks for repairs, since a single damaged piece is far easier to replace from the same batch. A durable floor also sets the tone for the whole remodel, so test samples beside cabinets and counters in the room.
27. Add or Enlarge a Window Over the Sink
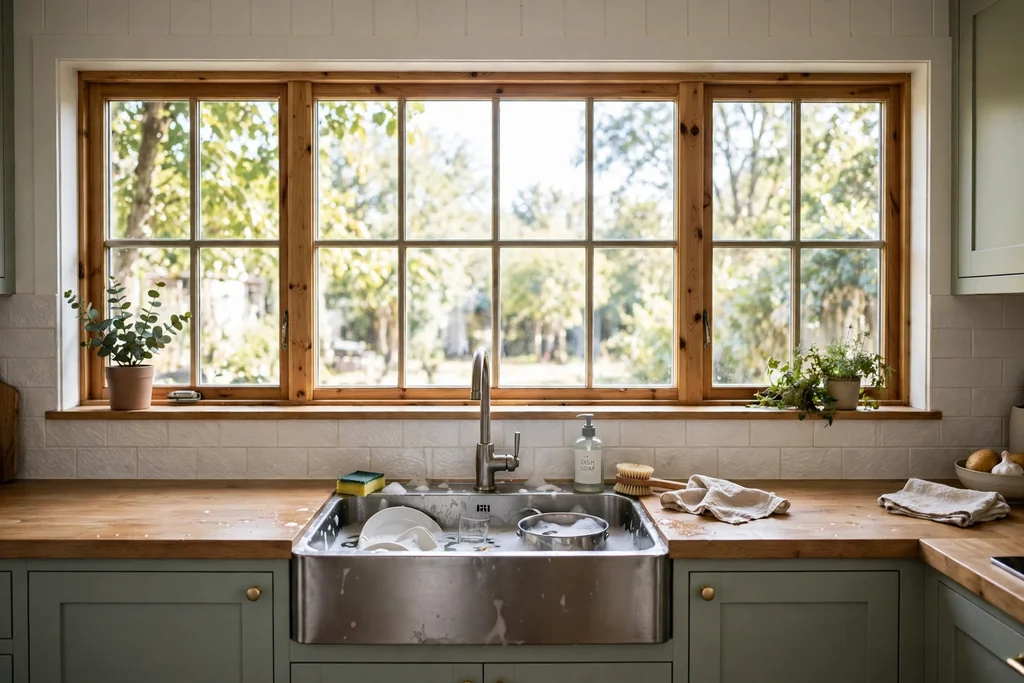
A window over the sink gives daylight where you stand longest, and it makes washing up feel less closed in. This suits kitchens where the sink sits on an outside wall, and where a larger window can be fitted during a remodel without moving the sink. Check the wall structure and outside finish before cutting, and plan the window height so the tap and any shelf sit clear of the frame.
Use a simple frame and an easy wipe sill, since sink splashes reach the window. Keep the window dressing light, such as a short cafe curtain or a simple blind, so daylight stays the point. If a new window is not possible, a larger mirror or a bright backsplash on the sink wall can lift the same spot with less work.
28. Add a Prep Sink on the Island
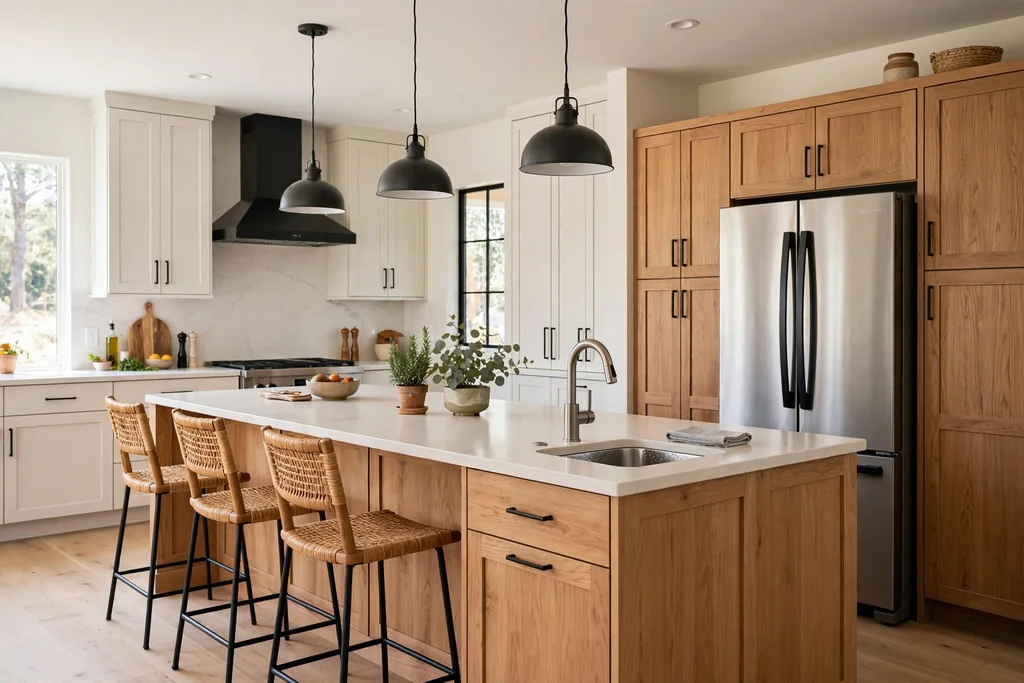
A prep sink on the island gives a second washing and rinsing spot, so two people can work without sharing one sink. This suits larger kitchens and households where one person preps vegetables while another cooks or cleans up. Place the prep sink at the end of the island nearest the fridge, so produce moves in a short line from storage to prep to cooking.
Run water and drainage during the remodel, since adding a sink after counters are fitted is costly. Keep the prep sink small, with a single bowl and a simple tap, so it does not take over the island top. Pair it with a bin below or beside it, so peelings go straight from board to bin without crossing the island.
29. Plan the Remodel in Phases
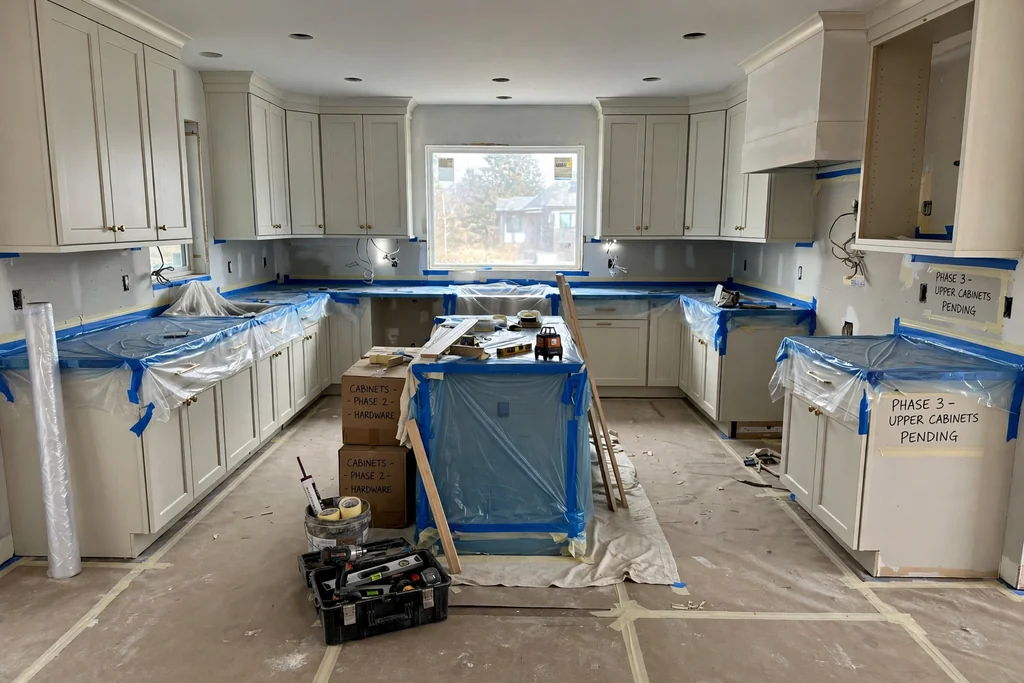
A phased plan orders the work so the kitchen stays usable for as much of the remodel as possible, and so each step does not undo the last. This suits remodels done over months, or homes where a full shutdown is hard to manage. Start with layout and services, such as walls, plumbing, and wiring, then move to cabinets, counters, and finally paint, hardware, and styling.
Write the order down before work starts, and check each phase against the next, so a floor laid early is protected during later cabinet work. Keep one usable prep spot through each phase, even if it is a temporary table with a kettle and a board. A clear phase plan also helps you pause between stages without losing track of what comes next, which makes a large remodel feel manageable.
Conclusion
A good kitchen remodel is less about doing everything at once and more about choosing changes that fit how you cook and live. Start with layout and zones, then fix cabinets and storage where clutter forms, then choose counters, lighting, and finishes that stand up to daily use. Work through the ideas in this list in the order that suits your room and your budget, and test samples in your own light before you commit. Save this list on Pinterest to compare ideas as you plan, and return to it when you are ready to choose the next phase of your refresh.
Frequently Asked Questions
What is the first step in a kitchen remodel?
Start by mapping how you use the kitchen now: where you prep, cook, clean up, and gather. Note the spots where you cross paths, run out of counter, or store items far from where you use them. Those notes shape layout and storage choices far better than starting with a finish or a single product.
Do I need to move plumbing for a kitchen remodel?
Not always. Many remodels keep the sink, dishwasher, and stove in place and change cabinets, counters, and finishes around them, which keeps costs and disruption lower. Moving plumbing is worth it when the layout itself is the problem, such as a sink far from prep space or a stove in a through route, but plan those moves early, before cabinets are ordered.
Should I reface cabinets or replace them?
Reface when the cabinet boxes are solid, the layout works, and only the fronts look dated. Replace when boxes are damaged, the layout needs to change, or you want deep drawers and tall storage that the old boxes cannot hold. Check box condition and layout needs first, since refacing a poor layout only refreshes a kitchen that still works badly.
How do I choose a kitchen countertop?
Match the counter to how you cook. Quartz suits busy kitchens that need a hard, wipeable surface, while butcher block suits an island used for prep and casual meals. Test samples beside your cabinets and floor in daylight and evening light, and keep the pattern simple if the backsplash or floor already carries a strong pattern.
What kitchen remodel changes add the most storage?
Deep drawers beside the stove, a pull out pantry tower, full height cabinets, and a banquette bench with storage inside all add useful space without enlarging the room. Add storage where clutter forms, near the stove, beside the sink, and at the pantry, rather than spreading small storage through the whole kitchen.
How can I keep a kitchen usable during a remodel?
Plan the work in phases, with layout and services first, then cabinets and counters. Keep one temporary prep spot with a table, a kettle, and a board, and protect finished floors and counters during later work. A written phase order helps you pause between stages and still know exactly what comes next.