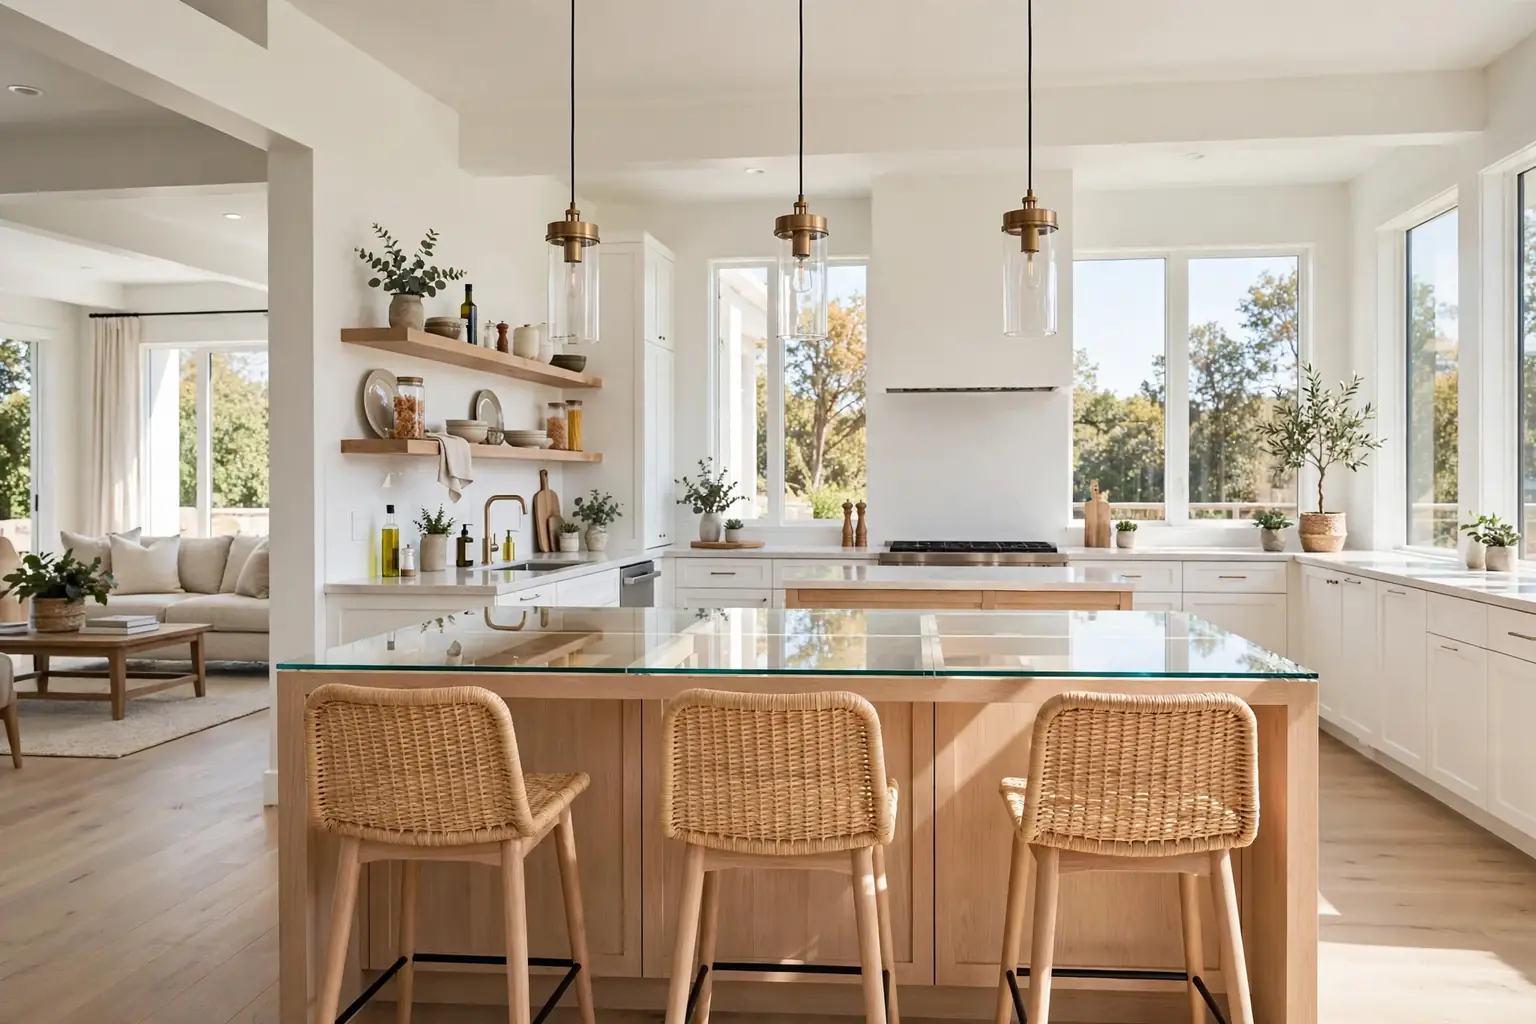
The best kitchen island balances storage, seating, and work space in one unit. Choose deep drawers for heavy pots, a clear prep run beside the sink or cooktop, and an overhang of about 12 inches for knees at the seating side, then match the island size to the walkways around it, so two people can move without crowding.
Start with the job the island must do most days, not the look alone. A busy cooking household needs drawers, a prep sink, and a clear landing spot for hot pans, while a household that eats at the island needs comfortable stools, a wipe clean top, and room for plates and elbows. For seasonal styling once the island is in place, see kitchen island Christmas decor for low displays that keep the middle clear, and for a calm pale kitchen around a new island, see white kitchen ideas.
Key Takeaways
- Plan storage first: deep drawers for pots, a pantry pull-out for dry goods, and a clear spot for trash and recycling.
- Keep one prep run clear at all times, even when the island also holds seating, a sink, or a display.
- Leave knee room at the seating side, and choose stools that slide fully under the overhang when not in use.
- Match the island length to the room: a long island suits an open plan room, while a slim or rolling island suits a small kitchen.
- Repeat one or two finishes from the rest of the kitchen, so the island reads as part of the room, not as a separate piece.
- Test the layout before you commit: tape the island outline on the floor, then walk the routes to the stove, sink, and fridge.
1. Deep Drawer Banks for Pots and Pans
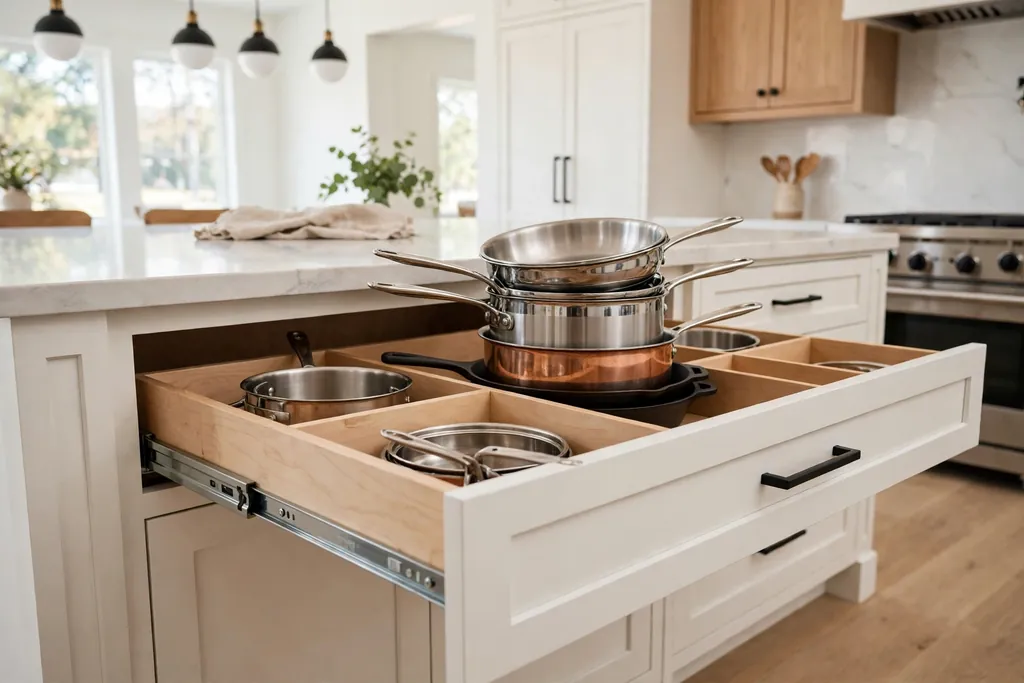
Replace deep base cabinets with full extension drawer banks on the working side of the island, so pots, pans, and lids slide out to you instead of hiding at the back of a dark cabinet. Use wide, deep drawers for stockpots and baking trays, and a shallower top drawer for utensils, wraps, and small tools, so each drawer holds one kind of item.
Keep the heaviest drawers low and near the stove run, and add dividers or a lid rack inside one drawer so lids do not slide around. Label nothing on the outside; the drawer order itself becomes the system once everyone in the household learns that pans live in the first bank and baking trays in the second.
2. Pull-Out Pantry Tower at the Island End
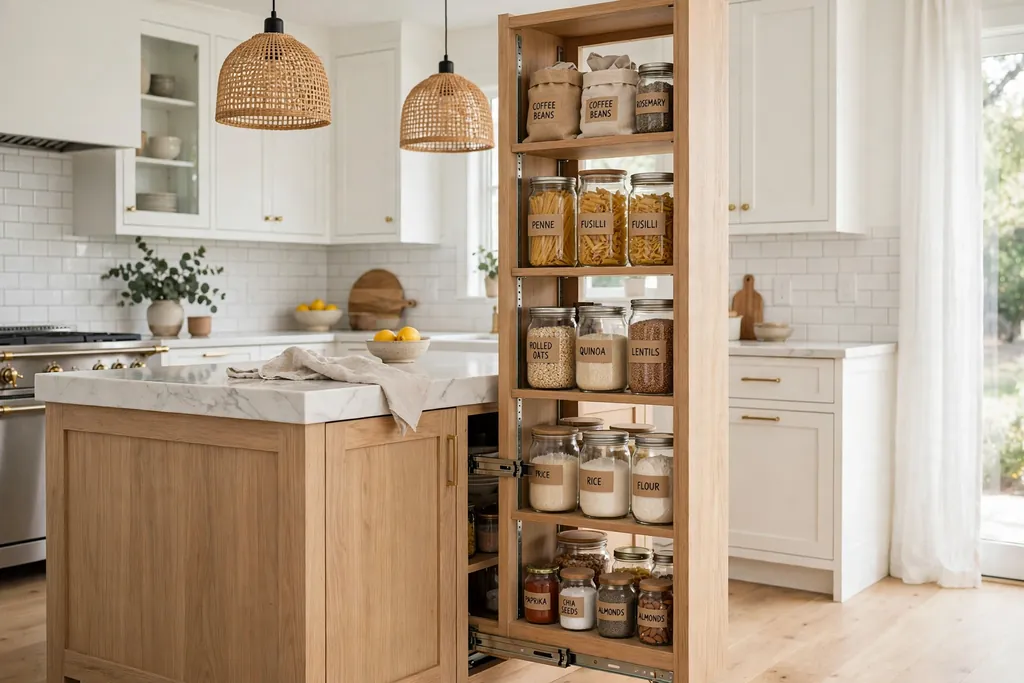
Add a tall, narrow pull-out pantry tower at one end of the island, with shelves that roll out as a single unit, so oils, sauces, grains, and canned goods stay visible and easy to reach. This idea suits kitchens without a full pantry wall, since the tower adds a large amount of storage in a small footprint.
Sort the shelves by use, with everyday cooking items at hand height and baking or rarely used items higher or lower. Keep heavy jars low, and wipe the shelves when you restock, so spills do not build up behind closed doors.
3. Open Shelving for Everyday Dishes
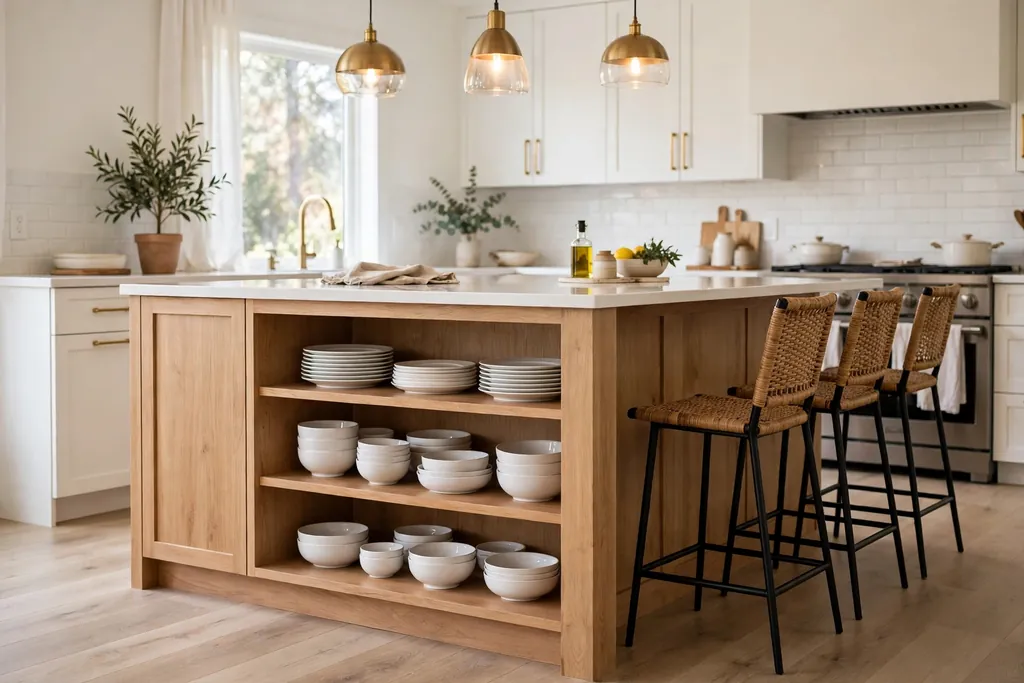
Use open shelves on the seating side or one end of the island for the dishes, bowls, and glasses you reach for daily, so setting the table starts at the island itself. Open shelving also breaks up a long run of closed doors, and it lets a wood or painted island show a little color through the dishes.
Keep the shelf contents to a small, matching set, and leave space between groups so the shelves read as calm, not crowded. Store fragile or rarely used pieces in closed cabinets instead, and dust the open shelves during a normal weekly clean.
4. Built-In Microwave Drawer Below the Counter
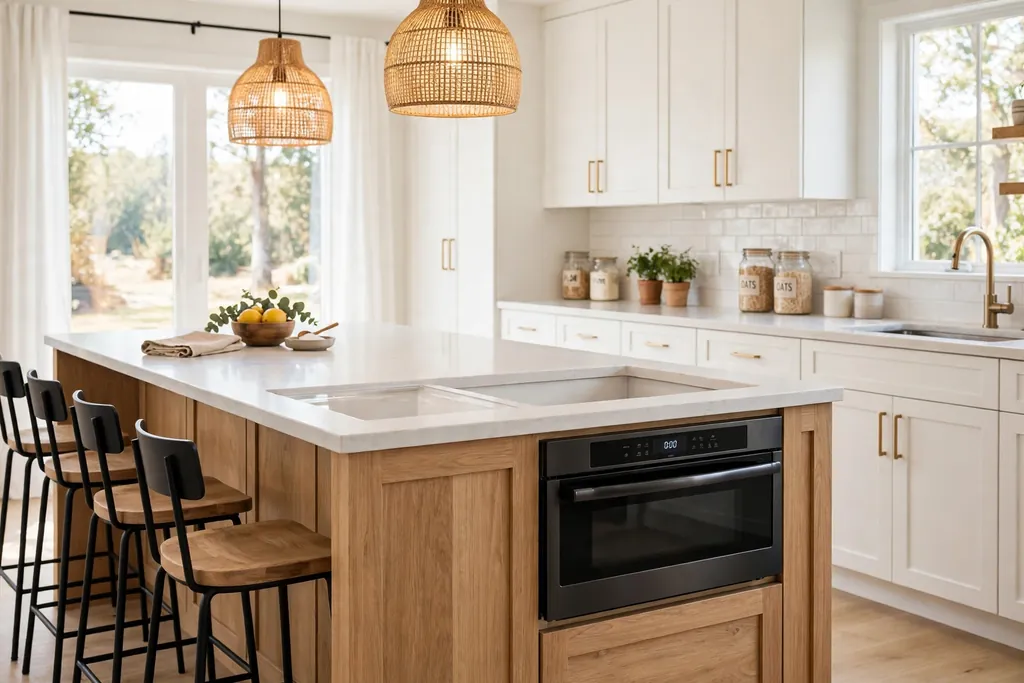
Fit a microwave drawer into the island base, below the counter and away from the main prep run, so the counter stays clear and the microwave sits at a safe, reachable height. This placement frees wall and upper cabinet space, and it keeps a bulky appliance out of sight in an open plan kitchen.
Place the drawer near the fridge or the serving side, where reheating and plating happen, rather than in the middle of the chopping zone. Check the drawer size against the island depth before ordering, and keep the area above it clear for a landing spot when food comes out hot.
5. Prep Sink Island for Two Cooks
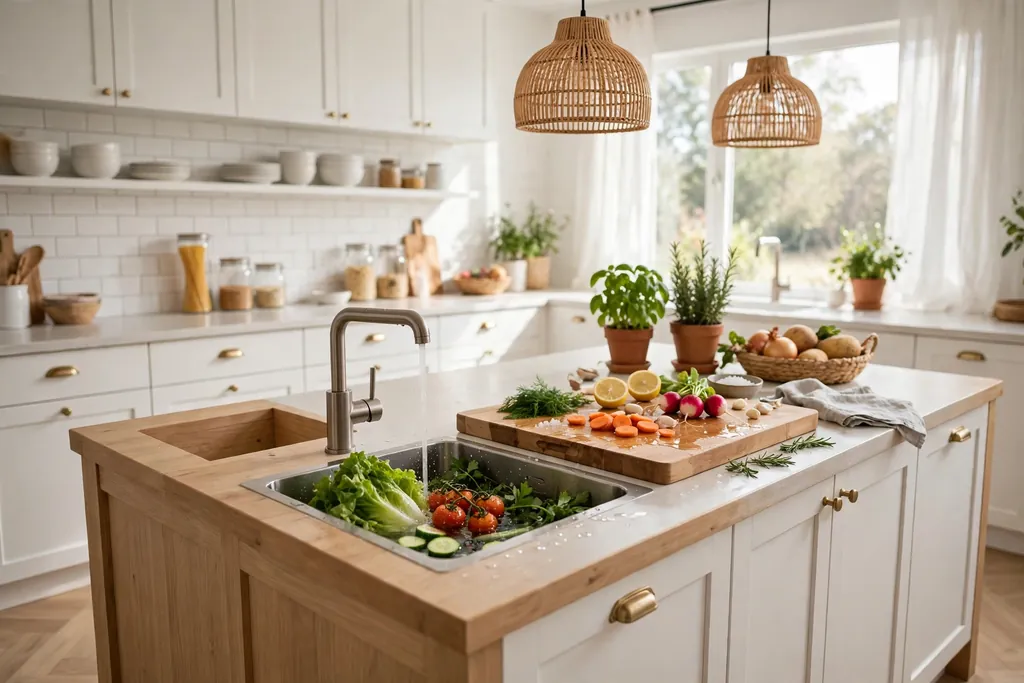
Put a small prep sink in the island, near the fridge and the chopping area, so one cook can rinse vegetables while another works at the main sink. A prep sink also gives the island a clear work zone, which helps when two people cook together or when guests help with a meal.
Keep the prep sink small, with a simple faucet and a cutting board that fits over the bowl, so it does not eat into counter space. Plan a drying spot beside it, such as a folded linen cloth or a small rack, and keep the main sink free for washing up.
6. Cooktop Island with a Downdraft Vent

Place the cooktop in the island, with a downdraft vent that rises beside the burners or pulls steam down through the unit, so the cook faces the room instead of a wall. This layout suits open plan kitchens, where the cook wants to talk with family or guests while cooking.
Keep the counter on both sides of the cooktop clear for pans, boards, and serving dishes, and keep seating away from the hot zone. Check the vent maker’s instructions for ducting and clearance before choosing this layout, since a cooktop island needs more planning than a plain prep island.
7. Breakfast Bar Overhang with Counter Stools
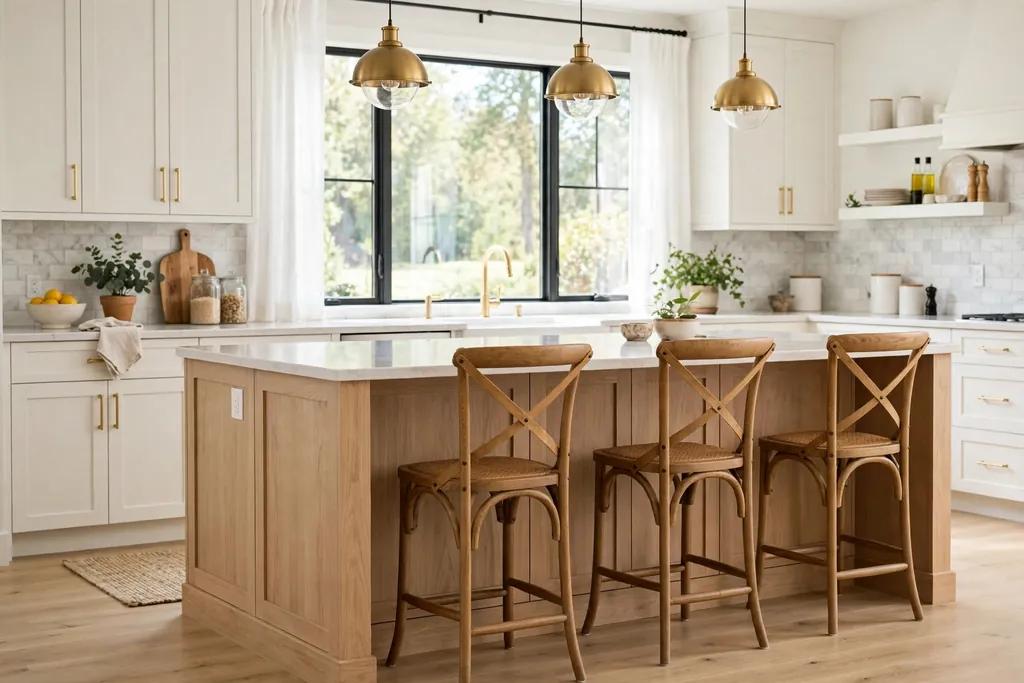
Add a counter overhang on one long side of the island, with backless or low back stools that tuck fully underneath, to make a breakfast bar for quick meals, homework, and coffee. The overhang turns the island into the household gathering spot without needing a separate table.
Choose stools at the right height for the counter, with a footrest that suits the people who will use them most, and keep the seating run clear of drawers that open into leg room. For everyday meals, set the table at the island itself, with placemats and a small centerpiece that lifts away when prep work starts.
8. Two-Level Island for Prep and Dining
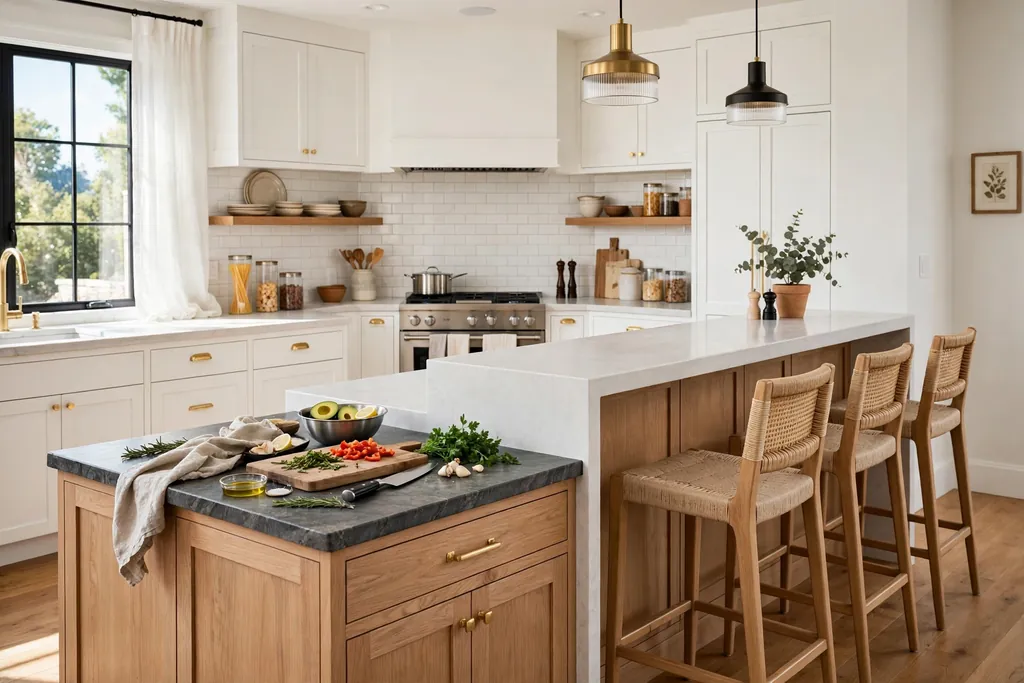
Build the island at two heights, with a standard work height on the cooking side and a raised bar height on the seating side, so the dining side hides prep clutter from the living area. The raised side also gives seated guests a clear sight line across the room, while the cook keeps a full work surface.
Use the raised section for serving and eating only, and keep hot pans, boards, and raw ingredients on the lower work side. Choose a counter material that wipes clean on both levels, since the raised side will see drinks, plates, and homework as well as meals.
9. Waterfall Countertop Island
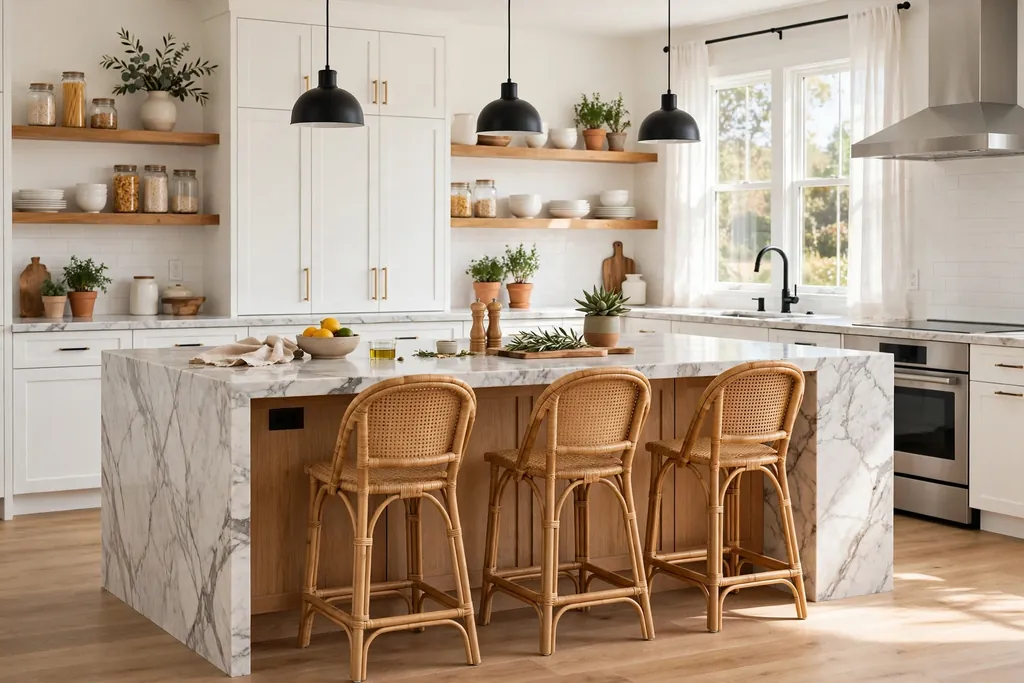
Wrap the counter material down both ends of the island, in a waterfall edge, so the island reads as one solid block and the side panels stay protected from kicks and scuffs. A waterfall edge suits stone and quartz counters, and it gives a plain island a finished look without extra decoration.
Keep the island front simple, with no handles or panels competing with the stone, and put seating on one side only, so the waterfall ends stay visible. Measure the room first, and leave enough walkway space on every side, since a waterfall island looks best with breathing room around it.
10. Warm Butcher Block Island Top
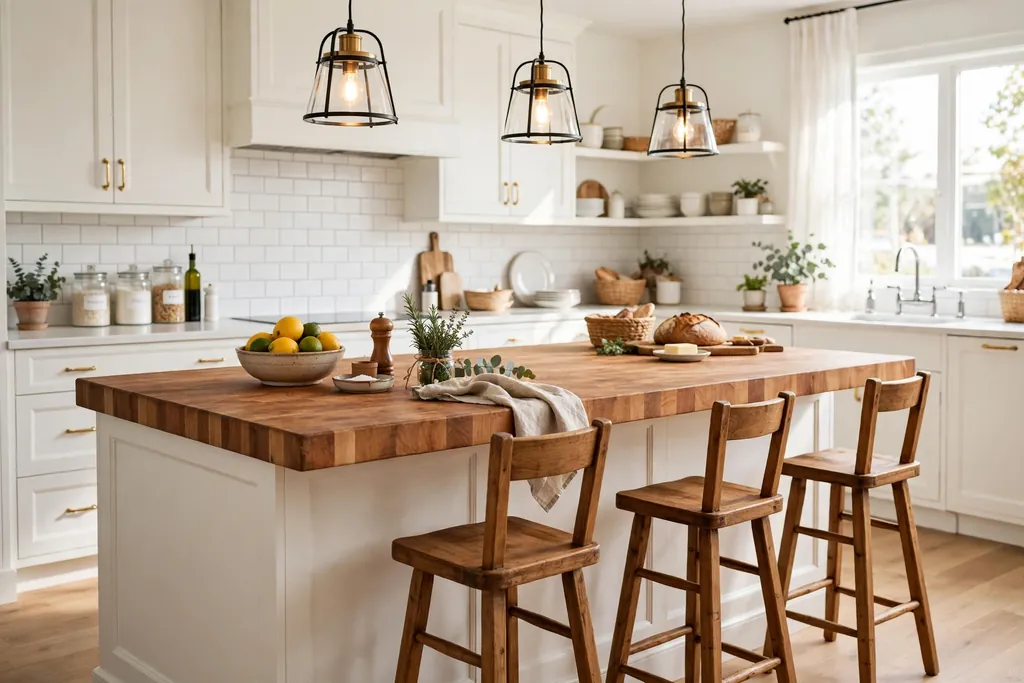
Top the island with butcher block, in a warm wood tone, to soften a kitchen full of painted cabinets and stone counters, and to give a work surface that feels pleasant to touch. Butcher block suits farmhouse, cottage, and Scandinavian style kitchens, and it pairs well with black, brass, or nickel hardware.
Use butcher block on the island alone, rather than on every counter, if you want to limit care, and oil the surface on the schedule the supplier advises. Near a sink, use a stone section instead, since constant water contact wears wood faster than a dry prep run.
11. Rolling Island for a Small Kitchen
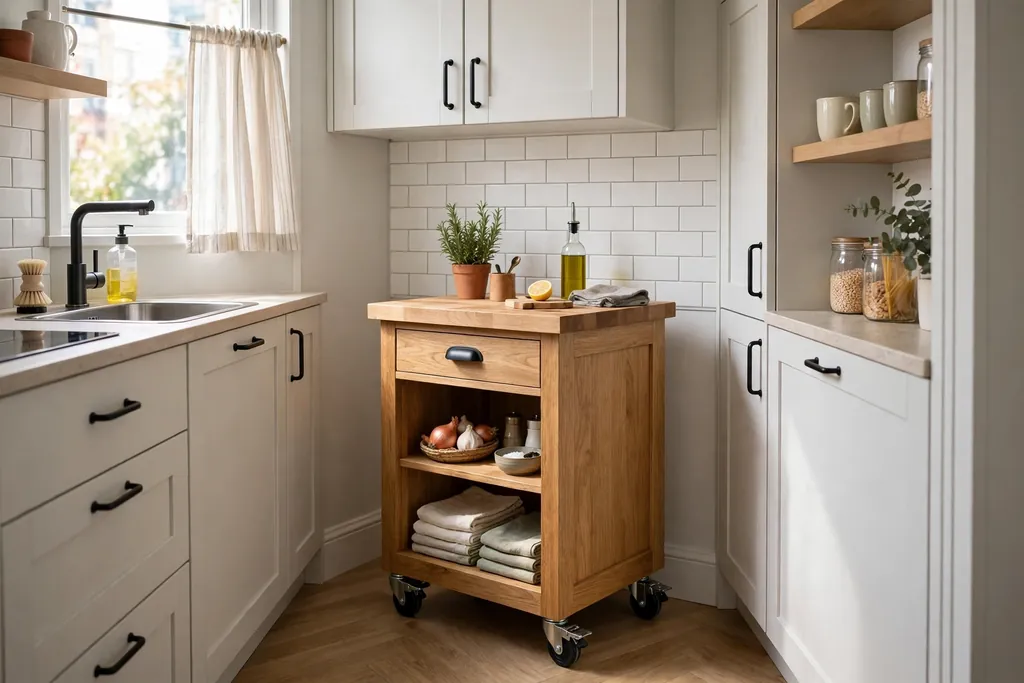
Choose a rolling island on sturdy locking casters for a small kitchen, so the extra counter moves where it is needed and parks against a wall when it is not. A rolling island adds prep space, a little storage, and a serving cart in one piece, without a fixed build.
Lock the casters before chopping or placing hot pans on top, and keep the island light enough to move with one hand when it holds only everyday items. Store the heaviest items in fixed cabinets, and use the rolling island for boards, bowls, and a small set of tools.
12. Slim Island for a Narrow Galley Kitchen
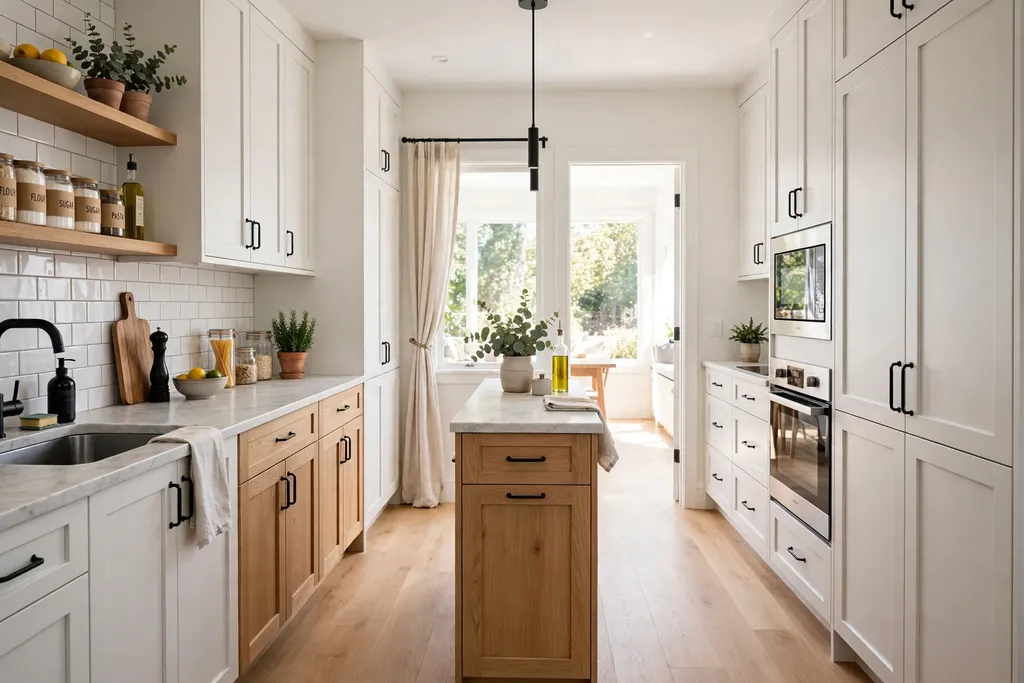
Fit a slim island, narrower than a standard island, into a galley kitchen, with shallow drawers on one side and a clear walkway on the other, so a small room still gains a work surface. A slim island works when the room has room for one comfortable aisle on each side, even if those aisles are narrower than in a large kitchen.
Keep the slim island free of a sink or cooktop, since plumbing and heat need more depth, and use it for prep, landing space, and seating for one or two people at most. For seasonal counter styling that keeps a small kitchen workable, see fall kitchen decor for surfaces that stay clear for cooking.
13. L-Shaped Island That Defines the Room
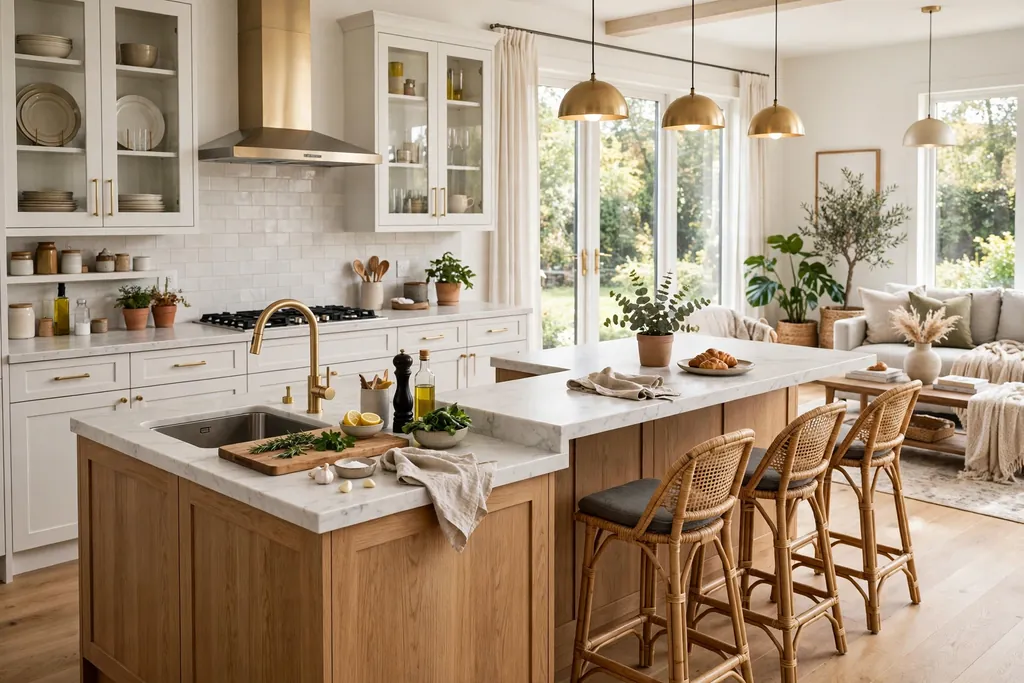
Shape the island as an L, with one arm for prep and one arm for seating, to define the kitchen zone inside an open plan room without building a wall. The L shape gives two work faces and a natural corner for a cook to stand, while the seating arm faces the living area.
Place the seating arm where guests can sit without blocking the route between the stove, sink, and fridge, and keep the corner itself for a large board or a serving tray. An L-shaped island suits a larger room best, since the shape needs floor space on both arms.
14. Beverage Fridge and Glass Storage Island
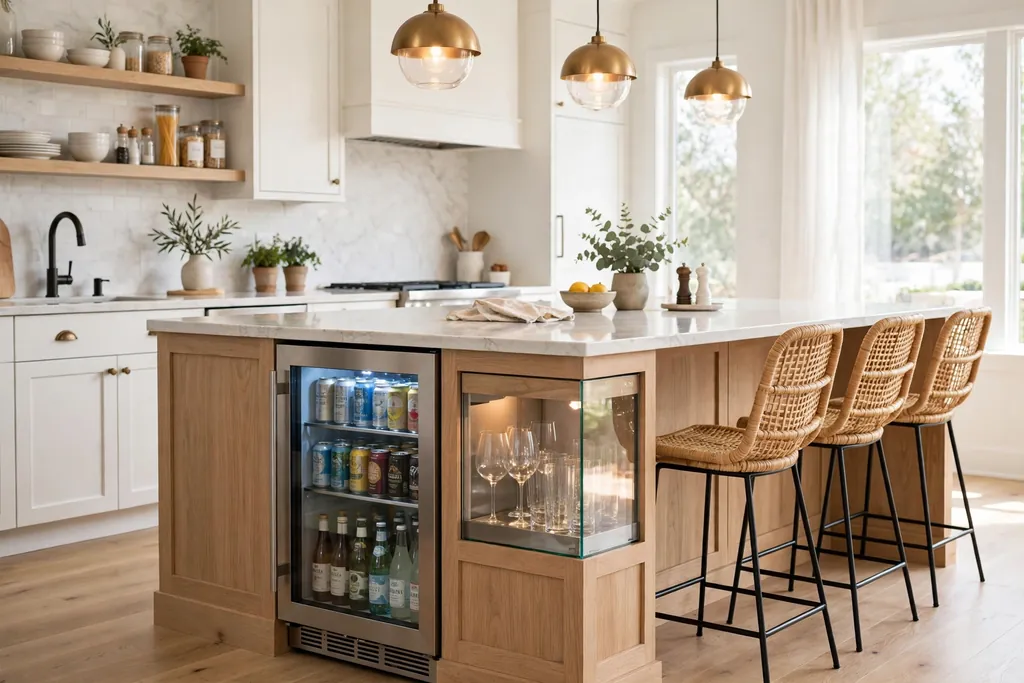
Fit a small beverage fridge into the island base, with glass storage in a drawer or cabinet beside it, so drinks stay cold and glasses stay close at hand for serving. This idea suits households that host often, and it keeps drink traffic away from the main cooking zone.
Place the beverage side near the seating end, where guests can help themselves without crossing the prep run, and keep the fridge door swing clear of stools. Wipe the glass storage drawer often, since drink spills and condensation gather there faster than in a dry goods drawer.
15. Island Homework and Charging Station
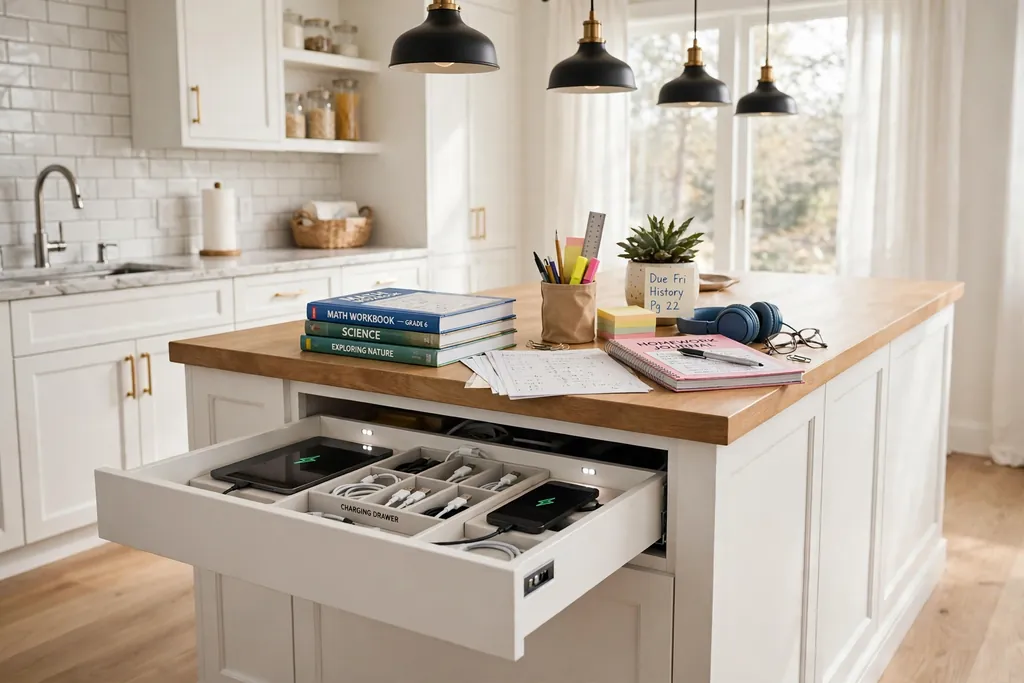
Set aside one end of the island as a homework and charging station, with a shallow drawer for chargers and cables, a small shelf for books, and a wipe clean top for writing. This setup keeps schoolwork and laptops in the room where adults are already working, without spreading cables across the main prep run.
Use a power strip inside a ventilated drawer or cabinet, following the maker’s instructions, and keep liquids away from the charging spot. When dinner starts, clear the station into its drawer in one move, so the island returns to a full work and serving surface.
16. Island with a Built-In Bookshelf End
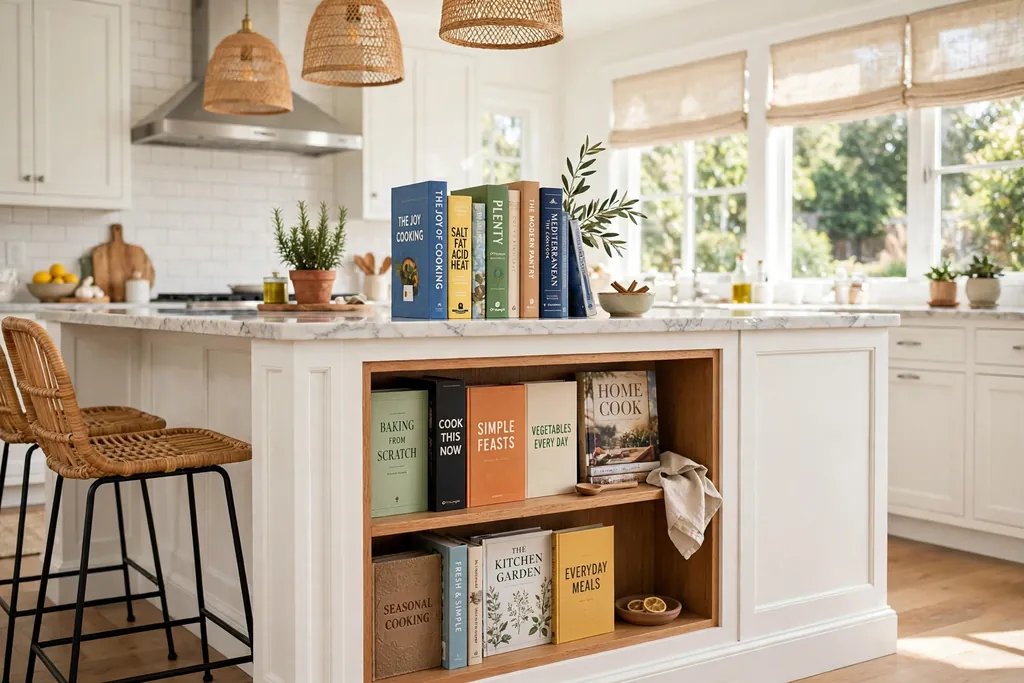
Build a bookshelf into one end panel of the island, for cookbooks, a small plant, and a few everyday reference books, so the end of the island becomes useful instead of blank. A bookshelf end suits islands that face a living area or entry, since guests see it as they walk in.
Keep the bookshelf shallow, so books do not stick out past the panel, and store only books you use often, with heavier volumes low. Dust the shelf during a normal clean, and keep the top shelf clear, so the island end does not collect clutter.
17. Island with Hidden Trash and Recycling Pull-Outs
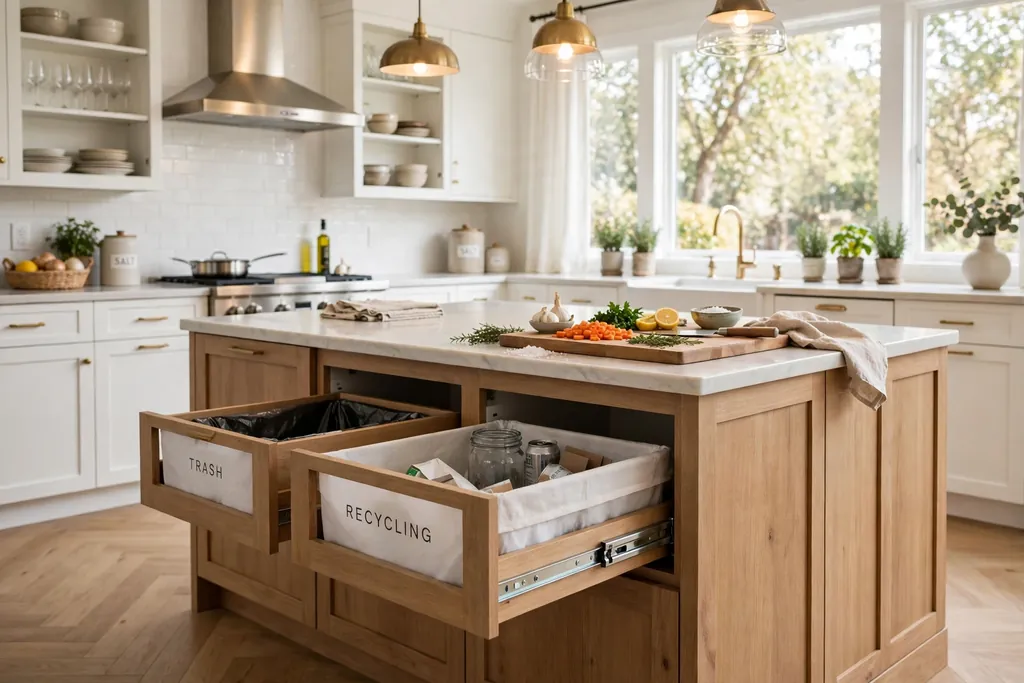
Hide trash and recycling pull-outs inside the island, near the prep sink or chopping area, so scraps go straight into a bin without crossing the kitchen. Two bins, one for trash and one for recycling, keep sorting simple, and a lid or closed front keeps the island looking tidy.
Line the bins and wipe them when you take out the trash, and keep a small compost caddy beside them only if the household uses one daily. Place the pull-outs where the cook stands most, not at the seating end, so guests never sit beside an open bin.
18. Island with a Herb Rail and Cutting Station
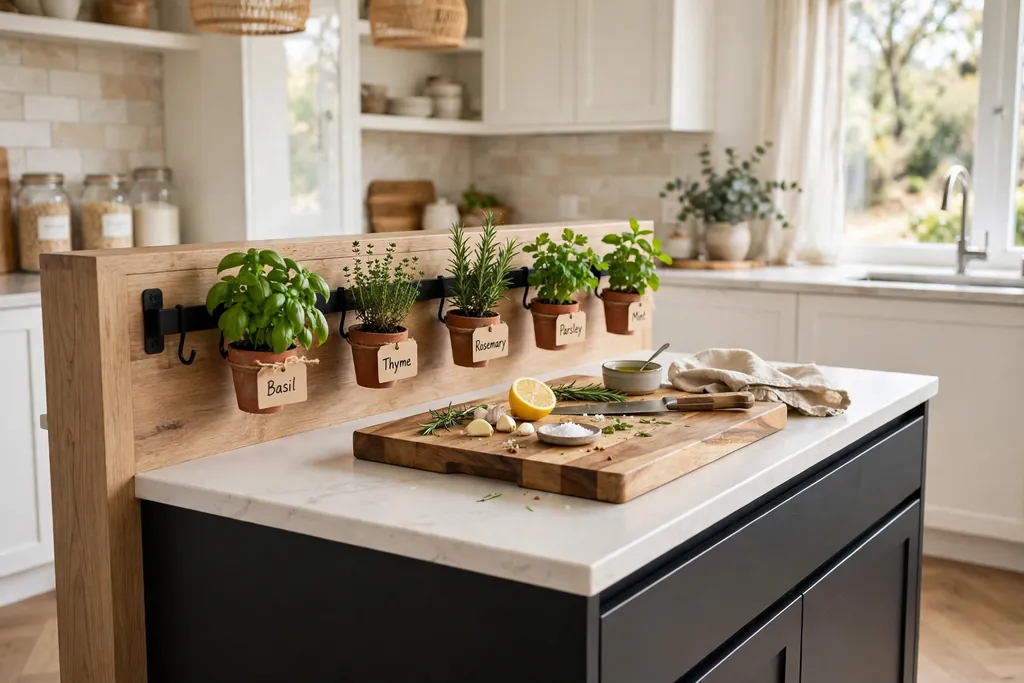
Add a herb rail or a shallow planter strip along the back edge of the island, with a cutting board station beside it, so fresh herbs sit within arm’s reach while you chop. This idea suits cooks who use herbs daily, and it keeps small pots off the main counter.
Keep the herb rail low and narrow, so it does not block sight lines across the island, and water the herbs over the sink, not over the counter. If live herbs do not suit the light in your kitchen, use the same rail for a knife strip, a towel bar, and a small jar of cooking tools instead.
19. Bench Seating on One Side of the Island
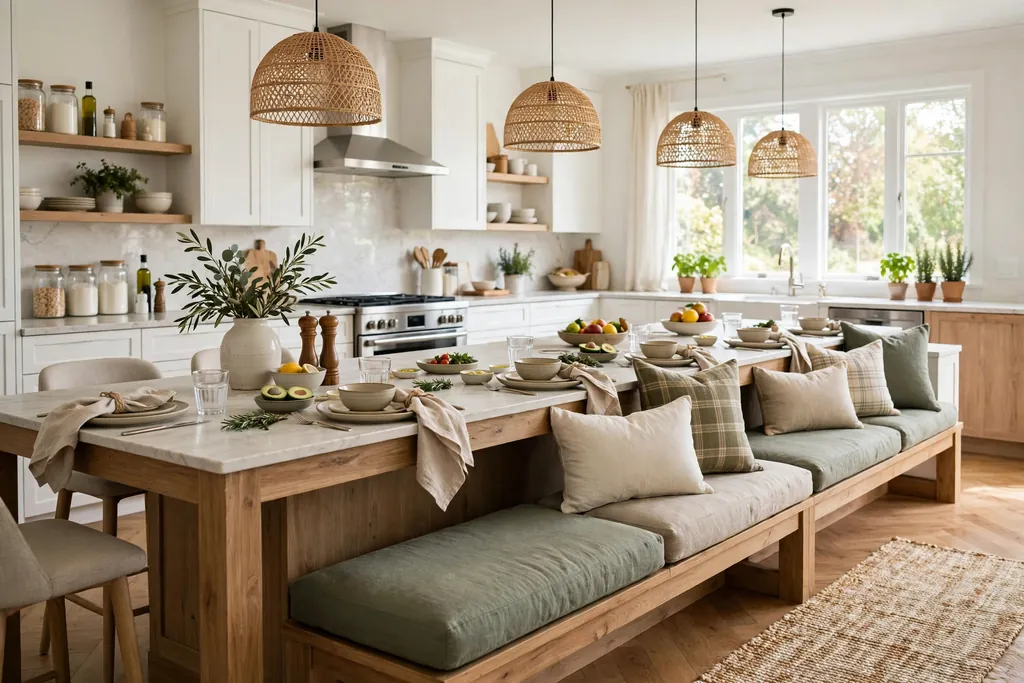
Pair the island with a low bench on one side, instead of individual stools, so children, friends, and family can slide in together for casual meals. Bench seating suits a long island in a family kitchen, and it tucks neatly under the overhang when the meal is over.
Choose a bench with a wipe clean seat and a small cushion that washes well, since island benches see daily use. Keep the bench length a little shorter than the island, so people can step around the ends without squeezing past the bench.
20. Curved Island for Easier Movement
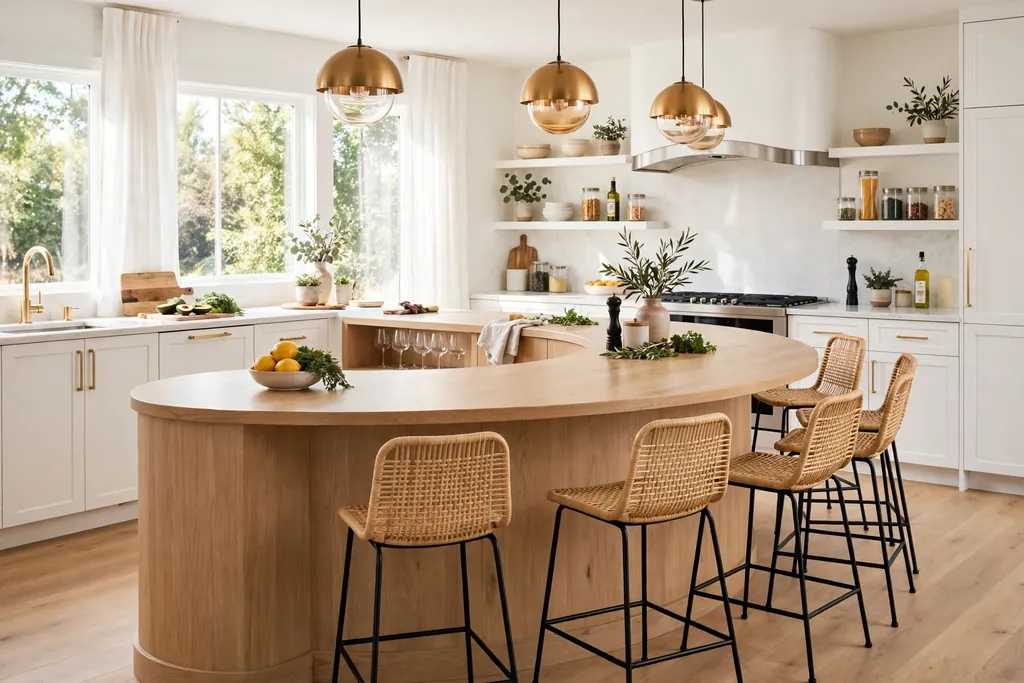
Choose a curved island, with a rounded end or a gentle bow along the seating side, to soften a large kitchen and make movement around the island easier. Curves remove sharp corners in a busy route, which helps in a household with children or in a kitchen where people pass the island often.
Keep the curve shallow, so the island still holds useful drawers and a flat work run, and place stools along the curved side where the overhang gives even knee room. A curved island suits a larger room best, since the shape needs floor space to read as a curve rather than a cramped bump.
21. Contrasting Cabinet Color and Mixed Materials
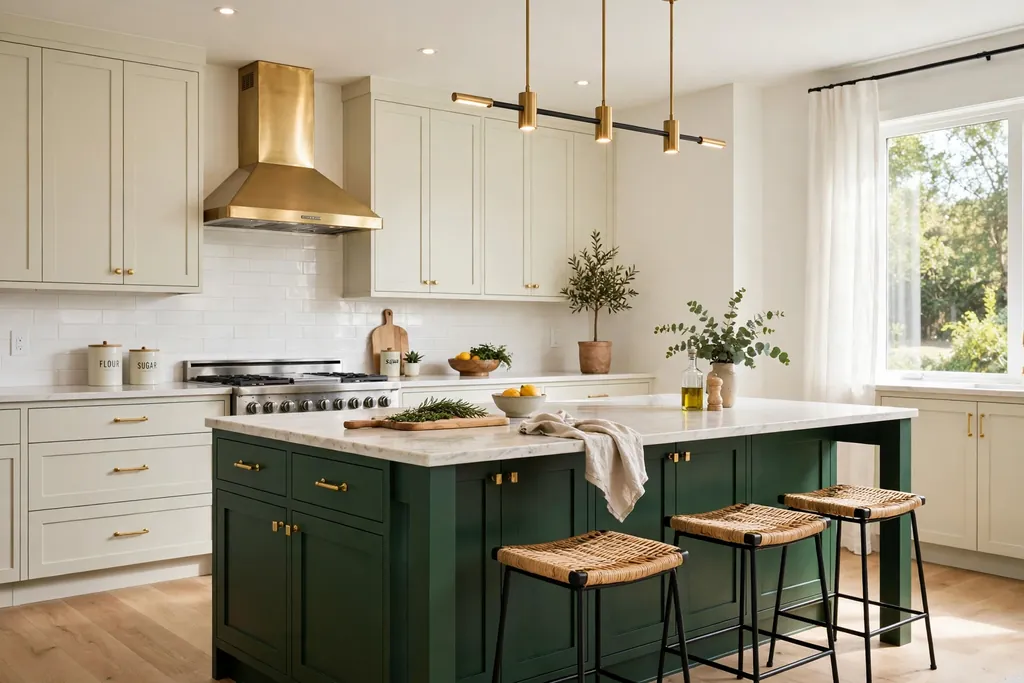
Paint or finish the island in a contrasting color to the wall cabinets, such as a deep green, navy, or warm wood tone beside pale cabinets, so the island becomes the clear focal point of the kitchen. A contrasting island also lets you test a bold color in one place, without repainting the whole room.
Repeat the island color once more in a small detail, such as stool cushions, a runner, or a vase, so the contrast looks planned. For a full pale kitchen that can carry a dark or wood island, see white kitchen ideas, and for wider seasonal kitchen styling, see kitchen Christmas decor.
Conclusion
A good kitchen island earns its floor space by doing three jobs at once: storing the items you use daily, giving you a clear place to prep, and offering a comfortable spot to sit. Start with storage, then seating, then style, and test the outline on the floor before you order. Choose one or two ideas from this list that solve a real daily problem, such as deep drawers for heavy pans, a slim island for a small room, or a breakfast bar for family meals, and let the rest of the kitchen stay simple around it. The island should make cooking easier, not add a surface you must work around.
FAQs
How big should a kitchen island be?
A kitchen island should fit the room with a comfortable walkway on every side, and with enough counter left for prep after any sink, cooktop, or seating is placed. Measure the room, tape the island outline on the floor, and walk the routes to the stove, sink, and fridge before you choose a final size.
How much seating overhang do I need at a kitchen island?
Allow about 12 inches of counter overhang for knees at the seating side, and choose stools that slide fully under the overhang when not in use. Keep the seating run clear of drawers that open into leg room, and leave enough elbow room per person so seated guests do not crowd each other.
What is the best storage for a kitchen island?
Deep full extension drawers suit heavy pots and pans best, since they slide out fully and keep items visible, while a pull-out pantry tower suits dry goods and a hidden pull-out suits trash and recycling. Sort each drawer or pull-out by one kind of item, so the system stays easy to use.
Can a small kitchen have an island?
Yes, a small kitchen can have an island if the room allows a slim or rolling island with a clear walkway on each side. Choose a slim fixed island for a galley kitchen, or a rolling island that parks against a wall when not in use, and skip a sink or cooktop in the island to save depth.
Should the island match the rest of the kitchen cabinets?
The island can match the wall cabinets for a calm, unified room, or it can use a contrasting color or material to become a focal point. If you choose a contrast, repeat the island color or material once more in a small detail, so the choice looks planned rather than random.
Do I need a sink or cooktop in my kitchen island?
No, a sink or cooktop is not required, and a plain prep and seating island suits many kitchens better, since it keeps the full counter clear and needs less plumbing or venting. Add a prep sink only if two cooks work together often, and add a cooktop only if the cook wants to face the room while cooking.