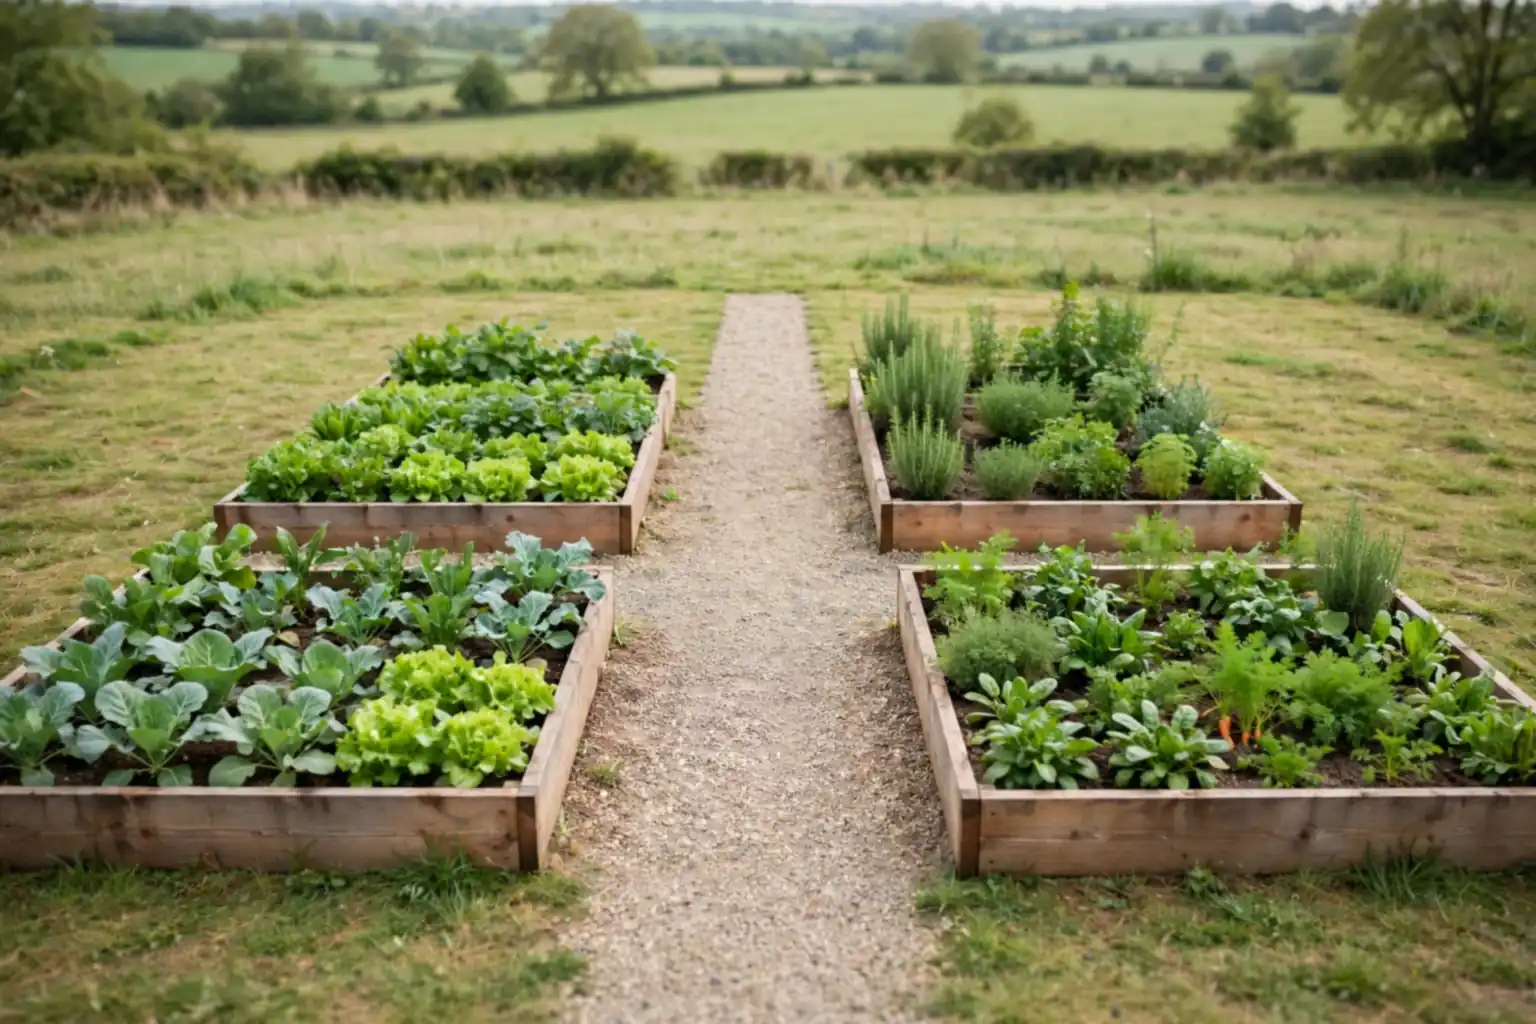
A vegetable garden earns its place when it is easy to reach, simple to water, and pleasant to walk through on an ordinary evening. Too often the layout comes last, so paths turn to mud, tall plants shade short ones, and the crops you pick daily sit furthest from the door. These 24 vegetable garden design ideas cover beds, paths, vertical growing, containers, and small working corners, so you can plan a new plot or reshape one you already have. Start with sun, water, and one path you can use with a wheelbarrow, then pick the ideas that fit your space and the food you actually cook with.
Key Takeaways
- Put daily crops, such as salads and herbs, closest to the kitchen door, and crops you visit weekly further away.
- Keep every bed narrow enough to reach the middle without stepping on the soil, usually about four feet wide or less.
- Leave a clear path beside every bed for a wheelbarrow, a watering can, and comfortable standing room.
- Match the layout to your light: sun loving crops in the sunniest spot, leafy greens where light is softer.
- Grow upward with trellises and arches where ground space is tight, so climbing crops free beds for low plants.
- Plan water and compost early, with mulch, a nearby tap, and a spot for a compost bin or heap.
1. Plan a Four Bed Rotation Layout
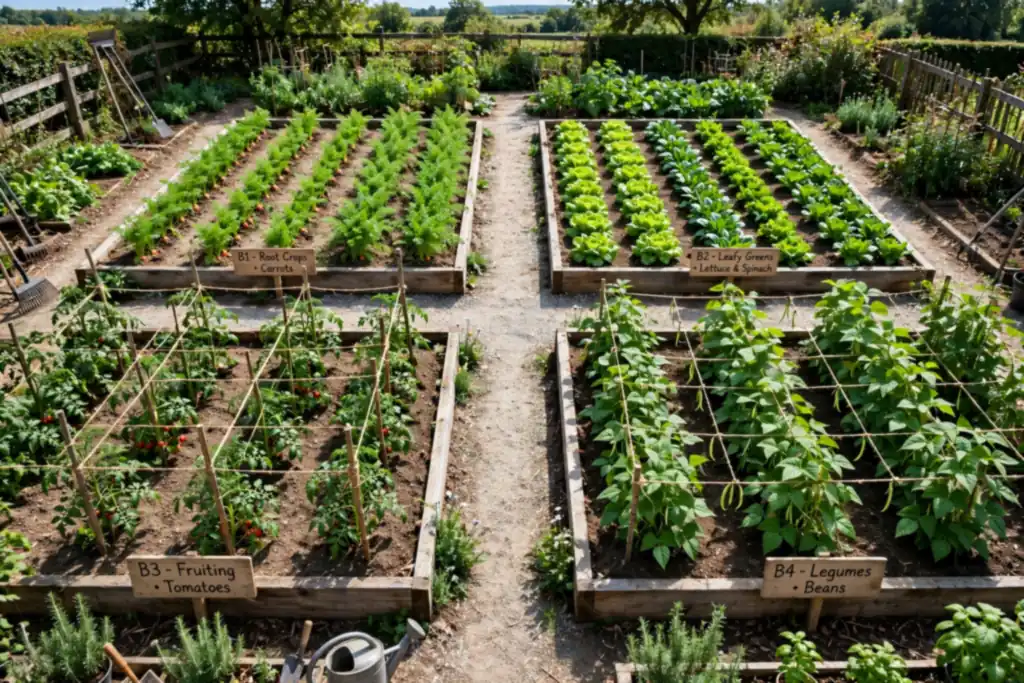
A four bed rotation splits the vegetable garden into four beds, one for each main crop family, and moves each family to a new bed every year. Roots, brassicas, legumes, and potatoes each take a bed in turn, which helps soil stay healthy and cuts down on pests and diseases that build up when one crop stays in the same spot. This layout suits a gardener with a medium sized plot who wants a clear plan that repeats year after year.
Mark the four beds with paths between them, and keep a simple sketch of what grew where. Plant each family in its bed for one season, then shift the whole pattern forward by one bed the next year. Keep labels on bed ends until the plan feels familiar, since a rotation only helps if you can remember last year’s layout when spring planting starts.
2. Divide a Bed Into a Square Foot Grid
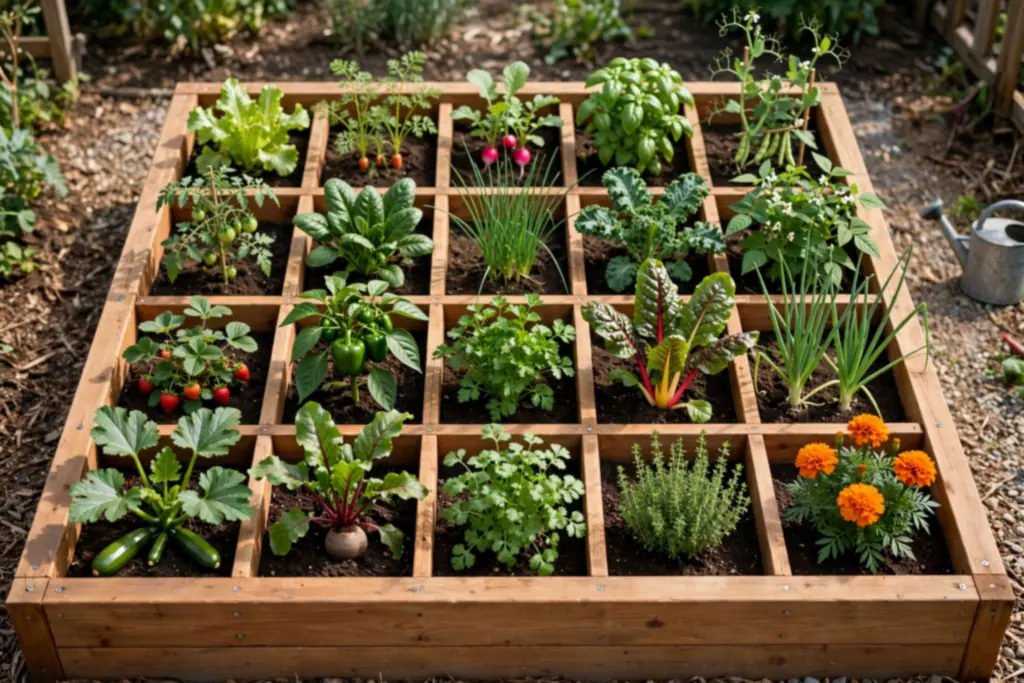
A square foot grid divides a four foot square bed into sixteen one foot squares, with one crop type per square, spaced as the plant label directs. The grid makes planning simple, stops overplanting, and helps a beginner see at a glance what is growing where. It suits small yards well, since one square bed can hold salads, herbs, carrots, and beans in a tidy pattern.
Mark the grid with string, thin battens, or a simple frame laid on the soil surface. Plant fast crops such as radishes and salads in squares you can replant through the season, and give large plants such as tomatoes a full square each. Water the whole bed evenly, and keep a small notebook of what each square holds, so rotation next year is easy to plan.
3. Grow Classic Rows in a Sunny Open Plot
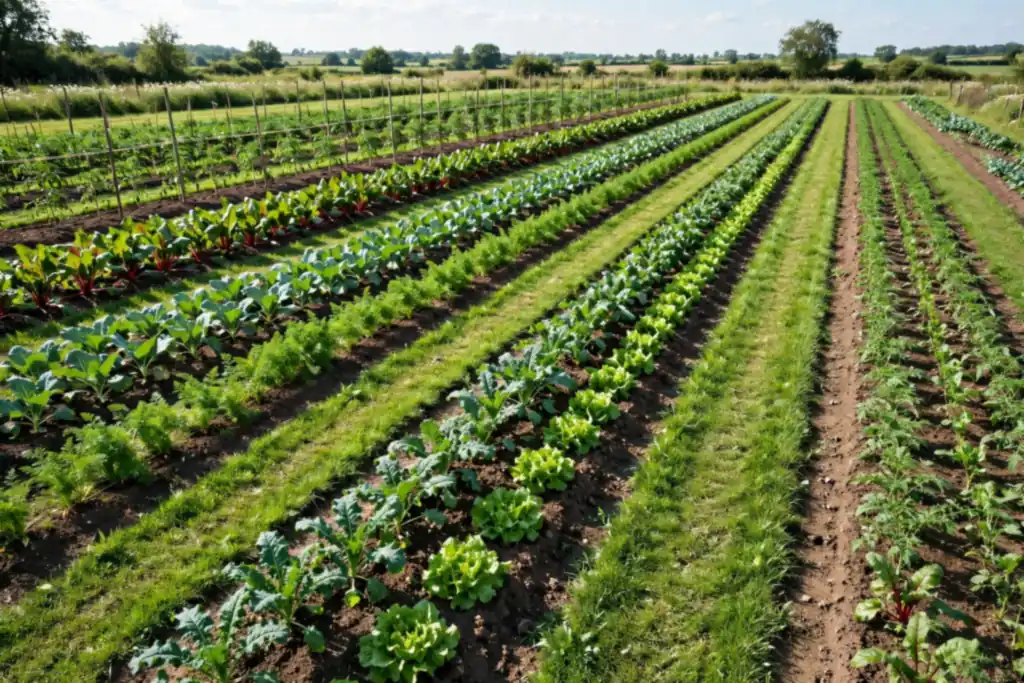
Straight rows in an open plot are the simplest vegetable layout, and they suit a larger yard where a wheelbarrow and a hoe need room to move. Rows give each crop its own line, so sowing, weeding, and harvesting stay orderly, and tall rows can sit at the north side so they do not shade shorter rows. This layout works best on fairly level ground with full sun for most of the day.
Space rows by the width of your tools, not just by the seed packet, so you can weed without treading on seedlings. Put paths of grass or mulch between rows, and plant one crop per row at first, so watering and feeding stay simple. A classic row plot is easy to expand, since you can add one more row each season as your confidence grows.
4. Build a Raised Bed Kitchen Garden by the Back Door
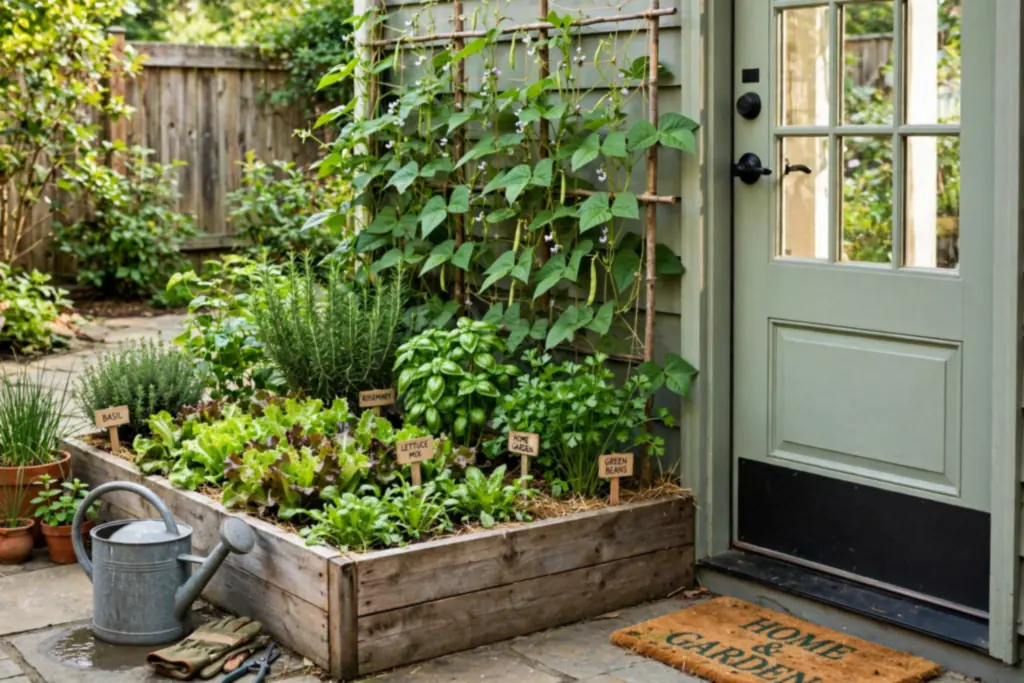
A raised bed kitchen garden near the back door puts salads, herbs, and beans within a few steps of the kitchen, so picking becomes part of cooking rather than a separate trip. Raised beds warm up early in spring, drain well, and give you clear edges that keep paths tidy. For bed materials, heights, and shapes, see these raised garden bed ideas.
Build beds about four feet wide so you can reach the middle from either side, and keep the length to what fits your path and watering routine. Fill beds with a mix of topsoil and compost, and top up the level each spring as the mix settles. Put the crops you pick most at the door end of the bed, and keep a watering can and a small basket by the door so harvests never wait.
5. Shape a Potager With Gravel Paths
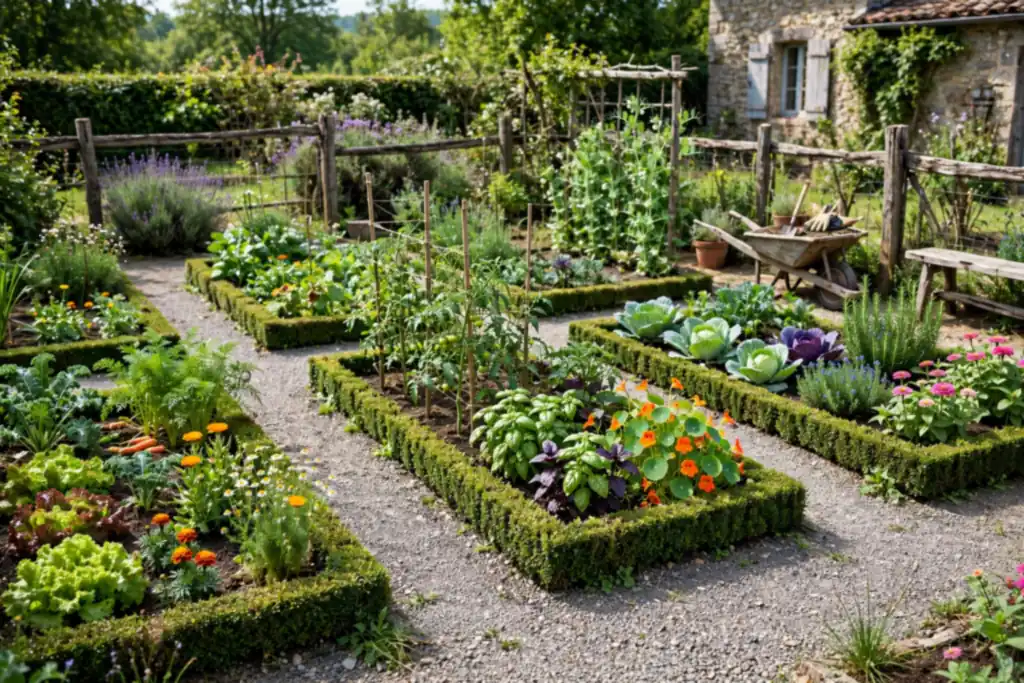
A potager is a kitchen garden laid out as a pattern, with beds edged in timber, brick, or low hedging and paths of gravel between them. It suits a gardener who wants the vegetable plot to look good from the house as well as feed the kitchen, since the pattern holds its shape even in winter when beds are bare. Gravel paths drain well and stay usable after rain, which keeps the garden pleasant to walk through.
Divide the potager into four or more beds around a central point, such as a small tree, a water butt, or a seat. Edge each bed firmly so soil stays out of the paths, and plant each bed with a mix of vegetables and flowers for color. Keep one bed near the path entrance for salads and herbs, so a quick pick does not mean walking across the whole garden.
6. Add a Keyhole Bed With a Compost Center
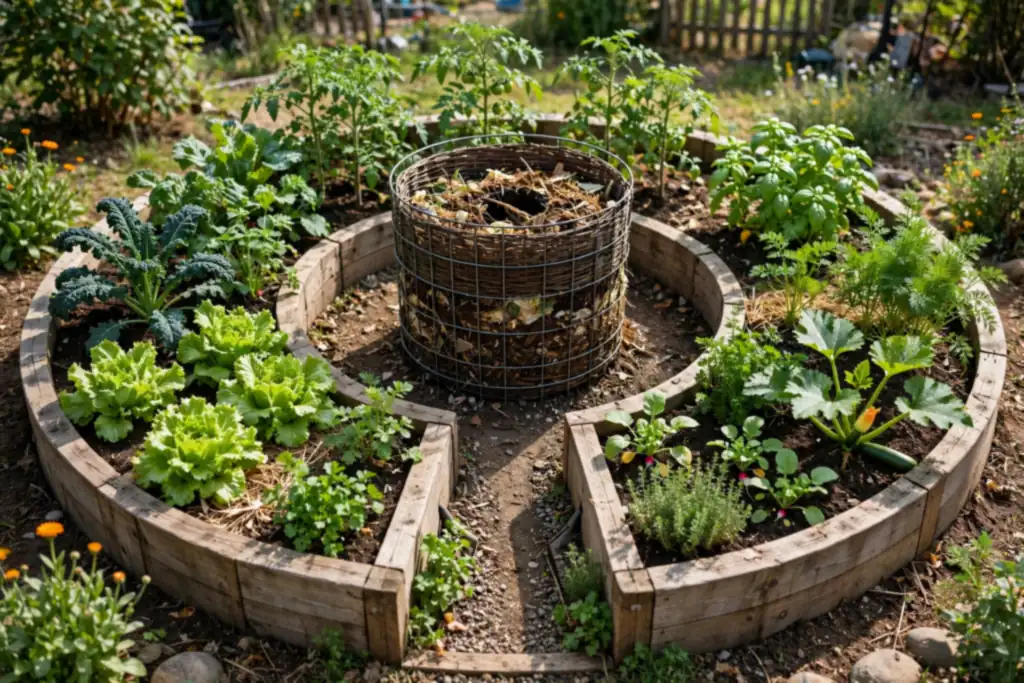
A keyhole bed is a round raised bed with a notch cut into one side, like a keyhole, so you can reach the center from the path. At the center sits an open compost basket, and kitchen scraps and water added there feed the soil around it. The shape suits a small yard, since one round bed holds a surprising amount of planting in a compact footprint.
Build the wall from stone, block, or timber, and keep the notch wide enough to stand in comfortably. Add water through the compost basket, so moisture spreads outward to the roots, and turn the basket contents now and then. Avoid meat or cooked food scraps in the basket, which attract pests, and plant tall crops away from the notch so the standing space stays clear.
7. Wrap Beds Into a U Shape Around a Path
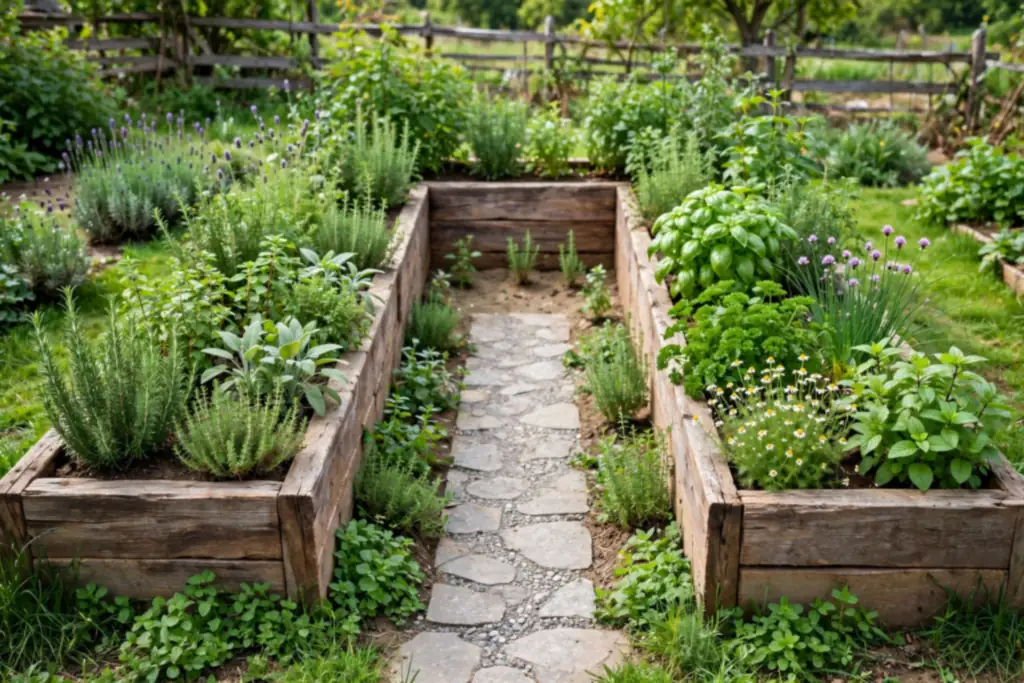
A U shaped bed gives you a large growing area with a path into the middle, so every plant stays within reach. It suits a kitchen garden where you visit daily for salads, herbs, and beans, and it keeps the working area compact. Build the three sides at the same height, and keep the inner path wide enough to kneel or place a small stool.
Use the back of the U for tall crops such as peas or tomatoes, and the front edges for herbs and cut and come again salads. A U shape also suits a family garden, since children can work one arm while an adult works another, without anyone stepping on the soil. Keep the path surface firm, so it stays usable in wet weather.
8. Grow Climbers on a Vertical Trellis Wall
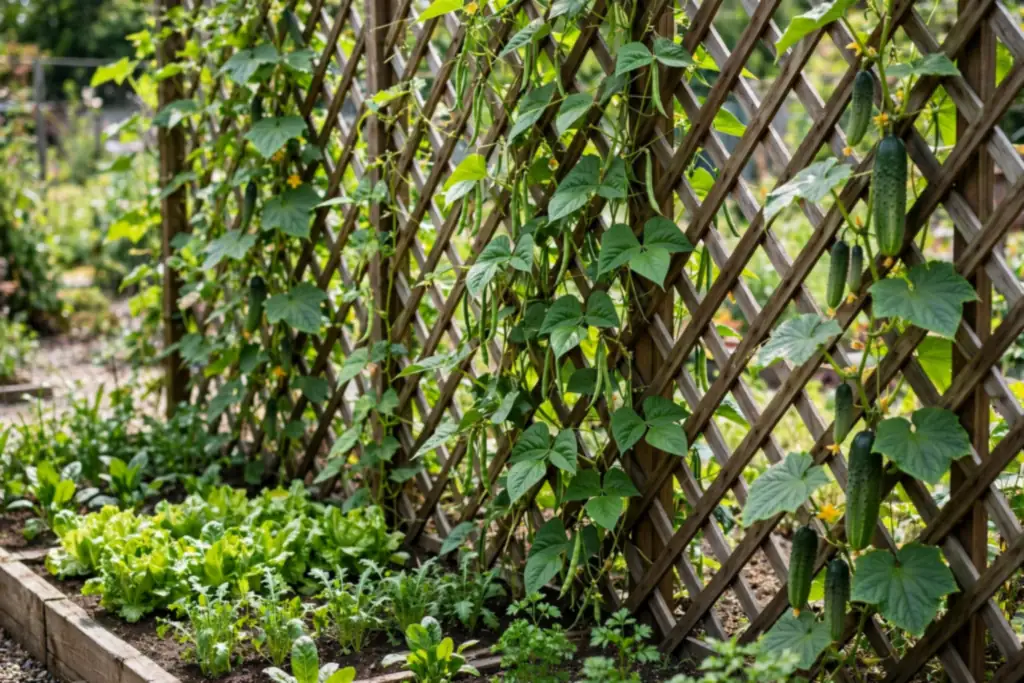
A trellis wall grows beans, peas, cucumbers, and small squash upward, which frees bed space for low crops in front. The trellis keeps fruit off wet soil, improves air flow around leaves, and suits a narrow side yard or a sunny fence where ground space is tight. Fix the trellis firmly into posts or a wall frame, so it does not lean once plants grow heavy.
Face the trellis to catch sun without shading the rest of the bed, and tie stems in loosely as they grow. Keep the front of the bed for salads, carrots, and herbs, which enjoy the light and the shelter the trellis gives on windy days. At season end, clear old stems and check the fixings before replanting, since a loose trellis fails fast under a full crop.
9. Walk Beneath a Bean and Squash Arch Tunnel

An arch tunnel turns a garden path into a growing space, with beans or squash climbing over the top and fruit hanging within easy reach. It suits a long path between beds, since the tunnel gives shade on hot days and a clear route for picking. Arches also make the garden feel like a place to walk through, not just a work area.
Set arches firmly in the ground or in beds on both sides of the path, and keep the path wide enough for a wheelbarrow beneath the arch. Plant one climbing crop per arch side, and tie stems in until they grip on their own. Pick fruit often, since hanging squash and beans grow heavy fast, and clear the arch at season end so winter wind has nothing to catch.
10. Edge Paths With a Herb Border
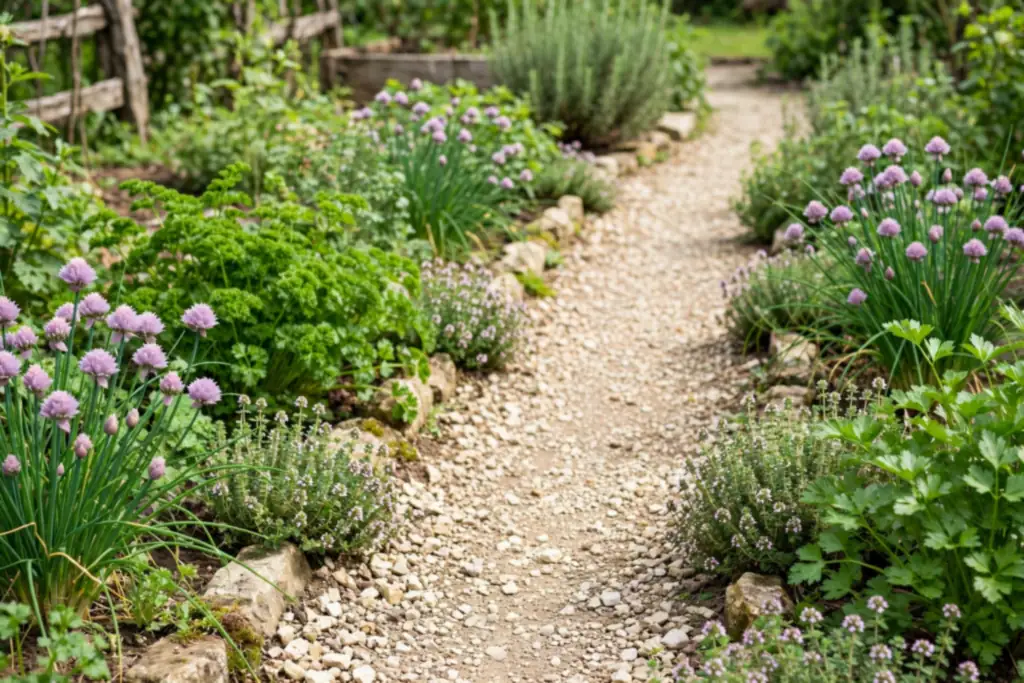
A herb border along a garden path puts cooking herbs where you brush past them daily, so scent and picking stay part of every walk. Low herbs such as chives, parsley, thyme, and oregano suit a path edge, since they stay compact and cope with light foot traffic nearby. The border also softens hard path edges and fills gaps that weeds would otherwise take.
Plant herbs in a single row or a narrow strip beside the path, in soil that drains freely. Keep mint in its own pot sunk into the ground, since it spreads fast and can crowd its neighbors. Snip herbs often, which keeps plants bushy, and replace tired plants in spring so the border stays full through the season.
11. Plant a Salad Patch Steps From the Kitchen Door
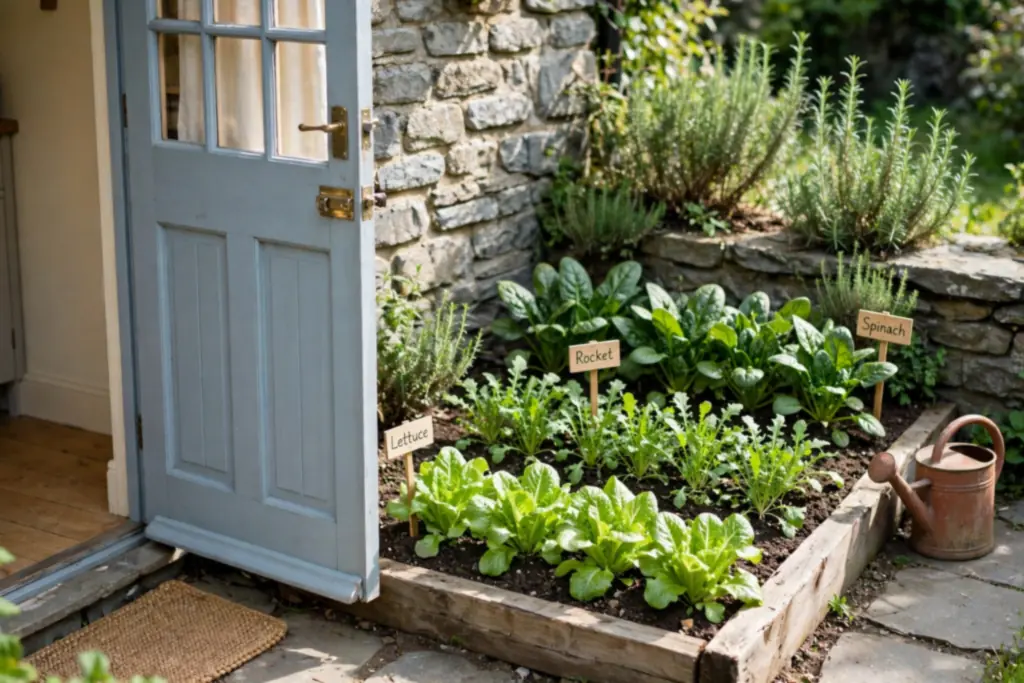
A salad patch by the kitchen door grows lettuce, rocket, spinach, and mixed leaves where you can pick them minutes before a meal. It suits even a small garden, since salads need only a shallow bed or a long trough, and cut and come again leaves regrow after picking. Place the patch where you pass it daily, so watering and picking become habit.
Sow a fresh row every two to three weeks through the growing season for a continuous supply, and pick outer leaves first to keep plants producing. Shade the patch on very hot days, since salad leaves bolt fast in strong heat, and water gently so seeds stay in place. Keep the patch close to a tap, since salads suffer quickly when watering is missed.
12. Grow a Container Vegetable Garden on a Patio
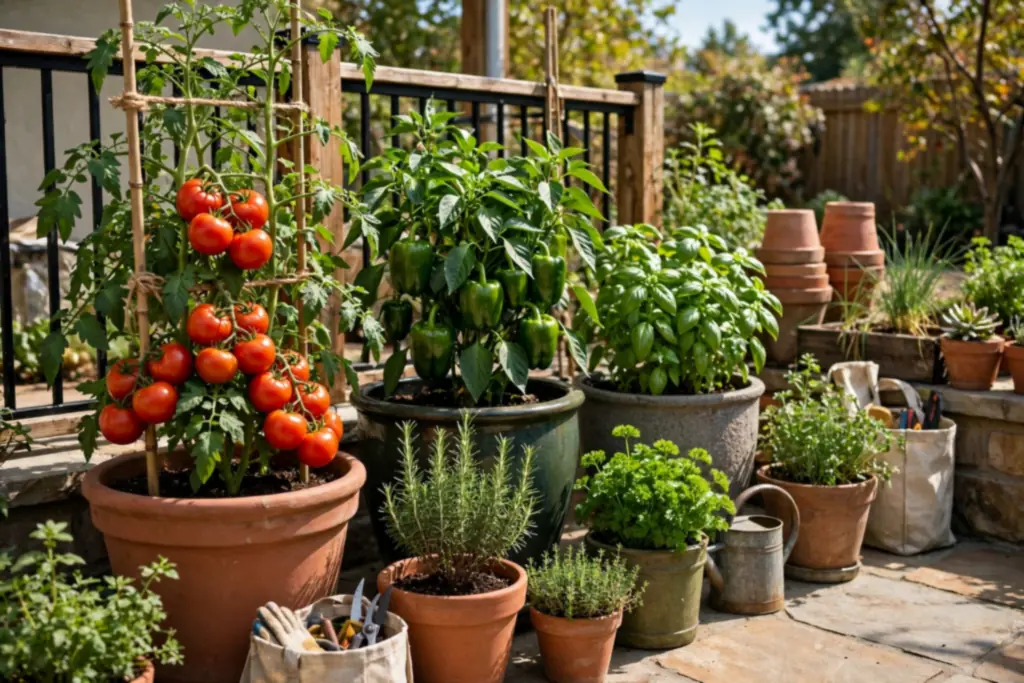
Containers turn a patio into a vegetable garden without digging, which suits renters and small yards where soil is poor or paved over. Large pots hold tomatoes, peppers, courgettes, and beans well, while troughs suit salads and herbs. Group pots near a tap and a sunny wall, so watering stays easy and plants gain warmth from the wall.
Choose pots with drainage holes, and raise them on feet so water drains freely. Use rich potting mix, and water containers more often than open beds, since pots dry out fast in sun and wind. Feed plants as the plant label directs once fruit sets, and move tender pots under cover before frost so the same pots serve again next year.
13. Fill a Balcony With Vegetable Pots and Rail Planters
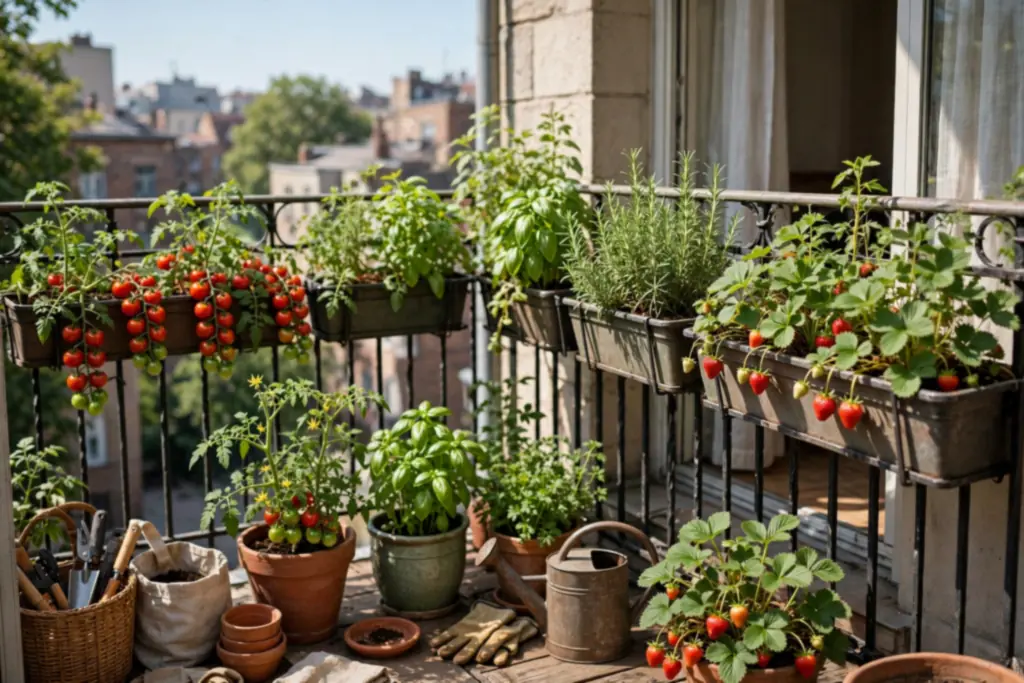
A balcony can grow a useful amount of food when pots, rail planters, and a trellis share the work. Cherry tomatoes, herbs, salads, and strawberries suit containers, and a rail planter turns the railing into growing space without using floor area. For balcony layouts, light containers, and wind care, see these small balcony garden ideas.
Check the balcony weight limit before adding large pots, and keep heavy pots low and near the wall. Choose light containers with drainage, and secure rail planters with brackets or straps so wind cannot lift them. Water little and often, and check soil with a finger before watering, since pots dry out fast in sun and wind.
14. Stack Straw Bales Into Temporary Vegetable Beds
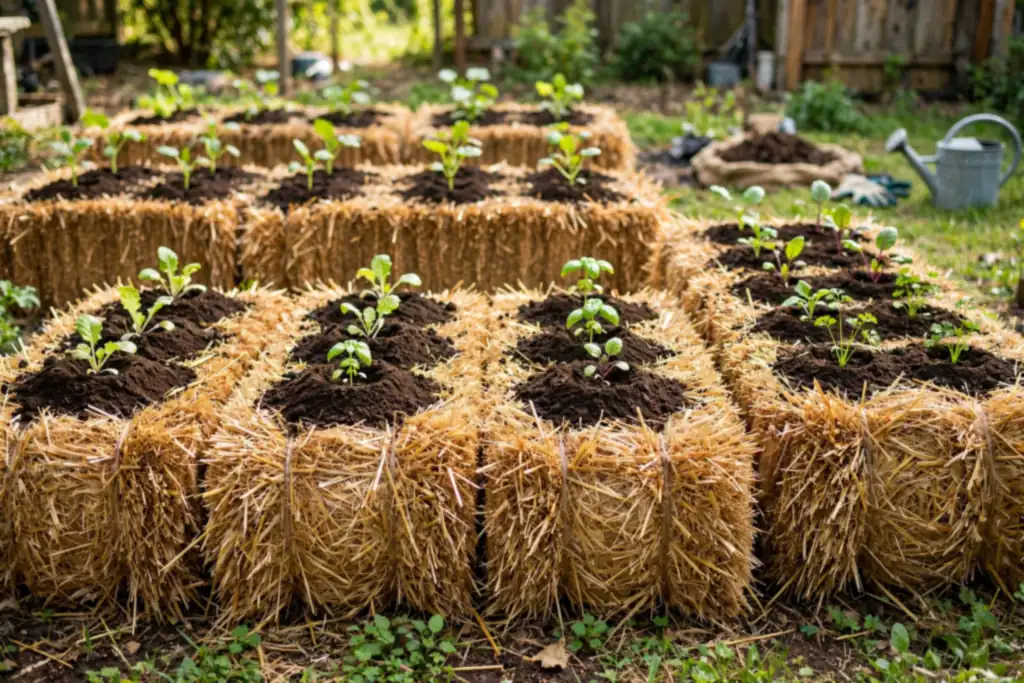
Straw bales make a raised bed without building work, which suits a trial garden or a rented yard where permanent beds are not wanted. Bales hold warmth, drain freely, and break down into compost over one or two seasons. They suit a sunny, level spot where the bales can sit for a full growing season.
Condition the bales for about two weeks before planting, watering them well so they start to break down inside. Plant into pockets of compost on top of the bale, and water often, since bales dry out faster than soil beds. At season end, break the bales apart and spread the rotted straw on other beds as mulch, so nothing is wasted.
15. Try No Dig Beds With Thick Mulch Layers
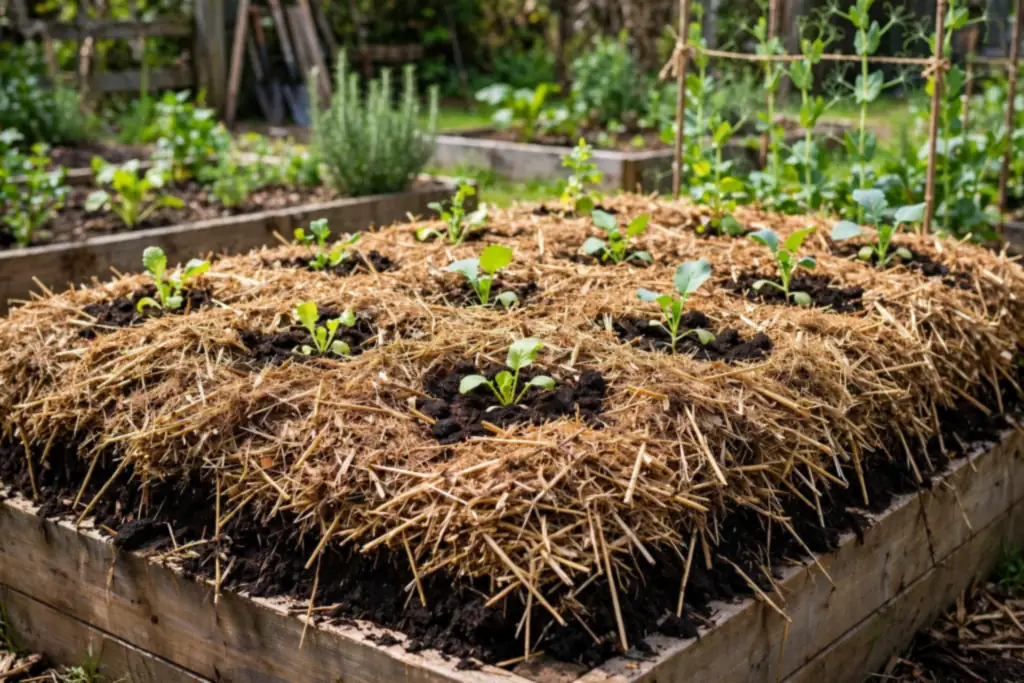
No dig beds build soil from the top down, with cardboard laid on grass or weeds, then layers of compost and mulch on top. The method suits a gardener who wants to start a bed without digging, and it keeps soil life intact, since worms and roots do the mixing. No dig beds also hold moisture well, which helps in dry spells.
Lay cardboard with overlaps, wet it well, and add a deep layer of compost, then mulch. Plant straight into the compost layer, and top up mulch through the season as it settles. Keep paths mulched too, so weeds stay down across the whole plot, and avoid walking on the beds, since compacted soil undoes the benefit of the method.
16. Pair Crops With Companion Planting Rows
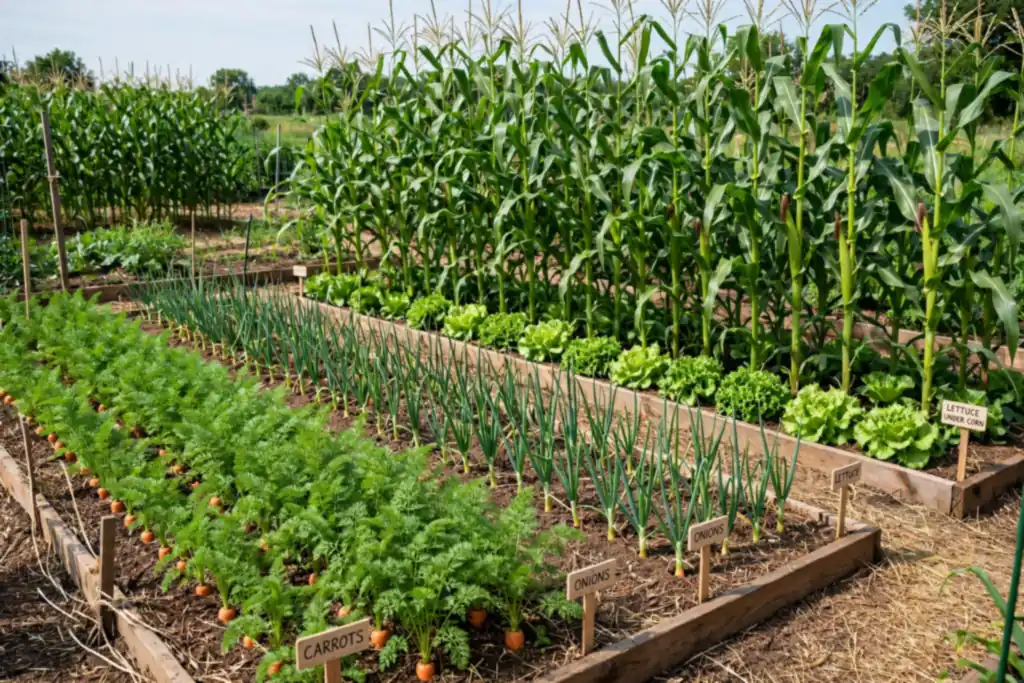
Companion planting pairs crops that help each other, such as carrots beside onions, beans beside sweetcorn, and lettuce under tall plants that give light shade. The layout suits a gardener who wants fewer pests and fuller beds without extra chemicals, since mixed rows confuse pests and use space at different heights. It also keeps the garden looking varied rather than lined up in single crop blocks.
Plan pairs before sowing, and keep the pairs simple at first, with one helper plant per main crop. Leave enough space for each plant to reach full size, since crowded companions compete for water and light. Watch which pairs do well in your soil and light, and repeat the winners next year while dropping pairs that stayed weak.
17. Run a Pollinator Flower Strip Through the Vegetables
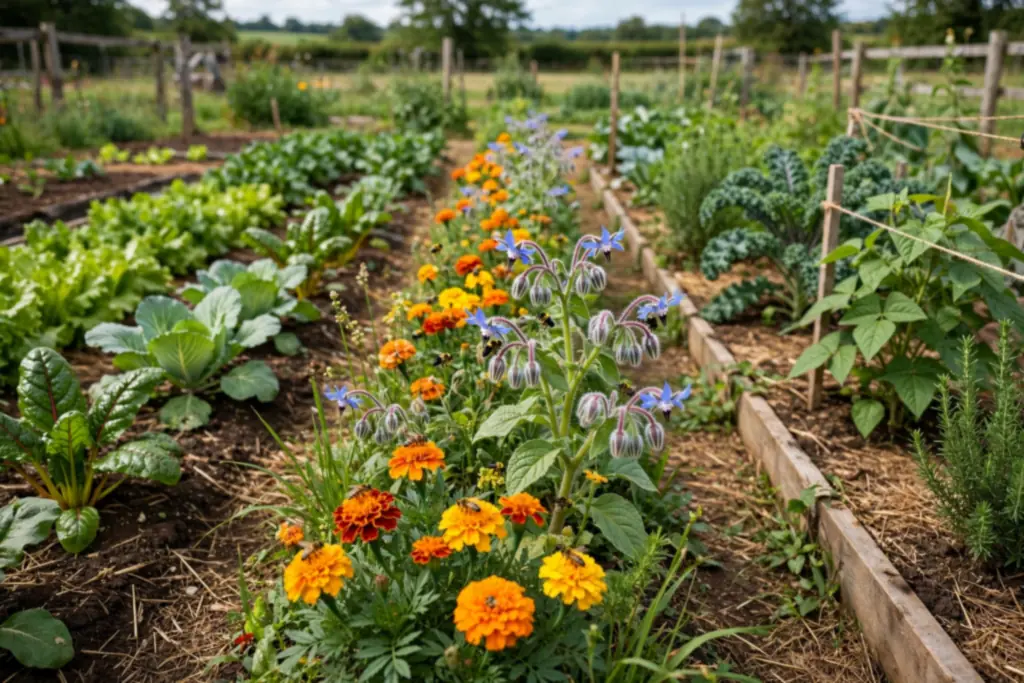
A flower strip through the vegetable garden invites bees and other helpful insects to visit crops that need pollination, such as beans, squash, and courgettes. It suits any size of plot, since a single row of flowers along a path or bed edge can make a difference. Flowers also add color to a working garden and give cutting stems for the house.
Choose flowers that bloom across the season, such as marigolds, calendula, borage, and nasturtiums, and group each type in drifts of three or more. Avoid spraying the strip, and let some flowers set seed for next year. Site the strip in sun near crops that need insects, rather than alone in a far corner, so pollinators move easily between flowers and vegetables.
18. Warm Early Crops in a Cold Frame Corner
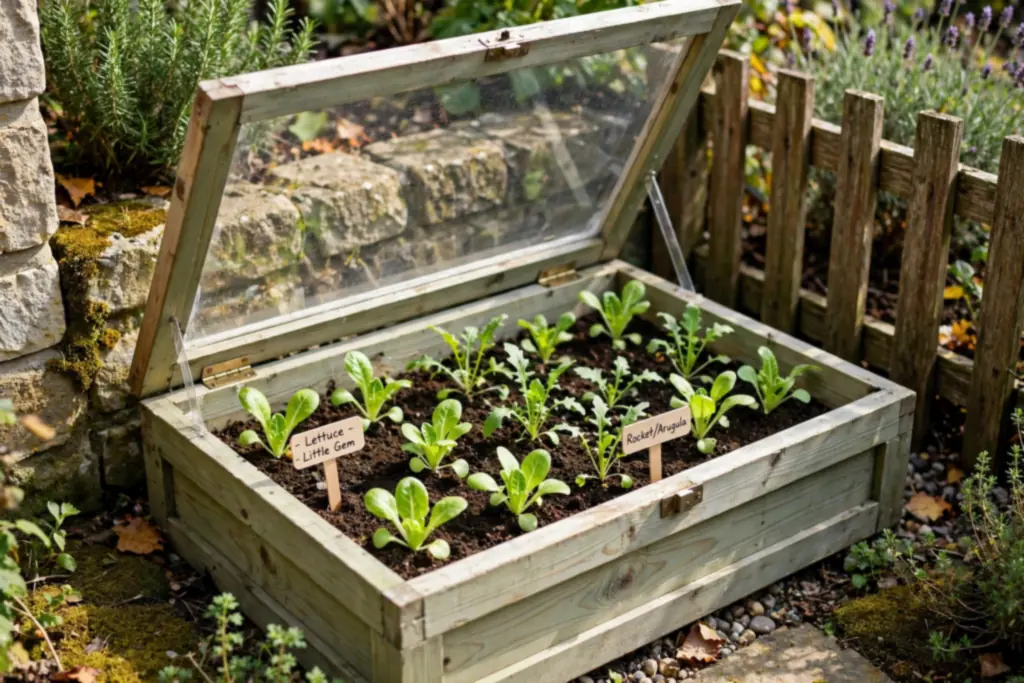
A cold frame is a low box with a clear lid that warms soil early in spring and shelters young plants from frost and wind. It suits a gardener who wants salads and early sowings weeks before open beds are ready, without the cost of a greenhouse. Place the frame in a sunny, sheltered corner near a path, so daily checks stay easy.
Open the lid on mild days to stop plants overheating, and close it before frost at night. Water inside the frame carefully, since rain does not reach it, and raise seedlings inside before moving them to open beds. At season end, clean the glass or clear panels, so light reaches plants fully the next spring.
19. Give Tender Crops a Greenhouse Vegetable Zone
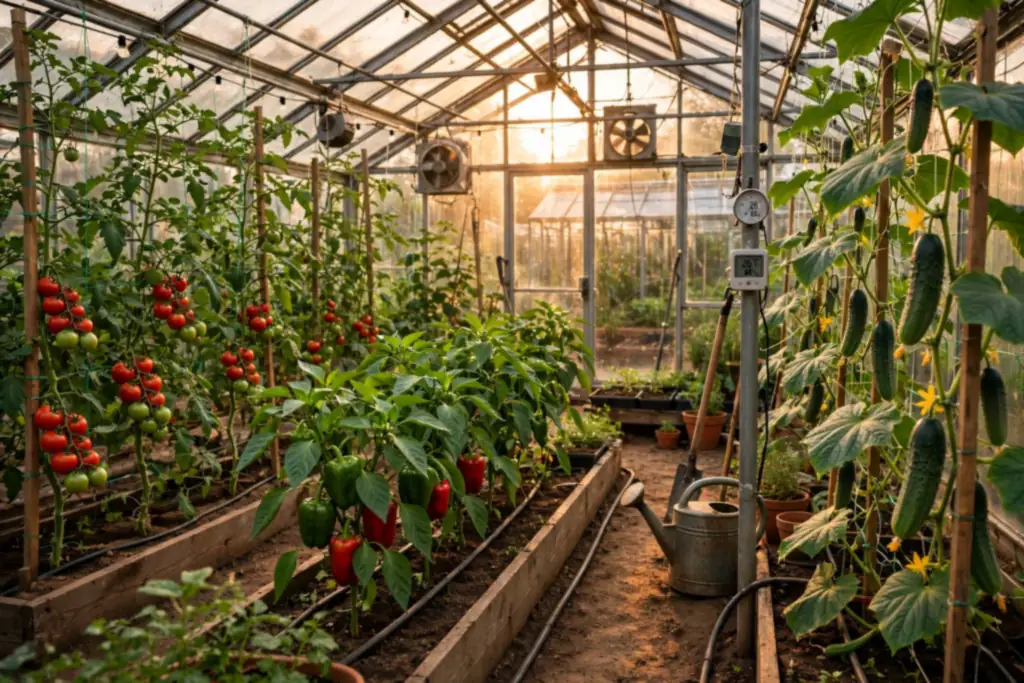
A greenhouse zone lets tomatoes, peppers, cucumbers, and aubergines grow in warmth that open beds cannot give in cooler areas. It suits a gardener with room for even a small greenhouse or a lean to against a sunny wall, since tender crops repay the shelter with a longer harvest. Keep the greenhouse near water and a path, so daily watering and picking stay simple.
Vent the greenhouse on warm days, and shade the glass in high summer so plants do not overheat. Water at the base of plants in the morning, and tie tall plants to supports as they grow. Use the greenhouse for seed starting in spring too, so young plants move outside strong and ready.
20. Set a Shady Corner Aside for Leafy Greens
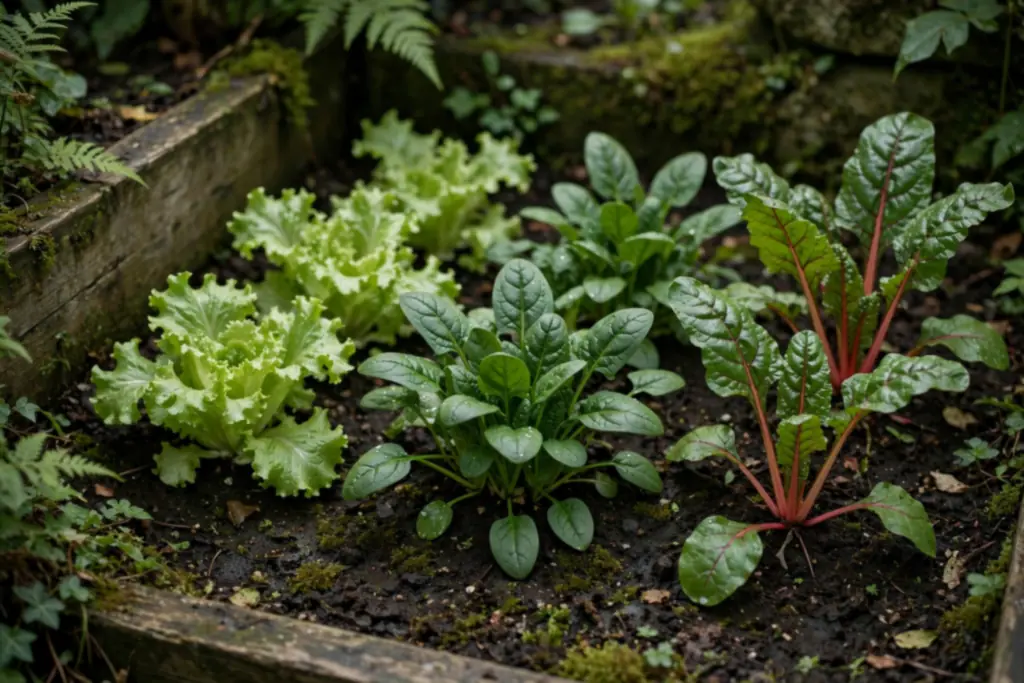
Leafy greens such as lettuce, spinach, chard, and Asian leaves prefer cooler, softer light than sun loving crops, so a shady corner suits them well. This layout works for a north facing bed, a spot under light tree shade, or ground beside a tall fence that blocks midday sun. Greens grown in shade stay tender longer and bolt later in hot weather.
Keep the shady bed rich and moist, with compost worked in and mulch on top to hold water. Sow small rows often, and pick outer leaves first for a steady supply. Watch slugs in damp shade, and check plants after rain, since shade beds stay wet longer than sunny beds.
21. Build a Sun Trap for Tomatoes and Peppers
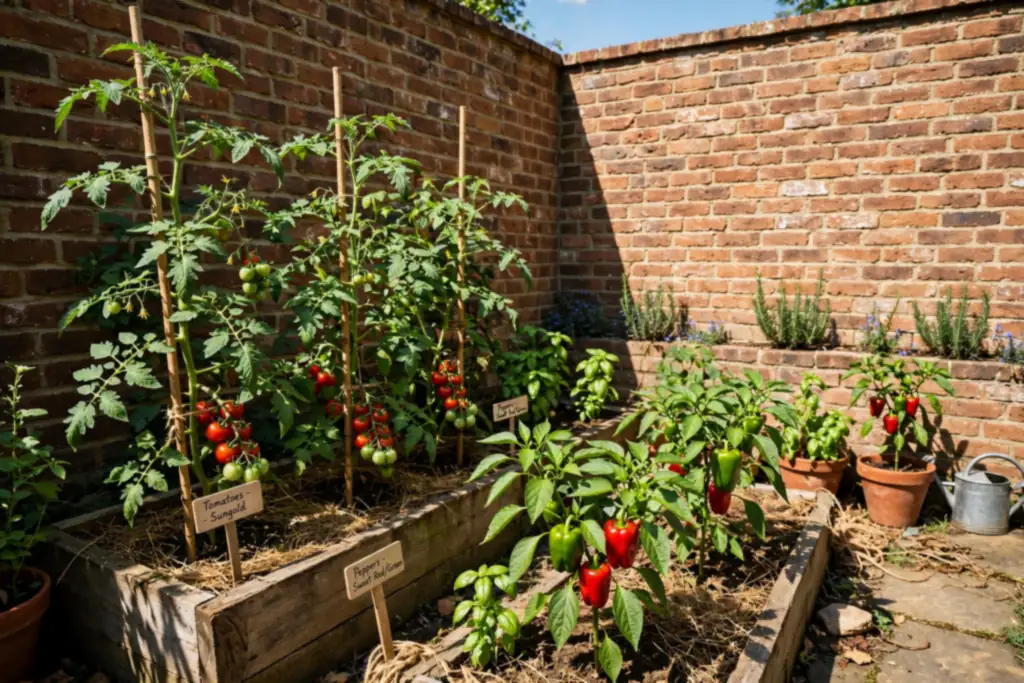
A sun trap is a sheltered, south facing corner where walls, fences, or hedges block wind and bounce warmth back onto plants. It suits tomatoes, peppers, chillies, and aubergines, which need long hours of sun and warmth to ripen well. A sun trap also lets you grow tender crops outside that would struggle in an open, windy plot.
Place the sun trap against a sunny wall or fence, and keep the ground free draining with compost added before planting. Tie tall plants to supports early, and water at the base so leaves stay dry. Mulch the bed to hold warmth and moisture, and pick fruit when fully colored for the best taste.
22. Dig a Deep Bed for Root Vegetables
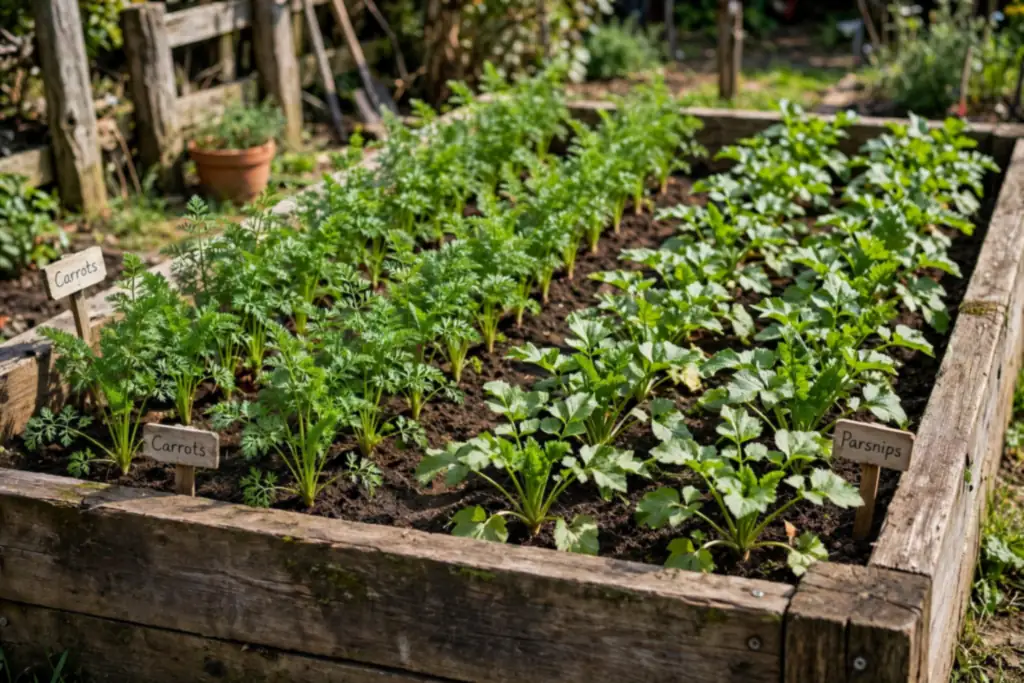
Root vegetables such as carrots, parsnips, and beetroot need deep, loose soil that lets roots grow straight and long. A deep bed, dug or built to at least a foot of loose soil, suits these crops better than shallow or stony ground, where roots fork and split. Keep the deep bed in sun, with soil free of fresh manure and large stones.
Work compost into the bed before sowing, and sow seeds thinly in rows so roots have room to swell. Water evenly through dry spells, since uneven watering can split roots, and thin seedlings early so each root has space. Harvest roots as needed, and leave the bed to rest with a mulch cover over winter.
23. Plant a Three Sisters Mound Garden
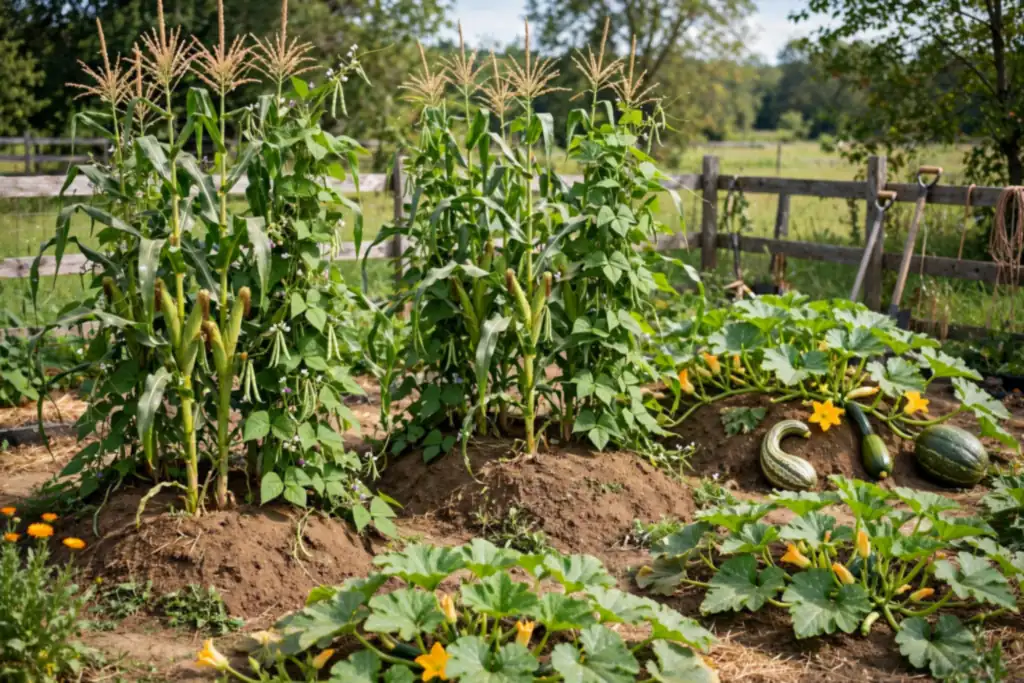
Three sisters planting grows sweetcorn, beans, and squash together on low mounds, a traditional pattern where each crop helps the others. Corn gives beans a pole to climb, beans feed the soil, and squash leaves shade the ground and hold moisture. The layout suits a sunny plot with room for mounds spaced well apart, and it makes a garden that looks different from straight rows.
Build mounds about three feet across, and plant corn first, then beans once corn is a hand high, then squash around the mound edge. Water mounds well at the start, since raised soil dries faster than flat beds. Pick beans often, and let squash spread across the paths between mounds, keeping a clear route for picking.
24. Add a Work Station and Harvest Corner
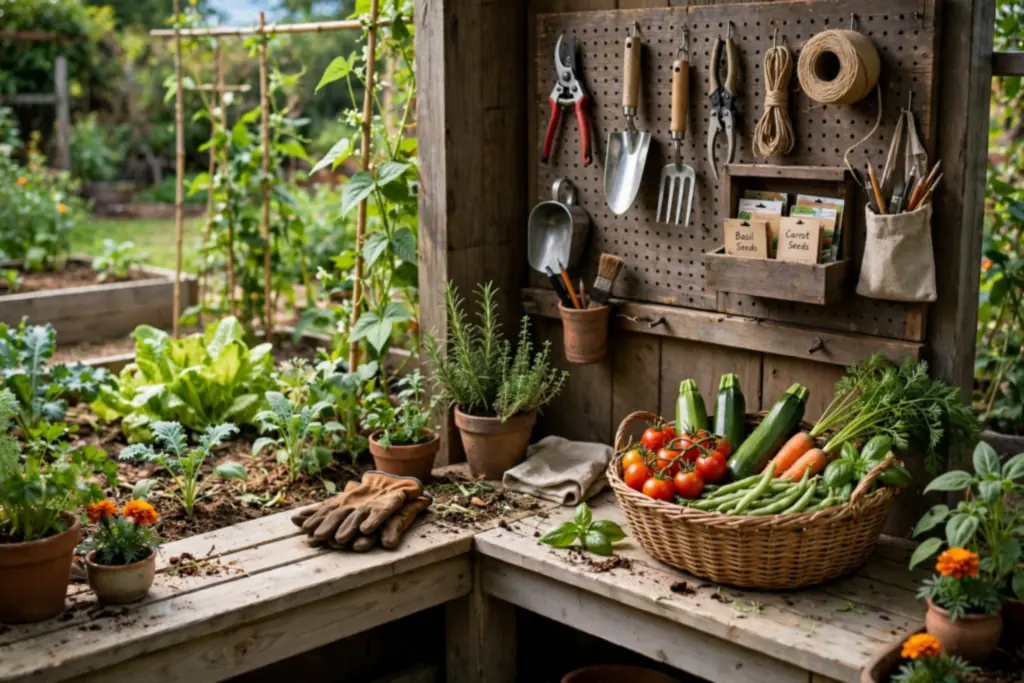
A work station corner gives the vegetable garden a place for tools, pots, seed trays, and a basket of just picked crops, so work stays organized instead of spread across paths. It suits any garden with a spare corner near the beds, and it turns harvesting into a calm routine: pick, trim, wash, and carry inside in one trip. A simple bench, a tool hook board, and a water butt cover most needs.
Site the corner on firm, level ground near a tap, with shade for seed trays in summer. Keep tools hung and clean, pots stacked by size, and a bucket for green waste beside the bench. Add a small seat, so the corner also serves as a rest spot, and keep the route from the beds clear, so a full basket never has to squeeze past pots and trays.
Conclusion
A good vegetable garden design starts with the way you actually use the space, not with the prettiest bed shape. Put daily crops near the door, keep beds narrow and paths clear, match crops to sun and shade, and grow upward or in containers where ground is tight. A rotation plan, a pollinator strip, and a small work corner will carry the garden through more than one season, and each idea above can stand alone or join a larger layout. Save this list, sketch your plot on paper first, and start with one bed or one corner that you can plant, water, and pick with ease.
FAQs
How do I start designing a vegetable garden from scratch?
Start with sun, water, and access. Find the sunniest spot that is near a tap, mark beds no wider than you can reach across, and leave a path beside every bed for a wheelbarrow. Sketch the layout on paper, put daily crops near the door, and build one or two beds first, so you learn the soil and light before expanding.
How much sun does a vegetable garden need?
Most vegetables grow best with at least six hours of direct sun a day, especially tomatoes, peppers, squash, and beans. Leafy greens cope with softer light and can take a partly shaded bed, which makes them a good choice for a north facing corner. Watch your plot through a day before building beds, since fences, trees, and houses shift shade across the seasons.
What size should vegetable garden beds be?
Keep beds about four feet wide or less, so you can reach the middle from either side without stepping on the soil. Length can suit your plot, but shorter beds are easier to work and rotate. Paths should be wide enough for a wheelbarrow, and raised beds can sit lower or higher to suit the gardener, with waist high beds helping anyone who finds kneeling hard.
Can I grow vegetables in a small space or on a balcony?
Yes. Grow salads, herbs, cherry tomatoes, and strawberries in pots, troughs, and rail planters, and use a trellis for climbing beans and peas. Check weight limits on a balcony, keep heavy pots low and near the wall, and water containers more often than open beds, since pots dry out fast in sun and wind.
How do I plan crop rotation in a small vegetable garden?
Divide the plot into three or four beds or zones, one per crop family, and move each family to a new zone every year. Keep a simple sketch of what grew where, and use pots or a separate bed for crops that stay in place for years, such as rhubarb and herbs. Even a small rotation helps soil and cuts down on pests that build up around one crop.
What is the easiest vegetable garden layout for a beginner?
A square foot grid bed or a pair of small raised beds near the kitchen door is the easiest start. Both layouts keep the area small, the plan clear, and the crops within easy reach for watering and picking. Start with reliable crops such as salads, beans, courgettes, and herbs, and add a new bed or idea each season as your confidence grows.