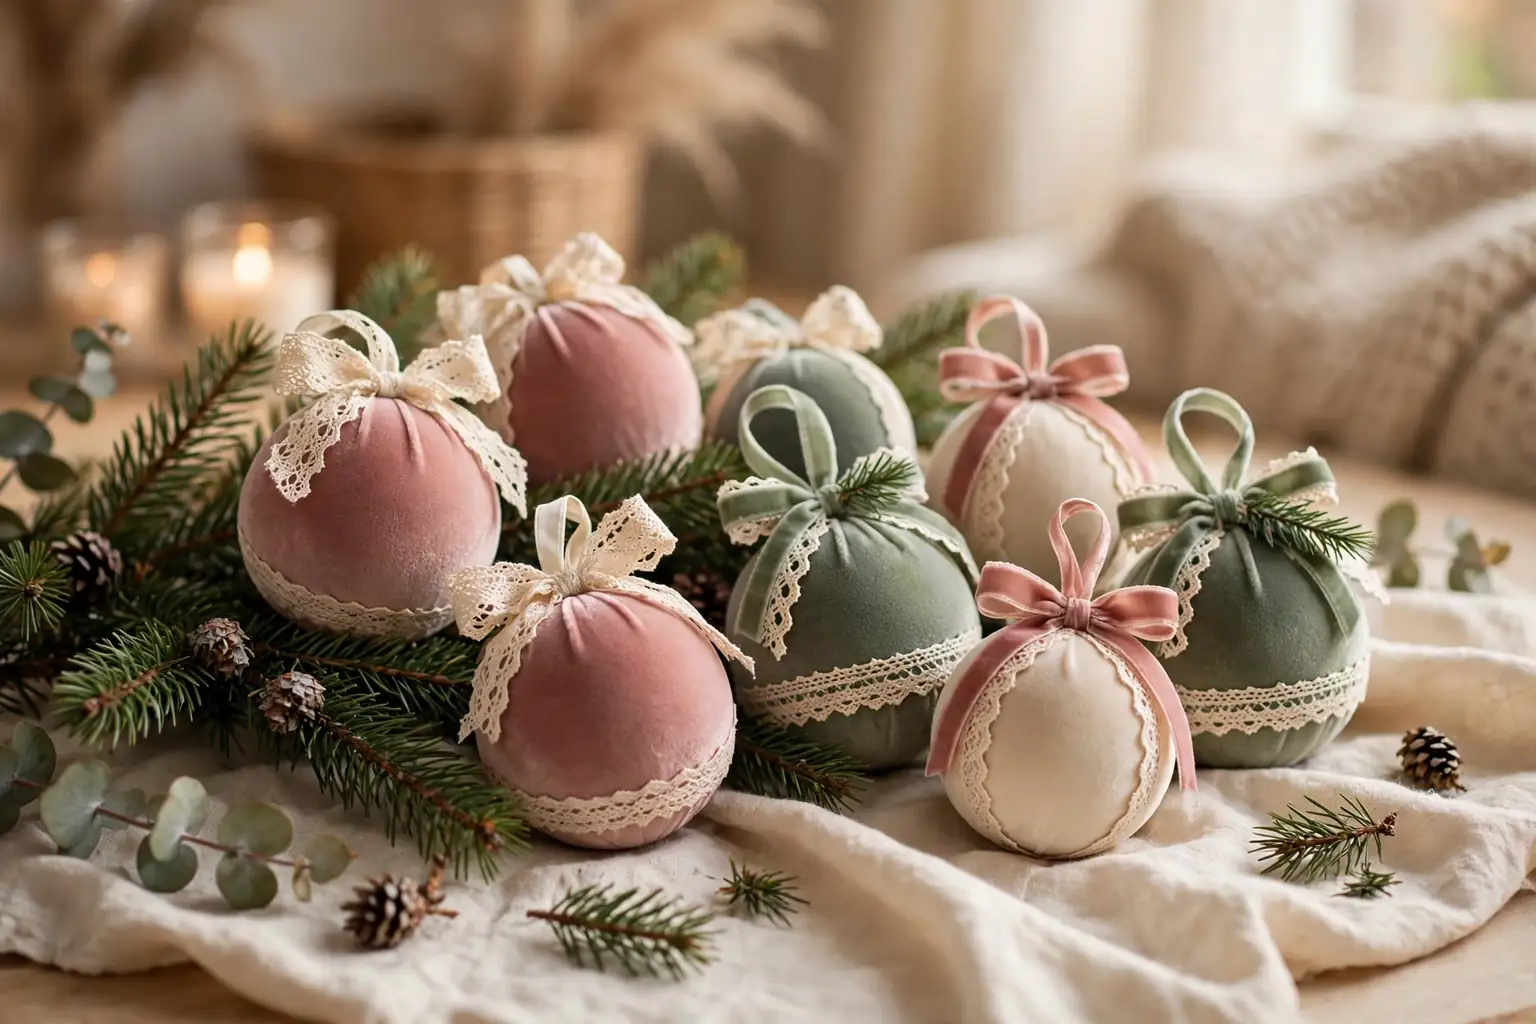
To make velvet Christmas ornaments with a soft vintage look, wrap foam or plastic baubles in cotton velvet, gather the fabric neatly at the top, and finish with a ribbon loop, muted trim, and small vintage details. Choose dusty, muted colors, keep seams hidden, and age the finish lightly for a collected, old fashioned feel.
Velvet gives a tree a quiet, soft layer that glass and metal cannot give on their own. The fabric catches light gently, hides a plain bauble base, and pairs well with wood, brass, dried greenery, and old style paper details. The vintage part comes from restraint: muted colors, narrow trim, a small bow or pearl accent, and no large, bright embellishment fighting for attention. For more old fashioned seasonal looks to pair with these ornaments, see the vintage Christmas decor ideas. Work one ornament at a time at first, check the finish in daylight, and repeat the method once the first piece looks smooth and balanced.
Key Takeaways
- Start with cotton velvet in muted, dusty colors, such as deep rose, sage, dusty blue, cream, or soft gold, for a vintage feel.
- Wrap foam or plastic baubles smoothly, keeping seams at the back and the gather small and neat at the top.
- Use narrow ribbon, lace, braid, and small pearl or bead accents, and stop before the ornament looks crowded.
- Fit a strong hanging loop and cap, and test the weight on a branch before you hang a full set.
- Age the finish lightly, with muted paint or a soft brush, rather than distressing the fabric until it looks worn out.
- Store velvet ornaments in tissue lined boxes, in a cool, dry place, so the pile stays smooth and clean.
Supplies You Will Need
- Cotton velvet fabric in two or three muted colors
- Foam or plastic baubles in small and medium sizes
- Sharp fabric scissors and a ruler or measuring tape
- Fabric glue and a low temperature glue gun, used with care
- Needle and thread to match the velvet
- Straight pins for holding fabric in place while you work
- Narrow satin or grosgrain ribbon for loops and trim
- Vintage style lace, braid, or narrow trim
- Small pearl beads, plain beads, and small charms or buttons
- Ornament caps, wire loops, or sturdy cord for hanging
- A fabric marker or chalk for marking cut lines
- Acid free tissue paper and a sturdy storage box for finished ornaments
1. Choose Your Velvet and Vintage Palette
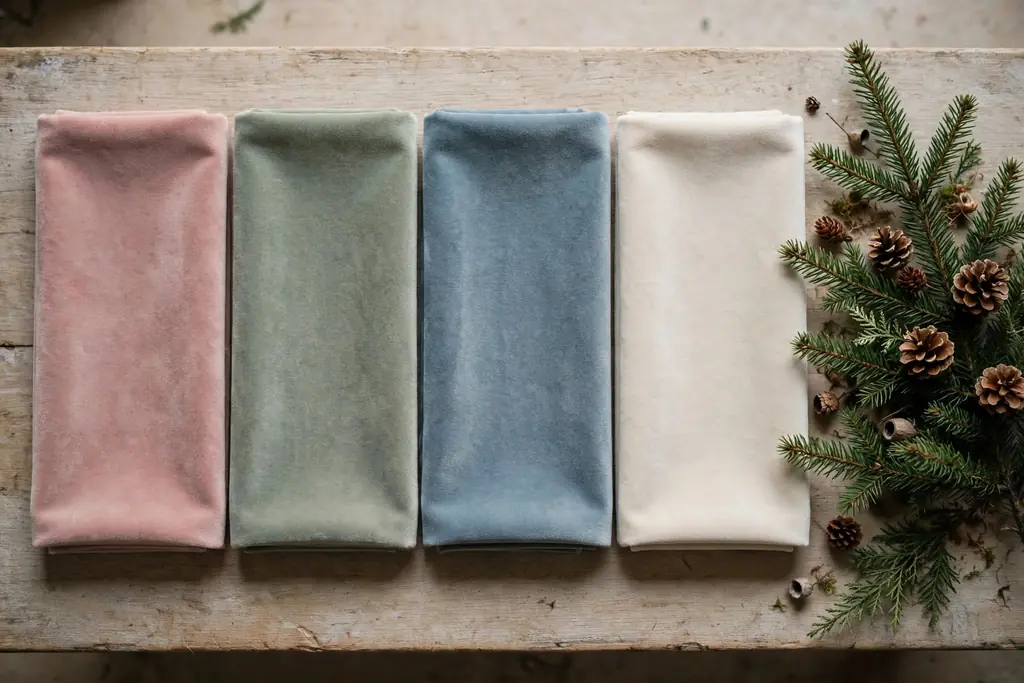
Choose velvet first, since color and pile set the whole look. Cotton velvet works well for this project because it wraps smoothly, holds a gather, and takes glue and hand stitching without slipping too much. Hold fabric samples near your tree, mantel, or existing ornaments in daylight, and pick two or three colors that sit calmly together, such as dusty rose with cream, sage with soft gold, or dusty blue with cream and brass. Avoid very bright or shiny velvet, since a loud color will read as modern even with vintage trim added later.
Plan the palette for the full set, not for one ornament at a time. A set looks collected when one color leads, a second color supports it, and a third appears only as a small accent. For example, make most ornaments in dusty rose and cream, then add a few in sage for balance. Note the colors you chose before cutting, so later batches match the first ones. If you plan to mix these with older pieces, look at the muted tones in vintage inspired Christmas ornaments for a sense of how soft colors and small details sit together on a tree.
2. Pick the Right Ornament Bases
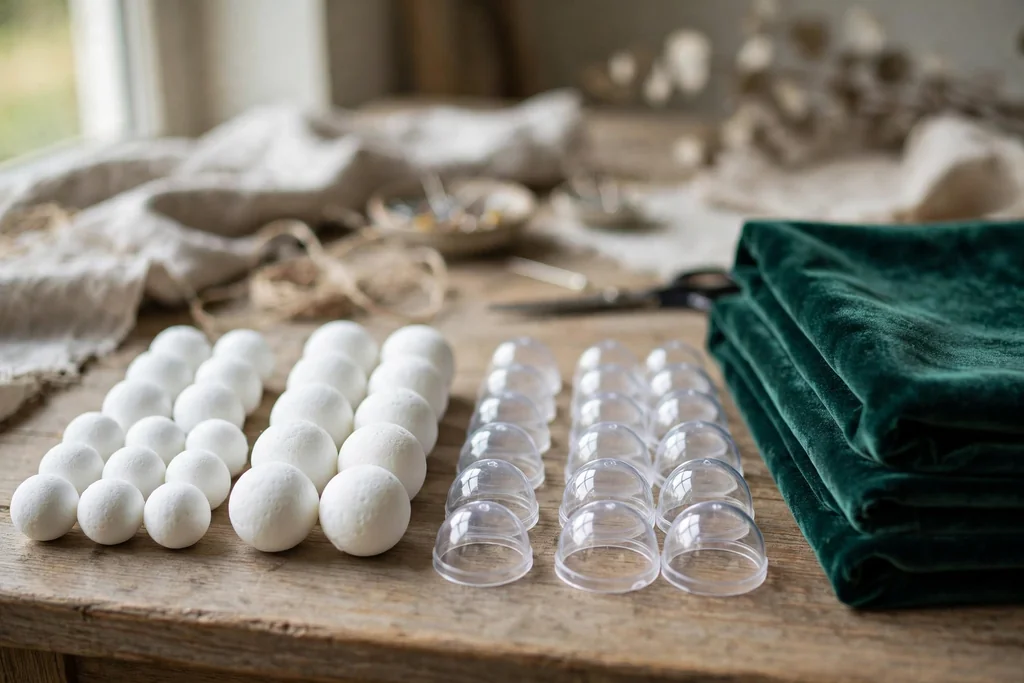
Pick foam or plastic baubles as the base, since both are light, easy to cover, and safe on most branches. Foam balls suit a fully wrapped look, because pins and glue hold well in foam and the surface has no hard seam to fight. Plastic baubles suit ornaments where you want to keep a cap and loop fitting, since the cap gives a clean anchor for the hanging loop. Choose small and medium sizes for a first set, so the finished ornaments hang well on inner and outer branches without pulling branches down.
Check each base before you cover it. Remove loose caps, dust, or rough seams, and set aside any base that is cracked, dented, or uneven, since velvet will show a dent under a tight wrap. Sort bases by size, so you can cut matching fabric pieces in batches and keep the finished set even. If a base has a deep seam line, plan to place that seam at the back of the finished ornament, where trim or a bow will cover it. Keep a few spare bases on hand, since a first wrap sometimes needs a second try.
3. Measure and Cut the Velvet Pieces
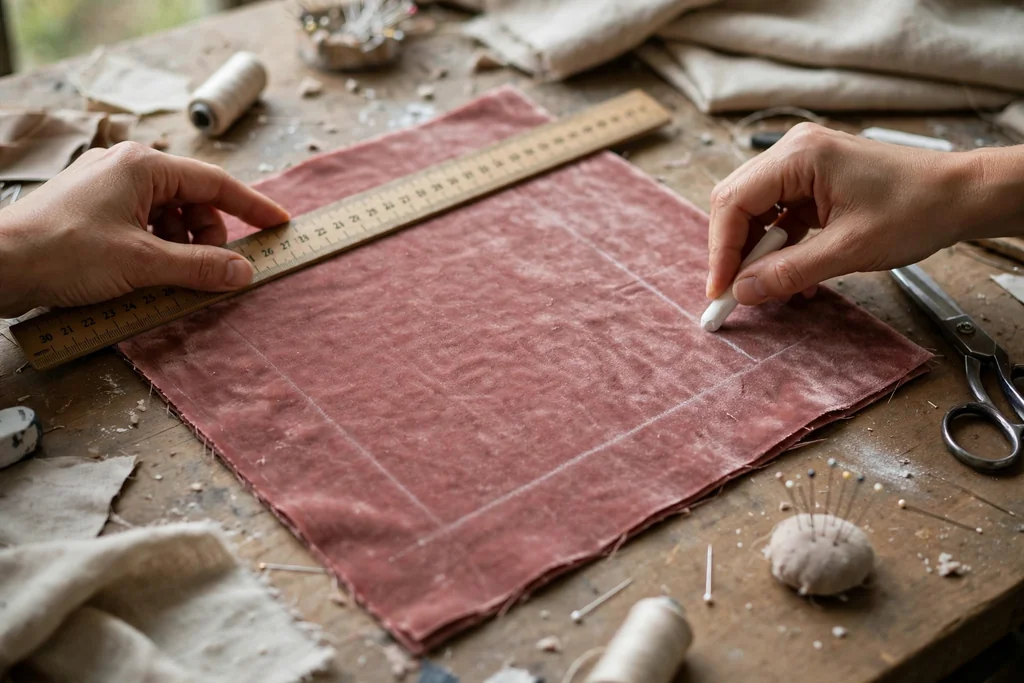
Measure each base before cutting, since velvet has little stretch and a short piece will pull and pucker. Wrap a measuring tape around the widest part of the bauble, then add enough extra fabric to gather at the top and tuck under at the base. For a round bauble, a square of velvet that covers the ball with fabric to spare on all sides is a safe starting point. Mark the cut line on the back of the fabric with chalk or a fabric marker, and cut with sharp fabric scissors so the edge stays clean and does not fray into the finished surface.
Cut one test piece first, wrap it around a spare base, and check the fit before cutting the full set. Note the size that worked for each base size, and write it down, since foam and plastic baubles in the same box can vary slightly. Cut with the pile running in the same direction for every piece in a set, so light falls evenly across the finished ornaments. Keep cut pieces flat and in color groups, and do not stack heavy items on them, since velvet pile marks easily under pressure.
4. Wrap the Base in Velvet
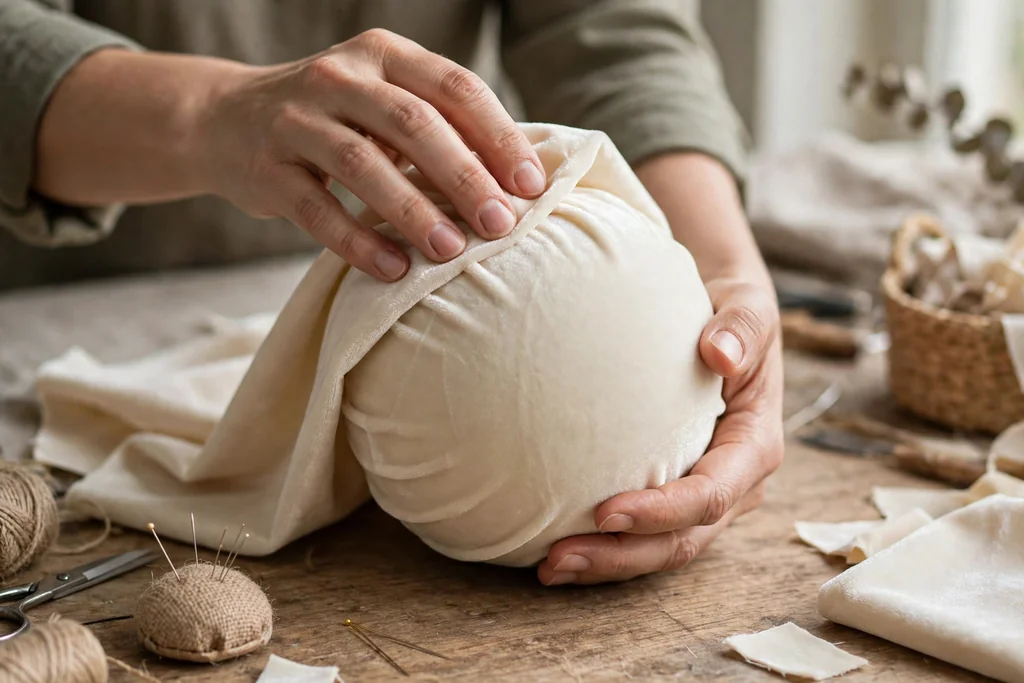
Place the velvet face down on a clean table, set the bauble in the center, and bring the fabric up around it in even sections. Smooth the fabric over the front first, where the eye will land, then work toward the back, easing out folds as you go. Use straight pins to hold the fabric in place while you check the fit, and keep the pile smooth with light hand pressure rather than pulling hard, since hard pulling can thin the pile and leave shiny spots. The goal is a smooth, even cover with no bare base showing and no deep folds across the front.
Work slowly around the sides, folding small pleats at the back where extra fabric gathers. Small, even pleats look neat once covered by trim, while one large fold will show as a lump under the velvet. If a fold keeps forming in the same place, lift the fabric, shift the bauble slightly, and try again, rather than gluing over a wrinkle. Once the wrap looks smooth from the front and sides, pin the back gather firmly and set the ornament aside for a short rest, so you can spot any slipping before you glue.
5. Smooth Seams and Finish the Gather
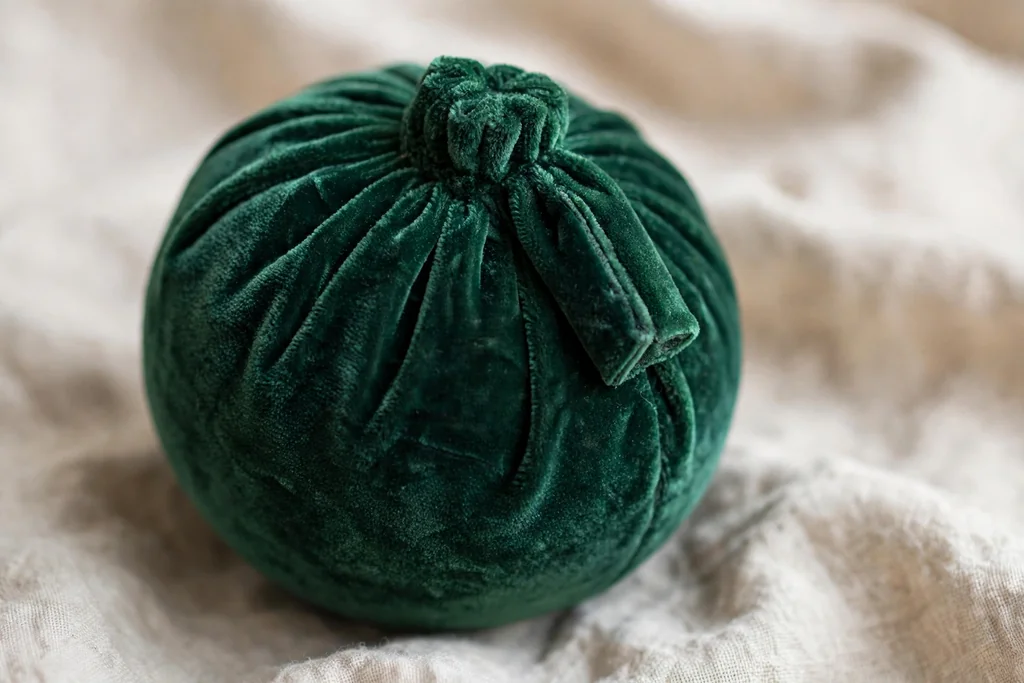
Finish the back seam and top gather with care, since this step decides whether the ornament looks handmade in a good way or simply unfinished. Fold the raw edges under at the back, so no cut edge shows, and secure them with small dabs of fabric glue or a few neat hand stitches. At the top, gather the fabric in small, even folds around the neck of the bauble, pulling just enough to close the opening without puckering the front. Trim away only the extra fabric that would bulk up the gather, and keep the rest tucked flat.
Press the gather with your fingers, not with a hot iron directly on velvet, since heat and pressure can crush the pile. If the gather still looks bulky, spread the folds more evenly around the neck instead of pulling them tighter to one side. A small, flat gather sits better under a ribbon bow or cap than a tall, tight bunch. Check the ornament from the front, back, and side before moving on, and fix any loose edge now, since trim added later will not hold a seam that is already slipping.
6. Fit a Secure Hanging Loop and Cap
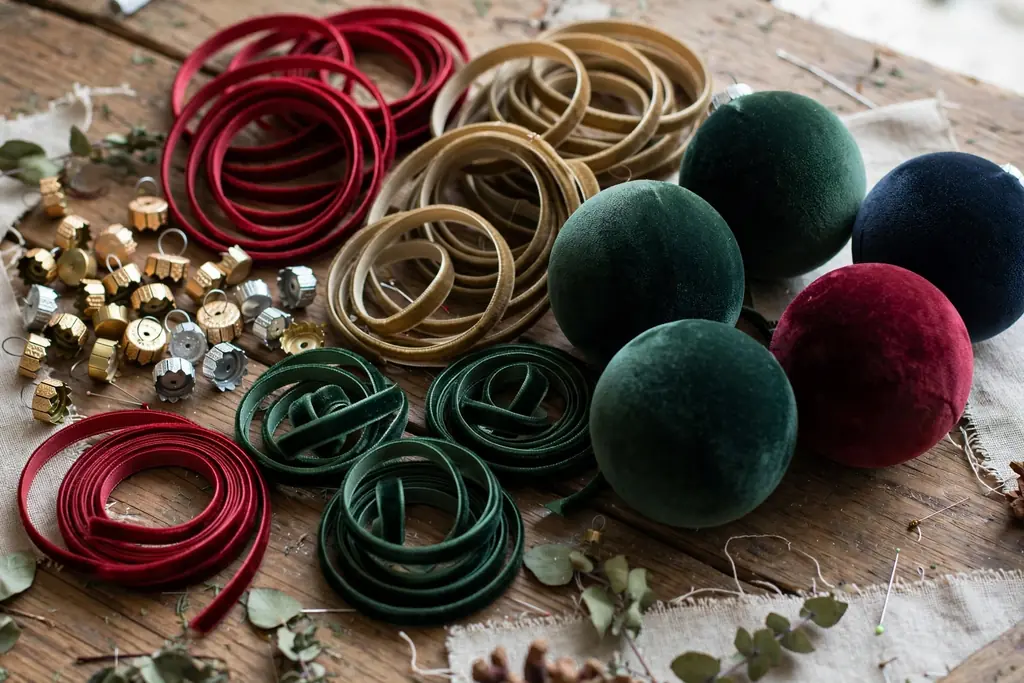
Fit the hanging loop before you add trim, so the trim can cover the join and the loop can be tested on its own. For a plastic bauble, refit its cap, or fit a new ornament cap, and thread a ribbon loop or sturdy cord through the cap loop. For a foam ball, push a wire loop or a folded ribbon loop into the top gather, then glue and stitch it in place so it cannot pull out under the weight of the ornament. Use a loop long enough to hang the ornament clear of the branch, but short enough that the ornament does not swing into its neighbors.
Test each loop by holding the ornament by the loop alone and giving it a gentle shake. If the loop slips, the cap turns, or the gather opens, remove the loop and refit it before adding beads or trim. A loop that fails on a table will fail on a tree, and a dropped velvet ornament can pick up dust, lose beads, or crush its pile. Once the loop holds, tie or glue the loop base flat against the gather, so the finished top looks neat from every angle.
7. Add Ribbon Trim Around the Seam
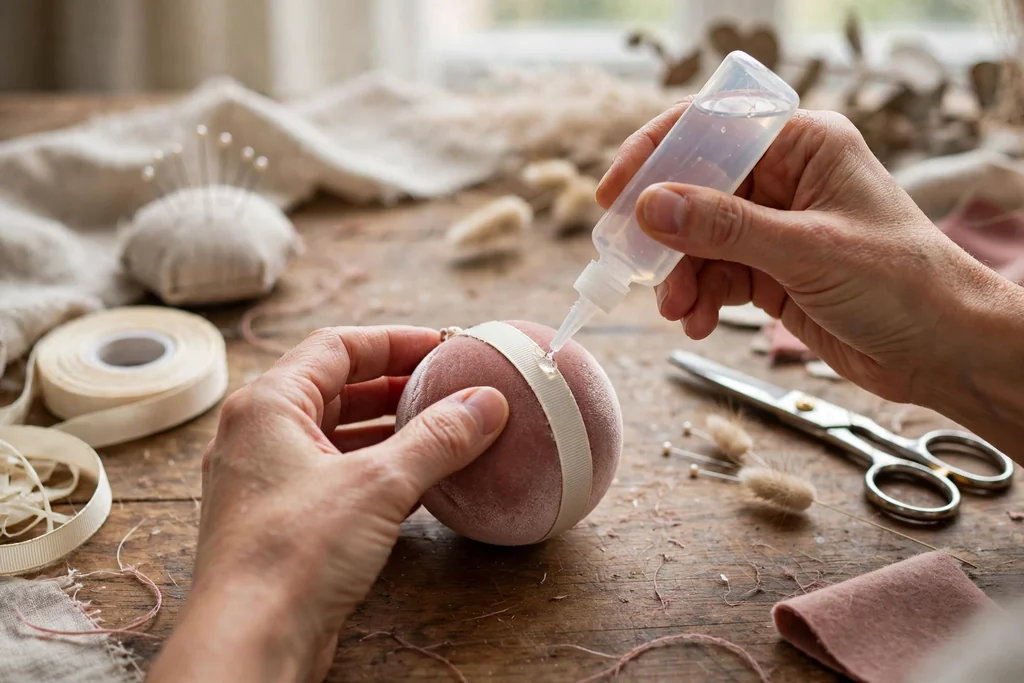
Add narrow ribbon trim around the seam or gather to hide the join and give the ornament a finished edge. Choose ribbon in a muted tone that matches or sits quietly beside the velvet, such as cream ribbon on dusty rose, or soft gold ribbon on sage. Cut the ribbon to fit around the ornament with a small overlap at the back, and glue it in place in short sections, pressing lightly as you go so the ribbon follows the curve without puckering. A single, well placed ribbon line often looks more vintage than several competing trims.
Keep the ribbon flat and even, and hide the join at the back, under the bow or where the ornament will face the tree. If the ribbon will cross the front of the ornament, plan the path first, such as a single band around the middle or a cross of two narrow bands, and pin it before gluing. Step back and check the balance: the ribbon should frame the velvet, not cover it. If the ribbon looks too bright or wide once in place, swap it for a narrower or more muted ribbon before adding lace or beads.
8. Layer Vintage Lace and Braid Details
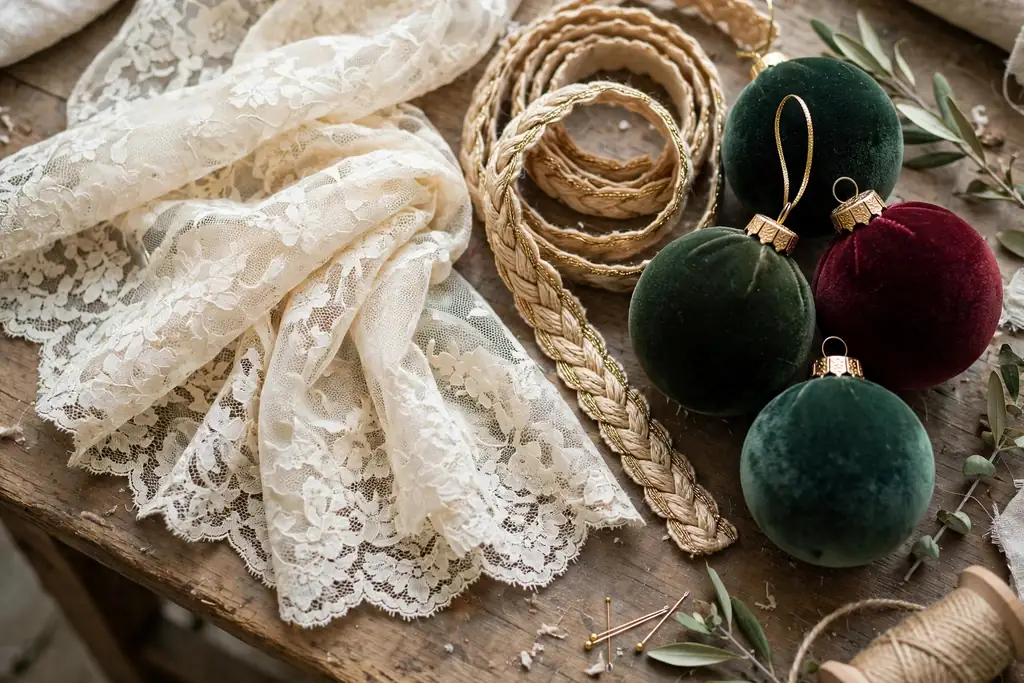
Layer lace or braid only after the ribbon trim is set, so each layer has a clean base to sit on. Choose one lace or braid style per ornament, such as a narrow cream lace edge, a small gold braid, or a simple cotton trim with a soft, aged tone. Glue lace in short sections along the ribbon edge or around the gather, easing it around curves without stretching it, since stretched lace will pull back and lift at the ends. Overlap the lace join at the back, and trim the end neatly so no raw edge sticks out.
Use lace sparingly. A thin lace edge at the gather, or a short lace band across the front, gives a vintage signal without hiding the velvet. If you add lace to every seam and edge, the ornament will look busy and the soft velvet texture will be lost. For a set, repeat the same lace on most ornaments, and vary only the color or the bow, so the group reads as a matching collection. Let the glue dry fully before handling the ornament, since moving lace while glue is wet can leave glue marks on velvet pile.
9. Add Beads, Pearls, and Small Charms
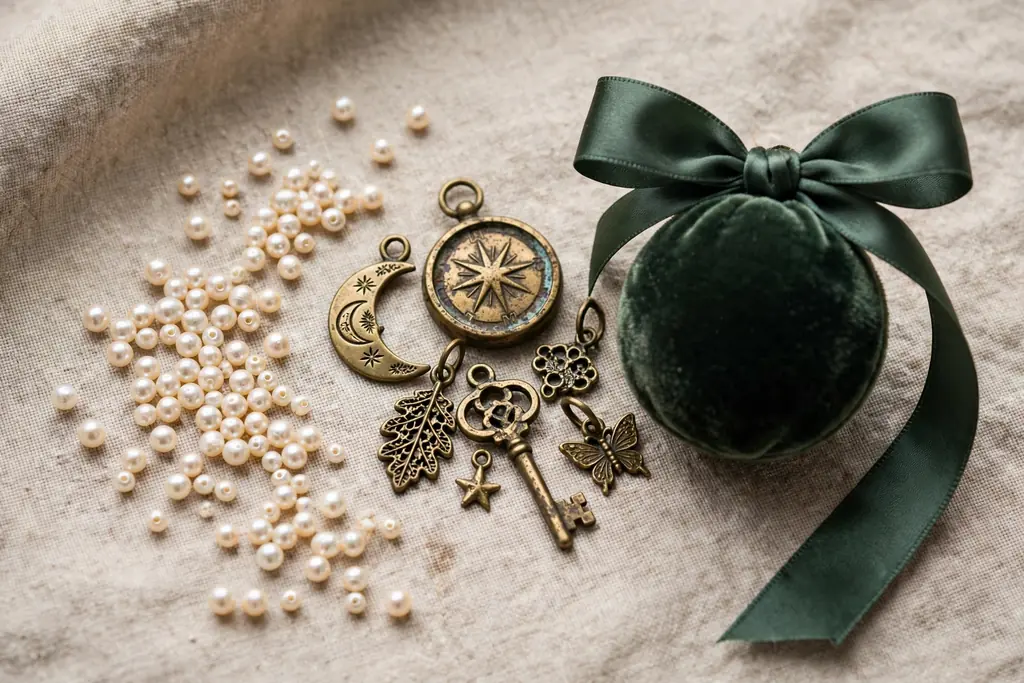
Add beads, pearls, or small charms last, when the wrap, trim, and lace are already secure. Place a small cluster at the gather, a single pearl at the center of a bow, or a short bead drop at the front, and pin the pieces in place before gluing so you can check the balance. Use muted finishes, such as cream pearls, aged brass charms, or soft gold beads, and keep the count low: three to five small beads often carry more vintage charm than a full ring of beads. Glue each bead in place, and for heavier charms, add a stitch through the fabric for extra hold.
Check the ornament from a normal viewing distance, not only up close. Details that look fine in your hand can look crowded on a tree, where several ornaments sit together. If a charm swings, catches on the ribbon, or pulls the gather to one side, remove it or move it closer to the cap, where the ornament is strongest. For ornaments that will hang low, keep bead clusters small and smooth, so they do not snag on branches, other ornaments, or hands during decorating.
10. Age the Finish Gently for a Vintage Look
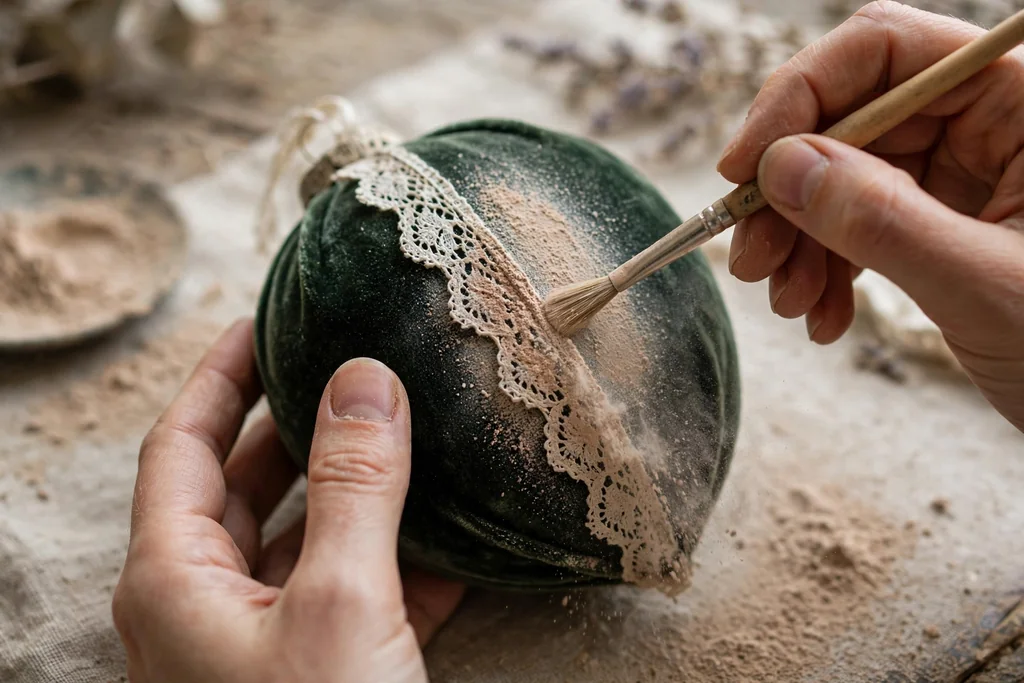
Age the finish lightly, so the ornament looks collected rather than new, without damaging the velvet. One gentle method is to brush a very small amount of muted, water based craft paint, in cream or soft taupe, over raised trim, lace edges, or a charm, then wipe most of it back with a dry cloth so only a soft, dusty tone remains in the crevices. Another method is to choose trim and ribbon that already carry a muted, aged tone, rather than adding wear to the velvet itself. Test any aging method on a spare ornament first, and let it dry fully before judging the result.
Do not sand, bleach, or soak velvet to age it, since those methods can thin the pile, change the color in patches, and weaken the fabric. Do not age every ornament in the same way, or the set will look uniform in a way that real collected pieces do not. Vary the aging slightly: leave some ornaments clean and soft, give others a light dusty tone on the trim, and keep one or two as plain velvet pieces for balance. The vintage look in antique Christmas ornaments comes from soft color, hand detail, and gentle wear, not from heavy distressing, and the same restraint works here.
11. Hang and Balance Ornaments on the Tree
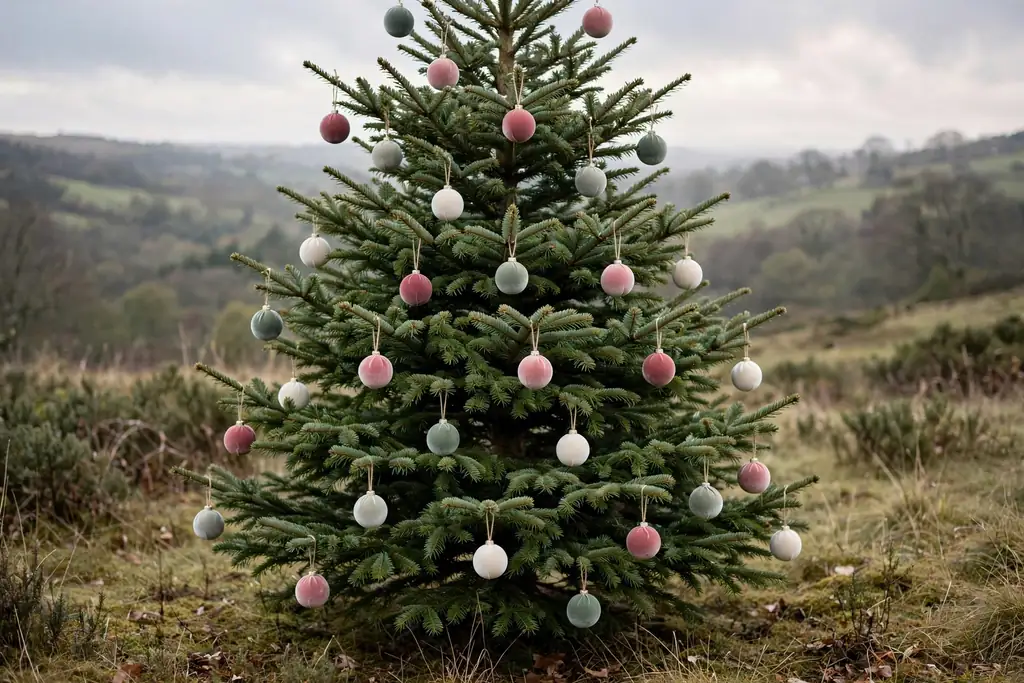
Hang velvet ornaments with space around each piece, so the soft pile shows and the trim is not crushed by neighbors. Place heavier or larger velvet ornaments on strong inner branches, close to the trunk, and lighter, smaller pieces on outer branches where they can catch light. Hang a few ornaments at a time, then step back and check the color balance: dusty rose, sage, and cream should appear in more than one part of the tree, not in one clump. Move an ornament rather than adding another one when a section looks heavy or empty.
Keep velvet ornaments away from heat sources, such as radiators, fireplaces, and hot lights, and away from damp branches or windows where condensation can spot the pile. On a mantel or in a bowl display, set velvet ornaments with tissue or a soft cloth between pieces, so beads and charms do not press into the pile of the next ornament. At takedown time, remove velvet ornaments before pulling lights or garlands off the tree, so loops do not snag and trim does not tear.
12. Store Velvet Ornaments So the Pile Stays Soft
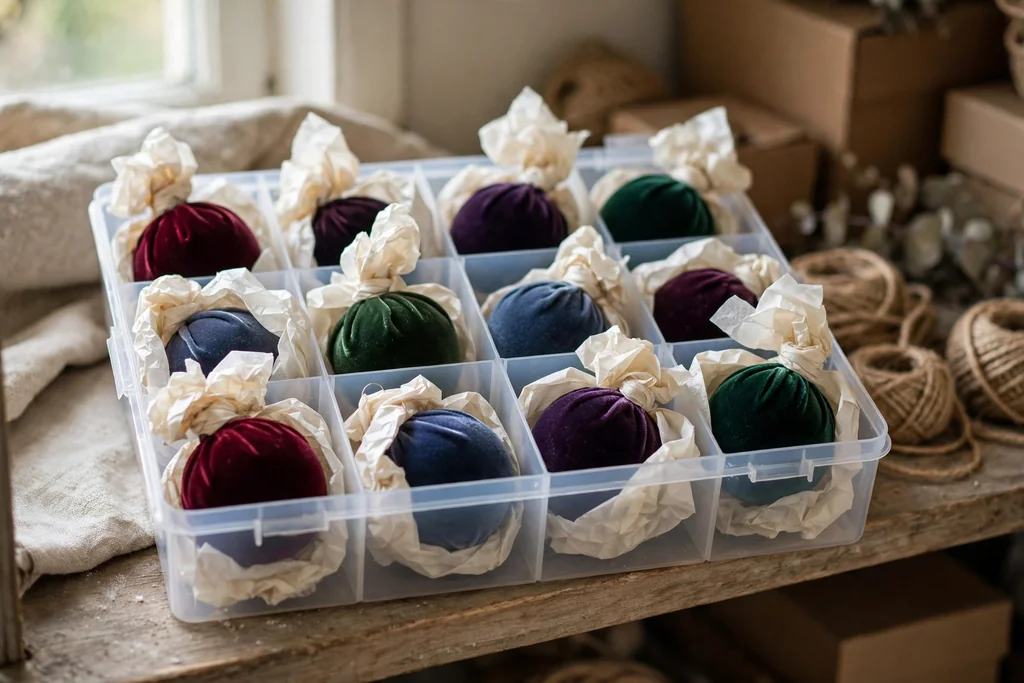
Store each velvet ornament in its own tissue lined space, so pile, lace, and beads are not pressed against each other for months. Wrap each ornament loosely in acid free tissue, place it in a divided box or a sturdy box with tissue padding between pieces, and keep heavier ornaments at the bottom and lighter ones at the top. Label the box by color and contents, so you can find the set next season without opening and handling every box. Keep the box in a cool, dry indoor space, off the floor, and away from damp rooms, direct sun, and strong smells.
Check the box once a year before decorating, and air the ornaments briefly in a clean, dry room if they smell musty or feel damp. Brush the pile very lightly with a soft, dry cloth or a soft brush if dust has settled, and support the ornament with your other hand while you work. Do not vacuum velvet ornaments, press them under heavy items, or store them in plastic bags that trap moisture. With gentle storage, a velvet set keeps its soft look from season to season, and small repairs, such as a loose bead or a lifted lace edge, can be fixed before the ornaments go back on the tree.
Conclusion
Velvet Christmas ornaments with a soft vintage look come from simple steps done with care: choose muted velvet, wrap the base smoothly, finish the gather neatly, fit a strong loop, and add only a little trim, lace, and bead detail. Keep the palette calm, keep seams hidden, and age the finish lightly, so the set looks collected rather than decorated all at once. Start with one test ornament, check it in daylight and on a branch, and then repeat the method for the full set. Stored in tissue in a cool, dry box, these soft ornaments will be ready to hang again next season, with their pile, trim, and vintage tone intact.
FAQs
What kind of velvet is best for Christmas ornaments?
Cotton velvet is a good choice for Christmas ornaments, since it wraps smoothly, holds a gather, and takes glue and hand stitching well. Choose a medium weight cotton velvet in a muted color, and avoid very thin velvet that shows the base through the pile, or very heavy velvet that will not gather neatly at the top.
Can I cover plastic baubles in velvet, or do I need foam balls?
You can cover both plastic baubles and foam balls in velvet, and each base has a use. Plastic baubles keep a cap and loop fitting for hanging, while foam balls accept pins and glue easily and suit a fully wrapped look. Choose the base that fits the hanging method you plan to use, and test the loop before adding trim.
How do I keep velvet from puckering when I wrap a round ornament?
Keep velvet from puckering by measuring first, smoothing the fabric over the front before working toward the back, and easing small, even pleats into the back gather. Pin the fabric in place and check the fit before gluing, and if a fold keeps forming in the same place, lift the fabric, shift the bauble slightly, and try again rather than gluing over a wrinkle.
What colors give velvet ornaments a vintage look?
Muted, dusty colors give velvet ornaments a vintage look, such as dusty rose, sage, dusty blue, cream, soft gold, and muted burgundy. Use one leading color, one supporting color, and only a small accent color, and pair the velvet with cream lace, soft gold braid, or aged brass details rather than bright or shiny trim.
How do I attach ribbon and lace to velvet without glue marks?
Attach ribbon and lace to velvet with small dabs of fabric glue applied in short sections, pressing lightly and letting each section set before moving on. Use as little glue as possible, keep glue off the face of the velvet pile, and add a stitch for heavier trim or charms, since glue alone may not hold weight through a full season.
How should I store velvet Christmas ornaments?
Store velvet Christmas ornaments wrapped loosely in acid free tissue, in a divided or tissue padded box, in a cool, dry indoor space off the floor. Keep heavier ornaments at the bottom, lighter ones at the top, and beads and charms from pressing into the pile of neighboring ornaments, and check the box once a year for damp or damage.