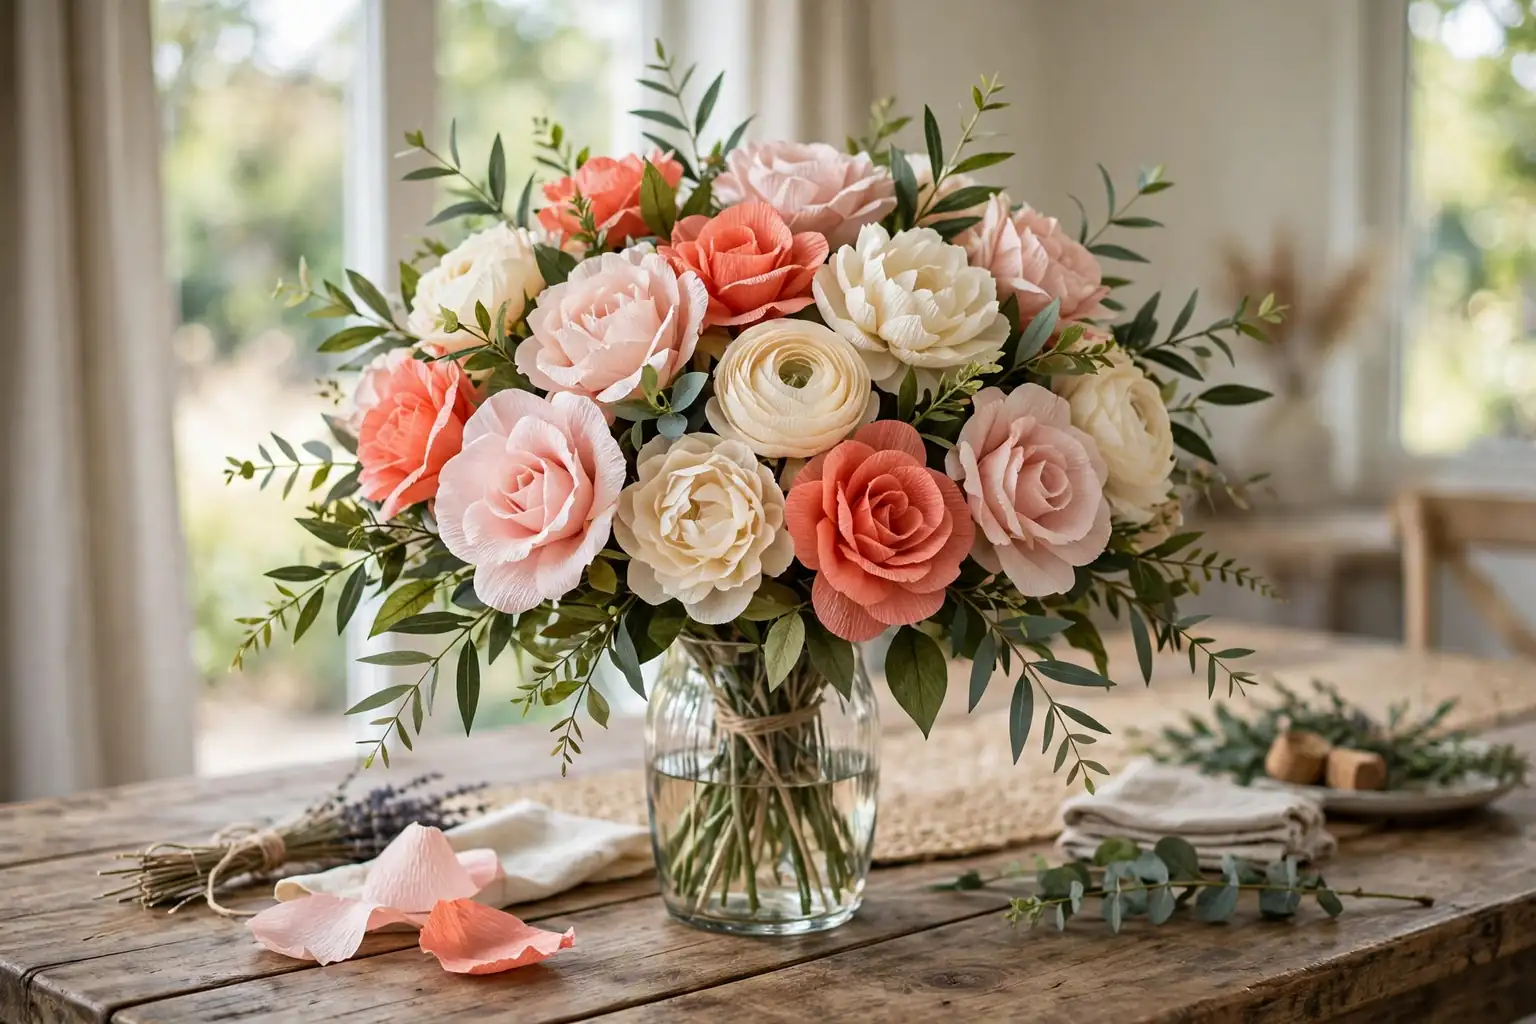
To make crepe paper flowers for home decor, cut crepe paper along the grain, shape petals by stretching and cupping them, wrap the petals around a wire stem, add leaves, and secure each flower with floral tape. Start with simple blossoms, then try layered roses and peonies, and arrange finished flowers in vases, wreaths, or garlands.
Crepe paper flowers suit rooms where fresh flowers fade fast, such as a sunny windowsill, a high shelf, or a guest room that is rarely used. The paper holds a curve once it is stretched, so petals keep their shape without water, and a finished bouquet can stay out for months. Work one flower type at a time, keep your first flowers small, and build a full arrangement only after you are happy with single blooms. For fresh flower arranging ideas to pair with paper blooms, see these fall flower arrangements and these Thanksgiving flower arrangements.
Key Takeaways
- Cut crepe paper with the grain running top to bottom on each petal, since the grain is what lets petals stretch and cup.
- Shape petals before you assemble the flower, and test one bloom before cutting a whole batch of petals.
- Build roses and peonies in layers, starting small at the center and adding larger petals toward the outside.
- Wrap stems with floral tape while pulling gently, so the tape sticks to itself and covers all wire.
- Keep paper flowers out of damp rooms and away from open flames, since crepe paper fades in strong sun and burns easily.
- Mix flower sizes, heights, and leaf shapes in an arrangement, so the display reads as a bouquet rather than a row of identical stems.
Materials and Supplies
- Crepe paper in flower colors and green, in medium weight if you can find it
- Floral wire in 18 gauge for stems and 26 gauge for wrapping small parts, plus wire cutters
- Green floral tape for wrapping stems and joining leaves
- Sharp scissors, including small scissors for petal shaping
- A pencil for tracing petal templates, and card or thick paper for making templates
- Tacky craft glue or a low temperature glue gun, for centers and small joins
- A ruler, for cutting straight strips and checking petal sizes
- Green crepe paper or floral tape in green for leaves and calyx pieces
- Vases, jars, a wreath form, or a garland base, depending on how you plan to display the flowers
- Tissue paper or a box for storing finished flowers flat
1. Choose Flower Types and a Color Palette
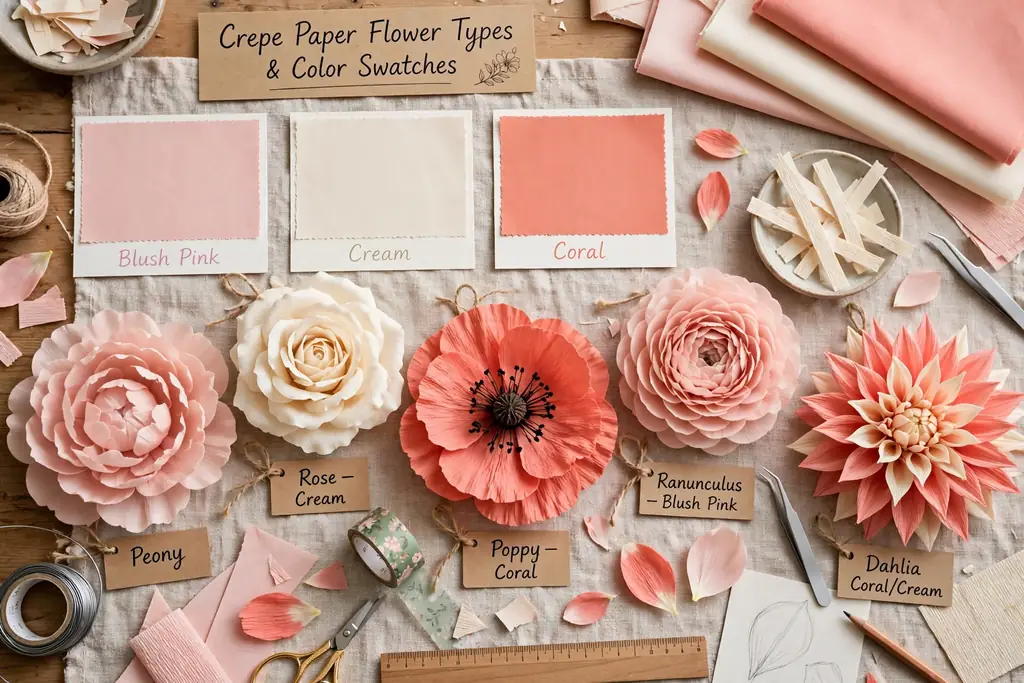
Start by picking two or three flower types, not ten, so your first batch stays manageable. Simple five petal blossoms and daisies are good first flowers, since they use one petal shape repeated around a center. Roses and peonies take more layers and more time, so save them for your second session, once your hands know how crepe paper stretches and tears.
Pick a palette of two or three colors plus green for leaves. A soft mix, such as blush pink, cream, and sage green, suits a bedroom or a living room with pale walls. A stronger mix, such as coral, gold, and deep green, suits a dining table or an entryway. Buy one extra roll of your main color, since shaping practice uses more paper than the finished flowers do, and matching a dye lot later is not always possible.
2. Gather Tools and Set Up a Work Table
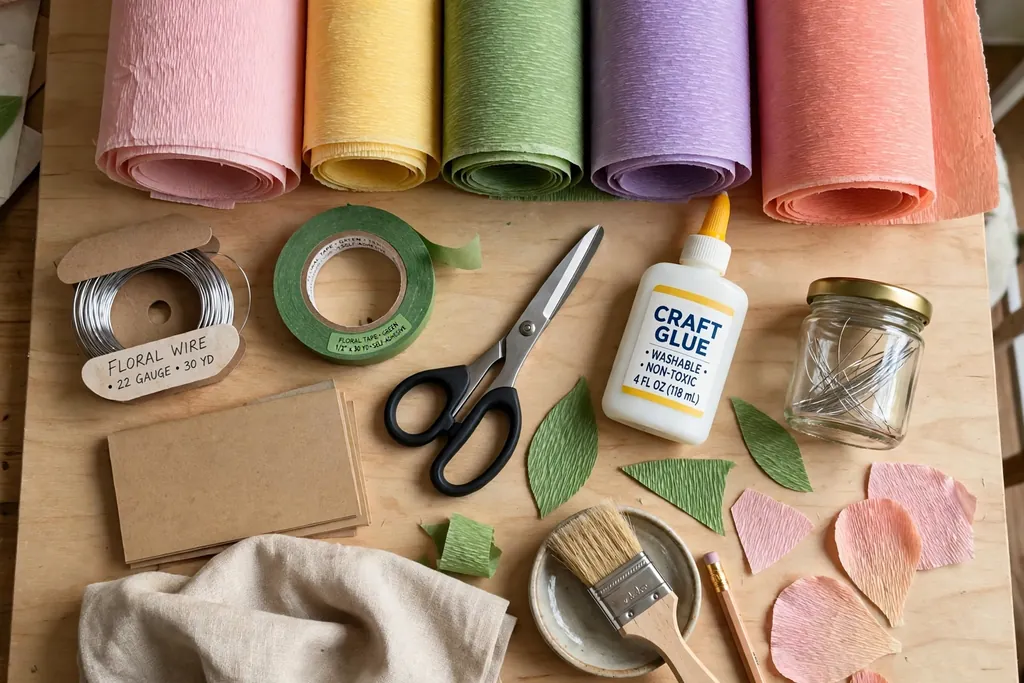
Clear a flat table and cover it with a sheet of plain paper or an old cloth, since crepe paper sheds fine fibers and glue can mark a surface. Lay out your crepe paper rolls, floral wire, floral tape, scissors, glue, and templates before you cut anything, so you are not hunting for tools with glue on your fingers. Keep a small bin nearby for paper scraps, since petal cutting makes many small offcuts.
Cut wire stems to length before you start assembling flowers. A stem of about 12 inches suits a table vase, while a stem of 8 inches suits a small jar or a wreath. Bend the top quarter inch of each stem into a small hook with pliers, since the hook gives the flower center something to grip. Set the prepared stems in a jar upright, so they stay straight and easy to reach.
3. Cut Petals with the Grain Running the Right Way
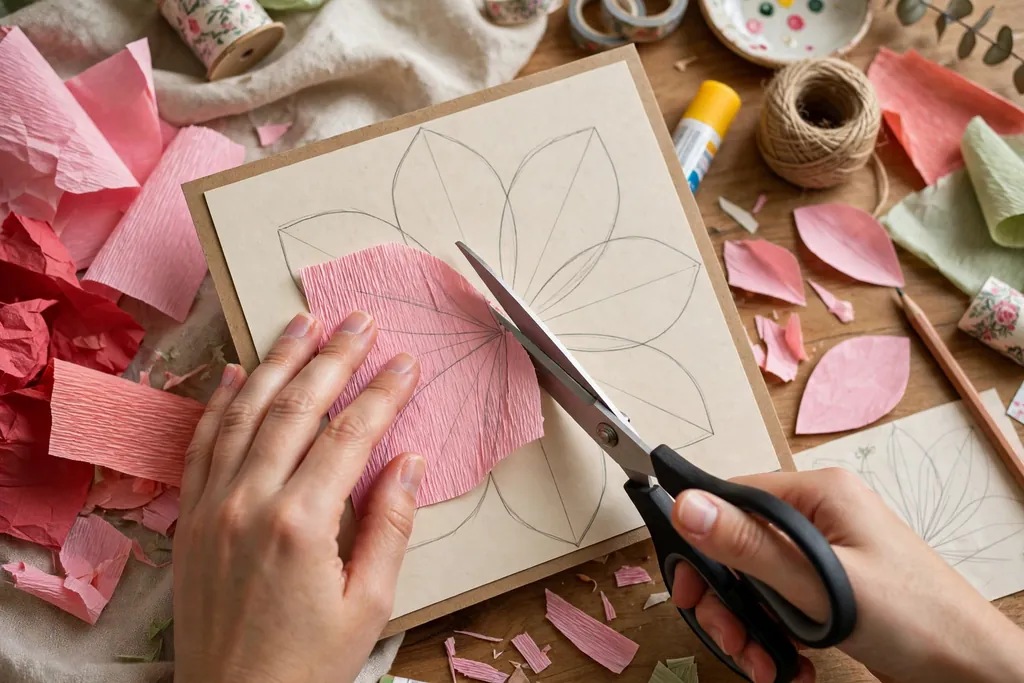
Crepe paper has a grain, like fine pleats running along the roll, and petals must be cut so the grain runs from the base of the petal to the tip. Hold a strip of crepe paper and pull gently across the grain: it stretches easily in one direction and barely at all in the other. Mark the stretch direction on your first strip with a pencil arrow, and use that strip as a guide for the rest.
Fold a strip of crepe paper into layers and cut several petals at once from a card template, keeping the template grain arrow lined up with the paper grain each time. Cut petals a little larger than you think you need, since stretching and cupping shortens them slightly. Keep cut petals in labeled piles by flower type and size, so you can find the right petal without unfolding a stack mid assembly.
4. Shape Petals by Stretching and Cupping
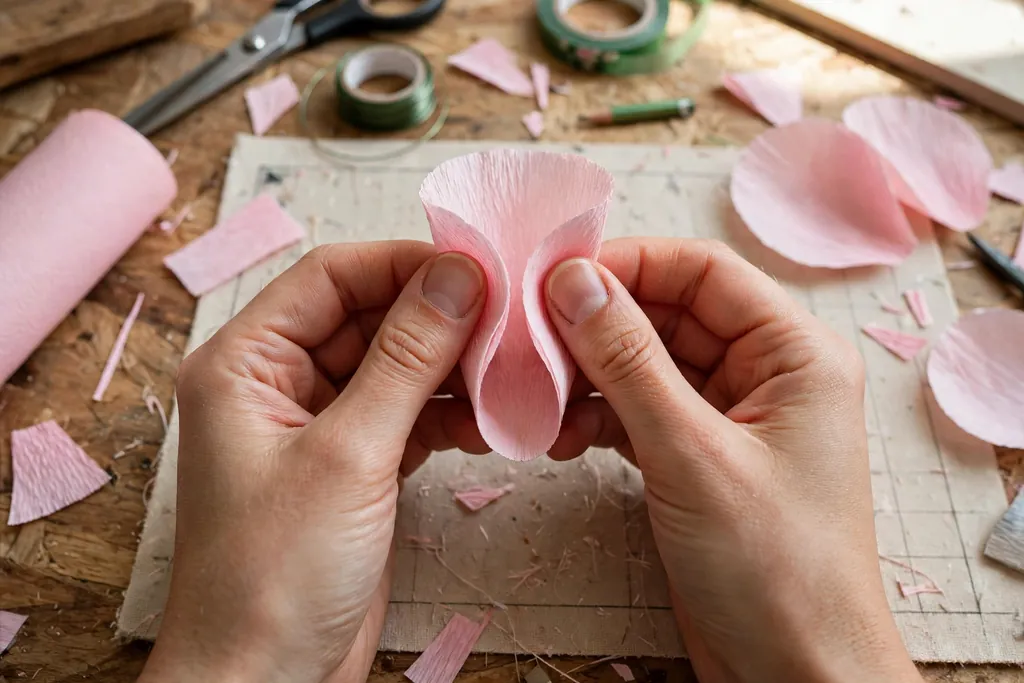
Shaping is the step that turns flat paper into a petal with depth. To cup a petal, hold its base between your thumbs and pull the center outward gently with both thumbs, working slowly so the paper stretches rather than tears. The center should bulge forward like a shallow bowl, while the edges stay flatter. To curl a petal tip, wrap the tip around a pencil or roll it between your thumb and a scissor handle.
Shape all petals for one flower before you start gluing, and lay them out in order from smallest to largest. If a petal tears, set it aside for a smaller flower or a bud, rather than throwing it away. Petals shaped too far will look loose and floppy, while petals barely shaped will look flat, so shape one test petal, hold it next to a real flower photo if you have one, and match the rest to it.
5. Make a Simple Five Petal Blossom
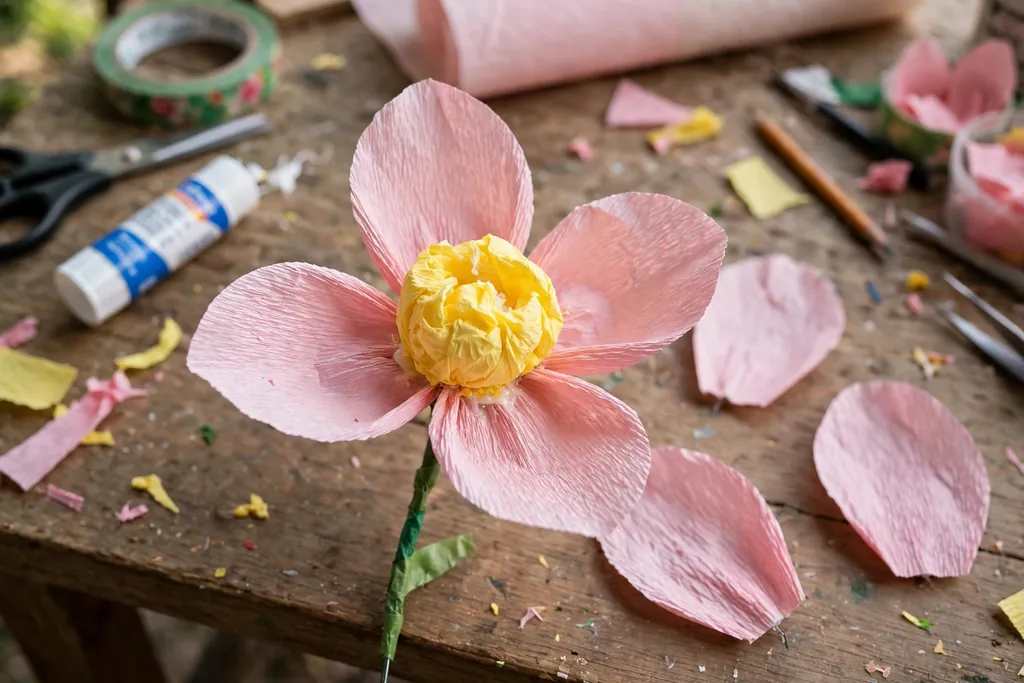
A five petal blossom is the best first flower, since it teaches wrapping, spacing, and taping in one short project. Cut five matching petals, cup each one lightly, and cut a small circle of crepe paper in a contrast color for the center. Fold a short piece of floral wire into a hook, glue the center circle over the hook, and let it set for a minute.
Glue or tape the five petals around the center one at a time, overlapping each petal base slightly over the last, and spacing them evenly around the stem. Pinch the petal bases together under the center, then wrap the join with floral tape, pulling gently as you wind down the stem. Fan the petals out with your fingers, bend two petals slightly forward and three slightly back, and the blossom will read as a flower rather than a flat star.
6. Build a Layered Crepe Paper Rose
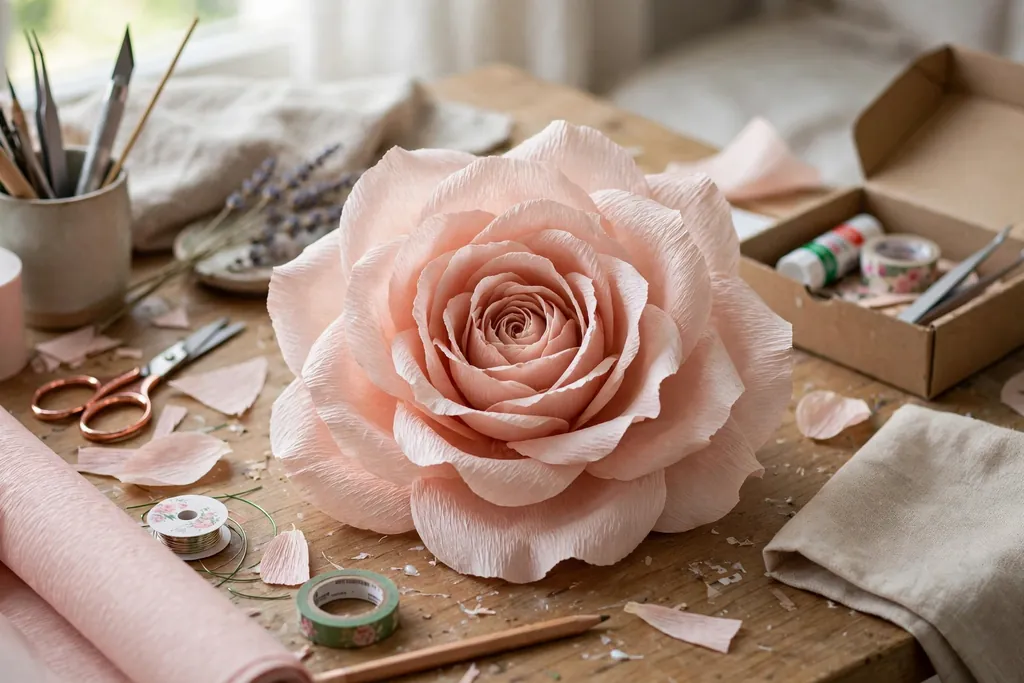
A rose is built from the center outward, in three layers. Start with a small bud center: fold a strip of crepe paper into a tight roll, glue it to the hooked wire, and pinch the top slightly to one side so it leans like a closing bud. Wrap three small petals closely around the bud, overlapping them so no gap shows at the top.
Add a middle layer of five medium petals, cupped more deeply than the inner layer, and wrap them so their tips flare outward. Finish with five or six large petals, cupped and with their top edges curled back around a pencil, spaced evenly around the rose. Tape the base firmly, then turn the rose in your hand and adjust any petal that sits too high or too low. A rose with tight inner petals and open outer petals looks more natural than one where every layer is equally open.
7. Make a Full Crepe Paper Peony
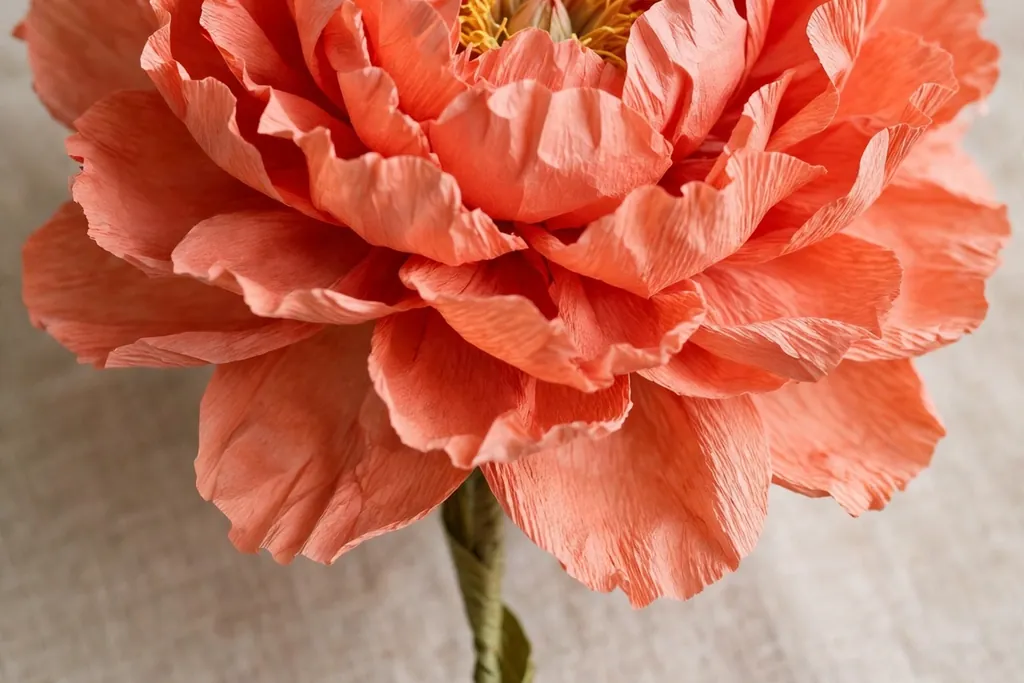
A peony uses many petals in graduated sizes, which gives it a full, ruffled look. Cut petals in three sizes: small for the center, medium for the middle, and large for the outside, about eight of each size for one flower. Cup the small petals deeply, cup the medium petals lightly, and curl only the tips of the large petals, so each layer has its own shape.
Start with a small ball of scrunched crepe paper glued to the wire as the peony center. Glue the small petals around the ball first, close together, then add medium petals in a looser ring, then large petals in a wide outer ring. Let the glue set between layers if the petals start to slip, and finish by wrapping the base with tape. Peonies suit a vase on their own, since one large bloom fills more space than three small blossoms.
8. Make a Daisy with a Coiled Center
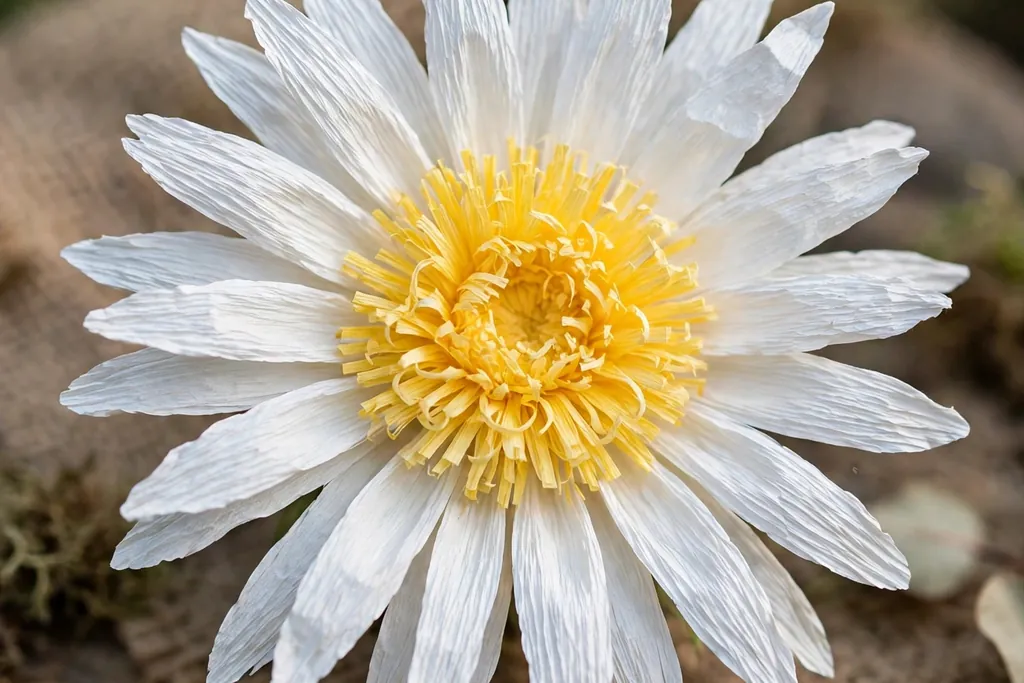
A daisy uses narrow petals and a flat, textured center, which makes it a good contrast to round roses and peonies. Cut a strip of yellow crepe paper, fringe one long edge with small scissors, and roll the strip tightly into a coil. Glue the coil to the hooked wire, then fluff the fringed edge outward with a pin or a toothpick so the center looks dense and even.
Cut ten to twelve narrow white or pale petals, cup each one lightly, and glue them around the center in a single flat ring, overlapping the bases slightly. Keep the petals in one plane rather than wrapping them upward, since a daisy face is flat. Tape the base, add a small green calyx of pointed crepe paper under the flower head, and the daisy is ready to mix into a bouquet with roses for contrast in shape.
9. Make a Ranunculus from Stacked Petals
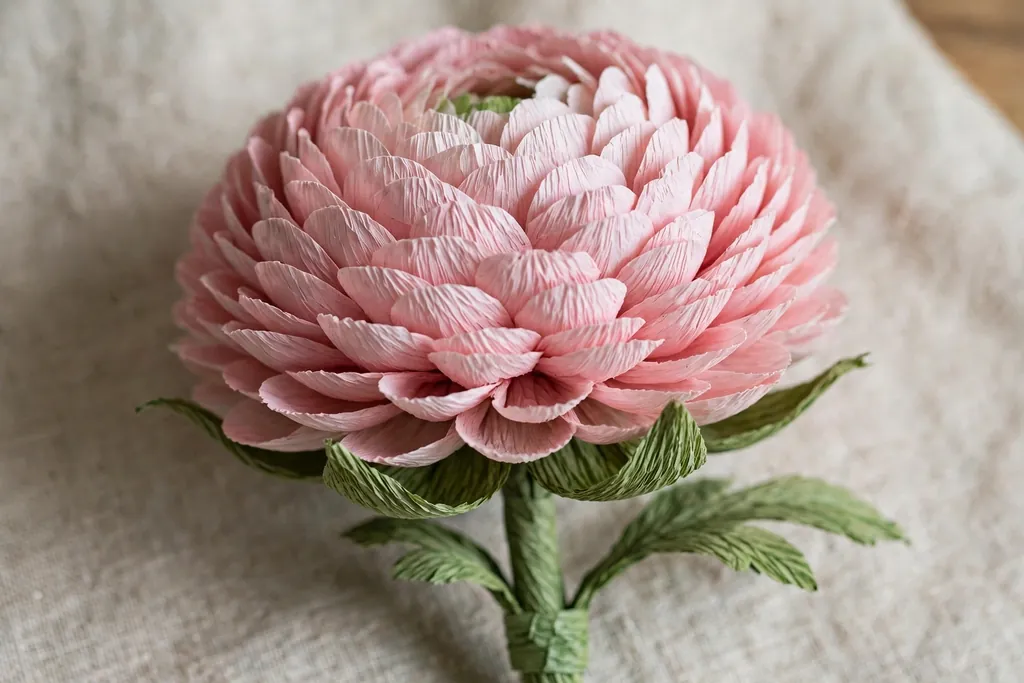
A ranunculus is made from many small, rounded petals wrapped in tight layers, which gives it a swirled, cabbage like head. Cut small rounded petals, about the size of a thumbnail for a small flower, and cup each one deeply so it forms a small scoop. You will need more petals than you expect, often 20 or more for one full flower, so cut a generous pile before you start.
Glue a small ball of crepe paper to the wire as the core, then glue petals around it in rings, each new ring slightly lower and wider than the last. Keep the petals close together and angled slightly inward, so the flower builds into a rounded dome rather than a flat disk. Tape the base when the dome feels full, and trim any petal that sticks out far beyond the rest. Ranunculus blooms suit small jars and posies, where their compact shape shows well.
10. Cut and Shape Leaves and Greenery
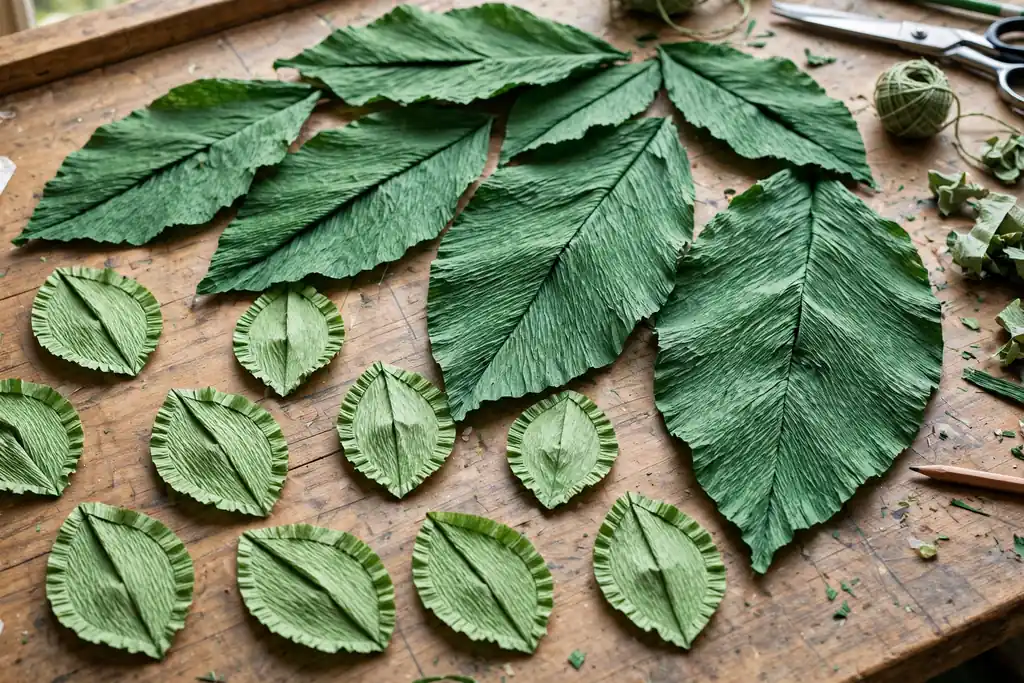
Leaves give a paper bouquet its structure, since flowers alone can look like loose heads on sticks. Cut leaf shapes from green crepe paper with the grain running along the leaf length, then fold each leaf in half lengthwise and open it again to form a center crease. Cup the leaf lightly and curl the tip slightly, and the leaf will hold a natural bend.
Make leaves in two sizes: small leaves near the flower head, and larger leaves lower on the stem. Glue or tape a short length of thin wire along the back of each large leaf, so you can bend it into shape after the bouquet is arranged. Add a few plain leaf sprigs without flowers to the bouquet as filler, since greenery between blooms stops the arrangement from looking crowded.
11. Wrap Stems and Attach Flowers and Leaves
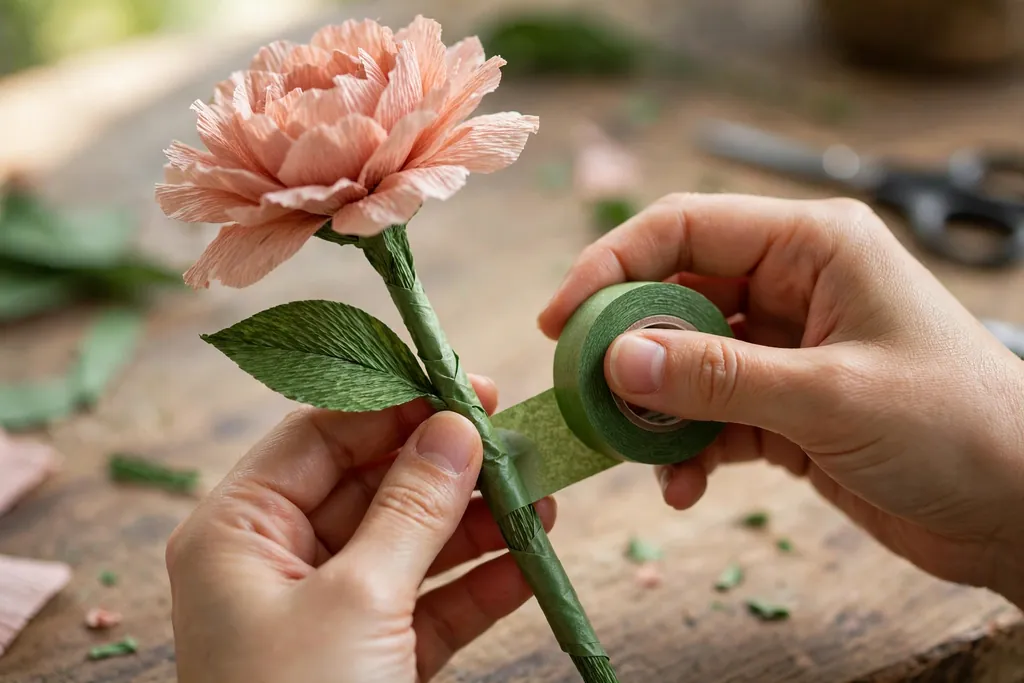
Wrapping is what turns loose parts into a finished stem that looks clean in a vase. Start the floral tape just under the flower head, stretch it gently as you wind, and overlap each turn by about half the tape width. The stretch makes the tape stick to itself, so you should not need glue on the stem, and the wrap should feel smooth, not lumpy.
Add leaves as you wrap down the stem: hold a leaf against the stem at the height you want, then wrap over its wire or base two or three times to fix it. Work from the top down, adding leaves on alternating sides so the stem looks balanced from every angle. When you reach the end of the wire, wrap a few extra turns, press the tape end flat, and trim any wire that pokes through.
12. Make Buds and Filler Sprigs
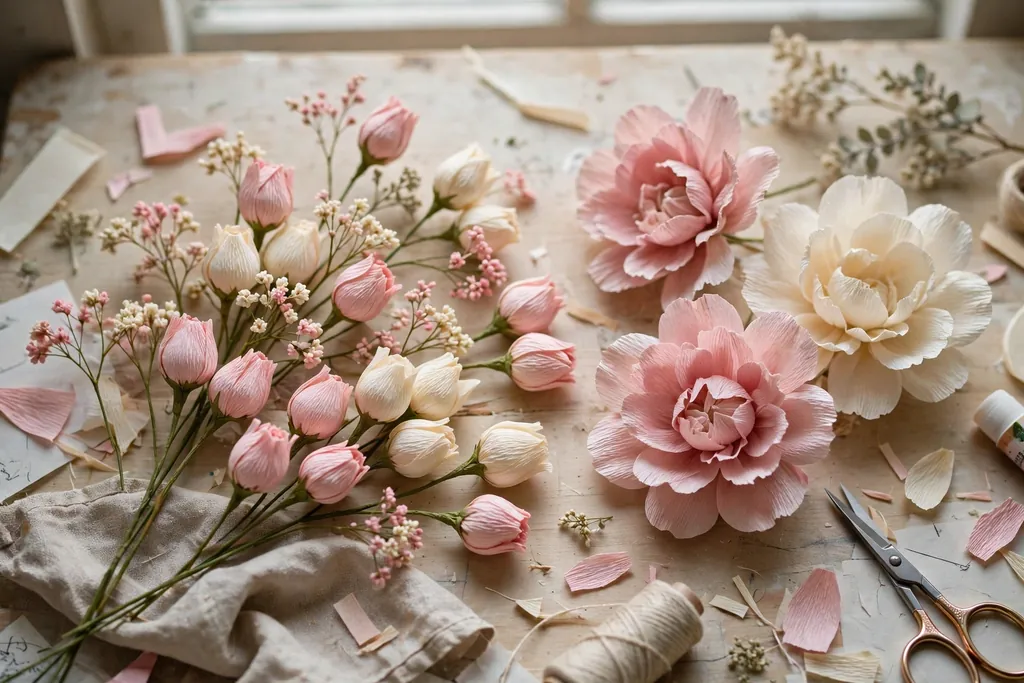
Buds and filler sprigs fill the gaps in a bouquet and make it look gathered rather than assembled flower by flower. To make a bud, wrap a small petal tightly around a wire hook, tape it closed, and add a pointed green calyx under it. Make buds in the same colors as your open flowers, in two sizes, and mix them through the bouquet at varied heights.
For filler sprigs, cut small circles or tiny five petal shapes from crepe paper, glue three or four to a thin wire stem, and add tiny green leaves between them. Three or four filler sprigs tucked between larger blooms soften the outline of the bouquet and hide bare stem sections. Keep filler small and plain, since its job is to support the main flowers, not to compete with them.
13. Arrange Flowers in a Vase or Jar
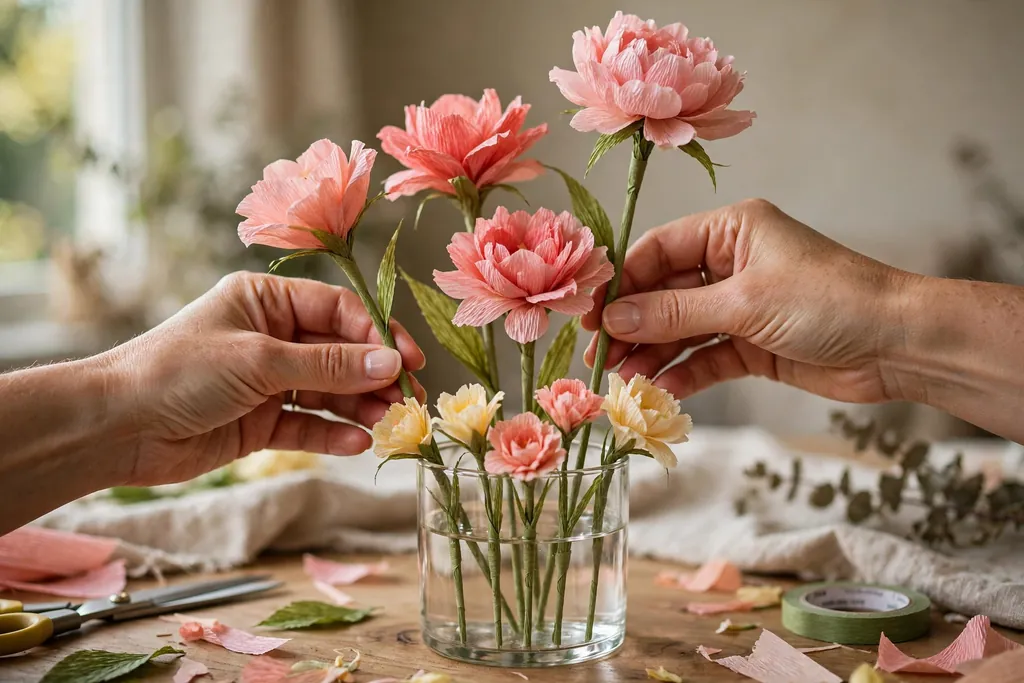
Start arranging with your tallest stems at the back and your shortest at the front, and build the bouquet in your hand before placing it in the vase. Hold the stems together, add one flower at a time, and turn the bunch often to check it from all sides. A good table bouquet has one or two focal flowers, such as peonies, several supporting roses and daisies, and filler sprigs between them.
Place the bunch in a vase that is about one third the height of the finished bouquet, and spread the stems so they rest against the vase rim at different points. Bend wire stems gently to adjust height and angle, since crepe paper stems will hold a bend once set. Step back and check the bouquet from across the room, and move any flower that sits too far forward or hides behind another bloom. For table arrangement heights and sightlines, the ideas in these Thanksgiving flower arrangements show how low and full displays keep a table easy to use.
14. Style a Wreath, Garland, or Wall Display
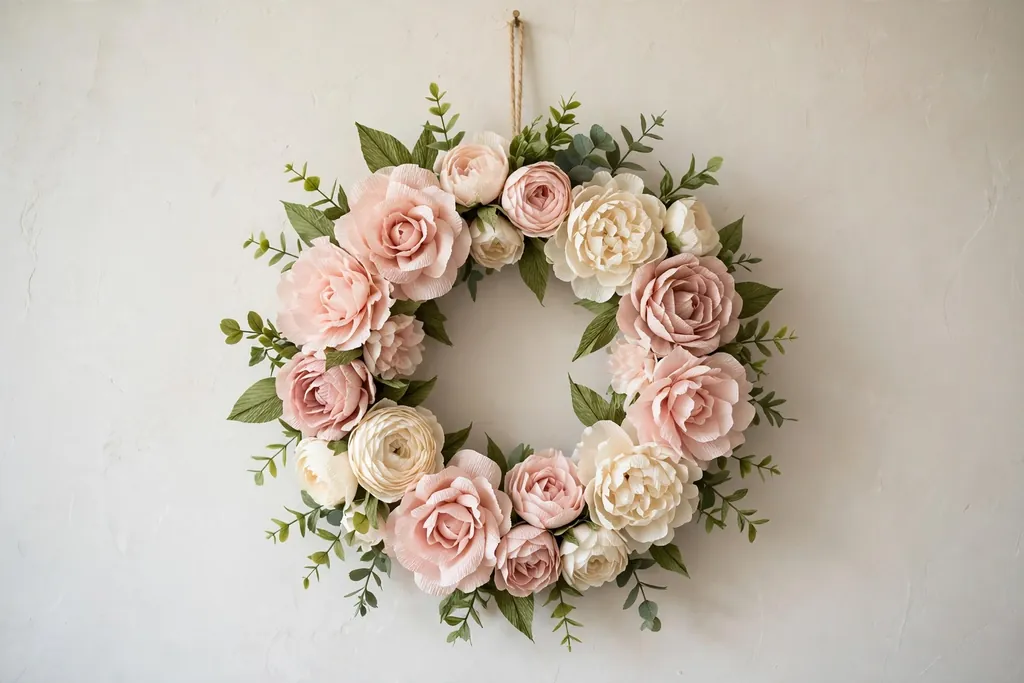
Paper flowers also work flat, on a wreath form, a garland base, or a wall frame. For a wreath, glue or wire finished flowers and leaves around a foam or grapevine form, starting with greenery as a base layer and adding flowers in groups of three. Keep the flowers facing outward and slightly forward, and fill gaps with buds and filler sprigs so no bare form shows.
For a garland, wire flowers along a length of twine or thin rope at even intervals, alternating flower types and adding leaves between them. Hang the garland where it will not be brushed often, such as above a mantel or along a shelf edge, since crepe paper crushes under handling. For a wall display, glue flowers to a fabric covered board or a hoop frame, and hang it with a sturdy hook, since a full board of paper flowers is heavier than it looks.
Caring for, Storing, and Refreshing Paper Flowers
Paper flowers last longest in a dry room out of direct sun. Dust them gently with a soft brush or a cool hair dryer held at a distance, and never use water or a damp cloth on crepe paper, since wet crepe paper bleeds color and loses its shape. Keep displays away from open flames, candles, and stovetops, since crepe paper catches fire easily.
Store flowers you are not displaying in a box lined with tissue paper, laying large blooms flat and standing small stems upright in a separate section. Do not stack heavy items on top of the box, and label the box with the flower colors inside, so you can reuse the blooms next season without opening every box. If a petal gets crushed, reshape it gently with your thumbs, or replace that one petal rather than remaking the whole flower.
Conclusion
Crepe paper flowers give you flowers that last, in any color and any season, with only paper, wire, and tape. Start with simple blossoms, practice petal shaping until it feels easy, then build roses, peonies, and daisies one layer at a time. Arrange your finished flowers in a vase, a wreath, or a garland, keep them dry and out of strong sun, and store them flat between seasons. A bouquet made this way can stay on display for months, and it can be taken apart and rearranged whenever the room changes.
Frequently Asked Questions
What weight of crepe paper is best for crepe paper flowers?
Medium weight crepe paper, often sold as 180 gram, is the easiest weight for most flowers, since it stretches well without tearing and holds a cupped shape. Lightweight crepe paper tears easily when stretched, while very heavy paper is hard to shape into small petals, so start with medium weight and adjust once you know how your paper behaves.
How do I stop crepe paper petals from tearing when I shape them?
Stretch petals slowly with both thumbs, working from the center outward, and stop as soon as the paper starts to resist. Dry hands shape paper more cleanly than damp hands, and petals cut with the grain running base to tip stretch much further than petals cut across the grain. If a petal tears, use it for a smaller flower or a bud rather than forcing it into a large bloom.
How long do crepe paper flowers last?
Crepe paper flowers last for months or even years indoors, as long as they stay dry and out of direct sun. Strong sunlight fades the color over time, damp rooms can make the paper limp, and frequent handling crushes petals, so a display on a shelf or a mantel will outlast flowers that are moved often.
Can crepe paper flowers go outside?
Crepe paper flowers are best kept indoors, since rain, dew, and strong wind will ruin them quickly. A covered porch display may last for a single dry day, but it should be brought inside before night, and it should never be left out in rain or damp weather. For outdoor displays, use flowers made for outdoor use instead.
How many crepe paper flowers do I need for a vase bouquet?
A small jar bouquet needs five to seven stems, while a full table vase usually needs nine to fifteen stems, including filler sprigs and leaves. Start with fewer flowers than you think you need, arrange them, and add more only where gaps show, since a crowded bouquet hides the shape of each flower.
Can I wash or clean crepe paper flowers?
Do not wash crepe paper flowers with water, since wet crepe paper bleeds color, goes limp, and loses its shaped curves. Dust them instead with a soft dry brush, a feather duster, or a hair dryer on a cool setting held at a distance, and reshape any crushed petal gently with your thumbs.