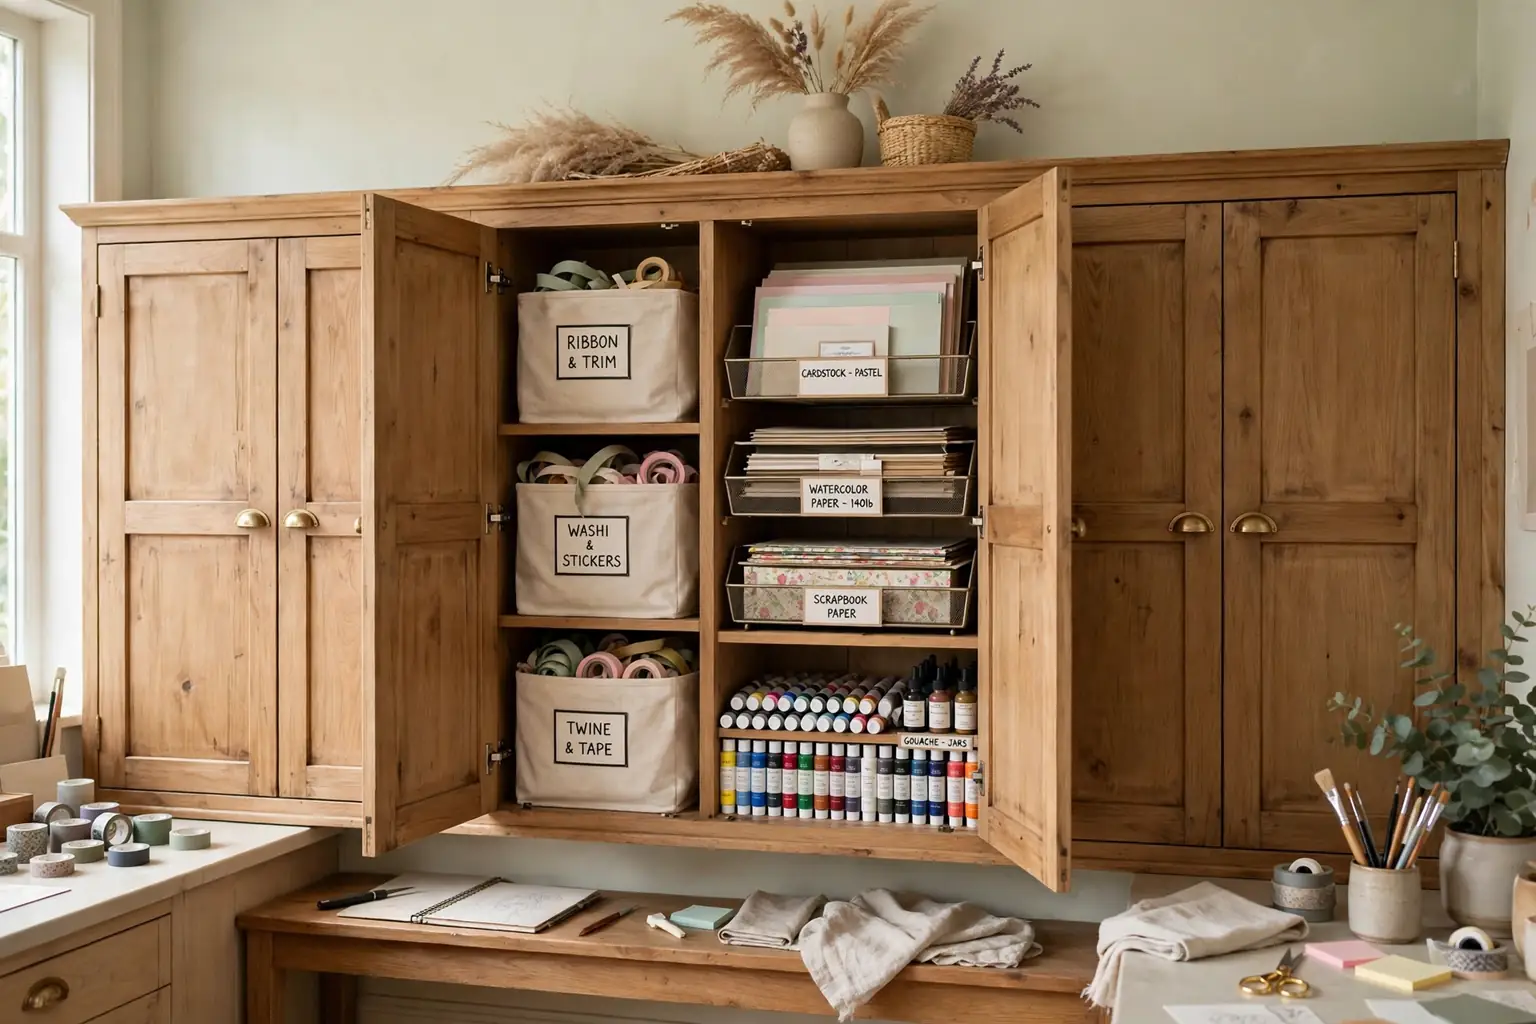
A craft storage cabinet works best when it groups supplies by use, keeps tools at hand level, and hides bulky stock behind closed doors. The 17 ideas below cover tall cabinets, armoires, wall units, and rolling carts with labeled bins, pull out trays, and clear fronts, so paper, paint, fabric, and small tools stay sorted and easy to reach.
Start by sorting supplies into groups you actually use together, such as paper and card making, paint and brushes, sewing, and small parts. Give each group one shelf, bin, or drawer, and label it in plain words. The same grouping rule that keeps bedroom storage usable applies here: what you reach for weekly stays at hand level, and backup stock goes higher or lower. Measure your tallest items first, from paper pads to paint bottles, so shelf heights fit the supplies instead of forcing supplies to fit the shelves.
Key Takeaways
- Group supplies by use, not by color alone, so each project pulls from one shelf or bin.
- Keep weekly tools at hand level and move backup stock to higher or lower shelves.
- Label every bin, drawer, and shelf in plain words, and keep the label facing out.
- Use clear fronts or open bins for small items you need to spot fast, and closed doors to hide bulky stock.
- Measure tall items before buying or building, so paper, rolls, and bottles fit without bending or tipping.
- Leave one empty shelf or tray for works in progress, so new projects do not spill onto the work table.
1. Tall Cabinet with Labeled Bins
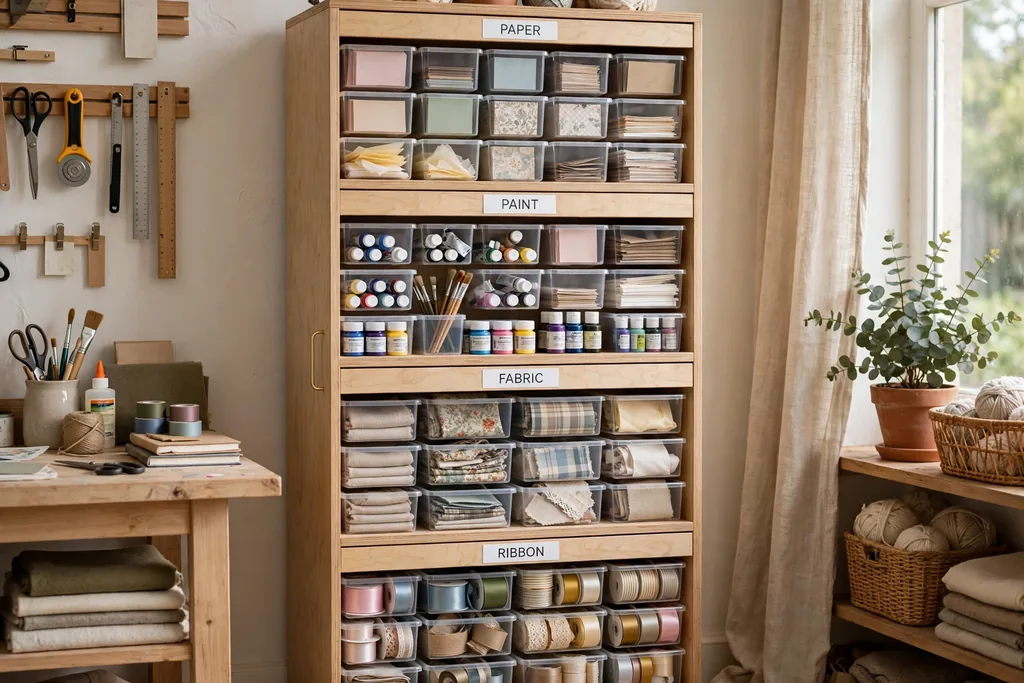
Use a tall cabinet with one labeled bin per supply group, such as paper, paint, fabric scraps, and ribbon, stacked from floor to eye level. Uniform bins keep the cabinet tidy even when the contents differ, and a label on each bin front means you can pull the right one without opening three others first.
Keep heavy bins low and light bins high, and leave a small gap at the top of each bin so you can lift it out by its handle. If a bin holds small loose items, add a smaller box inside it, so beads or buttons do not slide to the bottom and mix with larger supplies.
2. Armoire with a Fold Down Work Table
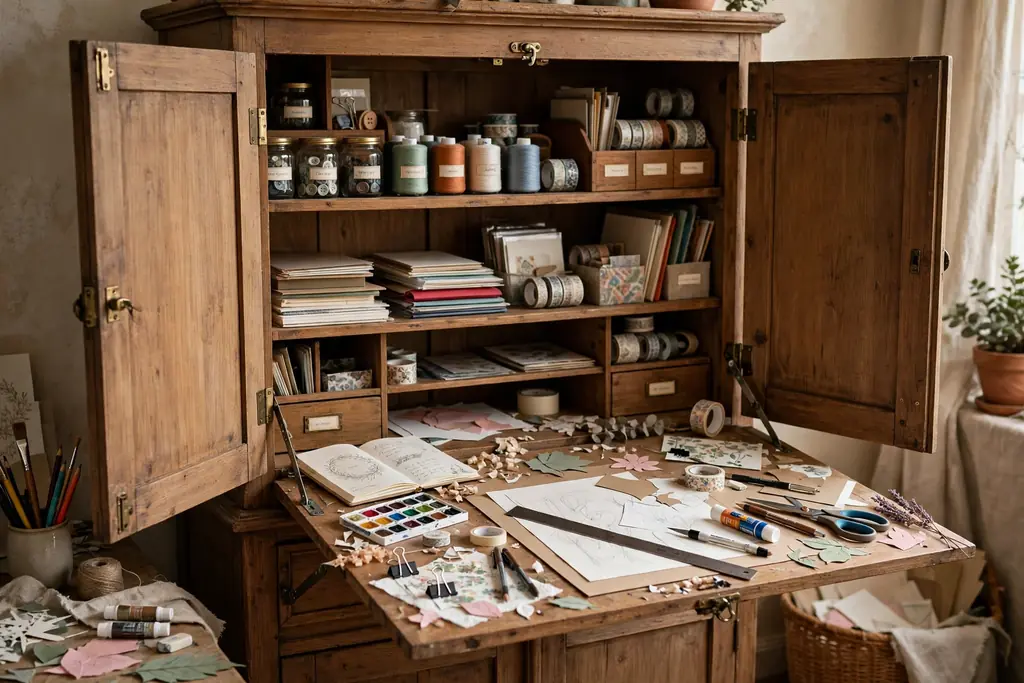
Turn a freestanding armoire into a craft cabinet with a fold down table fixed at sitting height inside the doors. When the table folds down, you gain a work surface; when it folds up, tools, paper, and small bins stay stored behind closed doors, and the room looks like a normal living space again.
Fix a small lip or rail along the table edge so pens and scissors do not roll off while you work. Keep only the tools for the current project on the fold down surface, and return the rest to the shelves above, so the table can fold away without a clear out first.
3. Cabinet with Clear Front Doors
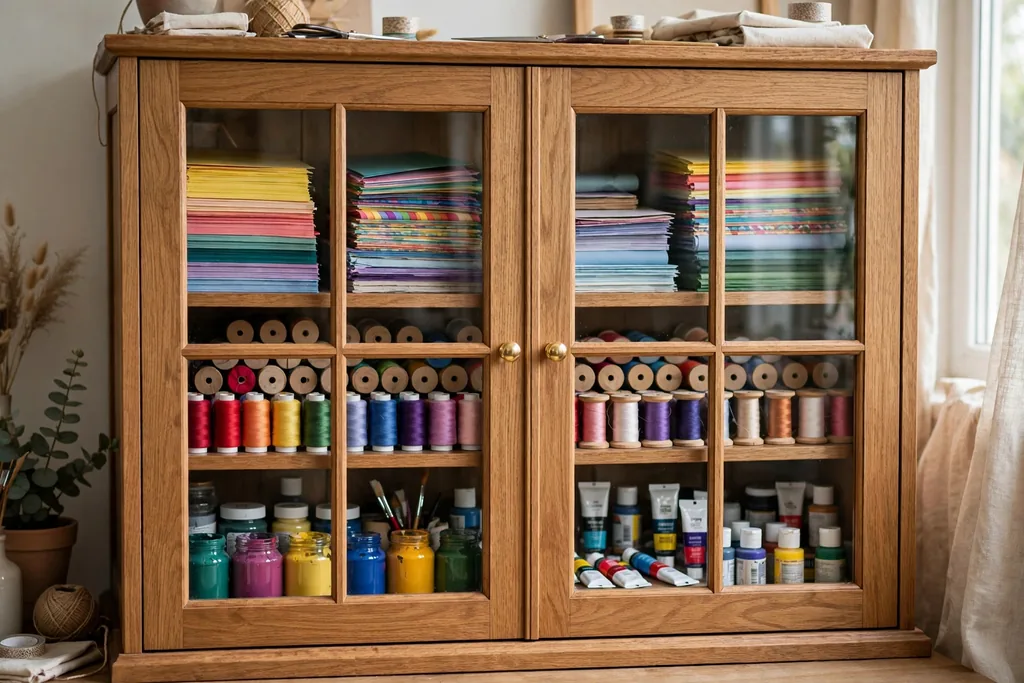
Choose a cabinet with clear glass or clear acrylic doors so you can see paper colors, thread, and paint at a glance without opening every door. Clear fronts suit supplies you pick by color, since you can compare shades through the door before you start a project.
Wipe the doors often, since dust and fingerprints show more on clear fronts than on solid wood. If the cabinet sits in bright sun, keep light sensitive items, such as photos and dyed fabric, in solid bins inside, so the clear doors do not expose them to fading light.
4. Pull Out Tray Cabinet for Paper and Cardstock
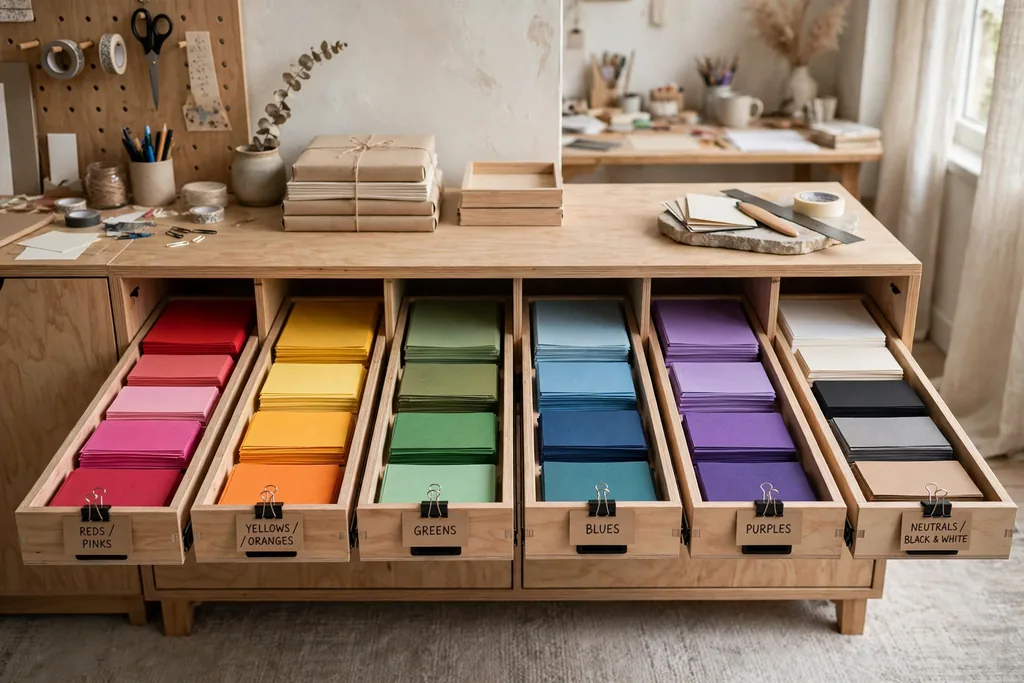
Fit a cabinet with shallow pull out trays, one tray per paper size or color family, so sheets slide out flat instead of bending when you lift them from a stack. Shallow trays stop the common problem of a tall paper pile tipping over when you pull a sheet from the middle.
Label each tray edge with the paper size and weight, and keep a sheet of scrap paper on top of each stack for test cuts. Store specialty paper, such as foil or vellum, in its own tray at the back, since it tears or creases more easily than plain cardstock.
5. Paint Cabinet with Upright Bottle Rows
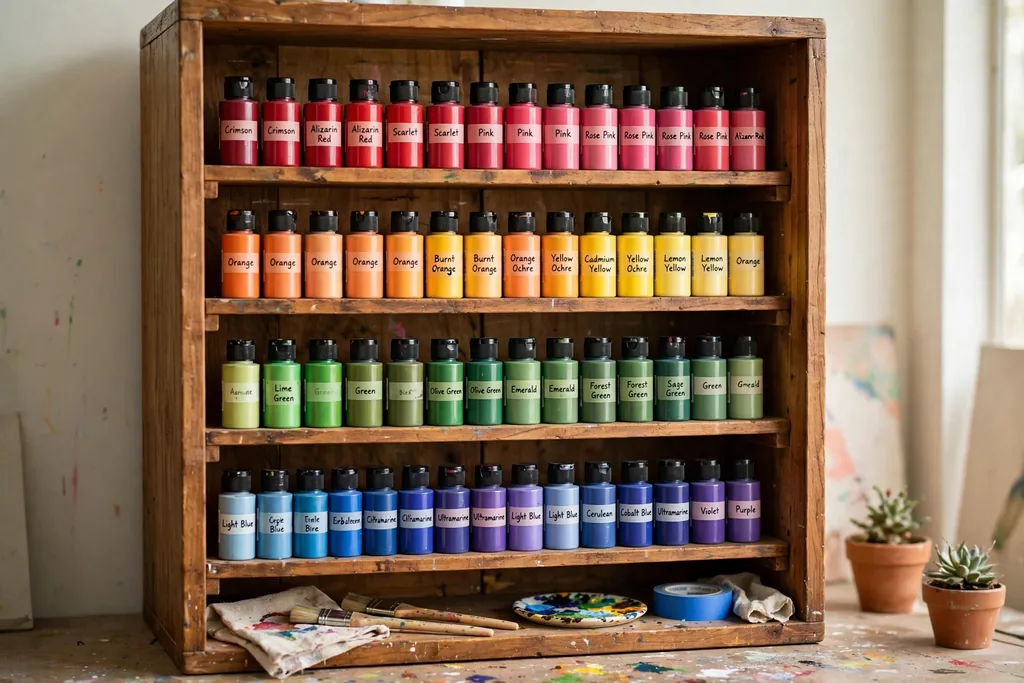
Set up a cabinet with short shelves spaced to fit paint bottles standing upright, with one row per color family and labels facing out. Upright storage keeps caps sealed and paint ready to use, and short shelf spacing stops bottles from tipping into a tall, hard to reach stack.
Keep a small tray on one shelf for open bottles in current use, so wet caps do not mark the shelf. Check caps each month and wipe dried paint from threads, since a stuck cap can crack a bottle when forced. Store fabric paint apart from wall or craft paint, so the wrong paint does not end up on the wrong surface.
6. Ribbon and Roll Cabinet with Dowel Rods
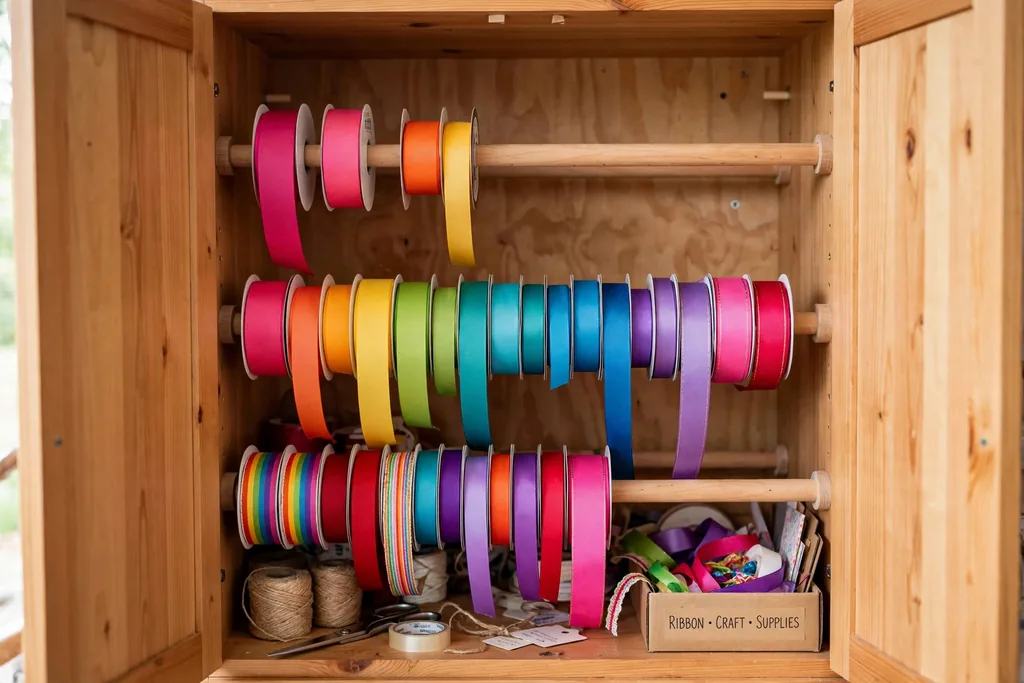
Mount dowel rods across the inside of a cabinet door or along a shallow cabinet section, and thread ribbon rolls onto the rods so each roll unwinds without leaving the cabinet. This setup keeps ribbon visible by color and stops rolls from unraveling inside a drawer.
Cut each ribbon end at an angle after use and tuck it back through the rod gap, so the next pull starts clean. Keep wide rolls on the lowest rod and narrow rolls above, since wide rolls are heavier and easier to handle low. If a roll runs out, slide a new one on from the rod end without removing the rest.
7. Fabric Cabinet with Cubbies and Folded Bolts
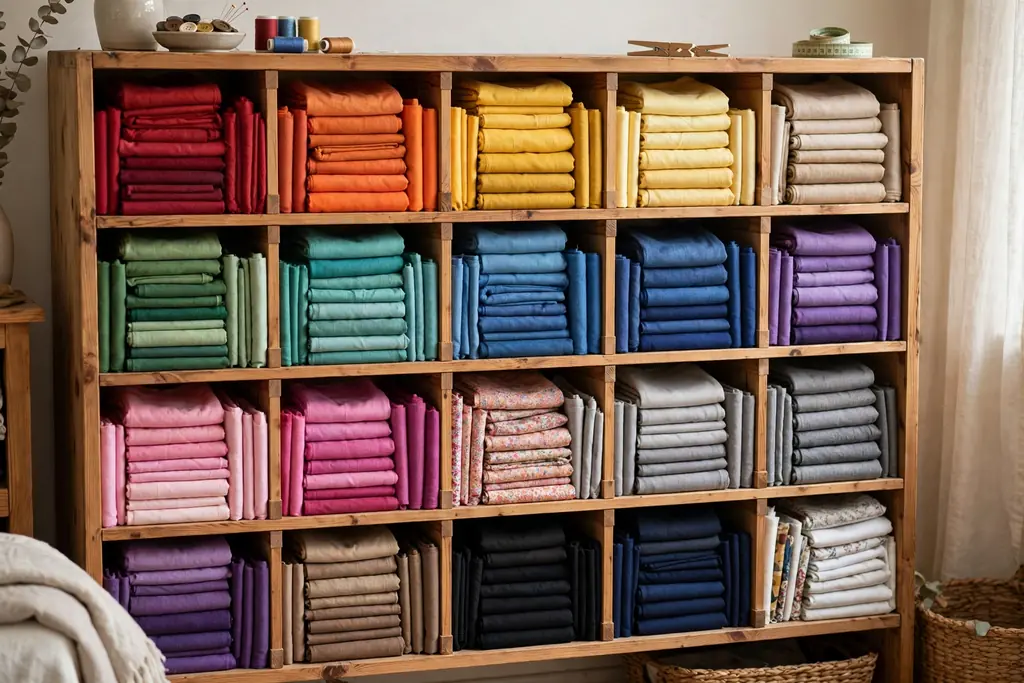
Divide a cabinet into cubbies sized for folded fabric, with one cubby per color family or fabric type, such as cotton, felt, and linen. Folding fabric to the same width keeps the cubbies neat, and you can see at a glance which colors are running low before you start cutting.
Fold fabric around a stiff card to keep edges straight, and stand the bundles upright like files where the cubby allows it. Keep delicate fabrics, such as silk, in a closed bin on a higher shelf, away from rough fabrics that could snag them. Air the cabinet now and then, since stored fabric can pick up a musty smell in a closed space.
8. Small Parts Cabinet with Tiny Drawers
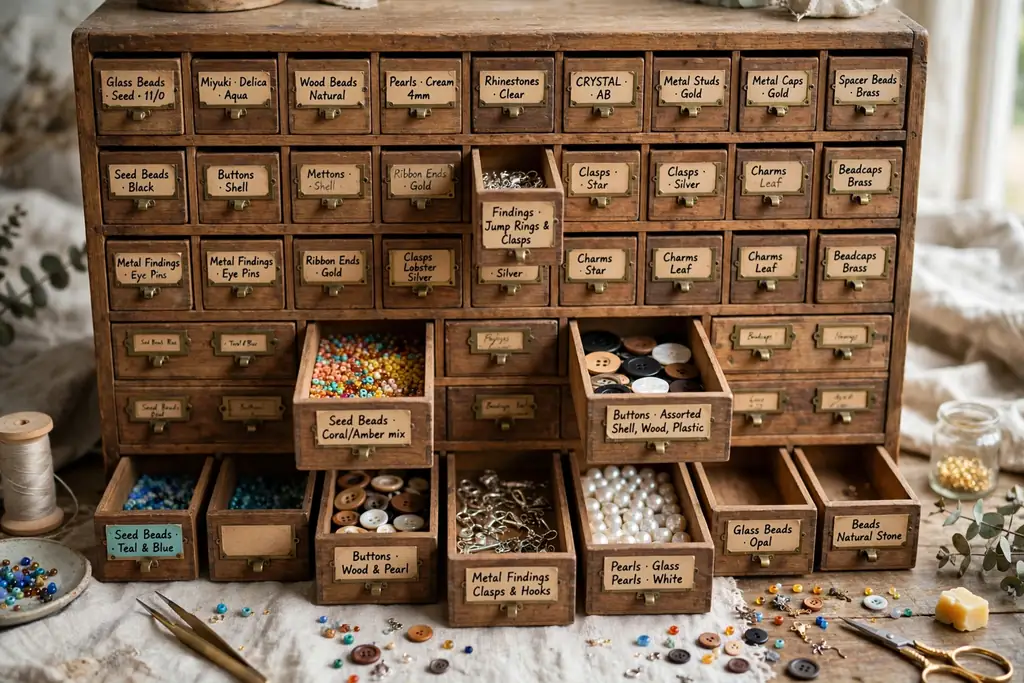
Use a cabinet fitted with rows of tiny drawers for beads, buttons, eyelets, sequins, and findings, with one drawer per item type and a label on each drawer front. Tiny drawers stop small parts from mixing in one large box, and they let you carry a single drawer to the table instead of the whole cabinet.
Line each drawer with a small piece of felt or paper so tiny parts do not rattle or slip under the drawer divider. Keep a spare empty drawer for new findings, and sort it once a month, since small parts multiply fast and an unlabeled drawer soon becomes a mixed drawer again.
9. Rolling Cabinet for a Shared Table
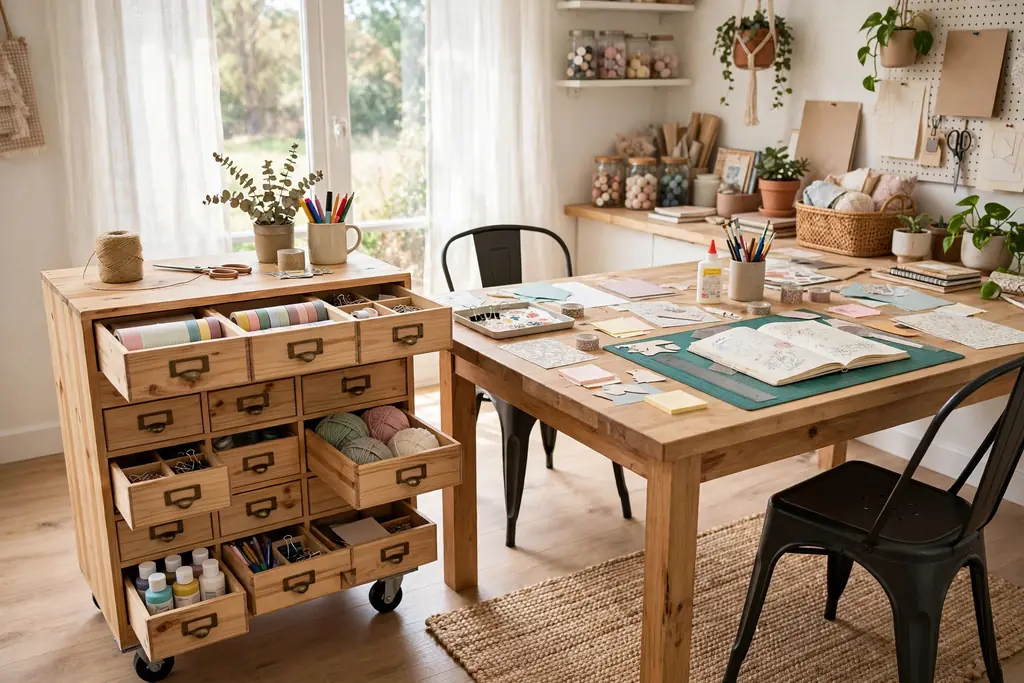
Pick a rolling cabinet with drawers and a flat top that slides under or beside a shared table, so craft supplies can move to the work spot and roll away when the table is needed for meals or homework. Casters with brakes keep the cabinet still while you work and let it move when the room changes use.
Lock the casters before opening heavy drawers, since a rolling cabinet can shift when a full drawer slides out. Keep the top clear except for the current project, and store tools for that project in the top drawer, so setup takes minutes rather than a full unpack.
10. Wall Mounted Cabinet Above a Desk
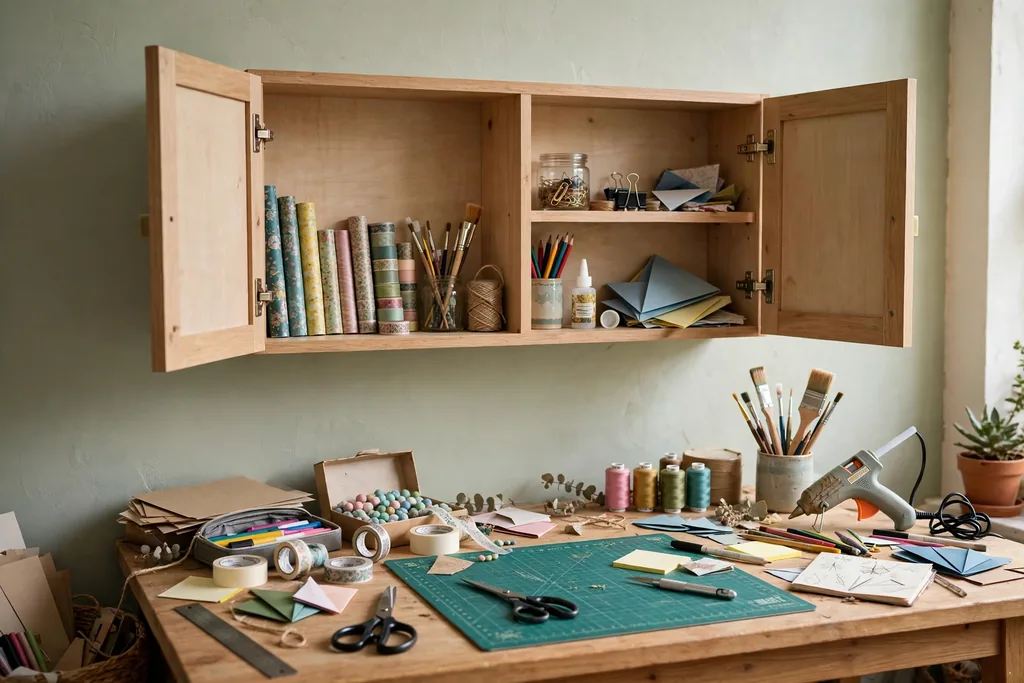
Mount a shallow wall cabinet above a desk, with doors that open upward or outward, to store tools and small supplies without taking desk space. Wall mounting suits a small room, since it uses wall height that a floor cabinet cannot, and it keeps supplies at eye level while you sit and work.
Check the wall fixings for the cabinet weight when full, not empty, since paper and paint add weight fast. Keep daily tools in the lowest wall section and backup stock higher, so you do not need a step stool for a pair of scissors. Leave the desk surface clear under the cabinet for the project in hand.
11. Corner Cabinet for an Awkward Nook
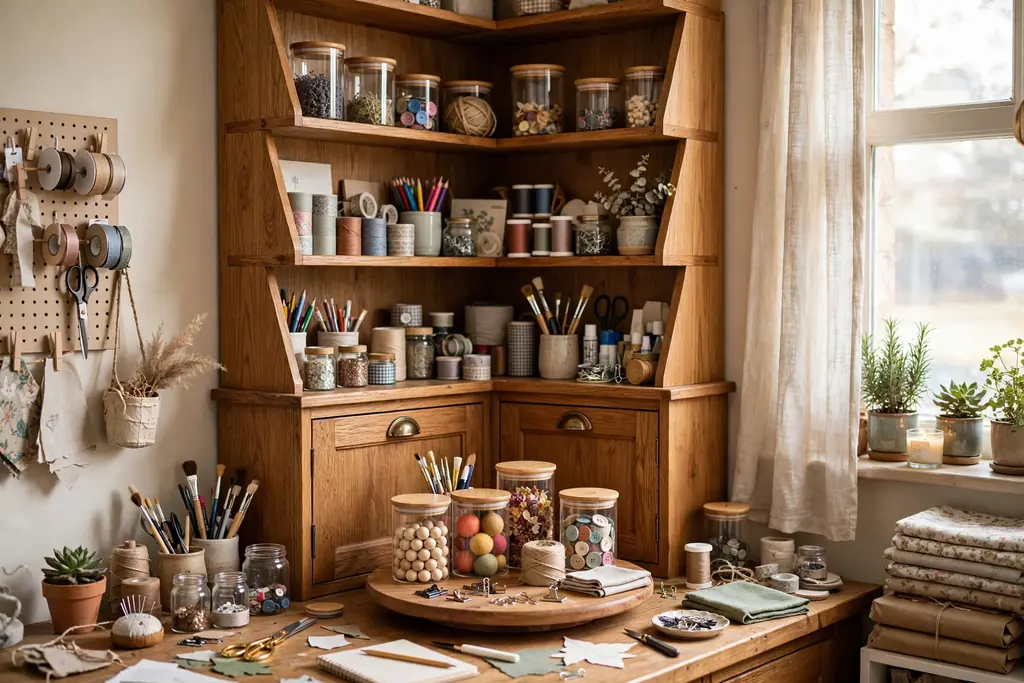
Fit a corner cabinet, with angled shelves or a rotating turntable inside, into a nook that a standard cabinet would waste. Corner cabinets suit rooms with an unused corner near a window or door, and a turntable shelf brings back items to the front without reaching deep into a dark corner.
Measure the door swing before fitting, since a corner cabinet door can hit a nearby wall or desk. Keep large flat items, such as cutting mats, on the lowest shelf, and small jars on the turntable above, so nothing hides behind a taller item at the back.
12. Cabinet with a Pegboard Door Interior
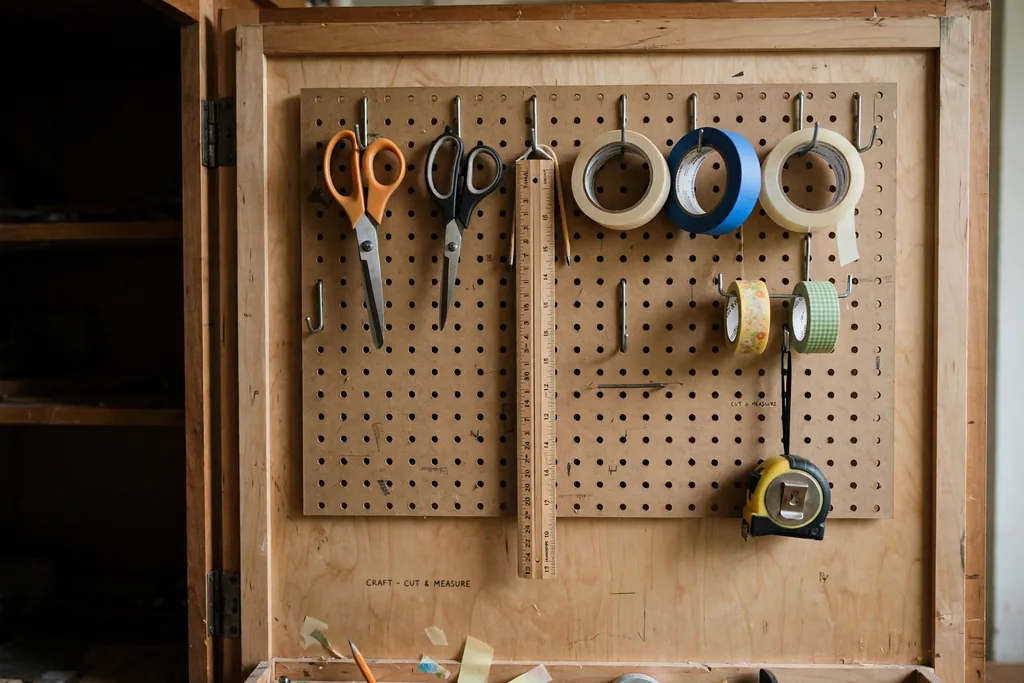
Fix a pegboard panel to the inside of a cabinet door and hang scissors, rulers, cutters, and tape on hooks, so tools hang in plain sight when the door opens and stay hidden when it closes. Door storage uses space that shelves waste, and it keeps sharp tools off the work table between uses.
Use short hooks for heavy tools and longer hooks for rolls of tape, and keep sharp edges pointing down or covered. Test the door weight after loading it, since a heavy pegboard door can pull hinges loose over time. Tighten hinge screws each season if the door starts to sag.
13. Sewing Cabinet with a Machine Lift
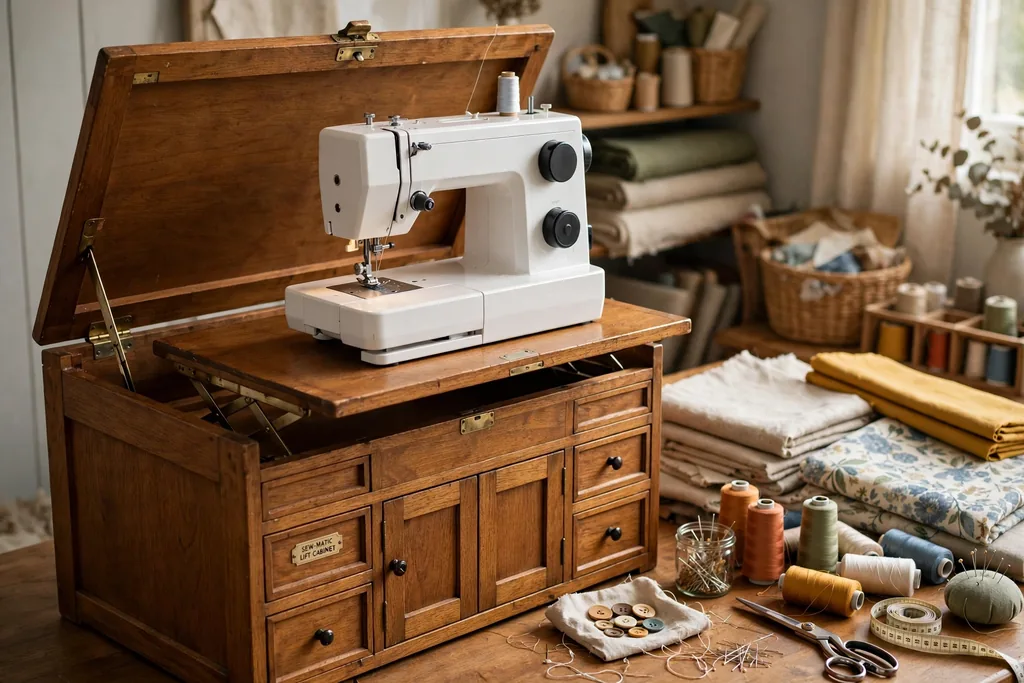
Choose a sewing cabinet with a machine lift shelf that raises the sewing machine to table height for use and lowers it for storage under a closed lid. A lift keeps the machine dust free between sessions and frees the table top for cutting and pinning when the machine is down.
Keep bobbins, needles, and presser feet in a shallow drawer beside the lift, so machine parts stay with the machine. Cover the machine when the lid is open for a long session, since dust settles on an open machine fast. Oil and clean the machine as its manual directs, and keep the manual in the same drawer as the feet.
14. Kids Craft Cabinet with Low Open Bins
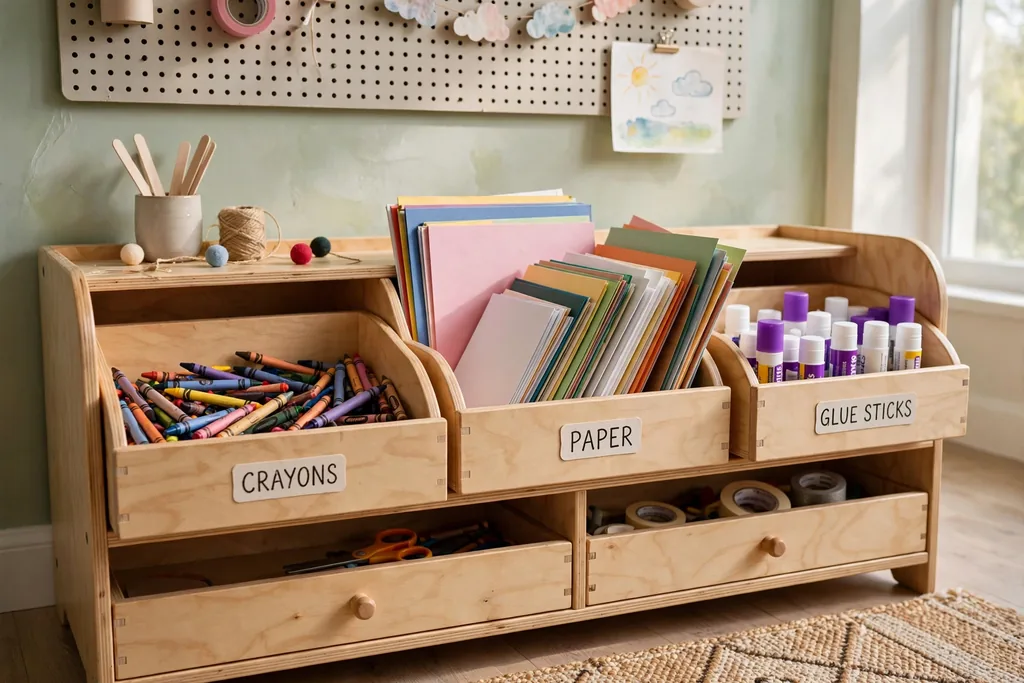
Set up a low cabinet with open bins at child height for crayons, paper, glue sticks, and safety scissors, and closed storage above for paint, glitter, and sharp tools. Low open bins let children pick supplies on their own and put them back in the right bin, while adult only supplies stay out of reach above.
Label bins with pictures as well as words for younger children, and keep one bin empty for finished work waiting to go home or on display. Wipe bins often, since glue and crayon marks build up fast, and check the low bins weekly for dried out markers or broken crayons to remove.
15. Vintage Hutch Converted to a Craft Cabinet
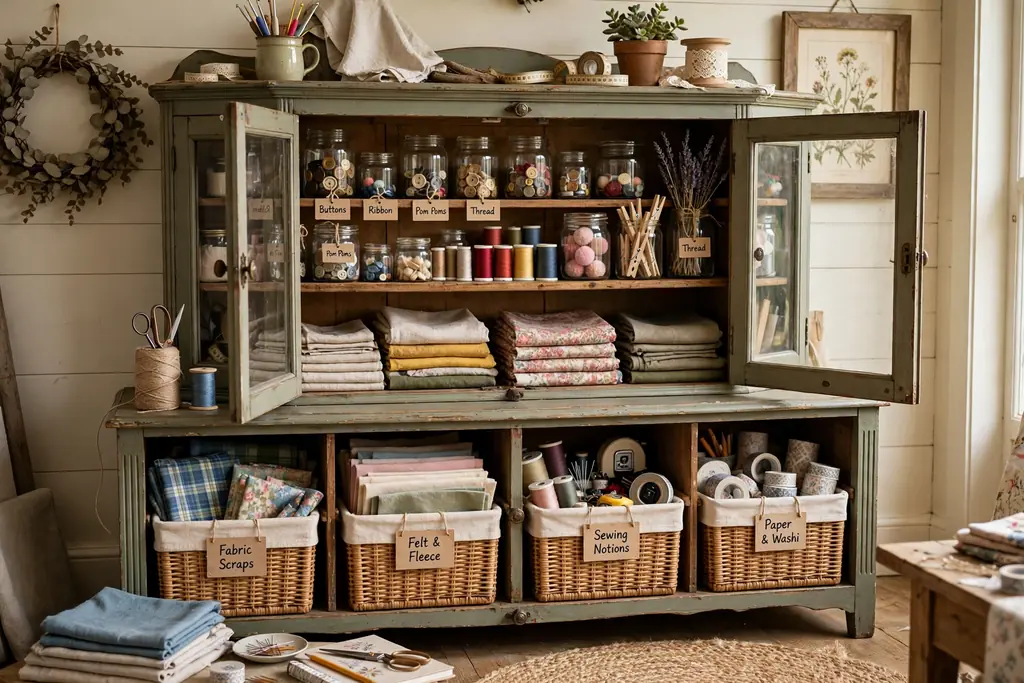
Convert a vintage hutch or dresser into a craft cabinet by adding shelf dividers, small bins, and a coat of paint that suits the room. A hutch gives deep drawers for fabric and tall upper shelves for jars, and it looks like furniture rather than storage, which suits a living room or bedroom corner.
Check old drawers for smooth runners before loading them, since a sticking drawer will spill small supplies. Line drawers with paper to protect both the wood and the supplies, and keep heavy items in the lowest drawers. The same furniture first approach that suits small storage ideas for small spaces works here: pick the piece for the room first, then fit the storage inside it.
16. Narrow Hall Cabinet for a Small Room
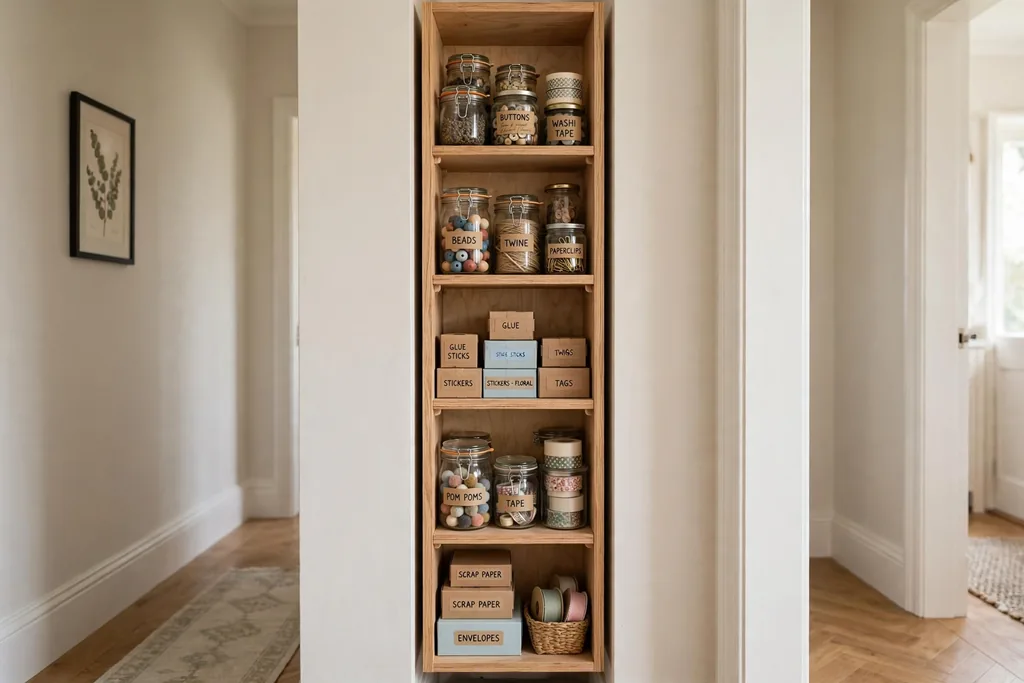
Use a narrow, tall cabinet in a hallway, landing, or beside a door, with shallow shelves that hold one row of jars or boxes each. Narrow cabinets fit where a deep cabinet would block a walkway, and shallow shelves stop items from hiding behind a front row.
Keep the most used supplies at waist to eye level and seasonal stock at the top, since a narrow cabinet is easy to knock when reaching high. Fix the cabinet to the wall, since tall narrow pieces tip more easily than wide ones. Leave the floor in front clear, so the door opens fully without moving shoes or bags.
17. Cabinet with Sliding Trays for Works in Progress
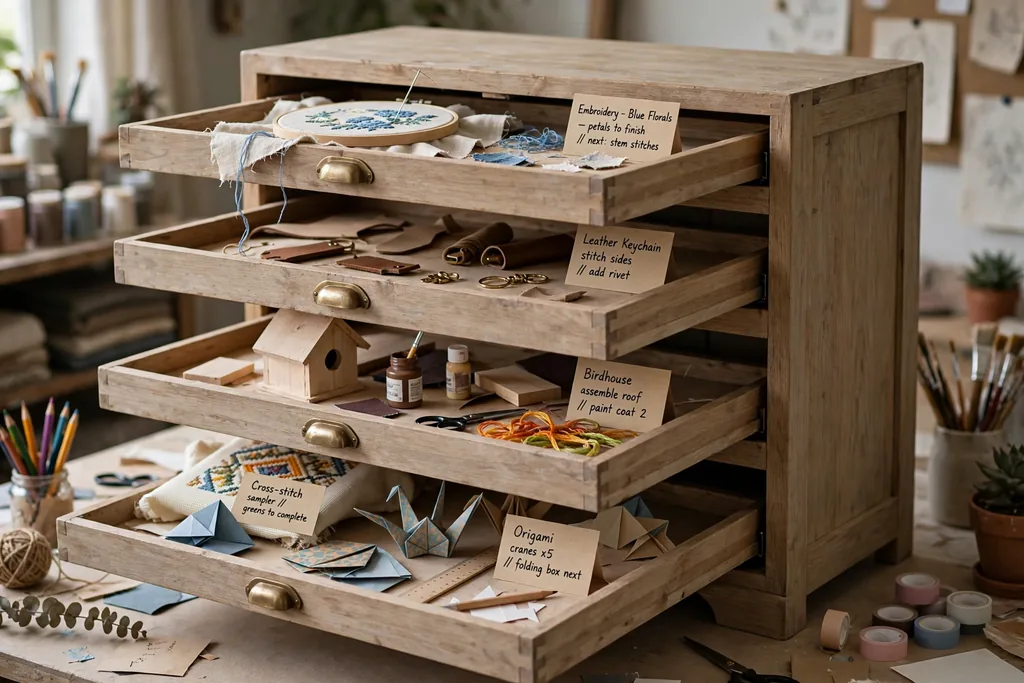
Reserve one cabinet section for sliding trays, one tray per unfinished project, with a small card on each tray noting the next step. Sliding trays keep half finished work flat and dust free, and they stop a project from taking over the table while you wait for glue to dry or a part to arrive.
Stack trays with a small gap between them so air moves and wet paint does not stick to the tray above. Date each project card, so the oldest project gets finished first instead of sitting at the back. When a project finishes, wipe the tray clean before it takes the next one, so old scraps do not mix into new work.
Conclusion
A good craft storage cabinet does not need to hold every supply you own. It needs to hold the supplies you use, in groups that make sense, at heights you can reach, with labels you can read at a glance. Start with one idea from this list that fits your room and your largest supply group, then add bins, trays, or a door pegboard as the system settles. Keep one tray free for works in progress, and review the cabinet each season, so backup stock does not crowd out the tools you reach for weekly. For seasonal stock that only comes out once a year, the same closed door rule in Christmas decoration storage applies: label the bin, store it high or low, and keep daily tools in the prime middle shelves.
FAQs
What is the best craft storage cabinet for a small room?
The best craft storage cabinet for a small room is a narrow tall cabinet or a wall mounted cabinet, since both use height instead of floor space and keep supplies at eye level. Pick shallow shelves so items do not hide behind a front row, fix a tall cabinet to the wall, and keep weekly tools at waist to eye level.
How should I organize a craft storage cabinet?
Organize a craft storage cabinet by grouping supplies by use, such as paper, paint, sewing, and small parts, and giving each group one shelf, bin, or drawer with a plain word label. Keep weekly tools at hand level, move backup stock higher or lower, and leave one empty tray for works in progress.
What size craft storage cabinet do I need?
The size you need depends on your tallest and widest supplies, so measure paper pads, paint bottles, fabric bolts, and rolls before you buy or build. Allow shelf heights that fit those items standing upright, add a few centimeters of clearance for lifting bins out, and choose a cabinet depth that lets you reach the back without moving the front row.
How do I store paint in a craft cabinet?
Store paint in a craft cabinet standing upright on short shelves, with one row per color family and caps facing out for easy checking. Keep open bottles on a small tray to catch drips, wipe cap threads often so caps do not stick, and store fabric paint apart from other craft paint.
Can a craft storage cabinet also serve as a work table?
Yes, a craft storage cabinet can serve as a work table if it has a fold down table, a machine lift, or a flat rolling top at sitting height. Keep only the current project on that surface, store the rest behind doors or in drawers, and lock casters or fold the table away when the room needs to change use.
How do I keep a craft cabinet tidy over time?
Keep a craft cabinet tidy by labeling every bin and drawer, returning each supply to its group after a session, and reviewing the cabinet each season. Remove dried out markers, broken tools, and duplicate supplies during that review, and move backup stock out of prime middle shelves so weekly tools stay easy to reach.