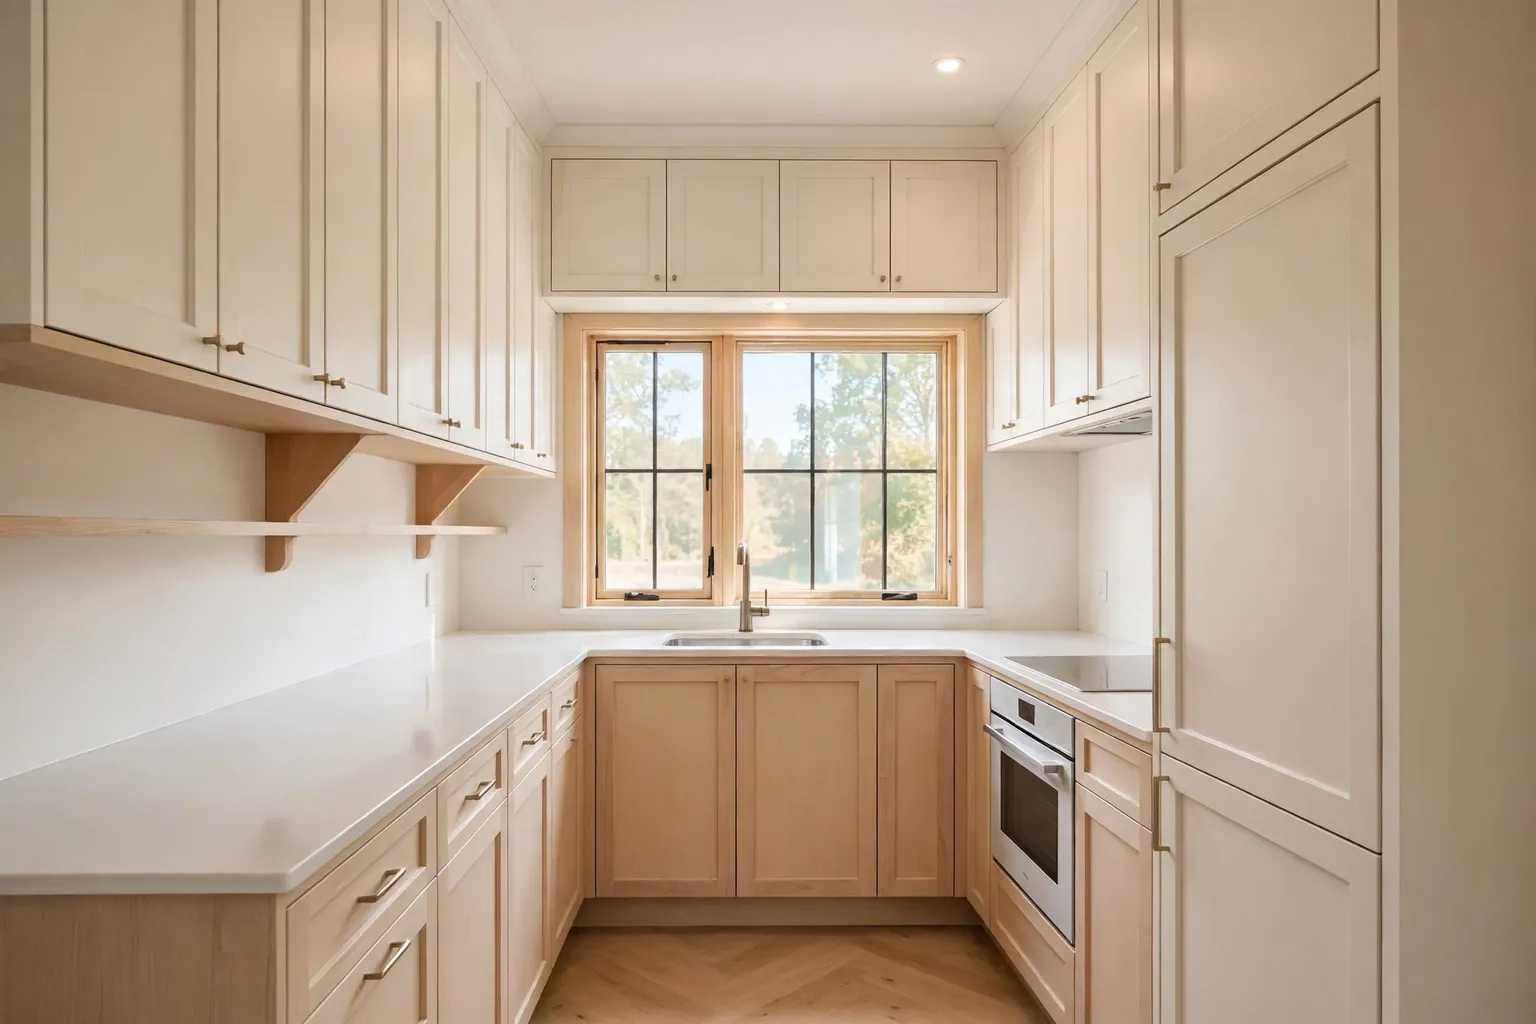
A small kitchen does not need more square feet to work better. It needs clear walkways, storage that fits what you actually own, light that reaches the counters, and surfaces that are easy to clean. The ideas below cover layout, cabinets, appliances, lighting, seating and small finishes, so you can pick one change, a weekend project, or a fuller remodel. Start with the change that fixes your biggest daily friction, whether that is a crowded counter, a dark corner, or nowhere to sit for a quick meal.
Key Takeaways
- Fix layout and storage before finishes: a clear work triangle and a place for every daily item matter more than a new color.
- Use height, corners and toe kicks for storage, and keep everyday items within easy reach.
- Bright, reflective surfaces and layered light make a small kitchen feel larger without moving a wall.
- Choose slim, counter depth and multi-use appliances so the room keeps its walkways.
- Keep one clear stretch of counter for prep, and give small appliances a home away from it.
- Plan seating that tucks away, so the kitchen can switch between cooking, eating and gathering.
1. Repaint Cabinets in a Light, Warm White
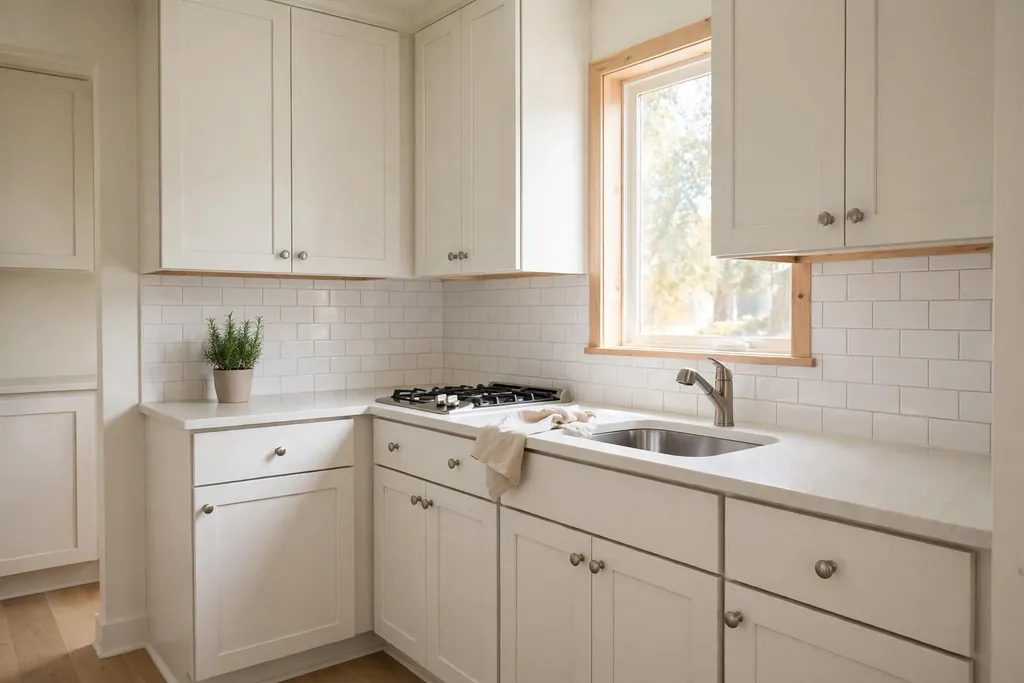
A fresh coat of light, warm white paint is often the fastest way to make a small kitchen feel brighter. It reflects light from the window and ceiling, softens dark corners, and gives mismatched cabinets a single clean finish. Choose a durable cabinet paint with a satin finish, which wipes clean and stands up to cooking splashes better than flat paint.
Prep matters more than the color itself. Clean cabinets with a degreaser, sand lightly, prime, and paint thin coats with a foam roller or sprayer. Replace or clean the hinges at the same time, and add simple knobs or pulls in brushed nickel, brass or matte black. Keep the inside of glass front cabinets neat, since light paint draws the eye there.
2. Replace Some Upper Cabinets With Open Shelves
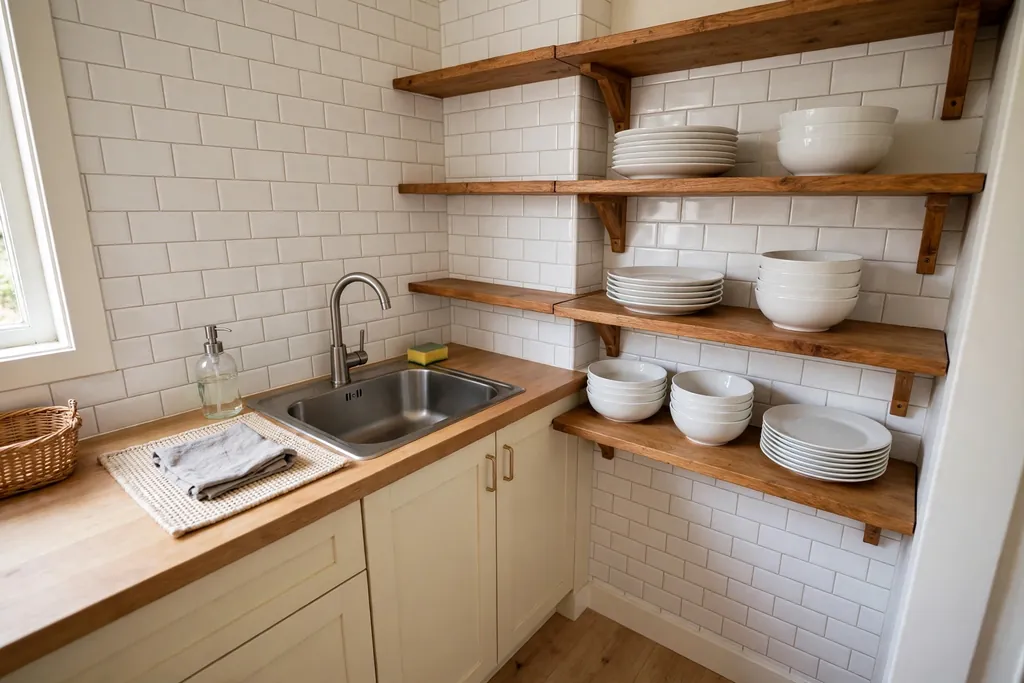
Removing one run of upper cabinets and fitting open shelves opens the wall above the counter and makes the room feel less boxed in. It works best beside the sink or stove, where you reach for plates, bowls and glasses every day. Keep the shelf run short, so the display stays easy to manage and dust.
Style shelves with everyday dishes in one or two tones, a small plant, and a stack of bowls, leaving gaps between groups. Our guide to how to style open shelves shows how to group items, vary heights and leave breathing space. Keep closed cabinets nearby for food, cleaning supplies and mismatched items that look better behind a door.
3. Take Cabinets All the Way to the Ceiling
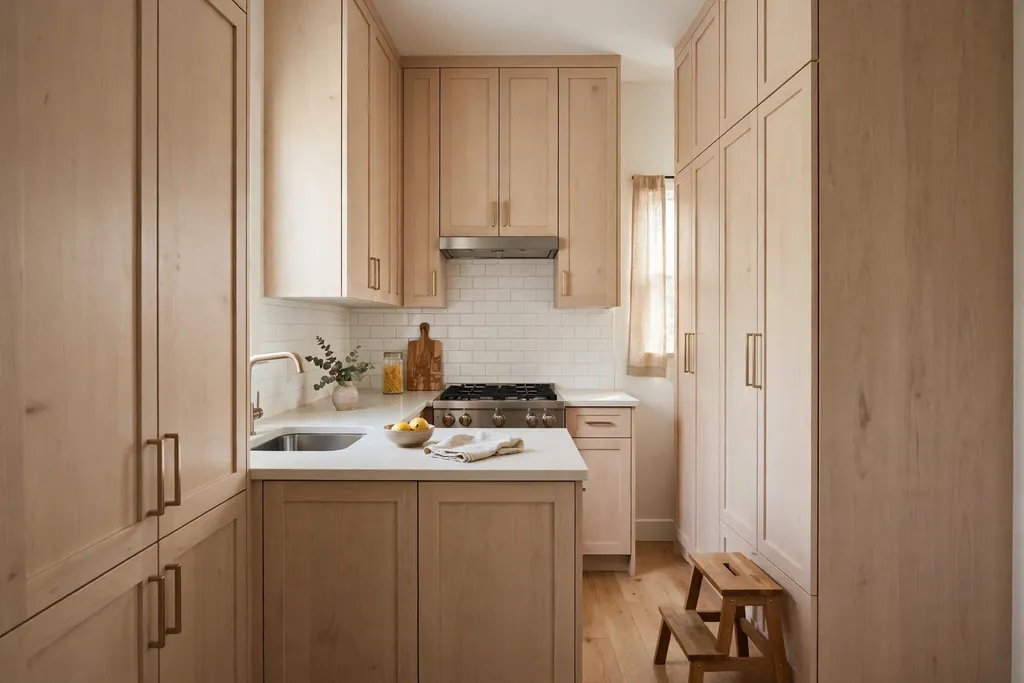
The gap above standard cabinets collects dust and wastes useful height in a small kitchen. Extending cabinets to the ceiling, or adding a matching top box, gives you a home for platters, holiday dishes and rarely used appliances. Use the top level only for items you need a few times a year, so you are not climbing up daily.
Add a small, stable step stool that lives in a tall cabinet or pantry, and label the top boxes if more than one person uses the kitchen. In a rental, a row of matching baskets on top of the cabinets gives a similar tidy look without building work. Keep the top line straight and flush, since a stepped top edge makes a low ceiling feel lower.
4. Fit a Slim Pull-Out Pantry Beside the Fridge
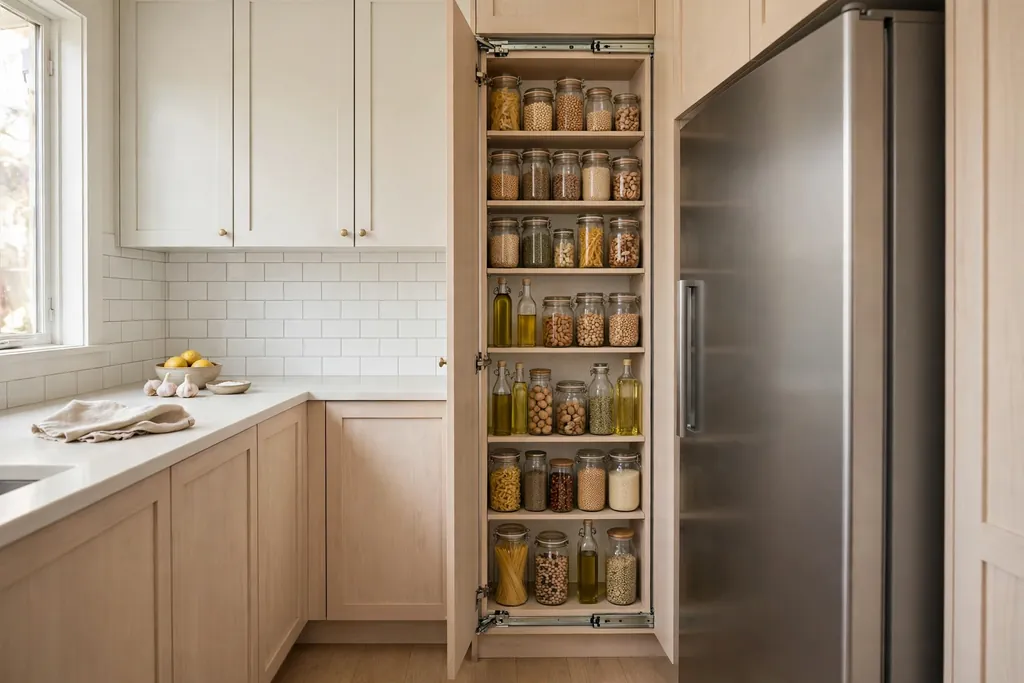
The narrow gap beside a fridge or oven often holds nothing but a broom. A slim pull-out pantry, usually 15 to 30 centimeters wide, turns that gap into tall, visible storage for oils, sauces, spices and cans. Because the whole unit slides out, you can see every jar without reaching to the back of a deep cupboard.
Measure the gap, the door swing and the depth before ordering, and check that the unit clears skirting boards and handles. Group items by use, such as cooking oils together and baking items together, and put heavy jars low. A pull-out pantry also helps in a galley kitchen, where every centimeter of wall storage counts.
5. Add a Pull-Out for a Blind Corner Cabinet
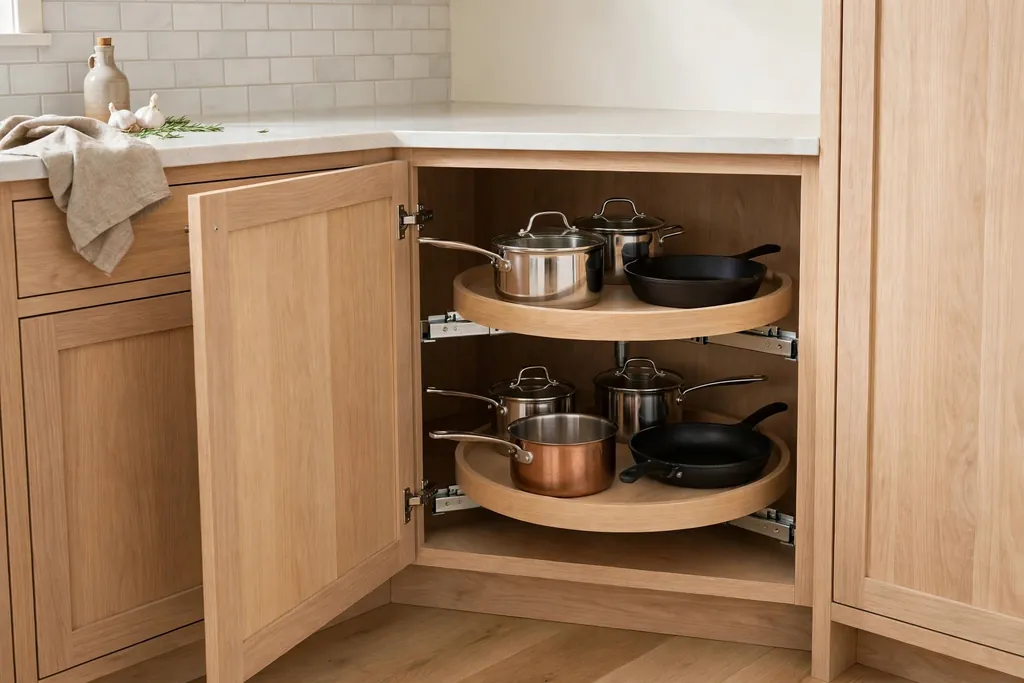
Blind corner cabinets are deep, dark and hard to use, so they often end up holding forgotten pans. A pull-out carousel, a half moon shelf or a corner drawer system brings the contents out to you instead of asking you to crawl in. Choose a system rated for the weight of your pots, and test the swing with the cabinet door fully open.
Move heavy, rarely used items out of the corner and put daily pans, baking trays or small appliances on the pull-out. If a full fitting is too costly, a simple turntable and a basket for the front section still improve access. Measure the door opening first, since some corner systems need a wider opening than the existing door allows.
6. Swap Lower Cabinets for Deep Pot Drawers
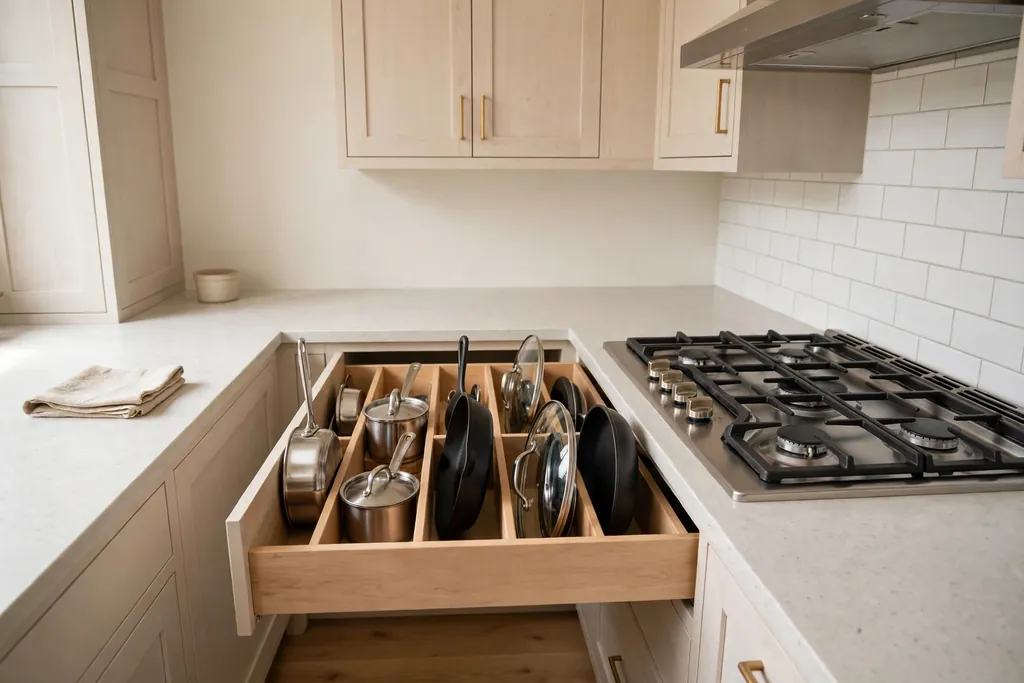
Deep drawers beat low cabinets for pots, pans and mixing bowls, because you can see everything from above and lift items out without stacking. Two or three deep drawers beside the stove can hold the pans you use most, with lids in a vertical divider in the same drawer or the one beside it.
Use drawer dividers or peg boards to stop pans sliding when the drawer closes. Put the heaviest pans in the lowest drawer, and keep a lighter drawer for baking sheets and trays. If you are keeping some cabinets, convert only the run beside the stove first, where the change makes the biggest daily difference.
7. Add Toe-Kick Drawers Under the Cabinets
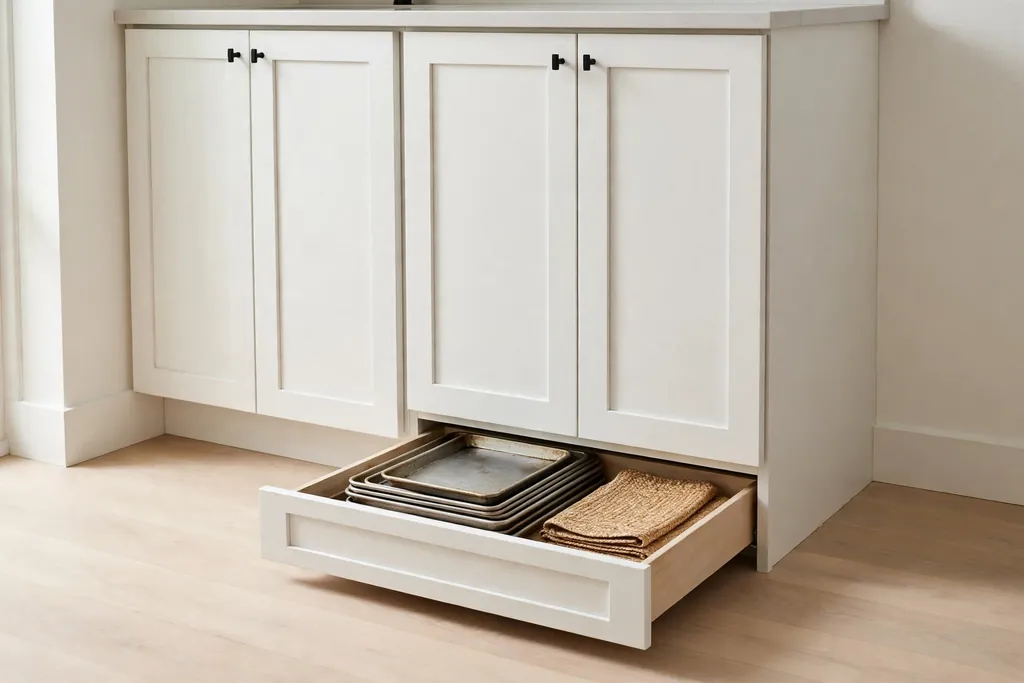
The recessed space under base cabinets, called the toe kick, can hold shallow drawers for flat items such as baking sheets, placemats, table linens and large serving trays. These drawers use space that is otherwise empty, and they keep flat items from piling up in a tall cupboard.
Toe-kick drawers suit kitchens with a plinth that can be cut cleanly, and they work best for light items you reach for weekly rather than daily. Keep the drawer fronts flush with the plinth so they read as part of the cabinet base. Wipe the drawer bottoms often, since this low spot collects floor dust and cooking splashes.
8. Use a Rolling Island or Kitchen Cart
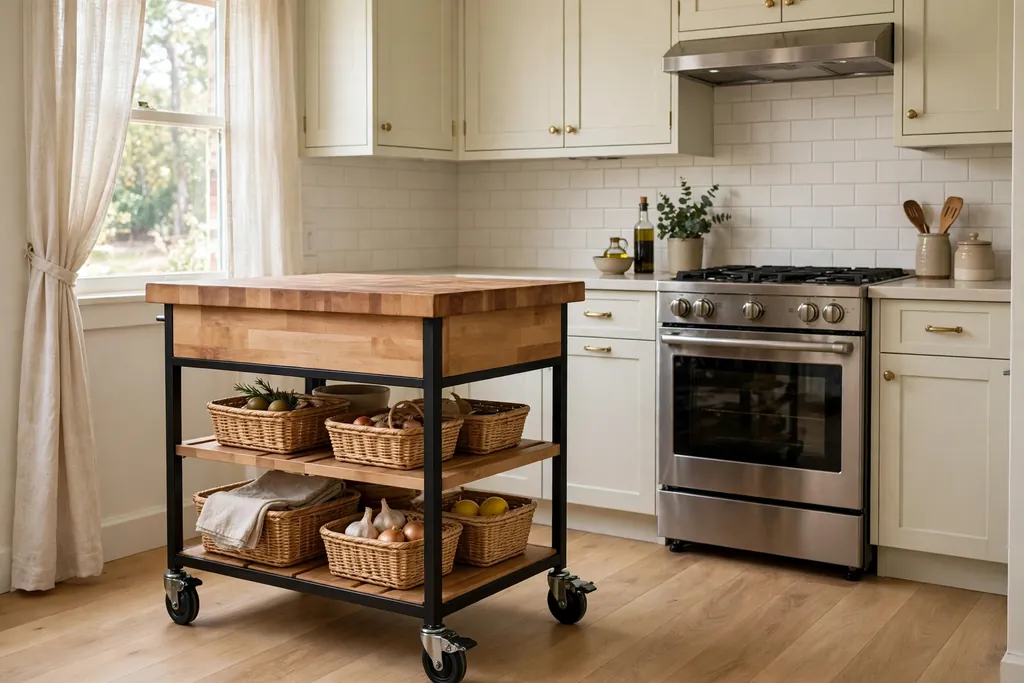
A rolling island gives a small kitchen extra prep space and storage without a fixed block in the middle of the floor. Choose a cart with a butcher block or solid top, a shelf or drawers below, and lockable casters so it stays put while you chop. When guests arrive or the floor needs cleaning, release the wheels and move it to the wall.
Size the cart to your walkways, leaving at least 90 centimeters clear around it when in use. A narrow cart suits a galley kitchen, while a wider one with a towel bar and hooks suits an open kitchen. Keep only daily tools on the cart, such as a knife block, oils and a chopping board, so it stays useful rather than becoming another crowded surface.
9. Fit a Fold-Down Wall Table
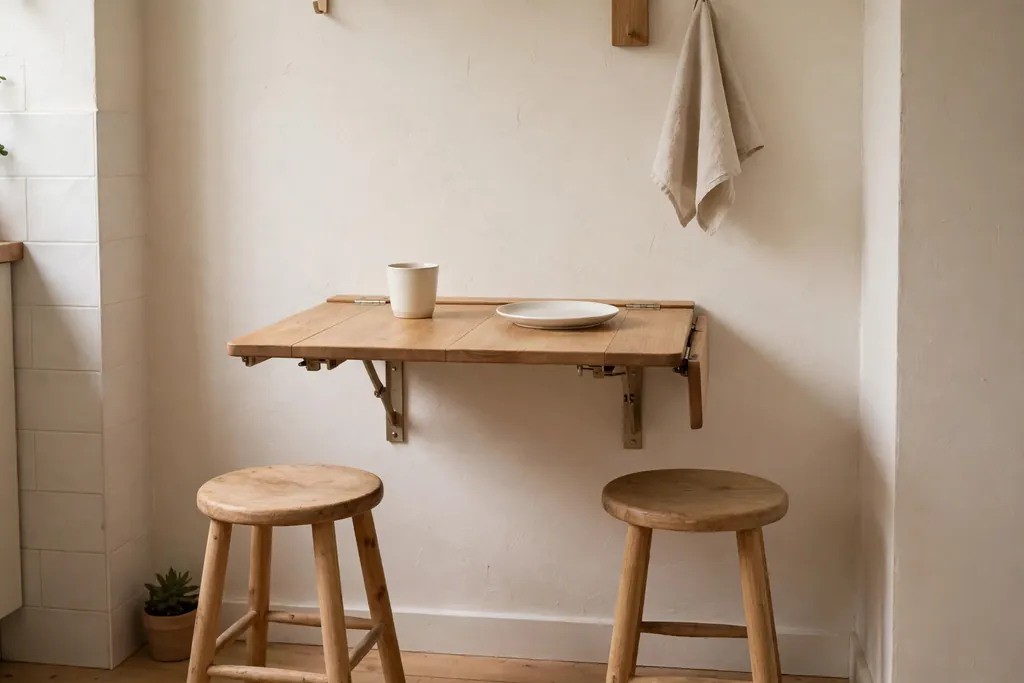
A fold-down table fixed to a free wall gives you a breakfast spot or extra prep surface that folds flat when you need the floor back. It suits a single cook, a couple, or a homework spot, and it needs only two stools that tuck under a counter or hang on wall hooks when not in use.
Fix the table to a solid wall or studs, since it must hold plates, cups and leaning elbows. Choose a size that seats two comfortably, usually about 70 to 90 centimeters wide, and add a small shelf above it for mugs or condiments. Fold it down only when the room is clear of through traffic, so no one walks into the open edge.
10. Build a Banquette in an Unused Corner
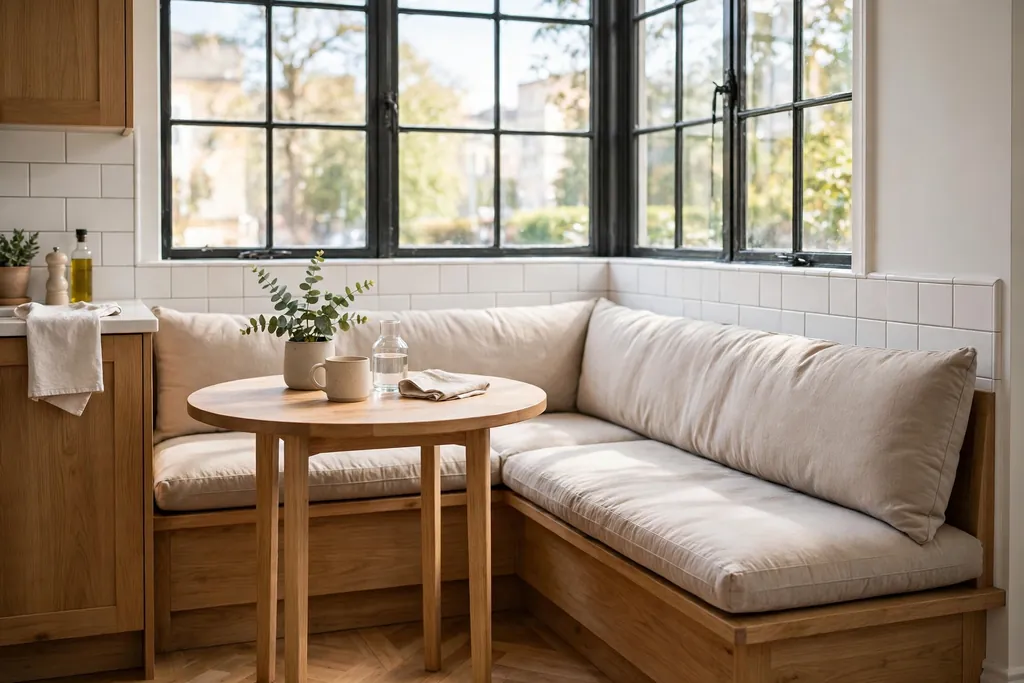
A built-in bench in a corner turns a dead spot into a dining nook that seats more people than separate chairs. The bench fits tight against two walls, so a small round or rectangular table can sit close, and the base can hold drawers or a lift-up seat for table linens, board games and rarely used serving dishes.
Add a firm cushion in a washable fabric and a few back cushions for comfort, since a flat bench gets uncomfortable fast. Keep the table size modest so people can slide in and out without moving the whole table. A banquette works well under a window, where daylight makes a small nook feel like a planned room rather than a leftover corner.
11. Add a Peninsula Breakfast Bar
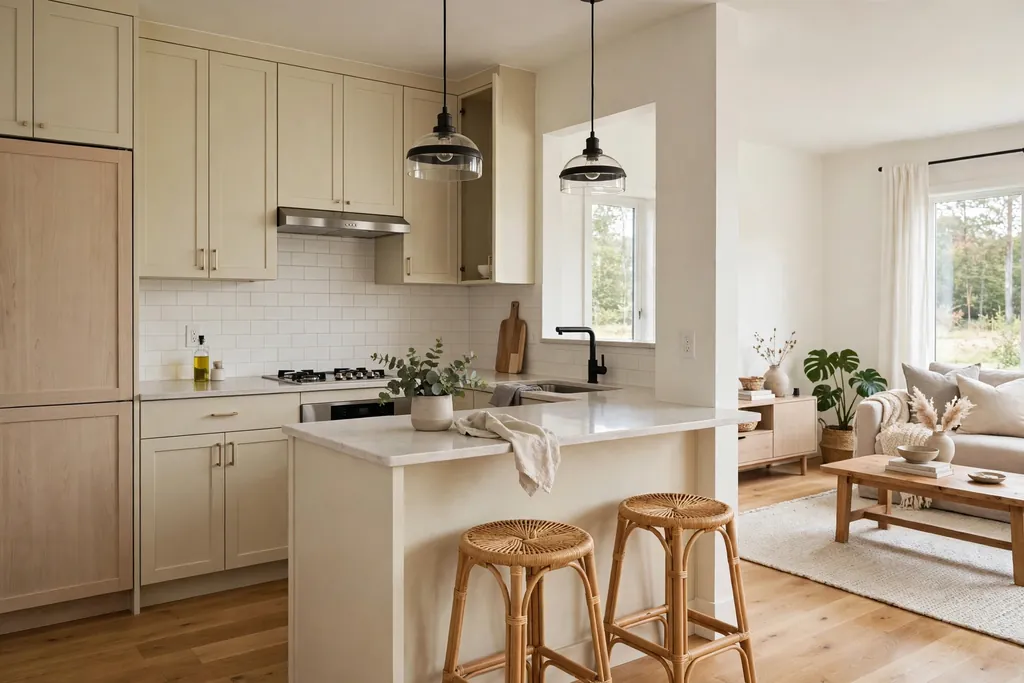
A peninsula is a counter that extends from a wall or run of cabinets into the room, creating a breakfast bar and a clear edge between kitchen and living space. It gives you seating on one side and prep space on the other, without the floor area a freestanding island needs. Two stools are usually enough in a small kitchen.
Keep the overhang deep enough for knees, about 25 to 30 centimeters, and choose stools that slide fully under the counter. Use the kitchen side for drawers or open shelving, and keep the bar top clear except for a small tray or plant. A peninsula also helps define the kitchen in an open plan flat, where a full wall would block light.
12. Rework the Layout Into a Clear Work Triangle
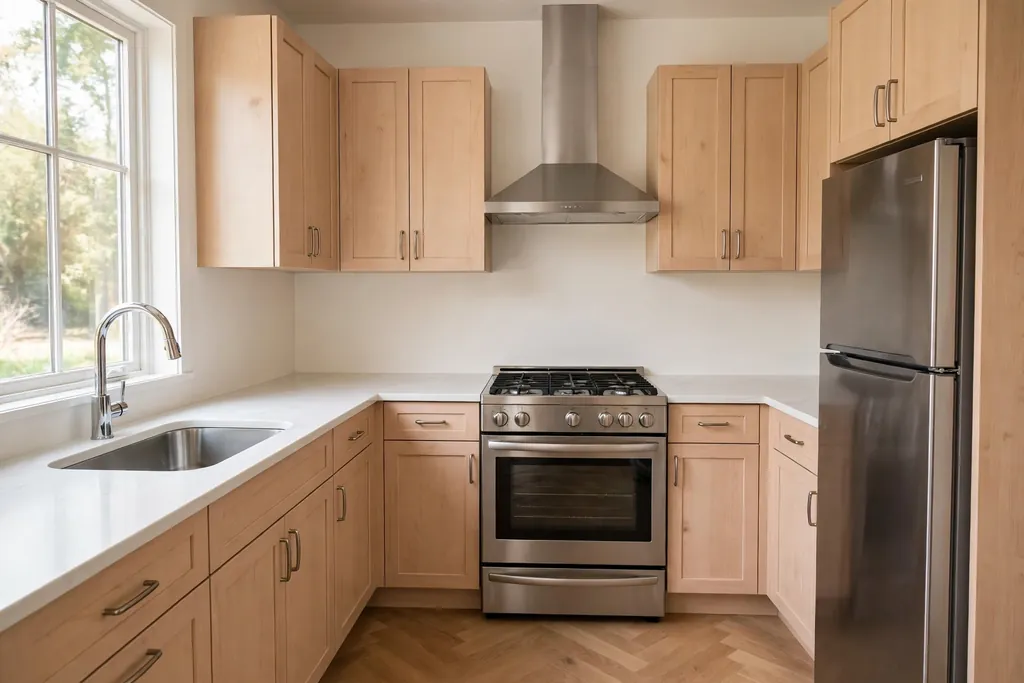
In a small kitchen, the sink, stove and fridge should form a short, clear triangle with no island, bin or stool blocking the paths between them. Walk the three routes yourself and note where you bump into a door, a bin or a chair. Often moving one appliance by a short distance, or swapping the sink and stove runs, fixes the worst bottleneck.
Sketch the layout on paper before any building work, and mark door swings, window positions and the main entry path. Keep the prep zone between sink and stove clear, since that is where most chopping and plating happens. If plumbing or gas work is involved, get a quote early, since moving those services sets the budget for the rest of the remodel.
13. Choose a Counter-Depth, Slim Fridge
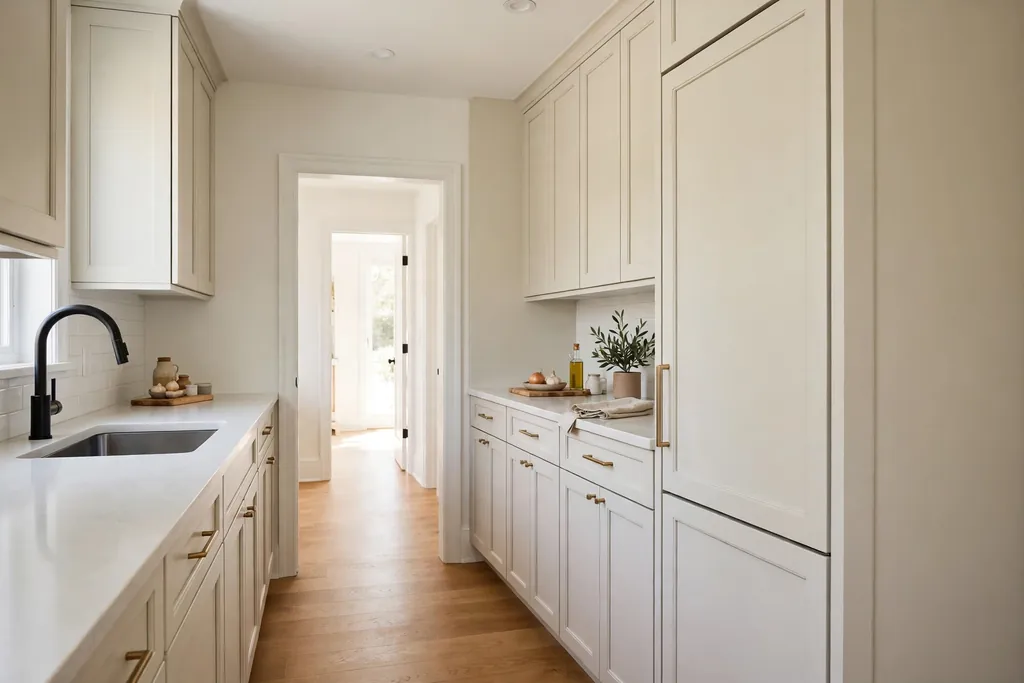
A standard fridge can stick out 15 centimeters or more past the counter, narrowing the walkway and catching hips and bags. A counter-depth model sits nearly flush with the cabinets, so the path stays clear and the kitchen reads as one straight line. In a very narrow kitchen, a slim fridge with a smaller footprint can free enough room for a pull-out pantry beside it.
Measure the width, depth with doors open, and ventilation gap before buying, and check that doors can open fully against a side wall. Inside, use clear bins for small items so a shallower fridge still holds a weekly shop. A panel-ready fridge, fitted with a cabinet front, can help the fridge blend into the cabinet run.
14. Fit One Large Sink With a Cutting Board Cover
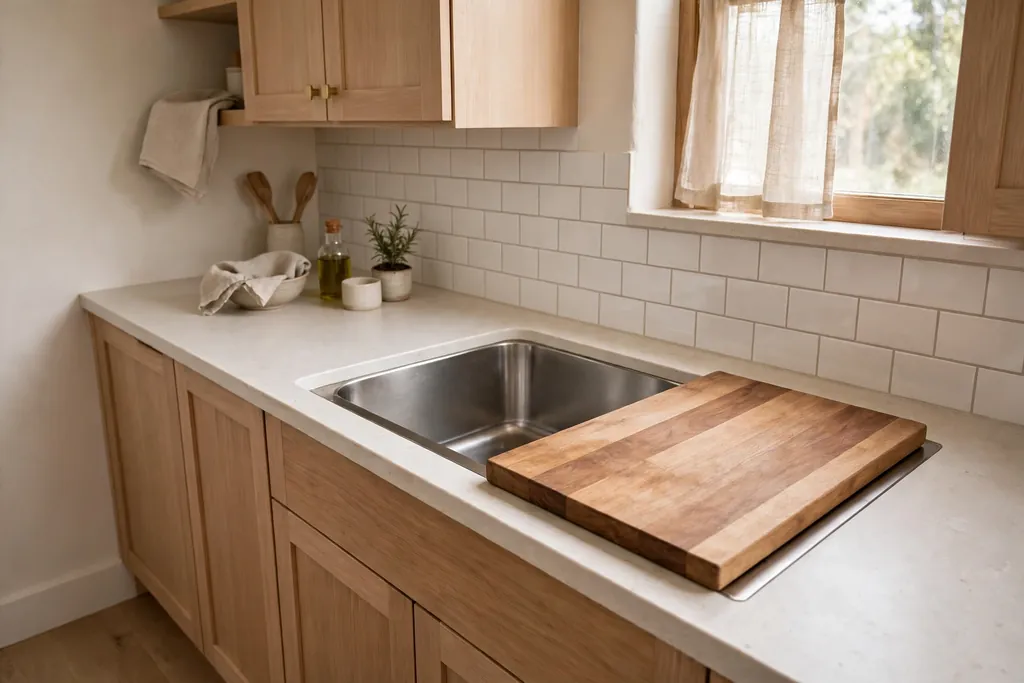
One large single bowl sink suits a small kitchen better than a divided sink that fits neither a roasting pan nor a baking tray. Add a cutting board that sits over part of the sink, or a sliding colander and drying rack, so the sink doubles as extra counter when you are not washing up. This trick is most useful in a galley kitchen with very little counter beside the sink.
Choose a sink depth that suits your height, since a very deep bowl can strain your back. Fit a tap with a pull-out spray for rinsing the sink itself, and keep a small caddy for soap and brushes so the rim stays clear. Dry the board cover after use and store it upright, so it does not trap moisture on the counter.
15. Switch to a Slim Induction Cooktop
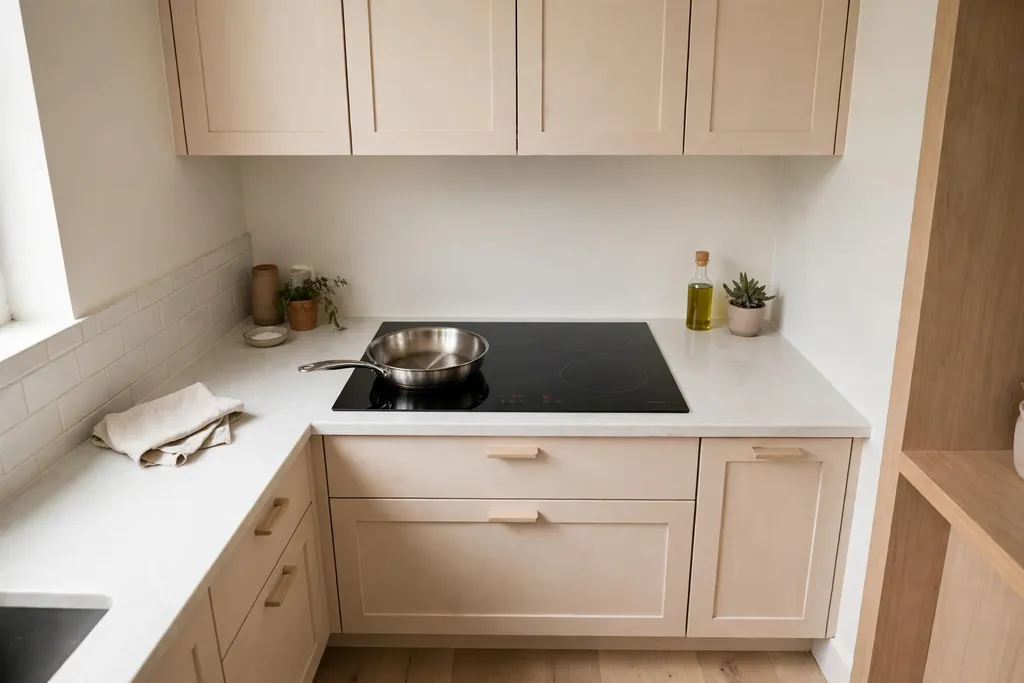
A slim induction cooktop, often 60 centimeters wide with four zones, frees counter space compared with a wide range and heats pans fast with precise control. Because the surface stays cooler than a gas hob, spills wipe off more easily, and you can use the cooktop as a landing spot for a tray once it has cooled.
Check your pans first, since induction needs magnetic bases, and check the electrical supply, since a new circuit may be needed. Keep a small gap beside the cooktop for hot handles and a landing spot for lids. If you cook with a wok often, keep one gas burner or a separate portable burner, since a flat induction surface suits flat pans best.
16. Add Under-Cabinet Lighting for Prep
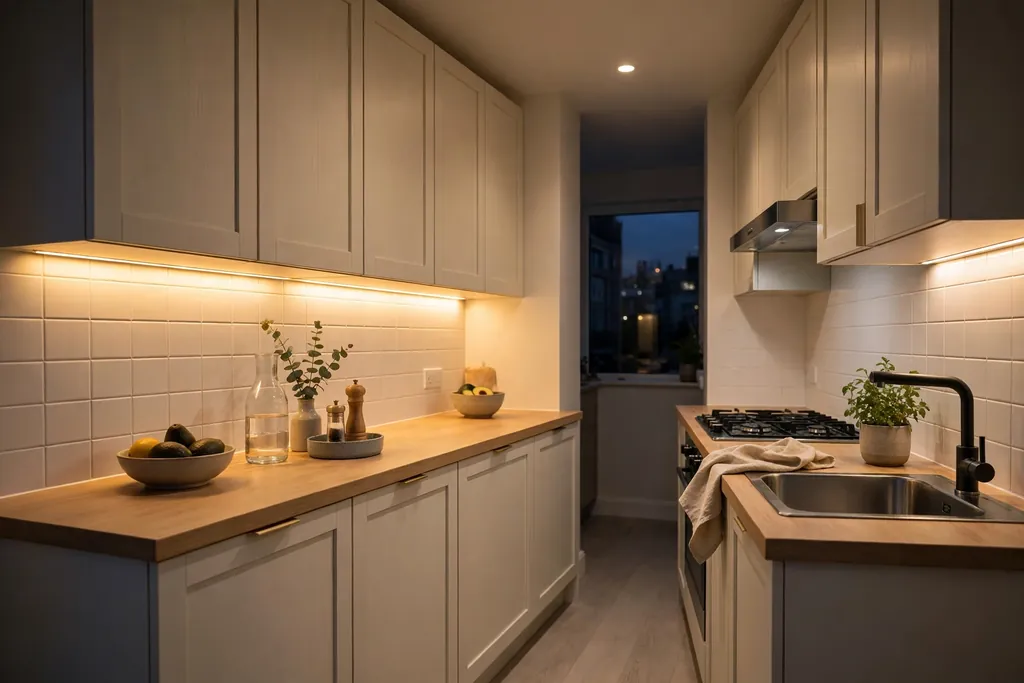
Under-cabinet lights put light exactly where you chop, read recipes and check food, instead of lighting only the middle of the floor. LED strips or slim bars under each upper cabinet remove shadows cast by the cabinets themselves and make a small kitchen feel brighter in the evening. Choose warm white light, around 2700 to 3000 Kelvin, for a comfortable kitchen glow.
Fit lights with a simple switch or dimmer near the main kitchen switch, and run the wiring neatly behind the cabinets. Battery lights work as a trial, but wired lights give steadier light and no battery changes. Add a strip inside a glass front cabinet too, if you want dishes to show softly in the evening without a bright ceiling light.
17. Hang Pendants Over the Peninsula or Bar
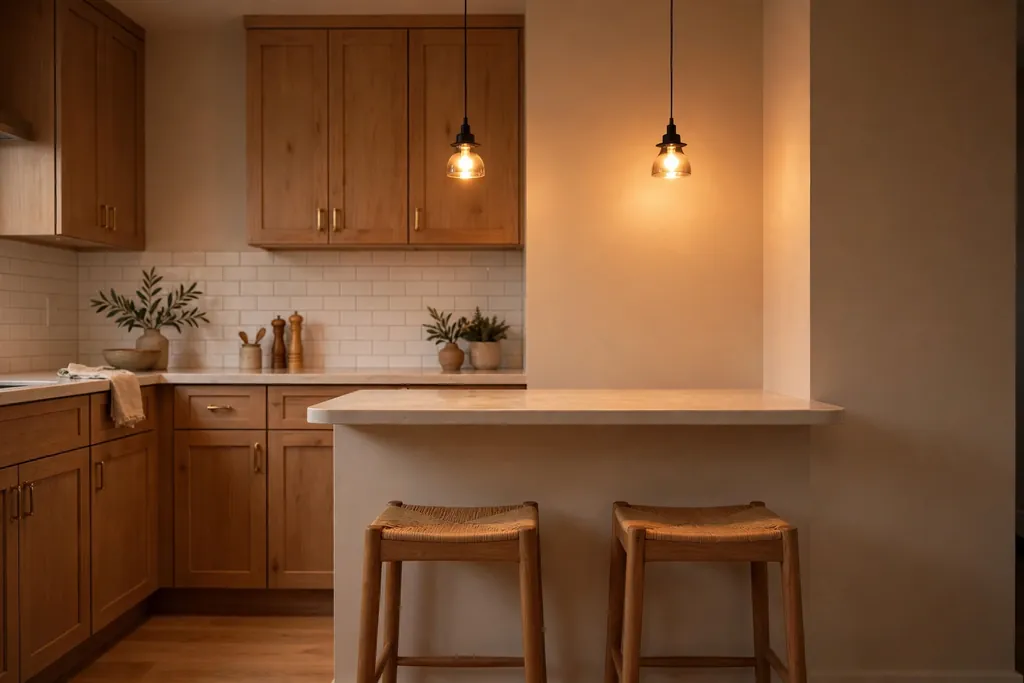
Two small pendants over a peninsula or breakfast bar mark the eating zone, light plates and faces, and add a focal point without taking counter or floor space. Hang them low enough to light the counter, usually about 75 to 90 centimeters above the surface, but high enough that you can see across the bar to the person opposite.
Choose shades that direct light down and do not glare into eyes when seated. A dimmer helps the same pendants work for breakfast prep and for evening meals. Keep the pendant count to two in a small kitchen, since three or more can crowd a short bar and compete with the ceiling light.
18. Use a Light, Glossy Backsplash to Bounce Light
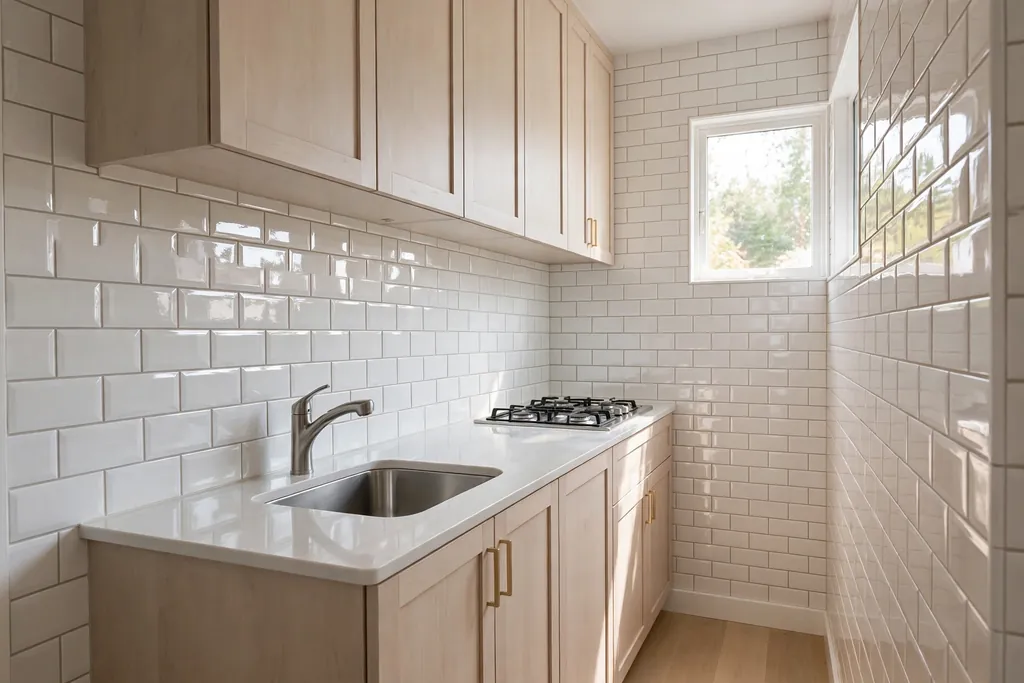
A glossy subway tile, a light glass tile or a pale stone backsplash reflects daylight and under-cabinet light back into the room, which helps a kitchen with one small window. Keep the grout color close to the tile color for a calm, continuous look, and run the tile to the underside of the upper cabinets for a finished edge.
Use a simple brick pattern or a straight stack, since a busy pattern can make a small wall feel crowded. Seal grout in the splash zone behind the sink and stove, and wipe it weekly to stop grease building up. If you rent, a peel and stick tile in a light gloss finish gives a similar lift and can be removed later without damaging the wall.
19. Fit Glass-Front Cabinets on One Upper Run
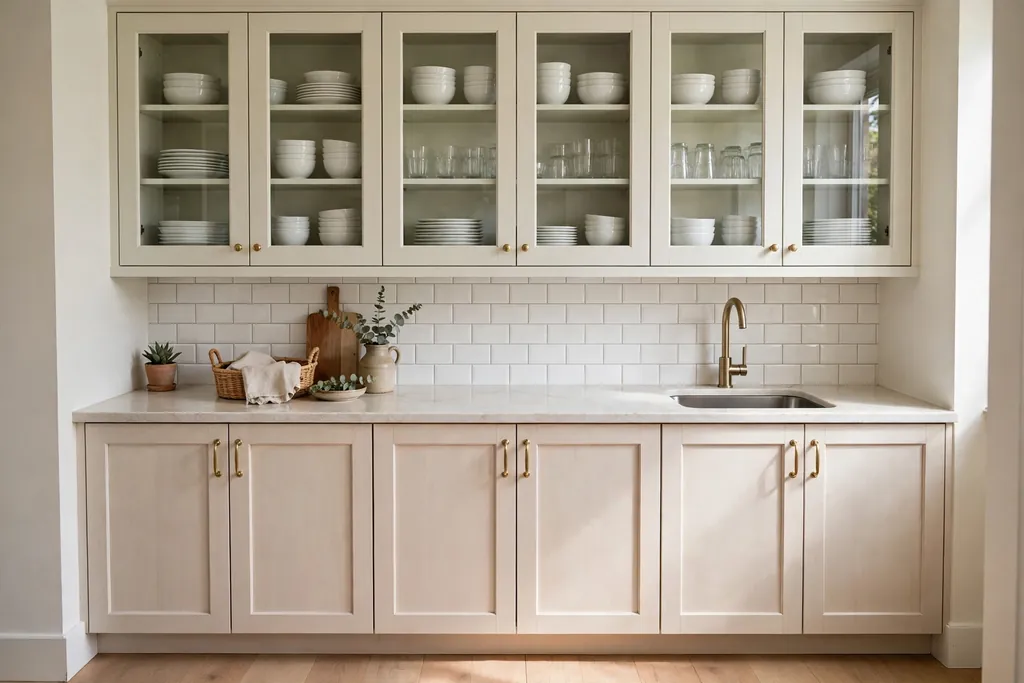
Glass-front cabinets on a single upper run lighten the look of a wall of cabinets and let you display neat dishes, glasses and a few favorite pieces. Keep this run to everyday items in matching tones, so the display reads as calm rather than crowded. Frosted or reeded glass is a good middle step if you want light without a fully open display.
Measure the glass doors carefully, since they show fingerprints and dust more than solid doors. Store only items you use weekly behind glass, and keep the rest in solid cabinets. Add a slim light inside one glass cabinet if the run faces the dining area, so the display glows softly in the evening.
20. Add a Butcher Block Worktop Zone
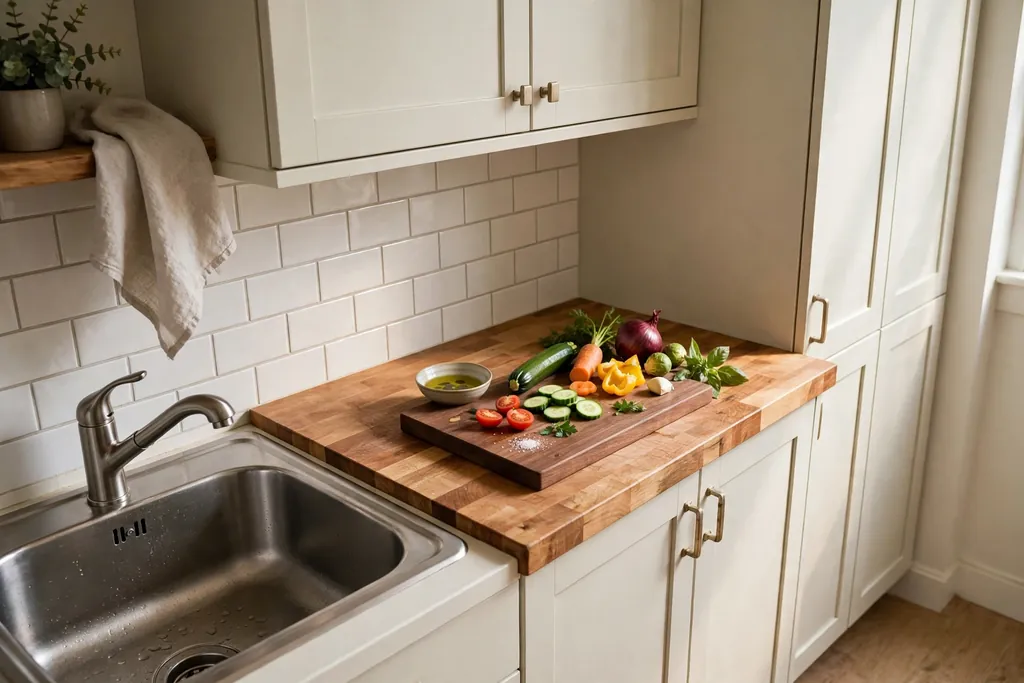
A section of butcher block counter, beside the sink or on a cart, gives a warm, forgiving surface for chopping, kneading and serving. Wood is kinder to knife edges than stone, and a well oiled board section can be sanded and re-oiled when it gets marked, which suits a hard working small kitchen. Keep the rest of the counter in a wipe clean material if you want low upkeep elsewhere.
Oil the wood regularly with food safe oil, wipe spills promptly, and keep a separate board for raw meat. Cut a small juice groove near one edge if you use the zone for bread and fruit, and keep hot pans on trivets rather than directly on the wood. A butcher block zone also warms up a kitchen that is mostly white, steel and tile.
21. Hide Small Appliances in an Appliance Garage
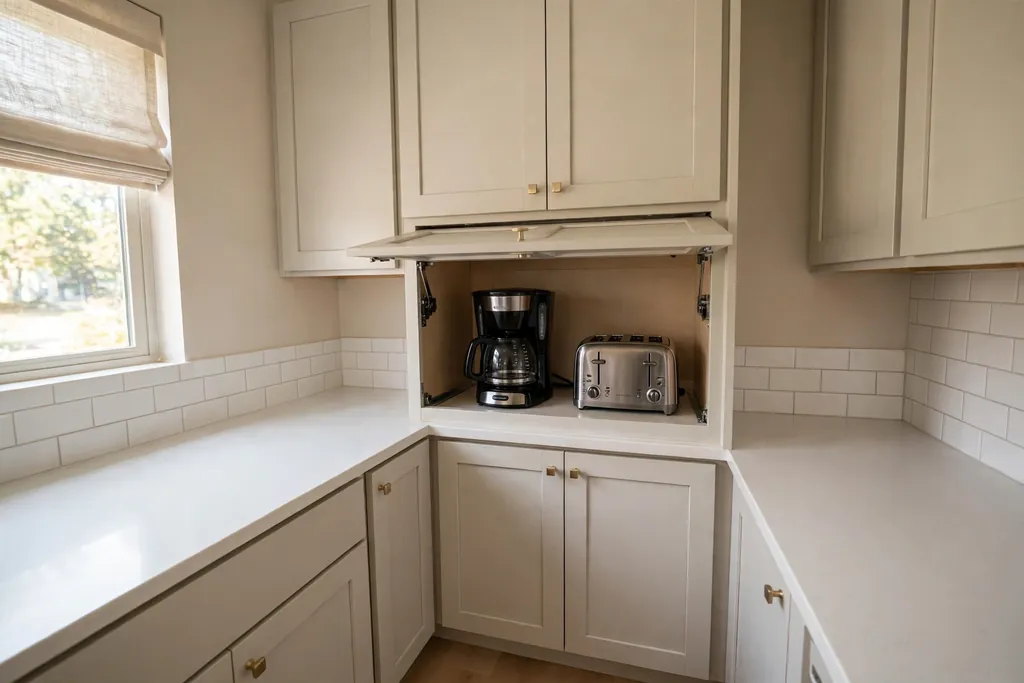
An appliance garage is a cabinet with a lift-up or tambour door that hides the toaster, kettle, coffee maker and blender, while keeping them plugged in and ready to use. It clears the daily counter clutter that makes a small kitchen feel crowded, and it protects appliances from splashes near the sink and stove.
Place the garage near a power outlet and away from the main prep zone, so making coffee does not block cooking. Measure your tallest appliance with its lid open before ordering, and leave ventilation space around a toaster. Keep only appliances you use at least weekly in the garage, and store the rest in a high cabinet, so the garage itself does not become overfull.
22. Dry Dishes Over the Sink to Free the Counter
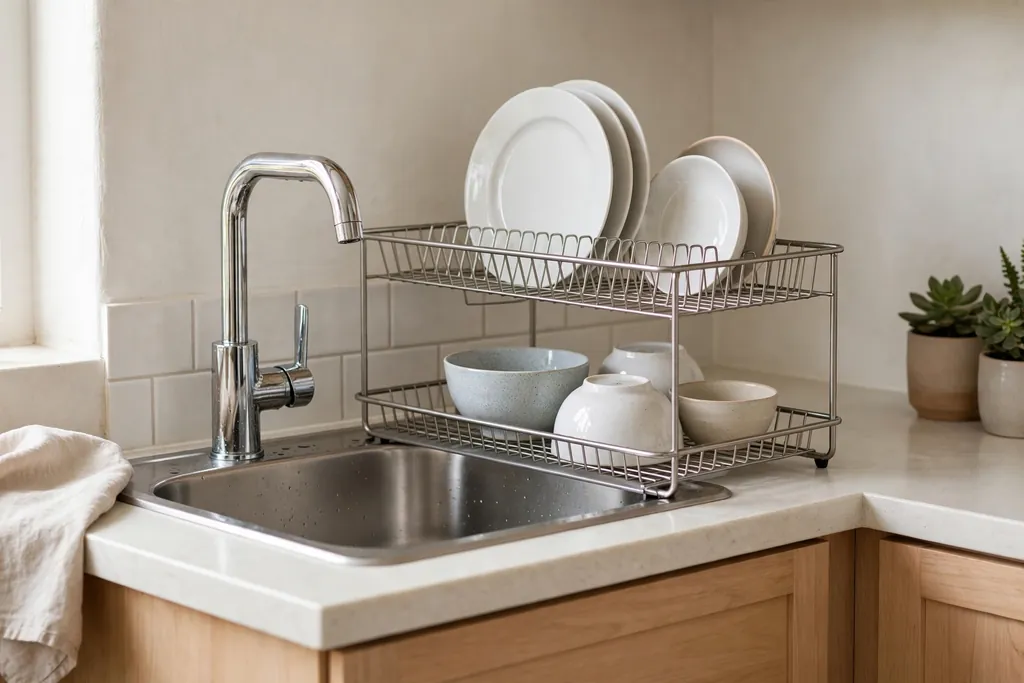
A rack that sits over the sink, or a roll-up rack that spans it, lets dishes drip straight into the sink and frees the counter beside it for prep. This is one of the cheapest changes for a small kitchen, and it works in rentals because most racks need no fitting. Choose a rack sized to your sink, with space for plates, bowls and a few glasses.
Empty the rack daily, wipe the sink rim, and keep a small tray under any items that stay on the counter. If you have a dishwasher, use the over-sink rack only for hand washed items such as knives, boards and large pans. A dish rack that is too wide will block the tap, so check the tap position before buying.
23. Put Utensils on a Wall Rail and Knife Strip
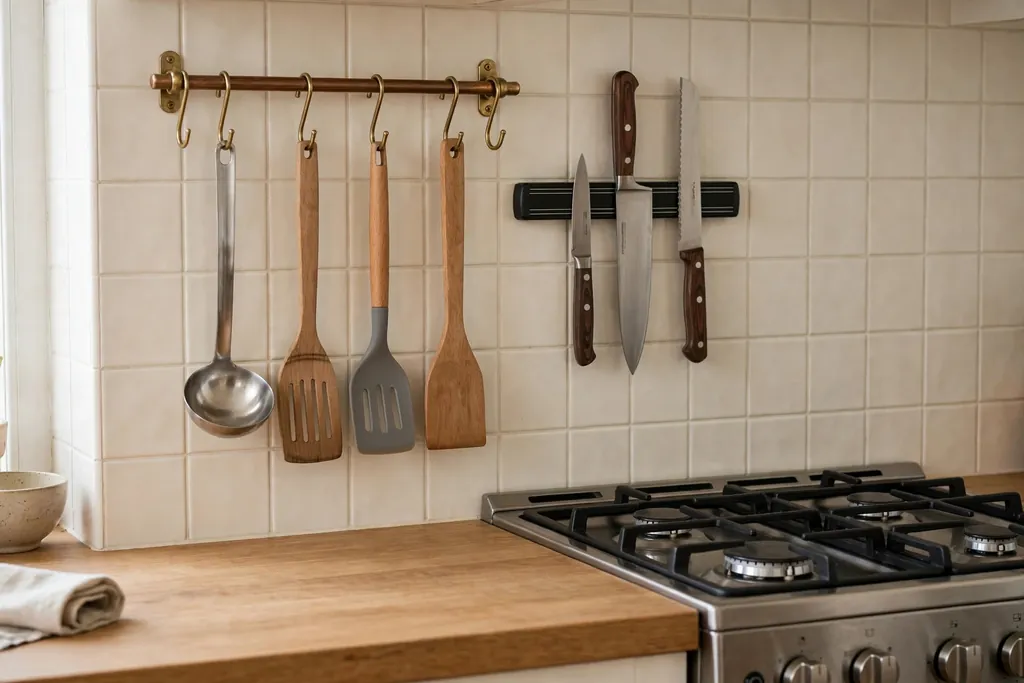
A wall rail with hooks for ladles, spatulas and measuring cups, plus a magnetic strip for knives, moves two crowded drawers onto a short stretch of wall. It keeps tools in sight while you cook, frees a drawer for other items, and makes it easy to see when a tool is missing. Fit the rail beside the stove, within arm’s reach but clear of heat and steam.
Use strong fixings into studs or masonry, since a loaded rail is heavy. Keep sharp knives high and out of reach of small children, and keep wooden handles away from direct steam. Group tools by job, such as cooking tools together and baking tools together, so you grab the right item without sorting through a drawer.
24. Use the Space Above the Fridge and Doorways
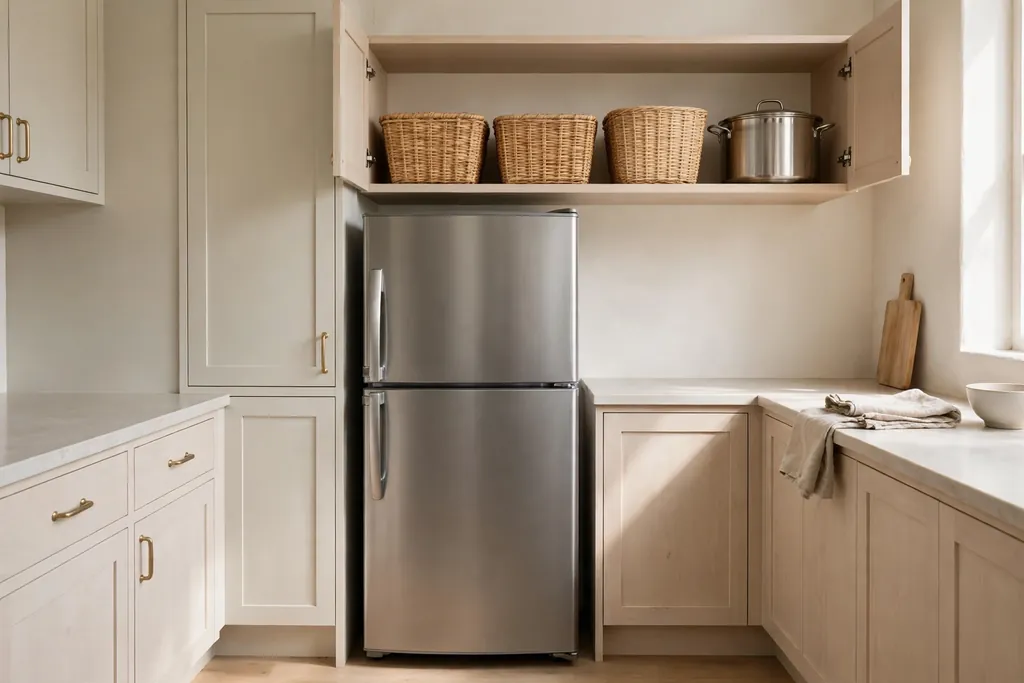
The cabinet above the fridge and a high shelf above a doorway can hold items you use monthly, such as a large stockpot, a picnic set or extra baking trays. A deep cabinet above the fridge works best with a pull-down shelf or a labeled bin that slides out, since reaching to the back of that cabinet is awkward.
Keep a folding step stool nearby, and never store heavy items above head height where they could fall. In a kitchen with a high ceiling, a single long shelf above a doorway can hold cookbooks and light baskets, but keep it shallow so items do not loom over the walkway. Leave ventilation space above the fridge as the maker advises.
25. Lay Light, Large-Format Floor Tiles
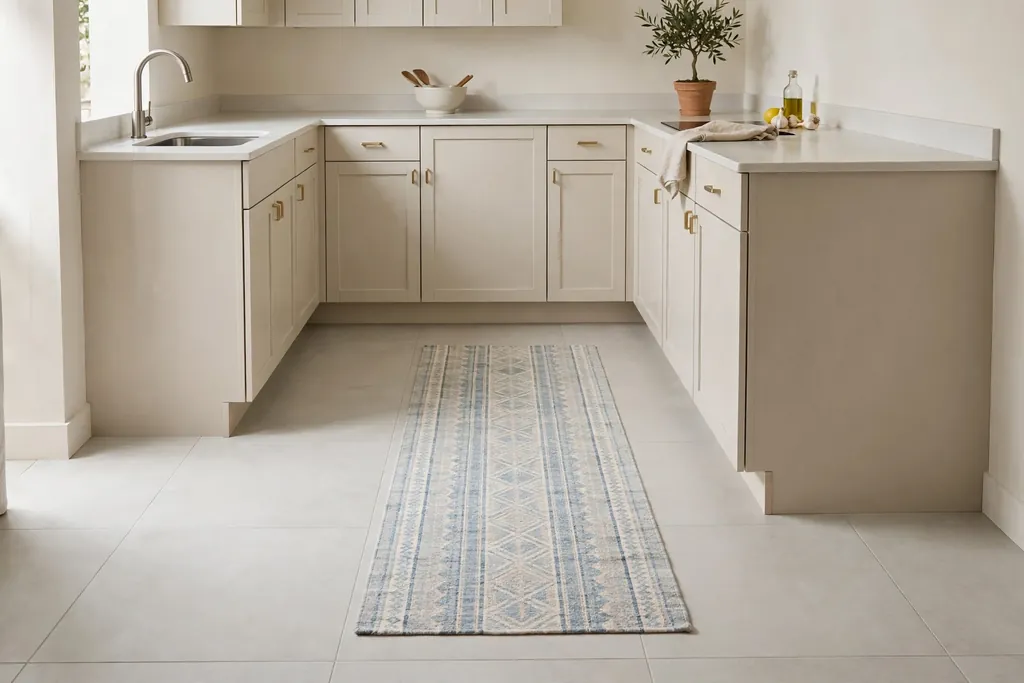
Small, dark or busy floor tiles can chop a small kitchen into pieces and make it feel smaller. Large-format tiles in a light, matte finish, laid with narrow grout lines, create a calmer floor that reads as one surface. Running the same floor into an adjoining dining area, where practical, helps the kitchen feel part of a larger room.
Choose a tile with a slip resistant finish for a kitchen floor, and check that cabinet doors and appliances still clear the new floor height. A matte finish hides crumbs better than high gloss, which shows every mark. If a full re-tile is too much, a washable flat weave runner in a light tone can lighten a dark floor in the main walkway.
26. Corral Daily Items on One Tray and Clear the Rest
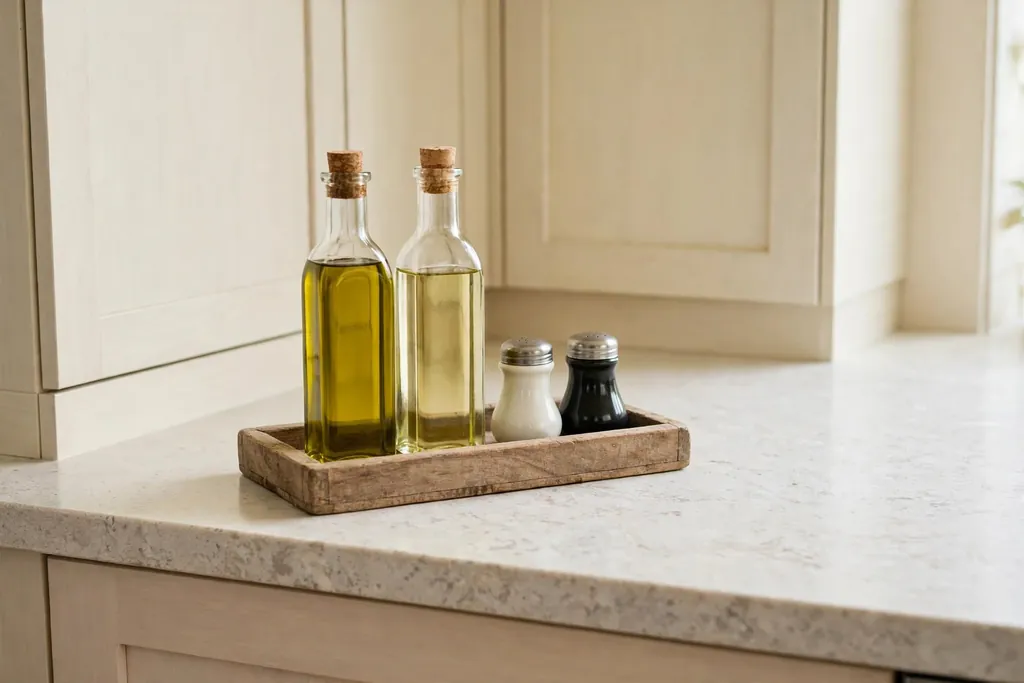
A small kitchen feels crowded when every surface holds a few items with no home. Pick one tray for daily items, such as oils, salt, pepper and a soap bottle, and clear everything else off the counters into cabinets, a pantry or a drawer. The tray keeps daily items together and can move to the table or a shelf when you need the full counter for prep.
This one zone approach also works for seasonal decorating, as shown in these Thanksgiving kitchen decor ideas, where a single styled zone keeps working counters clear. Review the tray weekly and remove anything you have not used, since trays fill up fast. Keep the tray away from the stove and sink splash zone, and wipe it when you wipe the counters.
27. Widen the Doorway or Open One Wall Section
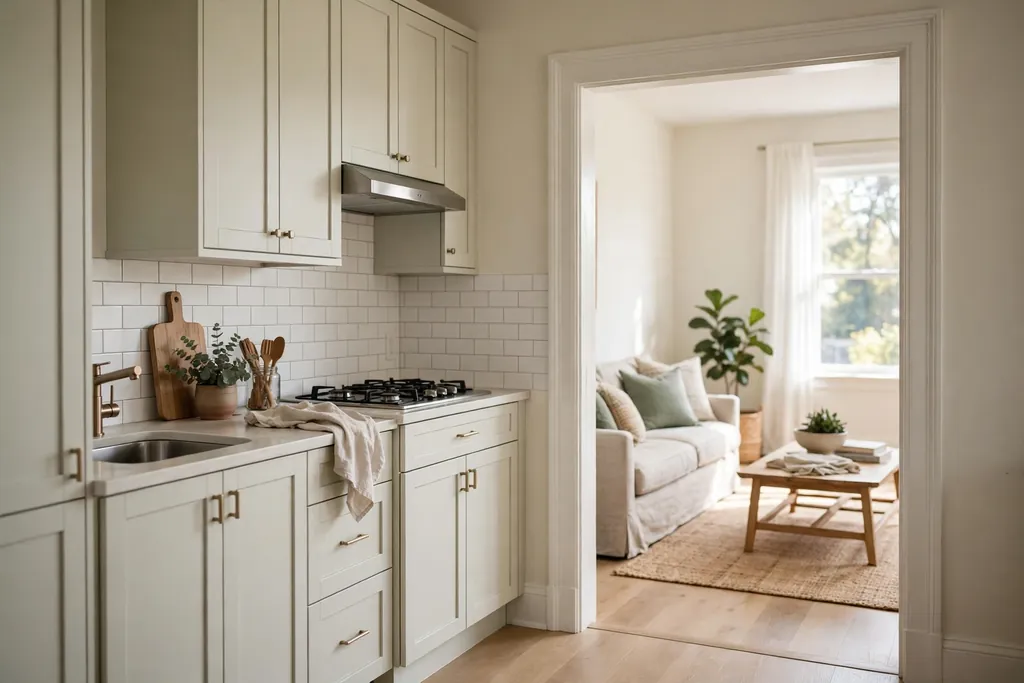
Removing a non-load-bearing section of wall, or widening the doorway into the living room, can make a small kitchen feel connected without a full open plan remodel. More daylight and a longer sight line help the room feel larger, and a wide opening lets two people pass with dishes without squeezing past a door frame.
Check first whether the wall is load-bearing, and whether it holds plumbing, wiring or vents, since those costs change the plan. Keep a clear opening without a door that swings into the kitchen, and use a cased opening or a pocket door if you still want to close the room off. A half wall with a counter top can serve as a pass-through and extra serving space in some layouts.
28. Let Daylight In With Sheers and a Bright Window Wall
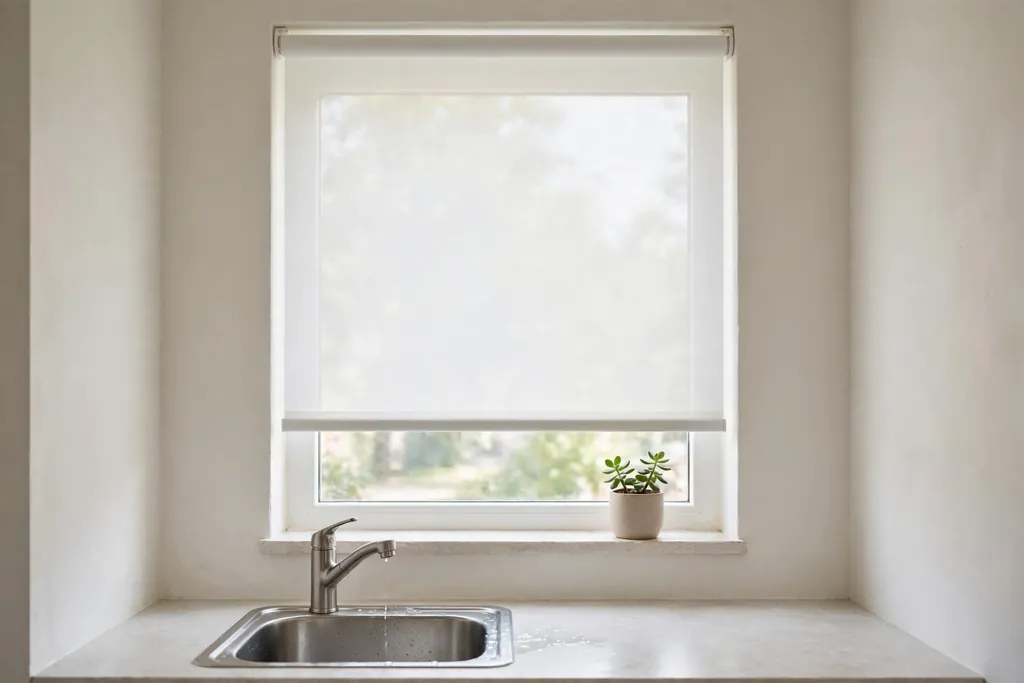
A heavy curtain or a cluttered sill blocks daylight that a small kitchen needs. Replace heavy window coverings with a sheer roller blind or a light linen cafe curtain that covers only the lower half of the window, so light comes in over the top while privacy stays at eye level. Clear the sill except for a small plant or a soap bottle, and paint the window wall in a light color.
Clean the window inside and out, and trim any outside growth that shades the glass. If the window faces a dark courtyard, a light backsplash and under-cabinet lights help make up for low daylight. Keep the window area free of tall appliances, so the light reaches the sink and prep counter rather than stopping at a tall unit.
29. Move the Microwave Off the Counter
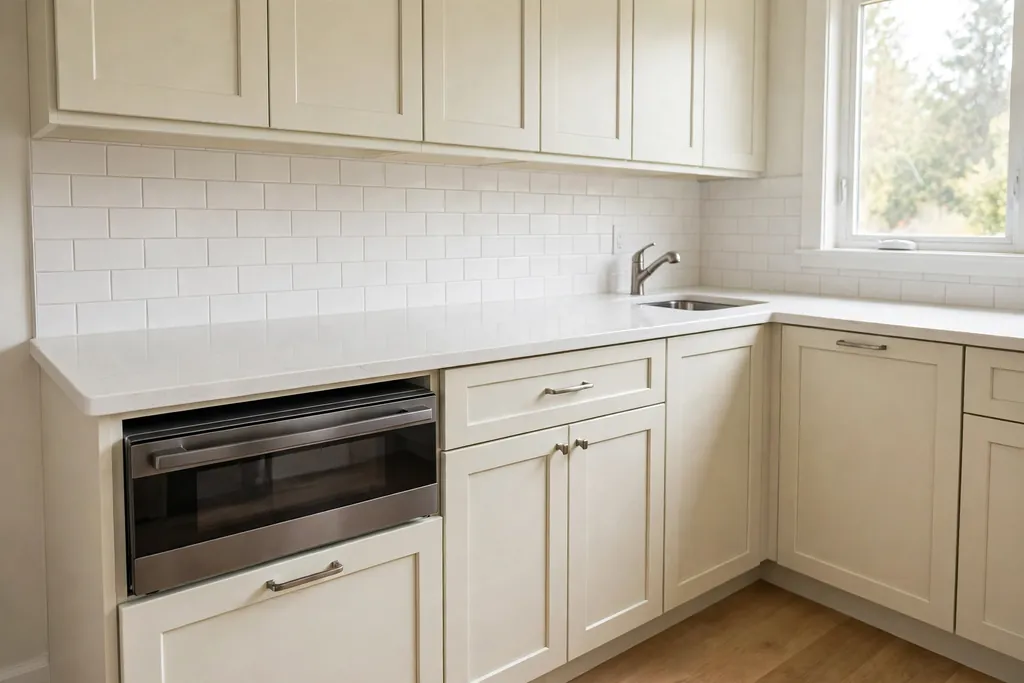
A countertop microwave takes up a large block of prep space in a small kitchen. Moving it to a built-in shelf, a microwave drawer under the counter, or a shelf above the oven frees that block and puts the microwave at a safer height. A drawer model suits children and shorter cooks, since hot dishes lift out at counter height rather than from above the head.
Measure the microwave with its door open, and leave ventilation space as the maker advises. If you choose a wall shelf, set it at a height where you can see inside without reaching up blindly. Keep a heatproof mat nearby for hot dishes, and store microwave-safe covers in the cabinet beside it so they are easy to grab.
30. Use Two Tones to Ground the Room Without Darkening It
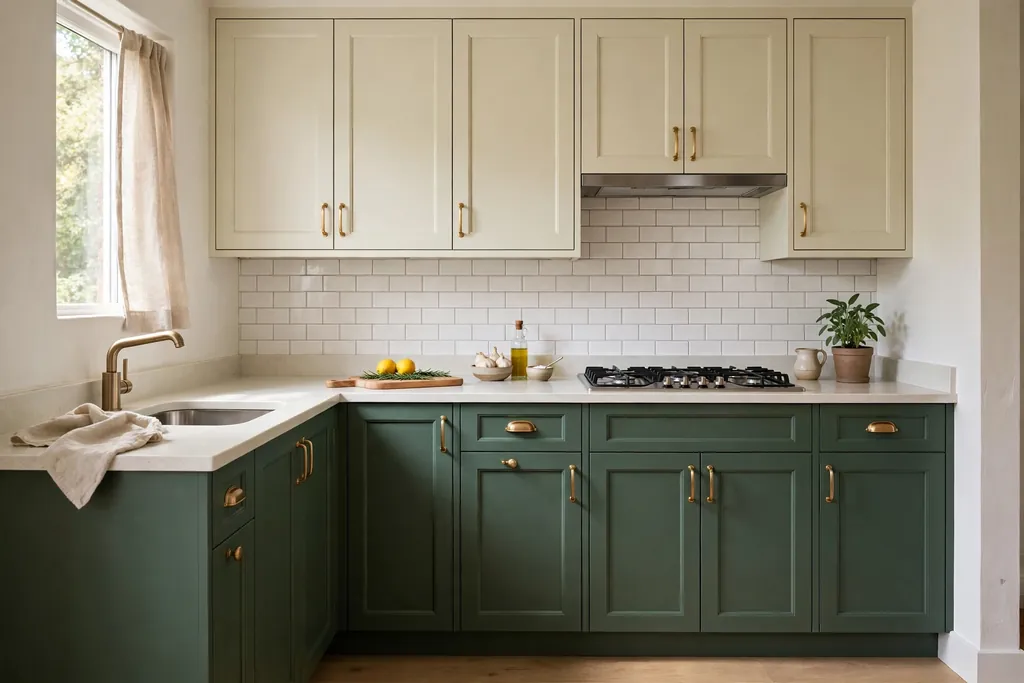
Two-tone cabinets, with a deeper color on the base units and a light color on the uppers, give a small kitchen depth without closing it in. The darker base grounds the room and hides scuffs near the floor, while light uppers keep the eye moving up and the wall feeling open. Sage, soft navy, warm gray or deep green all work with light uppers and a pale counter.
Repeat the base color in one other spot, such as bar stools or a runner, so it reads as planned rather than random. Keep hardware the same across both tones for a calm look. Test paint samples on both upper and lower doors in daylight and evening light, since a color that looks soft on a sample card can read much darker on a full cabinet run.
31. Choose Stools and a Table That Tuck Fully Away
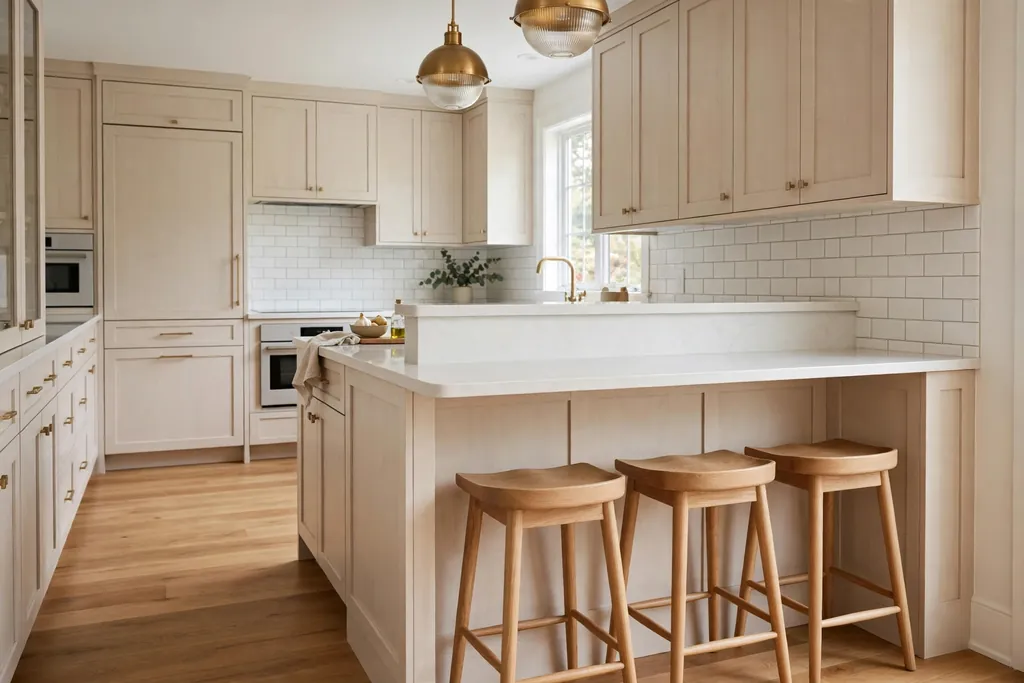
Seating that does not tuck away eats floor space all day for a meal that lasts an hour. Choose backless stools that slide fully under a peninsula or bar, or a small round table with two chairs that push in tight, so walkways stay clear between meals. A round table suits a corner nook, since it has no corners to bump into in a tight pass.
Measure the stool height against the counter, leaving about 25 centimeters between seat and counter underside for comfortable knees. Stacking stools or folding chairs stored on wall hooks are a good backup for guests. Keep the dining zone near the kitchen entry, so guests do not walk through the cooking zone to sit down.
Conclusion
A good small kitchen remodel is a set of small, practical wins rather than one big gesture. Start by clearing walkways and fixing storage, then add light and bright surfaces, and finish with seating that tucks away. Pick the ideas that match your budget, your building rules and the way you actually cook, and change one zone at a time so the kitchen stays usable while you work. The result should be a room that feels calmer, holds what you own, and makes everyday cooking easier.
FAQs
Do I need a full remodel to make a small kitchen work better?
No. Many of the biggest gains come from storage and layout changes, such as deep drawers, a pull-out pantry, a rolling cart and under-cabinet lights. Try those first, live with the change for a few weeks, and only plan building work if a real bottleneck remains.
What layout works best for a small kitchen?
A galley or L-shape layout usually works best, because it keeps the sink, stove and fridge close and leaves a clear path between them. A peninsula can add seating and a room divider, but only if it leaves at least 90 centimeters of clear walkway around it.
How can I add storage without adding cabinets?
Use height, corners and hidden spots: cabinets to the ceiling, a blind corner pull-out, toe-kick drawers, a wall rail, and the space above the fridge. Clear the counters first, so you know what actually needs a new home, rather than adding storage for items you rarely use.
What colors make a small kitchen look larger?
Light, warm whites, pale grays and soft sage reflect light and keep the room calm. Glossy light backsplash tiles and light floors help too. If you want a deeper color, keep it on the base cabinets and keep the uppers and walls light, so the room still feels open above eye level.
Should I remove upper cabinets in a small kitchen?
Removing one run of uppers for open shelves can open the room, but only if you have closed storage elsewhere for food and mismatched items. Keep shelves to everyday dishes in a calm palette, and keep closed cabinets for the rest, so the kitchen stays tidy rather than looking crowded.
Is a small island or a peninsula better in a small kitchen?
A rolling cart or a peninsula usually suits a small kitchen better than a fixed island, because both can be sized to the room and moved or tucked away. A fixed island needs clear walkways on all sides, which many small kitchens do not have, so measure your floor before choosing.