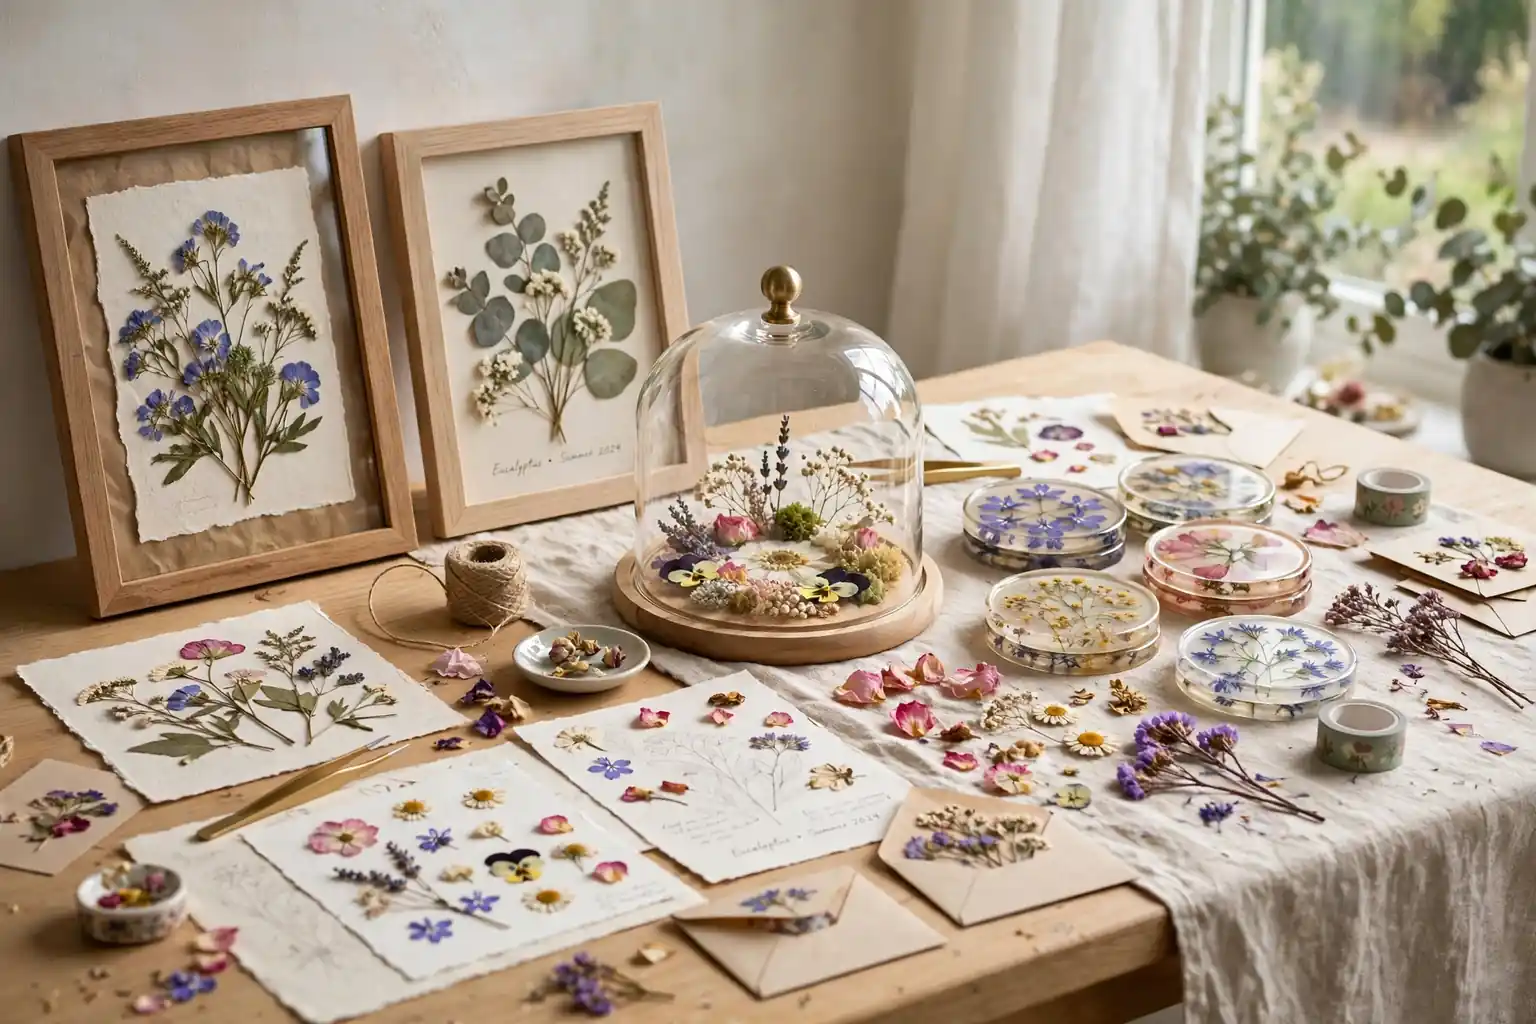
Pressed flower crafts turn flat, dried blooms into home decor you can display, use, and give as gifts. Press flowers until fully dry, arrange them on paper, glass, wood, or resin, seal the design against moisture and light, and choose a project that fits the room, such as framed art for a wall or coasters for a table.
Most pressed flower projects start the same way, even when the finished piece looks very different. Pick flowers that press flat, such as pansies, violets, daisies, ferns, and small leaves, and press them between paper under steady weight until they feel dry and papery. For fresh flower ideas to pair with these dried projects, see these fall flower arrangements. Once the blooms are ready, the choice is about the surface and the spot: a frame suits a hallway wall, a resin coaster suits a coffee table, and a bookmark suits a reader who will see the flowers often. Keep the palette to two or three flower colors per piece, leave breathing room around each bloom, and seal the work so dust and damp air do not soften the petals.
Key Takeaways
- Press flowers until fully dry and papery before use, since damp petals can lose color, curl, or grow mold under glass or resin.
- Flat blooms such as pansies, violets, daisies, and ferns press more cleanly than thick or fleshy flowers.
- Keep each design to two or three flower colors and leave space around each bloom so the arrangement reads clearly.
- Seal finished pieces against moisture, dust, and direct sun, using glass, laminate, or a sealant suited to the surface.
- Match the project to the spot: framed art for walls, coasters and trays for tables, and bookmarks and cards for gifts.
- Make one test piece first to check how your flowers look under glass or resin before committing a whole batch.
- Store spare pressed flowers flat between paper sheets in a dry box, away from sun and damp rooms.
1. Classic Framed Botanical Art
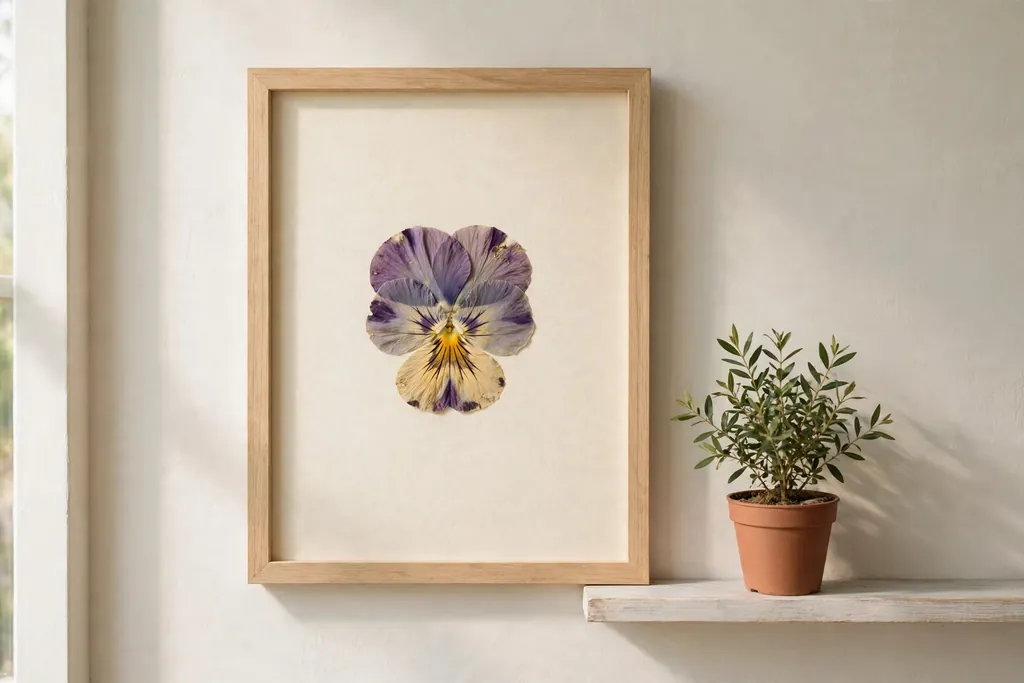
A single framed botanical print is the simplest pressed flower craft, and it suits a hallway, a bedroom wall, or a desk nook. Lay one large bloom, such as a pansy or a daisy, in the center of a plain paper background, add two or three smaller leaves or buds around it, and fix each piece with a tiny dot of clear craft glue on the back. Keep the stems pointing in one direction so the design looks calm rather than scattered.
Choose a frame with glass to protect the petals from dust and touch, and hang it away from direct sun so colors fade more slowly. A white or cream background suits most flower colors, while a soft sage or pale gray background suits white and yellow blooms. If the frame has a mat, use it to give the flowers breathing room and to keep the glass from pressing directly on raised petals.
2. Gallery Wall of Small Pressed Frames
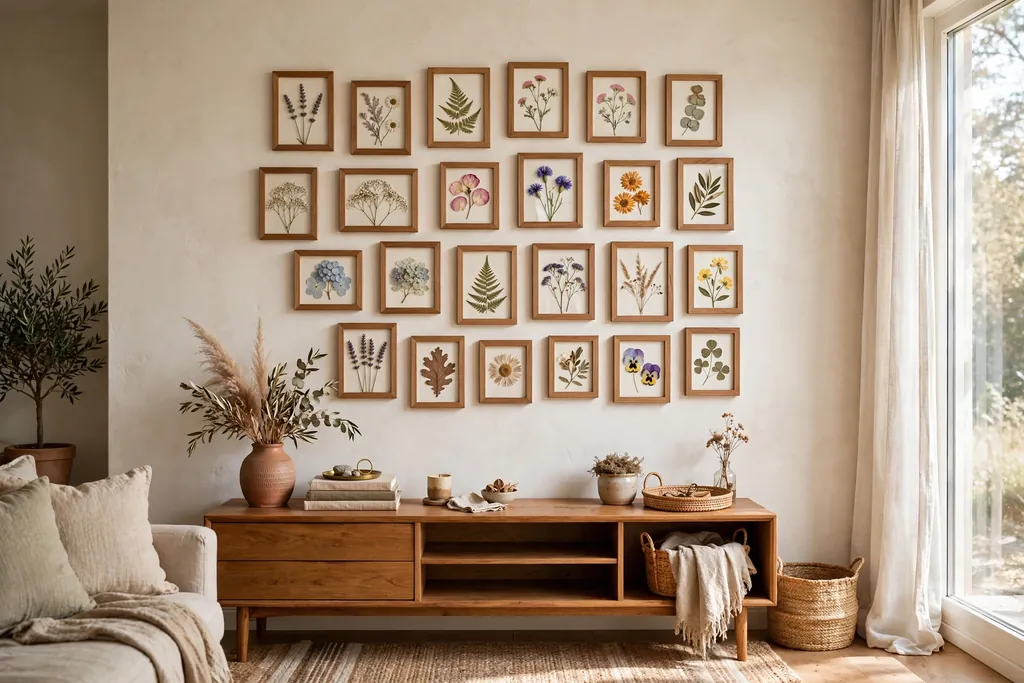
A gallery wall groups several small pressed flower frames into one display, which works well above a sofa, along a stair wall, or over a console. Use frames in one finish, such as light wood or black, and vary the flower in each frame so the wall reads as a set without repeating the same design. Hang the frames in a loose grid with even gaps, and step back often to check the balance.
Plan the layout on the floor first, and keep one flower color running through most frames to tie the group together. Mix a large bloom frame with fern frames and small bud frames so the eye has places to rest. This project also suits a growing collection, since you can add one new frame each season without redoing the whole wall.
3. Floating Glass Frame Display
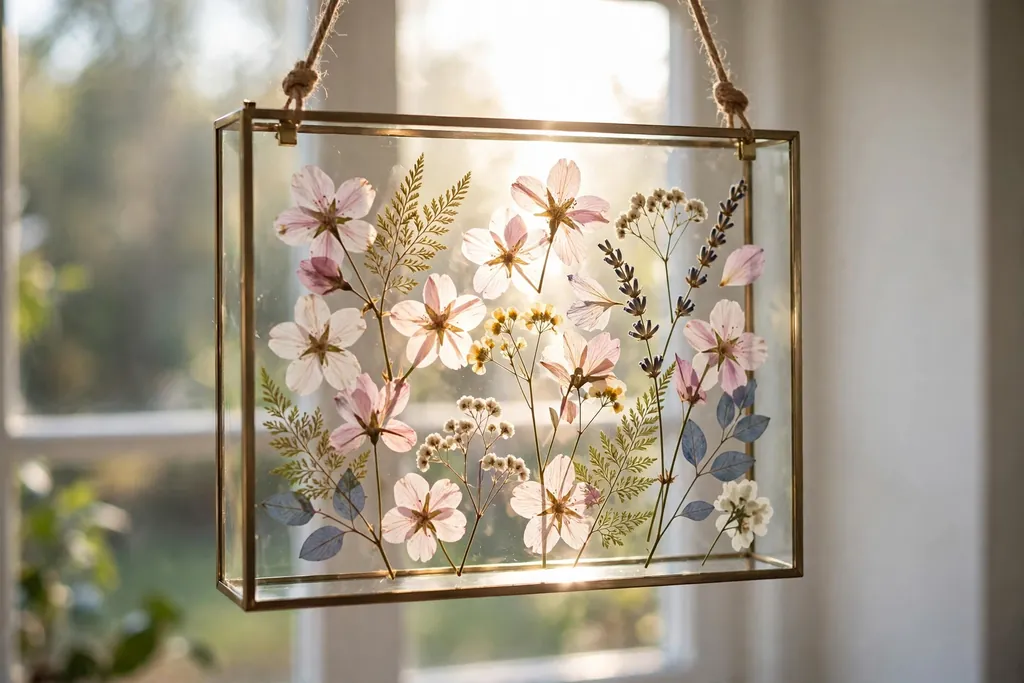
A floating glass frame holds pressed flowers between two panes of glass, so light passes through the petals and the wall color shows behind them. This suits a bright window wall, a sunroom, or a shelf near a window, where the backlight makes thin petals glow. Arrange the flowers on one pane, close the second pane over them, and secure the frame so the design cannot slip.
Use fewer blooms in a floating frame than in a paper backed frame, since every stem shows from both sides. Trim stems short, keep the design near the center, and avoid thick blooms that would keep the panes from closing flat. A simple metal or wood edge frame keeps the focus on the flowers, and a small hanging hook holds the frame steady on the wall.
4. Pressed Flower Resin Coasters
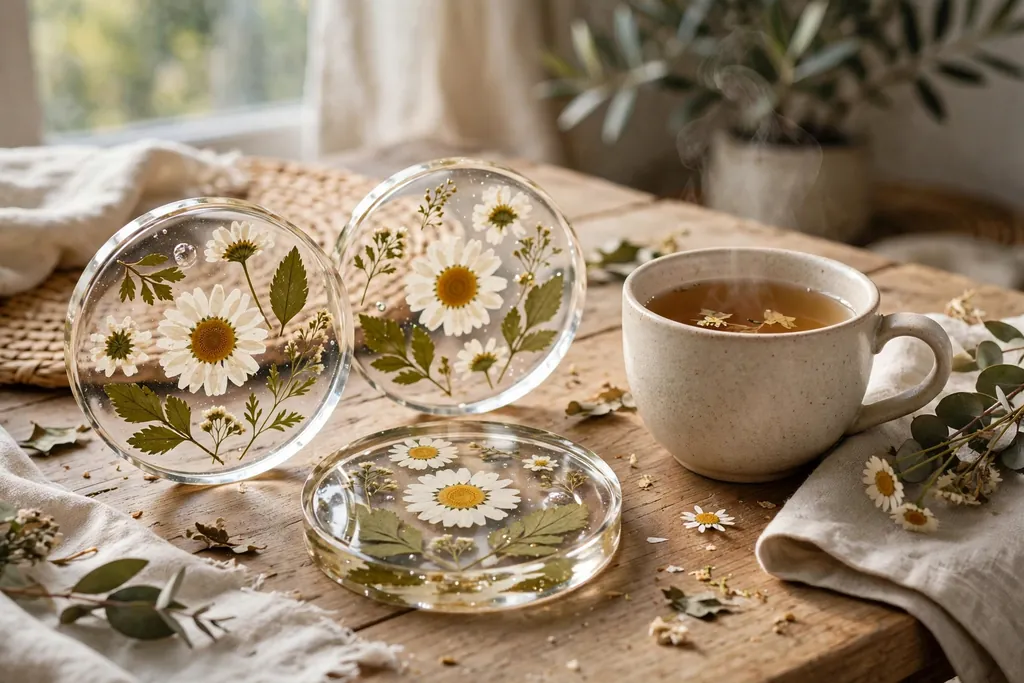
Resin coasters turn pressed flowers into table pieces you can use every day. Place a flat bloom and a small leaf in the bottom of a round or square coaster mold, pour clear resin over them in thin layers as directed by the resin maker, and let each layer set before adding the next. Thin layers help keep bubbles low and keep light flowers from floating to the surface.
Use fully dry flowers only, since moisture in a fresh bloom can cloud resin or trap bubbles. Keep the design flat and near the center so cups sit level, and sand any rough edge lightly once the coaster is fully set. A set of four coasters in one flower color makes a clear gift, while a mixed set suits a table that already holds many colors.
5. Pressed Flower Bookmarks
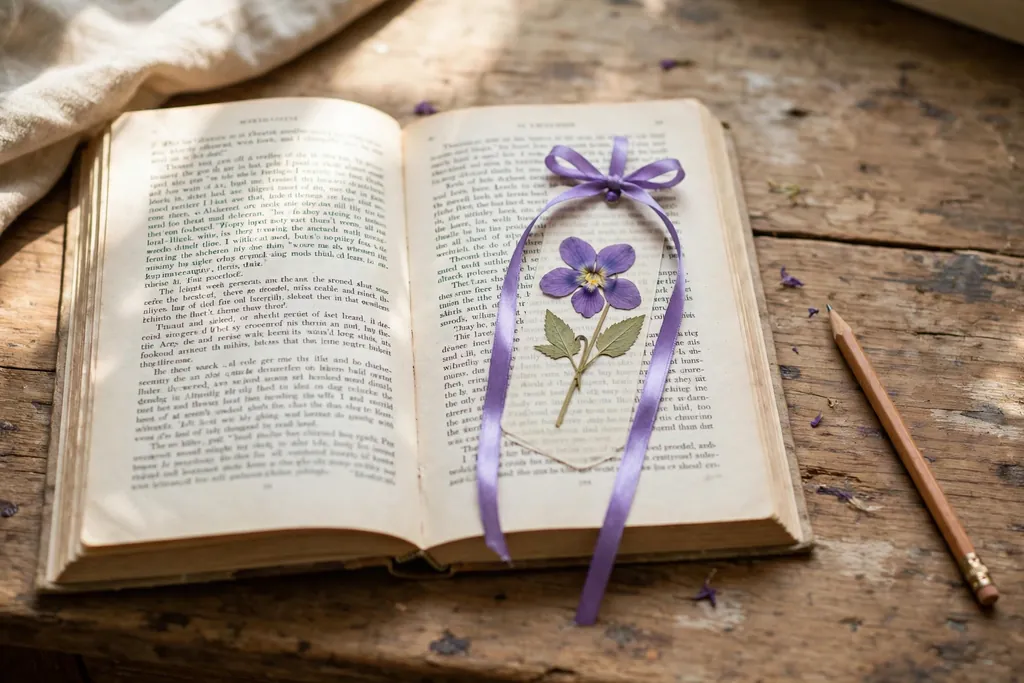
A pressed flower bookmark is a small, useful craft that suits readers, students, and gift baskets. Arrange one slim bloom and a fern tip on a strip of card, cover the strip with clear laminate or clear contact film, and trim the edges clean. Punch a hole at the top and thread a short ribbon through it for a finished edge that is easy to pull from a book.
Keep the design flat and away from the edges so the laminate seals fully around the flowers. Slim blooms such as violets, small daisies, and pressed leaves work best, since thick petals can keep the laminate from lying flat. Make a set in one color family for a gift, or make one bookmark per book so each reader has a personal marker.
6. Pressed Flower Greeting Cards
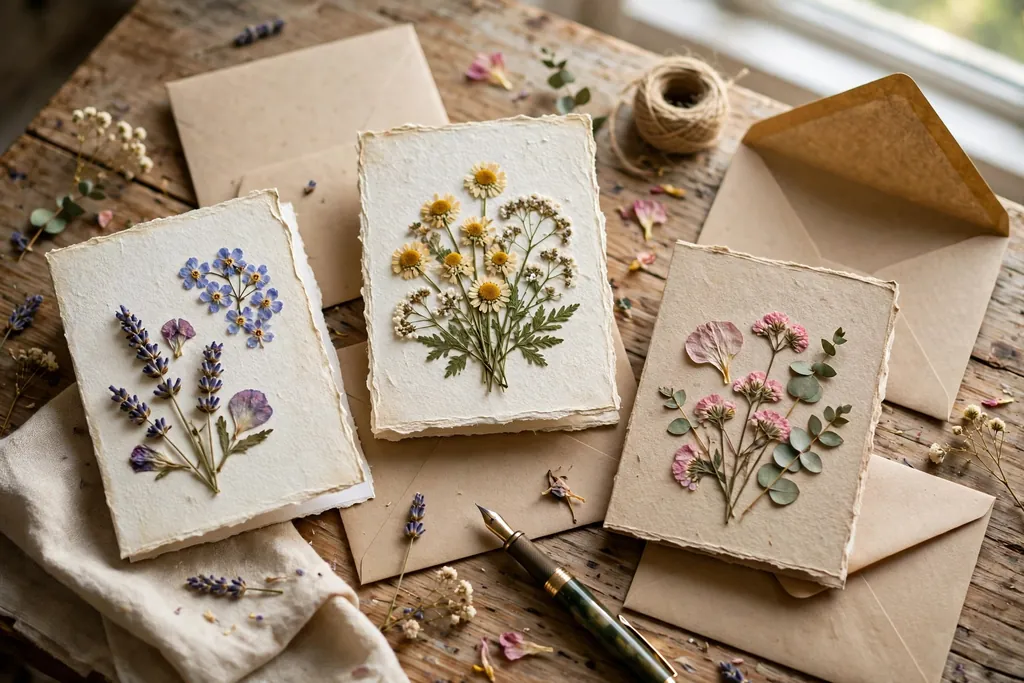
Pressed flower greeting cards add a handmade touch to birthdays, thank you notes, and seasonal greetings. Glue a small pressed bloom or a tiny spray of leaves to the front of a blank card, leave room for a short written message inside, and press the finished card flat under a book overnight so the glue sets without curling the card. A single bloom often looks better than a crowded front.
Use a light hand with glue, and place a dot only on the back of each petal or stem so no glue shows around the edges. Pair the flower with a plain envelope in a matching color, and keep the card out of damp rooms before sending. This project is also a good use for small or slightly torn blooms, since a single neat petal can still anchor a card design.
7. Pressed Flower Pillar Candle Wrap
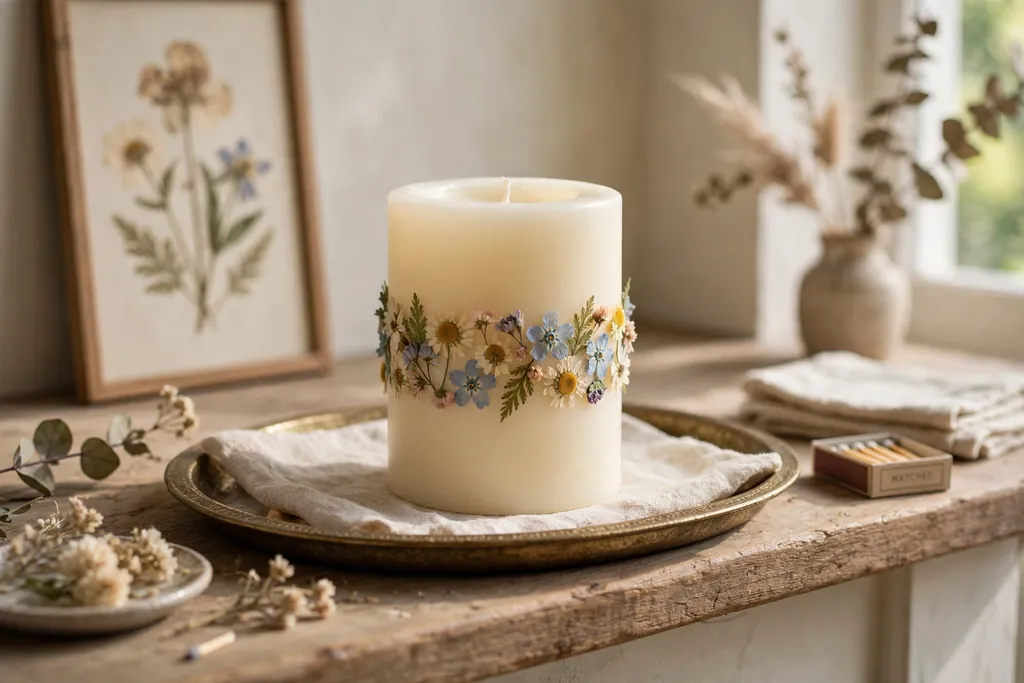
A pillar candle wrap places pressed flowers around the outside of a plain candle, held in place with a thin layer of clear wax or a heat safe method suited to the candle you use. Arrange small flat blooms around the candle in a vertical line or a loose band, fix them lightly in place, and seal them so they sit flat against the wax. The result suits a mantel, a dining table, or a bathroom shelf.
Use this craft for display candles or for candles burned only with care and attention, and keep pressed flowers away from the flame and the melted wax pool. Small blooms and leaves work best, since large petals can lift at the edges. A plain white or cream candle shows flower colors most clearly, and a simple tray under the candle catches any loose petal.
8. Pressed Flower Jar Lantern
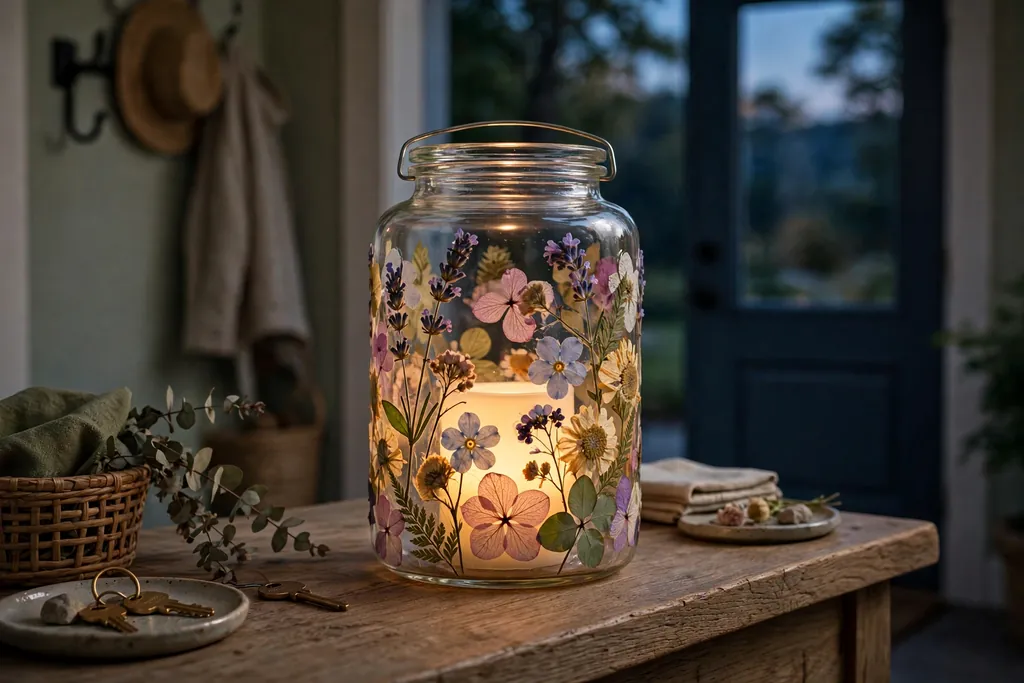
A jar lantern pairs pressed flowers with soft light for an entryway table, a porch shelf, or a bedroom dresser. Glue flat blooms to the outside of a clean glass jar, or place them between the jar and a clear outer sleeve, then set a battery candle inside so heat never reaches the petals. The light through the glass makes the flowers visible in the evening without a flame near dried material.
Use battery candles only for this project, and keep real flames away from dried flowers at all times. Small blooms in warm colors suit autumn jars, while white and pale pink blooms suit a spring table. Group two or three jars in different heights for a fuller display, and keep one flower color shared across the group so the set reads as one plan.
9. Pressed Flower Resin Serving Tray
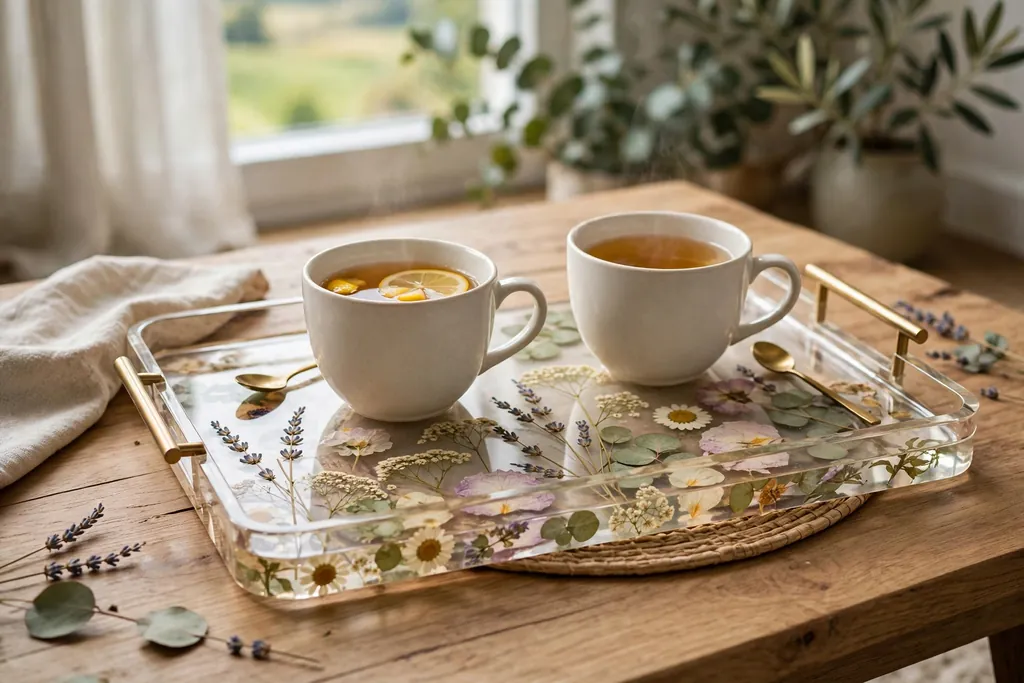
A resin serving tray gives pressed flowers a larger, useful surface for a coffee table or a tea tray. Arrange blooms across a flat tray base or inside a shallow tray mold, pour resin in thin layers as directed by the resin maker, and let the tray set fully before use. A wood rim or handles make the tray easy to carry, while the clear top keeps the flowers visible and wipeable.
Plan the layout before pouring, since resin sets the design in place. Keep flowers away from the rim and handles, leave a clear area in the center for cups, and use flat blooms so the surface stays level. This project suits a tray that holds light items, such as cups and a small plate, rather than heavy dishes that could scratch the surface over time.
10. Embroidery Hoop Wall Hanging
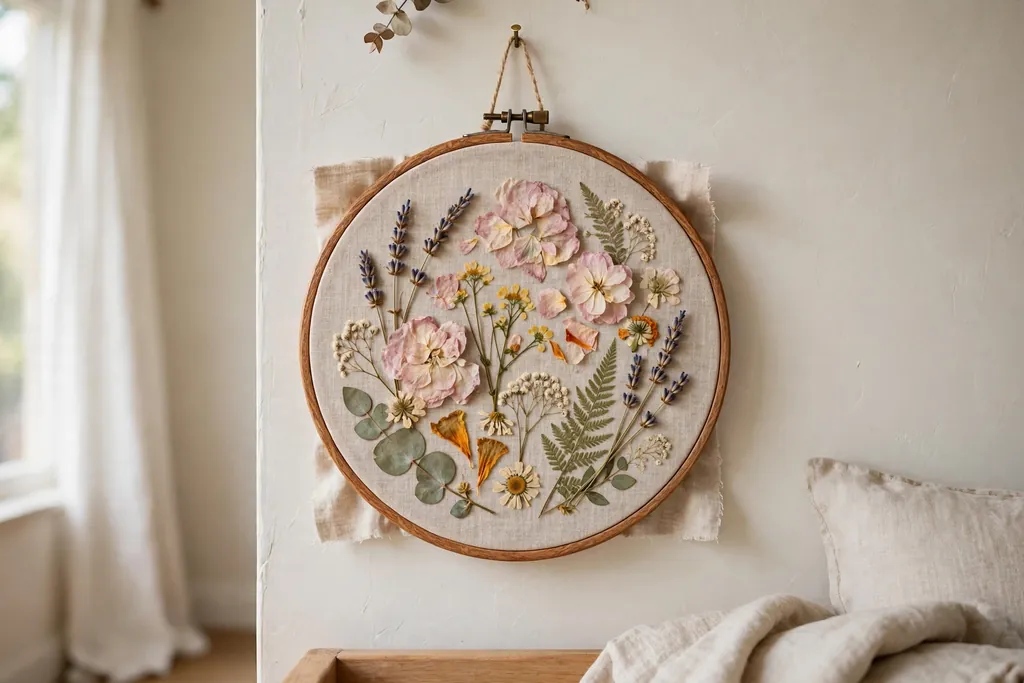
An embroidery hoop wall hanging frames pressed flowers in a round, light display for a bedroom, a craft room, or a nursery wall. Stretch a plain linen or cotton cloth in a wood hoop, arrange pressed blooms on the cloth, and fix them with tiny glue dots or a few fine stitches through the stems. Hang the hoop from a small nail or hook, with the screw at the top for a neat finish.
Keep the cloth color quiet, such as natural linen or soft white, so the flowers lead the design. A single large bloom with two leaves suits a small hoop, while a loose spray suits a larger hoop. This craft is easy to refresh, since you can swap the cloth and flowers for a new season without buying a new frame.
11. Laminated Pressed Flower Placemats
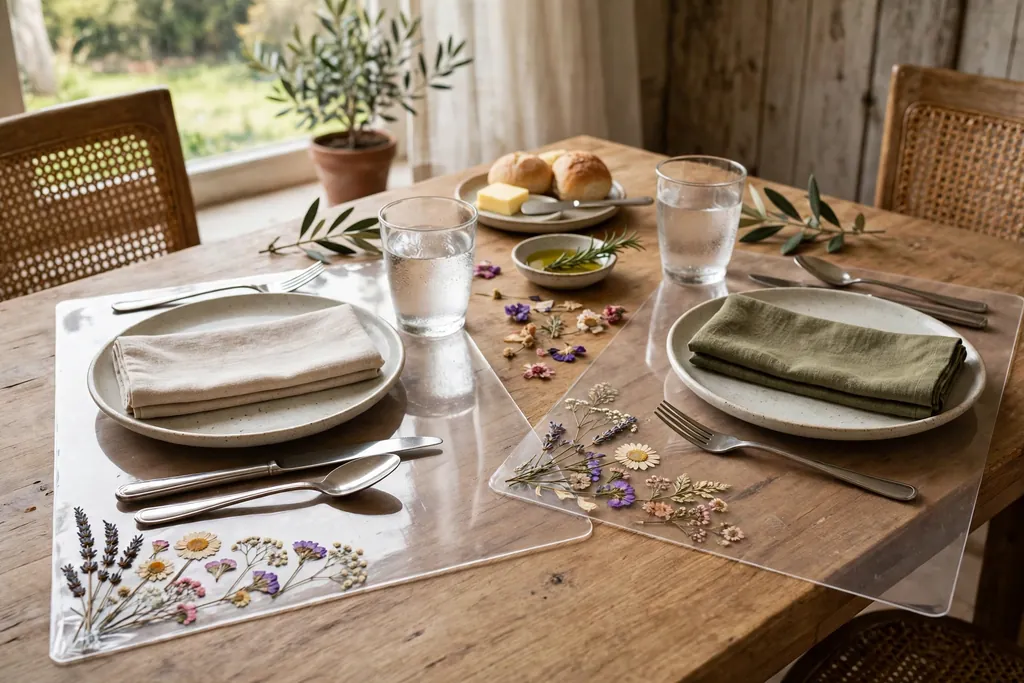
Laminated placemats place pressed flowers under a clear, wipeable surface for a dining table or a breakfast nook. Arrange blooms on a sturdy card or fabric base, laminate the full placemat so the seal runs past the edges of the flowers, and trim the border clean. The laminate protects the petals from spills and lets you wipe the mat with a damp cloth.
Use flat, fully dry flowers and keep the design away from the outer edge so the laminate seals well. A single bloom at one corner suits a calm table, while a border of small leaves suits a more dressed table. Make a set of four or six in one palette for a matching table, and store them flat so the laminate does not bend at the corners.
12. Decoupage Glass Vase
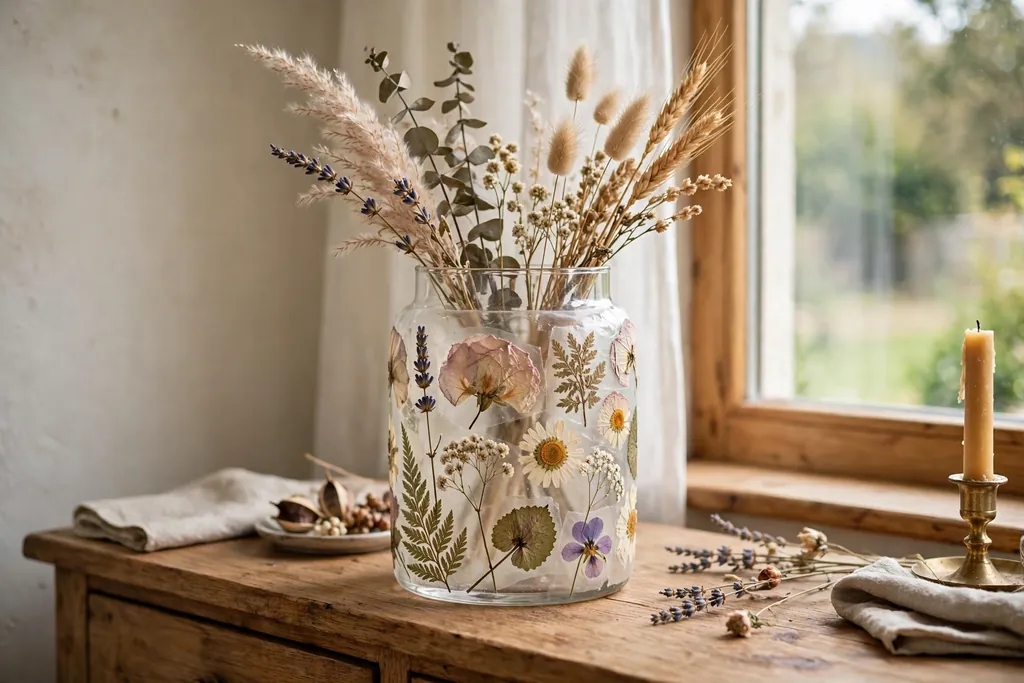
A decoupage vase covers a plain glass vase with pressed flowers sealed under a clear decoupage medium. Brush a thin layer of medium on the glass, place flat blooms and leaves on it, brush a second thin layer over the top, and let the vase dry fully between coats. The flowers stay visible through the glass, and the sealed surface can be wiped gently with a dry cloth.
Work in small sections so the medium does not dry before you place the flowers, and smooth each petal flat to avoid air pockets. Use this vase for dried stems or for fresh stems in a separate inner jar, so water never reaches the decoupage layer from inside. A tall cylinder vase suits a vertical flower line, while a rounded vase suits a loose cluster near the base.
13. Pressed Flower Mirror Frame
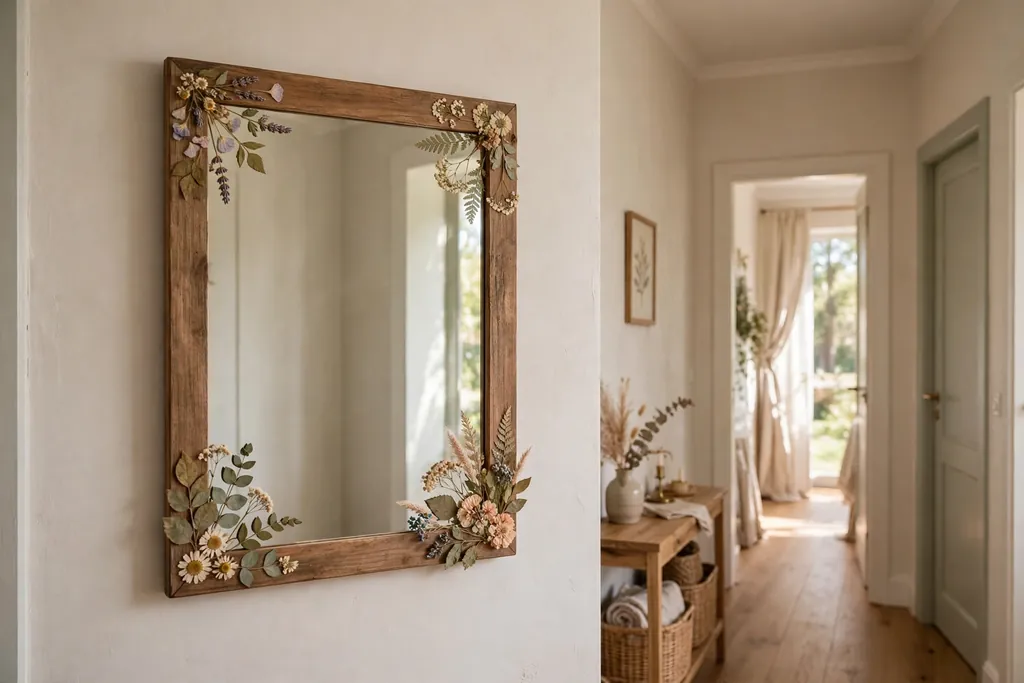
A pressed flower mirror frame adds a botanical border to a hallway or bedroom mirror. Fix flat blooms and small leaves around the mirror frame with clear glue, working in short sections, then seal the border with a clear coat suited to the frame material. Keep the flowers on the frame itself, not on the mirror glass, so the mirror stays clear and easy to clean.
Use small, flat blooms for this project, since large petals can lift from a narrow frame edge. Repeat one flower type at each corner for balance, and fill the sides with leaves and buds. A wood or painted frame holds glue well, while a metal frame may need a glue suited to smooth surfaces, so check the glue directions before you start.
14. Pressed Flower Clock Face
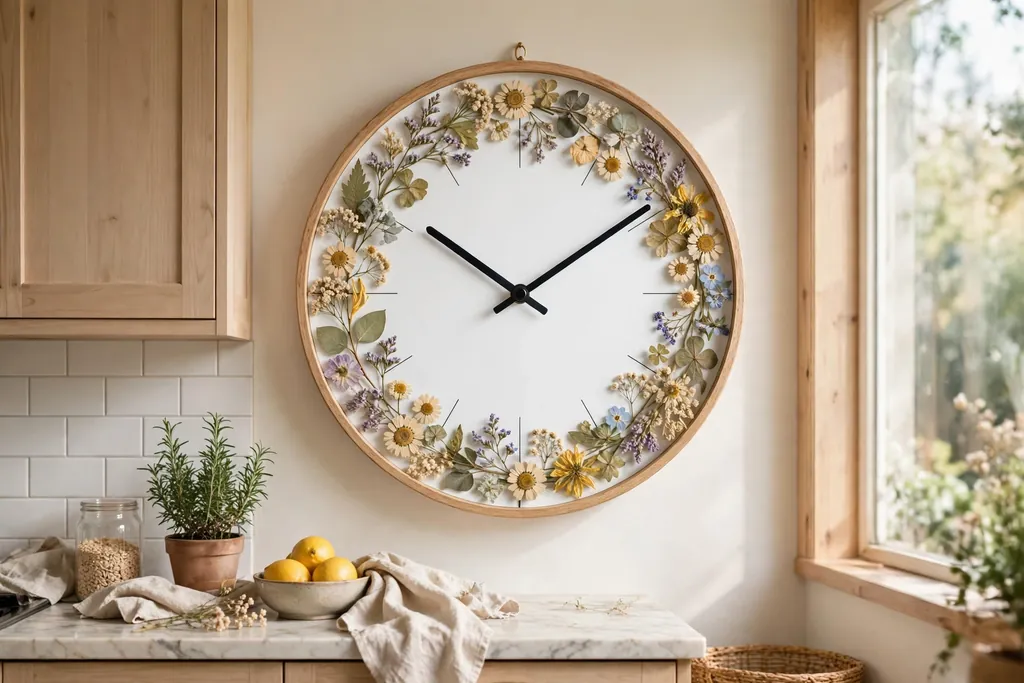
A pressed flower clock face turns a plain wall clock into a botanical display for a kitchen, a craft room, or a living room wall. Remove the clock face cover, arrange flat blooms around the numbers or in a ring near the edge, fix them lightly in place, and refit the cover so the hands move freely. Keep flowers clear of the hands and the center pin so the clock keeps accurate time.
Choose a clock with a clear, simple face so the flowers do not hide the numbers. Small blooms and fern tips suit the ring layout, and a single color family keeps the time easy to read. If you use a clock with a glass cover, the cover protects the flowers from dust, and you can change the design later by opening the case and swapping the blooms.
15. Pressed Flower Resin Trinket Dish
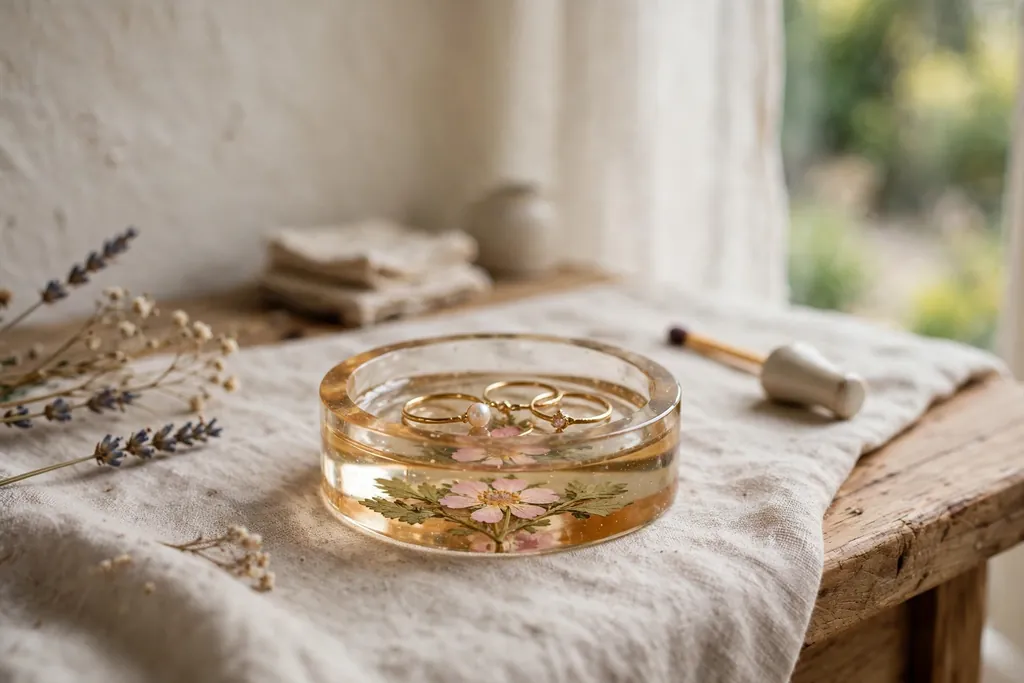
A resin trinket dish holds rings, keys, or small clips while showing pressed flowers in its base. Place a flat bloom and a leaf in a shallow dish mold, pour resin in thin layers as directed by the resin maker, and let the dish set fully before use. A round dish suits a bedside table, while an oval dish suits an entryway console where keys and mail land each day.
Keep the flower near the center and away from the rim so the dish edge stays smooth. Use fully dry blooms, since damp petals can cloud resin, and avoid thick flowers that would raise the dish base unevenly. A single bloom in a clear dish looks calm on a busy dresser, while a small cluster suits a quiet shelf where the dish itself is the display.
16. Pressed Flower Shadow Box Keepsake
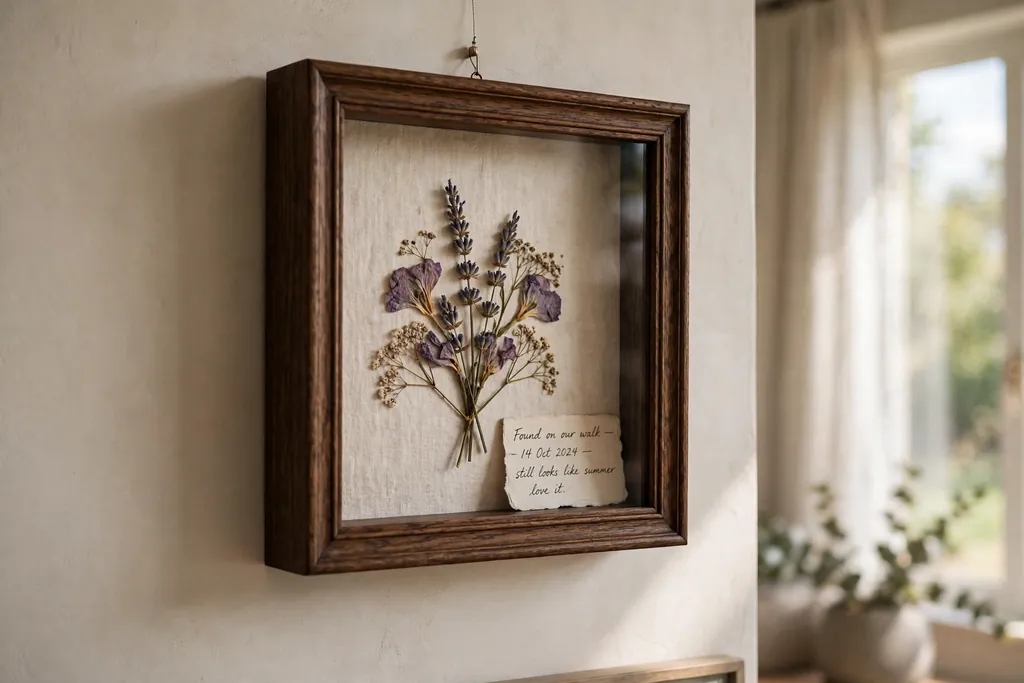
A shadow box keepsake pairs pressed flowers with a memory, such as a wedding bloom, a garden flower, or a card from a special day. Arrange the pressed flower on a paper background inside a deep frame, add a small note or a flat keepsake beside it, and close the glass front. The depth of the box protects thicker blooms and small items that would not fit in a flat frame.
Label the back of the box with the flower name and date if you know them, so the memory stays clear over time. Keep the box out of direct sun and damp rooms, and hang it where it will not be bumped often. This project suits one meaningful bloom more than a large collection, since a single flower with space around it reads as a keepsake rather than a sample board.
17. Glass Cloche Table Centerpiece
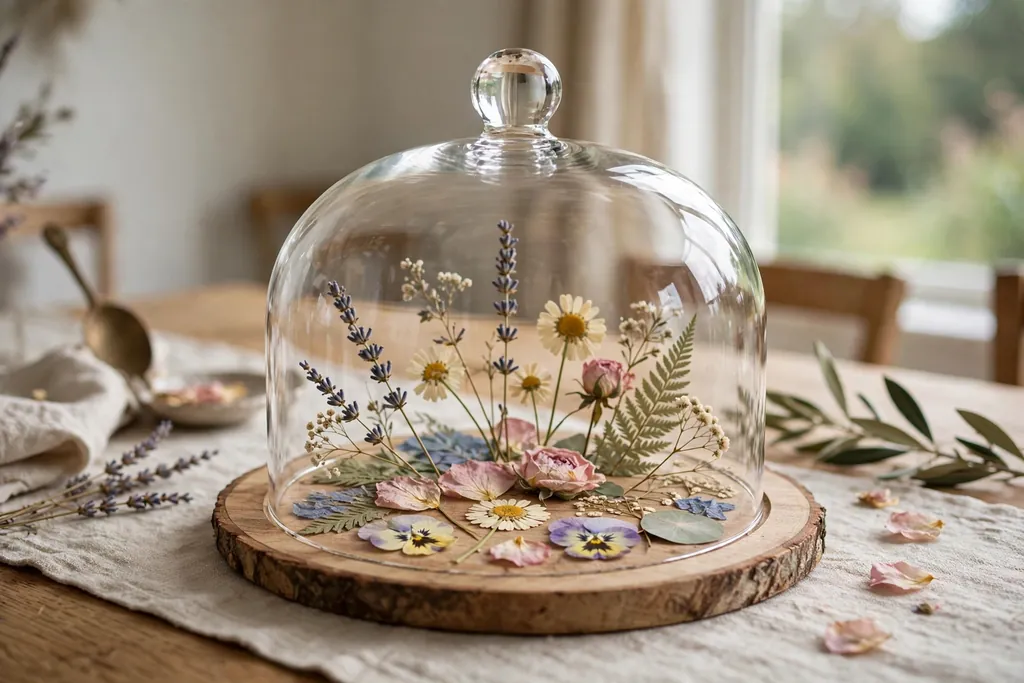
A glass cloche centerpiece displays pressed flowers under a clear dome on a dining table, a coffee table, or a mantel. Arrange flat blooms on a wood or ceramic base, or place a small pressed flower panel upright inside the dome, then set the cloche over it. The dome keeps dust off the petals and turns a simple arrangement into a clear focal point.
Keep the arrangement low and centered on the base so the dome sits level, and choose blooms that read well from all sides, since a table centerpiece is seen from every seat. A single color family suits a formal table, while mixed garden colors suit a casual coffee table. Lift the dome now and then to dust the base, and keep the display away from direct sun so colors hold longer.
18. Pressed Flower Window Suncatcher
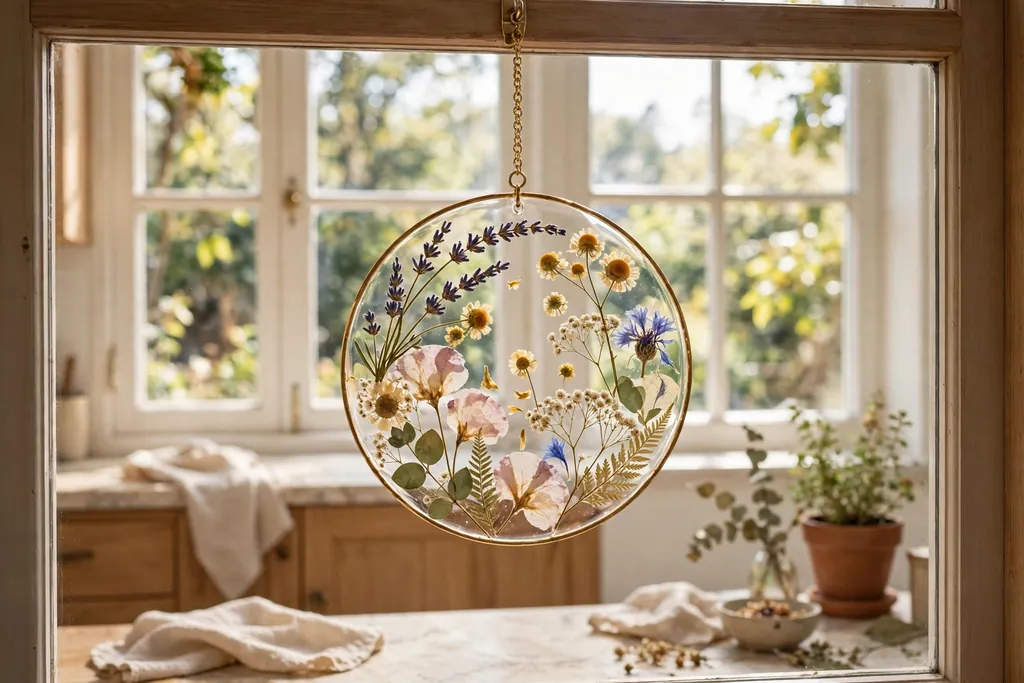
A window suncatcher hangs pressed flowers where daylight passes through them, for a kitchen window, a sunroom, or a bright hallway. Place flat blooms between two clear panels or inside a clear hanging frame, seal the edges, and hang the panel from a small hook or suction holder rated for the weight. Thin petals glow in daylight, and leaves add shape against the bright glass.
Use light, flat blooms and keep the design simple, since a crowded panel blocks light and looks dark from inside. Hang the suncatcher where it will not swing into the window frame, and check the holder often so the panel stays secure. This project suits a window that gets soft or filtered light, since strong direct sun can fade petals faster than a wall display.
19. Flat Pressed Flower Ornaments
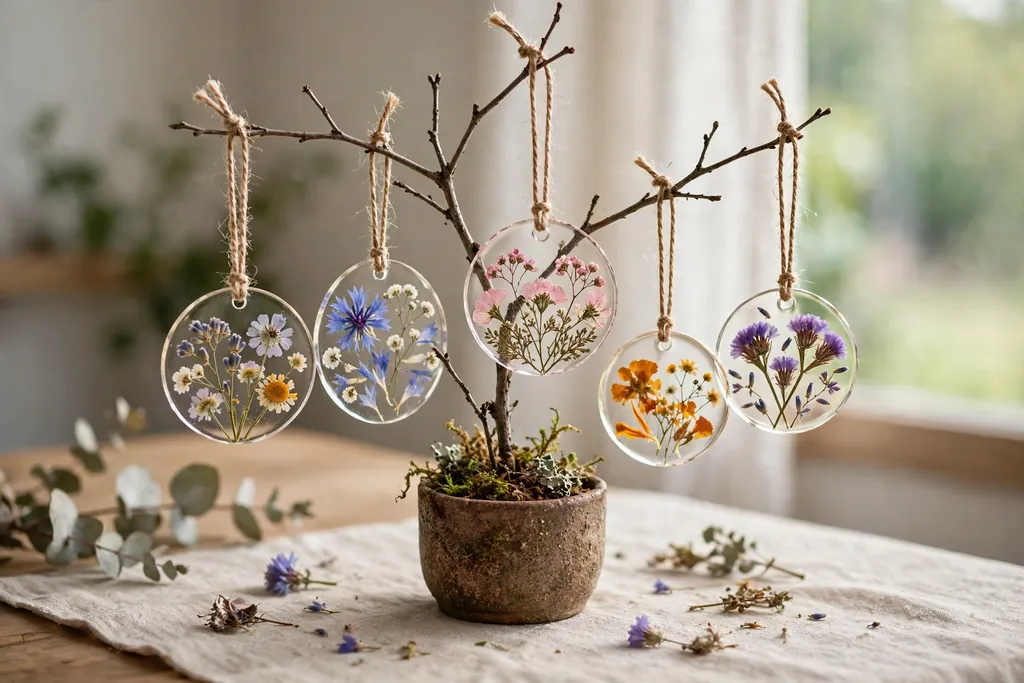
Flat pressed flower ornaments hang on a tree, a branch display, or a wall hook, and they suit seasonal decorating as well as year round displays. Place a small pressed bloom inside a flat clear ornament, or seal a bloom between two clear discs with a ribbon loop at the top, and hang the ornament where light can pass through the petals. For more flower ornament ideas, see these ornaments with flowers.
Keep each ornament light and balanced so it hangs straight, and use small flat blooms that fit the ornament without folding. A single bloom per ornament reads clearly on a tree, while a tiny spray suits a larger disc. Store finished ornaments in separate compartments wrapped in tissue paper, so petals and clear surfaces do not rub against each other between seasons.
20. Pressed Flower Wreath
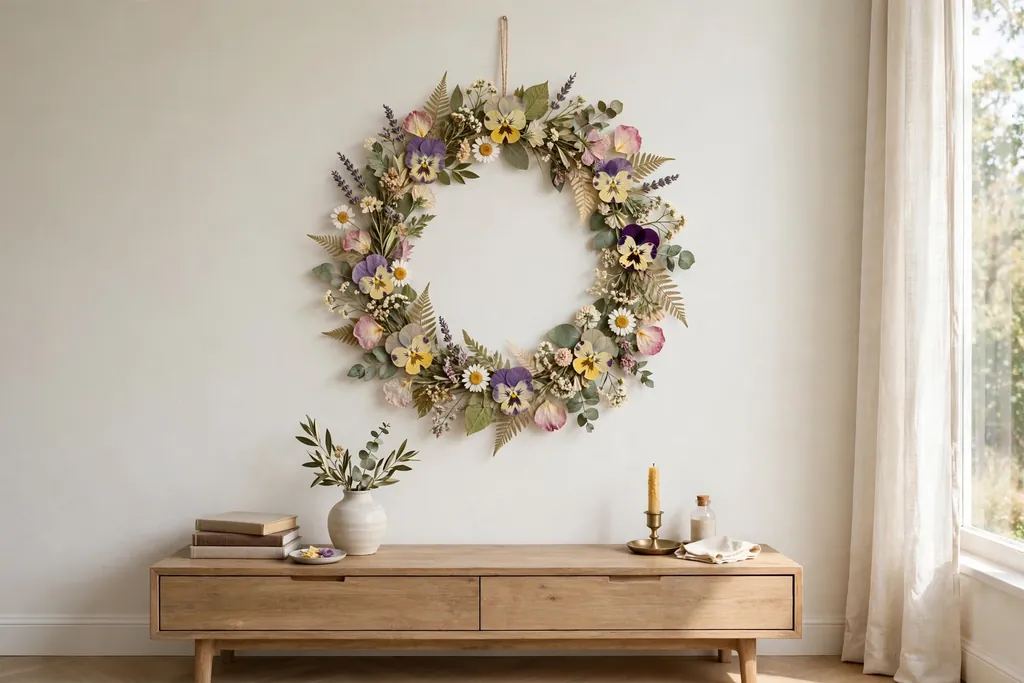
A pressed flower wreath forms a flat ring of blooms for a wall, a door, or a mantel. Cover a flat wreath form with paper or fabric, arrange pressed flowers and leaves around the ring in one direction, and fix each piece with a small glue dot. Leave a clear gap at the top for a hanging loop, and keep the ring even so no section looks heavy or bare.
Use small and medium blooms for the ring, with leaves filling gaps between flowers, and repeat one flower color at even points around the circle for balance. A wreath on an indoor wall lasts longer than one on an outer door, where damp air and sun can fade petals. If you hang it on a door, choose a sheltered spot and bring it inside during wet weather.
21. Pressed Flower Journal Cover
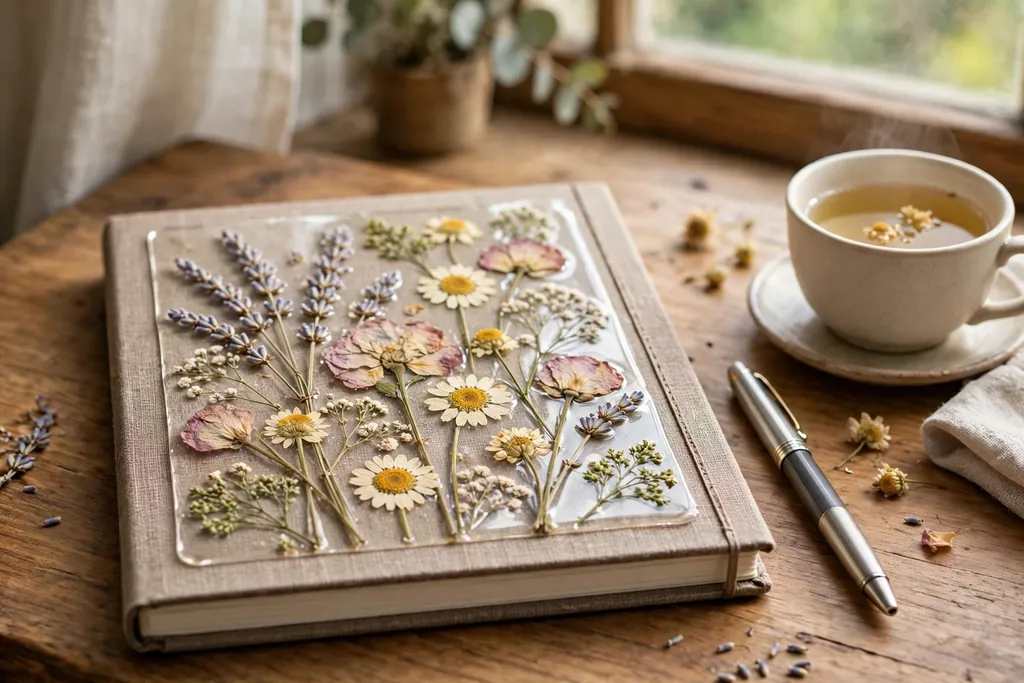
A pressed flower journal cover decorates a notebook, a planner, or a sketchbook that sits on a desk or a bedside table. Arrange flat blooms on the front cover, seal them under clear laminate or a clear cover suited to the notebook material, and trim the edges so the cover opens and closes flat. The flowers stay visible each time the journal is used, which suits a garden journal or a daily planner.
Keep the design away from the spine and the edges so the book still opens fully and the seal holds. Small blooms and leaves work best, since thick petals can crack when the cover bends. A plain notebook in a quiet color shows the flowers most clearly, and a matching ribbon marker in one flower color finishes the cover without adding bulk.
Conclusion
Pressed flower crafts work best when you start with fully dry, flat blooms, keep each design simple, and seal the finished piece for the spot where it will live. Framed art and wreaths suit walls, resin coasters and trays suit tables, and bookmarks, cards, and journal covers suit gifts and daily use. Make one test piece first, learn how your flowers look under glass, laminate, or resin, and then repeat the project in a matching set. With gentle handling and a dry, shaded spot, pressed flower decor can stay bright from one season to the next.
FAQs
How long do flowers need to press before use?
Press flowers for one to three weeks, depending on the bloom size and the room humidity, until petals feel dry and papery and stems snap rather than bend. Check the paper after a few days and replace damp sheets, since fresh paper draws moisture out faster and helps color hold. Do not use a bloom that still feels soft or damp, since it can lose color or grow mold under glass or resin.
What flowers press best for home decor crafts?
Flat flowers press best, including pansies, violets, daisies, small roses, ferns, and many small leaves. Thick or fleshy blooms, such as large succulents or very full peonies, press unevenly and can take much longer to dry. If you want to use a thick bloom, press single petals separately and rebuild the flower shape on paper, or choose a deep shadow box that suits a thicker piece.
How do you keep pressed flowers from fading?
Keep pressed flowers out of direct sun, seal them under glass, laminate, or a clear coat suited to the surface, and store spare blooms flat in a dry box away from damp rooms. Sun and damp air fade color fastest, so a shaded wall suits framed art better than a bright south facing window. Even with care, some colors soften over time, so treat fading as a slow change rather than a fault in the craft.
Can you use pressed flowers in resin safely?
Yes, you can use pressed flowers in resin if the blooms are fully dry and you follow the resin directions for thin layers, curing time, and ventilation. Damp flowers can cloud resin or trap bubbles, so test one small piece before pouring a large tray or dish. Work in a well ventilated space, wear gloves as directed by the resin maker, and let each piece cure fully before use.
Do pressed flower crafts need sealing?
Yes, most pressed flower crafts need sealing to protect petals from dust, moisture, and touch. Glass frames, laminate, clear decoupage medium, and resin all seal a design, and the right choice depends on the surface and how the piece will be used. A wall frame needs only glass, while a coaster or placemat needs a wipeable seal that stands up to cups and spills.
How should you store spare pressed flowers?
Store spare pressed flowers flat between sheets of plain paper inside a lidded box, kept in a cool, dry place away from sun and damp rooms. Keep different flower types in separate paper folds so colors do not transfer, and label each fold with the flower name and pressing date if you know them. Check the box now and then for damp paper, and replace any sheet that feels soft or smells musty.