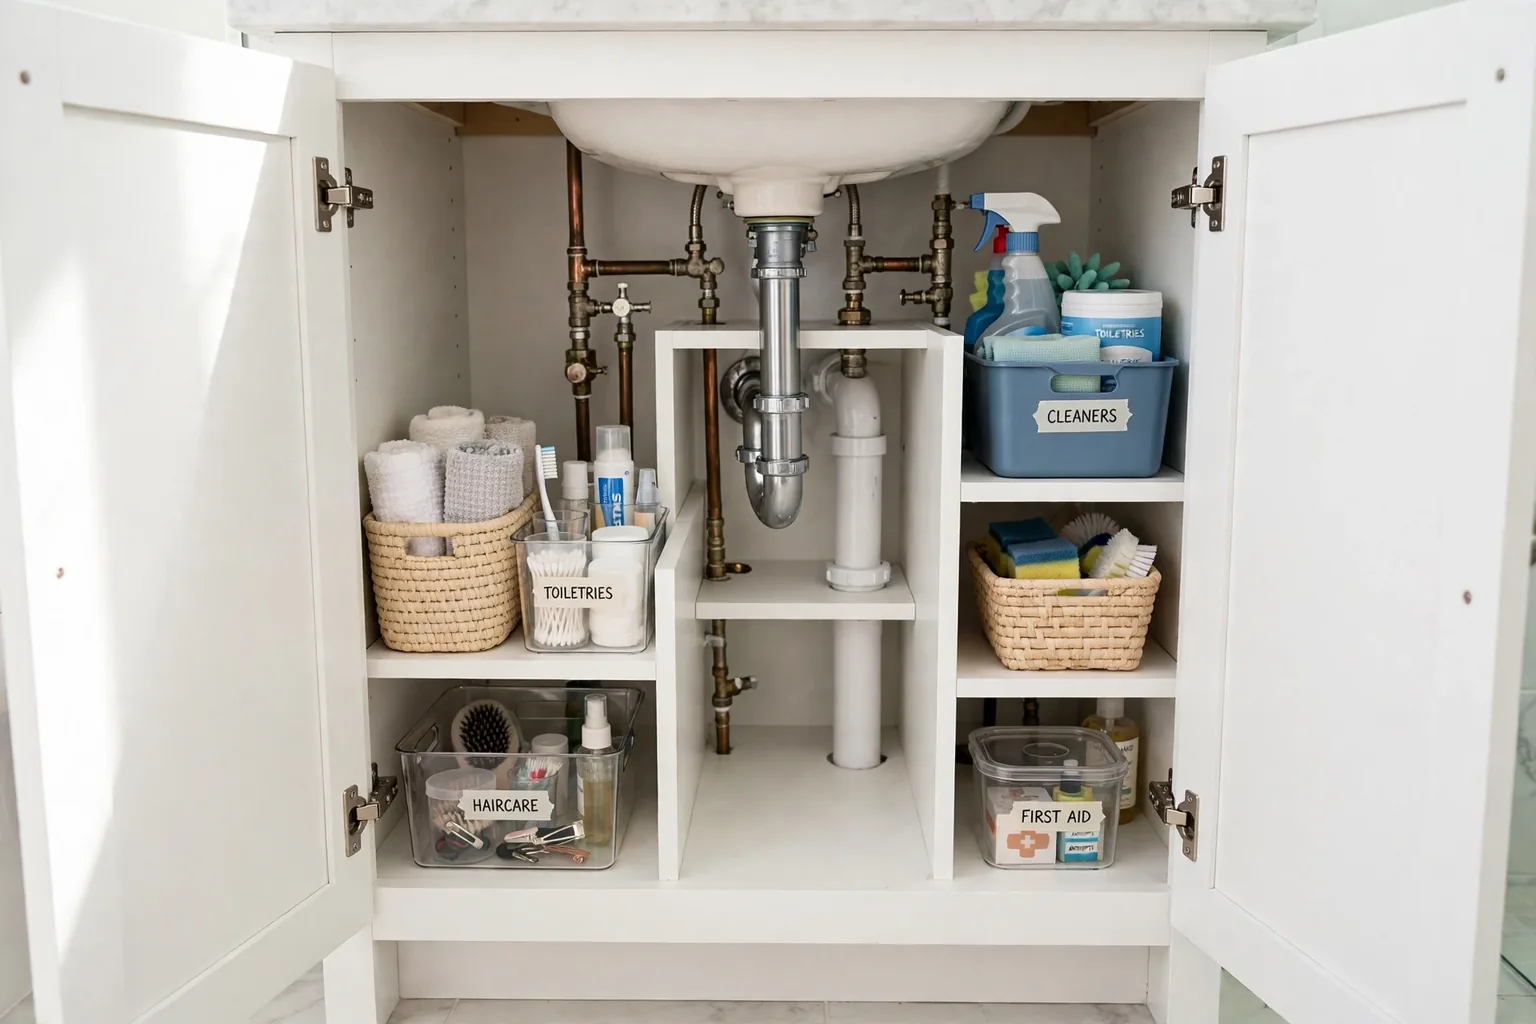
The cabinet under a bathroom sink often holds pipes, a trap, and a tangle of bottles, yet it can still work hard in a small room. These 30 under sink organization ideas for bathroom storage show how to use the space around plumbing, on the cabinet doors, and in the gaps most people leave empty. You will find shelf risers, pull-out drawers, turntables, labelled bins, and renter friendly fixes that need no drilling. Start by measuring around your pipes, then pick the ideas that fit your cabinet width, depth, and door type. For the wider small bathroom picture, these apartment bathroom ideas show how under sink storage fits with the rest of a compact room.
Key Takeaways
- Measure around the pipes, trap, and water lines before buying anything, since a few inches decide whether a shelf, drawer, or bin fits.
- Put daily items at the front, spare stock at the back, and rarely used items up high or in a separate bin.
- Use the cabinet doors, the side walls, and the space above low items, since the floor of the cabinet alone is never enough.
- Keep cleaning supplies apart from toiletries and medicines, and keep anything unsafe for children in a lidded box out of easy reach.
- Choose bins and shelves you can lift out for cleaning, since the cabinet under a sink needs a wipe more often than most cupboards.
- Leave a clear gap around the pipes and valves, so you can reach a shutoff quickly and spot a drip early.
1. A U-Shaped Shelf Riser Around the Pipes
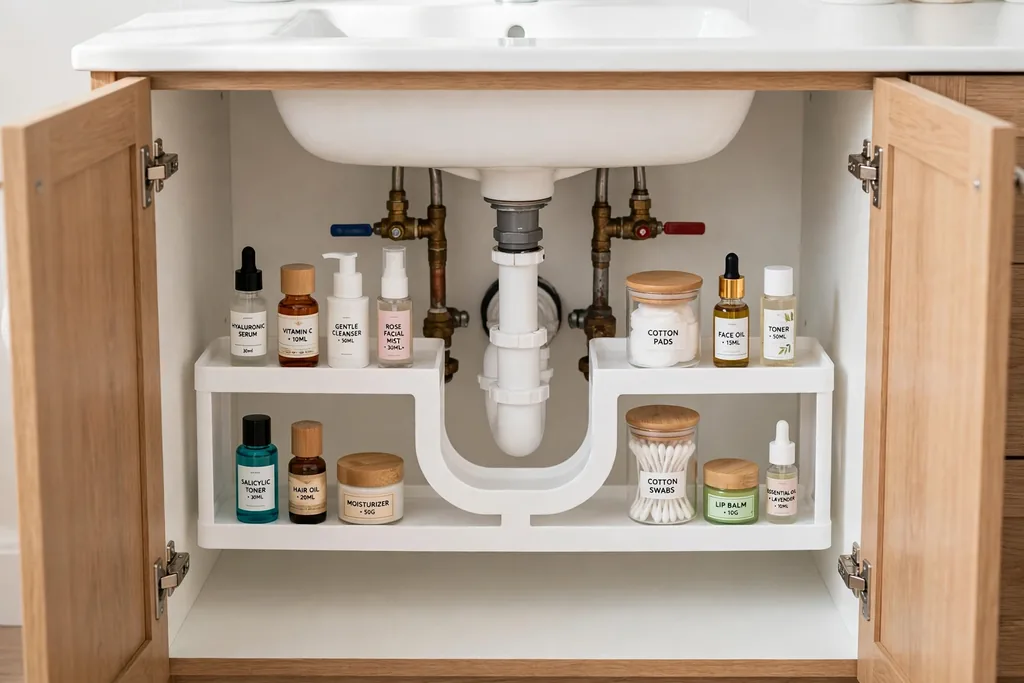
Fit a U-shaped shelf riser around the trap and water lines to claim the space above the cabinet floor. The cutout lets the shelf sit close to the pipes without pressing on them, and the raised level doubles the usable surface in a cabinet that otherwise holds only one layer of bottles. This is the best first step in most under sink cabinets, and it suits both fixed shelves and freestanding risers.
Measure the pipe positions and the height of your tallest bottle before you buy, and leave at least a finger width of air around every pipe. Put short daily items on the riser and taller bottles on the floor beside it, so nothing tips when you reach in. If your pipes sit off center, a riser with adjustable legs lets you level the shelf around them.
2. A Pull-Out Drawer on Rails
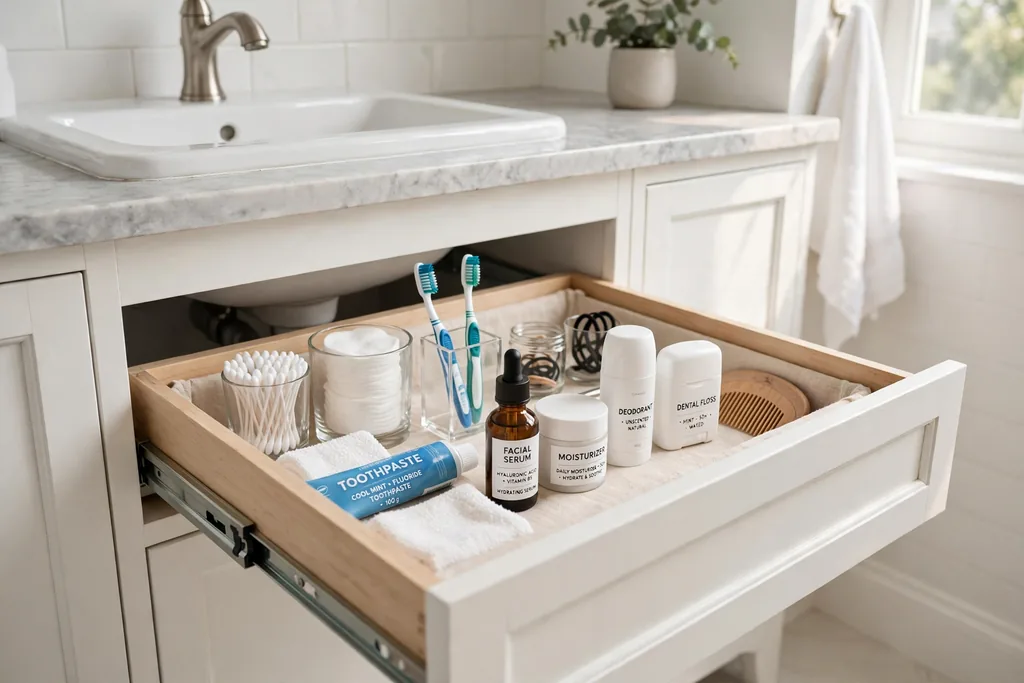
Fit a pull-out drawer or basket on rails so the back of the cabinet comes to you. Deep cabinets hide items at the back, and a sliding drawer stops the habit of pulling everything out to find one bottle. A single low drawer suits most cabinets, while a double tier version suits a tall cabinet with room to spare.
Check that the drawer clears the pipes when it slides, and keep heavy bottles at the front of the drawer so it runs smoothly. Sort the drawer by task, such as daily skin care in one section and hair care in another, and add a small divider if bottles slide sideways. Wipe the rails now and then, since damp air can leave a film on metal parts.
3. A Tension Rod for Spray Bottles
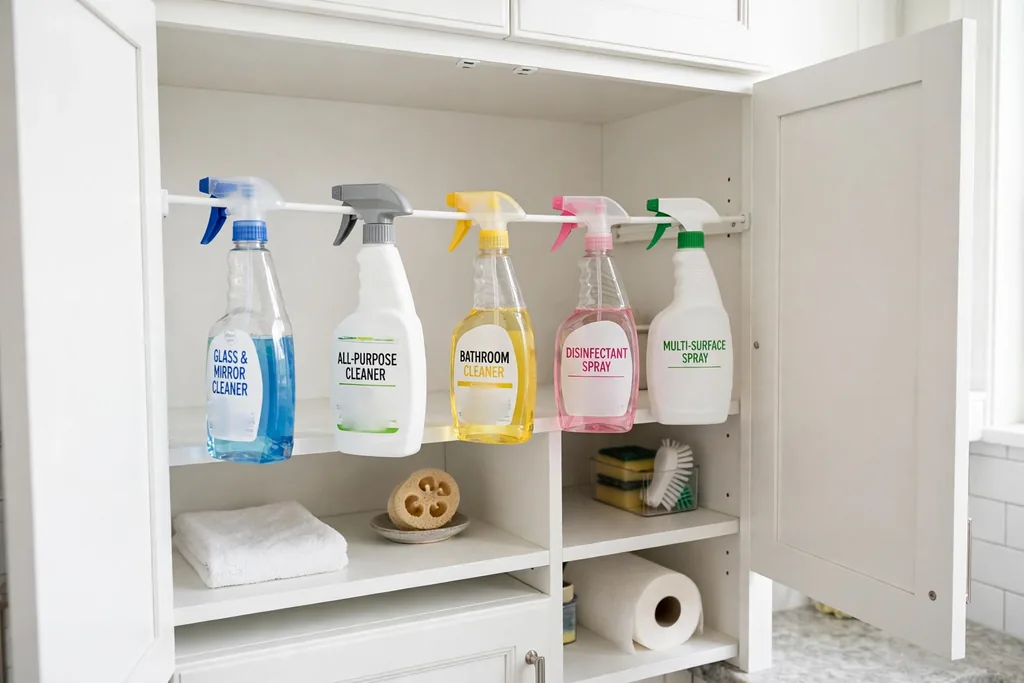
Hang spray bottles from a tension rod fixed across the cabinet, just below the top. The rod uses the empty air above low bottles, and hanging sprays by their triggers keeps them upright, visible, and easy to grab. This works well for cleaning sprays, which are often the tallest and most awkward items under a sink.
Set the rod high enough that bottles clear the shelf below, and test the tension before loading it fully. Keep the heaviest bottles near the ends, where the rod grips the walls, and lighter ones in the middle. If your cabinet walls are uneven, a rod with rubber ends grips better and marks the surface less.
4. A Rack on the Inside of the Cabinet Door
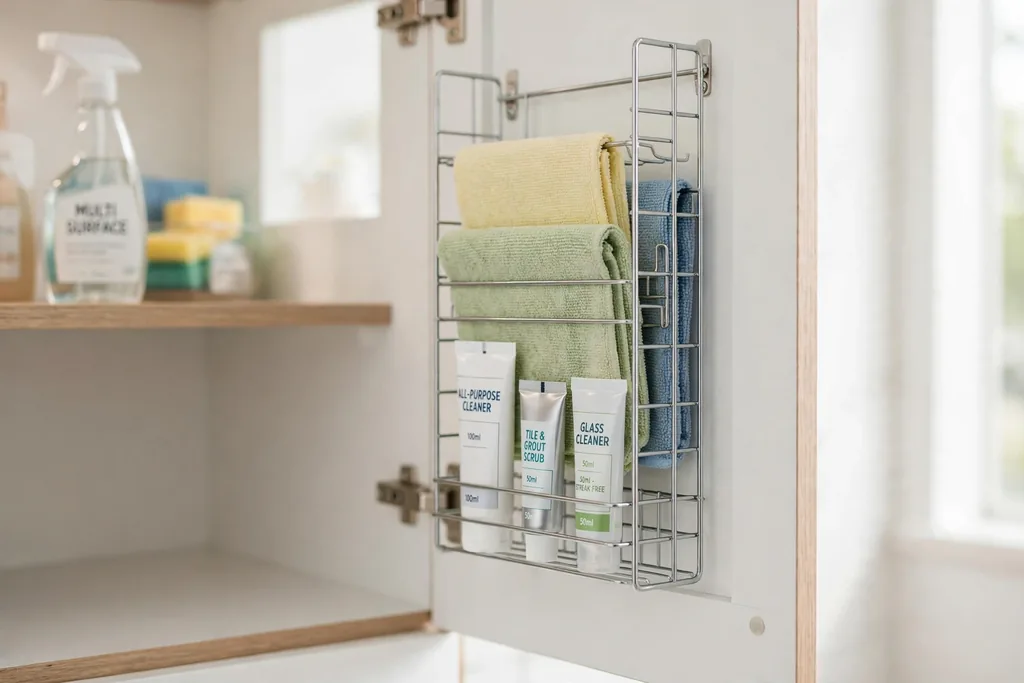
Fix a slim rack or a row of small baskets on the inside of a cabinet door for flat items such as cleaning cloths, gloves, and small tubes. The door is unused space in most cabinets, and a flat rack adds storage without taking a single inch of shelf. Wire racks suit damp cabinets, since air moves around them and they dry fast.
Keep the rack shallow enough that the door still closes without pressing on bottles inside, and put heavy items low on the door so it swings freely. Sort by use, such as cleaning cloths in one basket and spare sponges in another. If you rent, a rack that hooks over the door needs no drilling, but check that it does not stop the door closing flush.
5. Labelled Clear Bins by Task
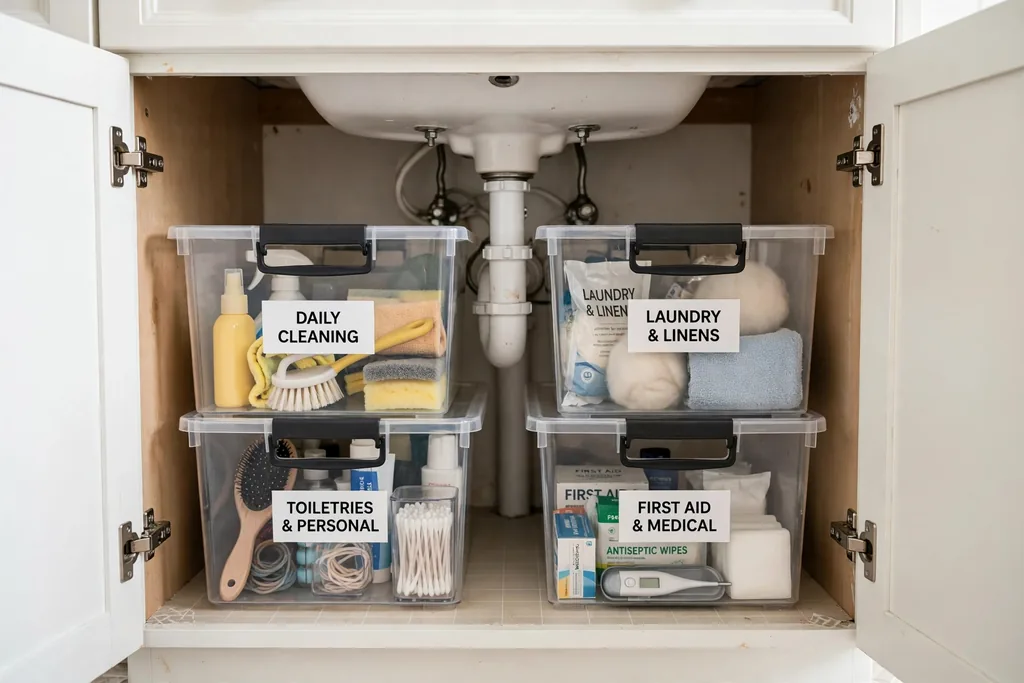
Sort the cabinet into clear bins, one per task, and label each bin on the side that faces out. Clear sides let you see what is inside without pulling every bin out, and labels save you from opening three bins to find one item. Good groupings are daily toiletries, hair care, cleaning supplies, and first aid.
Keep bins shallow enough to lift out with one hand, and avoid packing them so full that items fall out when you lift. Put a short list on the label, such as “shampoo, conditioner, treatment,” rather than a single vague word. Review each bin monthly, and move out empties and items you no longer use, since under sink bins quietly collect half used bottles.
6. A Lazy Susan for Deep Corners
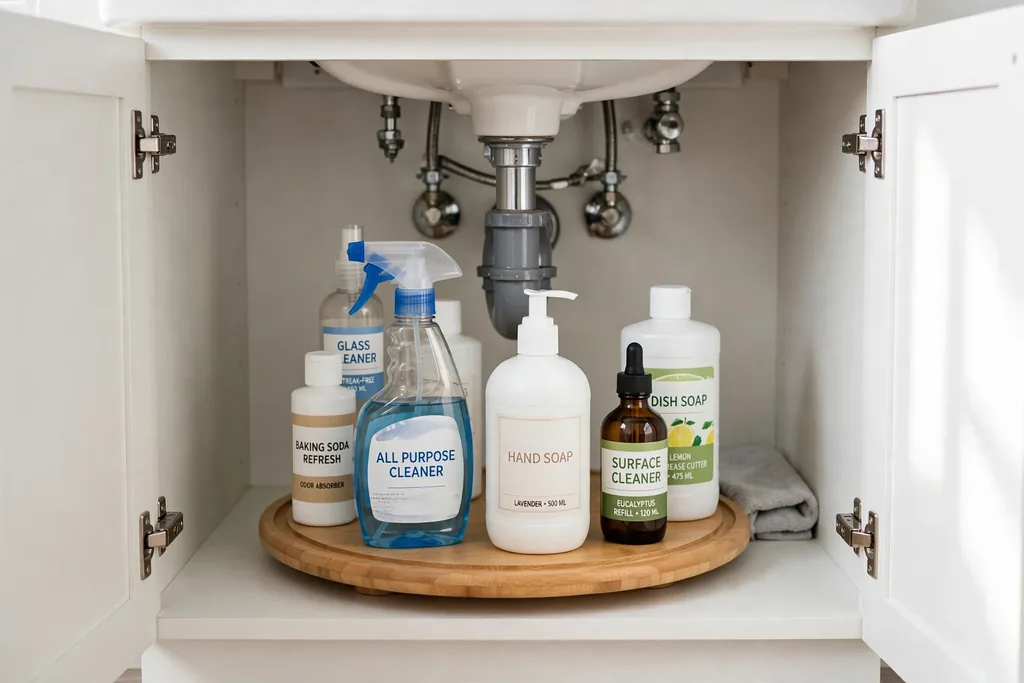
Place a turntable, often called a lazy Susan, in a deep cabinet so items at the back spin to the front. Deep cabinets hide bottles behind the pipes, and a turntable brings the back row forward with one spin, so every bottle stays in use. A low turntable with a rim suits the cabinet floor, while a two tier version suits a tall cabinet.
Group similar items on the turntable, such as cleaning supplies on one and spare toiletries on another, and avoid stacking bottles, since a tall stack topples when it spins. Keep the turntable away from the pipes, so it turns freely without catching. If the cabinet is very narrow, a small rectangular turntable fits better than a round one.
7. Stackable Bins With Lids
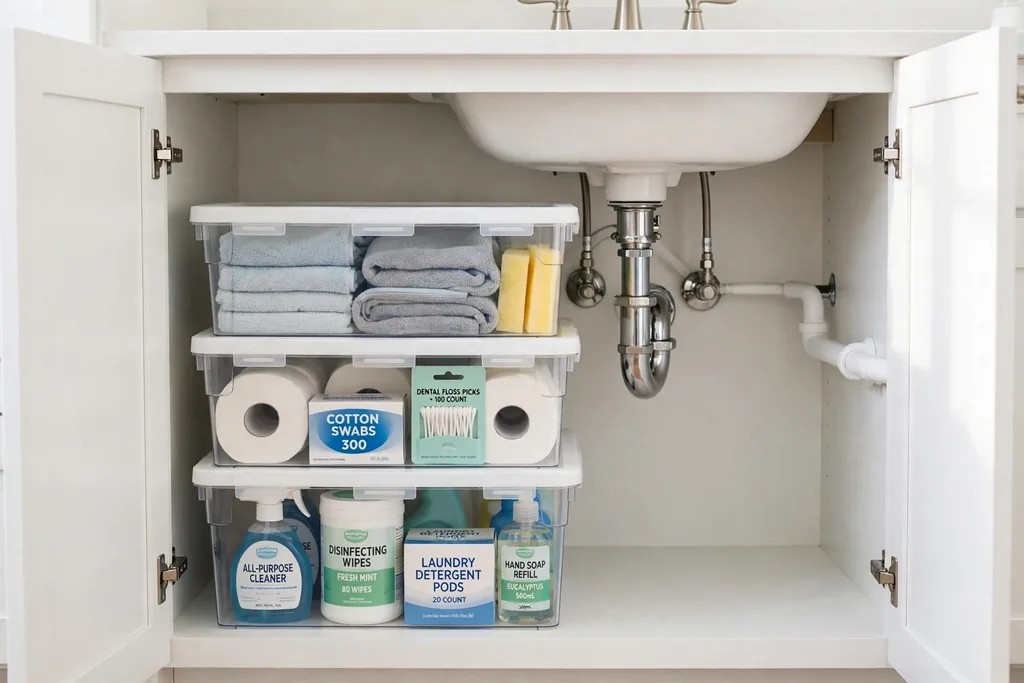
Use stackable bins with lids to build a second level over low items, without fixing a shelf in place. Lids keep dust and drips off the contents, and the stack can be rearranged when your supplies change. This suits renters and anyone who wants to test a layout before fitting a fixed shelf.
Put heavy items in the bottom bin and light items on top, and keep the stack low enough that you can lift the top bin out safely. Label each lid as well as the side, since you often see the top of a stack first. Leave one bin partly empty for new stock, since a full stack pushes overflow onto the cabinet floor.
8. Hanging Baskets Under a Shelf
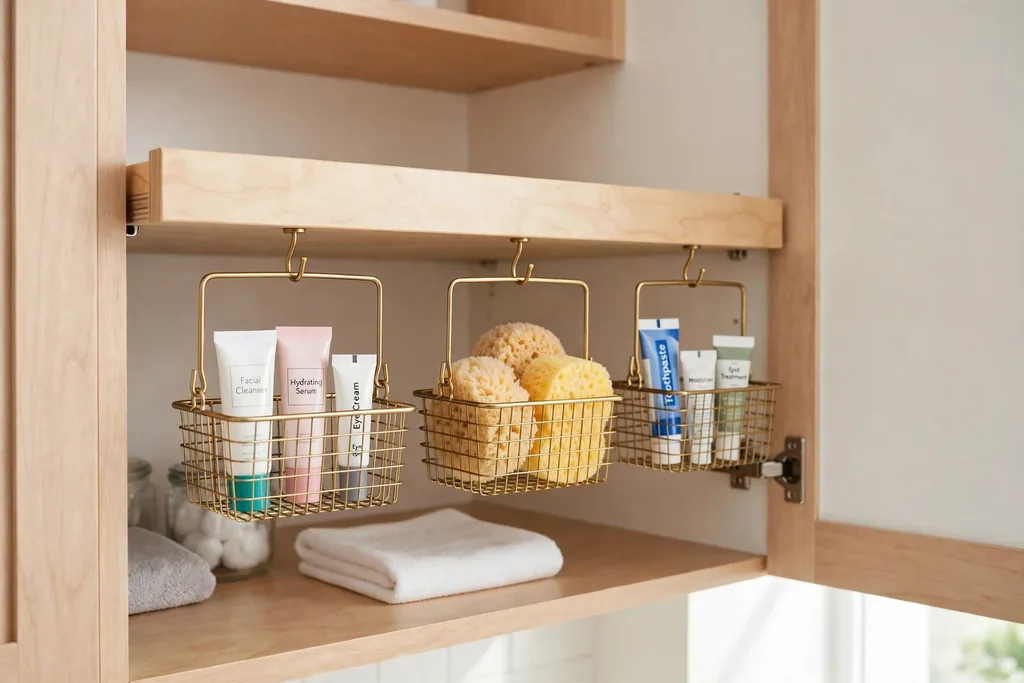
Hang small baskets from the underside of a shelf to use the air below it. The gap under a shelf is often wasted, yet it is deep enough for small tubes, sponges, and spare soap bars. Clip-on or hook-on baskets suit a wire shelf, while screw-on baskets suit a solid shelf in a home you own.
Keep the baskets shallow, so they do not block the items stored below them, and sort each basket by task. Wipe the baskets when you clean the cabinet, since hanging baskets collect dust on their rims. If the shelf is thin, test one basket with a full load before hanging several, so the shelf does not bow.
9. Adhesive Hooks on the Cabinet Side Walls
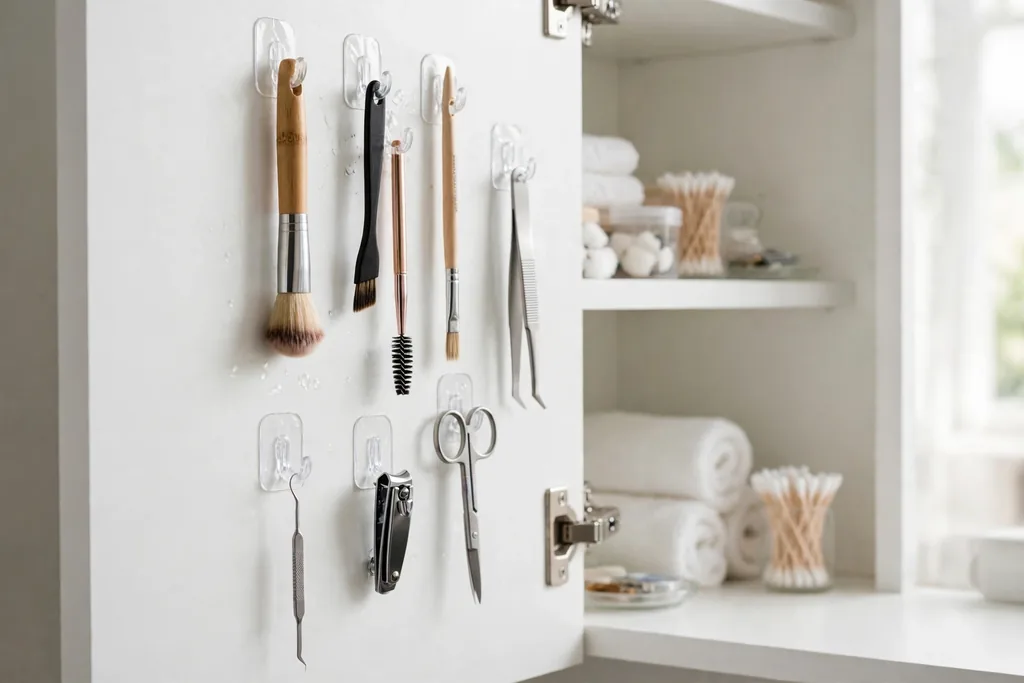
Stick adhesive hooks on the inside side walls for brushes, small tools, and measuring cups. Side walls are often bare, yet they sit at hand height and hold items that otherwise fall behind bottles. One hook per tool keeps handles from tangling, and hooks suit items that are awkward to stand upright.
Clean and dry the wall before sticking a hook, and let the adhesive set for the time the maker advises before loading it. Keep heavy items off adhesive hooks, since damp air can weaken the bond over time. If a hook fails, move it to a drier spot or swap it for a small screw hook in a home you own.
10. A Heat Safe Holder for Hair Tools
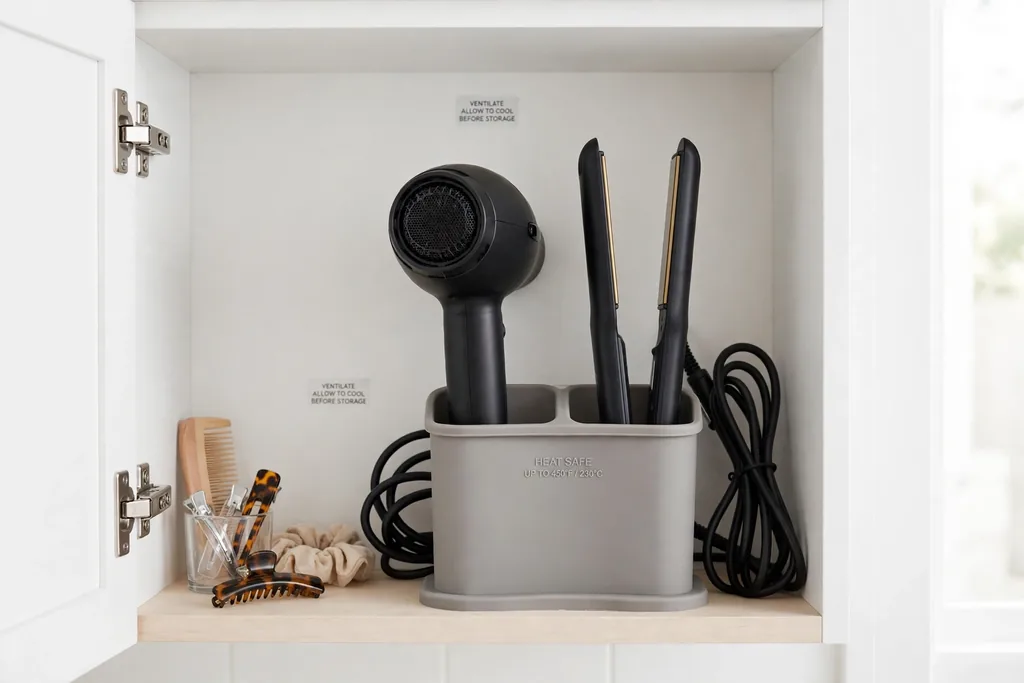
Store a hair dryer, straightener, and curling tool in a heat safe holder fixed to the door or a side wall. Hair tools tangle in a drawer and take up a wide shelf, while a holder keeps each tool upright, its cord wrapped, and the hot end away from bottles and cloths. A holder with a heat resistant sleeve is safest for a tool that is still warm.
Let tools cool for a few minutes before putting them away if your holder is not heat rated, and keep the cord wrapped loosely so it does not kink. Sort tools by use, with the daily tool at the front and occasion tools behind it. If the cabinet is very small, a holder on the door keeps the whole shelf free for bottles.
11. A Lidded Caddy for Medicines and First Aid
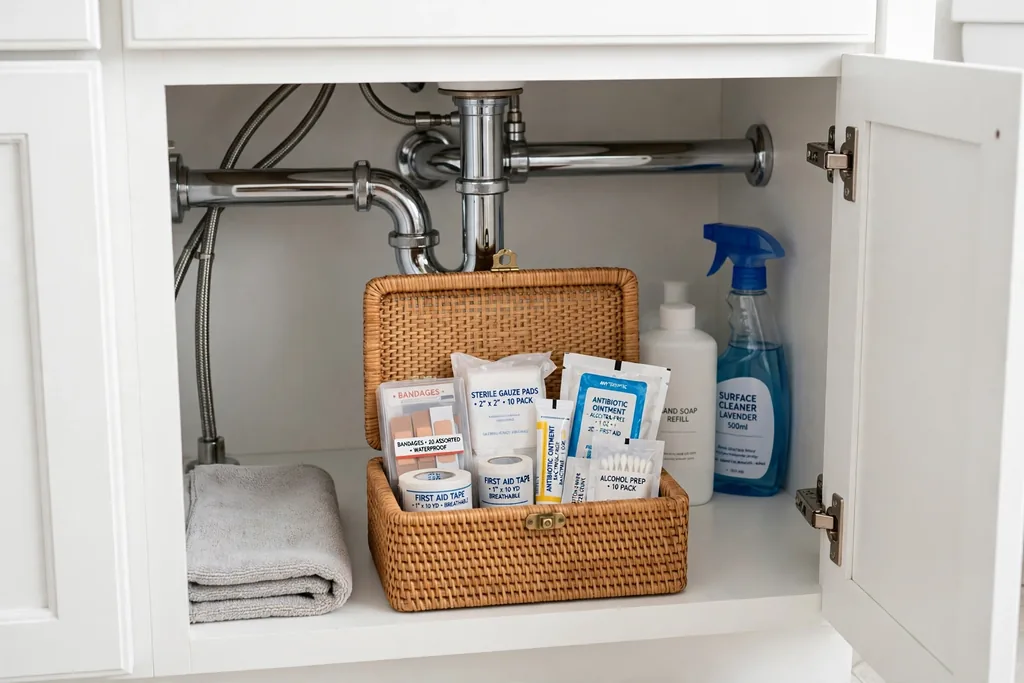
Keep medicines and first aid supplies in a small lidded caddy, stored high or at the back of the cabinet. A caddy with a lid keeps small packets and tubes together, and it lifts out as one unit when you need it, which matters when you are looking for a plaster in a hurry. A clear caddy lets you check stock without opening every packet.
Keep this caddy out of easy reach of young children, and check expiry dates when you restock it. Put a short list inside the lid, such as plasters, pain relief, and antiseptic, so anyone in the home can find what they need. If your bathroom stays damp, a caddy with a tight lid protects paper packets better than an open tray.
12. A Portable Cleaning Caddy
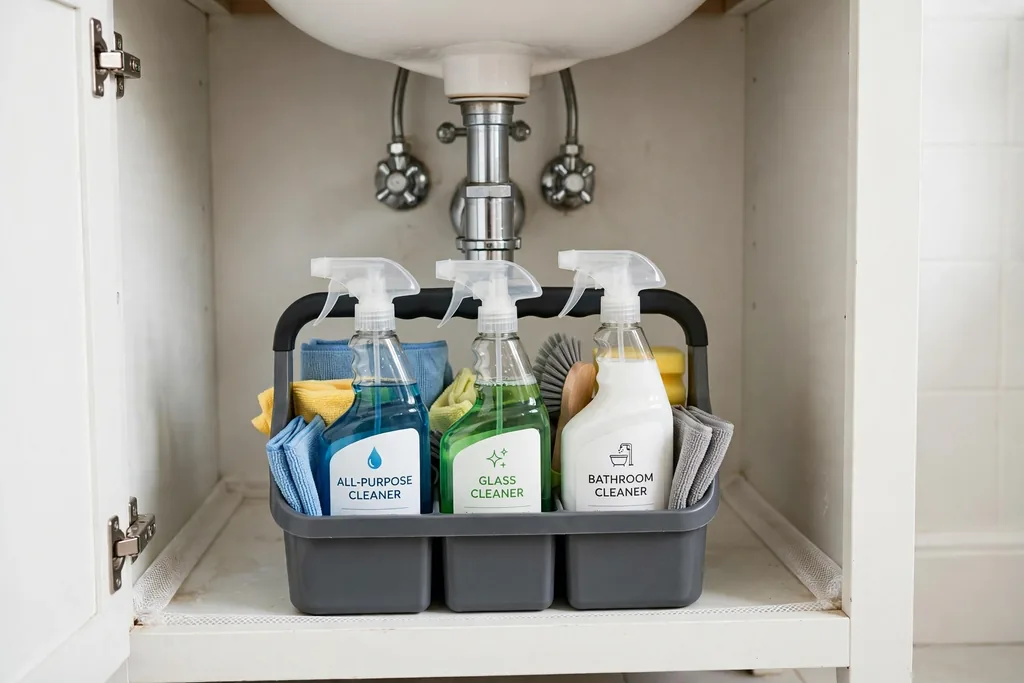
Keep all cleaning supplies in one portable caddy with a handle, so you can lift the whole set out to clean the bathroom. A caddy stops cleaning bottles from spreading across the cabinet, and it means you never leave a spray behind in another room. Sort the caddy by job, with a cloth and a sponge in one section and sprays in another.
Choose a caddy with a waterproof base, since a leaking bottle can otherwise soak the cabinet floor. Keep cloths separate from sprays, so a damp cloth does not soak a paper label. When you finish cleaning, return the caddy to the same spot, so the cabinet keeps its layout instead of drifting into clutter.
13. Vertical File Holders for Flat Items
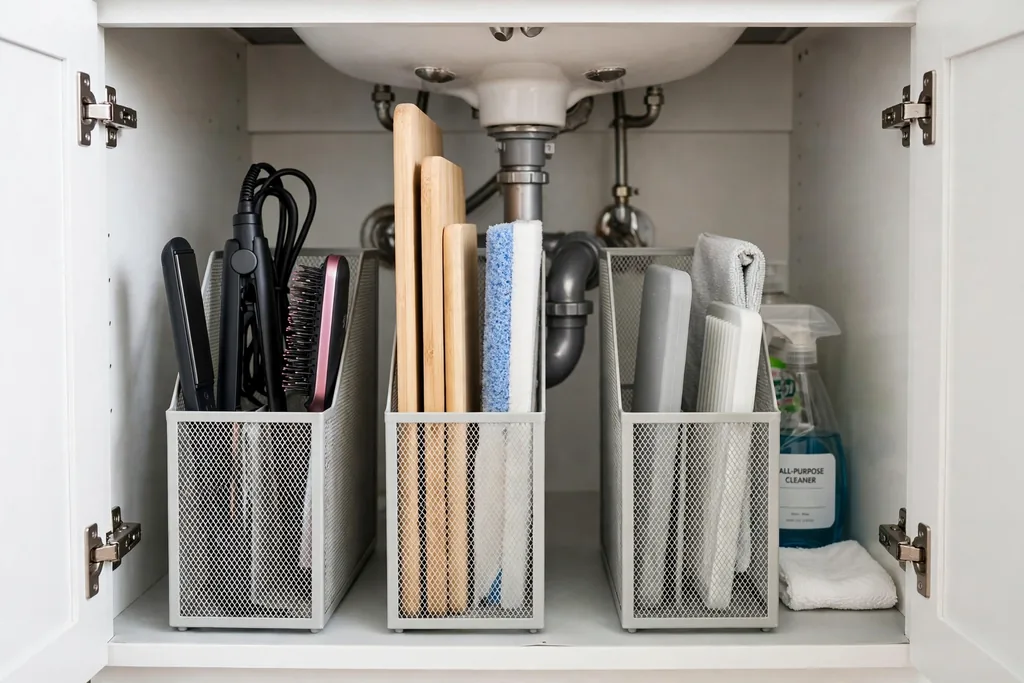
Stand flat items upright in vertical file holders, like books on a shelf, so you can pull one out without moving the rest. Flat items such as a straightener, a cleaning board, spare cloths, and thin trays slide and stack badly when laid flat, but they stand well in a narrow holder. This works best along a side wall or at the end of a shelf.
Keep each holder to one category, so hair tools do not mix with cleaning gear, and choose holders with drainage holes if they will hold damp cloths. Label the front of each holder, since upright items can look alike from the front. If a holder slides on the cabinet floor, a small non slip mat under it holds it steady.
14. A Narrow Tiered Shelf for Tall Bottles
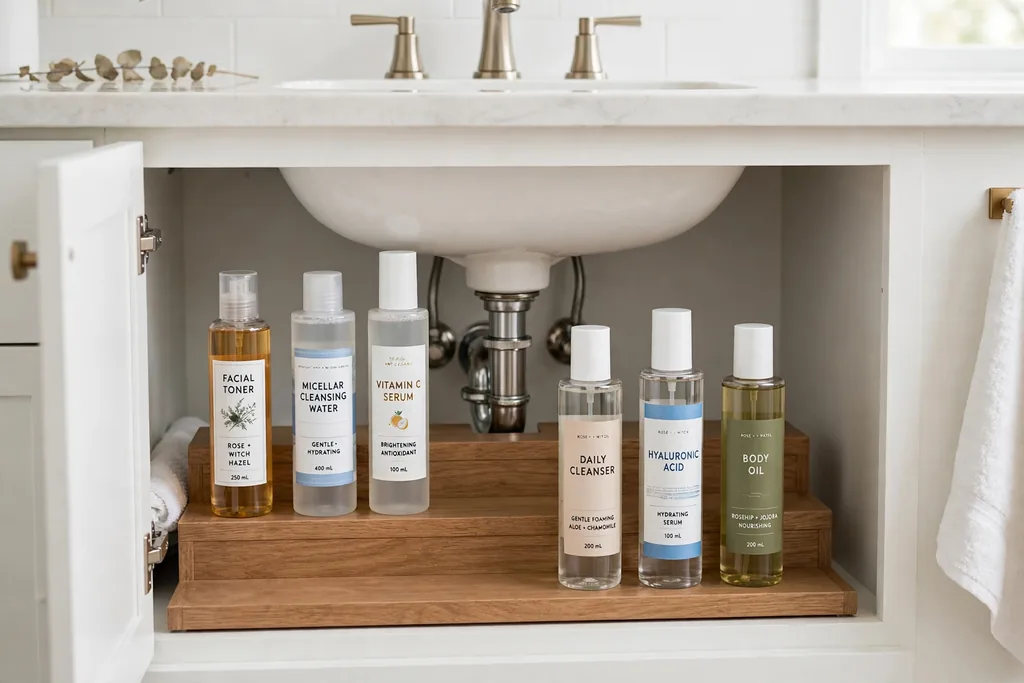
Fit a narrow tiered shelf, like small steps, for tall bottles at the back of the cabinet. Steps lift the back row above the front row, so you can see every label without pulling bottles forward. This suits cabinets where tall cleaning bottles hide short daily items behind them.
Put the tallest bottles on the highest step and the shortest at the front, and keep the steps shallow enough that bottles do not tip forward. Wipe the steps when you clean, since drips run down onto the step below. If your pipes block the back wall, a freestanding tiered shelf that sits on the cabinet floor works around them.
15. A Mini Drawer Unit Inside the Cabinet
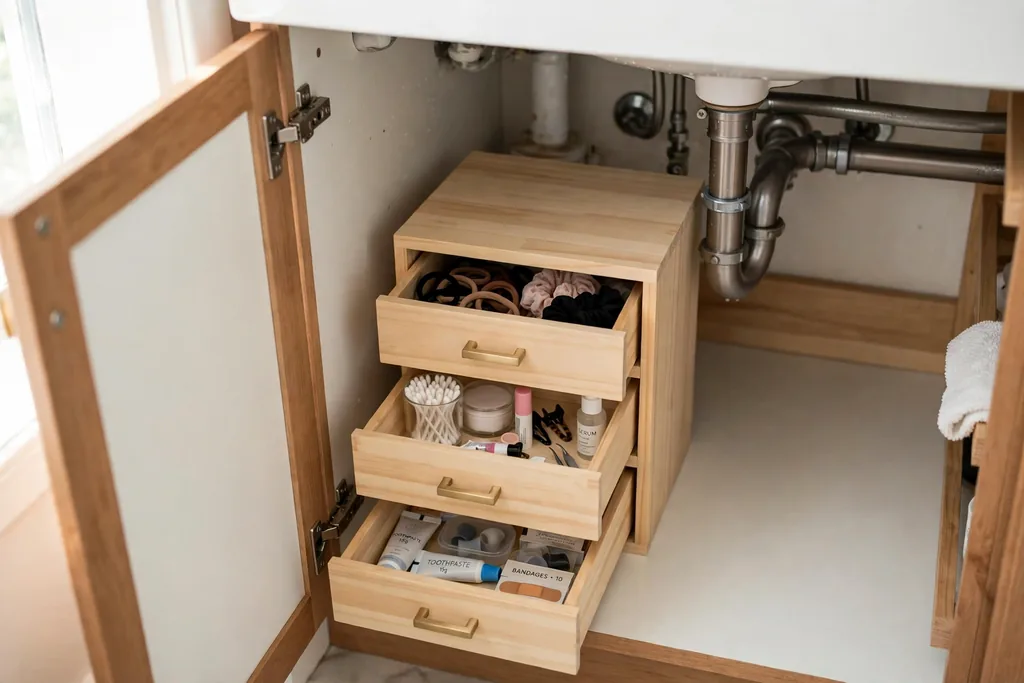
Place a small drawer unit inside the cabinet for tiny items that vanish in a big bin, such as hair ties, clips, cotton pads, and spare batteries. Drawers beat open piles because each drawer holds one category, and you can open one without disturbing the rest. A unit with three or four shallow drawers suits a wide cabinet better than one deep drawer.
Sort drawers by type, such as hair accessories in one and nail care in another, and add small dividers inside so items stay sorted. Leave a little air above the top drawer so the shelf above it still clears tall bottles nearby. If the cabinet has no floor space to spare, a small hanging drawer that hooks under a shelf gives a similar result.
16. A Waterproof Tray Under the Pipes
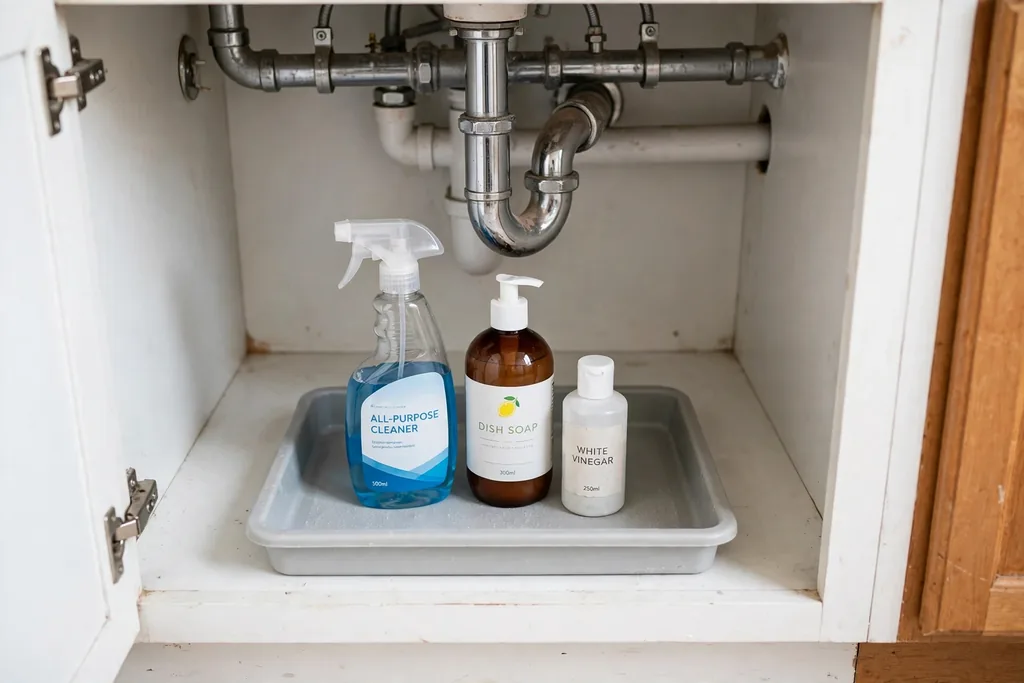
Set a shallow waterproof tray on the cabinet floor under the pipes and trap. A tray catches drips before they soak the cabinet base, and it makes a small leak easy to spot, since water pools in the tray instead of spreading unseen. It also protects the cabinet floor from damp bottles and cleaning spills.
Choose a tray that fits around the pipes, and check it monthly for standing water, which is a sign to look for a drip. Wipe the tray dry when you clean, and keep bottles on the tray rather than beside it, so any leak from a bottle is caught too. If your cabinet floor is already marked, a tray hides the marks and stops further damage.
17. A Magnetic Strip for Small Metal Tools
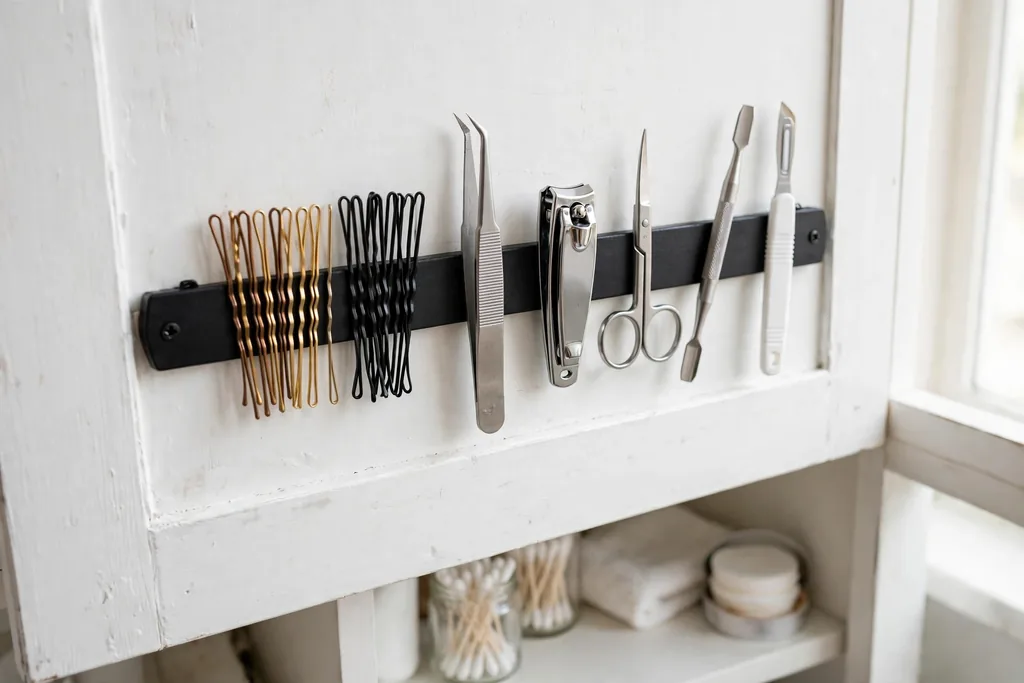
Fix a magnetic strip on the inside of a cabinet door for bobby pins, nail clippers, tweezers, and other small metal tools. Small metal items vanish in a drawer and slip to the bottom of a bin, while a strip holds each one visible and easy to grab. This is a small change that saves a daily search for a single bobby pin.
Keep the strip away from medicines with magnetic closures and from any item the maker warns against magnets, and wipe it when you clean, since pins collect hair and dust. Sort pins by type along the strip, so you can see at a glance when you are running low. If you rent, a strip with adhesive backing needs no drilling, but test the hold before loading it fully.
18. A Zone System: Daily at the Front, Stock at the Back
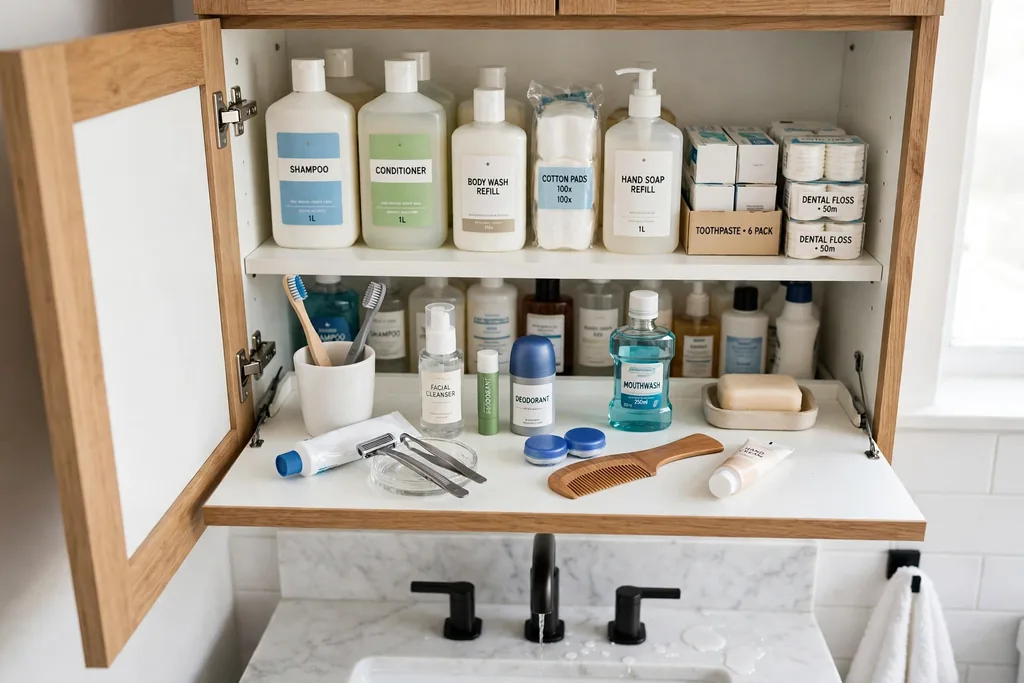
Divide the cabinet into zones, with daily items at the front, weekly items in the middle, and spare stock at the back. Zoning stops the morning search through everything you own, since you only reach into the zone you need. It also makes it clear which zone is overfull when the cabinet starts to feel tight.
Keep the same order every time you restock, such as daily toiletries, then hair care, then cleaning, then spares, so the eye learns where things live. Leave a small gap between zones, even if it is only one empty bin space, so the sections stay distinct. Review the stock zone monthly, since spare bottles are the ones most likely to pile up unnoticed.
19. A Deep Basket for Towels and Spare Rolls
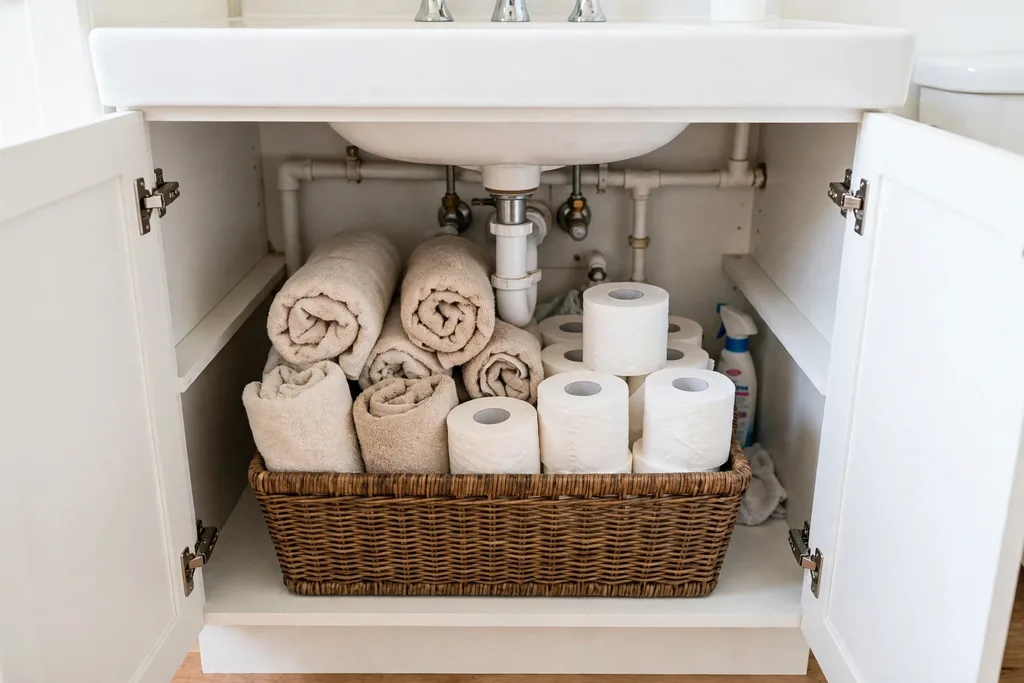
Keep a deep basket on the cabinet floor for bulky items such as spare hand towels, washcloths, and toilet rolls. Bulky items fill a shelf fast, yet they stack well in a basket, which keeps them together and easy to lift out as one unit. A basket with handles suits this job, since you will carry it out to restock the bathroom.
Roll towels instead of folding them, since rolled towels pack tighter and are easier to pull out one at a time. Keep the basket to one category, such as towels only, and put spare rolls in a second basket if space allows. If the cabinet is damp, a wire or mesh basket dries faster than a solid one.
20. Zipper Pouches for Travel and Spare Toiletries
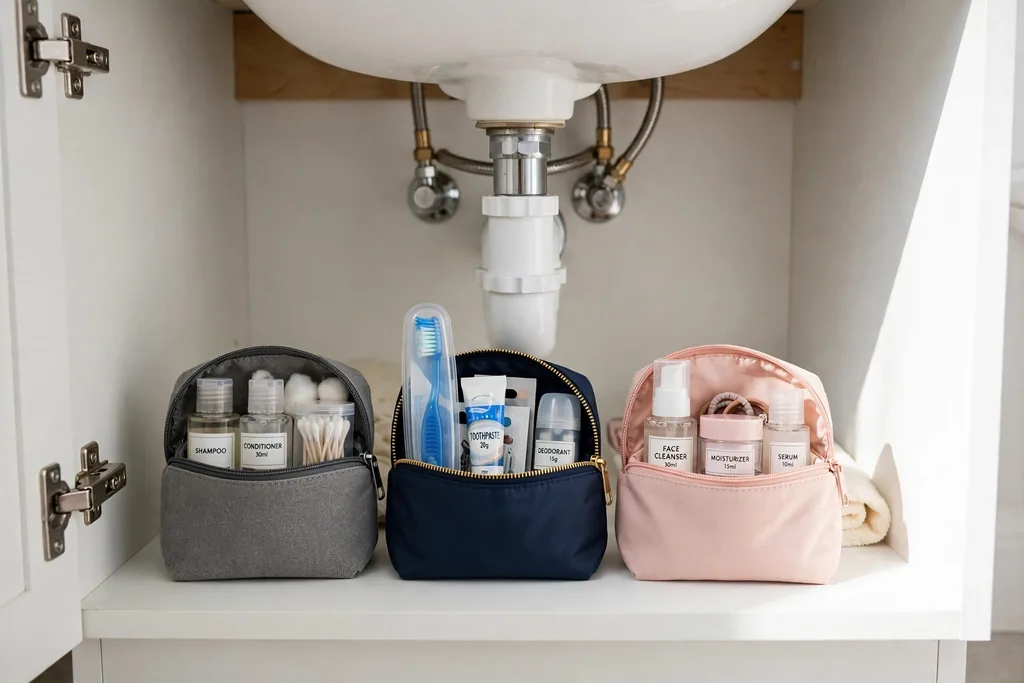
Sort spare and travel toiletries into small zipper pouches, one per person or per trip type. Pouches stop small tubes from rolling to the back of the cabinet, and they lift out as a ready packed set when you travel. Clear pouches let you see the contents, while fabric pouches give a calmer look inside the cabinet.
Label each pouch, such as “weekend” or “guest,” and keep one pouch for half used minis so they do not mix with full size bottles. Check pouches before a trip, and refill them from the stock zone rather than buying duplicates. If a pouch leaks, a zipper pouch contains the spill better than an open tray.
21. Decanted Refills in Matching Bottles
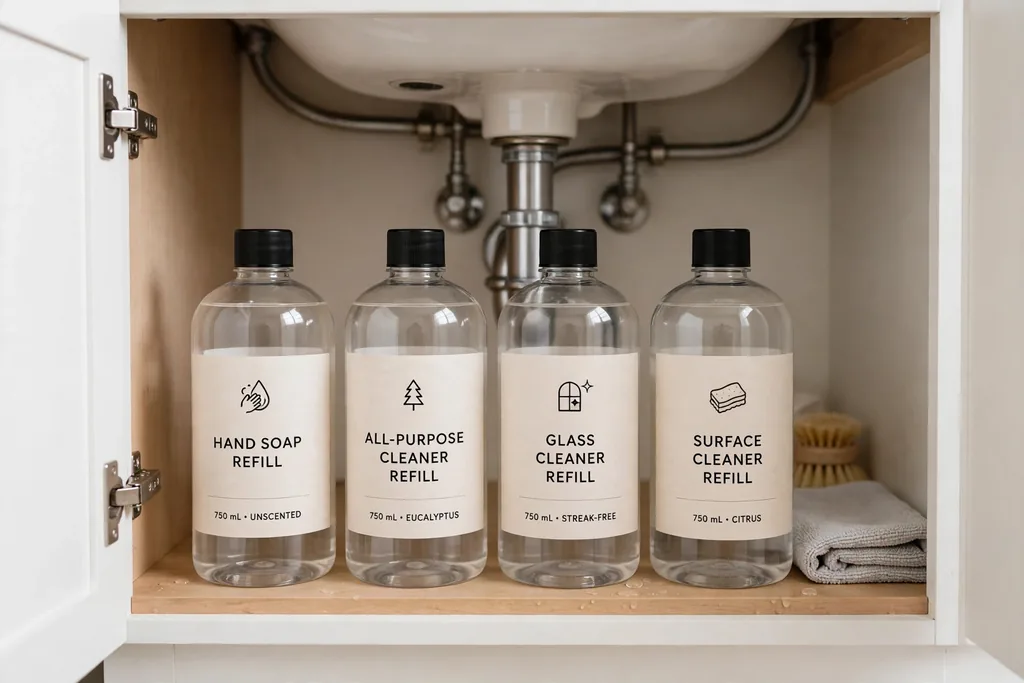
Decant cleaning and toiletry refills into matching, labelled bottles that fit your shelves. Mixed bottle shapes waste space, since a tall thin bottle beside a short wide one leaves gaps no other item can use. Matching bottles line up neatly, and clear labels stop a mix-up between similar liquids.
Keep the original labels or a note of what is inside each bottle, and never decant a product into a food or drink container. Use a funnel and wipe the neck before labelling, since a sticky bottle attracts dust. Refill from a large stock bottle kept at the back, so the front row stays tidy and uniform.
22. A Lift-Out Shelf Board for Plumber Access
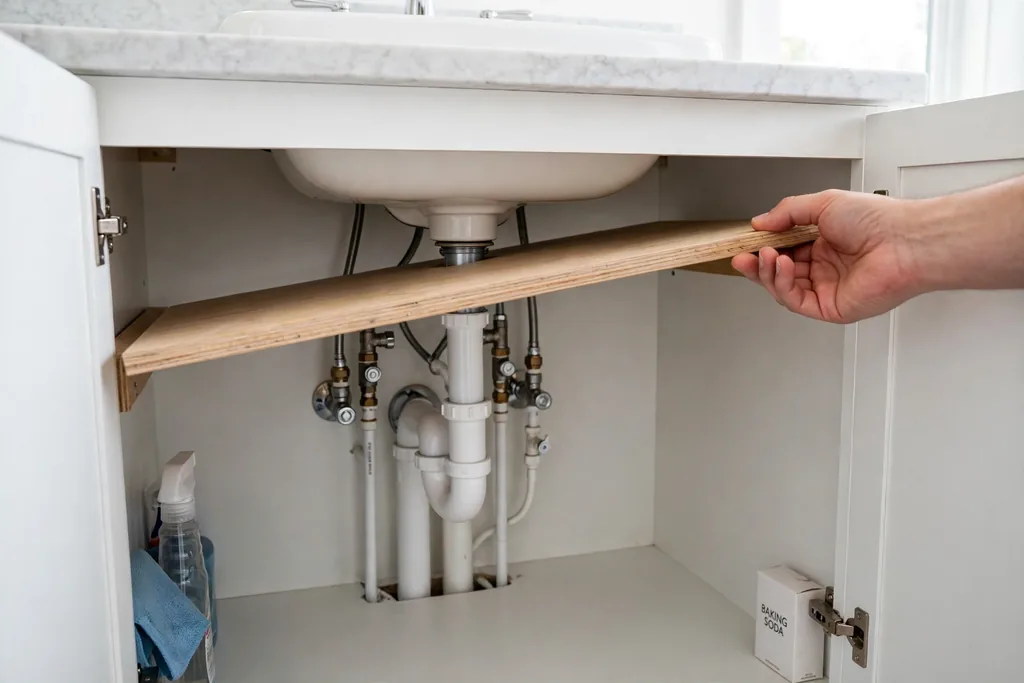
Fit a shelf board that lifts out without tools, so a plumber can reach the pipes fast. Fixed shelves around pipes can block access to valves and traps, and a lift-out board gives you storage most of the year and clear access when a repair is needed. A board with finger holes or handles lifts out easily even when loaded lightly.
Keep the board light, and store only small items on it, so one person can lift it out without emptying the whole cabinet. Mark the front edge, so the board goes back in the right way round. If your pipes need regular access, a board in two halves lets you lift only the half above the work area.
23. A Leak Alarm and Absorbent Mat
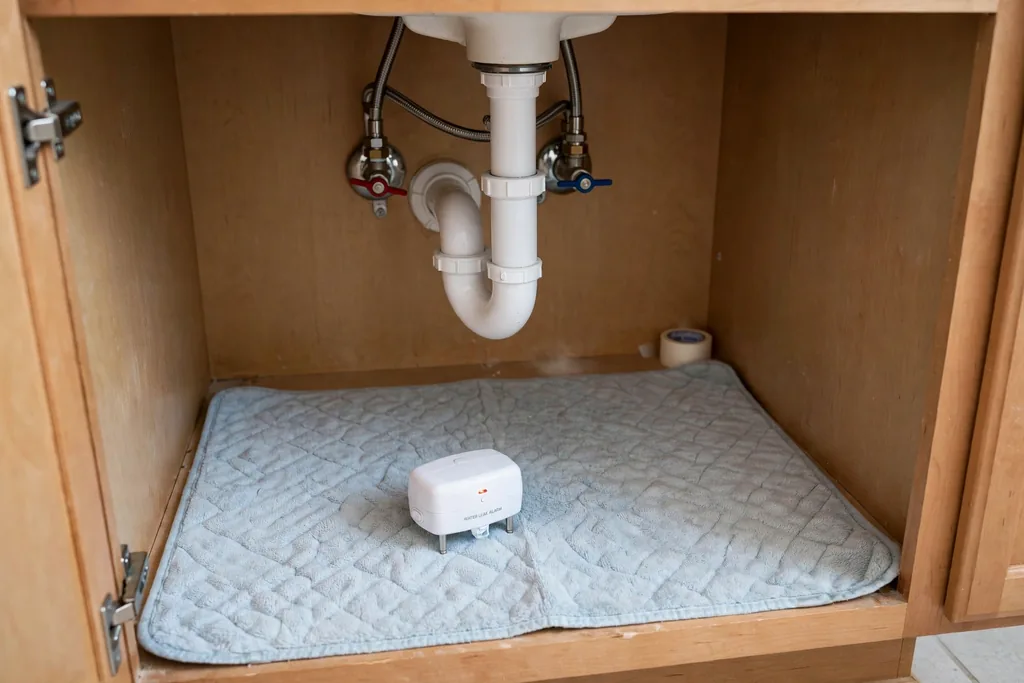
Place a small water alarm on the cabinet floor and an absorbent mat under the pipes. An alarm sounds at the first sign of a leak, which matters under a sink, where a slow drip can go unnoticed for weeks. A mat soaks up small drips and protects the cabinet base while you find the source.
Test the alarm battery monthly, and replace the mat when it stays damp or smells musty. Keep the alarm where it will touch water first, such as beside the trap, rather than buried under bins. If you rent, tell your landlord promptly about any leak the alarm finds, since early repairs cost less than water damage.
24. A Seasonal Swap Bin
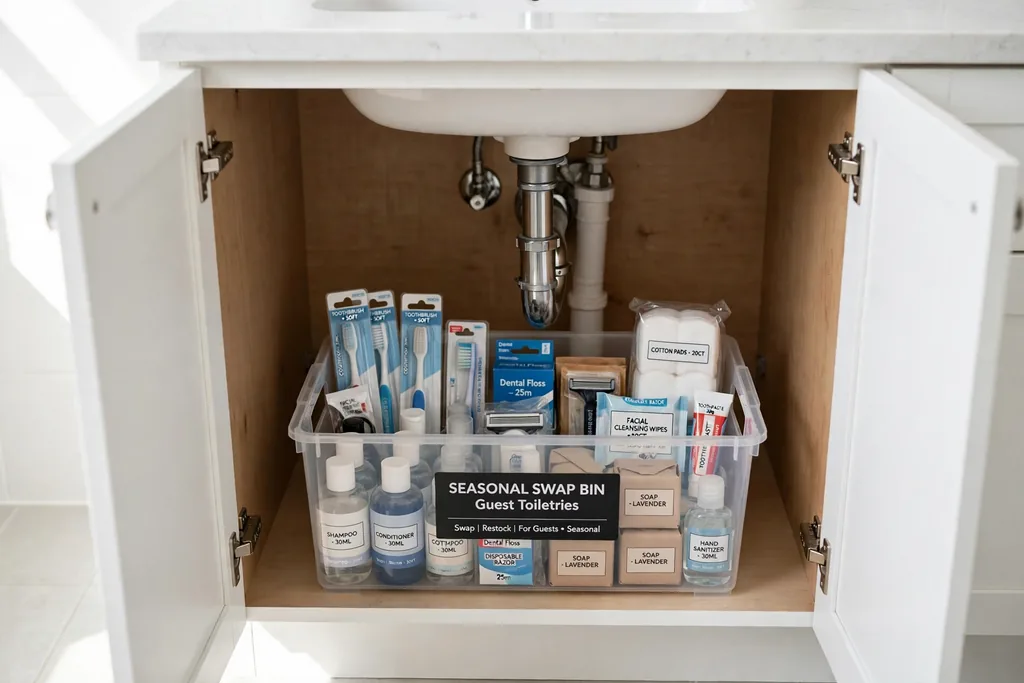
Keep a seasonal swap bin for items you use only part of the year, such as guest toiletries, holiday scents, or summer sun care. A small cabinet cannot hold every season at once without crowding, and swapping twice a year frees a full bin for the items you actually use now. Keep the out-of-season bin on a high shelf or in another room.
Wash and dry items before packing them away, and add a short list to the bin lid so you know what is inside without opening it. When the season changes, swap the bins in one session and review each item as you put it back. Anything you did not use last season is a good candidate to pass on before it goes back in the bin.
25. A Slim Rolling Cart for an Open Vanity
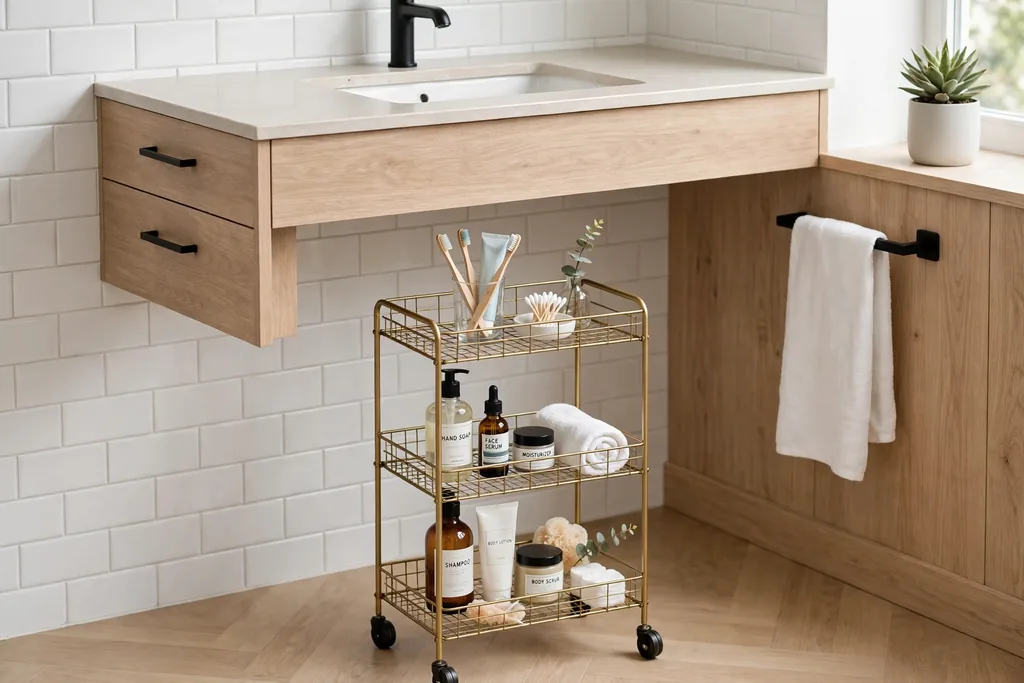
Park a slim rolling cart under a floating vanity or beside a pedestal sink, where there is no cabinet at all. A cart suits a narrow gap beside the sink, and it rolls out when you need it and back when you do not. Tiers keep categories separate, with daily items on top and spares below.
Choose a cart with wheels that lock, so it does not drift when you pull a tier. Keep the cart to one routine, such as daily toiletries, rather than general overflow, since a cart filled with mixed items becomes a second clutter spot. Wipe the tiers regularly, since small toiletries shed drips and dust.
26. A Sink Skirt for a Pedestal Sink
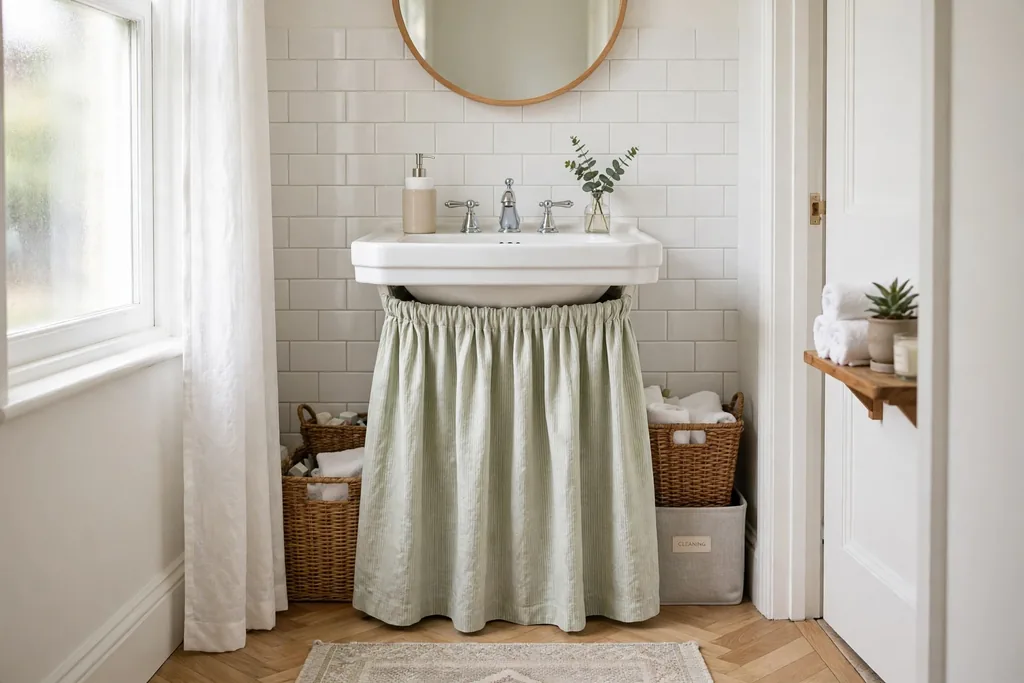
Hang a sink skirt around a pedestal sink to hide bins and baskets stored behind it. A pedestal sink has no cabinet, yet the space around the pedestal can hold a surprising amount, and a skirt hides it in one move. Choose a washable fabric, since a skirt near the floor collects dust and splashes.
Hang the skirt from a tension rod or adhesive hooks fixed to the wall behind the sink, so it can be lifted for cleaning. Keep bins low and pushed back, so the skirt hangs straight and does not bulge. If you like an open look, tie the skirt back during the day and close it when guests visit.
27. An Adhesive Caddy for Sponges and Brushes
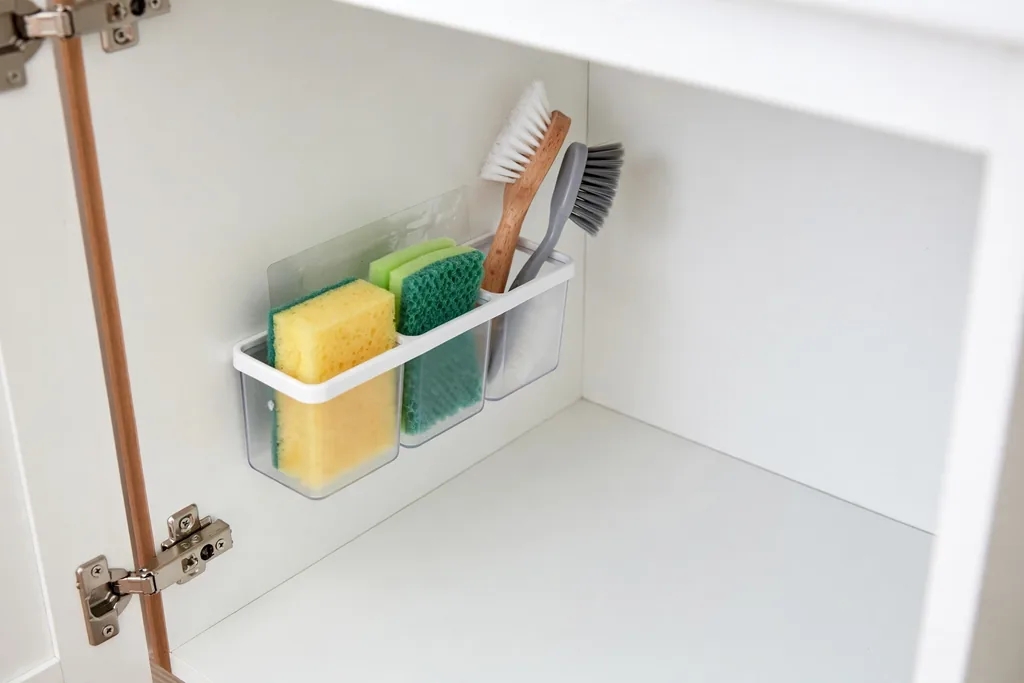
Stick a small adhesive caddy on an inside cabinet wall for sponges, brushes, and scrub pads. These items are damp after use and need air, yet they often sit in a puddle on the cabinet floor. A caddy with drainage holes holds them upright, lets them dry, and keeps them away from dry supplies.
Clean and dry the wall before sticking the caddy, and let the adhesive set before loading it. Rinse sponges before putting them back, so the caddy does not hold dirty water. If the caddy stays damp, move it closer to the front of the cabinet, where air moves more freely when the door opens.
28. Hooks for the Cabinet Doors to Hold a Hand Towel
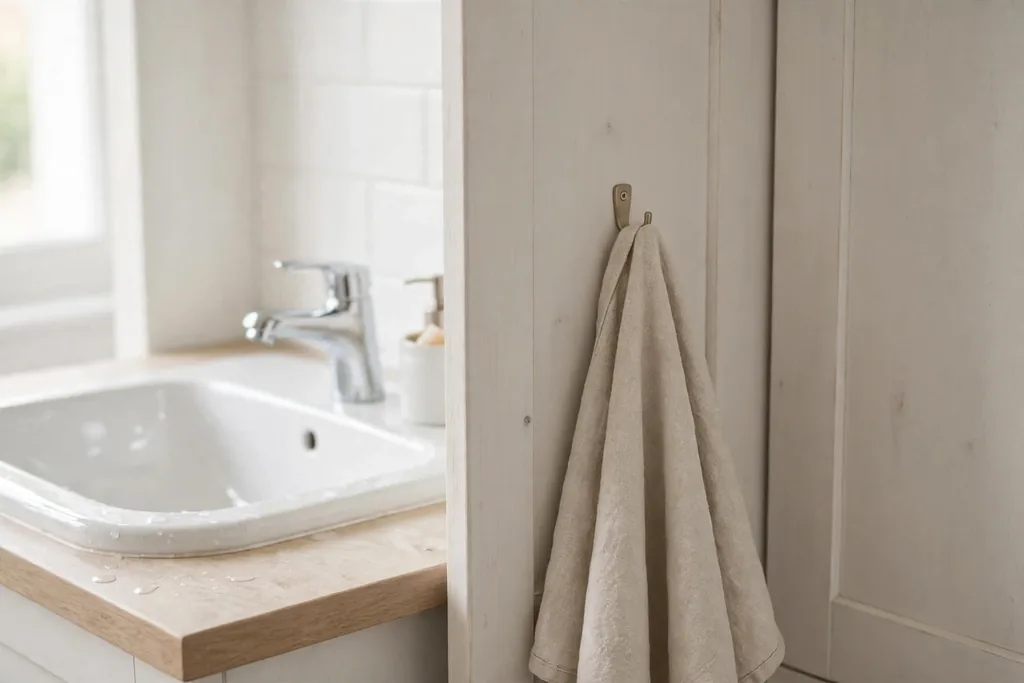
Hang a small hook on the outside of a cabinet door for a hand towel, freeing the towel rail for bath towels. A hand towel inside the cabinet gets damp and lost among bottles, while a door hook keeps it where you reach for it after washing your hands. This is a small change that also frees a shelf, since the towel no longer lives in a bin.
Choose a hook with a soft backing to protect the door surface, and keep the towel light so the door still closes fully. Wash the towel often, since a towel on a cabinet door is used many times a day. If you prefer a tidier front, a hook on the inside of the door holds a small towel for cleaning up spills instead.
29. A Weekly Reset Routine on the Door
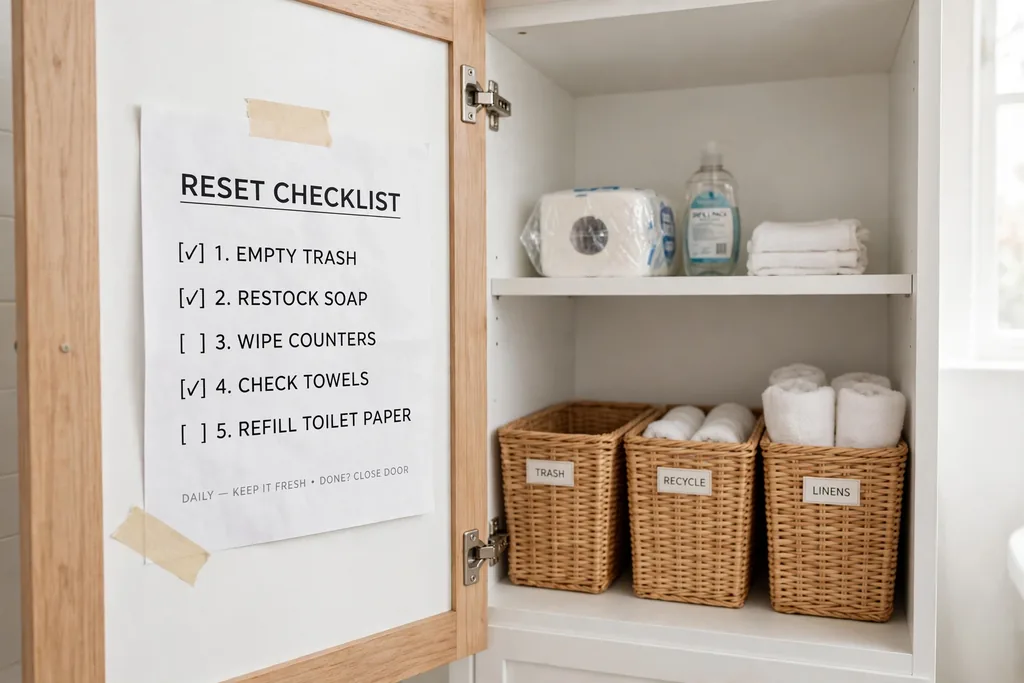
Stick a short reset checklist on the inside of the cabinet door, and run through it once a week. A five minute reset, which covers wiping the tray, tossing empties, returning stray items to their bins, and checking the stock zone, stops small piles from becoming clutter. A checklist on the door keeps the routine visible, so it happens instead of being forgotten.
Keep the list short, with no more than five steps, and tick off items with a dry wipe marker if you use a laminated card. Review the list each month, and change any step that no longer fits your supplies. The zoning tips in these creative closet ideas for small spaces pair well with this routine when a bathroom cabinet shares storage duties with a bedroom closet.
30. A Spare Stock List to Stop Duplicates
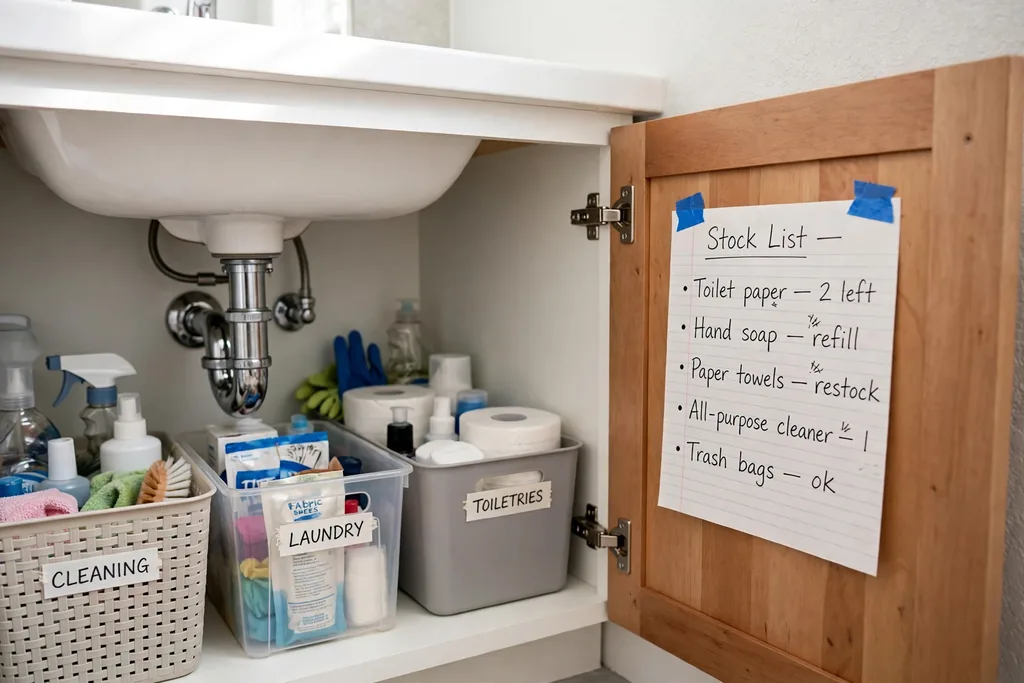
Keep a short stock list on the cabinet door or in the stock bin, noting what you already own. Duplicates are the main cause of an overfull under sink cabinet, since it is easy to buy a second bottle of something already sitting at the back. A list you check before shopping stops that habit fast.
Update the list when you restock, and cross off items as you open the last spare. Keep the list to one side of paper or one small card, so updating it takes seconds. If several people share the bathroom, a shared list stops two people buying the same item in the same week.
Conclusion
An organized under sink cabinet comes down to a clear layout, not more stuff in it. A shelf riser around the pipes, a pull-out drawer, labelled bins, and a home for cleaning supplies cover most of the gain, and small additions such as a door rack, a turntable, or a waterproof tray make the cabinet easier to use every day. Start with one change, such as measuring around the pipes and fitting a riser, and live with it for a week before adding another, so each addition earns its place. The storage ideas in these apartment bathroom ideas pair well with this guide when the cabinet sits in a compact bathroom. Pick the ideas that fit your cabinet, your lease, and your routine, and save this guide to Pinterest so you can find your favorite setup again.
FAQs
How do I measure an under sink cabinet around pipes?
Measure the width, depth, and height of the cabinet, then measure the position and diameter of each pipe, the trap, and the water lines, noting how far each one sits from the walls. Sketch the layout on paper, marking the pipes, and take the sketch when you shop for shelves or drawers. Leave a finger width of air around every pipe, and leave the shutoff valves clear so you can reach them fast.
What is the best first step for organizing under a bathroom sink?
Empty the cabinet, clean it, and sort everything into keep, move elsewhere, and throw away piles. Then measure around the pipes and fit a U-shaped shelf riser or a pull-out drawer, since these two changes use the space most cabinets waste. Sort what remains into labelled bins by task, with daily items at the front and spare stock at the back.
How can renters organize under a sink without drilling?
Use freestanding shelf risers, stackable bins, turntables, tension rods, and over door racks, all of which need no drilling. Adhesive hooks and caddies also add storage without fixing anything to the wall, but clean the surface first and test one hook before loading them all. Keep the original cabinet parts if you swap anything, so you can restore the cabinet when you move out.
How do I keep cleaning supplies separate from toiletries under a sink?
Give cleaning supplies their own caddy or bin, with a lid, and store it on the opposite side of the cabinet from toiletries. Keep medicines and first aid in a separate lidded caddy, stored high or at the back. Label each bin clearly, and never decant cleaning products into toiletry bottles, since a mix-up can be harmful.
What should I do if my bathroom sink has no cabinet?
Use a slim rolling cart that parks under a floating vanity, or hang a sink skirt around a pedestal sink to hide bins stored behind it. A small stool or a wall shelf beside the sink can hold daily items, while spare stock lives in another room. Keep the setup light and easy to move, so cleaning around the sink stays simple.
How often should I clean and reset an under sink cabinet?
Wipe the cabinet floor and tray monthly, and run a five minute reset weekly, tossing empties and returning stray items to their bins. Check the stock list and expiry dates when you restock, and test a leak alarm battery monthly if you use one. A full sort twice a year, when you swap seasonal items, keeps the cabinet from filling up again.