
Personalize clear Christmas ornaments at home by filling or decorating clear glass or plastic balls with names, photos, dried flowers, glitter, small keepsakes, or lights, then sealing each one and adding a ribbon for hanging. Clear ornaments suit trees, mantels, windows, and gifts, and most ideas need only basic craft supplies and an hour or less of hands-on time.
Start with clear ornaments that open at the top, so you can fill, adjust, and reseal them without breaking the shell. Work over a tray to catch glitter, beads, and small pieces, and test one ornament before making a full set. For a collected, old fashioned feel to pair with these clear pieces, see the vintage inspired ornament ideas.
Key Takeaways
- Clear ornaments work as a blank base for names, photos, dried flowers, keepsakes, and light fills.
- Use plastic ornaments for low branches, gifts for children, and homes with pets, and save glass for high branches and displays.
- Seal filled ornaments well, and keep loose fills dry so they do not clump or fade.
- Repeat one ribbon color or one metal finish across a set so mixed fills still look planned.
- Date the back of a tag or the inside of a cap so each ornament becomes a dated keepsake.
- Store clear ornaments in divided boxes with tissue between pieces so paint and fills stay clean.
1. A Handwritten Name in Gold Pen
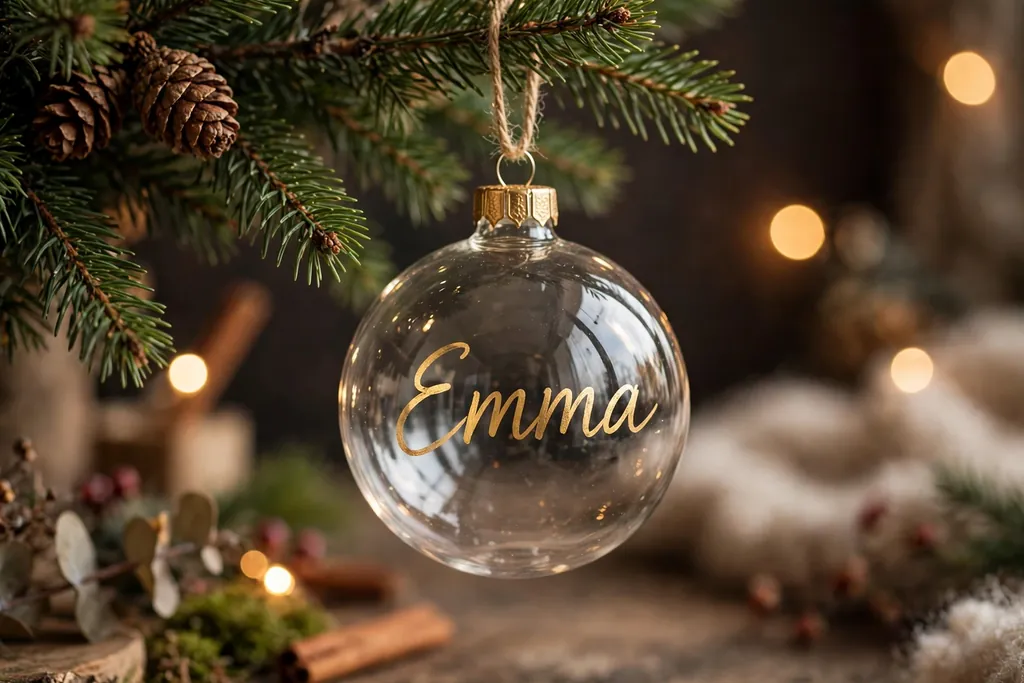
Write a name on the outside of a clear ornament with a gold or white paint pen, and add a small star or dot beside it. A handwritten name turns a plain ball into a place marker, a stocking tag, or a gift topper, and it suits a family tree where each person has their own ornament. Keep the lettering large and simple so it reads from a few steps away.
Let the paint dry fully before handling, and hold the ornament by the cap while you write so you do not smudge the front. If a letter goes wrong, wipe it off at once with a damp cloth and start again before the paint sets. Add a ribbon in a matching color, and store the ornament with the name facing up.
2. A Family Photo Curled Inside

Roll a small printed photo into a loose curl, slide it into a clear ornament, and let it uncurl against the inside wall. A photo ornament brings a face or a place into the tree display, and it works well for a first home, a far away relative, or a year worth remembering. Choose a bright photo with one clear subject so it reads through the curve.
Print the photo slightly smaller than the ornament opening, and trim the edges round so it slides in without creasing. Use a copy of the photo rather than an original print, and keep the ornament out of direct sun so colors stay true. A thin ribbon loop keeps the focus on the photo.
3. Dried Flowers and Greenery Inside
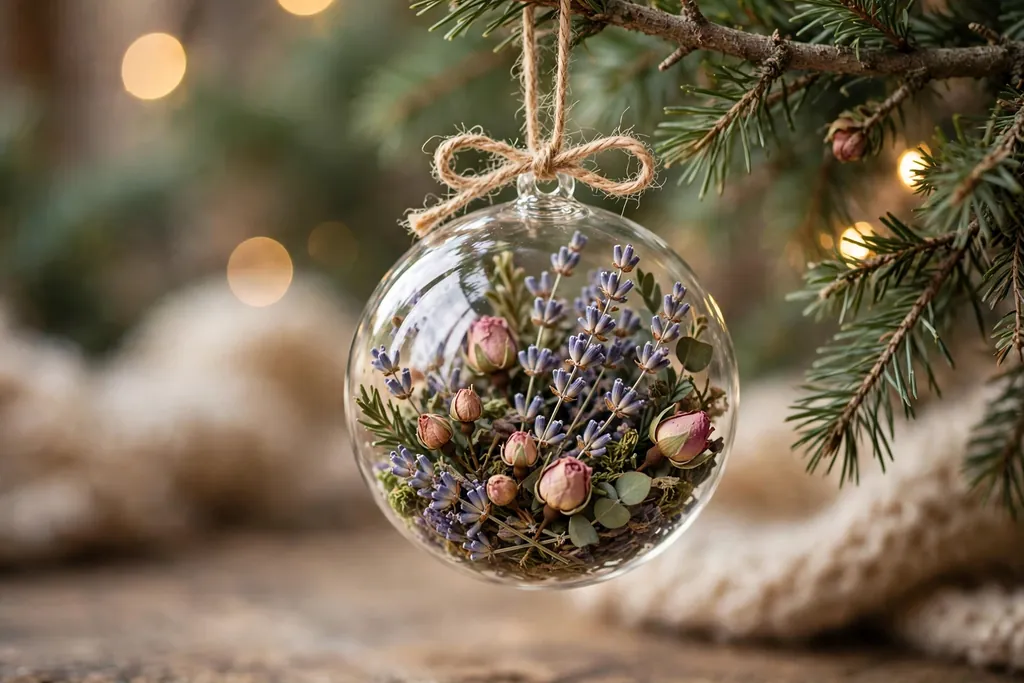
Place small dried flowers, such as lavender buds, tiny rosebuds, or baby’s breath, inside a clear ornament with a sprig of greenery. Dried flowers give a soft, natural fill that suits a neutral tree, a mantel branch, or a window display, and they need no paint or glue. Keep the flower mix to two or three types so the fill does not look crowded.
Dry flowers fully before filling, since damp petals will spot inside a sealed ornament. Use tweezers to place stems and buds, and turn the ornament as you work so the arrangement looks full from every side. Store dried flower ornaments in a dry box, away from damp rooms.
4. A Glitter and Confetti Fill

Pour a spoonful of fine glitter, star confetti, or paper dots into a clear ornament, and shake it gently to coat the inside. A glitter fill catches tree lights from every angle, and it suits a party tree, a New Year display, or a gift for someone who likes sparkle. Mix one glitter color with clear or white confetti so the fill has depth.
Seal the cap with a small dot of clear glue so glitter does not escape in storage. Work over a tray, and wipe the outside clean before hanging, since stray glitter dulls the clear shell. If you plan to reuse the ornament, keep the glitter dry and store it upright.
5. A Mini Snow Scene Inside

Set a tiny bottle brush tree, a pinch of fake snow, and a small white bead snowman shape inside a clear ornament. A snow scene turns the ornament into a tiny winter display, and it suits a mantel, a bookshelf branch, or a tree with a snowy theme. Keep the pieces small so they sit low and leave clear space above them.
Glue the tree base to a small disc first, then slide the disc in and add snow around it, rather than gluing inside the ball. Shake the ornament gently to settle the snow, and add more through the opening if bare spots show. Hang snow scene ornaments where they can be seen at eye level.
6. Hand Painted Dots and Stripes Outside

Paint dots, stripes, or a simple sprig pattern on the outside of a clear ornament with paint pens or a fine brush. Painted patterns give a handmade look without filling the ornament, and they suit a tree that already has filled ornaments, since the clear center keeps the display light. Repeat one pattern in two colors across a set for a calm result.
Paint on a clean, dry surface, and let each color dry before adding the next, so dots stay crisp. Hold the ornament by the cap, and rest it in a small cup between coats so wet paint does not touch the table. Seal the paint with a light clear coat if the ornaments will be handled often.
7. A Monogram Letter on the Front

Add a single large initial to the front of a clear ornament with a cut vinyl letter, a painted letter, or a small paper letter placed inside. A monogram suits a new home, a wedding gift, or a tree where each family member has their own initial. Pair the letter with a ribbon in the same color for a finished look.
Center the letter by eye, and step back to check it before pressing it firm or letting paint dry. Keep the letter size large enough to read from across the room, but small enough that clear space shows around it. If you use vinyl, smooth out air bubbles with a soft cloth.
8. A Child Fingerprint Keepsake

Press a small fingerprint or handprint in paint on the outside of a clear ornament, then add a name and year beside it with a paint pen. A fingerprint ornament records a child’s size at one Christmas, and it becomes a keepsake parents bring out each year. Use washable paint for the print, then seal it once dry.
Paint one finger lightly, press it once, and lift straight up so the print stays clear. Let the print dry fully before writing the name and year, and keep the ornament on a high branch if it will be handled by small hands. Date every fingerprint ornament so the set tells a growth story over time.
9. A Pet Photo and Paw Print Ornament

Place a small pet photo inside a clear ornament, or paint a paw print on the outside with a name beside it. A pet ornament suits a tree in a home with a dog or cat, and it works as a gift for a pet owner or a memorial for a pet no longer here. Choose a photo where the pet’s face fills the frame.
For a paw print, use pet safe washable paint on one paw, press it onto paper first to test the size, then press it onto the ornament. Clean the paw at once, and let the print dry before hanging. Keep pet ornaments away from low branches where a curious pet may bat them down.
10. Wedding Names and a Date
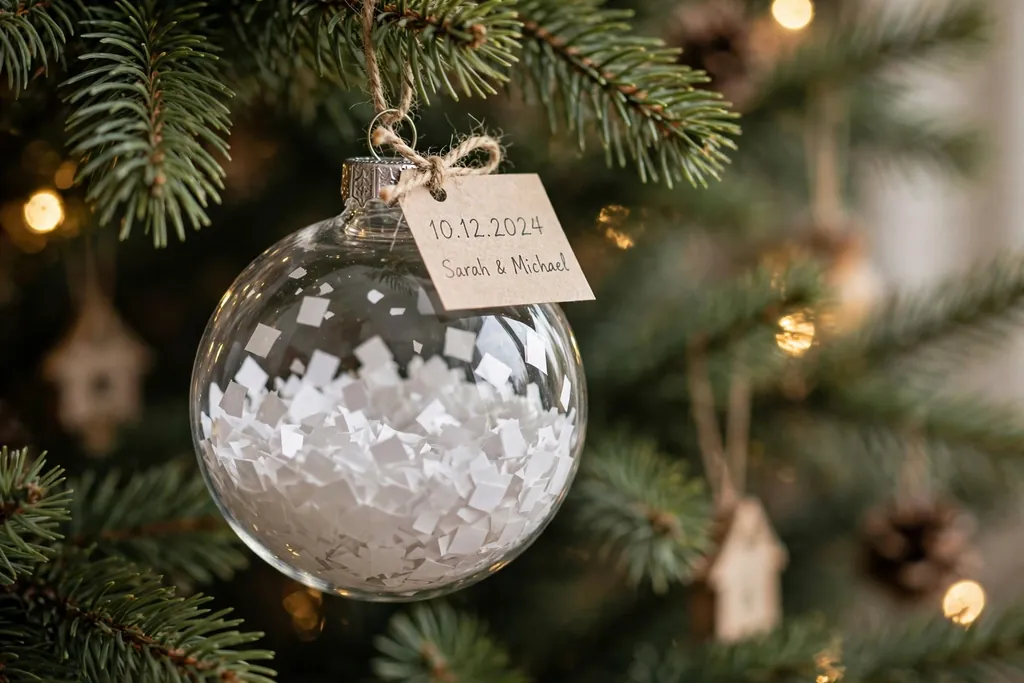
Write a couple’s names and wedding date on a clear ornament, and fill it with confetti in the wedding colors or a small dried flower from the day. A wedding ornament suits a first Christmas as a married couple, an anniversary gift, or a tree with a romance theme. Keep the lettering neat and the fill light so the names stay easy to read.
Place the names on the front and the date below them, in the same pen color. If you add confetti, use a small amount so it frames the names rather than covering them. Store wedding ornaments in a padded box, and bring them out for anniversaries as well as Christmas.
11. A Baby First Christmas Ornament
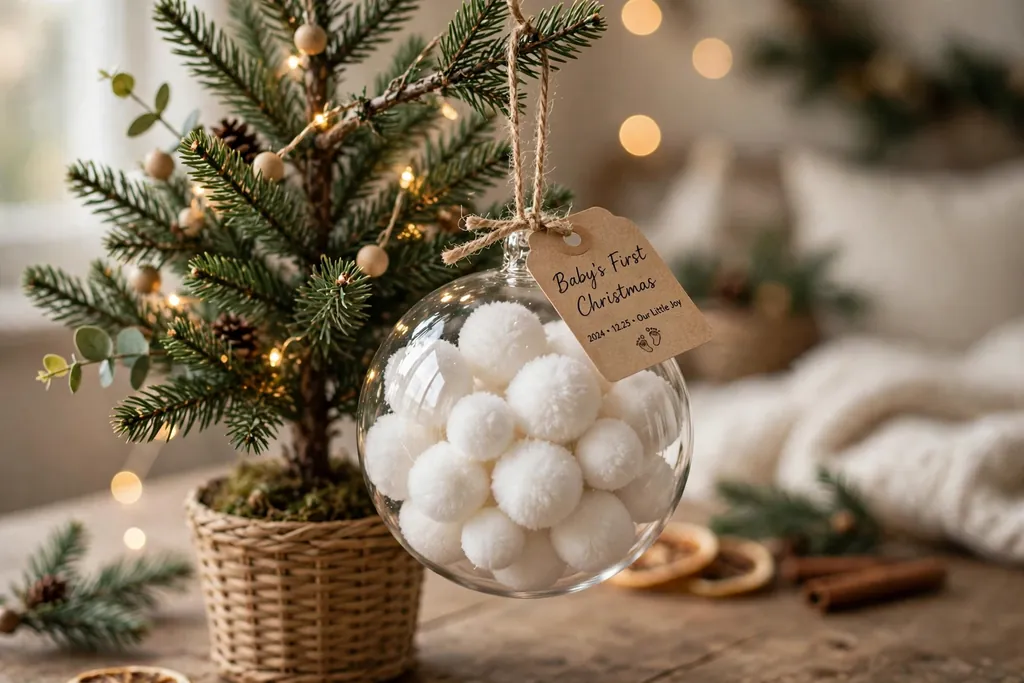
Fill a clear ornament with soft white or pastel pom poms, and add a tag with the baby’s name and first Christmas year. A baby first Christmas ornament marks a milestone year, and it suits a nursery tree, a grandparent gift, or a family tree with a new branch. Keep the fill soft and light so the ornament hangs safely on thin branches.
Write the name and year on a small card tag tied to the cap, rather than on the shell, so the tag can be read without turning the ornament. Use plastic for a baby ornament that may be handled, and keep small pom poms sealed inside so they cannot come loose. Store it with the year marked on the box.
12. Tiny Lights Glowing Inside

Thread a short string of tiny battery lights into a clear ornament, and let the cap hide the small battery pack at the top. Lights inside a clear ornament give a warm glow on a tree, a mantel branch, or a window at dusk, and they suit a display that needs light without a full string of tree lights. Use warm white lights for a calm glow, or multicolor lights for a party tree.
Check that the lights fit through the opening before buying a full set, and keep the battery pack outside the ornament if it is too large to hide. Switch lights off when the display is not in use, and remove batteries before storing so they do not leak. Hang lit ornaments near the front of branches so the glow shows.
13. Celebration Confetti and a Date Tag

Save confetti from a wedding, graduation, or birthday, and seal a pinch inside a clear ornament with a tag showing the event and date. Celebration confetti turns a party memory into a tree ornament, and it suits a milestone year or a gift for the guest of honor. Keep the confetti dry and flat so it does not clump inside.
Add the confetti with a small funnel or a folded paper cone, and shake the ornament to spread it evenly. Tie the date tag to the cap with thin ribbon, and write the event in short words so the tag reads at a glance. Store celebration ornaments upright so confetti settles evenly.
14. Travel Map and Ticket Scraps Inside

Cut a small piece of a map, a ticket stub copy, or a postcard into strips, and curl them inside a clear ornament. A travel ornament suits a couple who traveled that year, a study abroad memory, or a tree with a wanderlust theme. Choose one place per ornament so the story stays clear.
Use copies of tickets and maps rather than originals, and trim pieces small enough to slide through the opening. Mix one map piece with one plain paper strip so the fill does not look busy. Add a small tag with the place name and year on the cap.
15. Pressed Leaves and Botanical Pieces
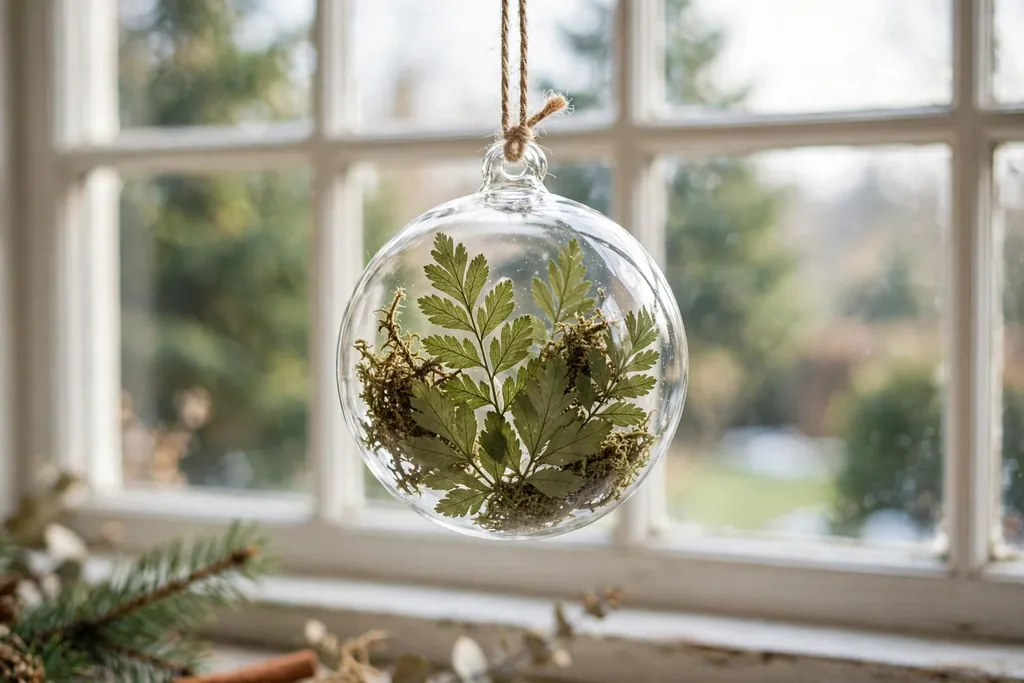
Press small leaves, ferns, or flower petals flat, then slide them into a clear ornament with a pinch of dried moss. Pressed botanicals give a quiet, garden feel, and they suit a nature themed tree, a sunroom display, or a gift for a gardener. Keep the leaf shapes small and flat so they sit against the shell.
Press leaves between paper under a heavy book for a week before filling, and handle them gently since dry leaves crack. Place one large leaf at the front and smaller pieces behind it for depth. Keep botanical ornaments out of damp air so leaves do not soften.
16. Pearls, Beads, and a Ribbon Bow
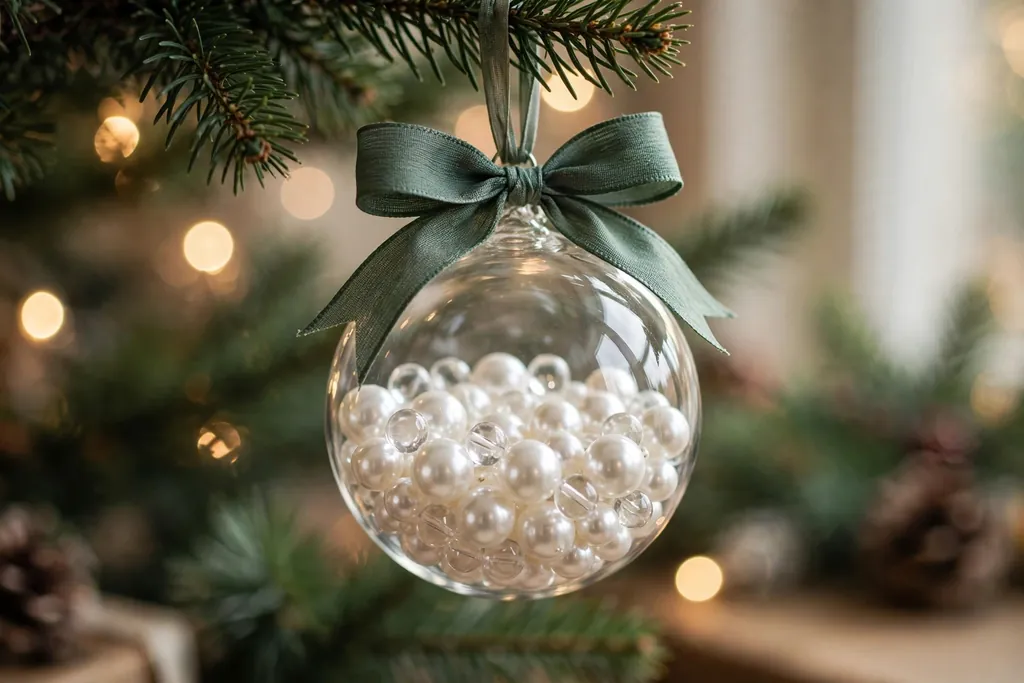
Fill a clear ornament partway with small pearls, clear beads, or tiny gold beads, and tie a ribbon bow at the cap. A bead fill gives a jewel like look without paint, and it suits a formal tree, a mantel display, or a New Year table. Mix pearl and clear beads so light passes through the fill.
Pour beads in slowly, and stop before the ornament is full so beads can move and catch light. Seal the cap well, since loose beads spill if the ornament tips. Use a ribbon that matches the bead color, and hang bead ornaments on sturdy branches, since a full bead fill adds weight.
17. An Etched Look Design in Cream Paint
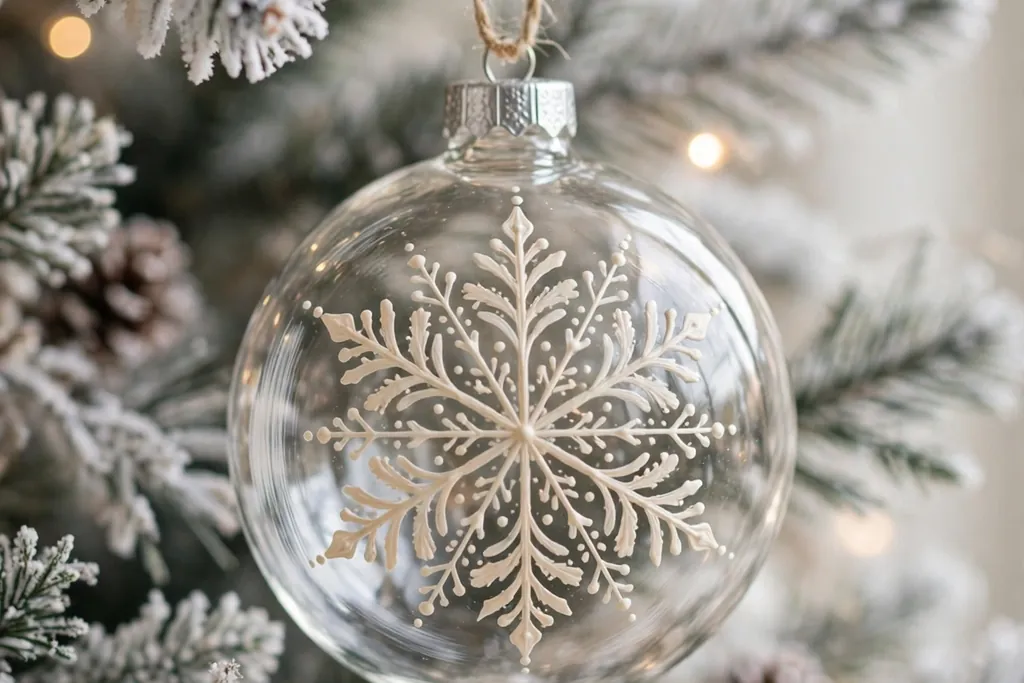
Paint a simple snowflake, star, or sprig design on a clear ornament with cream or white paint, leaving most of the shell clear. A cream painted design reads like frost on glass, and it suits a winter white tree, a snowy mantel, or a display with silver and white pieces. Keep the design to one motif per ornament for a clean look.
Use a fine brush or a paint pen, and practice the motif on paper first. Let the paint dry fully, then add a second coat only where lines look thin. Pair cream painted ornaments with plain clear ones so the frosted designs stand out.
18. A Dried Orange Slice Inside

Slide a small dried orange slice into a wide opening clear ornament, and add a cinnamon stick piece and a sprig of greenery beside it. A dried orange fill gives scent and warm color, and it suits a kitchen tree, a natural themed display, or a gift with a homemade feel. Keep the slice thin so it fits without bending.
Dry orange slices fully until firm before filling, since damp fruit will soften inside a sealed ornament. Place the slice facing outward, and add greenery behind it so the orange shows clearly. Store orange ornaments in a dry box, and replace slices that darken after a season or two.
19. Paper Stars and Snowflakes Inside

Fold tiny paper stars or cut small paper snowflakes, and place a few inside a clear ornament with a pinch of white glitter. Paper stars give a light, airy fill that suits a children’s tree, a classroom display, or a handmade gift. Use white, cream, or pale gold paper so the shapes show through the shell.
Cut stars and snowflakes small enough to pass through the opening, and fold them loosely so they open up inside. Add glitter last, in a small amount, so it dusts the paper rather than covering it. Keep paper fills away from damp windows, since paper softens when wet.
20. Rolled Wishes for the New Year
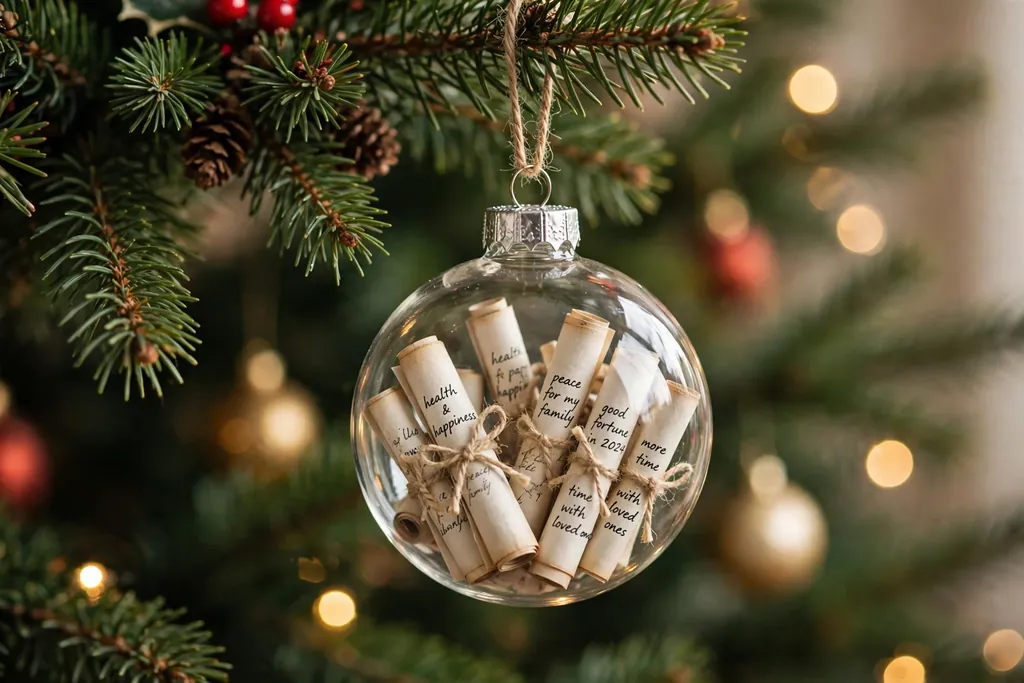
Write short wishes, goals, or notes for the coming year on small slips of paper, roll them tight, and place them inside a clear ornament. A wish ornament suits a family New Year tradition, a classroom tree, or a gift where each person writes one wish. Open the ornament next year to read the wishes together.
Use plain paper and a fine pen so writing stays clear on a small slip. Roll each slip with the writing inside, and tie it with a thread if it tends to unroll. Add a tag with the year on the cap, and store wish ornaments where they will be found before New Year.
21. A Gift Tag Ornament for Presents
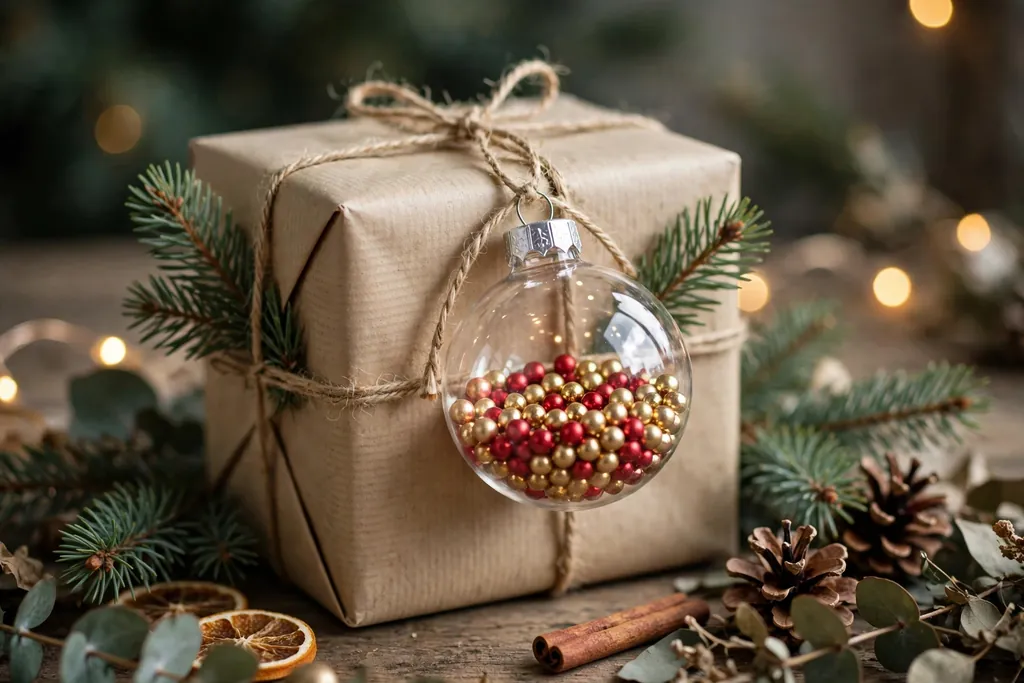
Fill a clear ornament with tiny pom poms, beads, or confetti in the gift wrap colors, and tie it to a present with a name tag. A gift tag ornament doubles as wrapping decoration and a keepsake, and it suits birthdays, weddings, and Christmas gifts alike. Match the fill to the wrap so the present looks planned.
Use plastic ornaments for gift tags, since presents are handled and moved often. Tie the ornament with ribbon through the cap loop, and write the recipient name large on the tag. Remind the recipient that the ornament can go on their tree after the gift is opened.
Conclusion
Clear Christmas ornaments give you a blank base that can hold a name, a photo, a keepsake, or a simple fill, without needing advanced craft skills. Start with one idea that fits your tree and your time, test it on a single ornament, then repeat it as a set with one ribbon color or one finish to tie the look together. For more color ideas to pair with clear pieces, see the pink ornament ideas. Choose the ideas that suit your rooms, your tree, and the people you want to remember, and leave the rest for another season.
FAQs
What kind of clear ornament is best for personalizing?
A clear ornament that opens at the top is best, since you can fill, adjust, and reseal it. Plastic suits low branches, gifts, and homes with children or pets, while glass suits high branches and displays where it will not be handled often.
How do I put a photo inside a clear ornament?
Print a copy of the photo slightly smaller than the opening, trim the edges round, roll it into a loose curl, and slide it in so it uncurls against the inside wall. Use a copy rather than an original print, and keep the ornament out of direct sun so colors stay true.
How do I seal a filled clear ornament?
Press the cap firm until it clicks or sits flush, then add a small dot of clear glue around the cap edge if the fill is loose, such as glitter or beads. Let the glue dry fully before hanging, and store filled ornaments upright in a divided box.
Can I personalize clear ornaments with children?
Yes, clear ornaments suit children when you use plastic shells, washable paint, paper fills, and pom poms. Keep small beads, glitter, and glass ornaments for adult supervised steps, and let children handle painting, filling, and ribbon tying.
How do I store personalized clear ornaments?
Store them in divided boxes with tissue between pieces, with painted sides facing up and filled ornaments upright. Keep boxes in a dry room away from damp air and direct sun, and mark each box with the year so keepsake sets stay together.
What fill works best for a clear ornament gift?
A photo, a name, a date tag, or a small keepsake fill works best for a gift, since it tells the recipient why the ornament matters. Pair the fill with a ribbon in the recipient’s favorite color, and add a short note explaining the date or memory behind it.